Dallas Peak – 13,812

1

RT Length: 12 miles

Elevation Gain: 5445’

There are a lot of really good reports on this mountain, but I’m visual and like a lot of pictures so I’m adding what I have to what’s already out there…

In keeping with my “sleep is for amateurs” theme this month I made it home yesterday just in time to pack up the truck and make it to the campground before dark.  I helped my daughter set up her tent and then walked around the campground talking with the other families (I was hosting a Girl Scout Family campout, which was pretty chill, seeing as how everyone was basically “family camping” at the same spot).  We’ve done this for the past 10 years now so I know every family has their own routine.  Most go off roading and a few go into town.  Everyone canoes/kayaks.  My daughter wanted to get her homework done the first day so she could enjoy the weekend, so I decided to let her do that and I’d go hiking.  4 hours away.  (Hey, in my mind the trailhead was 6 hours from my house, and by combining it with this trip I knocked 2 hours of the drive there and 2 hours back).

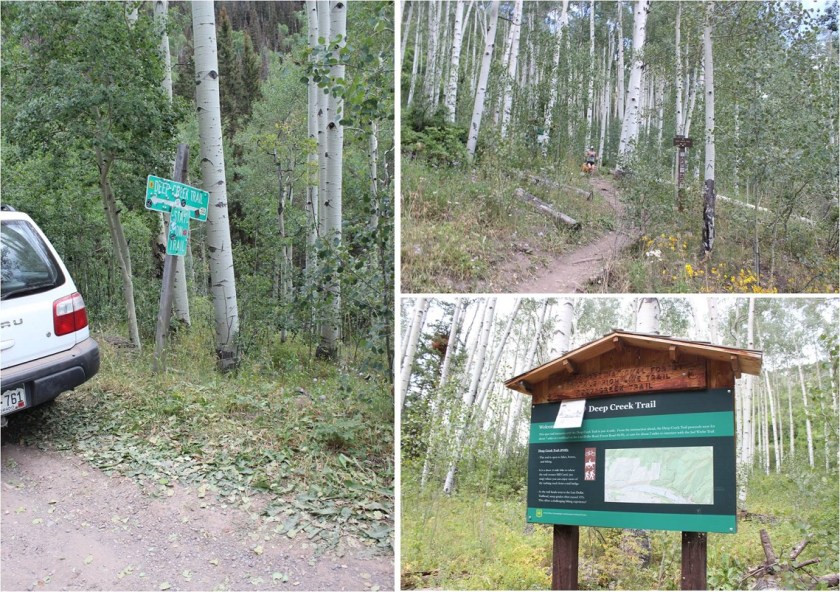
I was able to fall asleep around 8:30pm and got up at 10pm to drive the 4 hours to the Mill Creek / Deep Creek Trail (please do not confuse this with the Mill Creek Campground: you won’t end up in the right spot).

While sleep may be for amateurs, I’d had less than 4 hours sleep in the past 48 due to my South Colony Lake hike yesterday, and I found on the drive to the trailhead I was more tired than I’ve ever been driving. This scared me, so I pulled over to the side of the road and spent 5 minutes trying to fall asleep.  This didn’t work, but it did give me about another half hour of driving in before I felt too tired to go on and decided to set my alarm for 20 minutes.  20 minutes was the magic number, and I was able to effortlessly drive the rest of the way to the trailhead, hike all day, and make it back to the campground without feeling the need to sleep again.

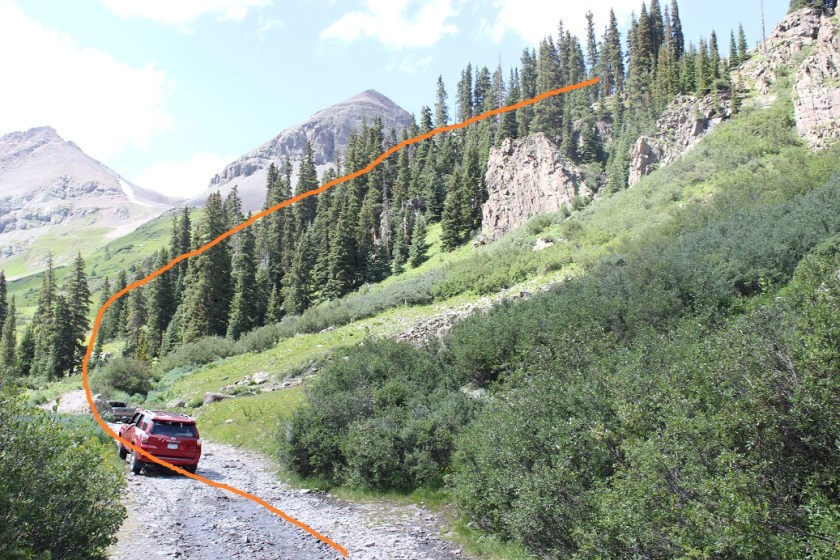
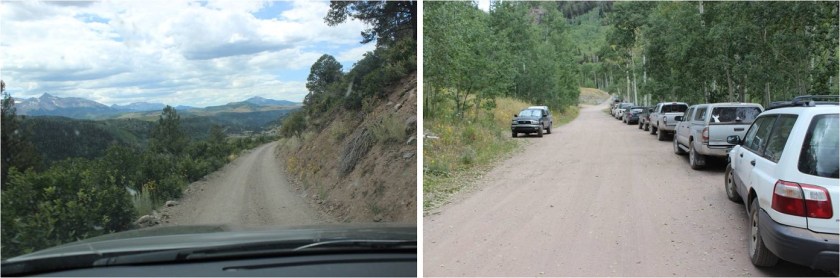
I was surprised to find the trailhead is at the end of a shelf road, and even more surprised to find so many vehicles parked there.

2

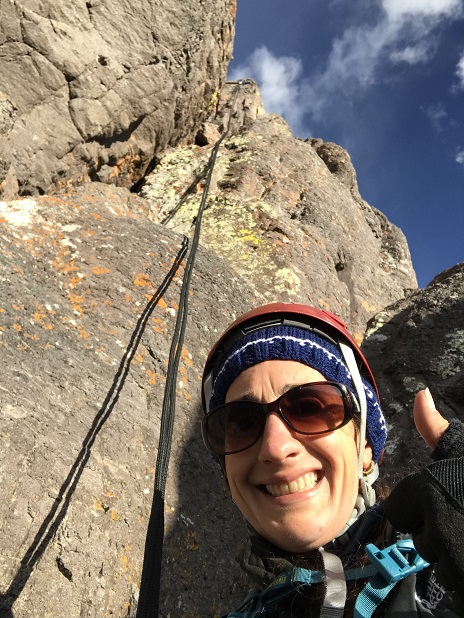
I was on the trail at 2:45am, a little disappointed in how heavy my pack was containing all my gear (60 meter rope, harness, belay device, webbing , etc.). I put on my helmet at the trailhead before starting the hike.  The trailhead was very easy to find.  I followed it northeast along the Deep Creek Trail.

3

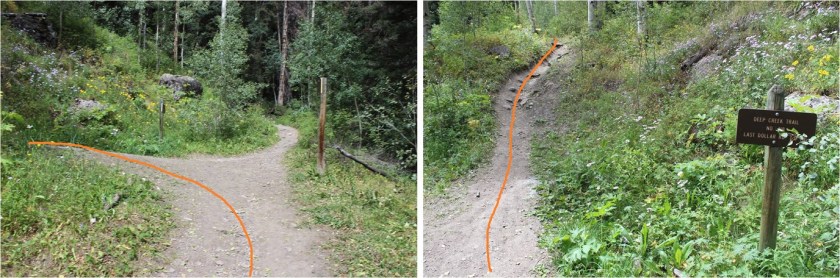
After about half a mile I turned left (west) at this junction and continued on the Deep Creek Trail

4

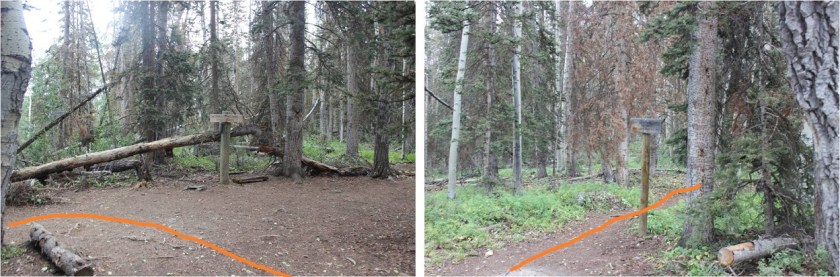
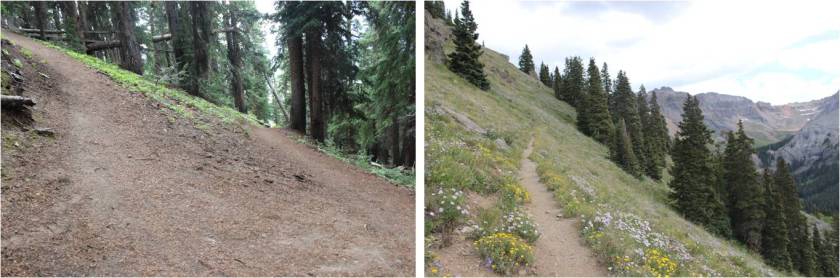
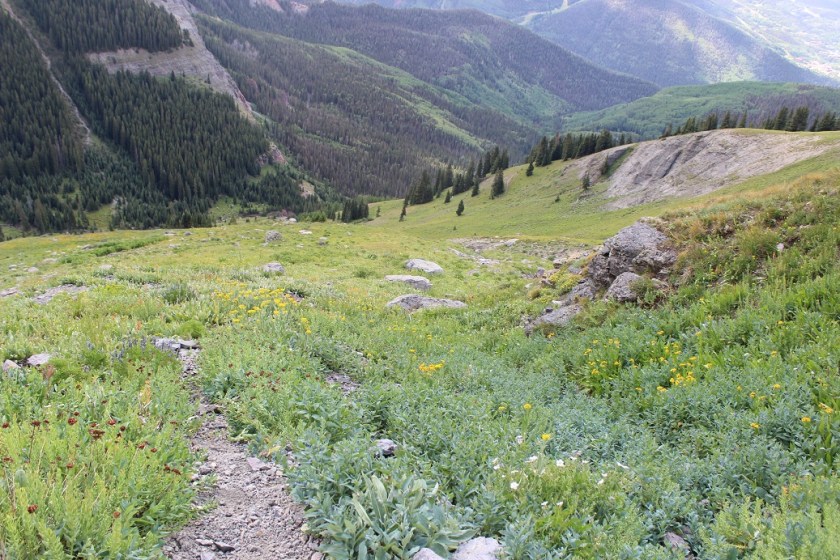
The trail switchbacked 5 or 6 times up the mountainside and then curved north around it, following a well defined trail

5

After a total of about 1.7 miles there’s another trail junction. I turned right (north) here

6

And followed the Sneffles Highline/Deep Creek Trail north through some aspen trees

7

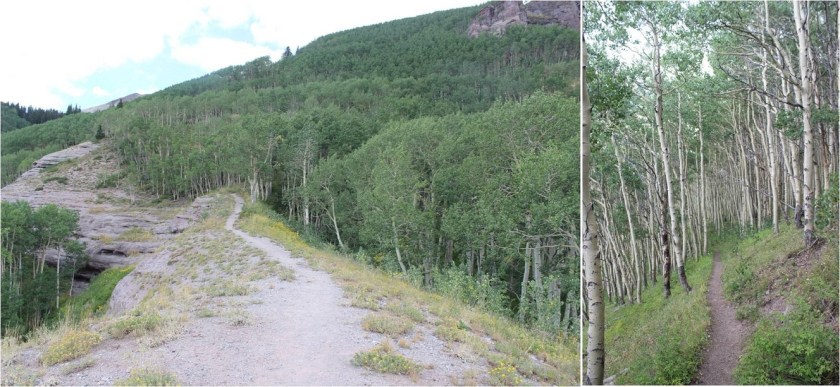
And switchbacked another 8 or 9 times up the mountain, transitioning through pine trees and then tundra mixed with pine

8

I was enjoying the lights of Telluride as I hiked in the dark, but I wasn’t enjoying the soreness in my shoulders.   I took an ibuprofen and trudged on.  This is where the trail looses about 300’ of elevation for no good reason.  Luckily it’s not too drastic of an incline because it’s dispersed over half a mile, but it still hurts on the way out.

9

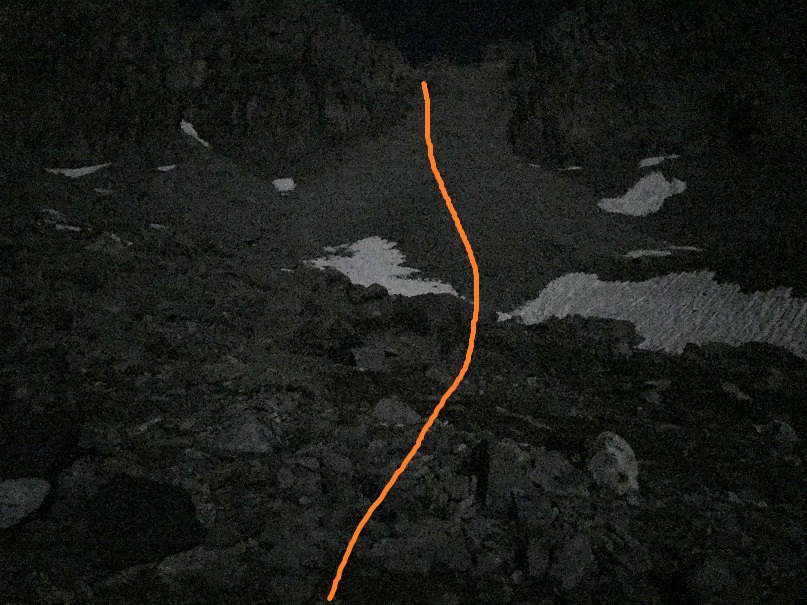
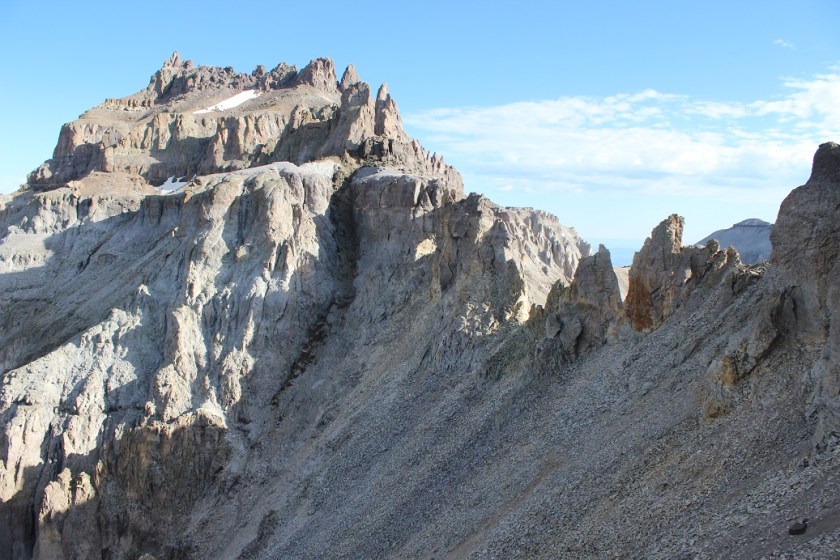
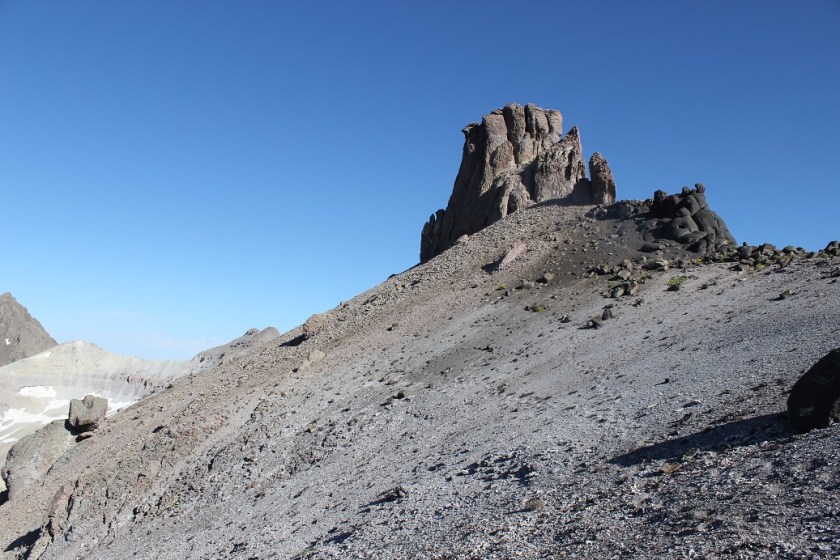
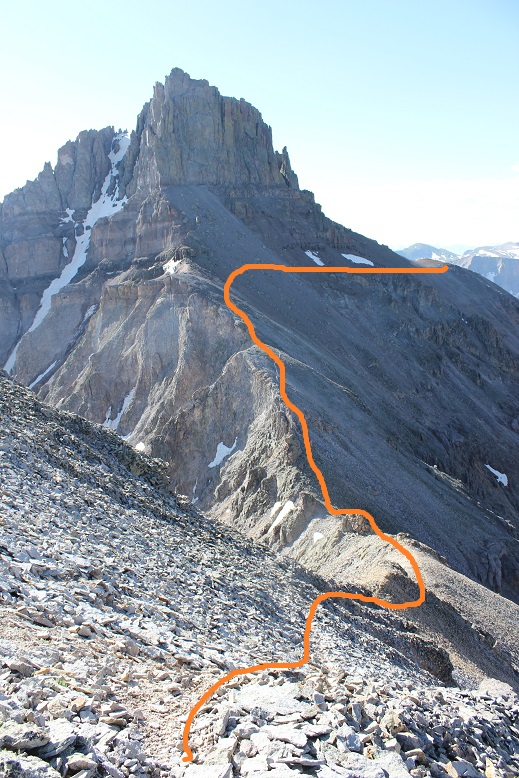
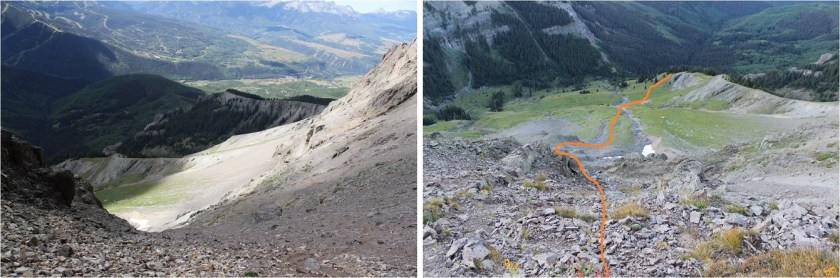
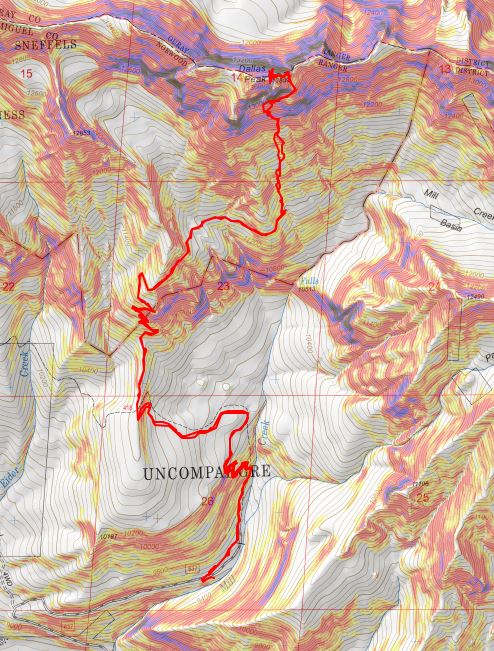
This decrease in elevation will take you to the base of Dallas Peak. Here you leave the trail and find your own way up the grassy slopes towards the cliff bands.  Here is the route I took:

10

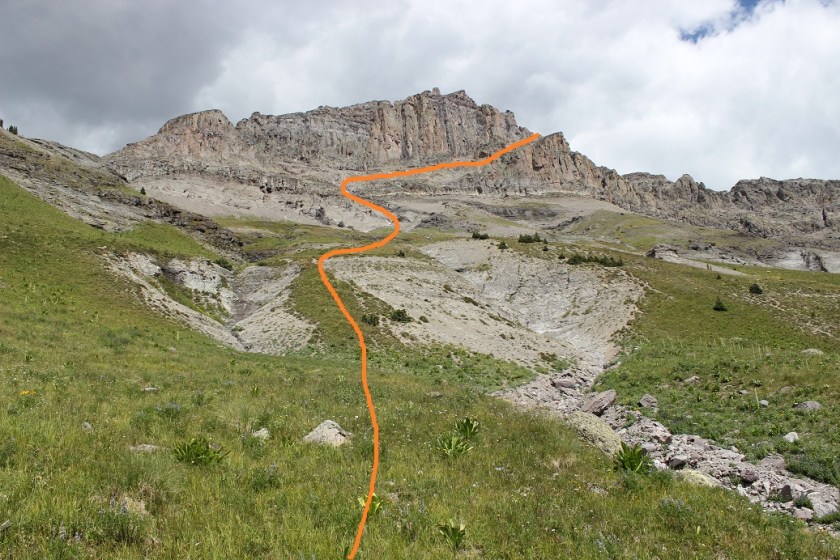
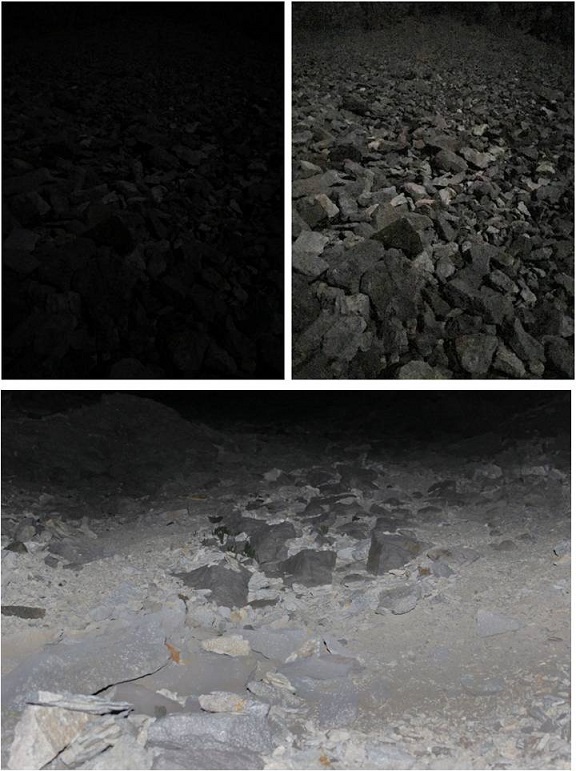
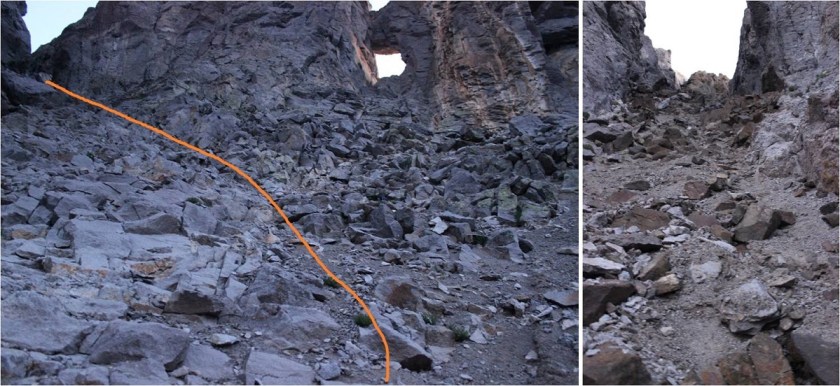
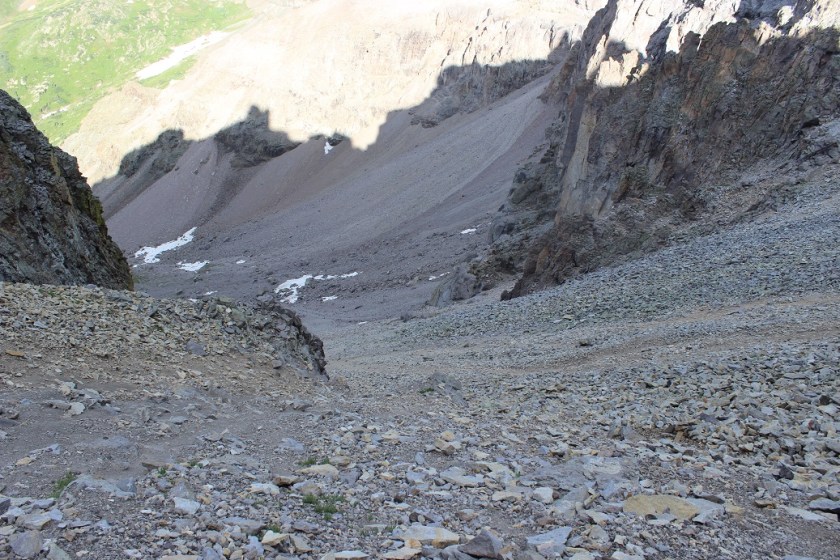
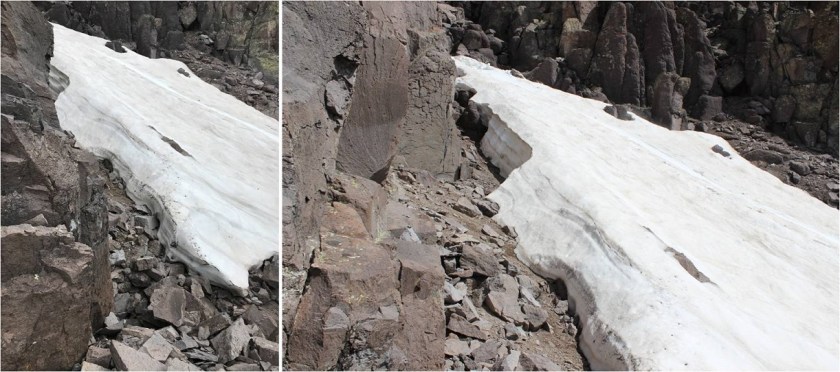
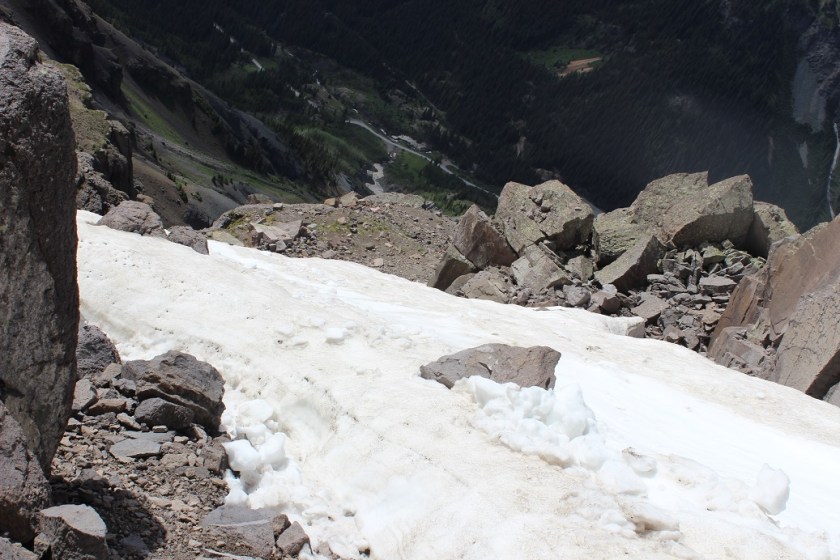
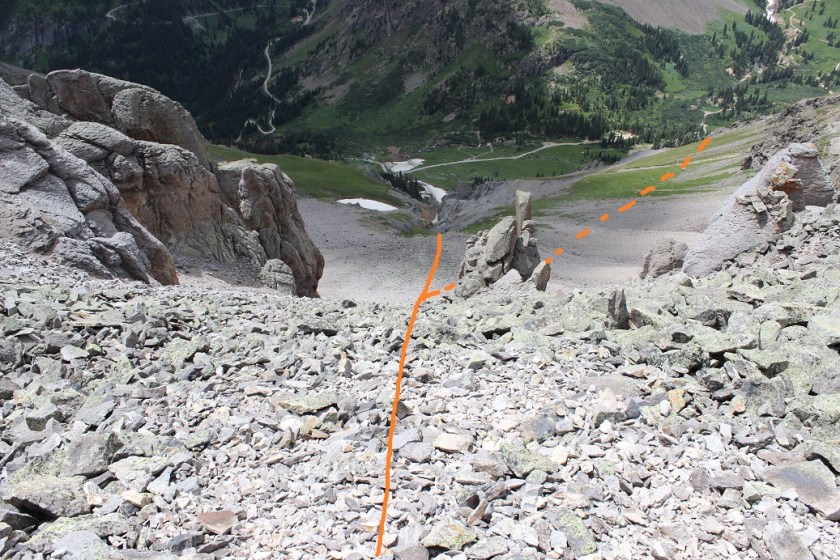
I started this in the dark, and just followed the tundra north, which eventually led me to a gully and a rocky cliff area. There was a lot of loose rock and scree here that slowed me down quite a bit (that and I was tired from all the hiking I’d already done this week).  This is also a good time to put on your microspikes.  I’ve heard there’s class 3 scrambling here but was able to find a class 2+ scree route by following social trails.

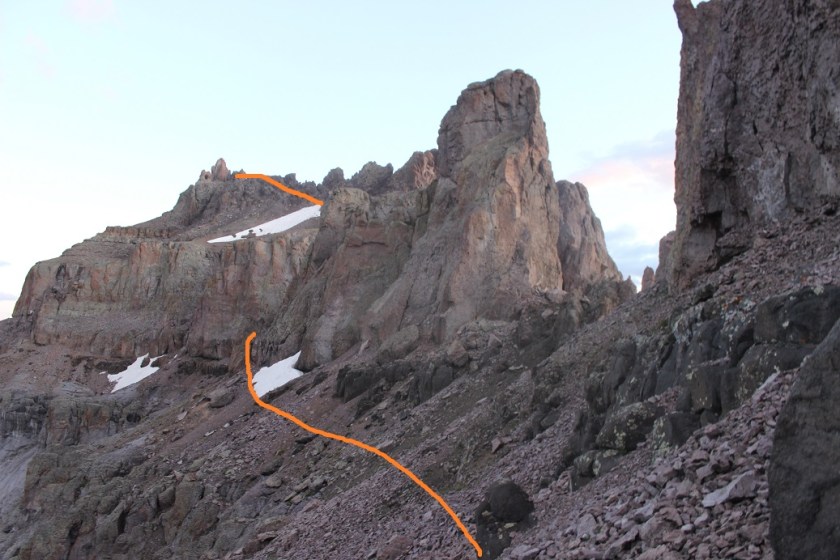
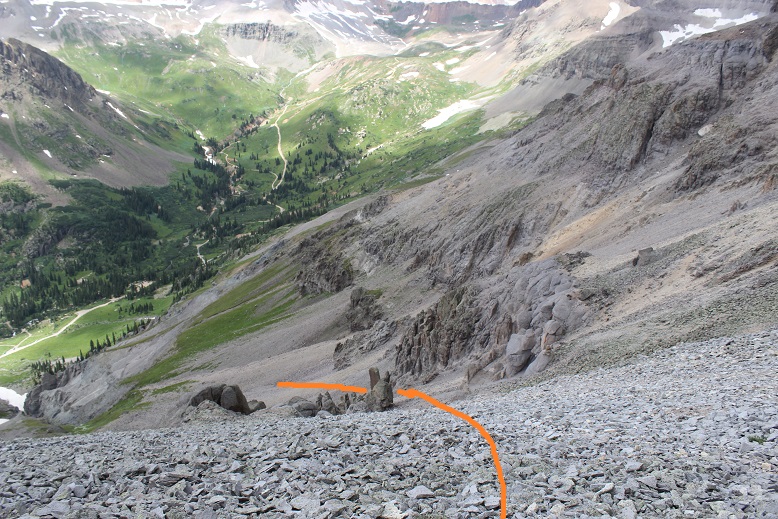
Just before making it to the cliffs I turned right (northeast) and followed some cairns to the ridge

11

12

You continue following to the left (northwest)

13

14

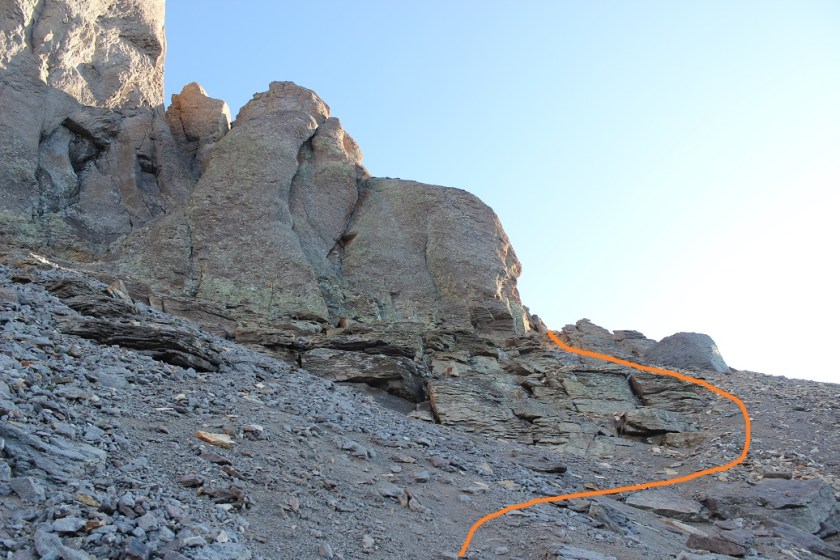
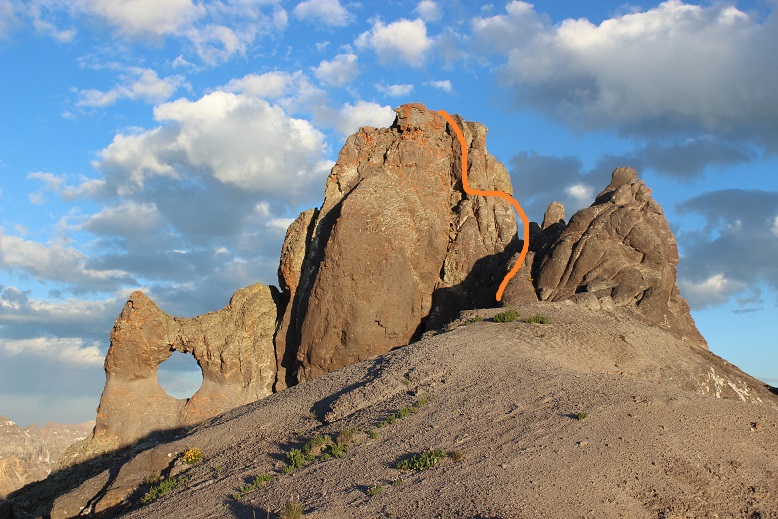
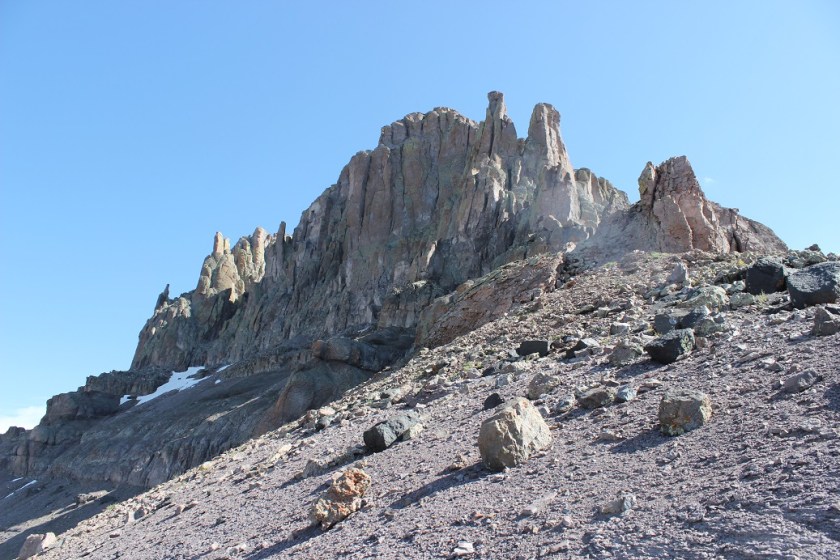
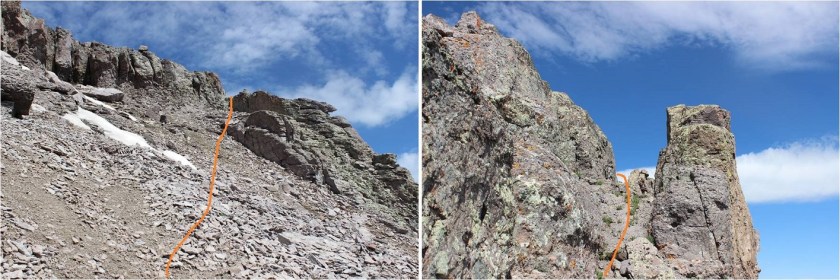
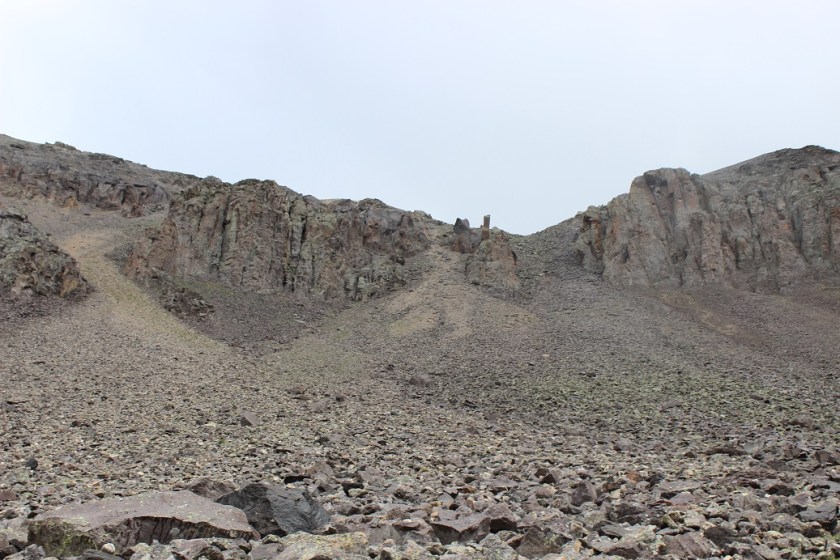
Until you see a gully to your left. Ascend via the class 4/5 section to the right of the gully.  There are plenty of hand/foot holds here, and at the top there are anchors to rappel down (I didn’t, but if the rocks were wet I could see how this would be useful).

15

16

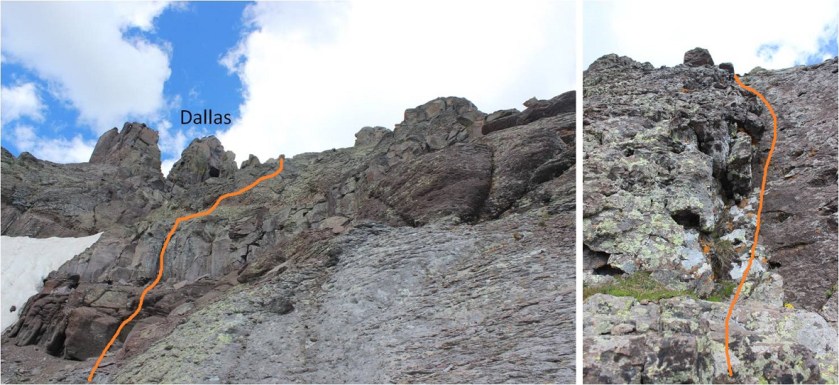
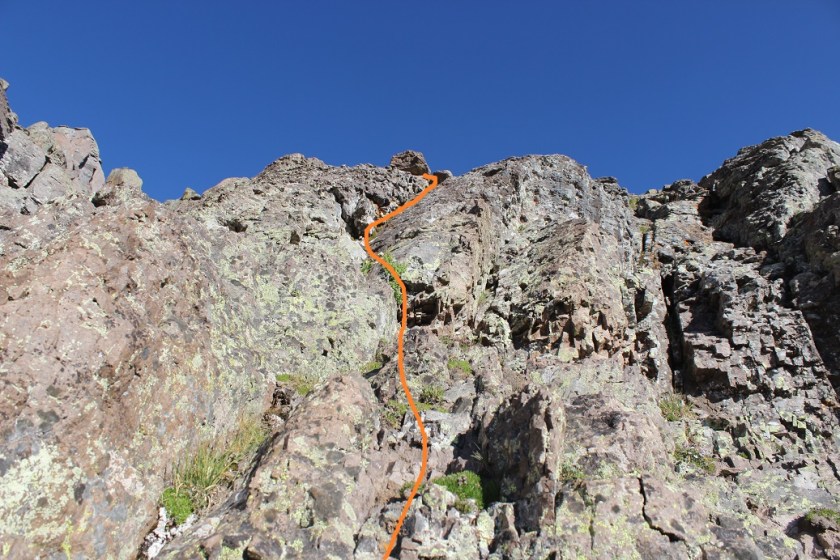
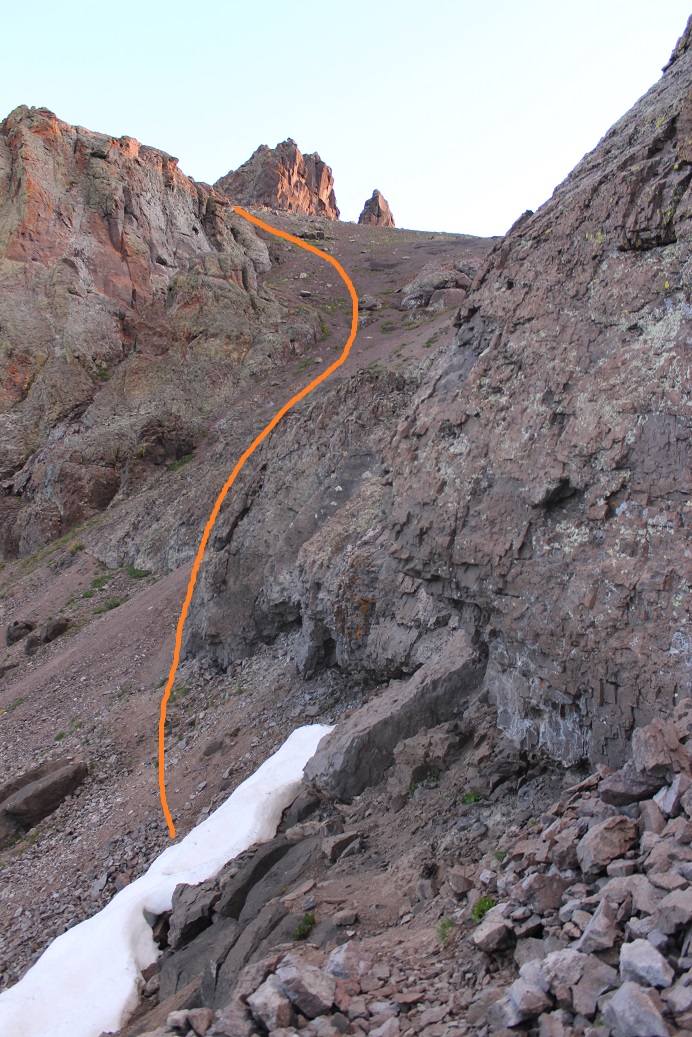
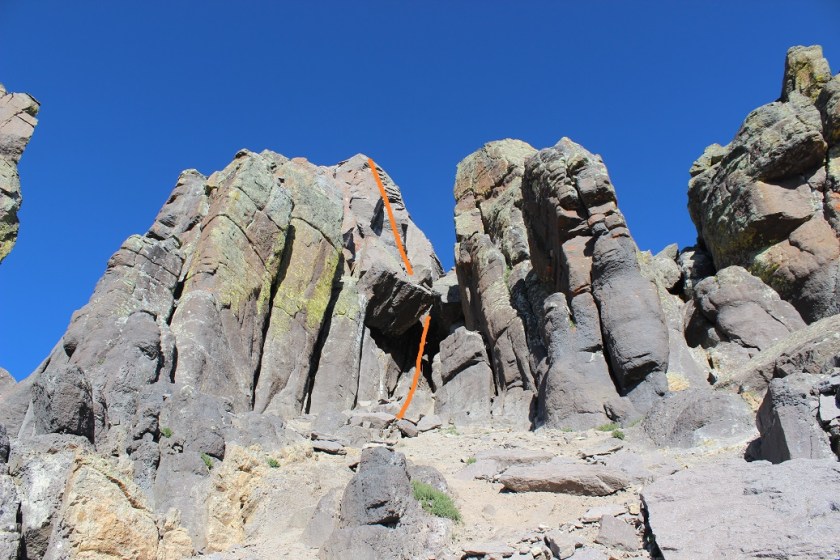
Once I gained this section I made my way to the base of the summit block and changed my gear, putting on my climbing shoes (totally worth carrying them) and harness. At this point I was exhausted:  My gear was heavy and that mile of scree/talus had taken a lot out of me.  Here’s the first part of the route:

17

This was as fun class 5 chimney climb that took some fancy footwork (only because I’m short). At times I was pressing my back to the rock for leverage and using my palms for support.

18

Here’s looking back down on this section

19

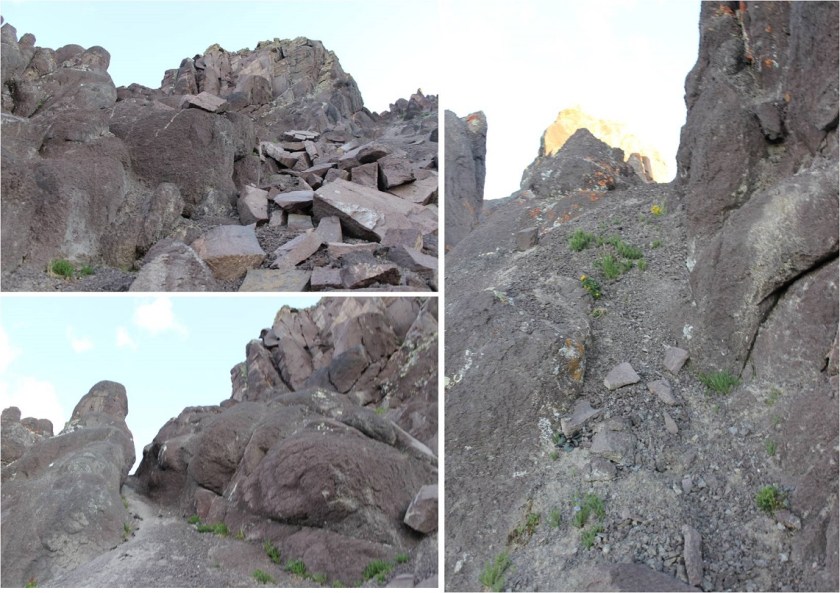
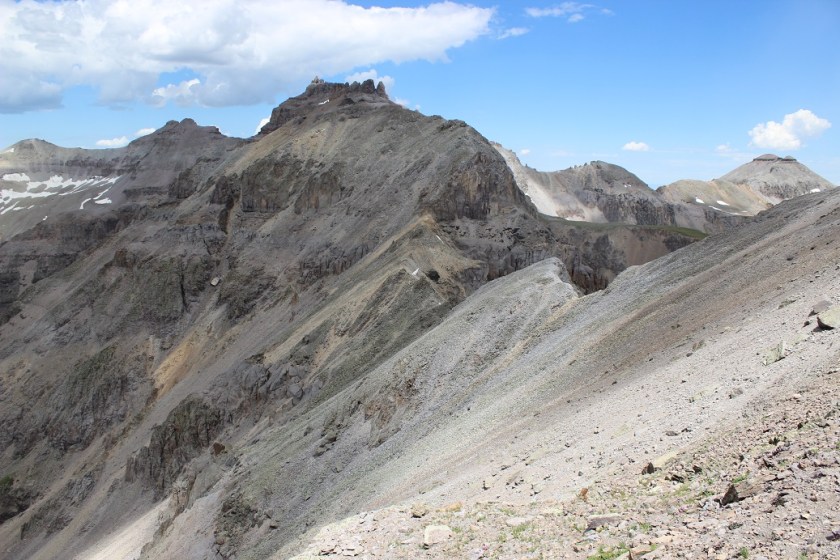
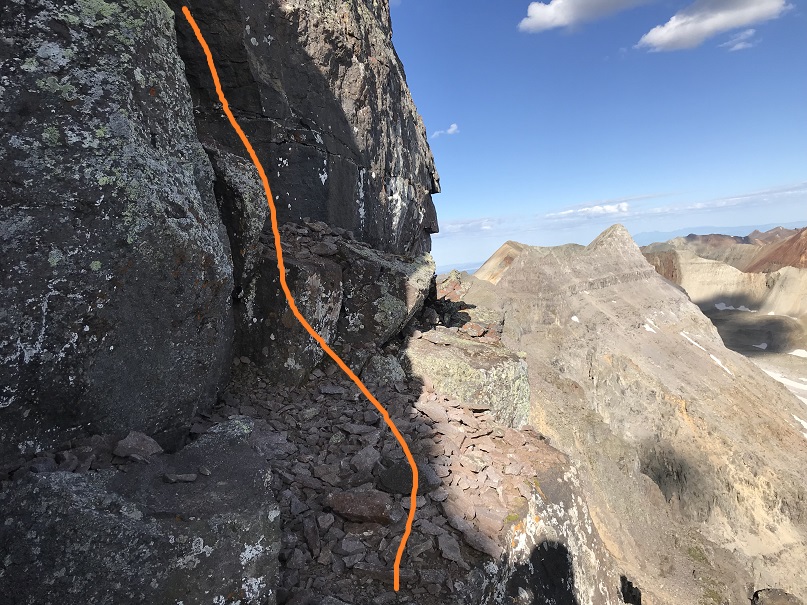
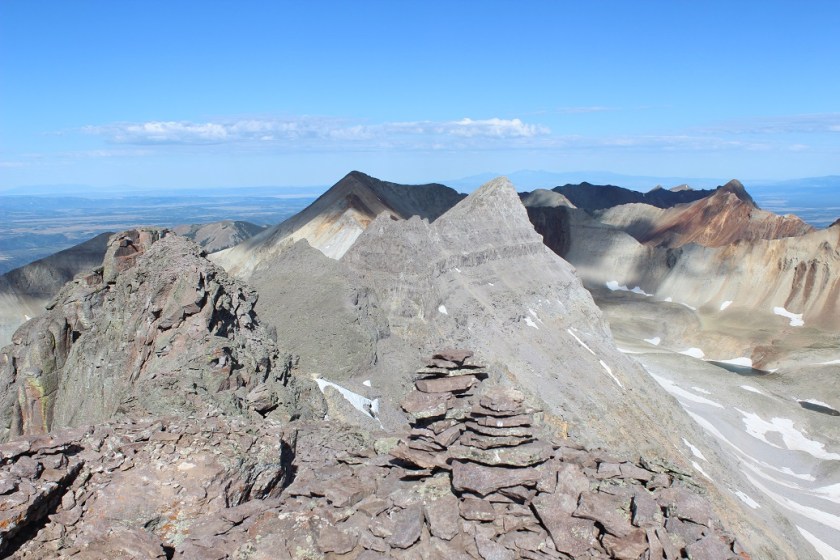
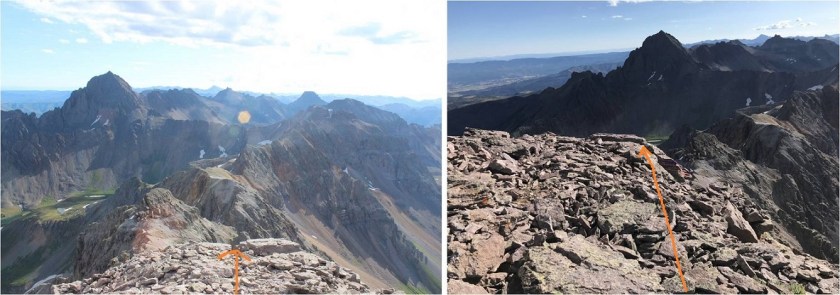
Here is where the route gets tricky. Even though you want to summit by going straight ahead (west) this is not the way to summit. Continue right around to the north side of Dallas.

20

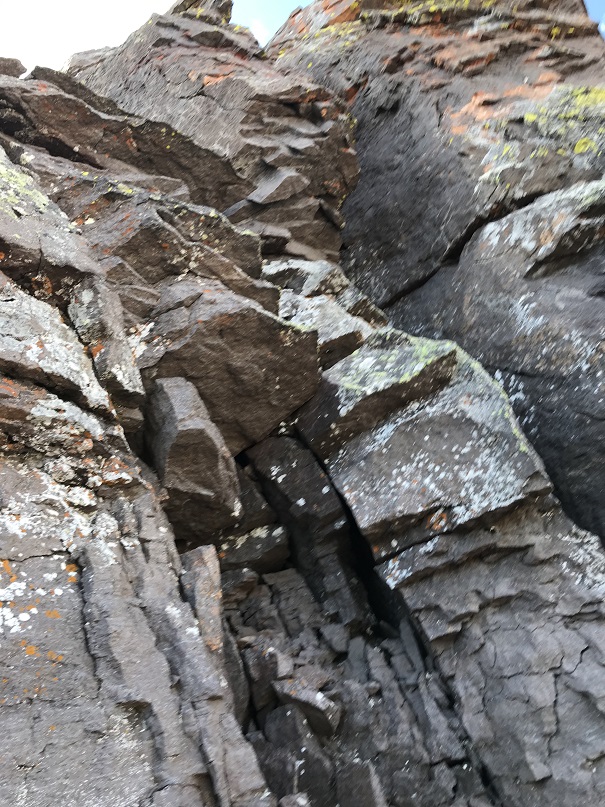
Cairns weren’t helpful here. I kept finding areas that looked ‘summitable’ but for me weren’t.  It was getting frustrating but I refused to give up:  I’d make it half or even three quarters of the way up a line only to find the hand/foot holds ran out, and I knew there had to be a safer way. In total there were two obvious areas I tried that didn’t work before before coming to the correct one at the bottom of a small dirt filled gully on the north side of Dallas

21

Here’s what it looked like from the bottom

22

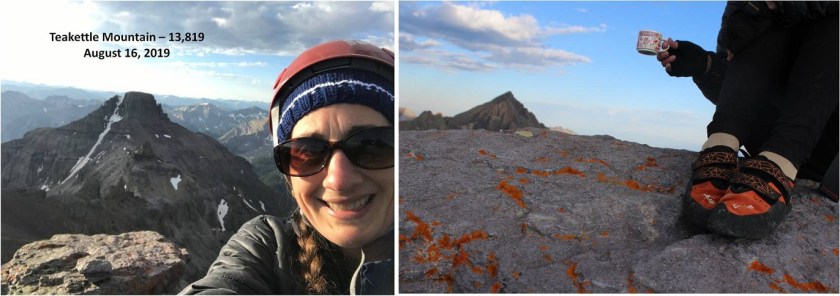
I was able to climb up this area without ropes, although it was slow going and I was careful with every hand/foot hold. I was very glad to have my climbing shoes.  I summited at 9:15am.
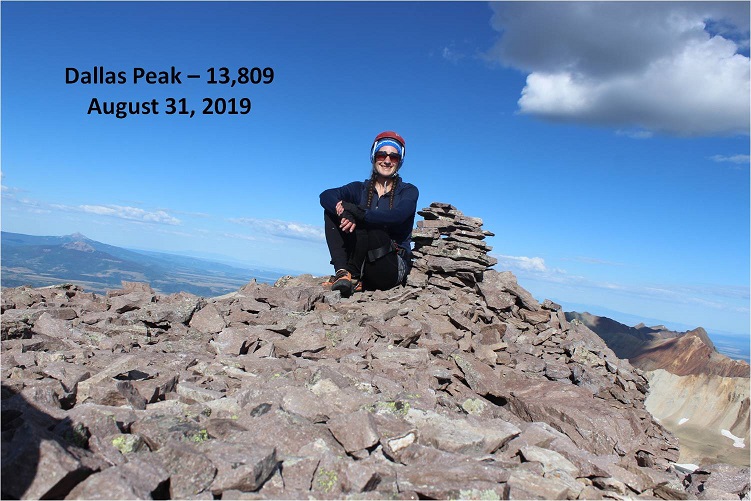
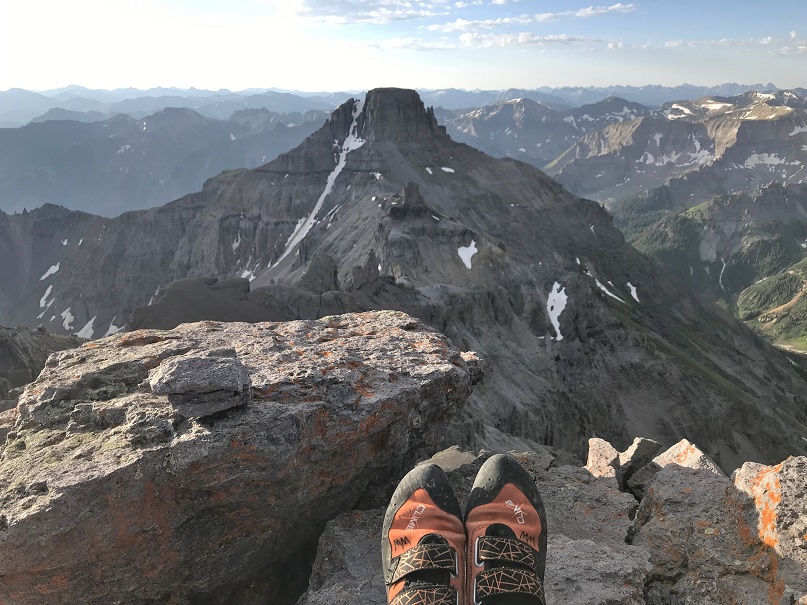
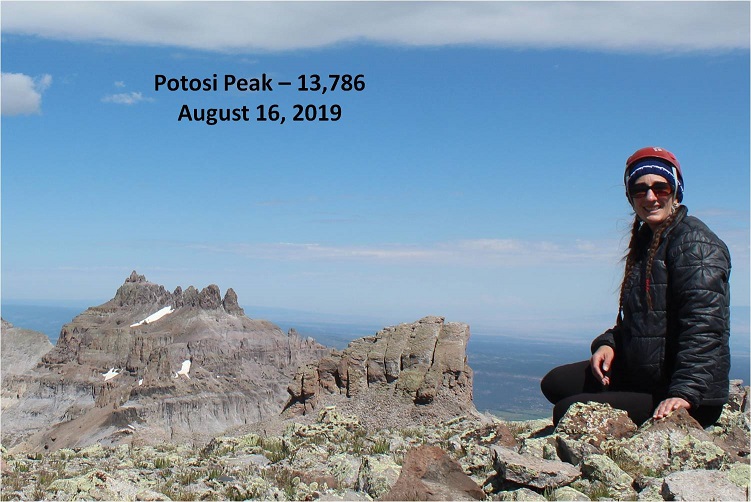
23

Dallas Peak:

I was quite thrilled with myself for making it up without ropes, and decided to spend a long time on the summit, enjoying my success.

24

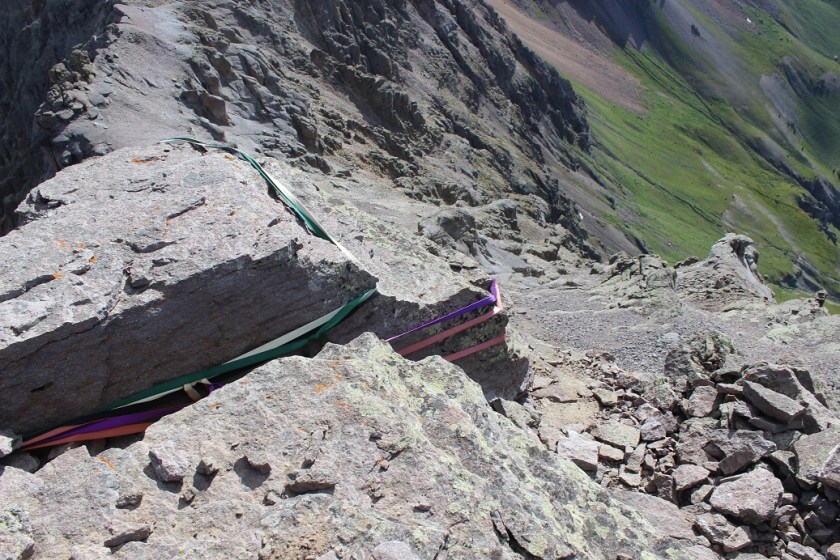
The way off Dallas Peak is to rappel to the southeast

25

There was quite a bit of webbing already set up.

26

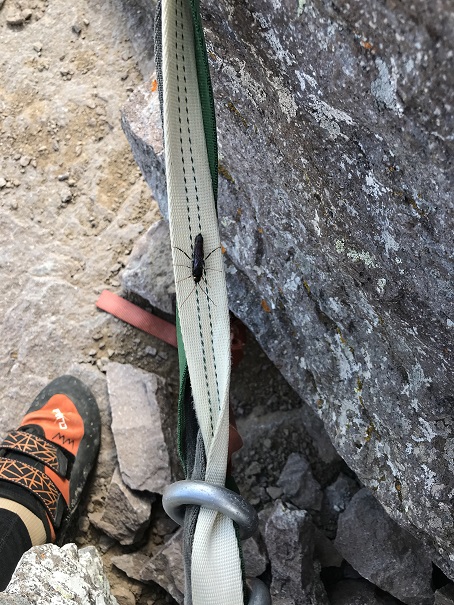
The only problem? This guy.  He refused to move, and quite honestly I didn’t want to scare him and have him bite/sting/fly all around me.  So I talked to him for a bit and told him if he didn’t move, I wouldn’t kill him.  This arrangement seemed to work, as he never left his spot.  He was about 2 inches long.

27

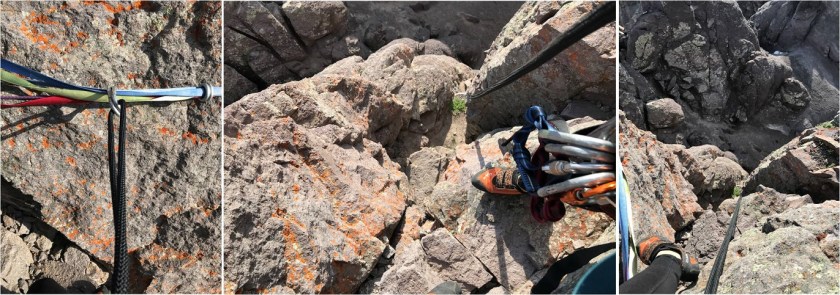
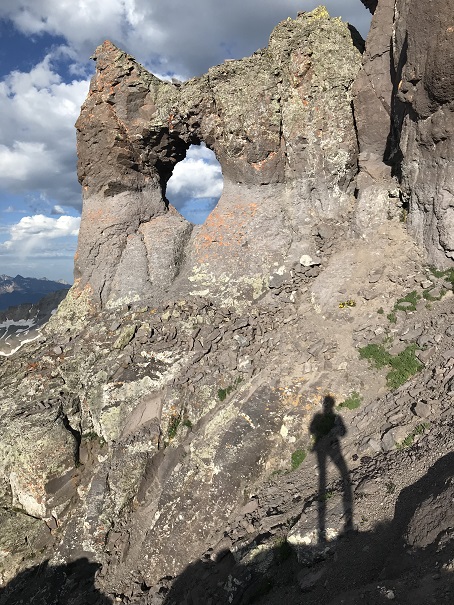
I set up my gear and threw my rope over the side. It got tangled, so I had to haul it back up, untangle it, and throw it again.  Success!  On the way down it’s instantly committing.  You aim for the hole (the hole is the halfway point down).

28

I double checked my set-up, leaned back and felt secure, so I unhooked my slings and started down, aiming for the hole in the rock

29

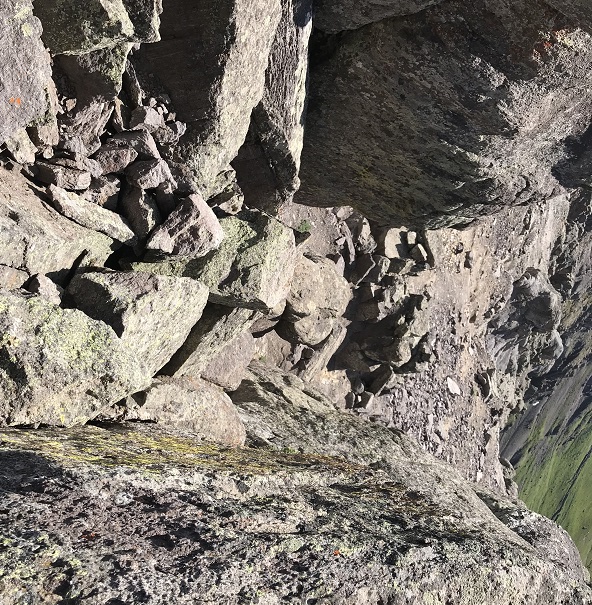
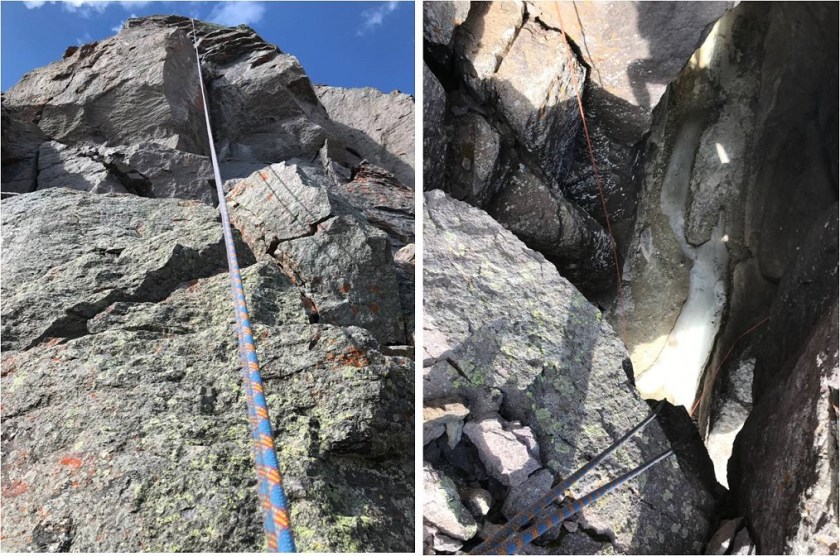
When I made it down to the hole I found it was a ledge: I could have set up a second rappel from here if need be (but my 60 meter rope was more than long enough).  Here’s what it looks like looking up and down from the ledge.

30

I leaned back one more time and started the rappel down through the hole, noticing there was a rope that had been left there. When I made it to the ground I saw a sign on the rope asking others to leave it as they found it, as its owner is coming back this winter to retrieve it.

31

I unhooked my belay device, pulled my rope through and recoiled it, mentally thinking through the rest of the descent. I felt confident I could descend the class 4 section without rope, so I put it away in my bag.

Here’s the way I rappelled down

32

I decided to keep on my climbing shoes until I made it back down past the class 4 section. I wasn’t disappointed, as the rock was easier to navigate than it had been on the way up wearing climbing shoes.  I felt very secure down-climbing this area.  Also, it looks very different on the way down

33

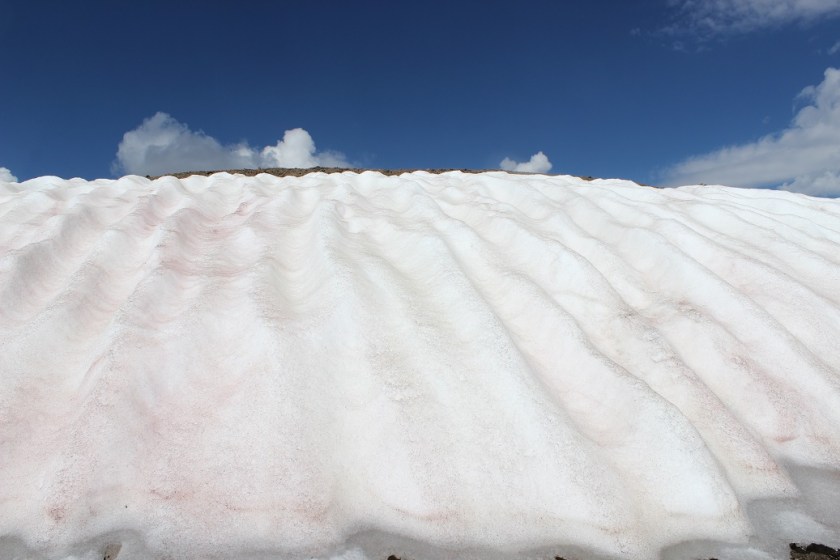
Here’s a look at the way down from the ledge. I stuck to the left (east) of the snow and just aimed for the obvious trail below that cut across the side of the mountain, so glad I was doing this now in the daylight

34

35

36

I made it back to the trail and all I could think about was making it back to the campground as soon as possible: I’d promised my daughter I’d make dinner.  I found some raspberries along the way that were delicious, so that settles it:  Raspberries in the San Juans just taste better.

I made it back to my truck at 1:30pm, making this a 12 mile hike with 5445’ of elevation gain in 11 hours

37

38

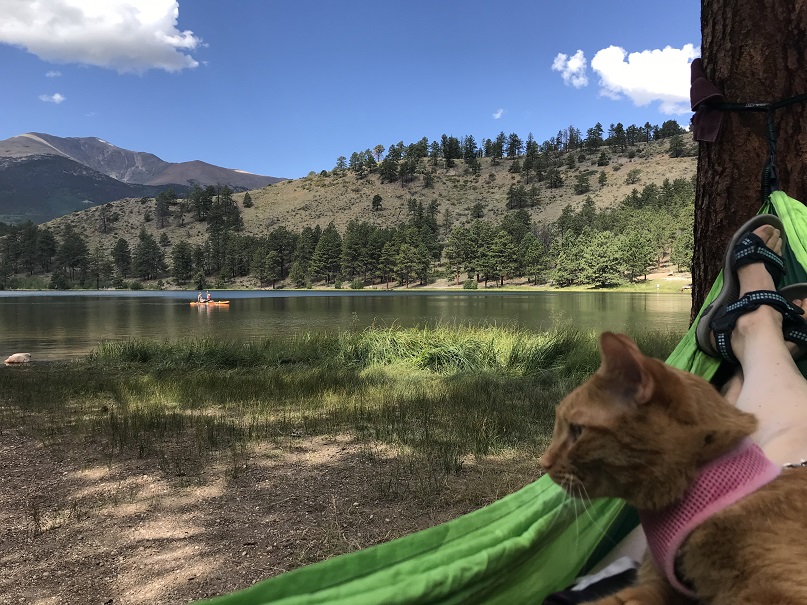
I made it back to the campground around 5:30pm and we stayed up and chatted around the lake/campfire until late into the night. This is how I spent the rest of my Labor Day weekend, relaxing in the beauty of one of my favorite Centennials…

39


Teakettle – 13,815, “Coffeepot” – 13,568 & Potosi Peak 13,793


1

RT Length: 6 miles (seems fake but I’ll take it)

Elevation Gain: 4168’

This climb was several years in the making. Knowing if I wanted to complete the Centennials (etc.) I’d need to have rock climbing skills I started going to a rock climbing gym once a week a few years ago.  While I enjoyed the climbing and the skills I learned helped immensely with scrambling on class 3+ peaks, I didn’t get a lot of experience with actually setting up/taking down ropes and anchors.

I bought books on mountaineering and watched YouTube videos, but there isn’t a lot of information out there on self-belaying/rappelling (I wonder why?). So I turned to friends I knew who rock climbed and picked their brains.  A couple even offered to take me out and show me the ropes.  I took them up on their offers, and by mid-summer this year I felt confident enough to go out and try this peak on my own.  Please note, I’d already gone out dozens of times and set up anchors and rappelled locally, this was just the first time I was going to do so solo and, well, without anyone to help if needed.

I arrived at the Yankee Boy Basin restroom area at 3:30am and was on the trail by 3:45am.

2

I put my helmet on before I left the truck, and my pack was curiously not as heavy as I’d anticipated. I considered this my first win of the day.  I walked about 1/10 of a mile down the road, realized I’d left my DSLR in the front seat and quickly turned around to retrieve it.  I’d been a little worried about my bruised tailbone from last week, and while I have a good 5 inch bruise on my backside my pack wasn’t bothering it as I hiked.  Second win of the day!

Camera retrieved I hiked northwest along the dirt road, crossing a large mud puddle and turning right.

3

Note: I chose this route because on a topo map it looked easier.  After completing the hike I have my doubts, and believe this is the correct entry point:

4

The elevation gain begins immediately and doesn’t quit. I headed northwest up a steep grassy slope, enjoying the meteor shower and a herd of either goats of sheep watching my ascent (in the dark I couldn’t tell which they were, but could see them watching me).

The grassy slope turned to large rocks and talus as I entered a basin.

5

In the moonlight I could see my goal: this steep scree section at the base of the black gully. I’ve lightened these pictures up for detail, but this is where I was headed.

6

The ascent was a grueling climb over steep scree, made marginally easier when I put on my microspikes. The worst part was getting all those small rocks inside my shoes.  I couldn’t help but think I should be wearing gaiters to keep the rocks out.  Don’t they make something for this for runners so they don’t get rocks in their shoes?  Anyway, the terrain was not ideal in the least:  some of the worst scree/talus/etc.  I’ve ever encountered.  At times I was literally grasping the dirt for traction with my hands.

7

I exited climbers left out of the black gully. The black gully is class 2+ climbing, and much easier than the scree/talus I encountered before the gully.  I was pleasantly surprised with how easy it was to climb.

8

Here’s a look back down the black gully. You can see “Coffeepot” in the upper left corner

9

Here’s a look at the route from the top of the black gully

10

I followed the rock rib around until I came to another gully, climbed up, and turned left

11

From here there’s some rock scrambling. I kept heading northwest towards the summit tower

12

Ok, easy part over. Now it was time to get out my gear and mentally prepare for this climb.  Looking at the route it didn’t look that difficult.  I felt confident I could climb both up and down without needing ropes (ha!).  I changed into my rock climbing shoes, put on my harness just so I wouldn’t need to at the top, and left my trekking pole and hiking boots at the base of the climb: no need to carry unnecessary equipment.

Here’s the route up

13

The first half of this climb was indeed straightforward, but as soon as I crossed over to the ‘actual’ climb things got a little more hairy and I quickly came to the realization I was not going to be able to downclimb if I continued, and if I were to go any further, I would need to fully commit. It was either downclimb now or I was doing this all the way.  My legs started to shake so I took a steadying breath and reminded myself I’d trained for this and it was within my abilities.  I looked up and steadily climbed to the top, being careful with each hand/foothold I chose.  I couldn’t help thinking to myself (over and over again) how much easier this would have been if I’d been a few inches taller.  I’m happy with being 5’4”, but at times like this being 5’6”+ definitely would have its advantages.

I made it to the top and looked back down on what I’d done. Woot!  I’d made it!  I dropped my gear and tried to get a few pictures.  This wasn’t working, mainly because the summit just wasn’t big enough.  So, selfies it is again.  I did get a video and a few pictures to prove I’d summited (you’d be surprised how much some other people care…).  I summited Teakettle Mountain at 7:15am

14

Summit Video:

Oh, and I know that’s not a teacup but an espresso cup. I don’t own any teacups and I was planning on climbing “Coffeepot” today as well, so I compromised (also, this is Teakettle, not Teacup… and btw I do love all those teacup photos, not throwing shade here, just rambling).  Mississippi is a nod to family.  Also, there may or may not be whiskey in that cup.  Ok, there was, but only a sip.  I still had to make it back down but still felt a bit like reveling:  I’d climbed up without a rope!

15

Now for the true test: setting up an anchor and rappelling back down.  There were several anchors already set up, and while I’d love to trust someone else’s’ anchor (let’s face it, the odds are in their favor here) I didn’t know how long they had been there, so I decided to set my own anchor up and attach it to the ones already in place.

I was worried I’d forget something. Not that I didn’t know what I was doing, but I was at altitude, hadn’t had any food/water besides a sip of whiskey (personal choice on 99% of my hikes to prevent nausea) and had done a lot of physical activity and I didn’t want to mess up here, so I checked and re-checked everything twice and then a third time and made sure to secure my sling(s) before even beginning. Luckily there was a stable rock behind the anchor for me to use during set-up as well.

Anchor all set up I uncoiled my rope, attached it to the anchor, and threw it in the position I wanted for a rappel.

16

OK, moment of truth. I put back on all my gear, attached the belay device, leaned back and everything held, so I unhooked my slings, took a deep breath, and leaned back.  It all went smoothly and faster than I’d anticipated.  So much so that I stopped about 10 feet from the ground and played with the side of the wall, pushing my feet off the rocks and bouncing back and forth for a bit before finishing the rappel.  Yes, I was pretty proud of myself when my feet hit the ground safely, and even more so after I’d retrieved and recoiled my rope.

17

After changing back into my hiking shoes and putting all my gear away I figured it was a good time to celebrate: I actually took a full shot of whiskey (now that the hard part was over) and decided to play a bit with the rock formation.  It would have been really cool to get one of those pictures with me in the hole, but there was no way I could set up my camera and make it back into position in time, so I settled for one of my shadowselfies.

18

I spent a lot more time here than I usually would at a ‘summit’ but I was celebrating: This climb had been several years in the making, I’d put a lot of energy and effort into all this climb entailed, and (with the training help of friends) I’d successfully summited solo.  I was going to celebrate!!!

After a few minutes of fun I turned and headed back towards the Black Gully. From the Black Gully here’s the look at the route over to “Coffeepot” (and the route I would have taken over to the Black Gully had I not taken the scree route up)

19

Here’s a look in the daylight back down the scree route up

20

From the bench below “Coffeepot” here’s a look back at the Black Gully

21

From here I turned left (east) and decided to check out “Coffeepot”. It doesn’t much look like a coffeepot from this angle, does it?  It’s basically a quick class 3 climb over some rocks, and a short class 5.0-5.2 climb (per Roach) up a chimney.

22

I made it about ¼ of the way up the chimney and realized I didn’t fit with my backpack on, so I retreated, set down my pack at the top of the class 3 part, and tried again sans gear. It was much easier this time and reminded me of when I was younger and would climb through a tree hollowed out by lightning.  It was a tight fit but I felt very secure as I twisted around and topped out at the top of “Coffeepot”.  I summited “Coffeepot” at 8:45am

23

Video:

Back down was a bit tricky because I had to go over an overhang to get back into the chimney, but in today’s conditions I felt in no way was a rope necessary (I did hold onto the anchor a bit as I was steadying myself in the beginning, but it wasn’t necessary).

24

It you feel comfortable at class 4 climbing and are considering trying “Coffeepot” I’d say go for it. Here’s a look at the climbing side of “Coffeepot”

25

From here I could see Potosi Peak, my next objective.

26

I was feeling pretty good at this point, having completed two Class 5 climbs. However, this peak actually proved to be difficult because there were some unexpected obstacles in the way.  Here’s the initial route down and back up the ridge, over to the corner of the cliffs

27

From the Coffeepot/Potosi saddle up the ridge was full of very loose talus. I’d encourage you to keep your helmet on for the entire hike, even though some of this stuff is labeled at 2+

28

The traverse around to the corner of Potosi took much longer than anticipated, but was straightforward.

29

At the corner I turned left and headed northeast up and over some more loose talus and rocks

30

And around the south side of Potosi until I came to a gully. This area was well cairned until the gully.

31

As I rounded the corner and came to the gully I was surprised to find a large mass of snow blocking the route up. This snow was at least 4 feet thick, 30 feet across, and 50 feet vertical, turning the class 2+ gully into a class 3 climb over large, unstable and loose rocks to get around the soft snow.

32

Here’s looking back down on the snow filled gully area

33

After the snow there was more class 3 climbing to get to the top of the gully. To be fair, it looked like there had been quite a bit of recent rockfall, including several large boulders.

34

About 100 feet before the top of the gully I headed up and over this rocky area. The rock is stable but covered in a lot of small rocks, making it slippery to climb.  There were cairns here as well.

35

Almost done, I headed up through more loose talus, through a notch, and turned left for the short push to the summit

36

There was a bit of snow here, surrounded by squishy mud: the kind that will suck your shoes off if your foot settles on it for any length of time, so I quickly traversed this area to the summit

37

I summited Potosi Peak at 11:05am

38

Summit Video:

The summit was relatively flat

39

I pulled out my phone and checked my tracker. It said I’d gone 3.9 miles so far today and that seemed like a lie.  I thought to myself I’d need to delete and re-download the app because last week it had stopped on me unexpectedly during my last hike and now it wasn’t tracking accurately… it must need a reboot.

I quickly headed back down the gully, around the side of Potosi, and back towards the Potosi/Coffeepot saddle. This is where I made my first mistake:  I had the option of climbing back up to Coffeepot and taking the traditional way down, or going straight down from the Potosi/Coffeepot Gully.  I chose the gully (I’d advise you to instead head back up to “Coffeepot” and then down).

40

In any event, I made it to the saddle and turned to head down the gully, aiming for the most stable sections of scree, navigating between rock formations

41

Here’s a look back up at the decent route I took from the saddle

42

When I got to the base of the rock formations I looked ahead and could tell I did not want to continue straight: The gully turned into a waterfall and I could see snow at the base.  It did not look safe.  (Solid line).  That was ok though because I had beta from a friend telling me I could just traverse over the hillside and I’d eventually run into the trail that led up “Coffeepot” (dotted line).  I figured nothing could be worse than the talus on the ascent, right?

43

Here’s what I was trying to avoid

44

Let me tell you, this beta was FALSE! Even though it looks like you can traverse over, you cannot.  Well, I did, but went through a lot of very sketchy terrain.  Visually it looks like you can cross on tundra the entire way but there are rock gullies you can’t see from here, and in fact can’t see until you’re right up on them.  Yes, I checked beforehand it looked like it went on a topo, but on the ground it wasn’t working. There were gullies everywhere that were extremely difficult to cross.  Every time I made it over one I’d encounter another.  I didn’t even feel comfortable stopping to take pictures.  It was frustrating because I could clearly see where I needed to be, I just couldn’t get there. Please don’t take this way. It looks like it goes, and maybe it does in winter, but it wasn’t safe. My advice is to skip this decent route all together and hike back up to “Coffeepot” and then down.  It took me a lot longer than it should have to descend, and there were many times I almost turned around and retraced my steps back up to the saddle (which I was very close to doing before figuring out the route). Oh, and there was graupel involved.  I was ecstatic when I finally did link up to the ascent route and made my way down to the parking lot.

45

Here’s a look from the road at the route I don’t advise you to take

46

I made it back at 3pm, making this a 6 mile hike/climb with 4168’ in elevation gain in just over 11 hours. And yes, my tracker was correct (it just felt like so much longer due to all the elevation gain).

47

48

All in all, I considered today a great success: I’d summited Teakettle solo, tagged “Coffeepot” and Potosi, and learned a lot about trusting someone else’s’ beta.  I drove the 6 hours home, took a bath, and then took my daughters out to a late dinner to celebrate my oldest being home from drum corps and my youngest completing her first week as an upperclassman.