I would like to preface this report by stating I do not consider myself a rock climber. Please don’t use this report as your only information when attempting to summit Lizard Head. There are several, much more detailed reports on this climb that can be found online. I’m hoping to share my experience, and hopefully add what little I can as someone who does not consider themselves a rock climber to the vast array of knowledge that is out there.
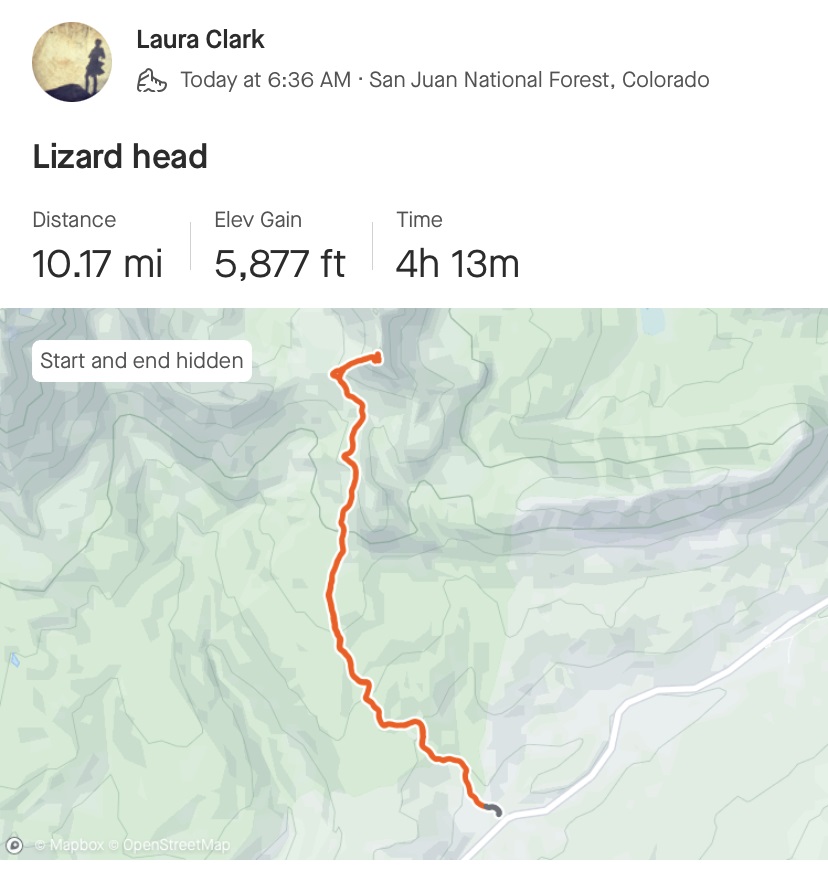
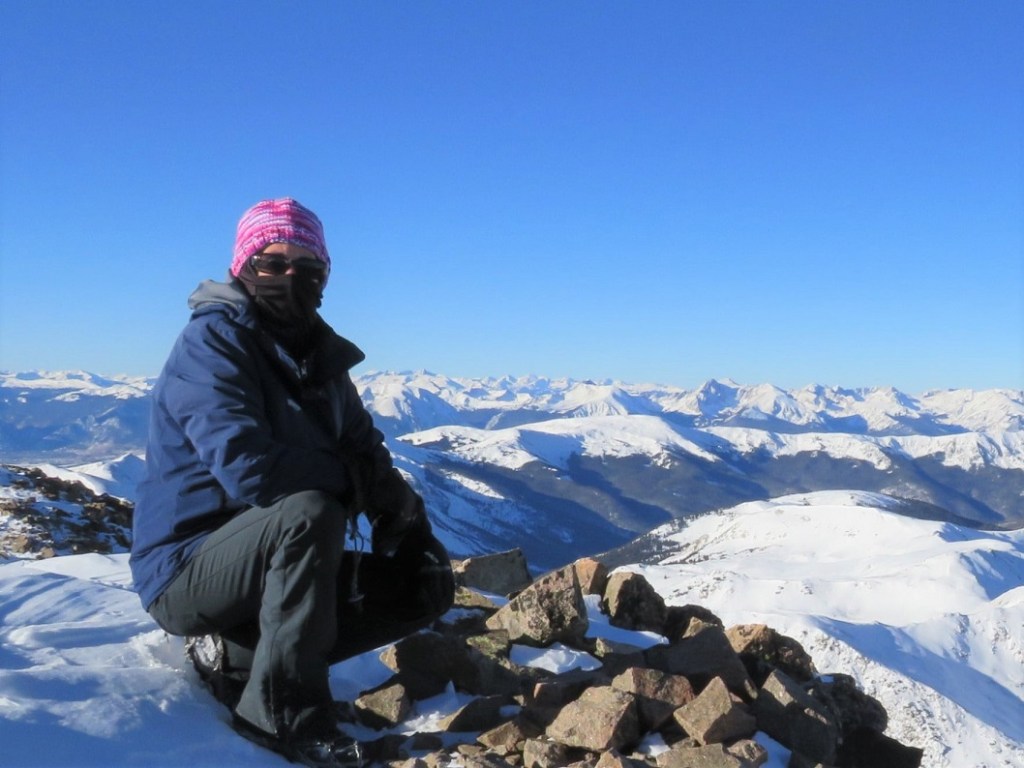
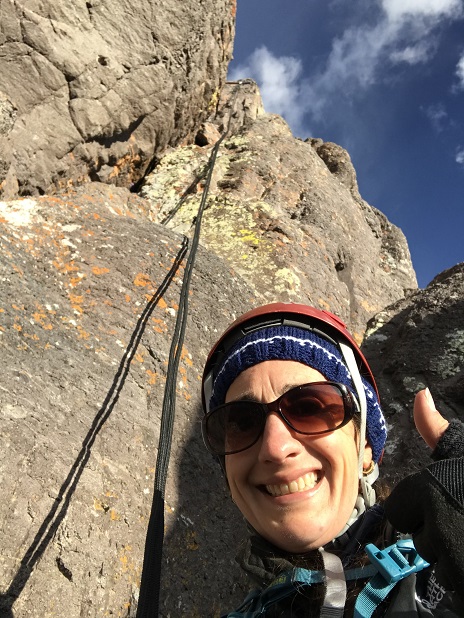
On my quest to summit all of Colorado’s 13ers, Lizard Head is the most difficult peak to climb, and with a 5.8 rating, requires ropes not only to descend, but to ascend as well. This is going to be a high-level overview. Please don’t ask me questions like how many cams were used (as many as were needed) or what sized cams (um… the ones that fit?) or what rating areas were (difficult?) as these are not my specialties. I can tell you there were 5 pitches (but this can probably be done in 3 or 4 by more experienced climbers) and 2 70-meter ropes were used (tied together for two rappels). There were several bomb-proof belay stations. If you don’t feel comfortable leading exposed class 5.8 on your own, but still wish to summit this peak, my advice is to hire a guide. San Juan Mountain Guides are the local experts in the area, but there are several companies to choose from.
Thank you for reading!
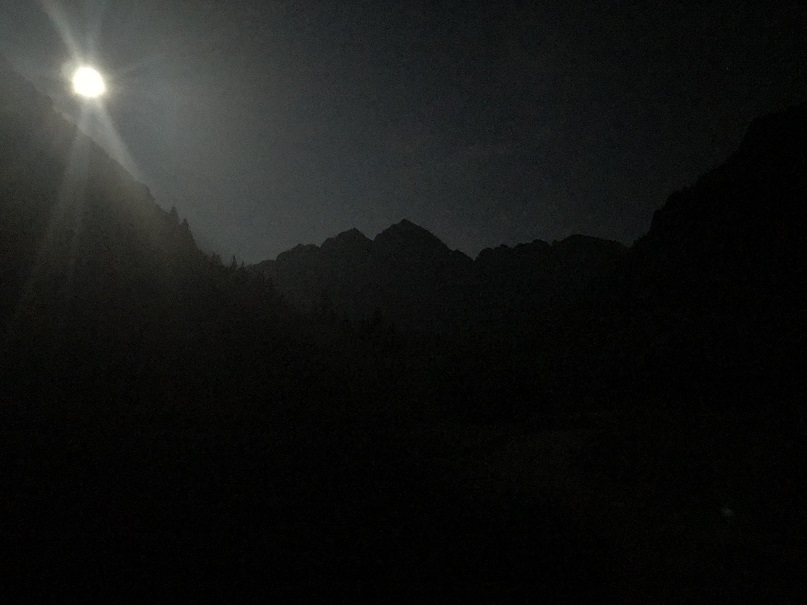
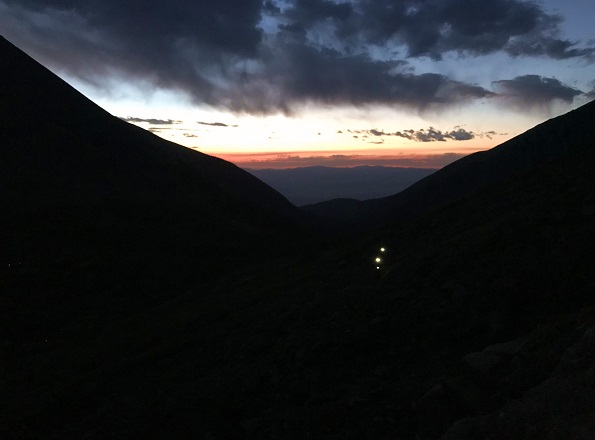
I got to the Cross Mountain Trailhead the night before and slept in my truck. It rained and hailed and sleeted a bit that day, but luckily, as I sat looking over at Lizard Head, it was always in the sunlight. I hoped this boded well for me the next morning.
I spend a lot of nights camping at trailheads/passes, and this one was unusually busy in the middle of the night. Several cars stopped and played music for a while. I’m not sure what they were doing there, as it was pitch black out, but it was my choice to be there, so I accepted their presence.
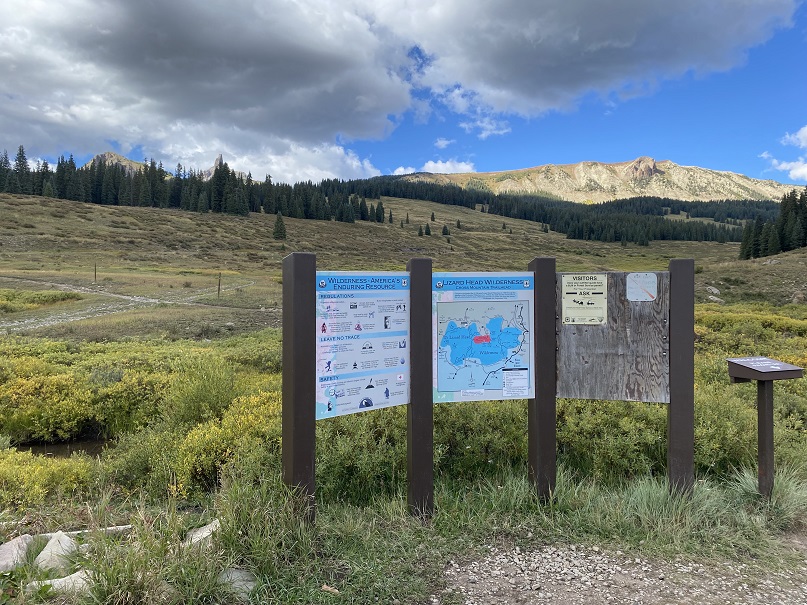
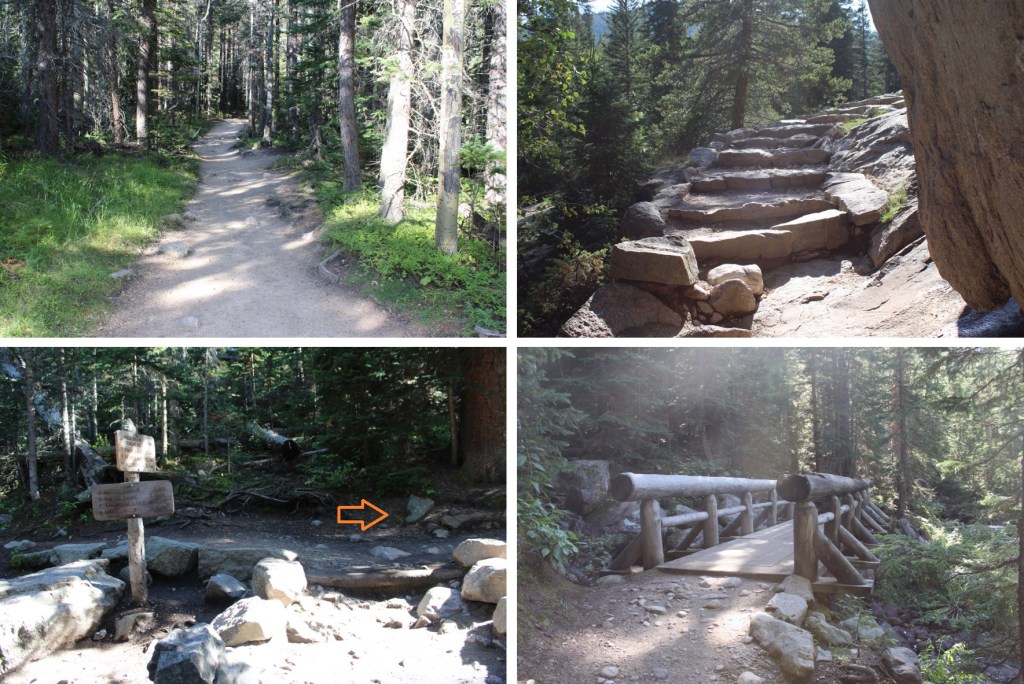
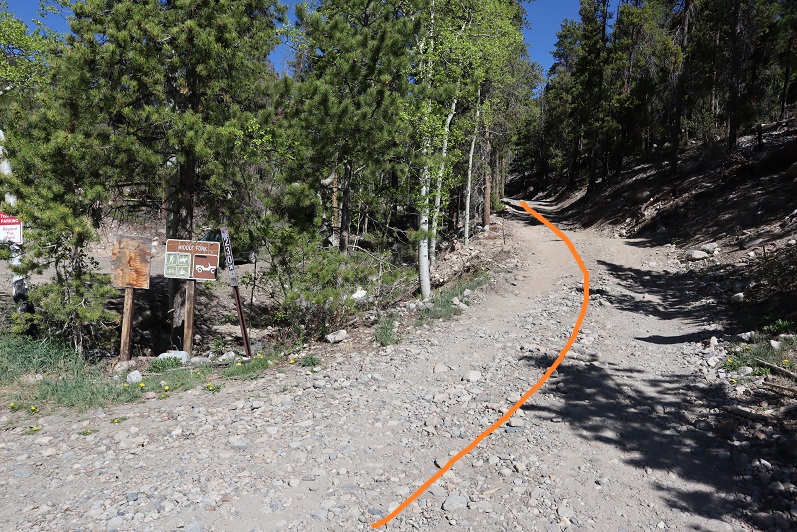
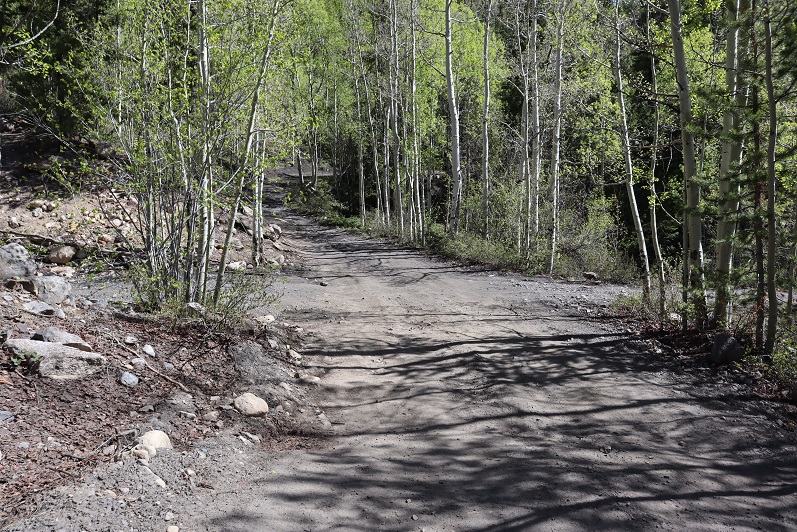
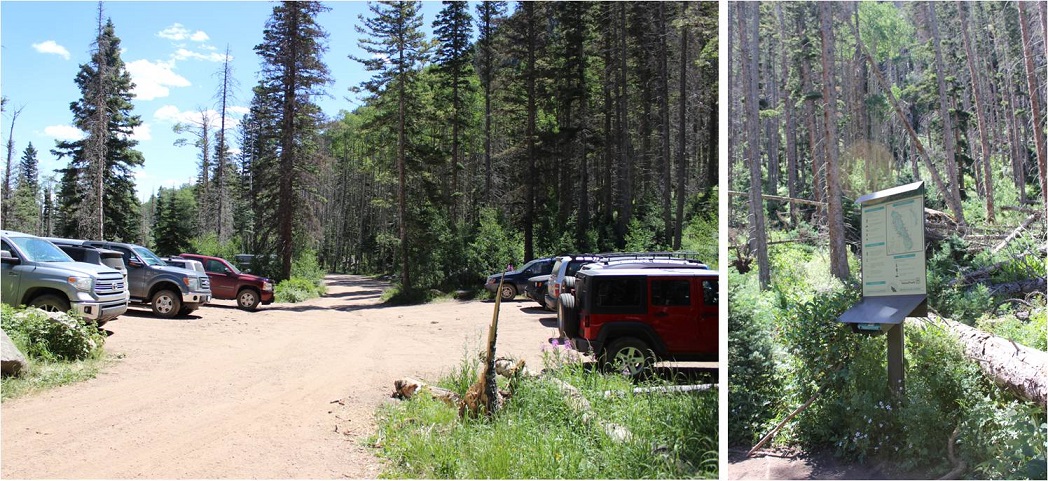
The trailhead starts at the west end of the parking area. It was 29 degrees outside when I left my frost covered truck and set out on the trail at 6:45am.
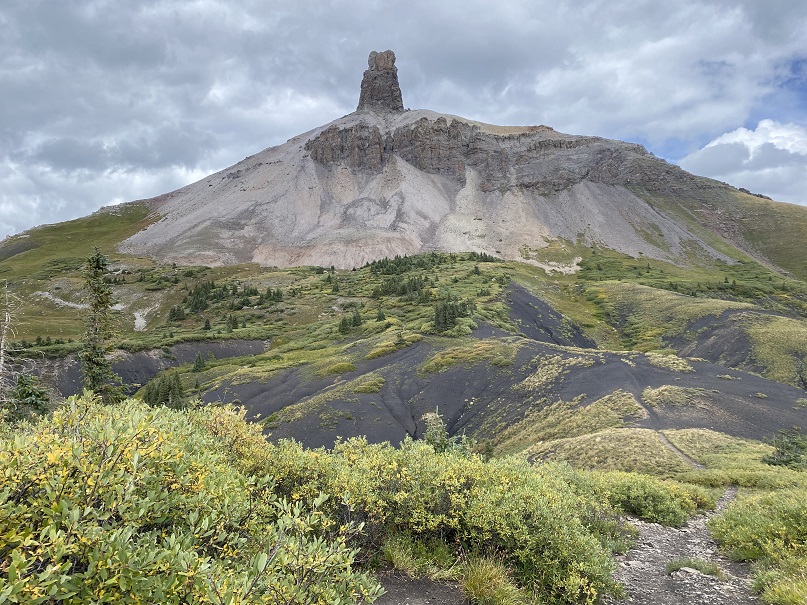
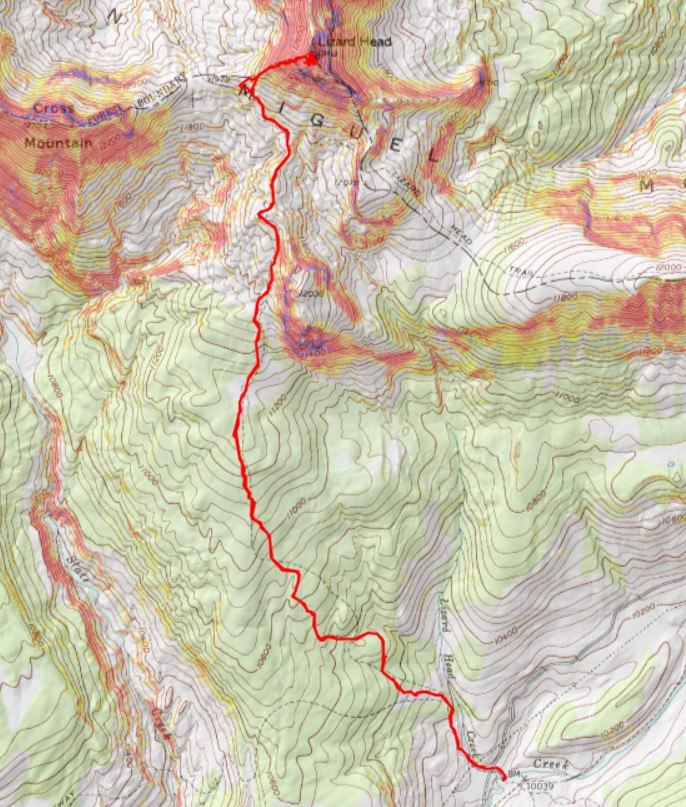
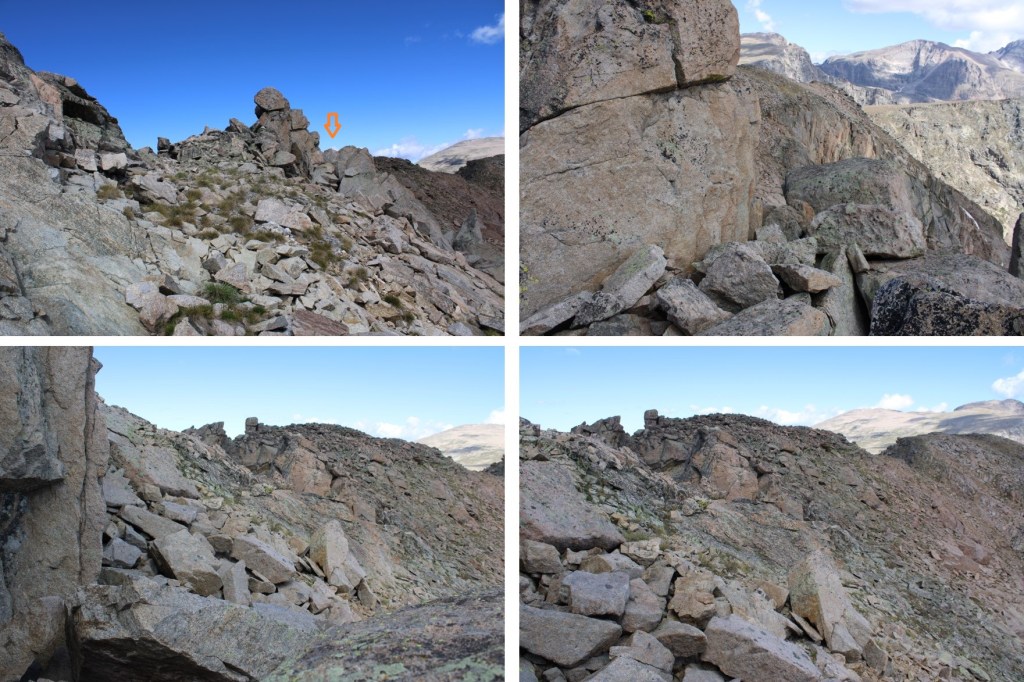
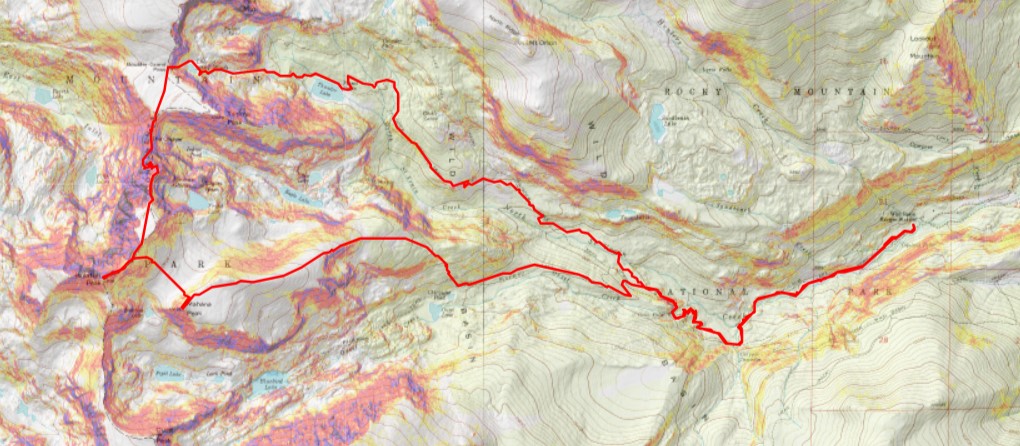
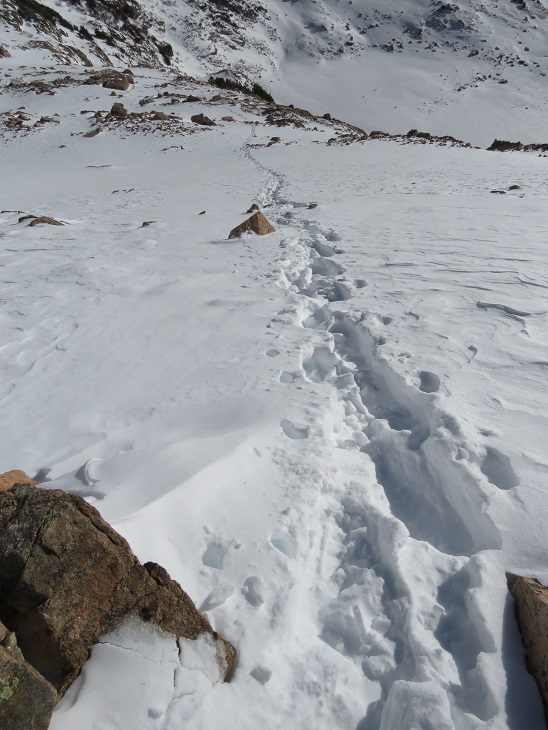
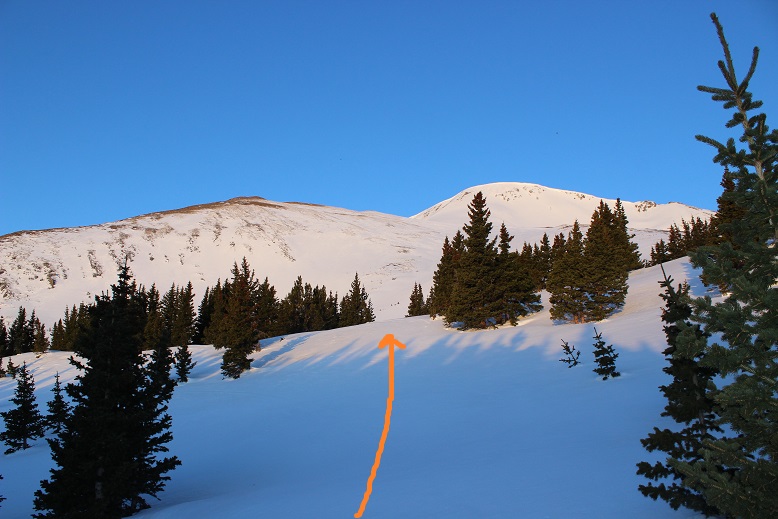
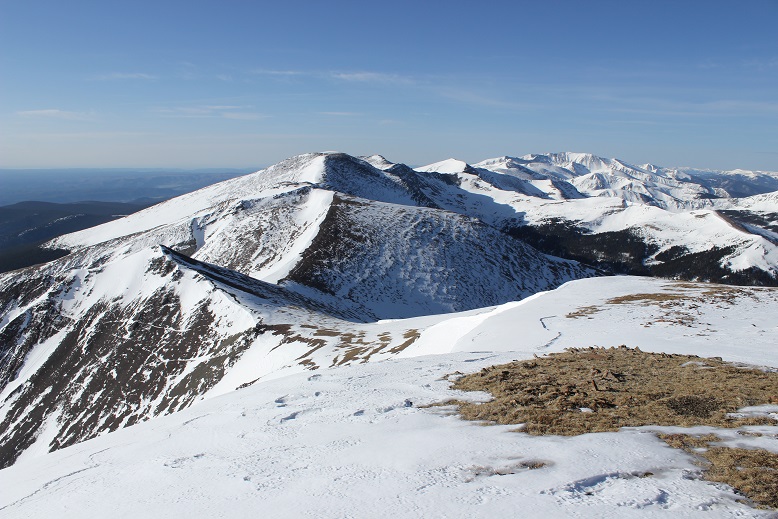
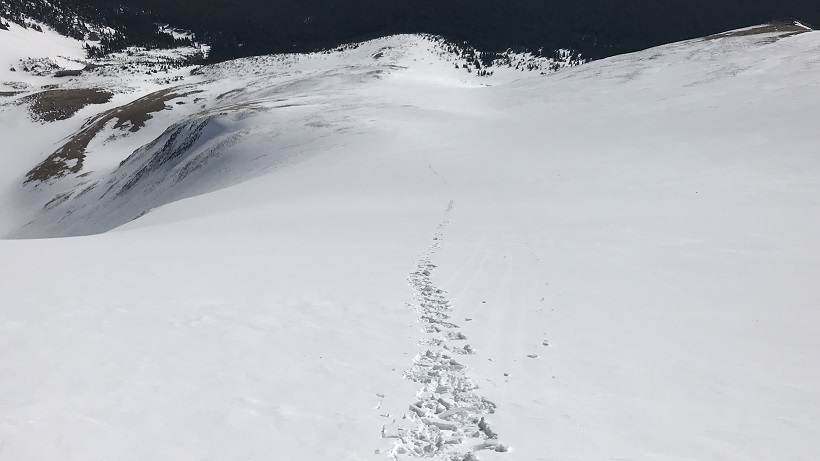
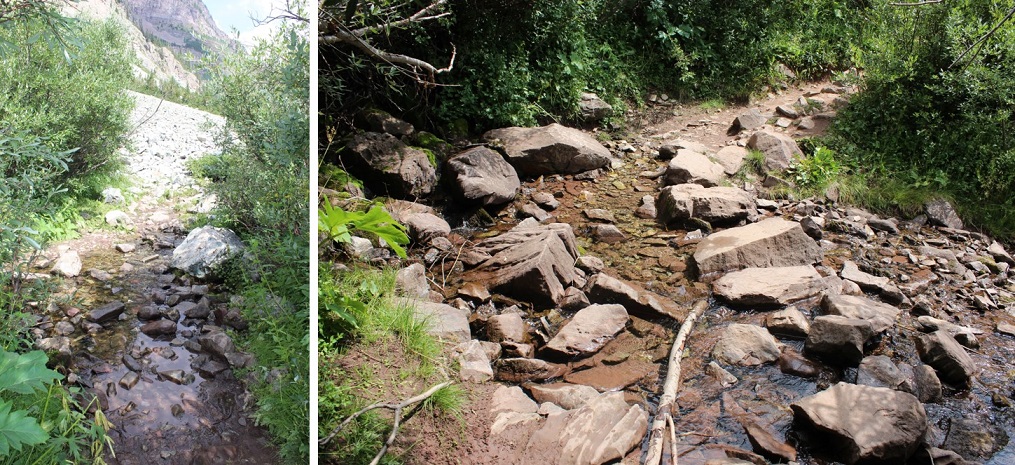
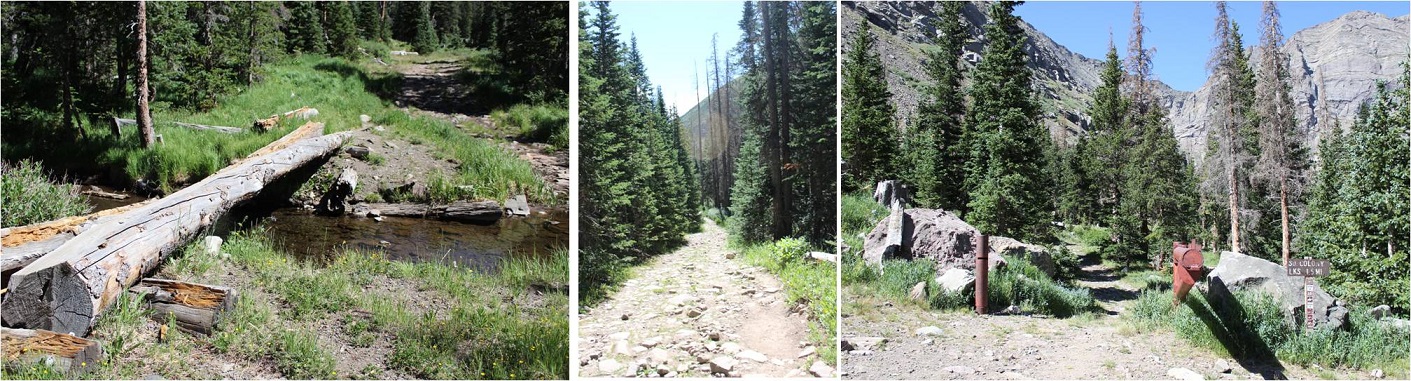
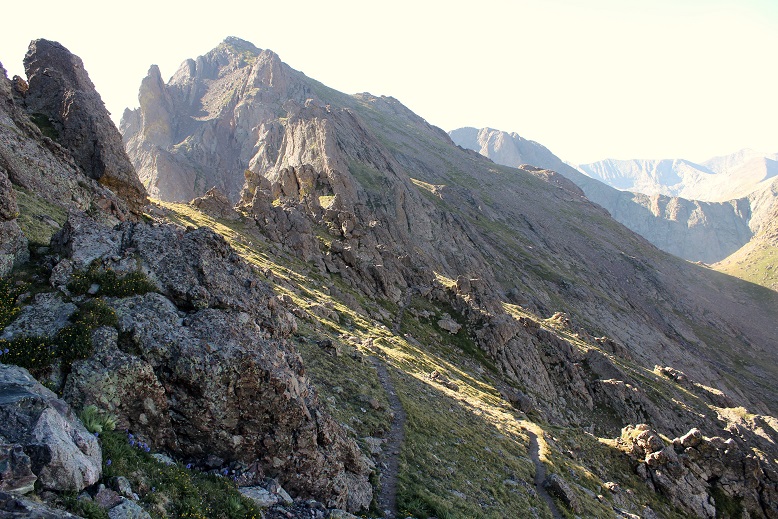
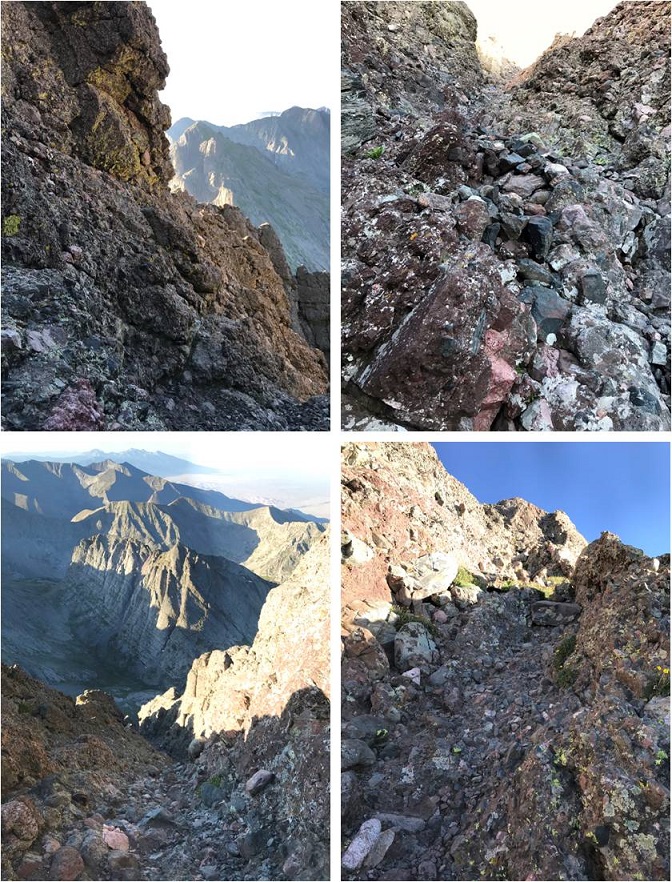
I followed the Cross Mountain Trail on a well-defined, class 1 path for what CalTopo tells me was 4 miles, before being able to see Lizard Head in the distance
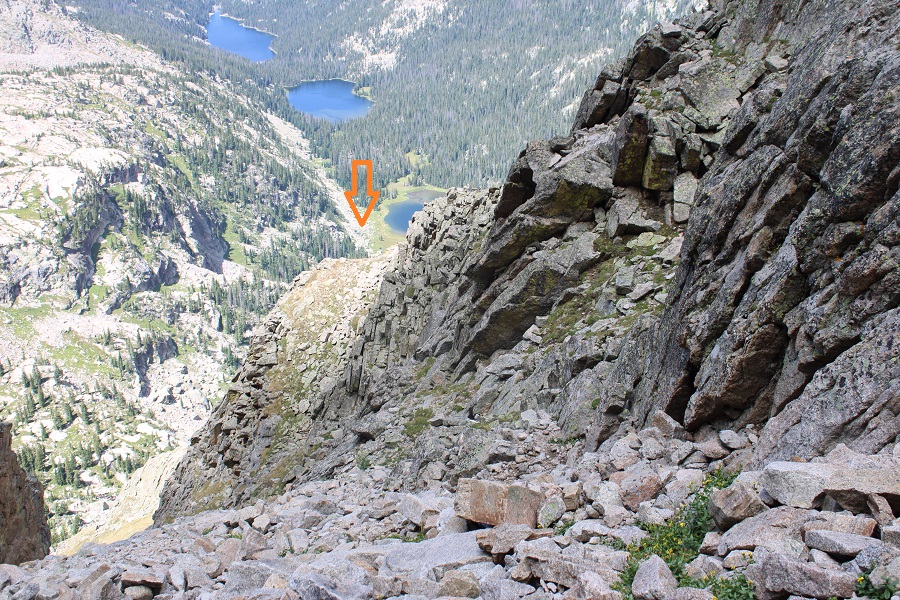
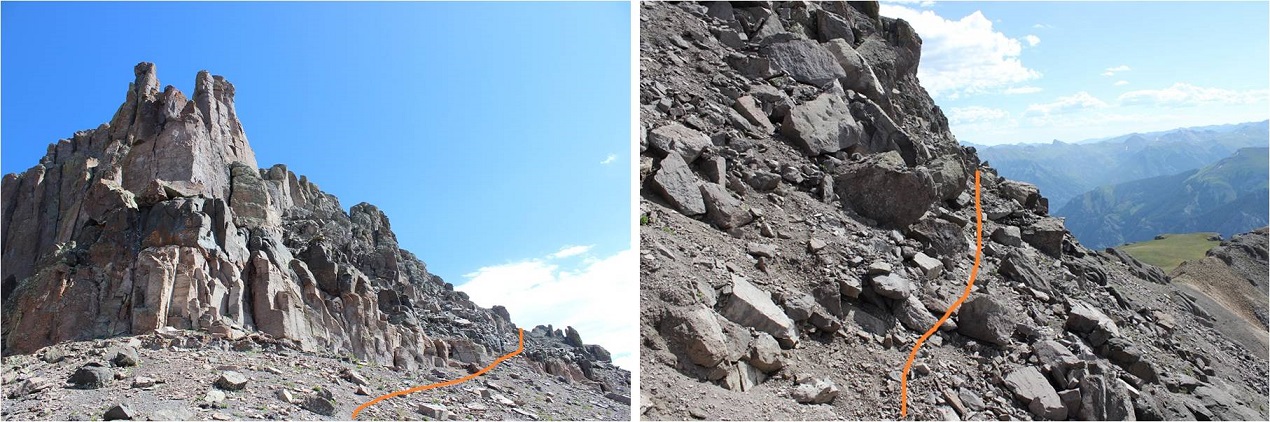
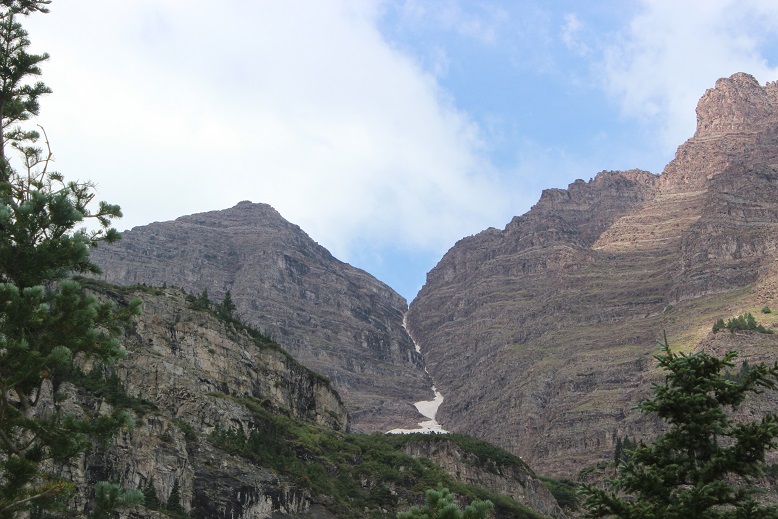
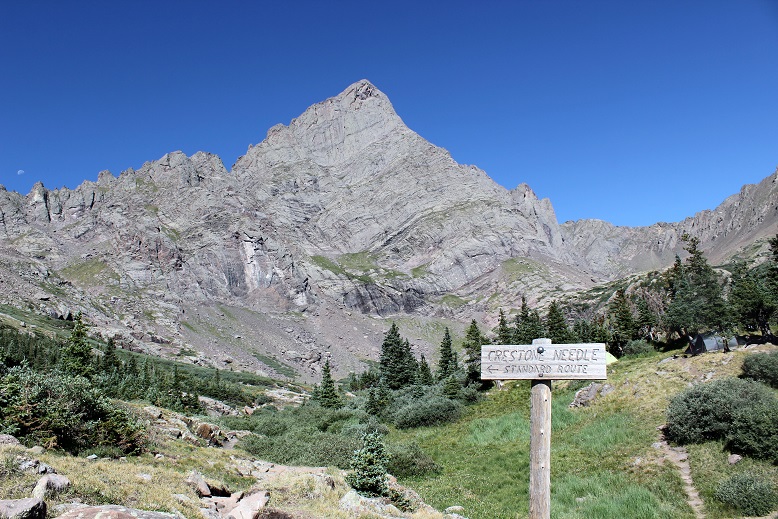
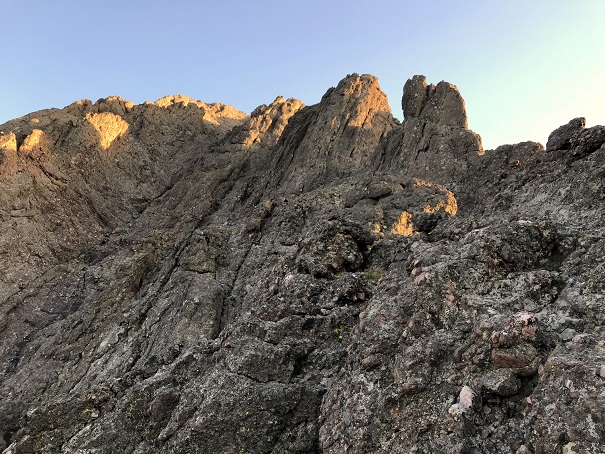
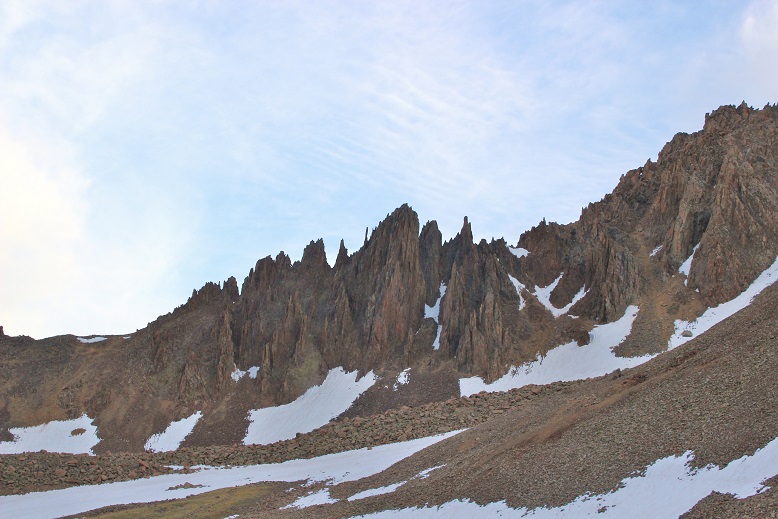
Access to Lizard Head is from the east
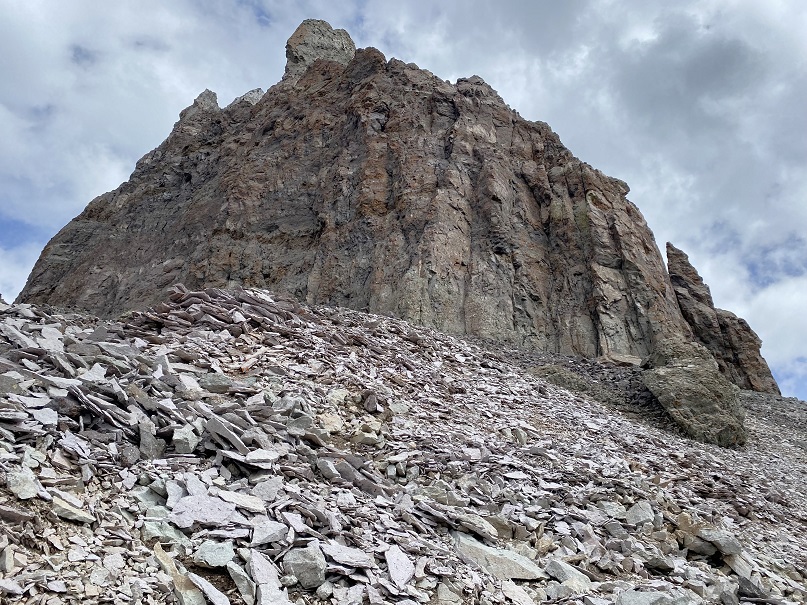
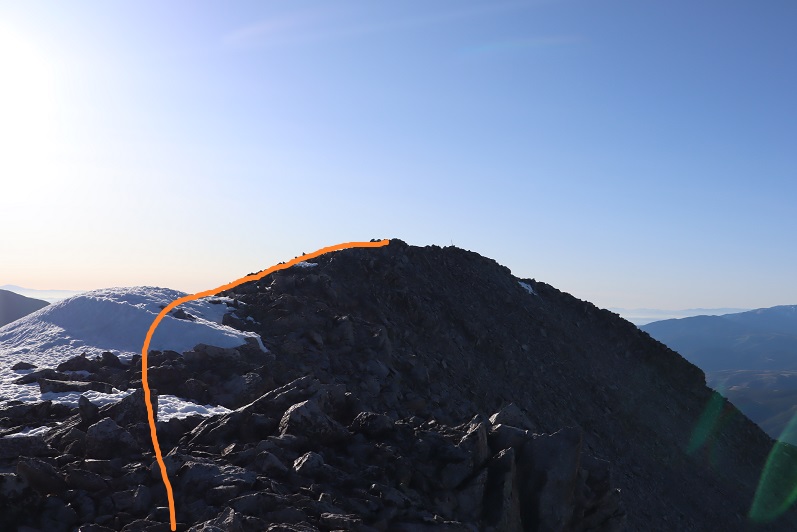
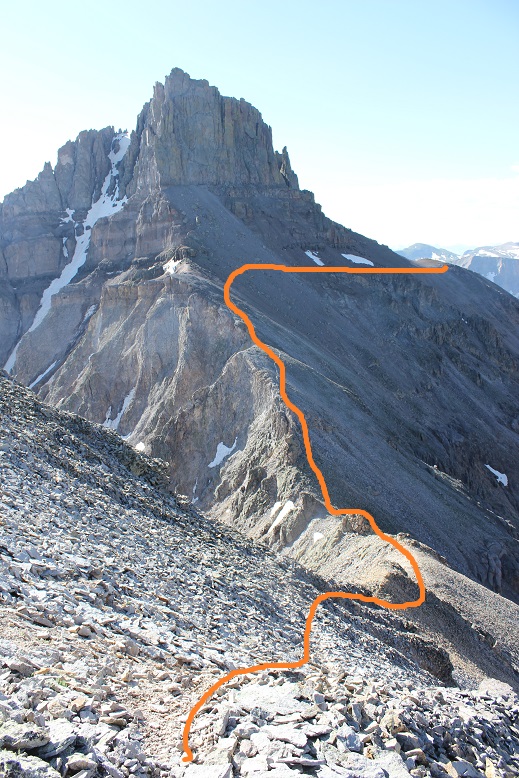
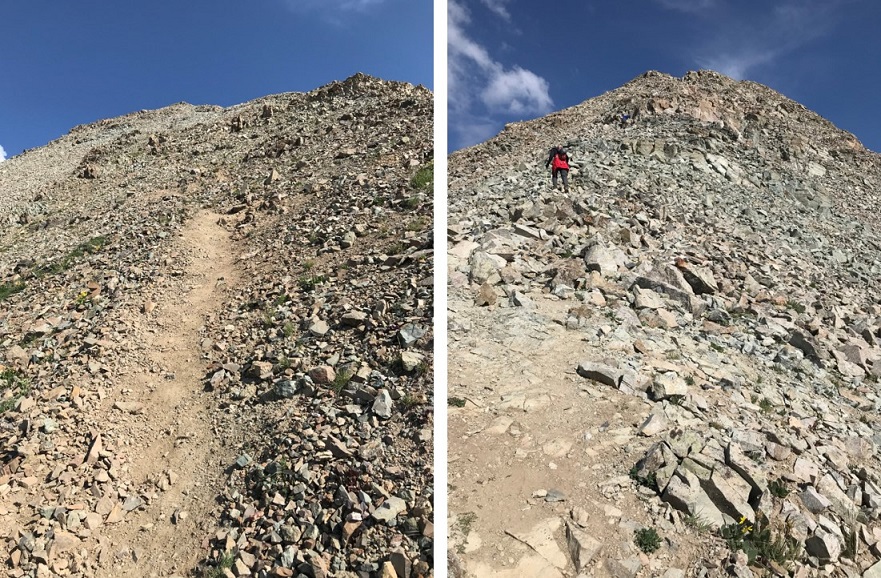
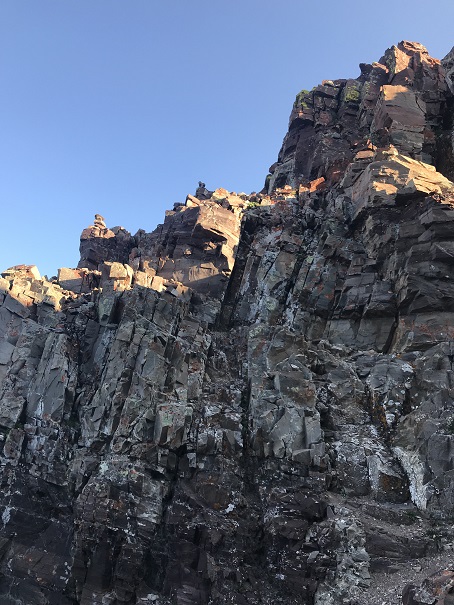
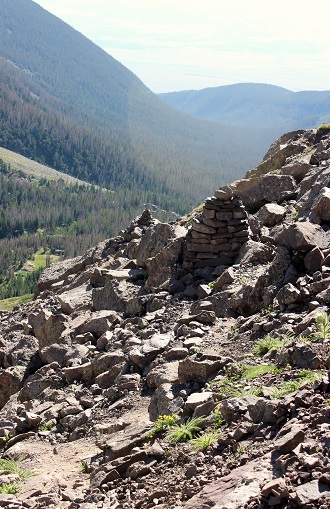
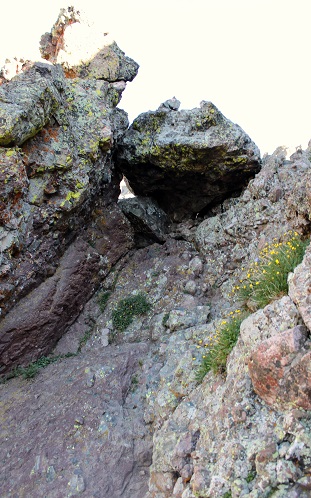
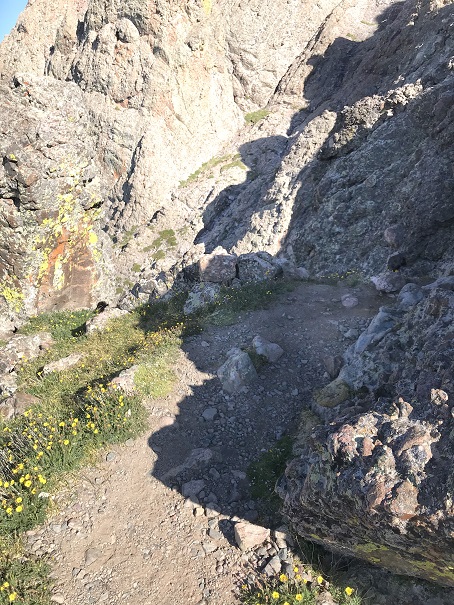
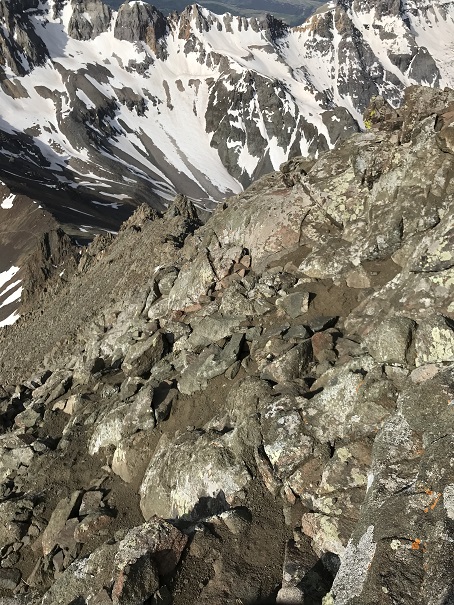
There is a well-defined climbers trail here to the base of the climb on loose talus. The goal was to make it here:
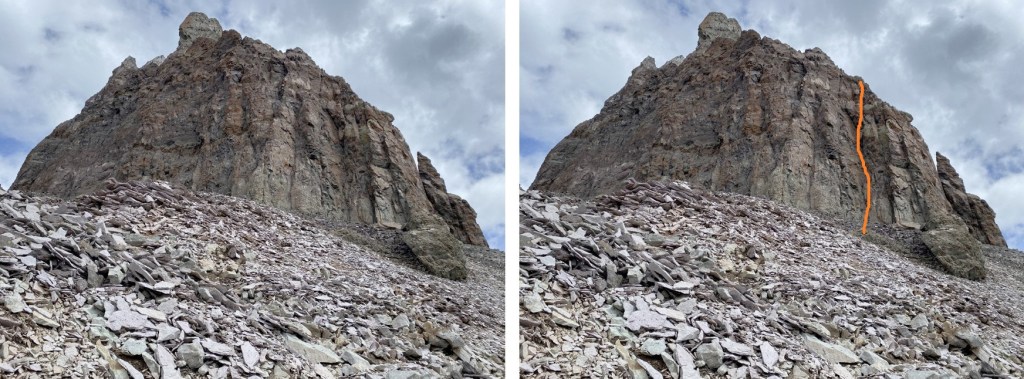
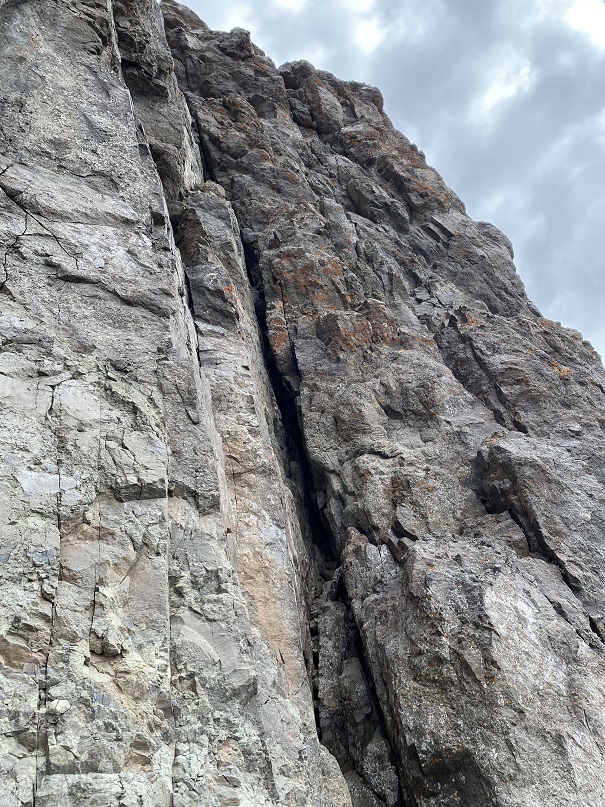
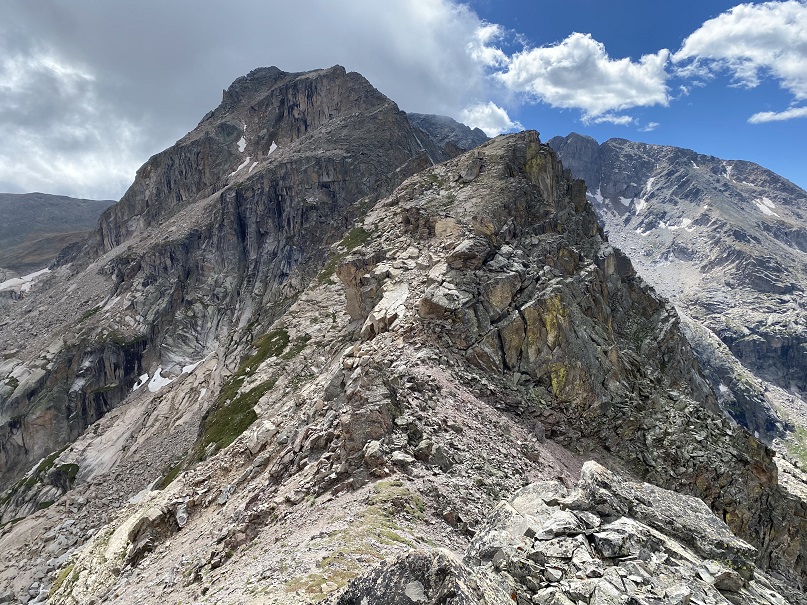
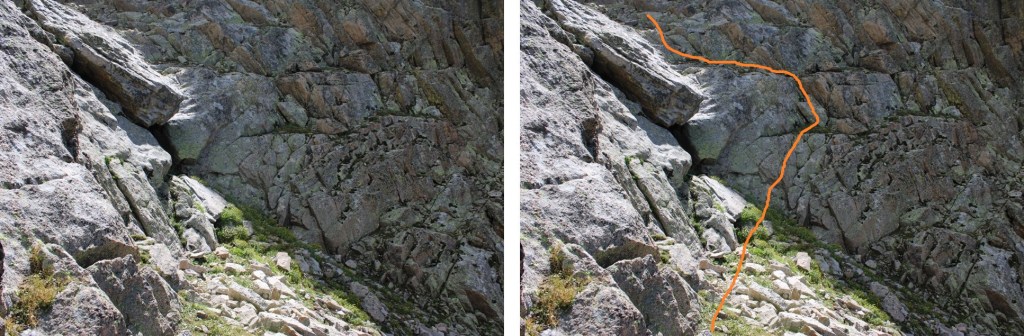
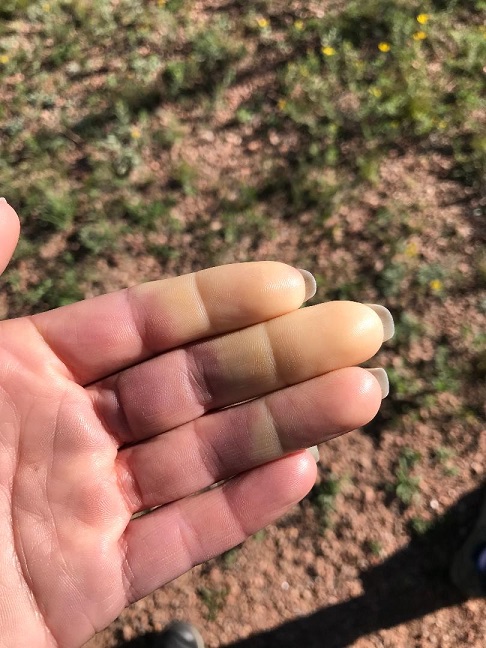
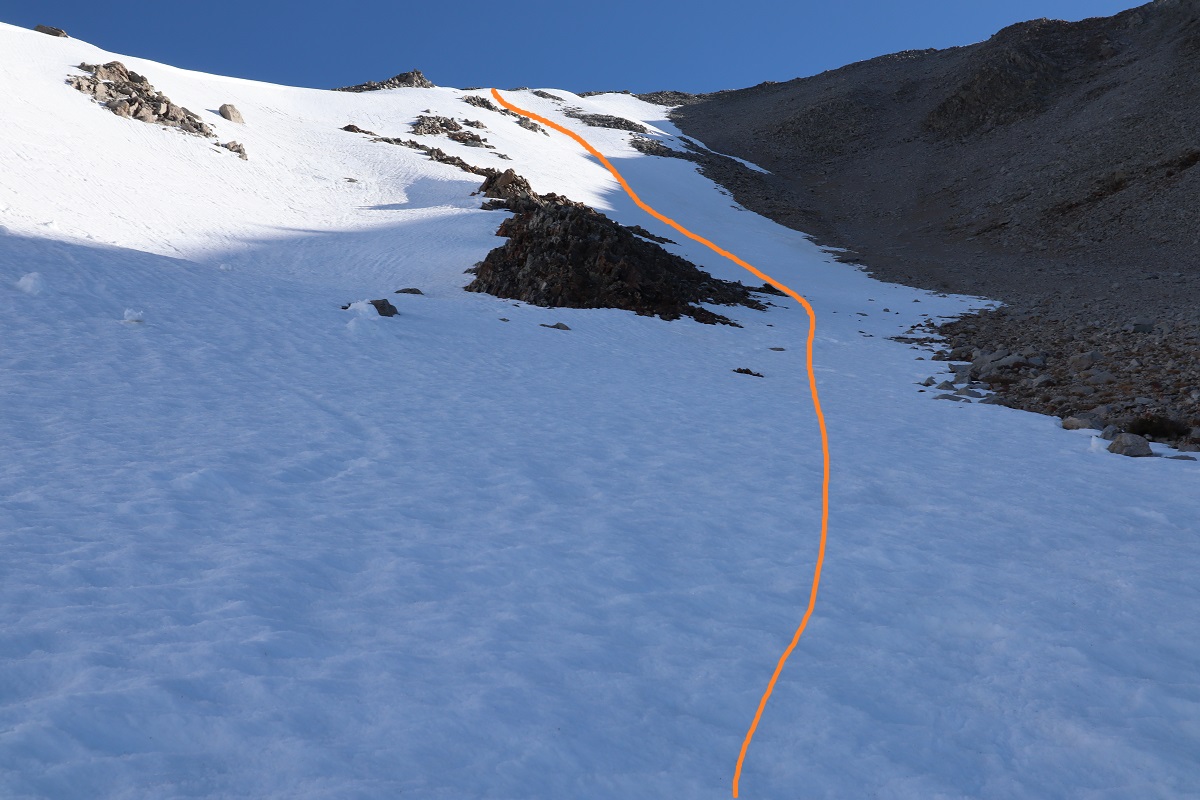
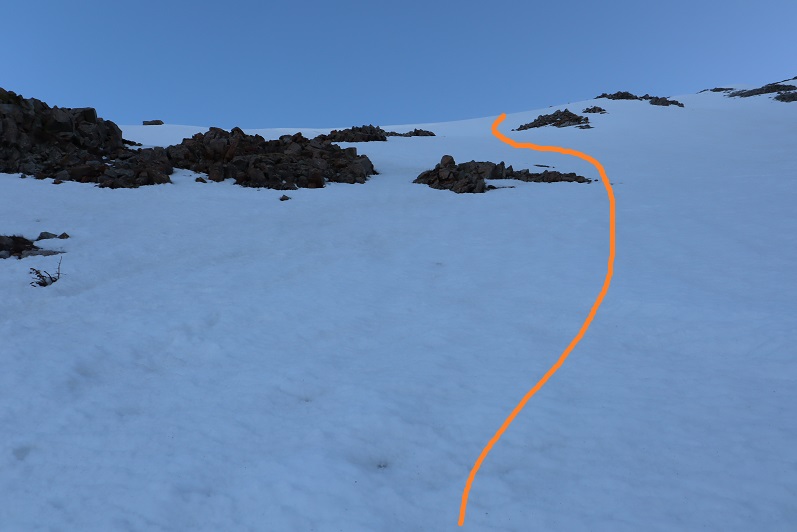
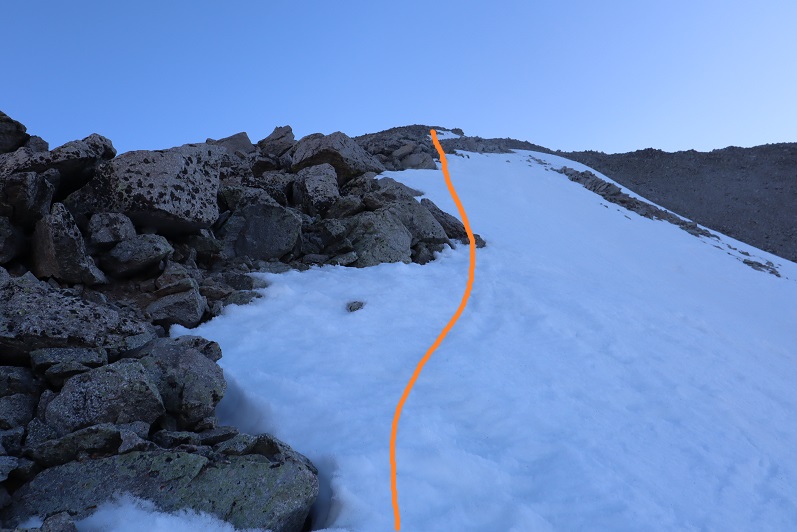
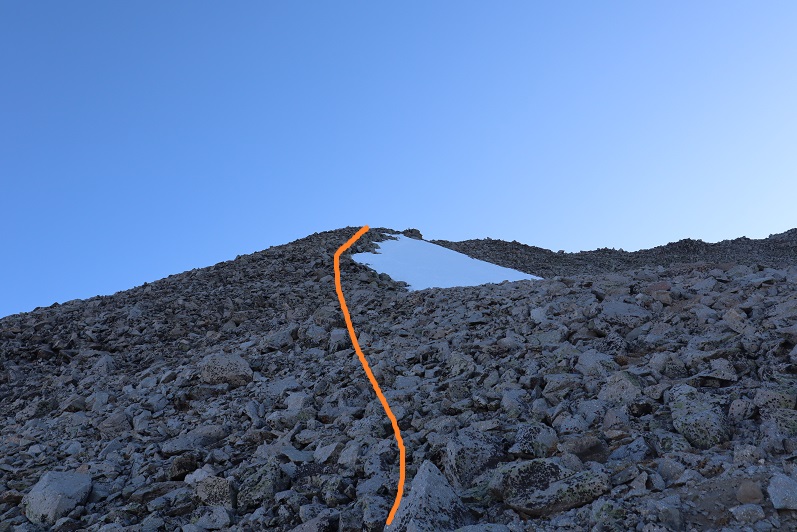
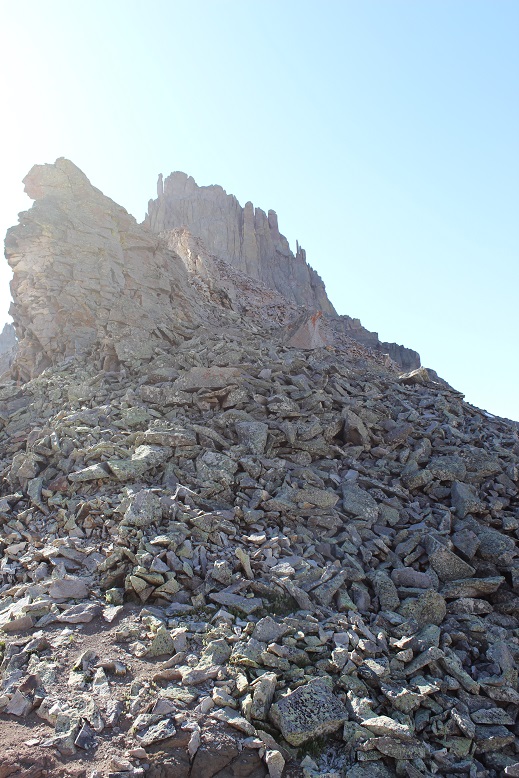
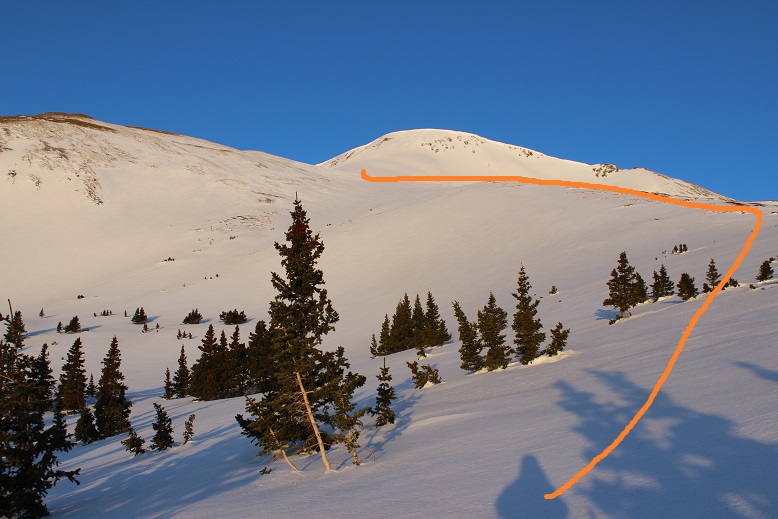
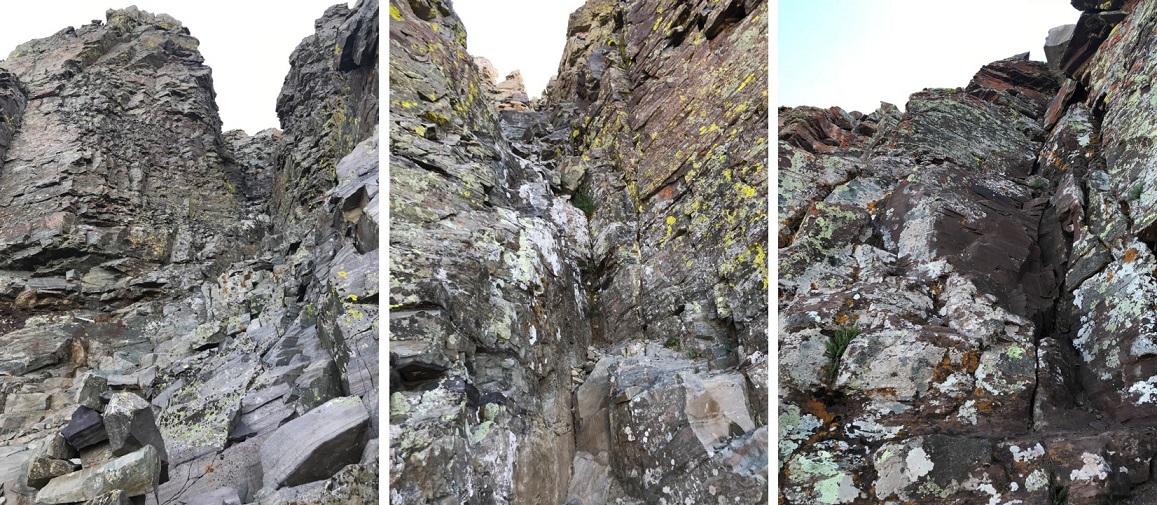
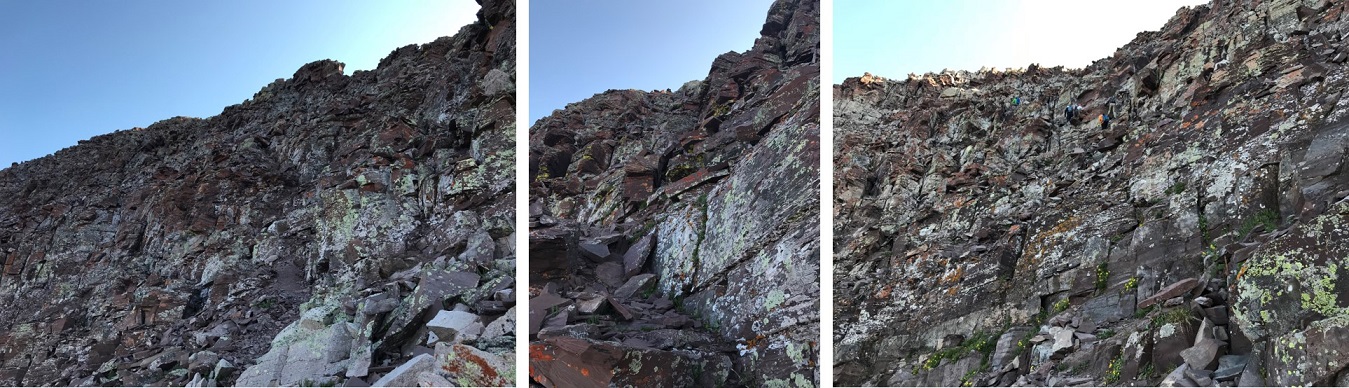
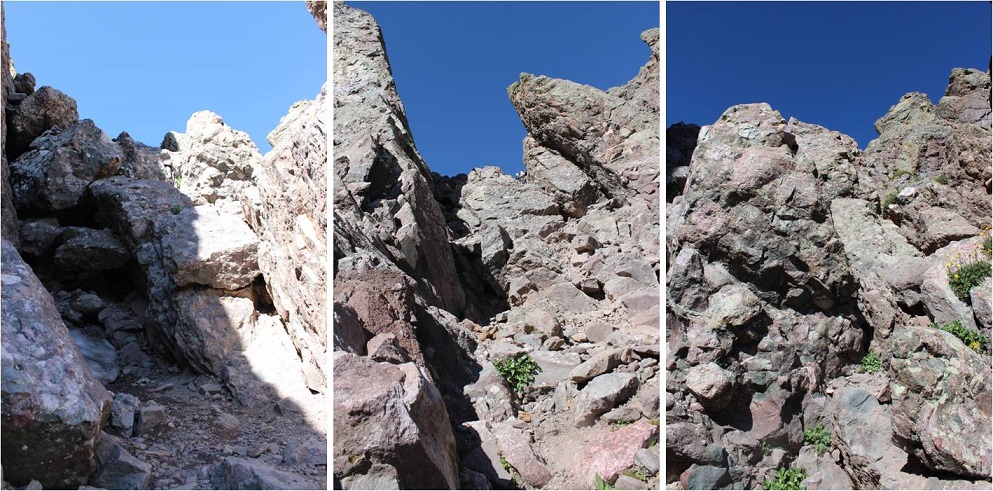
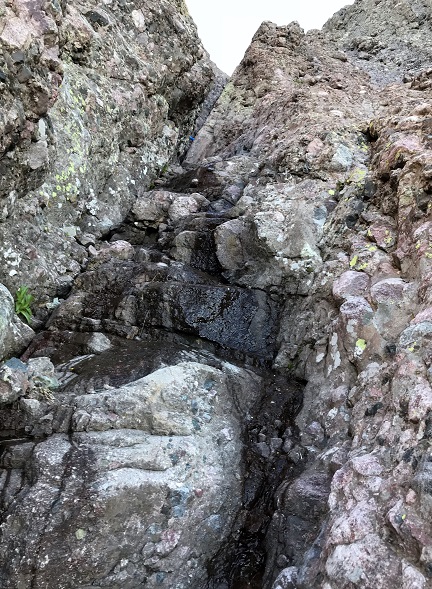
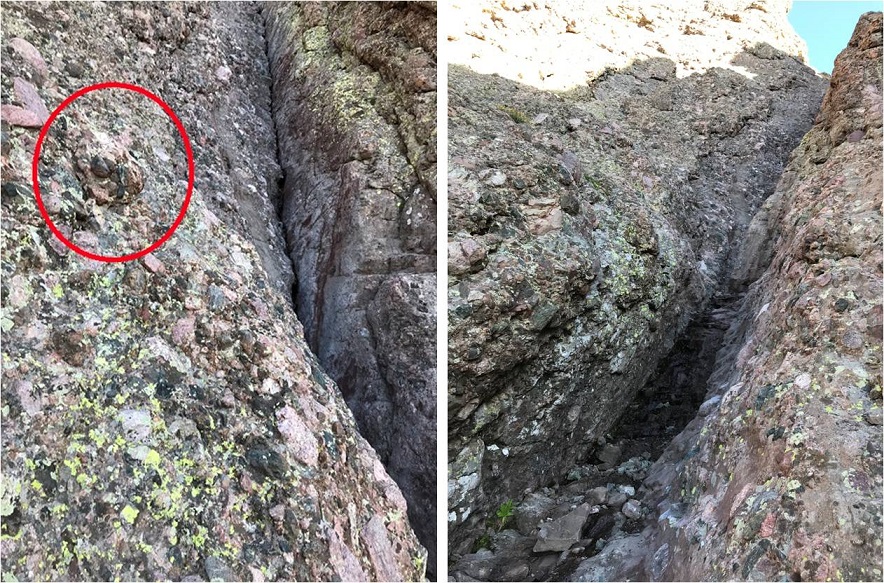
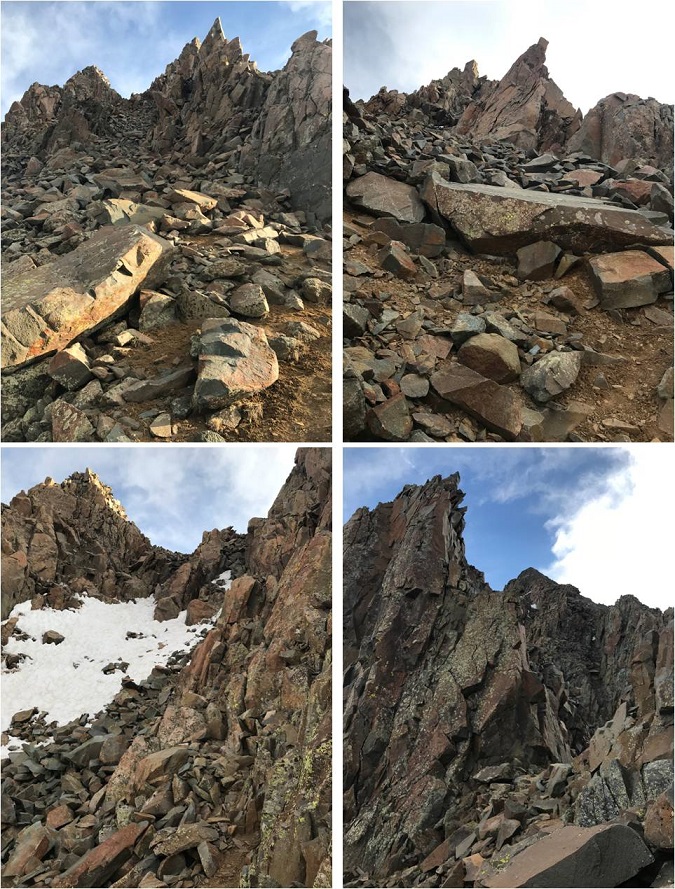
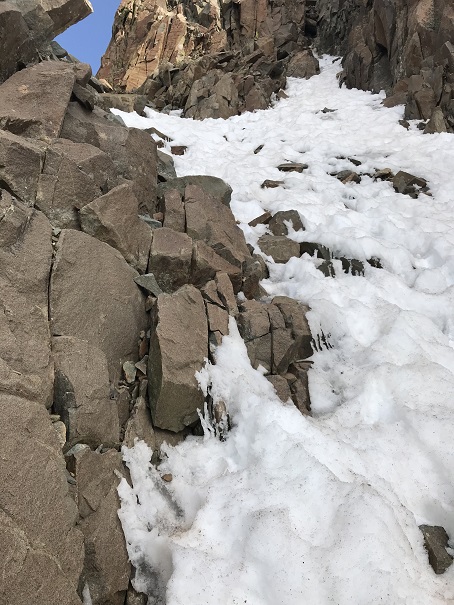
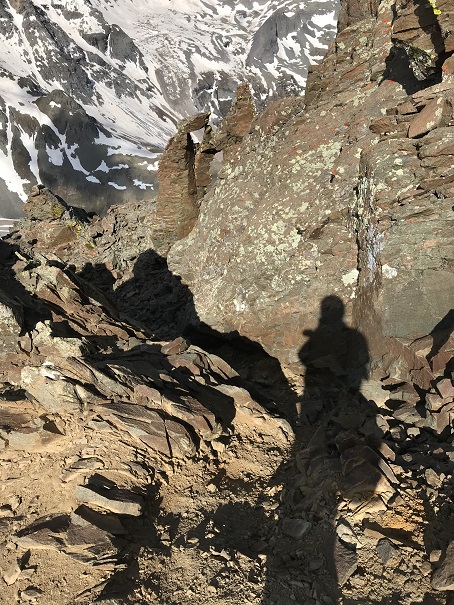
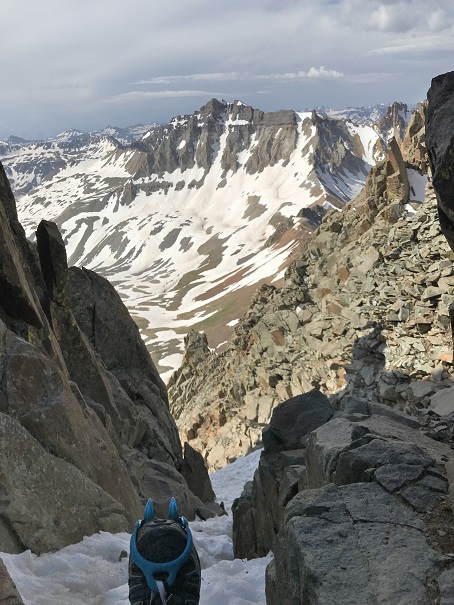
It was very cold this morning, and a little windy. It had snowed two days before, but luckily the snow had all melted out. I was frozen at the beginning of this climb, and didn’t melt out until making it to the summit, when I was finally in the sunlight. I do not have very many pictures of the actual climb up, because I had a really bad Raynaud’s attack and my fingers didn’t work with my phone’s touch screen. Ok, I’ll admit: I was a bit of a wuss, and there was a lot of spoken complaining as I ascended. Several times during this climb I had no use of my fingers, so I used my hands like ice picks to grab hold, hoping they would… hold. I clapped my hands together this morning more than I had keeping time at a color guard/band practice. So, all that to say I don’t have a lot of pictures, but here’s an overview of the beginning route, starting with a left-facing chimney:
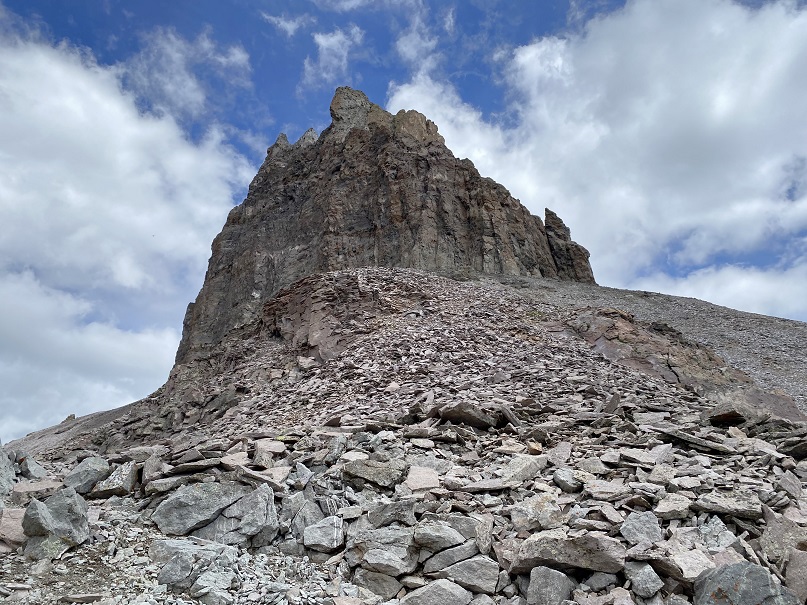
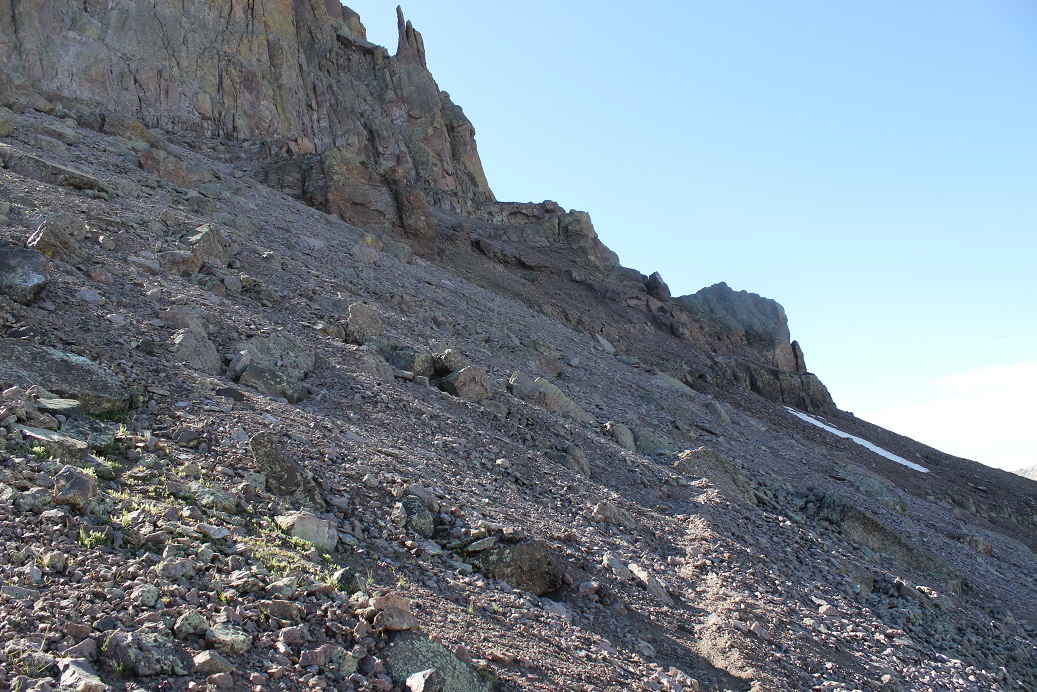
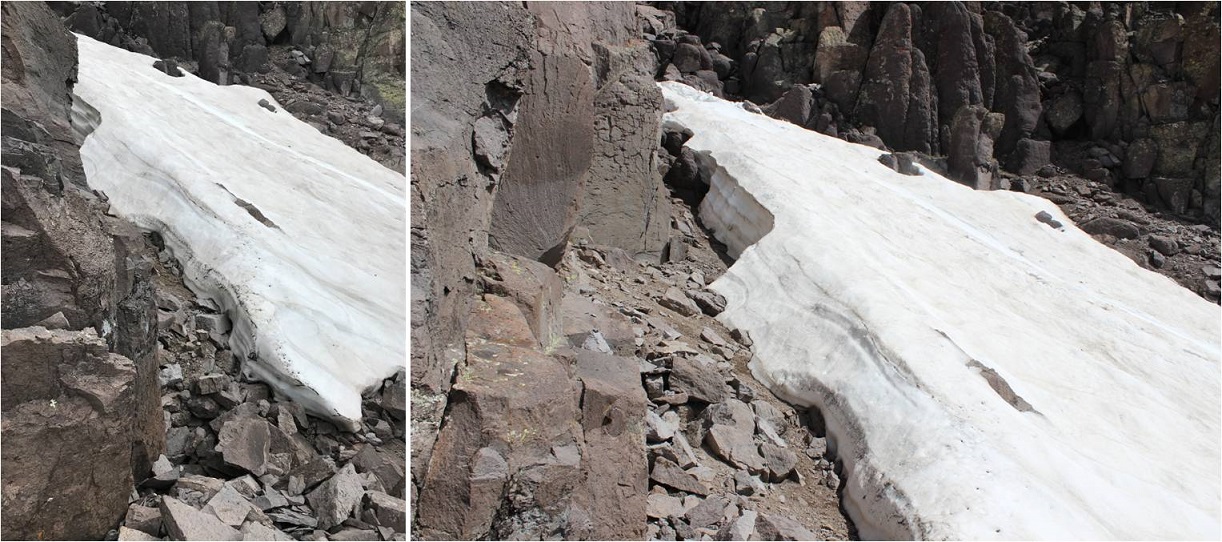
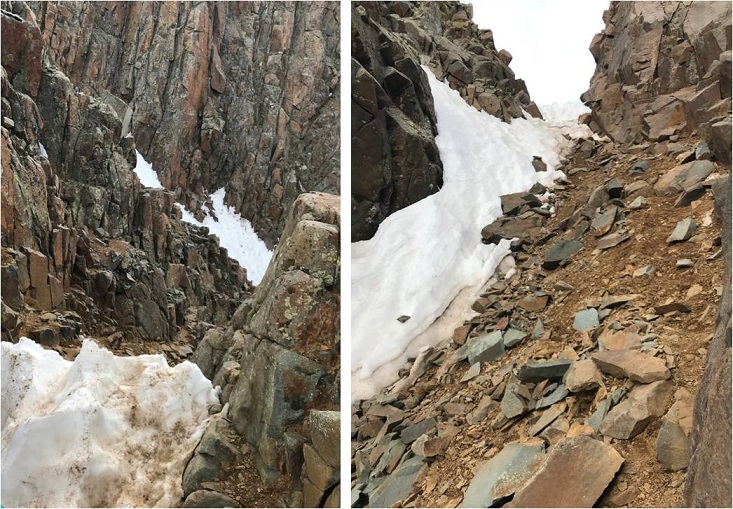
I then encountered a very exposed, less than 2-foot-wide (or less) ramp that went to the left for about 15 feet, then right for about 15 feet. Sorry, no personal pictures of the ramps, but here’s an approximation of what they look like from below:
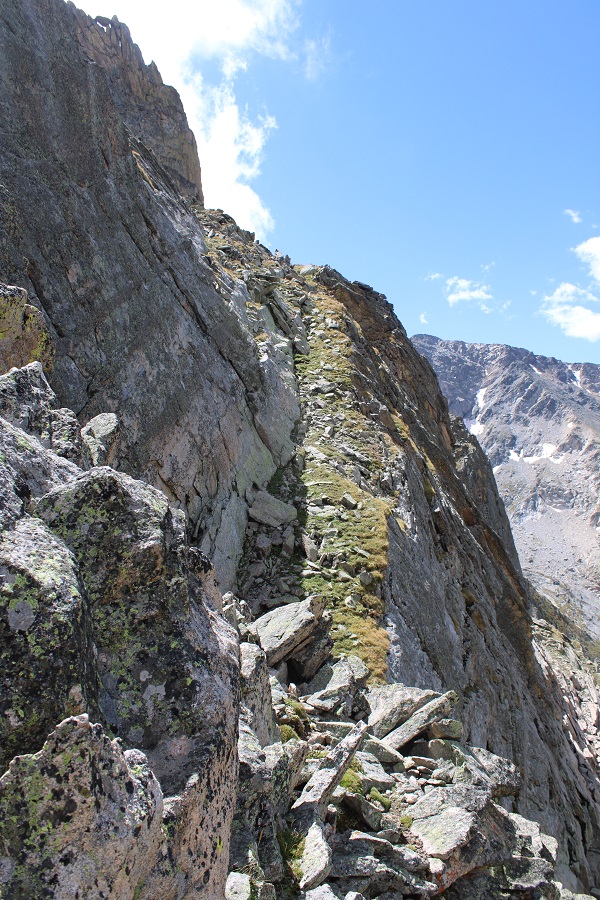
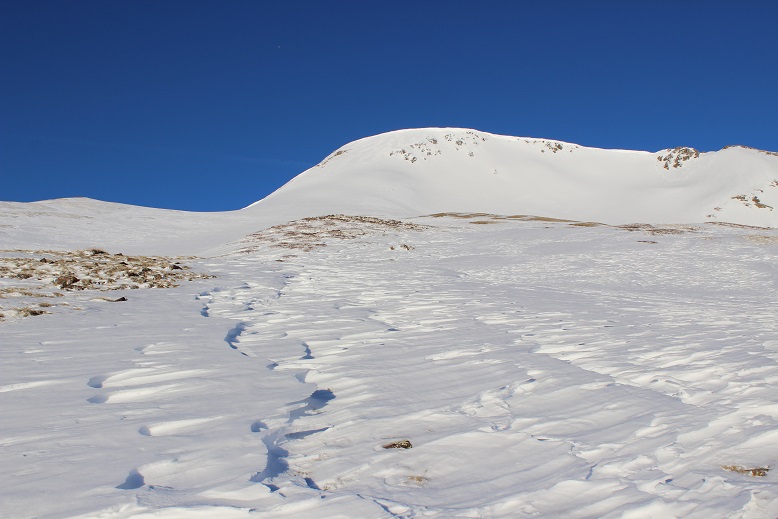
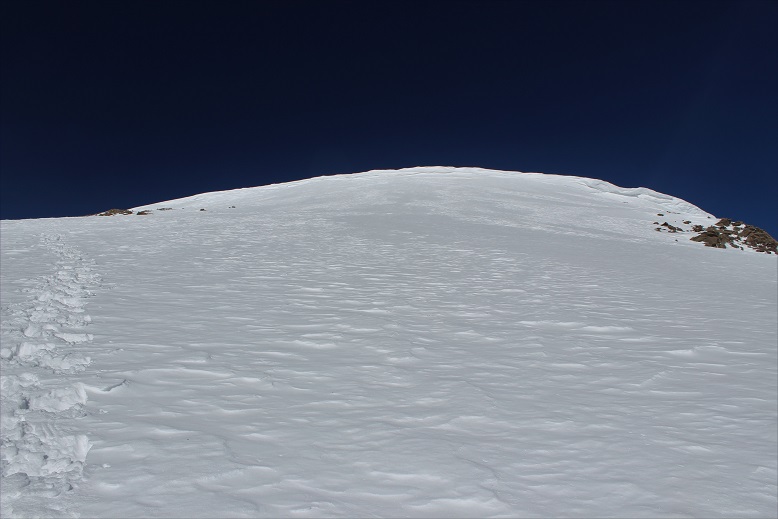
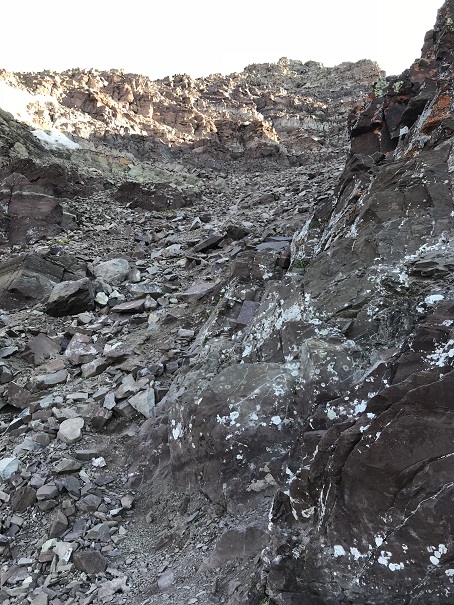
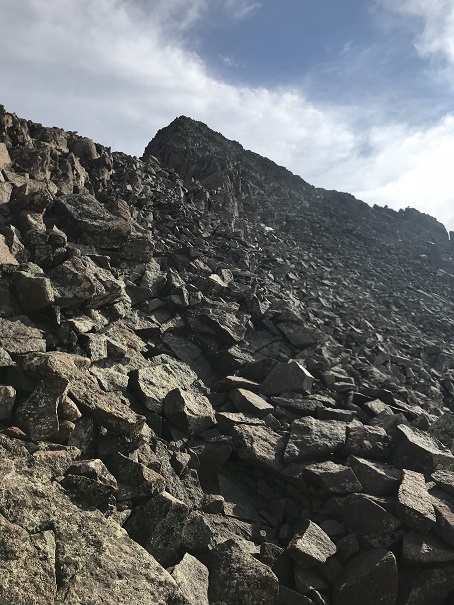
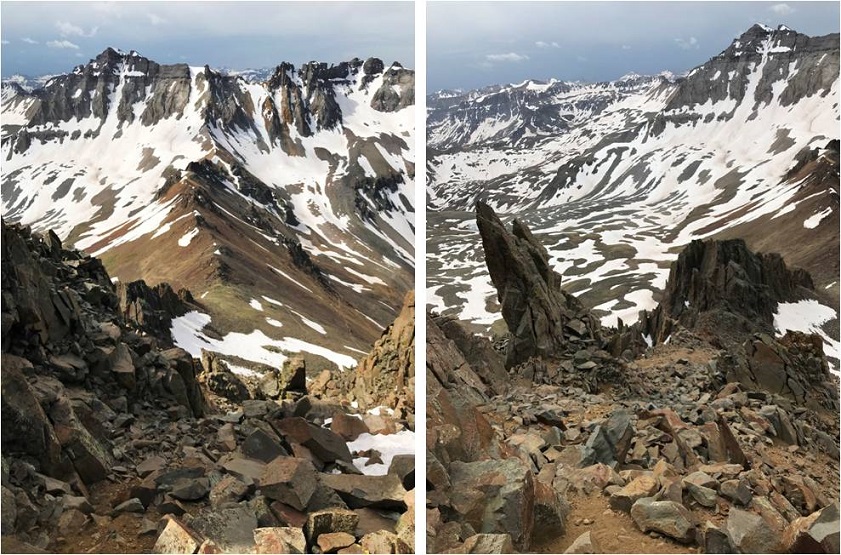
After the ramps there was some scrambling to do to get to the summit. This was chossy, but not too difficult to navigate.
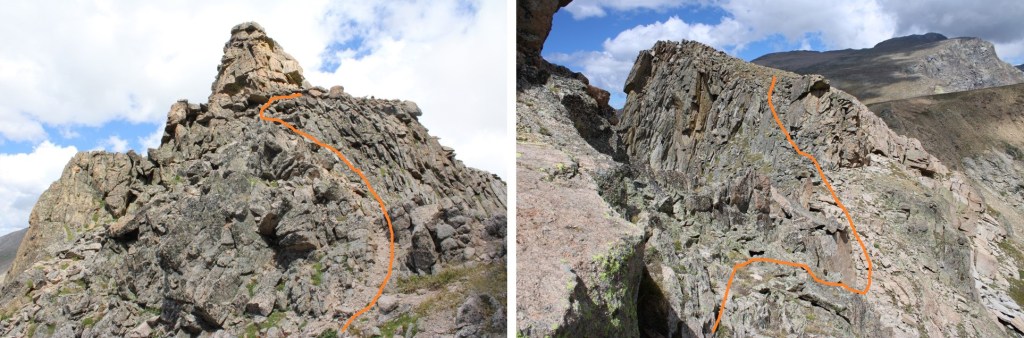
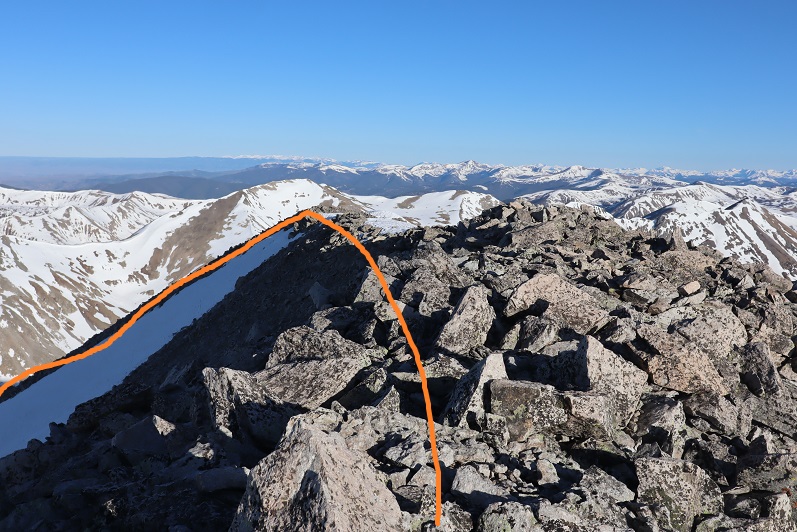
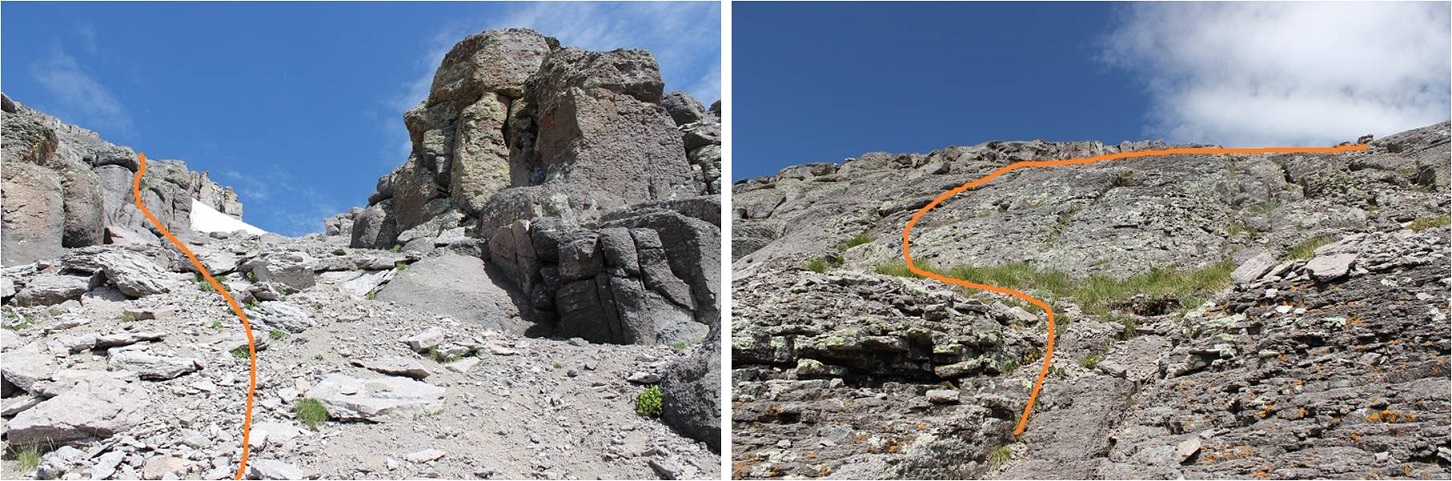
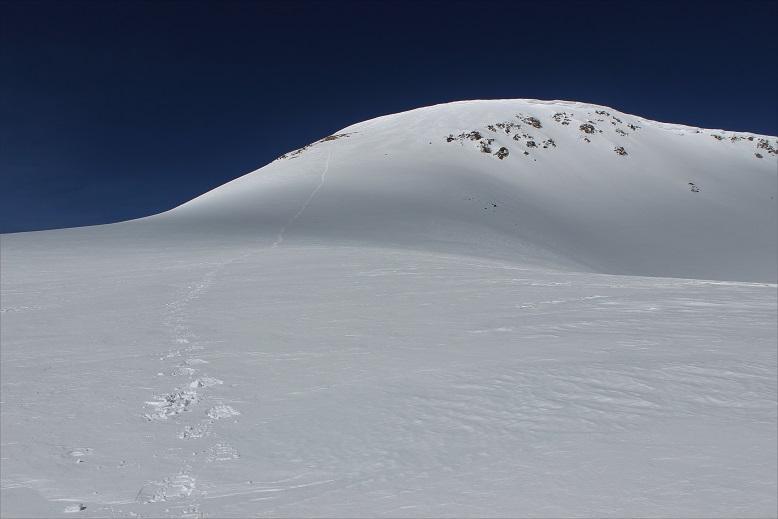
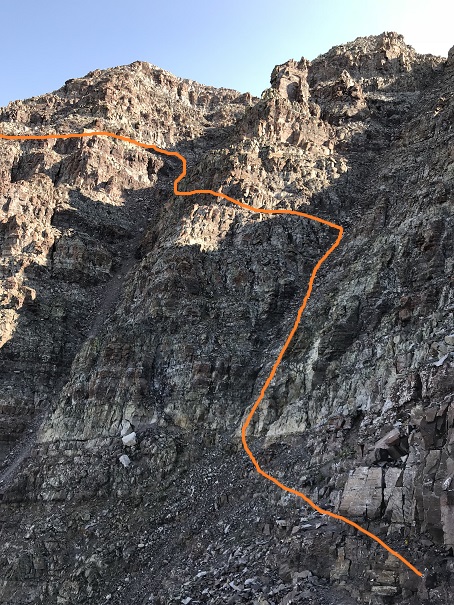
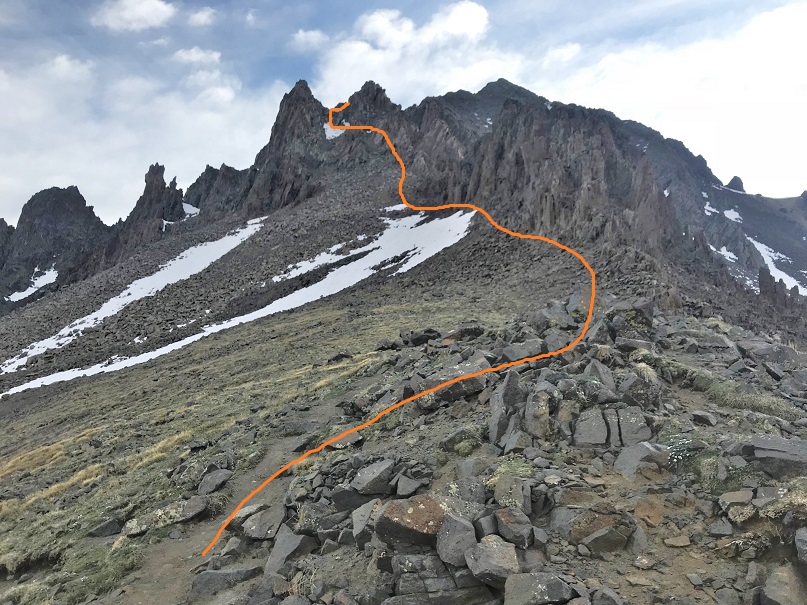
This is the route I took
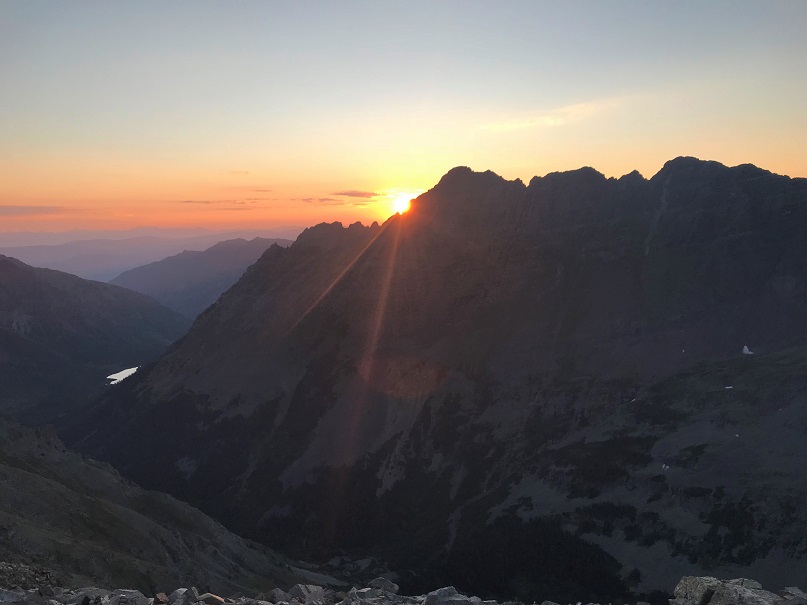
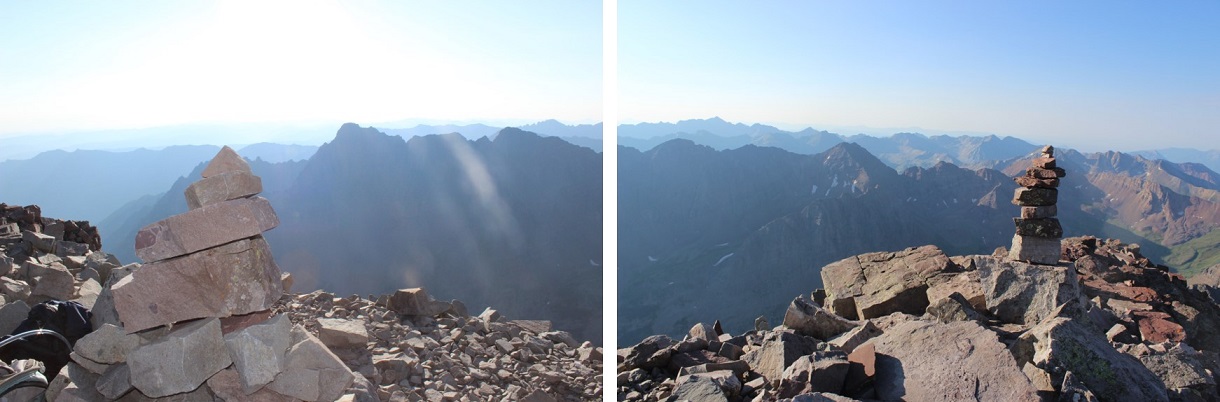
Here’s the view from the summit, looking east
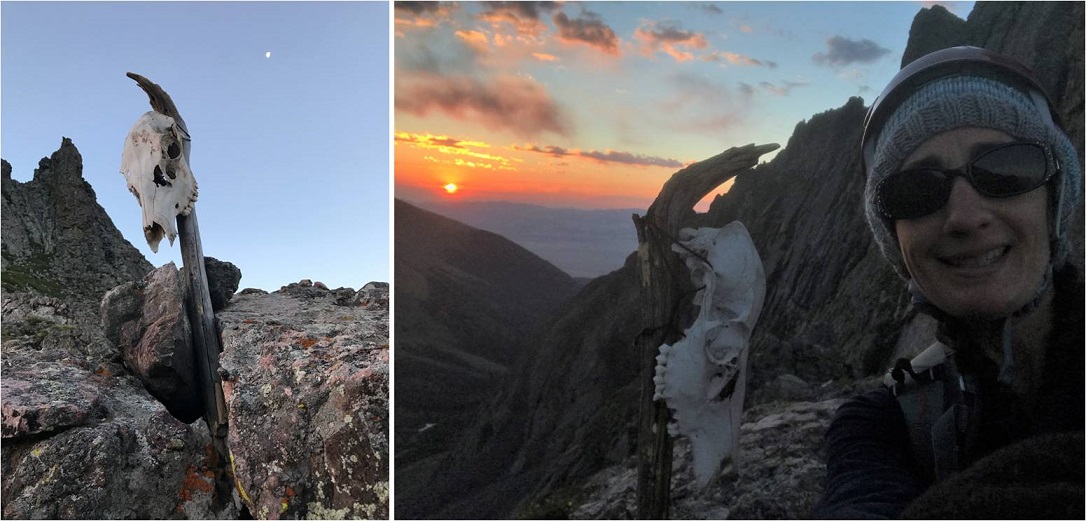
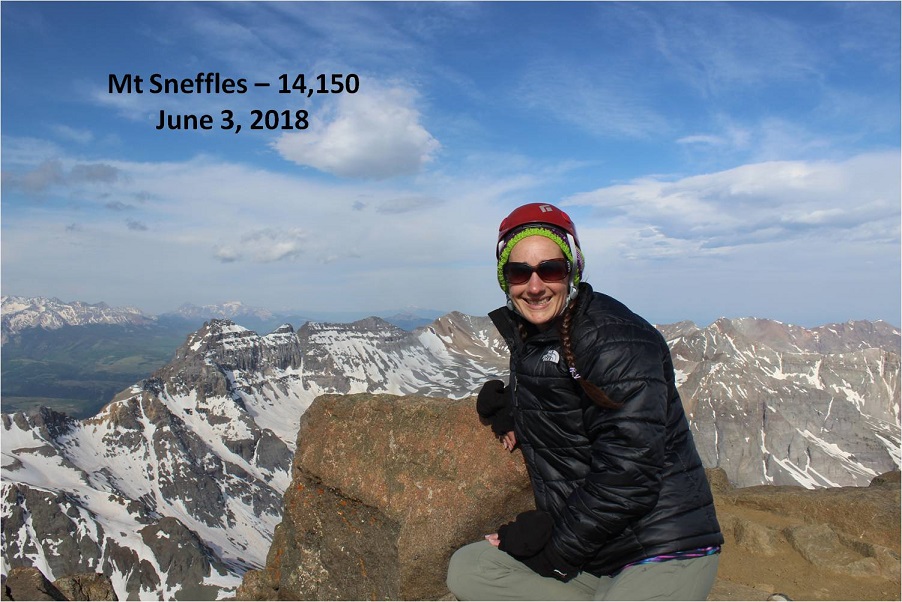
I summited Lizard Head at 12pm
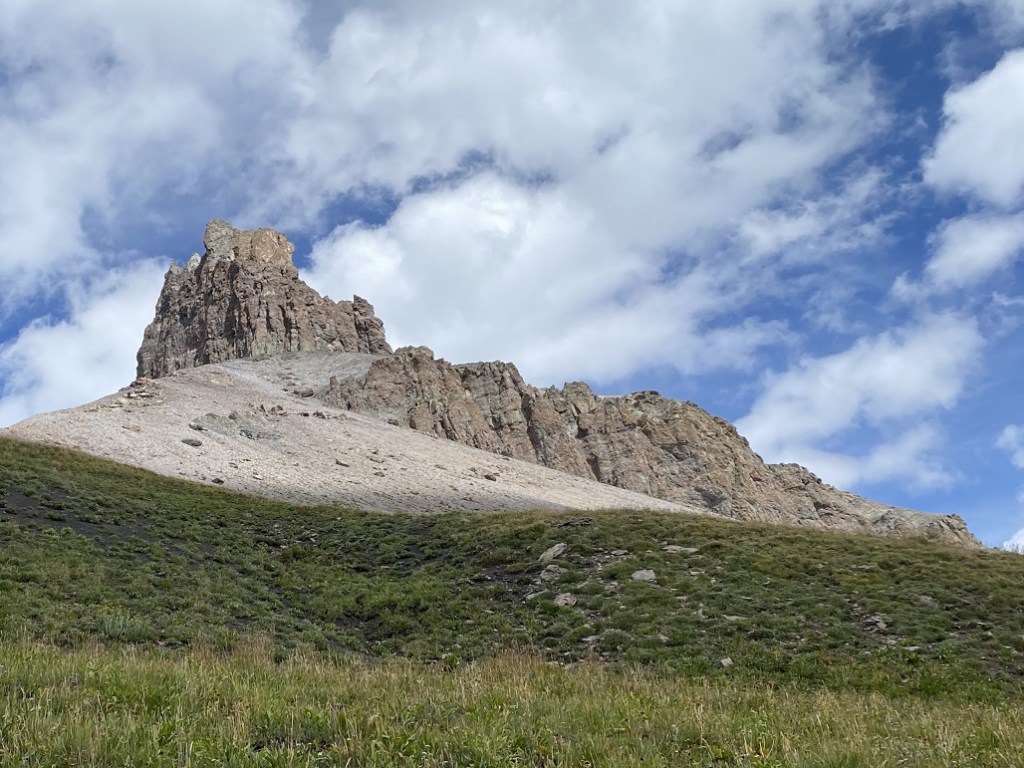
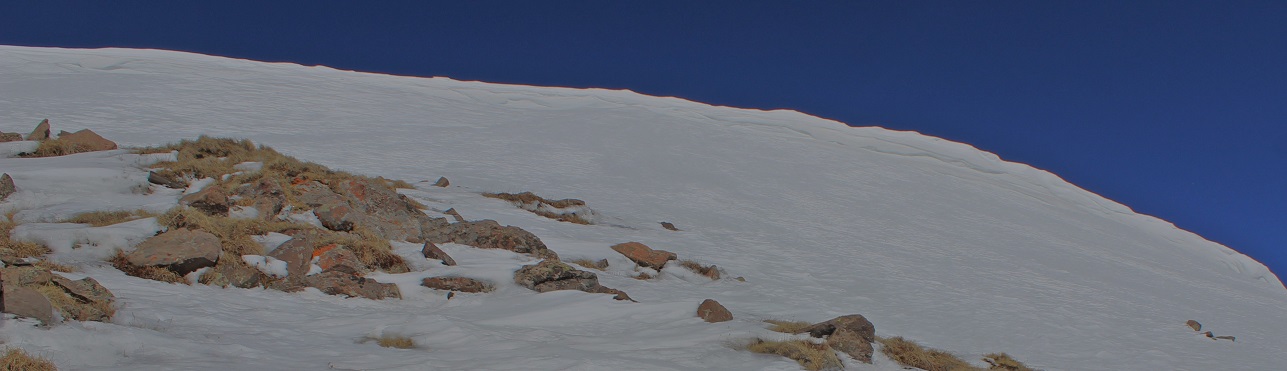
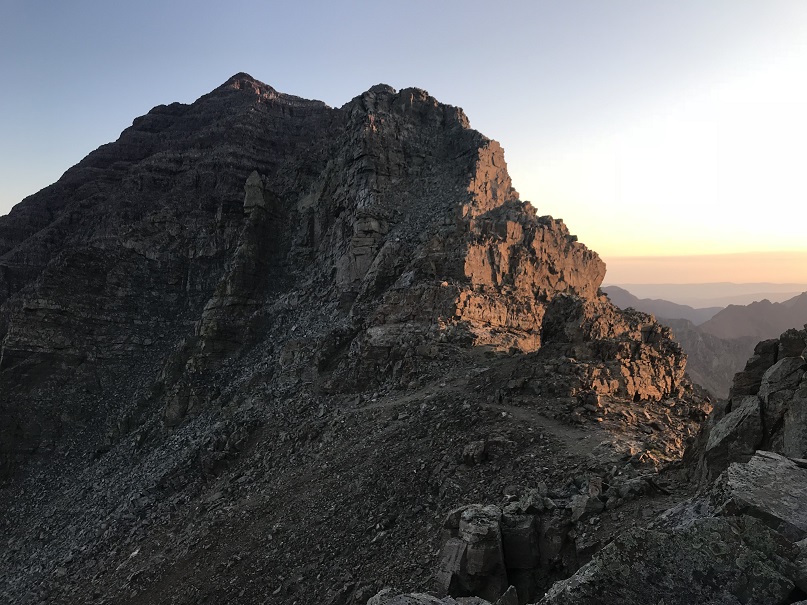
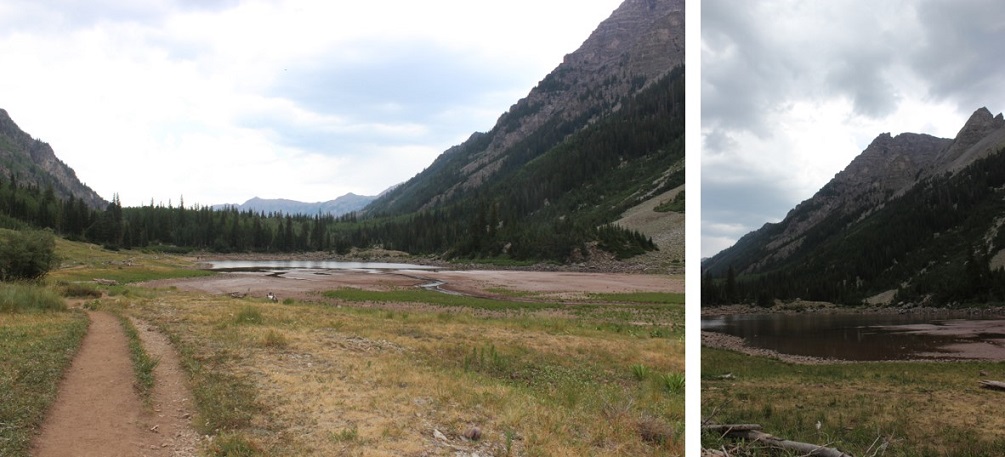
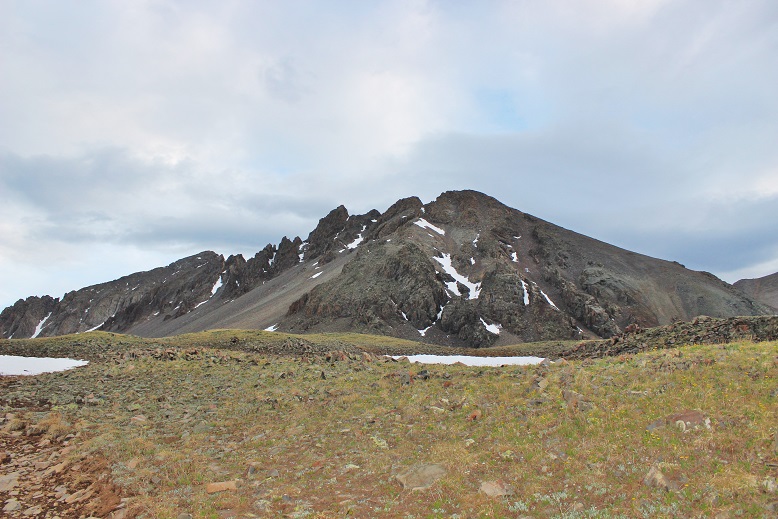
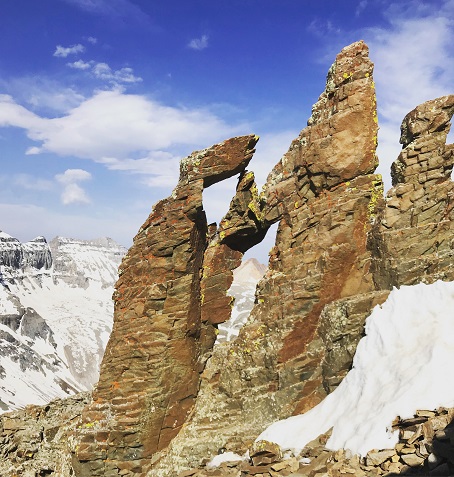
Lizard Head:
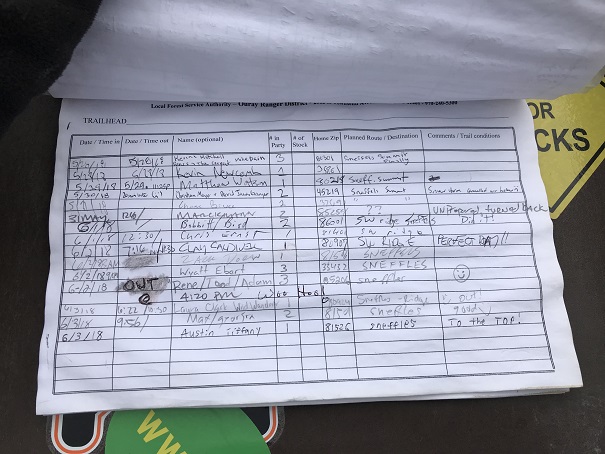
There was a summit register, but it was missing its lid. The pages were enclosed inside a ziplock bag that had holes chewed through it, so if the next person could bring a new summit register that would be great. As you can see by my sloppy handwriting, I had very little use of my fingers/no dexterity, so my penmanship was terrible (one of the many reasons I rarely sign registers, but this one felt important).
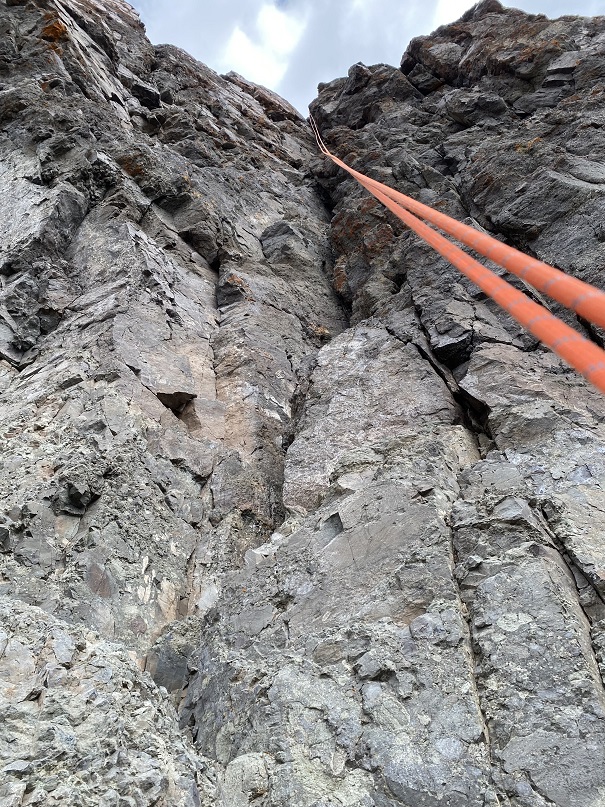
There were two bomb-proof rappel stations on the way down, which meant two rappels. The first was about 200’, the second about 100’, back down the initial chimney crack I climbed up.
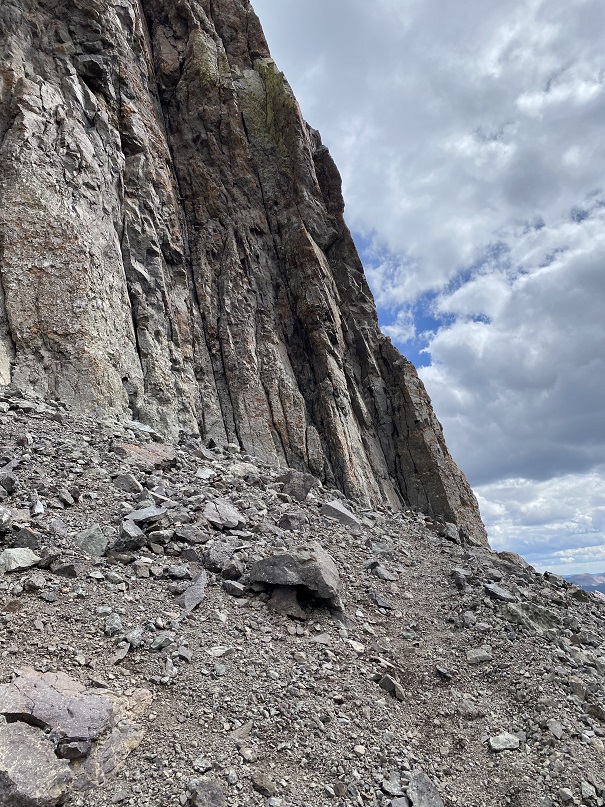
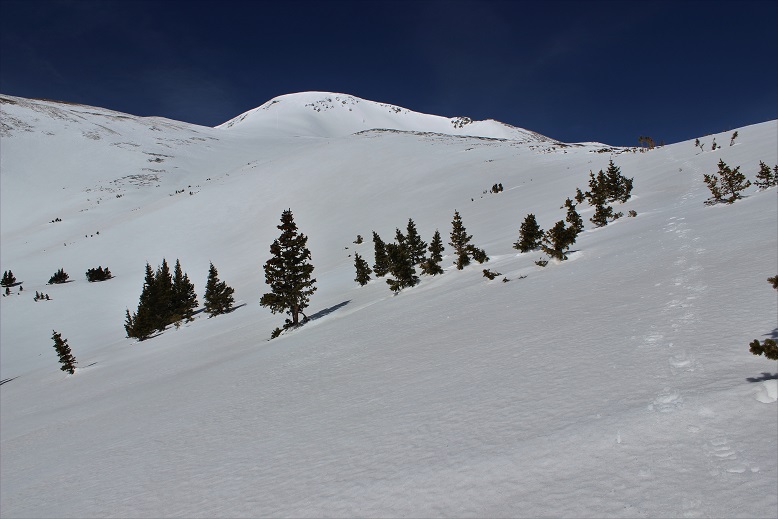
Then it was time to change out of rock-climbing gear, and head back to the trail down that wonderful pile of choss and head back on the Cross Mountain Trail back to the trailhead.
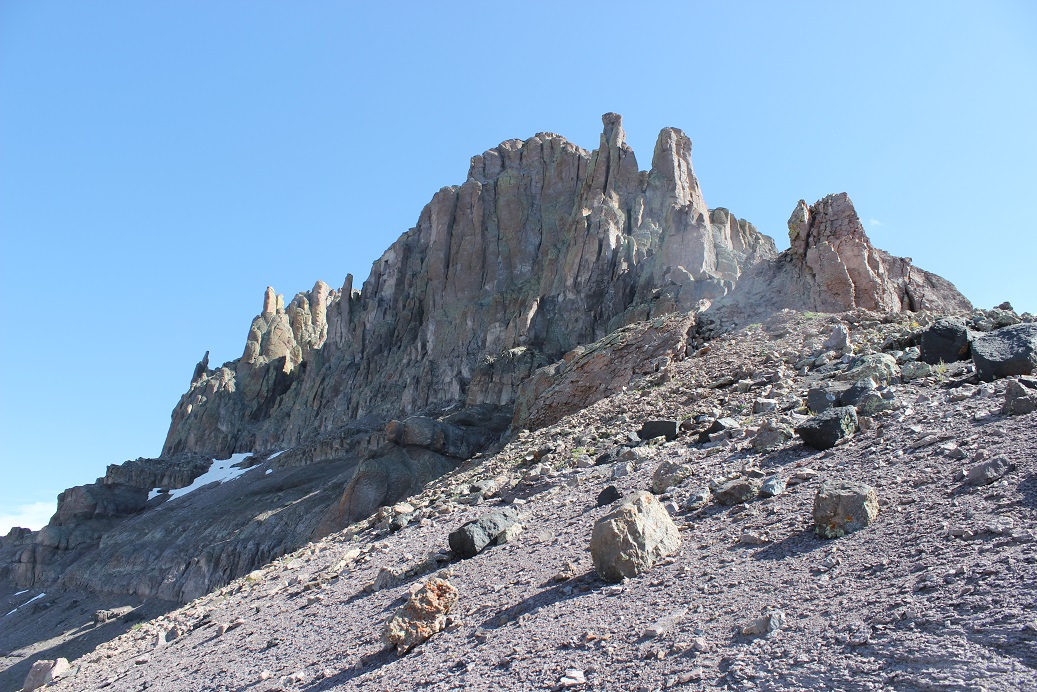
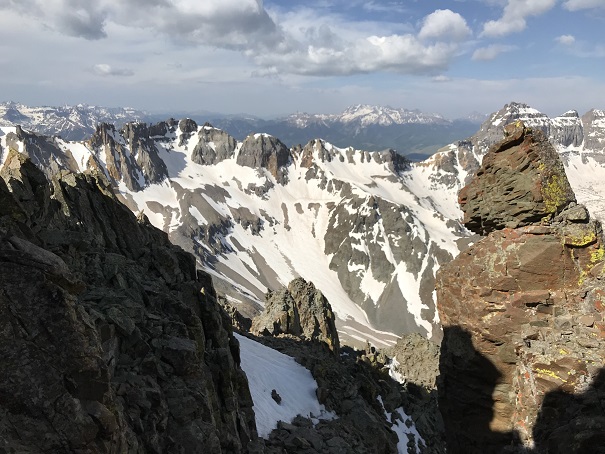
Once again, I apologize for this not being the quality of report I usually like to give out, but hopefully some of the pictures are helpful. Here are more pictures of the peak.
I made it back to my truck at 3pm, making this a 12.86 mile hike with 3566’ of elevation gain in 7 hours, 45 minutes. I believe the mileage seems a little high, but those are the numbers CalTopo gave me. Strava gave me drastically different numbers.
On to the next trailhead!
P.S.: I did indeed have a Raynaud’s attack on the climb, and while I don’t think I’ll loose the tips of my fingers, I do currently have blisters which will probably turn into ulcers on a few of the fingers on my left hand. They currently feel like I touched a hot stove. This is normal for people with Raynaud’s, and totally worth it for me to make this climb!
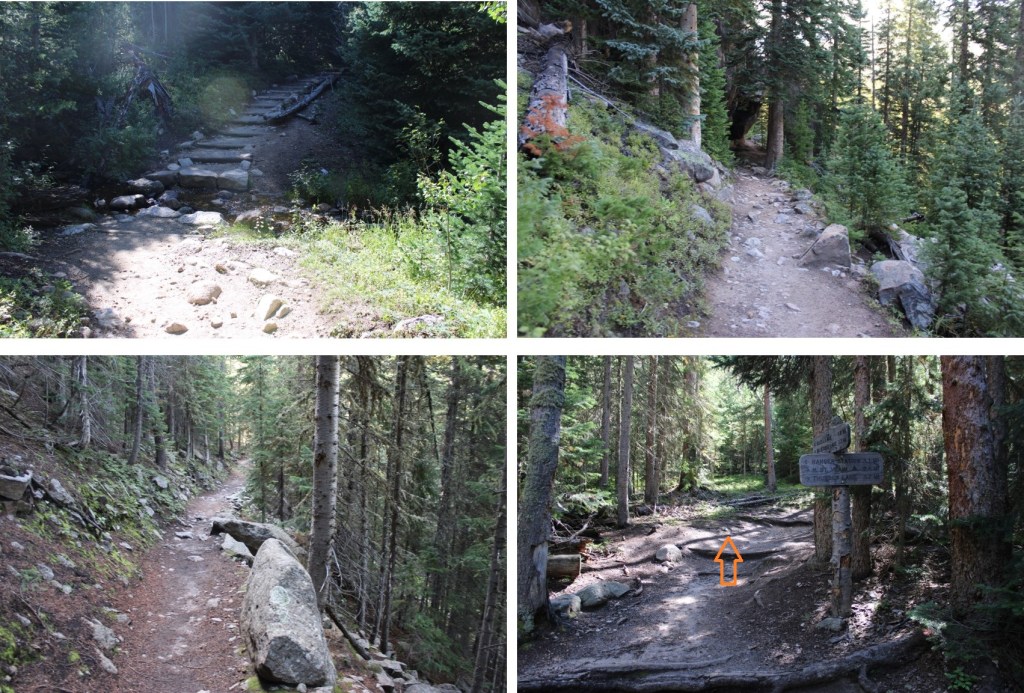
I parked at the Wild Basin Trailhead inside Rocky Mountain National Park and was on the trail at 4am. There’s plenty of parking here, but they have timed entry from 9am-2pm every day.
The trailhead starts at the south end of the parking area
I followed the signs for Ouzel Lake/Bluebird Lake. This class 1 trail is really well marked, so it’s difficult to get lost if you read the signs. I passed several waterfalls (Copeland Falls, Calypso Falls, and Ouzel Falls).
After hiking for 4.75 miles I came to the junction for Ouzel Lake and Bluebird Lake. I turned right onto the Bluebird Lake Trail.
I didn’t stay on this trail long however. Maybe about 10 yards or so. Then I left the trail and headed northeast to gain the ridge
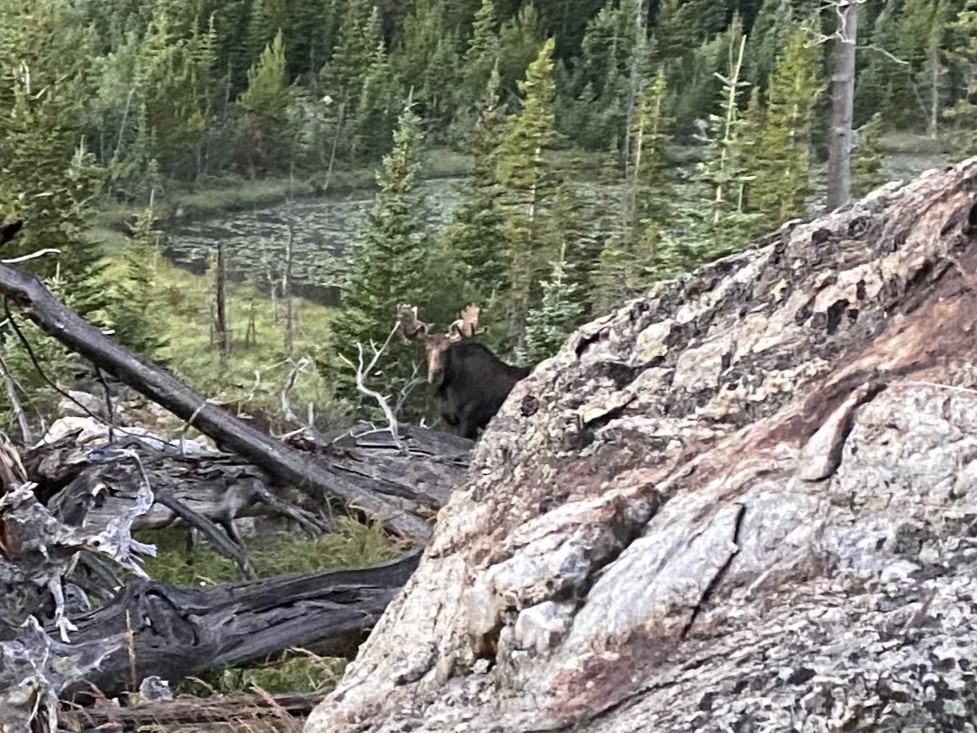
This is where I startled a moose. He was about 15 feet away from me when I saw him, so I quickly ducked behind a large boulder. Usually, moose run away when they see you, or ignore you, but this guy seemed interested in me. I’ve seen probably over a hundred moose in Colorado, and I’ve only been charged once. This guy looked like he wanted to charge me, so I remained hidden. For a solid 15 minutes, every time I peeked out from behind the boulder, he was still staring at the boulder I’d hidden behind. I know moose have poor eyesight, so while he knew I was still there, he was probably trying to figure out if I were a threat or not. (That’s Chickadee Pond in the background).
Eventually I crawled away on my hands and knees so he couldn’t see me in the brush, and continued my way up the ridge. This included a lot of bushwhacking through downed trees. A lot of downed trees.
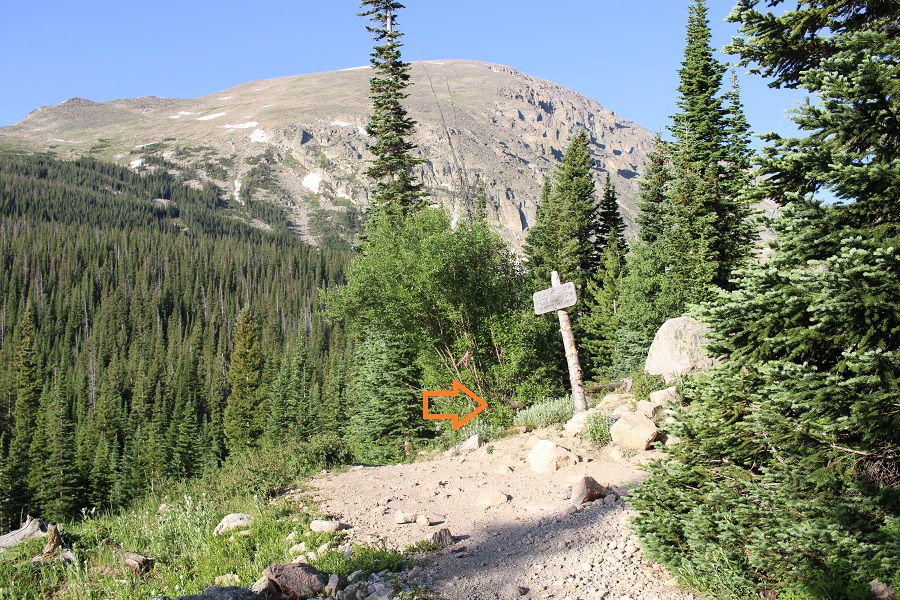
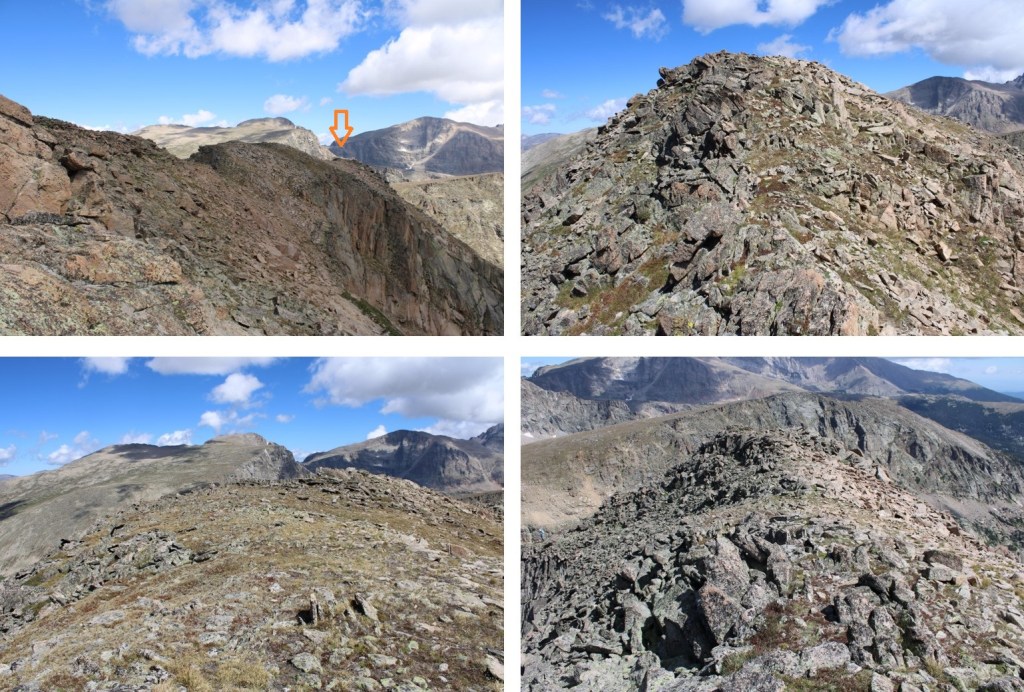
Once I made it to the ridge, I followed it west to treeline
The route from here was straightforward. I stayed o the ridge, following it west. The terrain started out as loose rocks, then changed to tundra.
When you get to the tundra, don’t be fooled: this is a false summit. Stay to the left of it
This is the true summit of Manaha Peak. It’s easy class 2 to get there
I summited Mahana Peak at 9am
Mahana Peak:
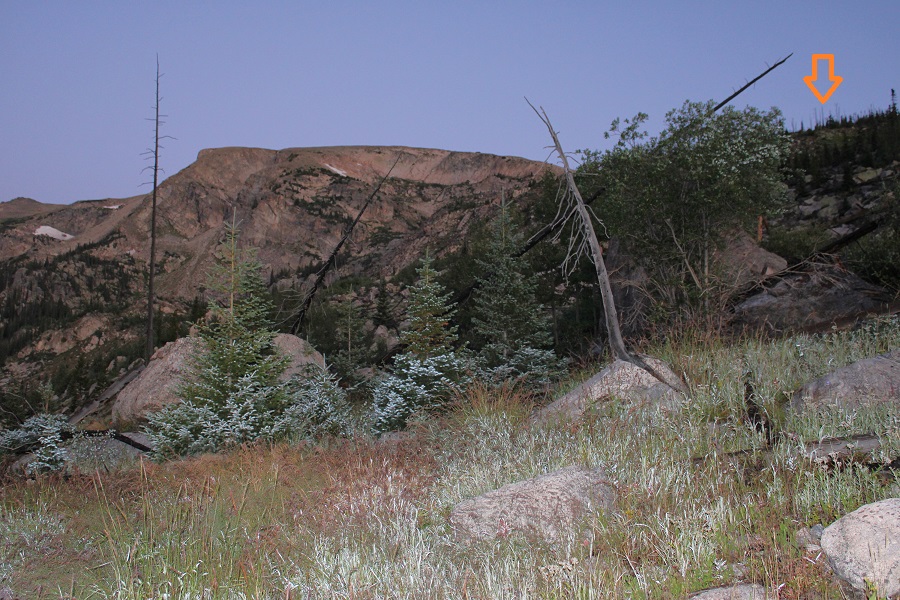
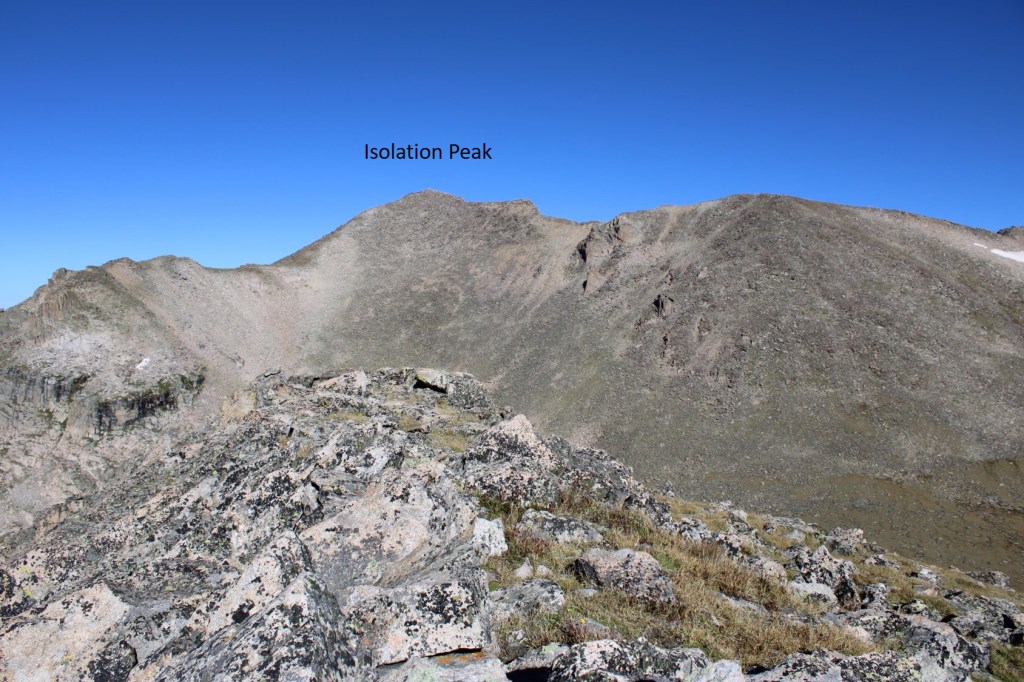
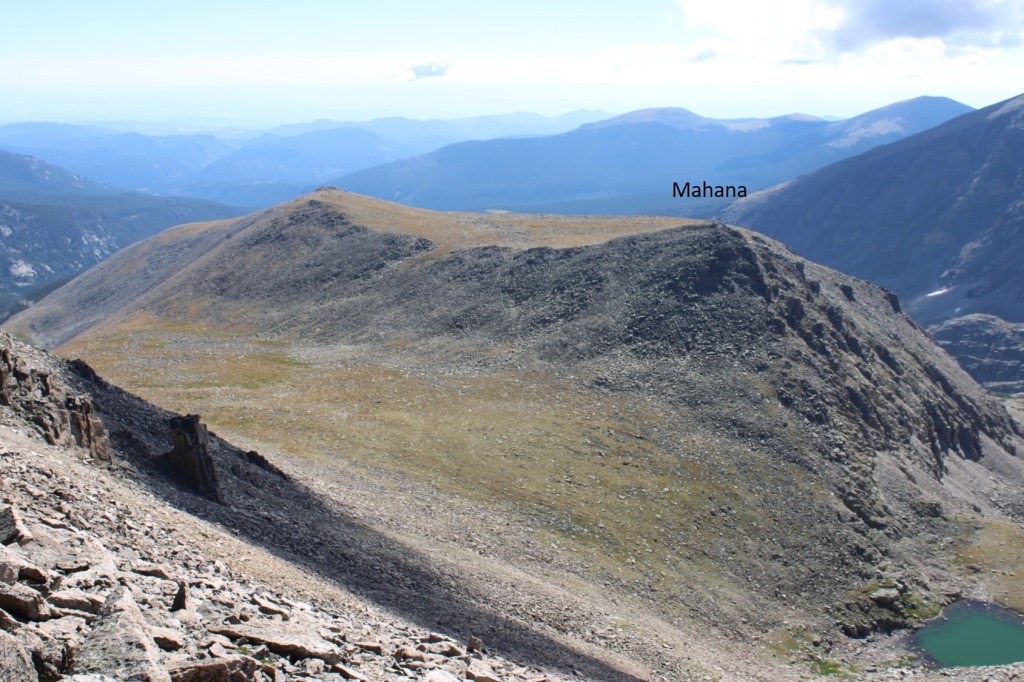
From Mahana Peak, I could see Isolation Peak to the northwest
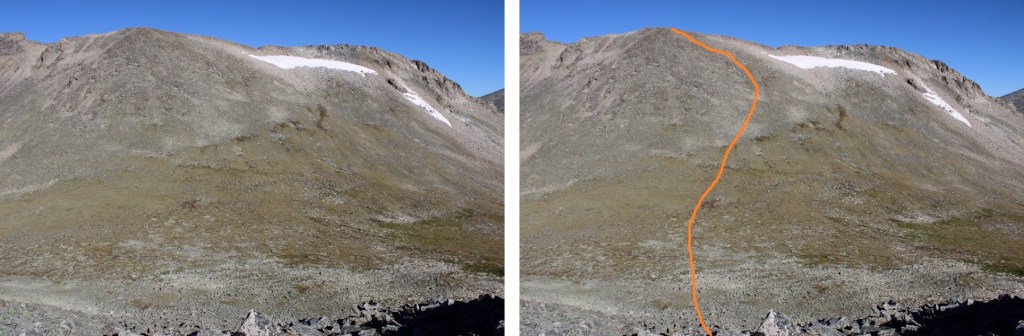
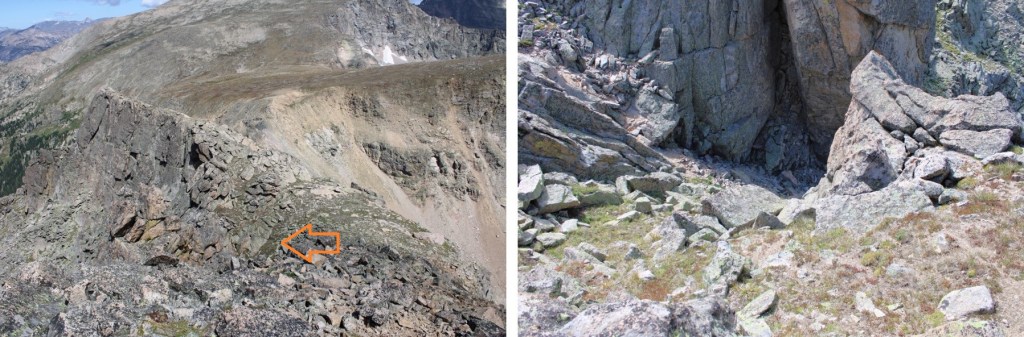
To get there, I headed northeast along the ridge until I came to a low point, and then headed northwest towards the ridge.
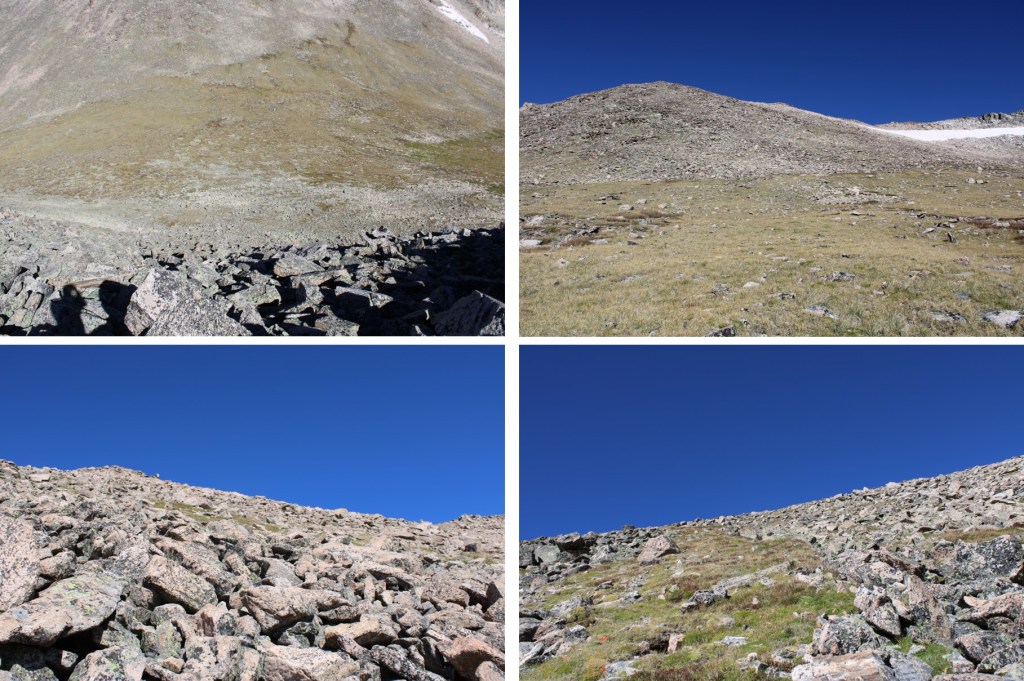
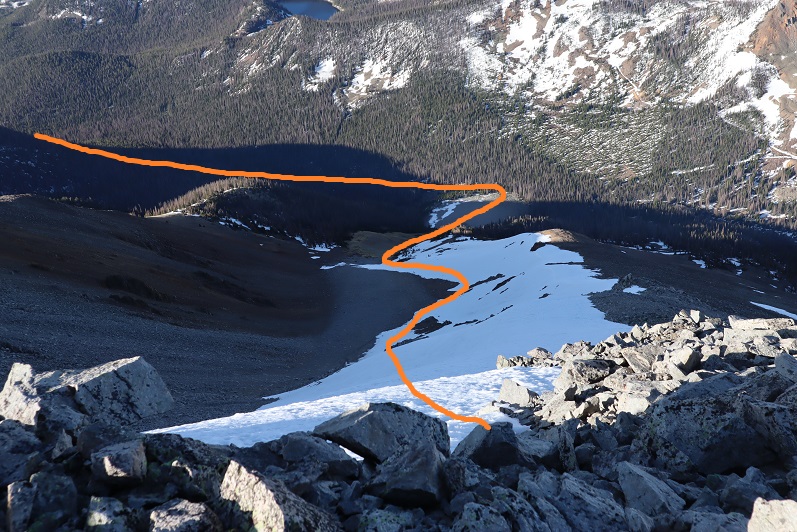
This is the overall route I took to gain the ridge of Isolation Peak. If you look carefully, you will see a green band of grass that makes the route easy to follow. I descended on rocky terrain, then was greeted with tundra, then rocky tundra as I ascended.
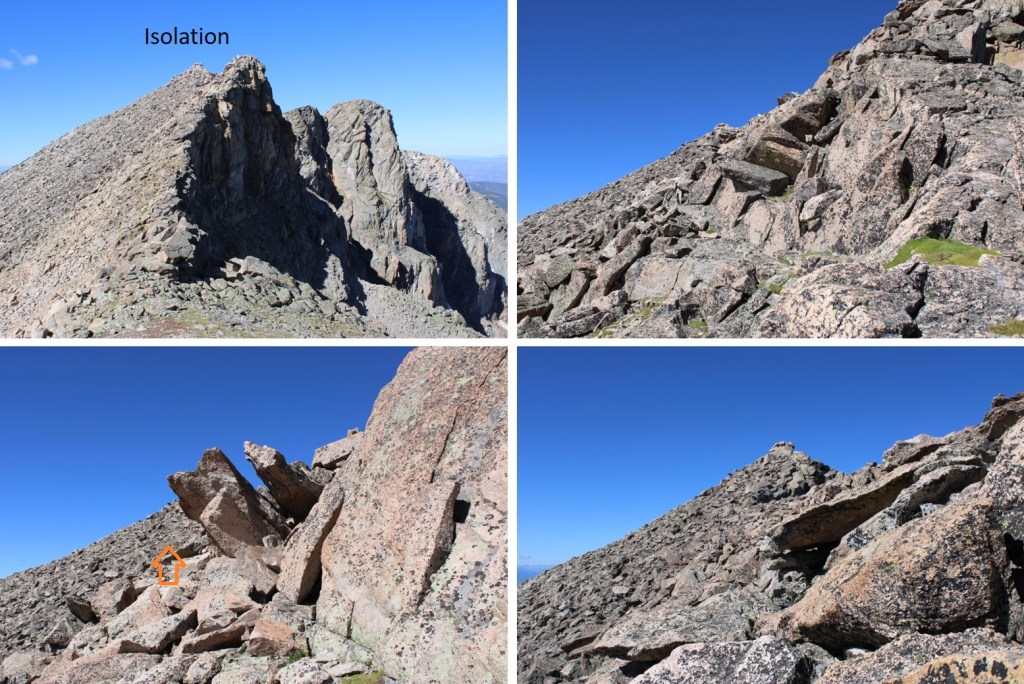
Once on the ridge, I turned left and could see Isolation Peak to the southwest. This was a class 2 hike, sticking to game trails either directly on or to the left of the ridge, until the last 10 feet or so, when it was a quick class 3 scramble to the summit
I’m pretty sure this block is the summit. I sat on it, but briefly. Pictures/video were difficult. The summit rocks didn’t feel stable, and I could see through them to air below if I looked down.
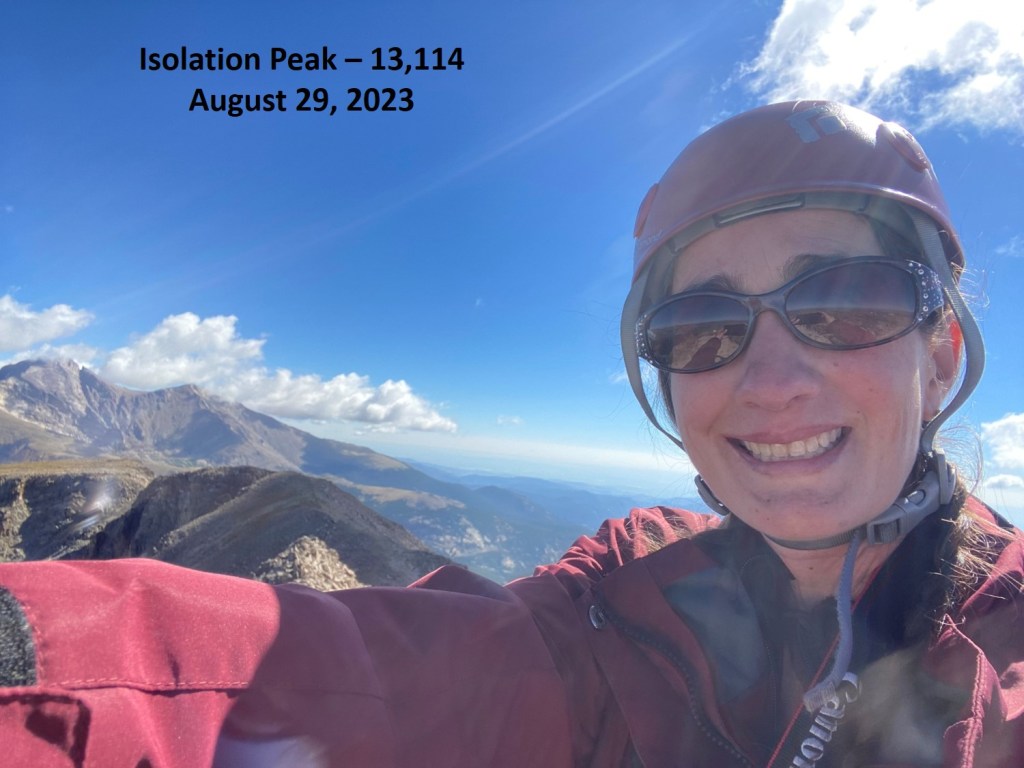
I summited Isolation Peak at 10:30am
Isolation Peak:
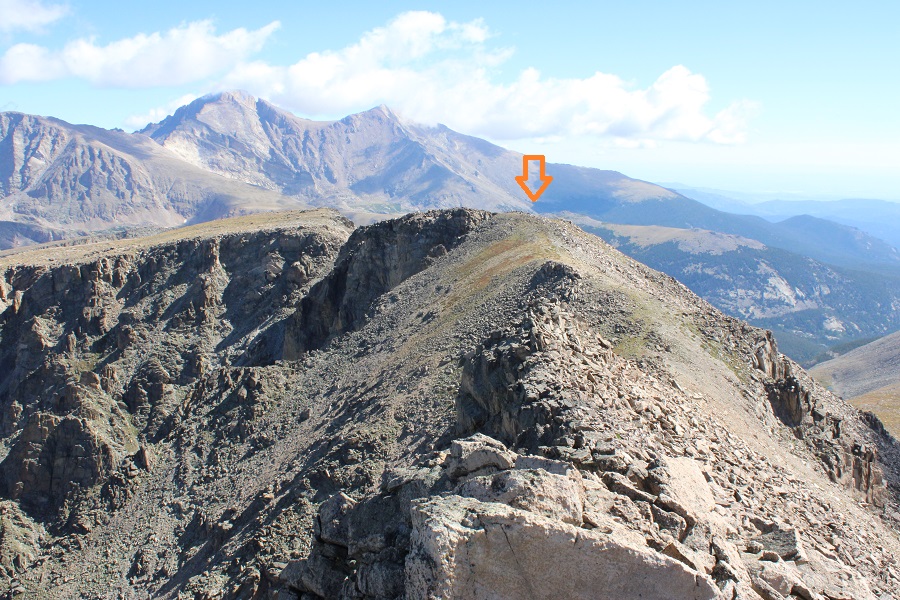
Here’s looking back at Mahana Peak from Isolation Peak
If you’re not up for class 3-4 scrambling, now’s the time to head back the way you came in, towards Mahana. It’s the fastest route. If you’re up for some scrambling, strap on your helmet if you haven’t already, and head northeast along the ridge. Some of this ridge I’d consider choose your own adventure. This is the route I took, keeping it class 3, with some easy class 4 scrambling (down chimneys/gullies).
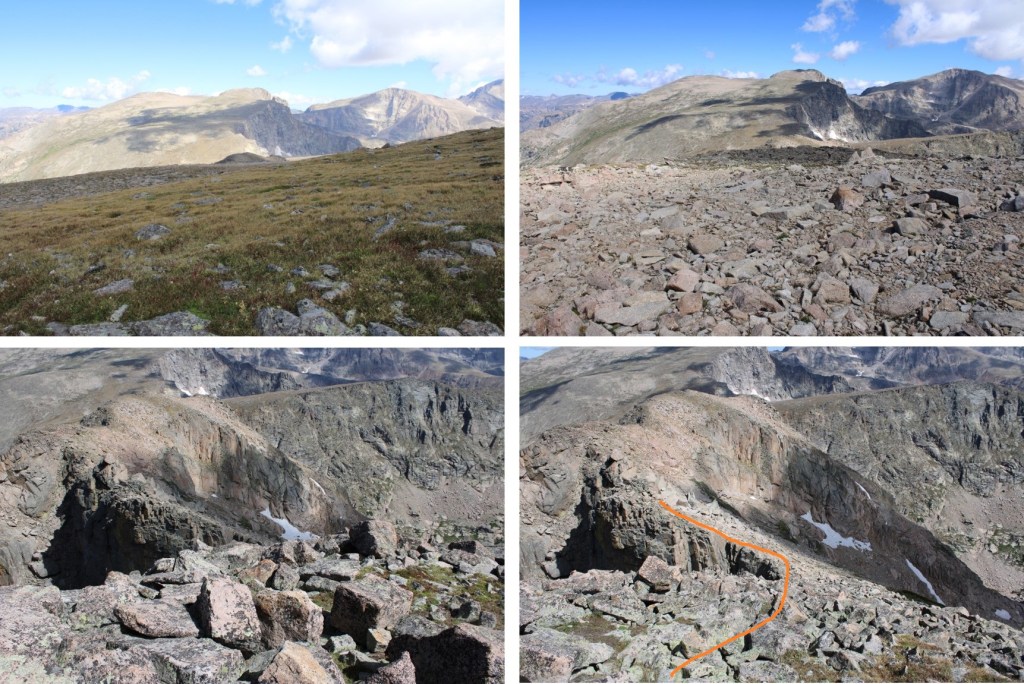
I was now back to where I ascended the ridge, and followed the ridge northeast. There is a lot of elevation gain and loss on this descent
I went to the right of this boulder. Getting through was sketchy class 3. The boulders were large, but there was a lot of empty space between them, and they didn’t feel solid.
My next objective was to make it here (this was class 2, sticking to the ridge)
This is where it got a bit tricky. I turned left, and descended into a rather large and steep gully. I spent a lot of time in this gully route finding, and my advice is to stick to the gully proper until you make it down to 12160’. You’re trying to go below this rock formation, which goes a lot further down than you’d think.
I turned left, and descended into the gully
I came to a place that looked like it cliffed out, but it was really just a drop onto a boulder, then a 7-foot downclimb.
Here’s looking back up at the gully
And a look at the final drop. The boulder in the middle was essential to the descent.
This was at about 12160’, where I stopped descending the gully, and looked for a grassy ledge climbers right.
I made it to the ledge, descended another grassy ledge, then reascended a grassy ledge to re-gain the ridge
For those of you doing this the opposite way, here’s a look back at the grassy ledge I descended. You can see why I had to drop down so low in the gully, with the sheer cliff face to navigate.
Here’s how I got around the next few obstacles
And that was it for the climbing for today. I kept my helmet on because I still had a scree-gully to descend, but all the class 3 and 4 stuff was done. I’d wanted to head over to Mt Alice today too, but clouds were forming and I didn’t think it was a good idea. I headed towards Boulder-Grand Pass, turned right, and descended the gully towards Lake of Many Winds. From the pass, it was 9.5 miles back to the trailhead.
A good trail picks up here, and leads all the way back to the Wild Basin Trailhead. Here you can see Thunder Lake. This trail becomes the Thunder Lake Trail, skirting the lake to the left. This is a class 1 trail. Once again, it’s very well marked, with signs indicating the route back to the Wild Basin Trailhead
I made it back to the trailhead at 4:45pm, making this a 21.79 mile hike with 5665’ of elevation gain in 12 hours, 45 minutes, at least according to CalTopo. Strava gave me drastically different numbers
My trail name is Wild Wanderer, I’m a mountaineer, and I have Raynaud’s. So far this year I’ve summited over 160 peaks above treeline, many of them in winter conditions, and I haven’t had a single Raynaud’s attack this year. With the cold weather approaching (or already here!) I’ve been asked to put together some tips on how I successfully mountaineer in the winter and manage my Raynaud’s. I believe these tips can help all cold weather hikers and adventurers.
Disclaimer: These tips in no way all inclusive or a substitute for the education you should receive before entering the backcountry in winter. Please consider taking classes in alpinism, orienteering, avalanche awareness, and wilderness first aid before entering the backcountry, especially in winter.
Raynaud’s causes some areas of your body — such as your fingers and toes — to feel numb and cold in response to cold temperatures or stress. In Raynaud’s disease, smaller arteries that supply blood to your skin become narrow, limiting blood flow to affected areas (vasospasm). This can happen even in warm weather.
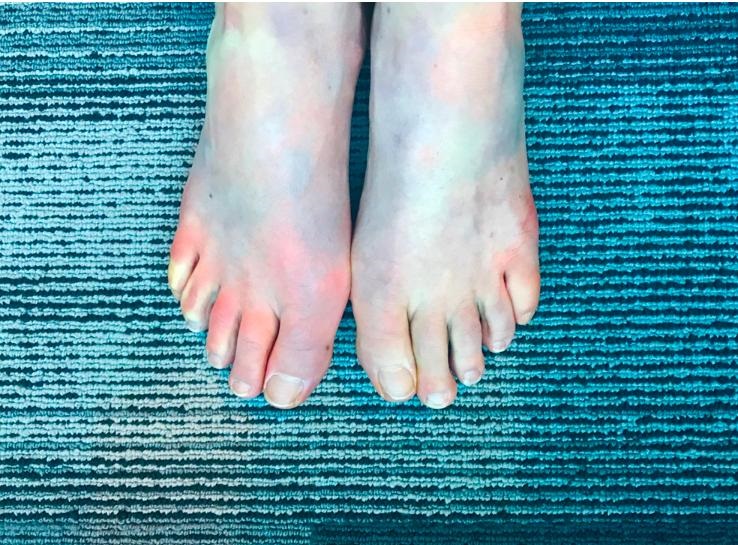
This picture was taken of my fingers while camping on a 70 degree day.These are my feet having an attack while I was at work, sitting at my desk
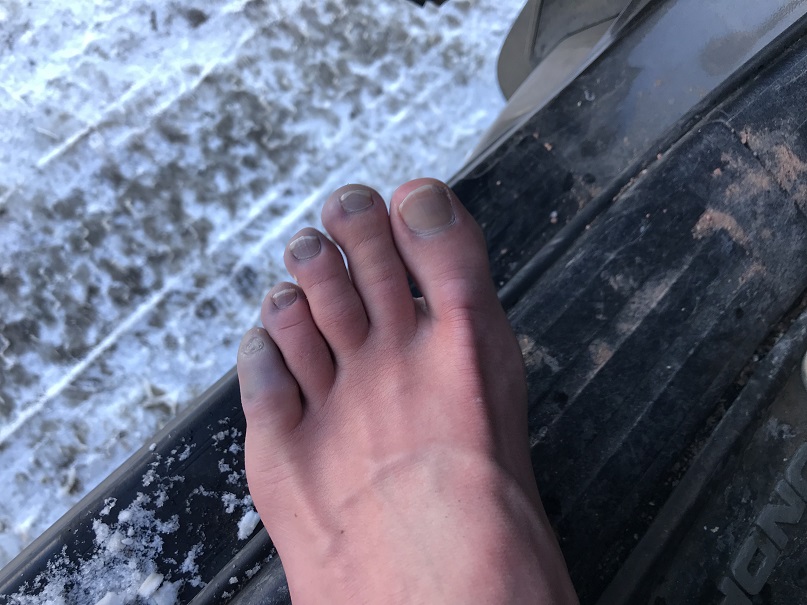
During an attack of Raynaud’s, affected areas of your skin usually first turn white. Then, they often turn blue and feel cold and numb. As you warm and your circulation improves, the affected areas may turn red, throb, tingle or swell. This can be a very painful experience. Many people mistake it for frostbite. This time I’d earned my blue toes, as I’d been snow-shoeing without the proper gear
Winter hiking is a wonderful experience. There’s a special reverence and tranquility to a winter mountain landscape. The trails are less crowded, the views are amazing, the wildlife easier to spot, and with this comes a unique sense of achievement to summiting a mountain covered in snow and ice. However, the cold and wind can be a barrier to this sport. I’ve been a mountaineer for 6 years now, and I’ve learned quite a few tips and tricks to keeping myself (and my digits) warm and attack free. It all comes down to prevention and preparedness.
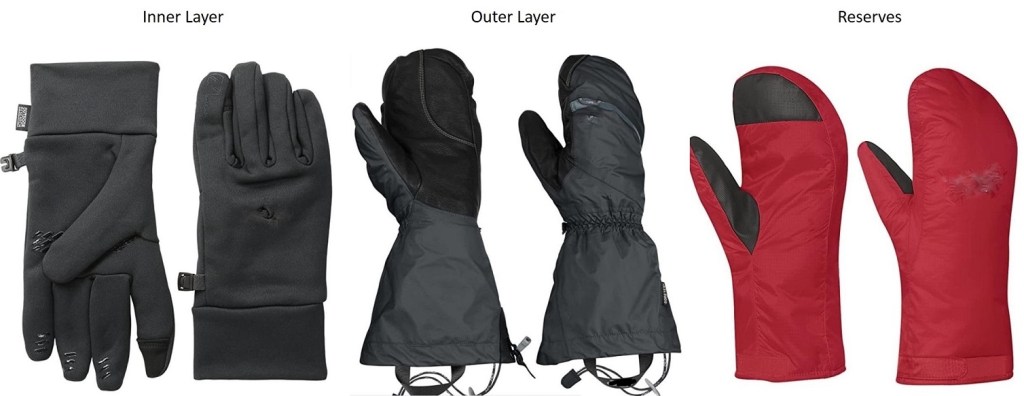
What Wild Wanderer Wears
I usually wear the same outfit when I mountaineer, emphasizing moisture wicking layers and fleece. It’s kind of boring and predictable, but it keeps me warm.
Here’s what I wear, from head to toe (scroll down for detailed information)
Knit/Wool Hat
Balaclava
Sunglasses / Snow Goggles
Sports Bra
Moisture wicking tank
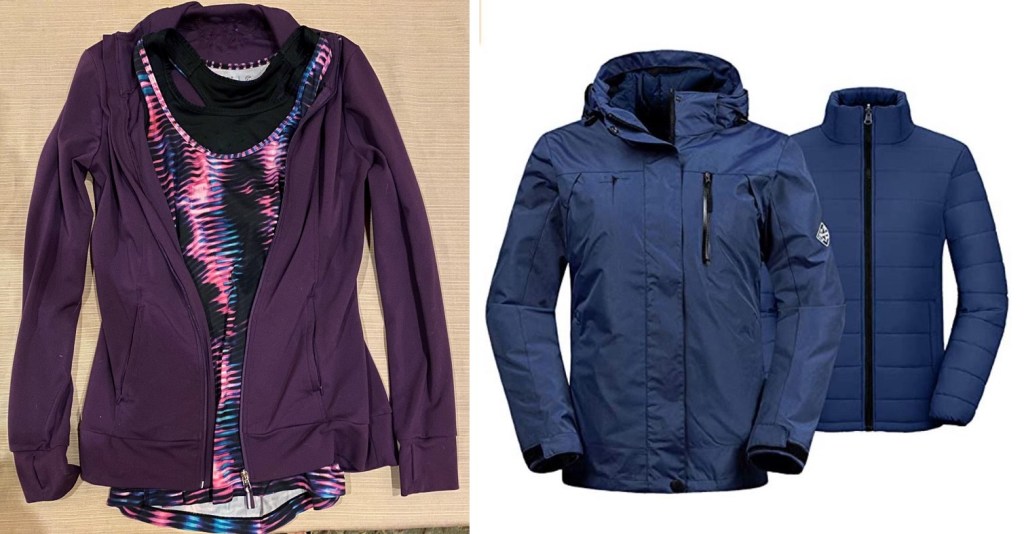
Moisture wicking jacket
Puffy Jacket
Jacket Shell
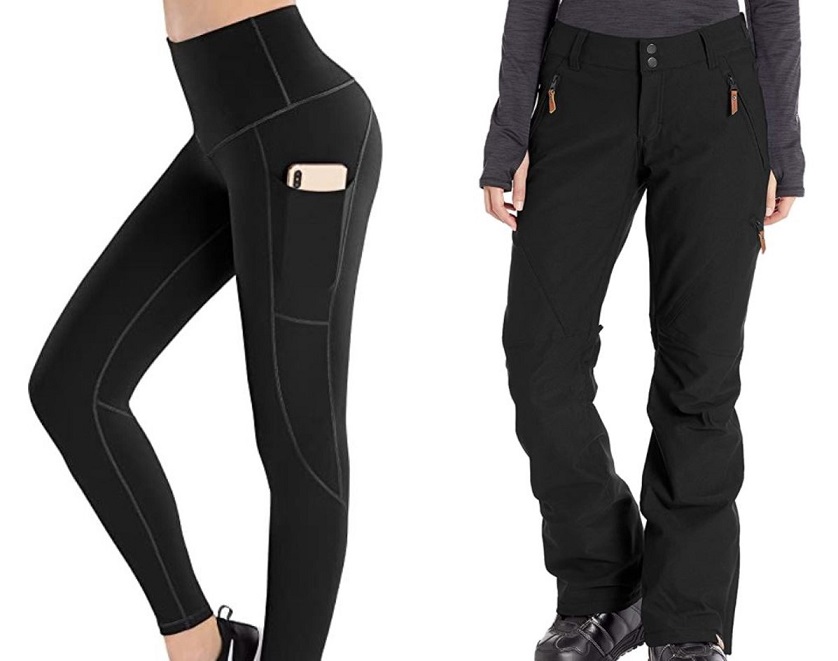
Yoga Pants
Snowboarding Pants
Wool Socks
Mountaineering Boots
Gloves
Bandana
Extra Gear (depending on weather/conditions)
Snowshoes
Microspikes
Ice Axe
Crampons
Knit/Wool Hat: I knit hats and donate them to an outdoor school for 4th graders. These kids are outside all winter long, and their heads need to stay warm. I make hundreds of these hats a year, and I always wear a different one each time I go hiking. When I get back, I wash the hat and donate it. The kids get a kick out of seeing me wearing their hat on top of a mountain. Wool is a great material, just don’t buy a cotton hat: cotton kills (more on this later).
Balaclava: If it’s windy you’re going to want one of these. Make sure it covers your whole face and nose, is made out of a breathable fabric (polyester works) and covers your neck and is long enough to be tucked underneath your inner layers.
Sunglasses / Snow Goggles: The snow can be blinding, and you’d be surprised how a good pair of goggles cuts down on the cold the wind can bring. I put my sunglasses in my jacket pocket before setting out, so they’re easily accessible.
Upper Layers: I rarely take layers off during a hike, as I’d rather be too hot than too cold. With Raynaud’s it’s easy to cool off when hot, but difficult to warm up once cold. I wear a moisture wicking sports bra, tank, and jacket all the time, no matter what. On top of that I have a puffy and a shell (the shell doubles as a rain jacket). The shell has a hood, which I have prepped to fit my head if needed to block out the wind.
Bottom Layers: To prevent chaffing, I like to wear form fitting yoga pants (polyester/spandex) under fleece lined snowboarding pants. These snowboarding pants will get torn up from crampons, microspikes and snowshoes, so I reserve a pair primarily for mountaineering. NOTE: Ski bibs are a terrible idea, as you need to take off unnecessary layers to use the restroom. Make sure your pants are just that: pants.
Wool Socks: Not cotton. Not too snug. You want your feet to be able to breathe and circulation to flow. Also, this is an instance where two is not better than one: only wear one pair of socks.
Mountaineering Boots: This is going to be a highly personal choice. I go through 4 pairs of boots a year, but to be fair I put a lot of miles in a year – around 2500 and over a million feet of elevation gain. What’s important here is to buy a pair a size larger than you’d normally wear, and, unless you have extremely narrow feet, get them in a wide size. This is because your feet will swell above treeline and you want them to have room to do so freely. A constricted foot is a cold foot. You don’t want to wear anything too constricting on your hands or feet. The footwear should also be waterproof, have a good tread, be flexible, and feel comfortable. Go to an outdoor recreation store and try on a few pair to see what works best for you before buying.
Gloves: Unfortunately, hand warmers have never worked for me (not the chemical ones, the battery-operated ones, or the ones that use fuel). Note: If you have Raynaud’s you can never take off all your gloves while winter hiking. Never. The cold will zap the heat out of your hands instantly, and regaining that heat is difficult.
I bring along 3 pairs of gloves: I wear two at a time, and have the third in reserve in case I loose one I’m wearing: The wind above treeline can be ferocious, and I’ve seen gloves blow away in the wind. If you have Raynaud’s and you lose a glove above treeline it’s quite possible you’ll be losing fingers with it. I buy all gloves one size bigger than I normally wear. This allows for my hands to swell at altitude and makes them easier to put on/take off as needed.
The first pair I wear is made of a 95% polyester, breathable, wicking, quick drying fabric with 300-weight fleece and a 100 weight fleece liner. I always have a glove with fingers as the base layer so I can move my fingers to perform tasks that require dexterity with a layer still on, protecting my hands from the elements. I never take these gloves off. Ever. (See stylus information below).
The second pair I wear is a shell. They’re waterproof, breathable, windproof, wicking, fully seam-taped with a water-resistant leather palm. These do a great job keeping out the wind, and are easy to take on and off. It’s important the outer layer are mittens and not gloves because my fingers and hands stay warmer in a mitten.
My reserve pair is also a pair of mittens. They’re fleece lined and come with the outer mitts. I keep these as a back-up in case I lose one of my other gloves.
Bandana: This is very important! I tie one to a carabineer and put it on the side of my pack so I have easy access to blow my nose. My nose drips like a faucet above treeline, and it’s nice to have something readily available to wipe my nose. (Yes, learning how to clog one nostril and blow is helpful, but not practical with large mountaineering gloves). The bandana should be made of polyester so it dries out fast. If you buy a cotton one it will freeze faster, get stiff, and be unusable until it melts. It becomes frozen snot.
Snowshoes: When it comes to snowshoes, you most likely won’t be putting these on at the trailhead, but later in your hike. Thus, ease of use is very important: you want to be able to put them on without taking off your inner glove. The three things I look for in a snowshoe are that they’re made of steel (not aluminum), have heel risers, and ratchet bindings. Ratchet bindings are the most important feature: I climbed all of Colorado’s 58 peaks over 14,000’ in a cheap pair of snowshoes, but I wouldn’t have been able to accomplish this if they hadn’t had the ratchet bindings.
Microspikes: Don’t spend a lot of money on these. A cheap, $7 pair will last you a long time. I use them year-round (they work great on scree for stability) and would never pay more than $10 for a pair. My advice here is if there’s any ice at the trailhead to put them on while you’re still in your vehicle, keeping your hands warm while doing so. I’ve worn microspikes for miles when they weren’t needed, and it didn’t damage them. It did however keep my fingers from getting needlessly cold putting them on. (Remember, when it comes to the cold, prevention is key). Microspikes can also be worn with snowshoes: There’s no need to take microspikes off to put snowshoes on.
Ice Axe: These are usually made of stainless steel/aluminum, which gets cold. I have an ice axe with a rubber grip (which is moderately warmer) and a leash. The leash goes around my wrist, under my outer glove but on top of my shell. I try to hold the ice axe by the leash when it’s not necessary to hold the shaft for safety purposes. Another way to avoid the cold here is to put a bandana around the shaft while gripping it.
Crampons: Make sure they’re made of steel and not aluminum (aluminum bends) and have front facing spikes for traction. Learn how to use these before trying them in the elements for the first time, as they can be tricky to put on correctly, especially while wearing gloves.
Keep Your Pack Packed
Unfortunately, those of us with Raynaud’s don’t have the luxury of packing light: we need to be prepared for all types of weather, and due to the possibility some of our gear might fail/get lost, we need backups. I like to keep all my gear in my backpack when not in use. When I get back from a hike, I usually wash my bandana, refill my water bottle, wash my sunscreen compact, and put them all back in my pack. I don’t forget important gear at home, as it’s always in my pack. In addition to the 10 essentials, I carry the following items (scroll down for detailed information):
Carabiners
Jetboil
16oz water bottle (in addition to my regular water bottle)
Stylus
Vaseline
Sunscreen
Camera
Collapsible trekking pole
Carabiners: Carabiners are your friend! The larger the better, so they’re easier to manipulate while wearing gloves. I use them to attach my water bottle to my pack, as well as my ice axe, bandana, and any other gear I want easily accessible.
Jetboil and 16oz Water Bottle: Jetboils are a useful tool, as they are relatively lightweight and can boil water very, very quickly. I have one in my pack during the winter, along with a 16oz Nalgene. Before the hike I warm up water, put it in the Nalgene, and keep this smaller water bottle close to my skin as I hike (sometimes in a pocket, or the waist of my pants, etc.) This helps keep me warm. I also start my hike with warm water in my drinking water bottle to help prevent it from freezing. Keeping the water bottle close to my body (and not in my pack) helps to keep the water from becoming frozen during the hike. The Jetboil comes along with me, and if needed I can warm up the water again, or, if the water is frozen, I can quickly heat up snow.
Stylus: These are so helpful to people suffering from Raynaud’s! Our fingers don’t register well on touch screen devices, including ATMs, gas station machines, phones, and tablets. A stylus is cheap (I bought 12 in a pack from Amazon for $4) and solves the problem of using our fingers on screens. A stylus while hiking has the added benefit of reducing the need to take off your gloves to use your phone or GPS device to take pictures or find direction. I keep a stylus attached to all my devices that require touch to operate.
Vaseline: I’m in love with Vaseline/Petroleum Jelly. Movie stars have sworn by its beauty effects (wear it to bed to keep skin soft and younger looking), it helps wounds heal faster, restores moisture after wind burn, and when you’re a mountaineer, it keeps your nose from freezing. Before hitting the trailhead I slather a generous layer of Vaseline on my nose to keep my nose warm. It works wonders!
Sunscreen: OK, so it’s cold above treeline, but due to the reflection of the sun on the snow sunscreen is still needed. This can be problematic because a tube of sunscreen freezes in the winter above treeline. Using an aerosol spray isn’t practical for obvious reasons (wind) and the sunscreen that comes in a deodorant-like stick doesn’t apply evenly/melt when frozen. To combat this, I went to the dollar store and bought a compact, took out the powder, cleaned the compact out, and filled it with my favorite sunscreen. Then I placed a new compact sponge over it (30 sponges for $1 at the dollar store) and let the sponge absorb the sunscreen.
I keep the compact in my pocket as I’m hiking (inside of a plastic ziplock bag) and when the sun comes up, I take out the compact and apply the sunscreen. The first time I did this I was surprised at how well it worked: The sunscreen doesn’t freeze this way, and is easy to apply. The only downside is the set-up needs to be washed/replaced every time you use it.
Camera: Of course, you’ll want to bring a camera, and the specific kind is up to you. Did you know cameras get cold too? The batteries freeze and they stop working. To combat this, I put my camera on a strap around my neck, and in between snapping photos keep the camera between my puffy and outer layer. This keeps the battery from freezing.
Collapsible Trekking Pole: These are indispensable for a variety of reasons at all times of the year. In the winter they are used for probing the snow to measure snow depth, determining the stability of ice at frozen stream/river crossings, and to whack snow off trees bent over with snow and blocking the trail. Make sure the handle is made of cork or plastic (not metal/aluminum) and easy to manipulate while wearing gloves. When not in use because you’re using your ice axe, collapse and attach to your pack with a carabiner. Also, a trekking pole is your first line of defense against 2 and 4 legged animals.
Trail Tips and Tricks:
Get dressed in your vehicle: It’s cumbersome to drive to the trailhead wearing all my winter gear, so when I arrive at a trailhead I tend to get dressed in the car. I do so with the heat on high, and put all my gear on without opening the car door (this includes snowshoes). It takes a little maneuvering, but I start the hike warm.
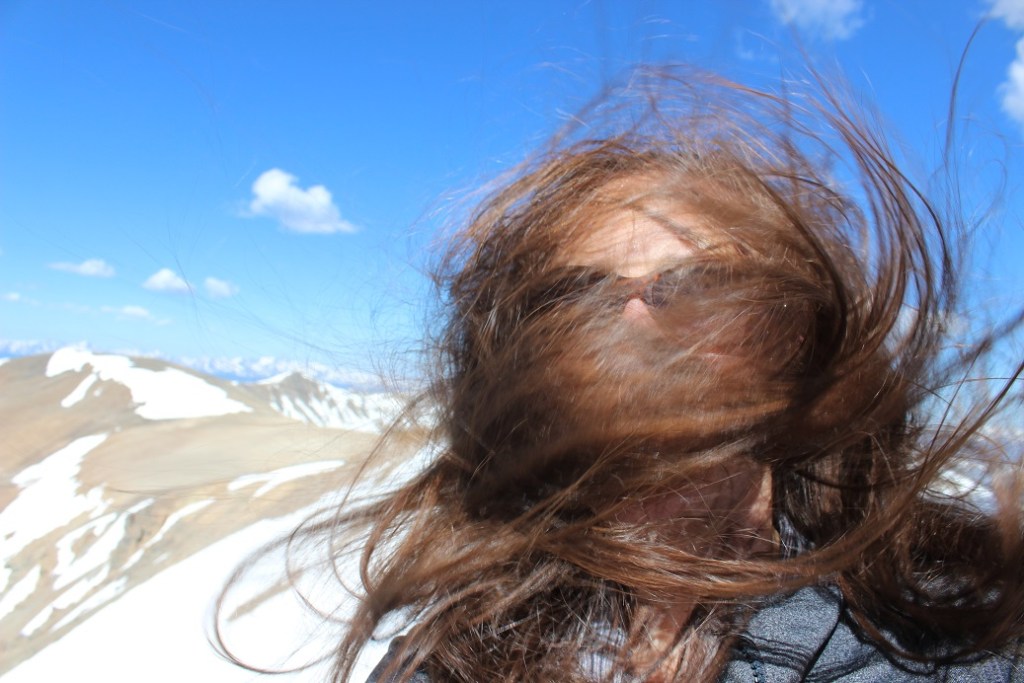
Tie your hair back: Here I believe a picture is worth 1000 words. I now braid my hair before a climb.
Don’t Wear Cotton: Cotton is heavy, takes a long time to dry, adds to rapid body heat loss, and absorbs too much moisture. That means you stay wet/cold for a long time. This includes jeans and that cool ‘It’s another half-mile or so’ t-shirt. Instead, pick a synthetic fiber such as polyester, nylon, fleece, or merino wool.
Add string to your zippers: Yes, wearing lobster-claw gloves is great for keeping your hands warm, but it makes manipulating your fingers and doing ordinary tasks, such as unzipping a zipper, difficult. I’ve added string to my zippers so they’re easier to grab while wearing bulky gloves. Note: don’t make the string too long, as it will flap in the wind and hurt when it hits you in the face at high speeds. 6 inches of string is best.
Pee Before Treeline: Wind intensifies at treeline, and stripping off layers in these conditions is not a good idea. If you’ll need to use the facilities (always assume you will), do so under the cover and protection of the trees.
Never Leave Gear Stashed: It’s tempting to leave your snowshoes stashed somewhere when no longer needed to pick up on your way back, but I’ve learned it’s important to carry all gear you’ll need to get down the mountain for your entire hike. I’ve had gear taken (either stolen or someone brought it down to the trailhead, thinking I’d lost it) and it’s easy to forget where you’ve placed the items. If you needed the gear to climb up the mountain, keep it with you so you’ll absolutely have it to get back down.
Keep Moving: There are times when rest is necessary, but resting can quickly lead to frigid body temperatures. Never allow your feet to stop moving, as this is when they cool down. If you’re taking a sip of water or rearranging gear, keep your feet engaged, moving them up and down (marching in place) as you do so. This will help prevent cold toes. Pump your fingers back and forth inside your gloves to keep the circulation going.
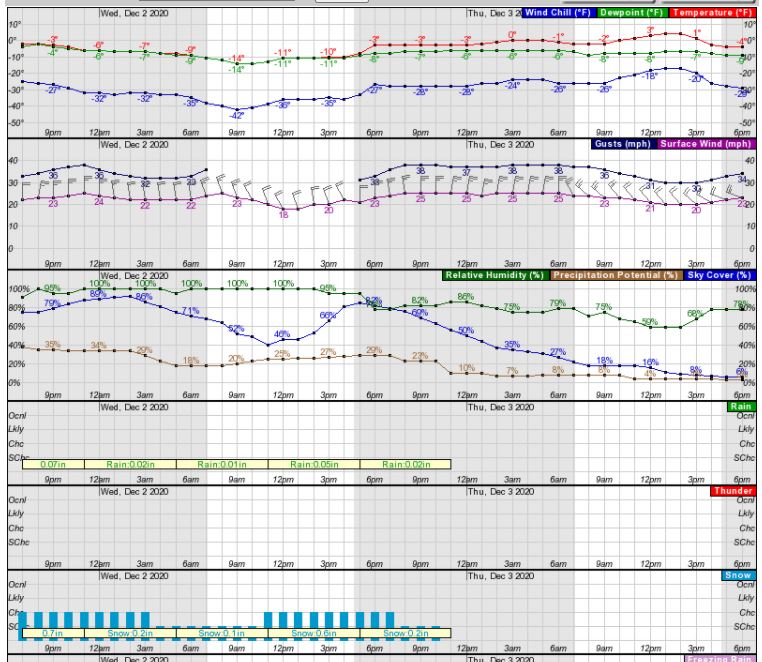
Become a Hobby Meteorologist: In winter the days are shorter, so daylight hiking time is less than in summer. Always check the forecast, but remember forecasts are often wrong and change during the day. Learn how to read weather forecasts and know how they relate to timing, topo maps, and geographic features. I’d recommend spending time learning how to navigate the NOAA weather forecasting site, particularly as it pertains to hourly weather forecasts for specific regions/peaks. You’ll gain information such as temperature, wind speeds, wind gusts, sky cover, potential precipitation, lightning, etc. in an hourly forecast. What you see may look daunting at first, but a few minutes studying and it’s mostly self-explanatory picture of the day’s conditions, letting you know the best times to climb, or if you should climb at all.
Windy Weather: When reading forecasts, know wind speeds/gusts are often much more important than how cold it is outside. Hiking in 20 degree weather is actually quite nice when prepared, wearing proper gear and the sun is shining, but add in windchill and it can quickly become hazardous. I’ve mountaineered in winds up to 80mph, and from personal experience, if the wind is predicted to be above 20mph I choose a different area to mountaineer or stay below treeline.
Learn how to read the forecasts to see which way the wind is coming from, and then you can plan your route to avoid ridges where there will be more wind, or at minimum design a route that avoids the brunt of the wind for as long as possible by staying below treeline for a longer period or in the shelter of the side of the mountain with less wind.
For example, in the picture below, if the normal route is in red, but there are winds coming from the north or west that day, you could avoid most of the wind by taking the black route instead, limiting your exposure time on the ridge.
The summit is only halfway: Know your limits, and realize when to turn back. People with Raynaud’s experience cold much more intensely than other people, with quicker and more drastic effects. Summiting is optional, making it back to the trailhead is mandatory. Preferably with all your digits intact. Know when to turn back.
Prevention is key: A Raynaud’s attack, once triggered, is very painful and can take a while to recover from, even after the affected area has been re-warmed. Doing as much as you can to prevent an attack is never wasted: Dress warmly, wear a wind barrier (outer shell), never take off your inner gloves, keep all your gear easily accessible, and bring along warm water. Start with short winter hikes and work your way up to longer, more technical climbs.
I hope this article has been helpful for those of you with Raynaud’s, as well as those of you who may not have Raynaud’s but are interested in staying warm while winter hiking. I’d love to hear from you! Do you have any advice for winter hiking? Comments? Questions? Is there a topic you’d like me to discuss? Contact Wild Wanderer here
I’m not a fan of couloir climbs, but feel they are something I should practice. I intentionally chose to climb Mt Aetna when there wasn’t a ton of snow so I’d have the option of hiking on either snow or rock.
I left my house at midnight to a swirl of thousands of Miller moths. I’m not exaggerating; as I opened my garage door they swarmed my truck and at least 5 made it inside the cab with me. I spent the next few hours doing my best not to get frightened when one flew past my face.
The drive was uneventful, but I saw no less than 6 police vehicles in the short drive from 285 to the Boss Lake Trailhead (seemed excessive for such a remote area at this time of night). Memorial Day weekend should be interesting. I parked at the lower trailhead so I could add the 1.4 miles each way and hopefully some elevation gain: I’m still trying to keep my average at 10 miles per hike with 4000’ of elevation gain and I’m a little under that right now so every little bit helps.
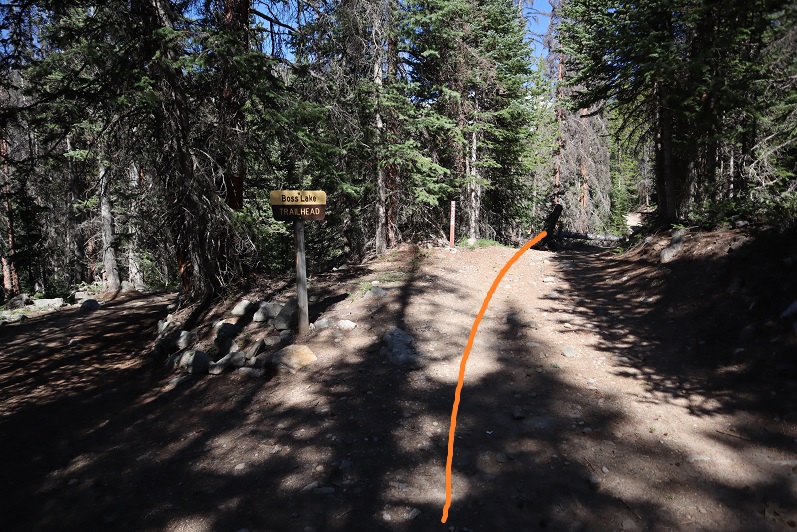
I parked and was on the trail by 3:15am.
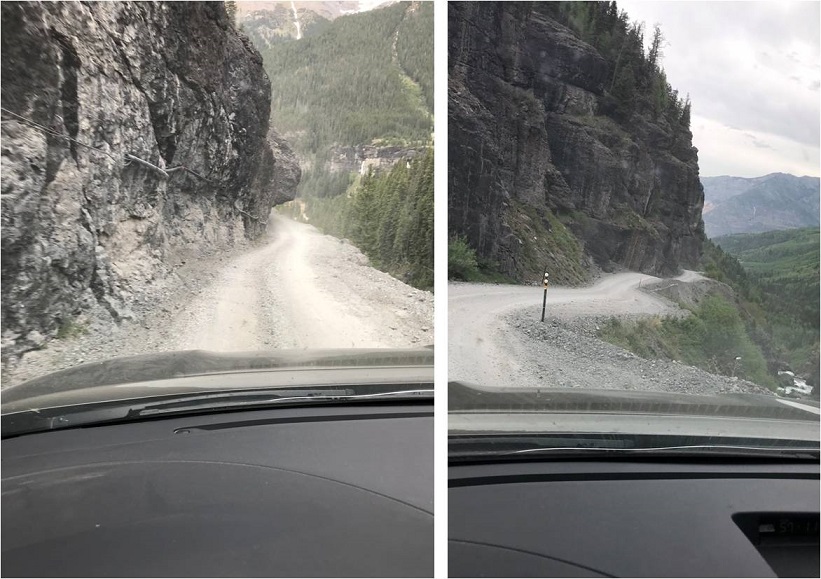
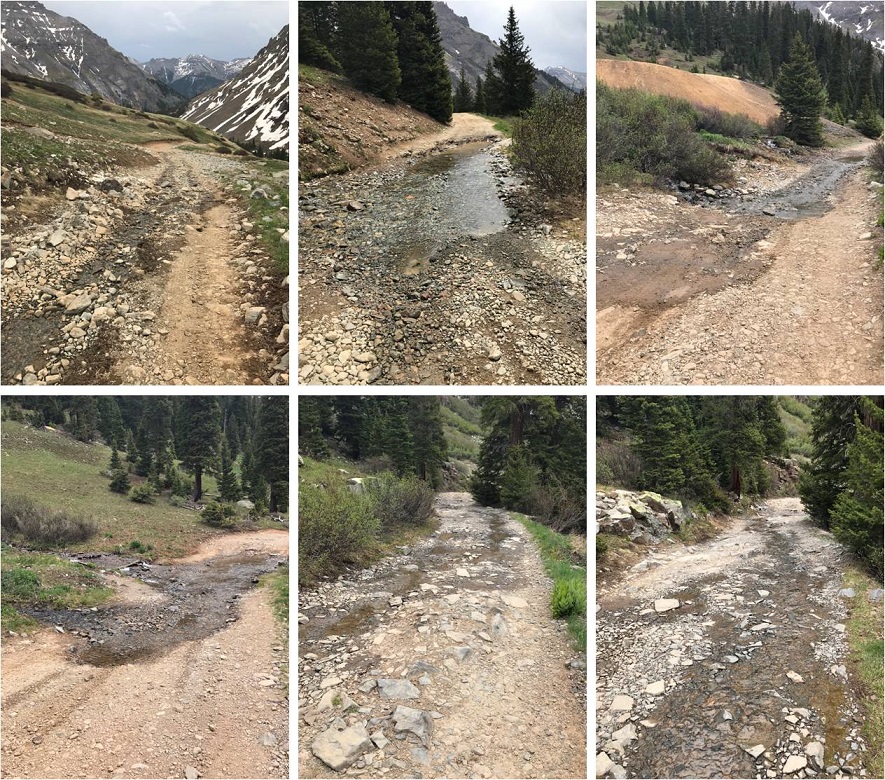
The 230 4WD road isn’t that bad to drive or to hike. I was glad I’d parked where I did because there were downed trees on the road before a little ways before the trailhead
At the trailhead sign I went right
And at the fork in the road I went left (the road has a chain across it and a “no trespassing” sign to the right)
The trail follows the 230 4WD road for 2.5 miles from the lower parking area. At 2.5 miles if it were light out you could see Mt Aetna on your right. I could have driven the entire way to this spot if there hadn’t been downed trees in the way.
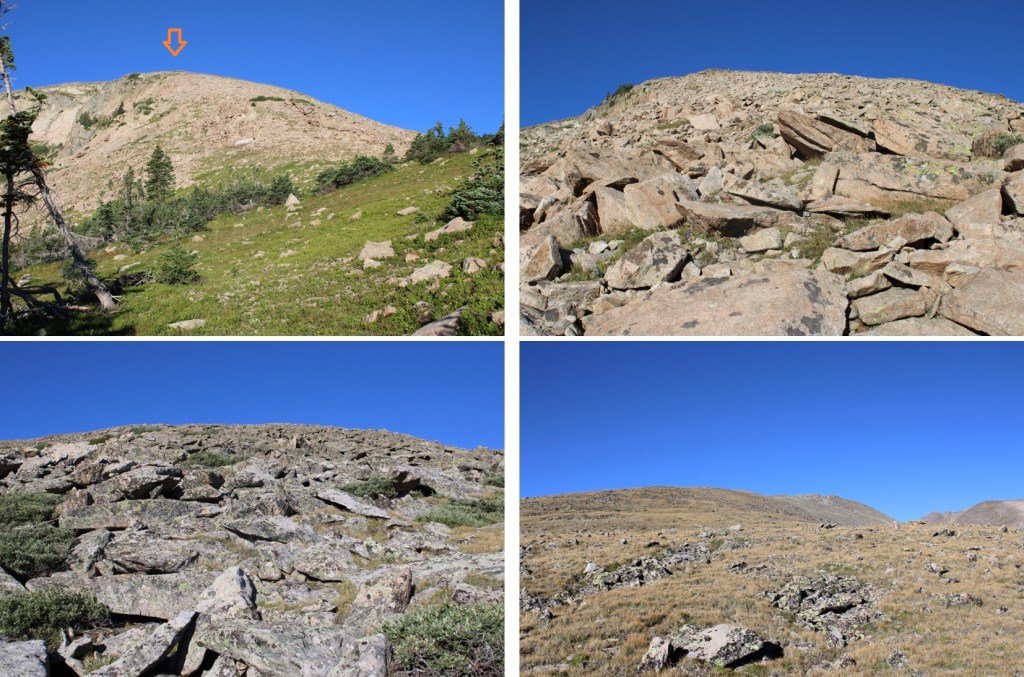
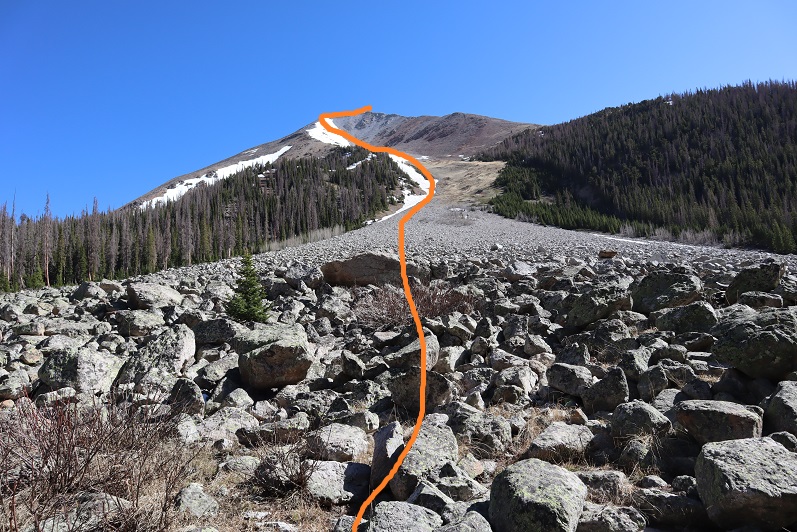
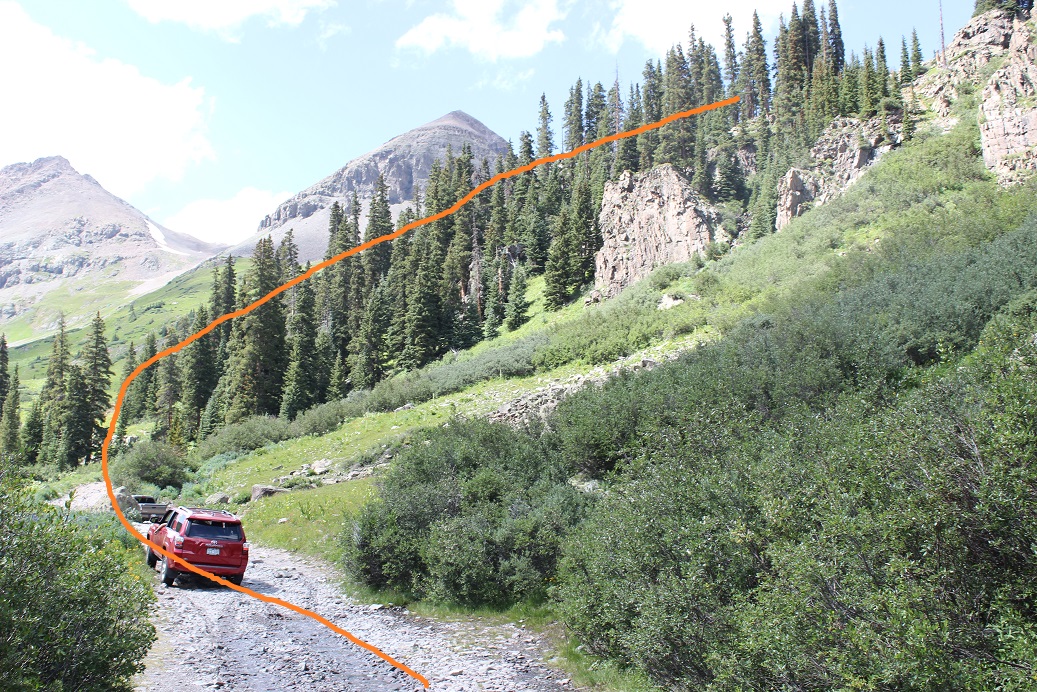
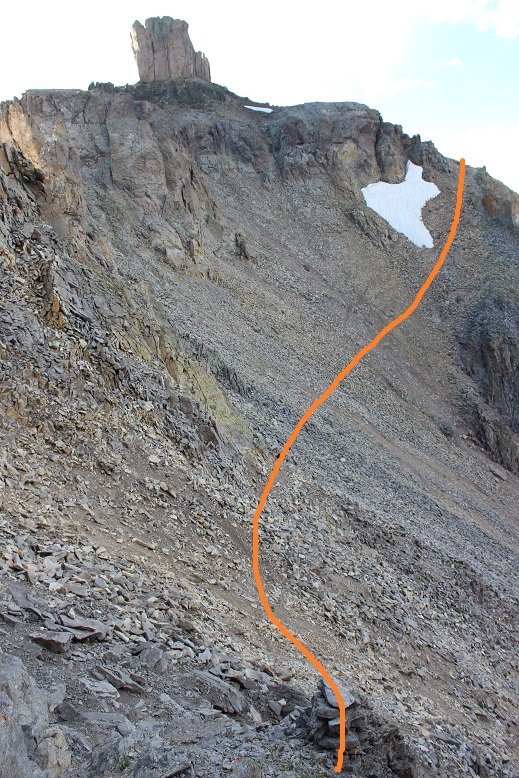
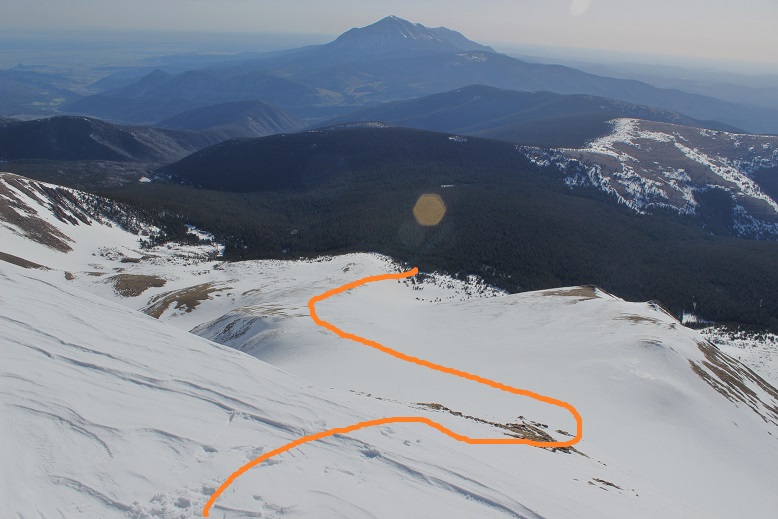
I turned right and crossed a boulder field. These rocks were loose and rolled. Since it was still dark I couldn’t see where I was going, so I headed northeast. As the sun started to come up it was obvious I had a lot of options for today’s summit. Here’s an outline of the route I took:
There is actually a lot more snow than it looks like from far away. I followed the gully about a third of the way on rocks and tundra until I had a decision to make: take the ridge to the left, the ridge to the right, ascend the scree just to the right of center, or put on crampons and go straight up the snow
I decided today was a good day to practice my couloir climbing. The snow was firm and I wasn’t the slightest bit tired yet. I strapped on my crampons, got out my ice axe (I brought along two proper ice axes this time but only needed one) and got to climbing.
I changed my intended route several times because the snow was steeper than it looked in some sections.
Once I made it to the ridge I found it was easier to keep my crampons on and walk along the snow than it was to walk on the loose rocks, so for as long as I could I stuck to the snow
Eventually the snow ran out and I followed the rocky but (mostly) dry ridge to the summit
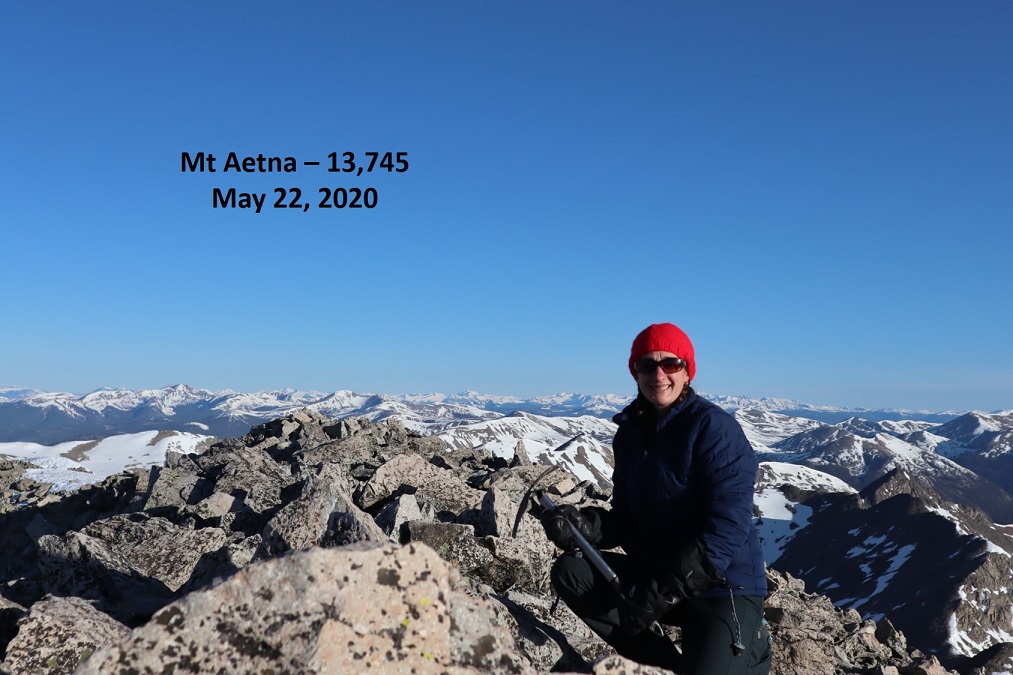
I summited at 7am and kept thinking to myself “that was much easier than I’d anticipated: why don’t I like couloir climbs again?”
Mt Aetna Summit:
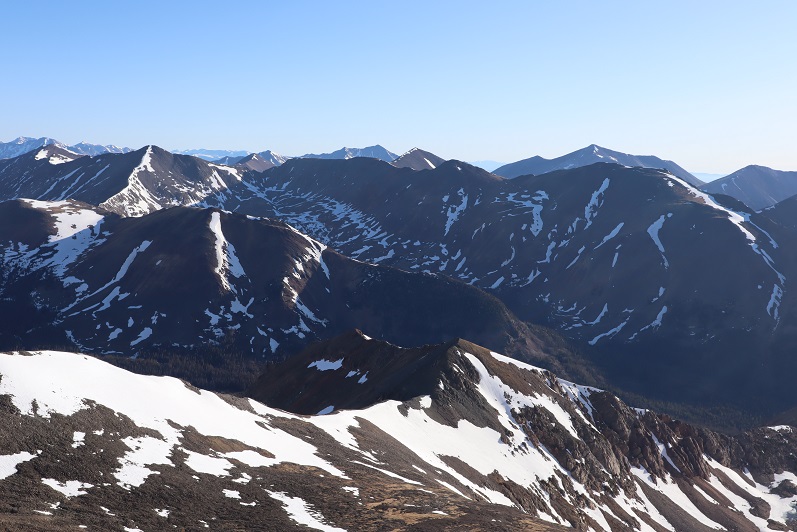
I stayed longer at the summit than I usually do, taking a good look at the nearby mountains I wanted to summit tomorrow, checking to see if the crux area was free from snow. It looked like it was, but a lot of the area seemed to be hit or miss with snow and too much was still in shadows to be completely sure.
Here’s the route I took down, keeping to the snow as much as possible.
Make no mistake, it’s steeper than it looks but the snow was still firm and I was able to walk down the entire way without turning to face the mountain.
What’s nice about this climb is you have a visual the entire way up and down of where you need to go.
I made it back to the road, turned left, and followed it back to the trailhead.
I made it back to my truck at 10am, making this an 8 mile hike/climb with 4103’ of elevation gain in 6 hours, 45 minutes.
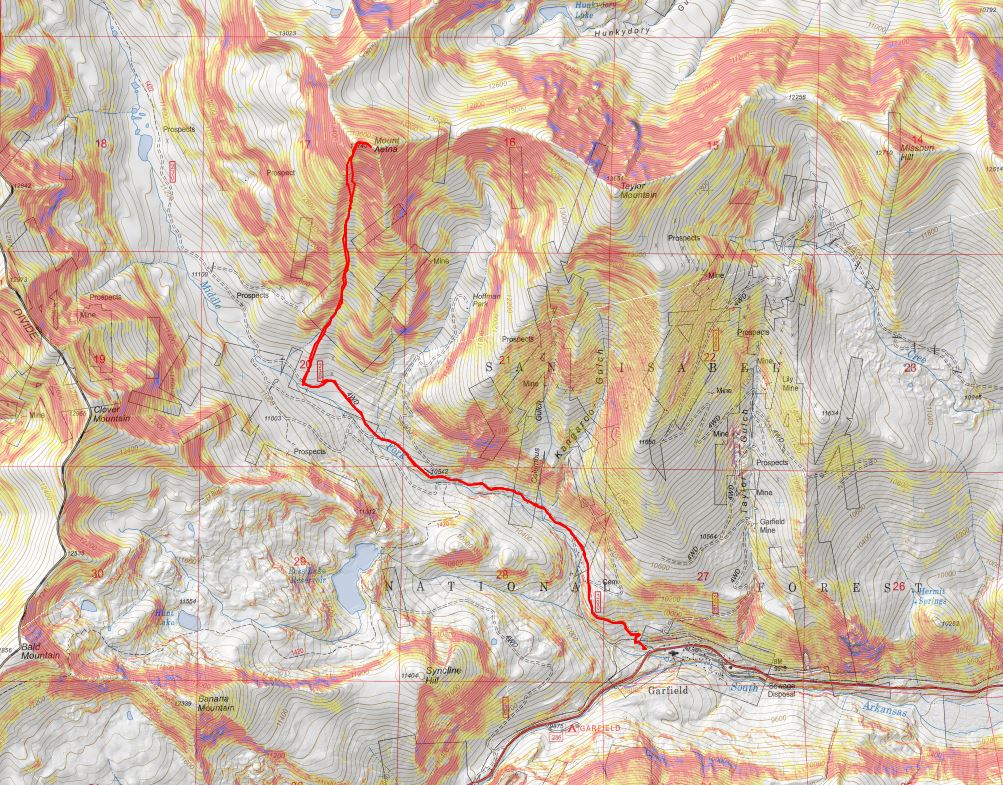
Here’s a topo map of my route.
Now I was off to the next trailhead. As soon as I came to an area with cell-service I pulled over to text my kids and see how they were doing (they were still sleeping). As I was sitting there an undercover cop pulled someone over for speeding right behind me. At first I only saw the flashing lights and thought I was in trouble for something. I sat there for a good 20 minutes and luckily for me, I was never approached and the police officer left before I did. But I got to see him again.
I turned onto CR 240 as I was headed to my next trailhead and saw two police vehicles parked on either side of the road. There were two police officers standing outside of their cars, stopping vehicles. I panicked and turned right into the (semi) residential area, drove for a bit, parked, and thought about my next move. Should I try to continue on to the trailhead, or turn around and go home? In the end I chose to continue to the trailhead: If I got stopped and ticketed or told to turn around at least I’d have beta for the next person.
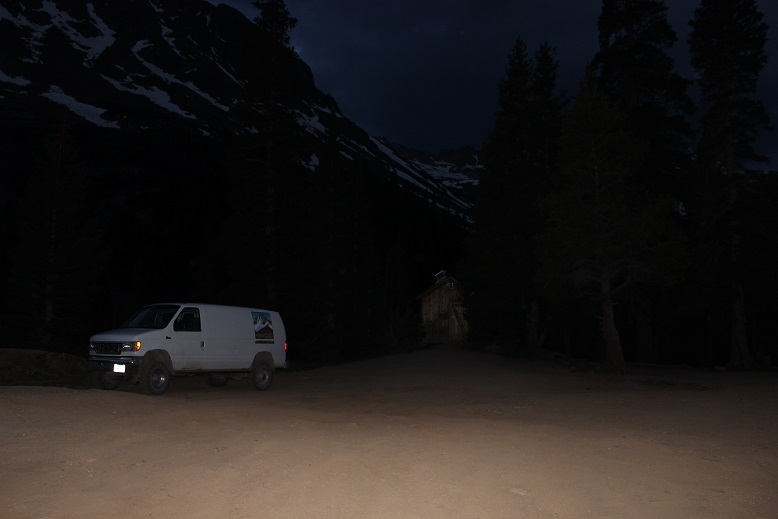
I drove back the way I’d come and slowed down when I came to the police officers. I waved to them, and for some unexplainable reason, they waved me on! Woot! Maybe because I’d turned from the residential area and not the main highway they assumed I was a local? In any event, I drove the rough 4WD road to the next trailhead, found a place to park, made dinner, jotted down some trip notes, set out my gear for the next day, walked around the creek for a bit, knitted a hat for tomorrow, read a bit from a Colorado History book, had a few glasses of whiskey and went to bed early (tomorrow was going to be a long day). Oh, and I didn’t see one other vehicle drive down the road the entire time I was there, and it’s Friday to Memorial Day weekend at a well known dispersed camping area.
This climb was several years in the making. Knowing if I wanted to complete the Centennials (etc.) I’d need to have rock climbing skills I started going to a rock climbing gym once a week a few years ago. While I enjoyed the climbing and the skills I learned helped immensely with scrambling on class 3+ peaks, I didn’t get a lot of experience with actually setting up/taking down ropes and anchors.
I bought books on mountaineering and watched YouTube videos, but there isn’t a lot of information out there on self-belaying/rappelling (I wonder why?). So I turned to friends I knew who rock climbed and picked their brains. A couple even offered to take me out and show me the ropes. I took them up on their offers, and by mid-summer this year I felt confident enough to go out and try this peak on my own. Please note, I’d already gone out dozens of times and set up anchors and rappelled locally, this was just the first time I was going to do so solo and, well, without anyone to help if needed.
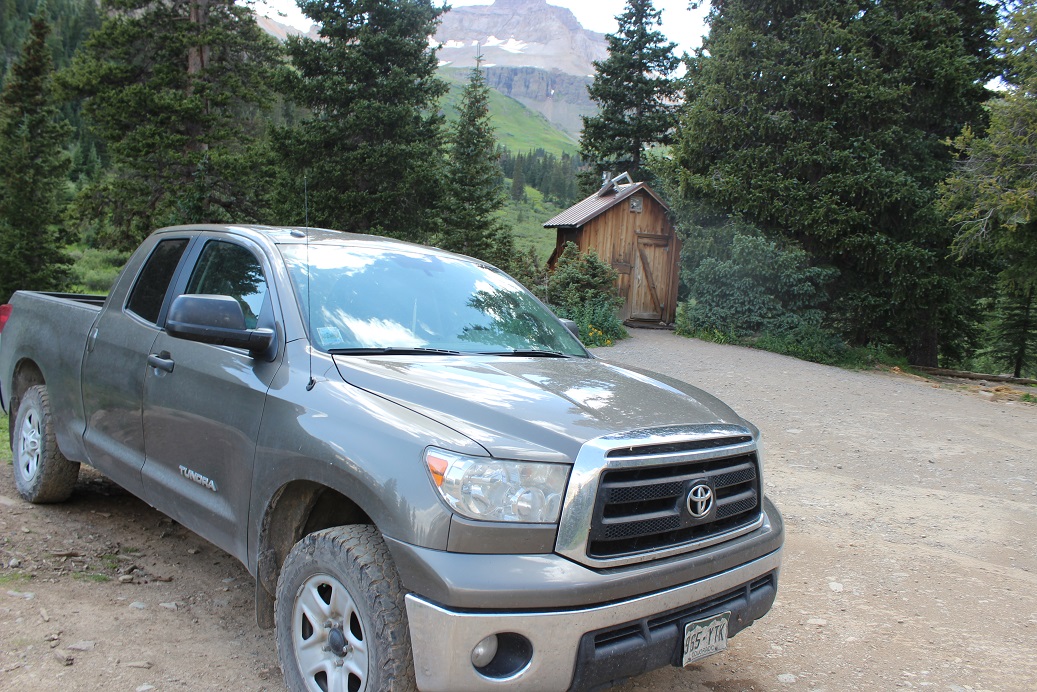
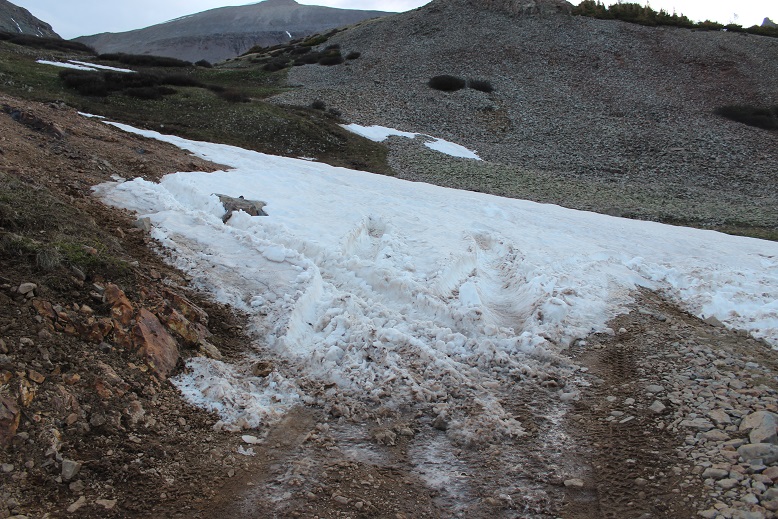
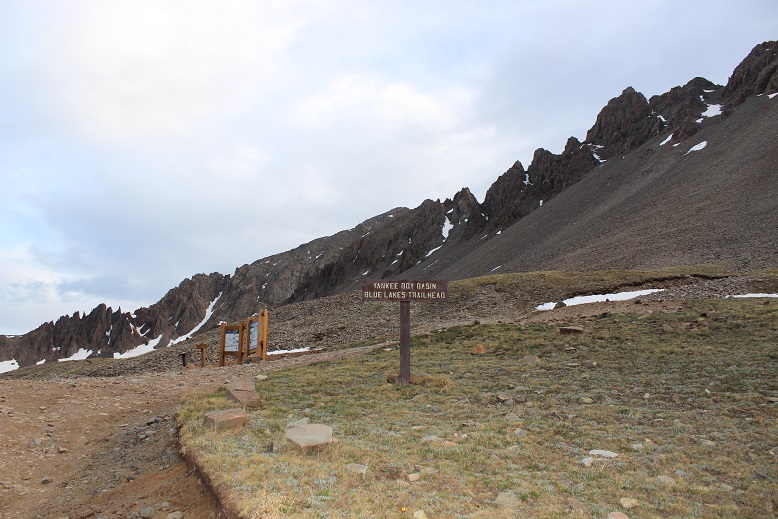
I arrived at the Yankee Boy Basin restroom area at 3:30am and was on the trail by 3:45am.
I put my helmet on before I left the truck, and my pack was curiously not as heavy as I’d anticipated. I considered this my first win of the day. I walked about 1/10 of a mile down the road, realized I’d left my DSLR in the front seat and quickly turned around to retrieve it. I’d been a little worried about my bruised tailbone from last week, and while I have a good 5 inch bruise on my backside my pack wasn’t bothering it as I hiked. Second win of the day!
Camera retrieved I hiked northwest along the dirt road, crossing a large mud puddle and turning right.
Note: I chose this route because on a topo map it looked easier. After completing the hike I have my doubts, and believe this is the correct entry point:
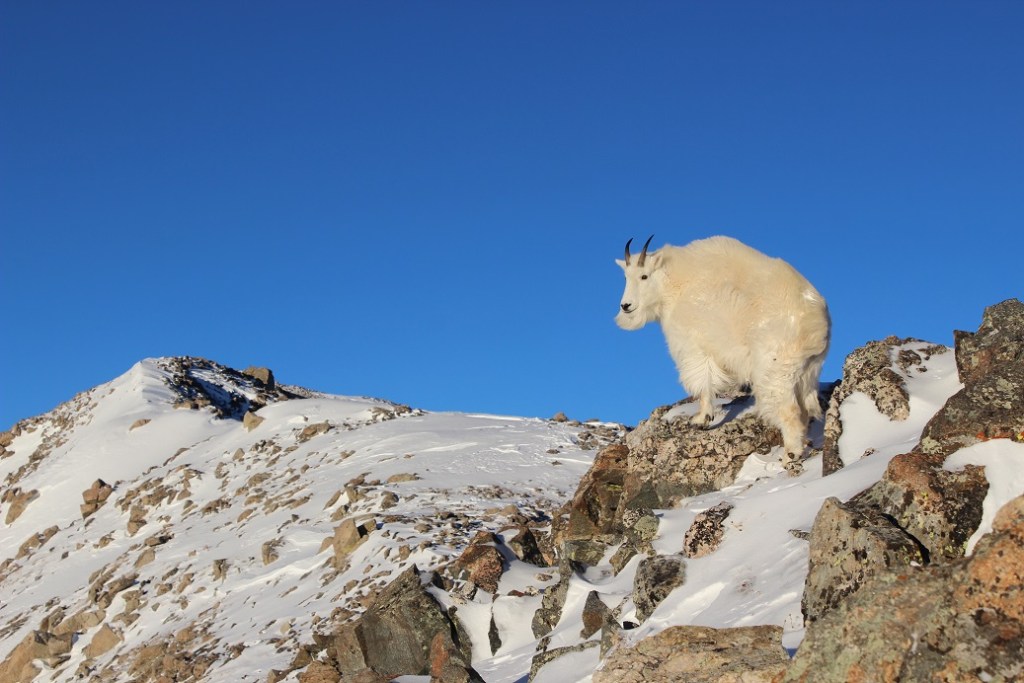
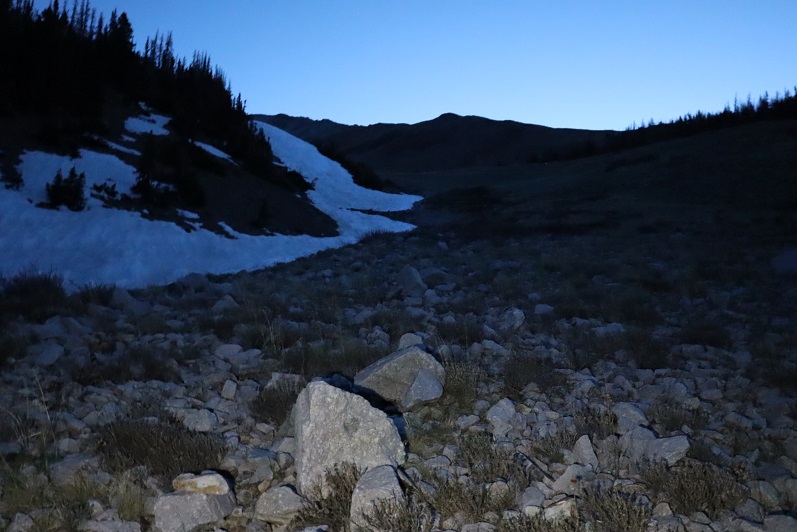
The elevation gain begins immediately and doesn’t quit. I headed northwest up a steep grassy slope, enjoying the meteor shower and a herd of either goats of sheep watching my ascent (in the dark I couldn’t tell which they were, but could see them watching me).
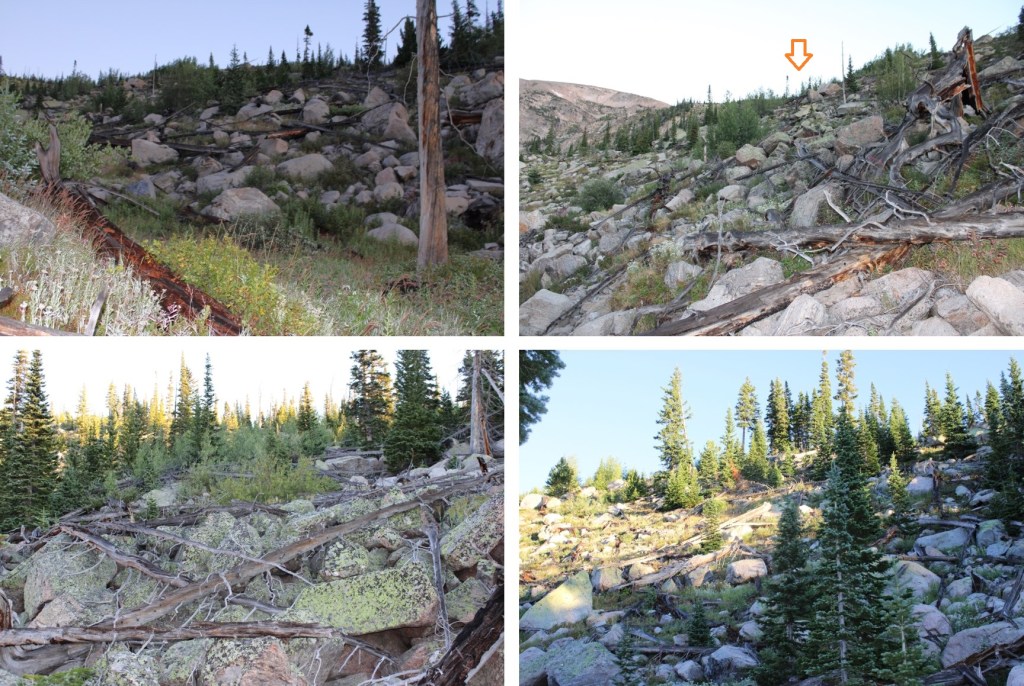
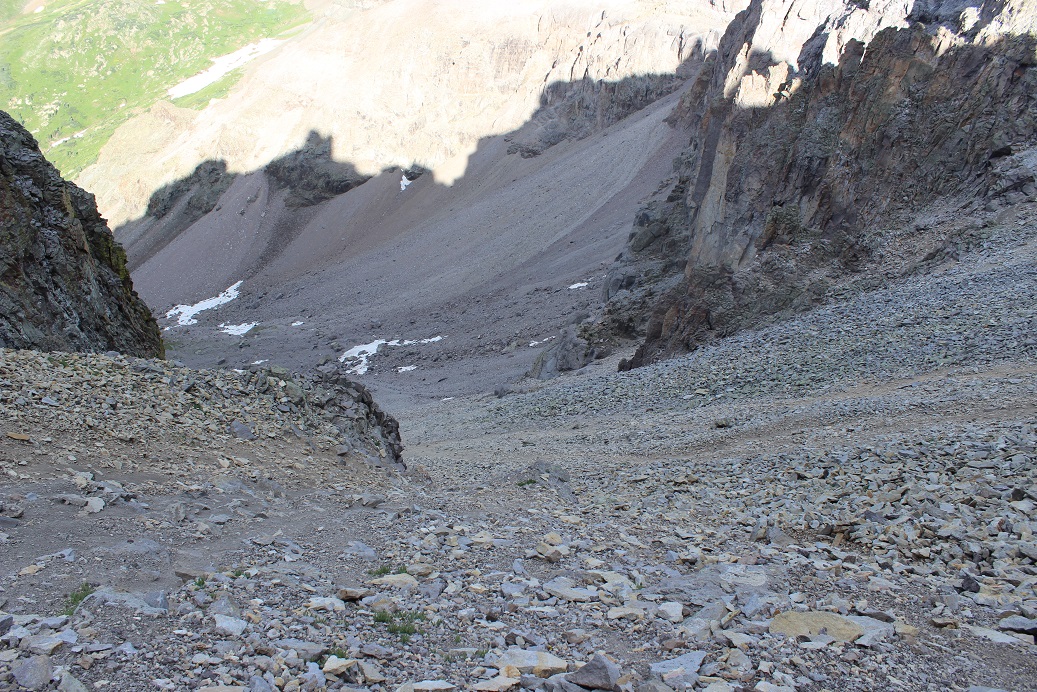
The grassy slope turned to large rocks and talus as I entered a basin.
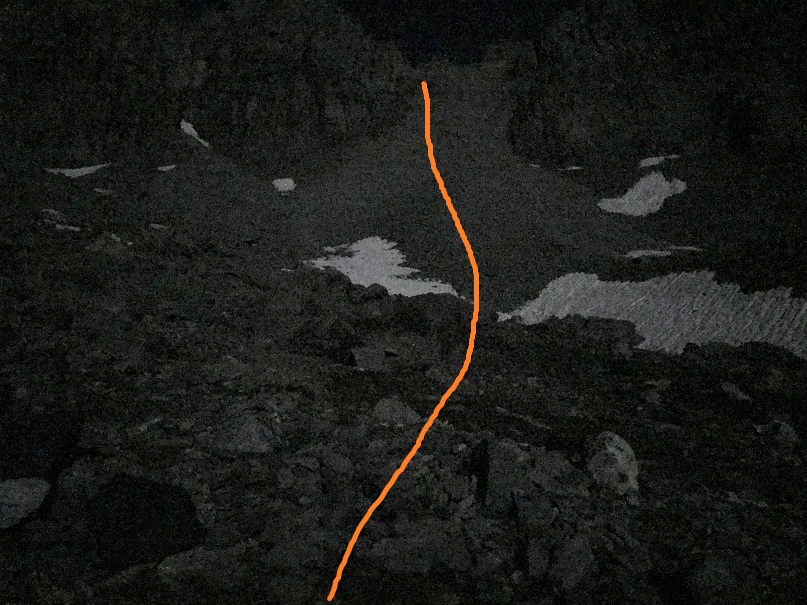
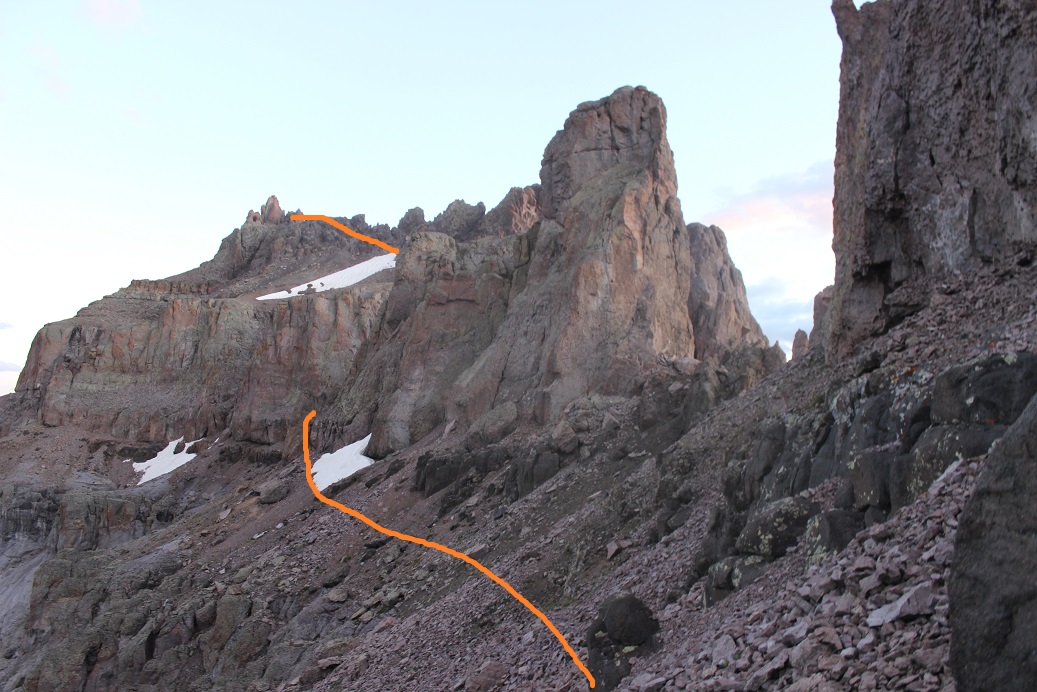
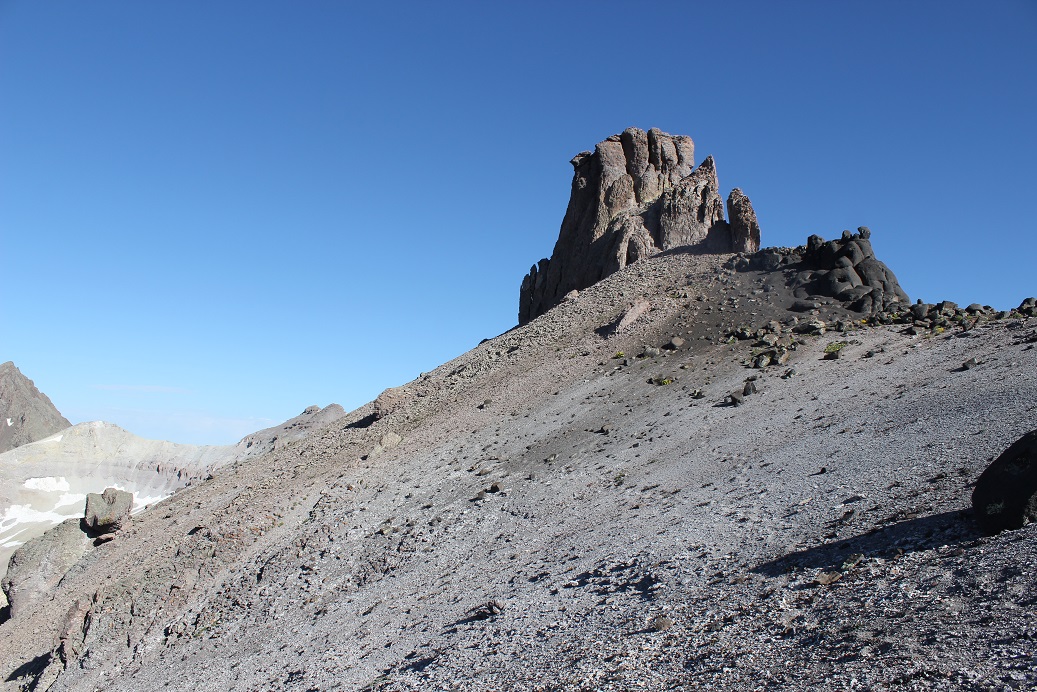
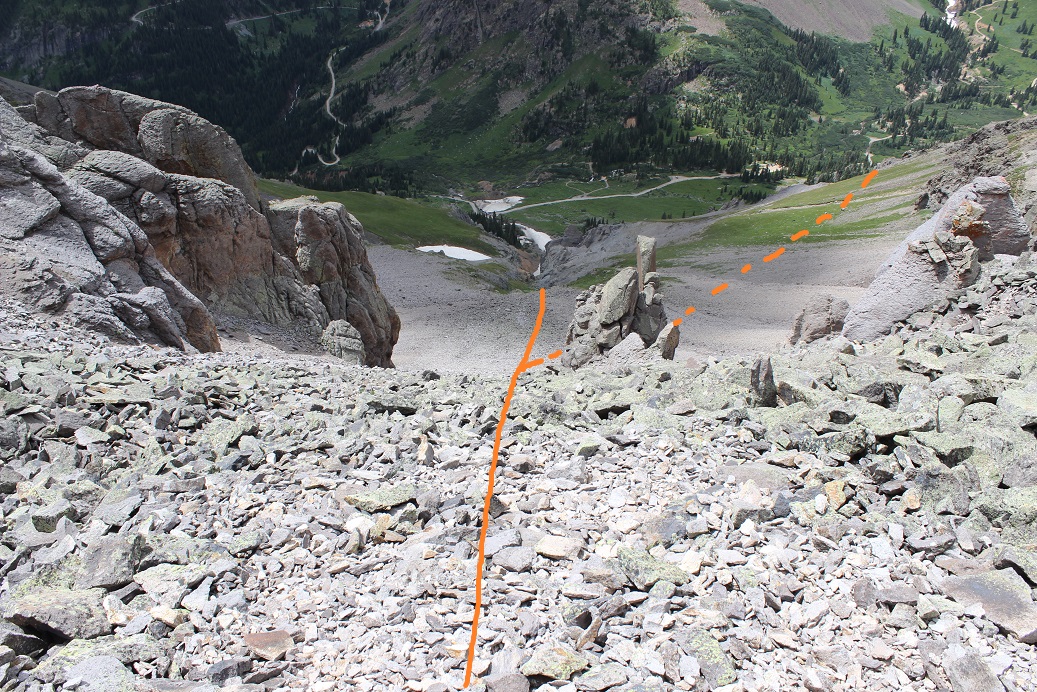
In the moonlight I could see my goal: this steep scree section at the base of the black gully. I’ve lightened these pictures up for detail, but this is where I was headed.
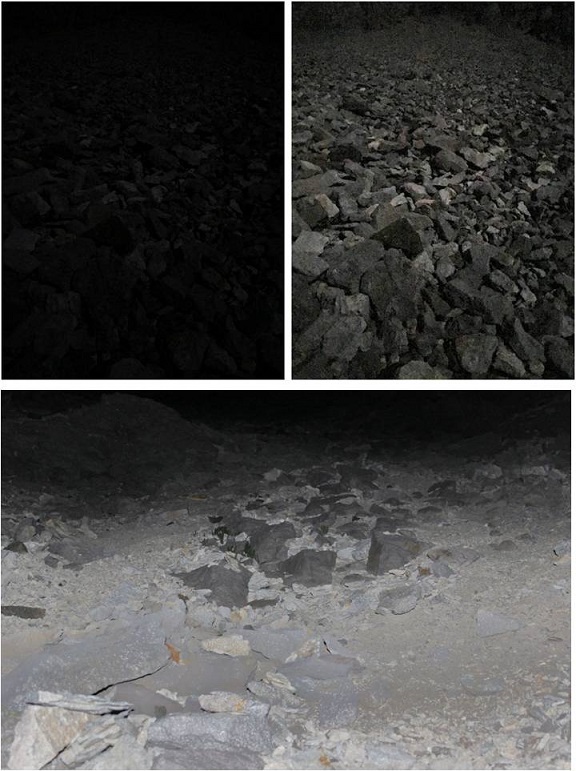
The ascent was a grueling climb over steep scree, made marginally easier when I put on my microspikes. The worst part was getting all those small rocks inside my shoes. I couldn’t help but think I should be wearing gaiters to keep the rocks out. Don’t they make something for this for runners so they don’t get rocks in their shoes? Anyway, the terrain was not ideal in the least: some of the worst scree/talus/etc. I’ve ever encountered. At times I was literally grasping the dirt for traction with my hands.
I exited climbers left out of the black gully. The black gully is class 2+ climbing, and much easier than the scree/talus I encountered before the gully. I was pleasantly surprised with how easy it was to climb.
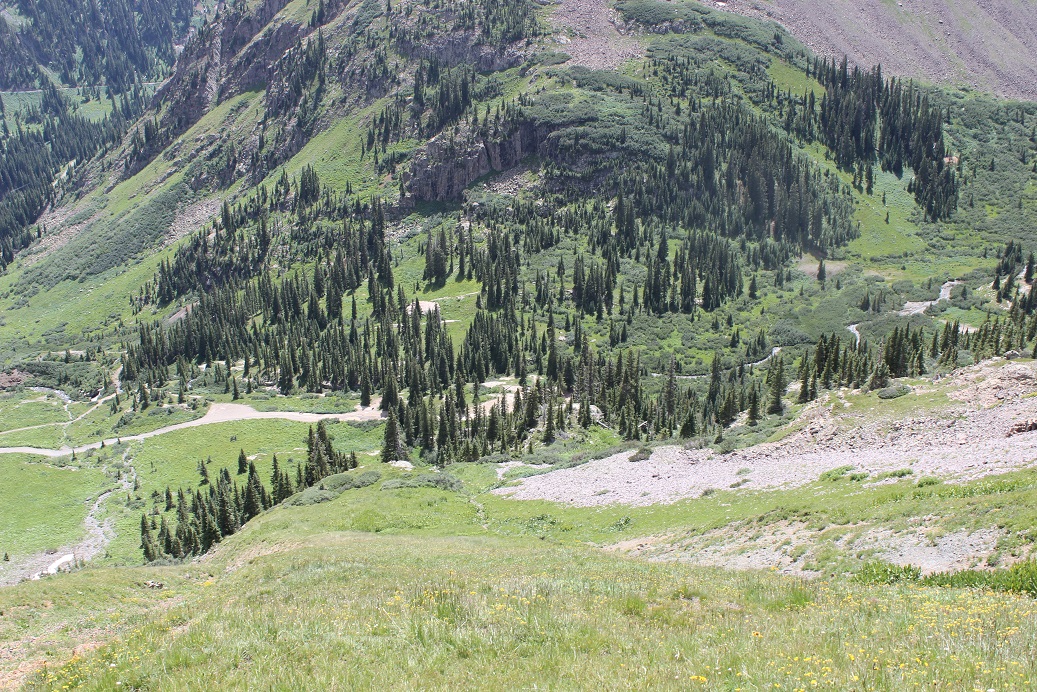
Here’s a look back down the black gully. You can see “Coffeepot” in the upper left corner
Here’s a look at the route from the top of the black gully
I followed the rock rib around until I came to another gully, climbed up, and turned left
From here there’s some rock scrambling. I kept heading northwest towards the summit tower
Ok, easy part over. Now it was time to get out my gear and mentally prepare for this climb. Looking at the route it didn’t look that difficult. I felt confident I could climb both up and down without needing ropes (ha!). I changed into my rock climbing shoes, put on my harness just so I wouldn’t need to at the top, and left my trekking pole and hiking boots at the base of the climb: no need to carry unnecessary equipment.
Here’s the route up
The first half of this climb was indeed straightforward, but as soon as I crossed over to the ‘actual’ climb things got a little more hairy and I quickly came to the realization I was not going to be able to downclimb if I continued, and if I were to go any further, I would need to fully commit. It was either downclimb now or I was doing this all the way. My legs started to shake so I took a steadying breath and reminded myself I’d trained for this and it was within my abilities. I looked up and steadily climbed to the top, being careful with each hand/foothold I chose. I couldn’t help thinking to myself (over and over again) how much easier this would have been if I’d been a few inches taller. I’m happy with being 5’4”, but at times like this being 5’6”+ definitely would have its advantages.
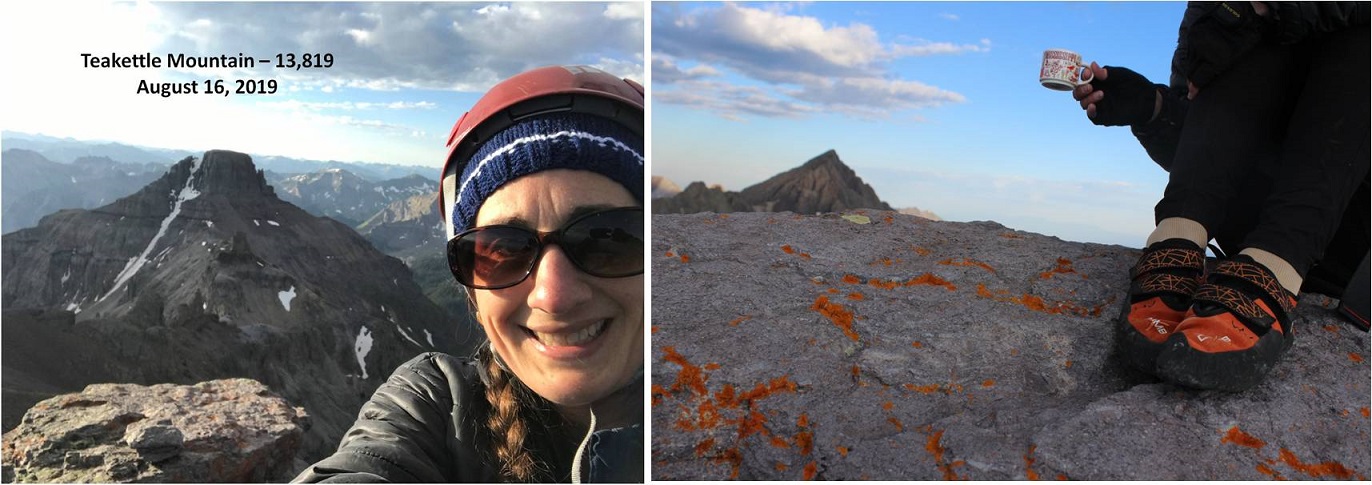
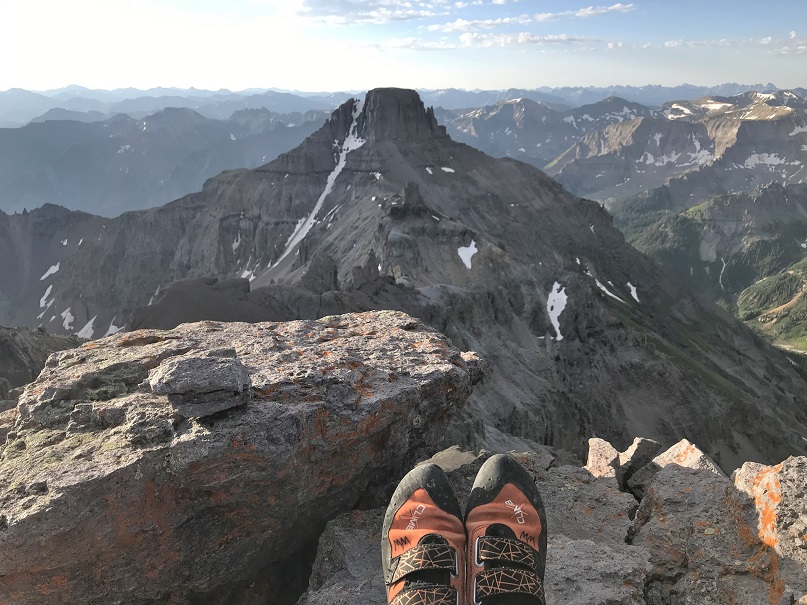
I made it to the top and looked back down on what I’d done. Woot! I’d made it! I dropped my gear and tried to get a few pictures. This wasn’t working, mainly because the summit just wasn’t big enough. So, selfies it is again. I did get a video and a few pictures to prove I’d summited (you’d be surprised how much some other people care…). I summited Teakettle Mountain at 7:15am
Summit Video:
Oh, and I know that’s not a teacup but an espresso cup. I don’t own any teacups and I was planning on climbing “Coffeepot” today as well, so I compromised (also, this is Teakettle, not Teacup… and btw I do love all those teacup photos, not throwing shade here, just rambling). Mississippi is a nod to family. Also, there may or may not be whiskey in that cup. Ok, there was, but only a sip. I still had to make it back down but still felt a bit like reveling: I’d climbed up without a rope!
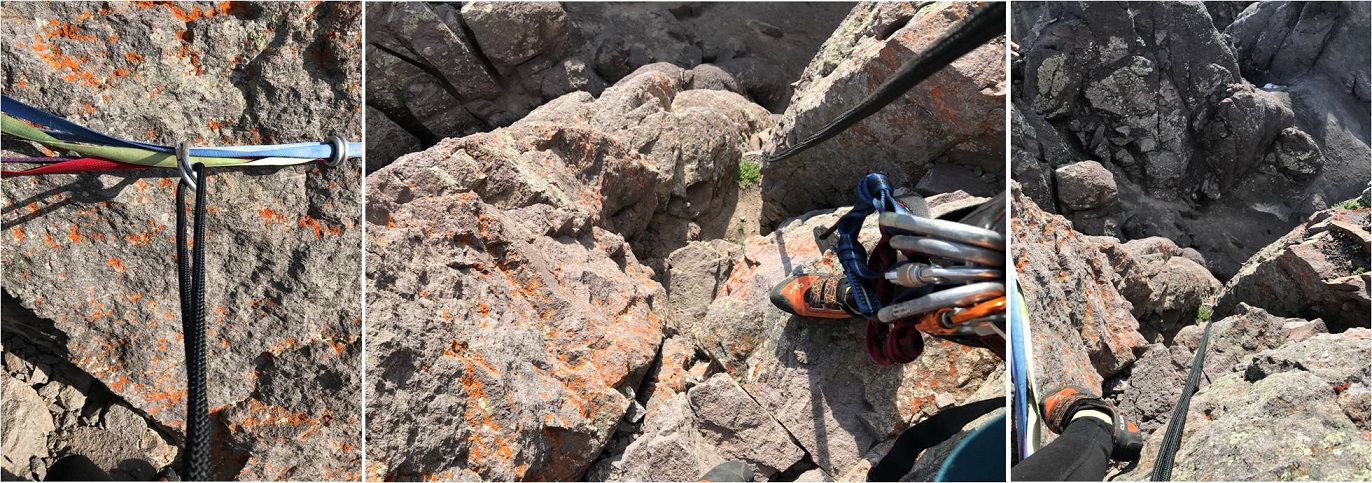
Now for the true test: setting up an anchor and rappelling back down. There were several anchors already set up, and while I’d love to trust someone else’s’ anchor (let’s face it, the odds are in their favor here) I didn’t know how long they had been there, so I decided to set my own anchor up and attach it to the ones already in place.
I was worried I’d forget something. Not that I didn’t know what I was doing, but I was at altitude, hadn’t had any food/water besides a sip of whiskey (personal choice on 99% of my hikes to prevent nausea) and had done a lot of physical activity and I didn’t want to mess up here, so I checked and re-checked everything twice and then a third time and made sure to secure my sling(s) before even beginning. Luckily there was a stable rock behind the anchor for me to use during set-up as well.
Anchor all set up I uncoiled my rope, attached it to the anchor, and threw it in the position I wanted for a rappel.
OK, moment of truth. I put back on all my gear, attached the belay device, leaned back and everything held, so I unhooked my slings, took a deep breath, and leaned back. It all went smoothly and faster than I’d anticipated. So much so that I stopped about 10 feet from the ground and played with the side of the wall, pushing my feet off the rocks and bouncing back and forth for a bit before finishing the rappel. Yes, I was pretty proud of myself when my feet hit the ground safely, and even more so after I’d retrieved and recoiled my rope.
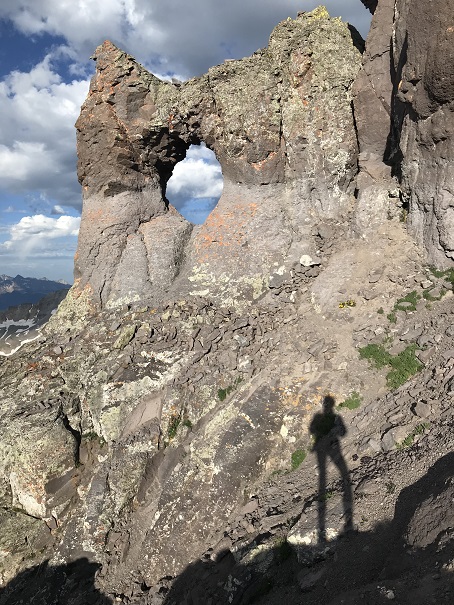
After changing back into my hiking shoes and putting all my gear away I figured it was a good time to celebrate: I actually took a full shot of whiskey (now that the hard part was over) and decided to play a bit with the rock formation. It would have been really cool to get one of those pictures with me in the hole, but there was no way I could set up my camera and make it back into position in time, so I settled for one of my shadowselfies.
I spent a lot more time here than I usually would at a ‘summit’ but I was celebrating: This climb had been several years in the making, I’d put a lot of energy and effort into all this climb entailed, and (with the training help of friends) I’d successfully summited solo. I was going to celebrate!!!
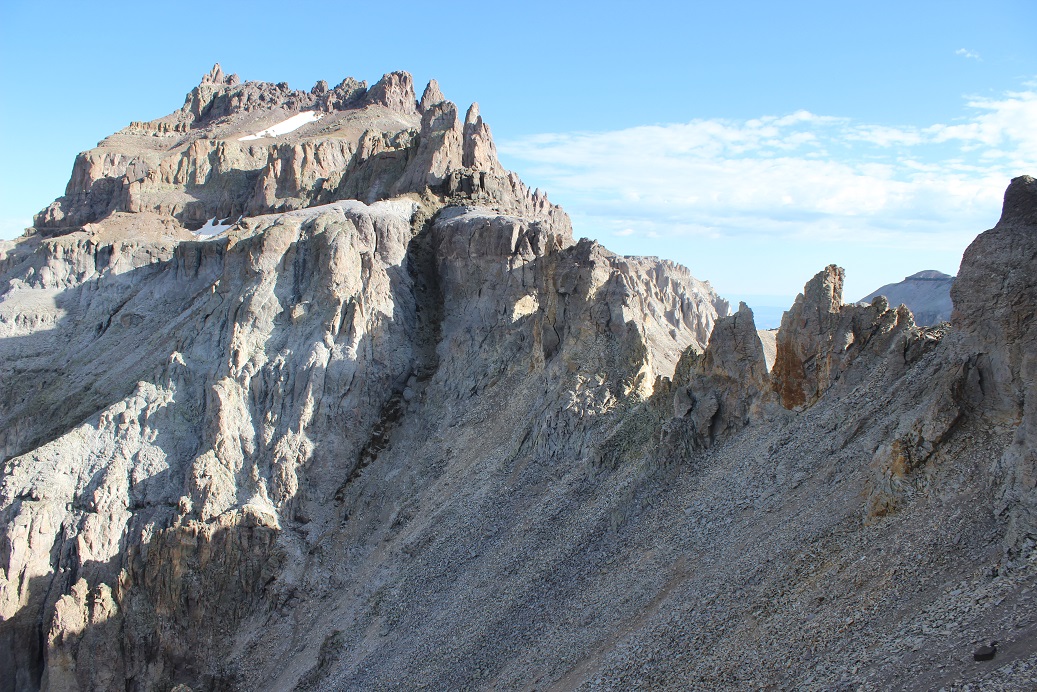
After a few minutes of fun I turned and headed back towards the Black Gully. From the Black Gully here’s the look at the route over to “Coffeepot” (and the route I would have taken over to the Black Gully had I not taken the scree route up)
Here’s a look in the daylight back down the scree route up
From the bench below “Coffeepot” here’s a look back at the Black Gully
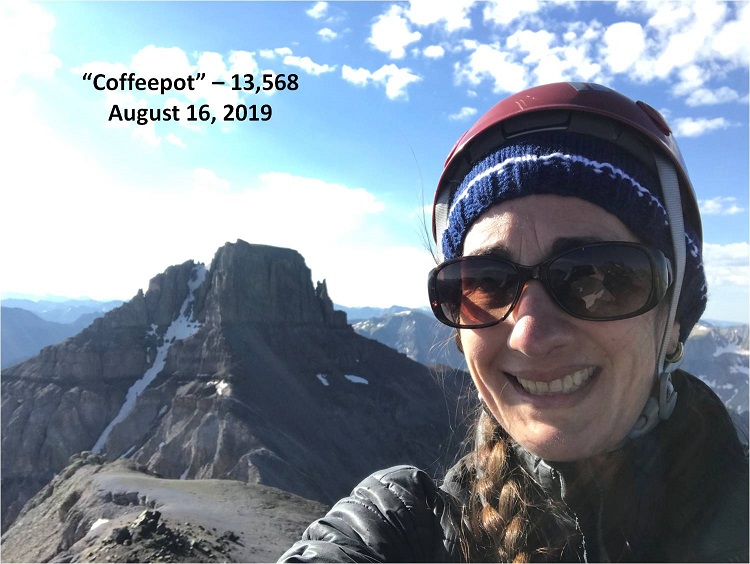
From here I turned left (east) and decided to check out “Coffeepot”. It doesn’t much look like a coffeepot from this angle, does it? It’s basically a quick class 3 climb over some rocks, and a short class 5.0-5.2 climb (per Roach) up a chimney.
I made it about ¼ of the way up the chimney and realized I didn’t fit with my backpack on, so I retreated, set down my pack at the top of the class 3 part, and tried again sans gear. It was much easier this time and reminded me of when I was younger and would climb through a tree hollowed out by lightning. It was a tight fit but I felt very secure as I twisted around and topped out at the top of “Coffeepot”. I summited “Coffeepot” at 8:45am
Video:
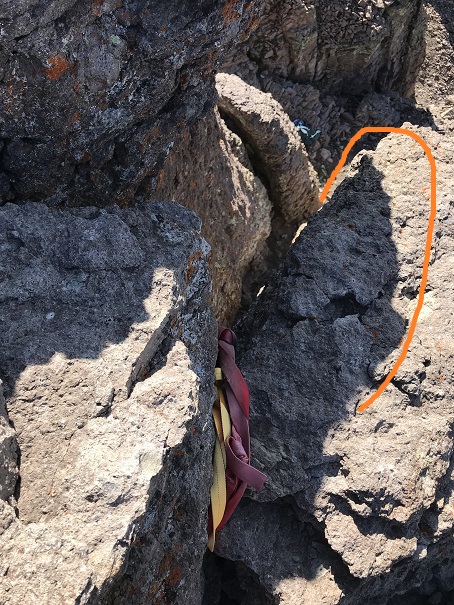
Back down was a bit tricky because I had to go over an overhang to get back into the chimney, but in today’s conditions I felt in no way was a rope necessary (I did hold onto the anchor a bit as I was steadying myself in the beginning, but it wasn’t necessary).
It you feel comfortable at class 4 climbing and are considering trying “Coffeepot” I’d say go for it. Here’s a look at the climbing side of “Coffeepot”
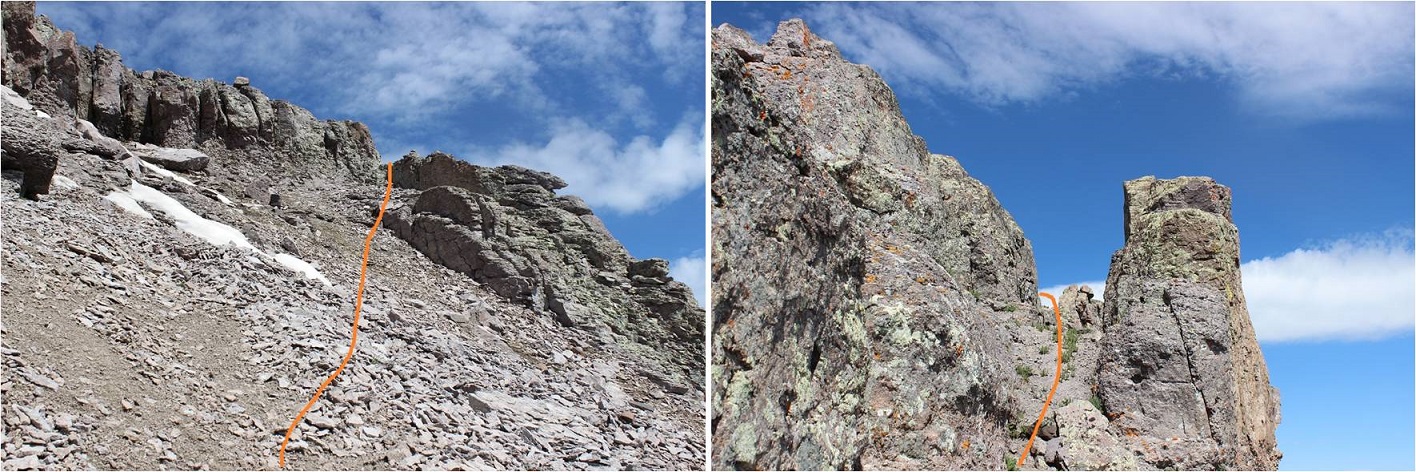
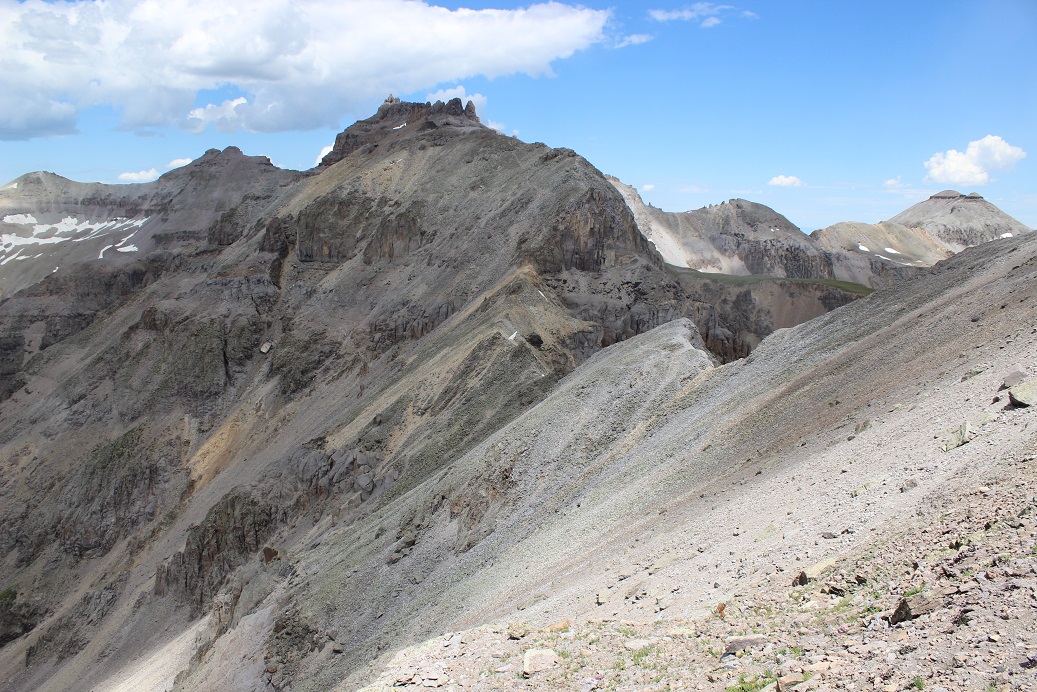
From here I could see Potosi Peak, my next objective.
I was feeling pretty good at this point, having completed two Class 5 climbs. However, this peak actually proved to be difficult because there were some unexpected obstacles in the way. Here’s the initial route down and back up the ridge, over to the corner of the cliffs
From the Coffeepot/Potosi saddle up the ridge was full of very loose talus. I’d encourage you to keep your helmet on for the entire hike, even though some of this stuff is labeled at 2+
The traverse around to the corner of Potosi took much longer than anticipated, but was straightforward.
At the corner I turned left and headed northeast up and over some more loose talus and rocks
And around the south side of Potosi until I came to a gully. This area was well cairned until the gully.
As I rounded the corner and came to the gully I was surprised to find a large mass of snow blocking the route up. This snow was at least 4 feet thick, 30 feet across, and 50 feet vertical, turning the class 2+ gully into a class 3 climb over large, unstable and loose rocks to get around the soft snow.
Here’s looking back down on the snow filled gully area
After the snow there was more class 3 climbing to get to the top of the gully. To be fair, it looked like there had been quite a bit of recent rockfall, including several large boulders.
About 100 feet before the top of the gully I headed up and over this rocky area. The rock is stable but covered in a lot of small rocks, making it slippery to climb. There were cairns here as well.
Almost done, I headed up through more loose talus, through a notch, and turned left for the short push to the summit
There was a bit of snow here, surrounded by squishy mud: the kind that will suck your shoes off if your foot settles on it for any length of time, so I quickly traversed this area to the summit
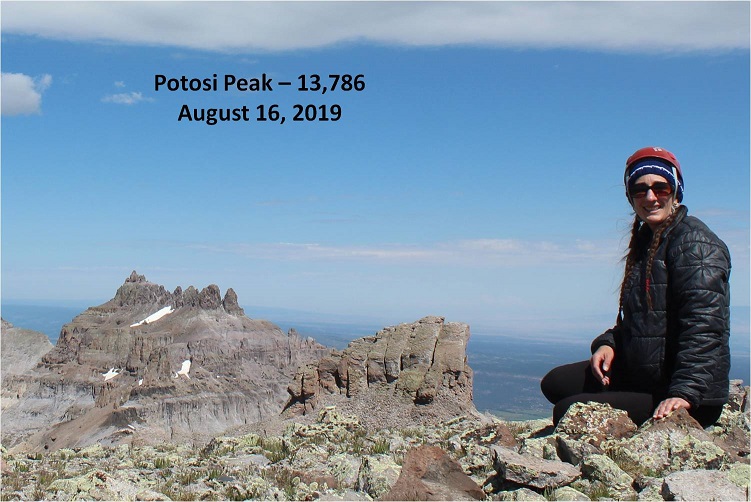
I summited Potosi Peak at 11:05am
Summit Video:
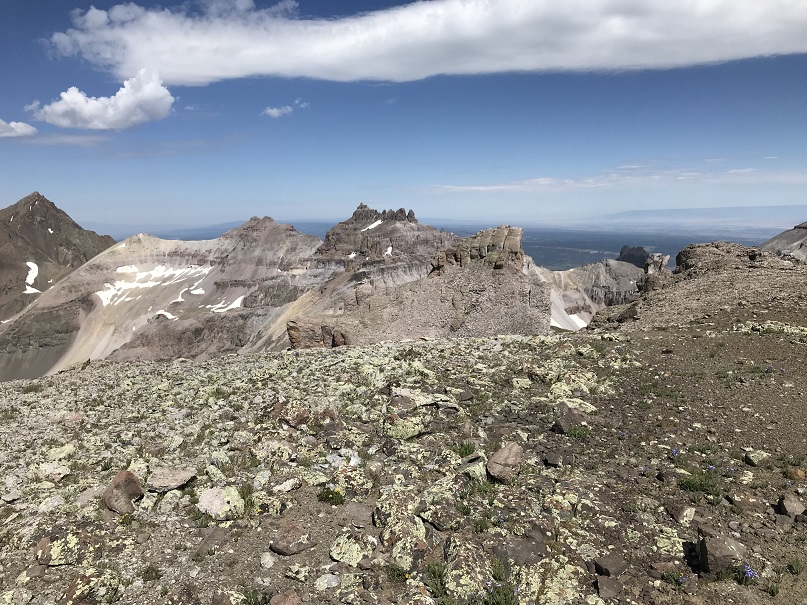
The summit was relatively flat
I pulled out my phone and checked my tracker. It said I’d gone 3.9 miles so far today and that seemed like a lie. I thought to myself I’d need to delete and re-download the app because last week it had stopped on me unexpectedly during my last hike and now it wasn’t tracking accurately… it must need a reboot.
I quickly headed back down the gully, around the side of Potosi, and back towards the Potosi/Coffeepot saddle. This is where I made my first mistake: I had the option of climbing back up to Coffeepot and taking the traditional way down, or going straight down from the Potosi/Coffeepot Gully. I chose the gully (I’d advise you to instead head back up to “Coffeepot” and then down).
In any event, I made it to the saddle and turned to head down the gully, aiming for the most stable sections of scree, navigating between rock formations
Here’s a look back up at the decent route I took from the saddle
When I got to the base of the rock formations I looked ahead and could tell I did not want to continue straight: The gully turned into a waterfall and I could see snow at the base. It did not look safe. (Solid line). That was ok though because I had beta from a friend telling me I could just traverse over the hillside and I’d eventually run into the trail that led up “Coffeepot” (dotted line). I figured nothing could be worse than the talus on the ascent, right?
Here’s what I was trying to avoid
Let me tell you, this beta was FALSE! Even though it looks like you can traverse over, you cannot. Well, I did, but went through a lot of very sketchy terrain. Visually it looks like you can cross on tundra the entire way but there are rock gullies you can’t see from here, and in fact can’t see until you’re right up on them. Yes, I checked beforehand it looked like it went on a topo, but on the ground it wasn’t working. There were gullies everywhere that were extremely difficult to cross. Every time I made it over one I’d encounter another. I didn’t even feel comfortable stopping to take pictures. It was frustrating because I could clearly see where I needed to be, I just couldn’t get there. Please don’t take this way. It looks like it goes, and maybe it does in winter, but it wasn’t safe. My advice is to skip this decent route all together and hike back up to “Coffeepot” and then down. It took me a lot longer than it should have to descend, and there were many times I almost turned around and retraced my steps back up to the saddle (which I was very close to doing before figuring out the route). Oh, and there was graupel involved. I was ecstatic when I finally did link up to the ascent route and made my way down to the parking lot.
Here’s a look from the road at the route I don’t advise you to take
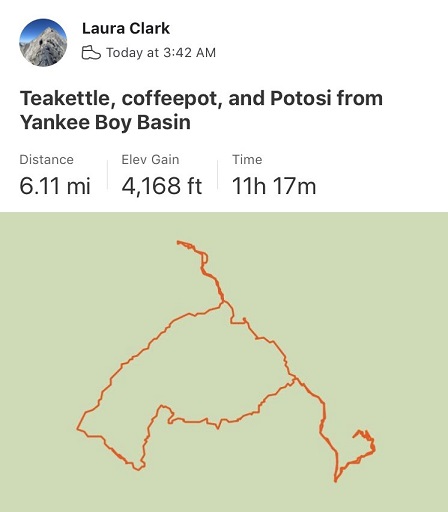
I made it back at 3pm, making this a 6 mile hike/climb with 4168’ in elevation gain in just over 11 hours. And yes, my tracker was correct (it just felt like so much longer due to all the elevation gain).
All in all, I considered today a great success: I’d summited Teakettle solo, tagged “Coffeepot” and Potosi, and learned a lot about trusting someone else’s’ beta. I drove the 6 hours home, took a bath, and then took my daughters out to a late dinner to celebrate my oldest being home from drum corps and my youngest completing her first week as an upperclassman.
I changed my mind several times before setting off on this hike. This is not the peak I’d wanted to do today, but after some last minute research I realized the one I really wanted to hike isn’t achievable this time of year. So I was bummed, but also glad I hadn’t attempted the peak just to have to turn back (that’s happened to me too many times this year as it is).
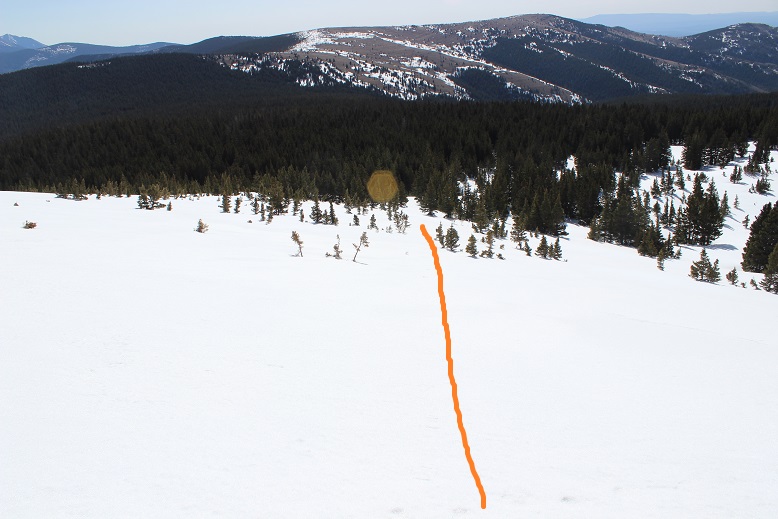
I arrived at the winter closure at 4am, surprised to find there was a winter closure? I was under the impression the winter closure was the Blue Lakes Campground, but here I was, faced with a locked gate 2 miles from the lake. Oh well, this was supposed to be a short hike, so I welcomed the added mileage.
I parked at the picnic area and was the only one there when I arrived. I’m not sure this area gets much winter use.
The dirt road up to the campground is a well maintained 2WD road. It was clear of snow in places and covered in a few feet of snow in others. It’s going to be a while before the FSR 422 road is opened this year.
Once I made it to the campground the snow coverage really picked up. Now the tricky part was trying to find the trail in the dark.
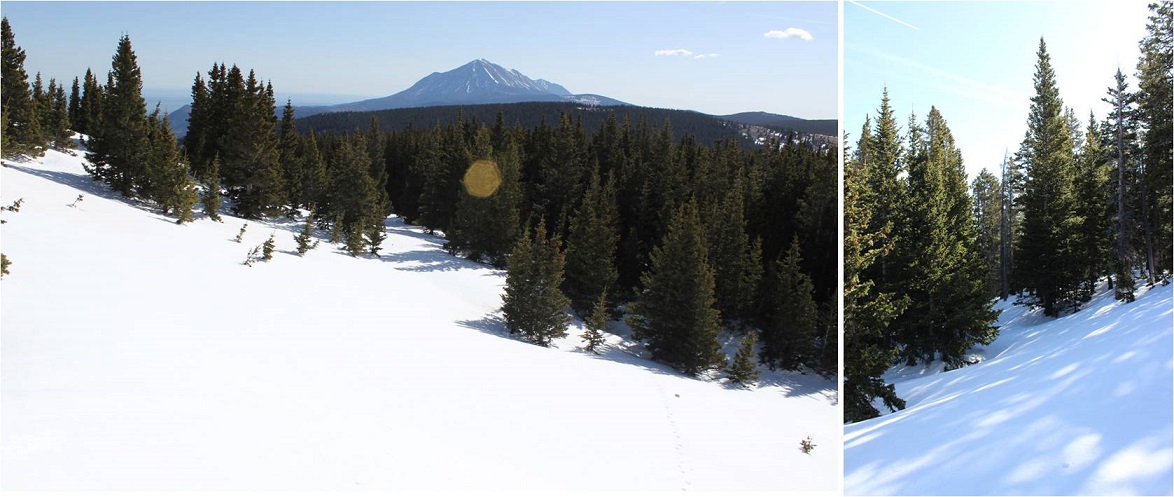
I’m sure this is a well maintained trail in the summertime, but it didn’t look like anyone had been out here in months, and certainly not since the last snow. At times the trail was obvious because there was a clear path through the trees, but most of the time I had to just keep heading southwest up towards treeline, making my own trench. There seemed to be several switchbacks.
Once at treeline the rest of the route became obvious. I found a path between the trees
And then gained the ridge and followed it up
I took a shadowselfie because I could, and turned and watched the sun rise over West Spanish Peak
Once on the ridge I started to get worried. What I thought was going to be a very easy hike now included an unforeseen obstacle: a HUGE cornice covering the entire summit. At least it looked stable.
The closer I got the larger the cornice became
I tried my best to find a route up that didn’t include the cornice, but that just wasn’t going to happen, so I aimed for the route with the least amount of danger. Sticking to the left I thought I could avoid most of the cornice and climb straight up a wall of ice. Here’s the route I took
The snow kept getting steeper and steeper, and the last 50 feet or so I continually used my ice axe and wished for my helmet. I just kept looking ahead and plugged in my ice axe, repositioned myself for stability, and hauled myself up. The last 10 feet were brutal, but I was able to hoist myself up over the lip of the cornice and found I was on a lot of solid snow with a windblown summit just beyond.
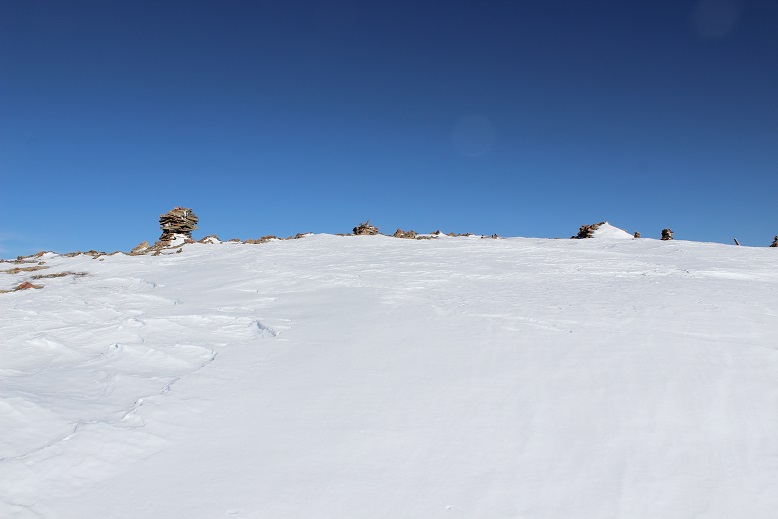
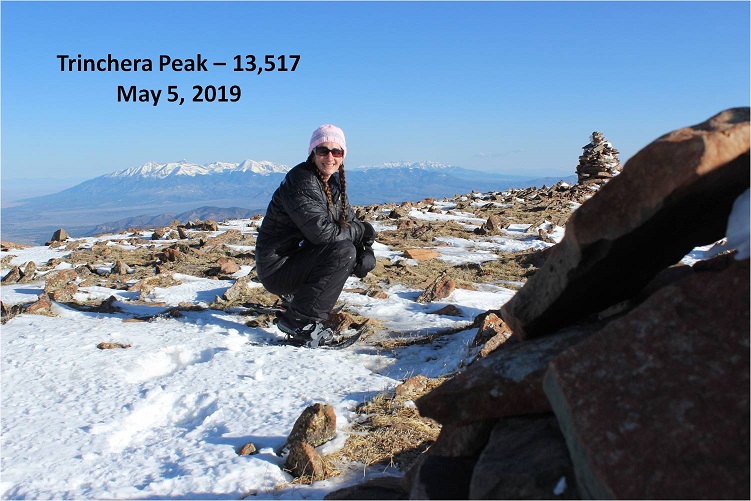
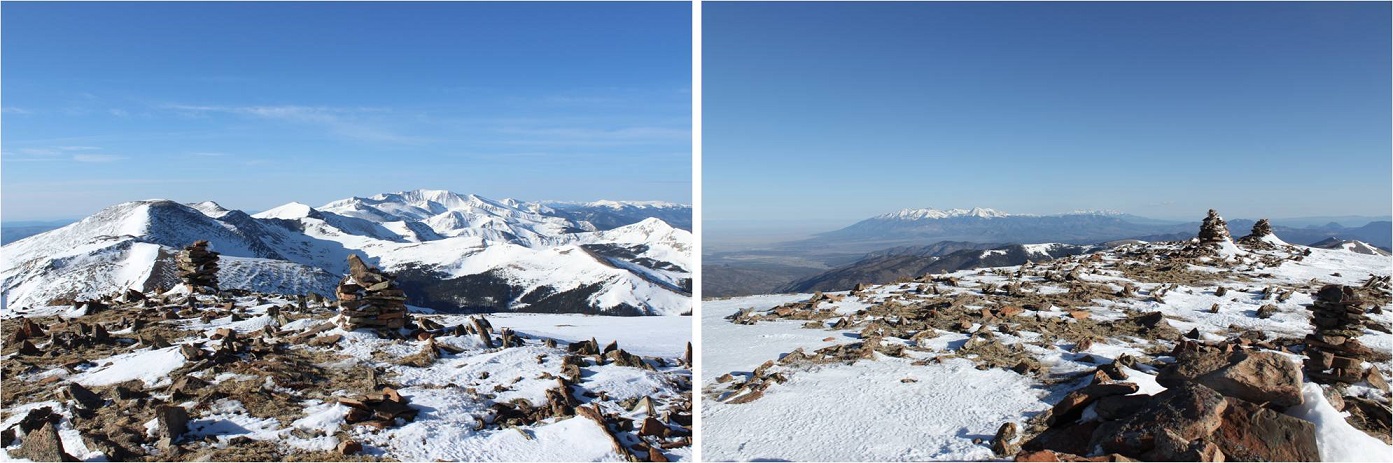
I summited at 7:30am. I tried not to get too excited about what I’d just done as I took a few pictures
I’d intended on summiting a few other 13ers today (Leaning South Peak, Leaning North Peak, and possibly Cuatro) but the extra miles I hadn’t expected from the winter closure meant I was behind schedule and unfortunately, the snow was warming up. As I was debating go or no-go I looked for a good route towards the other 13ers, but all I could see were cornices blocking my way down. Hmph. Oh well, I’ll just have to make another trip out here: In the summer when there aren’t any cornices.
Oh yeah, I still had to get down this cornice. I took a look over the edge…
Wow, that was steep! Here’s a look at the route from the summit back to treeline
I turned to face the cornice to head back and immediately realized snowshoes weren’t going to cut it on the way down. They’d been great for stability on the way up, but they would be in the way on the way down. I switched to crampons and was immediately pleased with my choice. OK, now to head down. The first 50 feet or so were harrowing to say the least. Wearing snowshoes on firm snow I hadn’t made steps on the way up but they were needed on the way down. So I spent a lot of time kicking in steps, balancing, and slowly making my way down off the slab of ice. I stopped when I felt safe and took a picture. The steepest part is circled
I was thrilled when the crampons were no longer needed and switched back into my snowshoes. I took a second to breathe and looked back at what I’d just done. Wow! Yes, much, much steeper than this picture makes it look. That had been an adrenaline rush!
Here’s the route back down to the trees
The snow was quickly becoming soft and was fun to walk though. I was very, very glad I’d chosen to head back and not summit those other 13ers: it was warming up fast!
As I hiked down I couldn’t help but think how this looked like a great mountain to ski, yet it was obvious no one had been here to do so in quite a while. There was continuous snow from the summit to treeline and honestly, all the way back to the campground. It seemed a shame no one was out here enjoying the skiable terrain.
I followed my tracks back to the “trail”
And through the forest
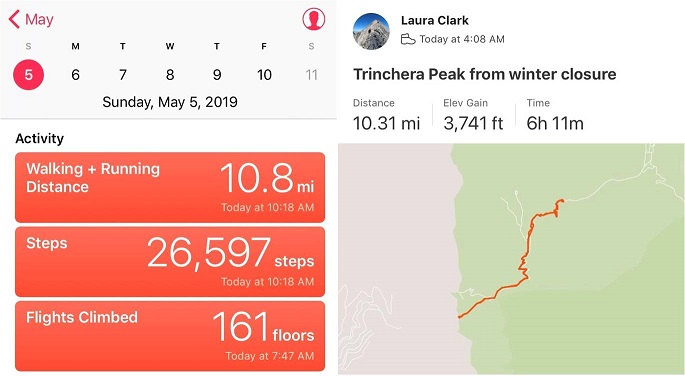
I made it back to my truck at 10am, making this a 10.5 mile hike in 6 hours.
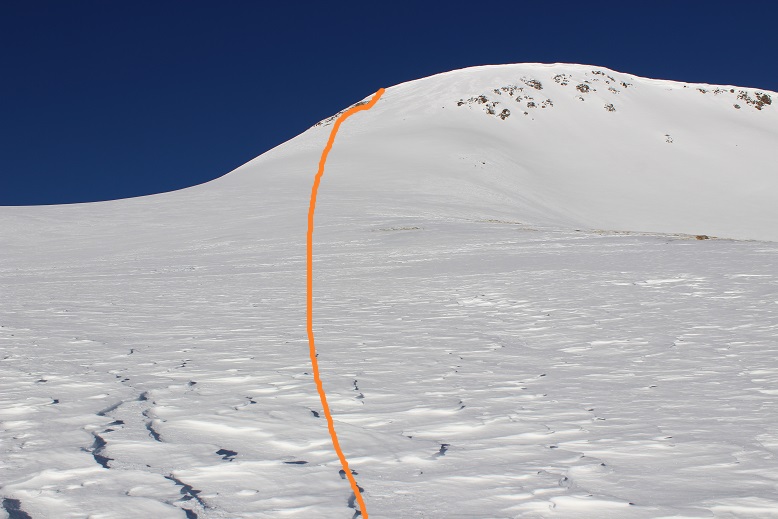
Today was fantastic! All I can say is this peak needs more attention! It was a beautiful day, which helped, but when I made it back to my truck I didn’t feel exhausted or even tired or sore. The ice axe and crampon use had been a fun surprise, and the 10.5 miles had spread out the elevation gain nicely so I didn’t feel it much. It’s a shame this peak doesn’t get visited more often. If it’s on your list, you should move Trinchera to the top!
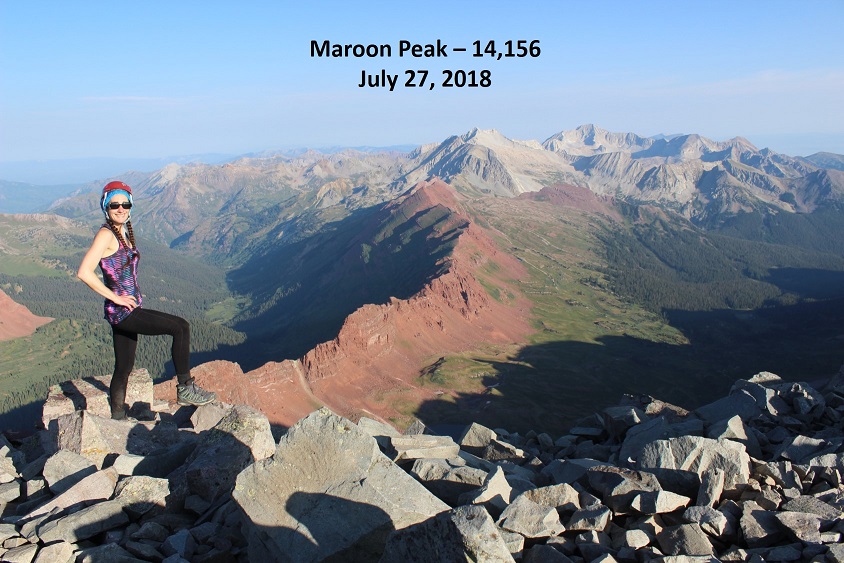
Today’s peak wasn’t much of a mystery: With 2 left and good morning weather and a finisher already selected, Maroon Peak was my only option. I left my house at 10:30pm and made it to the trail head at 3am. Note: I made it on the first try this time!!! There were several other hikers already in the parking lot getting ready to hike when I got there. I jumped out of the truck to get a head start, putting on my gloves as I walked.
Ugh! I’d brought two left gloves! No worries though, I just turned on inside out: Problem solved!
The best part about hiking this morning in the dark? The (almost) full moon! If you’ve never hiked under a full moon you should. It’s fantastic and amazing and difficult to describe. You don’t need your flashlight, as the moon lights up the trail with a glowing mist. The moonlight was reflecting off the lake and mountains. I so wished I had a better camera to take pictures of the moon and stars. Also, there was a rather loud bird on the lake, which was weird for 3am.
I passed crater lake and did my best to get as far ahead of the hikers behind me as possible. I was about ¼ a mile ahead of the first group of hikers when I got worried: I’d made it to a creek, which meant I’d missed the turnoff somewhere. I should have been going uphill. Drat! So I backtracked and saw a string of flashlights starting up the mountainside. Ugh! I’d lost a good half mile of distance between me and the hikers behind me! Now we were all kind of clumped together. On the way back I took a picture of the junction. Can you tell which way I should go? Let me tell you, in the dark it all looks the same….
This is the way you’re supposed to go
In any event, I politely rushed past them as best I could and was on my way up the mountainside. The trail up to this point was very well maintained and has great signs
But not for long. It quickly turns into a slippery scree and gully trail that goes for 2800’ with some rocks thrown in. In the dark I noticed 3 flashlights ahead of me? Hmmm…. I hadn’t noticed them before? Maybe they’d gotten a super early start?
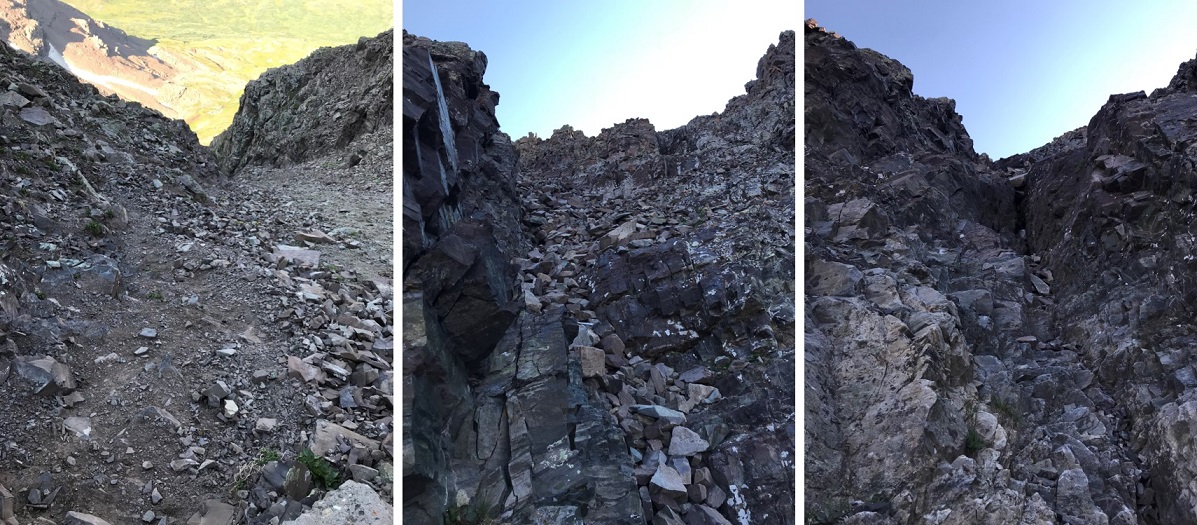
Your goal is to hike up this
Once you reach the top of the scree and gully trail you’re at a ridge that’s also full of scree and dirt
Here I saw goats. Side note: Last year I saw 1 goat. Just 1, and this year I’ve probably seen 50. Insane!
After I saw the goats the sun started to rise! I stopped for a bit just to enjoy
At the top of the ridge crest I met up with the three other hikers. They’d started at 3:45am from the junction (yes, the one I’d missed) and were impressed I’d caught up with them. We had a great chat, and I was on my way, intent on route finding alone (I like route finding… it makes me feel like I’ve “earned” the hike).
OK, so after the ridge crest this is the next obstacle…
The best way I can describe this is a lot of loose rock, and just keep going up and to the north. There are several routes to the top, but I tried to stick to the “standard” route. Several gullies are involved. But first you encounter a chimney. This was a great chimney to climb: very stable with lots of hand/foot holds
After this just follow the cairns… see them up there? Yes, those cairns.
I kept following the ridge north and came upon the two gullies. I’m not a fan of gullies. Either one of these gullies is climbable, but when I looked at them the first gully looked like it had more stable rock, and the second gully had that sand/scree mixture I dread. I chose the first gully. My instructions said to get a good look at the route you want to take before doing it because once you’re in it it’s difficult to figure out. Those directions were right. Take some time to study the route you want to take before diving in. Here’s the route I took. (I was very happy with this route…)
OK, more ledges and more going north until you hit another gully (big sigh). This gully had a lot of sand and large rocks, but if you hug the right side you have stable hand holds.
At the top of the gully is a notch
Aim for this and turn left. More ledges…woohoo! Actually, I like this type of climbing! These were taken from the way down (so you can see depth with other hikers). The ledges just keep going, and going, and going. Just aim up
Eventually you’ll reach a ledge. Follow that ledge to the summit (it has cairns)
I was so excited when I reached the summit! The climb had been intense but FUN!!! From the summit I could see Snowmass and Capitol
I took a summit selfie to prove I’d summited
And headed back down. I saw tons of people coming up as I was coming down! All those flashlights form earlier in the day took on faces. Some people looked more than prepared for this climb, and others looked scared out of their minds. I helped several with route finding. Just for fun, here are a few of the gullies on the way back down
I talked to several more hikers, and just after taking a photo of a group on the ridge lost my phone! I spent about half an hour trying to find it (I did, but backtracking up stinks!)
I made it back to the first ridge and noticed a marmot absconding with someone’s hat and water bottle. Marmots are notorious thieves, stealing everything they can get their paws on. I was surprised someone had left these items without putting something (a rock?) on them to hold them down. It was comical to see the marmot running away with them. Sorry to the owners, the marmot was actually pretty quick and far away from me when this happened, or I would have tried to stop it
I didn’t see any more goats on the way down, but I did see a lot of late and ill prepared hikers. Most had no clue what they were getting into, as they’d just come up for a “day hike”. Water? Check. Anything else (hat, jacket, map, food, sense of direction/upcoming weather etc?) Nope. They didn’t even know climbing as involved. I guess this is how people get into trouble….
Anyway, as I hit the final ridge I put on my microspikes for the scree/dirt descent. I’ve heard too many stories of people slipping here and breaking/spraining a wrist or ankle to take a chance without them. If you don’t use microspikes on scree you totally should! It makes a world of difference: I didn’t slip once!
I was down the hillside in no time and got a good look in the daylight at the small creek crossings
And the Bell Cord Couloir (for those interested)
Crater Lake looked really low…
And check this out!
There were tons of people on the trails today! Tons! I made it back to my truck at noon, making this a 14.8 mile hike in 9 hours.
The decision to hike Crestone Needle today didn’t come until late yesterday. I’d had this day on the calendar for this particular hike for over a month, but the fires in the area had me hesitant. I did a lot of online research and was 80% sure the road to the trailhead I needed to take was open. That was a chance I was willing to take. What I wasn’t thrilled with was the possibility of inhaling smoke for the entire hike. The weather looked good, and in the end I chose to take the hike because it’s my last 14er I need to complete the Crestones and I was afraid if I waited too long the fire would expand and I’d miss my opportunity to hike.
I woke up at 12:15am and drove to the trailhead. All roads were open from Colorado Springs South, but there were more deer on the roads than I’ve ever seen. I’m assuming they were displaced because of the fires. Most deer I see when driving at night are female, but these were mainly male deer in the velvet. I was just glad I was the only one on the road so I could drive cautiously and stop when needed.
I turned South on Colorado 69 and saw a flashing sign indicating the highway was closed ahead and only open to residents. I crossed my fingers and drove on. I was able to make it to the turnoff (Colfax) before the road closed. The drive in past the 2WD trailhead was worse than I remember it being back in April (but not worse than last year at this time). The drainpipe was a bit steep.
When I arrived at the trailhead at 3am the parking lot was almost full, which I’d expected even though it was a Wednesday morning. After all, it was the 4th of July! There was a lot of activity in the parking lot as people were getting ready for their respective hikes. I hate leapfrogging people, so to get a head start I jumped out of my truck and hit the trail, grabbing a bagel to eat on the way. There was no smell of fire in the air and I hadn’t been able to see flames the entire drive.
At 3:15am I signed the trail register and was on my way. BTW, the trail log book is in serious need of repair/updating. The pages are mostly loose, and there’s no clear order to signing it. I found a blank page and signed in, but if there was an emergency (say, a fire) and they needed to know who was hiking in the area it would take them a very long time to figure it out.
This is my third time this year hiking in through the South Colony Lakes trailhead. I have to say, it’s much easier and faster without snow to navigate through! It’s amazing how easy the trail was to follow without snow, and how difficult it is to navigate when snow is present. The hike in didn’t take me long at all. I was way ahead of schedule. Last time I was here the creek was frozen over and there was snow up to the footbridge. Today there was no snow to be seen.
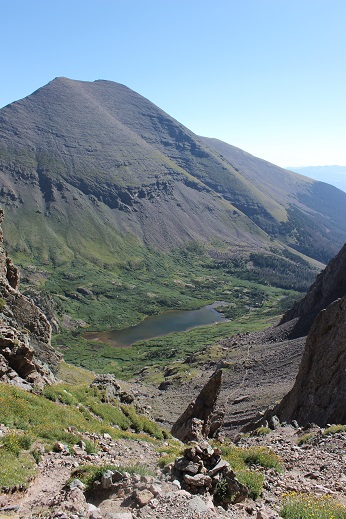
I made it to the South Colony Lakes and saw many tents lit up as people were preparing for their hikes today. It looked like there were dozens of people camping by the lake. I made it up Broken Hand Pass around 5:30am and looked behind me at the trail of lights from hikers taking the pass as well.
The only other time I’ve hiked Broken Hand Pass it was filled with snow and there was no clear path to follow, so I crossed the slope wearing snowshoes. Today the path was clearly visible, yet harder to hike without traction. I kind of missed the snow here! As I looked around me at the slope I realized back in April I must have been hiking on over 10 feet of snow! What a difference the snow made!
The trail up and through Broken Hand Pass is very well cairned. I now know why those cairns are so big! They looked small (or were non-existent) under the snow.
Last time I did this hike I forgot to put on my helmet until it was too late and I was in a position where it was too dangerous for me to take my helmet out of my pack to put it on, so this time I put it on before it was needed. Here are the first class 3 moves up the pass.
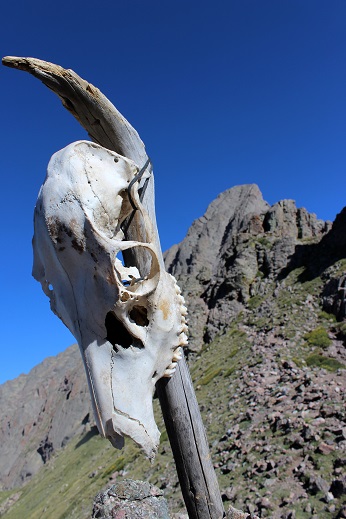
I made it to the saddle just as the sun was coming up, and when I looked over to my left I saw a skull that wasn’t there last time, placed on a large stick. Of course I went over to investigate. As the sun rose I made friends with Skully and got a few selfies with my new pal. He seemed to be keeping sentinel over the area.
I was way ahead of schedule at this point, but decided to keep hiking so I wouldn’t get cold. I followed the ridge and went to the heavily traveled trail to the right, and realized it cliffed out, so I turned left and encountered more class 3 moves.
The trail was well marked, although sometimes it split into two parallel trails. They both followed the South side of the mountain and ended in the same place. Here’s a look back at the trails and Broken Hand pass.
After hiking the slope the trail abruptly stops. I knew this was going to happen, but was surprised at how abruptly it did just… stop. I mean, it just ended at a rock.
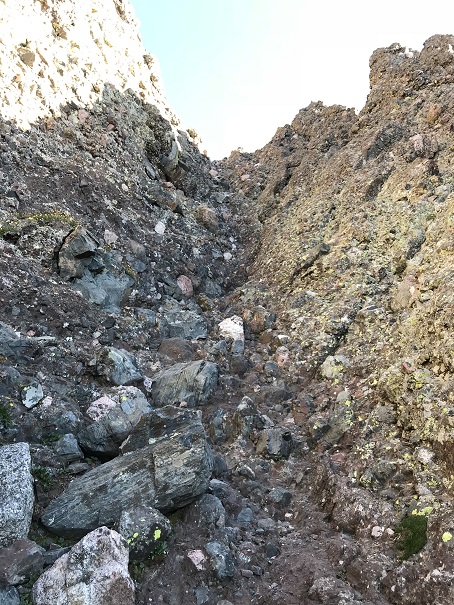
I looked up and down and then got out my directions. I needed to hike down about 75 feet, then over to the east gully. Here’s a picture of the route before me.
This is where the fun began! Climbing the gullies is a lot of fun! There was exposure, sure, but plenty of hand and foot holds available. I once again praised myself for joining a rock climbing gym and going weekly. This was child’s play! While this class 3 scrambling should have been challenging, for me it was really just fun.
The route wasn’t heavily cairned, but there were enough cairns in just the right areas so you knew you were on the right path (which I prefer to multiple cairned paths). For me the crux of the climb came at the dihedral, where you switch from the east to the west gully. The dihedral was obvious to find but difficult to cross. It’s much larger in width and depth than this picture suggests, and my task was to climb on top of it, locate a cairn, and cross the rib. There was a trickle of water running down its base, just enough to make climbing up slippery with wet soles.
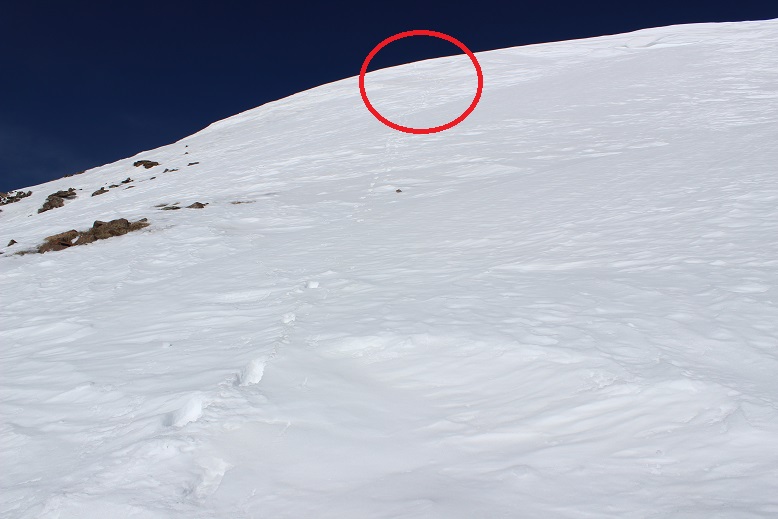
I’m not a large lady, and while I’m pretty flexible, here my 5’4” height was a hindrance and flexibility wasn’t much help. There were hand and foot holds all over this mountain, except in the dihedral. The rock here was smooth and there weren’t many places to grip. The width was just far enough apart where I couldn’t stretch across (although I’m assuming it wouldn’t be much difficulty for someone over 5’10” to navigate). So I was stuck: I couldn’t climb up the dihedral to cross over, and I couldn’t climb across the gap either. I searched and located the cairn on the rib above me and to the left. I knew that’s where I needed to be, but getting there seemed impossible! (The cairn is in the red circle)
I took a deep breath. This had to be traversable. There had to be a way across, I just wasn’t seeing it yet. I went back to where the dihedral was narrowest and tried again. There were a few stretch moves, but I was able to successfully climb up the wall and back over to the left where the cairn was located. Woot! I’d made it!!!
This is where the real climbing began! I climbed up the ridge and aimed for a notch. Here’s a picture from my way back down when I passed three male climbers heading up (who’d had trouble with the dihedral too, so it wasn’t just me!).
The exposure here was real! One of the other hikers told me this part almost made him lose his breakfast. Personally, I loved it! Yes, the exposure was extreme, but there wasn’t much danger from loose rock and there were plenty of hand and foot holds, so as long as you didn’t slip and fall you were fine.
I couldn’t help but thinking how awful this route would be with snow, and once again praised myself for not trying this peak after completing Crestone Peak last April and the waterfalls that were present then. It wouldn’t have ended well.
There were several large gullies to climb, all with the same secure rock and lots of holds.
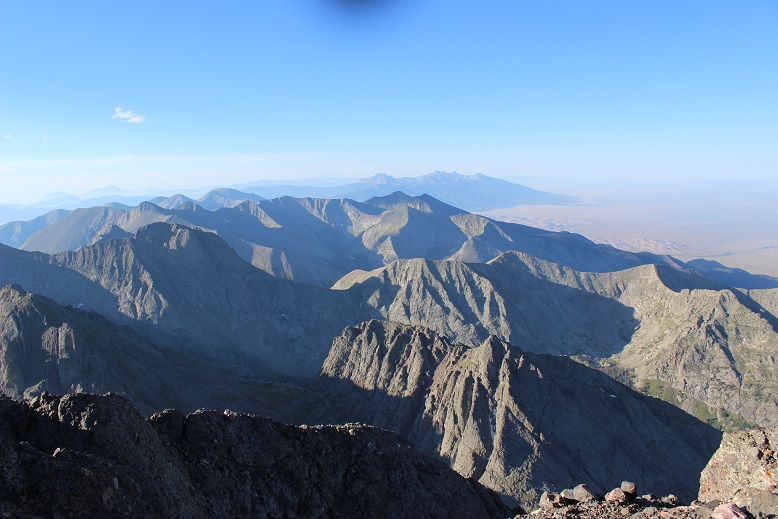
At 7:20am I summited! I had a great view of Crestone Peak
As you’ll notice from the video, there isn’t evidence of a fire anywhere
For the first time while hiking a 14er I was able to see the Sand Dunes in the distance
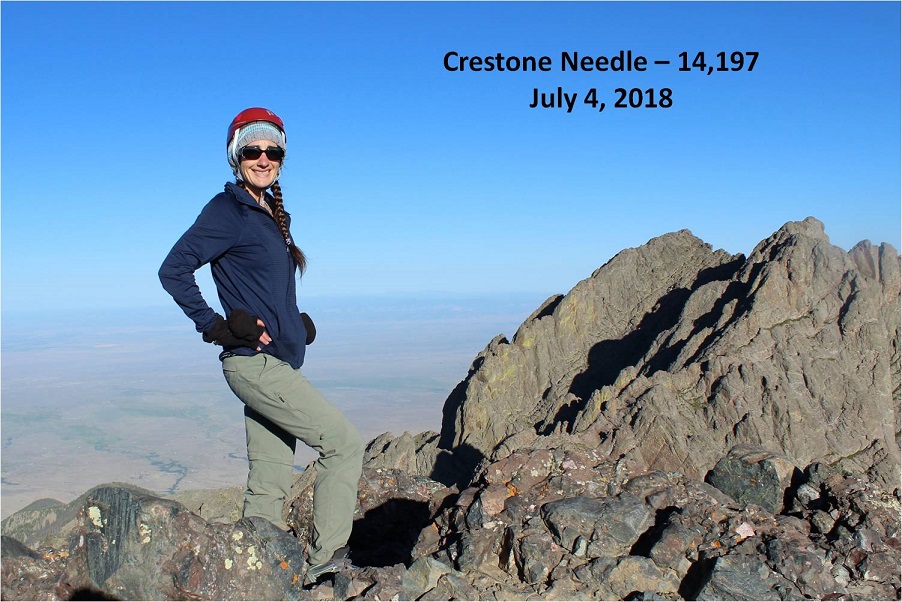
I took a summit selfie to prove I’d summited
And while it was still early I headed back down because I was only half way through with this hike. It was too early to celebrate yet.
Remember all those steep gullies I’d climbed up? Well, now it was time to climb back down them. They were pretty steep, so I turned and faced the wall and began climbing down, once again grateful for all the holds.
Thankfully the dihedral was much easier to navigate heading down than up. I just pressed my stomach on the wall and slid off and down into the open space below, using friction for balance, knowing I didn’t have far to fall if I did.
I have to pause for a second here to talk about down climbing. I may not know a lot about rock climbing, but I do know I have better balance when I’m facing the wall on the way down. I passed a hiker who was heading down these gullies feet first. He was continually off balance and honestly scaring me.
So I engaged him in conversation: “Have you tried turning and facing the wall when you down climb? You’ll thank yourself for it!”
I got no response, so I figured he must not have heard me. We parted but caught up to each other once again in another gully, where he was once again tip toeing down and sliding feet first.
I tried again: “Do you rock climb?”
Hiker: “No”
Me: “Oh, well if you turn and face the wall you’ll find your center of gravity isn’t off and the gully will be easier to navigate”
Once again, no response and he continued doing what he was doing. All I could think was “He’s going to fall and I’m the only one anywhere near him. He’s going to slip and tumble headfirst down one of these gullies and I’m going to have to rescue him because I’m the only other person out here”. I’d already warned him twice and he hadn’t listened. I decided to just sit and take a break for a while and let him get far enough ahead of me where we wouldn’t pass each other again. This way I wouldn’t have to watch him scare me half to death. I’d just keep an ear out for him falling. (Luckily he never did)
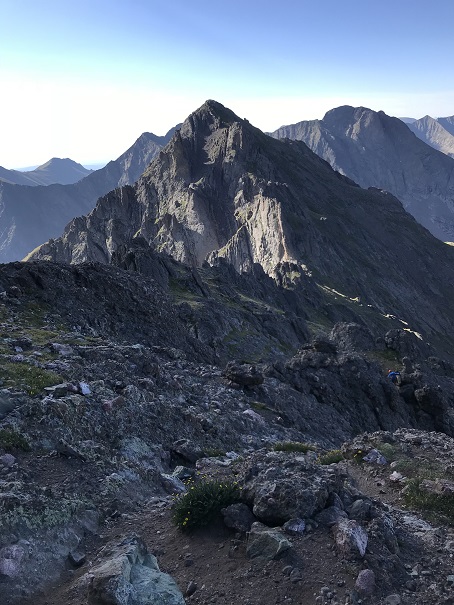
I made it back to Broken Hand Pass at 8:40am. The sun still hadn’t made it over the ridge
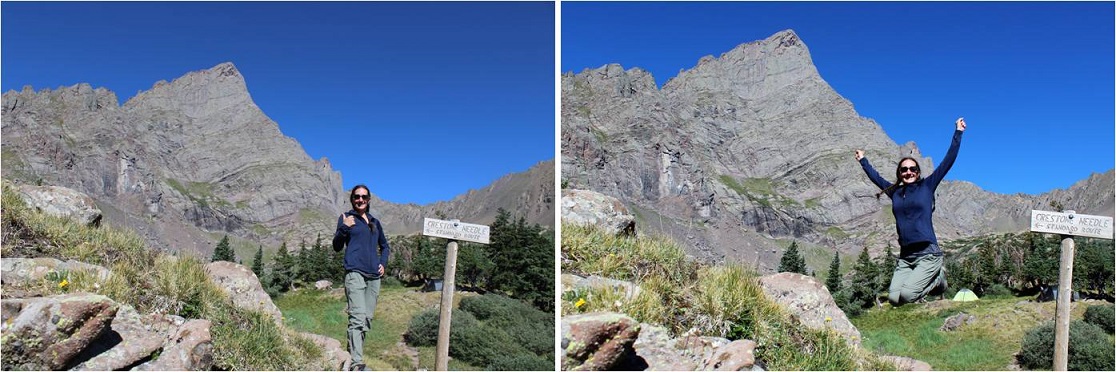
I waved to Skully and got a picture of him with the Crestone Needle in the background
Ahead of me were Humboldt and Broken Hand Pass. I was completely ready for the class 3 moves back down and got to it.
About 1/3 of the way down I heard a very loud and deep chirp, looked up, and saw a rather large marmot ahead of me skid to a stop on top of a pile of rocks. The rocks then went tumbling down the pass, making quite a racket and causing a rockslide. Wow! That marmot was a jerk! He’d just put about 4 people in danger of getting brained by rocks the size of my fist. I called down to the hikers below me, made sure they were ok, and blamed it (rightly so) on the marmot. See people? Wear your helmet, even if you’re the only person on that mountain!
I passed quite a few hikers on the way out. South Colony Lakes is a trailhead for multiple 14ers, as well as a great place to backpack and fish. Most people I passed who’d been there for a few days had no idea there was a fire or that the roads were closed.
As I hiked the last few miles out I marveled at what an awesome day it was. The weather was gorgeous, the wildflowers were just starting to bloom, the trail was in full summer conditions, and I’d made a quick and successful summit of what’s considered the 6th most difficult 14er in Colorado. So why wasn’t I jump up and down happy? Well, I kind of was. I took a few celebratory photos once I was back near the lakes.
But I wasn’t euphoric as I had been for many other hikes. No fist-bump, high five kind of feeling. This hike had been too easy. Don’t get me wrong, it’s not an easy hike, but it wasn’t as difficult as I’d anticipated and been looking forward to. Yes, there was exposure. Yes, there was climbing involved. Yes, it was a long hike with elevation gain, but it wasn’t as technical as I’d anticipated and everything I did was well within my abilities. There wasn’t even any snow to navigate!!! I wasn’t tired at all and even considered hiking up Humboldt to make the day a little more aggressive. Maybe I wasn’t tired because I wasn’t carrying all the stuff I’ve needed lately (crampons, ice axe, snowshoes, extra jacket, etc)?
I know the conditions were awful when I hiked Crestone Peak last April, but that seemed much more difficult than today’s climb of the Crestone Needle, and this was supposed to be harder. I didn’t feel challenged. Hmmmm… So I came to the conclusion these hikes are indeed tough, I’m just advancing in my skills. What scares me is I enjoy a challenge. I enjoy being tested and learning new skills. That’s something I’ll seriously need to spend some time considering.
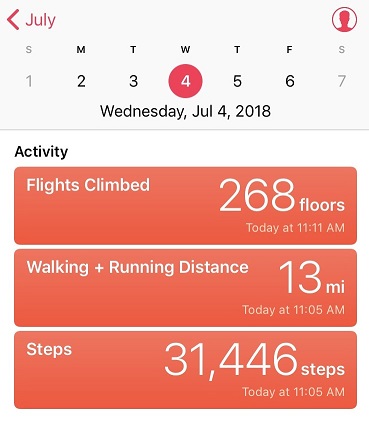
I made it back to my truck at 11am, making this a 13 mile hike/climb in 8 hours. This also means I was home by 1:30pm, in plenty of time to wake up my kids (yes, they’re teenagers, with nothing scheduled for today they were still sleeping when I got home) and grill some steaks for the 4th of July!
It has been a long weekend! Friday I did Snowmass and Saturday I took my High School aged Girl Scout Troop to Mt Princeton Hot Springs for the day. That was a lot of driving, hiking, and adventure and not much sleep. In fact, I’d only had 6 hours of sleep in the past 2 days. That wasn’t keeping me from summiting again today though! I had the day free, so I was going to hike! I just picked an ‘easier’ mountain today that didn’t have much distance (I still have blisters and sores from where my boots rubbed my feet raw from that dip in the lake and long hike out).
I packed my gear the night before, including extra band aids for my tender feet and lots of moth balls. I’d heard of the trouble the marmots and other varmints do to parked vehicles while the owners are away, and I wanted to stop them before they started. Hence the moth balls.
The 2WD road in was a breeze. Nice and clear and wide enough to pass other vehicles when needed.
I arrived at the trailhead and was on the trail by 5:30am. I decided to park below the lower trailhead to make up that extra 50’ in elevation gain, bringing the total to 3000’. I didn’t want to risk having someone say it ‘didn’t count’ because I didn’t gain at least 3000’ in elevation, and this seemed like a simple solution.
There’s a fire in the area, and I could immediately smell the smoke. After about 5 minutes of hiking however I could no longer smell the fire and I couldn’t see smoke, so it couldn’t have been too close. It was obvious a storm was moving in however, so I’d need to get a move on to successfully summit today.
There was a San Juan guide vehicle parked at the lower trailhead (there’s a clean restroom here), and people camping in the basin. Since there was only one vehicle I assumed they belonged to each other.
The 4WD part of this trail is indeed 4WD. My truck could have made it, but why risk it? There were so many opportunities for popped tires!
And a few spots had snow crossings. On my way out I did see a modified 4Runner up there, a Suburban, and a few off highway vehicles, but they’d all come just to off road for the day.
In the end the hike isn’t that long: I’d suggest playing it safe and parking at the lower lot and hiking the extra mile in. I didn’t have cell service, so getting a tow truck would have been a bit of an issue. I made it to the trail register, signed in, and looked at my route.
I was trying to decide whether to take the Southwest Ridge or the Lavender Couloir. I had mixed feelings about both. There was a storm coming in, and I wanted to summit in the most efficient way possible. The ridge might take longer, but everyone I talked to said to take the ridge. I signed the log stating I was taking the ridge but reserved the right to change my mind when I could see both routes properly.
There didn’t seem to be much to the hike. I was already above treeline. All I had to do was cross the basin and traverse the ridge or the Lav Col.
About halfway across the basin I got a good look at the Lavender Couloir and that settled it. Nope, nope, and more nope. After Snowmass on Friday I was done with scree filled gullies for the near future. I was taking the ridge! I’m only sharing this post because it has Mt Sneffles in it.
This trail had tons of signs indicating the route up to the saddle.
I crossed the basin following a well established trail with large patches of consolidated snow throughout.
I had a great view of Gilpin Peak.
And the ridge I’d need to cross. At this point my camera died. It kept telling me to switch the battery pack. Not my phone camera, but the DSLR I lug around. I was shocked! I’d just charged that battery 2 days ago and it usually lasted forever! Drat! I was going to have to rely on my iPhone from now on for pictures (which don’t turn out nearly as well) to conserve battery power. Hopefully I’d still be able to take a summit photo.
I gained the ridge and looked back on the trail
That seemed too easy! Next I looked at the ridge before me. This looked like fun! I’d need to pass in and out of the towers a few times Here’s the beginning of the route:
The first part of the ridge was easy and straight forward. Even the snow along the ridgeline was easily manageable
After the snow ended, the real work began. Luckily what this route lacks in distance it makes up for in climbing. The ridge route has gullies too. These aren’t filled with scree, but with large rocks. I much prefer rock scrambling gullies to scree filled gullies. This route had a lot of scrambling! Look at all those rocks! And not one of them was stable. I had to watch every hand and foothold to beware of a rock coming loose (and many did).
What was difficult was the route finding! I’d follow the directions I had, but they never seemed right. I kept thinking to myself “there’s no way this is the right route” and apparently everyone else thought the same thing because trails went off in every direction, looking for a different alternative. Nope, I really was supposed to go through that notch and descend into that gully, only to climb the next gully full of snow…
Here’s where it became seriously tricky. It was possible to climb this gully without touching the snow, but in order to do so some seriously clever moves were required on some seriously unstable rock with lots of exposure. I know I got in some class 4 scrambling at this point. I was going to have to figure out a safer way down when my pack put me off balance.
My directions said to exit the final) gully (there must have been 5 or 6) at the kissing camels. I missed them but I did end up exiting the correct way. I’d been traversing between those pillars I’d seen earlier from the basin. Once out of the gullies I just had to follow the ridge to the summit. This was easier said than done, as there were dozens of routes visible. Here’s a view of the final pitch to the summit. This was the most stable rock I’d encountered all day, and FUN to climb!!!
I summited at 8:30am and turned on my camera for a summit photo. I was hoping I had enough battery to get a good summit shot. I got one in and it refused to turn on again, so this is what I got. I swear I’m not as large and awkward as this photo makes me look!
I took a selfie with my phone I was much happier with and a video from the summit.
I looked back on the route down and saw what looked like people climbing. Cool, I’d get to meet people on my way down.
Following the path down was much more straightforward than following it up, but the exposure was real!
I made it to the kissing camels I’d missed on my way in. They really were a cool sight to see!
I was just getting to the point where I was wondering about the other climbers I’d seen? Maybe I hadn’t really seen them at all? I turned the corner and there they were, halfway down (up) a gully. There were three climbers: a couple with a guide, all roped in together, but not secured anywhere. I don’t know much (anything) about roped in climbing, but this seemed really counterproductive. If one person fell, wouldn’t they all fall because none of them were secured to anything? Am I missing something to this? (I know I am…). How is this safe for anyone involved?
The couple didn’t talk with me, but the guide and I discussed gullies. His climbers looked exhausted and frightened. I’m assuming they bit off more than they could chew.
I rounded the corner and saw the cairn I was looking for, and what looked like a rock bull standing sentinel.
This was the start of the gully I knew I wanted to climb down with my ice axe and crampons. I’m pretty sure I could have done it without them, staying to the rocks, but one false move/slip of my feet or the rock and I wasn’t surviving that fall. So I did the wise thing and geared up.
This ended up being a fantastic choice! I felt much more stable on my way down than I had climbing up. Proper gear is the way to go! Ice axe, crampons, and helmet all the way! I made it down this gully and back over the notch and felt I was home free. That to me had been the crux of this climb. From here on out I still had to watch every step, but it was all downhill from here!
A storm was indeed moving in, and I was glad I’d gotten such an early start. I met two more hikers on my way down who’d intended to climb the gully but were turning back due to weather. I also saw two hikers halfway up the gully. I seriously hope they made it back down safe.
I signed out of the trail register at 10:30am
And hiked happily back to my truck. That had been a fantastic climb! I was so glad I took this route instead of the Lavender Couloir. I would have been a miserable snot hiking that thing. The ridge was much more technical, but a lot of fun!
Doesn’t my truck look like she enjoyed herself while I was away?
Well, remember those moth balls I’d brought to toss under my truck to ward off the marmots while I was hiking? In my excitement and eagerness to get started I’d left them inside my truck during the heat of the day, so when I went to open it I was blasted by an overwhelming scent that reminded me of my granny. That smell’s not going away anytime soon. Note to self: Next time put the moth balls OUTSIDE!!!
I’d planned on taking an off day today instead of hiking. I’ve hiked 5 fourteeners in the past 6 days, and I’d thought I’d accomplished a lot this week. I wanted to take my kids to see the fall colors, but when I asked them all about their schedules two of my kids had to work and one was going to a slumber party.
So suddenly, at 7pm, I had the opportunity to hike the next day. This was wonderful! This was terrible!
I have the goal of hiking all 58 of Colorado’s 14ers, and when I set a goal I tend to aggressively meet that goal. It’s an added bonus I love hiking so it’s not much of a challenge to get me to hike a peak. But today I was supposed to rest! I knew from my hike yesterday and listening to the forecast on the way home most of the high country was getting snow this weekend. I’d already done a snow hike this week and that didn’t sound like a fun repeat. But I had an idea: I looked at the weather for Blanca and Ellingwood, and it was predicted to be 44 degrees, sunny, with 20mph winds all day! Great weather! I don’t think I’ve had a forecast yet this summer that was “sunny” all day.
I quickly put together a pro-con list for hiking (or not) in the morning:
Con:
·I’ve only had 15 hours of sleep total this week (due to working nights and hiking days)
·I hate hiking on Saturdays. There are just too many people!
·I still haven’t found a “hiking buddy”
·Gas is expensive
·I’ve hiked 5 peaks in the past 6 days and should let my body rest
Pro:
·I get to hike
·The weather was predicted to be great (for fall)
·I’m running out of good weather hiking days for the year (winter is coming)
·Hiking these two peaks would put me at 29 total 14ers (halfway to 58!)
·I just got new off road tires on my truck, and I’d get to try them out on Lake Como Road
·Although I’ve done a lot of hiking lately, I’m not physically sore
Darn it, I’m going hiking!
I woke up at 2am and made it to the trailhead by 5am. (That’s making really great time driving). No problems this time with directions/etc. I only took my truck about 3 miles up the road because that was what was suggested, but after hiking in a ways it was obvious my truck could have made it at least 4 miles, if not 5 up the road. The only problem I’d have would be finding a parking spot big enough for my Tundra that far up. There are a few parking spots at some of the switchbacks, but they were all full, and there wasn’t a place to turn around if needed.
Here’s what the road looked like driving in
When you see this sign, it’s a good place to park. Most good clearance 4WD’s can make it further, but there’s no space to turn around once your vehicle can’t make it anymore.
If you’re wondering if your vehicle can make it up this road, then it can’t. Here are some pictures of the Lake Como road. Yes, it’s insane.
This road continued until past Lake Como, and just gets worse as it goes on. The road itself is intense for vehicles, but not so bad for hikers. Not fun, but not bad/tough. Yes, it’s a long hike in, but I’d compare it to the Pikes Peak trail to Barr Camp. It wasn’t as bad as I’d been told it would be.
I made it to Lake Como at 7:20am (about 2 hours of hiking), and was surprised to find most people still sleeping and a few people fishing around the lake. I didn’t know Lake Como had fish?
This is the type of vehicle that can make it up Lake Como Road.
There were a bunch of signs indicating bear activity, but bear activity wasn’t obvious (no prints or damage). I did like seeing all the bear bags hanging from trees though!
The trail continued around the lake and around many more small lakes before coming to a small basin.
The trail was well maintained with plenty of cairns.
Here you can see Ellingwood (left) and Blanca (right).
The rest of the trail was easy to follow, but not very pretty. It was gray and rocky. Very, very rocky. But at least there were a lot of cairns marking the way.
I talked to several hikers along the way, asking if they knew where the cutoff to Ellingwood was exactly? Most of the directions I found indicated a general area, but said it was difficult to find. No one seemed to know for sure, but they were all interested in completing both Blanca and Ellingwood today as well. Everyone had an opinion on the cutoff though: Some thought the trail was above the snow left on the mountain, some thought under, some thought further up the ridge.
The weather was just as predicted. Kind of. It was beautiful. Everywhere except for Blanca Peak. I felt as if she was staring at me as I was hiking the basin.
Blanca Peak was covered in a thin layer of snow, ice, and a very small cloud. As I approached it got colder and the wind got stronger. Once I reached the ridge the weather turned nasty. The cloud that was covering Blanca’s peak was full of ice. As I climbed the ridge I was slipping all over the place and had to use both hands to steady myself. Obviously I put my camera away and trudged on.
I couldn’t see where I was going because the cloud covering Blanca was so thick. The exposure was such one false slip and I’d slide off the peak, so it was slow going as I made sure I was steady before making my next move.
The last push seemed to go on forever, until I was finally at the summit! I was frozen and couldn’t talk, but I’d made it!
What’s “funny” is the weather was perfect in every direction, except for directly over the peak. Heavy clouds were forming about 20 yards from Blanca’s peak, and the 20mph wind was rushing it over the peak. Then the cloud disappeared once it had gone over Blanca. It was maddening! The only bad weather in sight was directly above me!
I had to get back down from the peak quickly, as I was becoming a popsicle. Even the cairns were full of ice!
As I descended I kept telling myself Ellingwood was in the sun, so that hike would be warm. But as I descended Blanca the clouds descended as well, and started to envelop Ellingwood too. Ugh!
Descending Blanca was beautiful (and clear)
I really wanted to hike Ellingwood, but I was very, very cold, and it didn’t look warm on Ellingwood. I was seriously worried I’d need to come back at a later date to climb Ellingwood. This was NOT something I’d wanted to do, but was prepared to do if necessary. I just hoped it wouldn’t be necessary.
Added to that was the fact I didn’t really know where the cutoff was for Ellingwood. I knew where the trail was on the ridge, but with all the ice it didn’t look safe to take that route. I’d thought the cutoff for Ellingwood was at a cairn I’d seen earlier with a pink ribbon around it. Call me crazy, but this seemed like a sign. When I made it back to this cairn after hiking Blanca I brought out my GPS, and guess what? The cutoff was right where I was, at the pink cairn.
Once I found the trail it was really easy to follow. There were tons of cairns leading up the side of the mountain and to the left. The rock was loose but I never felt like I was going to slip or fall. And the sun came out! Woohoo! I felt like the hike up Blanca was more difficult than the hike up Ellingwood (due to the wind and ice, I’m sure it would have been cheery on a warmer day).
The only down side was the false summit, but it was really close to the actual summit, so it was ok.
There were 3 or 4 people on the summit already, and one offered to take my picture. I pointed out Mt. Lindsey in the background. It was 11:15am.
And then I was off on my way back down. I knew I had a long hike ahead of me, and I wanted to get started.
The hike down was long but uneventful. I wasn’t very tired, which surprised me, especially after my other hikes this week. The trail was well maintained, which made it easy to follow
I’m pretty sure this is the cutoff for Little Bear
I saw several modified jeeps (etc.) headed up Lake Como Road. I saw them in groups of 3-4, and passed no less than 4 groups. That’s a lot of vehicles headed to the lake! I just hoped no one was trying to drive back down…
I made it to my truck at 3pm, making this a 15 mile hike with 5800’ of elevation gain in 10 hours.
Oh, and you know what ROCKS about this hike? I’ve now summited 29 unique 14ers: I’m halfway to 58!