Sheep Mountain – 13,304 and Greenhalgh Mountain – 13,228

RT Length:  8.97 miles

Elevation Gain: 2714’

I was parked at Stony Pass, and was up and on the trail at 6:30am, heading east towards the CDT. 

I followed the CDT north for 2.2 miles.

At the junction with Moose Gulch, I turned right to stay on the CDT, and continued on the trail until I made it to 12800’.

After passing a small pond to my right, at around 12800’, I left the CDT and followed the tundra ridge southeast.

I kept following the ridge, and eventually I could see Sheep Mountain to the southeast.  The ridge eventually became a mesa, and the route to the base of Sheep Mountain became obvious. 

I needed to get to the ridge, and did so on tundra mixed with scree.  This is the overall route I took to get to the ridge

Once on the ridge, I turned left and headed southeast up the ridge.  This is where the terrain changed to small talus.  It was very loose.  The further you climb, the steeper and looser it will be, but you might encounter a game trail to follow. 

At the top is a wide, flat expanse, full of holes about 5 feet wide.  I kept heading east, towards the summit.

The rest of the route to the summit can be done on the ridge proper and kept at class 2.  The only difficulty here is the talus, scree, and exposure that might make it feel more difficult. 

I summited Sheep Mountain at 8:20am

Sheep Mountain:

My next goal for the day was Greenhalgh Mountain, to the east

I continued along the rocky, class 2 ridge east

I followed the ridge east, until I came to a dropoff of sorts.  Visually, it looked like the scree was continuous and went all the way to the rocks at the bottom.  However, that was not the case.  I ended up descending about 100 feet on scree, and then everything was loose talus, and steep, so I made my way climbers right to the ridge, and descended that way.  If I were to do this again, I would have just taken the ridge to the right.  It goes at easy class 3, and there’s talus, but it was much more stable than the talus below the scree.  Also, EVERYTHING moves here.  More info/pictures to come on my return route of this area.

From the bottom of the ridge, I headed northeast towards the Sheep/Greenhalgh saddle on class 2 terrain.

Then I ascended the ridge to the summit of Greenhalgh Mountain. This part of the route was actually very enjoyable, on class 2 terrain, with rocks that stayed put and didn’t roll.

I summited Greenhalgh Mountain at 9:20am

Greenhalgh Mountain:

In order to get back to the trailhead, I was going to need to descend Greenhalgh and then re-ascend Sheep Mountain, so I turned around and made my way back to the Greenhalgh/Sheep saddle.

At the saddle, I then aimed for the left ridge of Sheep Mountain.

Once there, I ascended the LOOSE rocks up to the ridge, then followed the ridge to the summit.  The rocky area went at easy class 3, and is more stable than it looks.  In this picture you can see the scree to the center.  That’s the way I came down, and I don’t recommend that route. Instead, stick to the ridge.

I then turned left, and re-summited Sheep Mountain, following the ridge west,

Then it was back across the hole filled rock field mesa

And back towards the tundra mesa I’d hiked in on.

However, when I got back to the tundra mesa, instead of heading back towards the CDT, I turned left and headed towards Stony Pass.  I could see the road in the distance, and was able to hike down the entire slope on tundra (except for a brief rocky section where I took a game trail), avoiding the willows.

Back on the road, I followed it northwest back to Stony Pass

I made it back to my truck at 11:30am, making this an 8.97 mile hike with 2714’ of elevation gain in 5 hours.

I spent the rest of the day playing Trail Angel for CDT and CT thru-hikers.  I met a ton of really cool people from all over the world, gave them snacks, water, and beer, let them re-charge their devices, and had some great conversations. What upset me though, was the Colorado Trail hikers told me I was the first person they’d seen doing trail magic on the trail.  Considering they probably only had 2 days left of a 30 day or so hike, this upset me.  We can do better Colorado!  If you have a free weekend next summer, I’d encourage you to do some trail magic.  You won’t regret it! 

On to the next trailhead!

Fishers Peak – 9,637’

RT Length:  15.3 miles

Elevation Gain: 3588’

This peak has been on my bucket list for a while, but it was located on private property.  Recently this property became a Colorado State Park (currently you need the Colorado State Parks Pass or to pay the $10 to park at the kiosk), and I was able to legally climb the peak.  The park is open sunrise to sunset, so I didn’t get my usual pre-dawn start.  There is plenty of parking at the trailhead, along with vault toilets and trailhead signs.

I parked at Fishers Peak Trailhead (the only trailhead in the park) and was on my way at 7am.  The trailhead is obvious, at the east end of the parking area.

There were a limited number of trail maps at the trailhead, and I snagged one.  If there isn’t one there, here’s a copy.  I can tell you this isn’t the best map, and the signs can be confusing, but you basically want to take trail 1 to trail 2 to trail 3, then 4, 5, and 6.  This may sound obvious, but trail 8 and 10 and 9 all lead to trail 2 as well (they just meander a bit). 

Trail 1: Navy Blue on Map, Challenge Hill Section

Trail 2: Dark Magenta on map (as opposed to light Magenta), Osita Ridge Section

Trail 3: Blue on map (as opposed to Navy Blue or light blue), Shady Forest Section

Trail 4: Green on map, Stone Guard Section

Trail 5: Light blue on map (Peak Approach Section)

Trail 6: Brown on map (Summit Loop Section)

I followed the Challenge Hill section for a short while (maybe 100 yards) before coming to a junction with several other trails.  I could see Fishers Peak from the parking area.

At the junction I stayed on the Challenge Hill Section, which is the wide path that goes straight (yes, this can be confusing, stay on the road).

The road quickly begins to gain in elevation.  I gained 770’ of elevation in just under 1.5 miles.

After hiking for about 1.3 miles, I came to another junction.  If you accidentally took trail 10 or 8 or 9, you’ll end up here as well.

I continued east, taking the Osita Ridge Section

Now the trail became more of a bike trail than a hiking trail.  It meandered around mountainsides instead of over them, and had a lot of small ups and downs, which I’m assuming make biking up hill easier?  I can see problems in the spring with rain and runoff collecting in pools on this trail, but for now it was just mildly annoying. 

After hiking for 3.85 miles I came to a junction, which congratulated me for making it halfway.  I like how the sign asks the hiker if they are truly prepared for the second half of the hike.

At this junction I turned right, and followed the Shady Forest Section.  If you go left, you can hike .4  miles up to Osita Point.

About 2 miles of hiking brought me to a gate.  The sign says this portion of the trail is closed March 15-July 31 for Raptor breeding season.  So if you’re going to do the peak, don’t plan on coming during that time.  This is also a good place to leave your bike if you rode one, as the trail becomes much more rocky and there are stairs involved. 

I was now in the Stone Guard Section, and followed the class 1 trail south as it gained the ridge.

There are a couple of gates here, but the trail doesn’t intersect them, and the path is obvious

I came upon some stairs, which is the beginning of the ‘hard’ part of this climb.  This is a fairly new trail, but the workmanship in the stair and narrow areas doesn’t look like it will last long.  I can see it eroding in a year or two, or even after this winter/spring season.  Although this is a class 1 trail, care should be taken not to dislodge a rock or slip off the side of the trail.

When you see these signs, you’re almost to the summit. There’s a little bit of scrambling here, but only for about 20 feet or so. 

The trail here is not obvious, but you’re trying to ascend these rocks.

At the top of the rocks I was surprised to be greeted by a mesa.  There is a well-established trail here, that goes around the mesa.  You can go either left or right.  I went left.  This is the Summit Loop section of the trail.

The actual summit can be difficult to discern, as there are multiple large cairns that look like the summit.  It you go left as I did, the summit will be the first large cairn you come to.  Because I wasn’t sure at the time, I went all over the mesa to make sure this was indeed the true summit.

I summited Fishers Peak at 10:15am.  This video is from the middle of the mesa.

Fishers Peak:

Now to head back down.  I simply re-traced my steps back the way I came

Back down the rocky area

Then I followed the trail backwards, taking sections 5-4-3-2-1

It wasn’t supposed to start snowing for another two hours, but mountains have a way of making their own weather.  It started graupeling pretty heavily.

Graupel:

I continued on through the graupel, following the well established trail

At the junction of trail 1,2,9 & 10 I followed trail 1, the Challenge Hill Section (the one that’s a dirt road), back to the trailhead.  You can take any of the routes, the others will just be longer.

When I got back to the trailhead, my truck was still the only vehicle in the lot, leading me to believe not many people know the park is open

I made it back to my truck at 12:45pm, making this a 15.3 mile hike with 3588’ of elevation gain in 5 hours, 45 minutes

On to the next trailhead!

“Baldy no es Cinco” 13,313 & Baldy Cinco 13,383

1

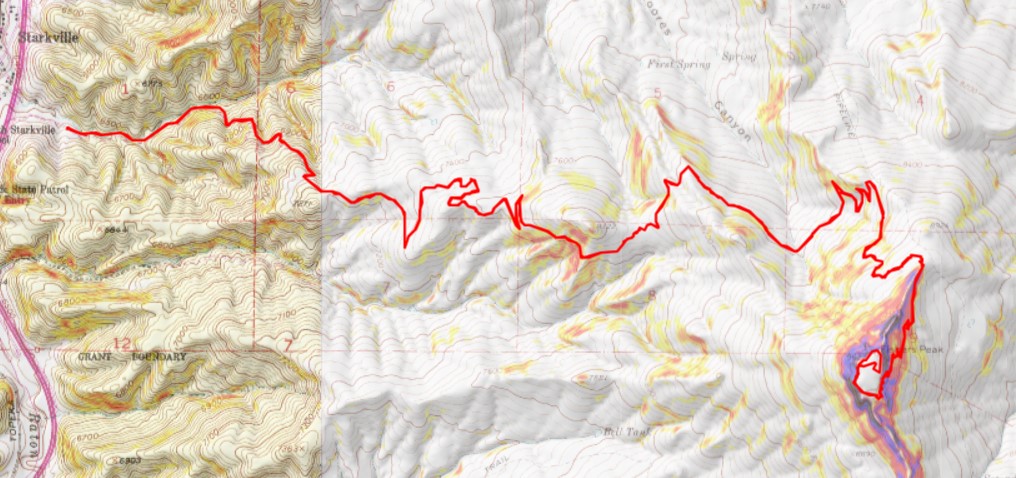
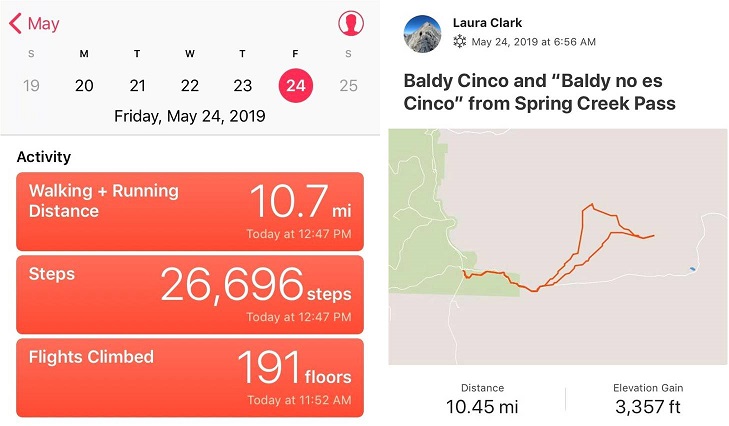
RT Length: 10.5 miles

Elevation Gain: 3357’

So far today nothing was going as planned. I took a 2 hour nap before getting up at 10pm to drive the 6 hours to the trailhead.  I’d wanted to hike Point 13,811 today but ended up getting “lost” (apparently there are two Williams Creek Trailheads geographically close to each other) and long story short the workaround was a 3 hour drive, so I missed my window to climb Point 13,811 safely today.

I’d driven all this way and wasn’t going to drive back without a hike. I switched my hiking plans around and decided to hike Baldy and friends today instead.  I drove faster than I should have and I made it to the Spring Creek Pass trailhead at 6:45am (after leaving at 10pm last night).  It had snowed overnight and it was really cool seeing a black moose in contrast to the white snow on the ground and hanging from the trees.  This lifted my spirits a bit (moose was too far away to get a good picture).

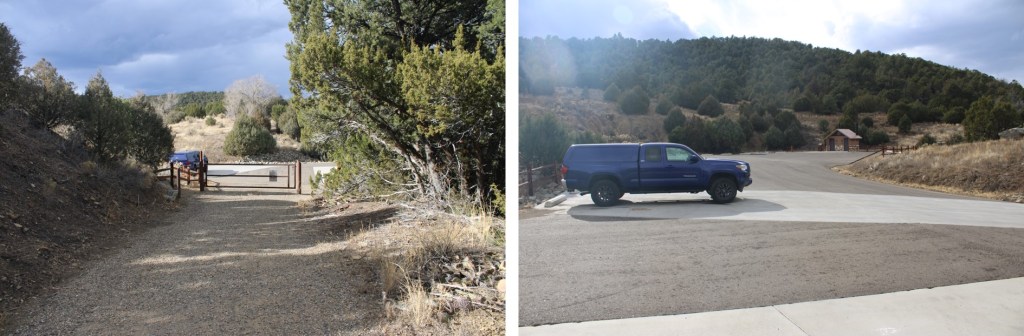
When I arrived at the trailhead it was covered in a layer of ice a couple inches thick so I decided not to park in the parking lot but just at the entrance to the road.

2

I’m sure this was going to make some people mad when they arrived later in the day, but I tried to allow as much room as possible so after the ice melted other vehicles could drive past.   And to be fair, a snow plow had put a foot or so of snow at the entrance to the parking area, so I guessed they expected people to still park on the road.

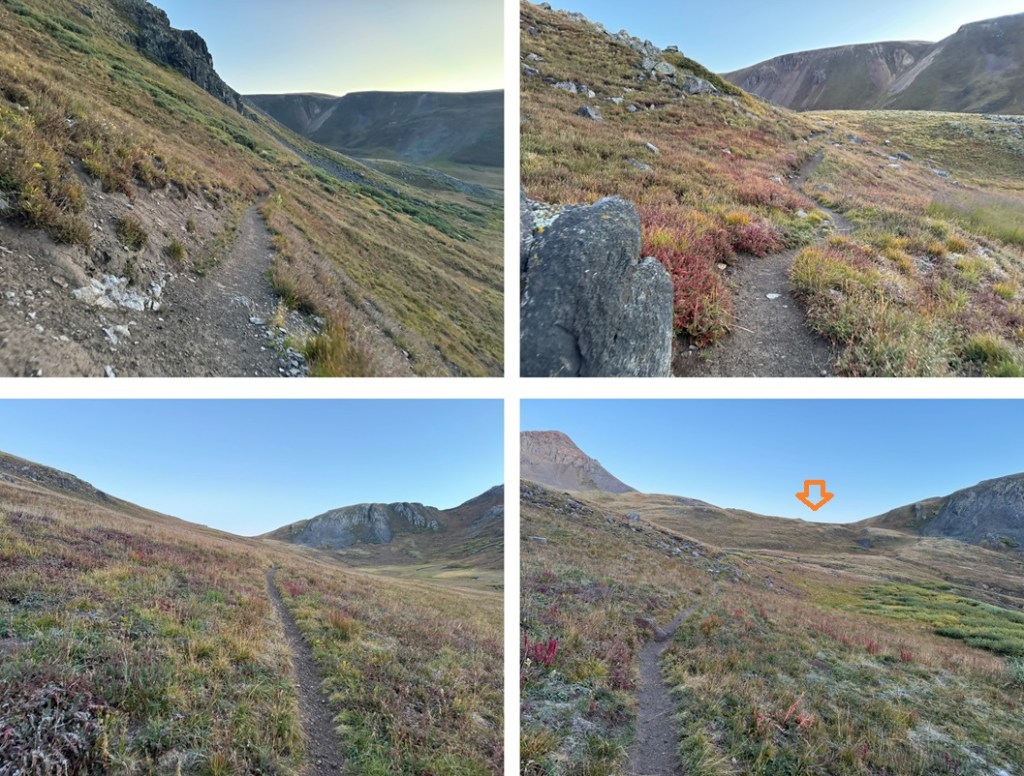
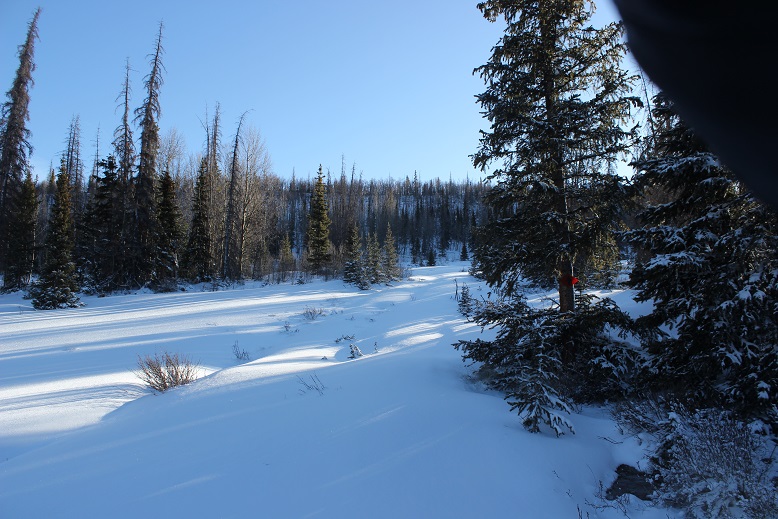
I’d planned on studying the route while spending the night at the trailhead (you know, after hiking point 13811 today), but since that didn’t happen I was just going to bring along my notes and hike from memory. On a positive note, I was starting this hike in the daylight, so while there was no visible trail route finding was easy.  I’m pretty sure this is the first hike I’ve done this year that’s started before sunrise.

I crossed the road and a small creek and looked for an obvious sign of a trail. There wasn’t one, but I knew I was aiming for the bowl, so I started hiking southeast.  Once again, I was glad I was doing this in the daylight.

3

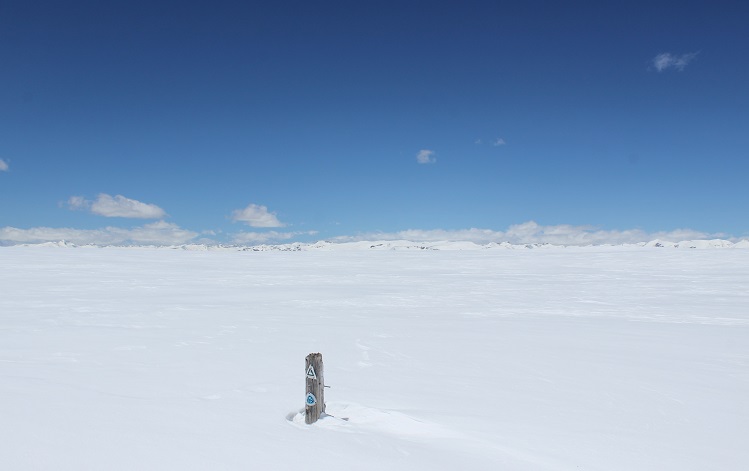
The trail follows the Colorado Trail, but with all the snow last night there was no clear path to follow. I was excited when I saw a trail marker (woot!  I was headed the right way!)

4

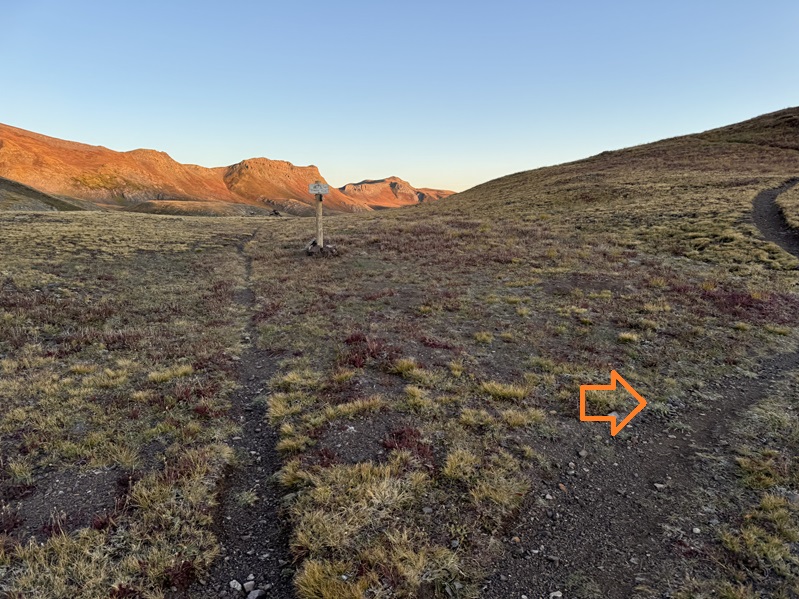
From this marker I turned left and headed towards the trees

5

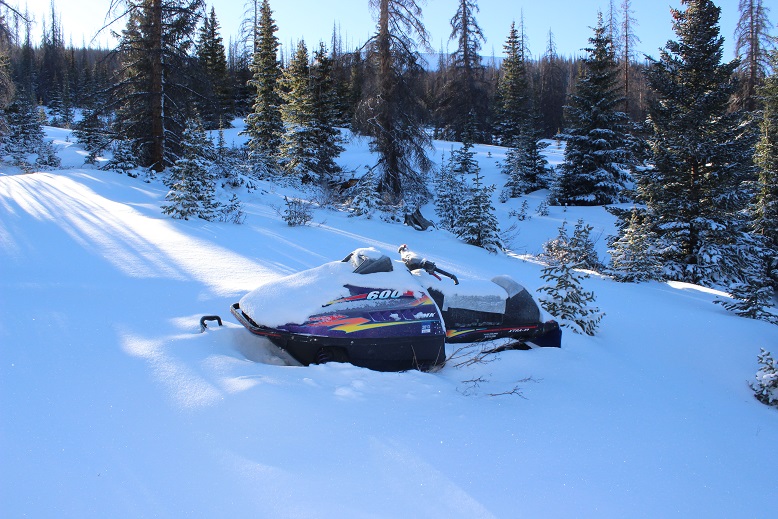
Looks like someone lost a snowmobile…

6

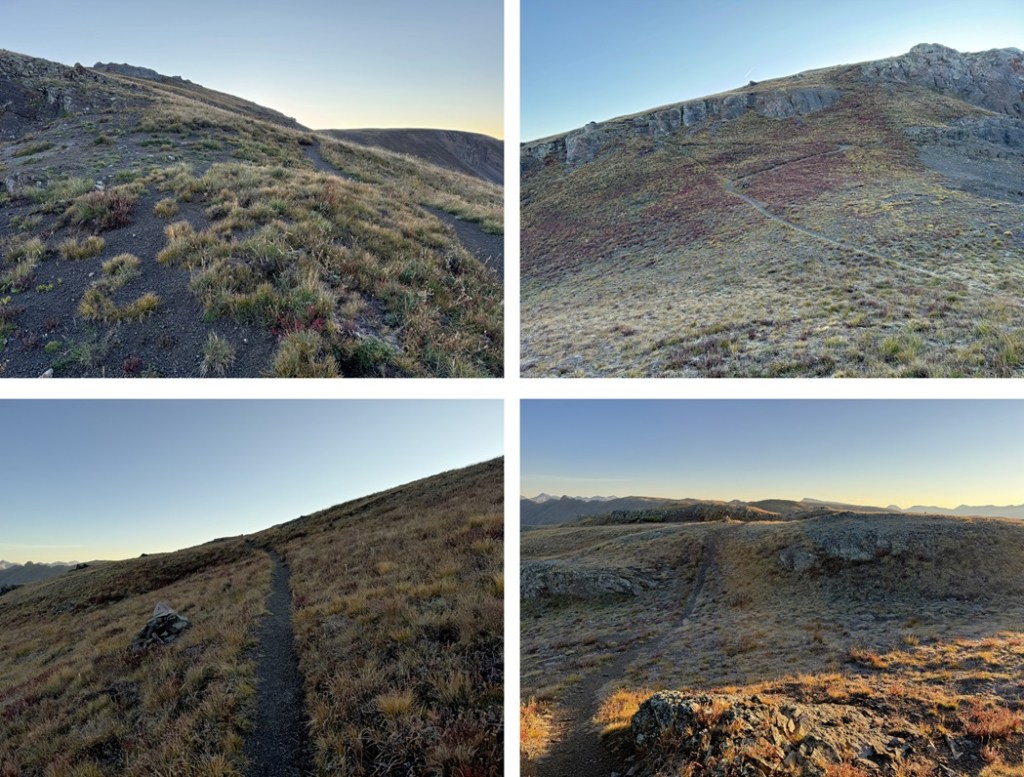
I encountered a clearing and once again entered the trees, aiming for the gully that led to the bowl/mesa

7

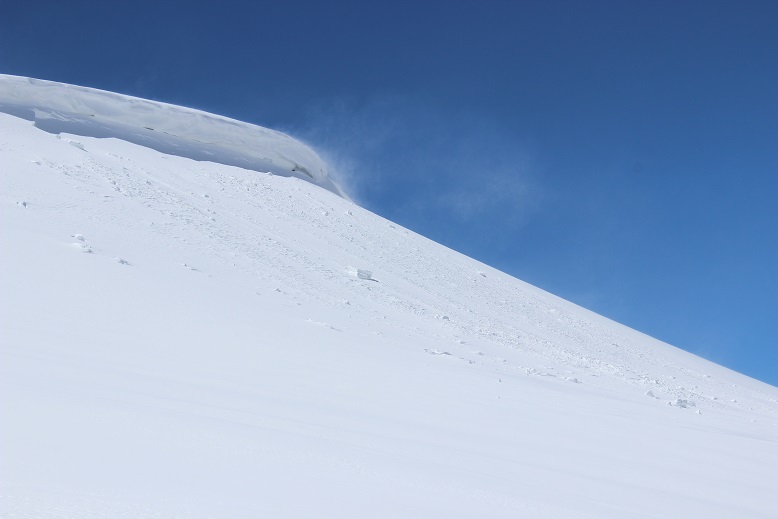
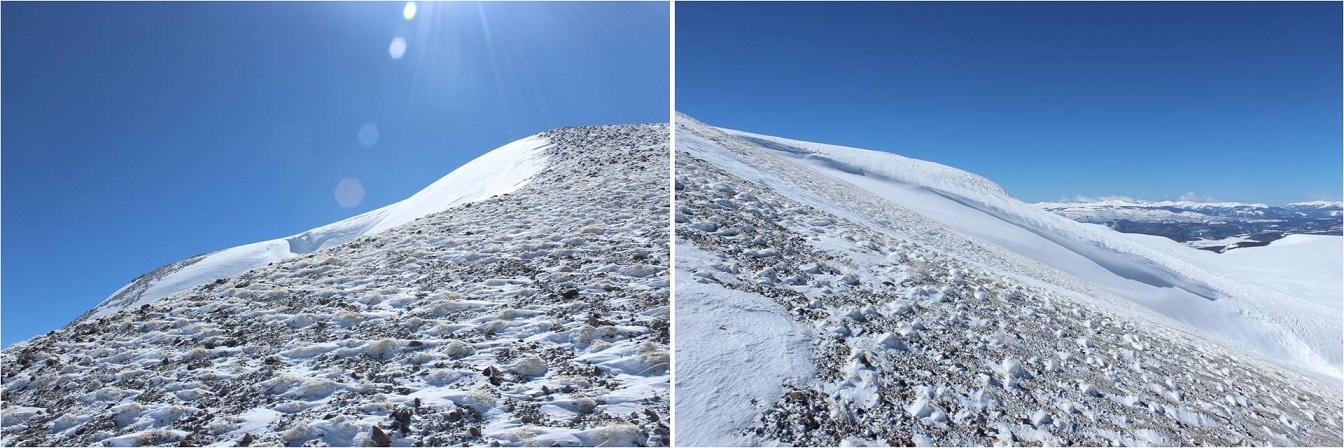
Wow! This was so cool!  I made it to treeline and followed this drainage path.  At first I wasn’t sure this was the correct way (it looked a bit dangerous), but it was

8

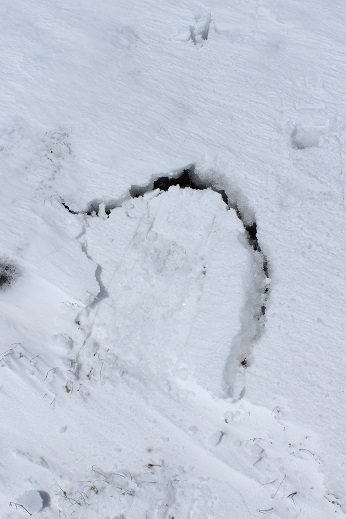
Why was it dangerous? Check out those cornices!  They looked ready to drop at any moment (and in fact, a few already had).

9

10

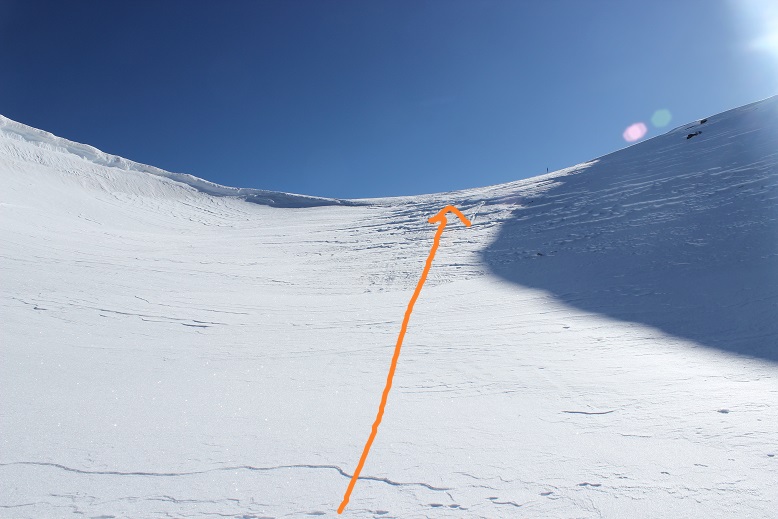
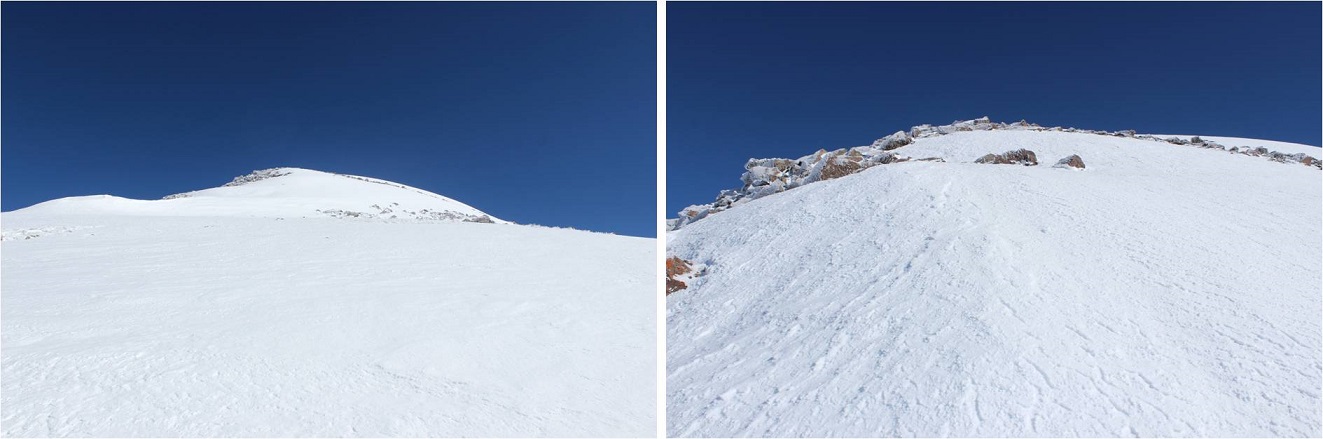
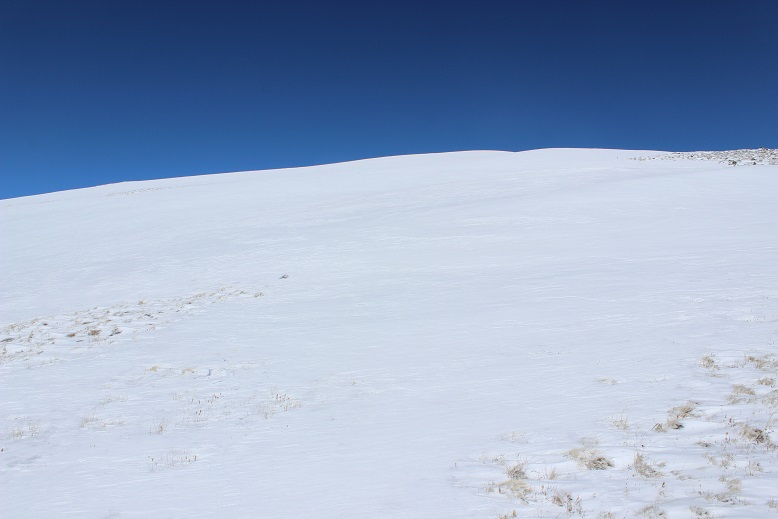
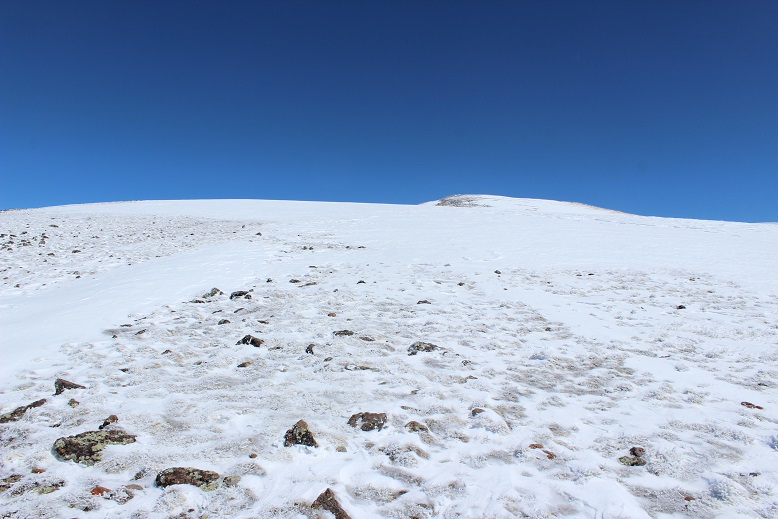
OK, so I headed directly up and over the lip of a bowl that’s steeper than it looks

11

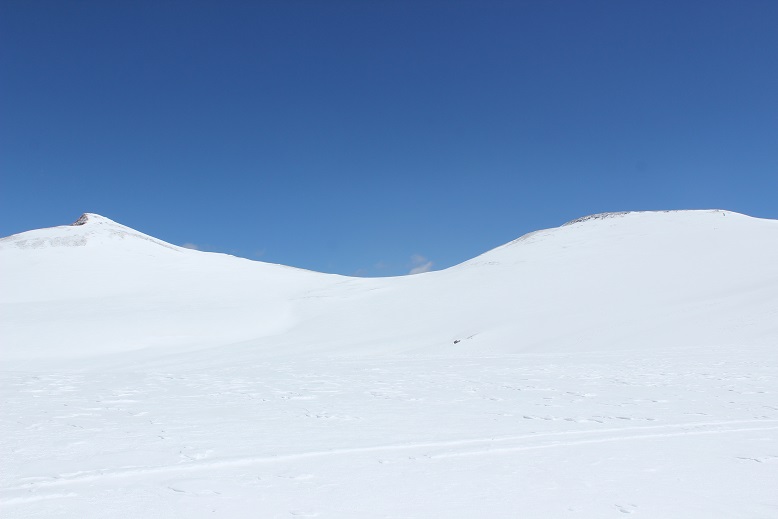
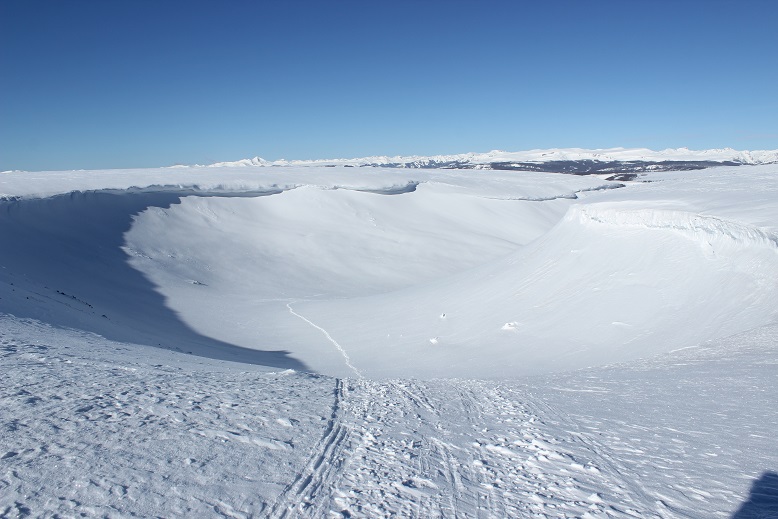
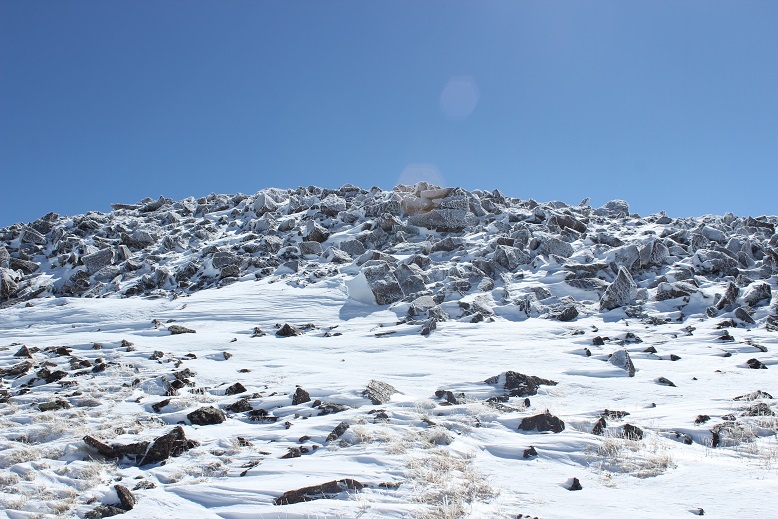
And everything was white. I was on top of a very large mesa that had just been dumped on with snow.

View from Mesa:

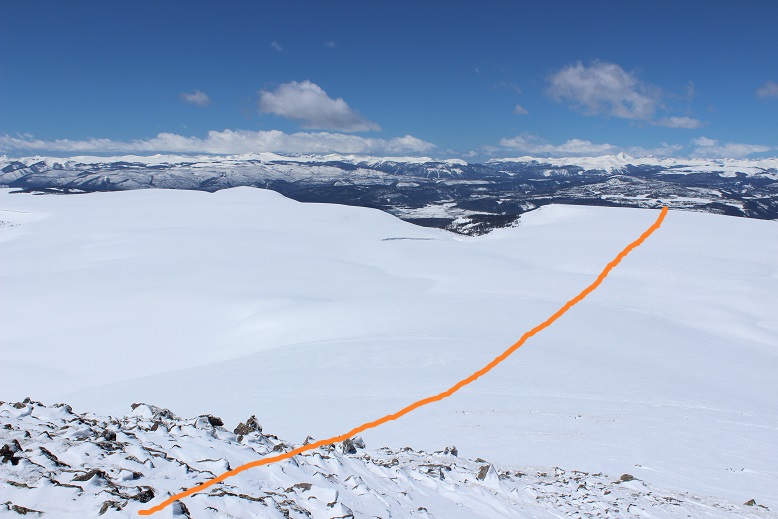
I turned around to look at my path back down the bowl

12

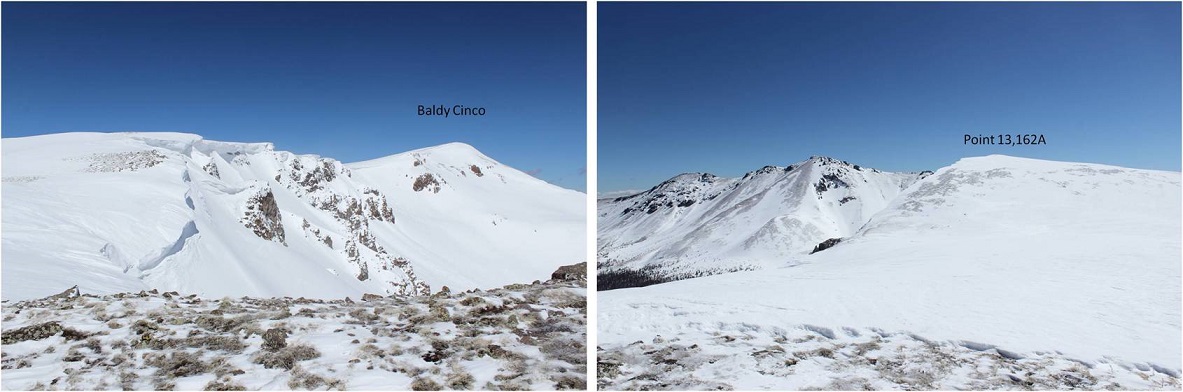
Time to get my bearings. The mesa was large, but the peaks I’d intended on hiking were obvious.  I wasn’t able to find a lot of information about these peaks, so I wasn’t exactly sure what to expect or the best way to attempt the climb.  I decided to cross the mesa and pay attention to optional routes, making sure to look behind me every so often so I wouldn’t get lost on my way out (a real consequence in all this snow).  The wind was erasing my tracks as soon as I made them.

13

14

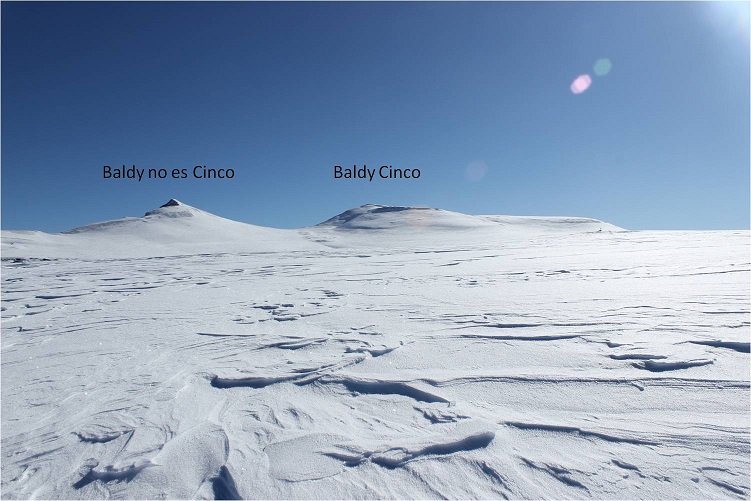
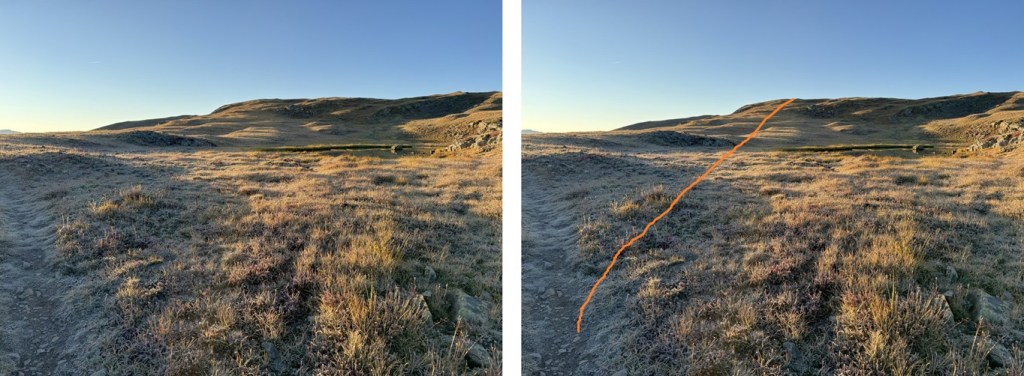
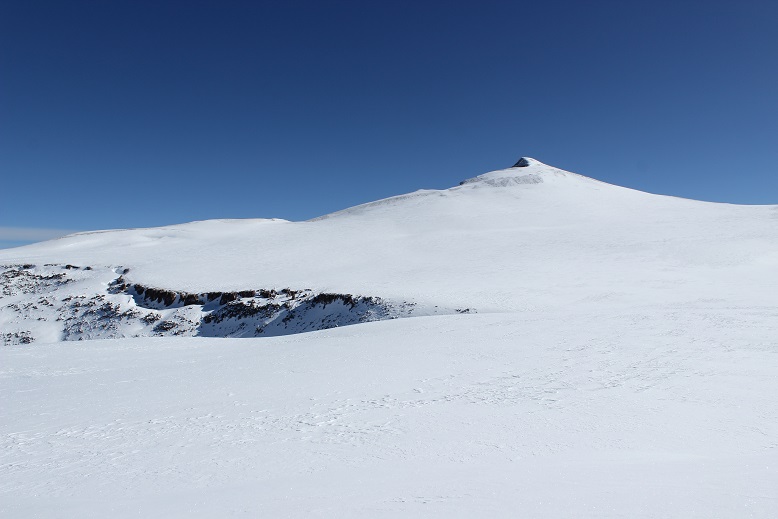
As I got closer to “Baldy no es Cinco” (which means “Baldy is not five” in Spanish) I noticed a trench and was worried I wouldn’t be able to cross the area, but by sticking to the right (east) I was able to avoid losing too much elevation or entering the trench

15

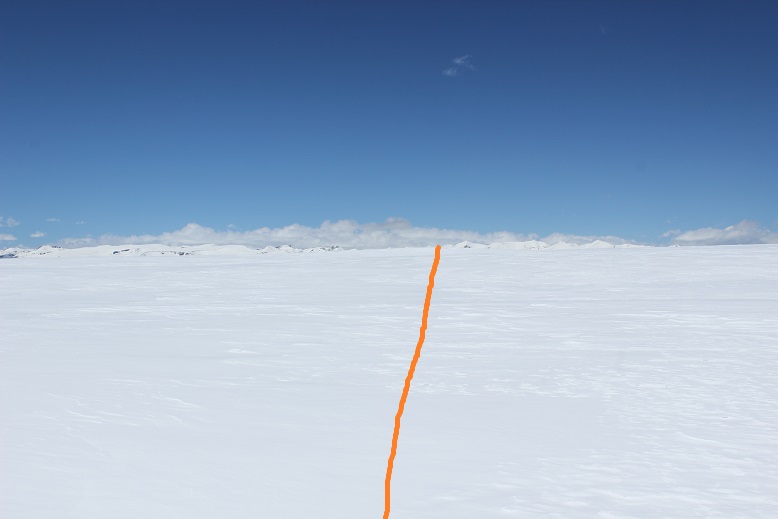
Here’s the route I took up “Baldy no es Cinco”

16

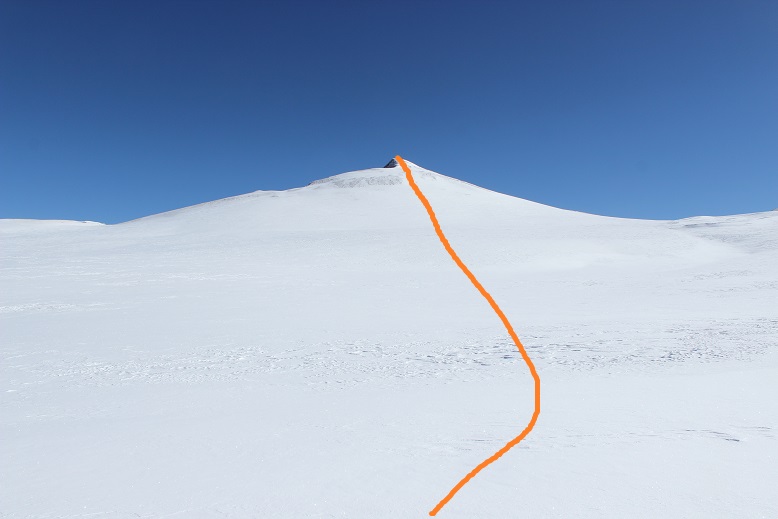
Please note, I would not advise taking this route up. It gets very steep and I needed to use my ice axe and crampons, and it felt sketchy at times.

17

Luckily the snow was very firm. If I were to do this again, I’d hike to the saddle of “Baldy no es Cinco” and Baldy Cinco and hike the ridge.

18

The reason I hadn’t done this was my research had told me to just hike up the face (that’s the problem with no winter beta) and honestly, the snow was blinding, even with sunglasses on. You can probably tell by these pictures they’re overexposed and I’ve been trying to darken them up so you can see details. I wasn’t able to see details very well, and I couldn’t tell how big the cornices were on the ridge, so I didn’t attempt the saddle.  In any event, I’d advise you to take the saddle.

The last bit to the summit was the easiest part of this climb. It was a bit icy and windy, but the ice made for great traction (the wind I could have done without).

19

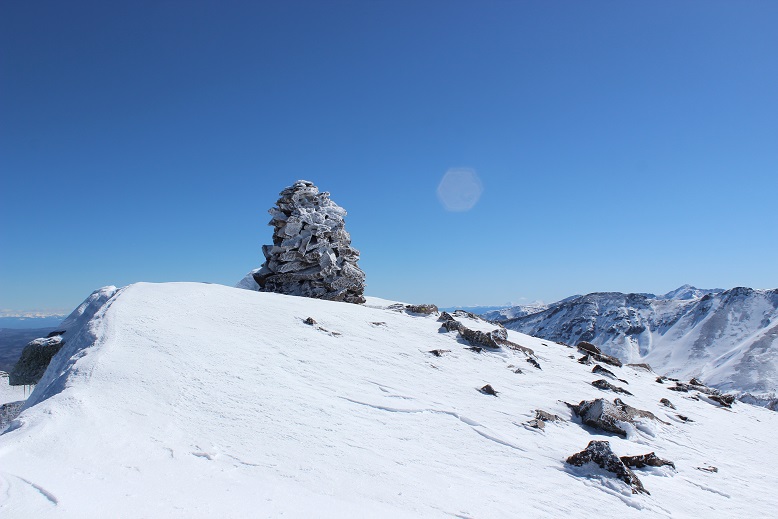
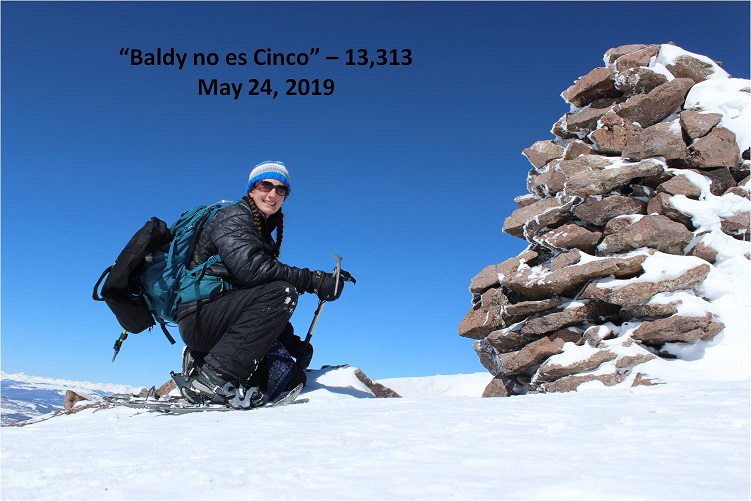
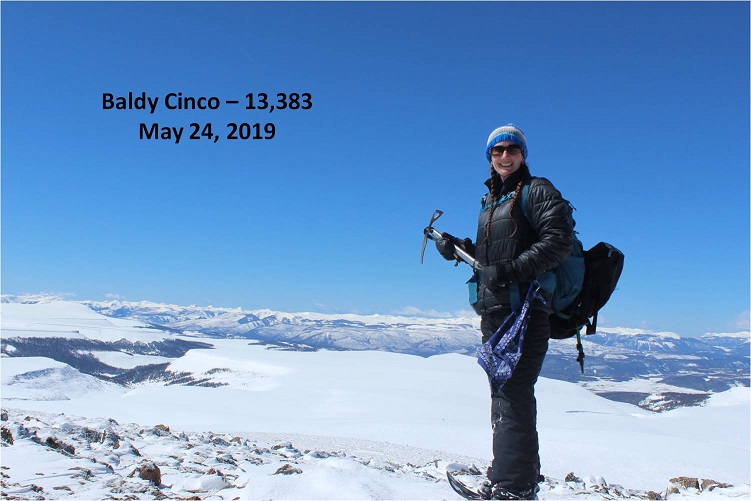
I summited at 9:15am. There was a massive cairn on the summit that begged to be in my summit photo.

20

21

“Baldy no es Cinco” summit video:

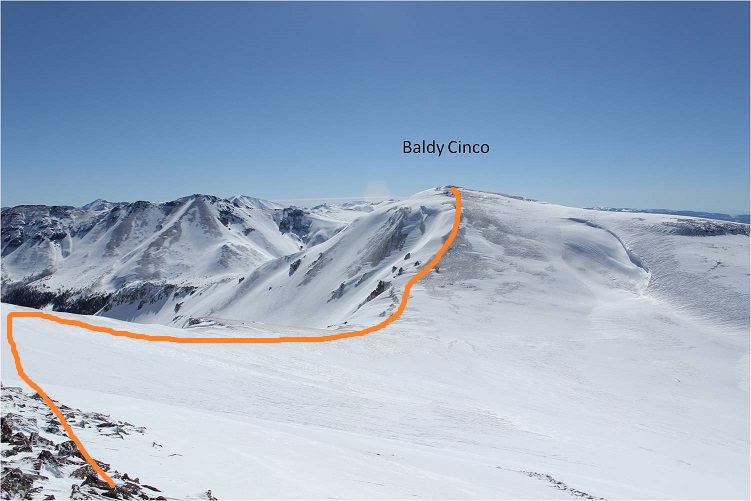
I decided to take the ridge from “Baldy no es Cinco” over towards Baldy Cinco

22

Also, the entire way down the ridge towards Baldy Cinco was one large cornice.

23
Here’s a look from the saddle back up at “Baldy no es Cinco” and towards Baldy Cinco.

24

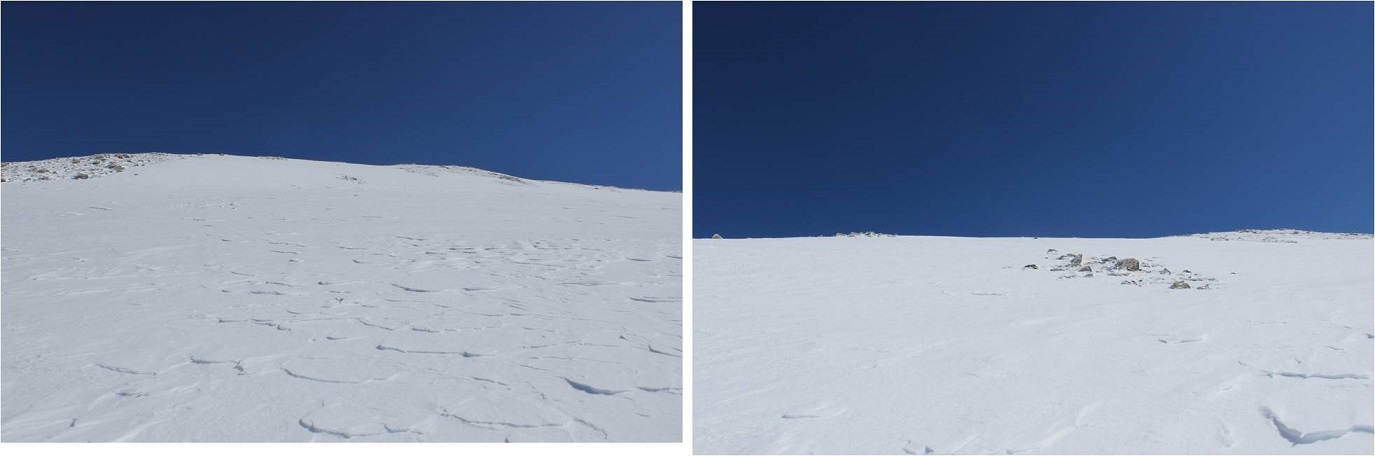
The hike up Baldy Cinco wasn’t challenging. The terrain was a mix of ice and rock, with cornices all over

25

The summit was icy rocks

26

I summited at 10am

27

View from Baldy Cinco:

Here’s looking back at “Baldy no es Cinco” from the summit of Baldy Cinco. Check out those San Juans!!!

28

At this point I should have just turned around and headed back down the slope of Baldy Cinco, towards the mesa and down the bowl. In fact, this would have been another great way to summit these two peaks.  (Summit up Baldy Cinco, take the ridge to “Baldy no es Cinco”, and descend using the saddle)

29

But it was still really early (10am) and I knew there were more peaks out here, calling my name. I looked over at Point 13,162A and was seriously tempted.  I didn’t have any beta on this peak, other than its location.  Once again, check out those cornices!!!

30

What you can’t see in this photo is the dramatic drop in elevation (topo suggests 800’). I decided to go for it.  Up close the cornices were intense

31

I made it to the saddle and re-assessed where I was at. Here’s a look back at Baldy Cinco and up at Point 13,162A.

32

The snow was starting to act up here. It was getting warmer and the snow was crunching and breaking under my feet, sending cornices falling.  I was starting to get tired, and wanted to save my energy for tomorrow’s hike (which had way more mileage/elevation than today’s hike, which is why I’d initially wanted to do that one first).

33

Ugh! I’d just descended 800’ in elevation, only to find a change in conditions.  I decided to head back and attempt point 13,162A another day (with unnamed 13510A and unnamed 13020C as well).

I knew in my head the route back was southwest to the mesa, but the snow was seriously blinding and I didn’t know the area “that well” (read: I could see myself getting lost if I attempted to find my way back to the mesa with just a topo map).  So instead of trying to route find in the blinding snow I decided to re-ascend Baldy Cinco to find my way back. Don’t worry, I didn’t re-gain the 800’ I’d lost, just enough elevation to see my way back visually (about 500’).

34

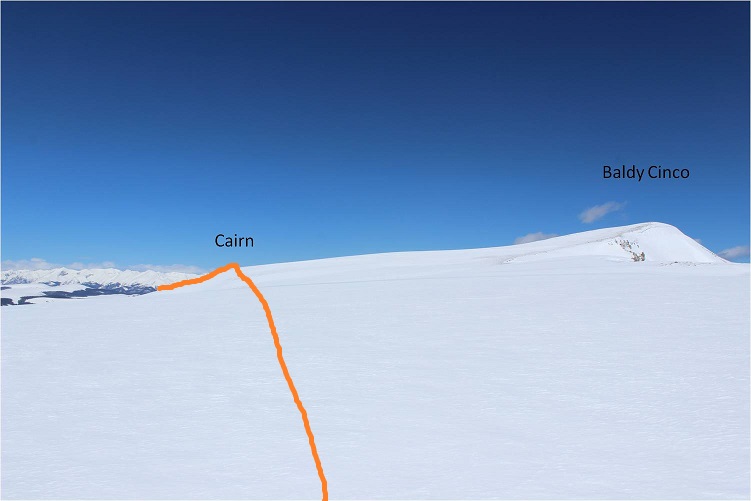
I skirted Baldy Cinco and headed here (where I found a huge cairn! See, that would have been the way to summit Baldy Cinco.  Oh well, today I got to be the beta).

35

36

At the cairn I saw something green flying through the air. Cool!  Someone was speedriding!  They were zipping all over the mesa at high speeds.  I was able to see their snowmobile sitting in the middle of the mesa as well (great idea btw).

37

For those of you intending to hike up Baldy Cinco first via this route, here’s a look from the cairn up at the summit of Baldy Cinco

38

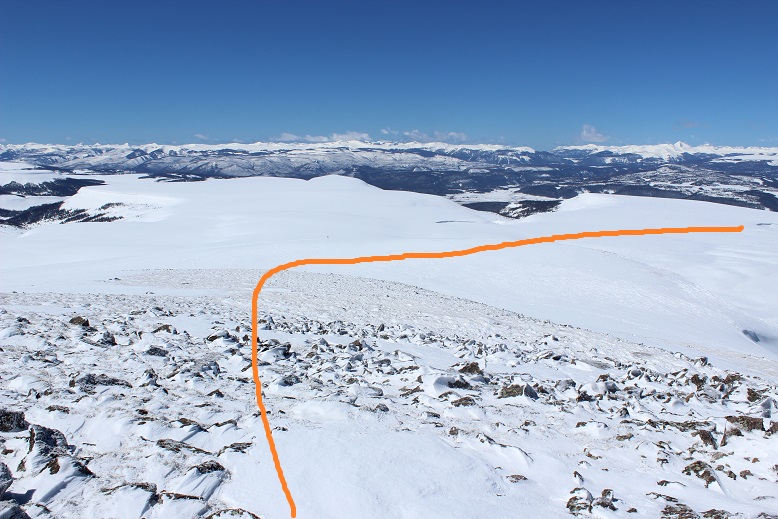
From the cairn you might think you just head towards the obvious depression in the mesa, but this is not the way to exit. I was seriously glad I’d looked back over and over again at my route so I’d know how to exit the mesa.  It’s not obvious.  In fact, it’s counterintuitive: you head away from what looks like the exit and continue to the straight part of the mesa that looks like a drop off

39

40

The snow on the mesa had changed dramatically: it was now quite soft under my feet and I was sinking in my snowshoes about 6-8 inches every time I stepped (quite a change from this morning).  I was so excited to see the Colorado Trail marker!

41

As you can see, it looks like you just drop over the mesa (which you do)

42

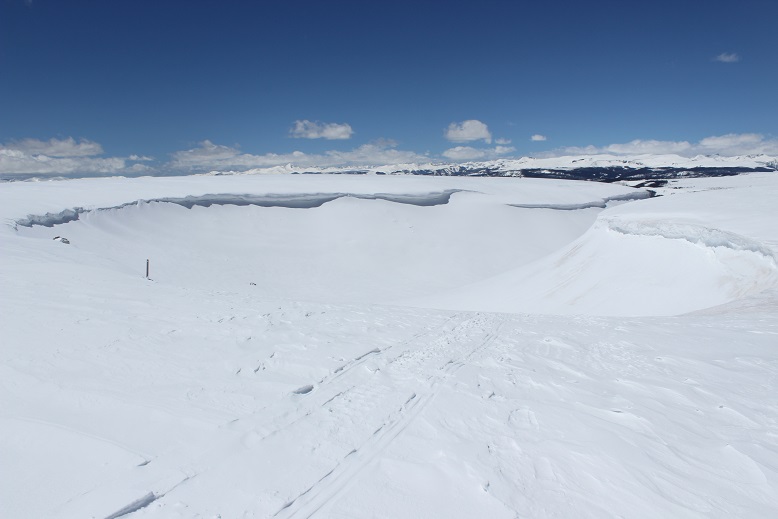
It’s a quick drop back into the bowl. Here I started seeing snowmobile tracks (it’s steeper than it looks)

43

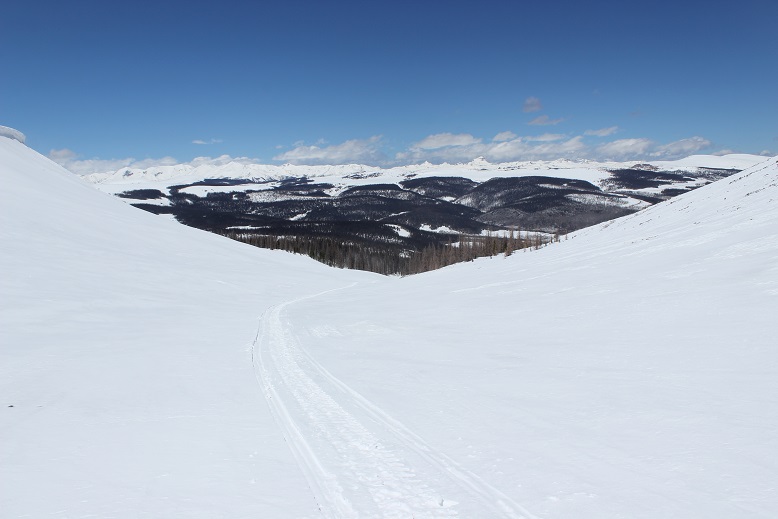
The tracks followed mine most of the way to the trailhead. Very cool!  He’d re-treaded my tracks, making the hike back easy.  I wasn’t sure what the protocol was for hiking next to/over snowmobile tread, so I decided to play it safe and just hike out parallel to the tracks (where possible).

44

When I got back to the parking lot it had indeed melted out and there were a few other vehicles parked in actual spaces

45

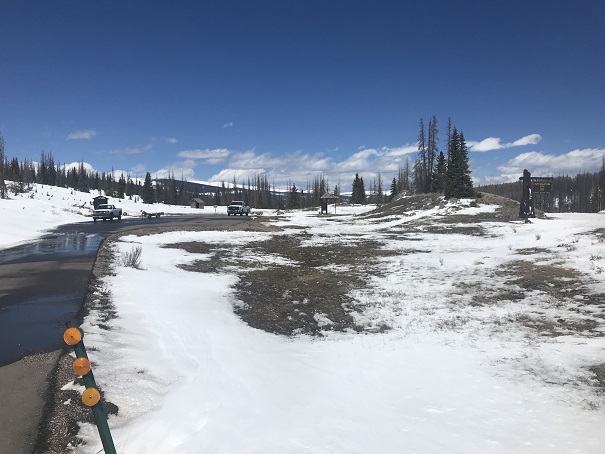
I made it back at 12:30pm, making this a 10.5 mile hike in 5.5 hours.

46

Ok, now I was headed to fix my earlier mistake and head to the correct trailhead. Lake City, here I come!

Relive:

47