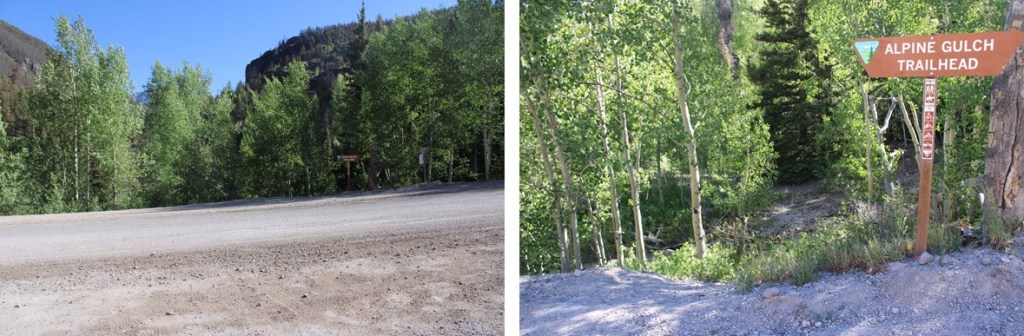
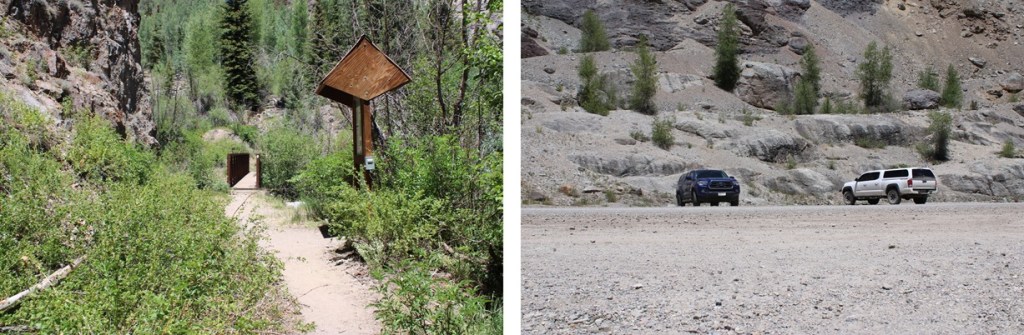
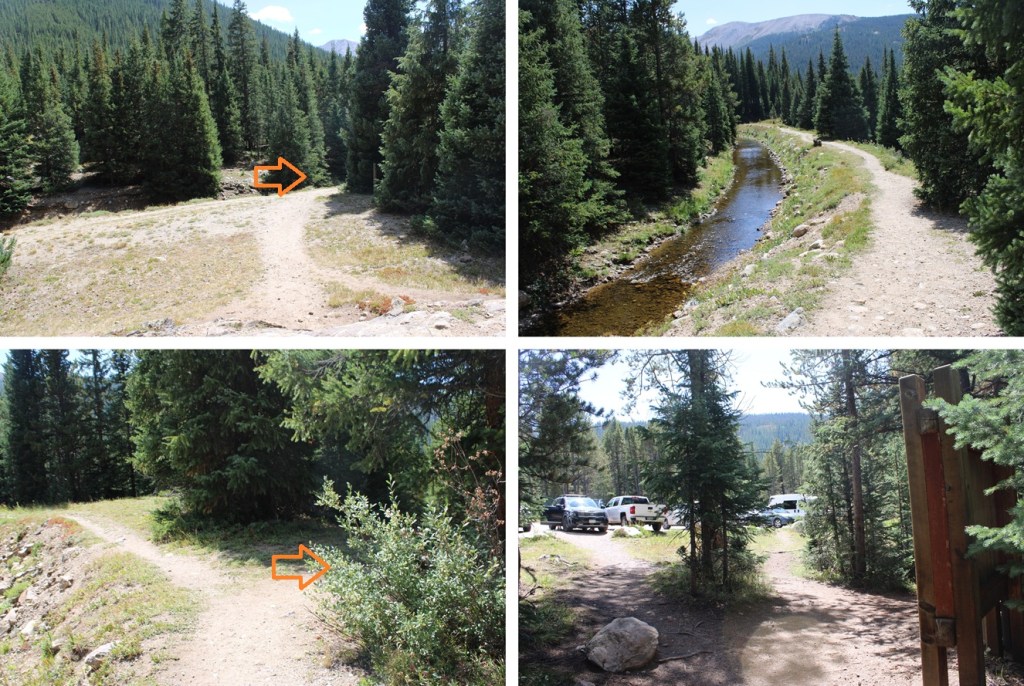
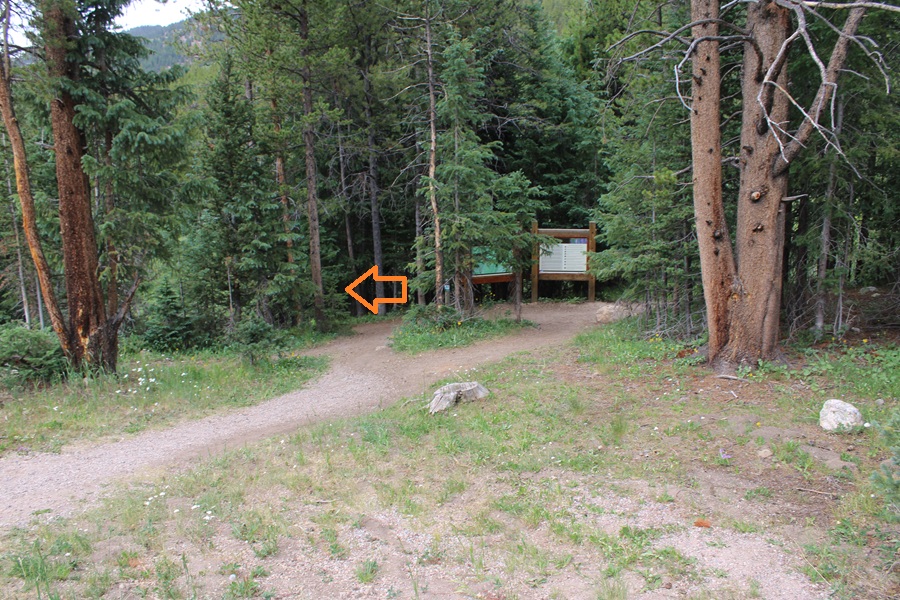
I started from the Alpine Gulch Trailhead in Lake City. This is a well defined trailhead that starts from the south end of the parking area.
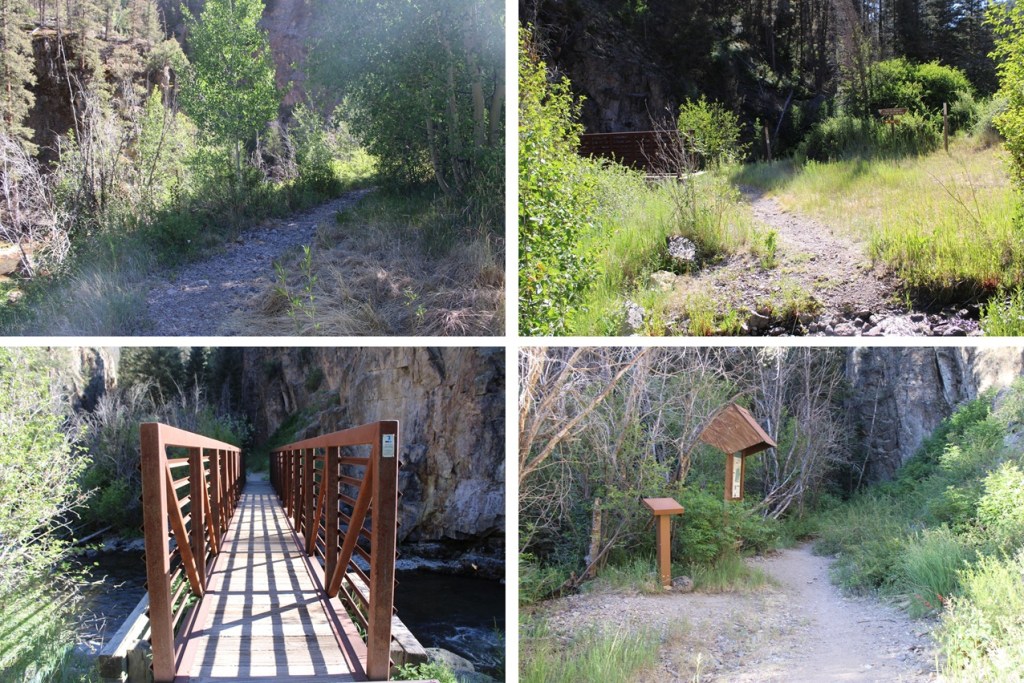
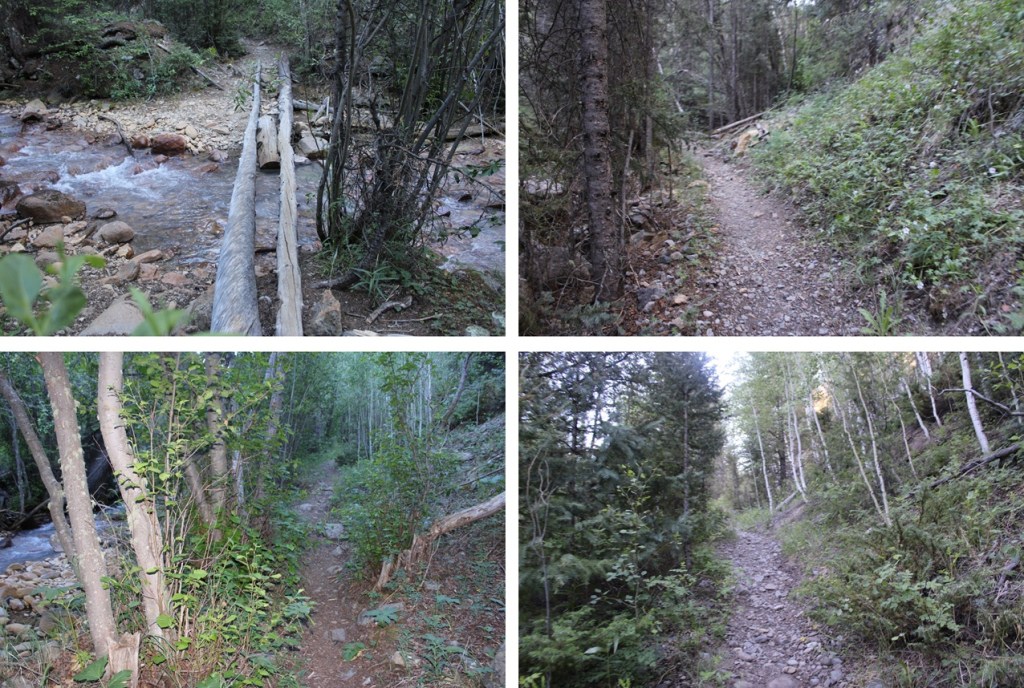
This trail heads down to Henson Creek, crosses the creek on a bridge, and then continues south along Alpine Gulch.
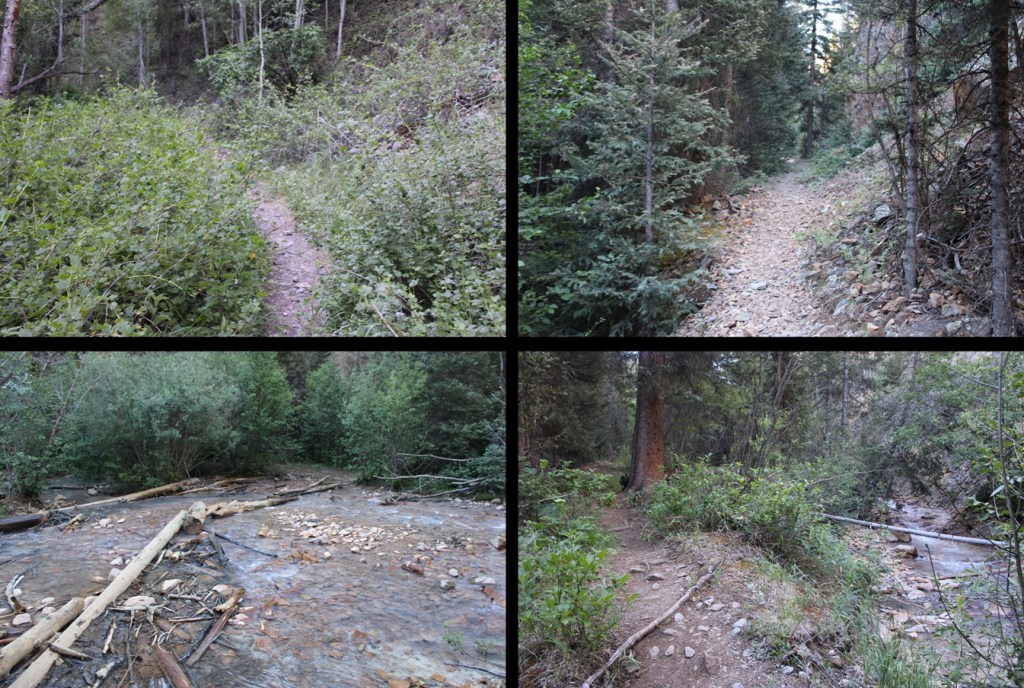
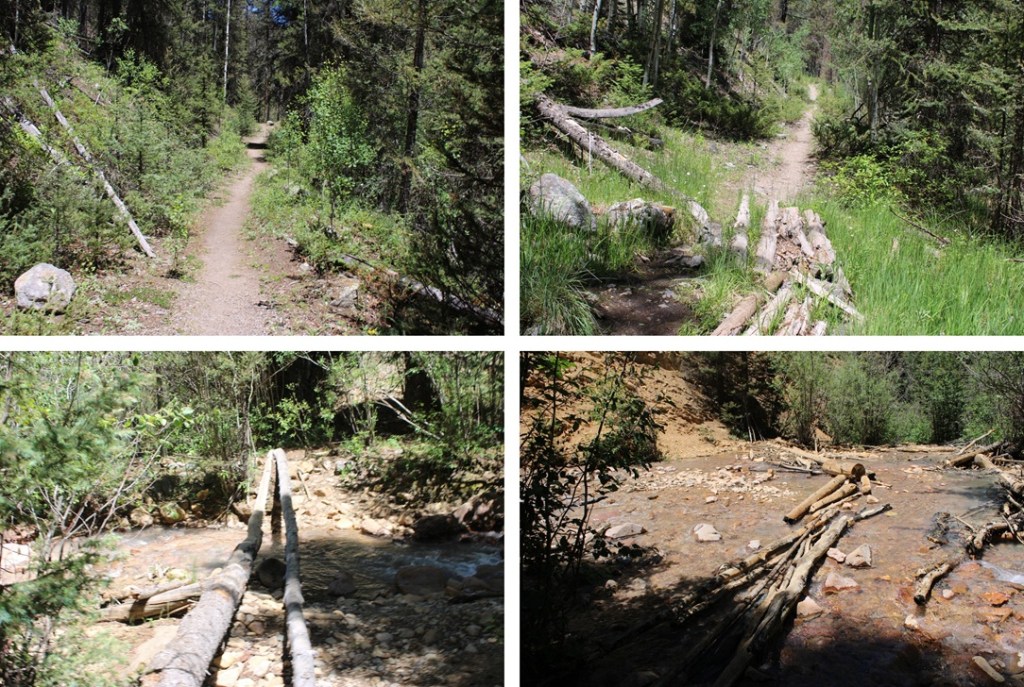
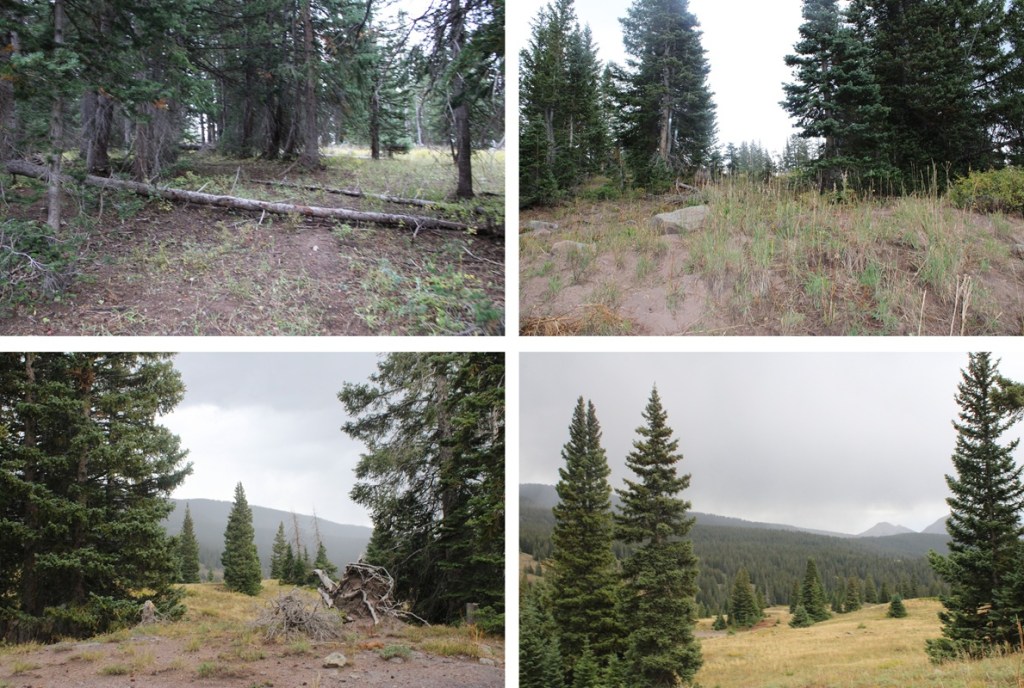
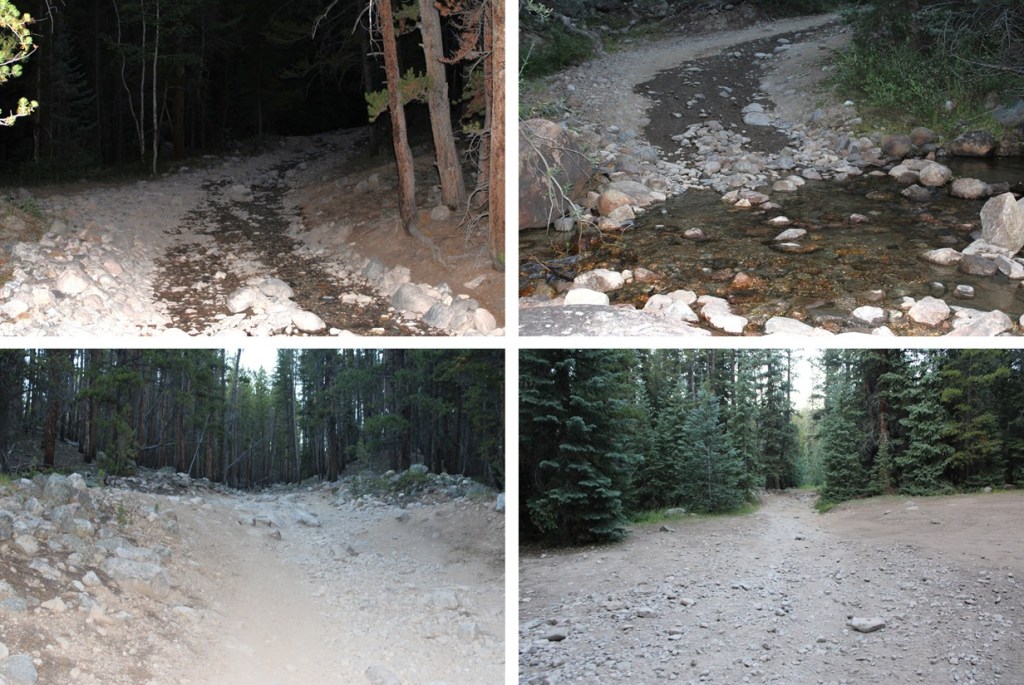
The trail is easy to follow in the daylight, but in the dark could prove difficult. There are several creek crossings to navigate. This was a low snow year so the crossings were manageable on logs and rocks. I crossed the creek several times, following Alpine Gulch south.
Once again, a lot of creek crossings and tons of downed trees blocking the trail that required navigating over, under, or around, but seeing old cabins and mines along the trail was a plus.
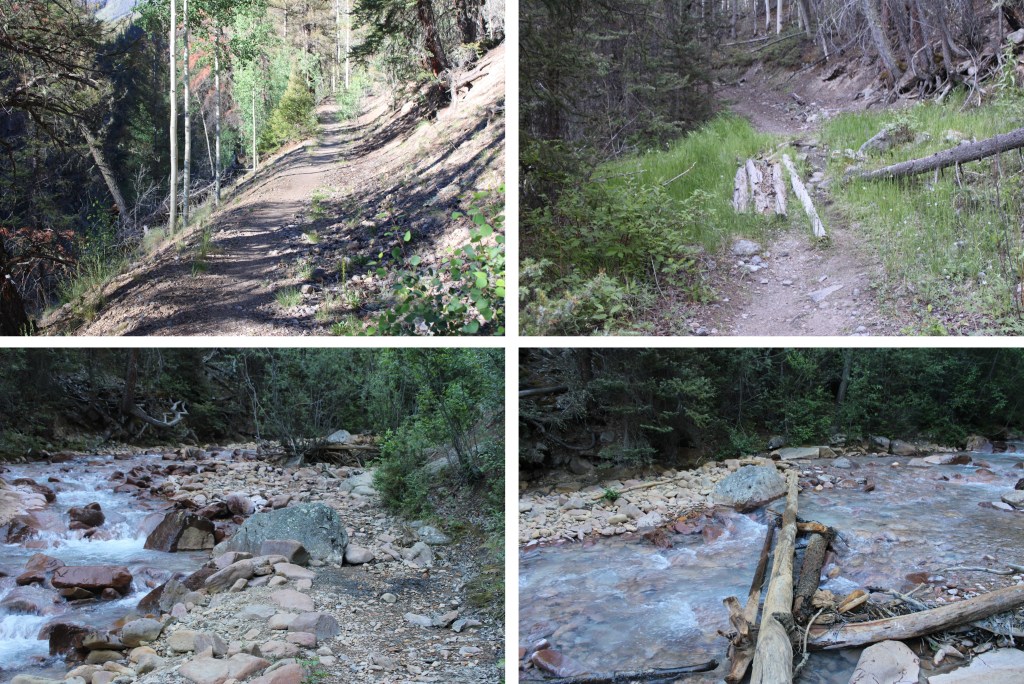
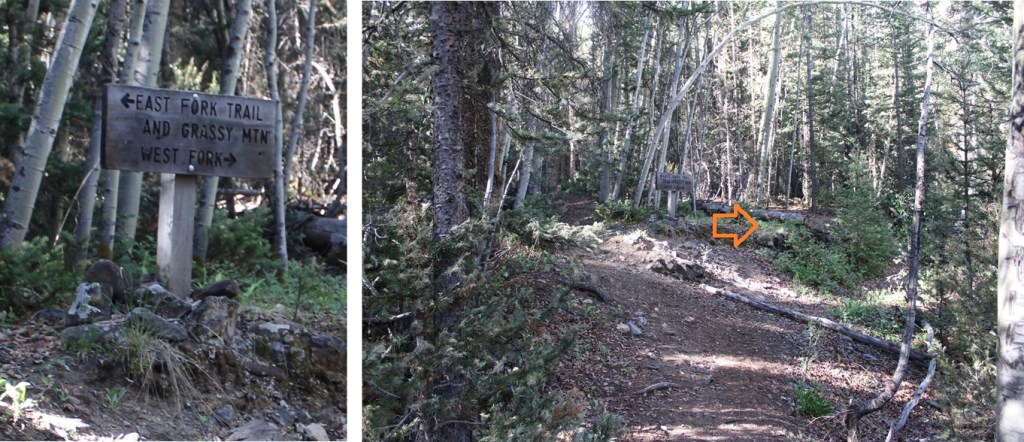
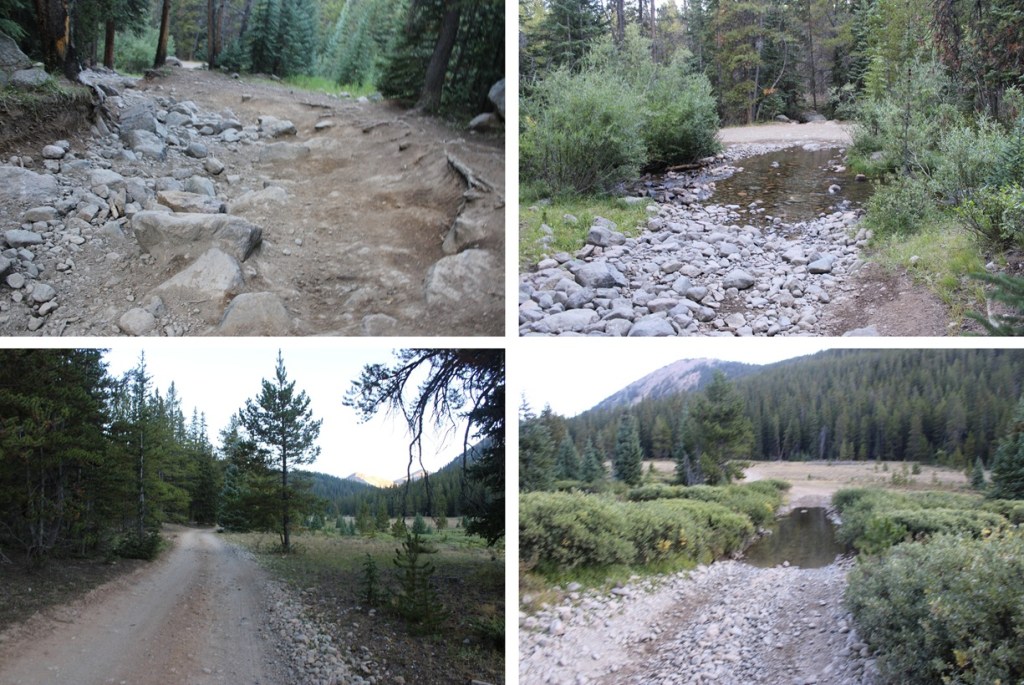
After hiking for about 2.75 miles I came to a bend in the stream
Just after this bend I came to a junction and went right, towards West Fork, heading southwest.
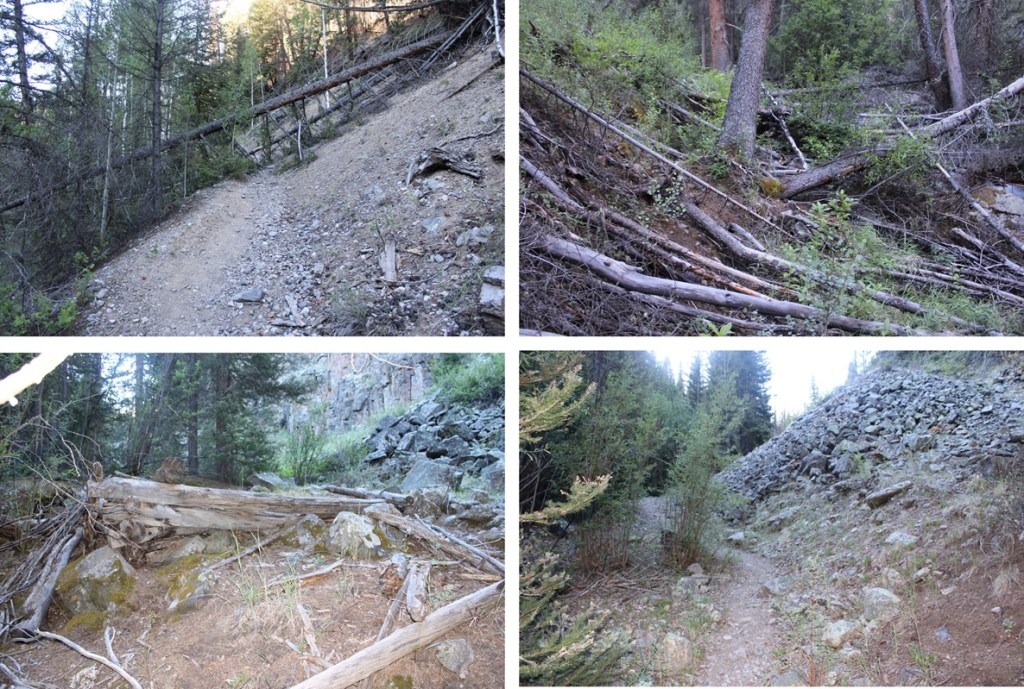
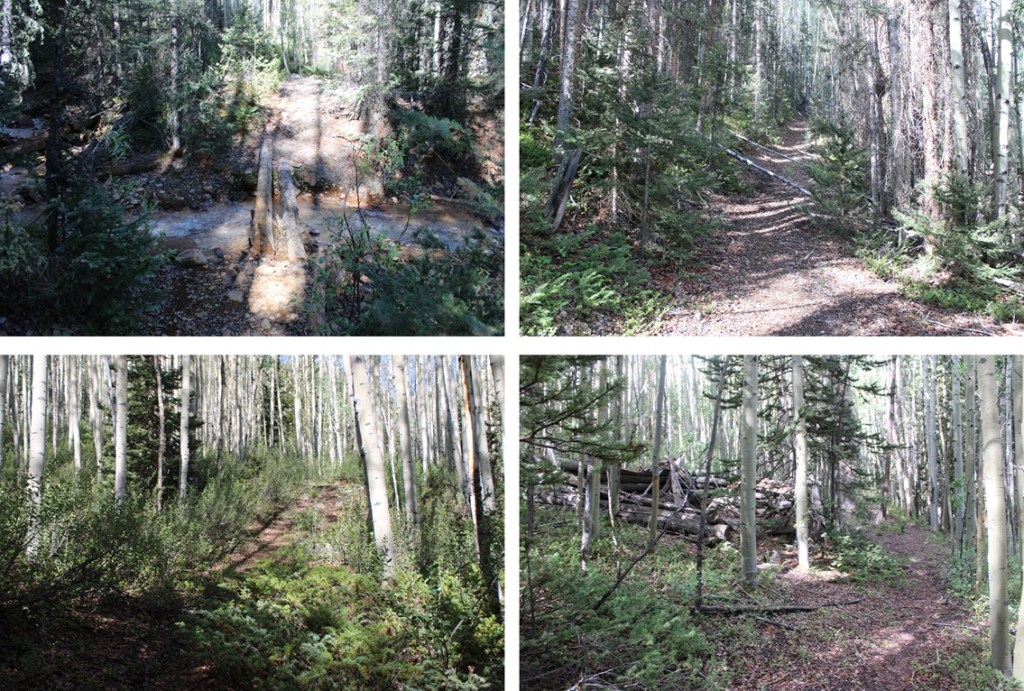
This part of the trail was even less maintained. Way more downed trees to navigate. The trail also faded in and out every so often, making it difficult to follow.
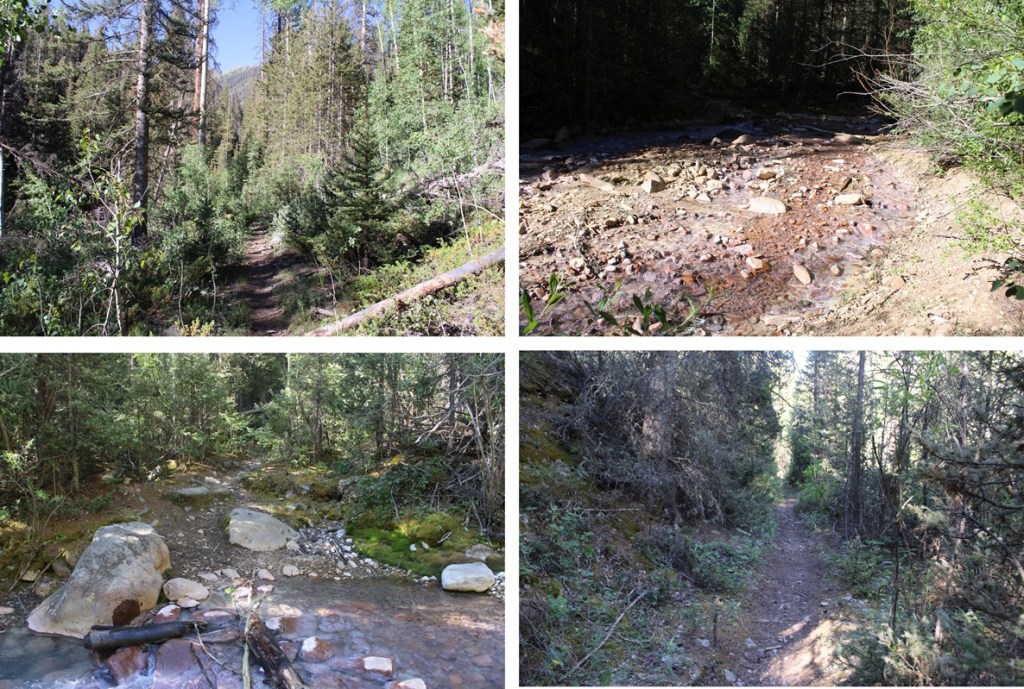
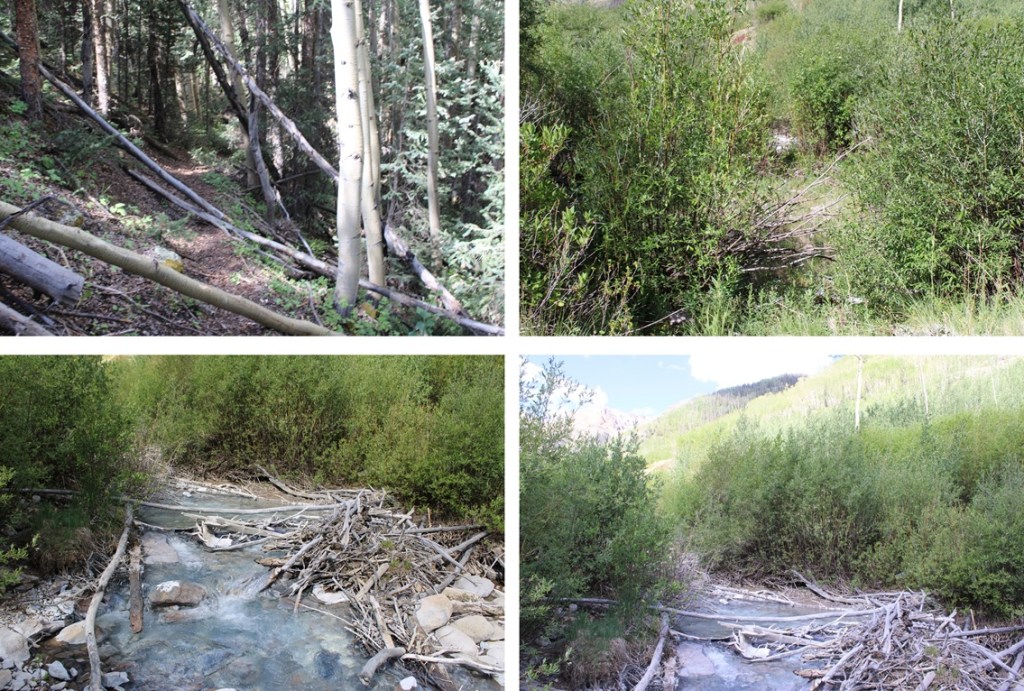
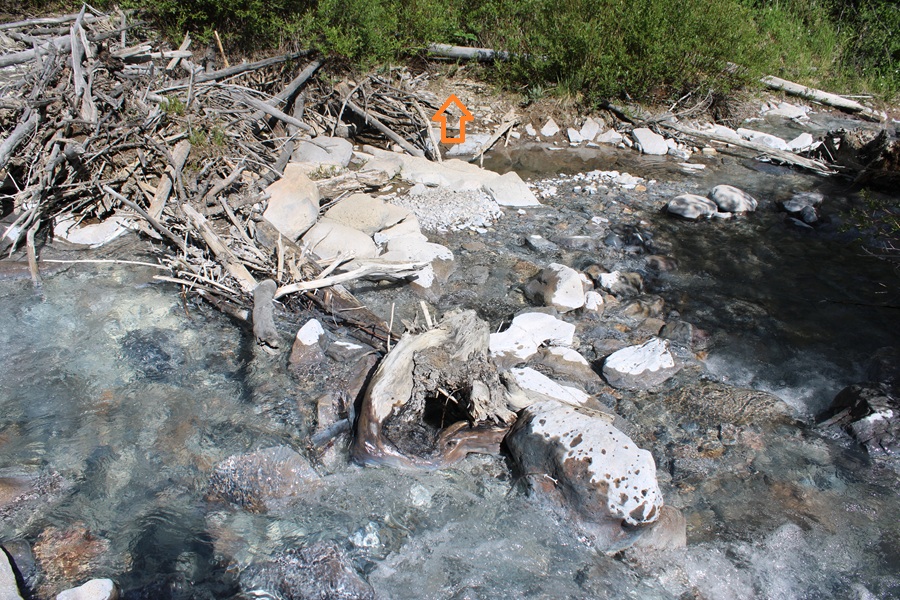
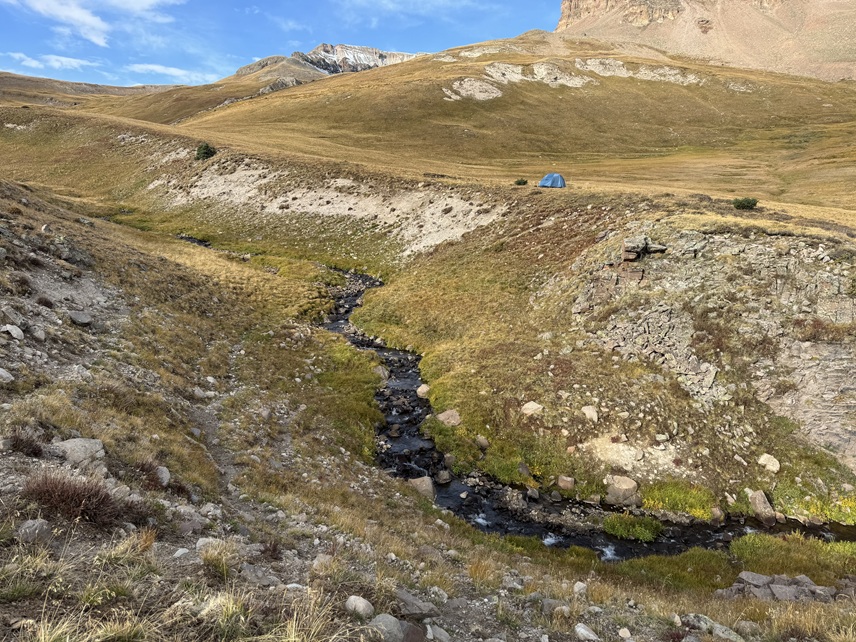
I navigated my way southwest, and after 4 miles of hiking (total) came to my final creek crossing over Alpine Gulch. There was quite a bit of evidence of beaver, moose, and bear activity in the area.
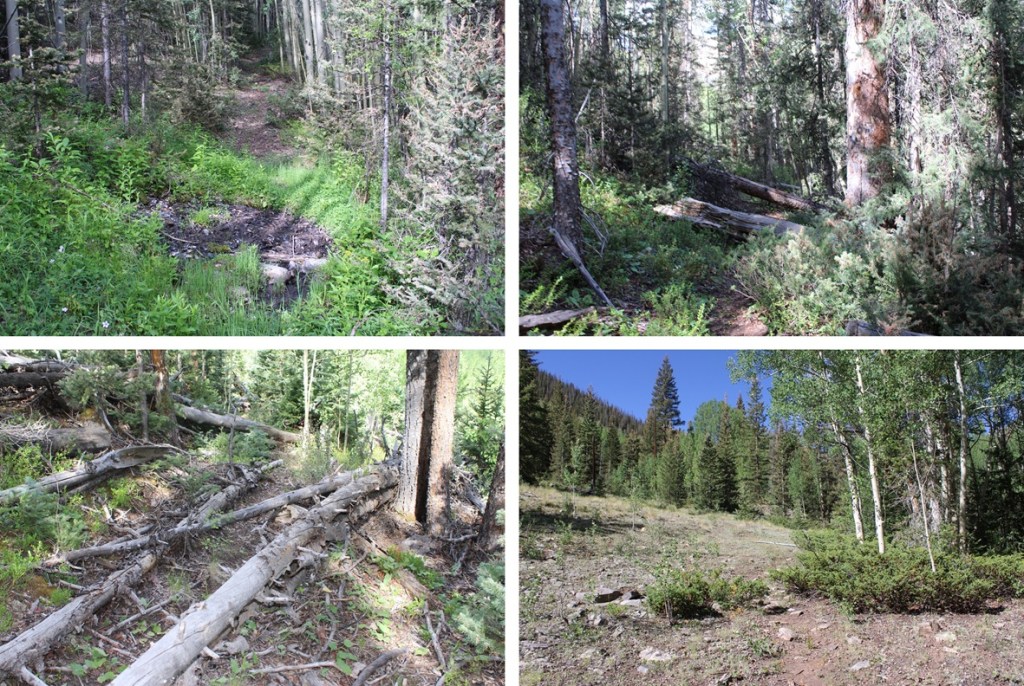
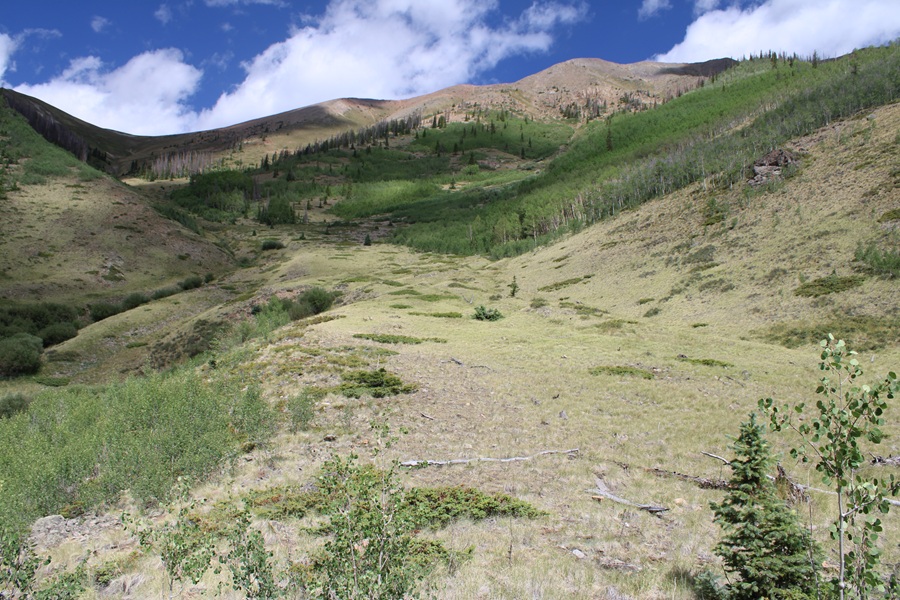
I crossed the creek and continued on a faint trail southwest to 10430’
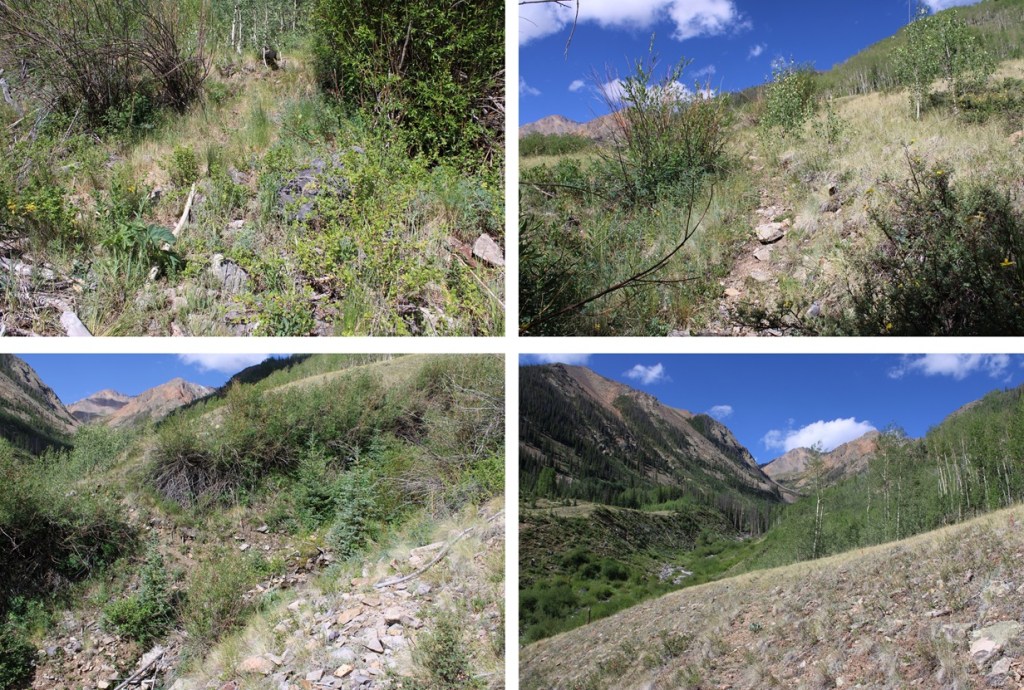
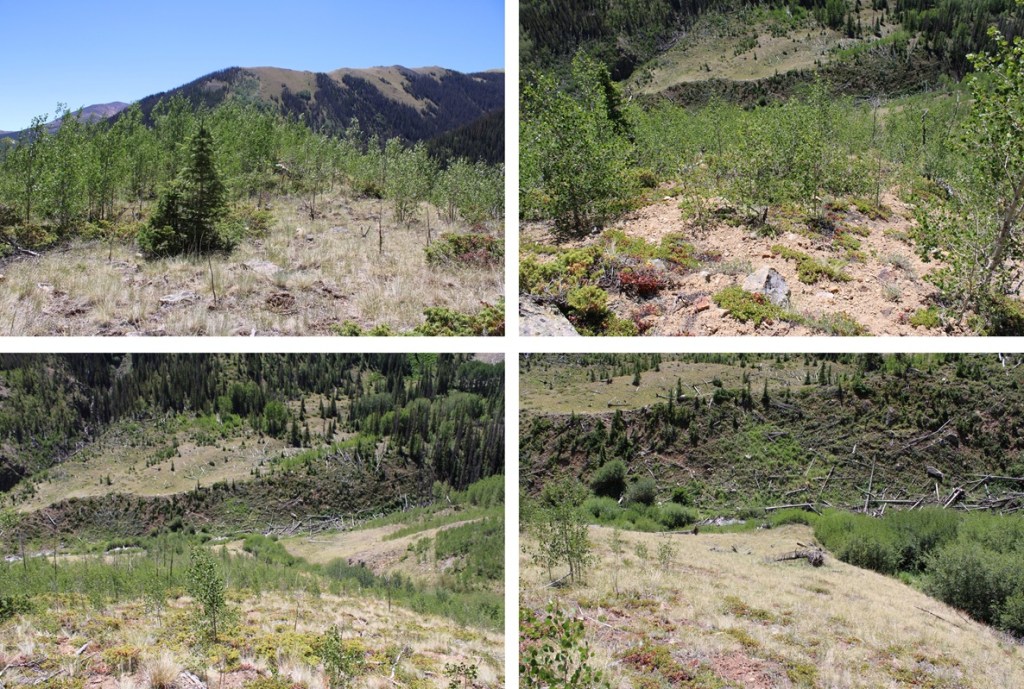
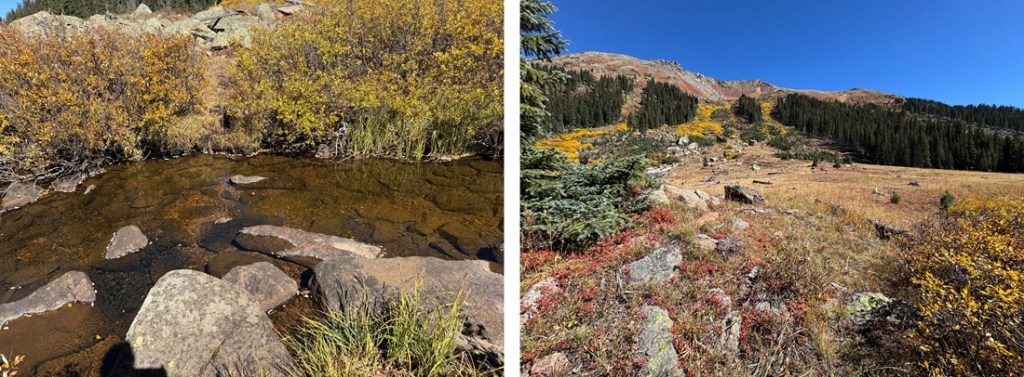
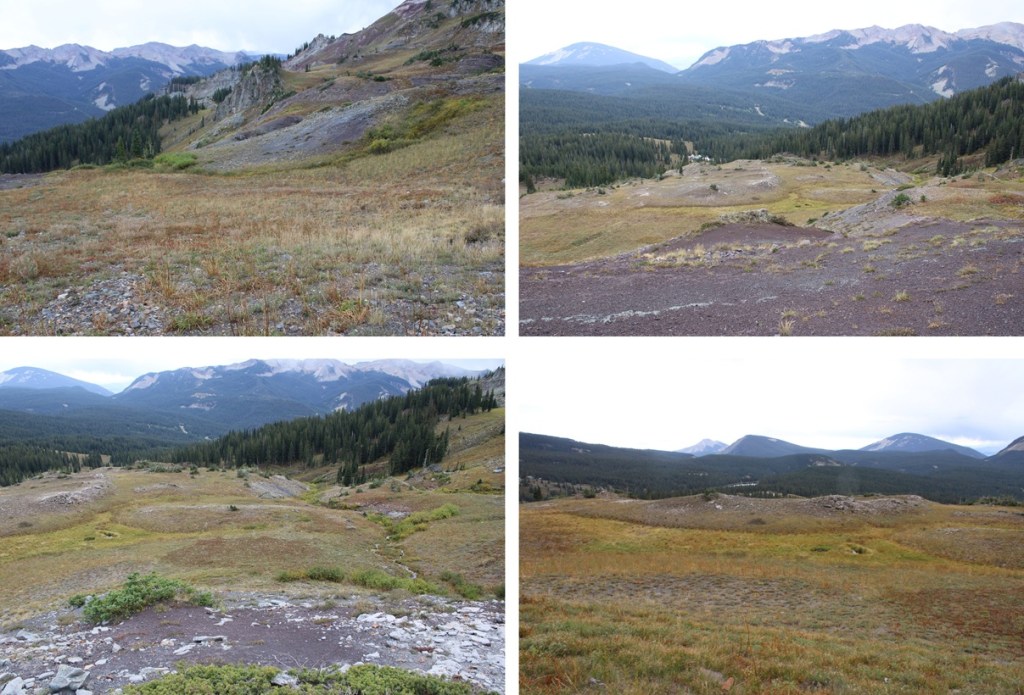
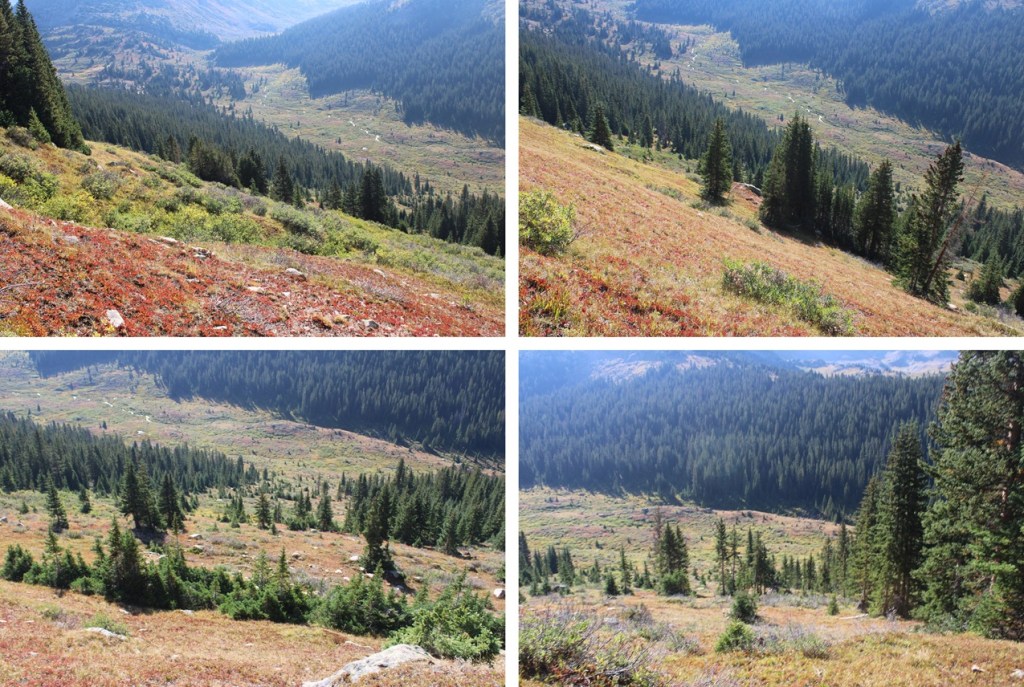
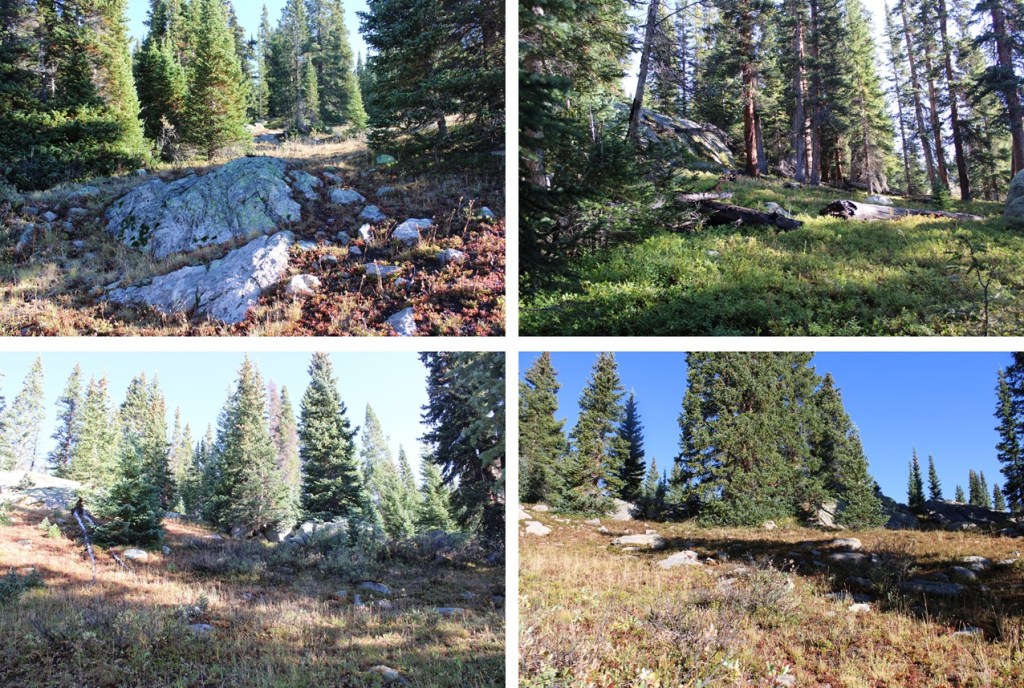
Just before coming to an avalanche debris area in the creek and a gulch at 10430’ I turned right and left the trail. I started heading northwest up the ridge. There were a lot of aspens to navigate and the terrain was steep.
At the top of this aspen grove at around 10,800’ I decided to make my camp for the night. It’s a semi-flat area with a great view of my route the next morning.
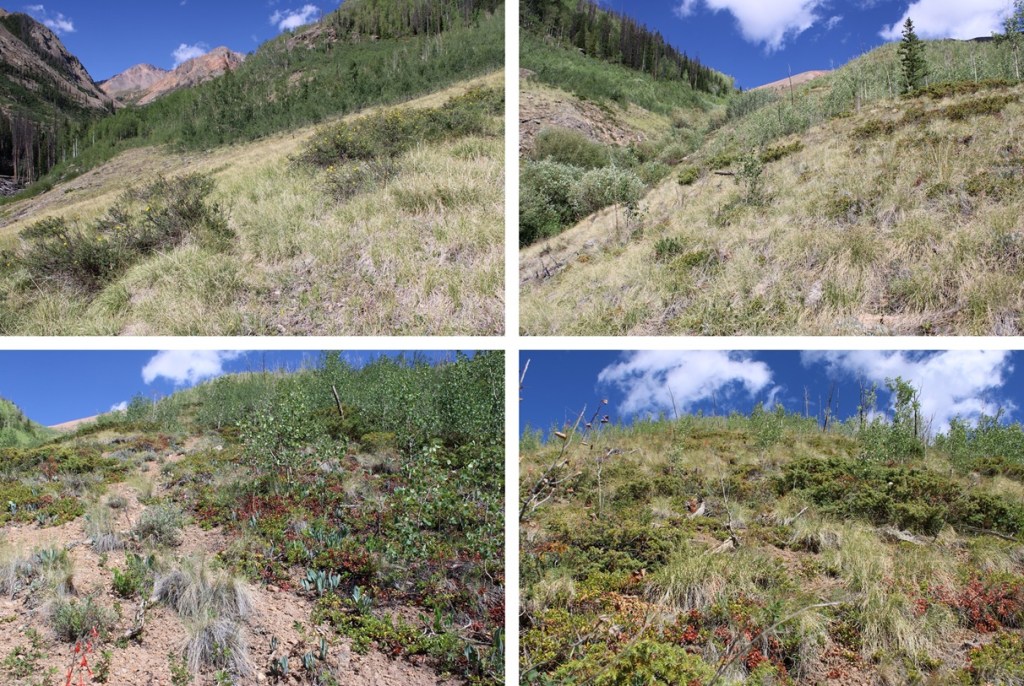
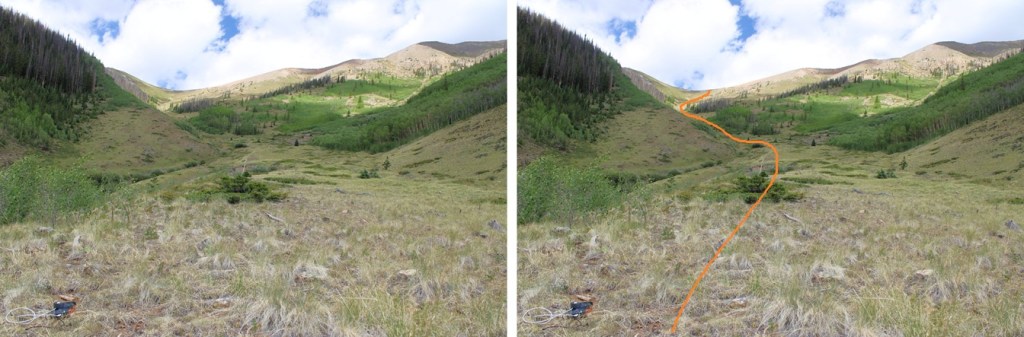
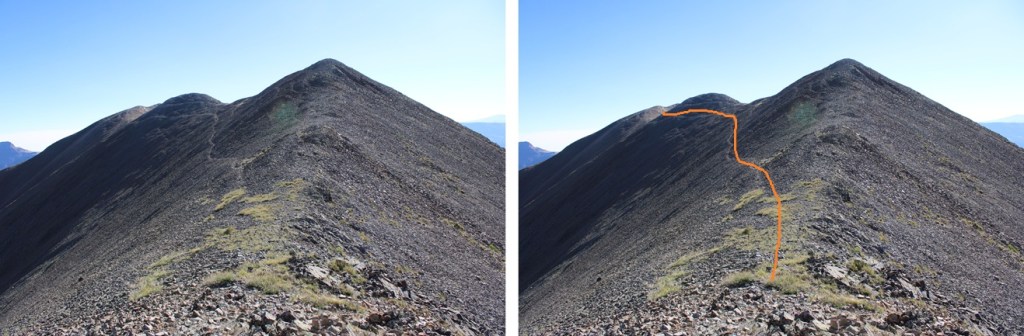
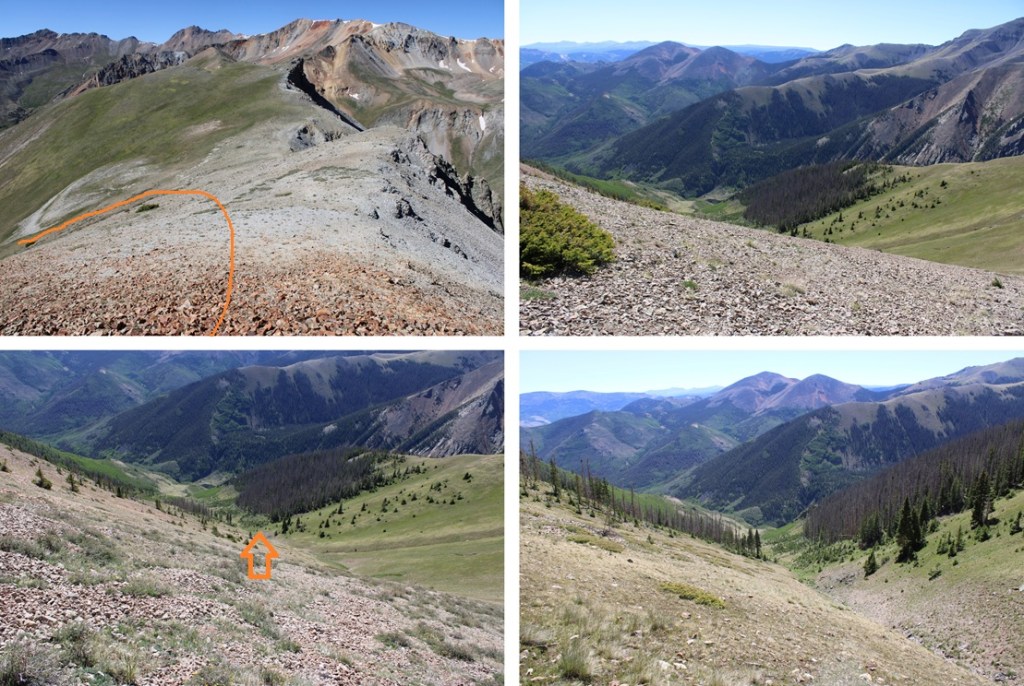
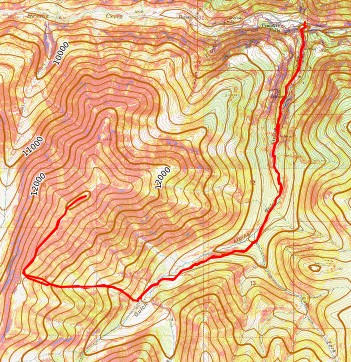
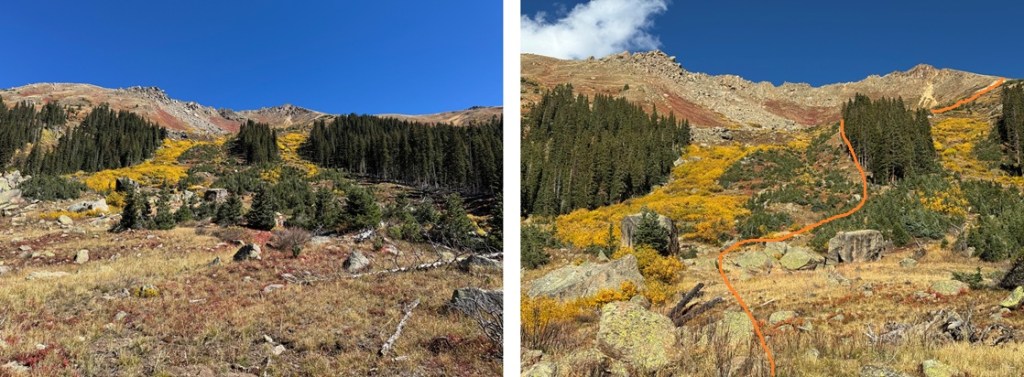
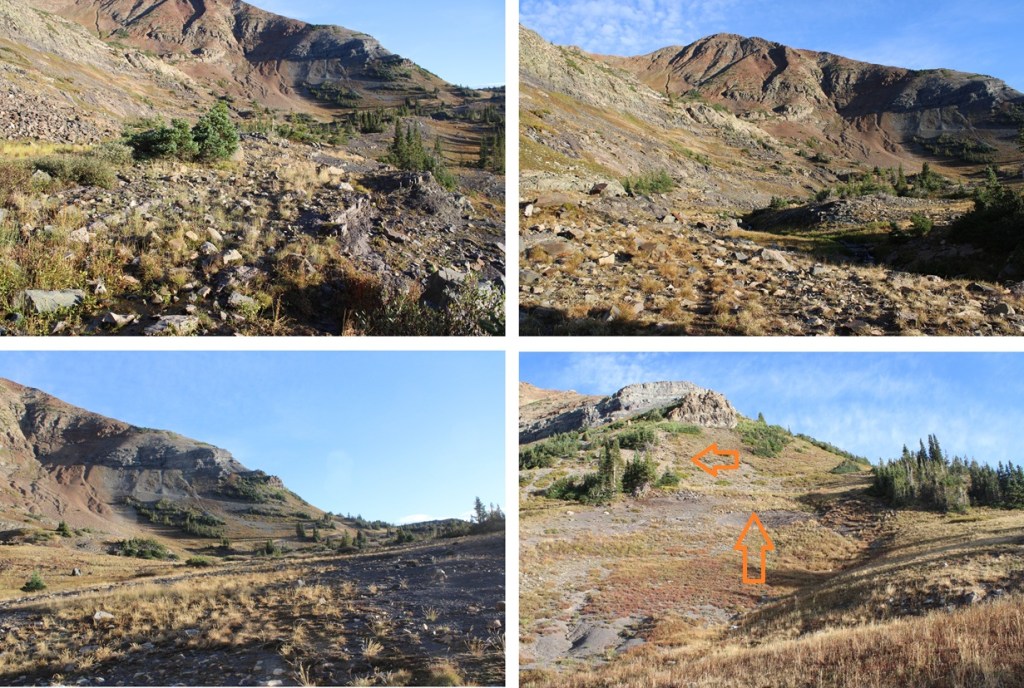
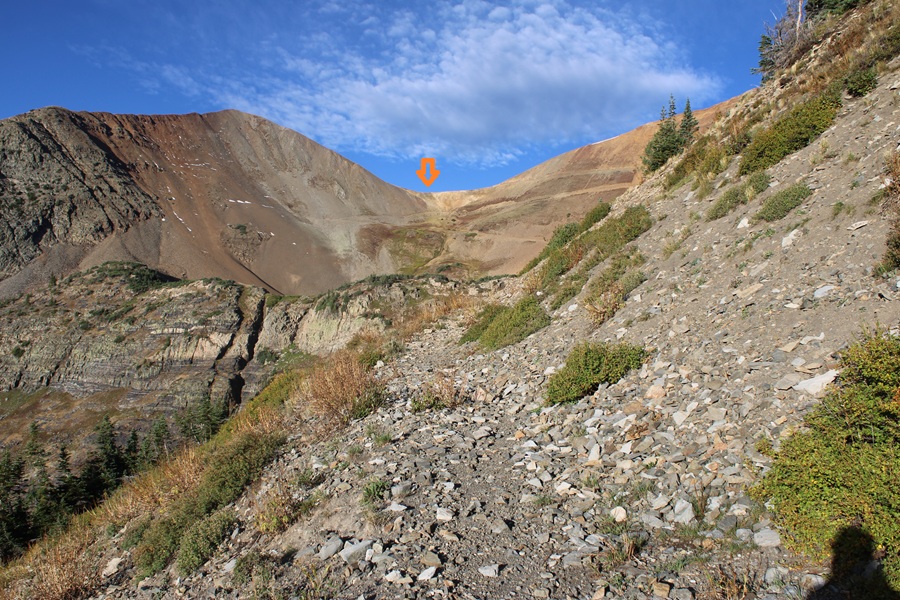
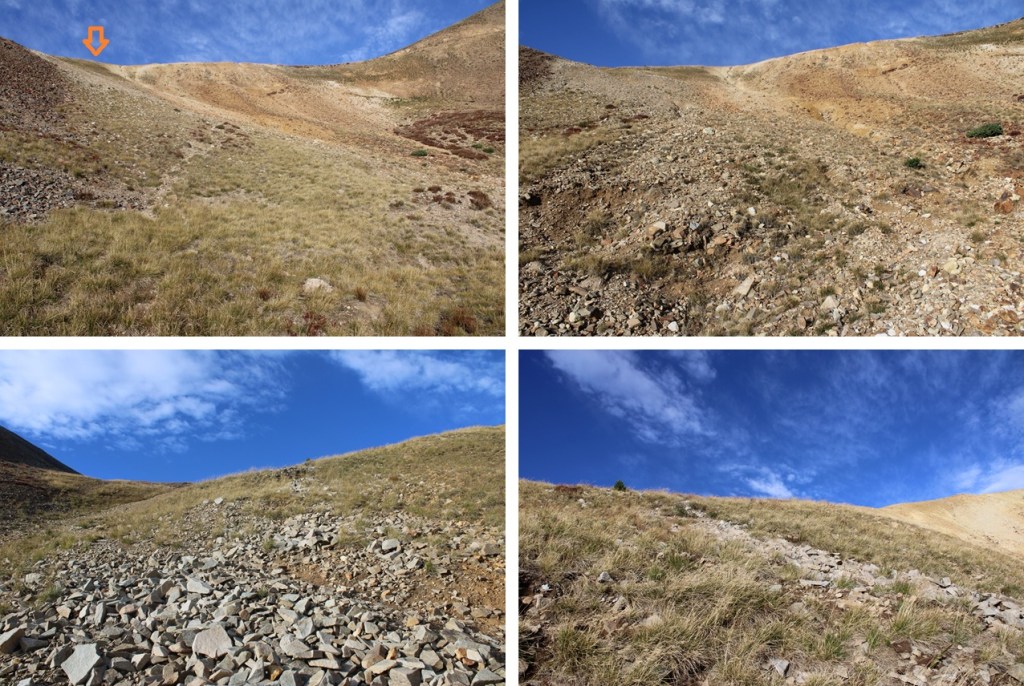
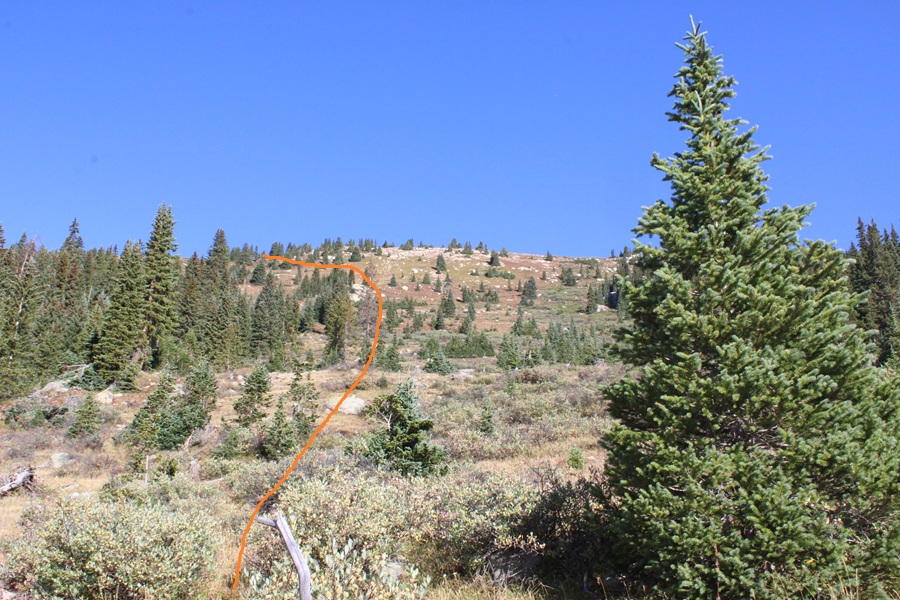
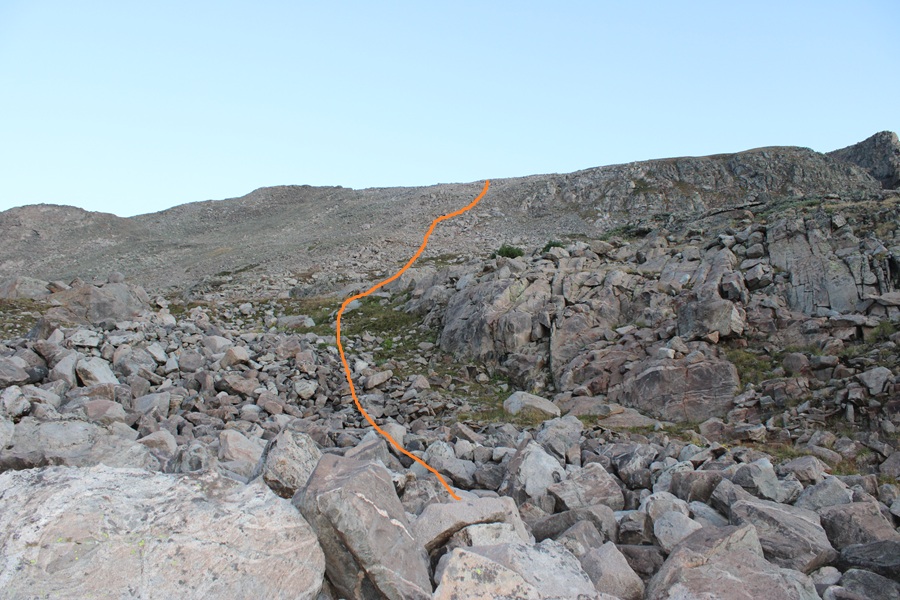
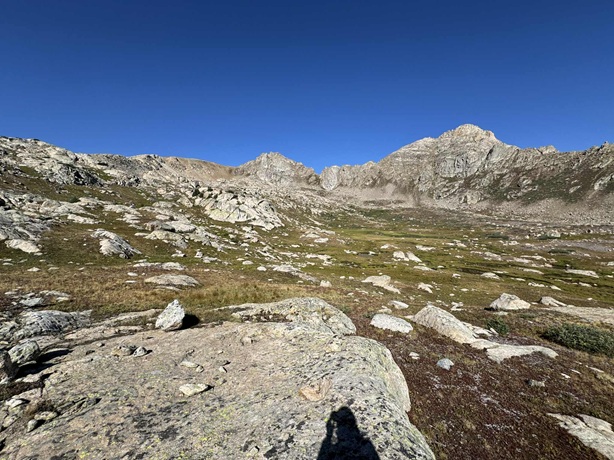
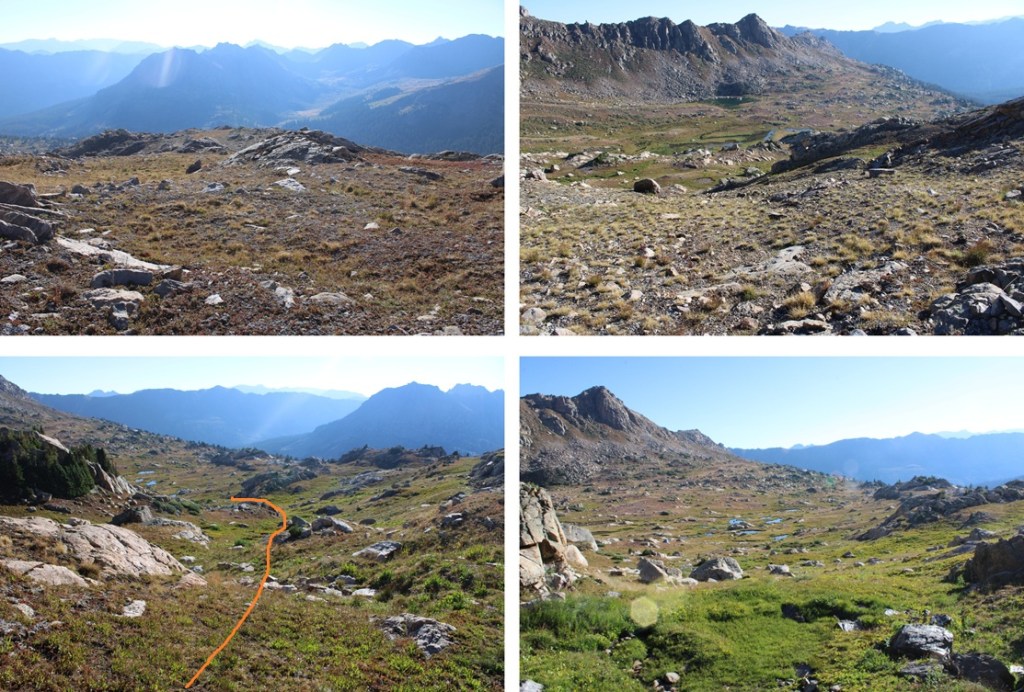
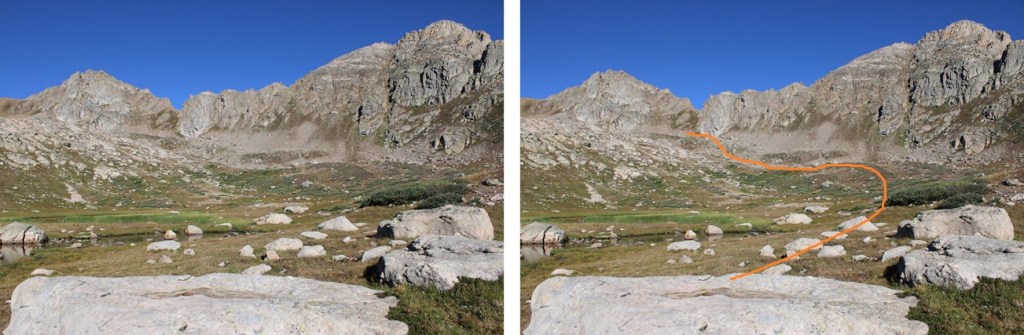
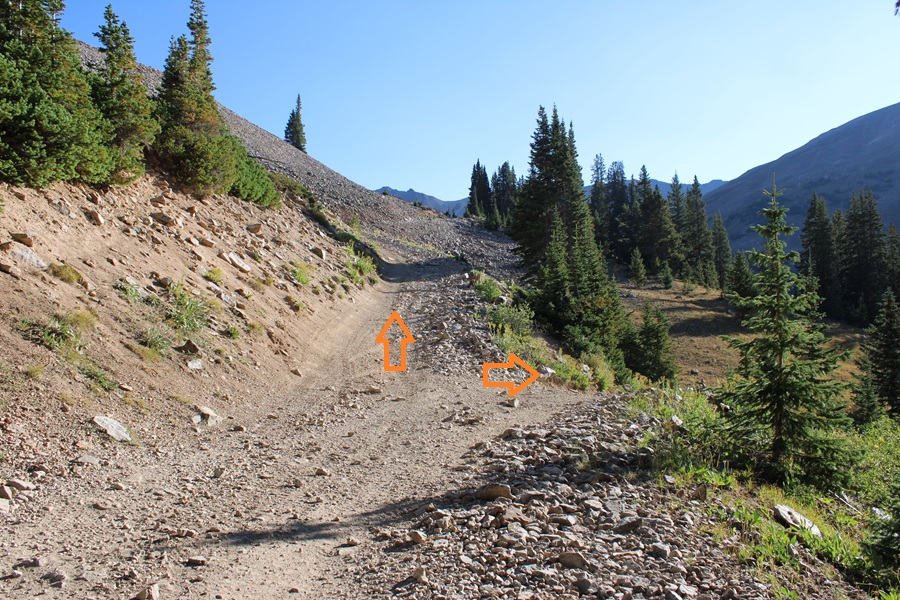
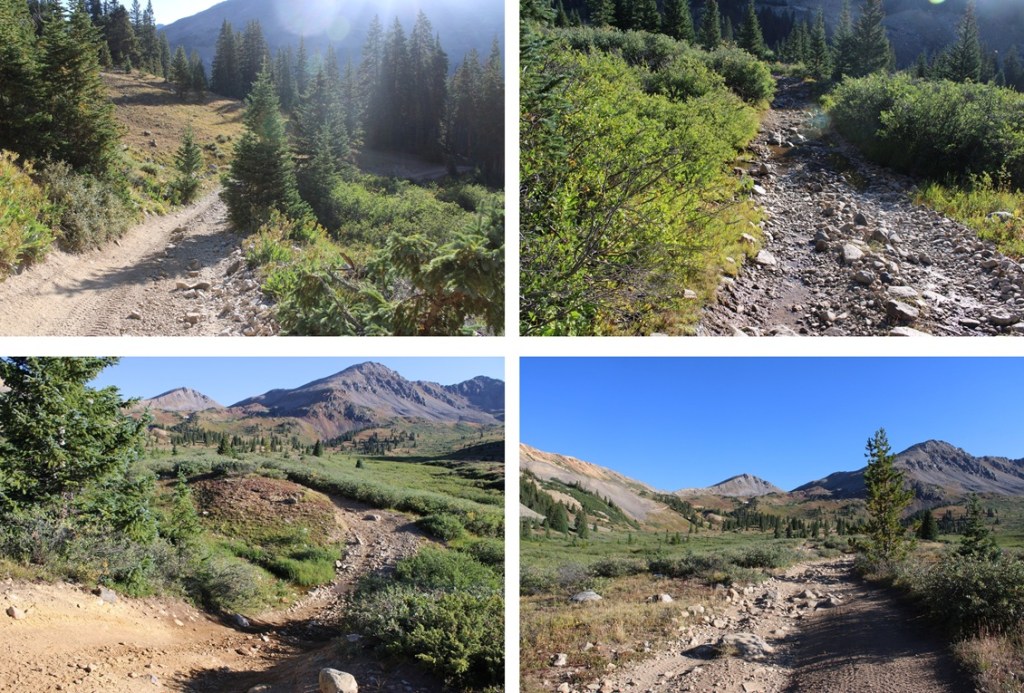
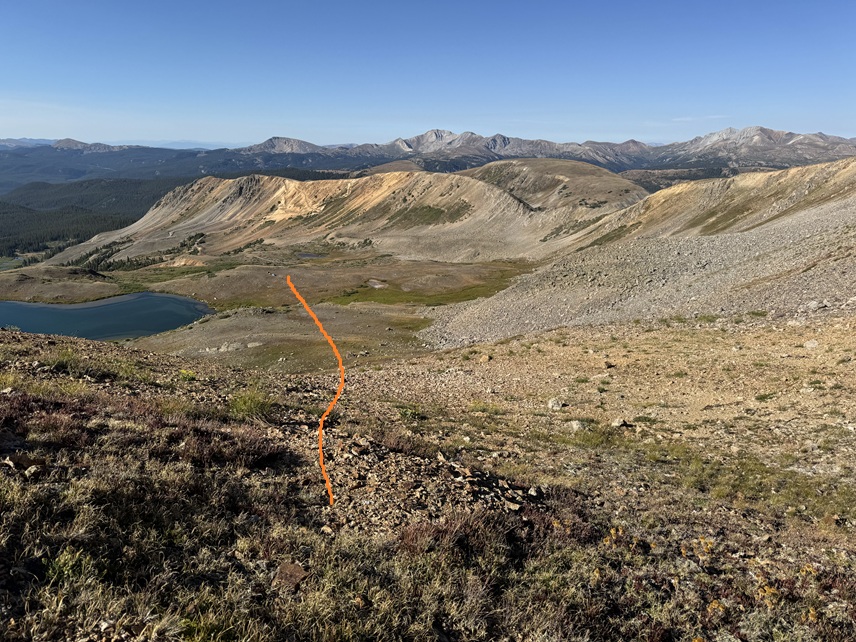
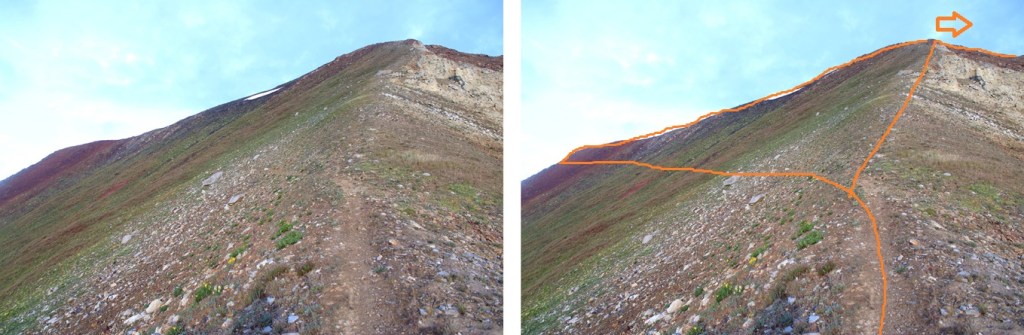
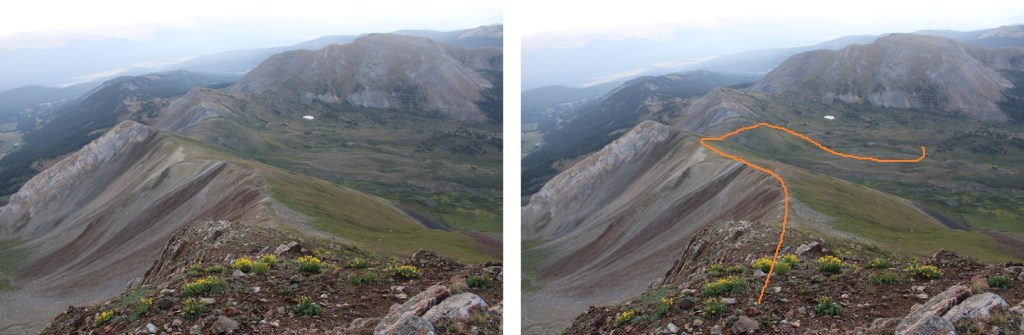
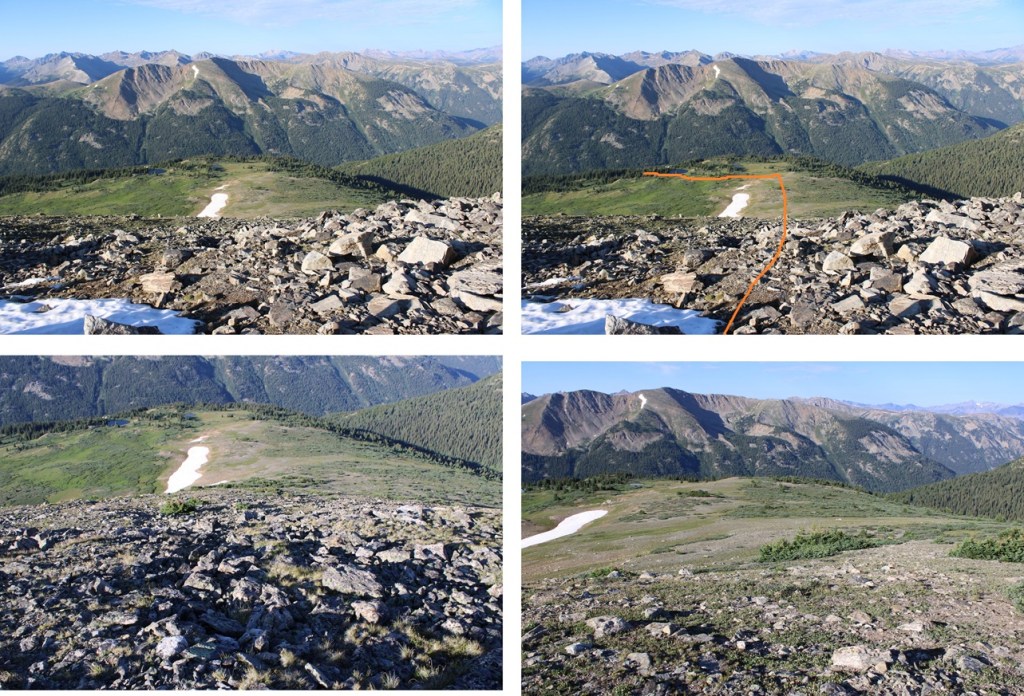
It was a windy afternoon and a windy night. My tent blew away as I was setting it up and I had to chase after it. I put rocks in the inside of my tent to keep it from blowing away, even while I was sitting inside. The wind and smoke from nearby fires were a major factor in my making this a 2 day hike. Early the next morning I took down my tent and was hiking by 6:10am. Here’s the route I took to the saddle:
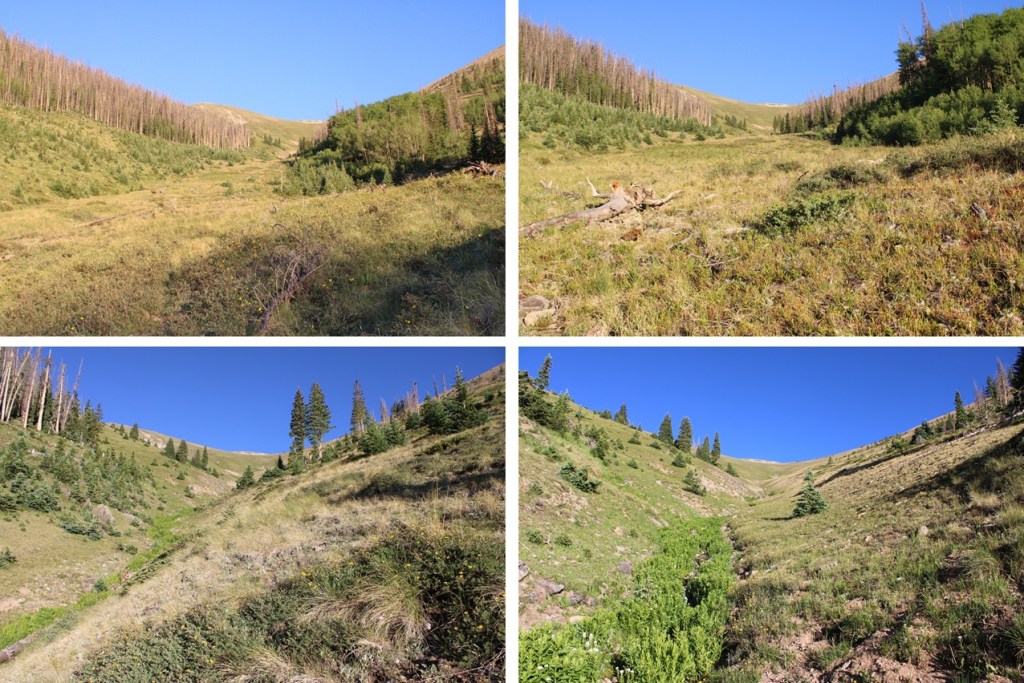
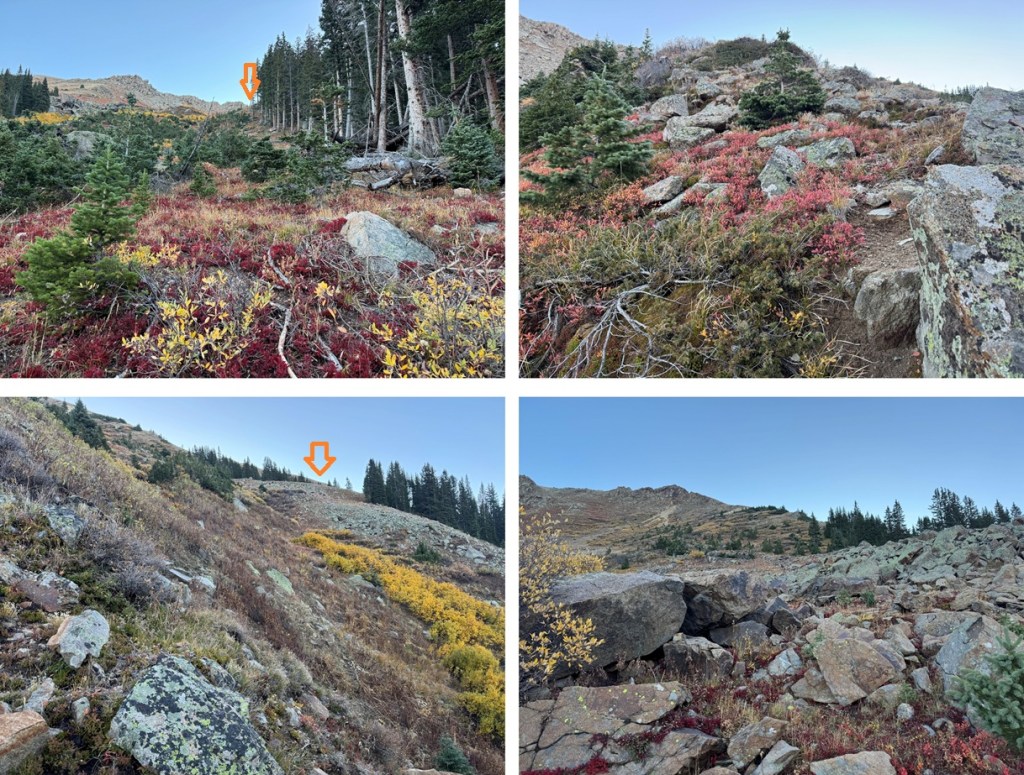
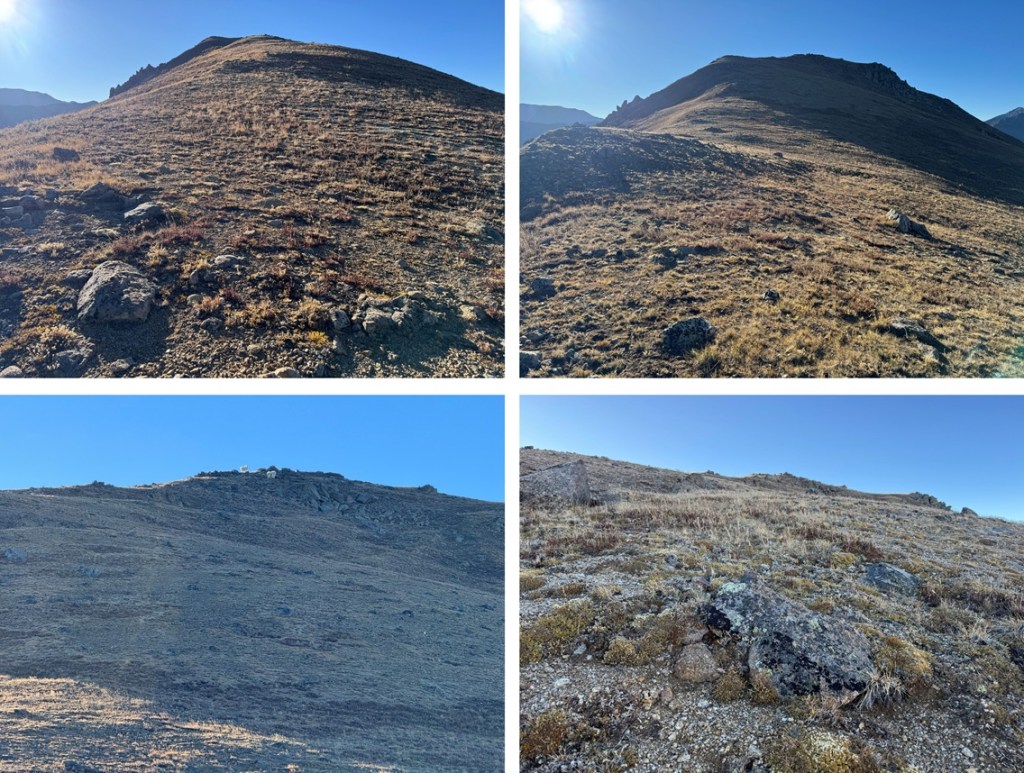
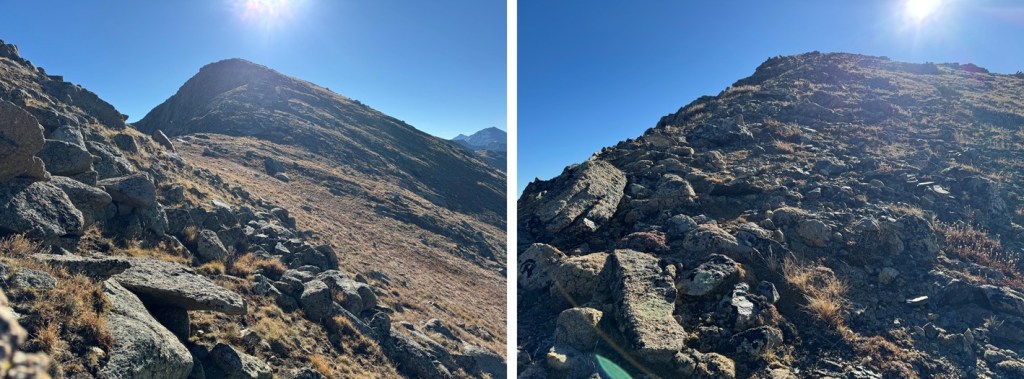
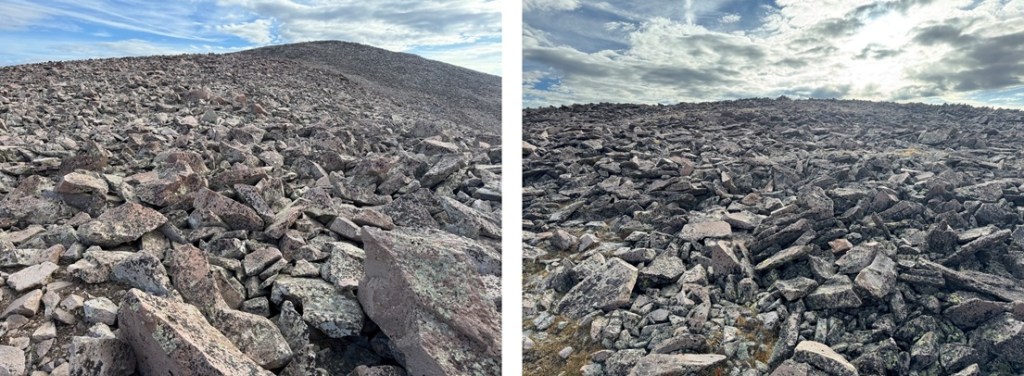
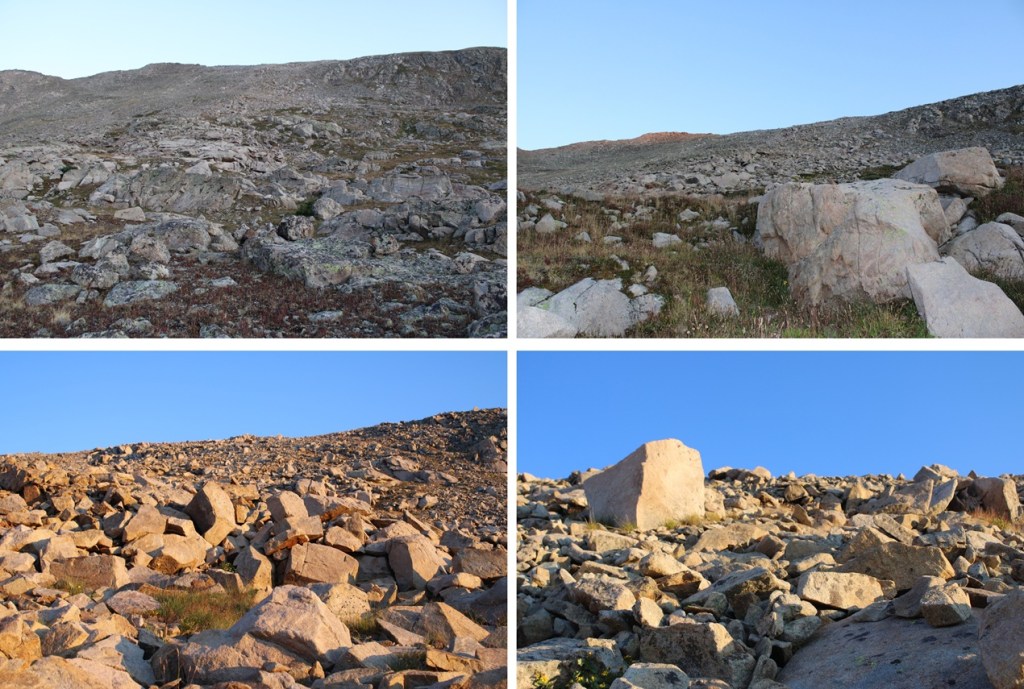
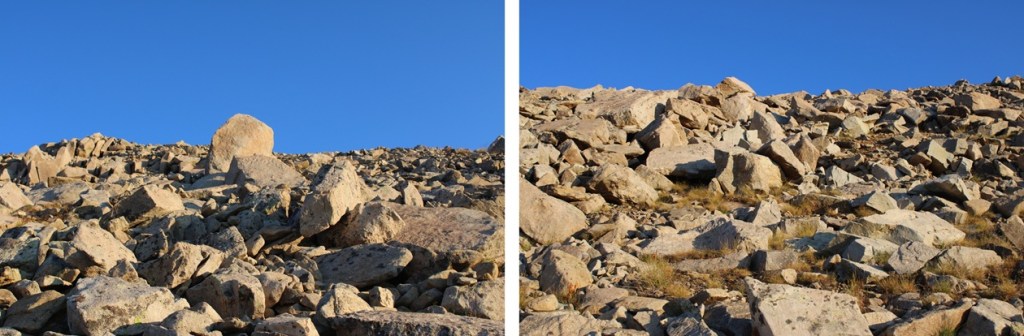
This looks straightforward but it was the most difficult part of the hike. From turning off the main trail earlier it was 1.25 miles with 2280’ of elevation gain to the saddle. The terrain is much steeper than it looks and it was slow going. I tried to stay just to the right of the gulch and then I just picked my best line to the saddle. The further up I hiked the steeper and rockier the terrain became.
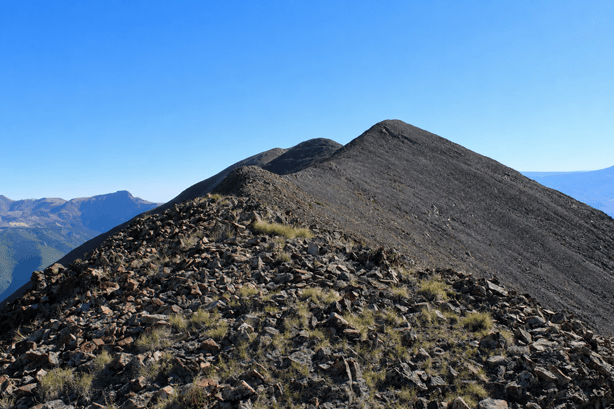
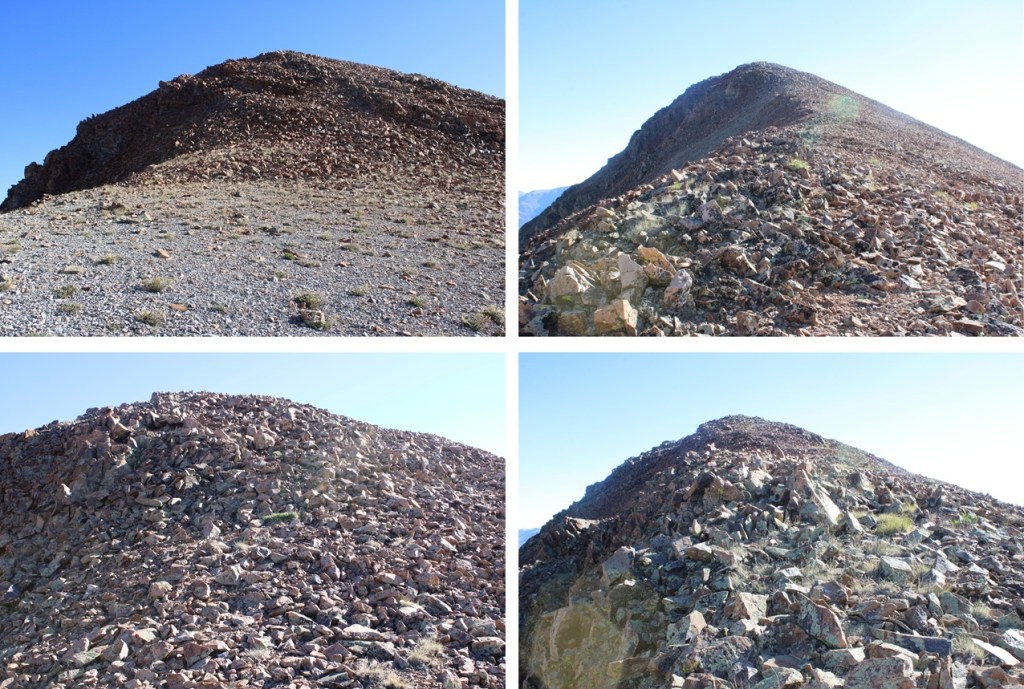
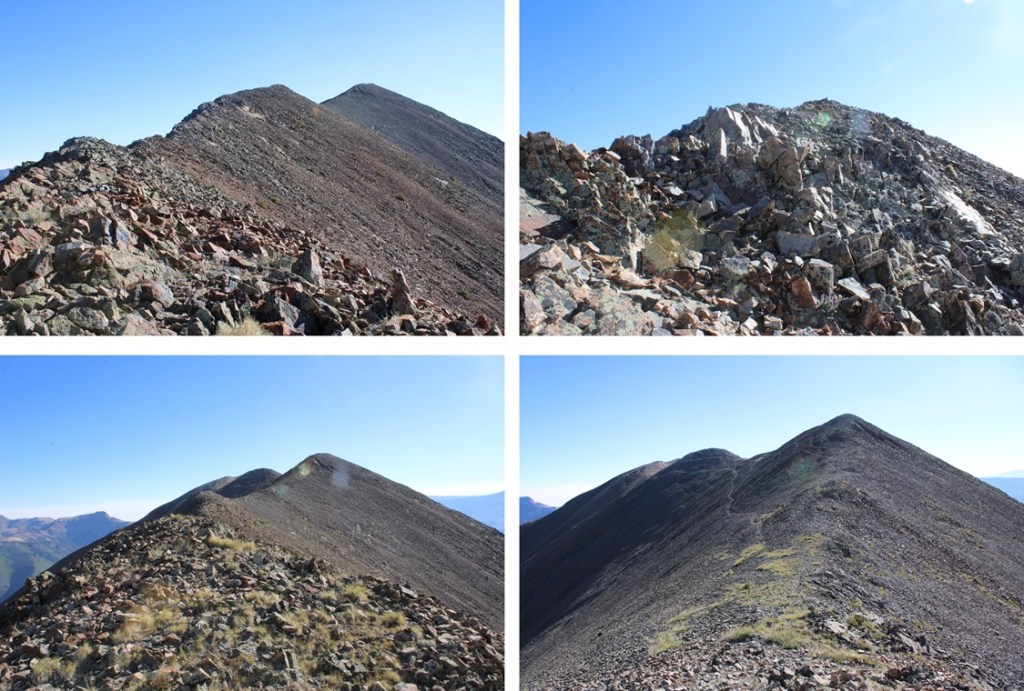
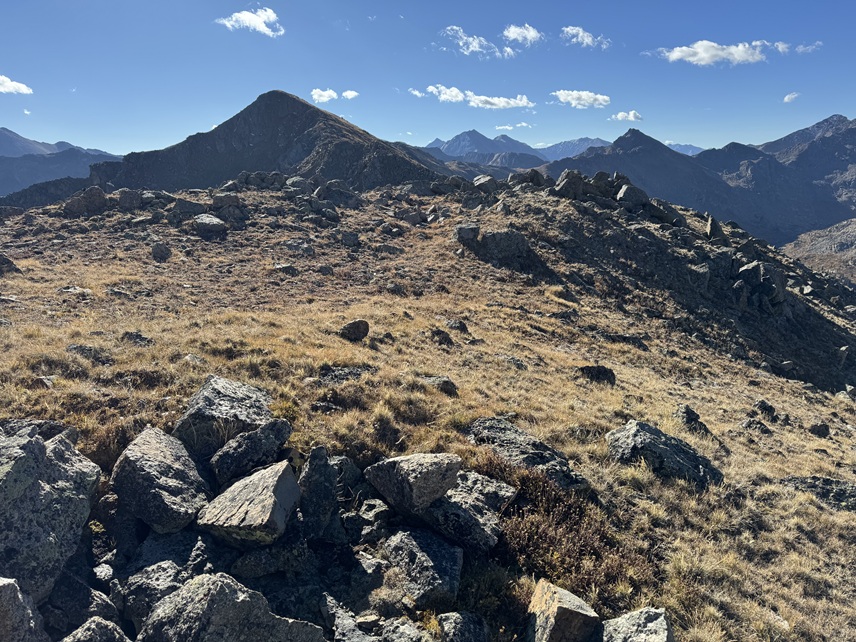
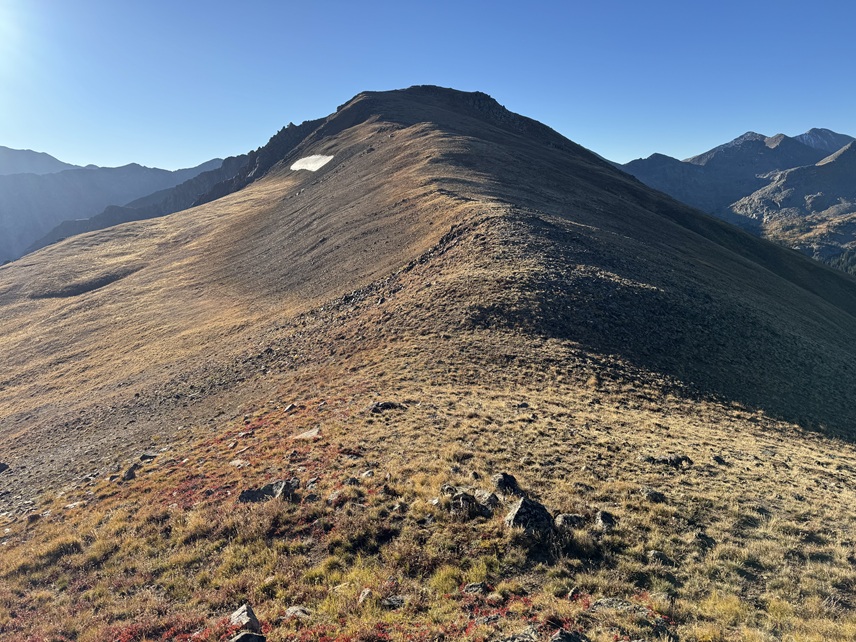
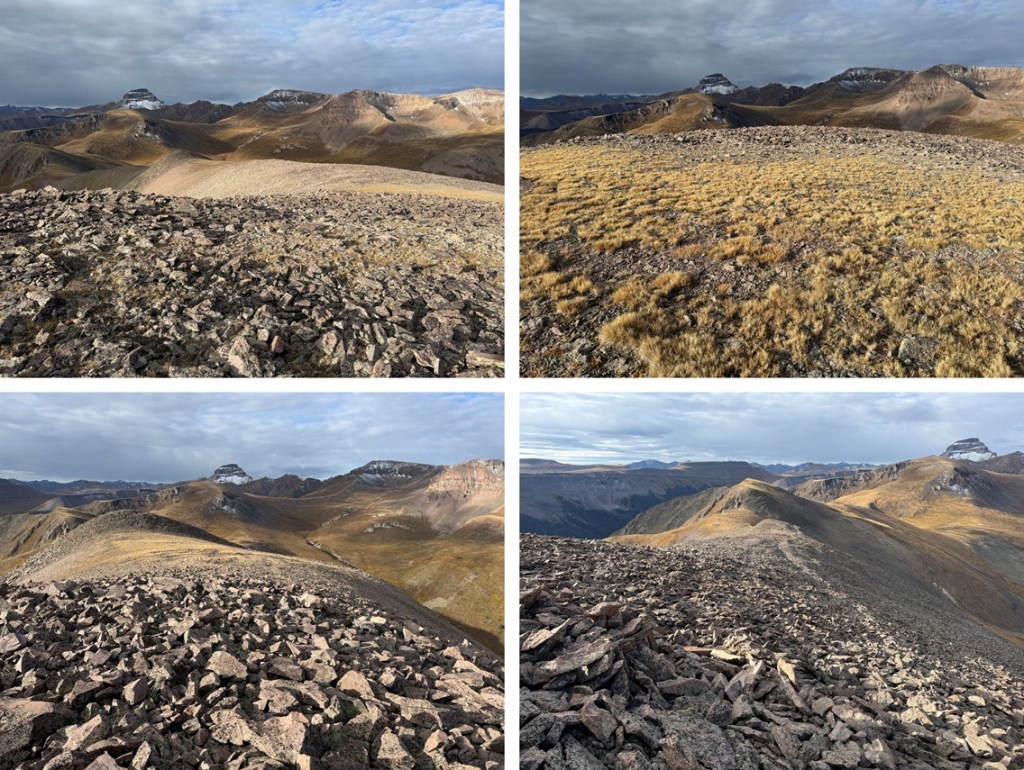
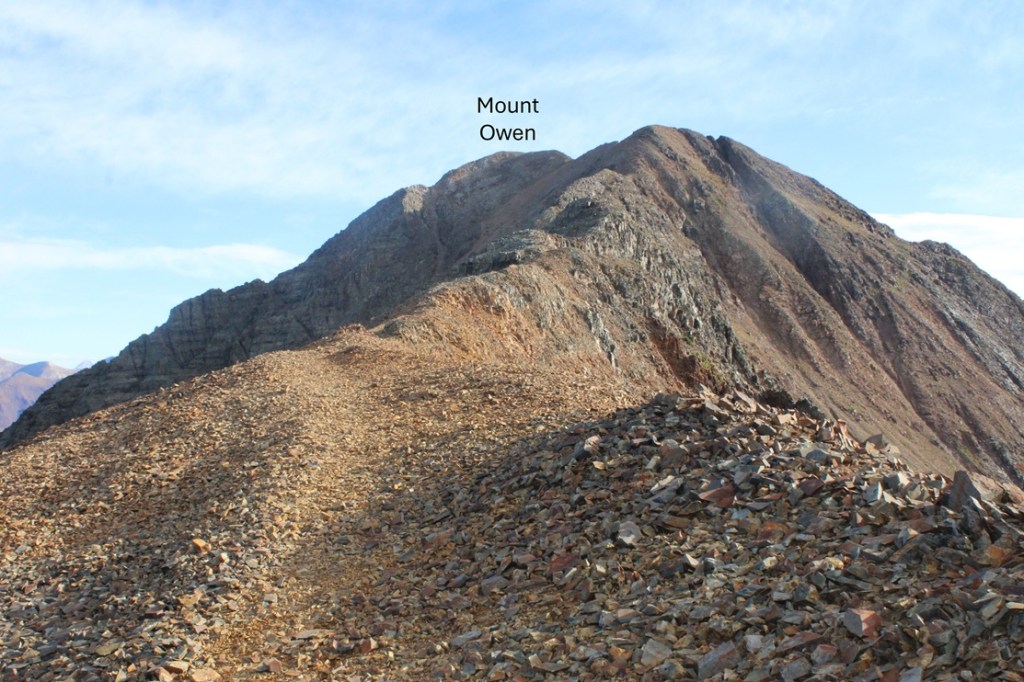
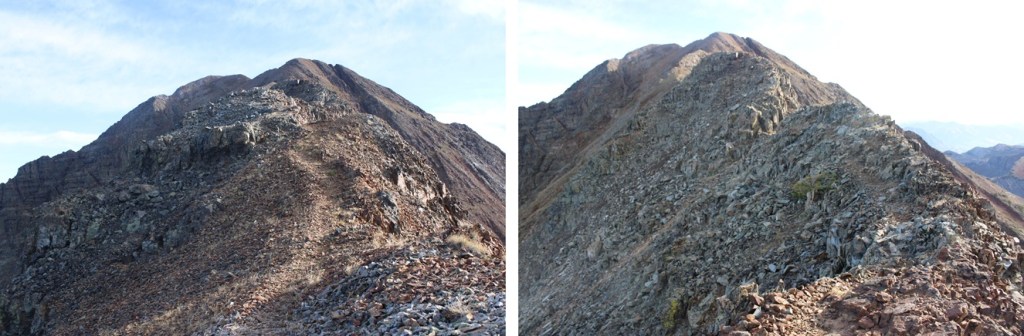
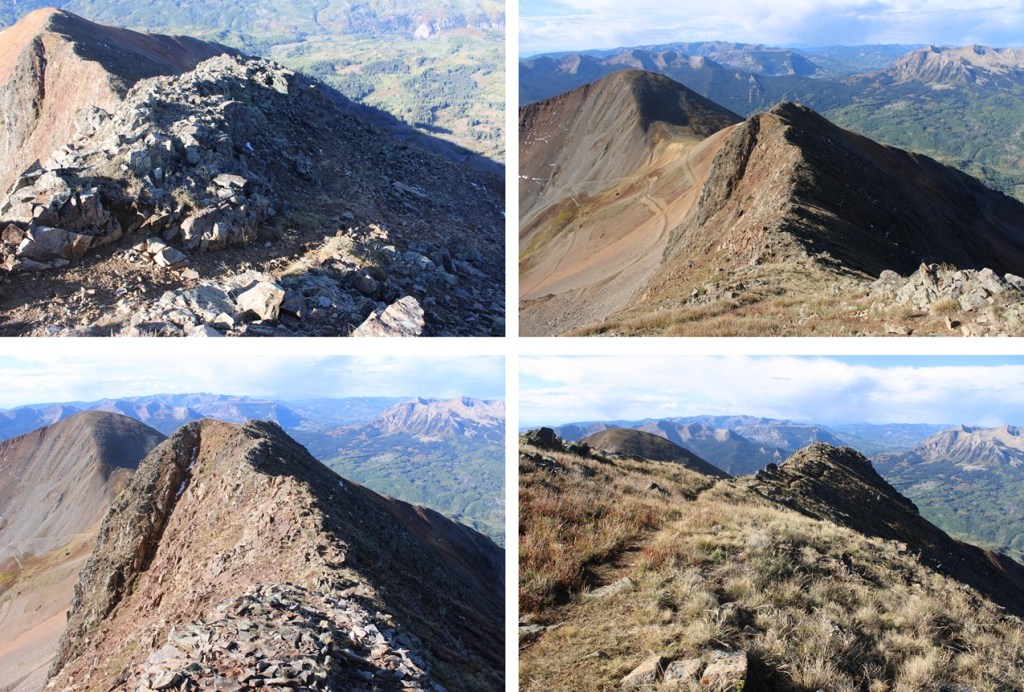
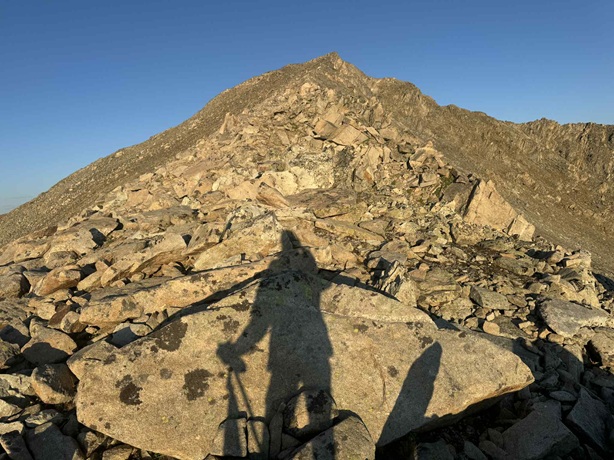
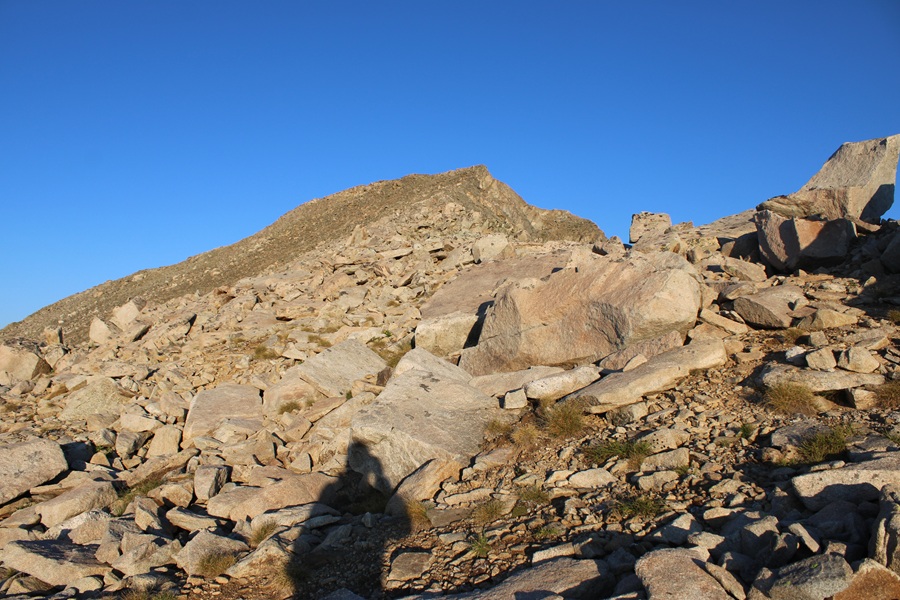
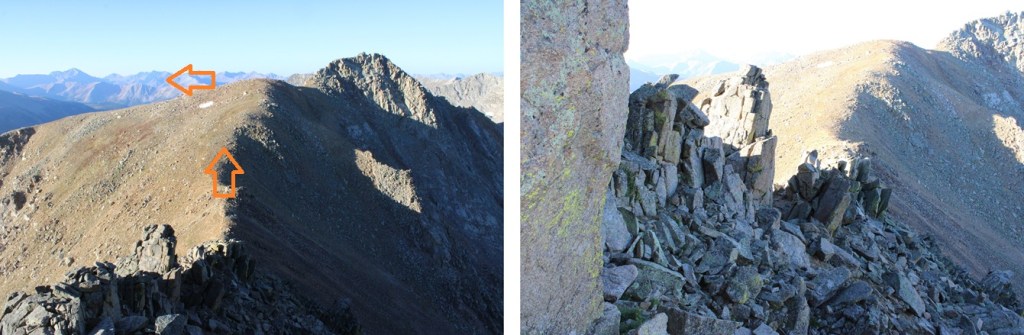
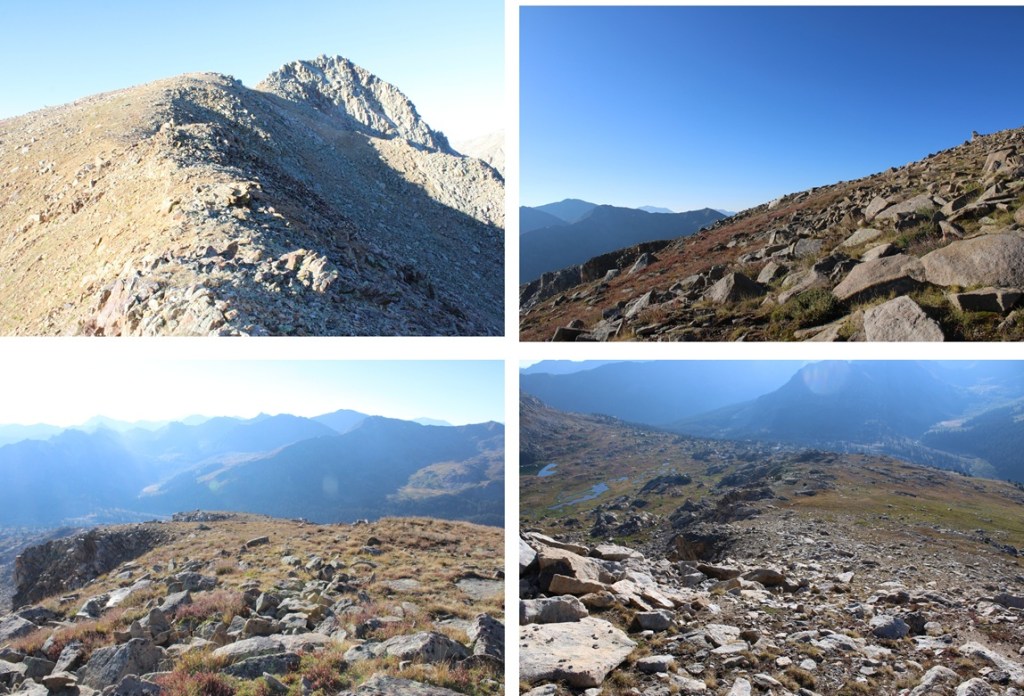
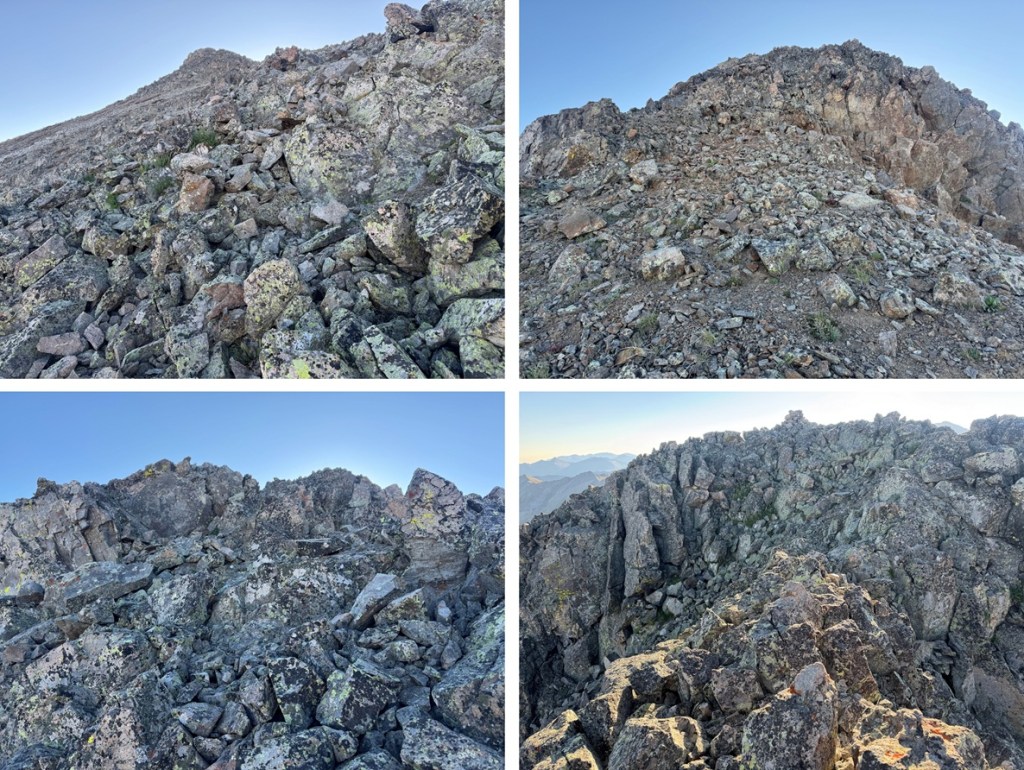
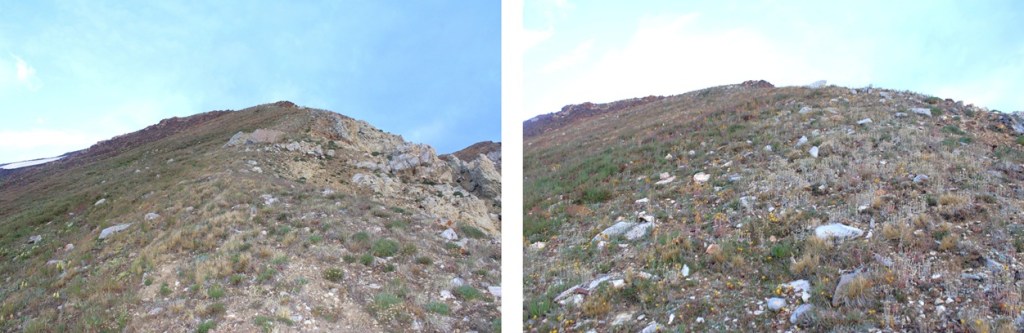
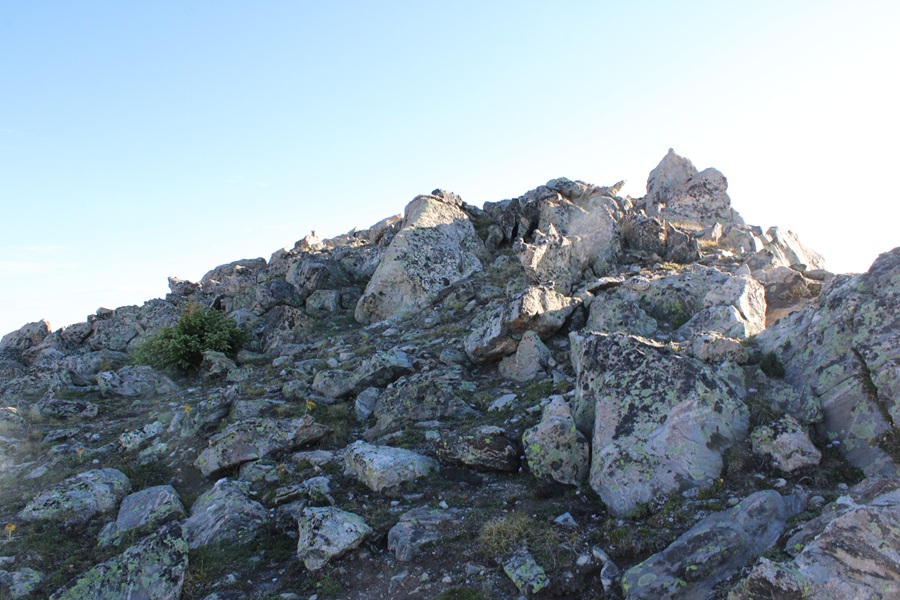
At the saddle I turned right and headed northeast, following the ridge. The ridge goes at a rocky and shale filled class 2 the entire way for a total of 1.1 miles to the actual summit. There are several false summits along the way and game trails to pass these to the left if you don’t want to follow the ridge proper.
I took the game trails to the left to avoid the ridge
26
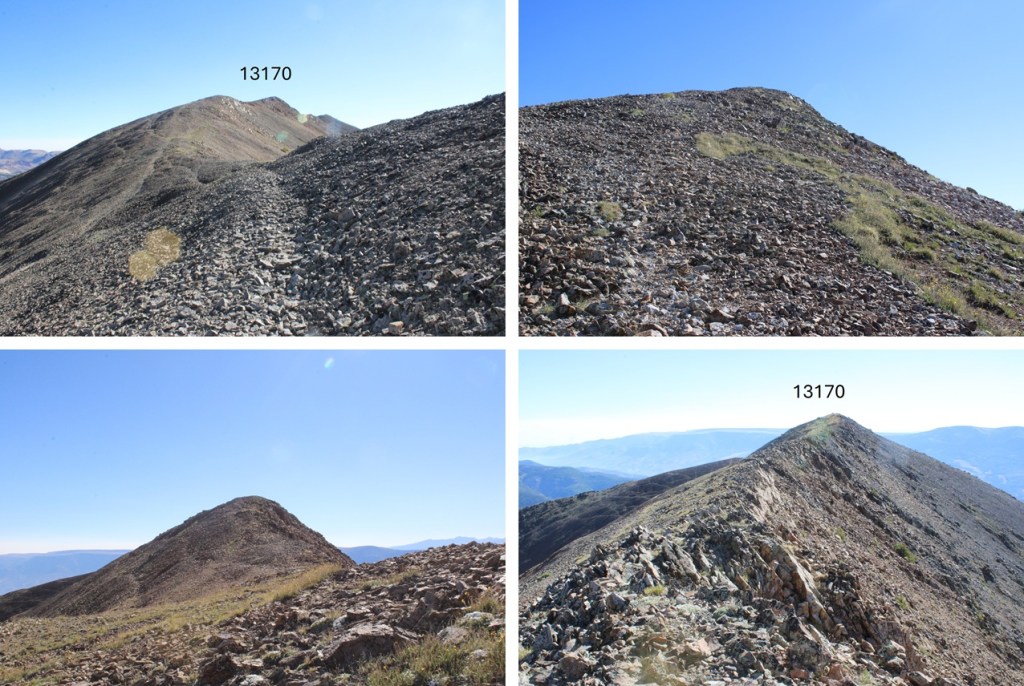
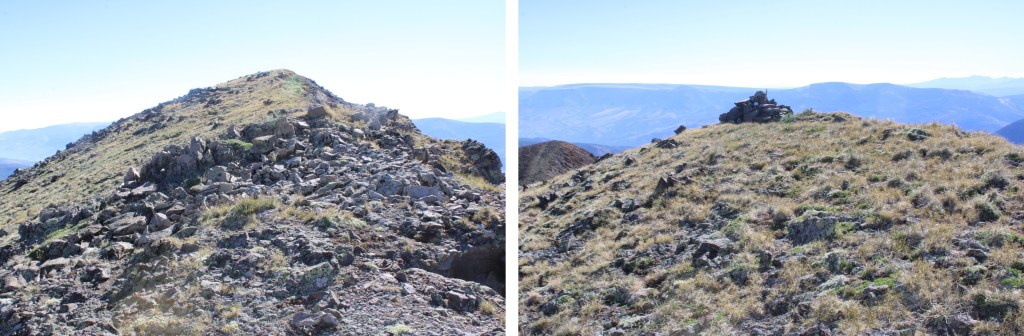
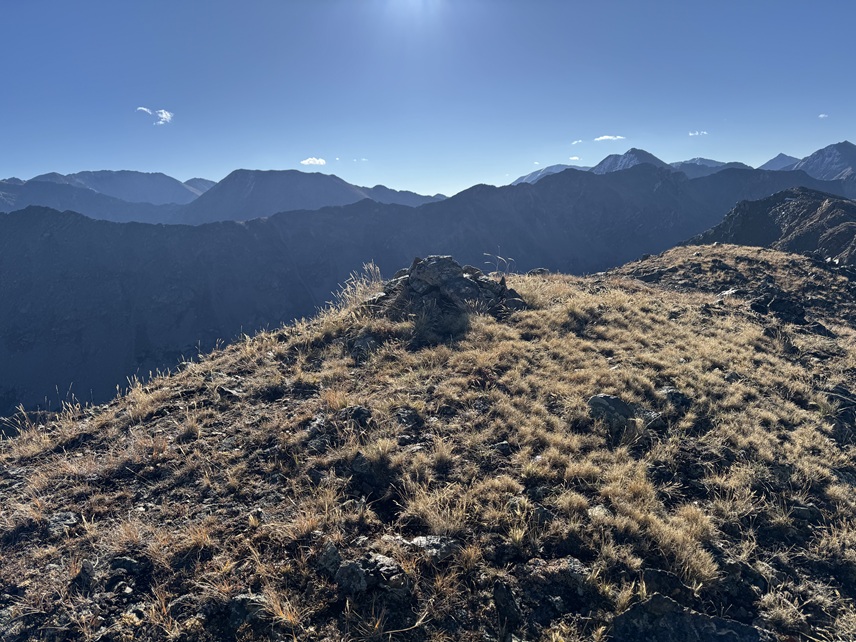
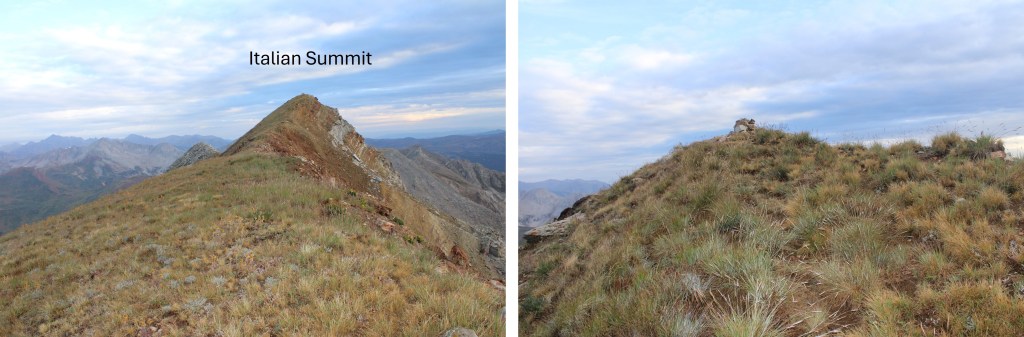
There was a large cairn and summit register at the top. The summit register was one of those large plastic tubes I can never open because they shut too tight, so I didn’t sign this one.
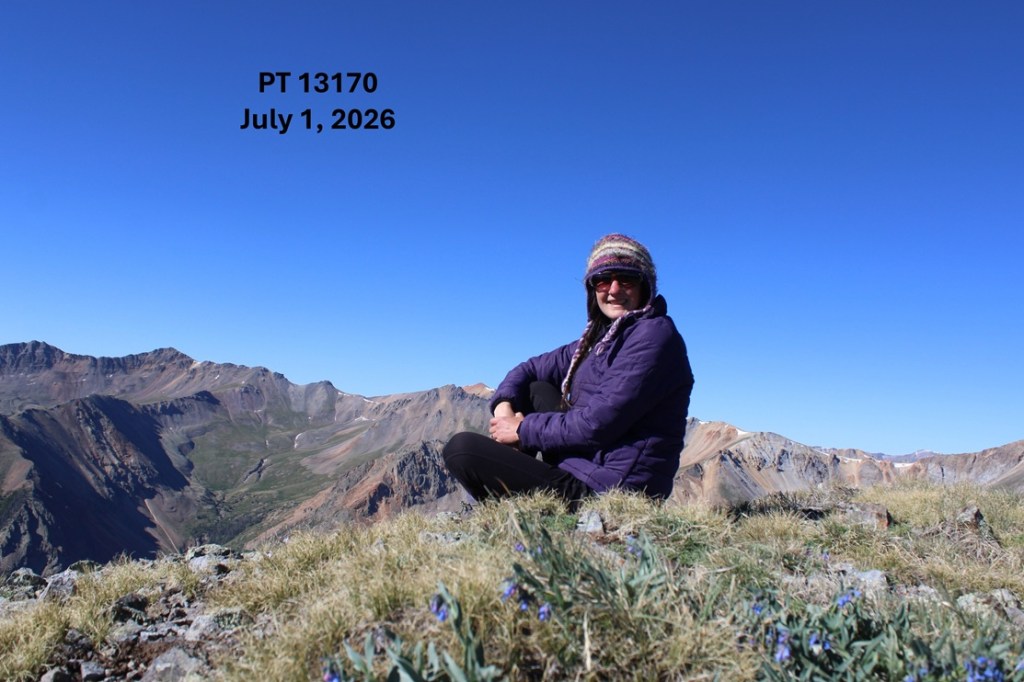
I summited PT 13170 at 8:45am
PT 13170:
There was smoke at the summit from the local fires, but it looked as if most of the smoke was hanging out below treeline.
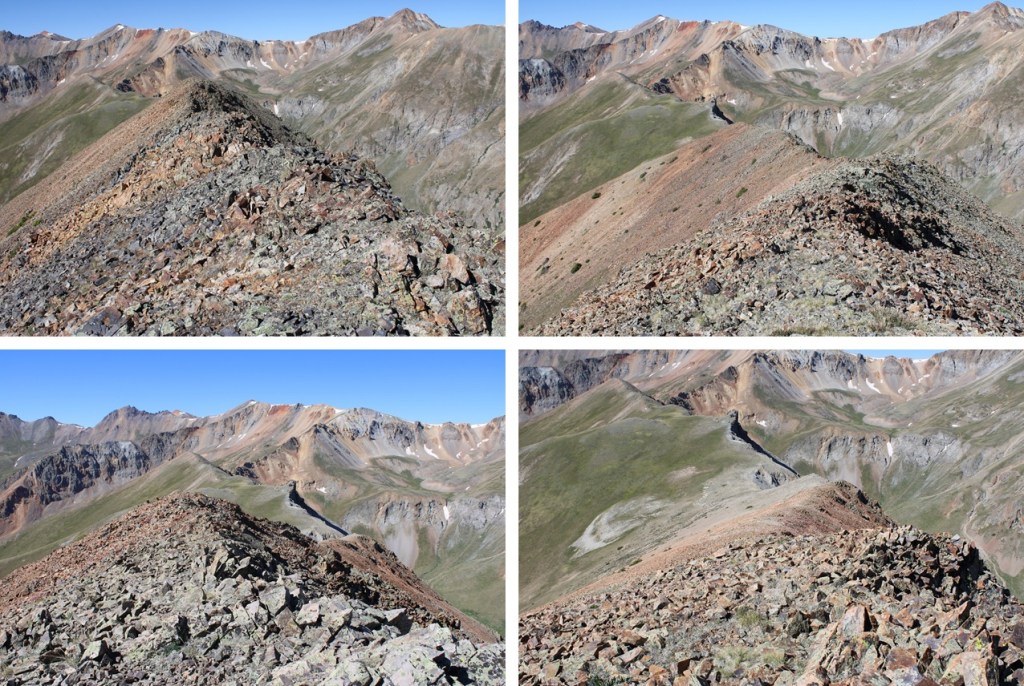
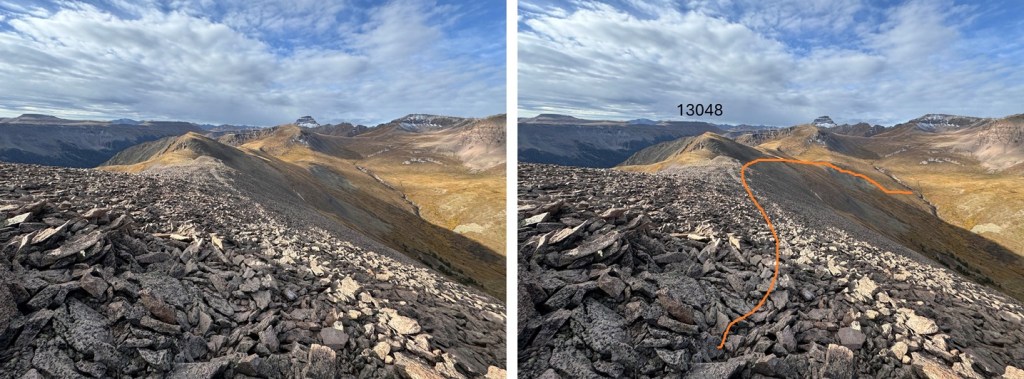
I turned around and headed back down the ridge the way I’d come, heading southwest along the ridge.
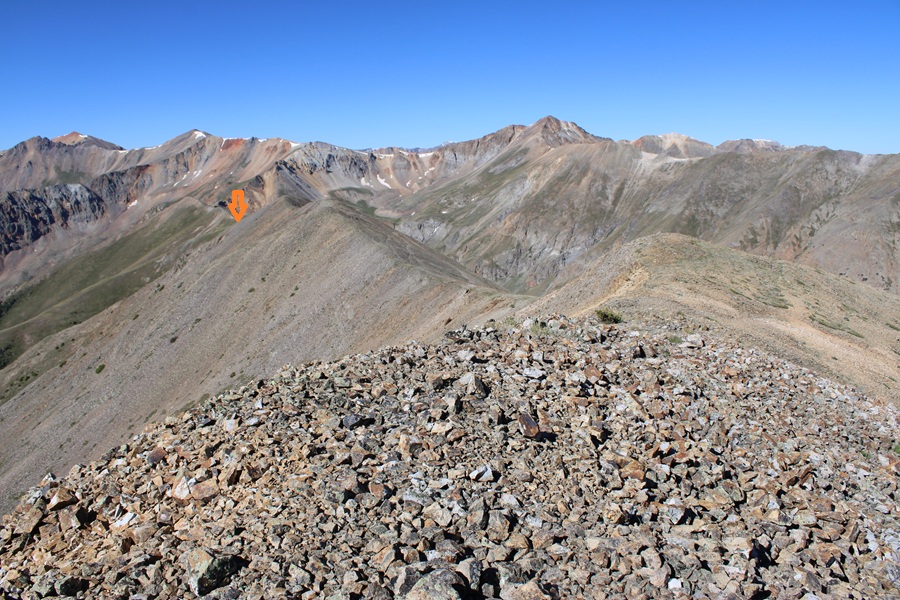
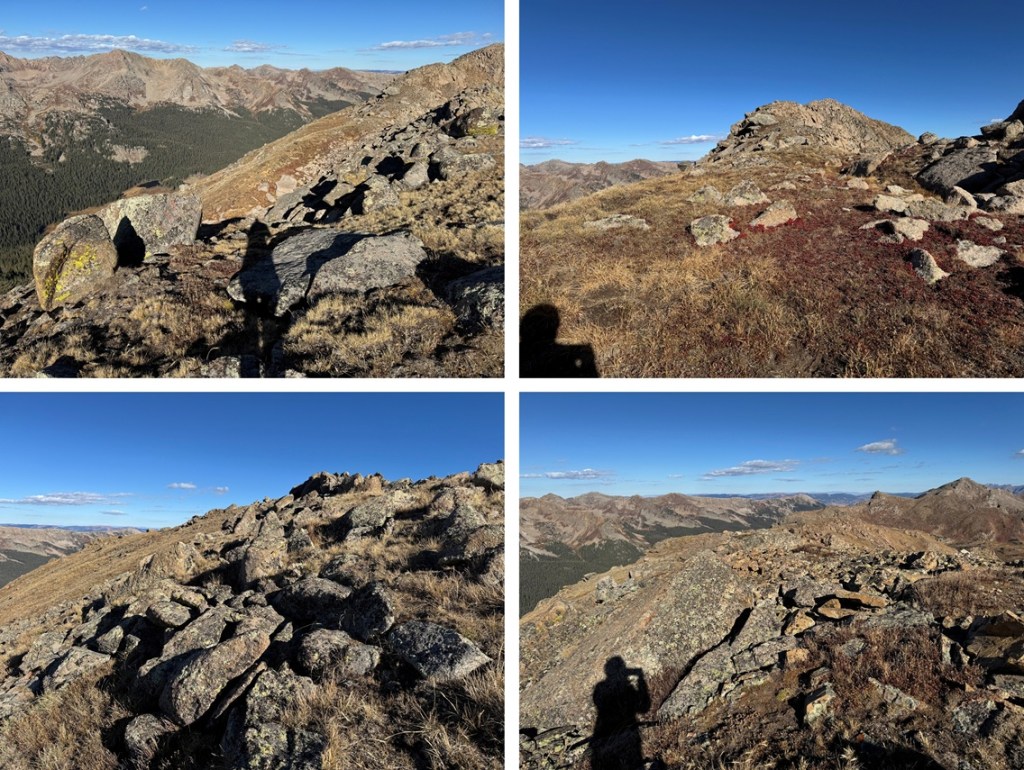
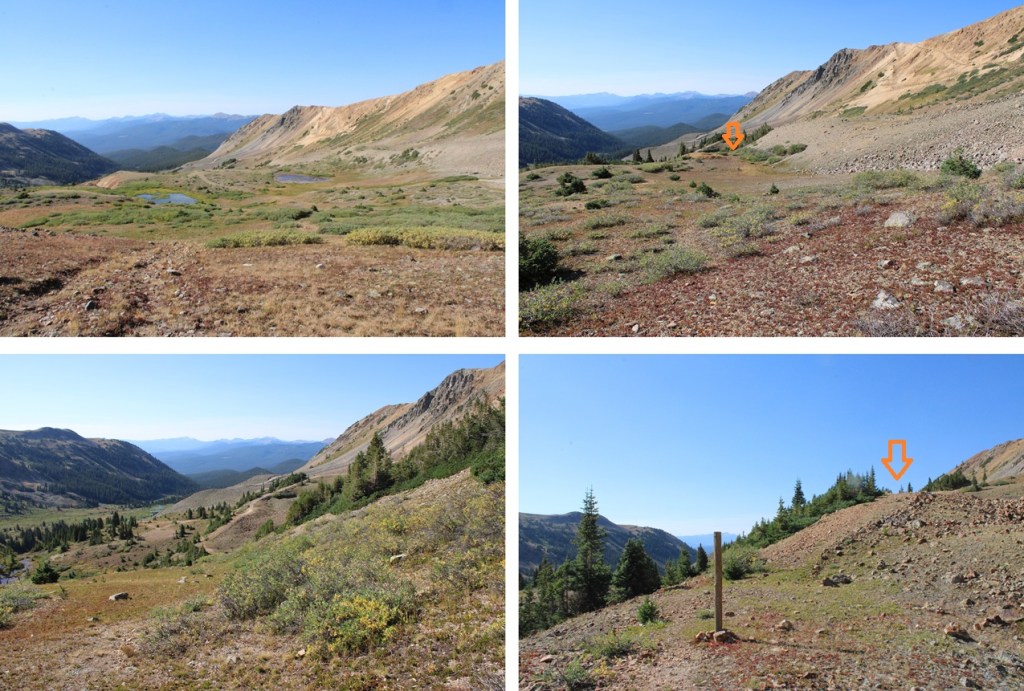
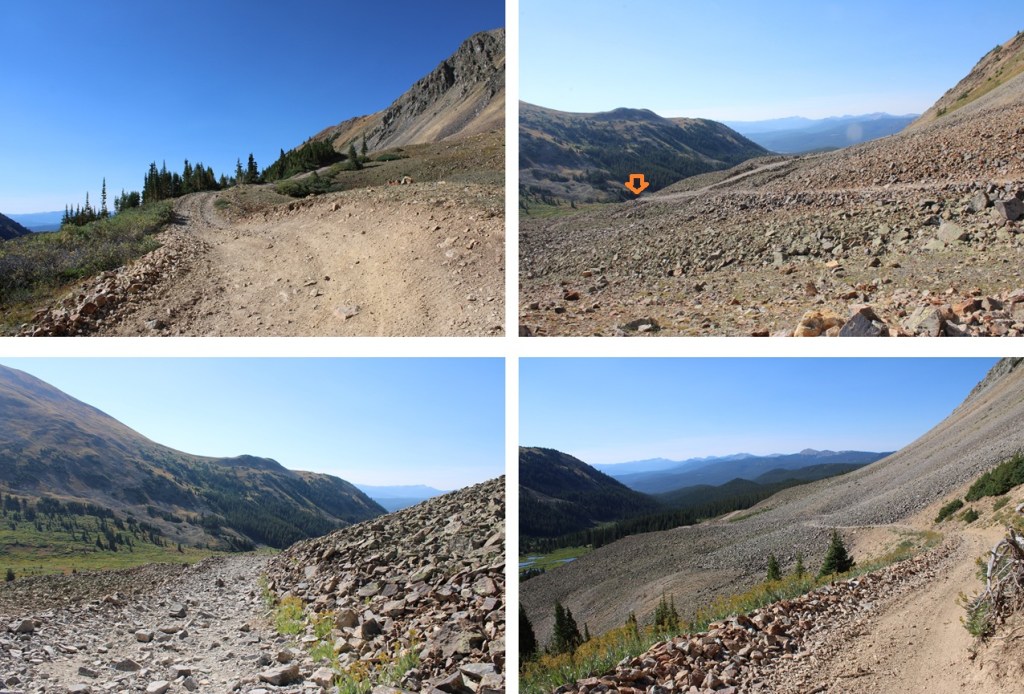
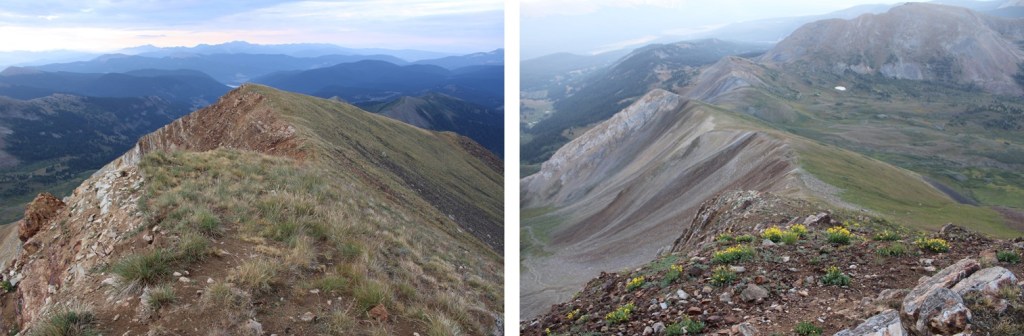
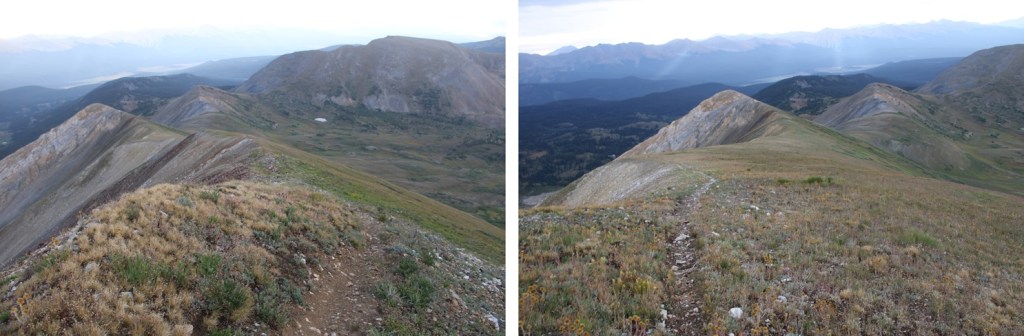
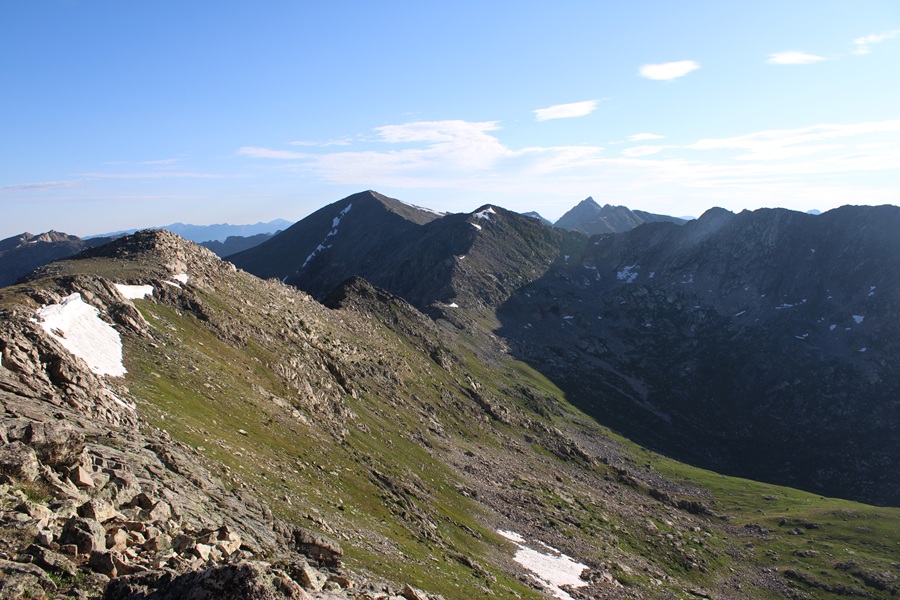
Here you can see a good visual of the gully I descended to get back. It’s where the terrain changes on the ridge from rocky to tundra.
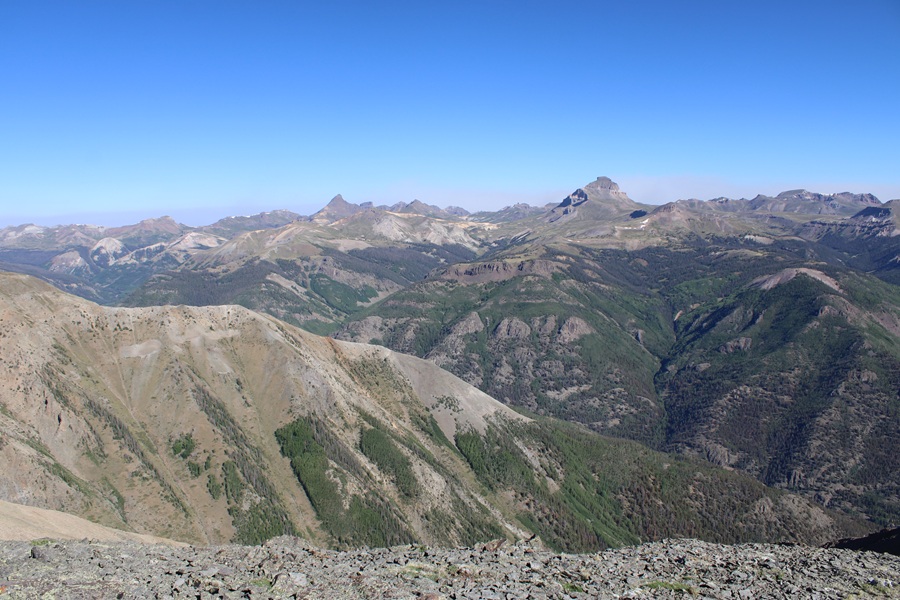
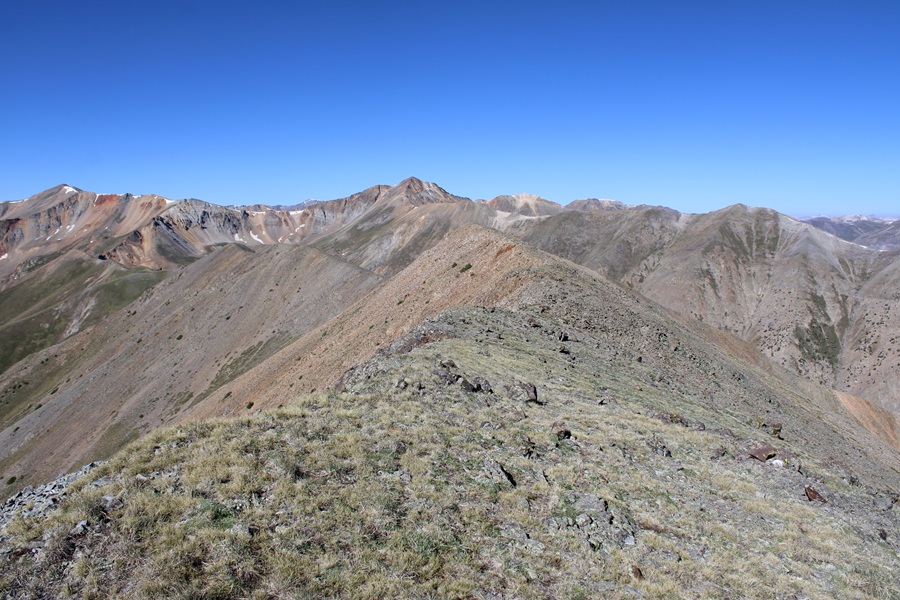
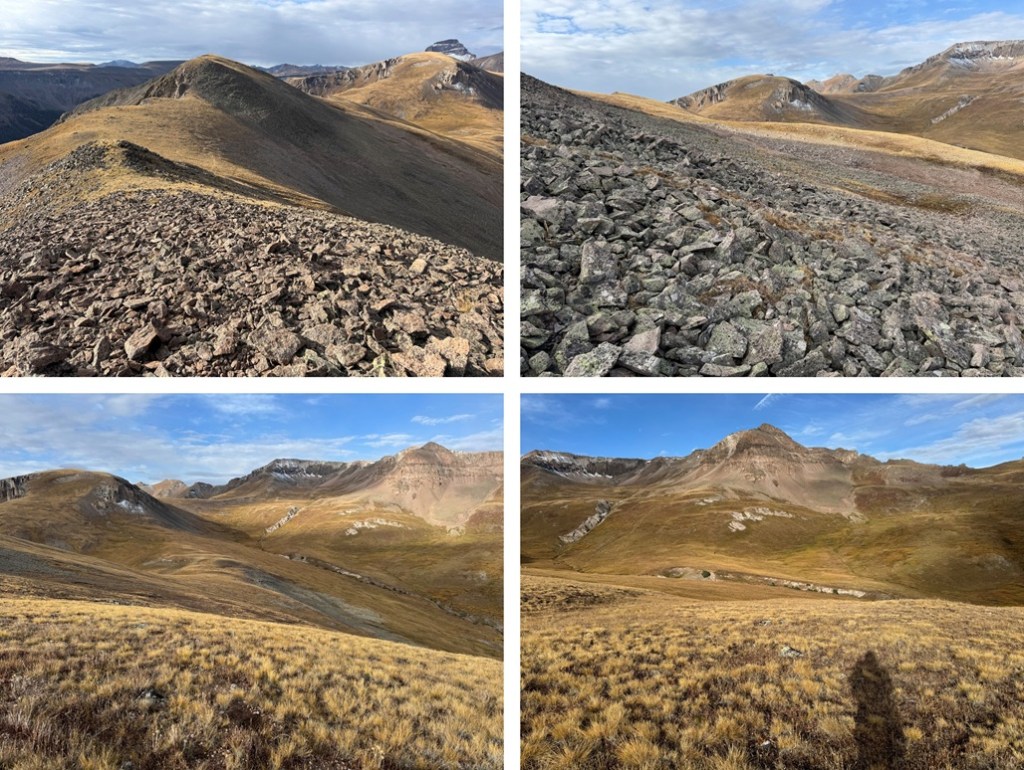
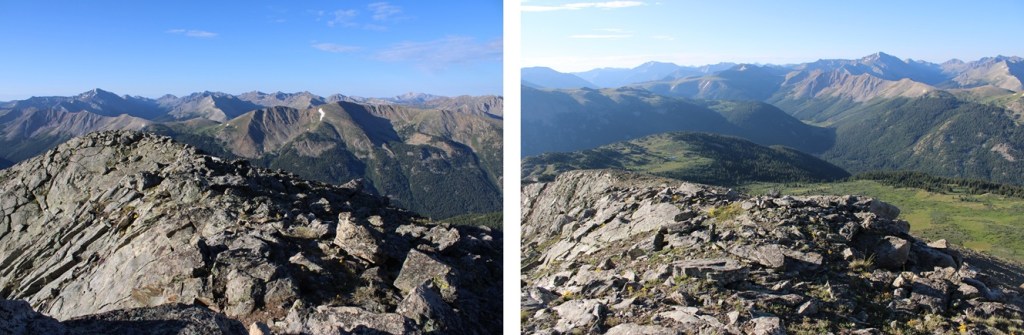
Here are some pictures of the ridge on the way back
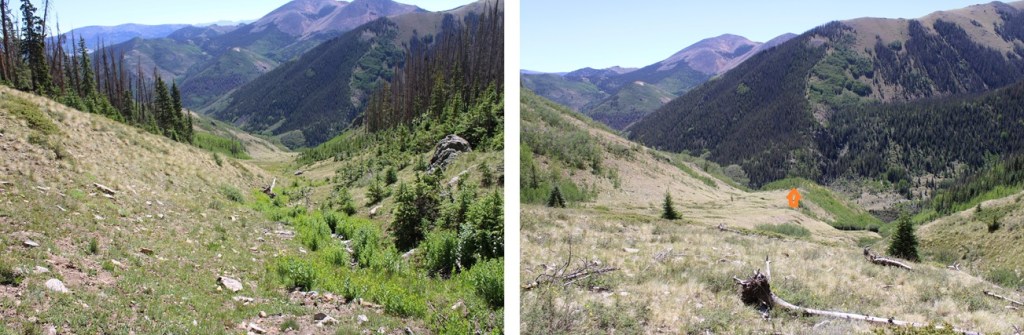
Then it was back down the gully to the small area of aspen trees
I headed through the trees back down to the trail
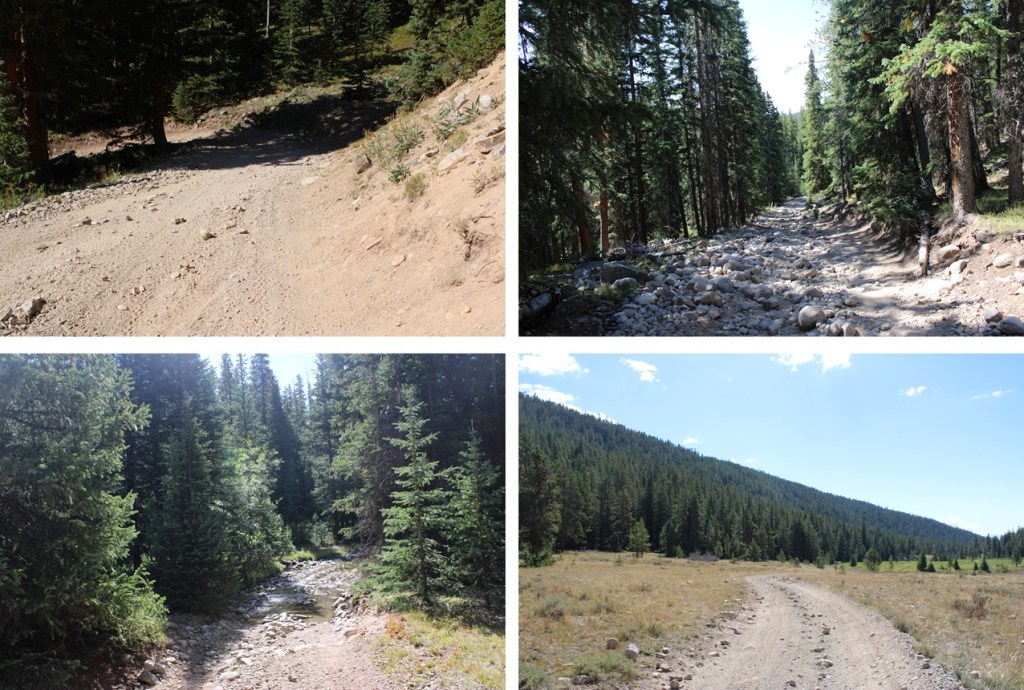
Once back on the trail I turned left and followed it northeast, making several creek crossings and climbing up, over, and around downed trees.
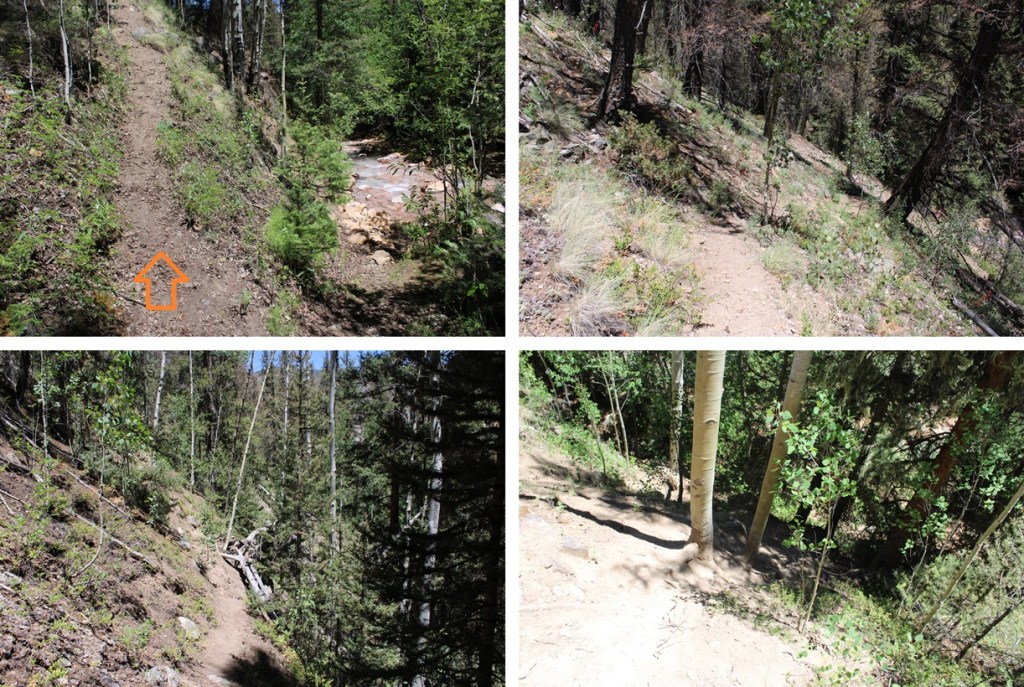
On the way back I noticed a side trail that went off to the left of the creek. It was steep but I decided to take it. It took off several creek crossings for the route, but like I said it was steep and slippery. It’s an option if you want to cut down 3-4 water crossings, but I’d recommend wearing traction. It brought me about 50 feet above the creek on steep terrain.
From there the trail was easy to follow. There were still more creek crossings, but they were minimal.
I made it back to the trailhead at 1:30pm. In total the hike was 13.7 miles of hiking with 4365’ of elevation gain.
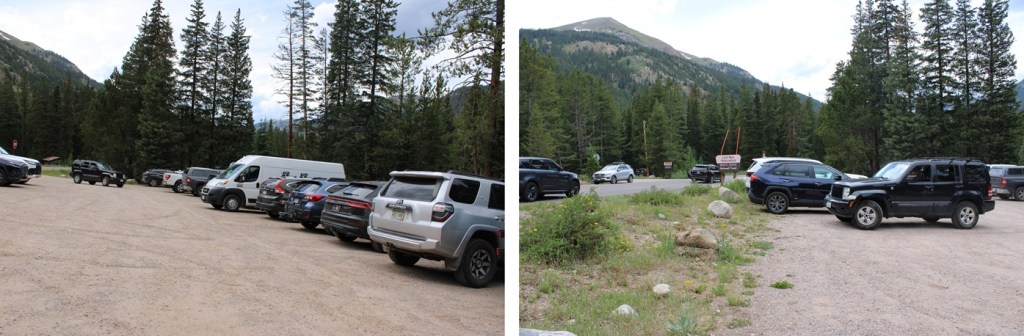
Maps call this trail 1940, but the sign at the trailhead said Fork Fryingpan Trail 1924. From Norrie Colony I took 2WD dirt road 504 for 10 miles until it ended. There is one place to turn left about halfway through the drive to stay on 504 but that was the only turn I took. The left turn is where there’s a sign saying “Hunters Beware: Moose in area, be sure of your shot”. At the trailhead there were several dispersed campsites and lots of places to park. This is a lightly trafficked and remote but easy to drive to trailhead. I didn’t see any other vehicles there. I did see several very large marmots I mistook initially for bear cubs. Be sure to marmot-proof your vehicle.
The trail starts at the south end of the parking area. This is a class 1 trail I followed for 4 miles. It parallels the South Fork Fryingpan River. If you get to Deadman Lake you’ve gone too far. There were several small stream crossings and lots of evidence of moose (but I didn’t see a moose). This area has also seen avalanches and a fire in recent years, but the trail is well maintained and easy to follow with no junctions. Oh, and SO MANY SPIDERWEBS! It was obvious no one had hiked this trail in a while. My tracks were the only ones (besides moose) going in and coming out.
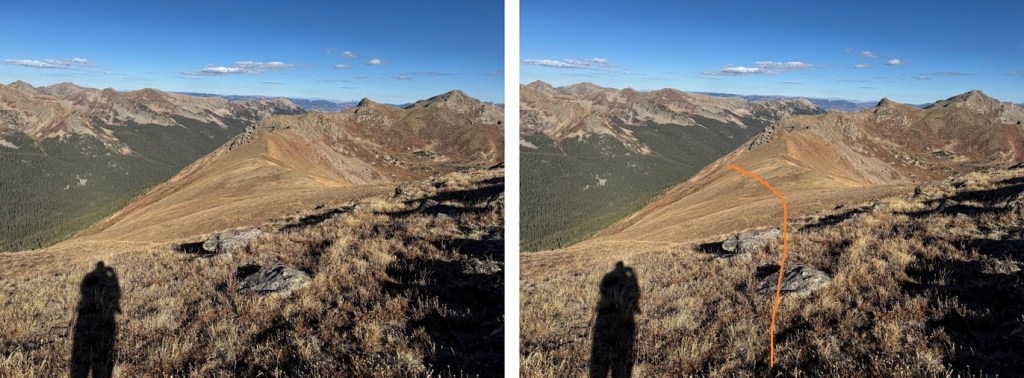
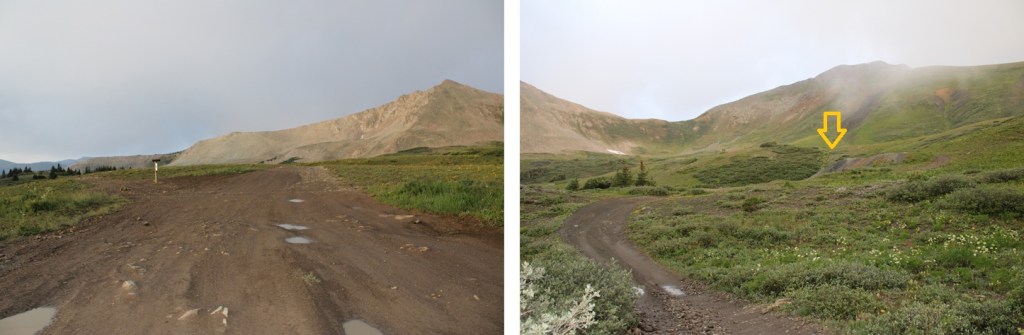
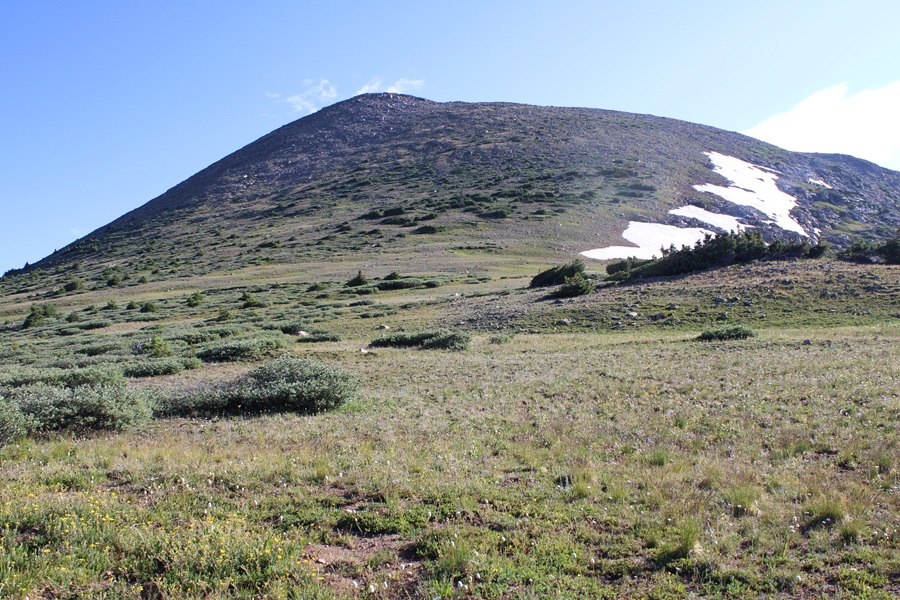
After hiking for 4 miles and at 10930’ of elevation I left the trail and headed east towards an obvious avalanche slide. There are a lot of slides in the area, so look for the one around 4 miles. I was making this an overnight to just enjoy the trek, so I planned to set up my tent at the base of this slide, but if you’re making this a day hike here’s the route I took up to the ridge
To get to my campsite (and to make it to the ridge) I had to cross the river. Luckily, I was able to rock hop across it, but earlier in the year it was several feet deep and I decided to turn back and wait for the water levels to lower because I didn’t have the correct gear to cross the river at that time. There’s a game trail that goes through the willows that will lead you to the river crossing area. I easily crossed the river and set up camp in the grassy area below the slide.
It took me 2 hours of hiking to get to this spot. I set up camp and enjoyed the rest of my afternoon. Surprisingly, the only wildlife I saw were camp robbers and raptors. While there was evidence of elk, deer, moose, etc. I didn’t see any. There were fish in the river however, and I spent some time watching them swim with the stream. I also enjoyed my views of the Williams group I’d summited earlier this summer. It’s cool seeing mountains from different angles. I went to bed early expecting a cold night. Pro tip: when the temperature is expected to be below 30 degrees I usually double up my sleeping gear. I set up my bivy inside of my tent to stay extra warm. My bivy is very light and small so it doesn’t take up too much space in my pack. It’s worth it for the extra warmth.
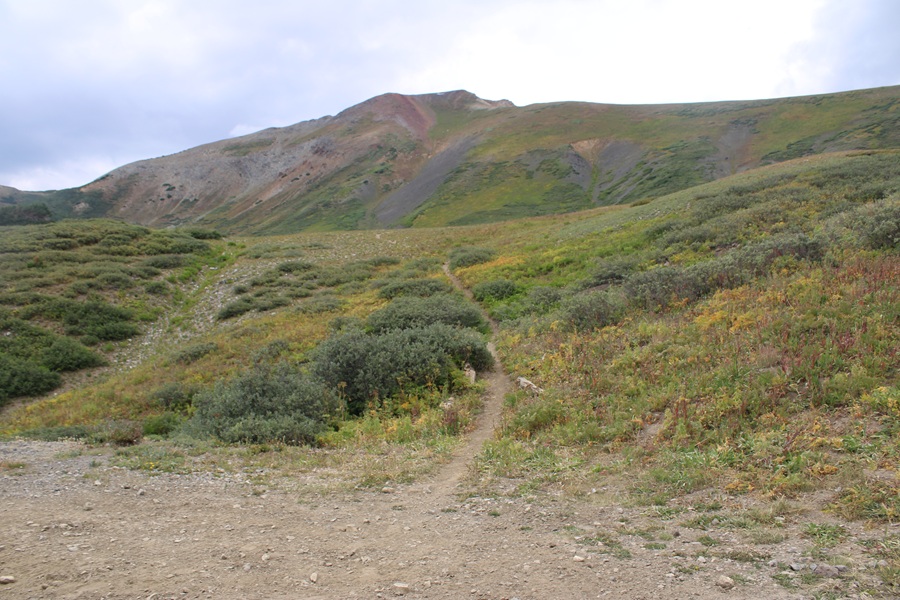
The next morning I was up and on the trail at 7:15am. I found the best way to avoid the willows in the slide area was to stick close to the trees. At the top of the trees I veered right on a game trail and took a tundra grassy hike to the ridge.
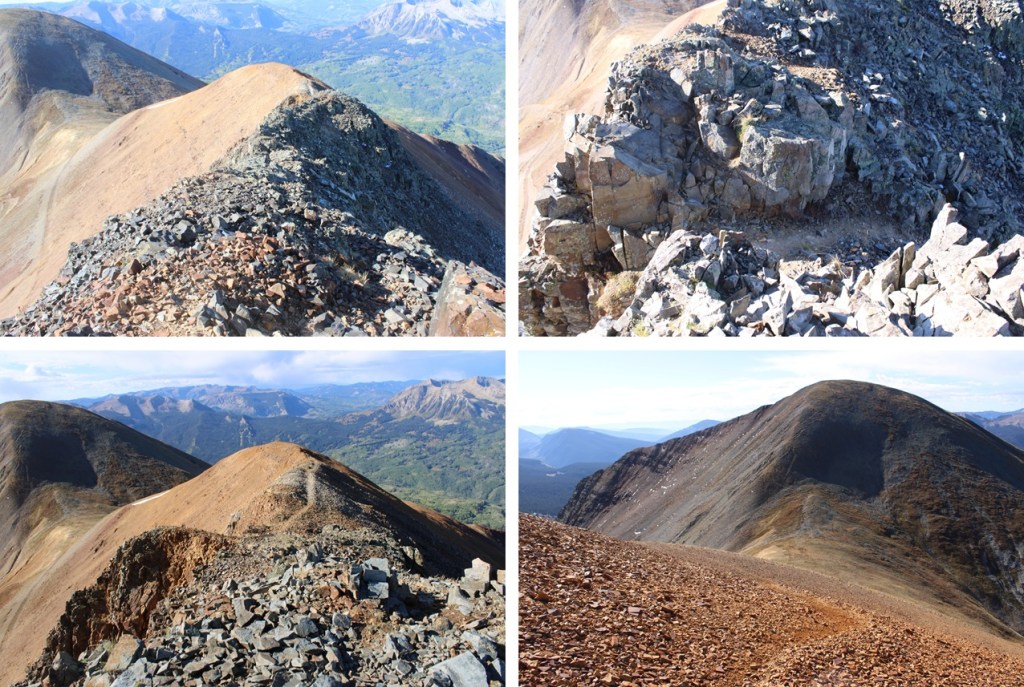
At the top of the ridge I turned right and started following the ridge southeast, still on tundra. This can all be kept class 2, but there is a false summit. I followed the ridge to the false summit and saw a pair of mountain goats.
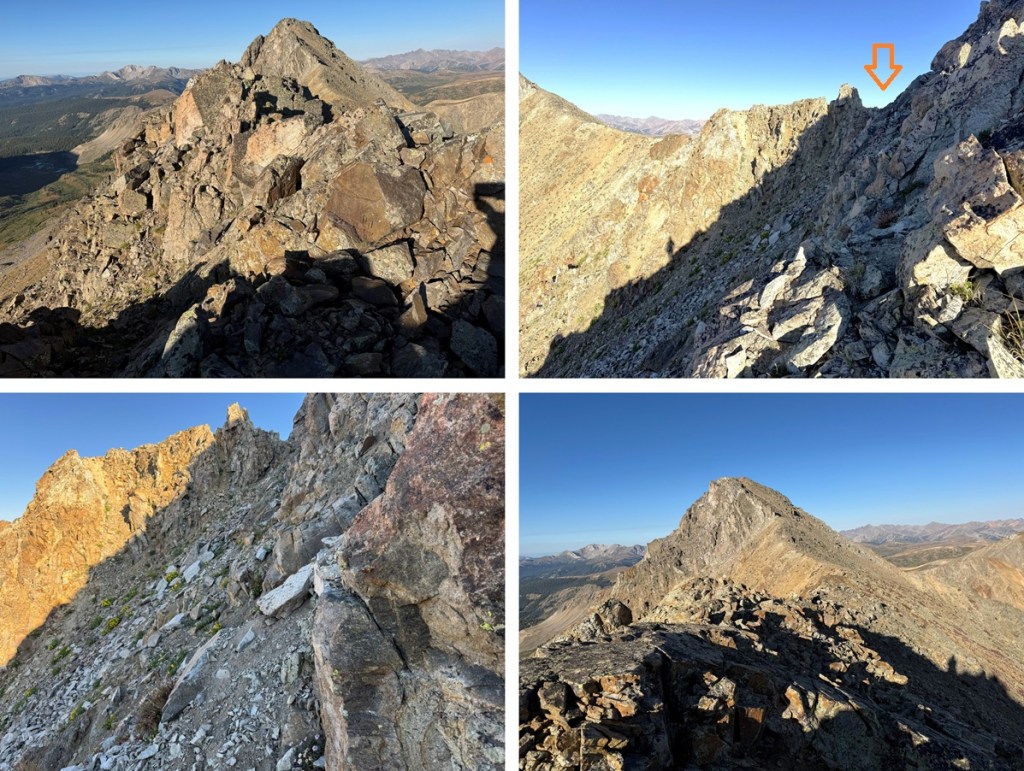
From the false summit I could see the true summit of 13033. The terrain becomes a little rockier, but it can still be kept class 2 by sticking to the ridge or dipping down a couple of feet to the right to stay on the tundra. The route is obvious. Even rock-hopping along the ridge this can be kept class 2.
Here are some pictures of the ridge to the summit:
I summited PT 13033 at 9am
PT 13033:
From the summit looking north I could see PT 13014.
It was my intention to summit 13014 today as well by following the ridge. However, I took my phone off of airplane mode and my cousin chat group immediately started blowing up with messages I had missed from the past 2 days. I must have had 200 messages (I have a lot of cousins) and apparently my Grandpa (who’s 97) was in the hospital. I tried to make phone calls and message back but didn’t have enough cell service to do so. I made the decision to cut this hike short so I could make sure my Grandpa (and my mom, who isn’t quite ready to lose her father) were ok. I’ll come back and summit 13014 another way (I already have ideas…). I turned back and followed the ridge northwest towards the saddle.
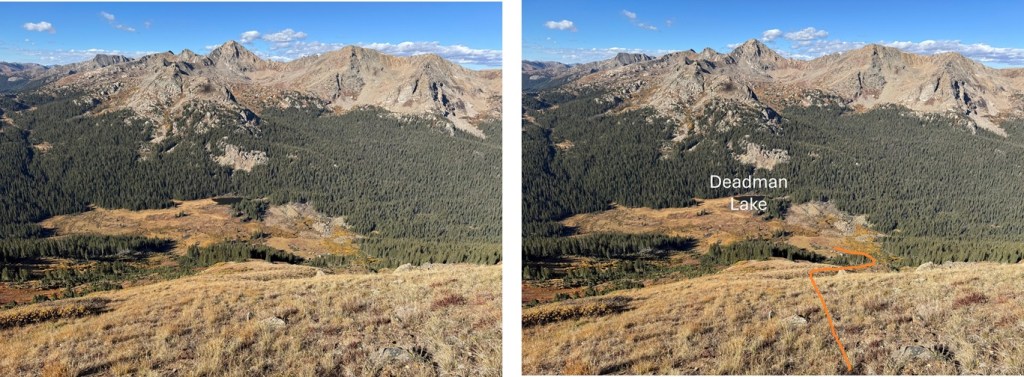
Back on the saddle I’d placed a small cairn where I wanted to descend. There’s also a robust game trail here that’s a good indication of when to descend, just don’t follow it, as it goes in the opposite direction.
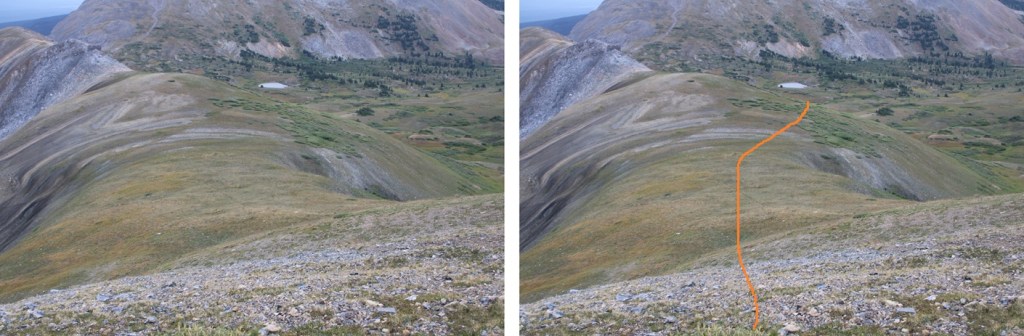
Here’s a view of my route back down the avalanche chute. Notice Deadman Lake in the distance. It’s a good visual for the decent.
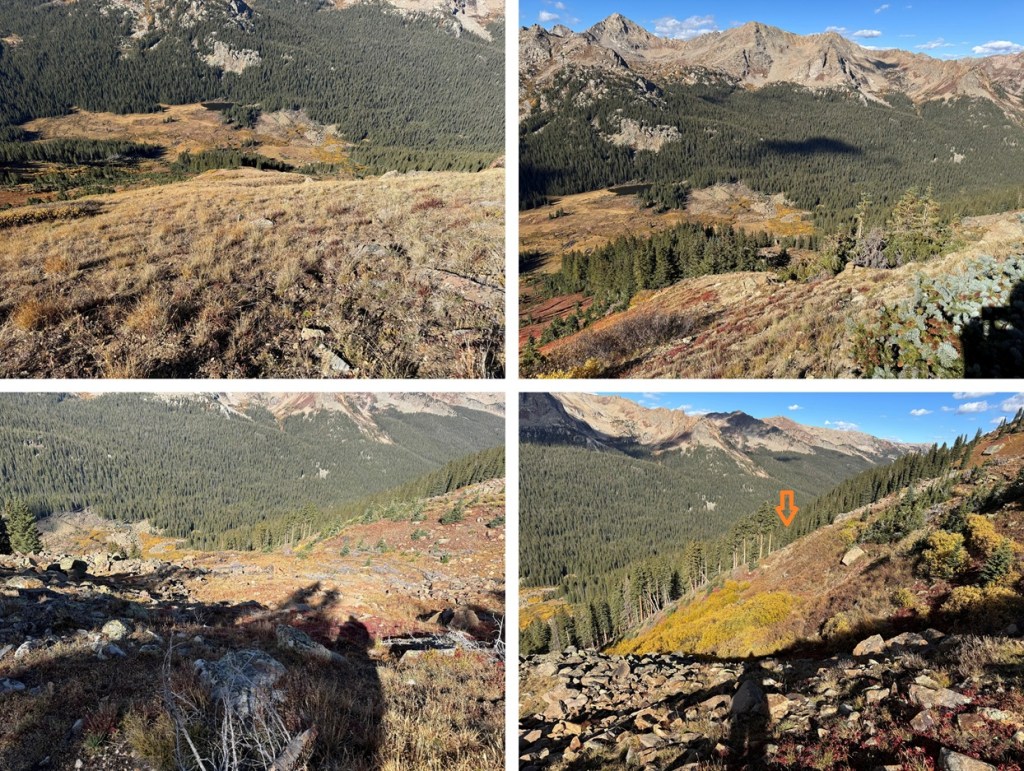
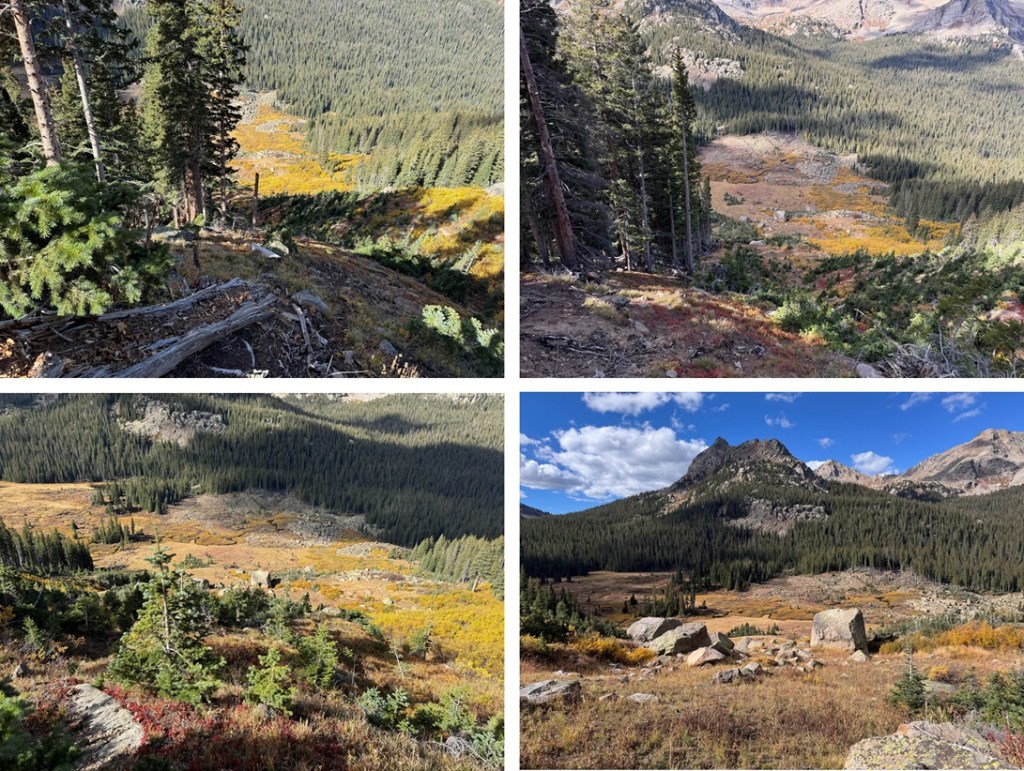
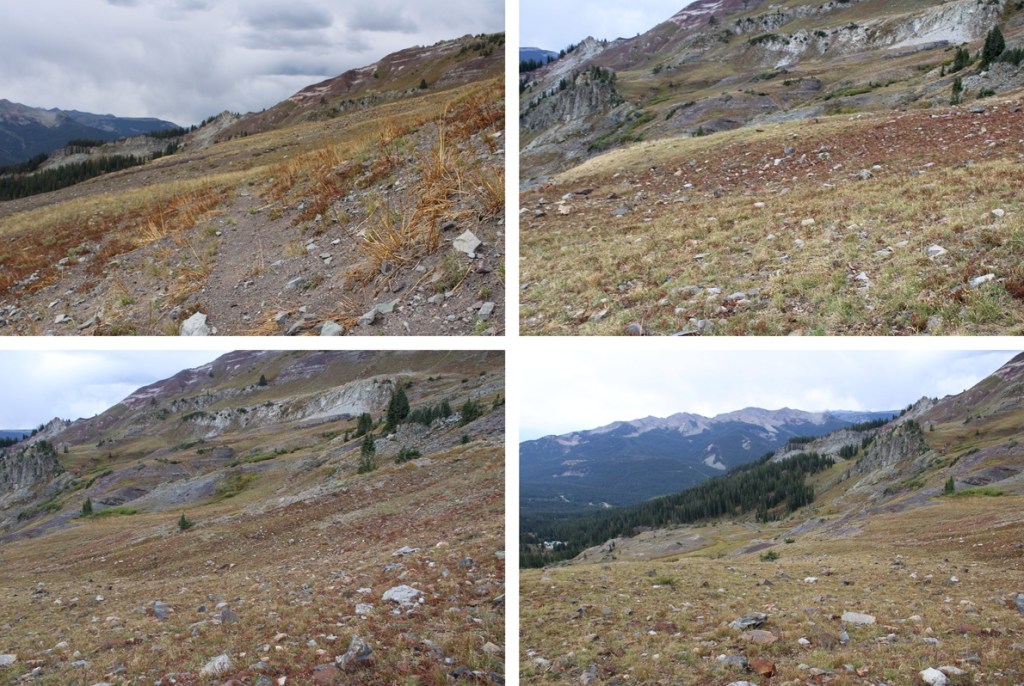
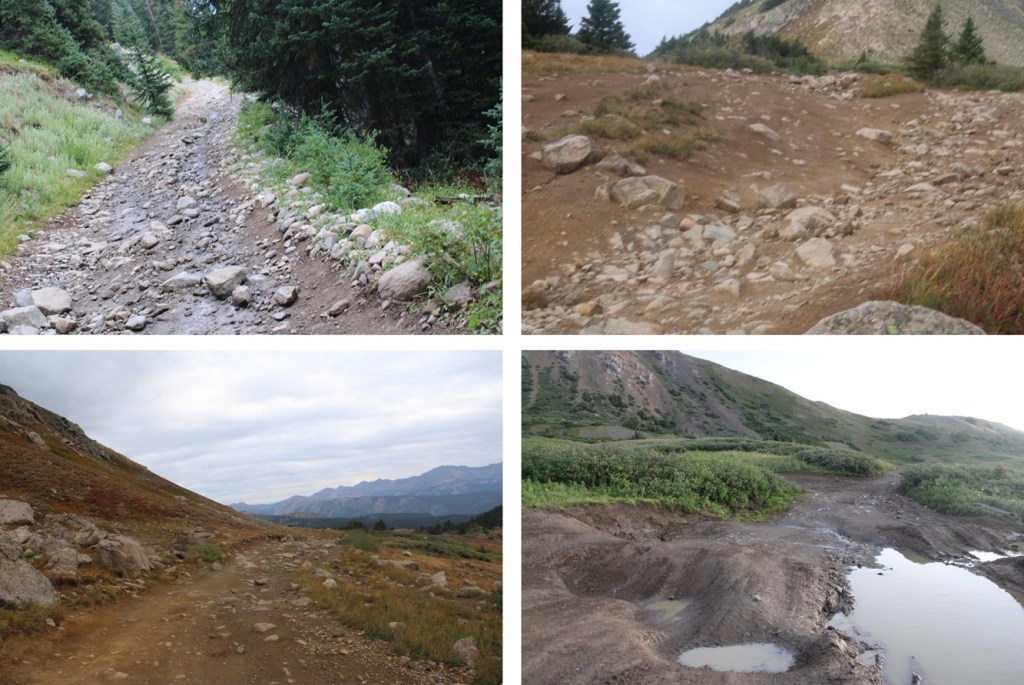
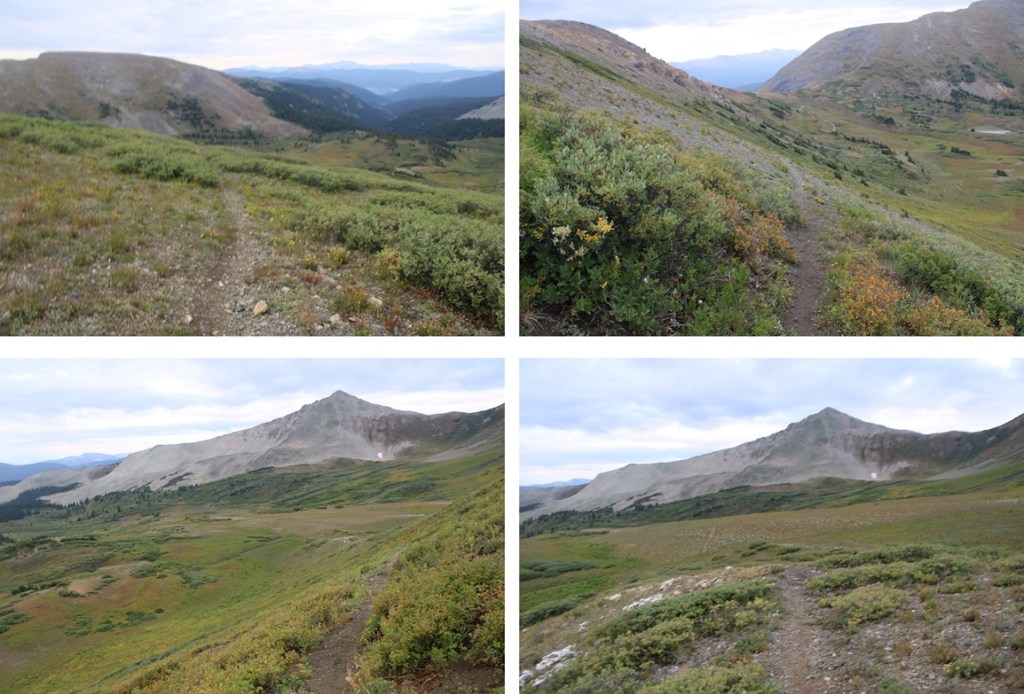
And some pictures of the route back to my campsite
Back at my campsite I quickly packed up my gear and was on my way. First, I crossed the stream/river and found the trail again.
I then followed the trail 4 miles north back to the trailhead.
I made it back to the trailhead at 12:30pm. This was a 12.14 mile hike with 3207’ of elevation gain.
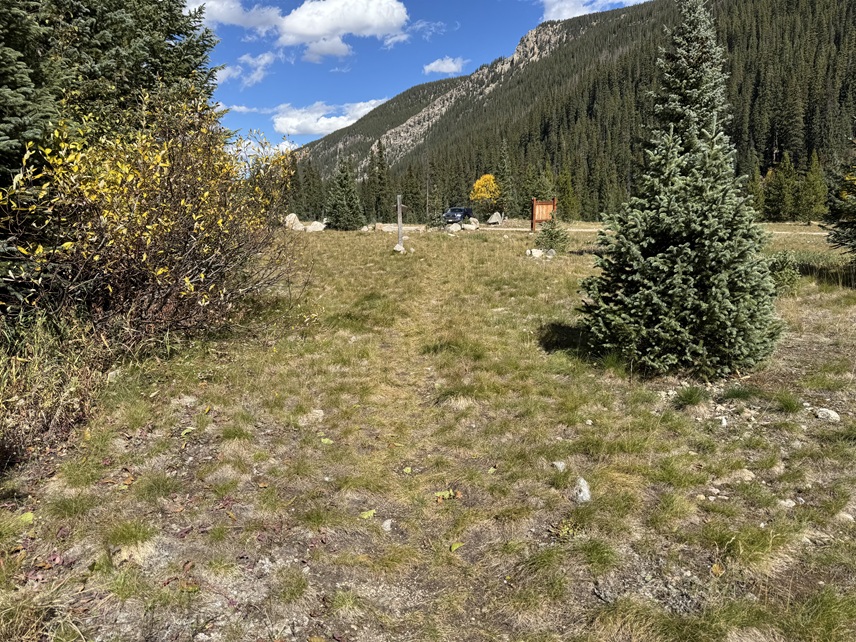
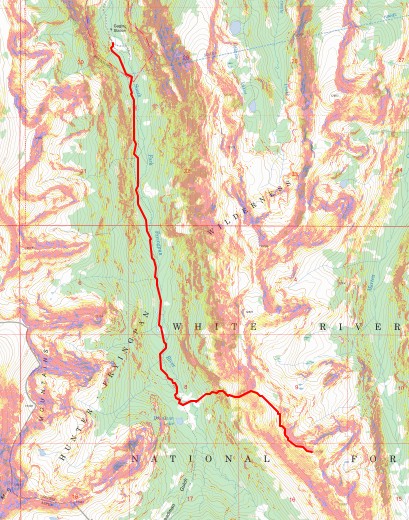
This hike starts at Fall Creek Trailhead. However, Google doesn’t seem to know where that is. To get there first go to the Little Cimarron Trailhead and continue past it for 4.4 miles until the road ends. It’s a total of over 18 miles on a 2WD dirt road to get to Fall Creek Trailhead. There’s room for about 10 vehicles to park, and some dispersed campsites along the way and at the trailhead.
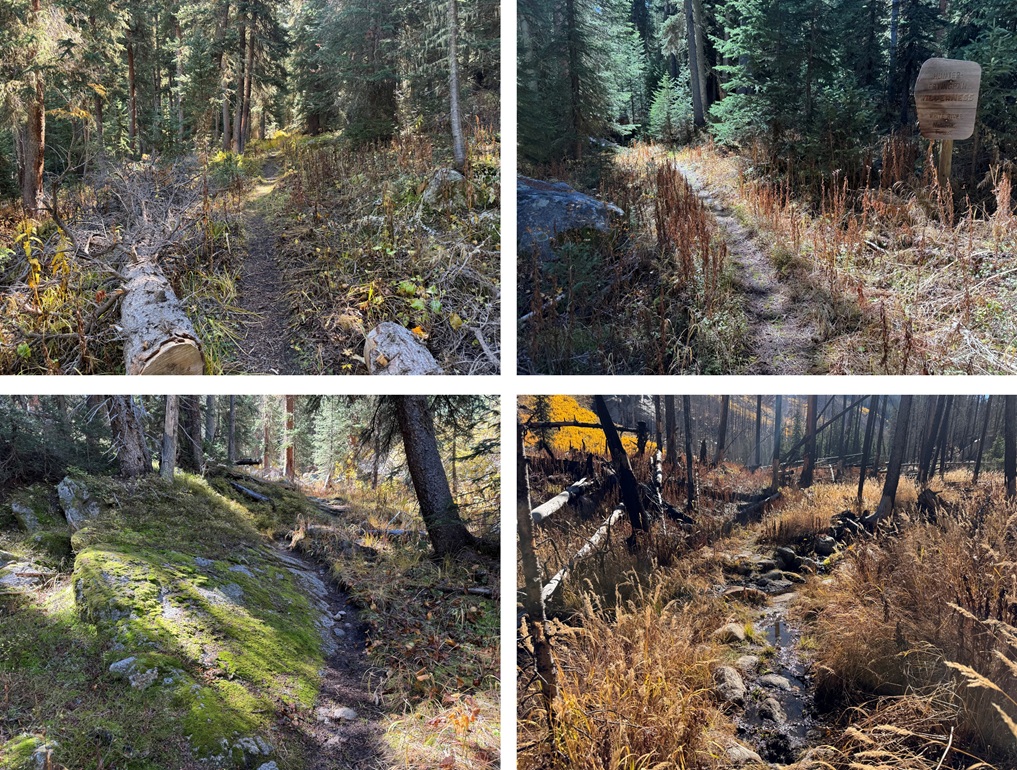
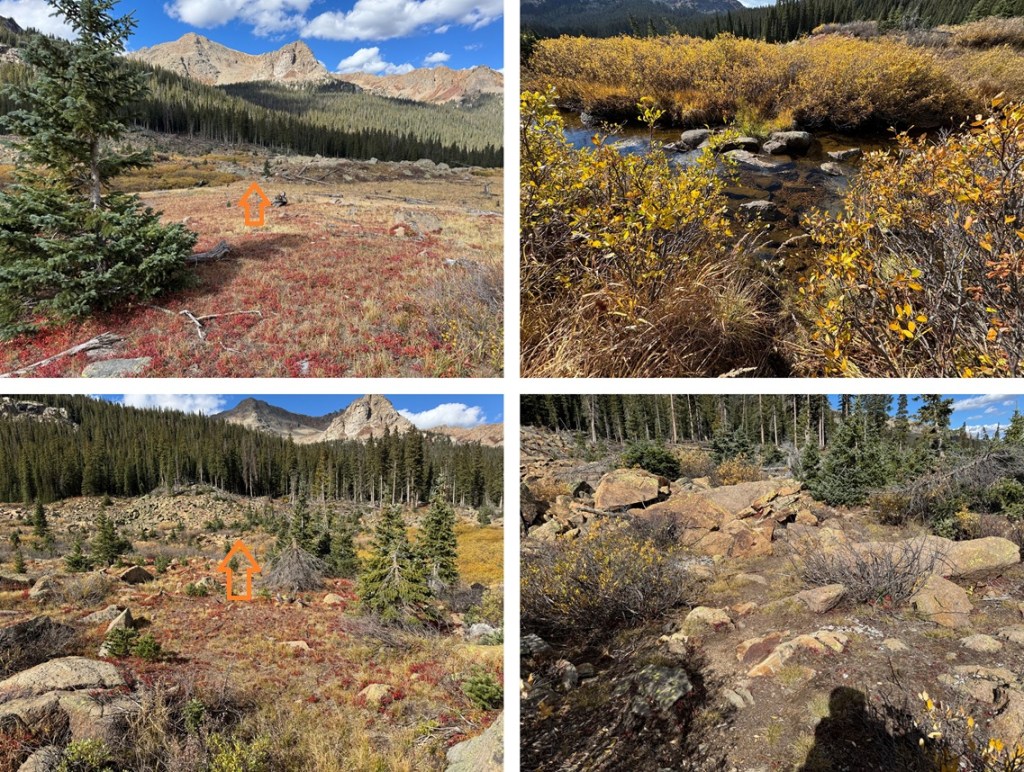
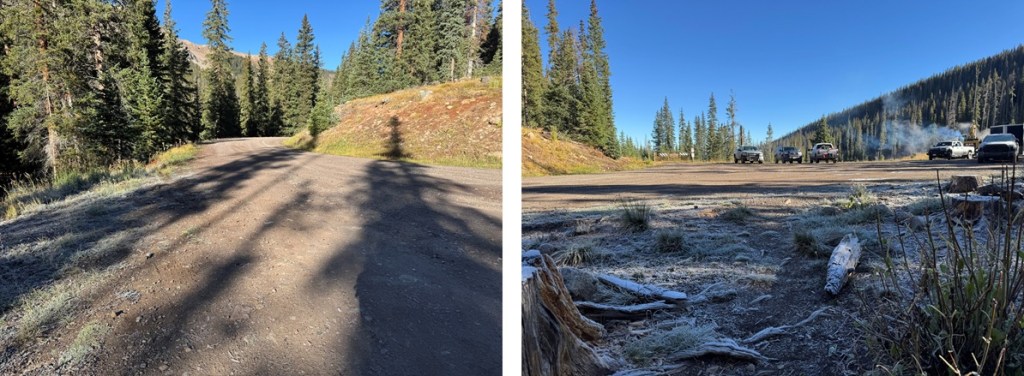
There’s been a fire and a lot of logging in the area, so the beginning of the trail isn’t easy to find. There isn’t a trailhead marker, etc. but the trail starts at the south end of the parking area.
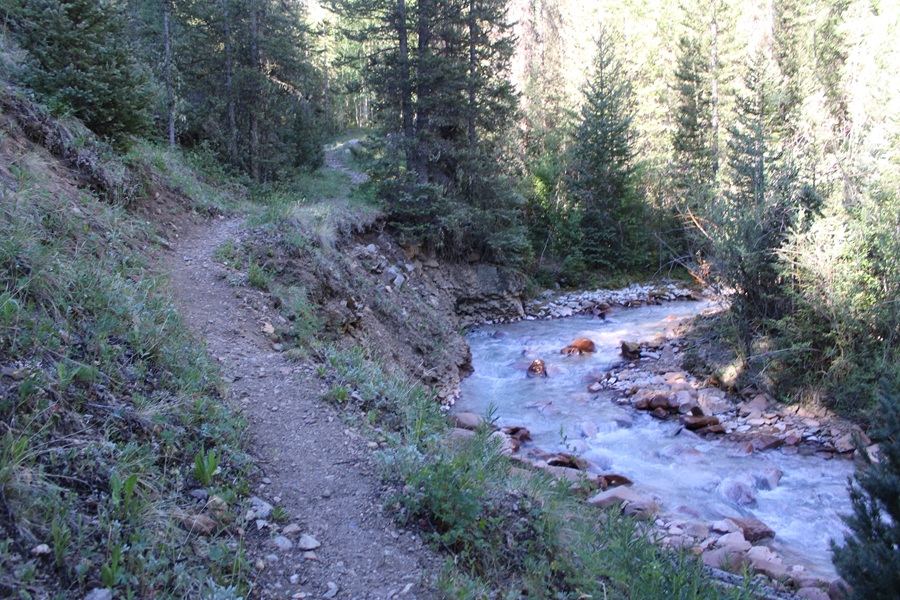
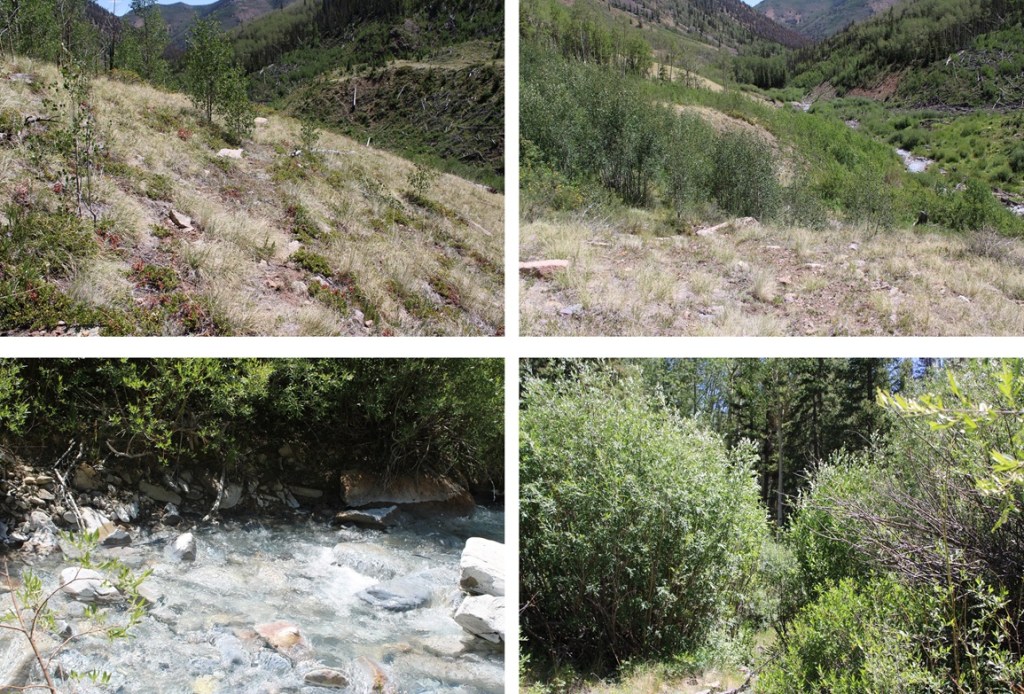
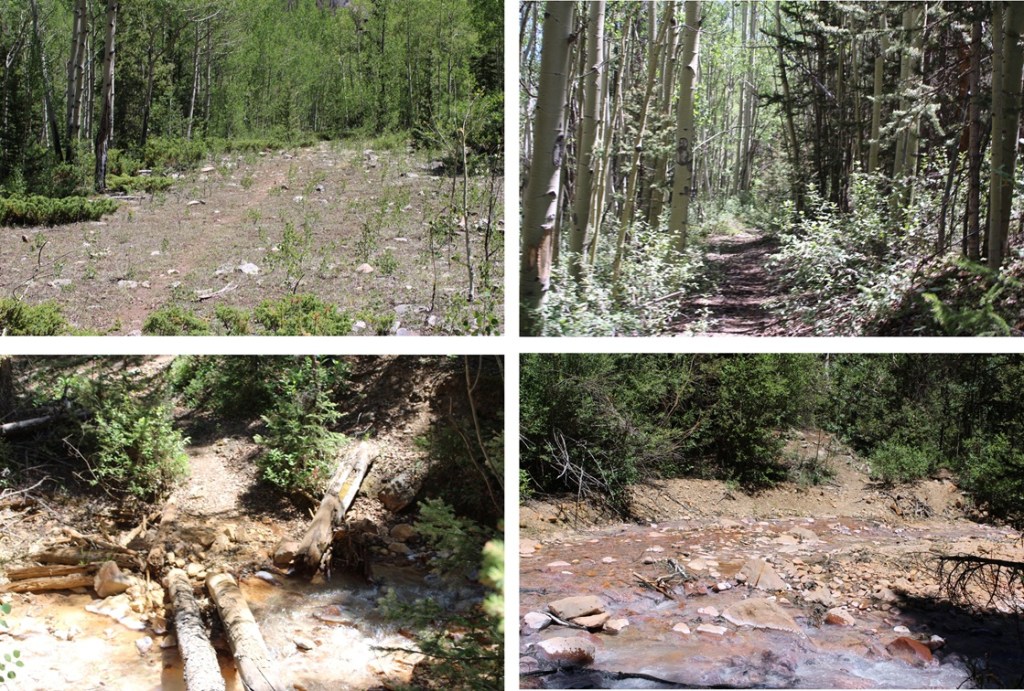
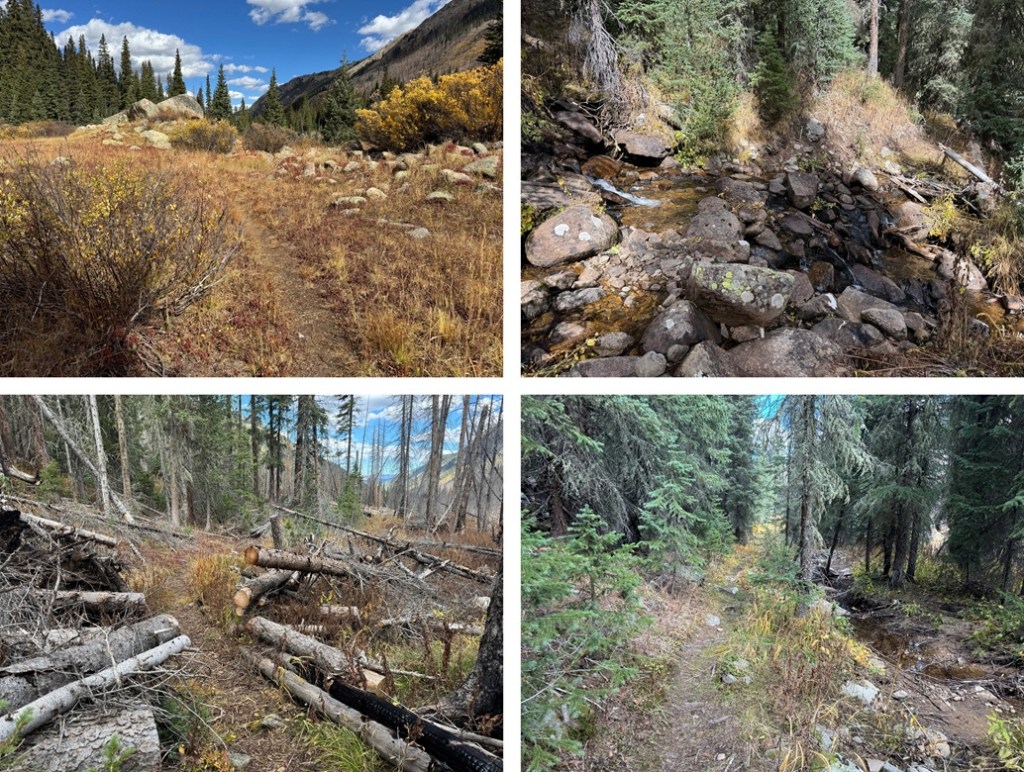
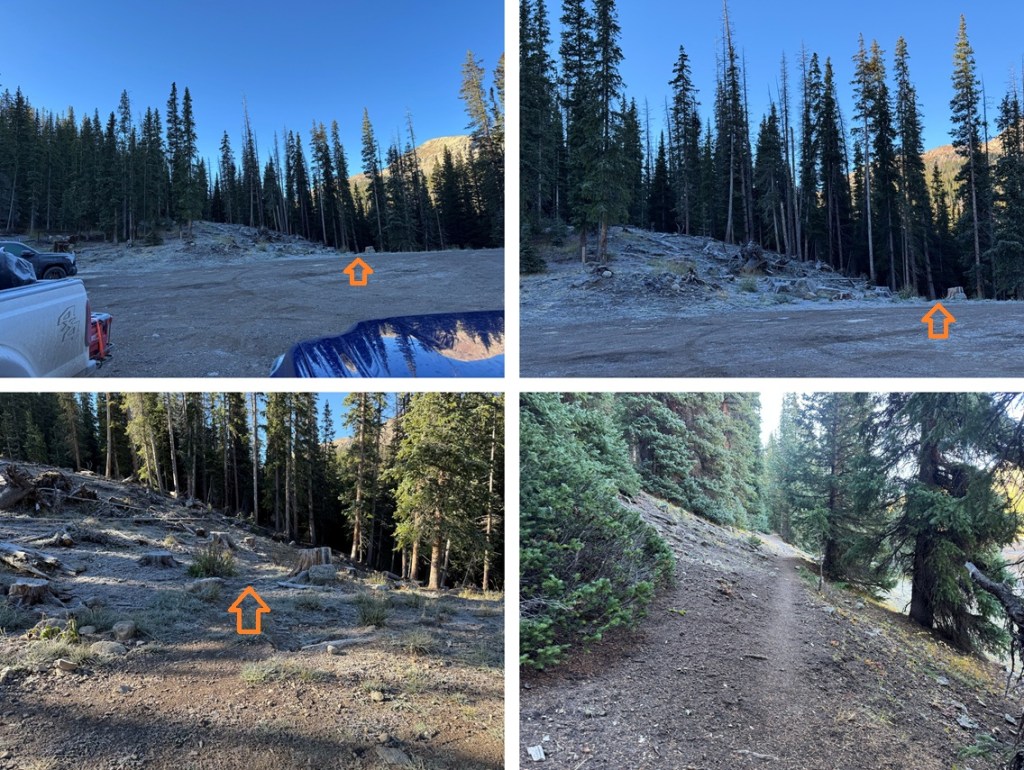
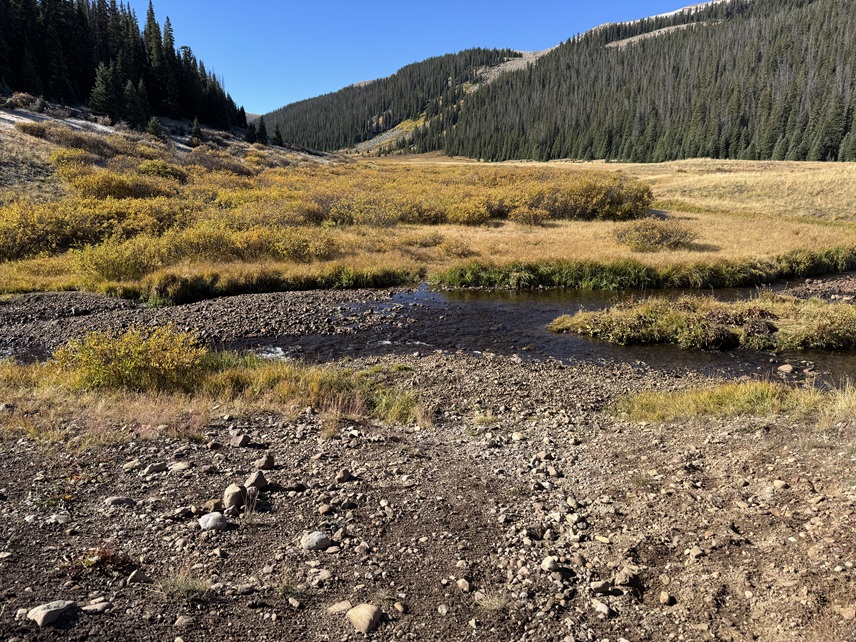
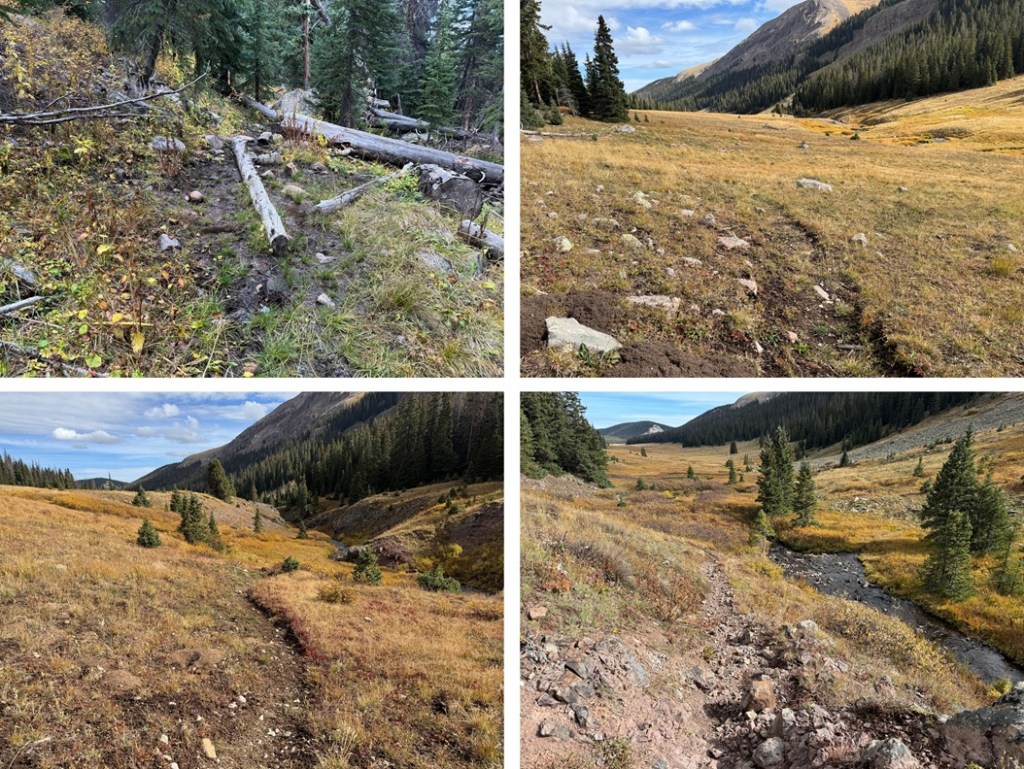
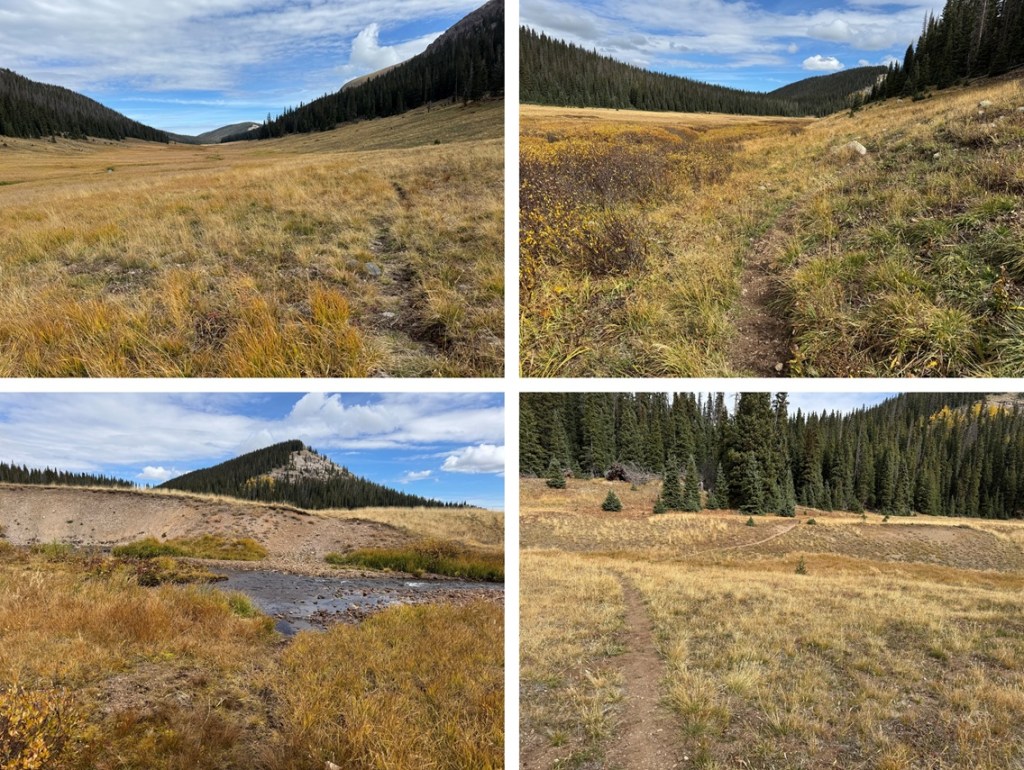
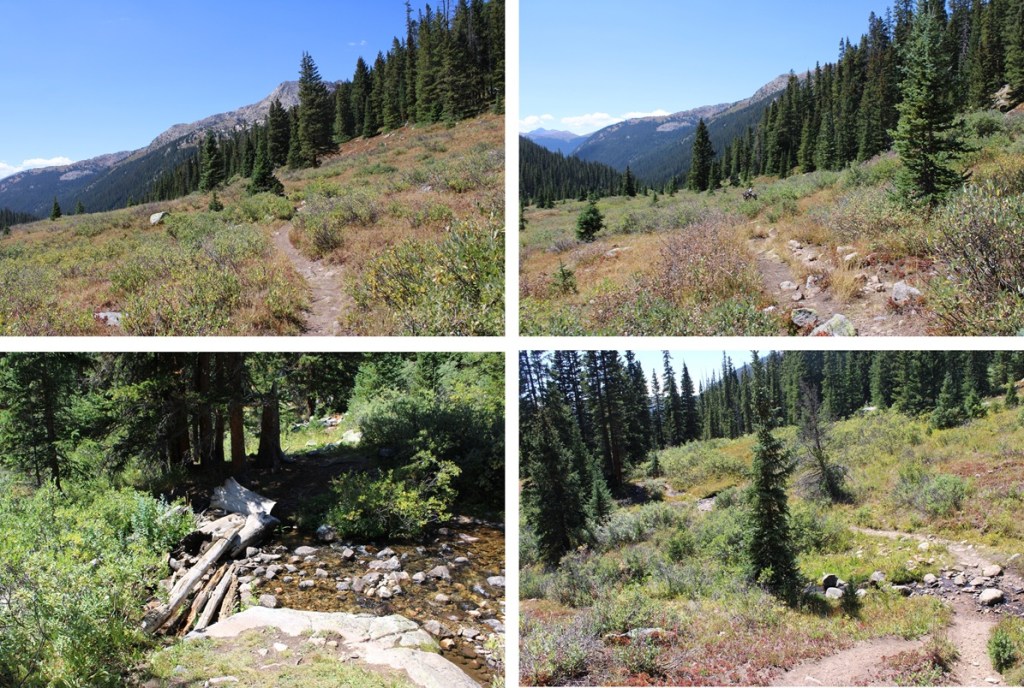
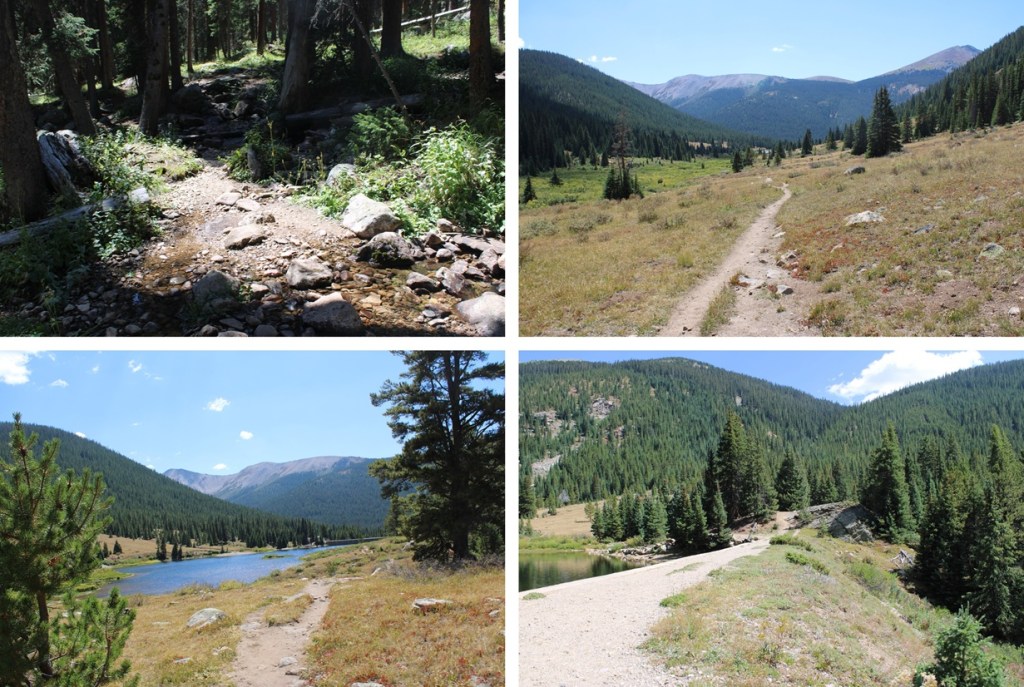
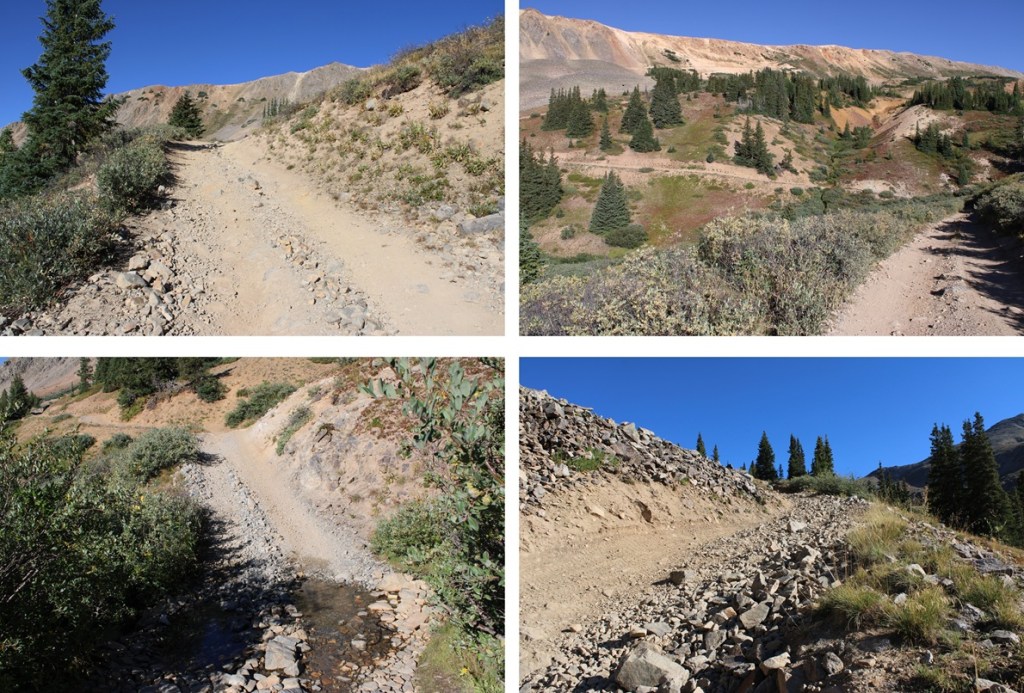
Once I found the trail I followed it south. This trail follows Fall Creek, and on a map is labeled Fall Creek Trail 9231. For the first few miles the trail is easy to follow. It goes through a rocky area and through several large meadows following the creek.
Just after descending through the trees I came to a creek crossing.
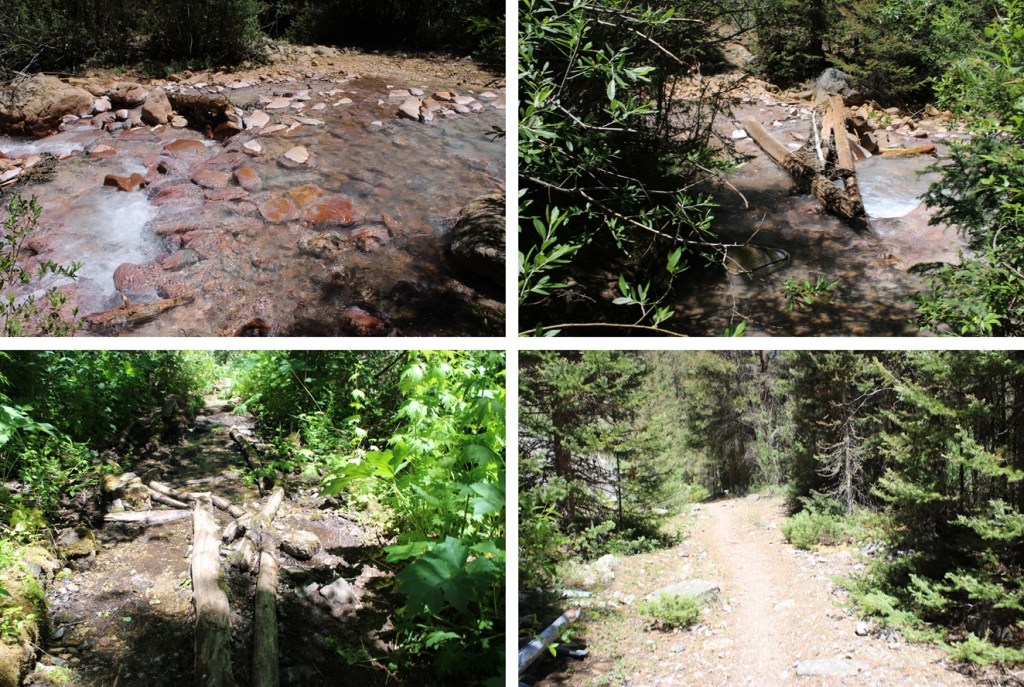
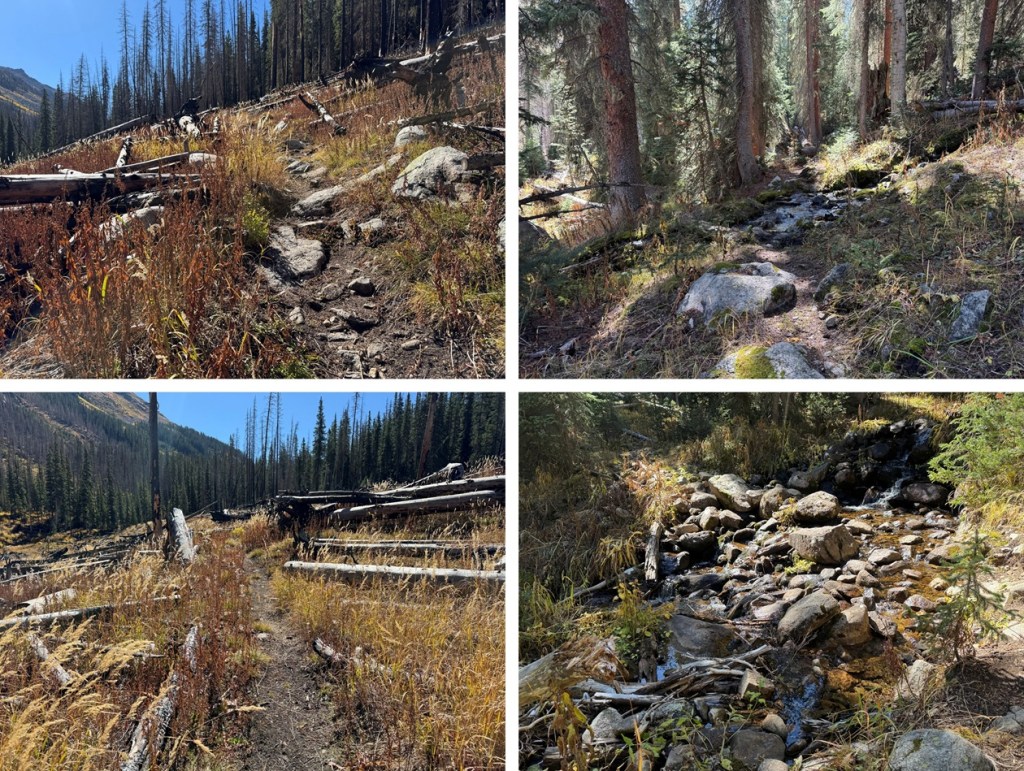
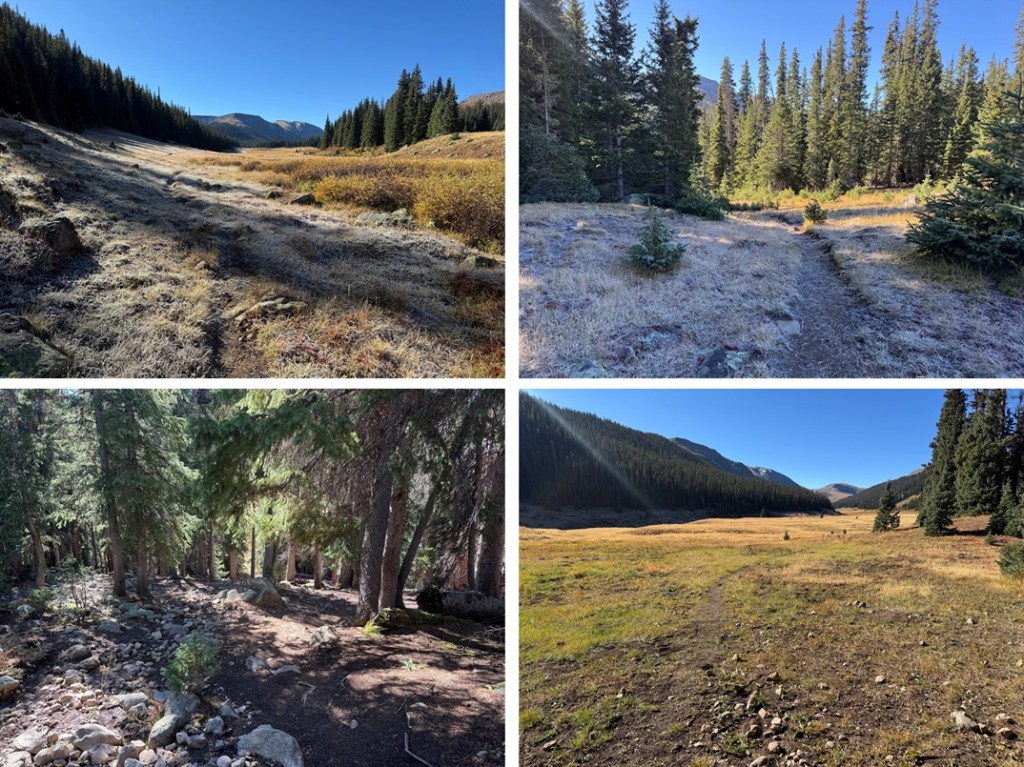
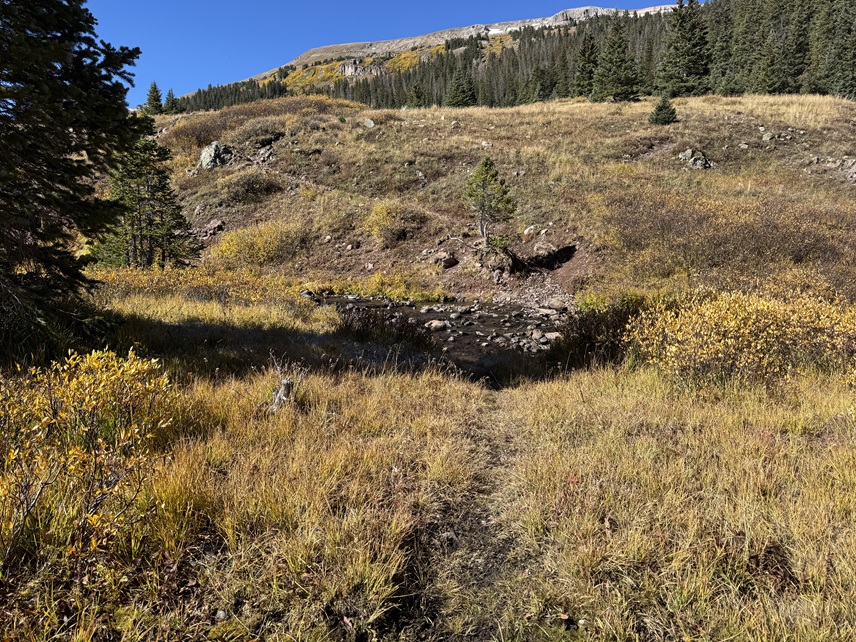
From here the trail can be difficult to follow but there are no trail junctions. It gets marshy and there are many game trails due to the mud and water. Also, horses have torn up this area. Be prepared with an extra pair of socks. From here I stayed on the left side of the creek until an obvious crossing point.
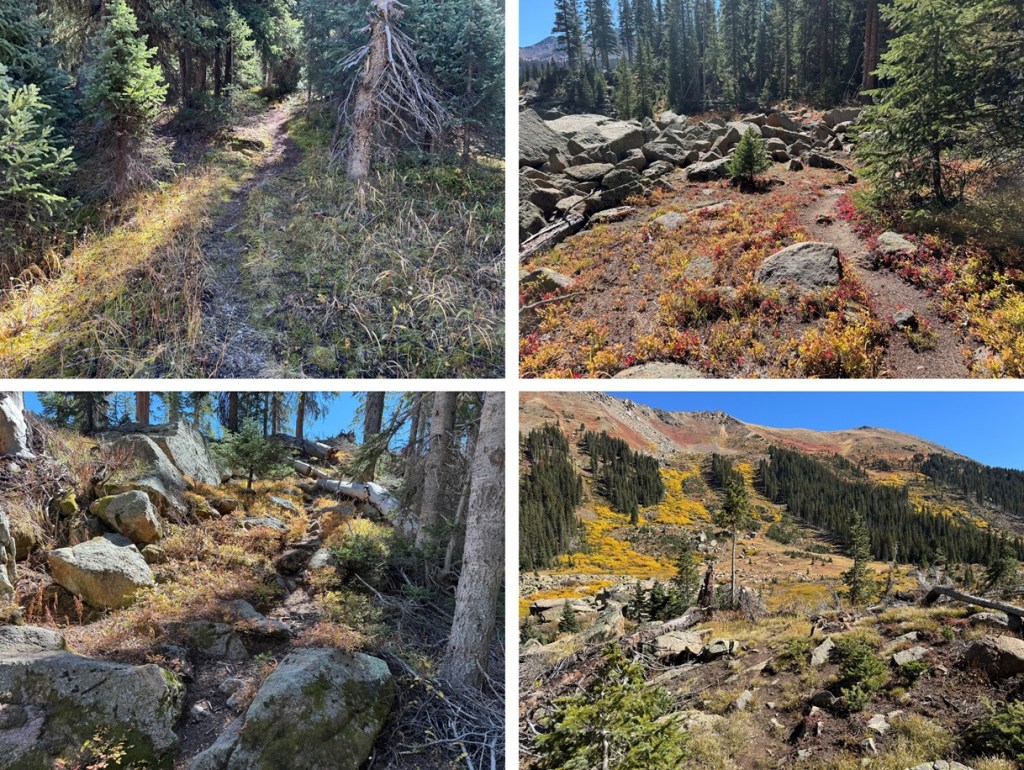
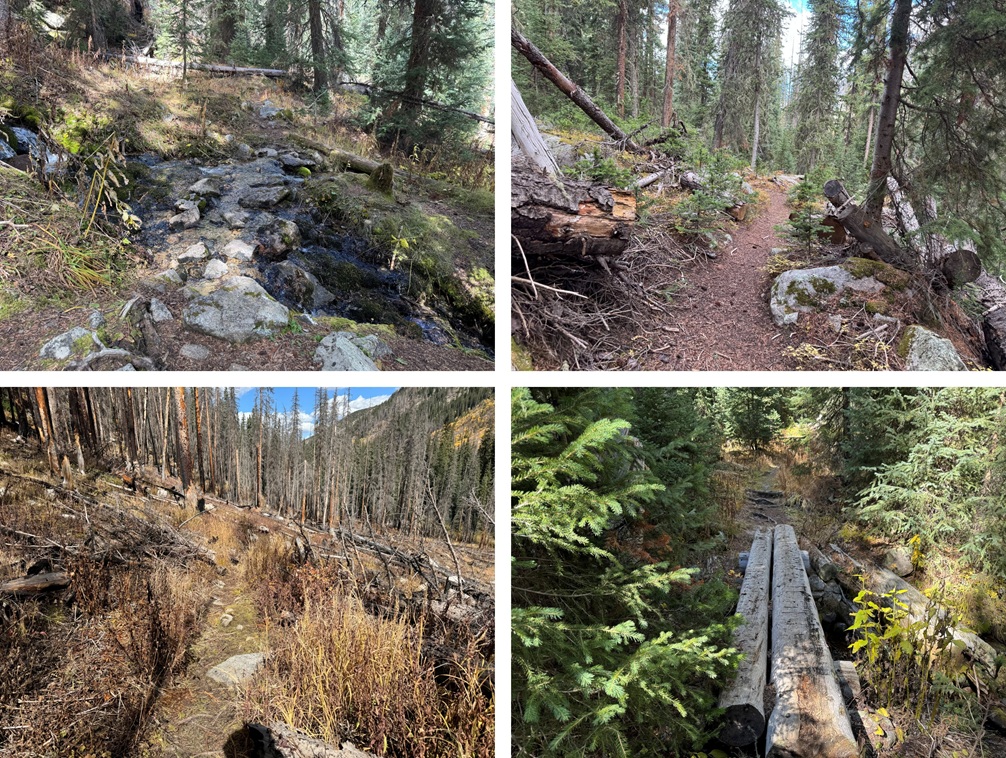
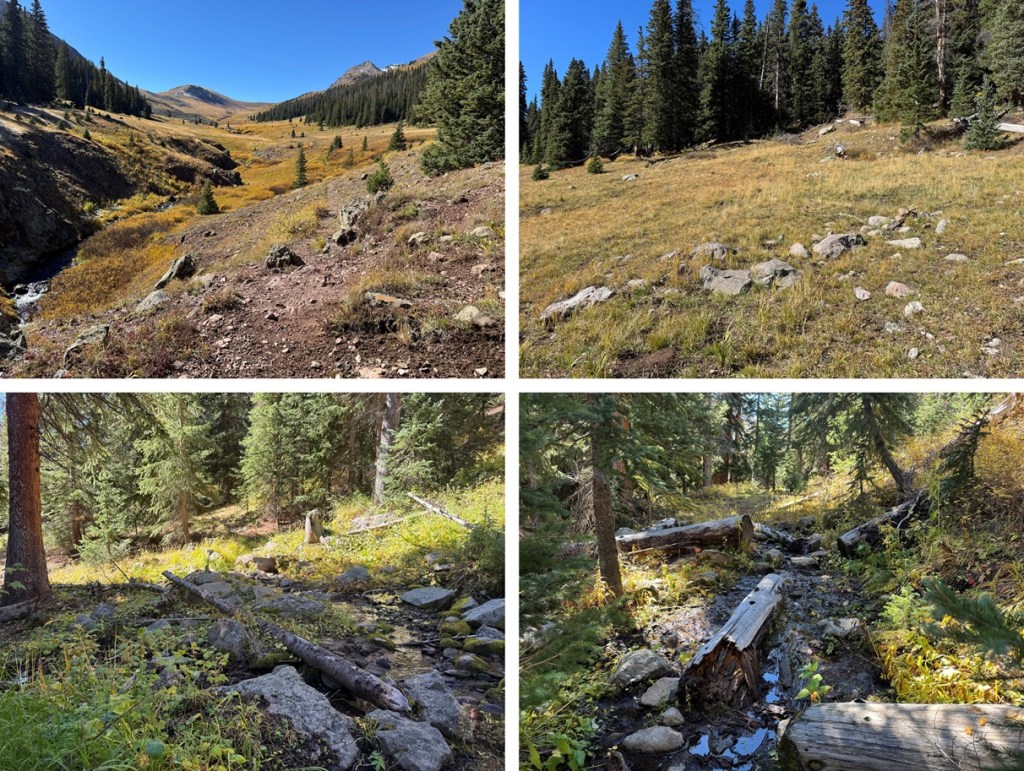
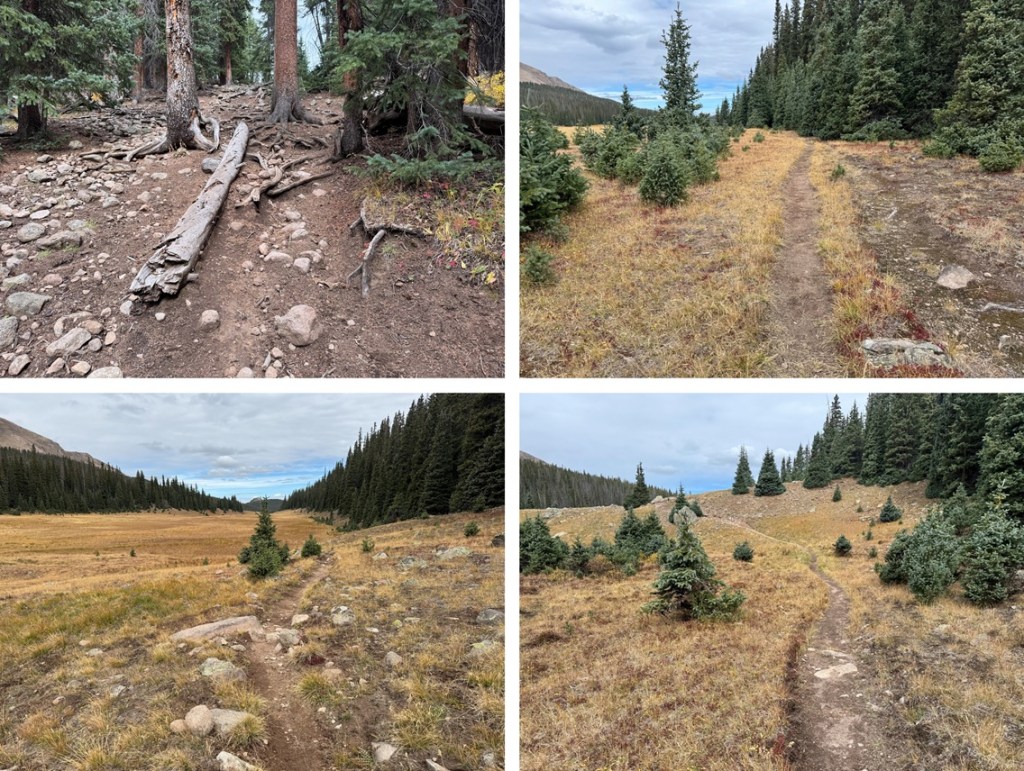
I crossed the stream and the trail brought me into the trees to avoid the willows below. This is where the elevation gain begins. There are some downed trees in this area but overall it was much easier to follow than heading through the marsh. But don’t change your socks yet: it’s going to get muddy through the willows up ahead.
After hiking for 6 miles, and at 12050’ of elevation I found my campsite for the night. It’s important to note this spot even if you don’t plan on making this an overnight, as this is where you’ll cross the creek again.
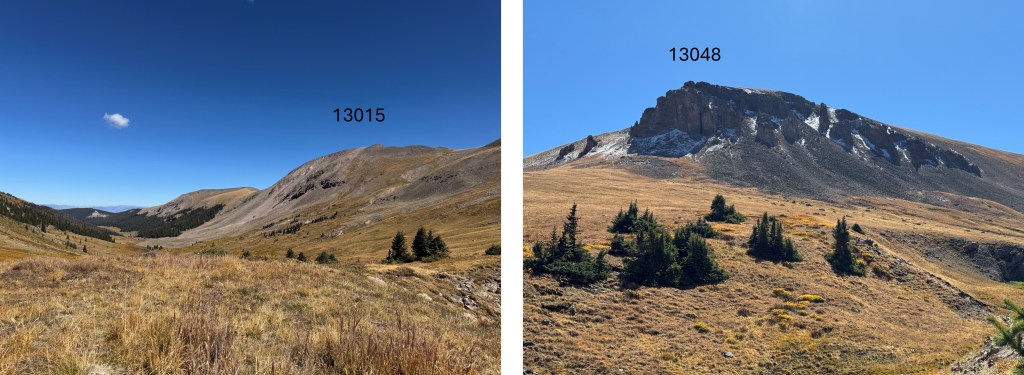
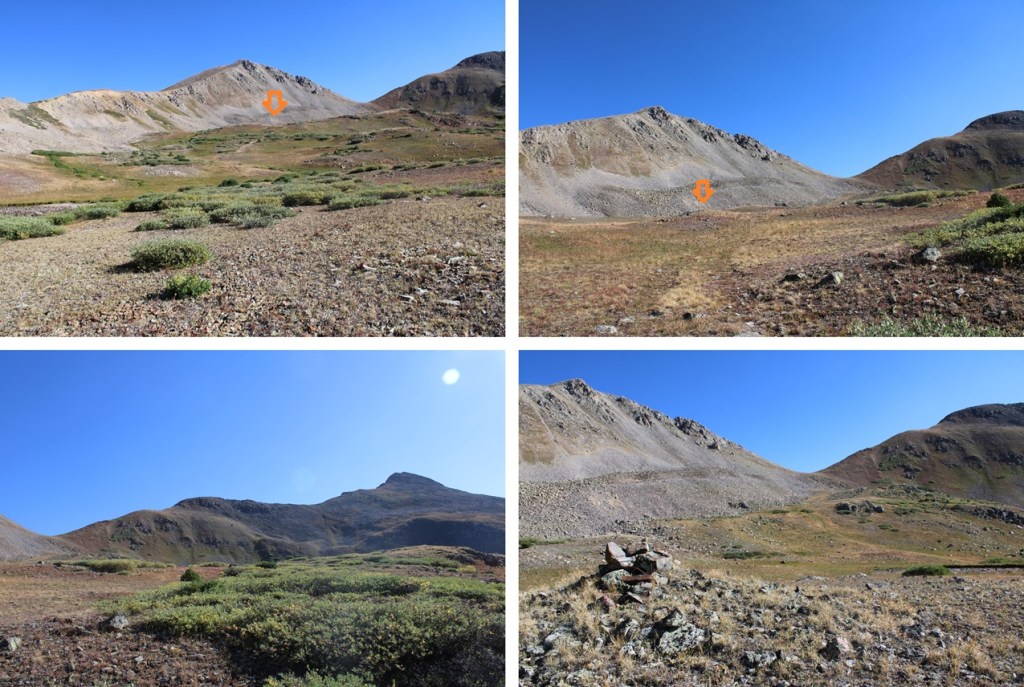
It took me just under 3 hours from the trailhead to my campsite. I set up camp and enjoyed the rest of my afternoon. I saw two different herds of elk, lots of raptors, and had amazing views of the peaks nearby. I could see PT 13015 to the northeast, and PT 13048 to the south. It was my goal to just enjoy the solitude.
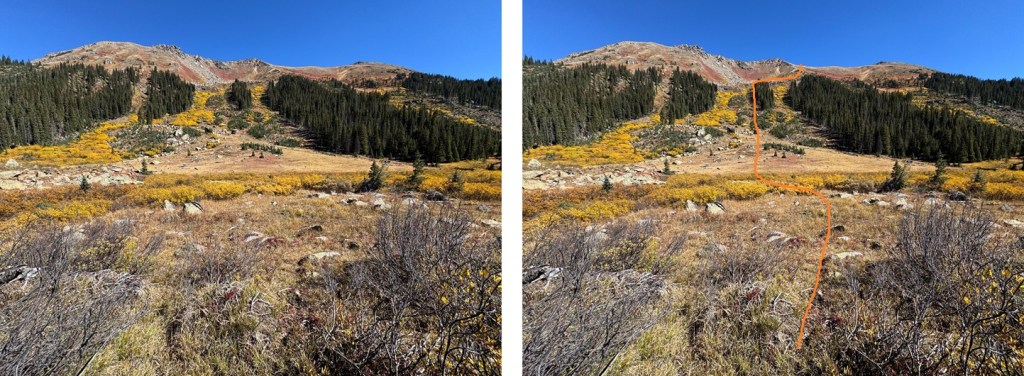
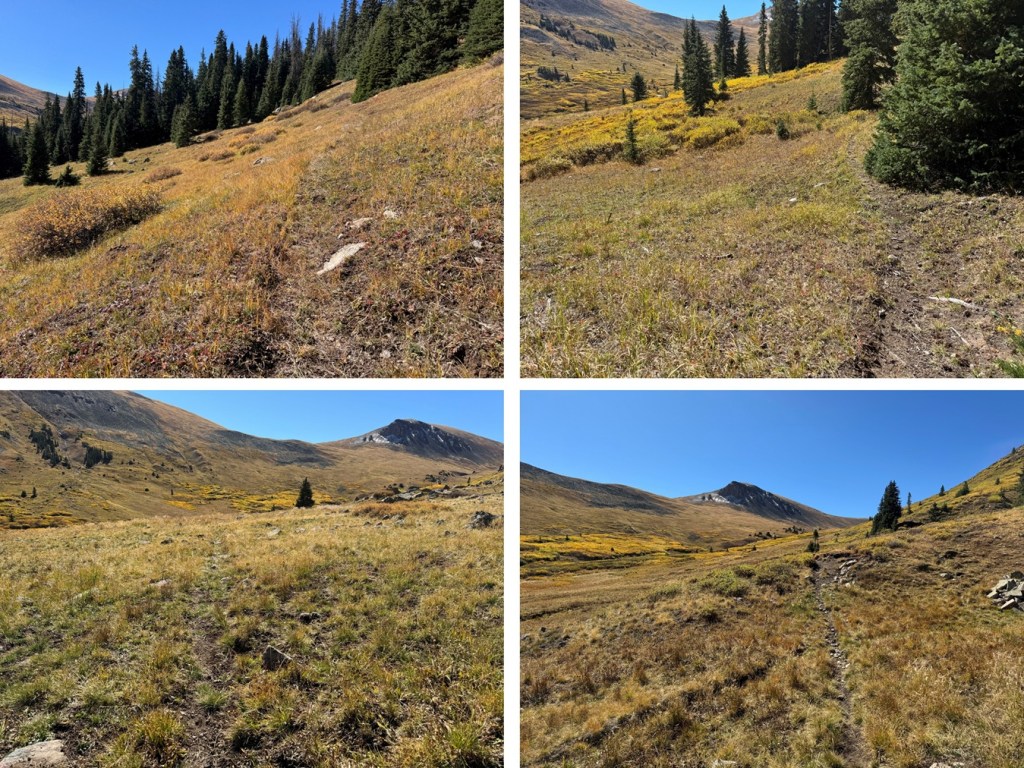
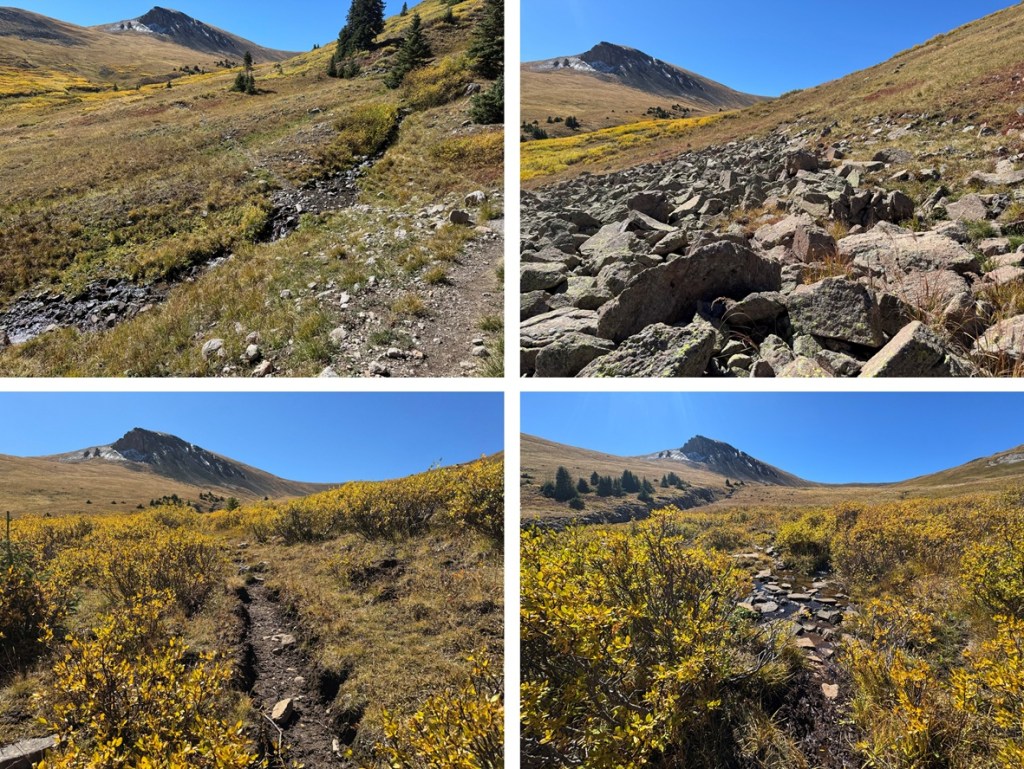
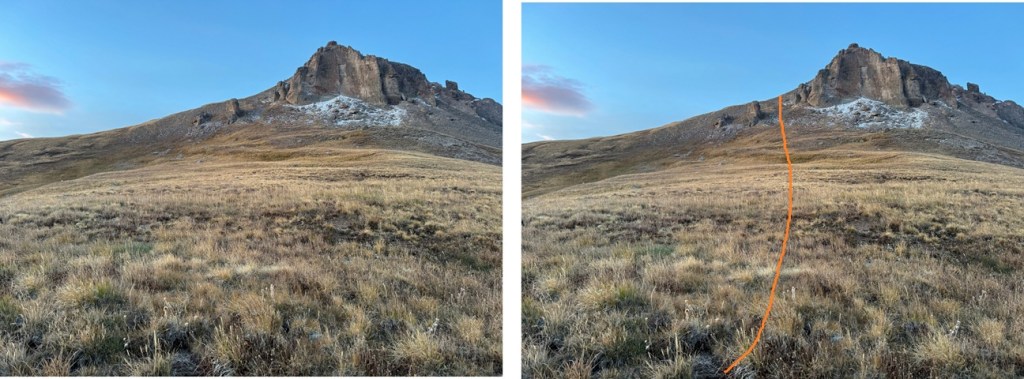
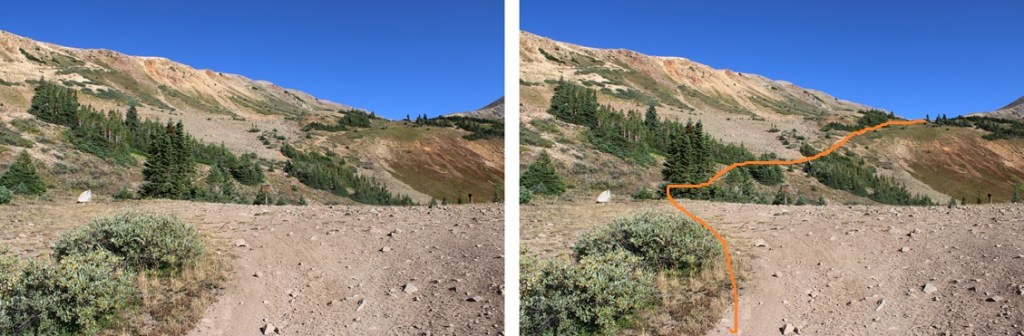
It was a long night, but that was just because I could hear the elk bugling and calling to each other. I’m also pretty sure I heard a cow moose at one point. This was why I’d made this trek an overnight: to enjoy the wildlife and fall scenery. It was worth it. I was the only one in the basin the entire time I was there. The next morning I was up and on the trail by 7am. I crossed the creek on a game trail and headed for the 13015/13048 saddle on tundra.
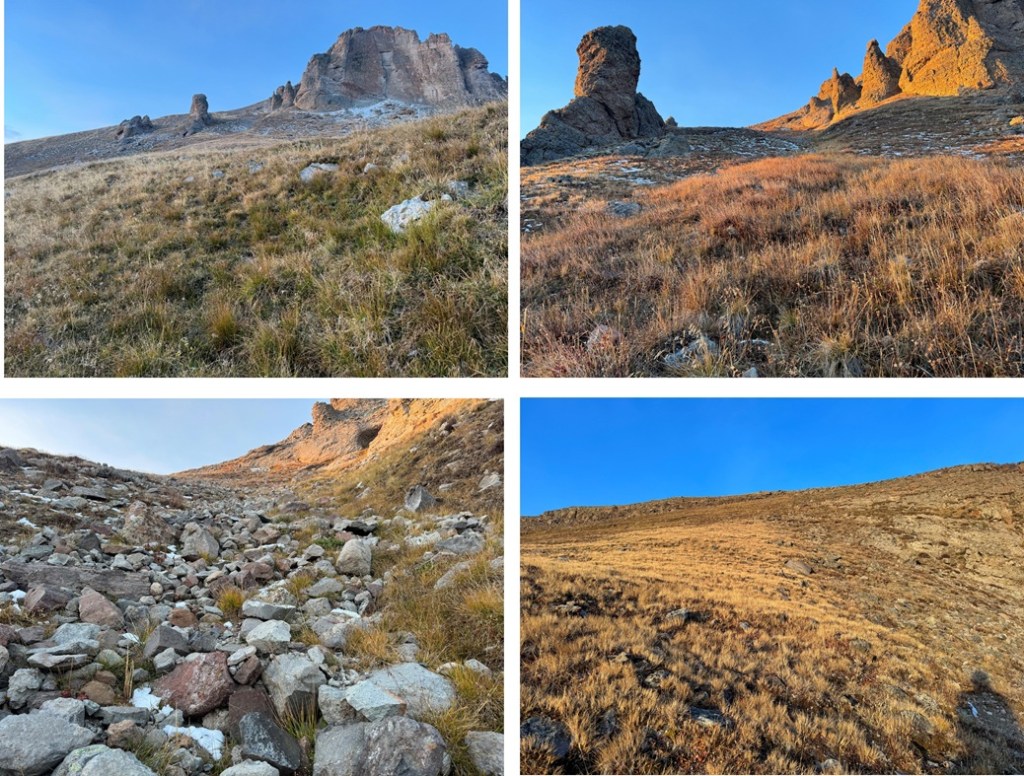
Once on the saddle my first objective was 13048. I turned right and headed up a small gully to the ridge. This was a class 2 gully and easy to navigate.
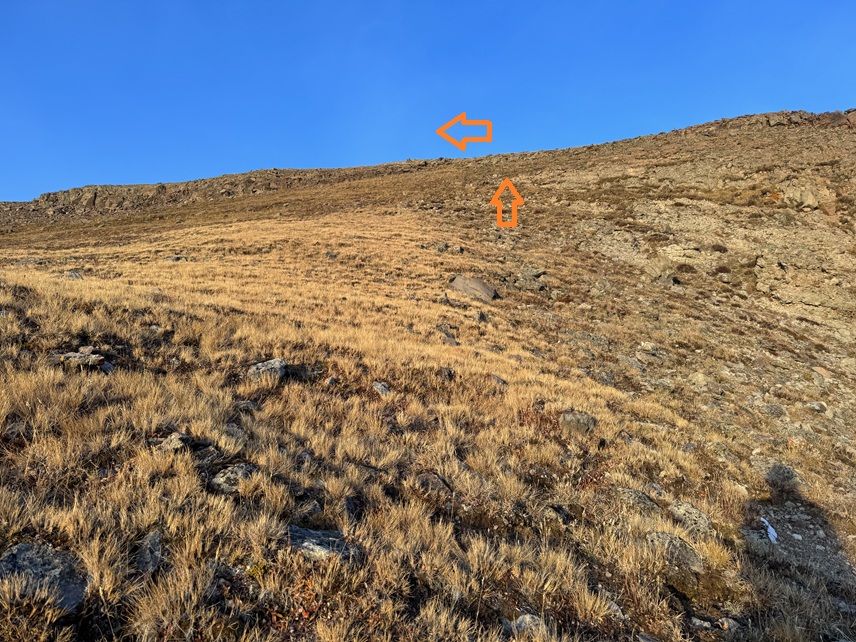
At the top of the gully I turned right to gain the ridge, also on class 2 tundra.
Once I’d gained the ridge I followed it southwest on easy tundra terrain to the summit.
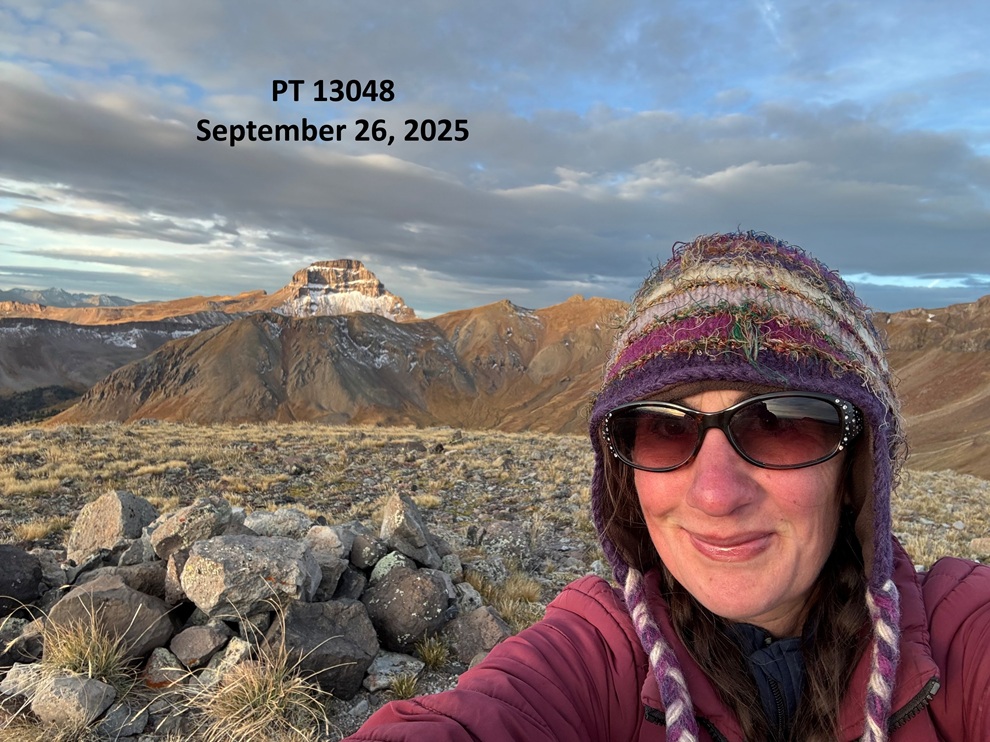
I summited PT 13048 at 7:30am
PT 13048:
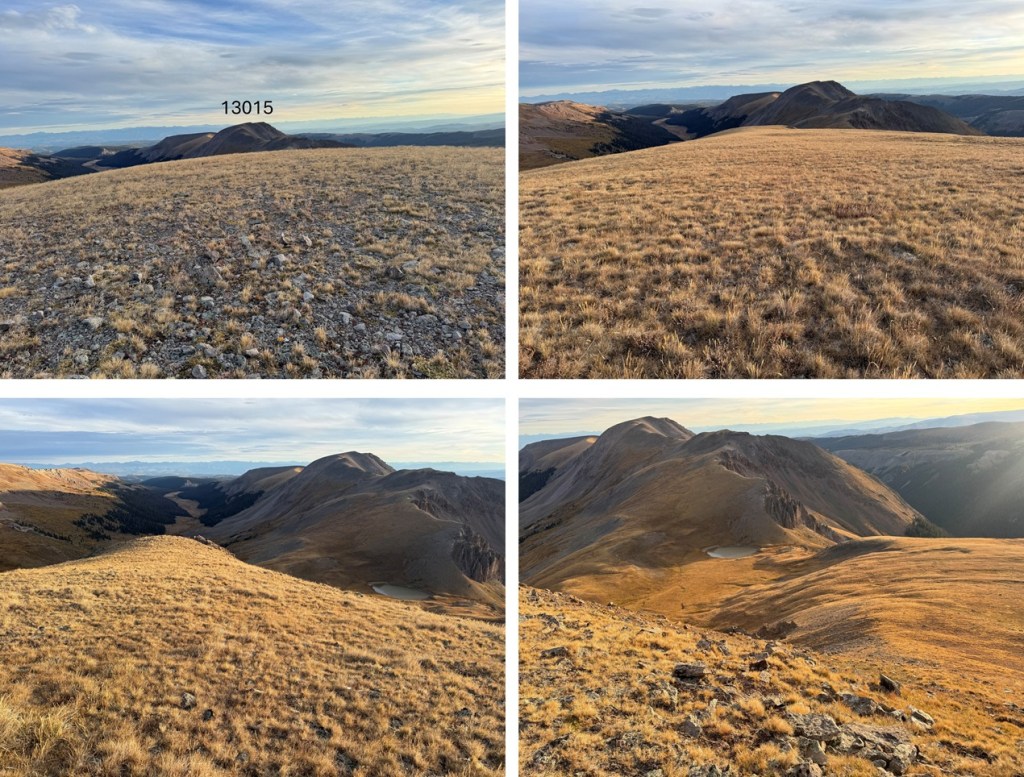
I could see PT 13015 to the northeast, so I descended back to the 13015/13048 saddle.
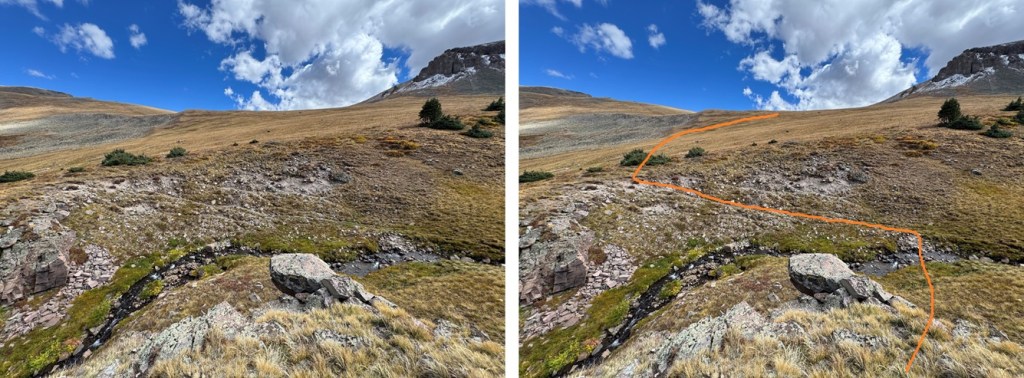
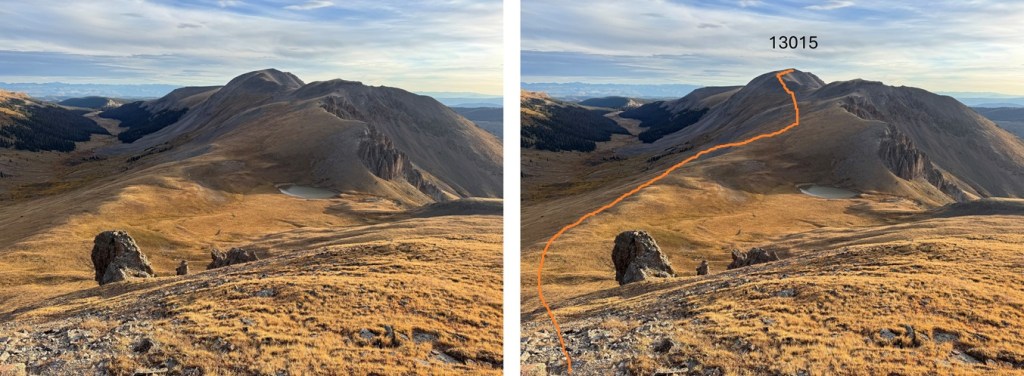
Here’s my overall route to the summit of 13015. It’s all class 2 on mostly tundra and then rocks at the end.
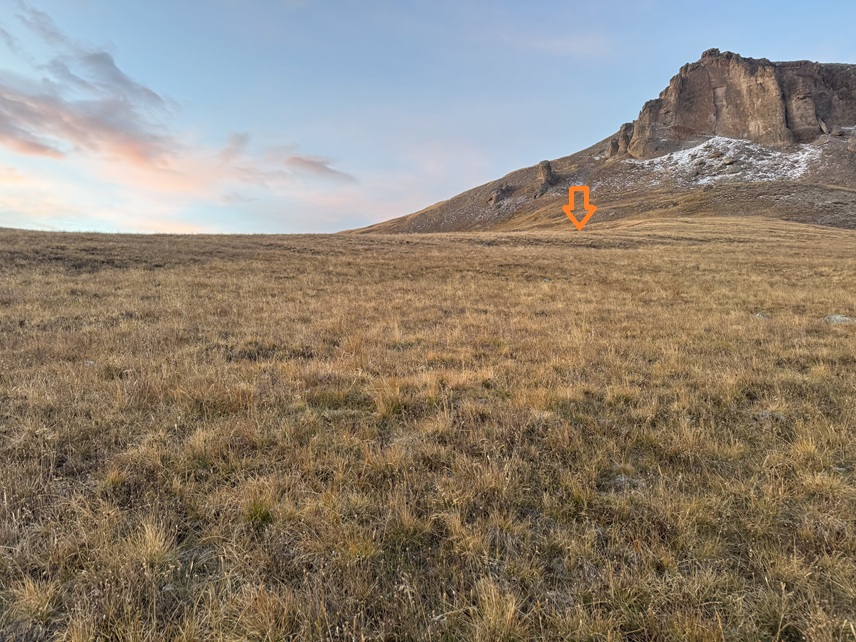
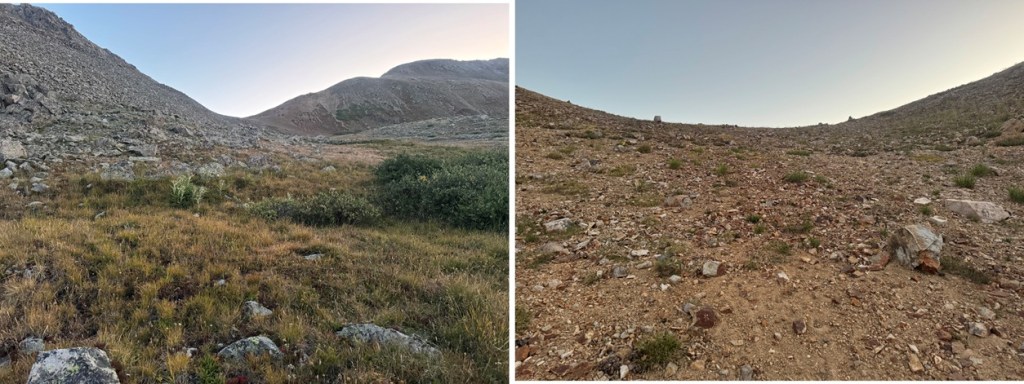
Back on the saddle I aimed for a low point in the tundra
Then I rock hopped to the saddle.
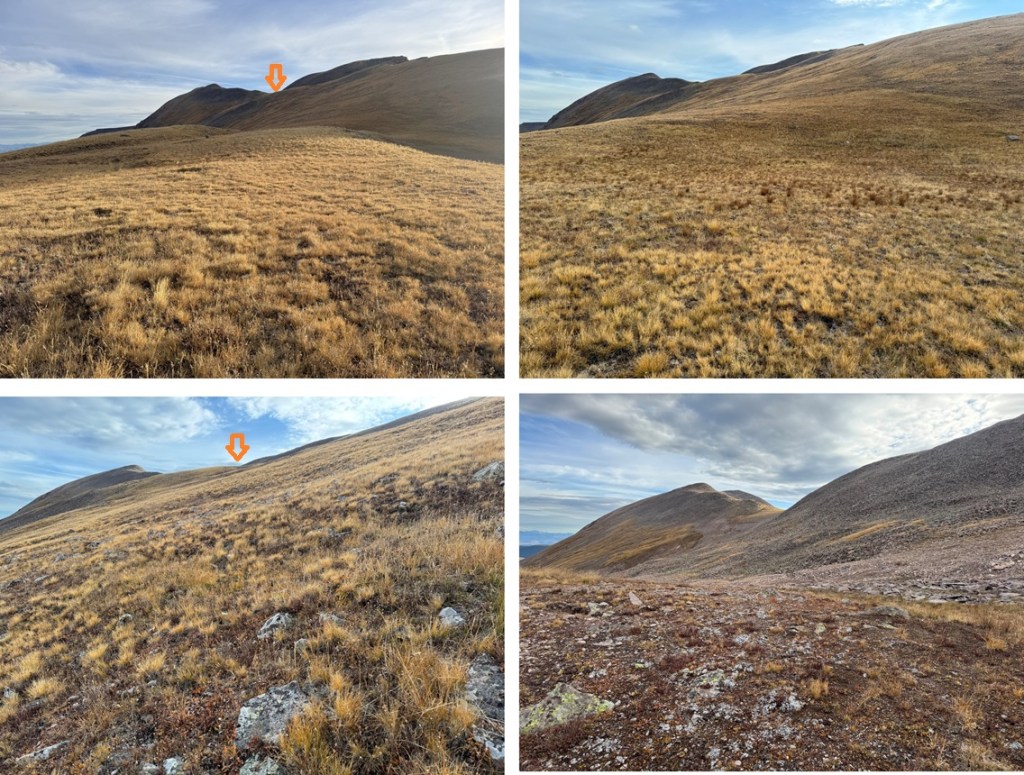
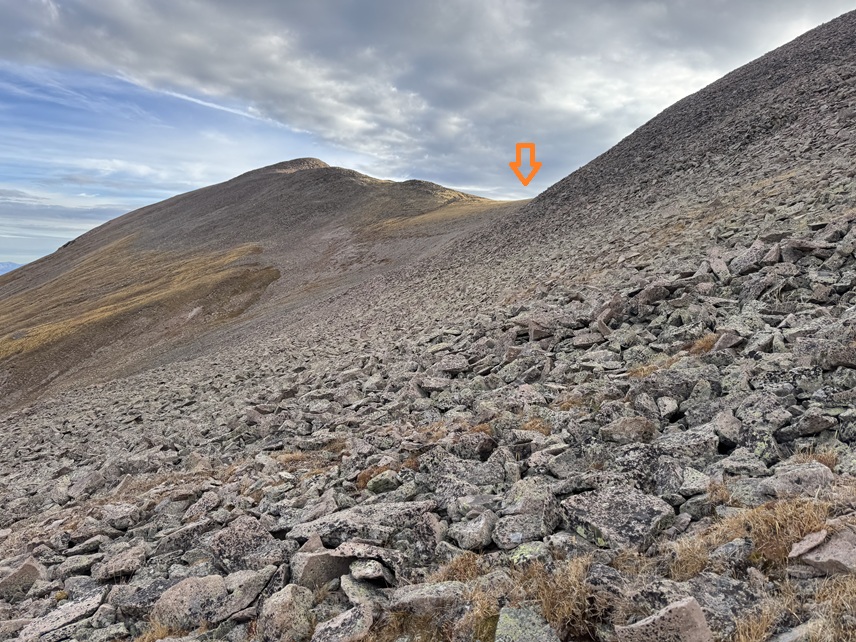
Once on the ridge I followed it north to the saddle. There was a game trail here to follow. There are a few false summits, and the last one has a trail that goes to the left so you don’t need to summit it if you don’t want to. It’s rocky, but all class 2.
I summited PT 13015 at 8:30am
PT 13015:
By this point it was very windy and very cold. I need to start carrying my balaclava again. I turned and headed back down towards the saddle.
Here’s the overall route back to my campsite:
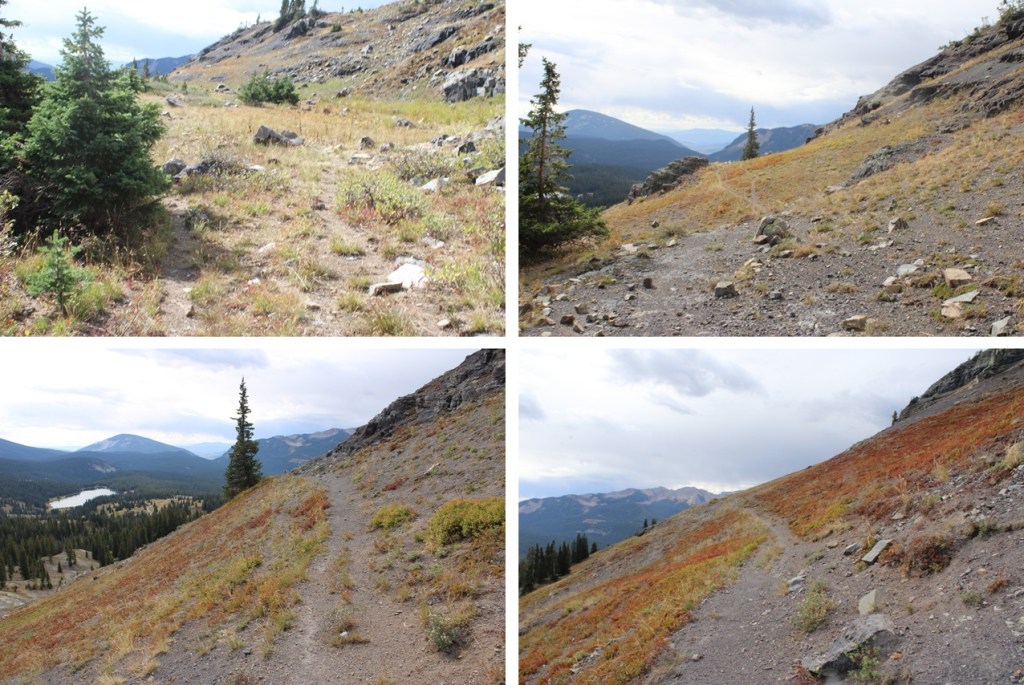
I made it back to my campsite at 9am, so I’d summited both peaks in under 2 hours. I ate breakfast, packed up my gear, and was back on Fall Creek trail heading north by 9:30am. Here are some pictures of the 6 miles back to Fall Creek Trailhead.
I made it back to the trailhead at 11:50am, making this a 16.36 mile hike with 3188’ of elevation gain.
I was a little leery of doing Mount Owen after hearing about the private property issues with landowners. So, I did my best to plan my route with CalTopo to avoid private property. I didn’t see any private property signs while hiking so I’m fairly sure this route avoids trespassing. In any event, I did see hunters out there as well.
I started from a dispersed campsite just past Lake Irwin. It’s a dirt road to get there but I saw several sedans in the parking areas. There are several dispersed sites here, and this one had a porta potty. They have signs stating only to camp in designated sites but I’ve seen people park at the lake or along the road.
I followed 4WD road 826 1D north for about 3/10ths of a mile from my site.
Just before coming to the first house I left the road and headed west to avoid hiking on private property.
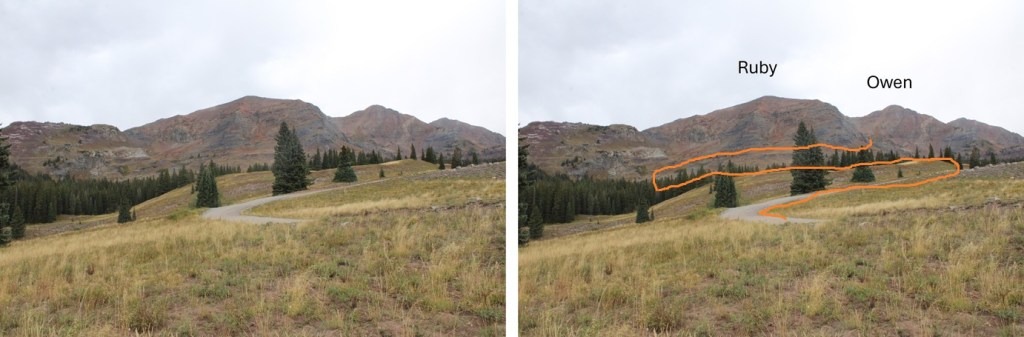
This first part is a little tricky because I did not go the obvious way (and believe me, there is an obvious way, but there are signs stating you can’t use the road if you don’t live there). It was frustrating going up and over small hills I could have easily avoided and heading further east than was necessary. Here’s an overview of my approach:
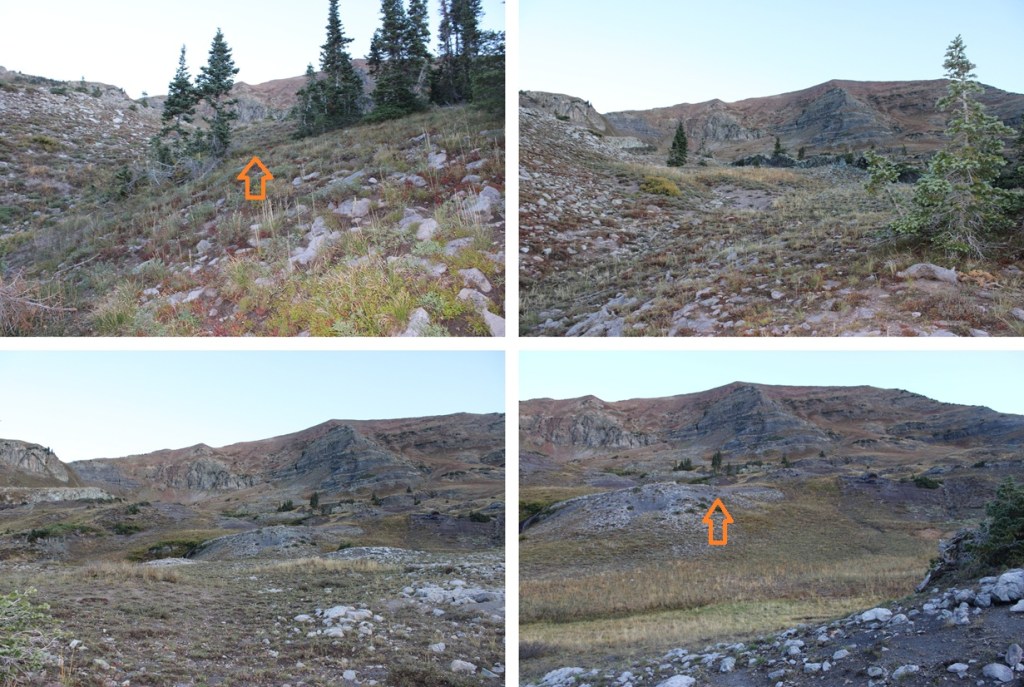
As I was heading east I was looking for a small gully to ascend.
When I made it to the gully I ascended it, heading northwest to 11175’
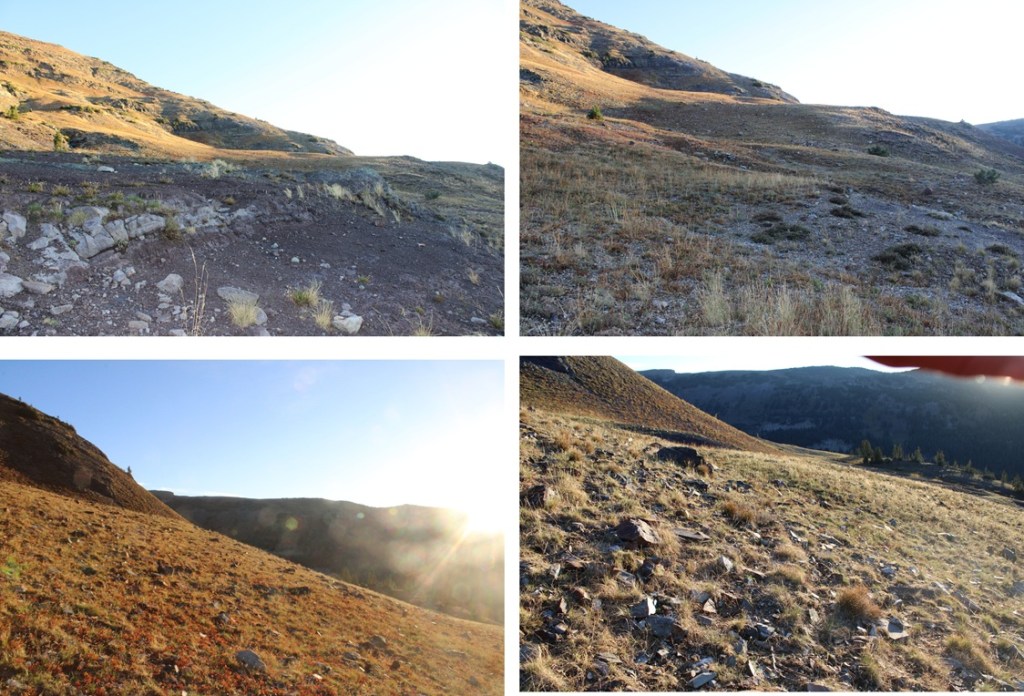
At 11175’ I headed northeast and followed the mountainside at this elevation. There were several strong game trails, and one took me all the way around the side of the mountain.
I continued following a game trail north, parallelling the 4WD road below. This eventually brought me to the base of Mount Owen, and an old mining road.
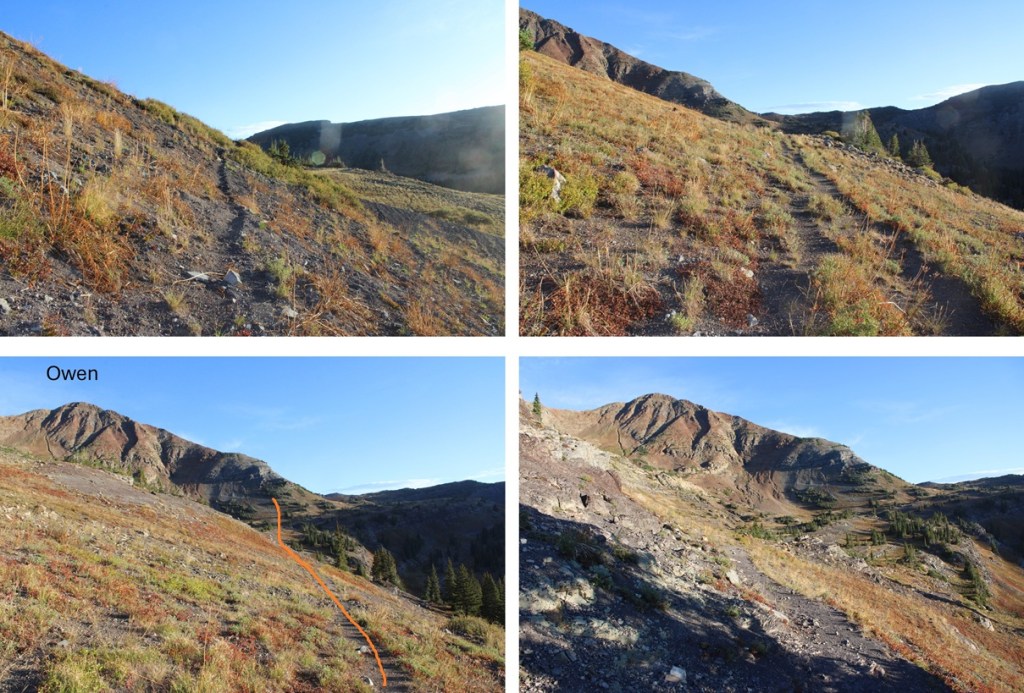
Once on the road I turned left and followed it west. This road hasn’t been used by vehicles for a long time. In many places there’s just a trail over talus and rockfall, but it’s very easy to follow. You can clearly see how the road goes all the way to the saddle. You can follow it to the saddle or take a game trail to the saddle and avoid the switchbacks.
I chose to avoid the switchbacks and head straight to the saddle. There were game trails here and some scree to navigate, but it was only about 100’ of elevation gain to the saddle.
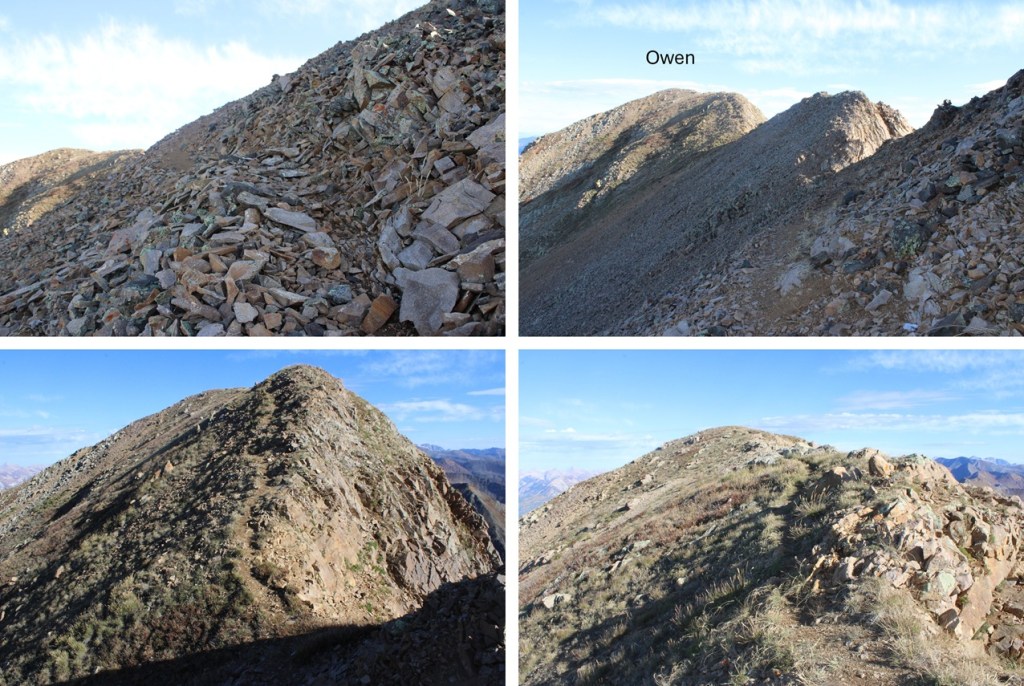
Once on the saddle I turned right and followed a game trail northeast up to the ridge and then all the way to the summit. There was some scree here, but it was all class 2 with one class 3 move that could have been avoided by going to the left. I was pleasantly surprised with how easy the trail was to follow.
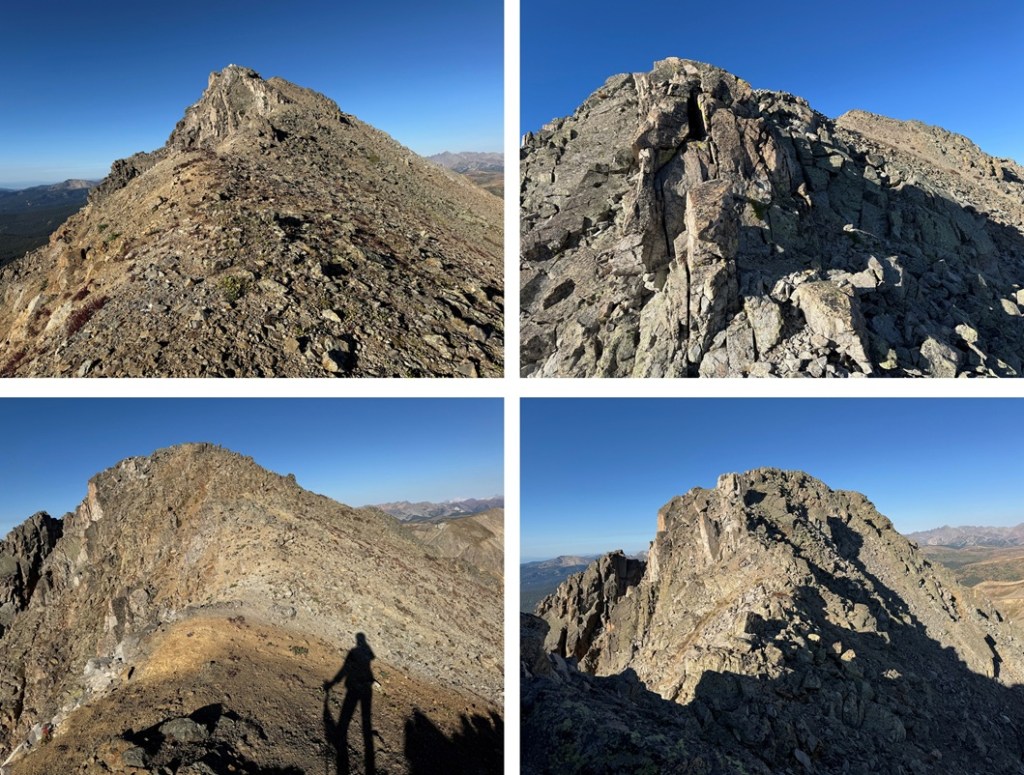
Once on the ridge I followed the ridge proper most of the way to the summit. The trail is obvious. Mount Owen is the peak to the left.
Here are some pictures of the ridge
The avoidable class 3 move. Just go to the left to stay on class 2 terrain.
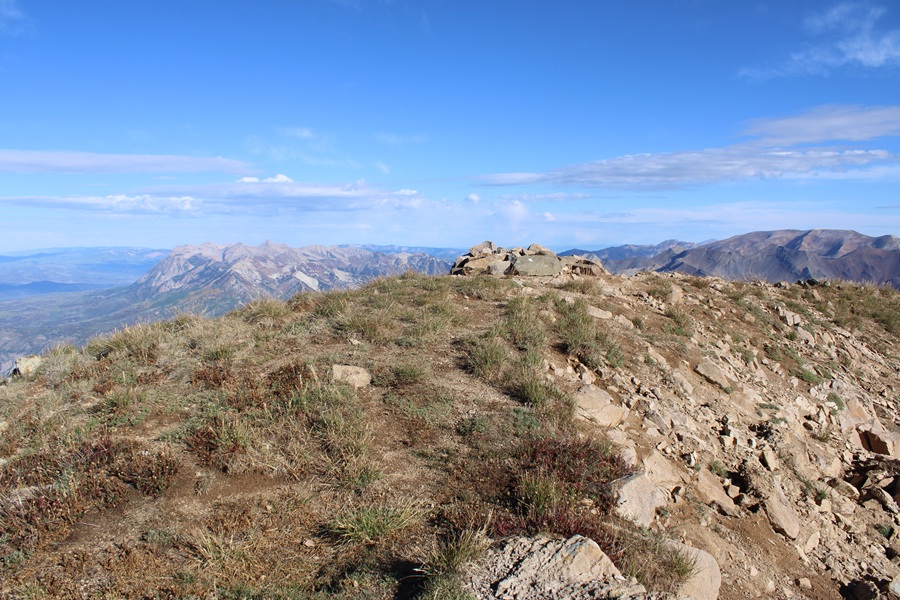
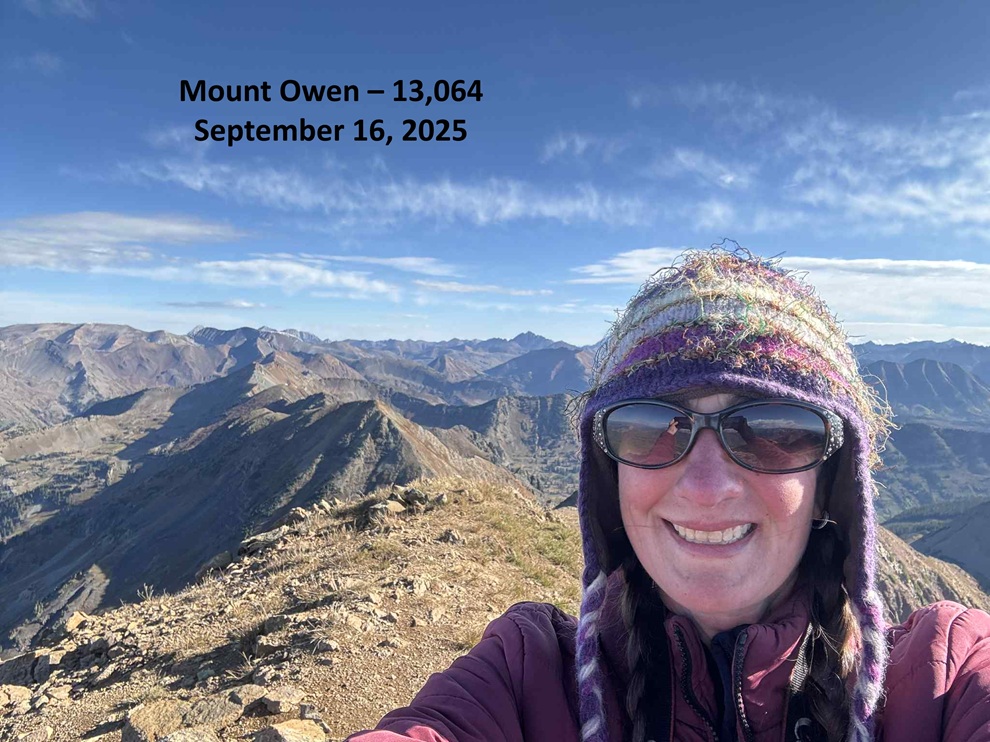
I summited Mount Owen at 9:10am. Notice how clear the sky is?
Mount Owen:
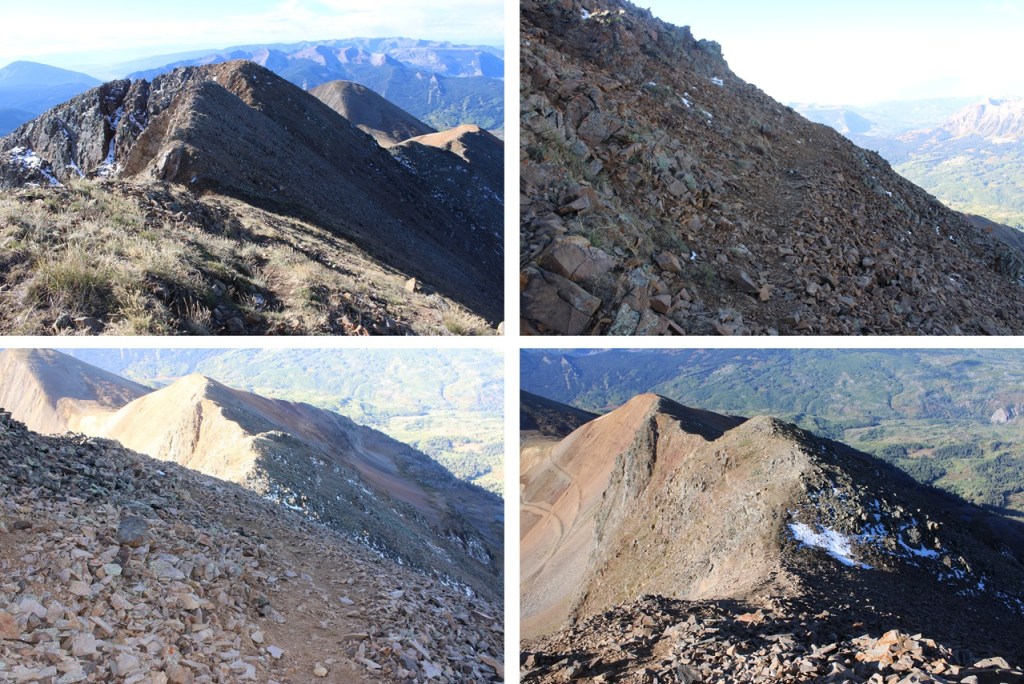
This was an out and back hike for me, so I turned and headed back down the ridge to the saddle of Ruby and Owen.
Once back at the saddle you can choose to climb Ruby Peak, a ranked 12er, but I’d already climbed this peak, so instead I descended back into the basin down the scree and hiked the road back down to 11500’.
At 11500’ I left the road and headed south around the ridge. There’s a good game trail here.
As I rounded the ridge I tried to stay high to avoid private property. I didn’t go lower than 11175’ until I made it to the gully.
When I made it to the gully/drainage I followed the drainage southeast until 10550’, then headed east back to the road. This is also when I heard a big clap of thunder. Around 10:30am the skies opened up and it started raining. At this point I was cursing the extra mileage avoiding private property was giving me (no, it wasn’t actually a lot, but it meant route finding in the trees which took time), and the weather forecast not calling for rain until after noon.
Back on the dirt road I followed it south back to my truck
I made it back to my truck at 10:30am, making this an 8.59 mile hike with 2897’ of elevation gain in 4 hours.
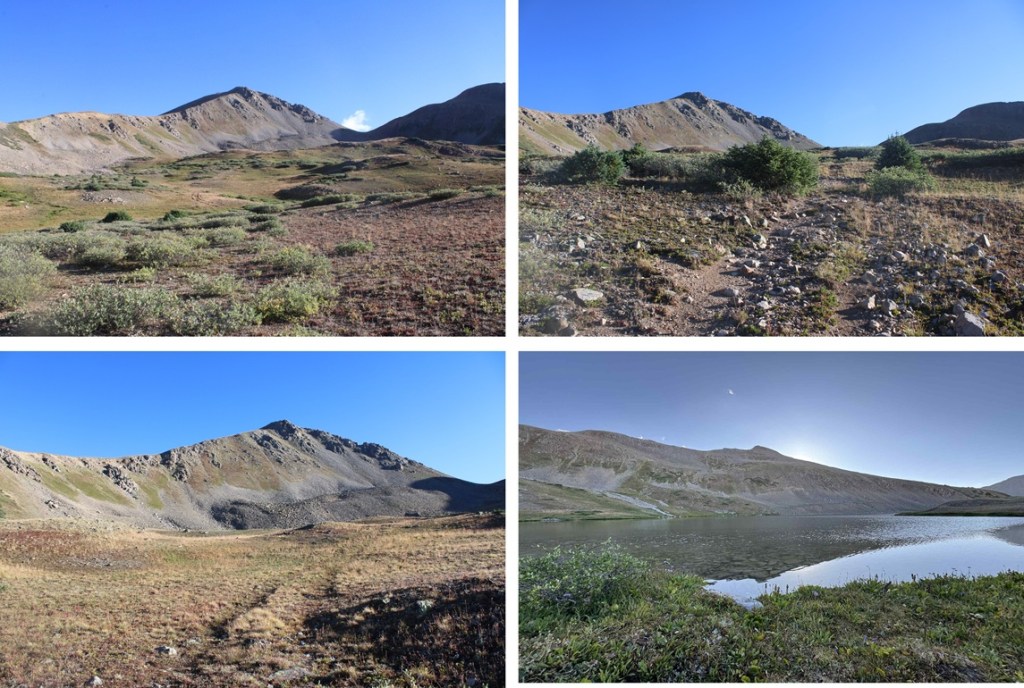
This was my final peak in the Williams Group. I didn’t want to do the traverse but instead wanted to camp in remote basins and find alternate routes. I thoroughly enjoyed the solitude of this peak. I started from Lost Man Trailhead at 2pm and made it to my campsite by 4:45pm. From the trailhead I headed northeast for 3.75 miles on the class 1 Lost Man Loop trail.
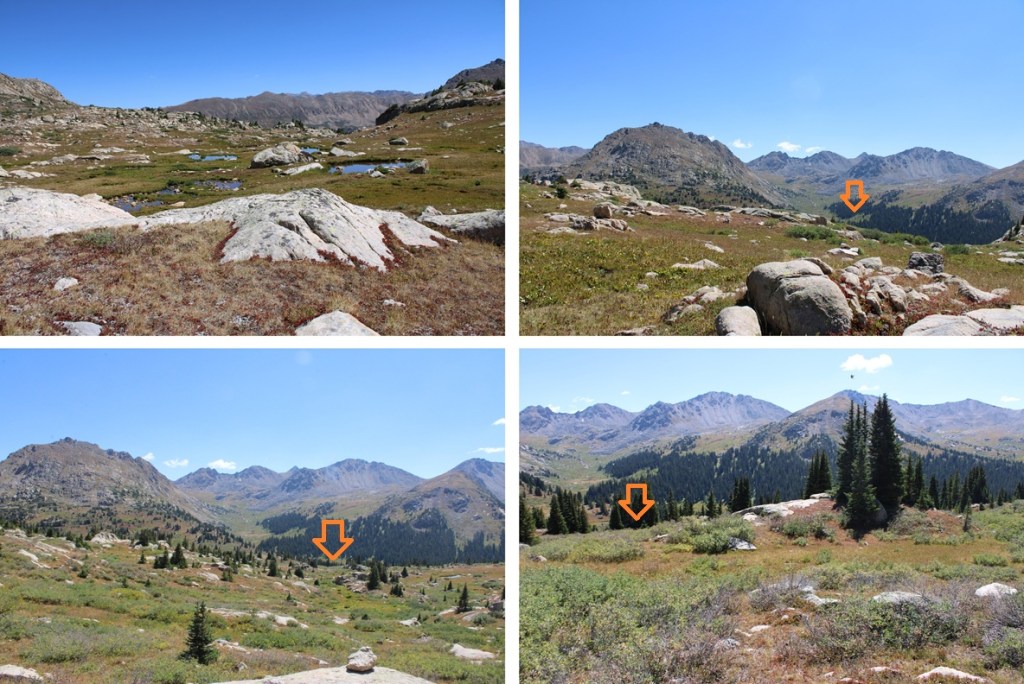
After following the trail for 3.75 miles and at 11370’ of elevation I came to an obvious avalanche area to my left.
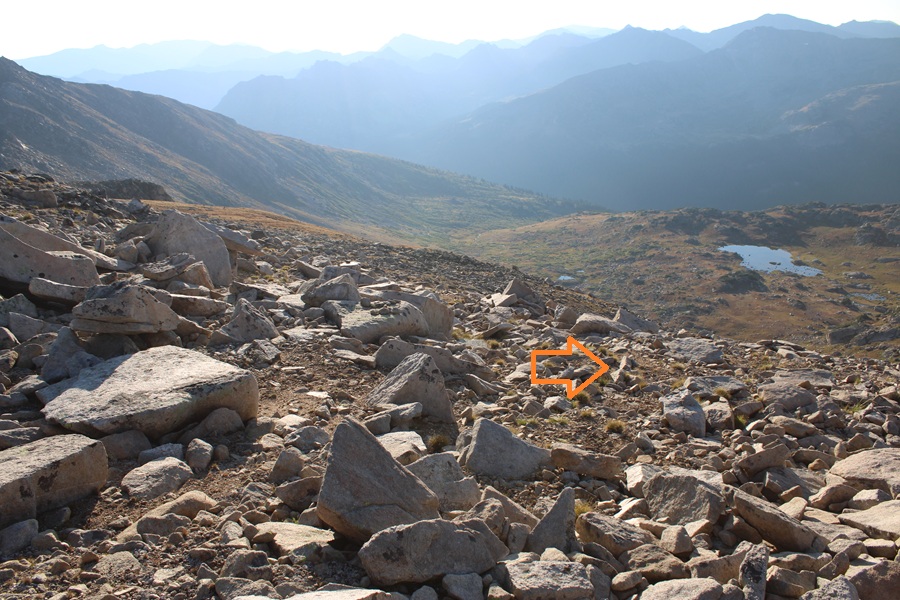
I followed the avalanche run northwest to treeline. I didn’t head straight to the trees but diverted a bit to the left to make it to the ridge. This was by far the most difficult part of the hike, as the elevation gain is steep.
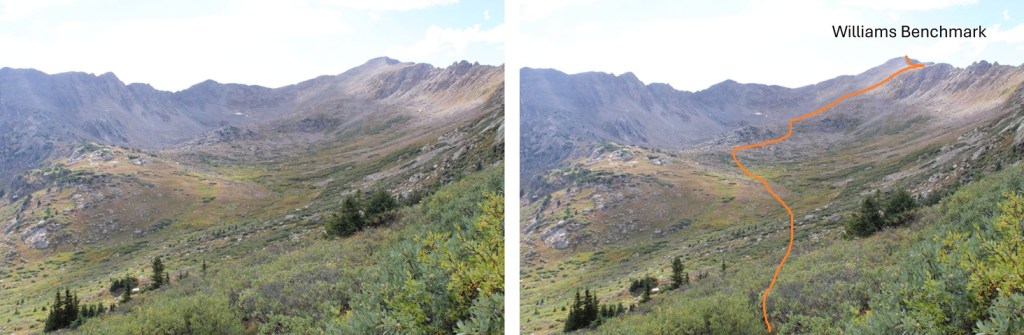
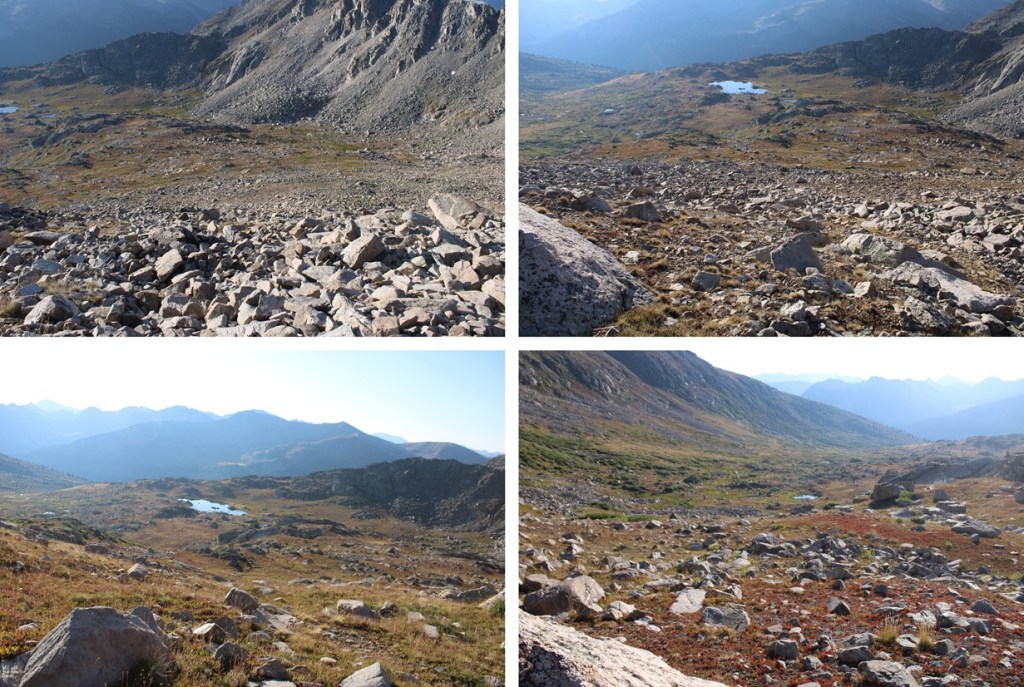
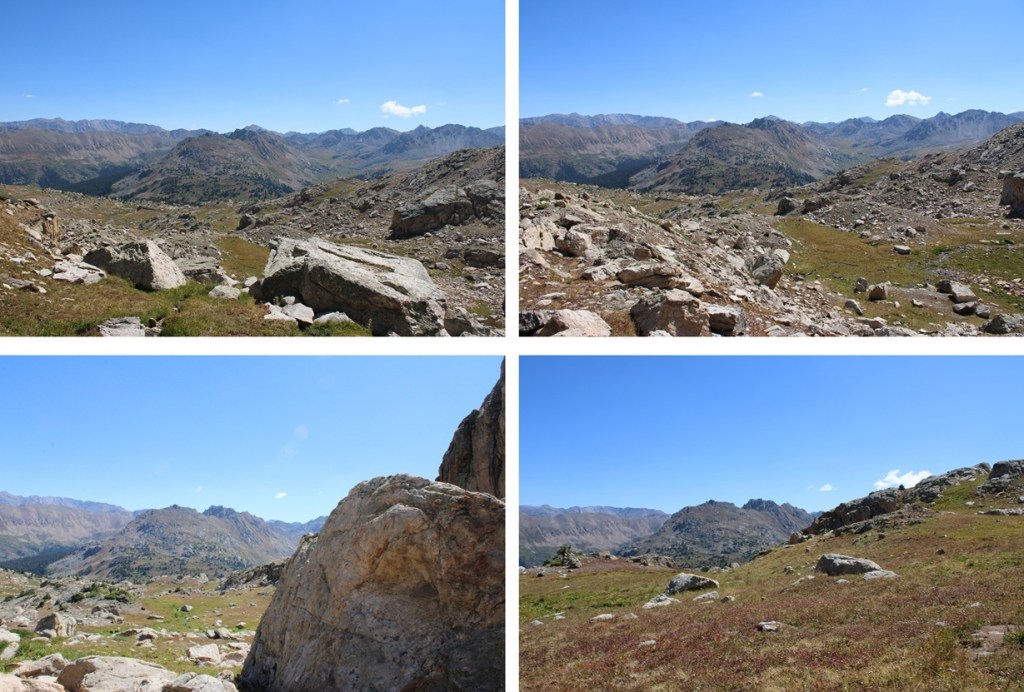
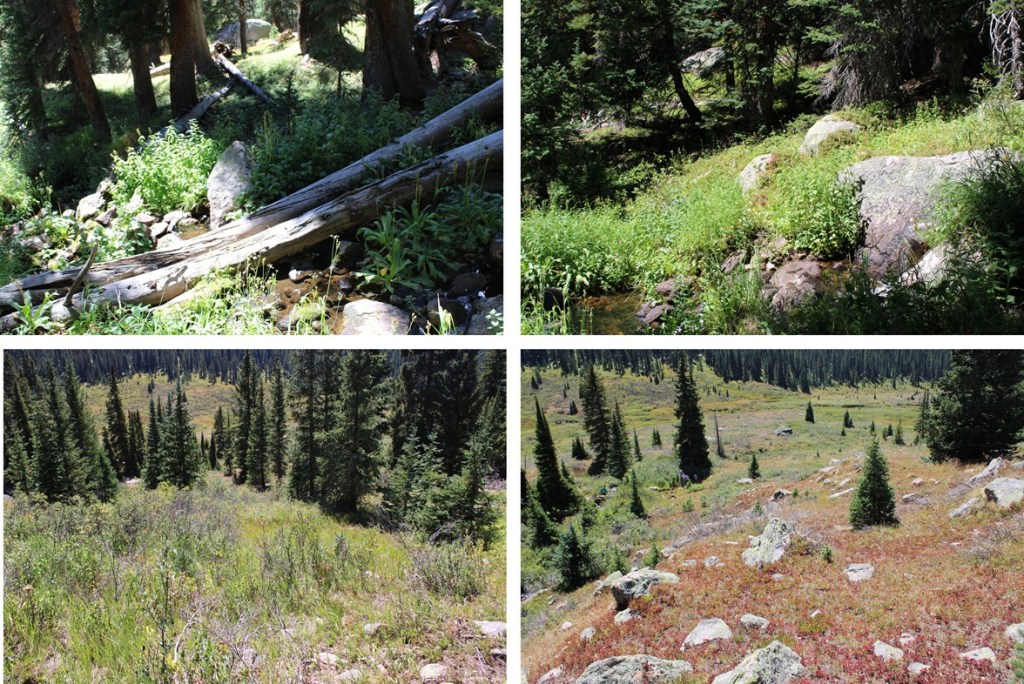
At the top of the avalanche run I could see a large unnamed basin (on a topo map it’s north of Scott Lake). This was where I planned on setting up camp. I could also see the rest of my route to the summit. As you can see from the picture, I needed to lose about 200’ of elevation as I headed into the basin. There are tons of willows here, but also several game trails to navigate through them.
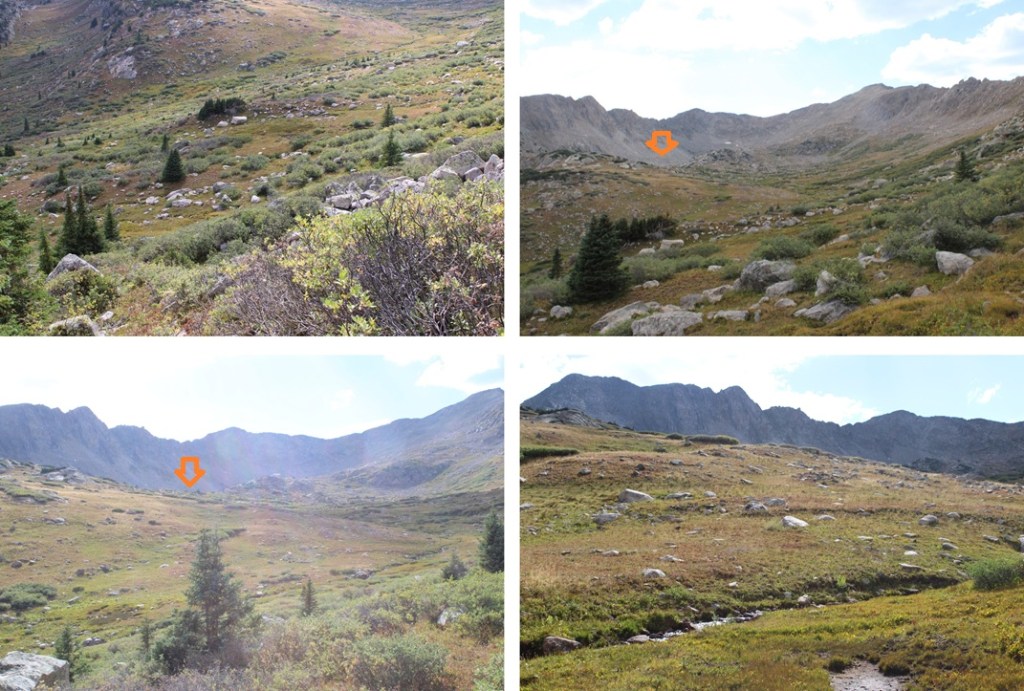
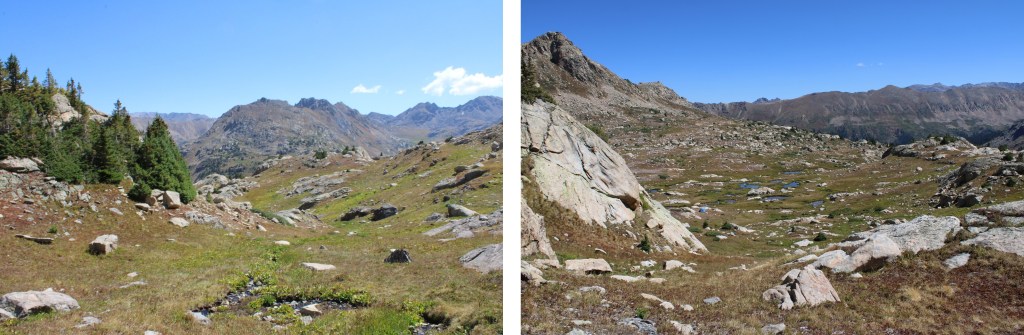
I headed west and found an unnamed lake/pond at around 12150’, went past it and found a campsite.
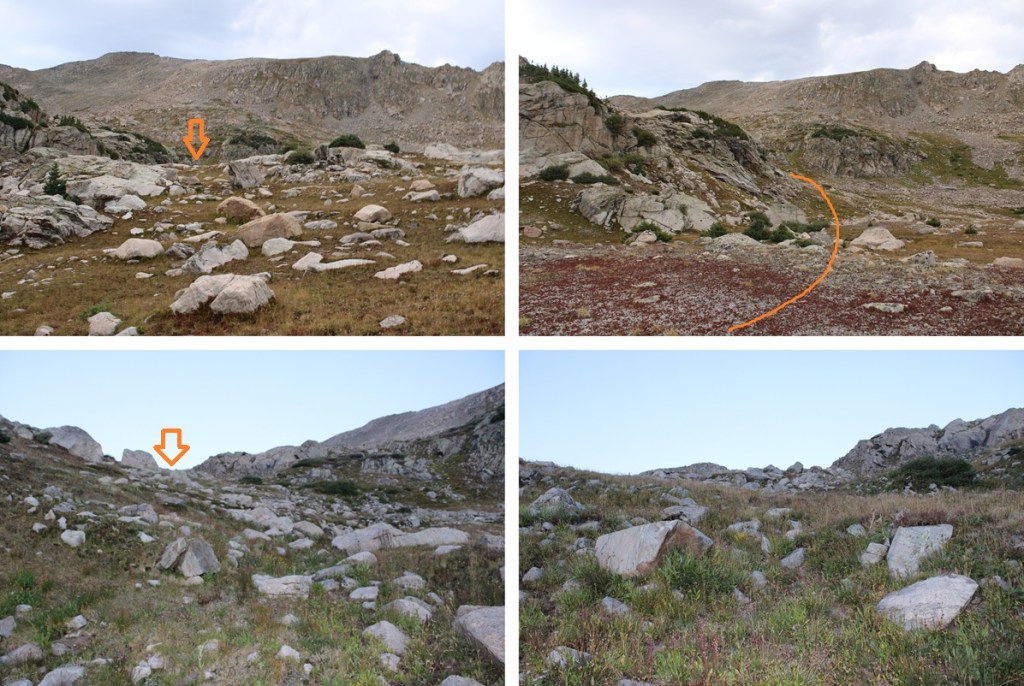
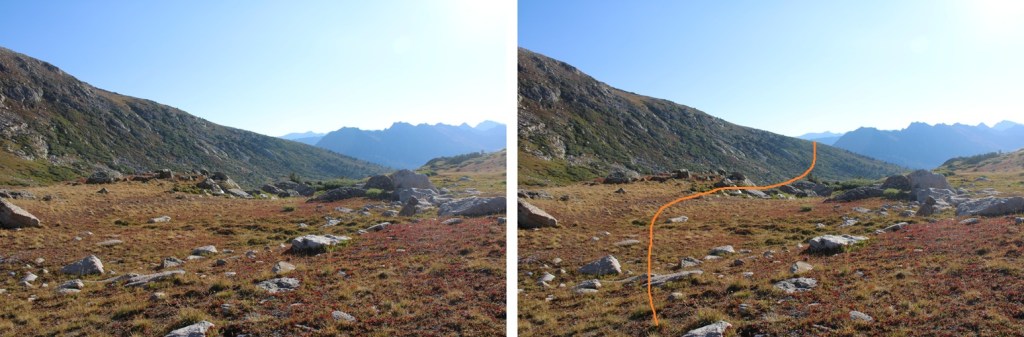
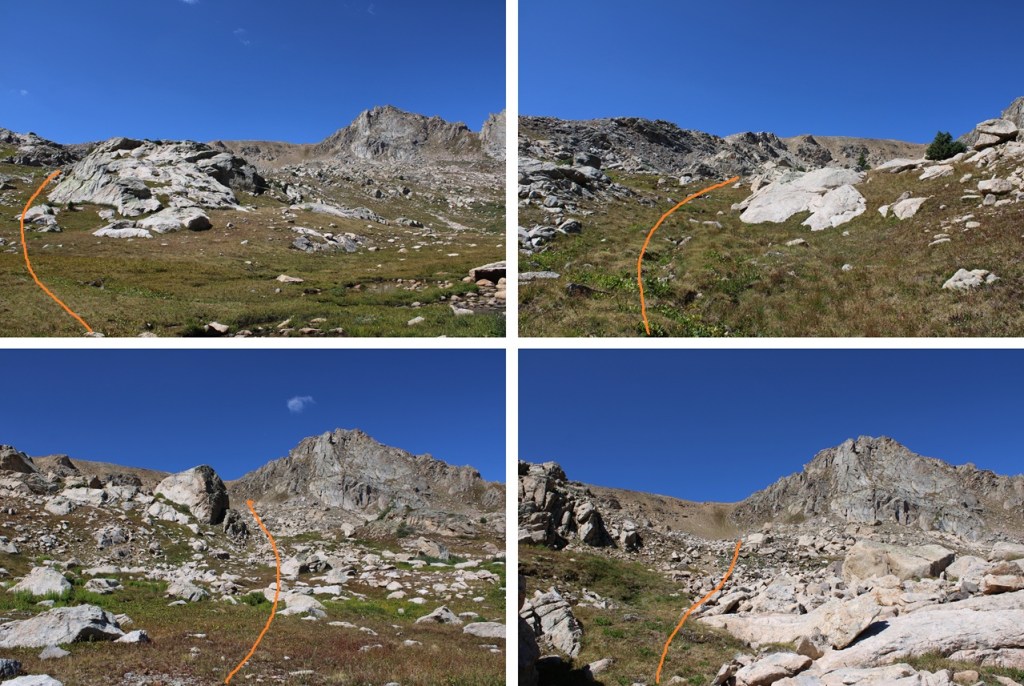
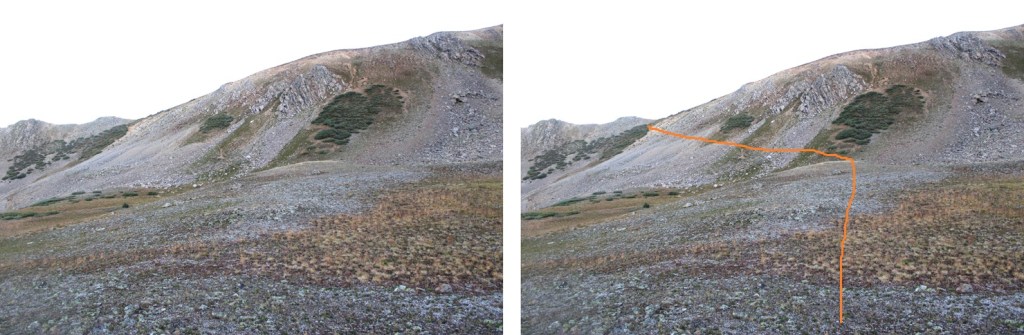
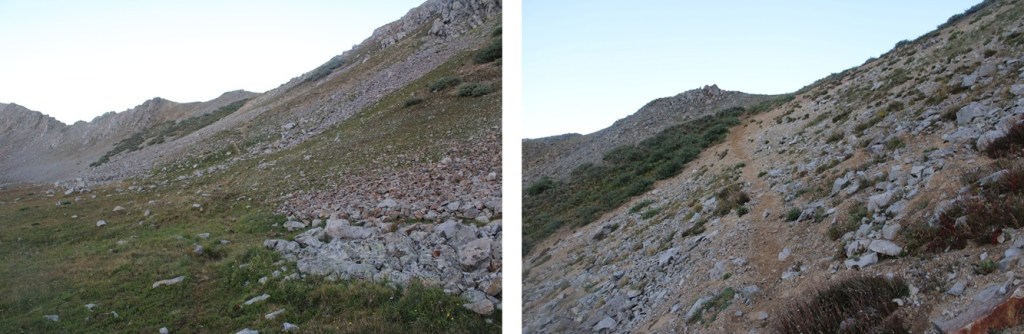
After spending a wonderful night in the basin I was up and hiking again at 6:30am. I started by finding an easy gully and ascending it west.
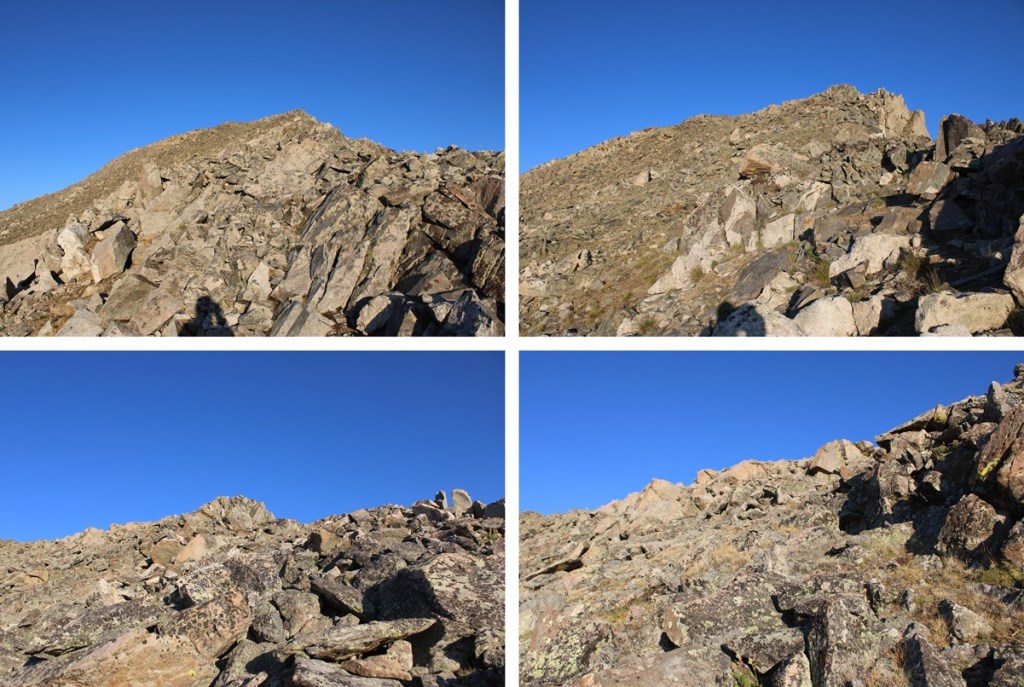
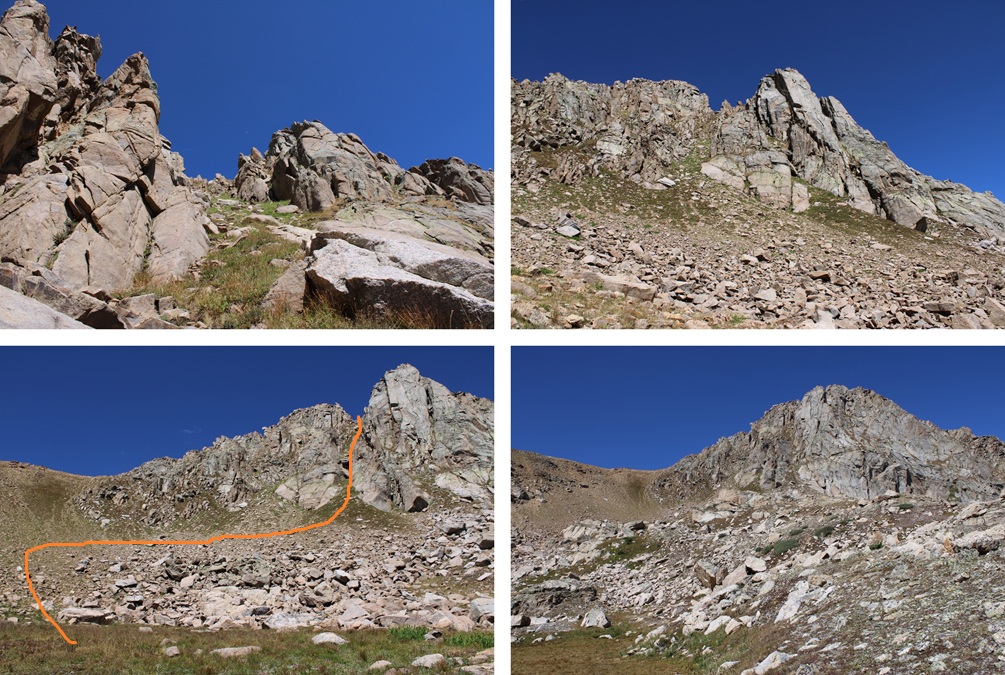
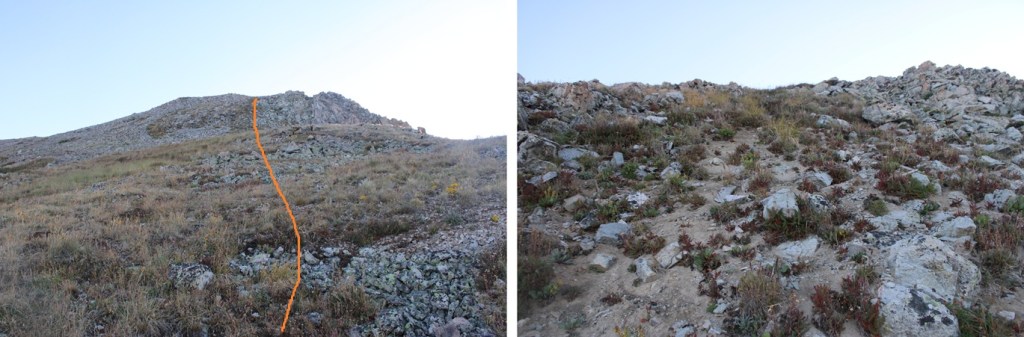
At the top of this small gully I turned right and headed up the ridge. To make it easier for me I looked for large boulders to the northwest and followed them to the ridge. This entire hike is class 2, and ascending the ridge was easier than ascending the avalanche run.
Once on the ridge I turned left and followed it west to the summit. The ridge proper goes at class 2. This was an easy yet rocky trek.
The true summit was difficult to determine, as there were two humps very close together on the relatively flat summit and both looked higher than the other, so I walked all around the summit to make sure I stood on the actual summit itself.
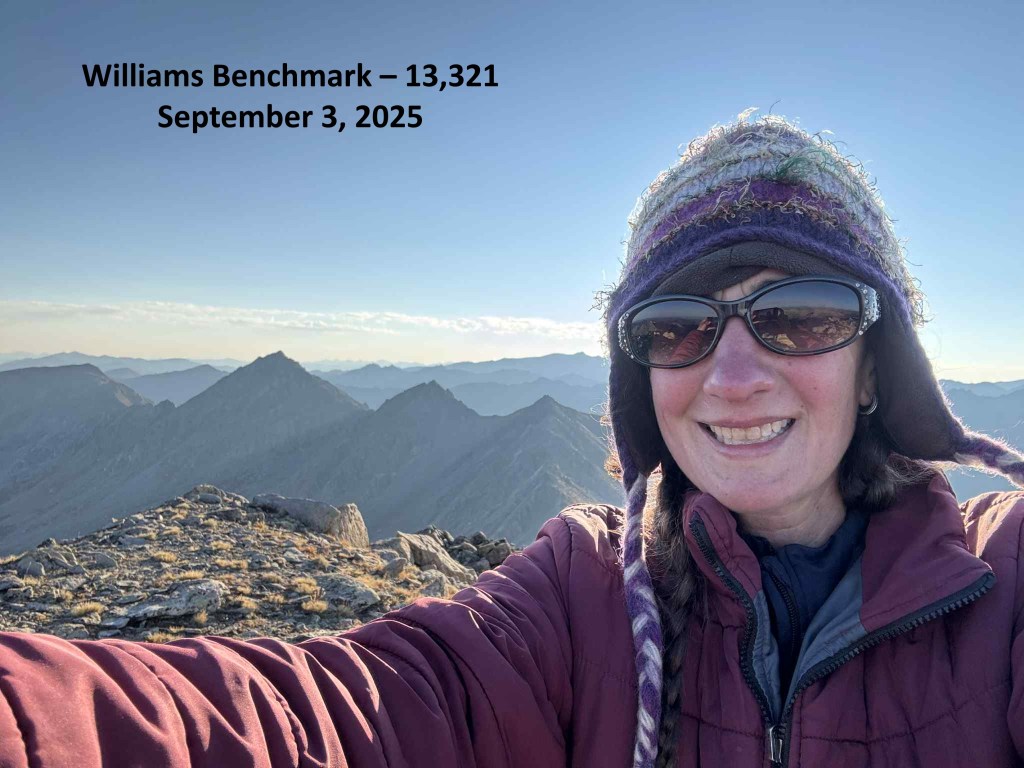
I summited Williams Benchmark at 7:25am
Williams Benchmark:
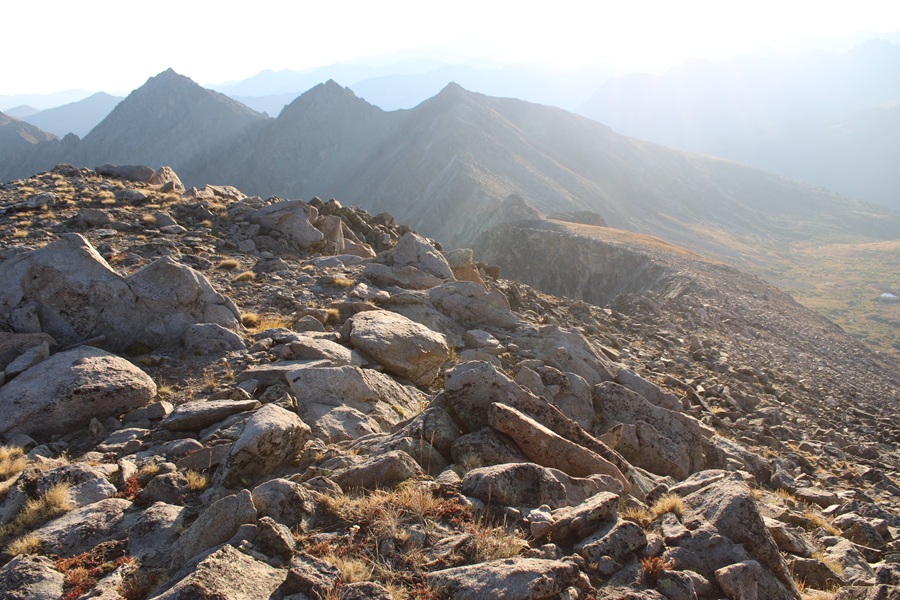
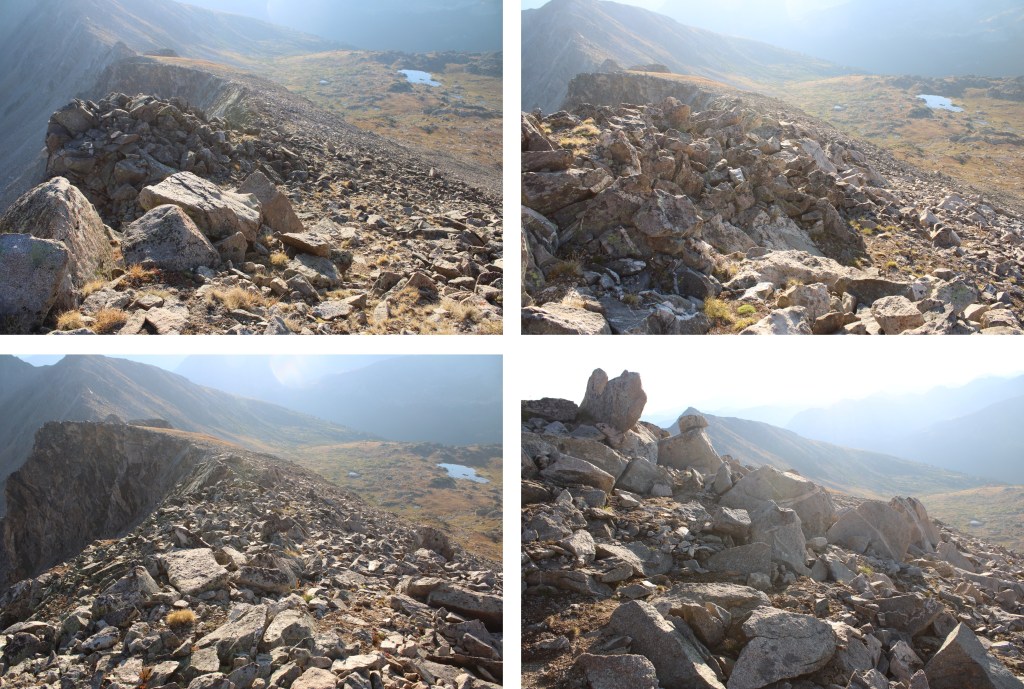
This was an out and back hike for me, so I turned around and descended the ridge the way I’d summited, heading east.
Just before the grassy area on the ridge I turned right and descended southeast back into the basin.
Back in the basin I would need to regain that 200’ to the ridge above the avalanche slide.
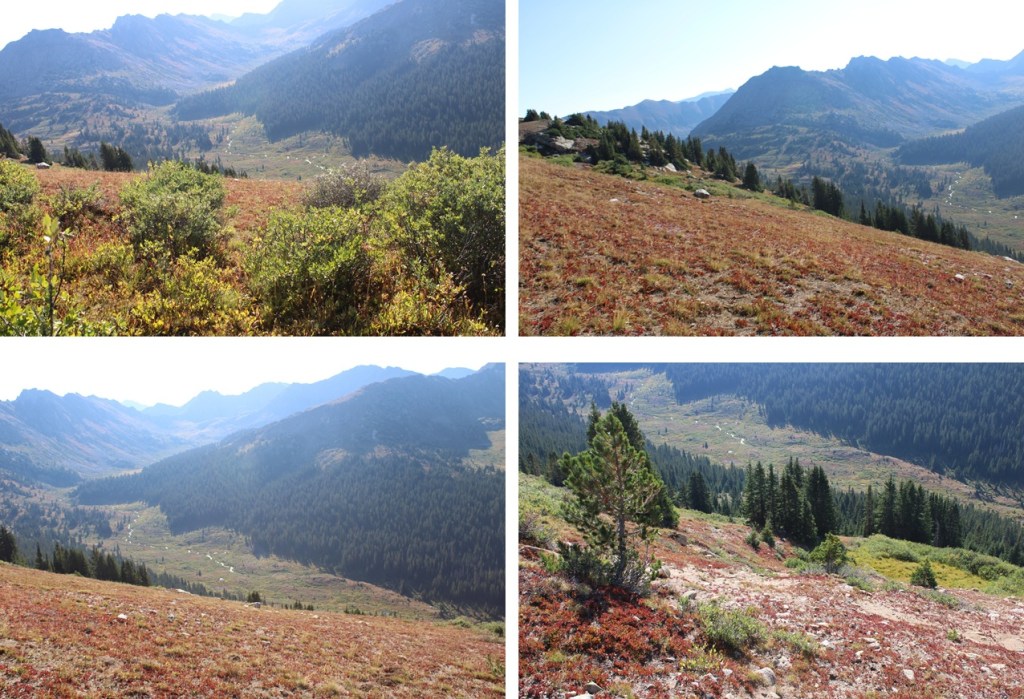
Then it was back towards Lost Man Trail, heading southeast down the ridge.
Back on Lost Man Trail I followed it southwest to the trailhead.
I made it back to my truck at 10:40am.
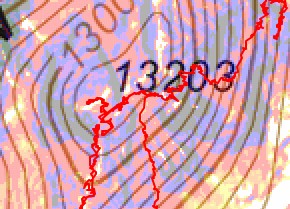
This finished my peaks in the Williams Group. Here’s a topo from all the peaks I did in the area, avoiding the traverse. If anything, they can serve as bailout points if needed.
Elevation Gain: Varies depending on route (see below)
This is a three-trip-report peak for me, so my numbers are all splattered together. I had an idea this peak would take me several attempts to get, so I came prepared and brought my backpacking gear. I’m going to give you the three reports as they happened. I found a way to make this a class 4, 3, or 2 peak. You can choose your route. Either way, the approach to the place I camped in the upper basin is the same.
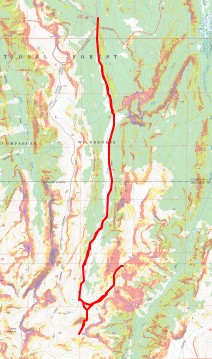
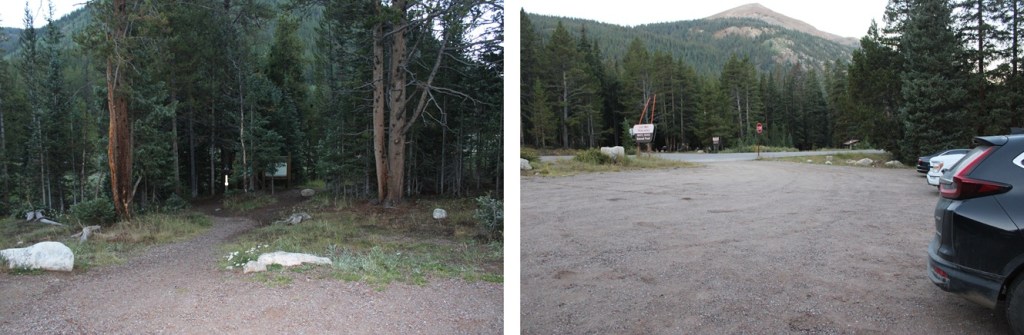
I started at the Lower Lost Man Campground and followed the trail (1996) north past Lost Man Reservoir and up towards South Fork Pass. This is a class 1 trail I followed for about 4.25 miles.
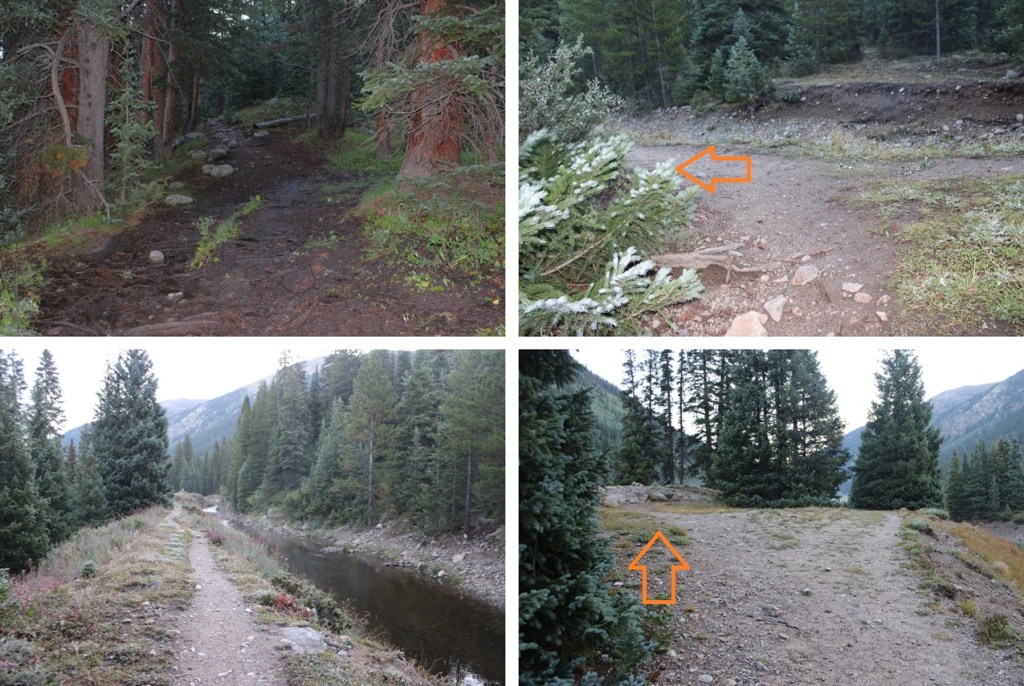
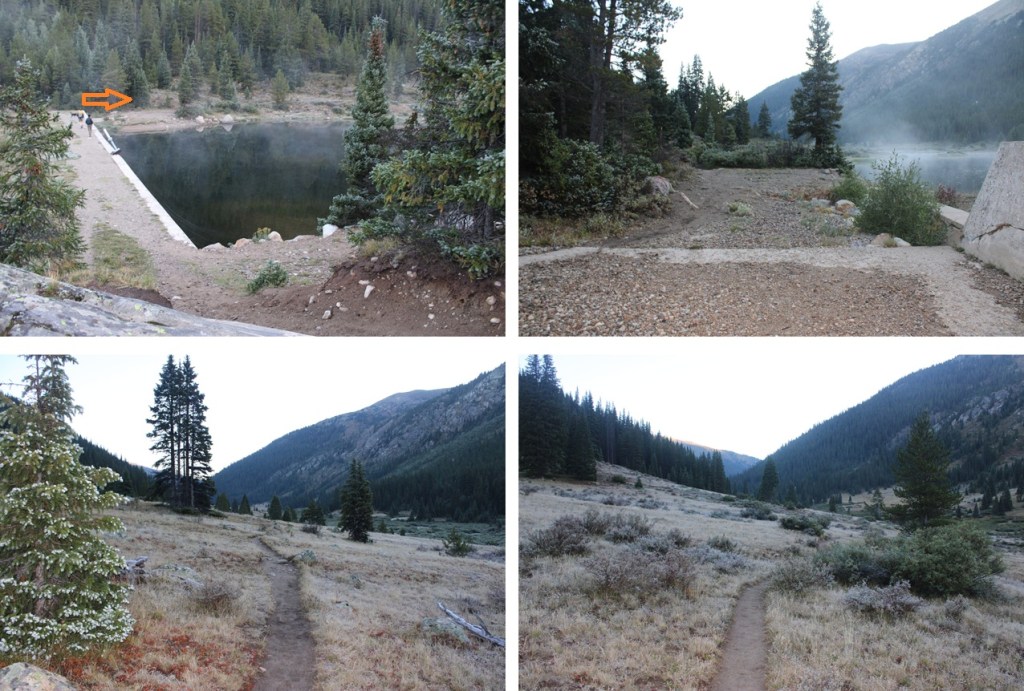
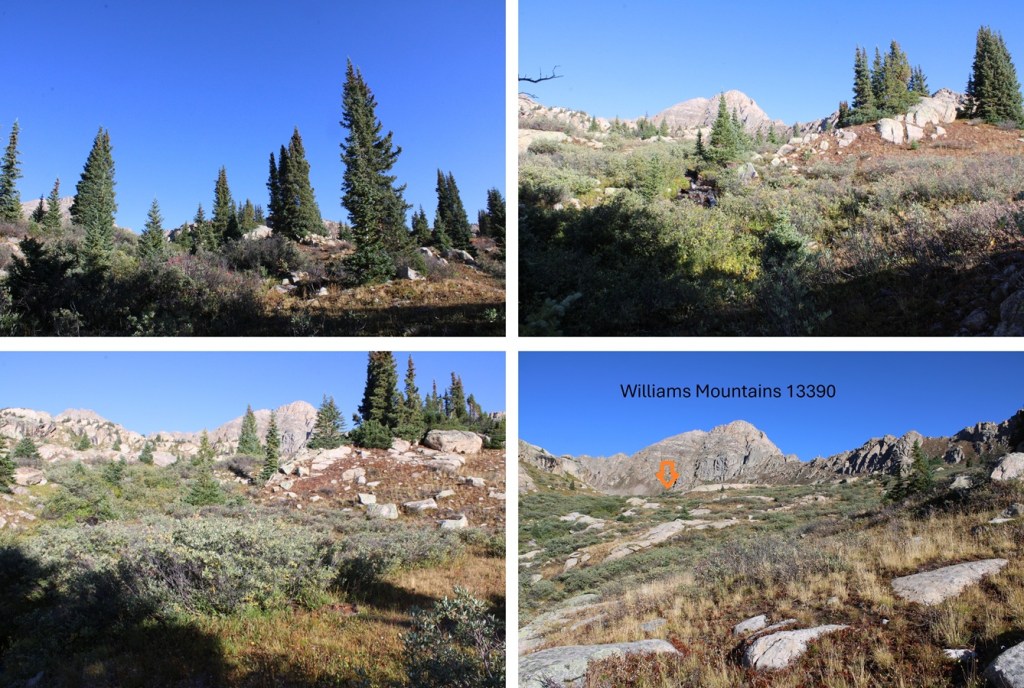
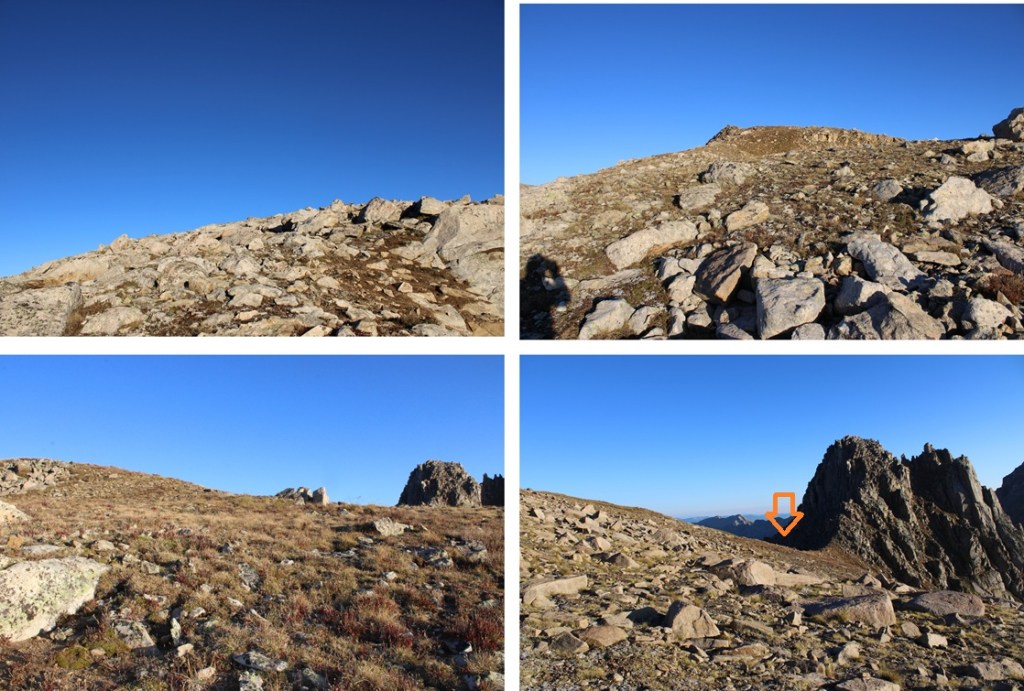
After about 4.25 miles, at 11430’, and just before the third creek crossing I turned left and followed the creek for about 20 yards before crossing the creek and then following the creek up to an upper basin, heading northeast. This creek isn’t named, and neither is the basin, but following it will put you just east of 13024. This is class 2. It’s less than a mile to make it into the basin once you leave the trail.
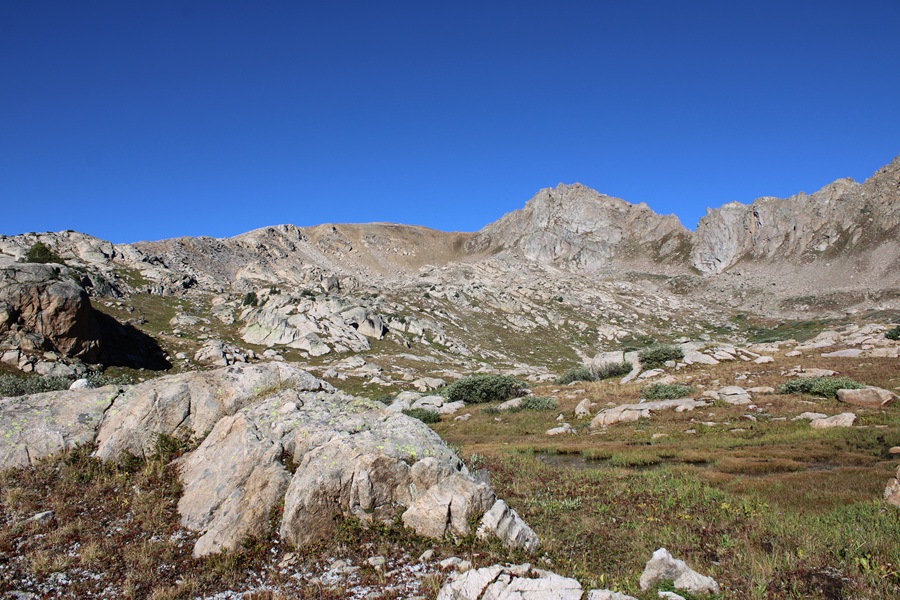
This put me into an upper basin. From this point there are several options to climb 13024.
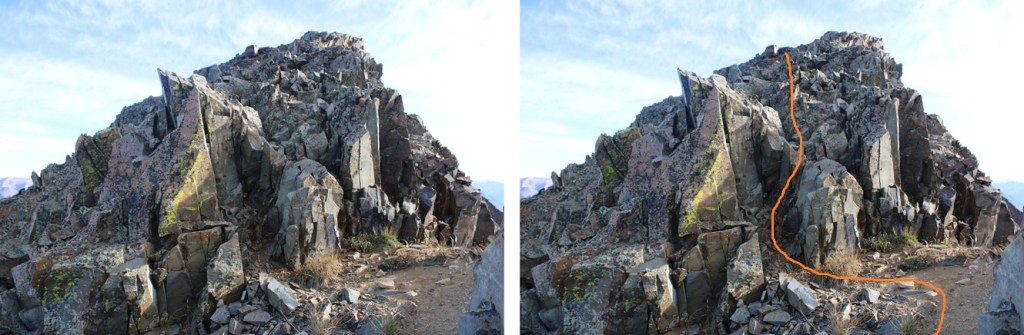
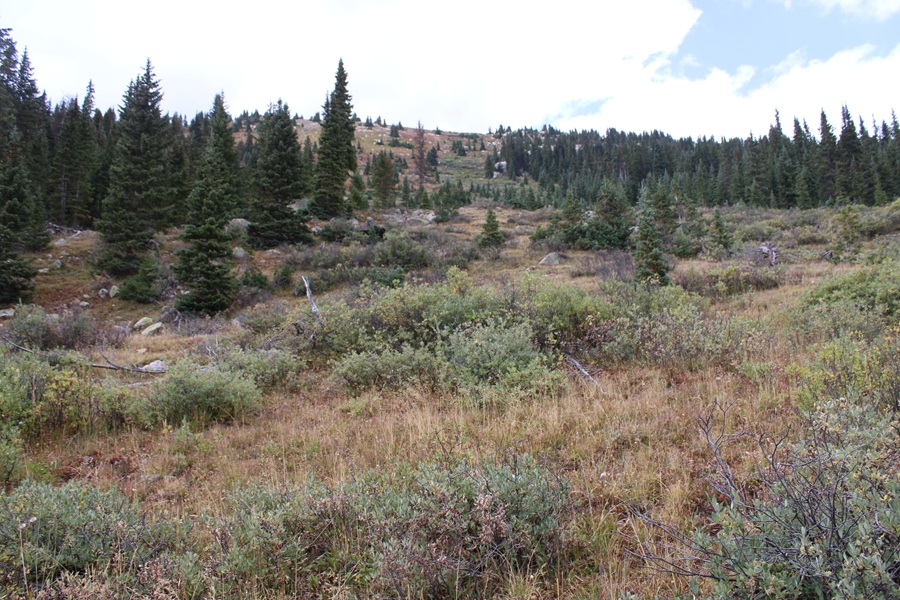
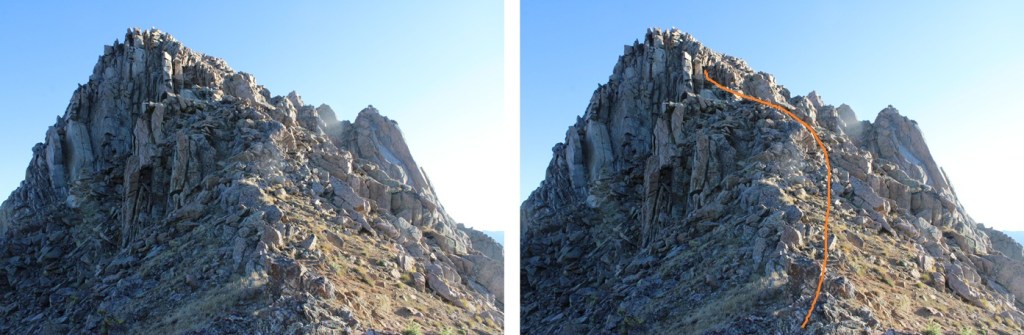
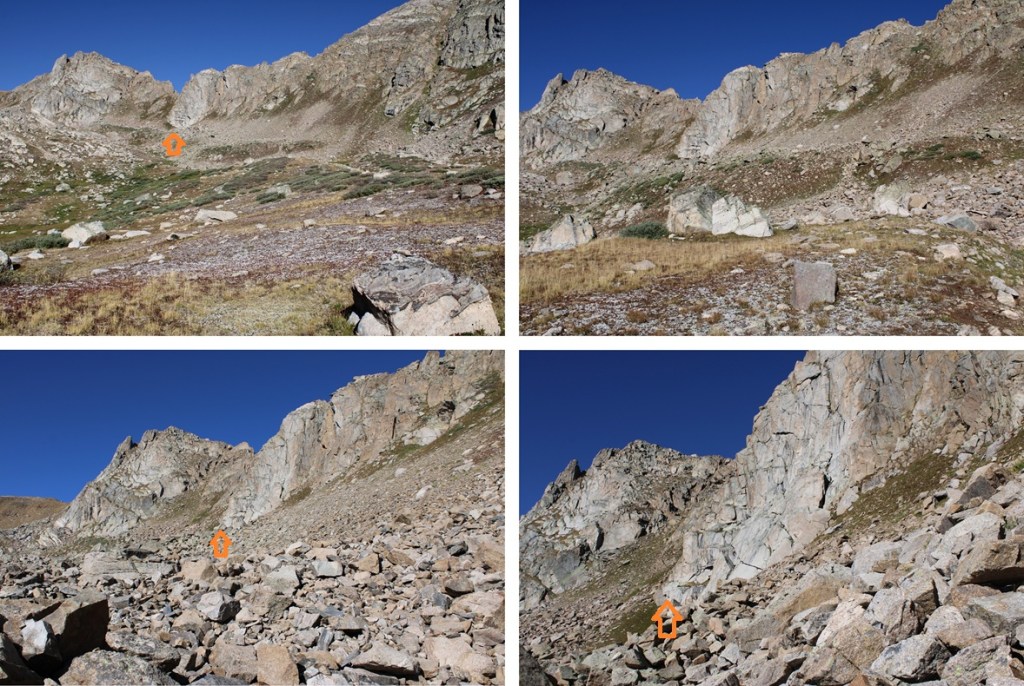
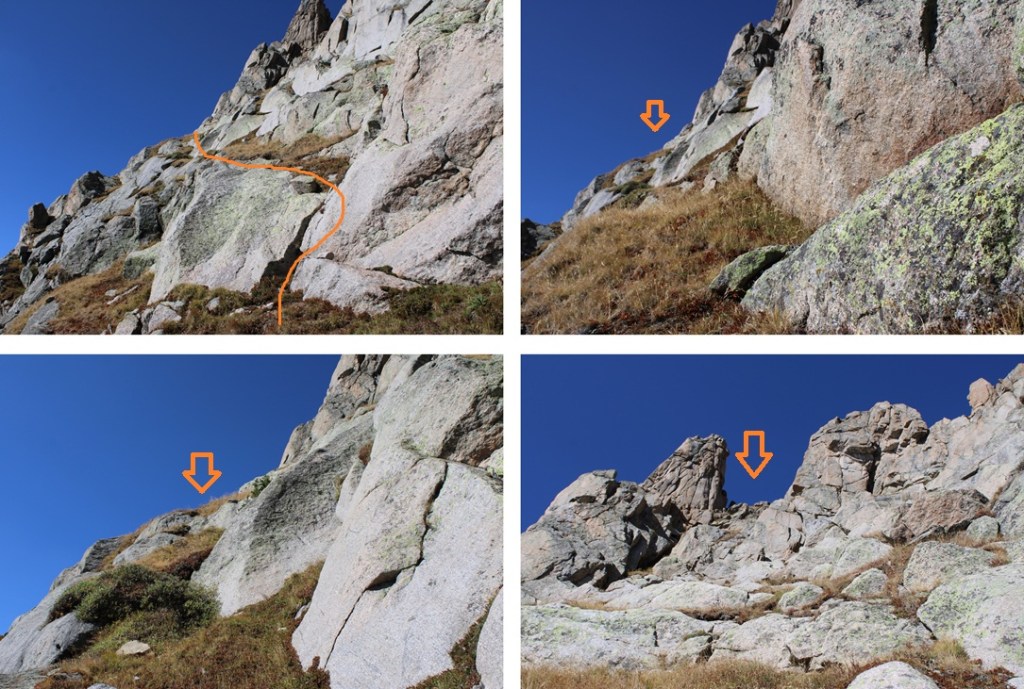
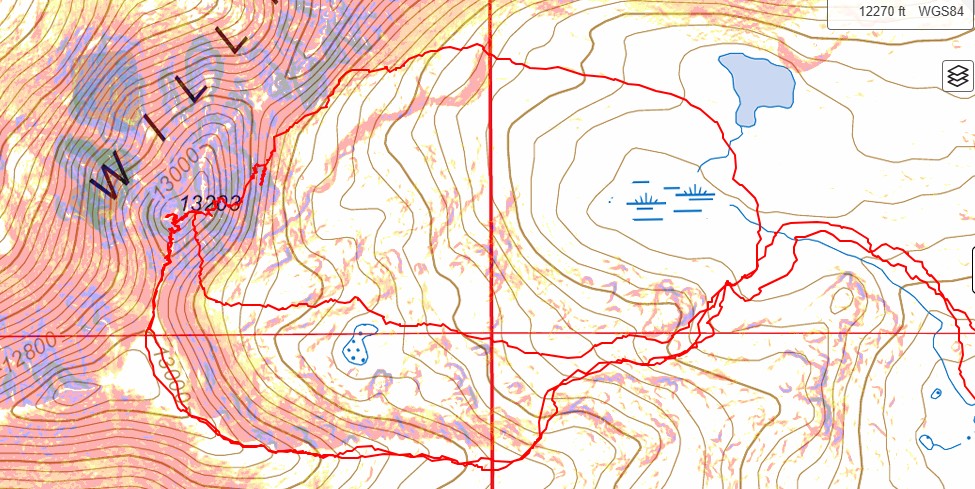
I found a camping spot and set up for the night. This area is boggy/marshy, and it’s difficult to find a spot 150’ from water, but I found one underneath a large rock outcropping. As you can see by the picture below, I found three different routes up/down PT 13024. The orange route is class 4, the blue route class 2, the pink route class 3 (I didn’t really know this beforehand). My first attempt the next morning was going to be to the left hand side, as I didn’t yet know if the ridge would go, and had heard it was the easier side (it wasn’t). I’d been in the area before, and the ridge looked like it went, so in the morning I was going to take the ridge to the summit from the left.
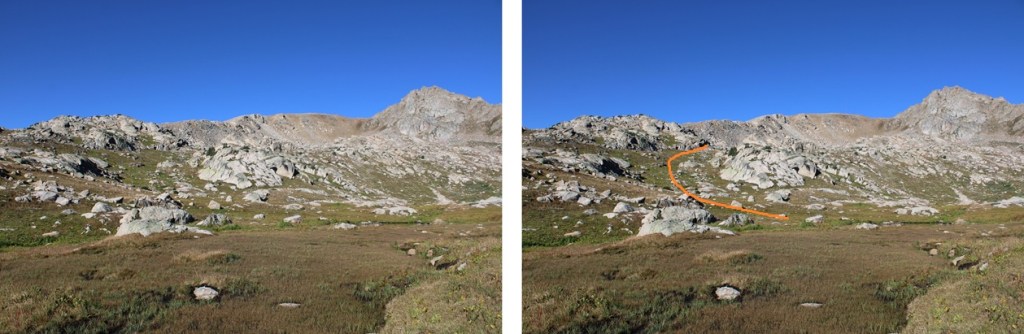
I set up my tent and had the late afternoon to just chill and relax (a goal of mine while climbing this year). While I was there a couple of hunters hiked in, scouting the area (hunting season was to start in a couple of days). I saw them pointing in the distance and getting out their binoculars and looking, then pointing again. I gave them their space, but half an hour later they started hiking towards me and my tent. They whistled and said “Just so you know, there’s a bear behind you about 200 feet, behind the rock you’re set up next to.” I was thrilled with this information, but a bit upset it took them HALF AN HOUR to let me know a bear was behind me. I got up, got my trekking pole, and spent the next 2 hours looking for the bear. I never saw it. I was mentally ok and prepared for the night (bear cannister and all), but still a little upset I never actually got to see the bear. I did hear cow elk calling to their babies in the night, but no more sighting of that bear. In the morning I was off at 6:30am to attempt the ridge (orange route). I started by following the grassy area southwest towards the ridge.
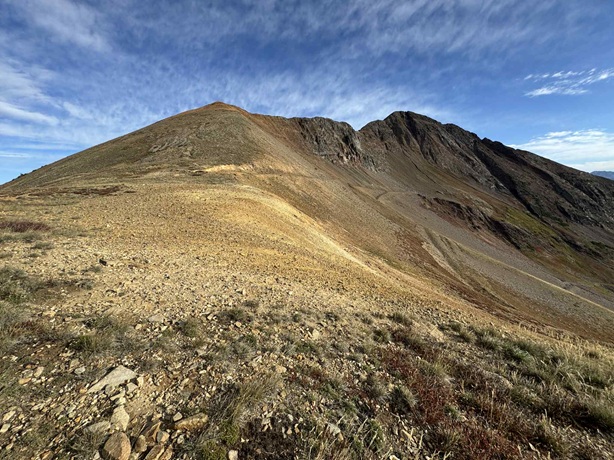
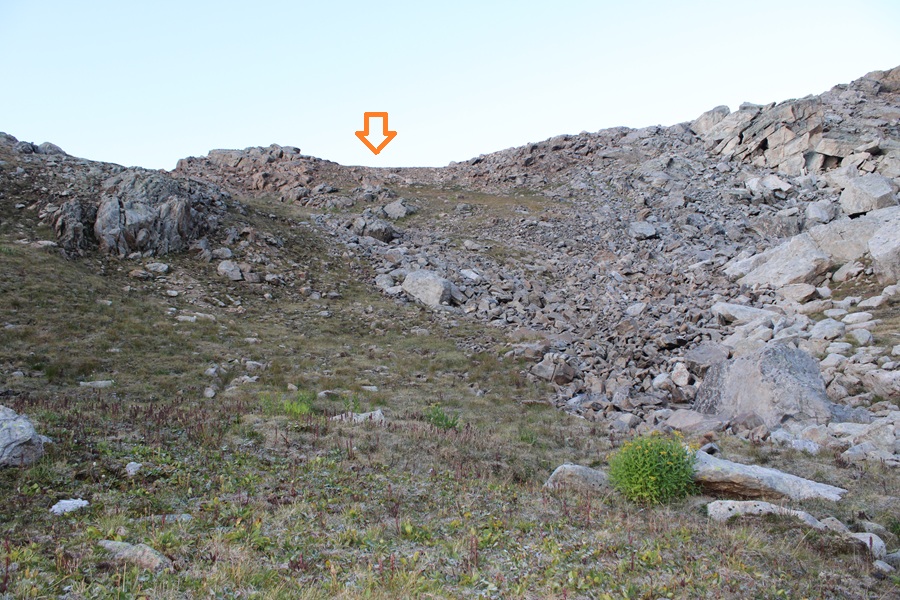
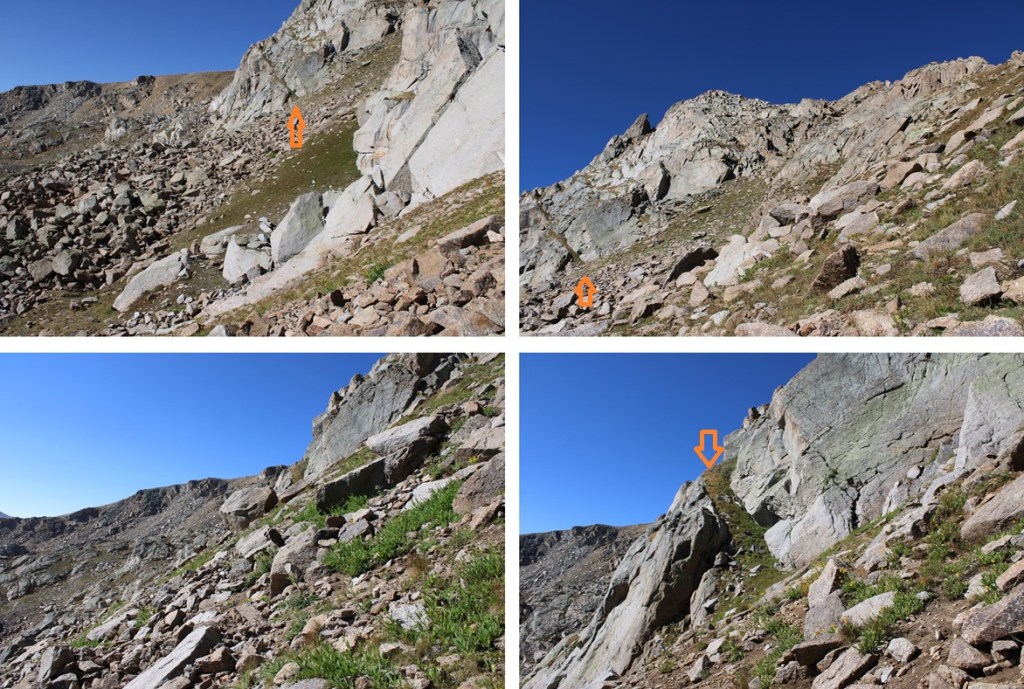
I then found a small gully and gained the ridge on tundra. This was all easy class 2.
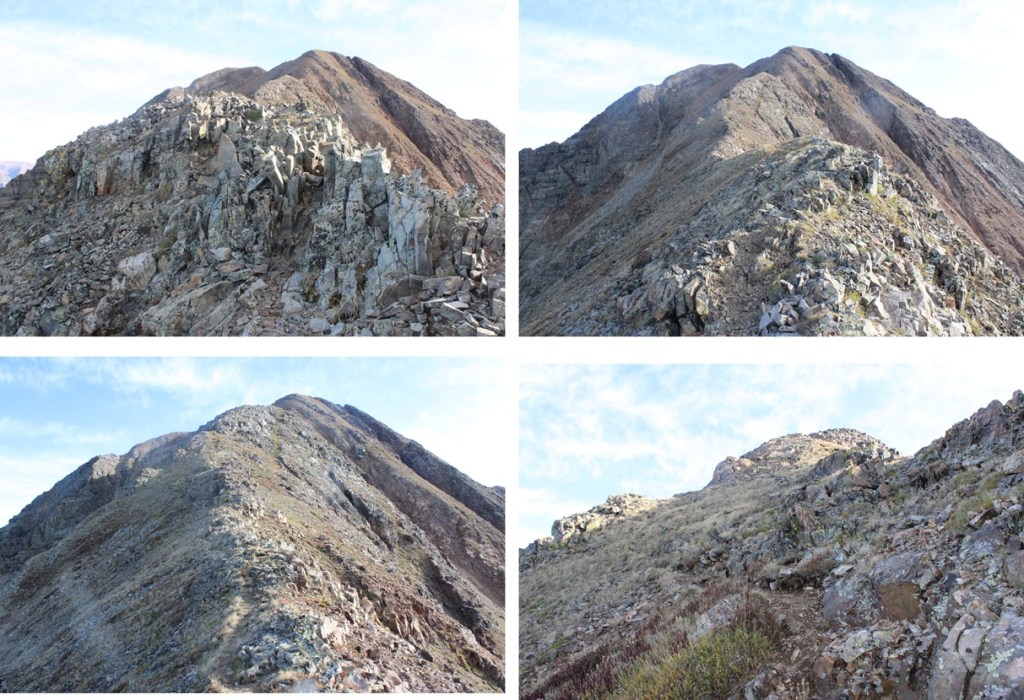
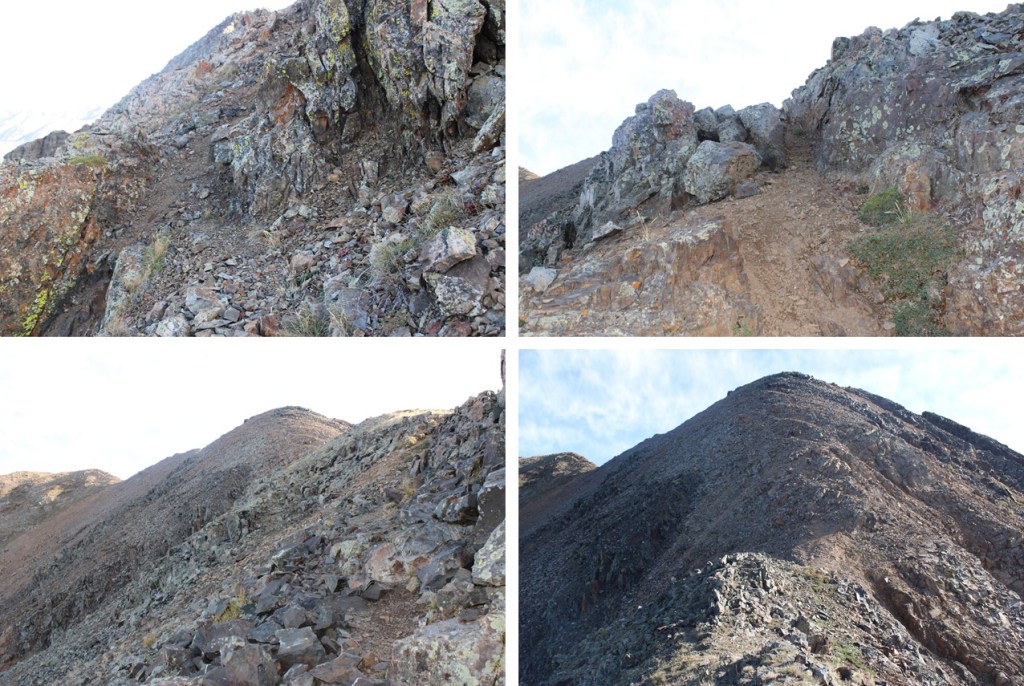
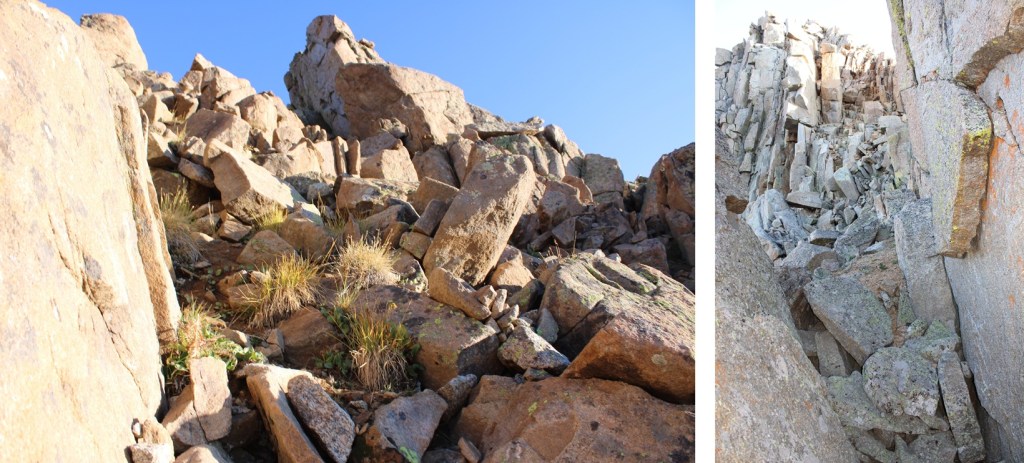
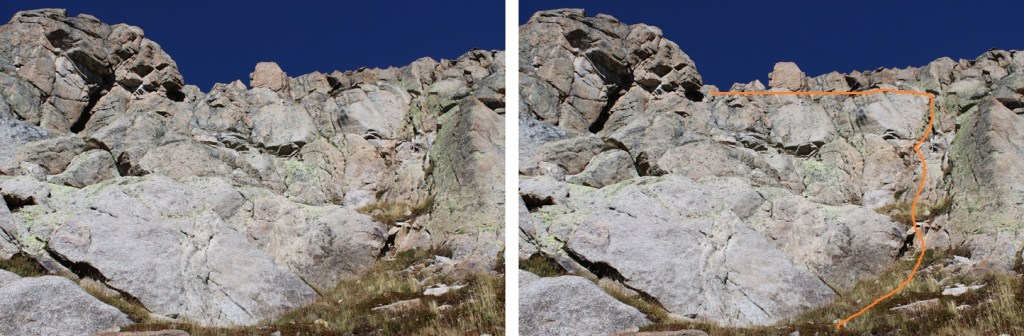
Once on the ridge it was an easy class 2 hike as I followed the ridge west/northwest.
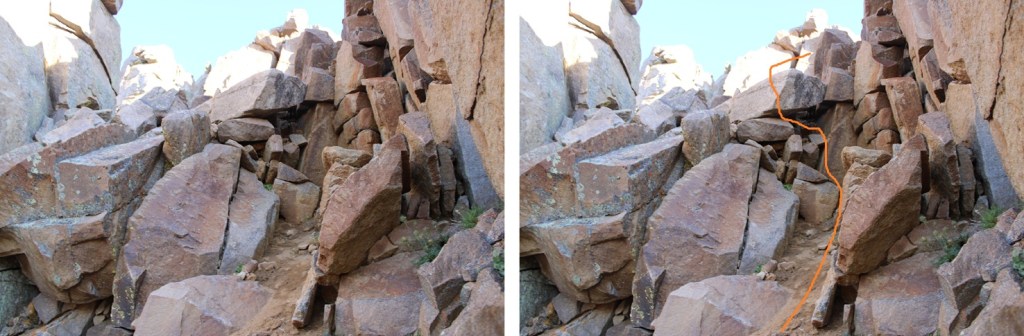
At the top of the ridge I could see 13024 to the right. I followed the ridge on class 2 terrain to the base of the rocky area. From here it’s only 1/10th of a mile and less than 200’ of elevation gain to the summit. It’s mostly class 2 or easy 3, but there was one class 4 move I didn’t feel comfortable attempting without ropes. Where the orange line ends is where I stopped, about 100’ from the summit.
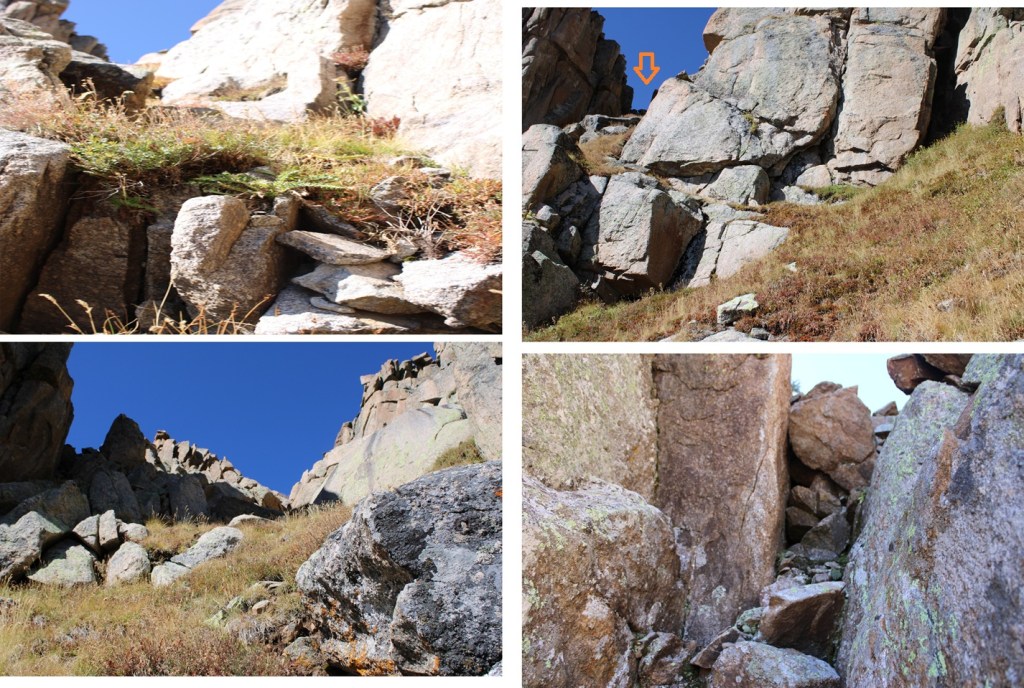
Here are some pictures of the route to that point.
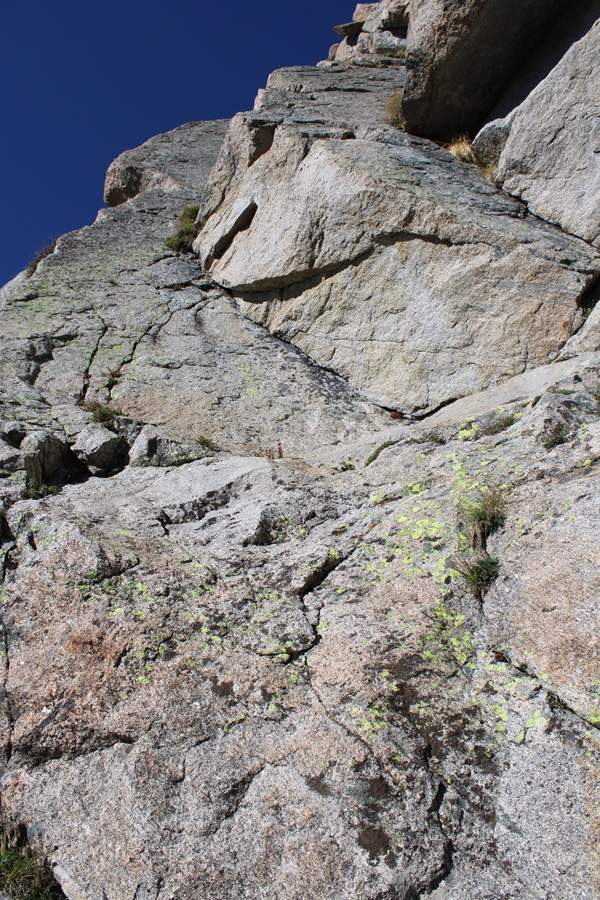
This was the move that I didn’t feel comfortable attempting without ropes. It was very similar to the final crux on Jagged after the rockfall, but when I was there I had rope to help me. The rocks above this problem overhang several feet over what look like easy steps from below, and it’s steep on all sides and all the rocks are loose, making depending on them for support/balance poor judgement. The picture doesn’t do this area justice, and it wasn’t until I was under the rocks I realized the difficulty. If I saw this picture, I’d go for it, but when I was there I knew it was too dangerous for me to do solo. I could see where I needed to place my hands/feet, but I wasn’t tall enough to make the moves. Rock climbing shoes might have helped, and a rope definitely would have, but I had neither. I spent about 15 minutes trying to find a way up/around this, and in the end turned around. I’d just been on an amazing podcast (seriously, you should listen to it just to know the podcaster: it’s called “Going in Blind” and will change the way you think of your own life experiences). We talked about failed attempts, turnarounds, risk tolerance, etc. and this move was above my risk tolerance for soloing. How terrible would it have been if I’d just talked about my many, many failed attempts and turnarounds and attempted this and failed because I was overconfident? I’d look like a fool. If I’d been with a friend they could have cheerleader lifted me and I could have pulled them from above but solo I didn’t feel comfortable attempting this move. I felt there was a 75% chance I could make it up, which just wasn’t good enough, especially when going solo. However, if you can get over this class 4 move it’s an easy class 3 climb to the summit.
As I said, I turned around and headed back down to the basin, retracing my steps on easy class 2 terrain.
Back in the basin at my campsite it was only 9am. I had a quick snack and started out again, this time taking the pink route up to 13204. I started out by heading northwest up the basin towards the base of a large rock outcropping. This is choose your own adventure, and all of it is class 2, just make your way towards the large rock outcropping.
From the base of this large rock outcropping I looked for a grassy ramp in the distance to the south/southwest. It’s small, and the access point for the rest of the climb.
I hiked up the grassy ramp and came to some willows. My beta said from here to climb up the rock slab. This was obviously class 4+ and I once again didn’t feel comfortable climbing up this rock face.
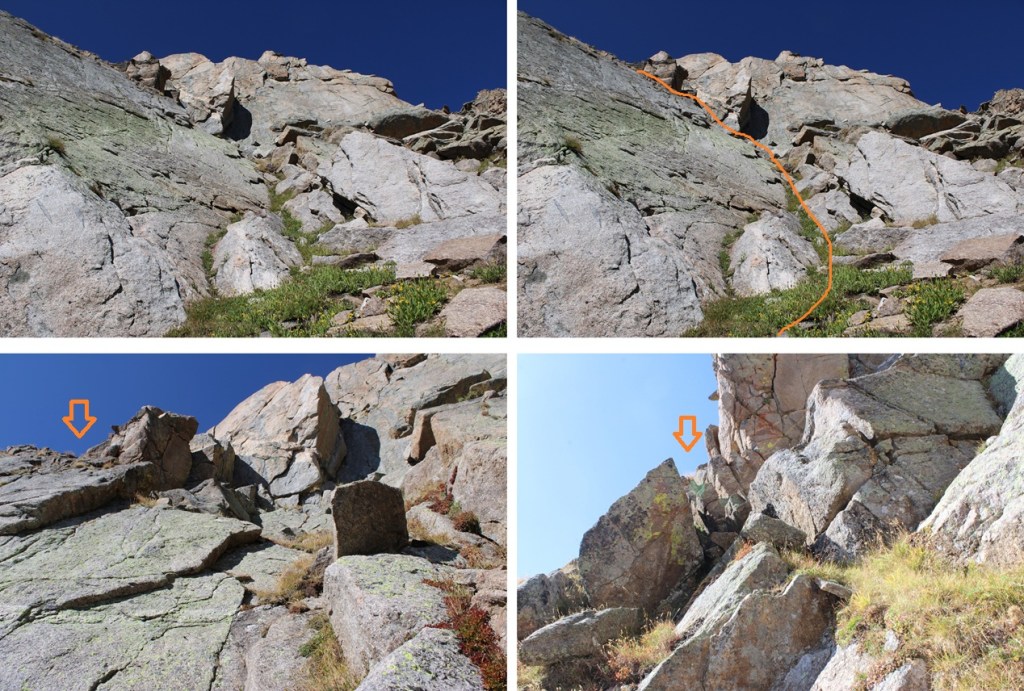
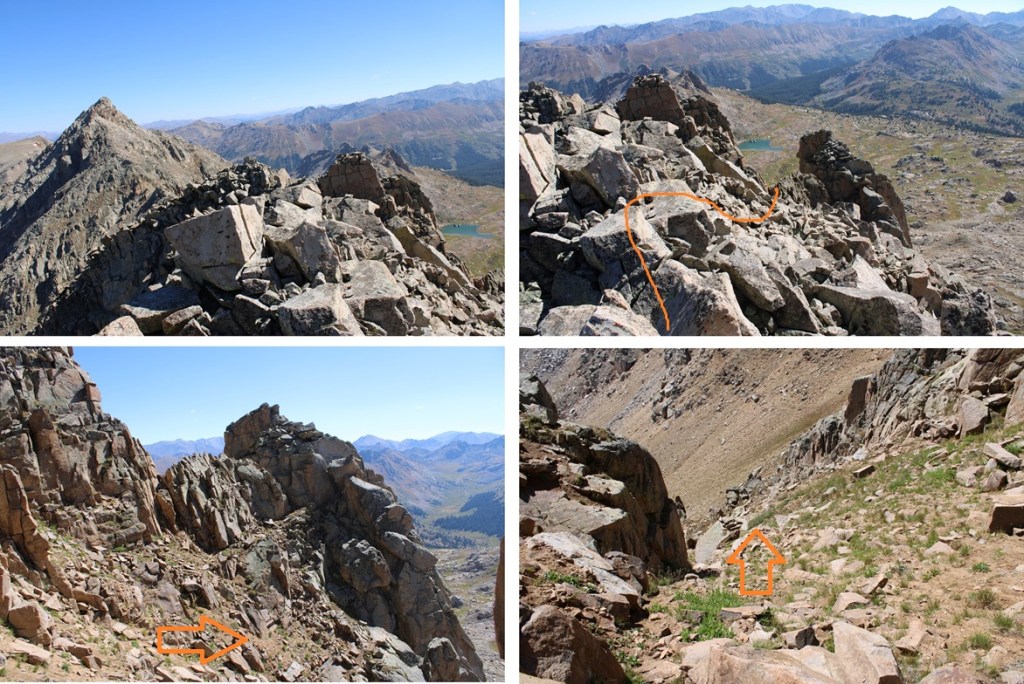
So I did some scouting around. BEFORE you see this rock face and before you make it to the willows (which are obvious) there is a nicer class 3 grassy slope. Take that up and follow it to the left and it will keep you on route but keeps it class 3. There’s some exposure, but I felt much safer on this route, and put up some cairns to indicate where you ascend.
From here on out it’s class 3 choose your own adventure up the grassy slopes. There is exposure here and be extra careful if the foliage is wet (which it was during my trip). I was aiming for a notch in the mountain, heading west.
Here’s looking from below the notch, and the route I took, class 3
Once over the notch I needed to descend about 20 feet into a gully, then re-ascend to the other side.
Now I found cairns leading me north and then west to the summit. From this point on it was difficult class 2, easy class 3 to the summit. It was choose your own adventure, and the routes were obvious.
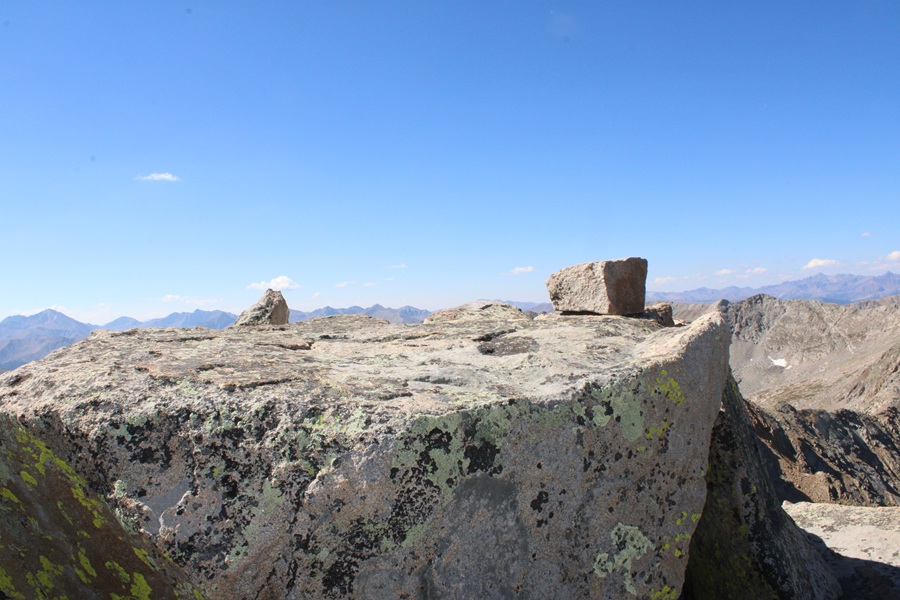
The true summit is to the left, with a small rock on top of a large boulder.
I summited 13204 at 10:50am
13204:
Now you might think I’d head back the way I’d summited, but I was curious as to if I could have made it down that class 4 route I’d attempted earlier, so I headed back the way I’d summited, then headed down southwest to try to link up my climb from earlier in the day. It was all class 2 until I got to the class 4 part, and I was glad I’d turned around.
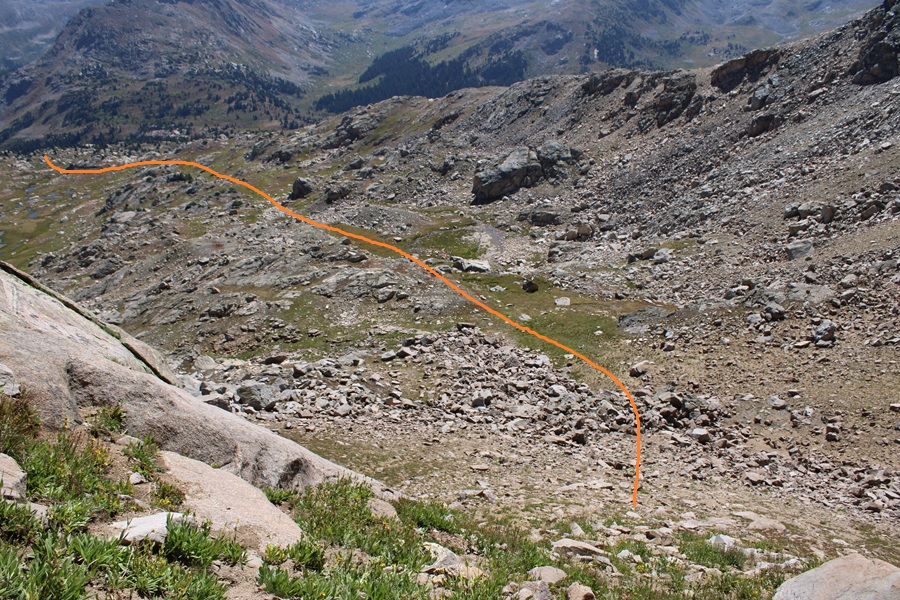
Seeing it wasn’t any better from this angle I reascended and found a gully to head down. I could see all the way down to the valley, it looked class 2, so I decided to go for it. I started at 13100’ and descended the entire way down on class 2 terrain just below where I’d dropped down and re-ascended again on the ascent. The place just before the notch on the return. That gully goes at class 2. I could see the access point from the summit.
Here are some pictures looking down the gully. It splits at least twice, but each option is class 2, so pick the route you like the best. If I were to do this peak again, I’d take the gully. Tons of game trails, not a lot of scree, lots of elevation gain but no exposure. Just keep this as an option as a bail out point, or another way to summit this peak if you’re dividing the peaks and not doing the traverse.
From the base of the gully I paralleled the ridge I’d hiked that morning, heading west until I’d reached my camping spot.
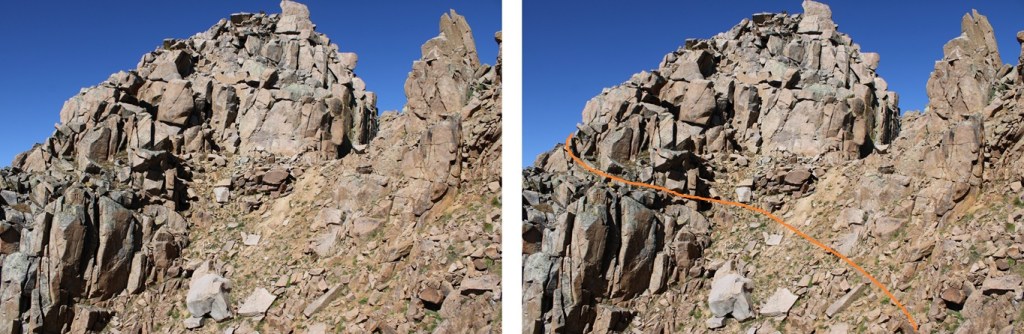
If you’re heading up from the basin doing this class 2 route, this is how the route would look:
Back in the basin I followed the stream back down, heading Southeast, staying to the left of the stream until I was about 20 yards from the trail, then crossing the stream on an obvious area, and linking up with Lost Man Trail.
Back on Lost Man Trail I turned right and followed it back to the trailhead.
I made it back to my truck at 1pm. Total stats for this hike vary.
Parking Area to campsite/upper basin: 5.43 miles, 1600’
Campsite to first attempt and back: 2.5 miles, 1000’
Campsite to class 3 summit: 1.3 miles, 1100’
Down summit class 2 route: 1 mile, 1100’ elevation loss
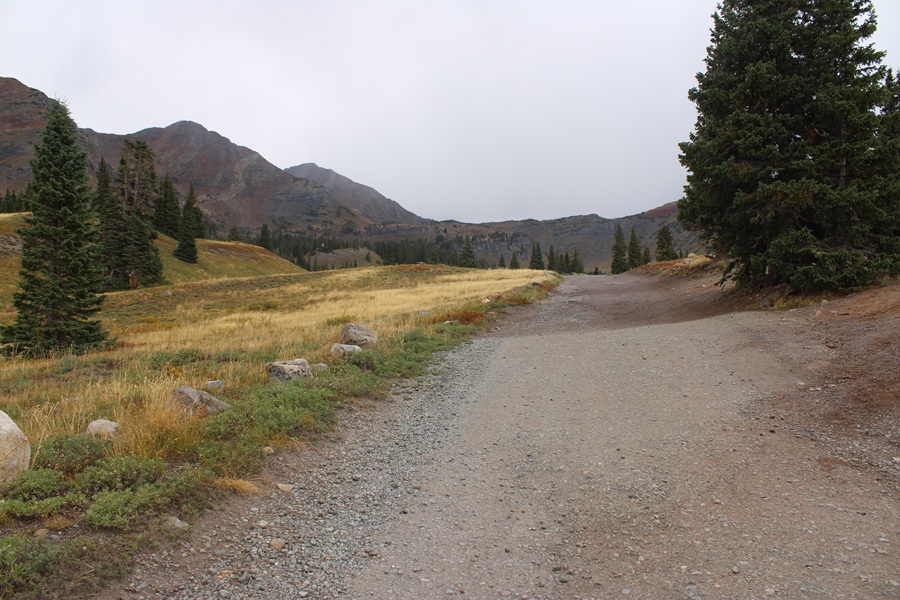
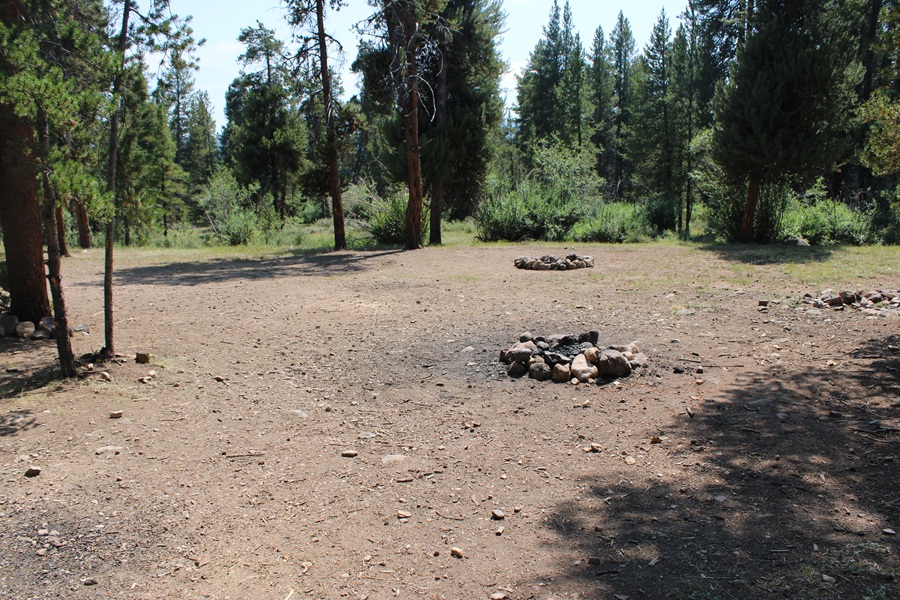
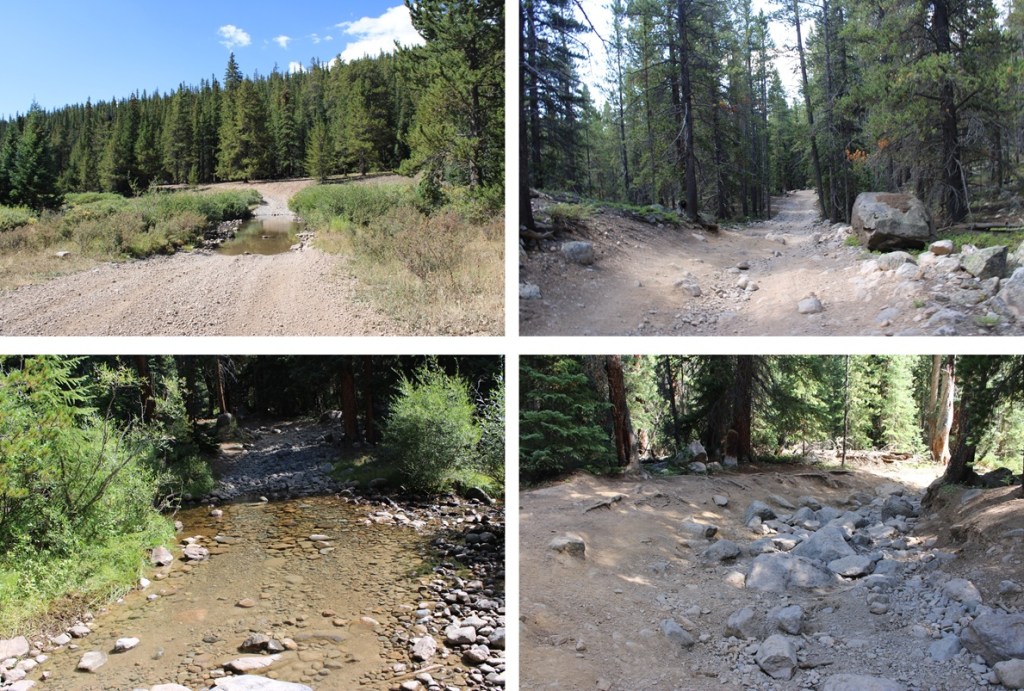
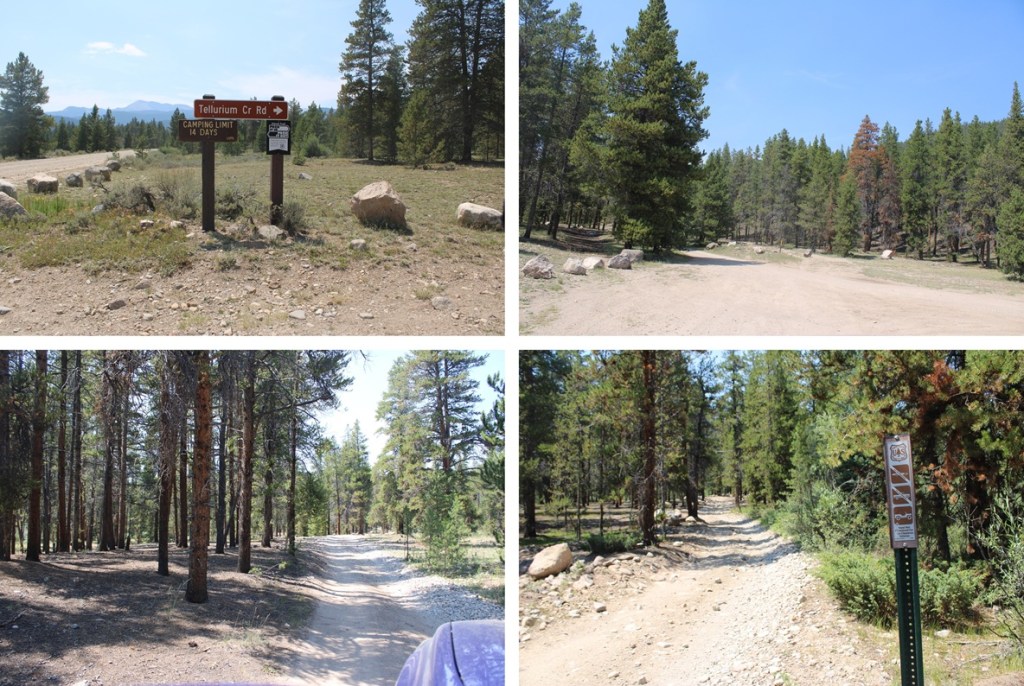
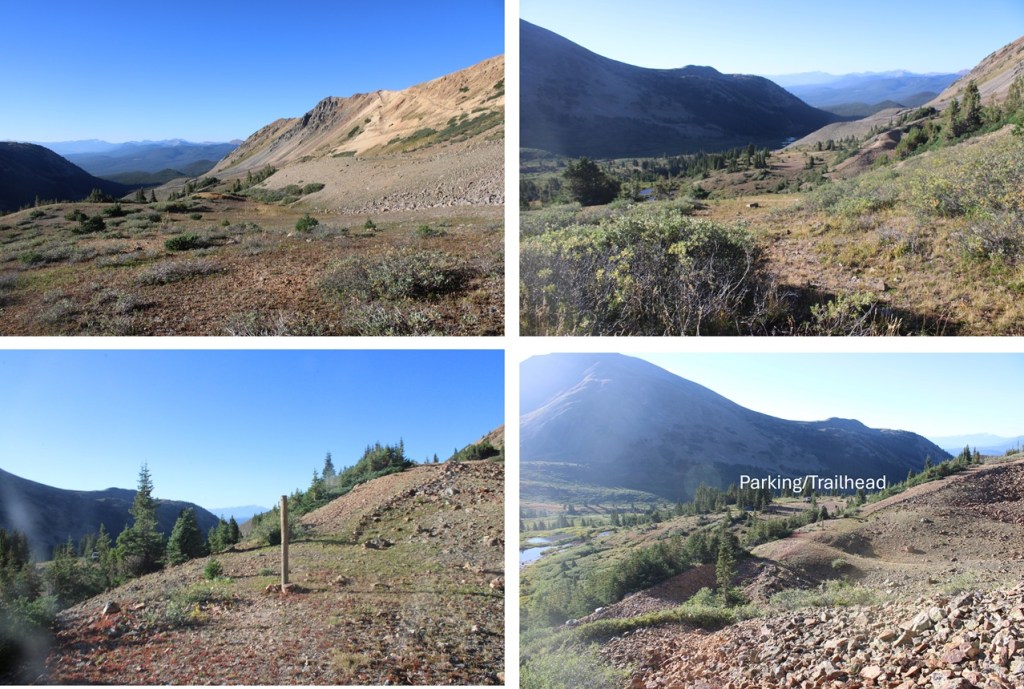
Last time I went to Ptarmigan Lake I did it in my side by side and it took over an hour and a half to drive up. This time, feeling like I needed to ‘earn’ this hike, I parked in the dispersed camping area and hiked 6 or 7 miles (depending if you trust Strava versus CalTopo) to Ptarmigan Lake. Here’s a picture of the camping area. There are several large, dispersed campsites at the beginning of the 4WD road. Vehicles (Tundra, Subaru, Tacoma, 4Runner, etc.) are not allowed on this road, so unless you have a side by side, Razor, etc. you’ll need to hike in.
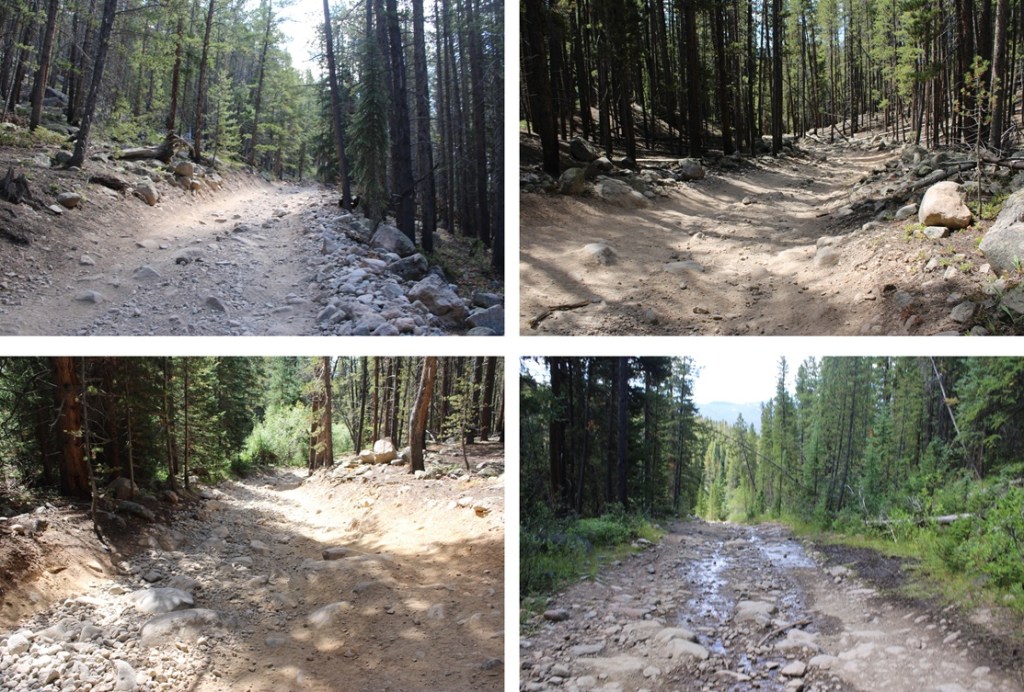
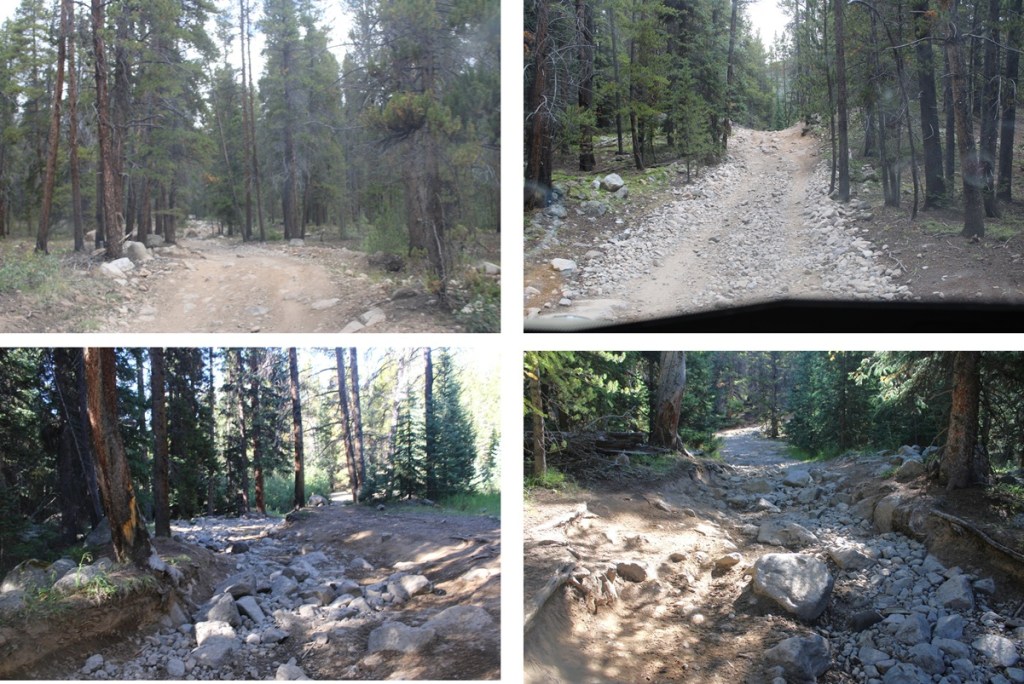
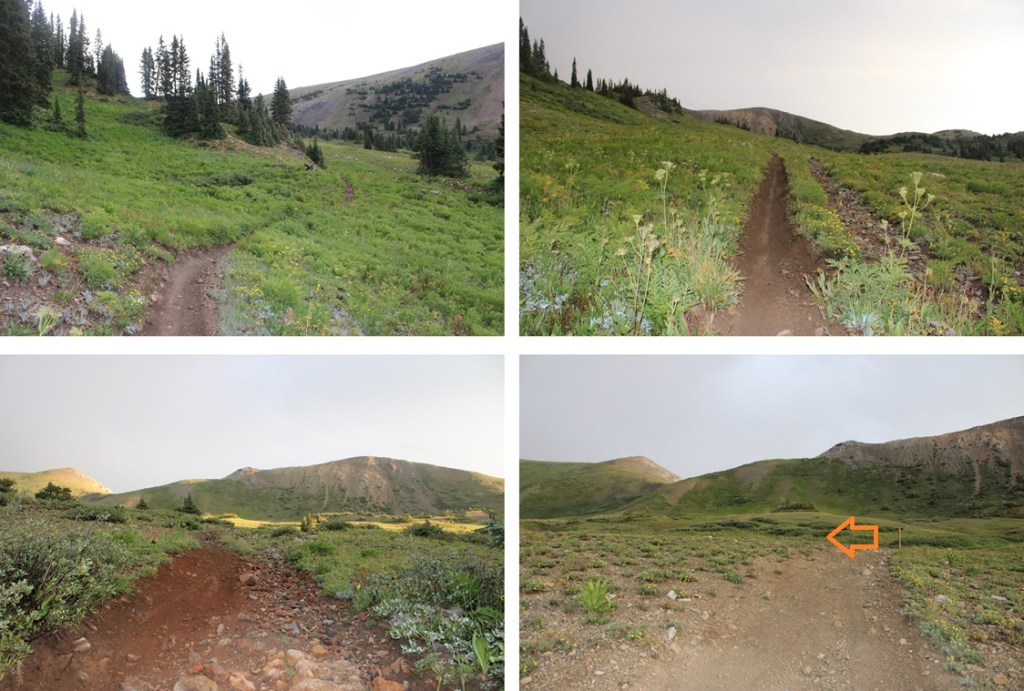
It took me 3 hours carrying a full pack to make it to the lake. The road is easy to follow but very rocky. Here are some pictures of the road up to 11900’, where the junction is with the trail that takes you to the lake. There are several stream crossings along the way, but this time of year they were all low enough I could rock hop across.
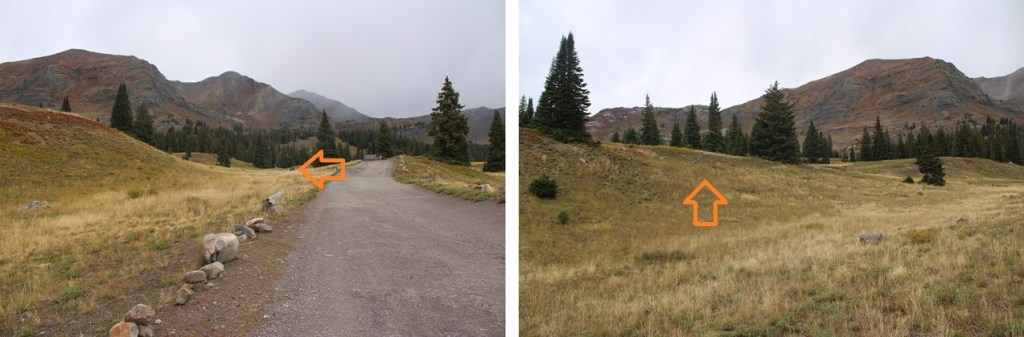
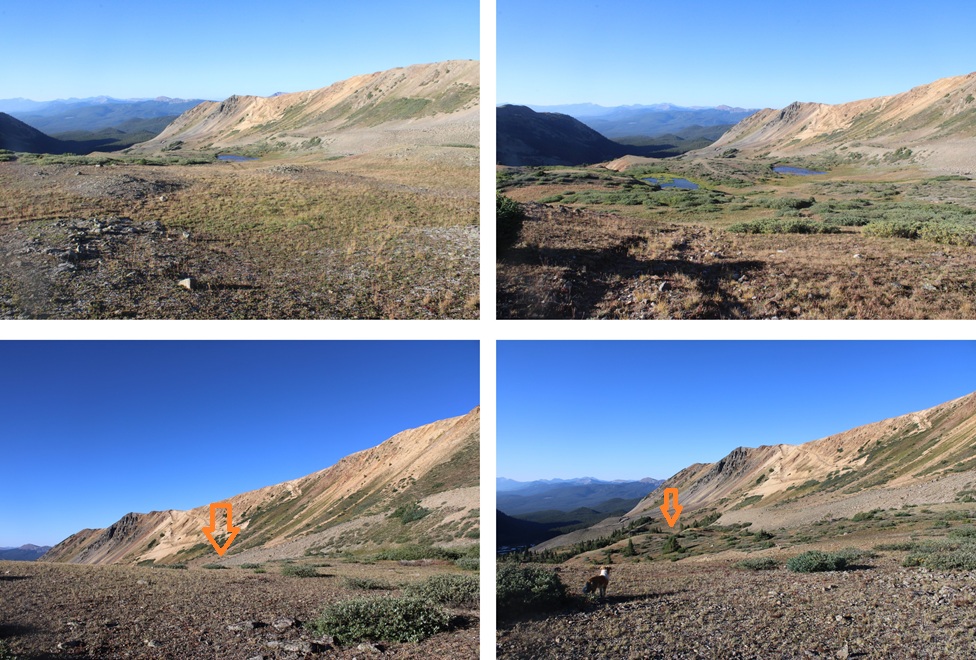
At around 11480’ there’s a junction in the road. You can go either way. To the right you’ll go through a marshy area, to the left you’ll stay high and see the marshy area. I went right on the way in and hiked out the other way. Both were comparable, but the road to the left is a little shorter.
Here are some pictures of the rest of the route up to the parking area.
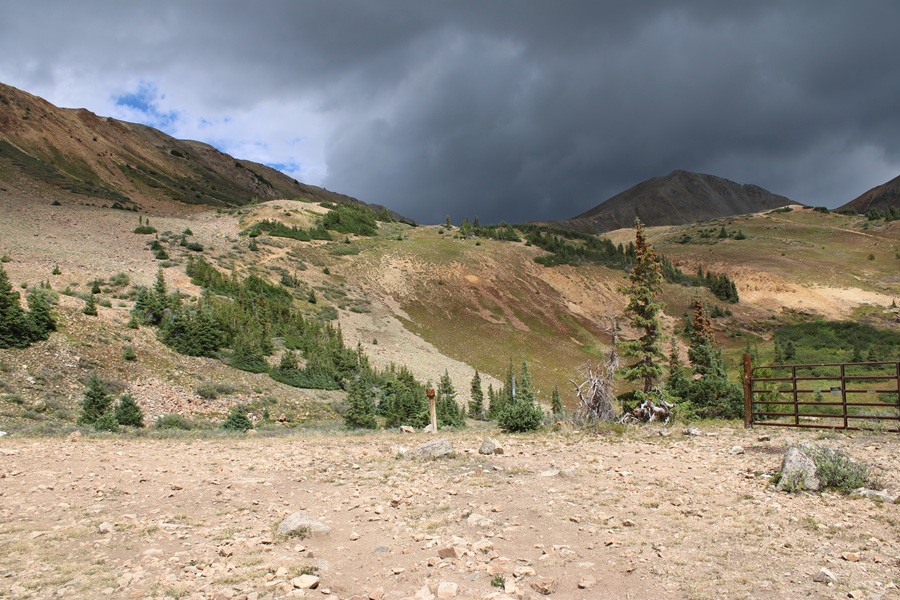
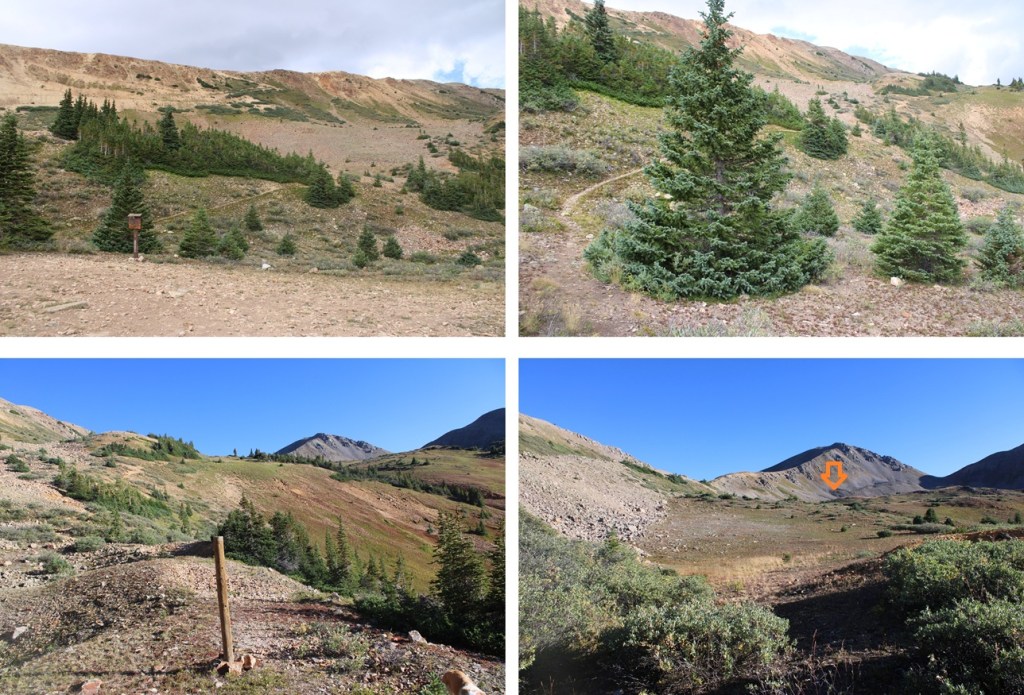
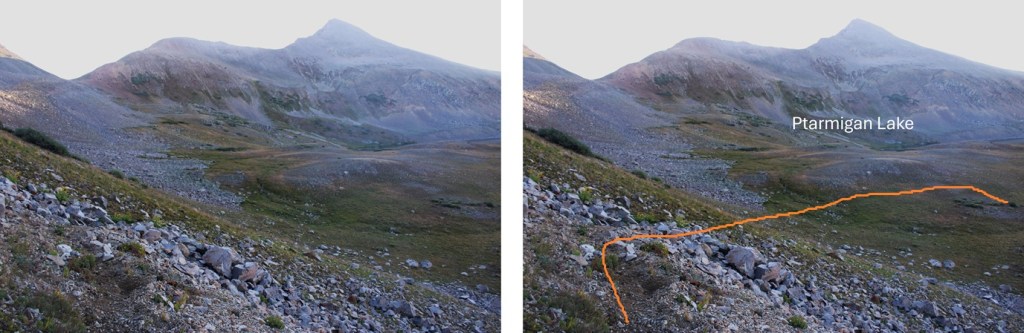
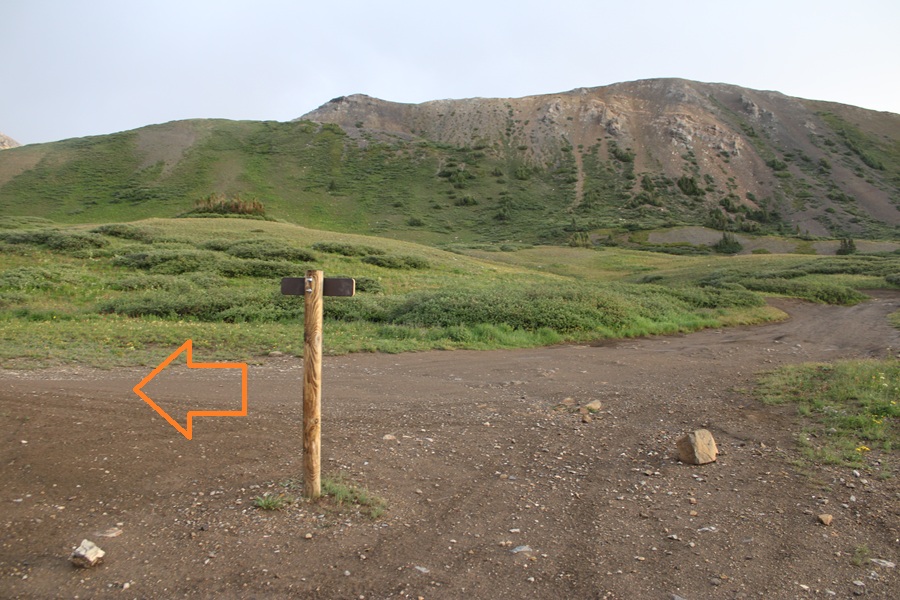
At 11900’ there’s a parking area and a closed gate. To the left if the gate is a trail that will take you to some old mines. The trail stops at the mines, but in the distance you can see where the old road to Ptarmigan Lake used to be. I aimed for that and hiked up to the lake.
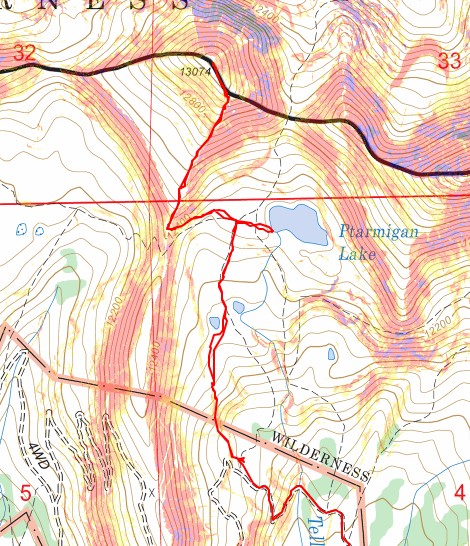
From here you can go right to Ptarmigan Lake or continue your hike. I stopped at the lake and set up my tent for the night. My watch said it was 6 miles to the lake, CalTopo gave me 7 miles and 2650’ of elevation gain. It took me 3 hours to get to the lake.
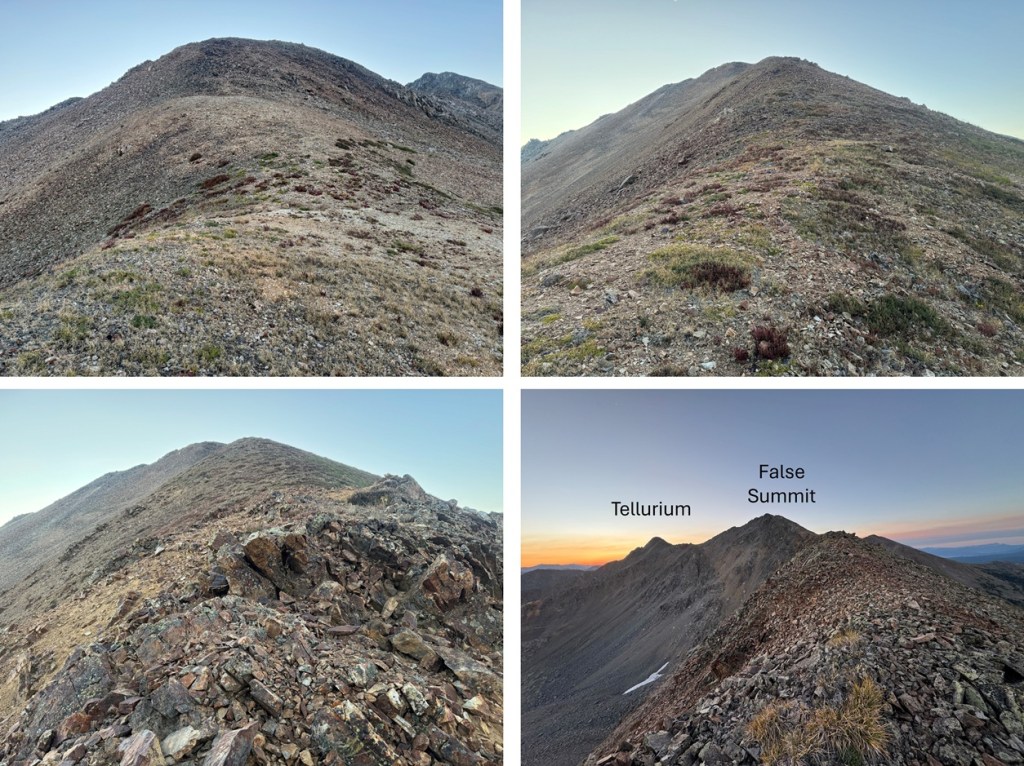
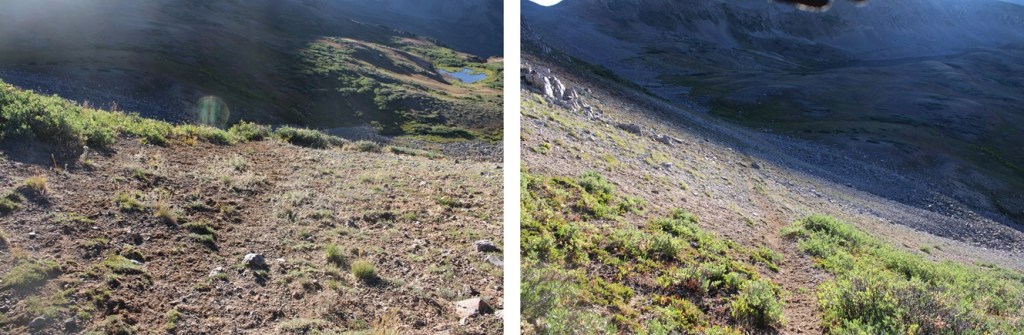
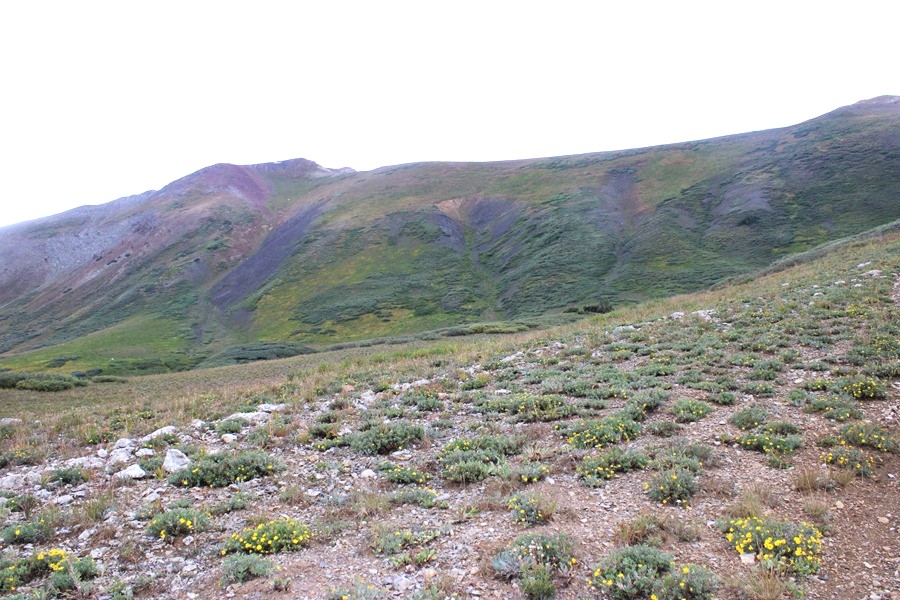
From Ptarmigan Lake the next objective is to head northeast to make it to the saddle of West Tellurium/Tellurium. It’s an easy class 2 hike to get there.
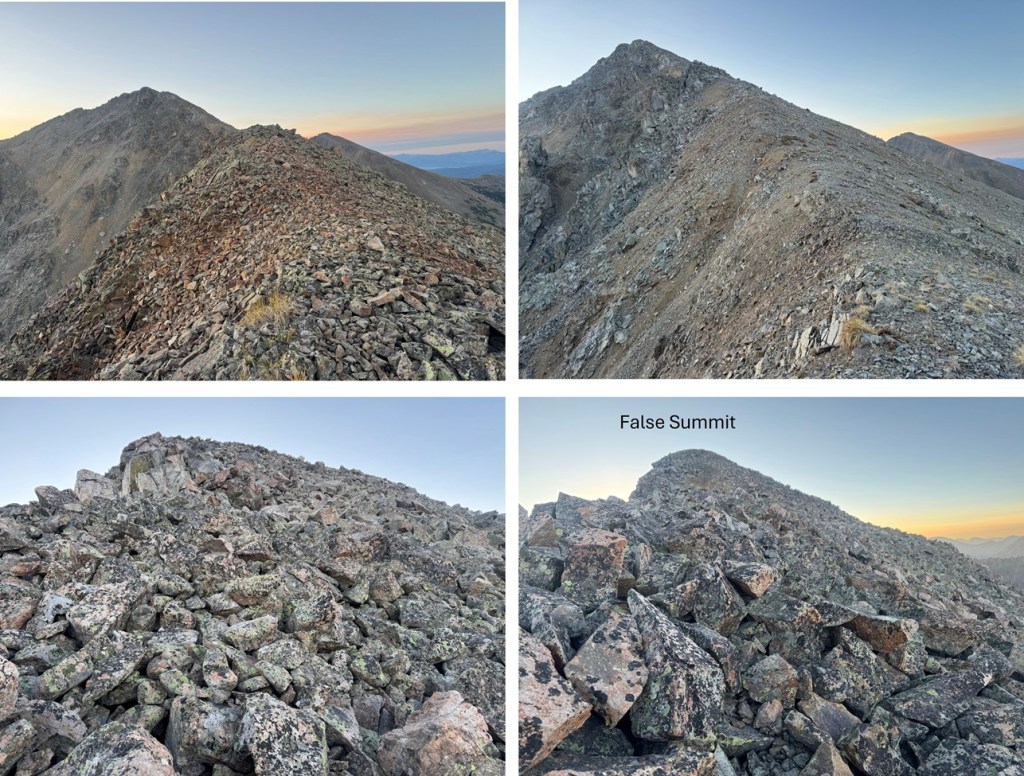
Once on the saddle I turned right, and this became a ridge hike. I followed the ridge east. It started out as class 2 and continued to be class 2 until the false summit. Just before the false summit the terrain became rocky but stayed at class 2.
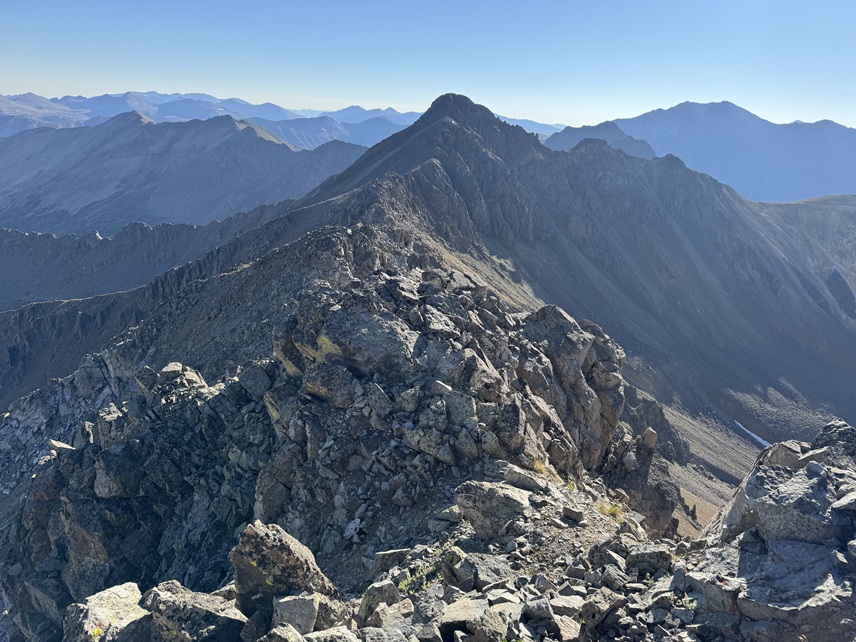
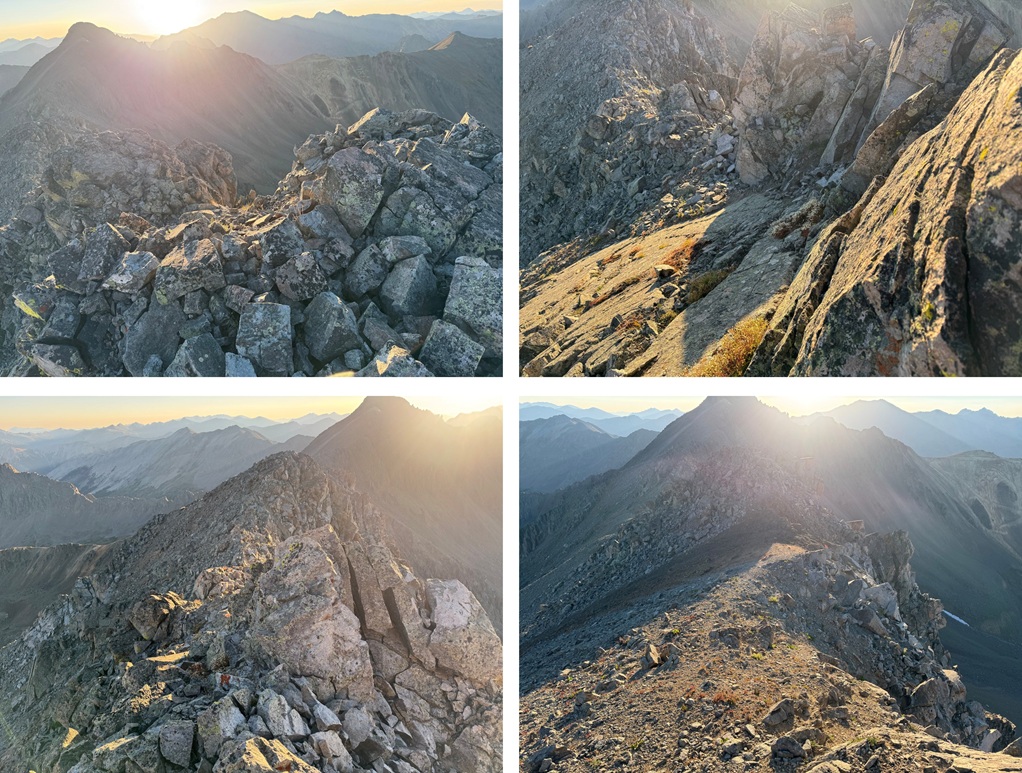
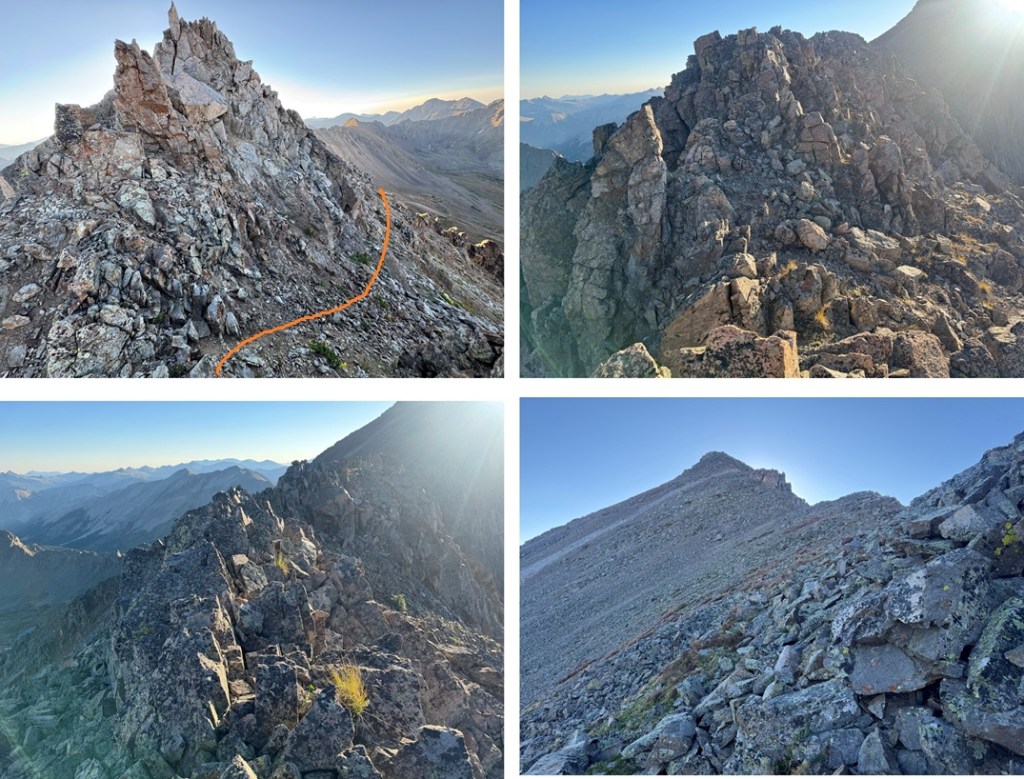
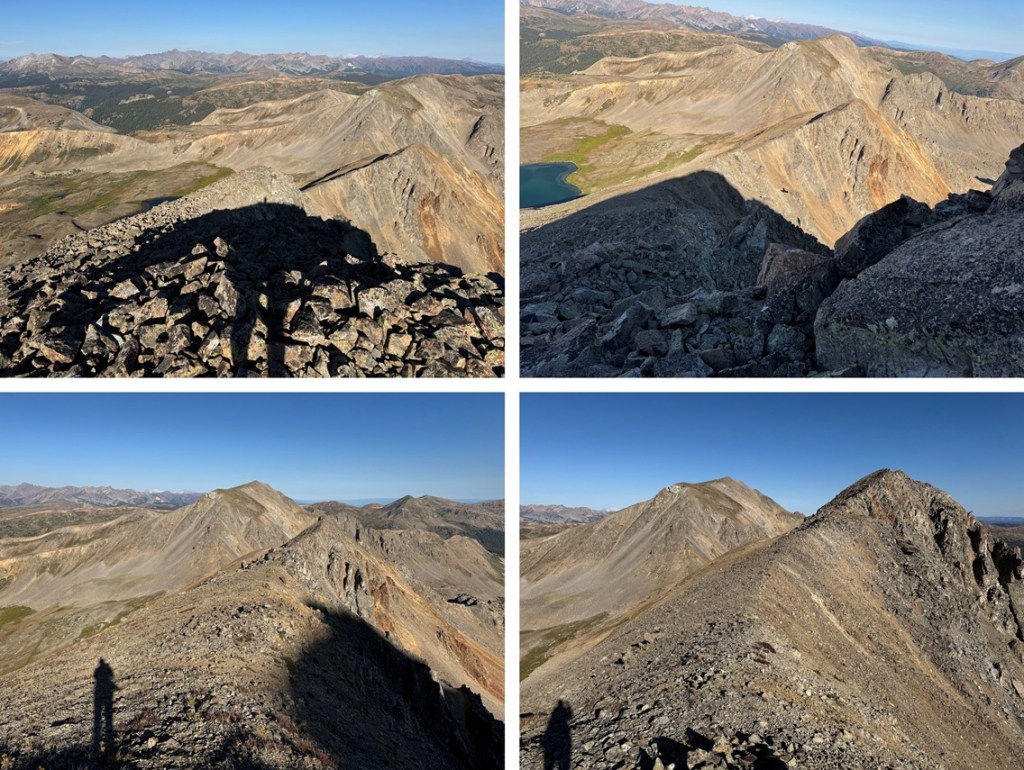
From the false summit I continued to follow the ridge east. The terrain became more difficult as I descended about 150’, then reascended up to Tellurium. I mainly stuck to the ridge, unless it was obvious to drop down to easier terrain. I felt this was easy class 3, but with a lot of choss/talus and exposure.
Here are some pictures of the ridge:
The last section of the ridge just before the summit became rocky, but a class 2 rocky
I summited Tellurium Peak at 7:40am
Tellurium Peak:
This was my only peak for today, so I turned around and headed back down/up/down the ridge. Here are some pictures of my way back over to the false summit.
Then it was back to the West Tellurium/Tellurium saddle.
Then from the saddle I hiked back to my campsite at Ptarmigan Lake
From the lake to the summit and back took me 3 hours total, with a stop on the ridge to make a phone call. Now to head out. From the lake I followed the 4WD road back to the trail/mines
Then I followed the road all the way back to the dispersed camping area, taking the upper road this time (both roads make a loop).
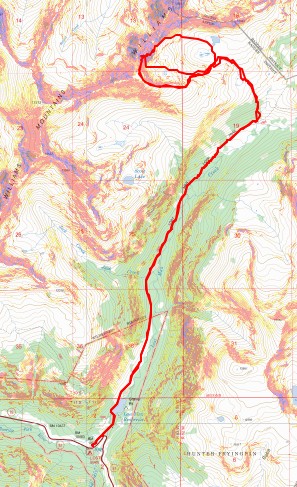
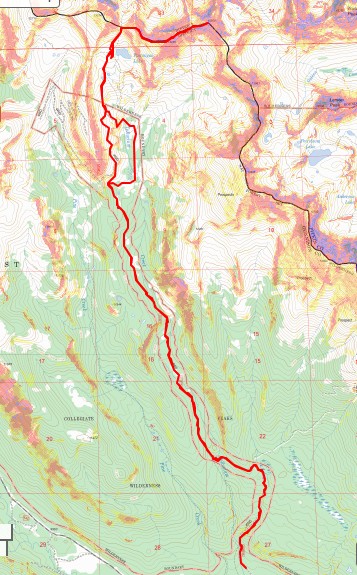
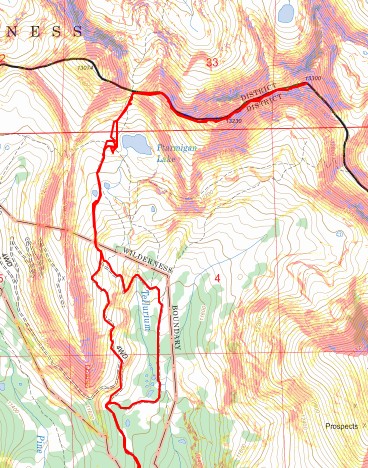
I made it back to my truck at 11:45am. This hike totaled 16.42 miles with 4219’ of elevation gain. Here’s the topo of my entire route
RT Length: 3 miles (from just below Ptarmigan Lake)
Elevation Gain: 1200’ (from just below Ptarmigan Lake)
This was my second attempt at this peak. In my quest to finish the 13ers slowly and enjoyably I planned to drive up to Ptarmigan Lake, set up a tent, and climb the next morning. Of course, this plan failed (kind of). Having attempted this peak before I knew I’d need to take a side by side up to Ptarmigan Lake, so I drove 6.23 miles up the worst 4WD road I’d ever driven in a side by side: 584/ Tellurium Creek .
There are signs as you enter saying no trucks, and there’s no way my Tacoma could have driven up the road. However, at the base of the road there are several large dispersed campsites, so feel free to park there.
Here are some pictures of the 4WD road. I think the hardest part was about 2.5 miles in, but it doesn’t let up the entire time. It started out driving up a wet and rocky creek bed, there were at least 4 stream crossings, there were large rocks (bigger than microwaves), narrow passages, and steep climbs.
I made it up to about 11880’, about .7 miles below Ptarmigan Lake, when I came to a road closure sign. Obviously the road had previously gone all the way to the lake, but it hadn’t for quite some time. So I set up camp near the road closure and was on the trail early the next morning.
There was a class 1 trail that started to the left of the closed gate. It looked like it went to Ptarmigan Lake, and indeed it did. I followed it through a couple of old mines until the trail ended, then saw the old road in the distance and followed that to the lake.
Ptarmigan lake is a great place to find a camping spot if you’re making this a backpacking trip. If not, to the left (west) of the lake is a strong game trail. I noticed it when I was hiking in and saw a herd of elk using the trail. This trail goes all the way to the ridge.
I followed the trail to the ridge
Once on the ridge I turned right and followed the class 2 ridge northeast.
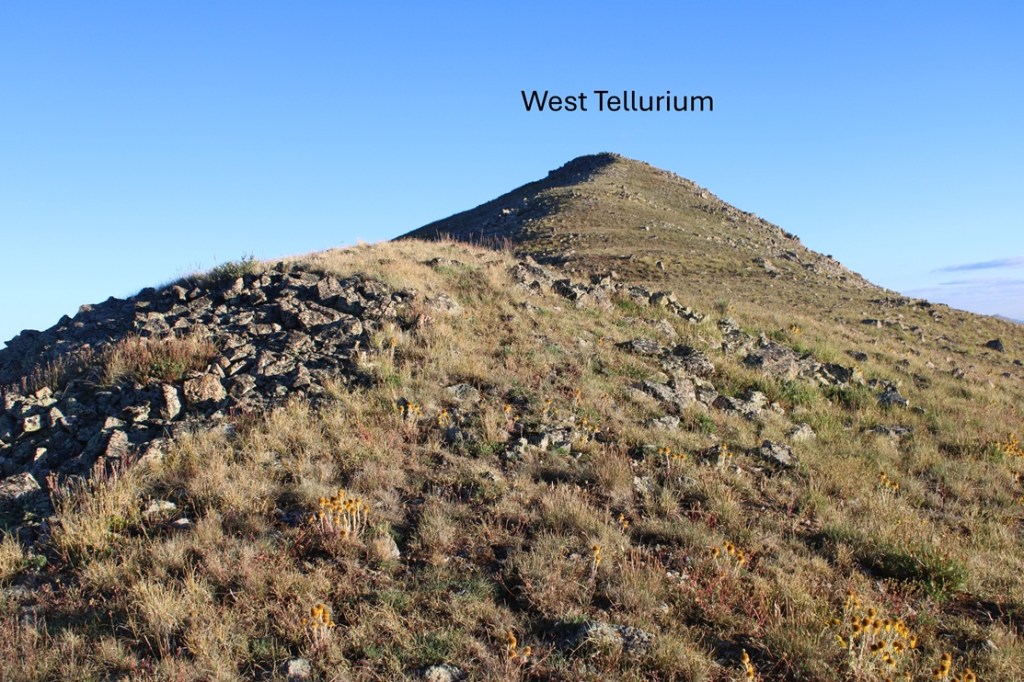
At the top I turned left and continued to follow the ridge to the summit.
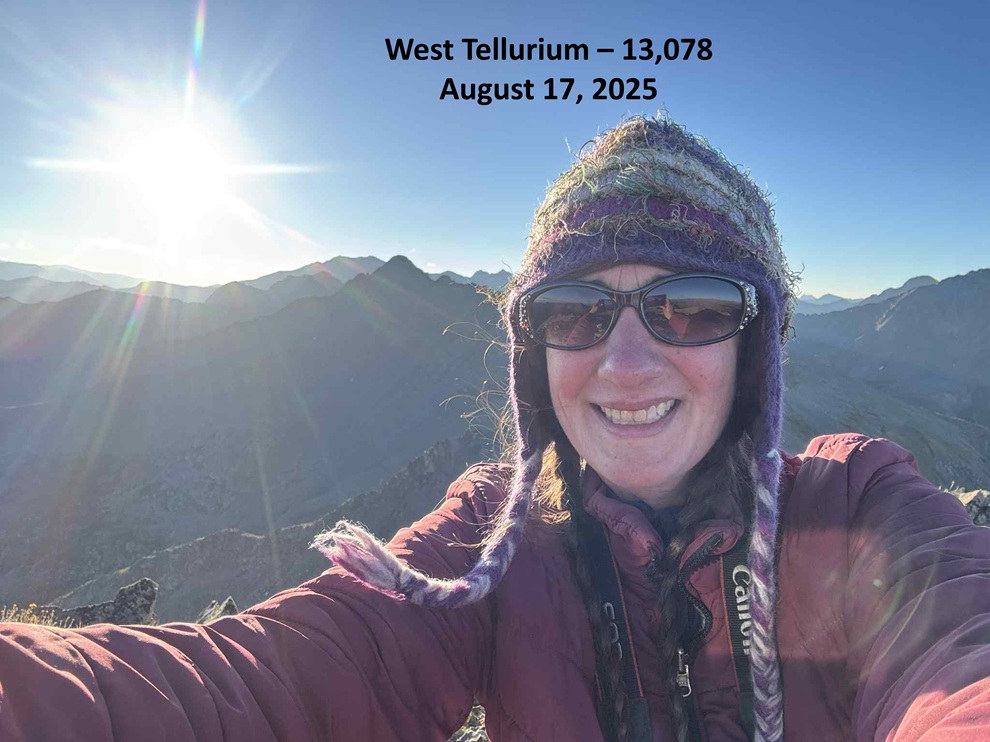
I summited West Tellurium Peak at 7am
West Tellurium:
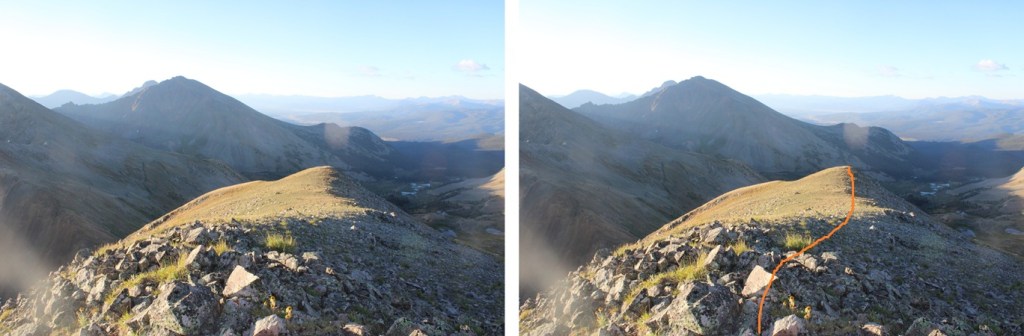
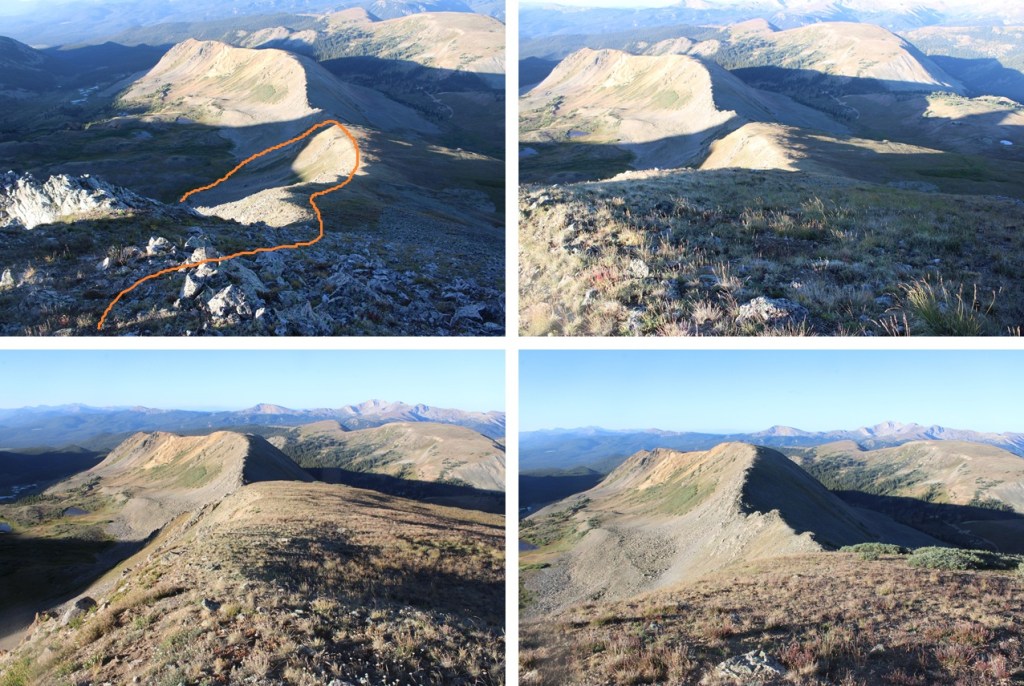
In keeping with enjoying my hikes this was an out and back hike for me, so I turned around and descended the ridge the way I’d summited.
Back on the trail, I took it east towards Ptarmigan Lake
I then found the old 4WD road, and followed that back to the trail that led me to the closed gate/parking area
I made it back to the side by side at 7:45am, making this a 3 mile hike with 1200’ of elevation gain in just under 2 hours.
Here’s the entire route topo. The most difficult part about this hike was by far the drive up/down Tellurium Creek Road, which I’m coming back to hike in again very soon. I wouldn’t drive it again.
This was my second attempt at Italian Mountain. Earlier this month (August) I hiked in from Spring Creek Reservoir and got turned around at Stewart Mine due to a summer snowstorm. Actually, it was the thunder that turned me around. If you do take the route from Spring Creek Reservoir you take 880 until it becomes a dirt road. If you have a 2WD vehicle leave it there in the parking/camping area. If you have a capable 4WD vehicle and competent driver you can take it another mile to the trailhead (at the end of the narrow road). There is one large campsite just before the trailhead on the left-hand side. You can then take the Italian Connector Trail to treeline, turn left at the only junction (the one with 4WD road 759), and follow it to Stewart Mine. It’s about 3.5 miles and 1500’ of elevation gain to Stewart Mine on a class 1 trail that starts with a creek crossing and is very easy to follow. I don’t have a lot of pictures of this part of the route because I either hiked it in the early morning dark or in whiteout conditions from the snow. Here are a few pictures of the route to treeline:
When I got to Stewart Mine a dark cloud descended from the ridge of Italian Mountain and within minutes I was in a minor blizzard. I hunkered down for 15 minutes waiting for it to pass, but when the thunder started I headed back down to treeline. Half an hour later I realized this summer storm was going to last a while and descended back to the trailhead to try again another time. It rained/hailed/sleeted/snowed the entire way back to the trailhead.
However, I hadn’t been expecting to see that 4WD road, so it got me thinking… could I drive up it? The short answer is no. My Tacoma could not drive this road, but my side by side could. So I drove the side by side from 742, turned left onto 759. There are a bunch of campsites along 742 and 759, but at the junction or near it is a great place to leave your 2WD vehicle. It’s where I left my 4WD Tacoma and started out on the side by side. From the junction it’s about 10 miles and 2300’ of elevation gain on a difficult 4WD road to Stewart Mine that follows Italian Creek and goes around private property (there are signs directing you on the road where you can legally drive). My Tacoma could not have made it to the mine. I’d strongly suggest either hiking in from Spring Creek Reservoir to the mine or taking a truly off road capable vehicle to the mine. Here are some pictures of the road in. Notice I don’t have many, because I was white-knuckling it the entire way.
I was on the trail at 6am. The trail starts directly behind Stewart Mine at 10230’, and is fairly obvious.
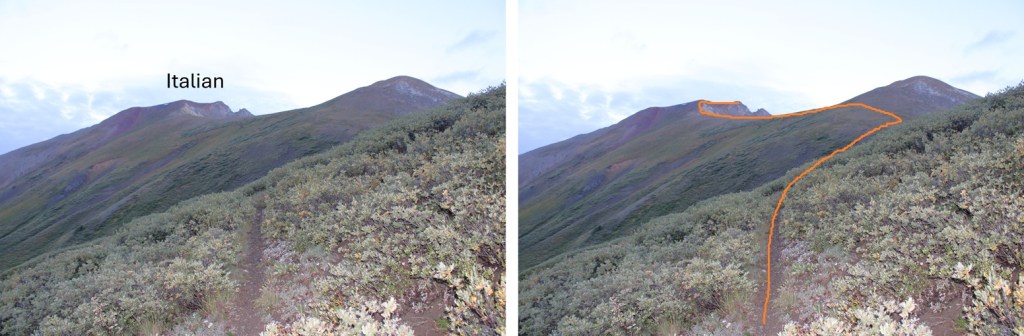
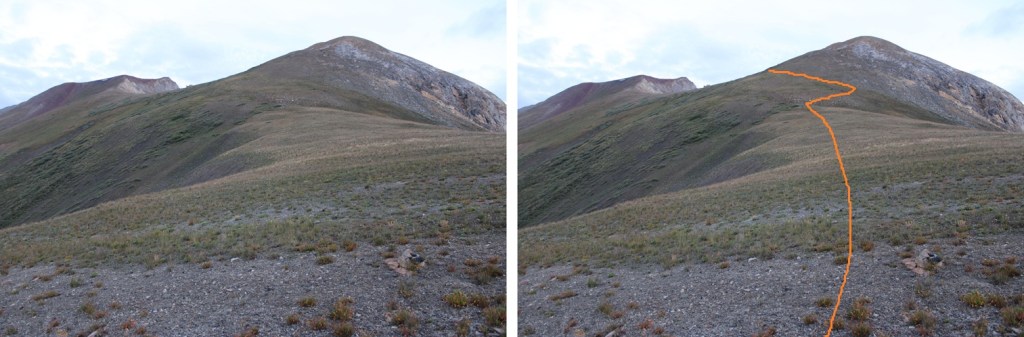
I followed the trail west and then northeast as it gained the ridge. The trail was very easy to follow the entire way, with no junctions. Here’s the basic route:
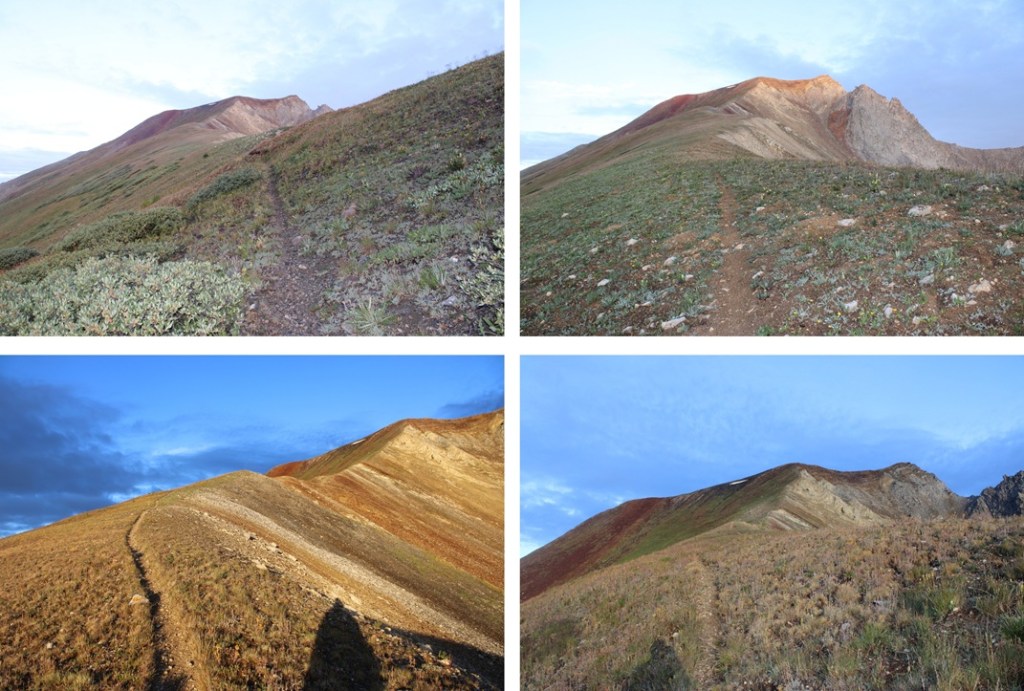
And some pictures of the route to the ridge:
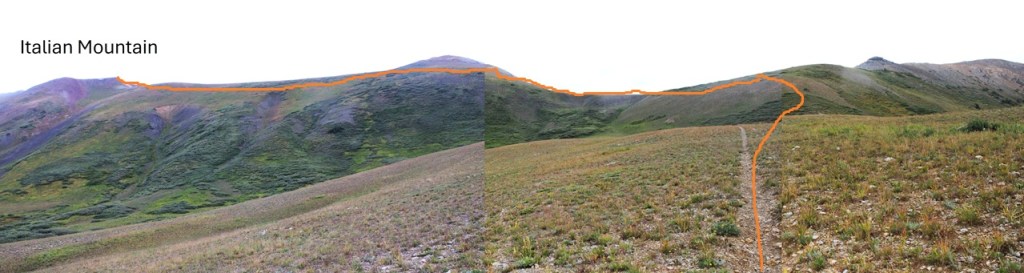
Once on the ridge I followed the trail west. Here’s the overall route:
There was one time the trail kind of disappeared, but it was easy to see where it picked up along the ridge in the distance.
I continued following the ridge (staying just to the left of the ridge) on this class 1 trail until I made it to 13180’. Then I made the hike class 2 by leaving the trail and climbing straight up the ridge. When I hit the top turned right and hiked a short way to the summit. Alternatly you could follow the trail the entire way to the summit (something I didn’t know until I was on my descent).
The last 20 yards or so was class 2 terrain, but easy tundra as I headed northwest.
I summited Italian Mountain at 7:10am. It was a rather gloomy day, but I was glad the weather held out this time.
Italian Mountain:
This was an out and back hike for me, so I headed south, then took the ridge back to the trail.
Here’s an overall view of my route back down to the mine
Here’s that spot where the trail vanishes for a bit
And then it picks up again and led me right back to the mine
I made it back to my campsite at 8am, making this a 3.2 mile hike with 1500’ of elevation gain in 2 hours.
The black line is my drive in from Spring Creek Reservoir, the purple line is my drive in on 759, and the red line is my hike.
While the Williams Group is a serious class 3 scramble, PT 13039 is an easy climb. I just had a few hours this morning, so I decided to take a hike to the top to get a look at the terrain. If you’re looking for a great class 2 13er in the Sawatch Range that’s straightforward and not crowded, try this one out!
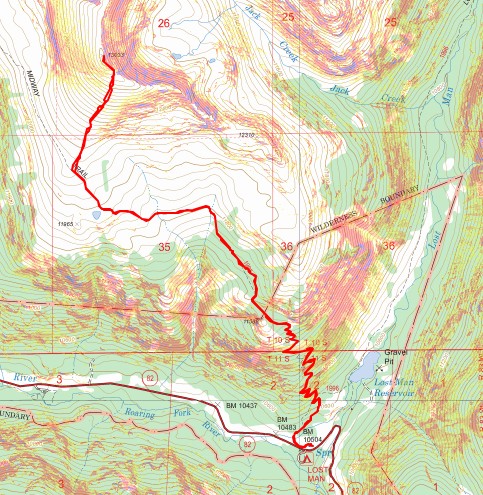
I started from the Lost Man Trailhead at 5am. This trailhead has plenty of parking (but it fills up on weekends), and is the one located directly across from Lost Man Campground. I just found out there’s a lower and upper Lost Man Trailhead. This is the Lower Lost Man Trailhead.
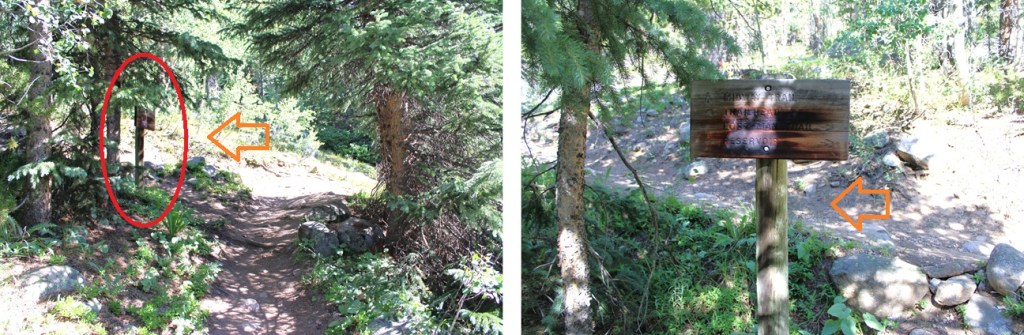
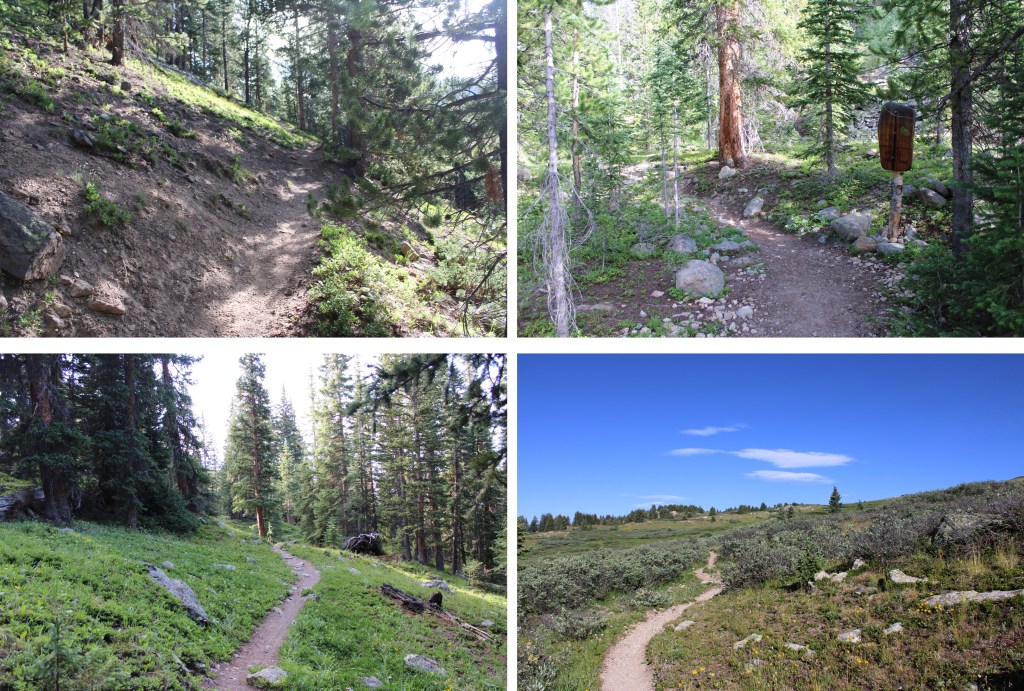
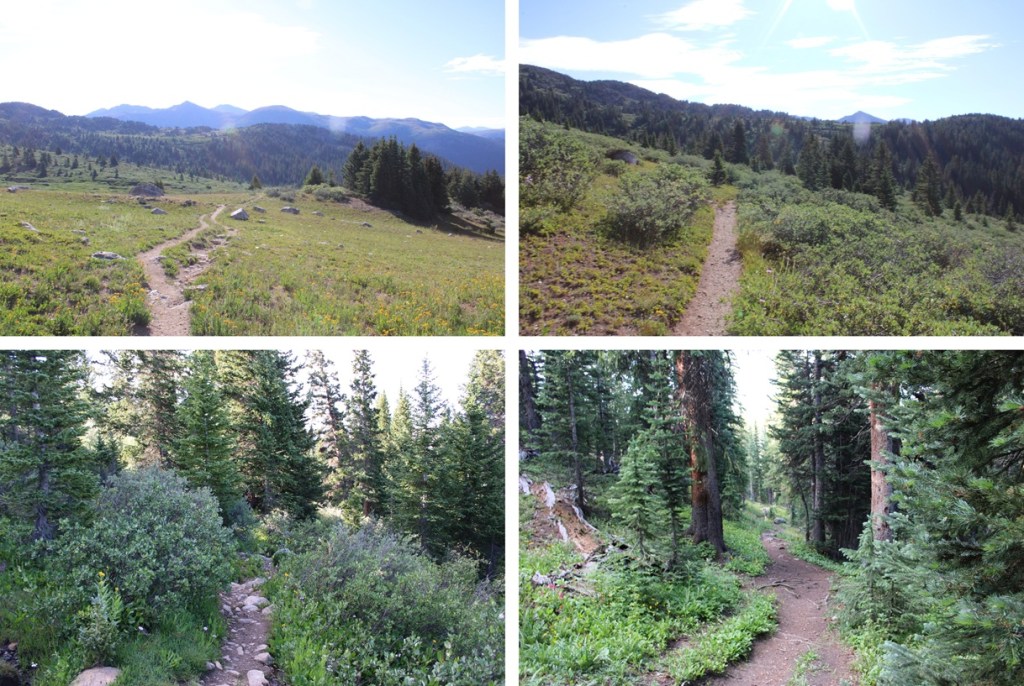
At the trailhead sign I went left and followed Midway Trail. It started out with willows that quickly changed to pine trees, then back to willows around treeline. If it’s been raining in the past day or so, you’re going to get wet walking through those willows, but the trail is easy to follow. There was also an abundance of wildflowers and I could hear the traffic from 82 below as I ascended.
Midway Trail is an easy-to-follow class 1 trail. I followed it over a bridge.
And then turned left at this junction to stay on the Midway Trail for as long as I was on a trail.
The trail switchbacked up to 11500’ and then continued along the south side of the slope.
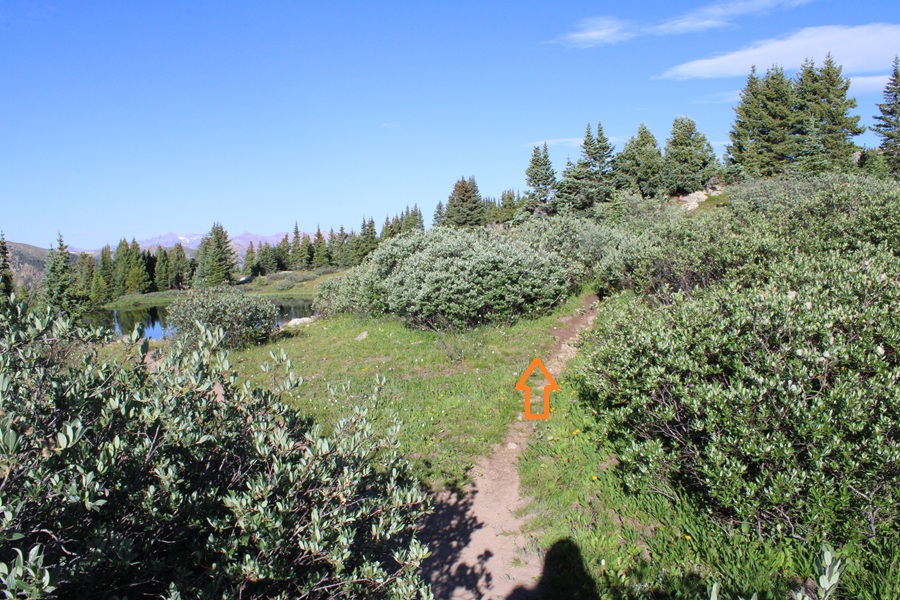
Just at about treeline I came to a small pond (11990’), and skirted it on the trail that goes to the right, following the trail up to 12100’
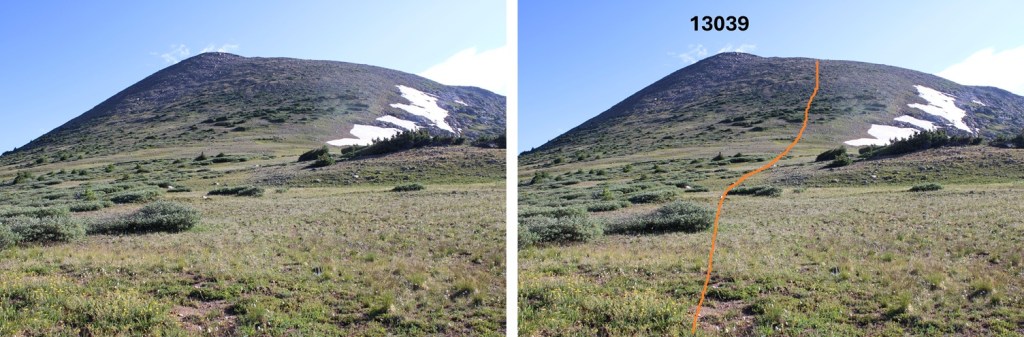
At 12100’ of elevation, just as the trail was starting to level out and after about 3 miles of hiking from the trailhead, I turned right and headed northeast up to the ridge of 13039. This is choose your own adventure, and all class 2. I did my best to avoid the willows and pine trees and aimed straight up the ridge, gaining about 850’ of elevation. Most of the rocky terrain can be avoided until you get to the top.
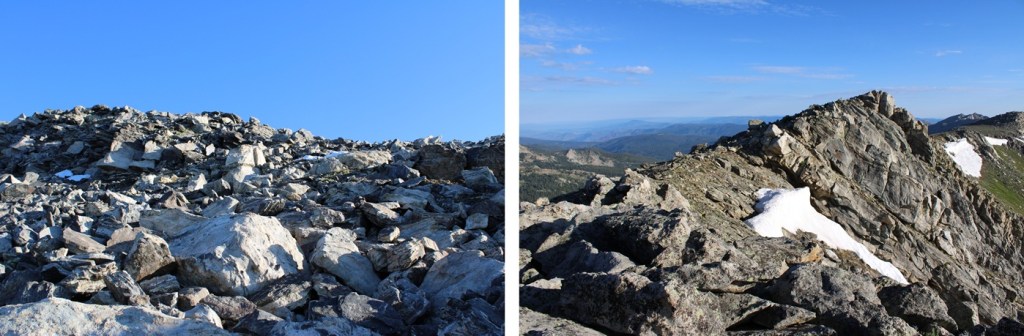
Once on the ridge it was a short, rocky, class 2 climb following the ridge west and then north to the summit.
I summited 13039 at 7:30am
13039:
Due to time constraints this was my only peak of the day, but here’s a view of some of the other peaks you can link with this climb to make it a long and challenging class 3+ day:
I turned and made this an out and back hike. I followed the ridge back down the way I’d ascended.
Then I headed south/southwest down the slope back to the Midway Trail.
Back on Midway Trail I followed it around 3 miles back to the trailhead.
I made it back to my truck at 9am, making this a 7.81 mile hike with 2560’ of elevation gain in 4 hours.
On to the Western Slope to volunteer at a Girl Scout camp for a week!