East Ridge
RT Length: 9.3 miles
Elevation Gain: 4300’
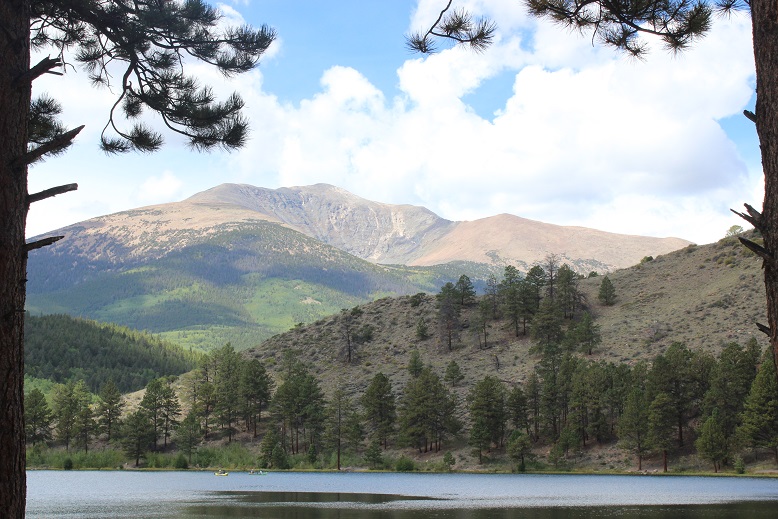
Every year for Labor Day we camp with a group at O’Haver Lake. Our campsite comes with a great view of centennial Mt. Ouray. For the past few years I’ve intended on hiking the mountain during our stay, but weather and a flat tire have interrupted my plans. This weekend however I was intent on making Mt Ouray mine. After sitting around the campfire for hours discussing life with my kids, I set my alarm and was actually sleeping in the tent before 10pm.
My alarm never went off. I woke to one of my cats gently pawing at my face (yes, we camp with our cats) and when I opened my eyes I could tell it was beginning to get light outside. Oh no! I’d planned on waking up at 4am. I looked at my phone: 6:04am. I was a bit worried because it was supposed to snow later today, so if I wanted to summit before the snow I’d have to get a move on. After a bit of fumbling with the zipper of the tent with cold fingers (we have to knot up the strings to the tent doors so our polydactyl cats don’t open the tent and escape during the night) I was in my truck by 6:07am. I guess I was foregoing the coffee and actually brushing my hair. Luckily the trailhead was less than 3 miles away: If I hurried I could still get in the hike.
I took Marshall Pass to the Grays Creek Trailhead. Marshall Pass (County Road 200) is a well maintained 2WD dirt road. The trailhead has room for 4 vehicles, but you can also park alongside the road. There is a ton of dispersed camping in the area.

After gathering my gear I started at 6:30am, two hours later than I’d originally planned. The sky was clear so I wasn’t too worried about the weather at this point. I did want to be back to my campsite by noon however to wake up my kids (all teenagers, so yes, they’ll still be sleeping): We had sailing to do today!
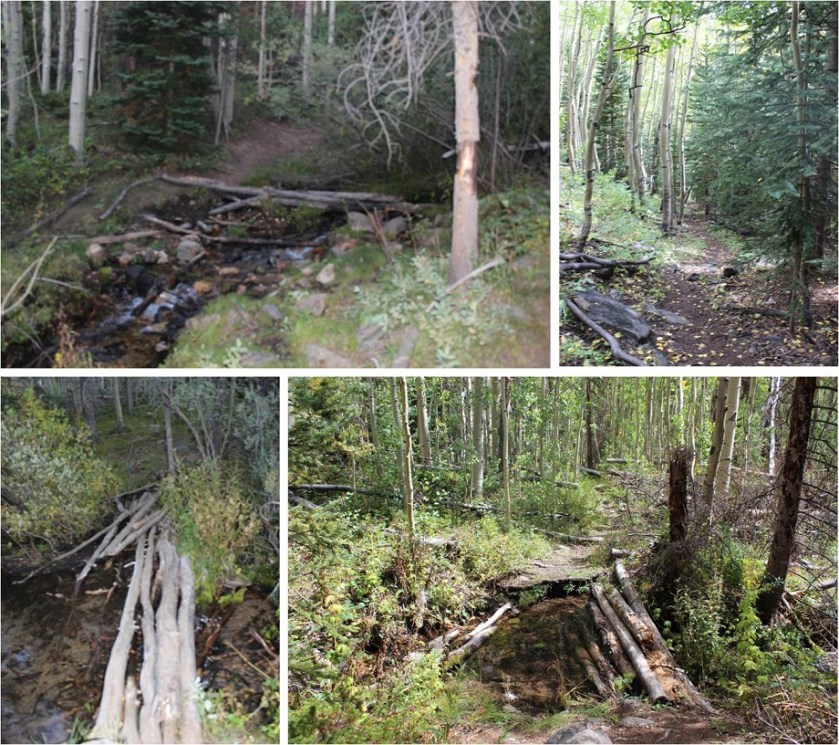
The trail begins lined with aspen and pine trees, gently heading west, crossing Grays Creek several times. Immediately I ran into an issue: my camera wasn’t working properly. Not having a functioning camera was a serious problem for me, so I fumbled with it for a good 20 minutes trying to get it to work (it wasn’t focusing… I think I just need a new lens). In the end I kind of gave up. Oh well, I guess I was just going to get fuzzy pictures today.
The trail was very easy to follow until I exited the trees and made it to a small boulder field
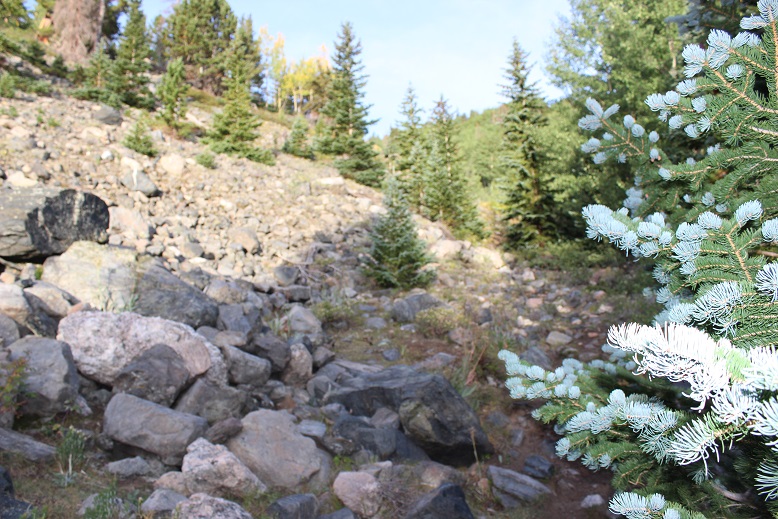
At this point the trail ends but you just continue up the drainage to the left (head west)

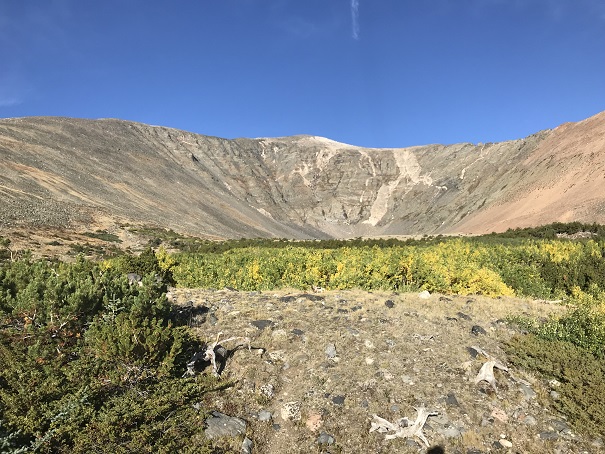
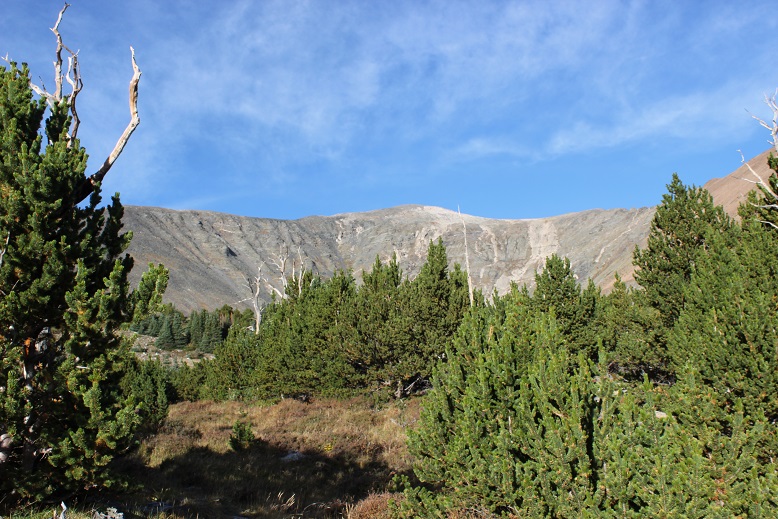
At the top of the drainage I was met with a great view of Mt Ouray’s peak, with small aspens below changing color at treeline. I was thrilled at this point because my camera decided to start working again!
There is still no trail, but your goal is to gain the saddle to the left. Here’s the route I took
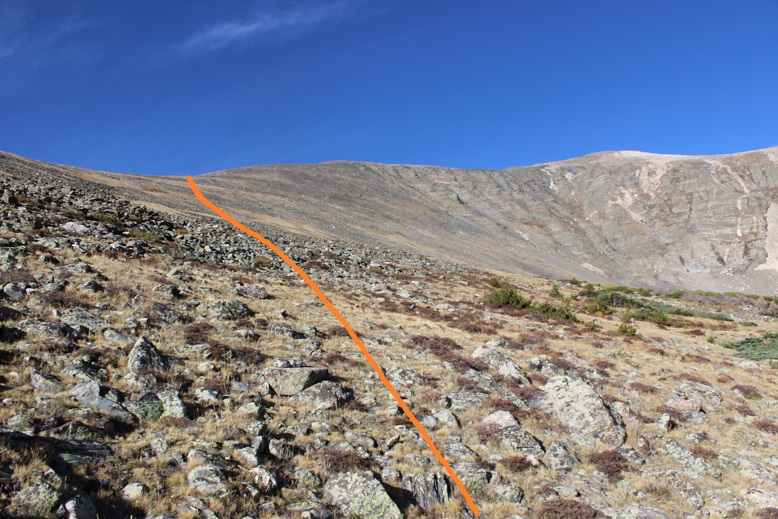
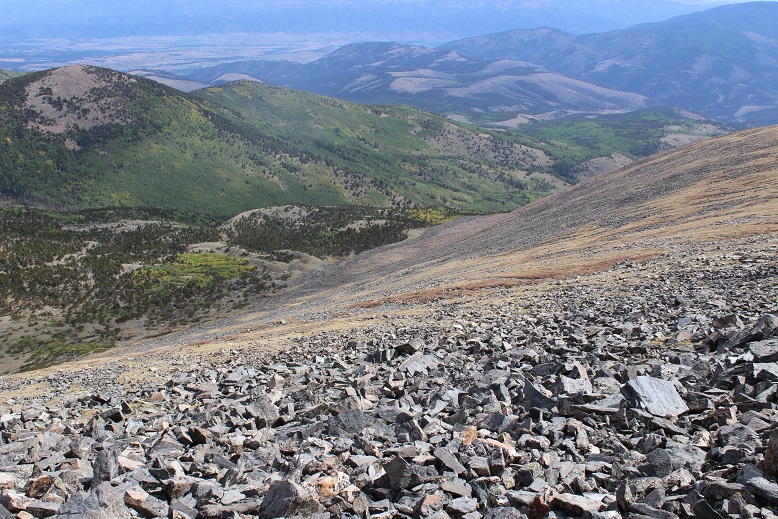
This area is much steeper than it looks, filled with rocks and when lucky a grassy slope with rocks thrown in. It was very slow going due to the elevation gain (about 2000’ in a mile) and because I was sore from hikes I’d taken earlier this week. Here’s a picture from the saddle looking back down on the route I took
I just kept aiming for the first hump in the ridge. When I was almost there I was greeted with a solid trail that led me another mile to the summit

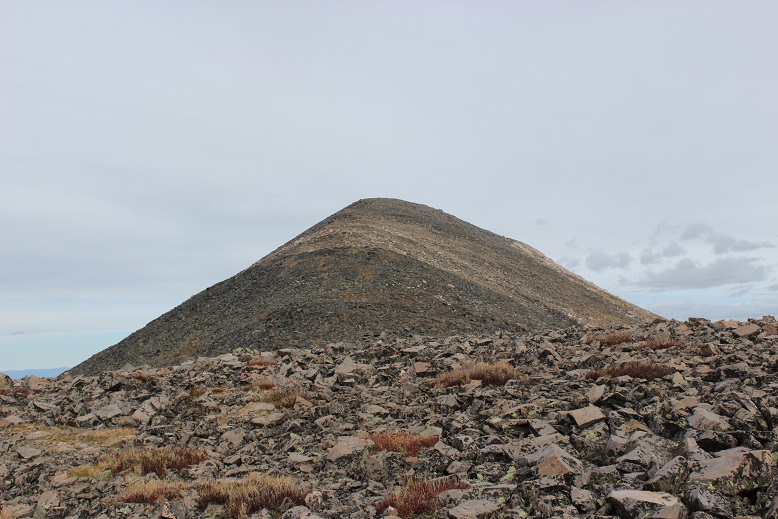
This trail switchbacks up the ridge and then around the southwest side of the mountain (which wouldn’t have been my first choice: I’d wanted to just go up and over and follow the ridge). Once you make it over the first hump you’ll notice several more smaller bumps in the ridge to navigate. Here’s your final view of Mt Ouray
You could tell this area used to be heavily used, even if it gets little traffic now (the trail is now overgrown with tundra in many places). There are several rock wind shelters built at various points on or near the summit.

There is also a 10×15 foot cleared area that looked like it was built specifically to set up a tent and spend the night on the summit. Very cool! I may just be back to do this one day.
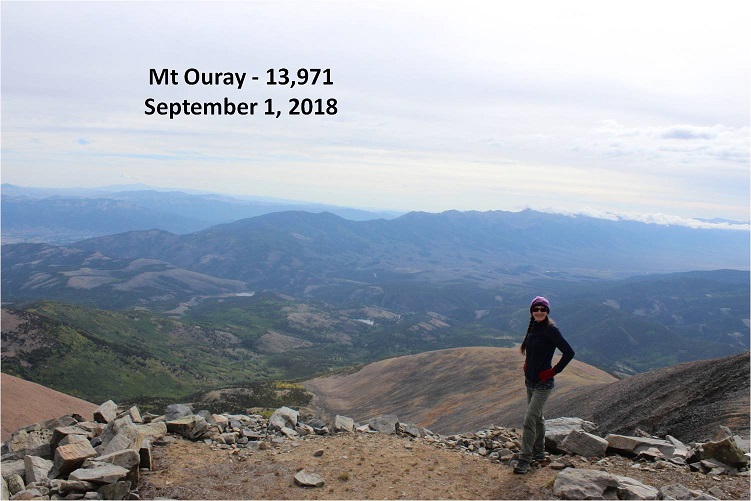
Here’s my summit photo
And video:
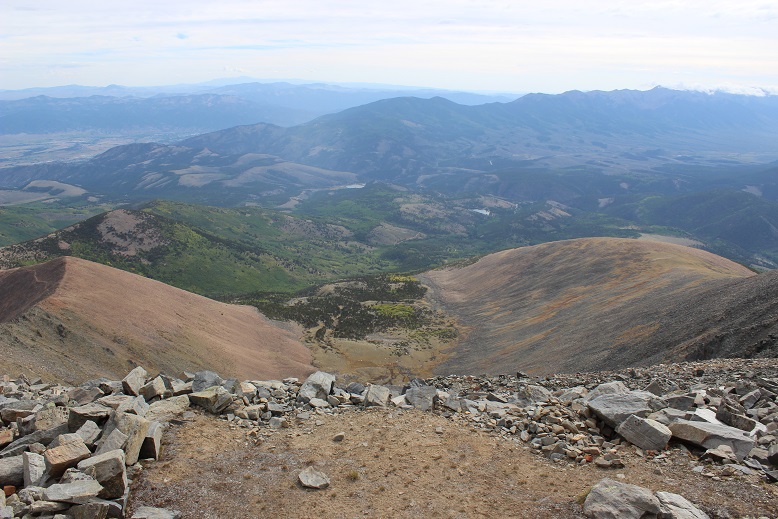
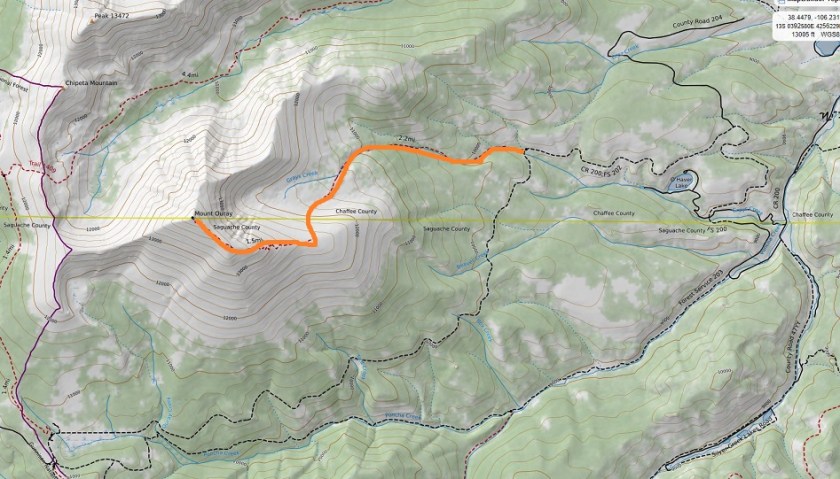
Here’s a look back on the route I took to the summit (and my campsite circled below)

The hike down was much easier than the hike up. I could see snow clouds in the distance, but the weather held off until much later that day. I made it back to the bristlecone pine area and followed the drainage back down through treeline and Gray’s Creek to the trailhead.
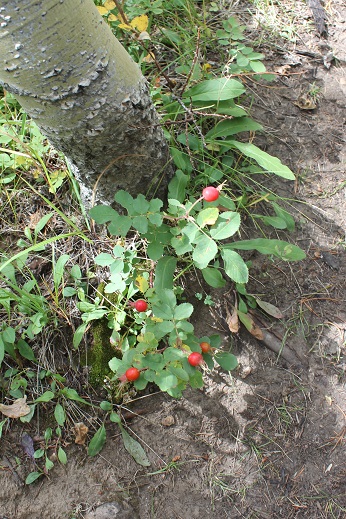
I was surprised at the size of the rose hips along the way.
I made it back to my truck at noon, after stopping and talking with a few women hikers about the joys of hiking 14ers (they’d just moved here from Illinois and wanted to attempt one soon). I met them about a quarter mile from the trailhead, and they were the only other people I’d seen all day. That made this a 9.3 mile hike with 4300’ in elevation gain in 5.5 hours (with lots of time thrown in for a camera fix and a chat with hikers). Here’s my route on a topo map
I made it back to the campsite at 12:30pm and woke up my kids. My son wanted to try out the sailboat he’d made out of our canoe (it worked great!)

And later that night we all enjoyed the campfire while it snowed on the peak. IMO, every cat should get to go camping…

Next year I plan on hiking the (shorter) west ridge. I was going to do so the following day but the snow on the peak didn’t look appealing this early in the season. That and I wanted to sleep in…

It looks like a very comforting area to be camping and hiking and just enjoying your time together as a family.It’s pretty ingenious for your son to adapt your canoe into a sailboat. I often wonder how you manage from spraining your ankles in such rough terrain. Even with your surefootedness it must occur once in awhile. I enjoyed looking upon your camp fire and your cat in the background. It would have been nice to have you photograph the family as a whole enjoying the warmth of the fire.The perfect time for a family selfie. Thank You once again for the mountain tour with words and photos. The best to You and your loved ones.
LikeLike