Hanson Peak – 13,462 and 13,078

RT Length: 11.42 miles

Elevation Gain: 2913’

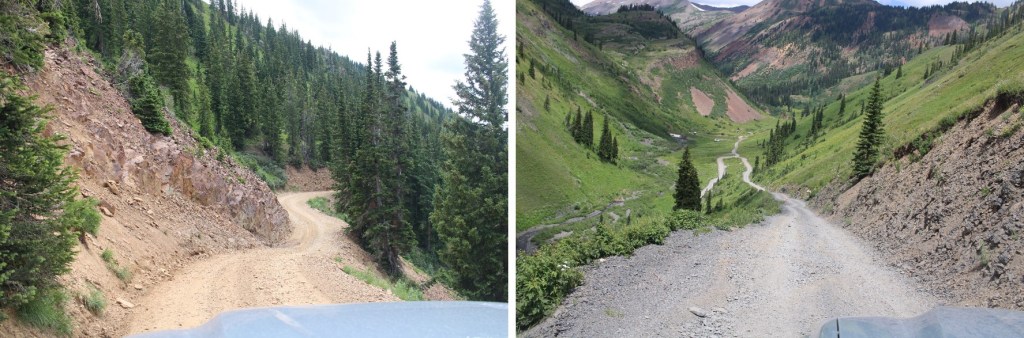
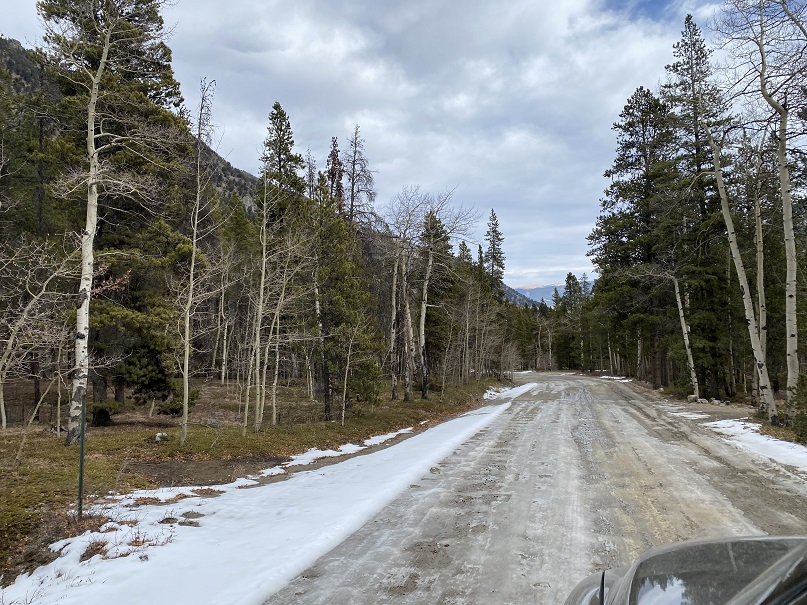
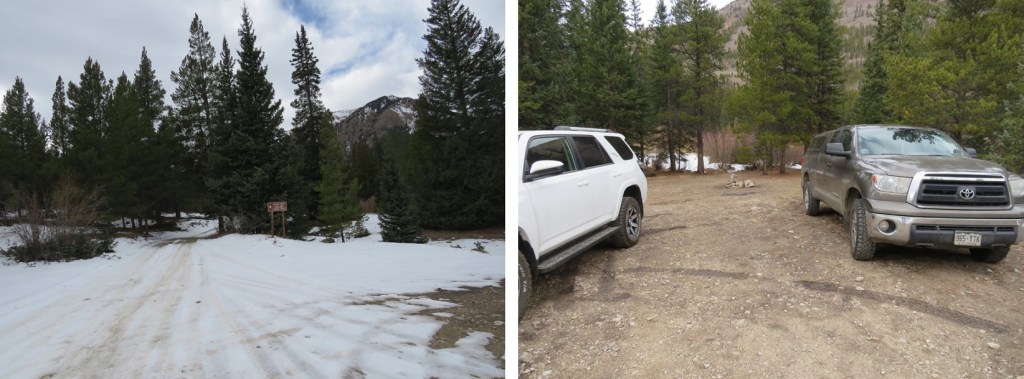
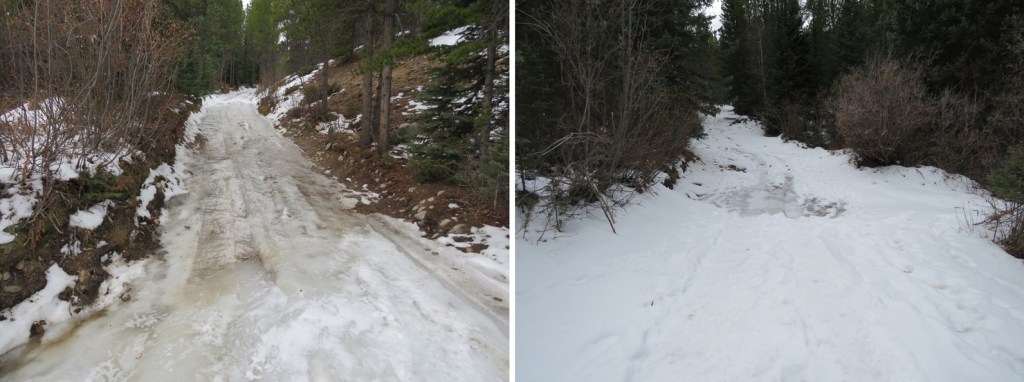
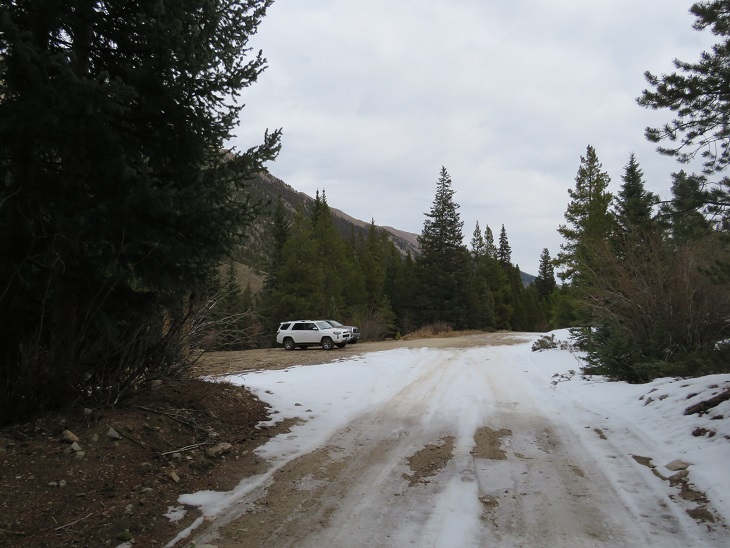
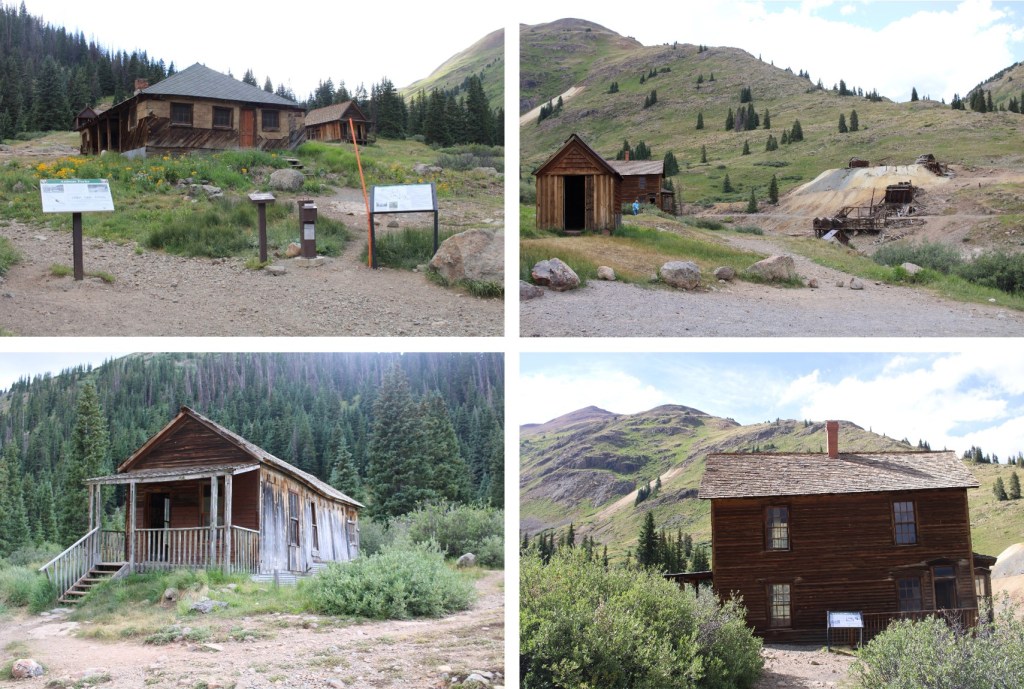
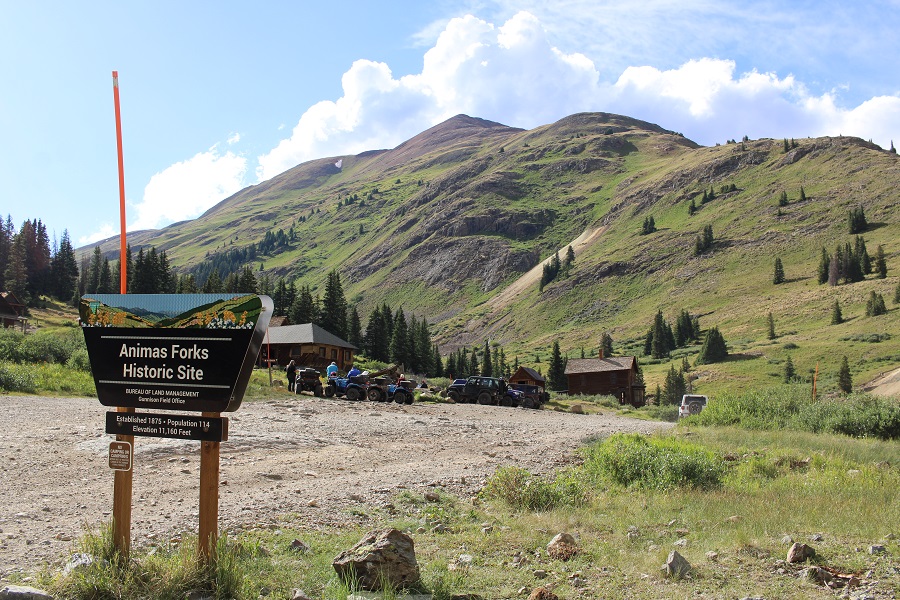
I parked at the Animas Forks Historic Site near Silverton.  A couple of notes:  the 4WD road in is 4WD, and it’s crowded!  The site however, is pretty cool.  Lots of stuff to see here, and you can go inside the structures (even the 2 story ones). 

There are plenty of spaces to park.  I chose one, and was on the trail at 3:20am

I followed the 4WD road that started to the northwest of the historic site, leading towards California Gulch

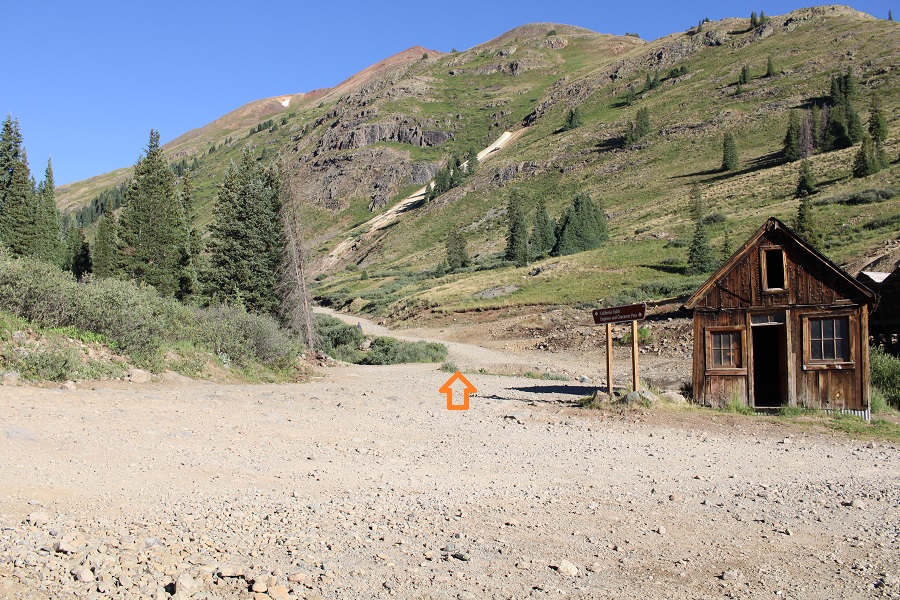
I followed this road west for 1.25 miles, to the Placer Gulch/California Gulch junction

At the junction (no signs) I turned left and headed south towards Placer Gulch

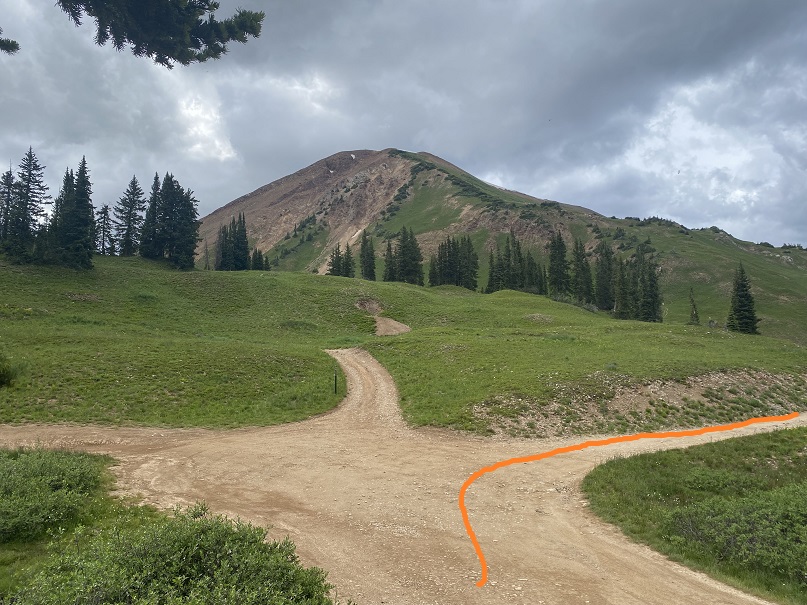
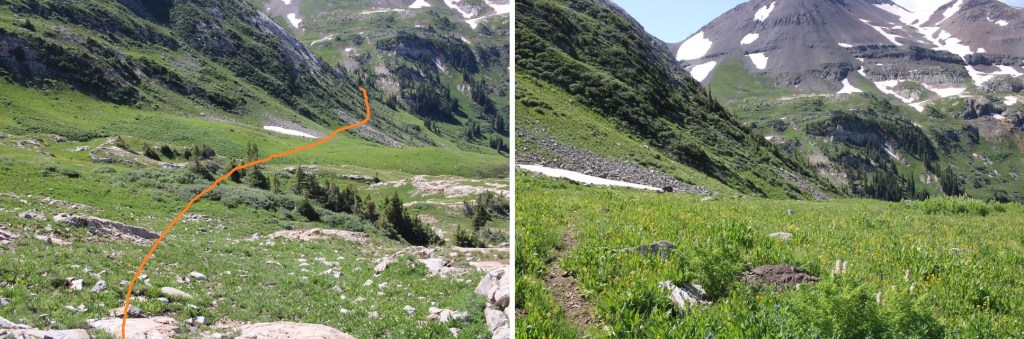
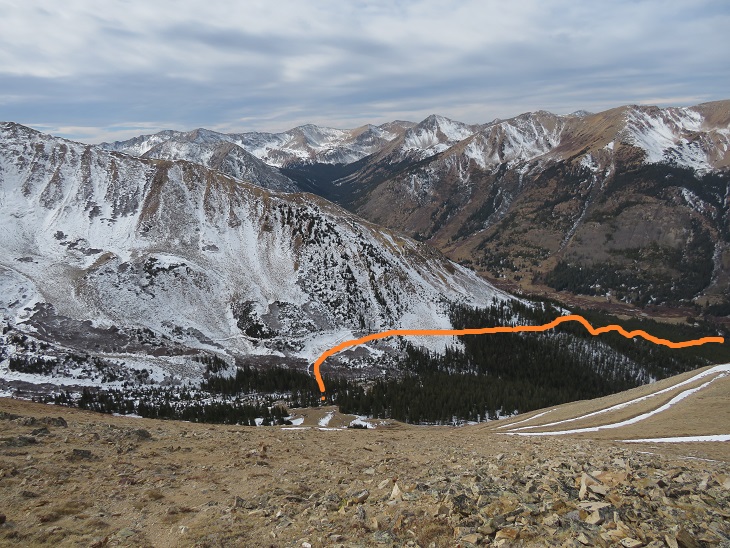
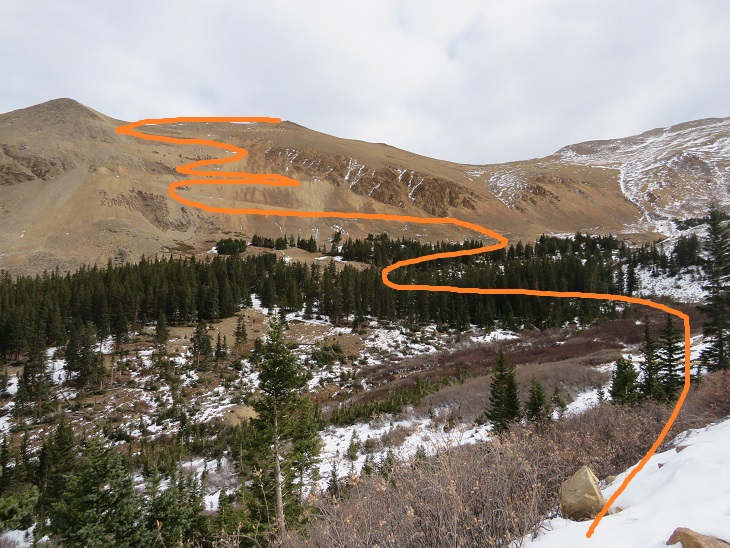
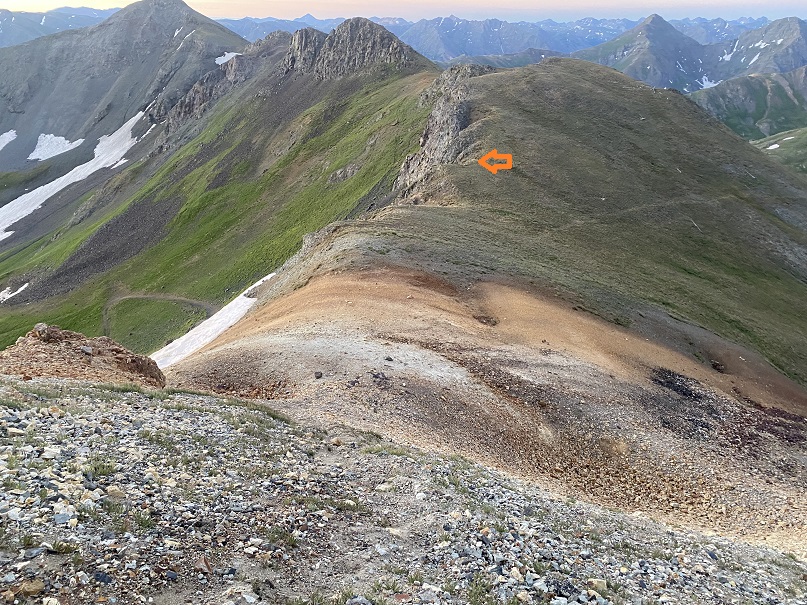
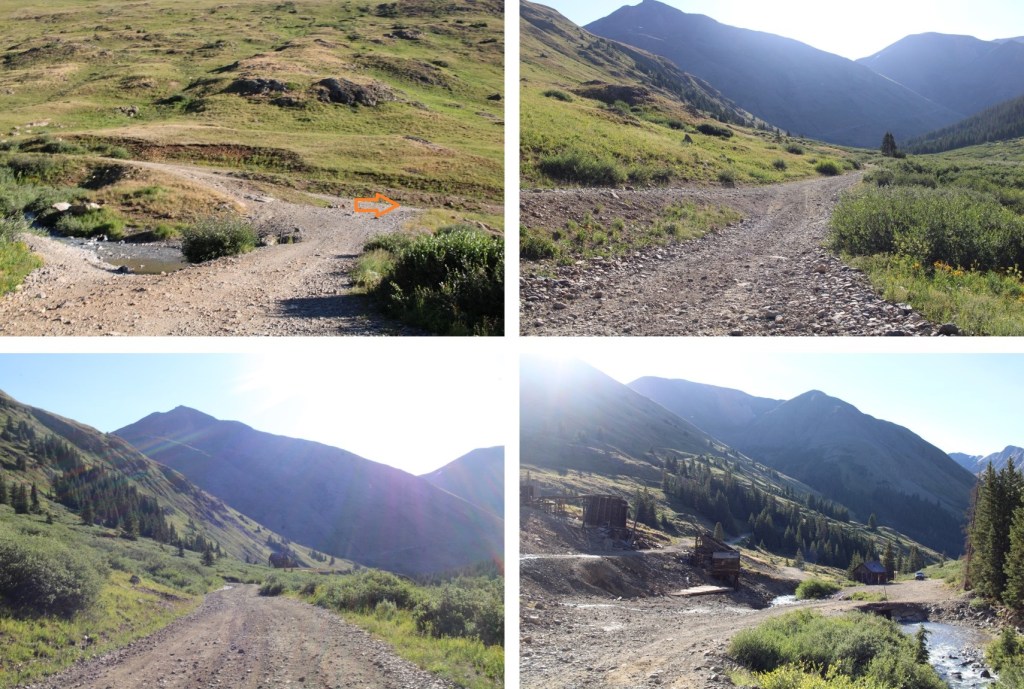
I followed this 4WD road south until I’d hiked a little over 4 miles.  It led me to Gold Prince Mine, zig-zagging up the hillside as it went (orange arrow).

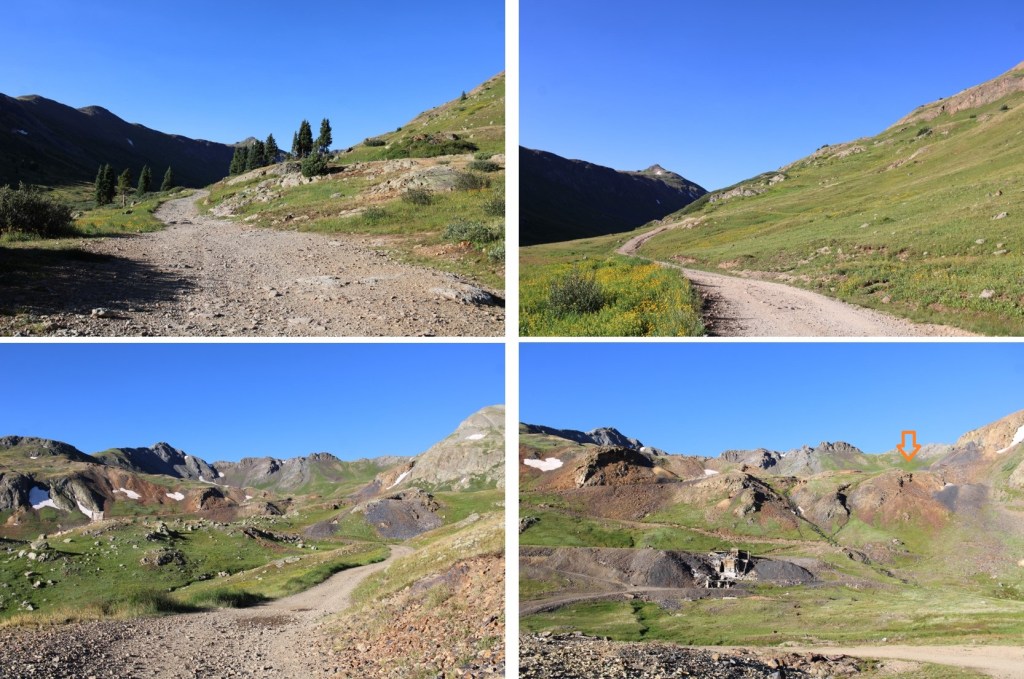
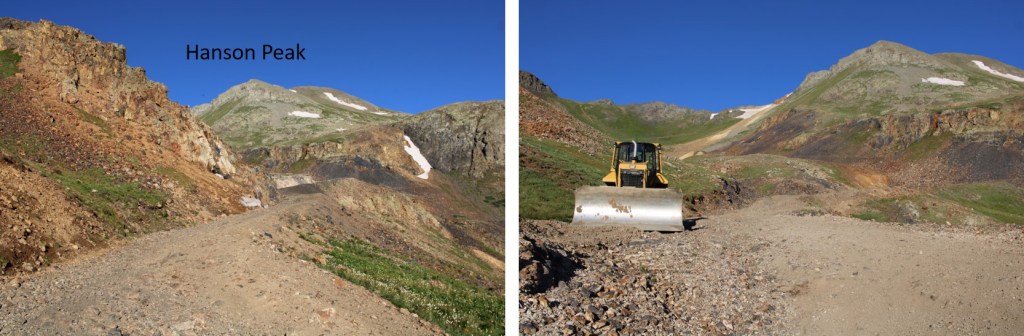
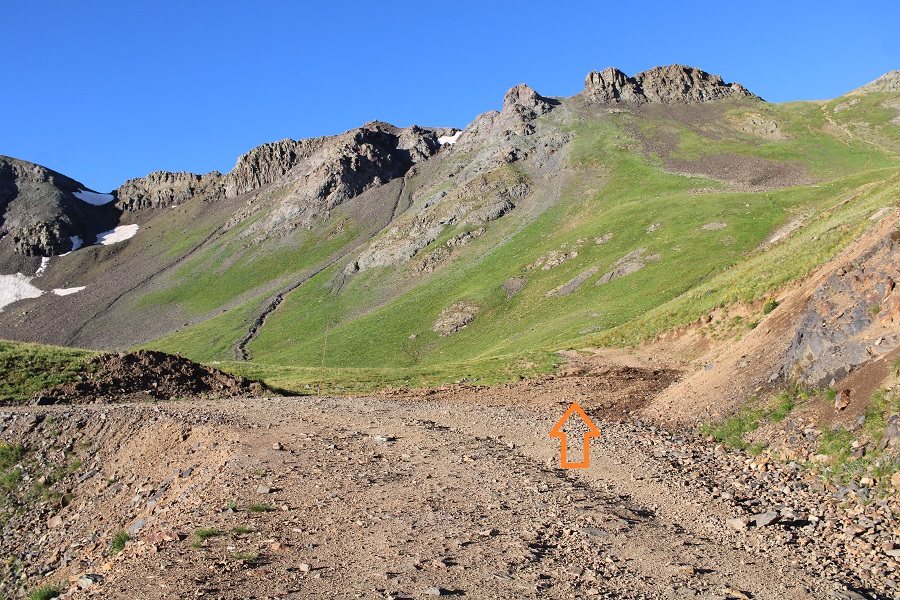
This part was tricky in the dark, but at 12615’ of elevation, there’s a side road that goes further up to another mine.  I took that road southwest. 

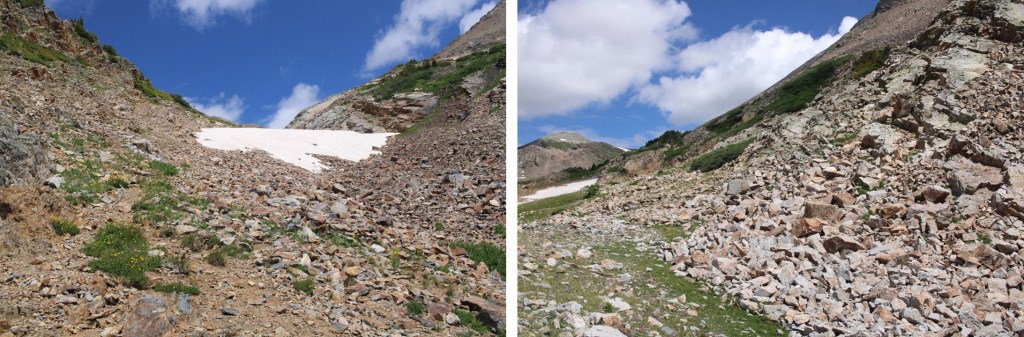
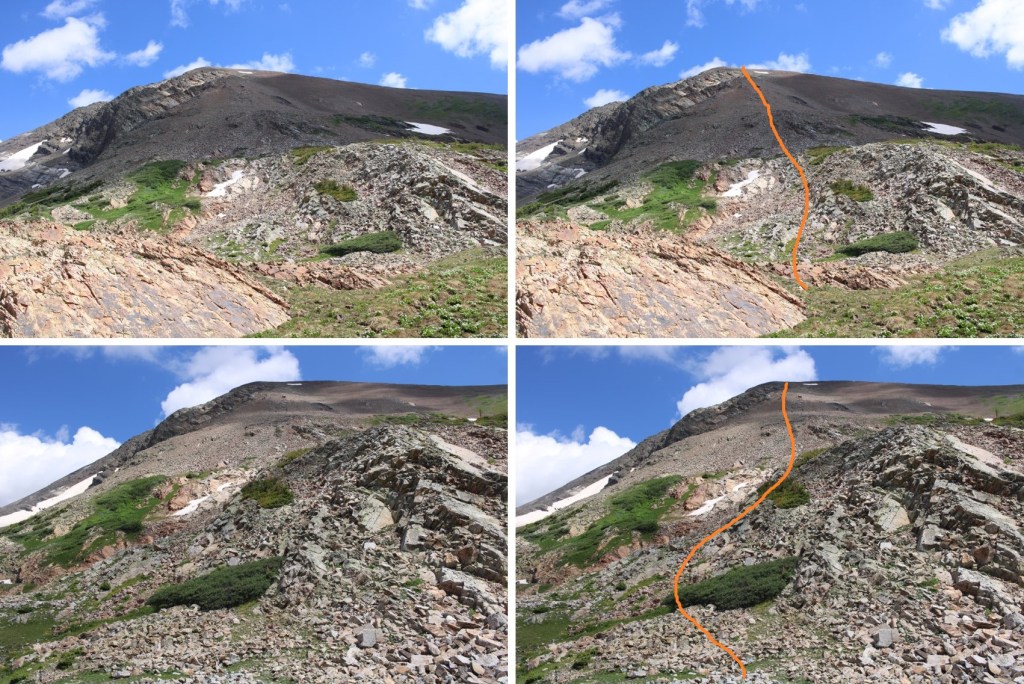
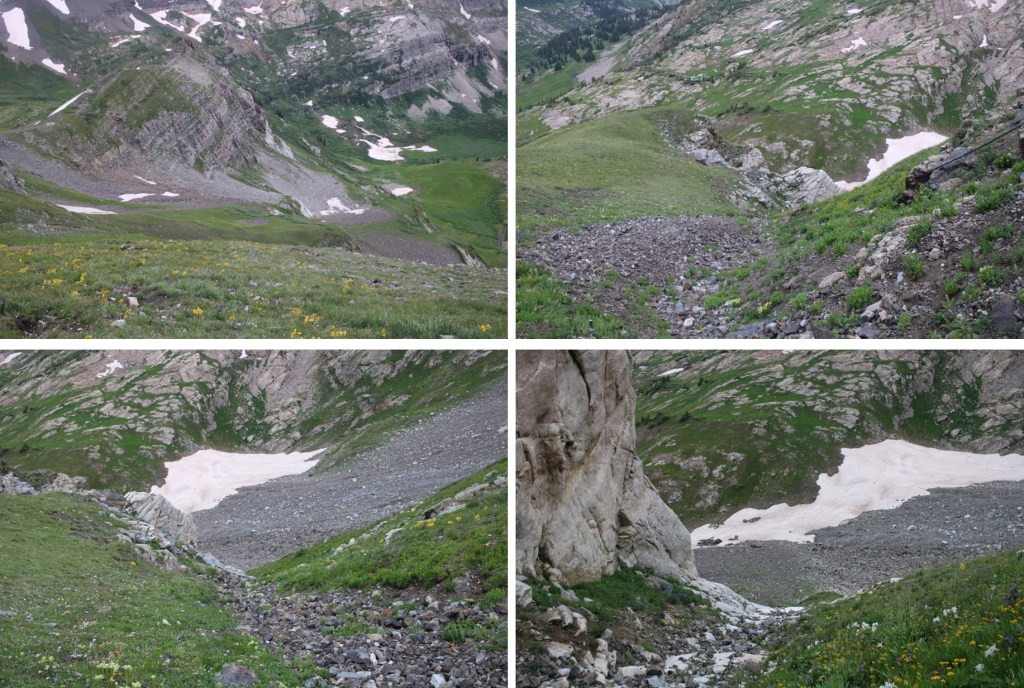
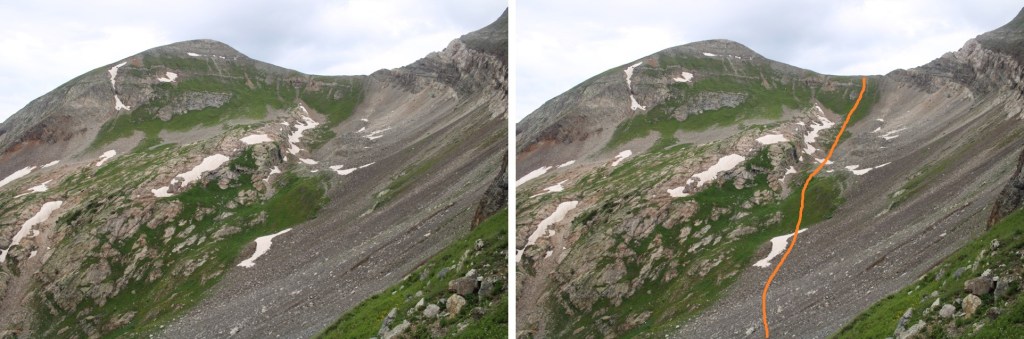
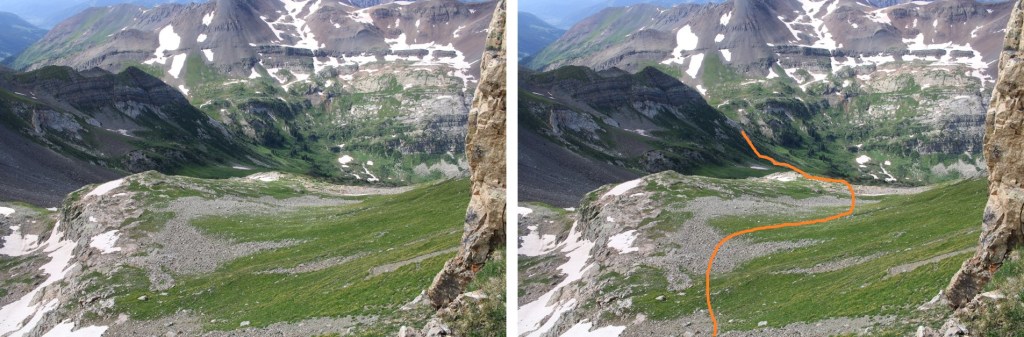
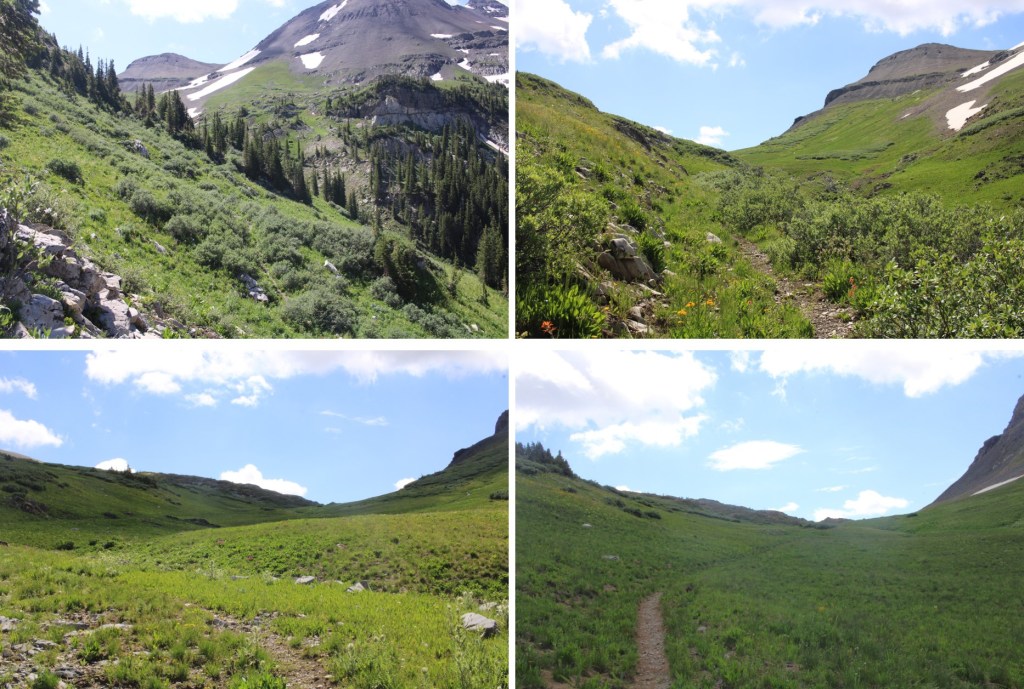
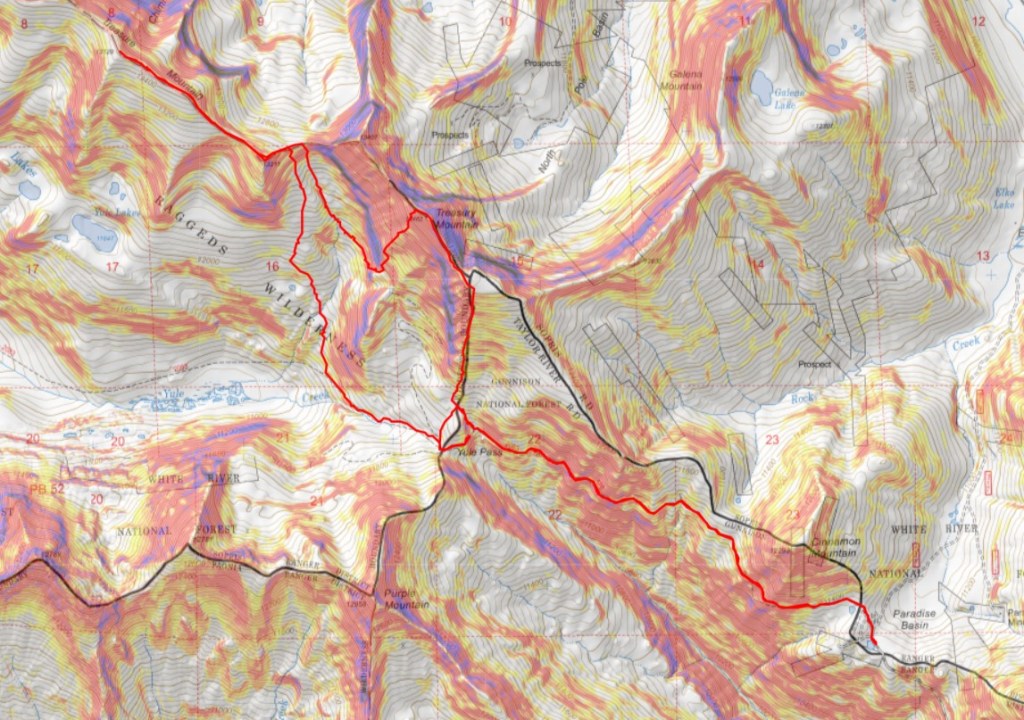
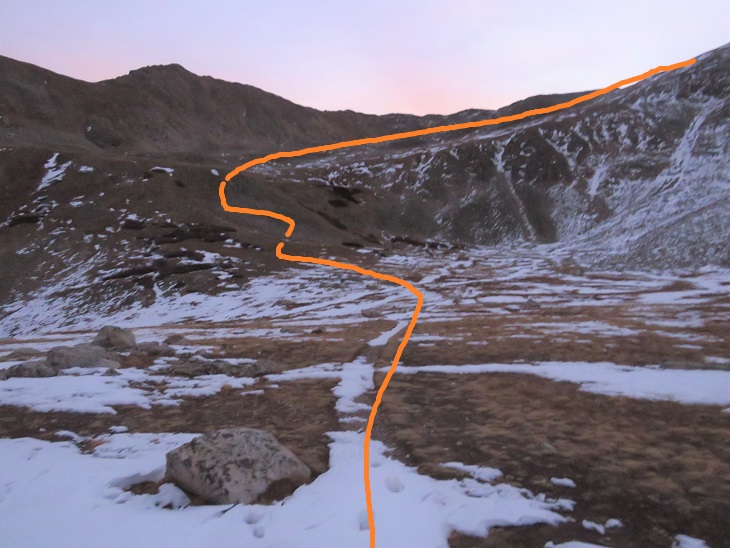
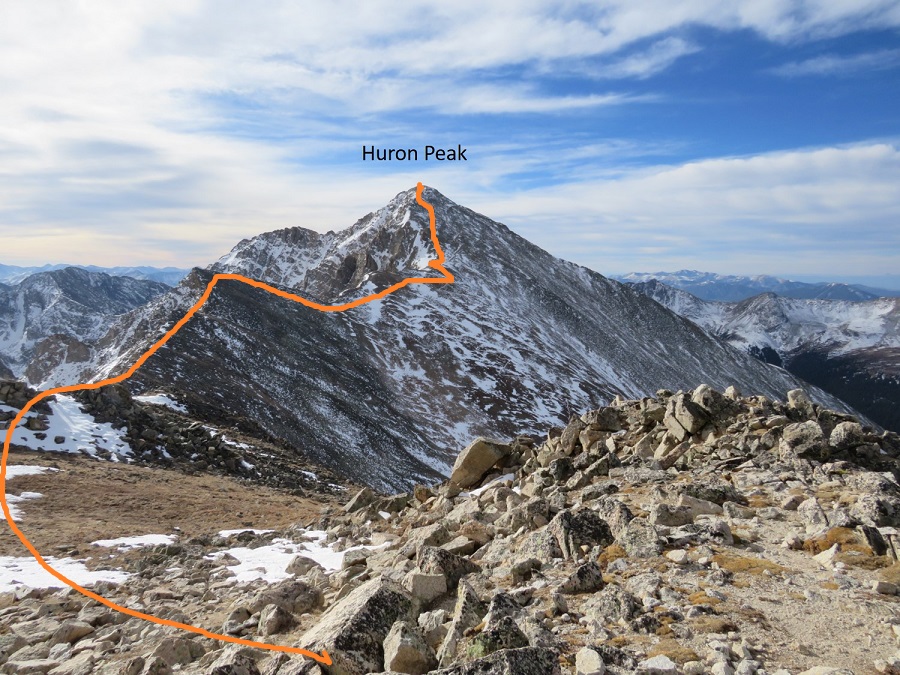
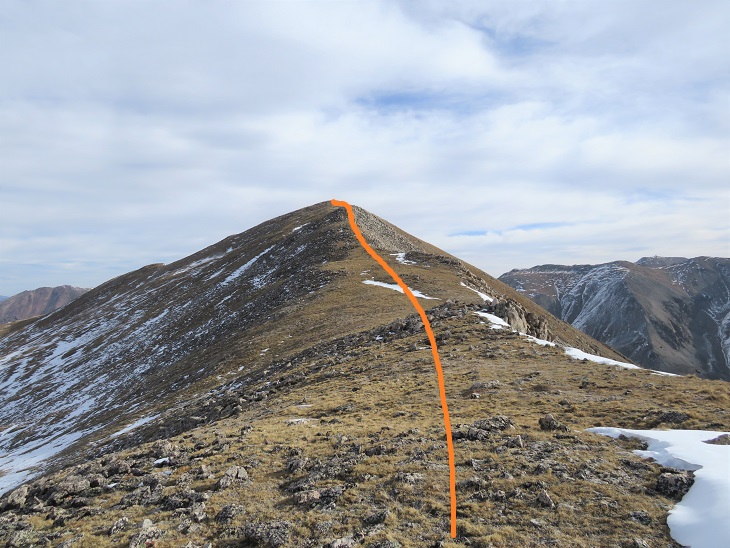
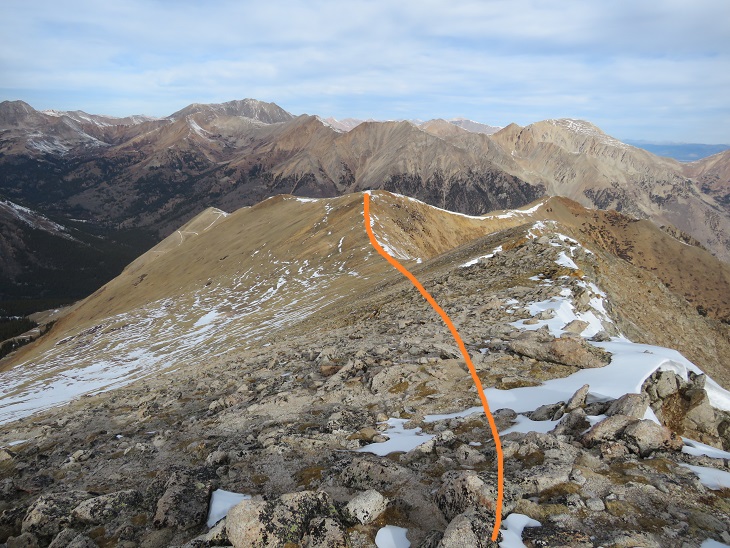
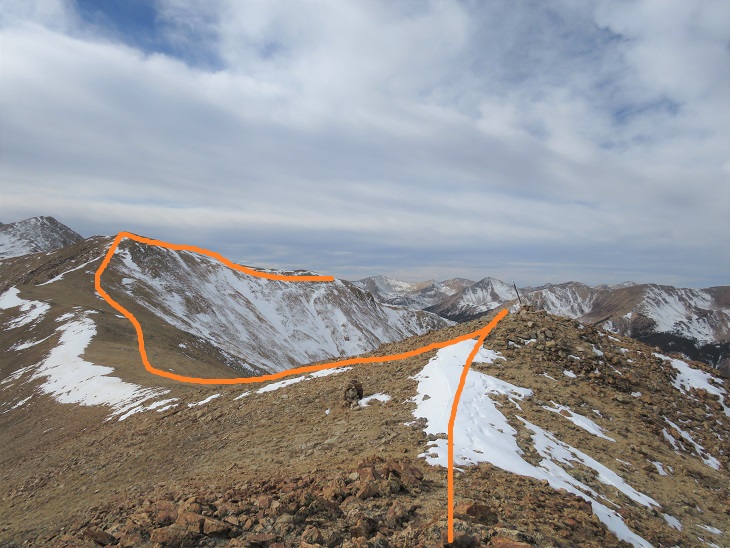
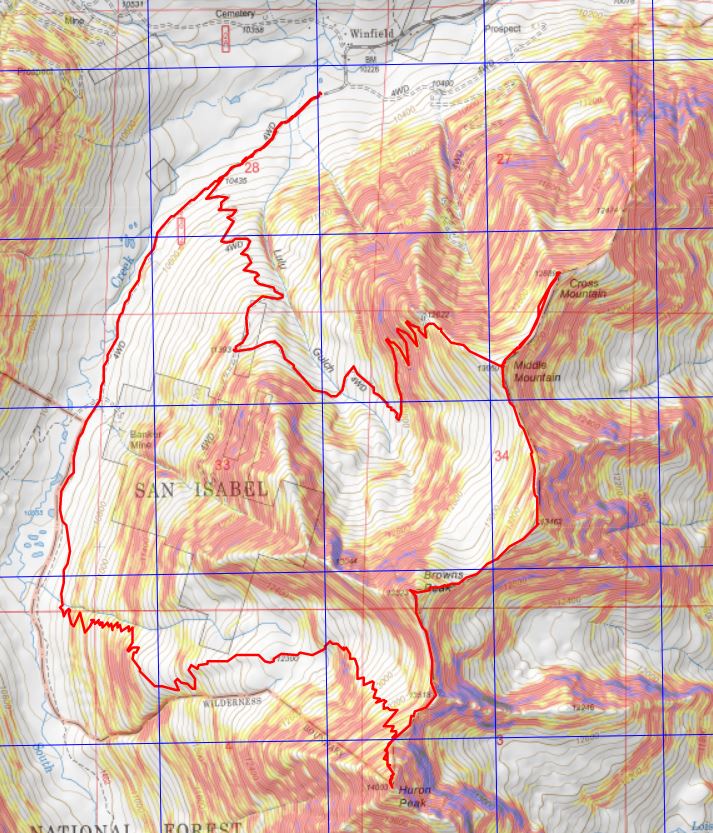
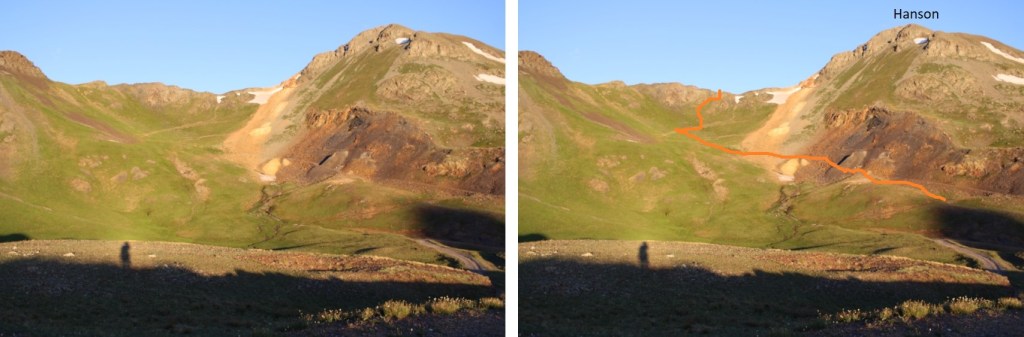
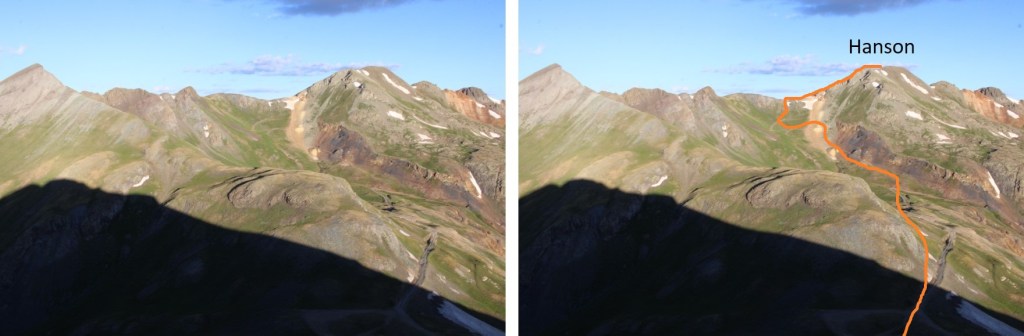
Here’s an overview of the route I would take to the ridge, using mainly a mining road, then finding a grassy shelf that led to a short class 2+ gully.

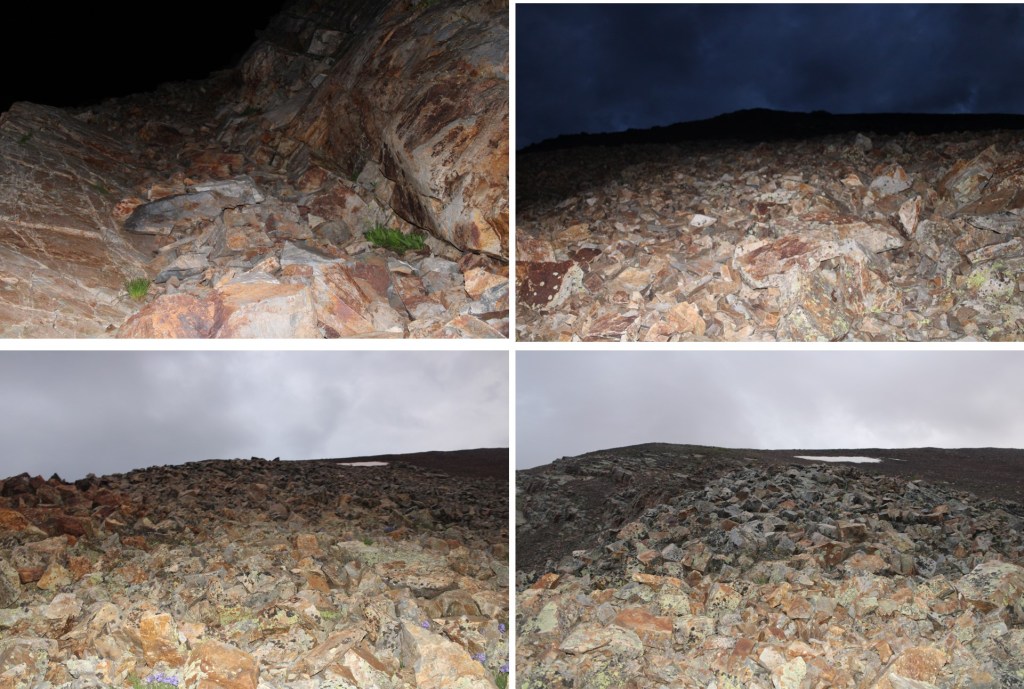
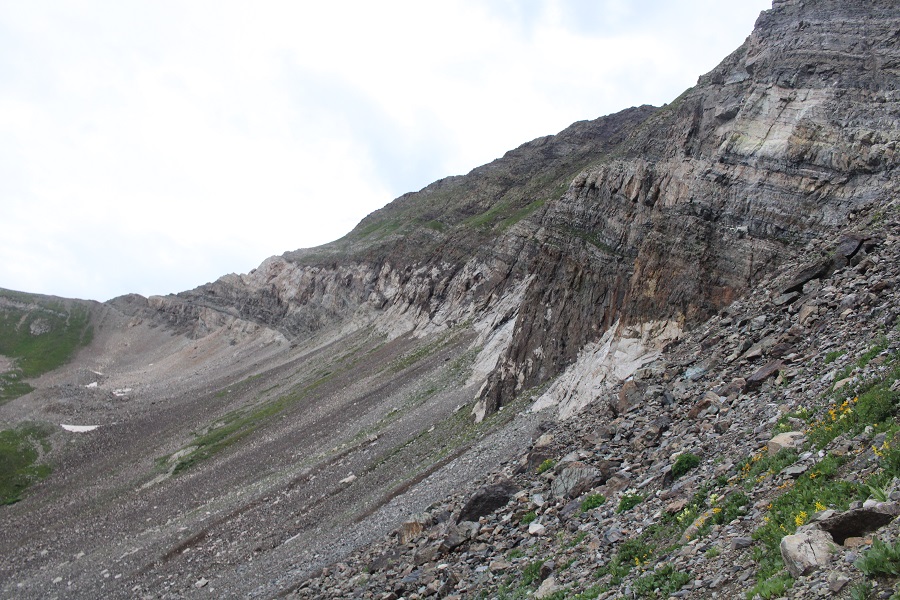
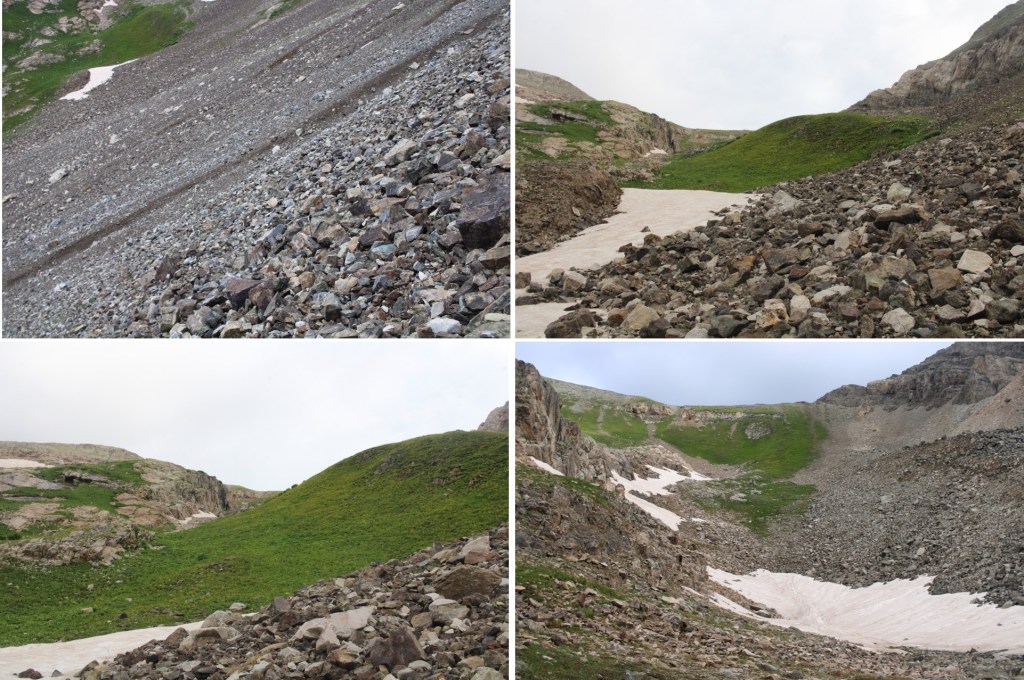
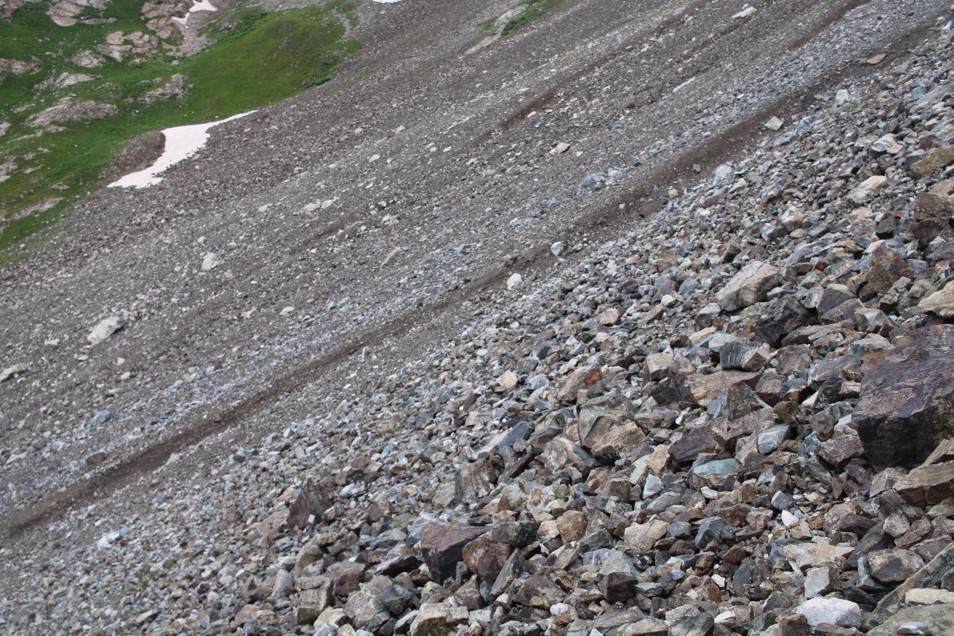
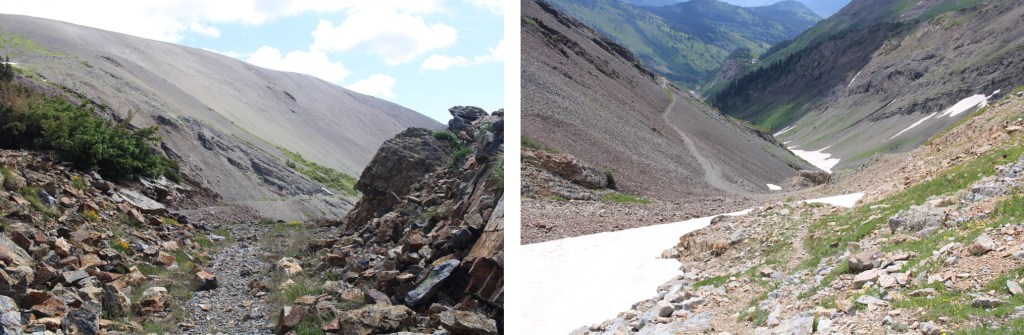
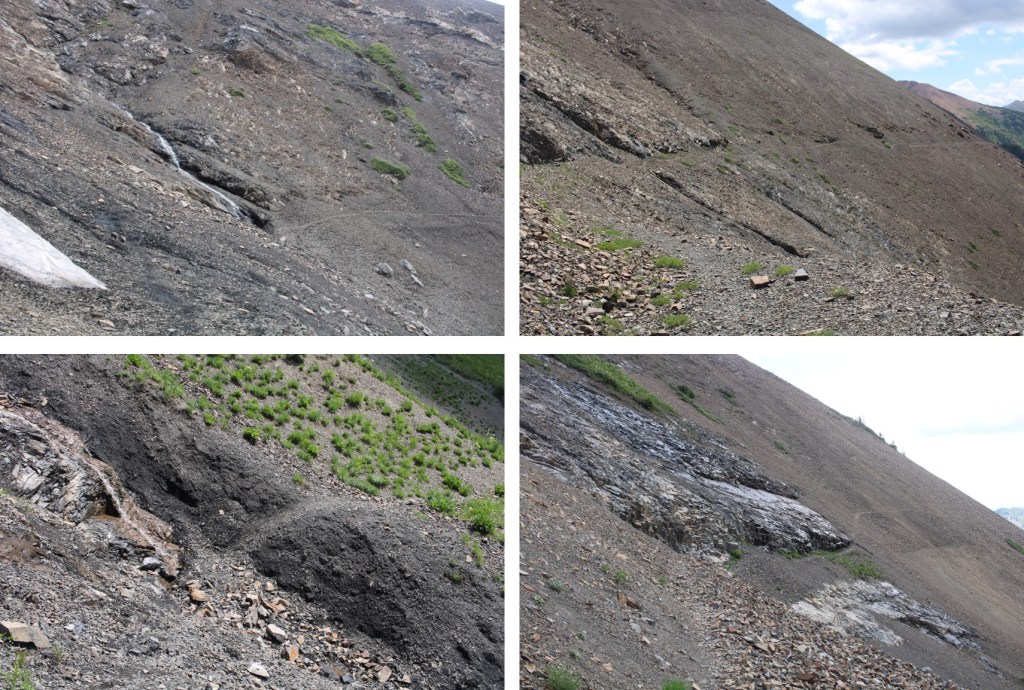
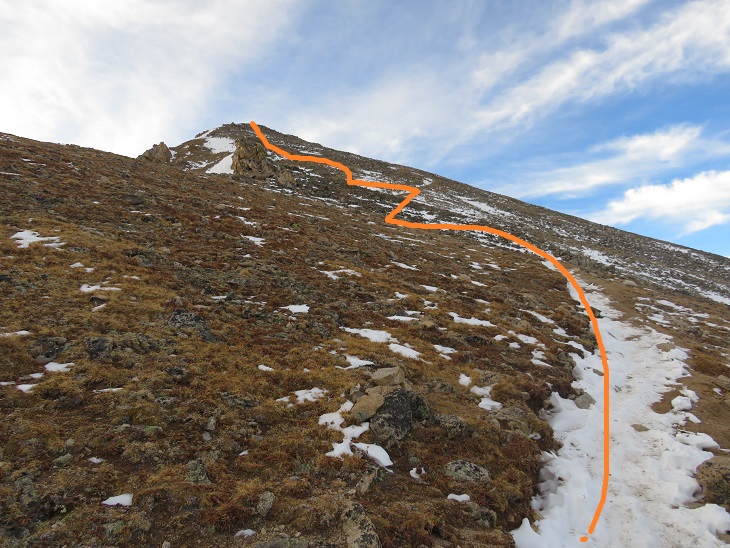
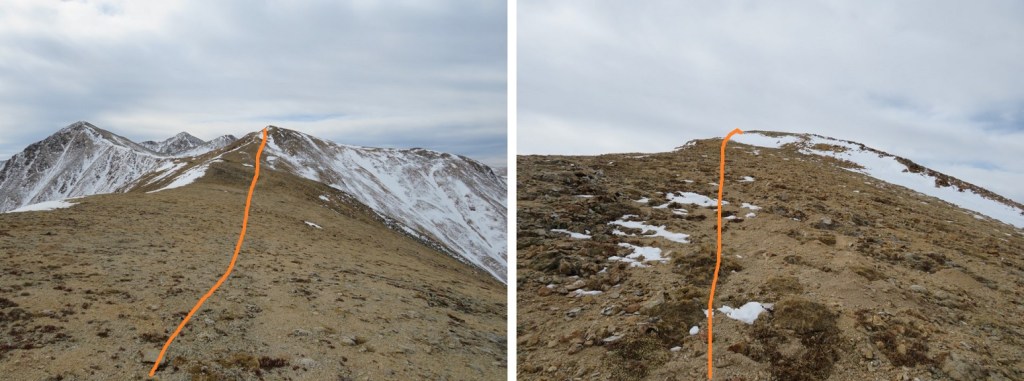
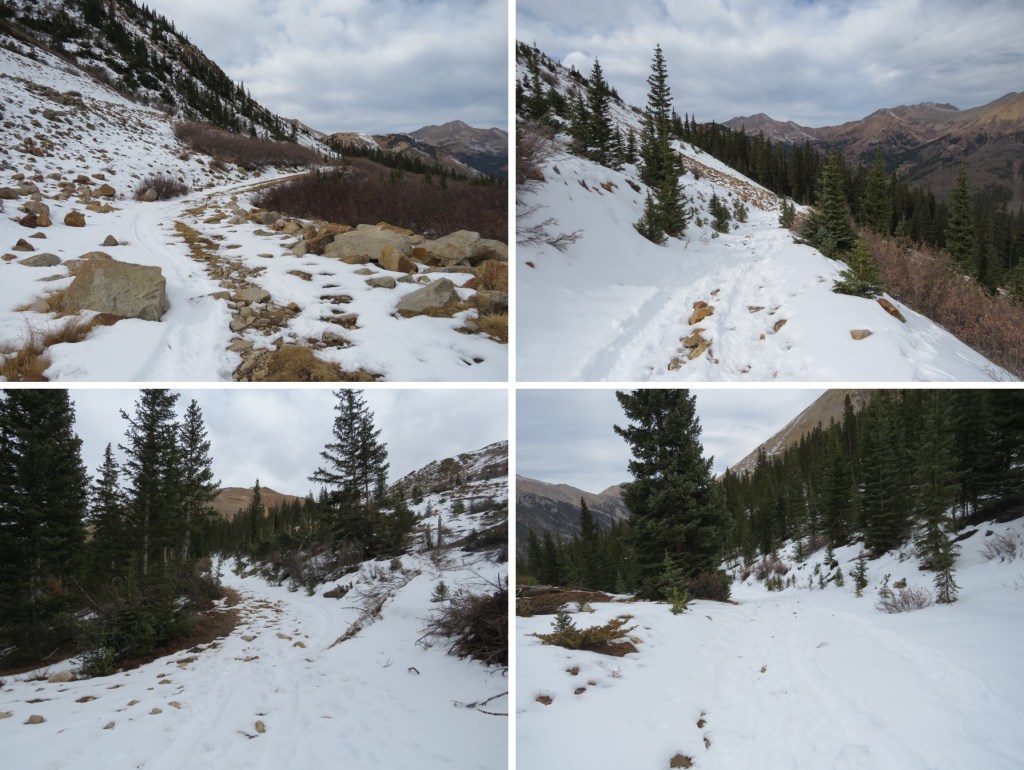
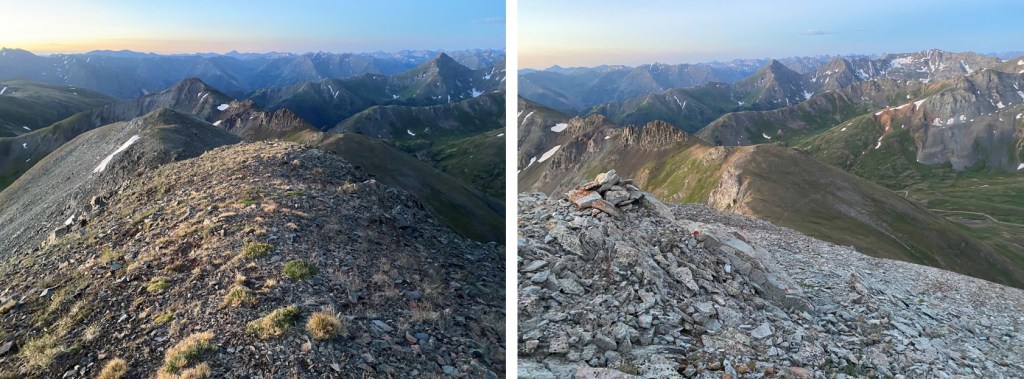
Here are some step-by-step pictures of the route to the ridge.  Once I left the dirt road, I put on microspikes, and kept them on until I made it to the summit and back down to where I’d put them on.

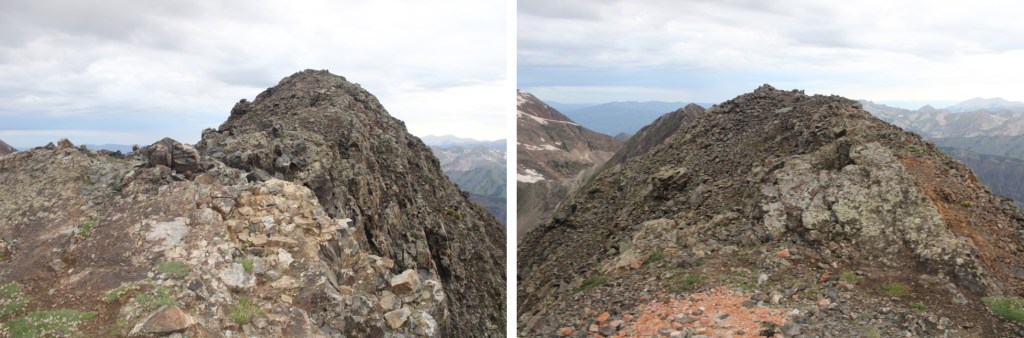
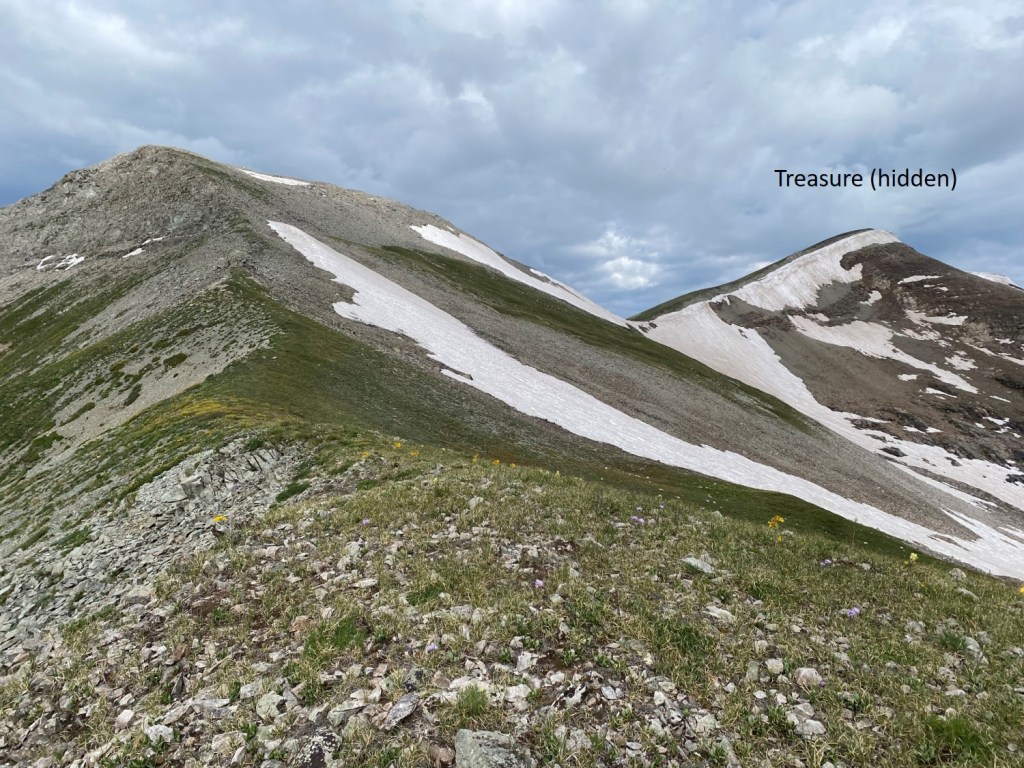
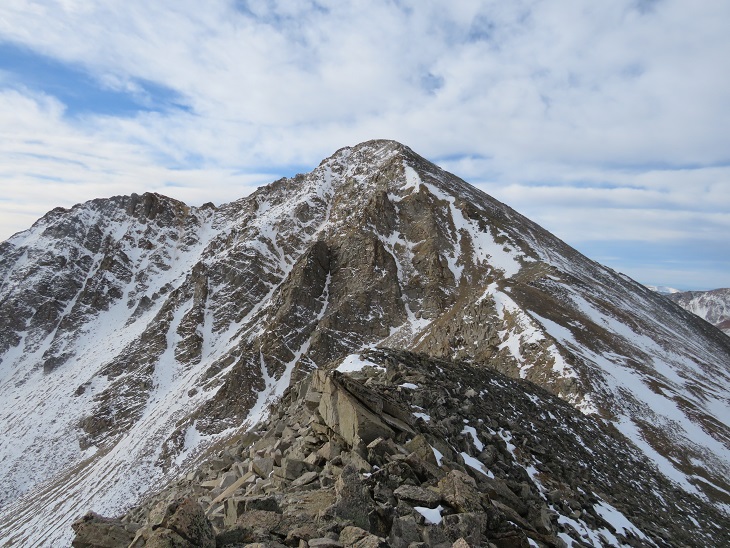
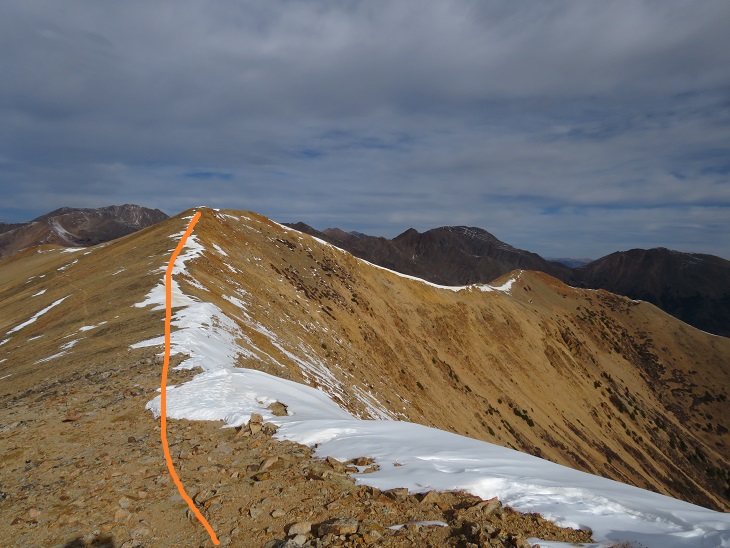
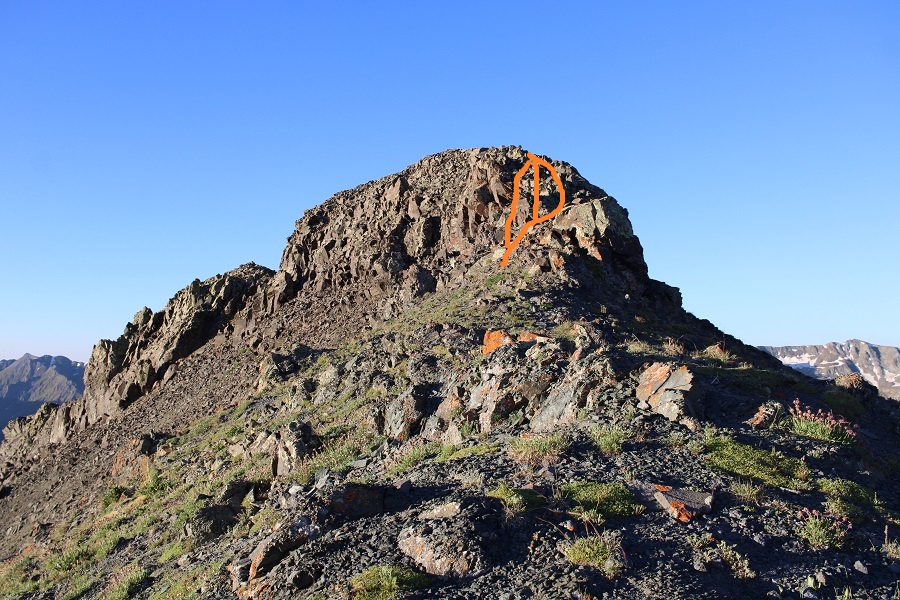
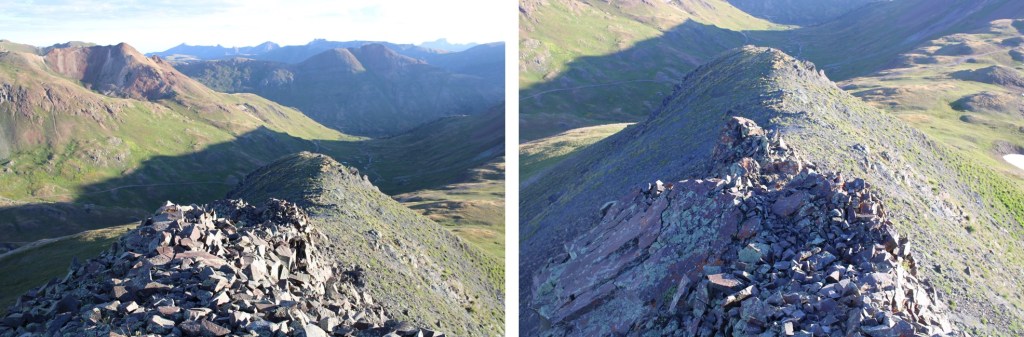
Once on the ridge, I turned right and headed north towards the summit (eventually turning into northwest as I followed the ridge).  I was able to follow game trails to the summit (there are a few of them, pick your favorite depending on conditions and ability).

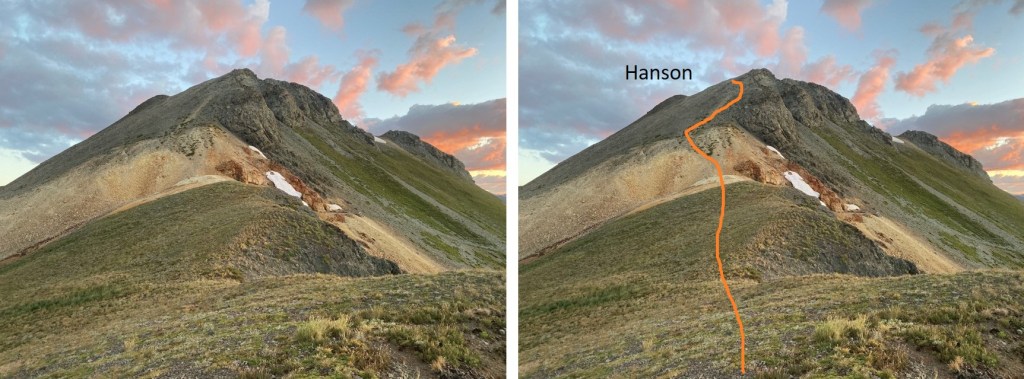
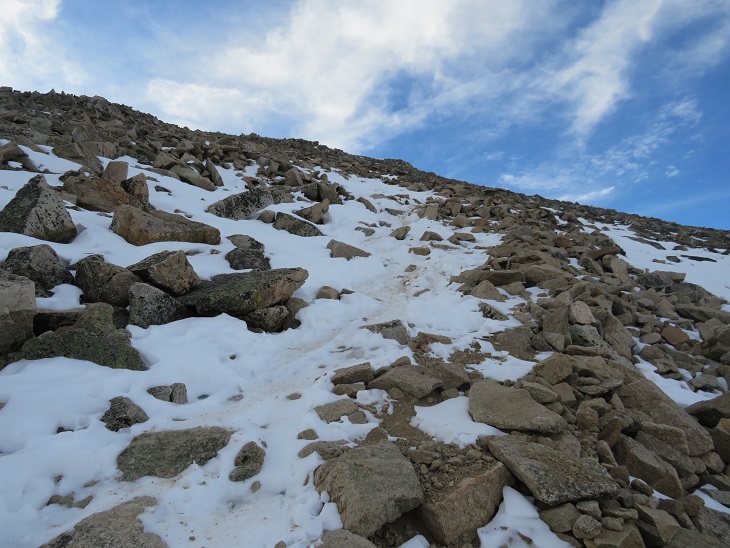
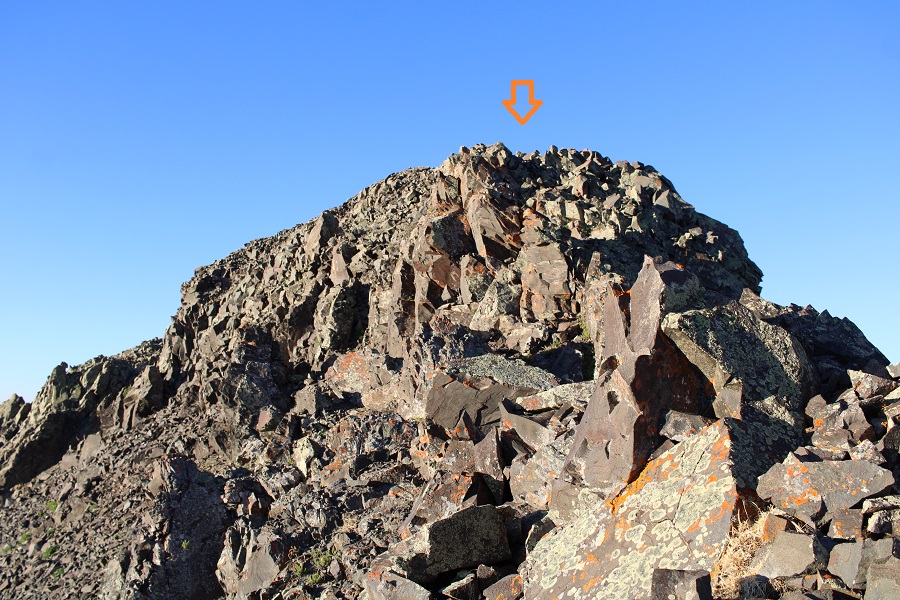
This was a bit loose, lots of chossy scree.   The actual summit is to the northwest, but going straight up this choss will get you to an easy ridge to traverse to the summit

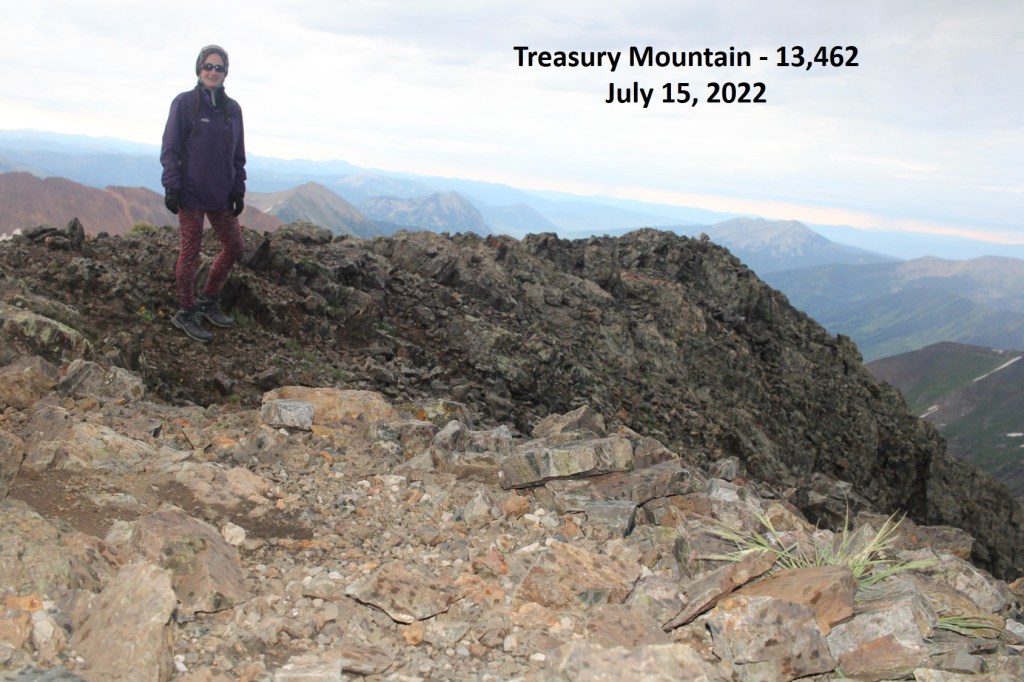
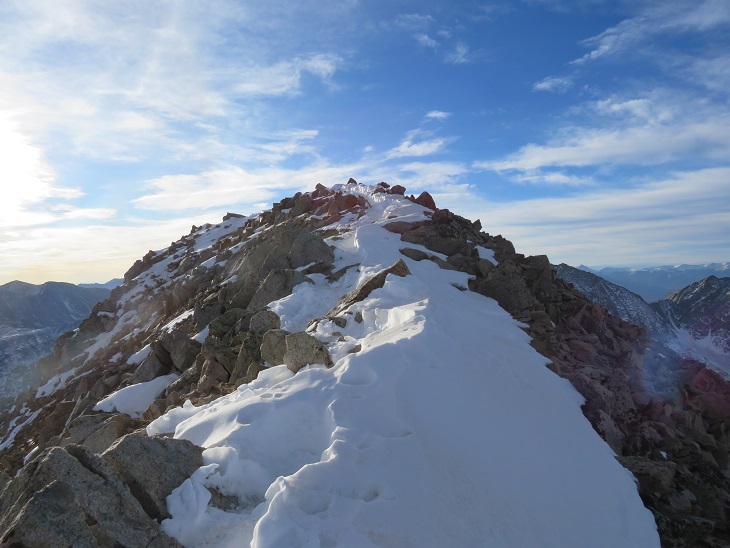
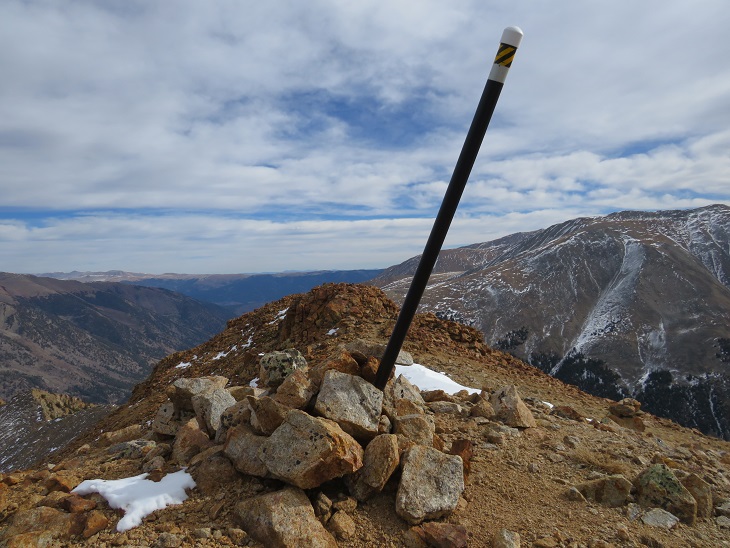
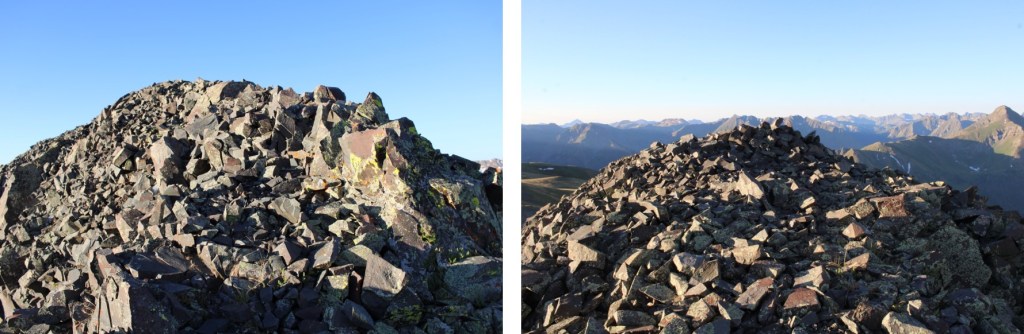
I summited Hanson Peak at 5:45am, and got to watch the sunrise
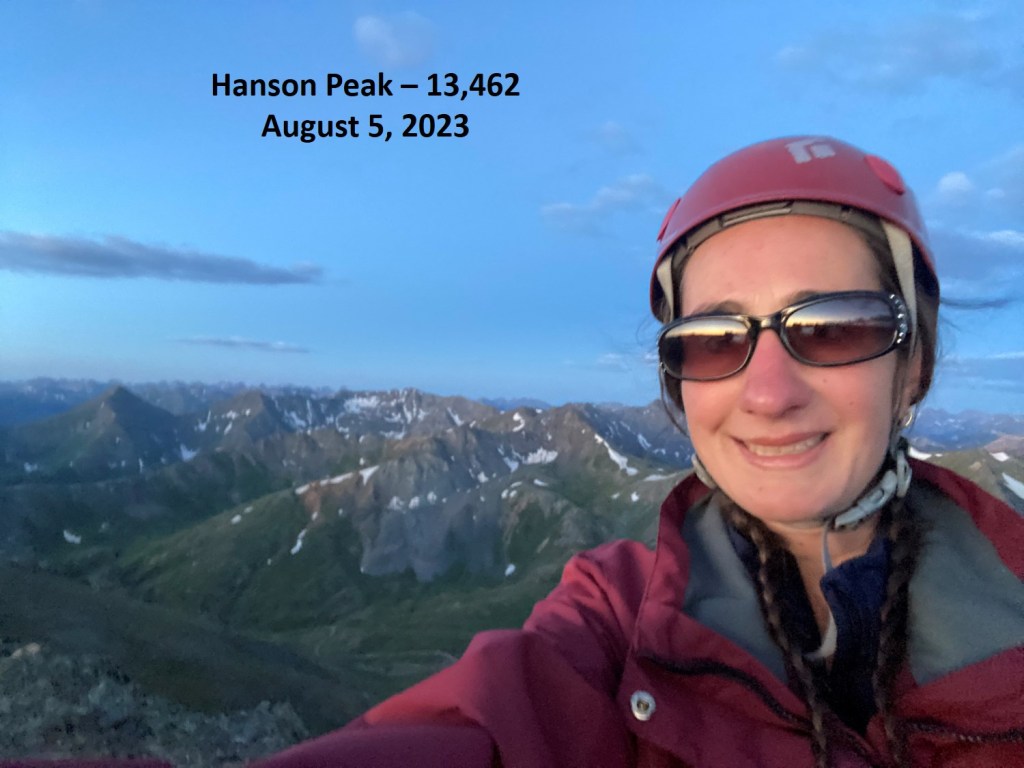
Hansen Peak:

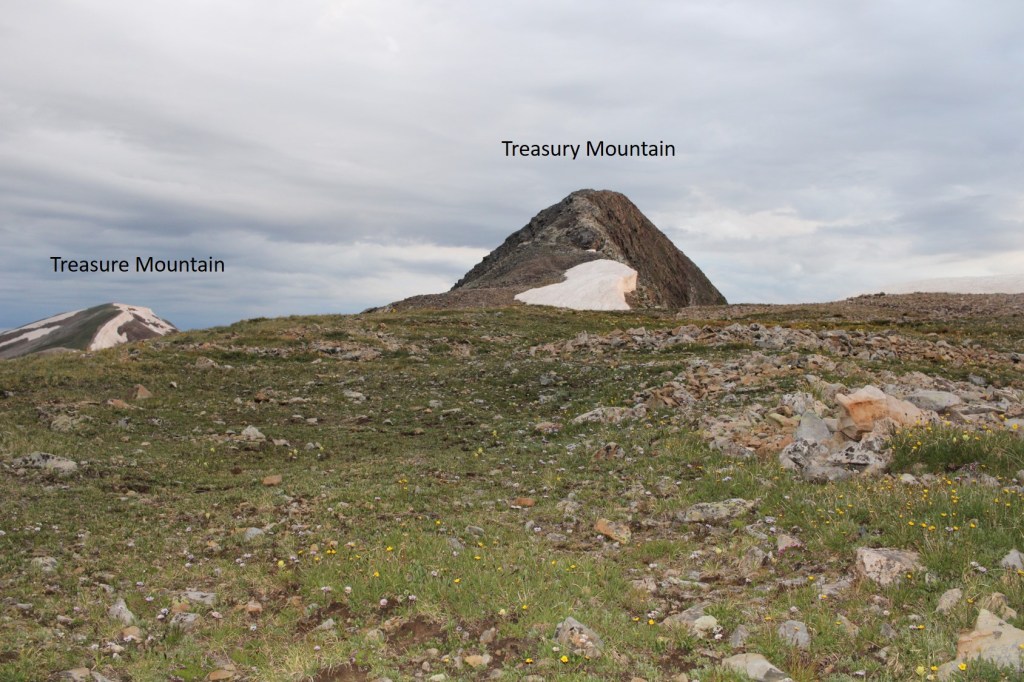
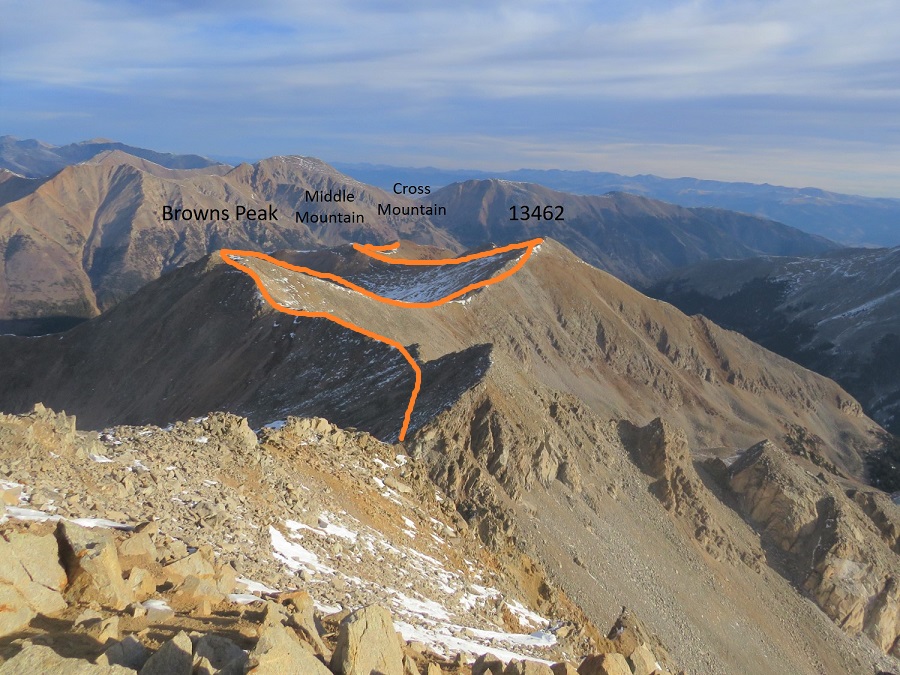
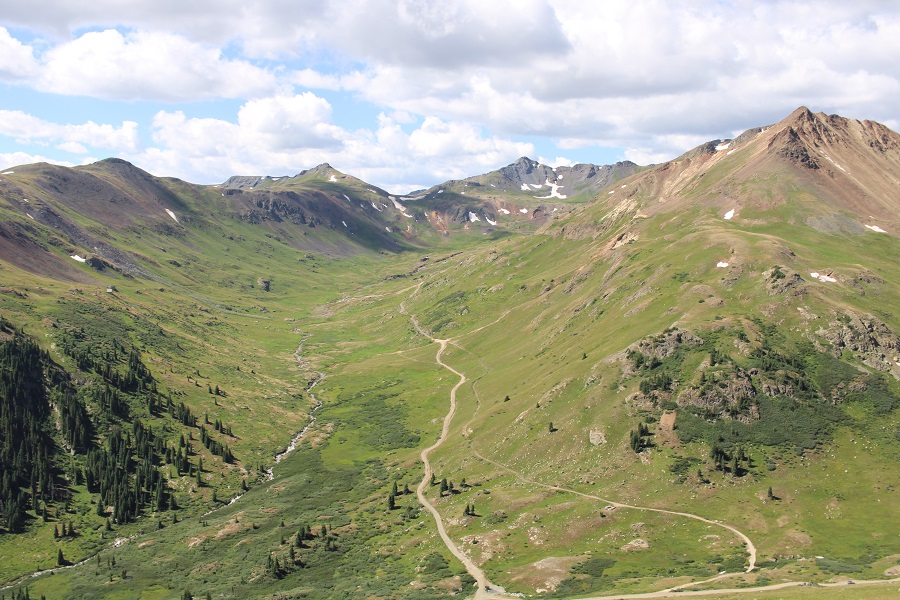
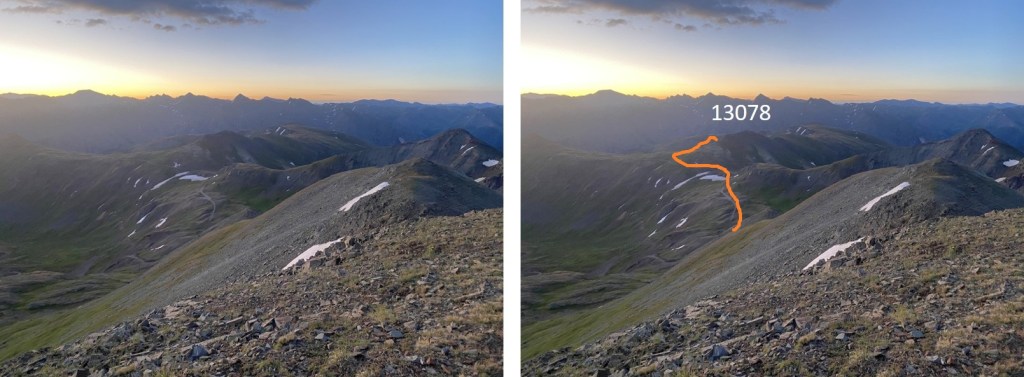
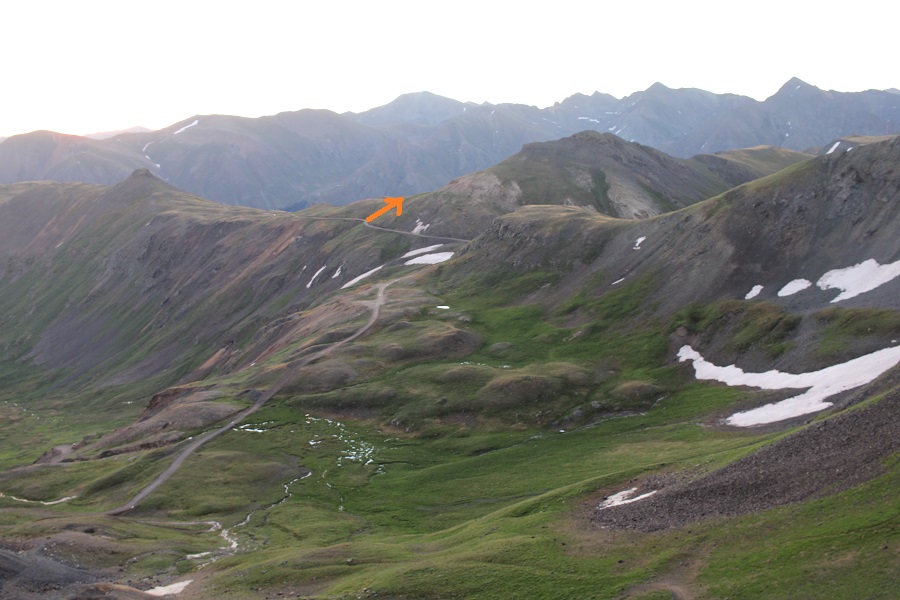
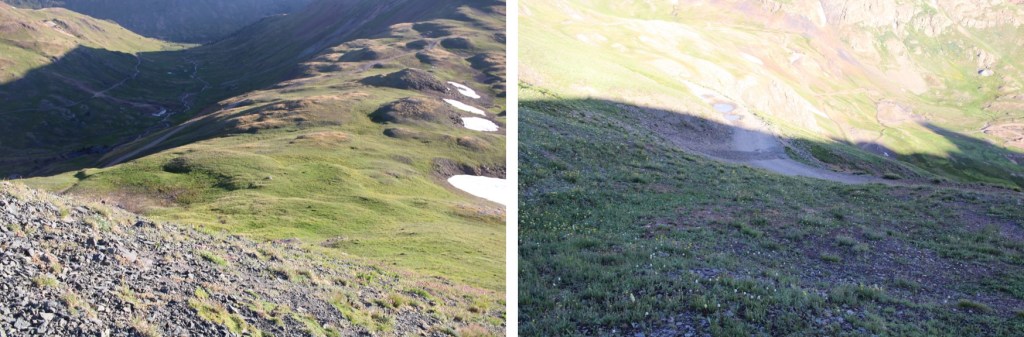
From Hanson Peak I could see my next objective, PT 13078, to the southeast.  Notice how the road goes very close to the peak?  I was going to need to get back to that road to summit.  I also didn’t summit this peak the way most people do, but instead took the NE slopes.  I found this to be much gentler terrain.  Here’s an overview of how I summited PT 13078

To get there, I was going to need to make my way back to the 4WD road, so I re-traced my steps back to the ridge

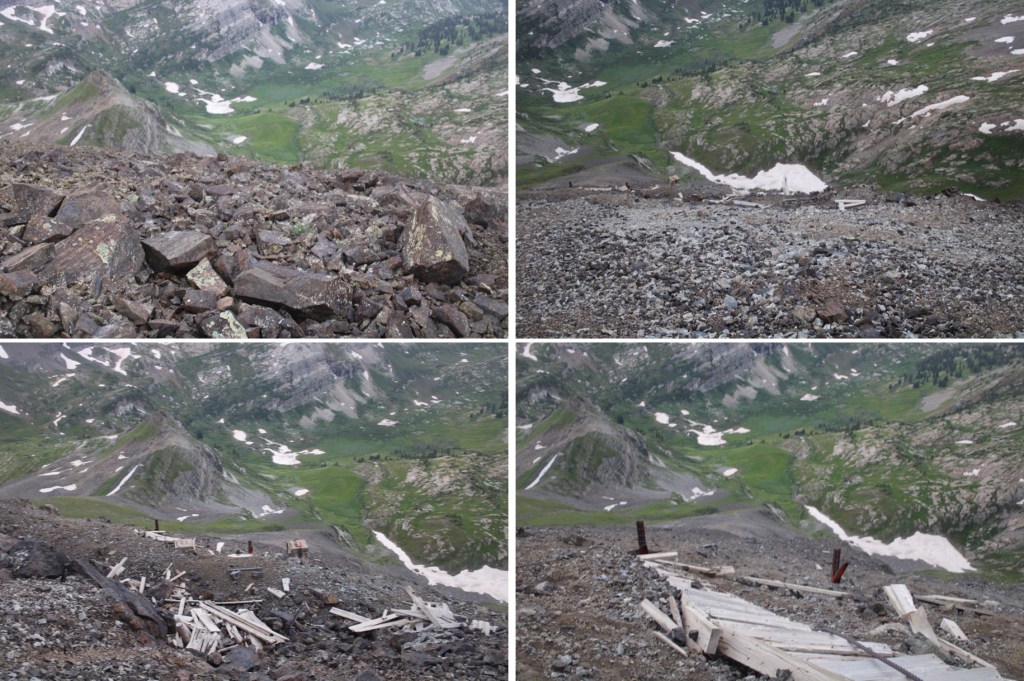
This is where I exited the ridge and descended back down to the mine.  I made myself a tiny cairn (seriously tiny, no more than 5 inches high, but I knew it was there) so I’d know the right gully to take.

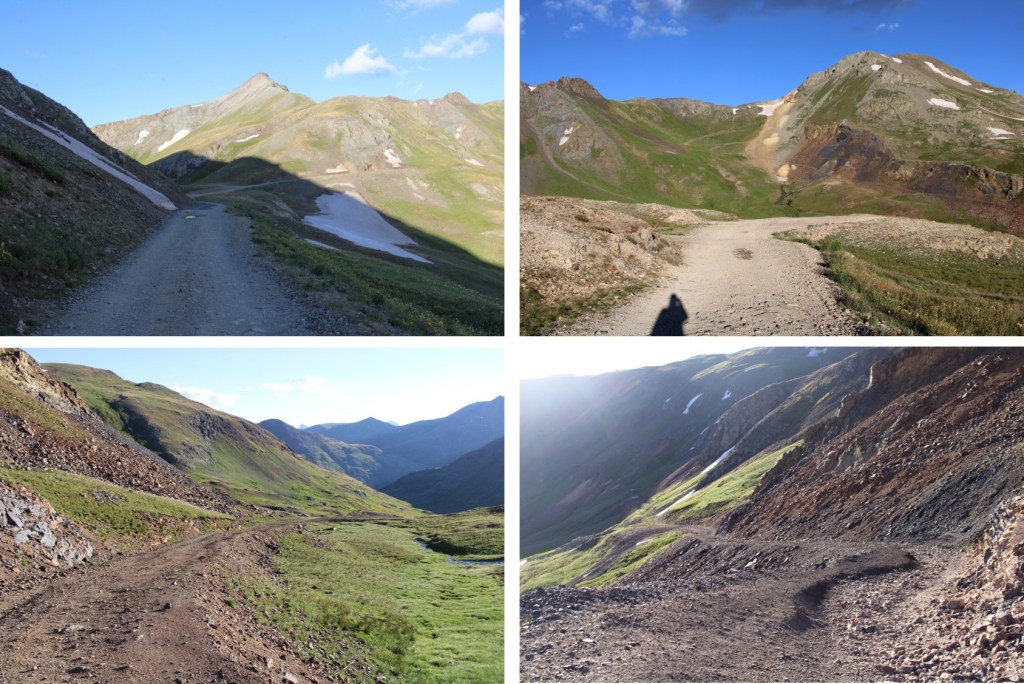
Then it was back down to the mine, and back to the road

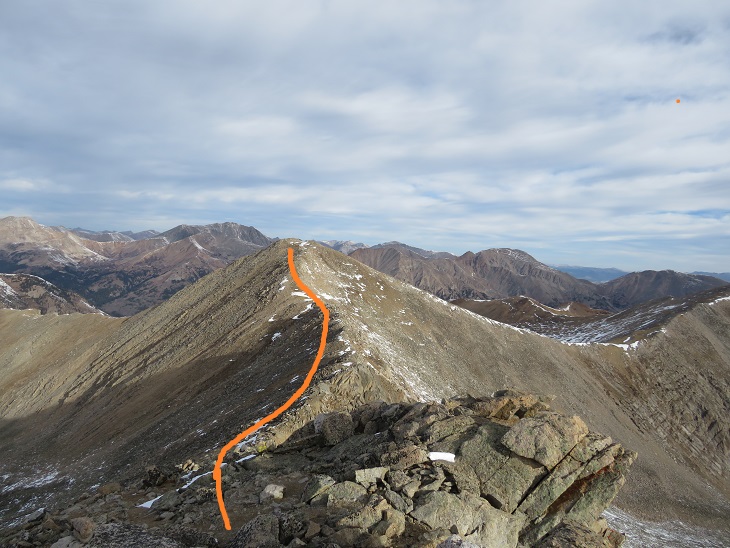
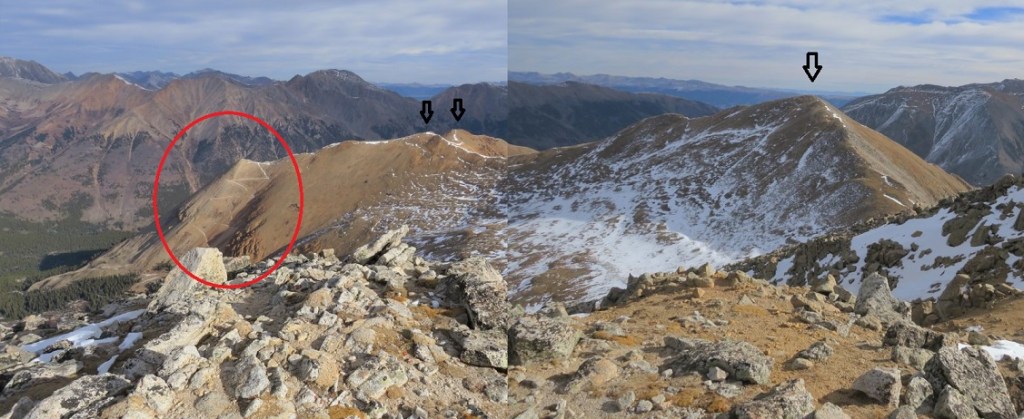
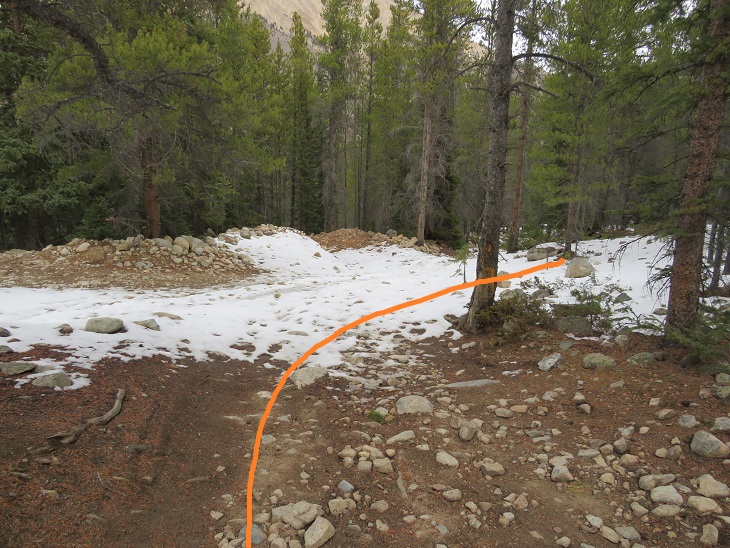
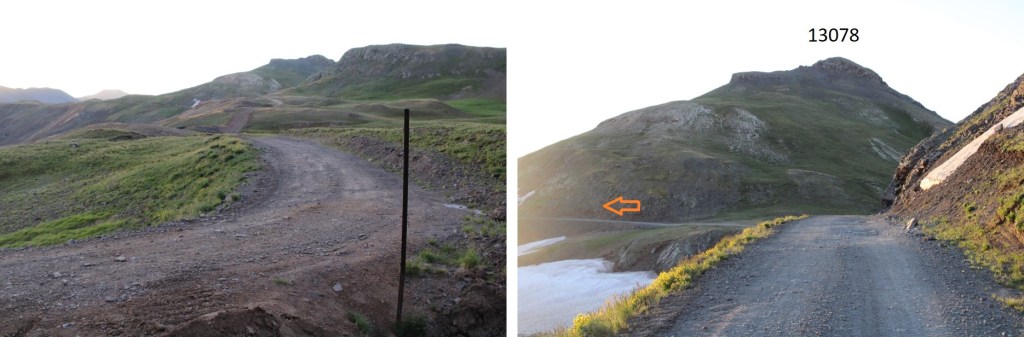
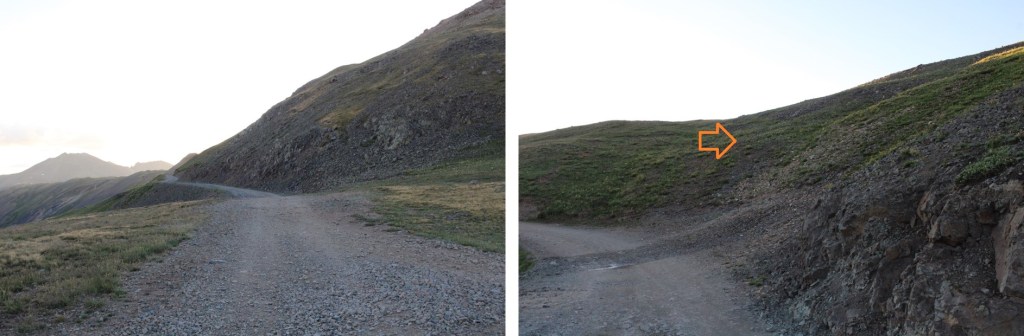
Back on the road, I turned right and followed it east until I was at 12750’  Here’s a visual of where I started my ascent up 13078

And some step-by-step pictures

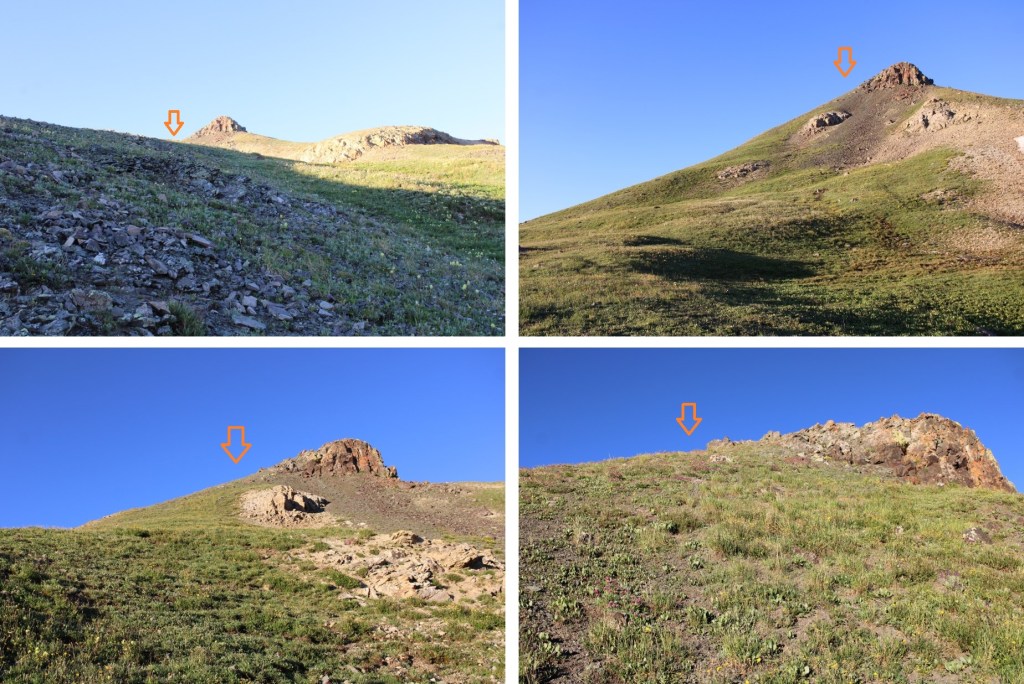
From here I could see the actual summit of 13078.  I followed the ridge south to the actual summit. 

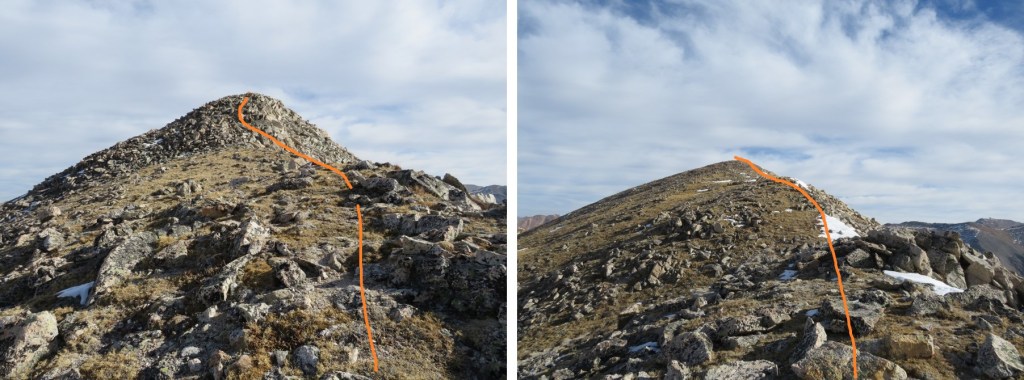
There was one short easy class 3 move, and there were three options to do this move to gain the summit.   

I chose to go straight up on the way in, but took a sideways route down.  Here are some of the available options, all easy class 3

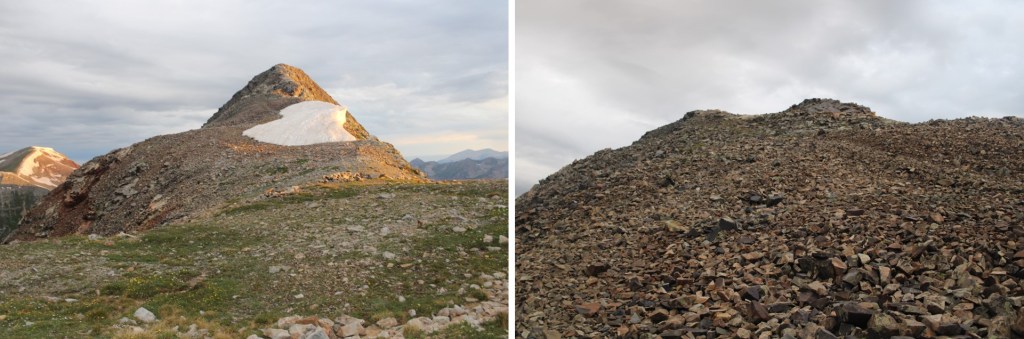
Then it was a quick, class 2-rocky ridge walk to the summit

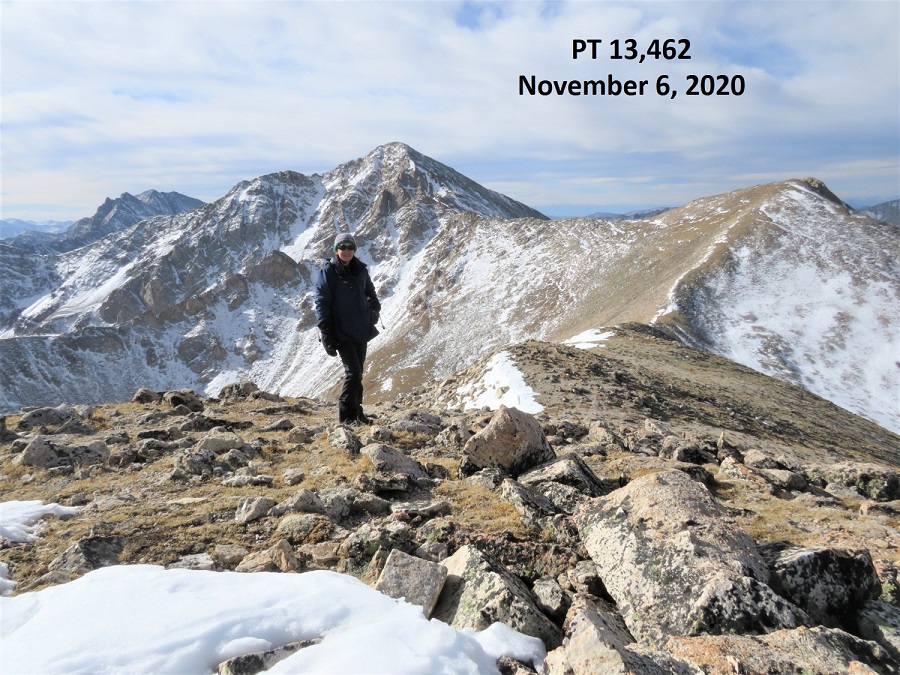
I summited PT 13078 at 6:50am

PT 13078:

Here’s an overview of the route from Hanson Peak, much of this done on mining roads

 I descended the same way I ascended, downclimbing that short class 3 section and heading back to the 4WD dirt road.

Back on the dirt road, I followed it back to the California Gulch/Placer Gulch Junction, past a lot of abandoned mines and mining equipment. 

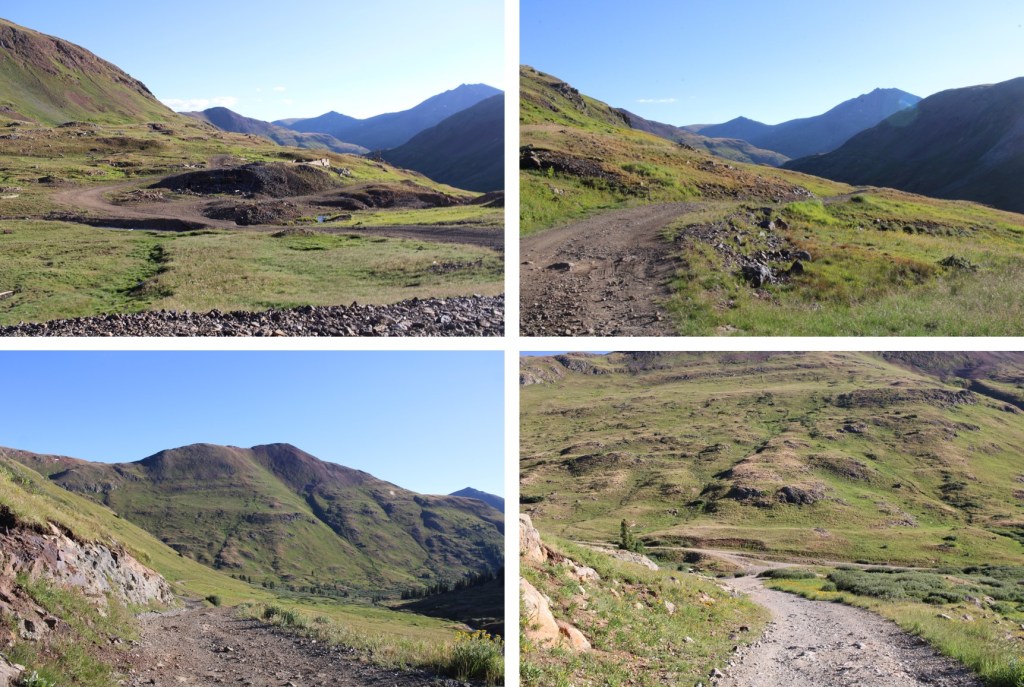
I turned right at the junction, and headed east 1.25 miles back to my truck

I made it back to my truck at 8:20am, making this a 11.42 mile hike with 2913’ of elevation gain in 5 hours.

On to the next trailhead!

Treasury Mountain – 13,462 and Treasure Mountain – 13,528

RT Length: 12.90 miles

Elevation Gain: 4689’

I made it to the Yule Pass Trailhead the night before, driving in on a well maintained, 4WD shelf road.  I’m pretty sure a 2WD vehicle could have made it to the top, but passing other vehicles was a problem.  Several times on the way in and out either I, or the other vehicle, had to back up on some pretty steep roads and squeeze into the mountain so the other could pass by.

It was a Thursday around 3pm, but all the dispersed camping spots were already taken.  I later learned there were several friends camping together, and each felt they needed their own campsite.  No worries though, as I was able to park by a small pond.

I was able to relax and read as a summer storm passed by, listen to my neighbors yelling at each other from across campsites (“DO YOU HAVE THE MATCHES?!?”, “WHAT????” , “I SAID, DO YOU HAVE THE MATCHES???”   “I THINK IT RAINED WHILE WE WERE GONE” ,  “WHAT???”  “RAIN!  I SAID I THINK IT RAINED!!!” – they probably should have shared a common site) and visually planned out my route for the next morning.

From my parking spot, there were several forks in the road.  This is the correct one for Yule Pass

I contemplated hiking the 12er Cinnamon Mountain before bed, but the thunder and lightning didn’t stop until it was too late to make an attempt, so I made it an early night, and was on the road at 3:30am, in an effort to finish my hike before the early afternoon storms materialized.

I followed the 4WD road to the Yule Pass Trailhead, Yule Pass Trail #576

From there, I followed Yule Pass Trail to northwest.  This trail used to be a mining road, but the mountain has re-claimed it and is healing its scars.  In a lot of areas it’s impossible to tell there was ever a road around this mountain.  Some areas were steep, but the runnels were all crossable. 

After hiking for 2.5 miles, I came to a gully just before Yule Pass.  I would use this gully to access Treasury Peak.  Also note the snow covering the trail to the left.  I was unable to see this in the dark on my way in, and it proved a problem on my way out. I had to re-trace my steps, but I was able to stay safe by exiting down the same gully I ascended.

I’d made great time, and it was still dark.  I couldn’t see much, so I waited for 20 minutes for the sun to rise.  There were a lot of clouds in the sky, and the sun refused to make a timely arrival, so I continued on.  Here’s what my ascent looked like

I know those pictures weren’t helpful, so, from later in the day, here’s a visual of how I ascended the ridge to Treasury Mountain

The terrain was full of loose rocks and smooth slabs, which gave way to smaller loose rocks and scree.  No worse than 2+.  I wore a helmet, and stuck to the runout until I made it to the ridge.

Once on the ridge, I could see Treasury Mountain to the northwest

This was a straightforward ridge hike, until the last bit, where the ridge became a series of slabs.  These would have been sketchy if they were wet, or if my shoes were lacking traction, but I was able to take the smooth rocky ledges to the summit. There’s a class 2 bypass below if needed.

I summited Treasury Mountain at 6:20am, just as it started to rain

Treasury Mountain:

I was glad I didn’t have to downclimb those slabs, as when wet they would have been a challenge.  Instead, I continued on towards Treasure Mountain, following the ridge for a bit to the northwest, then dropping down once I could see the defunct mine below.  From the summit of Treasury, it looks like the ridge goes all the way to Treasure, and it does, most of the way, but the area circled in red isn’t climbable without rope.  It’s part of a band of rock in the mountain that spans its whole side, so I would need to descend 1370’ to avoid this area.

I put on my microspikes and descended on scree past an old mine (not much is left)

I descended to 12400’, to a gully I’d descend to put me in the basin below. The gully was class 2, and easier to navigate if I kept to the right. 

At the base of the gully I could see the route before me I needed to take, to gain the ridge. This was all class 2. I lost several hundred more feet of elevation on my way, then gained it all back making it to the ridge

Here’s that rock band I was trying to avoid that all cliffed out

Here’s looking back up at the gully I descended

And now to gain the ridge.  Here are some step-by-step pictures of the terrain

Once on the ridge, to my left I could see the part of the ridge I was trying to avoid

I turned left and headed west along the ridge

Here are some close-ups of the ridge.  There are a couple of false summits, but if you got a good view of Treasure from Treasury, you already know this

I summited Treasure Mountain at 9am

Treasure Mountain:

Now to head back to the saddle.  I was going to descend similarly (but different) to the way I gained the ridge

Once back on the saddle, I aimed for this gully, put on my microspikes, and descended through it

Once down the gully, I stayed right of the rock rib, but headed back towards Yule Pass. 

Here are some step-by-step pictures.  I stayed above the small marshy area

Here’s another view of the gully I took down from Treasury

Eventually, I was able to see a game trail below, which led me to the actual trail

I then took the trail back up to Yule Pass

Once there, I should have been able to take the road back to my truck, but there was snow still covering it, even in mid-July, so I retraced my steps and took the first gully of the day again, but you should be able to take the road back all the way.  If not, it’s an easy and obvious workaround.

I now followed the road back to my truck

I made it back to my truck at 12pm, making this a 12.89 mile hike with 4689’ of elevation gain in 8.5 hours.

On to the next trailhead!

Huron Peak – 14,003, Browns Peak – 13,523, PT 13462, Middle Mountain – 13,060, & Cross Mountain – 12,889

RT Length:  13.83 Miles

Elevation Gain:  4811’

There was a storm predicted for this weekend, so I set out to try to get this loop in before the snow hit.  I had no trouble driving the 2WD dirt road all the way to Winfield, even though it was icy in spots.  

Once I made it to the 4WD road it became icy.  I decided to park in the dispersed camping area and hike along the road.   There are several dispersed camping areas here, and plenty of parking.

I put on my microspikes at the truck and didn’t take them off the entire hike (although they were overkill for over half of the hike).  I started out following the 4WD road southwest.  It quickly became icy and I was glad for the spikes.  I could also hear owls on either side of the trail.  They were hooting, calling to each other back and forth.  We’ve recently had an owl take up residence in our backyard and the calls were similar, so I’m guessing they were great horned owls.  I also heard a chirping in-between calls.  I’m not sure what animal the chirping belonged to, but it happened every time an owl’s call ended, and before the next one began.  In any event, the sounds kept me occupied as I hiked in the dark.

I followed the 4WD road for 2 miles to the upper trailhead (Lake Ann).  Here the trail splits.  I took the well marked ‘Huron Trail’ that went left up the mountainside.

The Huron Trail is a well marked and easy to follow class 1 trail that takes you all the way to Huron Peak.  This is also a well documented trail, so I’ll just add a few photos.

Once at the saddle the trail became increasingly icy, and I was glad to be wearing my microspikes.  Also, one of them broke (I continued to wear it anyway.  The other one broke as well later on, but microspikes are easily fixable so I wasn’t too worried). 

I summited Huron Peak at 7:45am

Huron Peak:

From the summit I had a great view of all the other peaks I intended to hike on this loop.  Here’s the overall route, which consists of a nice ridge hike

I turned around and headed back to the Browns/Huron saddle, and then over to Browns Peak.  I summited the point here on my way over to Browns, but that’s unnecessary, as it’s not ranked and just adds elevation (the elevation part was why I summited the point)

I summited Browns Peak at 9:10am.  Browns Peak is unranked.

Browns Peak:

Here’s a look back on the route to Browns from Huron

From the summit of Browns I could see my next 3 summits, as well as the trail I intended to take back down

It was a simple ridge hike to the saddle and then back up to PT 13462

There was a small false summit before the actual summit

I summited PT 13462 at 9:40am

PT 13462: 

Here’s looking back at Huron Peak and Browns Peak

The hike over to Middle Mountain B was also a simple ridge hike.  Here’s the route

I summited Middle Mountain at 10:10am (also unranked)

Middle Mountain: 

Here’s looking back on the route so far

It was still early in the day so I decided to head over to Cross Mountain.  This is another unranked peak, but it’s named, so I didn’t want to leave it out on today’s hike.  It was a quick and easy hike northeast over to Cross Mountain.

I summited Cross Mountain at 10:35am

Cross Mountain:  

Here’s a look back at the other peaks I summited this morning

I was making this a loop, which meant I needed to re-summit Middle Mountain, turn right and head northwest down the ridge to the 4WD road.  Here’s an overview of the route

First, I made my way back to Middle Mountain

Once I’d re-summited Middle Mountain I turned right and headed northwest down the ridge, aiming for the 4WD road

Then I followed the road back to my truck.  Here’s an overview:

A word of caution here:  the 4WD road isn’t truly a road for most of the way up the side of this mountain.  It looks to be an old mining road that hasn’t been used in many years, and has experienced rockslides and avalanches, turning the road into more of a trail down the mountain and into the gulch.  In other words, if you have a 4WD vehicle, or even a motorcycle, don’t plan on driving it up this road.  Evidence:

Once down in Lulu Gulch the 4WD road picks up again, and is easy to follow. 

Here’s a look at the hike down from the ridge

The 4WD road was indeed easy to follow, but it seemed to go on and on.  And on.  And on.  I was very happy with my choice to summit Huron first today, as this was a very long slog back to the main 4WD road and I would have been terribly bored following this road as it switchbacked (needlessly?) down the mountainside.  It kept going, and going, and going.  I seriously wanted to just cut the switchbacks and make it a straight line (but didn’t)

I was thrilled when I reached the main road

Here’s looking back at the turnoff (this is what you see when hiking in, you can go straight to the Huron Trail or left to follow the mining road and summit Middle Mountain first)

I followed the icy 4WD road back to my truck, thankful for my microspikes

I made it back to my truck at 12:15pm, making this a 13.83 mile loop with 4811’ of elevation gain in 8 hours, 15 minutes.

The Huron Peak Summit Sticker can be bought here