My plans for this weekend changed last minute. I got gas and was on my way, but suddenly my engine light turned on, saying there was a transmission problem, and to get to my dealer right away. I have less than 25,000 miles on my truck, so this concerned me. I decided to pull over on the side of the road to google what could be wrong. The next exit I came to there was a man wearing only jeans, holding a 6 foot 2×4 over his shoulders, swaying back and forth on the side of the off-ramp. It was 1am. I decided to wait for the next exit.
I googled the warning notification, and it turned out the light could be one of over 40 things wrong. With cars and mountaineering, hope is not a strategy. I thought about it for a minute, and finally decided driving 6 hours and then another hour off road was probably a bad idea, so I turned around and headed to the nearest dealership, and slept in my truck until they opened at 7am.
Bugs. Bugs were what was wrong. Bugs on my windshield and bugs on my grille were obscuring the sensors from doing their jobs. The sensors were now clean, and I was good to go, with the admonition I should wash my truck more often. To which I replied “It’s a truck. It’s supposed to get dirty. If not, you have no business owning a truck.” Seriously though, washing my truck in the summer lasts a good 6 hour drive to the next trailhead, and doesn’t seem worth the money. I got a high five and was out of there, now a day behind, so summit modifications would need to be made.
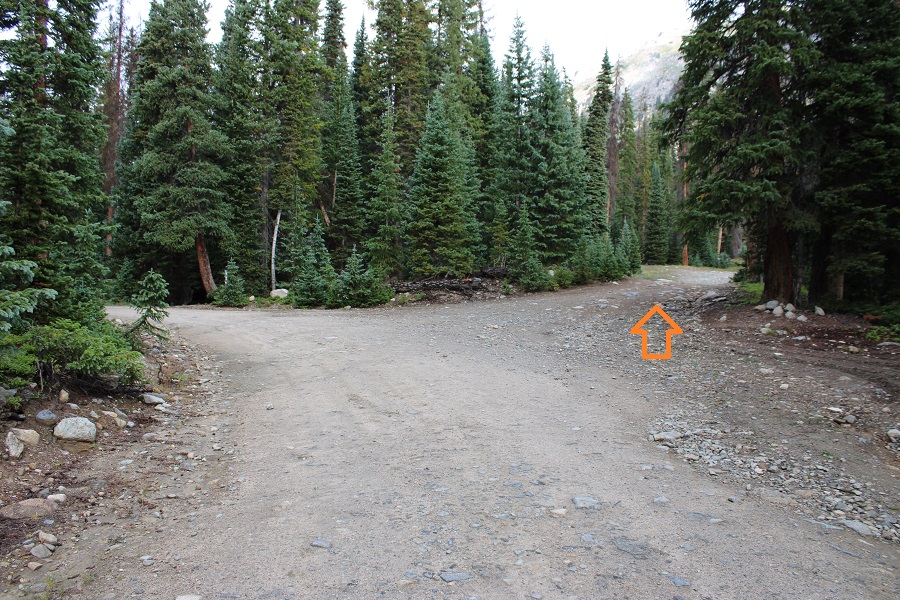
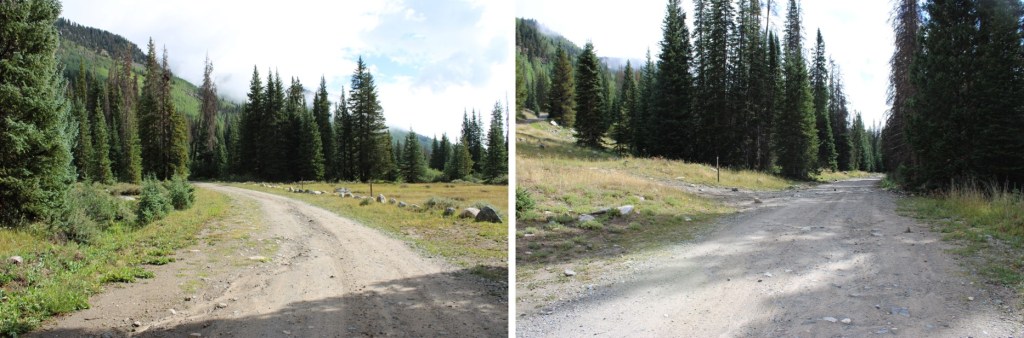
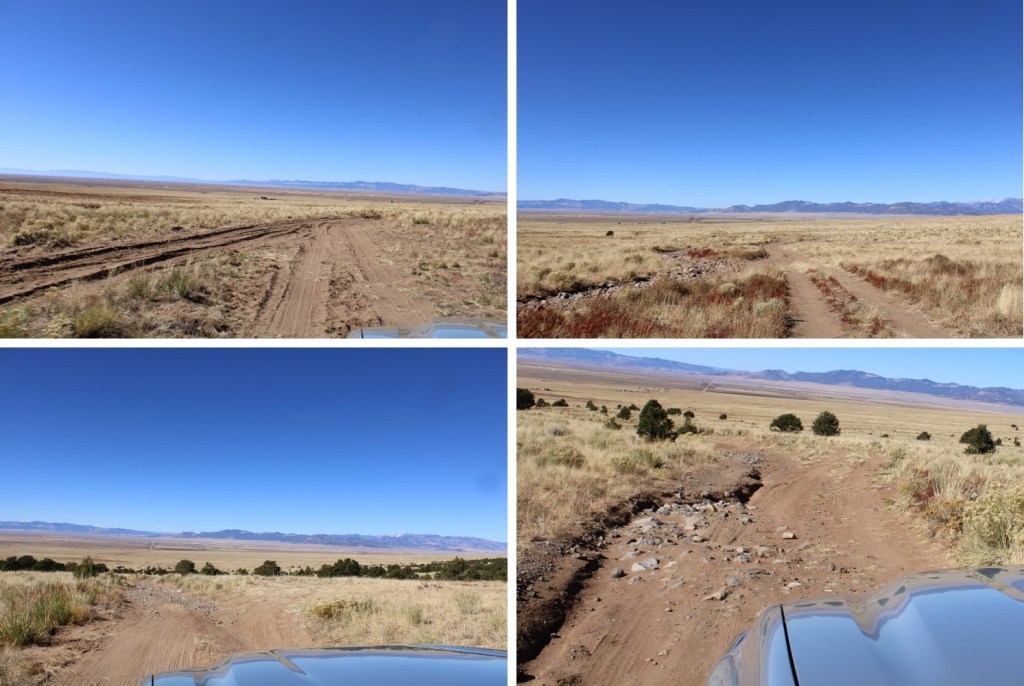
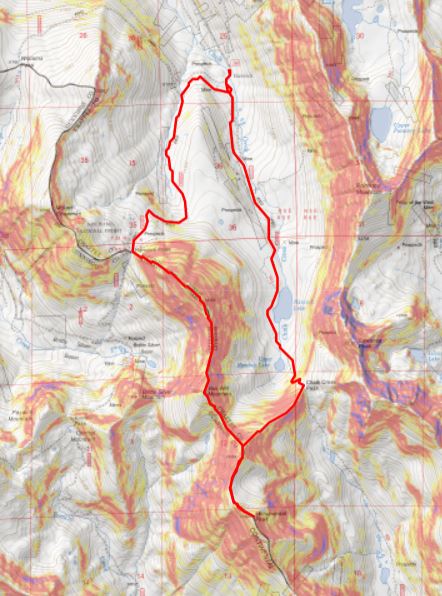
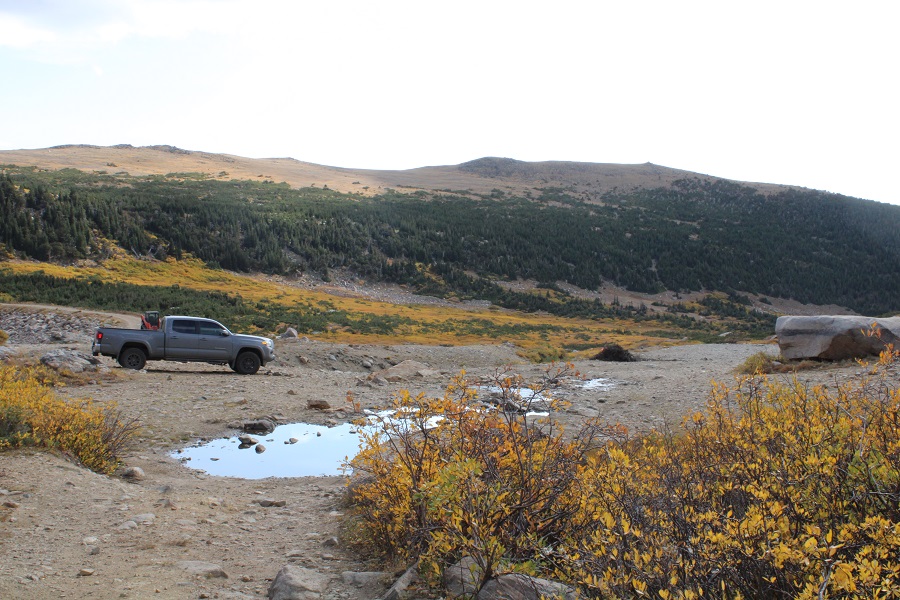
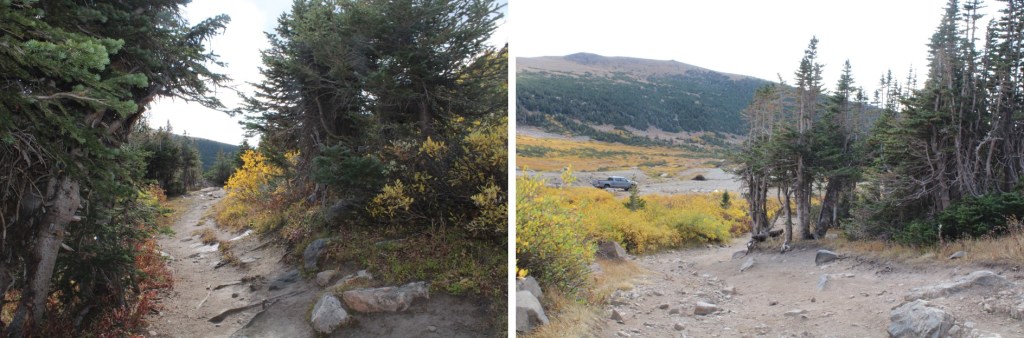
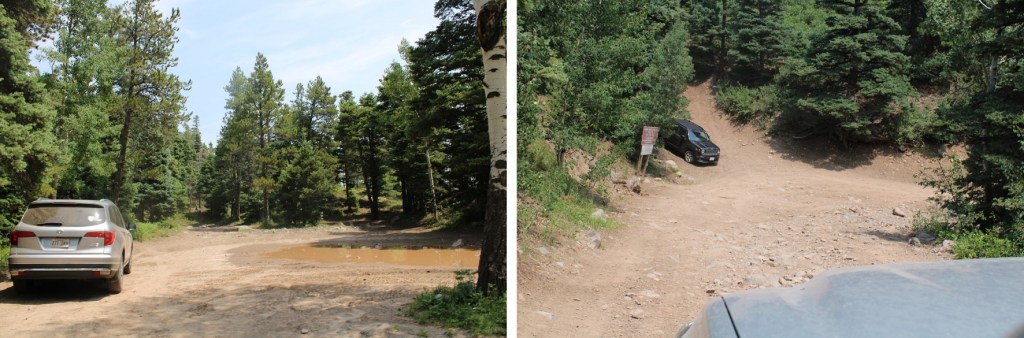
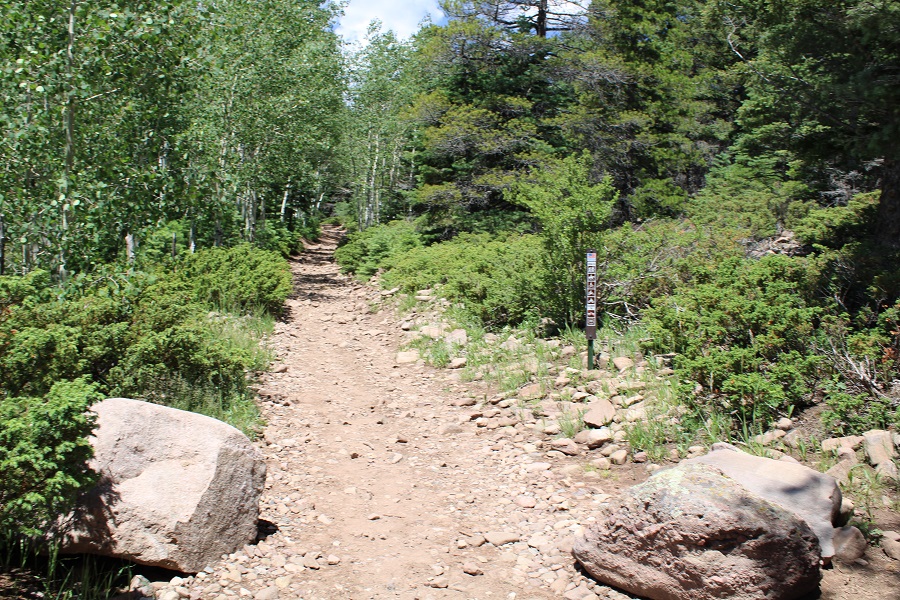
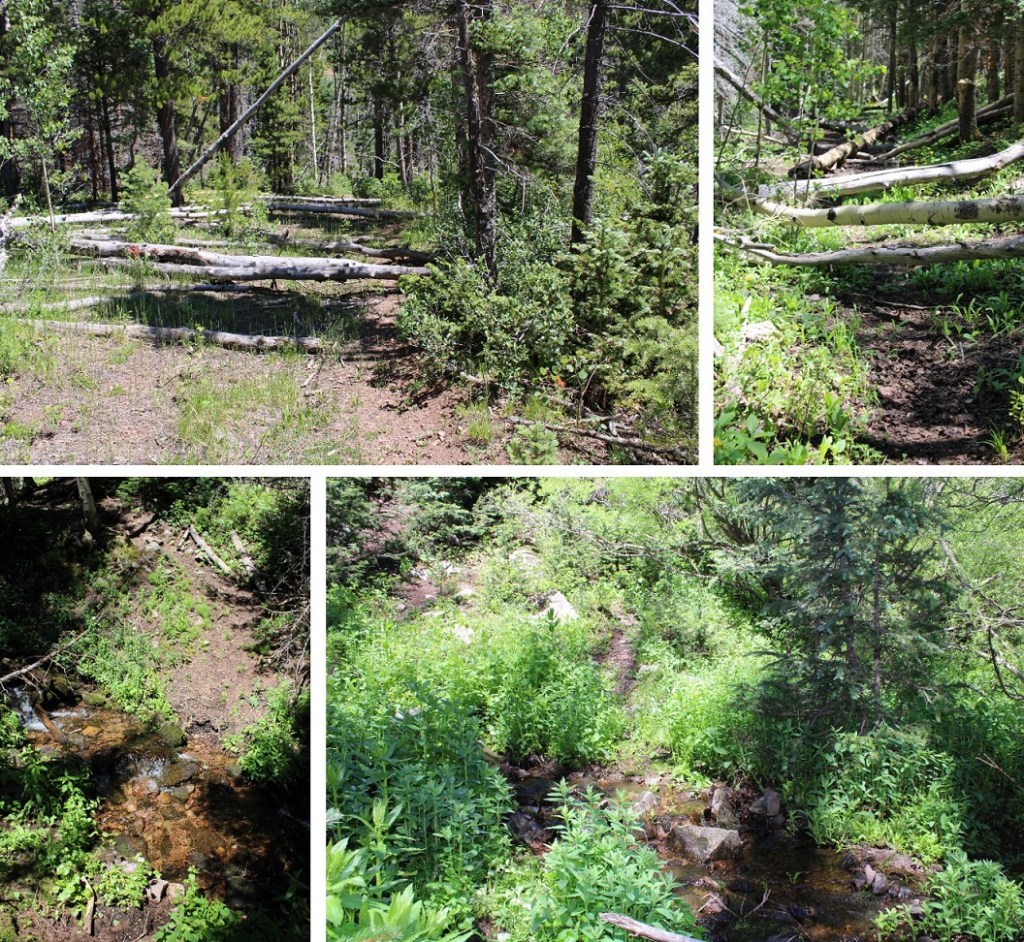
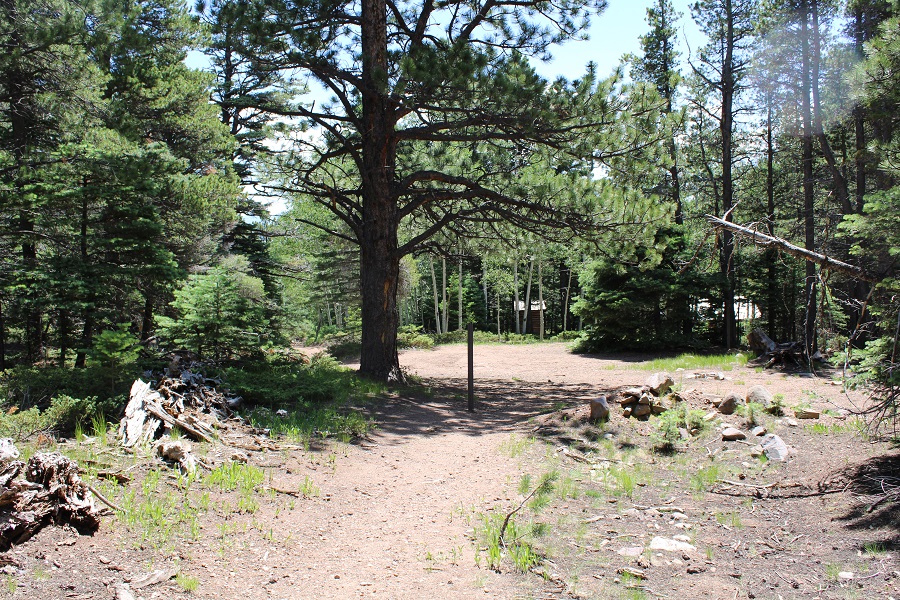
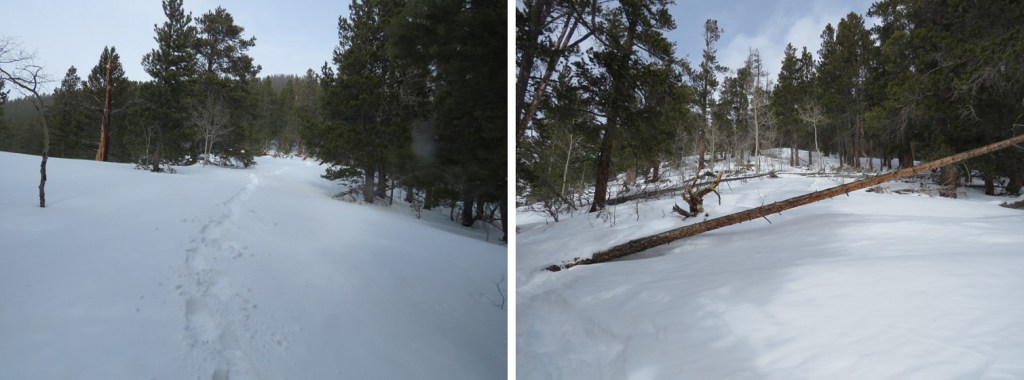
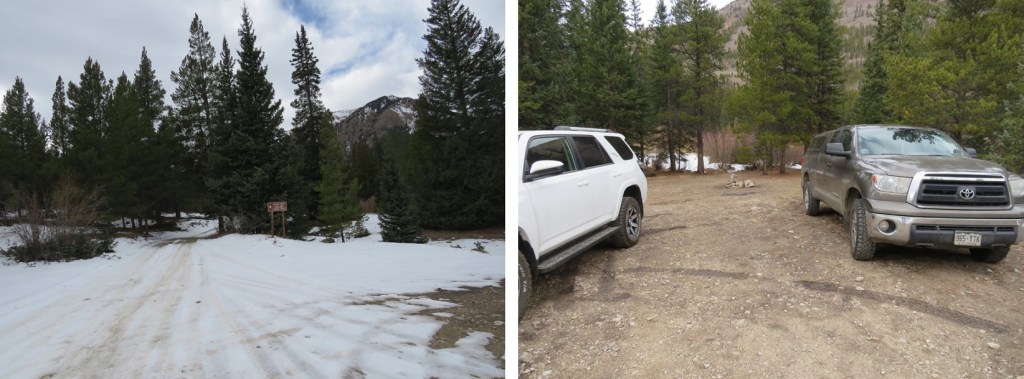
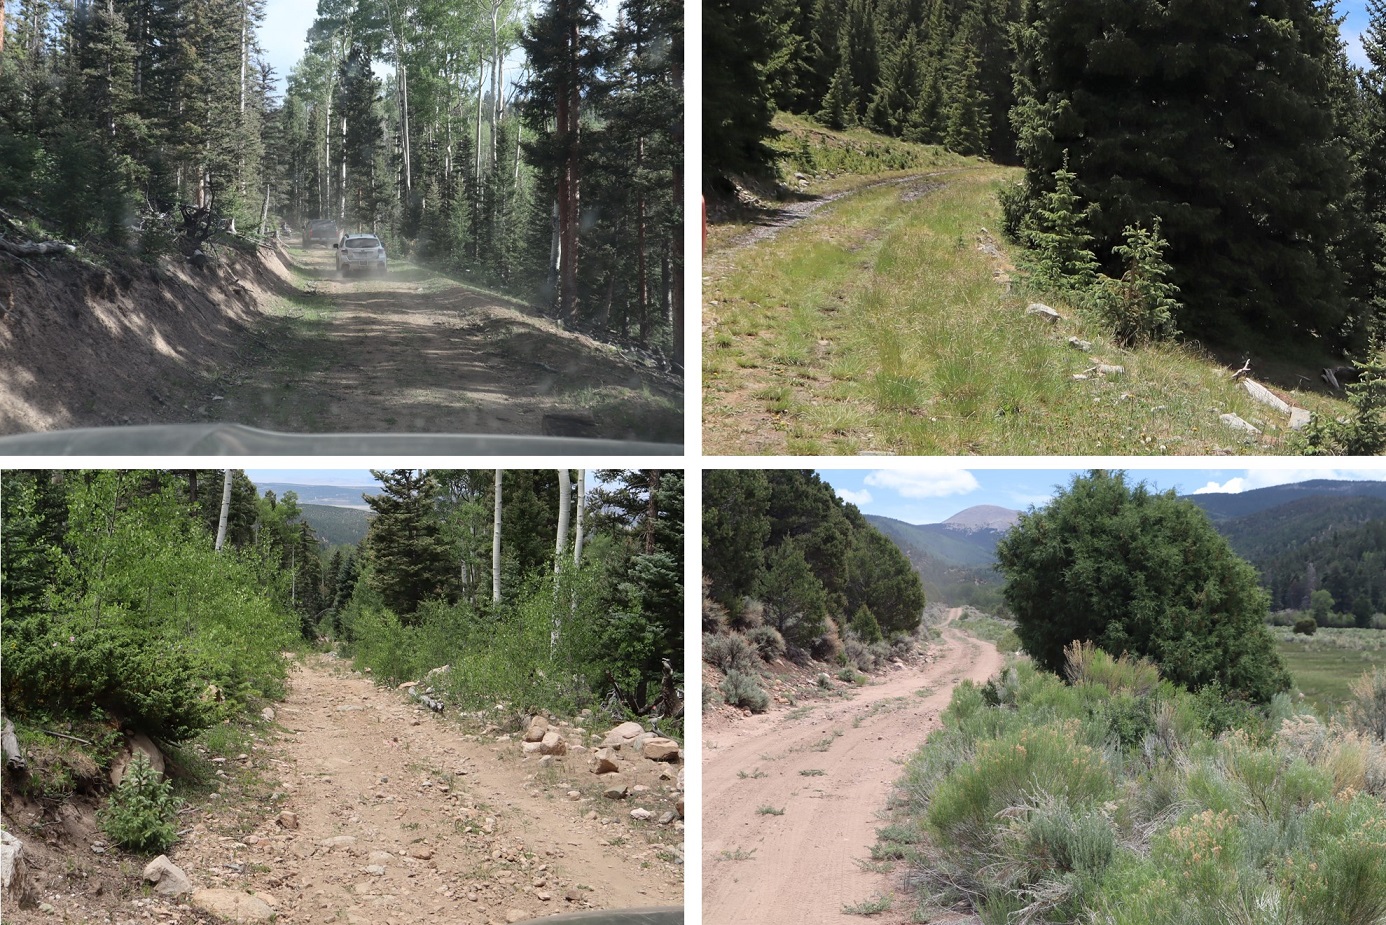
I made it to the trailhead in a thunderstorm, which I’d expected. It was my plan to wait it out, and start in the morning. I parked 6 miles past Cottonwood Lake, at the junctions of 344 and 349. There are dispersed campsites closer, but I planned to be here for a few days and this made a good base camp.
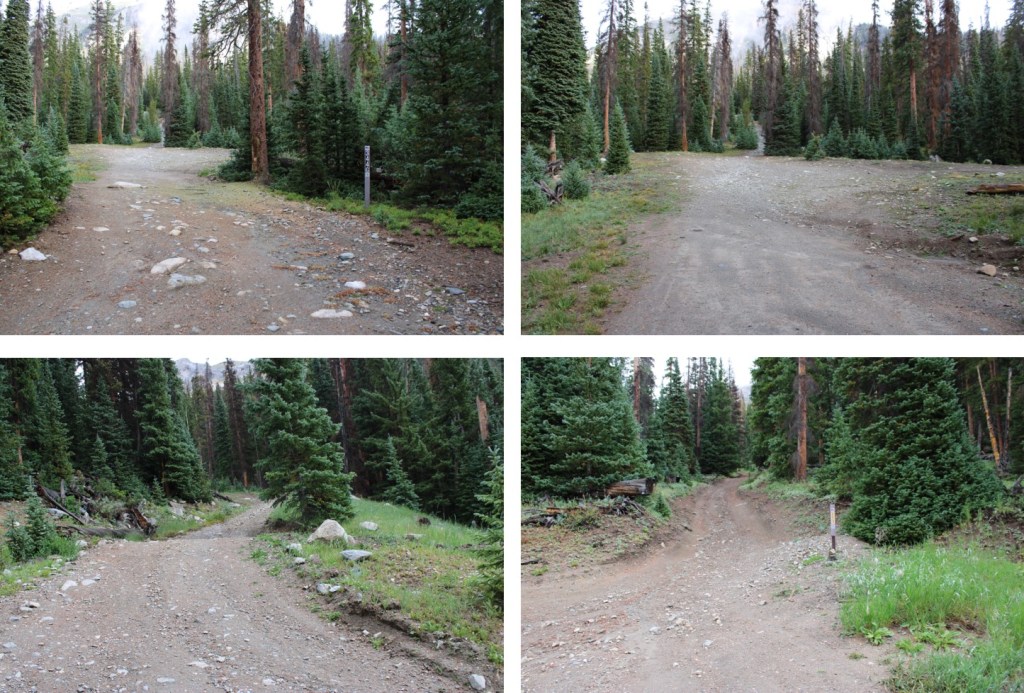
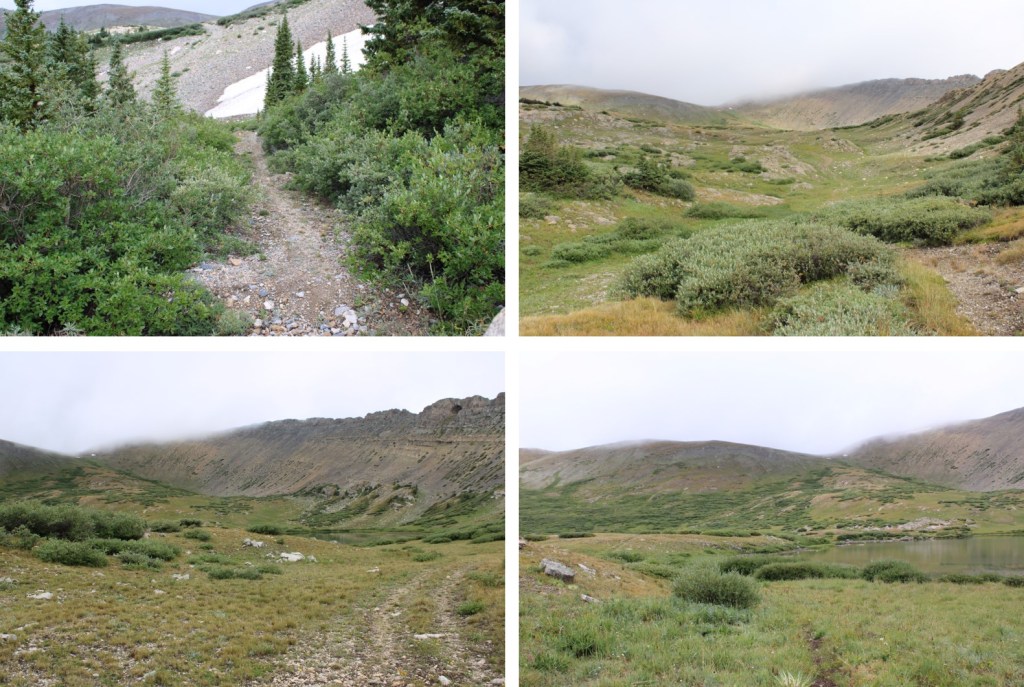
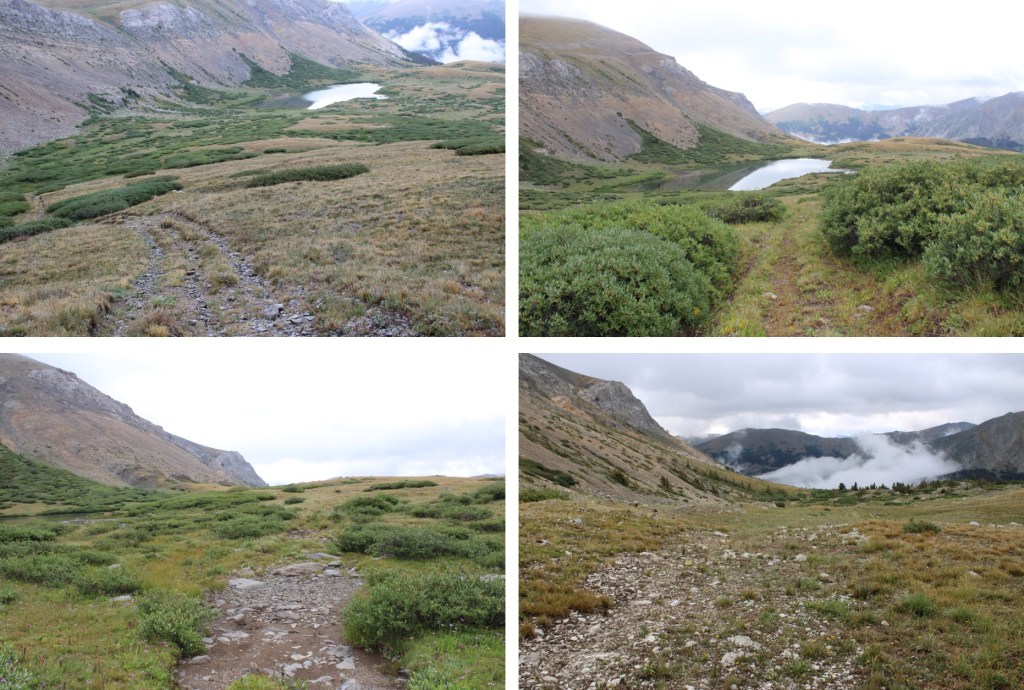
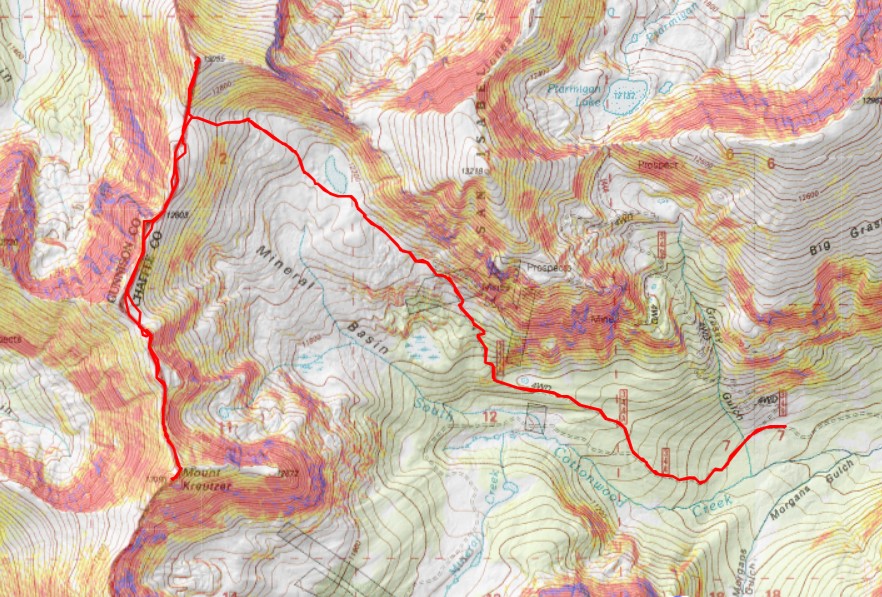
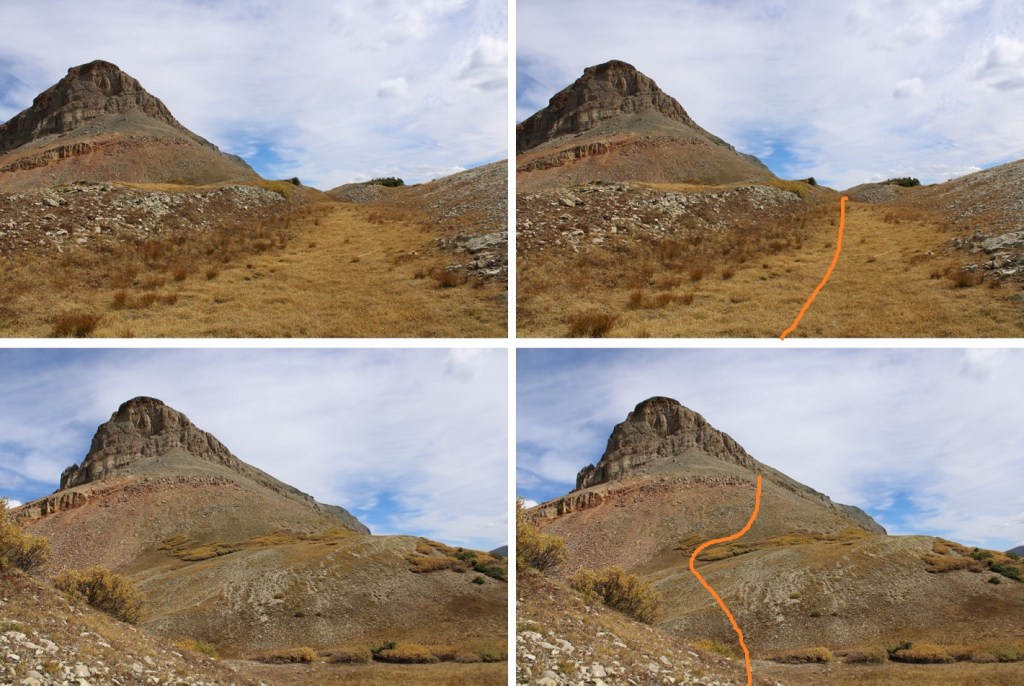
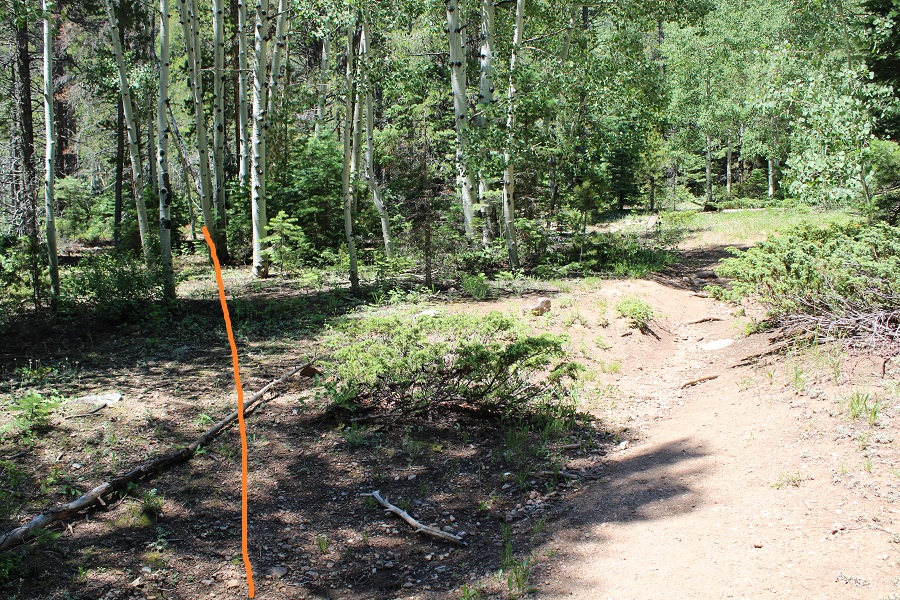
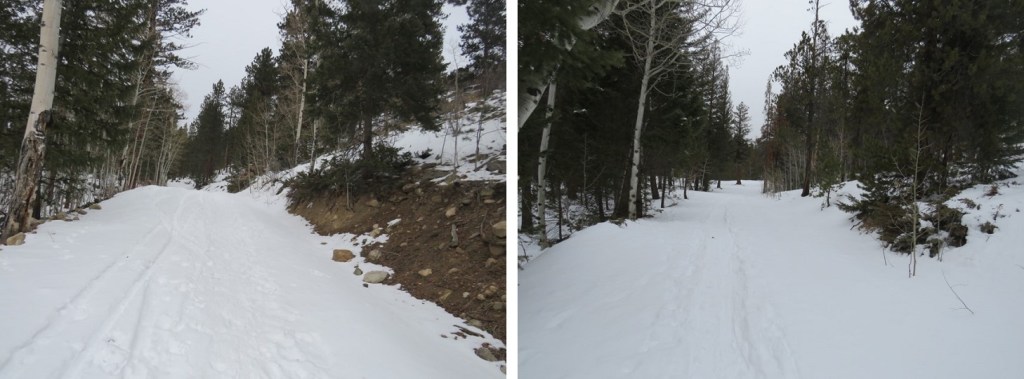
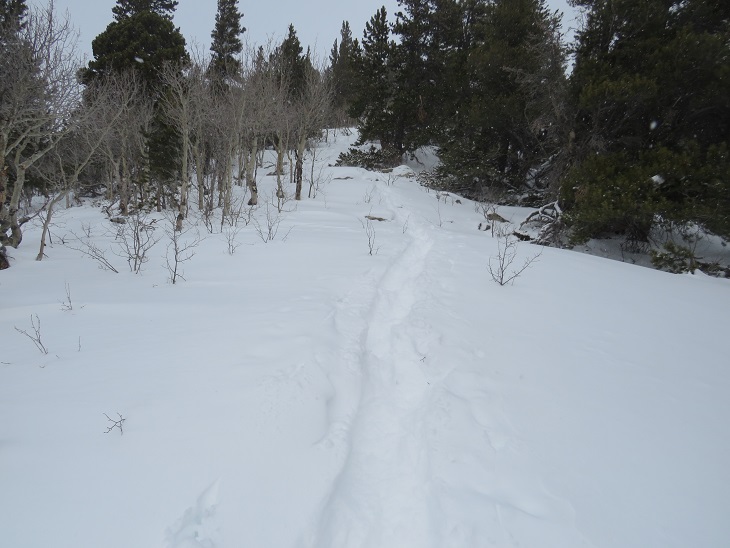
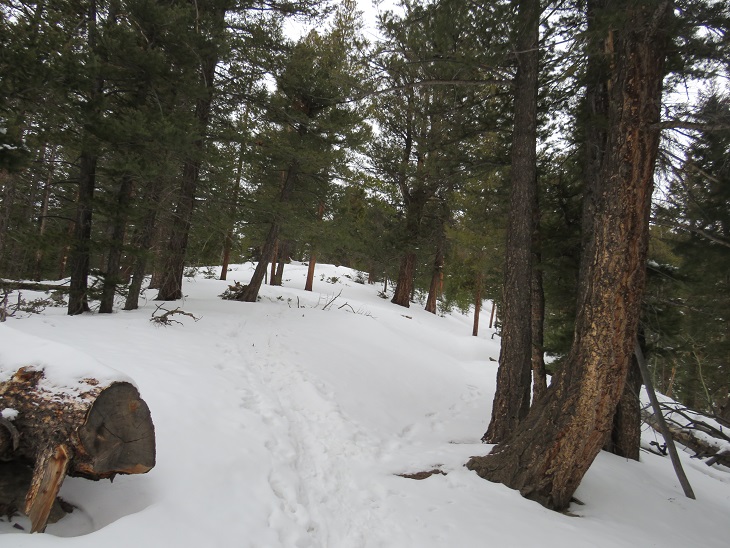
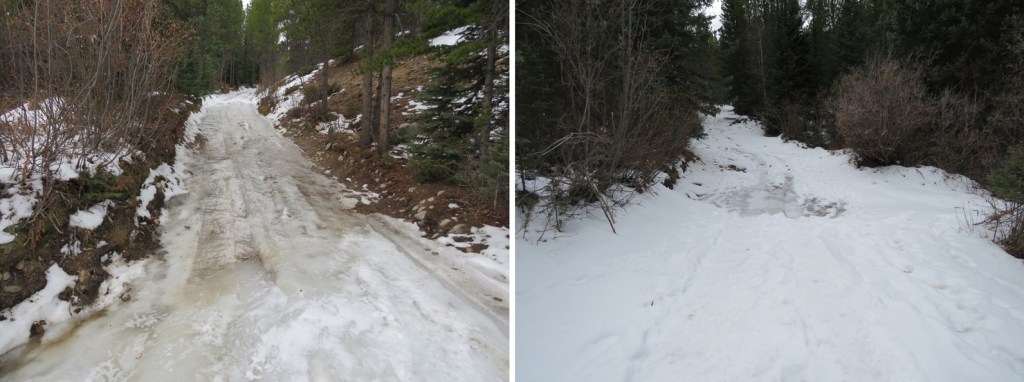
I was up and on the trail at 4:15am to a clear, starry night ski, hoping to get in my summits before the clouds and rain came at 9am. I followed road 344 west for 1.4 miles.
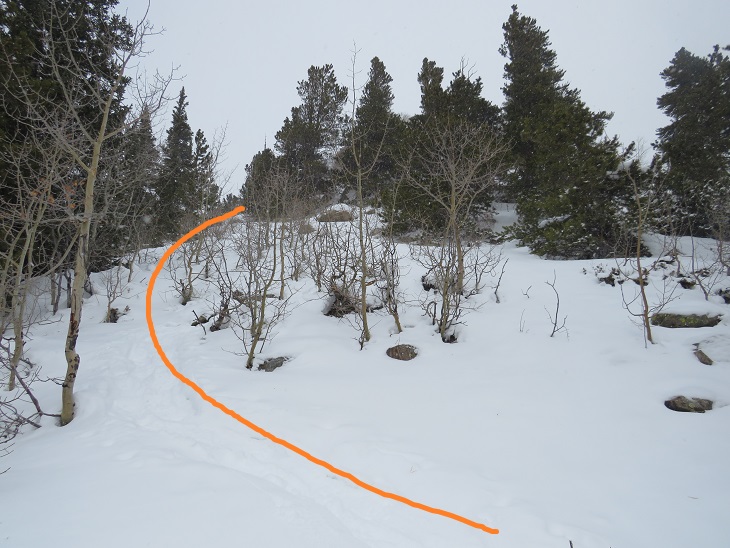
I then turned right onto 344G. There were several dispersed campsites here as well.
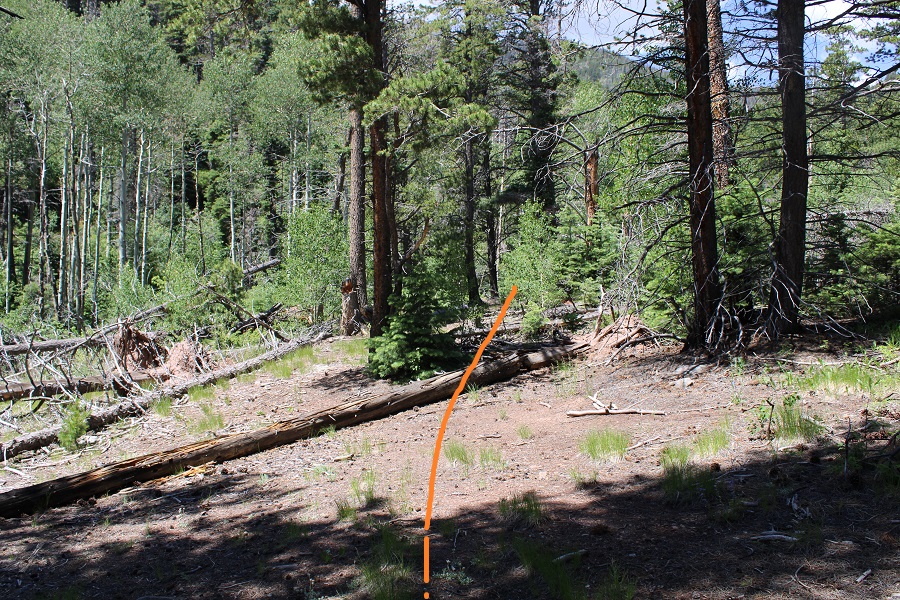
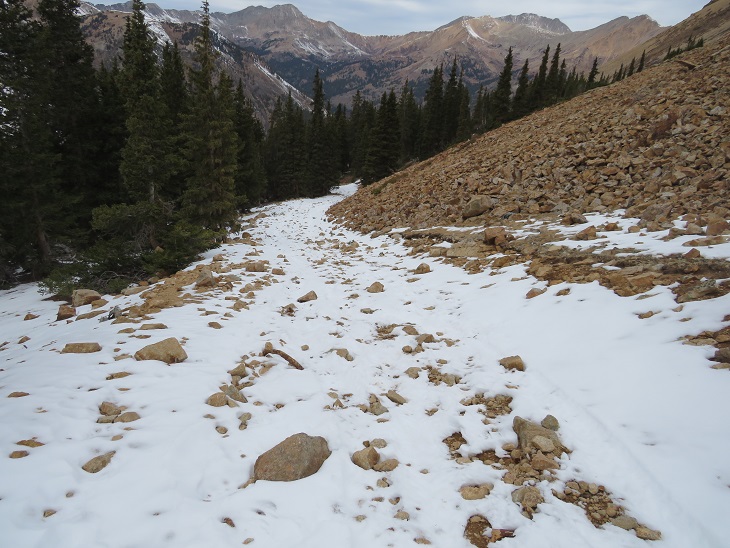
I followed this road all the way to 12,020.
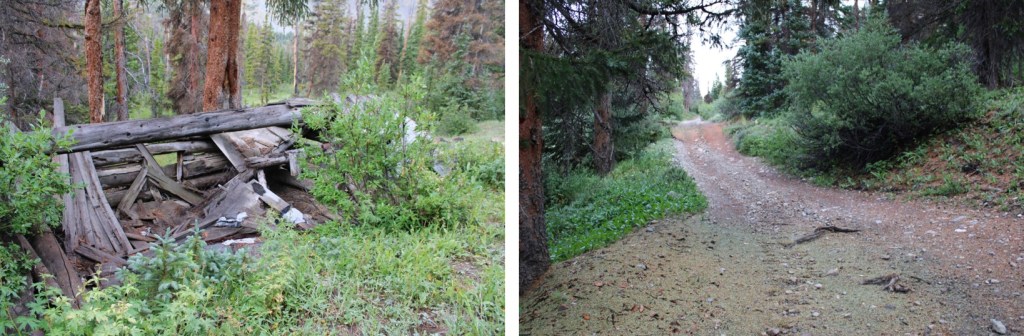
I passed an old log cabin
Staying left, I continued to 12,020
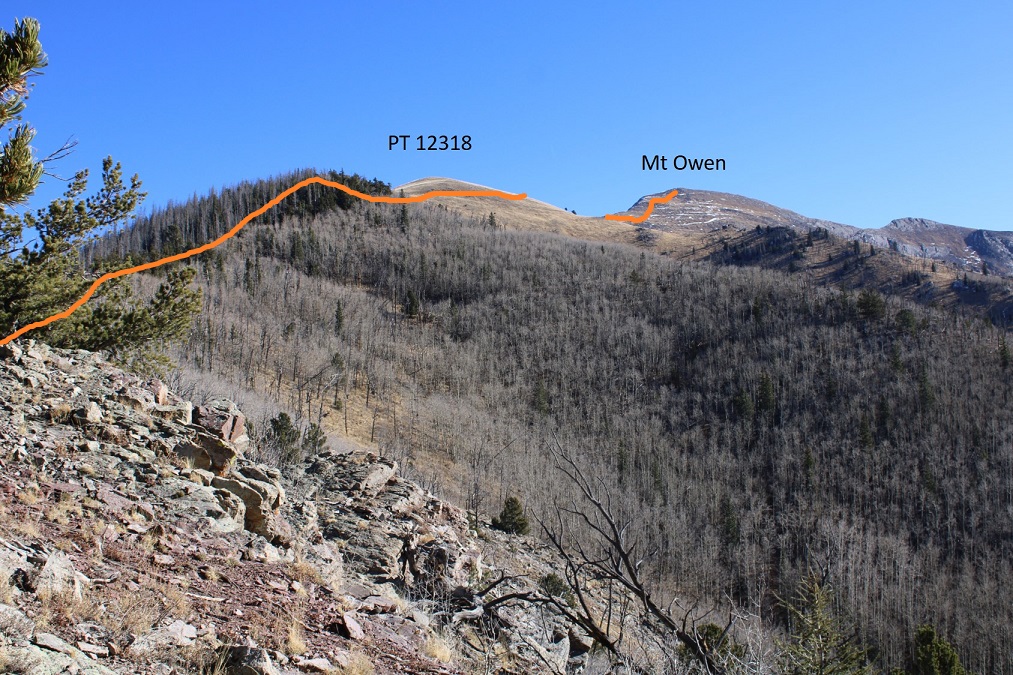
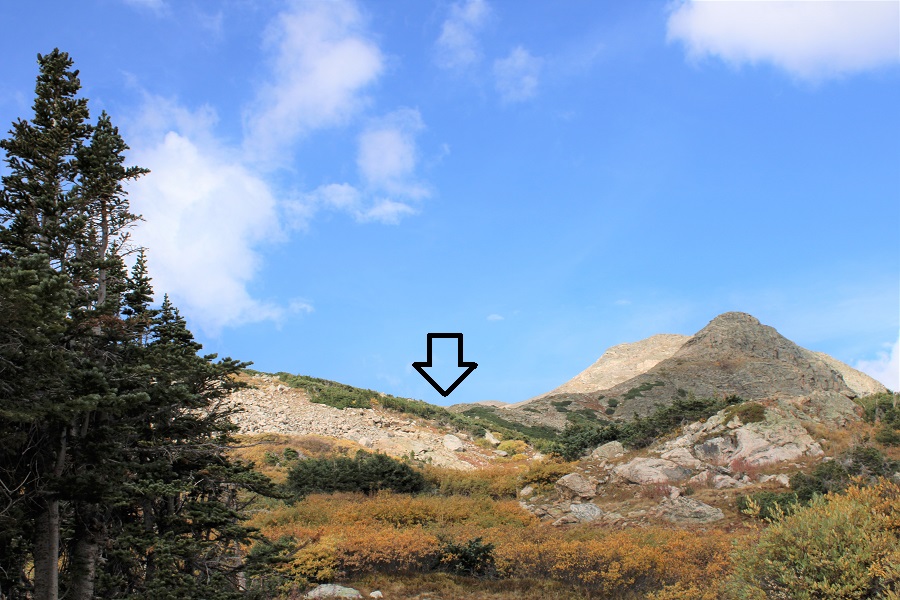
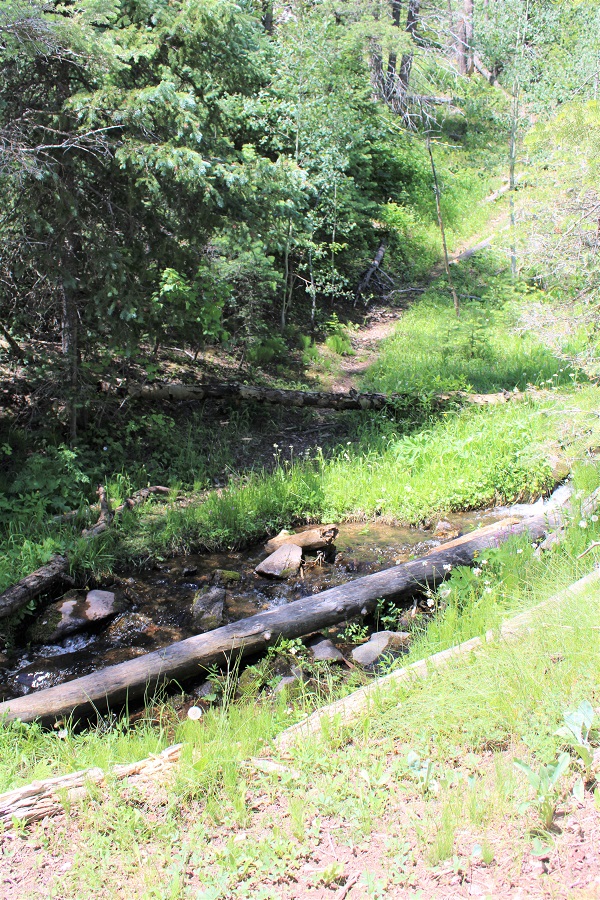
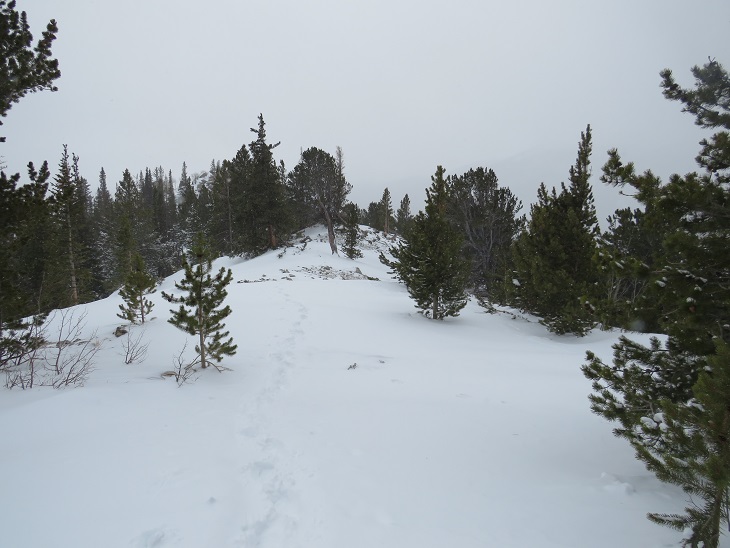
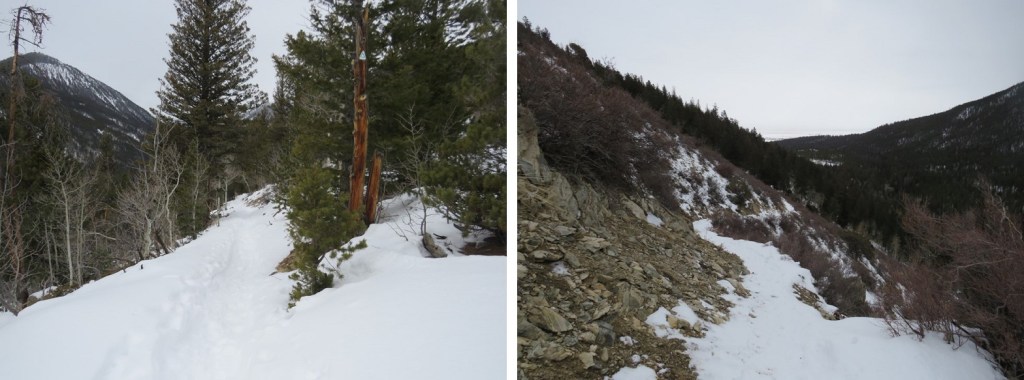
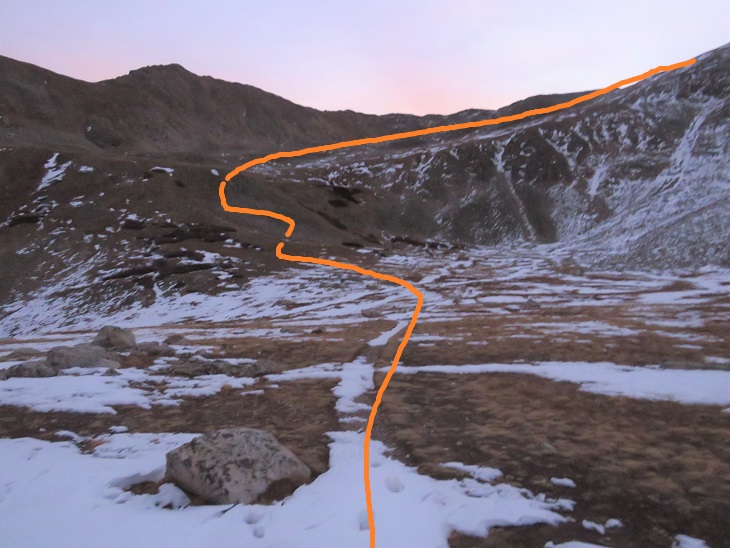
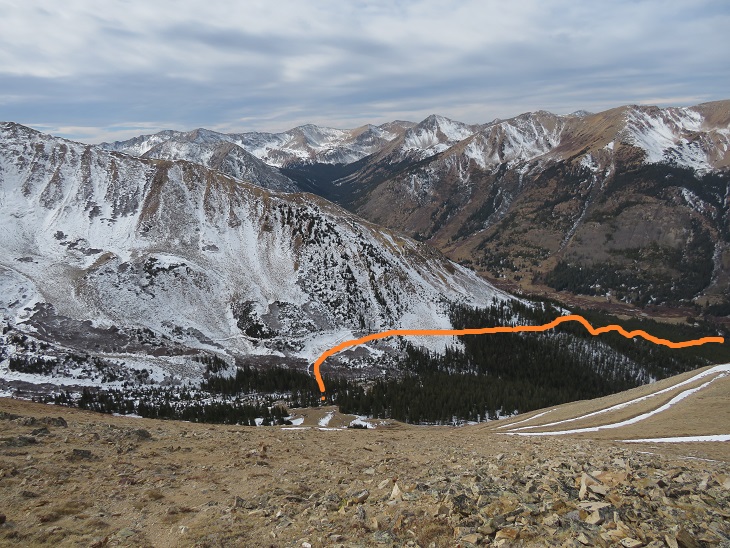
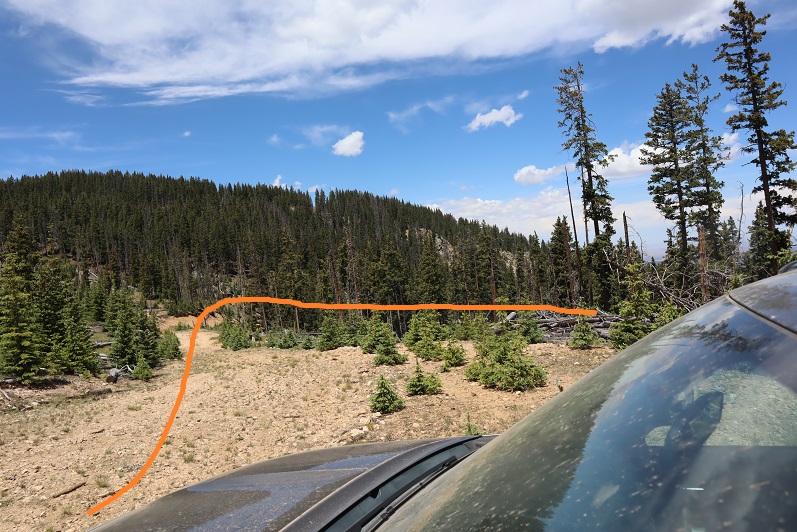
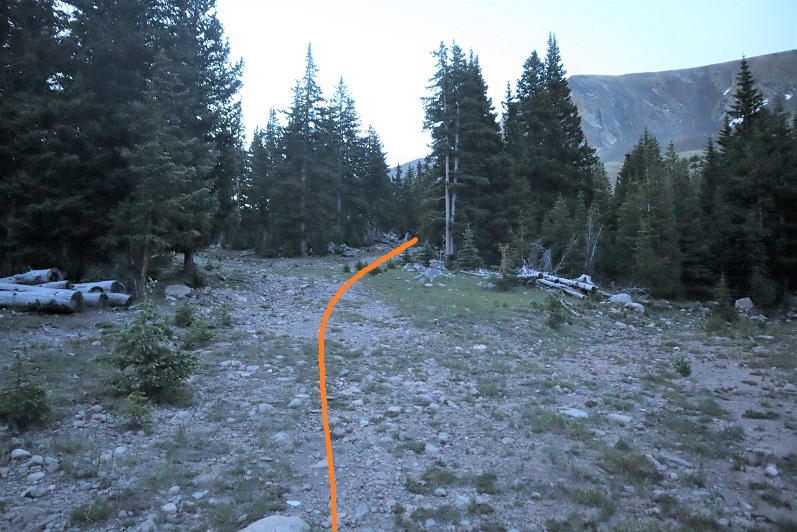
At 12,020 I turned left, and followed a trail northeast through Mineral Basin
This is where I was headed, towards the saddle. The road is sometimes a trail, sometimes two ruts, but it goes all the way to the saddle.
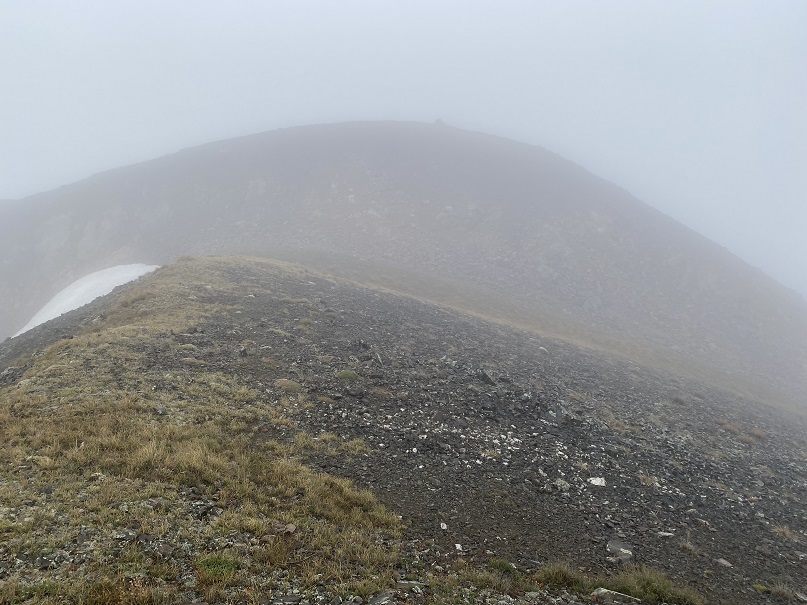
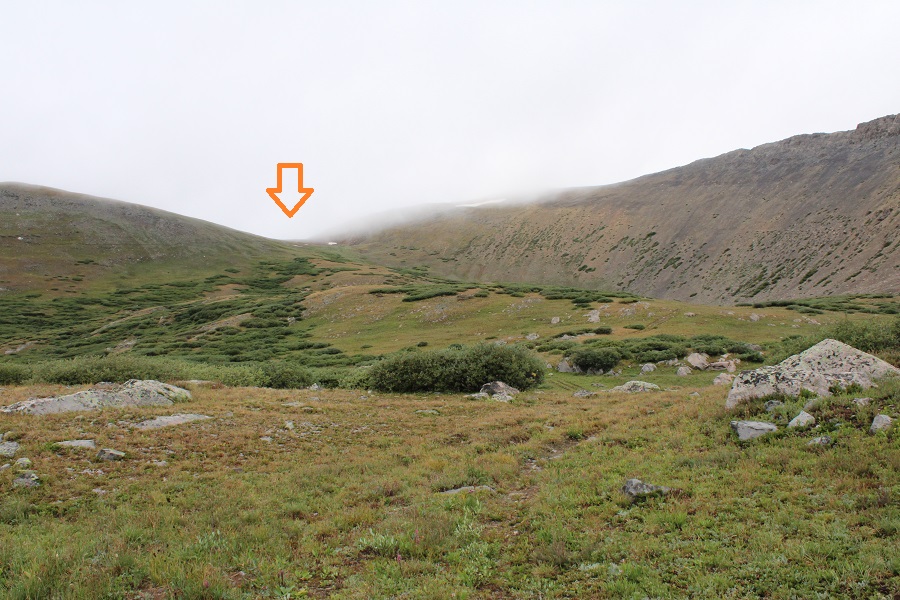
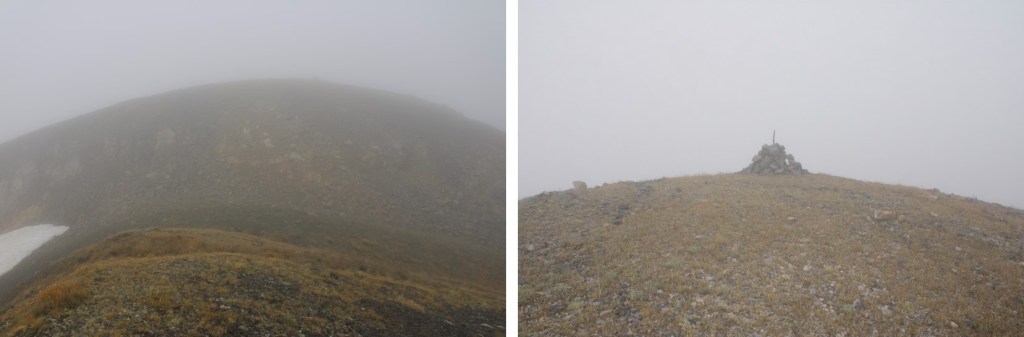
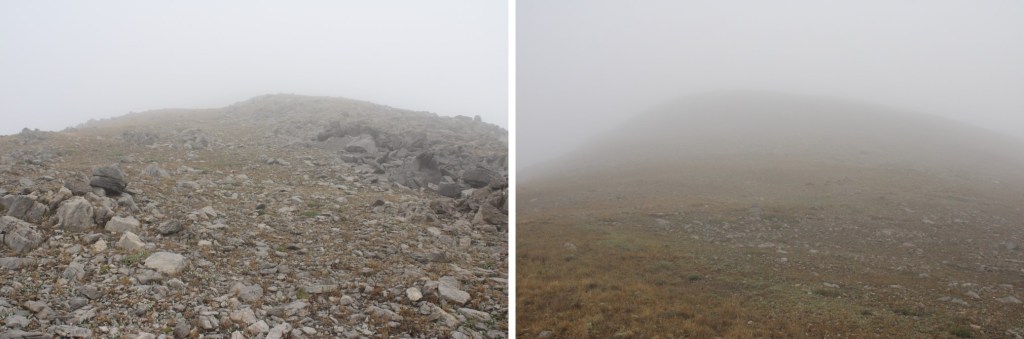
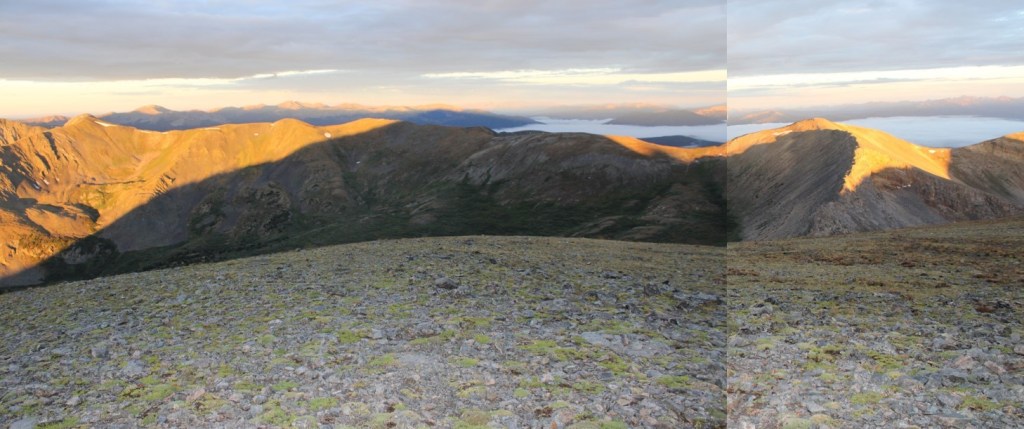
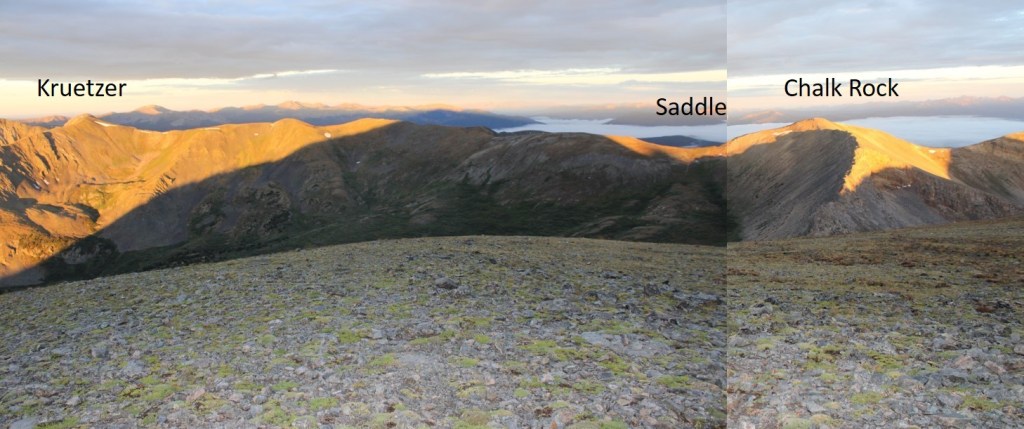
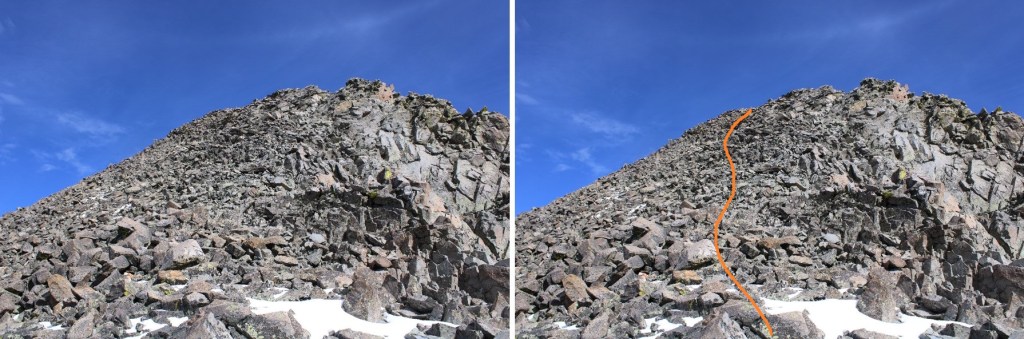
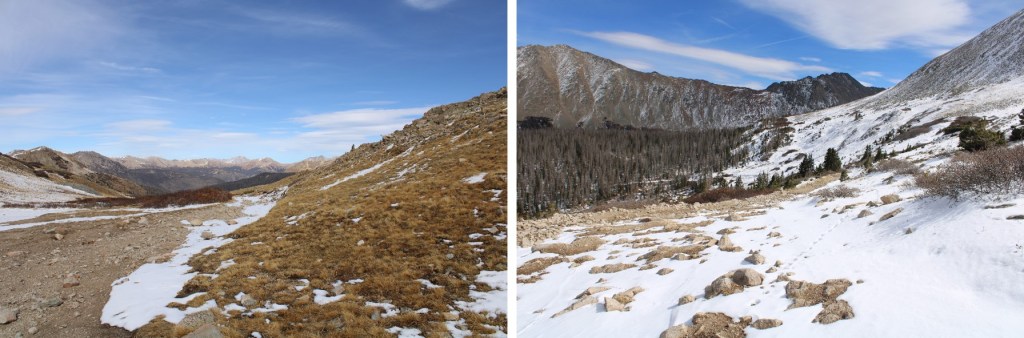
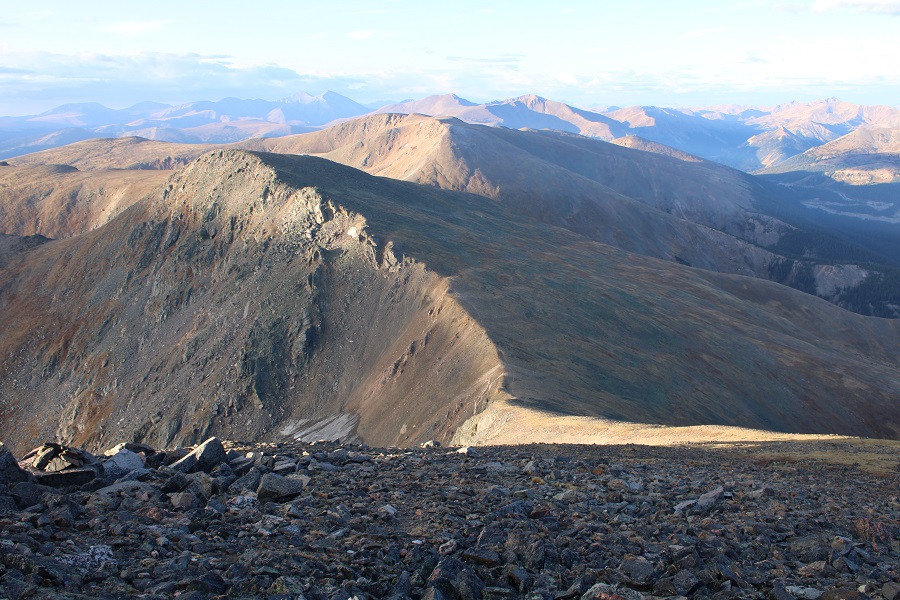
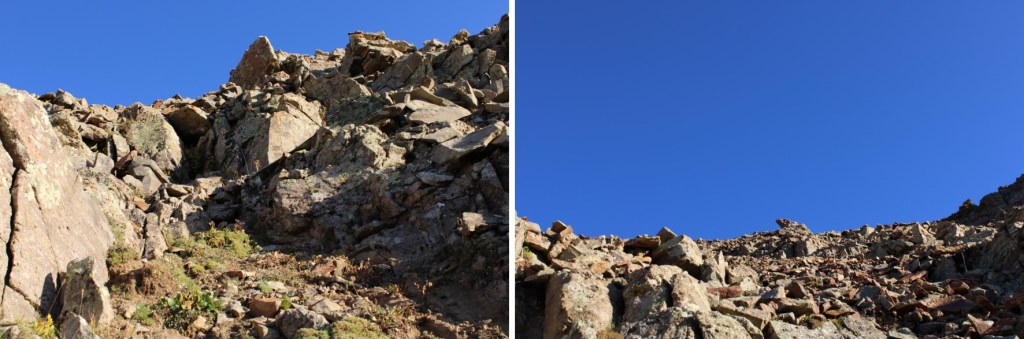
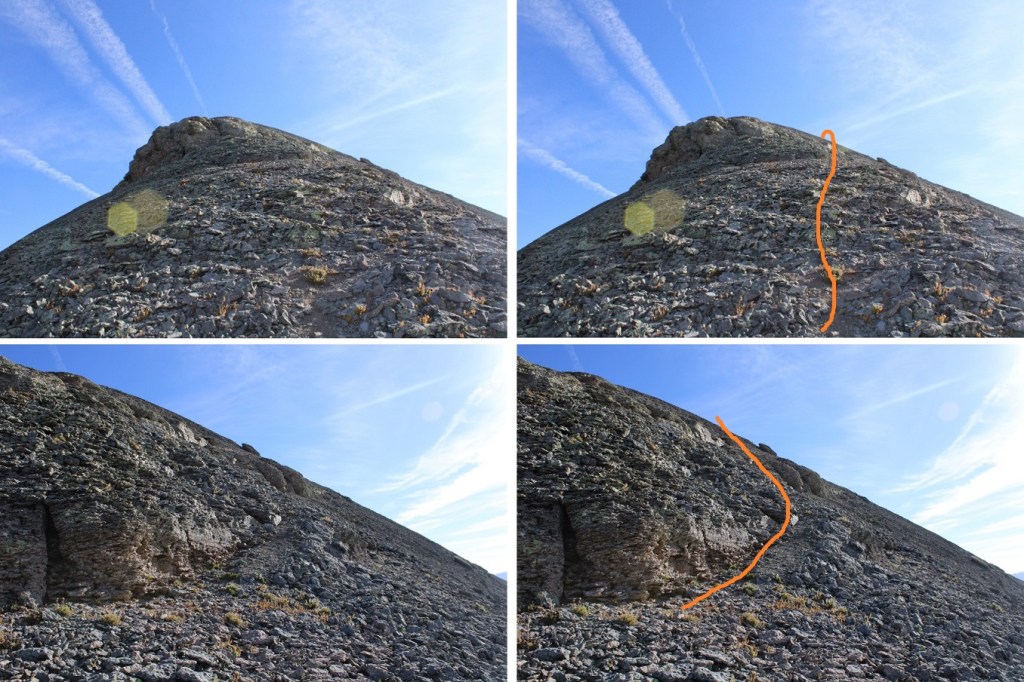
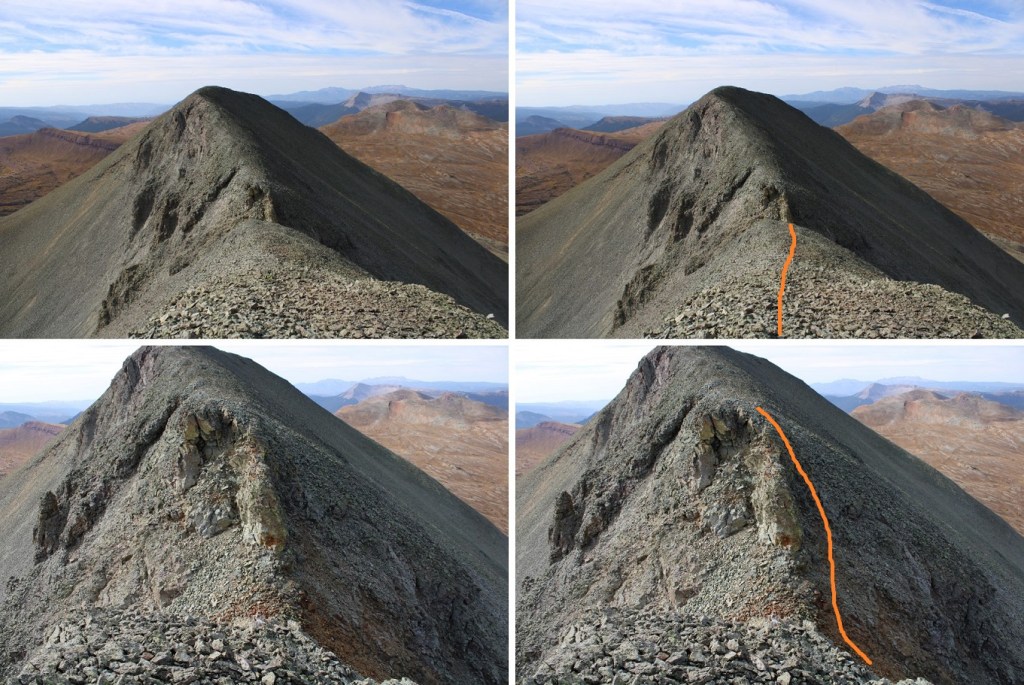
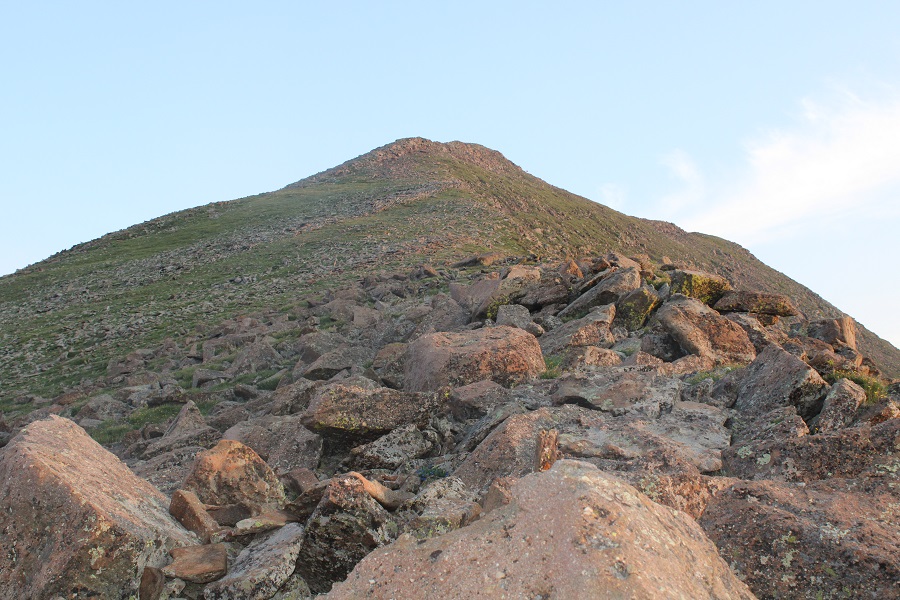
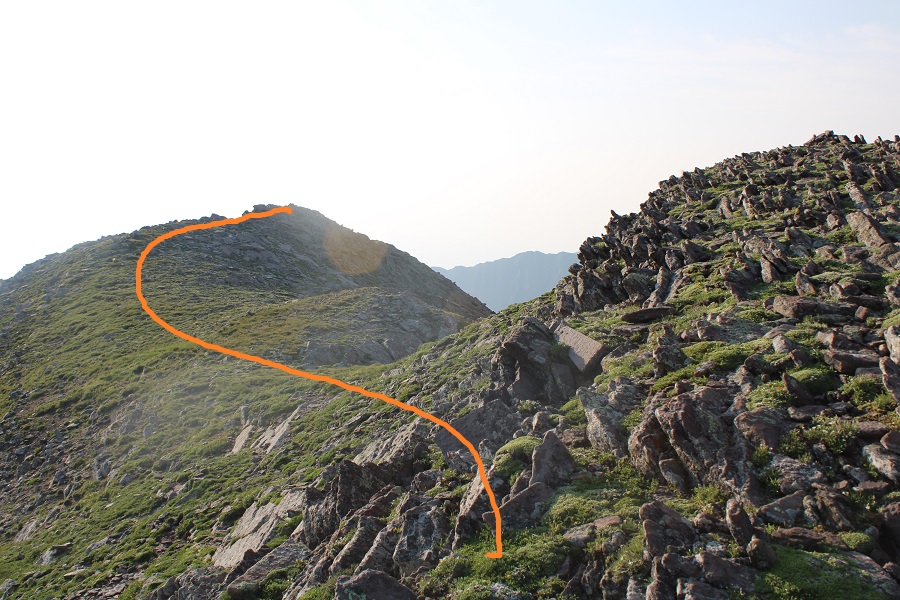
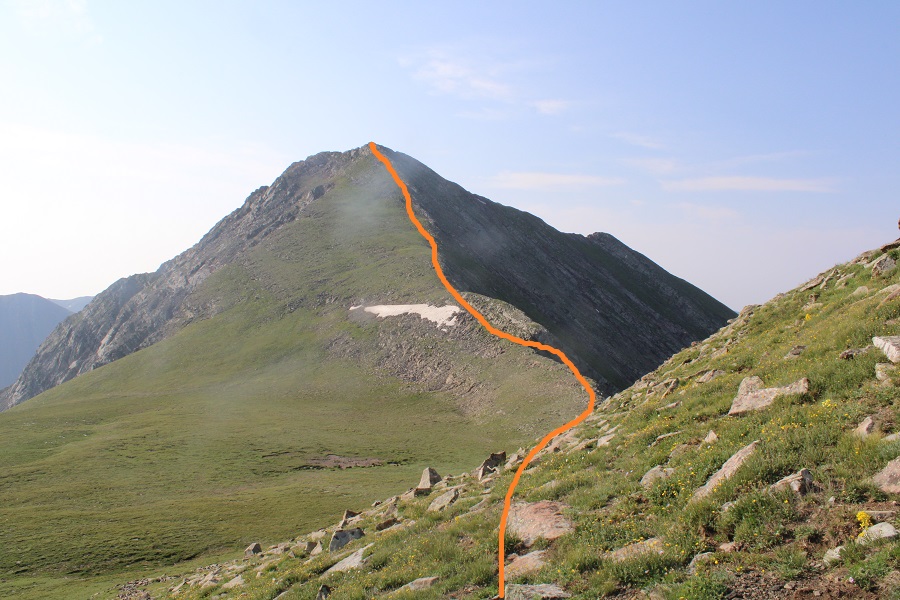
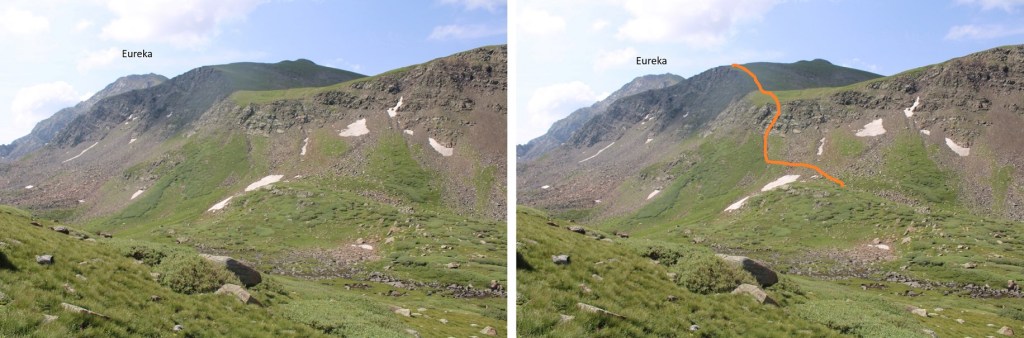
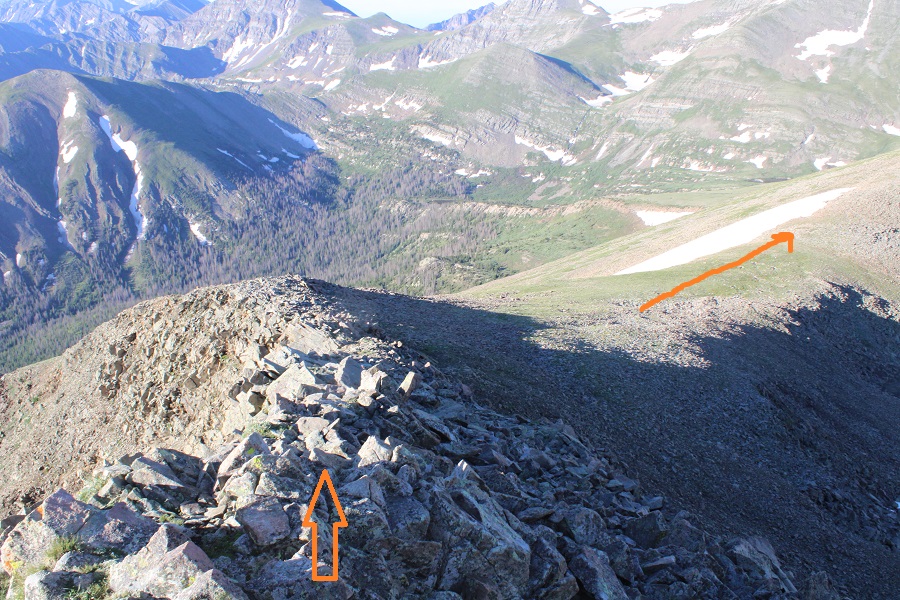
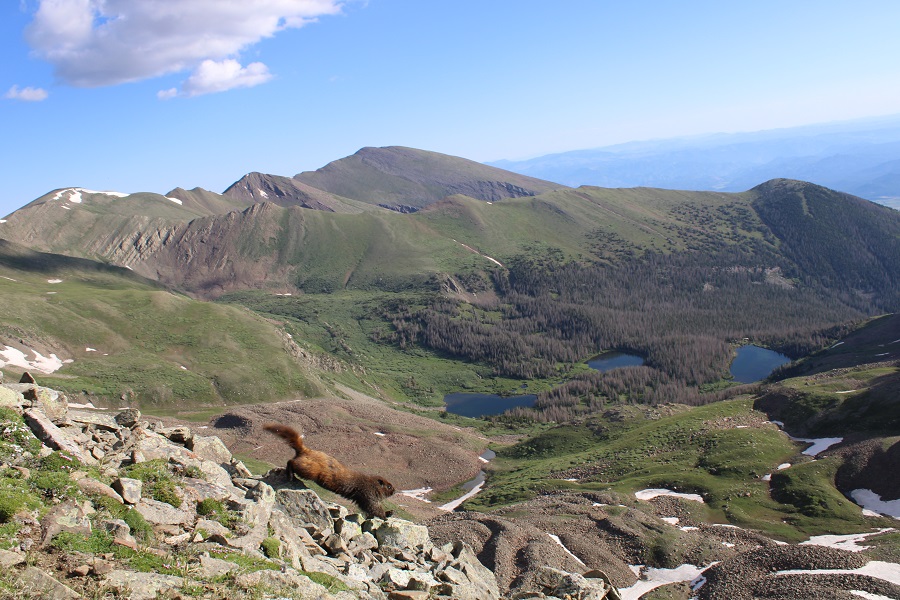
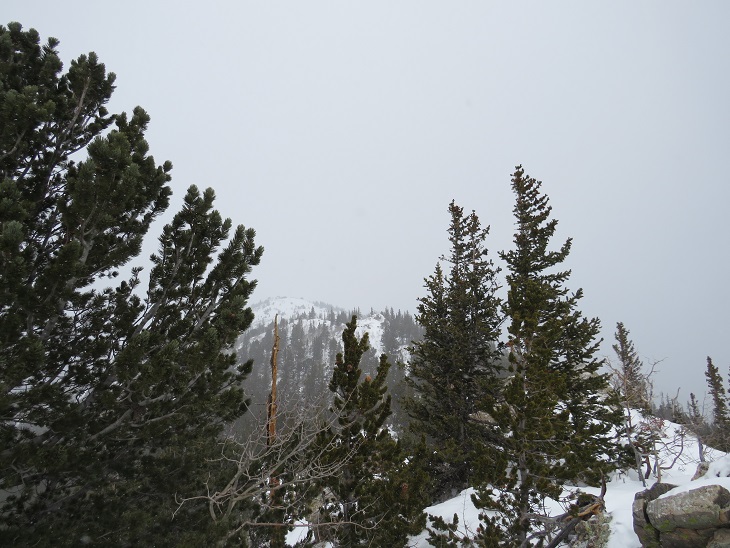
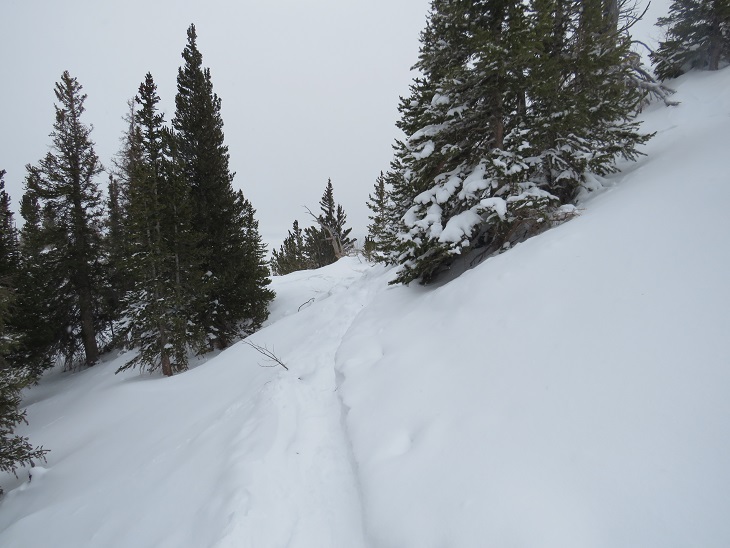
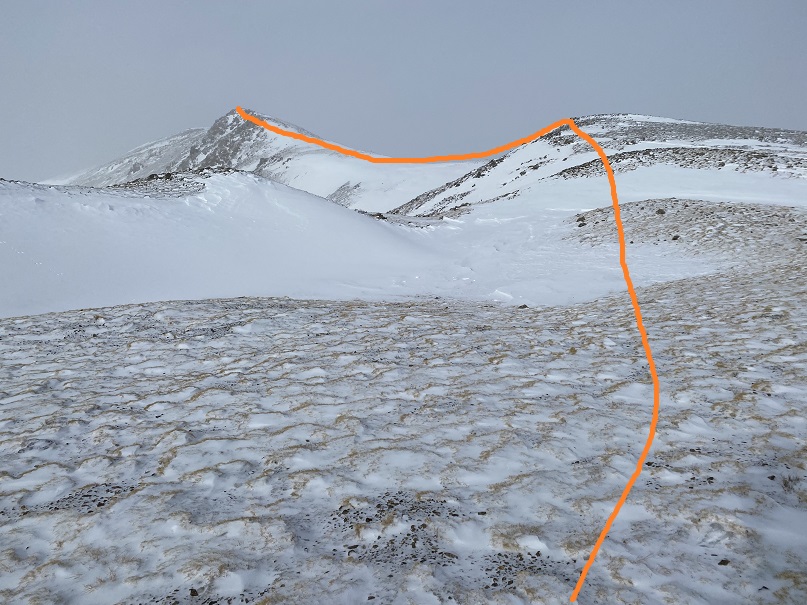
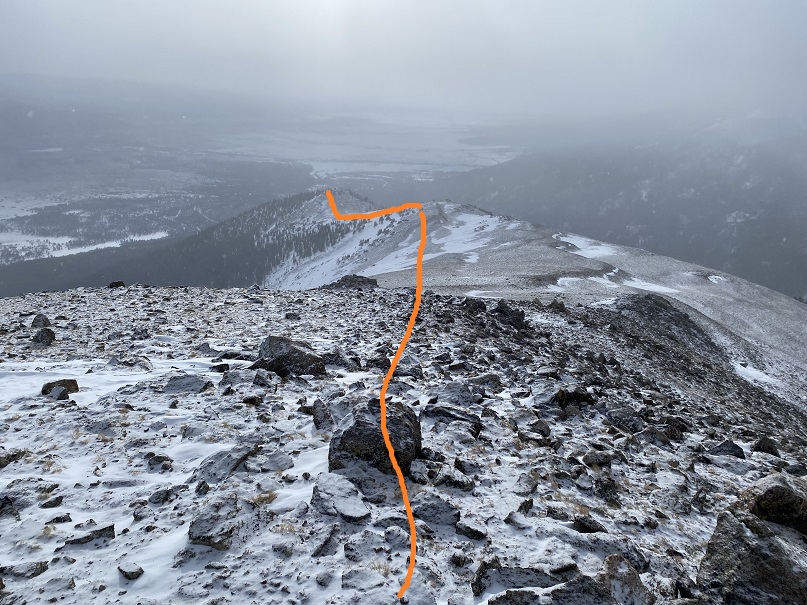
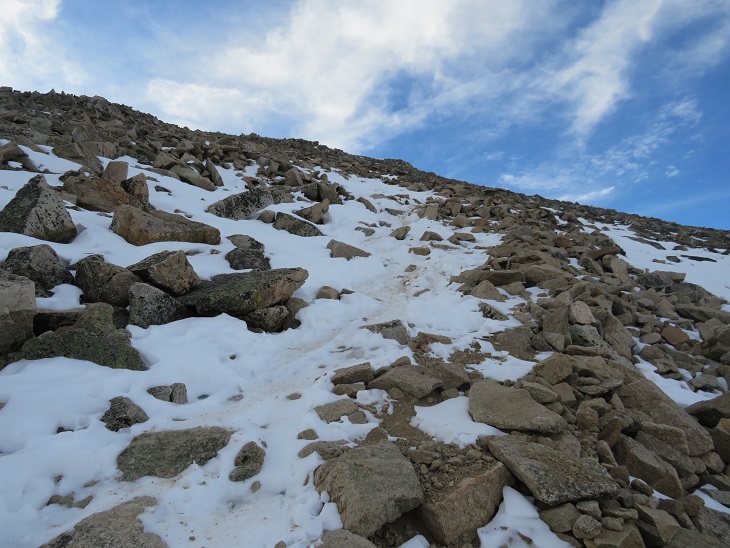
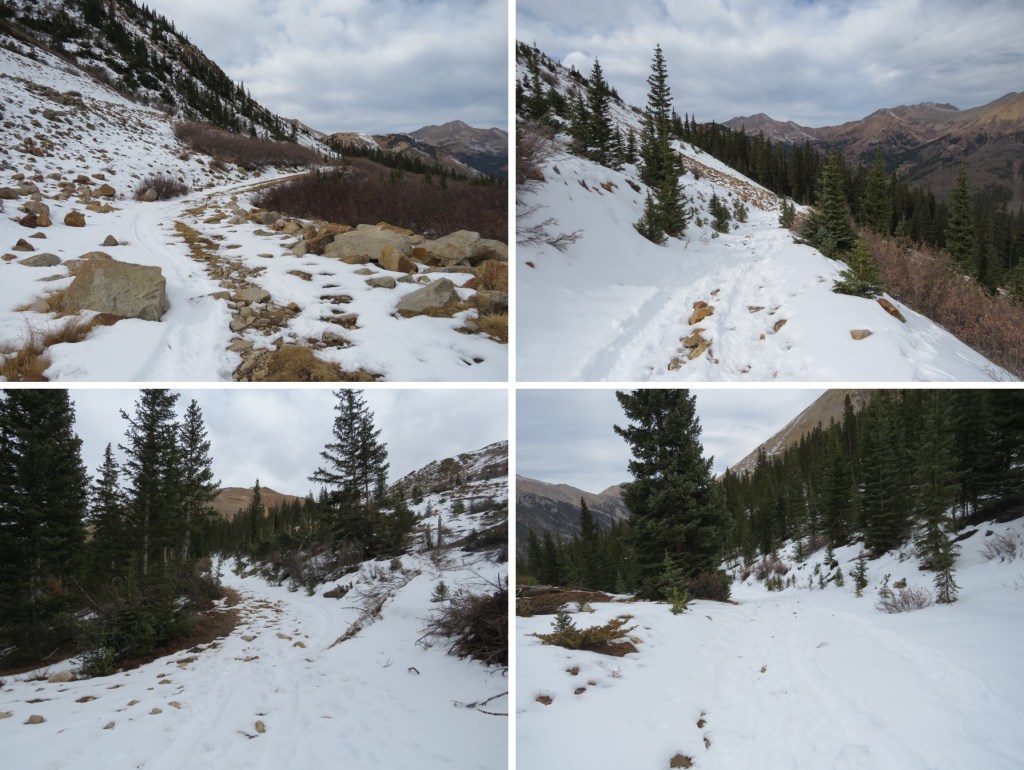
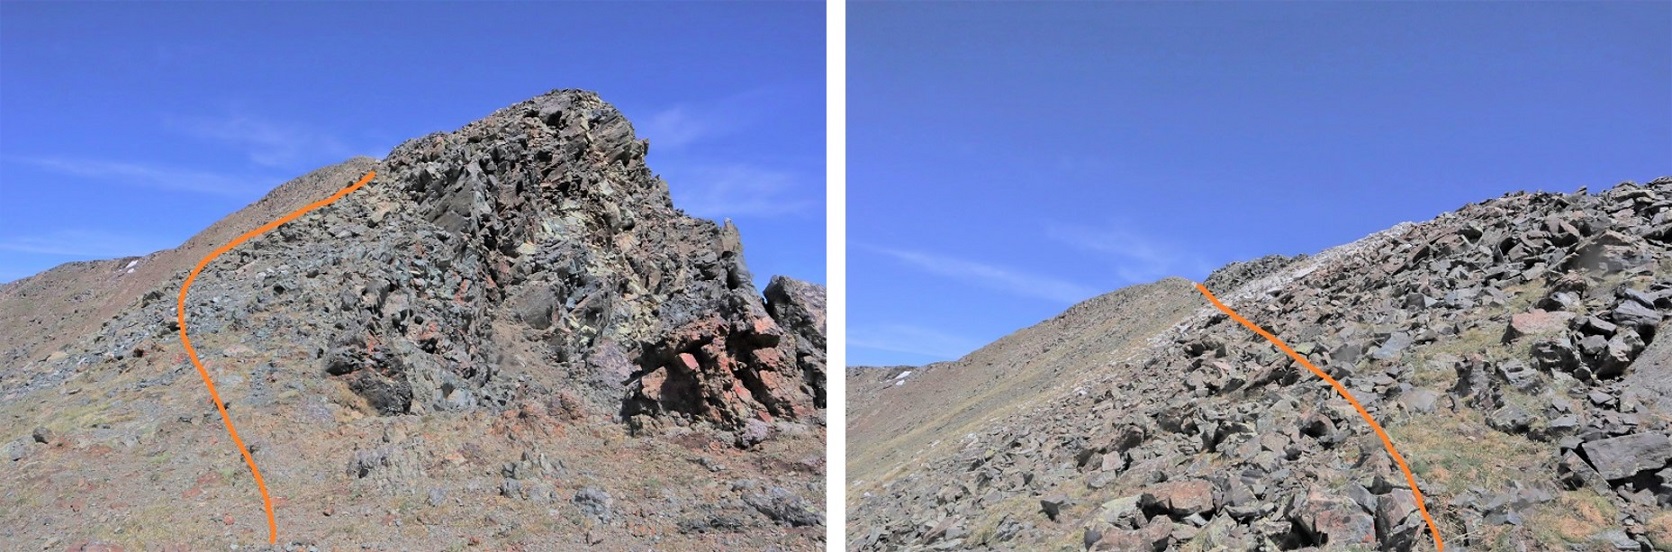
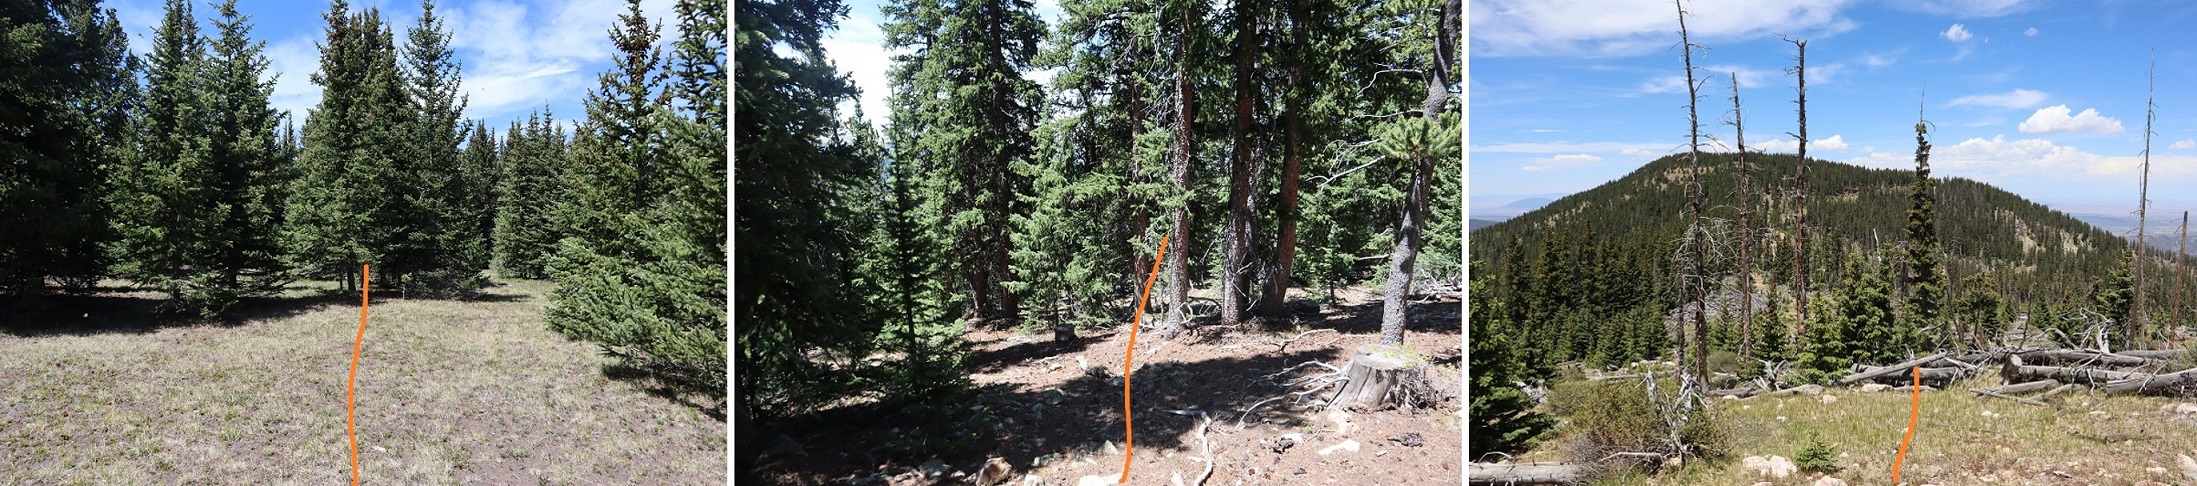
I’m going to apologize for the pictures on the ridge. The weather forecast said 57% sky cover until 9am, when the clouds were supposed to roll in, but as you can see, they arrived early. I thought about waiting the clouds out, but it was obvious they were just accumulating. At one point I even turned back, knowing I’d need to do this hike again anyway to get better pictures, but turned around again and summited, because I was so close. While this is a class 2 ridge hike, I hiked it with my compass out the entire time, as I couldn’t see more than a few yards ahead of me at a time. I’m going to show you some really terrible pictures of the route, but know from the saddle it’s .7 miles southwest, and then .8 miles south/southeast along the ridge, mostly on tundra with a few rocks thrown in.
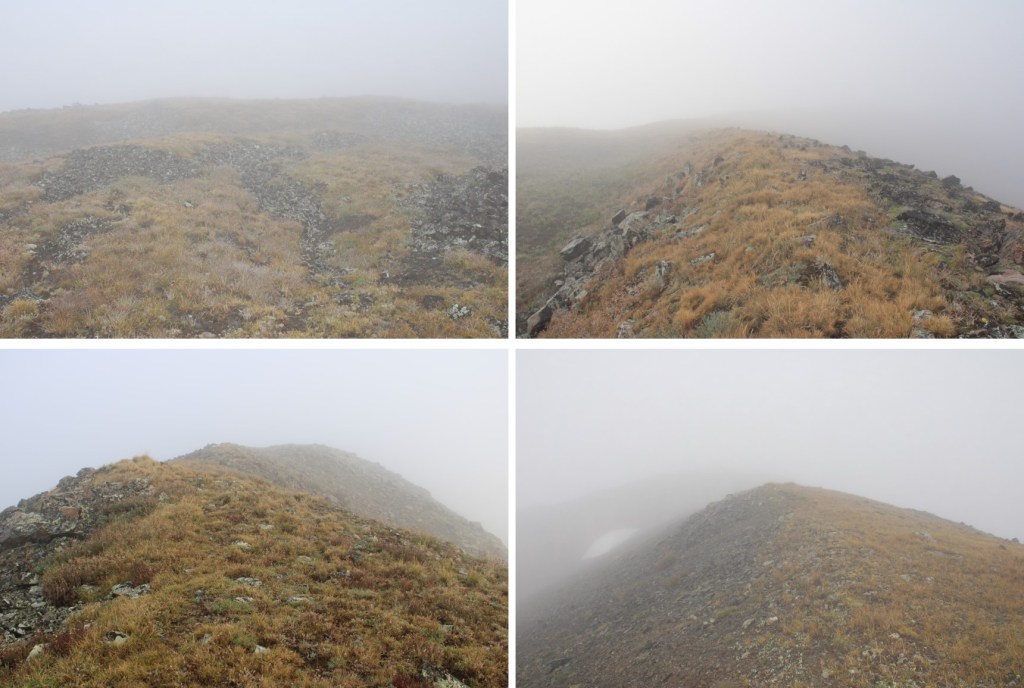
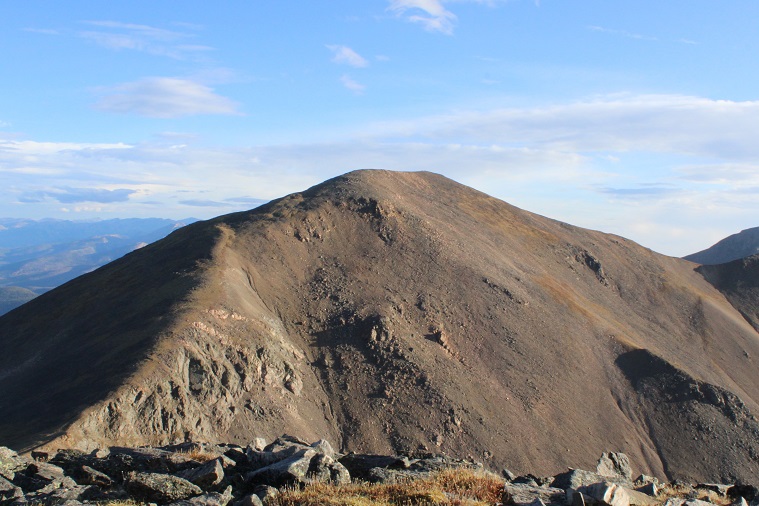
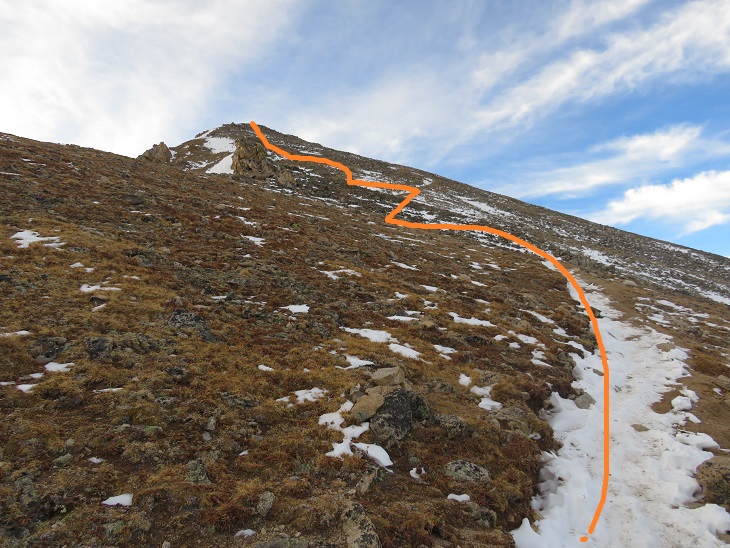
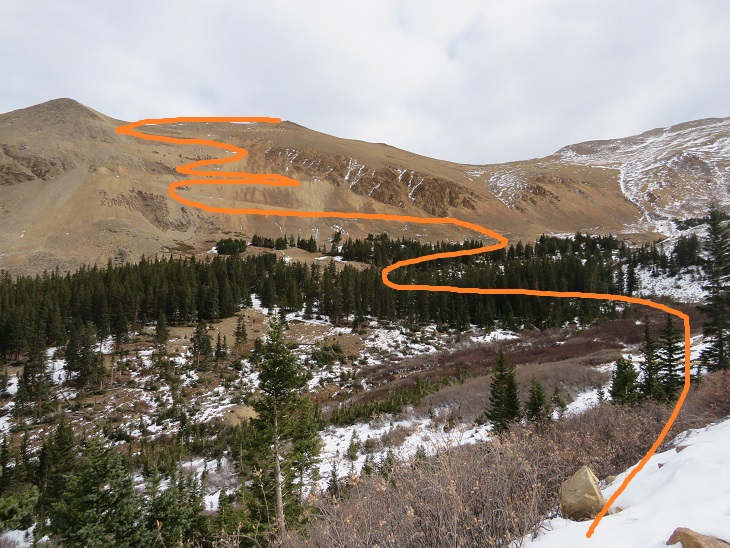
At the saddle I turned left, and headed up the ridge
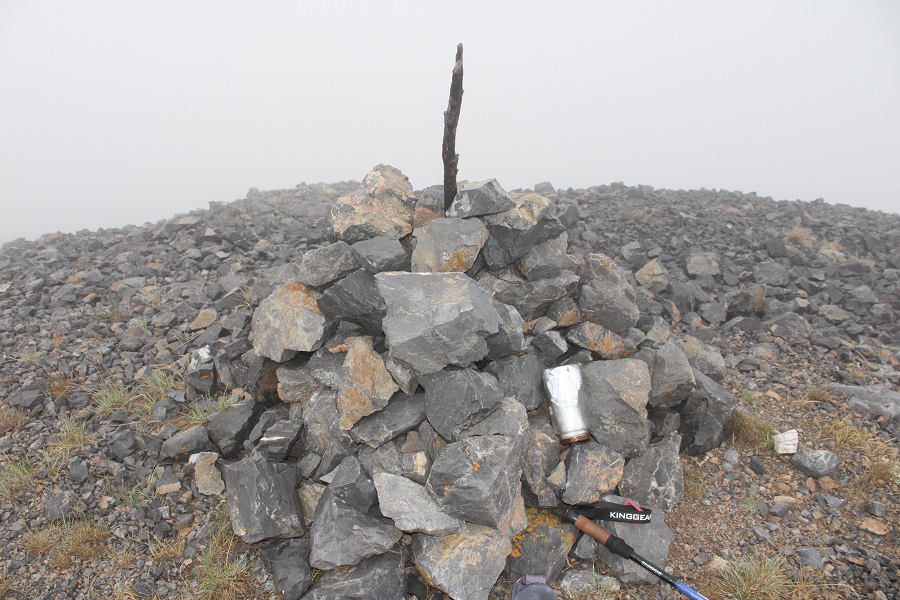
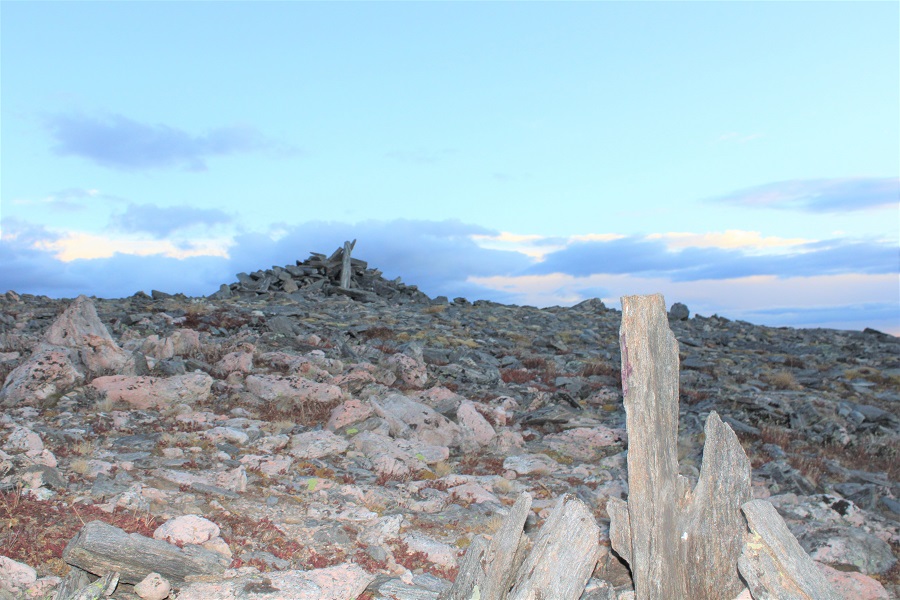
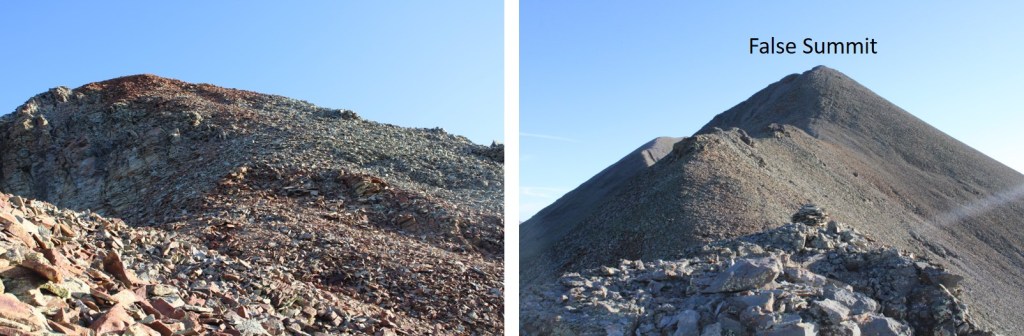
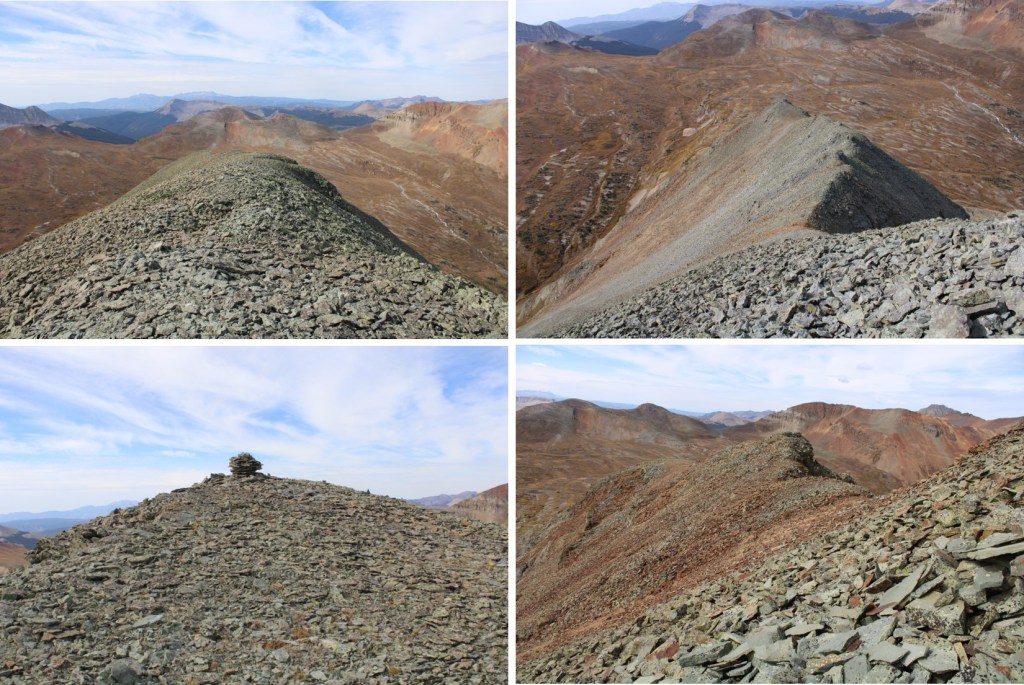
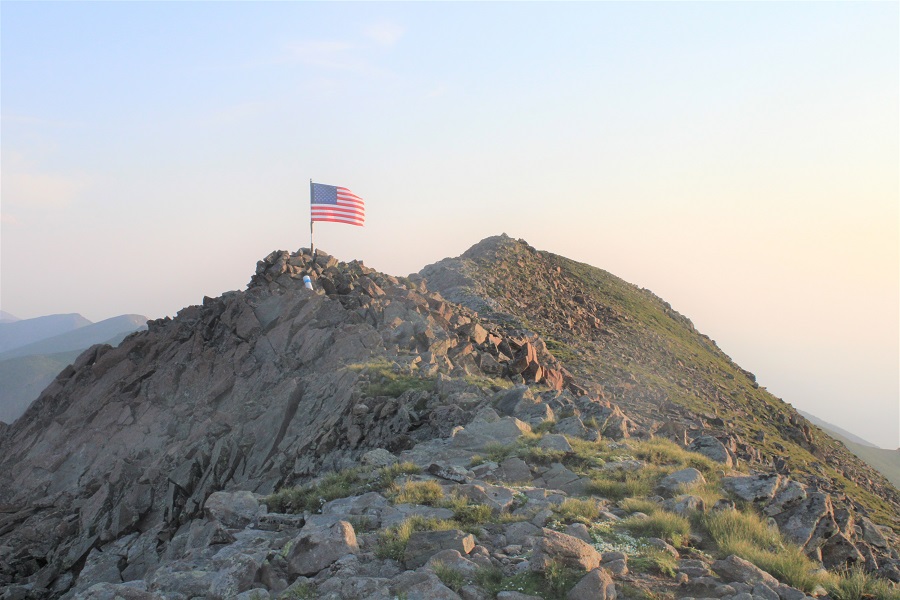
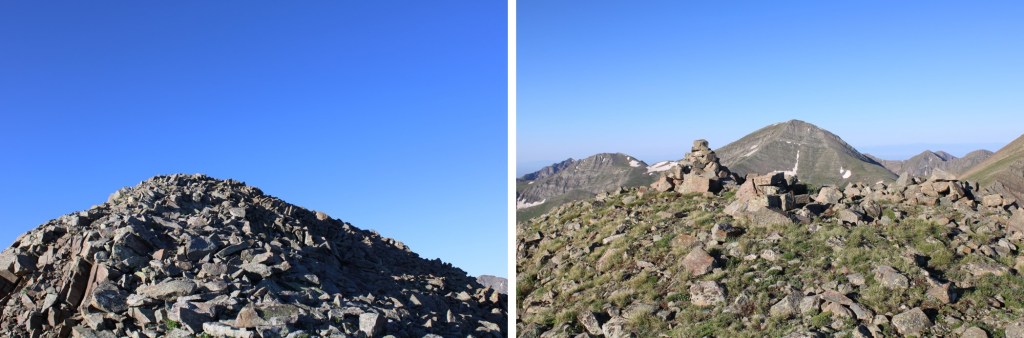
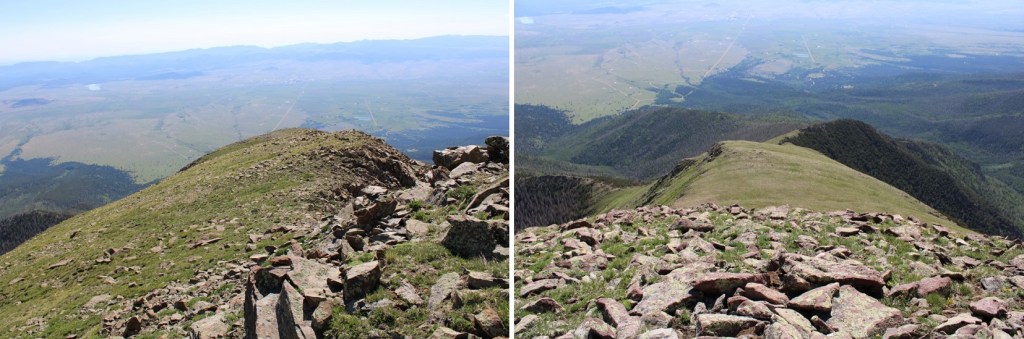
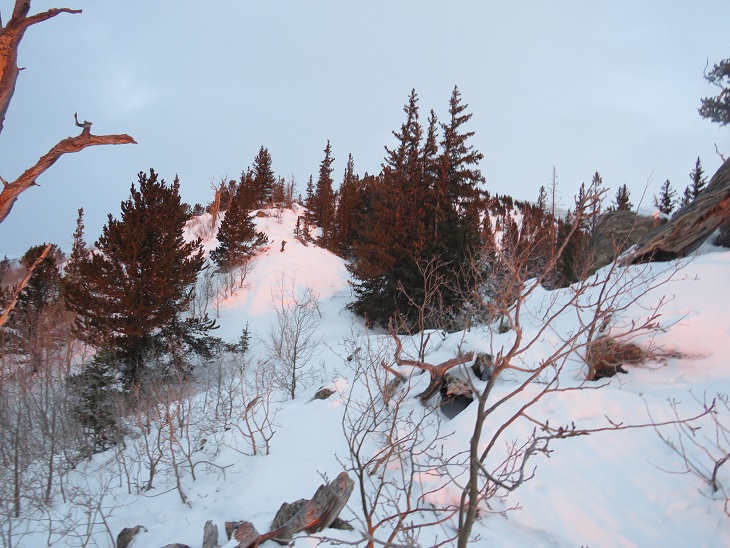
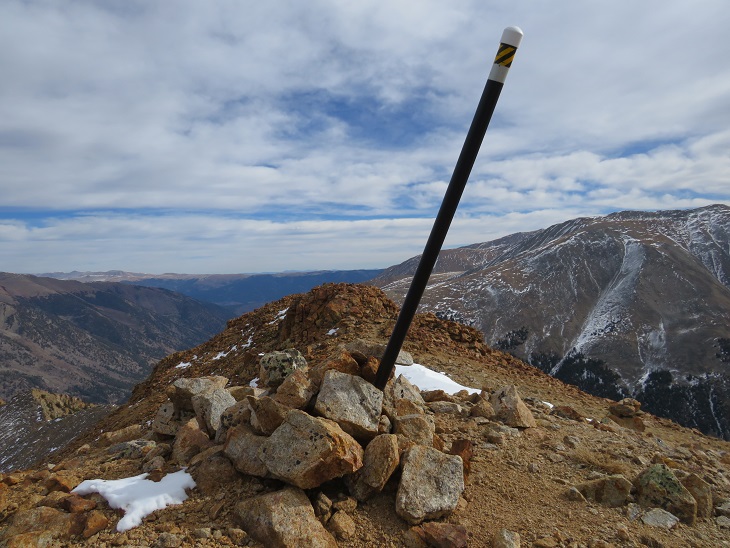
The summit is obvious, after quite a few false summits. Here I saw a mountain goat run past me into the mist. The summit was noted by an obvious cairn (that needs a new summit register)
It’s important to note by this time I was feeling like a popsicle. I could not feel my hands and my feet felt like blocks of ice. Apparently it’s wet and cold hiking inside of a cloud.
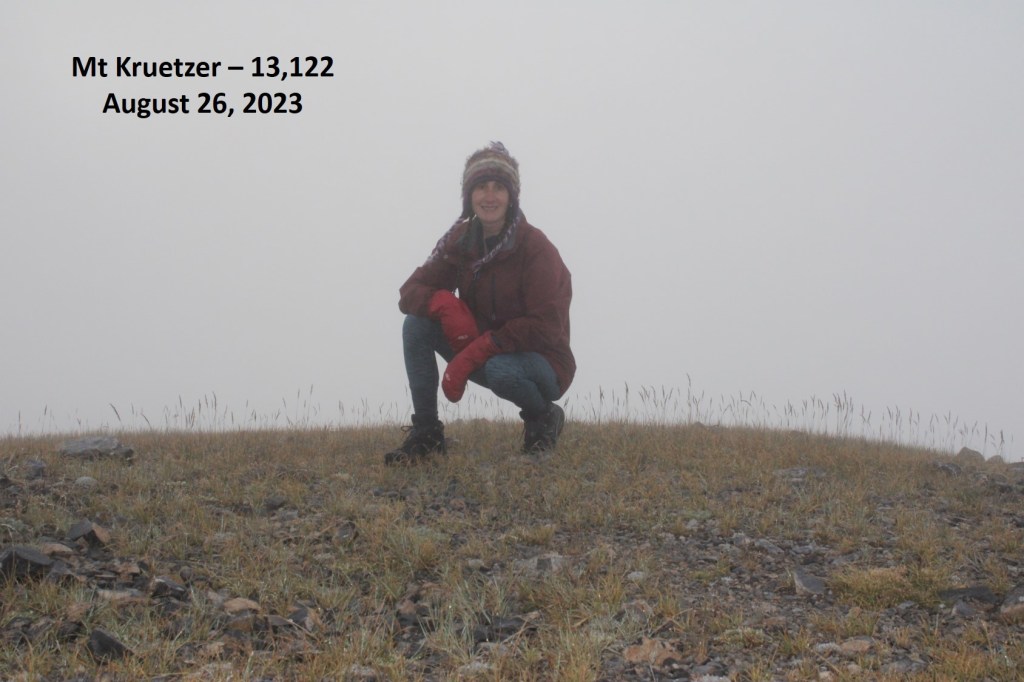
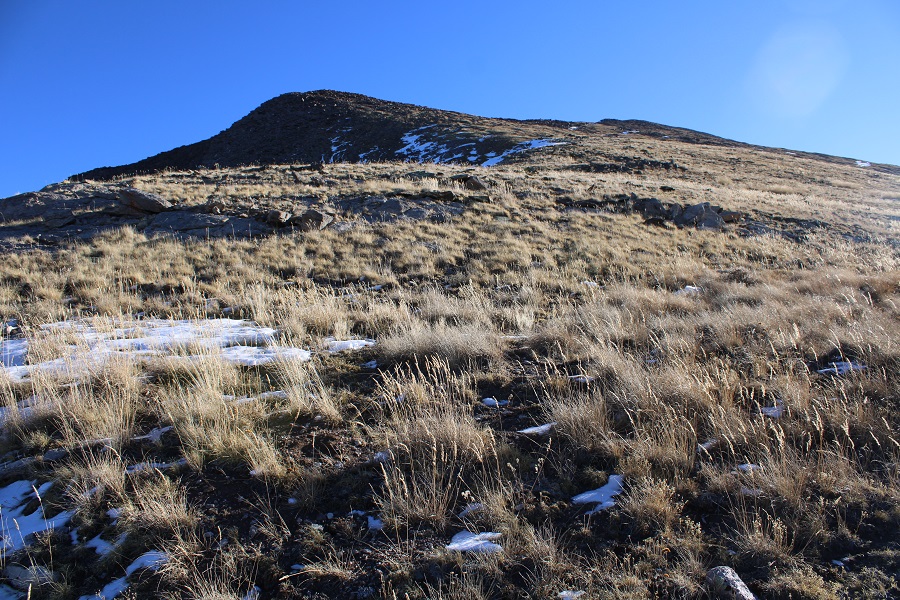
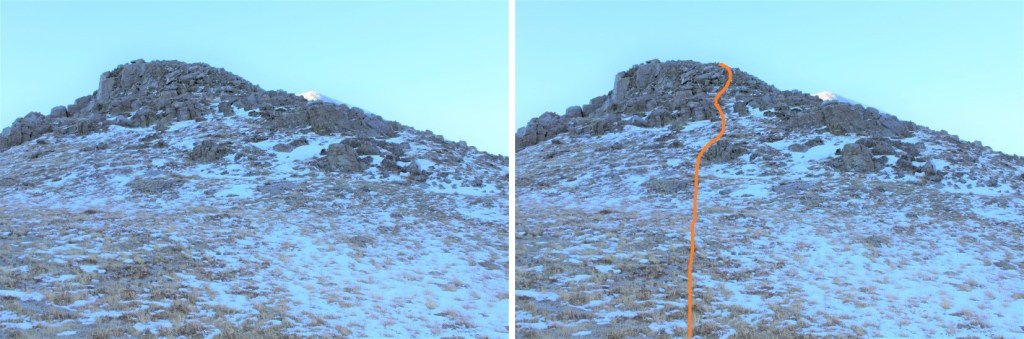
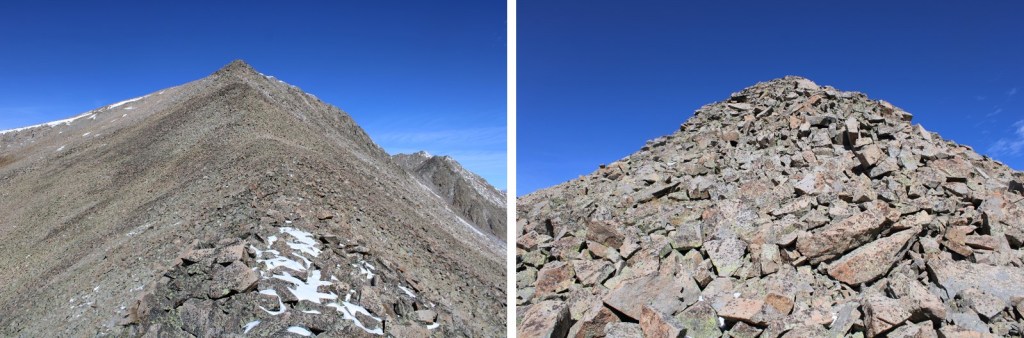
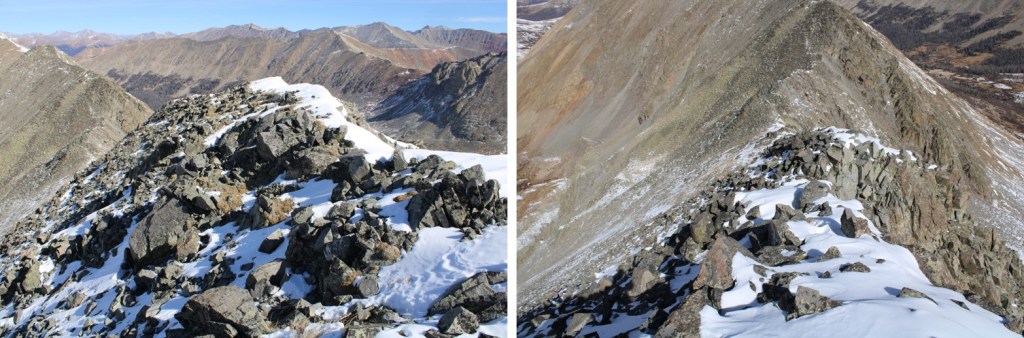
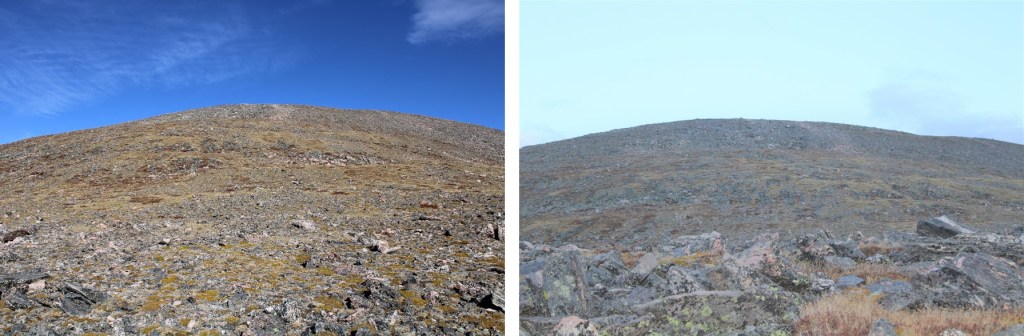
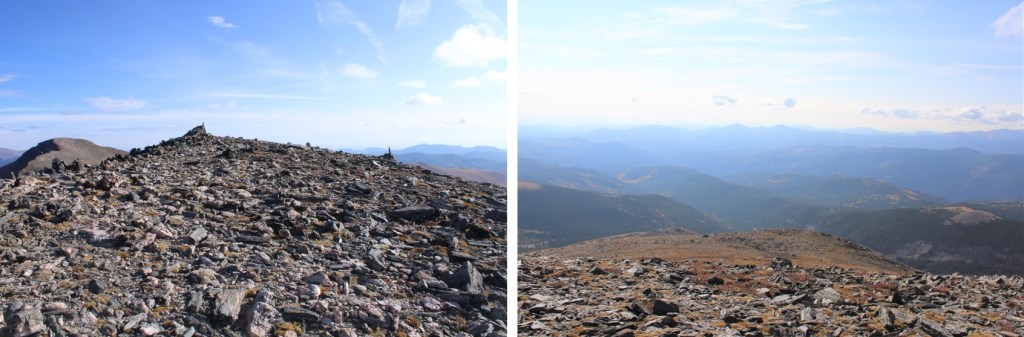
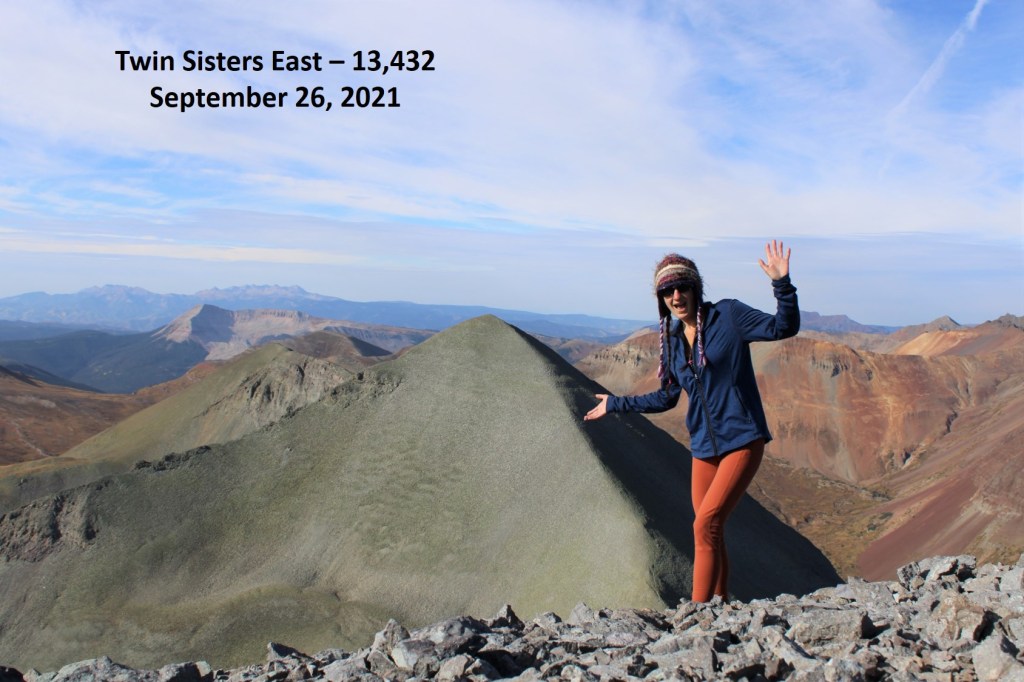
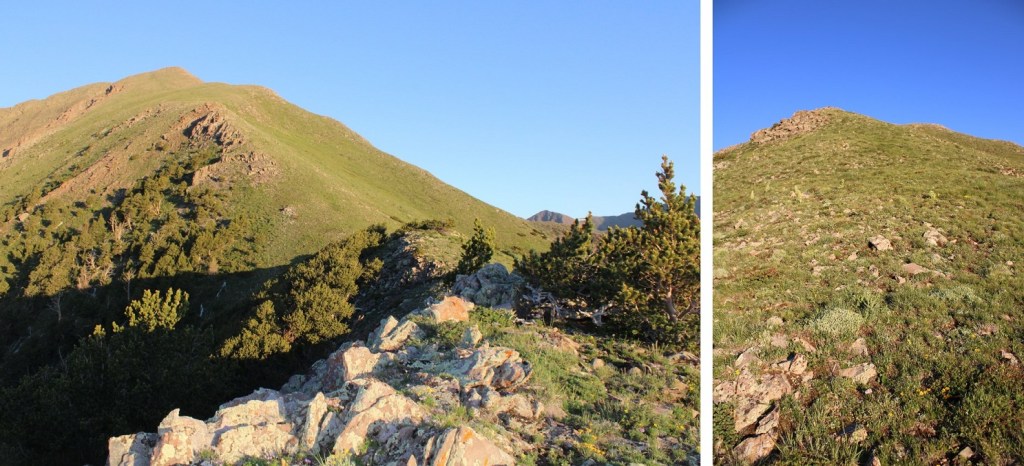
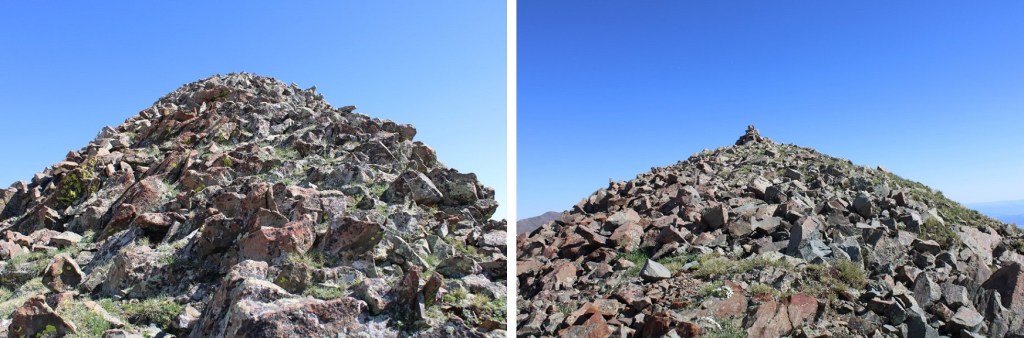
I summited Mt Kruetzer at 7am
Mt Kruetzer:
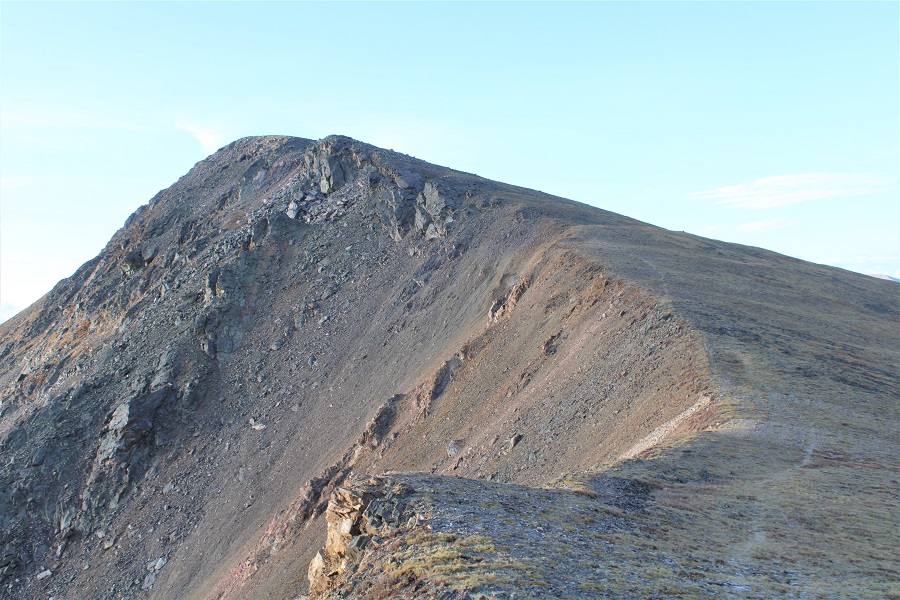
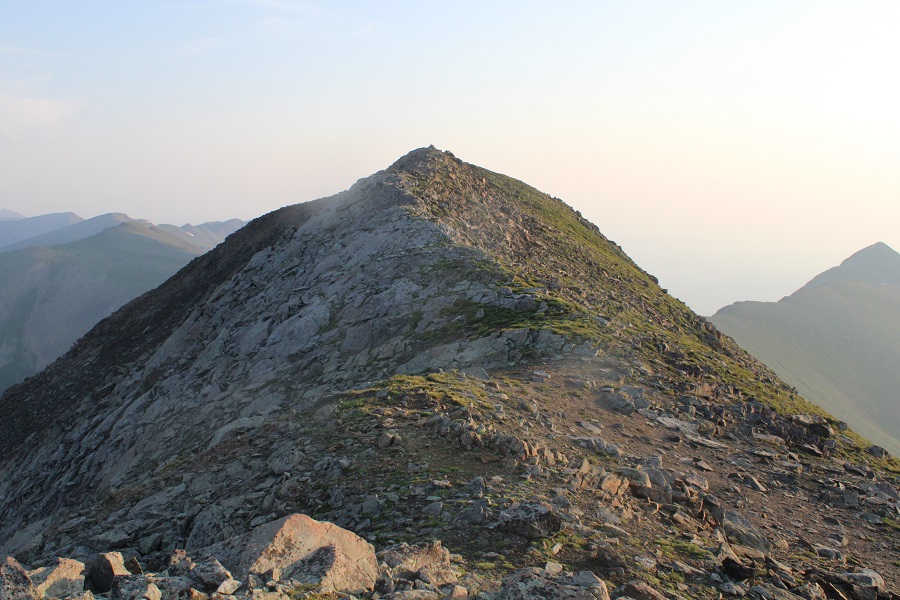
I made my way back to the saddle. I’ll apologize again for the terrible pictures, and promise to climb these peaks again someday so I can get better photos of the route.
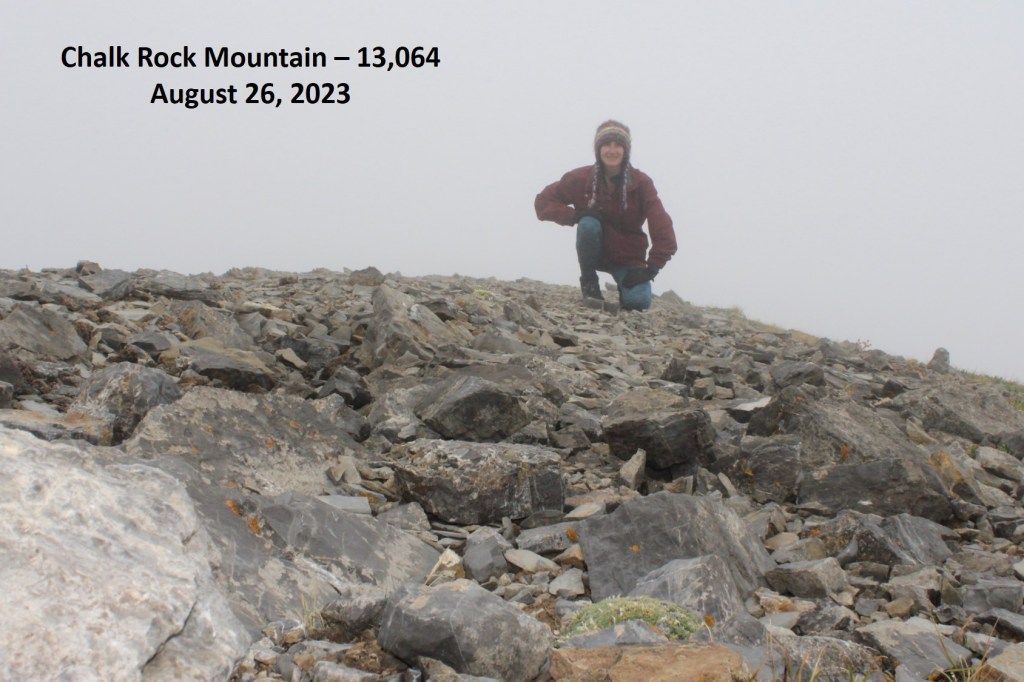
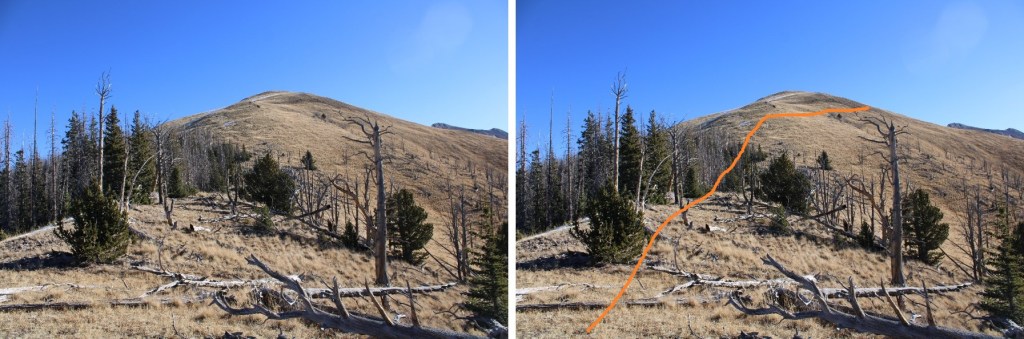
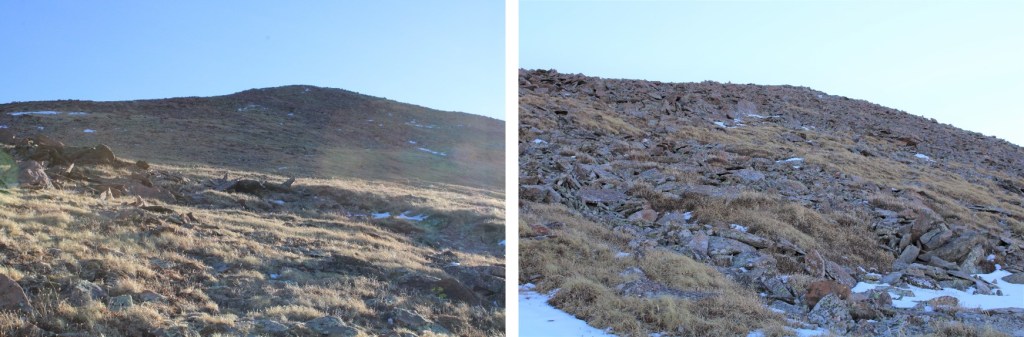
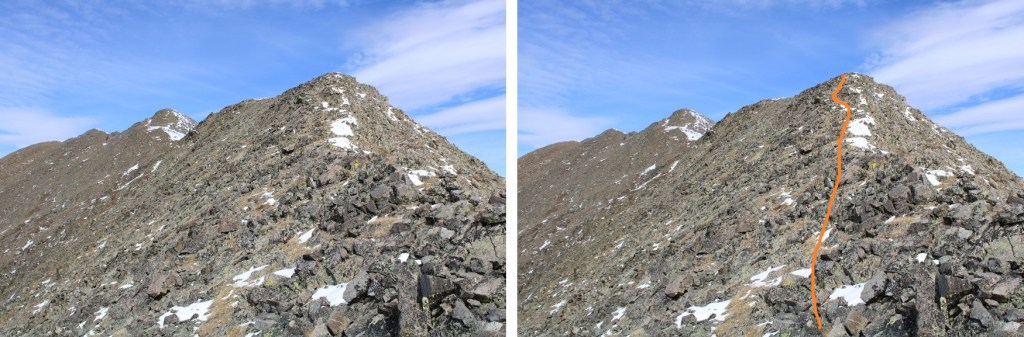
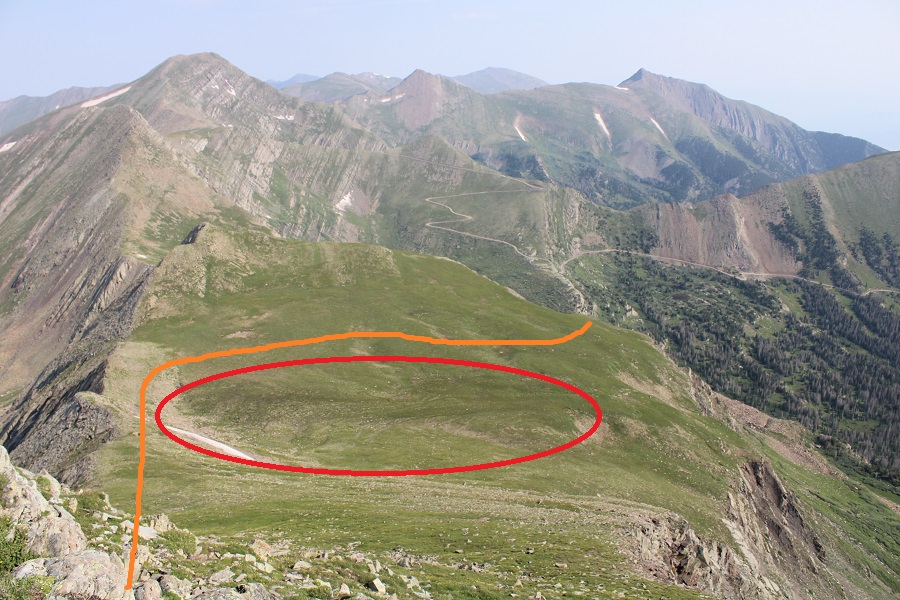
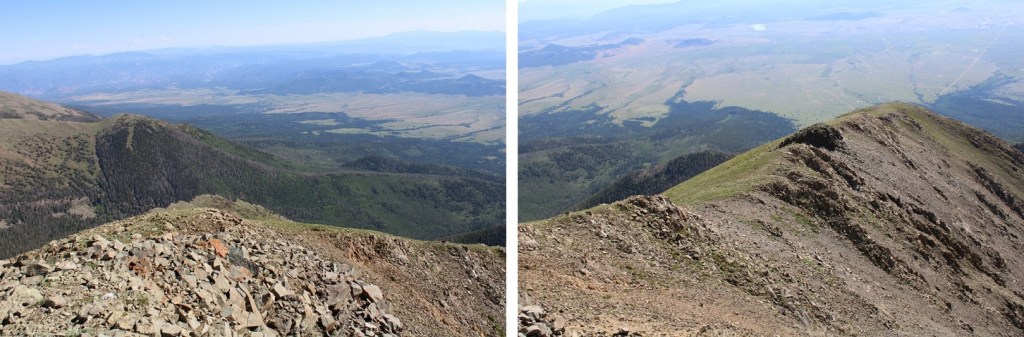
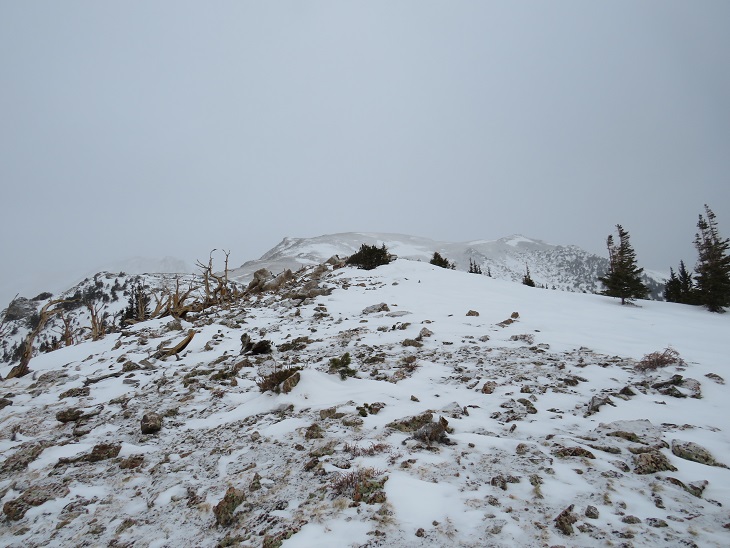
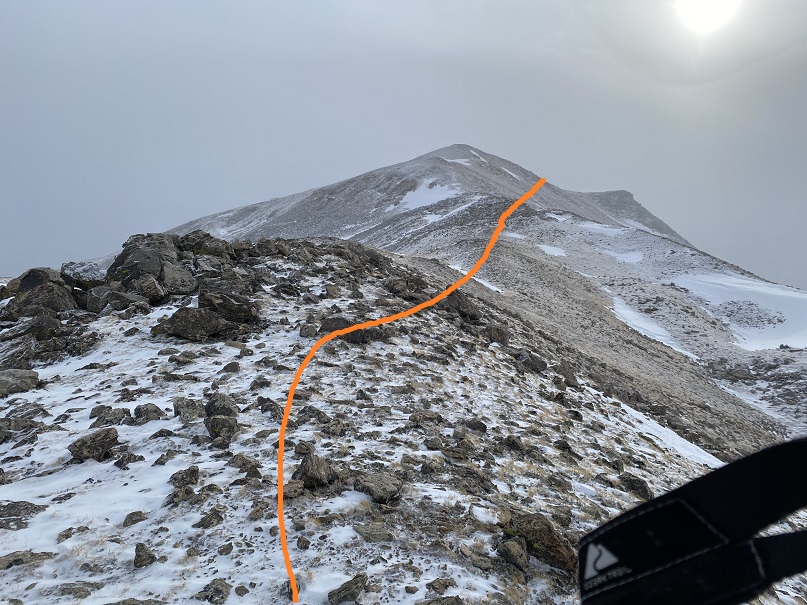
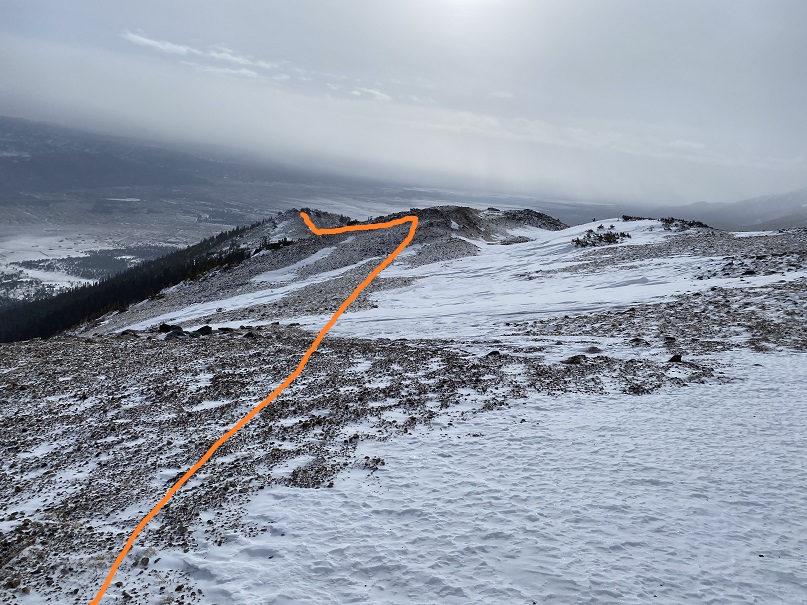
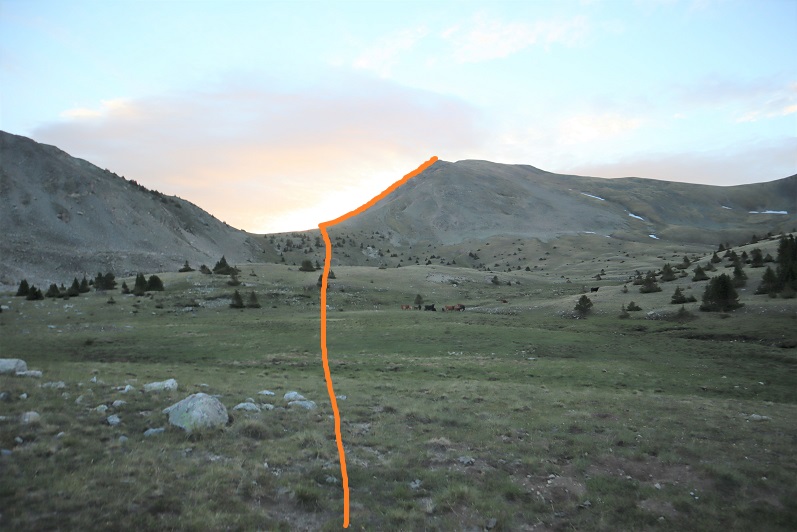
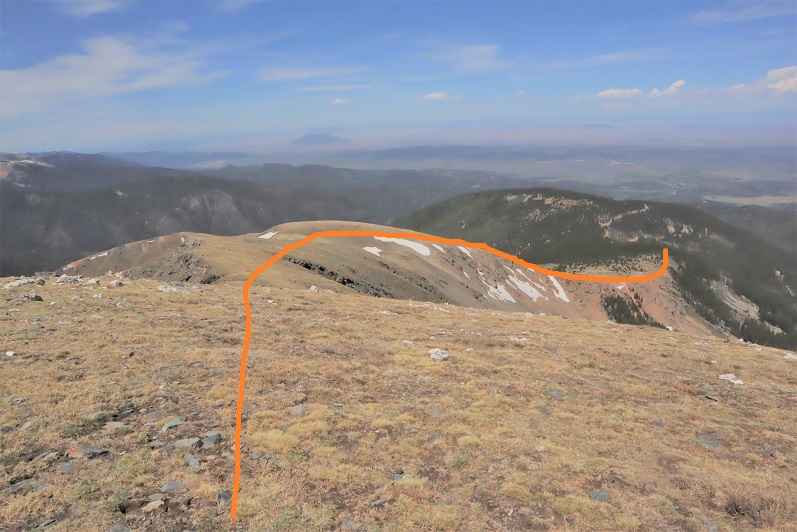
Back on the saddle, I headed northeast towards Chalk Rock mountain
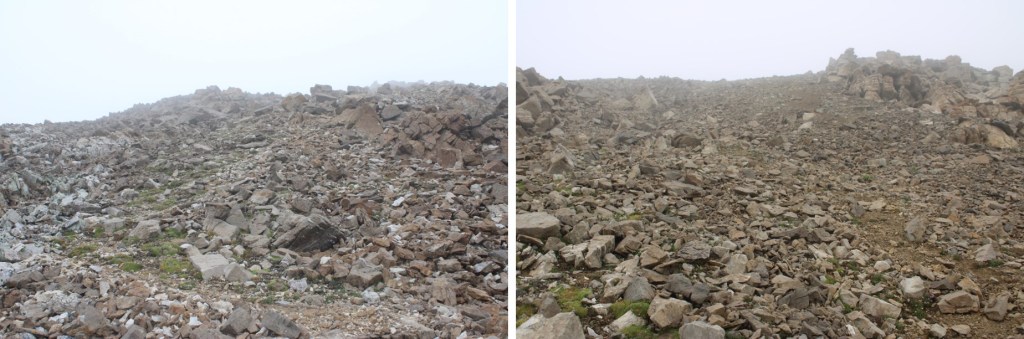
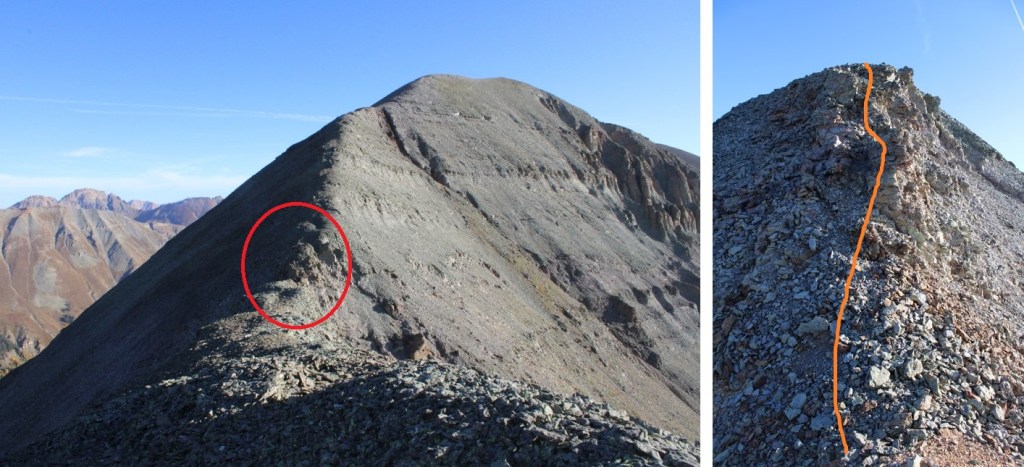
This is the route I took up. It was obvious why it’s named “Chalk Rock Mountain”. There were game trails here, and the summit was surprisingly close. From the saddle, it was only .3 miles to the summit.
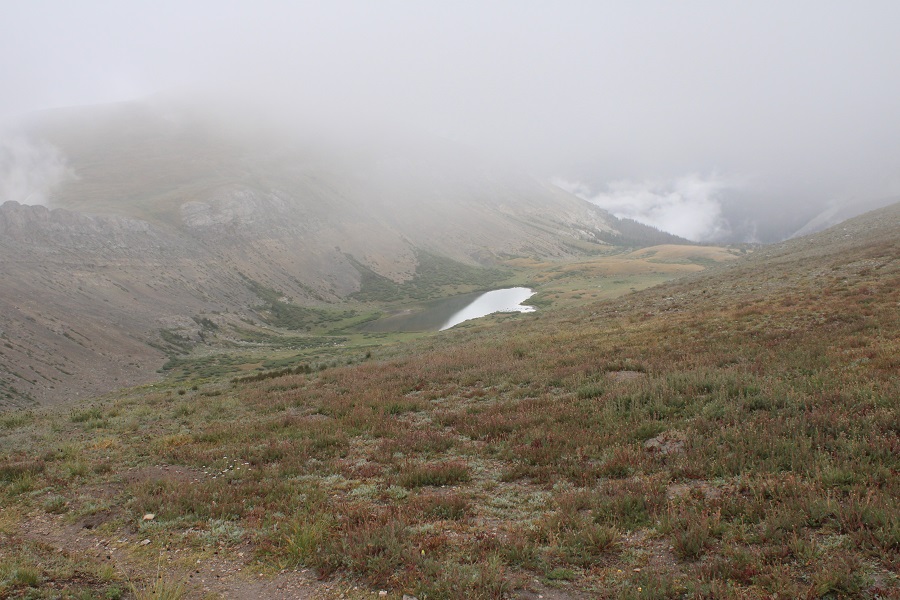
The summit was relatively flat, without a noticeable cairn
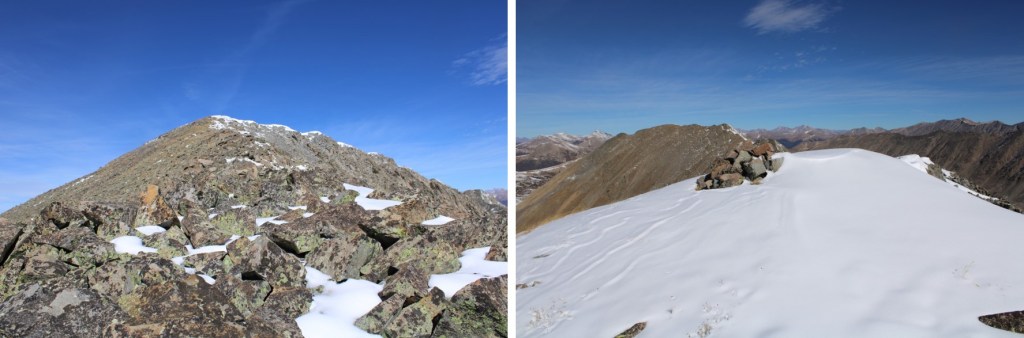
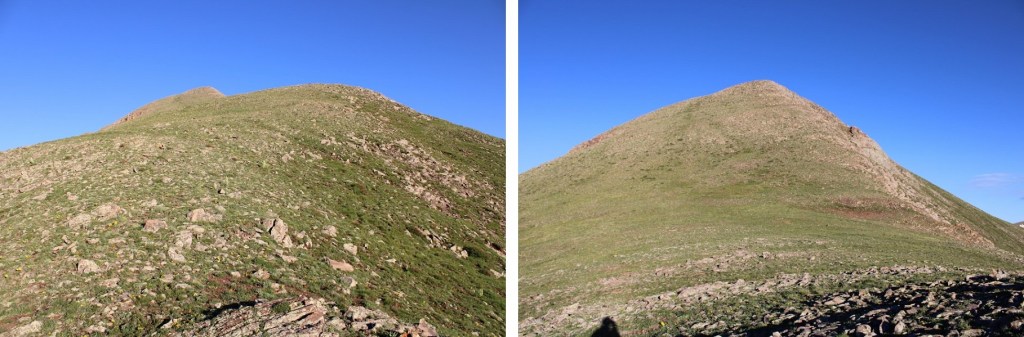
I summited Chalk Rock Mountain at 8:10am
Chalk Rock Mountain:
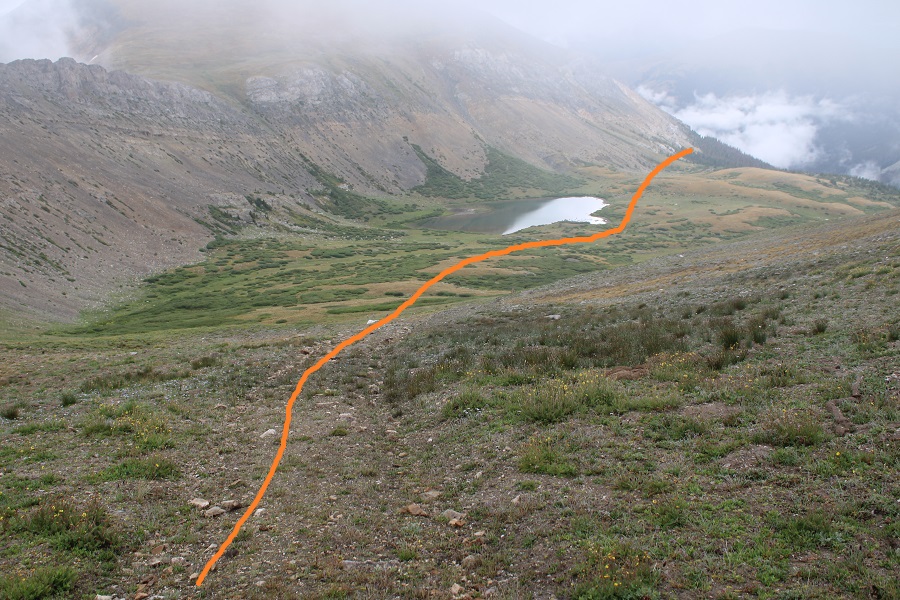
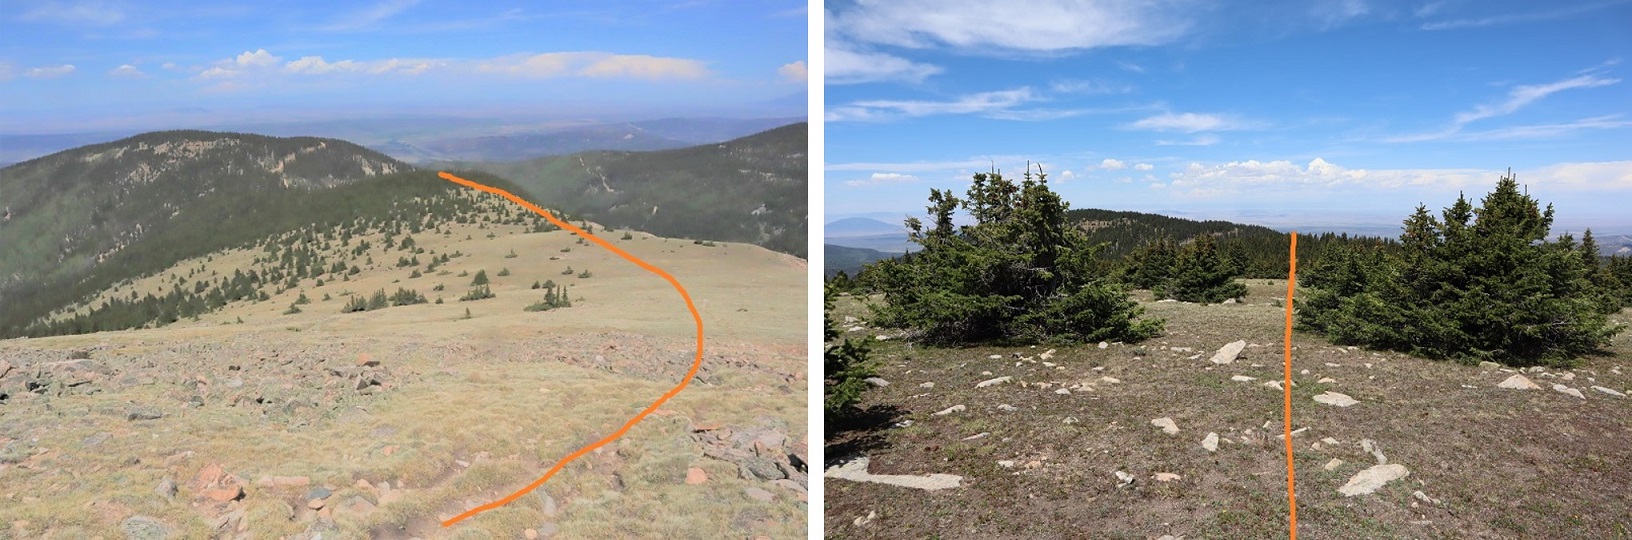
More than ready to be out of the clouds, I turned around and headed southwest back to the saddle.
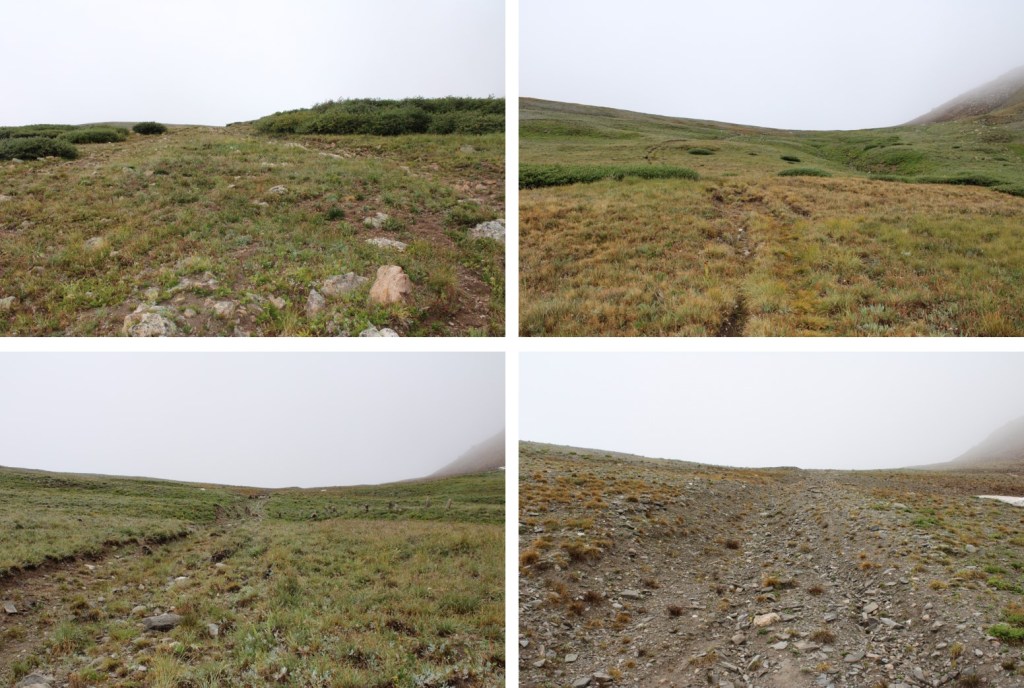
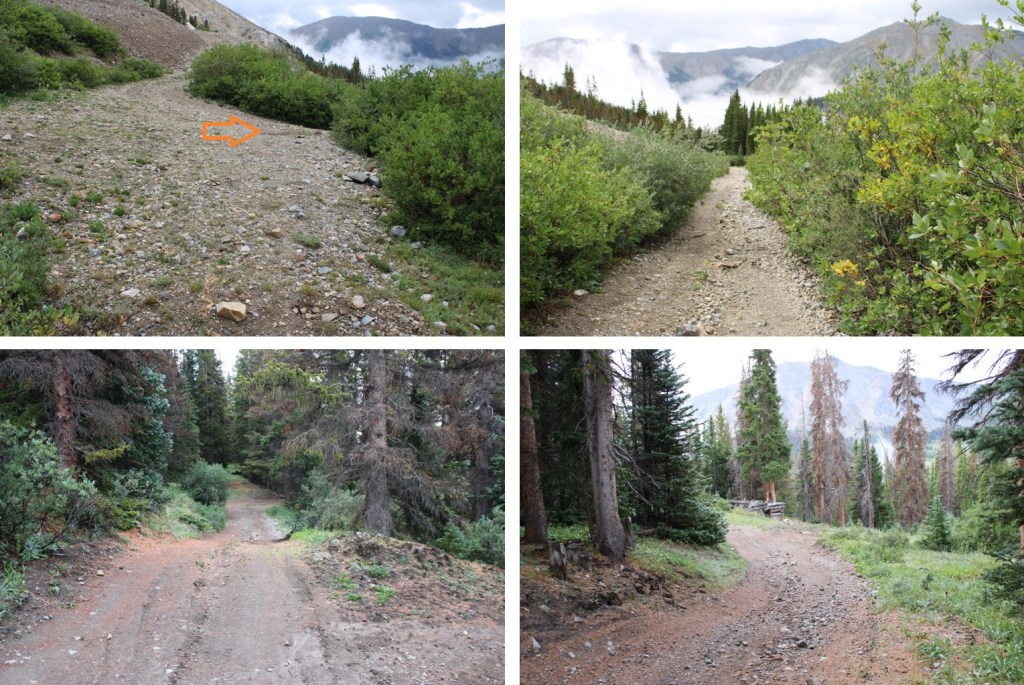
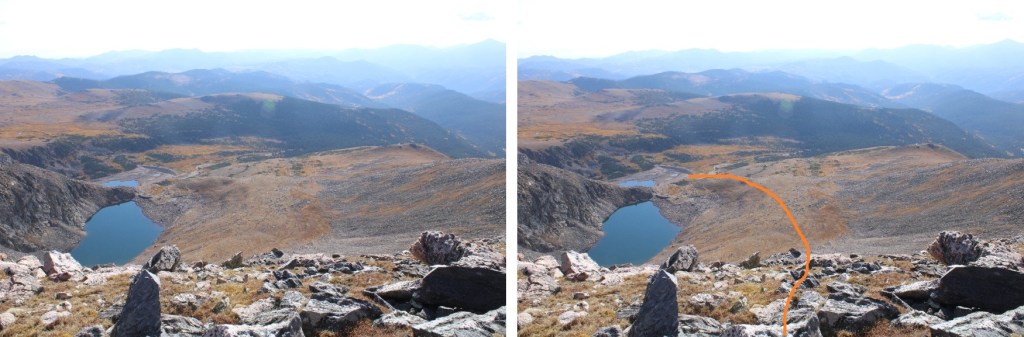
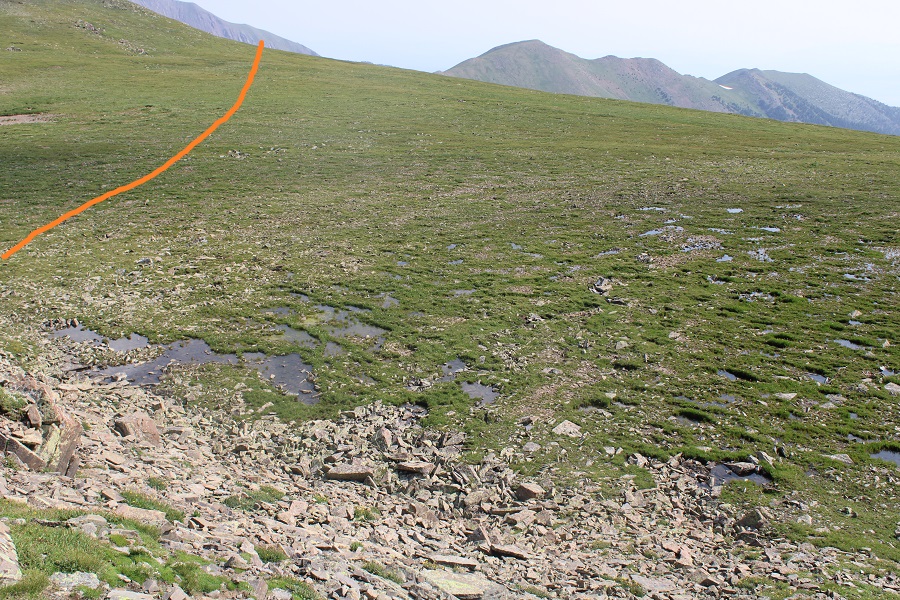
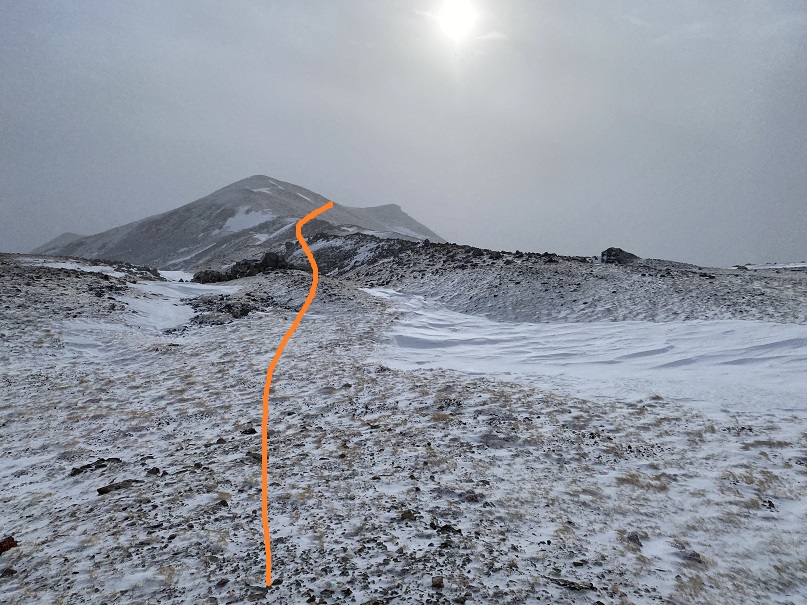
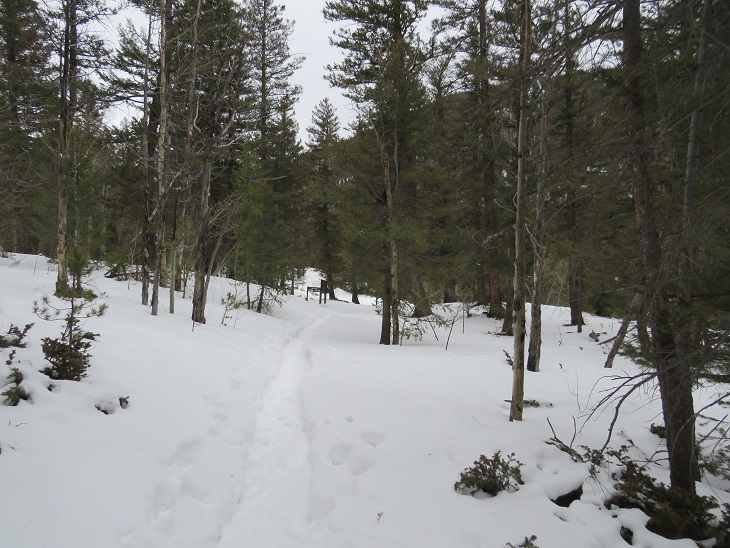
Back on the saddle, I turned left and followed the road back down into the basin
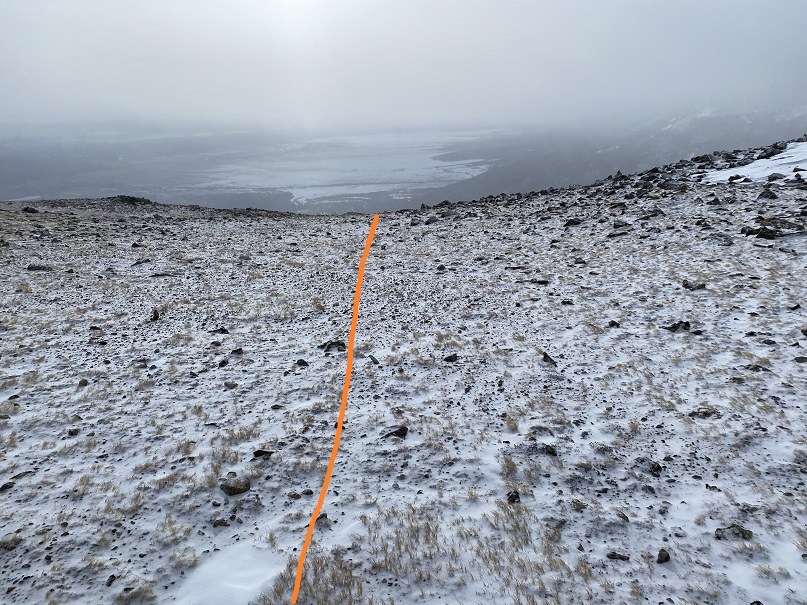
This is the route out of the basin
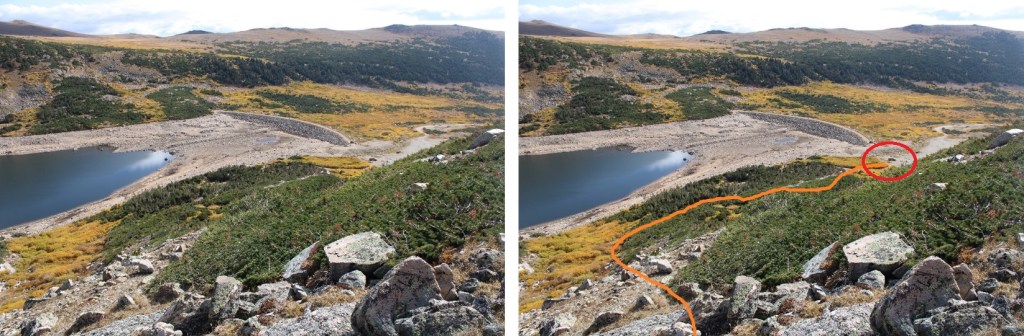
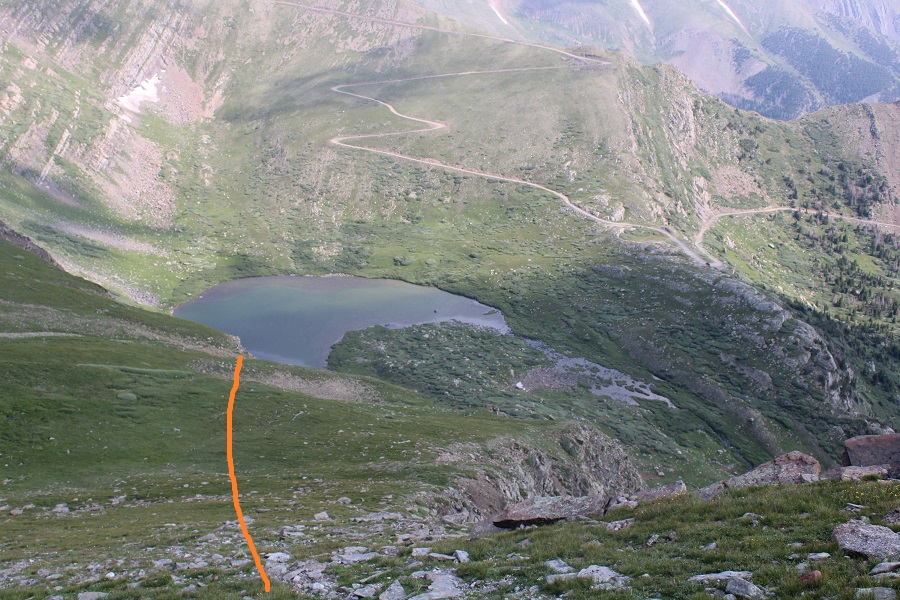
I turned right onto the road and followed it back down
Back at road 344 I turned left, and followed it back to my campsite
I made it back to my truck at 9:45am, making this a 10.43 mile hike with 3117’ of elevation gain in 5 hours, 30 minutes. Now it’s time to dry out my shoes, socks, and feet for tomorrow morning.
On to the next trailhead!
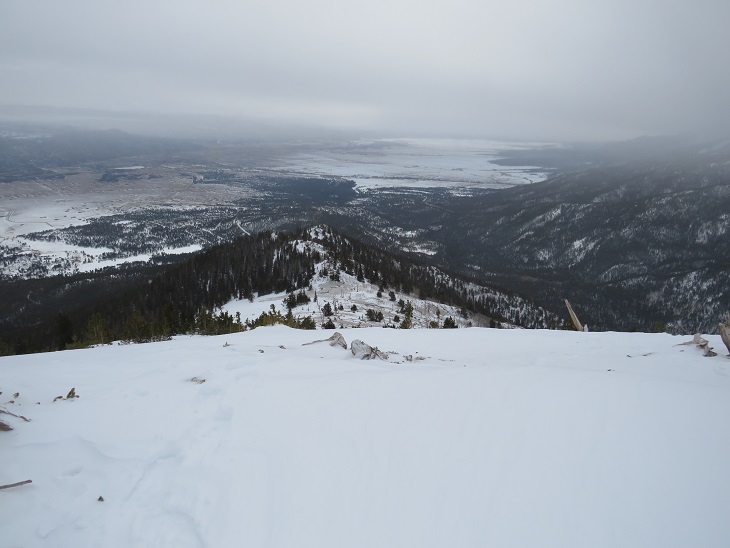
Oh, and this is what the mountain looked like as I hiked down. The clouds never went away!
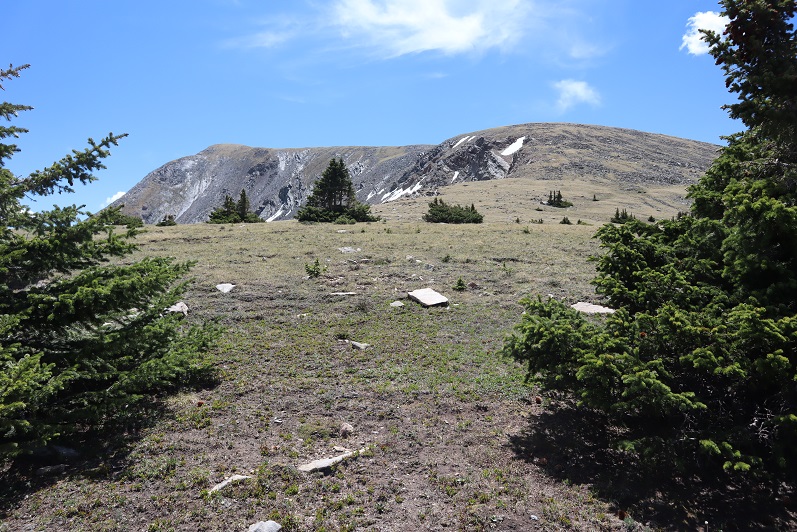
The next morning I hiked Jones Mountain B. Unlike yesterday, the there were no visible stars, as the sky was cloudy. However, once I made it to the ridge, I could see Kruetzer and Chalk Rock were clear. Here are some more visuals of the route
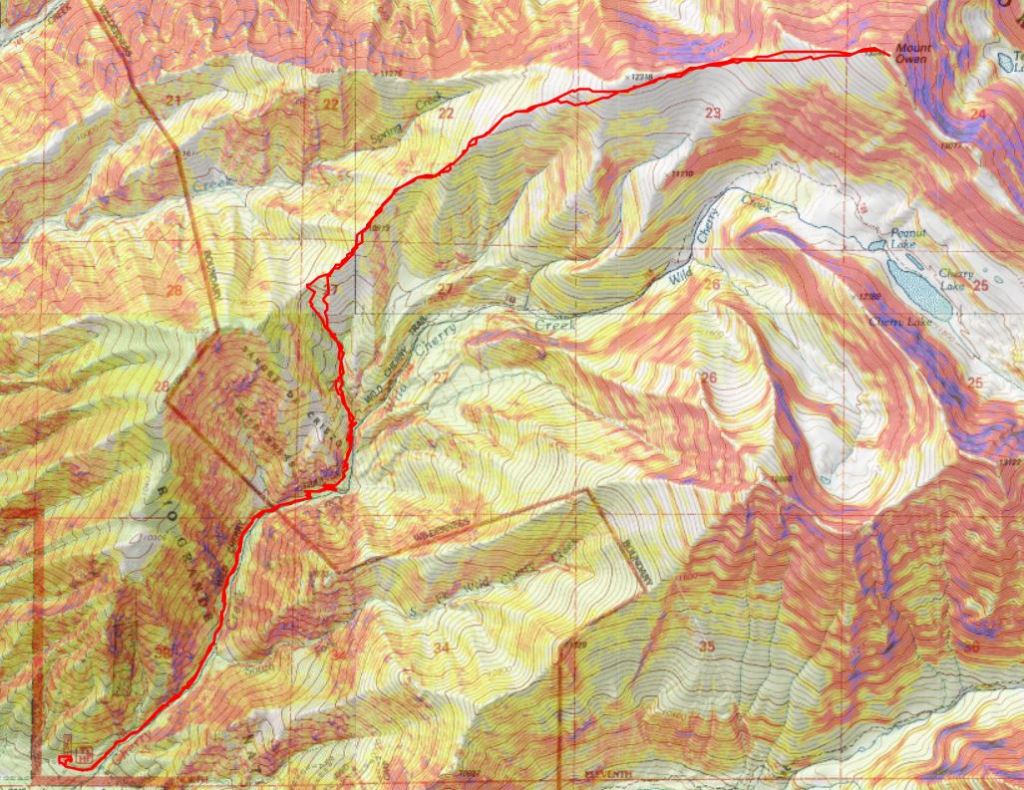
I was in a hurry today: I offered to help a Girl Scout Brownie troop (7–9-year-old girls) earn their hiking badge, and I needed to be home in time to meet them at the trailhead for their hike this evening. So, while I’d initially wanted to make this a loop with some other peaks, I settled for just doing Mt Owen today.
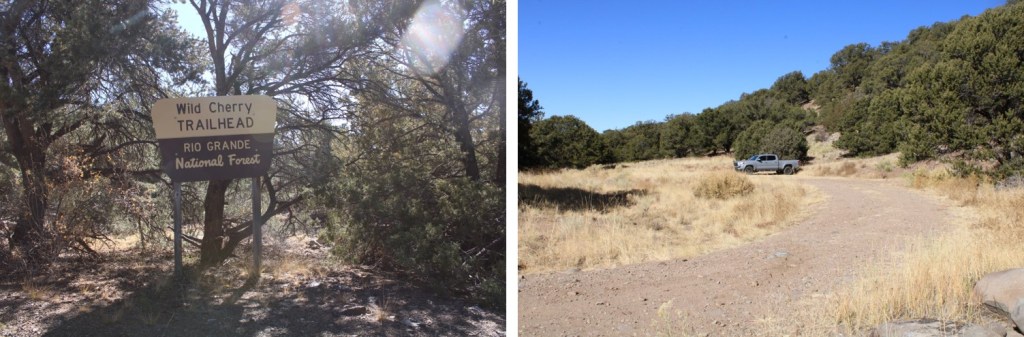
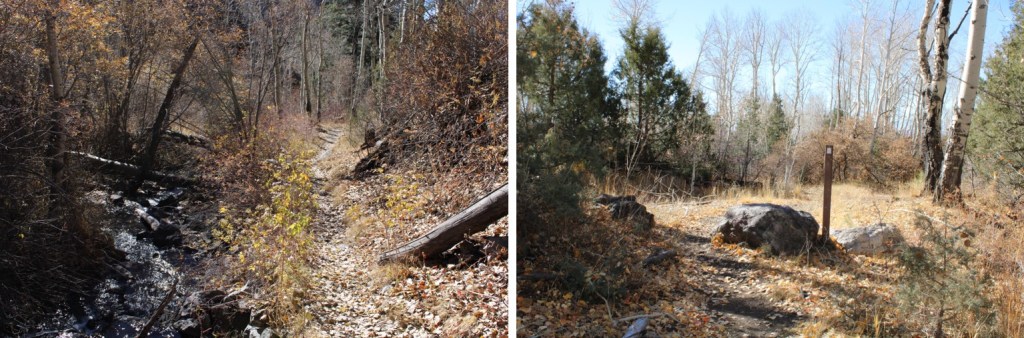
I drove to the Cherry Creek Trailhead, and was surprised at the condition of the road. The last 2 miles is certainly 4WD. I drove to the trailhead in the dark, and the first area of sand caught me by surprise. It had my tires spinning until I put my truck into 4WD. I backed up and took the side road. There are at least 3 different side roads off the main road that look relatively new. If you have the option, take the newer road, as the older road has been washed out and this is the workaround. They always re-connect.
I gathered my gear, set my ‘halfway point’ alarm so I wouldn’t be late to my event tonight, and I was on my way. There was a Subaru parked skewed in the parking area with a couple of boondockers, so I was doing my best to be quite as I made my way towards the trailhead.
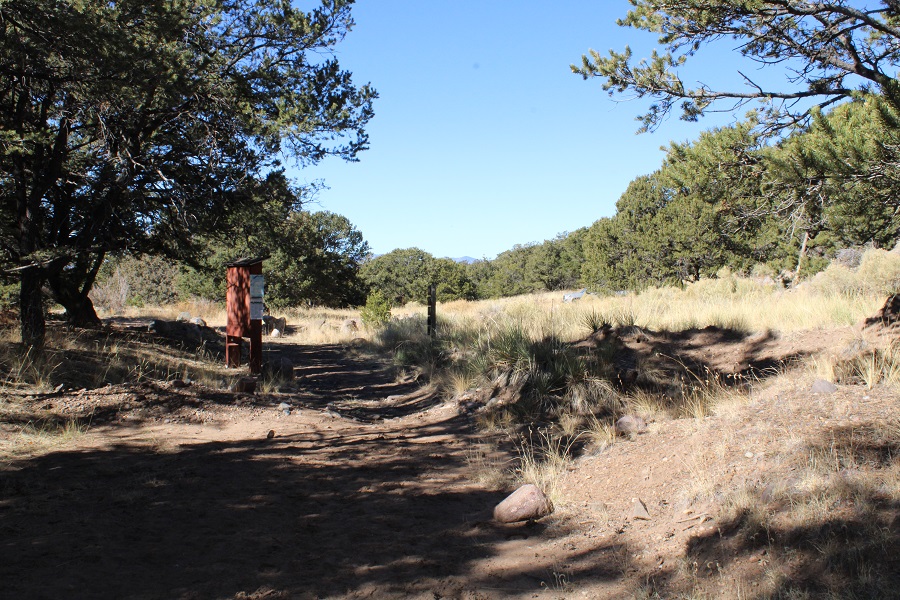
The trail begins at the east end of the parking area, and is very well marked. There’s a place to register, so I tried, but the pen was frozen and there wasn’t a pencil, so what I wrote only showed up as indentations on the paper. If you do this hike soon, it’d be nice if you dropped off a pencil…
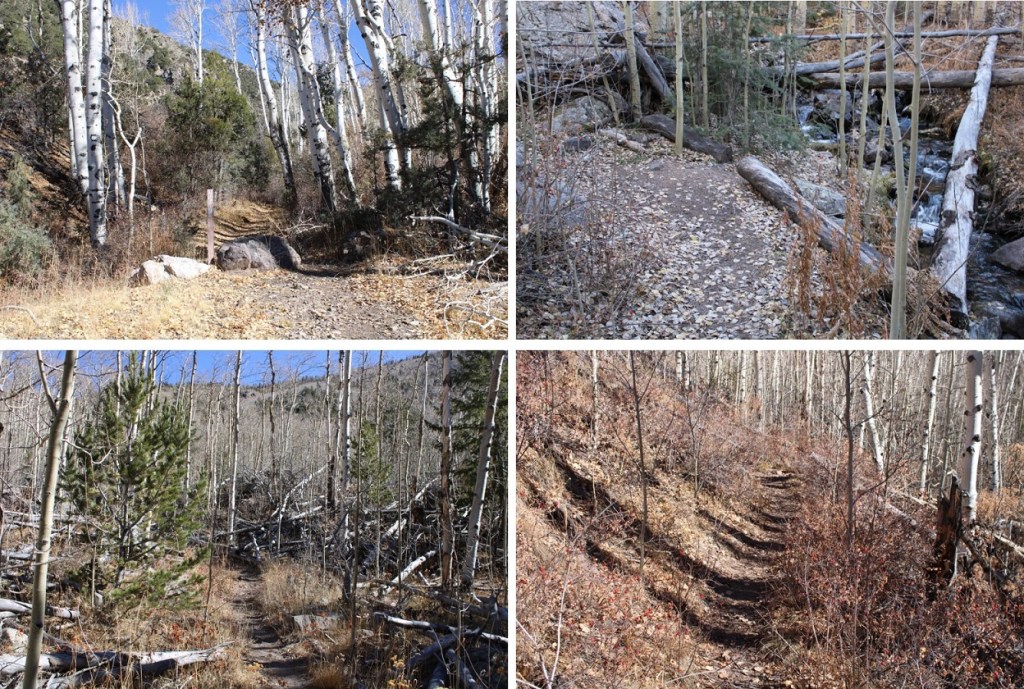
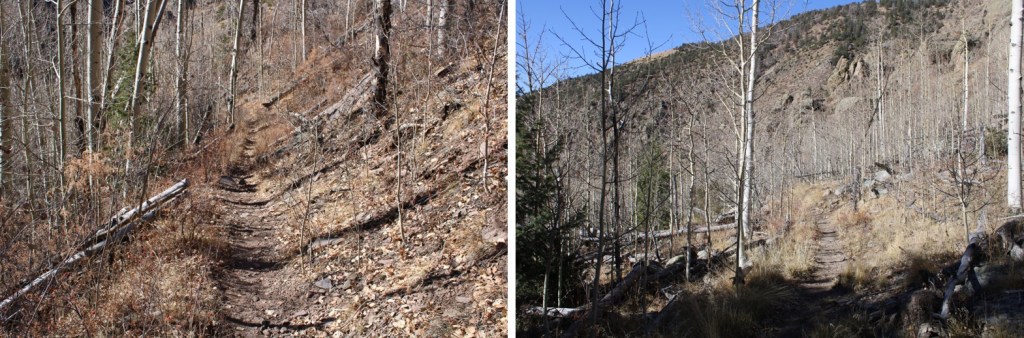
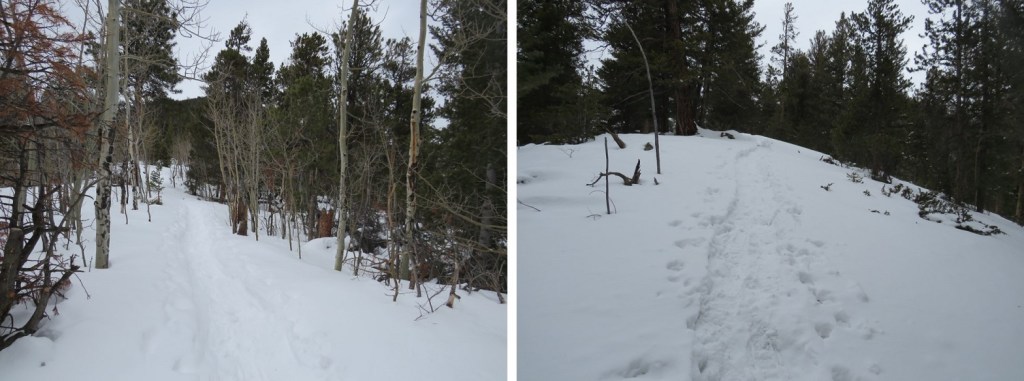
I followed the class 1, Wild Cherry Trail for 2.5 miles as it paralleled Wild Cherry Creek and the started to switchback northeast, skirting the mountainside.
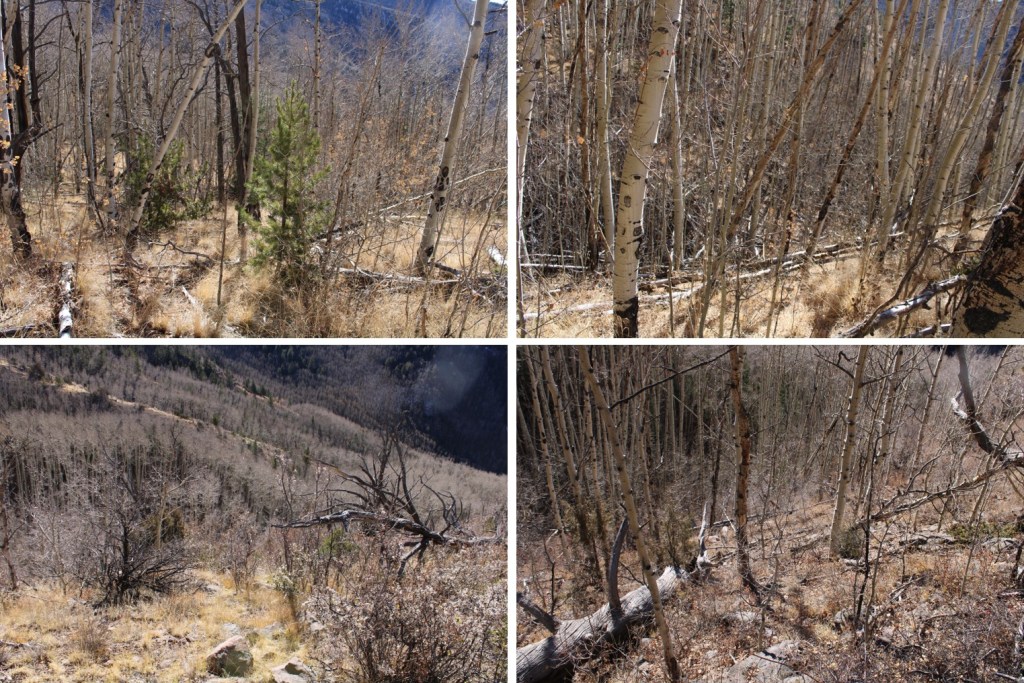
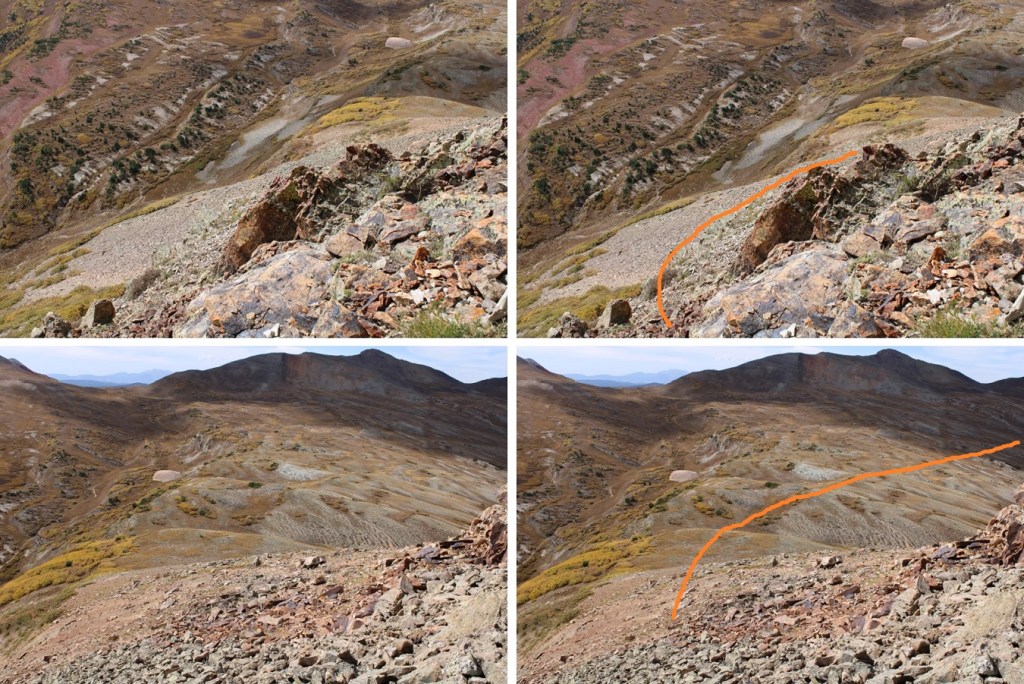
After 2.5 miles, at the middle of the last switchback, I left the trail and followed the drainage north to the ridge. I stayed to the left of the drainage, but in the daylight, on the way back down, I realized it would have been much easier to stay to the right, on the tundra and grass instead of in the trees. The bushwhacking wasn’t too difficult here, but there were a ton of downed trees, especially directly in the drainage.
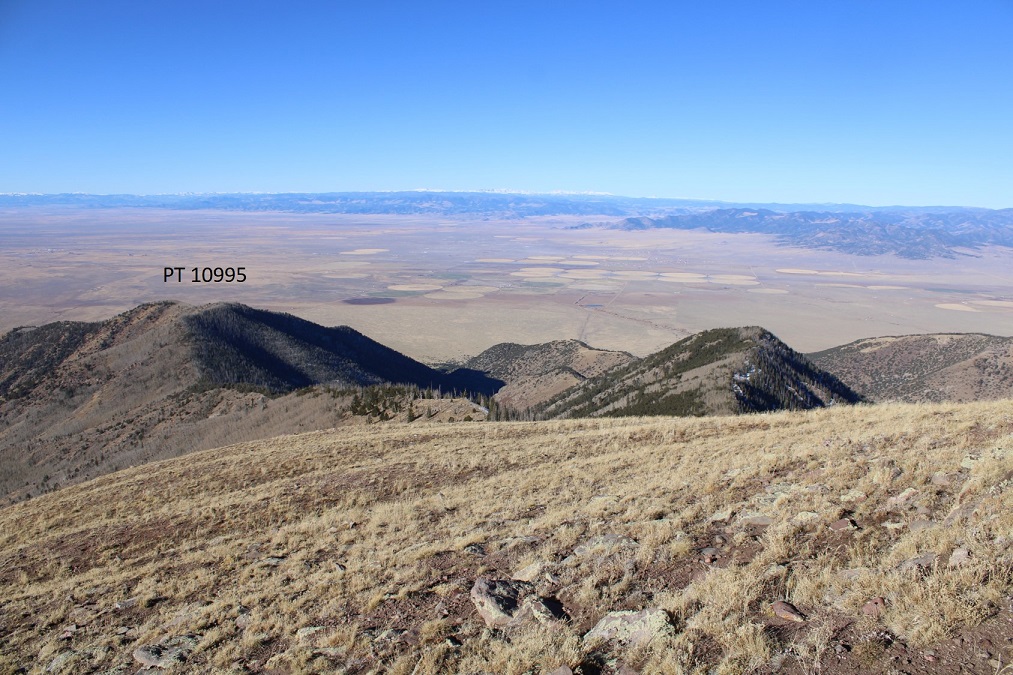
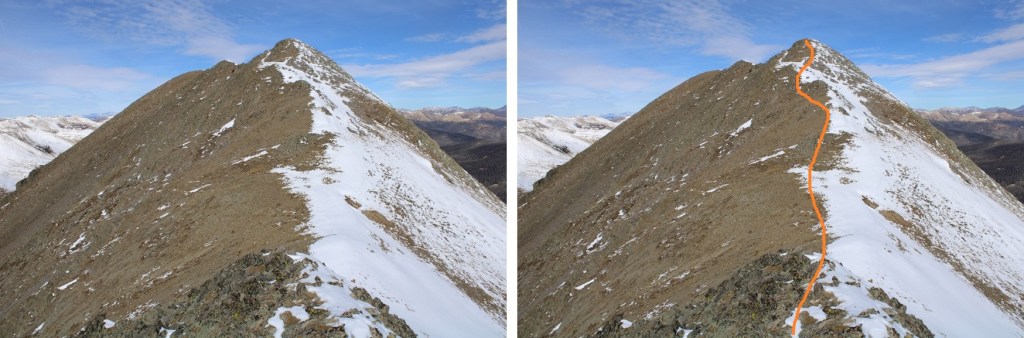
It was obvious when I made it to the ridge. I could see PT 10995 to the left, and followed the ridge towards Mt Owen to the right
The ridge was easy to follow. There were even game trails that were clearly evident. I followed the ridge northeast.
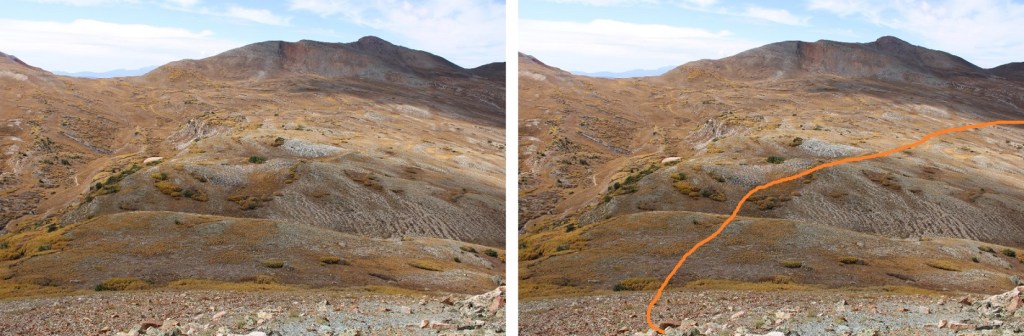
Through a break in the trees I could see the rest of the route to Mt Owen
I continued to follow the ridge
I made it to treeline, and instead of summiting unranked PT 12318, I skirted the mountain to the south, staying at about 12250’ (time was of the essence today….)
This was grassy tundra, and easy to navigate
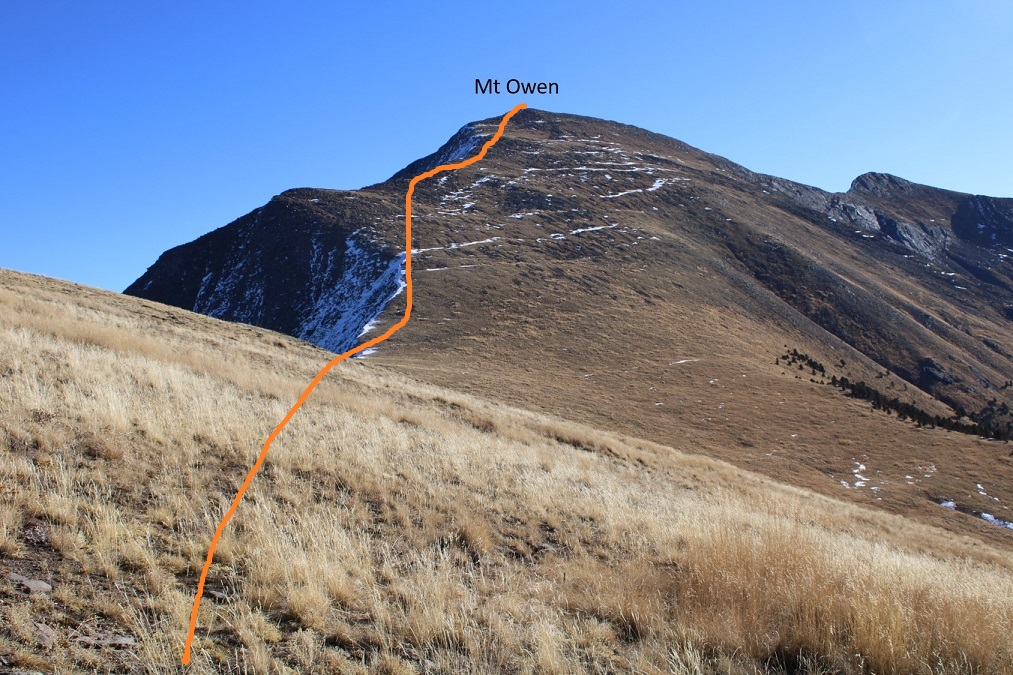
If you stay around 12250’, you won’t have to lose much elevation as you make your way to the 12318/Mt Owen saddle
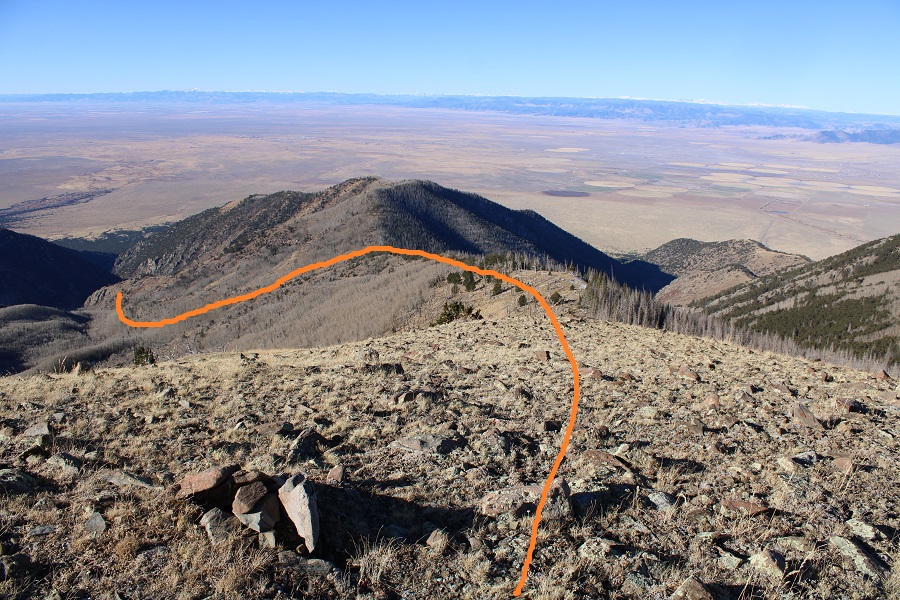
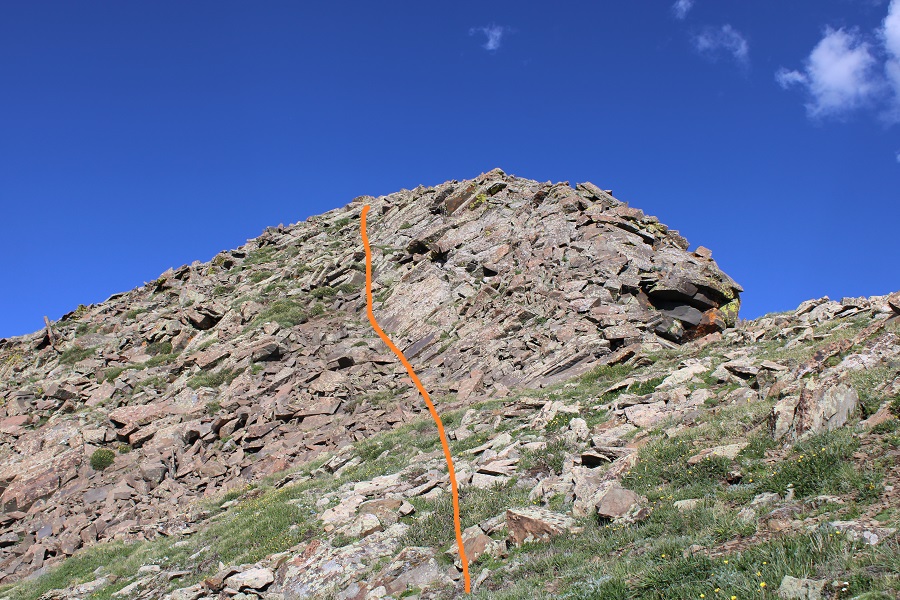
From the saddle, I gained 1100’ in .8 miles to the summit. Here’s the route I took
And some step-by-step pictures. It started out as tundra, and then became a bit rocky, but all class 2
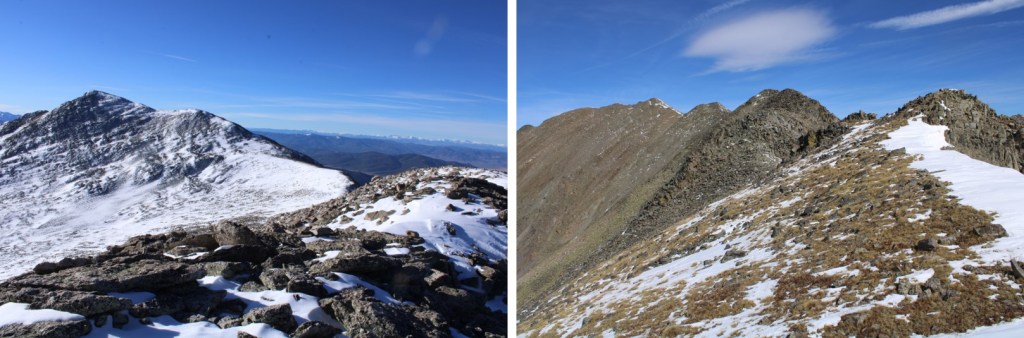
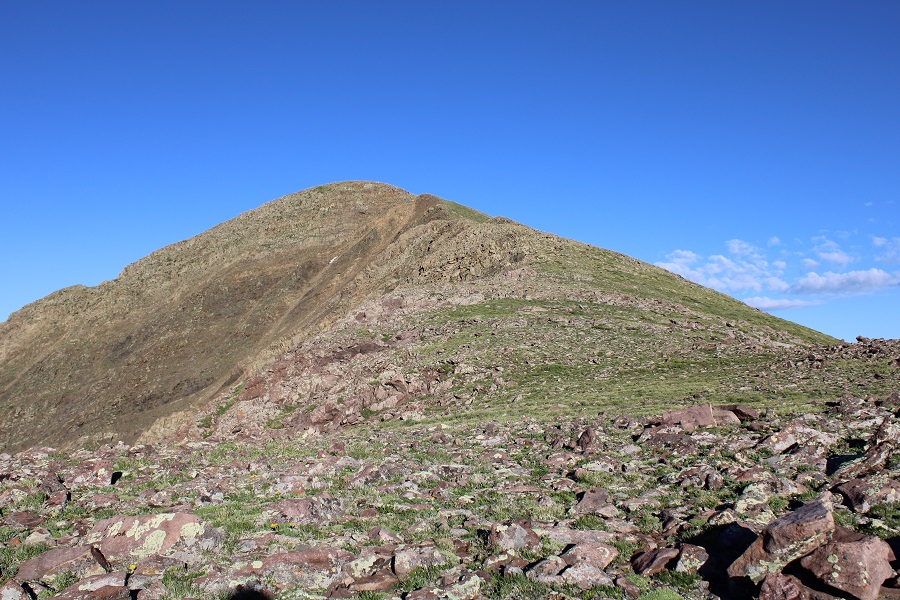
I summited Mt Owen at 8:40am
Mt Owen:
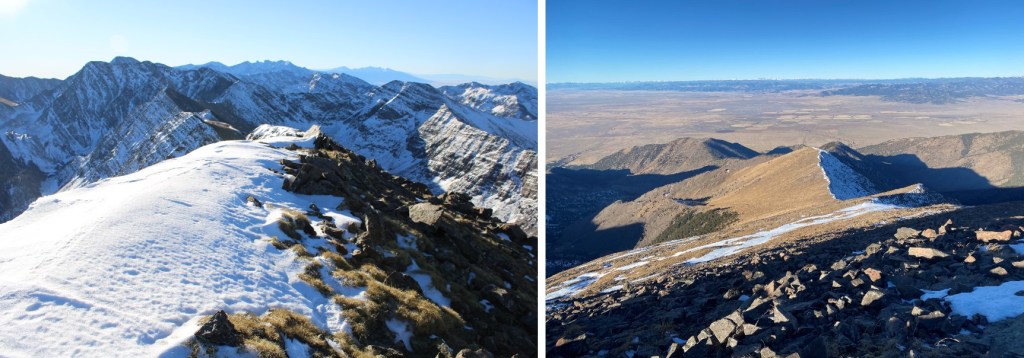
We’ve had some snow recently, but it hasn’t been sticking much in the Sangres. It’s always interesting to see the difference between the snow on the north versus south sides of the peaks in early season.
I was 20 minutes ahead of schedule, but that wasn’t enough time to make this a loop, so I turned and re-traced my steps back to treeline.
This small rock outcropping is a great visual. Stay just above the rock and you’re at the perfect elevation go skirt the mountainside and head towards the ridge down.
Make sure you choose the correct ridge to hike down. It’s the one nearest PT 10995, which is the largest point you can see, making it easy to notice, but also easy to miss if you haven’t been paying attention.
Here’s the route from the ridge back down to the trail
And some pictures of the ridge
Once at the lowest point on the ridge, I turned left, and headed south, following the drainage back towards the trail. Once again, if you’re doing this, stay in the grassy area. I… stayed in the trees. I didn’t have a great visual, but I could hear the creek ahead of me, so I just aimed south, towards the creek
There was a little bushwhacking involved, but I easily found the trail, and followed it back to the trailhead.
I made it back to my truck at 11:30am, making this a 12.21 mile hike with 5049’ of elevation gai in 6 hours, 50 minutes.
And now, back home to hike with some enthusiastic young adventurers!
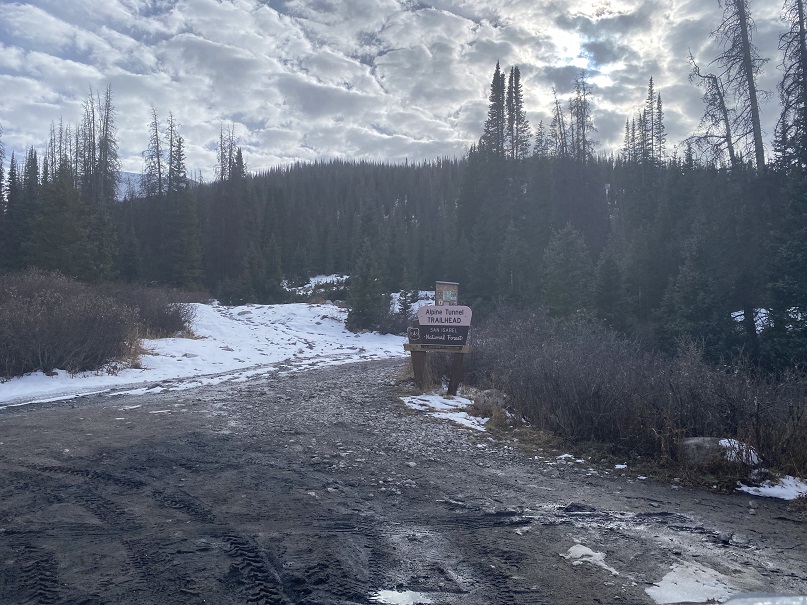
This was my first time at Hancock Ghost Town. There wasn’t much to it… but there was good parking and the 4WD road looked doable in a 2WD, even in snow. There was a lot of ice/snow on the road, but that was to be expected for this time of year. There was an abandoned RV parked with “No Trespassing” signs just before the parking area. I’m sure the signs were more to protect the mining claim behind the RV than the RV itself, which was missing several windows and looked occupied by wildlife. Due to the ice and snow, it was also muddy, so I decided not to park at the Alpine Tunnel Trailhead, but at the parking area just before the bridge, where there was less mud.
I got to bed quite early, and woke up to my alarm at 6am. I was surprised I hadn’t been cold, considering it was 22 degrees outside when I woke up and there was a layer of frost on my windows. I ate breakfast, gathered my gear, and was on the trail at 6:30am.
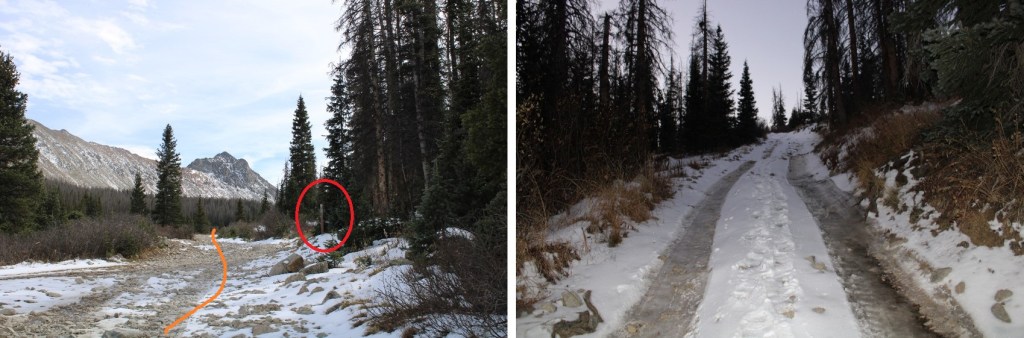
I was following Road 295 south, towards Hancock Lake. It was dark out, but there was a full moon and the road was easy to follow. I just had to watch out for ice.
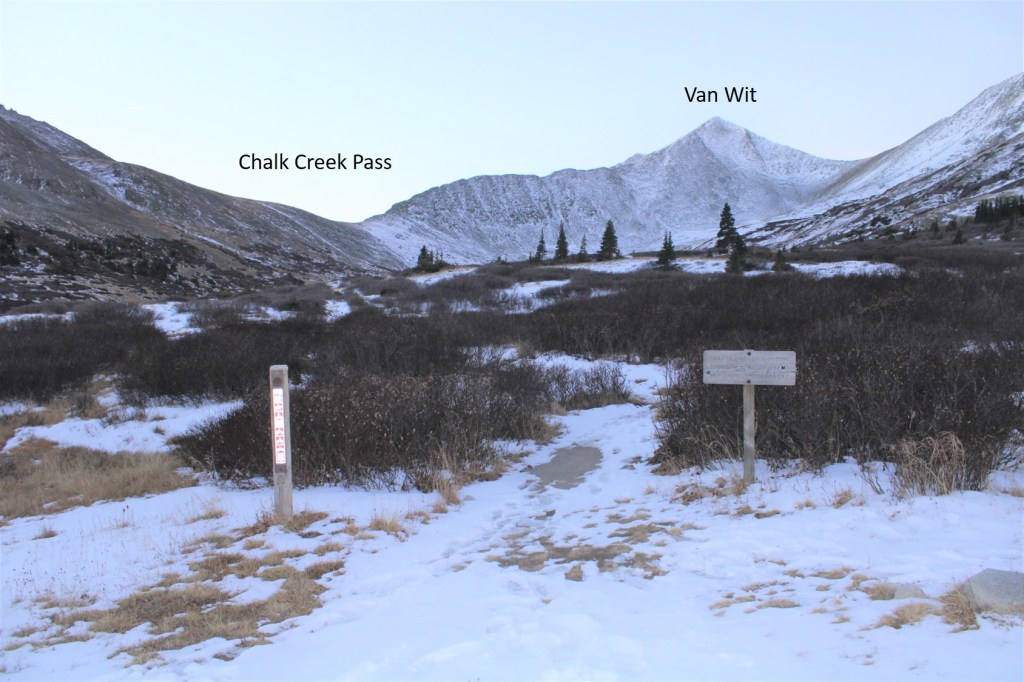
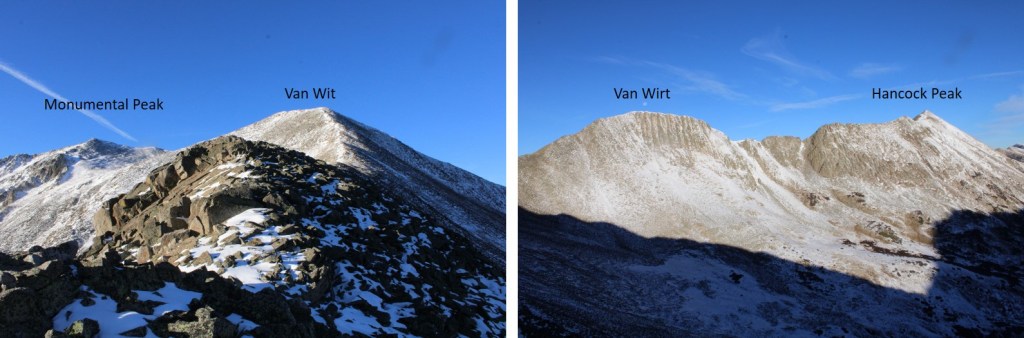
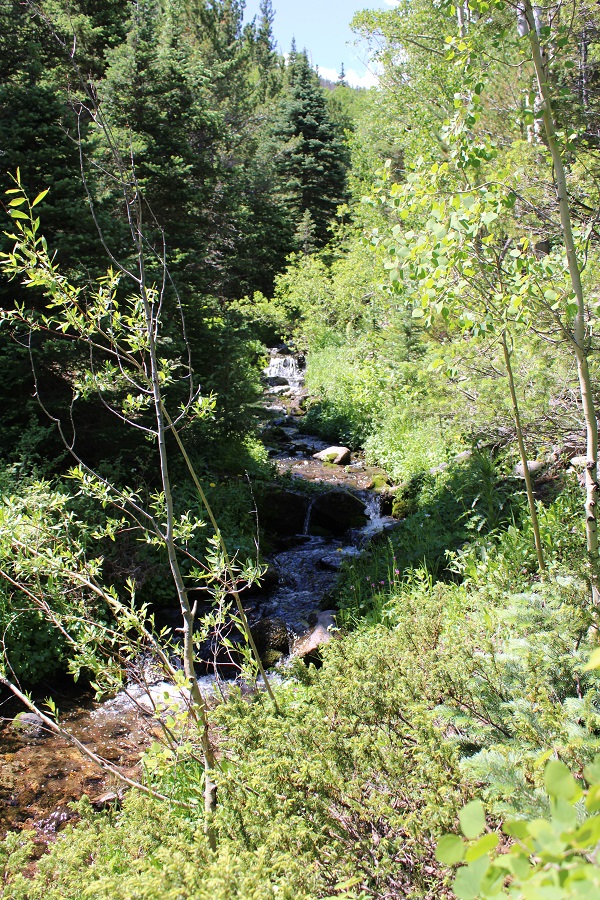
After hiking for 1.6 miles, I made it to Hancock Lake, where the road ended and I picked up trail 1422, skirting the lake to the west, before following the trail east up Chalk Creek Pass. Here the footprints and tire tracks ended, and I was now making my own tracks in the snow. I kept thinking what a wonderful basin this would be for a moose, when I came across some moose tracks. The tracks were facing the opposite direction, so I knew running into a moose was unlikely. I followed them all the way over Chalk Creek Pass. This is a good view of the hike to the pass, and the ridge to Van Wit.
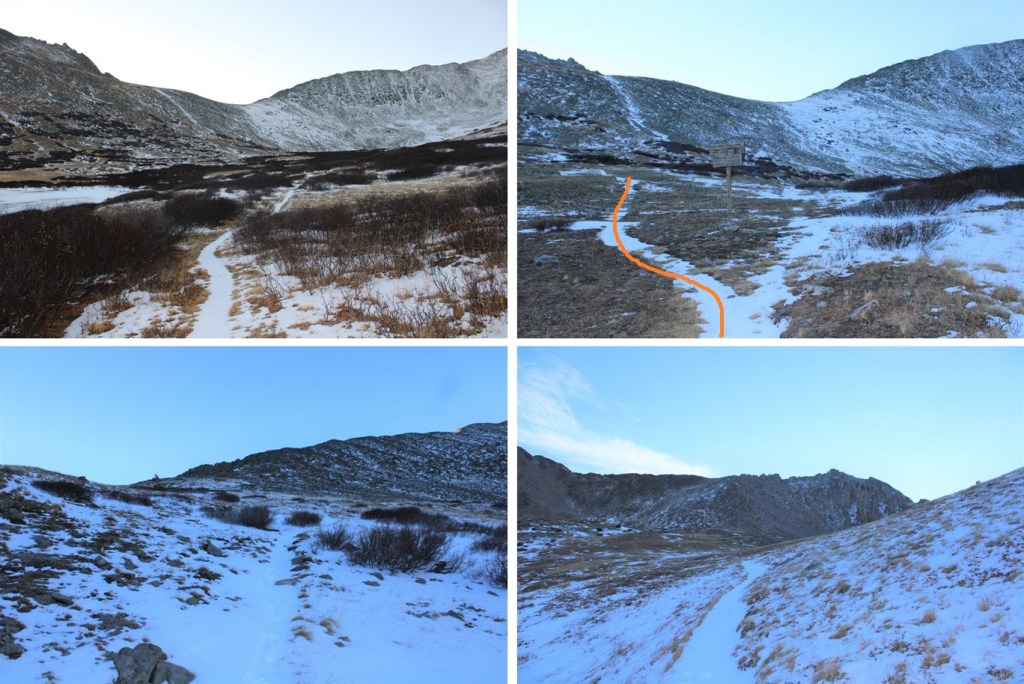
Here’s the route up to the pass, all class 1, sprinkled with snow. At the junction, take the trail that goes left, towards Chalk Creek Pass.
At the pass I turned right, and headed southwest along the ridge.
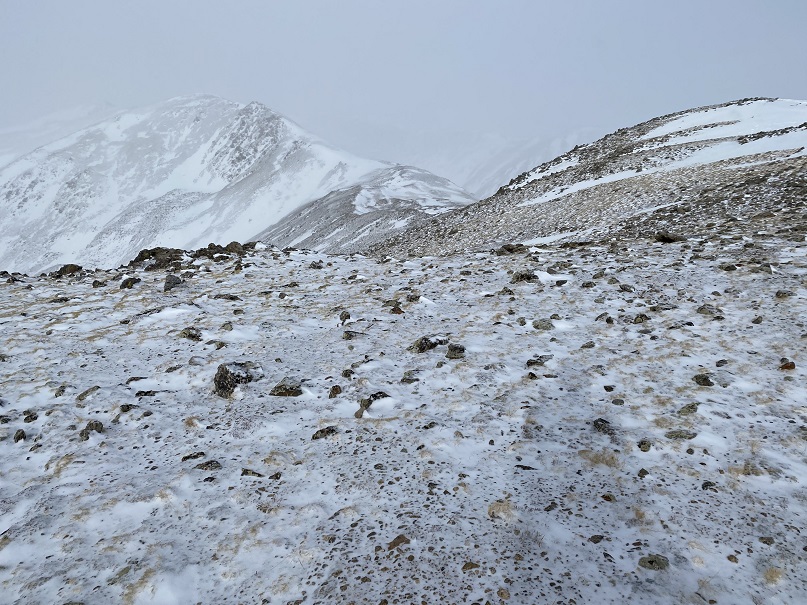
This is normally a class 2 ridge, but today, due to the snow, there were class 3 areas (on all the ridges with snow today). I continued following the ridge, being mindful of loose rocks and voids beneath the snow. From the ridge I had great views of all 4 peaks I’d be climbing today
I stuck to the ridge proper, dipping to the right only when necessary
Topping out of the ridge there was some snow to deal with, but a cairn leading the way
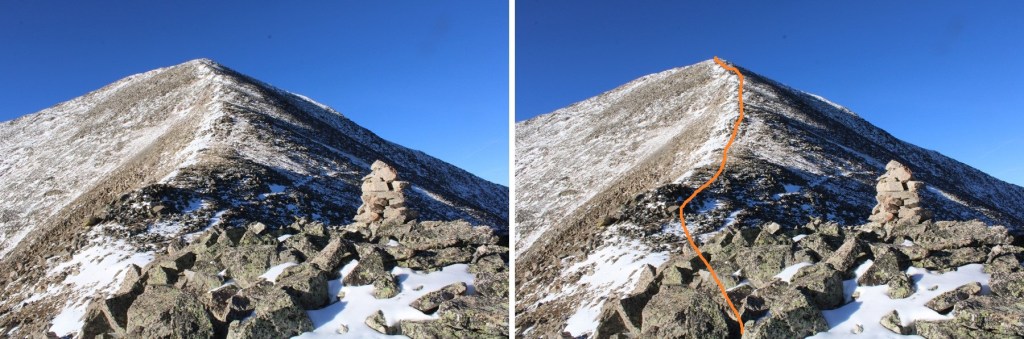
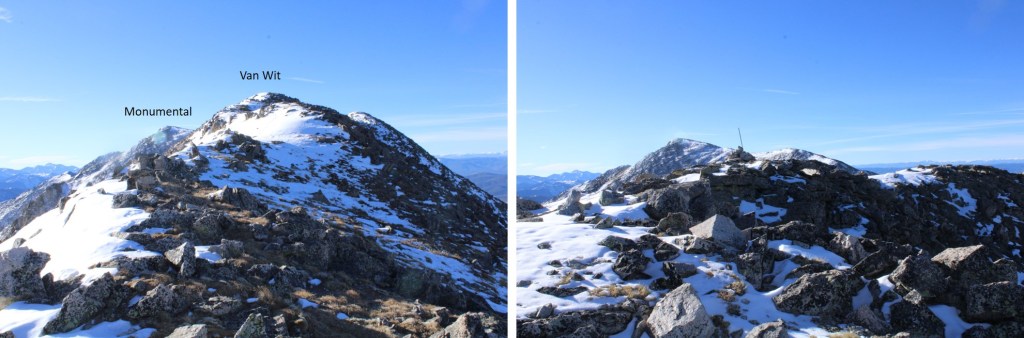
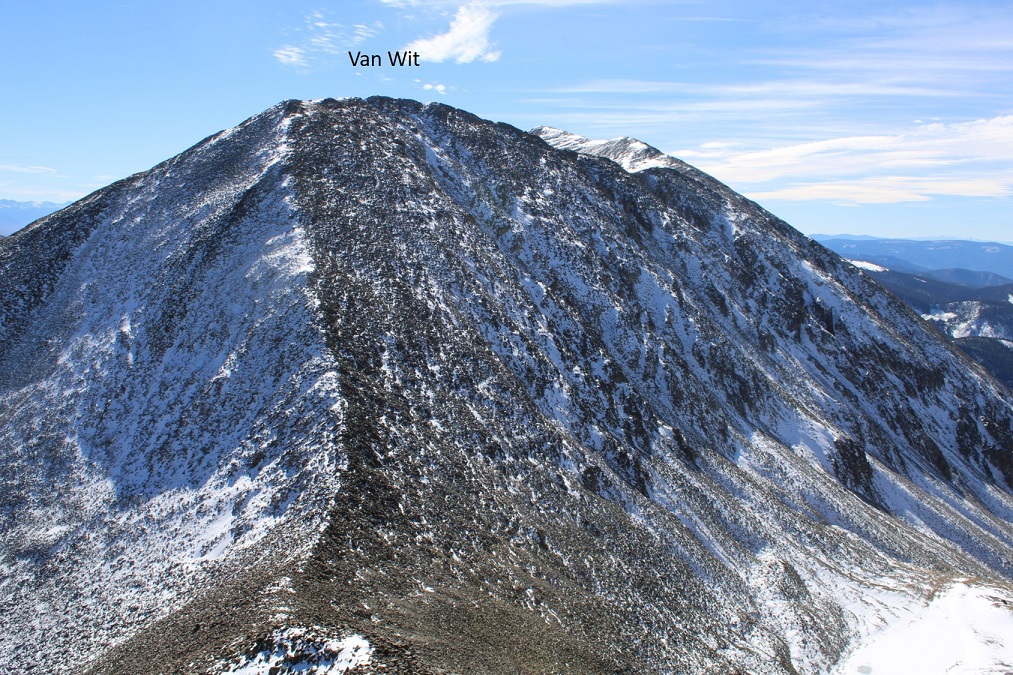
I turned left and followed the ridge south, towards an obvious cairn indicating the summit of Van Wit
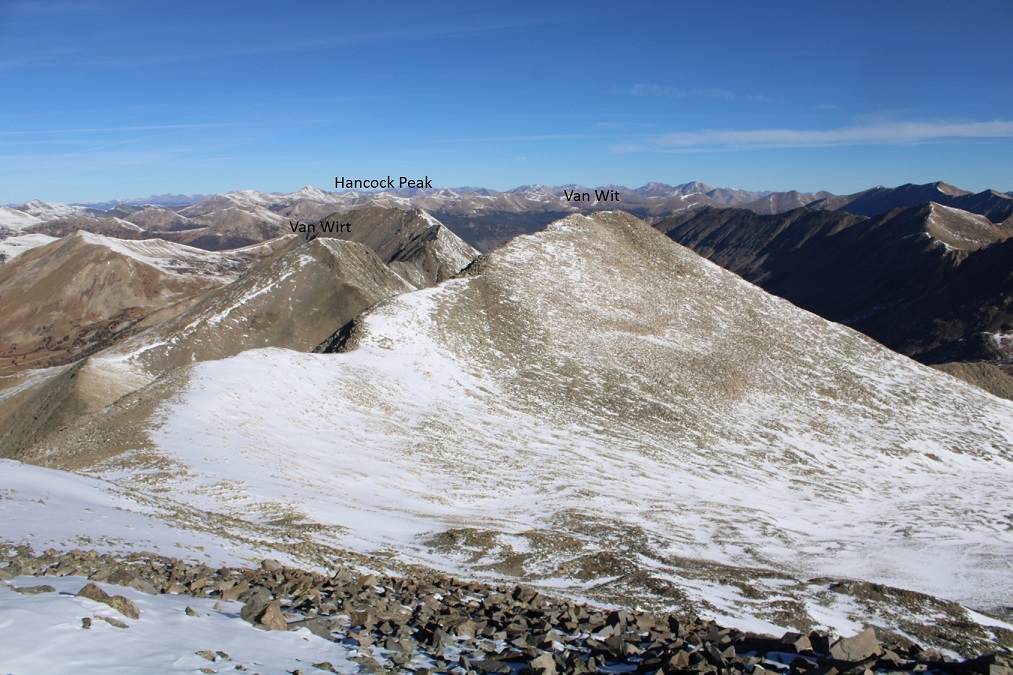
I passed the cairn indicating I was at the unranked summit of Van Wit, and continued following the class 2 ridge towards Monumental Peak
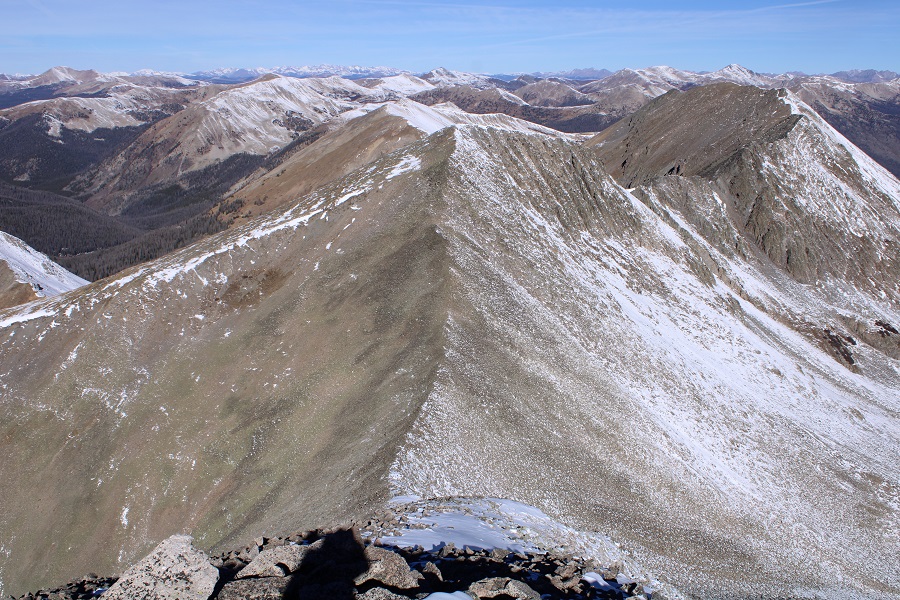
Here are some pictures of the rocky ridge
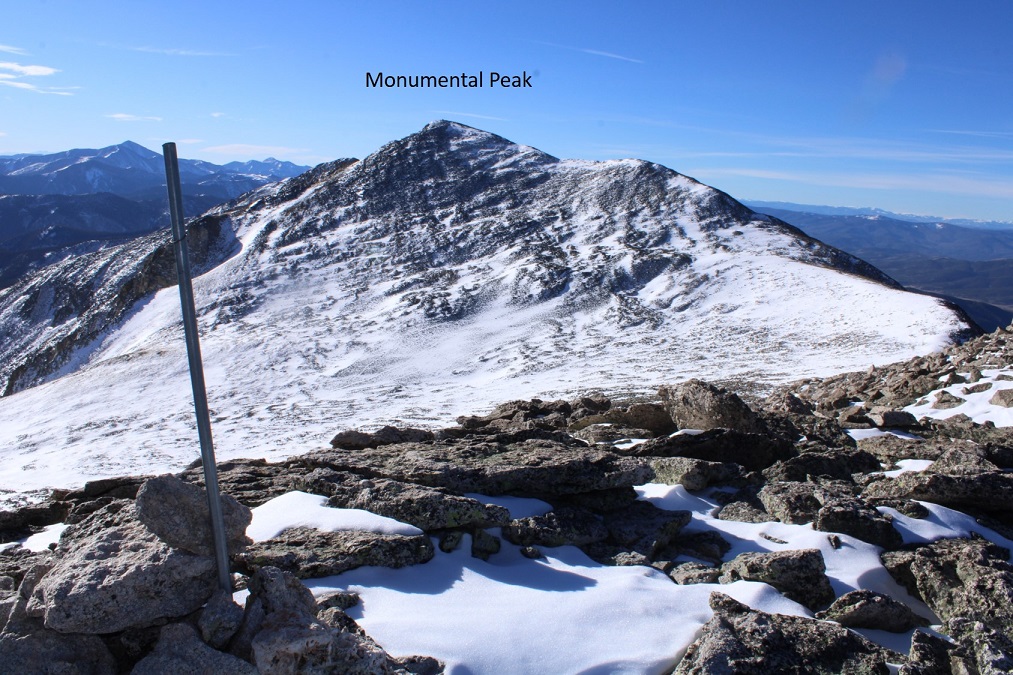
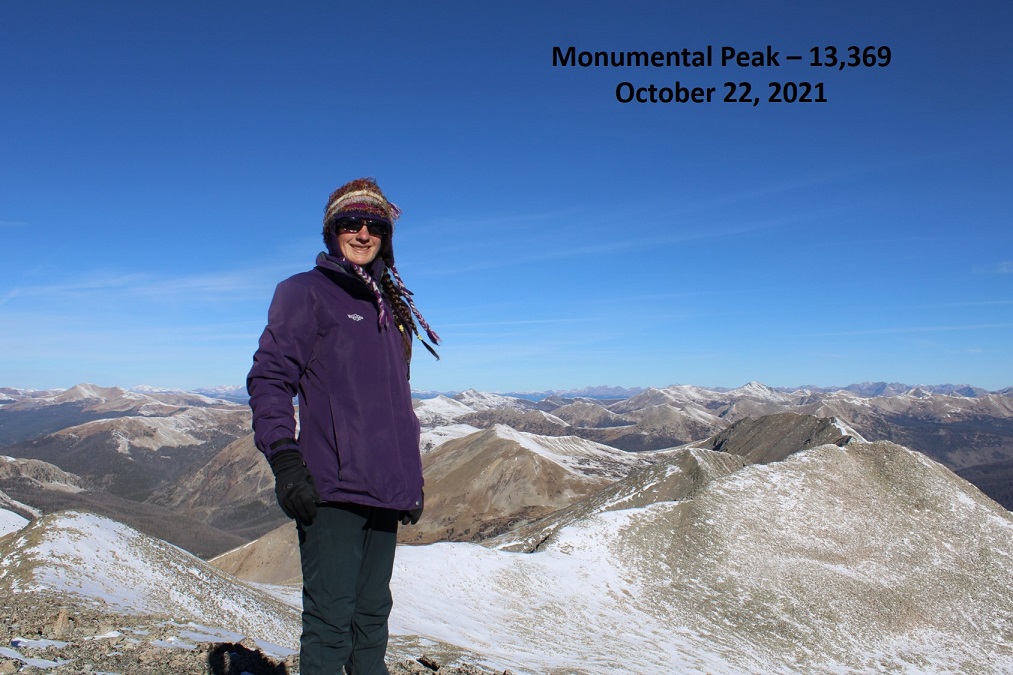
I summited Monumental Peak at 9:30am
Monumental Peak:
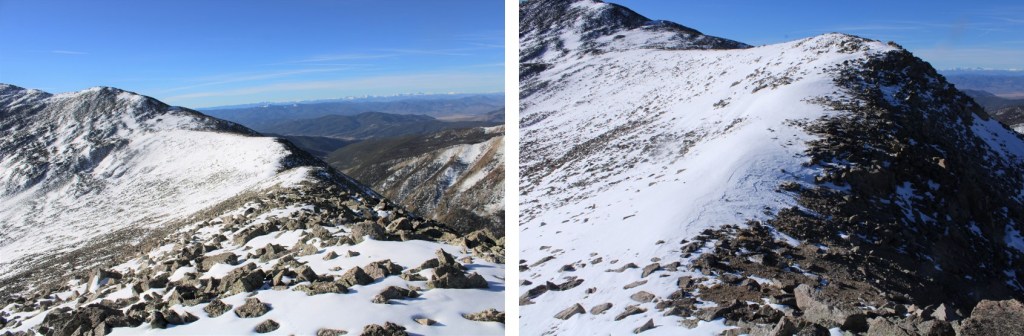
I re-traced my steps back to Van Wit, following the ridge and my tracks in the snow.
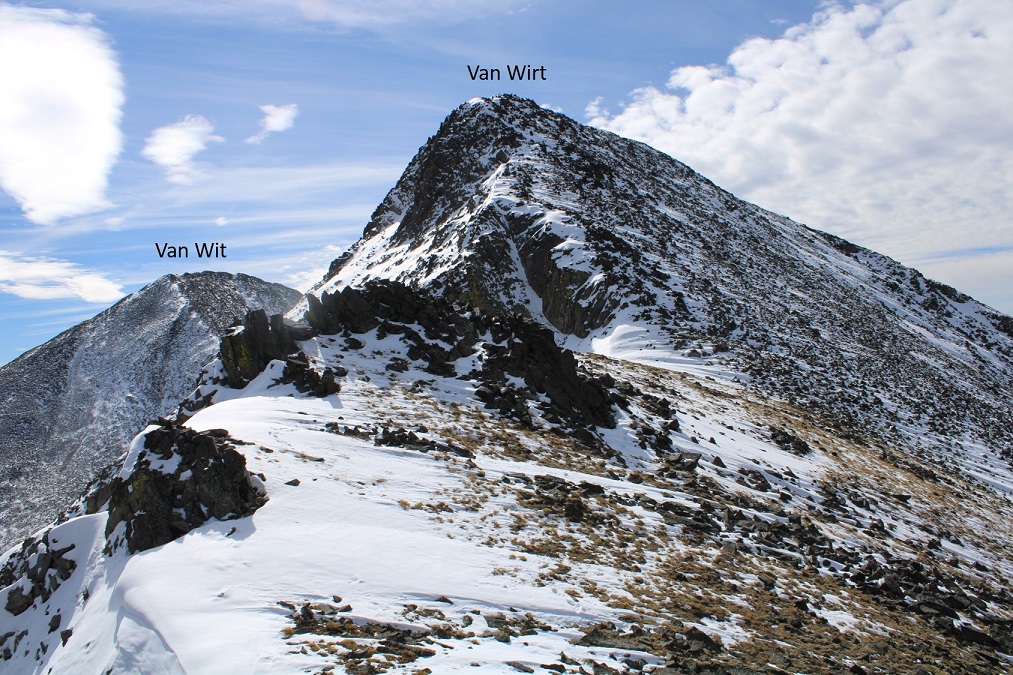
Back at the summit of Van Wit, I now followed the ridge northwest, towards Van Wirt. Due to the snow, this was class 3. I took a lot of time carefully navigating the rocks and snow on the way down, losing about 620’ of elevation.
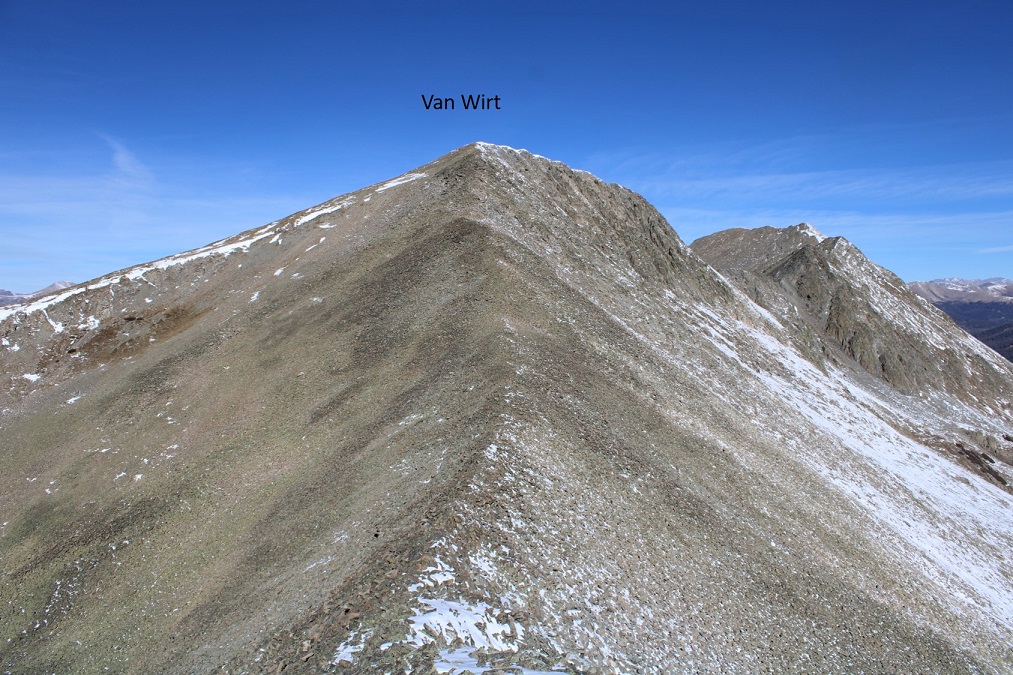
From the Van Wit/Van Wirt Saddle, here’s looking up at Van Wirt
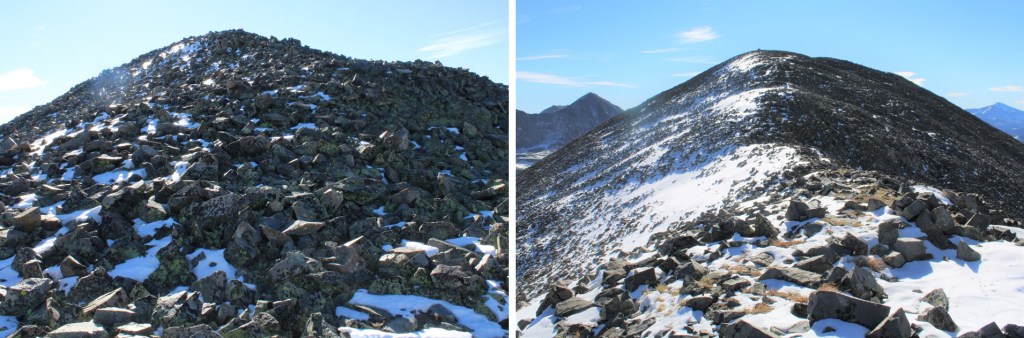
The ridge up to Van Wirt was rocky, but easy to navigate, especially without snow. I just followed the ridge, gaining about 375’ in elevation
From the summit of Van Wirt, here’s looking back at Van Wit
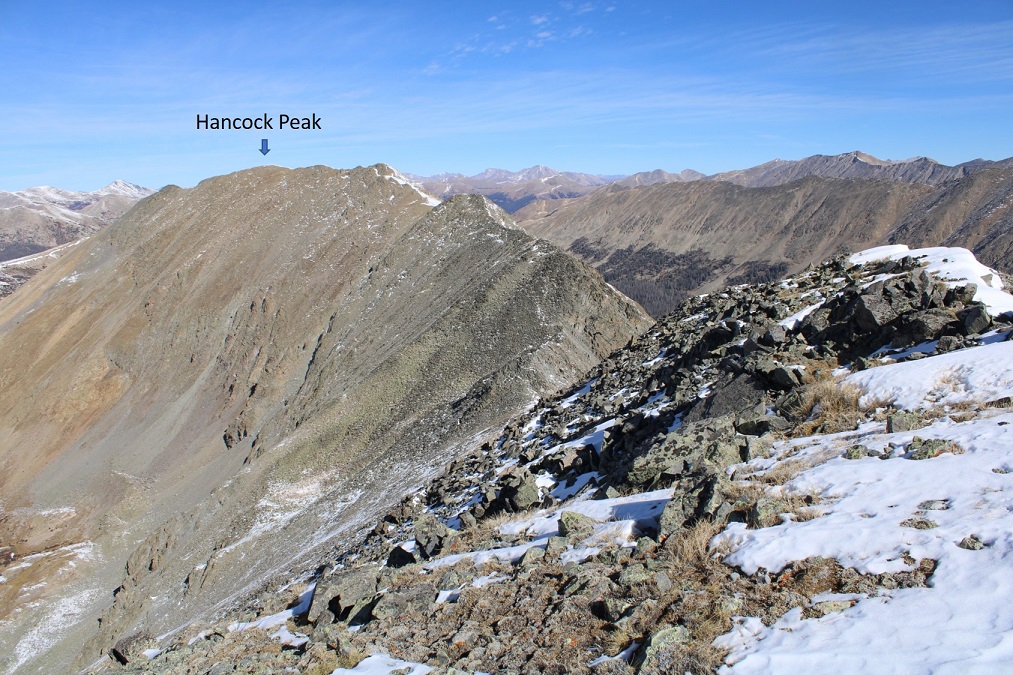
And now, to head over to Hancock Peak. Here’s the actual summit (you’ll know it because it has a cairn, and it’s in the middle of the upper, long ridge)
I followed the ridge north, losing about 275’ in elevation towards the Van Wirt/Hancock Peak saddle, once again, being careful where I placed my feet with the rolling rocks and snow (all still class 2).
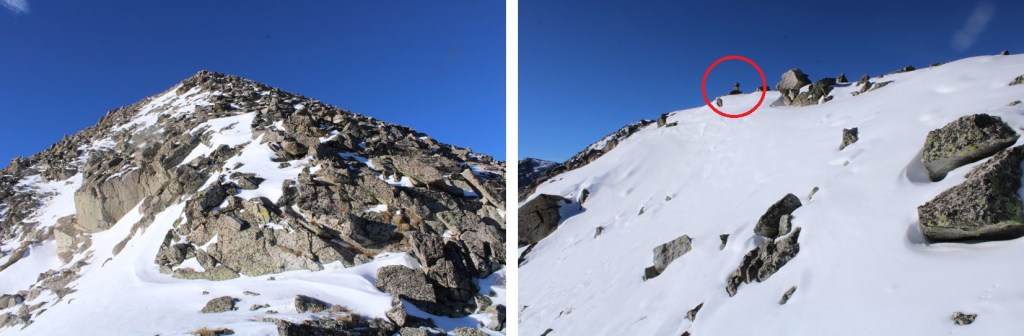
At the saddle I saw recent tracks from an adventurous fox, who decided to go down the gully this morning towards Hancock Lakes
Here’s looking back at Van Wirt
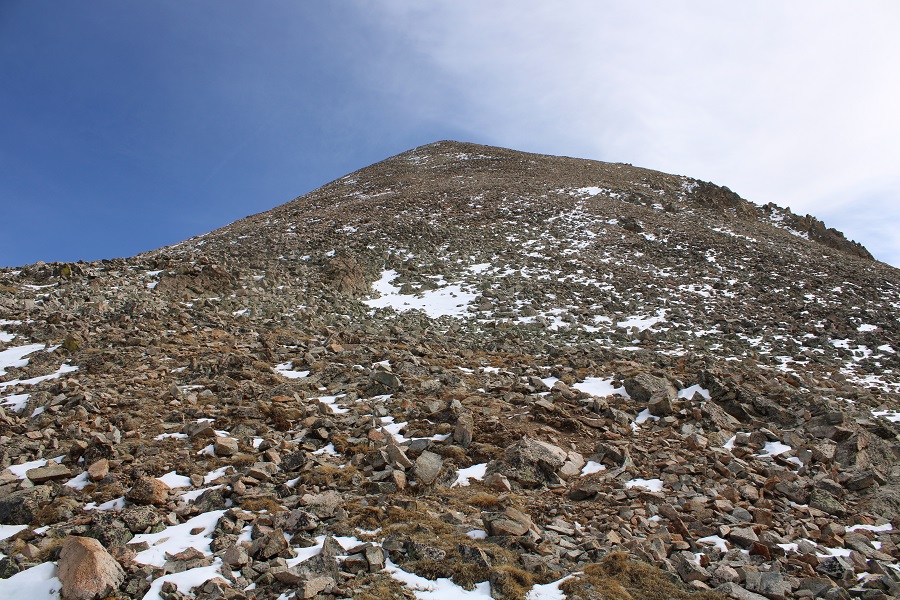
And now, to regain 375’ to the summit of Hancock Peak. This was rocky, but I was able to follow the ridge directly, keeping it difficult class 2
Here I went a little left, but could have gone straight over the top.
More ridge photos…
I crossed directly through the snow, which wasn’t as bad as it looked (note, this is a false summit)
Once at the top of this point, I could see the true summit to the northwest. You guessed it: I followed the ridge
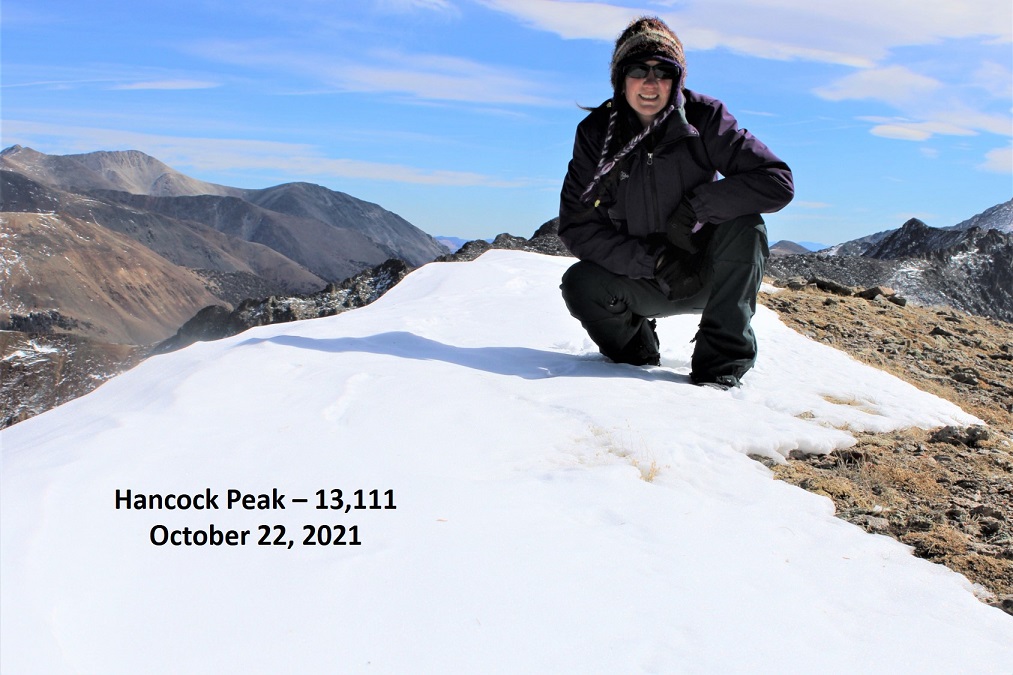
I summited Hancock Peak at 12:30pm
Hancock Peak:
There was a torn-up summit register hidden in the cairn. The last person to sign was here over a month ago.
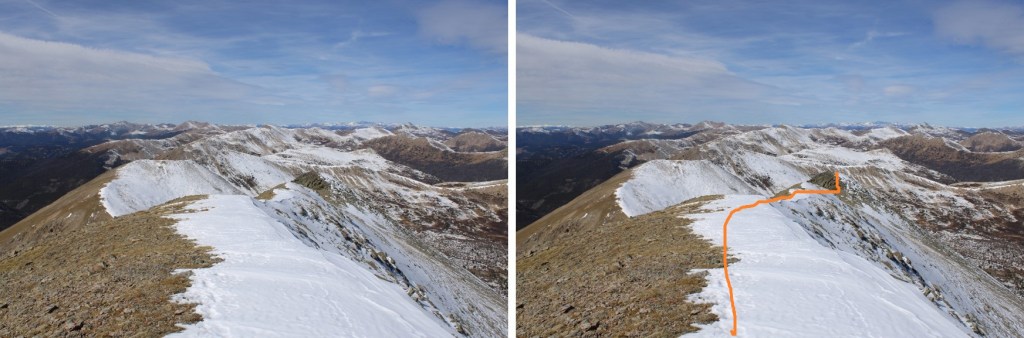
I was making this a loop, so I continued following the ridge northwest
I was headed towards Hancock Pass. At the end of the ridge, just before losing elevation, you can see the pass
I descended towards Hancock Pass, losing 850’ of elevation on rocky and scree filled terrain
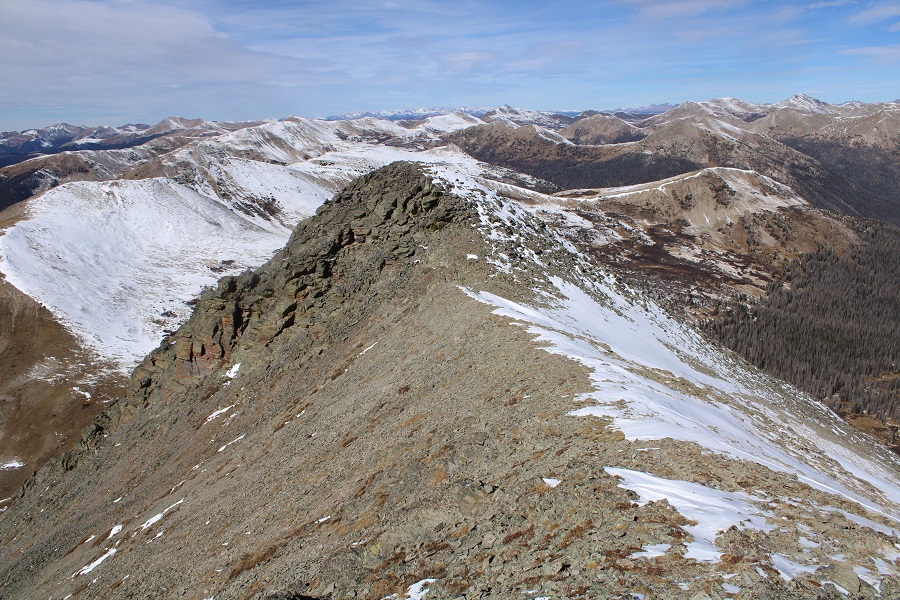
From the pass, here’s looking back up the ridge
I turned right, and followed Road 299 for 2.5 miles back to the trailhead.
About halfway back I came across moose tracks again, headed up the pass. That moose was moving! It looked like he was just passing through after the storm, and did so quickly.
I made it back to my truck at 2pm, making this a 10.27 mile hike with 3629’ of elevation gain in 7.5 hours.
I got lost in the dark on the drive up to Loch Lomand and accidentally took an intense 4WD road. Let’s just say, if you’re on a 4WD road that requires serious 4WD skills, you’re on the wrong road. I made it to Loch Lomand, passing several great dispersed camping sides along the way, parked, and was on the trail at 5:45am.
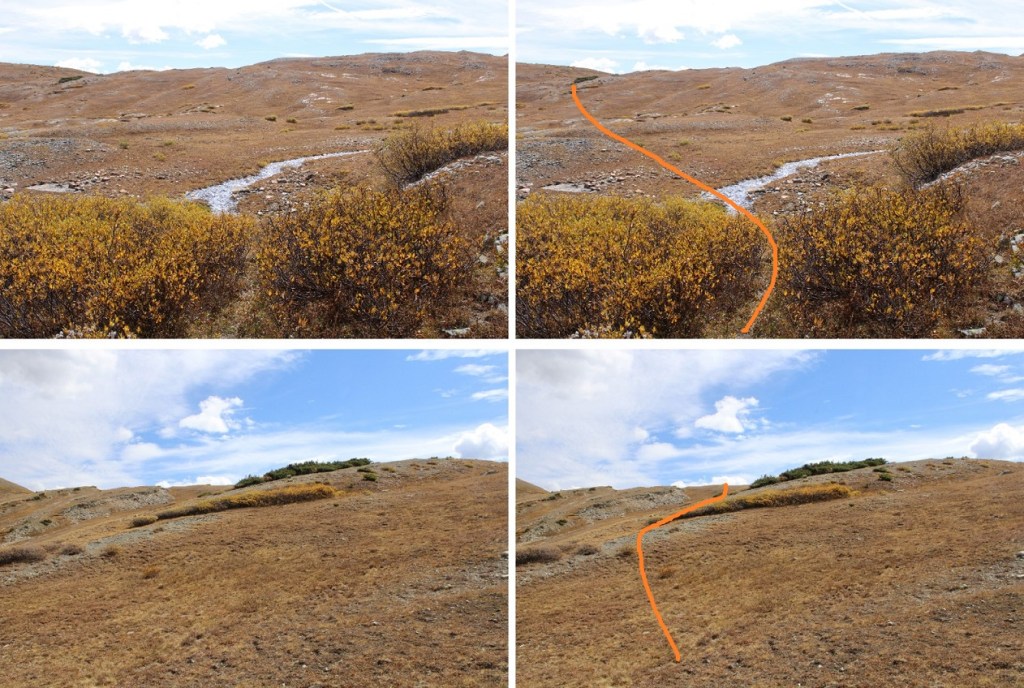
It was still dark when I started out, and I didn’t take the most efficient route, but your main goal is to get to the upper basin, near Lake Caroline. I did this by following a trail around the Loch, and then heading west, up a gully. You’re aiming to get here, by avoiding as many willows as possible.
I started by following this trail
And then headed up a gully
Eventually the willows ran out, and I was on rocky tundra. I followed this tundra west
Once un the upper basin, I kept Lake Caroline to my right and gained the ridge. This can be done any number of ways, Here’s my route:
It was rocky here, but all class 2
Once on the ridge, I could see the summit cairns to the northwest, and aimed for the summit of Mt Bancroft.
I summited unranked Mt Bancroft at 7am. There were two large cairns at the summit.
Mt Bancroft:
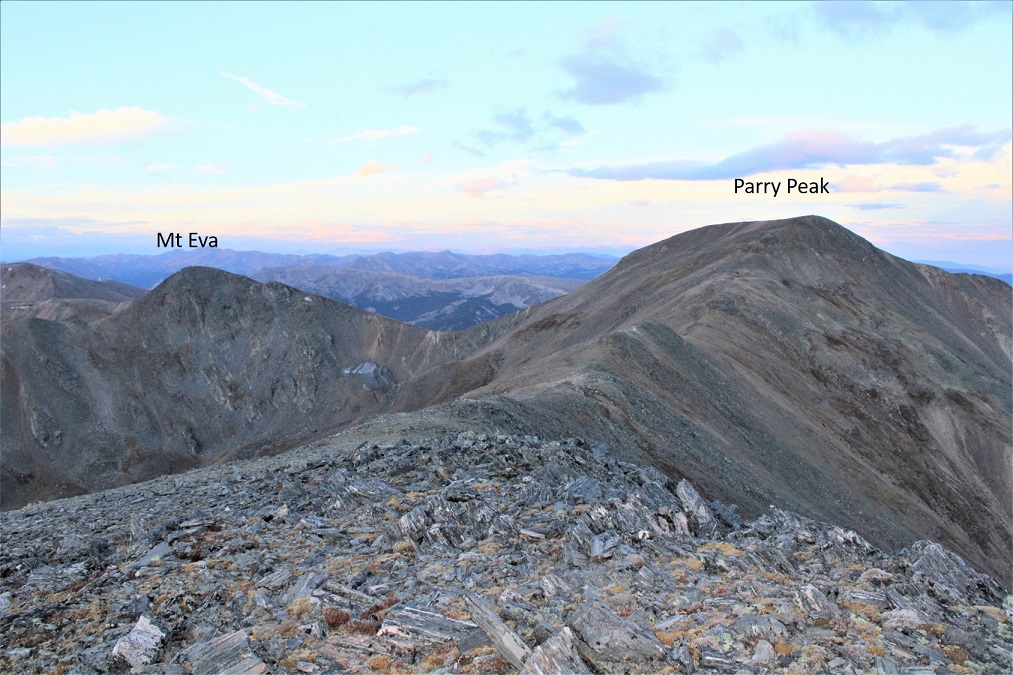
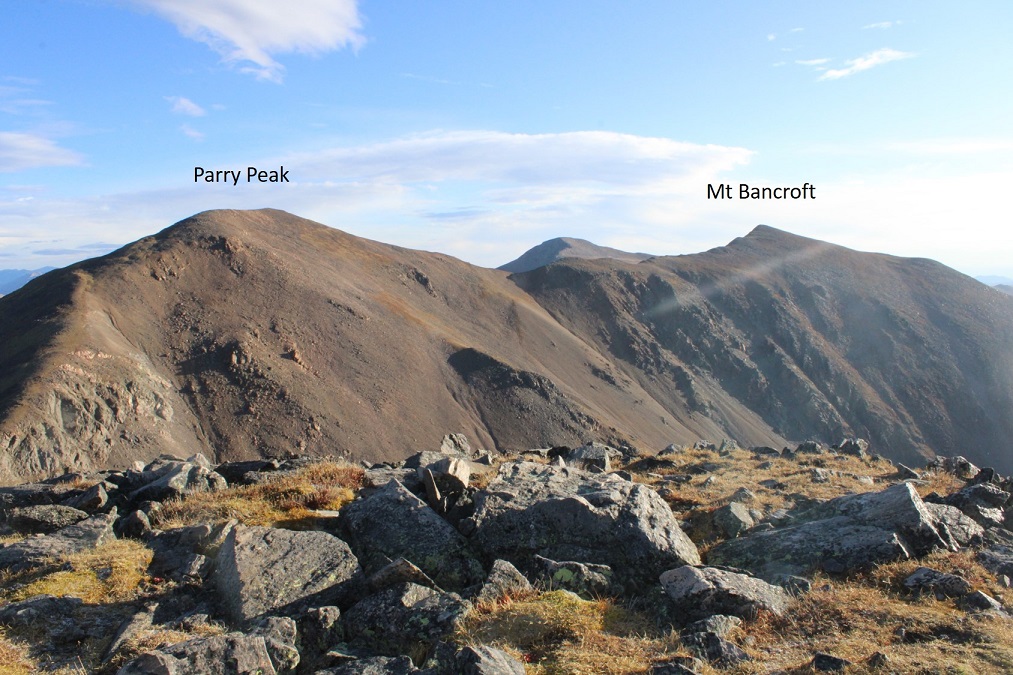
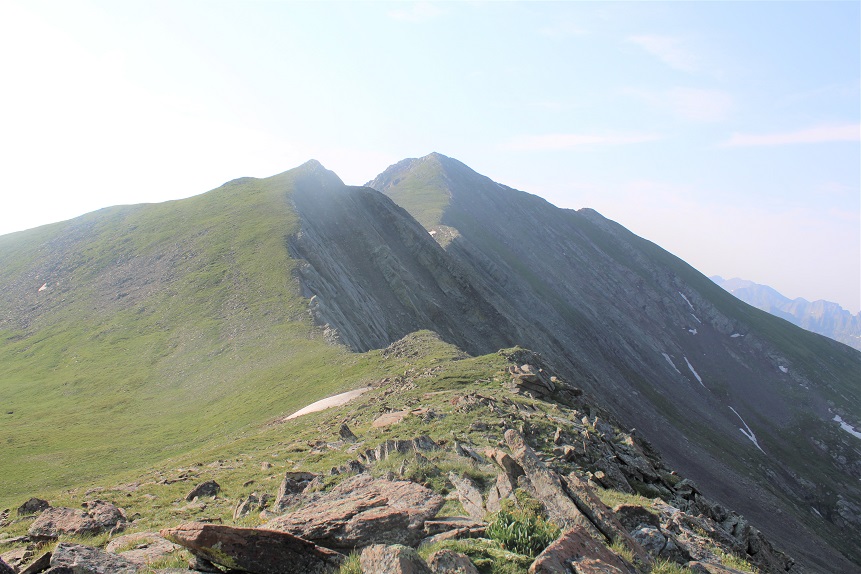
From Mt Bancroft I turned and looked west. It was a simple ridge hike to both Parry Peak and Mt Eva.
I followed the ridge west towards Parry Peak. Here the wind picked up, and didn’t stop for the rest of the hike. There were faint trails here
I summited Parry Peak at 7:30am
Parry Peak:
It was WINDY! Much windier than the forecasted 5-10mph. I was glad I’d packed my winter gloves. As I recall, the last time I was on this ridge it was super windy as well. The wind made the nice day quite cold. There was a storm coming in, so I kept going, turning and following the ridge southwest towards Mt Eva. There are faint trails here too.
This was another simple ridge hike, that got a bit rockier at the end.
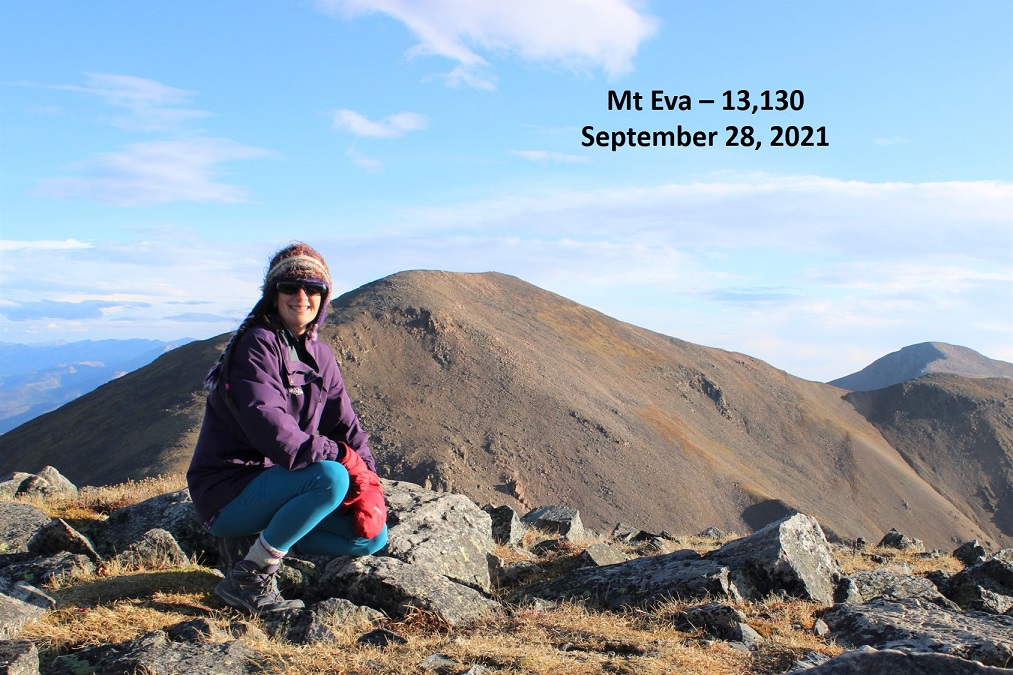
I summited Mt Eva at 8am
Mt Eva:
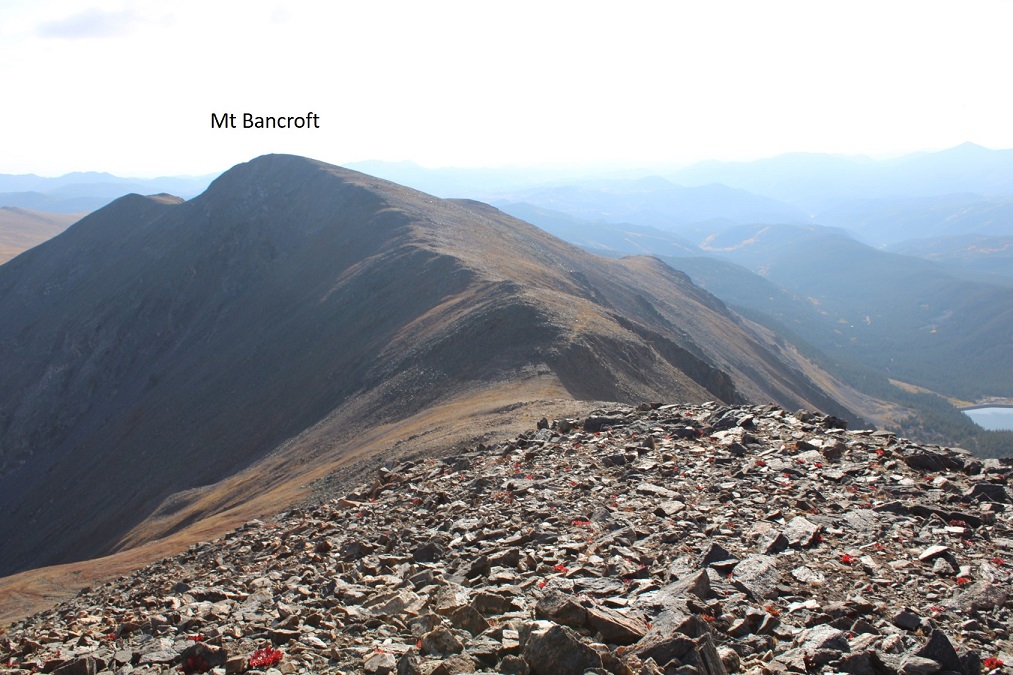
Today felt really laidback: it was easy to cruise along the ridgeline, without any major obstacles keeping me from slowing down. Here’s looking back at Parry Peak and Mt Bancroft from Mt Eva
There was a downed communications tower near the summit of Mt Eva. I’m guessing wind was involved.
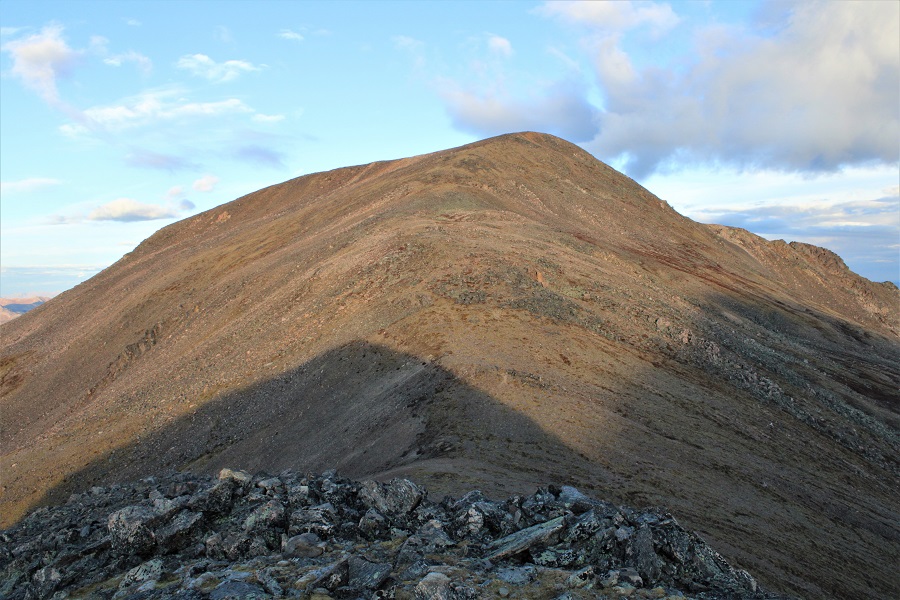
And now to head back to Parry Peak.
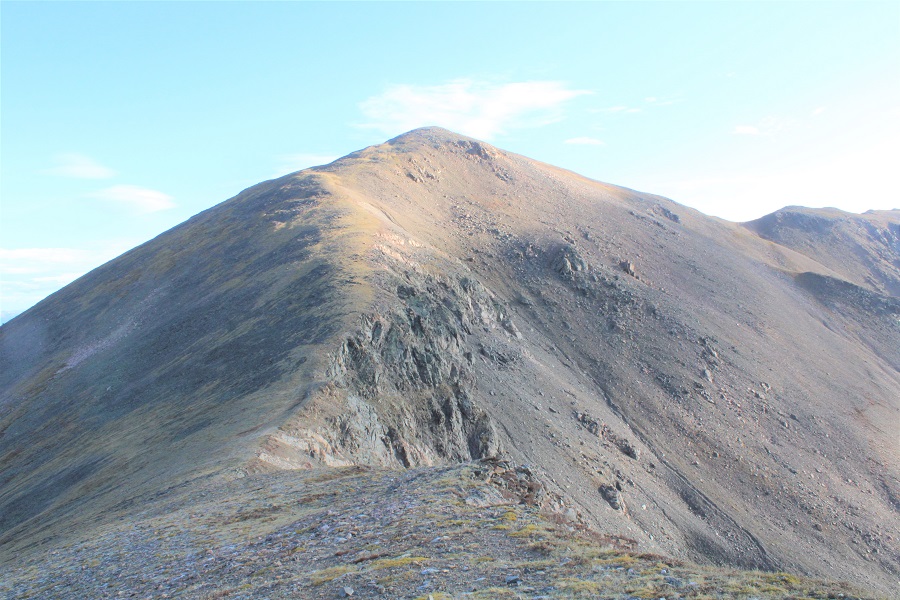
I re-summited Parry Peak, and then headed back to Mt Bancroft. I decided to actually summit these peaks again, as it felt like a really easy day and I welcomed the extra elevation gain.
Mt Bancroft from Parry Peak
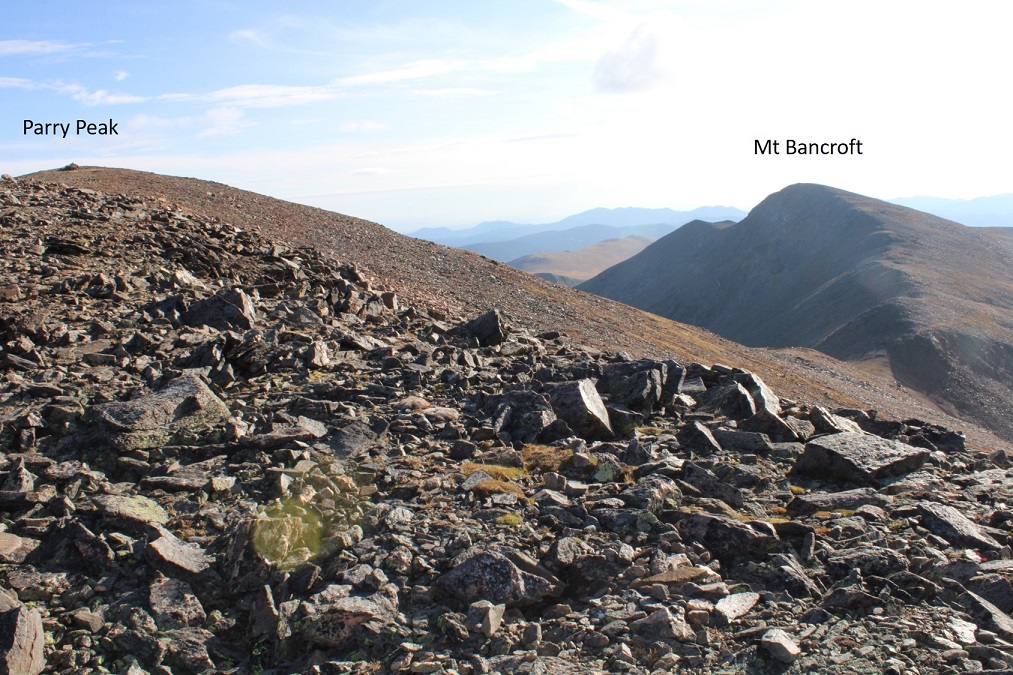
I re-summited Mt Bancroft, and then followed the ridge southeast
Here’s my overall route out of the basin, keeping Lake Caroline to my left this time
I just kept aiming east, for Loch Lomand
It was much easier in the light of day to navigate my way
I made my way east to the trail, then followed the trail southeast to my truck
I made it back to my truck at 10:15am, making this a 7.29 mile hike with 3921’ of elevation gain in 4.5 hours. I was surprised at how quick todays hike seemed to be. As I looked behind me, huge storm clouds were starting to form: it’s going to snow!
The Rico-Silverton Trailhead past South Mineral Creek has to be one of my favorite trailheads to spend the night. The 4WD road in isn’t very 4WD (except for the creek crossings), and there are rarely any people there. Also, no marmots. I was woken up in the middle of the night by a rustling sound I thought was a rodent in my truck, but ended up realizing it was just my elbow brushing a bag of chips.
It was another cold night, but I was ready to go at 5:45am. It was still dark, but I’ve taken this trail numerous times, so I knew which way to go.
The trail starts at the south end of the parking area, and immediately crosses the creek
I followed this class 1 trail all the way to treeline, crossing the creek several times along the way.
Another perk of hiking here is a mama moose owns this basin. Every year for the past few years I’ve seem mama, mama and baby, or mama and yearling in this basin. It’s been neat to see mama get bigger, and baby(ies) as well. This yearling seems to be female, as she didn’t have antlers. I saw these two just as it was beginning to get light out, so the pictures didn’t turn out well. As soon as they noticed me they headed south, slowly making their way over the pass.
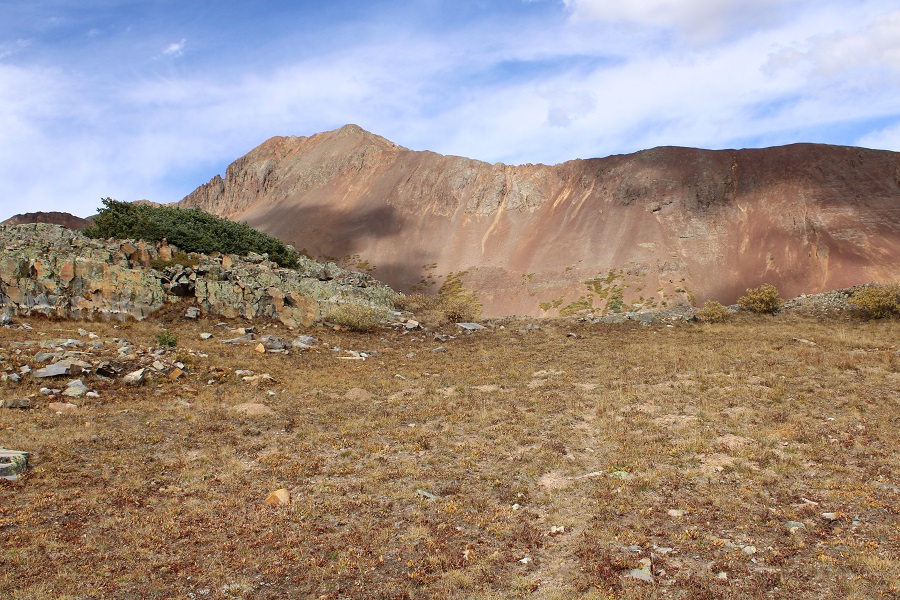
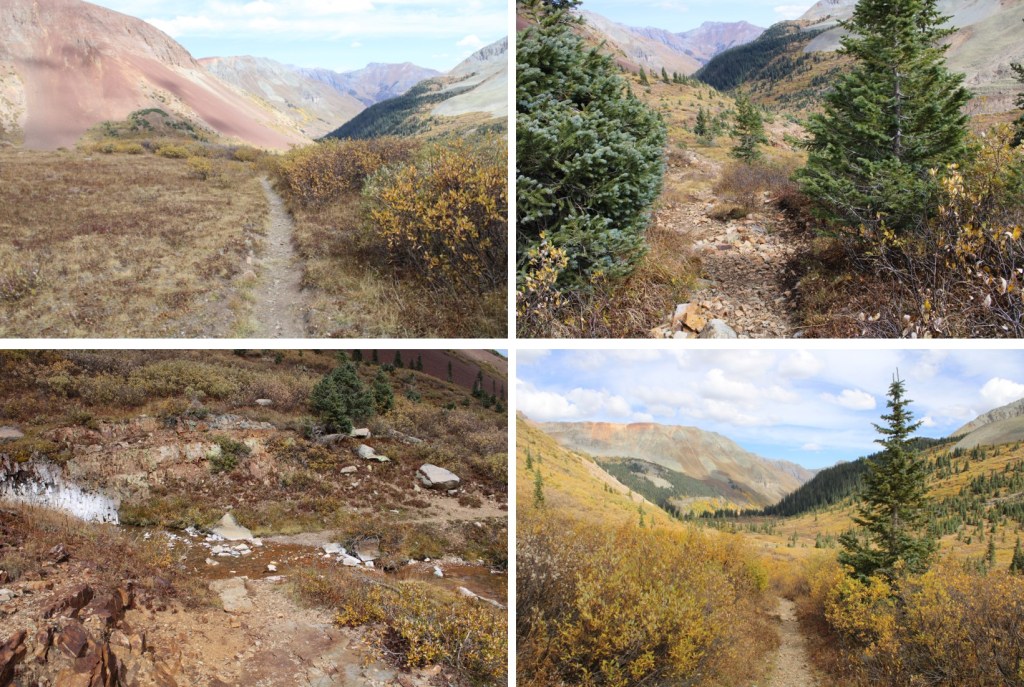
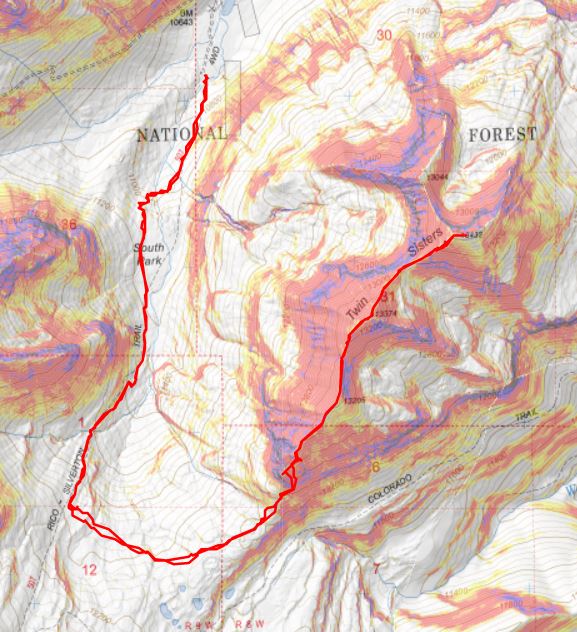
I hiked the Rico-Silverton Trail for 2.2 miles, to about 11925’, and then left the trail to follow the contour of the upper basin east, towards the south side of Twin Sisters. This is the route I took
And some step-by-step pictures:
There are some faint game trails here, but they aren’t really needed, as long as you’re heading for the base of the mountain
Once there, I found a clear path through the willows and ascended the talus
I was surprised when I heard coyotes yipping during the day: I usually only hear them at night
Coyotes:
Following this line brought me to the base of the rock outcroppings. I put on my microspikes, and followed where the slabs met talus until I found the gullies.
All of the gullies go, but, as I found out on my way back down, find the first one and stick with it (turn left and follow it to the ridge). You’re aiming for the ridge, which means hiking northwest. Microspikes were extremely helpful here. This shouldn’t be more difficult than class 2+
It’s going to be a chossy-talus-scree-filled mess, but it’ll go
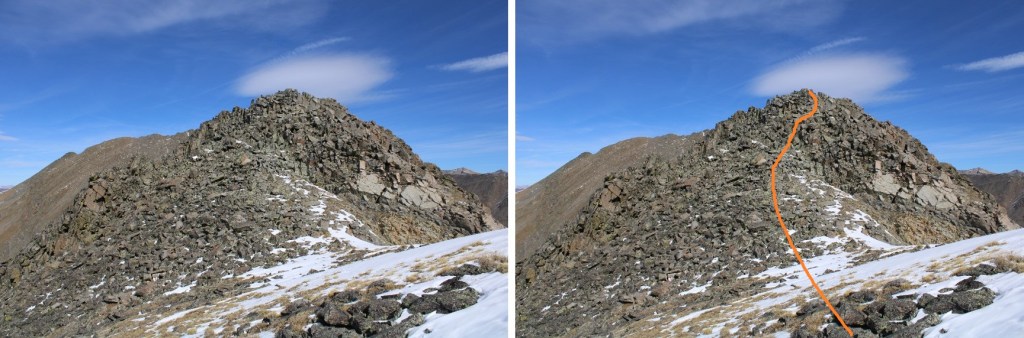
Once on the ridge, I followed it northeast, staying on the ridge. There’s a false summit here. I kept my spikes on, but they were overkill. The rock here was talus, and annoying, but firm.
Hitting the false summit was a bit of a downer, but the hike had been easy thus far, so it was kind of expected. I continued following the ridge. There’s a quick chasm to cross in the circled area. It can be kept at 2+. I dipped down to the left about 30 feet, then re-ascended and started climbing towards the summit
Form here it was a simple ridge hike to the summit
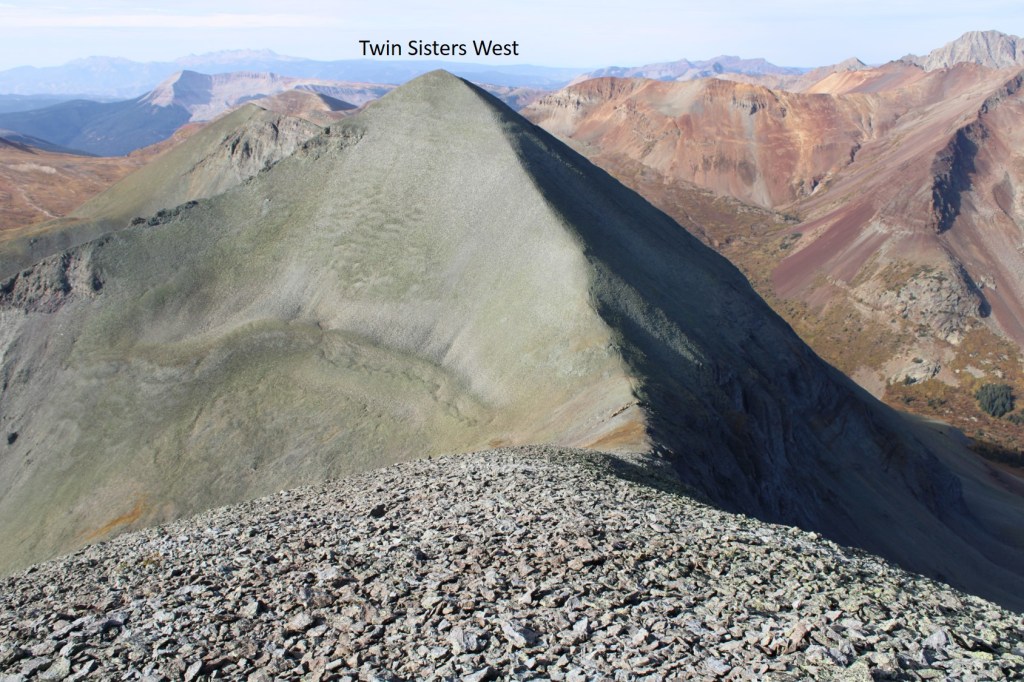
I summited Twin Sisters West at 8:40am
Twin Sisters West:
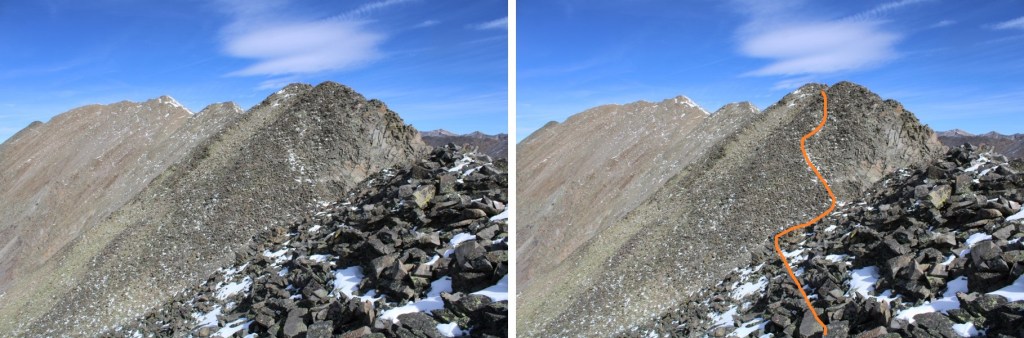
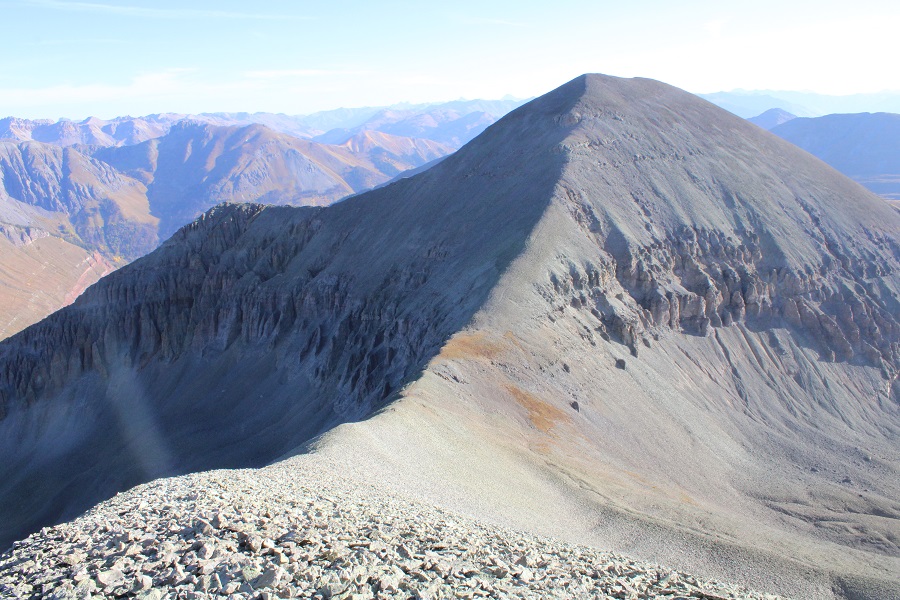
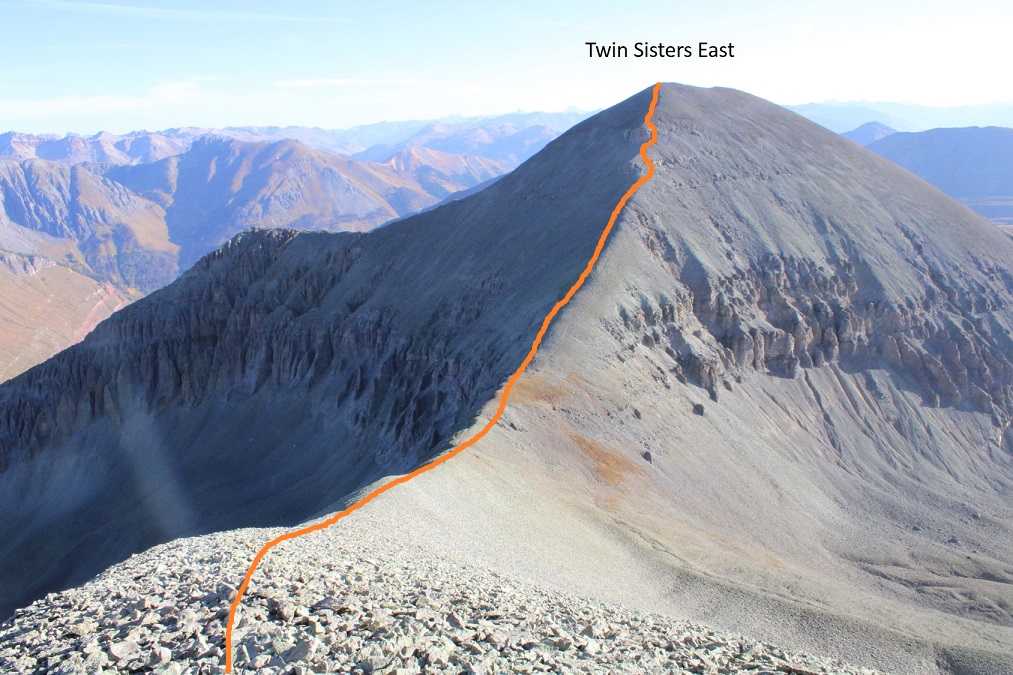
From the summit of ‘west’ it was easy to see the route to Twin Sisters East: I just needed to follow the ridge
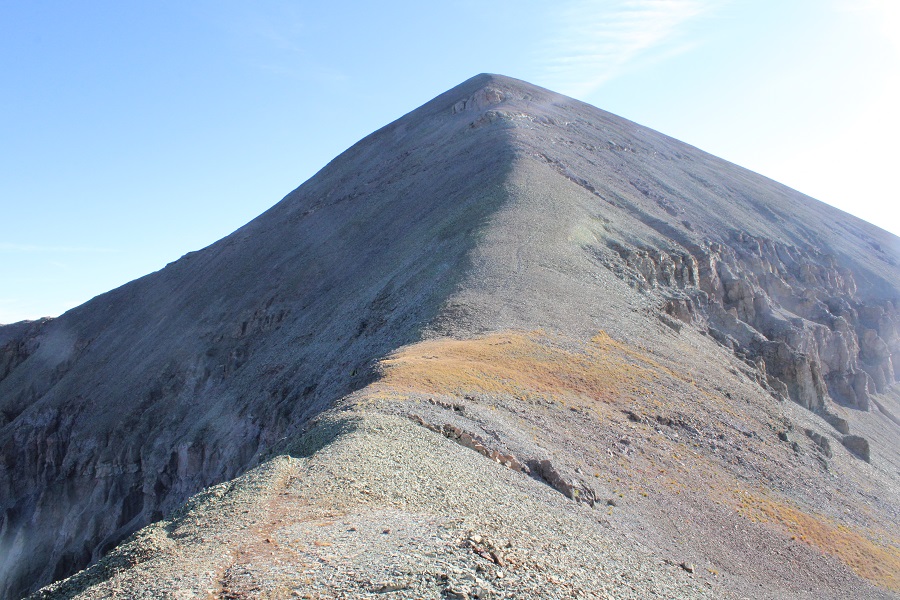
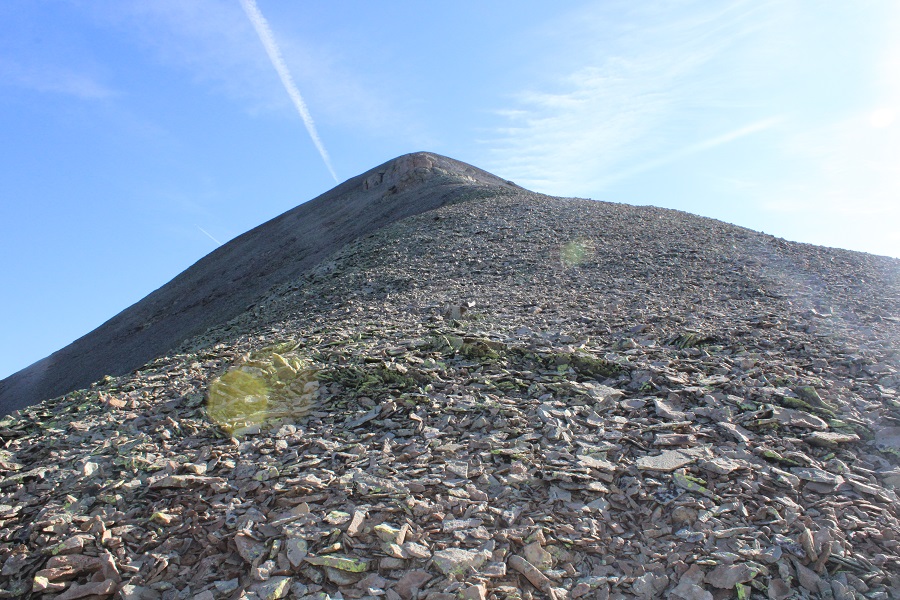
There were no big surprises on this one. There were some game trails to the right, but they didn’t seem prudent. I just followed the ridge, and then closely navigated the rock problems, which were all class 2. This is the route I took
And some closer pictures
The summit was relatively flat. I wasn’t sure where the exact summit was, so I waked the entire length, just to realize the summit was at the top of the ridge
I summited Twin Sisters East at 9:20am
Twin Sisters East:
Because I’d done most of my hiking in while it was dark, I decided to make this an out and back trip so I could get better pictures of the trek i. So, I retraced my steps back to Twin Sisters West. This was a simple ridge hike
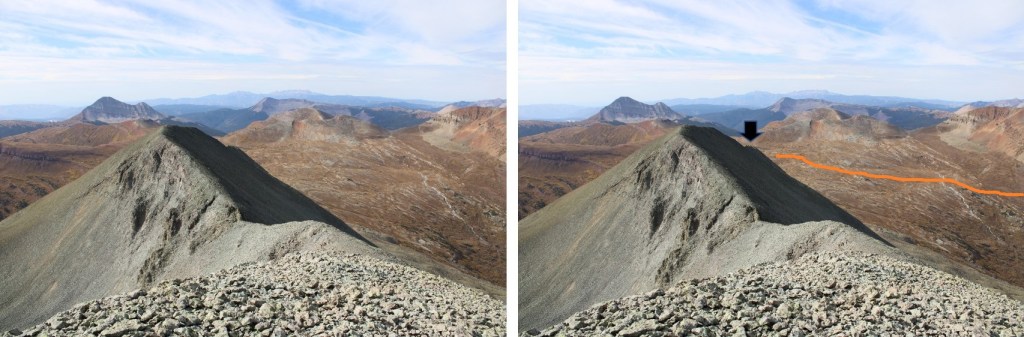
From Twin Sisters West I continued following the ridge southwest. It’s important to follow this ridge all the way to the end (black arrow). Also, here’s an overview of the route around the basin. Fun fact: the white area isn’t water, but rock from a dry stream bed. I’m sure at some point in the year it holds water, but I’ve only seen it dry.
Here’s a close up of the ridge problem
And following the ridge to the end
Once at the end of the ridge, I turned left and scree surfed/carefully navigated my way down the gullies
At the base of the gullies I turned right, and headed out of the basin
There were faint game trails here
That led me back to the Rico-Silverton Trail, which I took north back to my truck
I made it back to my truck at 12:30pm, making this a 10.32 mile hike with 4101’ of elevation gain in 6 hours, 45 minutes.
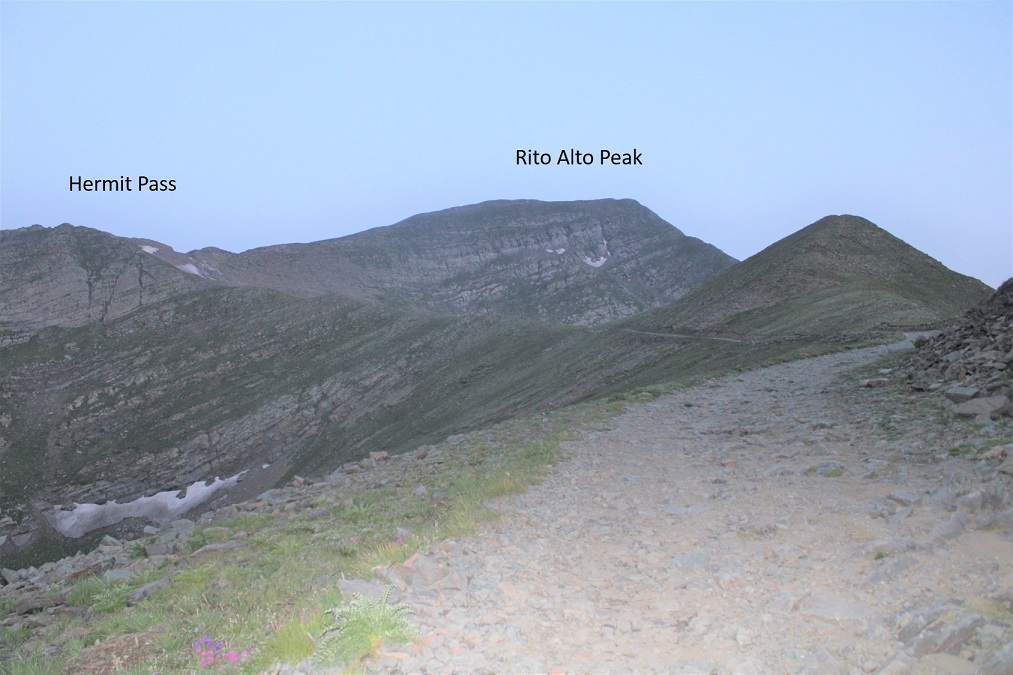
I’ve hiked Rito Alto Peak before, but due to an early snowstorm had to skip Hermit and Eureka. Today I was going back for those two (but hit Rito Alto again as well because I didn’t get good photographs).
If you love your vehicle, park at around 9000’. Seriously. This road is a lot worse than it was the last time I was here, and even then it was pretty bad. Here’s the parking area(s) around 9000’
I have a new Tacoma, and wanted to see what it could do, so I continued driving further. You’ll definitely want both high clearance and 4WD to continue.
If you can make it past 10,500’ you can make it all the way to the pass. I stopped and parked at a camping area at 10,800’ because that was where I’d parked last time. I gathered my gear and was on the trail at 4:30am.
I followed the 4WD road west towards Hermit Pass.
It was early morning, and I could hear the coyotes calling to each other. This lasted for about 10 minutes. I was actually a little concerned when they stopped yipping.
Coyotes:
From my parking spot I hiked 4.2 miles to Hermit Pass
As the sun rose, I could already tell I wouldn’t be getting great pictures today: the haze from the fires wasn’t going to cooperate.
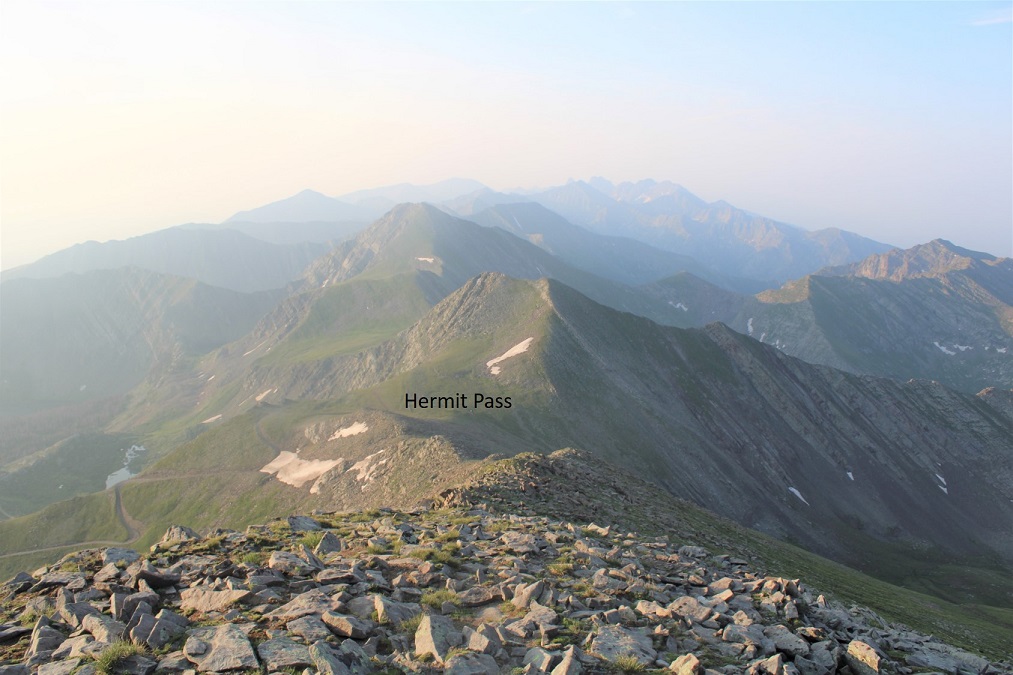
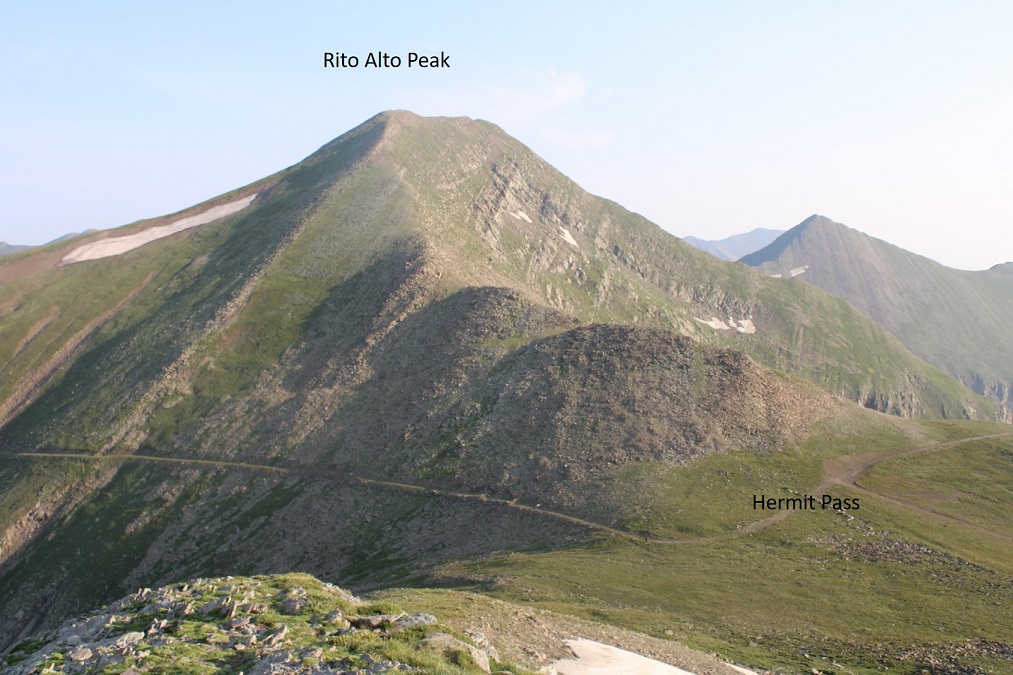
I made it to Hermit Pass, turned right, and followed the ridge northeast to the summit of Rito Alto Peak. This ridge has a lot of large rocks, mixed with tundra. The rocks have the Crestone-grip and most don’t roll.
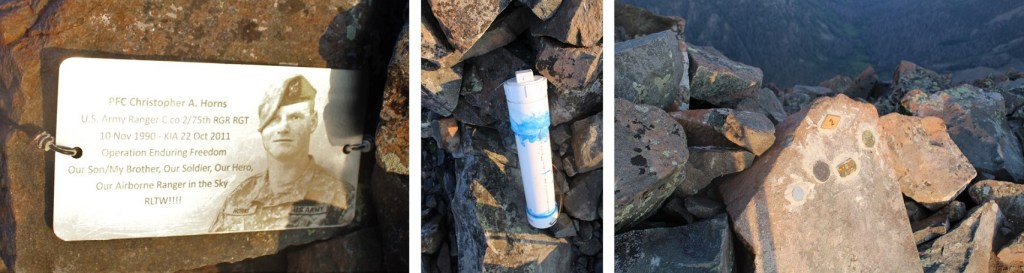
Just before the summit there’s a ‘false summit’ with a memorial to Christopher Horns. They’ve replaced the flag since the last time I was here, and added a large summit register tube.
I continued heading north to the summit of Rito Alto Peak.
I summited Rito Alto Peak at 6:45am. Note, there was a very small summit register here, in a jar that looked to be about 1.5 inches in diameter: like one of those sample jam jars. I left it where it was.
Rito Alto Peak:
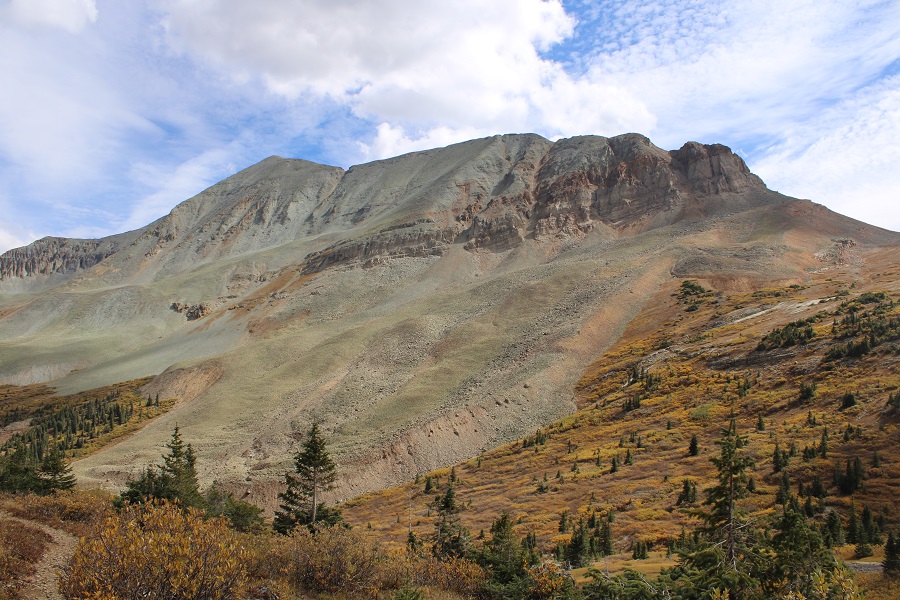
From the summit I had a good view of the other peaks I intended to summit today (if not a good view of the area overall).
I turned and headed back towards Hermit Pass.
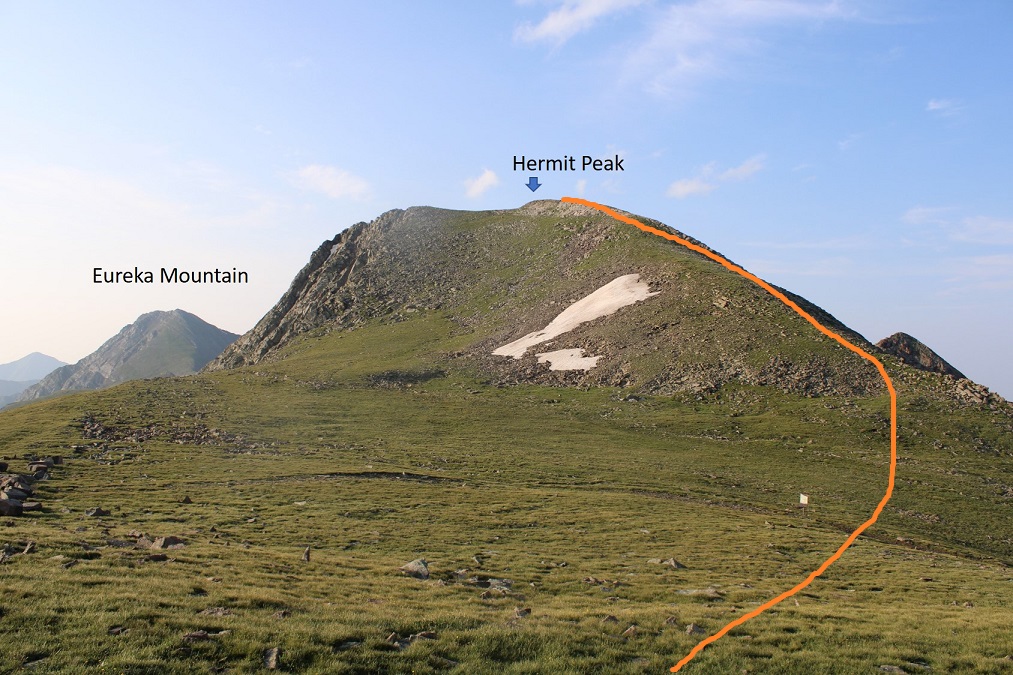
Once at Hermit Pass I chose the path of least resistance to the summit of Hermit Peak, making this a ridge hike. The true summit is hard to determine, as both the east and west ‘highpoints’ look like the summit, and indeed, both have cairns. CalTopo says the true summit is to the right (west).
Here are some pictures of the ridge hike, mostly on tundra to the summit of Hermit Peak
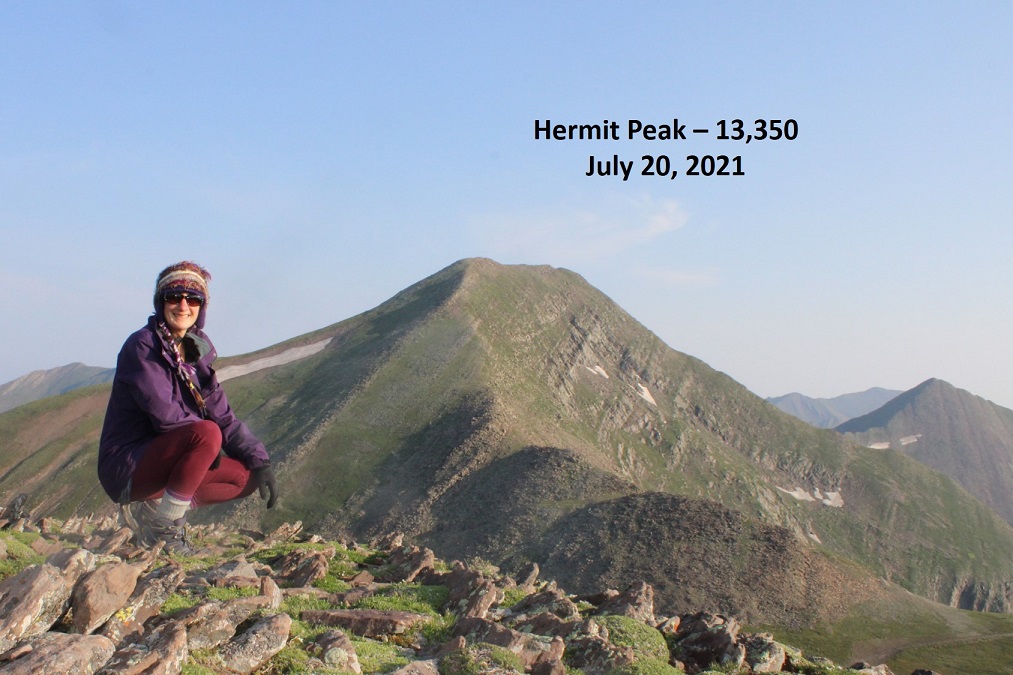
I summited Hermit Peak at 7:40am
Hermit Peak:
Here’s looking back at Rito Alto Peak
And now, on to Eureka. I first crossed over to the east side of Hermit Peak (which also had a cairn)
Here’s looking back at Hermit Peak from the cairn on the other side
Here’s looking back from that point at the Hermit Pass Road I took hiking in
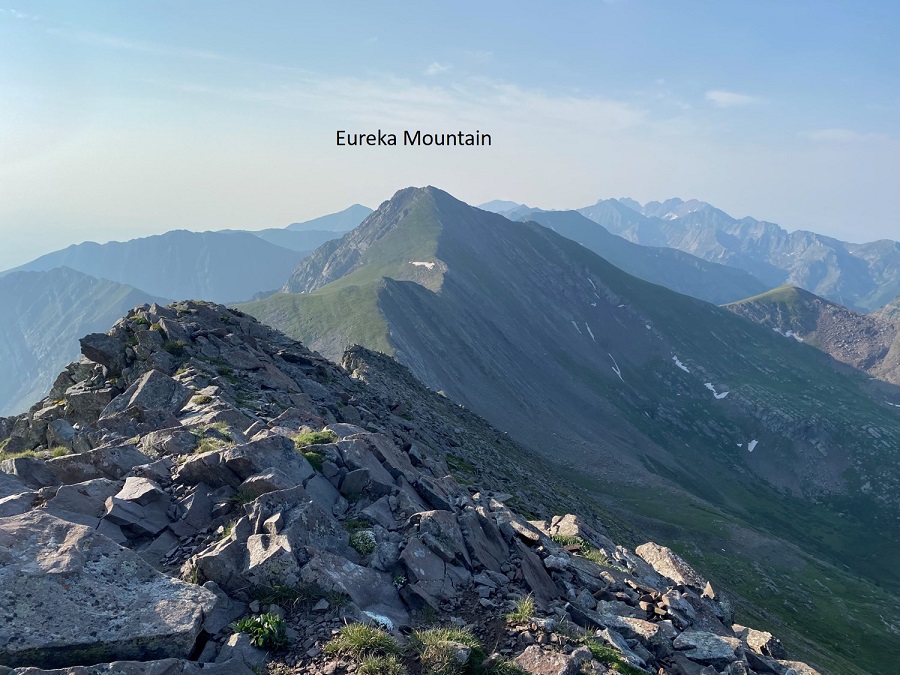
And from that point looking southwest to Eureka. As you can see, this is another ridge hike
While it might look sketchy, this ridge stays at class 2. First, I descended about 650’ down the ridge
Then ascended 300’
And descended another 150’ before gaining 550’ to reach the summit of Eureka Mountain. Note the true summit here is also to the west (this will be hard to determine when you’re up there, as it looks like it should be the point further east).
The hike is a tundra/rock ridge hike until the last 20 feet or so. Here’s the route I took, staying above the snow but below a rock formation on the ridge. You could also just go straight up the south face.
Just before the summit there was a little (very easy) scrambling
I summited Eureka Mountain at 9am. It was a small summit, so I sat on it but didn’t stand. I took a selfie instead of setting up my camera.
Eureka Mountain:
From here you can see, looking east, how it looks like that might be the summit. I wanted to be sure, so I hiked over there (sketchy class 2)
This area was actually lower, but gave me a good view of the true (small) summit of Eureka
I made my way back to the true summit and headed back down the ridge the way I came, eventually heading towards the red arrow.
I stayed on the ridge to avoid the marshy area, which didn’t look like a fun time. Once above the marshy area I cut across the tundra to the east side of the mountain
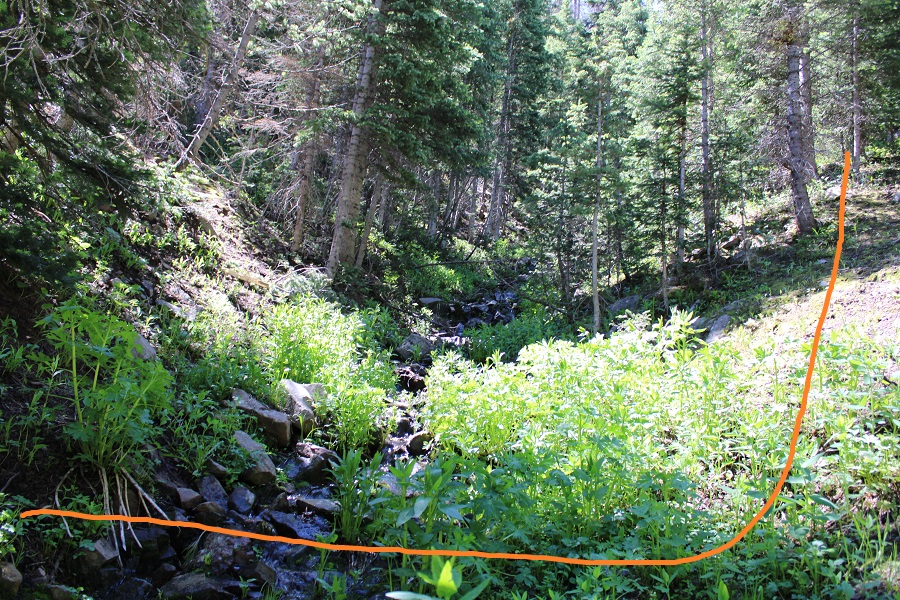
Here’s a closer look at the wet area, and my route across
As I skirted the ridge, I could see my intended route back to the road. I was aiming north, towards the smallest outlet of Horseshoe Lake. Once I made it there I would cross the stream and I hike up the hillside, back to the road.
First, I had to descend a gully. This was difficult class 2 at the hardest. There will be pictures later: make sure to descend the correct gully to make this easier.
Here’s the route I took down the gully, towards Horseshoe Lake, and back to the road. There were some willows to navigate near Horseshoe Lake, but once again, all class 2.
From the road, here’s a view of the path I took down the gully. If it’s daylight when you’re hiking in, spend some time visually memorizing the route.
Back on Hermit Pass Road, I followed it east back to my truck
The wildflowers were on point
I made it back to my truck at 11:15am, making this a 12.2 mile hike with 4551’ of elevation gain in 6 hours, 45 min.
The drive down wasn’t any better than the drive up, but Miles got his first real 4WD workout, and had fun splashing through the mud!
This was my 4th attempt at Peak of the Clouds. Not because it’s a difficult peak, but because every time I was in the area I was thwarted by the elements; snow conditions, or a fast-moving storm coming in. Today had a great weather forecast, so I figured today was my day.
Unlike my previous stays at the Gibson Creek trailhead, this time it was packed. Probably because it was a Saturday over 4th of July weekend. There were RVs set up everywhere, and every parking space in the lot was taken. Knowing I was going to spend the night in my truck I just waited for someone to leave and then backed into their spot.
I was sitting at the trailhead, just appreciating the sounds of the birds chirping and insects humming, and then the sun comes out and lights up each individual blade of grass and all I can think is how lucky I am this is my life. It was a perfect night, and the last one I’d be spending in this particular vehicle, as my new truck was waiting for me at the lot and I was picking it up Monday. I wanted to enjoy tonight.
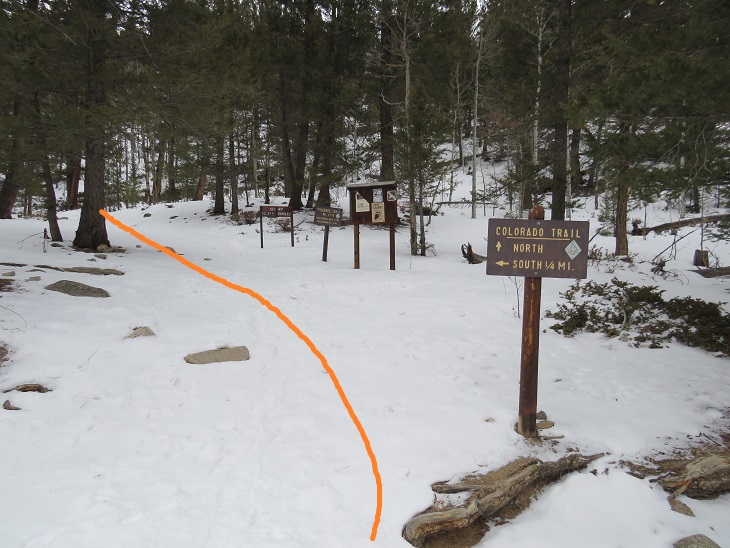
I’d been gone for a few days, and I also wanted to get back home to see my kids, so I made it an early morning. I was on the trail at 3:45am. The trail starts at the north end of the parking area, and follows trail 1456 west.
The trail starts out nicely defined. Stay straight at the Rainbow Trail Crossing. This sign has been broken for years. I wonder if they’ll ever replace/fix it?
Here’s where it gets tricky. After hiking for .4 miles, and at 9400’, leave the trail and cross Gibson Creek. It looks like there used to be a good trail here at one time, but it’s no longer well defined. In fact, someone placed a tree trunk over the way you’re supposed to go.
After crossing Gibson Creek, the trail picks up again.
The trail goes through various conditions, from being well-defined, to being covered with downed trees, to barely being a trail at all. It also crosses Gibson Creek several times.
The main thing is to just keep following Gibson Creek west/southwest
I followed the trail for about 2 miles, to when the trail abruptly ended where a tree had fallen over the trail. Here I crossed the creek one last time, and bushwhacked southwest, up the mountain. It’s important to note here something the topo map doesn’t show: Apparently, somewhere Gibson Creek was to my right, but a much larger creek was to my left (this creek is not shown on the topo map, and could just be an error in CalTopo, as the creek was always to the south of me, but on the map it’s shown as being north). Gibson Creek pretty much fizzled out here, so keep the creek you can see to your left as you ascend the hillside.
This is a steep hillside with some bushwhacking involved. It seemed to go on forever. I took a different way down than I did up, and I’d recommend taking the way I went up, directly aiming southwest towards the ridge, as it avoids the large section of willows to the northwest.
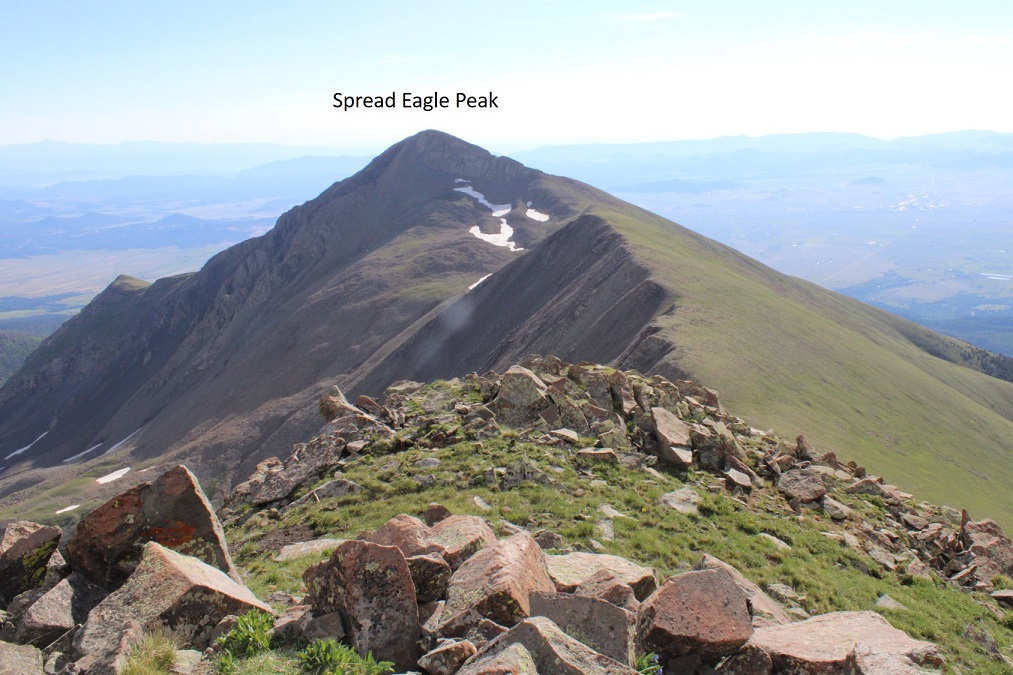
I made it to the ridge as the sun was coming up
Once on the ridge, it’s a straightforward, class 2 ridge hike to the summit.
Here are some step-by-step pictures of the ridge
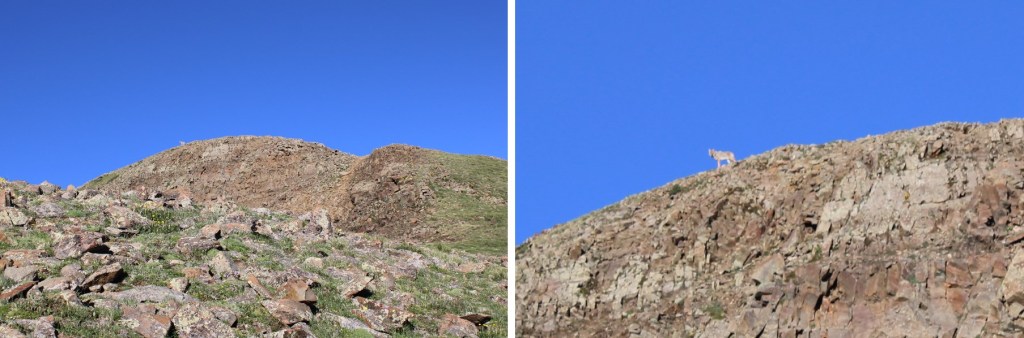
As I was nearing the summit, I looked towards the summit and thought I saw a bighorn sheep. When I looked again I realized it was a coyote: the biggest coyote I’ve ever seen! He was chillin’ on the summit.
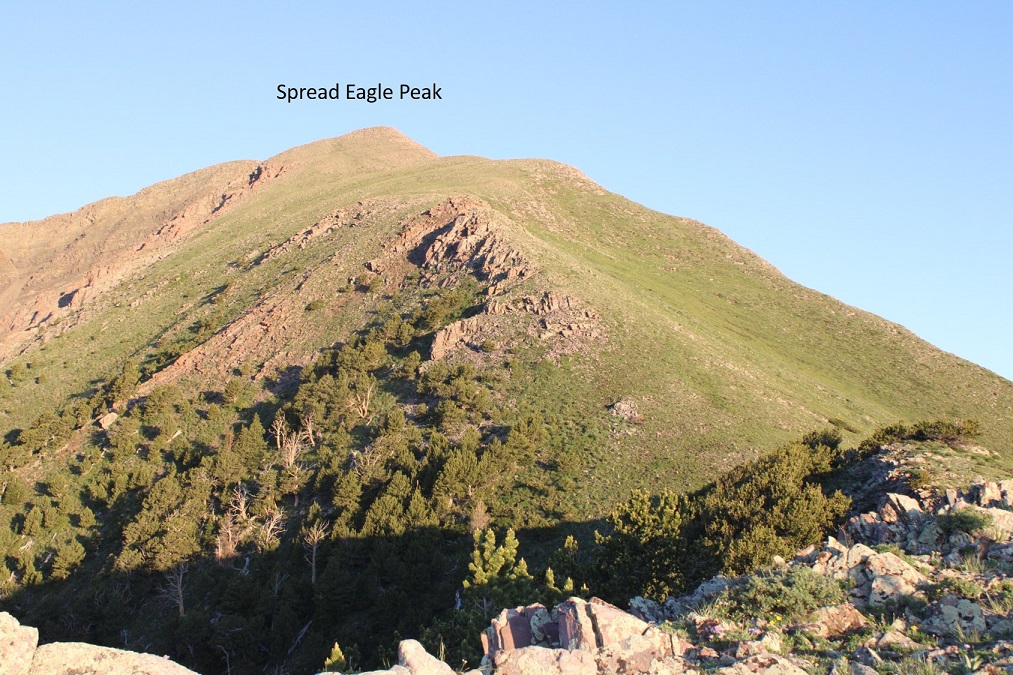
I summited Spread Eagle Peak at 7:15am. The coyote was nowhere to be seen.
Spread Eagle Peak:
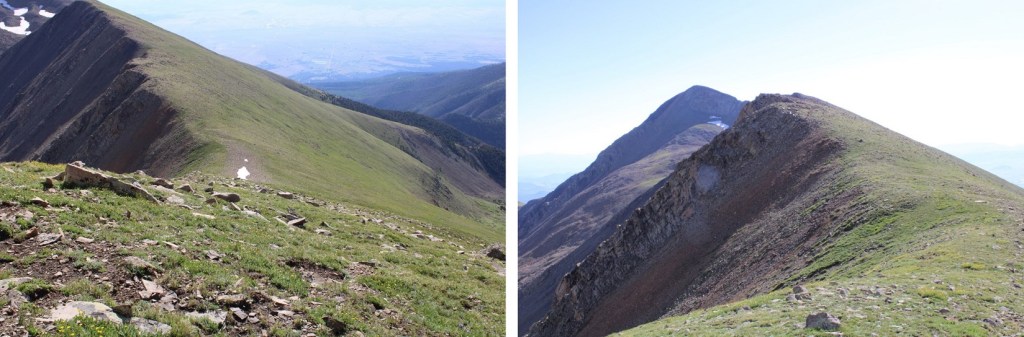
It was an absolutely beautiful day! I headed south, down the ridge to the Spread Eagle/Peak of the Clouds saddle.
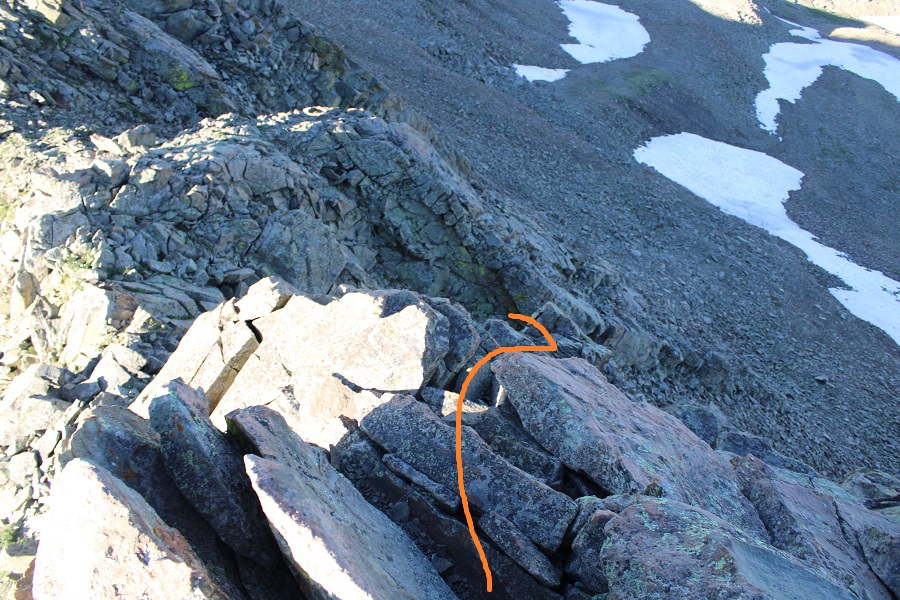
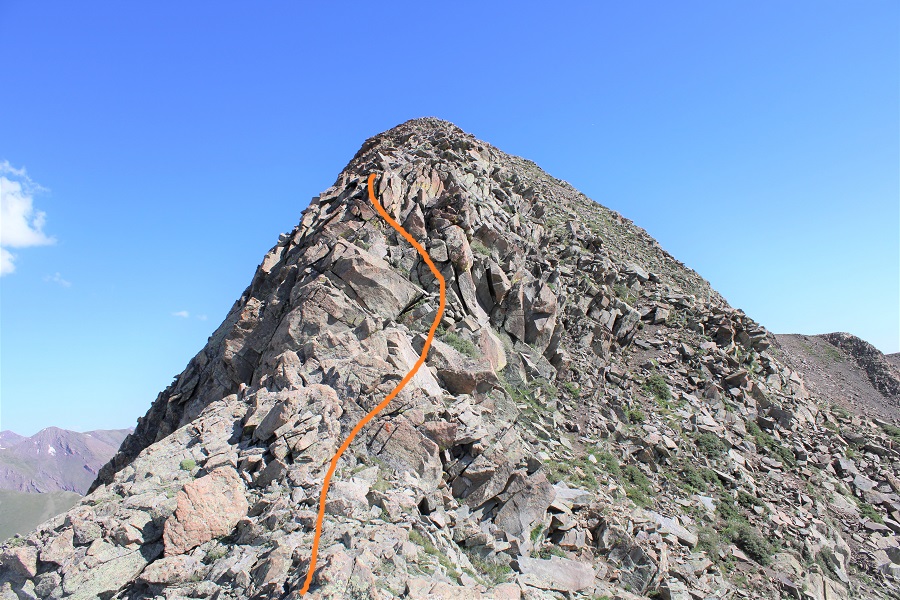
This was a straightforward trek, with just one short class 3 move. I stayed right and downclimbed this section.
Then followed the ridge to the saddle
It was a simple, class 2 ridge hike to the summit of Peak of the Clouds
Here are some step-by-step pictures
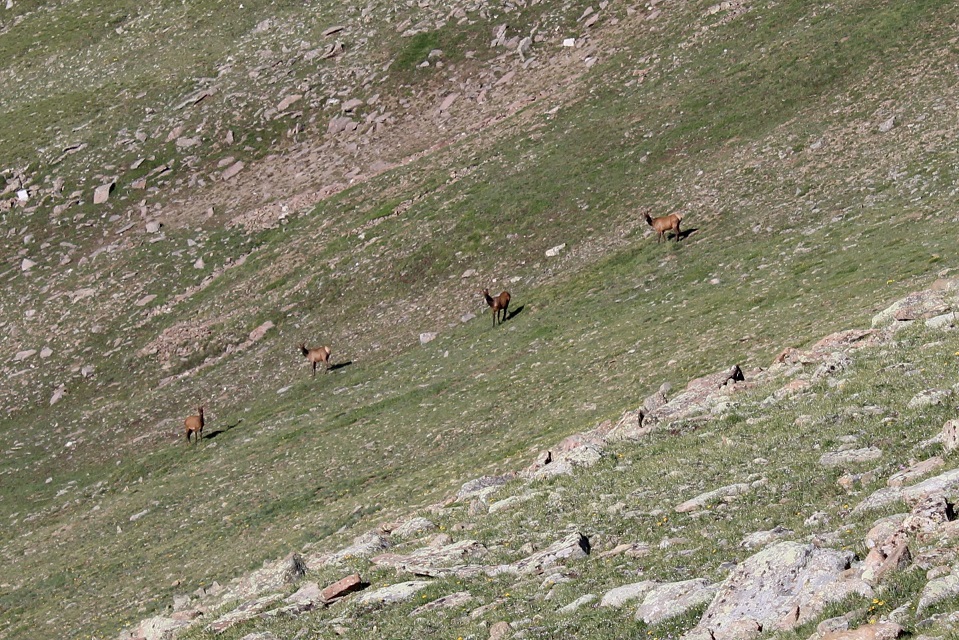
Here I saw some elk (they didn’t stay long)
Looking up at the ridge to Peak of the Clouds
As I was hiking up, a marmot rushed down past me. I wonder where he was going?
The last part of the ridge was rocky. I stayed to the left.
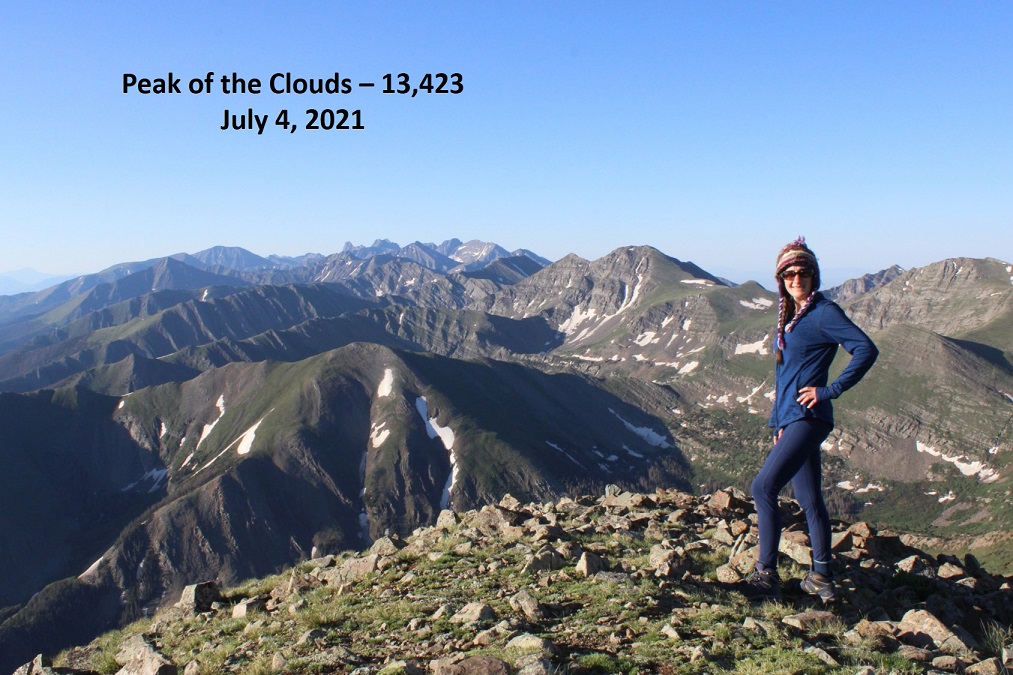
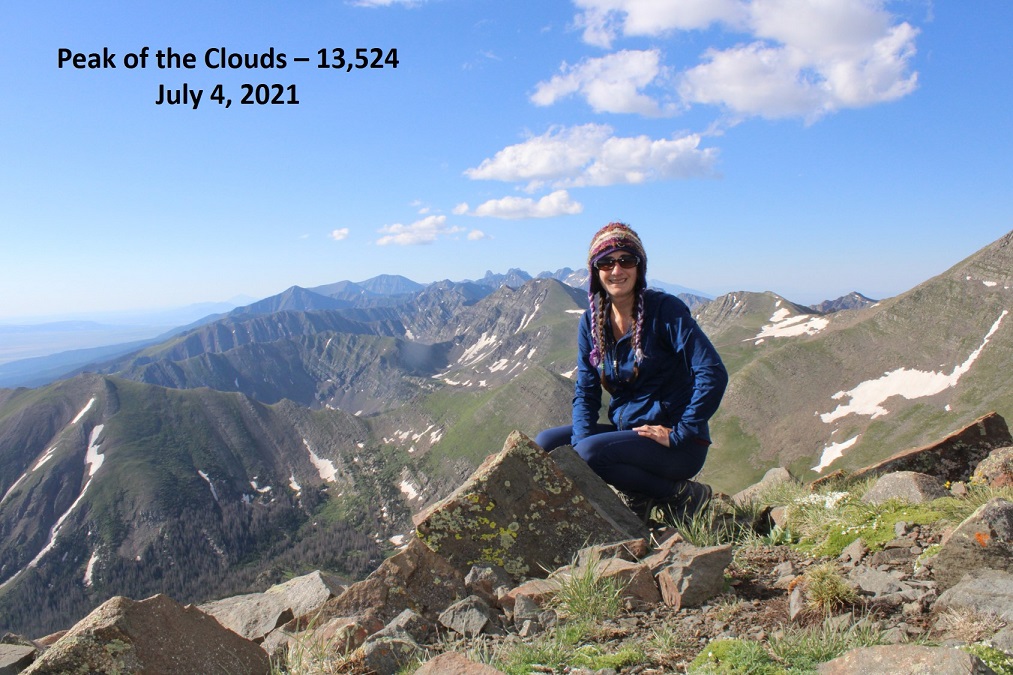
I summited Peak of the Cloud at 8:20am
Peak of the Clouds:
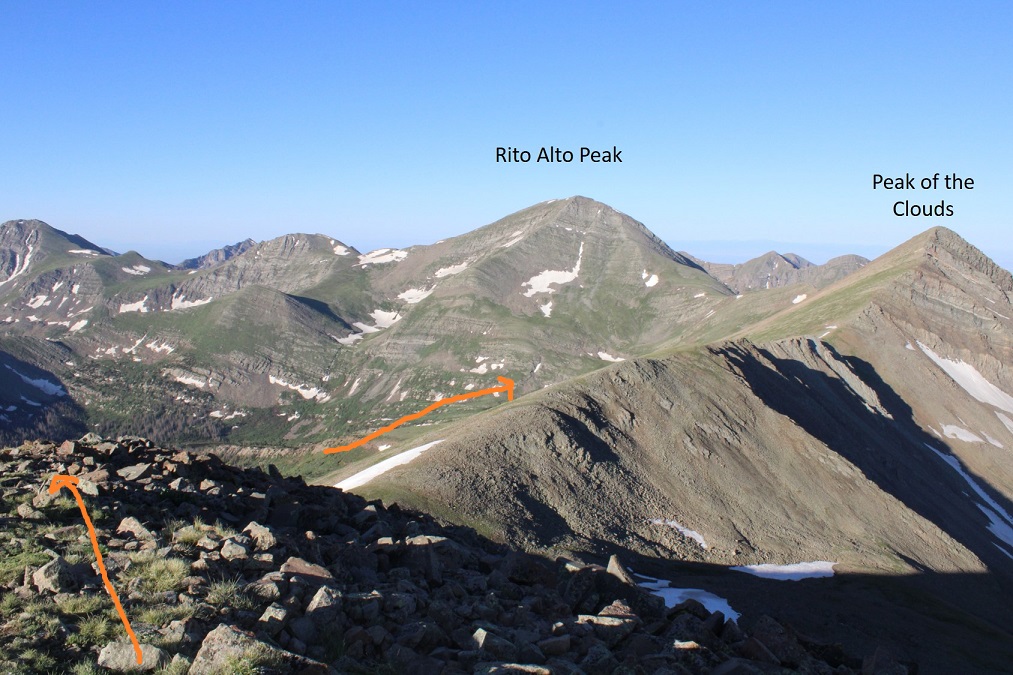
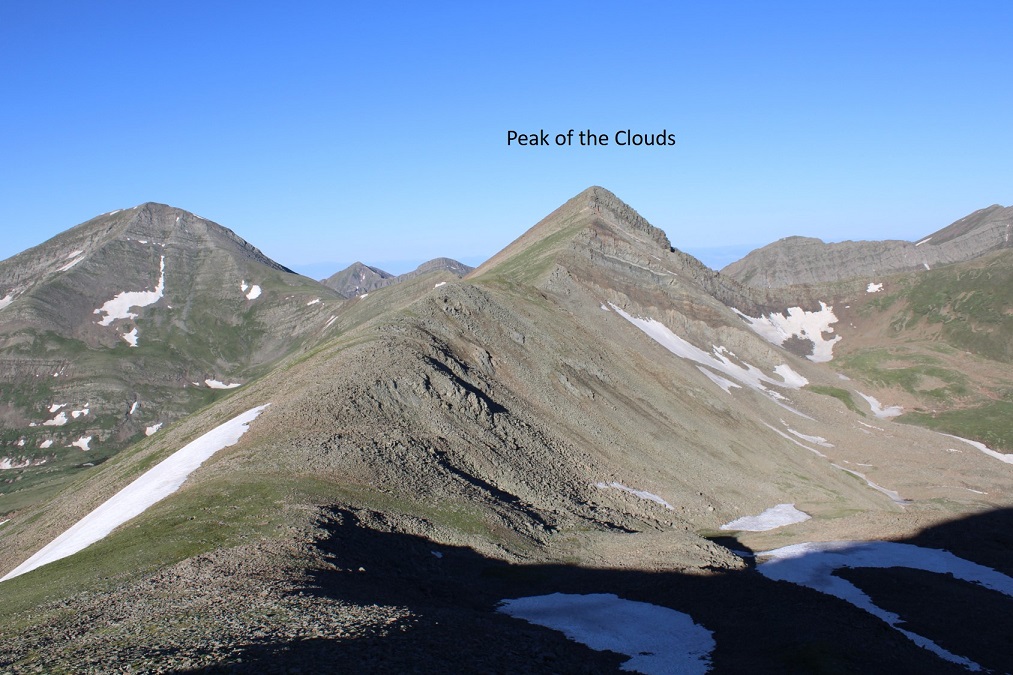
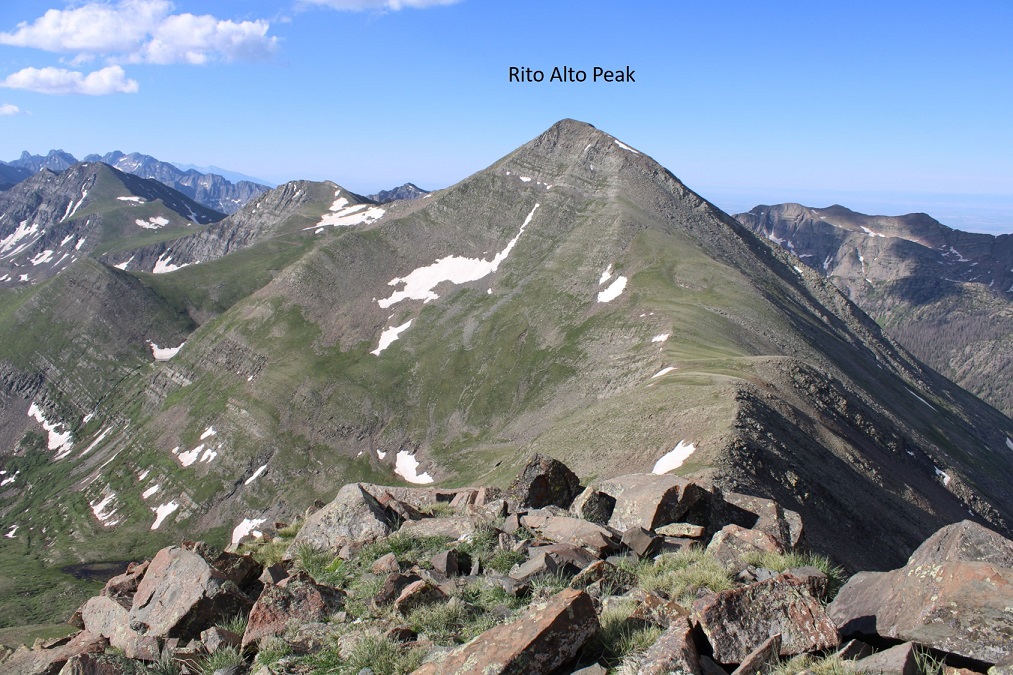
Here’s a look at the ridge to Rito Alto Peak (in case anyone is looking to do that one as well)
I sat for a minute and enjoyed my time on the summit. It was a beautiful 4th of July in the Sangres!
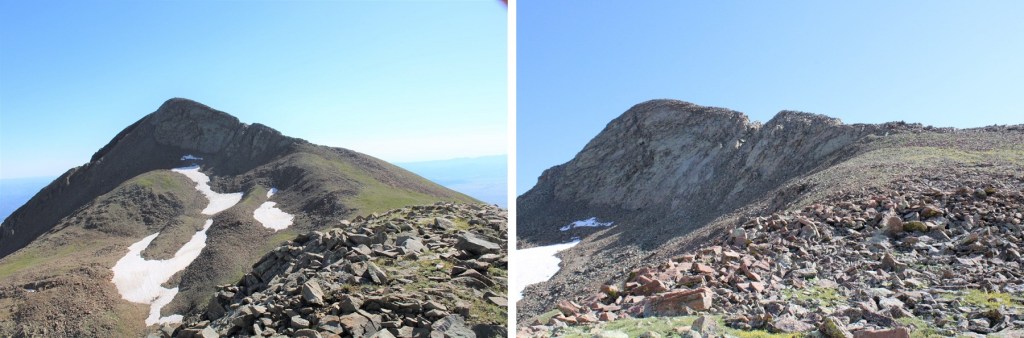
I was making this an out and back trip today, so I turned and looked back at Spread Eagle Peak
Here are some step-by-step pictures back to the saddle
This is how I accessed the ridge
And then followed the ridge north
The short class 3 section was easier to upclimb than downclimb.
Then it was an easy ridge hike to the summit
I turned and headed east down the ridge, back to treeline. I saw elk here as well.
Once near treeline I headed back toward Gibson Creek, but as I said before, I encountered a lot of willows and it was slow going. I’d recommend following the ridge as it slopes up a bit and becomes treed, and then heading northeast.
Yes, there’s bushwhacking and route finding involved.
I made it back to the creek, and followed the trail back as it curved northeast towards the trailhead
I crossed Gibson Creek one last time, and was back on the well-marked trail.
I made it back to my truck at 11:45am, making this an 11.05 mile hike with 5461’ of elevation gain in 8 hours. Now, time to drive home, wake up my daughters, and grill some steak!
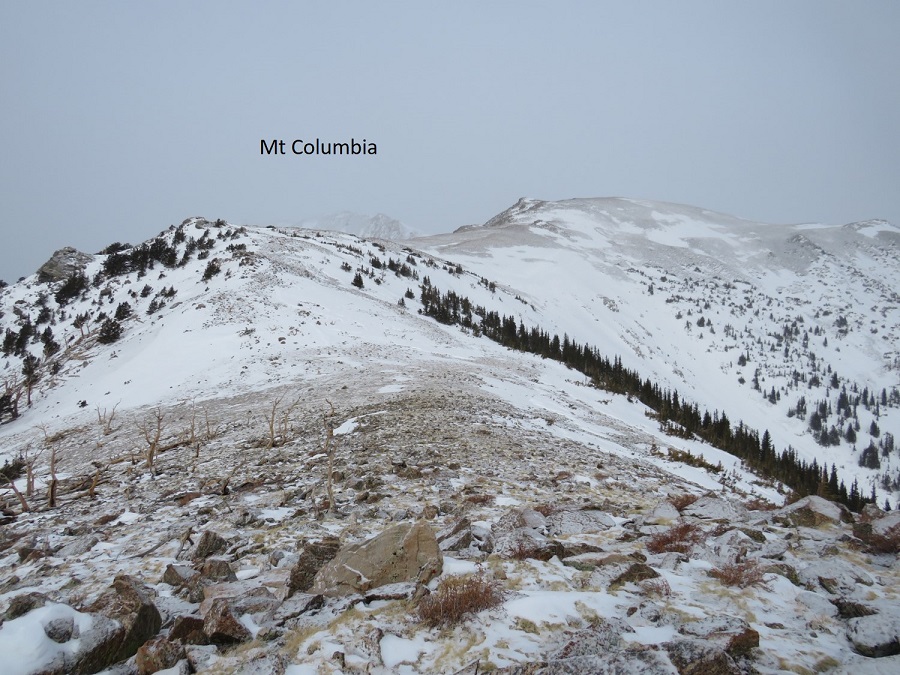
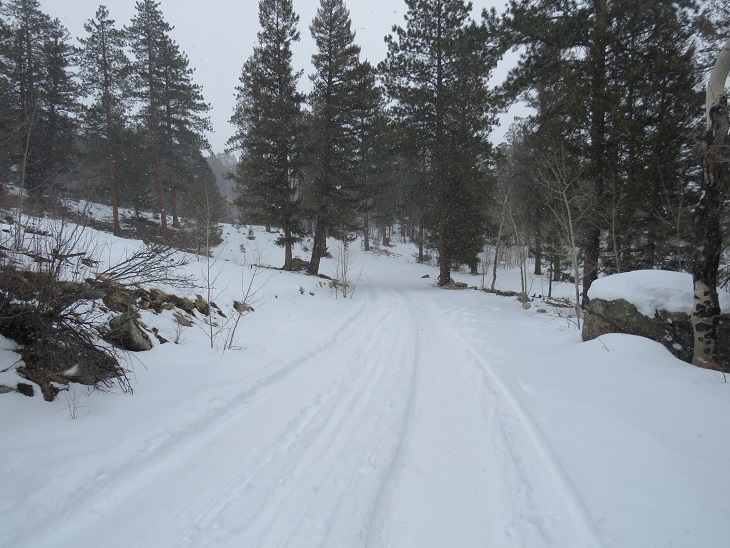
I’d already summited 3 peaks this week, but with my being so close to 100 14ers and winter weather moving in I really wanted to try to get in one more summit. I did a lot of weather watching: the storm kept changing areas, times, wind speeds, etc. I finally settled on Mt Columbia because I haven’t done it yet in winter and someone said they’d trenched it earlier in the week (remember, my motto this year is not to let a trench go to waste).
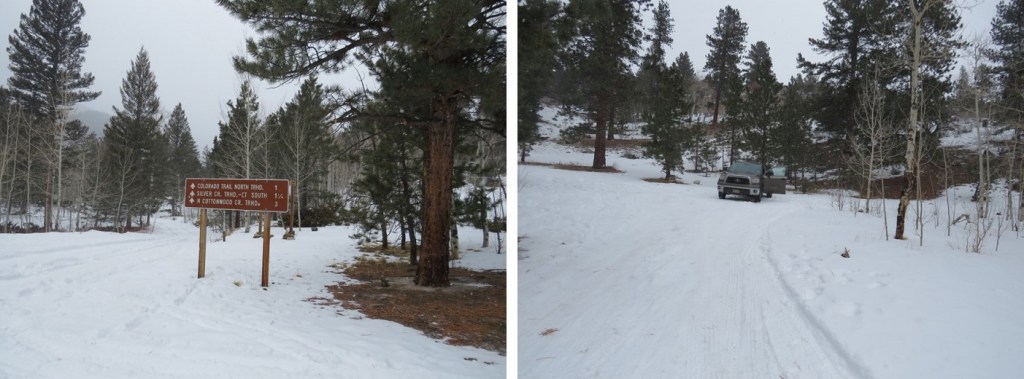
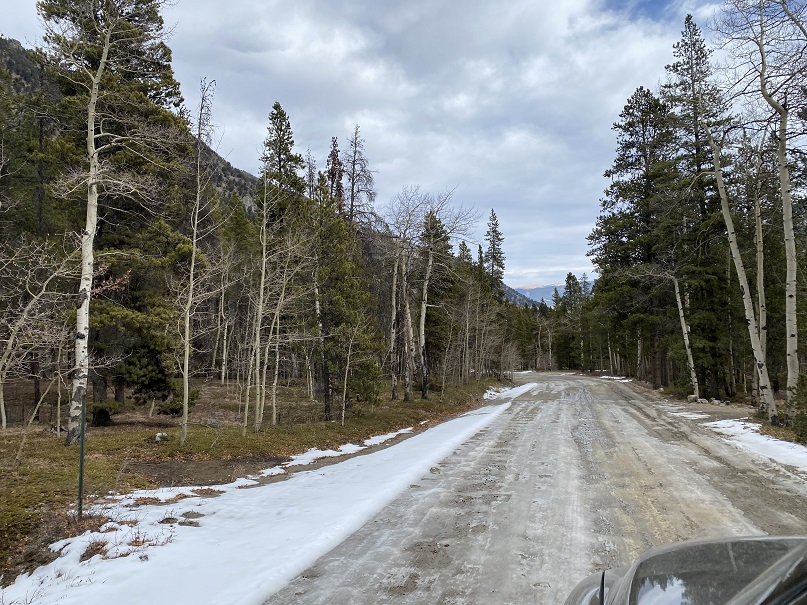
I didn’t make it all the way to the Harvard Lakes Trailhead on the drive in. There was too much snow and I ended up backing my truck up for about half a mile to find a good parking space. I parked here. There’s room for 2-3 vehicles if everyone parks nicely.
I gathered my gear and started hiking along the road. It’s about a mile from where I parked to the Harvard Lakes Trailhead along this road. Alost as soon as I started hiking my flashlight stopped working, so I had to get out another. When that one stopped working as well I walked for a bit in the dark, then sighed and got out my emergency charger/flashlight. It was then I realized I’d missed the trailhead, so I had to backtrack a ways. I was also very glad I’d decided to turn around/head back when I did on my drive in: the road isn’t driveable to the trailhead.
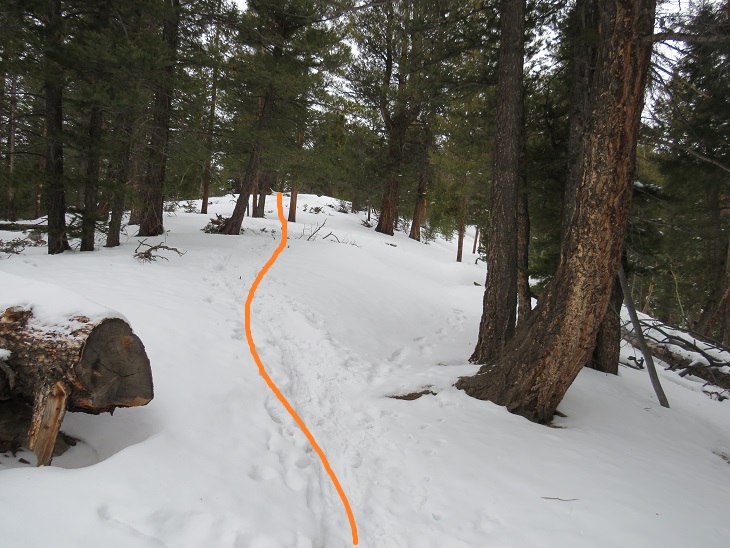
I made it to the proper trailhead, and followed the Colorado Trail as it switchbacked up the side of the mountain.
After hiking on the Colorado Trail for .8 miles I left the trail and followed the ridge. Luckily, this part was (mostly) already trenched.
From here on out it was a ridge hike. I followed the ridge to treeline (about 1.25 miles). Some of the area below treeline was trenched, but there were many areas under several feet of snow. I was stubborn and reused to put on snowshoes, postholing up to my waist several times.
Also, it takes forever to get to treeline!
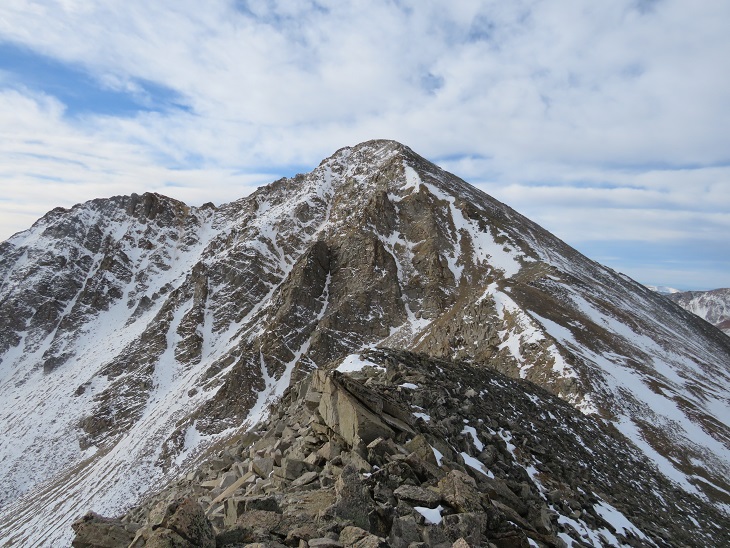
Finally, it became impossible to go any further without snowshoes, so I put them on, just before making it out of treeline. Here’s a good overall view of the route above treeline. It’s important to note the true summit is still not visible (it’s behind that ridge, to the north).
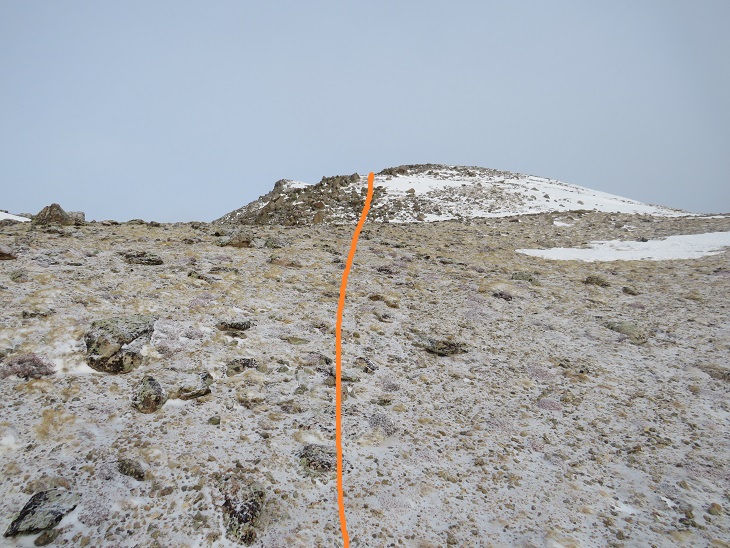
Now this became a ridge hike, above treeline. I could see the clouds moving in, and indeed, it was snowing off and on. The wind was also picking up. Taking off my snowshoes, I followed the ridge as it wound northeast. First heading towards point 12042
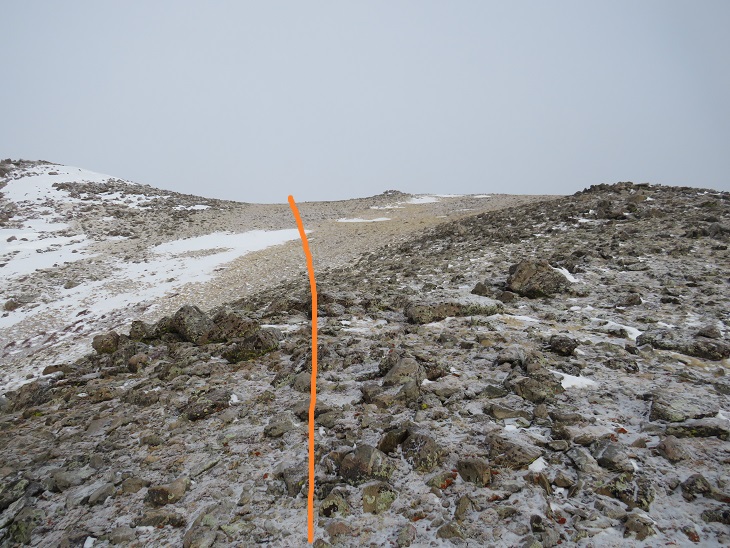
Once there, I lost some elevation, and the ridge split. I don’t think it matters which side of the ridge you take. I went right, since there was less snow there. Here’s an overview of the route
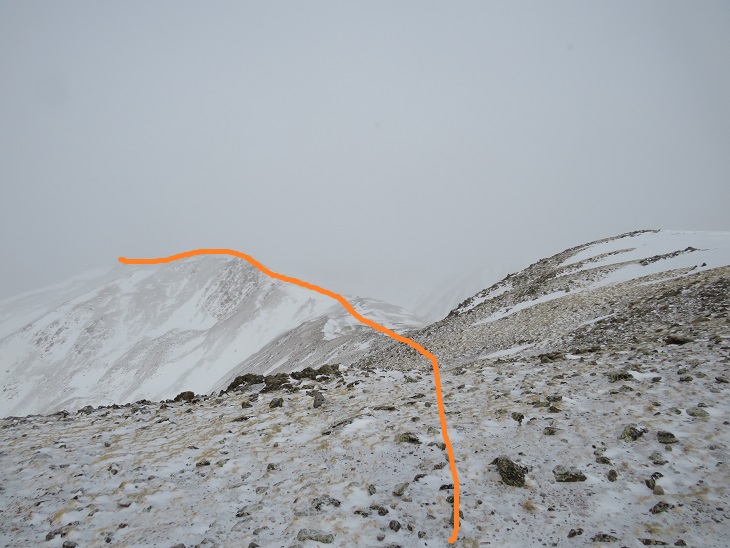
My camera died here (due to the cold), so I started using my phone. Here are some more close-up pictures
Around this point the wind became unbearable, and I could no longer take off my gloves to take pictures with my phone, so I don’t’ have any from this point on. Also, as you can tell, the weather moved in and you wouldn’t have been able to tell much from the photos anyway. What you need to know about the rest of this hike is it’s further than it looks, it’s all class 2, the ridge goes on forever, and what you think is the summit… isn’t. The summit is actually the northernmost point, not what looks like the summit from below (that’s PT 13544). It’s a rocky summit, and I couldn’t find a summit marker (but I also didn’t look for one).
The wind didn’t let up, and I summited in whiteout conditions. It seems the 50% chance of snow after 11am was happing at 9am. I tagged the summit, turned around, and retraced my steps down that long ridge. My fingers and toes were burning inside my socks and glvoes. I had on ski goggles that kept fogging up, and I had to be careful of my footing since I couldn’t see much in front of me. As I got further down the ridge the weather let up a bit, and I could see my way back (these pictures were actually taken from my way in).
I put my snowshoes back on and kept them on for the rest of the hike. The snow started picking up again, especially as I made it back to treeline.
I made it back to the Colorado Trail, and followed it back to the road
And now to follow the road back to my truck
Along the way I was passed by a cross country skier. He seemed impressed I’d just hiked Mt Columbia, especially since it was now snowing quite a bit. I’m not gonna lie, I was a little worried about my drive out. I wished him well as I took off my snowshoes and kept trudging along the road.
Just as I made it back to the trailhead I turned and saw a white dog running towards me, no owner in sight, clenching a deer leg in its mouth.
The skier said it was his dog, assembling a deer one piece at a time. His wife soon followed after the dog, they packed up and were on their way. I made it back to my truck at 12pm, making this a 14.28 mile hike with 5498’ of elevation gain in 9 hours.
The snow was really falling, so I got out of there quickly. The roads weren’t as bad as I’d thought, and completely clear by the time I made it to town.
In the end, I was glad I’d hiked today, but will most likely do this one again to get better ridge pictures. I should have picked a better weather day.
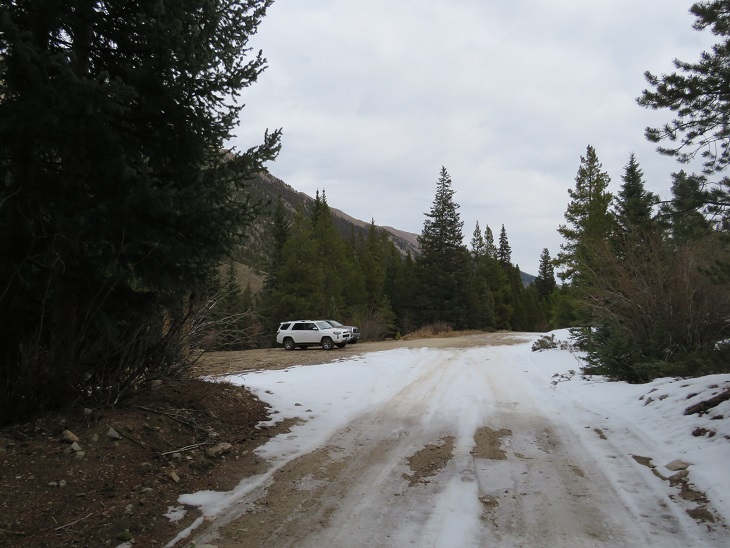
There was a storm predicted for this weekend, so I set out to try to get this loop in before the snow hit. I had no trouble driving the 2WD dirt road all the way to Winfield, even though it was icy in spots.
Once I made it to the 4WD road it became icy. I decided to park in the dispersed camping area and hike along the road. There are several dispersed camping areas here, and plenty of parking.
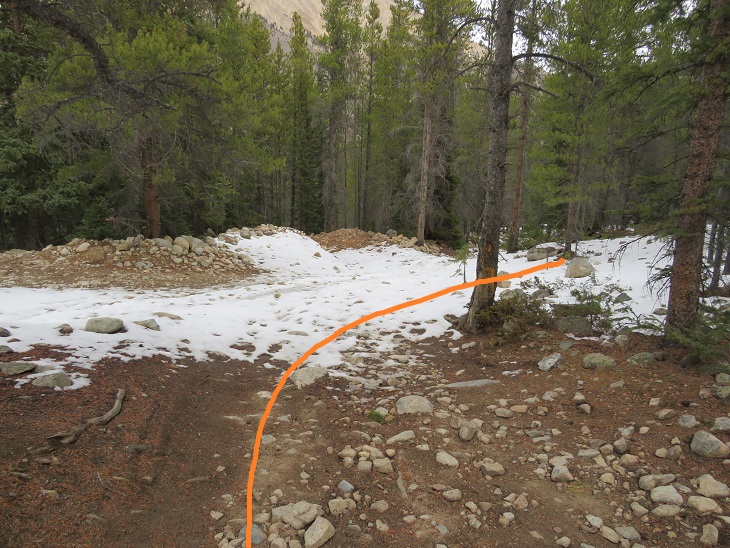
I put on my microspikes at the truck and didn’t take them off the entire hike (although they were overkill for over half of the hike). I started out following the 4WD road southwest. It quickly became icy and I was glad for the spikes. I could also hear owls on either side of the trail. They were hooting, calling to each other back and forth. We’ve recently had an owl take up residence in our backyard and the calls were similar, so I’m guessing they were great horned owls. I also heard a chirping in-between calls. I’m not sure what animal the chirping belonged to, but it happened every time an owl’s call ended, and before the next one began. In any event, the sounds kept me occupied as I hiked in the dark.
I followed the 4WD road for 2 miles to the upper trailhead (Lake Ann). Here the trail splits. I took the well marked ‘Huron Trail’ that went left up the mountainside.
The Huron Trail is a well marked and easy to follow class 1 trail that takes you all the way to Huron Peak. This is also a well documented trail, so I’ll just add a few photos.
Once at the saddle the trail became increasingly icy, and I was glad to be wearing my microspikes. Also, one of them broke (I continued to wear it anyway. The other one broke as well later on, but microspikes are easily fixable so I wasn’t too worried).
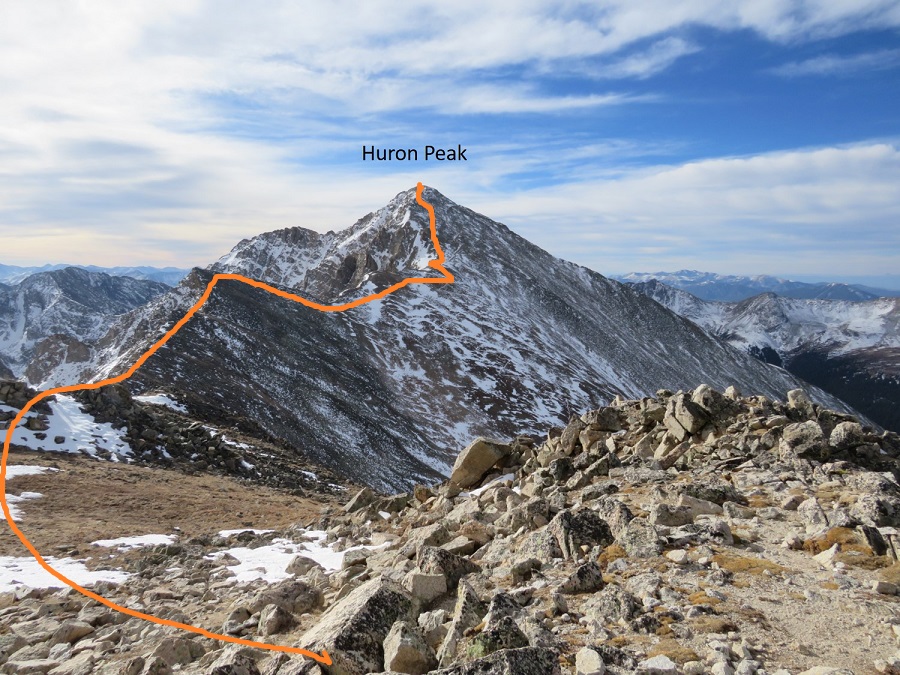
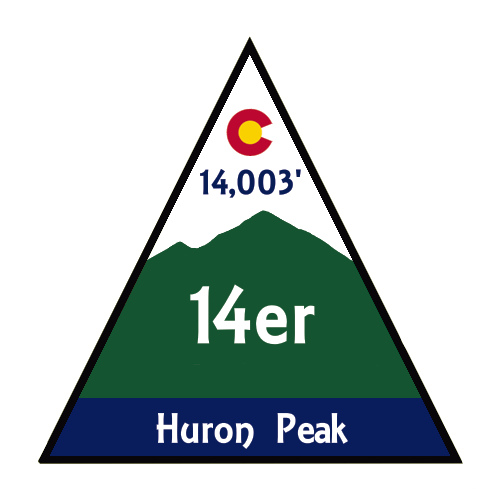
I summited Huron Peak at 7:45am
Huron Peak:
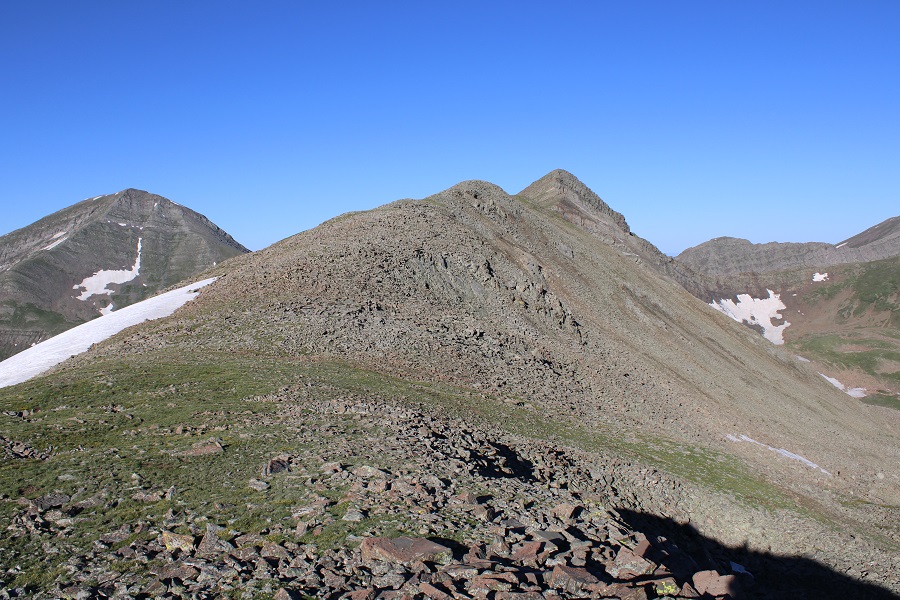
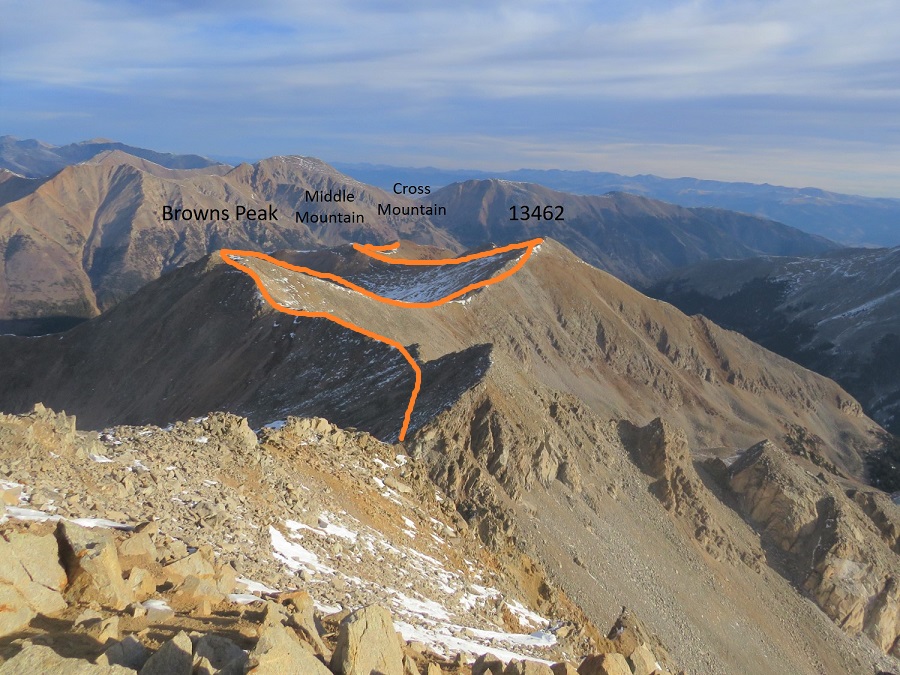
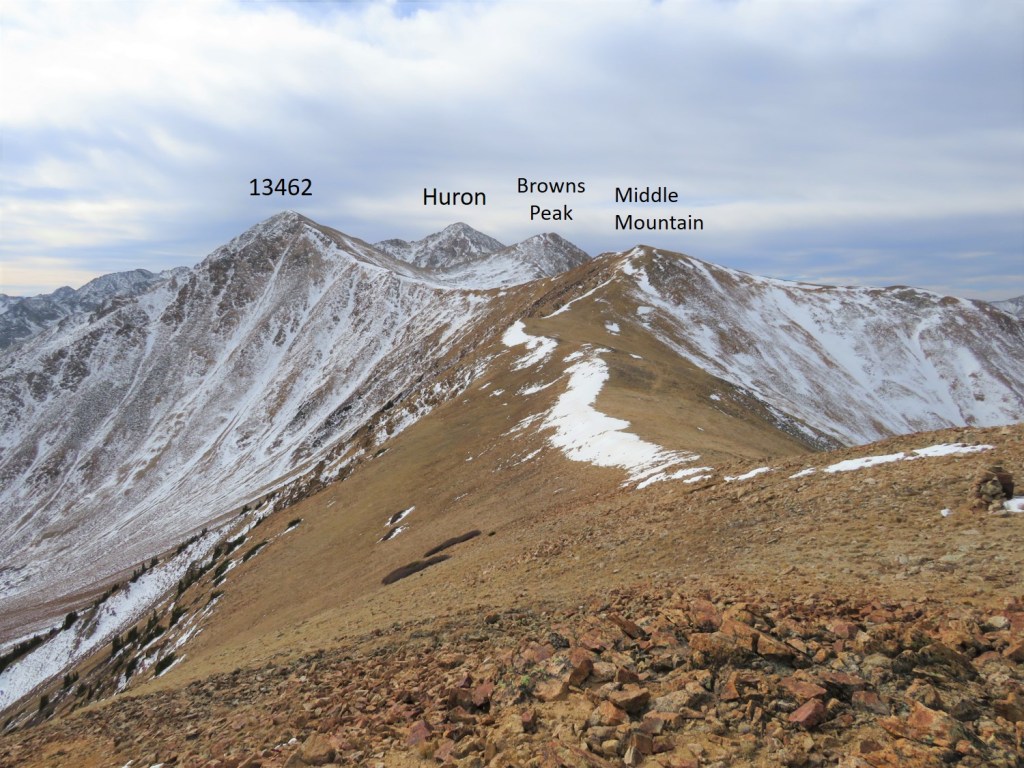
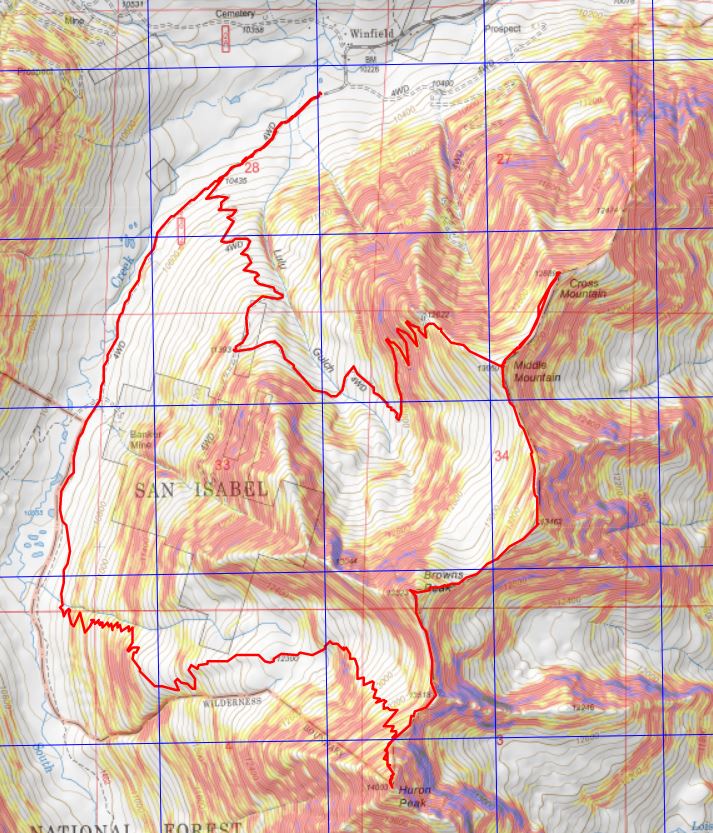
From the summit I had a great view of all the other peaks I intended to hike on this loop. Here’s the overall route, which consists of a nice ridge hike
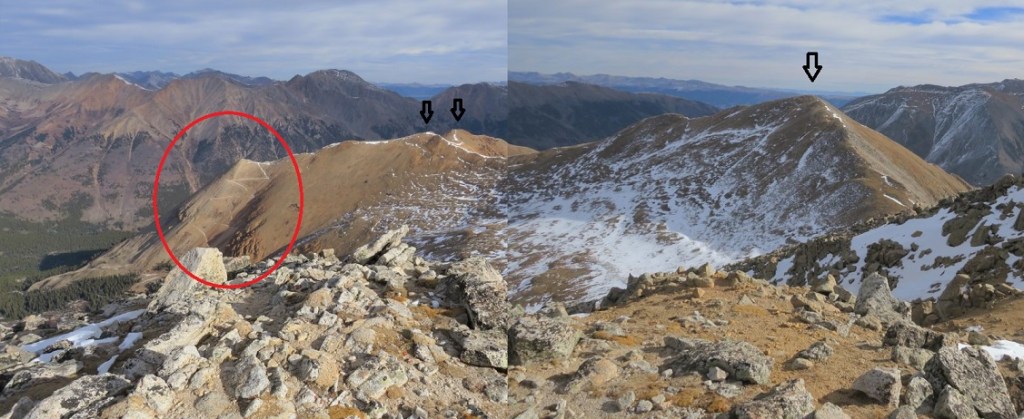
I turned around and headed back to the Browns/Huron saddle, and then over to Browns Peak. I summited the point here on my way over to Browns, but that’s unnecessary, as it’s not ranked and just adds elevation (the elevation part was why I summited the point)
I summited Browns Peak at 9:10am. Browns Peak is unranked.
Browns Peak:
Here’s a look back on the route to Browns from Huron
From the summit of Browns I could see my next 3 summits, as well as the trail I intended to take back down
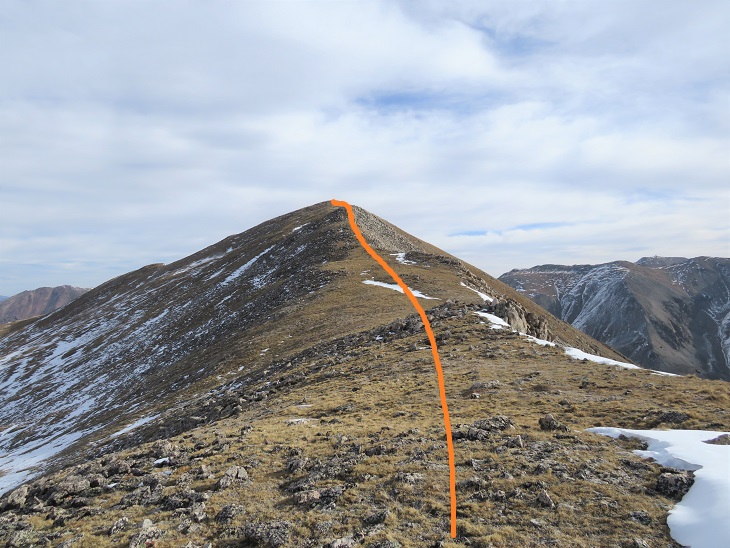
It was a simple ridge hike to the saddle and then back up to PT 13462
There was a small false summit before the actual summit
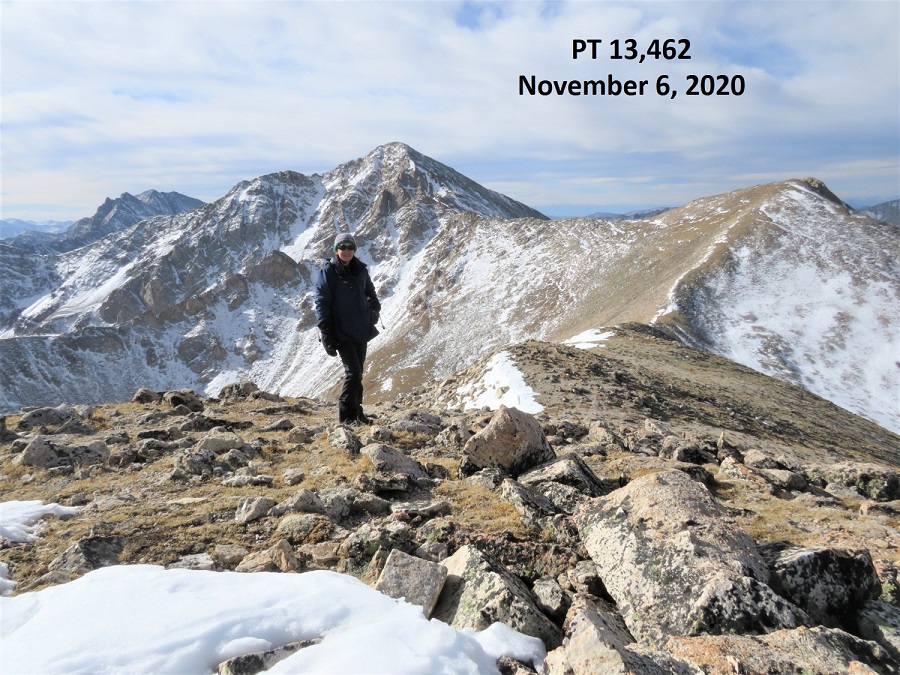
I summited PT 13462 at 9:40am
PT 13462:
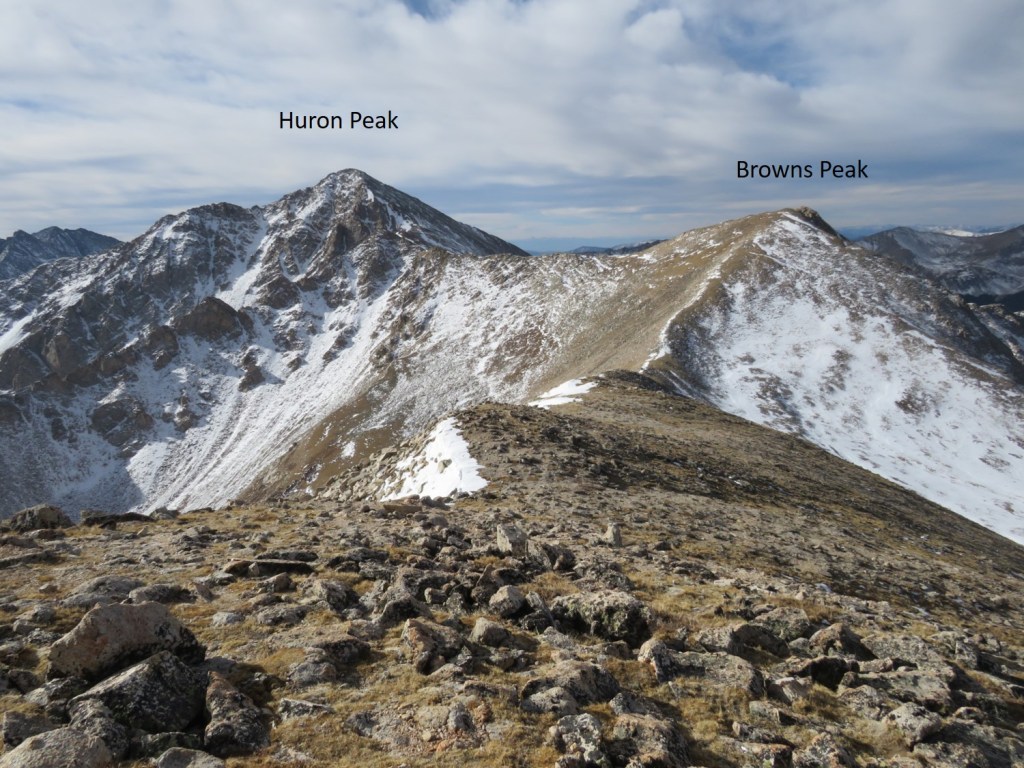
Here’s looking back at Huron Peak and Browns Peak
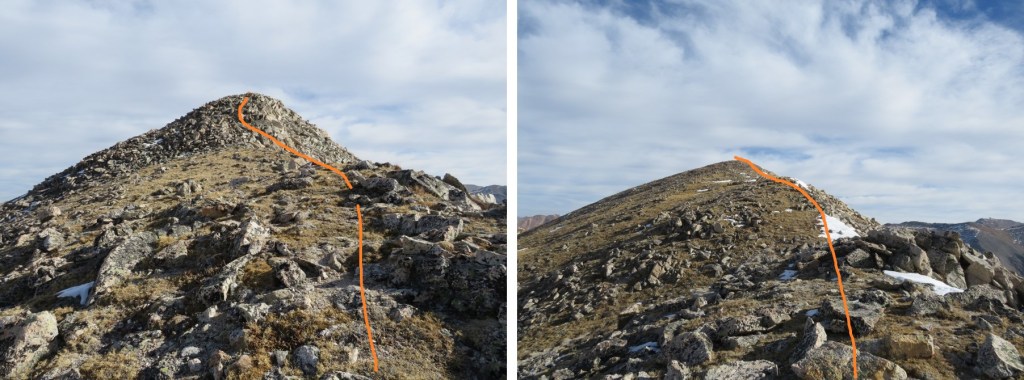
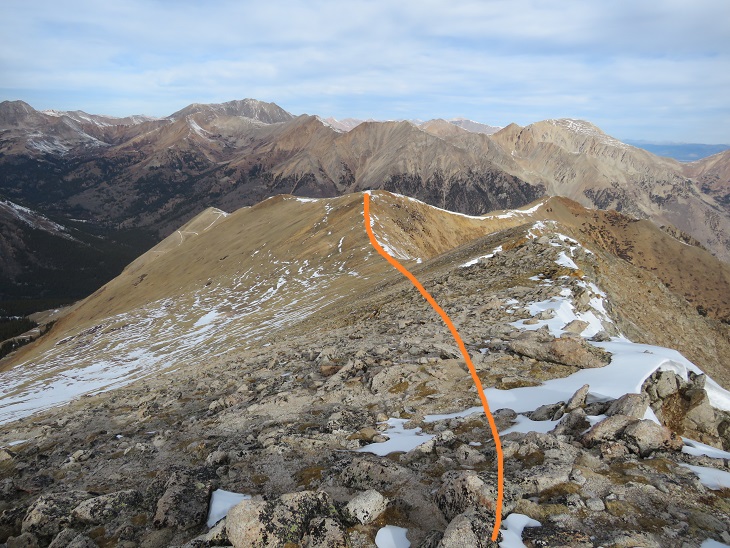
The hike over to Middle Mountain B was also a simple ridge hike. Here’s the route
I summited Middle Mountain at 10:10am (also unranked)
Middle Mountain:
Here’s looking back on the route so far
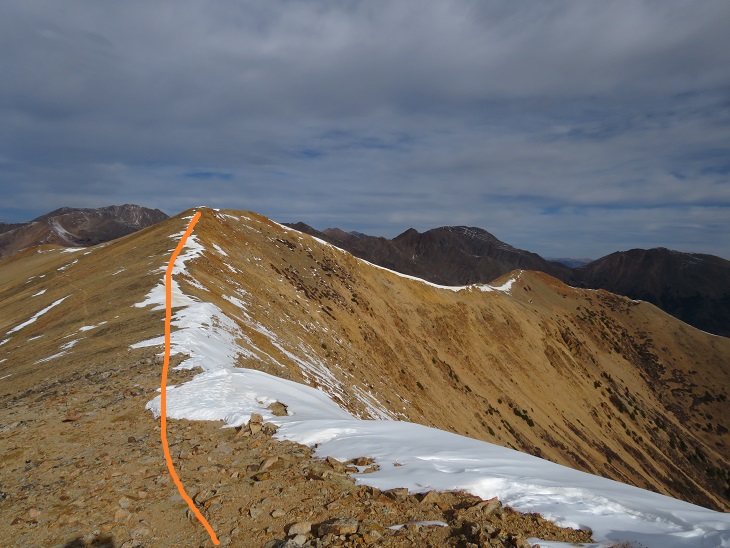
It was still early in the day so I decided to head over to Cross Mountain. This is another unranked peak, but it’s named, so I didn’t want to leave it out on today’s hike. It was a quick and easy hike northeast over to Cross Mountain.
I summited Cross Mountain at 10:35am
Cross Mountain:
Here’s a look back at the other peaks I summited this morning
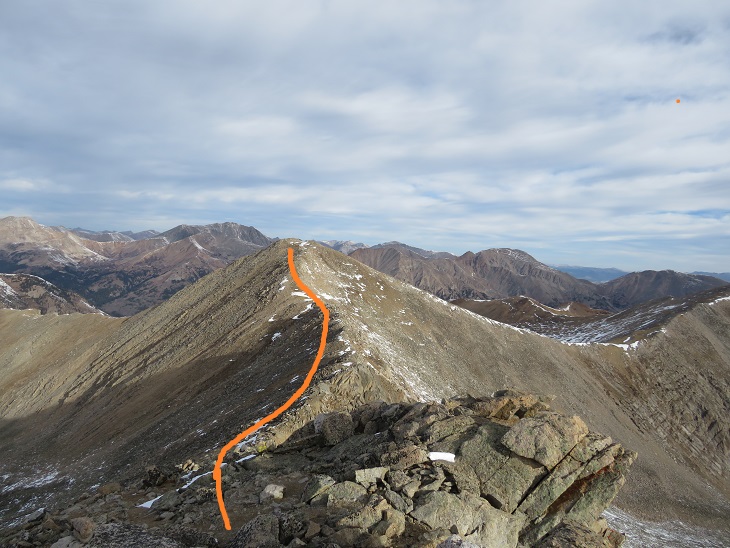
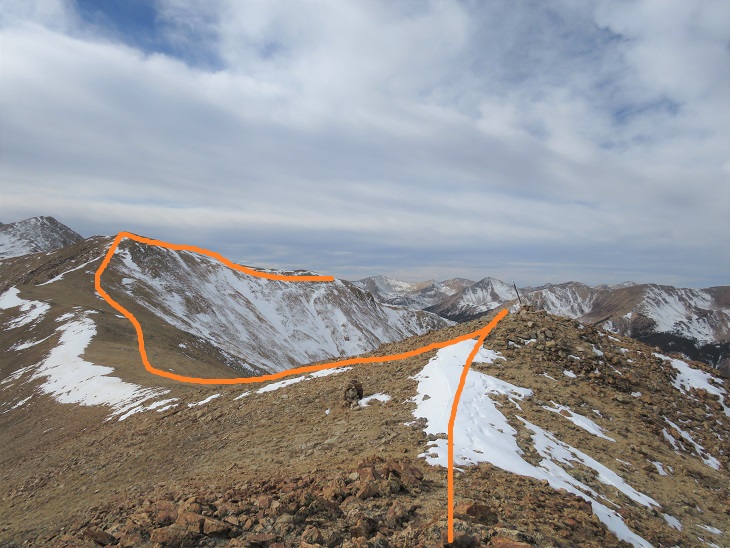
I was making this a loop, which meant I needed to re-summit Middle Mountain, turn right and head northwest down the ridge to the 4WD road. Here’s an overview of the route
First, I made my way back to Middle Mountain
Once I’d re-summited Middle Mountain I turned right and headed northwest down the ridge, aiming for the 4WD road
Then I followed the road back to my truck. Here’s an overview:
A word of caution here: the 4WD road isn’t truly a road for most of the way up the side of this mountain. It looks to be an old mining road that hasn’t been used in many years, and has experienced rockslides and avalanches, turning the road into more of a trail down the mountain and into the gulch. In other words, if you have a 4WD vehicle, or even a motorcycle, don’t plan on driving it up this road. Evidence:
Once down in Lulu Gulch the 4WD road picks up again, and is easy to follow.
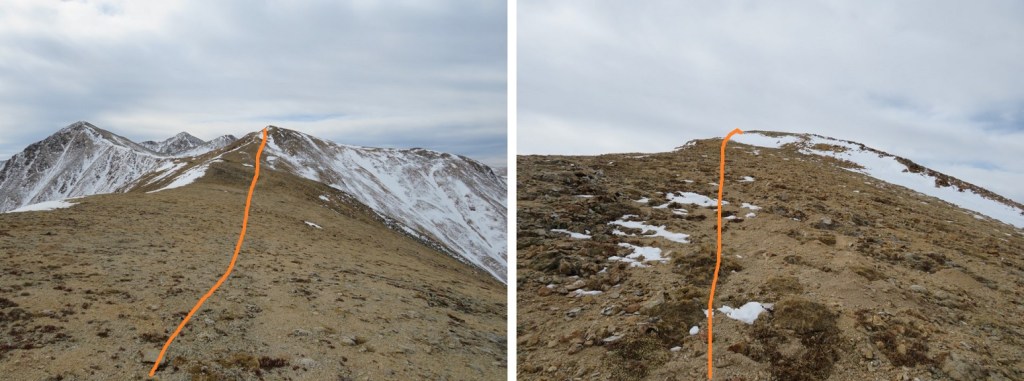
Here’s a look at the hike down from the ridge
The 4WD road was indeed easy to follow, but it seemed to go on and on. And on. And on. I was very happy with my choice to summit Huron first today, as this was a very long slog back to the main 4WD road and I would have been terribly bored following this road as it switchbacked (needlessly?) down the mountainside. It kept going, and going, and going. I seriously wanted to just cut the switchbacks and make it a straight line (but didn’t)
I was thrilled when I reached the main road
Here’s looking back at the turnoff (this is what you see when hiking in, you can go straight to the Huron Trail or left to follow the mining road and summit Middle Mountain first)
I followed the icy 4WD road back to my truck, thankful for my microspikes
I made it back to my truck at 12:15pm, making this a 13.83 mile loop with 4811’ of elevation gain in 8 hours, 15 minutes.
First of all, I’d like to recommend doing this hike backwards from the way I took the hike: Route finding is easier and it’s much more straightforward; You’re above treeline almost immediately and have great visuals of all the peaks/route.
Secondly, Cielo Vista Ranch makes special arrangements for people to hike these southern peaks and because of this they require you to hike (or at least drive in and camp) as a group. They wouldn’t give me a reservation to go solo, so every month since December I emailed Carlos asking if anyone else was hiking and if I could tag along. I’d get a response saying he’s “look into it” and then he’d go silent. Thank you Rose for putting the ask out there and letting me tag along on your reservation!
We all met at a special entrance to the ranch and around 5:30pm. Carlos met us at the gate and had one of his guys drive us 7 miles up a dirt road to our campsite. This is a 4WD dirt road, and while 4WD wasn’t necessary the entire drive it did come in handy once or twice. Carlos gave us each his business card and asked that we text him when we exited the property the next day. At this point I view Carlos as a celebrity. I mean this in a positive way. Yes, he’s charging us all out the nose, but at least he’s nice about it. Also, he’s known by his first name.
Here’s a topo of the road we took. These roads are not shown on maps (CalTopo). I made a GPX file on the way back, which came in handy because there aren’t many ways to get lost on this road but I always seem to find them (I backtracked twice). We’d noticed on the way in the GPX file(s) we had were correct, but the road they took us on switched back and forth between the two files (apparently some of the roads are now washed out and impassable). Also, TONS of moths. Like, Biblical plague amounts. We had our Miller Moth season last month: Cielo Vista is experiencing it now.
Here’s a picture of where we parked our vehicles and camped for the night, around 11,750’
We all sat and chatted for a bit. I kept thinking to myself I should go look at the route I’d intended to start out on while it was still daylight, but I had a couple glasses of whiskey and I fear I was a bit too chatty. You see, I’m used to drinking alone (that sounded bad) but what I mean by that is when I usually hike/camp/etc. alone I have a few drinks, scope out the beginning of the route or at minimum where the trail starts, and call it a night. Early. Instead here I was, talking to people at camp. It was so nice to have like-minded people to talk to: we understood and appreciated each other’s mountaineering experiences and goals. That’s so much more refreshing than my mom freaking out every time I bring up hiking because she thinks I’m going to die. We discussed our intended routes for tomorrow and I decided to take the opposite route as the others so I’d be able to do it solo. I didn’t get to bed until a little after 9:30pm, and I never got a good look at the route I intended to take.
I woke up at 3:30am and decided I wasn’t ready to get up yet so I slept a bit more. I was way too comfortable. The third time my alarm went off I figured I’d better get going. I woke up, gathered my gear, and was off. My plan was to head northeast around the mountain and pick up a trail in the basin to the north of Purgatoire. After hiking for about a quarter mile I came to a rocky area that didn’t look passable in the dark. Well, it might have been, but at that moment my flashlight went out and I couldn’t see a thing (I later confirmed on the hike both visually and after talking with others telling me they’d turned around there as well that that route’s not passable). I decided to retrace my steps and try again.
Back at my truck I saw the others getting ready; their headlamps glowing inside their tents/trucks. I got a new flashlight from my truck (a headlamp: I’m not fond of headlamps as they make me dizzy but it was better than nothing). I restarted my tracker and was on my way, following the 4WD dirt road as it wound around the mountainside, losing about 450’ of elevation in the process (which was what I’d been trying to avoid by going around the mountainside first. Oh well).
After about a half mile my headlamp gave out. Great. Two flashlights out in the same hour. Who would have guessed? At least I was just following a dirt road and the sun would be rising soon. I’d just make a lot of noise to scare the larger critters who may be hiking with me this morning away.
I heard a loud noise ahead of me. An animal had been startled by the noise I’d made, ran through the deadfall for about 20 feet and then stopped. Knowing some animal was standing still ahead I made a lot of noise with my trekking pole. It didn’t budge. I slowly hiked forward and noticed whatever I’d scared into bolting for a little bit I’d scared pretty badly: I could tell by the smell.
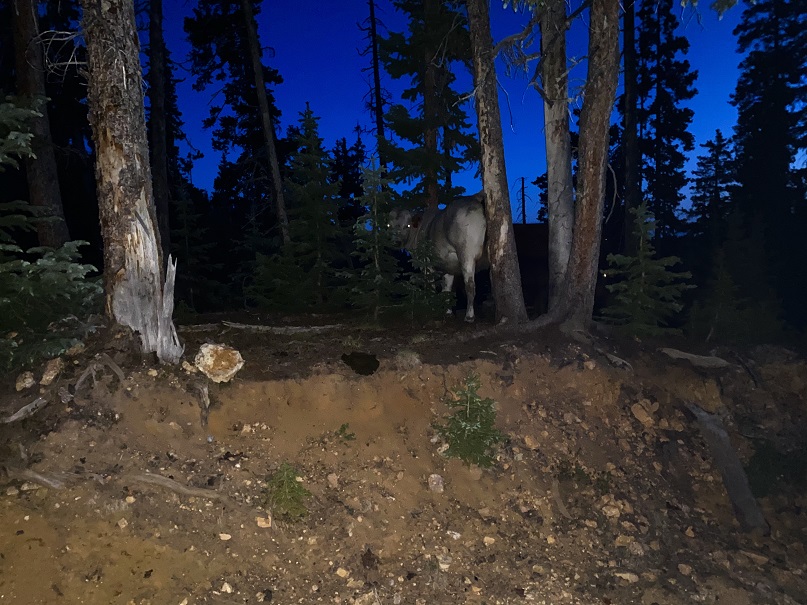
The animal was still there, and now I could hear it breathing. I made noises again but it didn’t move. I was worried it may be an injured animal and wanted to know what it was, and obviously I didn’t feel comfortable turning my back to it. In the dark I got out my phone and decided to take a picture (thinking the flash would go off and I’d be able to see what it was, even if the photo didn’t turn out. Note: Later in my hike I realized I could have used the flashlight app on my phone, but since I’d never used it before the thought didn’t come to mind until later).
I took a picture and the beast in front of me was…. a cow. Yep, a cow, and the first of many I’d see today.
Well, that was anticlimactic! I’ve raised cows before (both dairy and beef) and I know how to handle them. I clapped my hands, waved and shouted “Move on!” held my walking stick parallel to the ground and advanced forward. The cow turned, moved out of my way, and I continued on. I saw about 10 more cows before it got light, but knowing what they were I didn’t have a problem with them anymore.
I followed the dirt road for about 1.25 miles until it came to a 3 way divergence. I randomly took the middle road as it looked to be heading in the direction I wanted to go and it turned out to be the right one.
I continued east through the trees, encountering more cows, until I made it to the basin. The sun was now up and my anxiety level dropped. There were still tons of cows, but now I could see them, as well as cow trails and ATV trails. I followed the ones that went east.
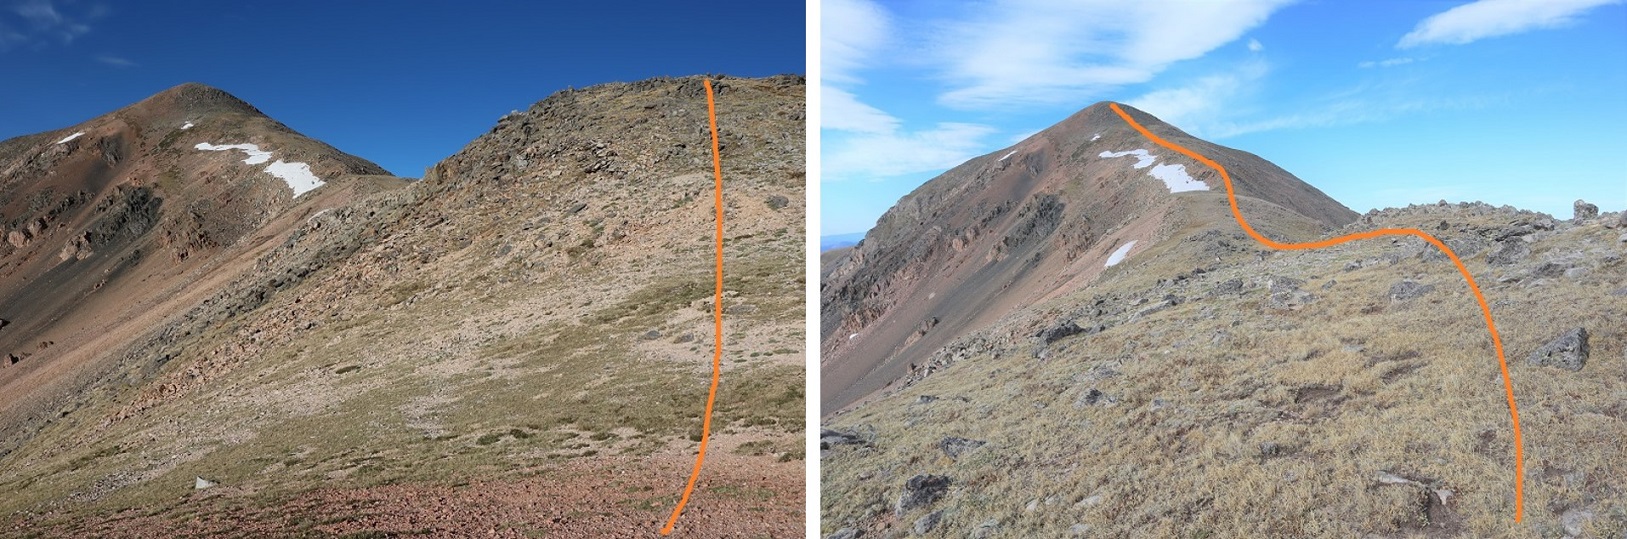
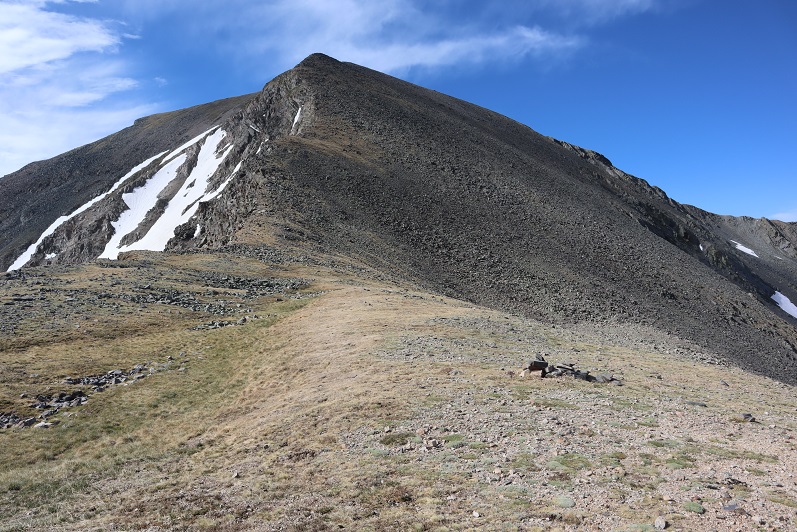
Once out of the trees I could easily see the path I wanted to take to summit Alamosito. (Note, some routes tell you to take the saddle and drop down into another basin and then gain another saddle, summiting Vermejo first then backtracking to Alamosito. The way I went just made more sense to me, but several routes all ‘go’. Alternately you could gain the Alamosito/Purgatoire saddle and summit from there as well).
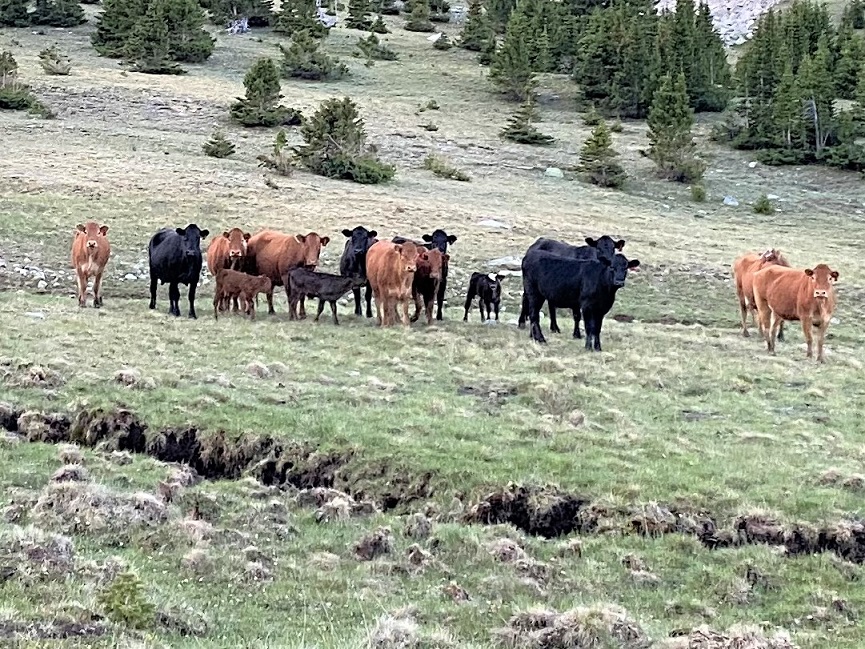
This was straightforward, except for these cows who didn’t seem to want me to pass. I made noise and told them to “get along” they just stared at me. One even lifted its hind foot and stomped a few times, kicking up dust. I got the impression they were expecting something from me. Even the calves had ear tags, so they’re used to humans (at least in some part). I passed them to their left and they went back to grazing.
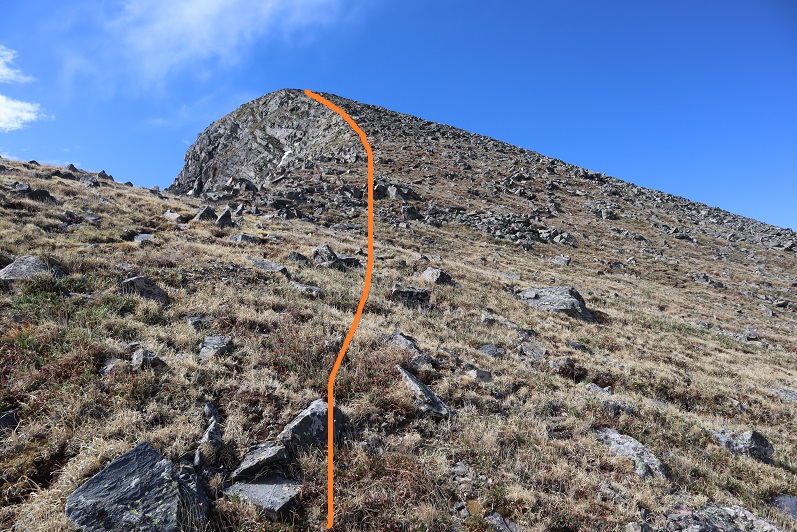
Here’s a look back from the saddle. I’ve circled the campsite in red, and the area that cliffed out in yellow. Note: Everyone else just went straight up the ridge to start (a better choice to begin). My route to the saddle is in orange.
From the saddle I turned right and headed east. This was a very straightforward ridge hike. In fact, they all were today.
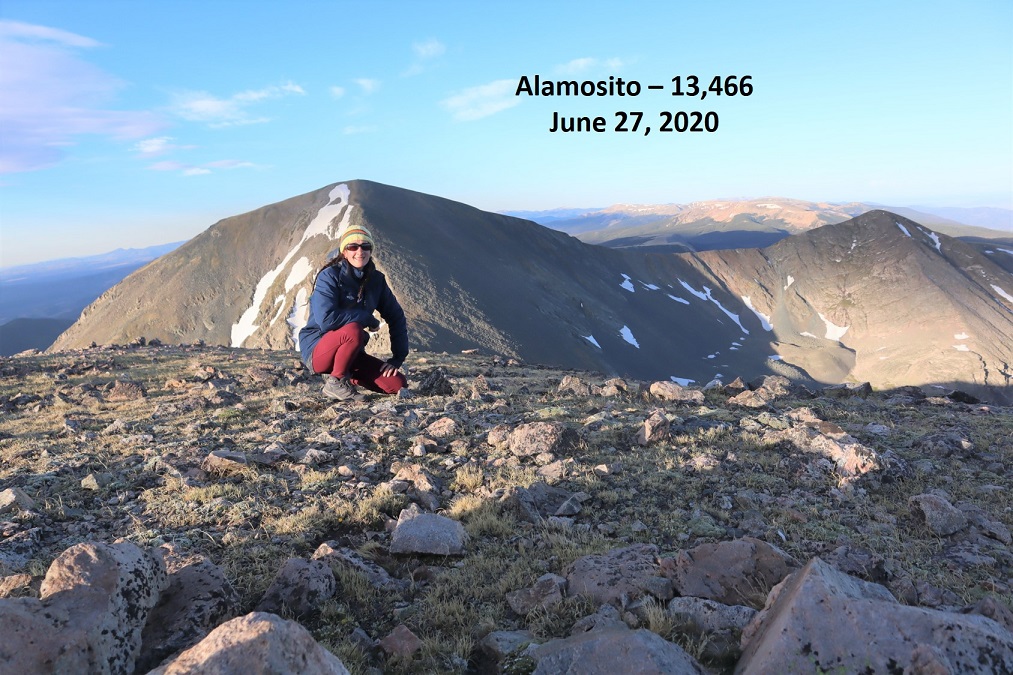
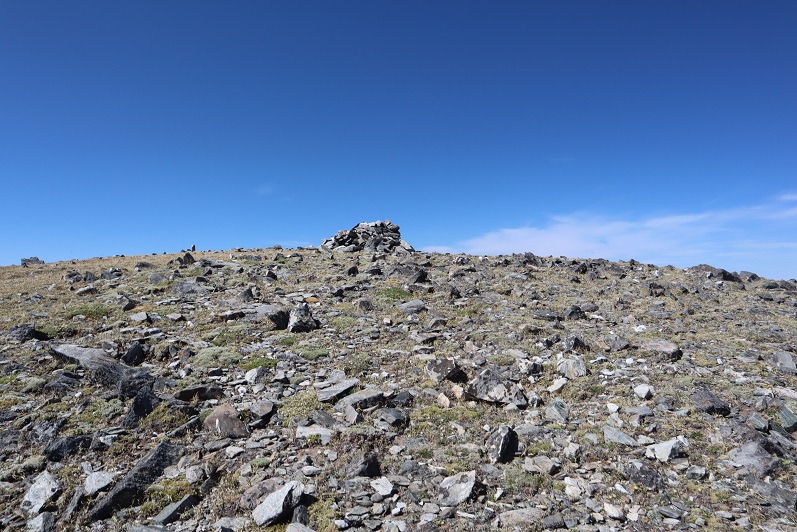
I summited Alamosito at 6:45am, after 2 hours and 3.3 miles of hiking. There was a summit register in a glass jar buried in the cairn.
Alamosito:
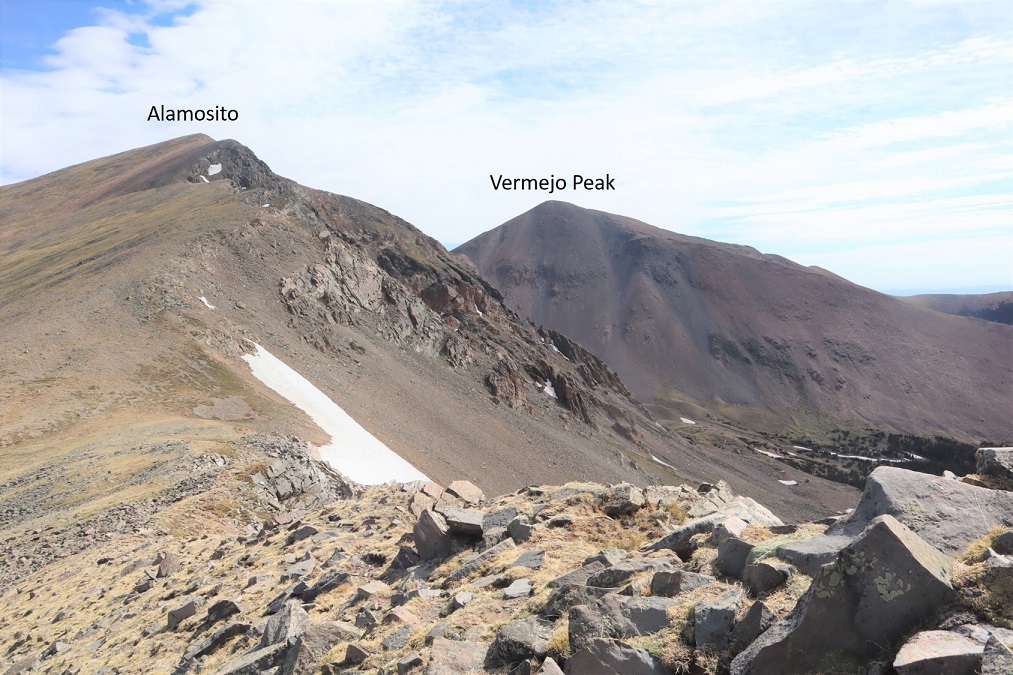
I turned north and headed down the ridge to the Alamosito/Vermejo saddle
There was some rubble to contend with on the way down, but all class 2
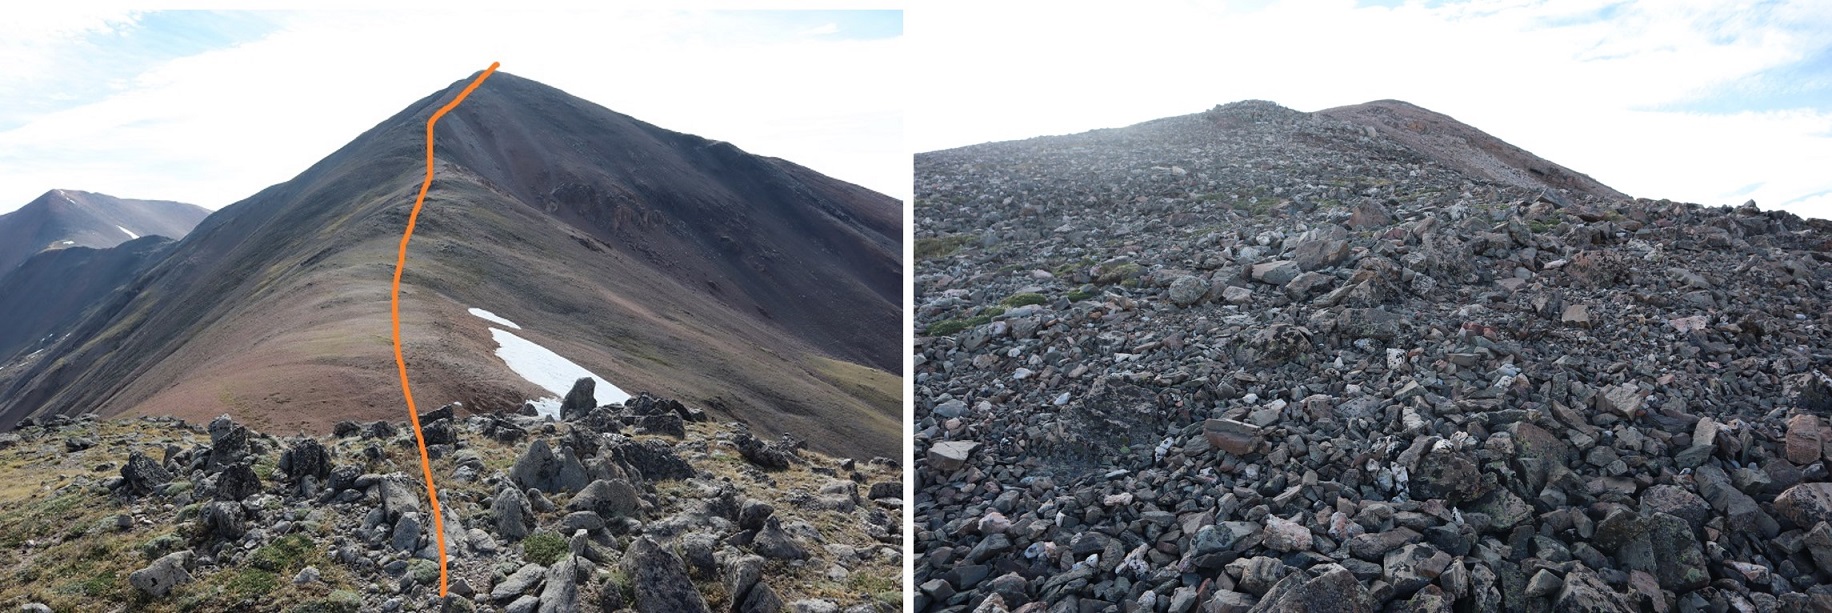
From the saddle I turned right and headed east up to the summit of Vermejo Peak (that’s a false summit you’re looking at here). There was some rubble here as well
At the top of this easy ridge walk there was another .3 miles to go before making it to the summit, also an easy trek that reminded me of Ireland: the tundra was green and there were lots of black and white rocks. The picture doesn’t do that justice.
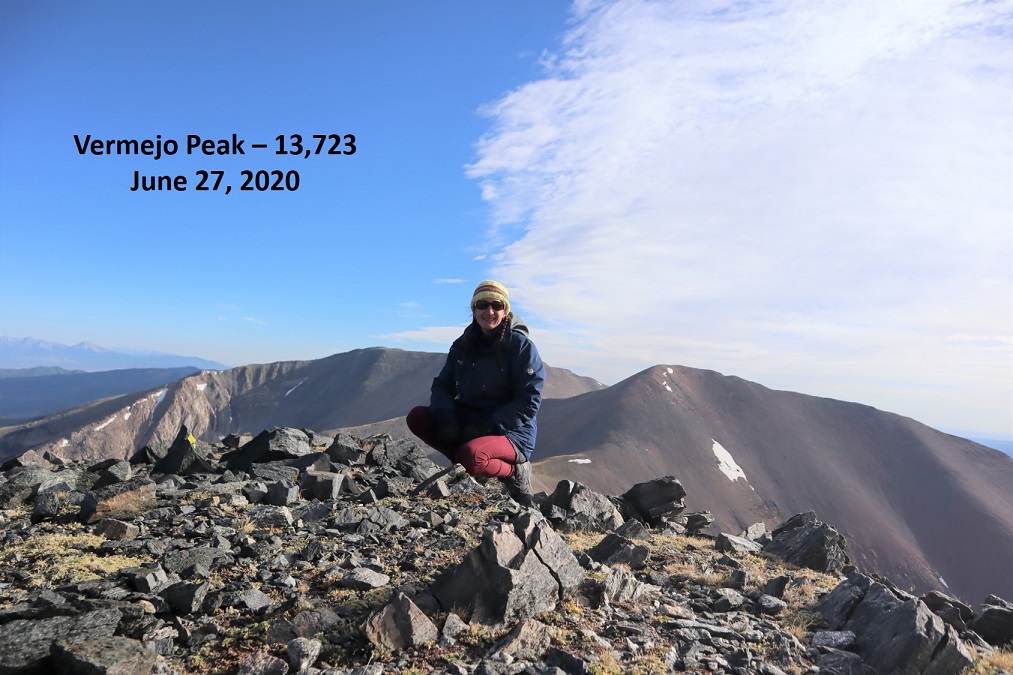
I summited Vermejo Peak at 7:45am. From Alamosito to Vermejo it’s just over a mile and a half of hiking. There was a summit register here as well (one of the pipe ones I can never open because: Raynauds).
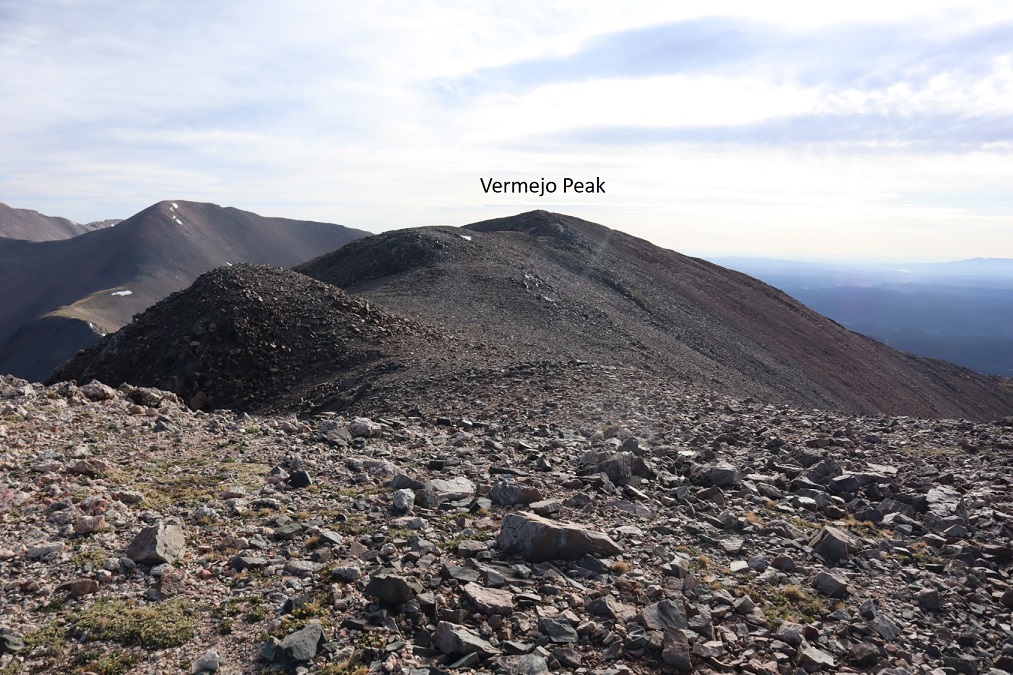
Vermejo Peak:
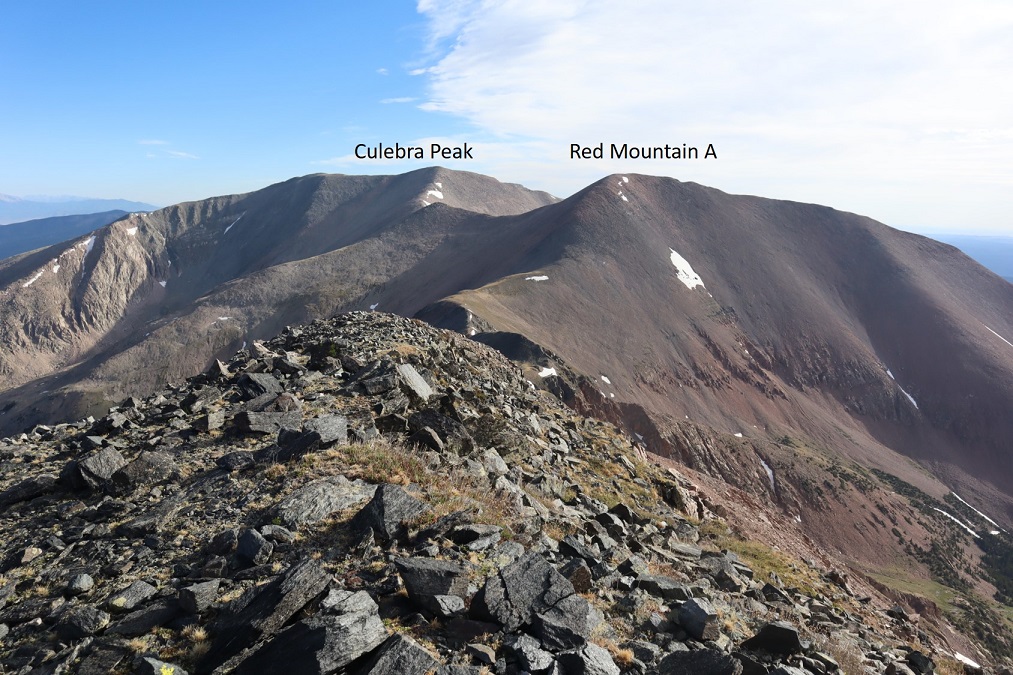
There were great views of Red Mountain A and Culebra from the summit
I turned and headed back the way I came, towards the saddle and back up to Alamosito
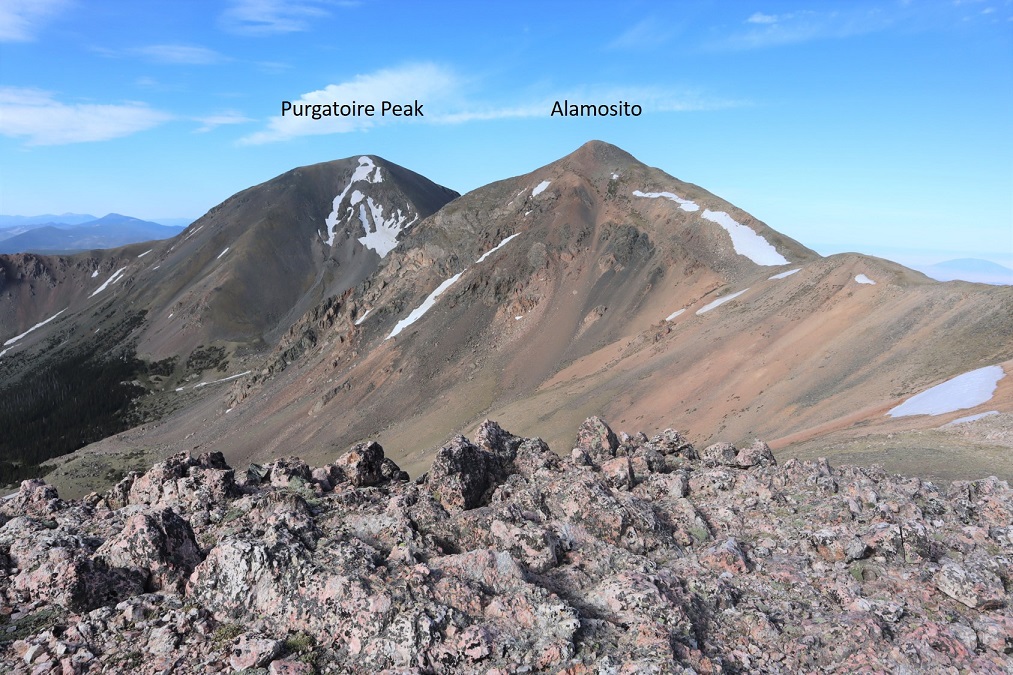
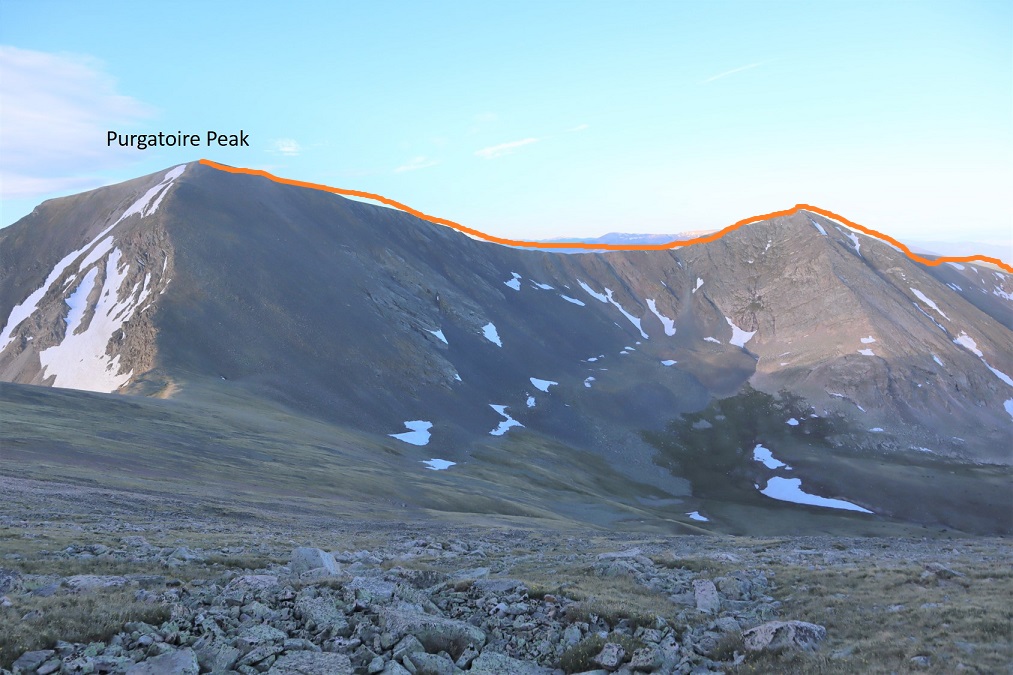
From the saddle there’s a great view of both Purgatoire and Alamosito
From the saddle I made my way back up to summit Alamosito
I re-summited Alamosito at 9am and looked over at Purgatoire Peak
This was another easy ridge walk. Rubble turned to tundra as I made my way towards the saddle
Here’s looking back at Alamosito and Vermejo Peak from the Alamosito/Purgatoire saddle
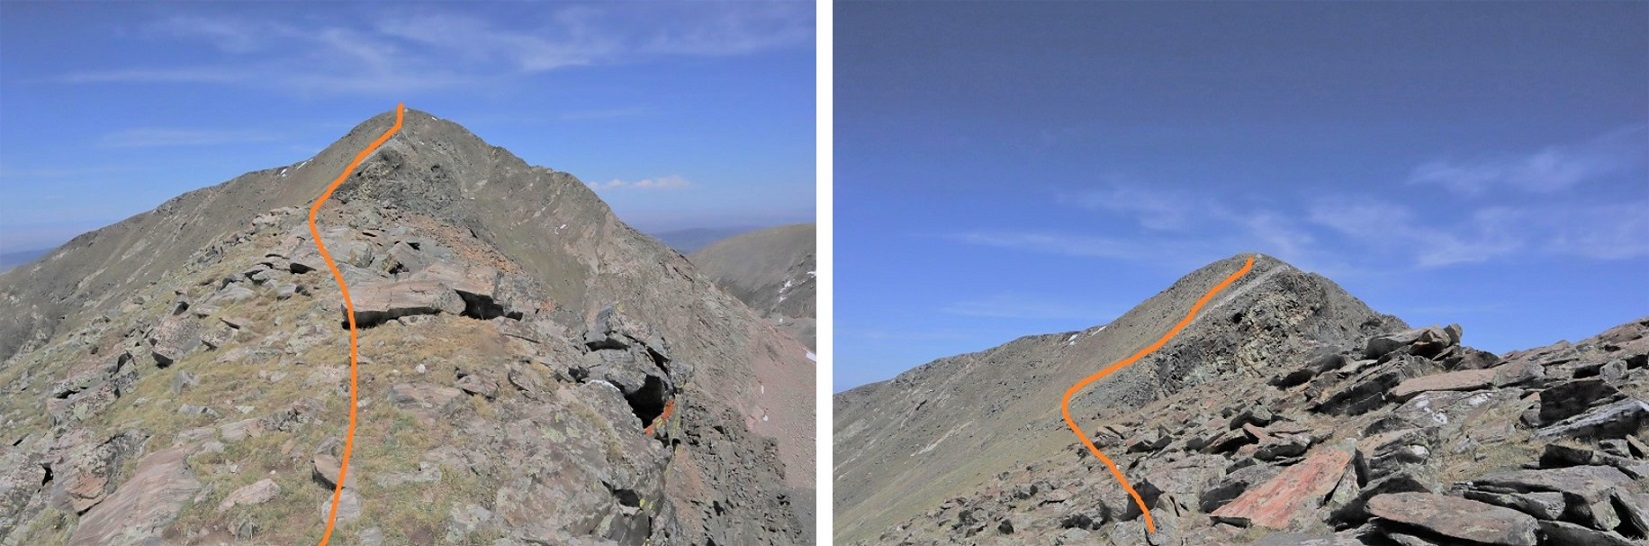
The rest of the ridge to the summit of Purgatoire was straightforward
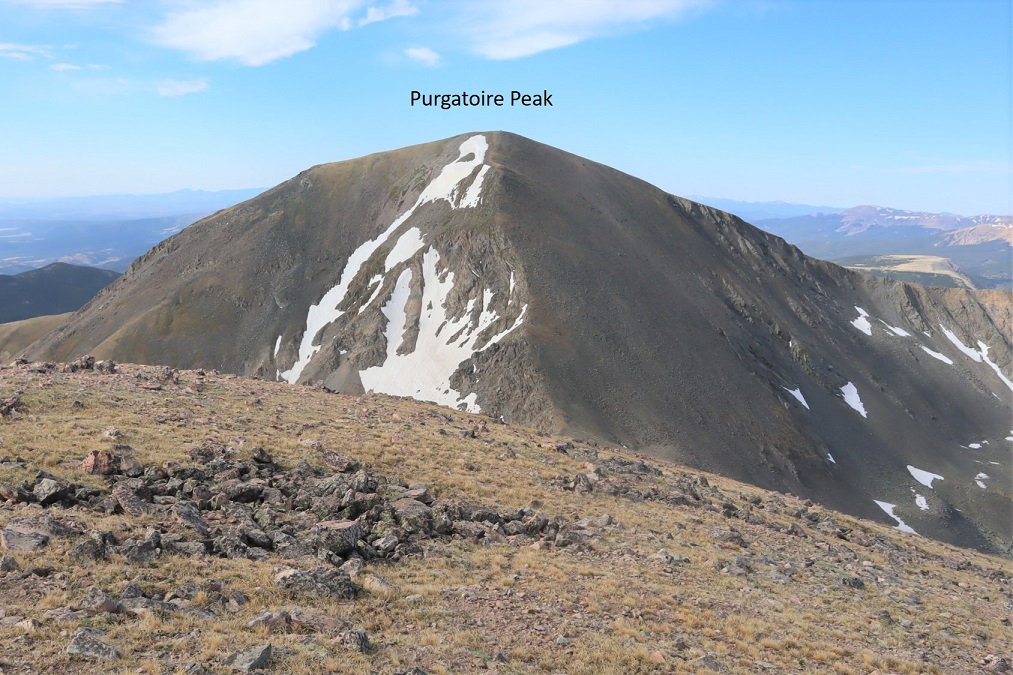
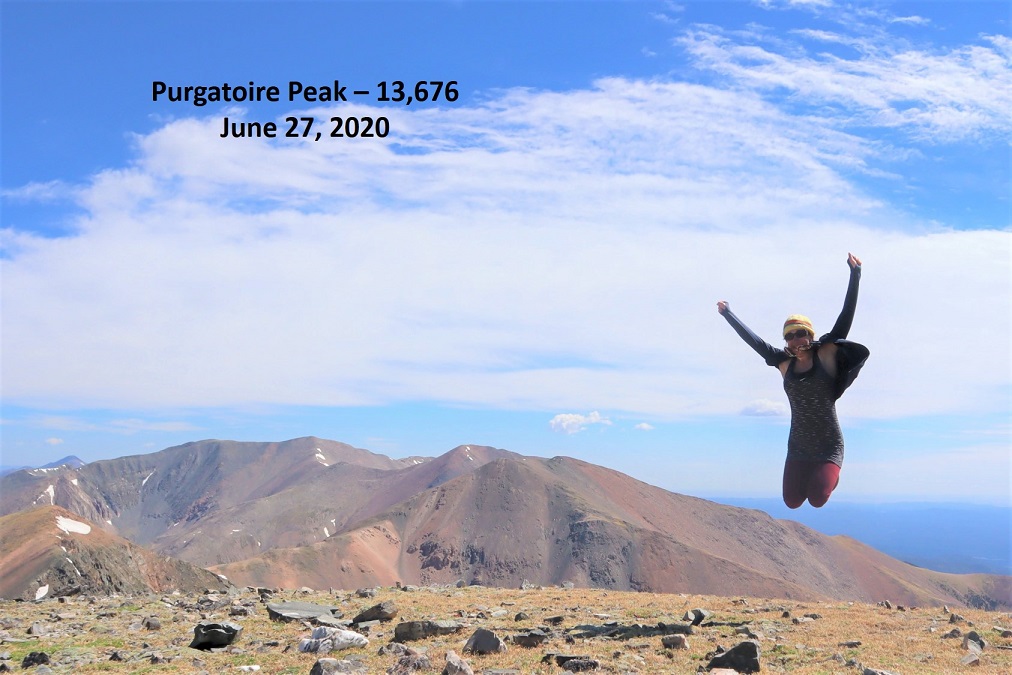
I summited Purgatoire Peak at 10am
Purgatoire Peak:
There was a summit cairn, and also this thing. I’m not sure what it is? I could probably look it up, but, thoughts?
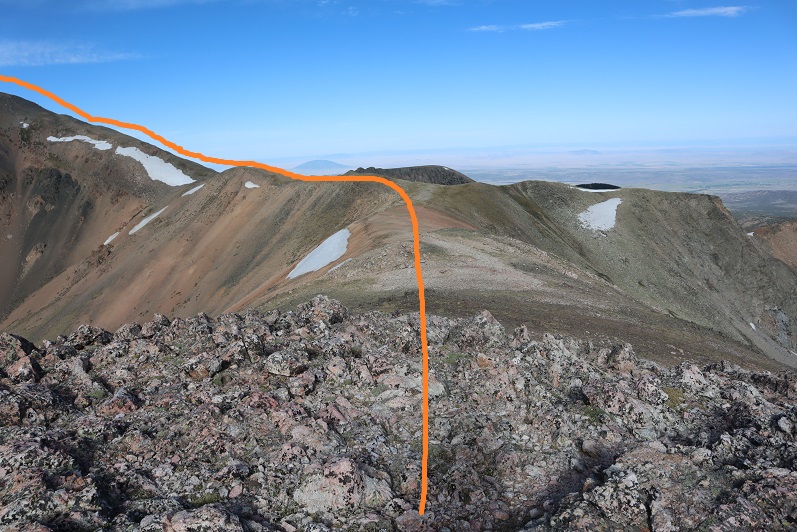
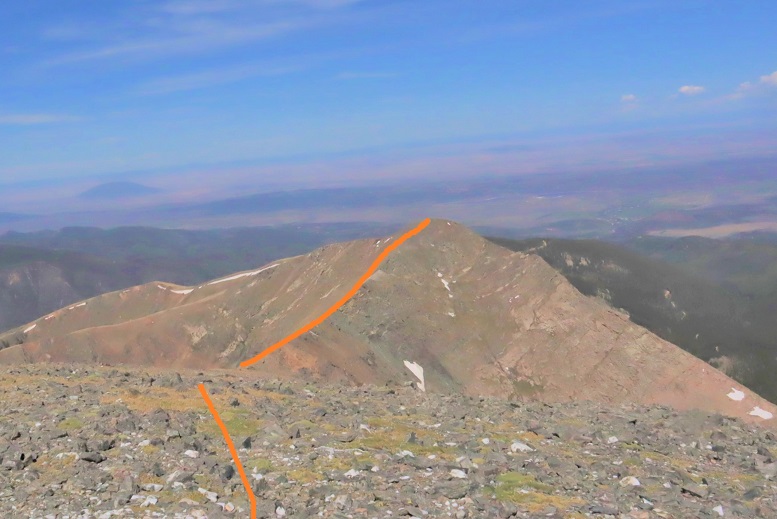
I turned west to head down the way I should have headed up, back over this unnamed point (which has about 260’ of elevation gain from the saddle, and tops out at well over 13K)
Here’s looking at the route from the morning when I was hiking up Alamosito
It starts out as a simple ridge walk on tundra, dotted with rocks the size of toasters, and once at the saddle it looked like there may be some scrambling involved, but there’s actually a game trail to the left of the ridge that makes the ridge easy to follow
Here’s a look at the route from the saddle towards Purgatoire Peak
From the top of the point there’s a tundra ridge to walk down, and just a little bit of forest to go through before reaching the road. As long as you aim for the road you’ll be fine, as you can follow it to the campsite. Yes, I should have hiked the couple hundred feet up this last night: it would have made the entire route more obvious.
Here’s a look back from treeline on the point you need to ascend if heading this way
Once you’re in the trees navigation can be a little difficult. Just keep aiming west and you’ll hit the road. Oh, and you can’t see them in these pictures, but there were moths everywhere! Thousands of them swarming around. They apparently appreciate the elevation / pines today.
I made it back to the 4WD road we drove in on and followed it back to my truck. I arrived back at my truck at 11:45am, making this a 9.74 mile hike with 4828’ of elevation gain in 7 hours (not counting my early morning false start).
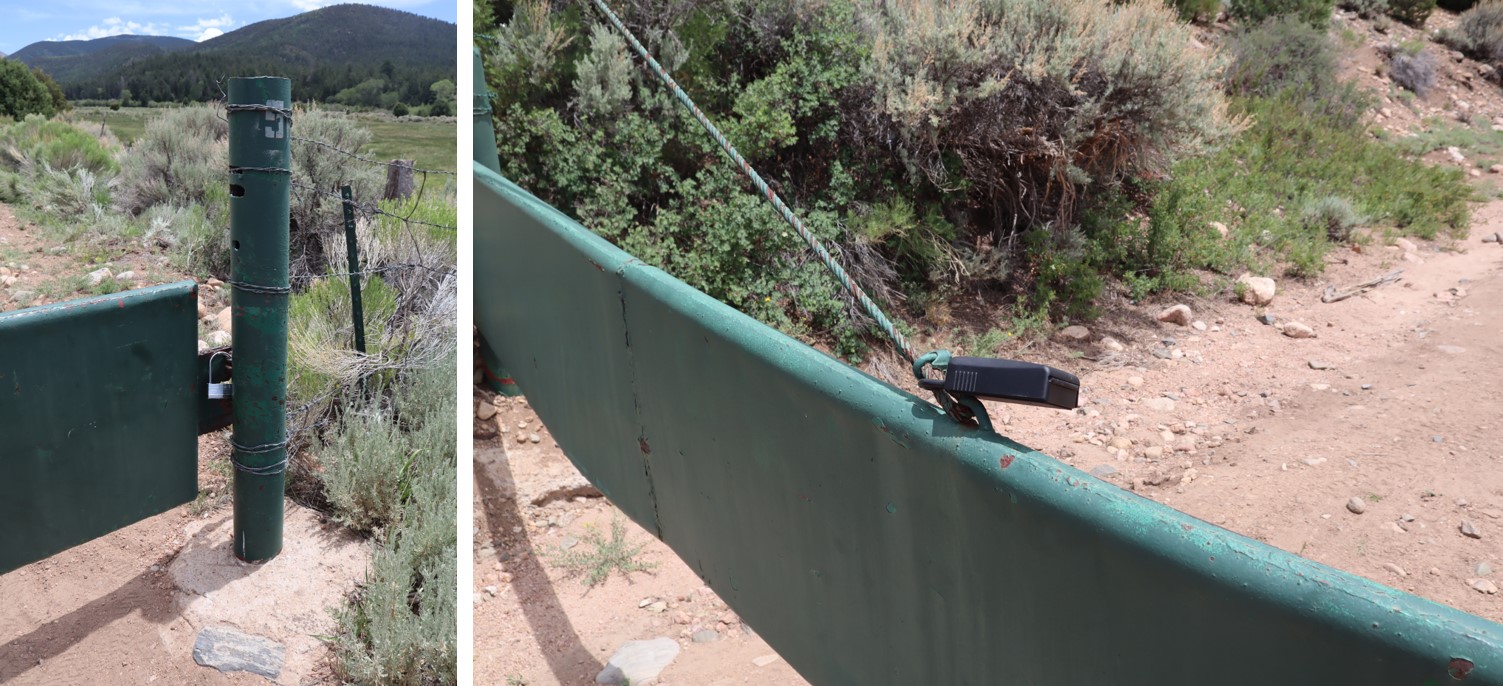
I got back in my truck and followed the road back to the gate. The route was much easier on the way down than on the way up. I unlocked the gate, re-locked it, drove through, and text Carlos to let him know I’d exited the property. Also, the lock was much easier to figure out than the one that was there when I hiked Culebra (but to be fair, it was also the first day they’d implemented that system).
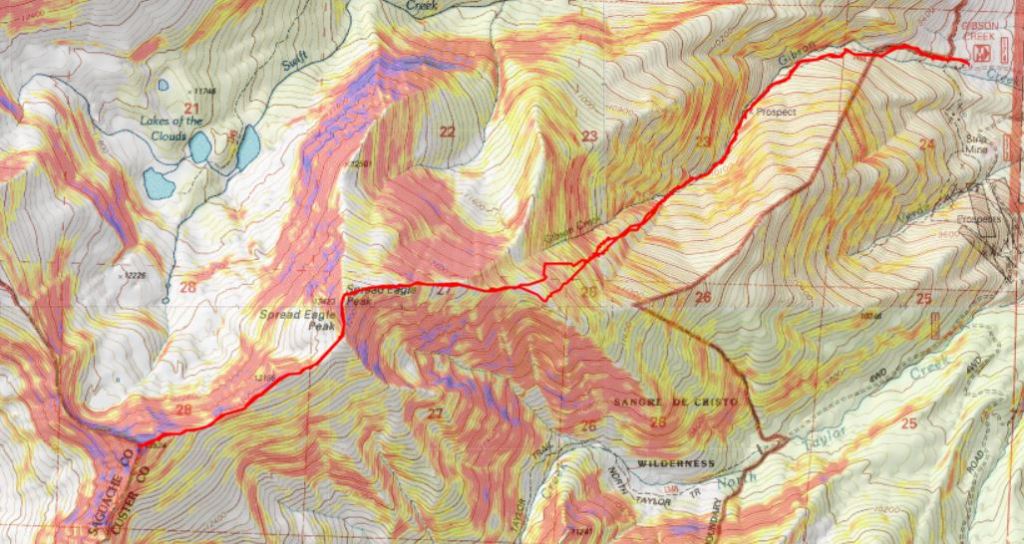
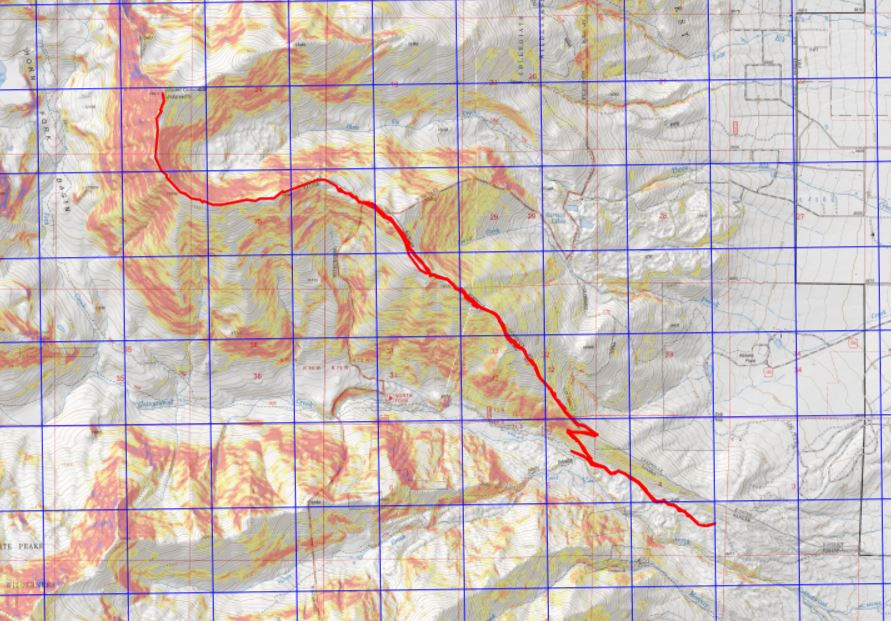
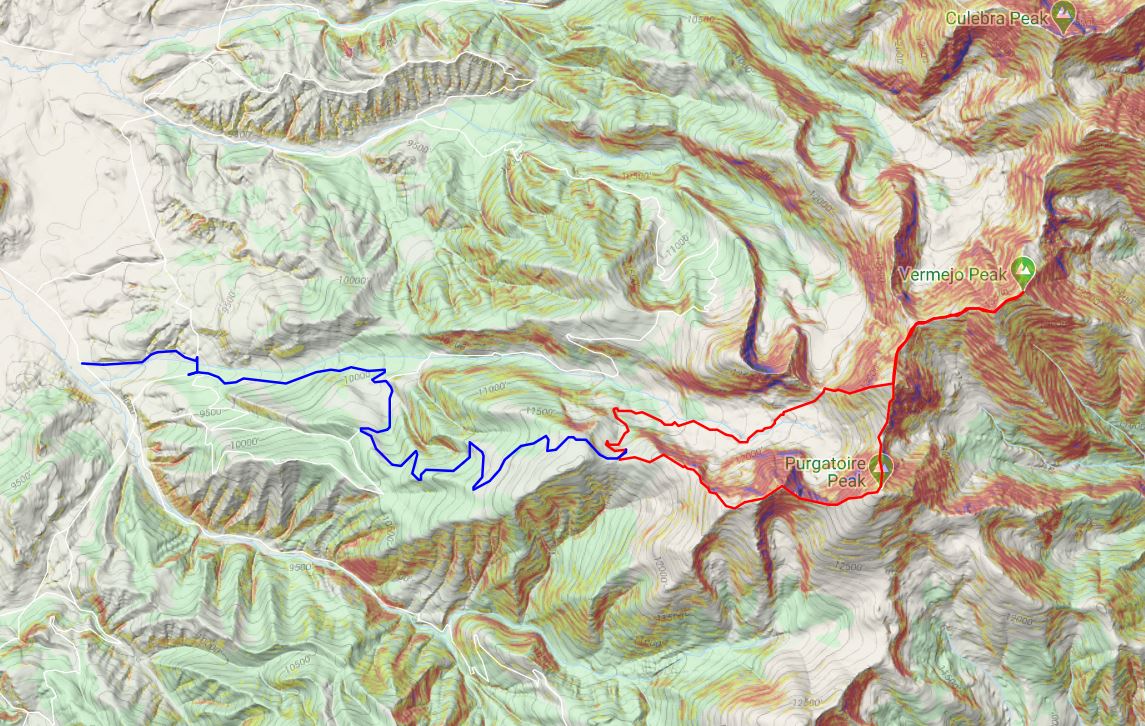
Here’s a topo map of my route, as well as the drive in.
It was still early in the day. I ate a sandwich as I drove the 3 hours to the next trailhead during a thunderstorm.