Hilliard Peak – 13,422 and Keefe Peak – 13,516

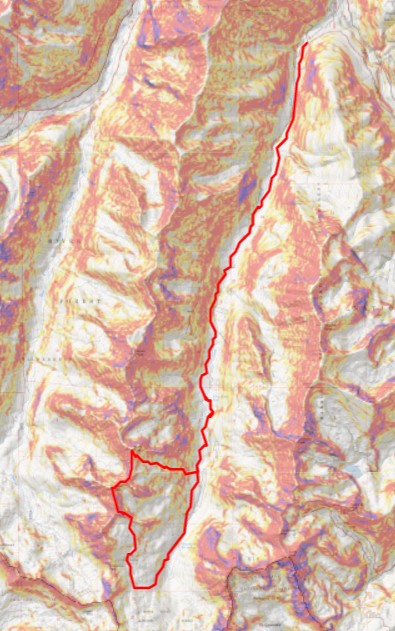
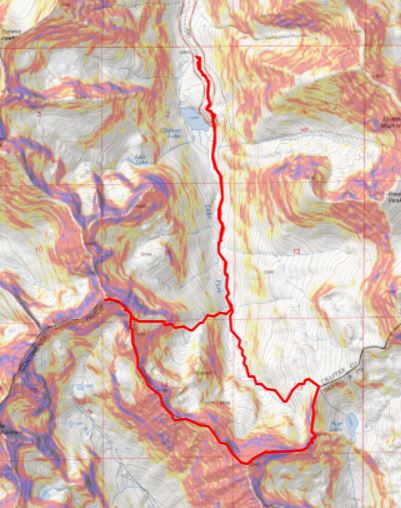
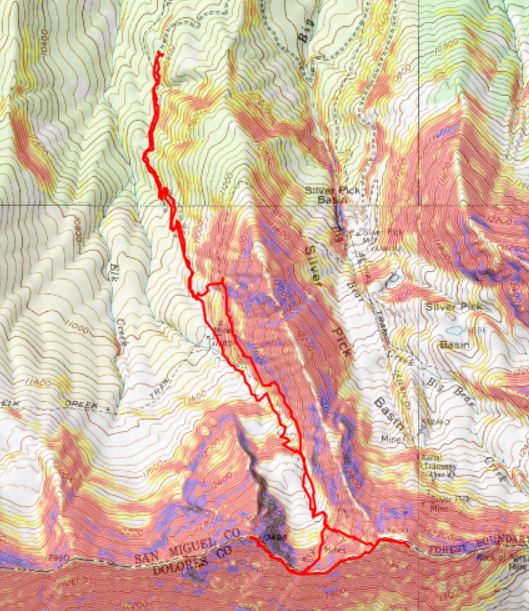
RT Length: 24.35 miles

Elevation Gain: 5700’

Due to weather issues, I did this as a multi-day trip. Due to permit issues, I camped just before the camping permit boundary for Conundrum Hot Springs (worked fabulously!!!). My stats are taken from several GPX files meshed together.

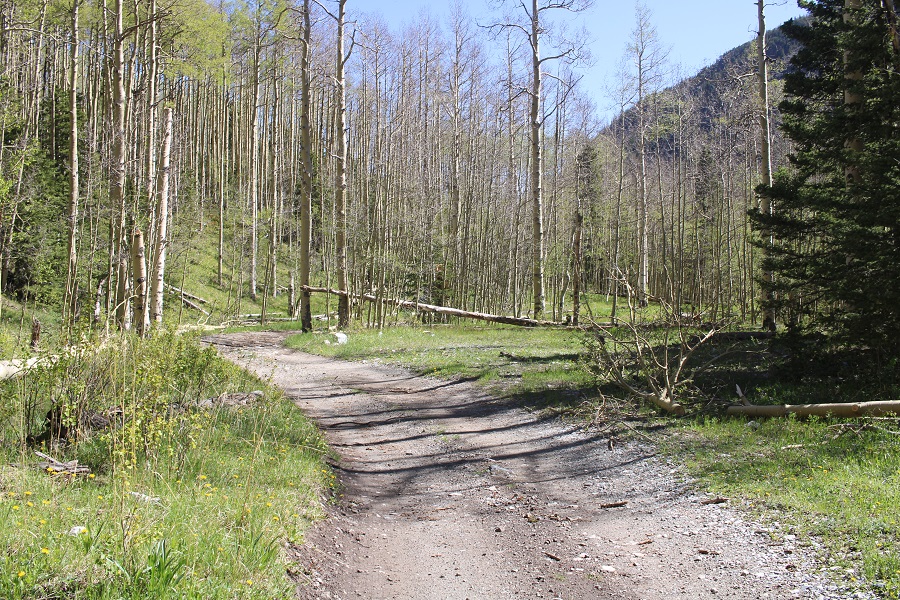
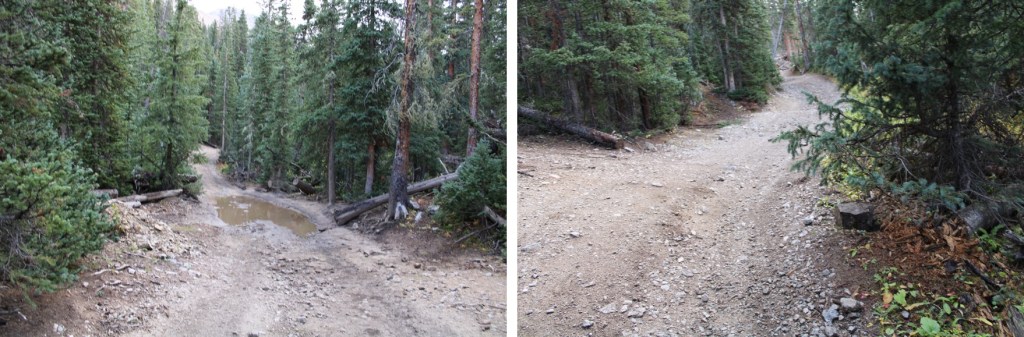
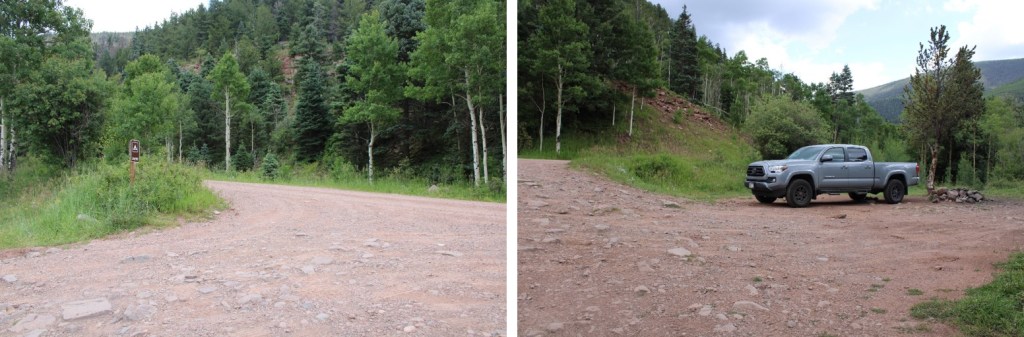
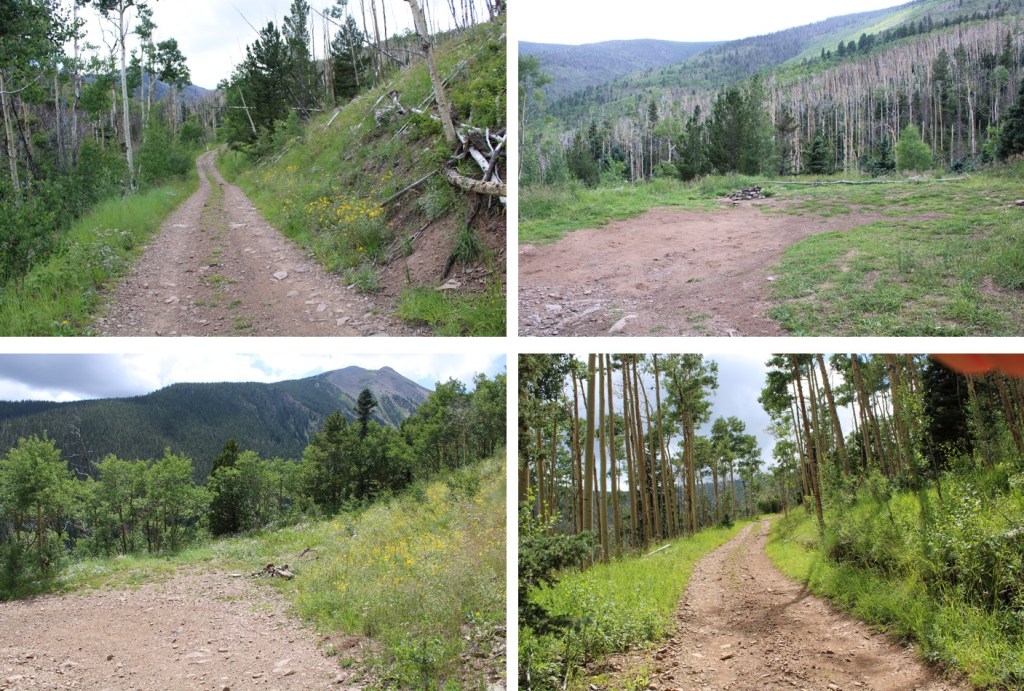
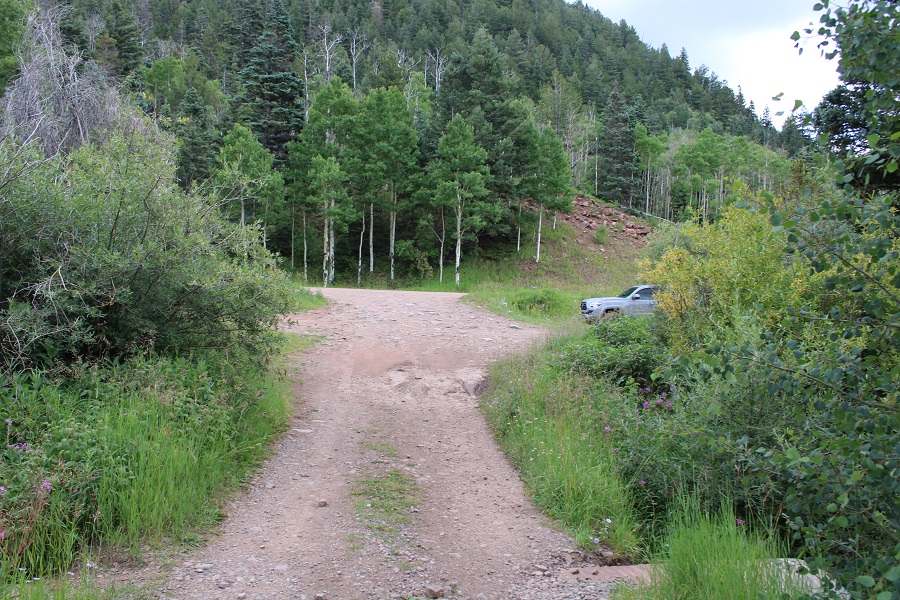
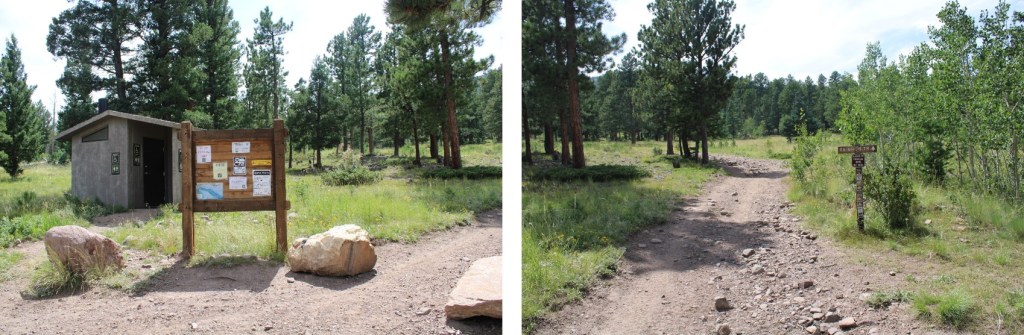
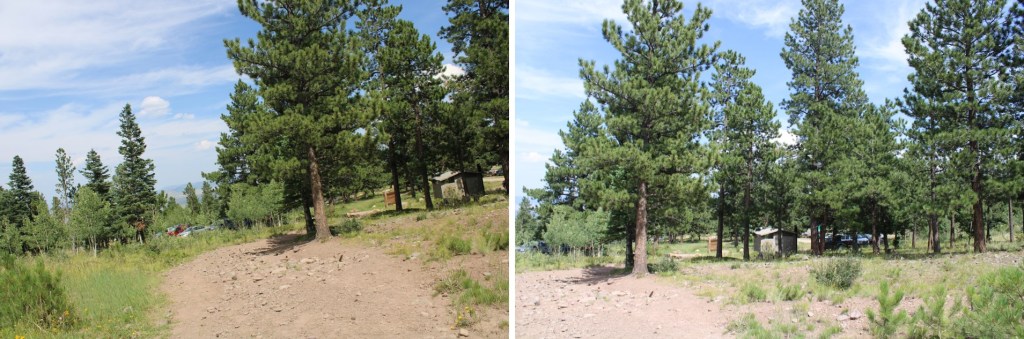
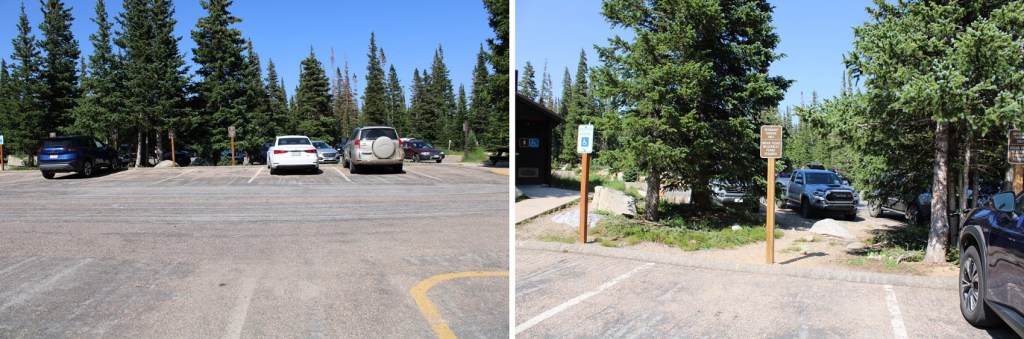
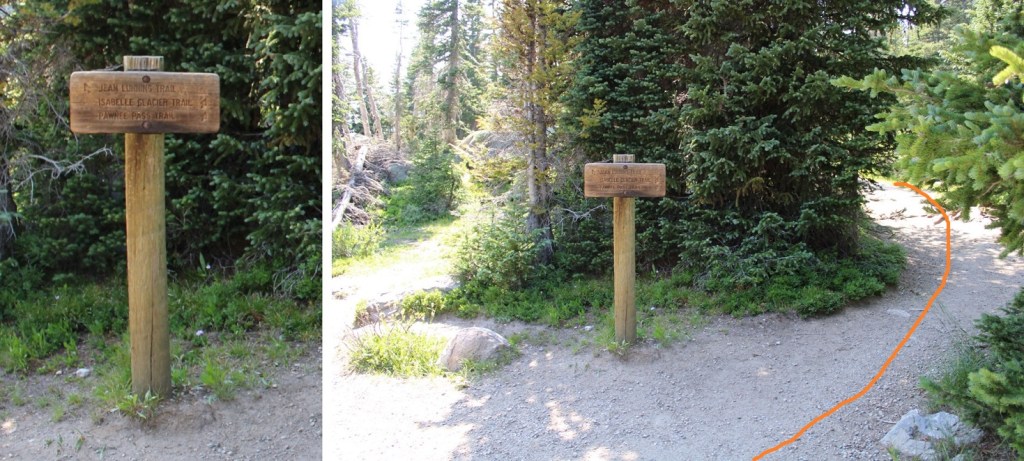
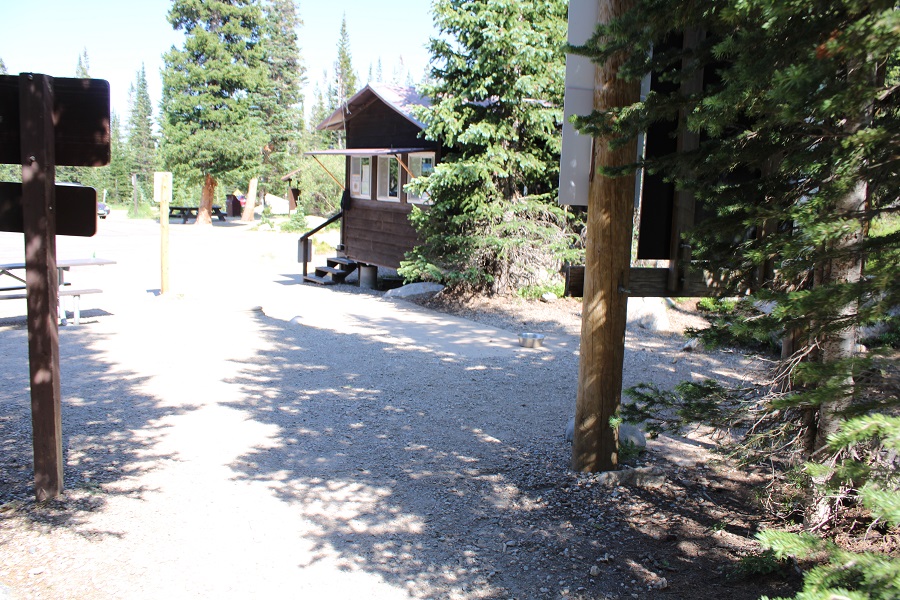
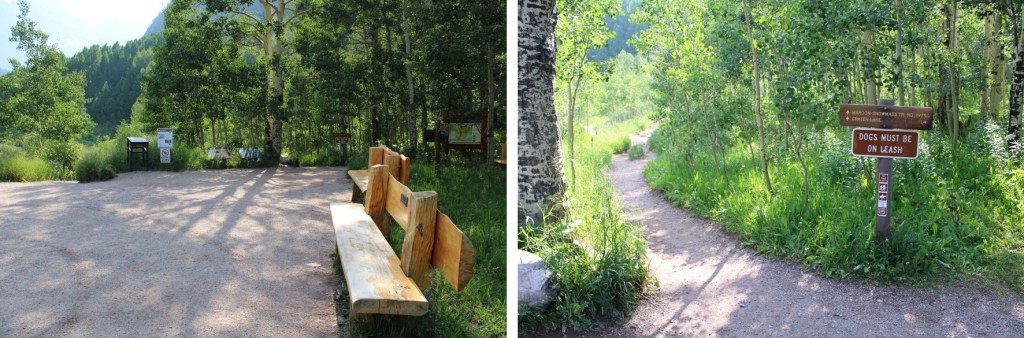
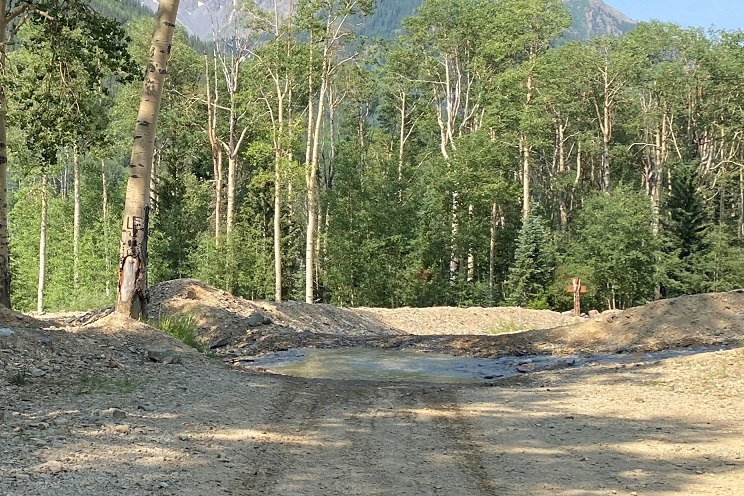
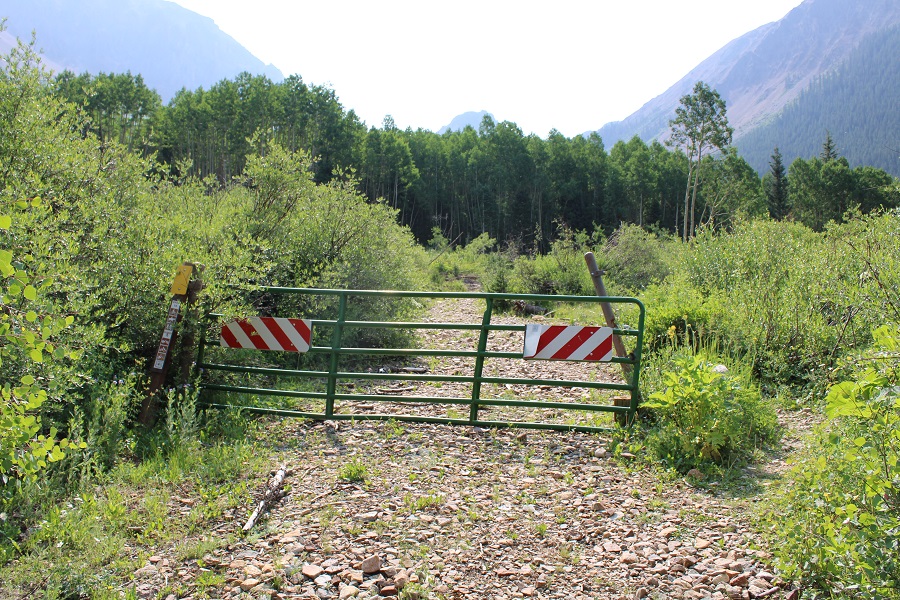
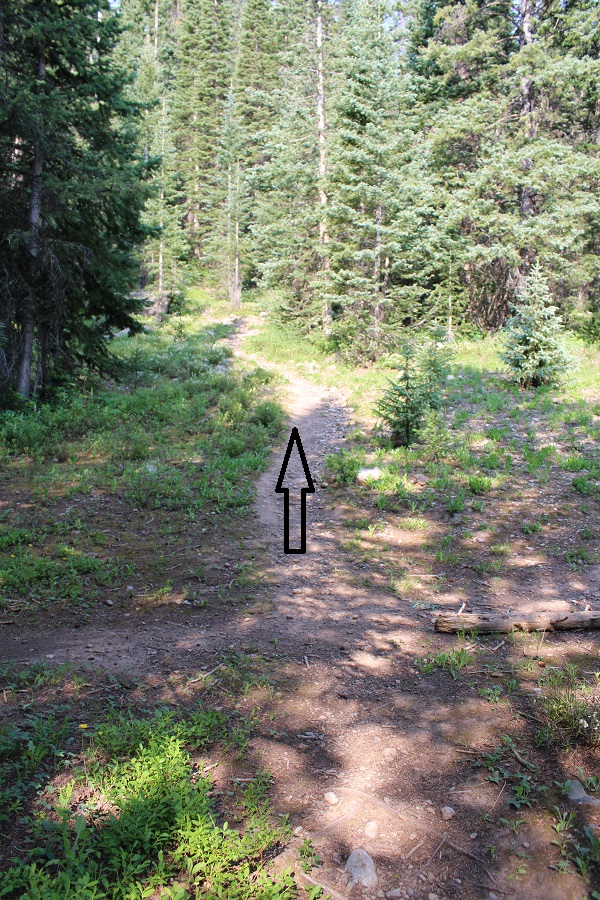
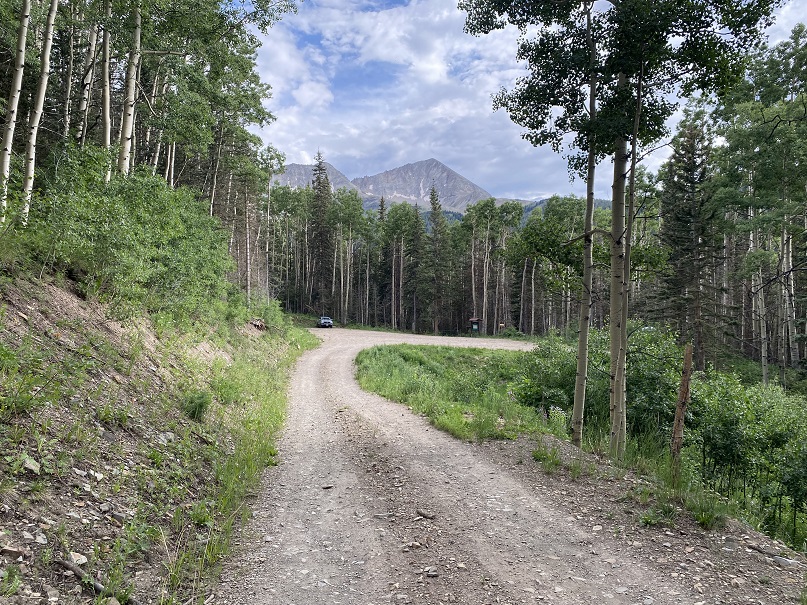
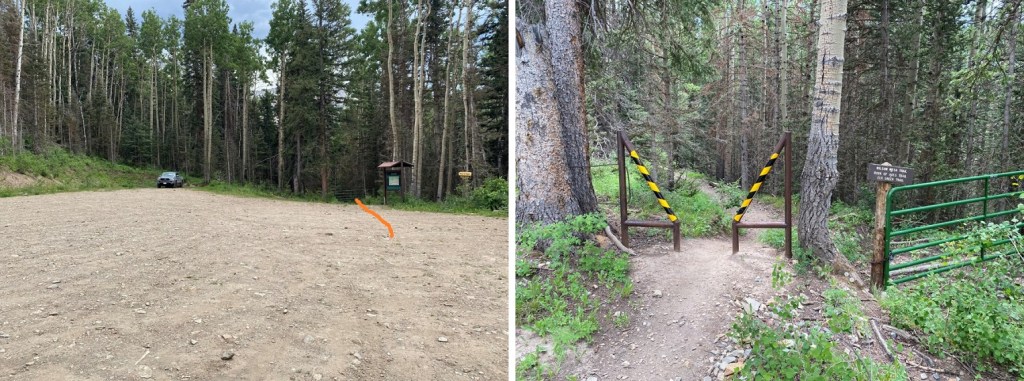
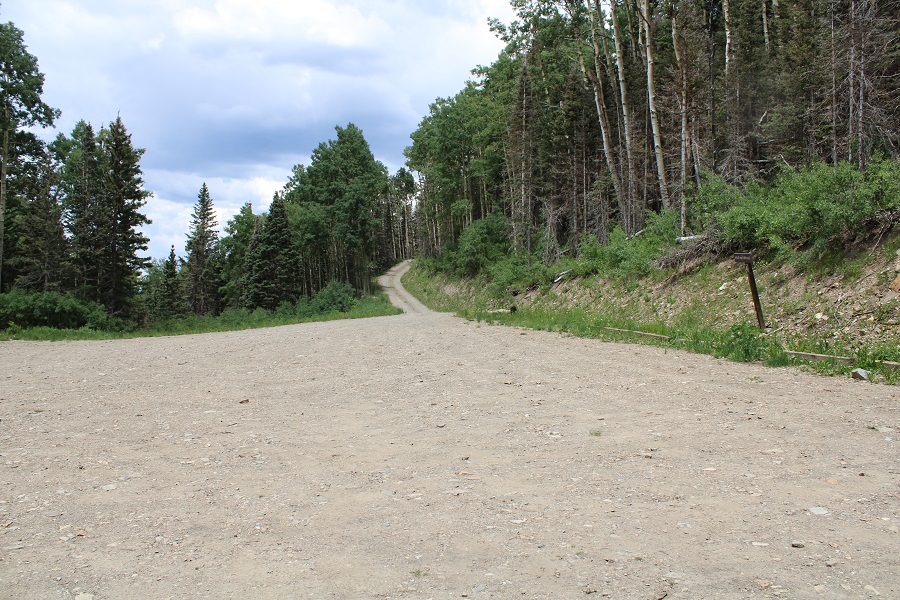
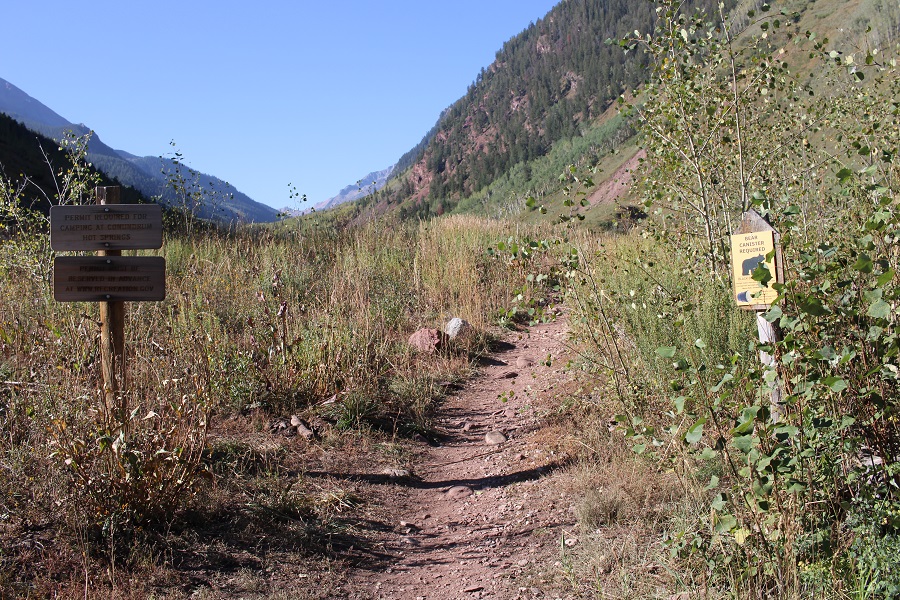
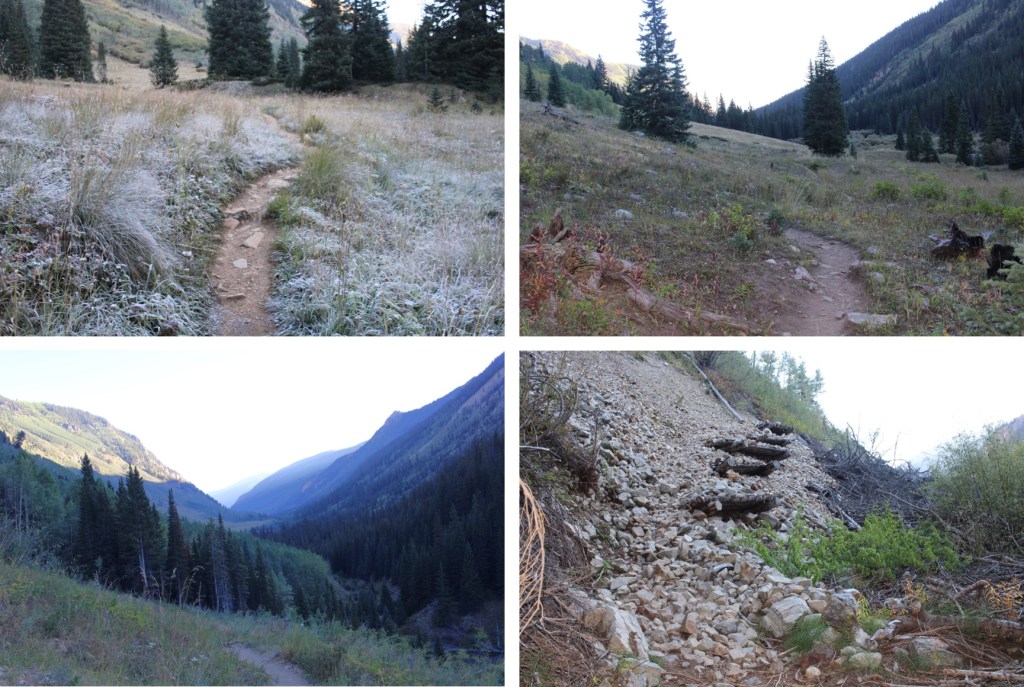
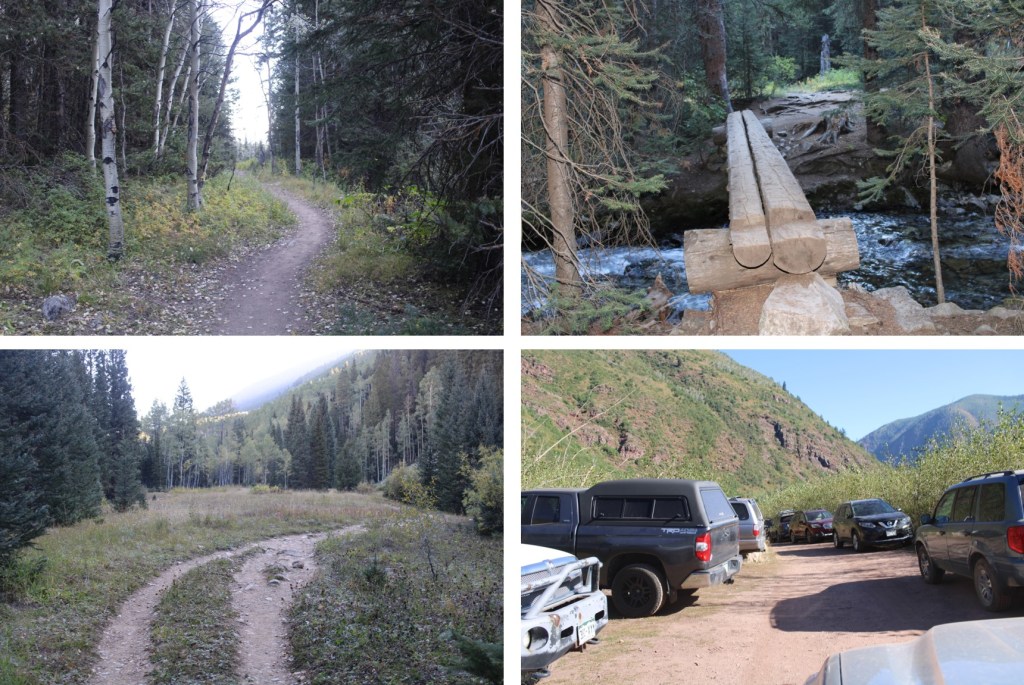
I started from the Conundrum Hot Springs Trailhead at 4:45am, after a quick nap on Independence Pass after a long drive and a long day.  Here’s the trailhead:

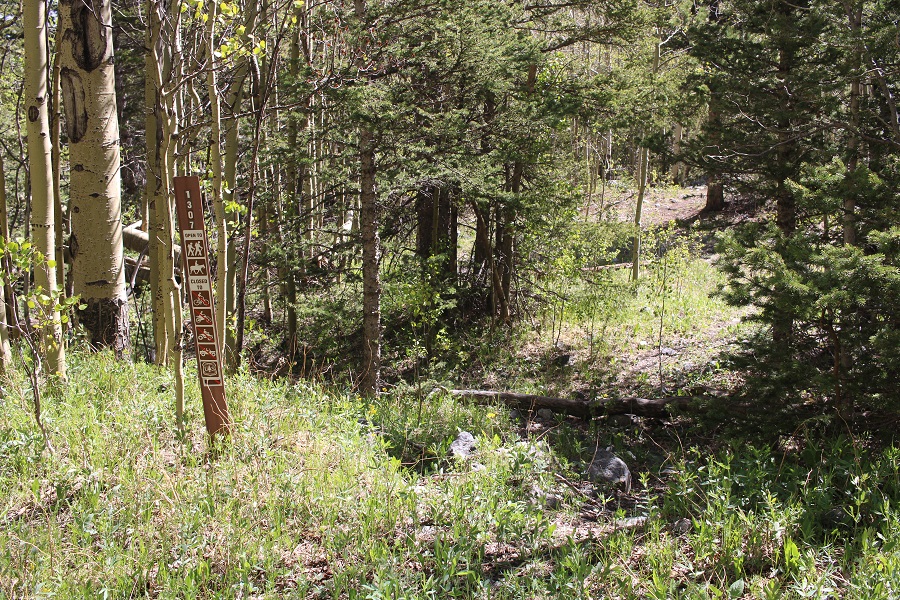
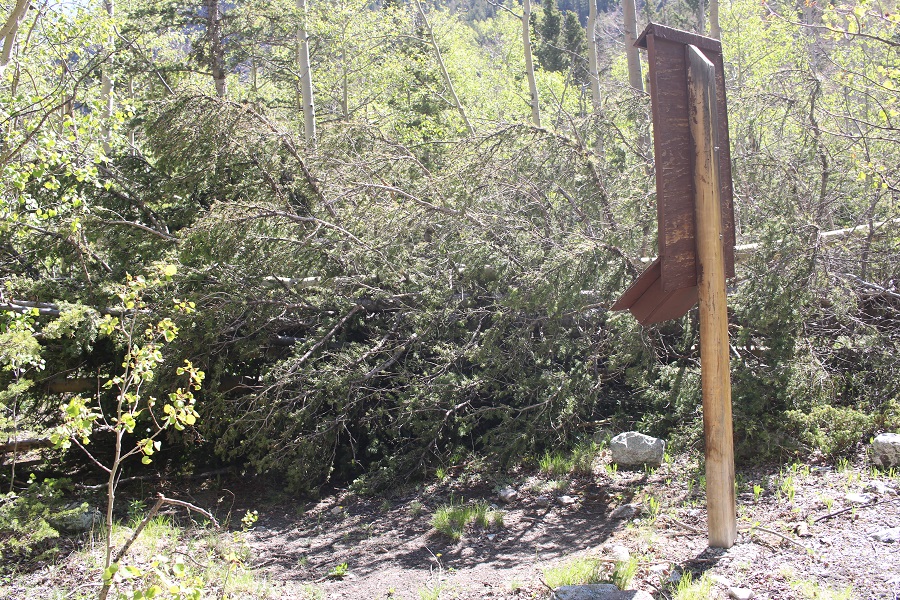
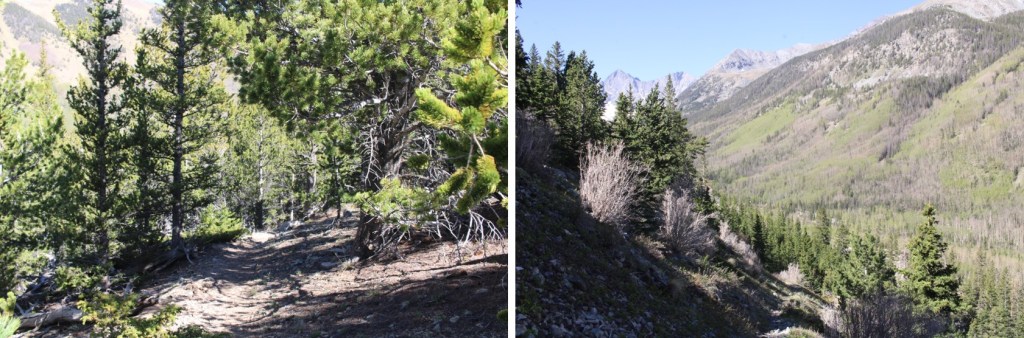
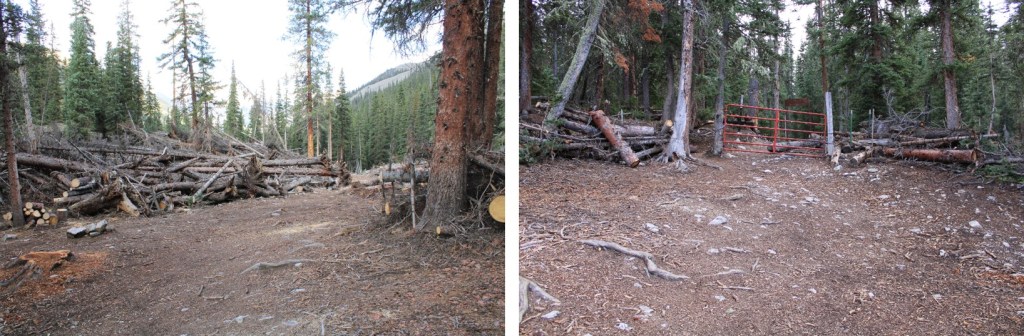
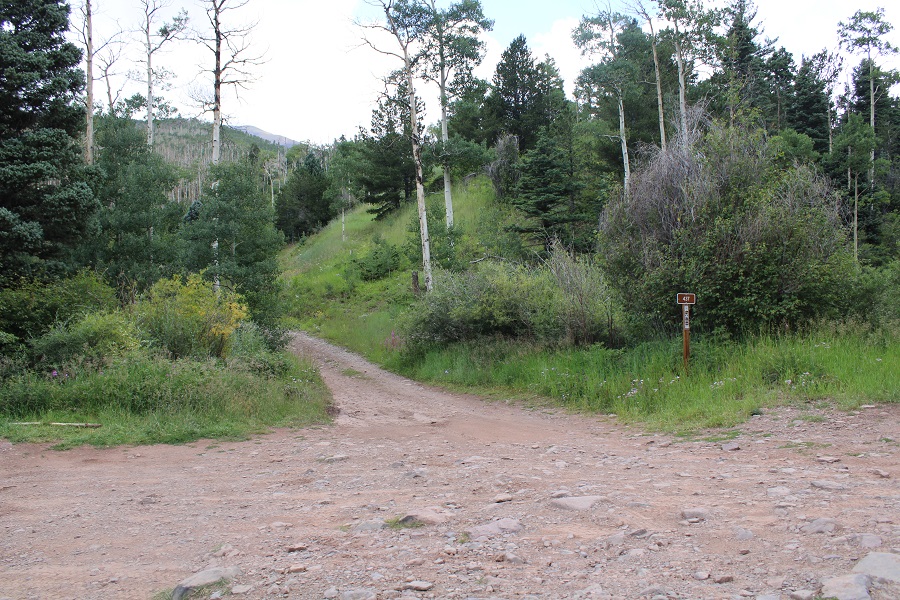
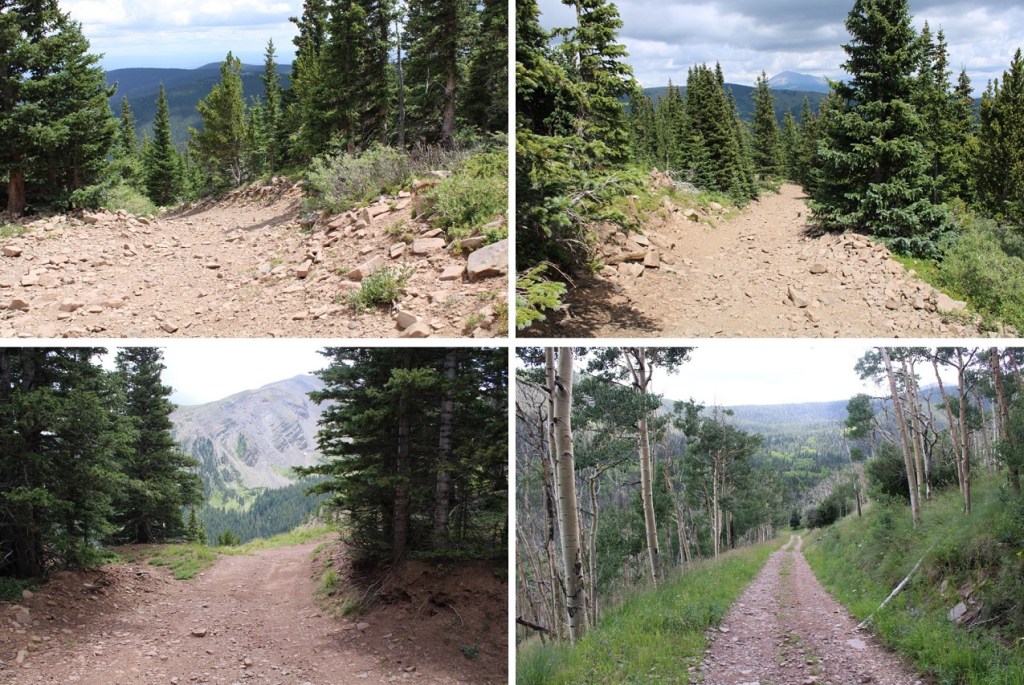
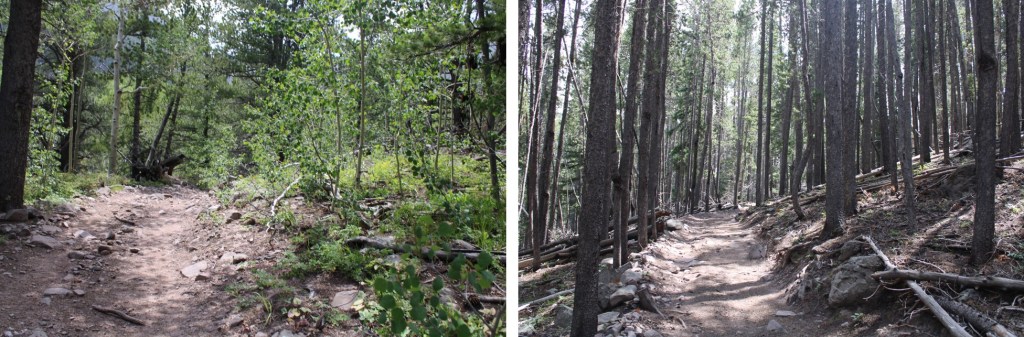
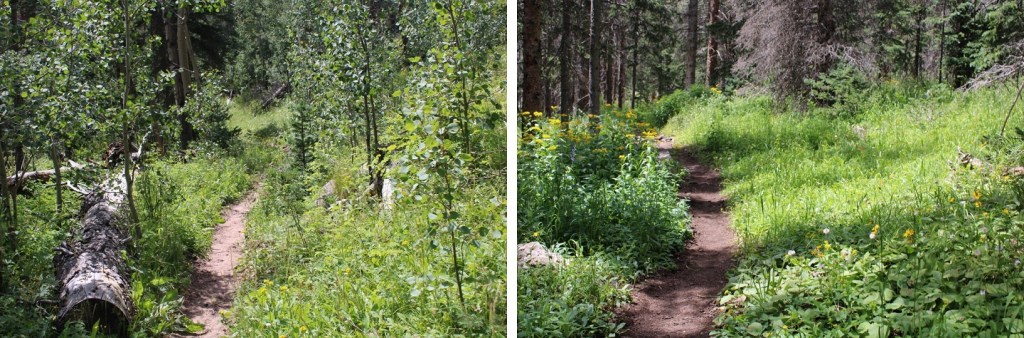
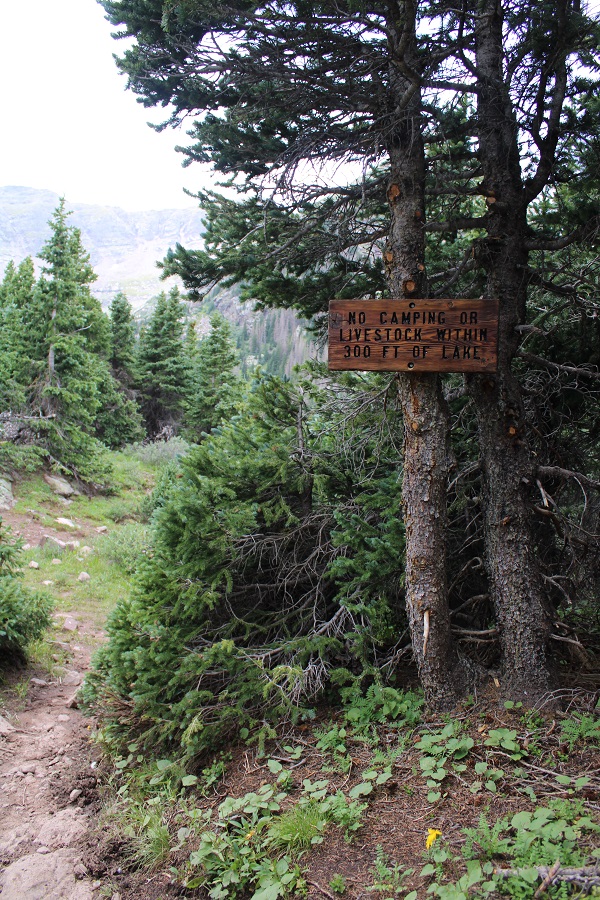
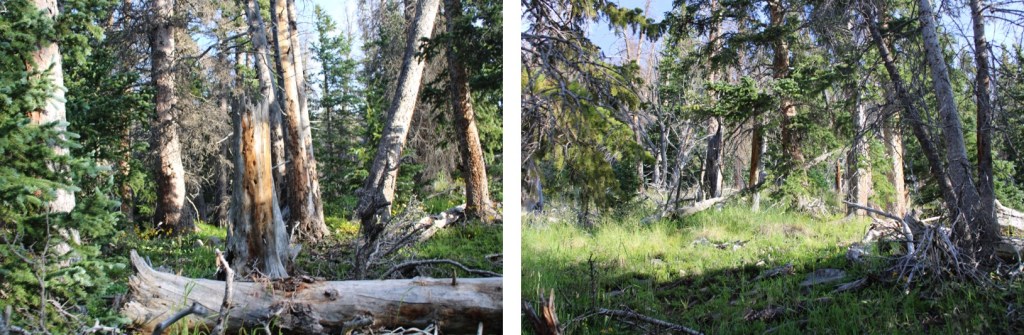
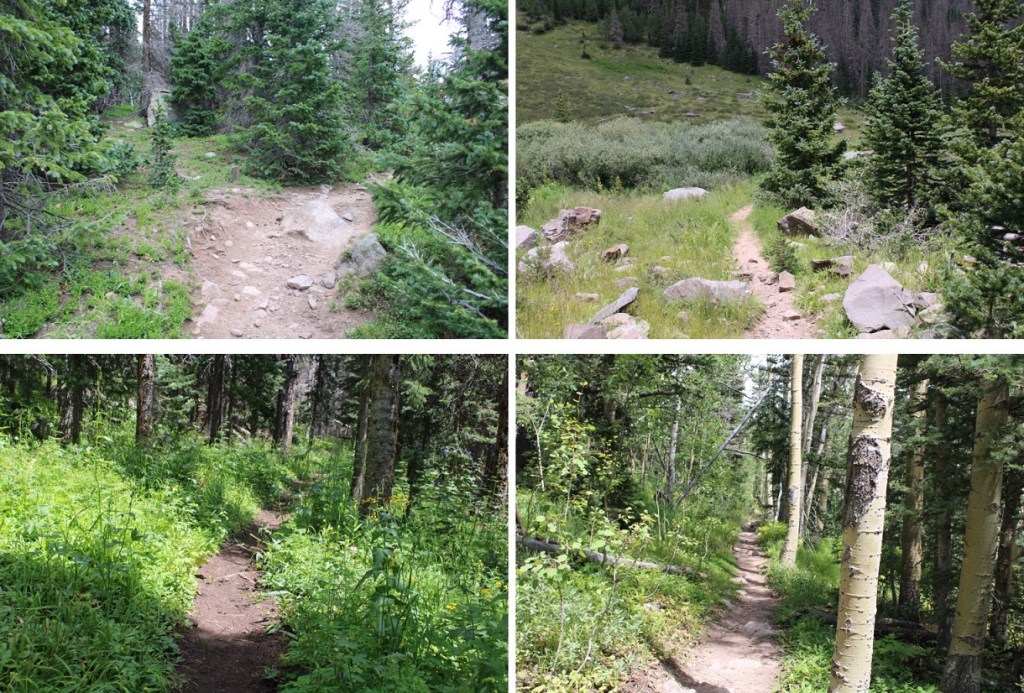
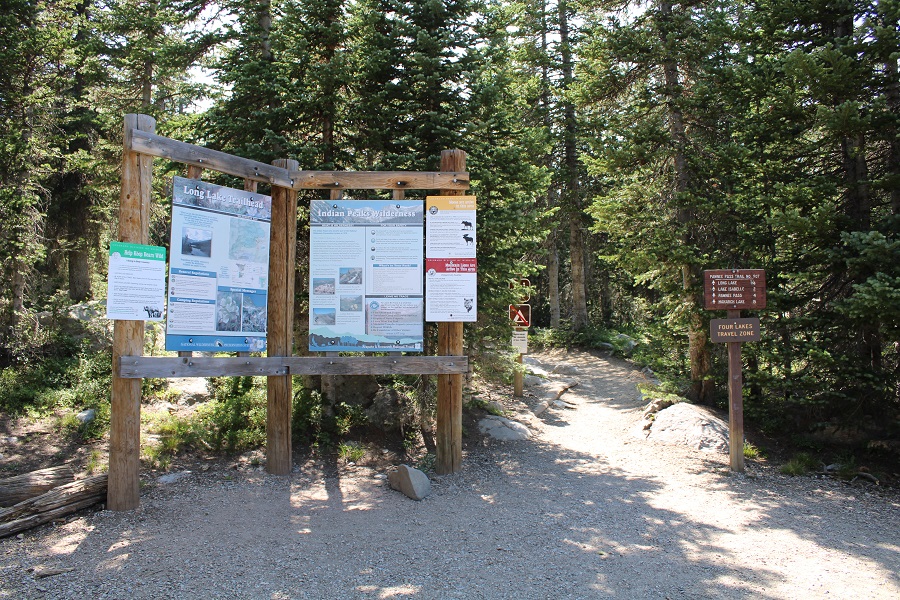
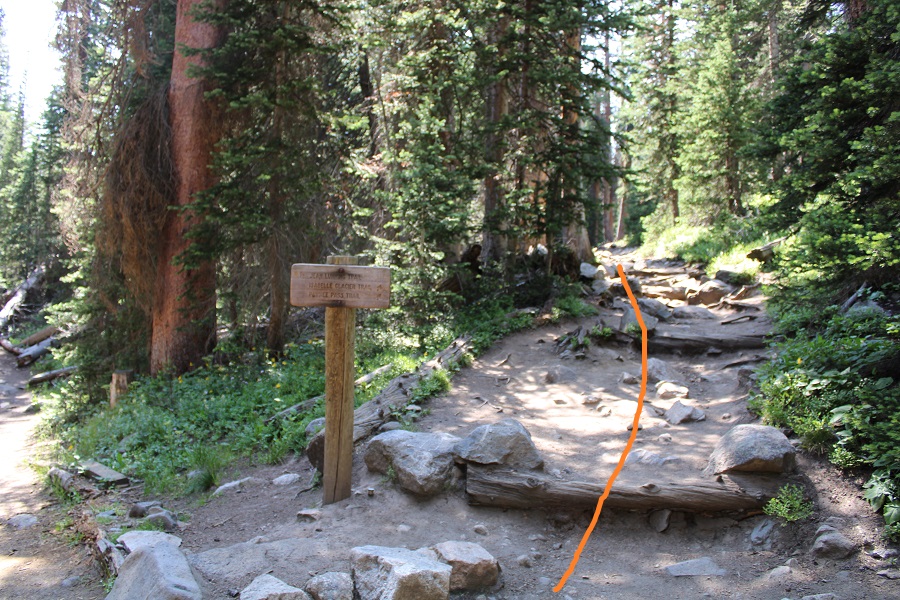
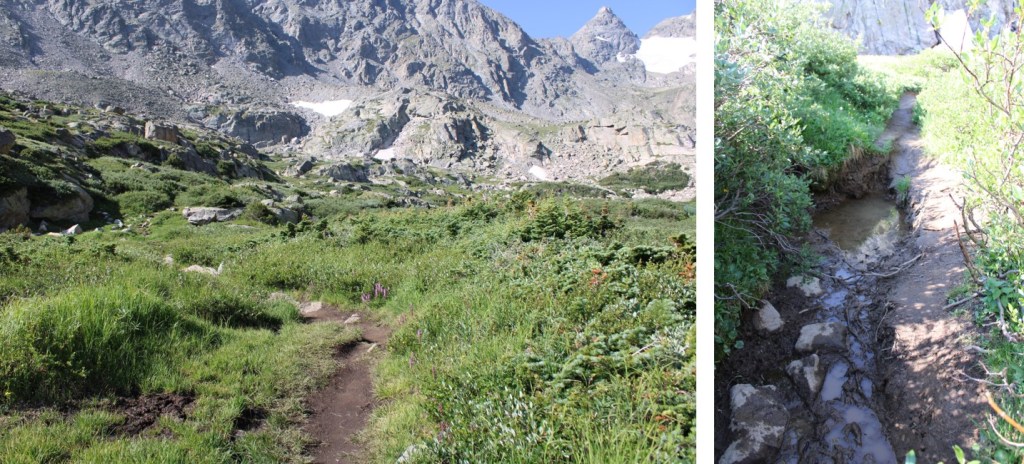
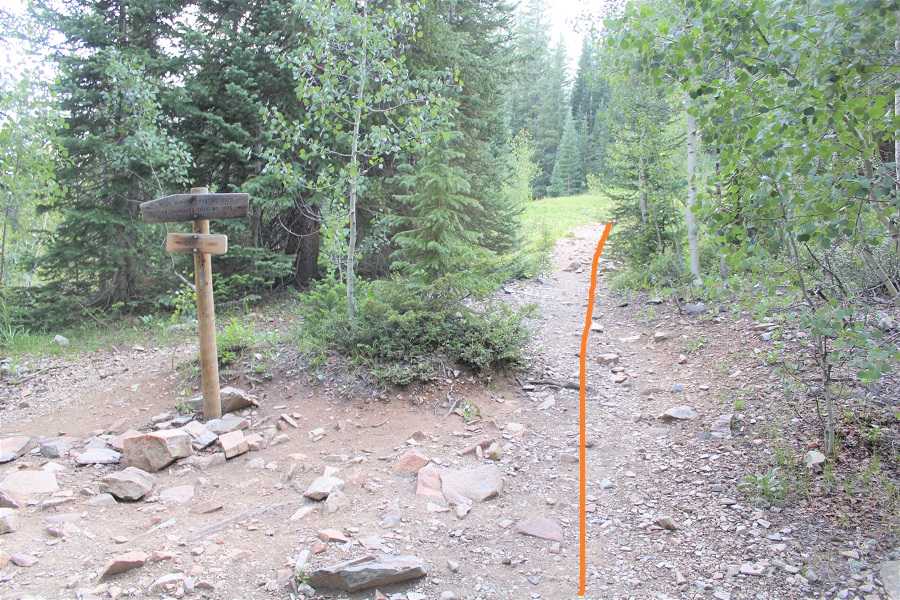
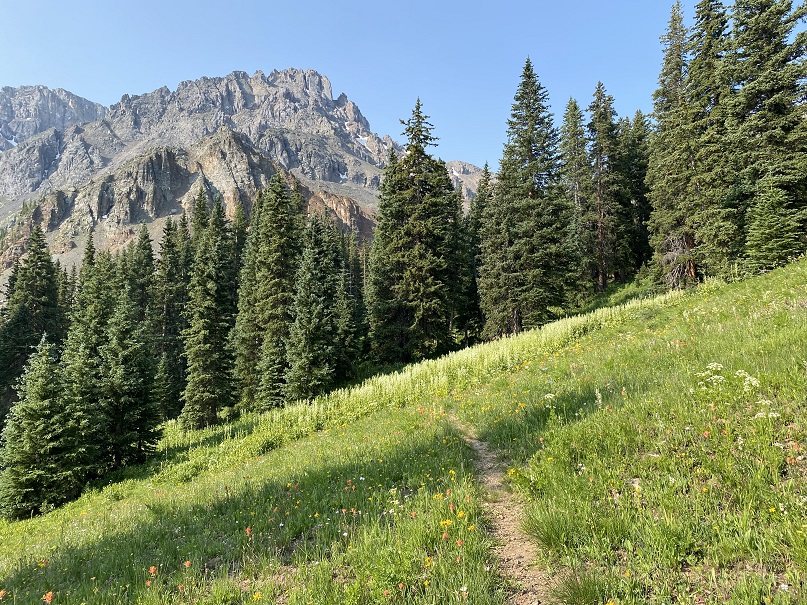
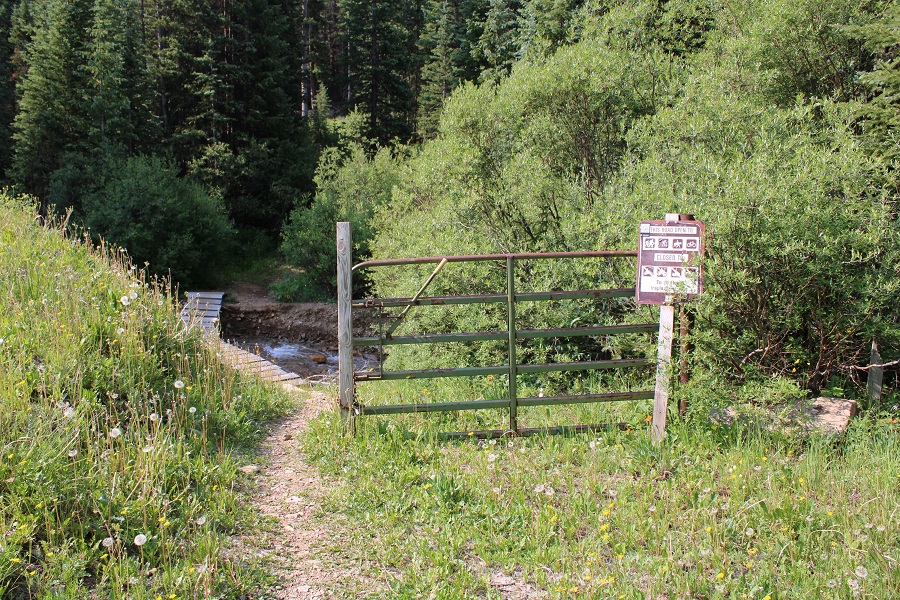
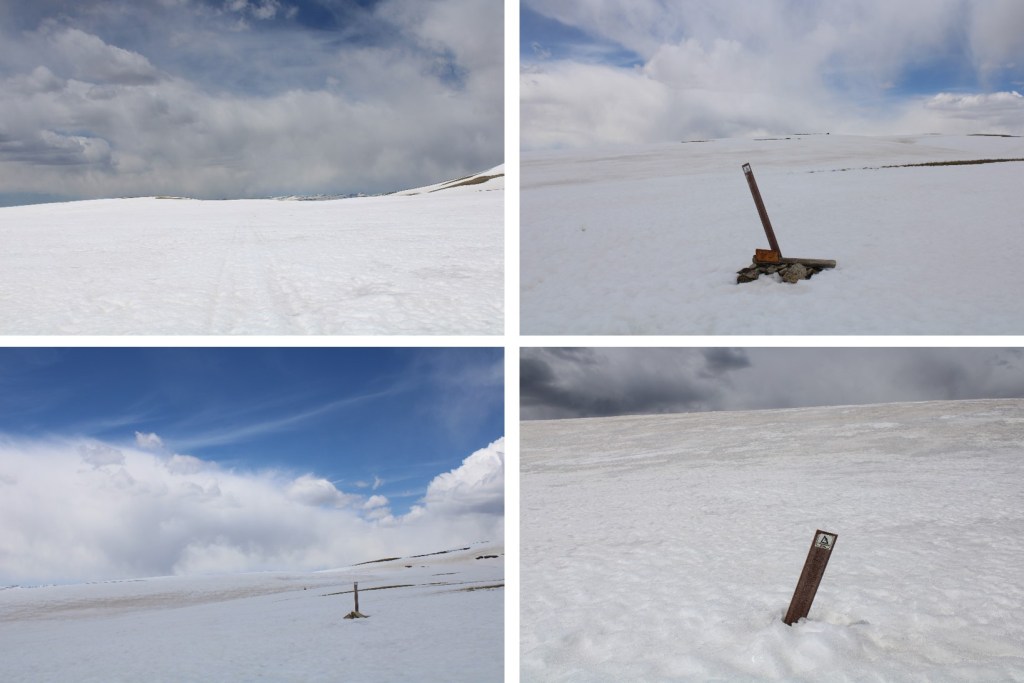
I followed the class 1 trail for 6 miles to the permit boundary, which is noted by a very visible sign. 

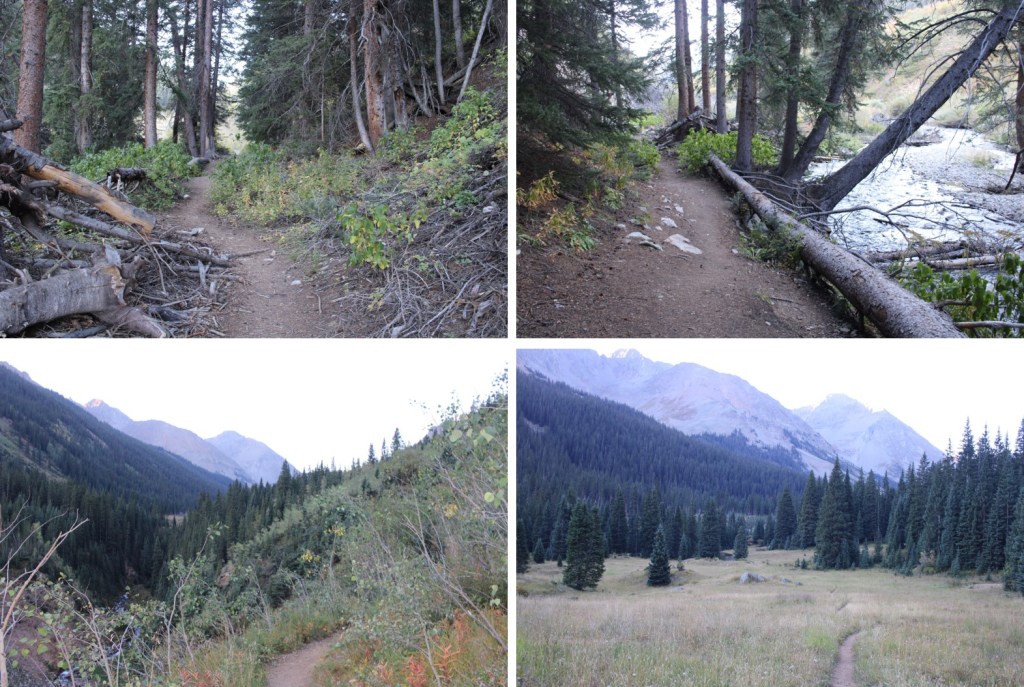
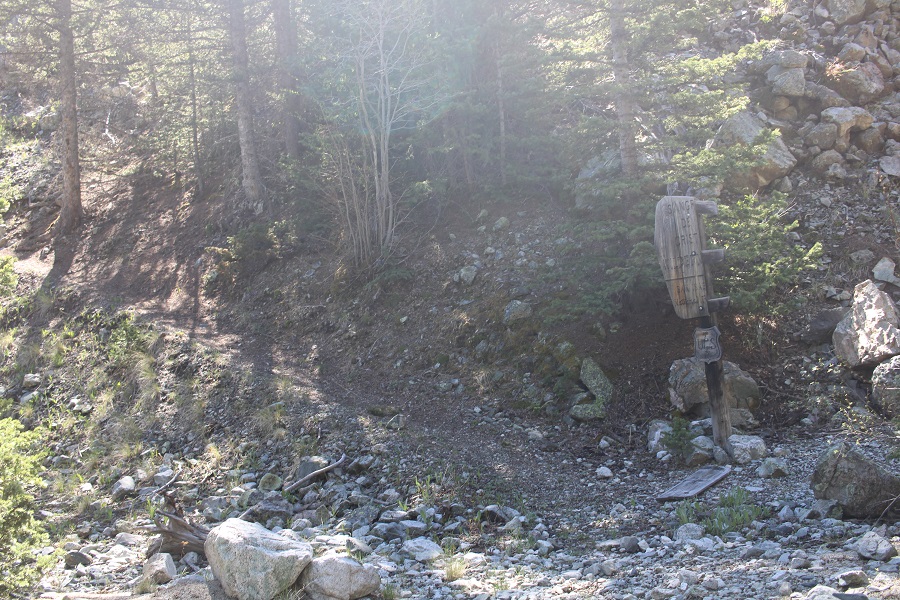
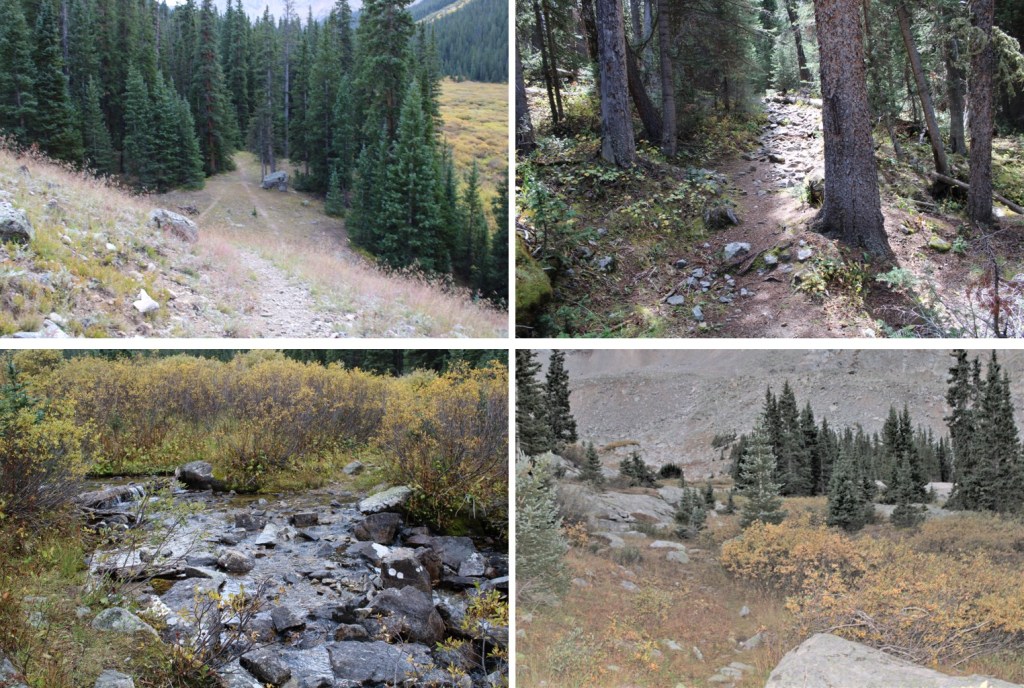
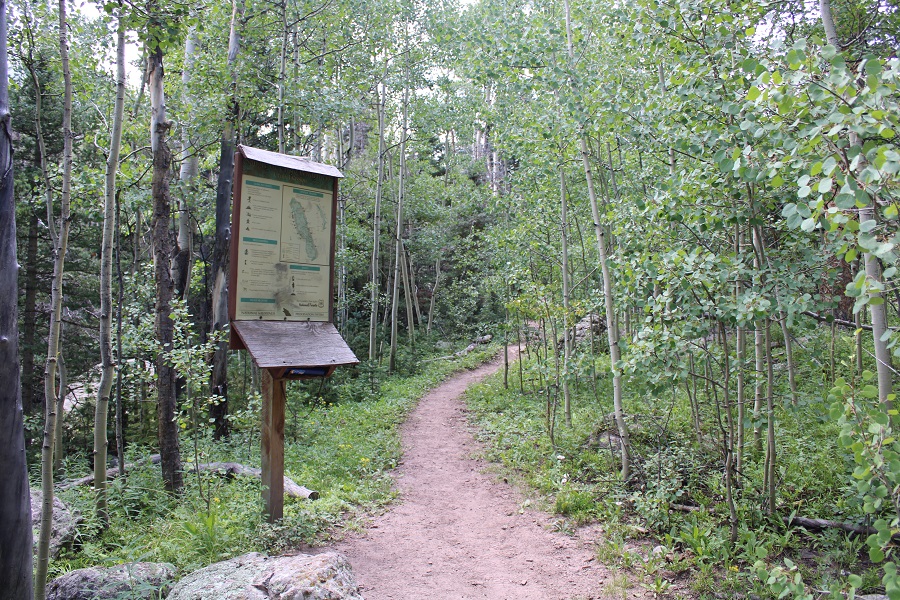
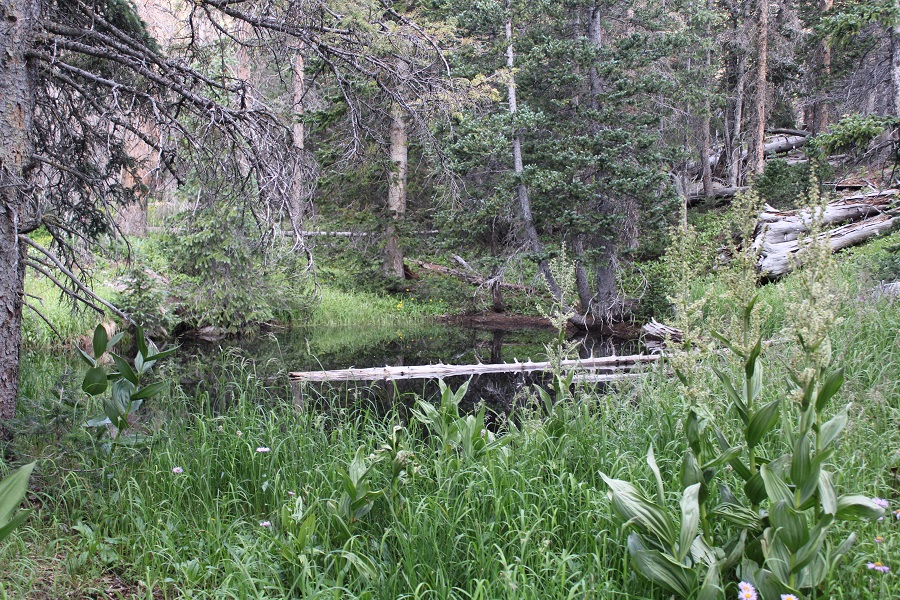
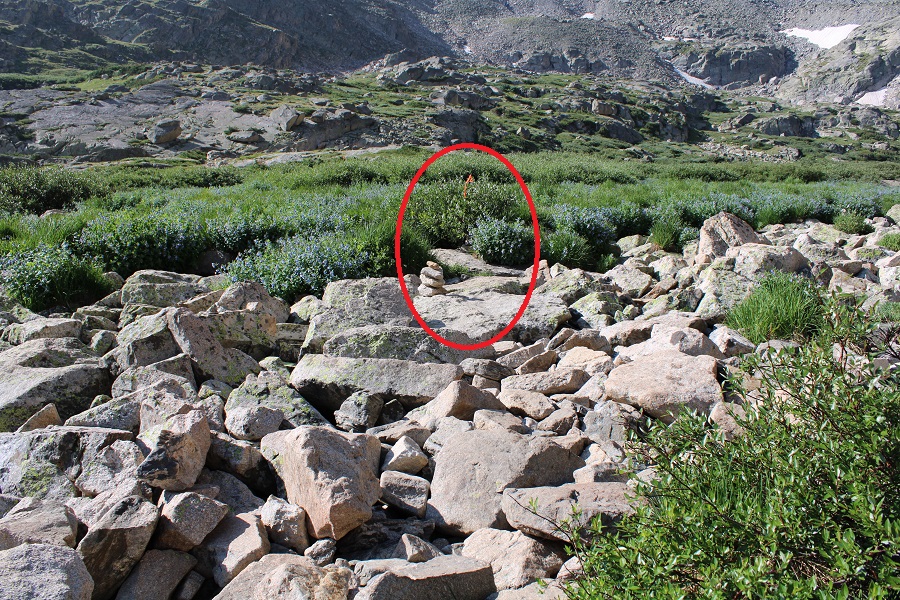
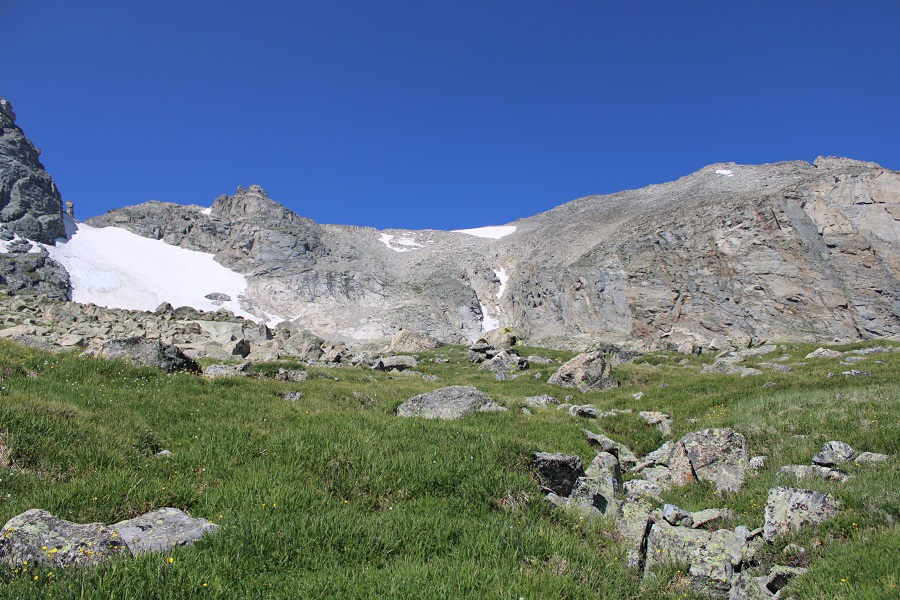
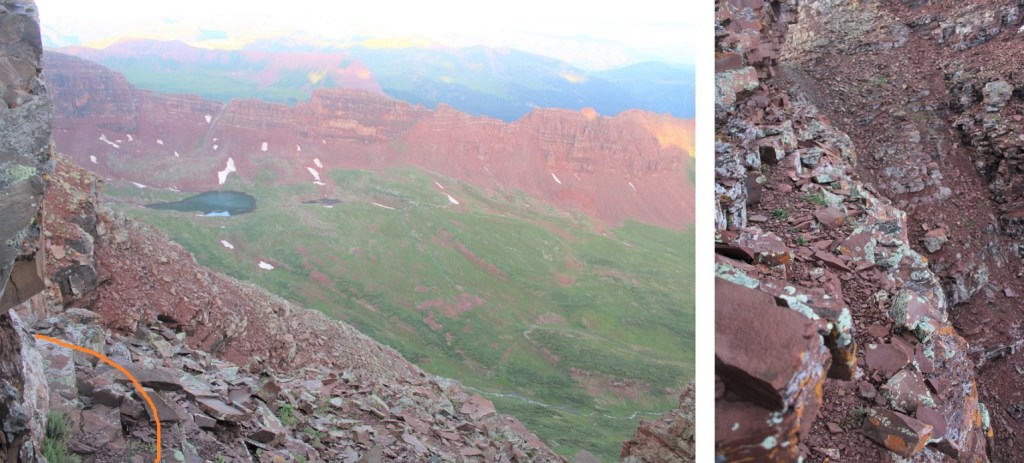
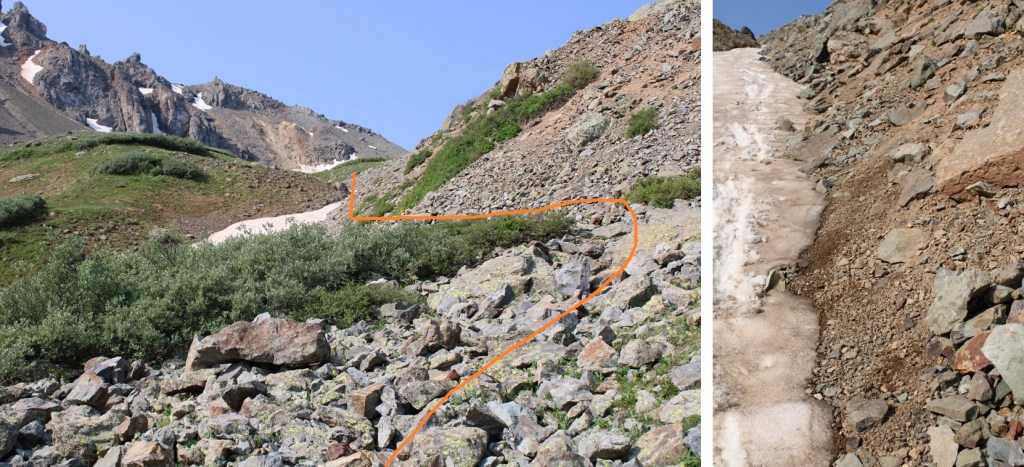
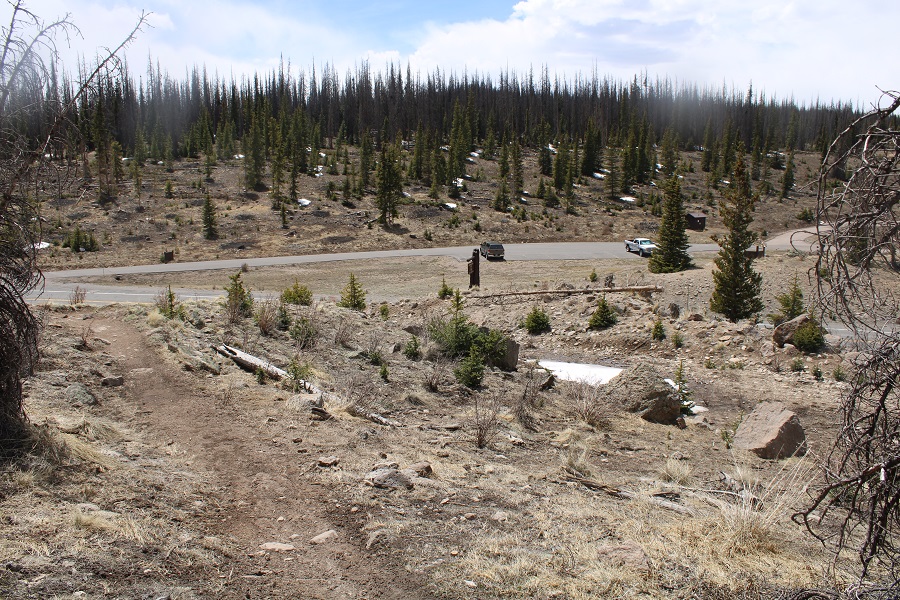
It was obvious this is a popular camping spot (just before the permit boundary).  There are a lot of social trails that lead off into the trees as well for campsites, if you don’t want to camp right next to the sign.  Here’s where I camped.   It’s relatively close to the stream, which is great for filtering water

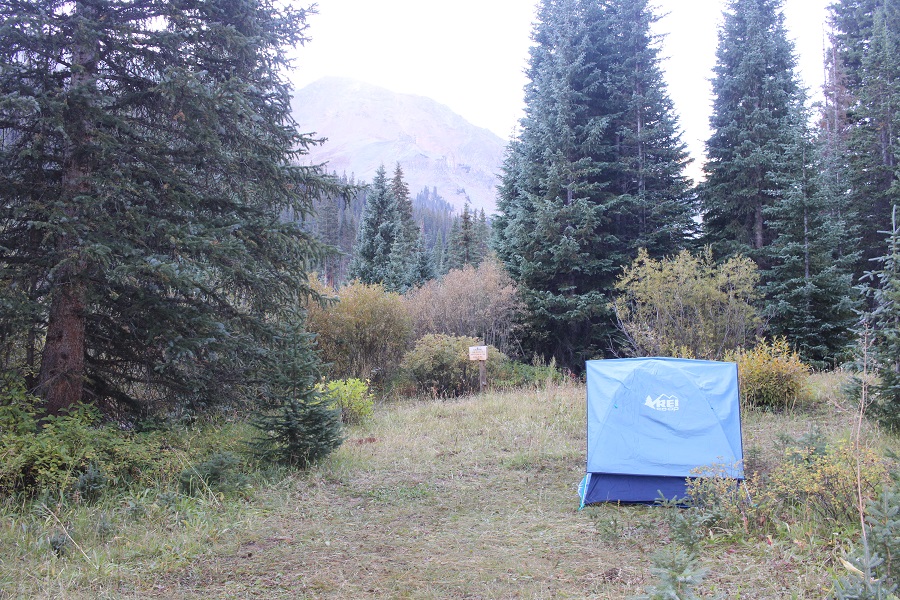
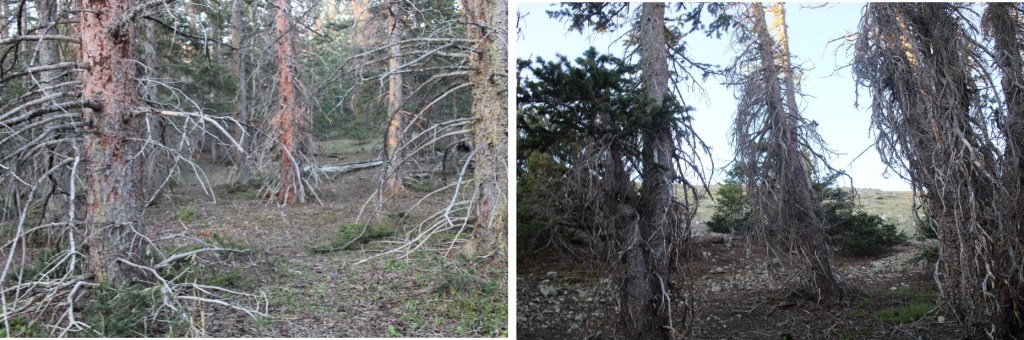
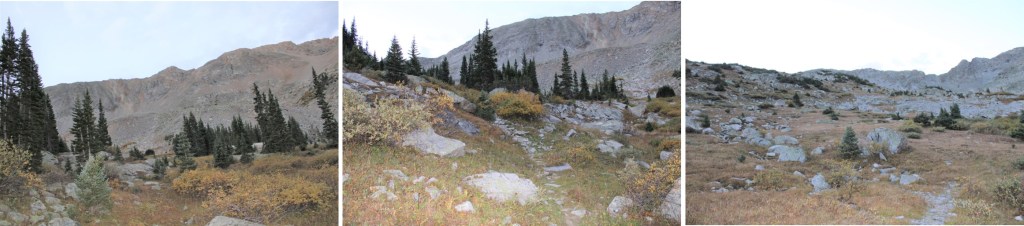
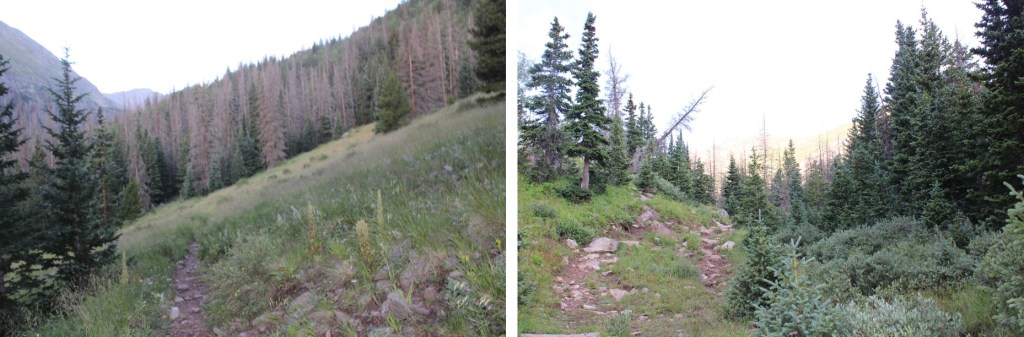
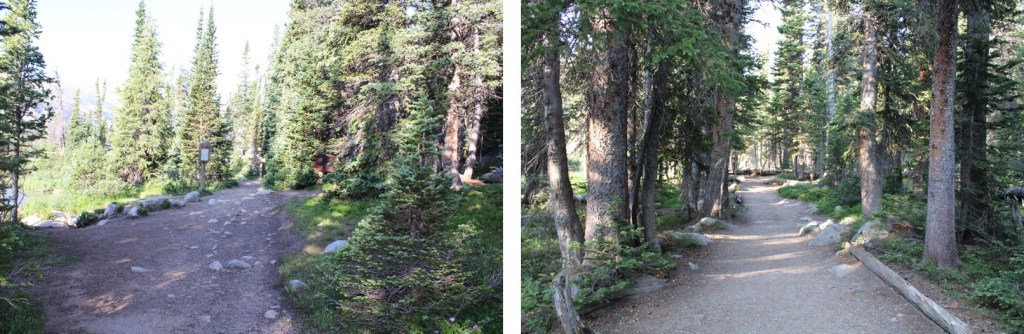
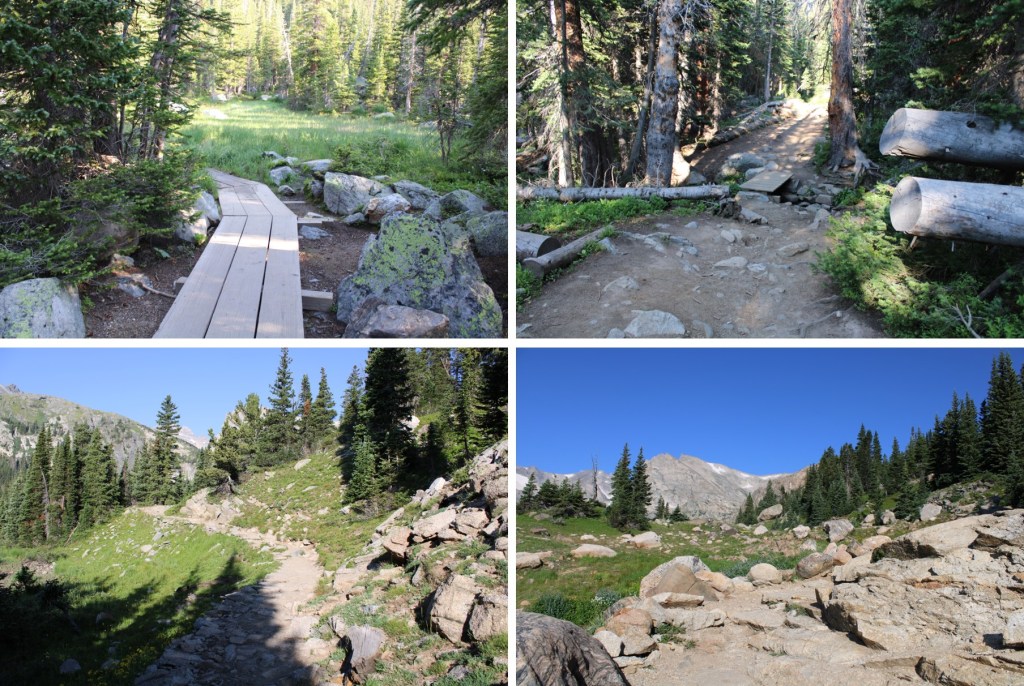
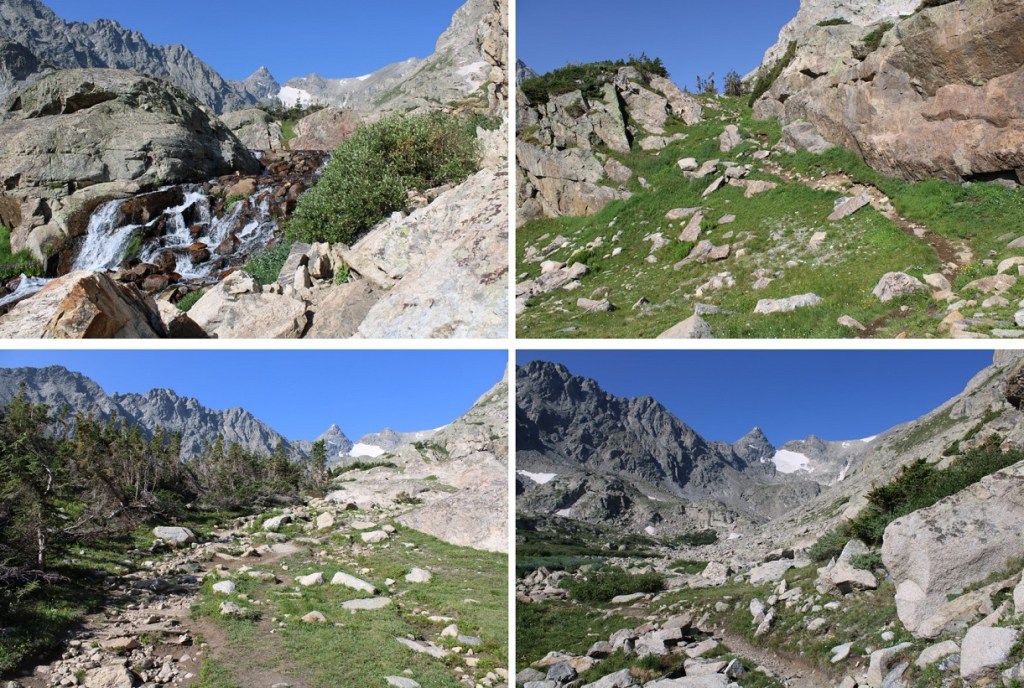
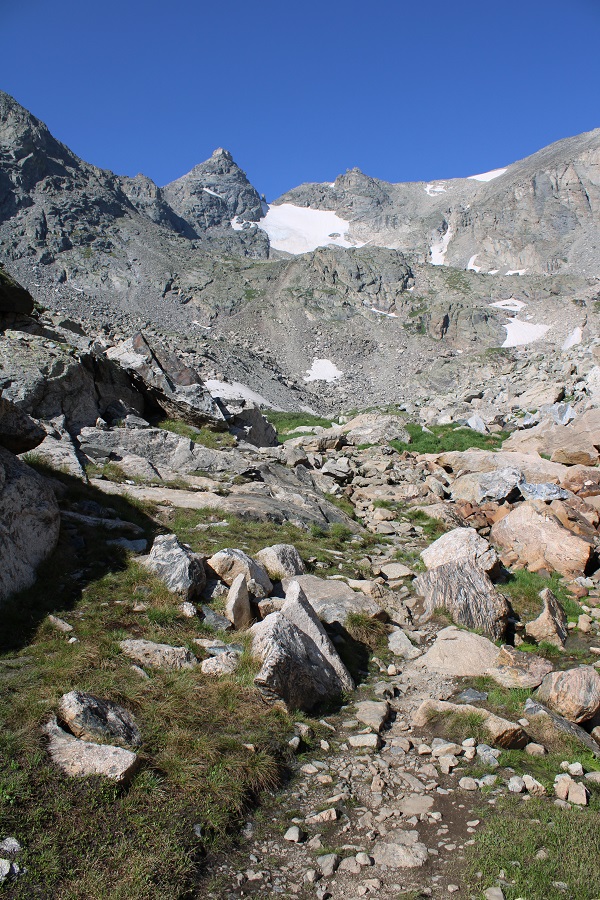
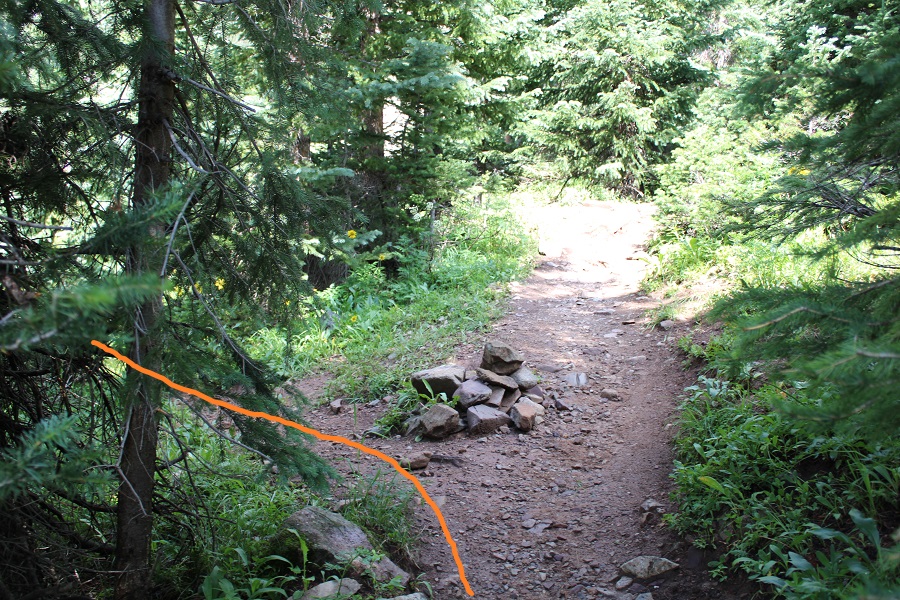
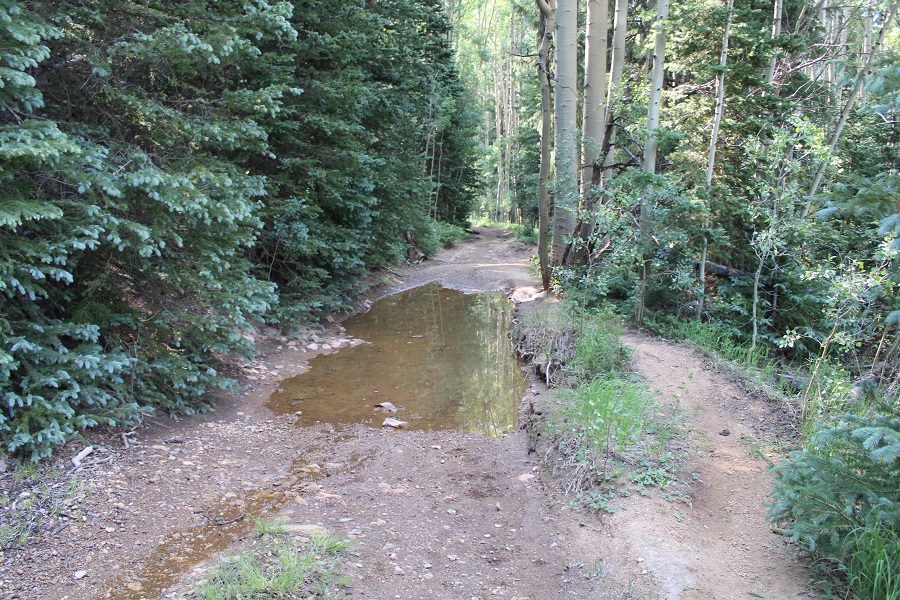
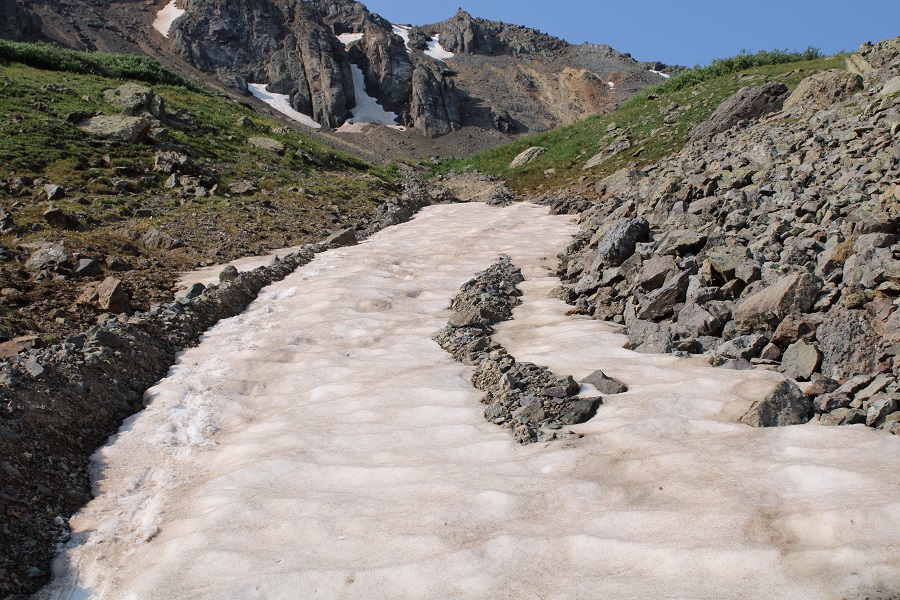
I set up my tent, as I planned on being here for a few days. The next morning, I started out at 4:45am.  The trail is still class 1, and crosses Conundrum Creek several times.  All creek crossings were easy.

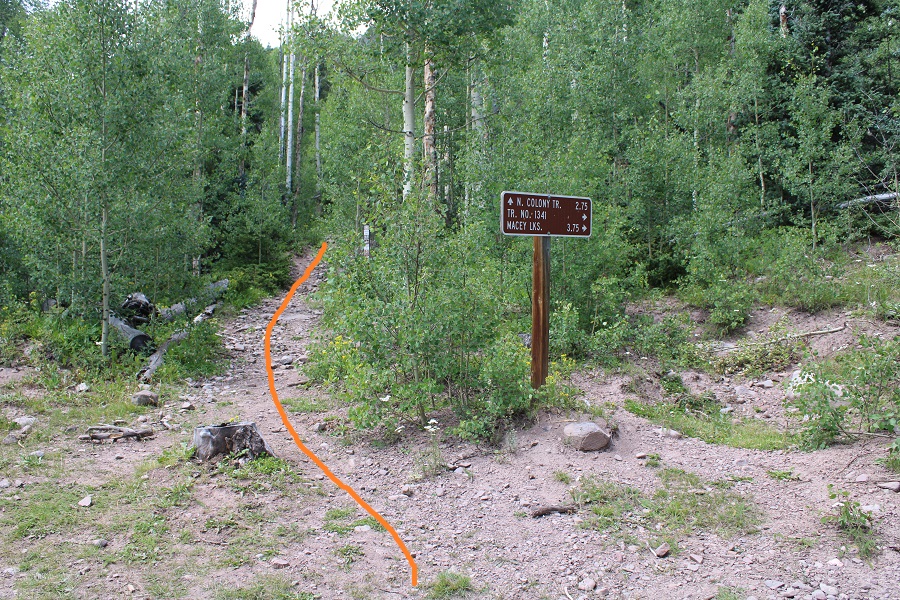
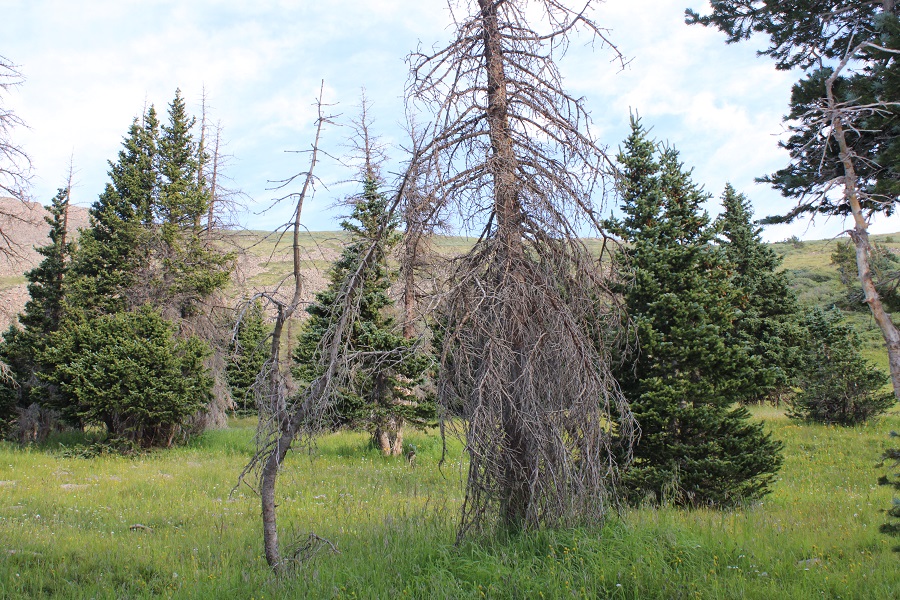
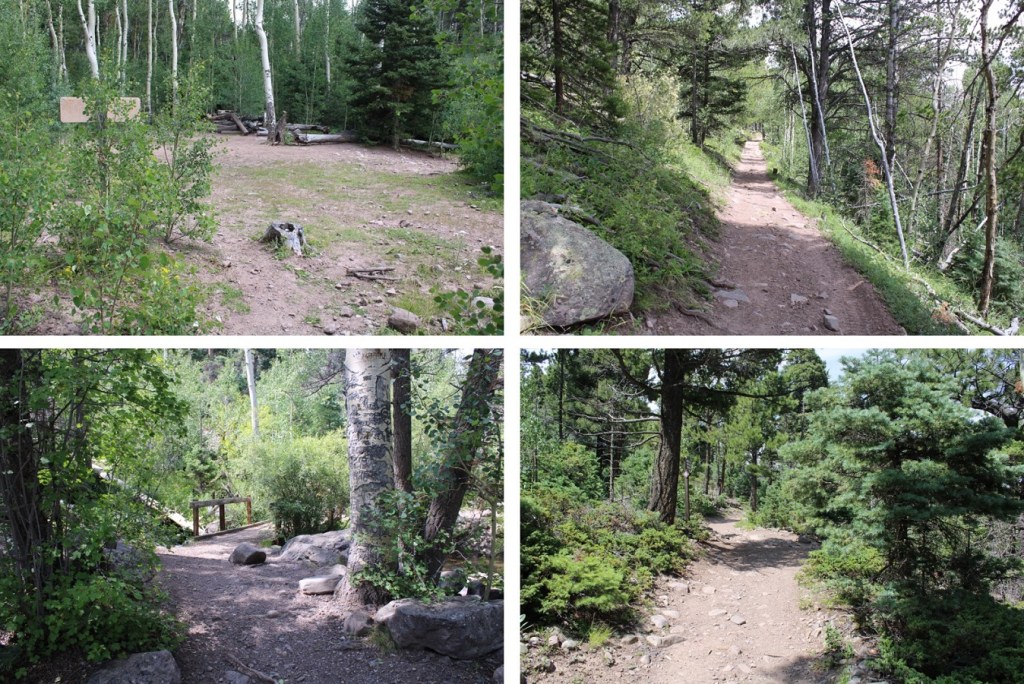
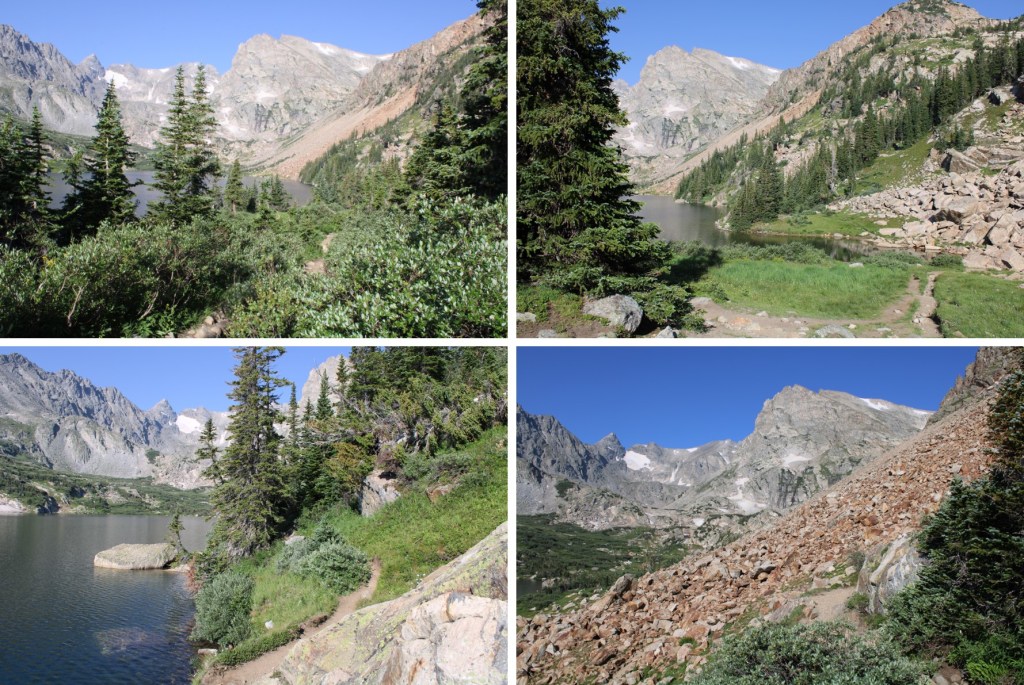
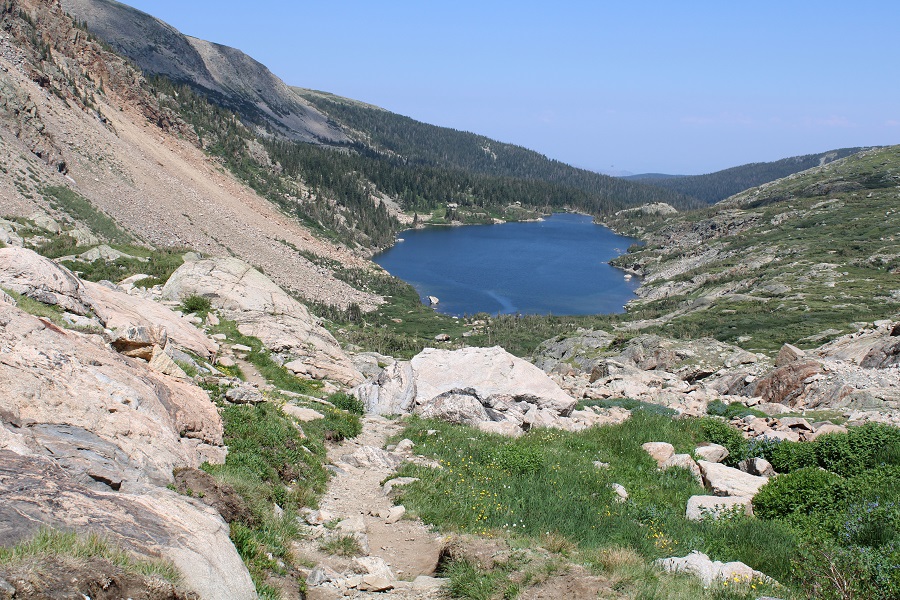
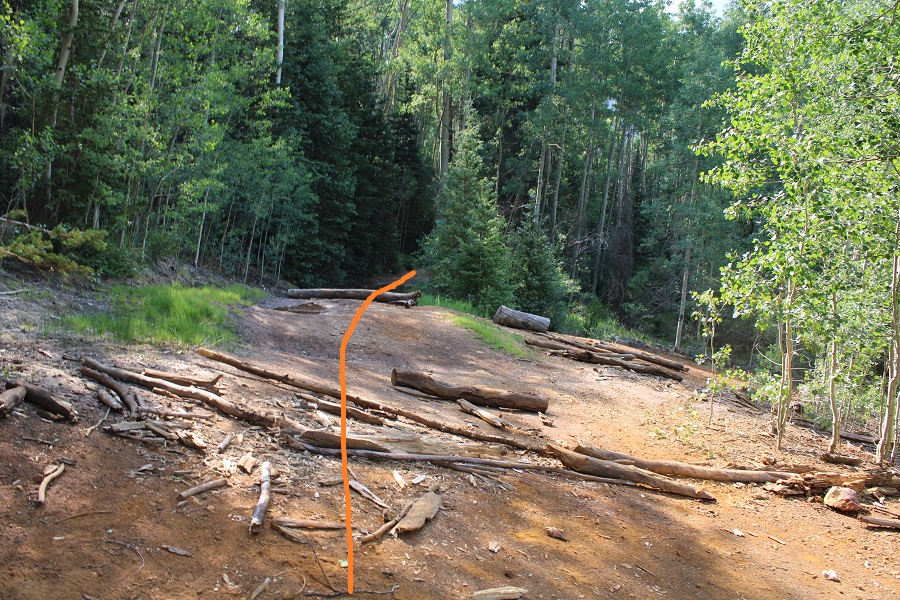
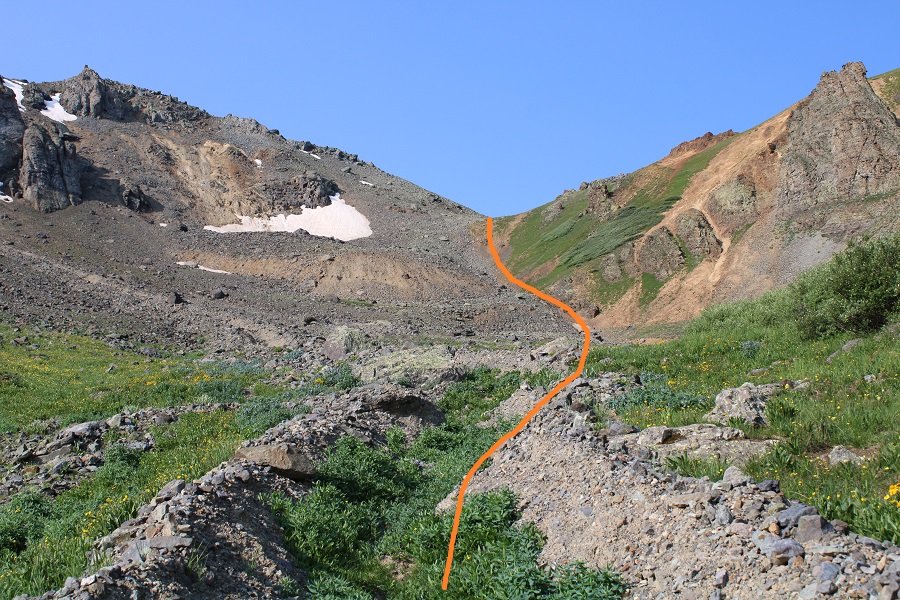
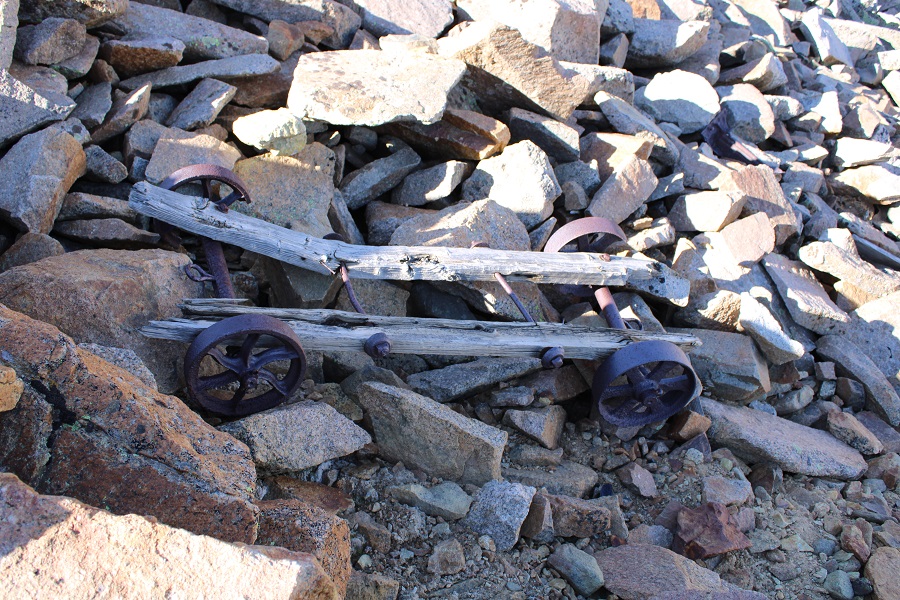
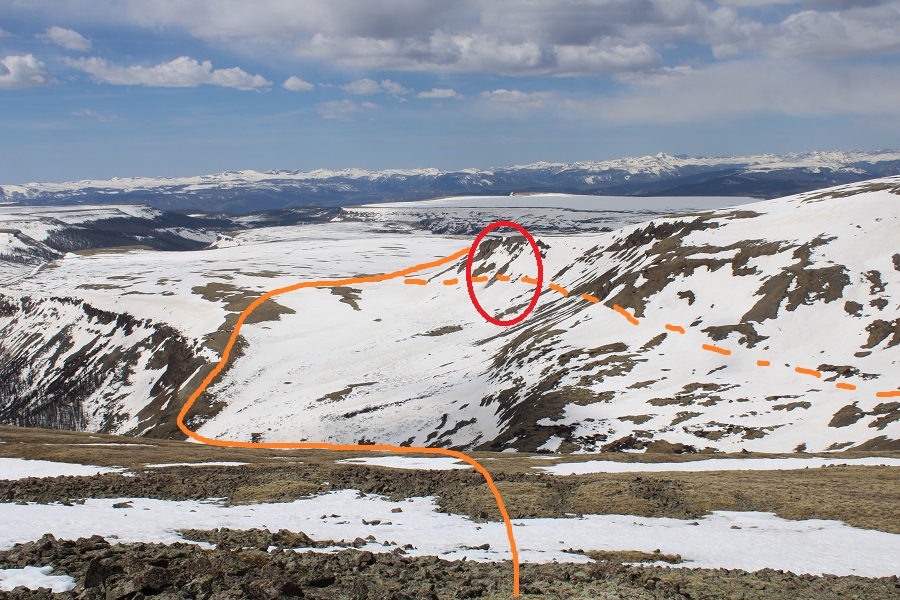
After about 2 miles I came to the Conundrum Hot Springs campsites, an old abandoned cabin, and more small creek crossings.  I took the trail to the right towards Triangle Pass

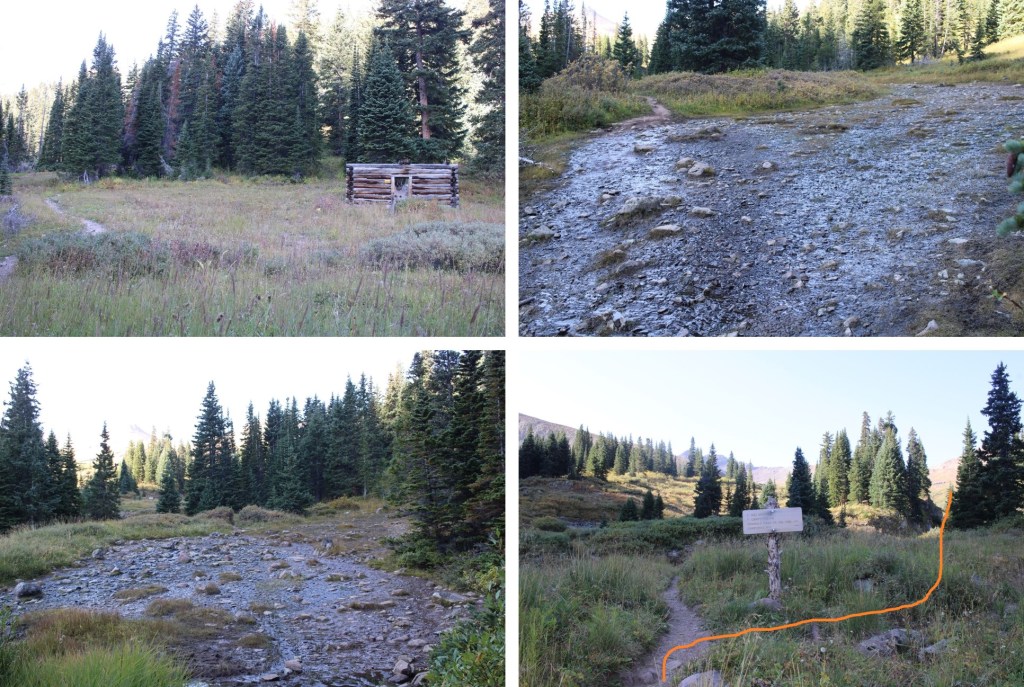
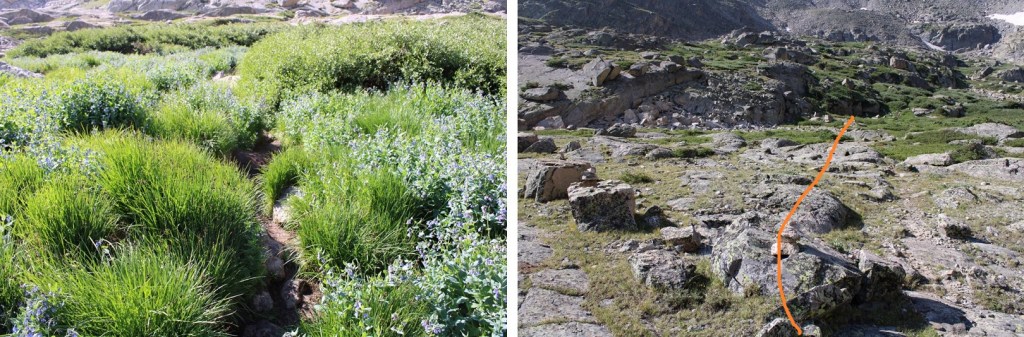
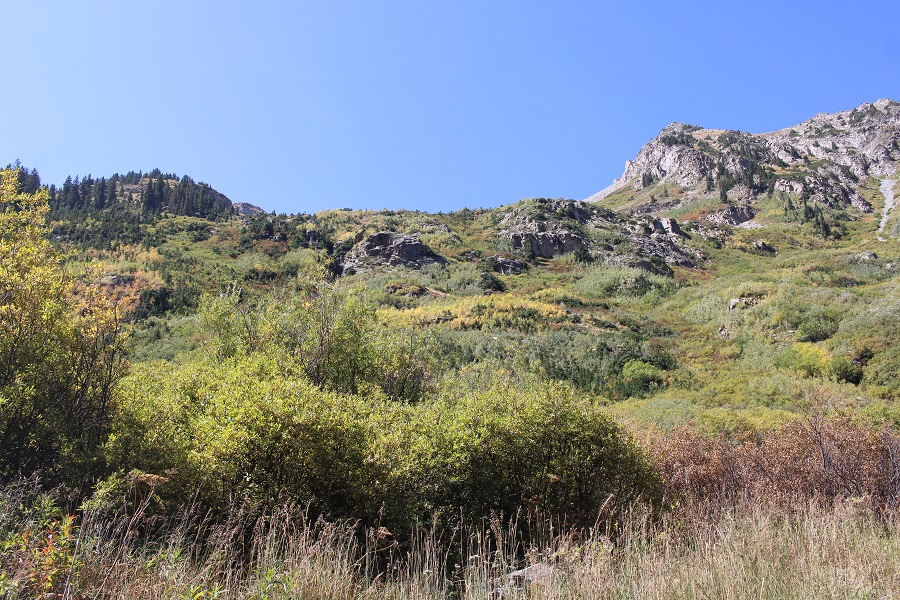
I was now still on Trail 1981, headed southwest, into the willows

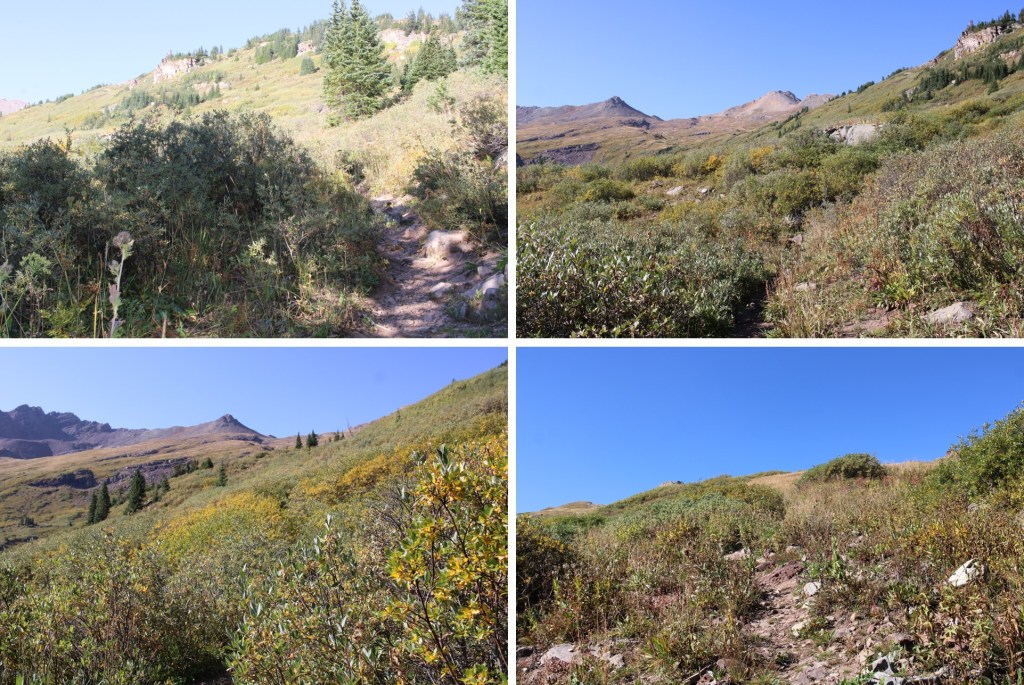
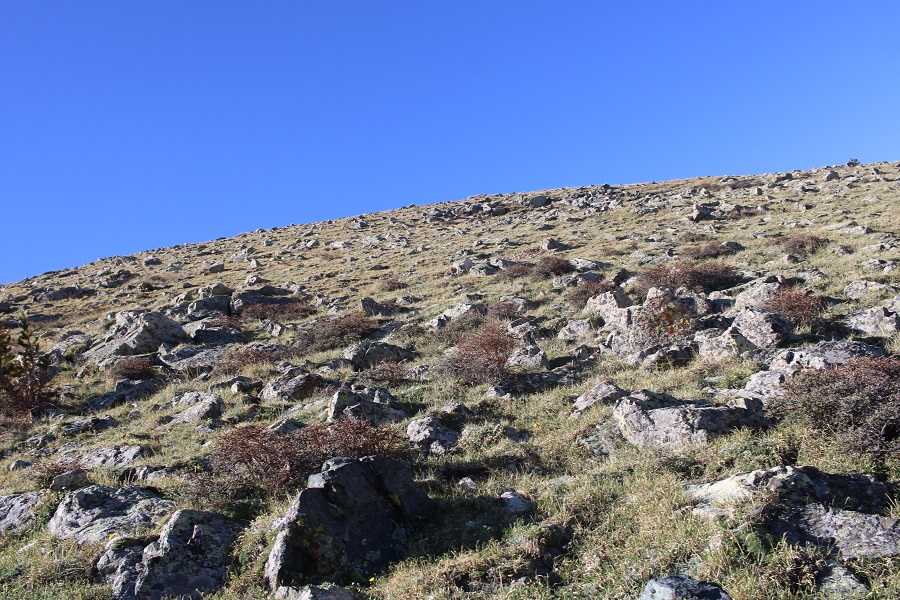
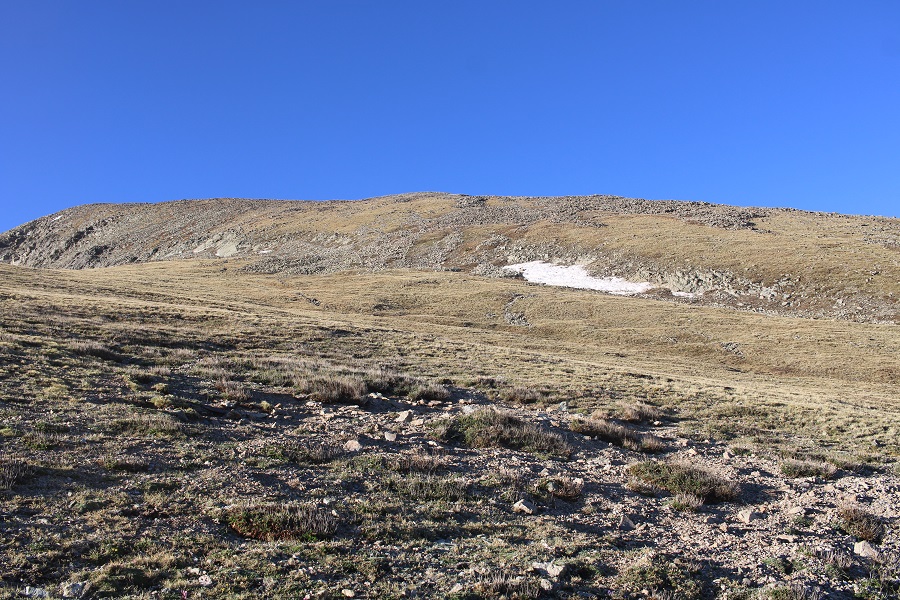
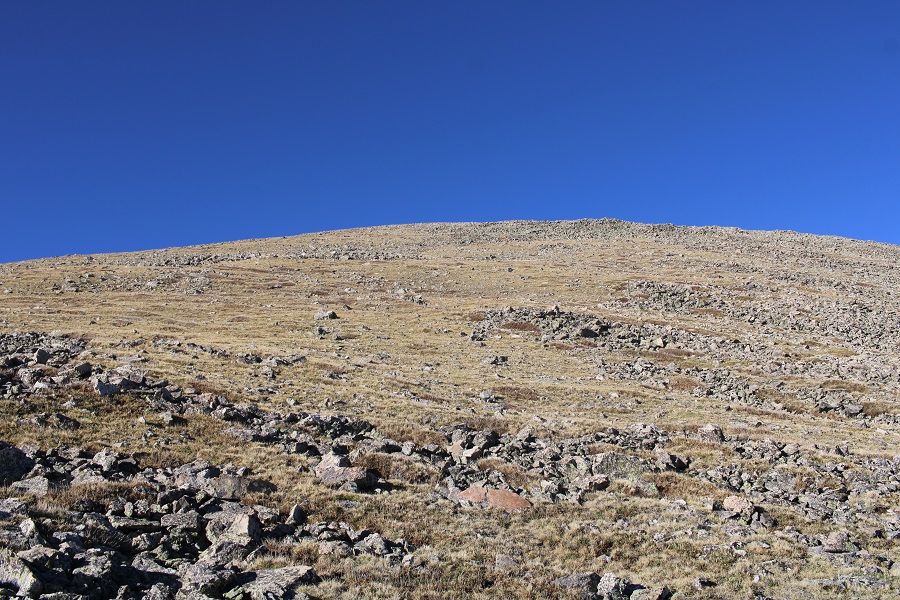
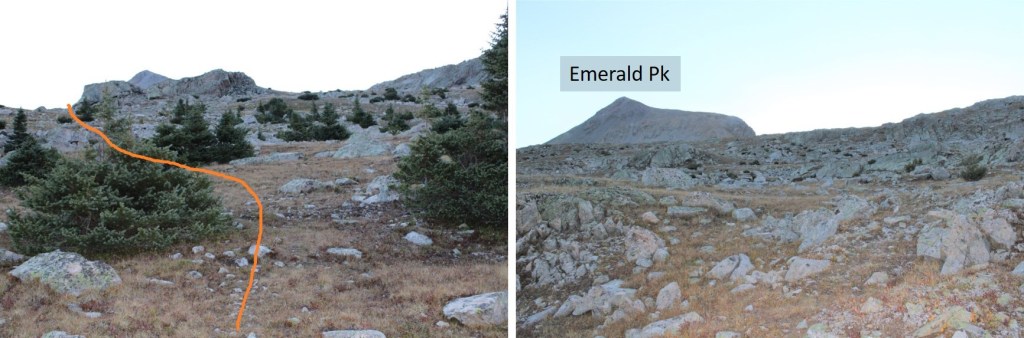
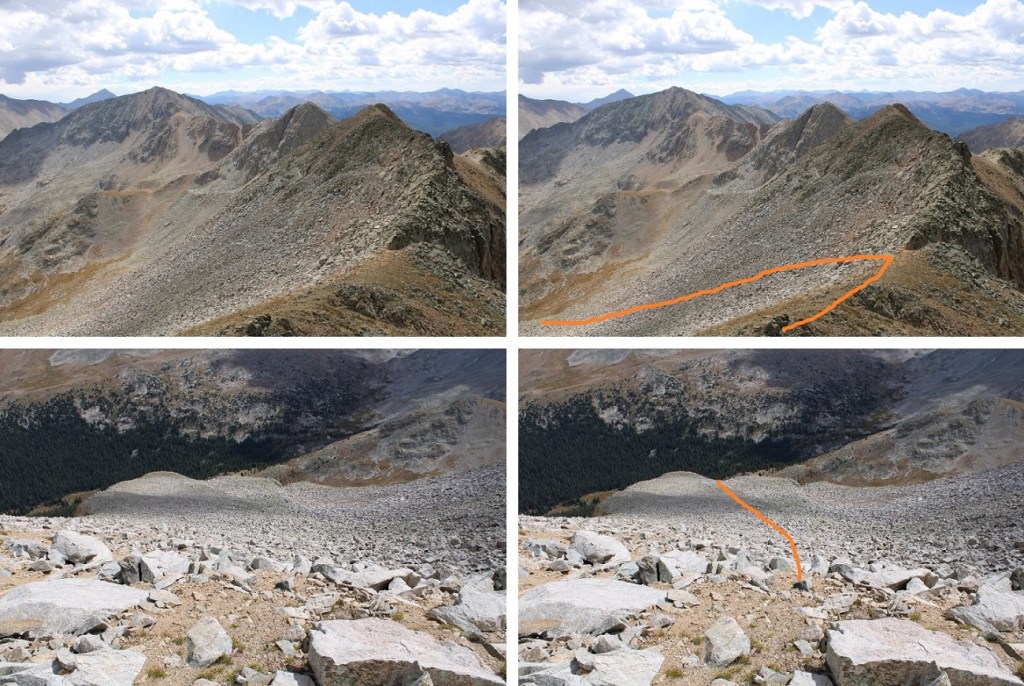
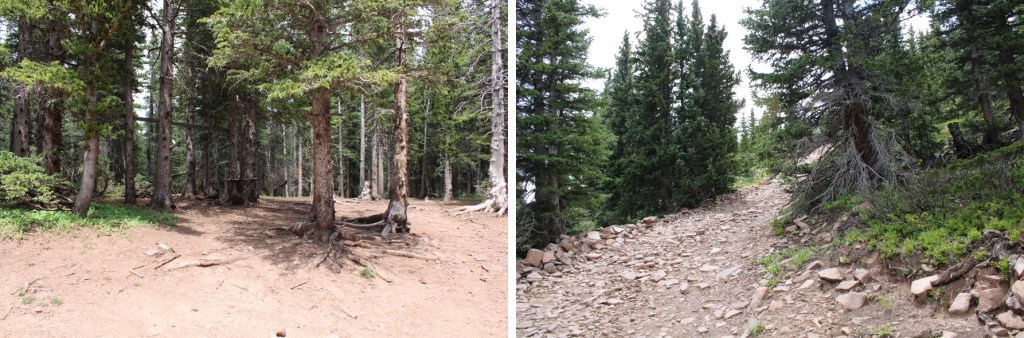
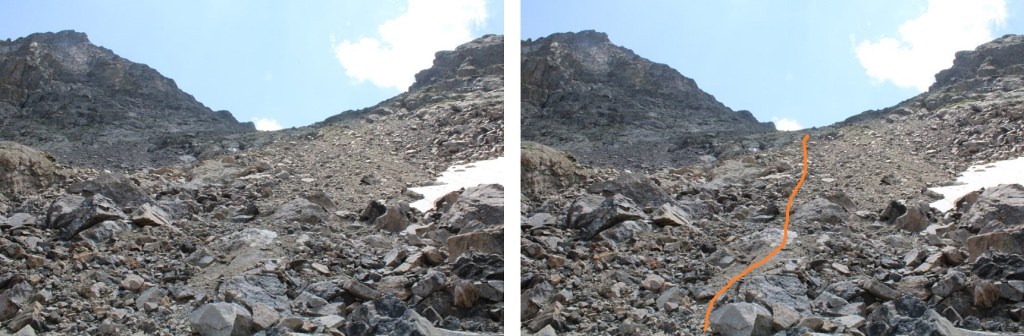
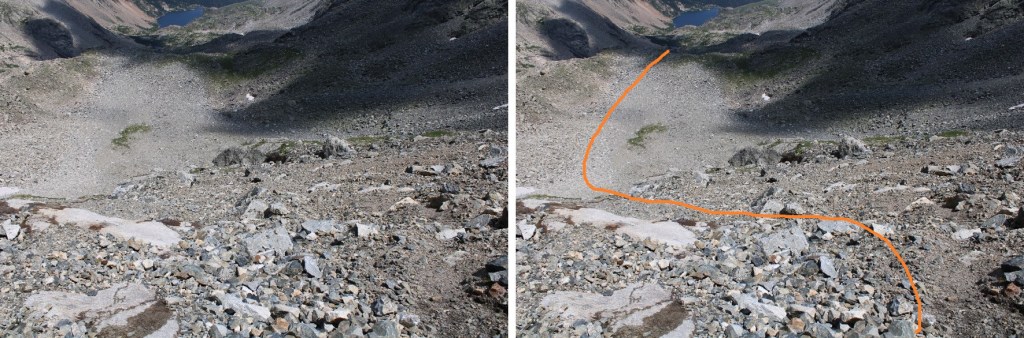
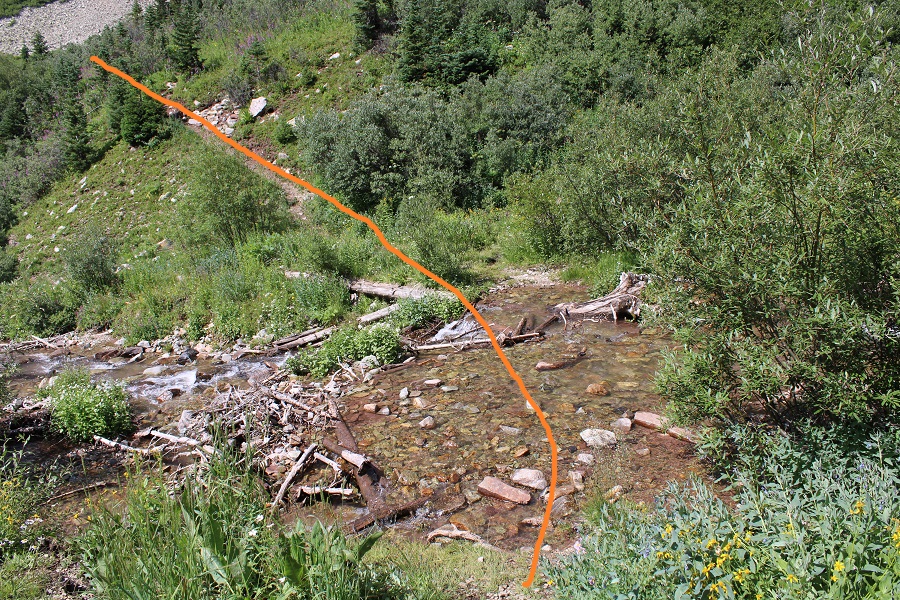
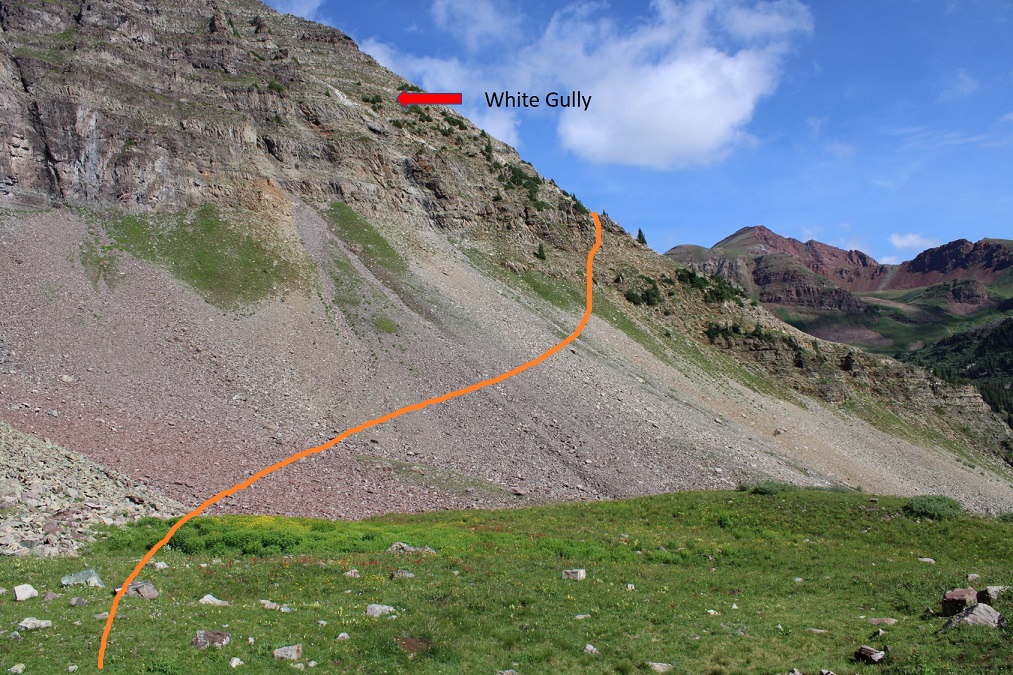
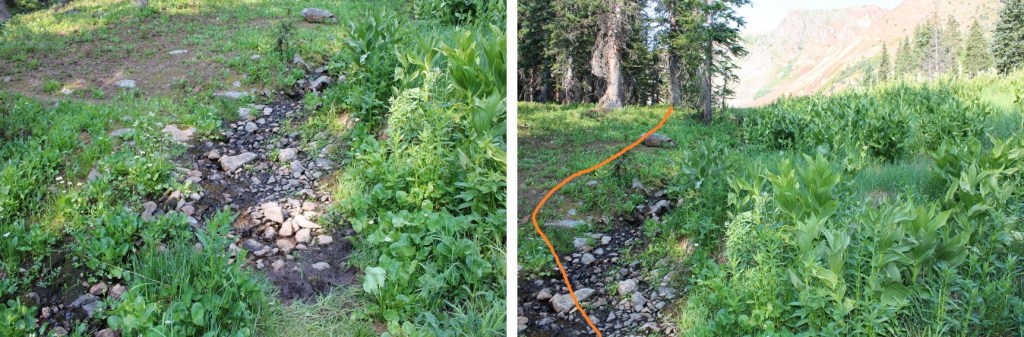
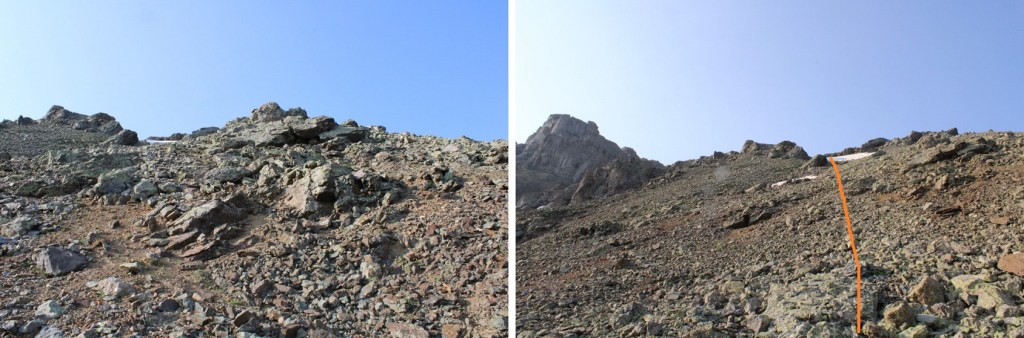
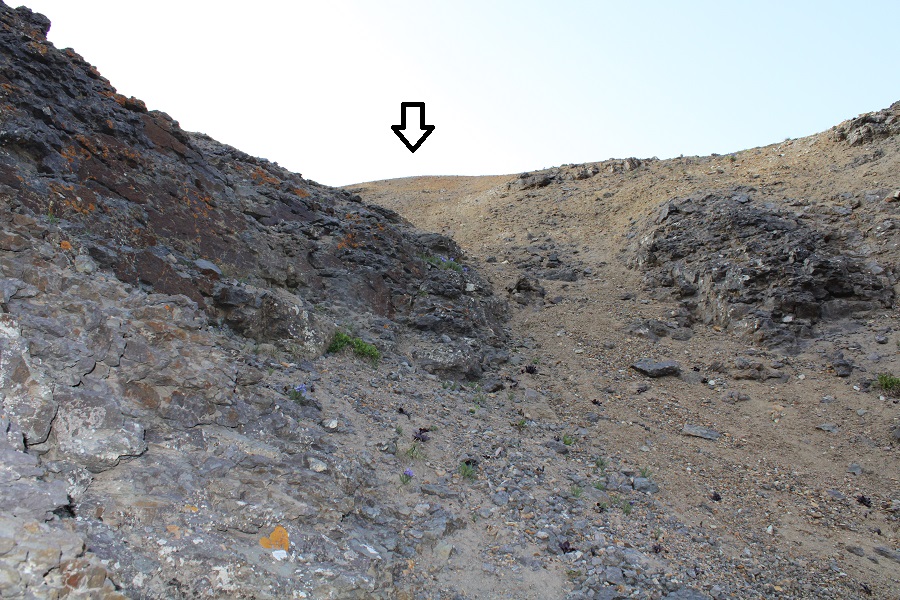
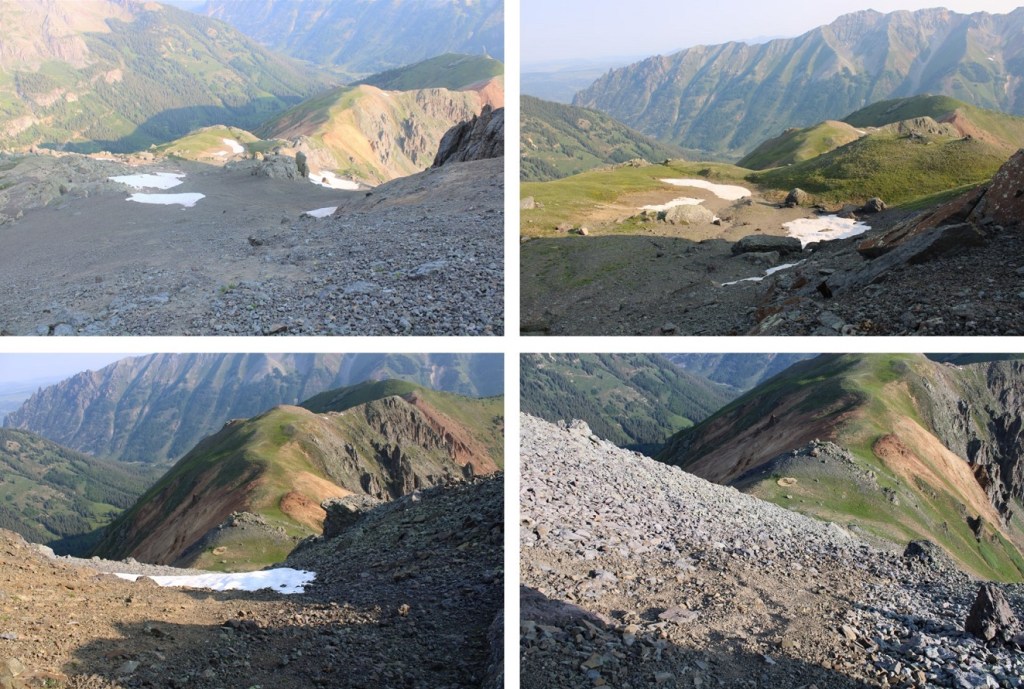
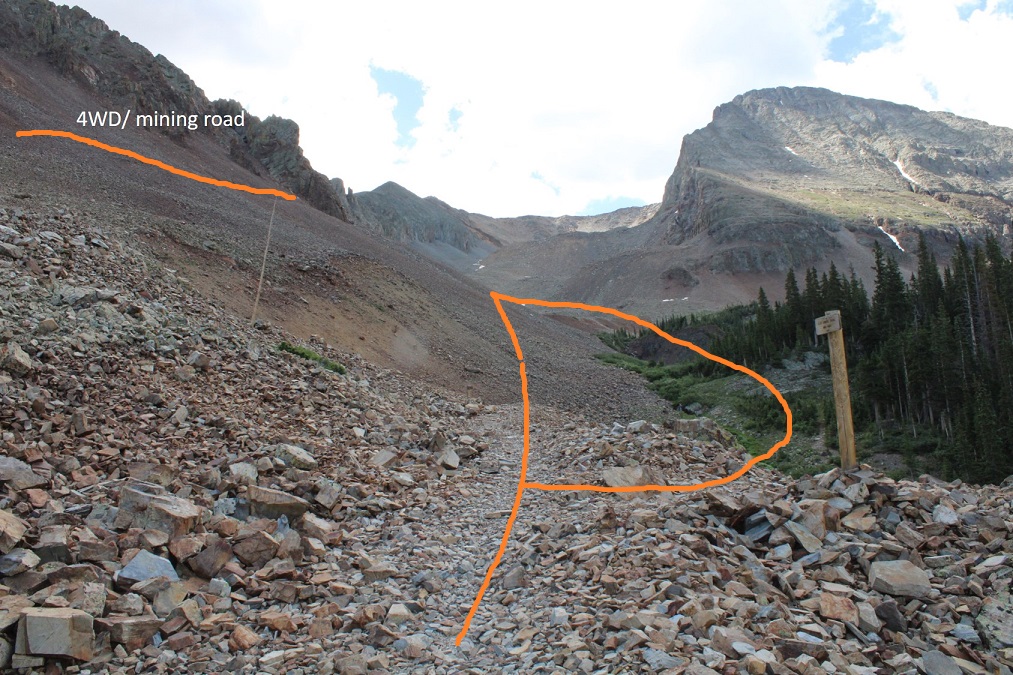
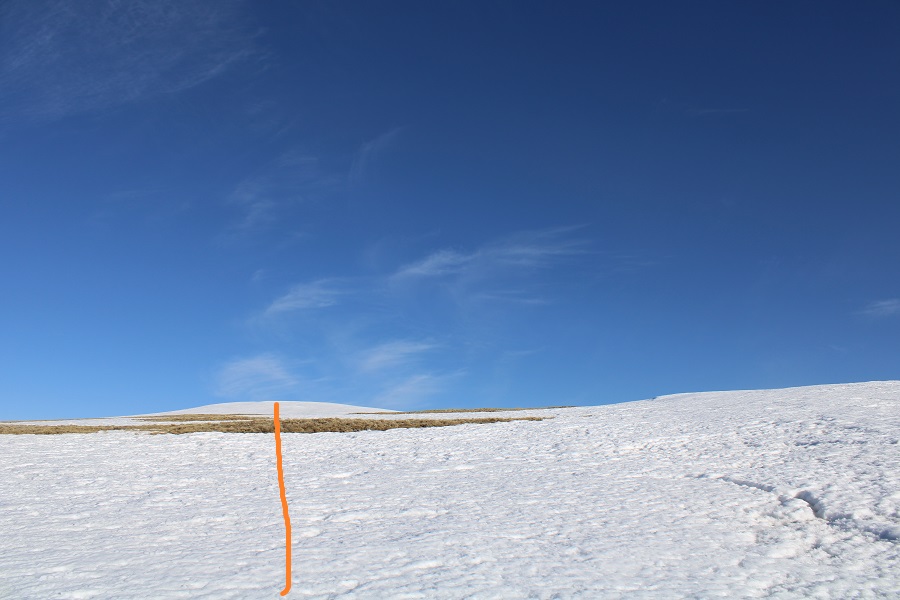
At 12000’ I left the trail, and followed a drainage west

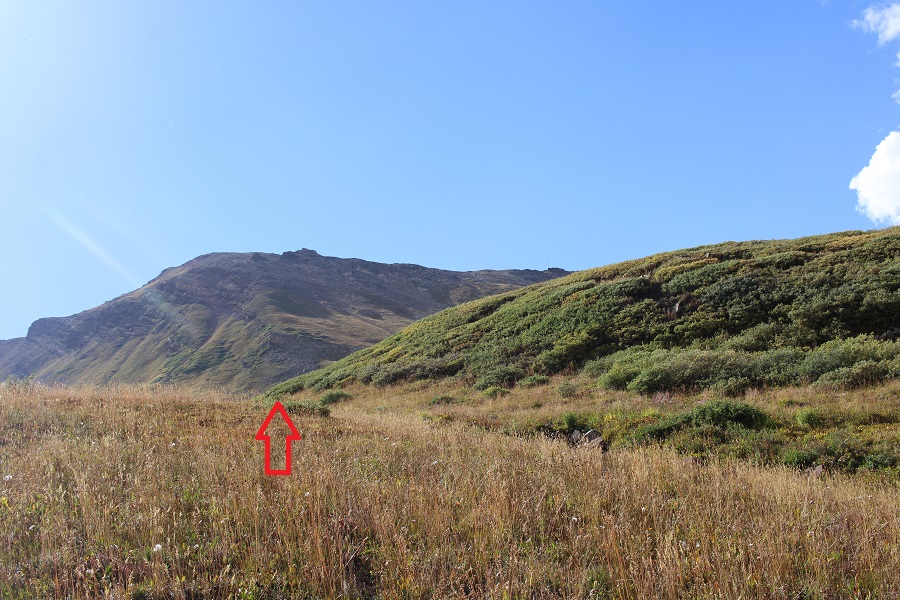
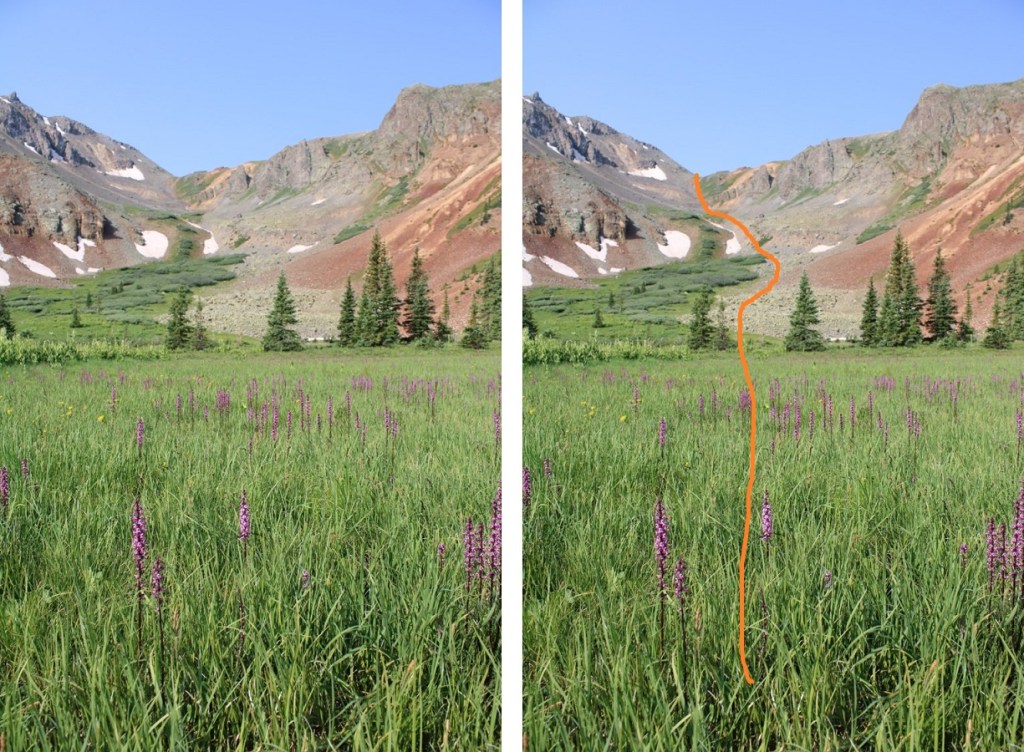
At about 12200’ I turned right and headed north, across the basin.  Yes, there were a lot of crows. 

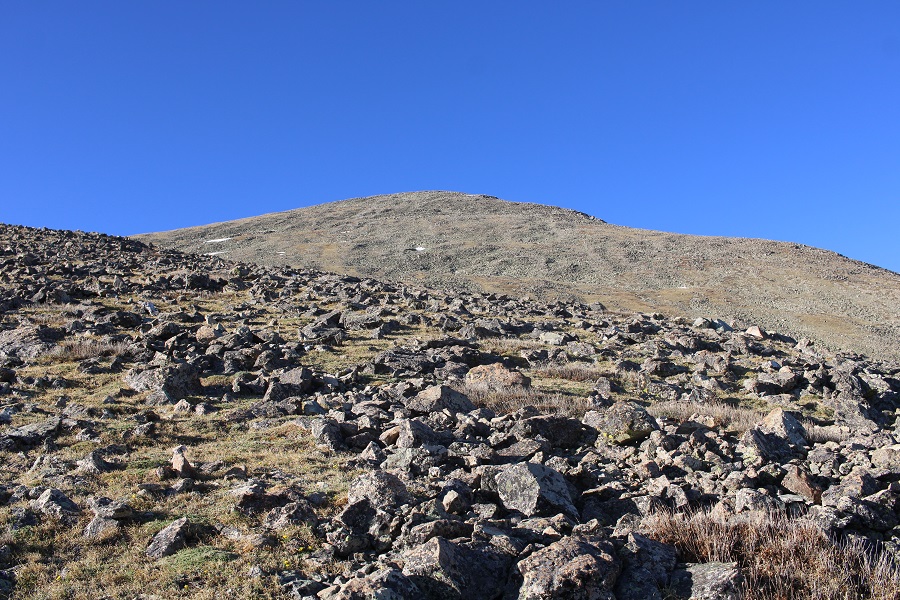
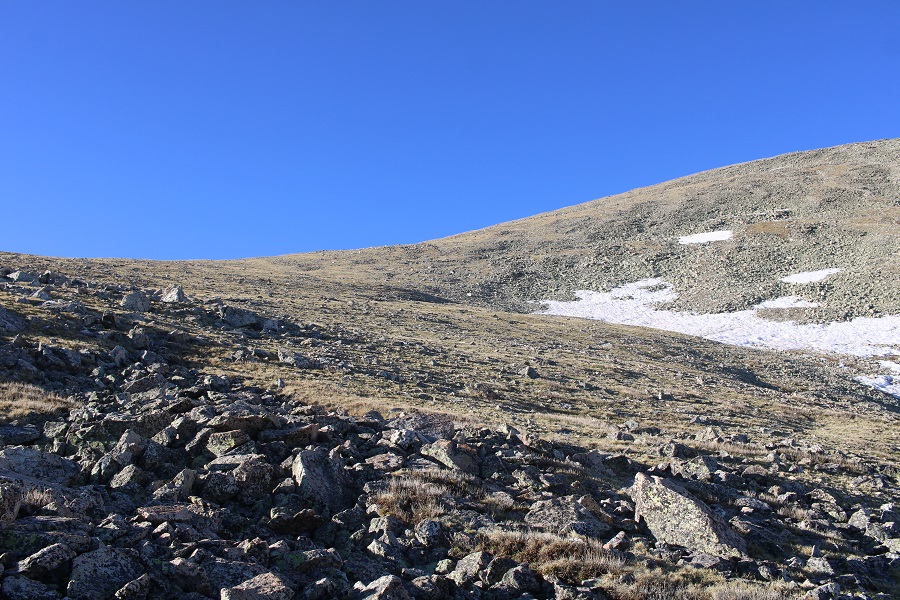
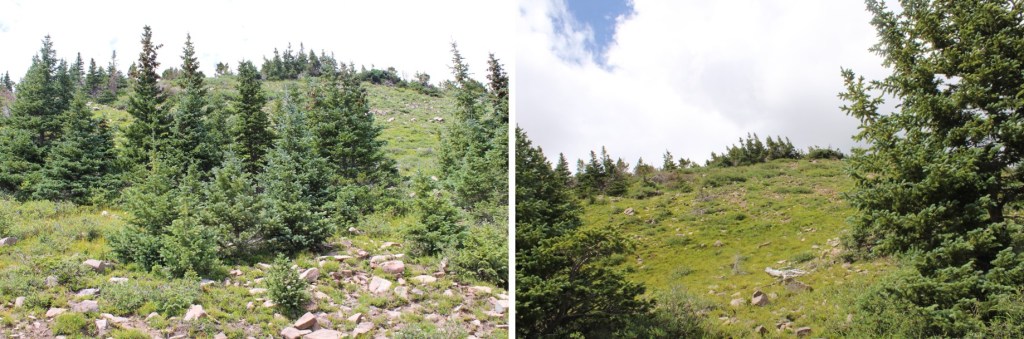
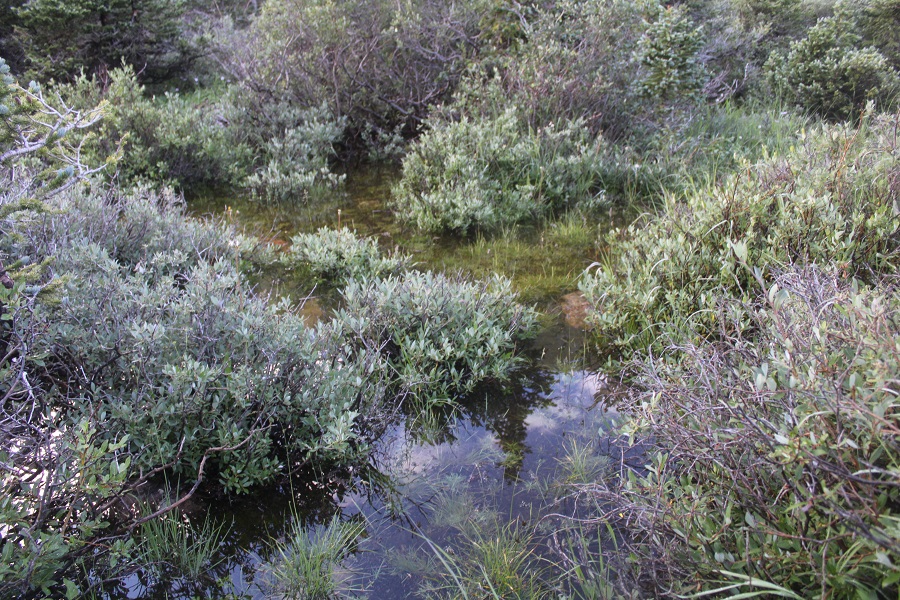
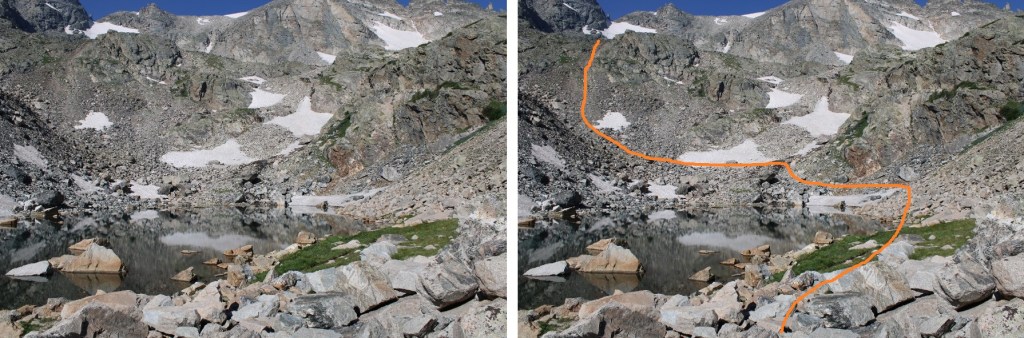
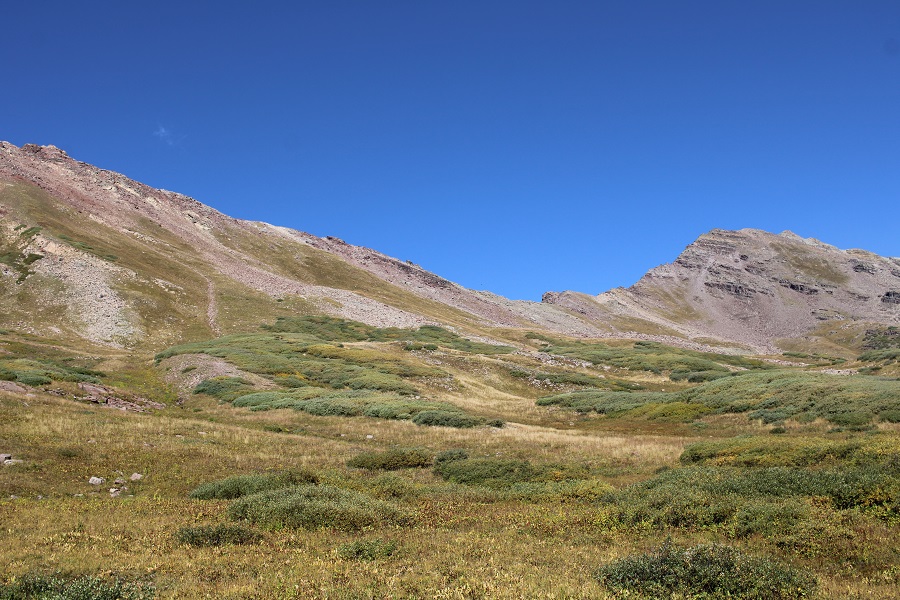
I kept heading north, skirting a small pond.  This was all class 2

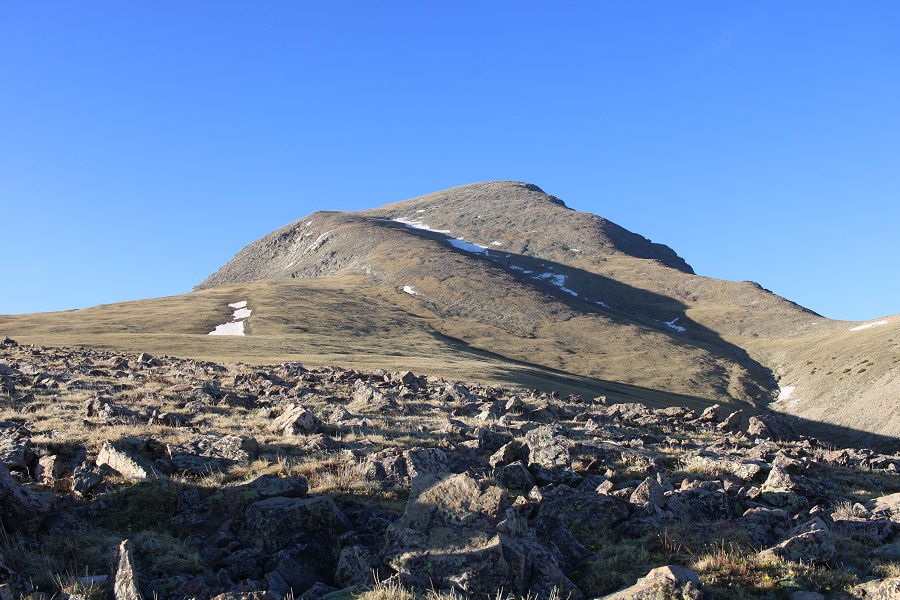
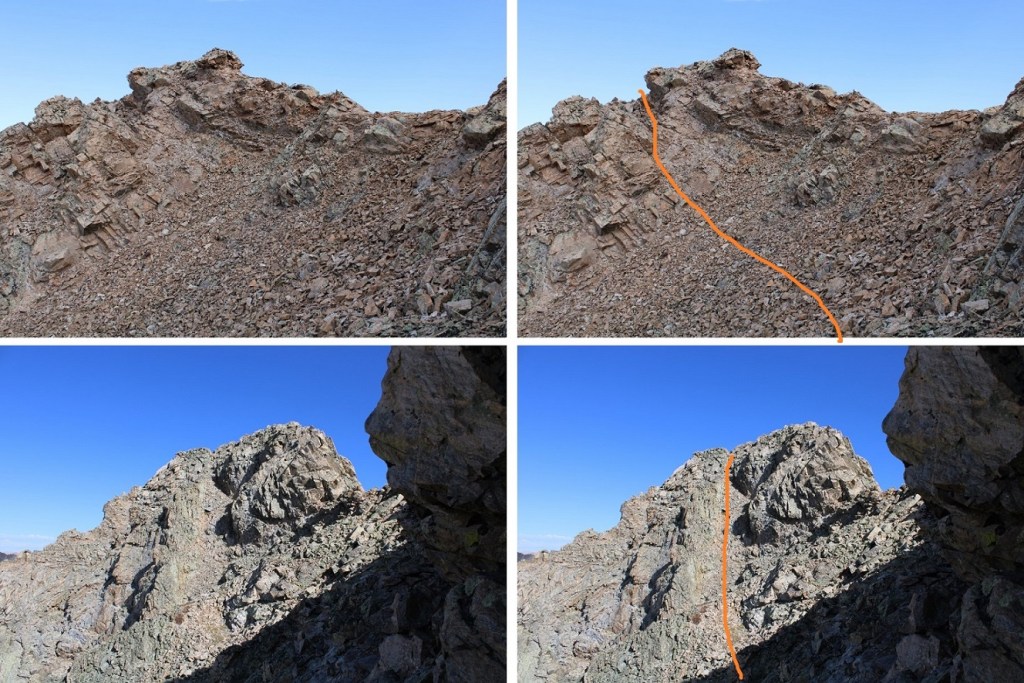
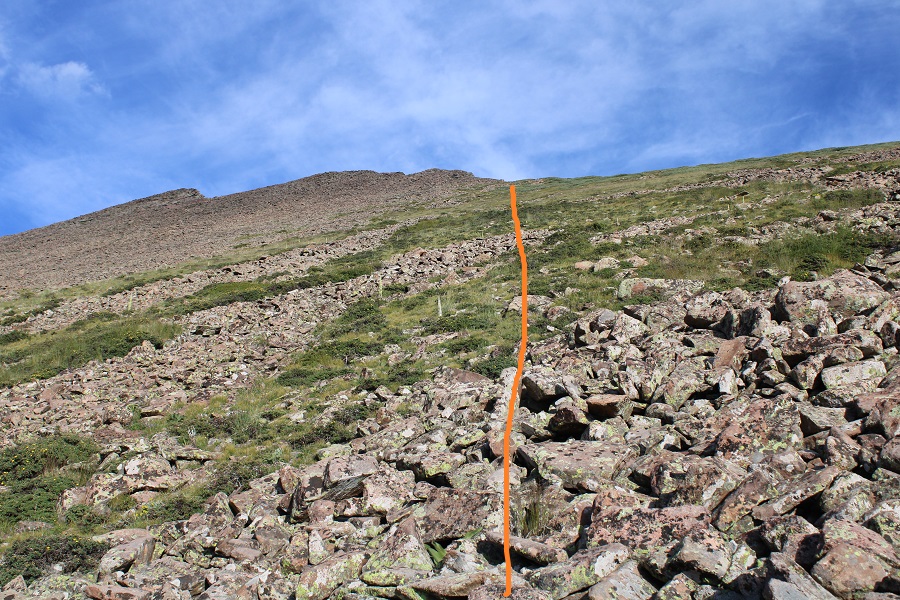
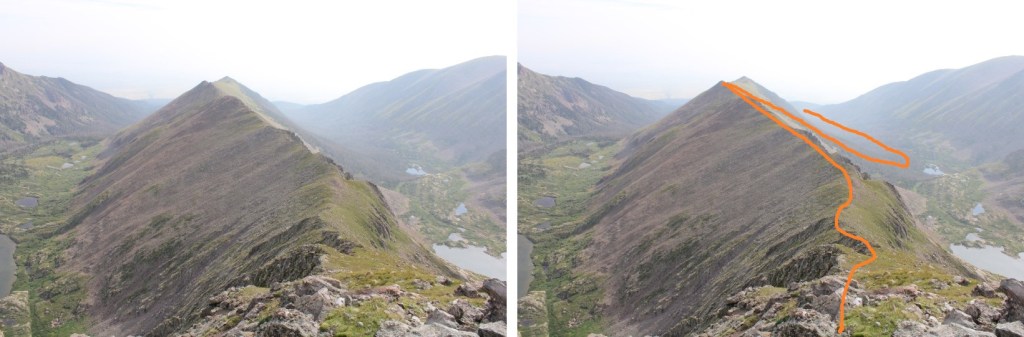
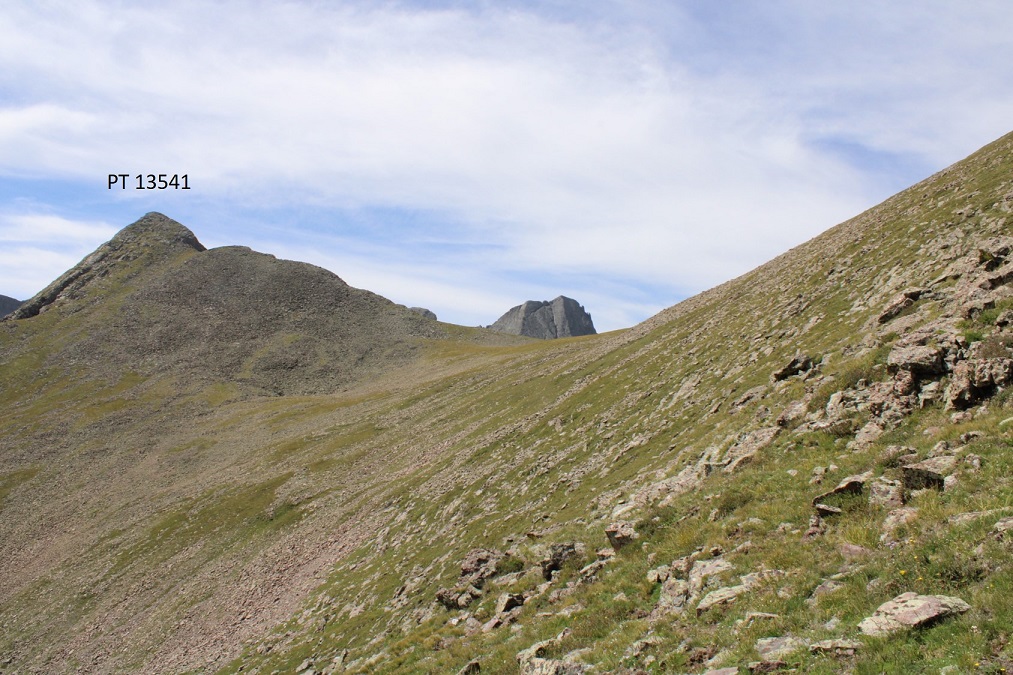
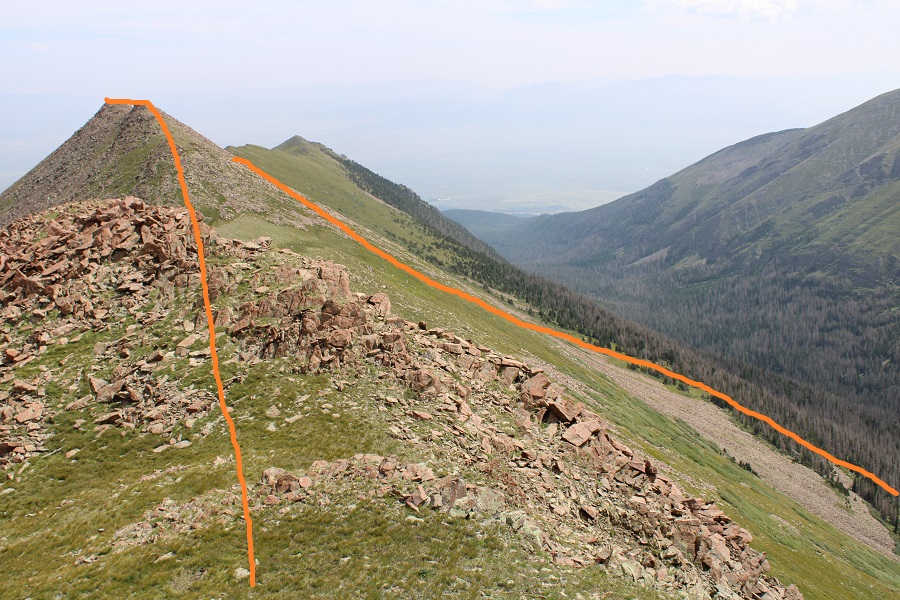
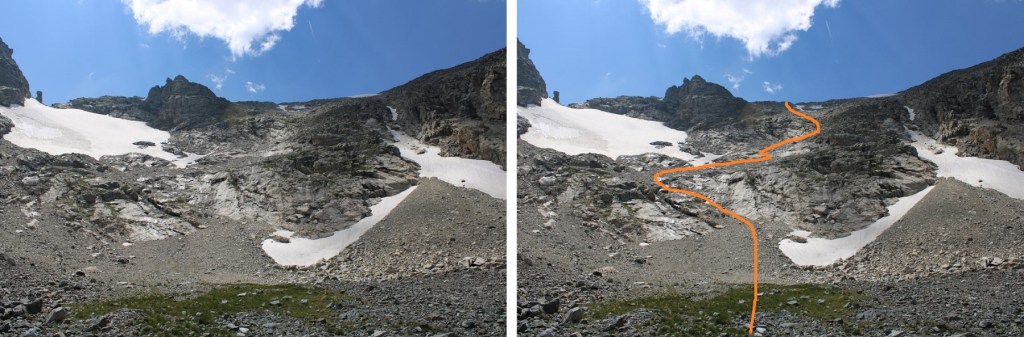
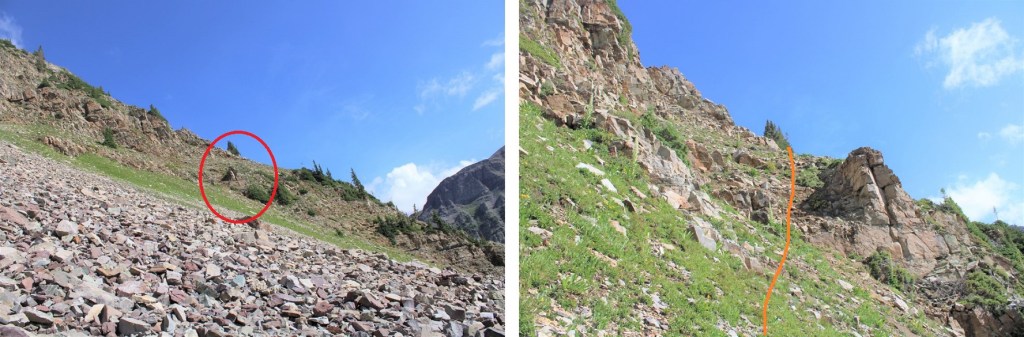
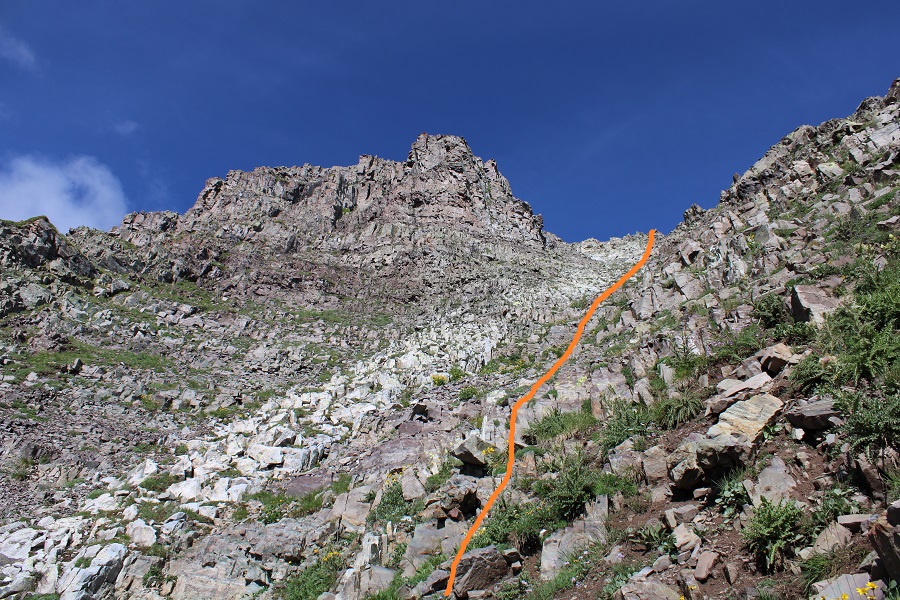
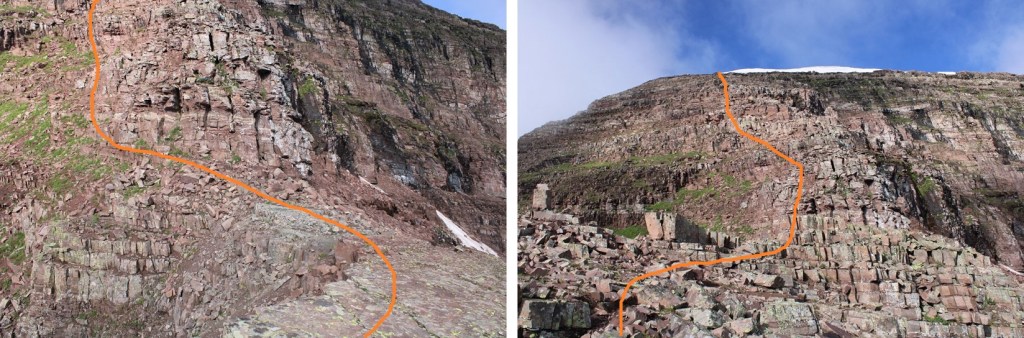
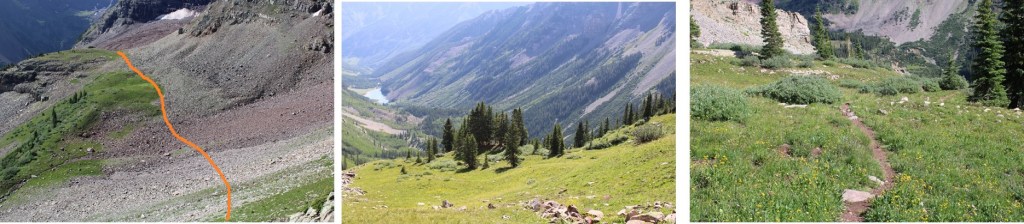
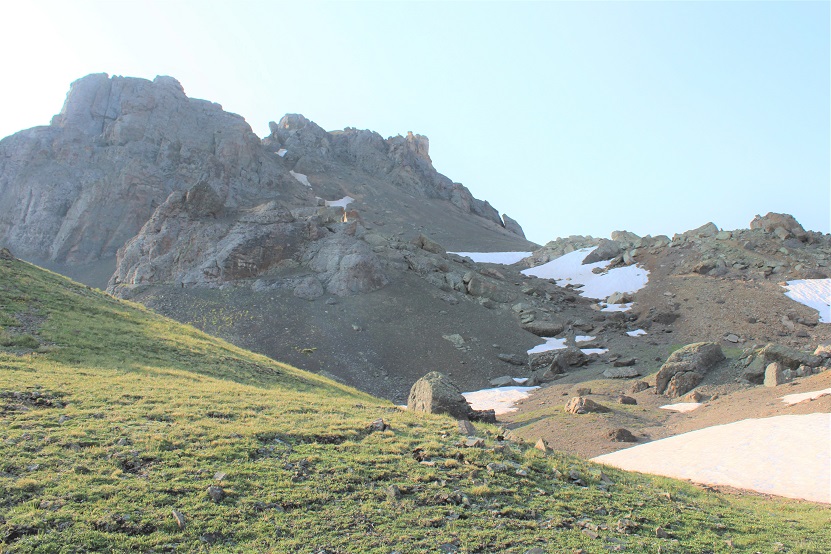
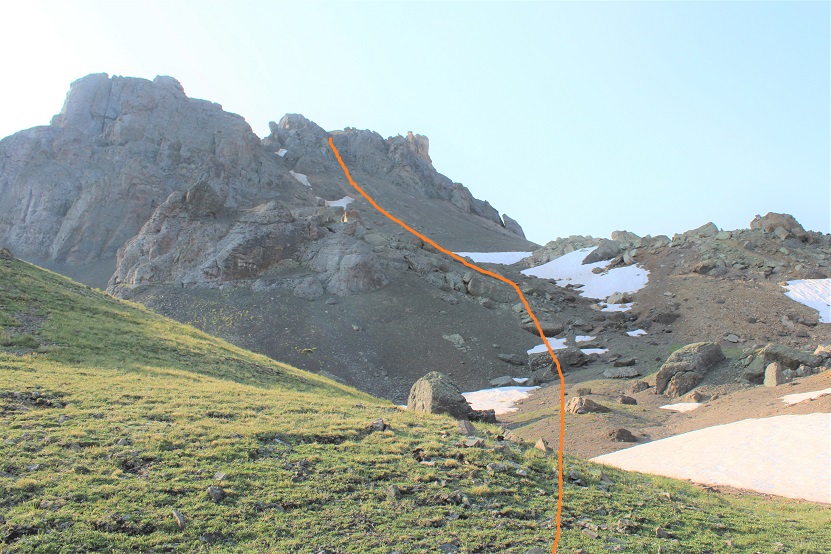
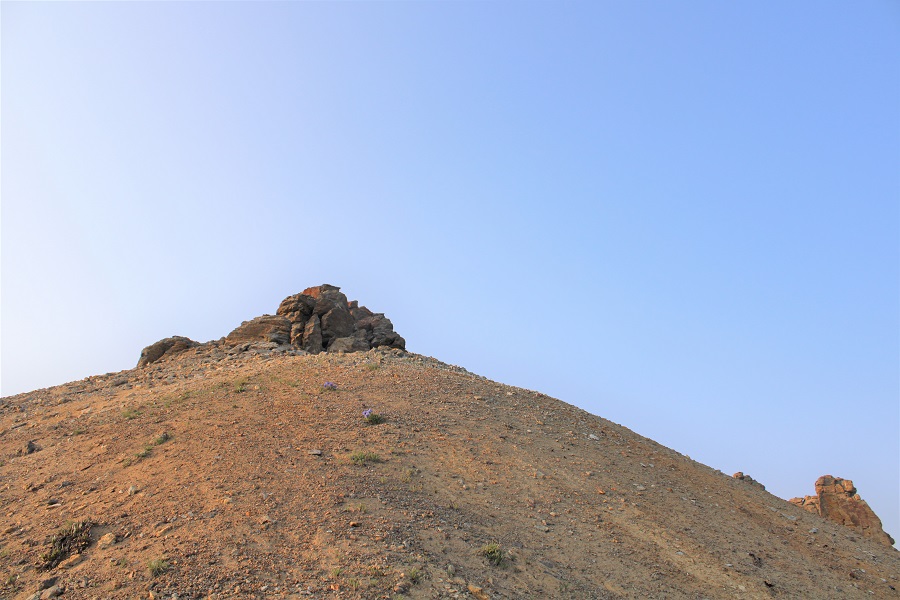
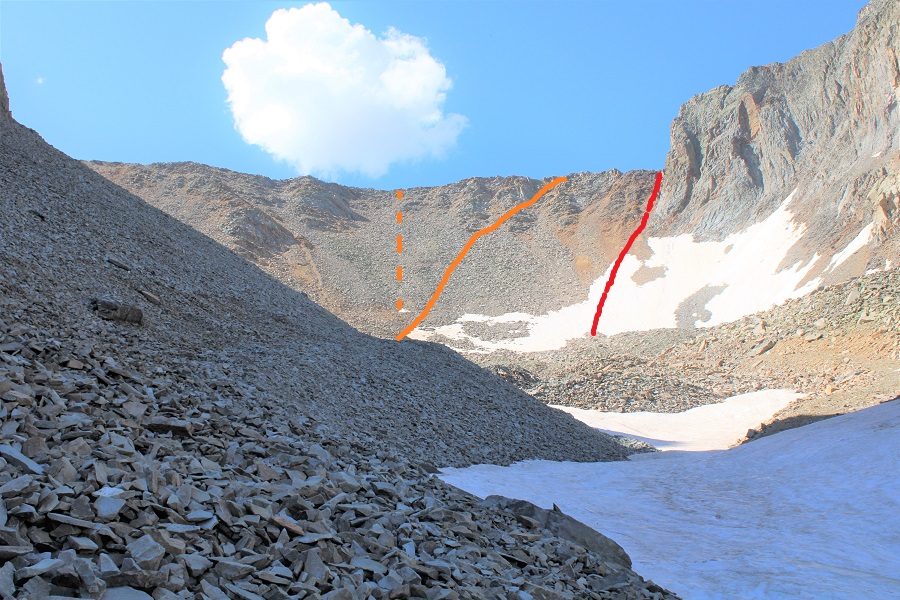
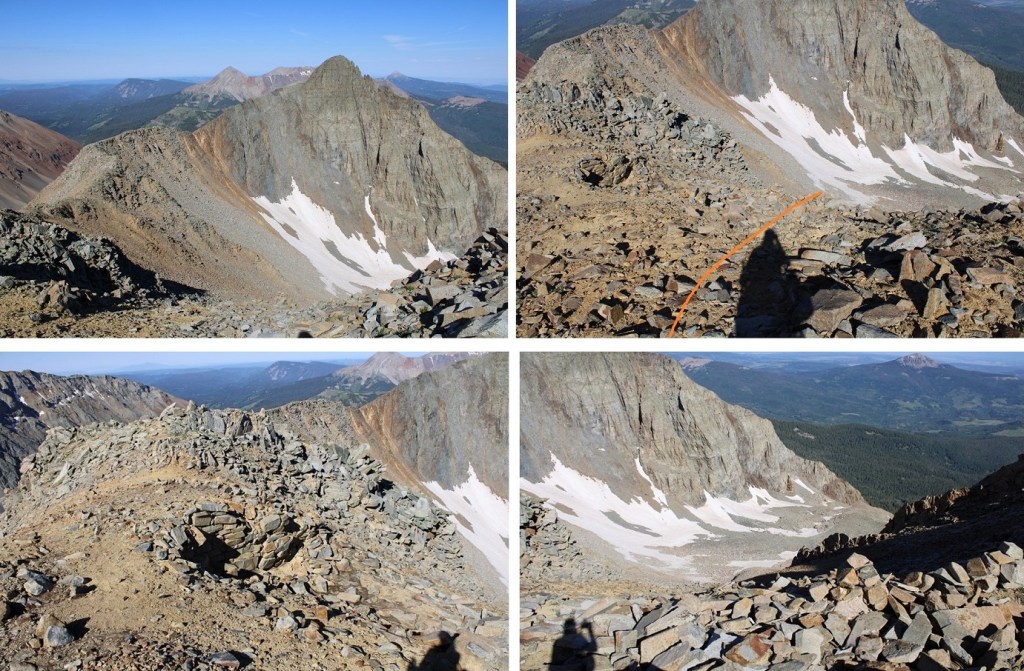
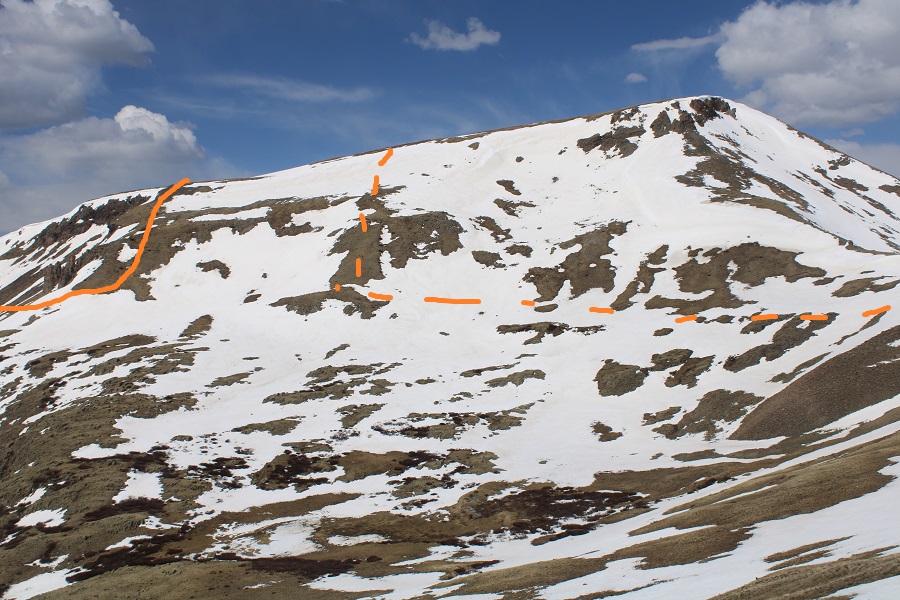
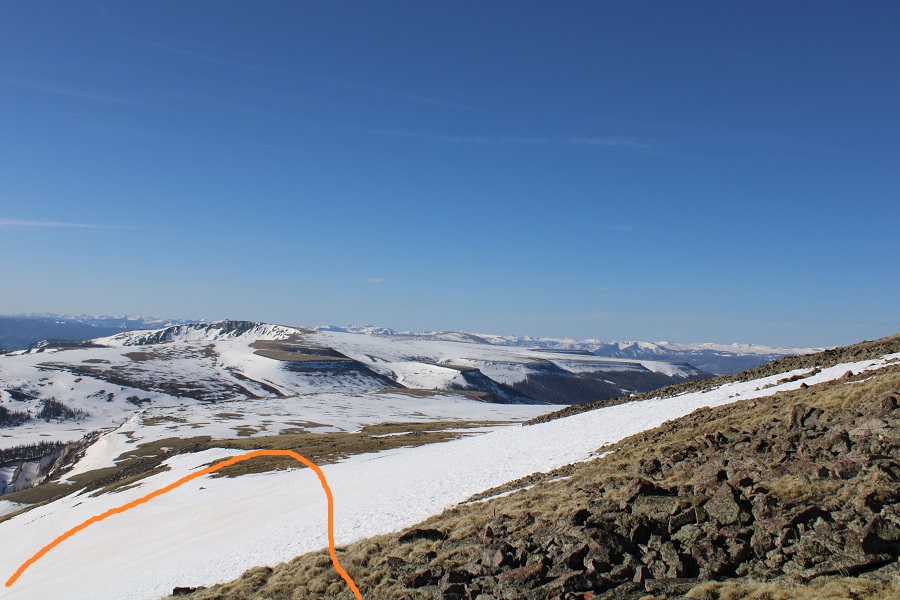
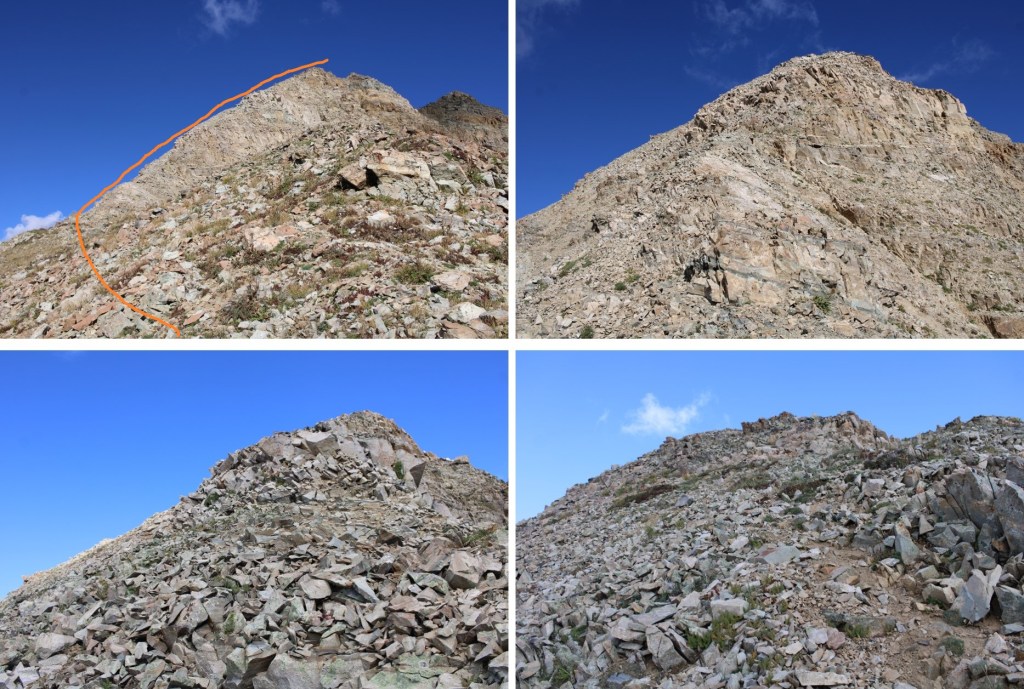
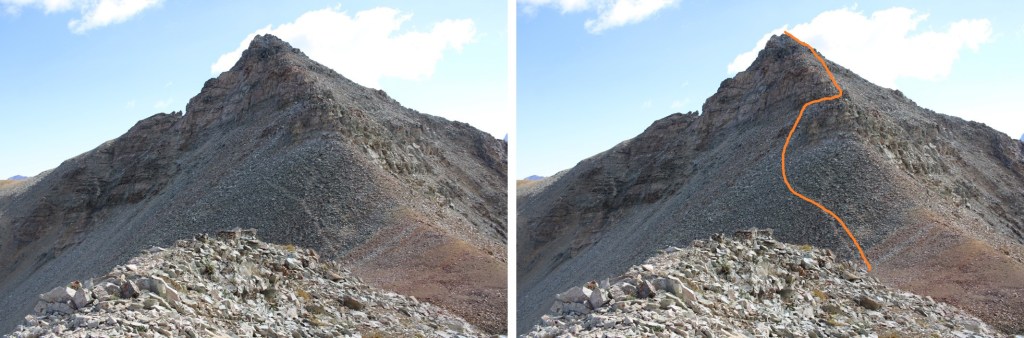
My goal was to gain this ridge.  This was my route (still class 2)

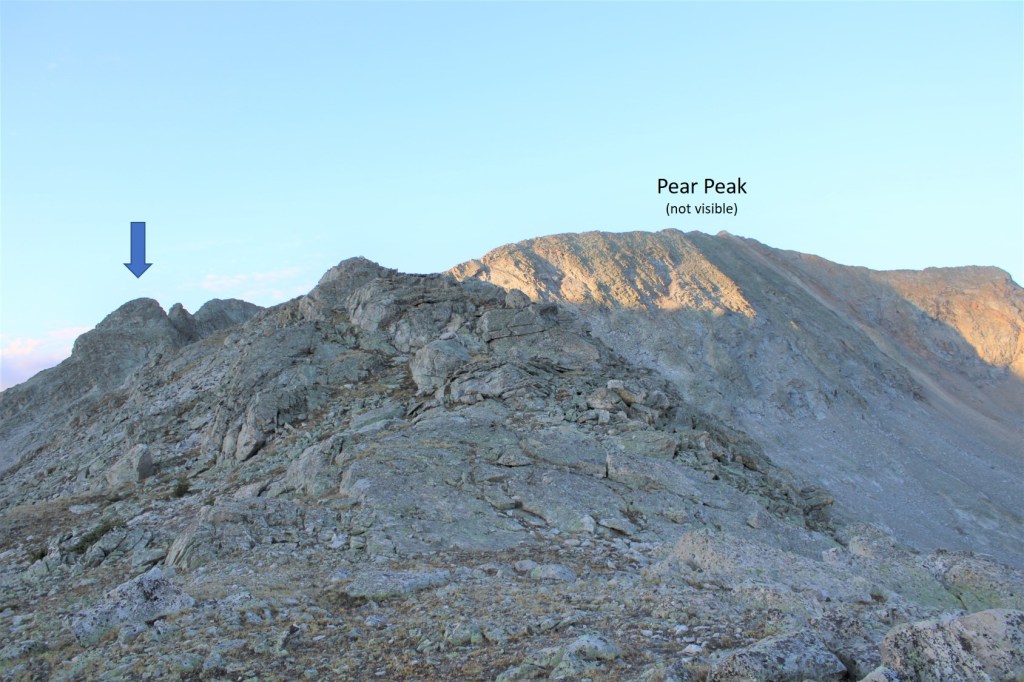
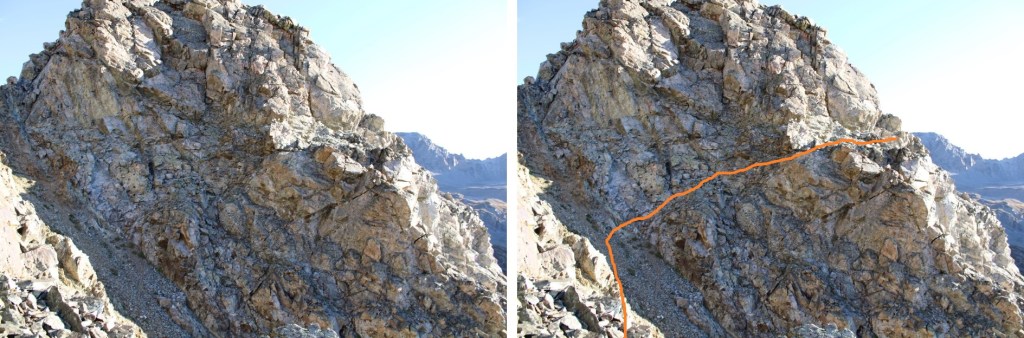
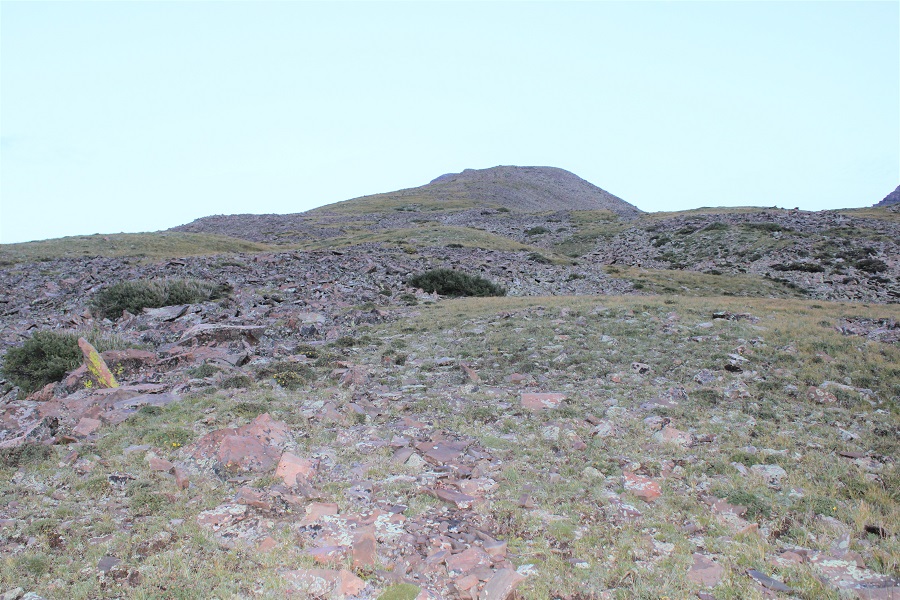
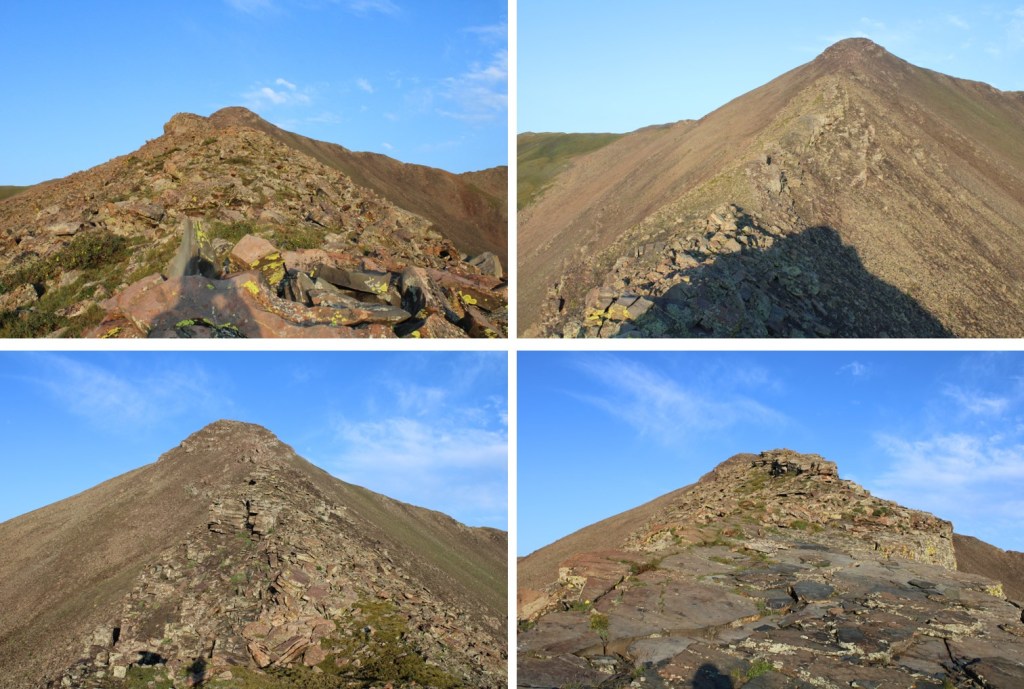
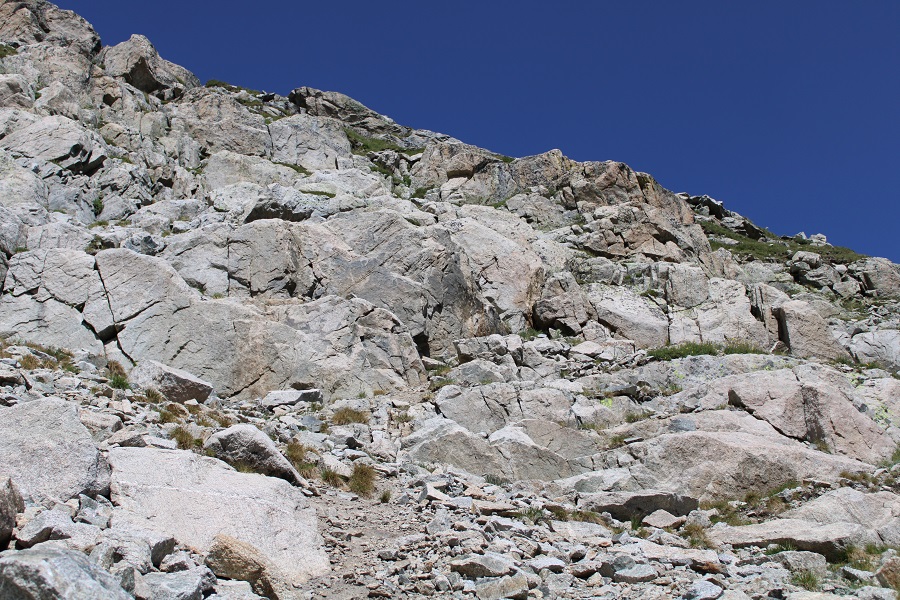
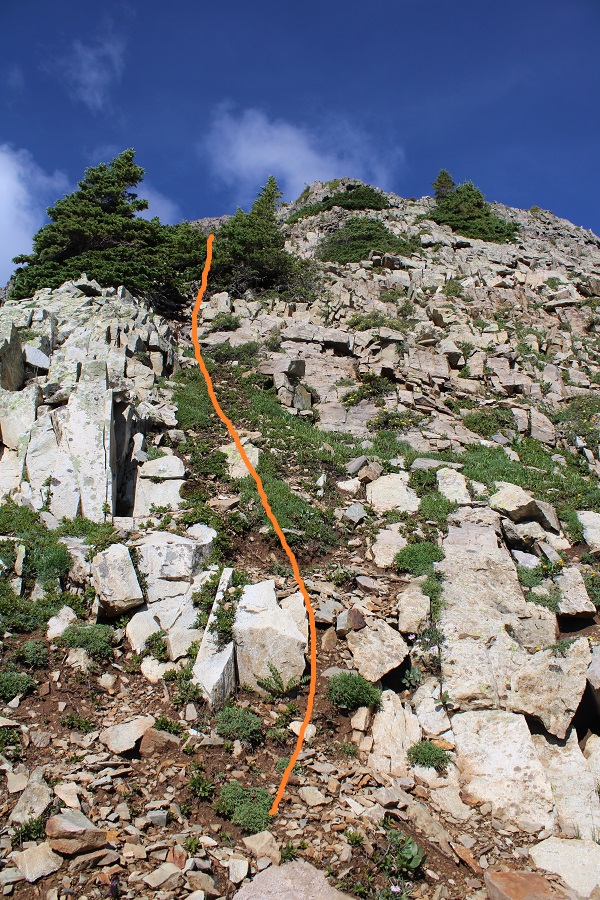
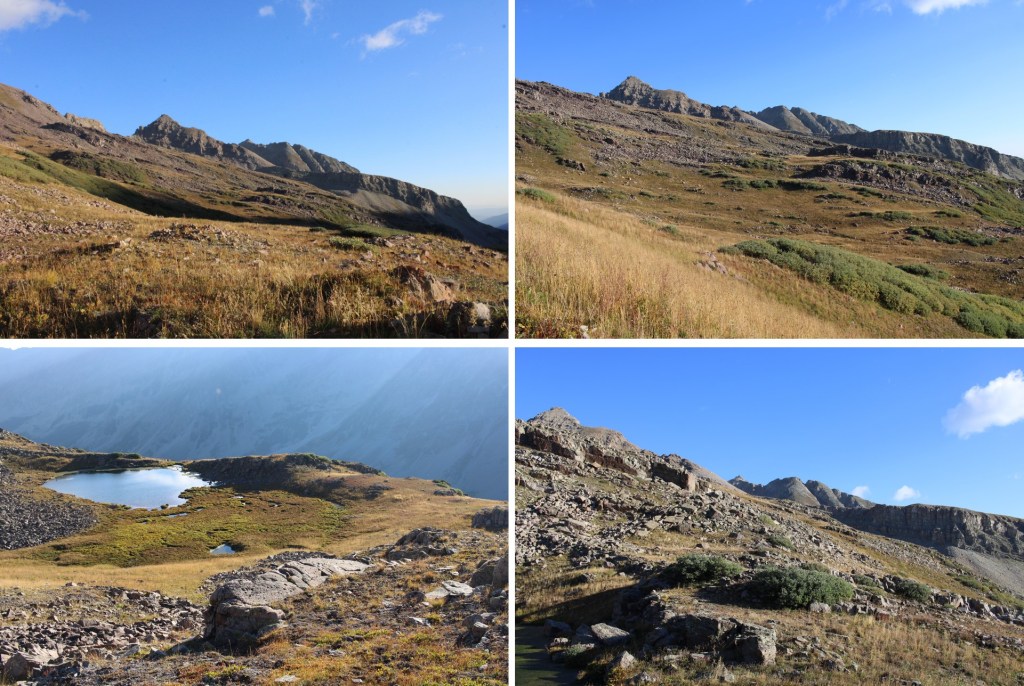
Once on the ridge I placed a large cairn, turned left, and headed west up the ridge

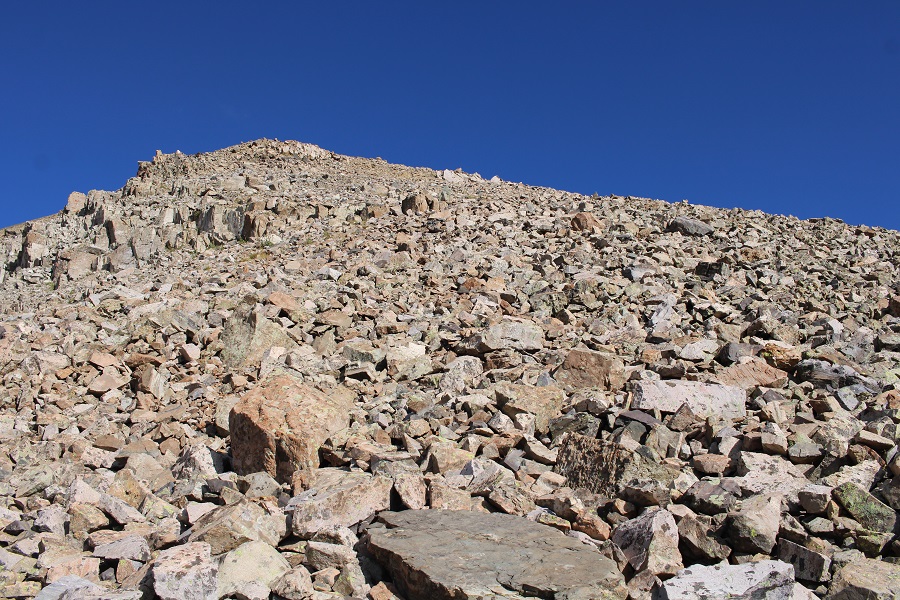
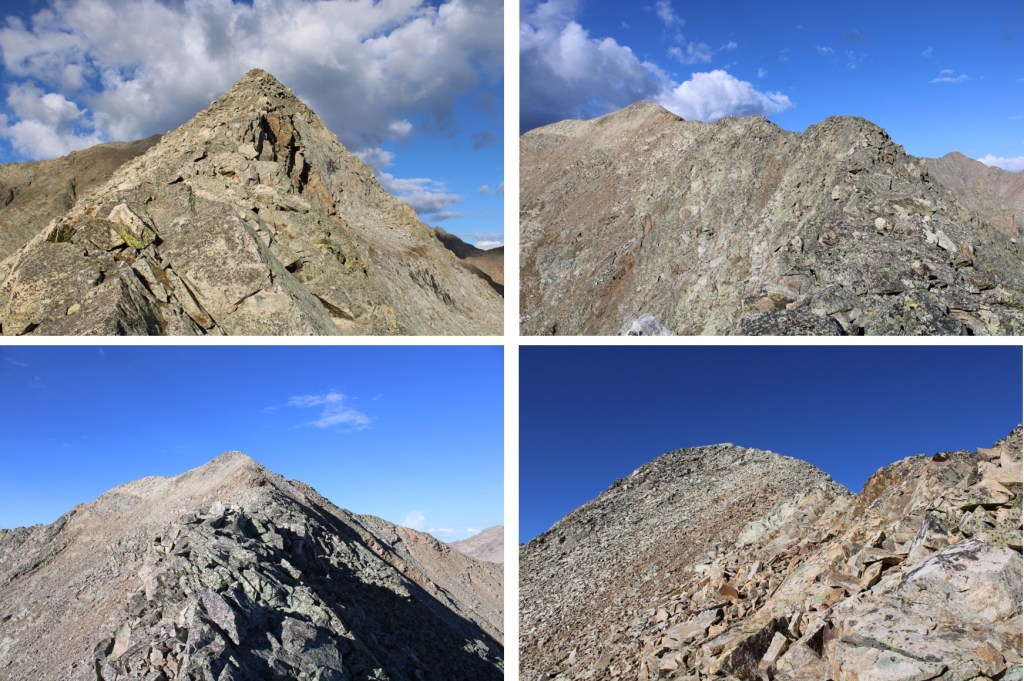
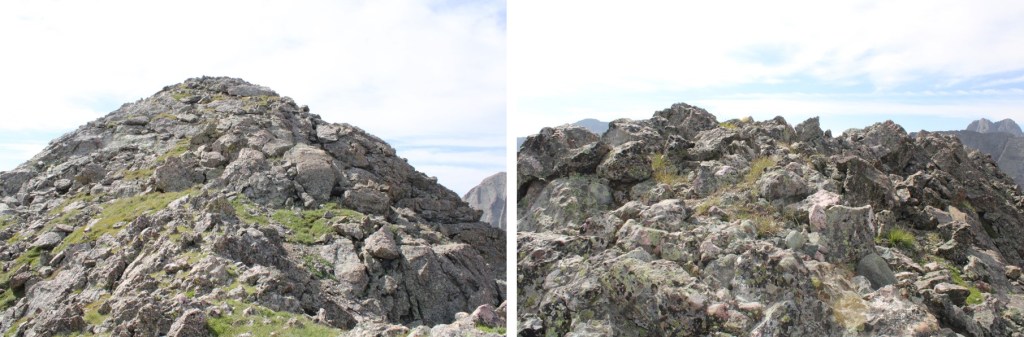
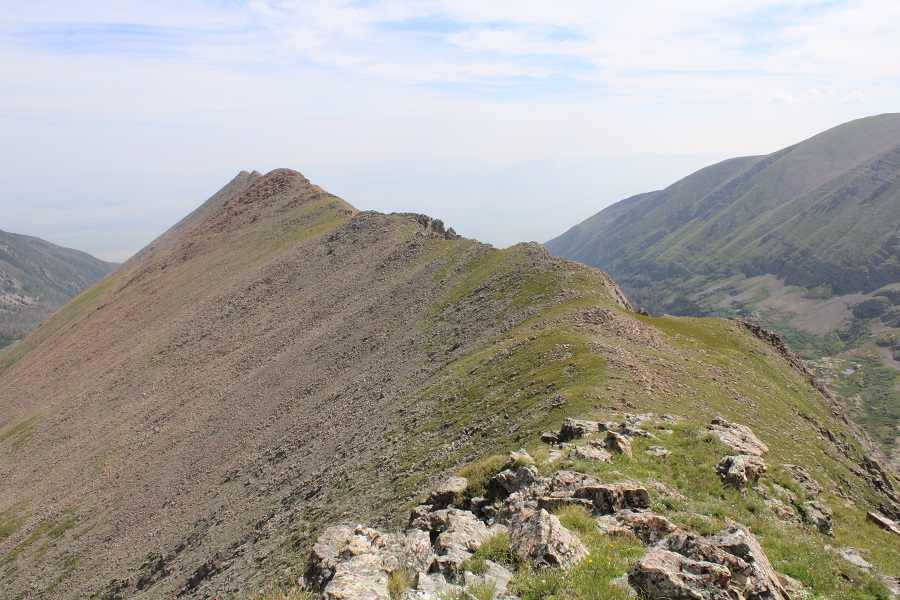
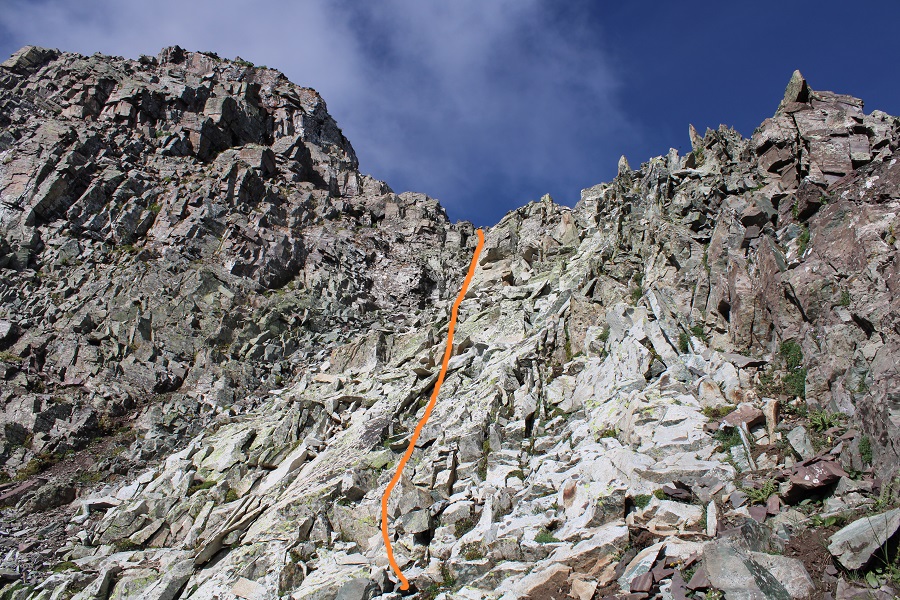
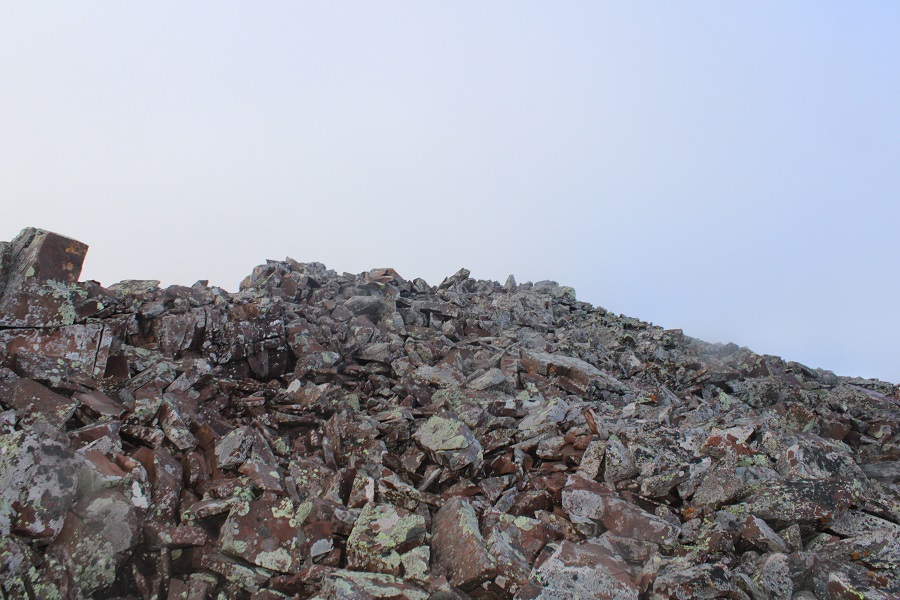
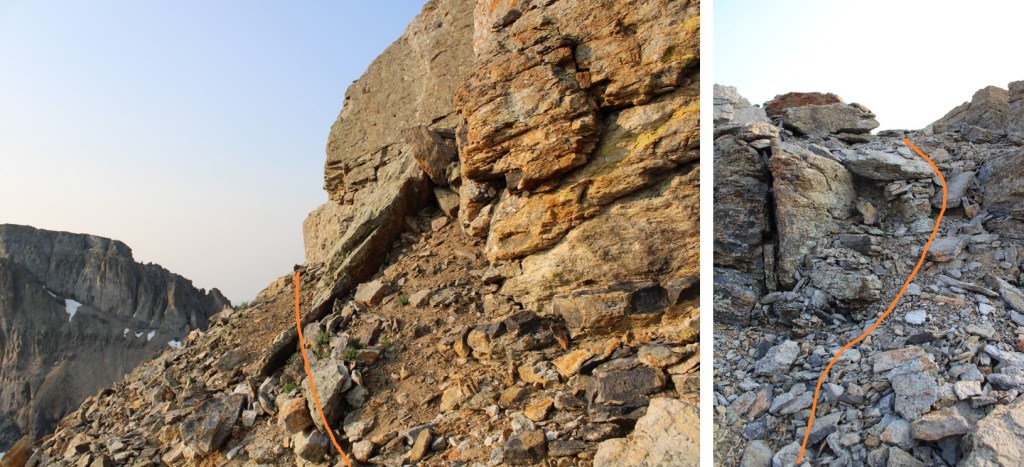
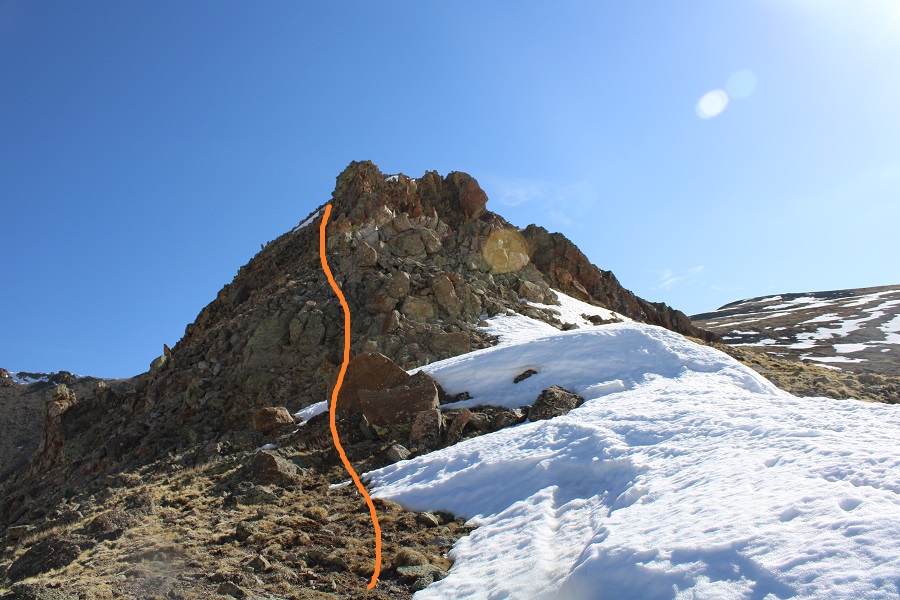
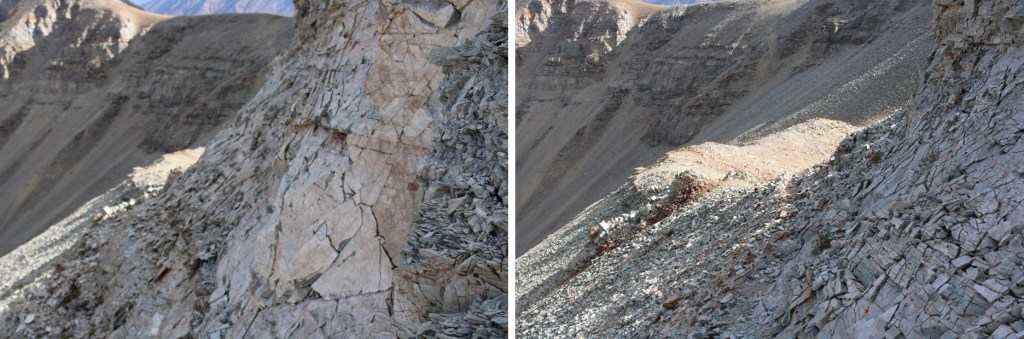
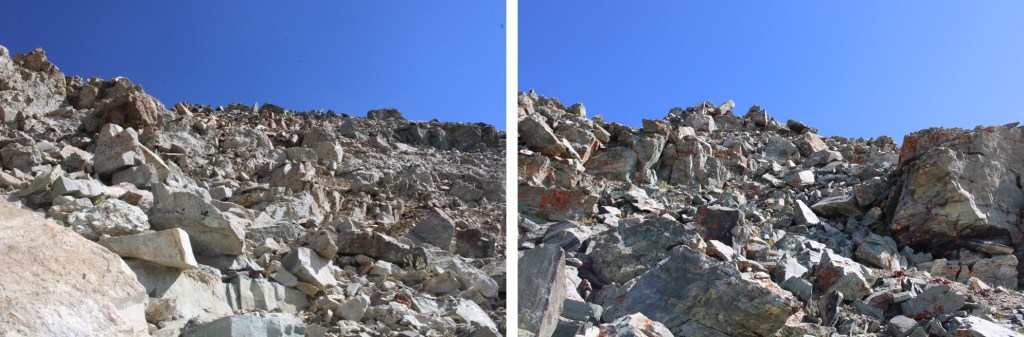
The terrain quickly narrowed and became class 3, full of chossy, loose rock. It never got more difficult than class 3, but the terrain was sketchy.  I was able to stay directly on the ridge.

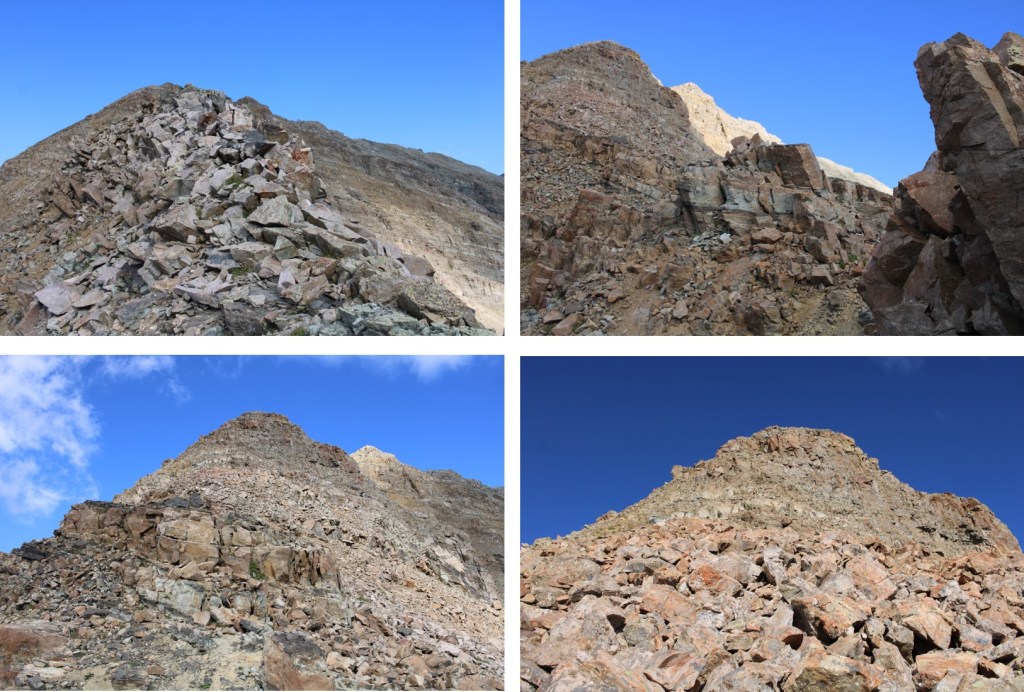
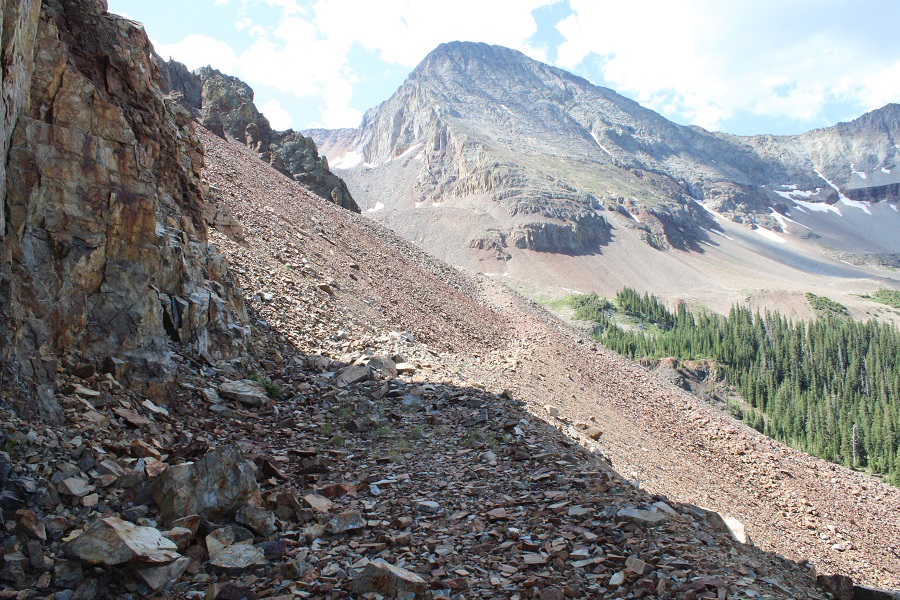
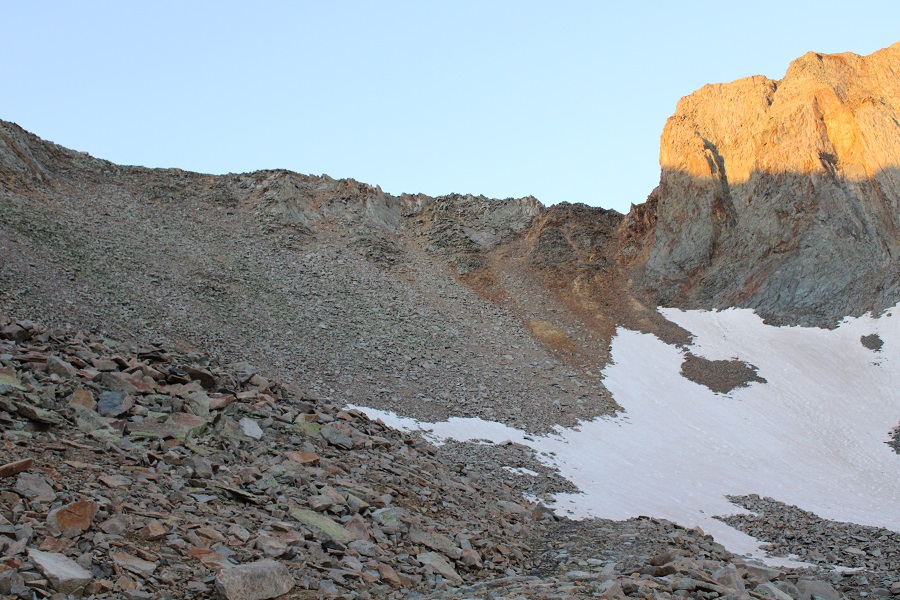
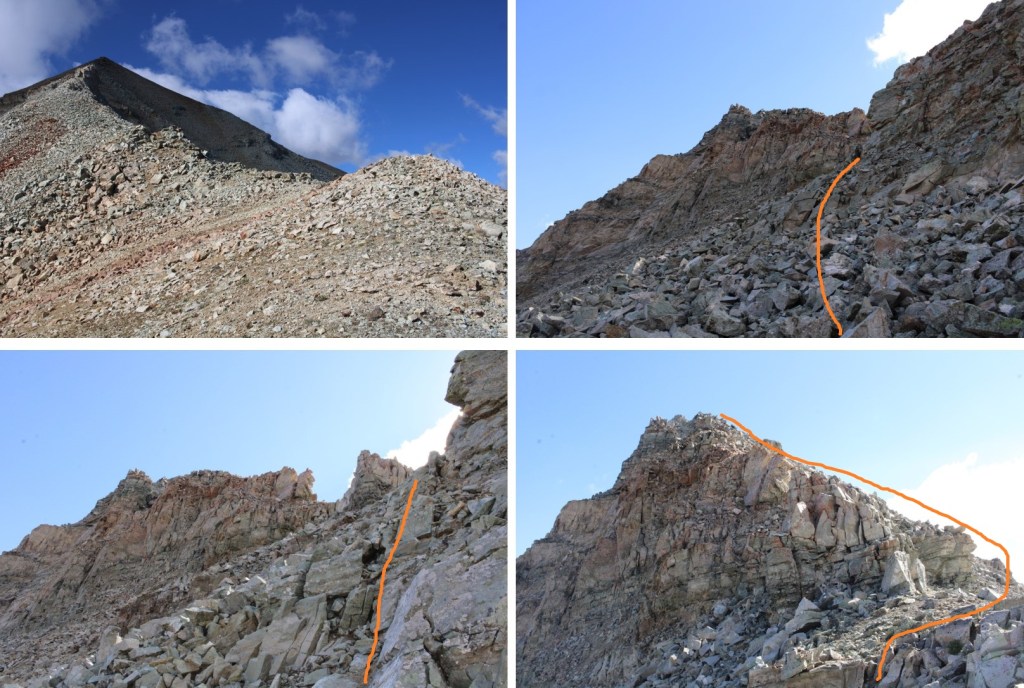
As the ridge rose, it curved, and I stayed more to the left

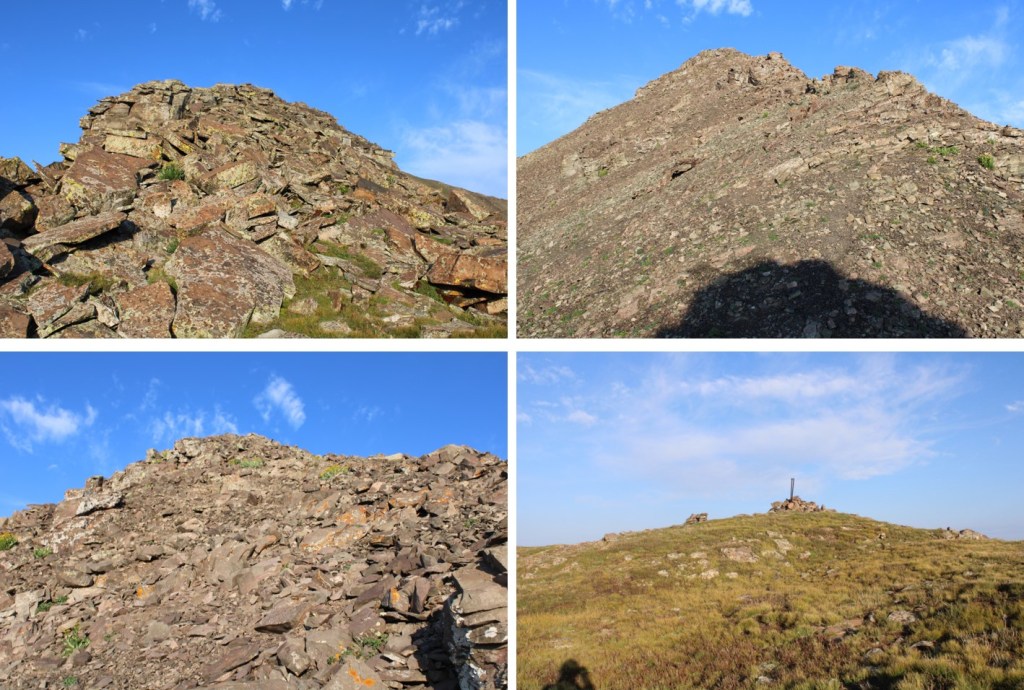
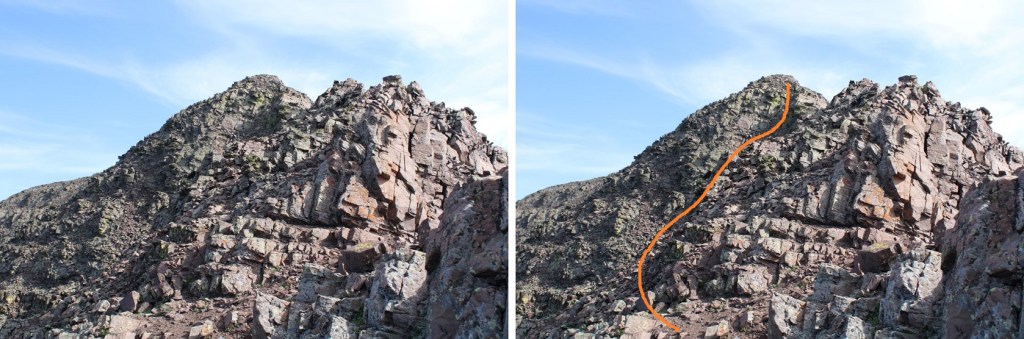
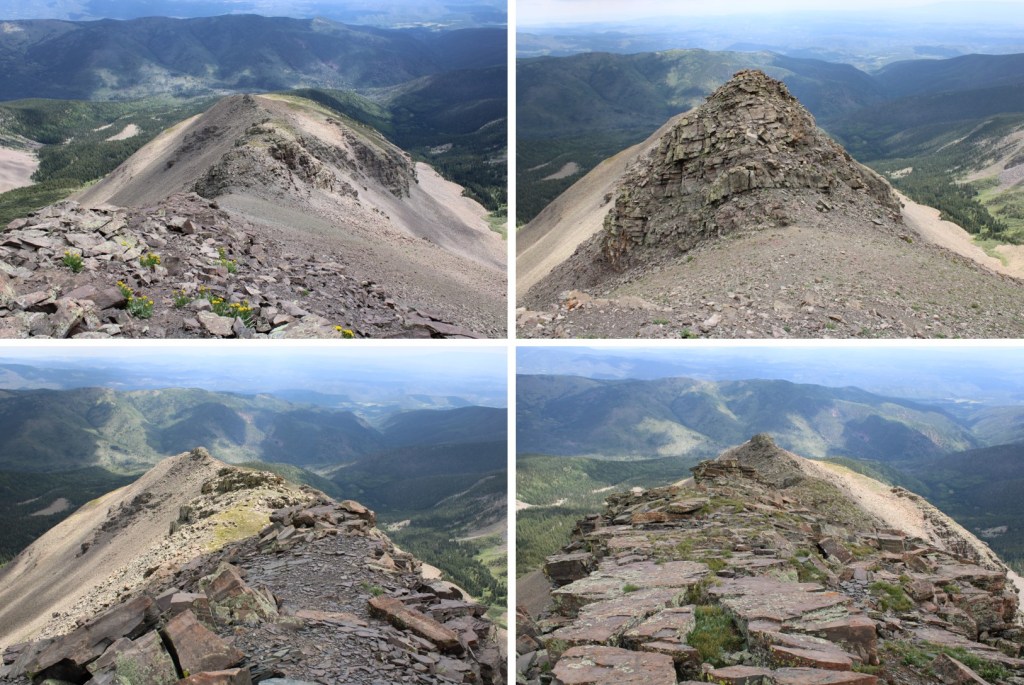
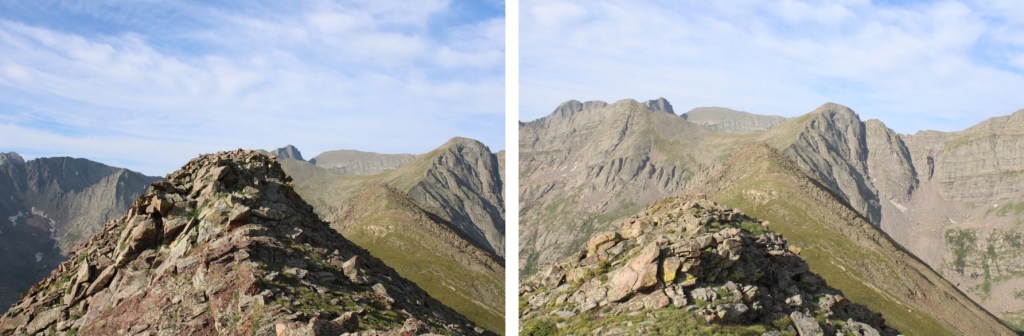
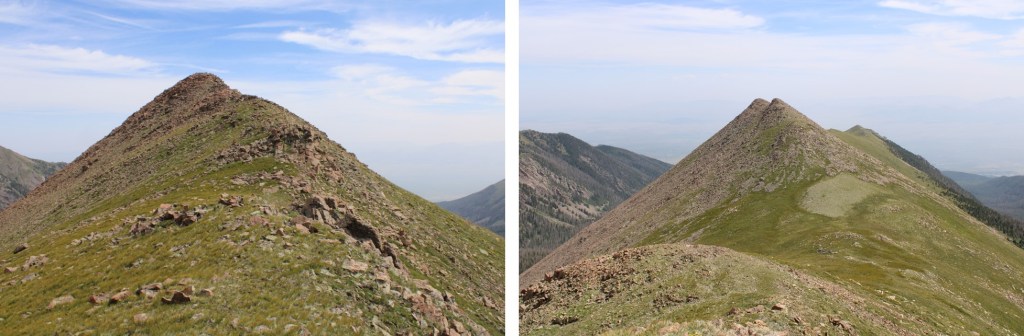
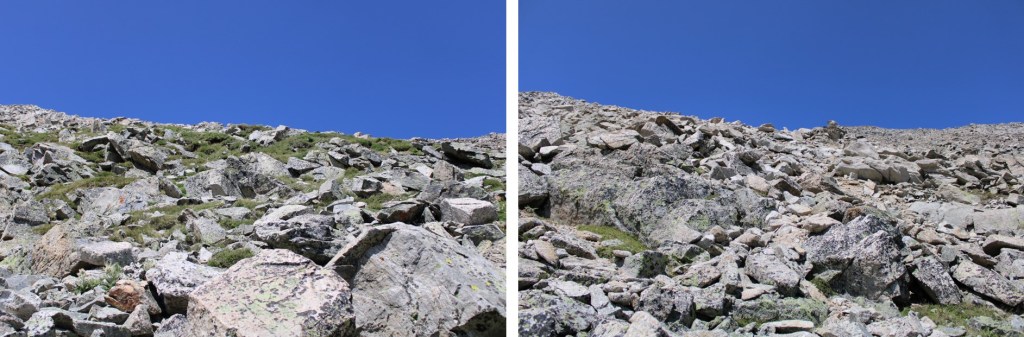
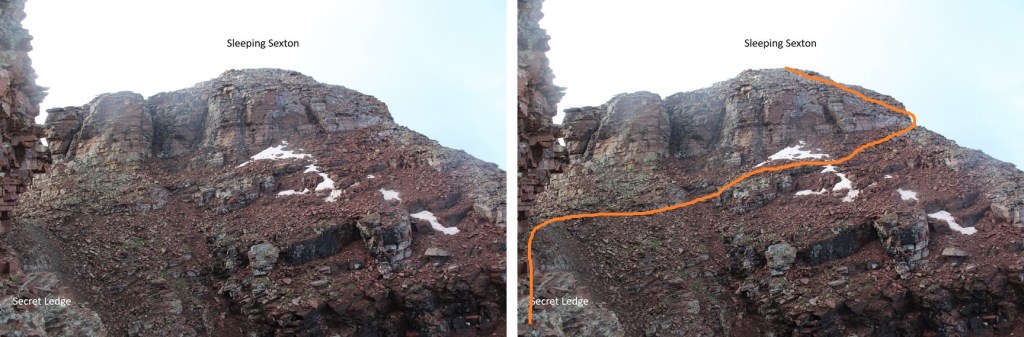
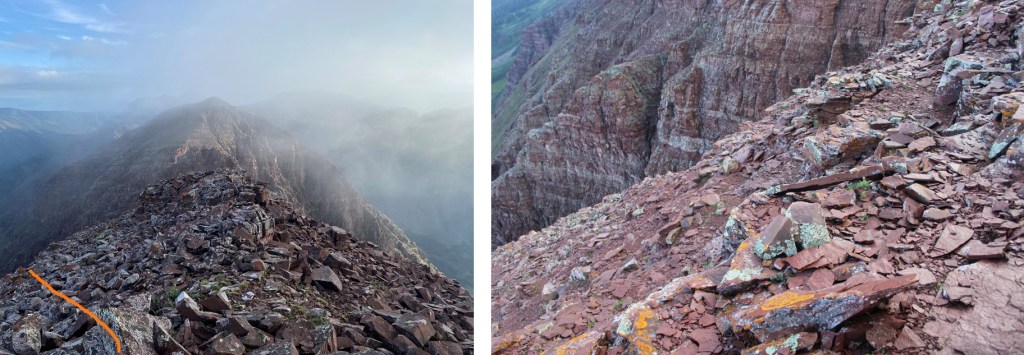
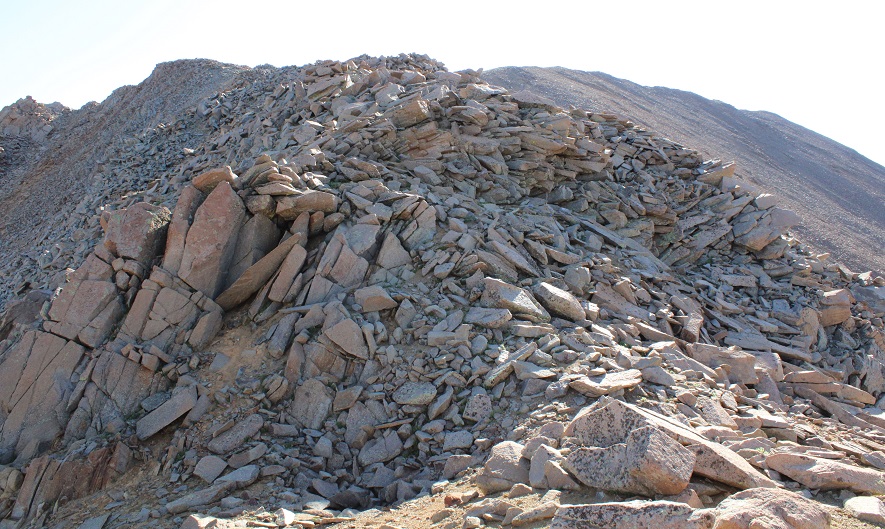
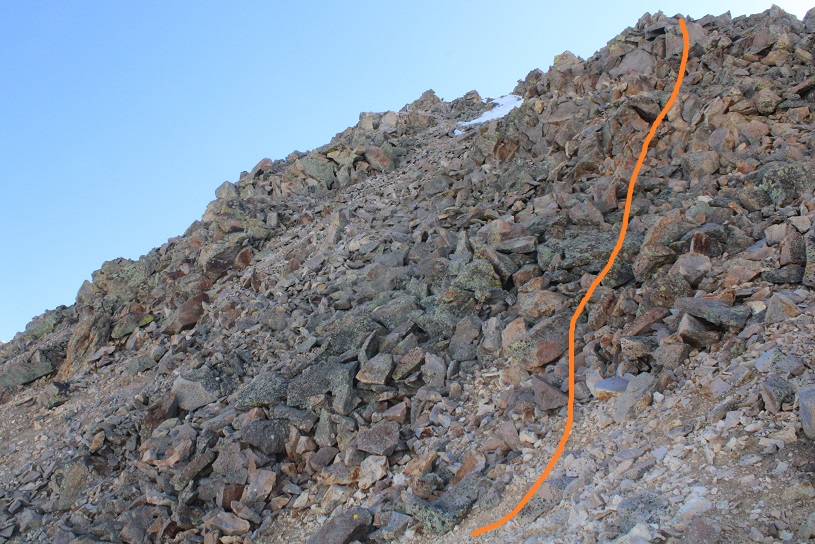
I topped out, turned the corner, and saw more class 3 ridge work as I now headed northwest

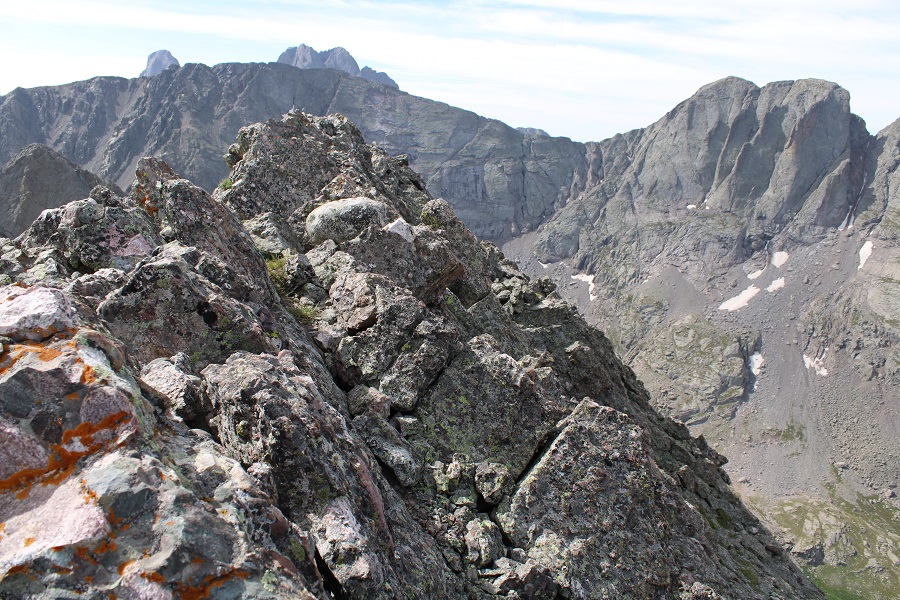
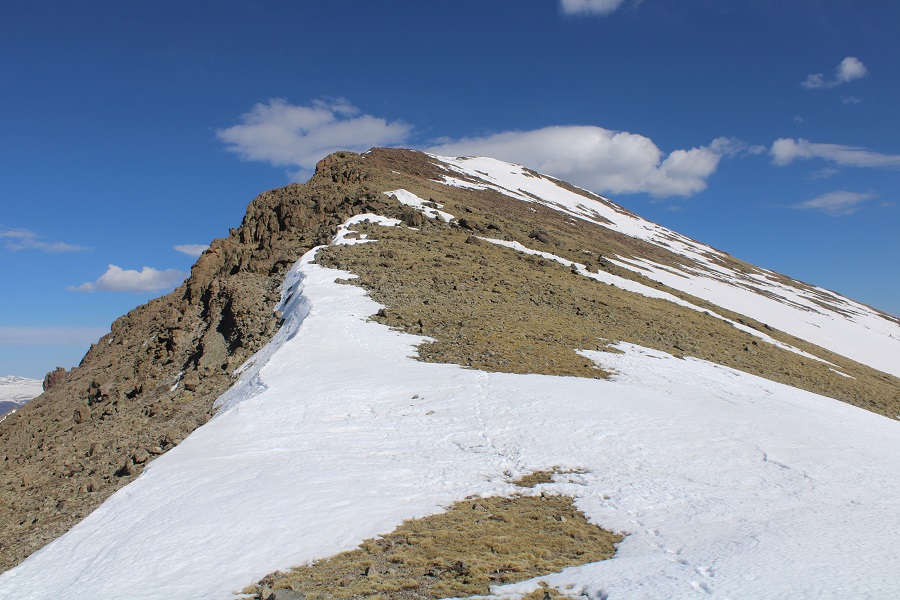
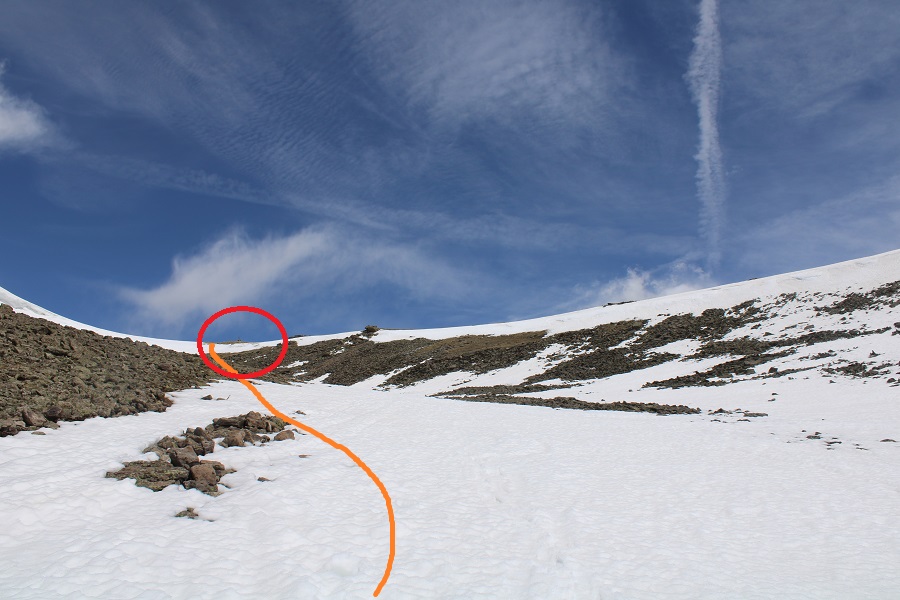
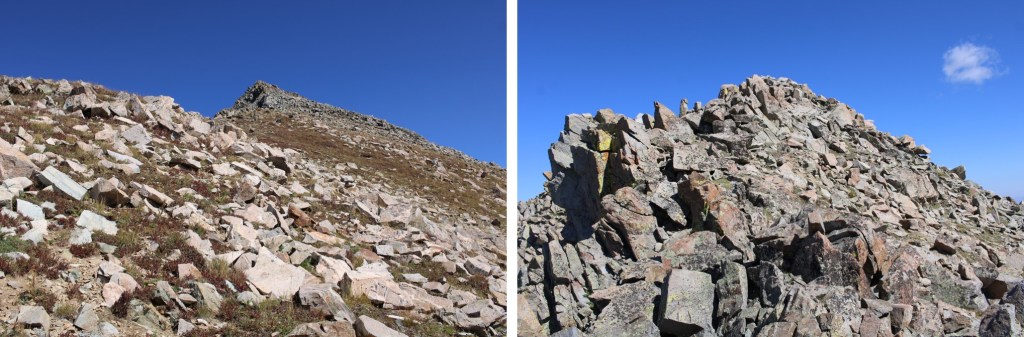
I lost a little bit of elevation, then followed the ridge to the summit

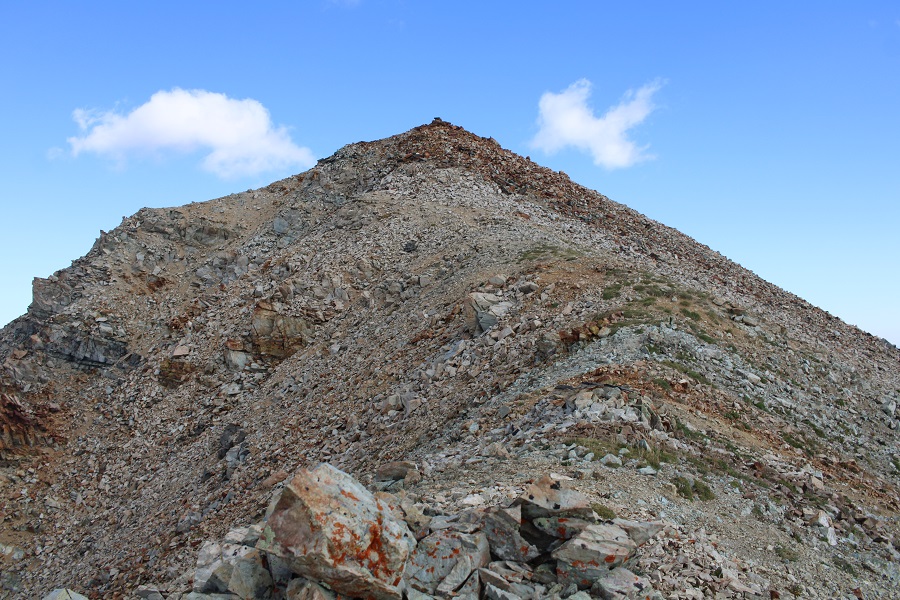
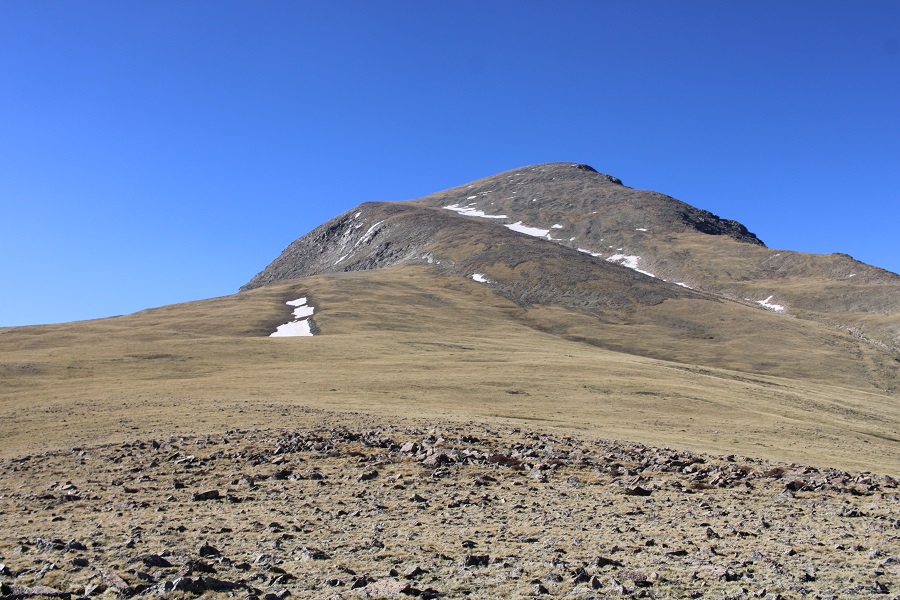
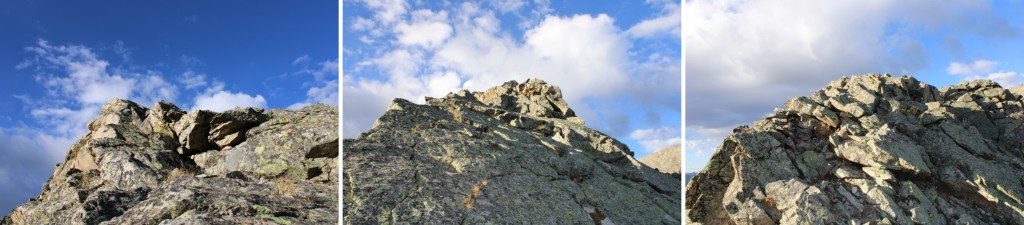
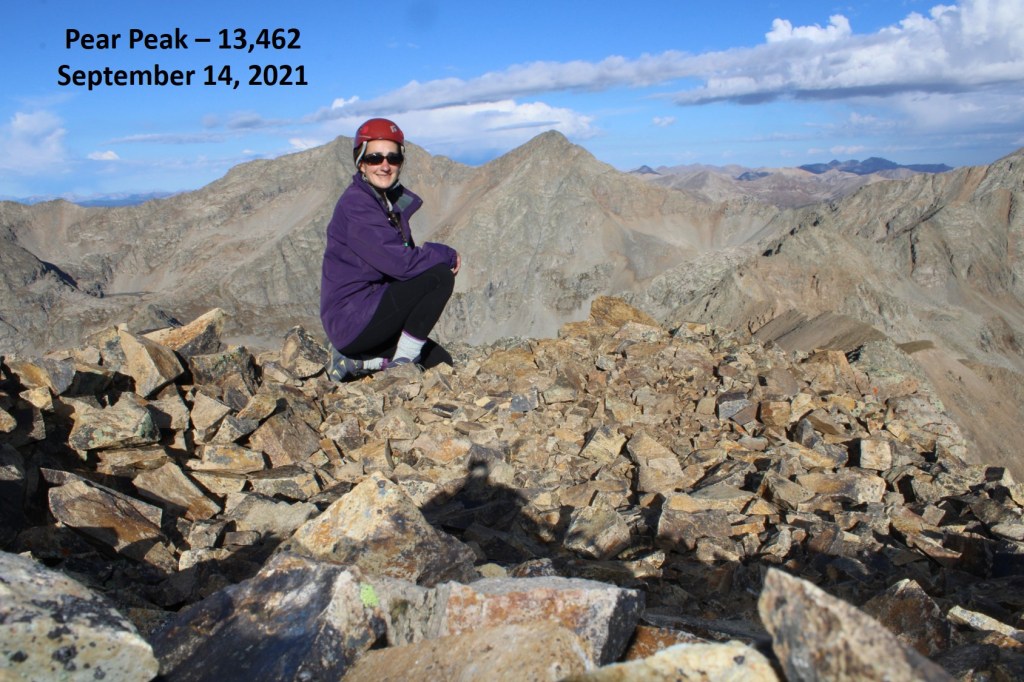
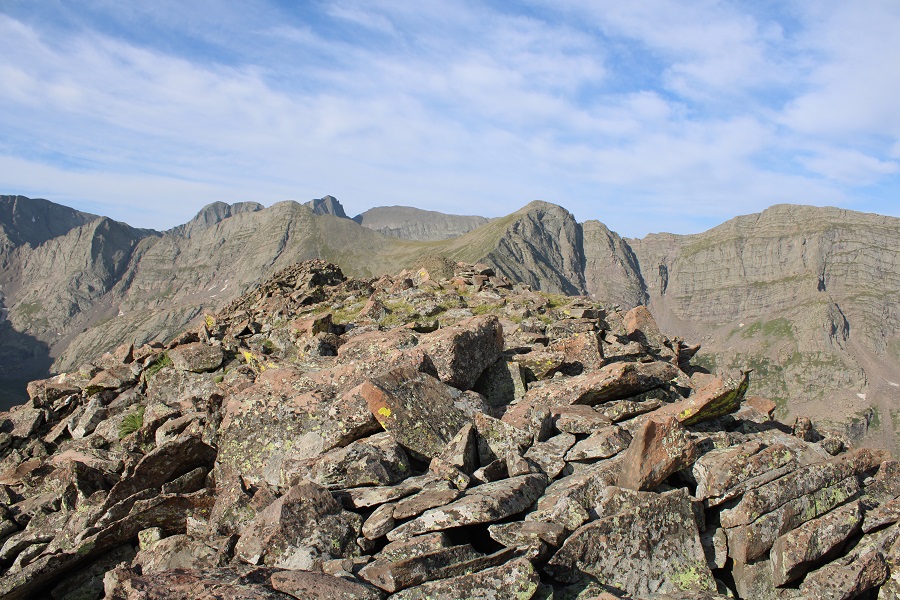
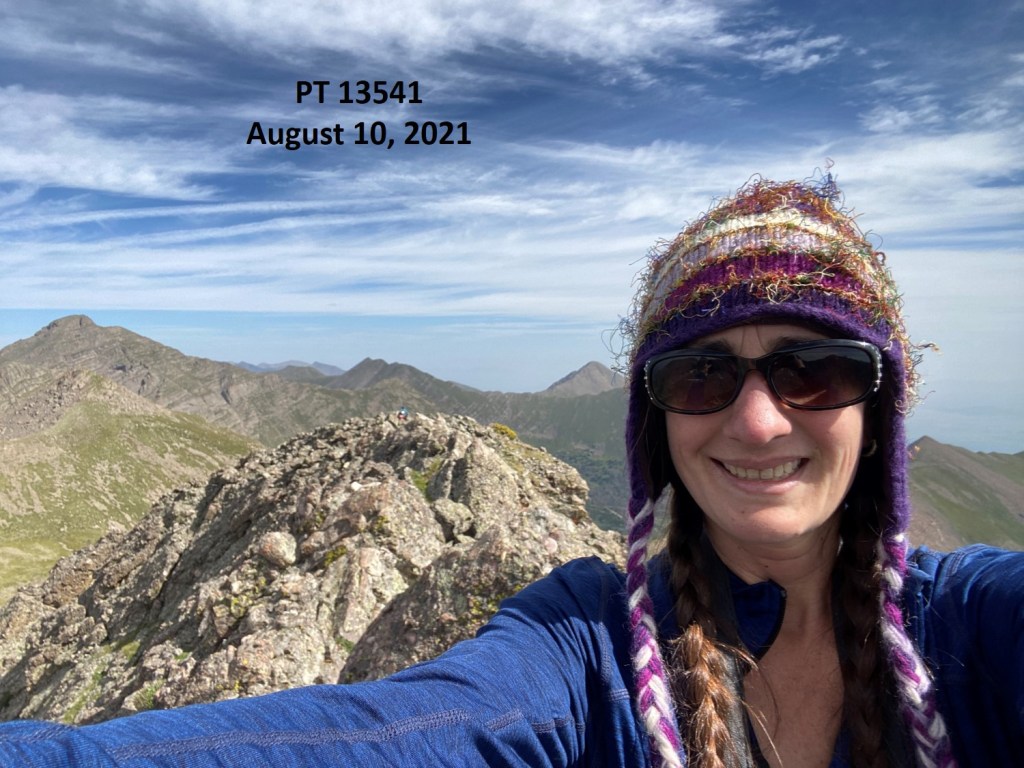
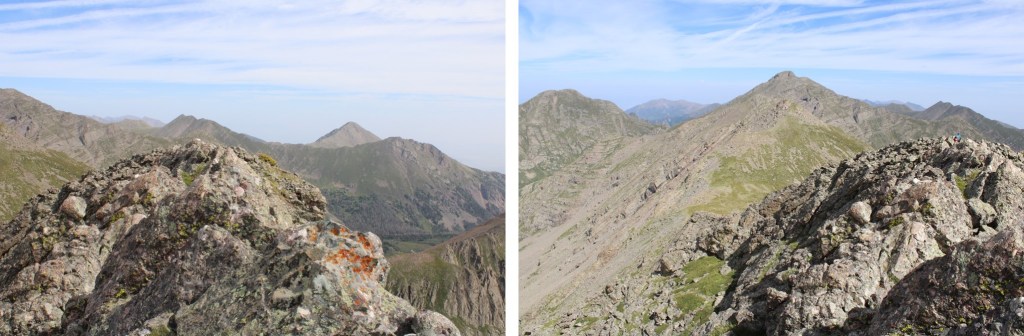
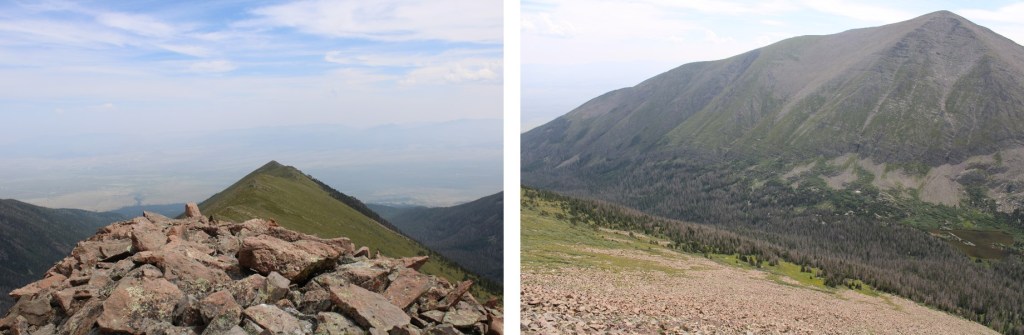
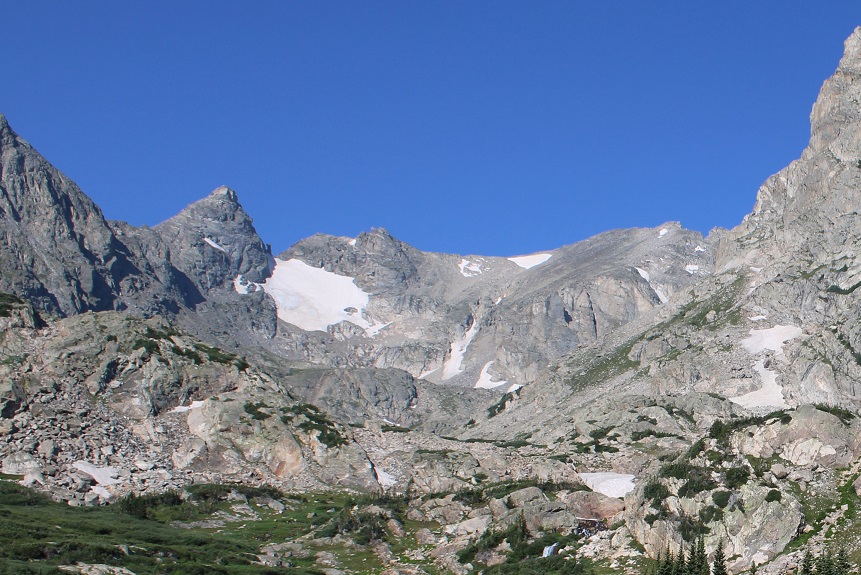
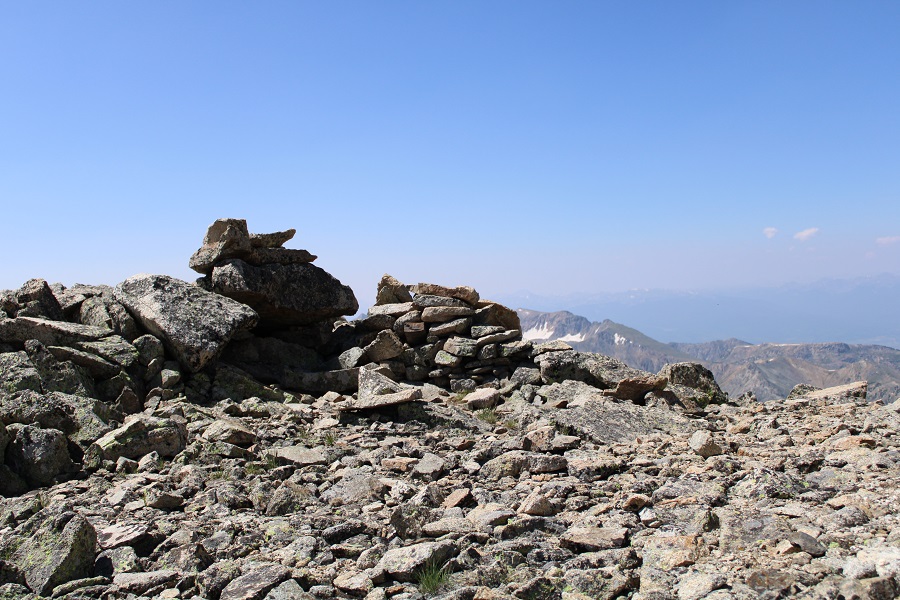
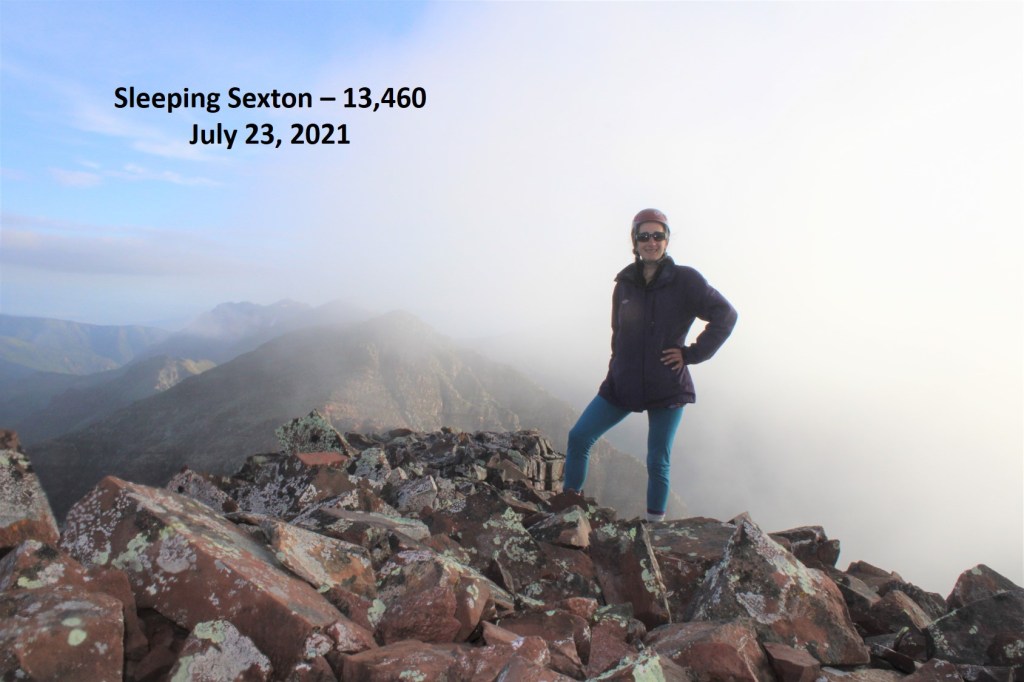
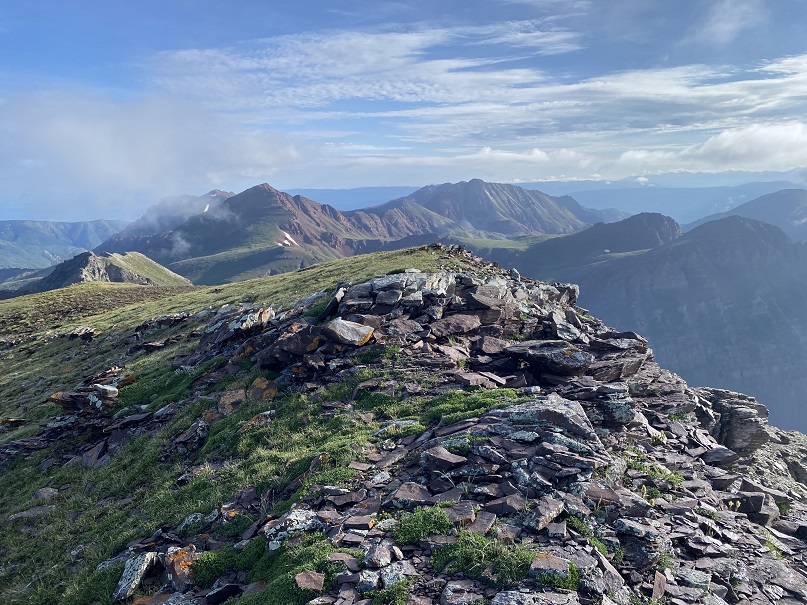
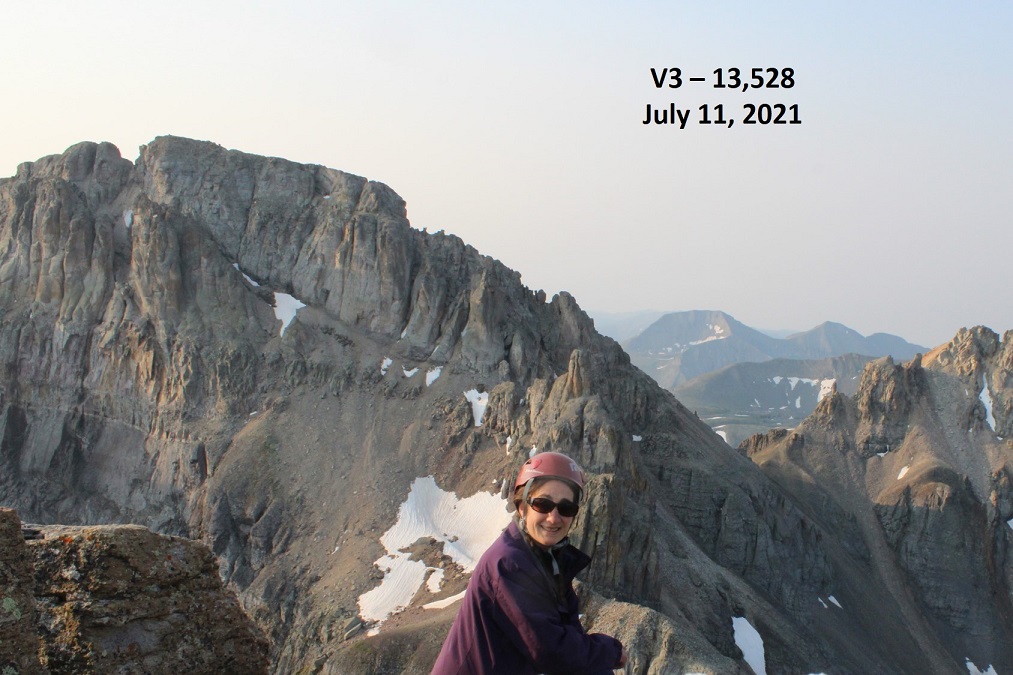
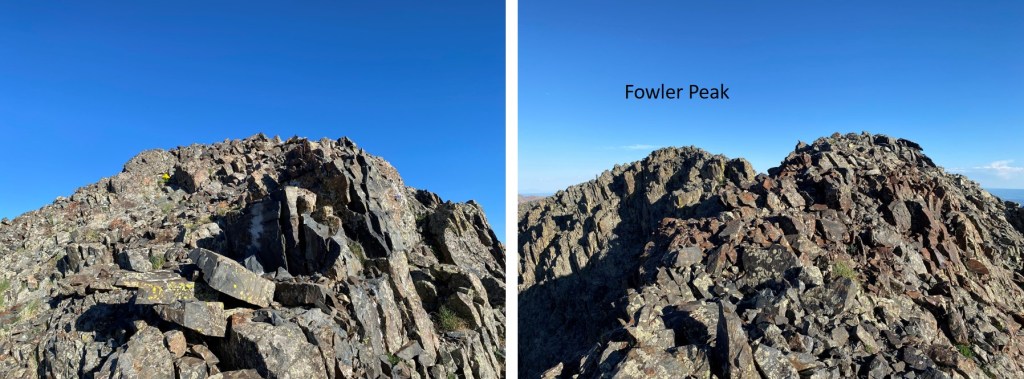
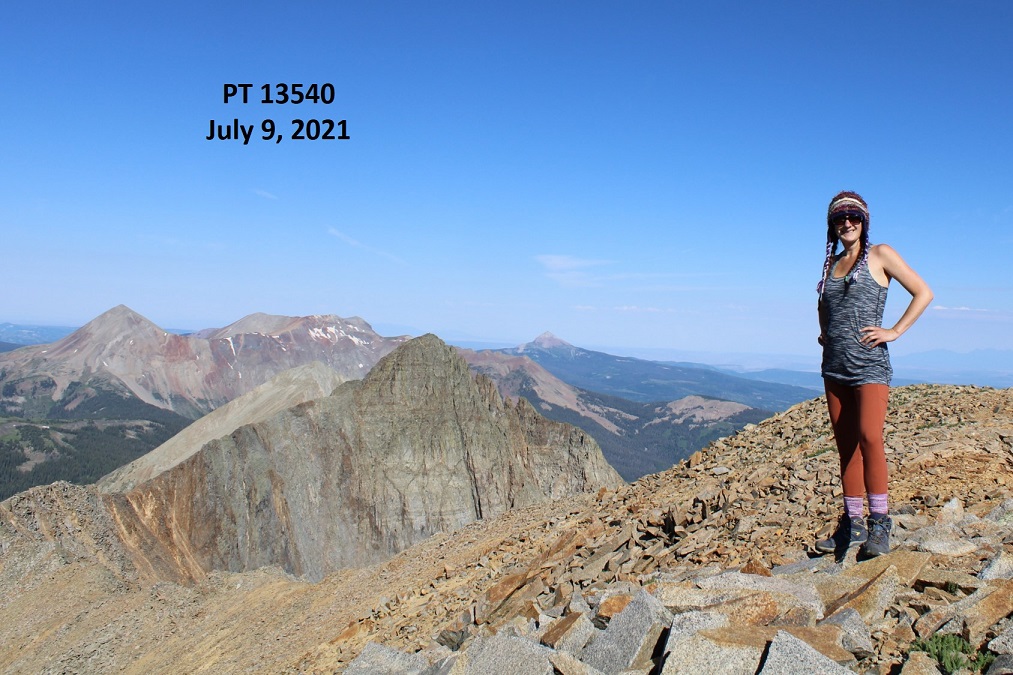
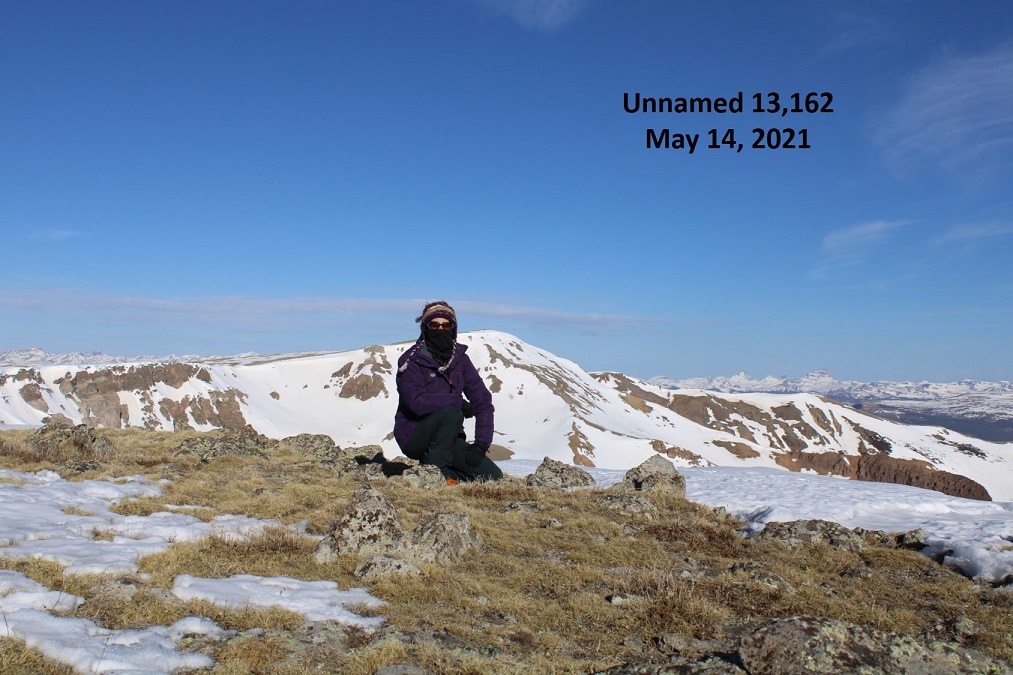
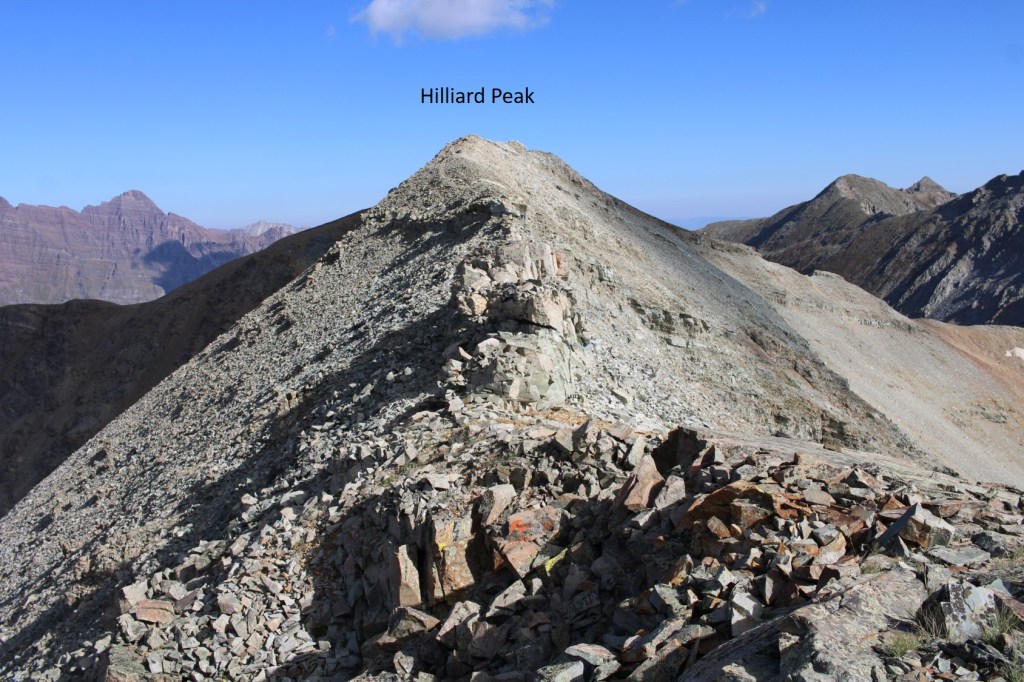
I summited Hilliard Peak at 9:45am
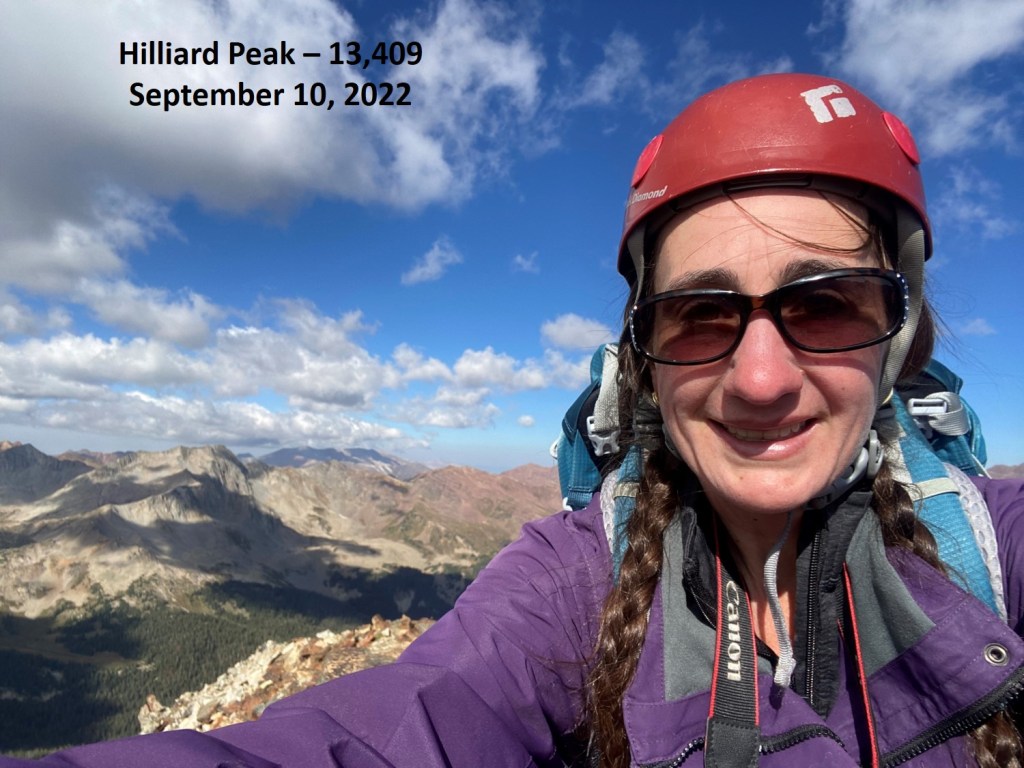
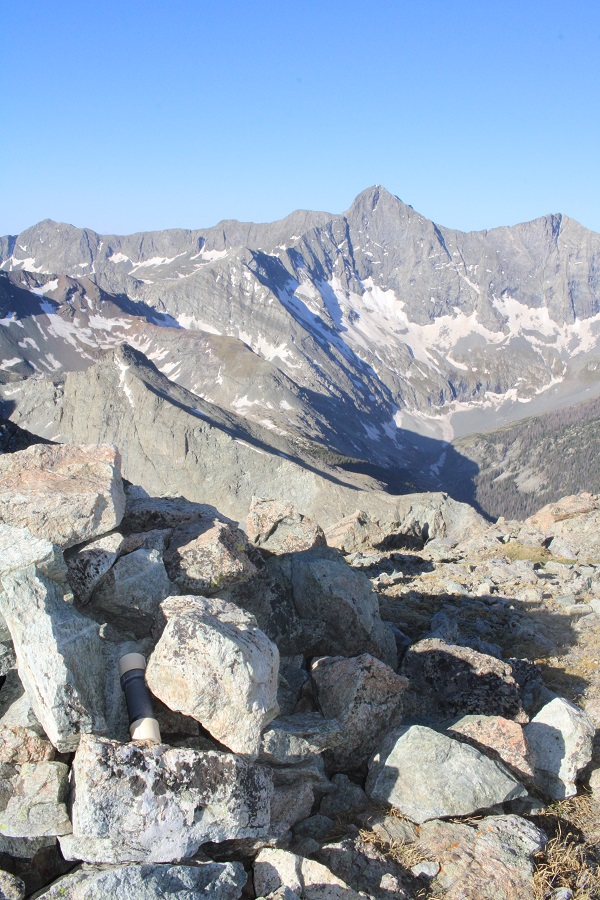
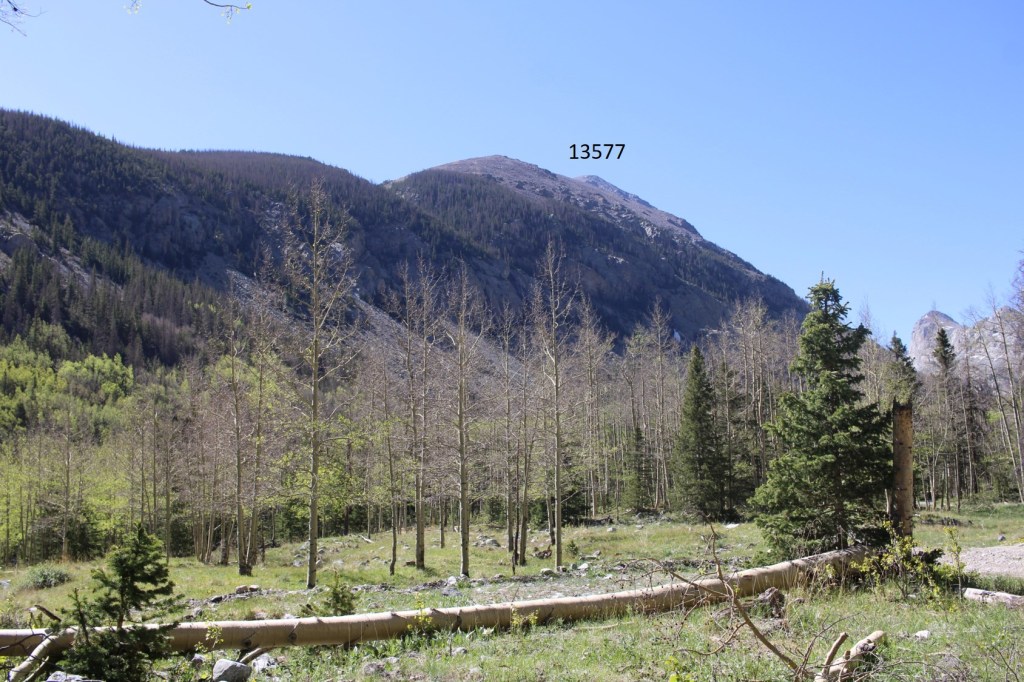
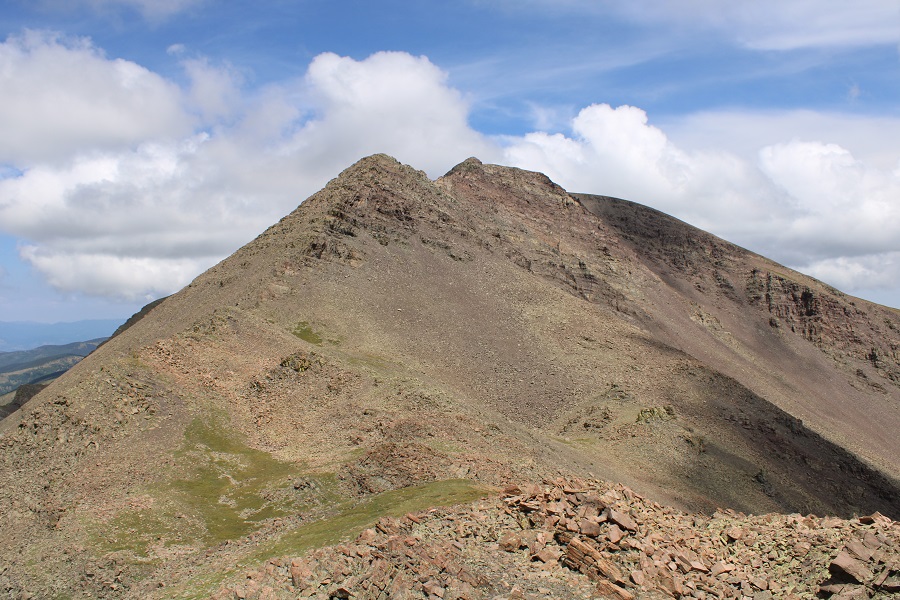
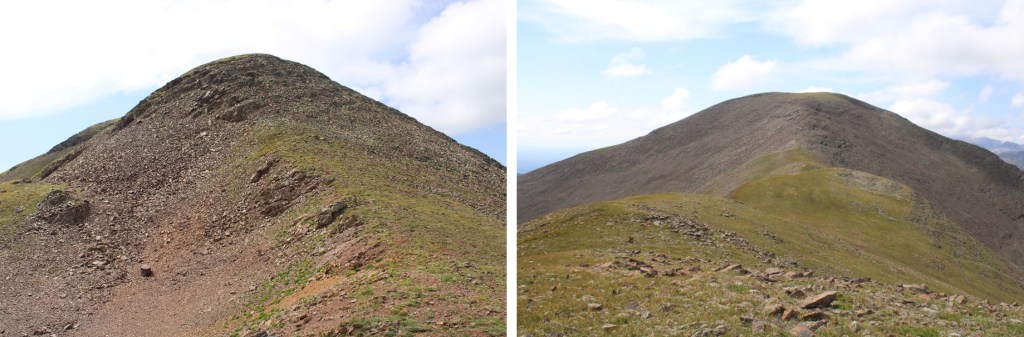
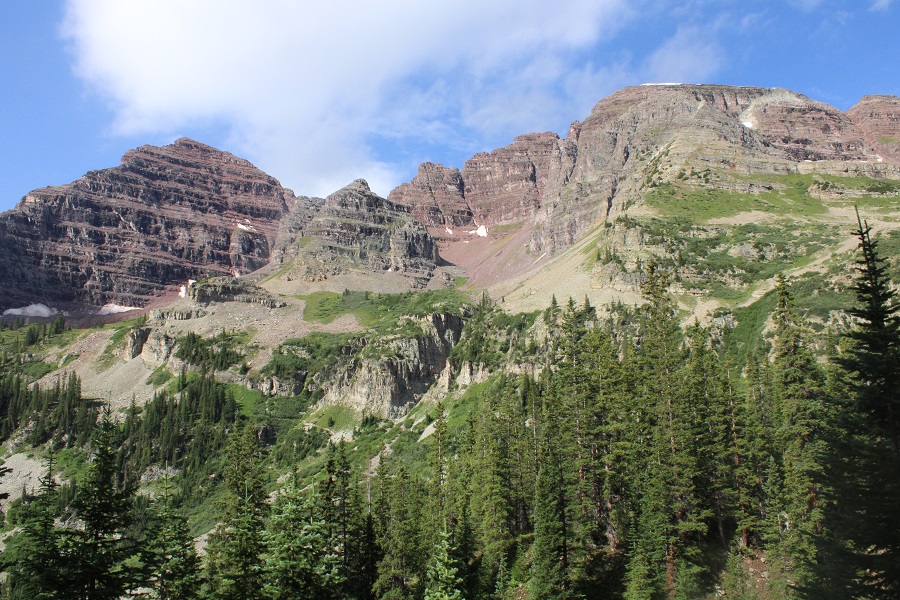
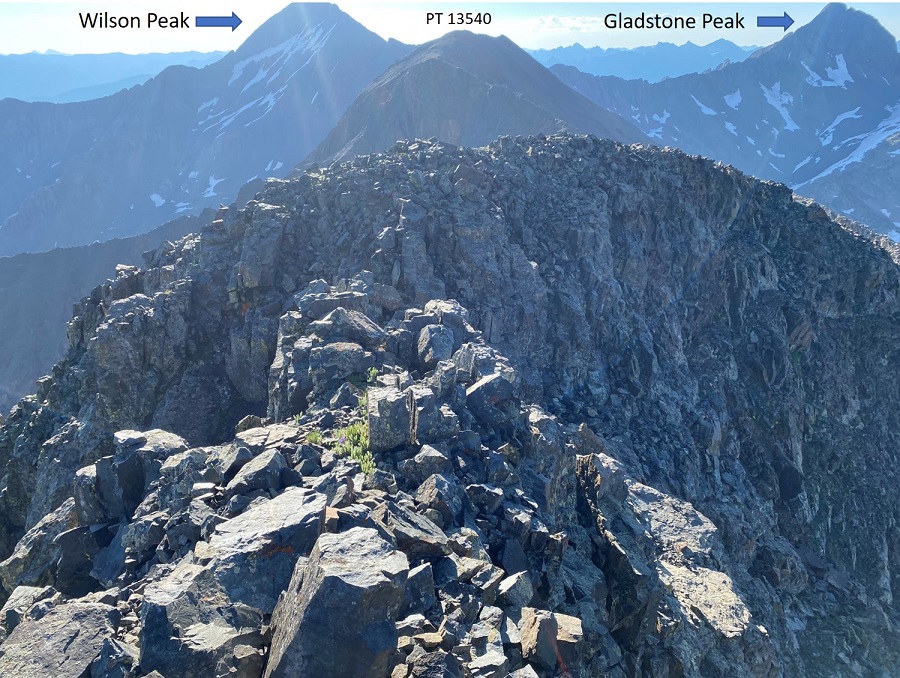
Hilliard Peak:

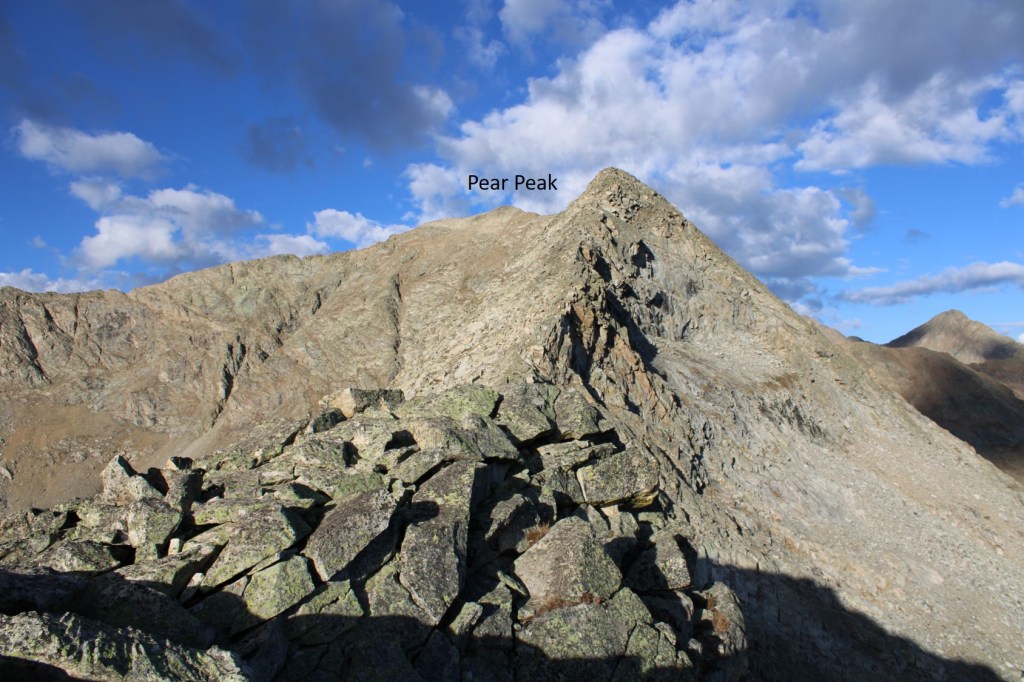
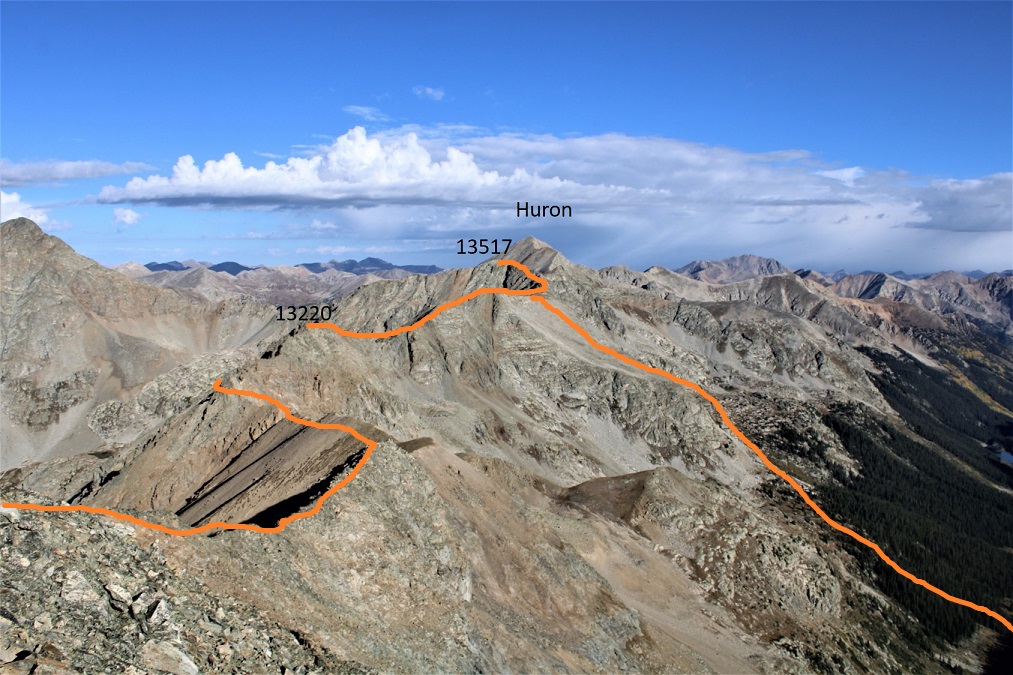
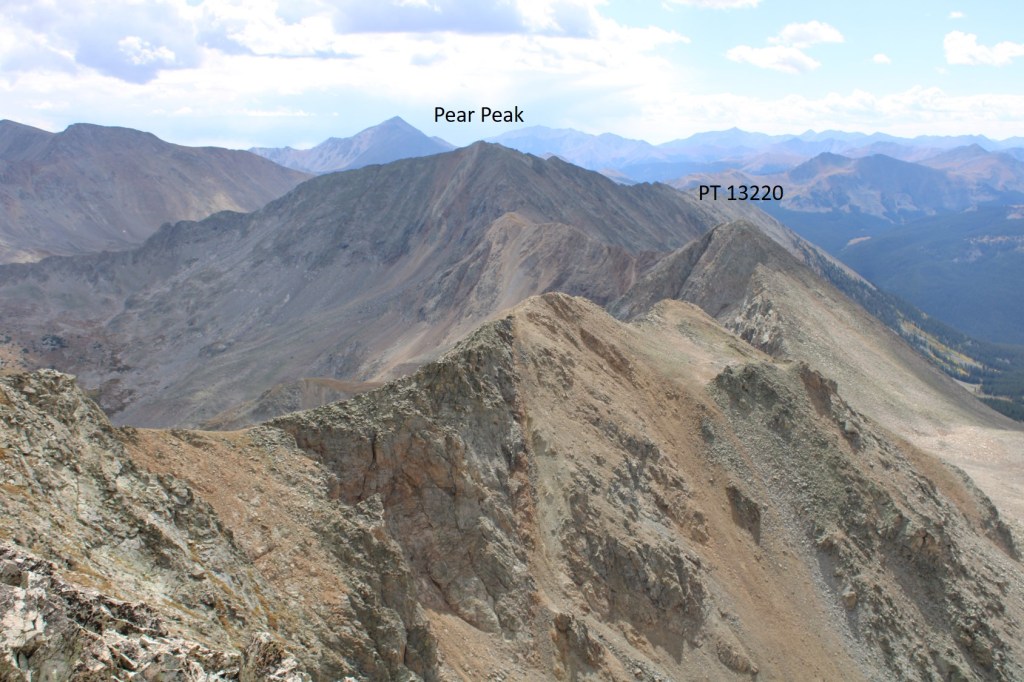
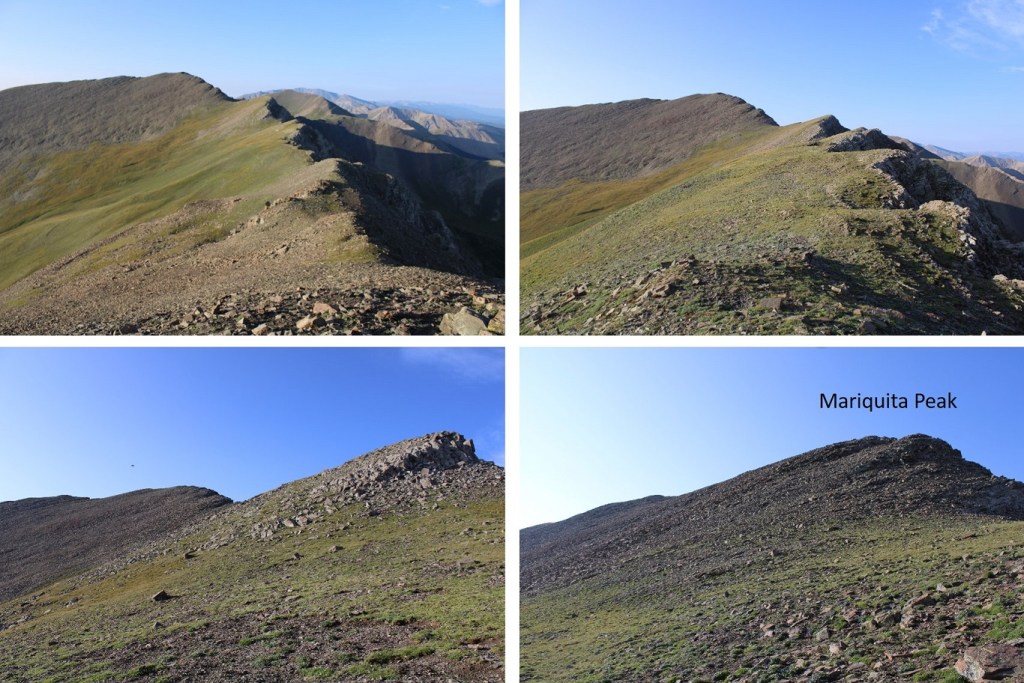
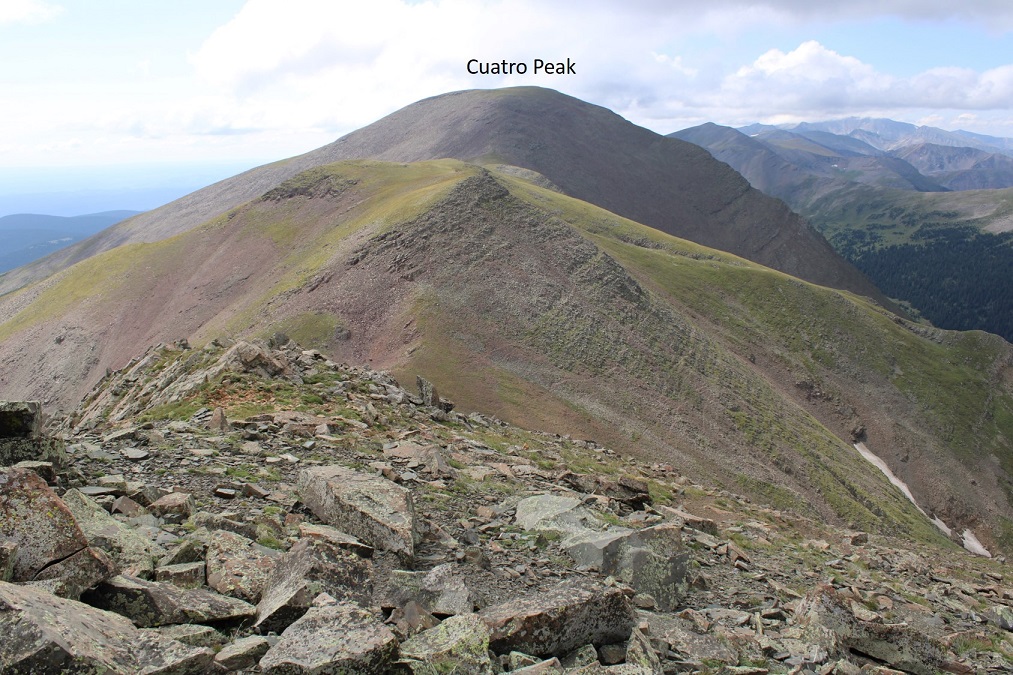
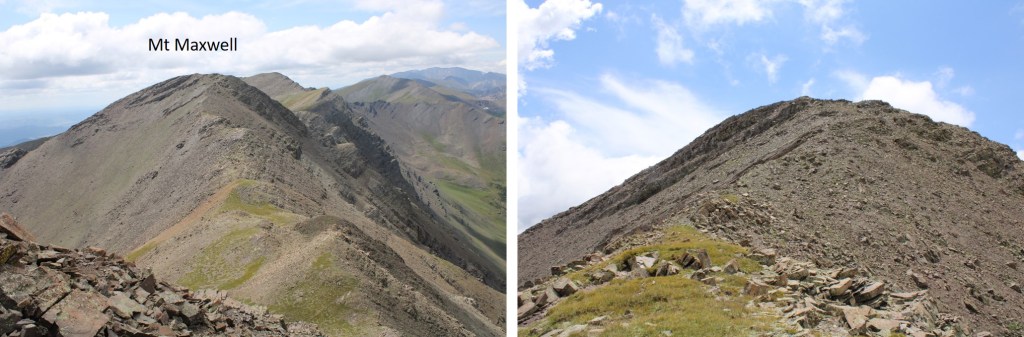
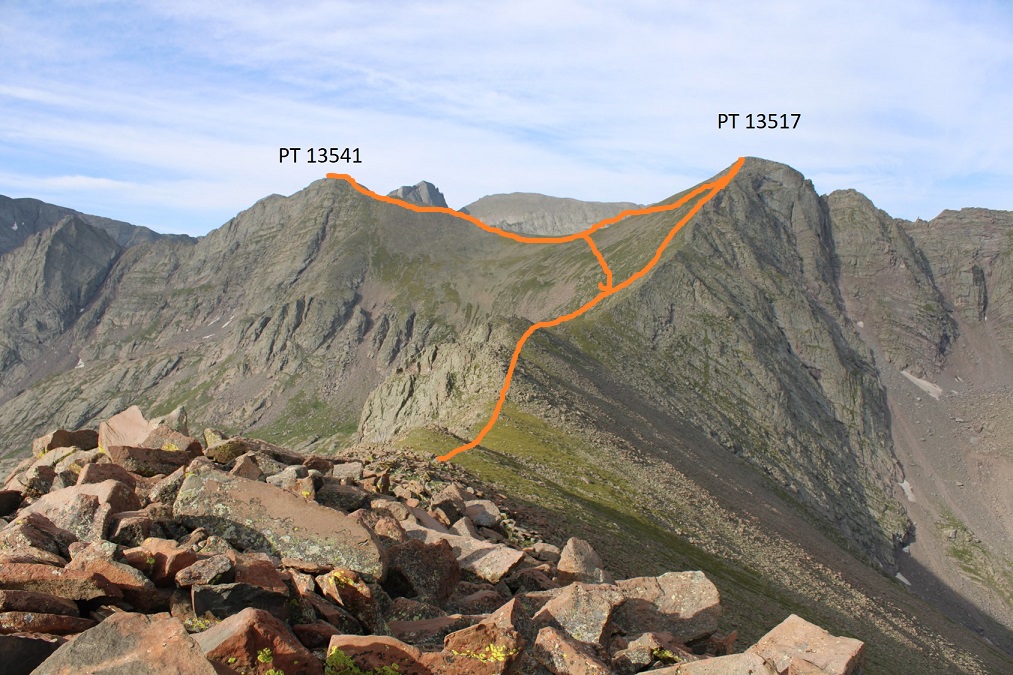
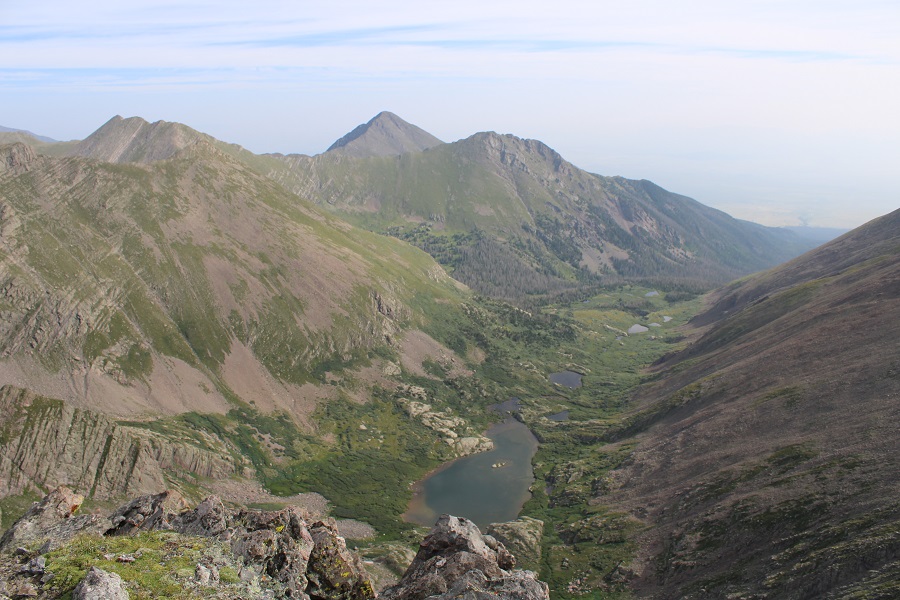
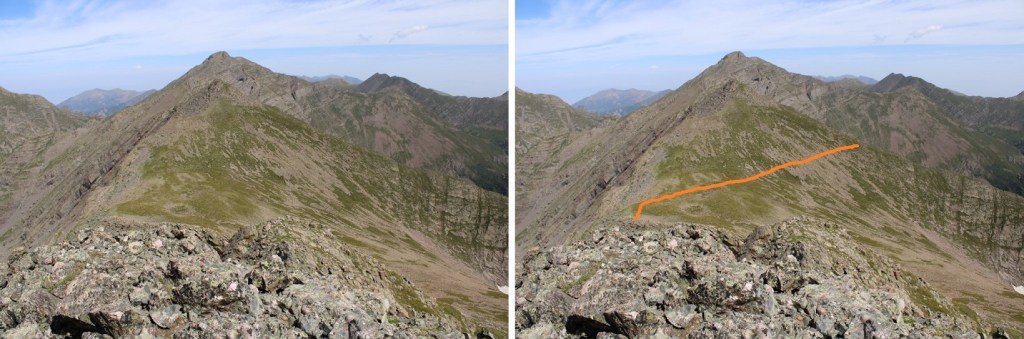
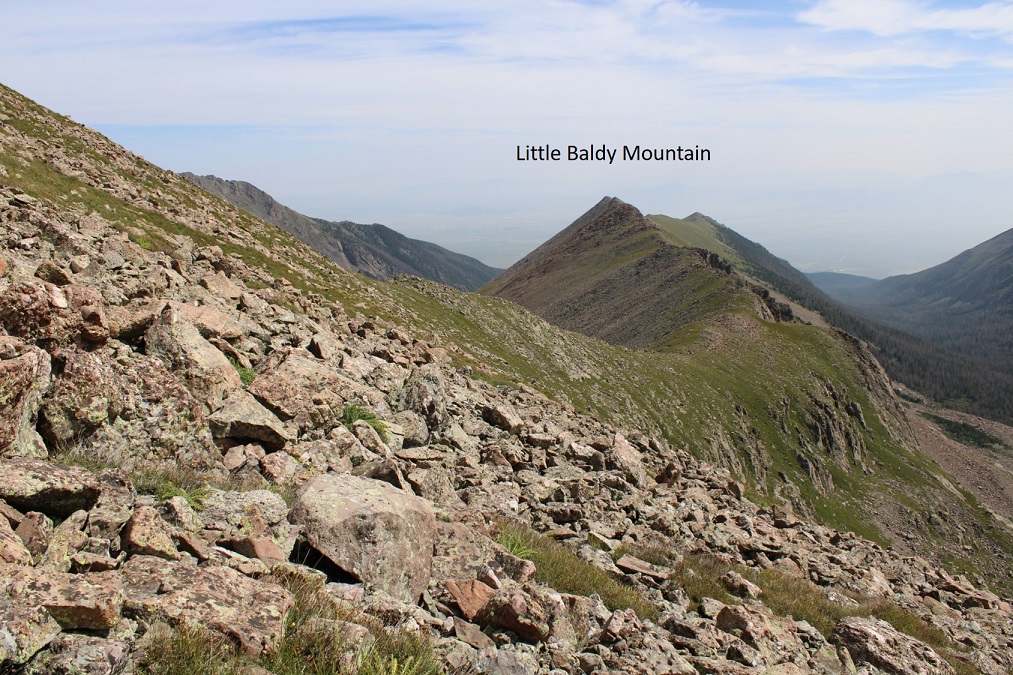
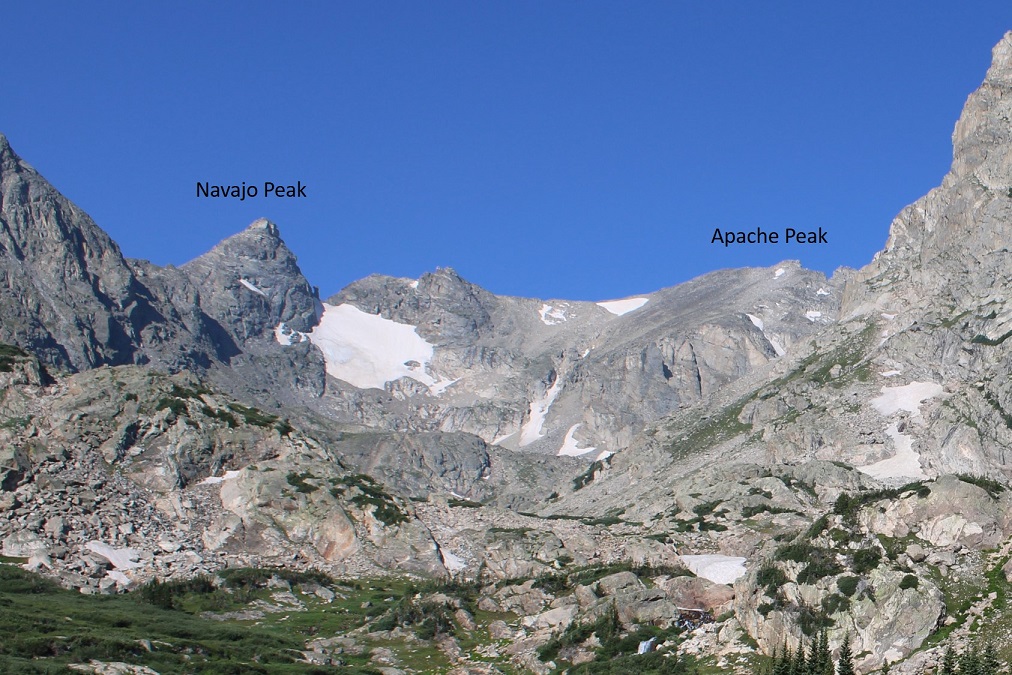
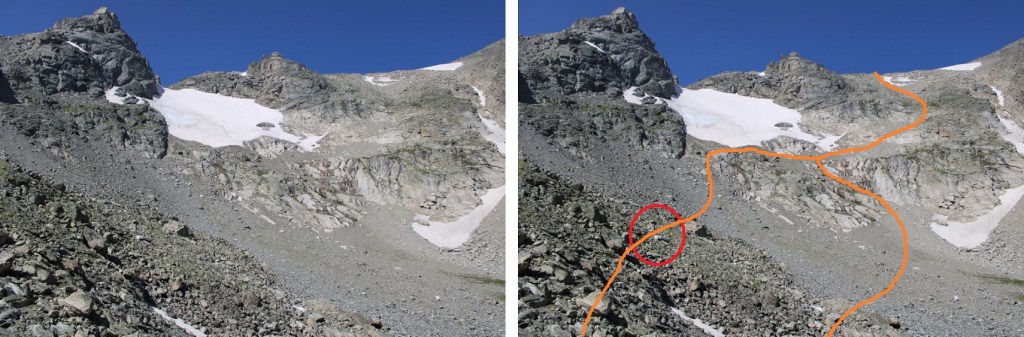
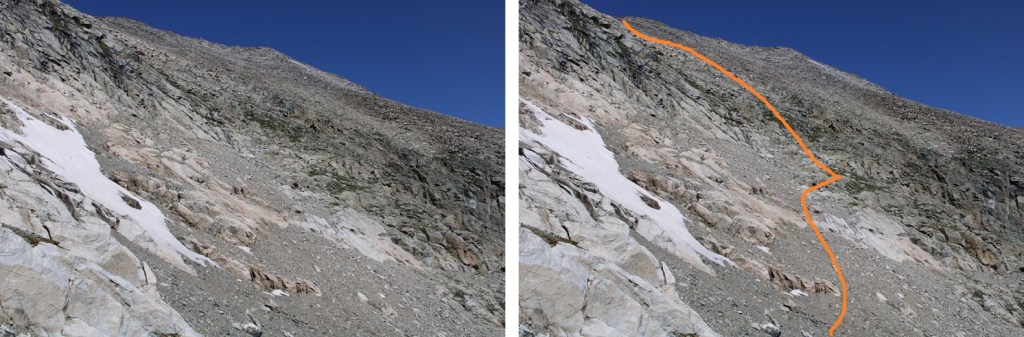
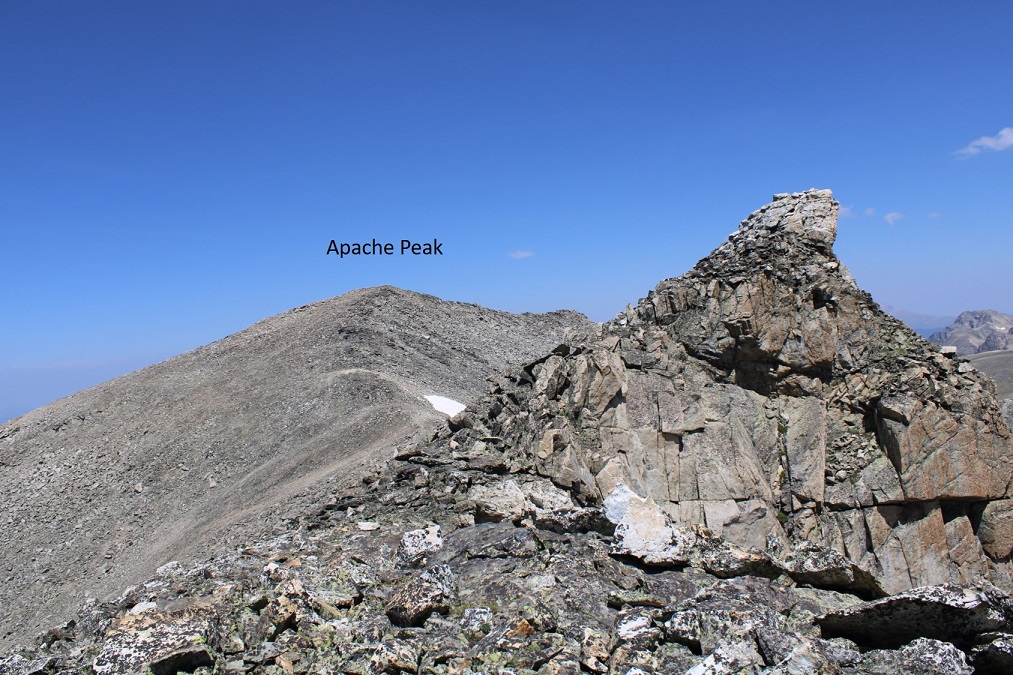
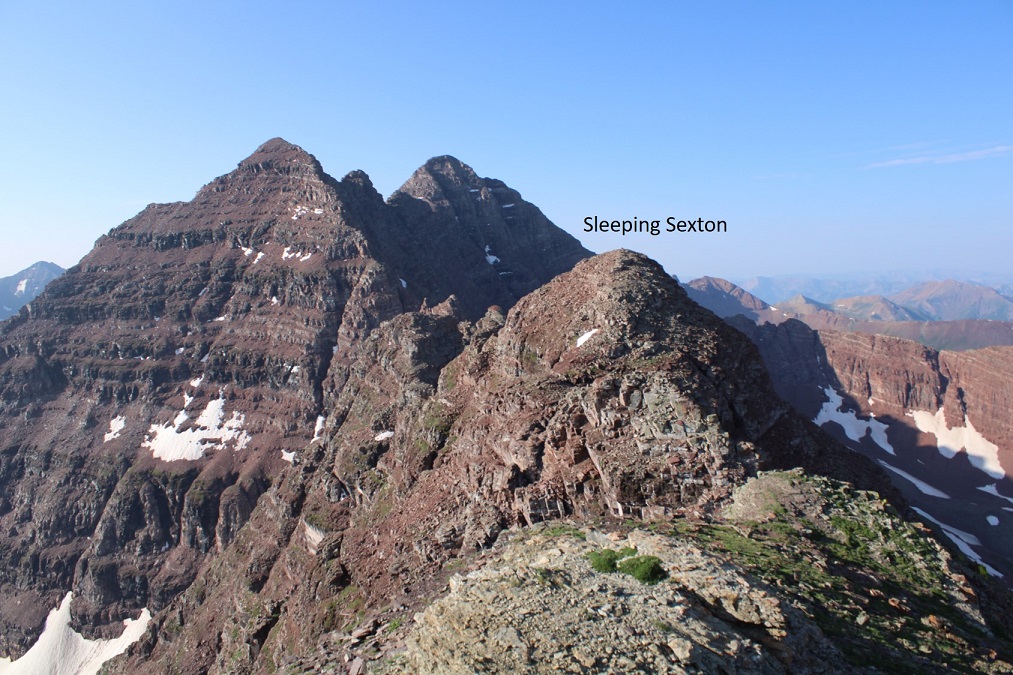
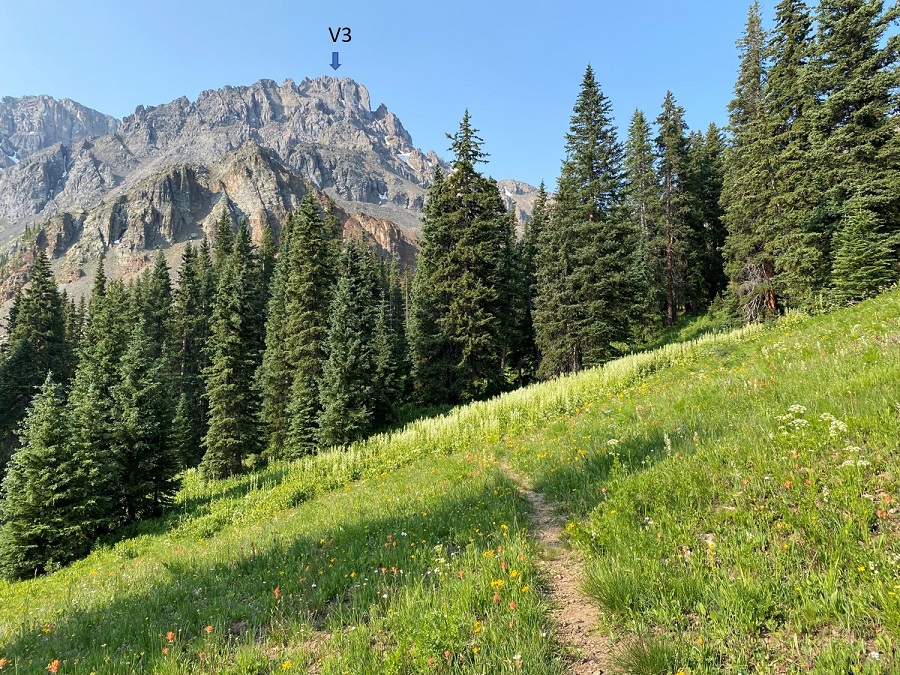
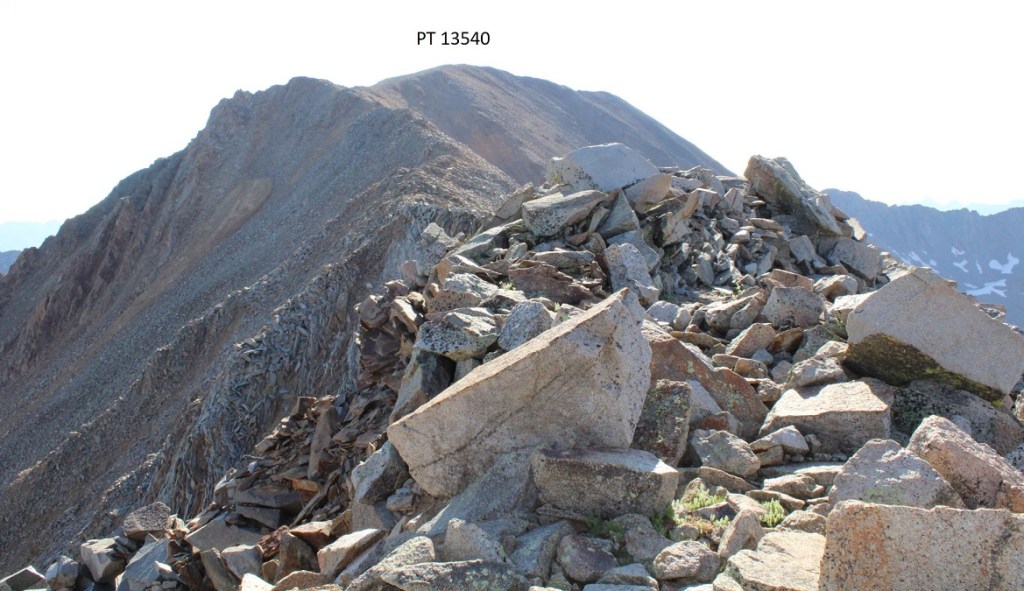
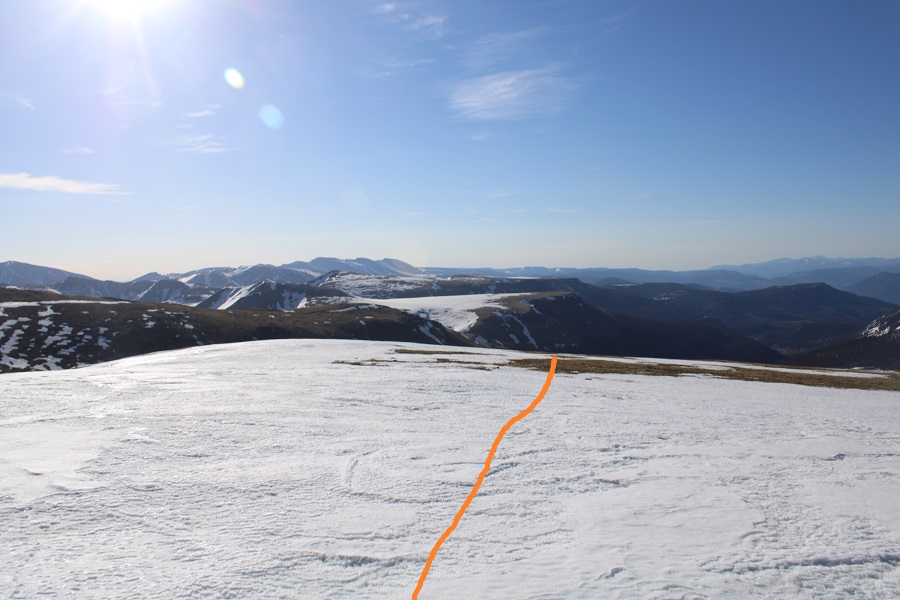
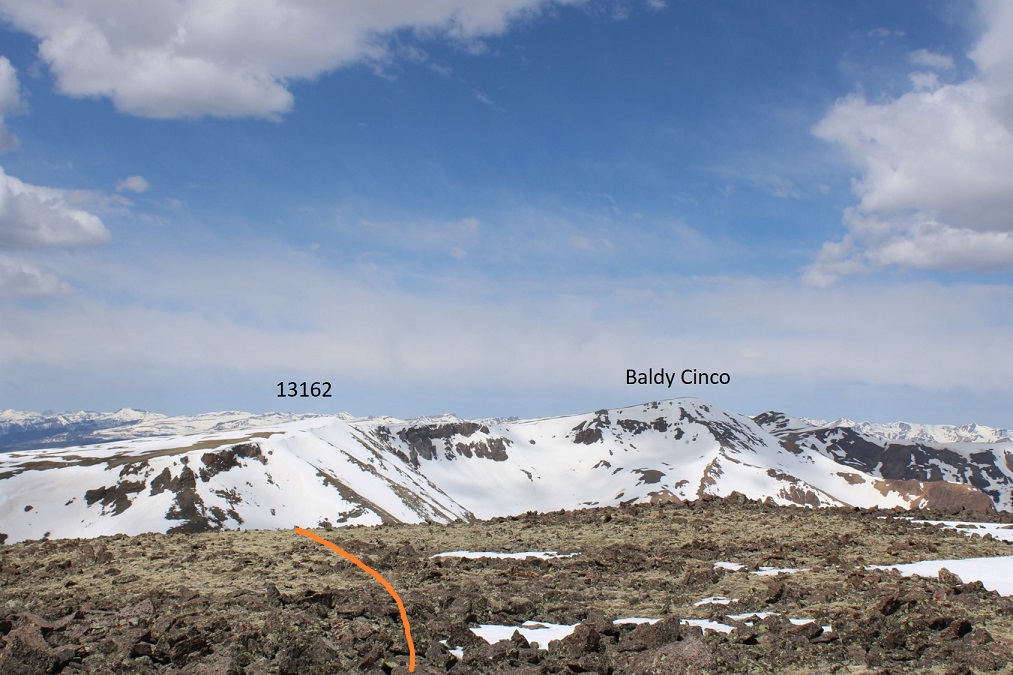
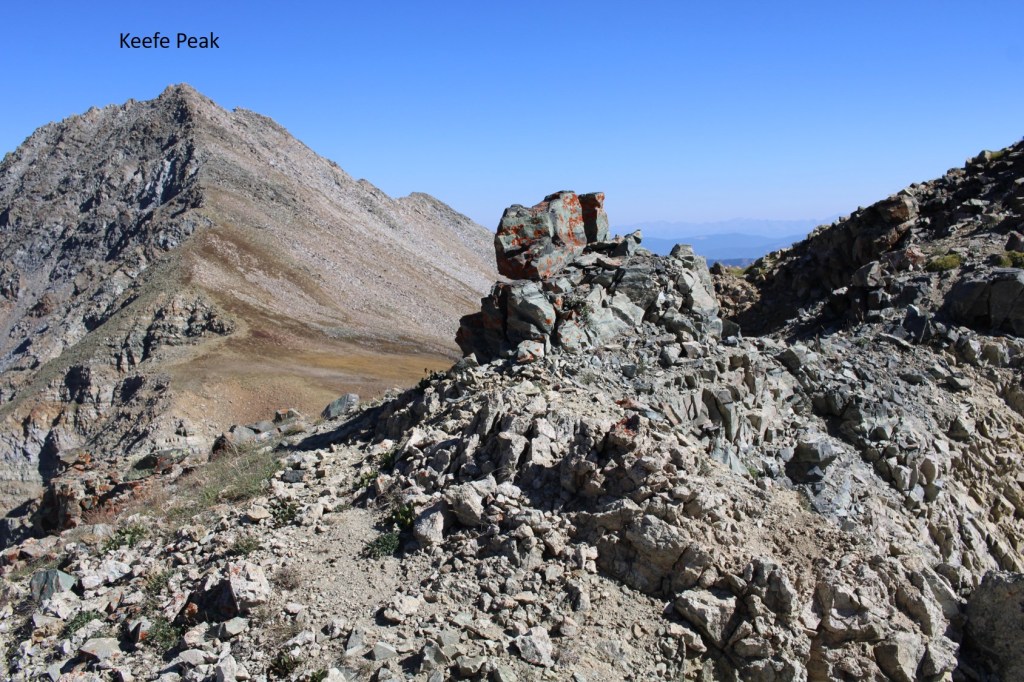
From Hilliard, I could see Keefe Peak to the northeast

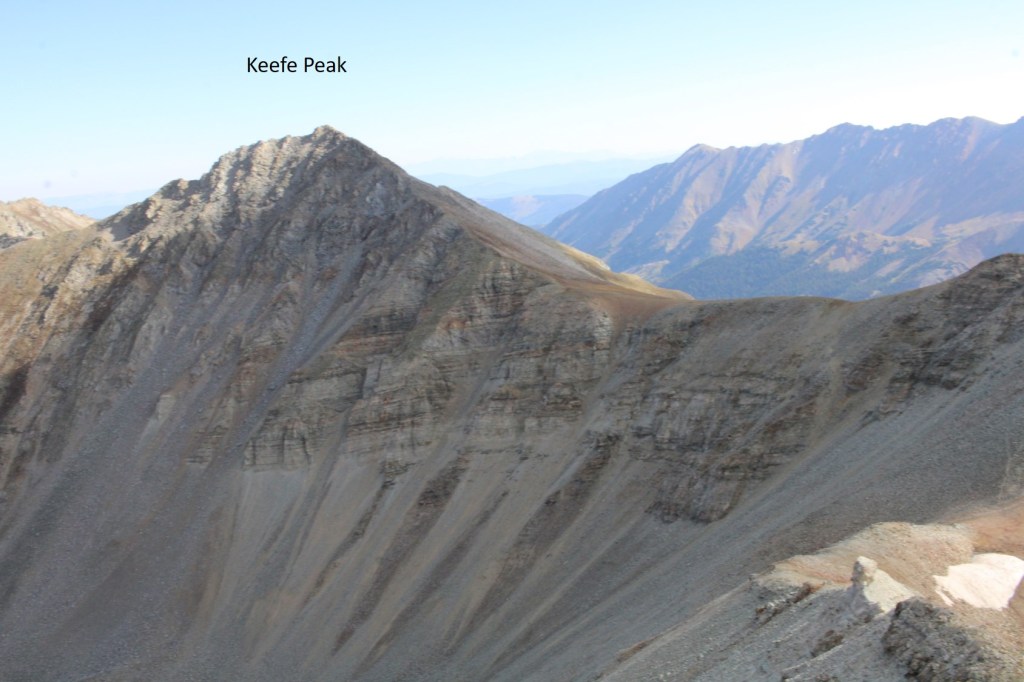
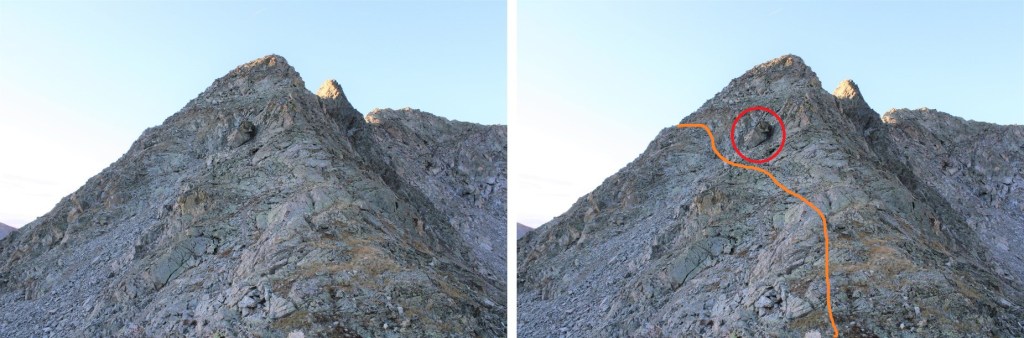
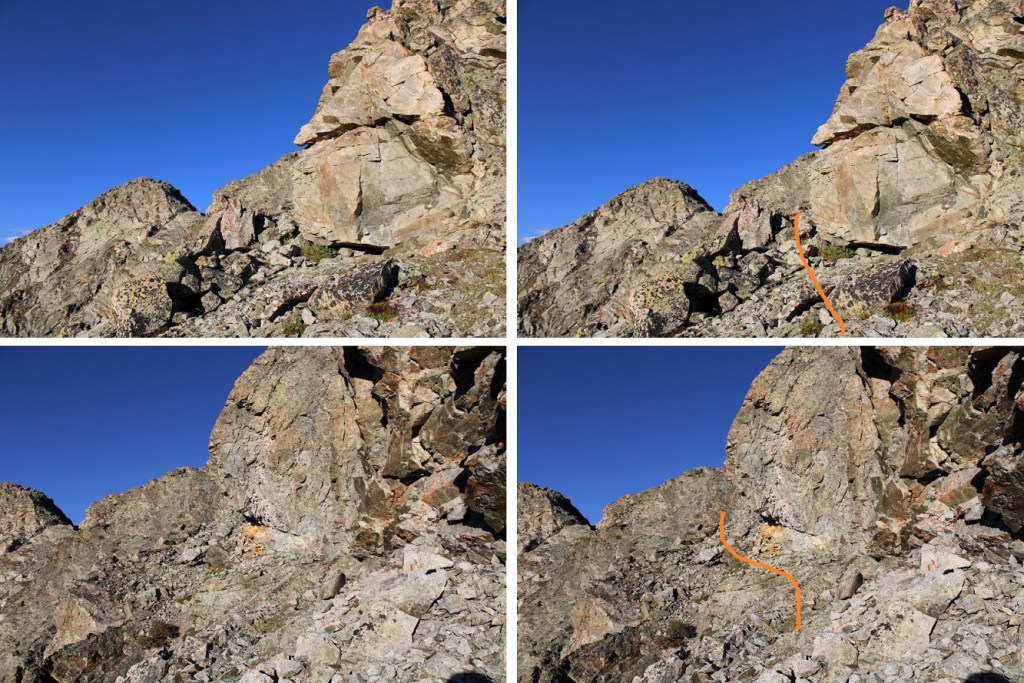
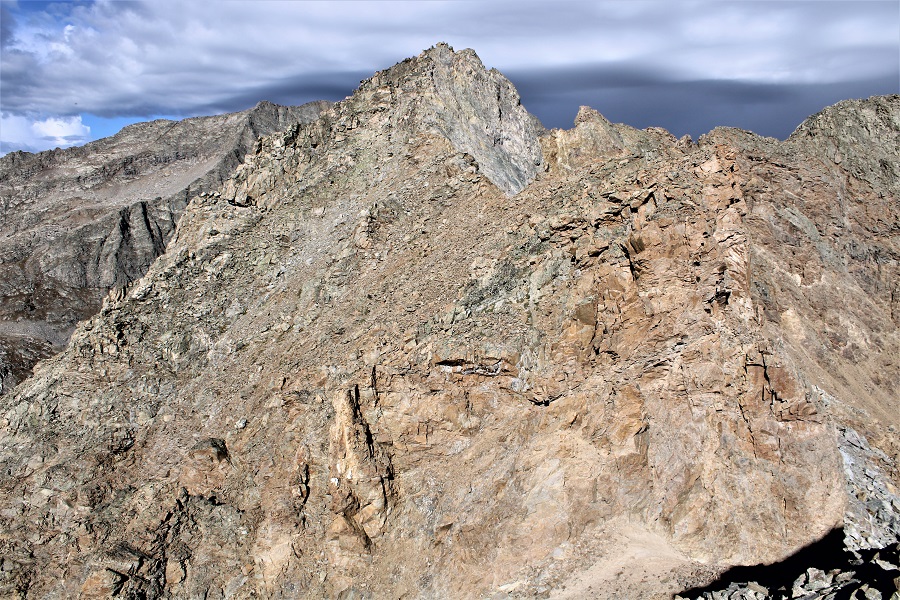
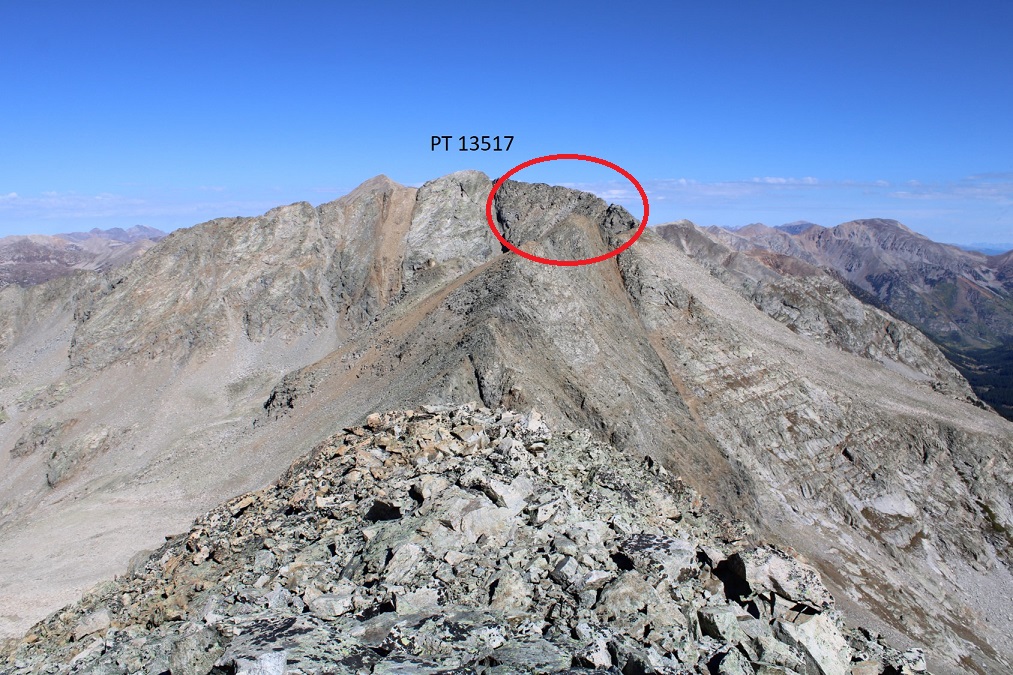
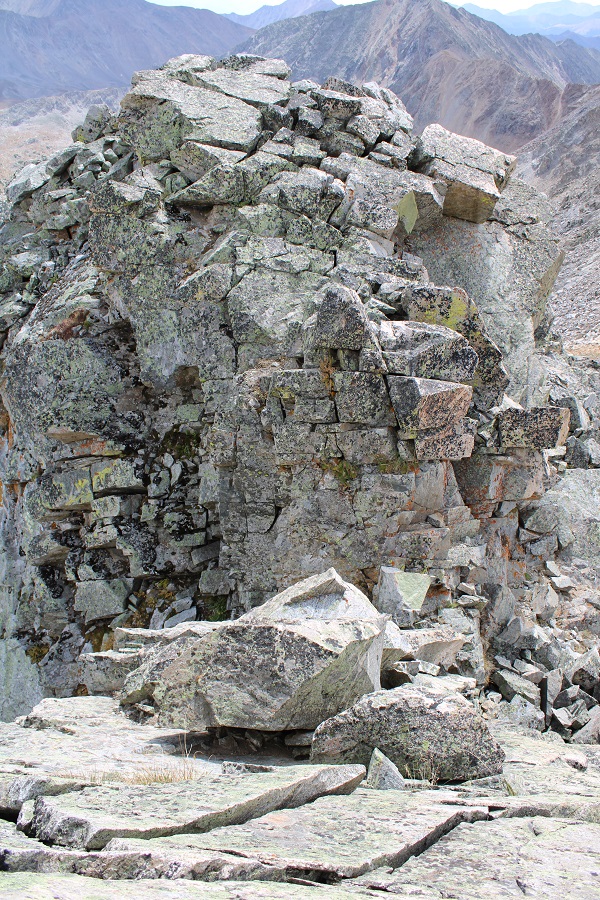
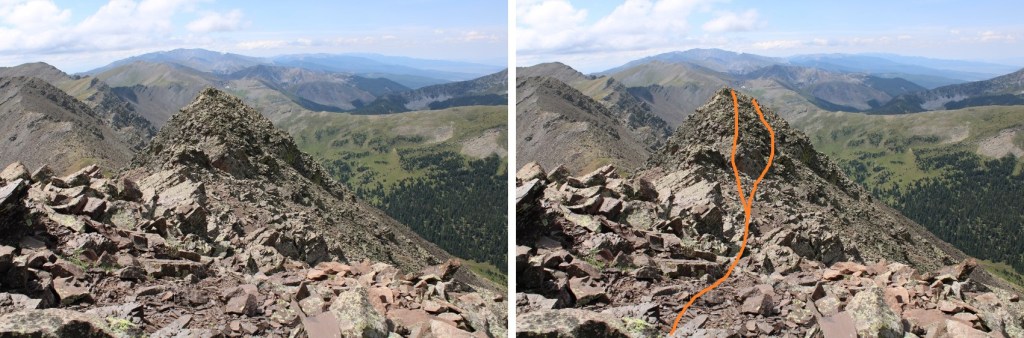
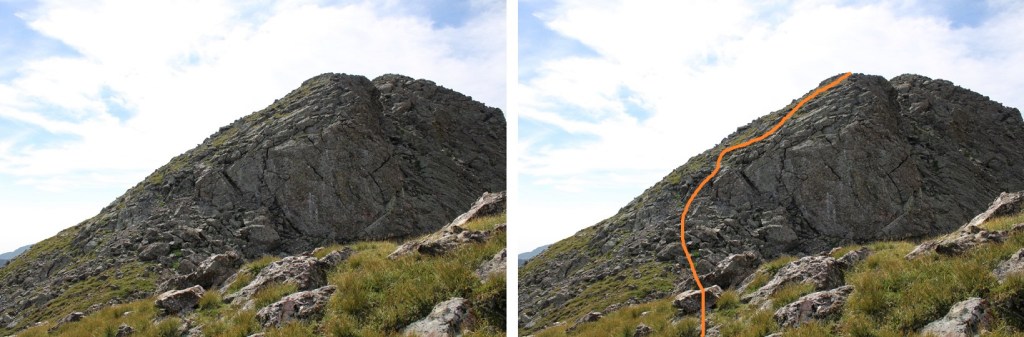
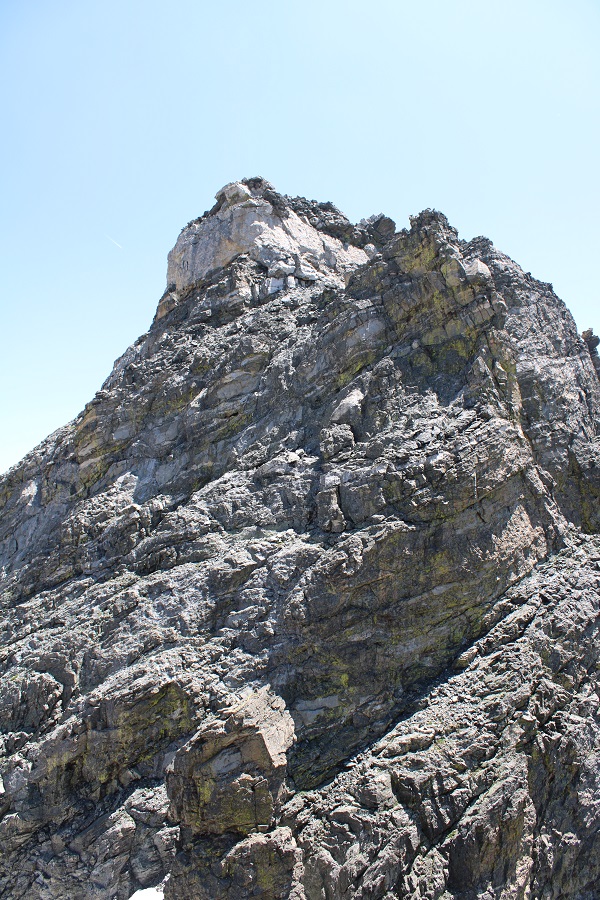
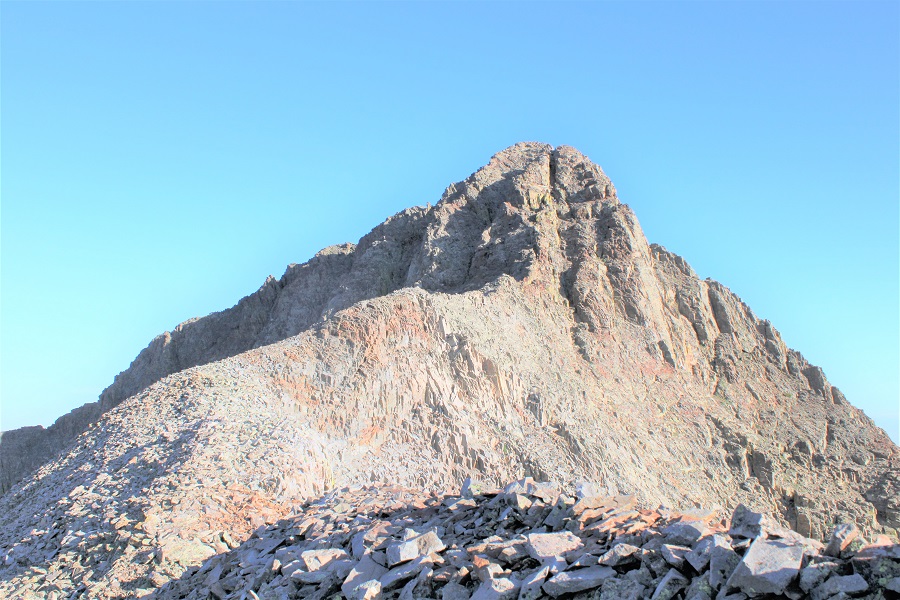
But first, I was going to have to get over the crux of the route: This pointy mountain right here.

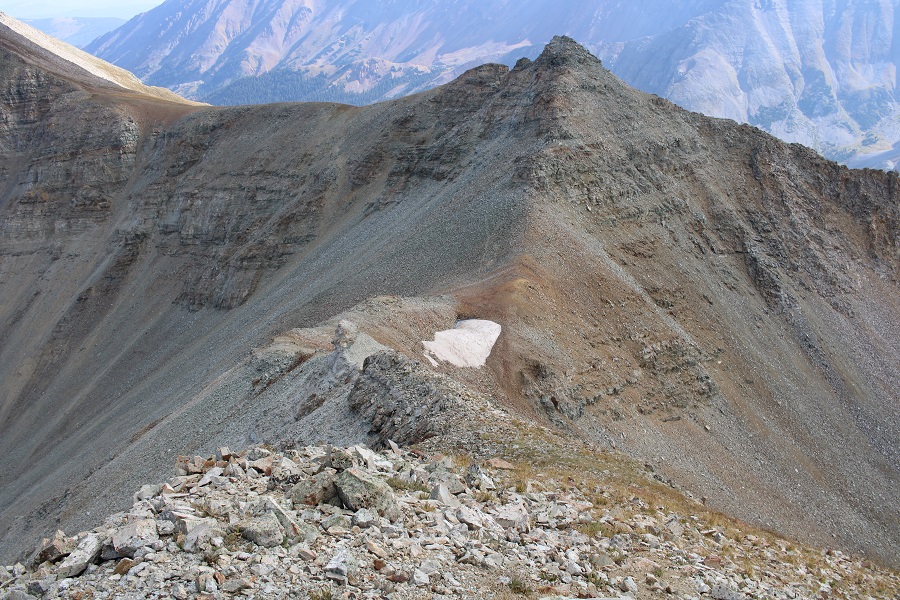
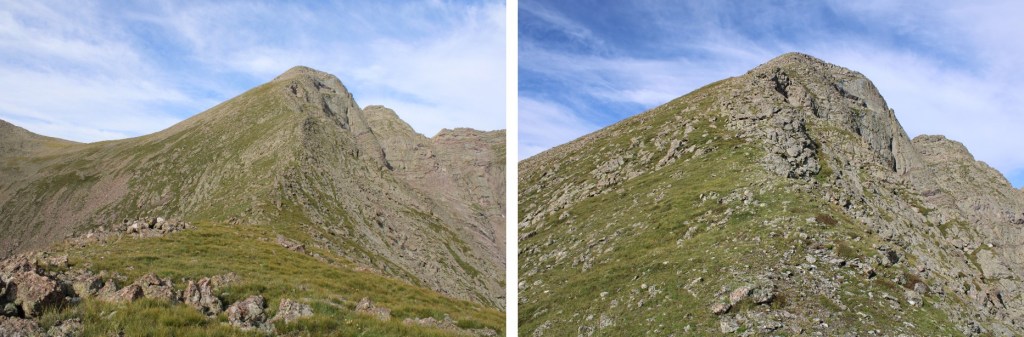
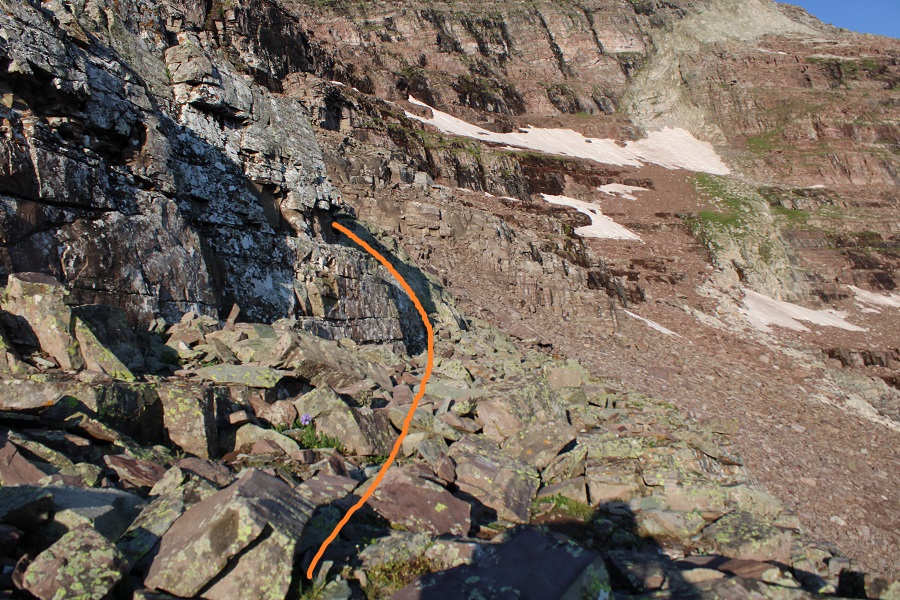
I followed the ridge northeast, and came across this fun formation. I easily passed it to the left

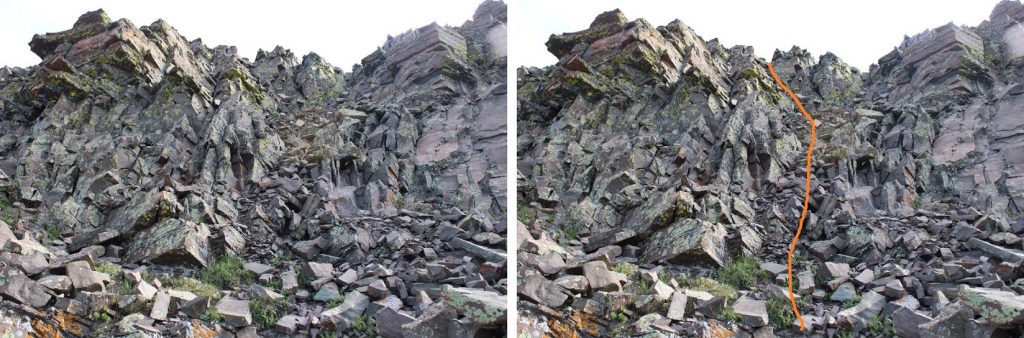
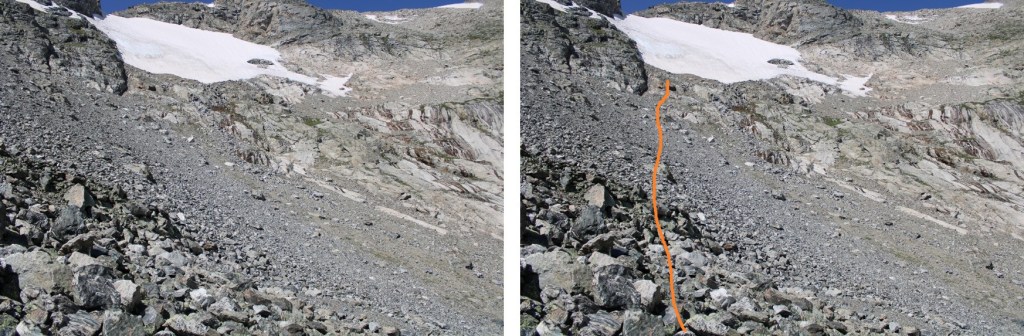
This brought me to a small saddle.  I ended up climbing this part by taking a game trail to the ridge, then crossing over to the right side and heading up

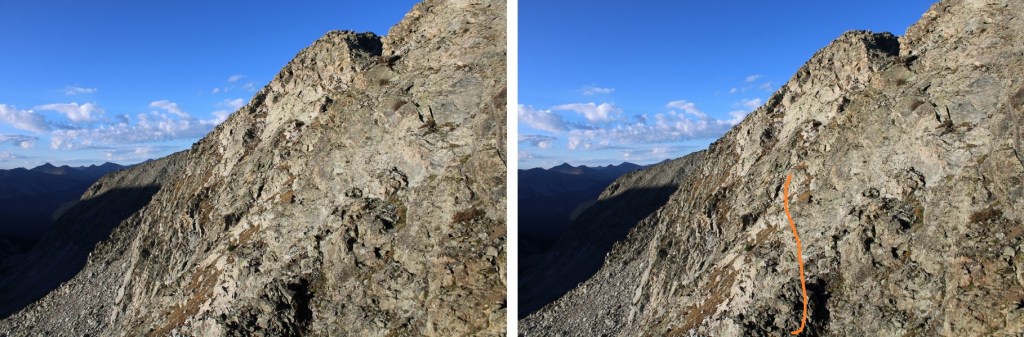
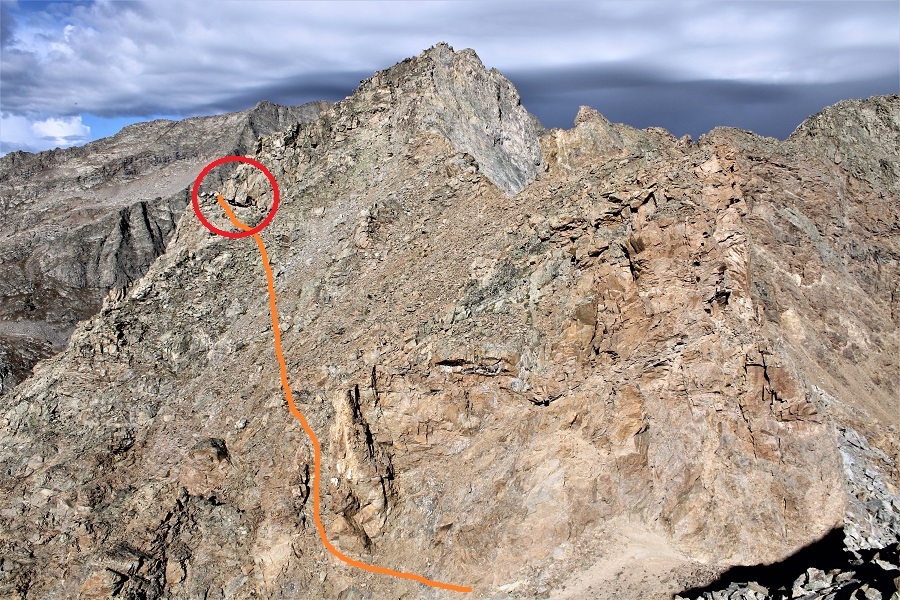
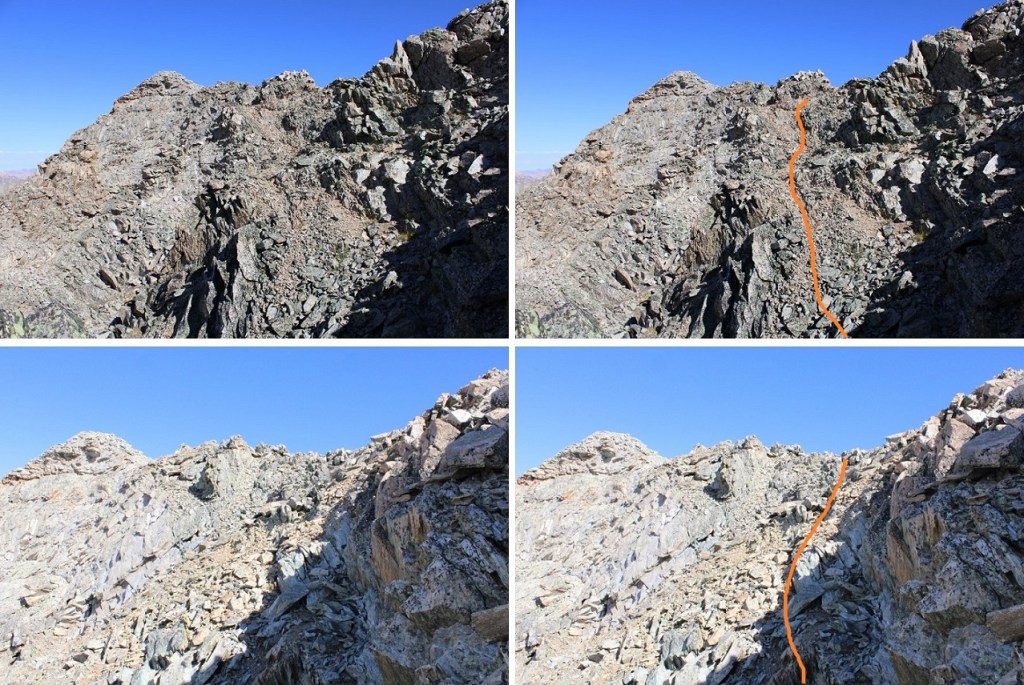
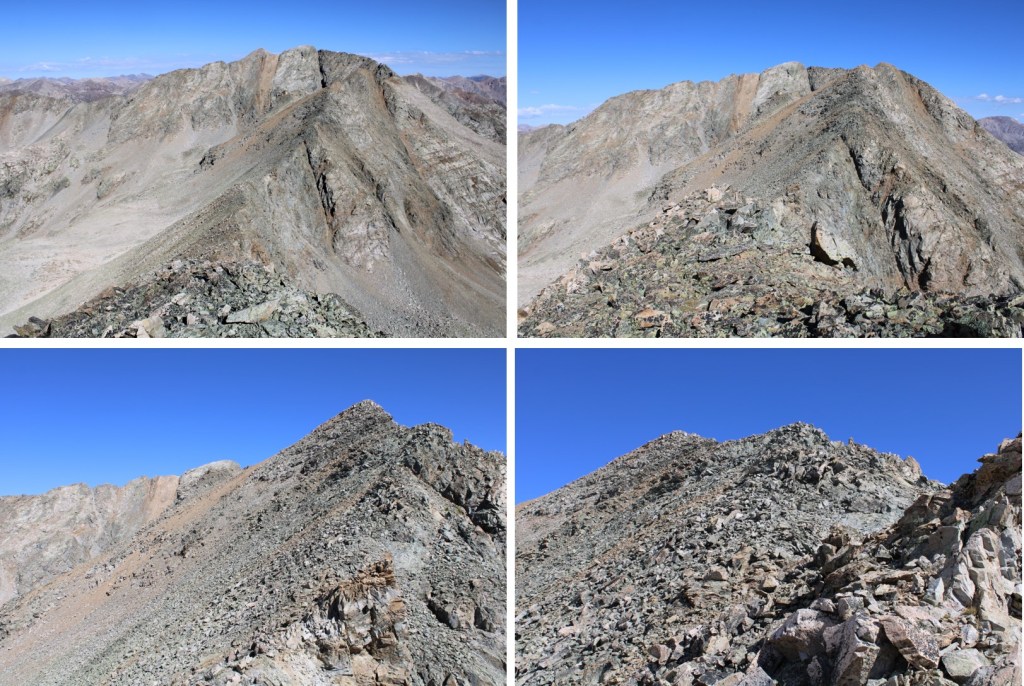
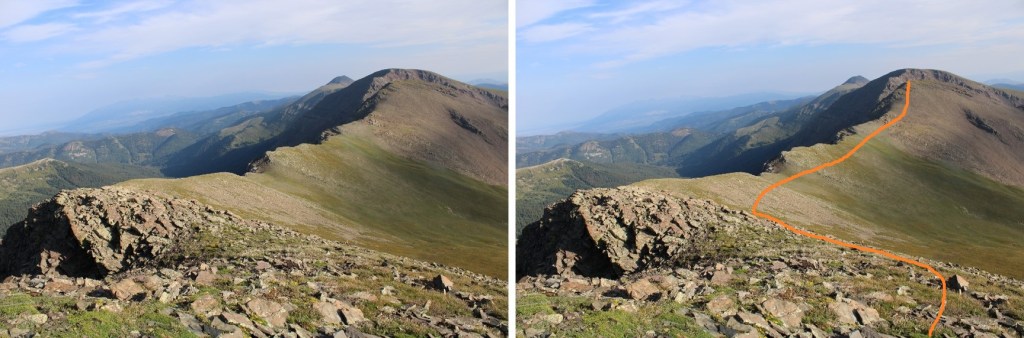
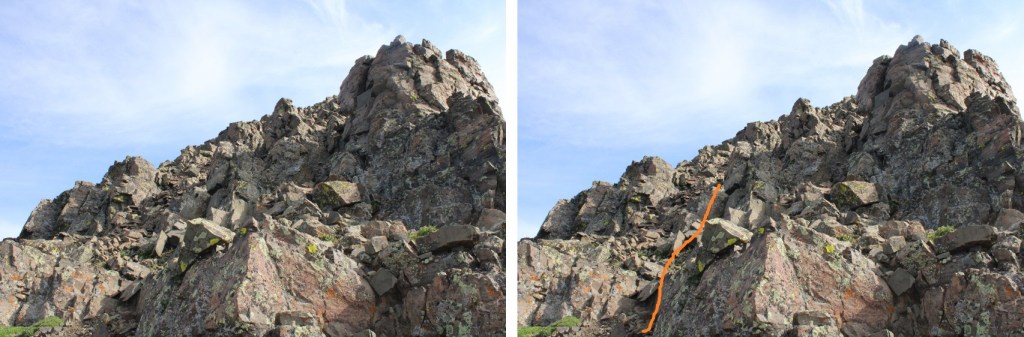
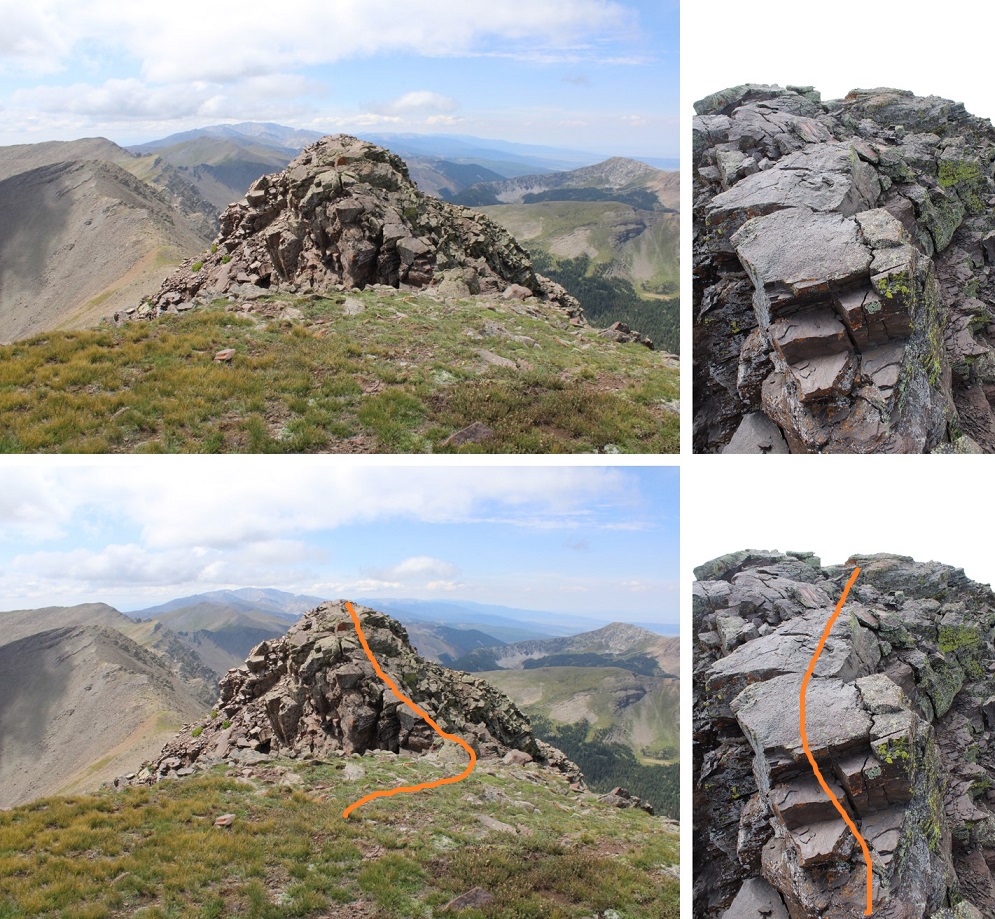
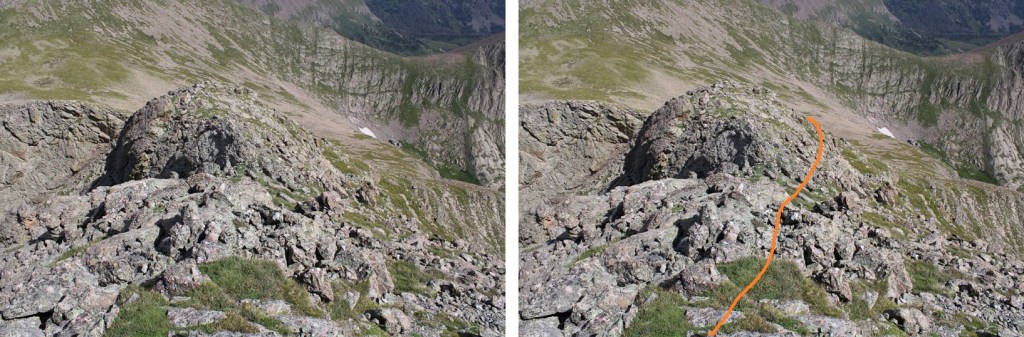
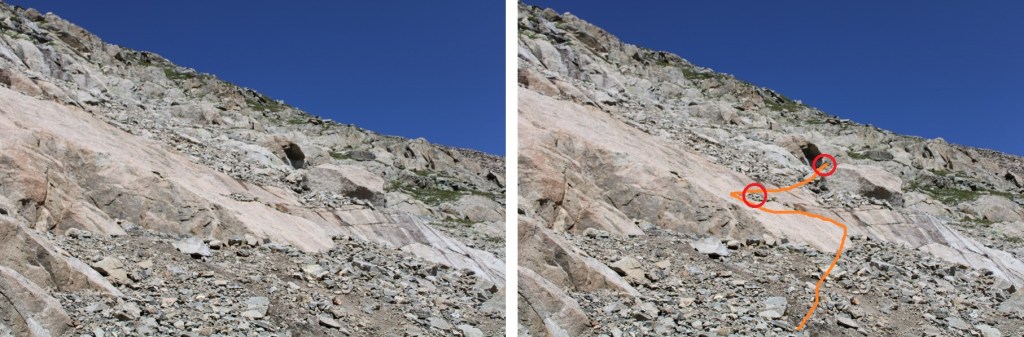
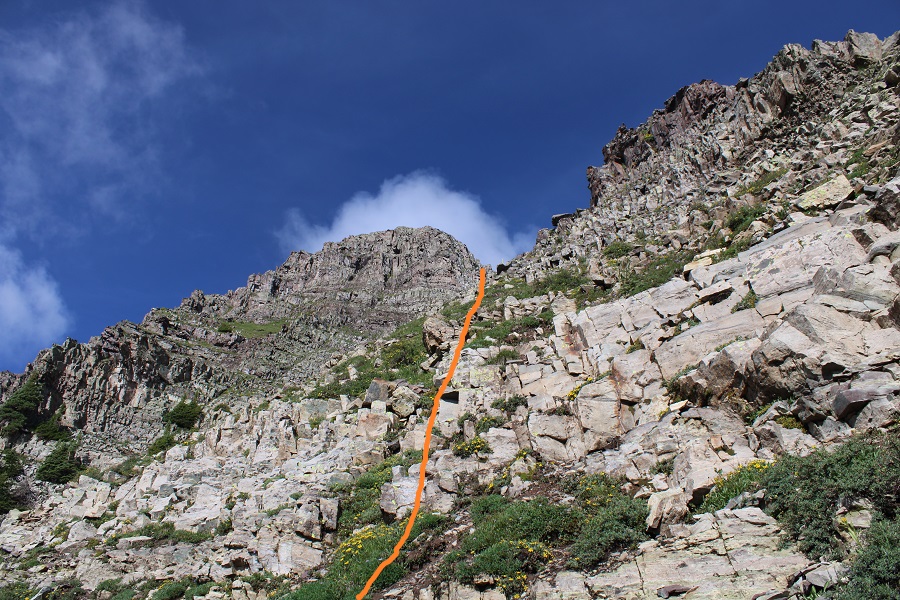
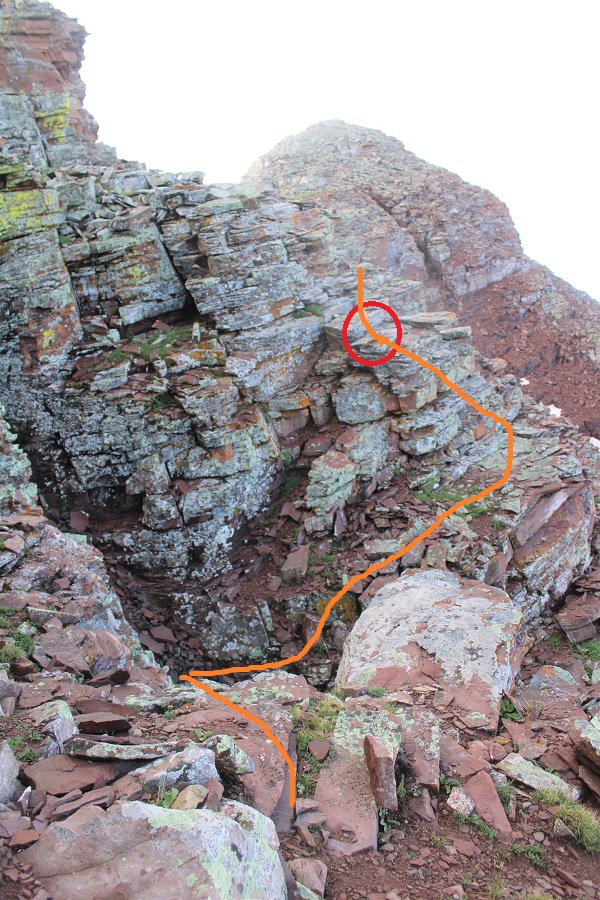
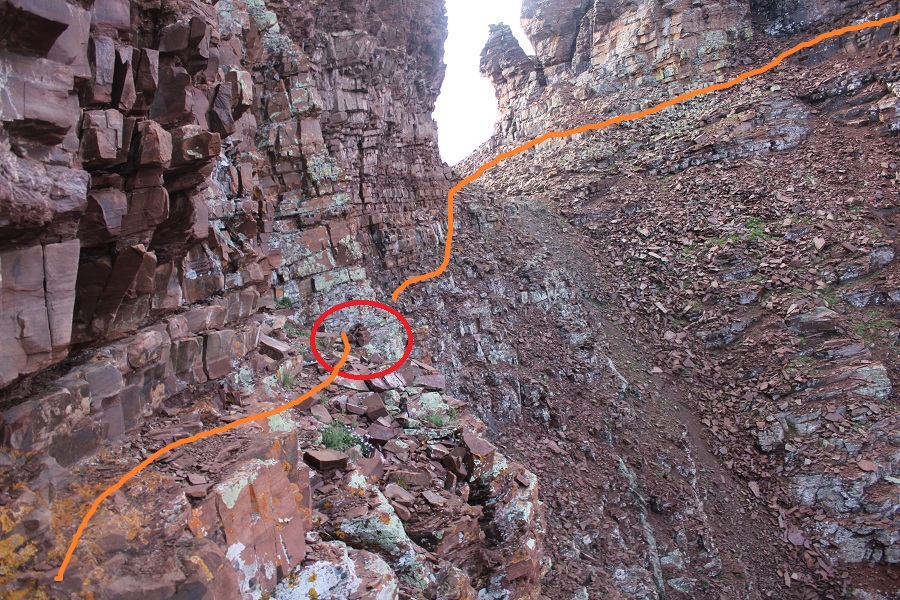
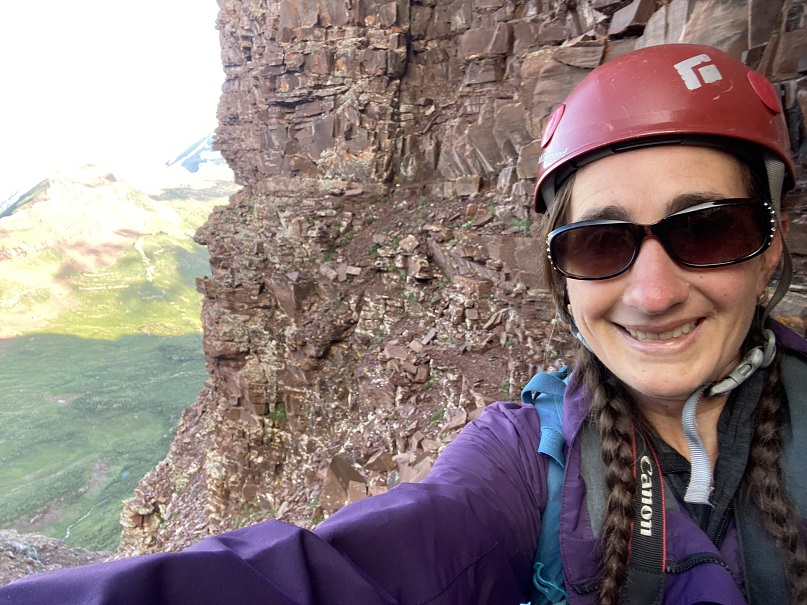
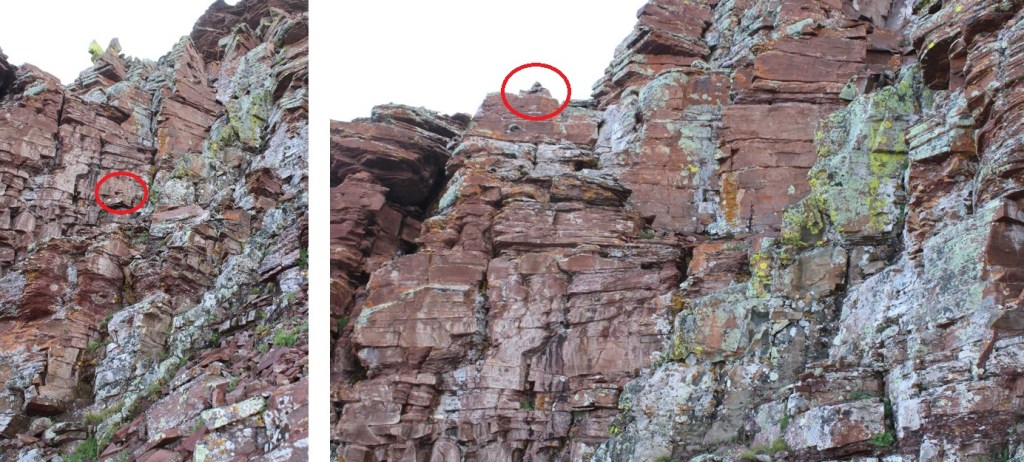
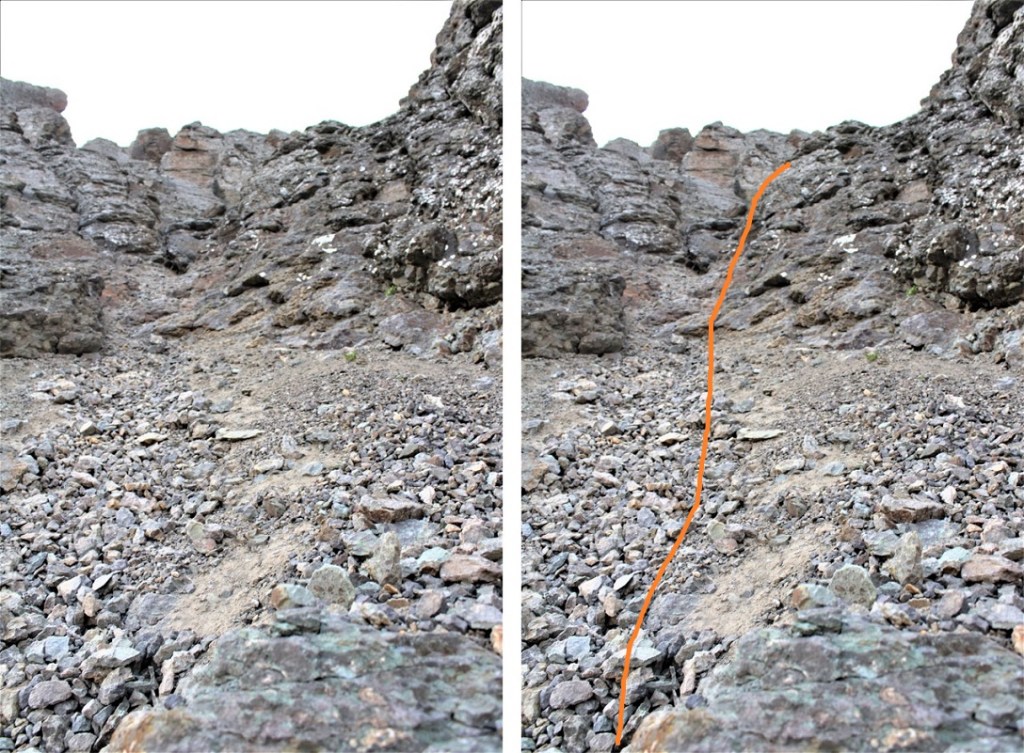
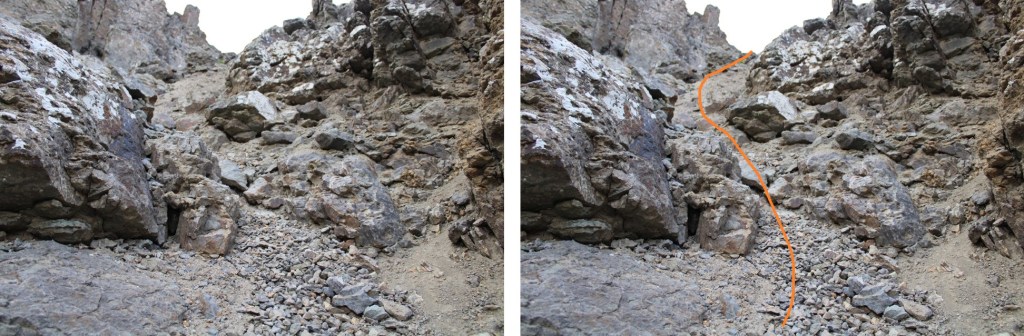
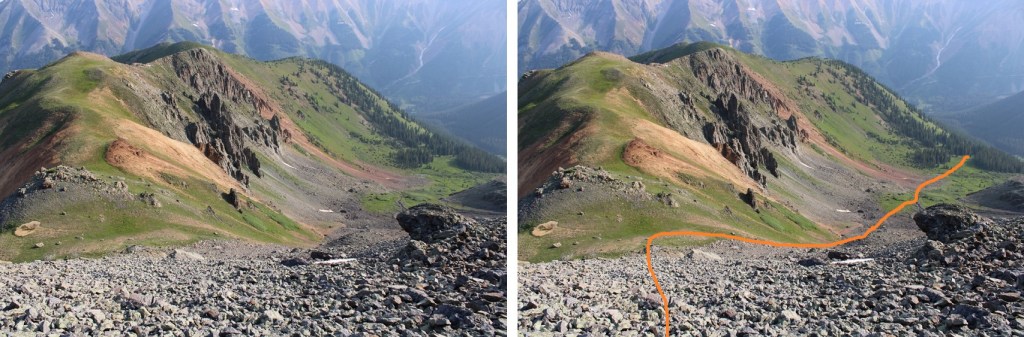
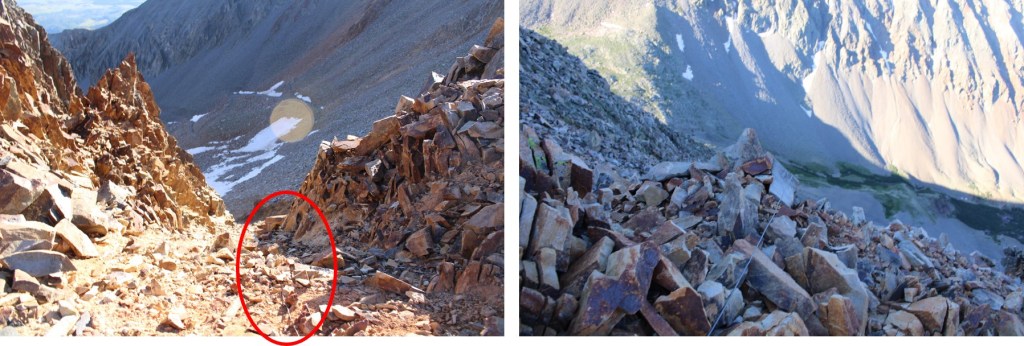
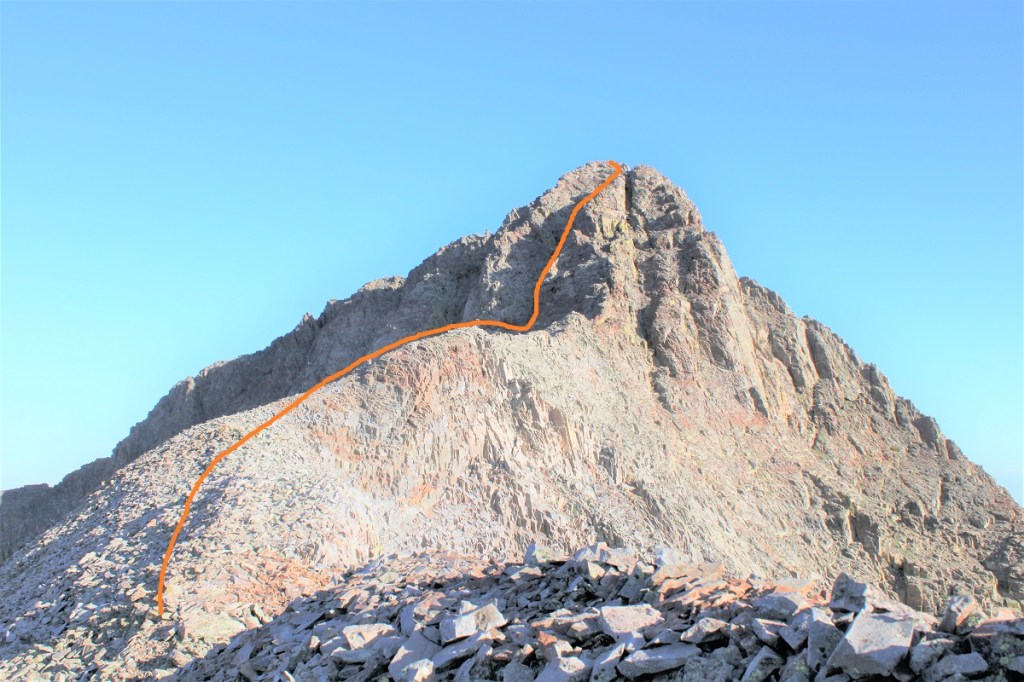
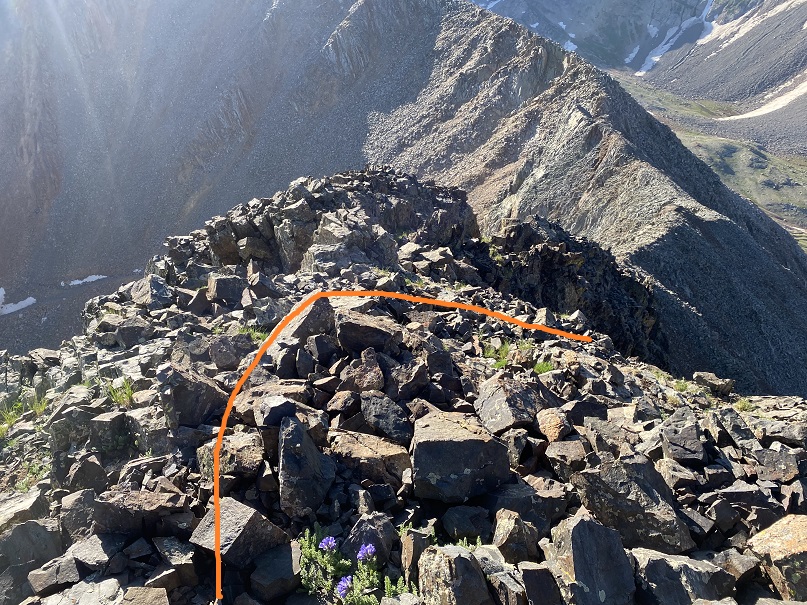
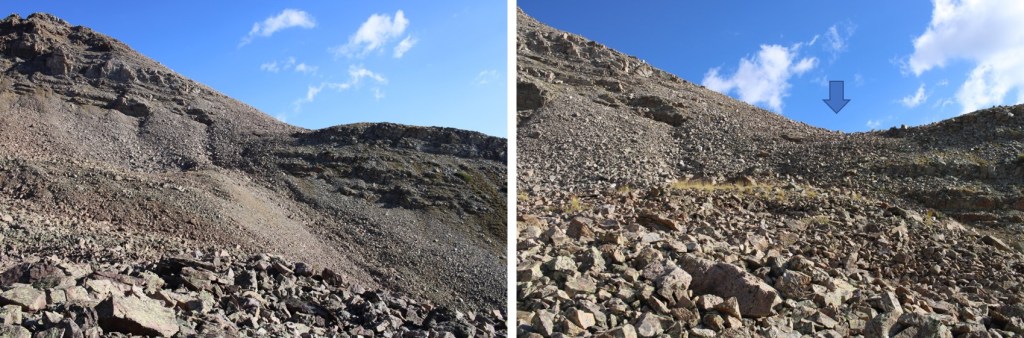
And now for the crux

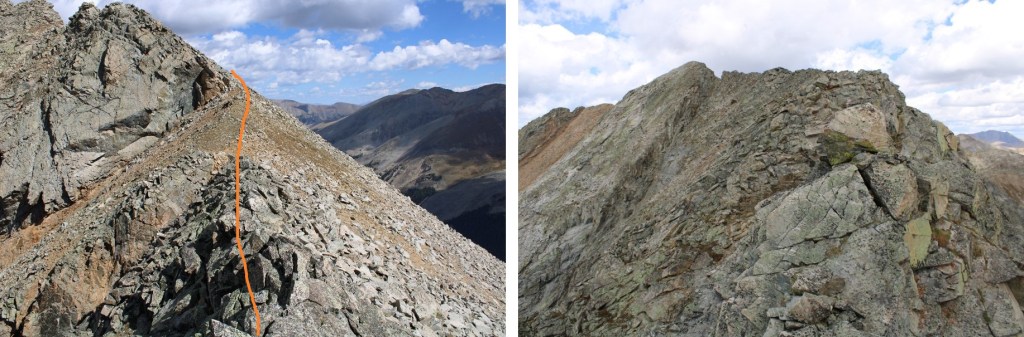
This is the route I took

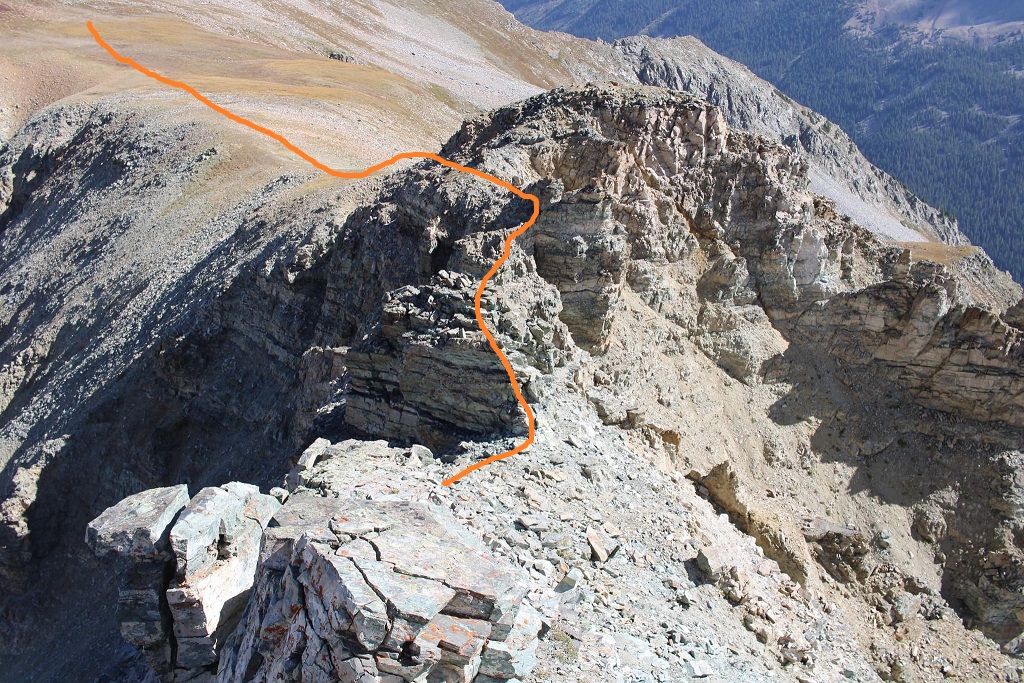
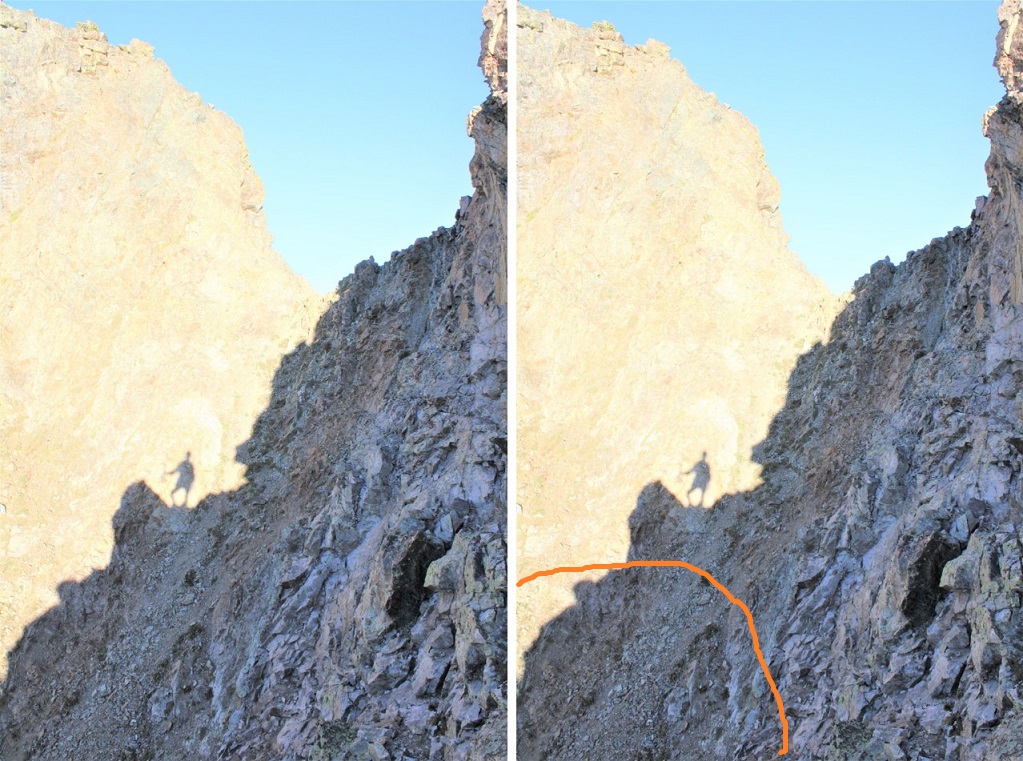
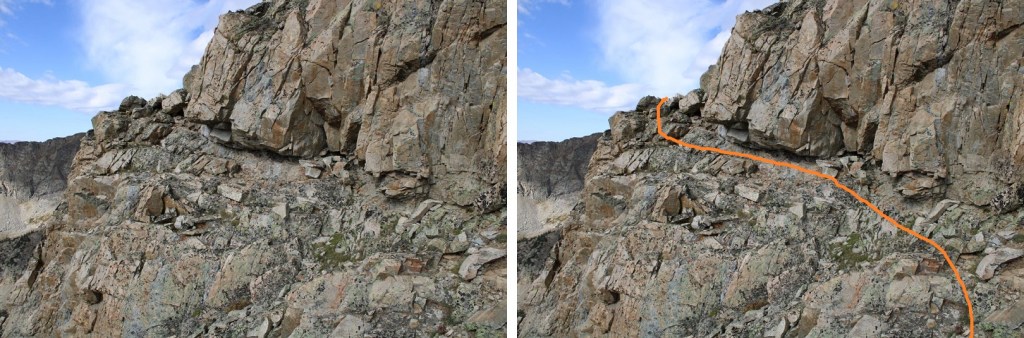
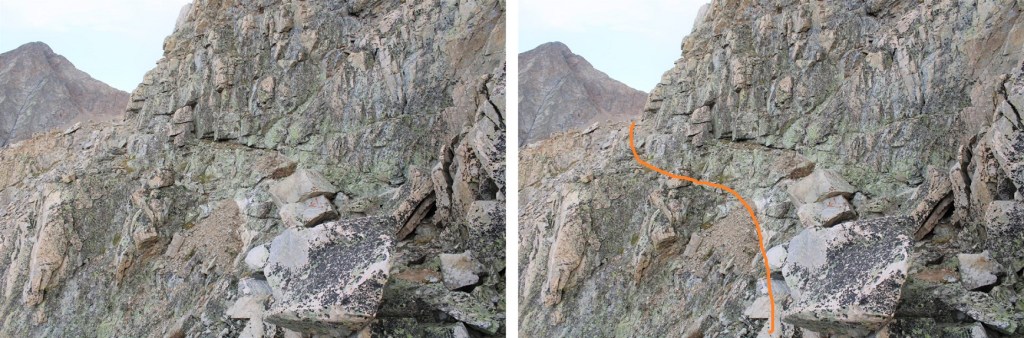
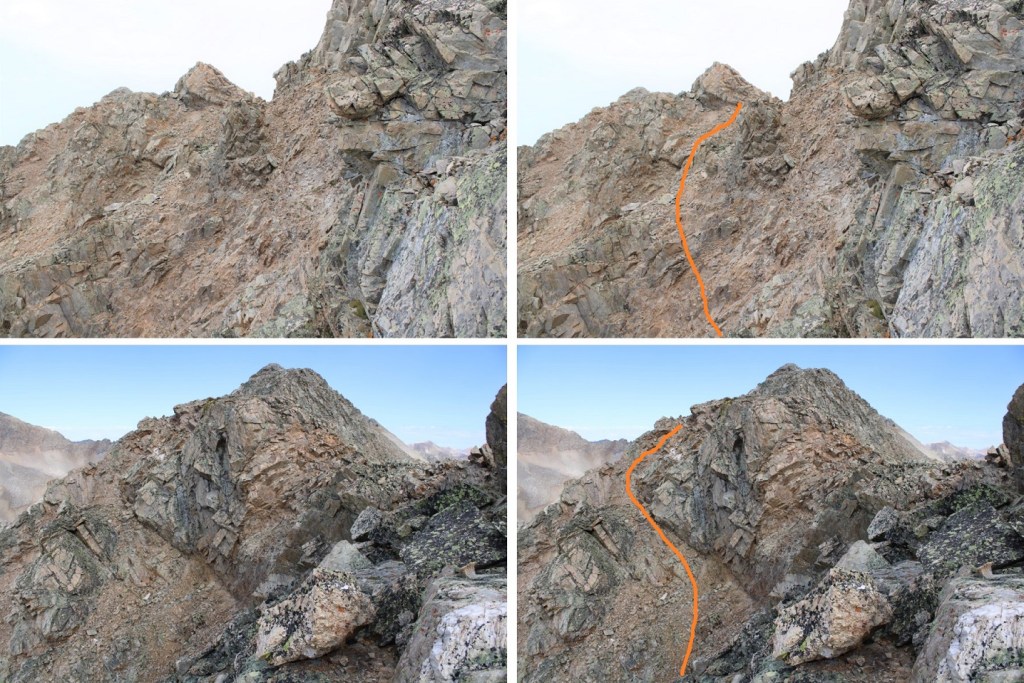
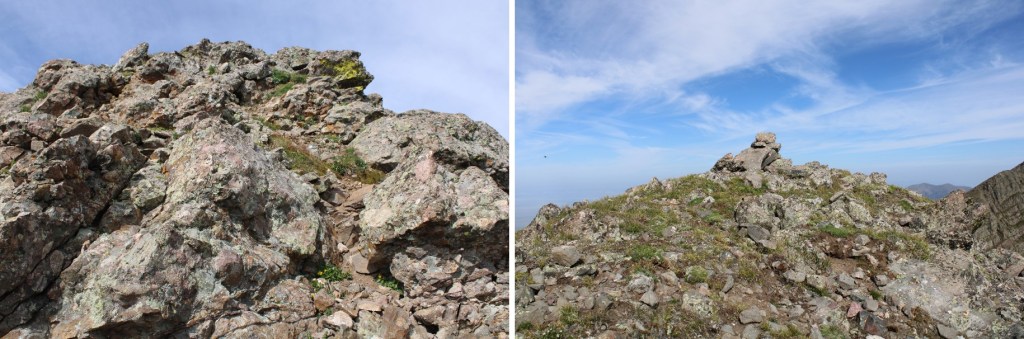
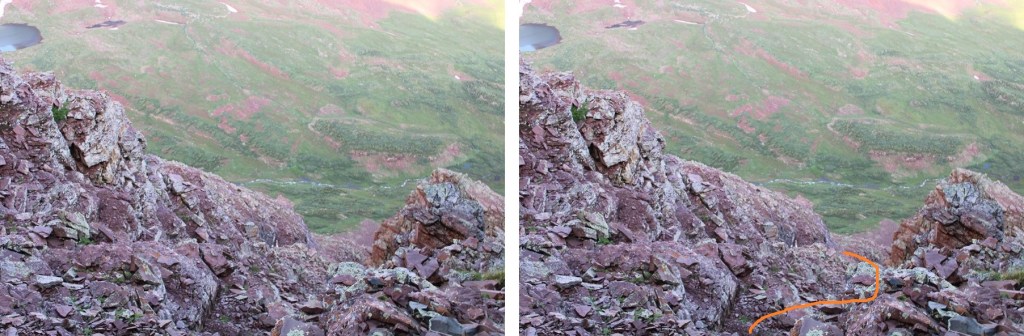
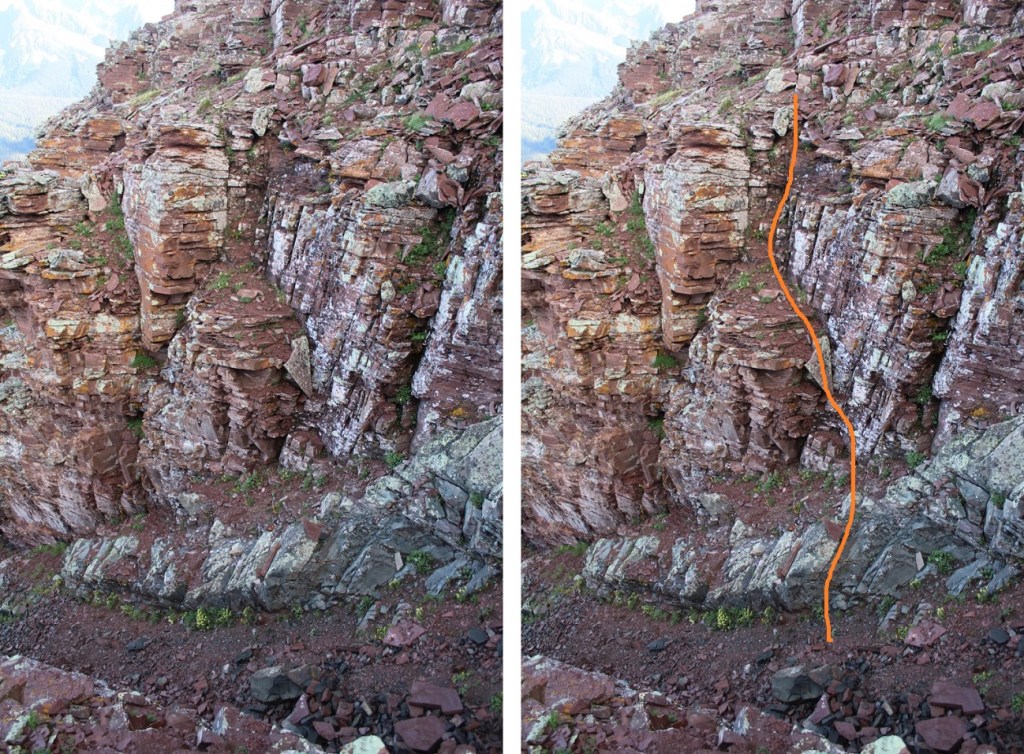
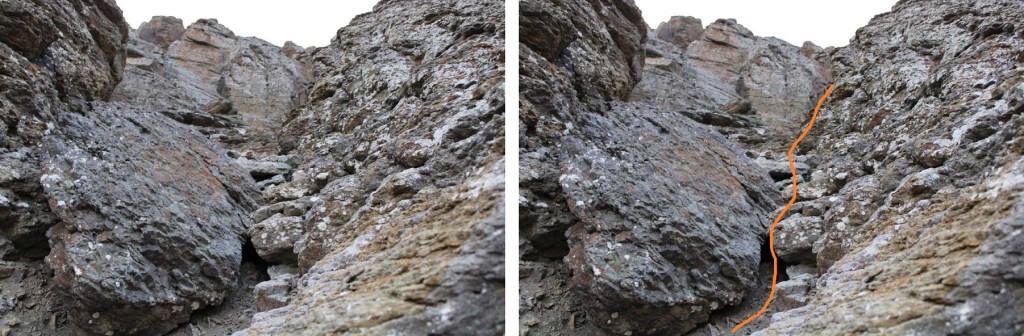
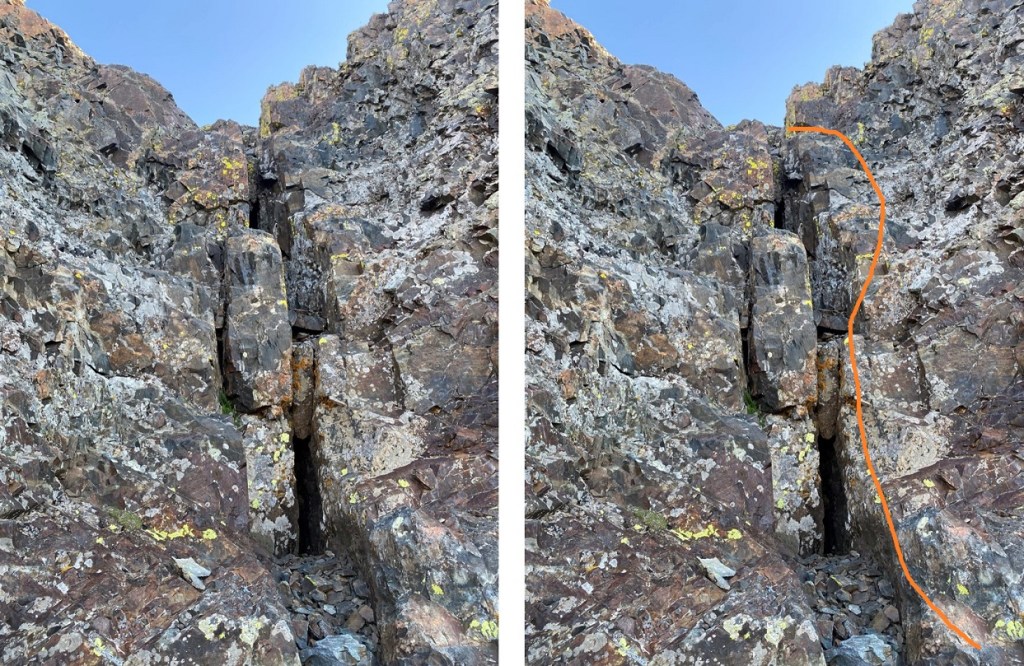
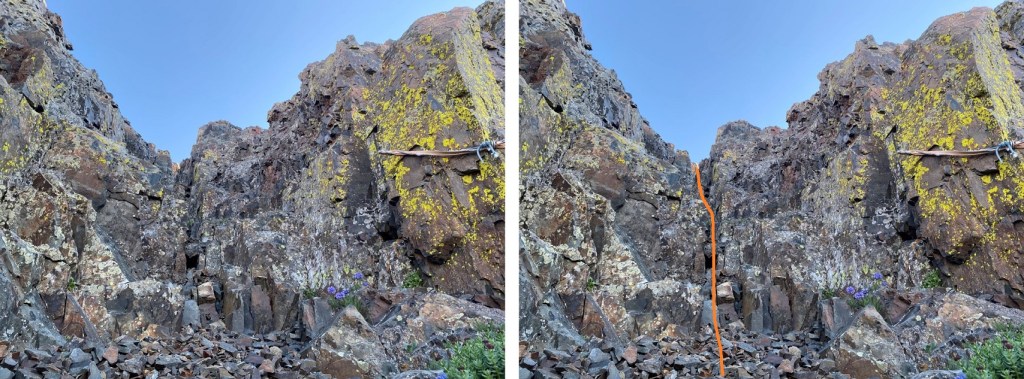
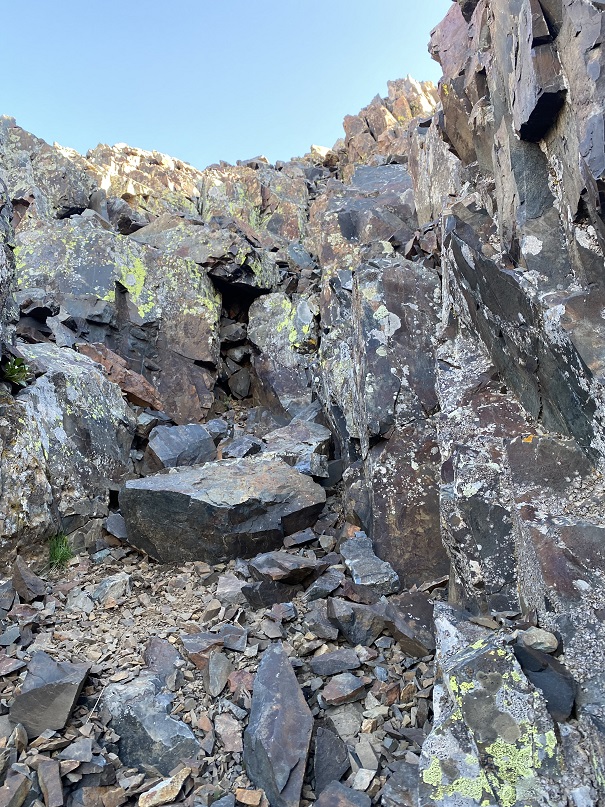
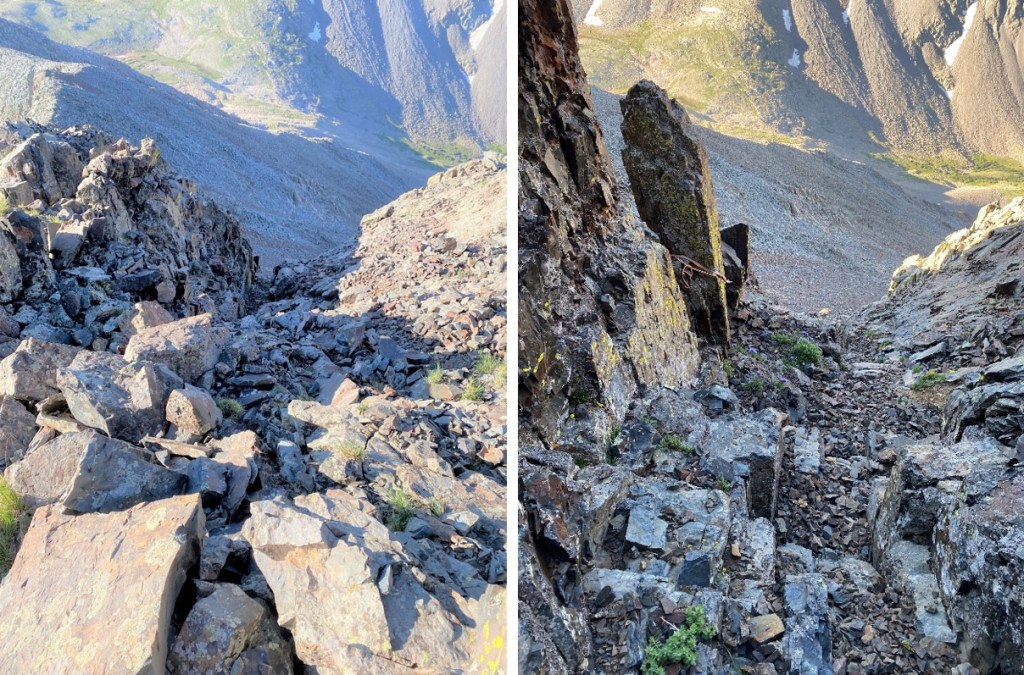
But there’s a lot you can’t see…  So here it is step by step.  This is class 4

This was a small, airy traverse, about 6 feet long, ad no more than a foot wide

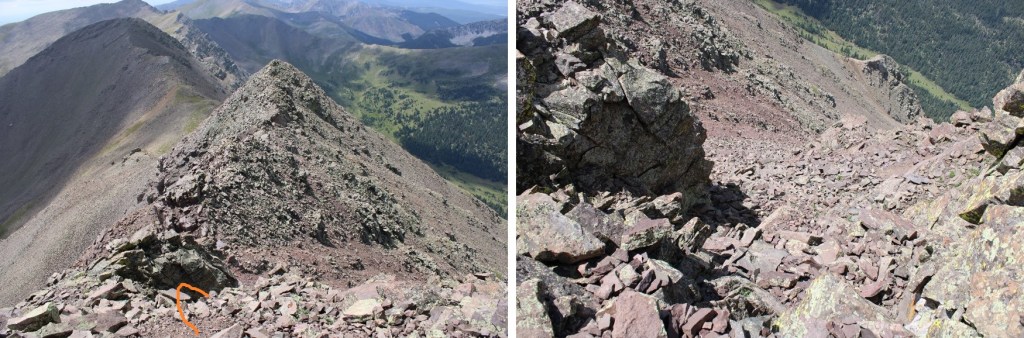
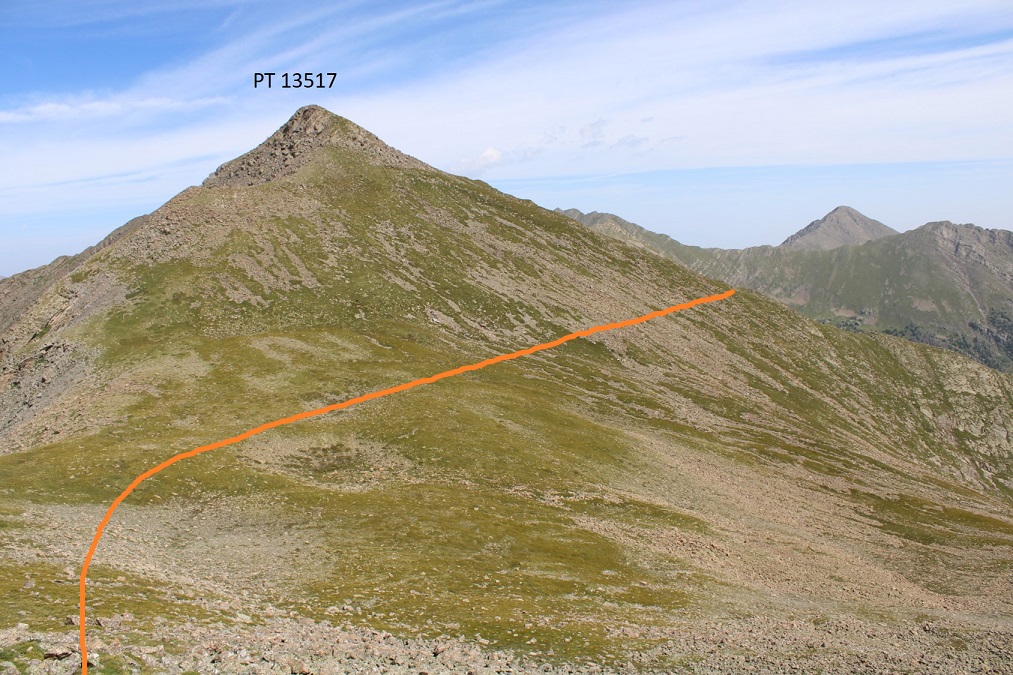
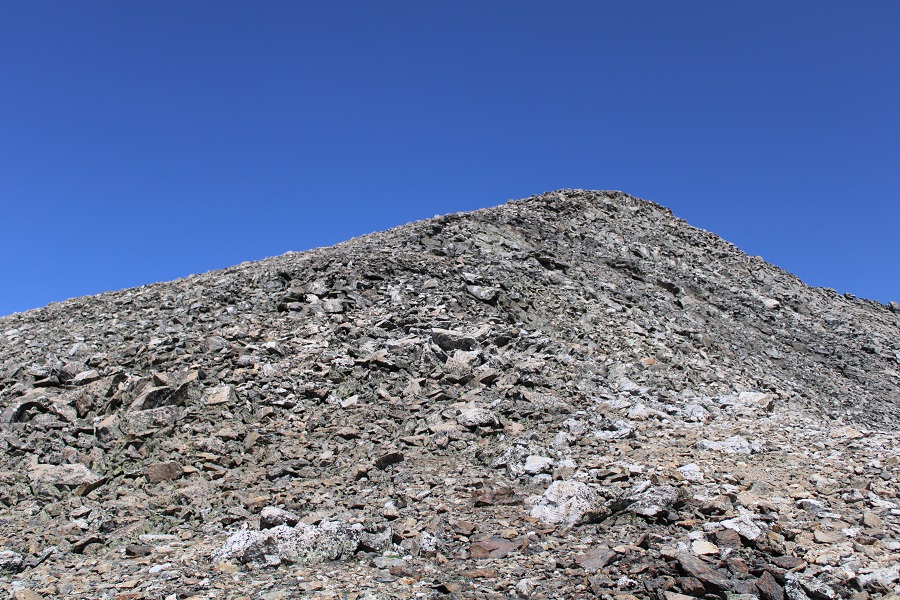
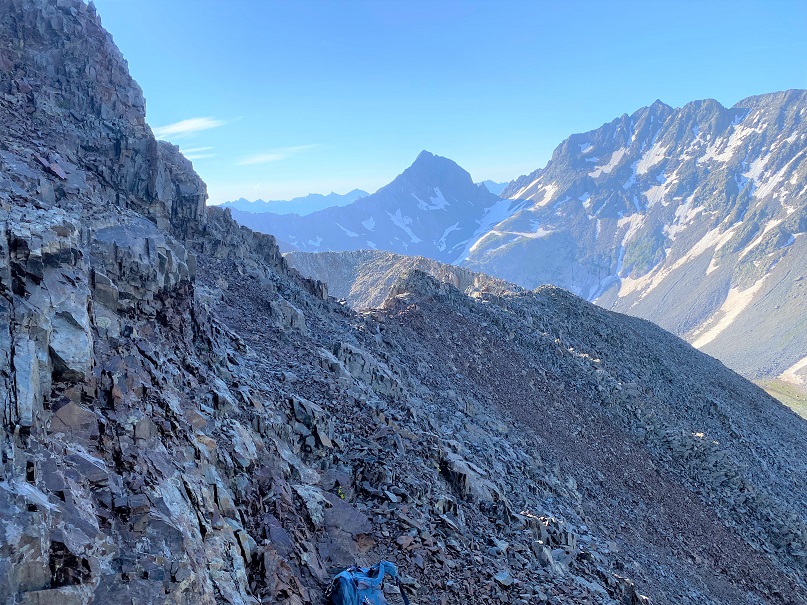
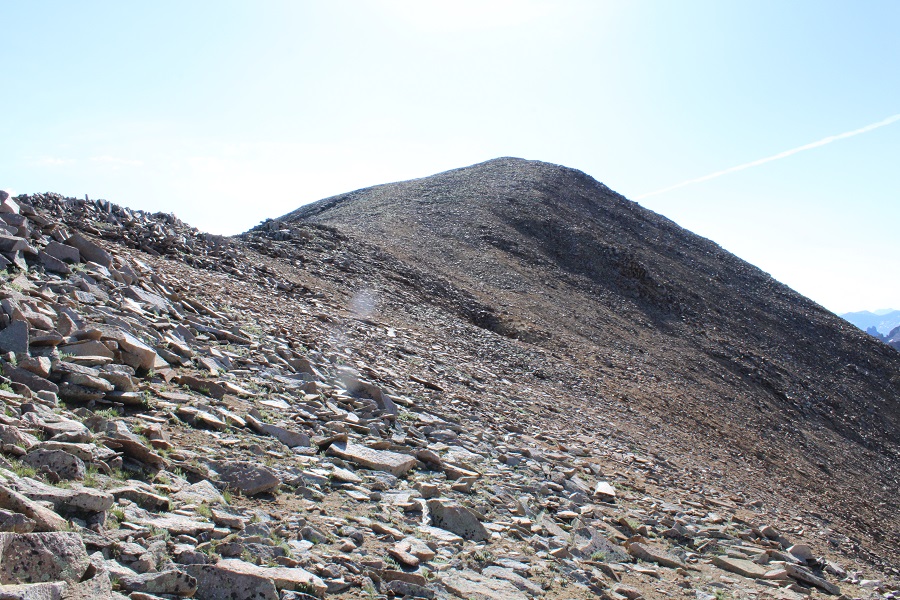
The good news is after that it’s all class 2 to the top of Keefe Peak.

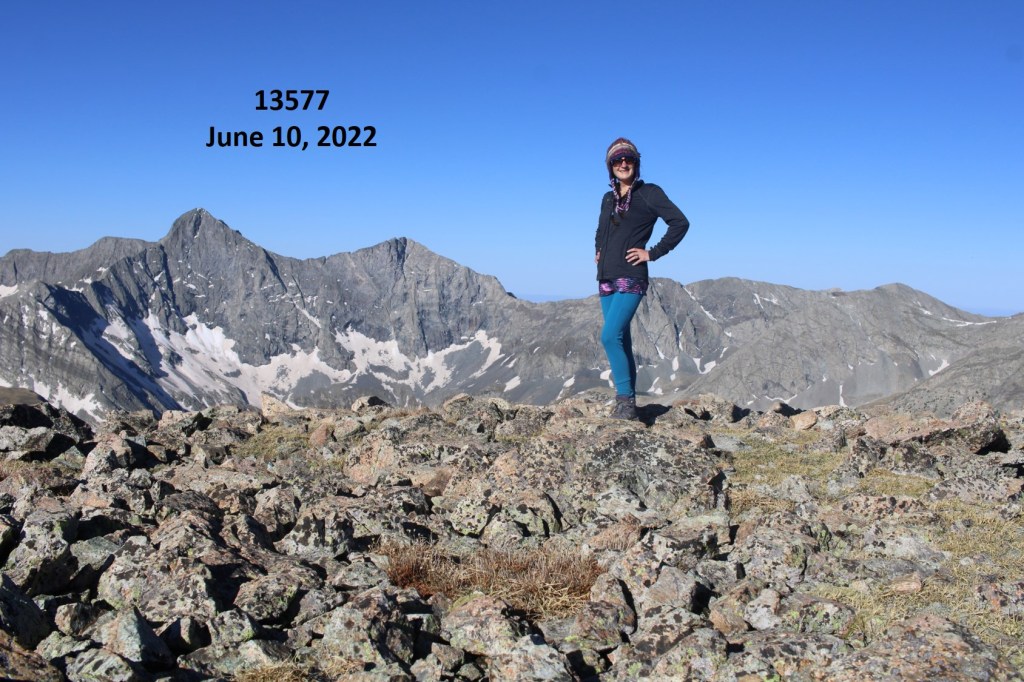
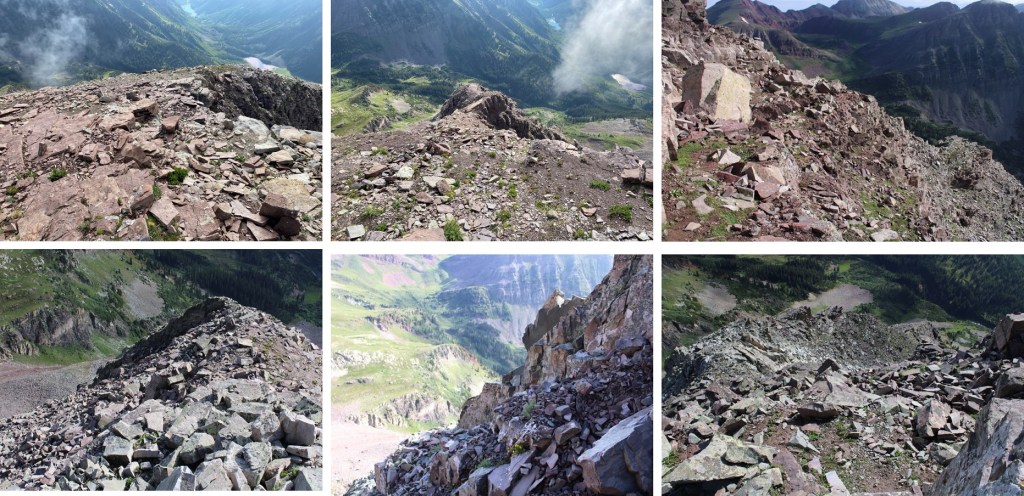
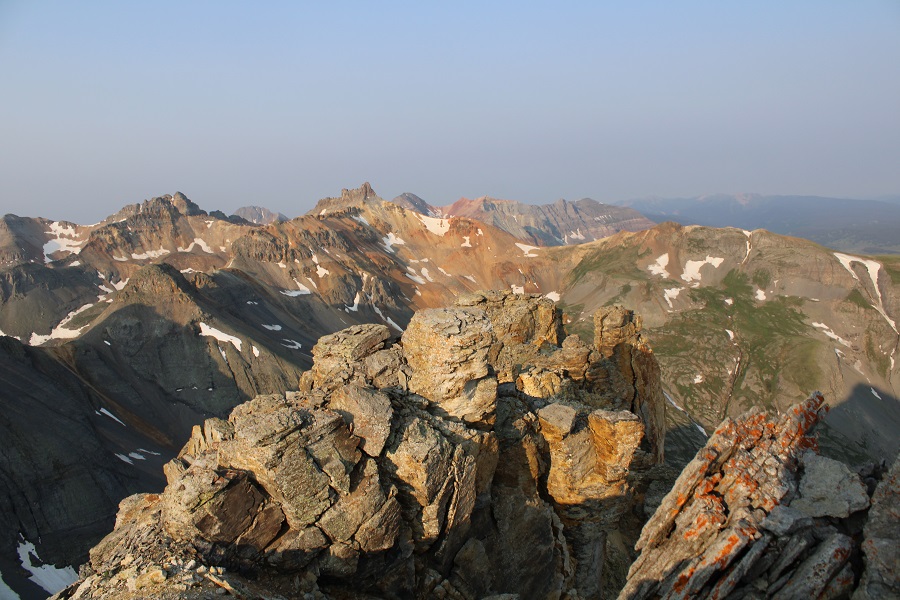
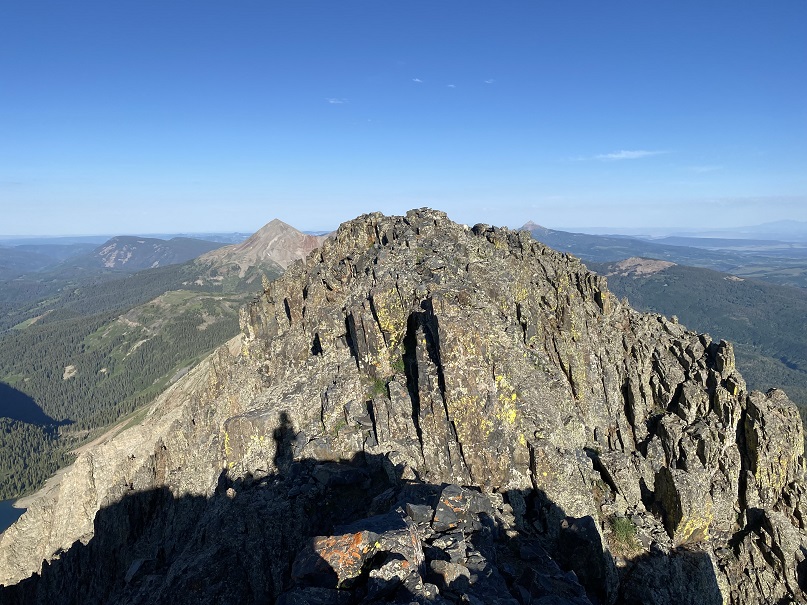
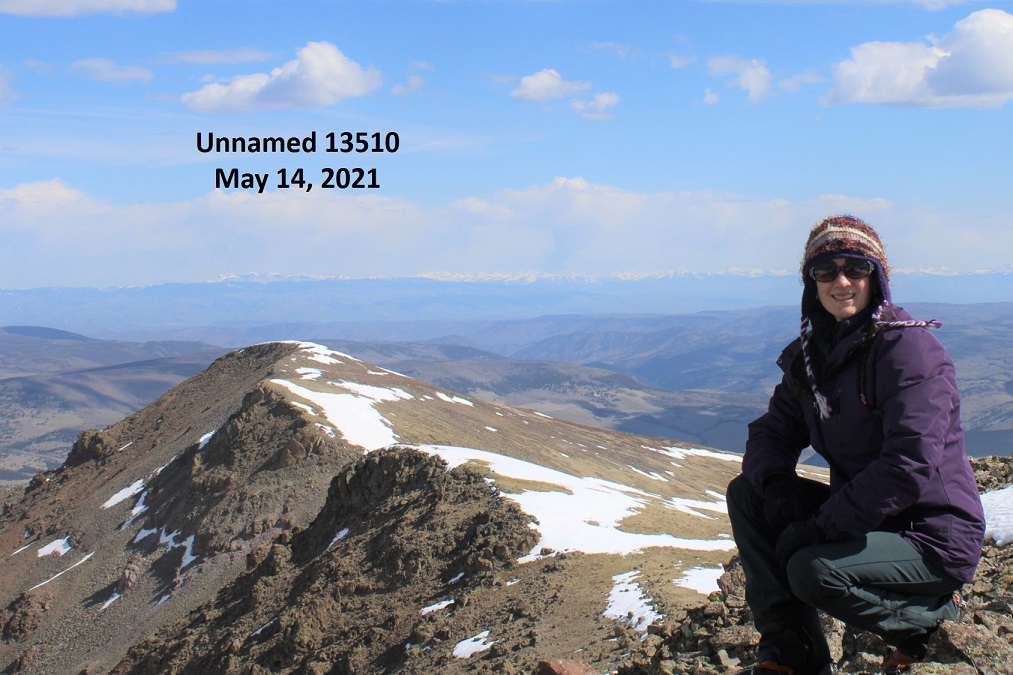
I summited Keefe Peak at 11am

Keefe Peak:

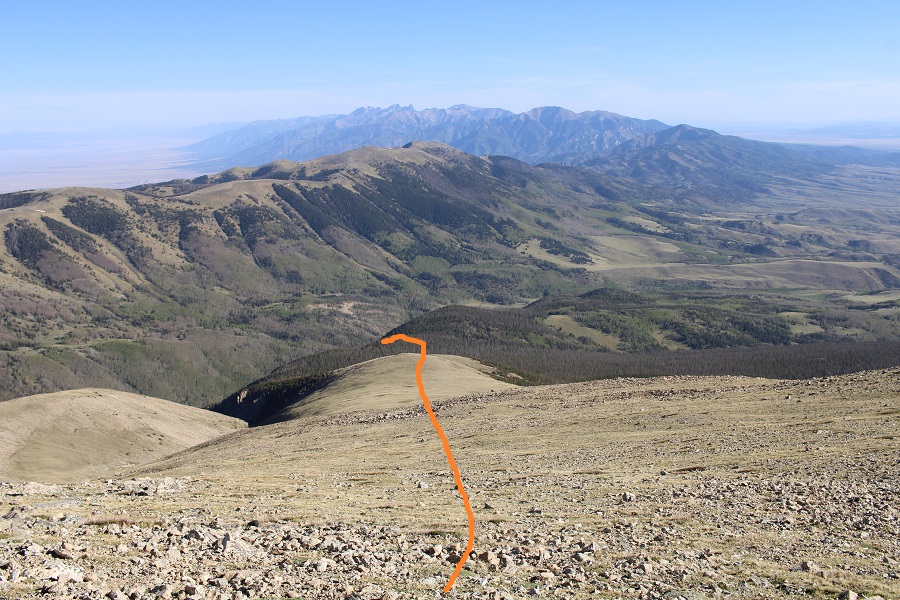
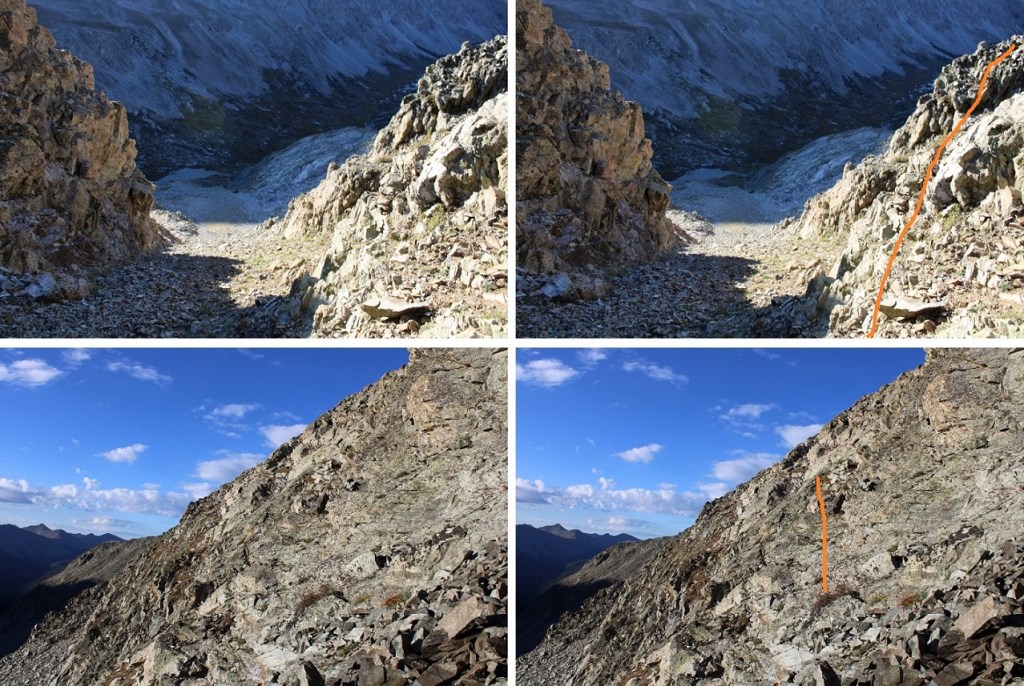
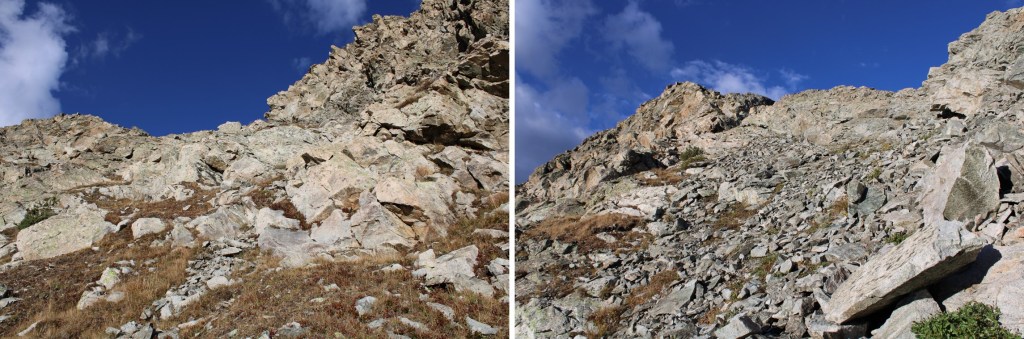
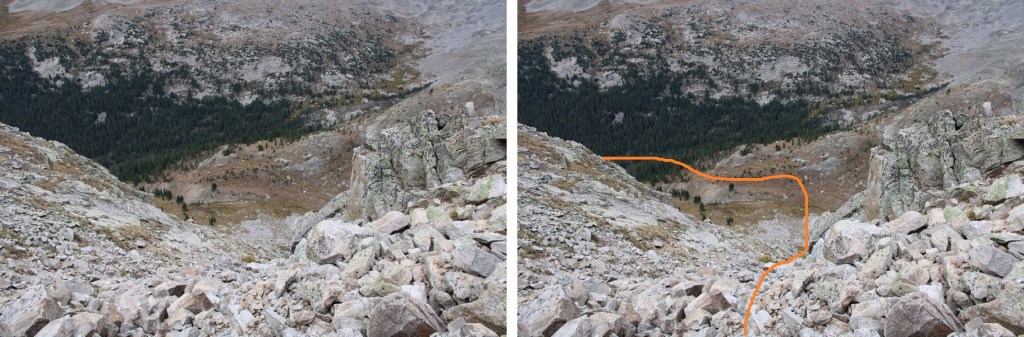
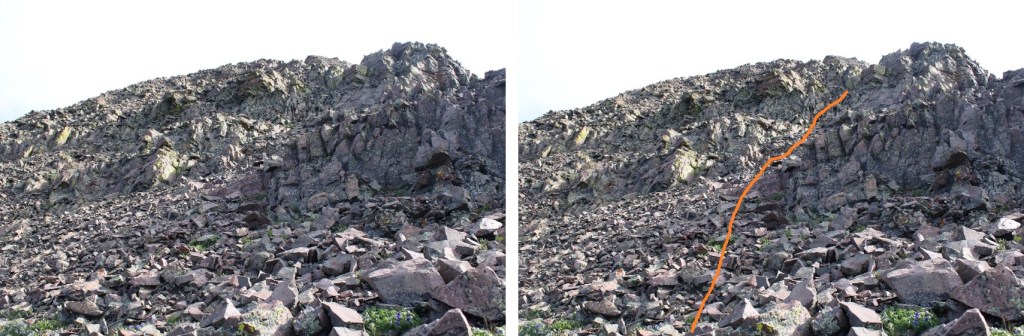
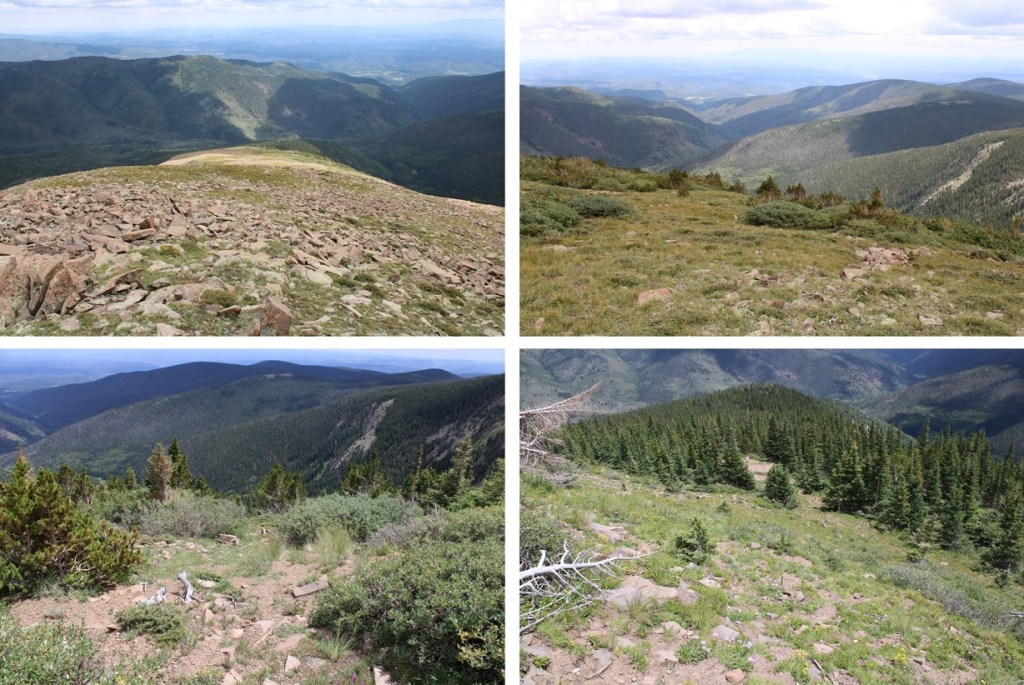
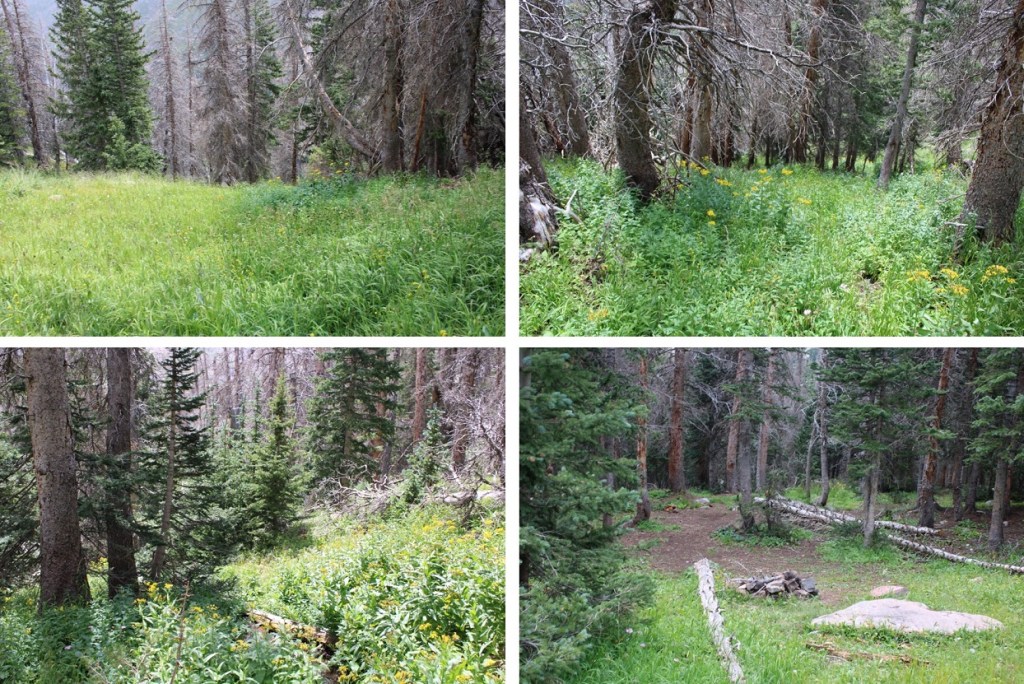
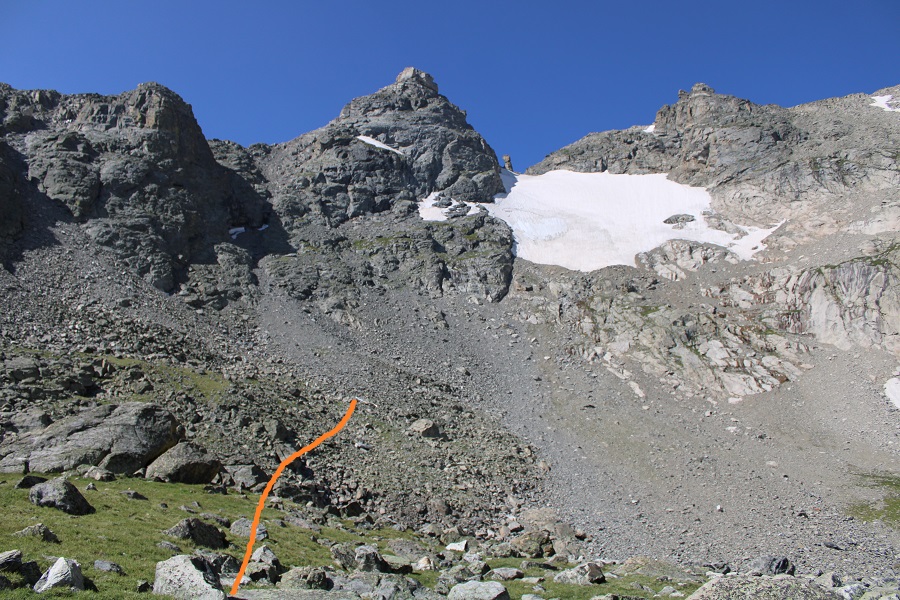
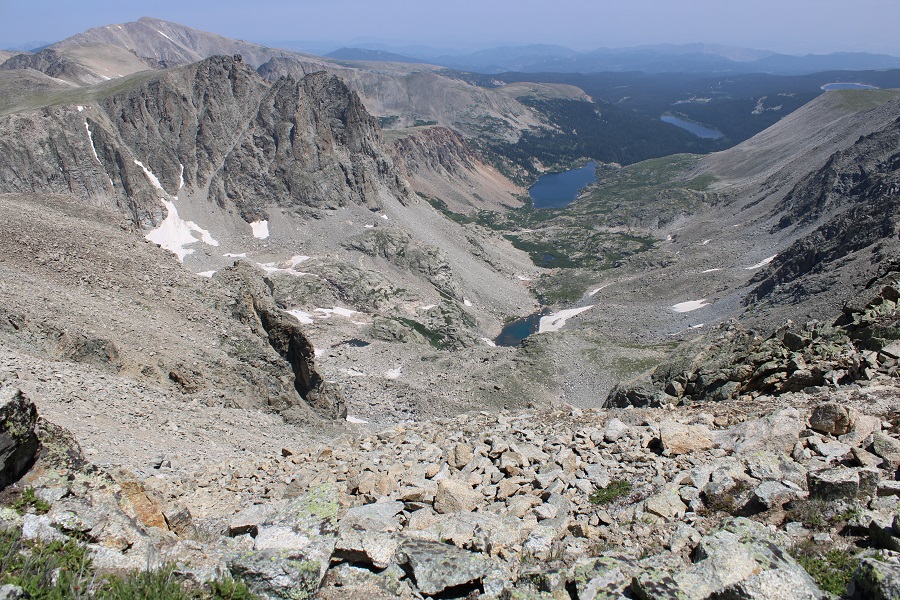
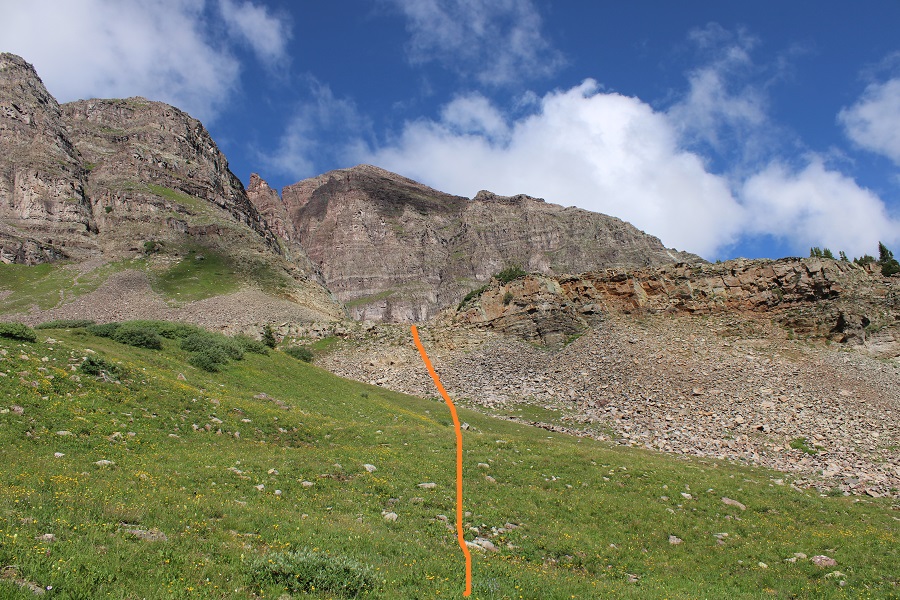
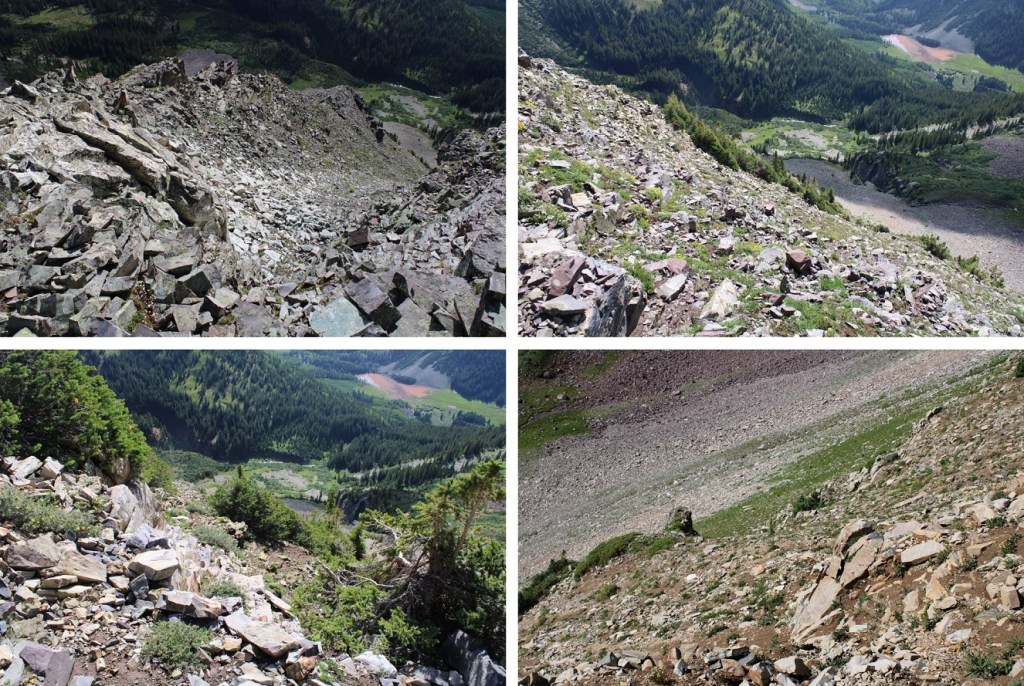
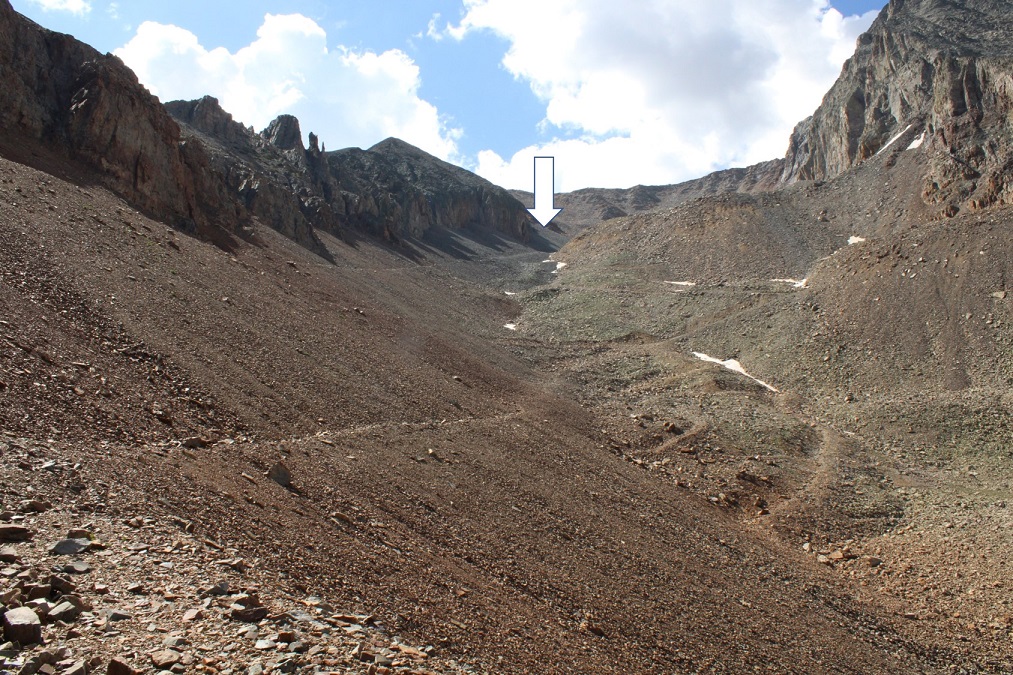
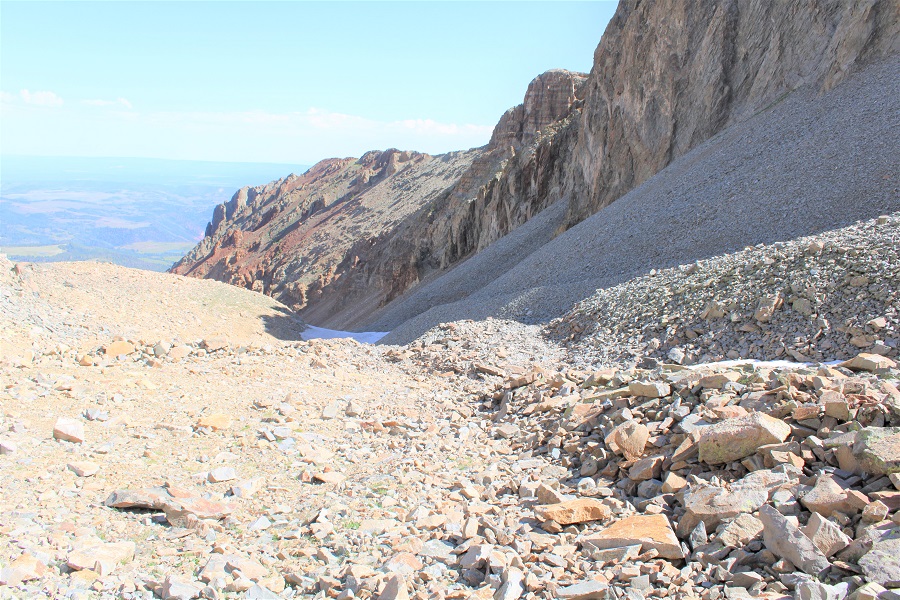
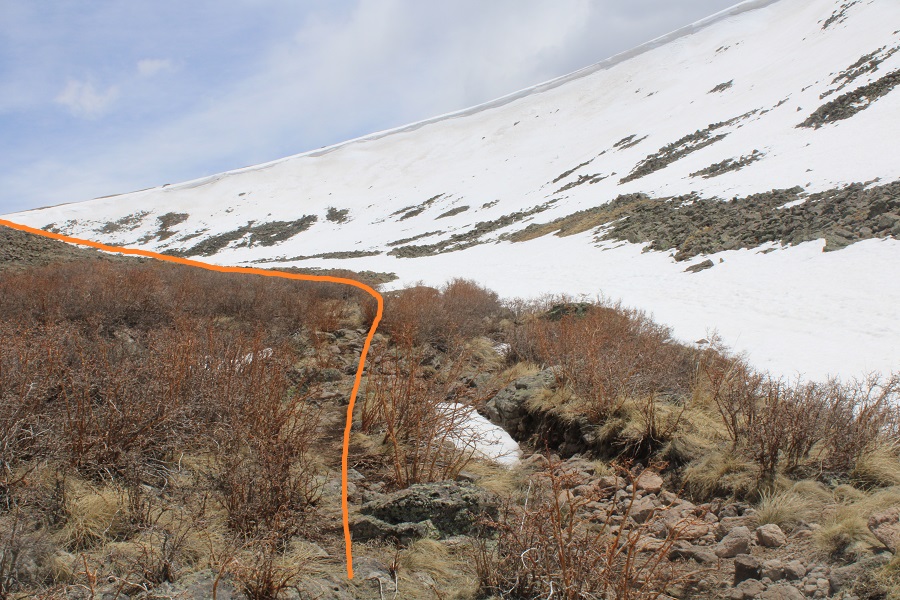
I decided to make this a loop, and head east down an old avalanche runout.  Let me preface this by saying it worked, but the runout is quickly growing back, and there was a ton of bushwhacking.  Plan your route carefully.  Here are some pictures of the route that led me directly back to the trail (1981) and Conundrum Creek below.

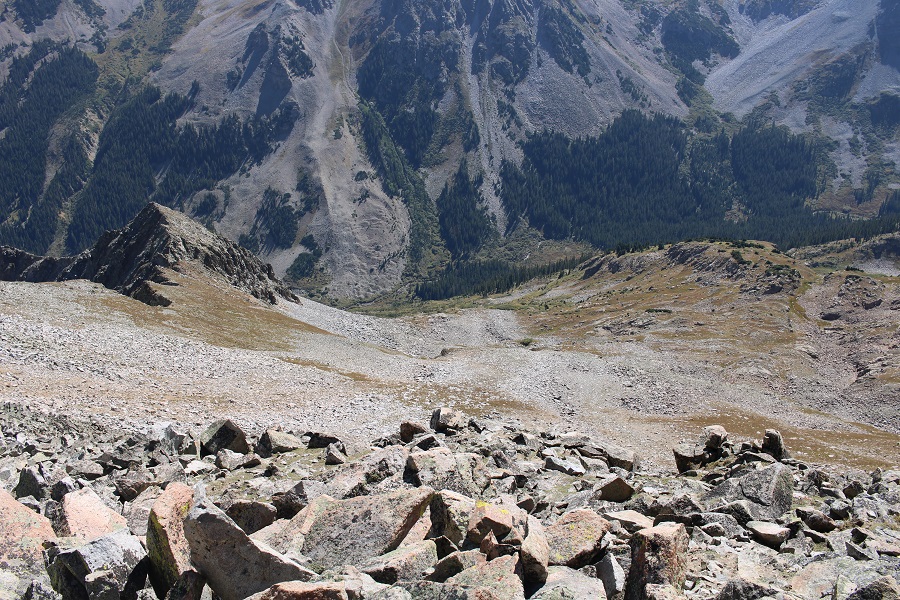
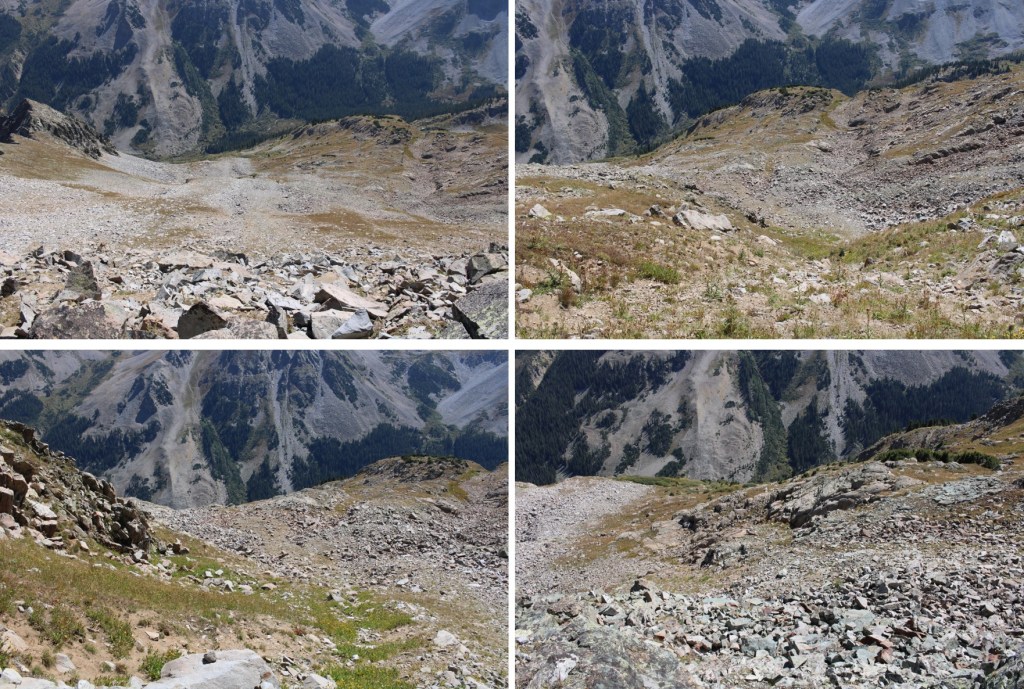
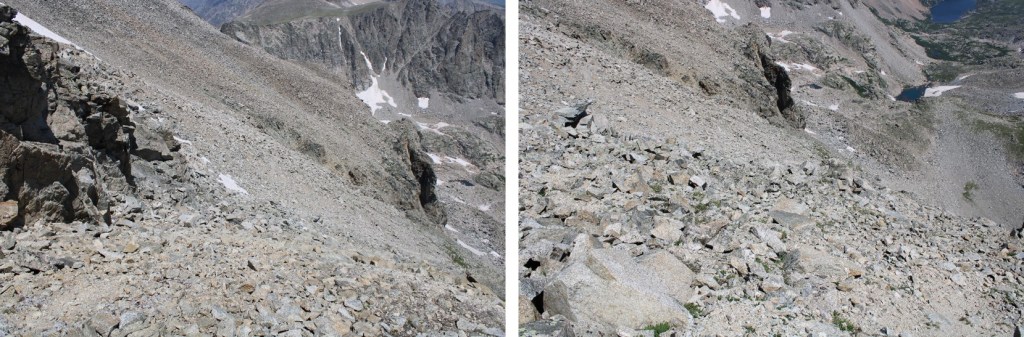
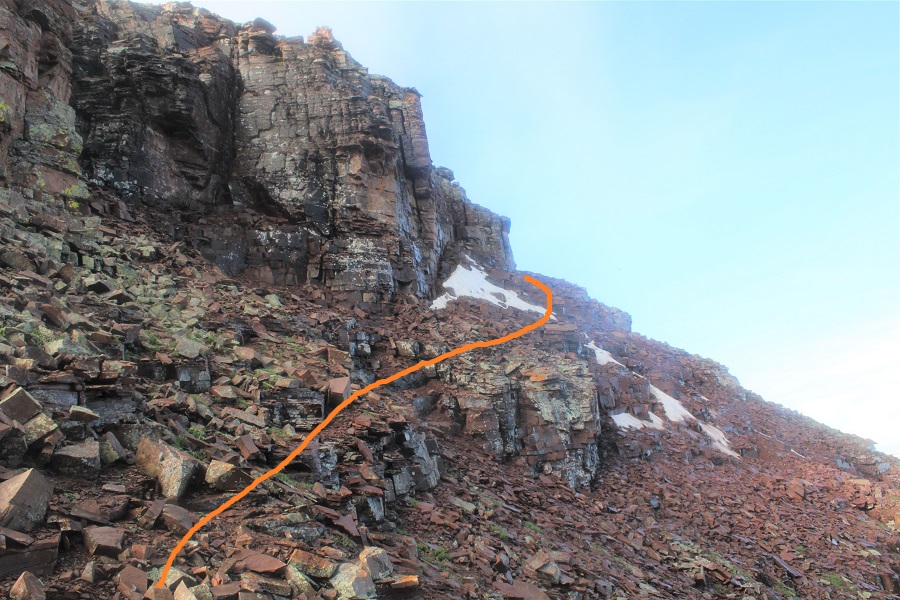
Here’s looking up at the route I took down.  You could also take this route up, and just do Keefe from this angle, and skip the class 4 section of the traverse.  It’s a lot of elevation gain in a short while though (3200’ in 7.5 miles) with a lot of initial bushwhacking, but it goes.  I came down the left side (when looking up), but would recommend sticking more to the right and avoiding the middle.

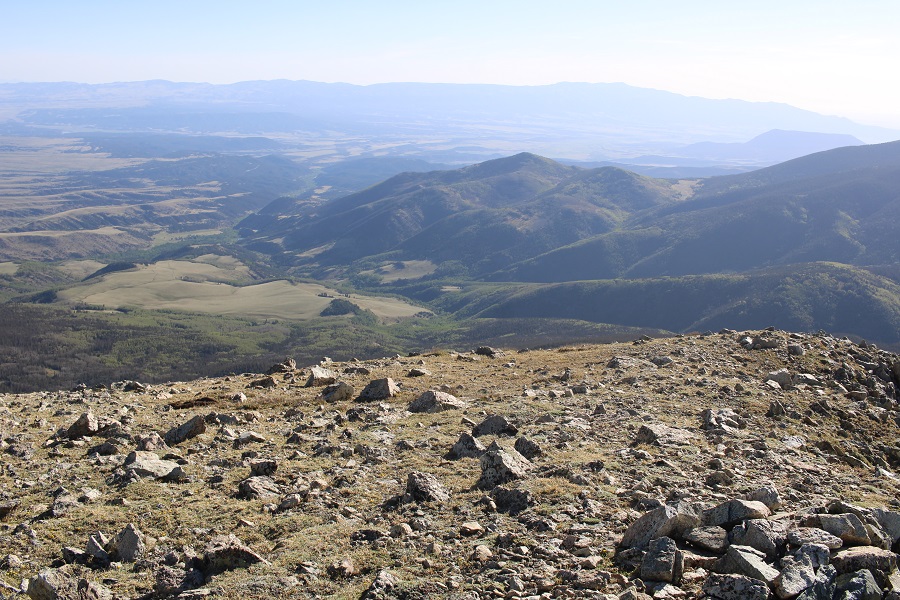
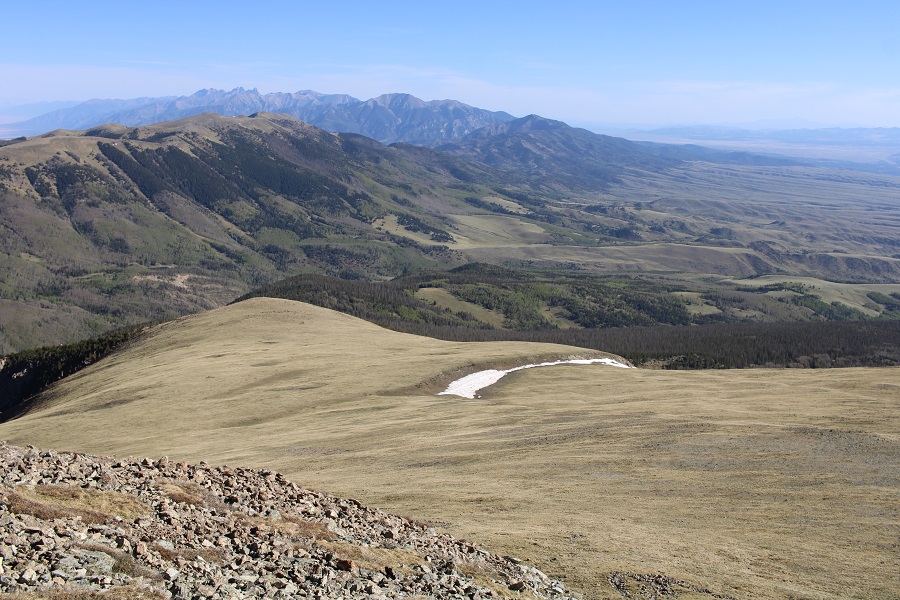
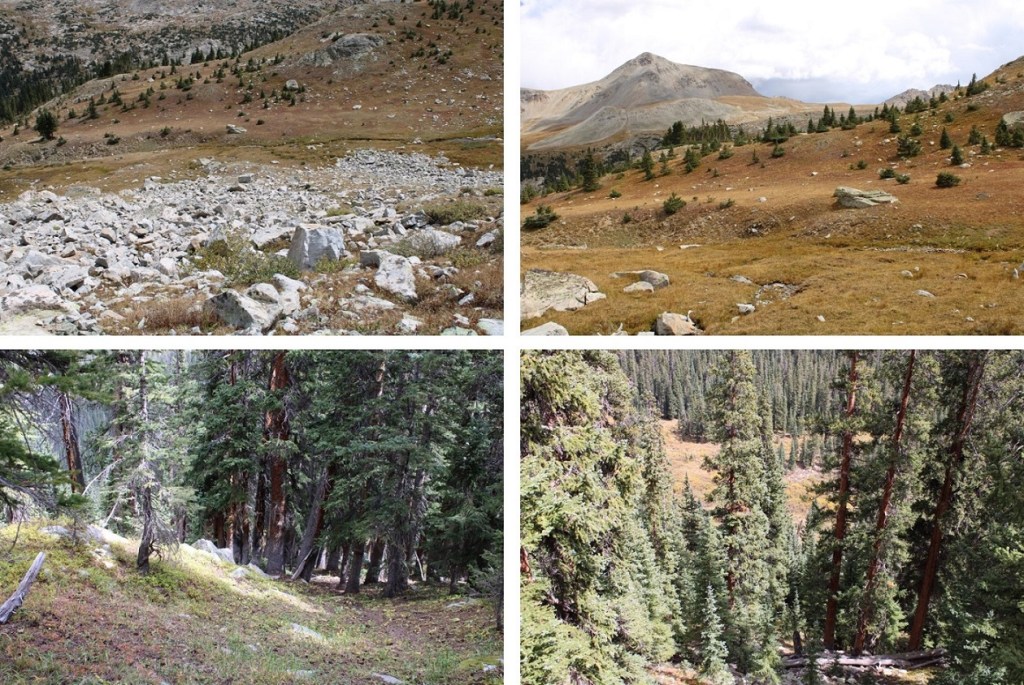
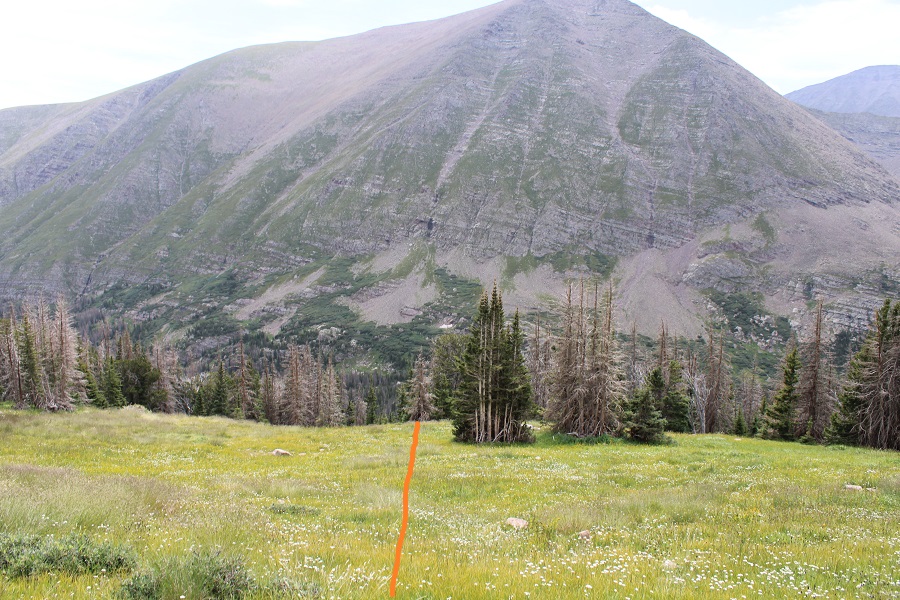
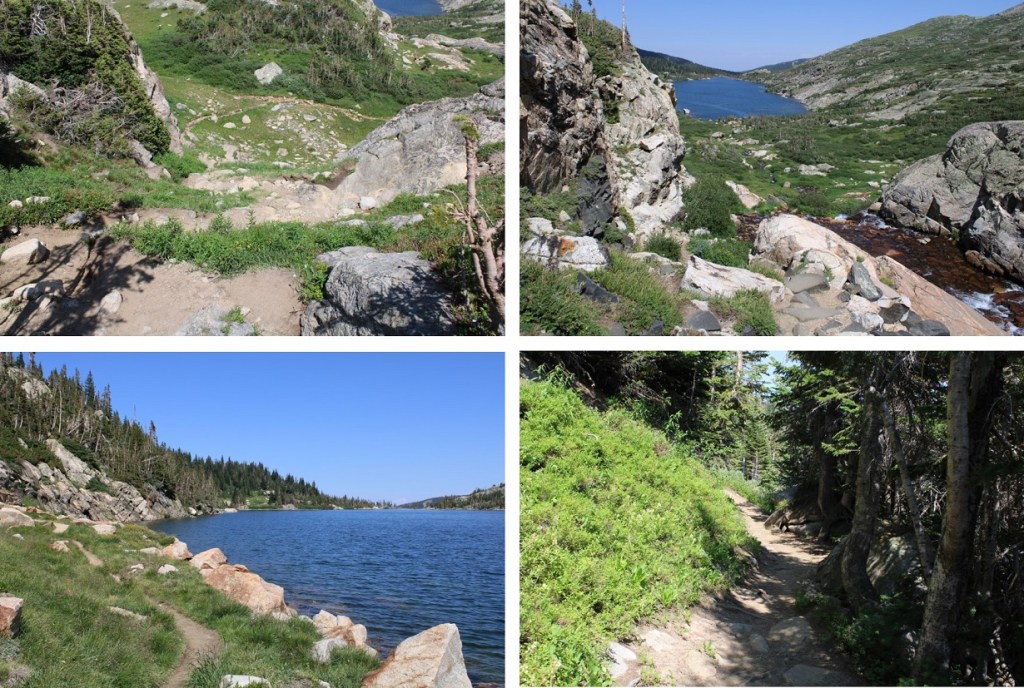
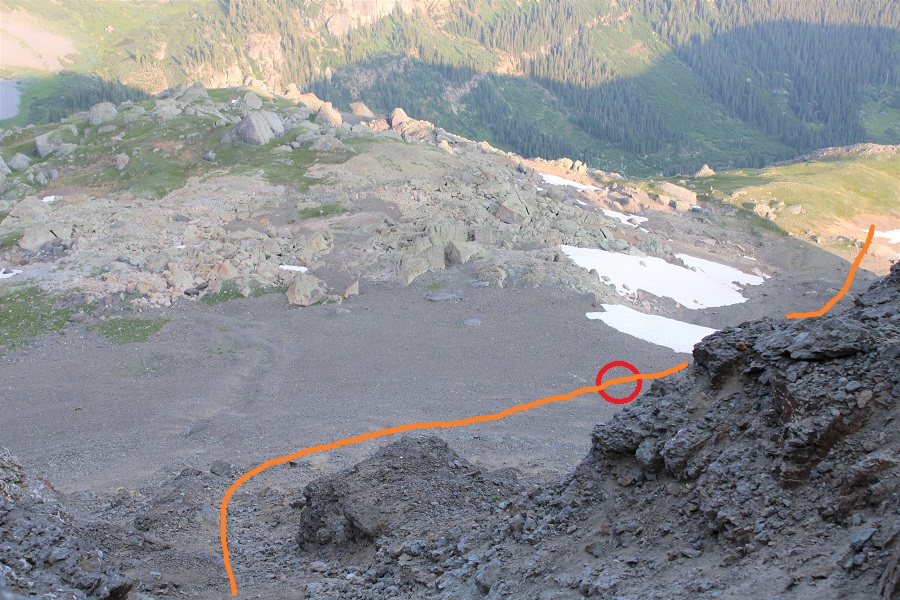
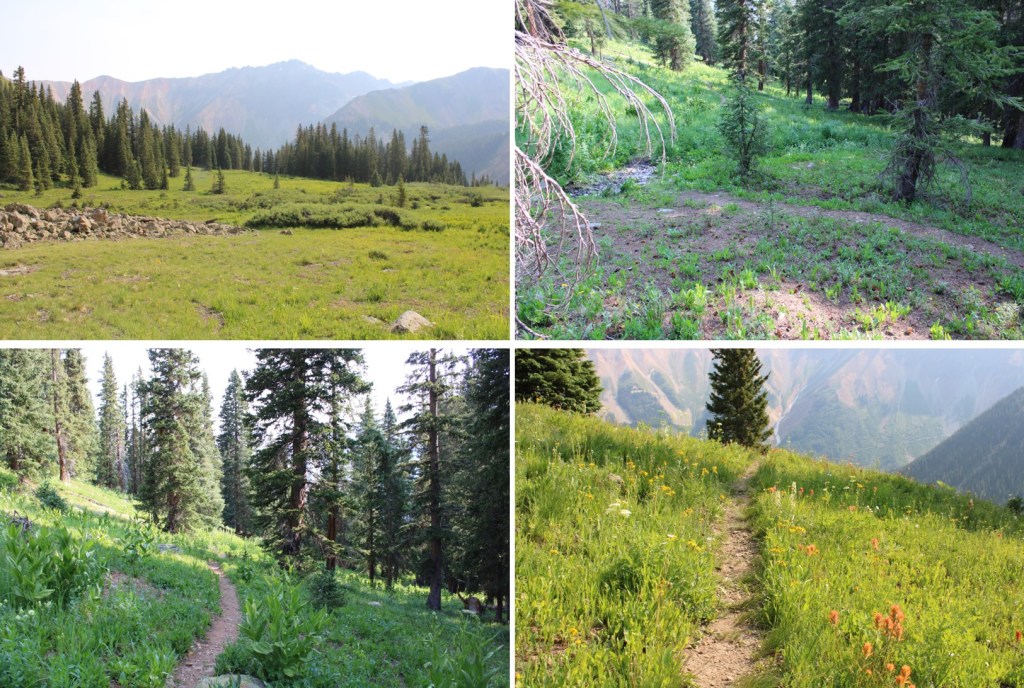
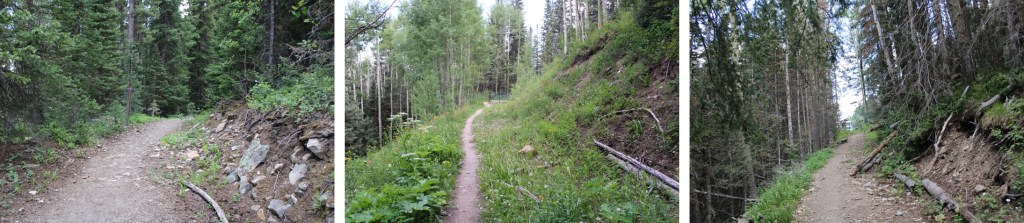
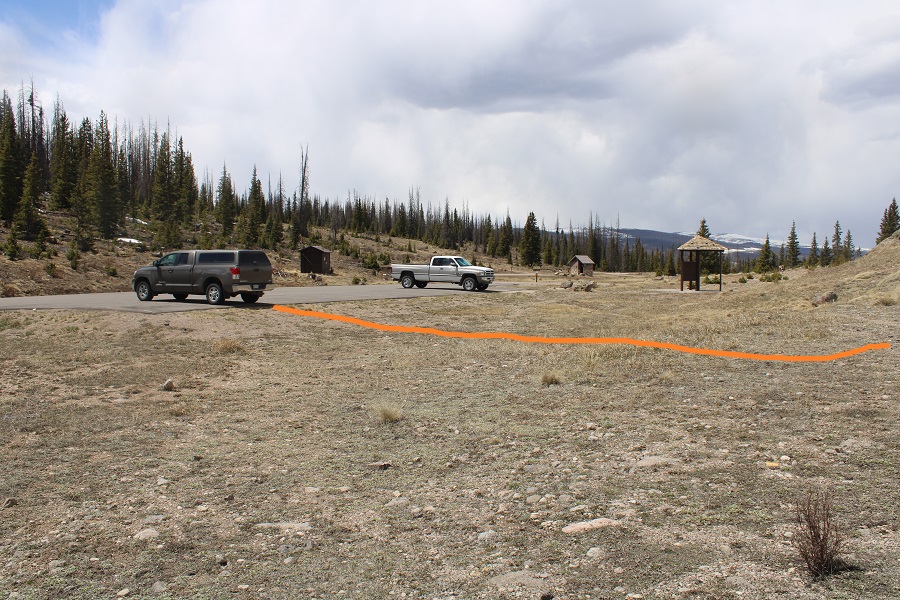
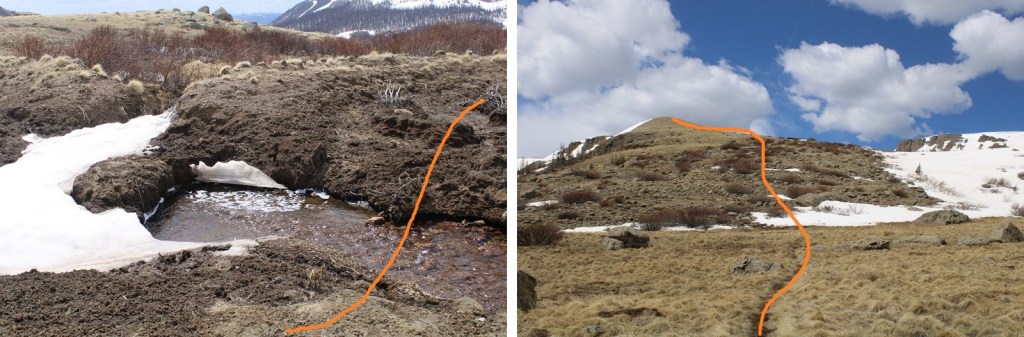
Back on the trail, I followed it back to my campsite, and stayed there for another night. 

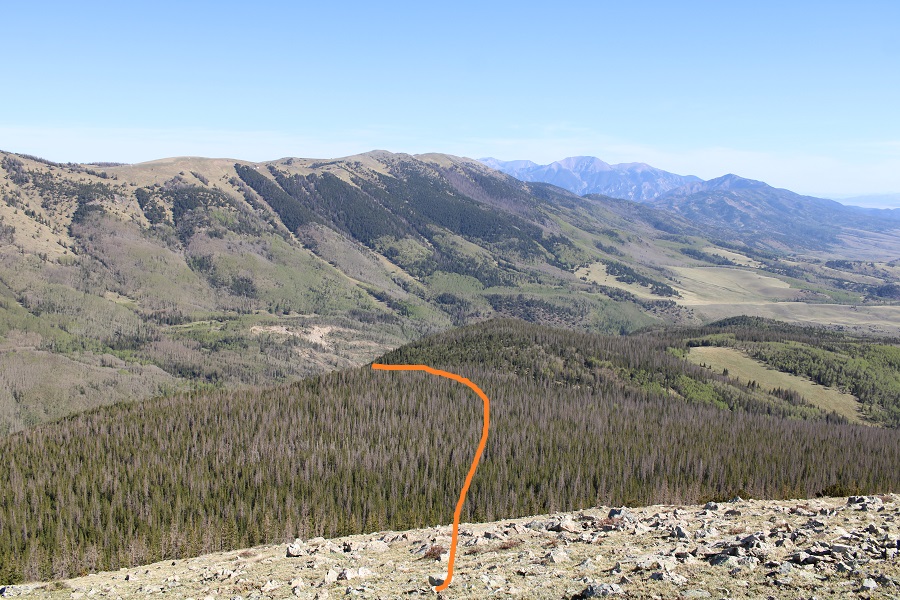
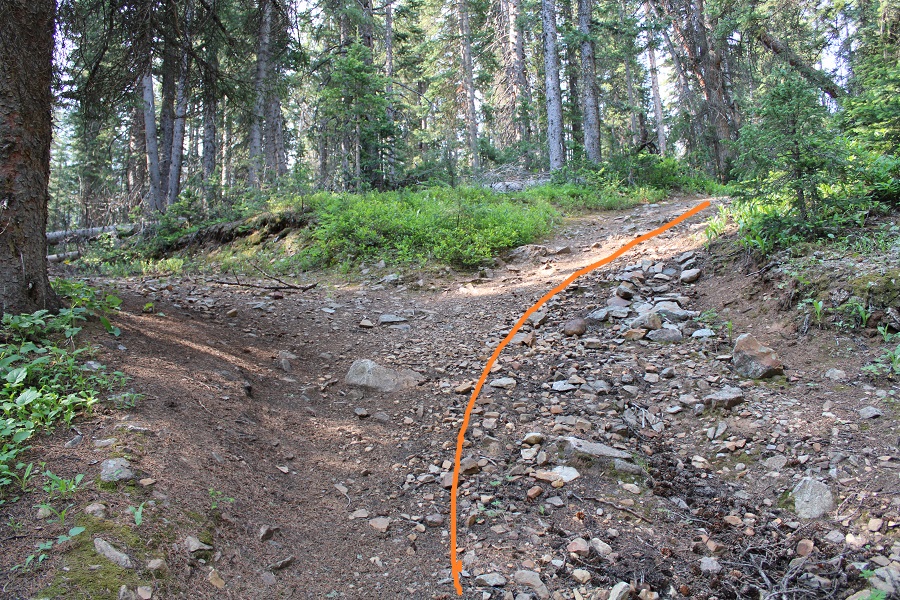
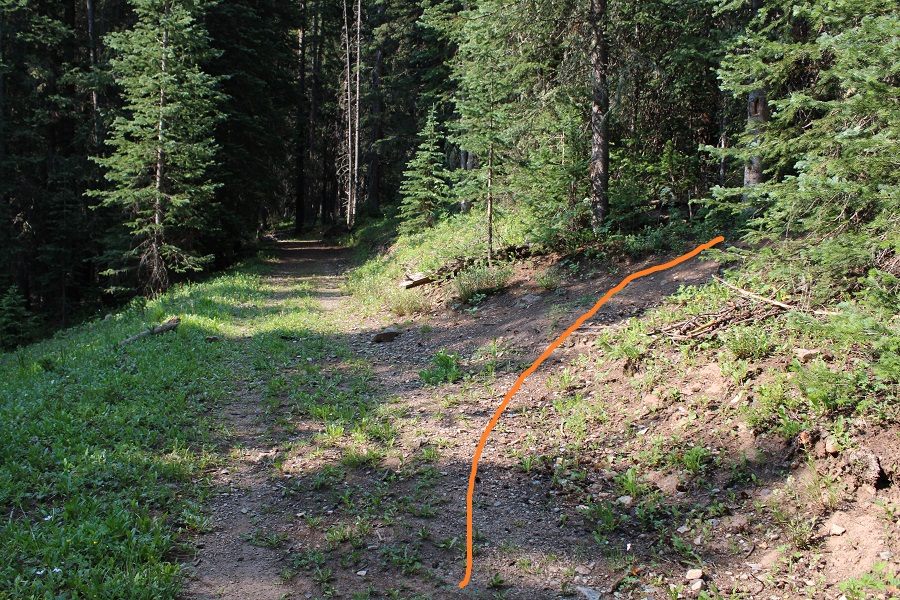
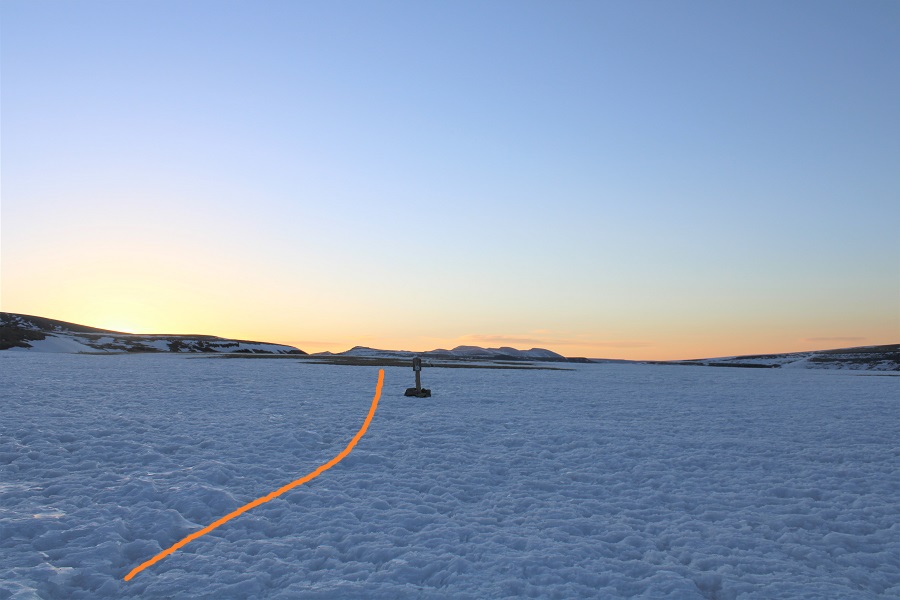
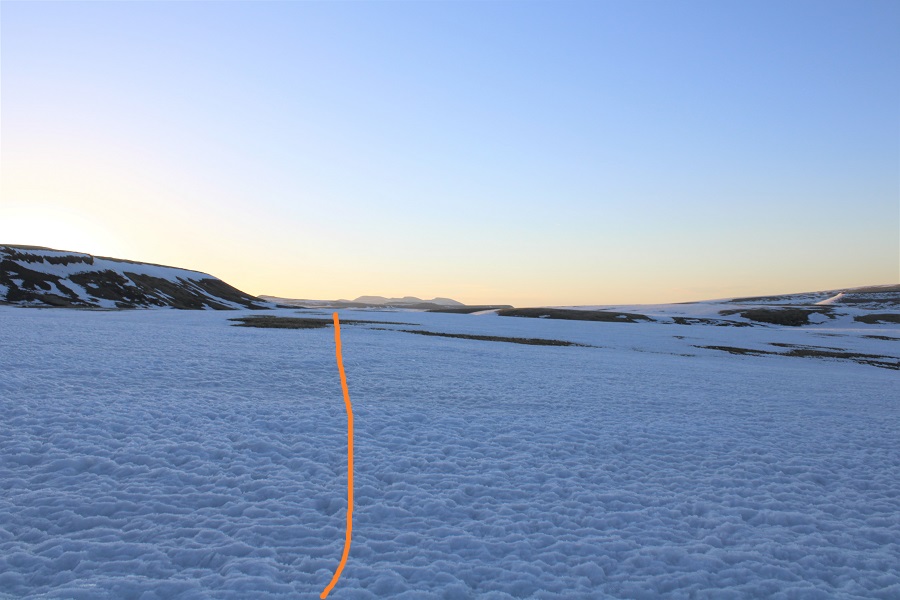
Here’s a look at the route out from the campsite back to the trailhead.
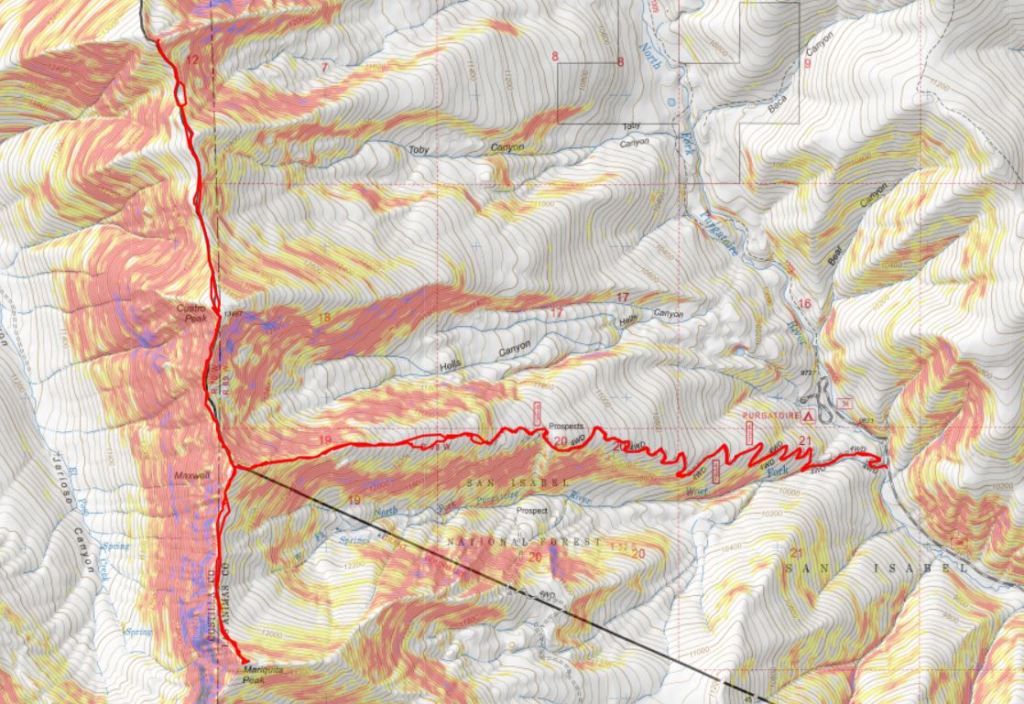
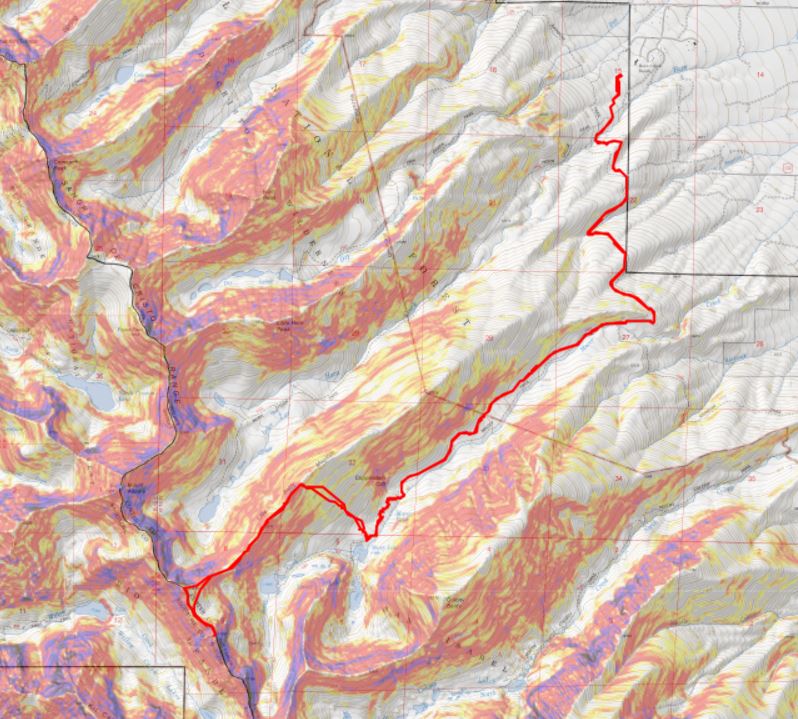
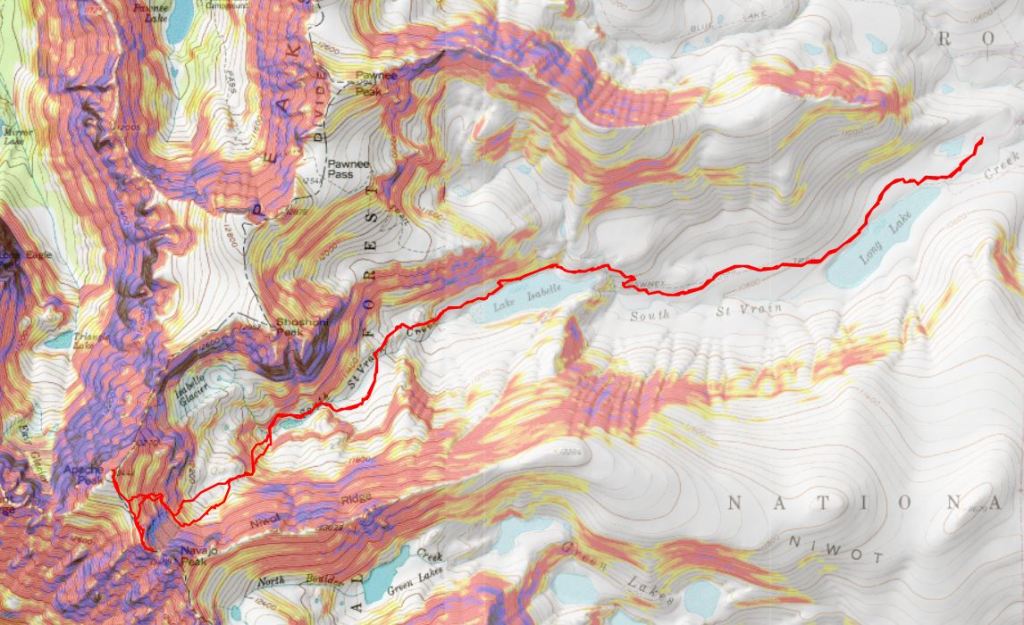
And my topo map

13557

RT Length: 8.88 miles

Elevation Gain: 3538’

I was I this area two days ago, but had a commitment back in Colorado Springs, so I went back home for a day.  The event ended at 8pm, and I drove back up to the Lily Lake trailhead that evening.  It was a Thursday night, but I was surprised to see a lot of the dispersed campsites already taken.  I ended up taking the last space, at 10350’, just before the downed trees started along the road.  I’d wanted to camp lower, but this would be a good place to set off for my next hike in a few days.  I was on the trail at 5am.

I followed the 4WD dirt road north for XXXX miles, to the Raspberry Trail (1307).  This had been where I’d wanted to stop for the night, but there were vehicles already camped there.

I followed the Raspberry Trail to a register, signed my name, and navigated around the downed tree blocking the path

I followed the trail down to the Huerfano River, and crossed it on downed logs

From here, I followed the class 1 trail as it switchbacked up the hillside.  There were several large downed trees obscuring the trail, but the trail was always easy to find.

The trail leveled off, and I came across some fire rings.  Here I left the trail and headed south until I hit treeline.  There was no path, and there were a lot of downed trees, but navigation wasn’t very difficult.

Once at treeline, the ground changed to tundra.  I continued following the tundra south.

Quickly, 13577 came into view

Here’s my route to the summit

This was a simple, but long, tundra walk, with some rocks thrown in. The ridge was 1.5 miles from treeline to summit.  Here are a few pictures of the route

I summited 13577 ay 7:45am

13577:

Check out the views of Lindsey

I turned and retraced my steps back to the trail

Here’s the overall route I took back to the trail

One in the trees it was difficult to navigate because I didn’t have any visuals.  I continued heading north until I crossed the Raspberry Trail.  There will be a lot of deadfall in this area.

Once back on Raspberry Trail, I followed it back to the 4WD road

I then followed the road back to my truck

This gave me a great view of PT 13577 from below

I made it back to my truck at 10am, making this an 8.88 mile hike with 3538’ of elevation gain in 5 hours.  I’ll be staying at this trailhead…

Pear Peak – 13,462, PT 13220, PT 13513

RT Length: 11.89 miles

Elevation Gain: 3995’

I’m not a fan of the Rockdale Trailhead. It’s an adventure in itself, starting with a drive through Clear Creek

And then the road to get to the trailhead is littered with dips and rocks. I feel I’m a pretty good driver on 4WD roads, but I have a hard time avoiding some of the obstacles on this one.  If you drive to the upper trailhead be sure of your driving skills/vehicle.

I made it to the trailhead and was on the trail at 5:30am. The trail is class 1, and starts out by heading south along trail 1461.

After hiking for less than half a mile I came to the avalanche area. Last time I was here was recently after the avalanche, and it was difficult to navigate.  They did a lot of work in this area, and now you can drive a car through it (if vehicles were allowed, that is).  I passed around the gate, and continued along the trail.

Just before making it to Clohsey Lake there’s a junction in the road and it becomes a trail.  You can take this, or continue taking the road to the lake and pick up the trail on the other side. I chose to take the trail up and over the small mountain

I followed this trail south for 3 miles from where I parked, through pine trees, willows, across streams, and eventually to treeline.

After about 3 miles the trail kind of disappeared/fizzled out.  Last time I was here I found cairns to take me to the ridge, but this time I didn’t see any.  No worries though, I just kept rounding the hillside, heading northeast towards the ridge. You’ll want to just head towards the ridge, but easier terrain is to your left (northeast).

It was 3.75 miles to the ridge.  Once on the ridge I turned right and followed the ridge south.  I could mainly stay on the top of the ridge, dipping to the left a few times when necessary.  I was headed towards the black arrow.

To continue to follow the ridge I had to make it around this point. I aimed for just below the large boulder, then went left, following dirt and scree and hugging the mountainside.

This part was easy, but as I rounded the corner, I came upon gullies full of choss. This area felt class 4.  To navigate these, I hugged the gullies, dipping down to cross the first big one, and then remaining level before eventually finding what looked like a game trail to the ridge.

Here’s the view and my route from the first big gully. I stayed level to get across the chossy gullies. It’s harder/steeper than it looks.

Safely across the first gully, here’s looking back at the route I took down

Now I continued at level elevation heading south, until I found an obvious route to the ridge.  Until this time the ridge had been rock slabs, spires, and choss, but once it became rocks and tundra I headed up, then turned left to follow the ridge.

From this point on, the ridge ‘goes’.  It’s mostly on large, solid rock, but remember, these rocks can move. It’s about three quarters of a mile from here to the summit of Pear Peak.  The ridge felt consistent class 2-3. I didn’t feel there were any class 4 moves on this ridge.

If I ever felt the need to dip off the ridge, I went left.  Pear Peak is actually to the left, past the false summit (which isn’t really a false summit because you can see the true summit most of the time)

Here are some more ridge pictures

I summited Pear Peak at 8:45am

Pear Peak:

Now the easy part, as I turned northwest and descended the ridge to the Pear Peak/PT 13220 saddle.  This was class 2, once again sticking to the ridge and dipping to the left when necessary.

Here’s an overview of the rest of my route, mostly following the ridge, except for a short area on the way to 13220 where I stayed left (more on this later).  You also have a good view of the decent route from here. Now’s a good time to study it.

Ok, down the ridge to the Pear Peak/PT 13220 saddle.  It’s all class 2, and you’re aiming for a scree filled gully, circled in red

Once you make it to the gully, the choss and adventure begins.

I dipped down into the gully, crossed it, and then stayed level in elevation as I rounded the south side of the peak, aiming for two protruding rocks.

Once I started heading north, I followed game trails up gullies and back to the ridge.  This area seemed to go on forever.  

Once on the ridge it was class 3 to the summit

I summited PT 13220 at 10am

PT 13220: 

Here’s looking back at the route from Pear to PT 13220.  It was 1.5 miles from Pear to 13220.

Next up, PT 13517 (more ridge work!)

I followed the ridge the entire time.  The ridge to the saddle was class 2.  The difficult part is the ridge circled in red, which I felt was consistent class 3, with a bunch of class 4 moves thrown in.

The trek to the saddle was mostly on rocks, with a short ridge at the end (yes, you can stick to this ridge too)

I entered the final ridge by going around to the east, then ascending the ridge by heading northeast.

As I said before, this is a class 3 and 4 ridge.  There are too many specific moves to illustrate here, as the climbing is consistent, so I’ll just show a few of the fun ones. While the rock looks solid, and mostly is, please be careful of the ones that look solid but roll. If you can’t go straight up the rocks, look for game trails to the left.  Nothing should feel over class 4.  To put it in perspective, I consider difficult class 4 anytime I need to remove my DSLR camera from around my neck, or put my trekking pole away to climb.  I didn’t have to do either of those things on this ridge, but it was the most difficult climbing of the day.

The last little dip before the final push to the summit was class 2

I summited PT 13517 at 11:15am

PT 13517: 

PT 13517 was a little over a mile away from PT 13220. Here’s looking back at PT 13220 and Pear Peak

I turned and retraced my steps back to the saddle. 

Here’s the other side of that initial class 4 move

Back at the saddle, I headed east, and took the gully to the left down

The gully had scree, tundra, and bounders.  I was easily able to find a way down this gully, but it looked challenging to find a good way to go up. I was glad I chose to do Pear first.

Here’s my overall route down the gully, across the small basin (I stayed high here) and back down to the trail.  I followed a waterfall northeast, keeping the waterfall to my left to exit so I wouldn’t need to cross the water. This brought me to willows and the trail I’d used to hike in.

The hike out was uneventful, except it rained.  I know it looks like it was a beautiful day, but in reality, just before PT 13220 it was snowing, and it rained/hailed/graupeled a bit on my way down. There were also people fishing at Clohsey Lake who had a few dogs. I was about 100 yards from them, but their dog wouldn’t stop barking at me.  I’m sure that made for wonderful fishing.

I made it back to my truck at 1:45pm, making this a 11.89 mile hike/scramble with 3995’ of elevation gain in 8 hours, 15 minutes.  And now, for the fun drive out!

Here’s a view of Clohsey Lake and the basin from Pear Peak

Mt Maxwell – 13337, Mariquita Peak – 13,405 – Cuatro Peak – 13,487, Leaning South Peak – 13,218

RT Length:  15.73 miles

Elevation Gain:  6807’

There’s a lot of dispersed camping spots along 34, and just before reaching the Purgatorie Campground off 34 there’s dispersed camping spots on the left, at the junction with 437.  It was dark when I arrived, so I parked at the camping spot on the side of the road and was on the trail at 4:30am.  

The trail follows road 437, and, although I didn’t know it at the time, my Tacoma could have easily made it all the way to 11700’ (the end of the road).  However, by the time I figured this out it wasn’t worth going back to get my truck, so I kept on hiking. 

I followed 437 for just over 3 miles to 11700’.  There were several dispersed camping spots along this road as well, mostly at switchback junctions.

Just before the last surge of elevation gain there’s a kind of junction in the road. Turn right here, as taking the road to the left doesn’t go anywhere.  There will be a nice camping spot on the right, and then a steep section of road and you’re at the end of the road (and another campsite)

Where the road stops the fun begins!  I headed west to treeline by ascending this hill.  If you look carefully, you’ll find cairns here that will get you to treeline: there are several cairned routes here.

Once at treeline the route will be obvious:  Juts follow the ridge west. I brought a helmet, but didn’t feel the need to wear it at all today. The toughest part of this route is easy class 3, and usually just a move or two at a time.

You can stay on top of the ridge the entire way to the summit:  even if it looks like you’ll cliff out from far away, you won’t.  Here are some ridge views…

I summited unranked Mt Maxwell and took a look around.  On the summit there was a property boundary marker, and just a little further west was a “No Trespassing” sign.  I’m not sure why anyone would want to continue west, as the terrain cliffs out, but this is the boundary for the Trinchera Ranch.   This was the one and only “No Trespassing” sign I saw. I did see property/boundary markers, and made sure to stay on the San Isabel National Forest side of the markers.

I decided to give the boundary line plenty of space, knowing they have game cameras set up here, and turned and headed south towards Mariquita Peak, being sure to stay at least 50 feet east of the ridge to ensure I was on San Isabel National Forest Land, even if I couldn’t see a boundary marker. I hear the rules for accessing this property change, so be sure to have the most up to date information. This was the most up to date info I could find:  https://cpw.state.co.us/learn/Maps/RFW_Trinchera_South_geo.pdf

Here’s the route I took to Mariqueta Peak

The beginning of this hike was rocky (better pictures on my way back), then became an easy tundra/ridge hike, before once again becoming rocky.  There was nothing technical about this hike. I descended just under 300’ to the saddle, and then ascended about 400’ to the summit.

On the summit there was another property marker, this one placed inside the summit cairn.  I made sure to stay east of this marker as well.  I summited Mariquita Peak at 8am. 

Mariquita Peak:

Here are some pictures of the path back to Mt Maxwell (once again, I stayed east to remain on National Forest Land)

As I ascended Mt Maxwell I stayed right, avoiding the rocky sections

I re-summited Mt Maxwell at 11am

Mt Maxwell:

From Mt Maxwell, Cuatro Peak (to the north) looks daunting

It’s actually a lot easier than it looks.  Most of this hike is class 2, with just a few easy sections of easy class 3.   Here’s the overall route I took, staying west initially until I made it to the ridge, and then taking the ridge all the way to the summit.

I headed down to the saddle.  This was rocky but easy to find traction

Once at the saddle I made my way to the ridge

This next part looks daunting, but it’s all class 2.  Here’s the route I took to the upper ridge

It’s choose your own adventure, but there are plenty of game trails for reference.  Here are some pictures of the route up to the ridge.  There’s an easy class 3 gully, that really only requires one or two class 3 moves.

Once on the ridge it again looks daunting, but you can pretty much stay on top of this ridge the entire way to the notch.  If you do feel you need to dip down, go left (west).  You’ll lose and need to regain elevation, but there’s less exposure.

There was one final gully to ascend with some class 3 moves to get out of the gully.  Here’s the overall view

And the final push to the top

Back on the ridge you’re so close to the summit!  But there’s a final chasm to cross.  I stayed on the ridge proper, downclimbed a short, easy class 3 section,

I summited Cuatro Peak at 9:40am

Cuatro Peak: 

I followed the ridge north to continue on to Leaning South Peak

This was a class 2 ridge hike, mostly on tundra, except for the areas that lost elevation, where there were rocks and scree thrown in.  I was aiming for Leaning South Peak, but there’s another ranked peak (Trinchera) beyond

I continued following the ridge north

Just before the last bit to Leaning South Peak I lost 240’ of elevation, then gained 310’ of elevation to the summit of Leaning South Peak.  No need to stay high here, as you’ll be losing elevation anyway (although on the way back it was easier to go straight up to the ridge).

Here’s the path I took to the summit, solid line up, dotted line down. I liked the dotted line better on the way back.

I summited Leaning South Peak at 10:30am

Leaning South Peak:  

There was a summit register, but it was broken and the papers inside were wet and unreadable. I replaced the summit register and turned and headed back, as the weather was starting to turn and it’s a long way back.  You can make this a loop if you’d like, by continuing on to Trinchera and then heading down to Blue Lakes Campground (etc., depending on where you park your vehicle), but I already had Trinchera Peak, so I decided to turn back.  Here’s looking over to Trinchera for those interested

From Leaning South Peak, here’s a view of the route back to Cuatro Peak

And a few pictures from along the way to Cuatro

Once back at Cuatro Peak I made my way back onto the ridge. This is easier than it looks

Then back down the gully…

And across the ridge. Route finding here was much easier on the way down. You can either stay on the ridge, or dip to the right

And back to the saddle and up Mt Maxwell

Then it was back down the ridge.  This is also easier than it looks, and goes to easy class 3. 

From the ridge I aimed for the willows and treeline, and eventually the road

And followed the road back to my ruck

I made it back to my truck at 2:30pm, making this a 15.73 mile hike with 6807’ of elevation gain in 10 hours

PT 13543, PT 13533 & Little Baldy Mountain – 12982

RT Length:  19.45 miles

Elevation Gain: 5950’

Route: Horn Creek Trailhead via Macey Trail

I was here last week and summited PT 13541 via Horn Lakes Trail, and to put it nicely, it was awful!  Once the trail ended at the creek crossing (Dry creek, which was flowing fast), I was met with hundreds of feet of 8-foot-tall willows to navigate, standing in about 18 inches of standing water.

There was no way I could recommend that route, so I went about trying to figure out another one. While this route is a bit longer, bonus: no willows in water!!!

I parked at the Horn Creek Trailhead and was on the trail at 4:30am.  The trailhead was full of vehicles (last week I was the only vehicle in the lot). The trail starts at the west end of the parking area, which holds about 20 vehicles. There are information maps here and a clean restroom. Dispersed camping is allowed for 14 days, and there are horse corrals.

I followed the Rainbow Trail for just under half a mile to this junction, then turned left and continued following Rainbow Trail / Macey Trail.

This trail is very well defined:  it’s used for OHVs.  I followed the trail as it hugged the side of the mountain, heading south

After hiking for a total of 3.3 miles I came to another junction, and took the Macey Trail west. This trail is a little more narrow, but still class 1.

There’s a trail register a ways after the junction. I signed it and continued on.

Just after Macey Falls, and just before making it to the first Macey Lake, I left the trail and headed northwest.  I’d hiked 6.5 miles total to this point. I’m guessing this is a camping area, because I left the trail at this marker (seen on the right side of the trail).

If you see this sign, you’ve gone a couple of yards too far.

I bushwhacked northeast to treeline, about half a mile. This wasn’t too bad: there were downed trees, but not too many. I was mostly pushing my way through thigh-high flowers and grasses. I started out by skirting a small pond to the right.

And then hiking up through grasses, flowers, and trees.  The elevation gain was moderate and I never came across a large obstacle (cliff, water, drainage, huge boulder, etc.)

After about half a mile I was at treeline, and could clearly see the ridge

I made my way to the ridge, staying mostly on tundra and rocks.   The willows are small and completely avoidable.

Once on the ridge I turned left, and followed it southwest

The ridge has a lot of ups and downs.  I crossed over two small bumps (kind of like ears), then lost 150’ of elevation and gained it again to the true summit of Little Baldy Mountain.  This is the best way to describe where Little Baldy Mountain is (an unranked 12er).  There is a cairn on the first hump, but it’s the second cairn you’re looking for (if it really even matters? It is unranked.  Just follow the ridge and you’ll hit it).

The ridge is a bit rocky, with some tundra thrown in, and all class 2. Here you can see the route to PT 13517 and 13541

Here’s an overview of the route I took.  I summited PT 13517 first, then took the ridge to PT 13541, and then went saddle to saddle. 

Here are some step by step photos. First, the ridge to PT 13517

The ridge was mostly tundra, but became rocky at the end.  All of the rock above treeline feels like Crestone rock:  conglomerate with lots of hand holds. The only difference is these are rocks, and not slabs. This stays class 2

I summited PT 13517 (unranked) at 9:15am

PT 13517:

Here’s looking back at the ridge and the route in

Here’s looking back at the Horn Creek approach: Look at all that water and willows!!!

Now to head over to the ranked peak of the day: PT 13541. Check out those Crestones!

The trek over to 13541 was straightforward, and a simple ridge hike until the last bit or so (circled in red)

I hiked down to the saddle and enjoyed the views for a bit. Doesn’t Kit Carson Peak look like a cooked (or uncooked) turkey from this angle?

From the saddle, here’s looking up at 13517

Most of this ridge to PT 13541 is just a tundra hike, until the end, where it becomes rocky and there are some steep drop offs to avoid. Here’s an overall view of the route: A little more than half way up the ridge I left the ridge and skirted the mountain to the left to head towards the summit

The ridge gets a little rocky, but this stays class 2

Just when you think you’re at the summit…

You’re close, but not there yet.  I had my helmet with me but decided it wasn’t really necessary. I dropped my gear and headed towards the true summit. This was easy class 3, with plenty of hand/footholds.

You can stay on top of the ridge the entire time, or dip down to the right.  The summit is in the middle of this short ridge

I summited PT 13541 at 9:55am I didn’t feel safe setting up my camera, so I took a selfie

PT 13541: 

I left a summit register, and then went back to get my gear.

It was a really nice day, so I enjoyed my time here for a while. I took a ton of fun photos, and did some visual research for another peak I still need to figure out how to climb in the area (next week???). When it was time to head back, I made my way back to the 13517/13541 saddle the way I’d come, then traversed over to the 13517/Little Baldy Mountain saddle.  This was all class 2 on tundra and talus

Here are some more visuals: 

From the saddle, here’s looking back at PT 13541

Once at the saddle I followed the ridge back up and over Little Baldy Mountain and the two small humps

After the second rocky hump I left the ridge and descended southeast, back towards Macey Lakes

Once in the trees I just kept aiming southeast until I made it back to the trail (Macey Trail 1341)

Now on the trail, I followed it back to the Rainbow Trail

And then followed the Rainbow Trail back to the trailhead

I made it back to my truck at 2:30pm, making this a 19.45 mile hike with 5950’ of elevation gain in 10 hours.

Apache Peak – 13,450

RT Length:  13.66 miles

Elevation Gain:  4127’

I’m not a fan of the timed permit system, and once again, I was reminded why (feel free to scroll down to avoid the drama/whining, just be sure you have ALL the correct passes you need when you purchase online). 

The night before this hike I was able to secure a dropped permit.  I was looking up available permits on my phone, saw one for tomorrow, and snatched it up.  It was an overnight parking permit that started the day of the hike.  Usually I start hikes around 3-4am, and this permit started later, but at least I’d get into the park.  Since it was an overnight permit it would give me a long time to hike, and I figured I’d just end my hike later than normal.  With any luck, no one would be at the gate that early and I’d sail on by.

No such luck.  The attendant checked my paperwork and told me I had to wait until 8am to check in.  So, at 8am I was back at the gate, checking in.  The attendant looked at my overnight pass and asked me where I was spending the night?  I said I was just day hiking, but it was the only parking permit I could get.  She got upset with me, and told me I ‘stole’ this permit from someone else who already had an overnight camping permit, and I needed an overnight camping permit to use this pass. 

Wait, you need 2 separate permits to be here?  “Yes”, she replied, “sometimes 3, and you made it difficult for someone else to stay that already has one of the other two permits, which they needed to order moths ago.” 

I refrained from letting her know I’d picked up a permit at the last minute, so I hadn’t ‘stolen’ it, and how crazy it was to need multiple permits to hike in one area, and asked her what my options were?  She was ready for this question, as she gets it All. THE.  TIME.  In fact, she already had permits printed and marked up for this exact purpose.  The website verbiage creates a lot of inconsistencies, so most people she talked to had the ‘wrong’ permit when they arrived at the Brainard Lakes entrance.  The website also gives out passes with similar names to other parks (such as Maroon Bells), but the permit names mean different things to different parks.  She gave me a day permit and told me I needed to be out by 5pm.  This wasn’t ideal, but I was getting in, so I took it, thanked her, and was on my way. 

Once they let me in, I had to park in the specific lot they gave me a pass for.  I parked in the Long Lake parking area.  The parking spaces were further labeled according to pass (overnight versus day), and there were rangers stationed at the trailheads, checking permits on vehicles.  This means no parking at the Brainard Lake area if you have a Long Lake Trailhead permit.  Plan on hiking (not driving) if you want to see other areas of the park.

Ok.  Rant over. The weather was scheduled to be perfect today, and I was ready to hike!

I was on the trail at 8:15am.  The trail starts at the west end of the parking area. 

This is a well-marked, class 1 trail

After about a quarter mile of hiking I came to a junction and followed it to the right, following the Pawnee Pass Trail

At the next junction I once again went right

And continued following the class 1 trail

At the third junction I went left, following the Isabelle Glacier Trail

This part of the trail had me skirting the north side of Lake Isabelle

From here you have a good view of Navajo and Apache Peaks

I continued following the trail west

After hiking for 3.5 miles the trail headed south/southwest, through the willows. 

The trail here was muddy, and full of bugs.  I choked on a gnat.

After about 4 miles of hiking, I continued west.  Here’s a visual of how I made it to the last little lake (unnamed).  The rock crossing would be slippery if wet.

Here’s a visual of the route to the upper basin.  I skirted the lake to the right, crossed South St Vrain Creek, and ascended the scree into the upper basin.

Here are some step by step pictures.  The creek was flowing, but I was able to cross without getting my shoes wet.

I then headed south to the ridge

Once I reached the tundra, I followed it west into the basin

This is where I had a decision to make.  I’d initially wanted to hike both Navajo and Apache Peaks today, but since I now had time constraints, I didn’t think I’d have enough time to do both.  I’d wanted to start with Navajo and see the plane wreckage, then head over to Apache.  But I ‘needed’ Apache before Navajo (Apache is taller, and a tricentennial, so higher on my list of peaks I want to climb).  I decided to head over to the plane wreckage, then skirt the mountainside above the waterfalls and ascend Apache’s east ridge.  On the way down, I took a more direct route.  Here’s a visual of the loop.  The plane wreckage is circled in red.

I headed south to the plane wreckage.  

The C-47 went down on January 21, 1948.  It was en route from Denver to Grand Junction, and crashed during bad weather.  Most of the wreckage is up high on the Niwot Ridge (nicknamed “airplane gully”), but some of it can be seen in the basin as well.  This site is considered a historical aviation archeology site, so the wreckage cannot be removed.   

From the plane wreckage at around 12,200’ I headed southwest, aiming for the base of the snow

Once there I turned right and headed northeast on the scree.  I was aiming for the green patch of tundra.  When I hit that, I planed on turning and heading west to the ridge.

Getting to the tundra proved a little tricky.  There was a fun slab to maneuver (there were small cairns here, circled in red)

I then aimed for the greenery, and followed it to the ridge

This is choose your own adventure.  I followed the larger rocky areas up, and the scree down.

There was a wind shelter at the top of the ridge.

I turned right, and followed the ridge northwest to the summit of Apache.   This was a straightforward ridge hike on large shale.

I summited Apache Peak at 11:45am

Apache Peak:  

I left a summit register, and headed back down to the saddle.  I could see Navajo Peak to the southeast

Once back at the saddle I looked at the time.  I knew I didn’t have time to hike Navajo today, but I decided to follow the ridge for a bit and see what it (and Dicker’s Peck) looked like from the end of the ridge.  So, I continued following the ridge southeast.

I climbed to the top of both highpoints along the ridge, made friends with a crow, and got a good view of Dicker’s Peck.  It looks like it has a new anchor at the top.

I continued on to the edge of the ridge, got one final view of Navajo and Dicker’s Peck (the route is snow free from the ridge), and turned and headed back to the wind shelter.

I took a more direct route down this time, following the scree

I made it back to the rock slab, and navigated down.

I then followed the scree down the basin

Here’s looking back at my descent route

And some pictures of the route back to Lake Isabelle.  It looked like a trail crew was putting in a new trail on the north side of the creek here.

A look at Lake Isabelle.  The trail out goes to the left of the lake

From Lake Isabelle it was an easy, class 1 walk out

I made it back to the Long Lake parking area, where park employees were stationed, ready to check passes.

I hopped into my truck and turned on the air conditioner.  It was 4pm, making this a 13.66 mile hike with 4127’ of elevation gain in 8 hours.  I’ll be back, but I think I’ll wait until the timed entry system expires for the year…

Sleeping Sexton – 13,460

RT Length:  12.7 miles

Elevation Gain:  5156’

This was actually my second attempt on Sleeping Sexton:  I was here last week but got turned around at the false summit due to getting ‘buzzed’.  I figured it was for the best however, because I had done some serious route finding that morning and now I could provide a clear and useful GPX file for the route, instead of one with a lot of attempts that didn’t lead anywhere.

I made it to the Maroon Bells welcome station, and this time the attendant recognized me.  We chatted for a bit, as he was interested in some of the summits I was doing.  Then he referred me to talk with someone at their offices in town, and we’re basically best friends now.

It was raining when I arrived, but people were walking around Maroon Lake anyway. 

I was on the trail at 2:15am. 

From the parking area, here’s an overview of the route above treeline to the false summit

The trail starts by skirting Maroon Lake, then taking the Crater Lake trail southwest.

There was a full moon out, so I didn’t need my flashlight.

At the junction for Crater Lake I continued following trail 1975 northwest. This is the trail you take if you’re doing the Northeast route for North Maroon Peak.  There are camping spots just before the next junction.

The trail continues to be a well defined, class 1 trail.  At about 10775’ there’s another junction.  If you’ve hiked North Maroon Peak before, you’ll recognize this trail.  I turned left here and crossed the creek, following the North Maroon Peak Trail (still class 1)

Here’s an overview of the trek to the false summit (or ‘the crown’) from the creek crossing.  I followed the North Maroon Peak’s Northeast Ridge Route until I made it to tundra, at about 11,600’.  I then left the trail and headed northwest, behind this outcropping, to the base of the white gully. I then trekked up the ridge and followed the white gully until it ended. Here’s a basic overview.

Here are some step by step photos of the way I accessed the white gully:  I followed the North Maroon Trail to treeline

At 11,600’ I left the North Maroon Trail and headed northwest

Here you can see the base of the white gully.  I didn’t want to climb straight up the gully, as it was very steep.  Instead, I accessed the ridge, and followed the ridge to the white gully.  (I did this after spending a lot of time last week trying to see if the smaller gullies ‘went’ to access the white gully, and turned back every time because I didn’t have rope.  I believe it’s much easier to access the ridge first and then head up).

Here’s exactly where I entered and exited the ridge.  I found this to be class 2 and direct access.  Now’s a great time to put on your helmet if you haven’t already done so.

Once on the ridge I followed it west, staying in-between the ridge and the white gully (to the right of the gully, but left of the ridge).  If you look for them, you’ll find game trails here (you may have to duck under some branches to use them though).

Once near the white gully, I found the terrain to the right to be more stable than the white gully itself, especially on my way down.

Topping out of the white gully felt class 3

From here it became ‘choose your own adventure’ as I followed the ridge southwest. I started out rounding the ridge’s north side, and then went back and forth between north and south sides of the ridge a few times.  There are cairns here, and nothing is more difficult than class 4.  In fact, if you’re extra careful/spend a lot of time route finding, you can probably keep this at mostly class 3. Here’s the route I took:

From the top of the white gully I rounded the corner and made my way back to the ridge.  It had rained the night before, so I had to be extra careful with every foot placement (wet = slippery)

Once back on the ridge I followed it for a ways

Before hitting a bit of a shelf and crossing over to the south side of the ridge

I followed the ridge to the false summit / ‘the crown’

From the false summit you can see the true summit of Sleeping Sexton

And now, the fun route finding begins!  I descended the false summit 125’ and crossed a gully.  There were cairns here to help in the crossing (circled in red). These are steep and go at class 3/4

After crossing the first gully I descended once again, another 160’

I was now at 13,130’, and parallel with the saddle between Sleeping Sexton and the false summit.  I followed the contour of the mountain to the ‘secret ledge’. Here’s what that looks like heading in

I crossed the ledge to the ‘saddle’, then skirted the side of the mountain and headed up to the summit

The ledge is not as bad as it looks.  There’s a cairn here (circled in red) DO NOT DESCEND HERE.  Instead, use it as a reference point and stay level with it (especially on your way back) and continue following the ledge. If you do this, it stays class 2 to the saddle.

From there it was an easy trek to the summit, first skirting the mountainside

And then ascending the ridge

I summited Sleeping Sexton at 6:45am, just as the weather started rolling in

Sleeping Sexton: 

Since the weather wasn’t cooperating I didn’t stay long.  I turned and headed back the way I’d hiked in.  Here’s looking back at the false summit / ‘the crown’

And a view making it back to the ledge

Here are some more images of that ledge, looking back.  Remember to look for the cairn, and stay level with it.

For reference, here’s the size of the route.  The route can clearly be seen over my shoulder (to the left)

I rounded the corner, and ascended the gully, aiming for the cairns

Crossed the next gully

And gained the ridge to the false summit / ‘the crown’

I actually stayed here for a bit because I had cell service.  I let my family know I was ok, and downloaded the weather forecast for the next day.  However, eventually the clouds told me to get going.

Clouds rolling in: 

Here are some pictures of my way back to the white gully

Back down the white gully to the ridge

And from the ridge back to the trail

Once back on the trail it was an easy, class 1 hike back to the parking area.

I made it back to my truck at 11:30am, making this a 12.7 mile hike with 5156’ of elevation gain in 9 hours, 15 minutes. 

It was still early in the day, so I ate lunch by Maroon Lake, read for a bit, looked at topo maps for tomorrow, and jotted down notes in my journal before making it an early night.  Oh, I forgot to mention the goats:  They were the same two goats I saw last week, and if for no other reason than them, wear your helmet until you make it back onto the class 1 trail:  They were kicking rocks down the gullies the entire time I was there. 

V3 – 13,545

RT Length:  8.29 miles

Elevation Gain: 3542’

Ophir Pass Road is a serious 4WD road, but the trailhead for this peak can be accessed from the Ophir city side with just a high clearance vehicle.  There were a few small water crossings, but 4WD was never needed.

I parked in a parking area about 1.3 miles east of the town of Ophir, on Ophir Pass Road, in the Iron Spring area.  All the parking spots were taken but 1, and every vehicle was parked there overnight.  This is a popular spot to park to backpack/hike in the area. 

The mosquitoes were out here as well, so I made it an early night and got some sleep.  I was up and on the trail by 3:45am.  The trail starts on a blocked 4WD road to the south of the parking area.

I followed this road southeast and then south, through gates, aspen trees and two stream crossings with easily crossable bridges

After the second stream crossing, I passed below some power lines, turned left to follow the trail, and started gaining elevation.

The hike below treeline was nice, and the trails were class 1, but there were no trail signs or numbers, and several trail crossings.  I’ll do my best to describe the correct route.

I followed a well-defined path south.

At the first fork in the road, I turned right

At the second fork I turned right again, off the road and onto a trail (I’d hiked a total of 1.15 miles at this point)

I hiked west for a few yards, and then came across a trail junction.  I continued heading straight

I was now on the trail that heads south/southwest up the hillside.  This is also where I ran into a porcupine.  Porcupines don’t run, but we noticed each other while we were about 3 feet away from each other:  He quickly turned and waddled away in the dark, showing me his full backside of quills as he did so. 

I continued on this well defined trail

Here’s your first glimpse of V3.  Look carefully, the arrow points to the exact summit, which you won’t see again until you’re there.

After hiking for a total of 2.25 miles and 11350’ I came to a small water crossing over the trail, and a meadow to my right. I left the trail and headed through the meadow.  It was still dark, and there was a camper with a bright headlamp getting ready for the day.  He was confused why I was ‘off trail’ and tried to direct me back to the proper trail.  I assured him I was going in the right direction, apologized for walking so close to his campsite, and nicely told him I didn’t expect to find a trail to the summit.

I was now in a meadow and basin.  There were wildflowers I couldn’t yet see in the dark, and willows I kept encountering.  I found out the hard way to stay right to avoid the willows.  The path is obvious in the daylight.  Here’s the route I took.

And some step-by-step pictures of my way to the saddle, first hopping across a small stream

Staying right to avoid the willows and ascending a small gully that still had snow.  Microspikes were helpful here, both on the scree and snow.

At the top of the gully, I was now in a rocky upper basin.  I crossed a boulderfield and headed towards the saddle.

Here’s a look at the last bit of hiking to the saddle

Once on the saddle I turned left and followed the ridge southeast, staying to the left of the snow.

At the top of this area you can see the crux of the route.  Now is a good time to put on your microspikes and helmet, if you haven’t already.  It’s much steeper than it looks, and the scree isn’t manageable without microspikes (trust me on this one).

Here’s your intended route:

You’re aiming for this gully.  The scree here is steep; a 45 degree angle for an extended amount of time. 

Once at the base of the gully the class 4 climbing begins.  The route is obvious, curving around to the right.  There is really only one way to go:  follow the trail set out for you from the fallen scree.  Also note:  the scree and rocks here are loose. Very loose.  I wouldn’t attempt to upclimb or downclimb this area with another person:  take turns the entire way up and down.  You will be causing screevalanches on climbers below you. 

Here are some pictures from the inside of the gully. Pictures do not do the steepness justice (although the pictures down give you a better perspective).  When heading up, continue climbing southeast.

Here’s a look at the exit of the gully

At this point it became even steeper.  I did not have on my microspikes, lost grip, and slid on my stomach backwards for a full 12 feet.  I seriously thought I was going to slide all the way back down that gully.  I braced myself, and without taking off my pack located my microspikes in my backpack pocket and gingerly put them on while trying to balance without much traction. It was much easier to upclimb once I put on my spikes.  Here is where I aimed

I then turned right, and hiked south towards the summit block. 

I made it to the base of the summit block and was surprised to see a pine marten.  He sat there and looked at me.  I tried to get a picture, but he quickly turned around and all I got was a picture of his tail and backside.  Why are all of my wildlife pictures of animal butts?

Ok, now, don’t let this summit block scare you:  yes, you can upclimb it, but you can also skirt it to the left and follow it around and have a class 2 trek to the summit, which is what I did.

I summited V3 at 7:15am.  There was a lot of smoke in the air from far away fires this morning.

V3:

I was surprised there wasn’t a summit register, so I left one.  It was obvious this peak does not get a lot of visitors. 

I kept my microspikes on for the trek back down, which seemed easier than the trek up.  Here are some pictures of the way back down the gully.  Once again, do this one person at a time, and when you’re done, head far away from the gully, as the rocks will slide and they will pick up speed as they do so. 

Once out of the gully, the scree-surfing will begin.  It’s always fun when you can ride the same pile of rocks all the way down the hillside.

Scree Surfing:

Here’s where you’re aiming.  If you’re doing this with another person, you should be standing far away from the rockslide area while they’re ascending/descending.  I’ve circled a good place to stand out of the way.

And now to hike down the ridge to the saddle, and exit the basin.

I made it back to the meadow, marveled again the wildflowers, and saw the group of campers were almost done taking down camp (I guess the man I talked to this morning was part of a larger group).  I made it to the trail, turned left, and followed it back to the trailhead.

I made it back to my truck at 9:45am, making this an 8.29 mile hike with 3542’ of elevation gain in 6 hours. 

Fowler Peak – 13,498 and PT 13544

RT Length: 10.53 miles

Elevation Gain: 3985’

I’d already been away from home a few days before this trip, so I stopped at Ouray Hot Springs to get in a quick workout and a shower (they only charge $4 for a shower, which might be nice if you’re hiking around Ouray and want to freshen up every few days).  The only downside?  The parking was terrible, even on a weekday in the morning. 

After cleaning up I drove to the Rock of Ages Trailhead. The drive in was a bit bumpier than I remembered, but also fun, because I was seeing what Miles (my new Tacoma) can do.  He handled the stream crossing and ruts in the 4WD road without needing to be put into 4WD.

I made it to the trailhead and was the only one in the lot (another good thing about arriving on a Thursday). 

I walked around for a bit, and immediately realized the mosquitoes were going to be a problem.  I’ve ordered a topper for Miles, but it’ll take up to 3 months to get here, so until then I’m sleeping in the back seat of the cab  (It’s a tight fit but luckily I’m small).  I made the decision to get to bed as soon as possible.  I ended up waking up several times during the night because I was so warm, but at least waking up ended one of my nightmares:  a dream about sharks in a swimming pool swallowing children whole. 

Ok.  So, I woke up and was on the trail at 4:15am. The route starts at the south end of the parking area, and follows a well-defined trail south.

I quickly came to a gate, and walked around it.

Next, I saw this sign to my right, and continued on the trail

I followed the trail to treeline. 

Shortly after making it to treeline I came to the Elk Creek Trail junction. From here there are several options, but your main goal is to make it into the basin.  You can follow Elk Creek Trail and lose some elevation, then follow a faint road into the basin.  Or, you could continue along the Rock of Ages trail and eventually hook up with the 4WD road that enters the basin from above (a bit chossy, but I chose to take it on the way out).  On my way in it was dark, I couldn’t see any of these ‘routes’, and I chose to just head straight into the basin.

If you take the mining road, here’s what the entrance looks like from the Rock of Ages trail.  It’s about half a mile past the Elk Creek Trail junction, on your right.

If you take the upper road, this is what the junction from the trail to the road looks like

In any event, I made my way into the basin. Here are the routes.  To the left you can see the mining road, and to the right you can see the abandoned dirt road.  They both lead to the same place.  (On my way in I didn’t see either of these roads and just headed south through the basin).

Once in the upper basin you want to gain the ridge.  This sounds easier than it turned out to be. It’s “choose your own adventure”, and on the way up I chose wrong. I ended up getting into some class 4 scrambling, which was unnecessary.  It’s my advice to do PT 13540 first, and gain the ridge to the left (southeast).  However, all areas here ‘go’, if you’re willing to do some scrambling.  When I made it to the ridge I found thick wire cording going where the red line is (I’m guessing that could be used as leverage if needed:  it wasn’t moving anywhere). I ascended via the orange line.  The dotted orange line is probably a better route. The best route is my descent route (pictured later).

I’ll spare you the scree-y and large-loose-rocky gully details of ascending the ridge.  Once on the ridge I turned right and followed the ridge southwest towards Fowler.  The ridge was all class 2

If you haven’t already, now is a good time to put on your helmet.  Here’s a picture of that cable I was telling you about.  It goes up and over both sides of the saddle.

Here’s an overall view of the rest of the route to summit Fowler.

And step by step:  It started out chossy as I ascended the ridge

I made my way to the gully to the left/middle.  This area had more solid rock, but it was littered with scree/rubble.  At the base of the gully I took off my pack and decided to go up with just my cell phone (and a summit register in my pocket, just in case).

This is the class 4 part of the climb, and lasted for about 120 feet of vertical gain.  I started by going straight up the gully.  Here’s my route:

Step 1:  ascend the chimney.  I went to the right of the chimney, and found adequate hand/foot holds.

Step 2: Once above the chimney I stayed to the center of the gully.  This is also where I saw an anchor set up (circled in red).

If you decide to rappel here, bring a new anchor, as this one looks like it’s been here for a while, and what’s been added to it doesn’t look recent either.

Step 3: From the anchor I continued straight up the gully (still class 4)

Step 4: Here’s a view of the last bit of the gully, before topping out.  This felt class 3

At the top of the gully I turned left and headed towards the summit.  It was a bit of a false summit, but all class 2/easy 3

I summited Fowler Peak at 7:45am

Fowler Peak: 

I sat and enjoyed my views of the Wilson/El Diente Traverse for a few minutes before heading back.

There was a summit register, but it was one of those tube ones.  It hadn’t been closed properly and all the papers inside were wet, so I left it and also added a new register with dry paper to write on.  And a new pencil.  Here are some pictures of the trek back to the saddle

Back down the gully

To my stashed gear and back to the ridge.

I followed the ridge over to PT 13540.  This was a simple ridge hike, if a bit loose.  Lots of rocks here. I stuck mostly to the ridge the entire time, only dipping to the right a few times when necessary.

I summited PT 13540 at 9am

PT 13540:

I worked my way back towards the Fowler/PT 13540 saddle

Once at the saddle there was what looked to be a boarded-up mine.  In fact, it looked like everything here had been blown up at some point, except this area, which was strategically filled with large rocks (but may have been blown up too).  I passed it and headed northeast back to the old mining road

This area was steep, and I did some scree surfing, but it was much easier to navigate when compared to the route I took to ascend the ridge. I saw tons of mining trash here:  lots of old cans and pieces of mining equipment, most of which were in small pieces, all made out of cast iron.  This was the most intact item I came across

Here’s the route I took down from the ridge (I’d recommend ascending this way as well)

Once back on the road you once again have options to exit the basin.  You can stay high, to the right/east, and follow the old mining road, or you can stay low and left/west, and follow an old dirt road. 

Here’s a better look at both roads.  Both take you out of the basin, and back to Elk Creek Trail / Rock of Ages trail (If you take the mining road all the way to the Rock of Ages trail, turn left and follow it to the Elk Creek Trail junction, and then continue following the Rock of Ages trail).

Once back on the trail I followed it through the trees northwest, back to the trailhead. 

I made it back to my truck at 11:15am, making this a 10.53 mile hike with 3985’ of elevation gain in 7 hours.

It was still early, and quite warm, and the mosquitoes hadn’t magically disappeared overnight.  I had a friend meeting me here at 6pm to hike Wilson Peak tomorrow, so I’d planned on staying at the trailhead until he got there, then heading to bed.  I’d brought a lot of things to do, but they all required sitting down, and once I did that the mosquitoes swarmed me.  It was like one would find me and sing its song to its friends and there’d be dozens to shoo away. 

If I was outside I needed to have a jacket on, but it was hot! I tried sitting in my truck with the air conditioning on, but that wasn’t going to work for 7 hours straight.  It was kind of funny watching the mosquitoes (and flies!!!) swarm my truck:  they seemed to know I was in there with the air conditioning on. 

So, I entertained myself for the next 7 hours by reading.  I got out my current book (On the Road by Jack Kerouac) and read while steadily walking around the trailhead in circles.  Continuously moving seemed to keep the mosquitoes at bay.  Luckily, the trailhead has a large parking area and I was the only one there.  Every few hours I’d take a break in my truck, and then get out and read again.  I would have started a campfire to shoo the bugs away, but they’re currently banned.  I can’t wait to get the topper on my truck!  It would have solved the mosquito/heat problem.

Unnamed 13,162 – Unnamed 13, 510

RT Length:  17 miles

Elevation Gain: 4750’

On my way to the Spring Creek Pass Trailhead I was the only one driving on the road.  Probably because it was 1am.  I did have to slow down for a moose who wanted to jaunt back and forth across the center line, and a herd of elk I surprised as I drove by (they’d been lying down by the side of the road).  I made it to the trailhead before 1:30am and decided to get some sleep before starting out.  My truck was the only vehicle in the lot.  I love my heater.

I was on the trail at 4:30am.  There are several ways to get to the snow mesa.  Last time I was here I took the snowmobile route

This time I decided to take the Colorado Trail/Continental Divide Trail/813 trail.  This is the one I’d recommend without snow on the trail.  If there’s a groomed snowmobile track, take that instead. The trailhead is directly across from where I parked my truck.

From the trailhead it’s a nice uphill hike for about 2 miles to the mesa, heading east and southeast.  Here’s an overview of where you’re headed

And what the trail looks like

You’ll know you’re getting close to the mesa when you parallel a gully to your right.

Be careful here in winter conditions:  the cornices fall.  Luckily for me, today there was a lot less snow than last year.  I didn’t need traction to ascend into the mesa.  From below, you can see a Colorado Trail marker.  Aim for the marker.  This is also where my flashlight ran out of batteries.  I was glad it was starting to get light out.

Once on the mesa I followed the Colorado Trail / Continental Divide Trail markers for 3.3 miles.  These markers are great most of the time. In the summer the trail is well defined and not needed.  When I was here last they were covered in snow and useless.  Today they were nice benchmarks, keeping me on track since there were no tracks.  In the morning, the snow was firm (not so by noon).  The trail initially  looks flat, but you’re really losing and gaining elevation all the time.  This was especially frustrating on the way back.

After a total of 5.1 miles since the trailhead I came upon a junction and continued heading north on 813.  Note:  The trail looked doable when I started.   If doing this in winter conditions, I’d recommend taking the lower route (the one I took back, via 787). However, I wanted to stay high to avoid losing and re-gaining elevation, and I had all the necessary gear (snowshoes, crampons, ice axe, etc.) so I decided to go for it.  Also, from the junction vantage point, all looked good. Here’s the route I took

Unbeknownst to me, there was a slide area directly on the trail.  This area is prone to cornice falls/slides.  I felt comfortable crossing the area so early in the morning, but wouldn’t advise taking this route later in the day.  I knew immediately I wanted to take a different route back.

Here’s a look back on the slide area

After the slide area there was another solid area of snow.  I decided to descend a bit to make this more manageable.  I brought out my ice axe and traction here.

I was still ‘following’ the trail (under snow), and as soon as I started heading north it was time to head up the east side of PT 13162.  Here’s what that looks like (as seen later in the day from point 13020).  Solid line is path up, dotted line is the route I took down and across to the 13162/13510 saddle.  I was just doing my best to avoid the snow.

When not covered in snow this area is covered in tundra.  It’s steep, but an easy ascent.

I just kept heading west, until I was at the ‘ridge’, where I started heading northwest to the summit


I summited Unnamed 13162 at 7:45am

Summit of 13162: 

From here I could see the summit of 13,510 to the northeast.  It looks like it should be a simple ridge hike to get there, but unfortunately, there’s a steep section in the way, so I re-traced my steps back to scenic trail 813.

There was one section I was worried about after the 13162/13510 saddle.  I was hoping I could just go straight over the area, and not around. (Note, when I first wrote this report, I thought what I labeled below was PT 13020, but it’s actually further east… in the same general direction, but it’s actually the small peak just above the saddle in this picture).

Ok, back to trail 813 and to the saddle of 13162/13510

Here’s the rest of the route to 13510

I made it to the saddle and the rocky area looked climbable.  It didn’t get any harder than difficult class 2.  The gullies in this area were either snow free, or the snow was avoidable. I stuck to the ridge, dipping to the left (west) when necessary.

The rock here was loose, but once again, difficult class 2

I gained the ridge and looked back at 13162.  I’ve circled the area I was trying to avoid on my way down, and detailed my route down.

The rest of the route to 13510 was an easy ridge hike.  The snow was either consolidated or avoidable.

I summited PT 13510 at 9:40am

Summit of 13510: 

Interestingly, there had been a summit register on 13162, but there wasn’t one on 13510, so I left one.  There were also a lot of crow droppings.  I even saw a few flying around.

From the summit of 13510 I had a clear view of PT 13020 (unranked).  I decided to go for it before heading back down.  Here’s the route

Here’s looking back on the route I took from 13510

Time to head back.  I didn’t want to take the way I’d hiked in back out because of deteriorating snow conditions and possible slide activity. Instead, I hiked directly down into the basin, heading southwest.  Here’s a view of the route I took down from 13020, as seen from my way to 13162.  I just did my best to avoid the areas of snow when possible (and the willows at the bottom).

From the summit of 13020, here’s the route back to Trail 787

Here I’ve outlined the route I took in (dotted line) and the route I took out (solid line).  Trail 787 was dry on the ridge/elevation gain back to the snow mesa.  I could see it from the summit, and aimed there, doing my best to avoid snow on the way down. I’ve circled the small slide area.

The snow wasn’t totally avoidable however, and I did posthole through the section of willows.  From down in the basin, here’s a look back at my route down.

I hopped a small creek, then took trail 787 southwest to the snow mesa and the Colorado/Continental Divide/813 trail.

Here’s another look at the slide area.  It’s small, but the trail goes right through it.  Also note the cornices above.

Once on the mesa I followed the trail posts across the snow. The snow had softened up considerably, so I had to put on my snowshoes.  Even with them I was postholing up to my knees.  It was a very long 3.3 miles back.

Here’s a look at the decent route off the snow mesa.

And the trail back to the trailhead.  At this point the snow was mostly avoidable, so I took off my snowshoes.

I made it back to the trailhead at 2pm, making this a 17 mile hike with 4750’ of elevation gain in 9.5 hours

When I got back to my truck I was a little disappointed, as Strava hadn’t engaged.  Luckily, most of this route was done on established trails, so it was easy to hand draw this topo route (just note it is hand drawn, and I don’t have a GPX file to share for this one).

On to the next trailhead!