Endlich Mesa Trailhead to City Reservoir and Emerson/Peak Twenty Two Saddle

RT Length to City Reservoir: 7.5 miles

EG to City Reservoir: 1250’

City Reservoir is a good place to set up basecamp for several 13ers in the area, including Mount Valois, Amherst Mountain, Organ Mountain, Peak Twenty-Two and Sheep Mountain.

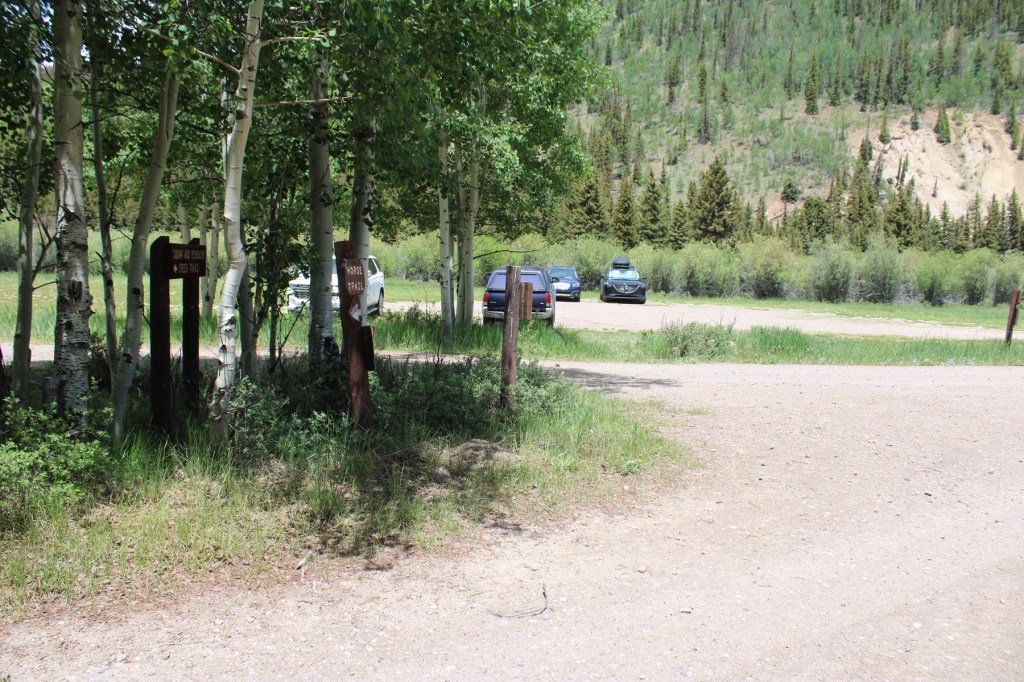
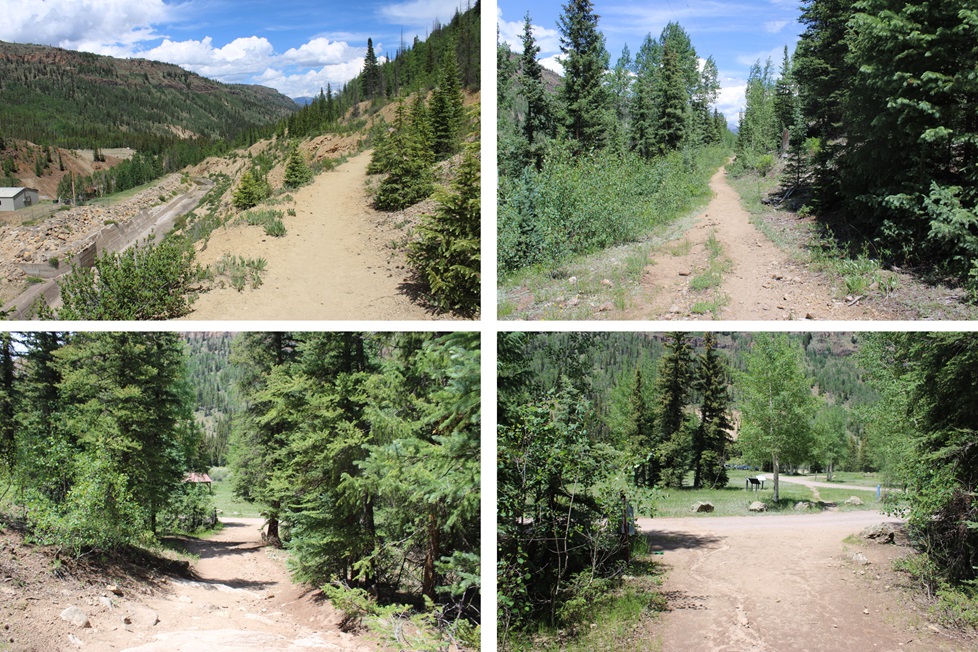
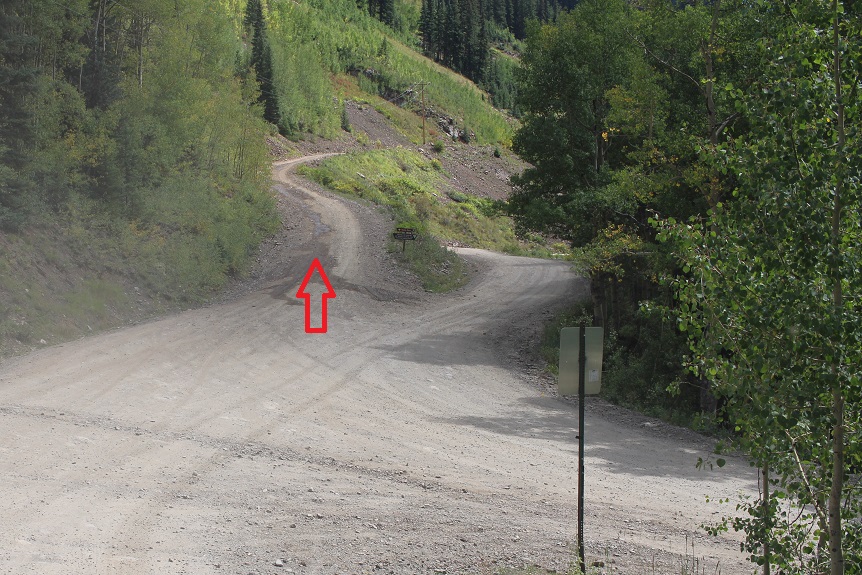
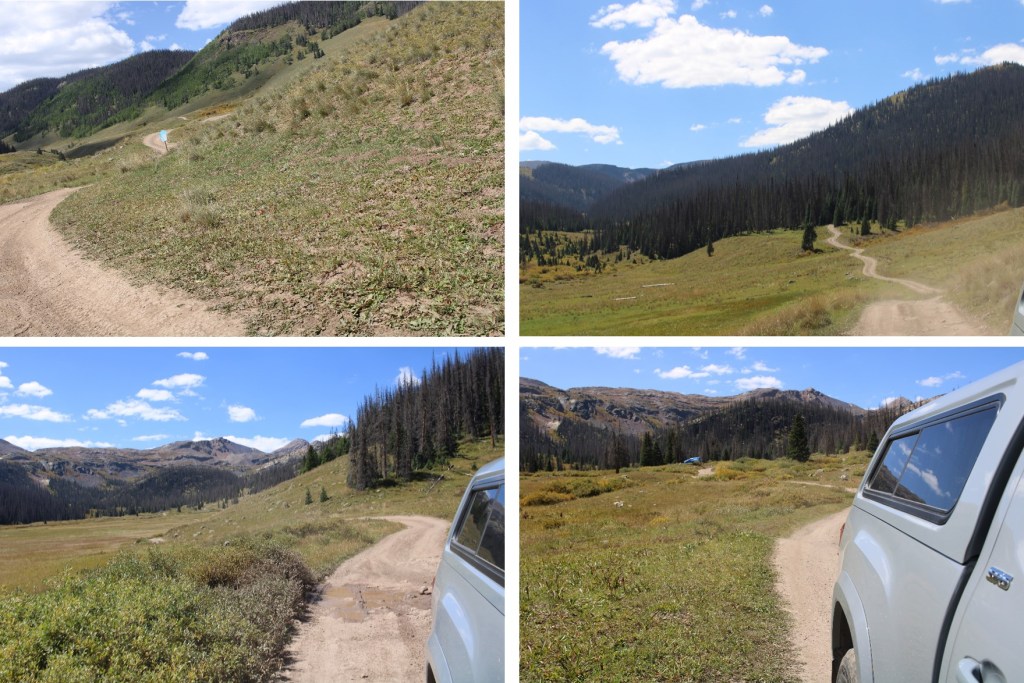
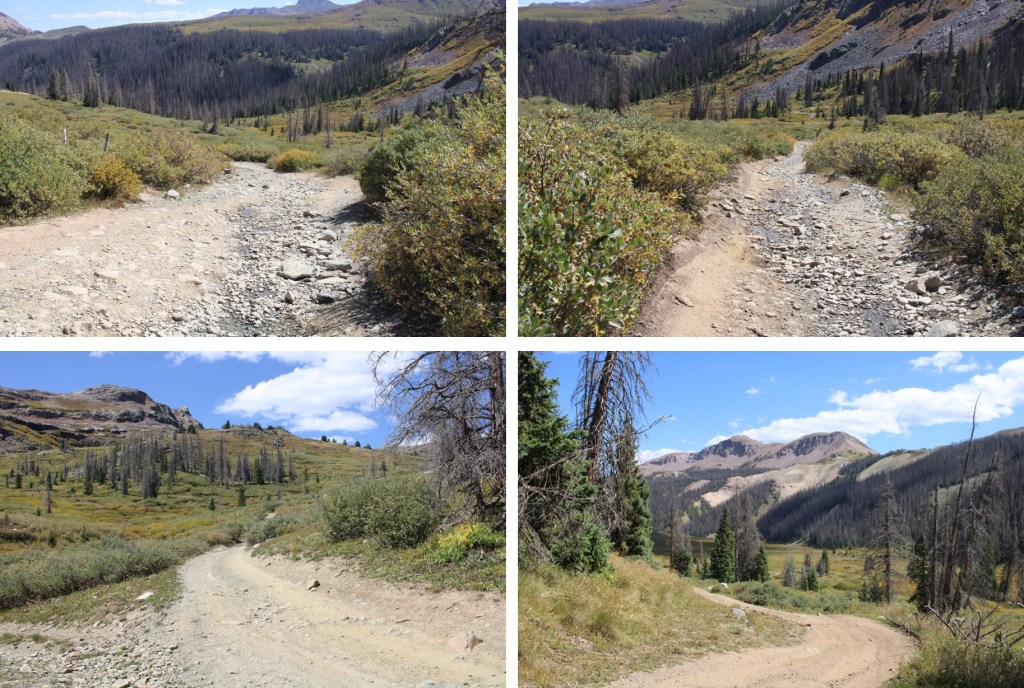
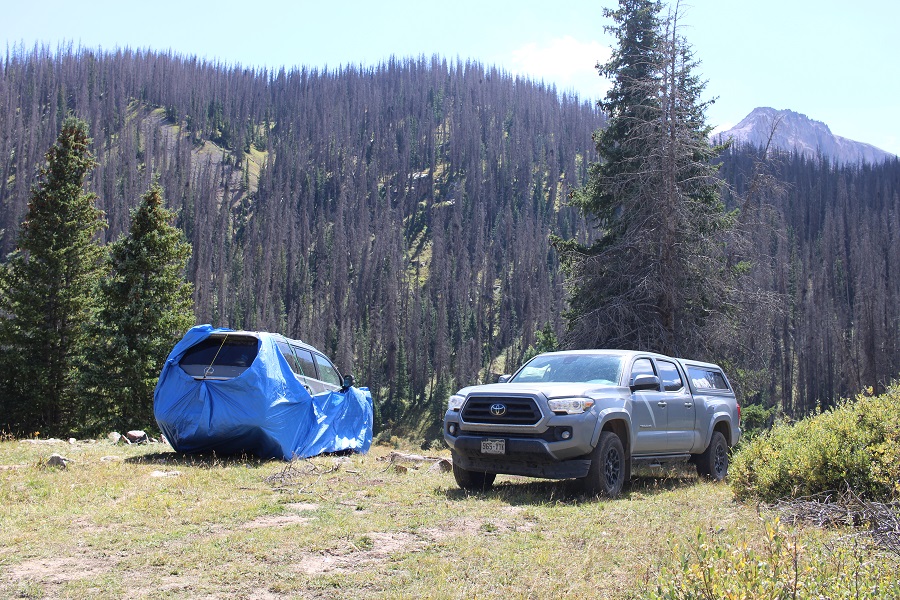
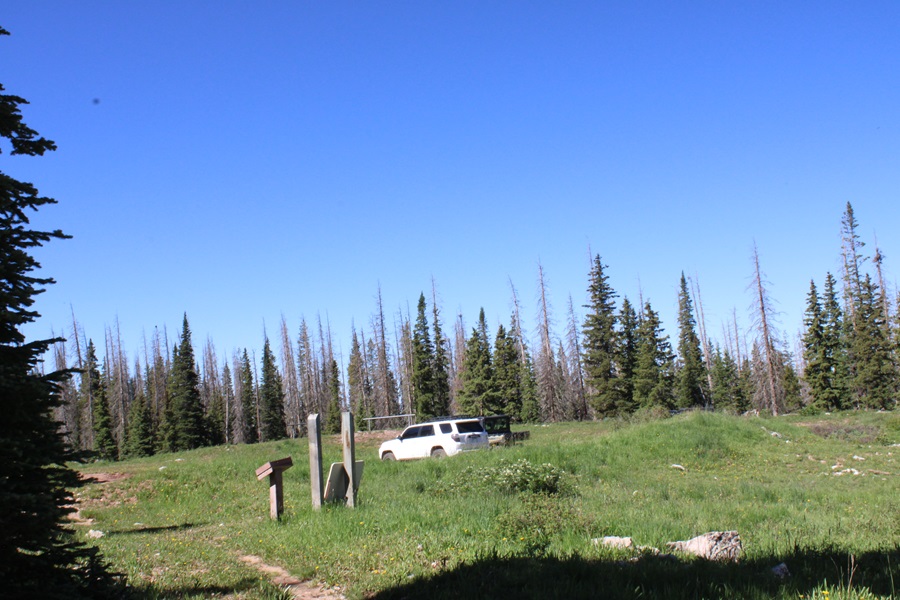
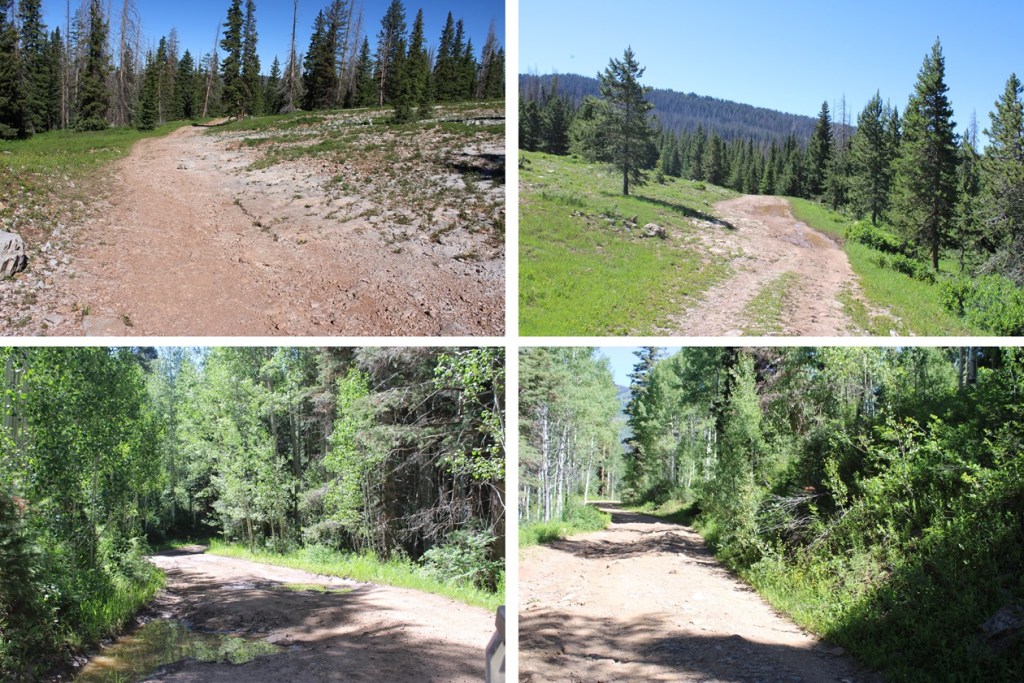
However, getting there can be kind of tricky, especially if you don’t have a 4WD vehicle.  There’s a good place to park about 11 miles below the Endlich Mesa trailhead, just after the Florida Campground.  The next 11 miles will be 4WD.  Think a step up from South Colony Lakes trailhead.  There were a lot of mudholes, even though it hadn’t rained in days, rock slabs to navigate, and rocks along the road.  Here are a few pictures of the lower parking area and 11 mile long 4WD road:

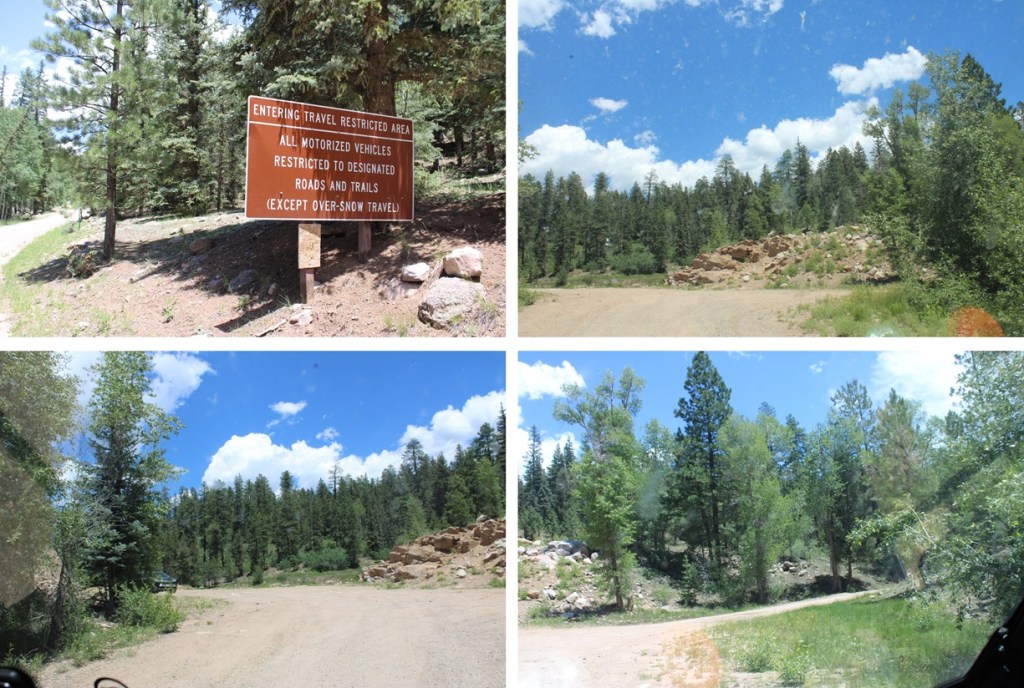
As you can see, two Ford Rangers made it to the trailhead. 

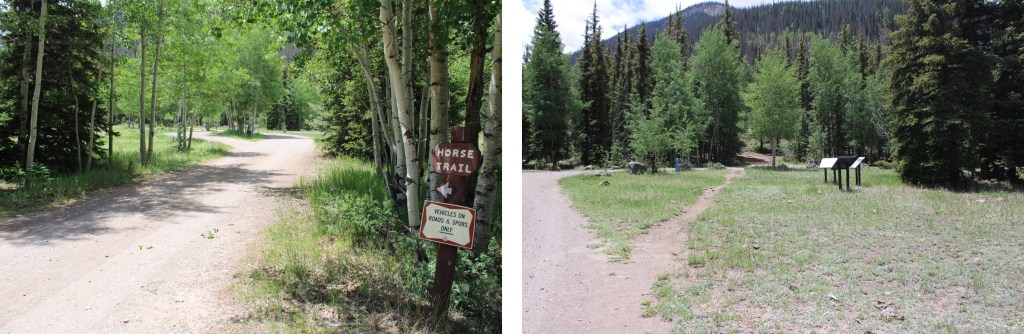
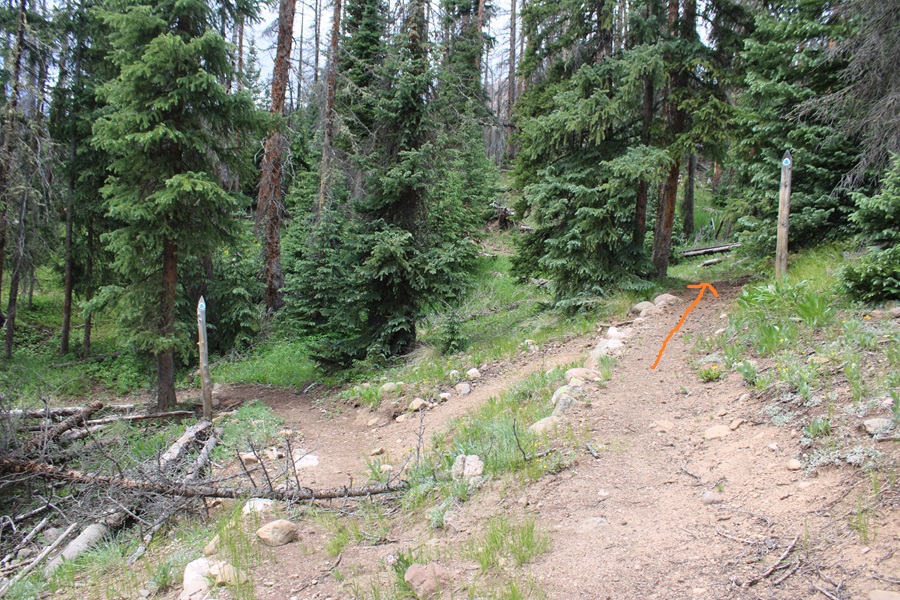
Endlich Mesa Trail starts at the northeast end of the parking area, is easy to identify, and has a trail register. 

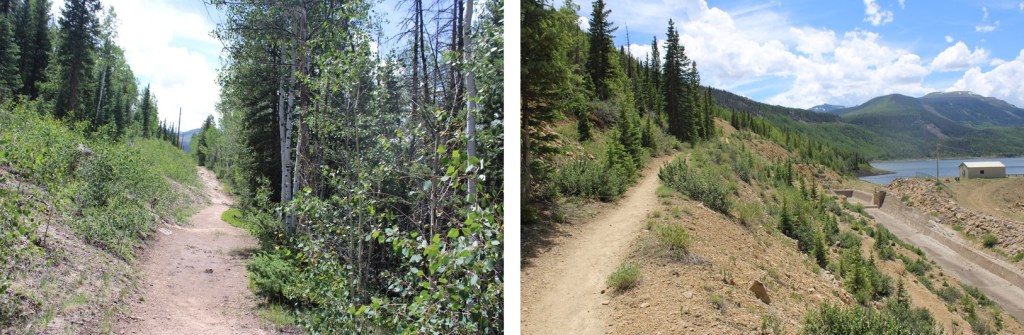
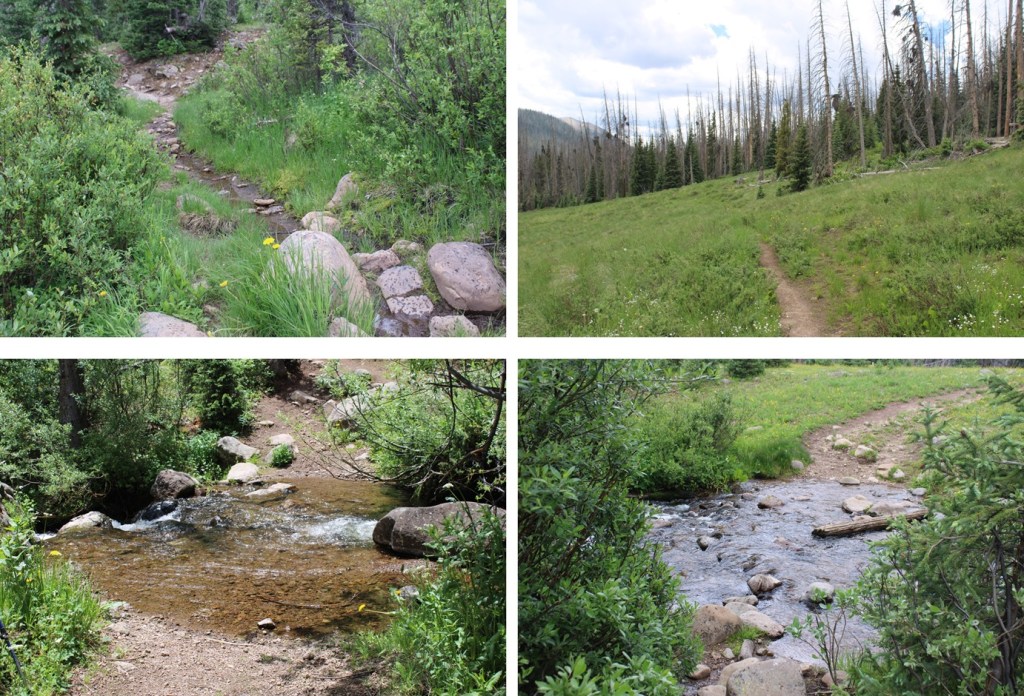
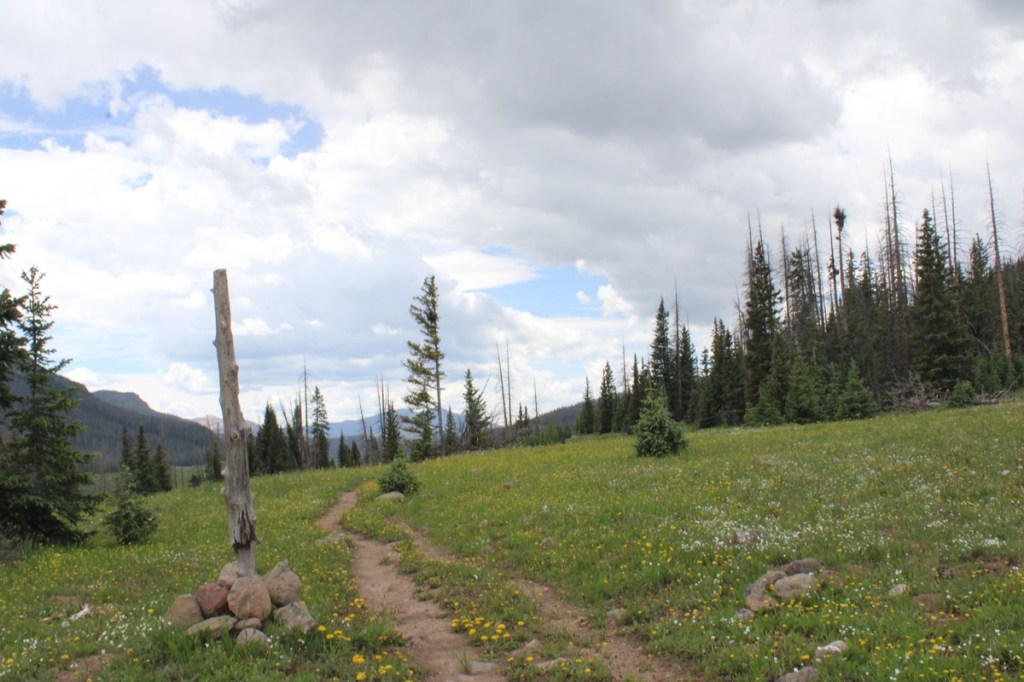
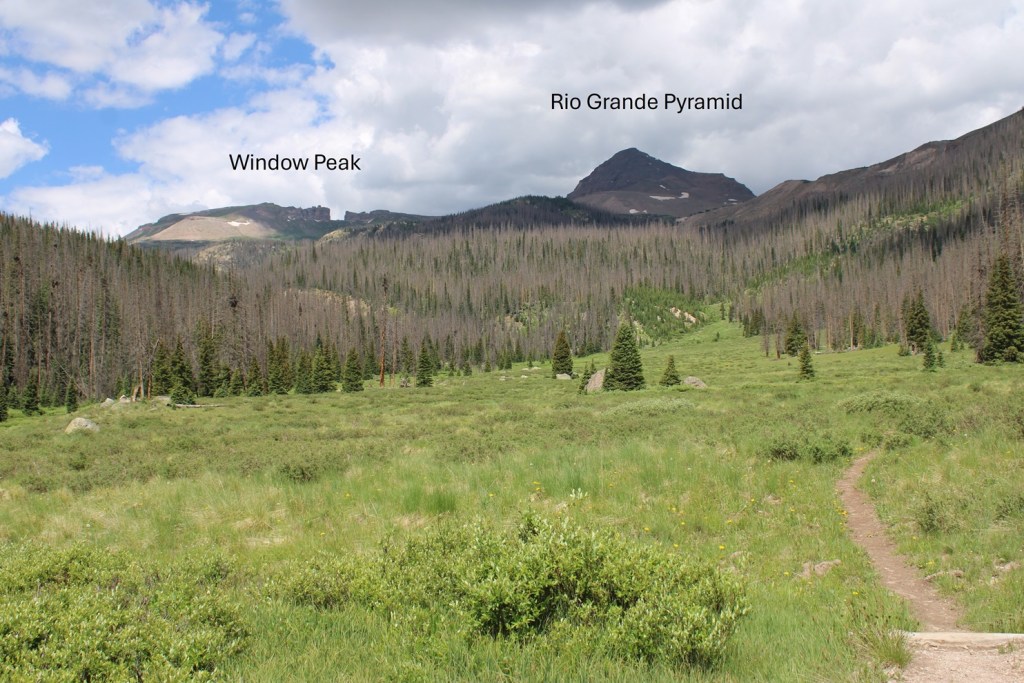
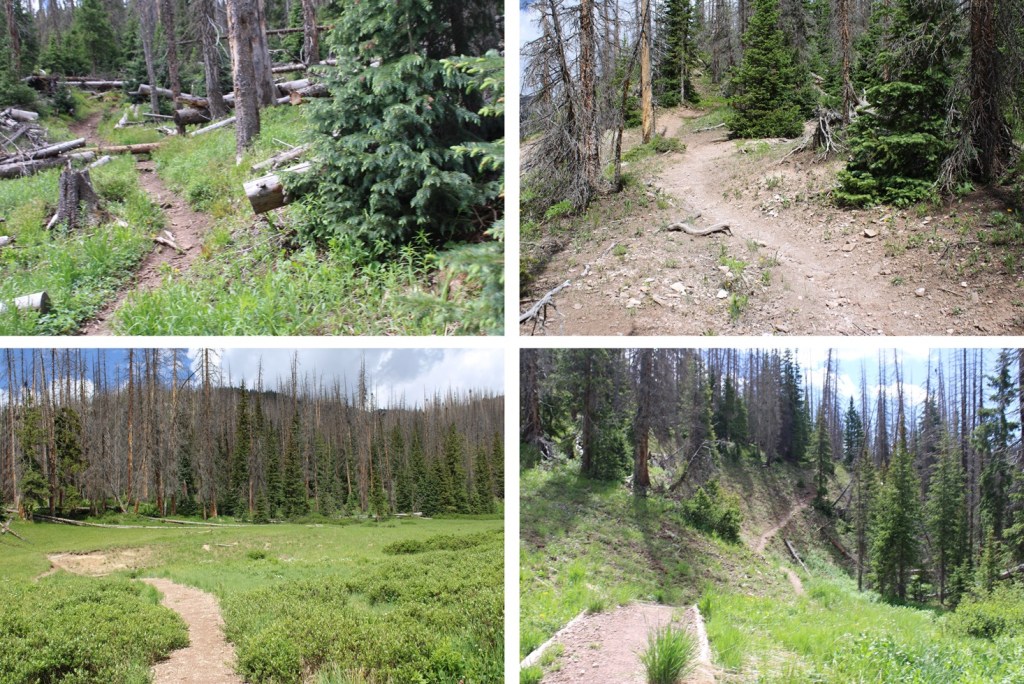
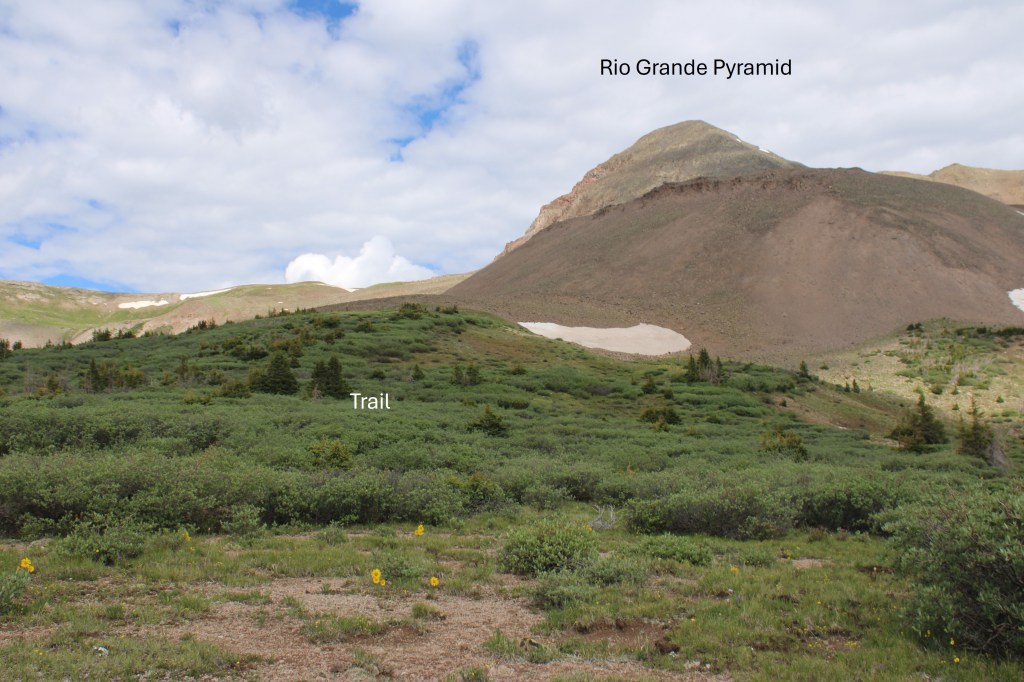
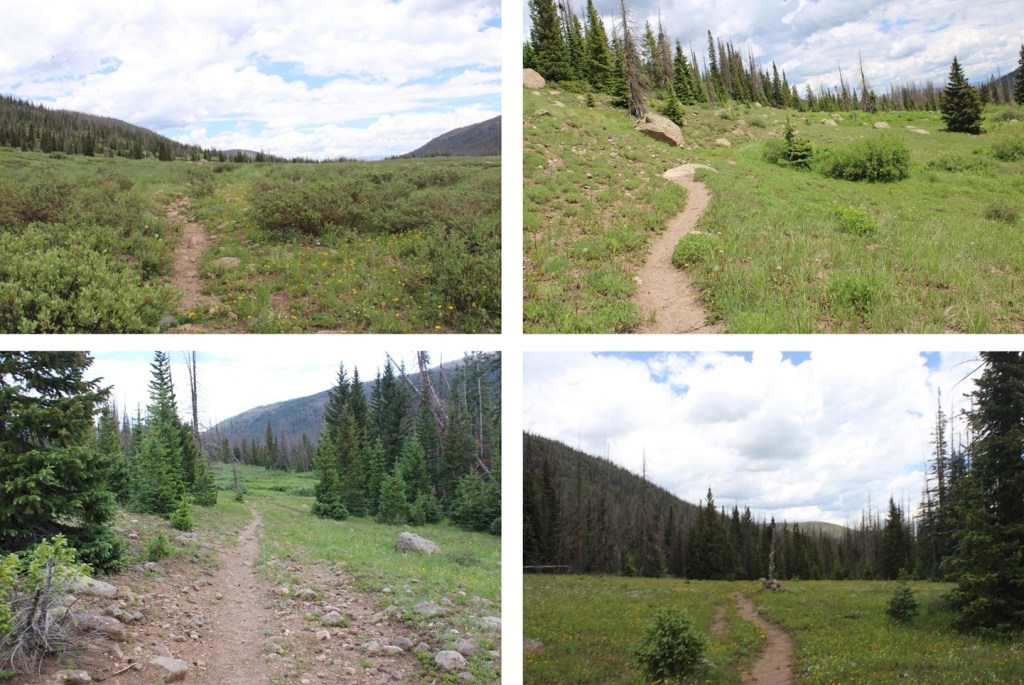
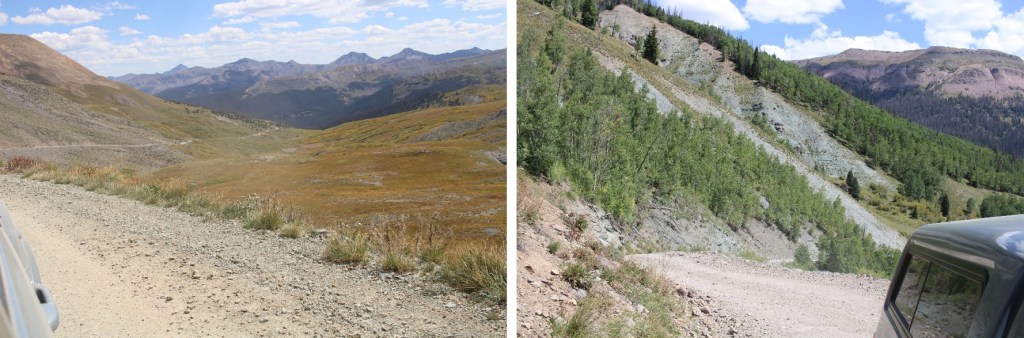
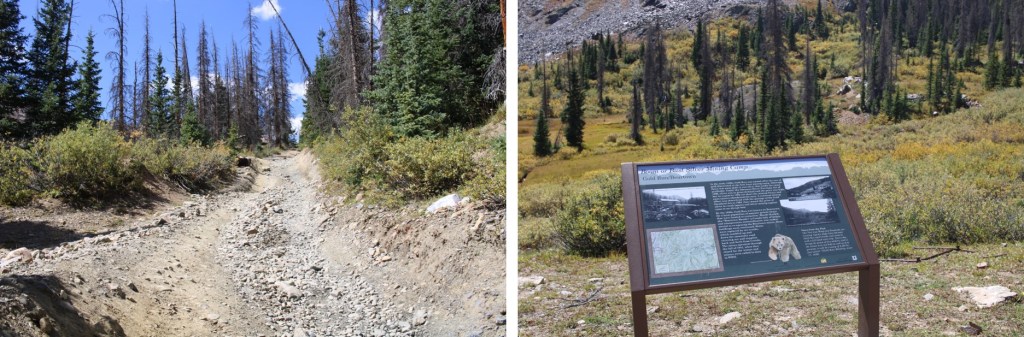
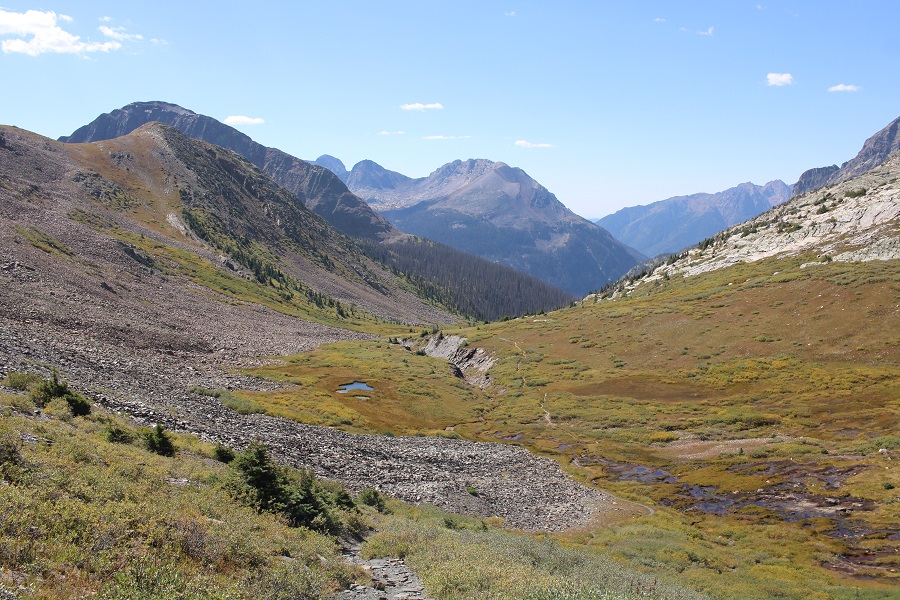
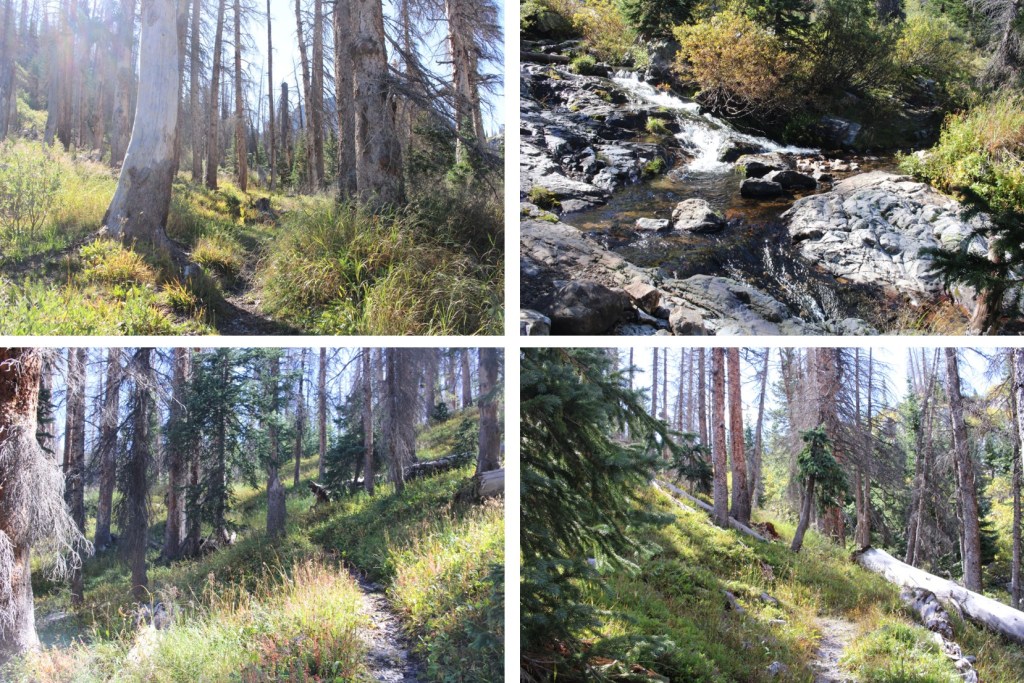
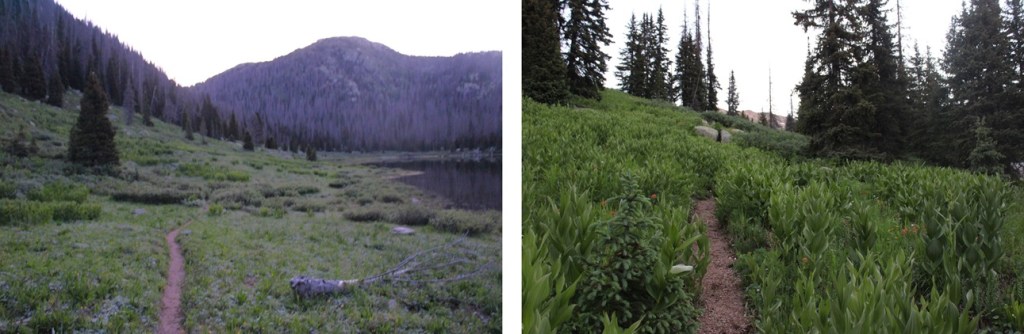
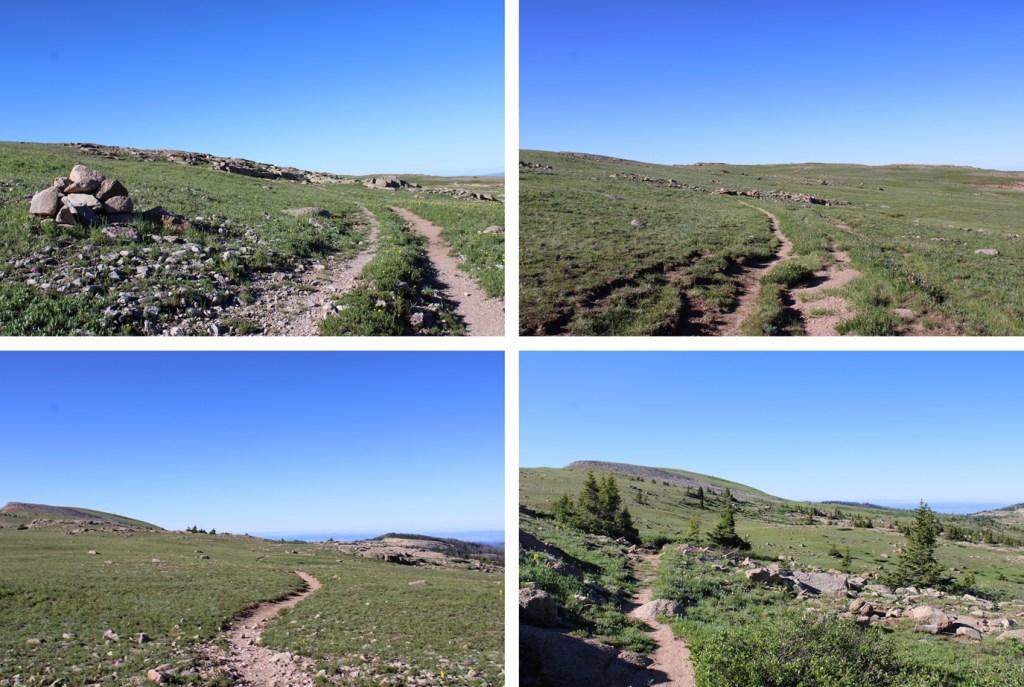
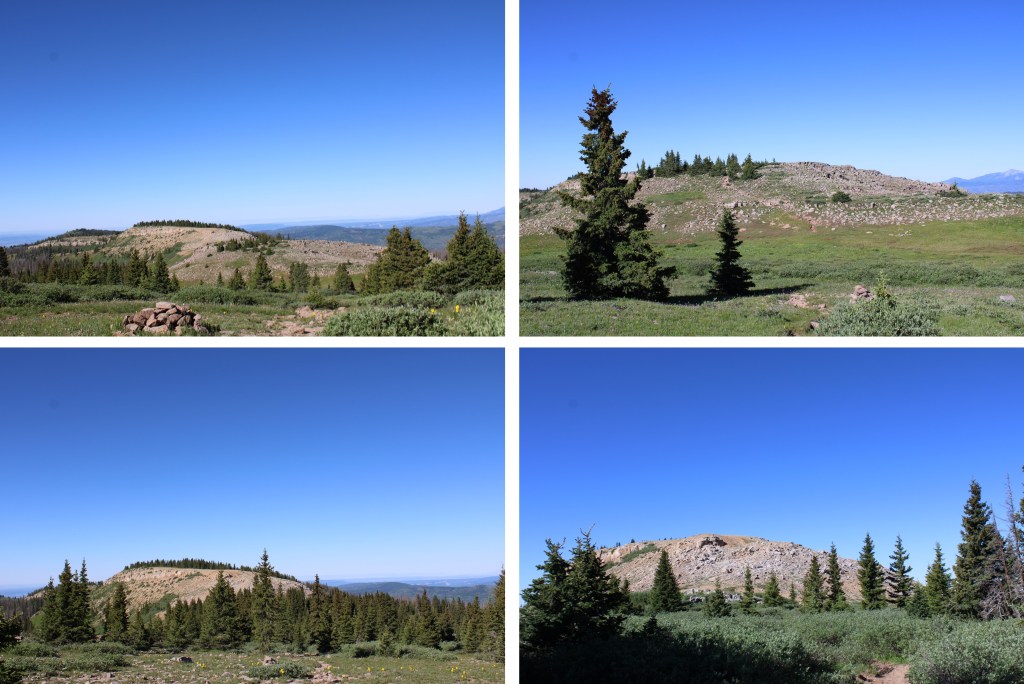
I started hiking north along this well established, class 1 trail.  There are large cairns to guide the way.  I followed Endlich Mesa Trail all the way to the reservoir.   The trail started off gaining in elevation.  I gained over 1100’ of elevation over 4.5 miles.  First, starting in the trees, then hiking along the wide, open Endlich Mesa. 

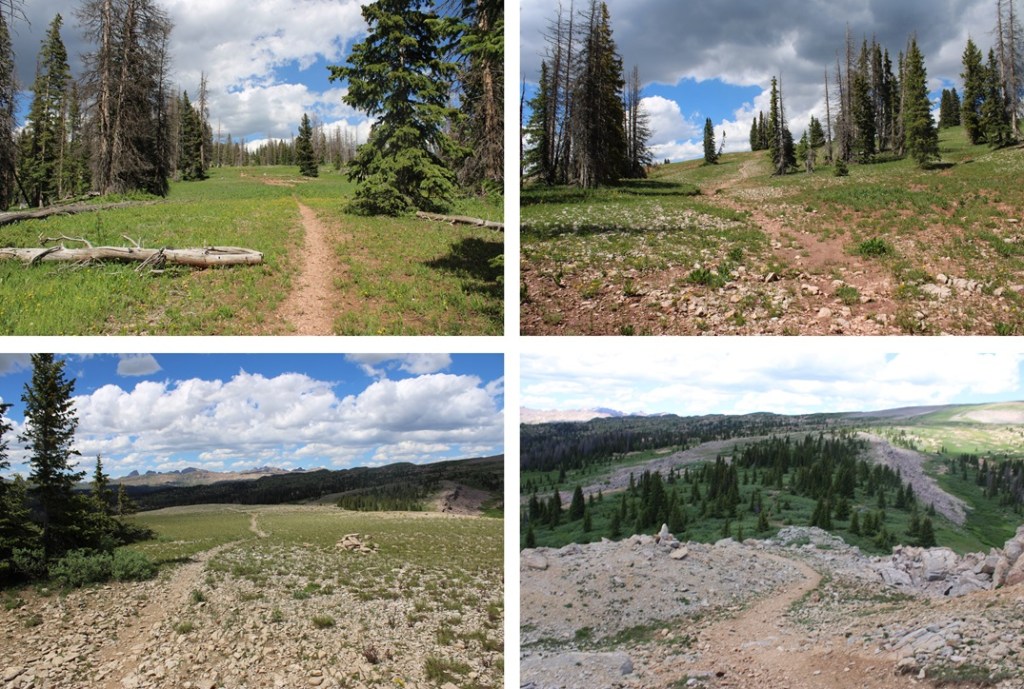
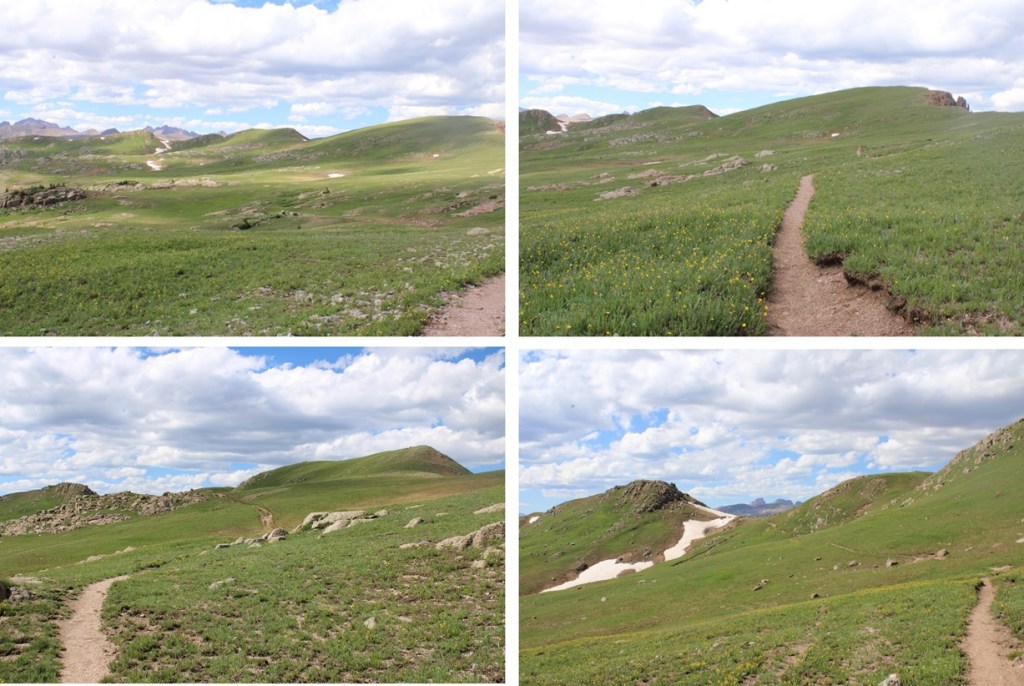
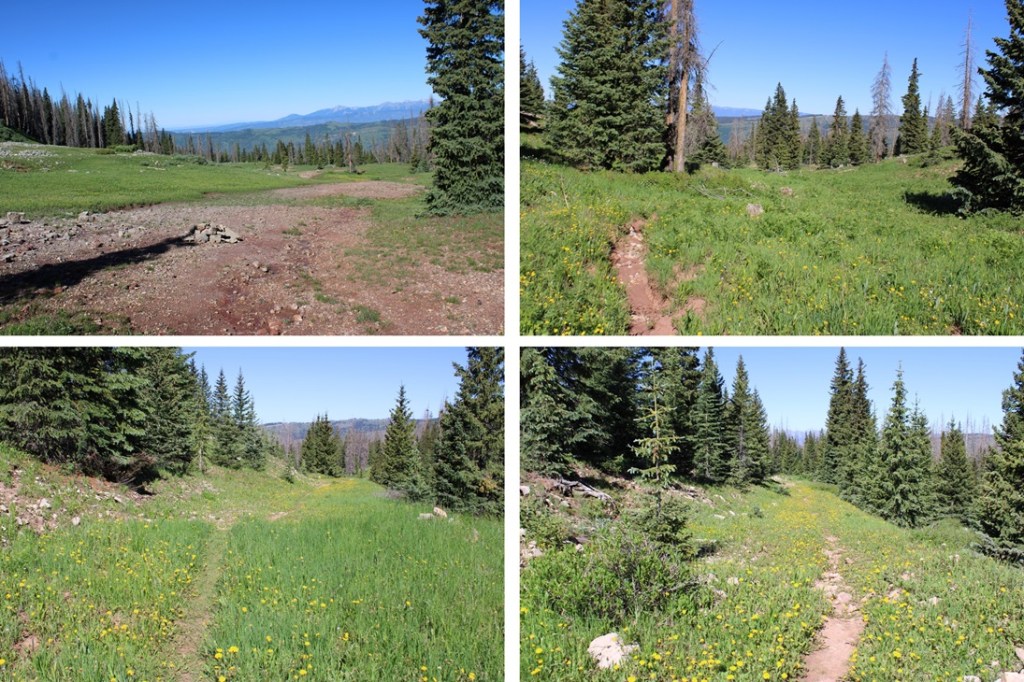
After hiking for 4.5 miles it’s time to lose 1350’ of elevation in 2.3 miles as I headed towards City Reservoir.  I would head back down into treeline to get too the reservoir.   (Spoiler alert:  this is not fun to regain on the way back, and feels like way more than 1350’, especially with a full pack).

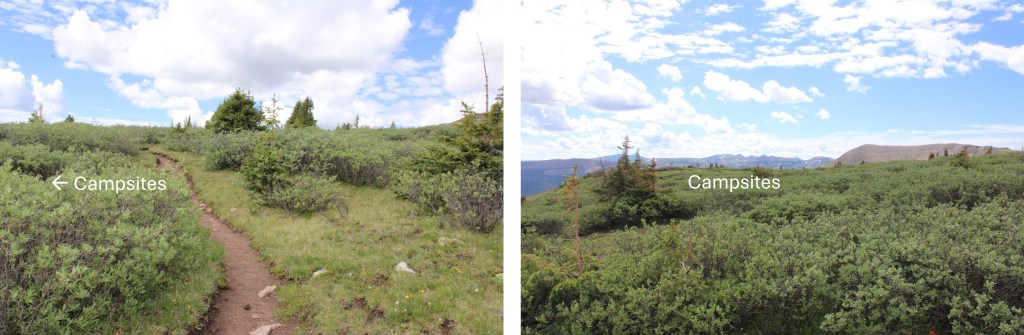
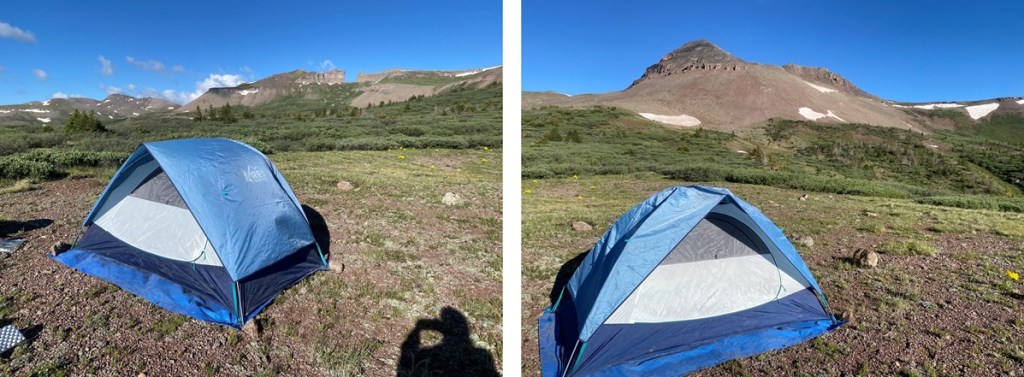
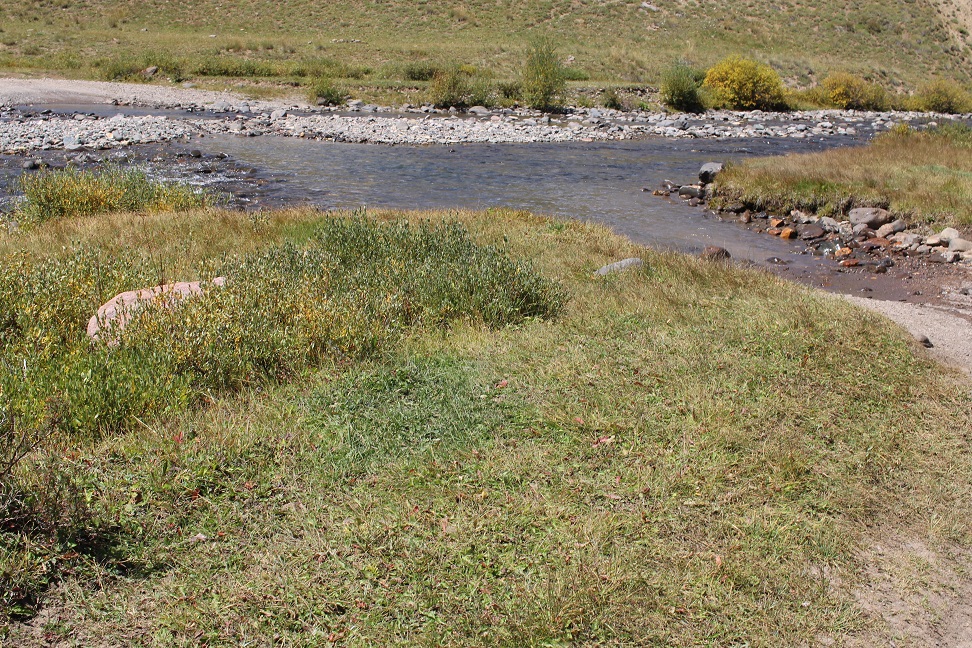
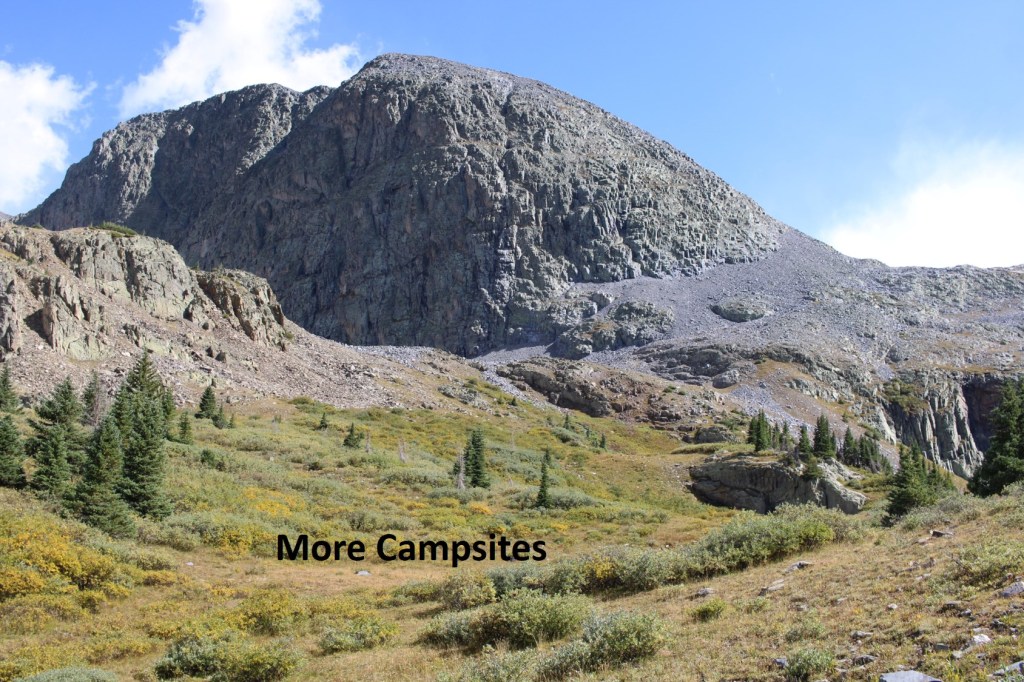
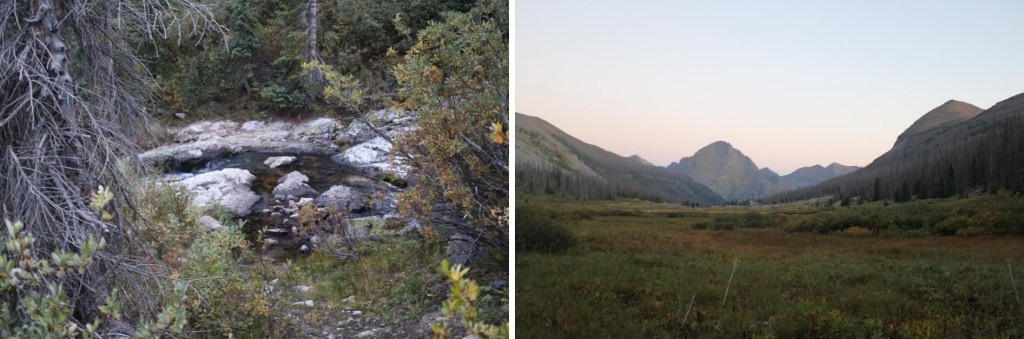
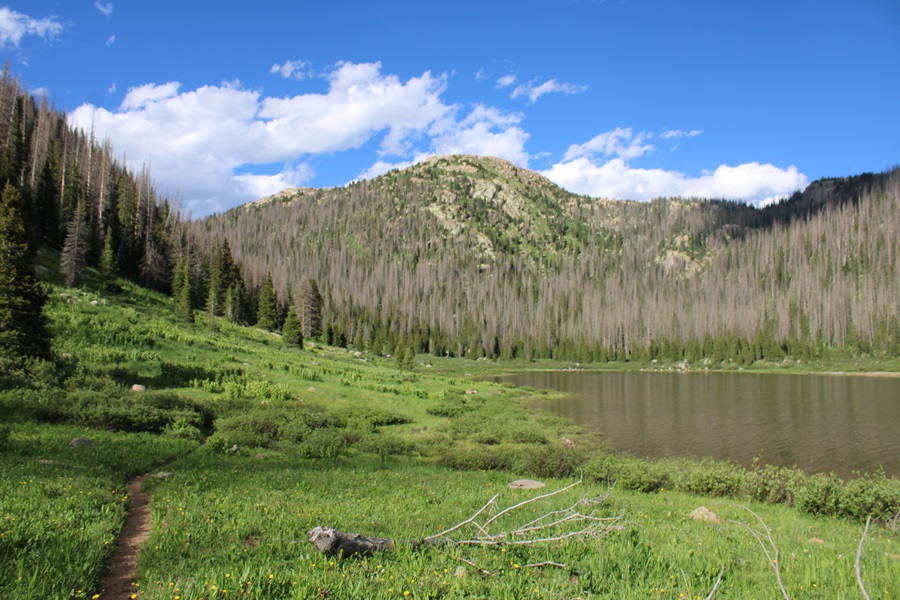
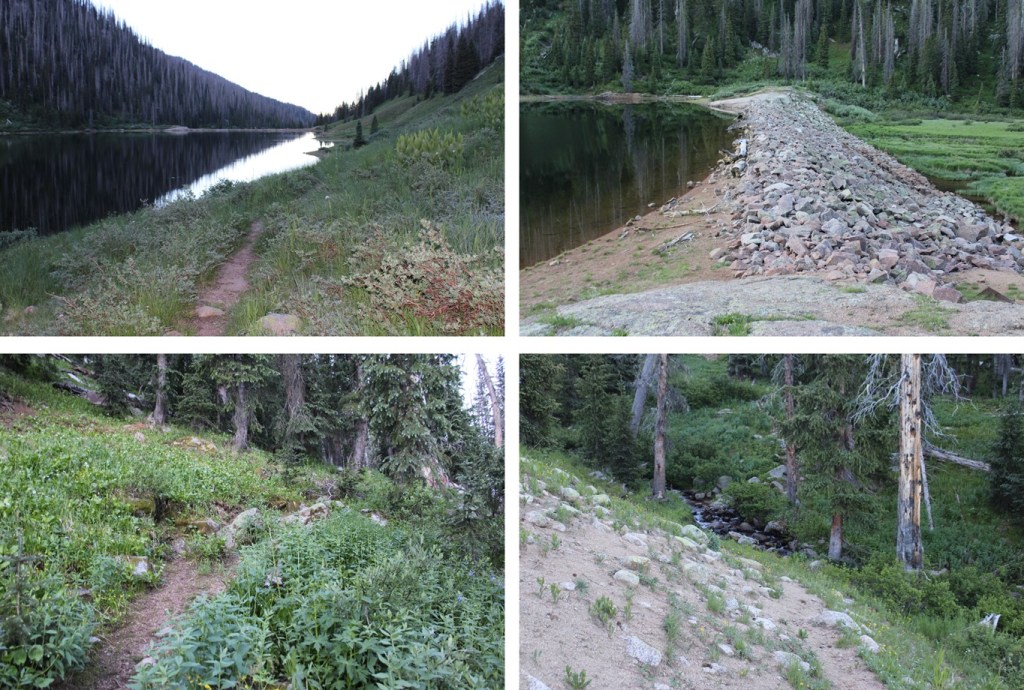
The west side of City Reservoir is where I made my basecamp. 

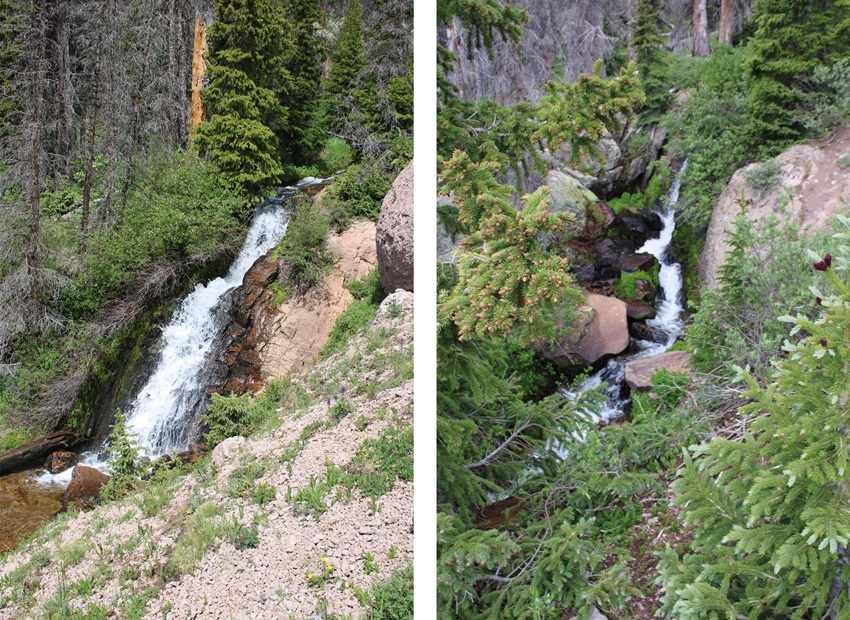
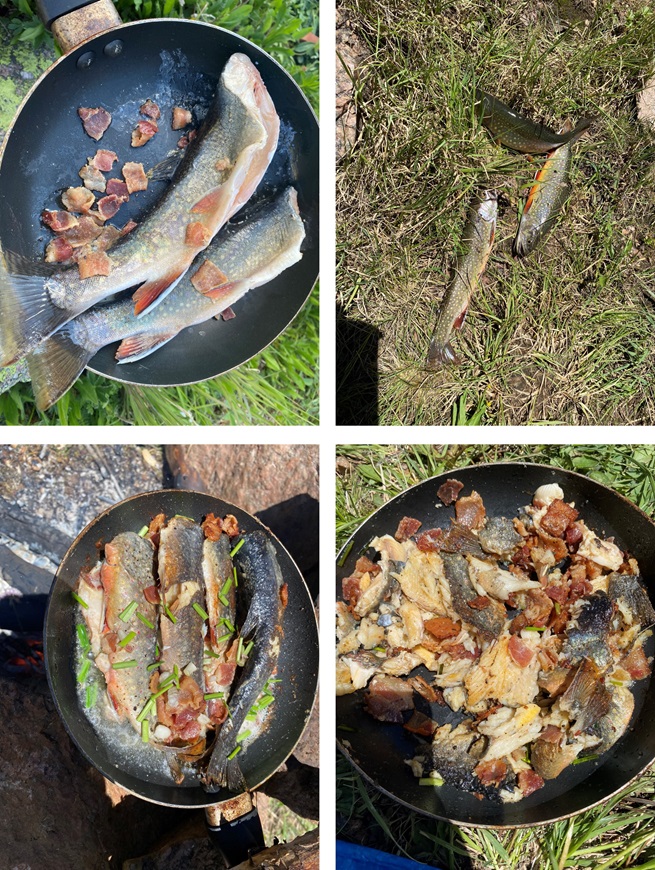
The fishing here was amazing!  3 casts and 3 fish later and I was cooking dinner.  I stayed here for 3 nights, and had fish every night.  In an hour I’d catch and release 30-40 fish.  At this time campfires are allowed, but you need to camp at least 100 feet from the water.  This was also a popular place to camp, and not everyone seemed to read the rules.  There were two groups set up with at least 20 people, so campsites were limited, but luckily I got there first and secured a great spot with a waterfall directly in front of and another behind my campsite. 

RT Length to Saddle from City Reservoir: 3.5 miles

EG to Saddle from City Reservoir:  2000’

The next morning, I had beta on how to get to the Emerson/Peak Twenty Two saddle, and I used it, and vowed to find a better way on the descent.  I’m not sure my way is better, but it is more straightforward.  I hope this information is helpful.  

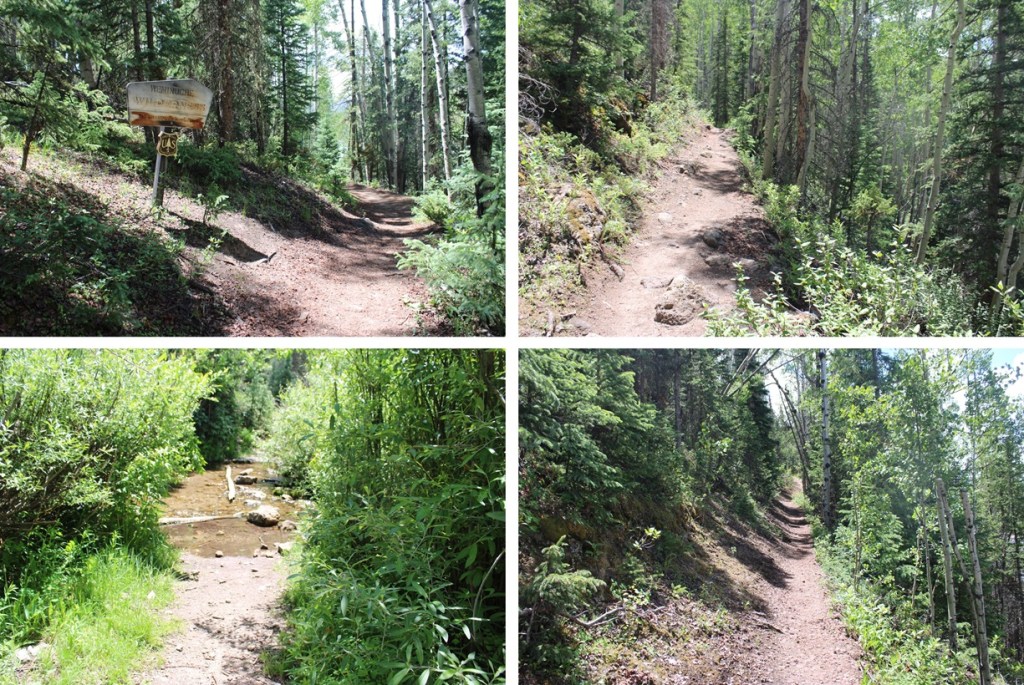
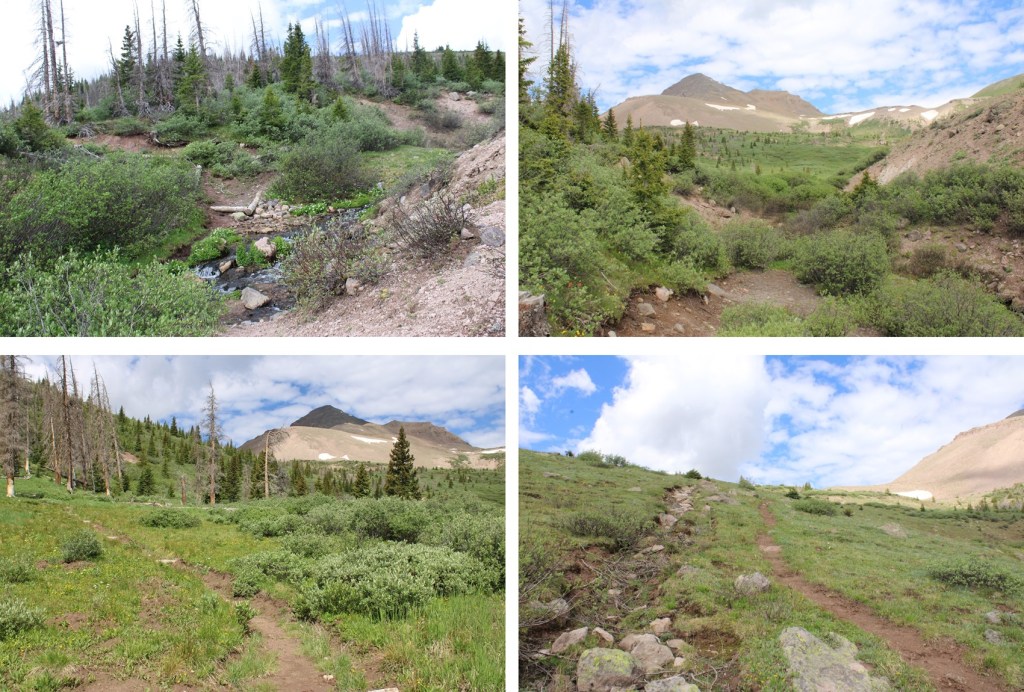
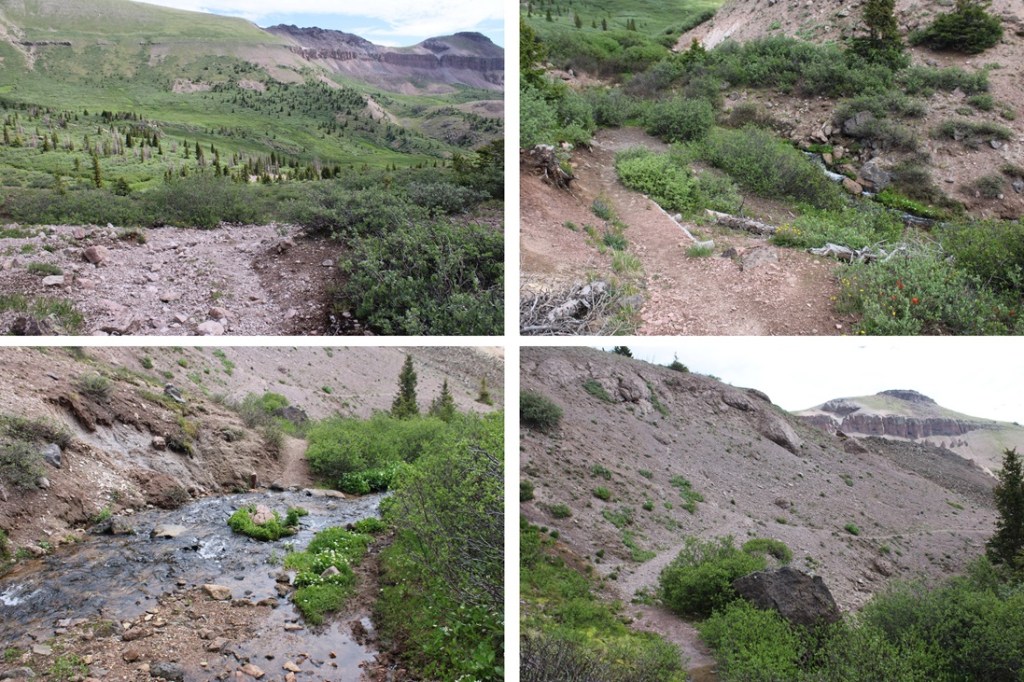
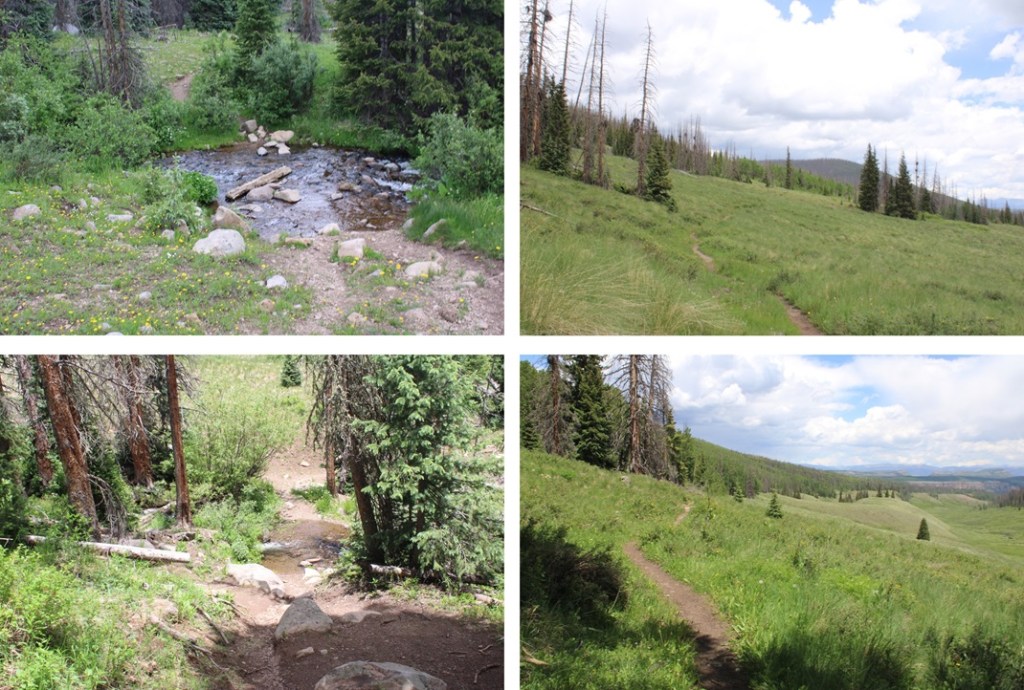
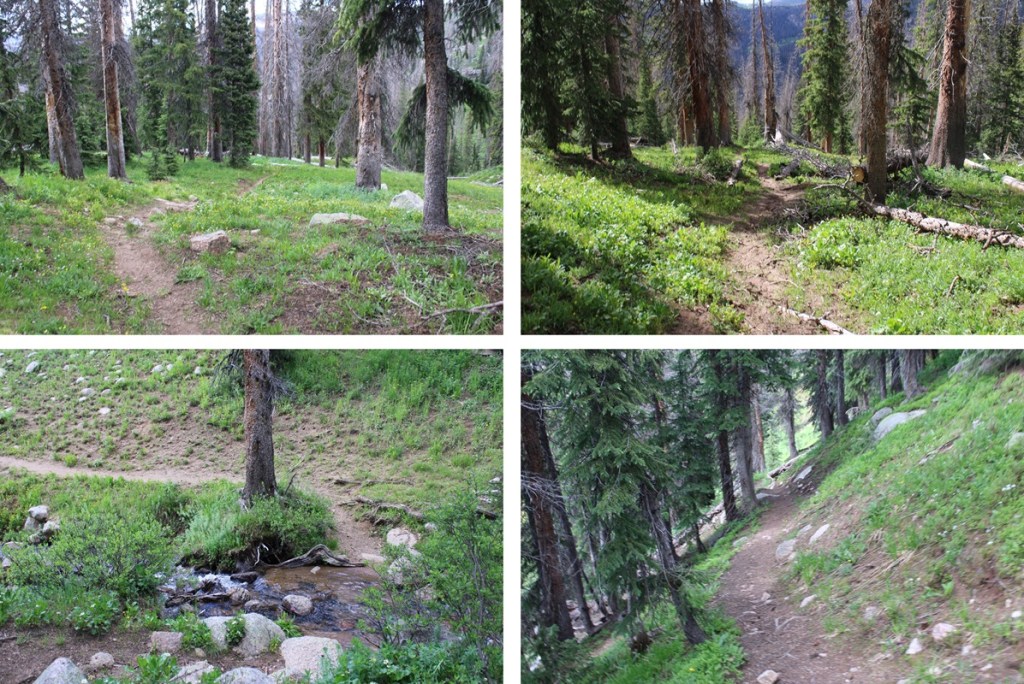
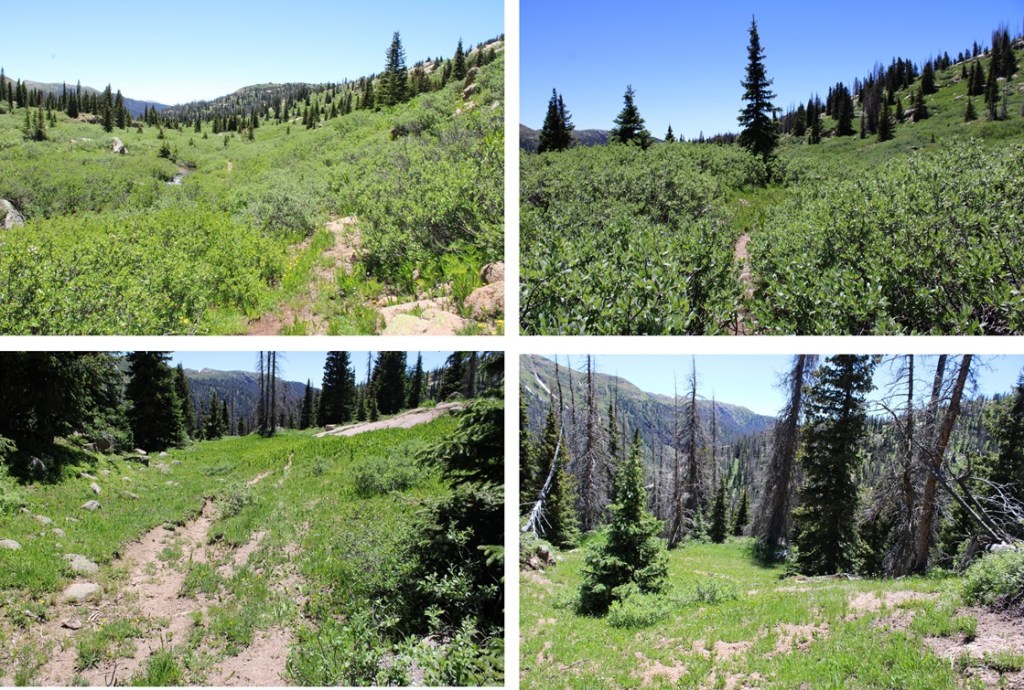
I spent the night near the reservoir, and was on the trail at 6am to head to the Emerson/Peak Twenty Two saddle.  I continued following the Endlich Mesa Trail north towards Logtown (which isn’t really a town… there’s nothing there).

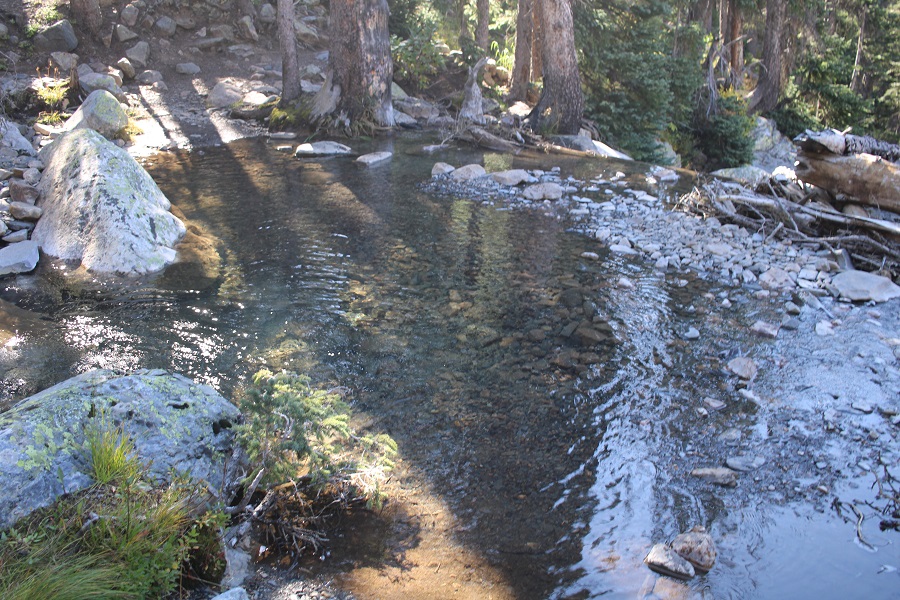
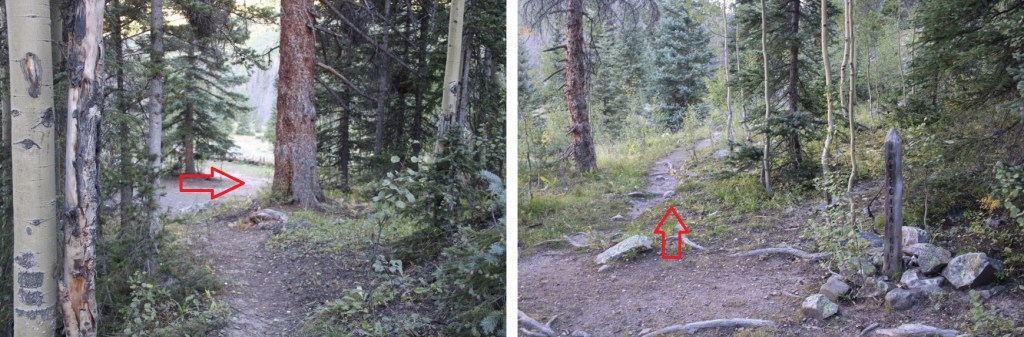
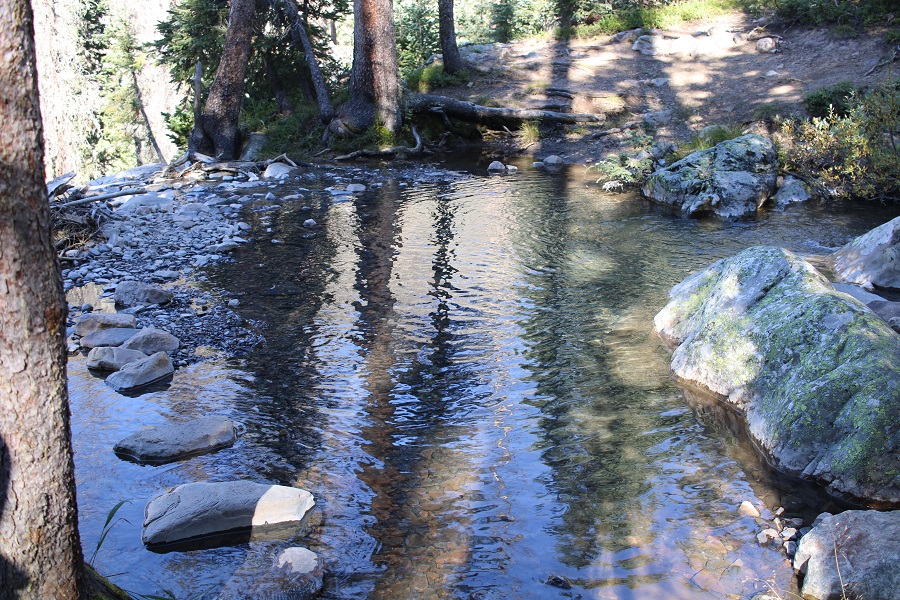
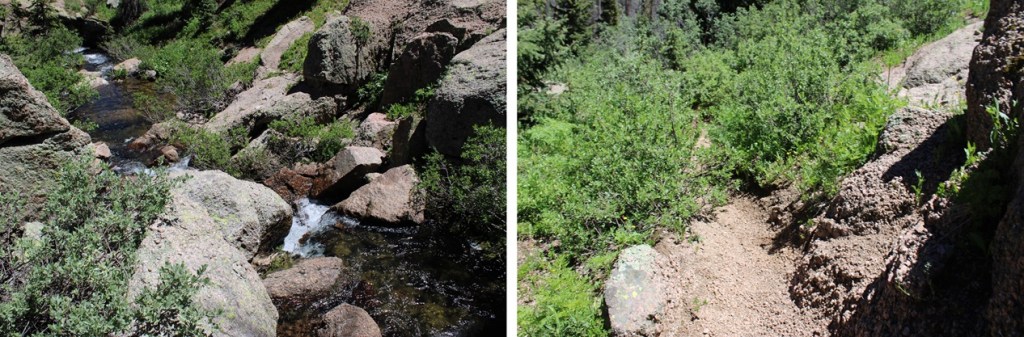
After hiking for about .9 miles I came to a waterfall, and crossed the creek just above the waterfall.

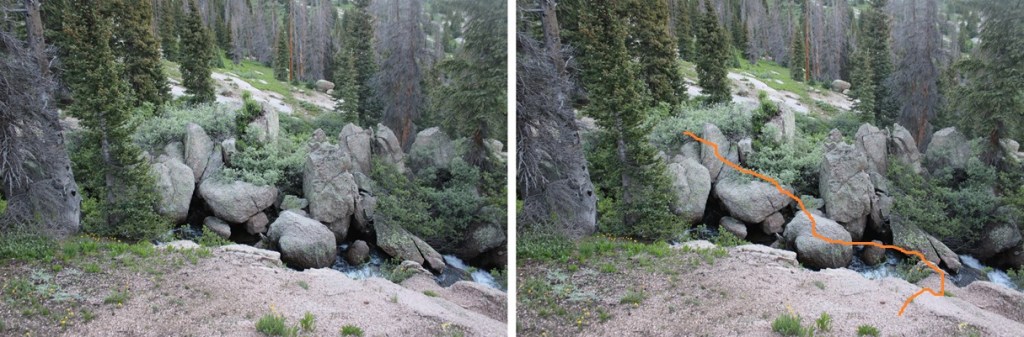
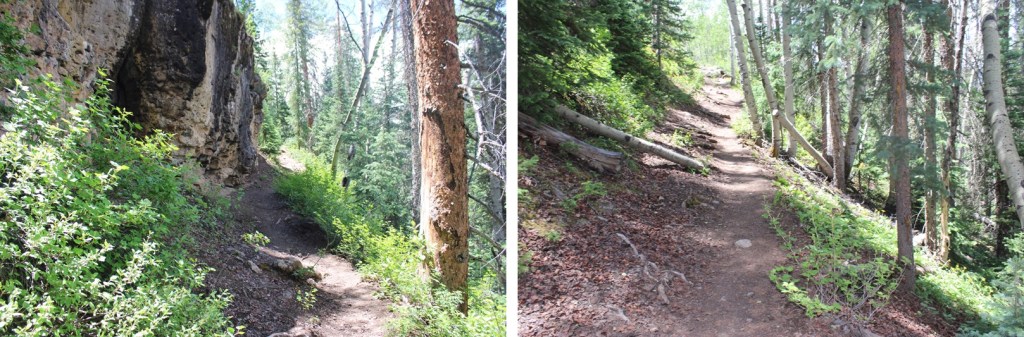
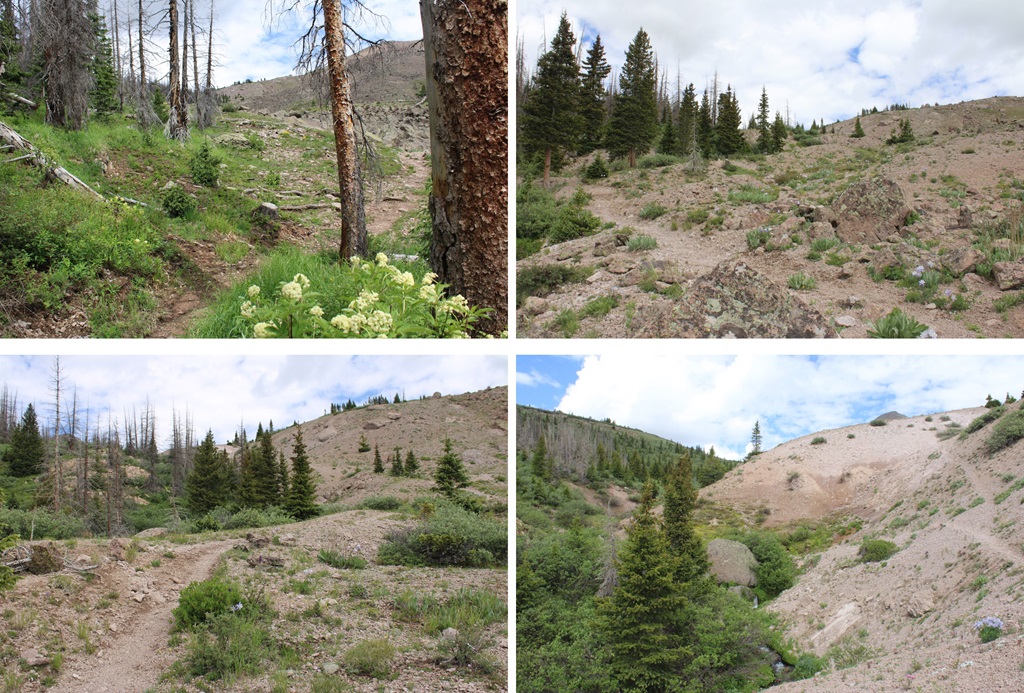
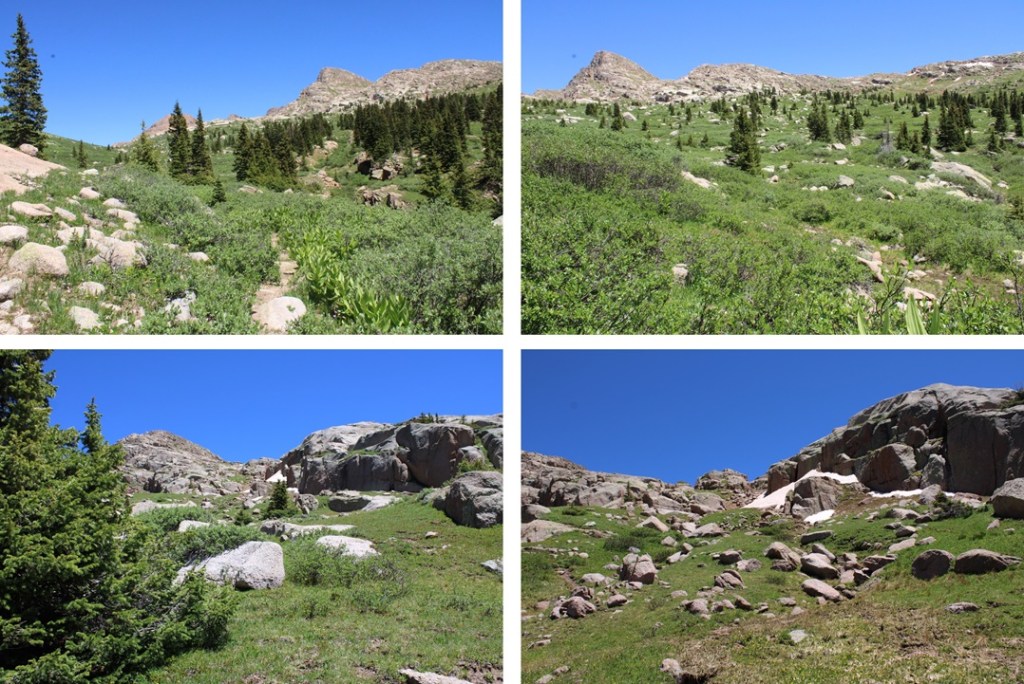
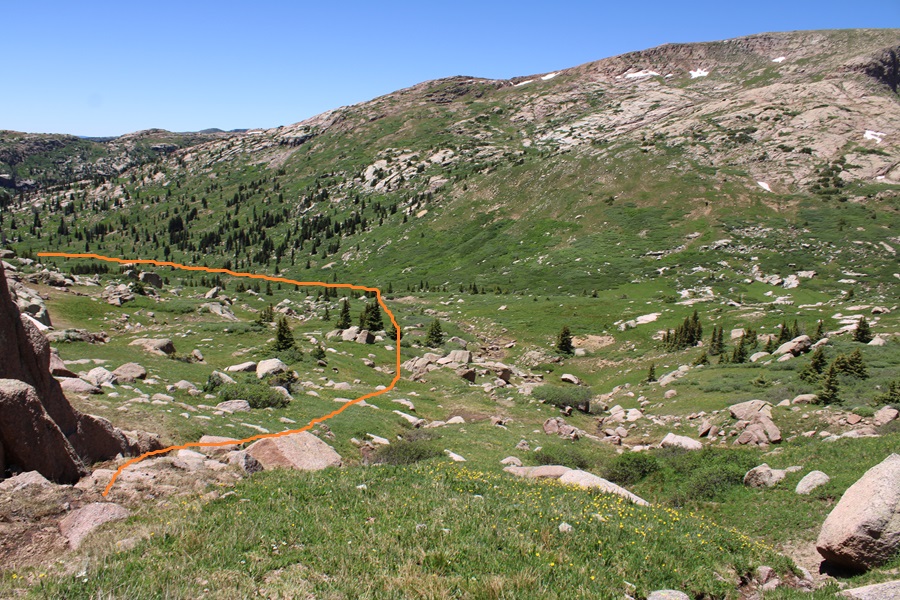
I found a large rock slab, and stayed to the right of it, heading northeast into the basin.

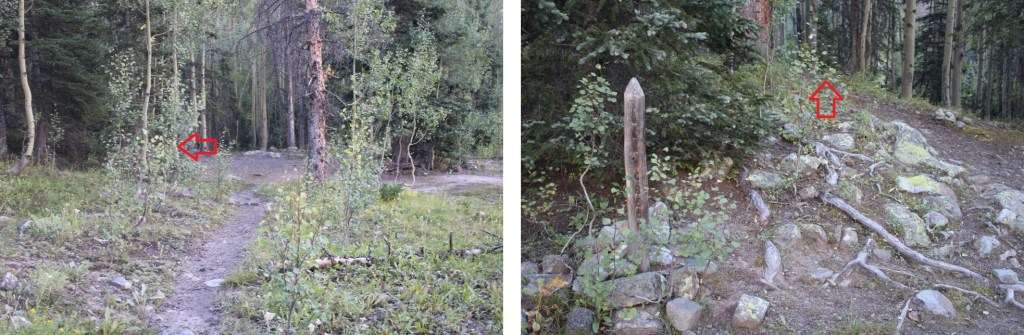
Once in the basin, I found a game trail not listed on maps to the left of the creek, that was very easy to follow.

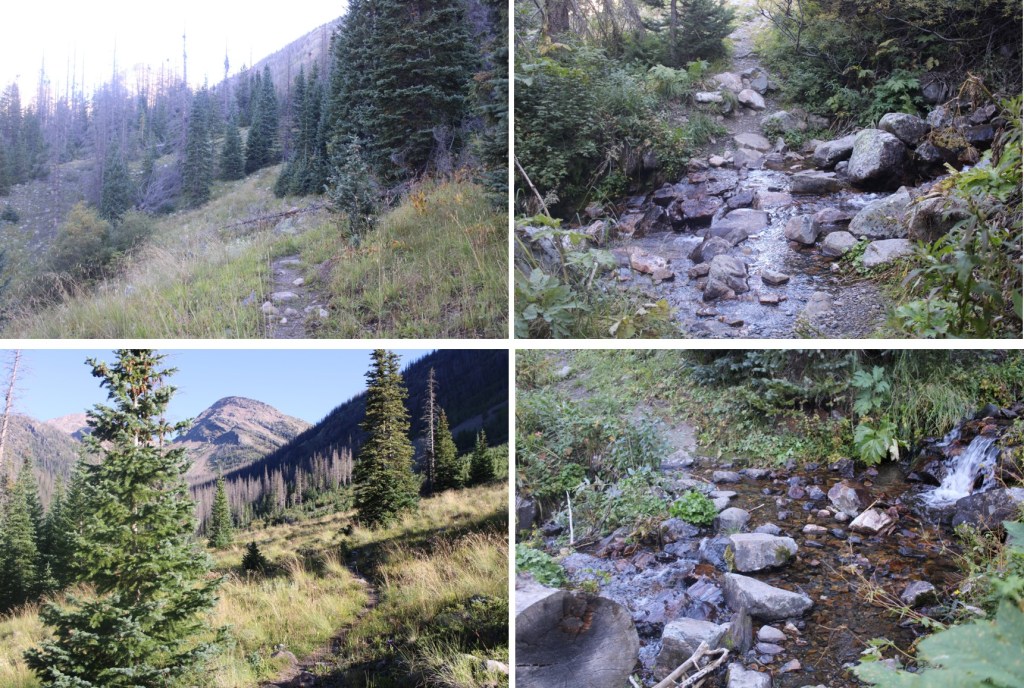
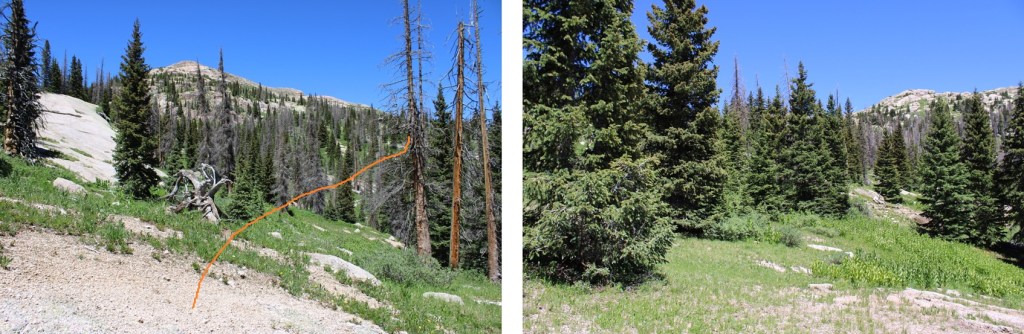
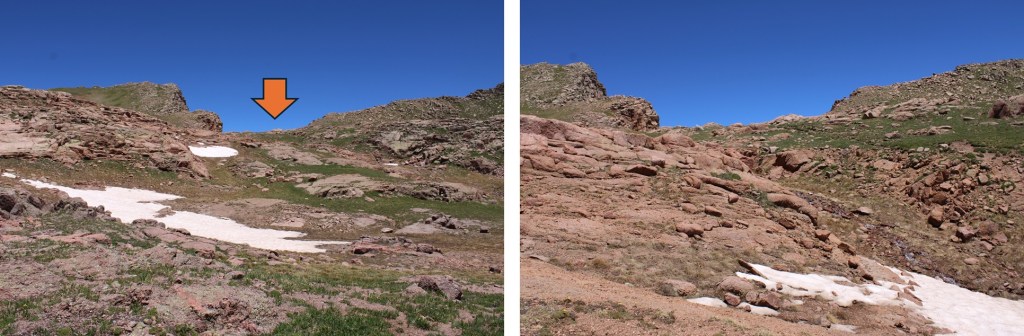
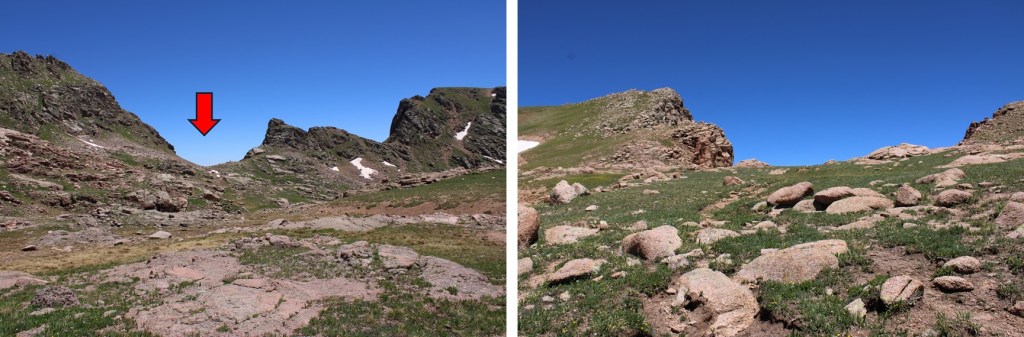
I followed this trail until I was parallel with a gully that ran between Emerson Mountain and PT 12843 to the east.  I aimed for this gully, then climbed straight up it, eventually finding a game trail to follow east.

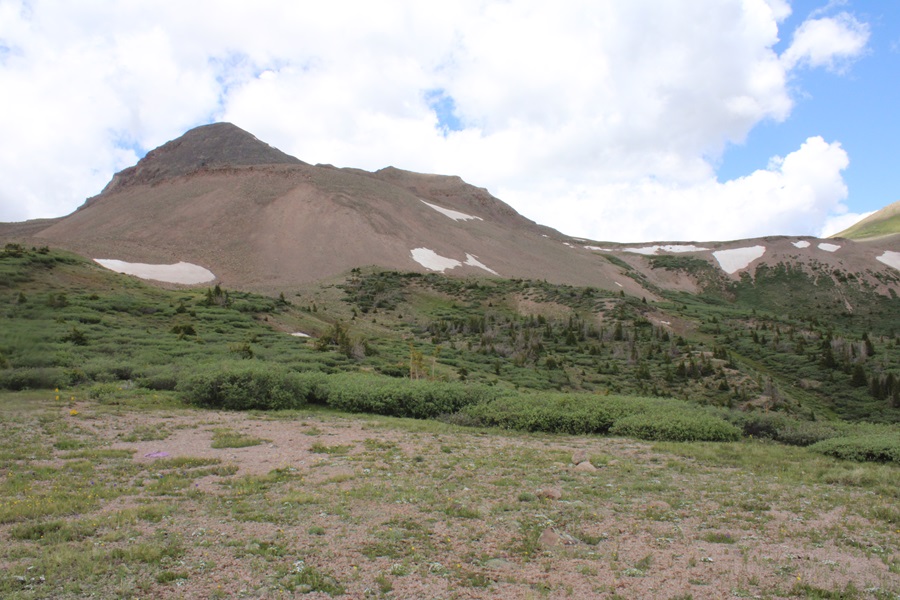
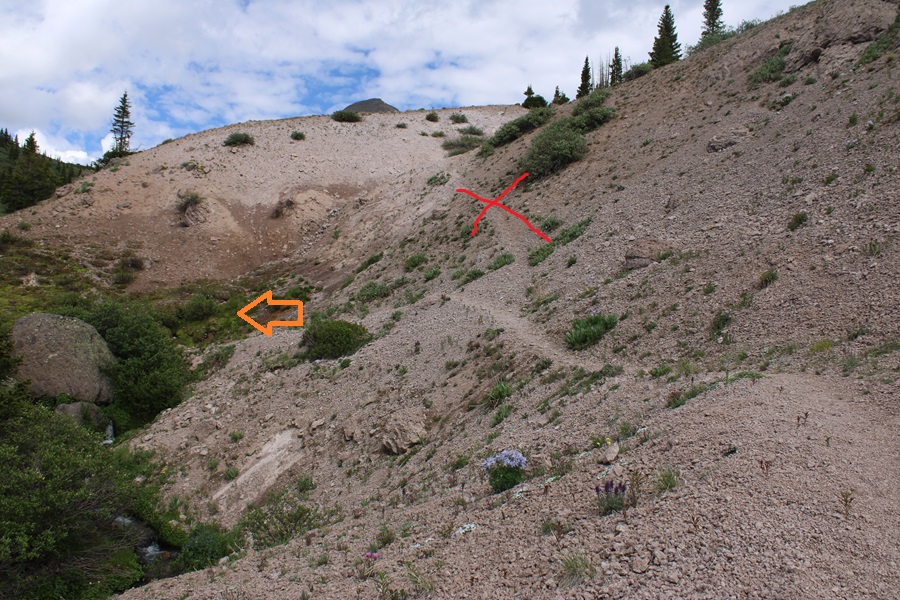
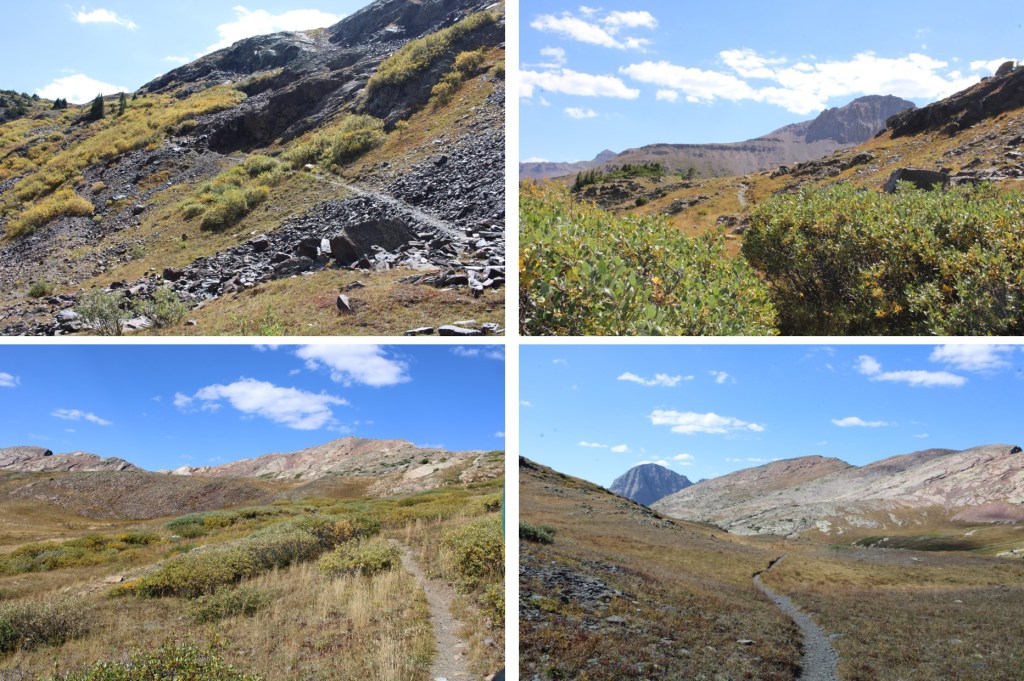
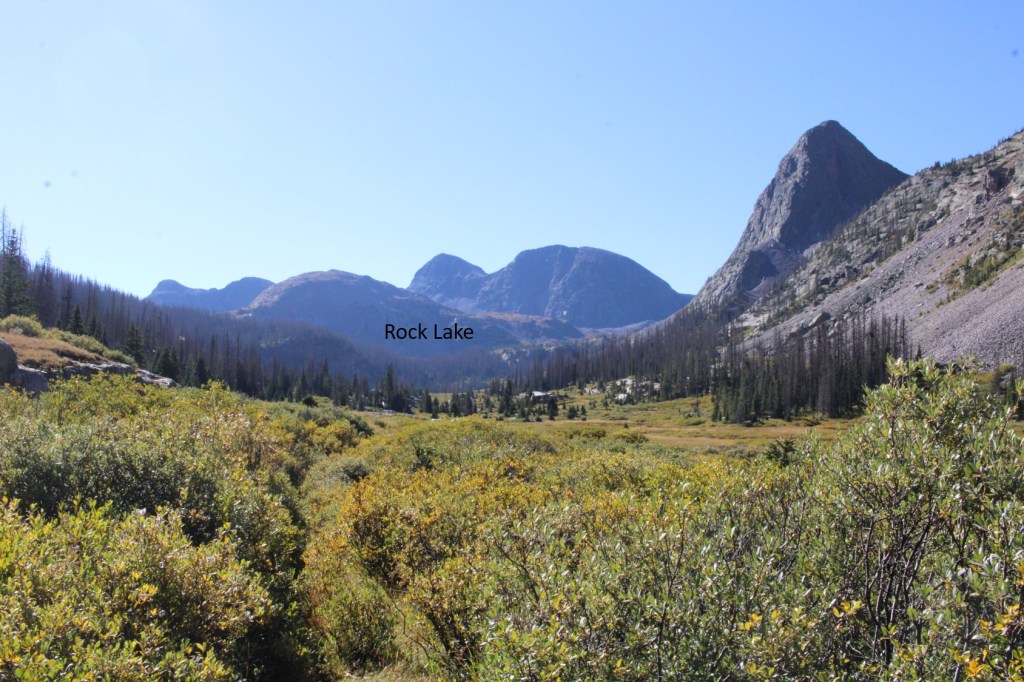
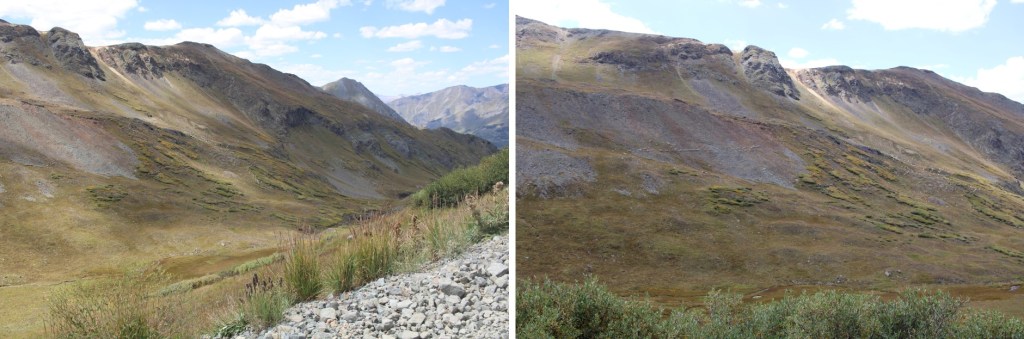
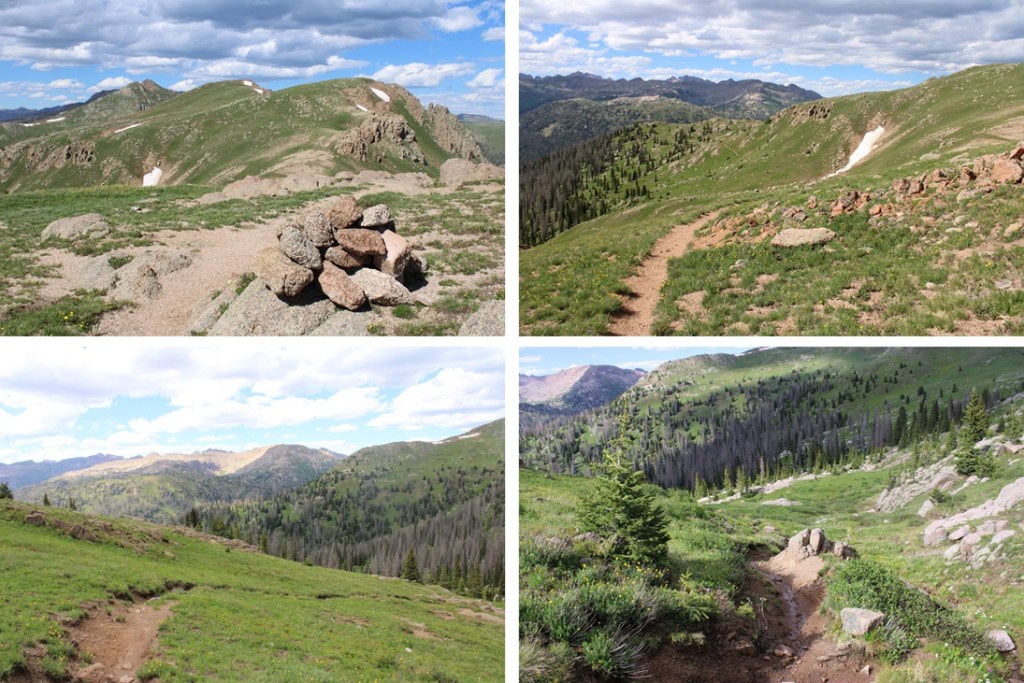
Here’s what that gully looks like from Mt Valois to the west

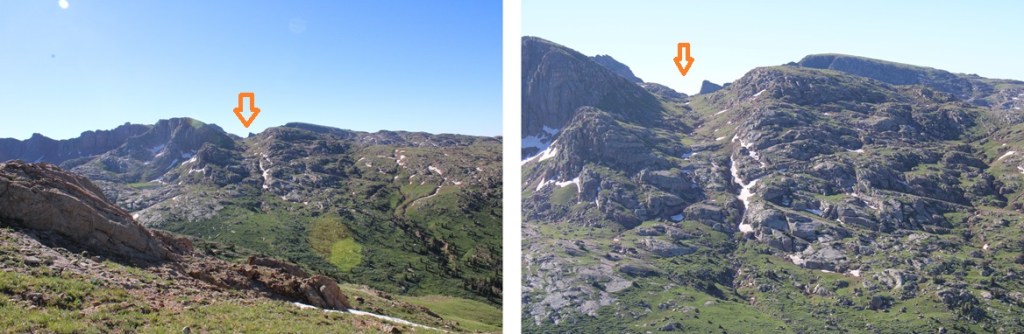
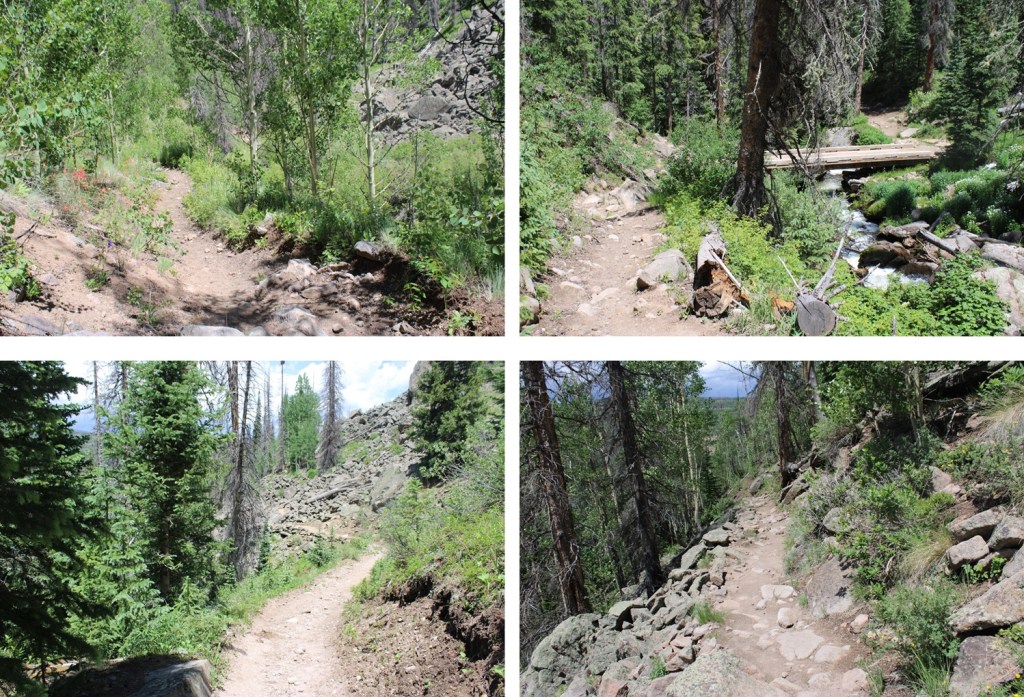
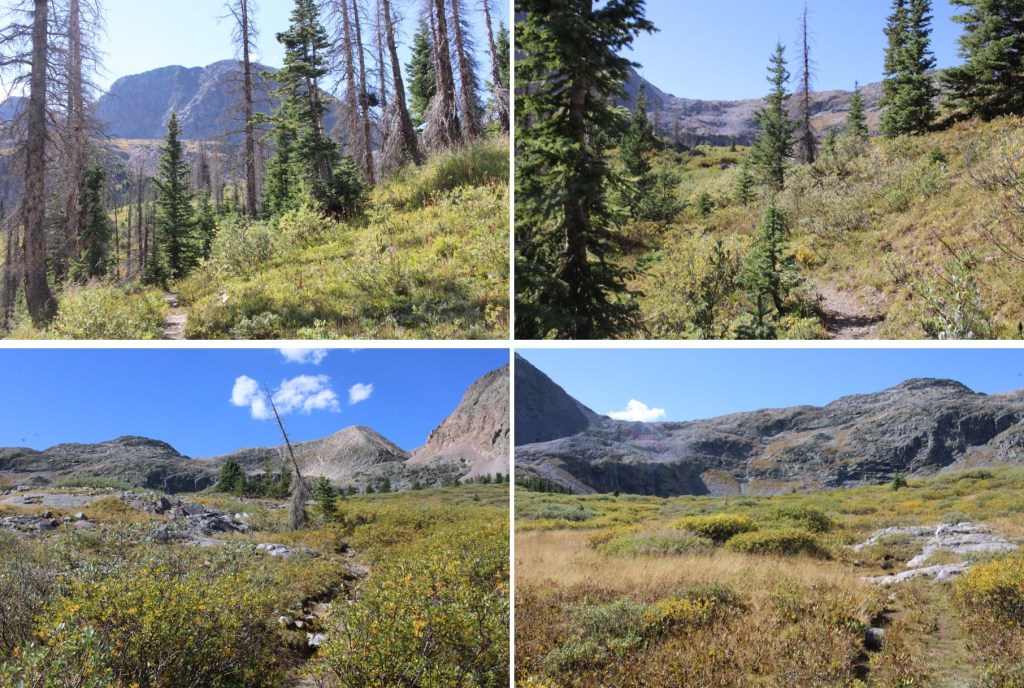
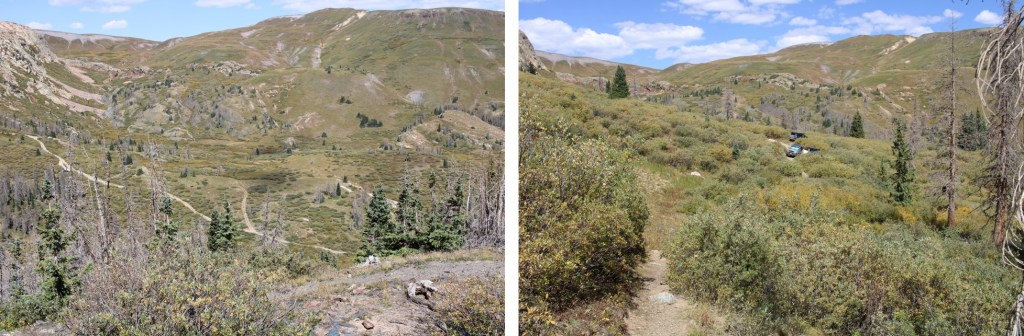
And some pictures of the upper basin and the gully

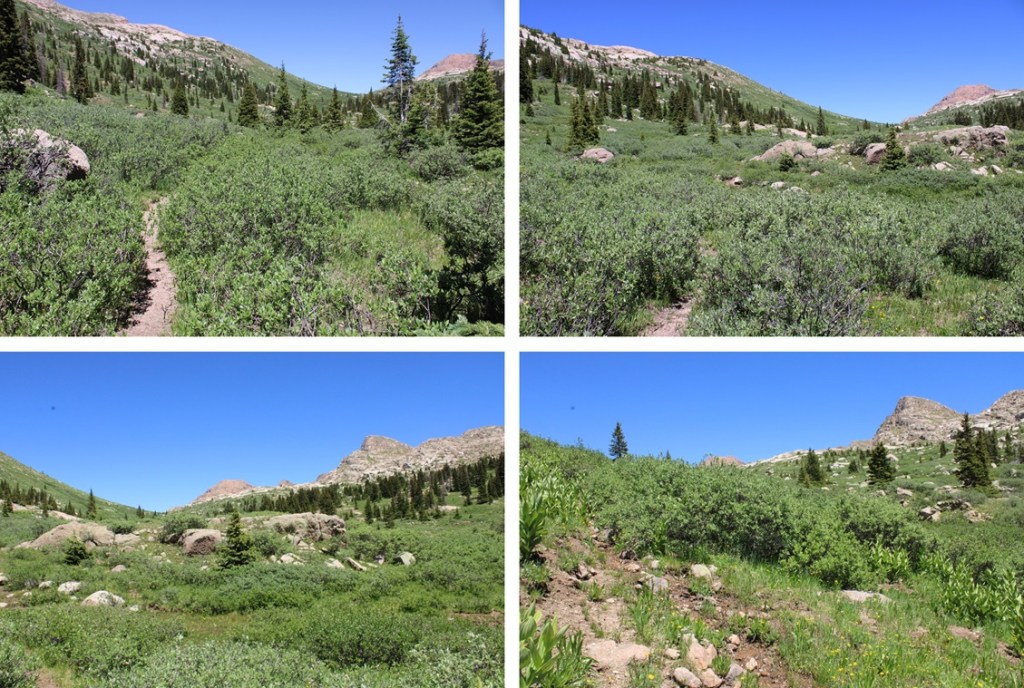
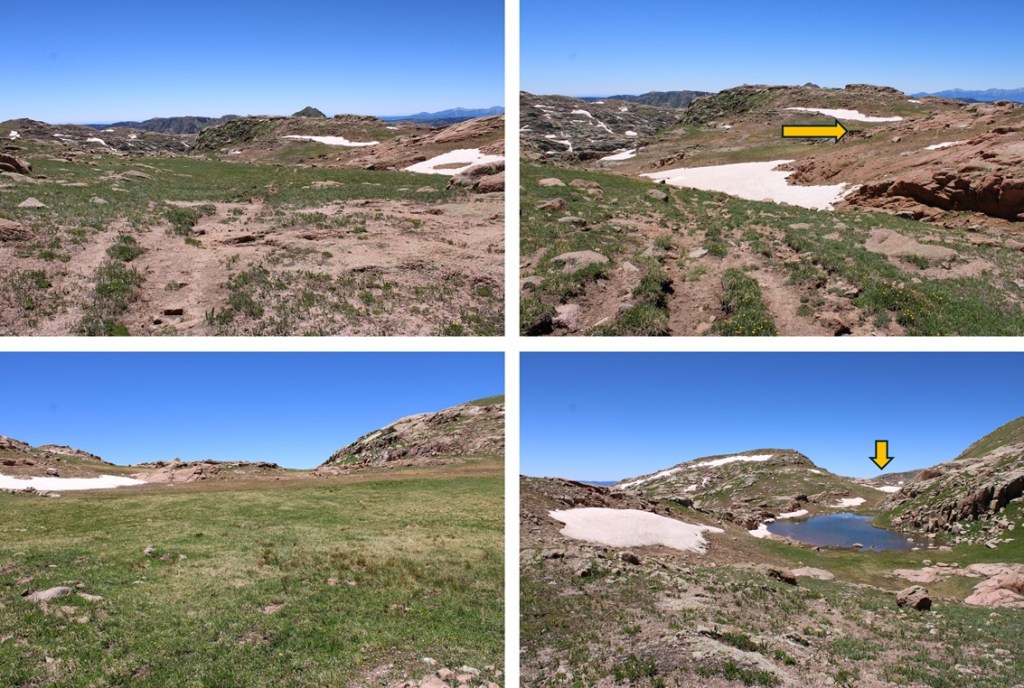
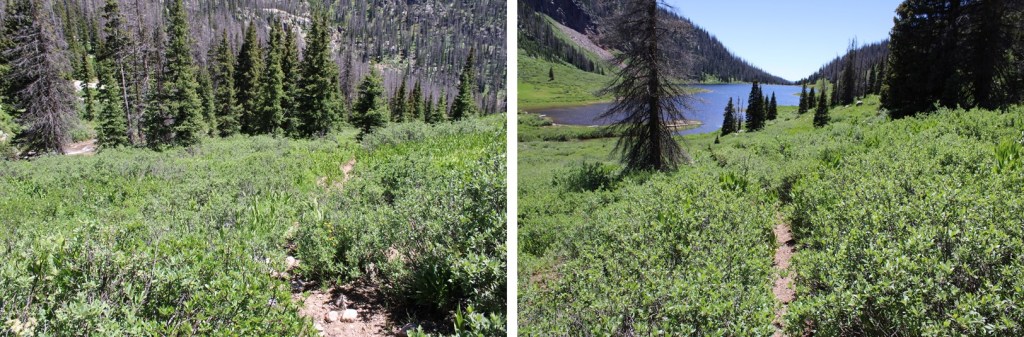
Now on a pretty established trail, I continued following it east
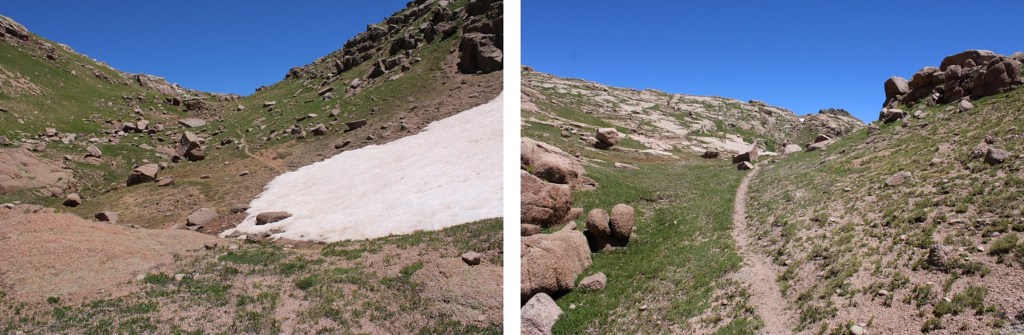
Past a small pond

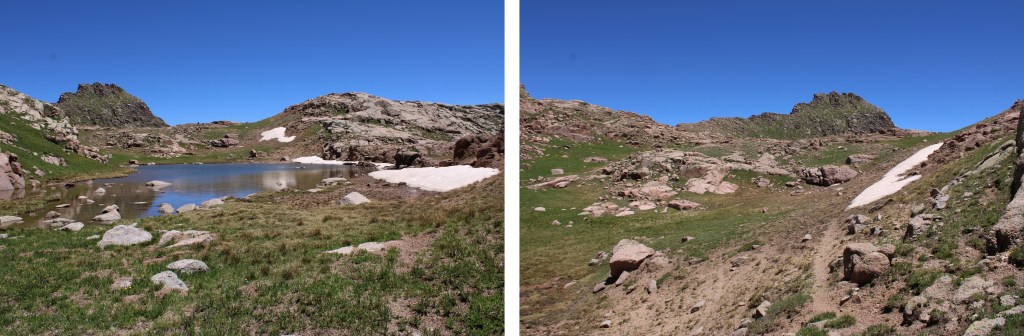
Then left towards the Emerson/Peak Twenty Two saddle

I was now at the saddle of Emerson and Peak Twenty Two.  From here I would summit Amherst Mountain, Organ Mountain, Peak Twenty Two, and Sheep Mountain. 

And now for the return back to City Reservoir. 

From the Emerson/Peak Twenty Two saddle, I headed west, staying to the left of the small lake.

I picked up the game trail

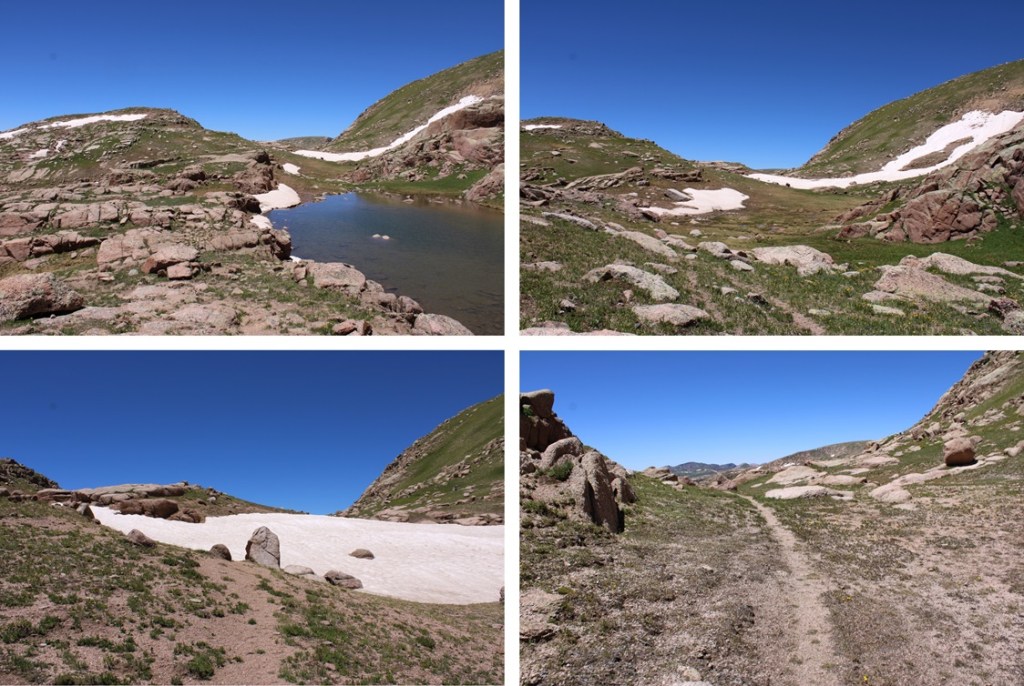
And followed it west back down the gully

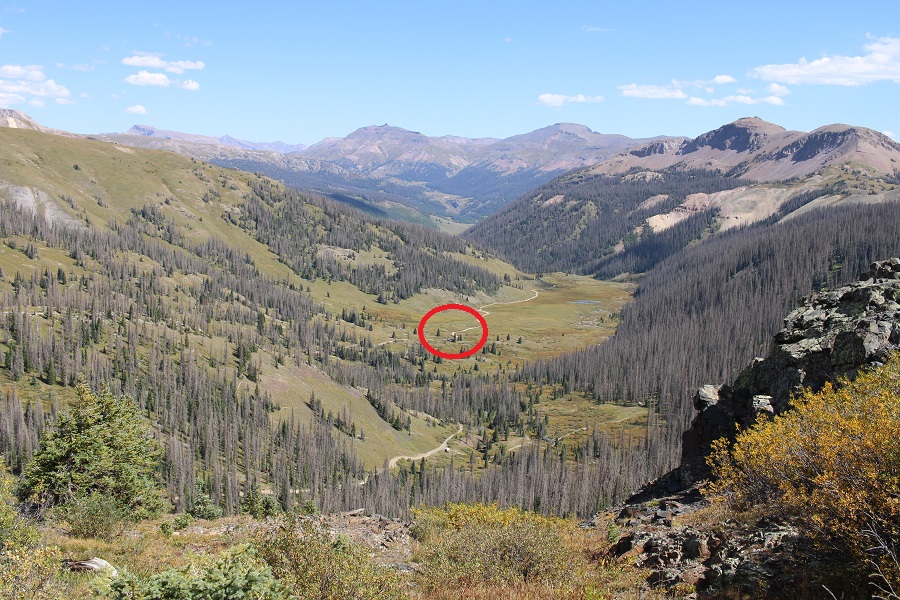
From the base of the gully it was choose your own adventure to find the solid game trail on the other side that would lead me southwest down the gulch.

Once on the game trail, I followed it southwest to about 11600’

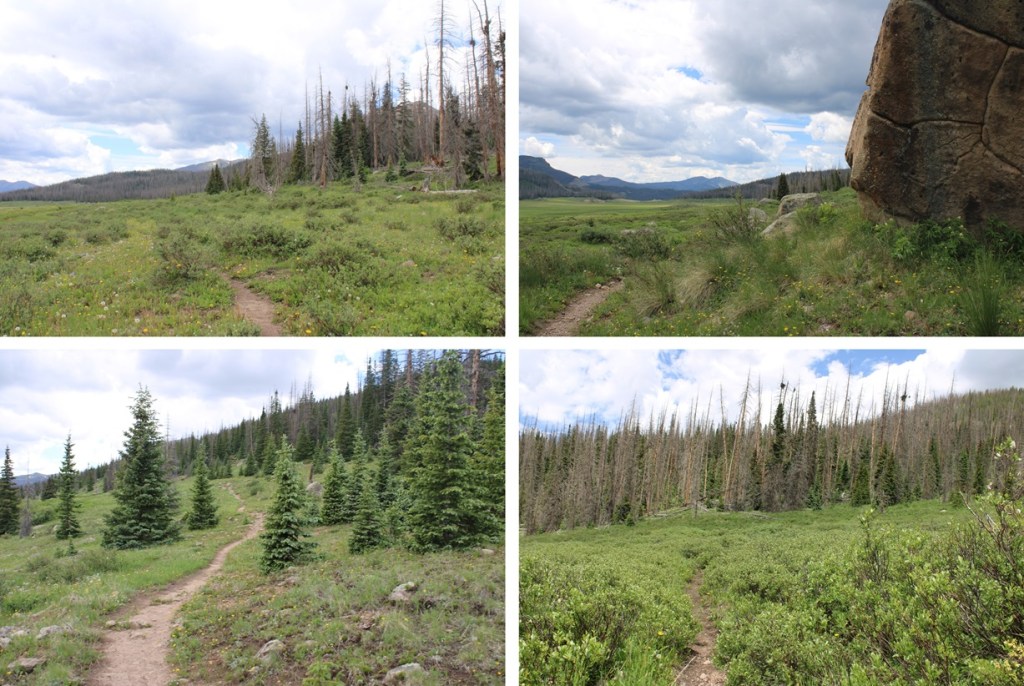
Once I could see the big boulder in the distance, I left the trail and headed towards it, following it to the creek and the creek crossing.

I crossed the creek, and followed the Endlich Mesa Trail back to City Reservoir.

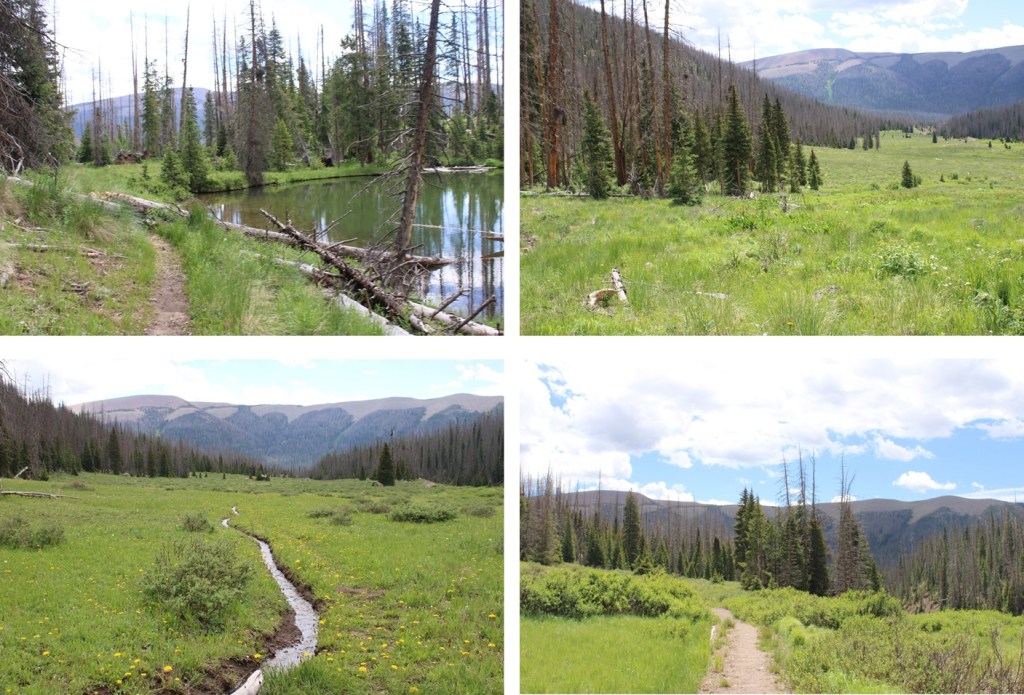
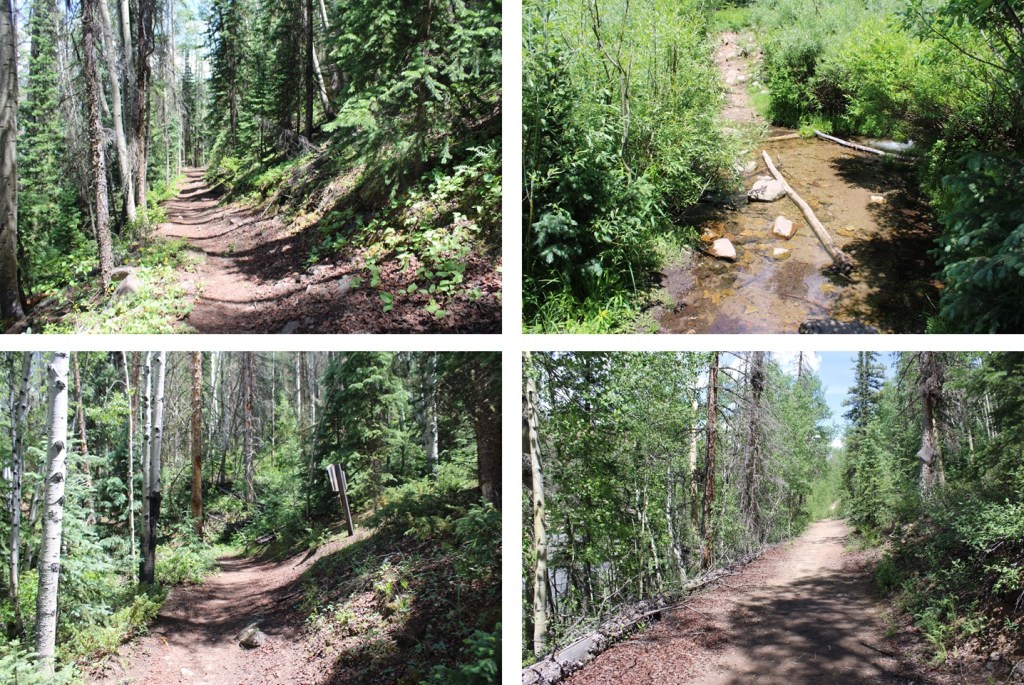
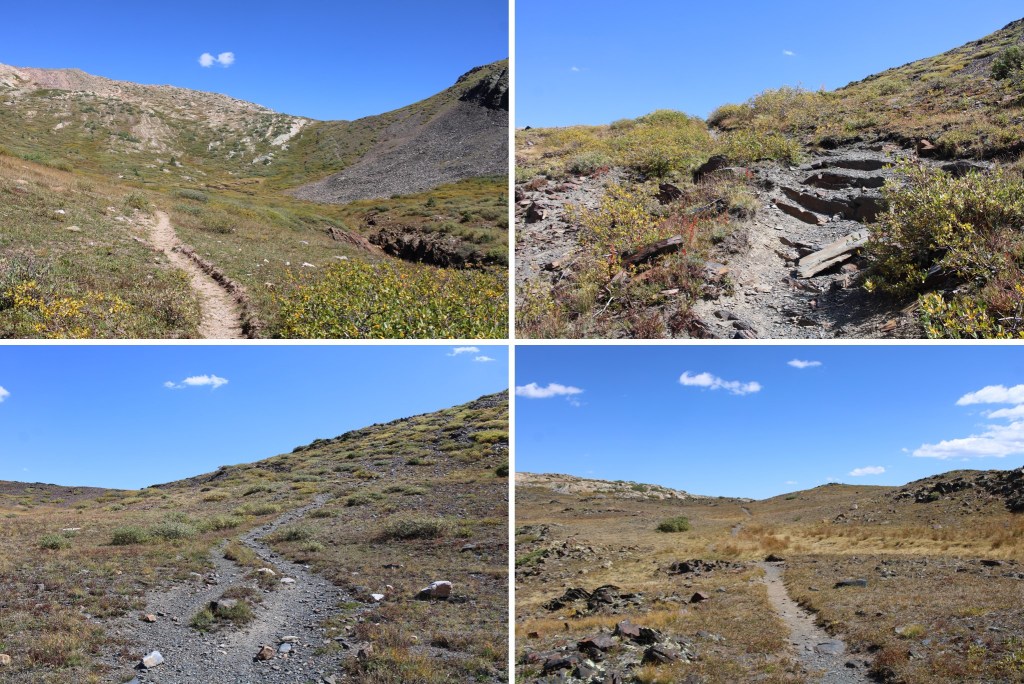
I stayed at the reservoir for a few days, hiking other peaks.  Here are some pictures of the hike from City Reservoir back to Endlich Mesa Trailhead:

NOTE:  you will gain 1600’ of elevation going from the City Reservoir back to the trailhead.  The elevation gain begins as soon as you’ve crossed the reservoir.

Then it’s back across the mesa

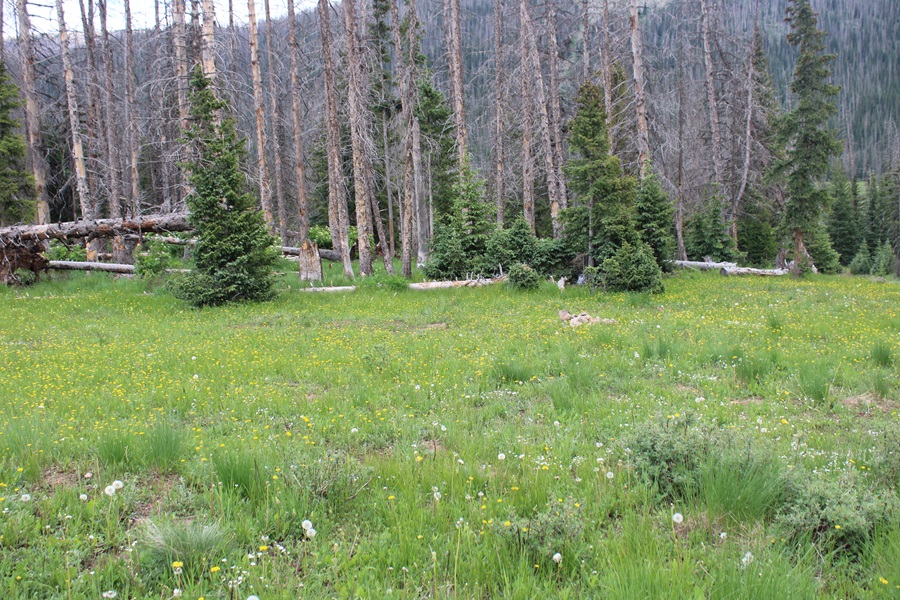
And then a little bit of uphill to get back into the trees.

Once in the trees, I continued following the Endlich Mesa Trail southeast back to the trailhead.

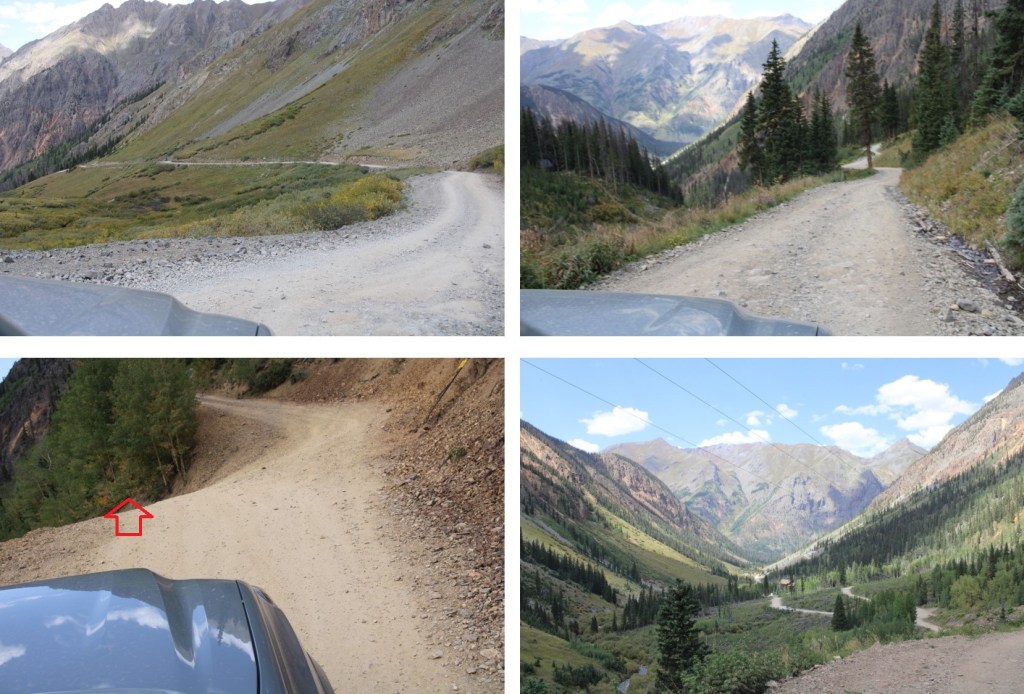
Here are some pictures of the 4WD road back towards Florida Campground.

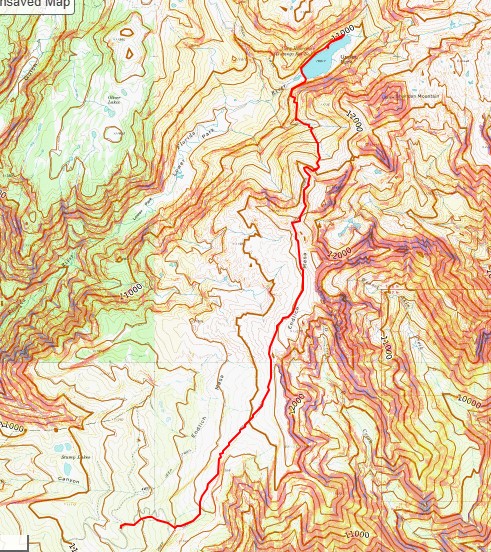
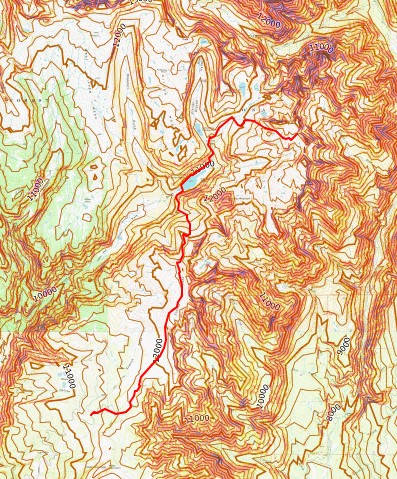
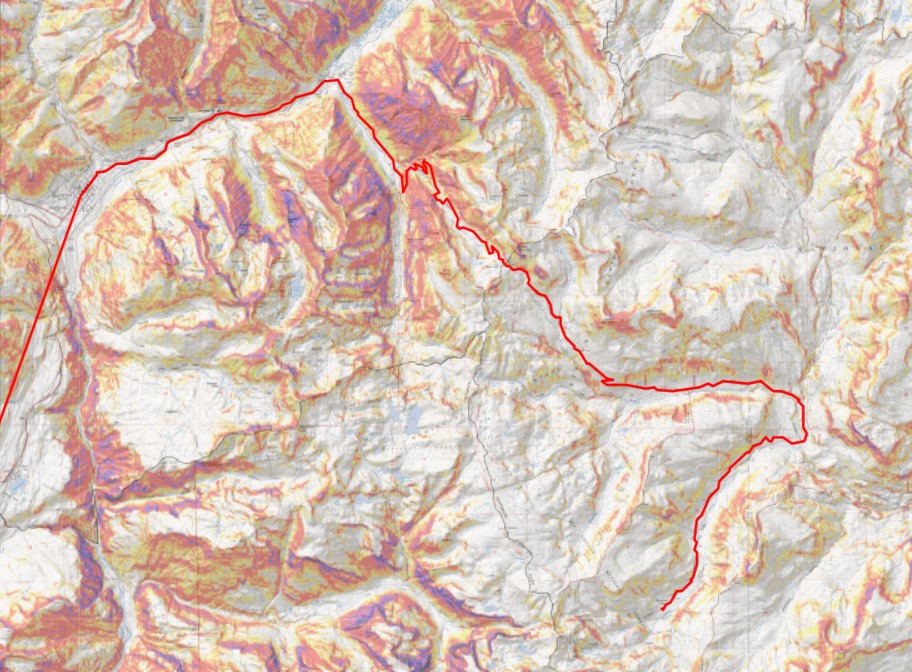
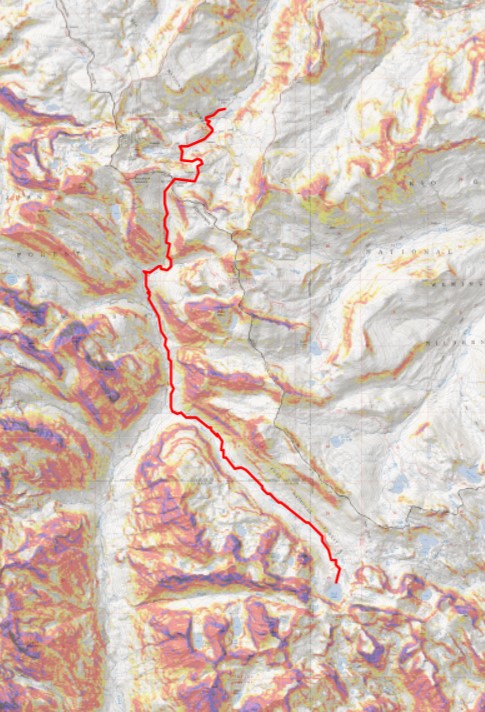
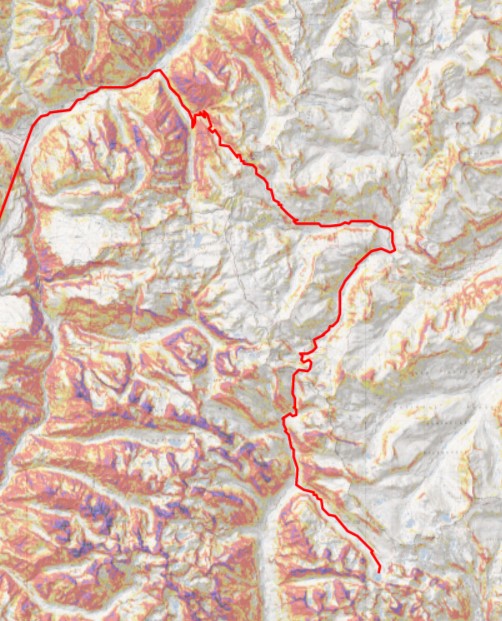
And topo maps of the route to the reservoir and to the saddle

Basecamp for Rio Grande Pyramid 13ers

This report will get you to many of the 13ers and 12ers in the Rio Grande Pyramid Group, starting from the trailhead in Thirtymile Campground.  It’s a 10 mile trek with 3150’ of elevation gain just to this basecamp, not including adding on mileage and elevation gain for the peaks, so while these peaks are certainly doable in a day if you’re fit and experienced, I decided the last time I was here to take my time and make it a several day trip on my next adventure.  As an added bonus of spending the night at this basecamp, the views of Rio Grande Pyramid, Fools Pyramid, PT 13022, and Window Peak/Window Rock are breathtaking. 

There are several ways to get to this basecamp at 12210’, and I’ve taken many of them, but the one I’m detailing here is by far the most direct and easiest to follow.  The other trails require good route finding and navigating through endless willows, making the trail more difficult to find/follow, especially in the dark. 

I started by parking at the hikers parking lot at Thirtymile Campground. There are plenty of spaces here, and bathrooms nearby. 

The trail starts to the south of the parking area, and is clearly marked

After hiking for a short distance you’ll come to a trail register.  Here you have two options:  Squaw Creek Trail to the left, or Weminuche Creek Trail to the right.  Take the trail to the right.

I followed Weminuche Creek Trail (818) for a total of 7.25 miles. This trail starts off by skirting the south side of Rio Grande Reservoir

Then the trail goes through a rocky section before crossing a waterfall.  The waterfall is about 2 miles into the trek.

After the waterfall, there was a quick uphill section that would bring me to a large gulch, sprinkled with sections of hiking in the trees and small creek crossings.  I followed the trail southwest for another 5 miles.

Just after this post (which indicates the cutoff for the Opal Lake Trail, which I wouldn’t recommend taking, as it will lead you through bushwhacking adventures to the murderous willow section), there are some nice camping spots to the left, should you want to camp here.  There’s a fire ring, and the ability to filter water.

I continued on the Weminuche Trail, always staying to the right of Weminuche Creek.

After hiking for a total of around 7 miles, I came to the cutoff for the Continental Divide Trail.  Here I went right, onto the Continental Divide Trail. 

This is where the fun (elevation) begins.  For the next 3 or so miles it was uphill all the way, across meadows, around ponds, through trees, beside waterfalls, and through rocky areas.  From the very beginning you can see Rio Grande Pyramid to the northwest.  Just keep heading that way.

Here are some pictures of my way towards treeline

Just before treeline I came to a sandy area.  I’d been here before.  Make sure you take the trail to the left, across a small creek, and DO NOT take the sandy trail that goes straight. This will lead you into the willows. 

I crossed the small creek, and followed the trail for about another half mile, to about 12210’ of elevation.

Here there was a willowy area to the left, and a few yards away, plenty of camping space.   The camping area are hard to see from all those willows, but trust me, they’re there.

From my campsite, here’s my view of Rio Grande Pyramid.  The trail is in those willows.

From here you’re at a great base area to climb 13022, Window Peak, Rio Grande Pyramid, Fools Pyramid, 13274, and various other peaks in the area.  Here’s a topo map of the route thus far:

And now some pictures of the way out:

Rock Lake Approach from Silverton to Beartown

The approach drive is 21 miles from Silverton to Beartown, starting out on 110, then turning right onto 589, or the Alpine Loop, towards Stony Pass.  It’s a really good idea to make a gpx file for this drive, as I’ve encountered several people who got lost in the area while taking side roads.


At the fork in the road, keep left to head towards Stony Pass.

The 4WD road quickly begins gaining elevation, but is easy to follow.  There are several places to pass vehicles coming the other way.  After about 5 miles, you’ll make it to Stony Pass. 

From Stony Pass you’ll lose over 2000’ of elevation as you make your way east, towards the Rio Grande River.

I did this hike in September, when the river crossings were low.  In fact, they were lower than I’d ever encountered them before, and my Tacoma had no problem crossing.

First river crossing:

Then there’s a junction.  Stay right, and take the road that goes towards Beartown

Second river crossing:

From here you are now on 3A, and the road gets more difficult.  It does feel like it’s been graded recently though, as it wasn’t as bad as I remember it being last year.

I parked at a nice campsite at 10890’.  My truck could have made it further, but I love my truck, and didn’t want to drive it further down the road. Here’s the topo for the drive in

Now for the approach to Rock Lake.  This entire approach is class 1.

Here are the stats: 

2.7 miles and 1263’ of elevation gain from my parking spot to the top of Hunchback Pass

5 miles and 2349’ of elevation loss from Hunchback Pass to the Rock Lake cutoff

4.8 miles and 1713’ of elevation gain from the Rock Lake cutoff to Rock Lake.

I started out heading southwest along the dirt road (3A), towards the actual trailhead, passing a sign for Beartown along the way.

There were many capable vehicles parked at the trailhead

I followed the trail, 813/Vallecito Trail, as it wound its way up towards Hunchback Pass. 

At this point I was above treeline, but that would soon change.  From the top of the pass I descended down into the basin

Encountering willows (bring your rain gear) and re-entering treeline.

I crossed Nebo Creek, which is a great place to stop for lunch, or to filter water

This is where the downed trees began.  There were dozens of them, but luckily this is also a horse trail, so there were paths already beginning to form around the downed trees.

At around 10135’ I came to the junction for the Rock Creek Trail.  It’s marked by a wooden post, and easy to miss in the dark.

I turned left, and followed the Rock Creek Trail

The trail was easy to follow as it gained elevation, heading southeast, paralleling Rock Creek. I entered a wide basin (where I’d been charged by a bull moose on a previous trip to the area), and headed through willows towards Rock Lake.

The willows gave way to trees and switchbacks

Which gave way to more willows

At the end of the willows, was Rock Lake.  From where I parked, it was a total of 12.51 miles with 3044’ of elevation gain to Rock Lake

There are tons of places to set up camp directly in front of the lake, but also on its east side.  If you see campers set up on the north shore of the lake, realize there are many, many more along the trail ahead as well (hikers left).

Here’s my topo map for the route in from Beartown

And now some pictures of the way out, from Rock Lake back to the Vallecito Trail.

Back at the junction I turned right, and followed the Vallecito Trail.  At this junction, there’s a great place to camp (if needed).

Now for the fun part:  2350’ of elevation gain back to Hunchback Pass

I re-crossed Nebo Creek

And came across tons of wild strawberries, raspberries, and blueberries.  Since it was September, they were all ripe, and a great snack halfway back up the pass

I re-entered willows, and followed them towards Hunchback Pass

From the top of the pass, I headed back to the trailhead

From here you can see where I parked my truck

Back at the trailhead, I followed the 4WD dirt road back to my truck

When I got back, I found another vehicle parked in the campsite alongside mine, ready to combat those pesky marmots (I saw several on my drive out).

Here are some pictures of the drive out.  Remember, it’s all left turns now to get back to Silverton.

After Stony Pass I came across a rather large herd of domestic sheep grazing on the hillsides

Here’s my topo map for the entire route

As always, please contact me if you’d like a gpx file for this route.