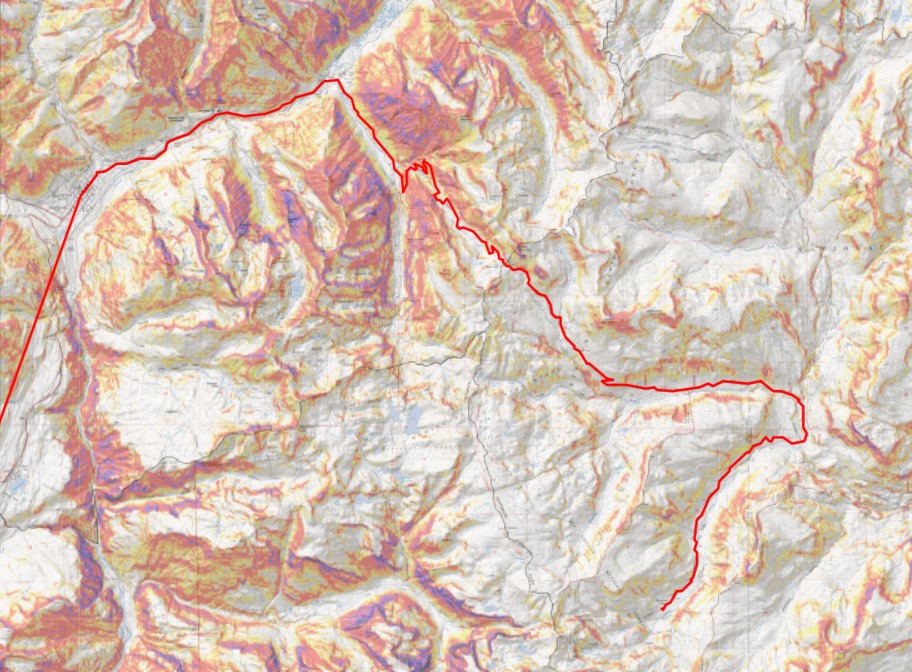
RT Length: 6.61 miles
Elevation Gain: 2539’
Edited to add:
I came back a month later and was successful in summiting P2. Details below.
Full disclosure, I did NOT summit P2. However, I came very close, and thought I’d share the information I have for those who might find it useful.
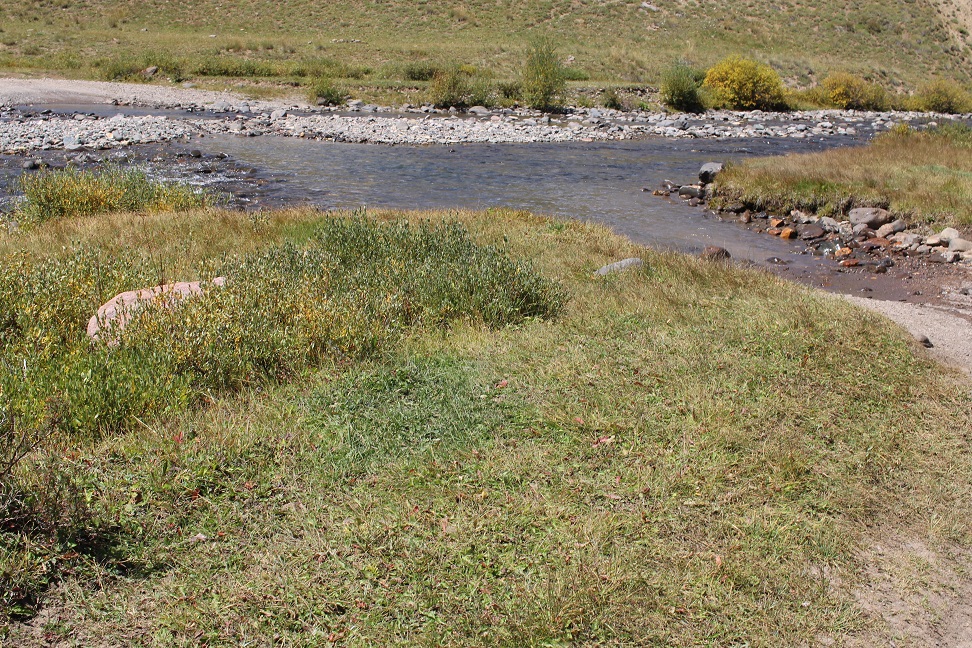
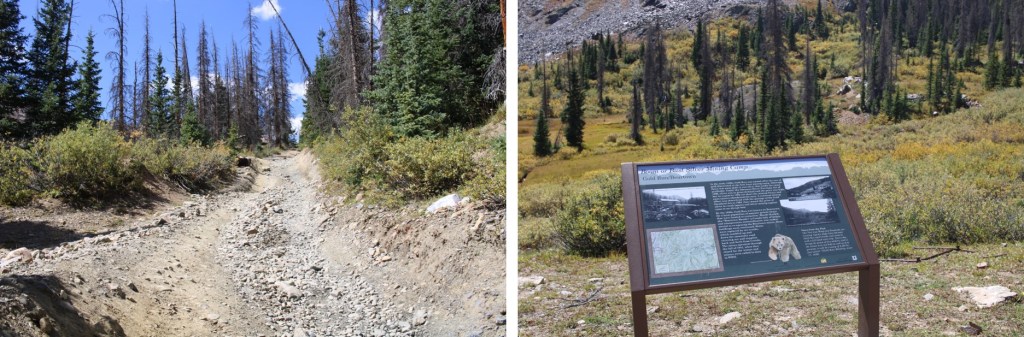
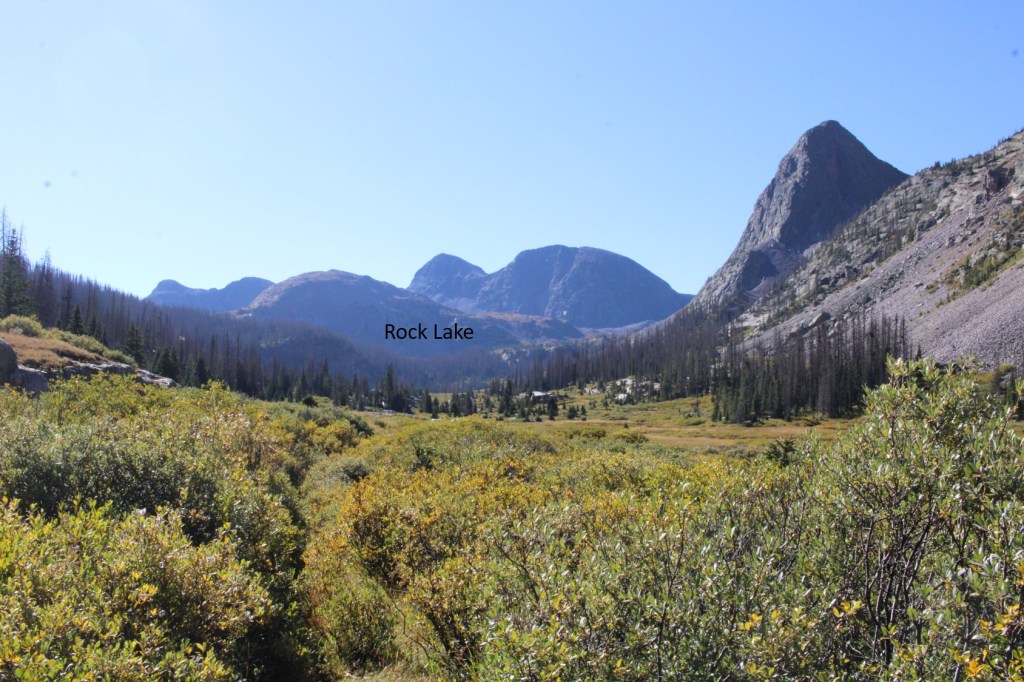
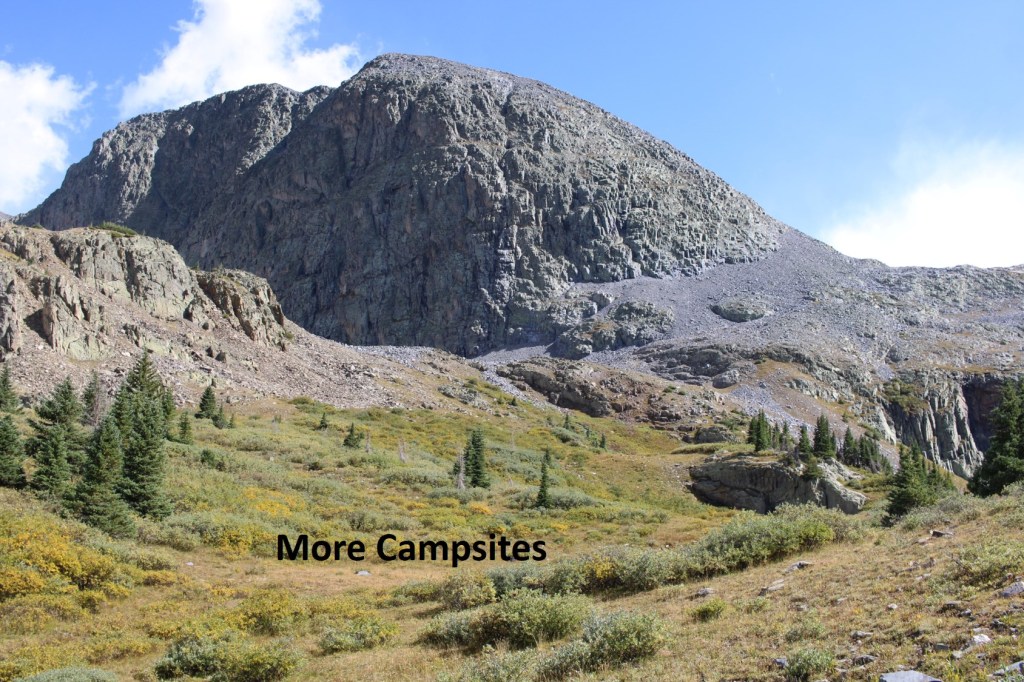
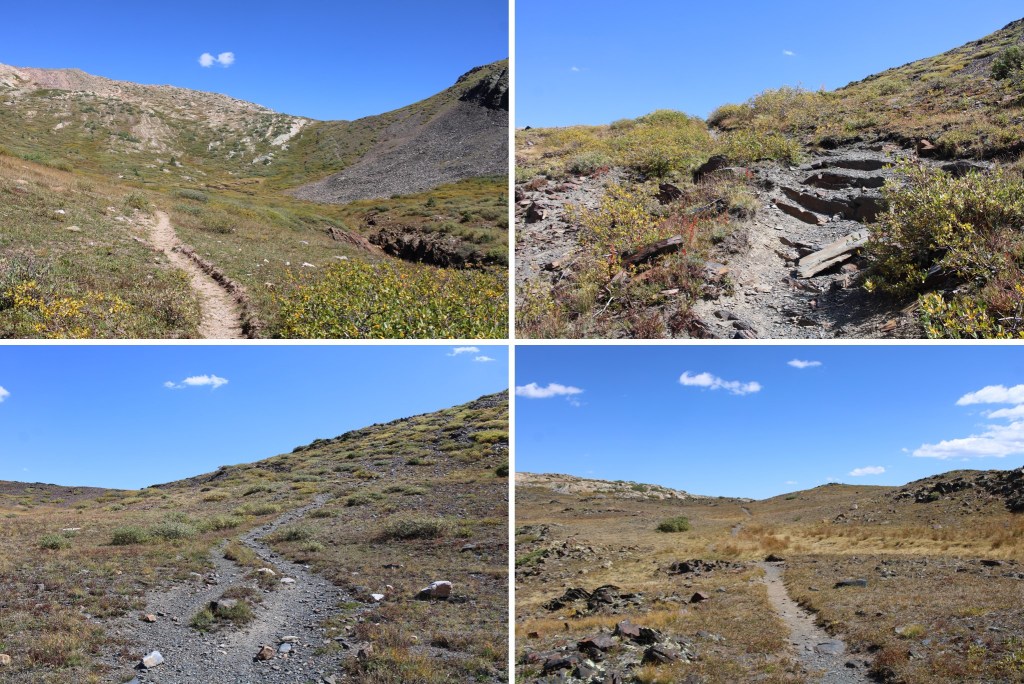
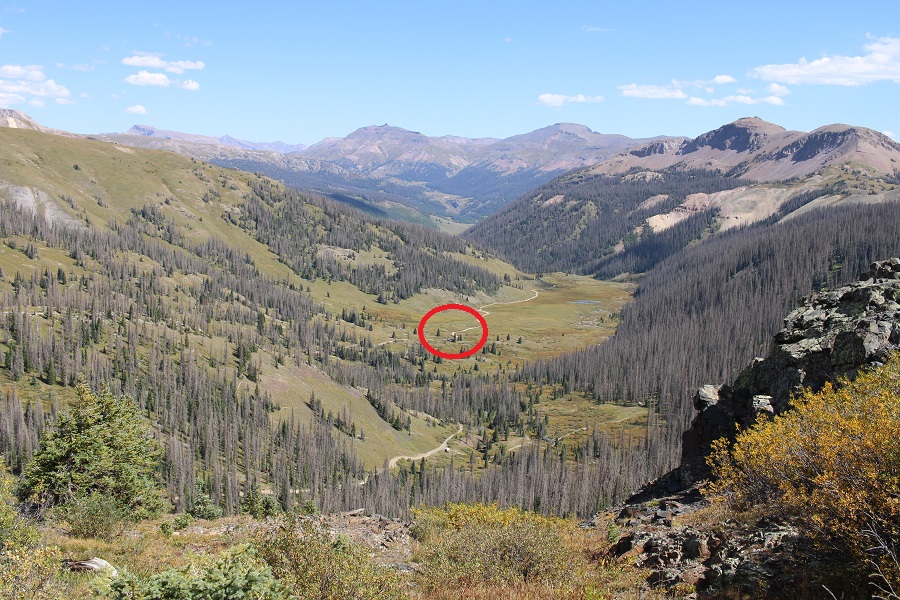
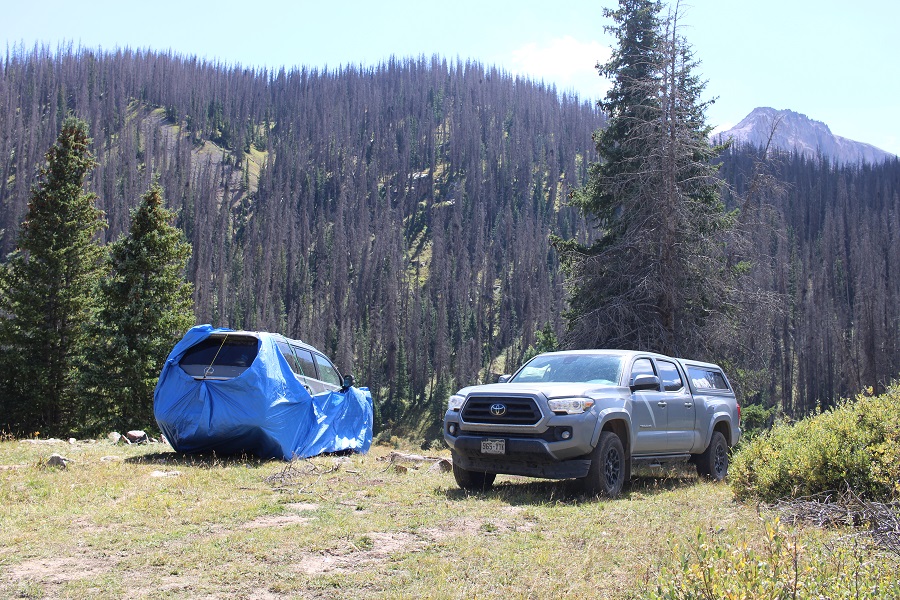
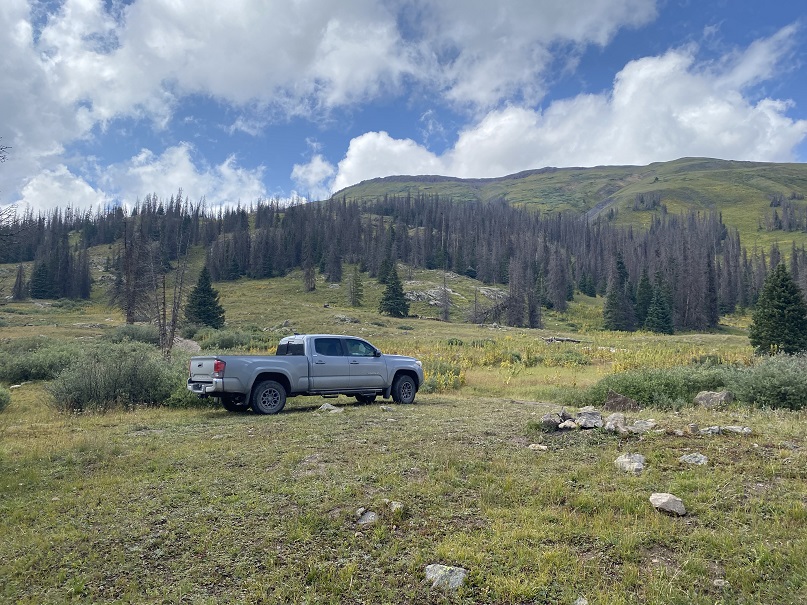
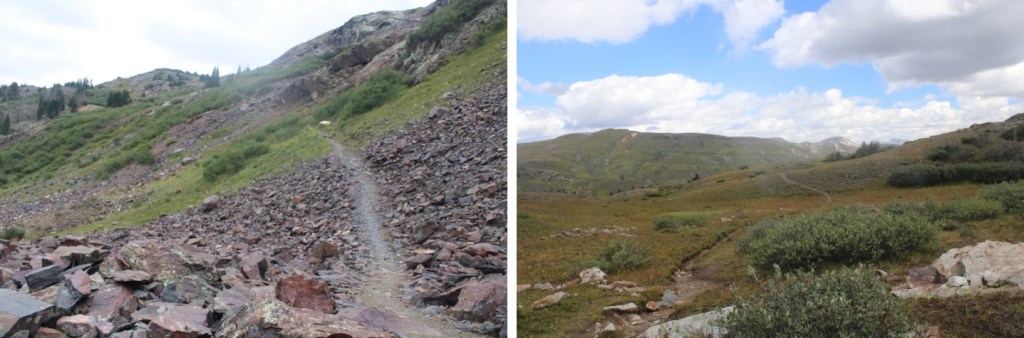
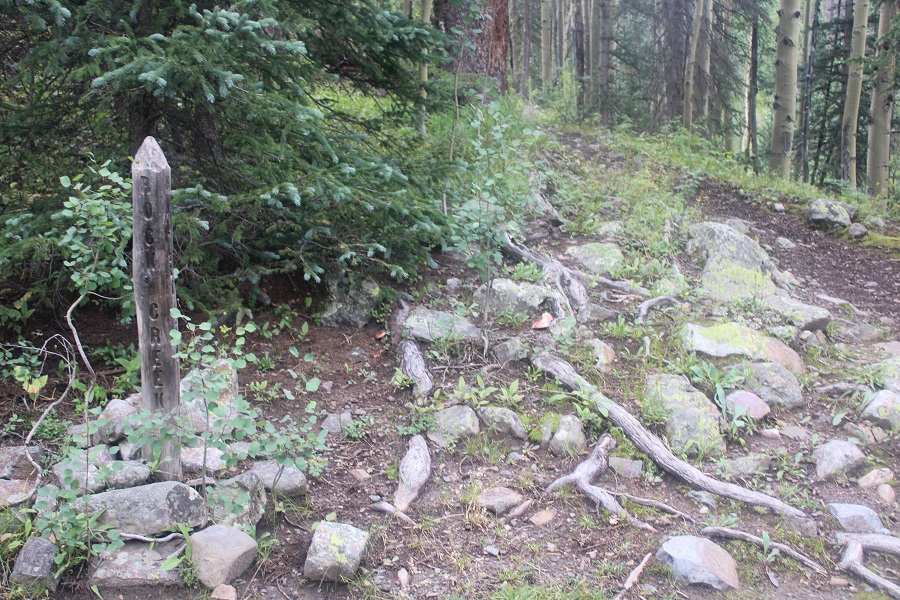
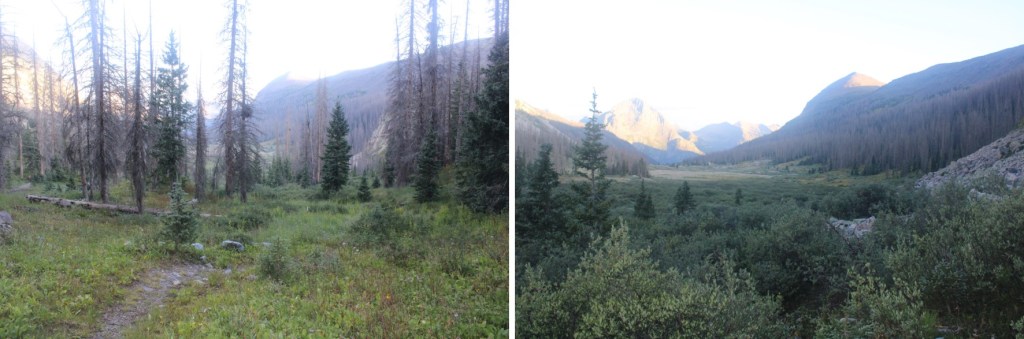
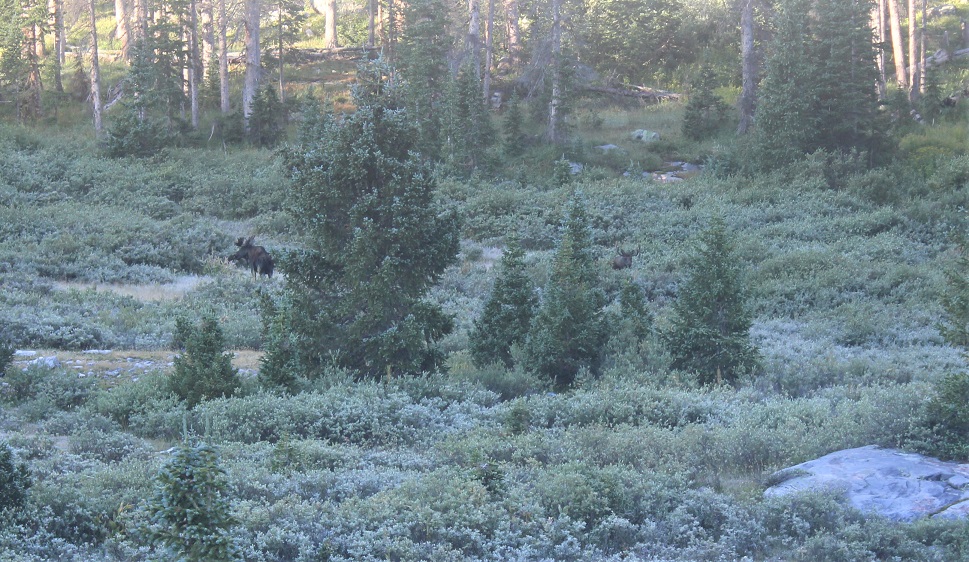
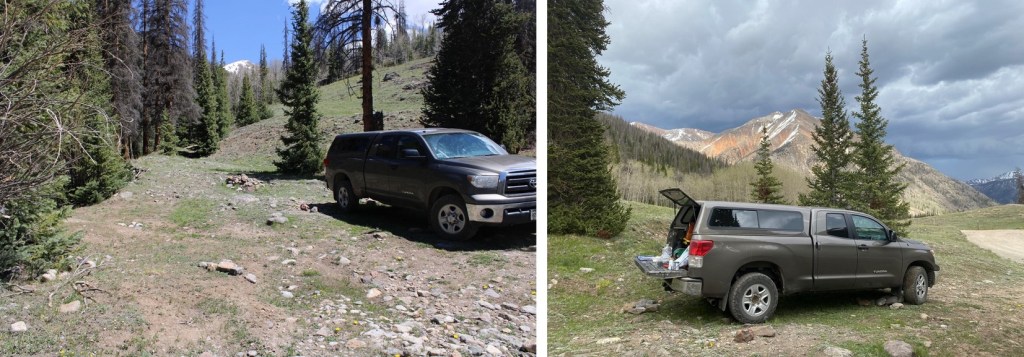
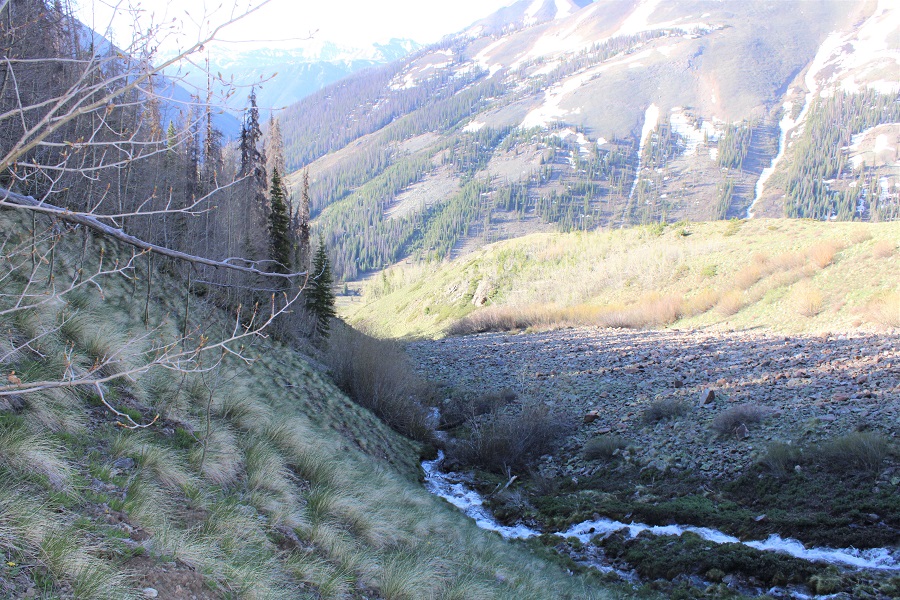
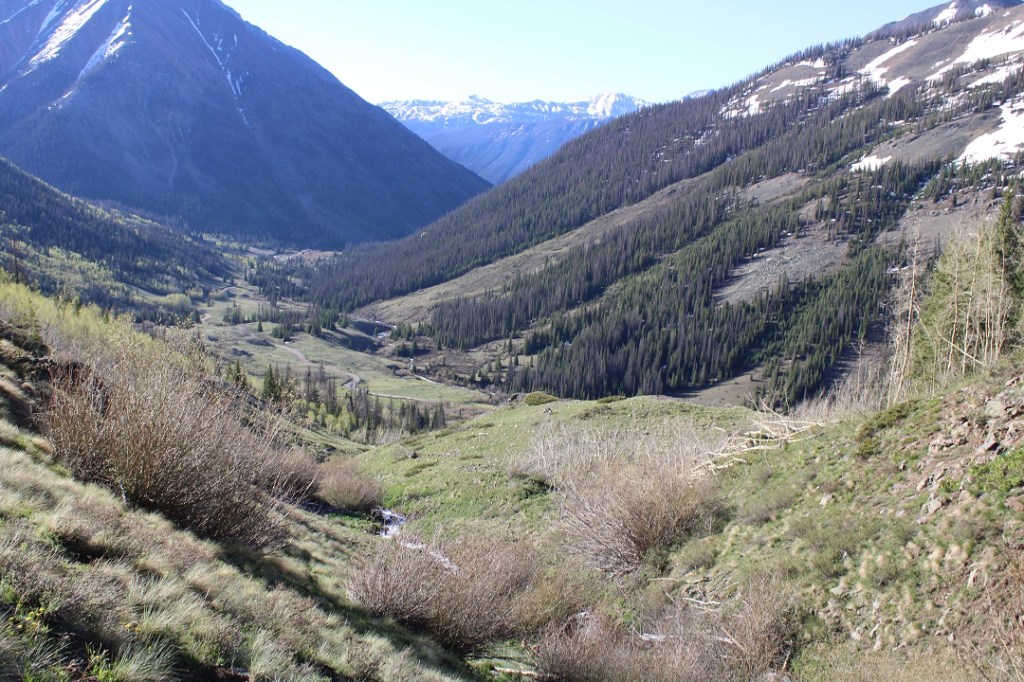
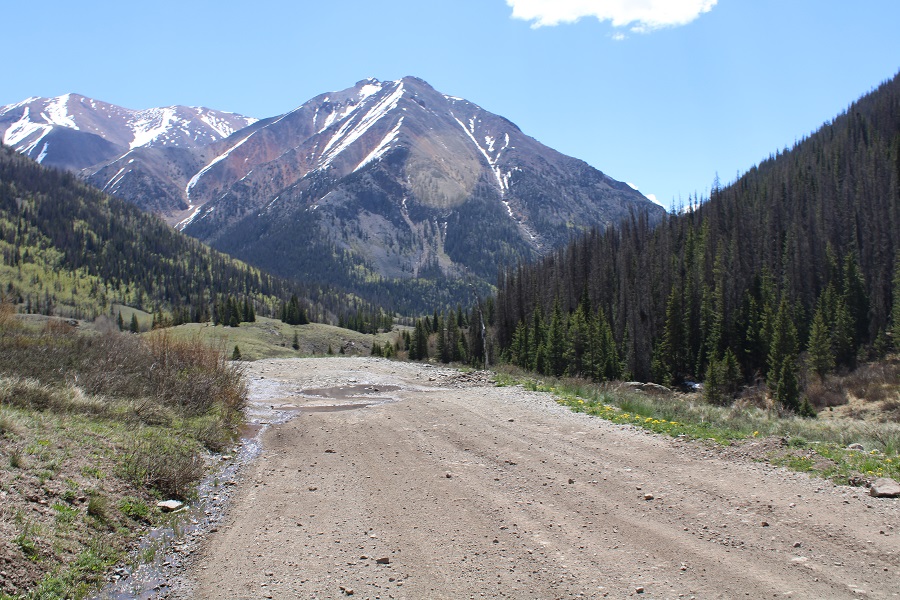
I camped at 11330’ of elevation, along the Rock Lake Trail that parallels Rock Creek in the basin just before Rock Lake.
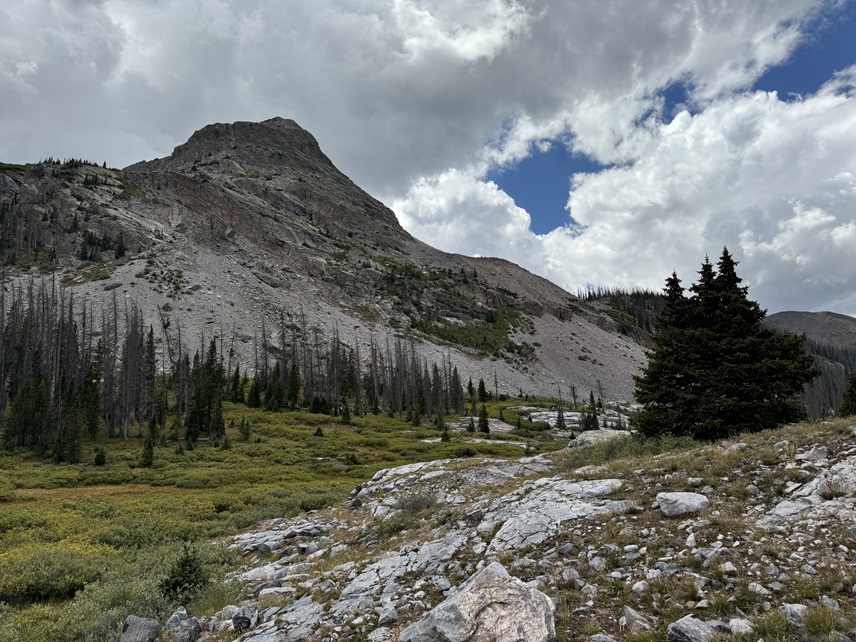
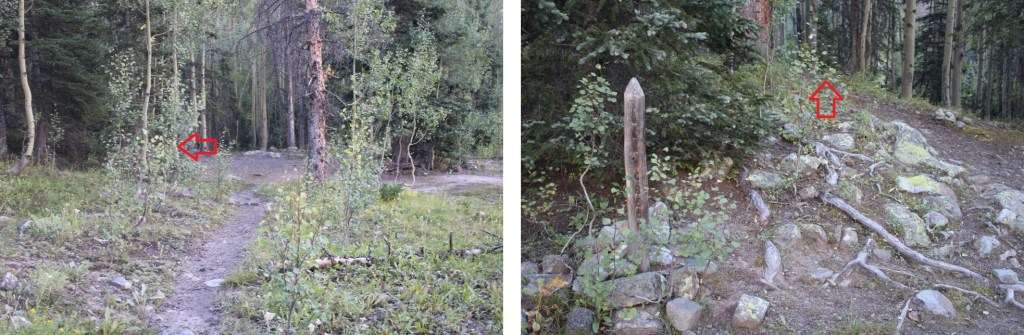
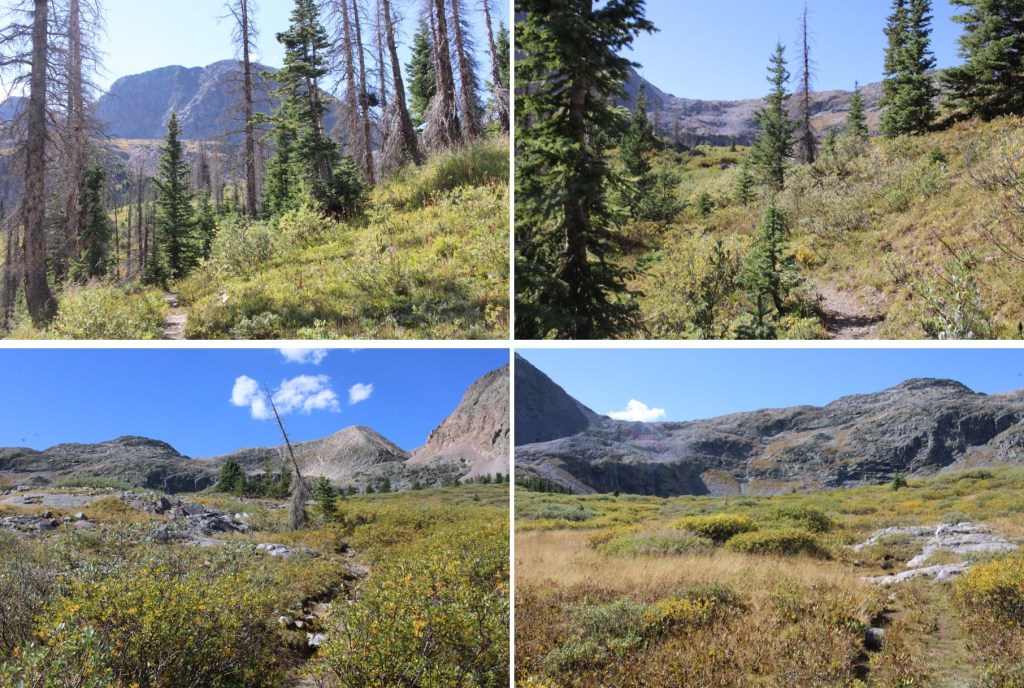
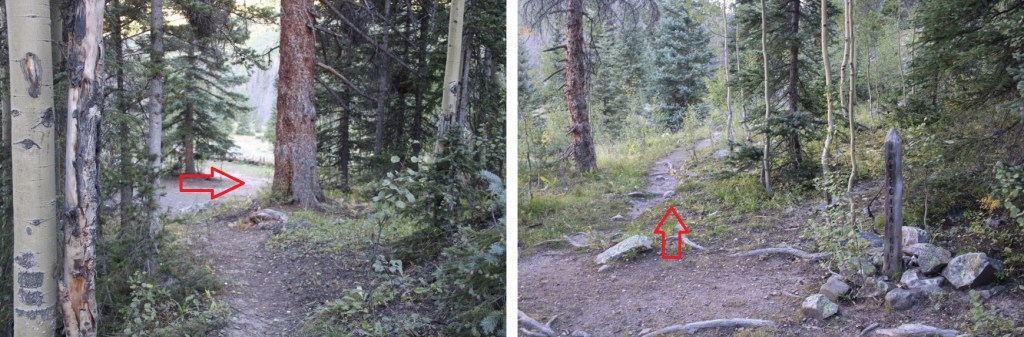
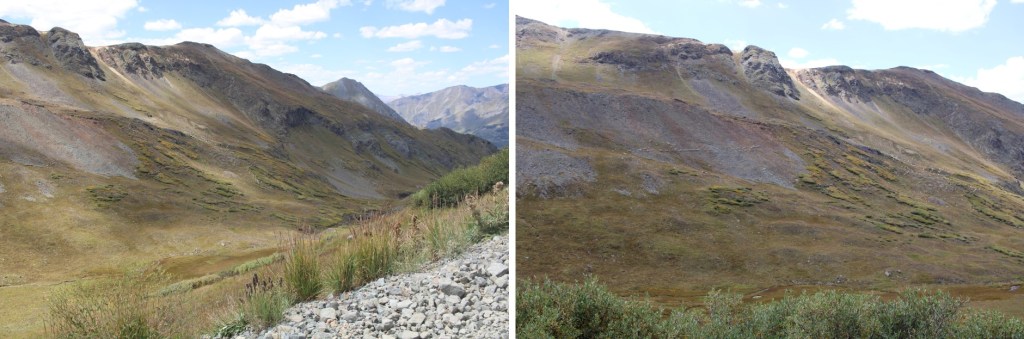
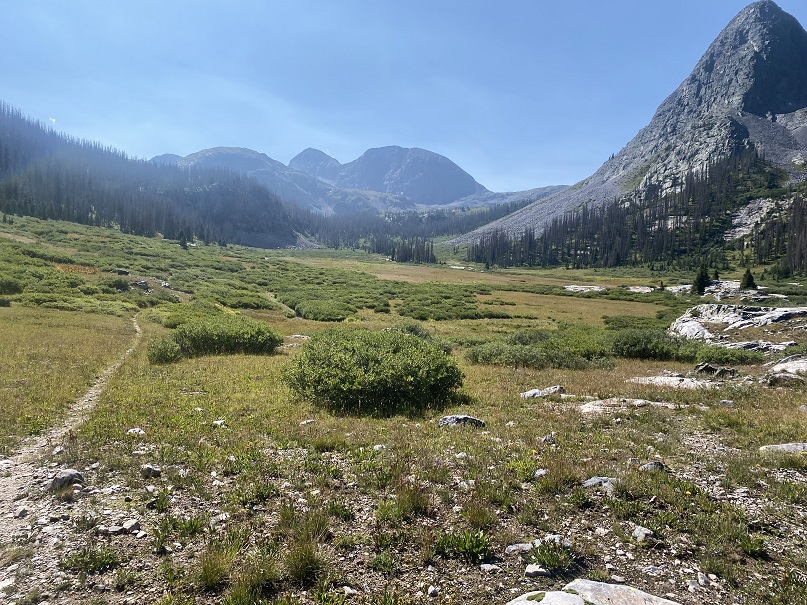
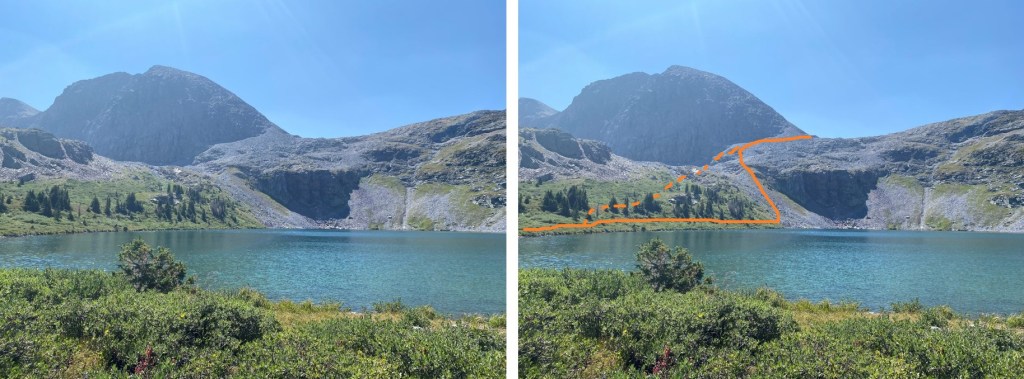
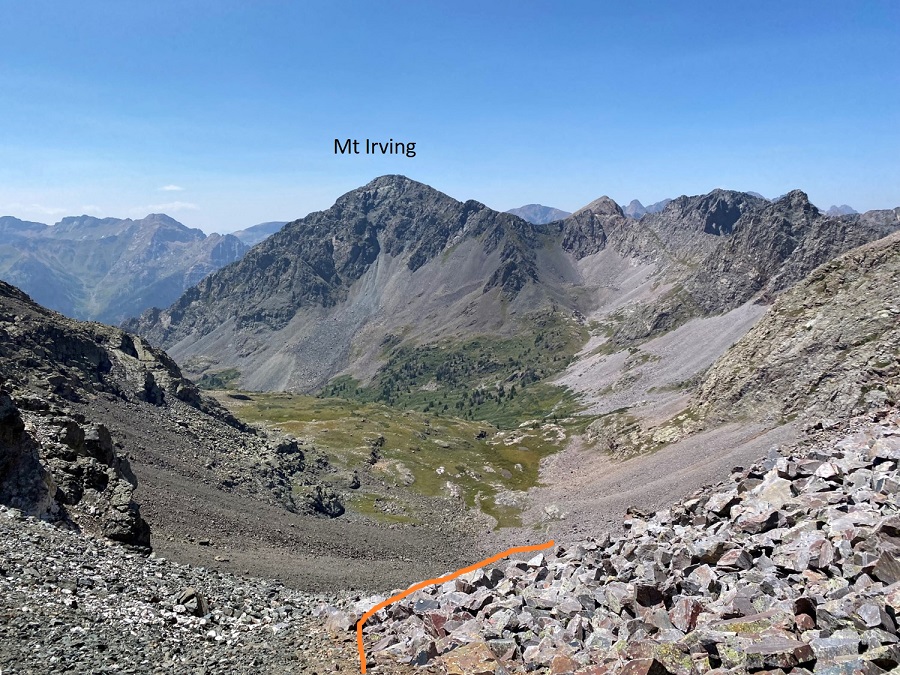
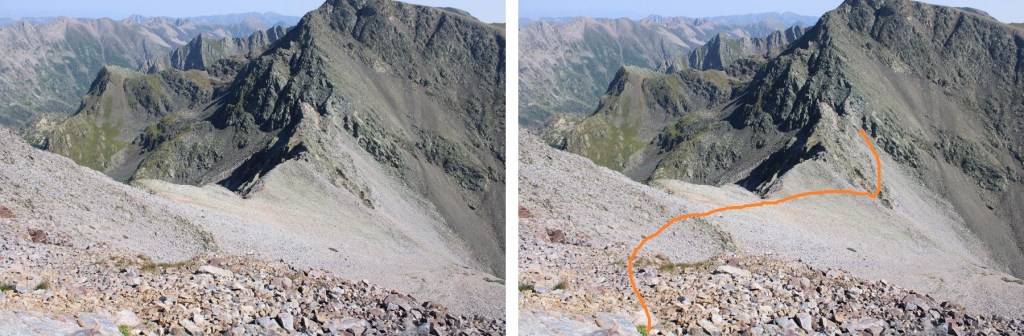
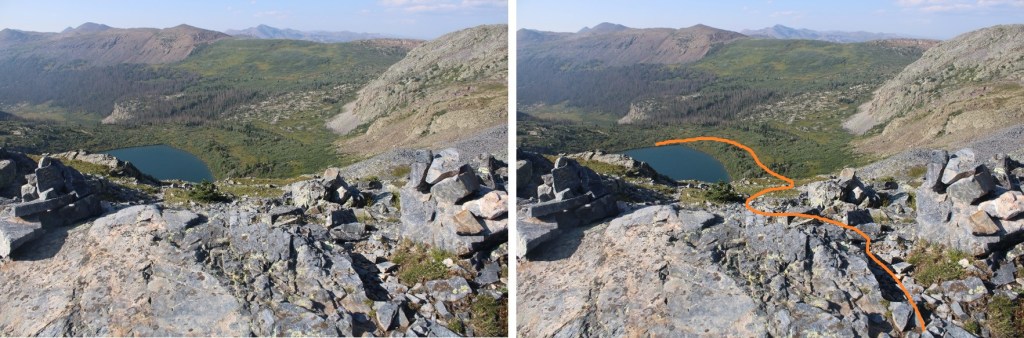
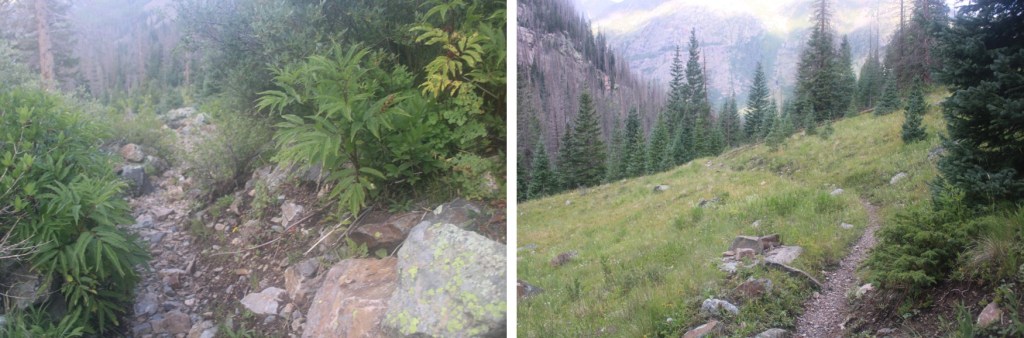
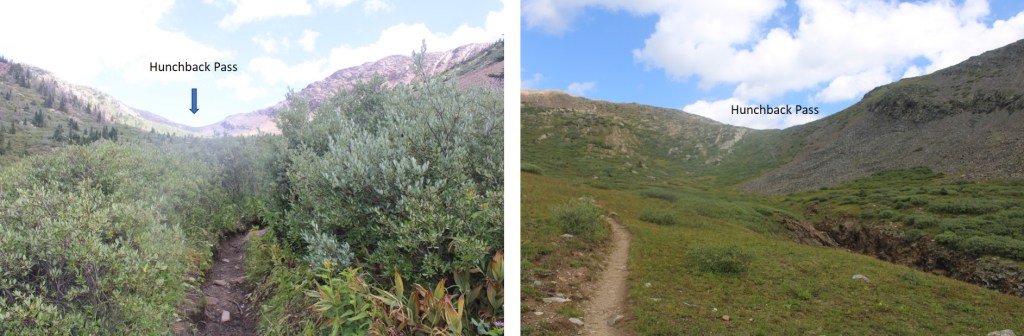
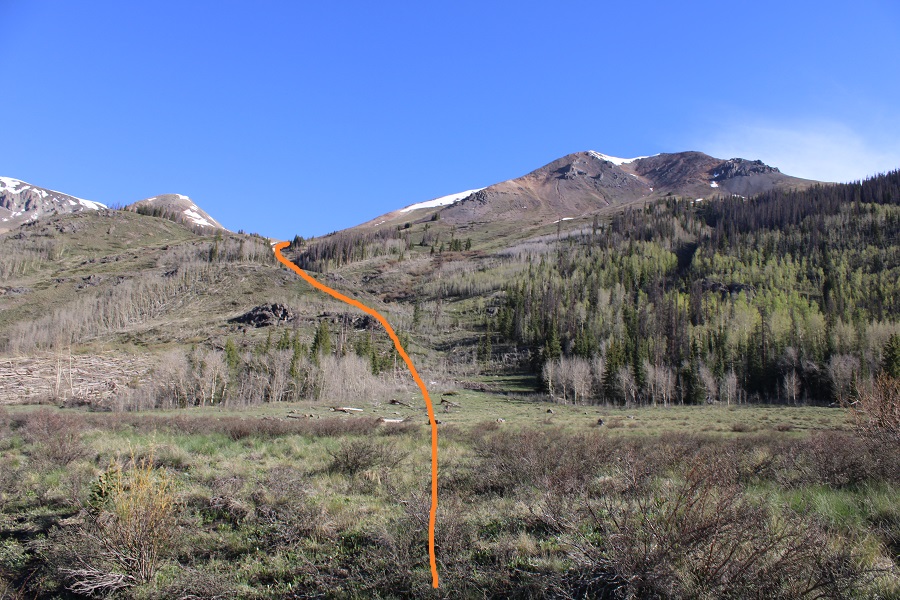
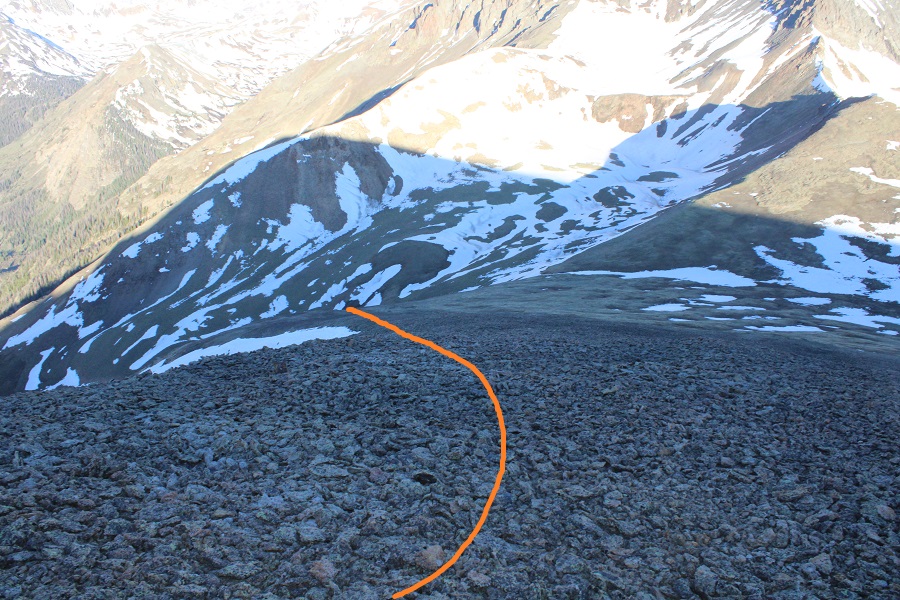
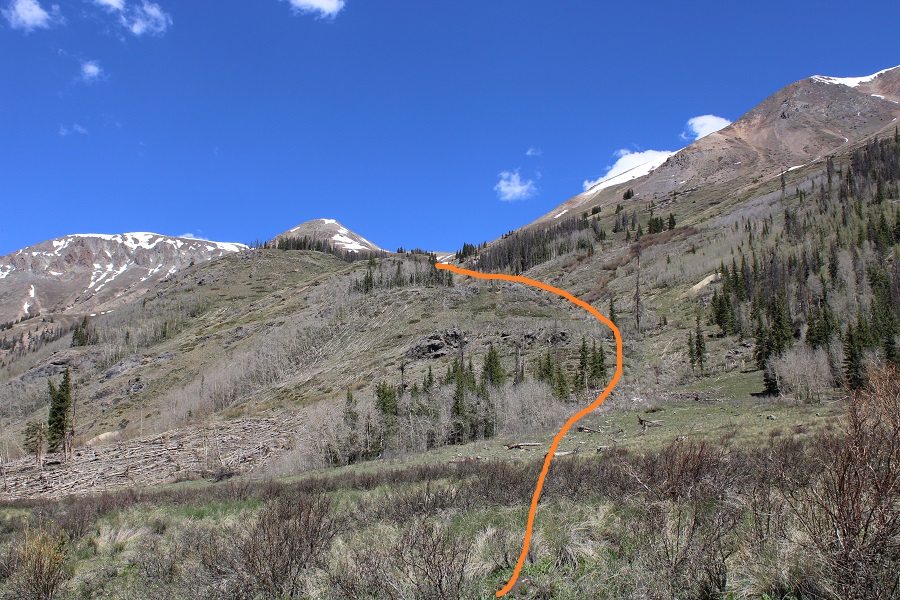
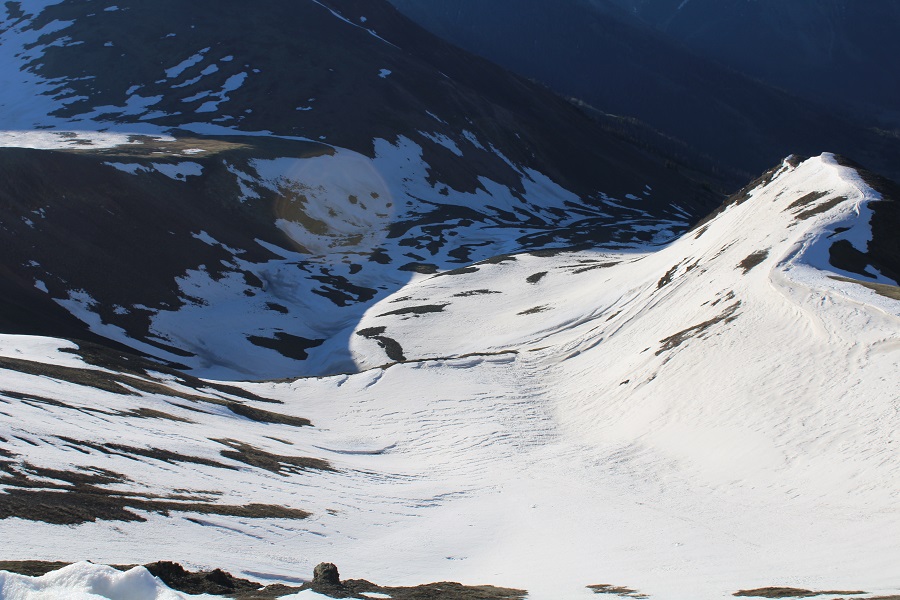
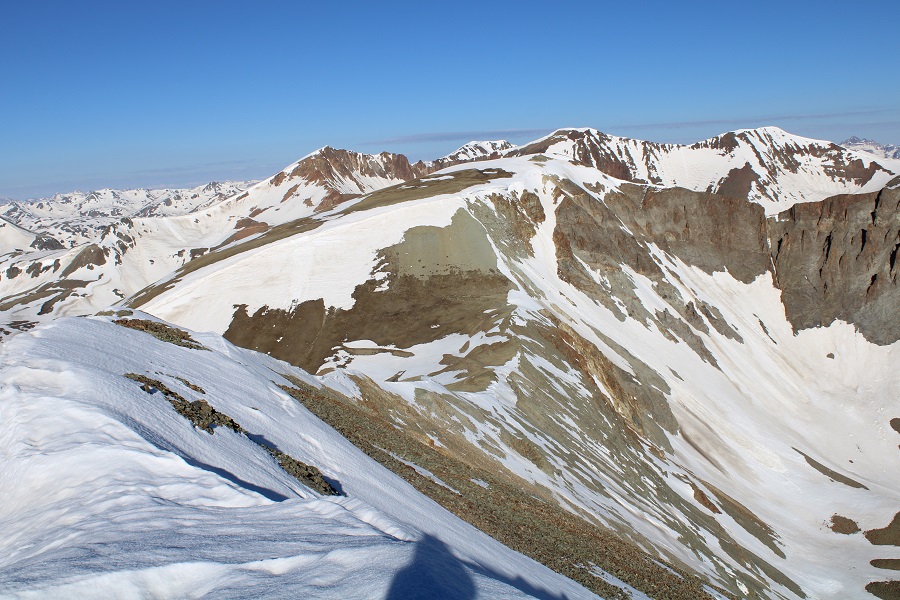
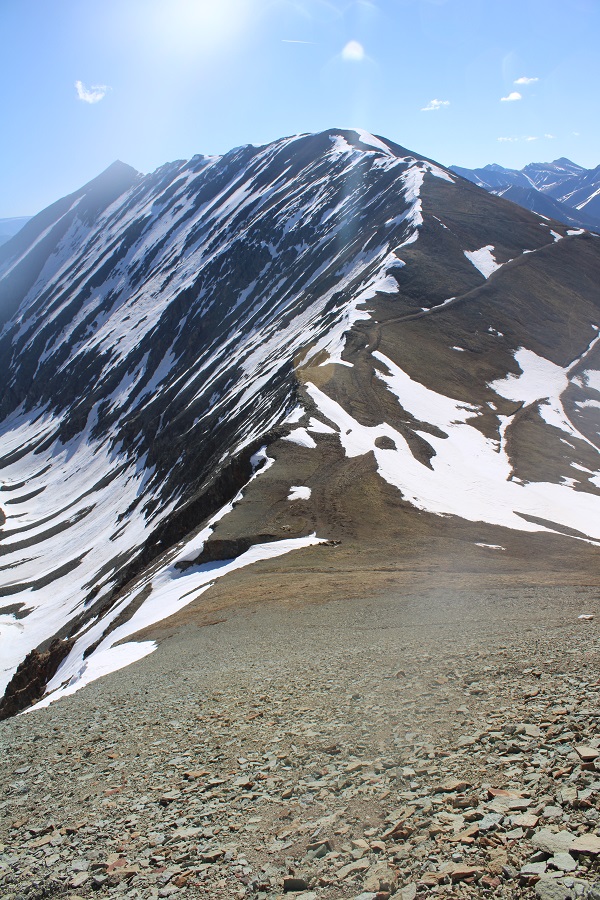
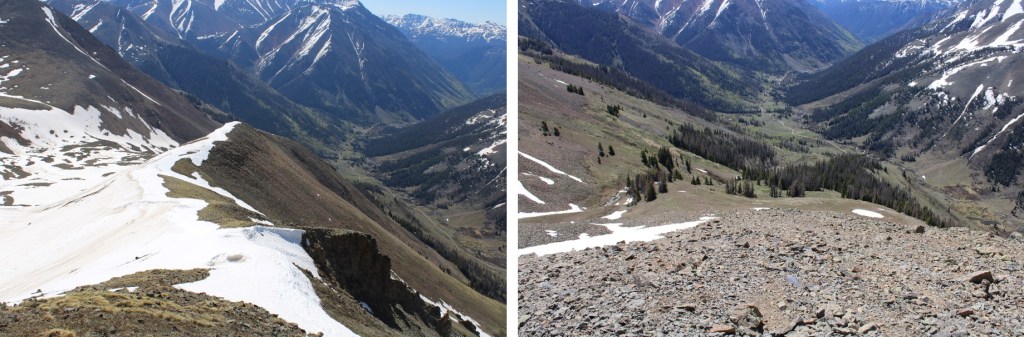
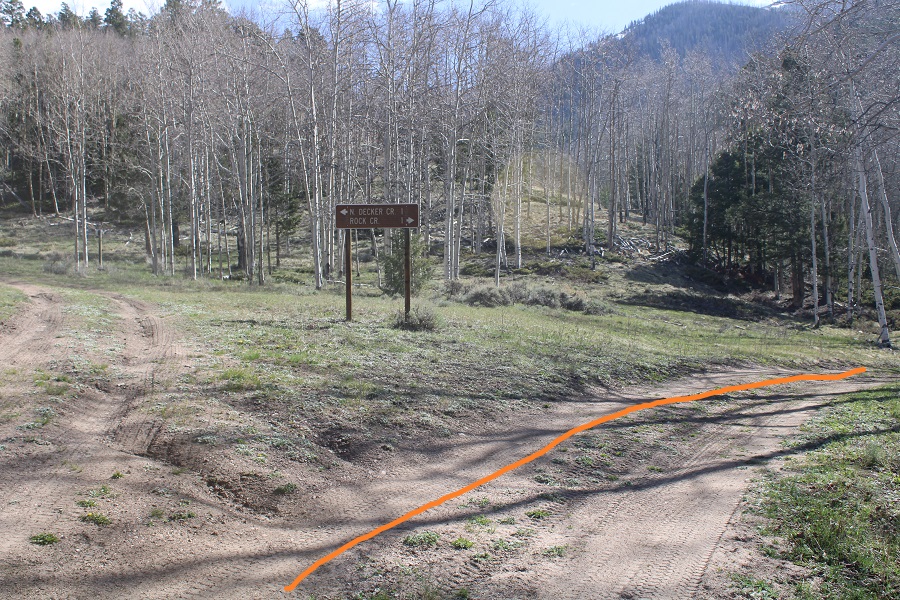
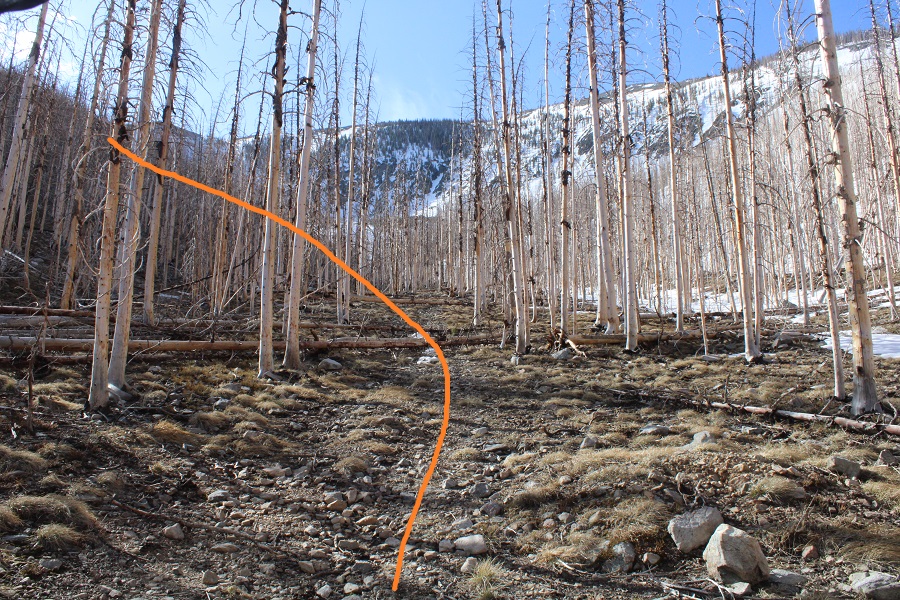
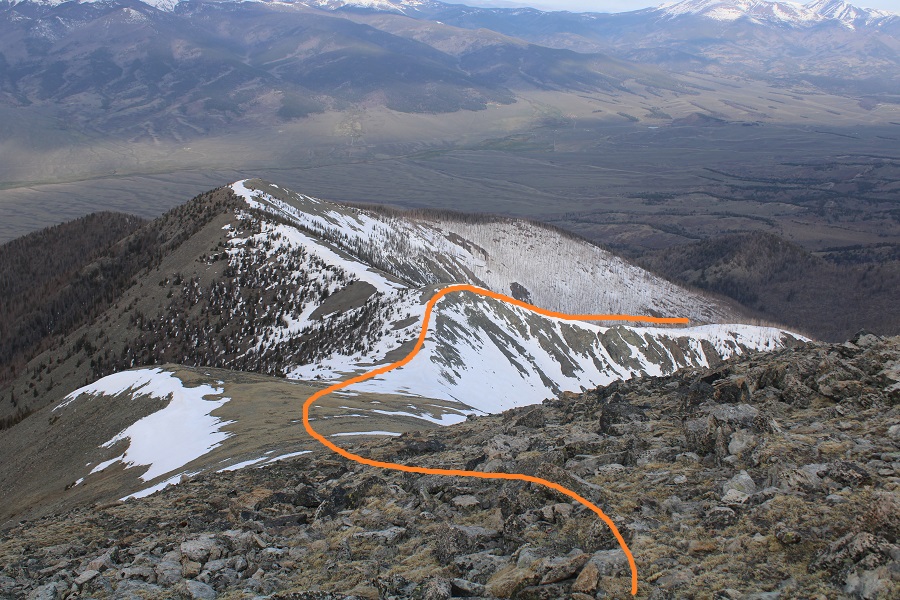
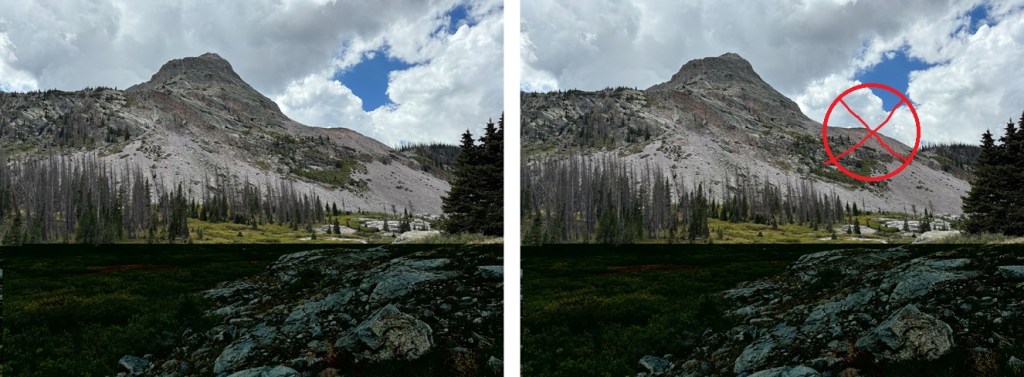
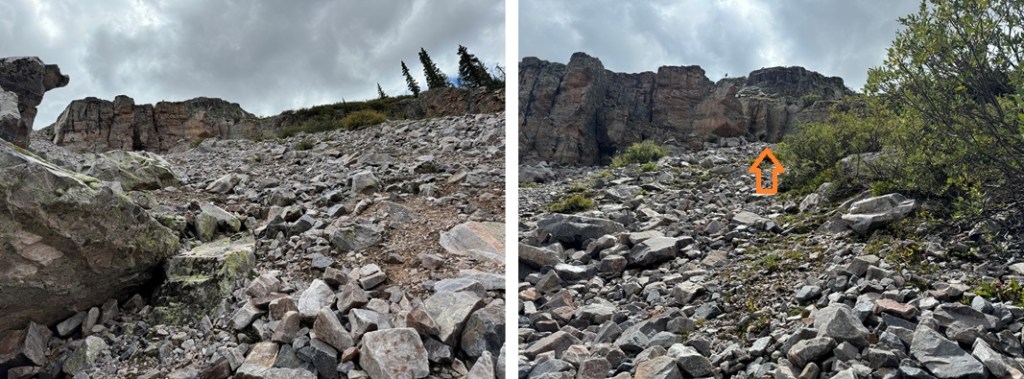
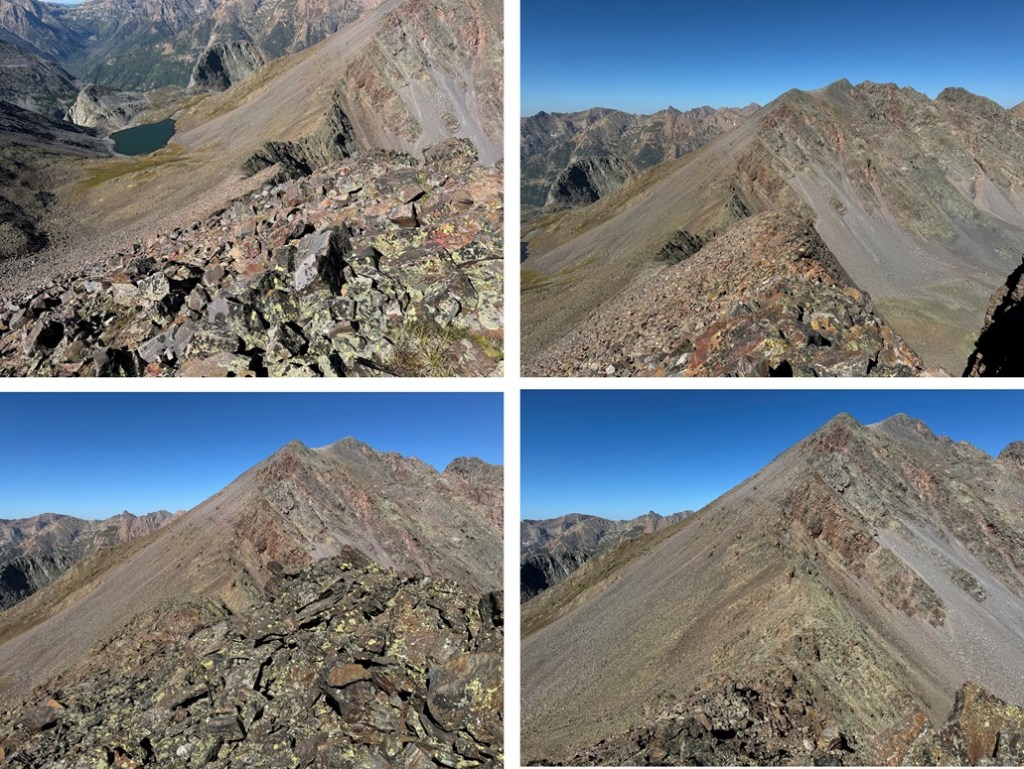
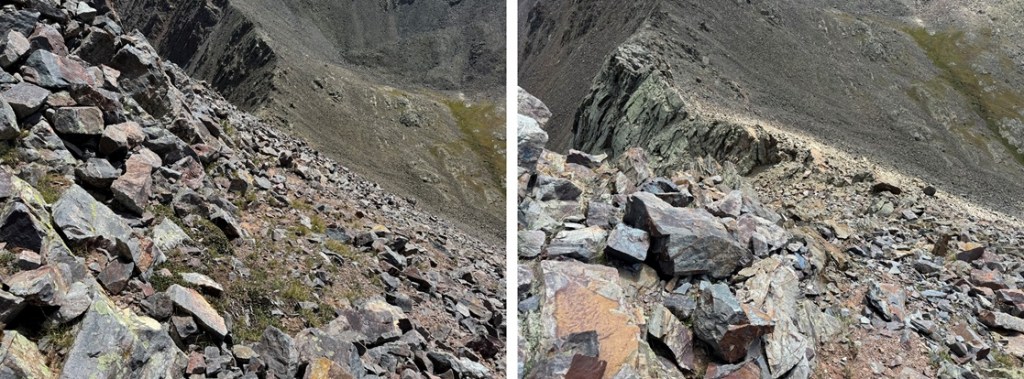
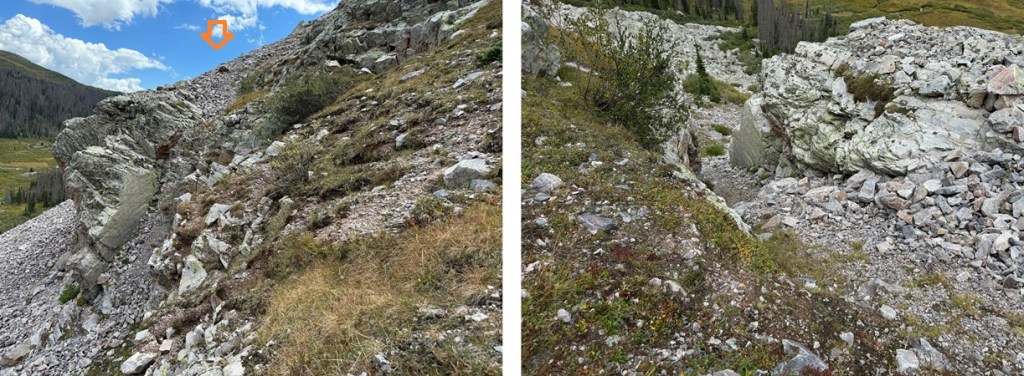
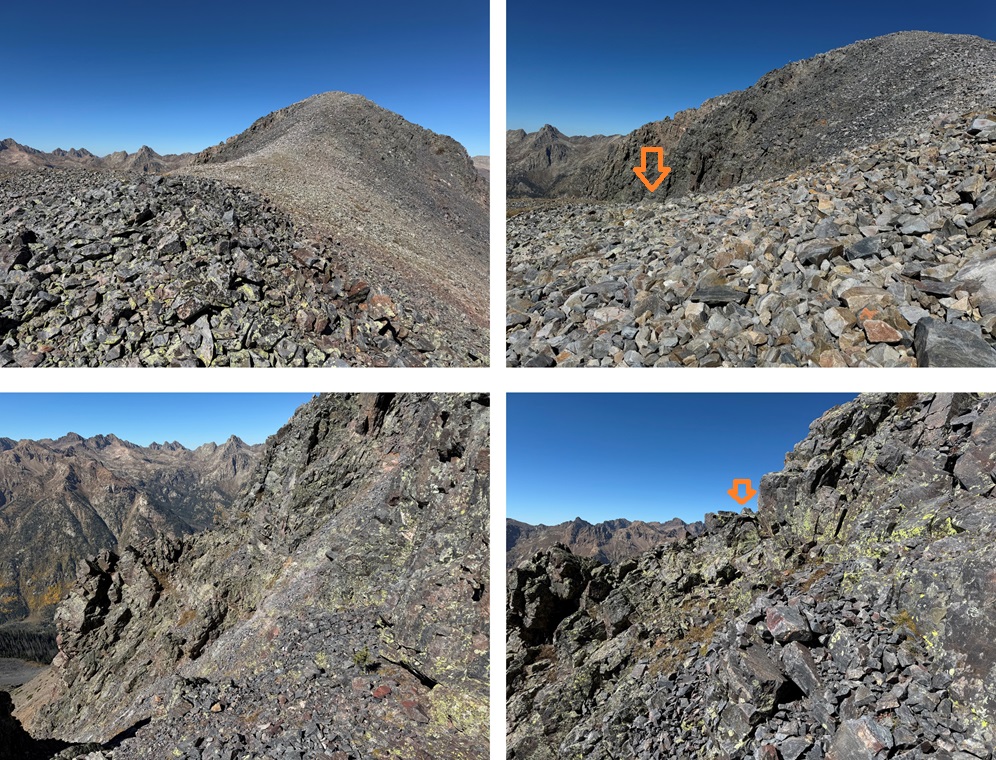
The next morning I was on the trail at 6:30am, heading west. My goal was to gain this ridge, and I did it poorly. I spent way too much time route finding, so I’m going to try to make this easier for you. You need to ascend this ridge, but DO NOT do it here. There is a way to find a weakness and ascend here, which I did, but I was greeted with the steepest, worst scree I’ve ever encountered, where if I’d have fallen, I would have skidded all the way down, over the edge. It was dangerous, and put me at a too high position and I needed to descend anyway.
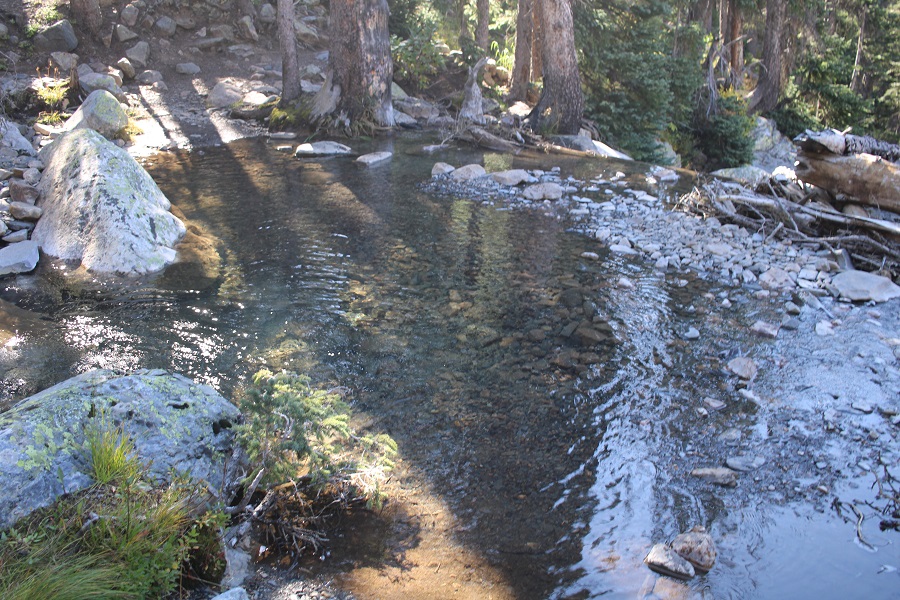
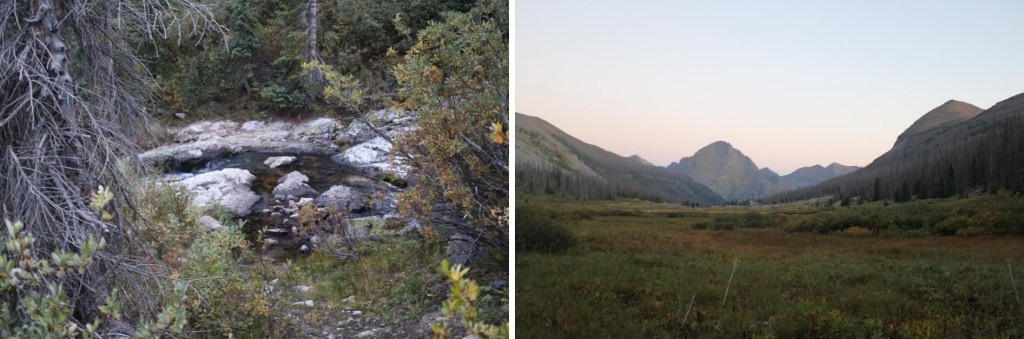
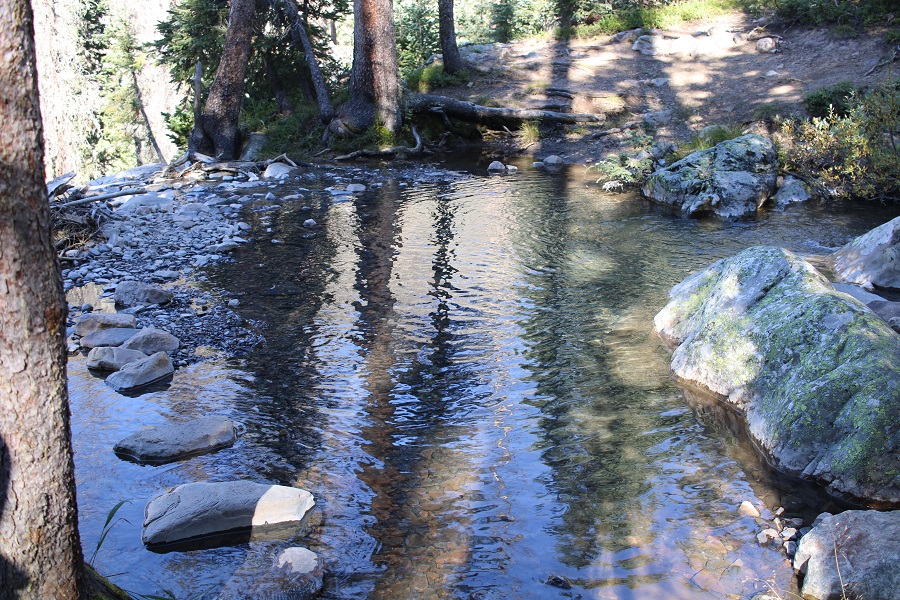
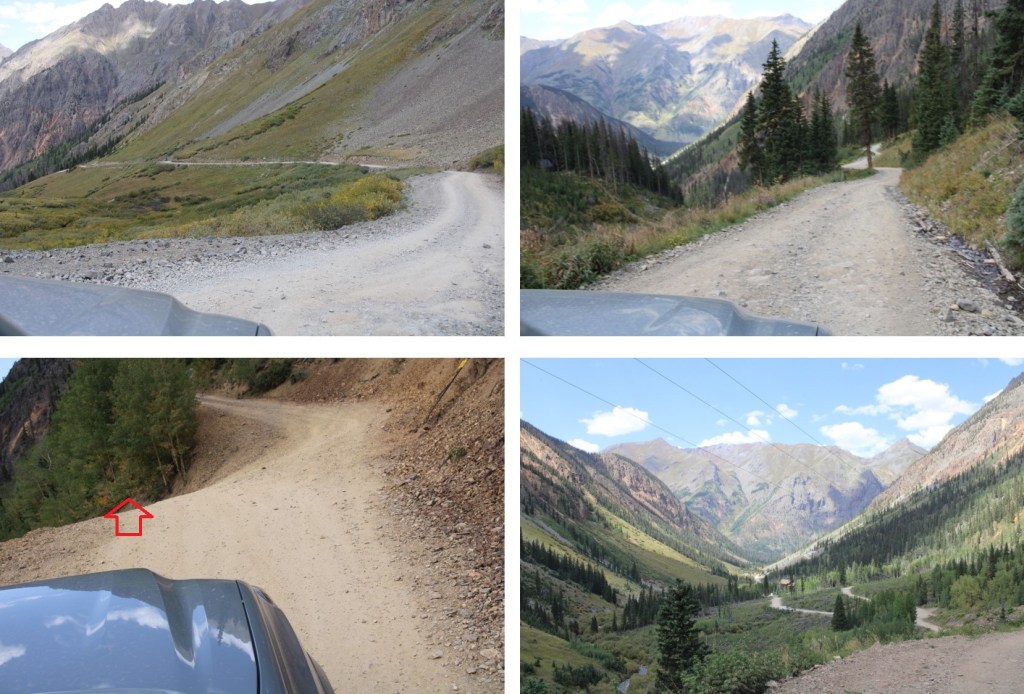
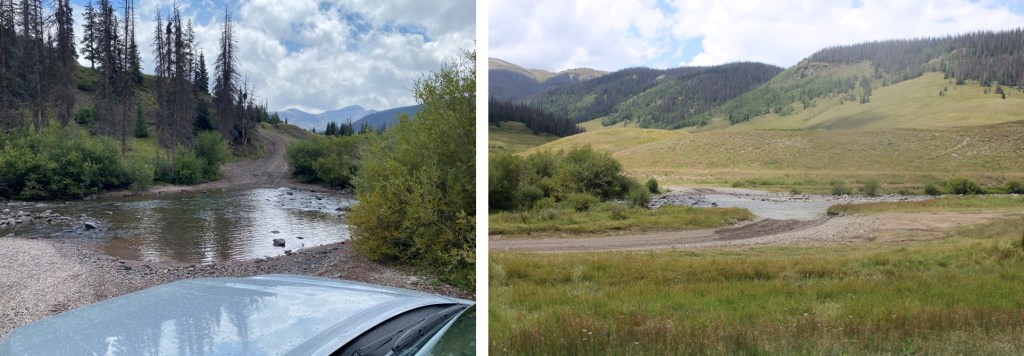
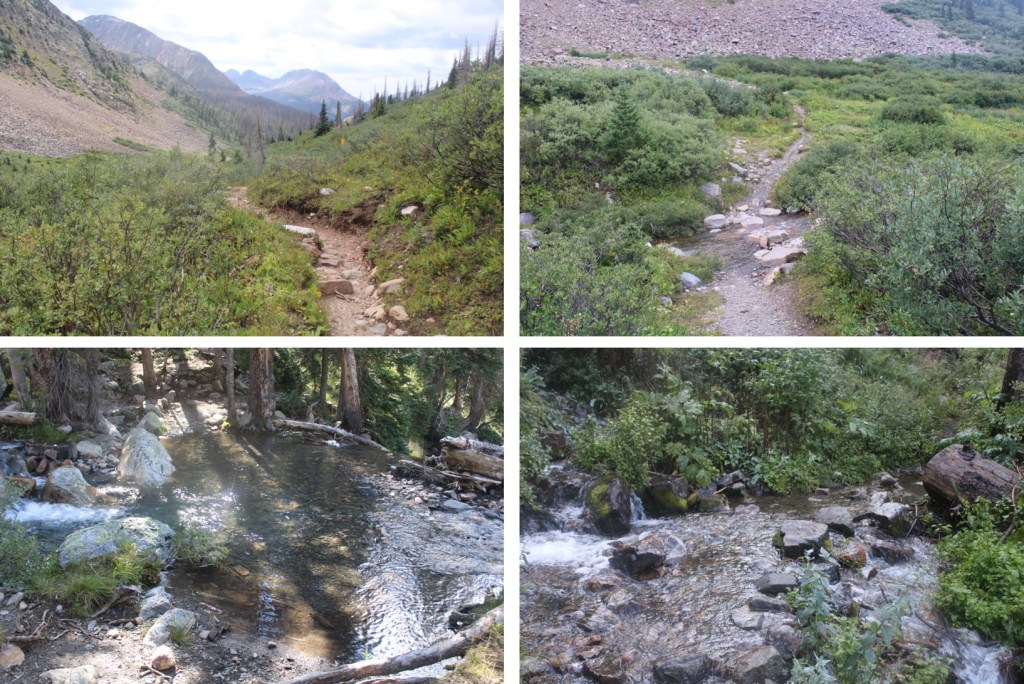
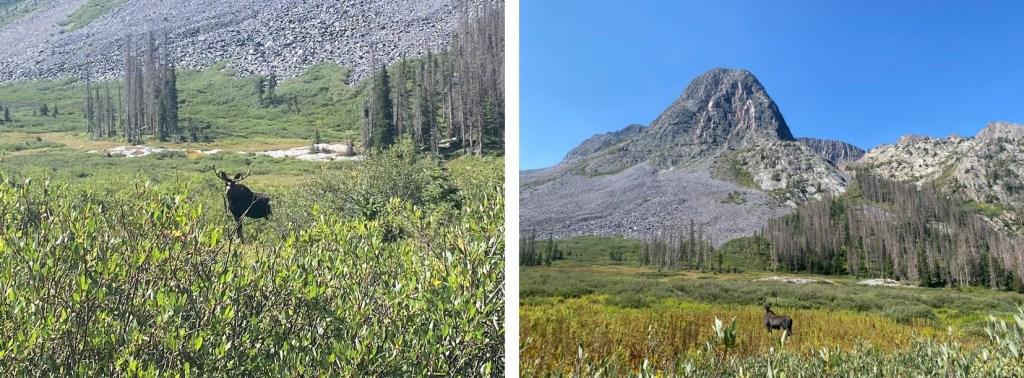
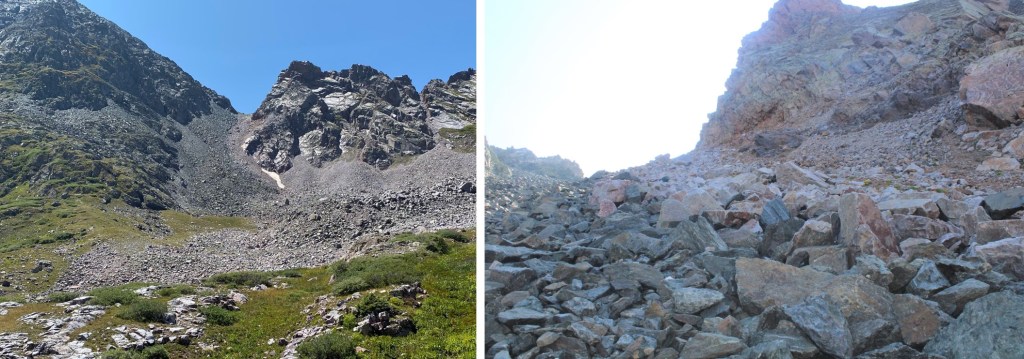
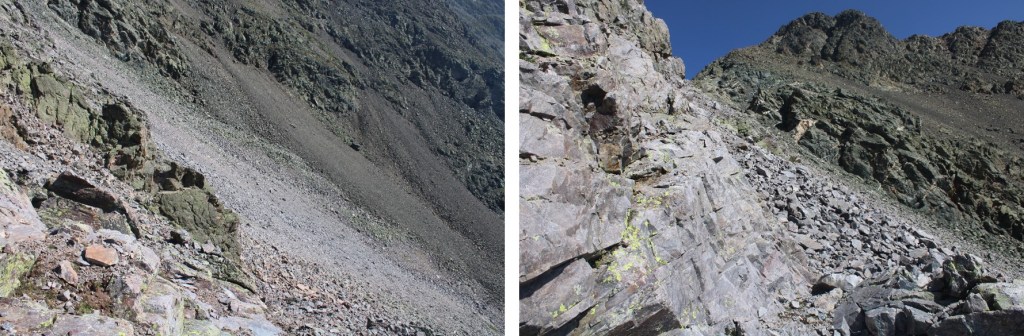
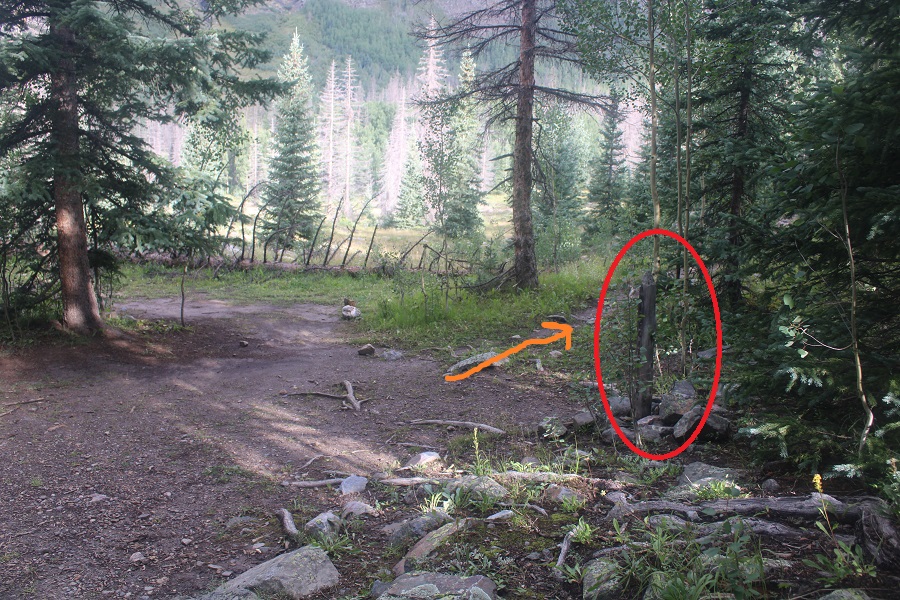
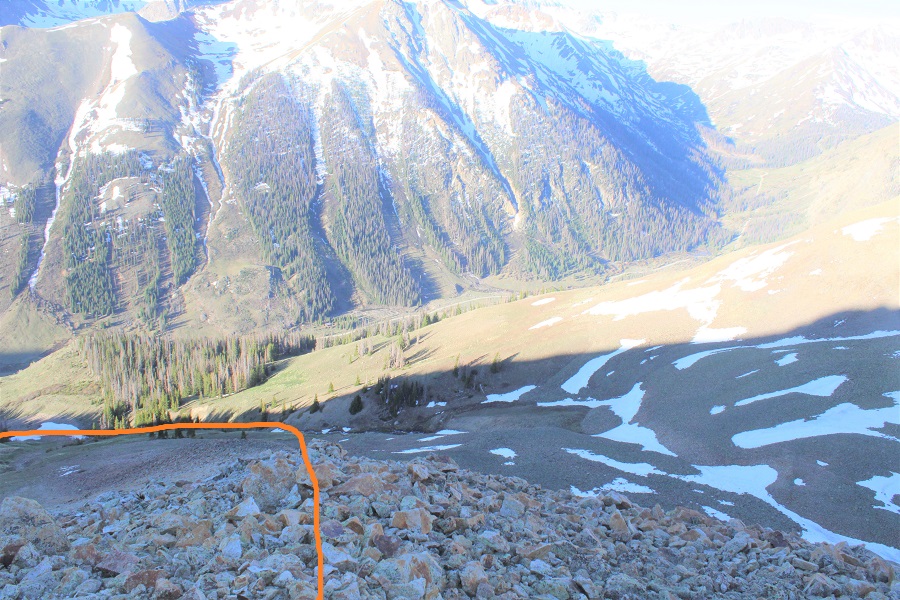
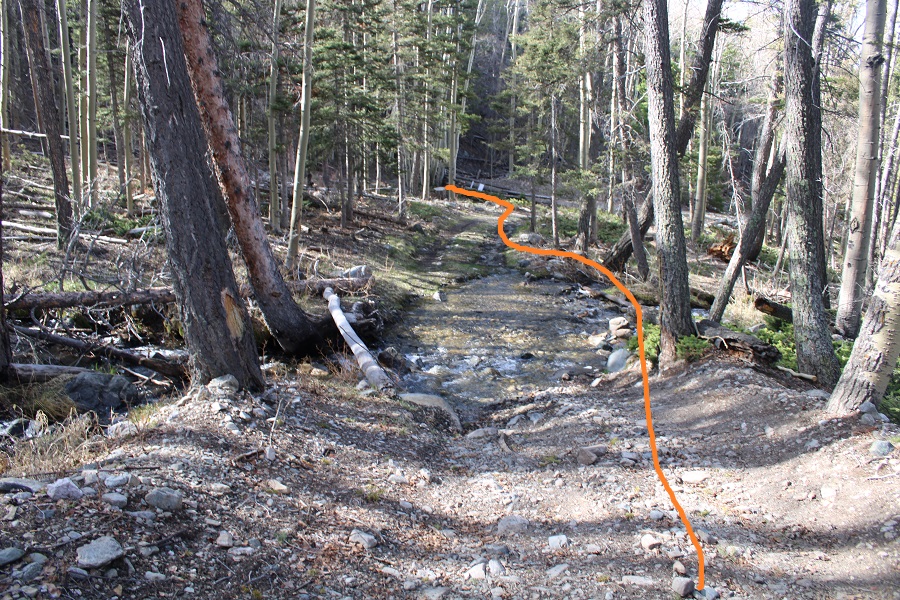
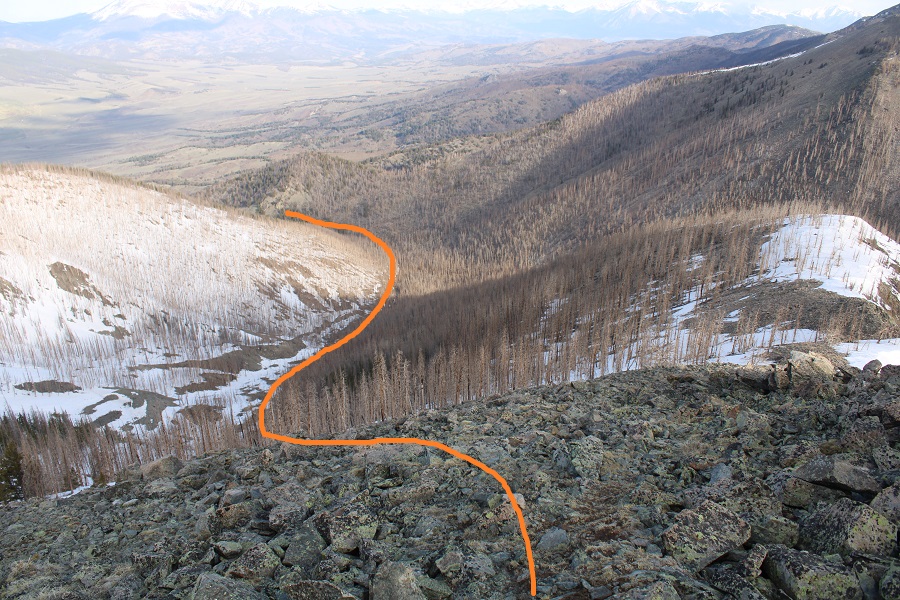
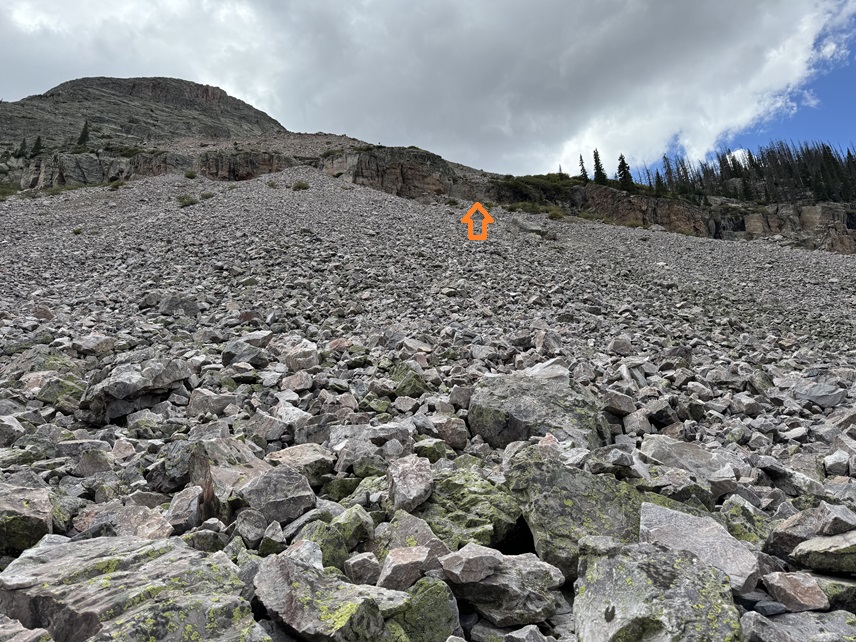
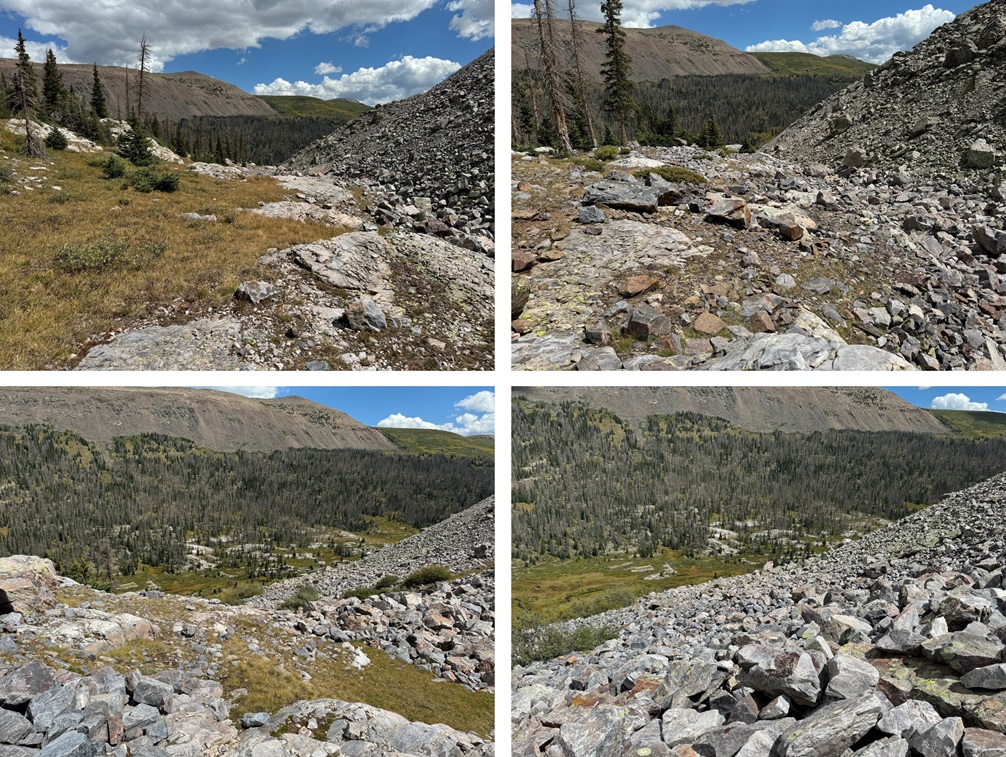
Instead, start out by crossing Rock Creek (I was able to jump across it) and head for the rocky section.

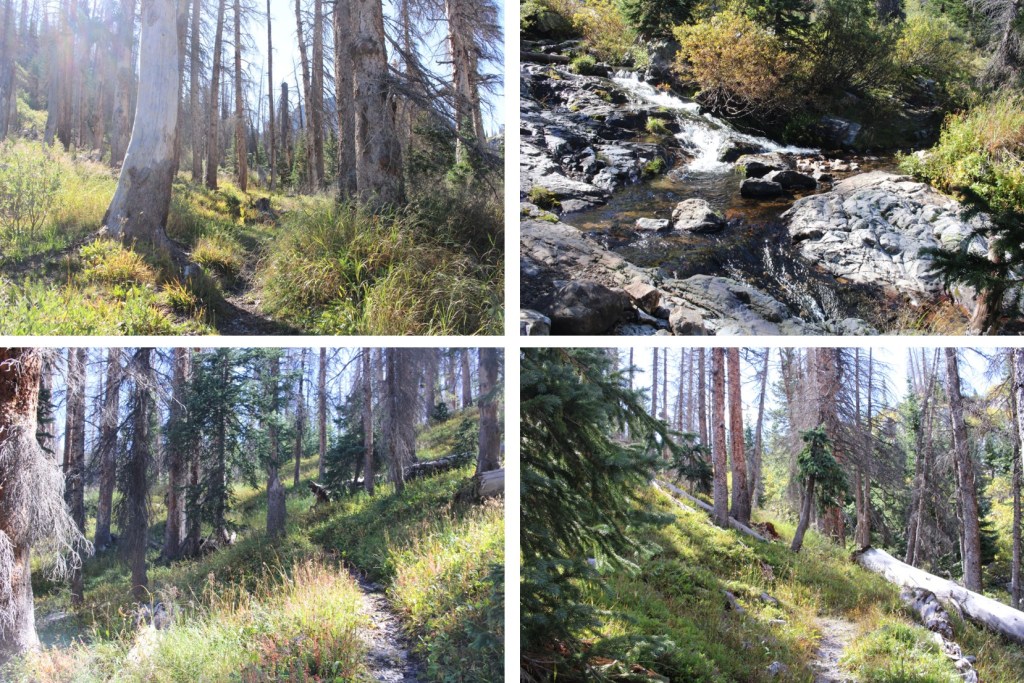
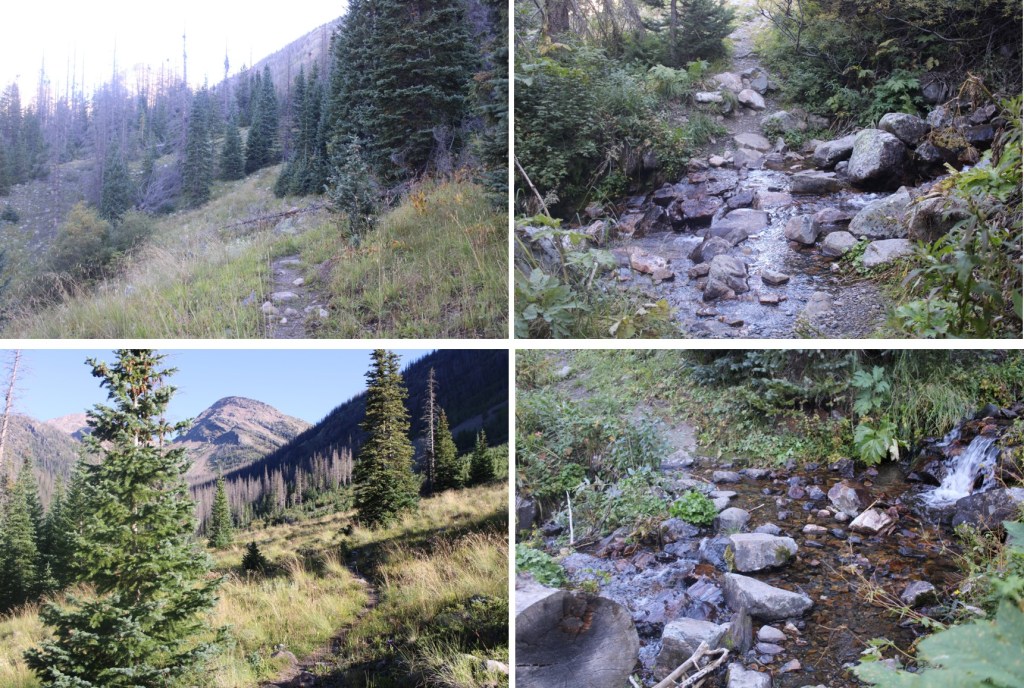
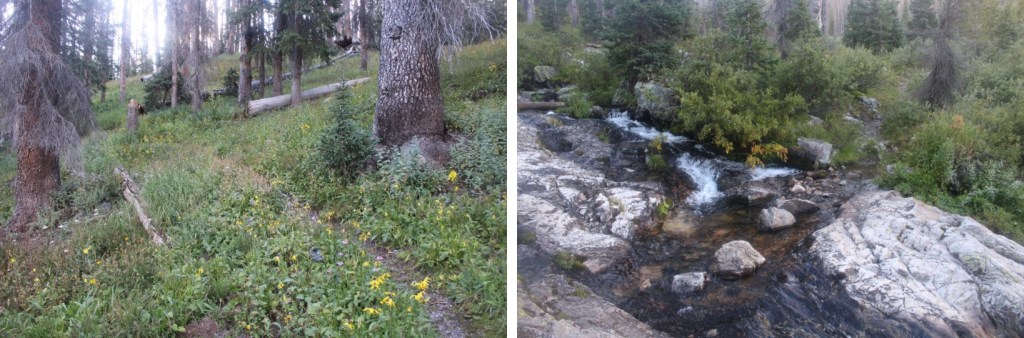
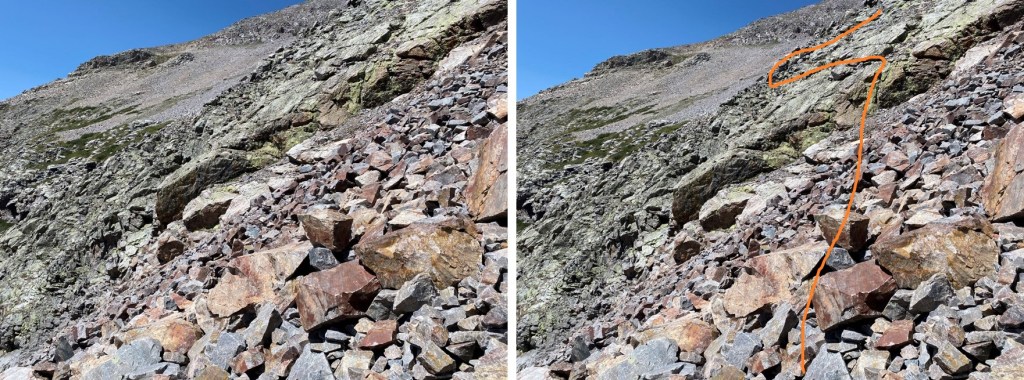
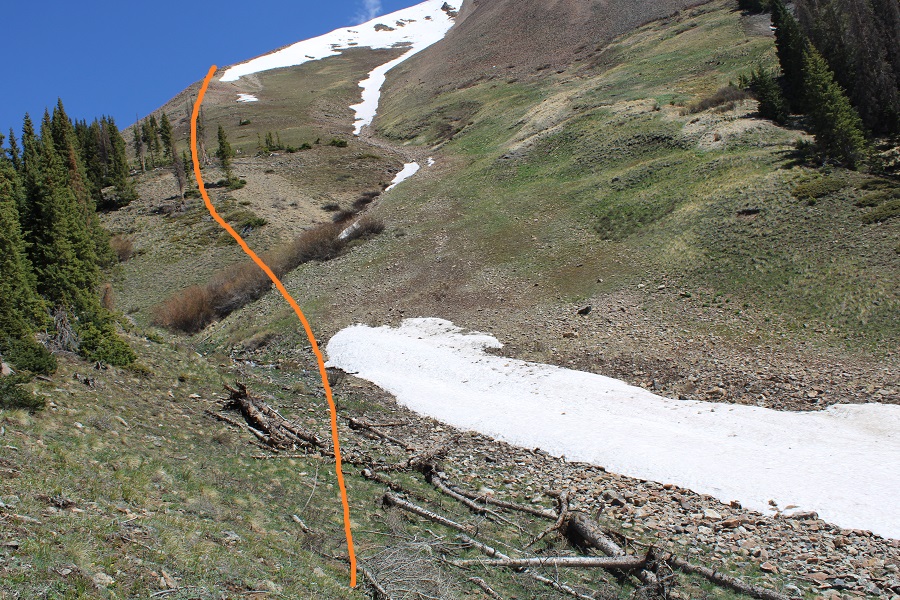
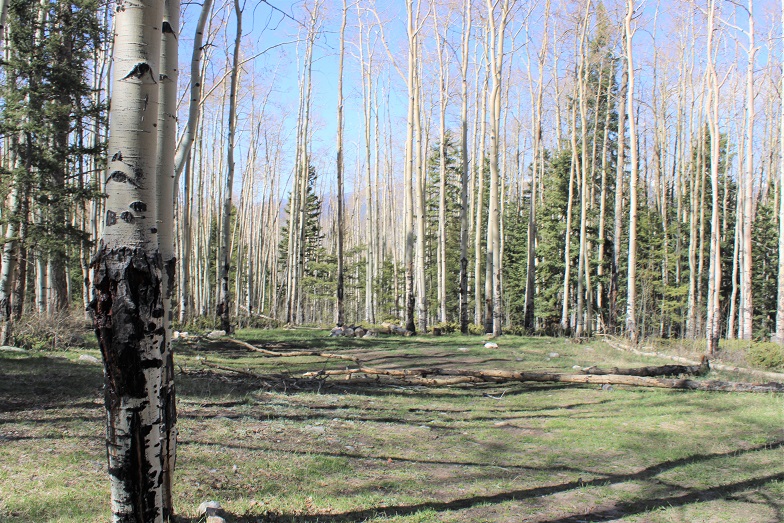
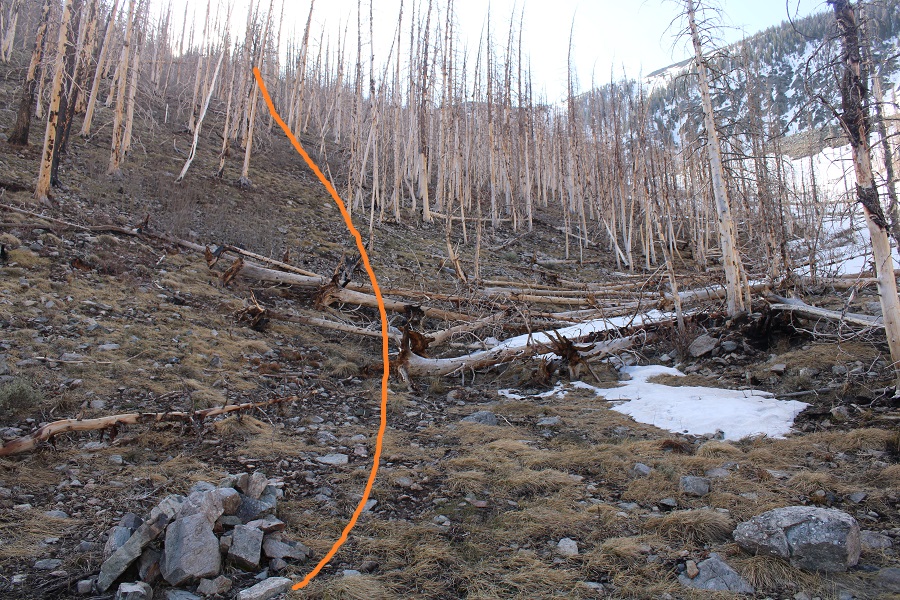
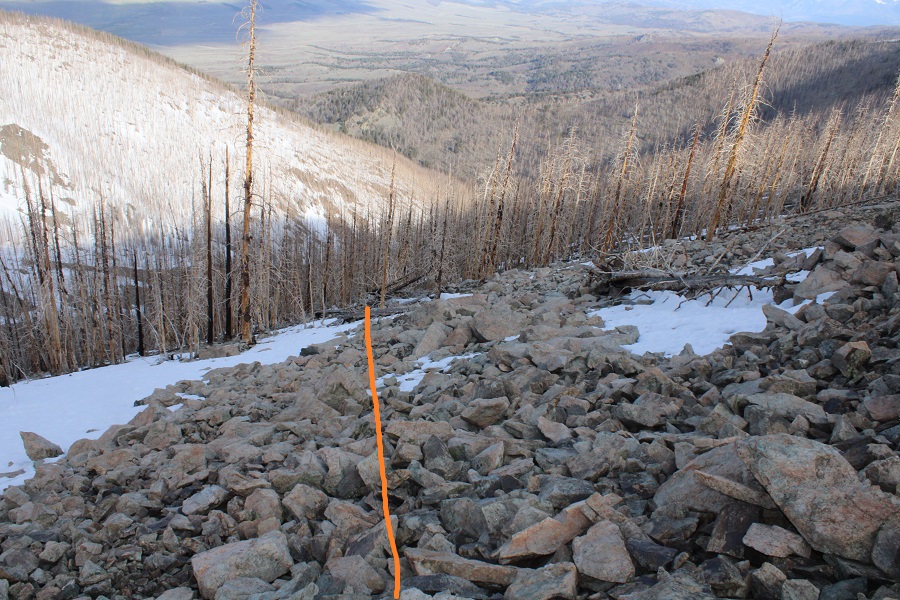
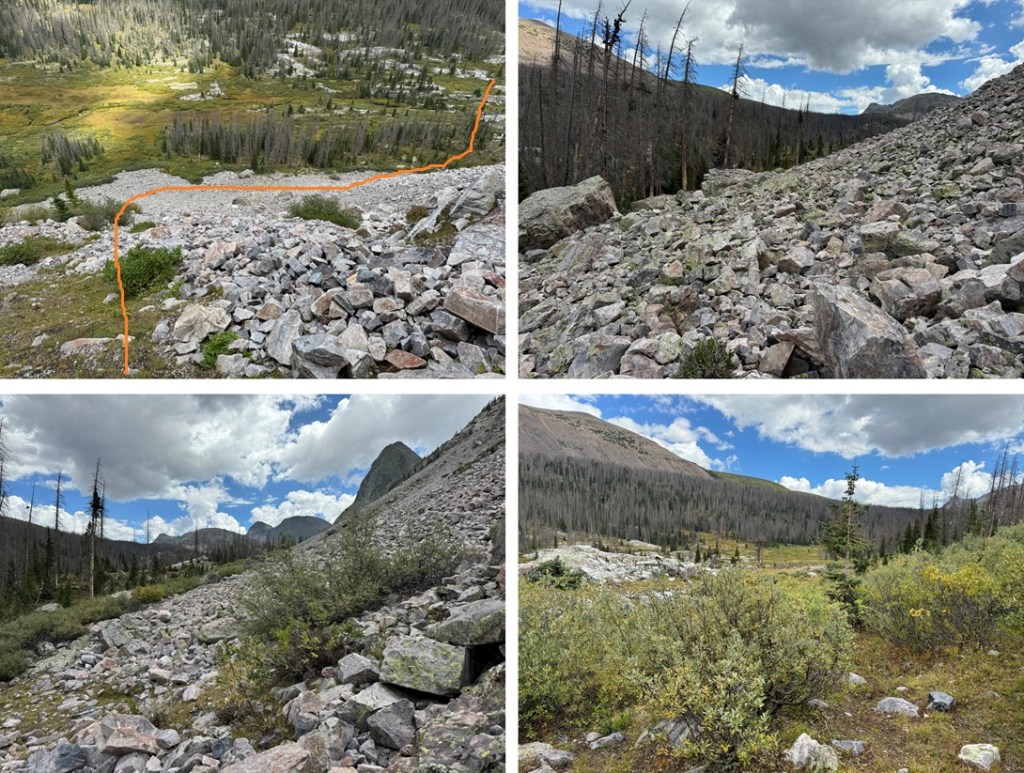
Parallel the rocky section until you come to just before the waterfall. Then turn left, and head up the scree to what looks like a solid rock wall. There is a very well-hidden access gully here, that will easily get you where you want to go.
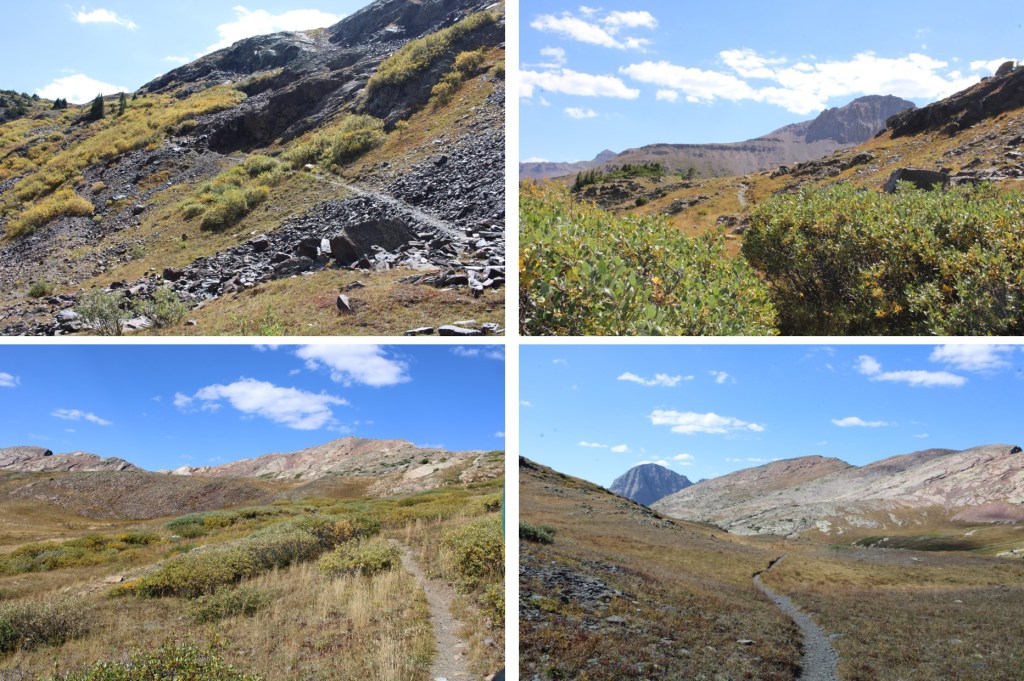
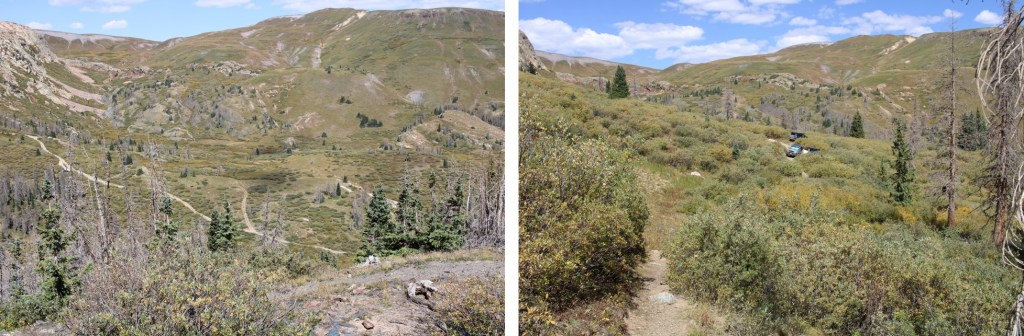
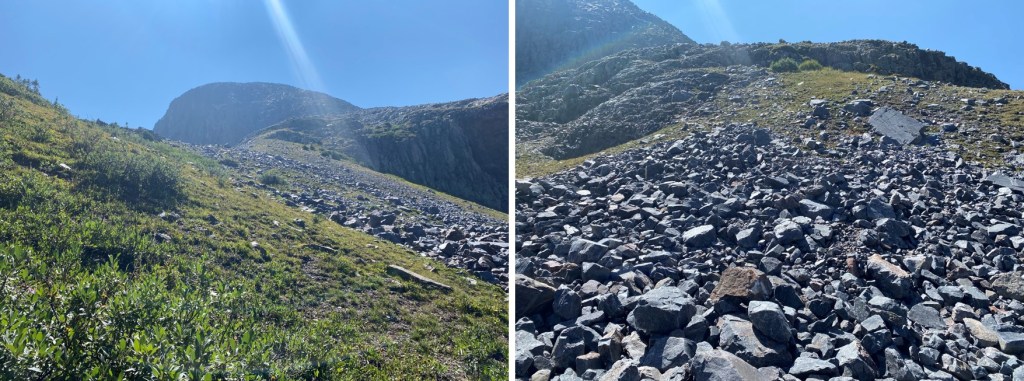
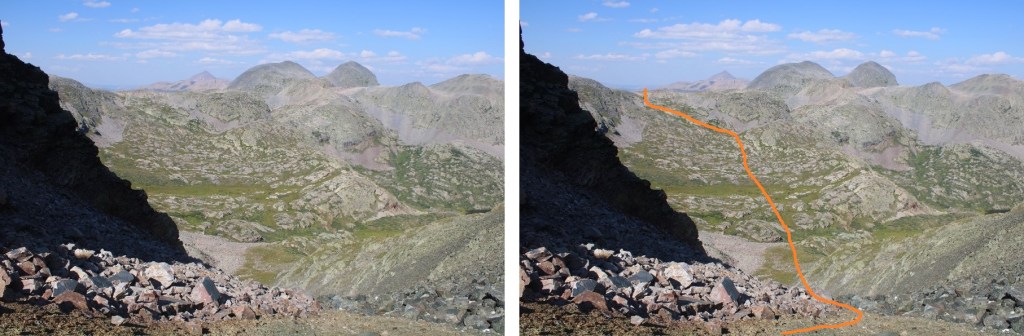
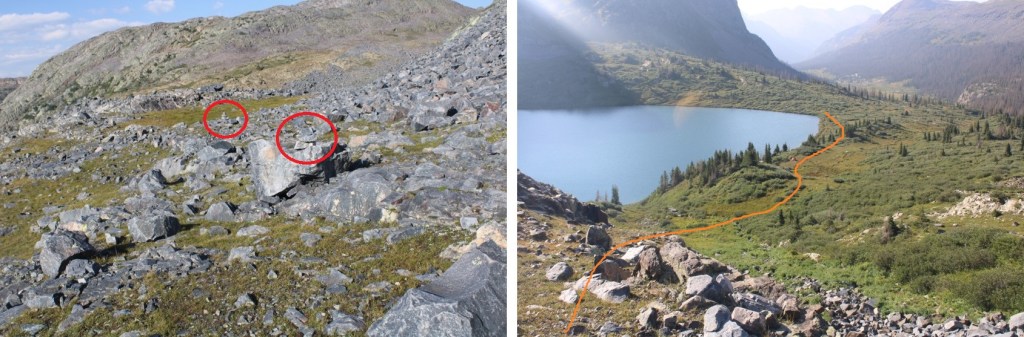
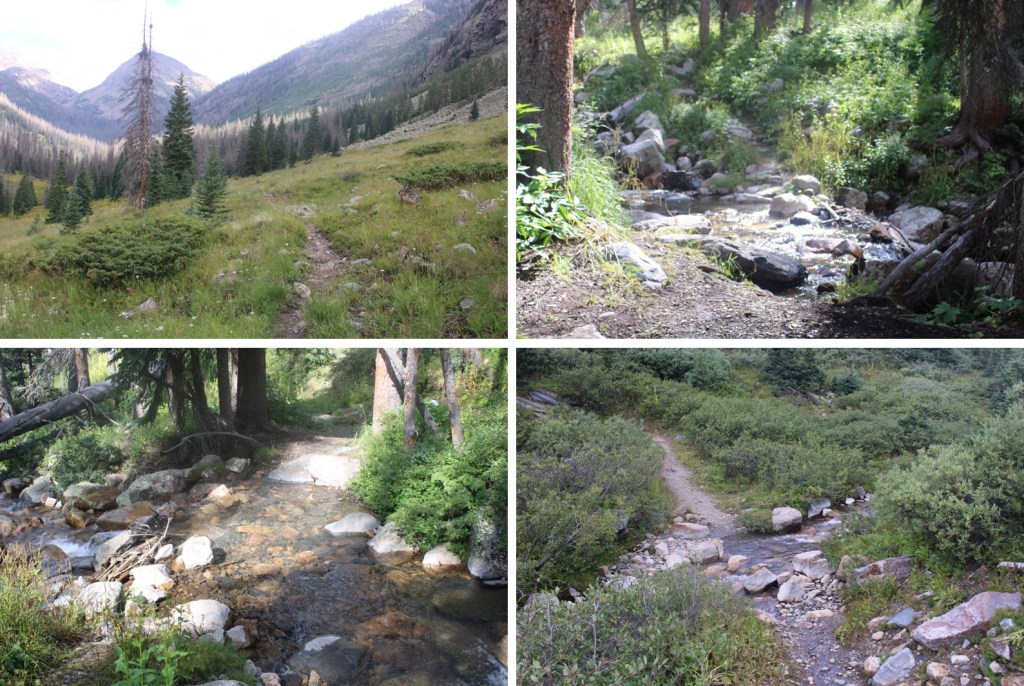
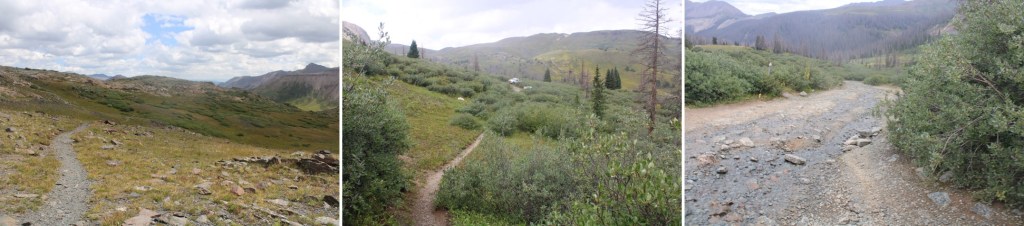
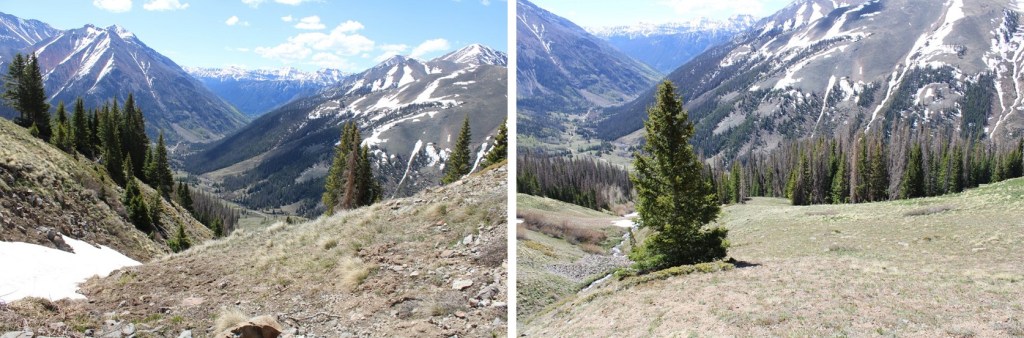
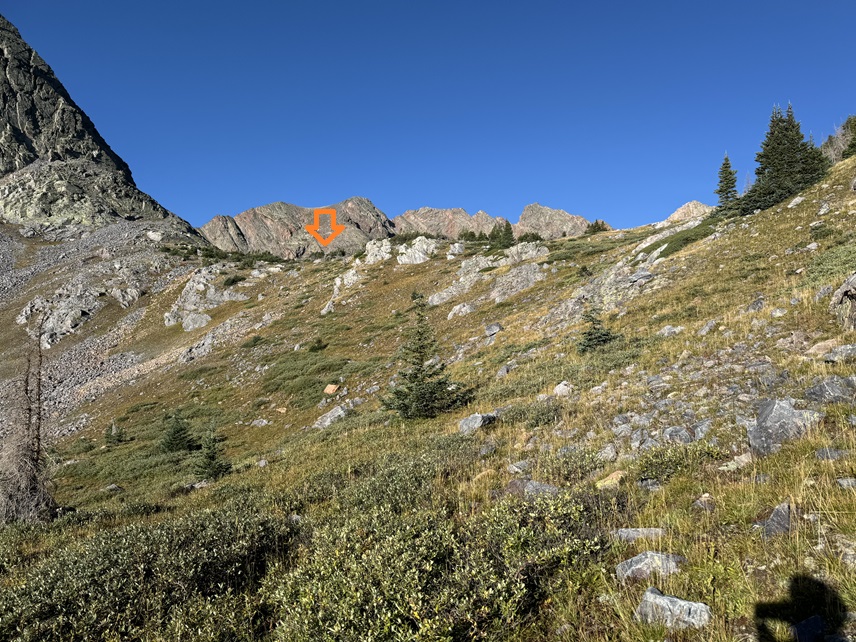
Climb up this easy gully, and immediately turn right, and head towards a drainage.


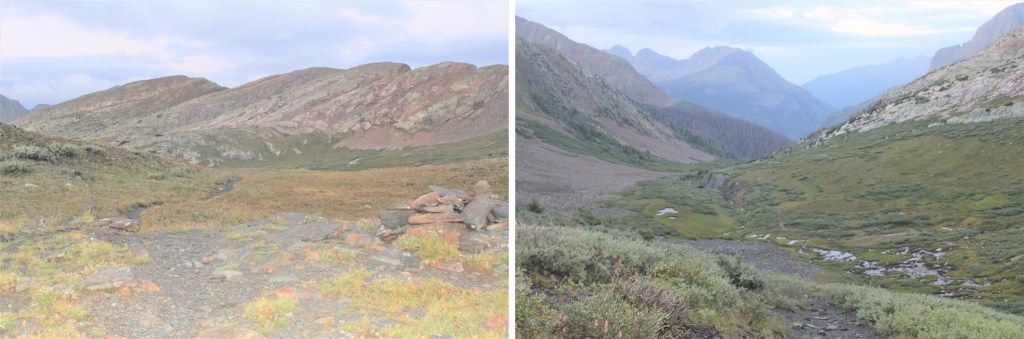
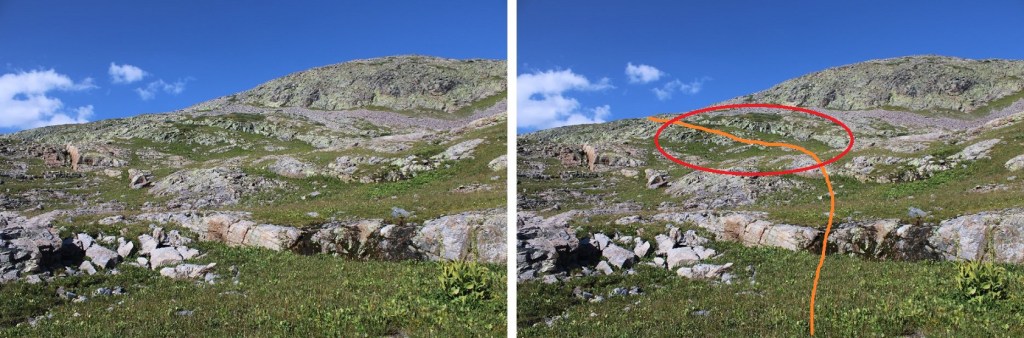
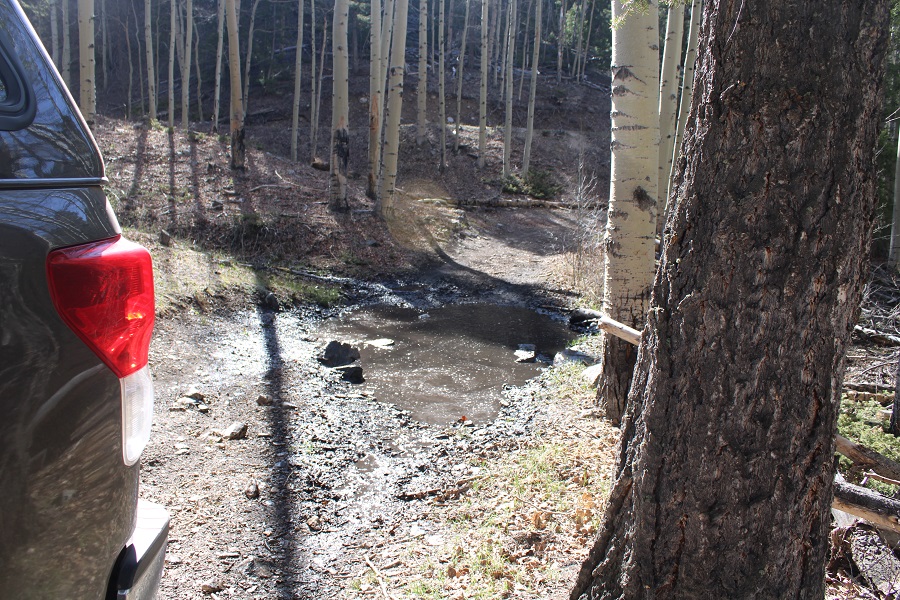
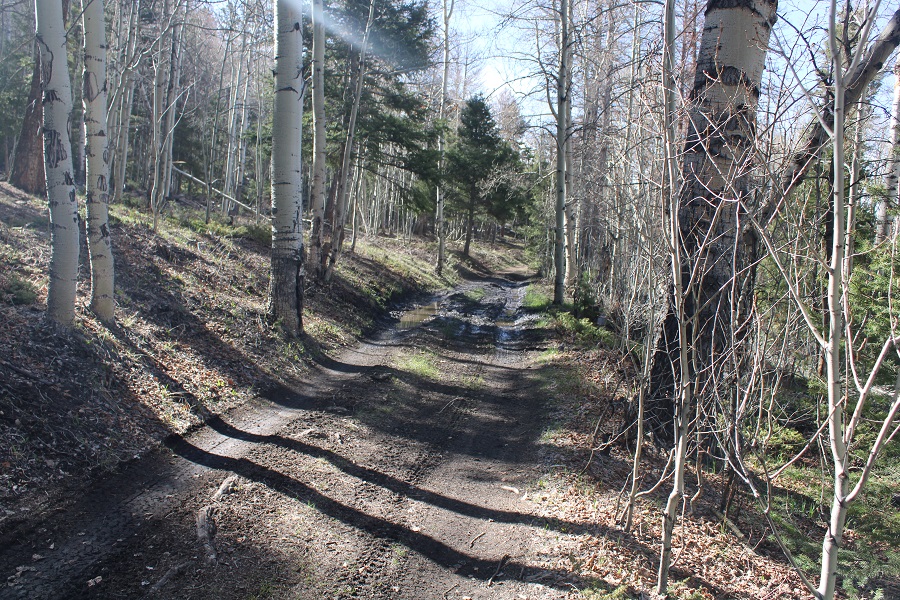
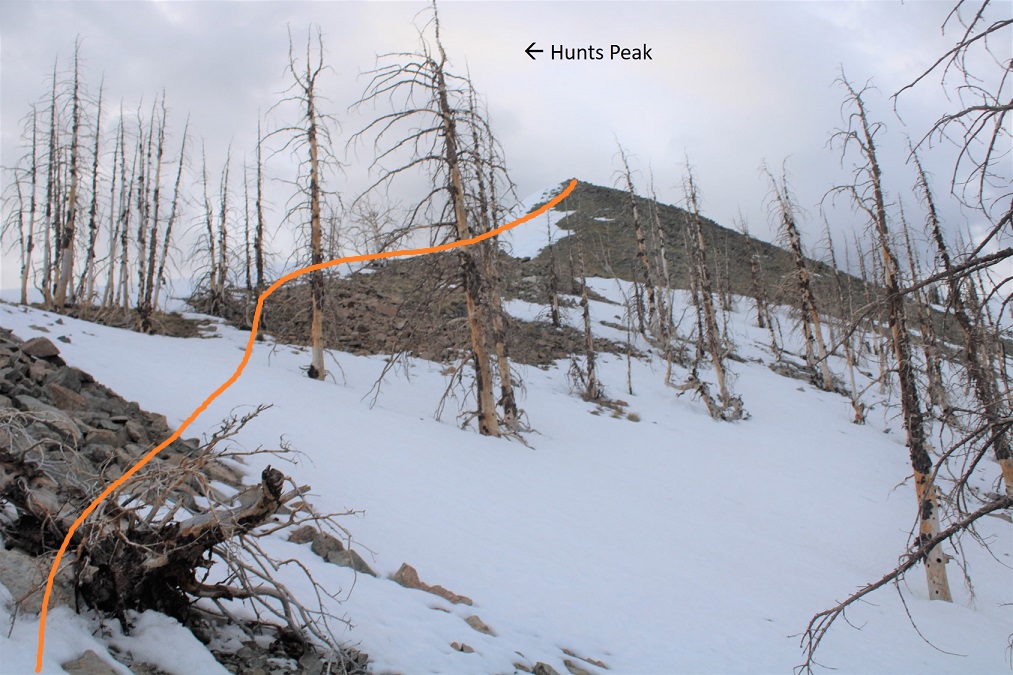
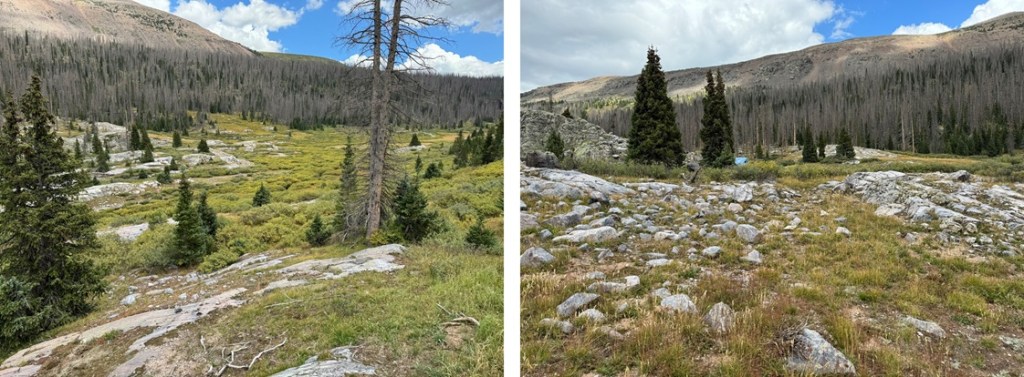
When I made it to the drainage, I followed it west as far as it went, until I was on a small ridge parallelling a pond. There are a few game trails here that will lead you up. Stay in the drainage, which goes from rocky to grassy as it ascends.

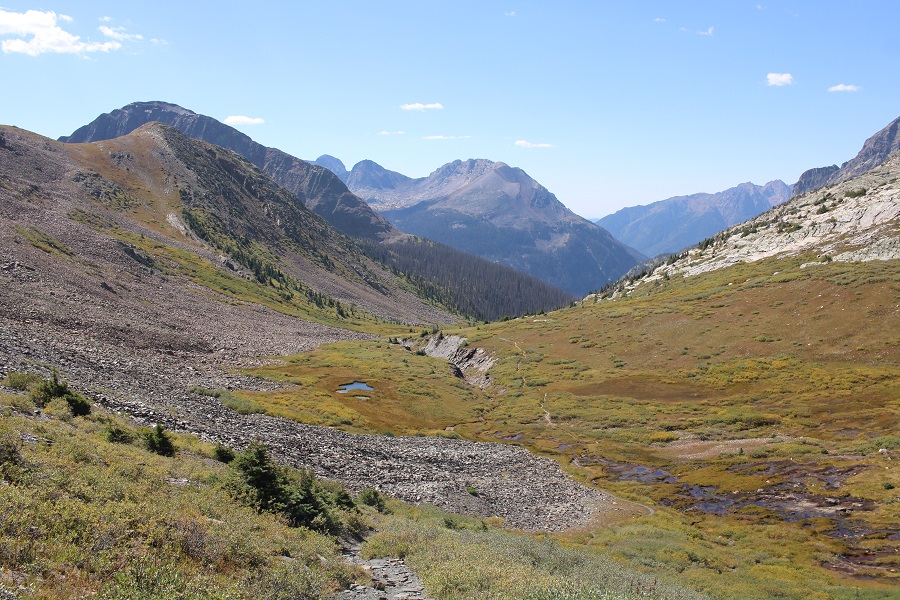
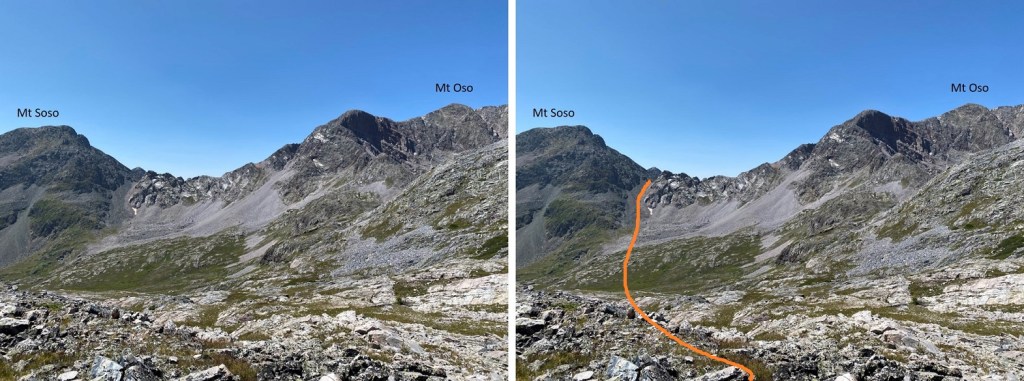
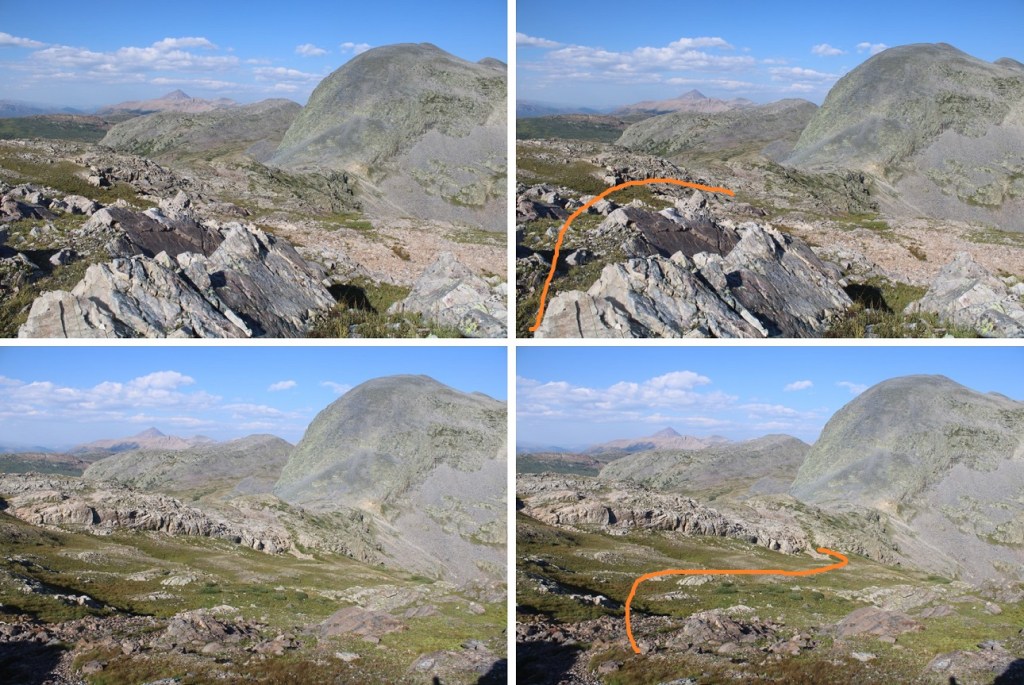
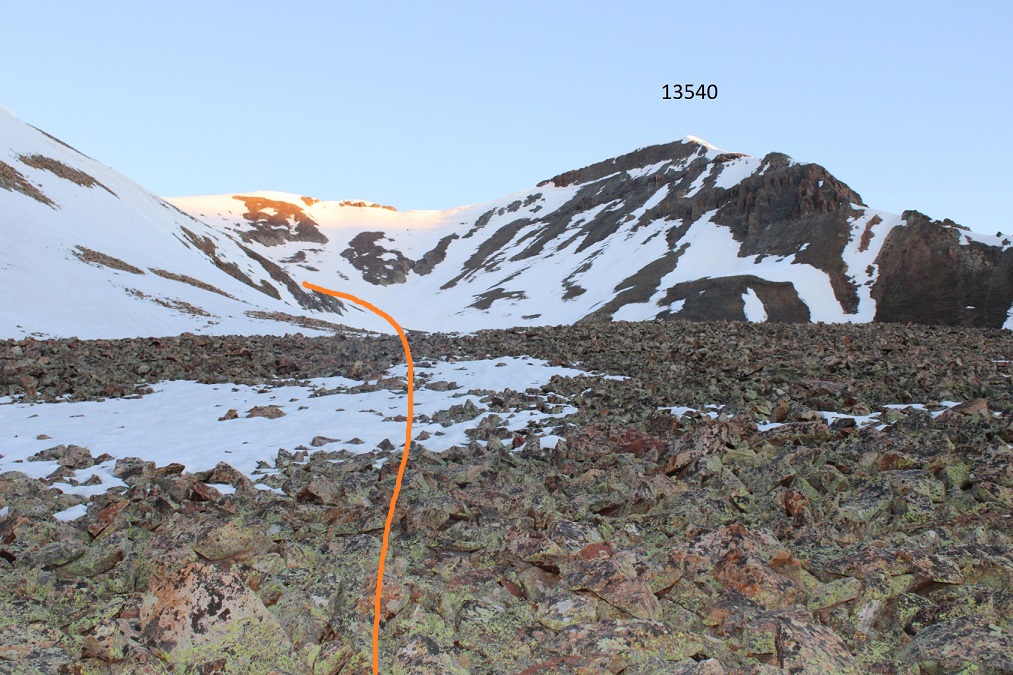
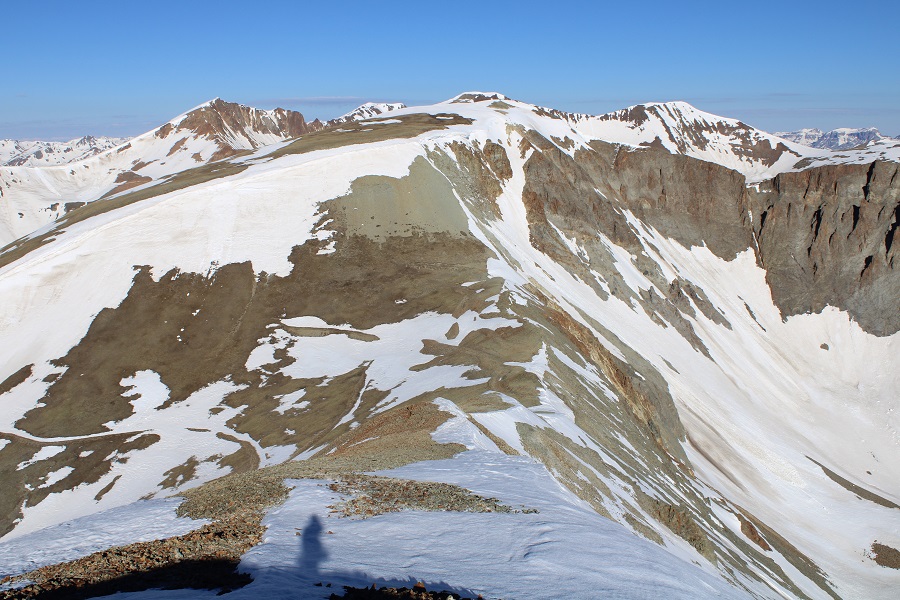
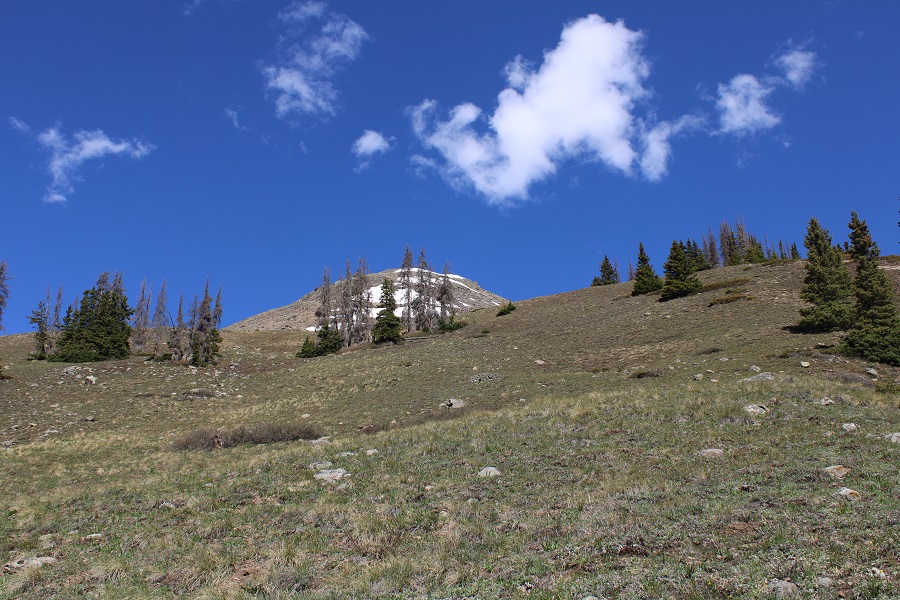
I came to a ridge and turned left. Here I could see a rocky basin. I followed the basin southwest, left, until it ended.
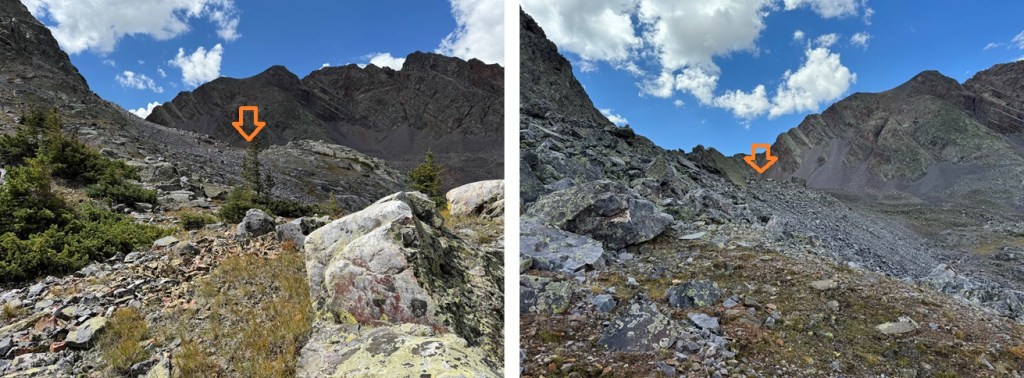
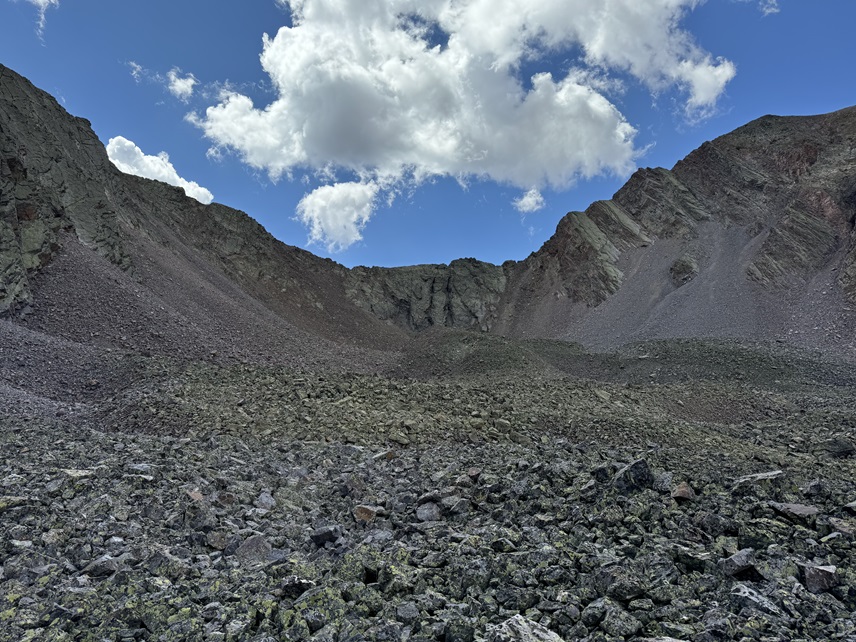
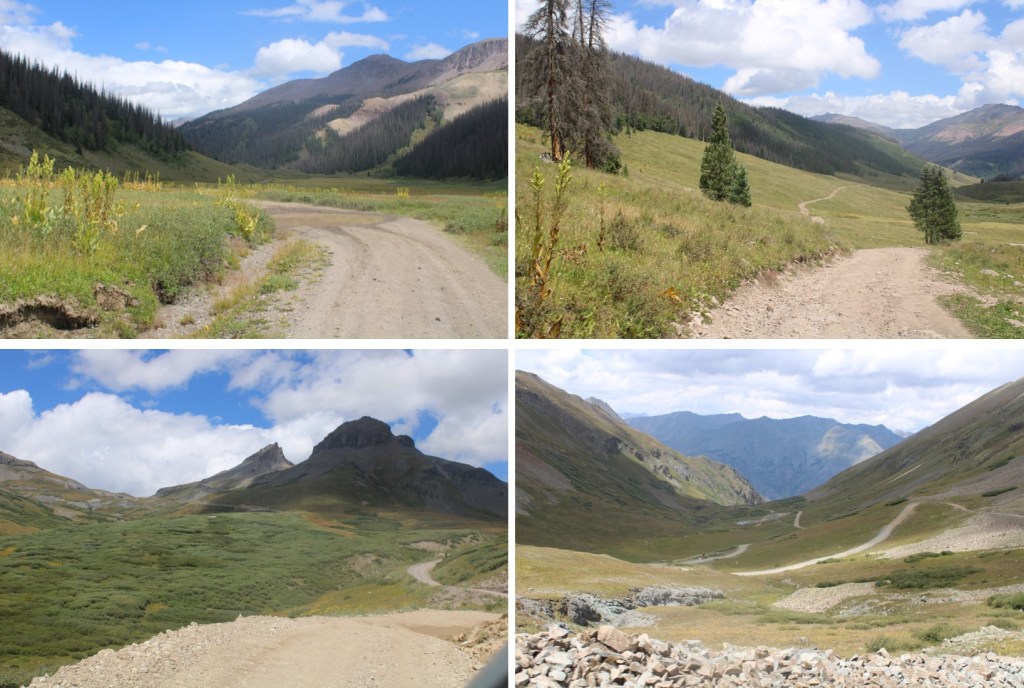
From here you can see two gullies. One leads to P3, the other to P2. I went up the gully to the left, and came down the gully to the right. Both are loose and scree filled. The P2 gully had larger rocks, which would have made it better (for me) to ascend, and the P3 gully had more scree, which would have made it better (for me) to descend. Alas, I ascended the P3 gully, and descended the P2 gully.

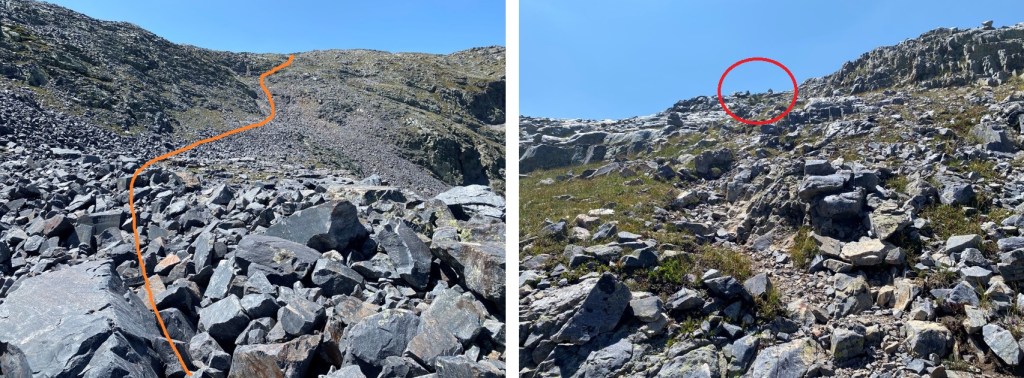
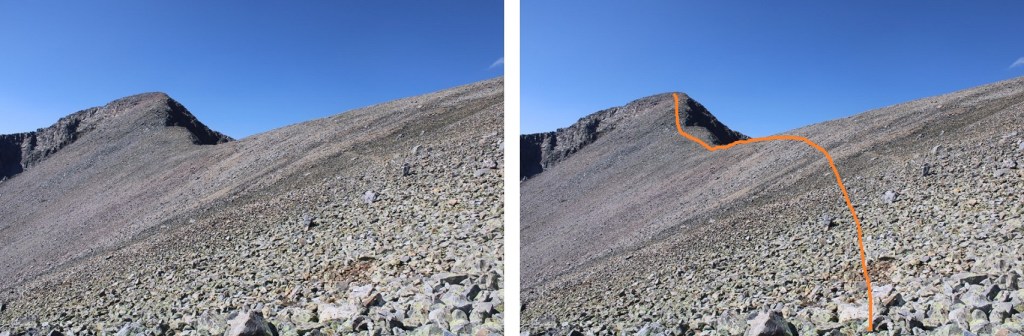
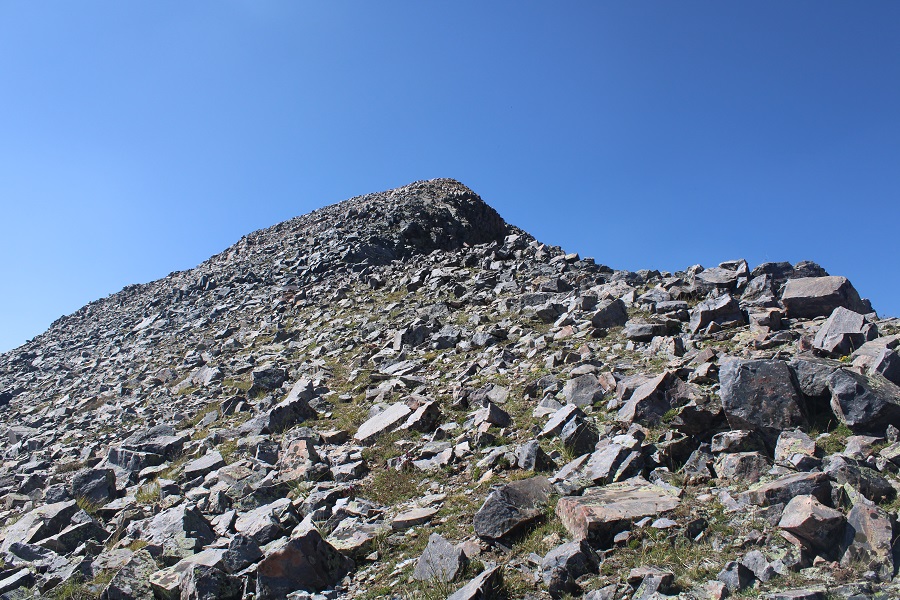
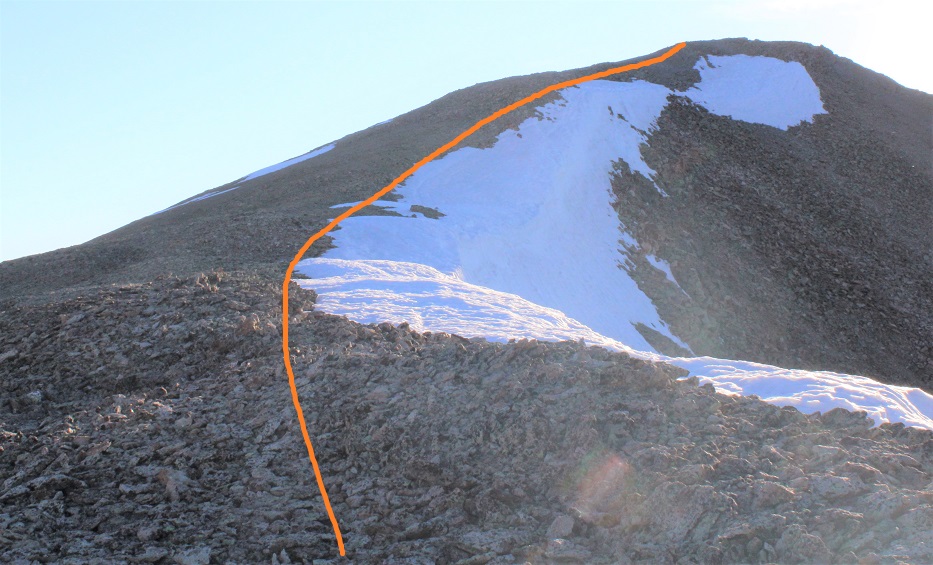
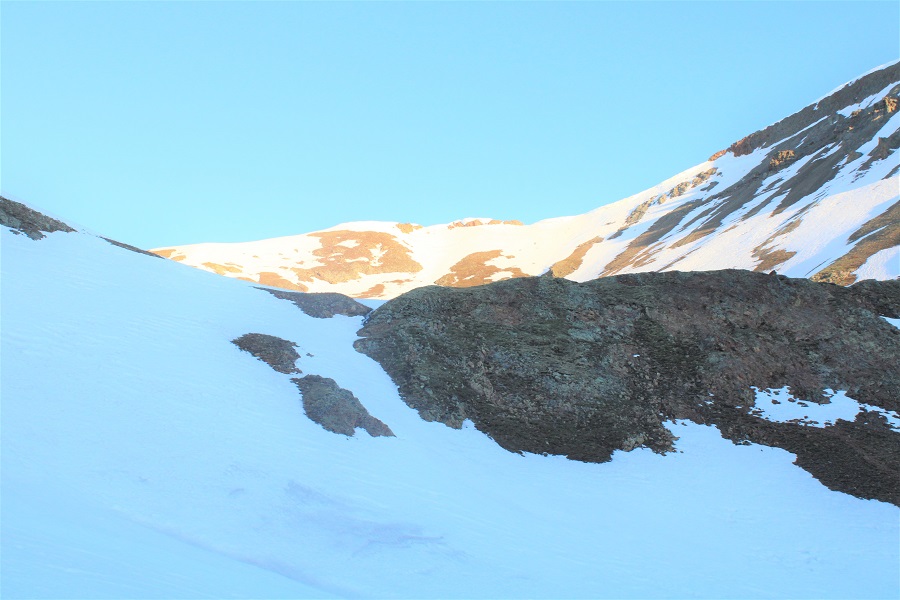
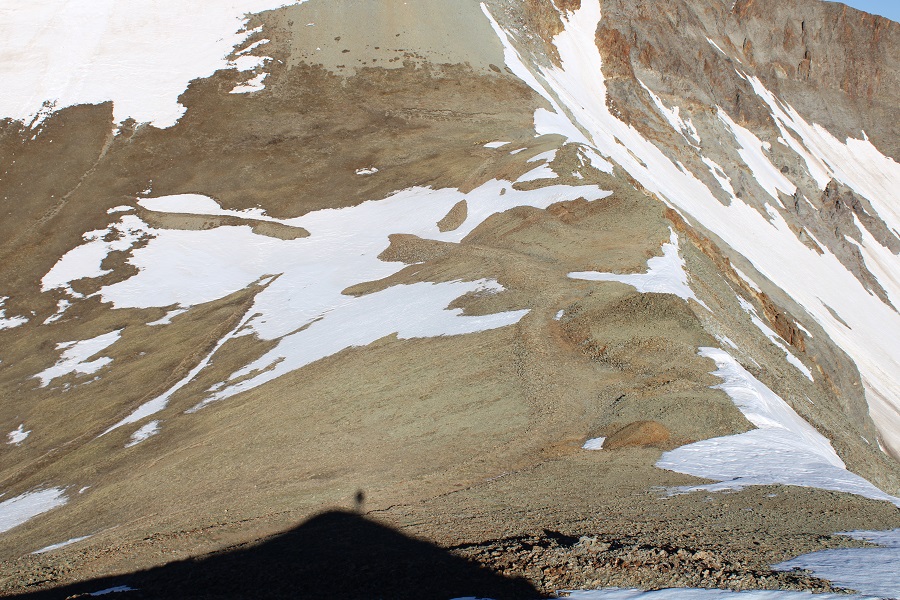
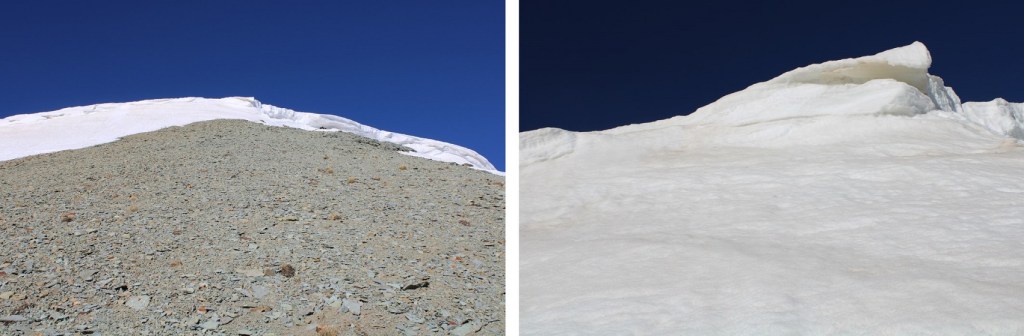
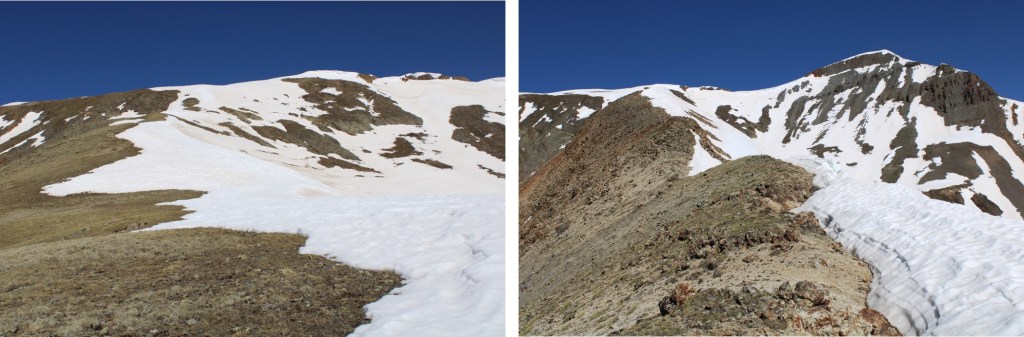
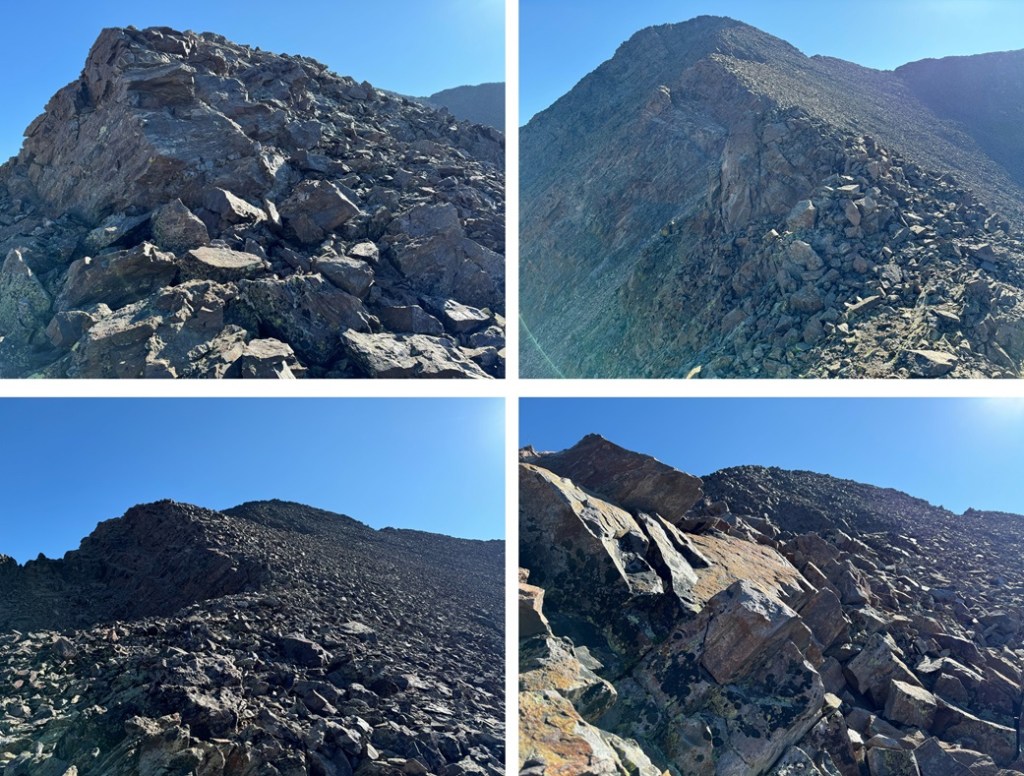
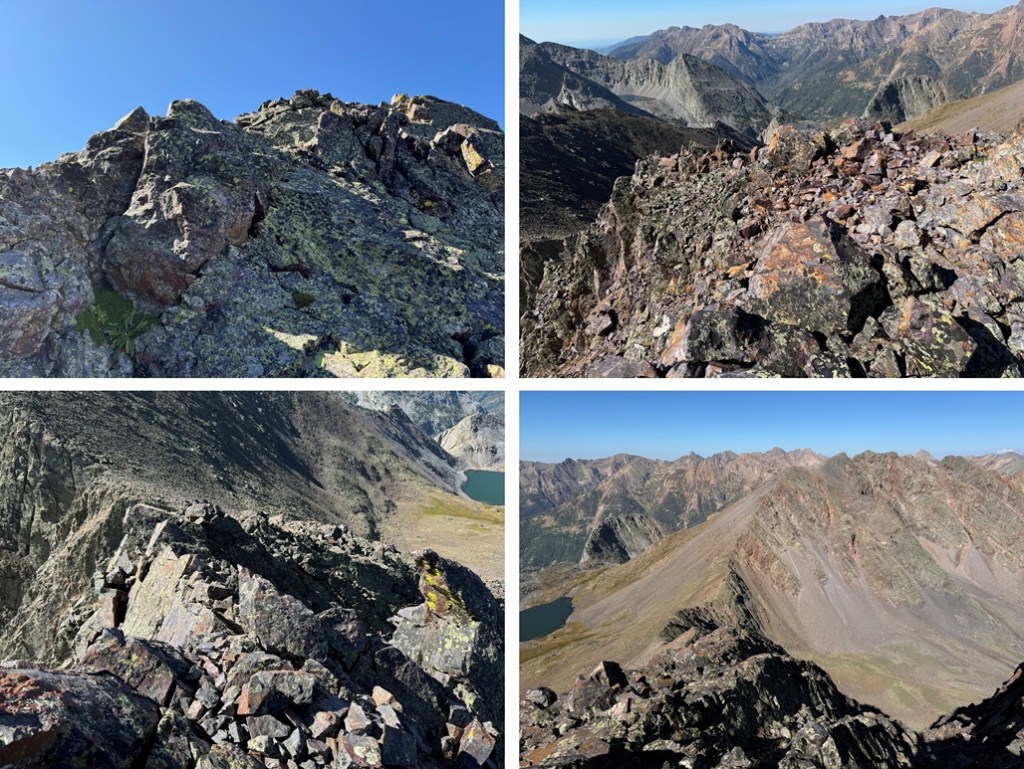
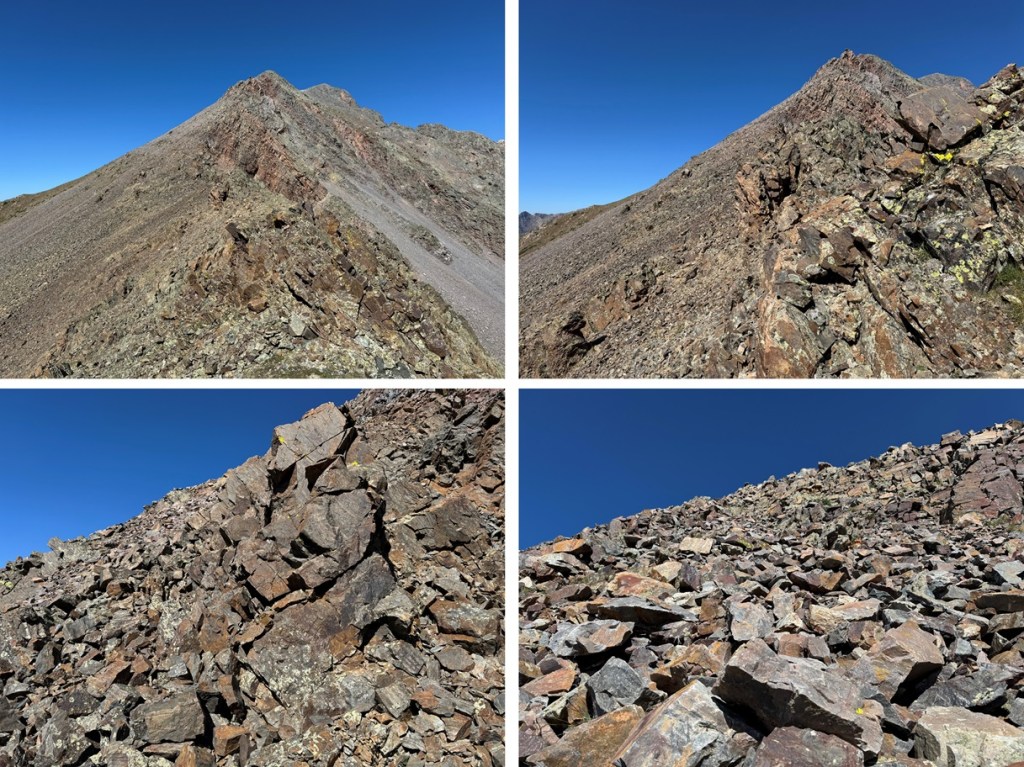
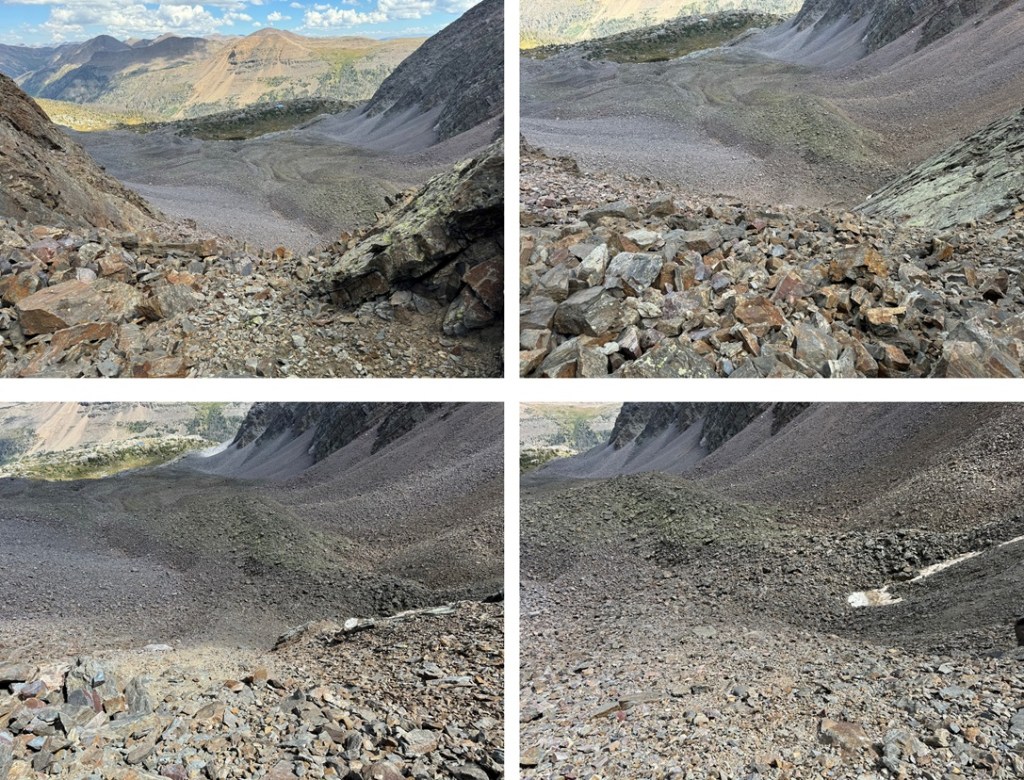
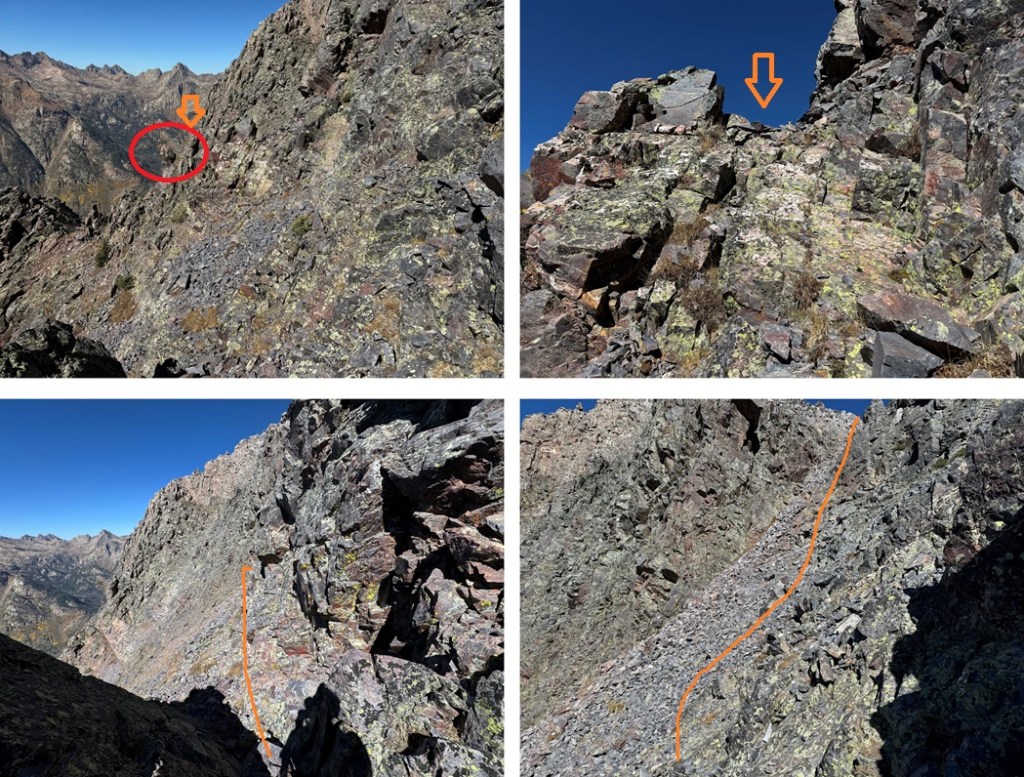
Here are some pictures of the P3 gully. I ascended on scree, sticking close to the rock band, and headed towards the ridge.

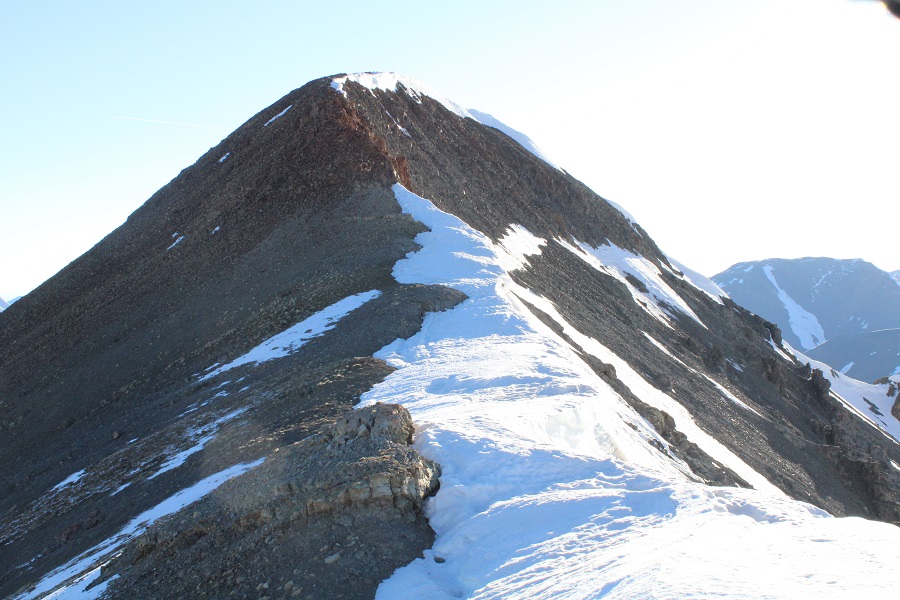
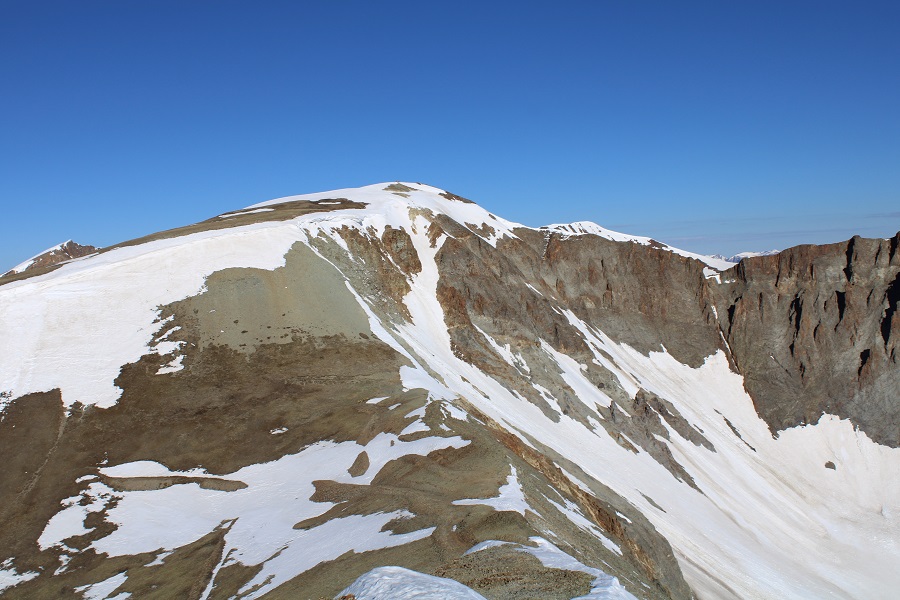
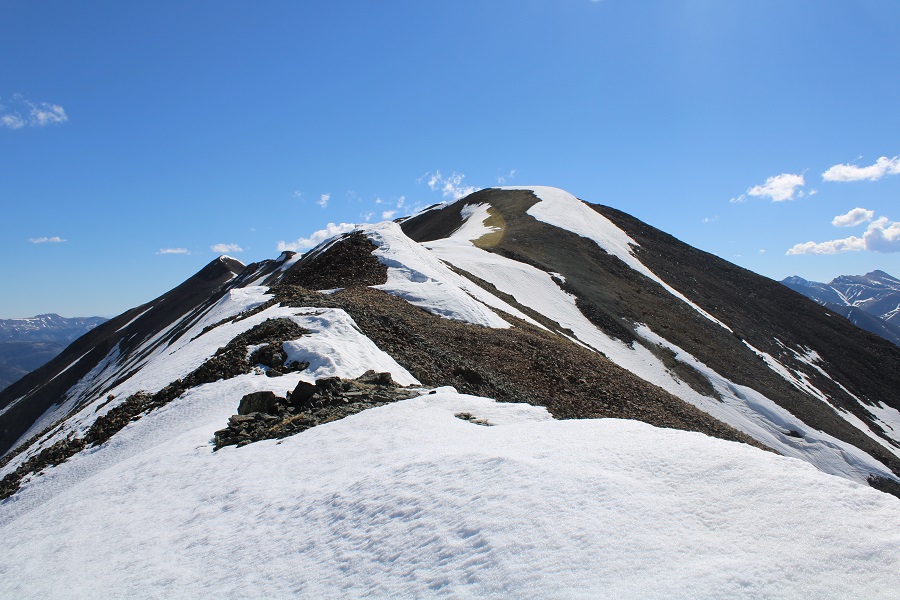
Once on the ridge I turned left, and followed it northeast. While it looks daunting, this was all class 2 on stable rock, and not so stable rock.

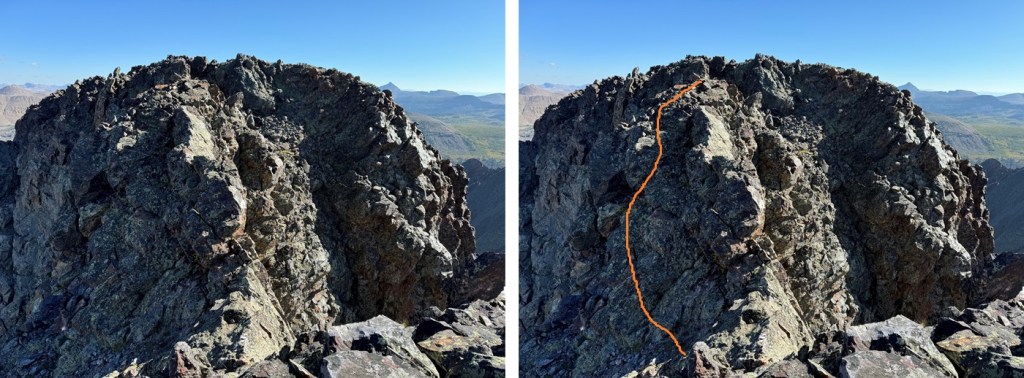
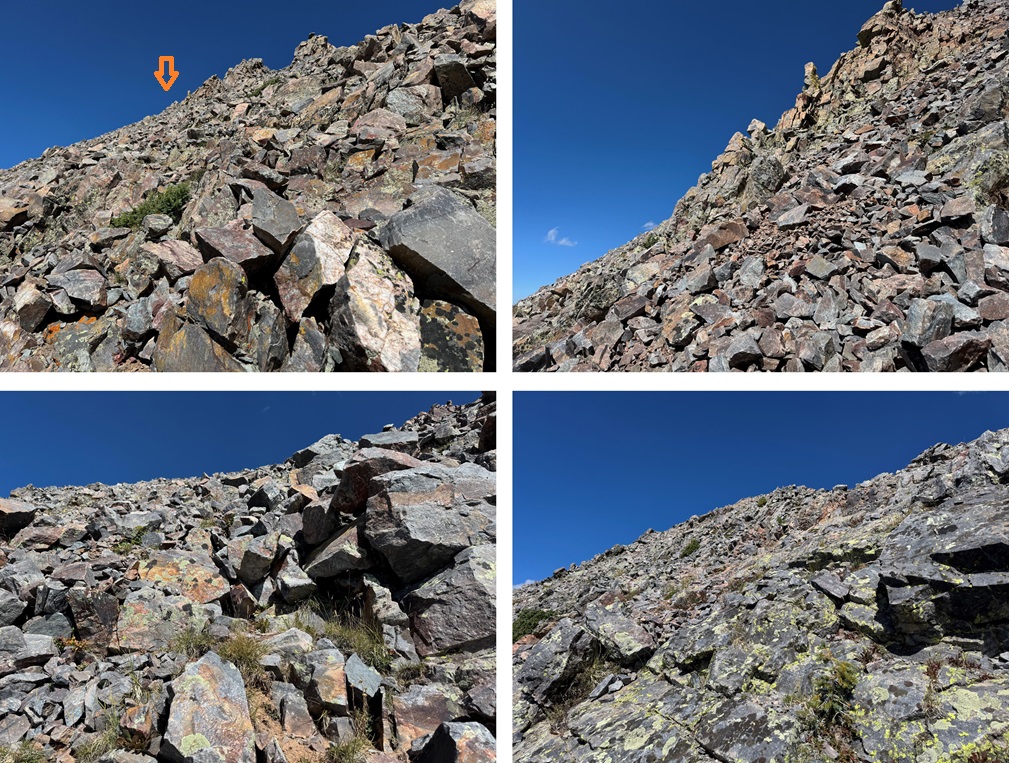
Until I got to here. If you haven’t already, now is your time to put on your helmet. From here the rest of the route is exposed class 3 and class 4 climbing. I chose to stick to the ridge. Luckily, the rock here is solid and there are plenty of hand and footholds.
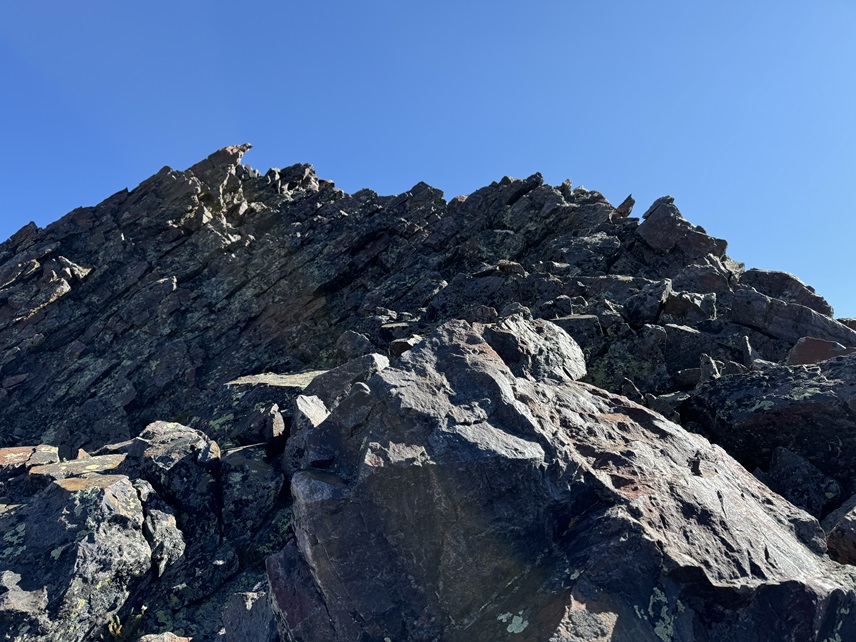
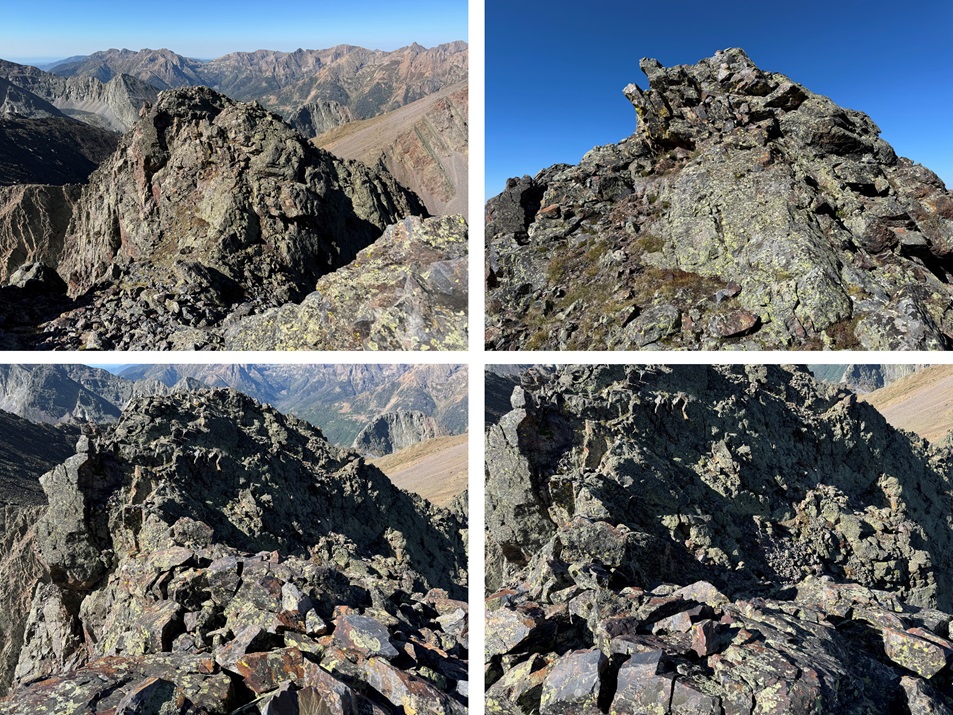
I stuck to the ridge here, so I won’t include direction lines, but I’ll show you a few pictures of this part of the ridge, which I considered class 3
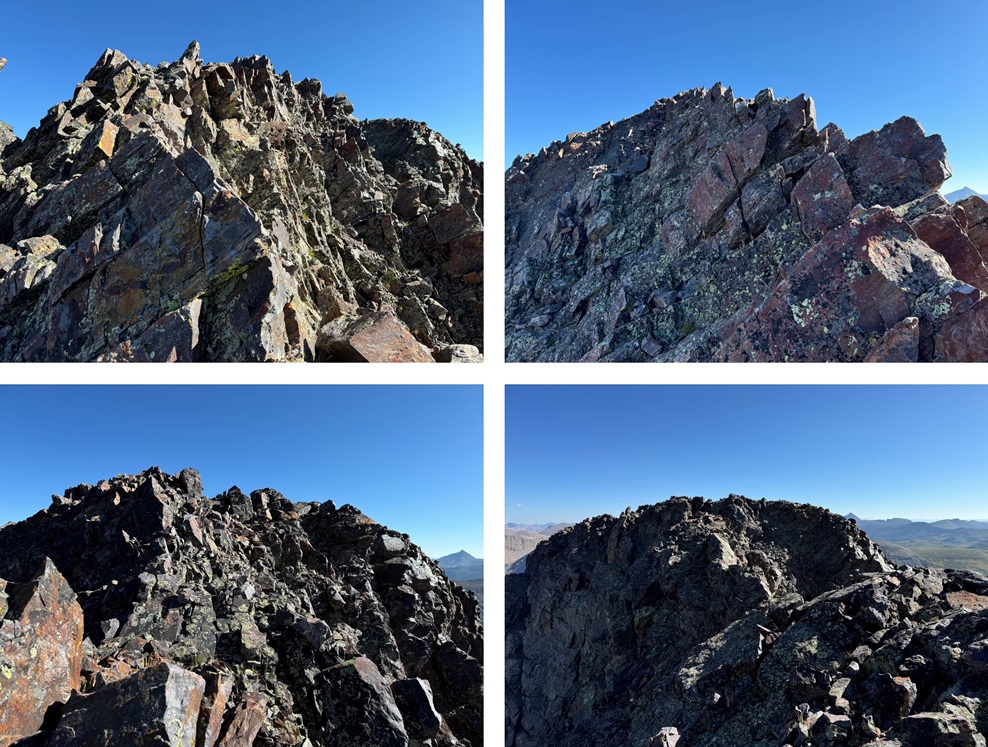
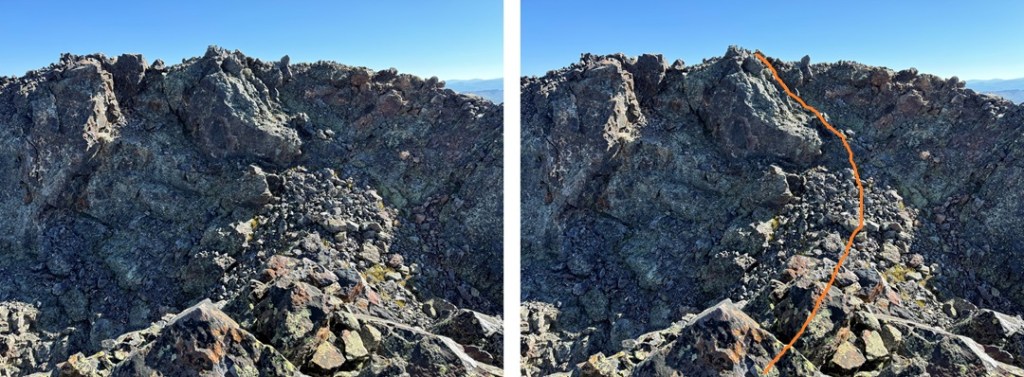
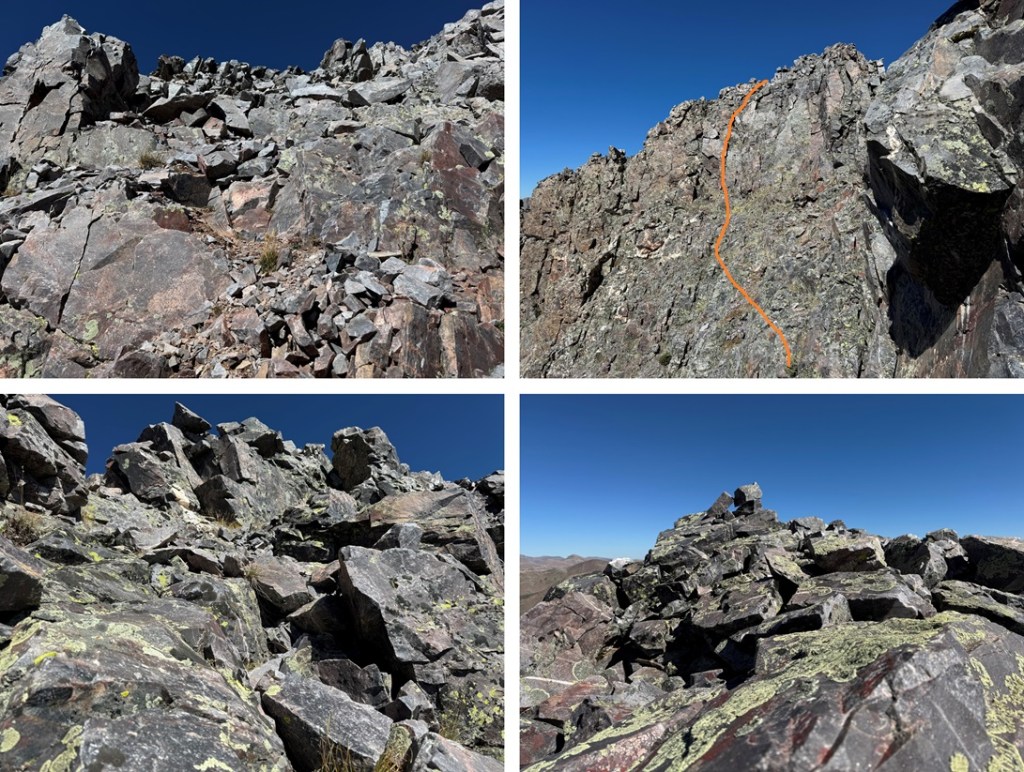
Until I got to here. I felt this was class 4, and the crux of P3. This is the route I took, sticking a bit to the left as I felt there were more holds, but I can see how someone with a higher risk tolerance would have gone straight up the middle.

I could now see the summit of P3. This is the route I took.
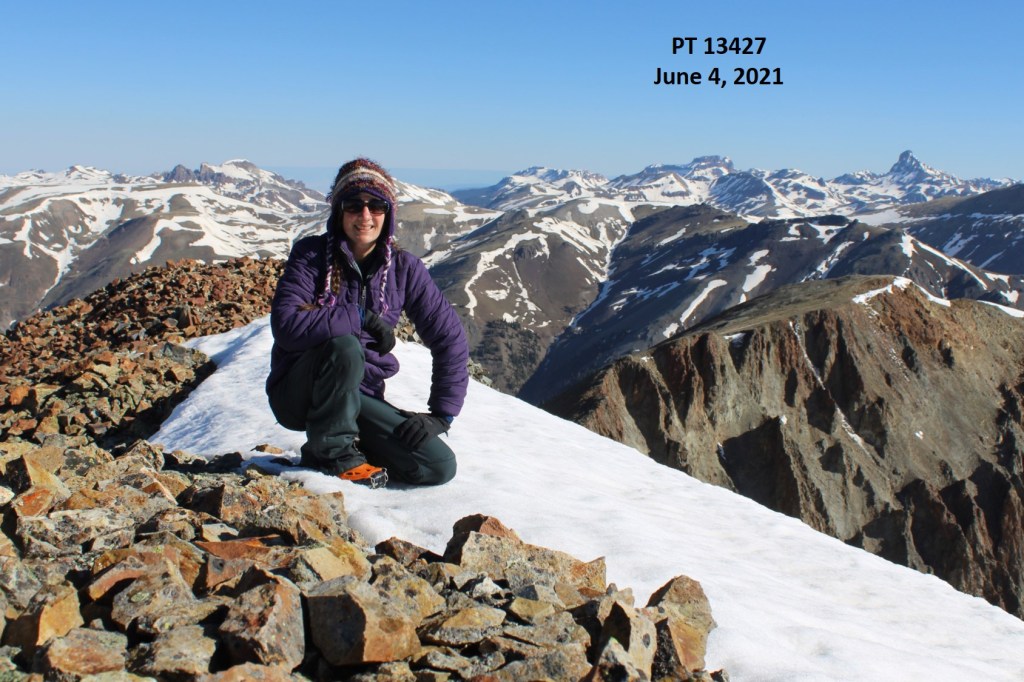
I summited P3 at 9:45am

P3:
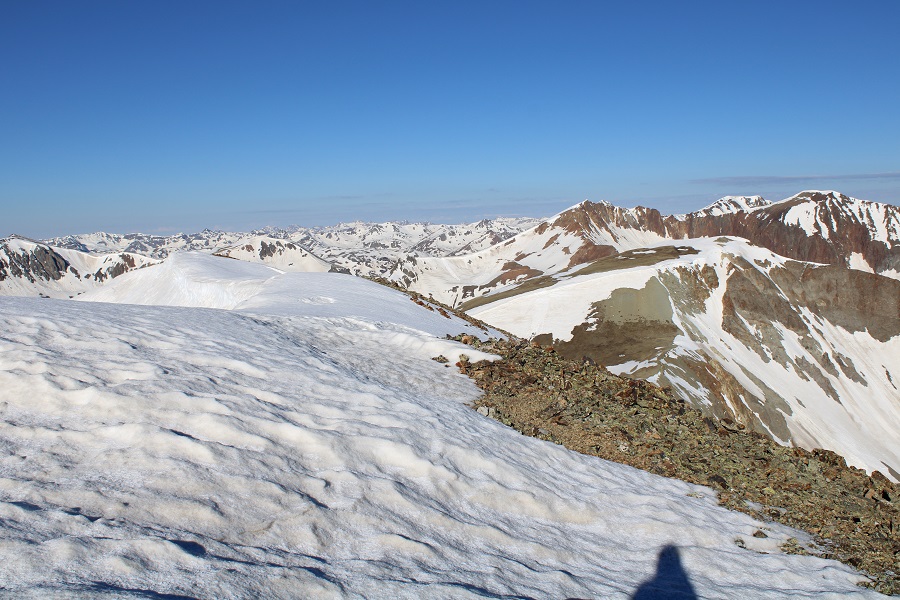
From the summit of P3, I made my way back to the ridge.
Back on the ridge, I followed it to the P3/P2 saddle
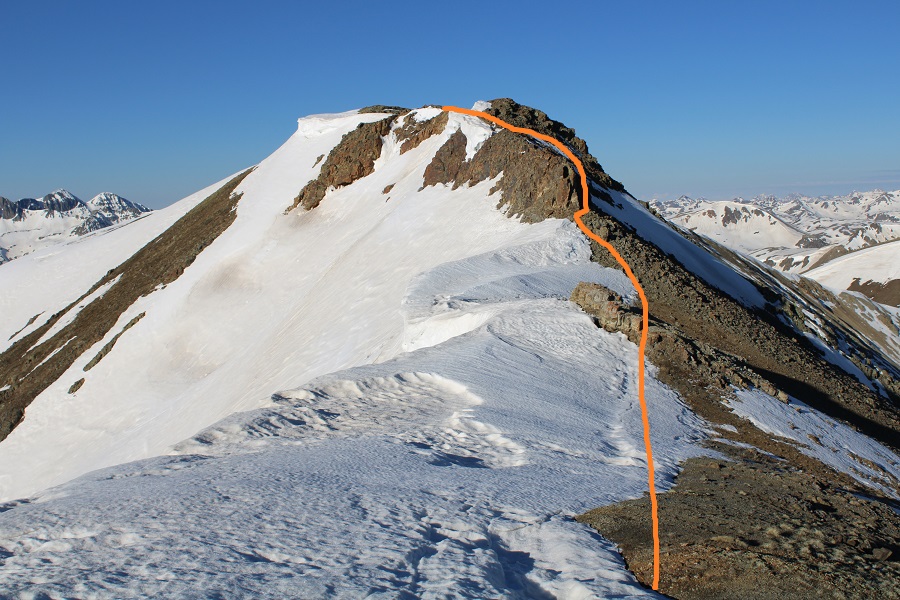
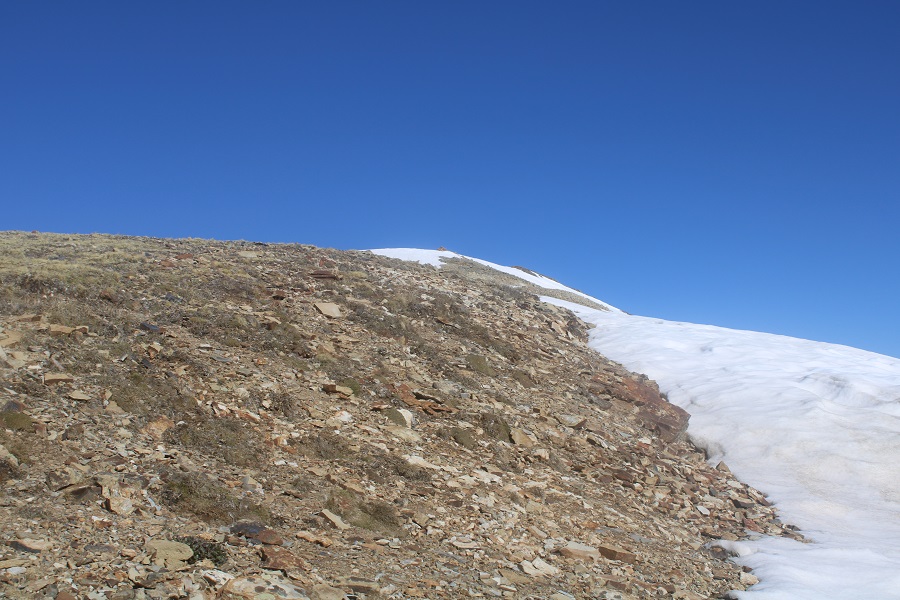
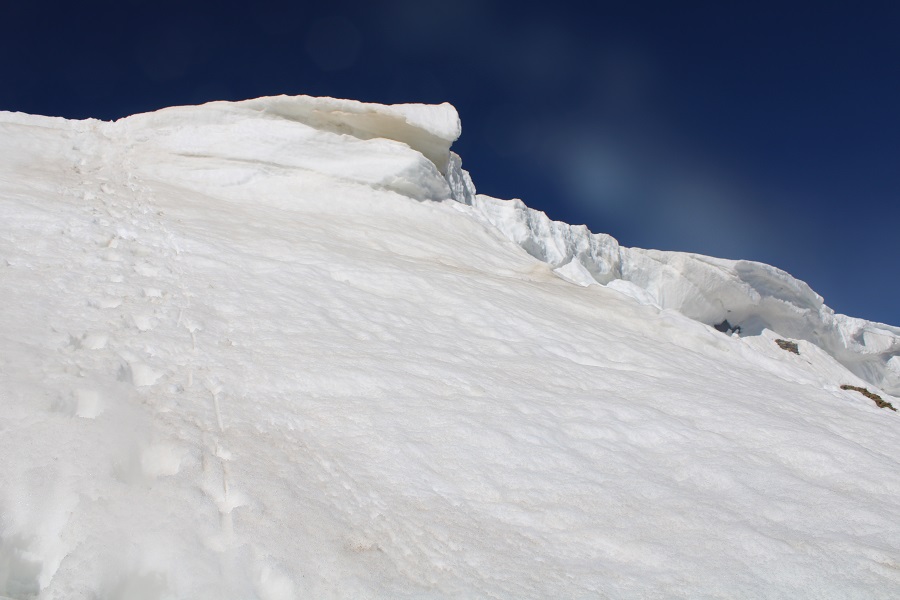
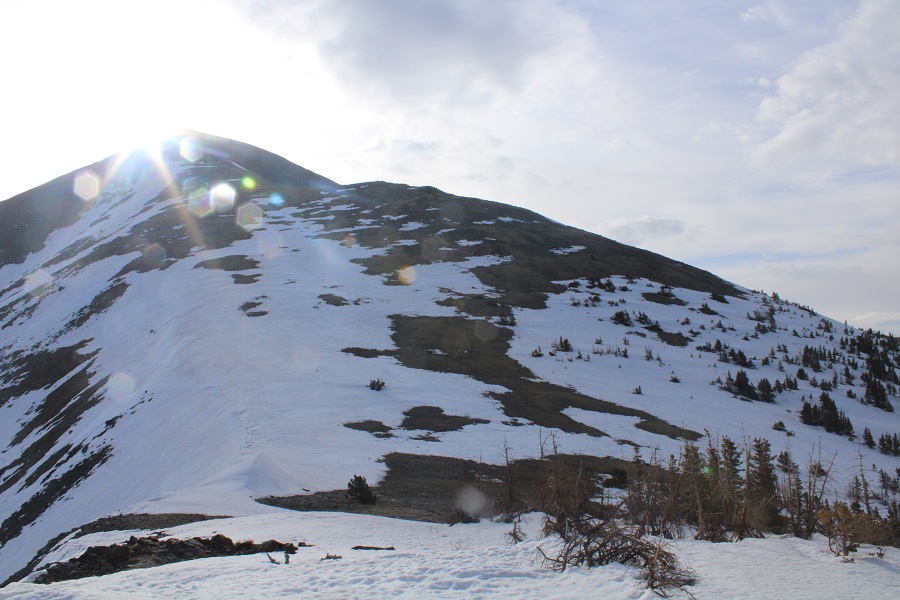
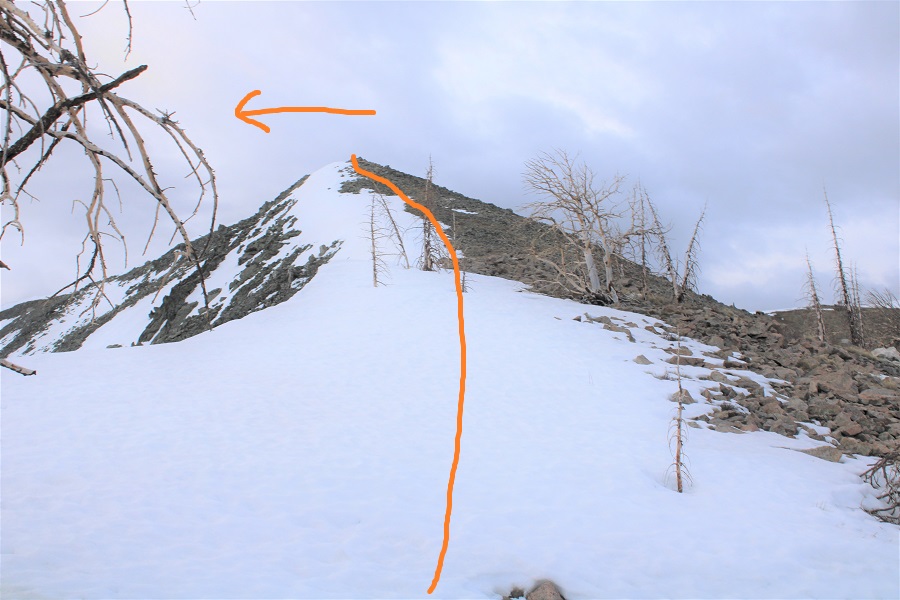
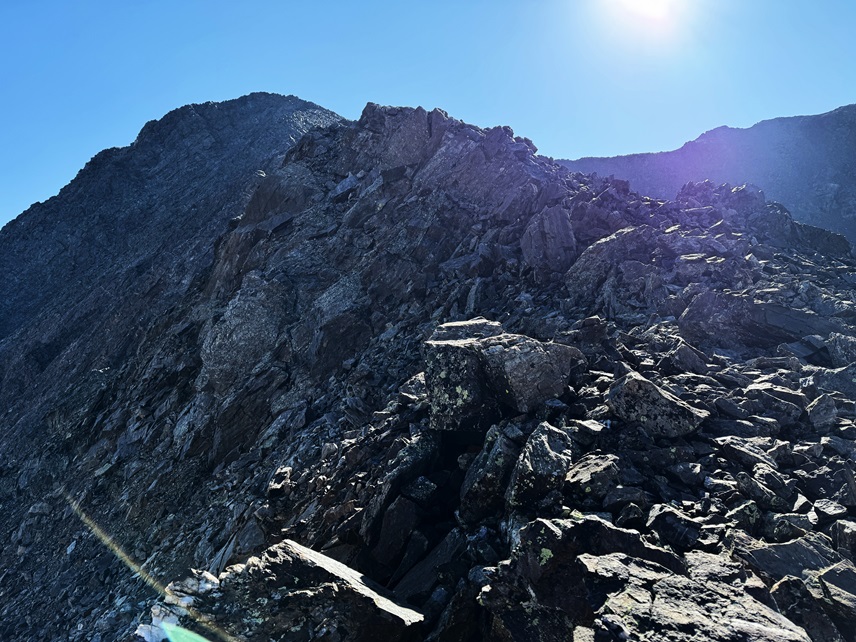
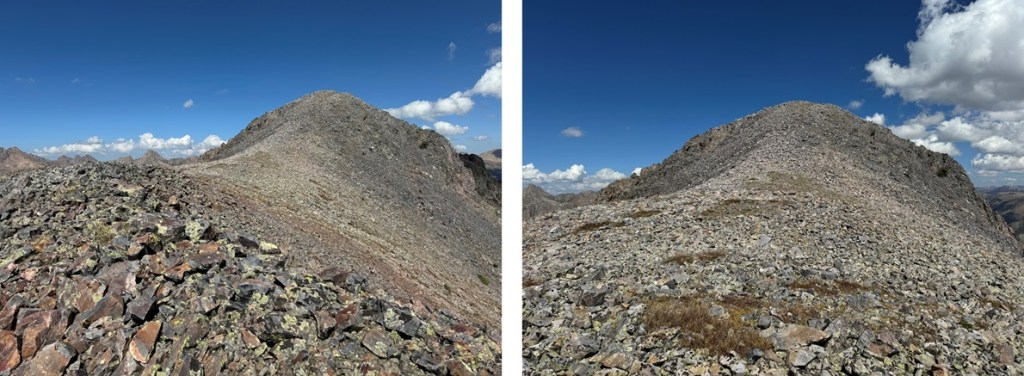
From the saddle, I headed up on talus and scree, following the ridge towards P2, but avoiding the large rock structures to the right.

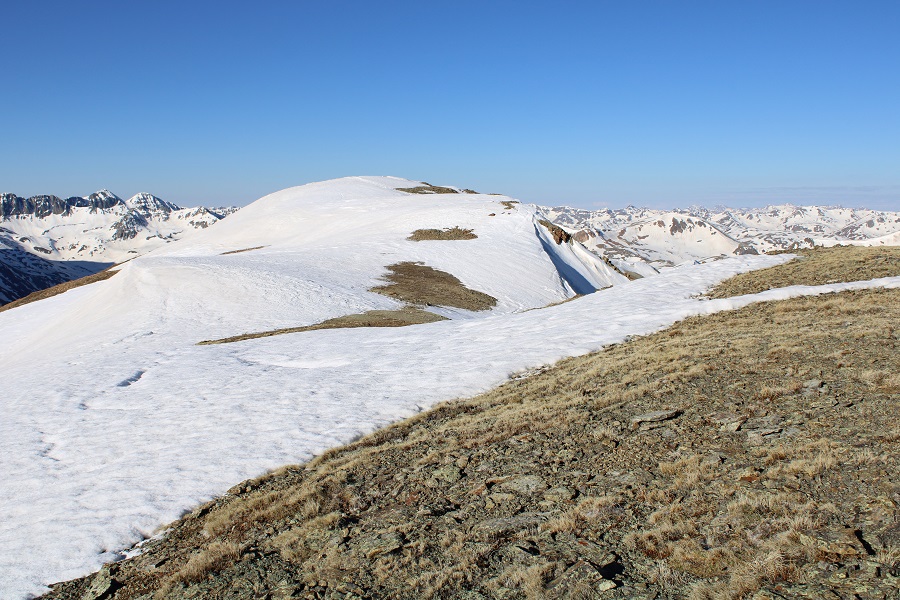
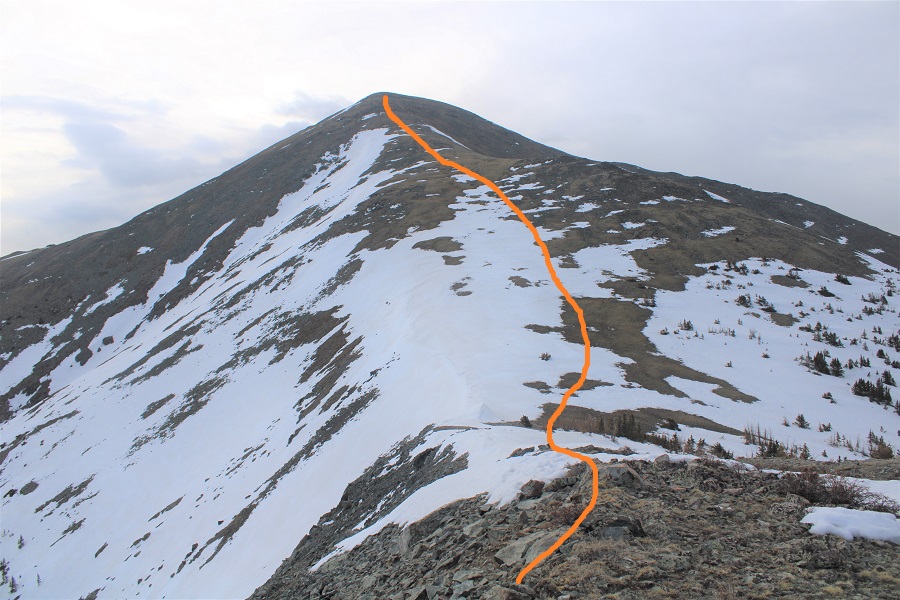
I then came to a sloping section, with a false summit. I made my way towards the false summit
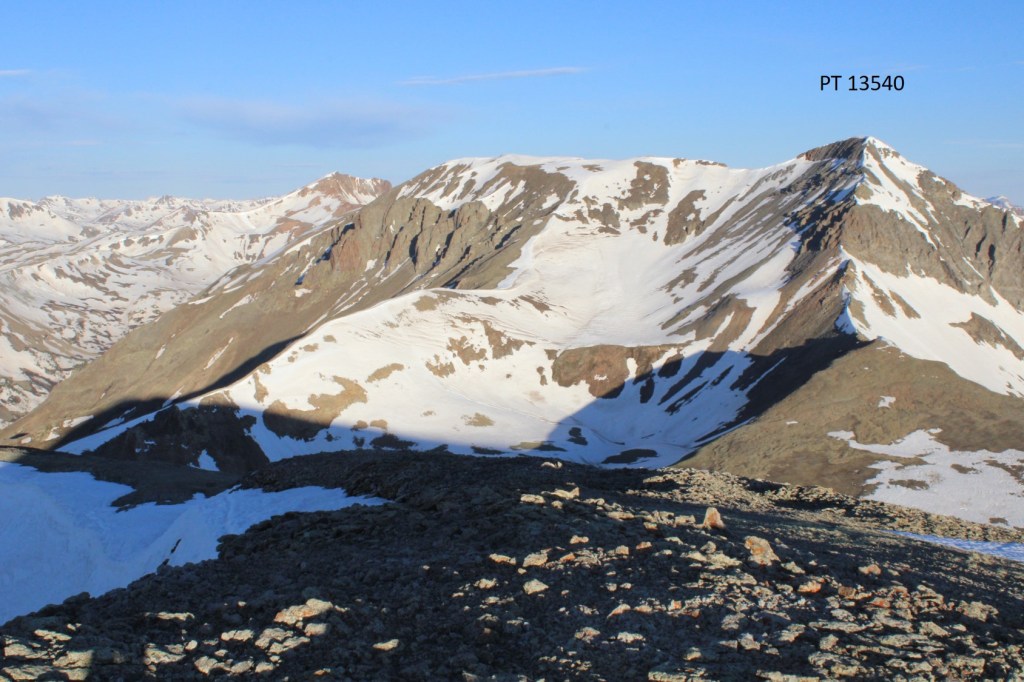
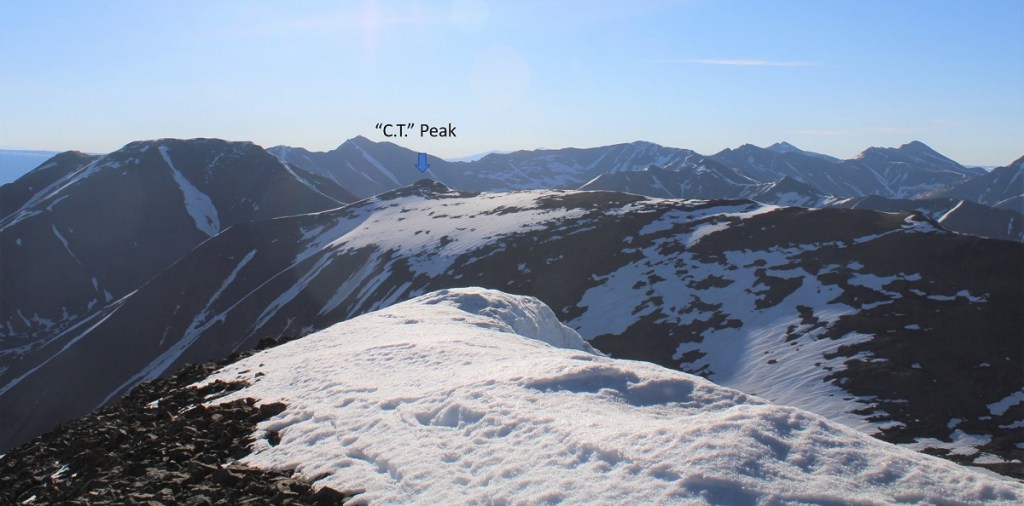
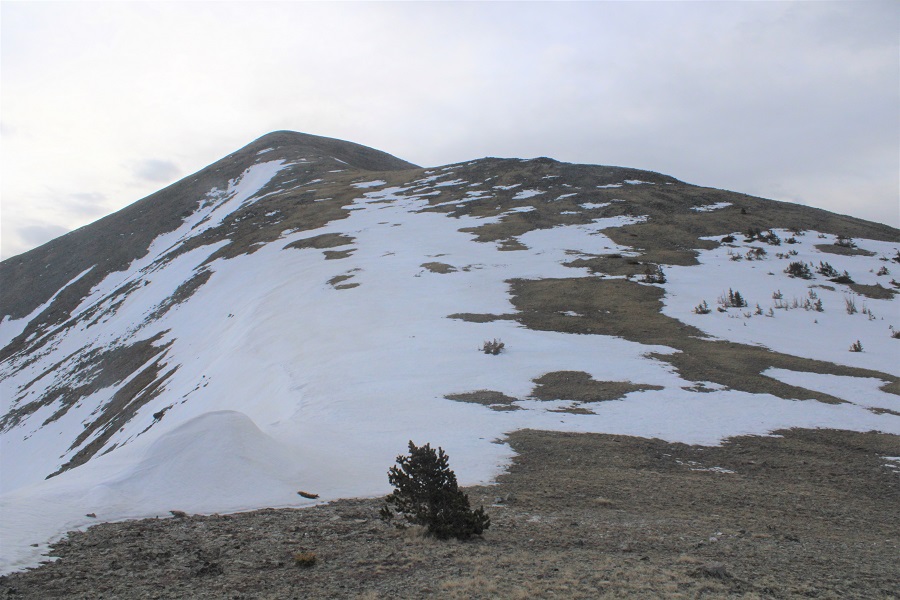
From the false summit, I could see the true summit of P2 in the distance.
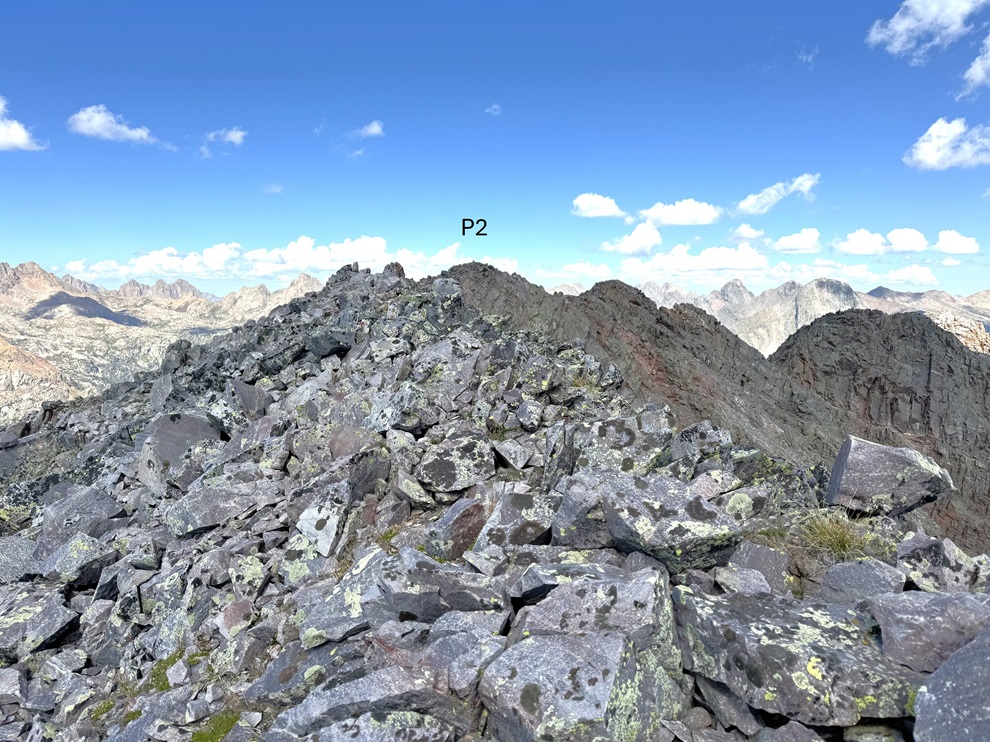
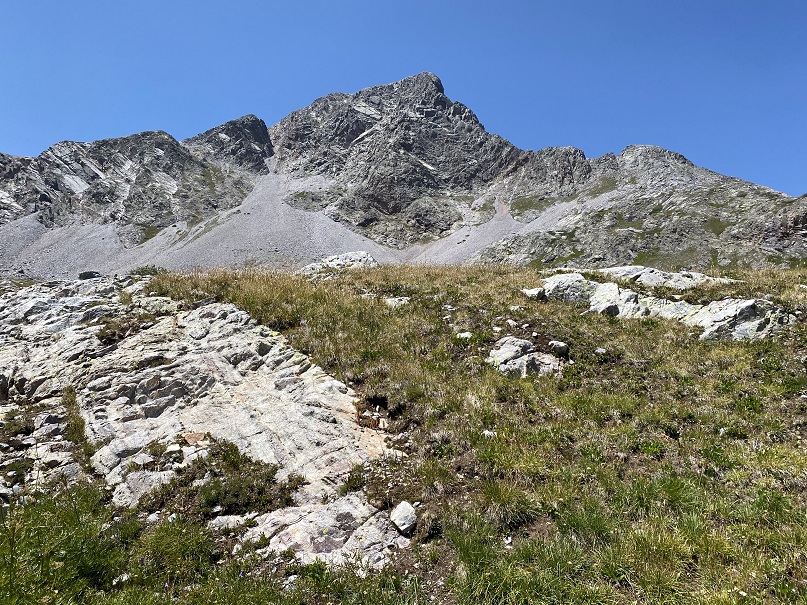
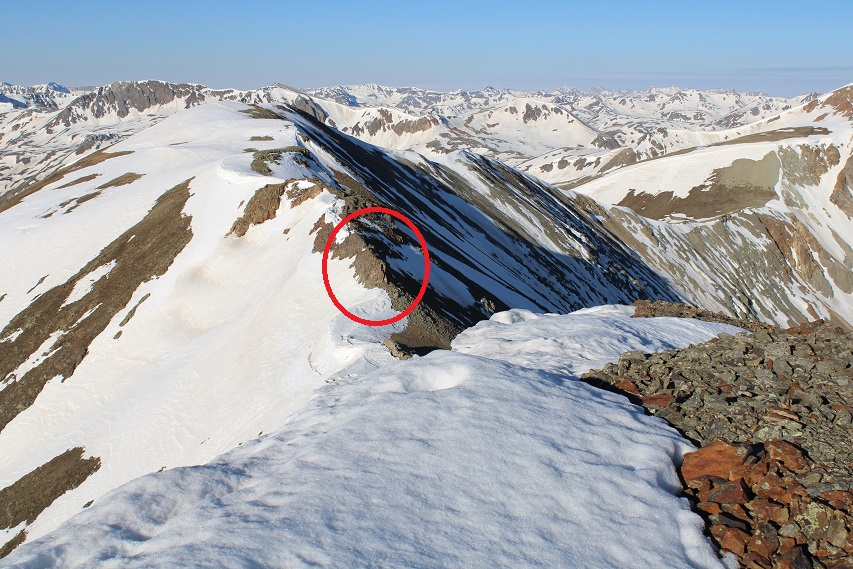
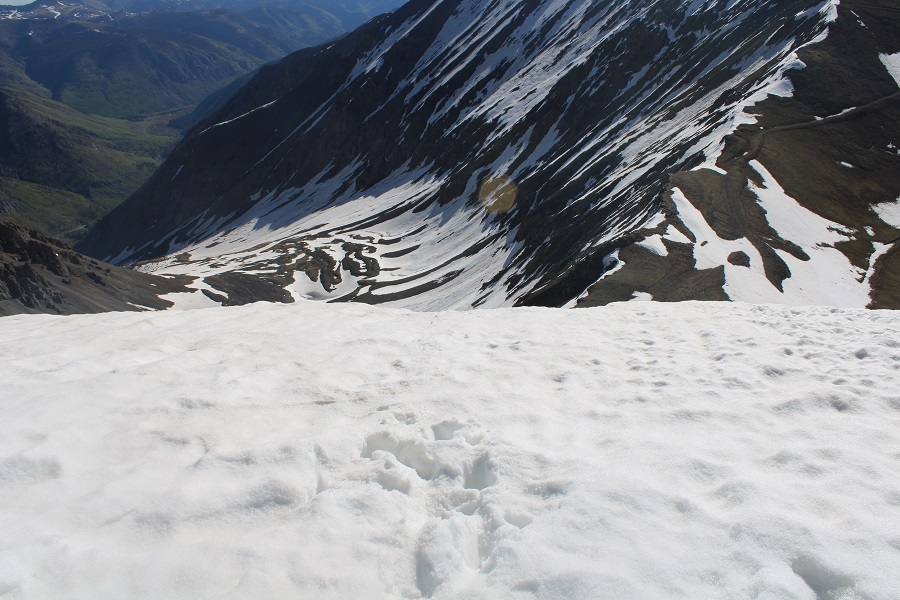
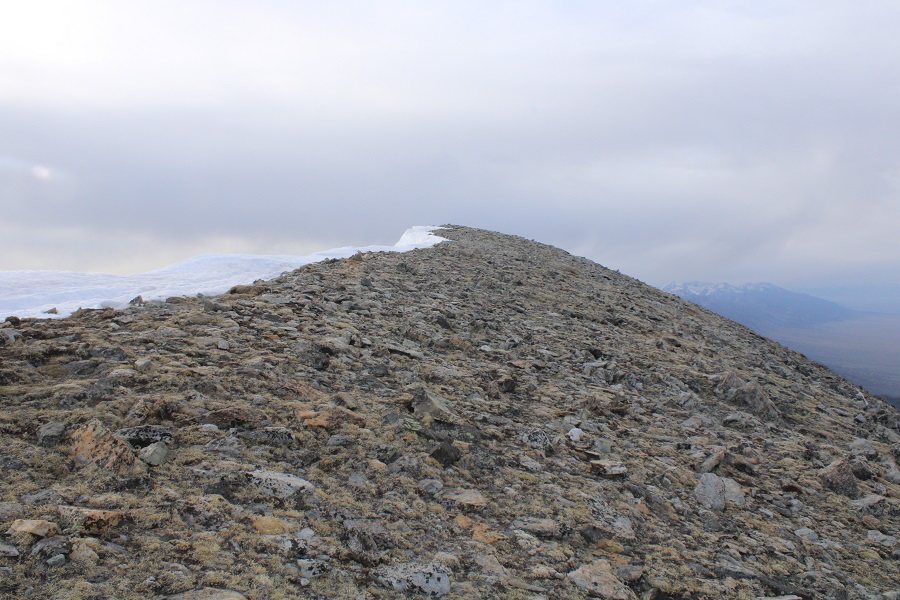
I followed the ridge, and this is what I saw in front of me

The climbing wasn’t what bothered me here. It was that long, yellow rock slab. I’d heard it was maybe 40 feet, but being there in person, it looked double that. I downclimbed a bit to get a better view, and the view didn’t get any better. Pictures DO NOT do this slab and it’s exposure justice.


At this point I had to make a very difficult decision. I do a lot of crazy stuff while hiking solo, but it’s always within my abilities, and I try not to take unnecessary risks. This rock slab was an unnecessary risk, and that’s coming from someone who’s favorite 14er is Capitol because of the knife’s edge. I did not feel safe downclimbing this slab solo, or even with another person present, although I would have tried it going from the opposite direction if I didn’t need to downclimb it again. I had about a 75% certainty if I attempted to downclimb this slab, I would fall. And the exposure wasn’t pretty.
One of the reasons my husband encourages me to hike solo is he knows I don’t take unnecessary risks in the backcountry, and I want to come home safe to him. I also want to be a Grandma someday, and I can’t do that if I die.
I knew there was another way to summit by dropping down to the left, so I got out my cell phone and checked the weather. The 10% chance of rain after 12pm had now become 80% chance of thunderstorms. I wouldn’t have the time needed to route find my way to the summit of this peak and make it back to my tent in time before the storm came in.
So, I turned around at the final crux to the summit and headed back down. I did a lot of scouting around while I was up there and know how I want to attempt this peak next time (I’m thinking of dropping down to avoid the edge or coming in from a different angle). I’ll be back to summit this peak another way.
So, I turned around and headed back towards the P3/P2 saddle.

Just before the saddle I turned left, and took the P2 gully down into the rocky basin.
I then followed the basin back to the drainage, staying mostly to the right of the basin.

When I came to the drainage, I turned right followed it, staying to the left of the pond, back to the ledge, following game trails where I could find them.

Just before making it to the waterfall I headed right, found my access gully, and headed down.
I descended the rocks, then headed back to my campsite.
I made it back to my campsite at 1:30pm, making this a 6.61 mile hike with 2539’ of elevation gain and tons of route finding in 7 hours.
Oh, and that storm? It dumped about 4 inches of slush, rain, snow, and hail on top of my tent in about 2 hours. So now, I had another difficult decision to make: Stay there overnight and wake up at 5am to a tent frozen solid, pack it up, and hike out, or just hike back to Beartown now. For those of you who know me (and my Raynaud’s), you know what I did. I packed it up and headed back to Beartown, hiking in the dark to make it back to my truck in time for my work meeting in the morning. It was NOT a fun hike out, as the trails were now covered in slush (I slipped a few times in the granite rock sections) but I stayed (relatively) warm.
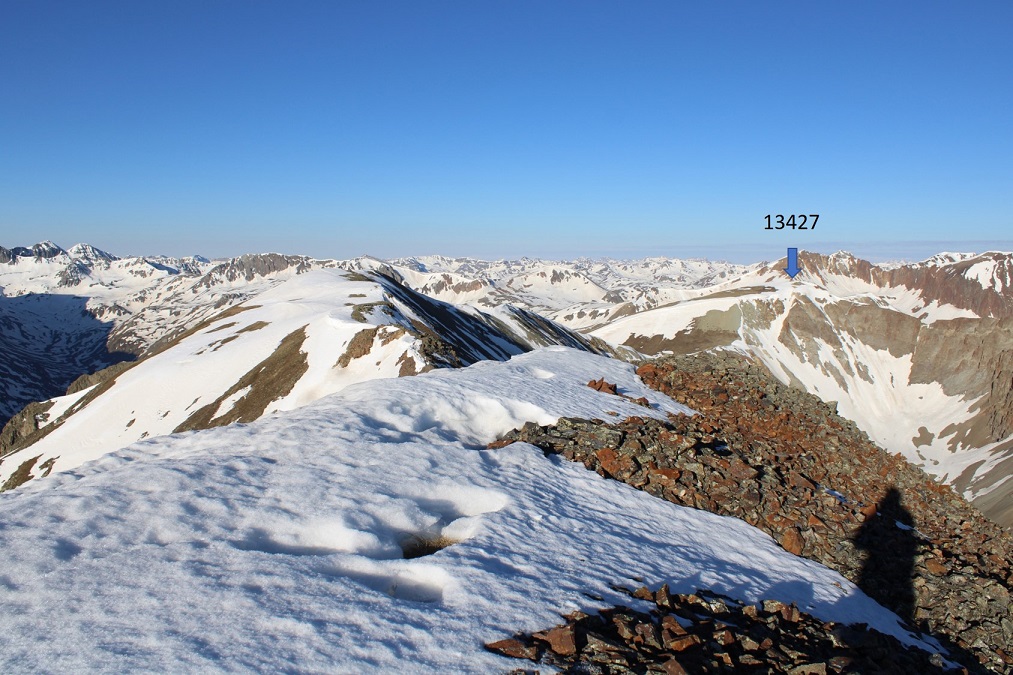
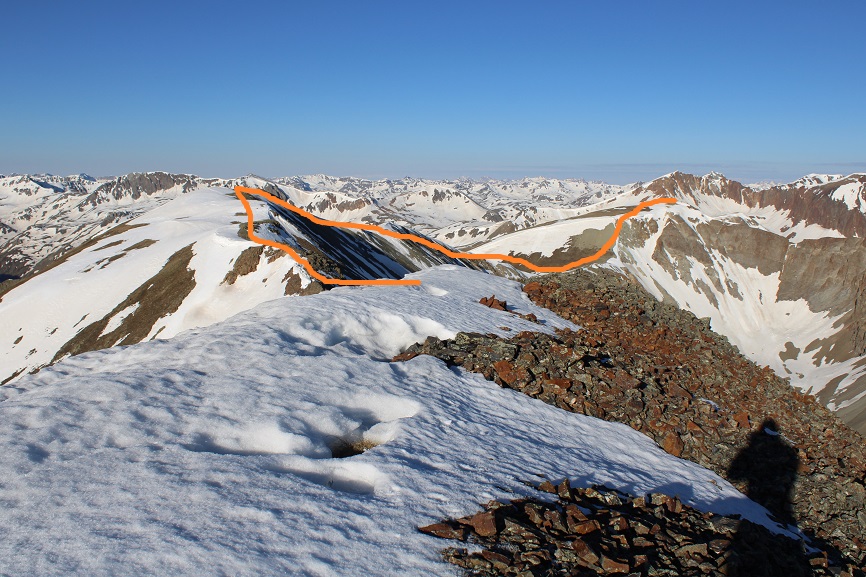
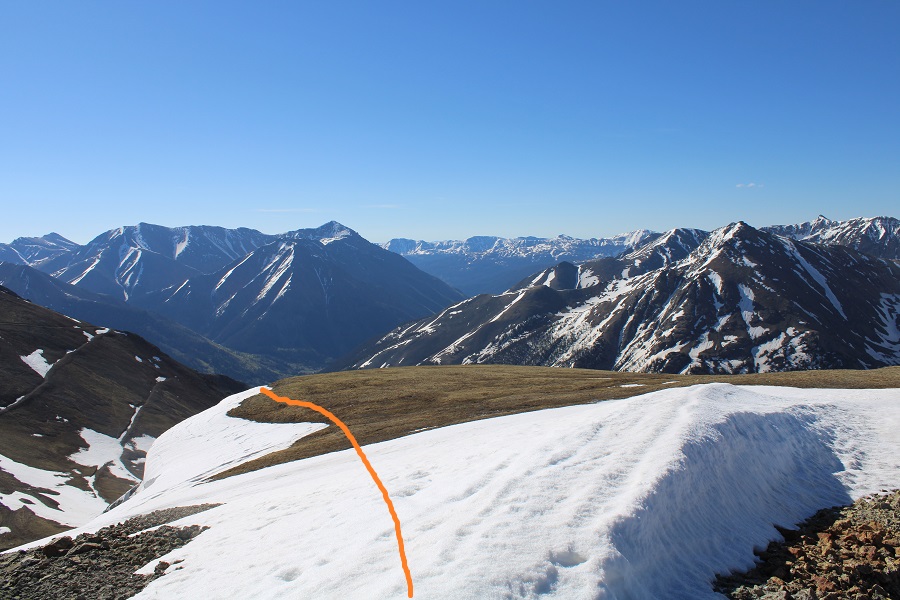
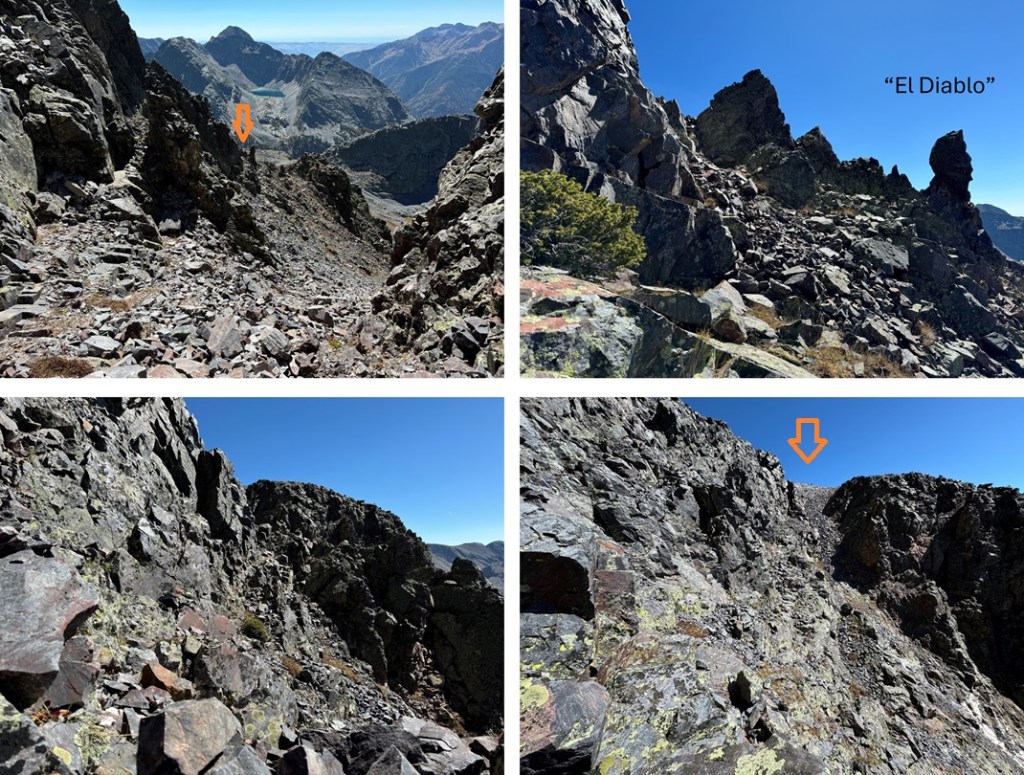
From the saddle of P3 and P2, I followed the ridgeline to 13190’, where you can see the false summit. From below the false summit, I went left (east) and found a gully. I descended this gully, but not all the way. Instead, I stayed high and traversed these rock outcroppings. This route is basically class 3 and choose your own adventure. I stayed high so as not to have to re-gain elevation, and this worked for me. Here are pictures of the route I took:
See this rock formation here? While it’s difficult to see from this angle, I’m nicknaming him “El Diablo”, because to me he looks like a lot of things, but also closely resembled my High School Mascot, the Diablo. Yes, my high school mascot is the devil. For middle school we were the Banditos (imagine Yosemite Sam as a Mexican, complete with the mustache and beard, bullet harnesses and a gun in each hand). Alas, after I went there the parents got upset and changed things and now they’re the “Leopards”. The parents keep trying to change the Diablo mascot as well, but the students won’t let them. In any event, I digress. I went to the right of El Diablo on my way in and used him as a spotting point on my way out. After passing El Diablo I could see a large gully to the right. I stayed high on class 3 terrain and climbed the gully, which brought me to the base of the rock slab.
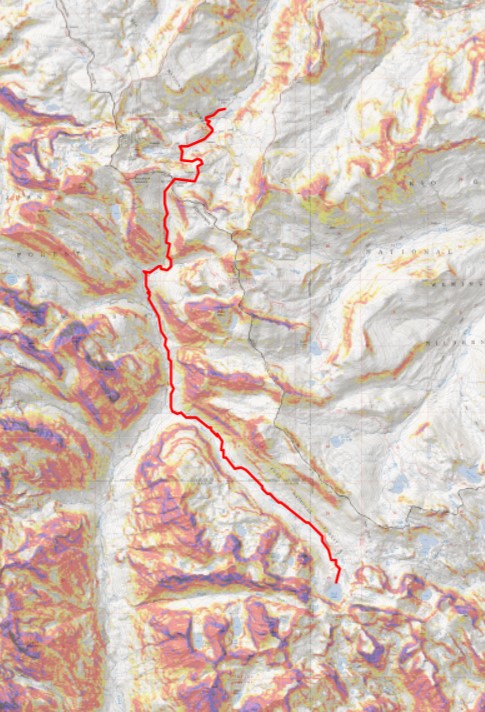
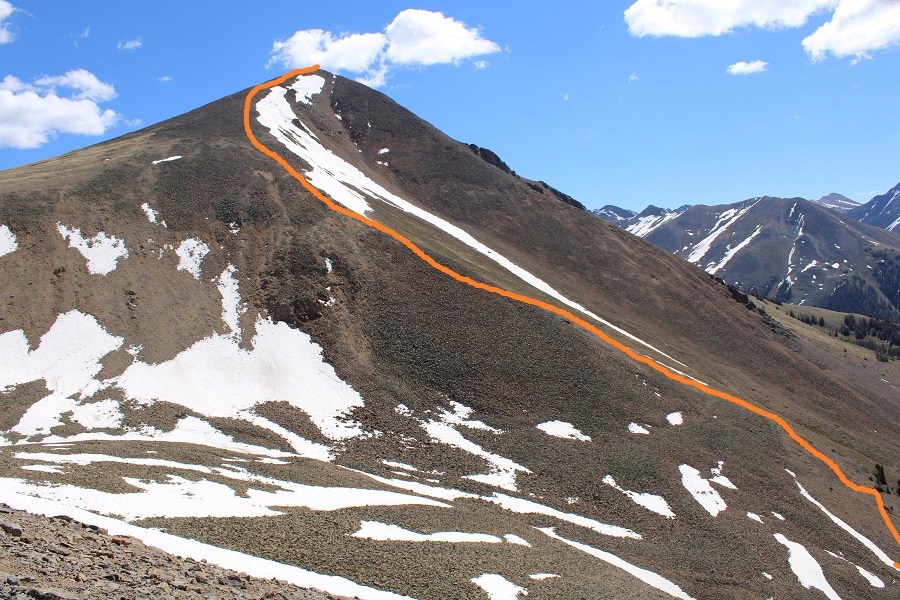
From there, I turned left, and it’s a class 3 climb to the summit. I tried a lot of different routes that others said ‘went’, but I found climbing straight up the face was the easiest way to summit and stayed at easy class 3. Climbing straight up the face is easier than it looks, with lots of ledges. From there I was on a small ridge, and it was 10 feet or so of walking northeast to the summit. Here’s the overall route:
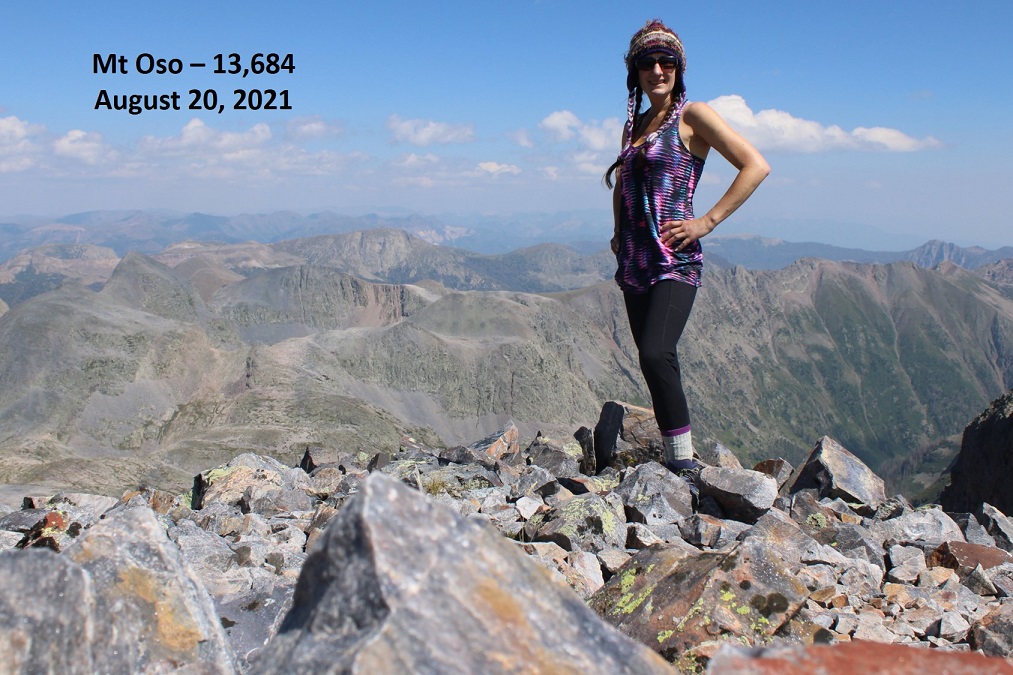
And my summit Photo:

P2:
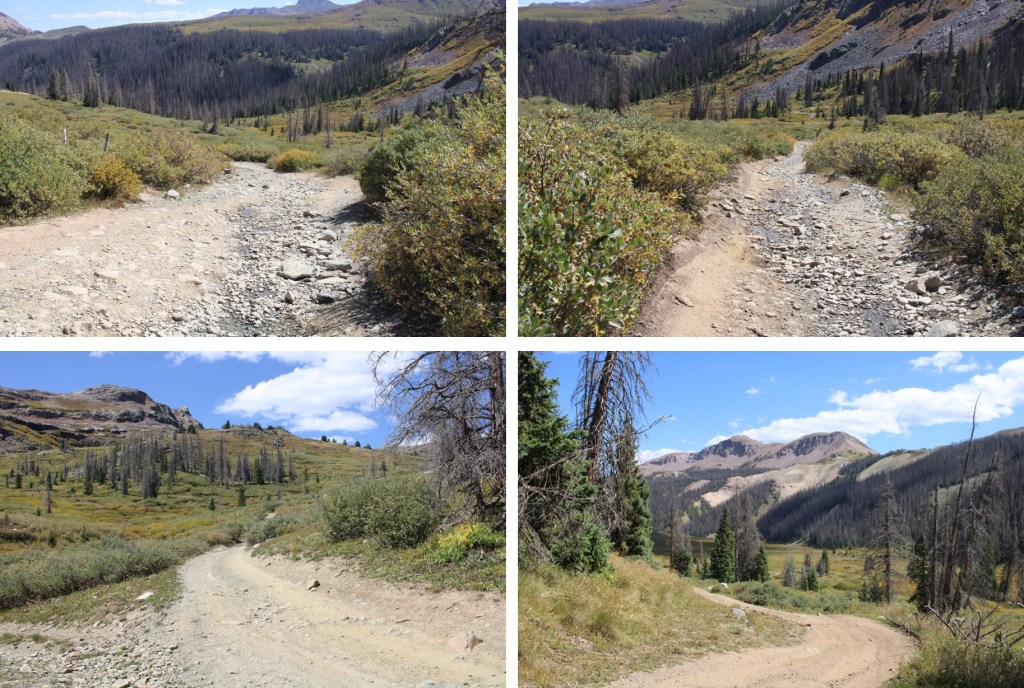
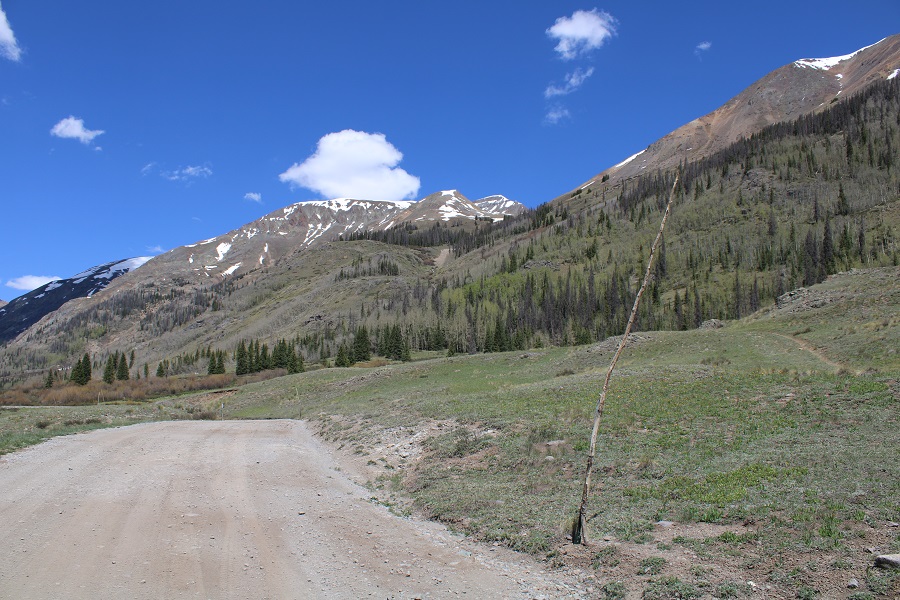
Here are some pictures of the route back:

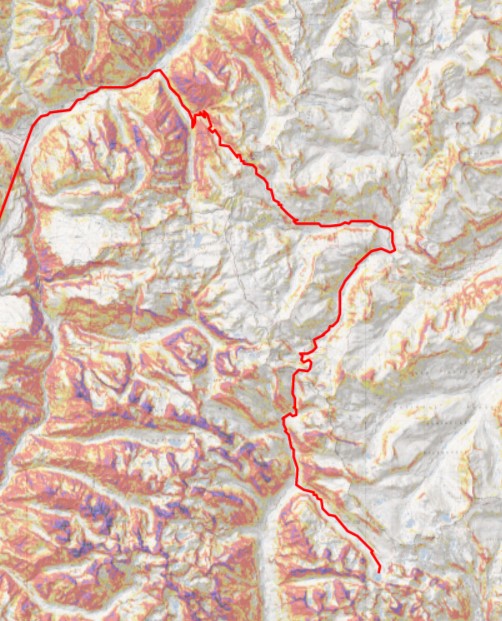
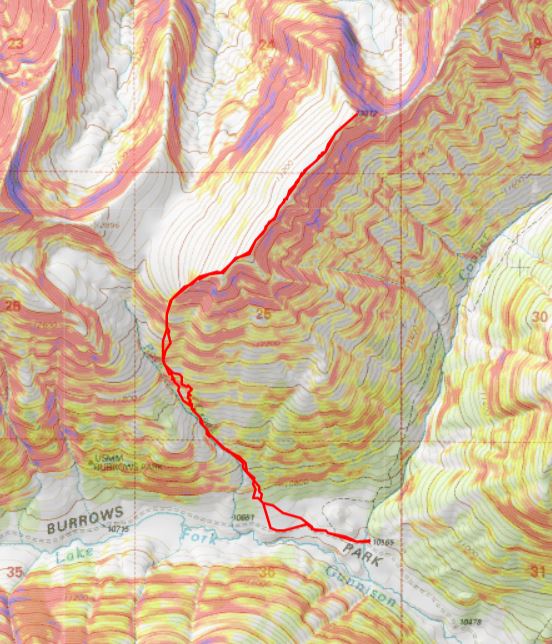
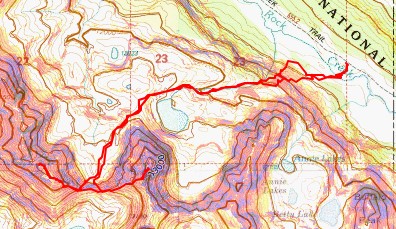
And the TOPO for P2

On to the next trailhead!