Mountaineering – The Freedom of the Hills 5th Edition  (notes)

These notes were taken in order of appearance.

Many of these points I already knew but thought pertinent to remind
myself

I did not include much technical rock climbing information, as I don’t
believe I’m ready for that yet.


P. 29 – the 10 essentials
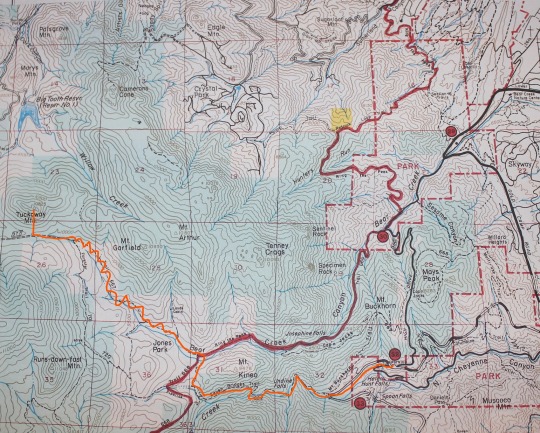
  1. Map

  2. Compass

  3. Flashlight / headlamp with spare bulbs and
    batteries

  4. Extra food

  5. Extra clothing

  6. Sunglasses

  7. First aid supplies

  8. Pocket knife

  9. Matches, in a waterproof container

  10. Fire starter


P. 60-61


P.77 – Good navigators are never truly lost – but having learned
humility through years of experience, they always carry enough food, clothing,
and bivouac gear to get them through hours of even days of temporary confusion.

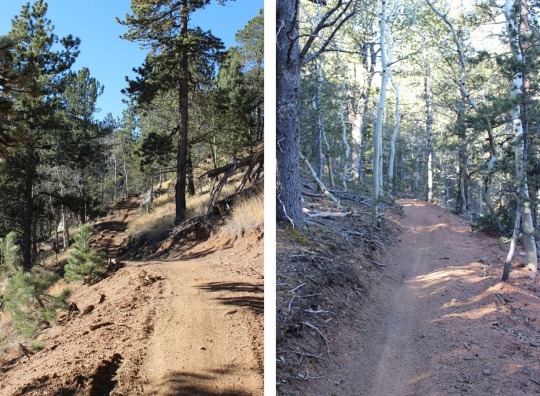
P. 83 – walk in a single file to protect trail-side vegetation

P. 85 – Screeing – shuffling
your feet to start a minor slide of pebbles and riding it down, in a standing
glissade.


P. 86 – When crossing a large stream / river, cross at the widest part,
as it will be the shallowest.

P. 92 – Rope Care:

  • A rope used daily should be retired within a
    year

  • A rope used during most weekends should give
    about 2 years of service

  • An occasionally used rope should be retired
    after 4 years

  • After one very severe fall it may be wise to
    replace your rope.  New ropes are often
    certified to take 5 falls, but if your rope is not new, consider all the
    factors affecting its condition. 


P. 96 -97


P. 107


P. 119


P. 124 – Mϋnter Hitch – the only
traditional belay method that provides sufficient friction regardless of the
angle between the ropes entering and leaving


P. 125-126 –The Hip Wrap – It’s
main advantage is the speed with which you can belay a follower who is moving
rapidly over easy ground.
  It can be set
up quickly and requires no hardware.


P. 135 – The three factors a belayer can control are

  • Strength of hand grip

  • Choice of belay method

  • The angle of the ropes


P. 139 – Proper and improper positioning of gates on double carabiners


P. 147 – To gain stability while rappelling, your legs must be nearly perpendicular
to the slope.


P. 149 – Potential Problems – Shirttails, hair, chinstraps from a hard
hat, and just about anything else that can get caught in the braking
system. 
Keep a knife handy in case you
have to cut foreign material out of the system.


P. 162-167

  • Mantel
    Down-pressure technique.  Place both
    hands flat on a ledge at about chest height, palms down, with the fingers of
    each hand pointing toward the other hand. 
    Then raise your body up on stiffened arms. 

  • Counterforce
    – is the use of pressure in opposing directions to help keep you in
    place. 

  • Stemming
    A counterforce technique that lets you support yourself between two spots on
    the rock that may be of little or no use alone. 

  • Undercling
    – The hands, palms up, push up beneath the lip of the rock while the body leans
    out and the feet push against the rock.

  • Lieback
    – Another form of counterforce, uses hands pulling and feet pushing in
    opposition as the climber moves upward in shuffling movements. 


P. 174 – Dihedrals (inside
corners) may be climbed by pure stemming.


P. 187 – Ethics –

  • Preservation of the rock is paramount

  • It’s almost never justified to add a bolt to an
    existing route.  If you feel you can’t
    safely climb the route as it is, don’t try it.

  • Keep other climbers in mind while climbing, both
    in your group and of other groups


P. 213 – Determining the fall
factor
: dividing the length of a fall by the length of rope run out from
belay.
  The higher the fall factor, the
greater the force.
 

  • Fall factor is lower when the length of rope run
    out from belay is relatively great because a long rope stretches more and
    absorbs more energy than a short length.


P. 227 – Hauling packs – You may decide to shed your pack sometime
because you can’t fit inside a chimney with it or because the weight would make
a pitch too difficult. 
Then you’ll have
to haul the pack up after you.

  • Trail a rope behind you as you climb, tied to the
    pack down below.


P. 259 – All ropes should be different colors


P. 286 – Self Arrest

  • The hands hold the axe in a solid grip, one hand
    in the self-arrest grasp with thumb under the adze and fingers over the pick,
    the other hand on the shaft just above the spike

  • The pick is pressed into the snow just above
    your shoulder so that the adze is near the angle formed by neck and shoulder.

  • The Shaft crosses your chest diagonally and is
    held close to the opposite hip.  Gripping
    the shaft near the end prevents that hand from acting as a pivot around which
    the spike can swing to jab the thigh.

  • The chest and shoulder are pressed strongly down
    on the ice-axe shaft

  • The spine is arched slightly away from the
    snow.  This arch is crucial:  it places the bulk of your weight on the axe
    head and on your toes or knees, the points that dig into the sow to force a stop.  Pull up on the end of the shaft, which starts
    the arch and rolls weight toward the shoulder by the axe head.

  • The knees are against the surface, helping slow
    the fall in soft snow.  On harder
    surfaces, where they have little stopping power, they help stabilize your body
    position.

  • The left are stiff and spread apart, toes digging
    in, but if you have crampons on keep them above the snow until you’ve nearly
    come to a halt.  A crampon point could
    catch on hard snow or ice and flip you over backward.


P. 301 – Couloirs – Safe passage
through a couloir
is usually depends on time of day.  They can be safe in early morning when the
snow is solid and rocks and ice are frozen in place.
  It’s often a different story later in the day,
when they can turn deadly.
  Gullies are
the garbage chutes of mountains and with the arrival of the sun they begin to
carry down such rubbish as well as avalanching snow, rocks loosened y
frost0wedgin, and ice blocks weakened by melting.
  Most of the debris comes down the
center.
  But even if you keep to the
sides, listen for suspicious sounds from above and keep an eye out for quiet
slides and silent falling rock.


P. 303 –


P. 306 – Four out of five avalanches strike during or just after a storm. 


P. 312 – Traversing snowy slopes
– After you’ve checked your avalanche beacon, put o mittens and warm
clothing.
  Get set to jettison your gear
so it can’t drag you down in the event of an avalanche.
   Loosen
the shoulder straps and undo the waist and chest bands on your pack.
 

When the route lies up a slope, head straight up the fall line instead
of switchbacking (which undercuts the snow). 
Only one person moves at a time, and everyone else watches from safe
places, ready to should if a slide starts.
 
If the climber is on belay, don’t tie the rope directly to the belayer,
who would risk being pulled in if it proves impossible to stop a climber hit by
a wet, heavy avalanche.


Avalanche Rescue:  The rescue effort starts even before the
avalanche has stopped.

  • Someone must pay attention to where a victim is
    first caught, where the person disappears beneath the snow, and where the point
    of disappearance on the moving surface of the avalanche finally stops, and be
    able to relate these three points to fixed objects, such as trees or
    rocks.  With this information, the search
    area is immediately reduced in size. 

  • Then mark these three points and search. DO NOT
    GO FOR HELP.  This is a critical
    principle of avalanche rescue.  The
    chance of a person surviving depends on everyone staying put, searching efficiently,
    and digging the victim from the snow.  You
    can go for help after all search efforts prove to be futile.

  • Select a search leader so the operation will be
    thorough and methodical.  Approach the
    scene carefully, posting an avalanche lookout in case of another slide.  Start with a quick scruff search of the snow
    surface, looking for someone partially buried, castoff equipment, or any
    logical spot the victim might have come to a stop against a tree or rock. 

  • The next step is a thorough search with avalanche
    beacons, or snow probes.

  • A probe is anything you can use to pole into the
    snow in hopes of finding the victims’ body. 
    Set up a probe line, probing at every step. 


P. 323 – Crevasse Rescue –When
the climber in front of you suddenly disappears beneath the snow,
 Do not stop and think.  Your immediate reflex must be to drop into
self-arrest (facing away from the direction of the pull)in the snow and hold
the fall.


P. 397 – Expedition Philosophy
– Members of an expedition need a common code to live by during the weeks they
struggle together.
  A good one is summed
up in three promises you and your teammates make:

  • To respect the land

  • To take care of yourselves

  • To come home again


P. 403 – Leadership
Leadership starts with each individual.
 

  • Individual leadership means being aware of the
    group and its progress, whether or not you’re the formal climb leader. 

  • The complexities of leadership grow as a party
    size and trip length increase. 

  • The leader cannot do everything, nor is that desirable.

  • A leader is also a teacher.

  • Leaders prepare carefully to meet any major
    disaster that could befall their party. 


P. 427 –


P. 438 – Lightning facts:  Current flows because of a voltage difference
between two points along its path. A person bridging two such points with some
part of his or her body presents a second and probably better path for the
current.

  • Avoid moist areas, including crevices and
    gullies

  • Span a small distance (occupy as little area) as
    possible.  Keep the feet close together;
    keep the hands off the ground

  • Sit, crouch, or stand on insulating objects if
    possible – a coiled rope or sleeping bag, preferably dry.

  • Stay out of small depressions; choose instead a
    narrow slight rise.  A small detached
    rock on a scree slope is excellent.

  • Stay away from overhangs and out of small
    caves.  Large caves are very good if one
    keeps clear of the walls and entrance. 
    However, a cave might well be the lower terminus of a drainage crevice,
    and should be avoided. 

  • When on a ledge, crouch at the outer edge, at
    least 4 feet from the rock wall if possible. 
    If there is danger of falling off in event of a shock, tie in crosswise
    to the prospective flow of current.  Make
    the tie short and avoid placing the rope under the armpits.

  • Rappelling when lightning is imminent should be
    avoided, but may be a valid calculated risk if it is the quickest way to escape
    a danger zone.  Dry synthetic rope
    presents the minimum hazard.

  • Contrary to popular belief, metal objects do not
    attract lightening as such.  However, in
    the immediate vicinity of a strike, metals in contact with one’s person may
    augment the hazard from induced currents. 
    Induced currents usually are quite small, but when added to ground
    currents may mean the difference between life and death.  Thus it is best to set aside all metals, but
    to keep them close by (don’t worry about an article buried in the pack).  A metal pack frame might well be positioned
    to provide a more attractive path for ground currents beside and past one’s
    body.  At distances greater than 100 feet
    from a possible strike there is no need to divest oneself of metal
    objects. 

Almagre – 12,367 and Microwave Tower 12,349

My directions said this was a 6.5 mile round trip, with 1000
feet in elevation gain and some route finding.
Wrong.  Wrong.  Wrong!!!

You see, the problem with hiking routes that aren’t hiked
often is you often times need to rely on just one person’s post about the area
because no one else has given any information.
Because this was supposed to be a relatively short hike I woke up at
5am, ran 5 miles on the treadmill, did an hour of yoga, and was on my way.

I looked at how much gas I had:  just less than half a tank, and since I was
only going about 30 miles I figured this would be plenty.  To get there I needed to take Old Stage Road
for 19.6 miles, which took a lot longer than I’d anticipated:  This is a 2wd dirt road normally, turned 4wd
in the winter, but there were a lot of turns and I never went more than 15mph
because it was iced over.

I watched my gas gauge quickly and steadily drop and started
to get concerned I’d get stuck out there, 20 miles off a dirt road, out of
gas.  I mentally gave myself a point on the
gas gauge of no return and kept driving towards the trailhead.  If worse came to worse I’d hike an extra 5
miles of so to take this hike… it wasn’t that long anyway.  I turned right onto forest road 376 and went
for another 3.2 miles to the trailhead at the junction of a locked gate/dead
end and Forest Road 379 (which is part of the ring the peak trail and also the
part that still needs to be worked on, depending on which way you turn).

I was the only car there as I grabbed my gear and headed
east up the 379 at 9am.

This part of the trail was quite steep, and since it’d
snowed recently quite slippery.  I didn’t
put on my microspikes, but I did use my trekking pole quite a bit.

I was told to hike to a small meadow and turn left.  So I did and the trail went nowhere.  I was supposed to be heading towards a
saddle, but the trees were too tall for me to see the saddle.  Just for reference, DO NOT TURN LEFT HERE:

I backtracked and looked at my map and the area around
me.  I was near the microwave tower, and
I could find where I was on my map.  I
could tell by looking at my map the road I went on continued all the way to the
summit of the microwave tower and continued on to Almagre.  This was not how I wanted to summit, but I
wasn’t ready to give up yet, so I continued on the road.  Eventually I came to a rather large meadow.

I realized this must have been the meadow they meant in my
directions, and headed west, looking for that saddle.  At the very northwest part of the trail I
noticed another trail, and took that a short distance to a hold in the fence

Now I was getting somewhere!
This vaguely went along with my directions, and I was following my map,
so I continued up the saddle.  This was
no walk in the park!  The picture below
doesn’t do that scree justice!  It was
steep and slippery and much larger in real life (steeper too)

I made it to the top of the saddle and looked for that trail
that was supposed to be so obvious:  It
wasn’t there.  I’m blaming the snow, but
no worries, as that didn’t stop me.  I
could see the microwave tower, as well as the route to get there, and decided
to just head towards that so I could get in some route-finding.

I headed east, and for some reason this easy hike became
difficult.  I haven’t been above treeline
in a month and a half, and my body seems to have forgotten how to breathe!  Yes, it was a steep slope and physically
challenging, but this was difficult!  I
was sweating up a storm in 30 degree weather.
My calves and shins were screaming.
I kept going.

About here it became difficult to breathe. I hadn’t tied my
hair back so it was a bit unruly, but I figured I’d fix it at the summit.  I just got mad at myself for being tired so
quickly and continued onwards.  Woohoo!  I could finally see the microwave tower
again!

This gave me hope, and pretty soon I summited to a much
larger microwave tower than anticipated!

The views were absolutely amazing!  I dropped my bag and took a few pictures

I wanted to take a summit photo to prove I’d made it, and
reached into my bag to get my hairbrush and hat.  Unfortunately, both were left on the front
seat of my truck.   Drat!  Oh well, summit hair don’t care!  I was just lucky it wasn’t windy today…

I got my gear back together and looked at the route before
me:

I took a look at my topo map and realized I had two
options:  I could hike the ridge to
Almagre or the trail down to the Stratton Reservoir, and then back up
Almagre.  It looked like there was snow
either way, but experience has told me rocks mean ice, so I decided to take the
road.  My immediate views of Colorado Springs
were amazing!

I’m not sure this was in the end the best choice, as it was
covered in snow.  It was kind of cool
seeing all the animal tracks though!

I rounded a corner and could see both Pikes Peak and Almagre
and thought it was the most amazing view ever!

I kept going and could see the rest of the route before
me:  Stratton Reservoir (or what’s left
of it) on the left, and the road to the right.

I made it to the reservoir and saw this… I’m not sure what
it is, but it’s obviously not put there as a shelter from lightning…

I crossed the reservoir and headed north

This is where the snow completely covered the trail, but
only enough to get inside my hiking boots.
I was continuously hiking through about 6 inches of snow, but it was up
to 3 feet in areas.

The trail rounded the mountains, and pretty soon I could see
Almagre in front of me. The trail up to the summit covered in snow…

The summit was worth slogging through all that snow!  I had a grand view of Pikes Peak, and an
answer to ‘what it was and how to get to that patch of green land I can see
from A-frame’. I’ve been wondering that for years, and today I had my answer!  It was Almagre!  Awesome!
Now I need to spend the night at A-frame again so I can appreciate it
once more with new knowledge.

I took some pictures to prove I’d summited (once again, summit
hair, don’t care) and headed back down.

Here’s a video of the summit view:

I could have taken the ridge back to the microwave tower and
back down, or any number of routes, but I didn’t feel like summiting again, and
I wanted to see where the road led. Maps are all well and good, but nothing is
as good as visually seeing the trail, as well as the mountains before me.  I’d hiked most of them in the past month, and
wanted to see them from this angle.  So
when I made it back to the reservoir  As
I was hiking here I saw someone hiking up the trail, towards the Microwave
tower.  I’m not sure which route he’d
taken because I never saw his footprints. I’m assuming he climbed over from the
west side of the reservoir.

I headed east along a trail that quickly took me to a locked
gate (easily avoided).

From here on out the rest of the trail was lined with 6
inches of snow.

I need new hiking boots (mine have holes) so this was
particularly miserable for 2 reasons:
Sand and rocks getting inside my shoes and snow keeping them wet.  At this point I wished I’d brought
gaiters.  Microspikes wouldn’t have
helped, floatation would have been nice, but gaiters would have solved a lot of
problems.

The trail back down was slow because of the snow:  I kept slipping.

I followed the 379A and had some off roaders in modified
jeeps pass me.  I eventually caught up to
them when they were on a break.  One guy
asked me “You hiking the ring?” and to save time I told him “Yes!  It’s a beautiful day for it!” and continued
on.  Hey, I WAS on the Ring the Peak trail,
so I wasn’t lying (I just didn’t want to stop for conversation).

It seemed like it took forever to take this route!  It felt like it took twice as long, and it should
have been faster as I was hiking downhill.
However, I eventually made it to the High Park area, and found a trail
that I’m assuming goes to point 12,225’.
I’m going to need to come back and try that one!  But not today, because it was probably
getting late…  I made it back to the meadow
that has the turnoff for Microwave Tower and noted with a picture the correct
trail to take

Now I was back on the loop, and hiked the mile and a half
back down to mu truck.  When I got there
my truck had made a friend!  This must be
the truck from the guy I saw at the reservoir.

In any event, here’s the route I took:

I made it back to my truck at 2:30pm.  I’m guessing I hiked about 10-12 miles in 5.5
hours. I did the elevation gain when I got back, and it was 3000’ in elevation
gain with all the ups and downs and double summits.

Oh, and my truck made it out just fine (and all the way
home) without needing to stop for gas.
Woot!

Climbing Day 3

Before leaving home I gathered my gear and put it all in one
spot so I wouldn’t forget stuff like last time, and then I quickly made dinner
and got changed out of my work clothes and into something I could climb
in. 
I only had 15 minutes before I had
to take Thomas to Boy Scouts, so I had to be quick.
  I looked for my moleskin (my climbing shoes
still need to be worked in and I figured I’d take some preventative measures),
but realized it was in my truck and my truck was still in the shop.
  This whole not having my truck thing is
getting inconvenient!
  So instead of the
moleskin I put a couple of Band-Aids on my heels and figured that would have to
work.
 

Tonight I actually didn’t do any bouldering.  From the time I arrived until I left an hour
later Tim helped me with climbing.
  We
started with attaching the rope to the harness with a figure 8 follow through, and
discussing different types of carabineers.
 
Woohoo!  I actually know my knots,
so I was excited to be doing something I considered easy.
  Well, at first it was, but for some reason I
wasn’t able to tie the knot successfully after that.
  Actually, I did tie it successfully a few
times, but not on a consistent basis.
 I
told myself it was because I was holding the rope a different way than I usually
do, and looping it through the harness, but that’s just an excuse, and I hate
excuses.
  Practice is what I need.

I’m not a good student because I get frustrated easily when
I don’t understand something or when I do something wrong. 
My defense mechanism is to change the subject
and move on as quickly as possible to the next thing.
  I’m not used to failing, so this knot-tying incompetency
hurt on a personal level and became a challenge and a focus for me the rest of
my night. The more I focused, the worse I did.
 
 
I’m sure my attitude became
challenging as well.
 

I’m not sure what was wrong with me, but I kept messing up
the knot, and it’s a really simple one!!! 
When Tim asked me if I had any rope to practice on at home I tried not
to laugh:
  My basement is pretty much a
knots and lashing practice area for the girls, with a large 50 gallon bucket full
of ropes of all thicknesses and sizes.
  Yes,
I’d be practicing (probably as soon as I got home).

Seriously though, I do need some practice.  I want to be able to tie the knot without
thinking, and I suppose that was the problem tonight:
  I was thinking too much about it. 

Tim had hurt his shoulder (or so he says) so he belayed
while I climbed. 
I was able to successfully
complete three runs without falling, although it felt a little weird to just
lean back and have him control my descent.
 
They gym was crowded (although not as packed as it had been the previous
two weeks) and I didn’t want to hit the climbers below me, so I kept grabbing
at the holds on the wall to push myself away from the other climbers.
  Apparently this is frowned upon.  I’m just supposed to fall backwards, pushing
back from the wall with my feet, but this simple act was difficult for me to
do.
  Another thing to work on!

The climbing shoes weren’t as uncomfortable as I’d thought
they would be, although they were stiff. 
They fit well, but were bulky in the front (once again, similar to a tap
shoe).
  I think they’re supposed to be
like that, and after a few minutes I got used to them.
  However, I couldn’t help thinking how much
easier it would be to just climb barefoot (traction wise).
 

Climbing actually gets more difficult the longer you do
it. 
Well, to be fair, I wasn’t taking
breaks, which was probably the problem:
 
I was wearing myself out.  After
the 4
th run my forearms started feeling tight.  I’ve never experienced that before and it was
really a cool feeling.
  I could have done
without the veins showing though :/

On the 5th run Tim gave me some advice:  Stop for a second and rest.  Ha!  Obviously
he doesn’t know me very well.
  Stopping
and resting are two words not in my vocabulary.
 
I wasn’t able to stop (unless I was stuck), but he also told me to shake
out my arms and angle them down when they got sore, which worked amazingly
well!
  Something so simple gave me extra
strength.
  This must have something to do
with blood flow.
 

I tried a new kind of run today:  He gave me advice on angling my arms to get
leverage that really helped!
  (Manteling?)  I do push-ups, but will need to do more to
work on my upper body strength.
  He also
showed me how to dropknee, but I’m not convinced yet it will give me more
height (but theoretically it should).
  I
was just too tired by that point to try it successfully.

I also need to work on planning out my route.  I just kind of go with it and look for the
right color holds.
  This often means
back-tracking a bit.
  It would do me well
to stop and plan a few holds ahead instead of just clambering towards the top.
  I
should use more chalk too.
  Several times
my hands just kept slipping no matter how many times I tried to reposition them,
and I think more chalk would have helped:
 
that must be why climbers attach chalk bags to their harnesses and don’t
leave them in their cubby with the rest of their gear…

The last run I did was brutal towards the end.  I just didn’t have the strength left in my
arms to lift myself up that last bit, and I wasn’t patient enough to just sit
and wait for the strength to come back (I wasn’t sure it would tonight
anyhow).
  I ‘fell’ three times, and
finally just yelled down to Tim to let me come back down. I think I’m supposed
to say something like “Lower off” but that made me uncomfortable and sounded
weird:
  kind of like failure.  I was only one hold from the top, and it was
the only run I didn’t complete tonight.
 
I think I can do it though, so if they don’t change the holds I’m going
to try it first next time to see if it was just an ‘I’m exhausted’ thing (and
not an ‘I can’t do this’ thing).
 

When I made it back down I decided to try and practice that
knot again. 
The hour passed very
quickly, and before I knew it it was past time for me to go:
  But I wasn’t done practicing that figure 8
follow through!
  I wanted to be able to
do it with my eyes closed, and consistently every single time I tried it. But
that wasn’t going to happen tonight.
  Oh
well.
  I have all week to practice!

Before I left Tim lent me a book to read Mountaineering:  The Freedom of the Hills.  It’s all about climbing, and full of clarifying
illustrations.
  I have no time to read,
so it looks like I’m going to have to make time because there is a lot of really
great information in this book and I’ll feel bad keeping it until I give it
back to him (another area for growth… this list keeps getting longer and longer…lol!).
 

Oh, and lucky me, no blisters!  I celebrated by putting my logo on the shoes,
branding them as officially mine 🙂

Fifth incident this year…

One of my favorite parts about hiking is the solitude.  I love the time to think and process information, and just enjoy being outside with the sun, sky, trees, and animals.  Maybe this makes me sound sappy, but I really enjoy the alone time.  And since I work in software, time away from a computer is always welcome.

However, I know even when I hike in quite a ways off the well traveled trails to expect people.  I’ve seen people in places I didn’t think I’d ever see someone, and in fact their usual response is “I didn’t expect to see anyone this far out”.  

We all know most people are found about 2 miles from a trailhead, but even when hiking further in I always assume someone can see me.  Several times I’ve been surprised to see people off trail “in the middle of nowhere”, and once I had someone tell me he’d followed me with his binoculars for over a mile before I met up with him (no worries here, it was a hunter who heard a rockslide and thought I’d been hurt… He just wanted to congratulate me for successfully maneuvering the route without dying).  

It’s an inconvenient truth that if you’re hiking and you’re drinking water, at some point you’ll need to pee.  No one knows this more than I do, and usually the urge comes above treeline, when everything is exposed.  I think this is something women are more aware of than men, but something happened to me today that got me to thinking…  I’ve seen at least 5 men peeing out in the open this year while hiking, and I haven’t yet seen one woman doing the same.  I know the numbers of men hiking far outrank those of women, but come on guys?  Seriously?

There are rules about such behavior, for your comfort as well as mine.  I realize it’s not always possible to deviate 200 feet from a trail to do your business, but at least do the best you can.  

Today while hiking this became a serious issue.  Not for me, but for the guy decided to pee on trail, and the woman he was with.  

You see, I was on a very well traveled trail, hiking towards a popular junction connecting two trails, about 3 miles from a trailhead.  I wasn’t being quiet (I have a walking stick that makes a dreadful noise every time it hits the dirt), and I saw a couple of mountain bikers stopped for a rest.  I saw them a good 50 feet before they saw me.  In fact, I was about 10 feet away when the man suddenly turned around, whipped it out, and started to pee. I saw the whole process, and was thinking “No, that can’t be what he’s doing”, but yes, it was.   It took him at least 2 seconds to realize I was hiking towards him in full view,  whereupon he quickly turned (embarrassed), and ended up peeing on his (female) partner who was standing right next to him.  

It didn’t end well, and I ended up being the one most embarrassed, even though I’d done nothing wrong.  

This brings up so many issues!  Men, do you really pee in front of the women you’re with?  Is it really so hard to walk a few yards away for privacy?  Do you really think you’re the only one on the trail?  I’m only bringing this up because it’s happened so many times this year it’s becoming bothersome.  

North Cheyenne Canyon

Today was disappointing on so many levels, but wonderful
because I was able to spend some time outside!

I’d wanted to hike a 13er today (the weather was absolutely
perfect!)  but due to my truck issues I’m
stuck with a 2WD rental car that wouldn’t make it to the trailhead.  So I decided to take another hike in North Cheyenne
Canyon.  

I woke up at 5am and because it was still too early (cold)
to head out I ran for an hour on the treadmill, took a shower, and did 30
minutes of yoga.  

I made it to the trailhead at 8am and started on the 7
bridges trail.  I was aiming at hiking
Runs-Down-Fast mountain, which is on my Atlas but not in my GPS or on any trial
map I’ve seen.  

North Cheyenne Canyon has a lot of amazing, well kept
trails.  They’ve been doing a lot of work
in the area maintaining their trails, which is great, but in the process they’re
destroying established trails and making new ones, and sometimes changing
existing trails and moving them to other routes.  In other words, none of the maps sync.  It’s been very frustrating hiking in the area
lately!  They have posted signs with
terrible maps that make no sense and are difficult to read.  Not all of the trails have trail signs on
them, and some of the names are wrong.
It makes for quite an adventure!
Even with a topo map nothing makes sense (because the trails have
moved).  

The 7 Bridges Trail is still the same.  Today it was all iced over!

I took 622A to 668 and was looking for the turn off to 622
to bring me west towards the mountain.  I
hiked and hiked and hiked, and crossed this area that took a lot of
concentration (I couldn’t tell how tough the ice was or how far the creek
went).  

Most of the trail was free of snow at this point

Then I followed the pipeline trail.  I tried to find some history on the pipeline
and failed.  Basically, it looks old and
it obviously hasn’t been functional for quite a while.  

I rounded a corner and saw where the 622 A intersects with
the Pipeline Trail, but there was no route at all hiking west.  So I continued to follow the trail for
another half a mile before pulling out my topo and realizing I was way too far
south.  So I backtracked to the cutoff,
and nope, still no trail west.  I kept
going for another quarter mile and realized my mistake:  Just at the creek crossing I was paying so
much attention to was a snowed over trail.

It was unmarked but looked like the trail I was looking for
(it matched on the topo).  The only
problem was it was obviously a trail they didn’t want me to follow.  It looked like crews had purposely destroyed
it, making it difficult to follow.  

I followed it anyway and ended up at intersecting the 667
trail. Ugh!  I knew I was too far north
at this point, so I headed back, figuring I’d missed the 720 at some
point.  I never found it.  Instead I took a route that brought me nowhere.  I could tell I was supposed to head west, but
it just didn’t look possible.  I bushwhacked
for a bit, heading in the direction of Runs-down-fast Mountain, and eventually
came to some orange marking tape.  

Woohoo!  I figured
this would get me to the 720 or the Forester Trail, so I followed it for about
half a mile.  Nope, it brought me to this
big hole in the ground.  Ugh!  

However, at this point I heard some motorcyclists and
watched them speed past me about 50 feet up the hill.   I headed up to the trail (once again hoping I’d
hit the 720 or Forester) but nope:  I was
back at the 667!  

Now I was extremely frustrated.  I knew where I wanted to go, but apparently
when I’d backtracked the second time I didn’t backtrack far enough. I knew where I was and what I’d done wrong, but at this point I had two options:  Backtrack again and try it a third time, or
head back down the trial and make it a look by taking Cap’n Jacks Trail over to
Mt Buckhorn and follow High Drive back down.

I decided I wanted to get back home to my kids, so I took
the loop.  Here’s the entire route I took
today:

It was frustrating not summiting anything (especially when I
had 3 ‘easy’ summits I wanted to hit today), and basically hiking in circles,
but I did take a few trails I haven’t taken before, and I was able to problem
solve and route find.  I also mapped out
in my head where several trails intersect so next time I’ll be more prepared.  

I’m not done searching to summit Runs-down-fast, but I think
I’m going to start at a different trailhead next time, at least until North Cheyenne
Canyon gets their act together and publishes some accurate maps available
online (I mean this with the utmost respect).

Climbing Shoes

image

I got these in the mail today.  They aren’t the brand or color or size or style I wanted, but after three iterations of ordering they’re “good enough”. 

I’ve been rock climbing 5 or 6 times and canyoneering as well, and now I’ve been to CityRock as a climber twice, so I knew what size shoes I needed.  I found the pair I wanted online and ordered my size.  But when they arrived they were way too small.  I couldn’t even get my feet inside, let alone close and tie them.

So I returned them for a larger size.  Those too were way too small.  I did some more research and realized I needed to order two sizes up from my normal size for this shoe.  Unfortunately, no one had them in my ‘new’ size.

This process took two weeks (ordering, shipping, returning, etc.) and my whole “saving money on climbing shoes by buying them” thing wasn’t working now that I’d already rented twice.  

So I just found a pair of random climbing shoes in stock in my size and ordered them.  They arrived today (two days late) and while I’m not happy with the color they do fit (if a little awkwardly).  They’re a little big (but tight?) and I can already tell I’m going to get blisters on my heels from them (time to break out the moleskin for preventative measures).  I felt like I was wearing tap shoes when I put them on, but they’re here!  They weren’t too expensive, so when I decided I want to seriously climb I’ll know what to look for and get a new pair.   I’m considering putting my new hiking logo on them in Sharpee to offset the wonderful orange color that I’m sure will go well with my red climbing helmet.  

Now it’s time to break them in!

Bouldering Day 2

OK, so I’m a little embarrassed about this one.  Emily didn’t want to climb today (she’s
thinking once a month sounds about right for her), but she did agree to go with
me and sit in the lounge area and draw.
 
I think it had something to do with getting pizza on the way…

When I was about half way there I remembered I’d left my chalk bag on
the counter. 
Whoops!  I was also hoping to wear my new rock
climbing shoes today, but I still don’t have them.
  They came in the mail (twice) but each time
they were the wrong size (more on that once I actually fix this situation).
  So I rented some very well-fitting shoes and
headed straight for the climbing wall.

Once again there were a lot of people there tonight, and I wanted to
get some practice in before there weren’t any lines left available. 

 I was doing pretty good today.  I
started with a 5.5, and then went on to 5.6, 5.7, & 5.8.
  Each time I’d successfully make it to the top
(using the correct color routes, of course) I’d try something a little
harder.
  I was doing great until I got to
5.9:
  I was two holds away from the top
when I lost my footing and fell.
  Luckily
I was on a pulley, so I didn’t fall too fast, but I did hit someone on the way
down.
  He was pretty close to where I was
on the wall next to me, and as soon as I fell I knocked into him (I didn’t have
time to realize what was going on before colliding).
  He was obviously a much better climber than I
as he was on a pretty difficult run.
  He
didn’t fall, but I could tell I had jostled him a bit. I apologized profusely, blamed
it on being a novice, and figured that was probably enough rock climbing for
today.
 

On to bouldering!  The runs (I’m
not even sure if that’s what they’re called?) had been changed since last week,
so everything was a bit different.
 
However, this time I knew to follow the same color run, so I felt a bit
more confident.
  The lower wall was more
difficult to climb today than it had been last week (and I don’t think that run
had changed?)
  I decided to skip it and
take the stairs (side note:
  I came back
to it later and was successful).
 

My hands were slippery and I had several blisters already (once was
cracked and bleeding) and I’d forgotten my chalk, so I tried to “steal” chalk
from the counters by covertly wiping my hands across them where chalk had
settled from others. 
I know, I’m
pathetic.
  Next time I’ll offer some of
my chalk for free to someone to make up for it.
 

Once again I started with the easiest runs and worked my way up.  5.0-5.4 were easy and I was racing up each
run, over the wall, and back down to try the next in line.
  There were fewer people bouldering than
climbing, and it was easy to keep advancing without waiting for those around me
to climb.
 

Then I came to a run that was a bit more difficult.  I don’t remember the class, but I was one
hold from the top when I lost my balance and fell.
  No, I didn’t fall away from the wall like you’re
supposed to, ad I didn’t anticipate the fall.
 
This time was worse than the first time because I was sideways when I
fell, and my arm hit a couple of holds on the way down.
  I landed on my backside, not seriously hurt
because of the mats below me (I fell about 10 feet).
  I didn’t look at my arm when I landed, but I could
tell I’d bruised it pretty well.
 It felt
like a nasty rug burn.
 

I looked around and no one seemed as embarrassed as I was about my
fall, so I picked an easier run, climbed just to prove to myself I could, and
then made my way back down to the lower climbing area to lick my wounds where
no one would know what I’d just done. 

This time it actually hurt worse than it looked (usually it’s the
opposite).    
I asked the lady at the front desk if she had
any Vaseline and she looked at me like I was crazy.
  I guess my type of injury isn’t common. 

I made it back down to the lower area and found a couple I’d met earlier
who offered to let me climb with them when they found out I was alone and new
to climbing. 
I’m really uncomfortable
making friends when I can’t reciprocate, so I didn’t take them up on their
offer to let me climb while they belayed, but I did stand and watch them for a
bit.
  This is something I need to work
on, but I know it will take me a while to accept help/friendship. I’m slow to
warm, but working on it!

Mays Peak – 8,283 and Mt. Buckhorn 8,360

I was looking for a quick hike today because I wanted to be
home by 11am to spend time with my oldest daughter who’s 19 and I feel like I never
see anymore because we have conflicting schedules.  Fridays are my hiking days, but they are also
the only time I have free to see my daughter before she goes to work in the
afternoon.  She sleeps in really, really
late, so I just got up early and headed to the trail, intending to be back by
noon to wake her up for some mother/daughter time.  

I’ve been spending a lot of time in the North Cheyenne
Canyon area recently.  I hear they’ll
close the road in for winter at some point, so I’ve just been going to the same
trailhead and hiking different peaks.  This
is a pretty popular area, with trails to many different areas, so getting there
early is essential.  There’s nothing
really special about Mays Peak or Mt Buckhorn.
They aren’t particularly tall peaks, and they aren’t difficult to find
(they don’t have established trails but they’re both pretty close to the
trail).  However they’re on the map and
they’re labeled, so I figured I’d add them to my list of points to see.  

I parked at the trailhead at Gold Camp Road and High Drive,
and was on the trail at 8:10am.  Here’s
the route I took:

I hiked north on High Drive to just after this sign:

I was at a junction (left is Buckhorn, right is Mays).  

I turned right and took this trail east and then curved
north around the mountain.  For some
reason it looked like they didn’t want me to take this trail, but it was the
way I’d wanted to go, so I did.

The trail looked established, but it’s not on their trail
maps.

After rounding the mountain and turning north I decided to try
to find my own way up Mays Peak.  I know
there’s a trail, but I wanted to practice my route finding, so I turned west and
this is what I saw.

I continued west and continued up the hillside.  The only difficult part was avoiding those
darn banana yuccas:  they’re prickly!

I made it to the ‘summit’ and took a few pictures of the
view (to the north I could see the Waldo Canyon Burn Scar)

And one of me to prove I’d summited.

Then I was on my way back down to the junction.  I took 667 south and around the mountain and
then up the hill.

Once the trail started heading north there was a junction that
was difficult to see and unmarked.  You
could go north or west.  Mt Buckhorn is
north, so stay straight.  

Mt Buckhorn is kind of difficult to find, but just keep
heading north and eventually you’ll get there.
First you pass this rock formation

Then you pass a large firepit.

Next you’ll go through a few more
rocks            

And another very large crater size fire pit

You’ll know you’re at the summit because you’ll come to a
very large area of boulders that defy explanation of how they got there.  These things are HUGE!  The actual summit is on top of this rather
large boulder, that requires ropes to climb.
I’d heard this so I’d come prepared with my helmet.  However, there was absolutely NO WAY of
climbing this rock without ropes.  Trust
me, I spent a good 15 minutes walking all around this thing looking for a
viable route.  This rock is much larger
than it looks (you can camp underneath it).

So I put my helmet away and headed back down.  I couldn’t believe what wonderful weather we
had today!  Here it is, December 1st,
and I’m wearing yoga clothes out on the trail!
It was 65 degrees today in the mountains, with no wind.  

There are many trails in this area, so I had options on my
way back down.  I decided to take the 667
to the 776, mainly because I wanted to see where it went.  

I’d already taken the 667 for quite a ways and knew that
took me to the Kineo cutoff.  The 776
took me down to the area just before the 7 bridges trail.  I could exit just below the North Cheyenne Creek
or just after the 1st bridge, where it turns into 622 (7 bridges
trail).  

I exited here and took Gold Camp road back to my truck, making
it there at 10:30am.  The hike was quite
pleasant, and although short (5 miles or so?
Maybe a little more…) I didn’t see many people and I was out hiking in
the sunshine.  I was so happy I’d gotten
outside today!  

Climbing Gym

I’ve been thinking about joining a climbing gym for a few
months now, but the closest one is about 30 minutes away from my house. 
It’s about $60 a month to join, which didn’t
seem too appealing since I just discontinued my actual gym membership.
  They did offer free yoga classes and one free
massage a month with the membership, which was really appealing, but I didn’t
like the distance.
  Plus if I were paying
$60 a month to climb I’d be there several times a week, which would mean an
added cost in gas as well. Did I mention I’d have to pay to park too? Ugh!
  But I really need to develop my rock climbing
skills for my 14er challenge:
  I need to
feel safer out there while climbing, and that’s only going to come with
practice.
 

So I did some research, and found a much cheaper option:  A ‘punch pass’.  I pay up front, get 10 visits, and can use
them for anyone I choose (I can bring a friend with me, etc.).
  I was trying to justify time for using the
pass when I remembered Thomas has scouts Monday nights directly across the
street from the climbing gym.
  Duh!  I could just go with him to scouts and while
he’s there walk across the street and get in some climbing practice instead of
sitting there at the meeting knitting hats.
 
Brilliant!  Why did it take me so
long to figure this out?

Anyway, tonight was my first attempt at this whole climbing
thing. 
I’ve been to this gym several
times, but I’ve never actually climbed here.
 
I’ve always been a chaperone taking scouts or for birthday parties.  I’ve never climbed in any gym before, but I
have been rock climbing at Red Rock Canyon a few times.
 

Emily went with me. 
We dropped Thomas off at Boy Scouts and then walked together to the
gym.
  I bought the punch pass and we used
two immediately.
 They let us use a
harness and shoes for free (the harness is always free, the shoes were to make
up for the fact we had to fill out liability forms again).
 

It was Monday night at 7pm, and this gym was packed!  There were tons of climbers there!

I found the last cubby open to store our stuff and we put on
our climbing shoes and harnesses. 
Normally
when I’m attempting something new I stand around for a bit and watch everyone
around me to see how it’s done, but there were so many people I figured it was
best to just jump right in and find a place to climb.

I found an open area and attached the carabineer to my
harness. 
This was actually a lot more
difficult than I’d thought it would be:
 
It wasn’t a simple push down and turn like I’d expected, and despite
trying my best I never quite got the hang of it.
  I was able to eventually clip in, but I’m
sure I looked like I had no idea what I was doing, even toward the end of the
night after doing it several times.
 

Climbing was much easier than I’d anticipated!  I made it all the way to the top in no time
at all, and was quite pleased with myself.
 
However, I wasn’t ready to just jump off and let the pulley carry me
down, so I ended up climbing back down the way I’d climbed up, and told myself
I was practicing because while outside I’d need to climb back down the way I
went up (yes, I was lying to myself, kind of).

OK, this was fun!  I
was actually able to climb to the top without stopping, and on my first
try!
  I went to find Emily (she’d been in
the bathroom taking care of a bloody nose) and challenged her to climb with
me.
  We did a couple of runs together,
and she convinced me to jump backwards and fall all the way down.
  From the top of a climb I took a leap of
faith and jumped backwards, letting the pulley slowly carry me back down to the
floor.
  It was actually quite fun!  Just make sure you’re actually secured and
clipped in first…

Now on to bouldering, because this was why I was actually
here. 
This scared me more than climbing
because I wouldn’t be clipped in.
  Once
again, this was easier than I’d anticipated, and I was able to quickly catch on
and climb up and over the wall(s).
  I
went to take a break and find Emily.
 She
was climbing the same area we’d been climbing before, and it was here I realized
something:
  when climbing the walls you’re
supposed to stick to one color of holds as you progress up.
  Whoops! 
No wonder everything seemed so easy! 
I’m going to have to spend some time learning about different classes
(etc.) of climbing.

OK, so I felt a bit silly about my climbing optimism (no
wonder it’d been so easy!) and decided to try it for ‘real’. 
I took a few runs, sticking to only one
color, and while it was more challenging I was able to climb them all successfully
except one.
  I kept trying that one over
and over again, but instead of getting easier it was just getting more
difficult.
  I was getting tired!  I knew what I needed to do, but my arms were
worn out.
  We’d been at the gym for about
an hour, and I’d been climbing almost continuously.
  Now even runs I’d done successfully earlier I
wasn’t able to climb.
  I told myself to
stop now because I was wearing myself out.
 

I went down the slide one more time (I can’t remember the
last time I went on a slide!) and we changed out of our gear.


All in all I learned a LOT tonight.  Everyone was pretty friendly, and even though the gym was packed it didn’t feel too crowded.  I want to eventually learn how to belay (including putting on the ropes, etc) and I need to get better at bouldering.  I think it will just come with more practice. 

Tuckaway Mountain – 10,825′

image

RT Length:  12+ miles

Elevation Gain: 3400’

Notes:  Bring your
sense of adventure and a helmet!

This hike was really pretty awesome!  Each time I go out looking for a bit more of
a challenge, and today I found it!
Tuckaway Mountain is listed in the Pikes Peak Atlas, but there is no established
(or even mildly established) trail to the summit.  The hike is long, the summit a class 3 scramble
(at least).  It really is Tucked Away, and takes a long trail through North Cheyenne Canyon to reach.

I started this hike at 7:45am at the 7 Bridges Trail parking
lot.  Around the 2nd bridge I
saw a decorated Christmas Tree that wasn’t there two days ago when I hiked this
part of the trail to summit Mt Garfield and Mt Arthur. The tree immediately
brought a smile to my face, and then my next thought was “I hope whoever put
this here takes it down as well”  LNT and
all.

image

I followed the 7 Bridges Trail to the junction and turned left
onto 667.  I stayed on this trail until
it ran into trail 377.  This seemed to
take a really long time, probably because of all the switchbacks!  My map didn’t mention those, so I put them in
where they’re missing.  They go on
forever!

image

This trail is newly renovated, and seems to cater to
motorcyclists/mountain bikers.  I didn’t
see one hiker on this trail all day, but saw 1 group of motorcyclists and 2
groups of bicyclists.  They all seemed
surprised to see me.

image

The wind started picking up around 9500’ and I was glad I’d
chosen to stay below treeline today.  Looking
at the topo map I thought once I was close to Tuckaway Mountain the hike would
be easy, but I was wrong.  First off, the
mountain was extremely difficult to see, even though it’s late in the
fall.  Secondly, it was covered in
rocks!  

image

Once I made it to the area directly in front of the mountain
I turned right/north.  This is what I
saw:

image

I decided my best course of action was to really study the mountain,
pick my route, and head up.  The entire base
was covered in Aspens, making it difficult to tell where I was going. I didn’t
want to get stuck at a rock outcropping.

image

I chose to summit to the east to avoid the large
outcroppings, but in reality, you can’t avoid them all.  There is no established trail to the top of
Tuckaway Mountain:  no trail, no cairns,
nothing.  I did some major scrambling,
involving all hands and feet at once, as well as some intuition and luck!  The rocks weren’t stable, and even the big
ones rolled when I touched them.  Where
there weren’t rocks there was scree, and very slippery terrain.  

image

Since I was basically bushwhacking and I couldn’t see the summit
through the trees, I kept stopping every 20 feet or so to look back behind
me.  I kept this sandy area in my sights
for my return trip back down.

image

I summited at 10:45am, to a bunch of rocks!  The summit was rather long and irregularly
shaped, full of trees, and lots of rocks to scramble on.

image
image

I took a bunch of photos from all around the mountain, just because
I could, and to show where it’s located in relation to the other peaks in the
area.

image

Next came the fun part:
heading back down.  The trek up
was challenging, and so was the trek back down.
I had to be careful with my footing.
I spent a lot of time lowering my center of gravity and getting stuck
with needles and thorns.  My gloves were ripped
in places and covered in yellow Aspen dust by the end.  Just an FYI:
pine needles are slippery… avoid patches of pine needles.  By the time I’d made it down I was COVERED in
dirt.  I really looked like I’d worked
for that summit!

I made it back down to the Aspen grove and was able to find
trail 377 to lead me back.  The trek back
seemed a lot longer than the trek in (which seemed long to begin with… I’m thinking
it may be more than 12 miles total now that all the switchbacks are there…).  It was mostly downhill, but those switchbacks
went on forever!  When I made it to the 7
falls area it was PACKED with people!  I
was surprised to see so many families lining the trails.  And I mean families!  Most groups had over 10 people, over half of
them under 10 years old, most younger than that.  It was great to see so many young families
out enjoying the trails, but it was frustrating trying to pass the large groups
who were (understandably) going slow.  Gold
Camp Road was full of strollers.  The
parking lot that had 6 cars in it when I arrived was overflowing with at least
100 cars:  people were parking down at
Helen Hunt falls and walking up!  I was
really glad I’d gotten an early start on such a popular hiking day.  

image

I made it back down to the trailhead at 2pm, making this 12+mile hike with 2400′ elevation gain in 6 hours, 20 min (with a lot of summit time!)