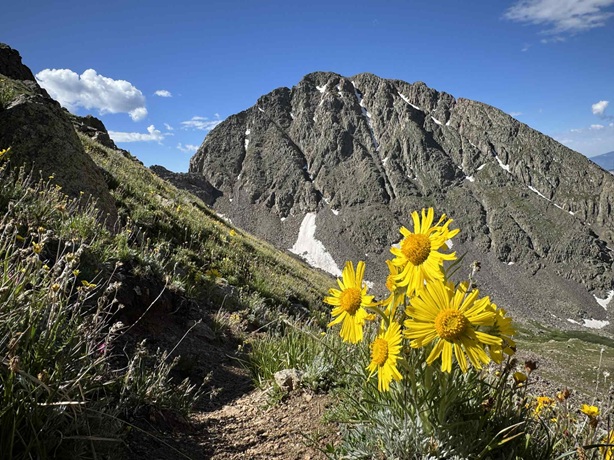
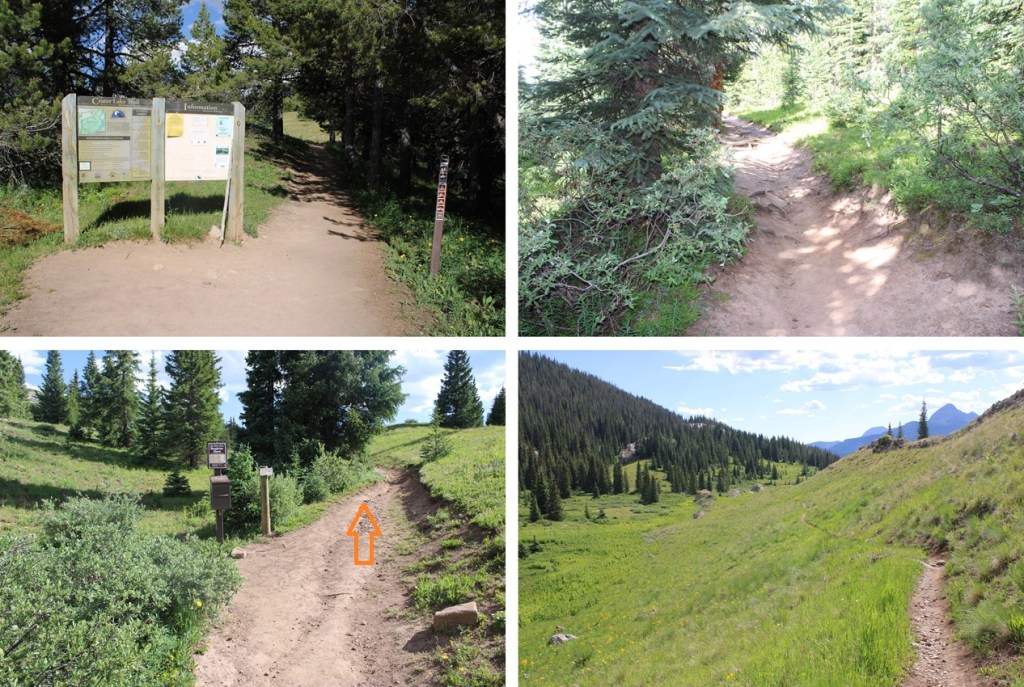
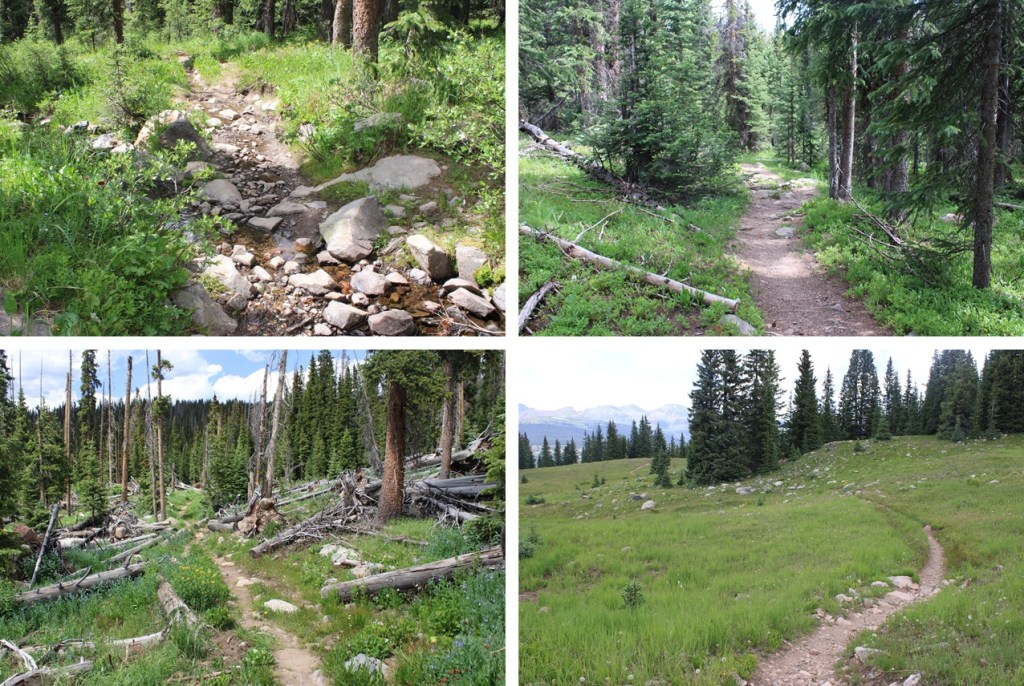
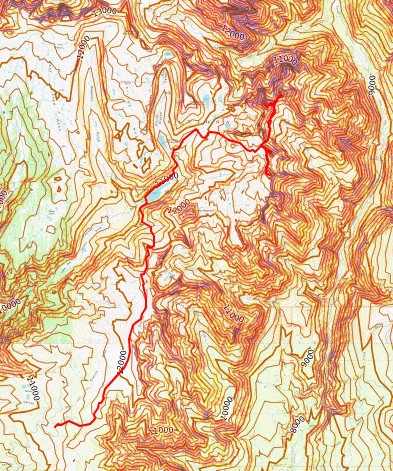
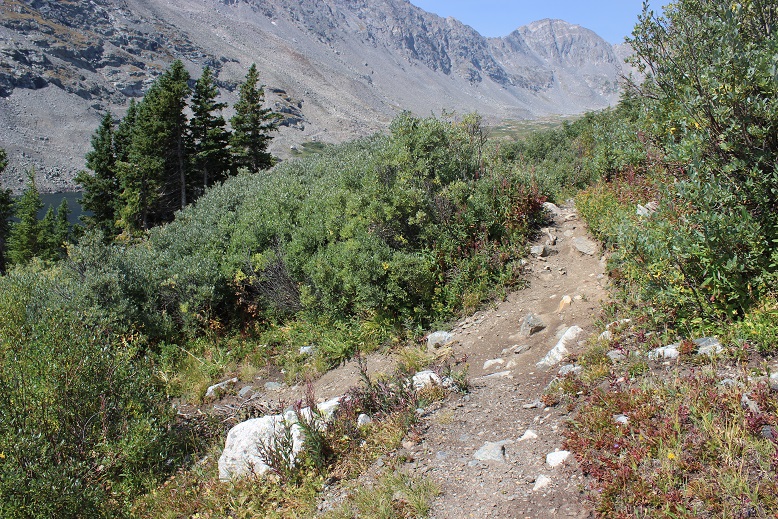
I started from the Andrews Lake trailhead at 6am. On a positive note, the bathrooms were clean this time! No toilet paper, but the seats were clean (always bring your own TP). The trail starts by skirting the south side of the lake.
I then took Trail 623/Crater Lake Trail all the way to Crater Lake. This is an easy, class 1 trail that is easy to follow with no major junctions. I hiked the 5.5 miles to Crater Lake on this trail.
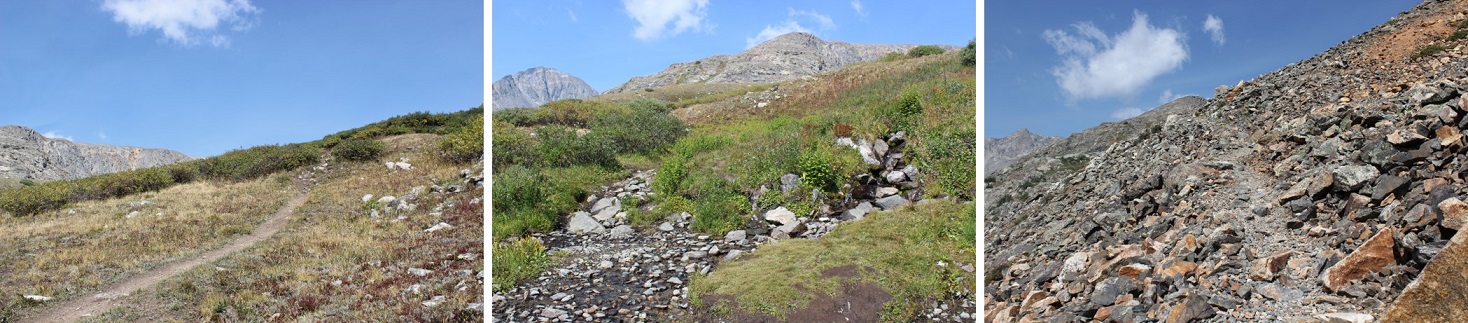
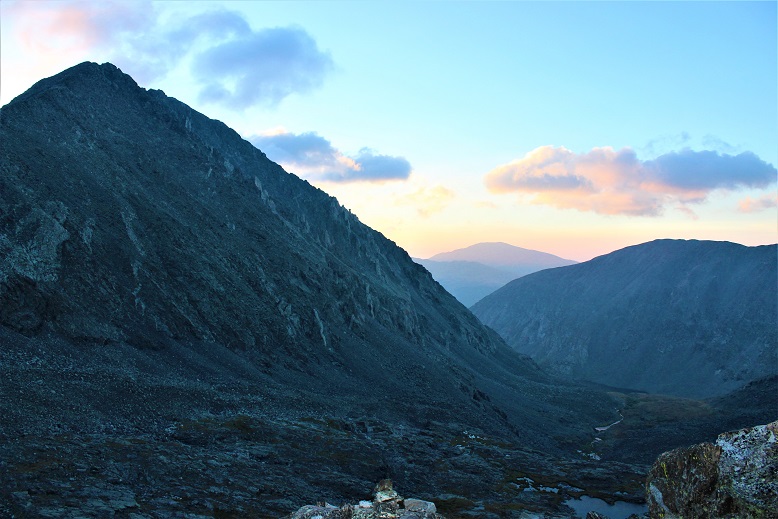
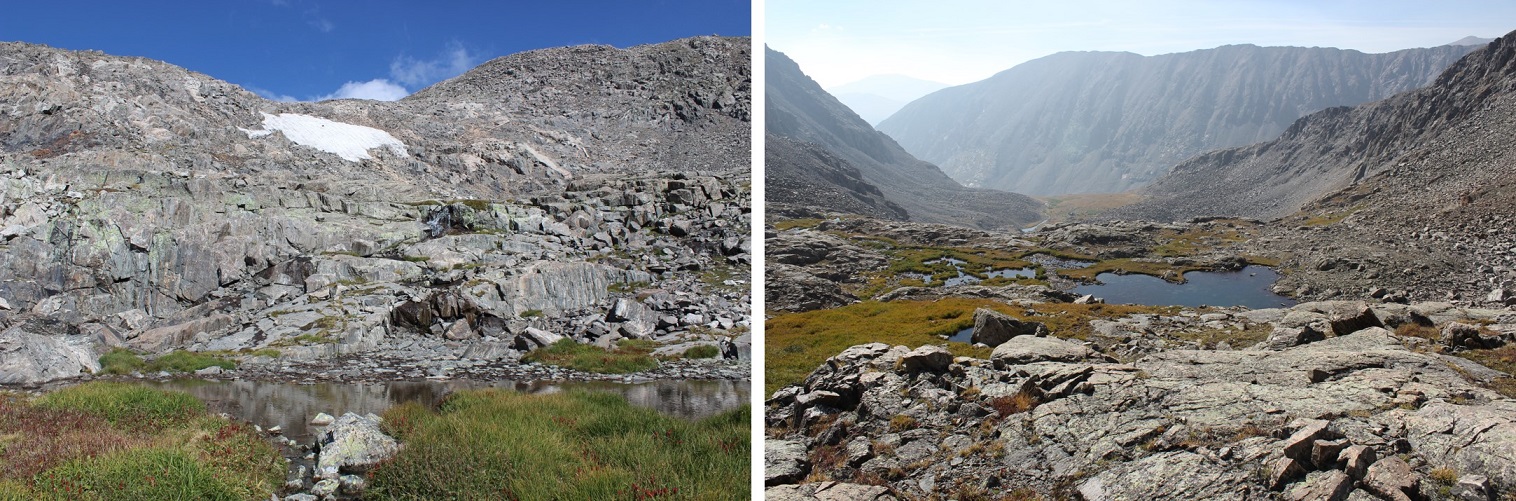
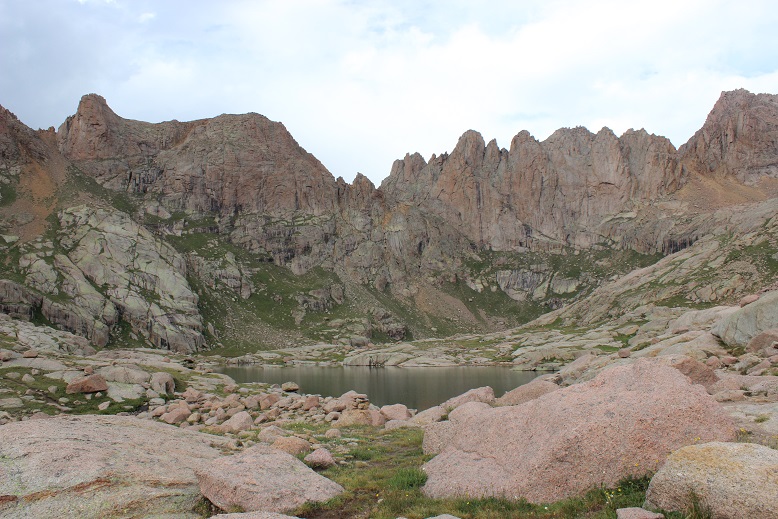
Once at Crater Lake there’s a side trail that goes off to the left. This trail stops at 11750’ at a small pond. I took the trail to the pond.
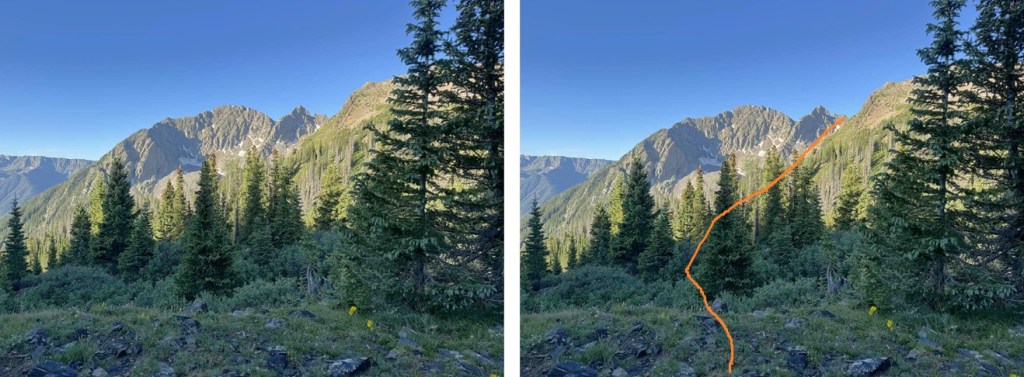
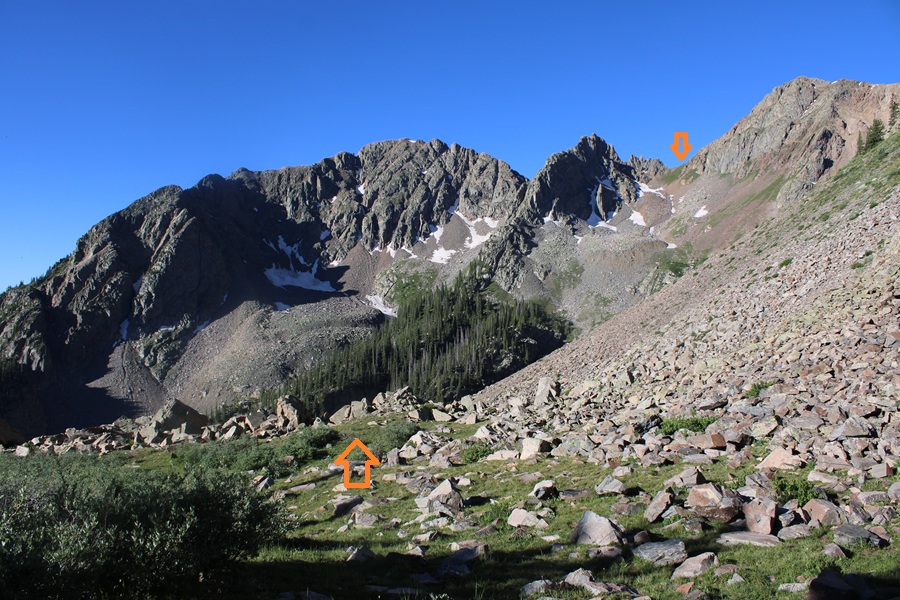
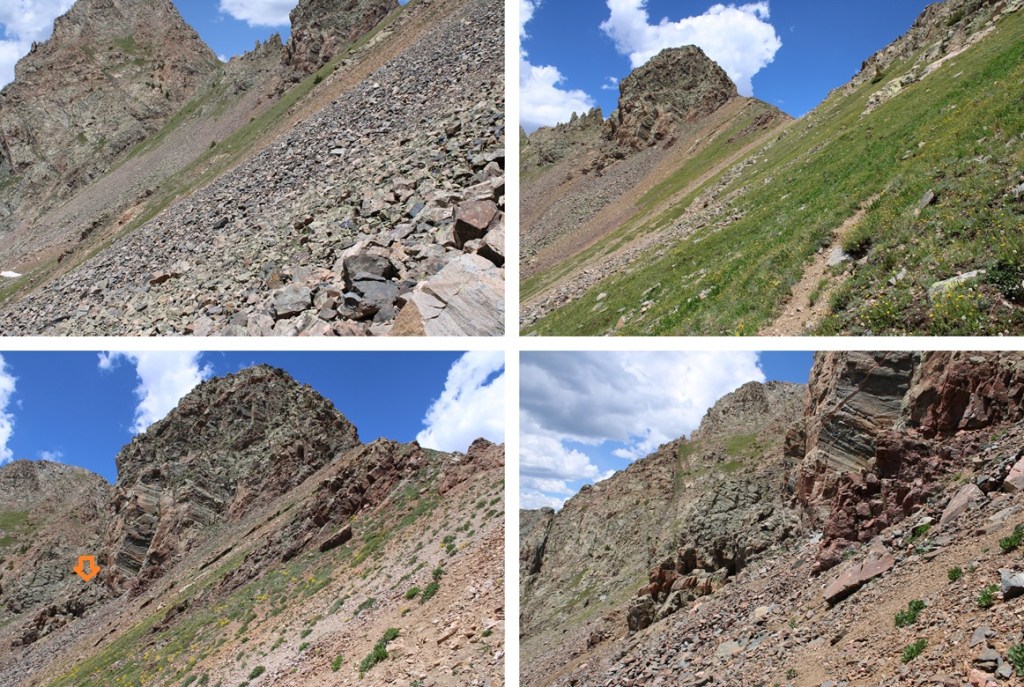
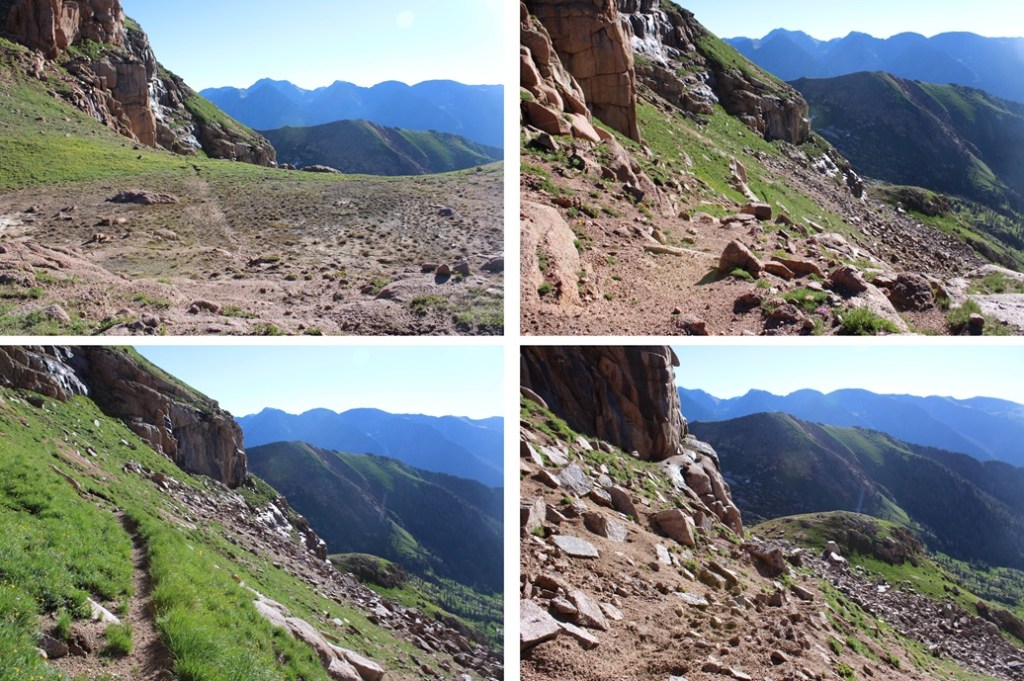
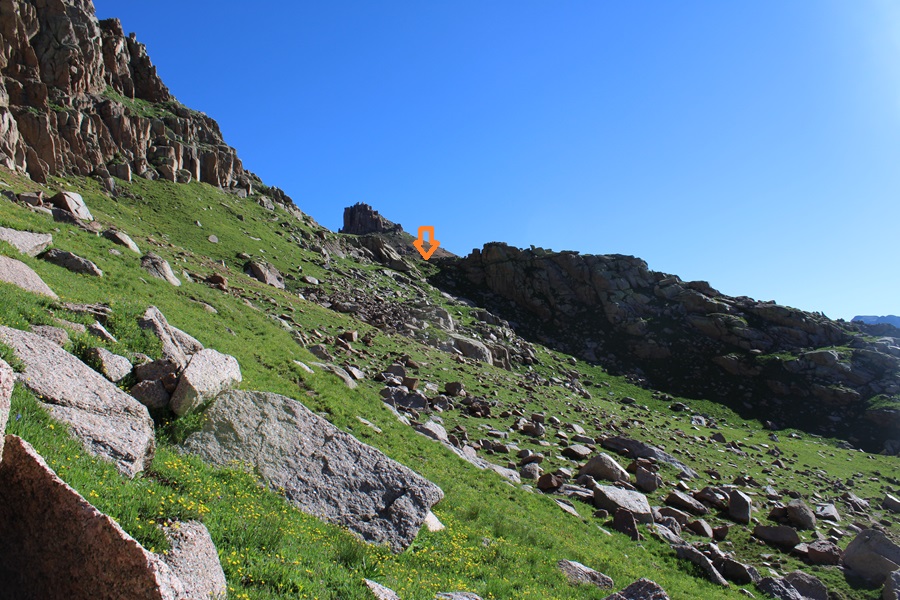
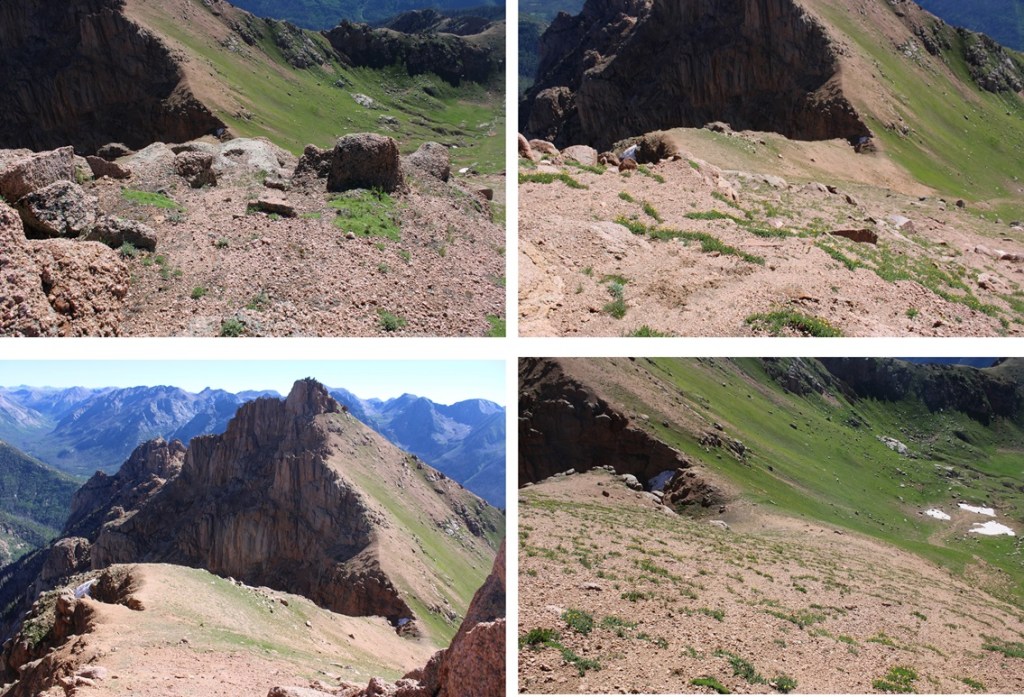
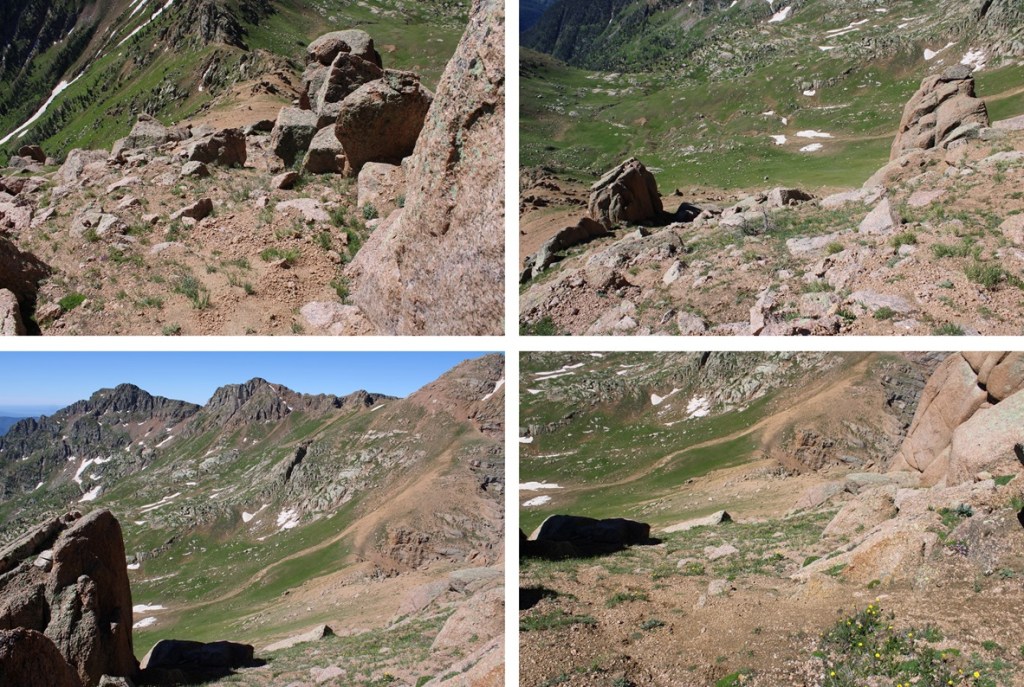
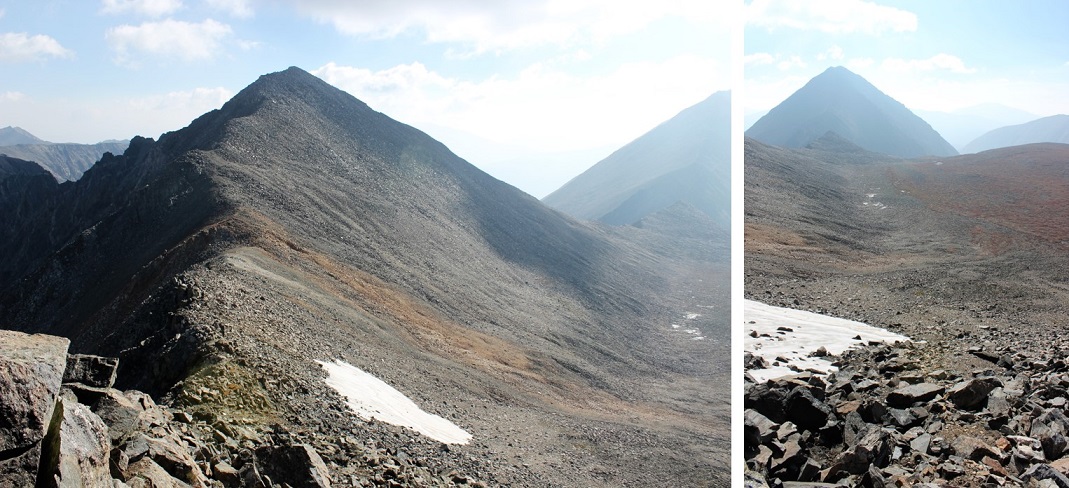
The trail stops at 11750’ and now it’s time to bushwhack. I lost 400’ of elevation as I headed southwest towards a gully I couldn’t yet see. Here’s an overview of where I was headed.
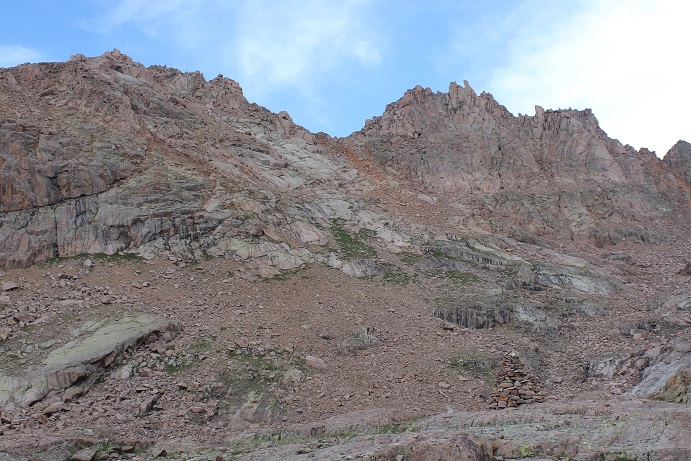
Aiming southwest I skirted the hillside until I came to the end of the trees.
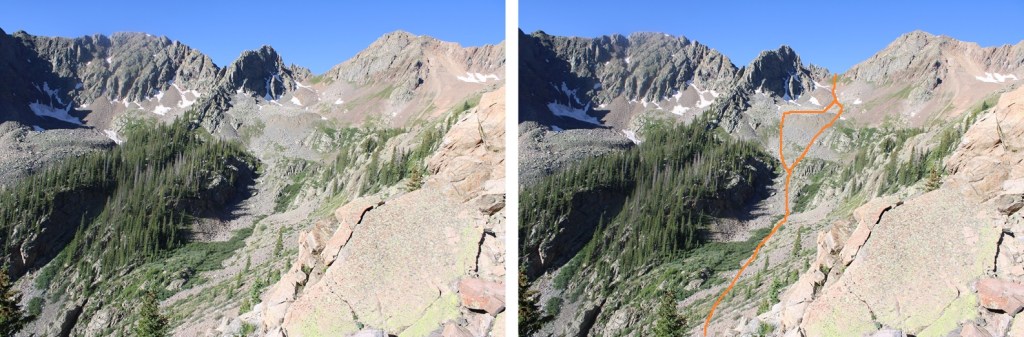
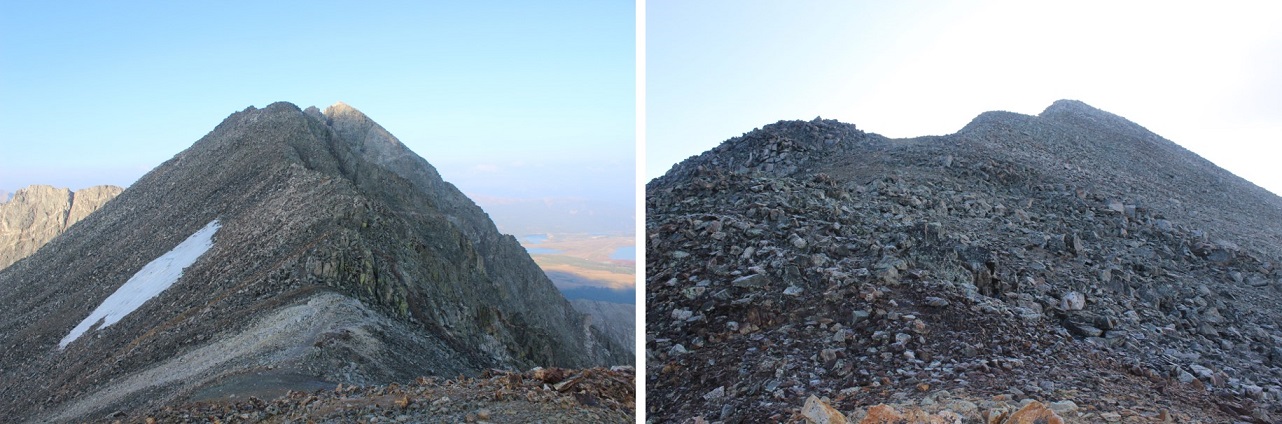
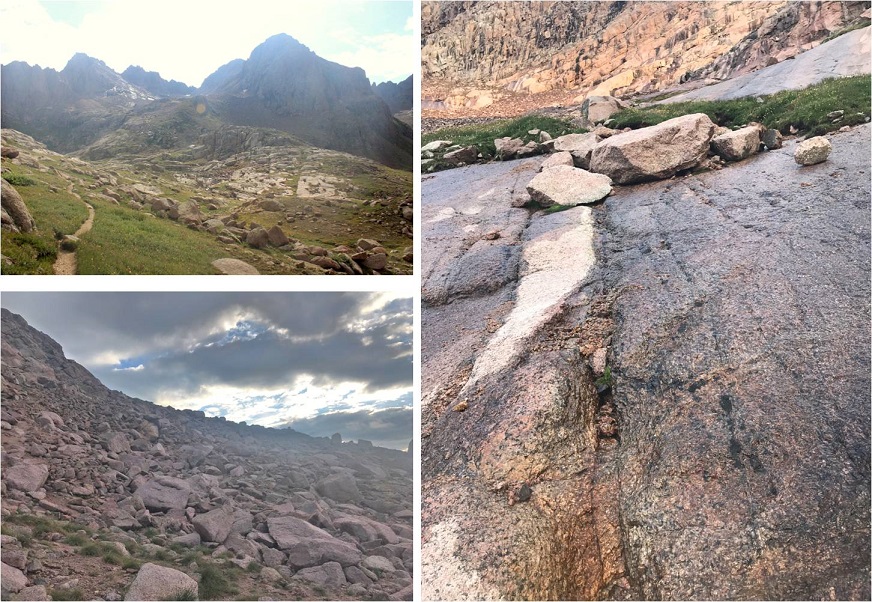
I now had a clear view of my path to the saddle between South Twilight Peak and PT 12932. I kept descending towards the creekbed and then ascended up 1260’ towards the saddle.
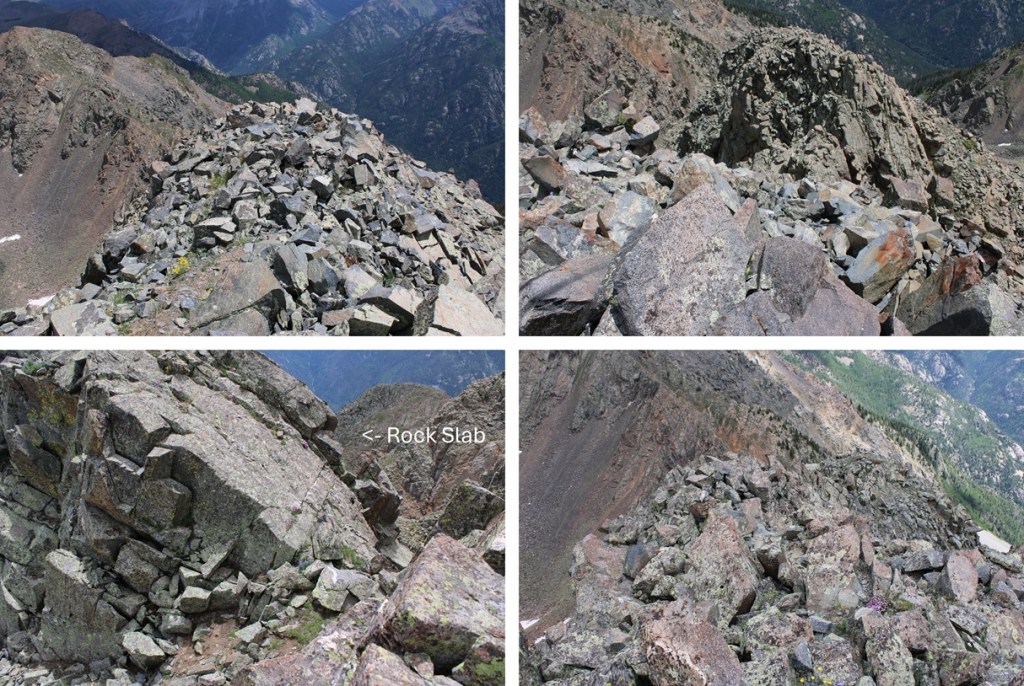
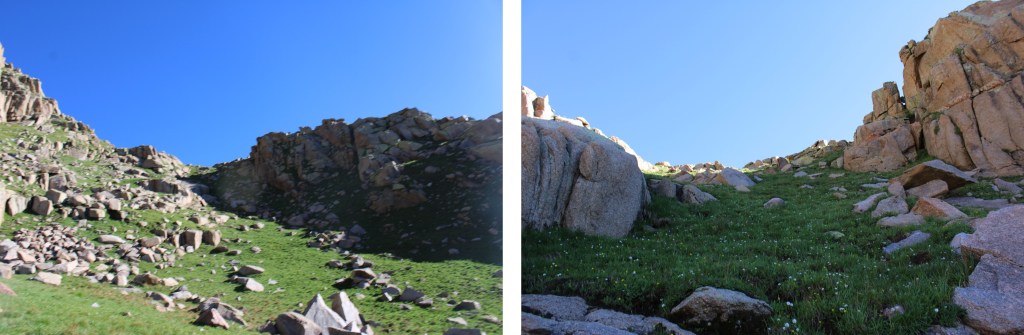
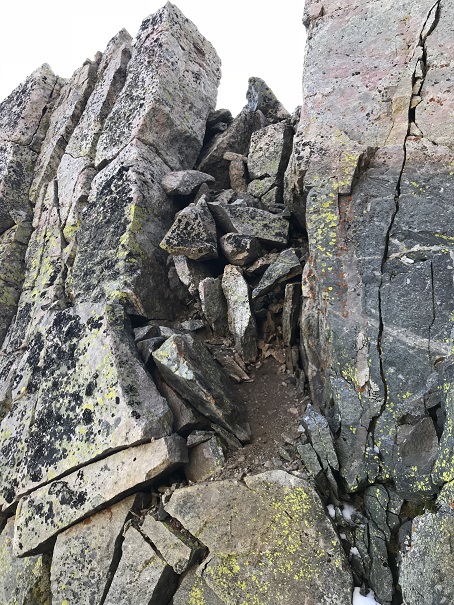
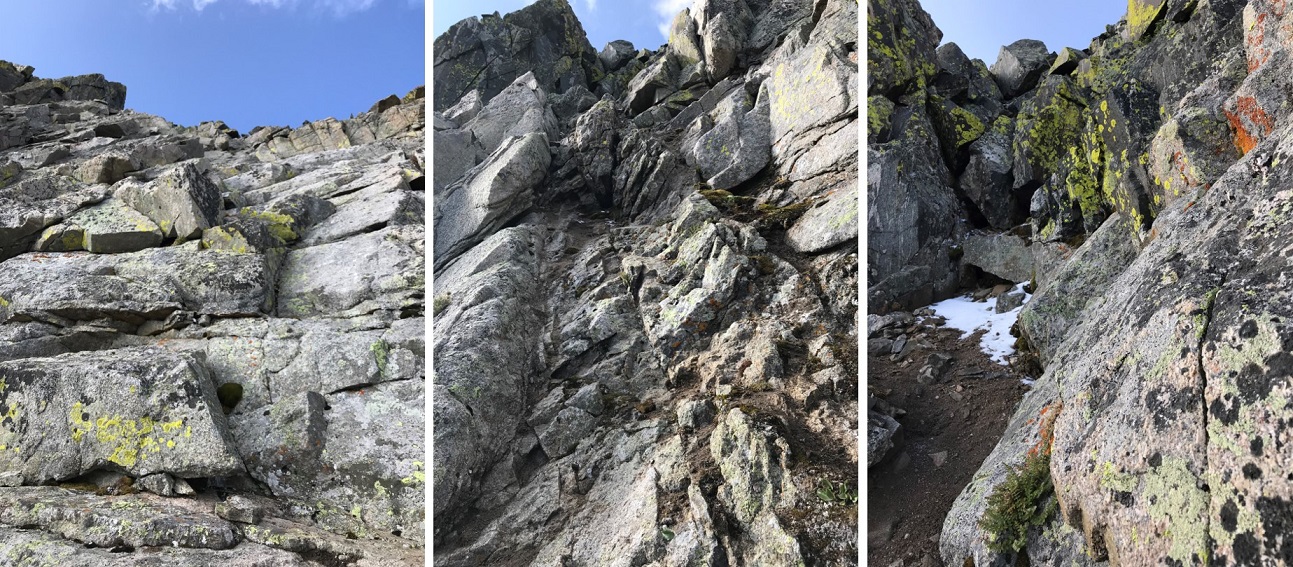
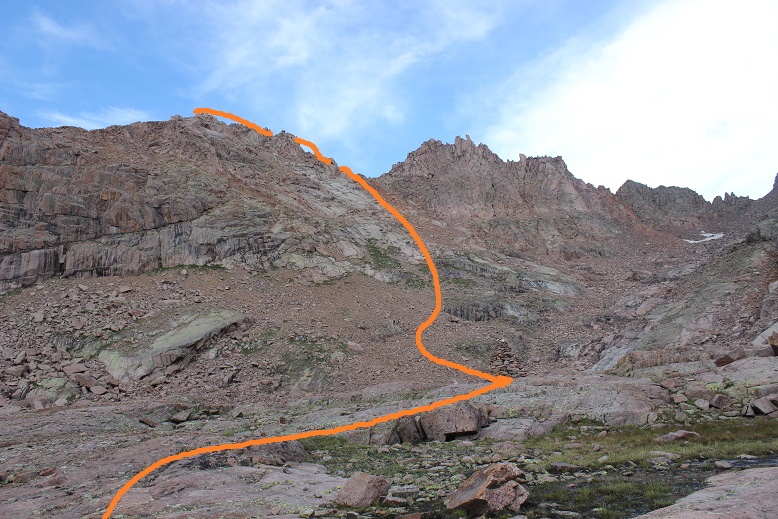
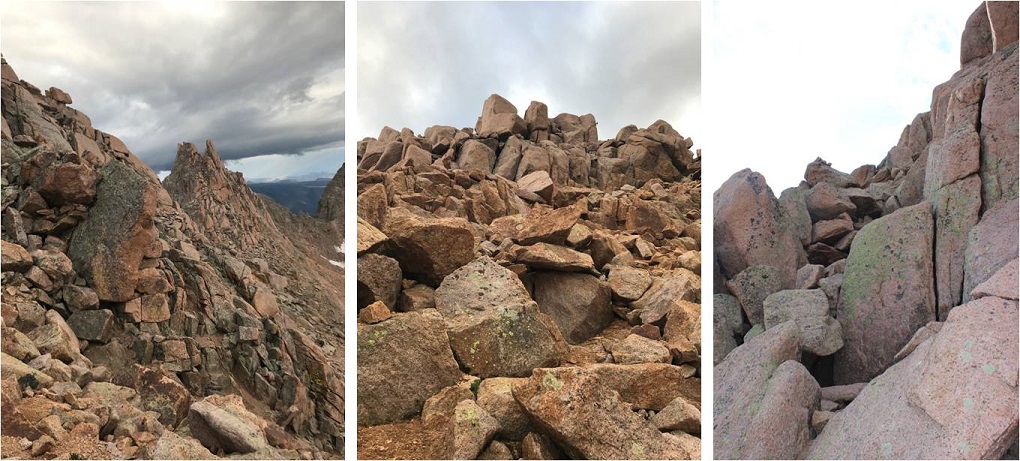
The route was obvious but not marked. I went to the left on the way up, to the right on the way down, and both were similar. The left side had larger boulders and the right side had more tundra, but both were essentially snow free and clear.
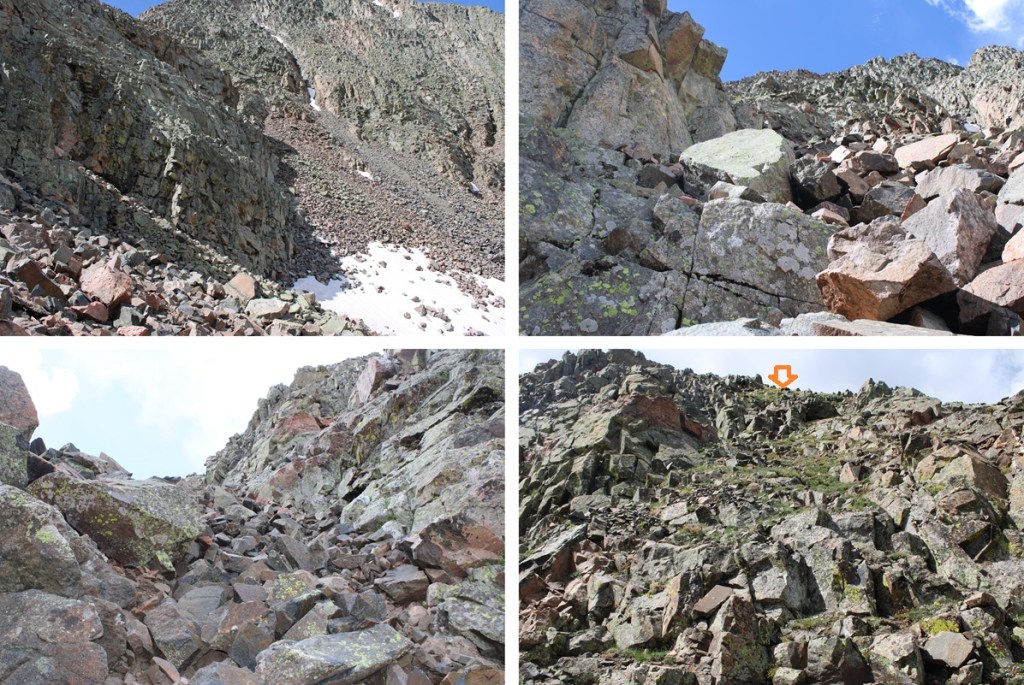
Here are some pictures of the route to the saddle
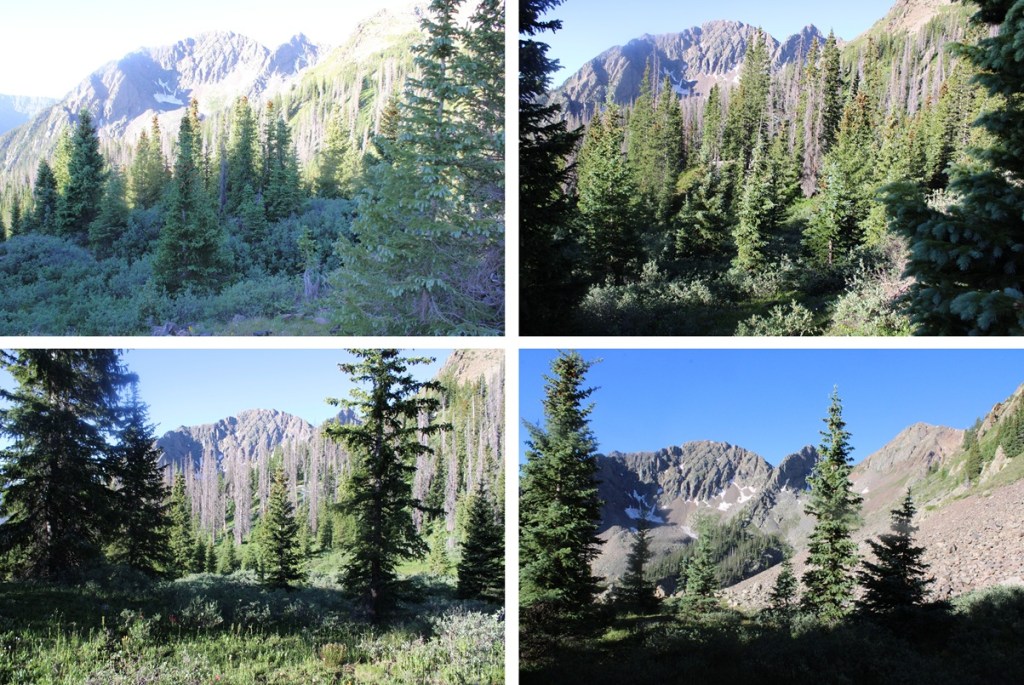
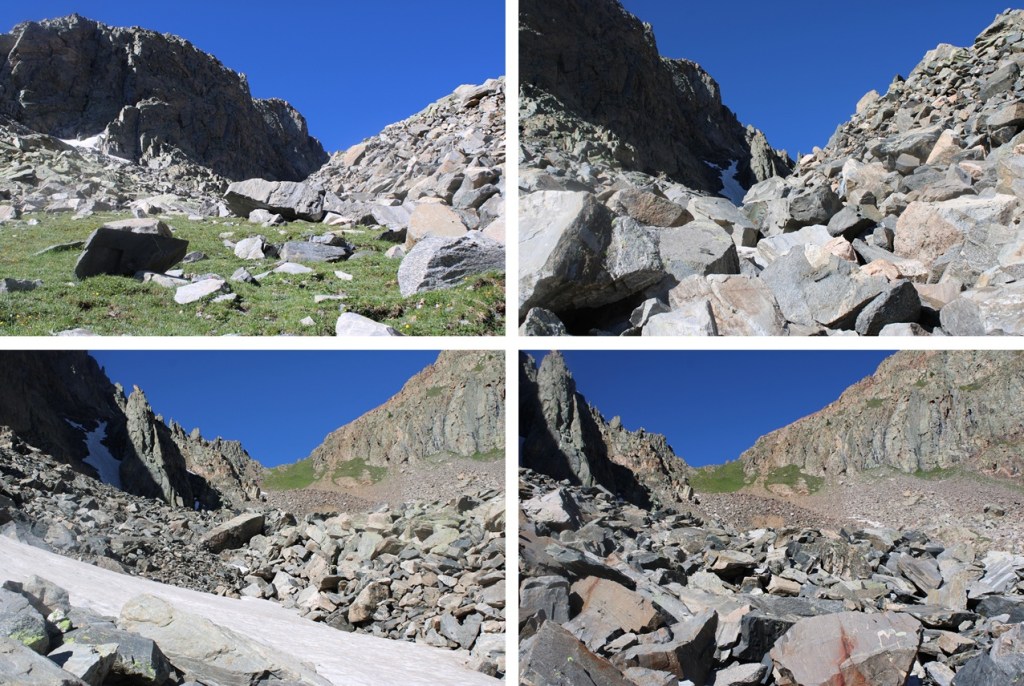
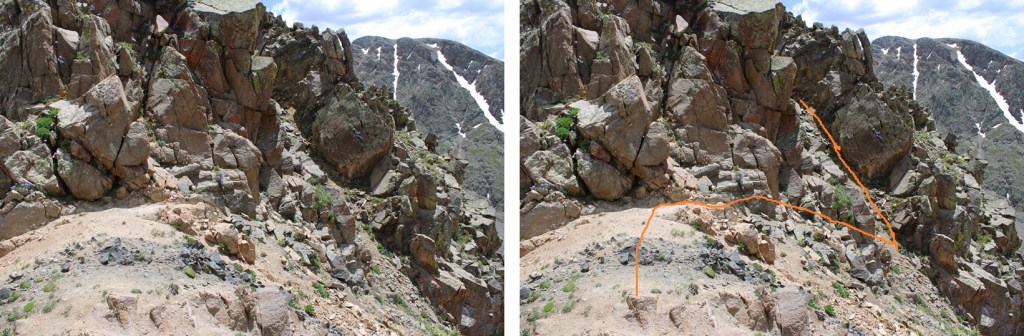
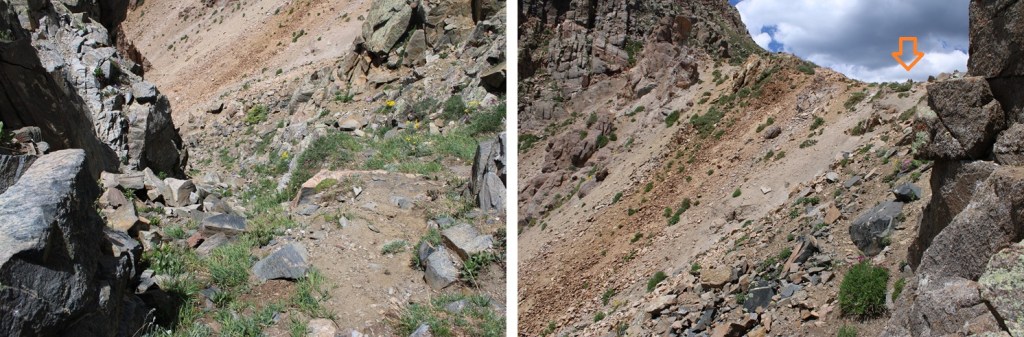
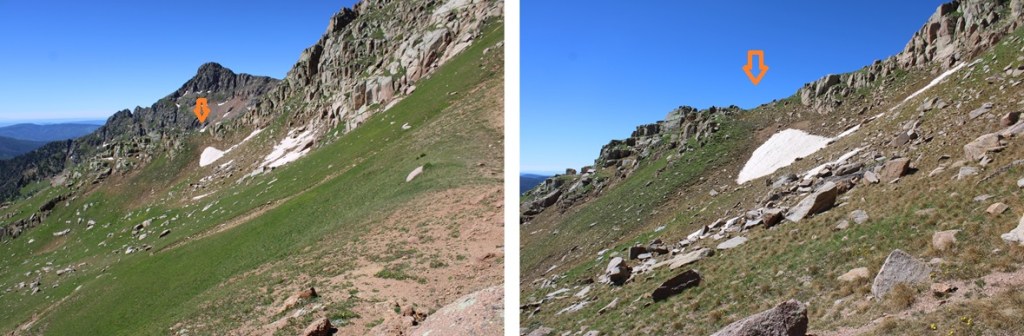
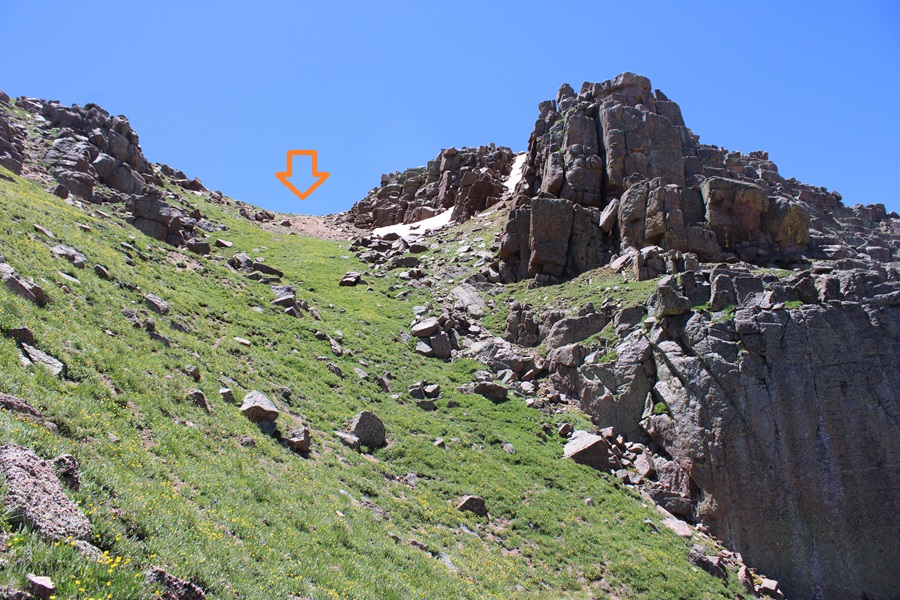
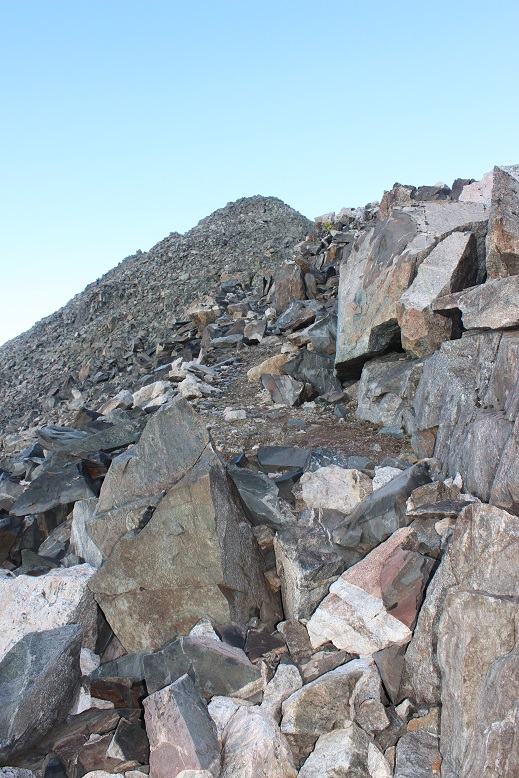
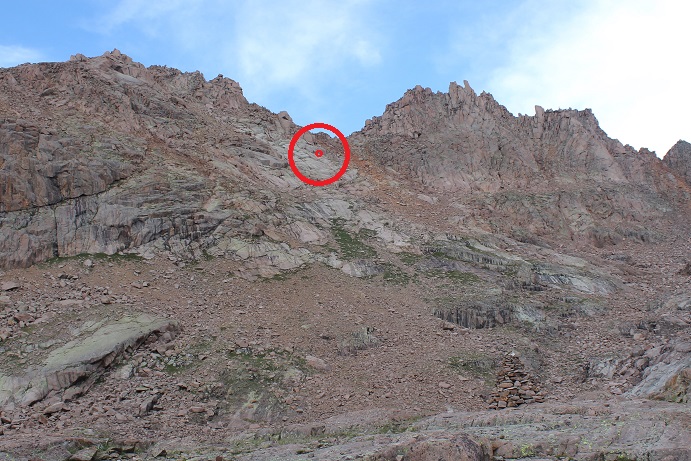
Now at the saddle I had to descend a bit to traverse towards West Needle Mountain. I descended about 25 feet to the south and found an access gully on the left that would get me around the rock outcroppings.
I ascended the class 2 gully
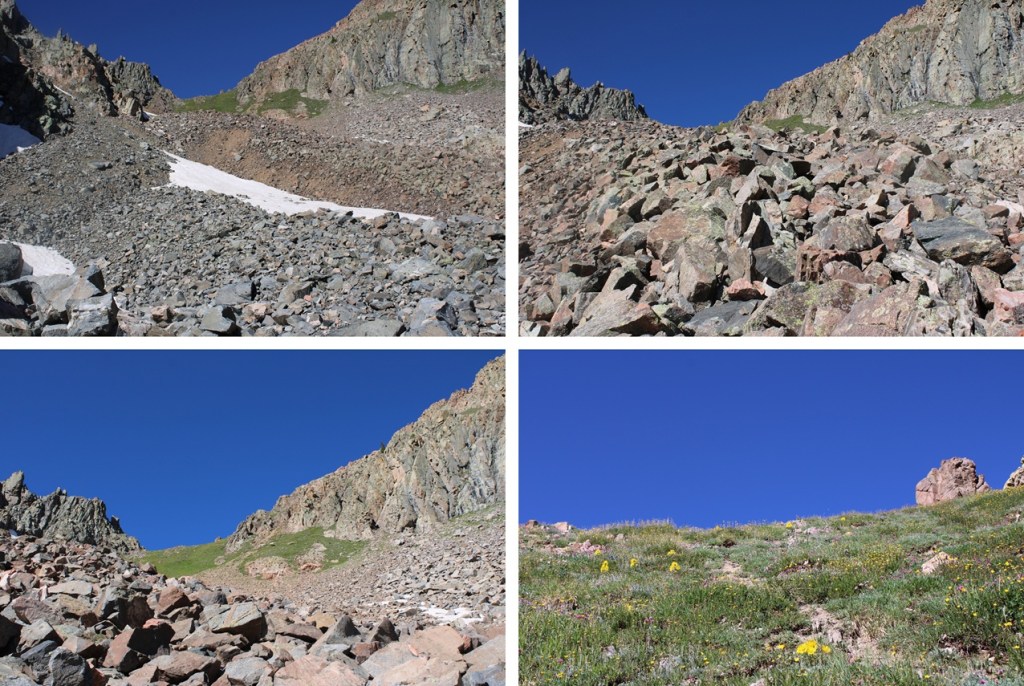
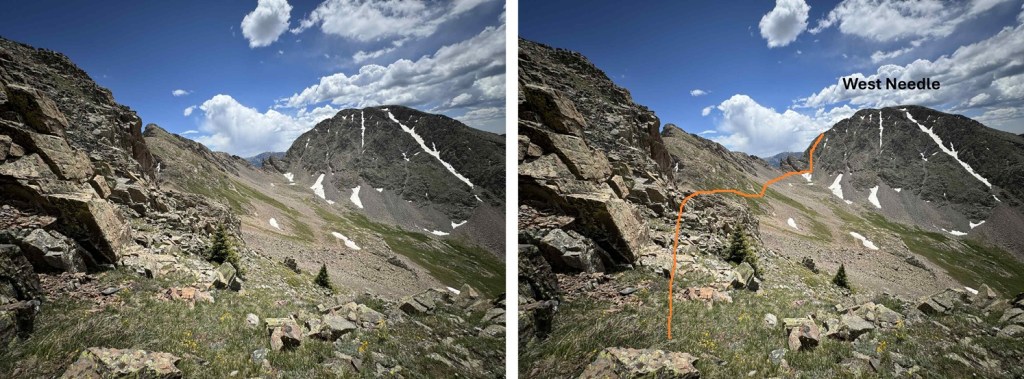
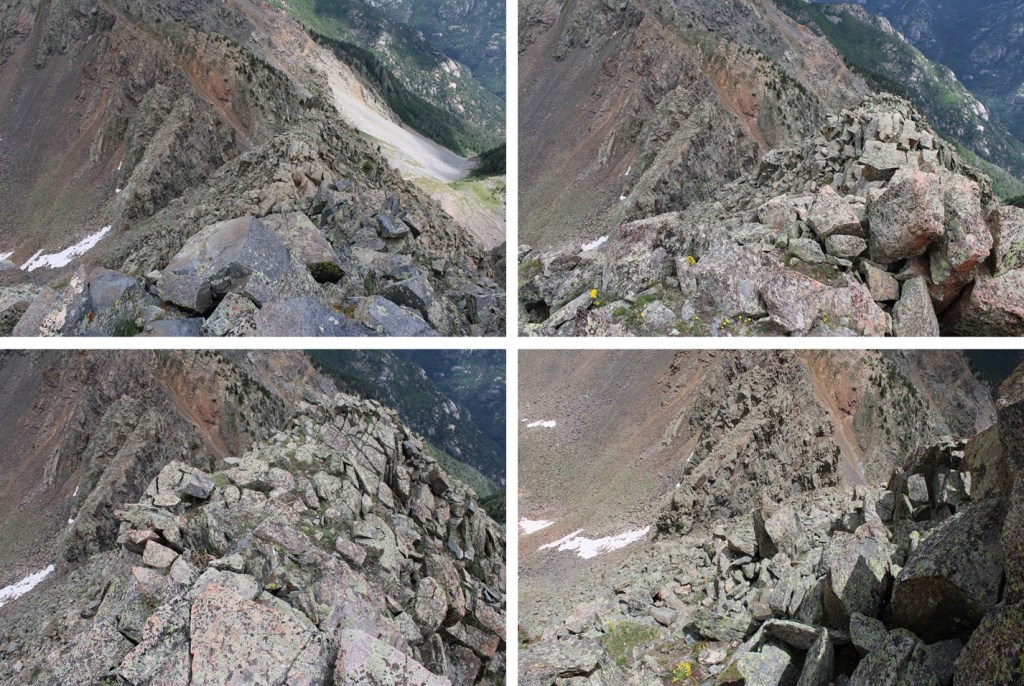
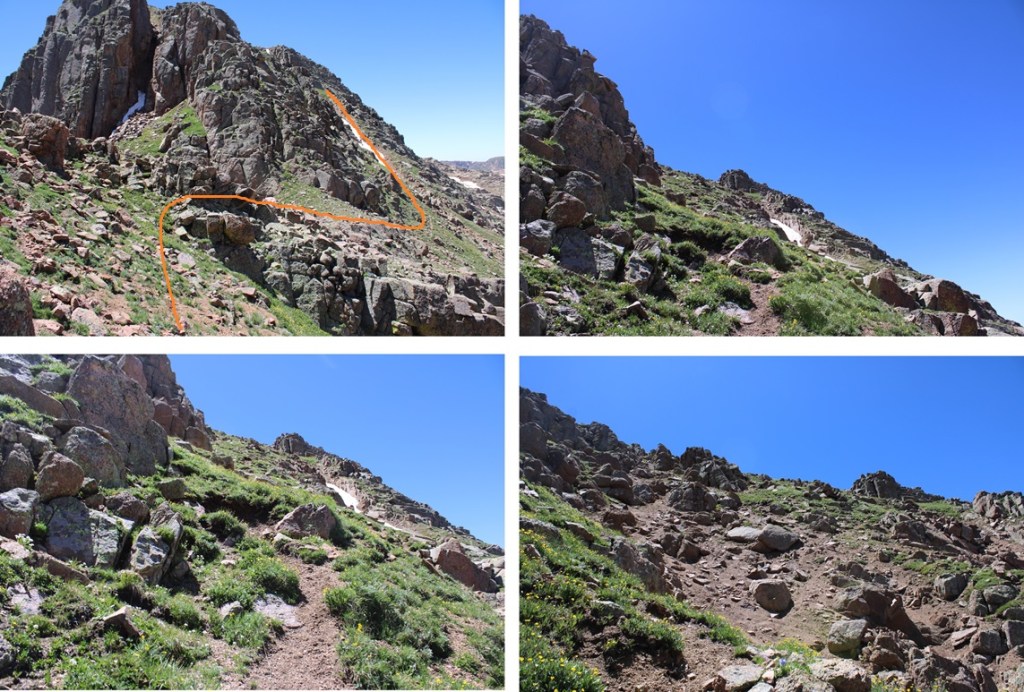
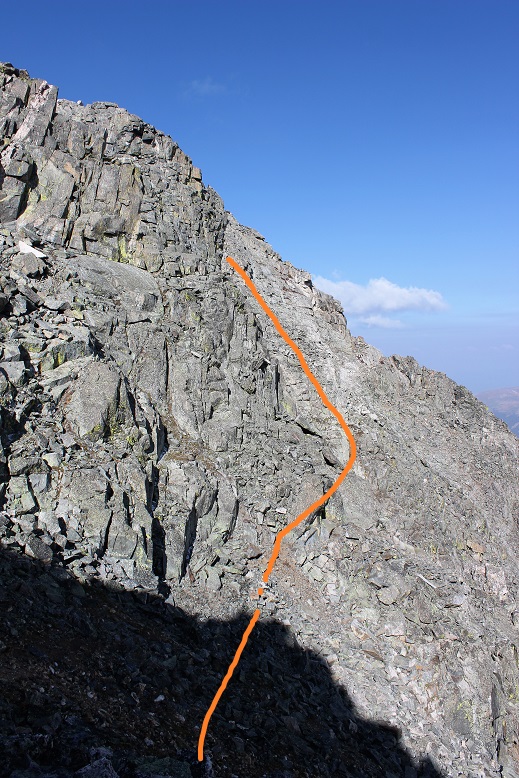
From the top of the gully I could see my intended route for West Needle Mountain. I would initially stay high, just under the rock outcroppings, then pick up a game trail for a while and follow it towards the base of the ridge in the distance, aiming towards just below the two large outcroppings and up a gully.
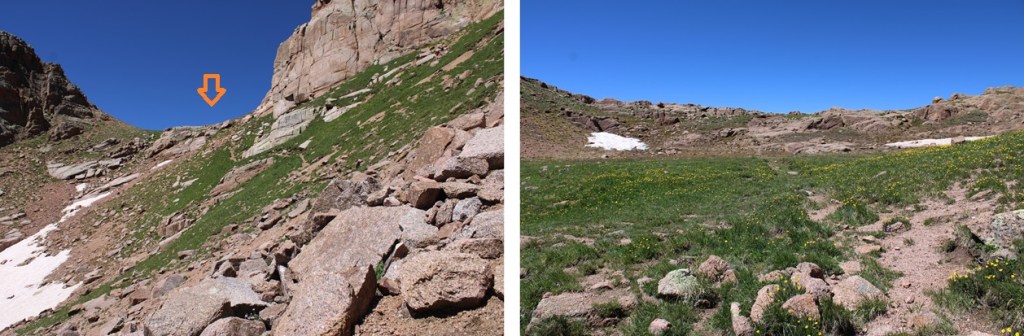
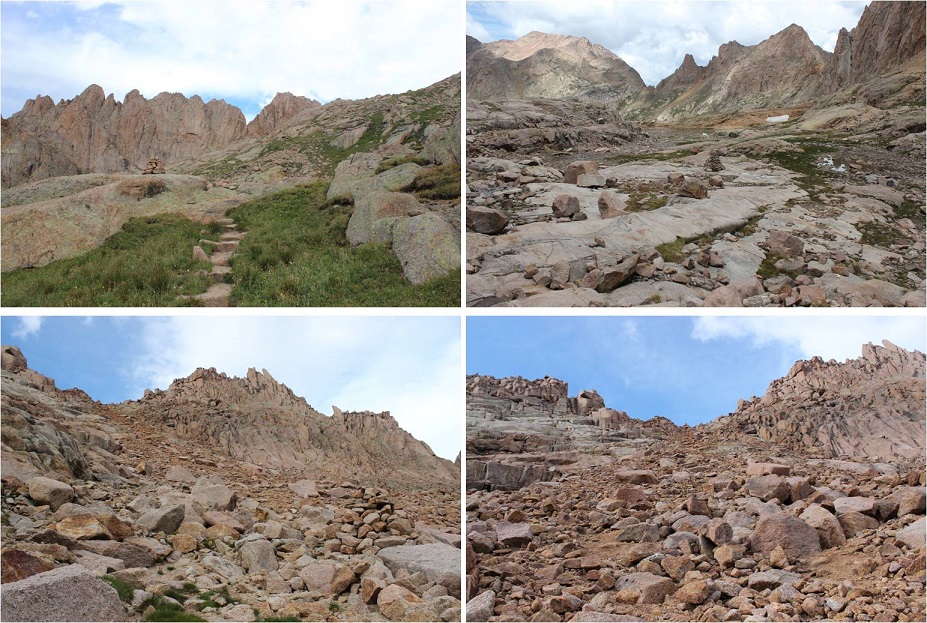
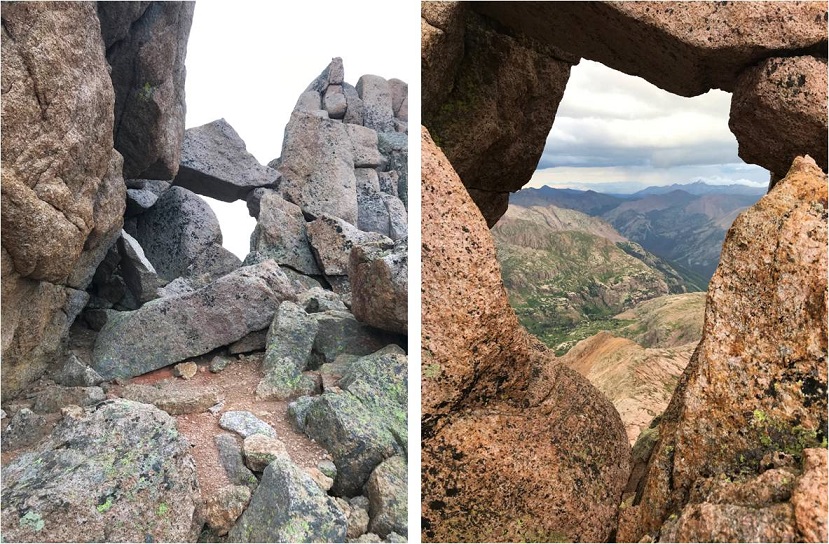
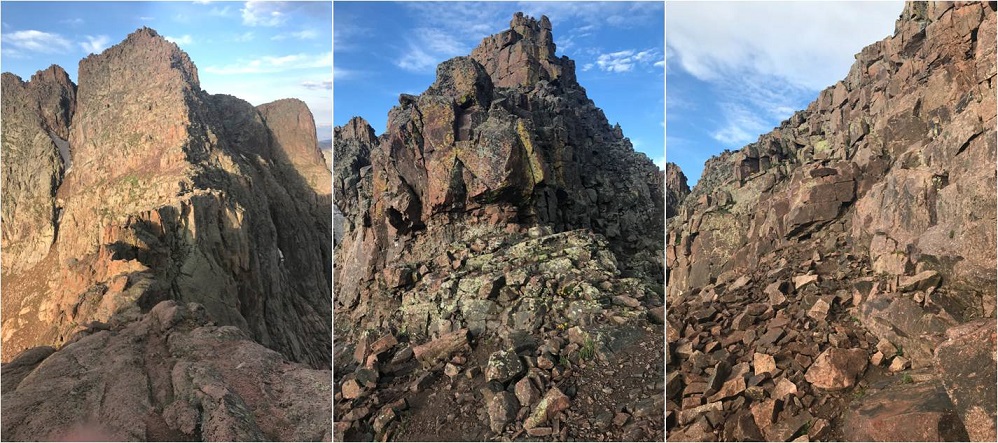
Here are some pictures of the route to the base of the gully I used.
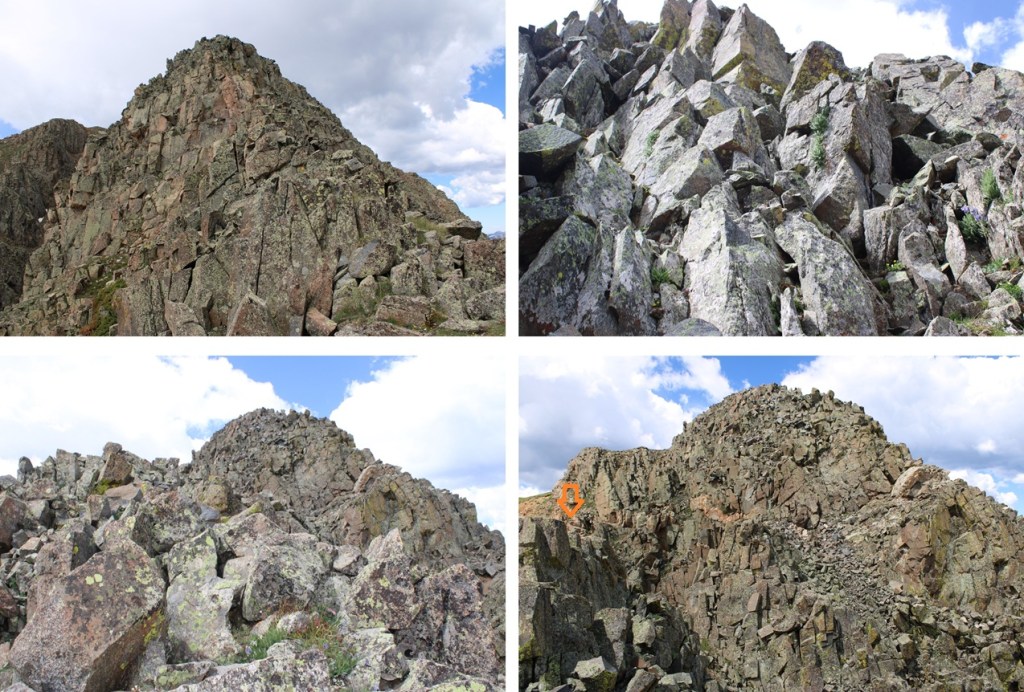
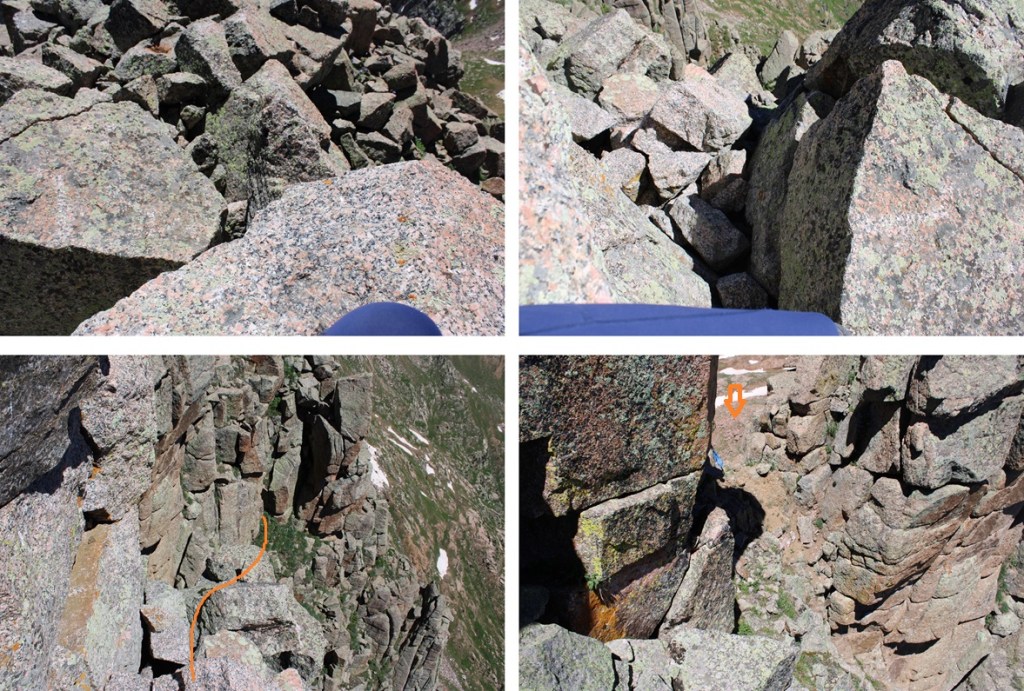
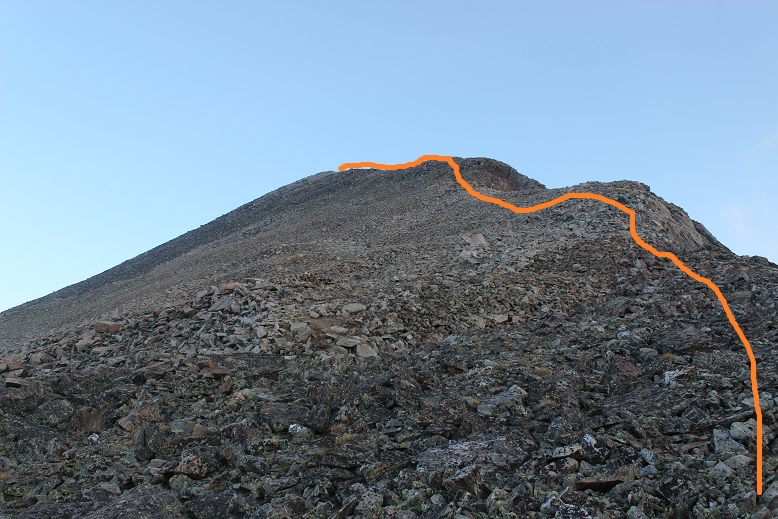
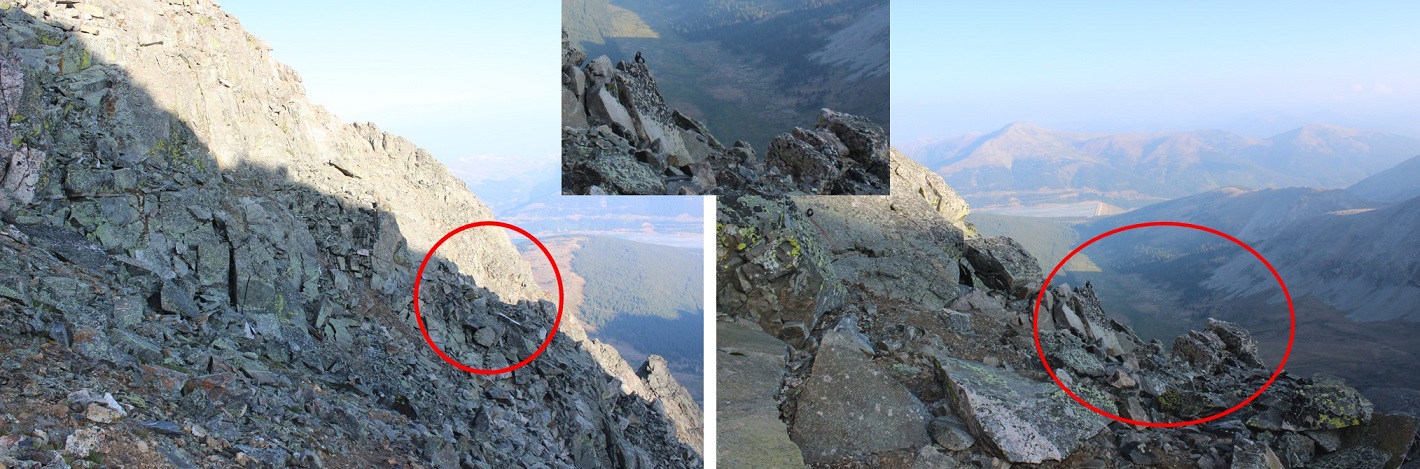
From here it’s a great time to look at the route before you. This is choose your own adventure, and there seem to be a lot of different possibilities for gaining the ridge. All class 3. This is the route I chose, first going up the loose and rocky gully then straight up the class 3 face.
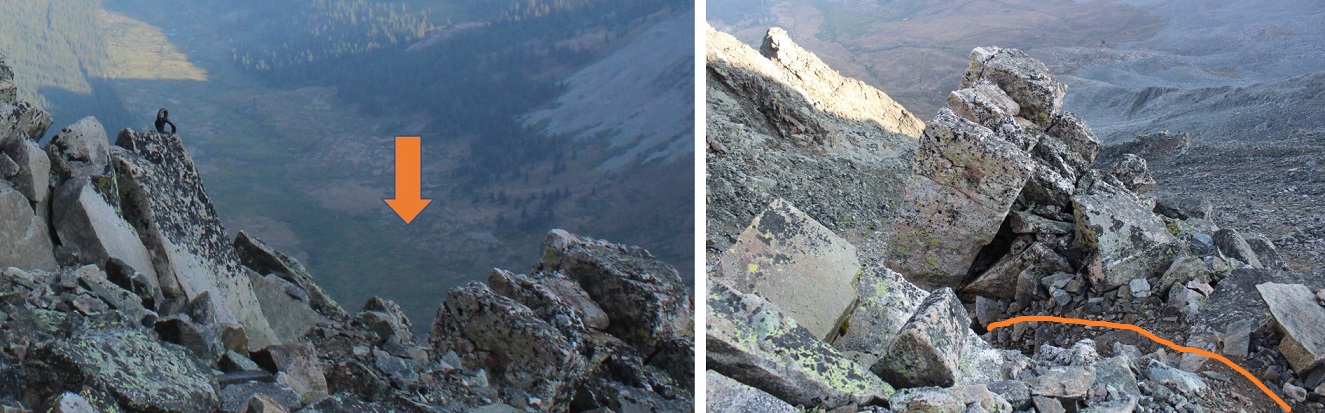
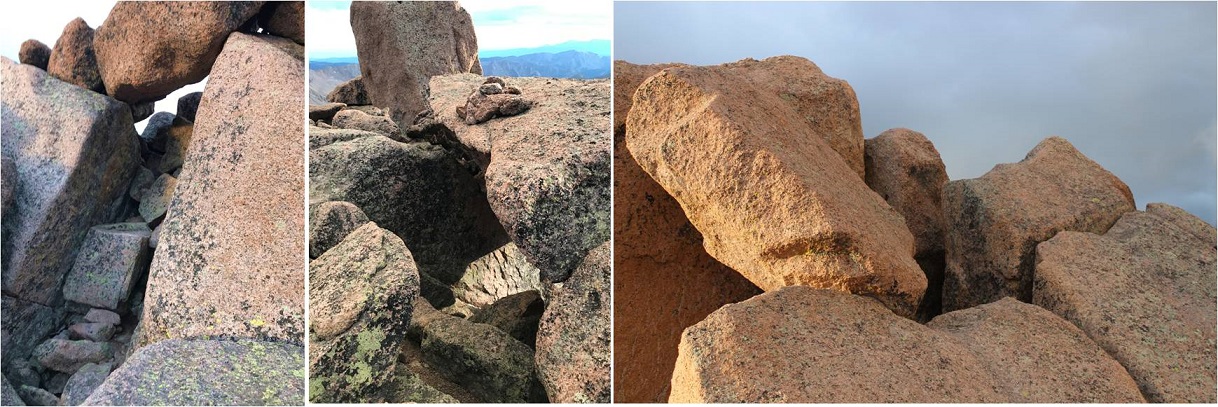
Once on the ridge it was still choose your own adventure. I stuck mainly to the ridge itself in class 3 terrain. There was one ‘sketchy’ move where I had to slide down a 10-15 foot boulder/rock slab and shimmy down. It wasn’t difficult, but there was exposure. The entire ridge for me was ‘figure it out as you go’. I just kept following it up, never cliffed out, and kept heading southwest.
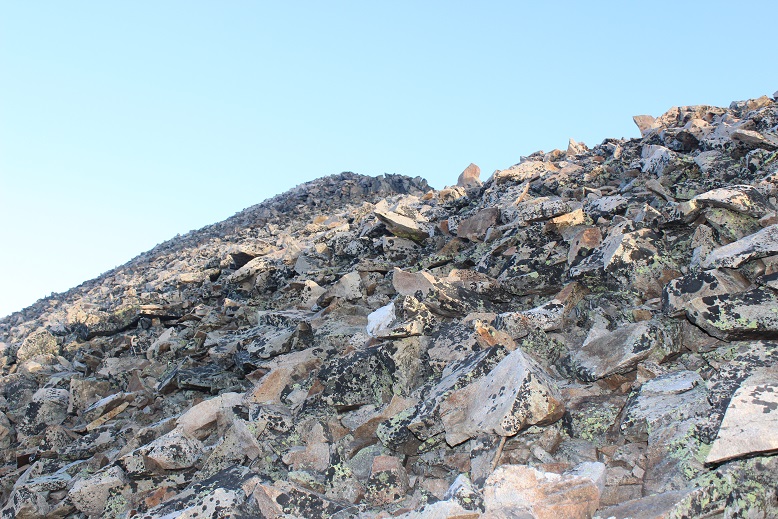
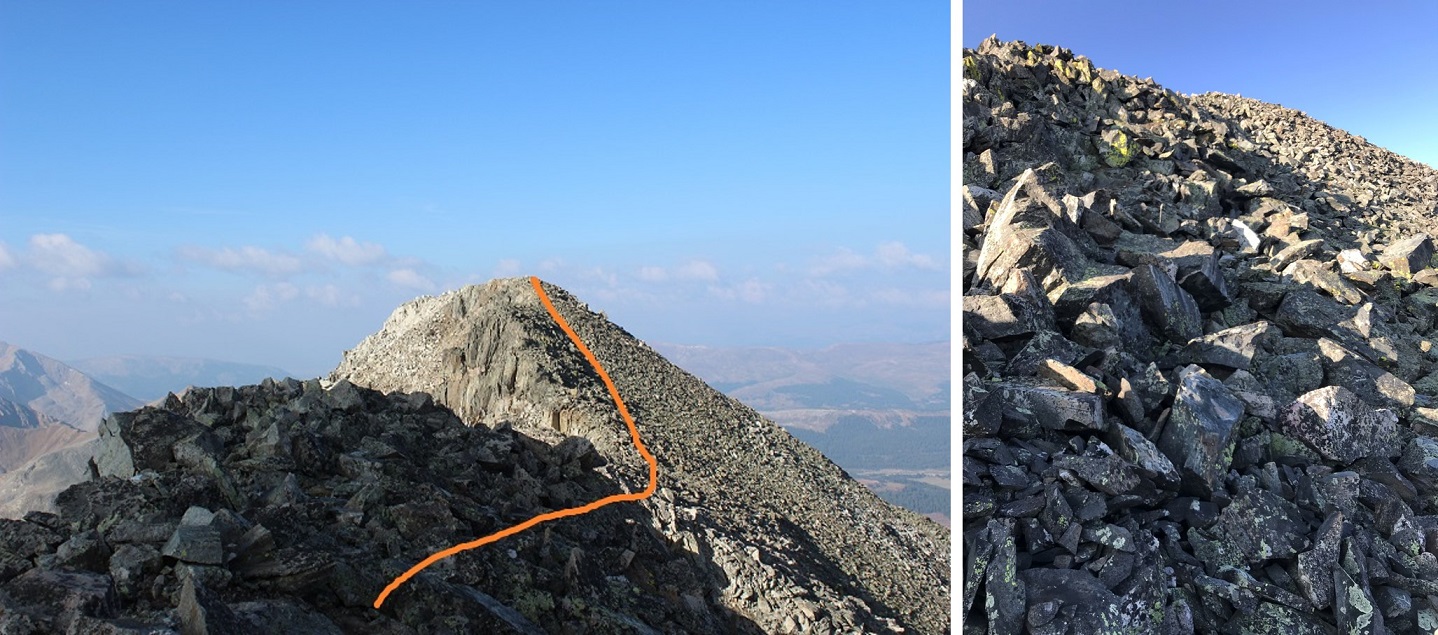
Of course there was a false summit, but luckily the terrain got easier from there.
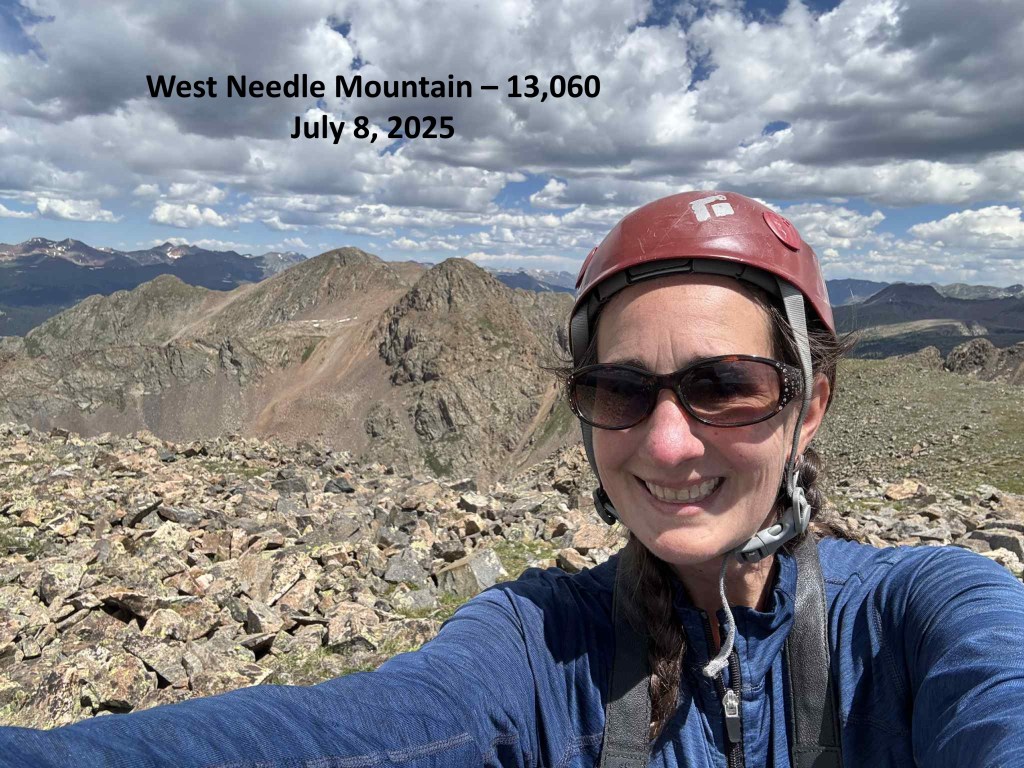
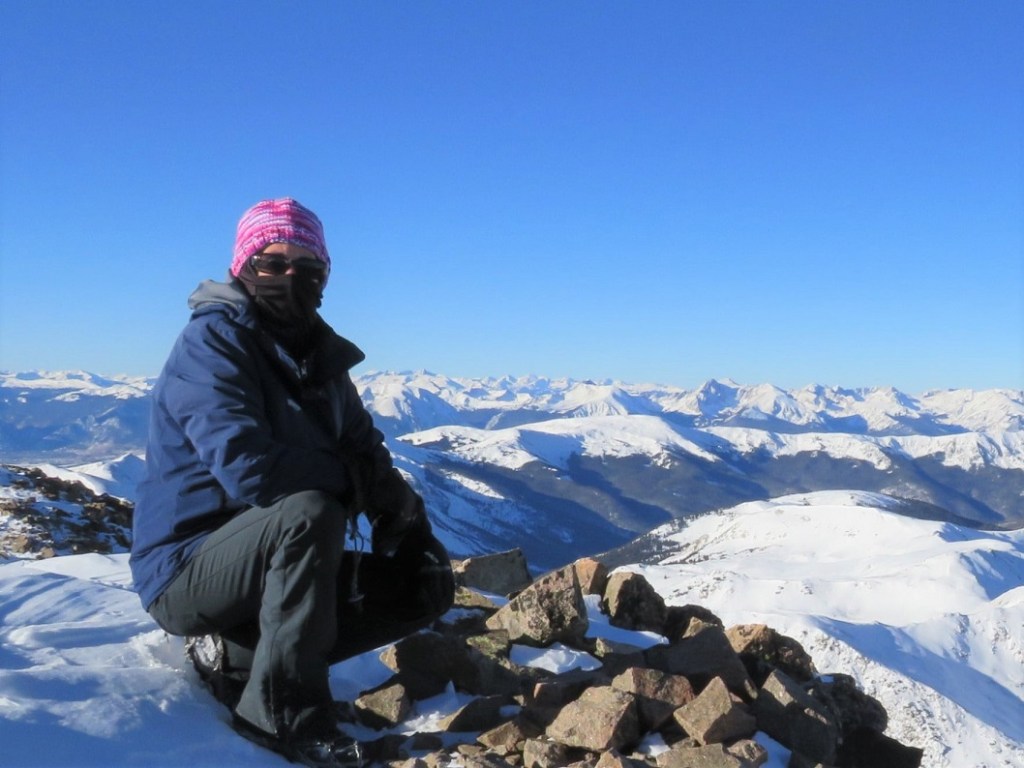
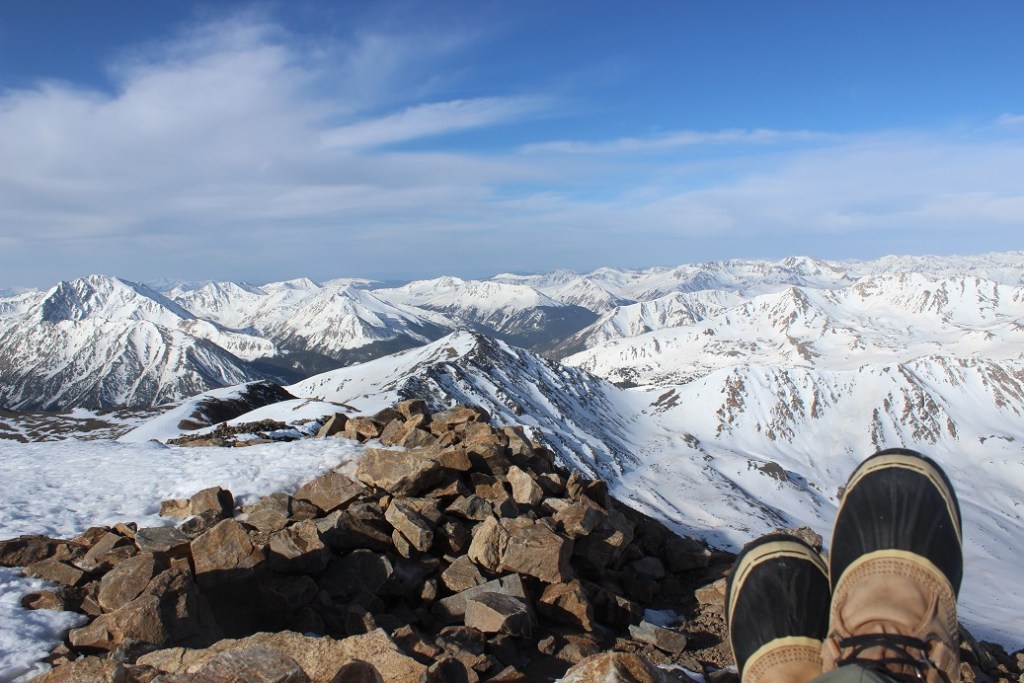
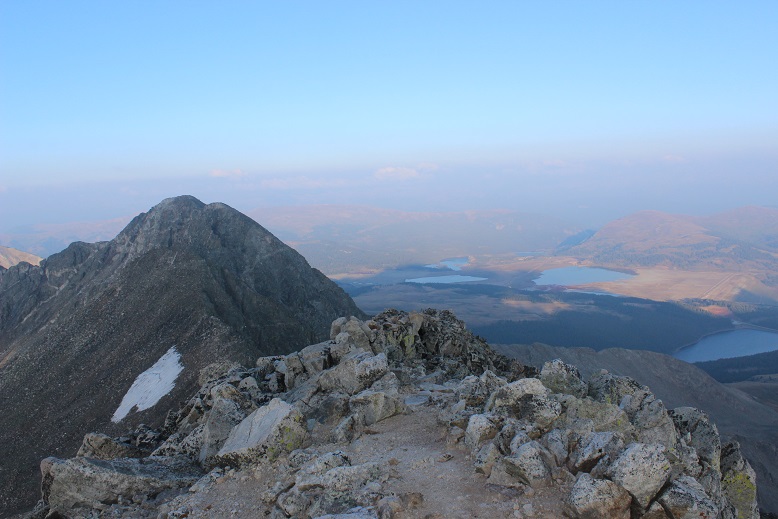
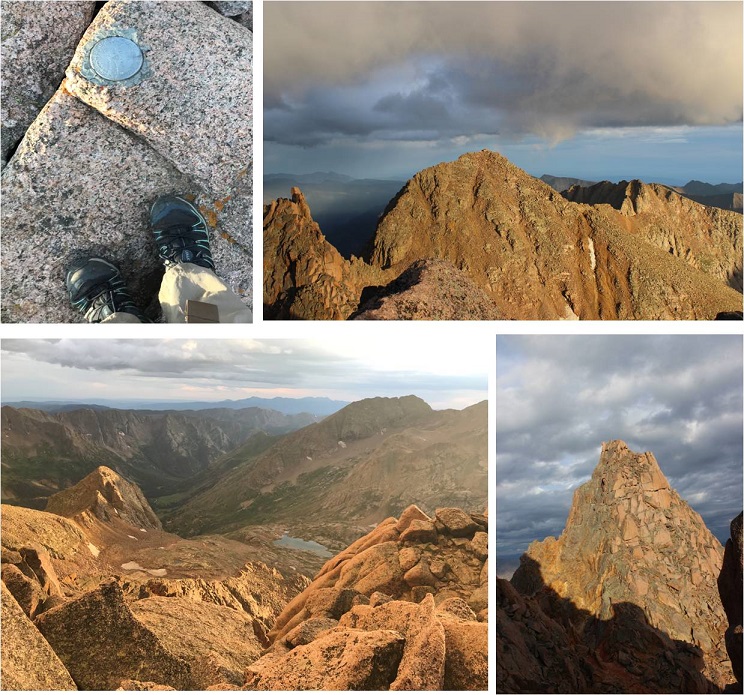
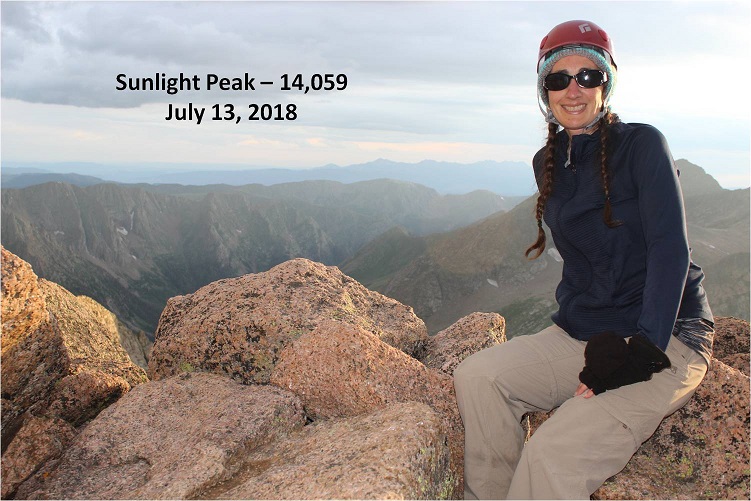
I summited West Needle Mountain at 11:40am
West Needle Mountain:
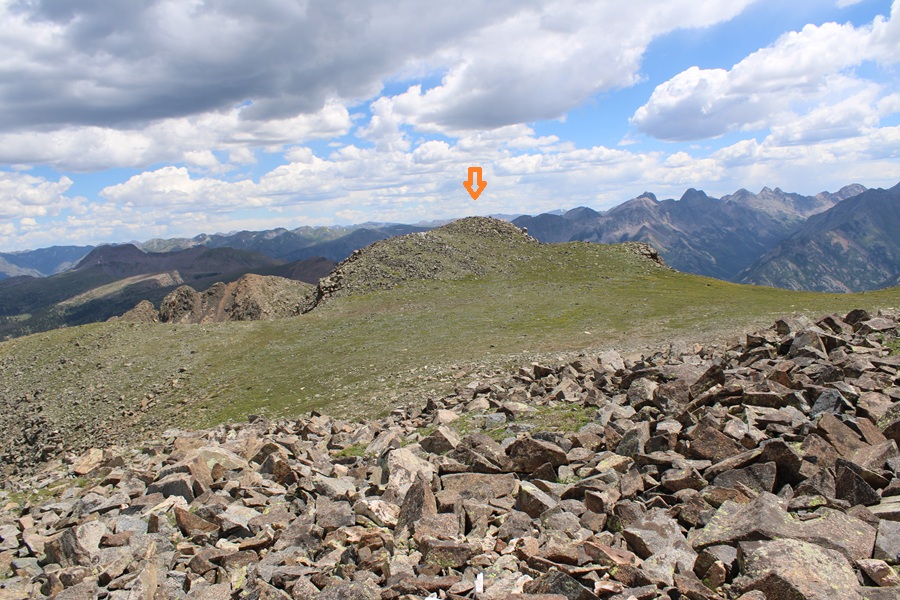
This was an out and back hike for me, so I turned around and headed towards the false summit
Then back down the ridge. Downclimbing seemed much easier than upclimbing on this route. The route was easier to ‘find’ on the way down.
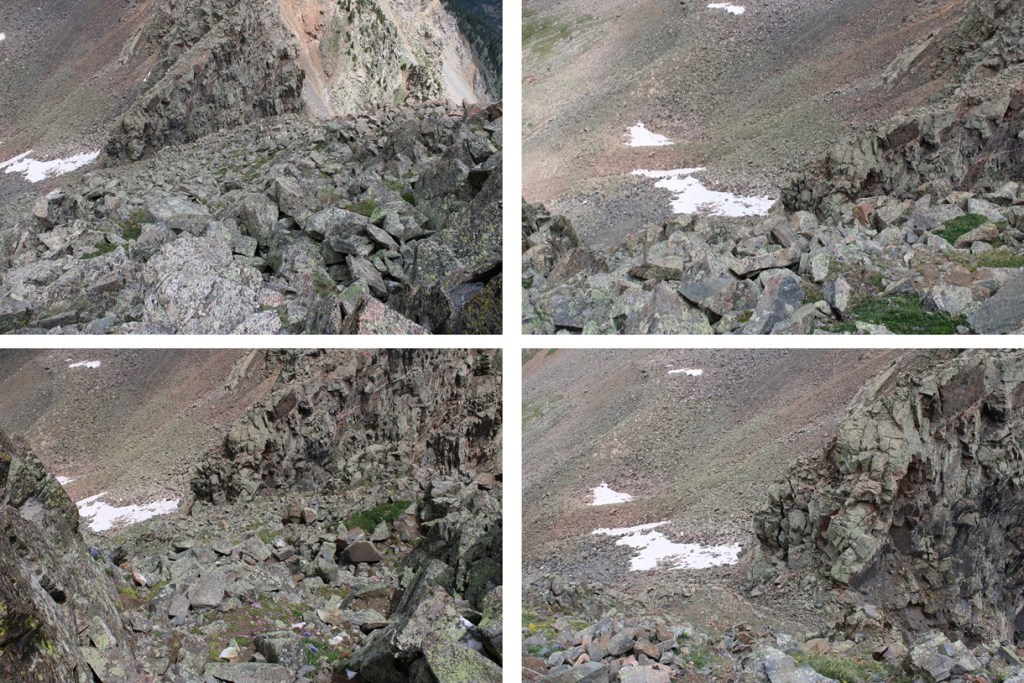
And then back towards the gully. It’s easy to know when to start the descent towards the gully as the terrain gets noticeably easier and you have a line of sight as to where you need to descend.
From the base of the gully this is my route back up to the saddle. I’d be ascending about 250’ to get there.
Then it was back down the gully and up towards the saddle
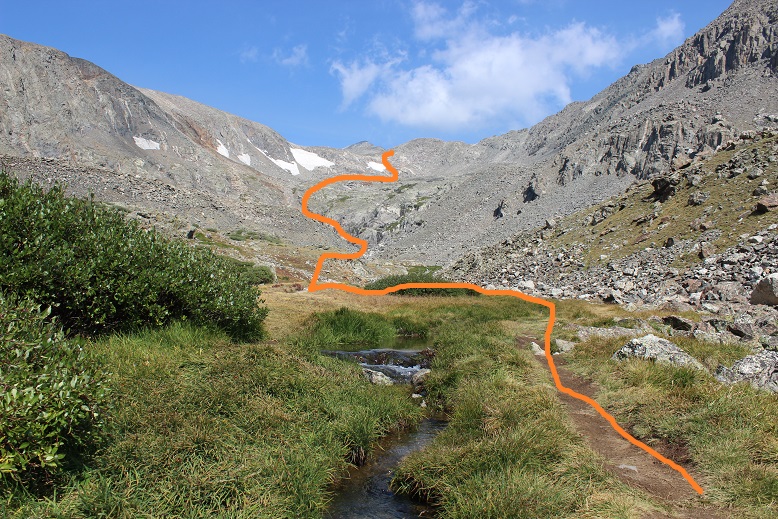
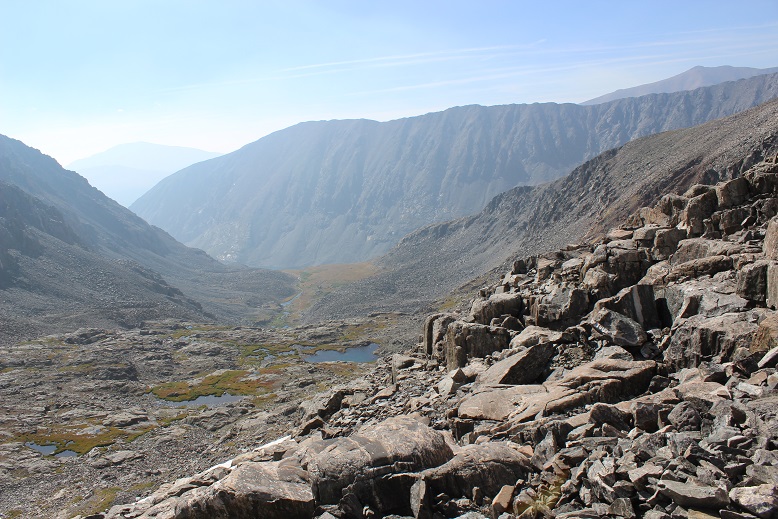
From the saddle I could see my route back towards Crater Lake. I’d descend back down 1260’, then up 400’.
First to head back down the drainage
Then to head back up towards the pond at 11750’. To help me navigate I first aimed for this large boulder in the distance, then headed north through the trees.
Once at the pond at 11750’ I found the Crater Lake Trail and took it the 5.5 miles back to Andrews Lake.
I made it back to my truck at 5:30pm, making this a 19.1 mile hike with 4853’ of elevation gain in 11 hours, 30 minutes. At least according to CalTopo. Strava gave me different numbers.
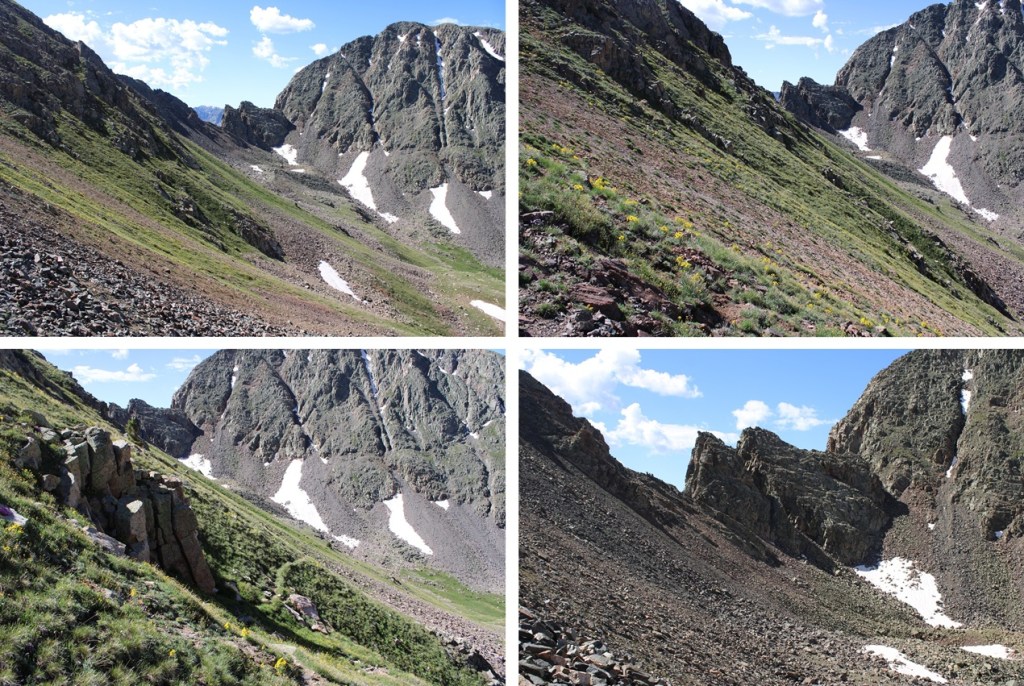
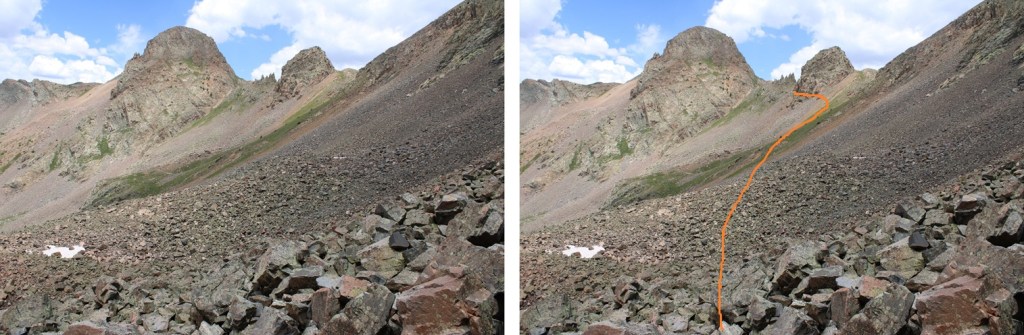
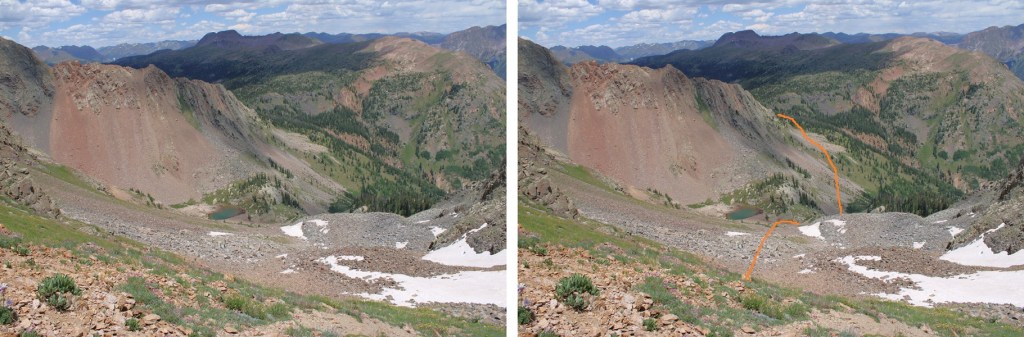
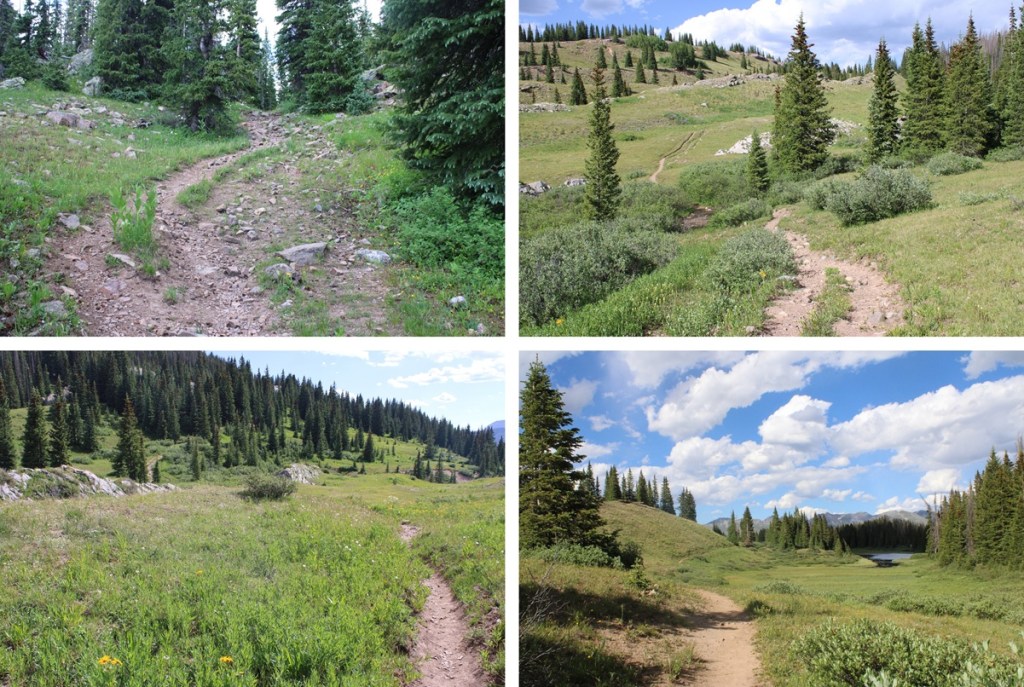
The approach to the saddle between Emerson and Peak Twenty Two is a total of 11 miles and 3250’ of elevation gain from Endlich Mesa Trailhead and City Reservoir. You can view the approach to the saddle here.
From the saddle of Emerson and Peak Twenty Two, I continued following a scree-filled game trail northeast skirting the east side of Emerson, losing 450’ of elevation as I wound my way towards an upper basin.
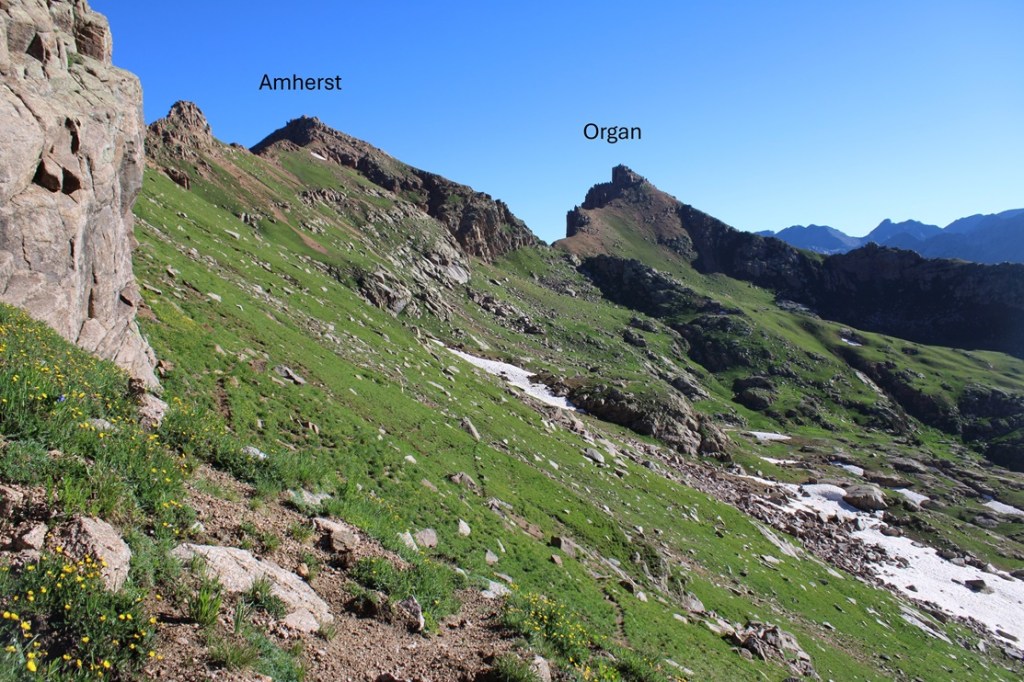
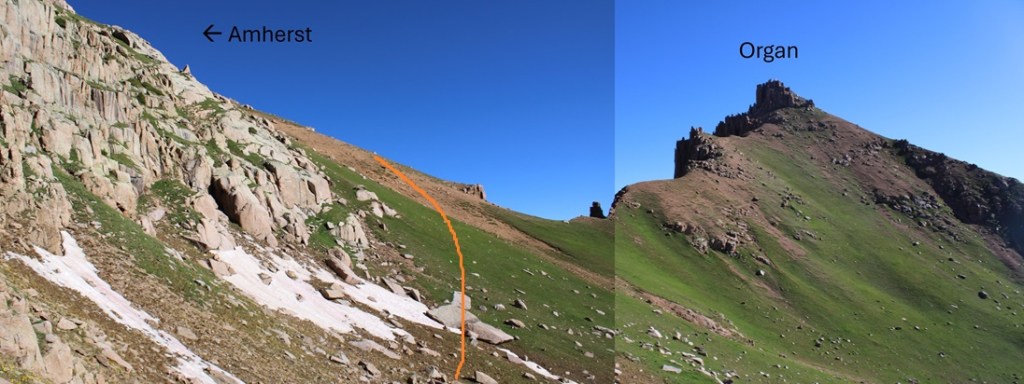
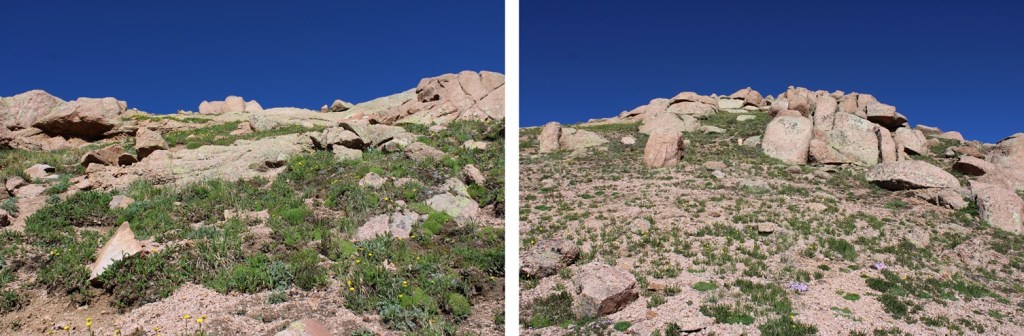
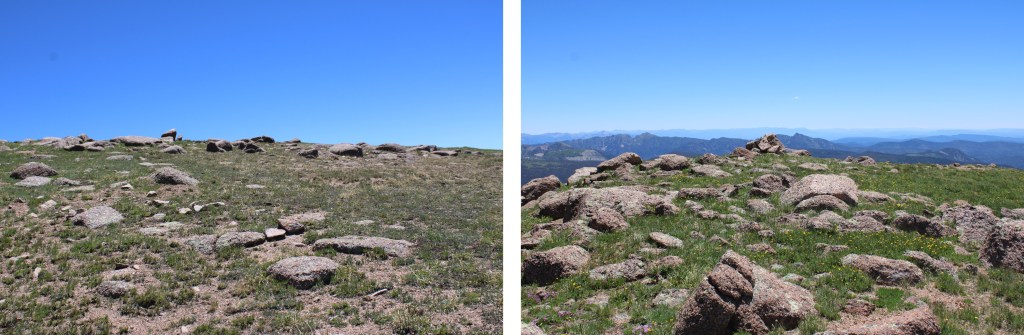
Here you can see Amherst and Organ
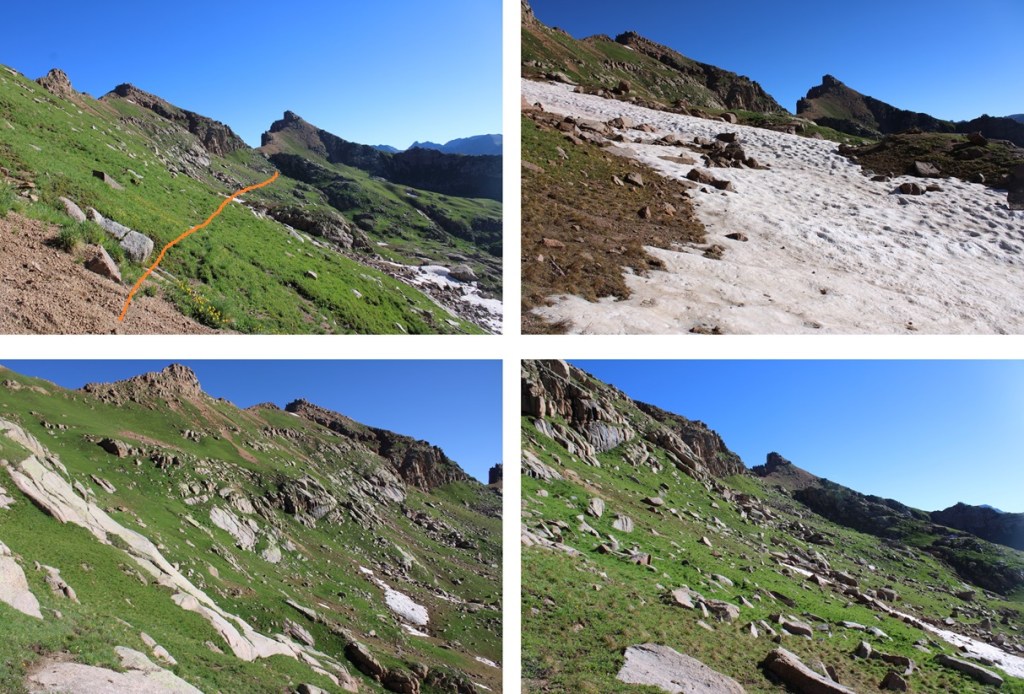
I continued following this trail until I kind of lost the trail, then stayed at about 12400’ of elevation as I made my way towards this gully
I aimed for this gully, and ascended it.
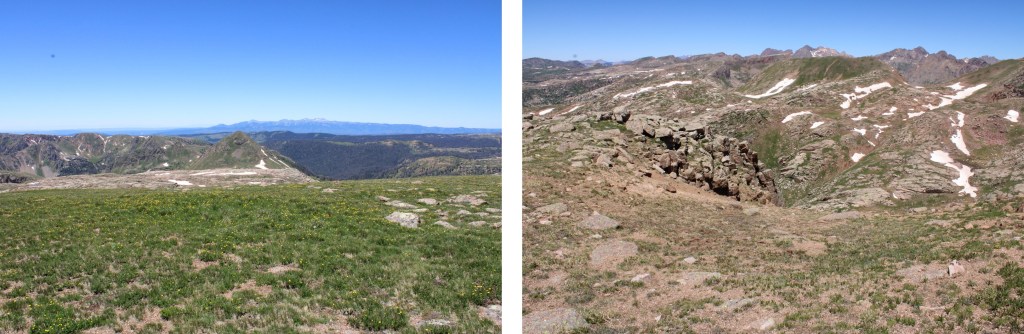
At the top of the gully I could see the saddle between Amherst and Organ. You can aim for the saddle, or just turn left and ascend Amherst. I aimed left, and ascended 800’ on very steep tundra terrain, which eventually gave way to rocky class 2 terrain.
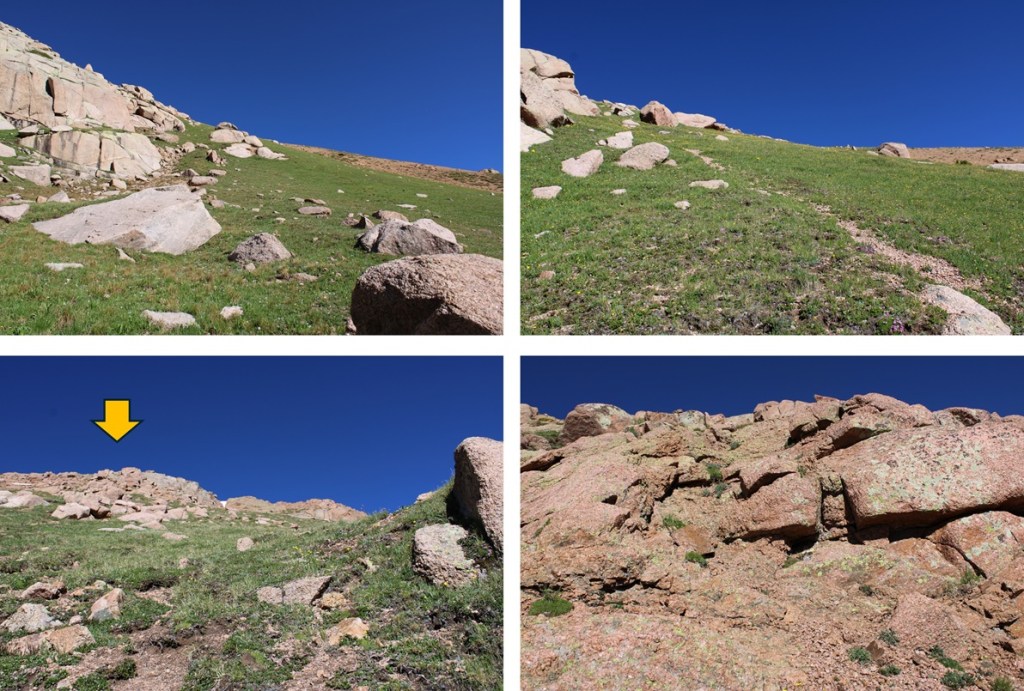
At the top of this rocky area I looked right, and it looked like the area to the right was higher than I was, so I continued following the ridge north.
But when I got to the other side, it looked like where I had been was the highpoint, so I headed south back to the other side.
My altimeter gave both points equal height, and there wasn’t a summit register, so I’m not entirely sure which is the true summit. There was what you could call a cairn on the first summit. In any event, they are both easy to tag.
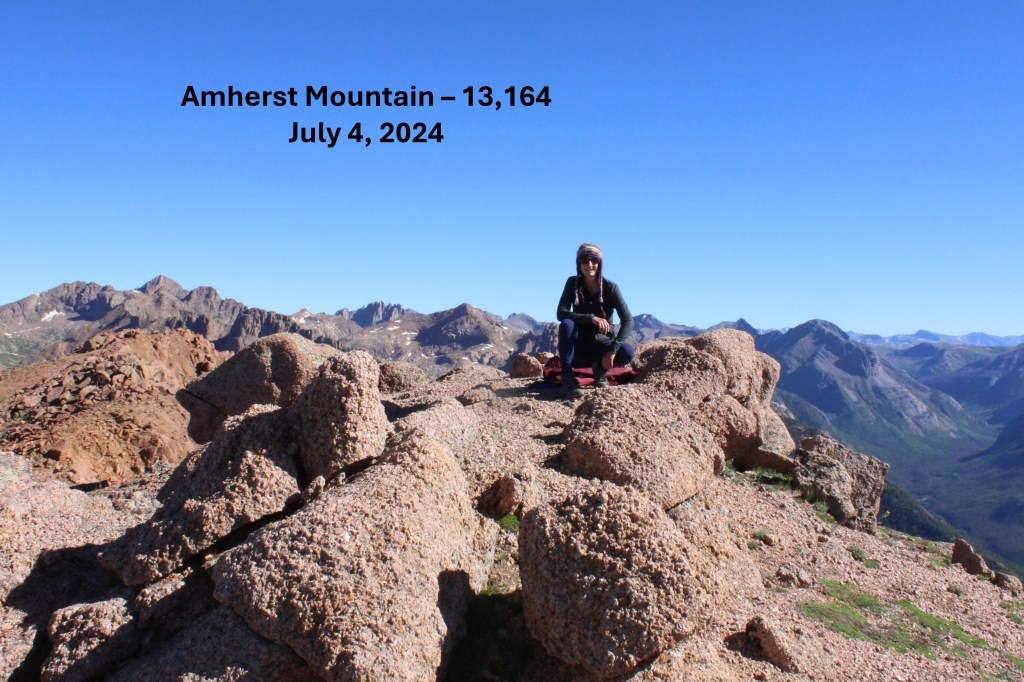
I summited Amherst Mountain at 9am
Amherst Mountain:
From the summit I could see Organ Mountain to the northeast
It looked like it would be a simple ridge hike, so I headed down to the Amherst/Organ saddle.
From the saddle, this is the route I took to the summit, aiming for the ramp to the right. This initial part was all class 2 on either scree or tundra.
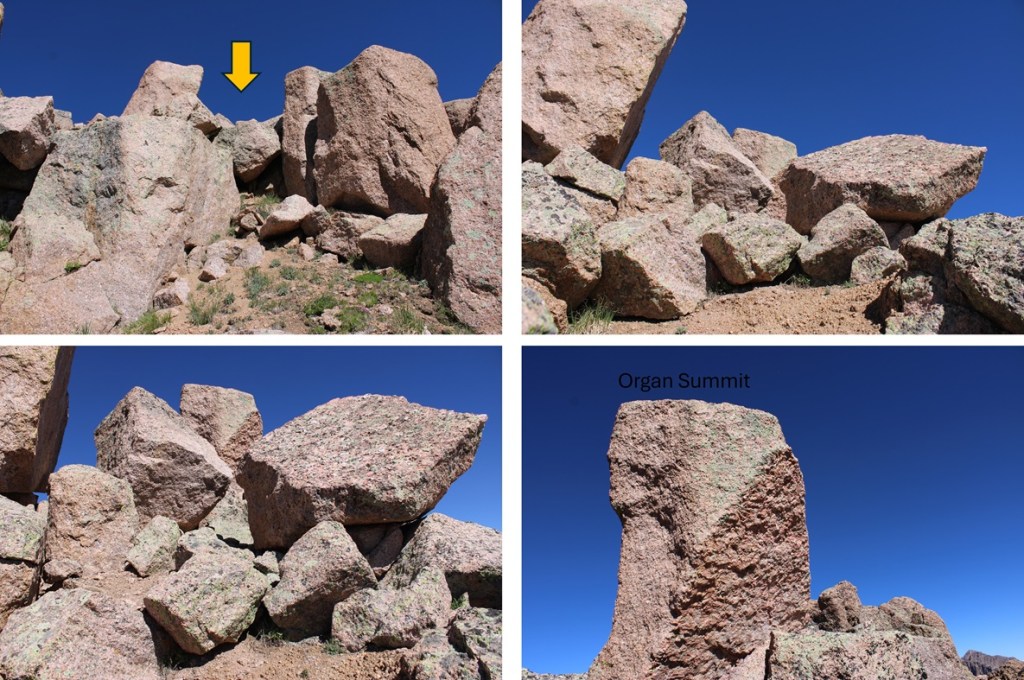
Once reaching the top of the ramp however, it became choose your own adventure, with some short class 3 climbing included at the very end. I hopped over a few rocks, and could see the summit boulder to the north. Climbing this was class 3, and a little airy, but easy access was found to the right of the summit block.
The summit block
I summited Organ Mountain at 10am
Organ Mountain:
I turned around and headed back down to the Amherst/Organ saddle.
From the saddle of Amherst/Organ I made my way back over this gully, then descended to around 12400’ as I wound my way back around the basin and up to the saddle of Emerson/Peak Twenty Two.
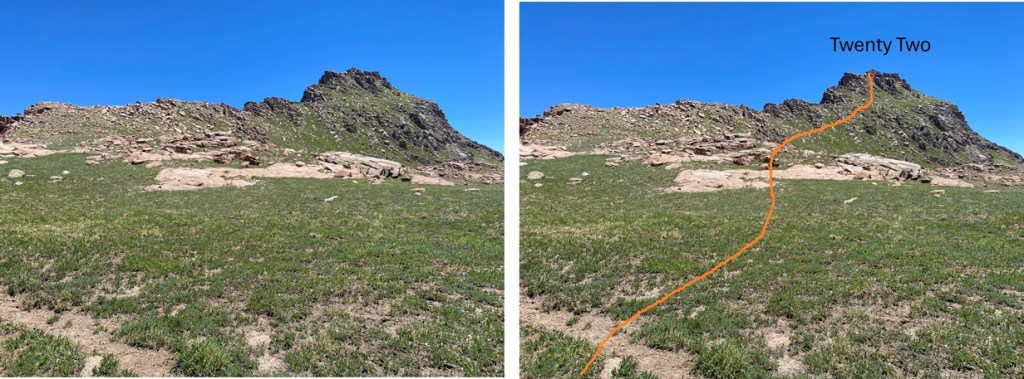
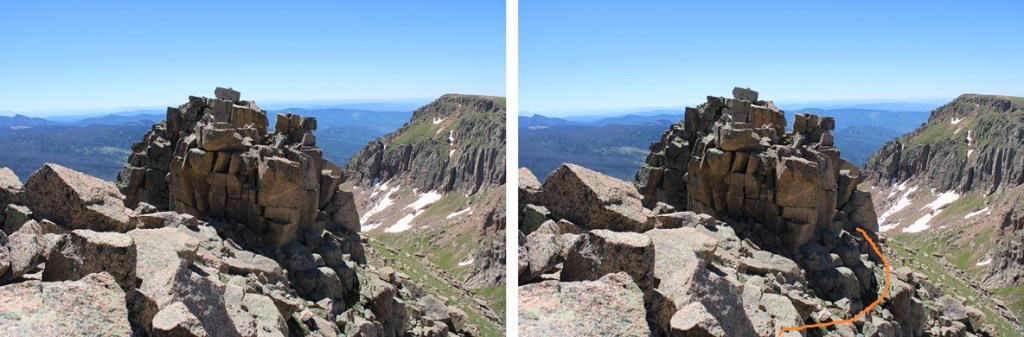
Now to head over towards Peak Twenty Two. From the saddle, I turned left and headed southeast towards Peak Twenty Two. I bypassed most of the ridge, and instead took a grassy gully towards the summit. Here’s the overall route I took to gain the summit.
This part was easy. I just followed the tundra line up the ridge.
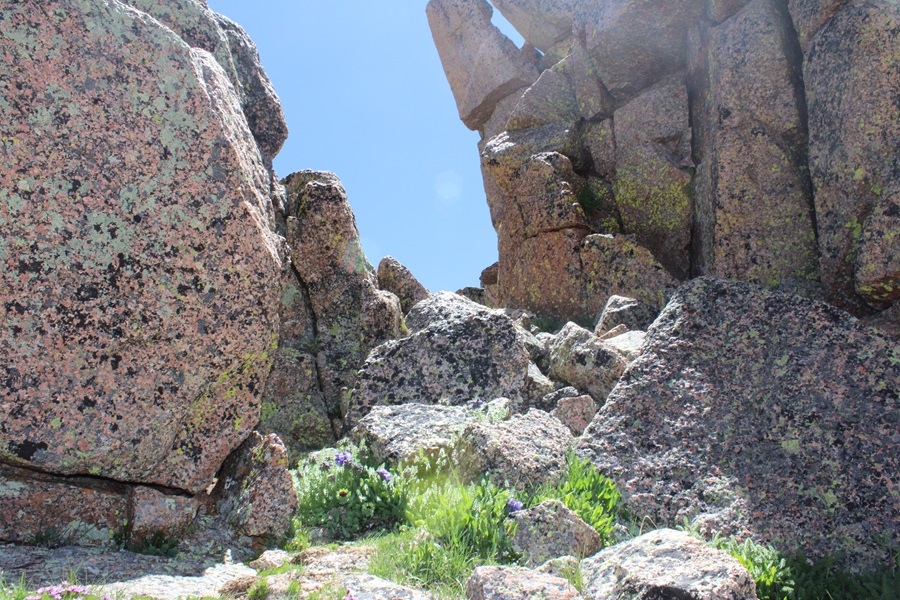
At the top of the tundra I thought I’d be at the peak, but I turned right and could see a rocky formation in front of my. I descended a few feet to the right, and skirted the rocky area.
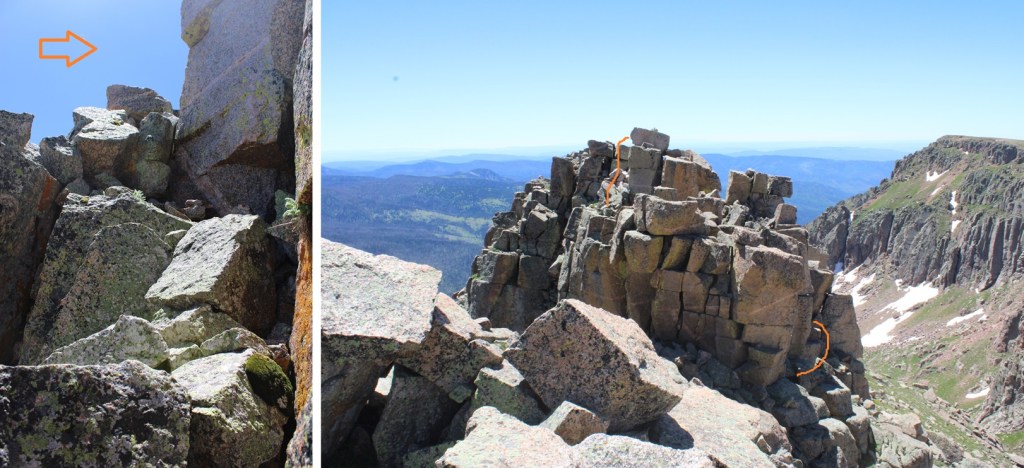
I then found a ramp and climbed up.
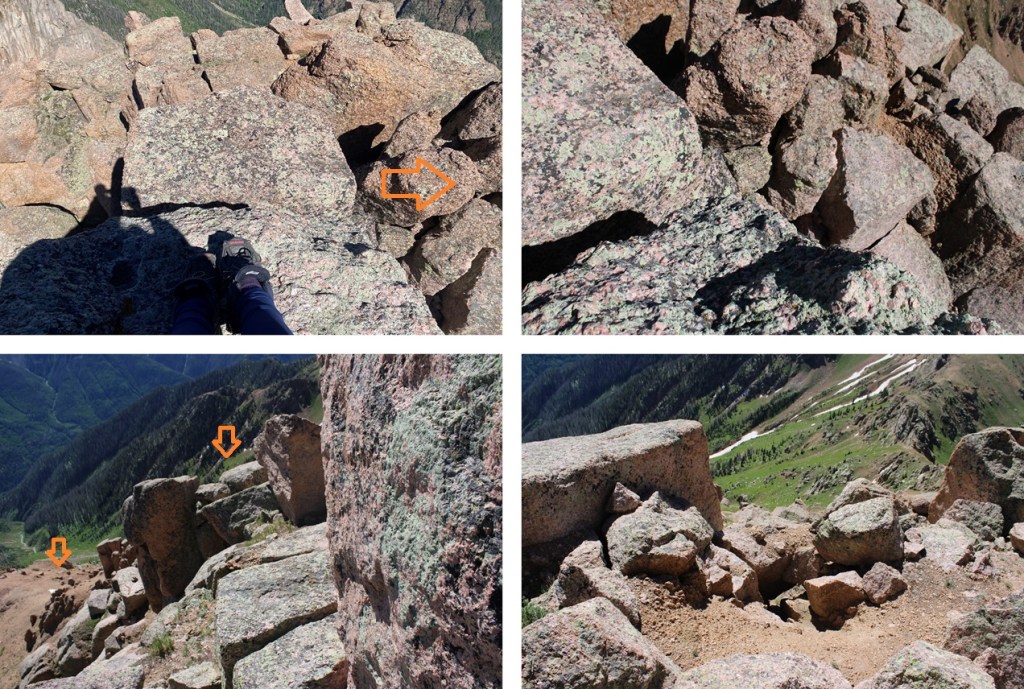
This is where it became class 3, or maybe class 4 depending on which route you take. There are two more rocky ramps you can ascend. One to the right, and one to the left. I looked at both, and liked the one on the left better. They were both very exposed and required scrambling, but the one on the left felt “less” exposed. Here’s the ramp I took:
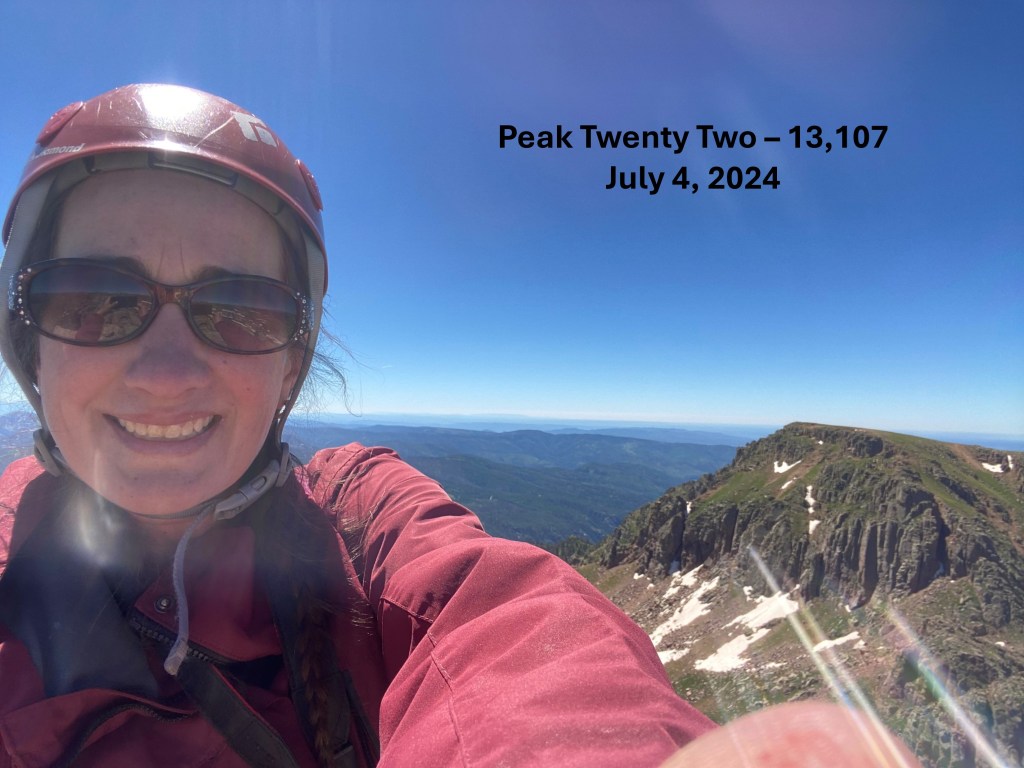
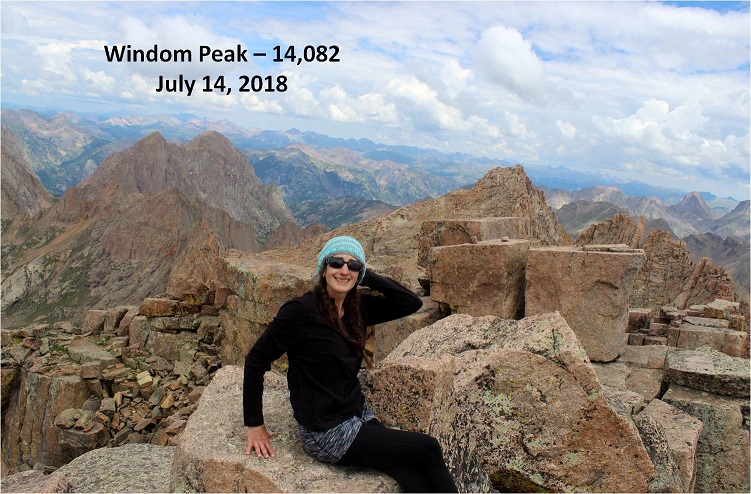
I summited Peak Twenty Two at 11:45am
Peak Twenty Two:
I could see sheep mountain to the south, but first I was going to need to descend the way I’d come and head back towards the grassy access ramp.
I gingerly left the summit, and headed back towards the grassy ramp.
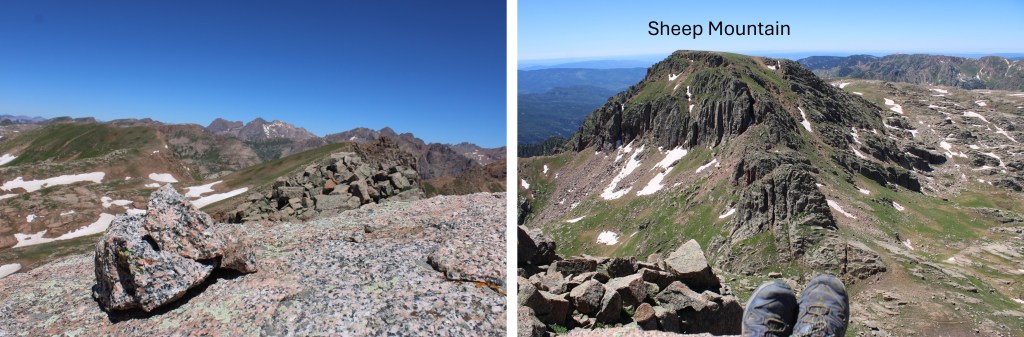
When I’d descended to about 12800’ I turned left and headed south towards Sheep Mountain. This peak was much easier to ascend, all class 2, with a few game trails thrown in. This is the route I took to gain the ridge:
And some step by step pictures, first heading south along the tundra, then looking for a grassy ramp.
I then dropped a little in elevation, and gained the gully to the ridge.
Once on the ridge, it was very flat. I aimed east and up towards the summit.
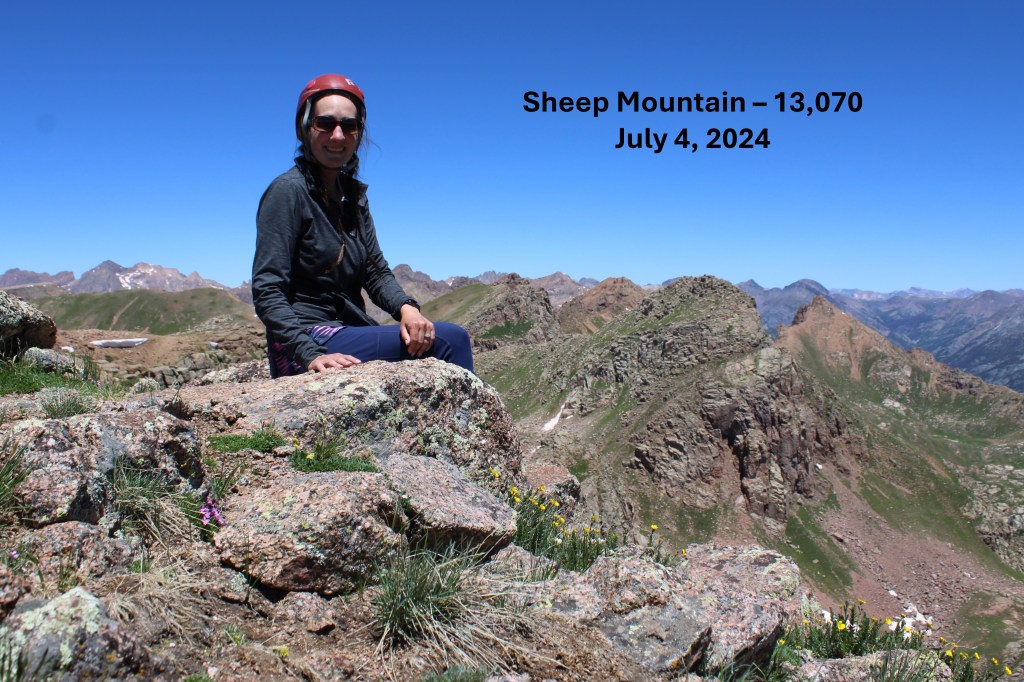
I summited Sheep Mountain at 12:30pm
Sheep Mountain:
Now to head back to the Emerson/Peak Twenty Two saddle. I descended back down the gully, then headed north towards the saddle.
Round trip from the Emerson/Peak Twenty Two Saddle to Amherst, Organ, Peak Twenty Two, Sheep, and back to the saddle was 6.57 miles with 2550’ of elevation gain. From City Reservoir, it was 13.5 miles with 4495’ of elevation gain.
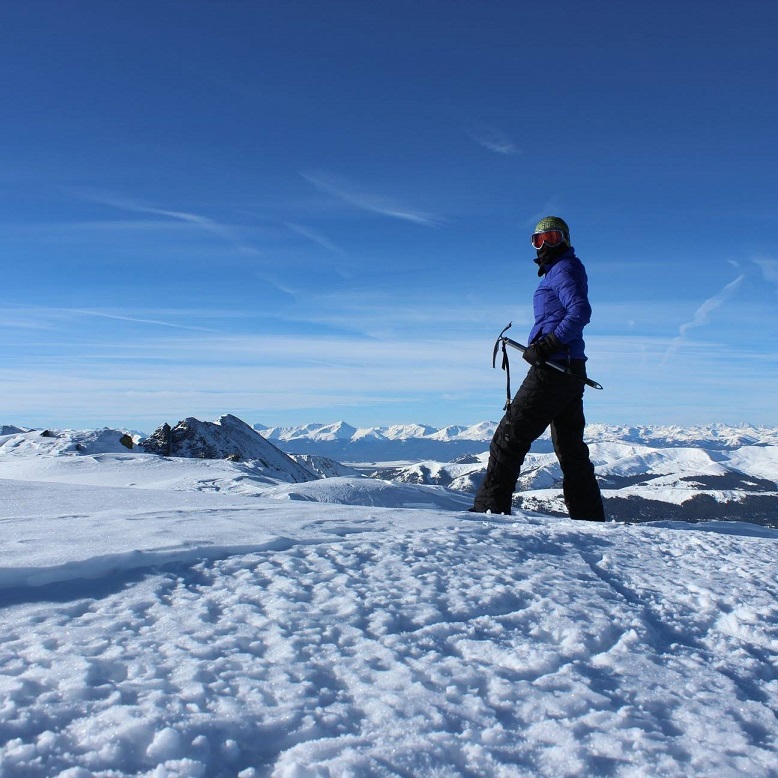
My trail name is Wild Wanderer, I’m a mountaineer, and I have Raynaud’s. So far this year I’ve summited over 160 peaks above treeline, many of them in winter conditions, and I haven’t had a single Raynaud’s attack this year. With the cold weather approaching (or already here!) I’ve been asked to put together some tips on how I successfully mountaineer in the winter and manage my Raynaud’s. I believe these tips can help all cold weather hikers and adventurers.
Disclaimer: These tips in no way all inclusive or a substitute for the education you should receive before entering the backcountry in winter. Please consider taking classes in alpinism, orienteering, avalanche awareness, and wilderness first aid before entering the backcountry, especially in winter.
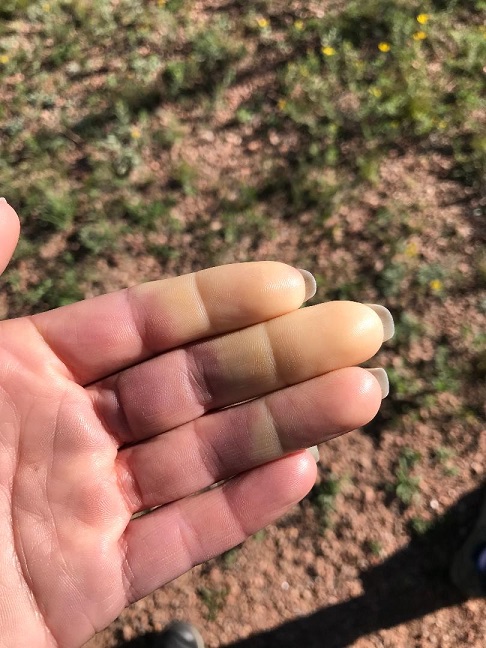
Raynaud’s causes some areas of your body — such as your fingers and toes — to feel numb and cold in response to cold temperatures or stress. In Raynaud’s disease, smaller arteries that supply blood to your skin become narrow, limiting blood flow to affected areas (vasospasm). This can happen even in warm weather.
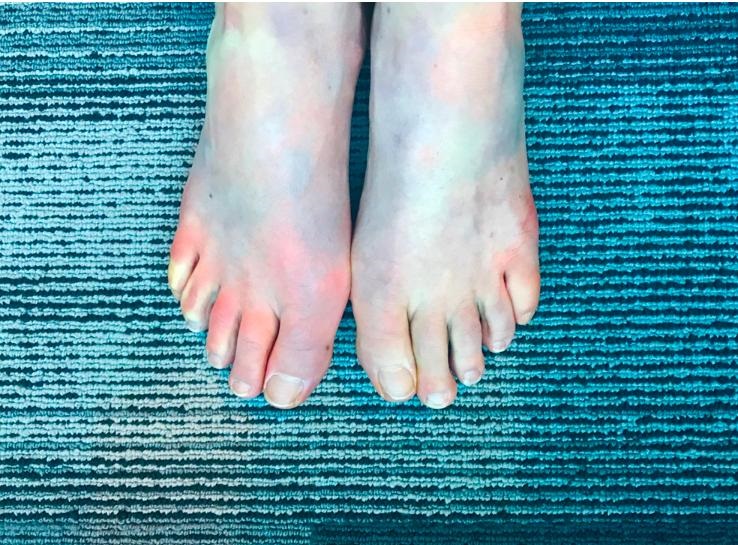
This picture was taken of my fingers while camping on a 70 degree day.These are my feet having an attack while I was at work, sitting at my desk
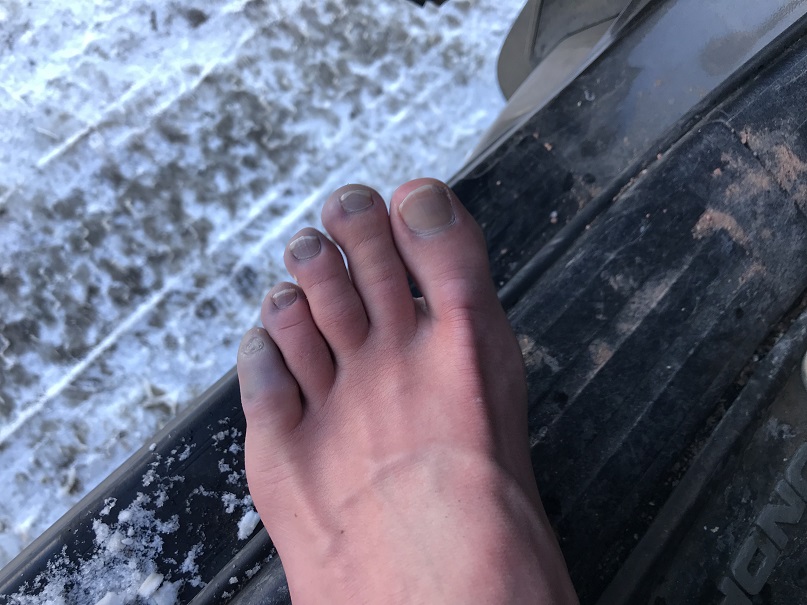
During an attack of Raynaud’s, affected areas of your skin usually first turn white. Then, they often turn blue and feel cold and numb. As you warm and your circulation improves, the affected areas may turn red, throb, tingle or swell. This can be a very painful experience. Many people mistake it for frostbite. This time I’d earned my blue toes, as I’d been snow-shoeing without the proper gear
Winter hiking is a wonderful experience. There’s a special reverence and tranquility to a winter mountain landscape. The trails are less crowded, the views are amazing, the wildlife easier to spot, and with this comes a unique sense of achievement to summiting a mountain covered in snow and ice. However, the cold and wind can be a barrier to this sport. I’ve been a mountaineer for 6 years now, and I’ve learned quite a few tips and tricks to keeping myself (and my digits) warm and attack free. It all comes down to prevention and preparedness.
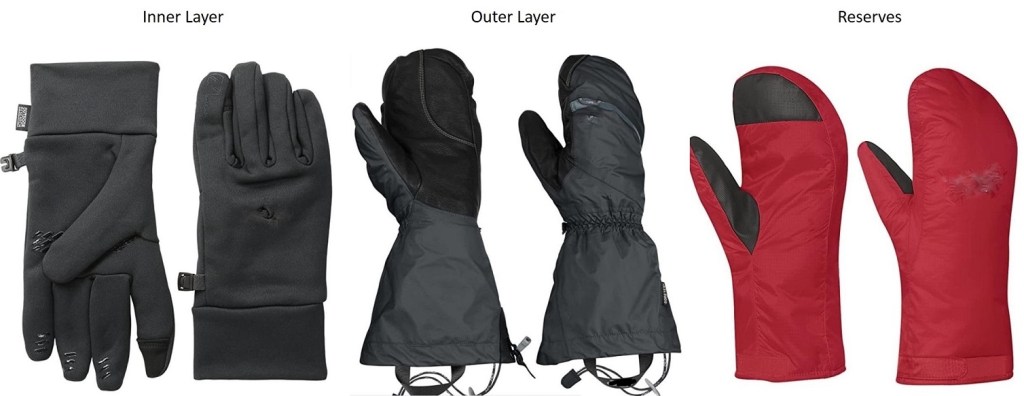
What Wild Wanderer Wears
I usually wear the same outfit when I mountaineer, emphasizing moisture wicking layers and fleece. It’s kind of boring and predictable, but it keeps me warm.
Here’s what I wear, from head to toe (scroll down for detailed information)
Knit/Wool Hat
Balaclava
Sunglasses / Snow Goggles
Sports Bra
Moisture wicking tank
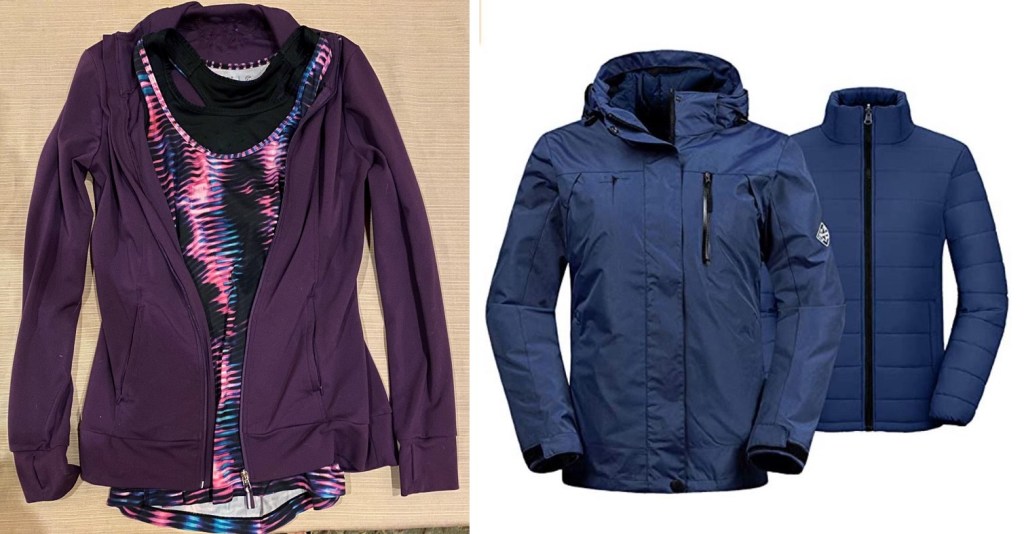
Moisture wicking jacket
Puffy Jacket
Jacket Shell
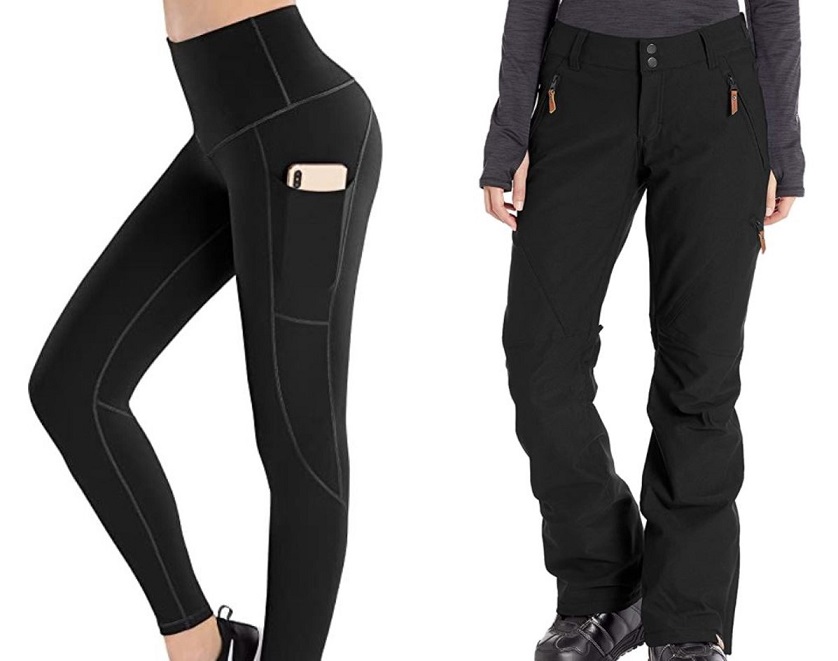
Yoga Pants
Snowboarding Pants
Wool Socks
Mountaineering Boots
Gloves
Bandana
Extra Gear (depending on weather/conditions)
Snowshoes
Microspikes
Ice Axe
Crampons
Knit/Wool Hat: I knit hats and donate them to an outdoor school for 4th graders. These kids are outside all winter long, and their heads need to stay warm. I make hundreds of these hats a year, and I always wear a different one each time I go hiking. When I get back, I wash the hat and donate it. The kids get a kick out of seeing me wearing their hat on top of a mountain. Wool is a great material, just don’t buy a cotton hat: cotton kills (more on this later).
Balaclava: If it’s windy you’re going to want one of these. Make sure it covers your whole face and nose, is made out of a breathable fabric (polyester works) and covers your neck and is long enough to be tucked underneath your inner layers.
Sunglasses / Snow Goggles: The snow can be blinding, and you’d be surprised how a good pair of goggles cuts down on the cold the wind can bring. I put my sunglasses in my jacket pocket before setting out, so they’re easily accessible.
Upper Layers: I rarely take layers off during a hike, as I’d rather be too hot than too cold. With Raynaud’s it’s easy to cool off when hot, but difficult to warm up once cold. I wear a moisture wicking sports bra, tank, and jacket all the time, no matter what. On top of that I have a puffy and a shell (the shell doubles as a rain jacket). The shell has a hood, which I have prepped to fit my head if needed to block out the wind.
Bottom Layers: To prevent chaffing, I like to wear form fitting yoga pants (polyester/spandex) under fleece lined snowboarding pants. These snowboarding pants will get torn up from crampons, microspikes and snowshoes, so I reserve a pair primarily for mountaineering. NOTE: Ski bibs are a terrible idea, as you need to take off unnecessary layers to use the restroom. Make sure your pants are just that: pants.
Wool Socks: Not cotton. Not too snug. You want your feet to be able to breathe and circulation to flow. Also, this is an instance where two is not better than one: only wear one pair of socks.
Mountaineering Boots: This is going to be a highly personal choice. I go through 4 pairs of boots a year, but to be fair I put a lot of miles in a year – around 2500 and over a million feet of elevation gain. What’s important here is to buy a pair a size larger than you’d normally wear, and, unless you have extremely narrow feet, get them in a wide size. This is because your feet will swell above treeline and you want them to have room to do so freely. A constricted foot is a cold foot. You don’t want to wear anything too constricting on your hands or feet. The footwear should also be waterproof, have a good tread, be flexible, and feel comfortable. Go to an outdoor recreation store and try on a few pair to see what works best for you before buying.
Gloves: Unfortunately, hand warmers have never worked for me (not the chemical ones, the battery-operated ones, or the ones that use fuel). Note: If you have Raynaud’s you can never take off all your gloves while winter hiking. Never. The cold will zap the heat out of your hands instantly, and regaining that heat is difficult.
I bring along 3 pairs of gloves: I wear two at a time, and have the third in reserve in case I loose one I’m wearing: The wind above treeline can be ferocious, and I’ve seen gloves blow away in the wind. If you have Raynaud’s and you lose a glove above treeline it’s quite possible you’ll be losing fingers with it. I buy all gloves one size bigger than I normally wear. This allows for my hands to swell at altitude and makes them easier to put on/take off as needed.
The first pair I wear is made of a 95% polyester, breathable, wicking, quick drying fabric with 300-weight fleece and a 100 weight fleece liner. I always have a glove with fingers as the base layer so I can move my fingers to perform tasks that require dexterity with a layer still on, protecting my hands from the elements. I never take these gloves off. Ever. (See stylus information below).
The second pair I wear is a shell. They’re waterproof, breathable, windproof, wicking, fully seam-taped with a water-resistant leather palm. These do a great job keeping out the wind, and are easy to take on and off. It’s important the outer layer are mittens and not gloves because my fingers and hands stay warmer in a mitten.
My reserve pair is also a pair of mittens. They’re fleece lined and come with the outer mitts. I keep these as a back-up in case I lose one of my other gloves.
Bandana: This is very important! I tie one to a carabineer and put it on the side of my pack so I have easy access to blow my nose. My nose drips like a faucet above treeline, and it’s nice to have something readily available to wipe my nose. (Yes, learning how to clog one nostril and blow is helpful, but not practical with large mountaineering gloves). The bandana should be made of polyester so it dries out fast. If you buy a cotton one it will freeze faster, get stiff, and be unusable until it melts. It becomes frozen snot.
Snowshoes: When it comes to snowshoes, you most likely won’t be putting these on at the trailhead, but later in your hike. Thus, ease of use is very important: you want to be able to put them on without taking off your inner glove. The three things I look for in a snowshoe are that they’re made of steel (not aluminum), have heel risers, and ratchet bindings. Ratchet bindings are the most important feature: I climbed all of Colorado’s 58 peaks over 14,000’ in a cheap pair of snowshoes, but I wouldn’t have been able to accomplish this if they hadn’t had the ratchet bindings.
Microspikes: Don’t spend a lot of money on these. A cheap, $7 pair will last you a long time. I use them year-round (they work great on scree for stability) and would never pay more than $10 for a pair. My advice here is if there’s any ice at the trailhead to put them on while you’re still in your vehicle, keeping your hands warm while doing so. I’ve worn microspikes for miles when they weren’t needed, and it didn’t damage them. It did however keep my fingers from getting needlessly cold putting them on. (Remember, when it comes to the cold, prevention is key). Microspikes can also be worn with snowshoes: There’s no need to take microspikes off to put snowshoes on.
Ice Axe: These are usually made of stainless steel/aluminum, which gets cold. I have an ice axe with a rubber grip (which is moderately warmer) and a leash. The leash goes around my wrist, under my outer glove but on top of my shell. I try to hold the ice axe by the leash when it’s not necessary to hold the shaft for safety purposes. Another way to avoid the cold here is to put a bandana around the shaft while gripping it.
Crampons: Make sure they’re made of steel and not aluminum (aluminum bends) and have front facing spikes for traction. Learn how to use these before trying them in the elements for the first time, as they can be tricky to put on correctly, especially while wearing gloves.
Keep Your Pack Packed
Unfortunately, those of us with Raynaud’s don’t have the luxury of packing light: we need to be prepared for all types of weather, and due to the possibility some of our gear might fail/get lost, we need backups. I like to keep all my gear in my backpack when not in use. When I get back from a hike, I usually wash my bandana, refill my water bottle, wash my sunscreen compact, and put them all back in my pack. I don’t forget important gear at home, as it’s always in my pack. In addition to the 10 essentials, I carry the following items (scroll down for detailed information):
Carabiners
Jetboil
16oz water bottle (in addition to my regular water bottle)
Stylus
Vaseline
Sunscreen
Camera
Collapsible trekking pole
Carabiners: Carabiners are your friend! The larger the better, so they’re easier to manipulate while wearing gloves. I use them to attach my water bottle to my pack, as well as my ice axe, bandana, and any other gear I want easily accessible.
Jetboil and 16oz Water Bottle: Jetboils are a useful tool, as they are relatively lightweight and can boil water very, very quickly. I have one in my pack during the winter, along with a 16oz Nalgene. Before the hike I warm up water, put it in the Nalgene, and keep this smaller water bottle close to my skin as I hike (sometimes in a pocket, or the waist of my pants, etc.) This helps keep me warm. I also start my hike with warm water in my drinking water bottle to help prevent it from freezing. Keeping the water bottle close to my body (and not in my pack) helps to keep the water from becoming frozen during the hike. The Jetboil comes along with me, and if needed I can warm up the water again, or, if the water is frozen, I can quickly heat up snow.
Stylus: These are so helpful to people suffering from Raynaud’s! Our fingers don’t register well on touch screen devices, including ATMs, gas station machines, phones, and tablets. A stylus is cheap (I bought 12 in a pack from Amazon for $4) and solves the problem of using our fingers on screens. A stylus while hiking has the added benefit of reducing the need to take off your gloves to use your phone or GPS device to take pictures or find direction. I keep a stylus attached to all my devices that require touch to operate.
Vaseline: I’m in love with Vaseline/Petroleum Jelly. Movie stars have sworn by its beauty effects (wear it to bed to keep skin soft and younger looking), it helps wounds heal faster, restores moisture after wind burn, and when you’re a mountaineer, it keeps your nose from freezing. Before hitting the trailhead I slather a generous layer of Vaseline on my nose to keep my nose warm. It works wonders!
Sunscreen: OK, so it’s cold above treeline, but due to the reflection of the sun on the snow sunscreen is still needed. This can be problematic because a tube of sunscreen freezes in the winter above treeline. Using an aerosol spray isn’t practical for obvious reasons (wind) and the sunscreen that comes in a deodorant-like stick doesn’t apply evenly/melt when frozen. To combat this, I went to the dollar store and bought a compact, took out the powder, cleaned the compact out, and filled it with my favorite sunscreen. Then I placed a new compact sponge over it (30 sponges for $1 at the dollar store) and let the sponge absorb the sunscreen.
I keep the compact in my pocket as I’m hiking (inside of a plastic ziplock bag) and when the sun comes up, I take out the compact and apply the sunscreen. The first time I did this I was surprised at how well it worked: The sunscreen doesn’t freeze this way, and is easy to apply. The only downside is the set-up needs to be washed/replaced every time you use it.
Camera: Of course, you’ll want to bring a camera, and the specific kind is up to you. Did you know cameras get cold too? The batteries freeze and they stop working. To combat this, I put my camera on a strap around my neck, and in between snapping photos keep the camera between my puffy and outer layer. This keeps the battery from freezing.
Collapsible Trekking Pole: These are indispensable for a variety of reasons at all times of the year. In the winter they are used for probing the snow to measure snow depth, determining the stability of ice at frozen stream/river crossings, and to whack snow off trees bent over with snow and blocking the trail. Make sure the handle is made of cork or plastic (not metal/aluminum) and easy to manipulate while wearing gloves. When not in use because you’re using your ice axe, collapse and attach to your pack with a carabiner. Also, a trekking pole is your first line of defense against 2 and 4 legged animals.
Trail Tips and Tricks:
Get dressed in your vehicle: It’s cumbersome to drive to the trailhead wearing all my winter gear, so when I arrive at a trailhead I tend to get dressed in the car. I do so with the heat on high, and put all my gear on without opening the car door (this includes snowshoes). It takes a little maneuvering, but I start the hike warm.
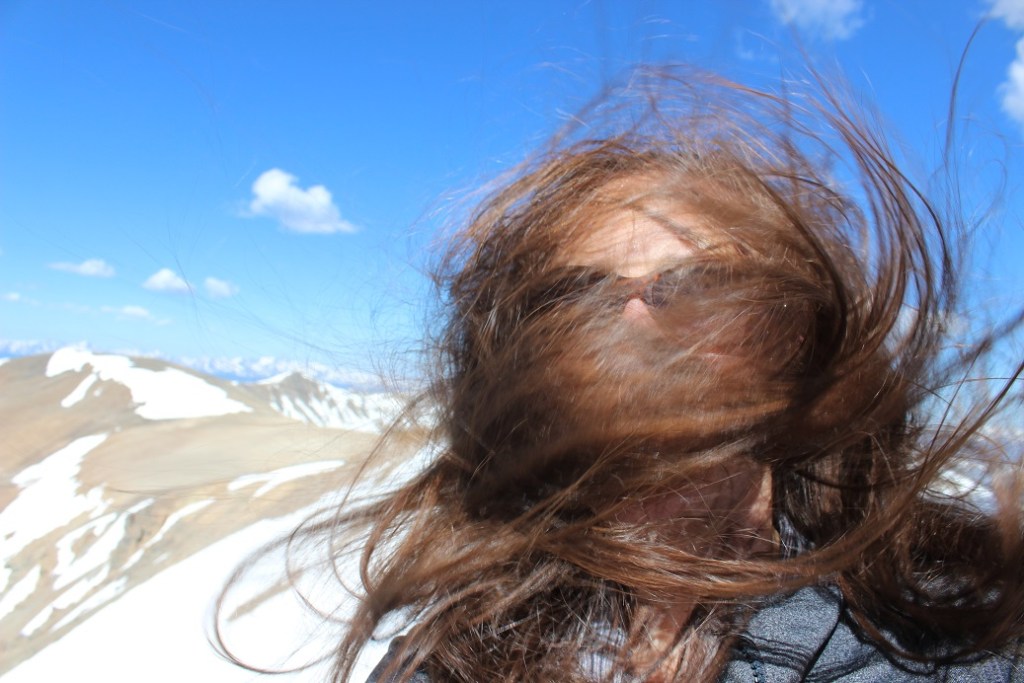
Tie your hair back: Here I believe a picture is worth 1000 words. I now braid my hair before a climb.
Don’t Wear Cotton: Cotton is heavy, takes a long time to dry, adds to rapid body heat loss, and absorbs too much moisture. That means you stay wet/cold for a long time. This includes jeans and that cool ‘It’s another half-mile or so’ t-shirt. Instead, pick a synthetic fiber such as polyester, nylon, fleece, or merino wool.
Add string to your zippers: Yes, wearing lobster-claw gloves is great for keeping your hands warm, but it makes manipulating your fingers and doing ordinary tasks, such as unzipping a zipper, difficult. I’ve added string to my zippers so they’re easier to grab while wearing bulky gloves. Note: don’t make the string too long, as it will flap in the wind and hurt when it hits you in the face at high speeds. 6 inches of string is best.
Pee Before Treeline: Wind intensifies at treeline, and stripping off layers in these conditions is not a good idea. If you’ll need to use the facilities (always assume you will), do so under the cover and protection of the trees.
Never Leave Gear Stashed: It’s tempting to leave your snowshoes stashed somewhere when no longer needed to pick up on your way back, but I’ve learned it’s important to carry all gear you’ll need to get down the mountain for your entire hike. I’ve had gear taken (either stolen or someone brought it down to the trailhead, thinking I’d lost it) and it’s easy to forget where you’ve placed the items. If you needed the gear to climb up the mountain, keep it with you so you’ll absolutely have it to get back down.
Keep Moving: There are times when rest is necessary, but resting can quickly lead to frigid body temperatures. Never allow your feet to stop moving, as this is when they cool down. If you’re taking a sip of water or rearranging gear, keep your feet engaged, moving them up and down (marching in place) as you do so. This will help prevent cold toes. Pump your fingers back and forth inside your gloves to keep the circulation going.
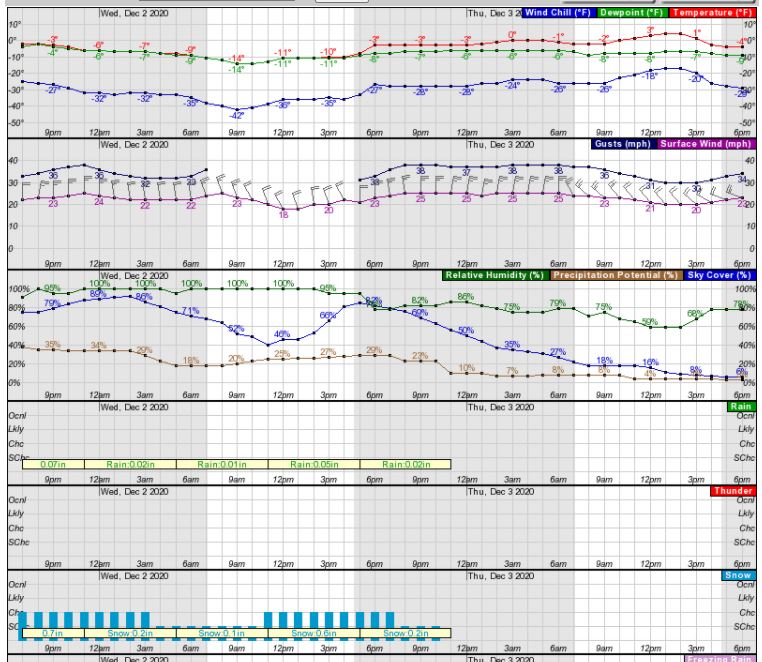
Become a Hobby Meteorologist: In winter the days are shorter, so daylight hiking time is less than in summer. Always check the forecast, but remember forecasts are often wrong and change during the day. Learn how to read weather forecasts and know how they relate to timing, topo maps, and geographic features. I’d recommend spending time learning how to navigate the NOAA weather forecasting site, particularly as it pertains to hourly weather forecasts for specific regions/peaks. You’ll gain information such as temperature, wind speeds, wind gusts, sky cover, potential precipitation, lightning, etc. in an hourly forecast. What you see may look daunting at first, but a few minutes studying and it’s mostly self-explanatory picture of the day’s conditions, letting you know the best times to climb, or if you should climb at all.
Windy Weather: When reading forecasts, know wind speeds/gusts are often much more important than how cold it is outside. Hiking in 20 degree weather is actually quite nice when prepared, wearing proper gear and the sun is shining, but add in windchill and it can quickly become hazardous. I’ve mountaineered in winds up to 80mph, and from personal experience, if the wind is predicted to be above 20mph I choose a different area to mountaineer or stay below treeline.
Learn how to read the forecasts to see which way the wind is coming from, and then you can plan your route to avoid ridges where there will be more wind, or at minimum design a route that avoids the brunt of the wind for as long as possible by staying below treeline for a longer period or in the shelter of the side of the mountain with less wind.
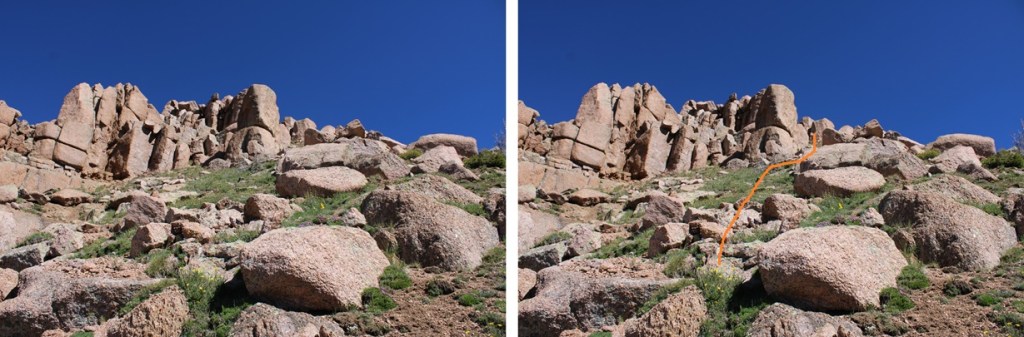
For example, in the picture below, if the normal route is in red, but there are winds coming from the north or west that day, you could avoid most of the wind by taking the black route instead, limiting your exposure time on the ridge.
The summit is only halfway: Know your limits, and realize when to turn back. People with Raynaud’s experience cold much more intensely than other people, with quicker and more drastic effects. Summiting is optional, making it back to the trailhead is mandatory. Preferably with all your digits intact. Know when to turn back.
Prevention is key: A Raynaud’s attack, once triggered, is very painful and can take a while to recover from, even after the affected area has been re-warmed. Doing as much as you can to prevent an attack is never wasted: Dress warmly, wear a wind barrier (outer shell), never take off your inner gloves, keep all your gear easily accessible, and bring along warm water. Start with short winter hikes and work your way up to longer, more technical climbs.
I hope this article has been helpful for those of you with Raynaud’s, as well as those of you who may not have Raynaud’s but are interested in staying warm while winter hiking. I’d love to hear from you! Do you have any advice for winter hiking? Comments? Questions? Is there a topic you’d like me to discuss? Contact Wild Wanderer here
I was a bit worried about today’s hike. After hiking Stewart Peak with frozen feet last Tuesday I found this rock in my right hiking boot.
I’m not sure how long during the hike it had been there, but it had apparently rested under the ball of my right toe for quite some time. I know this because for the past 2-3 days I’ve had a hard time walking without pain. My foot wasn’t red or swollen, but I couldn’t walk on it normally, and it hurt to massage it. I researched my symptoms, and Google told me I did something to the joint. Ironically the way to treat it was to either exercise it, rest it, or take Ibuprofen. I don’t rest and I don’t take medication if I can avoid it, so I decided to get some exercise (but not too much).
So for today I picked a moderate class 3 hike that was supposed to be about 6 miles in length with around 3000’ of elevation gain in a heavily trafficked area so if something went wrong I’d have a better chance of finding help.
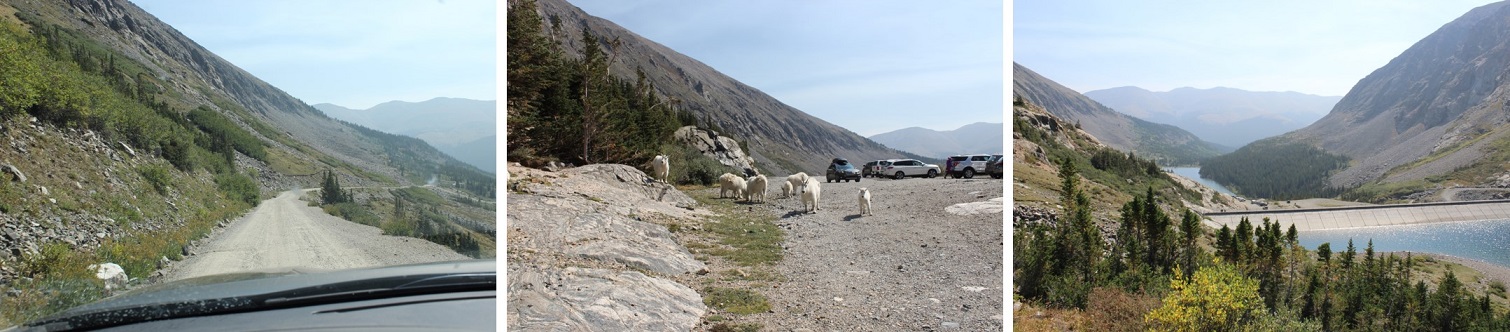
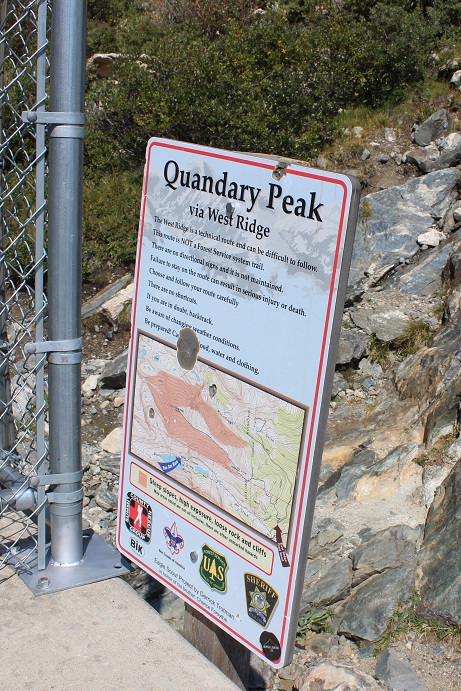
I woke up at 2am (woohoo! It’s like I slept in!) and made it to the trailhead at 5am. There was one other car in the parking lot but as I was getting ready someone pulled up and asked me if we were at the Quandary Trailhead. Technically we were, but it’s the trailhead for the more dangerous West Ridge route, and I figured by looking at them they were looking for the East Ridge Route, so I gave them directions back to the lower trailhead. For so many reasons sorry not sorry if I’d been wrong.
Here’s a view of the 2WD dirt road in and the parking area
It was dark when I started out. I crossed my fingers and started my new tracker, walked to the right to the hill where the gate and dam meet and noticed this sign:
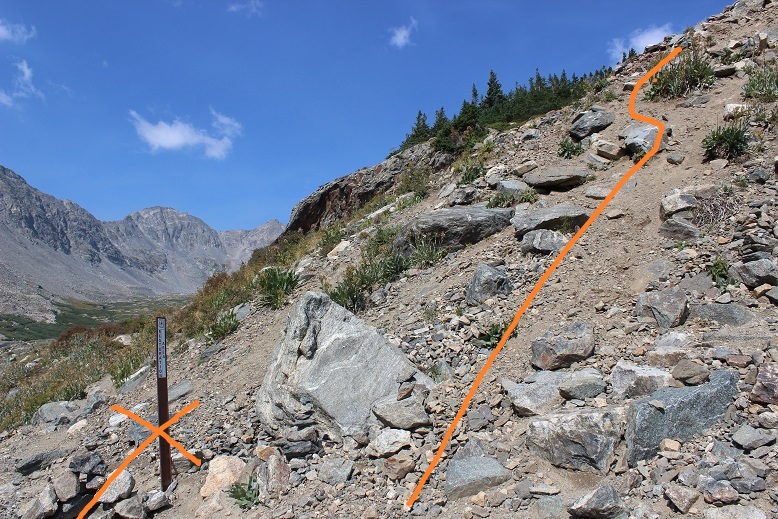
There’s a trail here that follows the lake. I took it for longer than I should’ve and quickly noticed my mistake: I was too far south. In the dark where I was supposed to turn didn’t look safe so I’d continued along the lake looking for another trail that headed up. Luckily there were several social trails that headed north towards the correct trail. I found one that was most likely more difficult than the first and was soon back on route. Here’s where you’re supposed to turn right and climb the hill.
Here’s where I joined the trail
The trail up through the basin is easy to follow (even in the dark). The trail gained elevation very gradually and my right foot throbbed with every step.
Here’s the route I took through the basin and up over to 12,500’
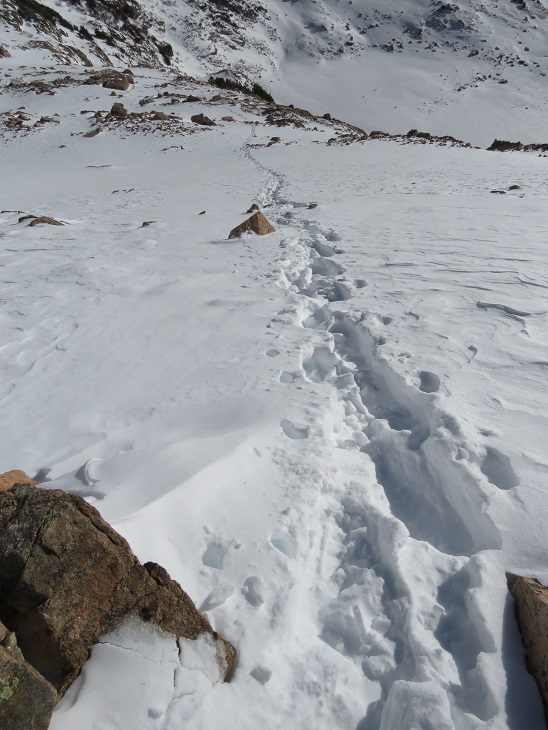
Once the trail ends it’s heavily cairned and easy to follow, even in the dark. I wasn’t able to see the red gully, but it was still the obvious trail to follow. As I gained in elevation and the route became steeper my foot curiously stopped hurting.
After the red gully there were large boulders and rocks to hike around, with lots of carins to help out with route finding.
When I reached the top of the basin I turned around. Quandary’s west ridge looked amazing in the morning light!
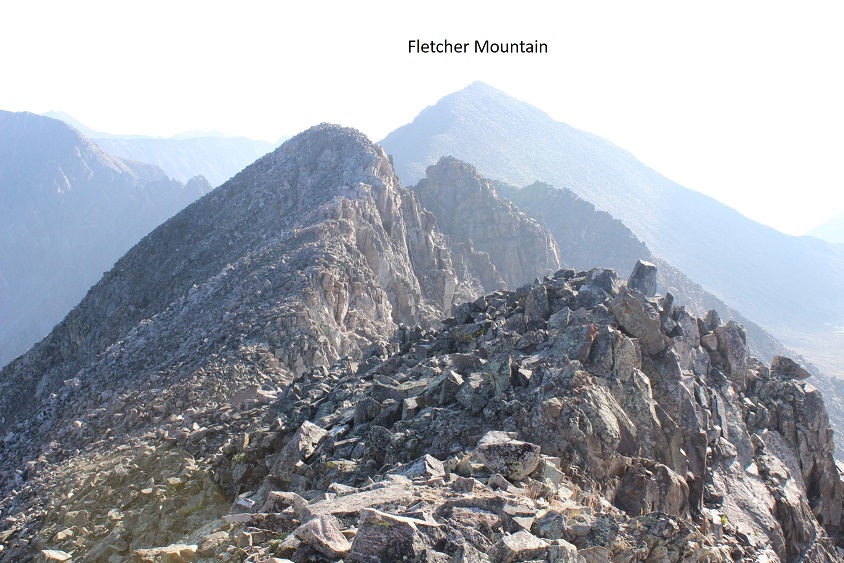
Ahead of me I could see Fletcher Mountain
There was no trail, but the route to the summit was obvious. Here’s the route I took
You want to stick to the left of the ridge because there are steep drop offs to the right. The rocks aren’t stable but they won’t fall on you either, they’ll just roll. About half way up it started getting tricky: I was curiously slipping with every step! That wasn’t right? I have great shoes that usually grip everything. It seemed there was a thin layer of ice on the rocks I couldn’t see but which made hiking without slipping nearly impossible. Yes, I resorted to a kind of forward crawl where I had at least 3 points of contact the entire time. I probably looked silly with my butt in the air but I wasn’t slipping and falling. And there wasn’t anyone around to see…
I made it to the summit at 7am and had a great view of Quandary (it looked cold up there!). The wind was intense and made it much colder than it should have been. Here’s my summit photo
And video:
The cloud above Quandary worried me, but the wind was blowing east and I was headed west so I decided to just keep an eye on the weather. Otherwise it was a perfect morning!
I looked to the southeast at my next goal
The hike down Fletcher towards the saddle was just as awkward as the hike up (I kind of spider crawled due to the ice) but by the time I’d made it to the saddle the ice was pretty much gone. Here’s the view of Drift (left) and Fletcher (right) from the saddle
This is a great place to put your helmet on (and keep it on until you make it back here). The beginning part of the ridge for Drift wasn’t too difficult. I just gained the ridge and followed it
From the picture below you want to stop following the ridge and turn right (north) to bypass the crux of the route (if you continue on the ridge you’ll encounter steep drop-offs and need to turn around)
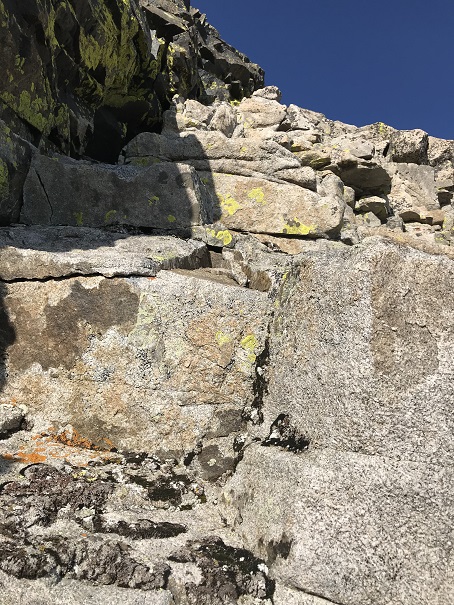
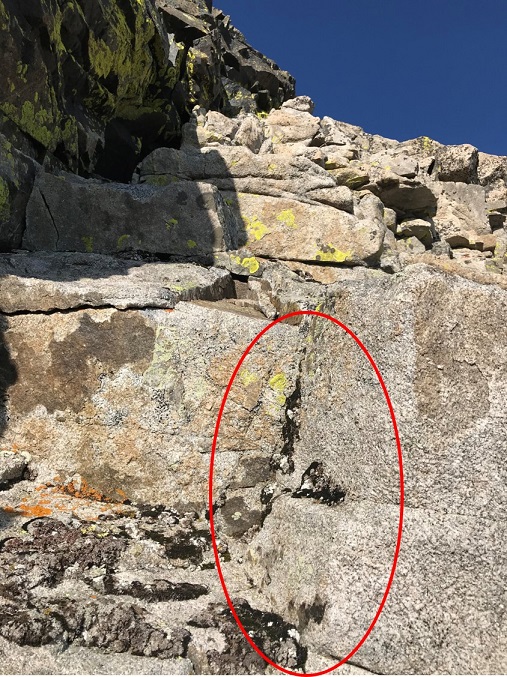
You’re looking for and aiming towards a large round bolt in the route. It’s about 5 inches in diameter, and visible from a good ways away if you know where to look. I’ve circled the bolt in the pictures below
When you make your way to the bolt you’ll see by facing north how to drop into the gully.
This is kind of a chimney, and gets you ready for the more serious climbing ahead
Oh, did I mention the rocks were now icy again? Here’s a better view of the ice
From here I had to re-gain the ridge. I crossed the gully, located the lighter gray colored rocks, and headed up.
There are several routes to regain the ridge but if you stay on the lighter gray rock you should be fine. Did I mention this was steep? Seriously steep and slippery (due to the ice) and definitely Class 3+. Several times I thought how helpful a rope wouldn’t been…
But once I gained the ridge all I had to worry about was ice and wind as I crossed the easy path to the summit. The rocks weren’t stable but they weren’t a problem to navigate. Just be careful for rolled ankles.
Well, easy if the wind wasn’t blustering at 40mph and there wasn’t a thin layer of ice on the rocks. I was very cold and honestly crab-walked over the slippery rocks to the summit, afraid with the wind and ice I’d slip and fall. But I made it! I summited at 8:15am. I couldn’t smile because my lips were frozen… I tried though.
Video:
Here’s a look back at the ridge
I was cold and my fingers were starting to freeze so I didn’t stay on the summit long. I knew I’d need some dexterity in my fingers to make it back down the light gray rocks. I followed the easy ridge back and braced myself to downclimb back into the gully. The first few sections were fun and I was easily able to navigate the large boulders. Until I reached this point
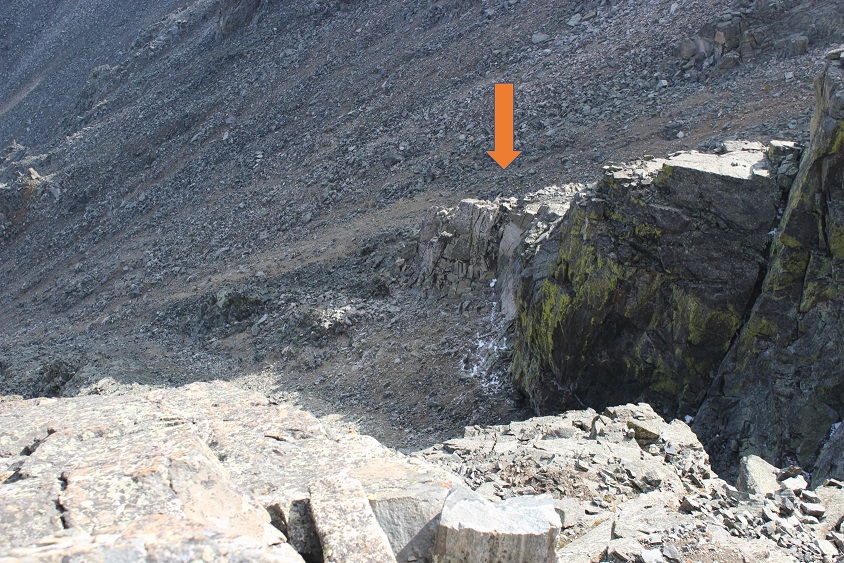
This is where I fell. Well, I didn’t actually fall, more like slid for about 4 feet (scarier when it’s actually happening than it sounds reading about it). You see, everything was once again covered in a thin layer of ice, and there were no foot/hand holds available. None. I know, I was looking. I was in a spot that (due to the ice) offered very little in the way of help for the situation I was in. There were a few patches of moss that I tried to use, but naturally they weren’t stable and quickly crumbled out from under my shoes. And that ice didn’t help at all! I knew I was going to slip and slide eventually, so I tried to minimize the acceleration as much as possible before and as it happened by hugging the rocks and leaning forward. When I slid I was able to stop myself on a ledge about 3 inches wide and 6 inches long, stabilize myself, take a deep breath, and continue downclimbing. I’d bruised my right shin (just a little scrape with minor bleeding) and I had a hole in my pants at my shin, but I was proud of myself for not turning this into a worse situation. Here’s the section where I slid. From top of the circle to the bottom is about 10 feet.
I couldn’t go to the left or right because it was actually steeper in those sections and led to larger drop-offs. This looked less steep when I was first climbing down, and the moss and lichen looked to be on larger/actual holds, or I wouldn’t have attempted it. In hindsight, before I was downclimbing this area I should have retraced my steps to where I climbed up (as I knew there were adequate hand and footholds in that area).
Once I was on more stable ground I took a look around: I needed to find that chimney to head back. Here you can see it from across the gully
I headed towards the chimney, climbed it, turned right and headed back to the ridge, knowing the worst was behind me. I made it back to the saddle and saw no reason to re-summit Fletcher, so I turned right and headed down the middle of the basin towards Quandary.
Once again, no trail, just rocks. Luckily, while the rocks weren’t stable they also weren’t icy. I felt humbled by the enormity of the rock field and my small place in it.
VIDEO:
As I descended into the basin the beauty caused me to pause. This is truly a gorgeous area! I’ll be coming back to attempt Quandary’s West Route someday.
I followed the cairns down and around the several small ponds I’d missed in the dark.
I stayed here much longer than I should have, but it was worth it for the views! The red gully was clearly visible in the daylight
And those ponds and streams are much deeper than they look. For such narrow streams at a high elevation I was surprised they were 4-5 feet deep.
Exiting the basin was an easy walk. At this point I noticed my foot didn’t hurt anymore. I guess exercise was the answer! I passed an old mine
Turned the corner to take one last picture of the basin (I may frame this)
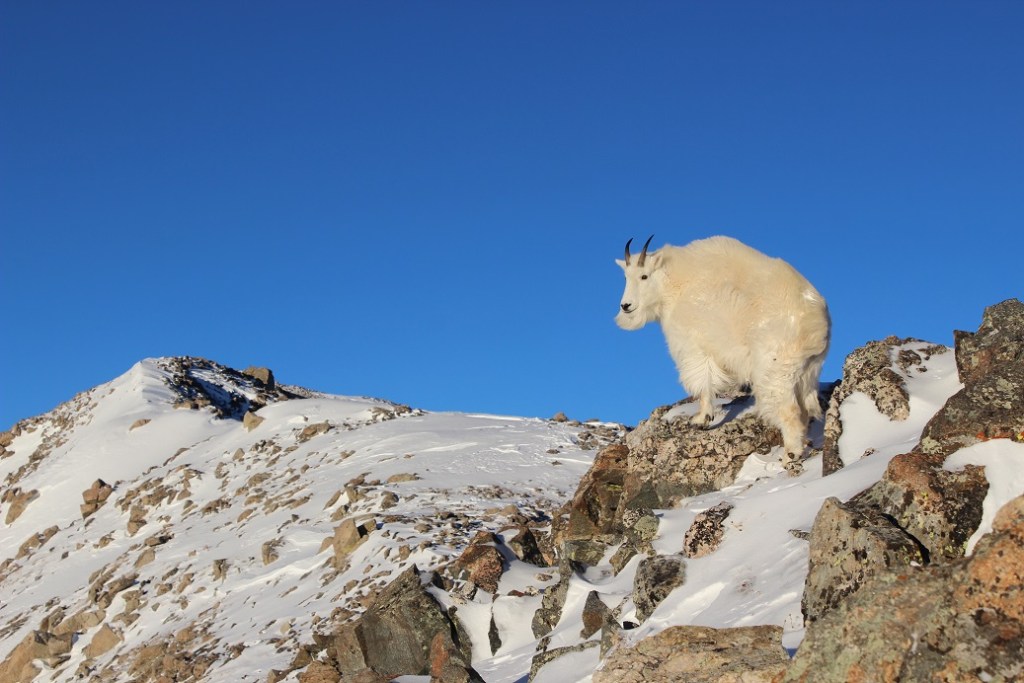
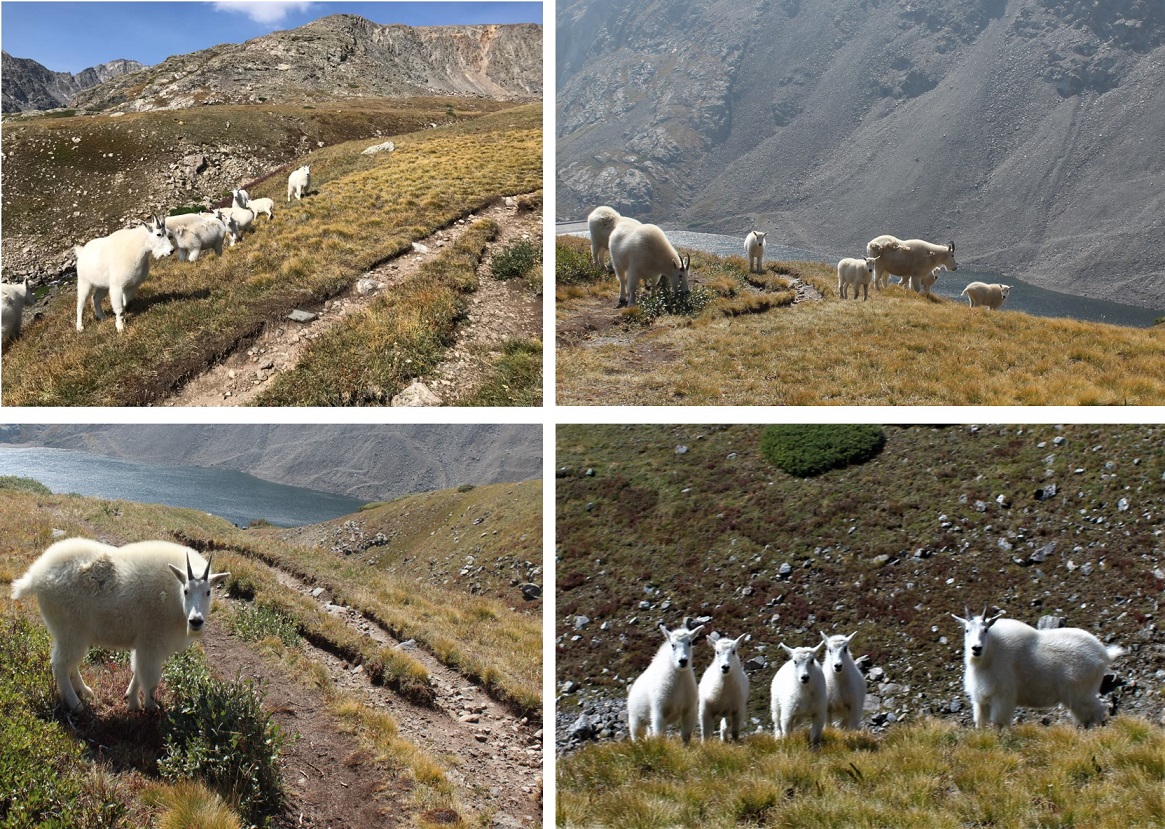
and: Goats! I love running into goats on the trail! This herd had several kids. All adorable
Video:
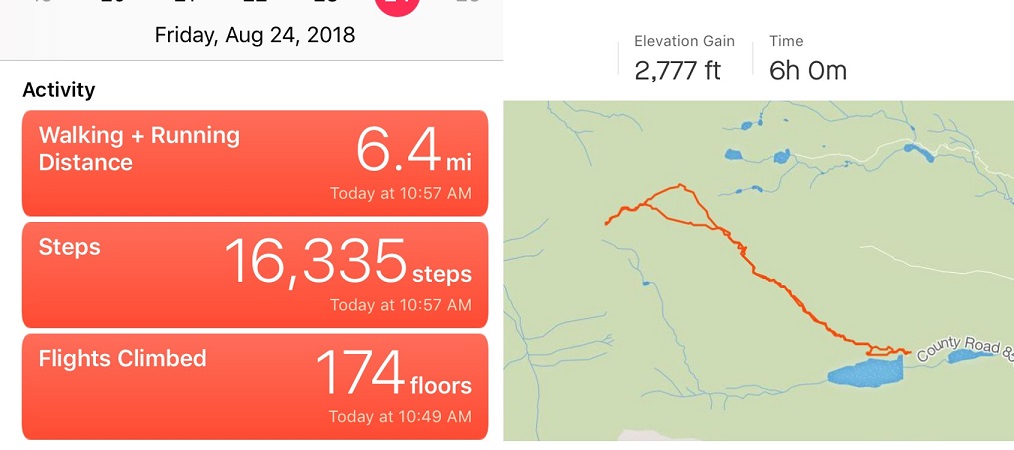
I made it back to my truck at 11am, making this a 6.4 mile hike/climb in 6 hours. Oh, and my tracker had worked! It said I’d climbed 2777’ in elevation, which I thought was pretty close to the 2800’ I’d been expecting. Now I just need to figure out how to save and transfer the GPX file to my computer. I was not happy with my time, but considering I’d crawled for a good portion of it due to ice I wasn’t too upset either. And I’d stayed safe. And I’d seen goats!
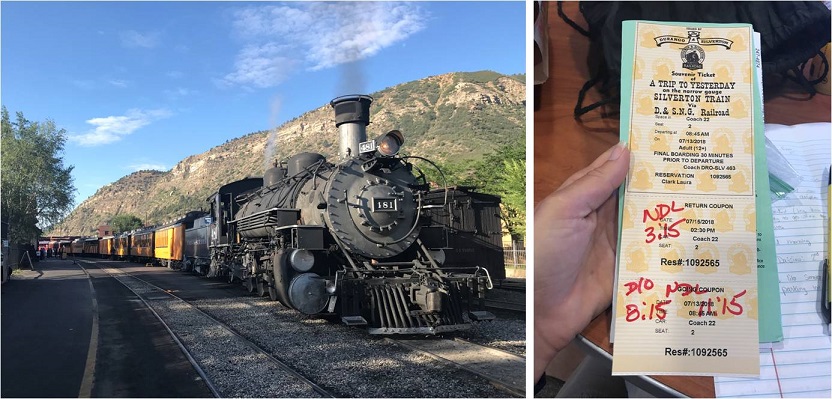
I’ve been preparing for this weekend since February when the summer camp catalog came out. I knew I wanted to plan this trip for the days when my youngest daughter was at summer camp, so when she chose her camp I made my reservations with the Durango & Silverton Narrow Gauge Railroad for the days she’d be gone.
It didn’t matter what the weather was, that was the time I had available to go. My son was going on a solo road trip to Arizona (well, he brought the cat) and my oldest would be at Drums Along the Rockies, so I had 1 free weekend to backpack this summer.
Well, then the fires happened and not only did they shut down the railroad, they closed the entire San Juan National Forest. This was unfortunate for numerous reasons, and also because it looked like my trip wasn’t going to happen. Then they re-opened the forest (woot!) but not the railroad. This was getting frustrating! I kept calling the railroad station to see if they were going to be running the train, and every time I called I got a different answer.
So I made two plans: One for if the train was running, and another for if it was not. This was my one weekend to visit the Chicago Basin and attempt its 14ers this summer and I didn’t want to waste it. Going through Purgatory didn’t sound fun but if it was my only option I was prepared to hike into Chicago Basin that way. Normally I wouldn’t mind, but I had a strict time limit because I had to work Monday morning.
I checked and re-checked and checked the weather forecast again. It did not look promising. 70% chance of thunderstorms in the morning, afternoon, and evenings for the entire weekend. These conditions were less than ideal but at least I could prepare for them. I became a weather expert (it seems this isn’t monsoon season yet, but pre-monsoon season that mirrors the actual monsoon season… yeah, basically it’s going to rain buckets with lightning and thunder added in for fun, and it won’t be predictable).
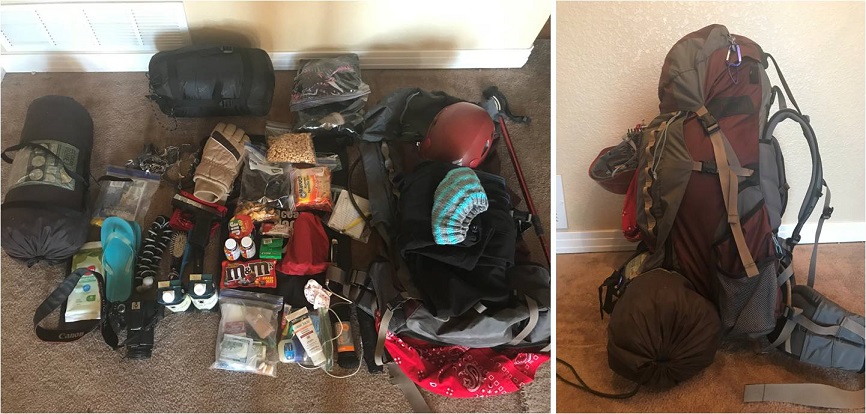
I packed, unpacked, reduced, and packed again. I decided to cut weight by eliminating the need to cook my food (I make a mean beef jerky and dehydrate fruit to bring with me that doesn’t need to be cooked) and added warm layers. Extra socks, pullovers, hats, and gloves.
The day before my trip the train was scheduled to run again, but they weren’t giving out backcountry permits until late August. However, they would honor my tickets since I’d bought them so long ago. Woohoo! I was good to go!
Thursday afternoon I closely watched the weather out the windshield of my truck as I drove the 6.5 hours to Durango. If the weather tomorrow was like today I was golden: heavy cloud cover with no rain. Before checking into the motel I stopped by the train station to pick up my ticket. There was only one other backcountry permit in the queue besides mine, which told me not many of us would be packing in with the train.
Next I checked into the motel. I made small talk with the man at the front desk wearing the Zia Marching Festival shirt (my kids went two years ago for band so small talk was easy) and was assigned a room and a parking space. I stopped by Wendy’s for a quick dinner and brought it back to my room.
This was the smallest motel room I’ve ever stayed in, mainly because I’m a hotel snob. I travel a lot for work, and I need the hotel to have a gym so I can work out every morning. Most hotels with gyms are just… nicer in general. I didn’t think that was necessary for tonight’s stay, so I just chose the cheapest place I could find. I had an assigned parking space my truck didn’t fit into and a room just big enough to walk around the bed. I was a little concerned my truck would get broken into overnight. Well, all I really needed was a place to sleep, so this would do just fine. Check out the view from my room…
I poured myself a glass of wine and brought my backpack in from the truck. After dumping all the contents on the bed I went through my gear one last time. I’ve been backpacking many times, but tonight I seriously felt like Cheryl Strayed. I dipped a fry into my frosty and considered: I’d done a good job packing. There was nothing I thought I didn’t need and I had extra space in my pack. Everything was in a Ziplock bag and I had extra large trash bags if needed. I was good to go! But it felt weird only packing for myself. I haven’t been solo backpacking in a long time: I’m usually in charge of a group of scouts, so I have to over pack things like emergency supplies, food, etc. I could get used to this!
I took a last minute shower (I’d brought my Disney shampoo for good luck: if you’ve ever stayed at one of their resorts you know what I’m talking about), and charged my cell phone and camera. I made a list of goals for this weekend (stay warm/safe/make good choices, learn something, make the most of the time I had, hike at night if necessary, and if the weather’s bad sleep until it’s good). I did some texting and problem solving and answered some very important last minute emails that came in about a potential magazine interview on Monday and made it an early night so I could get started early in the morning.
I had a couple of people who had considered hiking in with me but had canceled due to weather. I was actually relieved they weren’t able to make it! I would have been a terrible hiking buddy in this weather because I’m too goal oriented and I don’t need much sleep. Hiking solo gave me time to hike as fast as I needed, set up camp (or not) and hike/eat/etc. whenever it worked for me. If someone else had been with me I’d have felt responsible for their comfort/ etc. and I’m pretty sure I’d have either made them mad or I wouldn’t have summited (making me mad).
The night had been sweltering. There was an air conditioner that I had to turn off because all it did was make noise. Well, you get what you pay for. I had to take another shower in the morning because it had been so hot overnight. I dressed for success in my new hiking pants that are supposed to repel insects and are two inches too short because I had to get them in the kids section. (Note to athletic/outdoor clothing manufacturers: not every “woman” is large. I’d like some hiking pants that fit a 5’4” 105lb woman please… I’ve been looking for years and resorting to wearing yoga pants under your size 2’s or shopping in the kids section isn’t working for me!)
I did one last sweep of texts and put my phone on airplane mode. The weekend had officially begun.
Check out at the motel wasn’t until 8am but I had a train to catch. The front doors were locked so I dropped off my room key in the slot and headed to the train station. It was a beautiful morning! And that sunrise! It almost physically hurt not to be hiking now when the weather was good.
I was the first one of the day in the parking lot at the train station. I parked in long term parking with 3 other vehicles from yesterday and mentally calculated how many people should be in the basin.
McDonalds was close so that was breakfast. I haven’t eaten this much fast food in quite a while. In fact, I don’t think I’ve been to a McDonald’s since I was in High School. Thoughts from the McDonald’s lobby: it smells like cigarette smoke in here, there are two types of people here: those in their pajamas and those in their motorcycle gear. The parking lot filled up fast.
My Daily Daisy text pinged my phone and I took it as a good sign:
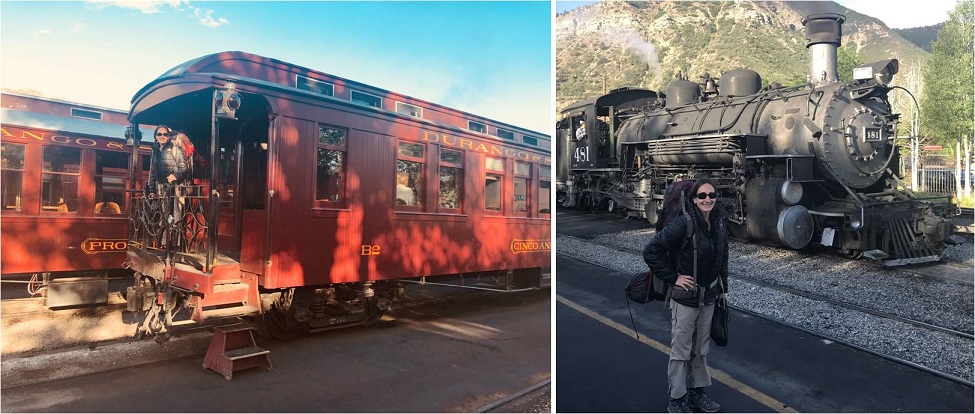
I went back to my truck to get my gear and walked to the train station.
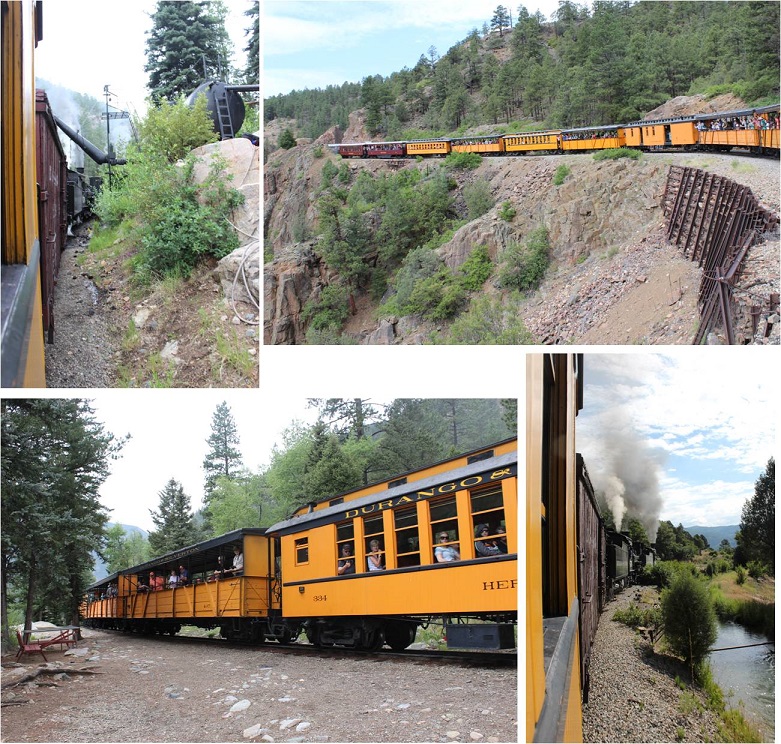
Of course I got there early, so I walked the platform and talked to the volunteers and employees. They were all thrilled to be working again, as they’d all been out of a job for the past 6 weeks. Some teared up as they talked answered questions.
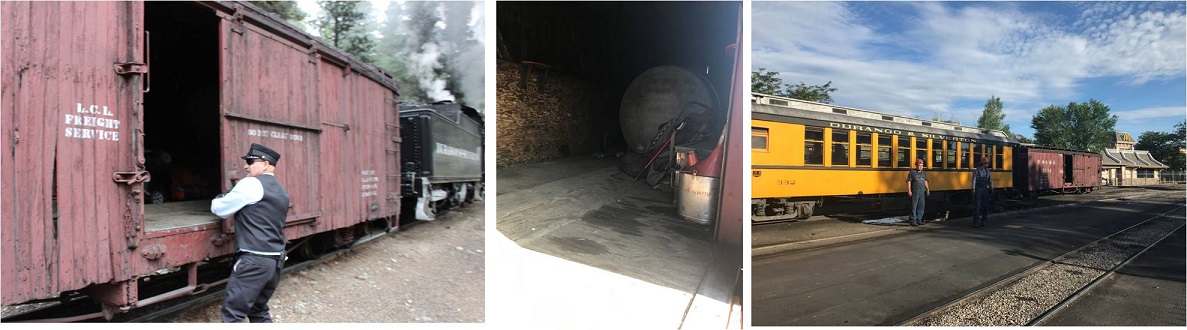
With the help of brakeman Chris I loaded my gear into a boxcar with the two other backpackers and thought to myself how it was already hot outside and I stunk. Those two guys in the picture below on the right stayed behind and watched the wheels on the train to make sure there weren’t any sparks. Several employees shook hands with the engineer and told him to “stay safe out there”.
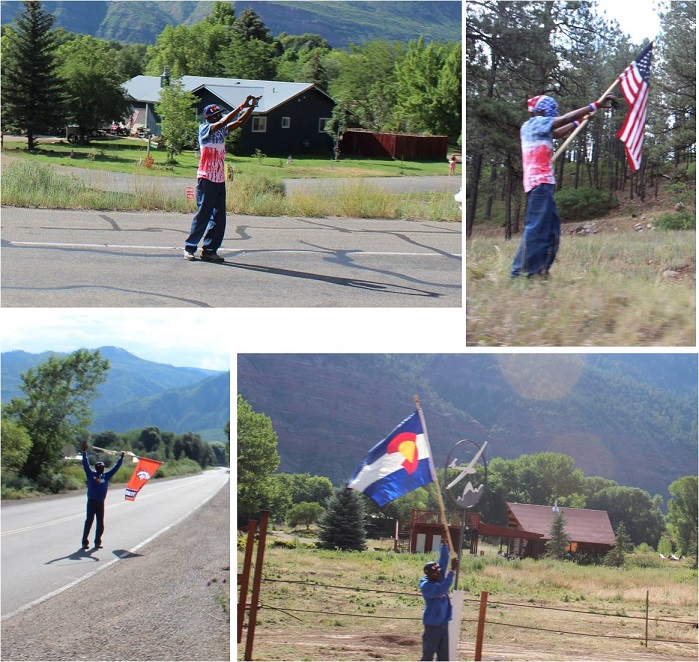
The train left right on schedule. There were homemade signs and posters all over the fences thanking firefighters and welcoming the train back. Several houses had “Welcome Back Train” signs, and tons of people stood by and cheered the train on as it left, or came out to see the train as it passed by their front yards. The citizens were visibly emotional to see the train in action again, wiping away tears sand clapping. You could tell the closure of the train had impacted the community greatly.
Check this guy out! We saw him every few miles or so, cheering us on. I’m not sure if he was an enthusiastic Durango citizen or paid to do so by the train station, but he would cheer us on, get in his vehicle and drive ahead of the train, change is outfit, and get out and cheer us on again. Everyone on the train loved him. We passed him at least 8 times.
I sat next to a brave mother and father of 6 well behaved boys under 10 years old. One of the train employees talked with me about stopping in Needleton and asked me if I knew how to jump off of a moving train. The boys eyes got wide when I said “Absolutely, I just tuck and roll, right?”
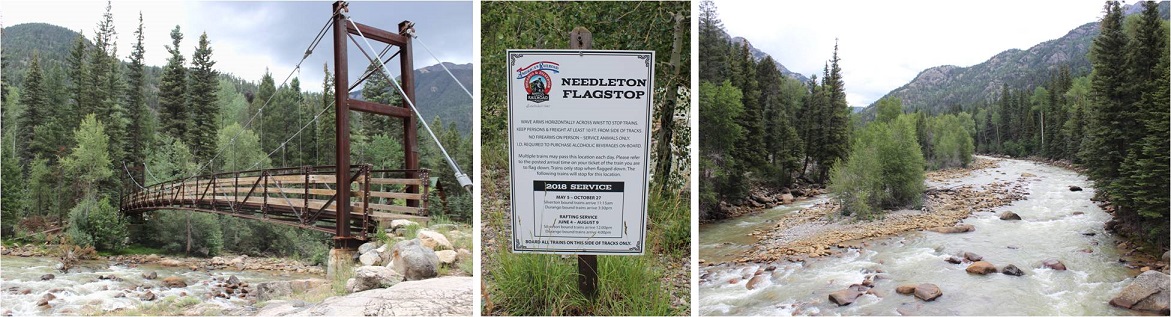
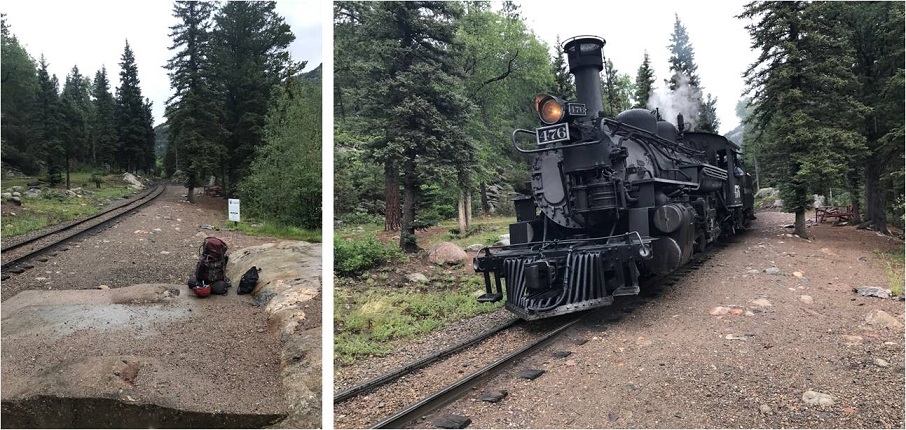
It was a long 2.5 hours to the Needleton stop. I passed the time by going over my trail notes again and again. I arrived at the Needleton flagstop at 11:40am.
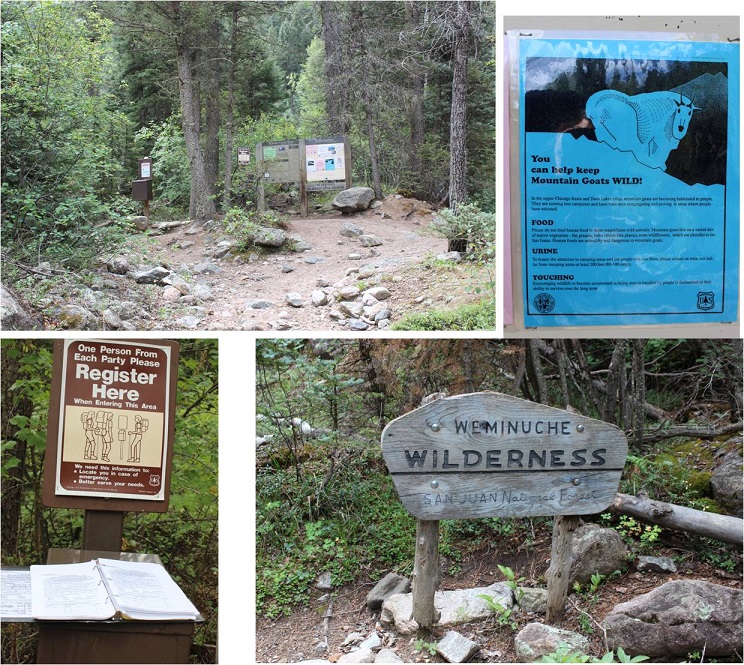
I waved goodbye to the train, said a quick greeting to the other two hikers, and started the 6 mile hike to the Chicago Basin. This hike has excellent signage. I signed in at the trail register at about .8 of a mile up the trail where it intersects with the Purgatory Trail.
I passed several groups of hikers hiking out as I was hiking up. They gave me some advice that ended up being very useful: Hang everything up when you leave with your bear bag. Leave nothing in your tent or on the ground. The goats and marmots will eat through your tent to get to your stuff. Also, don’t pee anywhere near your campsite: the goats like pee and will follow you to get it. I found this last part weird since usually urine (especially male urine) usually keeps predators away, but I guess goats aren’t predators and like the salt. In any event, their advice was correct.
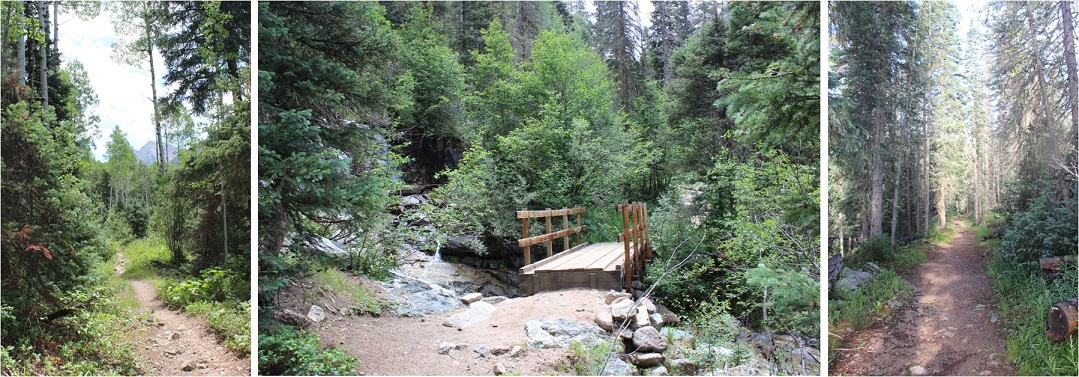
The trail was heavily shaded and followed a creek, but that didn’t stop it from being hot out! I don’t usually hike in the middle of the day: It’s tiring! Most of the hike in follows a creek. At the halfway point I crossed a bridge, knowing I had 3 miles left of the hike and seriously hoping it would rain soon.
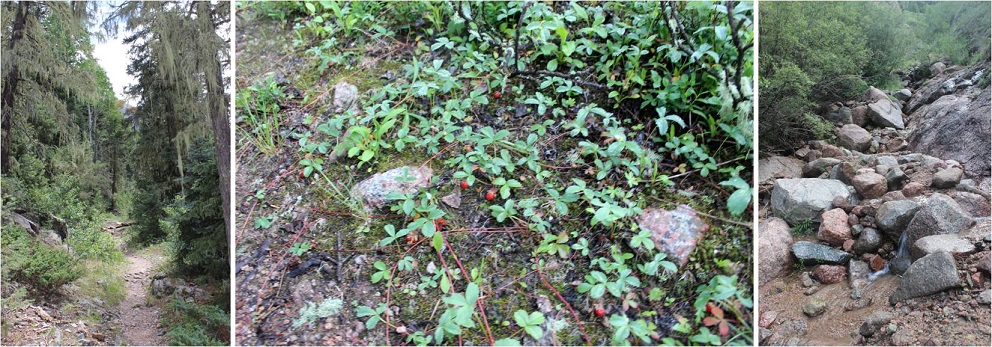
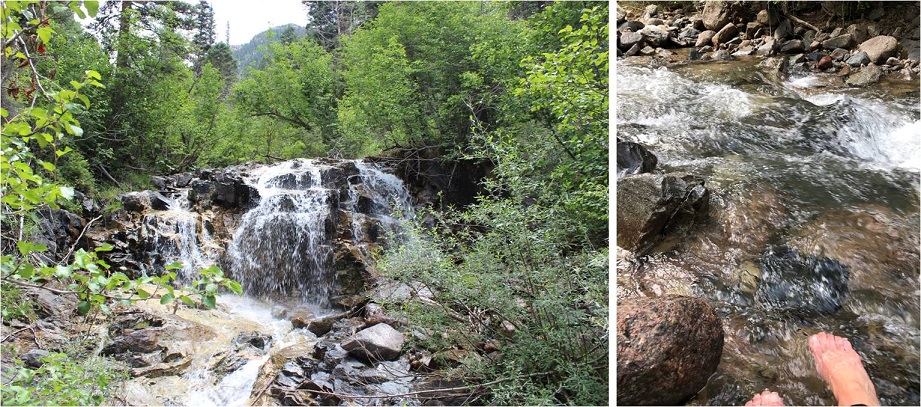
There were tons of strawberries covering the ground, as well as downed trees. When I saw this small waterfall I stopped and dipped my head in the water (swallowing some in the process, so if I get Giardia I’ll know why). This cooled me off and felt amazing! I soaked my bandana and continued on. From here it was 1 mile left to the basin.
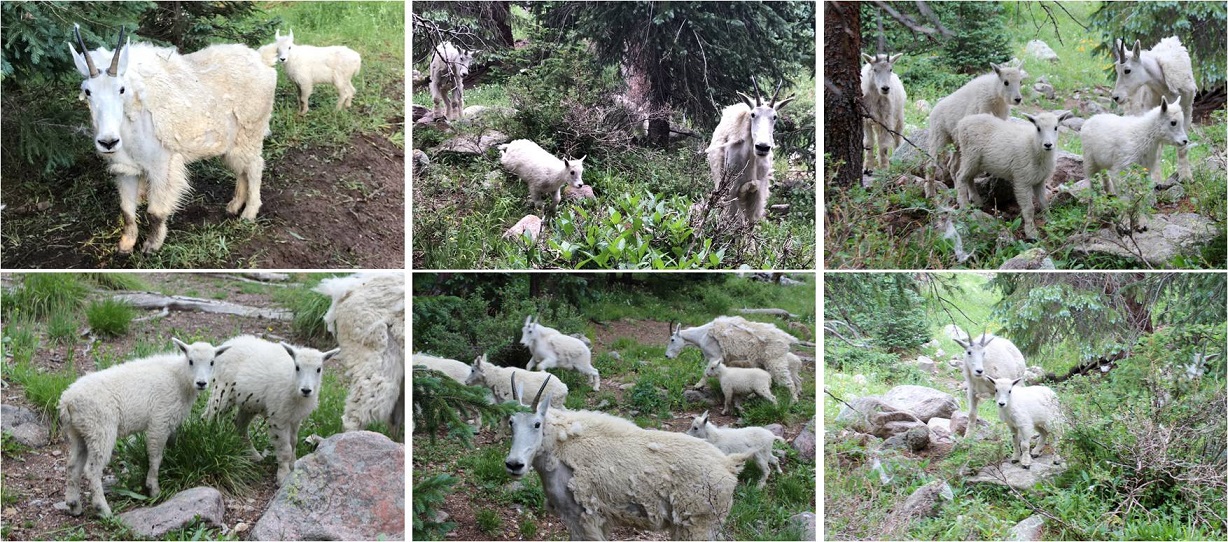
I arrived at 2:40am and was greeted by tons of bold and very adorable goats! Here’s proof:
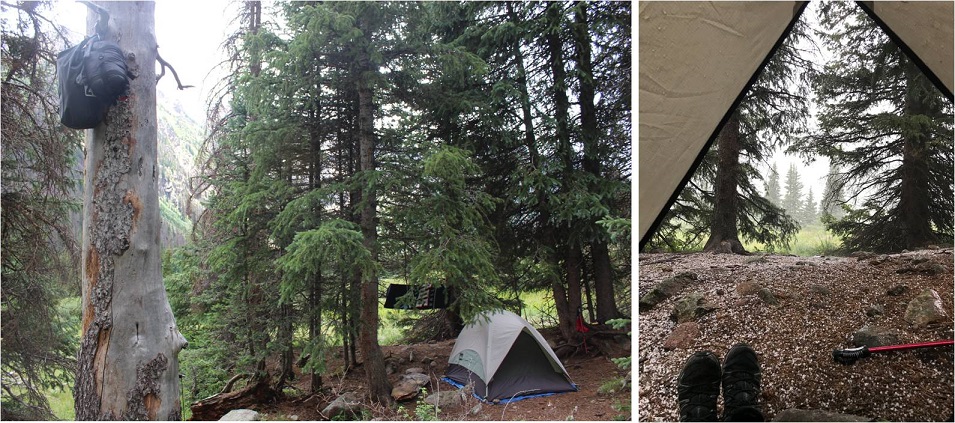
The goats were everywhere, and seemed to like my company. I carefully placed a beer in the creek to cool off, set up camp, hung my bear bag, re-hung my bear bag because the first place I hung it was covered in sap, and looked up at the weather. It didn’t look too promising, so I went back to the creek to retrieve my beer and went back to camp to eat something. I’d been saving the beer for tomorrow but I was really hot and needed to cool off. I sat down to eat and it immediately began to hail!
This lasted for about 45 minutes and cooled everything off in the basin. It was a good time for me to eat, rest, and get my bearings. There were a lot of people camping in the basin, many more than I’d anticipated considering they couldn’t take the train. They must have all hiked in from Purgatory. Oh, and the inside of my tent was getting wet. Lovely. It stopped raining at 5:15pm and just before it completely stopped I decided I wasn’t going to waste any time. I hung up everything I wasn’t taking with me, gathered my gear and headed towards the trail.
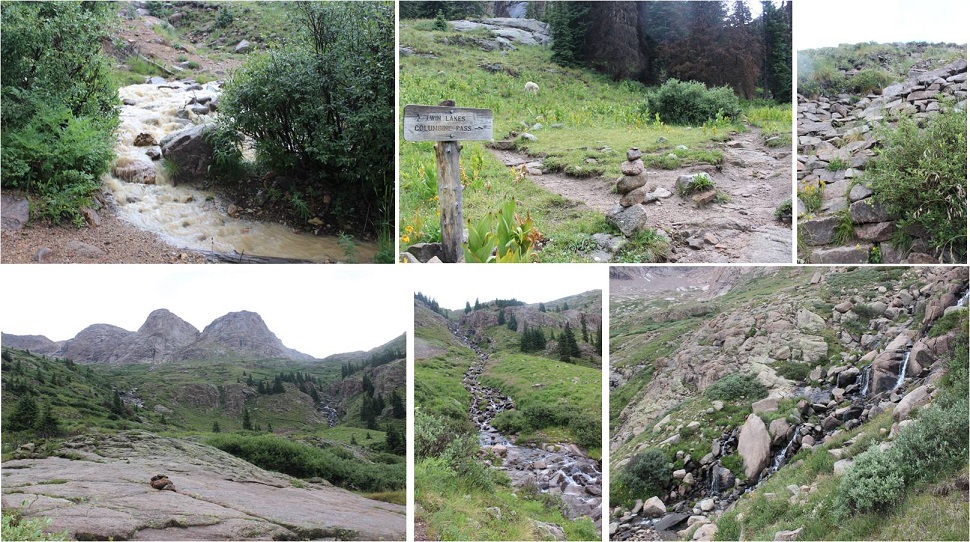
The Twin Lakes Trail gets you to the intersection for all 4 14ers, so I decided to hike up to Twin Lakes and make my decision then which 14er I’d attempt tonight once I got there. I passed several goats along the way.
Since it had just rained/hailed the creek crossings were high. I had to get creative to cross them. The trail came to a junction where I turned left and followed it up the hill, through some rocky areas and some well maintained stairs up a slope and through some waterfalls.
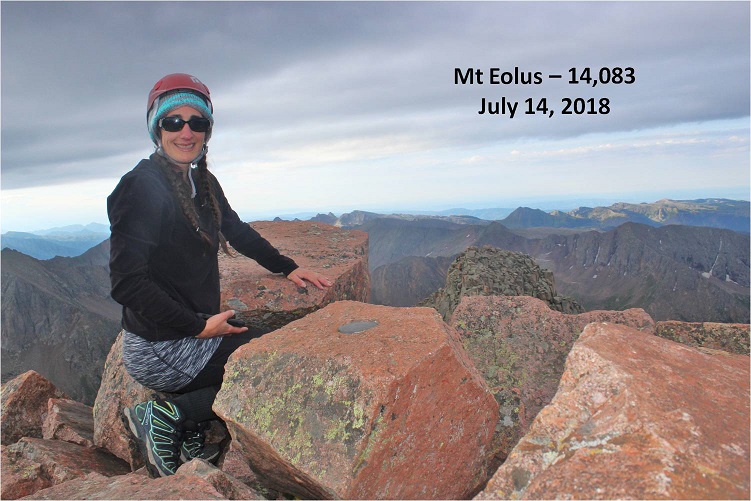
At the top of the slope was Twin Lakes. I could go either left towards Mt Eolus and North Eolus, or right towards Sunlight or Windom.
I’d been doing a lot of thinking on the trek up to Twin Lakes about which 14er I should attempt. I really wanted to get both Eolus and N Eolus done tonight, but as I was watching the weather it looked best near Sunlight Peak. It was a difficult choice, but I chose Sunlight, purely due to weather. I mean, doesn’t it look inviting?
Here’s the route I took:
As you can see, the route is very well cairned. I followed the 6 foot tall cairns toward the gully, and then up the gully to a notch. This gully was a good gully! It had some loose terrain, but was mostly made up of rocks about the size of a tire. I was keeping an eye on the weather, but as you can see, it looks great!
From here I followed the route left. This part was actually quite easy and didn’t require much route finding, just some scrambling over class 3 terrain.
Here’s a great view from a hole in the ridge. I decided not to take this route but to turn left and head to the final summit pitch.
From here there were a couple of class 3 moves, and then a class 4 move up and around to the summit. I made it to the summit and decided to drop my gear and climb the last bit to the “true summit”. It was a scramble on some grippy rock to the top of a few boulders placed a few feet apart in all the critical areas. That had been too easy!
I made it up to the top of the highest boulder and took a look around. Wow! I needed a picture of this! Drat! My camera was back down with my stuff. No worries, I’d just climb back down and get it. I slid feet first down the rock and jumped onto more solid ground. I got a few pictures of the summit marker and surrounding peaks
And took a summit selfie to prove I’d summited.
I took a quick video of the summit, and came to the realization a storm was approaching very quickly. I hadn’t been able to see it from the way I’d climbed in, but it was obvious now I needed to get back to treeline as soon as possible.
Please watch the video below with the sound on. Note it starts at 7:58pm, and then it jumps to 8:30pm.
In 10 minutes time I made it to the top of the gully and it started sprinkling. Wow, that was fast. No worries, I’d just put on my poncho and keep heading down. I made it about a quarter of the way down the gully when the sky broke loose: it started pounding rain, and then hail, and then the thunder and lightning started. There was nowhere to hide: No caves or rocks to hide in or under. I was completely exposed and I couldn’t hike up or down to find shelter, as there wasn’t any. I didn’t want to be a moving target so I found two large rock slabs that didn’t provide any shelter to back up and huddle against. I still had my helmet on, but water was cascading down the rocks straight onto my head, and I was being pelted from the front by the storm. The second half of this video takes place after the worst of the storm is over, but you can still get a sense for the atmosphere.
Just for reference, this is where I was during the storm.
I sat there for over an hour and a half, listening to the thunder crackle all around me and waiting for the lightning to stop. There was no lightning tingle or electric current in the air as I’ve heard from other people who’ve been caught out in storms. Luckily most of the lightning stayed in the clouds, but every so often I’d see a bolt strike Windom. I couldn’t get off that mountain fast enough, but I needed to be safe at the same time, so I waited it out. When I finally felt the lightning was far enough away I got out my flashlight and hiked back to the Chicago Basin soaking wet.
Well, as far as picking a peak to hike tonight I had picked the right one. Windom was a nightmare with all that lightning, and I realized the next day I wouldn’t have been able to summit the other two peaks: I’d have had to come back and hike at least one if not both of them again the next day.
I made it back to my campsite sometime before midnight, and the entire basin was already asleep (besides the goats I said hi to as I passed them on the trail). I was hungry, so I brought down my bear bag and rummaged around for something to eat. Peanut Butter sounded good, but where was my spoon? In the dark it was difficult to find anything, and I was trying to be respectful and quiet for the other campers. Well, I couldn’t find a spoon, but I did have some dehydrated bananas that I could use as a spoon. So there I squatted next to my bear bag, trying not to sit on the ground because it was wet, flashlight on the soil, with a tub of peanut butter in one hand, and the other scooping it out with a banana slice. When I was done I licked my fingers and put everything away.
Now to deal with my sleeping arrangements. I’d put my sleeping bag in the tree with my bear bag before leaving to keep it away from the critters, not anticipating the rain, and now I had a soaked sleeping bag (or so I thought). Luckily I’d brought two tarps. One I’d put under my tent earlier today when setting up, the other I got out now and as quietly as I could folded into a square and placed it inside my wet tent, forming a barrier between the wet floor and myself. I opened my sleeping bag and was delighted to find the fleece blanket I’d rolled around the sleeping bag had absorbed 95% of the rain water, and the sleeping bag itself was mainly dry. I hung the fleece outside and settled down for bed.
Saturday morning came early. After almost 4 hours of sleep I was up at 3:45am and out by 4:15, ready to tackle another peak. I re-hung all my gear by my bear bag and set out in the dark, hiking under the stars and some wispy clouds. The clouds didn’t look too threatening. Everything was still wet from the storm.
I followed the same route I had yesterday up to Twin Lakes. My legs were still sore and I was actually thirsty. I hiked slow and steady past Twin Lakes and towards Mt. Elous. Here the sun began to rise and I got a good look at the route before me.
I hiked towards the edge of a basin and then up a ramp and over some rock slabs
Here’s where the hiking got fun! It became a climb from here on out. I climbed up this optional (class 4?) wall to reach the saddle / ridge
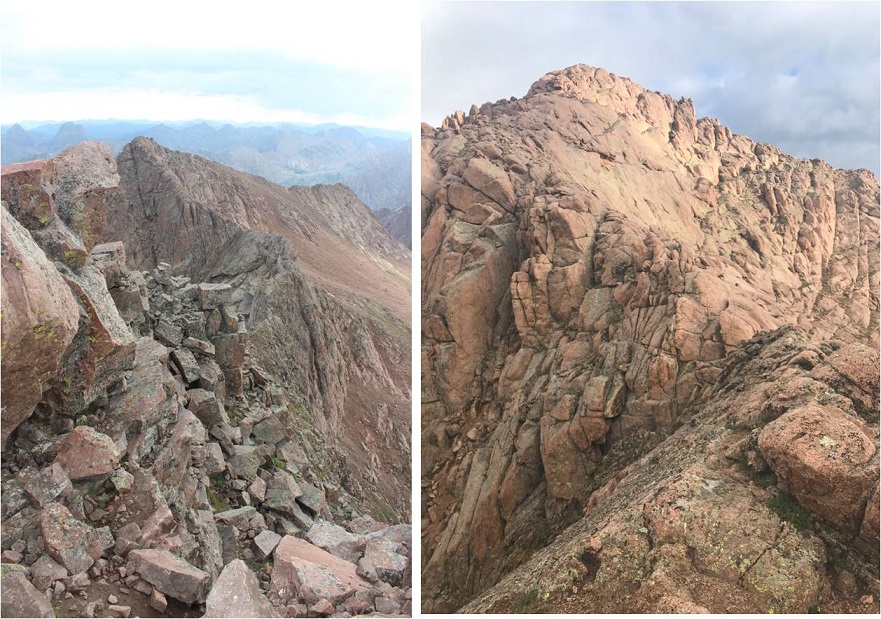
And looked at the catwalk to my left. This was going to be fun!
There was a lot of exposure here but the route wasn’t too narrow. I followed the catwalk to the final pitch up the East Face, which required a lot of route finding and class 3 moves. Let’s just say aim up: There are tons of cairns and they all parallel each other, but the basic route goes up.
Woohoo! Summit Selfie
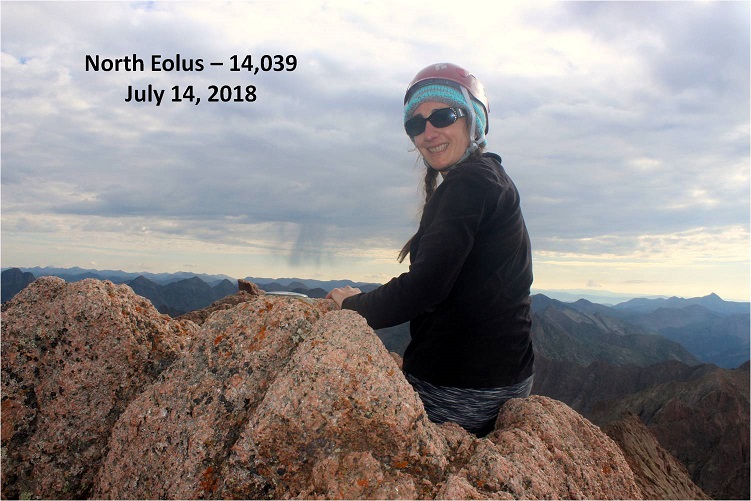
Now it was time to head back and tackle North Elous. Here’s a look back at the Catwalk and North Elous’ Ridge
The ridge was actually very easy to navigate. It had grippy rock and was a sticky but simple scramble towards the top. Once again, I was glad I’d chosen today to hike this instead of yesterday. Oh, and I was a bit sore so I was hiking slow.
I took a quick summit selfie
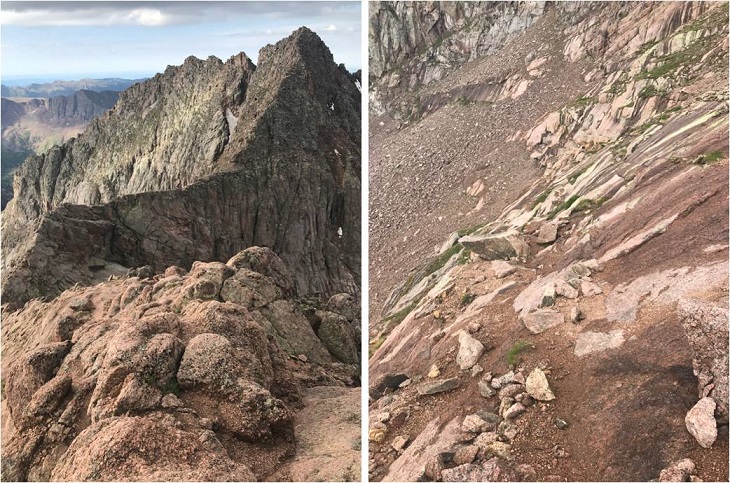
And looked back at the way I’d come. Pretty cool! The catwalk looks like a beast, and so does the way back down.
Ok, 3 down, 1 to go. I was closely watching the weather today as I hiked back to Twin Lakes. I made it to the lakes at about 9am and was concerned with the amount of clouds I saw in the sky. I figured I had a 50/50 chance of needing to bail on Windom, but like I said before, I was sore and didn’t want to hike down to Chicago Basin just to hike back up to do Windom again later today: That elevation gain was brutal! I decided to try it, as I could always turn back if needed. I’d just take it slow and keep watching the weather.
At Twin Lakes I met Boy Scout Troop 393 from Phoenix, a fun group of guys to talk with. They were filtering water, and told me about the time a couple of years ago when they hiked Windom. A few of them were Eagle Scouts and Life Scouts.
I continued on towards Windom. The trail follows much of the same route as Sunlight through the basin, but then angles right up a gully (there is a trail to the right near the ridge but it’s currently washed out).
There were several routes, but I took the gully up and aimed towards the ridge, to what I found was a false summit. Drat! I thought I was making great time and I’d been so excited I was going to climb this mountain before the weather set in, but when I hit the notch I realized I still had another 45 minutes or so to go. I steeled myself against the let down and kept climbing, more intent now than ever on finishing this trek.
The final push from the notch follows the left (not the right as the GPS told me to go) and contains some class 3 moves, even though it’s rated 2D. It was very well cairned, and quite a bit of fun!
It took me longer that I’d have liked to summit, but when I did I felt fabulous!
Check out that view of Sunlight!
OK, now it’s time to head back down. The weather was holding, but I didn’t want to cut it close. I turned around and the Boy Scouts called to me from the saddle. They wanted to know if they could summit before the rain hit. Now, that’s a difficult question to answer. I’m not sure how fast they hike, and sure, they could probably make it up, but they weren’t going to make it down before the rain hit. I told them as much and passed them on their way down. They’d already hiked this one a few years ago, so they knew the route. I wished them luck and continued on.
Just before making it to Twin Lakes I met up with the rest of their troop (not all were prepared enough to climb Windom today). We had a nice chat before I excused myself to head back down to camp. I practically skipped back down as the weather held. Sure, I hadn’t brushed my hair in 2 days, I was getting hungry and I was tired, but I’d just summited the 4 14ers I’d come to summit! This mission was a total success!
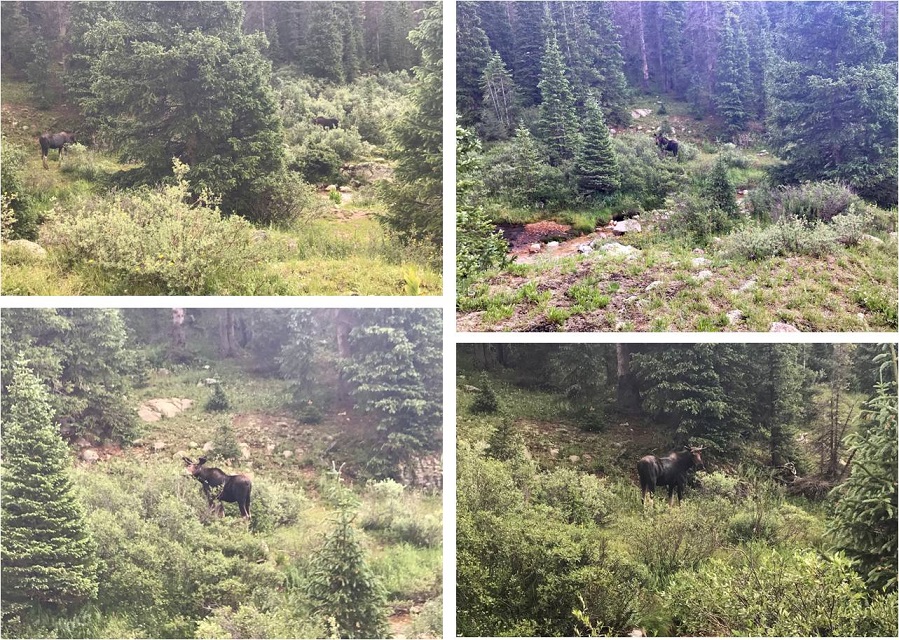
To top it all off, today I did everything right. All my clothes and sleeping bag were dry, as it hadn’t yet rained. I took a trip down to the stream to filter some water and stumbled upon two moose! A male and a female who didn’t much care I was there
I went back to my tent, ate about ¼ a package of Ramen and some dried fruit, and then cleaned myself up before the rain started. My feet were sore and I stunk, but I was happy as I sat all dry in my tent. I thought about tackling Jupiter tonight/tomorrow. Should I? I kept going back and forth with it in my mind. I took a quick 2 hour nap and was woken by my neighbors. Unfortunately they were boisterous and the man’s voice carried. It continued to rain so I decided against Jupiter for now. I lay down, and the next thing I knew I woke up at 1am, needing to use the bathroom. Well, that had been quite a nap! I guess I’d caught up from the night before. The only problem was it was too early to hike. I didn’t want to summit in the dark, so I decided to just lie in bed and wait an hour or two. The next thing I knew it was 5am, and now it was too late to summit and still make it back. Or was it?
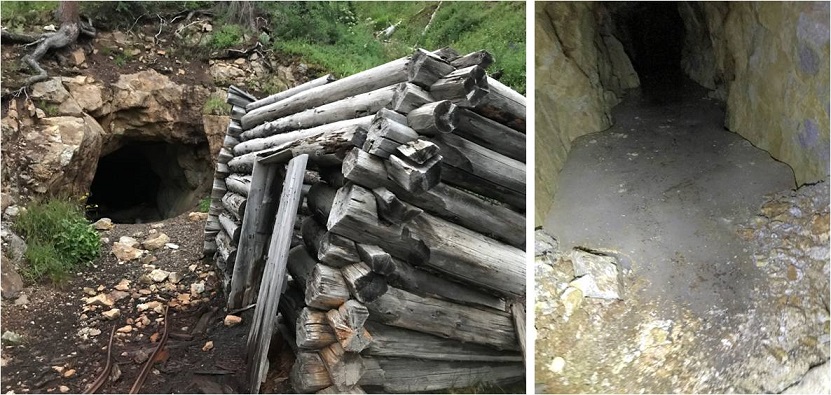
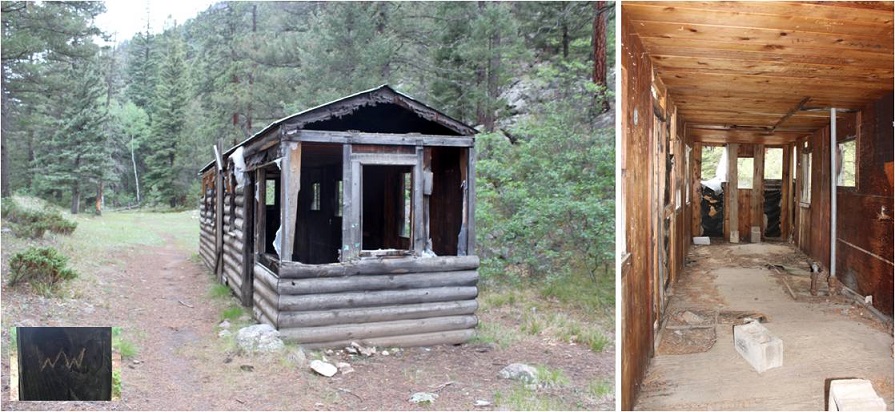
I jumped out of bed, gathered some food, and went to look for the Jupiter trail. As I was hiking I really gave the outing some thought, and while I felt I could summit in time I was worried it would put me hiking back down to the train during the wet weather time of day, and I didn’t much want to do that. So I made a nice 3 mile loop out of the hike instead. I came across an abandoned mine I’d wanted to explore but the ice kept me from it
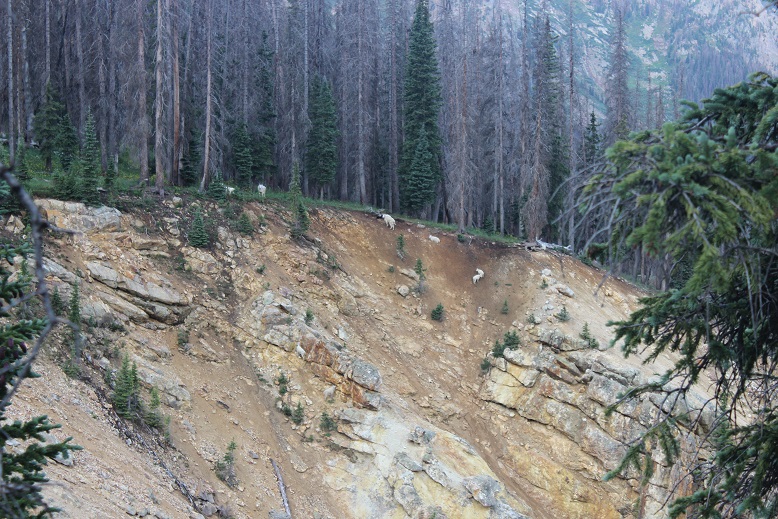
I stopped for a bit to filter some water, and then continued the trail as it followed a ridge. Here I meet a ton more goats all playing on the scree slope. Two baby goats looked like they were trying to push each other off. The rest just seemed to be rock climbing.
I leisurely walked back to camp, and when I arrived at 7am I was surprised to find the Basin was totally cleared out! Everyone had packed up and left. Wow! So I packed up my things, said goodbye to the goats, searched for and picked up pieces of trash, and left at 7:45am to head back down to the train.
I was in no rush today, which is not normal for me. I’m always in a hurry. I actually stopped, took breaks, and enjoyed the waterfalls and streams. It was so nice not to be in a hurry! I stopped to have a snack by a waterfall, and once I’d made it down to the Needleton/Purgatory Junction I took off my shoes and soaked my feet in the stream as I heard the 11:30am train go by. I washed my hands and re-did my hair. There were tons of flies here, and I tried not to take offense they seemed enamored with me.
I put my shoes back on, passed 4 hikers who’d been let off the train and watched the clouds roll in as I made it to the flagstop. Hey, guess what? I just realized I hadn’t seen a single mosquito this entire trip! I thought the Chicago Basin was notorious for mosquitoes? Hmmm… I must have been lucky!
I made it to the flagstop at 12:30pm, which meant I had 3 hours to wait for the train. That’s quite a bit of time to do nothing, but almost immediately it began to rain. I crossed the tracks and found an old shelter on the other side. It didn’t look too safe, but it did look like it would keep me dry. I’d just have to be careful not to sit down/step on any nails.
For the next 2 hours I watched the rain from inside the shelter. It looked much worse on the trail, and I congratulated myself for not going for Jupiter today: I’d have been stuck in that hailstorm hiking right now if I had.
At about 2:30 the rain stopped, so I went back out by the tracks. A little before 3pm the 2:30 train went by, and out of nowhere 3 high school aged boys ran across the bridge to wave at the train. It seems they’re staying at a cabin on the river (they’d come in by train this morning) and their only entertainment was waving at the train, so they were coming out every time one passed.
My train came closer to 4pm. The two other hikers who’d come in on the train with me were there to take the train back (they’d gotten caught in the hailstorm hiking back down). After getting a $5 beer I had some great conversations with the other people sitting next to me. I tried to relax before my 6 hour drive home, but everyone was chatty. I was ok with that. In fact, I was just fine. I’d accomplished what I’d come to accomplish, meaning I didn’t have to hike in through Purgatory next week to finish hiking the Chicago Basin 14ers. But… I’d still like to come back at a later date, maybe with others next time. I would also still like to come back and do Jupiter someday, but I’m thinking of making it a day hike from Purgatory…
Many of these points I already knew but thought pertinent to remind
myself
I did not include much technical rock climbing information, as I don’t
believe I’m ready for that yet.
P. 29 – the 10 essentials
Map
Compass
Flashlight / headlamp with spare bulbs and
batteries
Extra food
Extra clothing
Sunglasses
First aid supplies
Pocket knife
Matches, in a waterproof container
Fire starter
P. 60-61
P.77 – Good navigators are never truly lost – but having learned
humility through years of experience, they always carry enough food, clothing,
and bivouac gear to get them through hours of even days of temporary confusion.
P. 83 – walk in a single file to protect trail-side vegetation
P. 85 – Screeing – shuffling
your feet to start a minor slide of pebbles and riding it down, in a standing
glissade.
P. 86 – When crossing a large stream / river, cross at the widest part,
as it will be the shallowest.
P. 92 – Rope Care:
A rope used daily should be retired within a
year
A rope used during most weekends should give
about 2 years of service
An occasionally used rope should be retired
after 4 years
After one very severe fall it may be wise to
replace your rope.New ropes are often
certified to take 5 falls, but if your rope is not new, consider all the
factors affecting its condition.
P. 96 -97
P. 107
P. 119
P. 124 – Mϋnter Hitch – the only
traditional belay method that provides sufficient friction regardless of the
angle between the ropes entering and leaving
P. 125-126 –The Hip Wrap – It’s
main advantage is the speed with which you can belay a follower who is moving
rapidly over easy ground. It can be set
up quickly and requires no hardware.
P. 135 – The three factors a belayer can control are
Strength of hand grip
Choice of belay method
The angle of the ropes
P. 139 – Proper and improper positioning of gates on double carabiners
P. 147 – To gain stability while rappelling, your legs must be nearly perpendicular
to the slope.
P. 149 – Potential Problems – Shirttails, hair, chinstraps from a hard
hat, and just about anything else that can get caught in the braking
system.Keep a knife handy in case you
have to cut foreign material out of the system.
P. 162-167
Mantel –
Down-pressure technique. Place both
hands flat on a ledge at about chest height, palms down, with the fingers of
each hand pointing toward the other hand.
Then raise your body up on stiffened arms.
Counterforce – is the use of pressure in opposing directions to help keep you in
place.
Stemming –
A counterforce technique that lets you support yourself between two spots on
the rock that may be of little or no use alone.
Undercling
– The hands, palms up, push up beneath the lip of the rock while the body leans
out and the feet push against the rock.
Lieback
– Another form of counterforce, uses hands pulling and feet pushing in
opposition as the climber moves upward in shuffling movements.
P. 174 – Dihedrals (inside
corners) may be climbed by pure stemming.
P. 187 – Ethics –
Preservation of the rock is paramount
It’s almost never justified to add a bolt to an
existing route.If you feel you can’t
safely climb the route as it is, don’t try it.
Keep other climbers in mind while climbing, both
in your group and of other groups
P. 213 – Determining the fall
factor: dividing the length of a fall by the length of rope run out from
belay.The higher the fall factor, the
greater the force.
Fall factor is lower when the length of rope run
out from belay is relatively great because a long rope stretches more and
absorbs more energy than a short length.
P. 227 – Hauling packs – You may decide to shed your pack sometime
because you can’t fit inside a chimney with it or because the weight would make
a pitch too difficult.Then you’ll have
to haul the pack up after you.
Trail a rope behind you as you climb, tied to the
pack down below.
P. 259 – All ropes should be different colors
P. 286 – Self Arrest
The hands hold the axe in a solid grip, one hand
in the self-arrest grasp with thumb under the adze and fingers over the pick,
the other hand on the shaft just above the spike
The pick is pressed into the snow just above
your shoulder so that the adze is near the angle formed by neck and shoulder.
The Shaft crosses your chest diagonally and is
held close to the opposite hip.Gripping
the shaft near the end prevents that hand from acting as a pivot around which
the spike can swing to jab the thigh.
The chest and shoulder are pressed strongly down
on the ice-axe shaft
The spine is arched slightly away from the
snow.This arch is crucial:it places the bulk of your weight on the axe
head and on your toes or knees, the points that dig into the sow to force a stop.Pull up on the end of the shaft, which starts
the arch and rolls weight toward the shoulder by the axe head.
The knees are against the surface, helping slow
the fall in soft snow.On harder
surfaces, where they have little stopping power, they help stabilize your body
position.
The left are stiff and spread apart, toes digging
in, but if you have crampons on keep them above the snow until you’ve nearly
come to a halt.A crampon point could
catch on hard snow or ice and flip you over backward.
P. 301 – Couloirs – Safe passage
through a couloir is usually depends on time of day.They can be safe in early morning when the
snow is solid and rocks and ice are frozen in place.It’s often a different story later in the day,
when they can turn deadly.Gullies are
the garbage chutes of mountains and with the arrival of the sun they begin to
carry down such rubbish as well as avalanching snow, rocks loosened y
frost0wedgin, and ice blocks weakened by melting.Most of the debris comes down the
center.But even if you keep to the
sides, listen for suspicious sounds from above and keep an eye out for quiet
slides and silent falling rock.
P. 303 –
P. 306 – Four out of five avalanches strike during or just after a storm.
P. 312 – Traversing snowy slopes
– After you’ve checked your avalanche beacon, put o mittens and warm
clothing.Get set to jettison your gear
so it can’t drag you down in the event of an avalanche.Loosen
the shoulder straps and undo the waist and chest bands on your pack.
When the route lies up a slope, head straight up the fall line instead
of switchbacking (which undercuts the snow). Only one person moves at a time, and everyone else watches from safe
places, ready to should if a slide starts. If the climber is on belay, don’t tie the rope directly to the belayer,
who would risk being pulled in if it proves impossible to stop a climber hit by
a wet, heavy avalanche.
Avalanche Rescue:The rescue effort starts even before the
avalanche has stopped.
Someone must pay attention to where a victim is
first caught, where the person disappears beneath the snow, and where the point
of disappearance on the moving surface of the avalanche finally stops, and be
able to relate these three points to fixed objects, such as trees or
rocks.With this information, the search
area is immediately reduced in size.
Then mark these three points and search. DO NOT
GO FOR HELP.This is a critical
principle of avalanche rescue.The
chance of a person surviving depends on everyone staying put, searching efficiently,
and digging the victim from the snow.You
can go for help after all search efforts prove to be futile.
Select a search leader so the operation will be
thorough and methodical.Approach the
scene carefully, posting an avalanche lookout in case of another slide.Start with a quick scruff search of the snow
surface, looking for someone partially buried, castoff equipment, or any
logical spot the victim might have come to a stop against a tree or rock.
The next step is a thorough search with avalanche
beacons, or snow probes.
A probe is anything you can use to pole into the
snow in hopes of finding the victims’ body. Set up a probe line, probing at every step.
P. 323 – Crevasse Rescue –When
the climber in front of you suddenly disappears beneath the snow, Do not stop and think.Your immediate reflex must be to drop into
self-arrest (facing away from the direction of the pull)in the snow and hold
the fall.
P. 397 – Expedition Philosophy
– Members of an expedition need a common code to live by during the weeks they
struggle together.A good one is summed
up in three promises you and your teammates make:
To respect the land
To take care of yourselves
To come home again
P. 403 – Leadership –
Leadership starts with each individual.
Individual leadership means being aware of the
group and its progress, whether or not you’re the formal climb leader.
The complexities of leadership grow as a party
size and trip length increase.
The leader cannot do everything, nor is that desirable.
A leader is also a teacher.
Leaders prepare carefully to meet any major
disaster that could befall their party.
P. 427 –
P. 438 – Lightning facts:Current flows because of a voltage difference
between two points along its path. A person bridging two such points with some
part of his or her body presents a second and probably better path for the
current.
Avoid moist areas, including crevices and
gullies
Span a small distance (occupy as little area) as
possible.Keep the feet close together;
keep the hands off the ground
Sit, crouch, or stand on insulating objects if
possible – a coiled rope or sleeping bag, preferably dry.
Stay out of small depressions; choose instead a
narrow slight rise.A small detached
rock on a scree slope is excellent.
Stay away from overhangs and out of small
caves.Large caves are very good if one
keeps clear of the walls and entrance. However, a cave might well be the lower terminus of a drainage crevice,
and should be avoided.
When on a ledge, crouch at the outer edge, at
least 4 feet from the rock wall if possible. If there is danger of falling off in event of a shock, tie in crosswise
to the prospective flow of current.Make
the tie short and avoid placing the rope under the armpits.
Rappelling when lightning is imminent should be
avoided, but may be a valid calculated risk if it is the quickest way to escape
a danger zone.Dry synthetic rope
presents the minimum hazard.
Contrary to popular belief, metal objects do not
attract lightening as such.However, in
the immediate vicinity of a strike, metals in contact with one’s person may
augment the hazard from induced currents. Induced currents usually are quite small, but when added to ground
currents may mean the difference between life and death.Thus it is best to set aside all metals, but
to keep them close by (don’t worry about an article buried in the pack).A metal pack frame might well be positioned
to provide a more attractive path for ground currents beside and past one’s
body.At distances greater than 100 feet
from a possible strike there is no need to divest oneself of metal
objects.
Well, I guess the seasons over. I hiked 35 unique 14ers and 2 13ers since June of this year, bringing my total 14er count to 47 (including repeats). I also made several failed attempts of 14ers and successful summits of peaks at 8K, 9K, 10K, and 11K not included in these numbers.
When I started this last June I had a goal of hiking eleven 14ers this year. I more than tripled that goal.Not because I intended to, but because it became really fun:mountaineering became a passion, a lifestyle, and very, very addicting.
Most trails took 3-5
hours to drive to, approximately 10 hours to hike, and 3-5 hours to drive
back. That’s a lot of solo time to think:I loved every minute of it!
I’ve learned a lot too. So much I could easily write a book. Obviously I’m not done learning:Mountaineering is full of continuous learning,
improvement, and reevaluating.
I wouldn’t be exaggerating to tell you my whole world view has changed this summer. We all hear or read certain words and immediately a picture comes to mind of what that word means.We have an association with that word.For example, what do you see in your mind when you hear the word gully, traverse, junction, self arrest, spur, couloir, glissade,basin, post hole, head wall, saddle, pitch, scramble, ridge, cornice, crevasse, chute, narrow, soft, hard, rock wall, scree, river crossing, switchbacks, talus, summer storm, exposure, approach, cairn, chimney, timberline, gain the summit or take the ridge?
Previous to this 14er endeavor I had visions in my head to fill all these words and phrases, but in this past
climbing season these visions have changed. Drastically.They’ve come to life and taken on a world of their own.Now when I see the word ‘basin’ in my head it’s not a drawing on a map, but a full scale area of drainage and rolling hills spanning multiple football fields in length, covered in tundra and alpine flowers. A ‘gully’ is a 4 letter word (more on that later) and ‘exposure’ is something dangerous that could include drastic changes in weather or falling to my death.When I hear the phrase ‘take the ridge’ I see a long narrow mountaintop with steep drops on either side I’m supposed to navigate around towers or rock to get to the summit I wish to climb.I can envision in my mind vividly what each of these words means as an experience, and these experiences have changed me.
I’ll continue to learn, and I’ve learned more than I could ever put into words here, but I’ll give you some of the highlights in no particular order:
Climbing is not the same as Hiking. There is a huge difference between hiking and climbing (and between different types of climbing).All 14ers include a hike, but not all include a climb. I’d say most climbs begin with Difficult Class 2 and include Class 3 and above.A climb requires putting away the camera and using all four appendages to scale a mountain.There were times this caught me off guard, even with proper planning.In essence, climbing is mountaineering, and hiking is just that (hiking).
Hiking /Climbing /Mountaineering takes planning: Successful summits don’t just happen. Driving directions, routes, GPS coordinates, weather, dates, time, ability, etc. all need to be taken care of before the hike actually takes place.Of course, you can just try to do all this on the fly, but I can guarantee you something will go wrong.Things go wrong with even the best of plans, but when you plan you give yourself a bigger degree of success.
When you plug in the coordinates into your GPS and it brings you 200 feet but 10 driving miles away from the trailhead where you no longer have access to cellular data and the GPS keeps unsuccessfully trying to reroute but you HAVE NO DATA and you arrive in the dark it can be daunting, but if you have a printed map available that can get you where you’re supposed to go you’ll appreciate your planning. This happened to me so many times this summer I’ve lost count.
There were several times I found out hours before a hike my booked schedule was now free and I was able to go. If I hadn’t already pre-planned routes, driving directions, etc. I would have missed out on a hike because they take a while to plan.Several times weather derailed my plans at the last minute. Because I’d put together dozens of potential trips I just switched to an area with more favorable weather.Mountaineering takes planning.Plan.
Hike when you can (see above).
It’s not always easy to get up at 2am and drive 4 hours to a trailhead, but I’ve never regretted a hike.If I slept in on all the days I wanted to instead of hiking I would have missed dozens of amazing experiences, all for sleep.You can tell people about your dreams or your accomplishments.As far as I’m concerned, sleep when the weather is bad, hike when you can.
Difficult Class 2 means gully.
I hate gullies.I used to think a gully was a beautiful canyon full of lush landscape, trees, waterfalls, and streams (hello, Fern Gully?) but they’re not.Gullies are alleys eroded by water and snow.They’re usually narrow and steep, formed by loose rock and sand, extremely difficult to find traction on to climb, and the only route up the mountain due to steep rocks on all sides.
The more challenging ones encompass an entire mountainside. They are difficult to climb up, but even more difficult to climb down, as your center of gravity is off and slipping and sliding hundreds of yards to your death or grave bodily injury is a serious possibility.In my opinion, gullies are more dangerous and difficult to climb than a Class 3, and a route that includes a gully is one I try to avoid if at all possible. Wear a helmet and microspikes whether or not there’s snow/ice.
Listen to others.
Ask for advice from others who’ve summited a mountain you’ve yet to summit.I’ve never understood why some people just don’t want to take advice?Everyone has something you can learn from.As far as
I’m concerned, I want to be as prepared as possible when out there dozens or hundreds of miles from civilization (read: help is far away).It’s great to know if there’s a false summit or difficult area that has a trick to get around.Ask hikers hiking down the mountain while you’re hiking up about conditions (etc.) and truly listen to their responses.I can’t tell you how many times I’ve been hiking down a mountain due to weather and tried to warn people hiking up. No one has ever taken my advice, and I know for a fact several of them ended up getting caught in hailstorms above treeline.
Everyone has different comfort levels / risk tolerances. Know yours.
When getting advice from others keep this in mind. Challenge yourself, but don’t be stupid. I’ve taken several routes I know I wouldn’t have completed if I’d been with others because I have a higher risk tolerance than most people.We would have turned back and I wouldn’t have summited.I’ve also taken alternate routes when the one in front of me was too difficult.The bottom line is if you don’t feel comfortable don’t do it just because someone else has.
Climbing time and pace don’t correlate to distance.
Just because you can hike 20 miles in a day near your home doesn’t mean you can hike a 20 mile 14er in the same amount of time. A general rule of thumb for hiking is 2mph, but this varies widely depending on ability, experience, weather, carrying weight, and terrain.Just because you hiked a 7 mile class 1 14er in 3 hours does not mean you can hike a 7 mile class 2 14er in 3 hours.Look at elevation gain and difficulty of terrain before setting out, and remember climbing takes longer than hiking.Think about it:Can you climb up a mile worth of rocks in the same amount of time it would take you to walk the same distance?Probably not.This corresponds with 14ers too, and learning your speed comes with experience.
Keep your pack packed.
This also goes hand in hand with planning. If you never unpack your gear you’ll never need to re-pack it.I always keep my microspikes, sunscreen, gloves, hat, compass, emergency first aid kit, matches, whistle, etc. in my hiking pack.When I get back from a hike I refill my water bladder and replace my bandana (and wash the old one).I never need to wonder where my gear is or if I have it because I always keep it in my pack. This saves me the time and hassle of prepping the night before, and wondering where stuff is.
Have the proper gear.
This is very important.You shouldn’t just head out on a hike up a 14er with just tennis shoes and a water bottle (although trust me, I’ve seen many people do just this).Know what the 10 essentials are and bring them.Use a water bladder instead of a water bottle.Get a good pair of hiking boots, trekking poles, a helmet, microspikes, and all weather jacket.It’s amazing what a difference good shoes and microspikes can make on a trail with just a little bit of snow/ice.If the weather/terrain calls for it, invest in crampons, climbing gloves, and an ice axe (and learn how to use them properly before needing them).It’s extremely frustrating to hike in 10 miles and have less than 1 mile left to the summit, only to have to turn back because you don’t have crampons and you can’t hike any further without them.
Learn to layer.
The weather on the mountains is unpredictable and changes quickly. I’ve never regretted bringing my snow jacket on every hike I’ve been on, even in the summer. And in case this is new to you, NO COTTON!(this means no jeans, cotton socks, cotton t-shirts, cotton gloves, etc.).In case you’re unsure of how to layer, here’s a photo:
Learn how to eat.
I don’t get hungry on the trail as a rule, but every so often the hike takes longer than anticipated and I’m glad I pack food no matter what. While on the trail don’t go for foods that are overly ‘healthy’.During the hike is when you need protein/calories to keep going! Lightweight foods that are high in calories work best.I like to make homemade beef jerky and bring
that with me as a snack, along with some dehydrated bananas and peanuts.When hiking long distances remember the weight to calorie ratio:I’d rather bring along and eat two Reese’s Peanut Butter cups than an apple (even though it’s “healthier” the apple weighs a lot and doesn’t give you the calories you
need to keep you going).
Hike Early.
We’ve all heard to hike early to avoid summer storms, but there are realistically many more reasons to do so than just the stormy and unpredictable summer weather.
You’re generally more rested earlier in the day
In the summer while it’s cold in the morning you’ll warm up fast once you start hiking and it won’t be quite so hot above treeline if you get there earlier in the day.
If something goes wrong you’ll have more time in the daylight to problem solve
You avoid the crowds and actually get a spot at the trailhead to park your vehicle
Colorado sunrises are amazing. Be where you can appreciate them (above or as close to treeline as possible)
If you finish early you’ll have time to celebrate by resting your feet in a stream or head to town for a beer
Making it up is optional, making it down is mandatory.
We’ve all heard this phrase dozens of times, but it’s much more difficult to implement than to say.Nothing hurts more than turning back on a summit, but know your abilities, and make a plan before you ever get into that place where you need to make the decision to turn back.This includes time limits (I need to be at my halfway point by x time to summit today) and weather restrictions (if I hear thunder I’m turning back versus if I hear thunder 3 miles away I’m turning back versus if I’m above/below treeline and hear thunder I’m turning back, etc.).If the terrain is above your abilities or you don’t feel comfortable, know to turn back.The mountain will be there tomorrow, next week, and next year.Make sure you’re there to see it.
Easy and close to Denver means crowded.
Think Mt Evans, Mt Bierdstadt, Quandry Peak, etc. If it’s a class 1 or 2 and less than 8 miles of hiking distance expect to hike with dozens (if not hundreds) of your favorite hiking buddies no matter what day of the year it is.This means limited parking at the trailhead, crowds, fewer animal sightings, blaring music from someone hiking with speakers, hikers that smell like marijuana, seeing people peeing above treeline and summit photos with people you don’t know in the background.Sometimes the drive away from town is worth it.
The mountain is bigger than it looks, and smaller too.
Study your maps and do your research and things will still surprise you. The mountain looks different from far away than it does up close.Sometimes the challenges are bigger than they appear, but often smaller as well.There have been several places that from afar looked impassable, but once I was closer I could see a navigable path. Take the trek one step at a time, and don’t give up or make up your mind until you get there.
If you don’t try you’ll never know.
I got this advice from my 14 year old while going back and forth over whether or not to hike on a particular day when all my information was giving me a 50/50 chance of summiting.When in doubt, go.You can always turn back if you need to, but you’ll wonder forever if you never try.
Weather forecasts are wrong, but check them anyway.
I can’t tell you the number of times I’ve checked and checked and checked the forecast for a particular area only to have it completely different once there. Sometimes this worked out in my favor (anticipated 30+mph winds that never materialized) but often it didn’t (the only cloud in the sky was directly
above the peak I intended to hike, and it was filled with ice and wind).On the other hand, it’s nice to know when it’s expected to thunder and lightning all day or if the wind speeds are
anticipated to be above 50mph.Knowing there’s a 50% chance of hail at noon helps you to make an informed decision about whether or not to continue your hike when you see clouds forming overhead, or even in determining which hike you should take that day.
If there’s water, there’s ice. Especially when it’s dark, just assume everything wet is really ice and can cause you to slip and fall.Proceed with caution.
Ladies: Never let anyone tell you a tampon is unnecessary weight. Never, ever ever.Altitude does weird things to your body, and those around you as well.You might not need it, but you’d be surprised how often you might just meet someone along the trail who does and make a friend. They don’t weigh enough to outweigh the benefits of having one with you, and they can double as emergency first aid supplies (a quick google search can answer any questions).
Carry a bandana (or two). Seriously, these are lifesavers!There are hundreds of ways to use a bandana, not to mention for blowing your nose, for use instead of toilet paper (this is why I said two), or to immobilize an injured appendage.Ladies, also see note above and infer.
Ladies, learn how to pee above treeline.
For guys this is a no-brainer, but for women it can become an issue, as many hikes continue for miles above treeline and if you’re drinking water you’ll need to pee (and there’s no place to hide). Here’s a hint:Find a place to sit and use your jacket to cover your lap. Problem solved!
Learn how to blow your nose without a tissue/bandana/etc.
It’s gross, but along with a trusty chapstik will save your nose/upper lip from getting raw (basically you just plug one nostril with your thumb and blow really hard).Also, don’t do this in the company of others (once again, it’s gross).
Bring along a GPS and a topo map:
And know how to use them!Social trails abound in popular areas and the real trail can get muddied.A GPS is no good if you don’t know how to use one, and a topo map and compass are as well. Practice before you need them on easier hikes closer to home.They can both really save you if you get
lost/stuck on the trail.
Don’t expect an engraved invitation.
What this basically means is don’t expect a trailhead sign to indicate where the trail starts, or even signs along the way indicating which direction to take at a junction.While there are many trailheads with amazing signs indicating you’re at the right trailhead and where the trail begins, this is often not the case for 14ers.Several times I’ve parked (in the dark) at the end of the route and supposed beginning of the trailhead,not able to see where the trail actually begins, or even a sign indicating I’m at a trailhead.Often times you’ll come to an area where several trails intersect and there’s no signage.This is where having a GPS comes in handy.
Don’t expect a trail.
Unless you’re hiking a class 1, there won’t be a trail to the summit. There will be some route finding involved as well as hiking over rocks (etc.) with no established trail. I’m not sure why this as a surprise to me, but it was in the beginning.For some reason I thought I was owed a trail while hiking, but 14ers are a different game and considered difficult and a hallenge for a reason.Learn to use a map and compass and develop some route finding skills.
Sometimes the obvious route is the actual route.
One time I was hiking and met several people along the way.We all knew the cutoff for the peak was
difficult to find, and somewhere in-between two points.I happened to see a cairn wrapped in pink
electric tape, and suggested that was the route to take.Everyone else agreed that was too obvious,
and probably there to indicate the mine behind it.Nope, the pink tape indicated the correct trail.GPS was helpful here as well.
Just because they’re close to each other doesn’t mean they’re the same.
Each 14er is unique, and just because two 14ers are a couple of miles apart or in the same range or ‘connected’ doesn’t mean their routes are similar.Sure, the views, animals, flowers, and stability of ground will be similar, but look at their class rankings:A 2 class can be very different from a class 3, even in the same range.
Buy a 4WD vehicle with clearance.
Extra points if you can sleep in the back.If you’re serious about hiking all 14ers you’re going to need a 4WD with clearance; either that or you’ll need to love hiking an extra 15 miles to get to the trailhead.Many trailheads to 14ers are at the end of serious 4WD roads. If you can’t afford to buy one make friends with someone who has one, or rent one for the weekend.
13er doesn’t mean easier.
Think about it, a 13er could be one foot shy from being a 14er and is still referred to as a 13er (13,999). They’re just as difficult, and often more so because they don’t have established trails and aren’t as frequented by other hikers. Don’t judge.
The way the mountain is facing is important for snow/ice reasons.
Routes facing the west and south clear of snow and ice much faster than routes facing the east and north due to length of exposure to sun and ability to melt snow and ice. Do your research, know which way your route is facing, and plan appropriately. I’ve hiked mountains where one side of the mountain was completely clear of snow (the side you could see from the road), and as soon as I got to the inside hiking area it was like a snow globe.
Weather changes class.
A class 1 hike can easily become a class 2 climb or above in snow. Wind, snow, ice, etc.can drastically change the difficulty of the climb.Know your abilities and be prepared.
Don’t hike to get in shape. Get in shape to hike.
The hike will be a lot more enjoyable if you’re physically up to the challenge.Breathing above treeline is a lot different than breathing below it. When you go above treeline, it’s like you can suddenly feel that the air is thinner. You get tired quicker and it’s harder to breathe as well as you do in lower altitude. Being physically fit makes this transition easier.Use the winter months to work out and build up your endurance.You’ll thank yourself for this later.
It hurts just as much not to hike as to hike. Sometimes you need to make the call not to hike, and that has to be ok. Personally, right now, I’m itching to go hiking this weekend, but the weather isn’t cooperating and I’ve already made other plans. I’m a nervous ball of energy that’s struggling to find an outlet, so I’m going to use this weekend to catch up on sleep, and to plan future hikes.Be prepared for times when hiking isn’t possible, and ways to be ‘ok’ with it.
Every hike/peak/summit has a story: Yours.After a while they’ll all run together and you’ll forget things.Write them down as soon as possible after your hike. Take pictures.Talk about your experiences and share your stories.If you don’t, you’ll wish you did…
Today I wanted elevation gain. This is most likely the last change I’ll get to hike a 14er this year (I promised my mom no more hiking alone between Nov-May) so I wanted to go out with a bang. Weather was pretty stable across Colorado today, but there was a prescribed burn scheduled in the Shav/Tab area that was affecting air quality in the Colligate Peak area, so that excluded a bunch of 14ers. I couldn’t find any recent trip reports (etc. ) on Challenger Point and Kit Carson, but I’d attempted them a few weeks ago and hadn’t heard of any snow in the area since, so I decided to attempt them again, knowing if I failed (again) at least I’d get in some elevation gain.
I remembered thinking last time I hiked Willow Creek trail I’d wished I’d started at 3 or 4am, instead of 6am. It really is an early trail. So I woke up at midnight and made it to the trailhead at 4am. I’m not going to post info about the Willow Creek trail because I’ve done it before (TH and Trail info here: http://wildwandererblog.tumblr.com/post/166343409816/willow-lake).
No one had signed the trail register for days, but the last entry (10-24-2017) stated Kit Carson was socked in. I mentally prepared myself not to summit Kit Carson, but I’d take a look at it just in case (a lot could happen in 5 days!)
I was on the trail at 4:15am, and made it to the lake at 6:00am: It was still dark! Oh no! I’d hiked 4.25 miles in less than 2 hours! Lat time it took me longer, and I couldn’t help but think maybe it was due to route finding? Either that or I wanted to get a jump start on that elevation gain. In any event, I circled the lake in the dark. About halfway up the ridge I heard a loud TWANG! It startled me, as it echoed throughout the canyon. The sound was unique, but I’d heard it before when my cousins and I used to throw rocks on a frozen pond. The lake must be frozen! I bet a pretty big rock/icicle fell and hit the ice!
I continued on in the darkness, hiking slow to allow the sun to rise. Just after I passed the willows I was able to turn off my flashlight. I’d timed this perfectly! Oh, and the weather was great! MUCH BETTER than the last time I was in the area. No wind to speak of this time, but unfortunately, it looked like it had snowed recently.
Take a look at the mountain before me:
In any event, there was no wind, and I could see a lot of snow-free area, so I decided to make a go for it. I couldn’t help but think to myself, as I was halfway up Challenger Point, what a great decision it had been to hike this mountain today! The trail was pretty much free of snow, it was warm, and there wasn’t any wind. Very cool!
Unfortunately, I spoke too soon. When I’d made it about three quarters of the way up the mountain I ran into trouble. The snow up here was covering every single avenue I had to make it to the summit! I could totally see where I had to go, but the path was covered in 5-6 feet of snow and there were no footprints/tracks from pervious hikers to follow. I kept trying to find a snow-free route to make it to the ridge, but it just wasn’t happening. I had microspikes, but they were no good: I’d hike out about 8 steps or so on snow that gave me traction, then all of the sudden, ice skates. Of course I backtracked when this happened.
There were a few boulders I felt I could safely climb up and over, but I did not feel comfortable climbing back down those boulders. I need an exit strategy when I climb, and I wasn’t getting one with these rocks (so I didn’t even attempt it).
I was seriously getting frustrated, traversing in circles trying to find a safe way around these boulders/snow. Have I mentioned I hate gullies? However, I didn’t have evening plans tonight and it was a really nice day. I had plenty of time to figure this problem out. I obviously didn’t have the gear I needed for this climb (Crampons and an Ice Pick/Axe), but I really wanted to summit (safely). The snow wasn’t really that bad, I just couldn’t get traction anywhere. I looked around and thought for a bit. Most of the soft snow was by the boulders. How could I use this to my advantage?
I decided to hug the boulders, and make stairs with the soft snow at their base and around their sides. I’d be able to hold onto the grips in the rock on my way up and down, giving me stability. This took quite a bit of effort, but I needed to make sure I’d be able to climb back down after climbing up. Several times I stopped to make sure these stairs “worked” in steep areas. Success! It was slow going, but eventually I made it to the ridge! Woohoo!
I was so glad there wasn’t much wind today! The ridge wasn’t very wide, but only half covered with snow, so it was easily navigable.
I made it to Challenger Point at 9:15am. Here’s proof of summit:
And a 360 degree video.
Challenger Point was named in memory of the Challenger Space shuttle, and there’s a plaque there to commemorate it.
OK, now I looked over at Kit Carson Peak. It did indeed look like The Avenue was full of snow, but if I’ve learned anything from Mountaineering, everything looks different up close. I decided to hike over and take a look. The worse that could happen would be I’d have to come back for Kit Carson another day, but re-summit Challenger Point today (which would give me more elevation gain! Woot!).
I couldn’t take the traditional route down Challenger to Kit Carson because of that darn snow. It was really hard packed and slippery there. Luckily however, the ridge was pretty dry, so I just followed that down.
When I reached the small saddle between Challenger and Kit Carson I could see the Avenue was indeed full of snow, but navigable. And, an added plus: The snow as soft! I’d be able to get traction! I was on my way.
All I have to say about Kit Carson Peak, even with the snow, was that it was SO MUCH EASIER than Challenger Point! It was very straightforward, had lots of cairns, and was easy to follow.
I made it up Kit Carson at 10:15am. Here’s picture proof I summited
And a 360 degree view
I was fully aware at this point I was only halfway done with my hike. I now had to hike back over Challenger point and back down the mountain.
Oh, this sign says: Danger: Lose Rocks. Many people have died
Hiking back down proved a challenge, but I’m proud to say my stairs worked! A few times I needed to glissade a very short distance (less than 10 feet) to make it to a safe area, but otherwise it was a success! Very slow going, as I didn’t want to slip and fall, but a success nonetheless. The entire hike down to the basin seemed to take forever! Have I mentioned I hate gullies?
I made it back down and crossed the lake, this time in the daylight. I could see where a piece of ice had broken off in the lake, and heard another large rock drop! The lake was indeed iced over, but not completely frozen.
On the way back down to the TH I thought about how Challenger Point is a Difficult Class 2, but Kit Carson Peak is an Easy Class 3. But that was totally reversed when snow was added into the mix! Challenger Point was much, much harder for me today than Kit Carson Peak. In fact, it was the hardest 14er I’ve done so far, even though it technically shouldn’t be. It’s amazing what ice and snow will do to a climb! But I got in that elevation gain, so I’m happy!
Side note: I didn’t see anyone else on the mountain at all today? I was the only vehicle at the trailhead when I got there and when I left…