Tabor Peak – 13,282

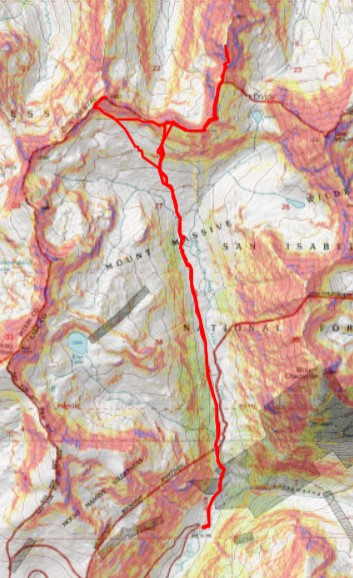
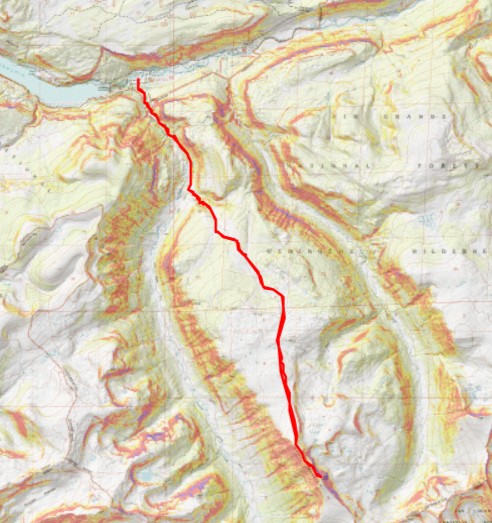
RT Length:  9.72 miles

Elevation Gain:  3055’

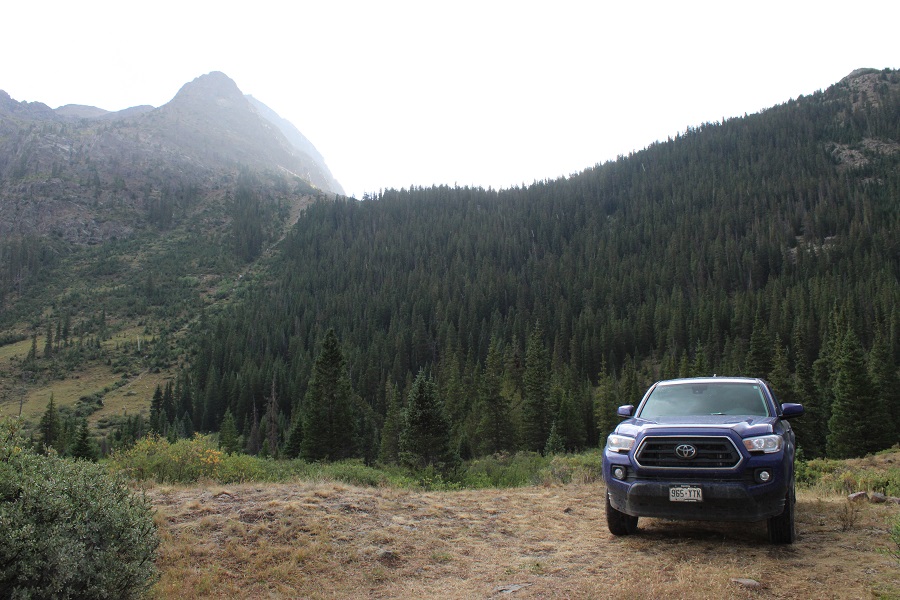
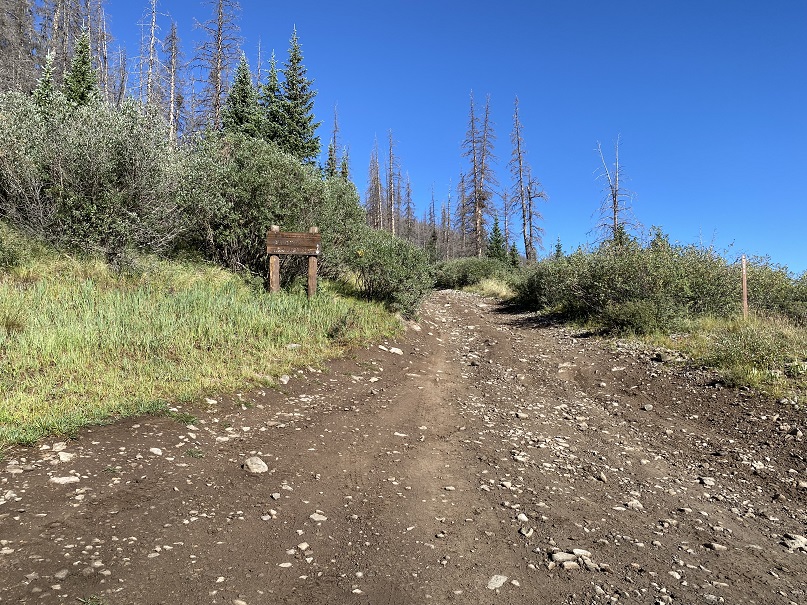
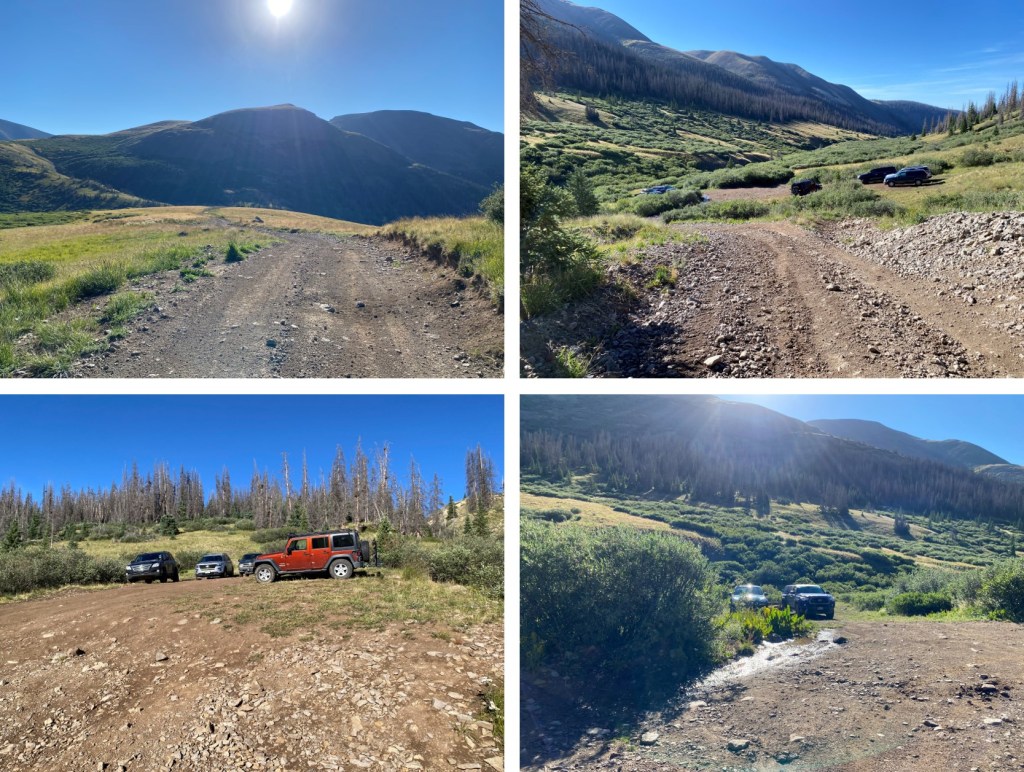
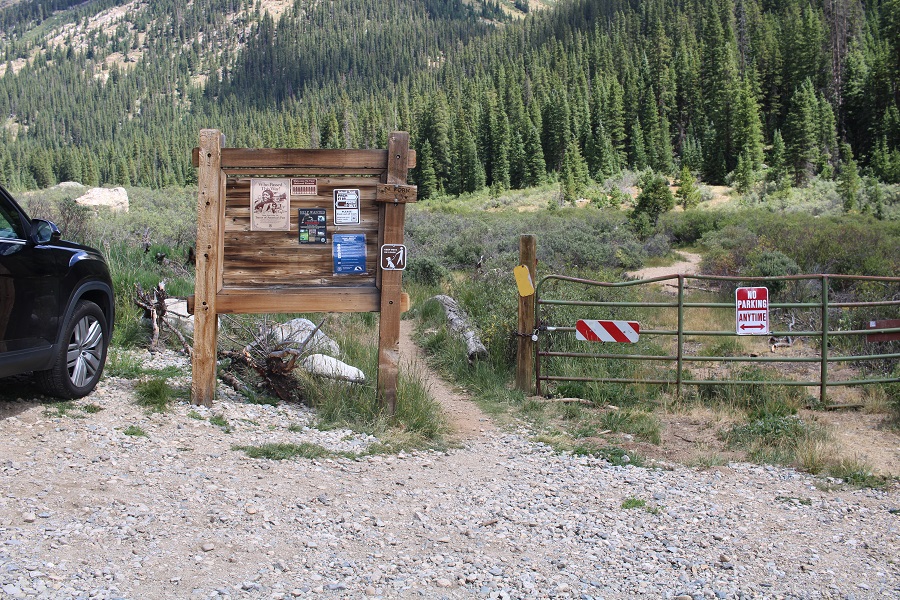
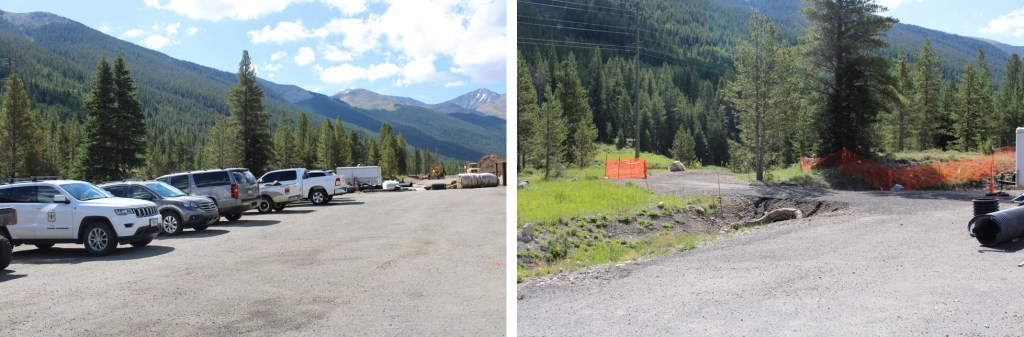
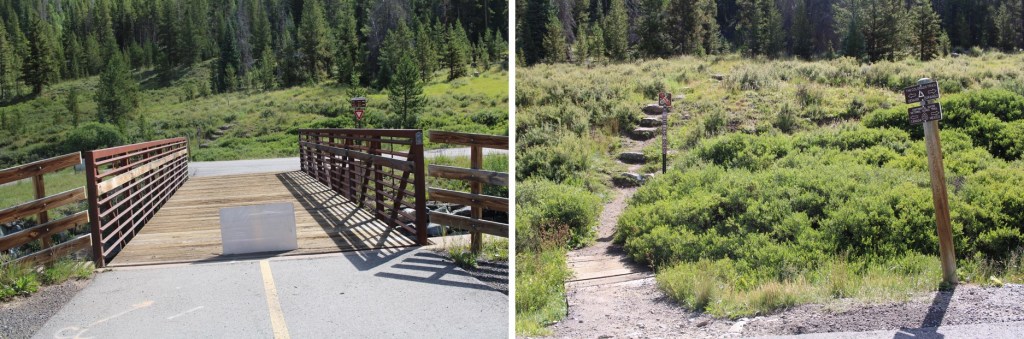
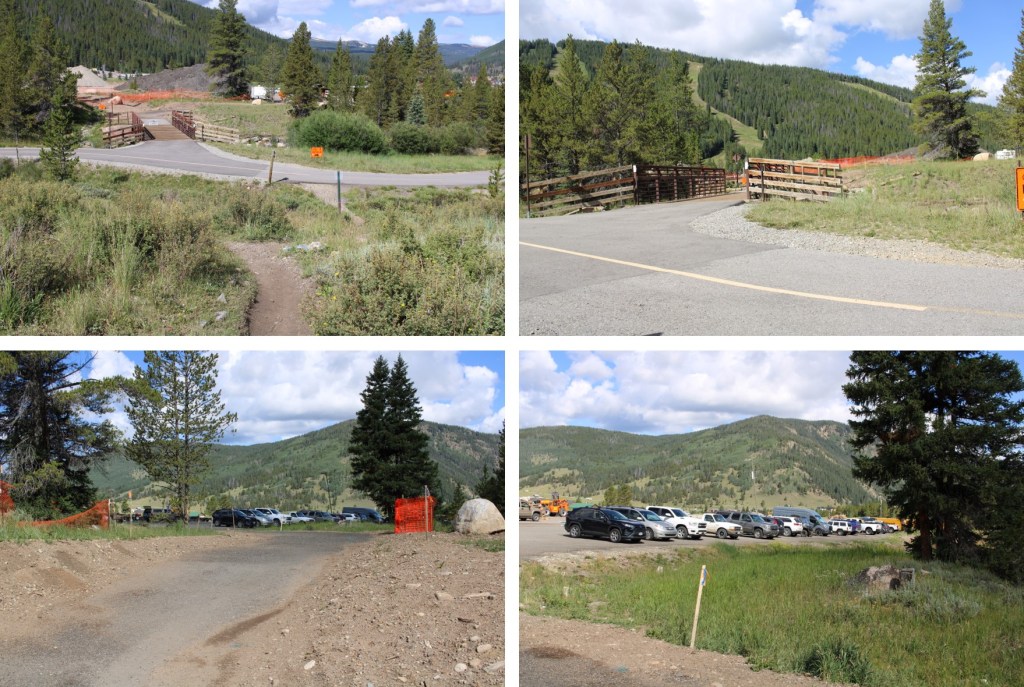
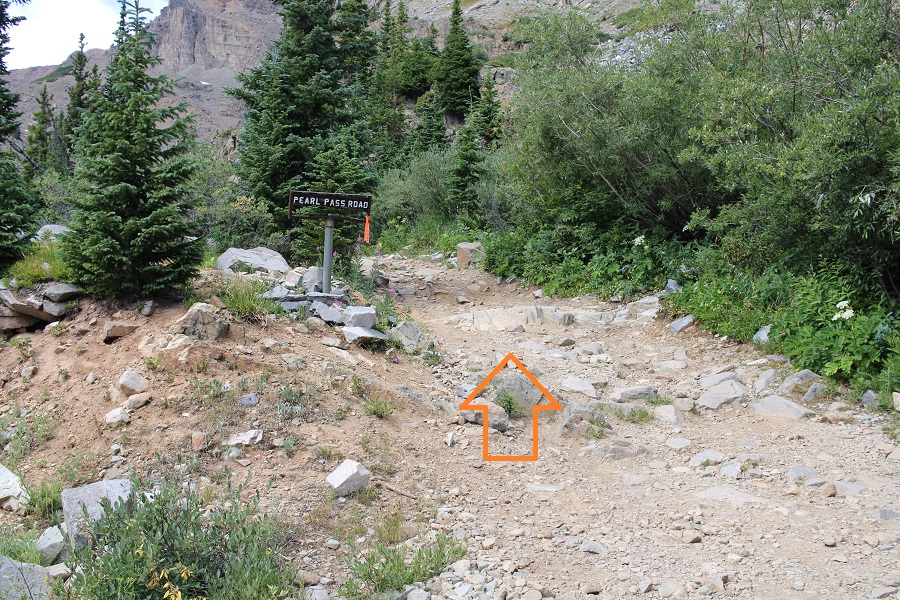
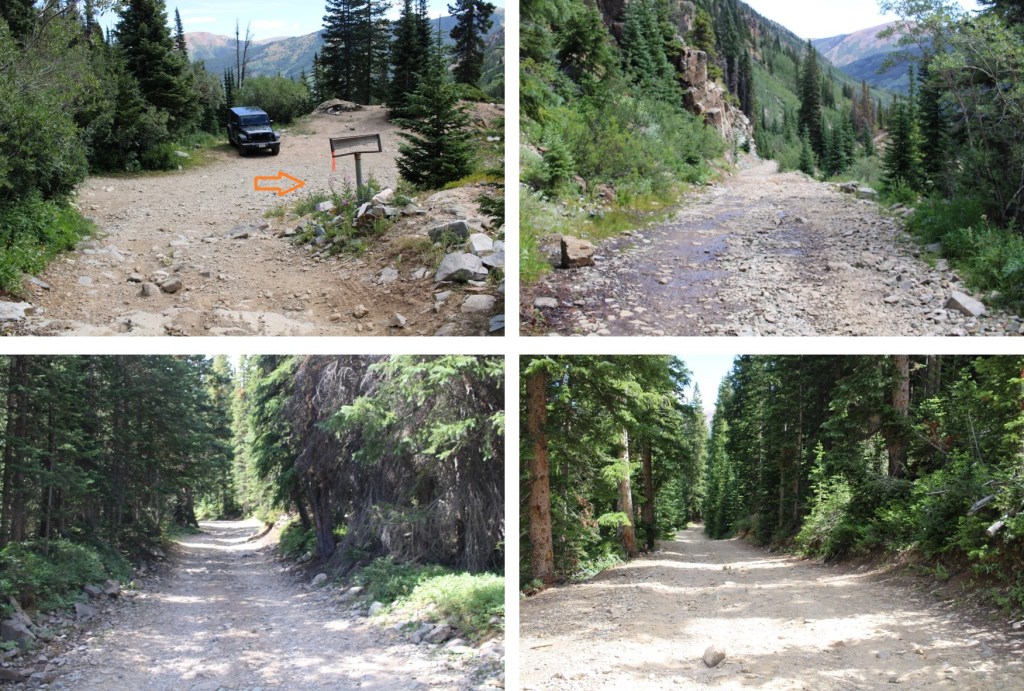
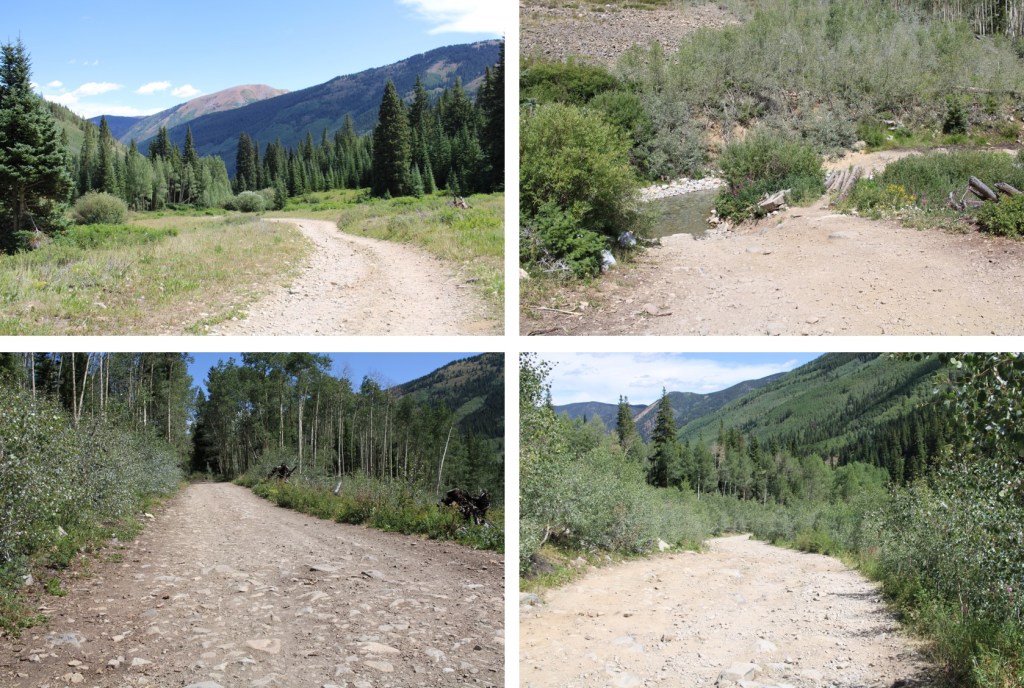
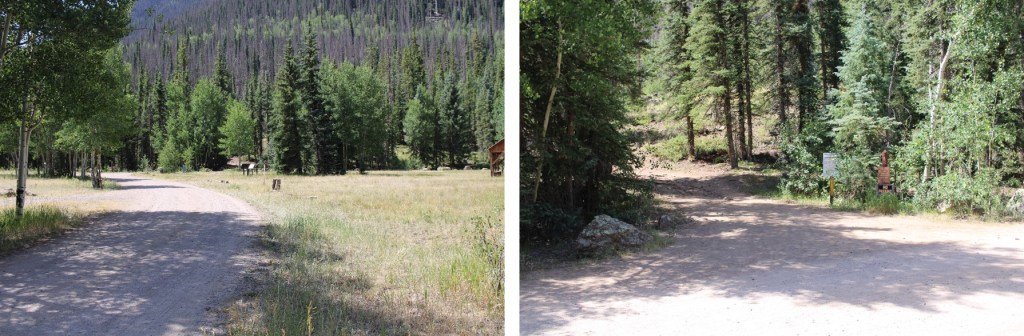
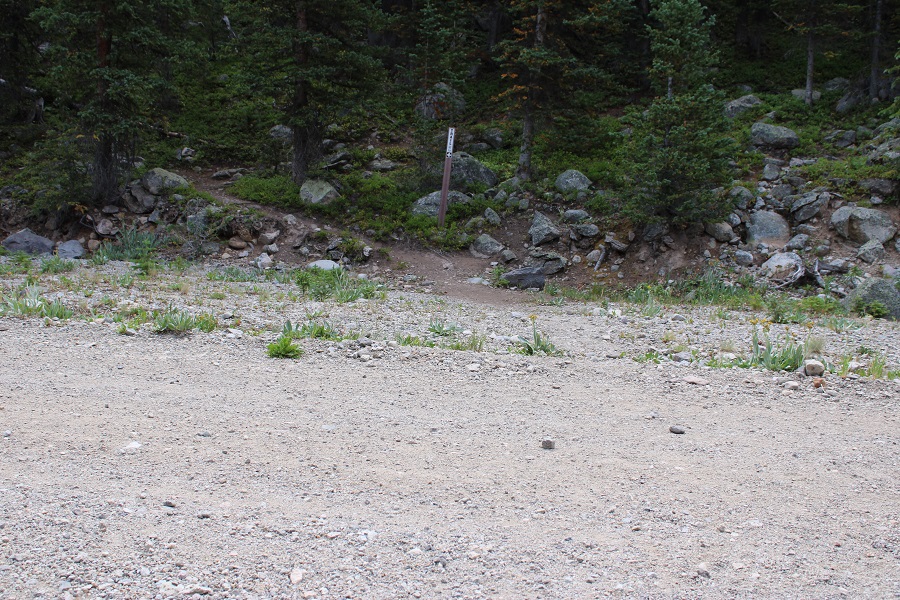
I parked at the Tabor Creek Trailhead (2185) and was on my way at 4:30am. 

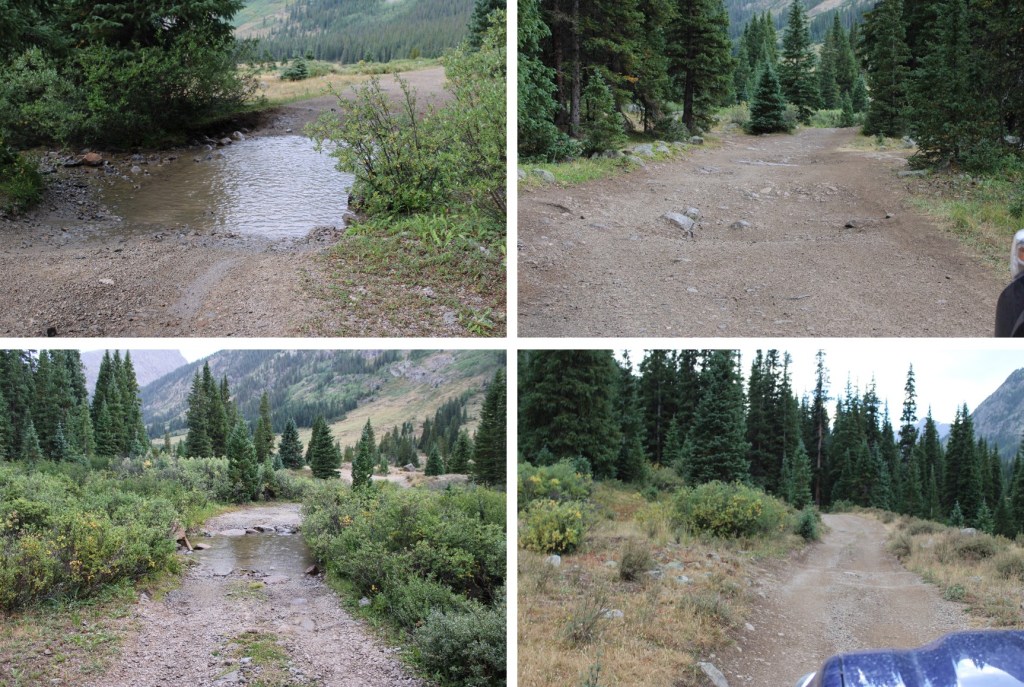
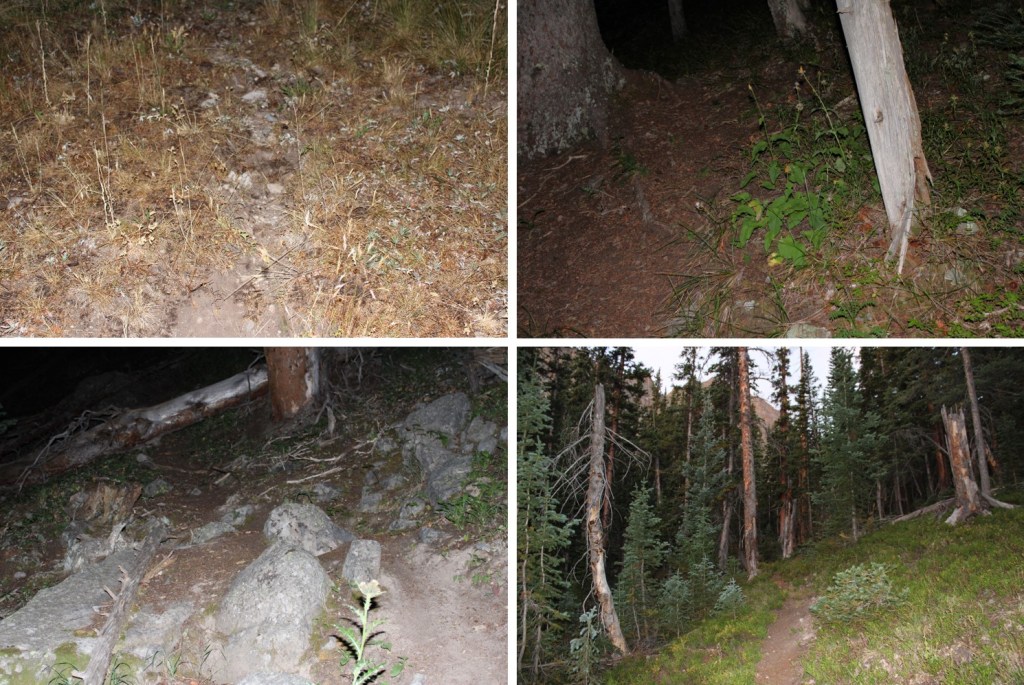
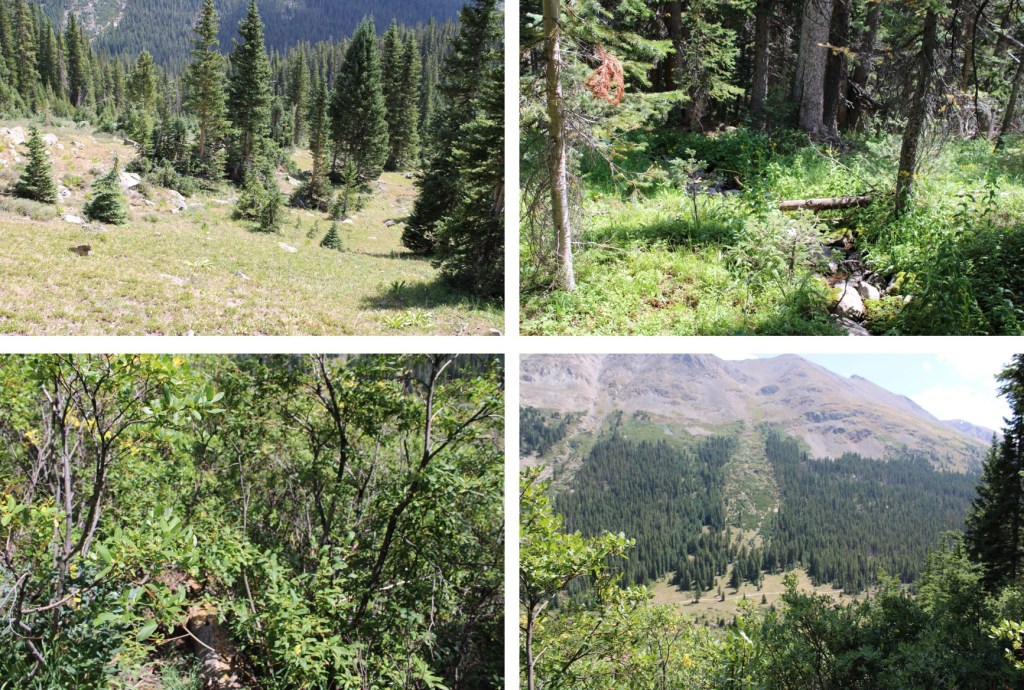
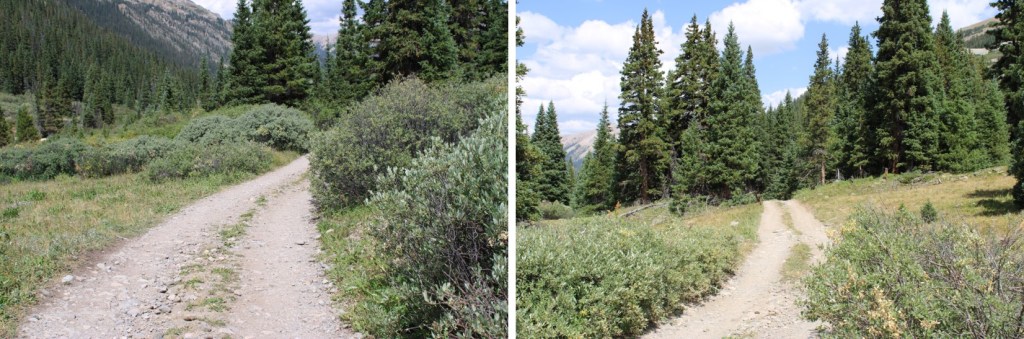
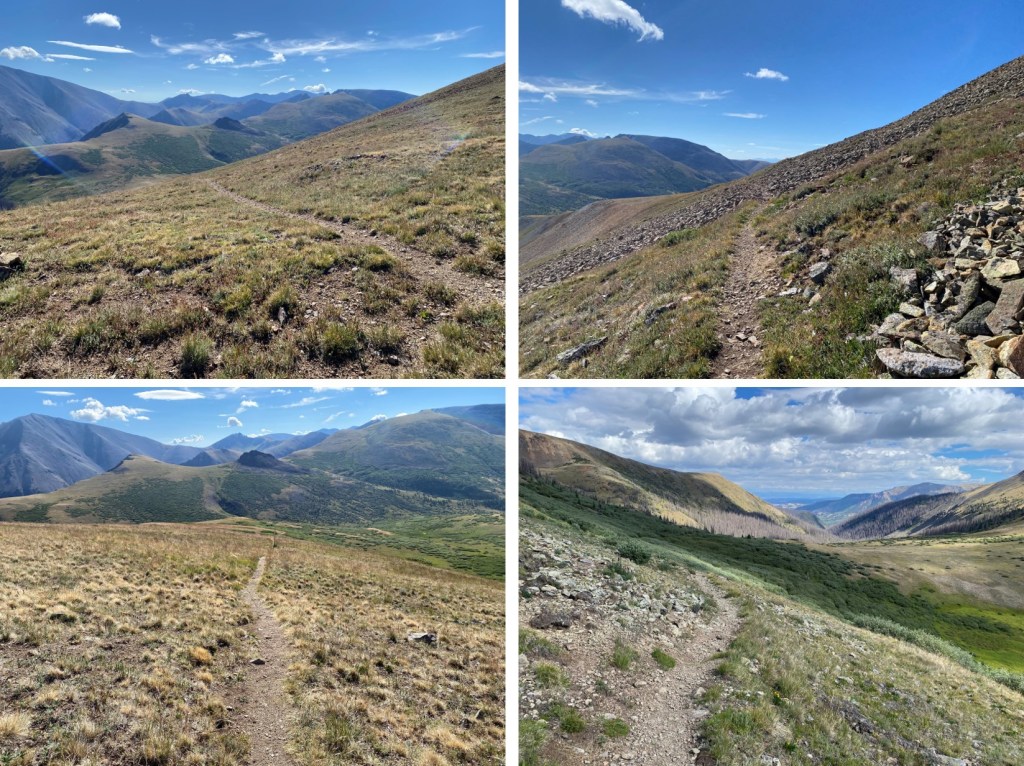
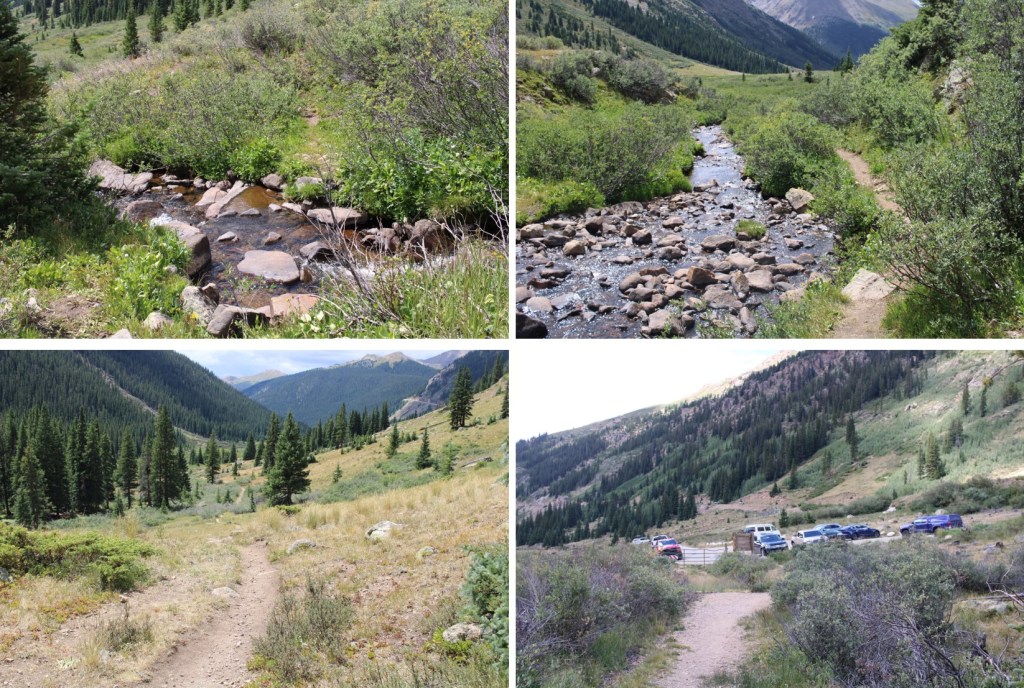
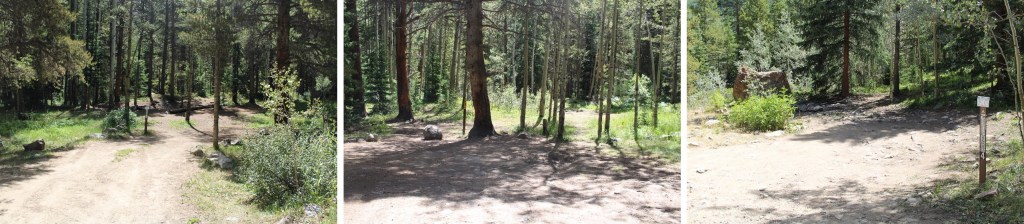
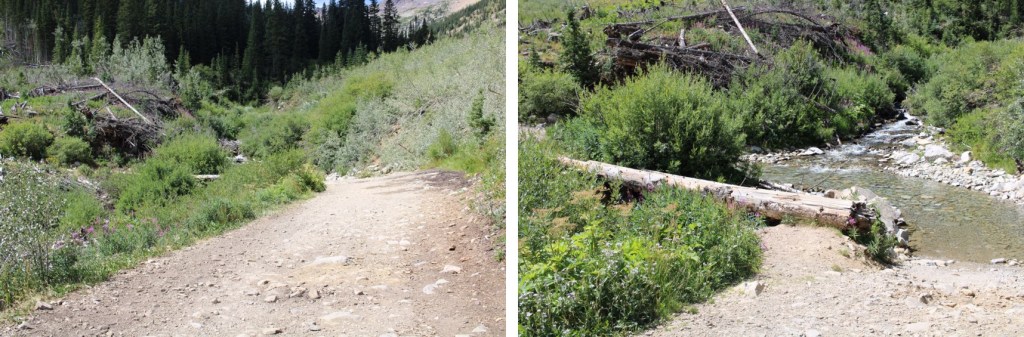
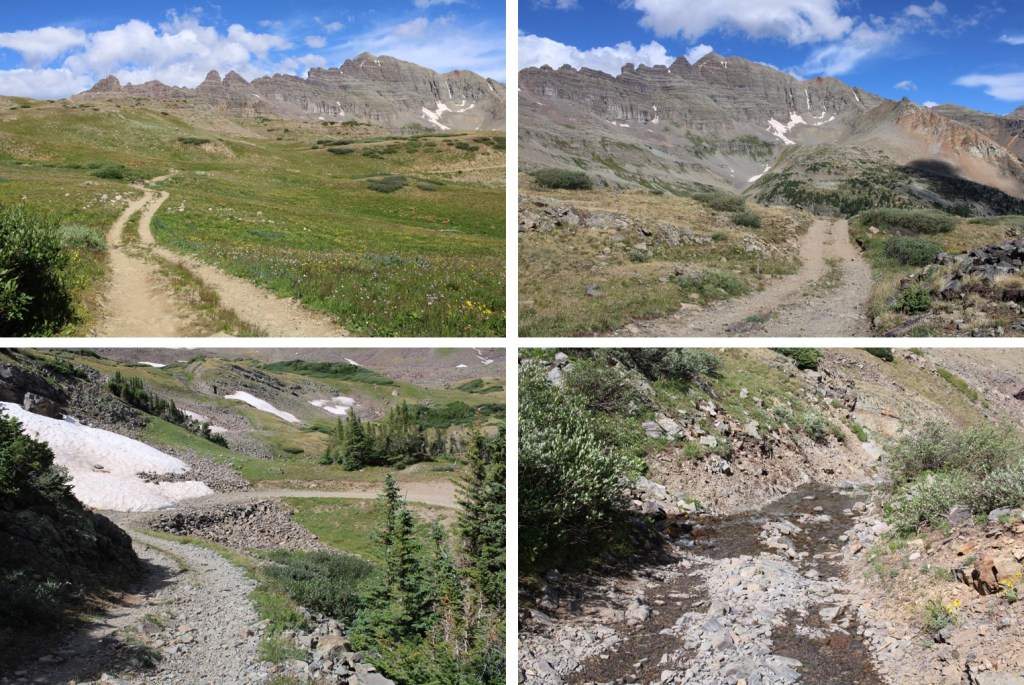
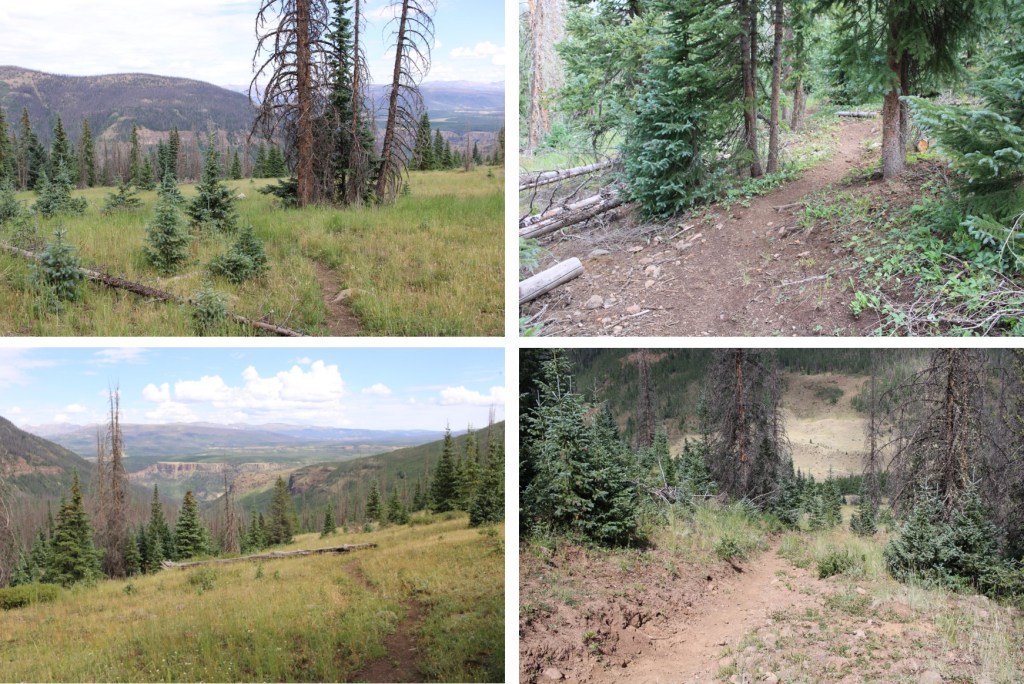
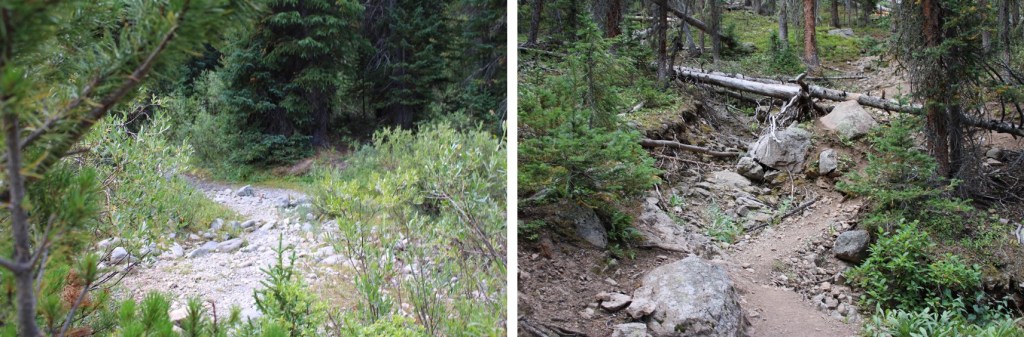
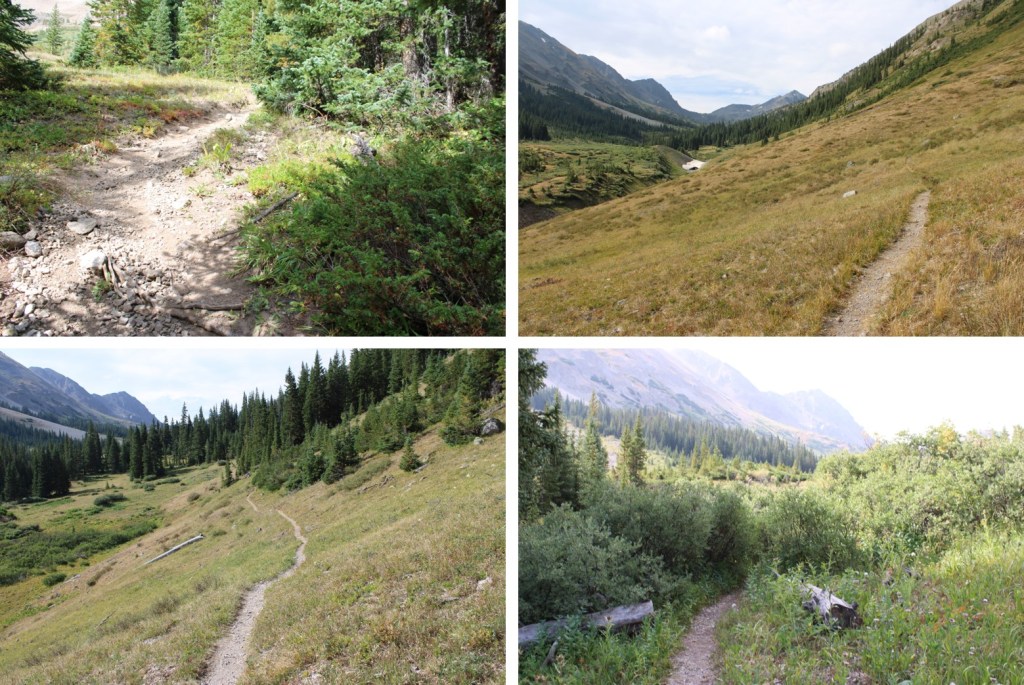
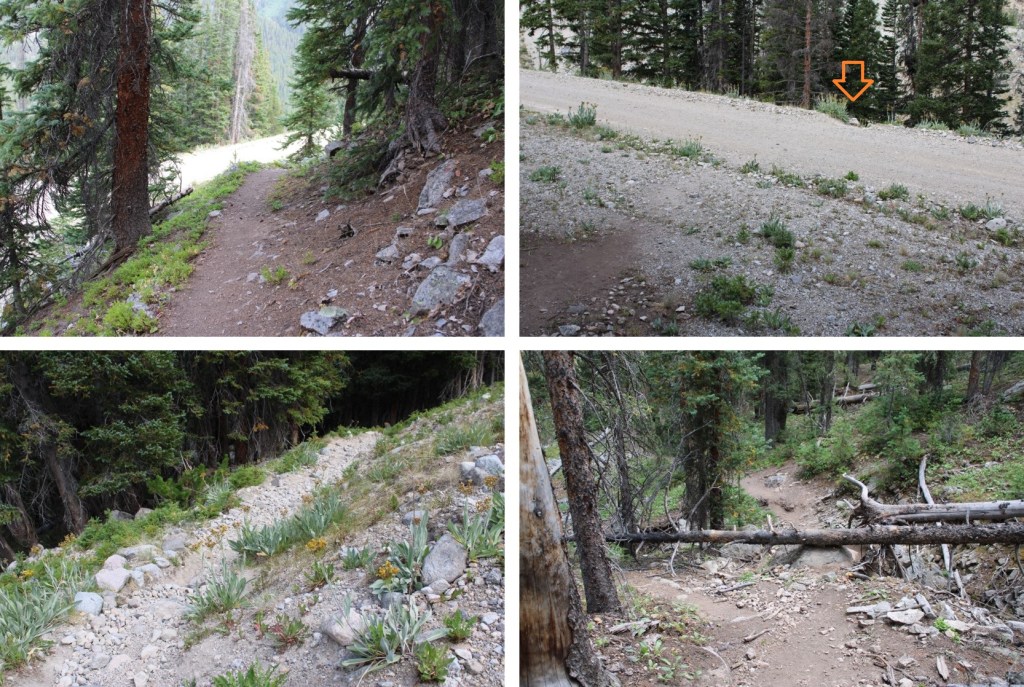
I followed the class 1 trail south as it crossed Lincoln Creek, and then began gaining elevation.

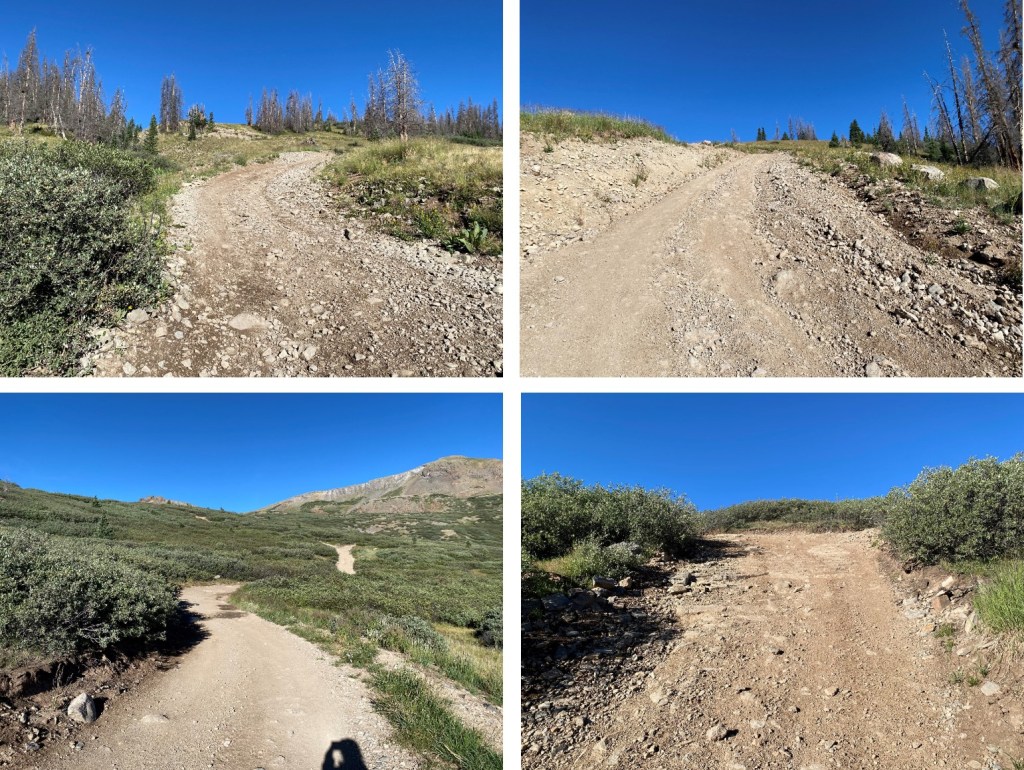
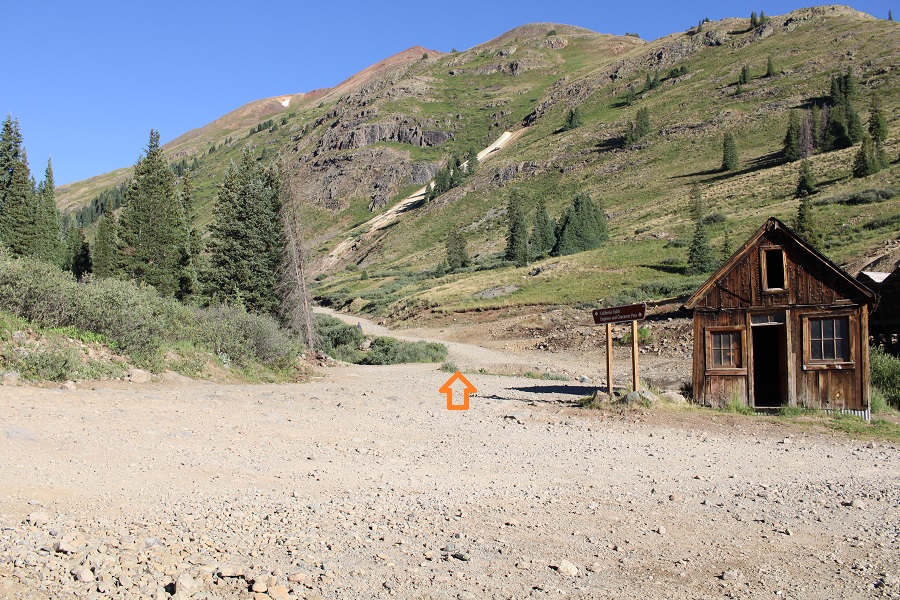
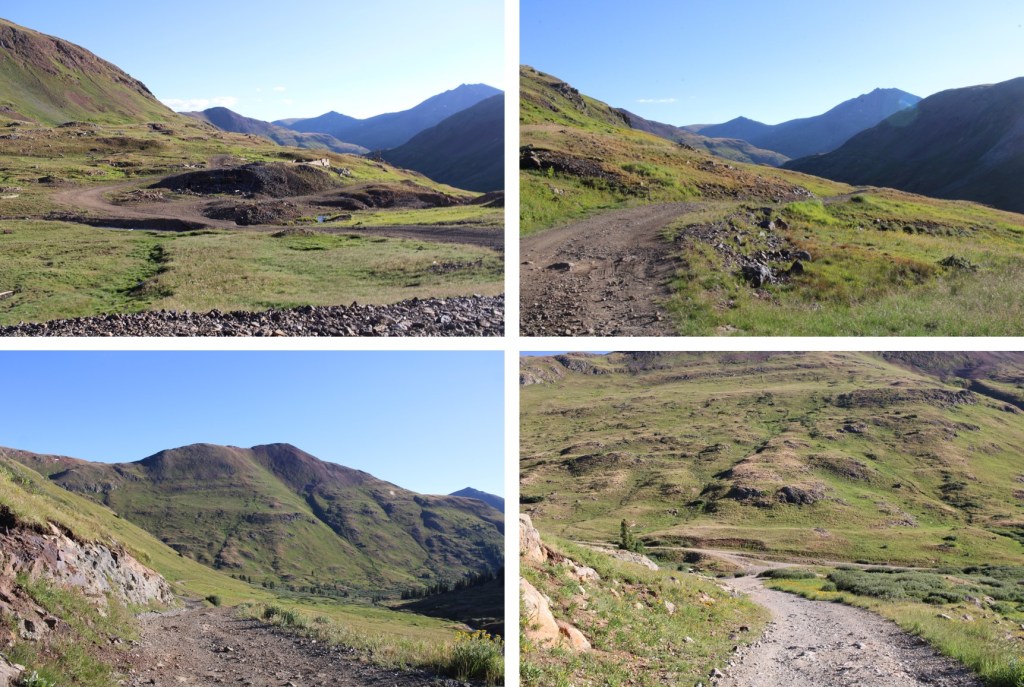
After hiking for .5 miles I came to a road, crossed it, and continued following the trail on the other side

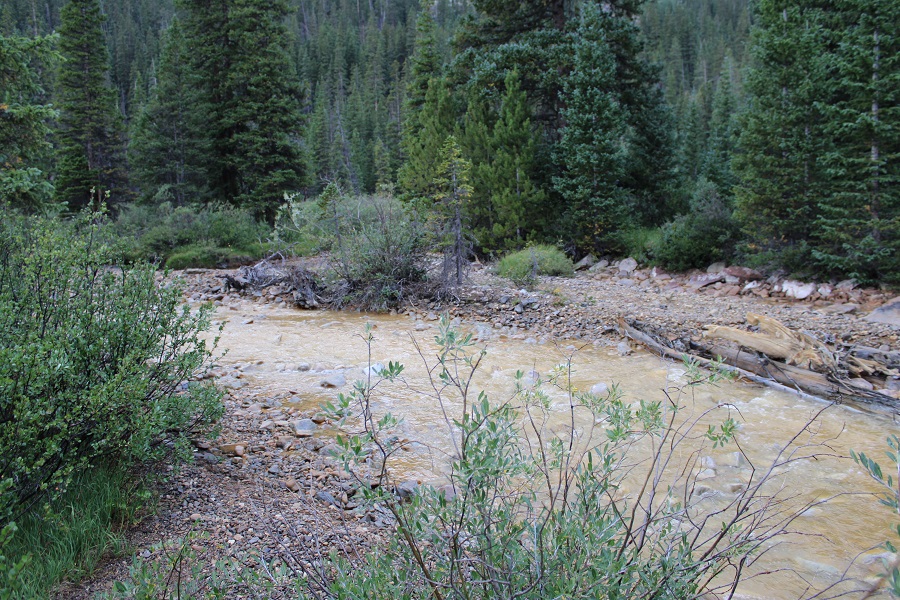
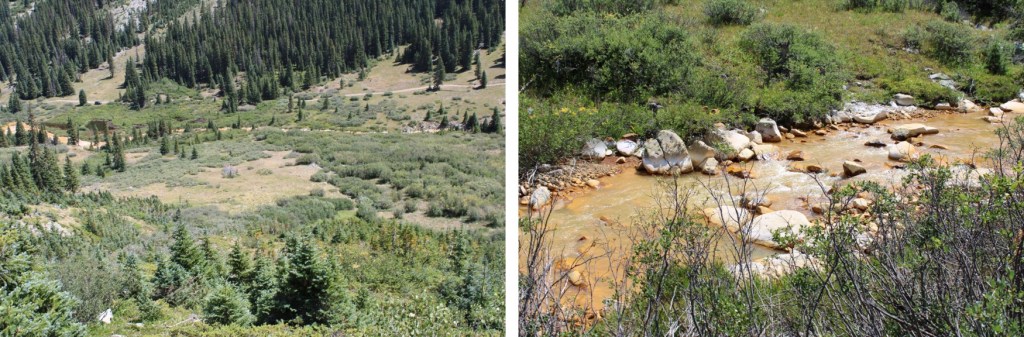
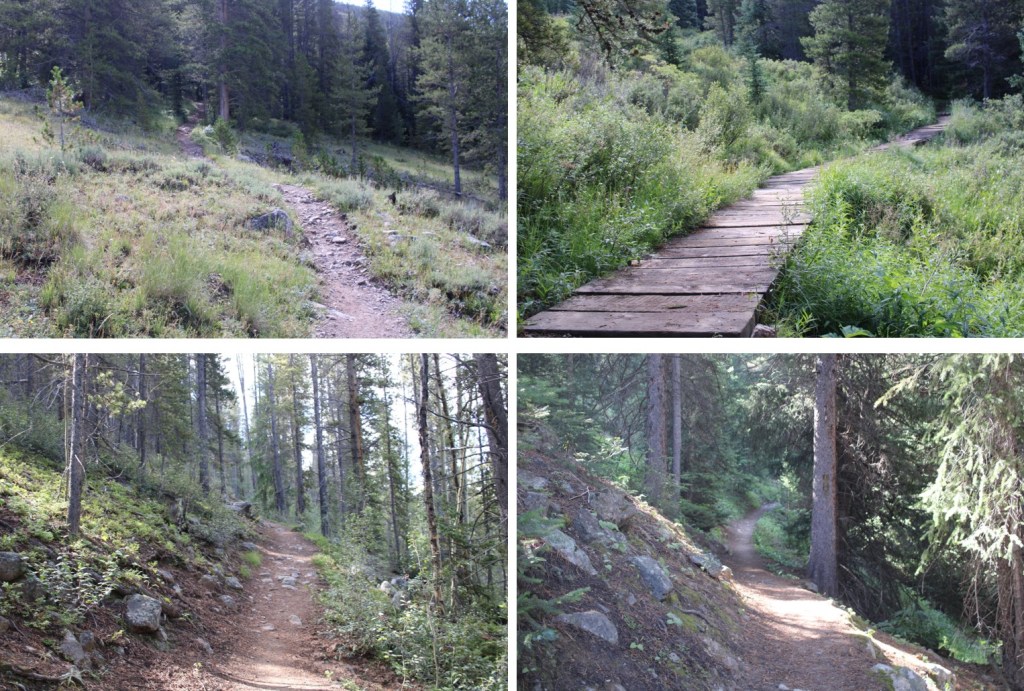
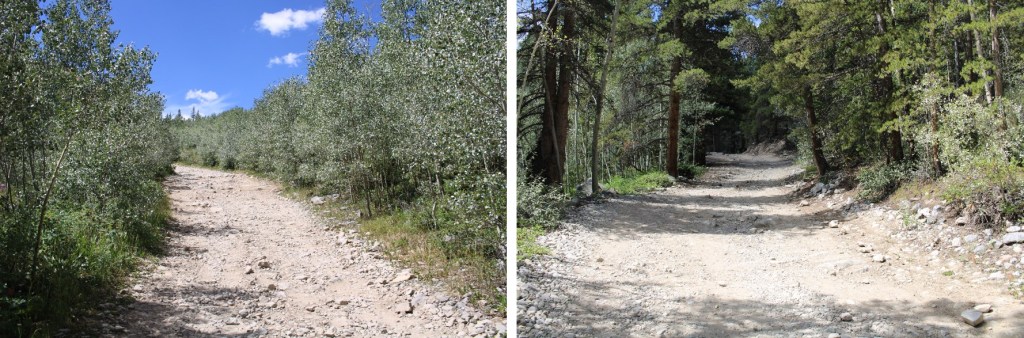
I crossed Tabor Creek, and continued on this class 1 trail, staying to the right (west) of the creek for the rest of the hike.

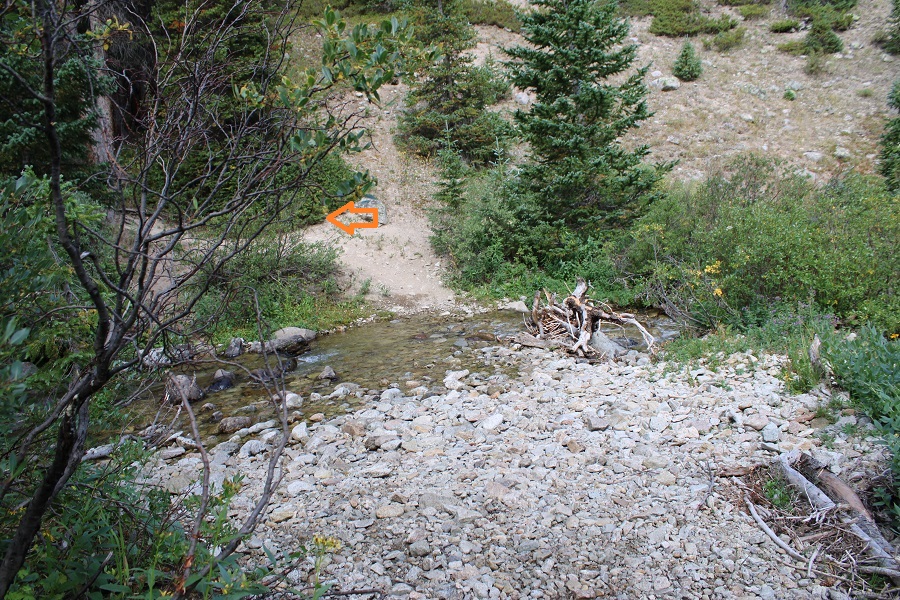
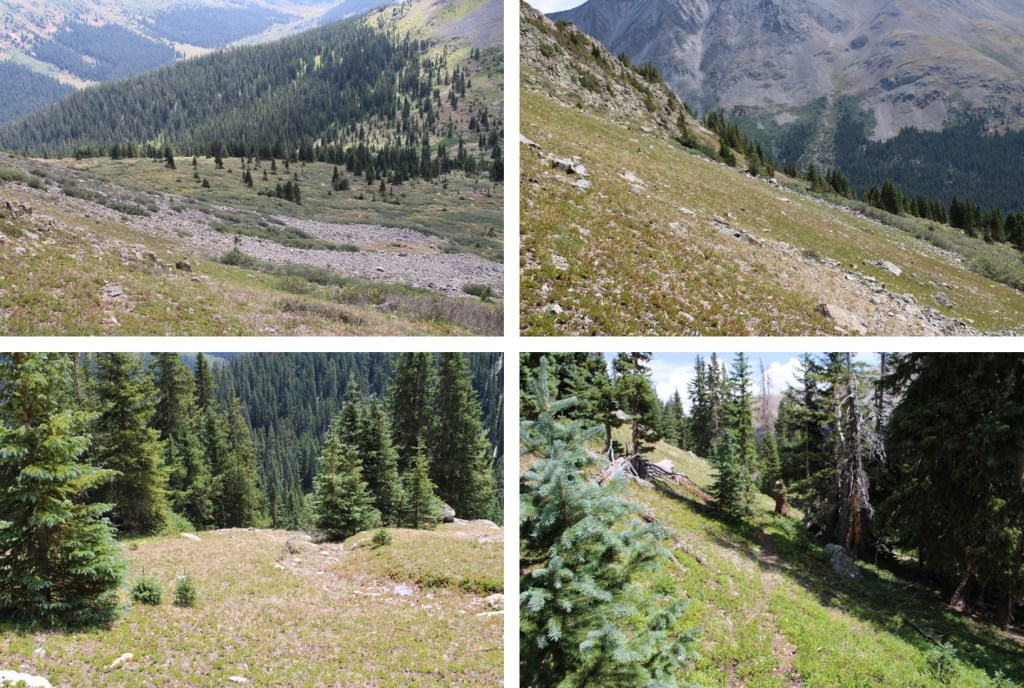
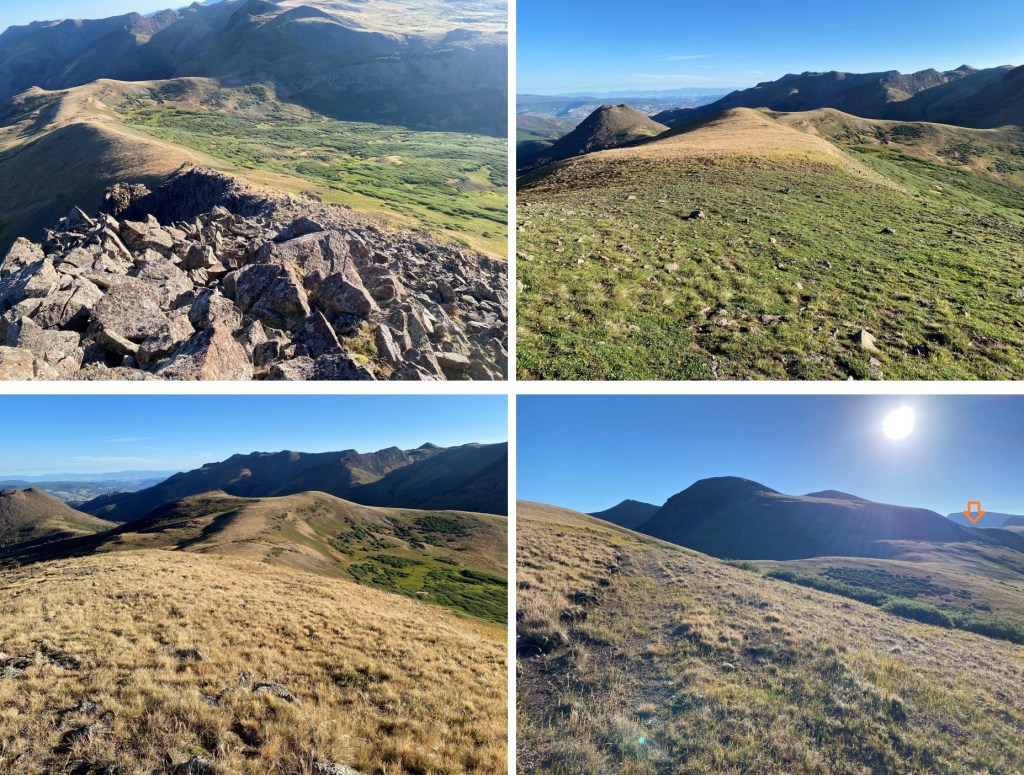
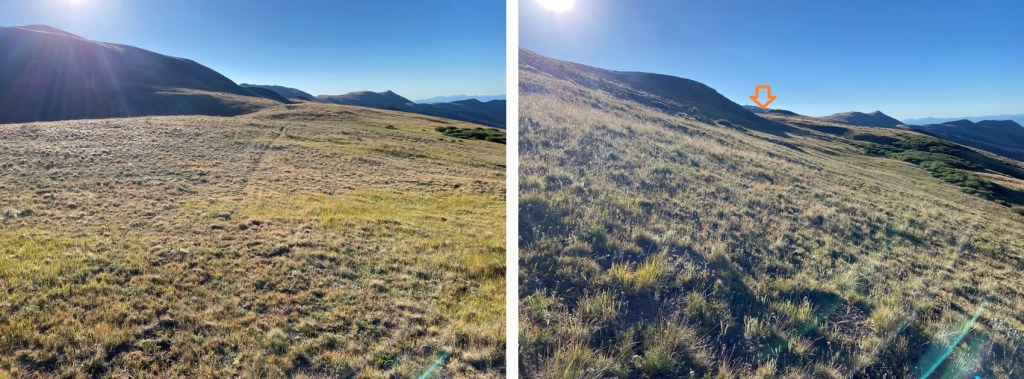
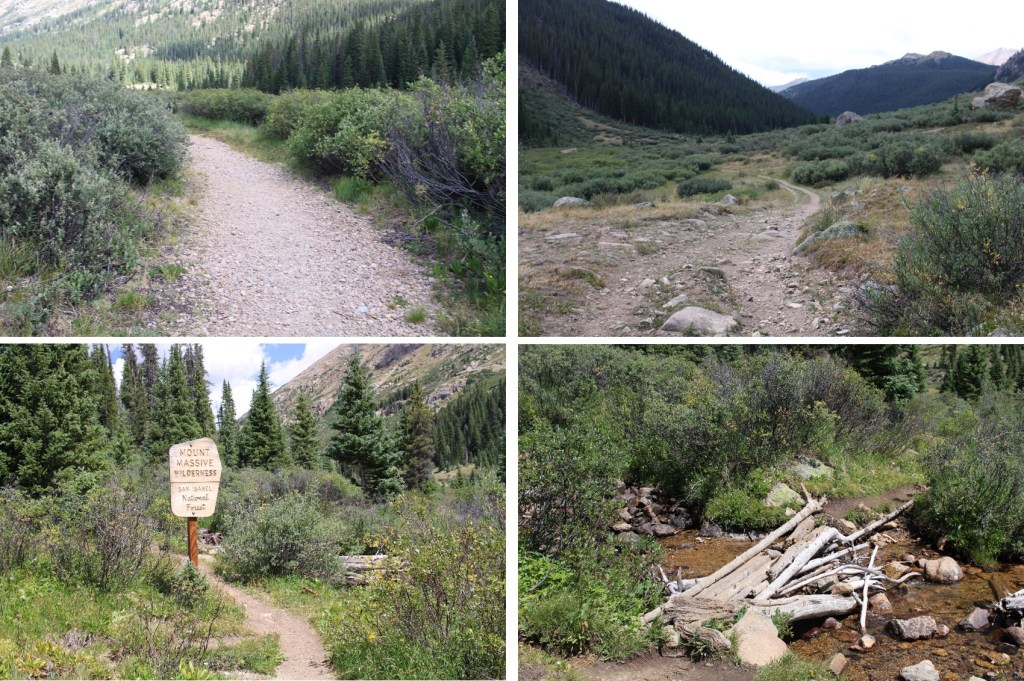
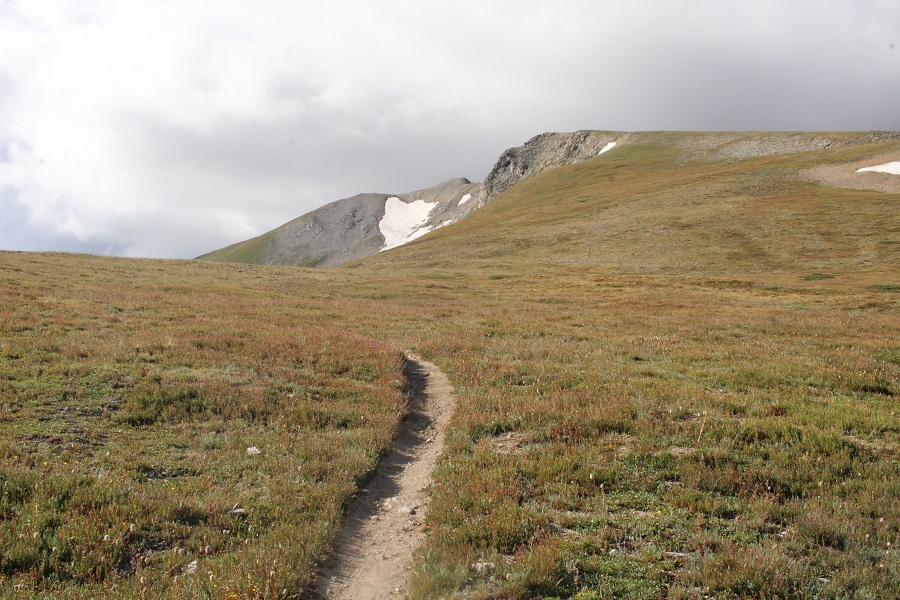
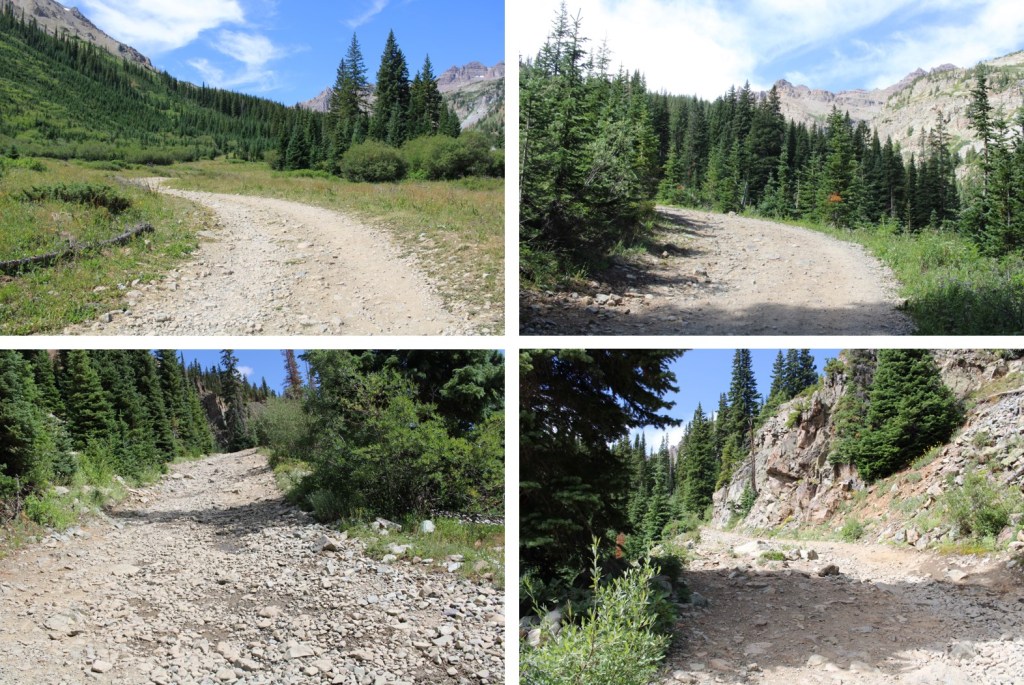
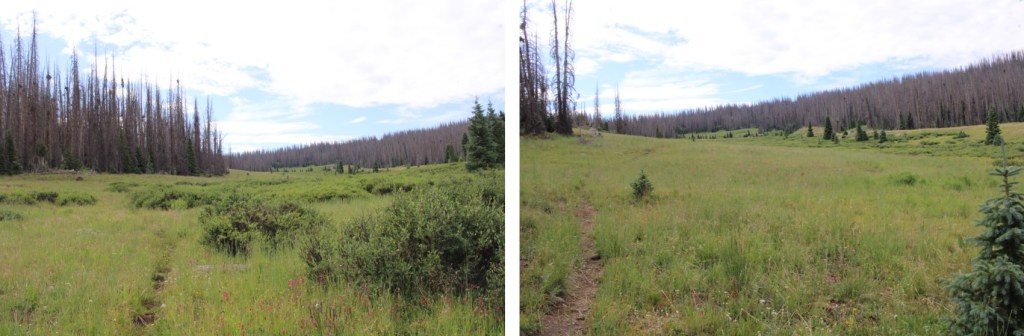
The trail brought me through a gulch, and in and out of treeline and willows several times.

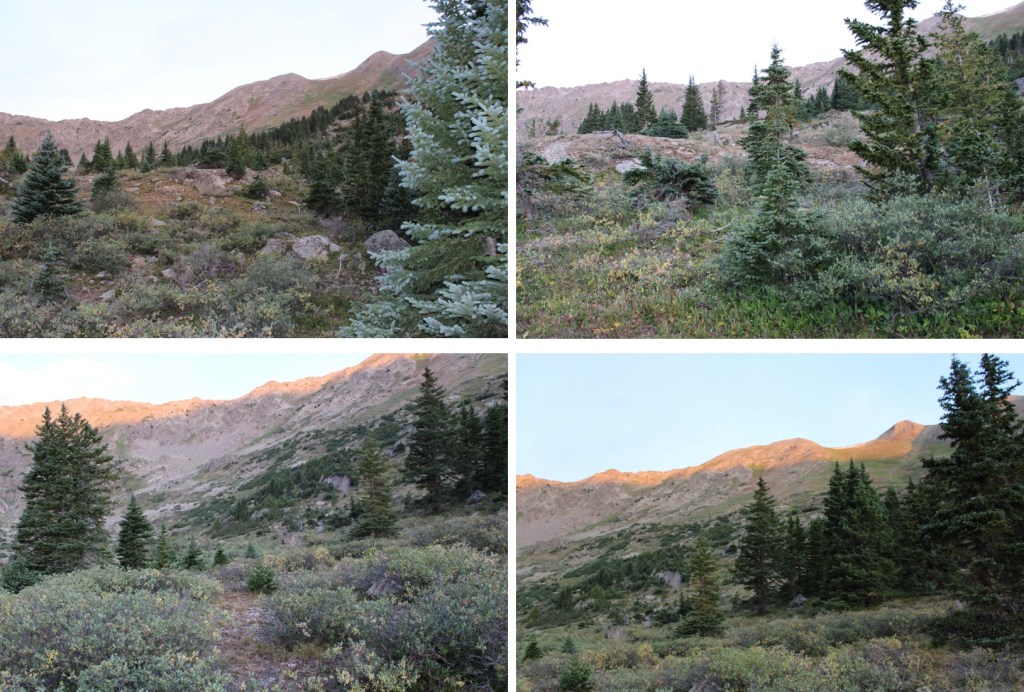
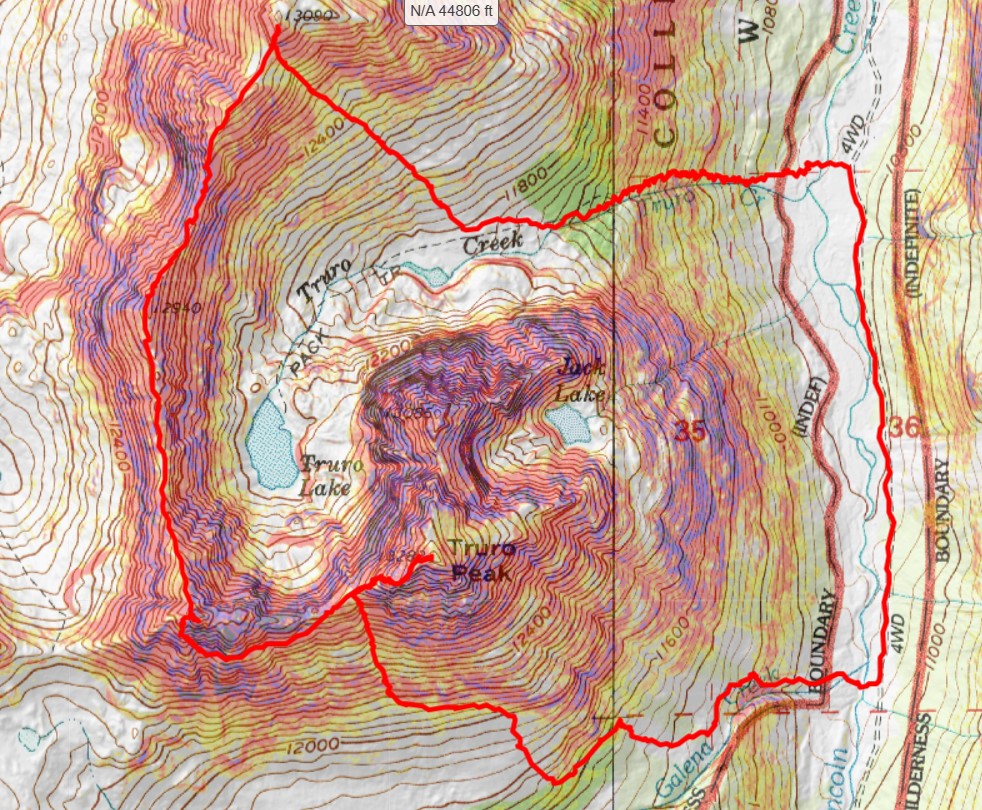
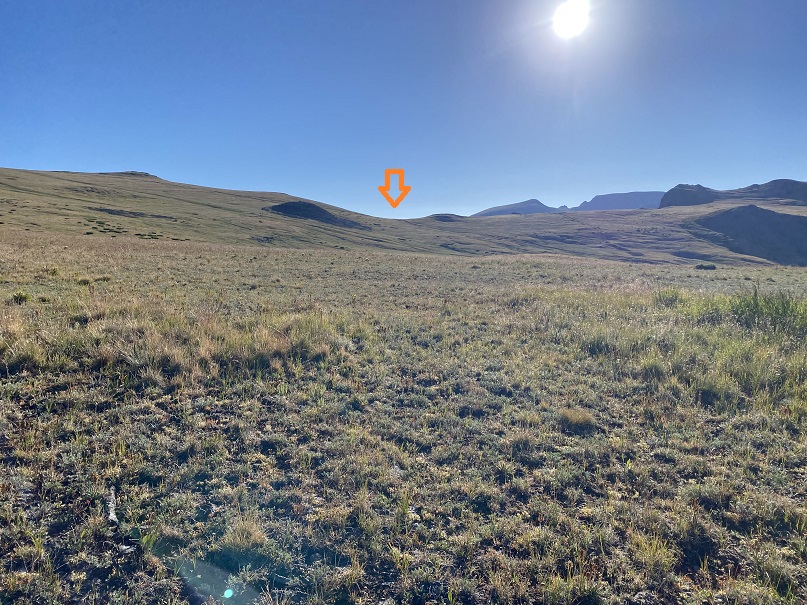
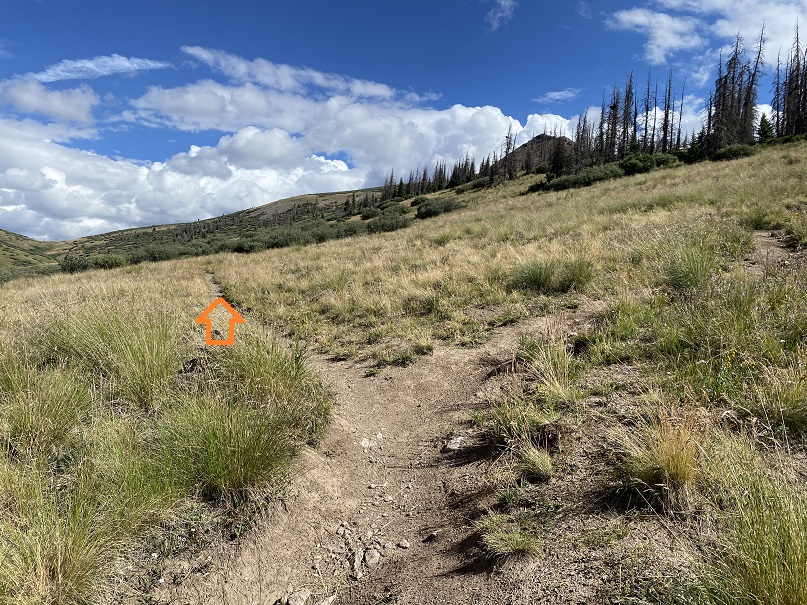
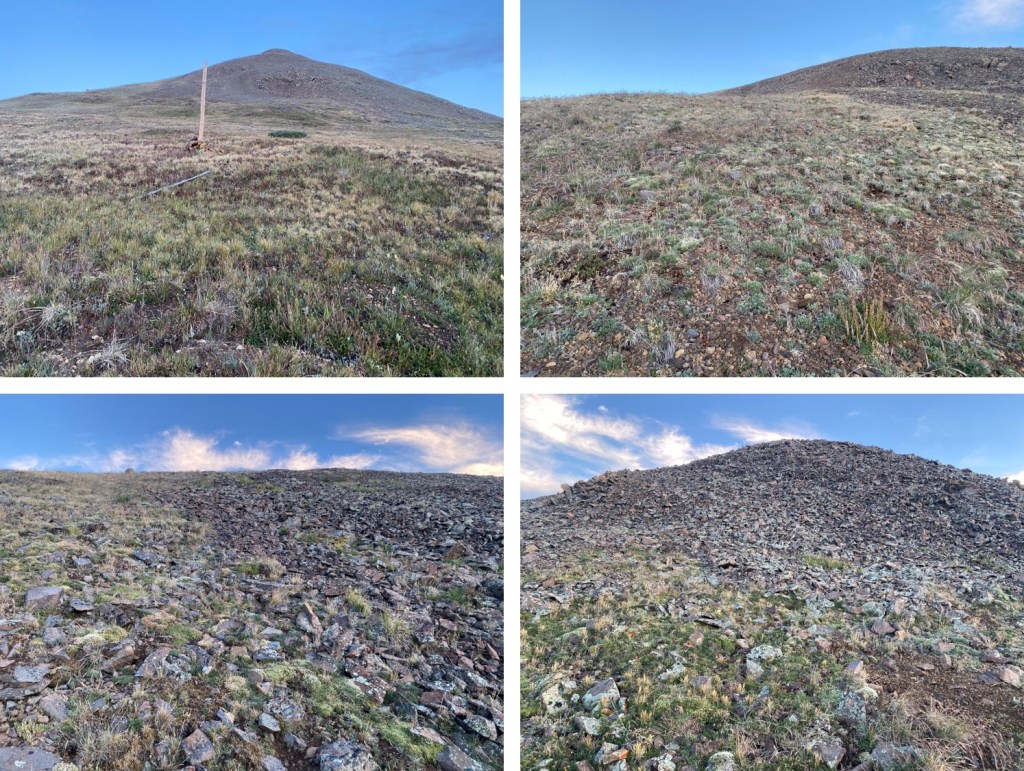
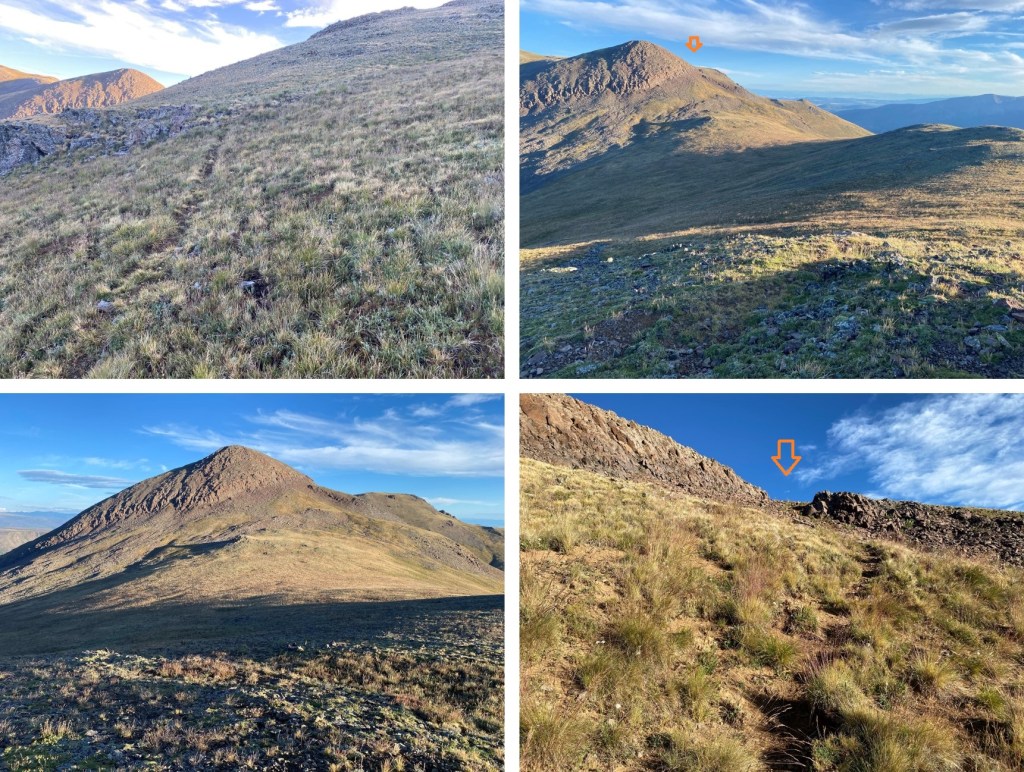
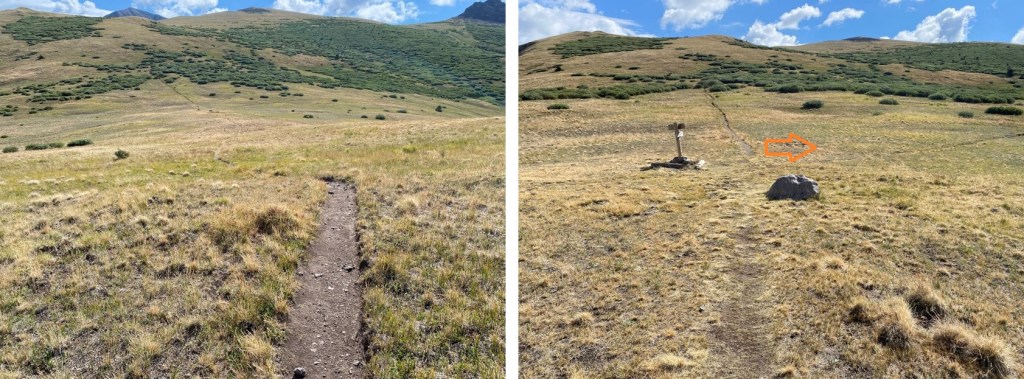
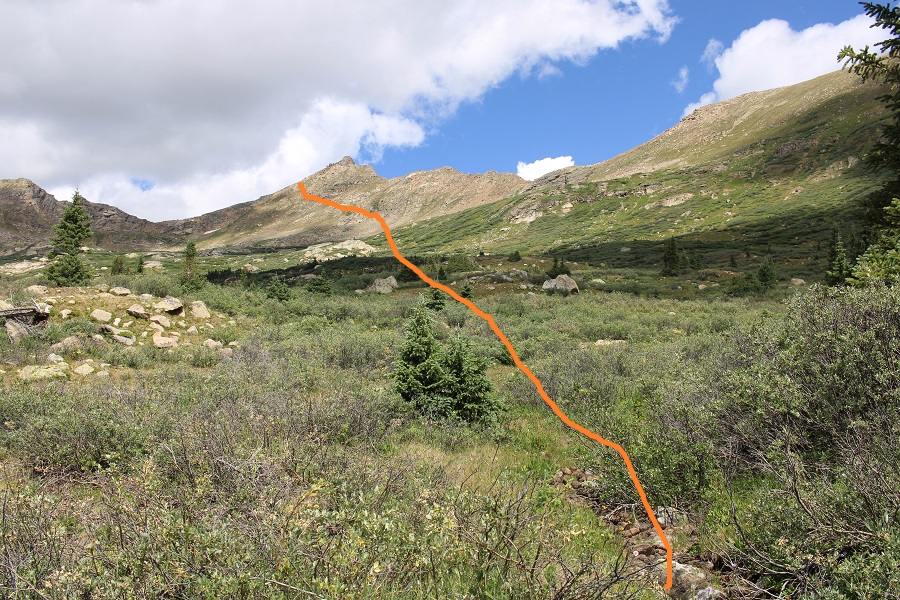
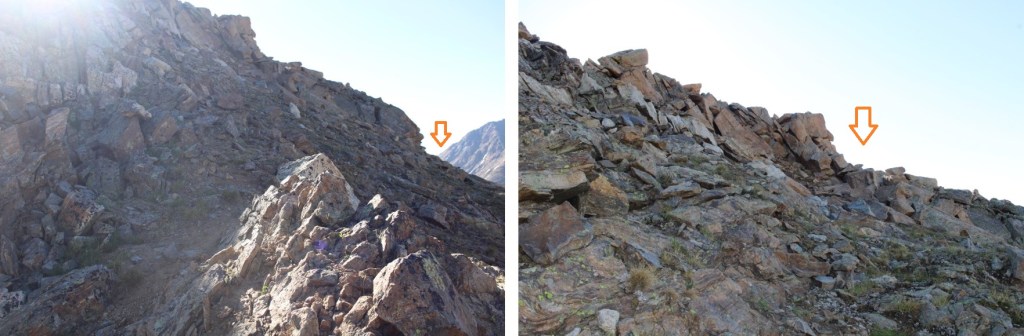
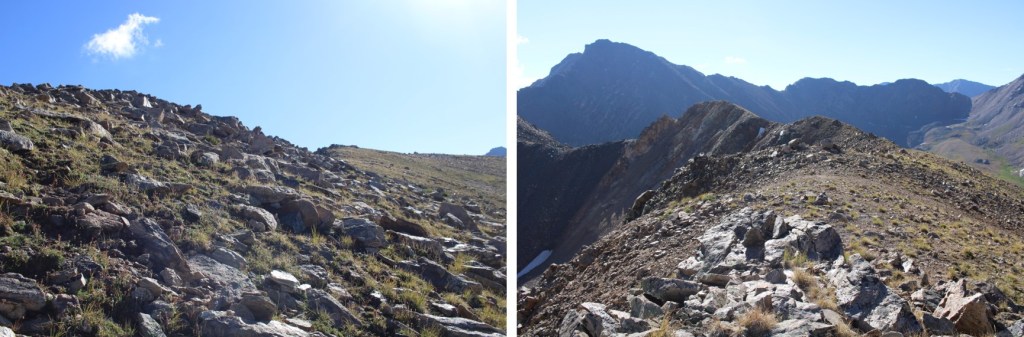
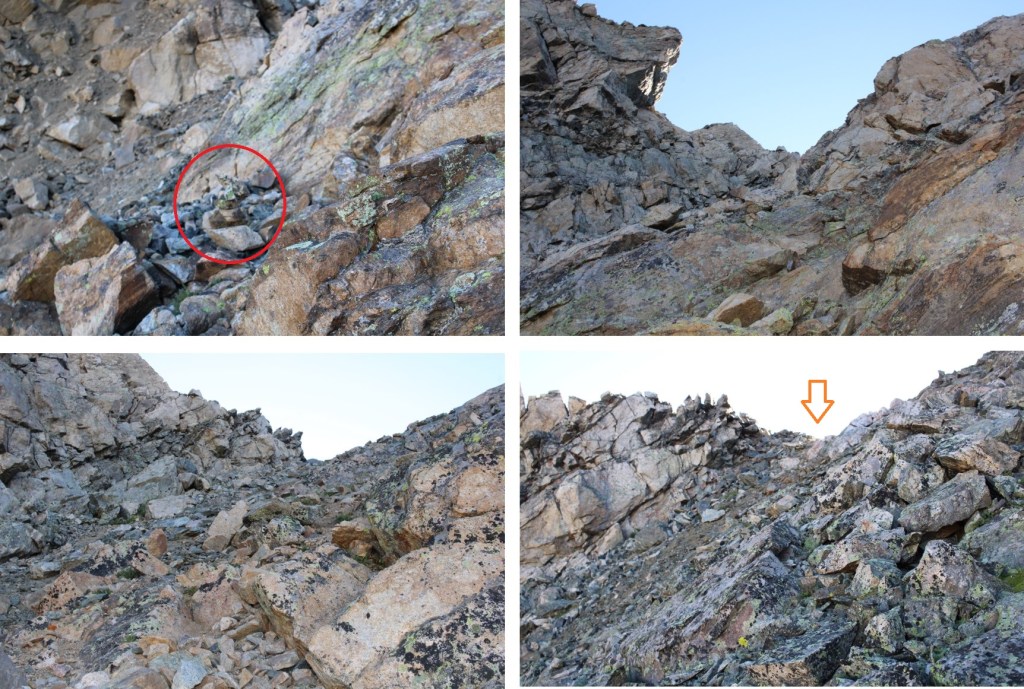
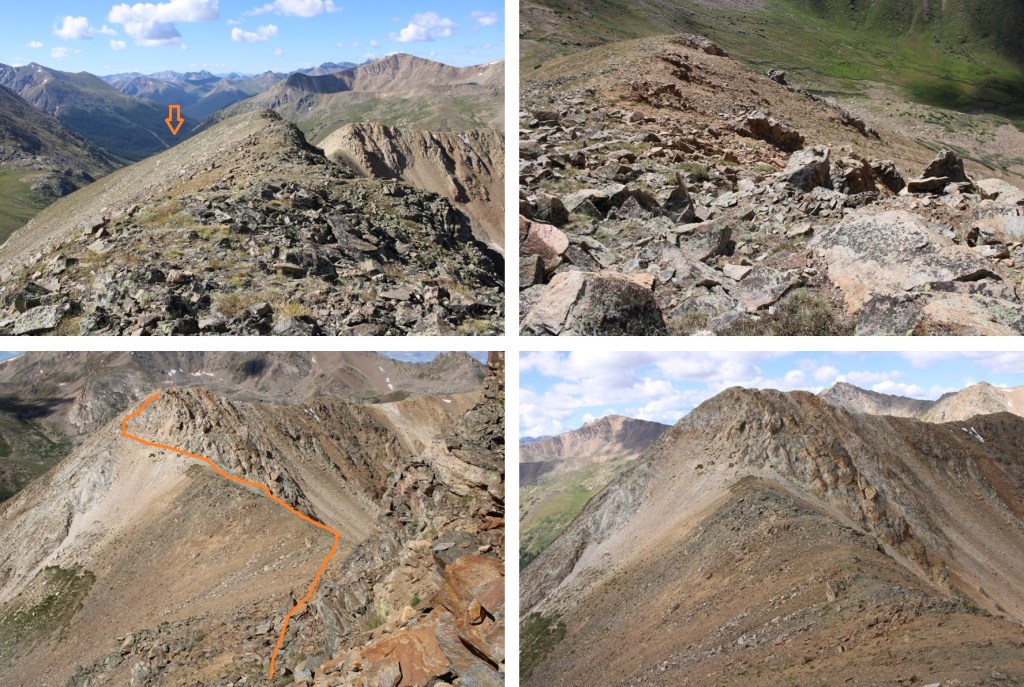
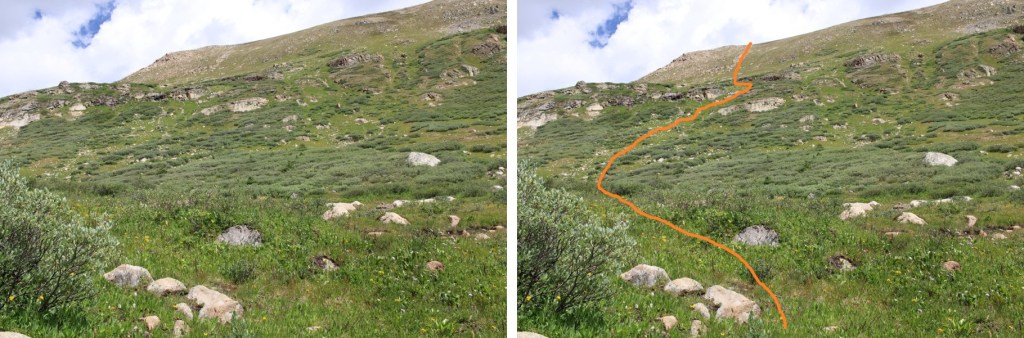
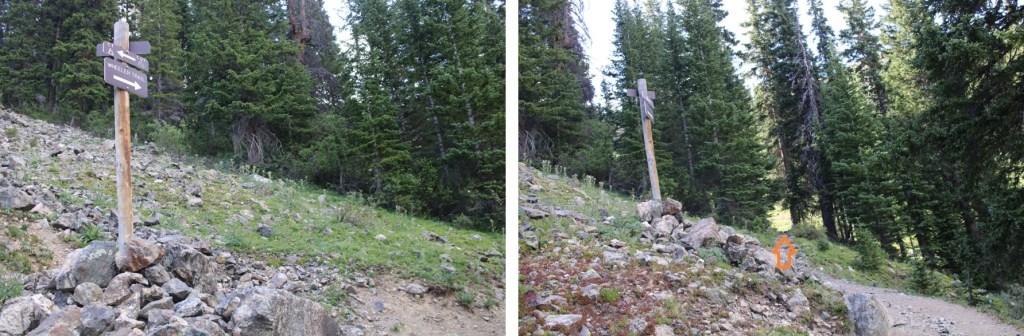
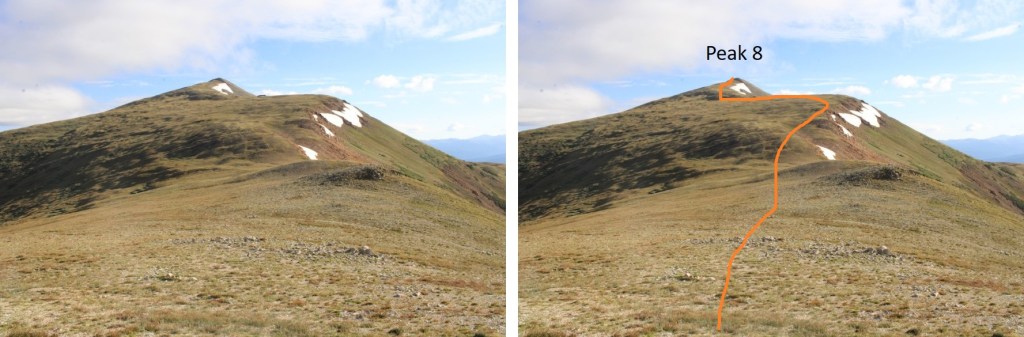
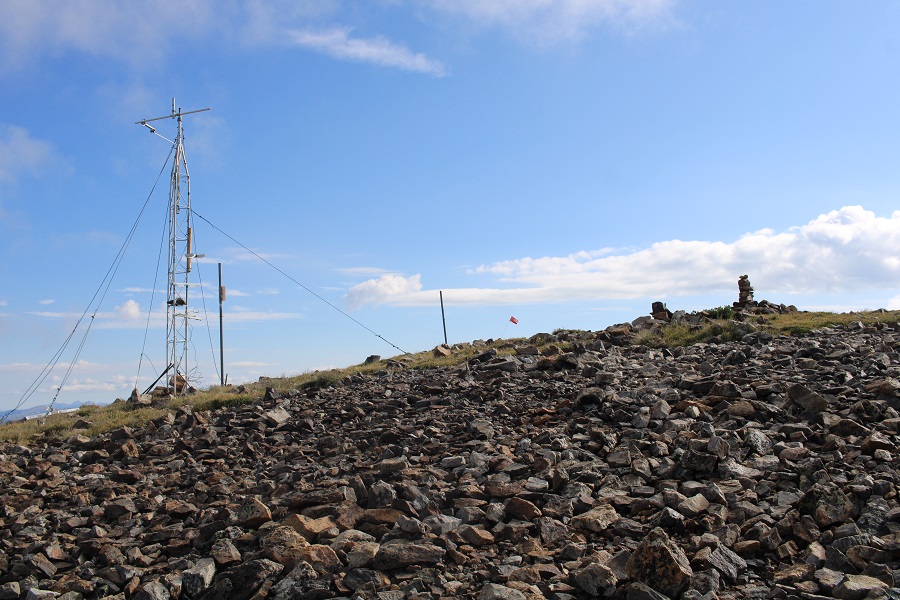
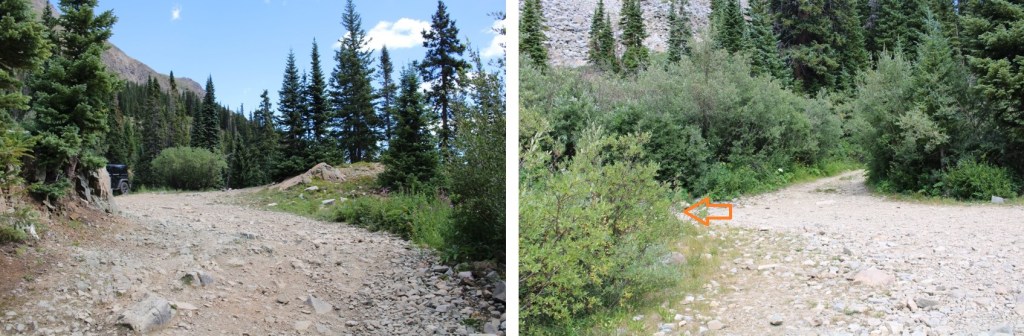
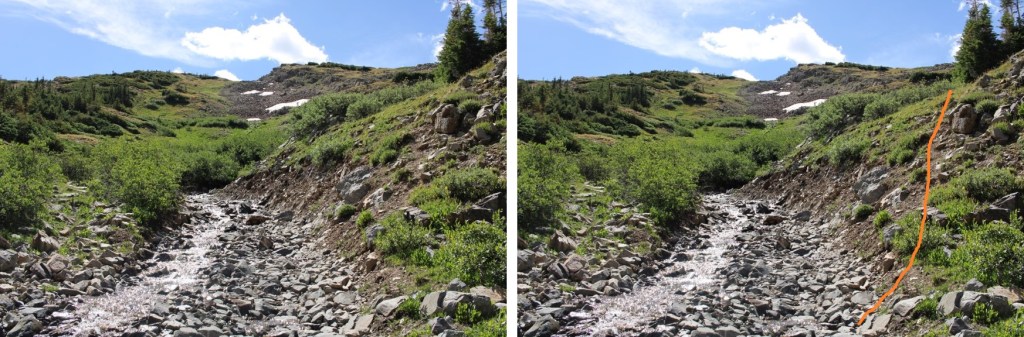
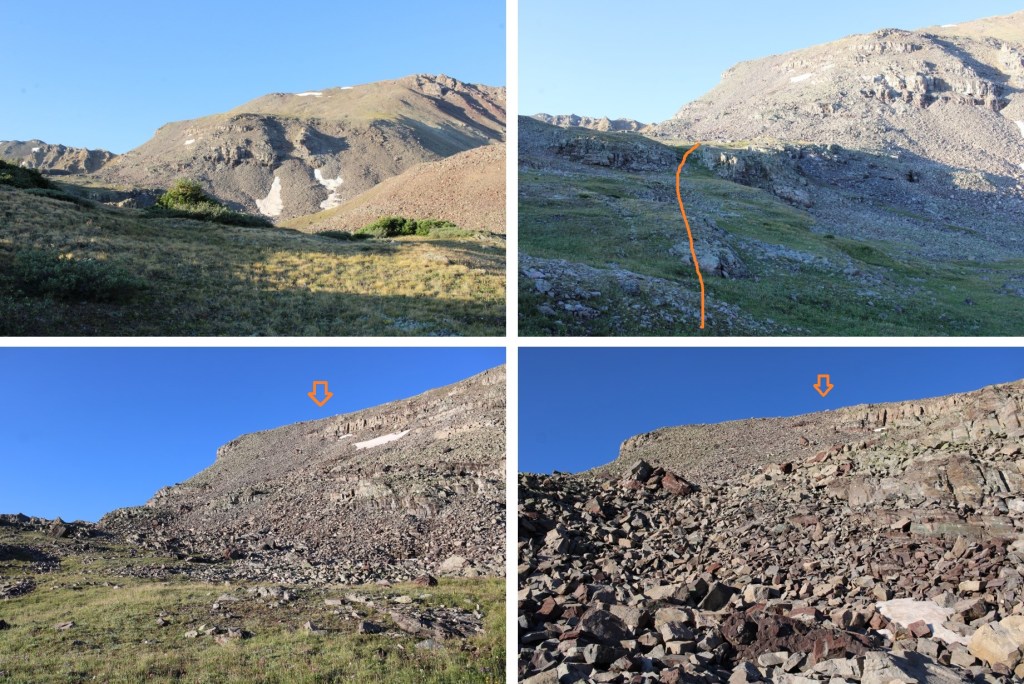
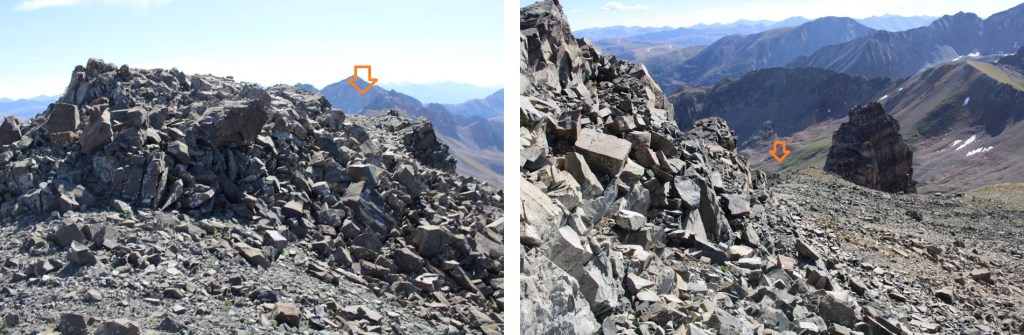
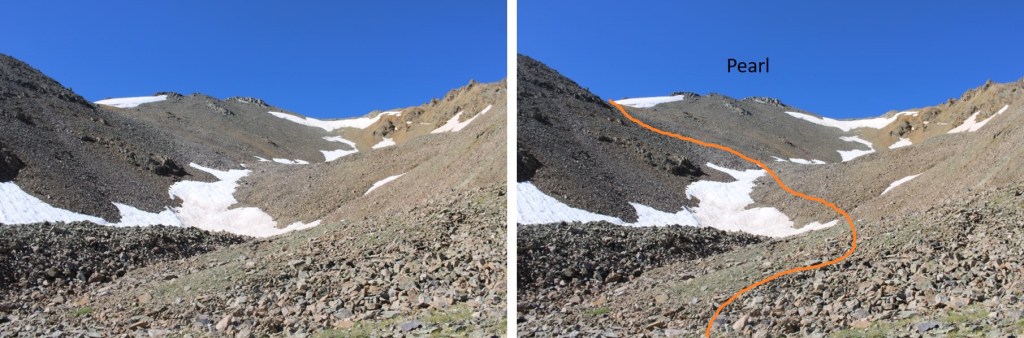
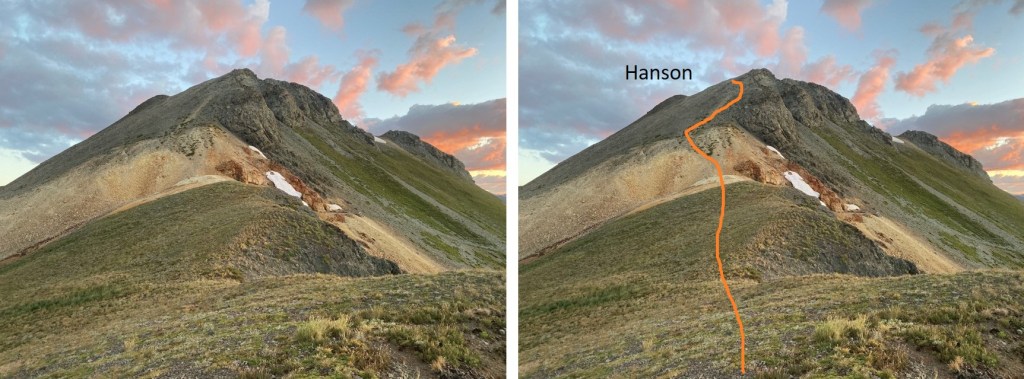
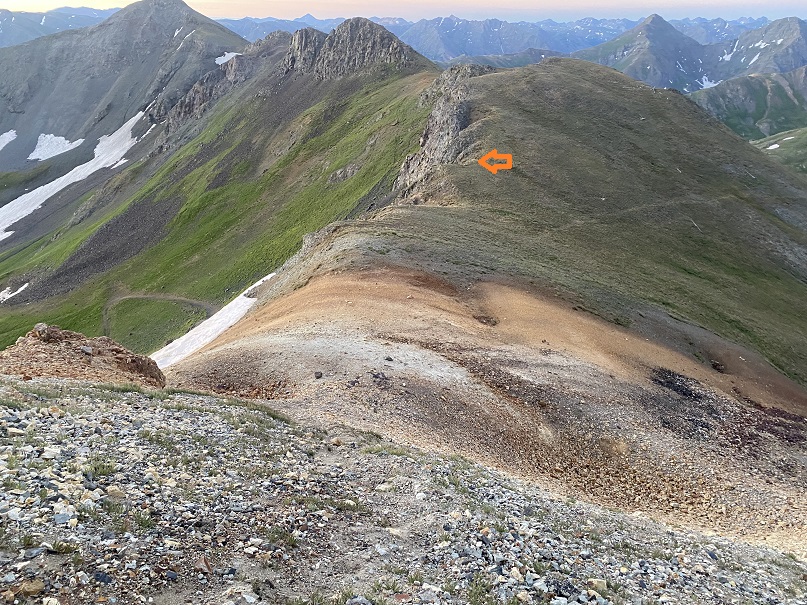
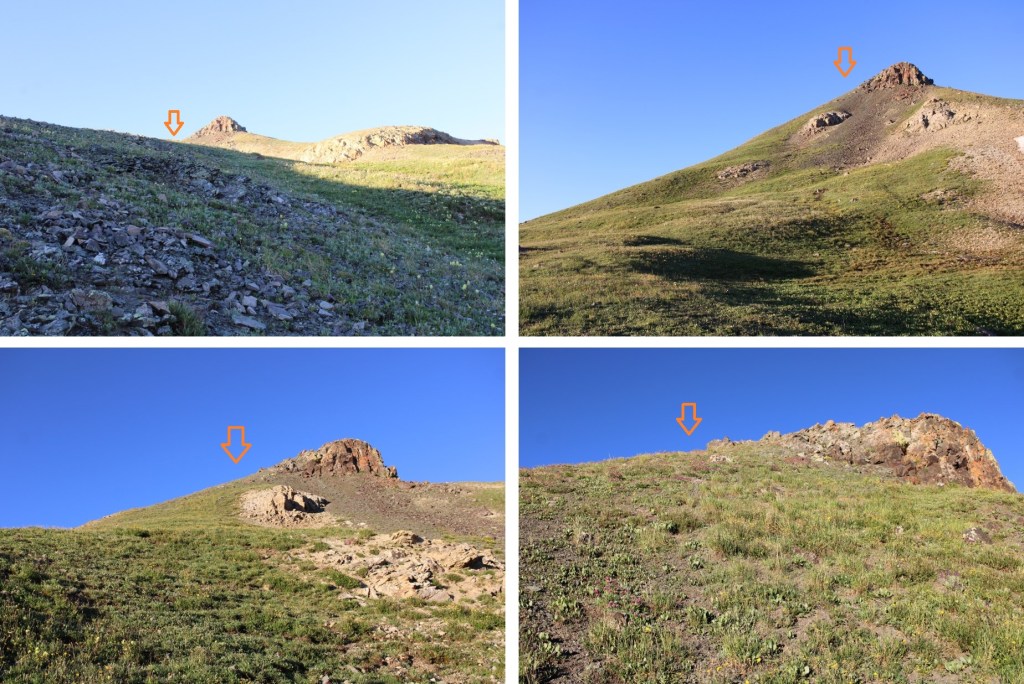
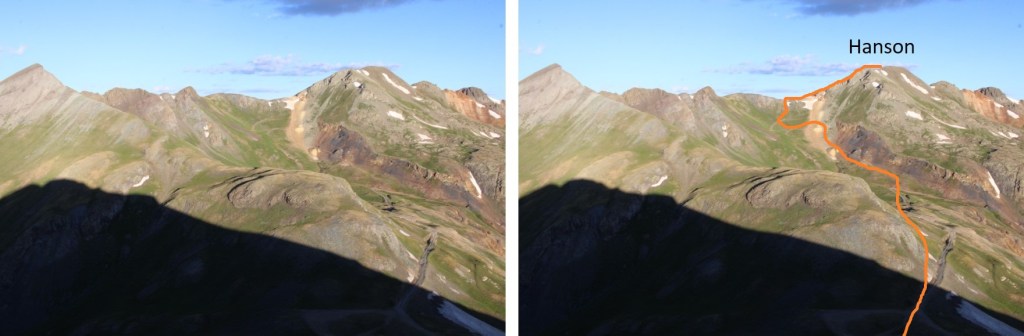
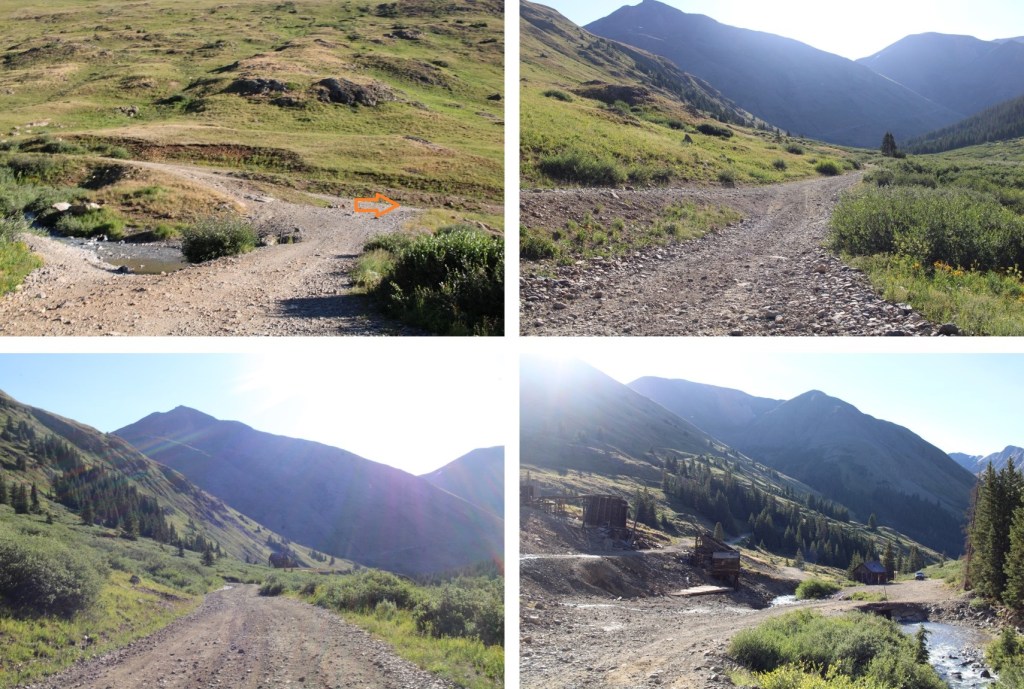
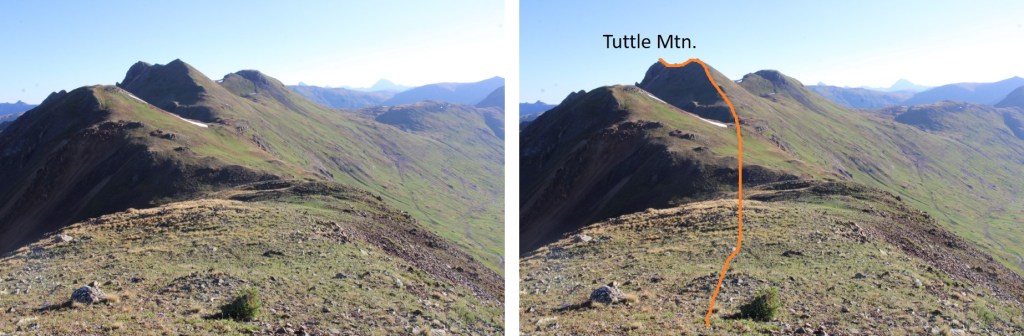
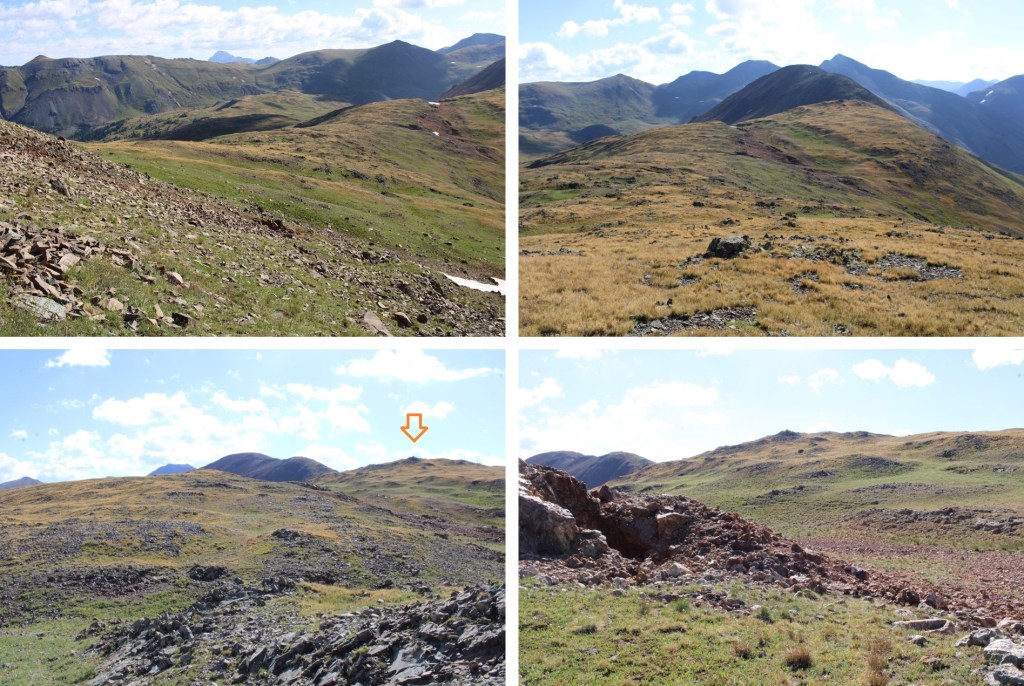
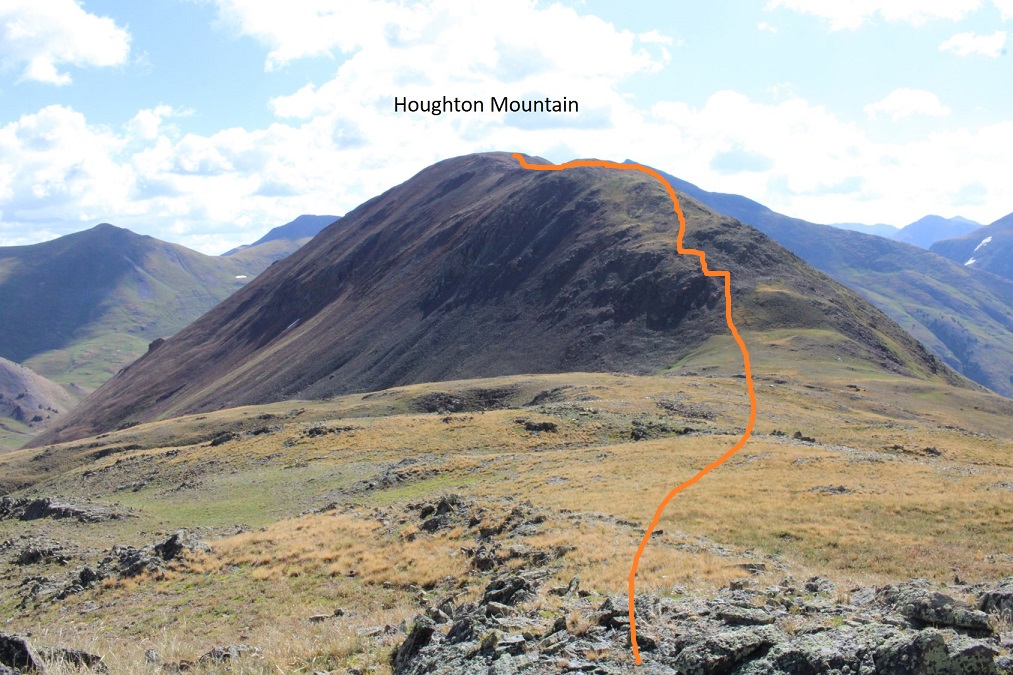
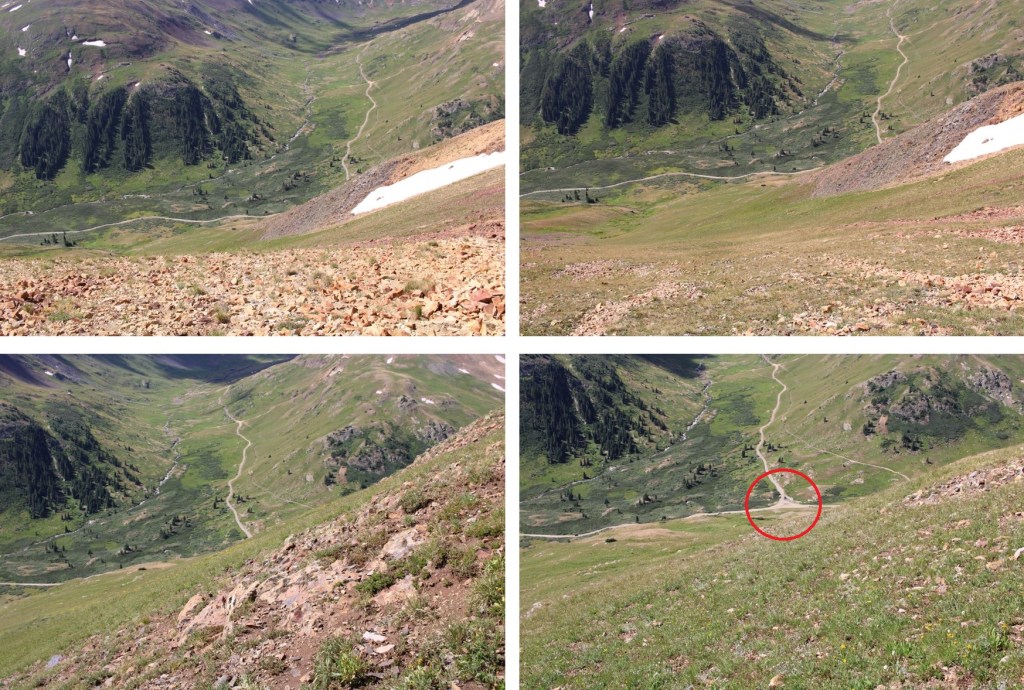
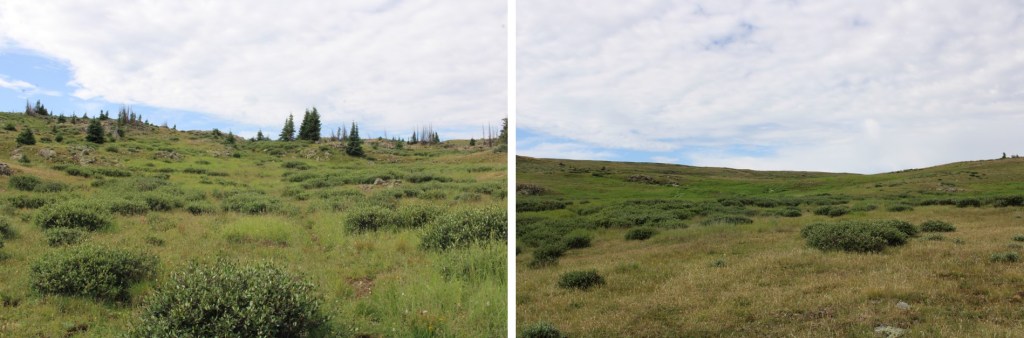
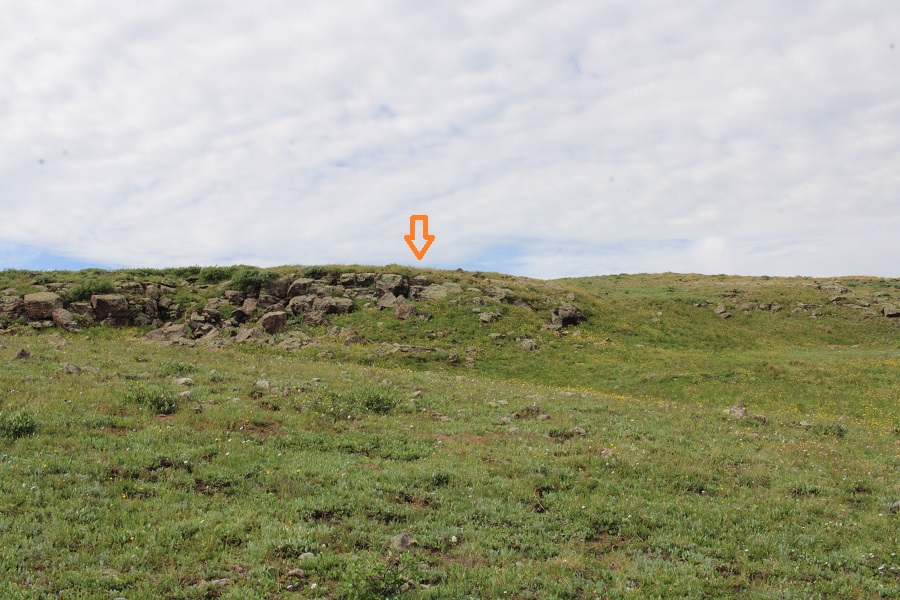
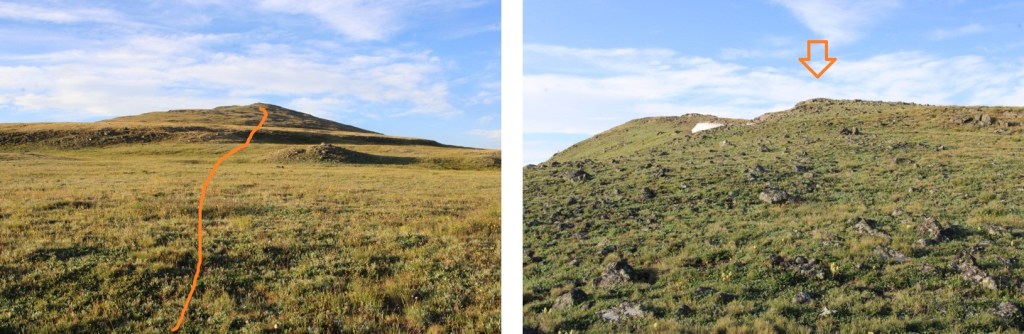
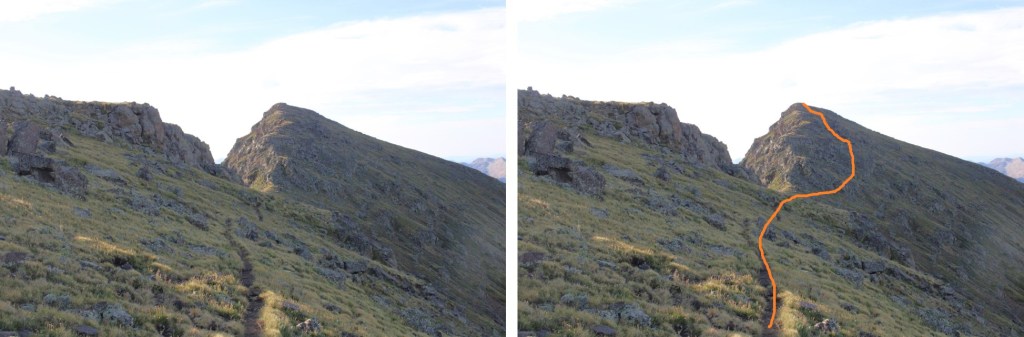
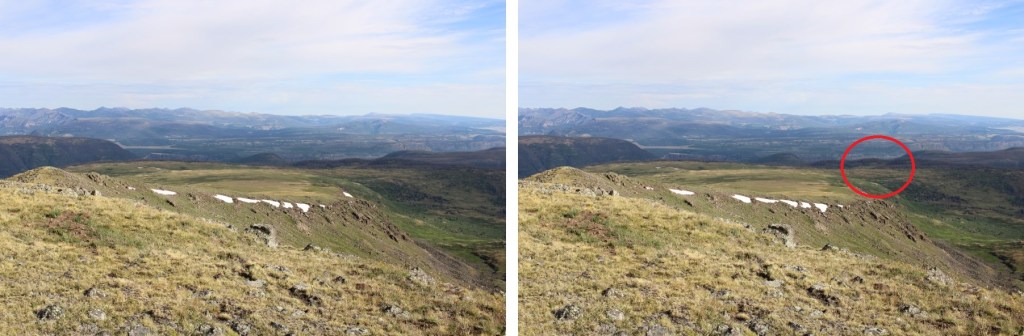
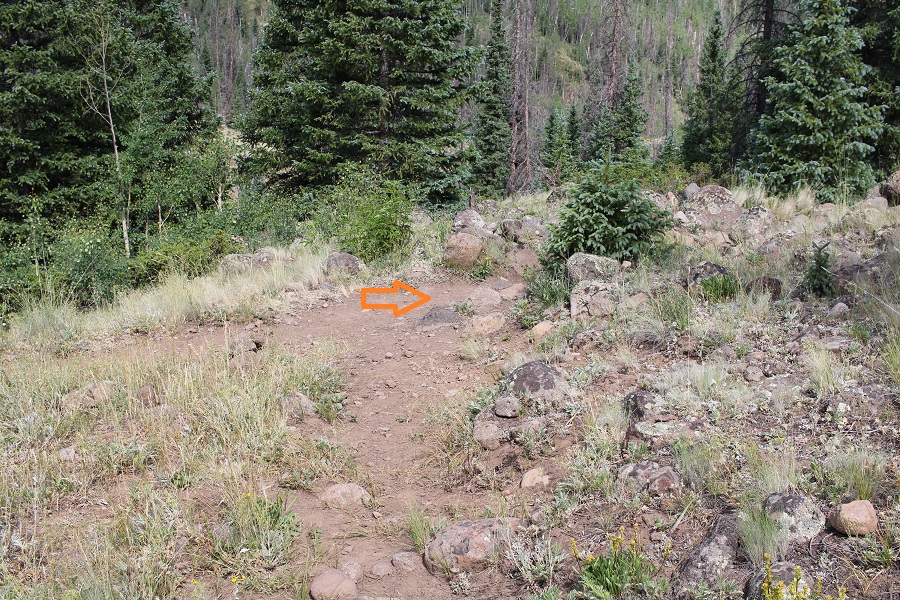
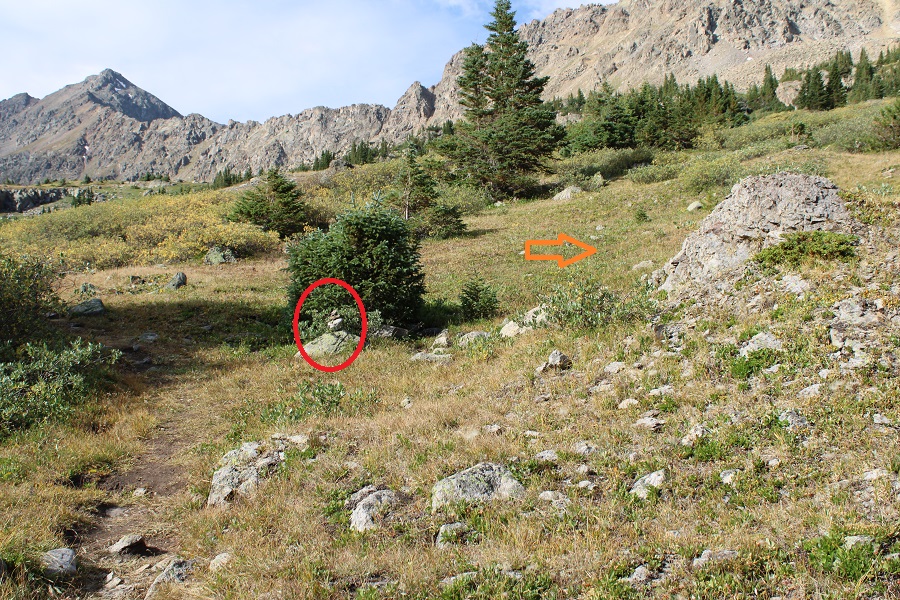
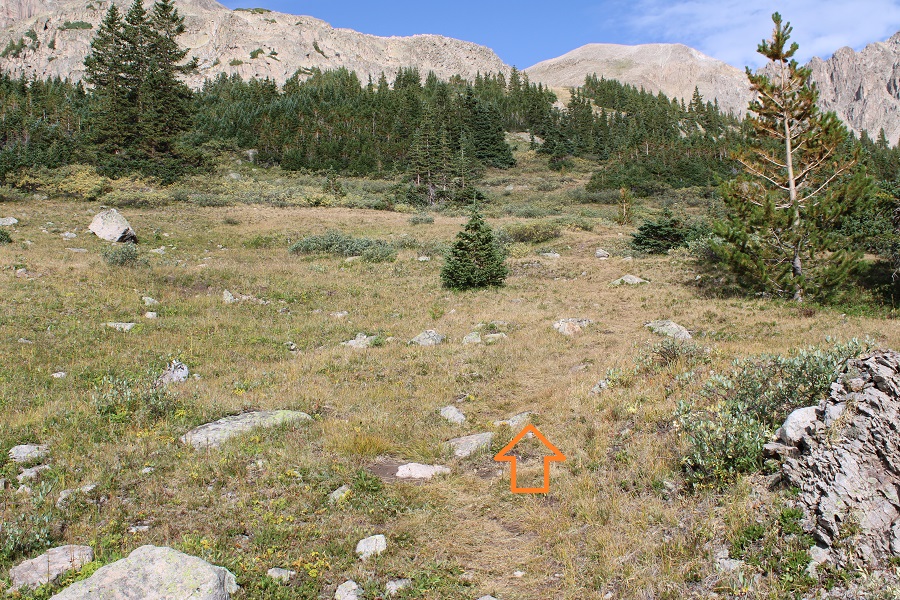
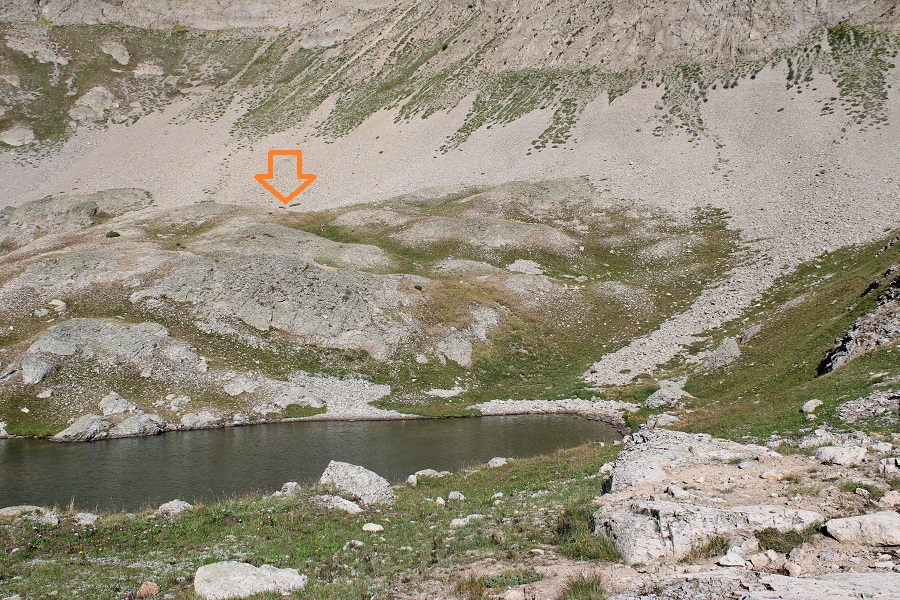
After hiking for 3.2 miles, and at 11630’ of elevation I turned right onto a game trail and headed west.  Actually, the trail isn’t visible the first few yards, but once you find it, it’s a class 1 game trail.  I put up a small cairn to indicate where it starts, but if that gets knocked down, notice the unique shaped rock in front of it.  That’s where you turn right.

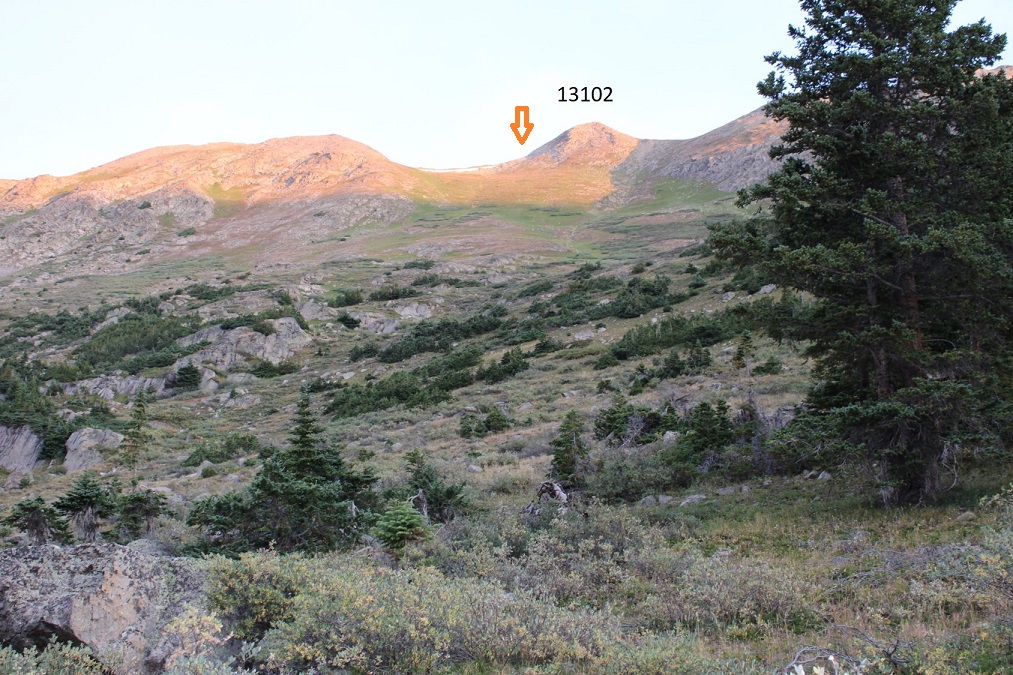
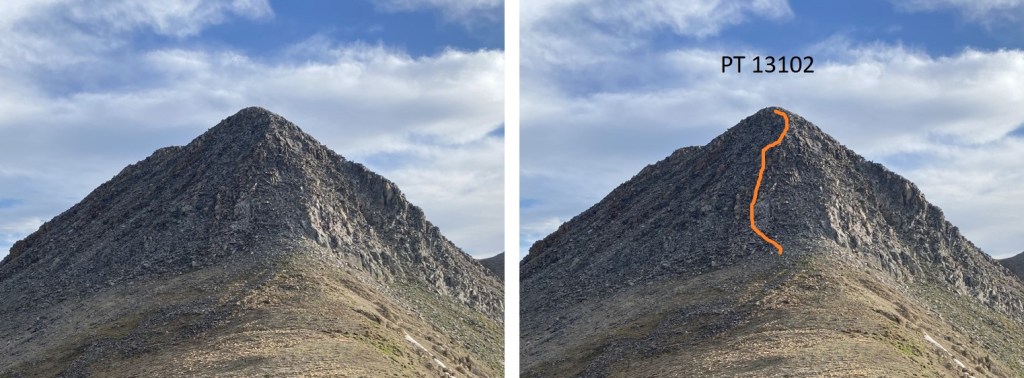
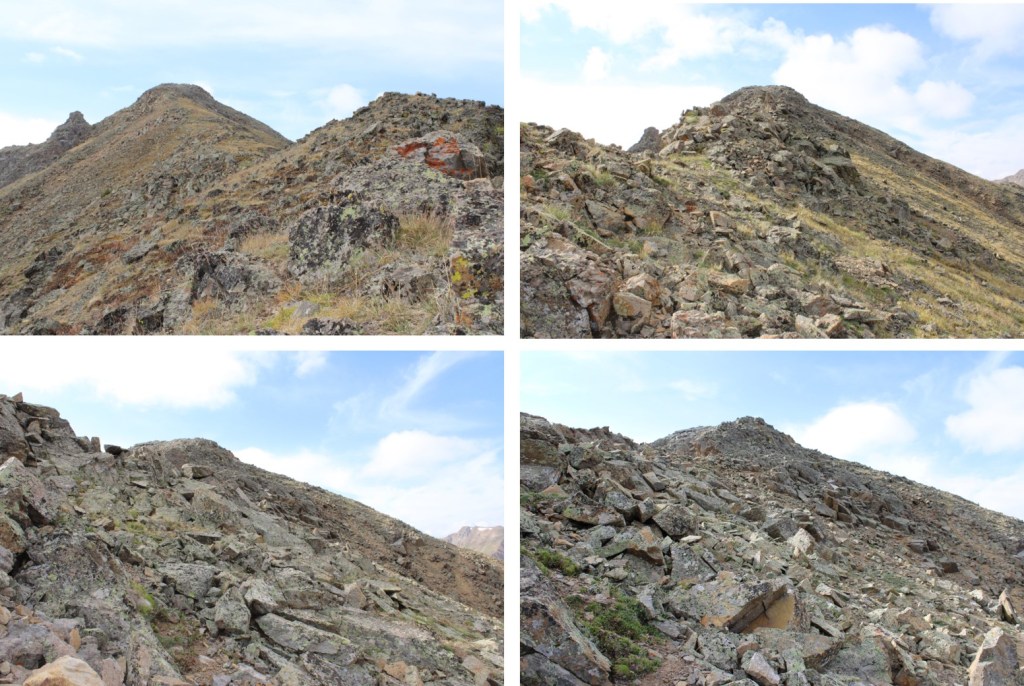
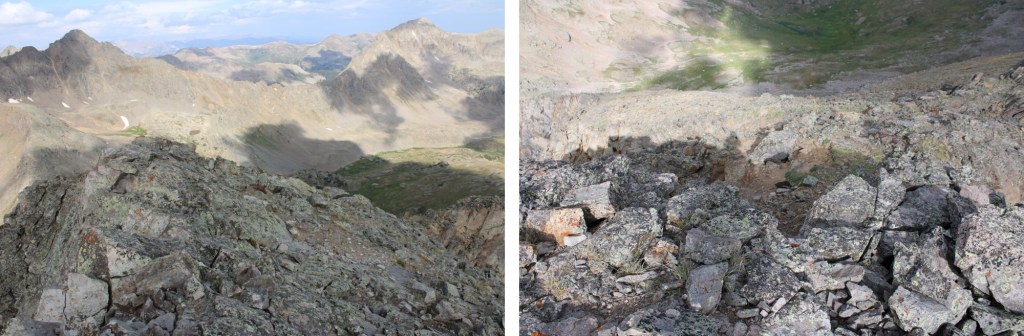
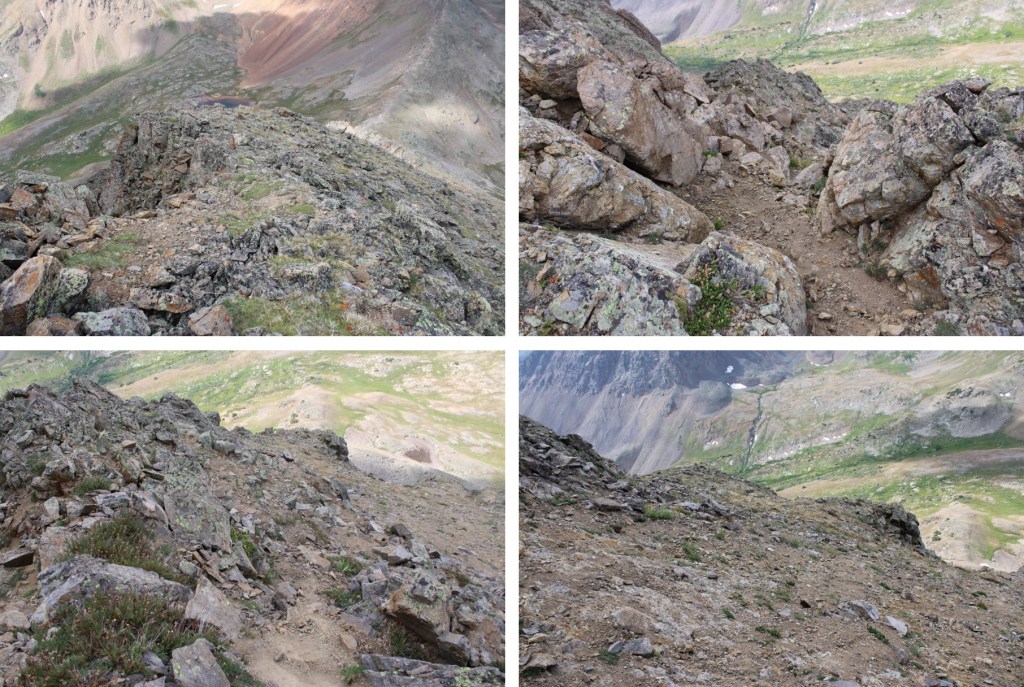
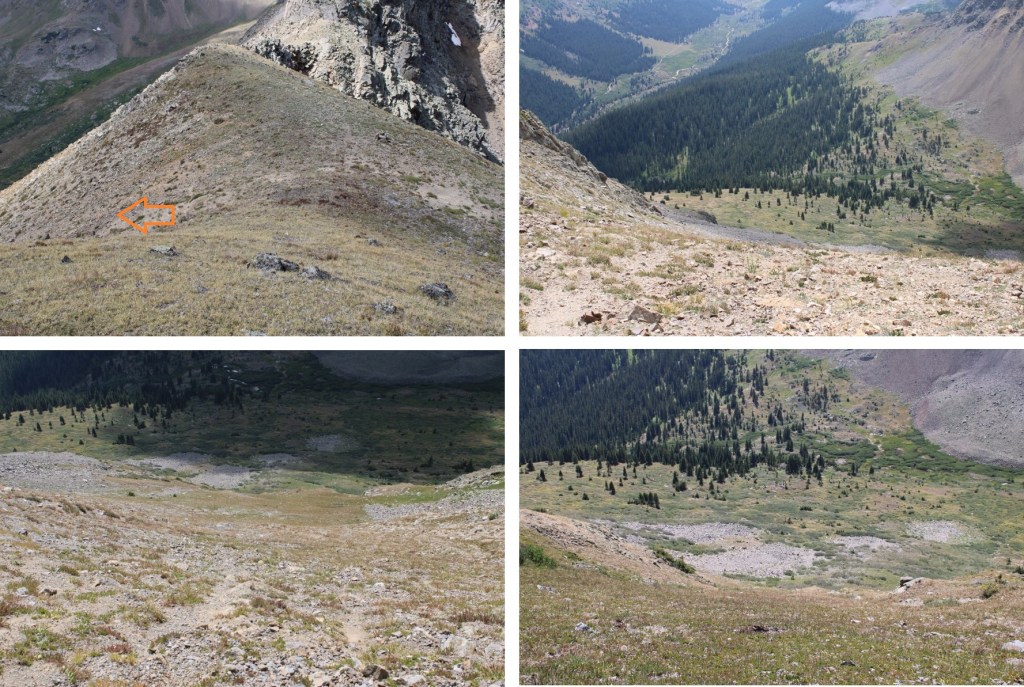
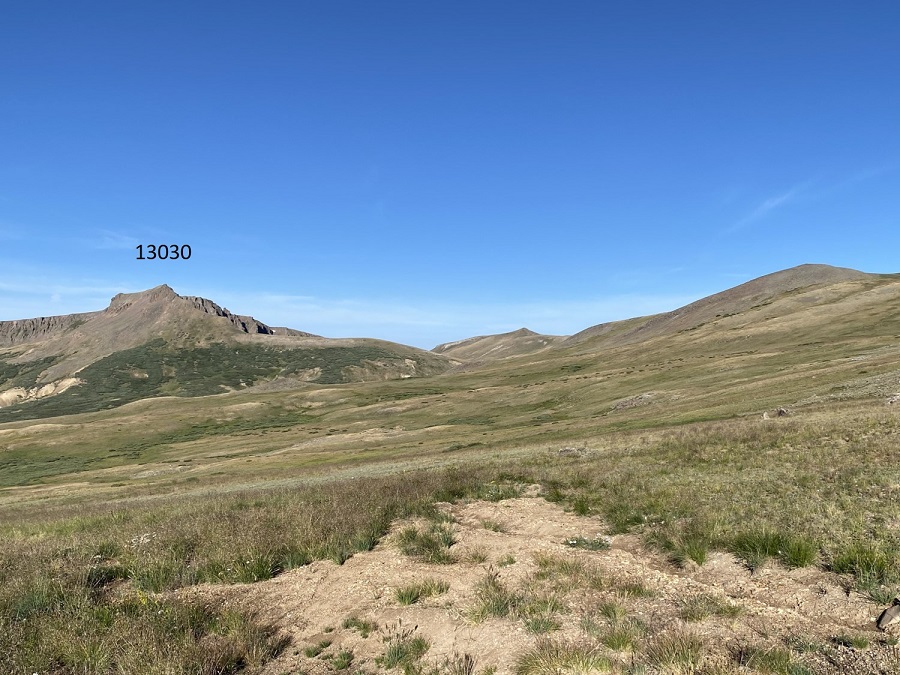
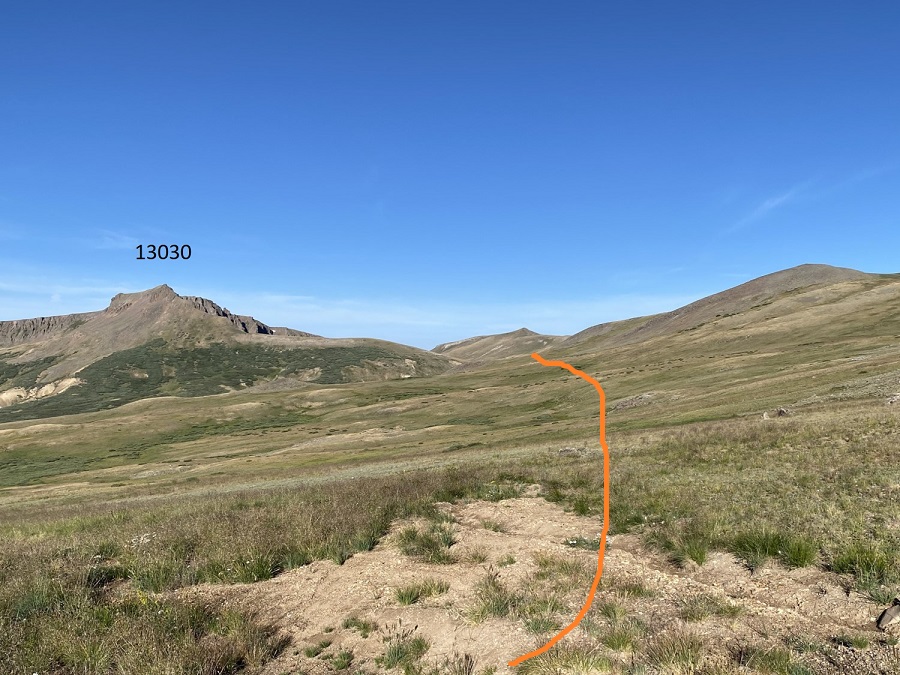
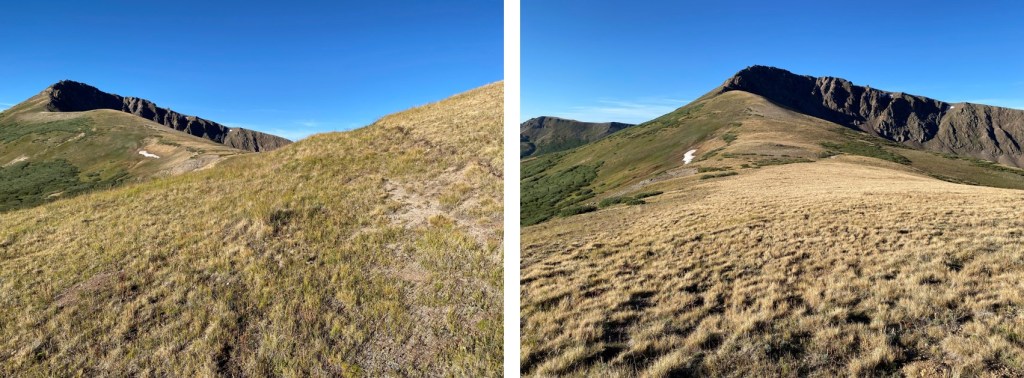
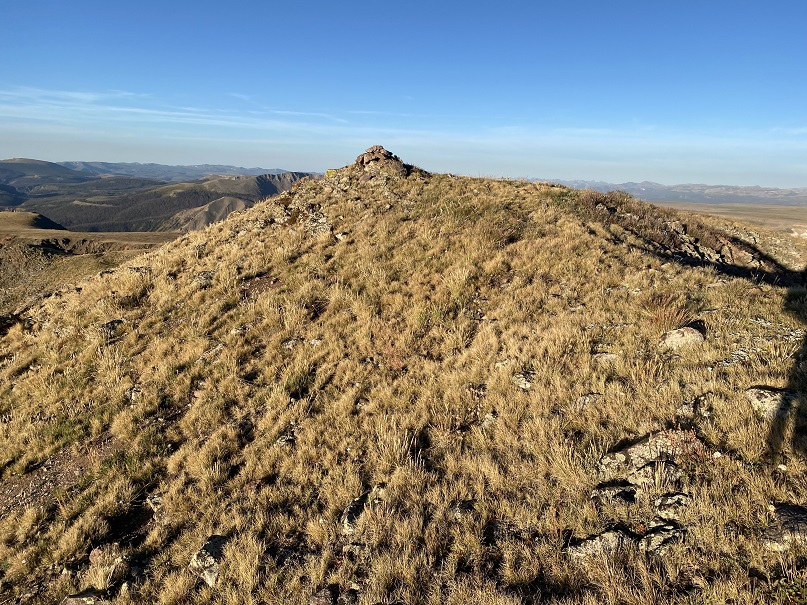
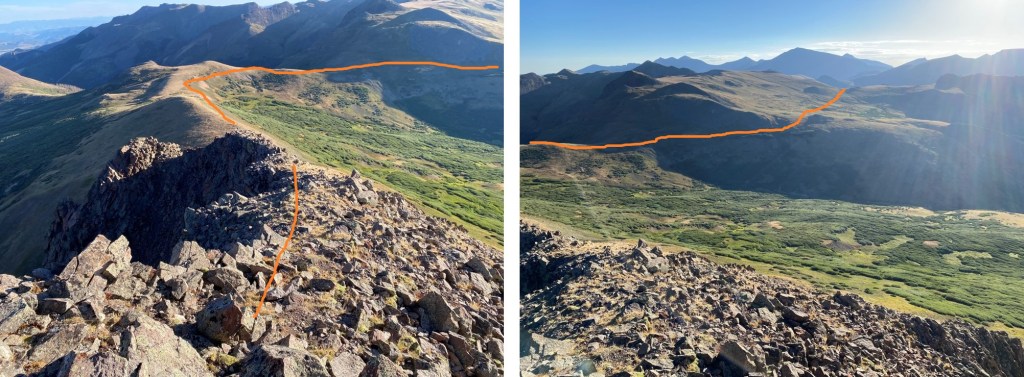
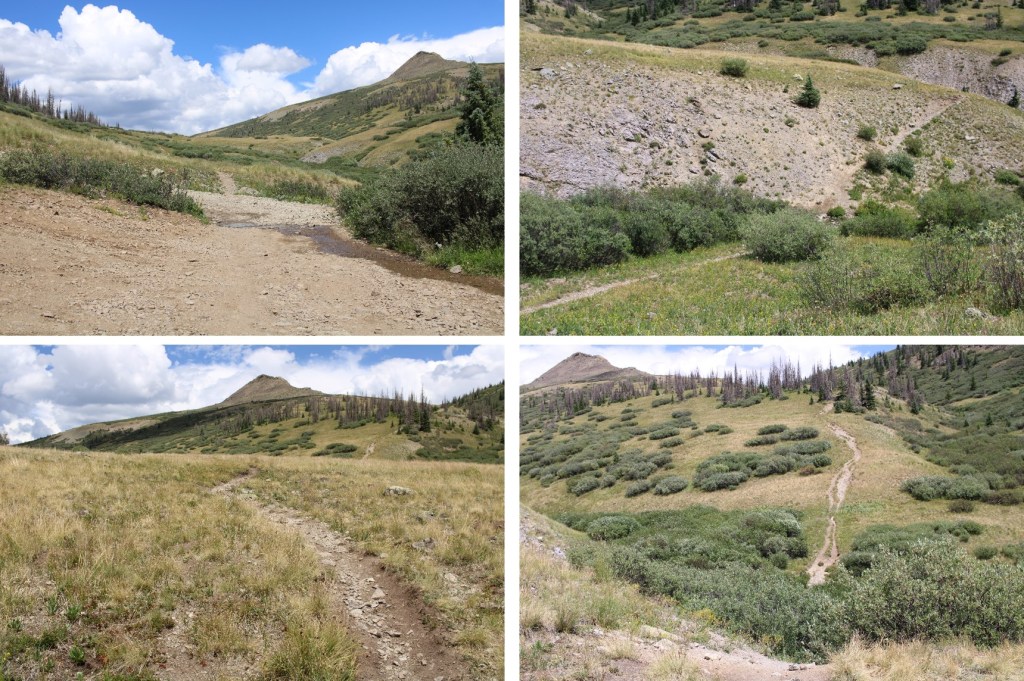
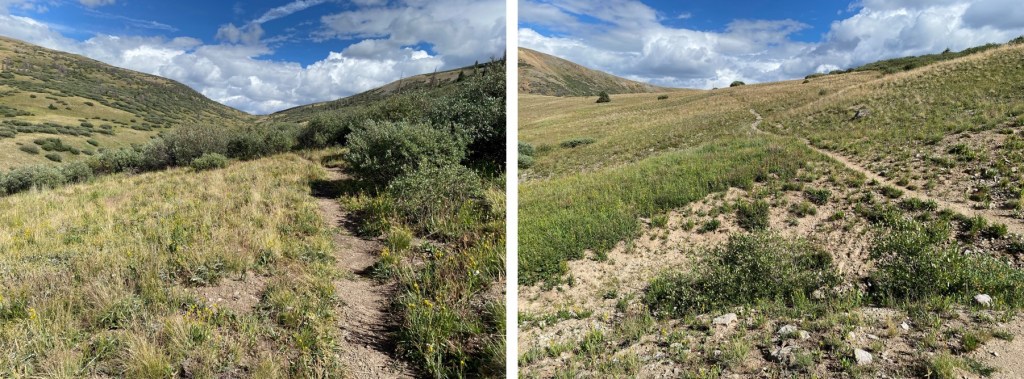
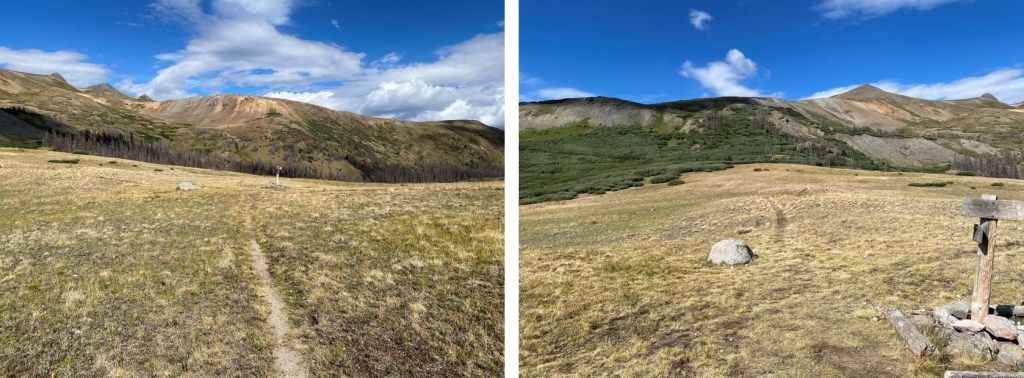
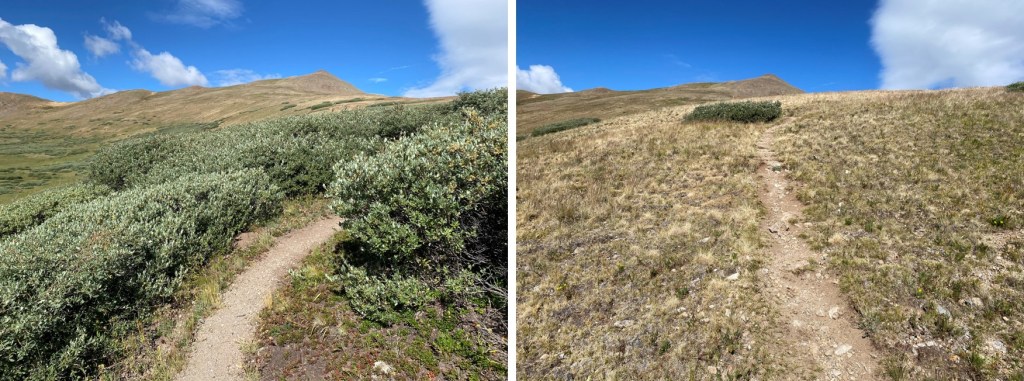
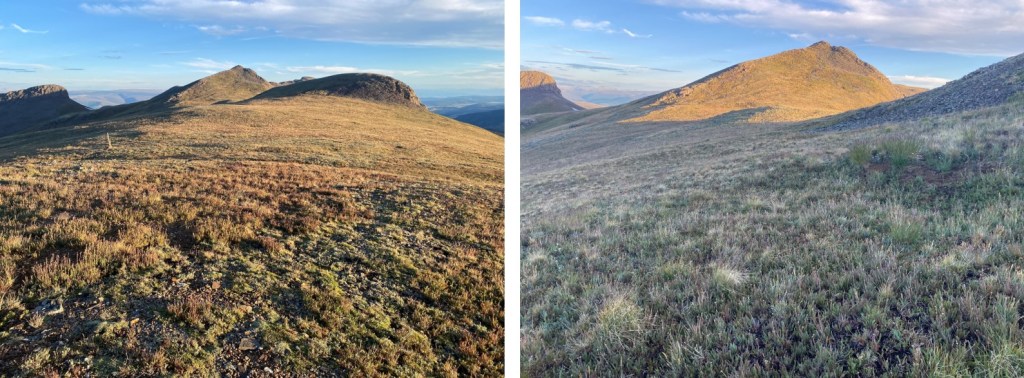
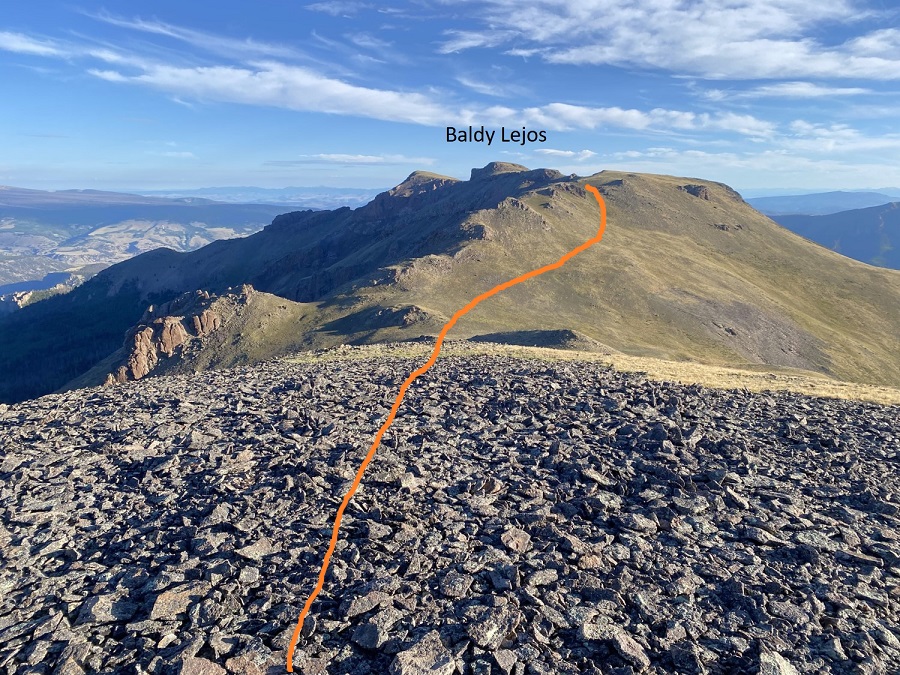
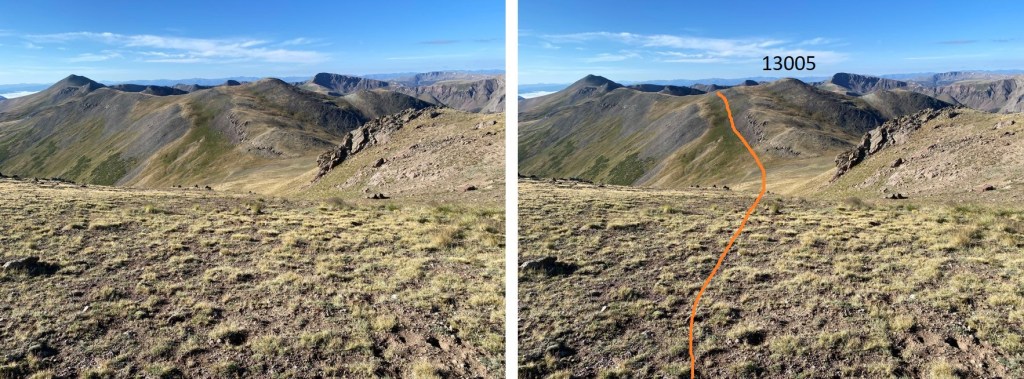
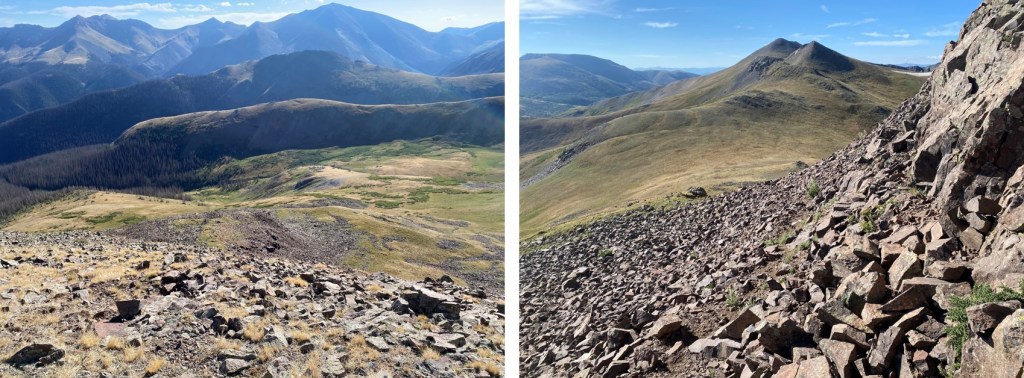
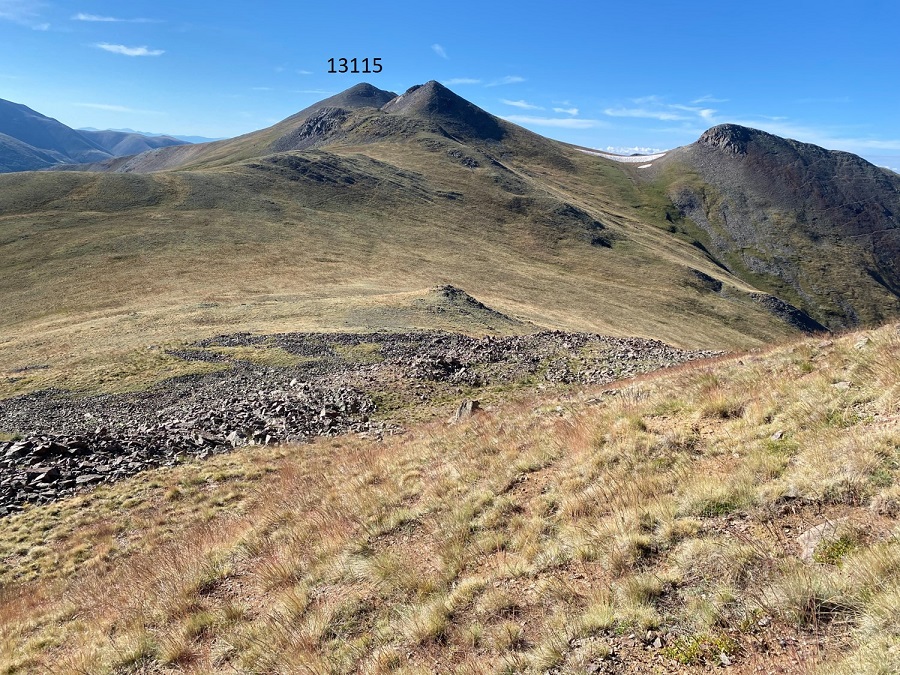
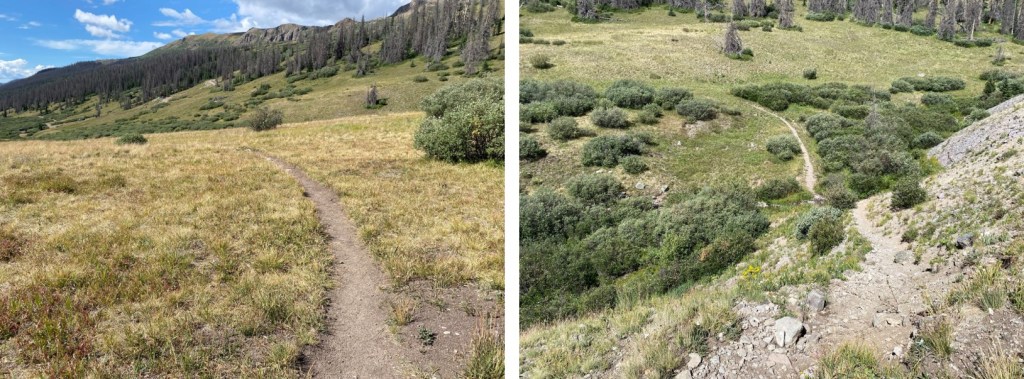
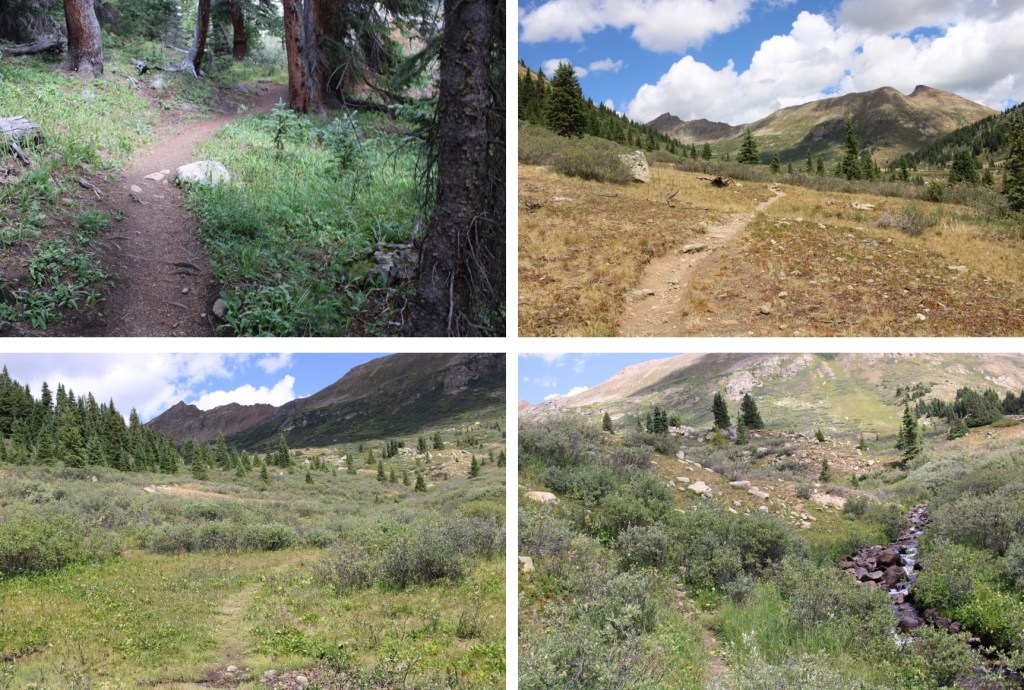
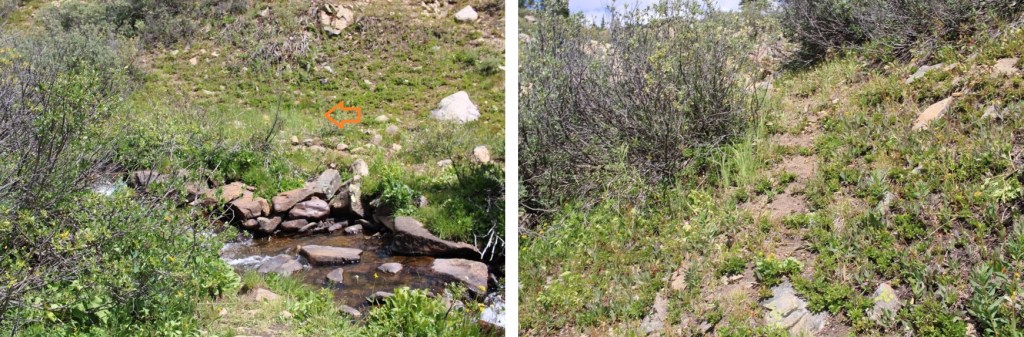
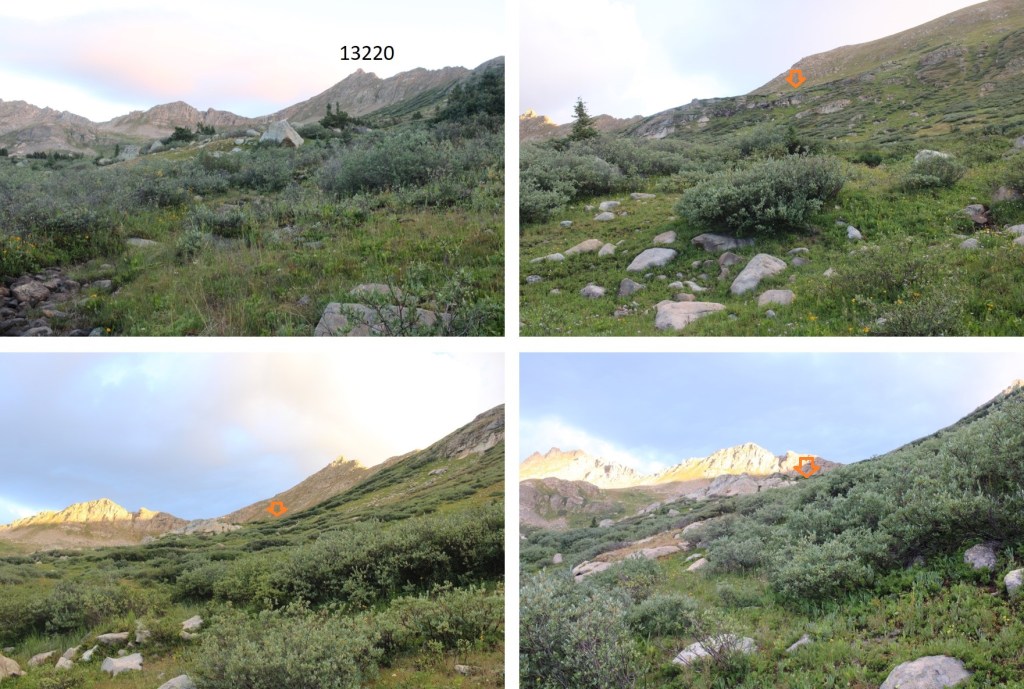
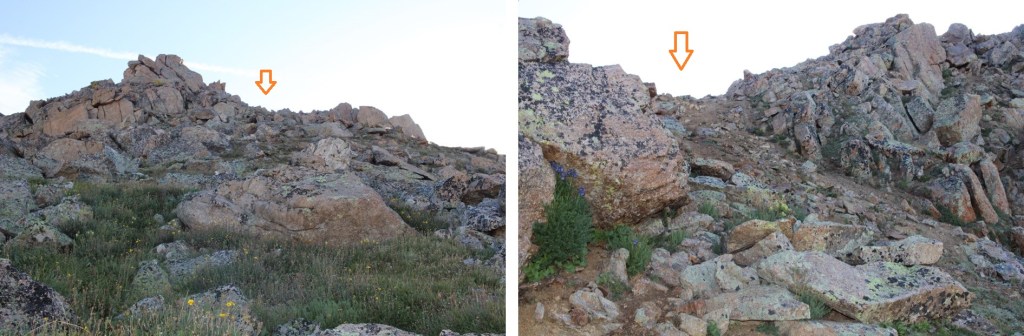
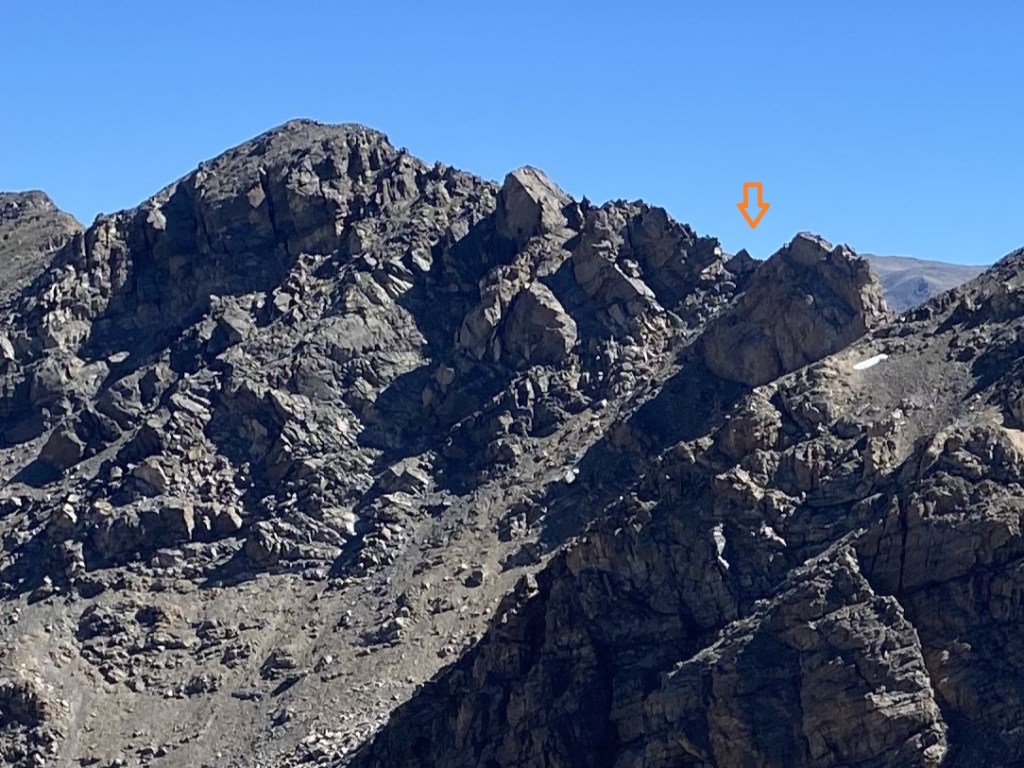
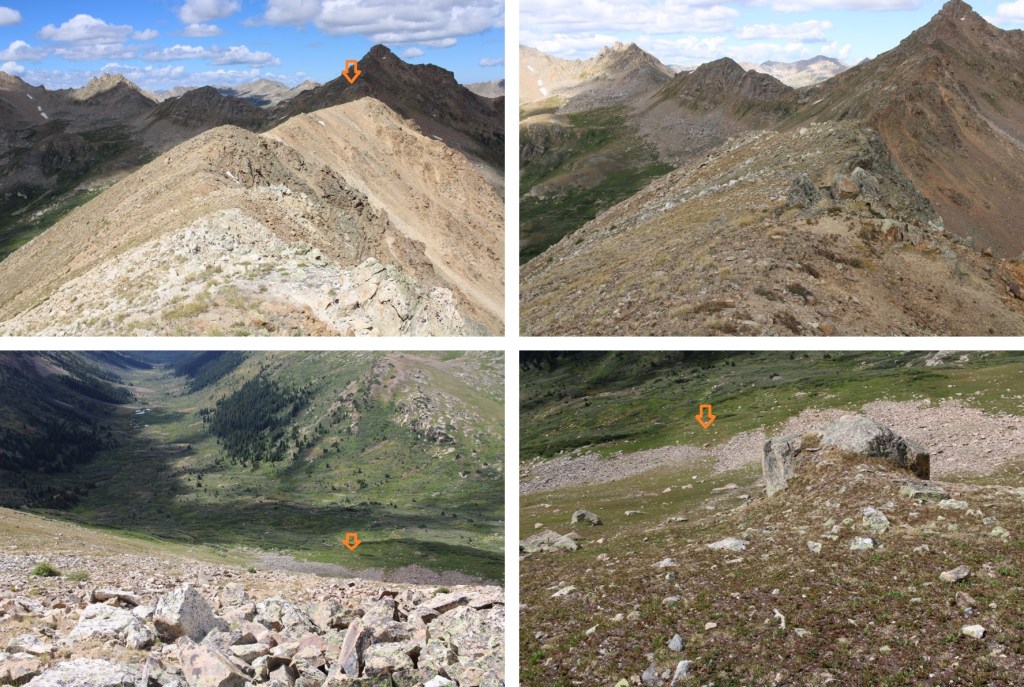
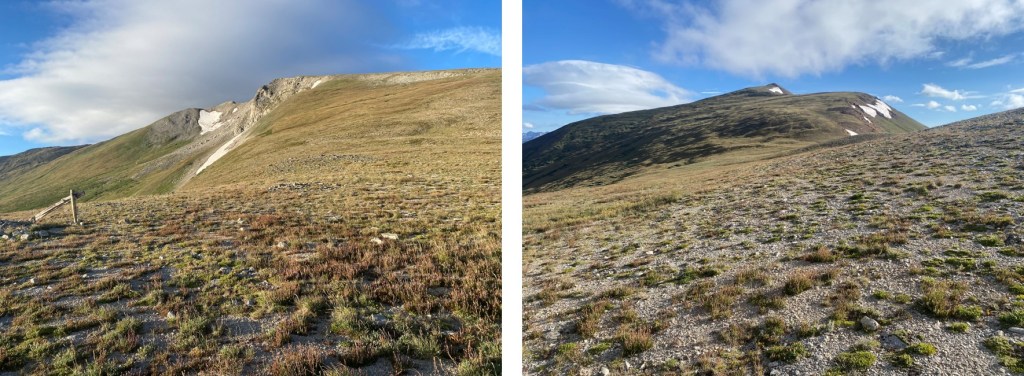
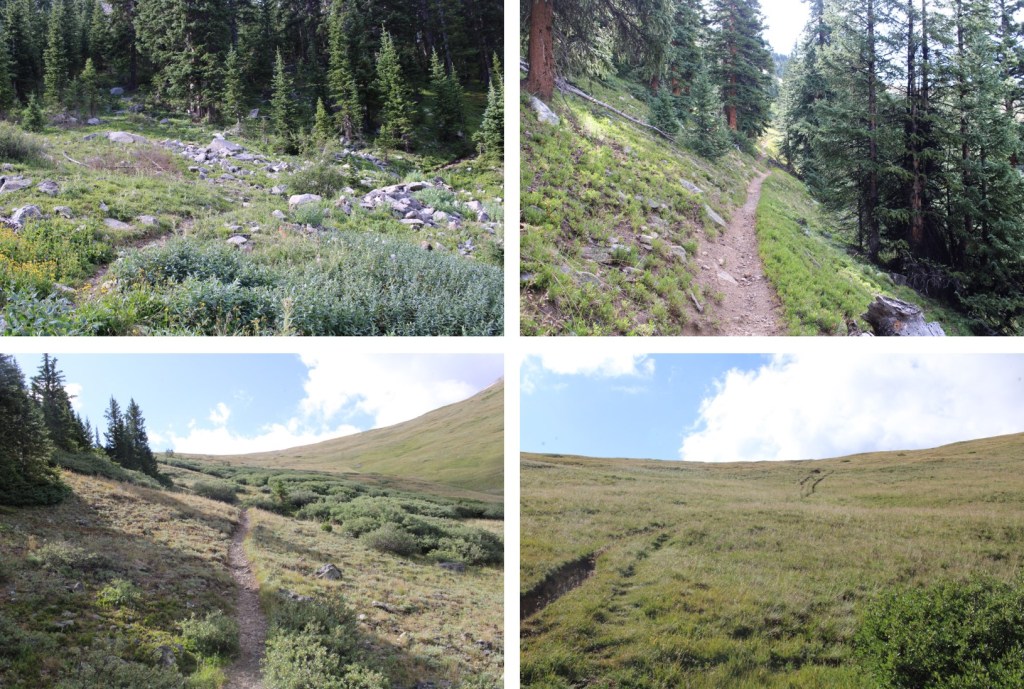
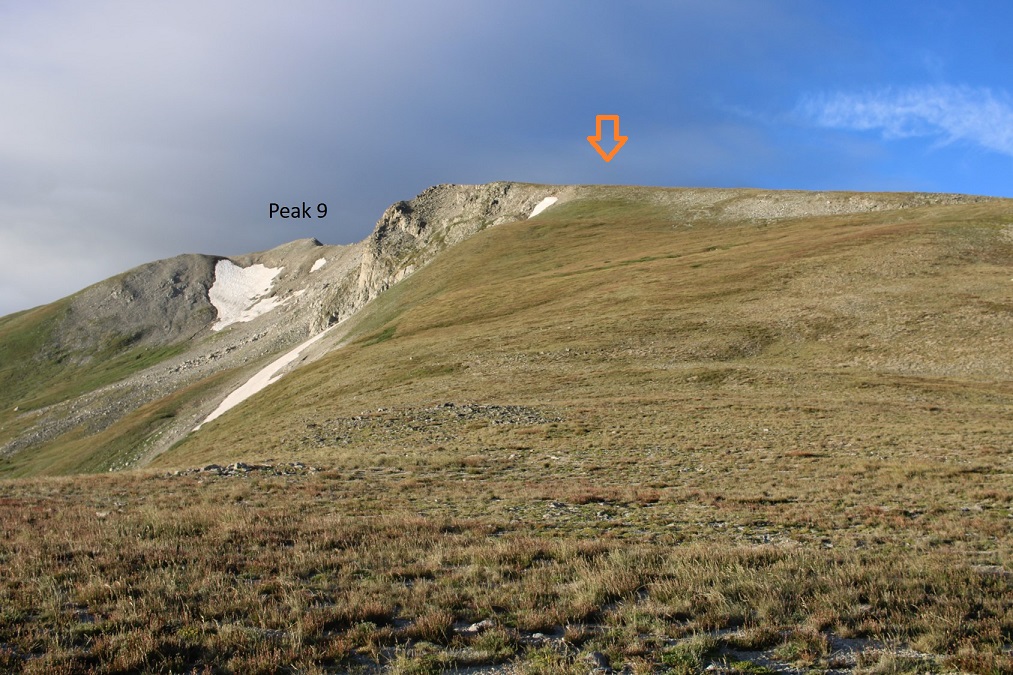
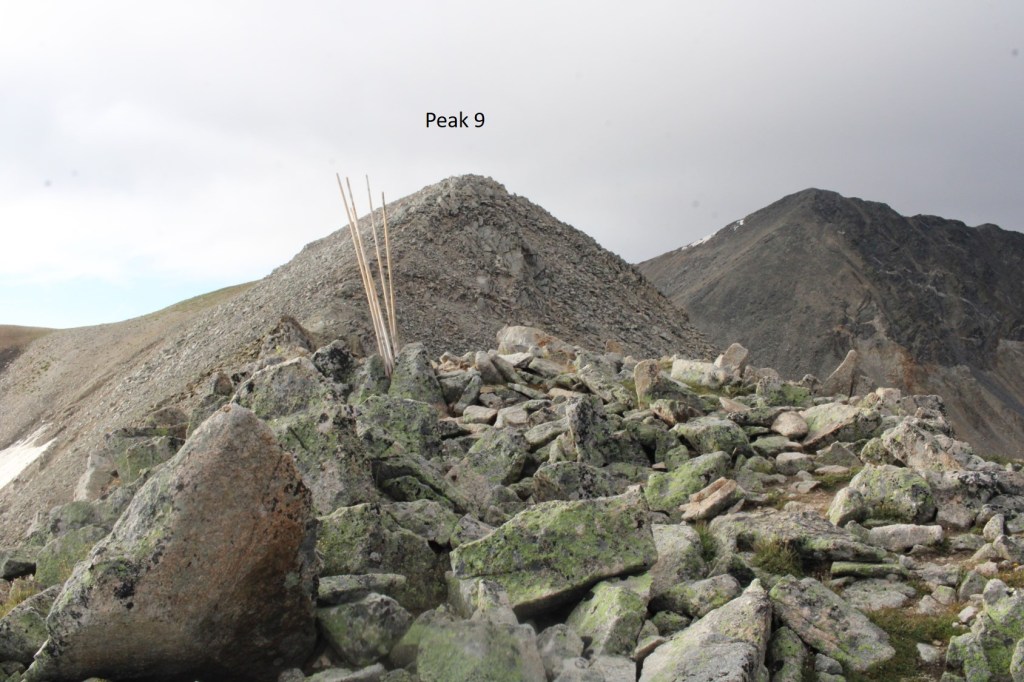
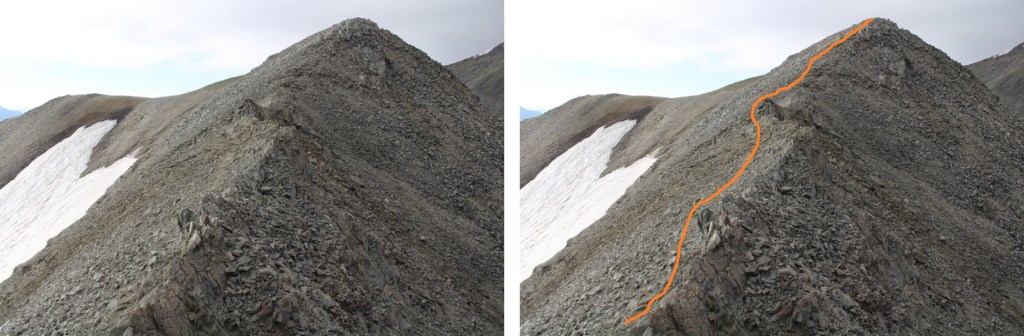
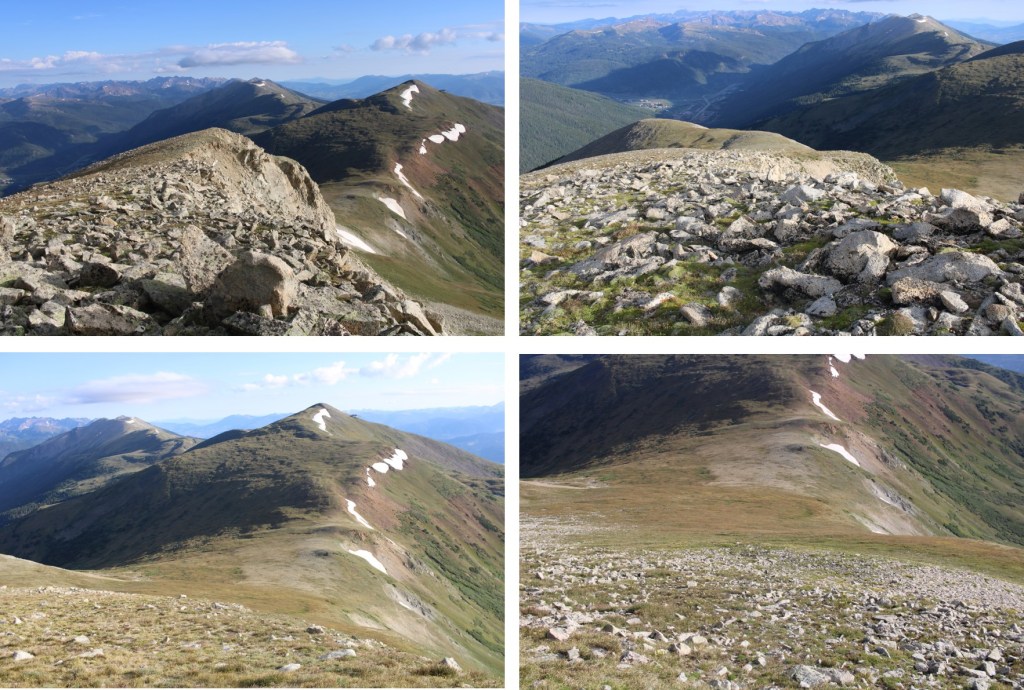
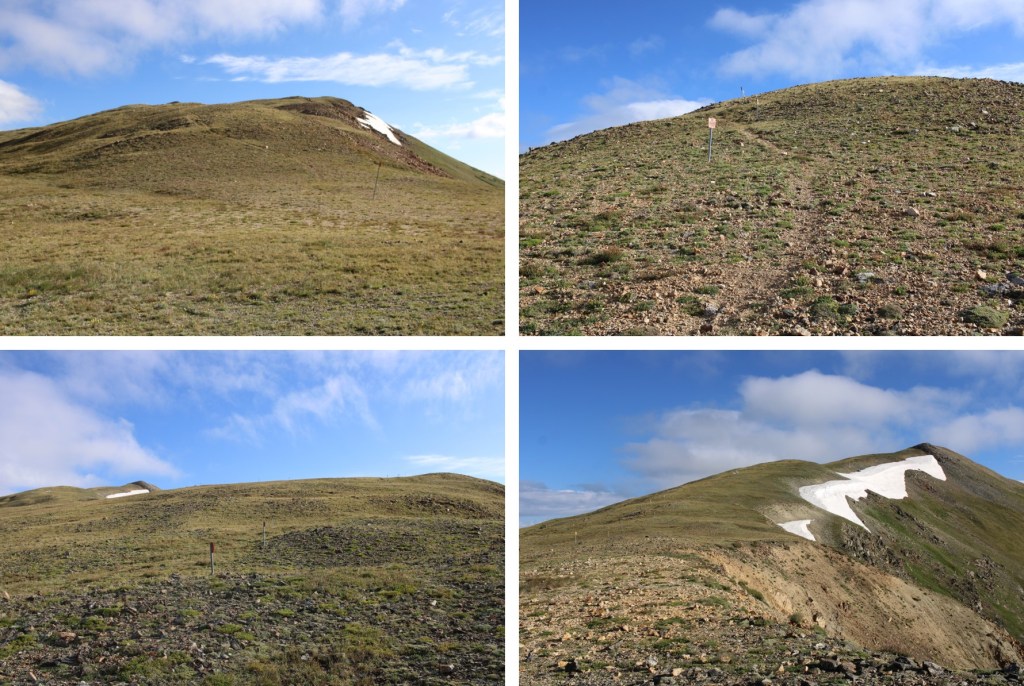
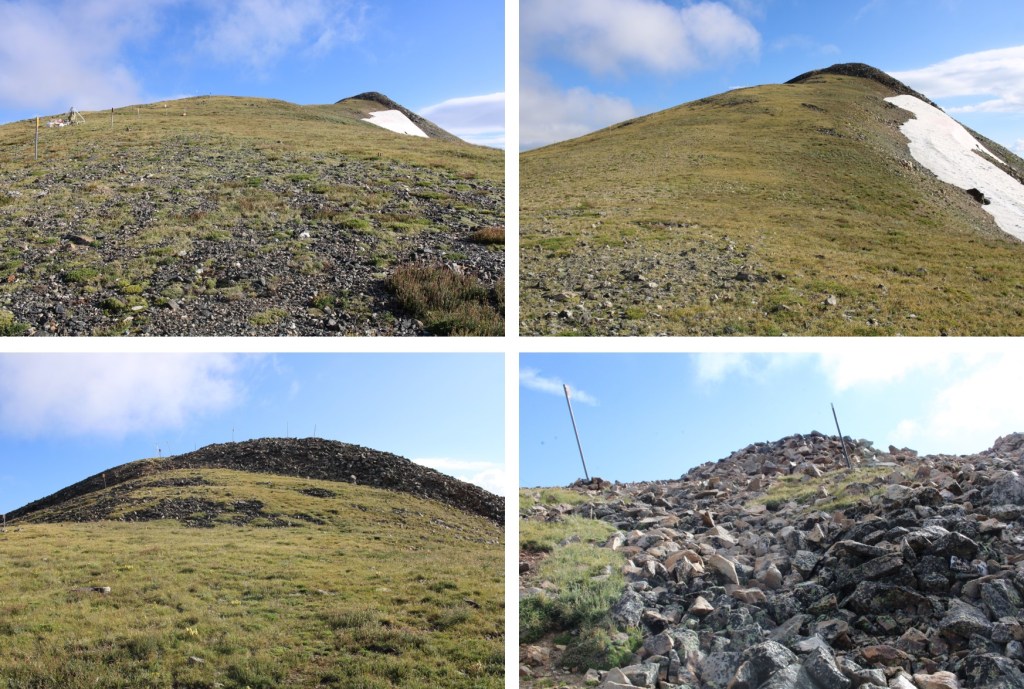
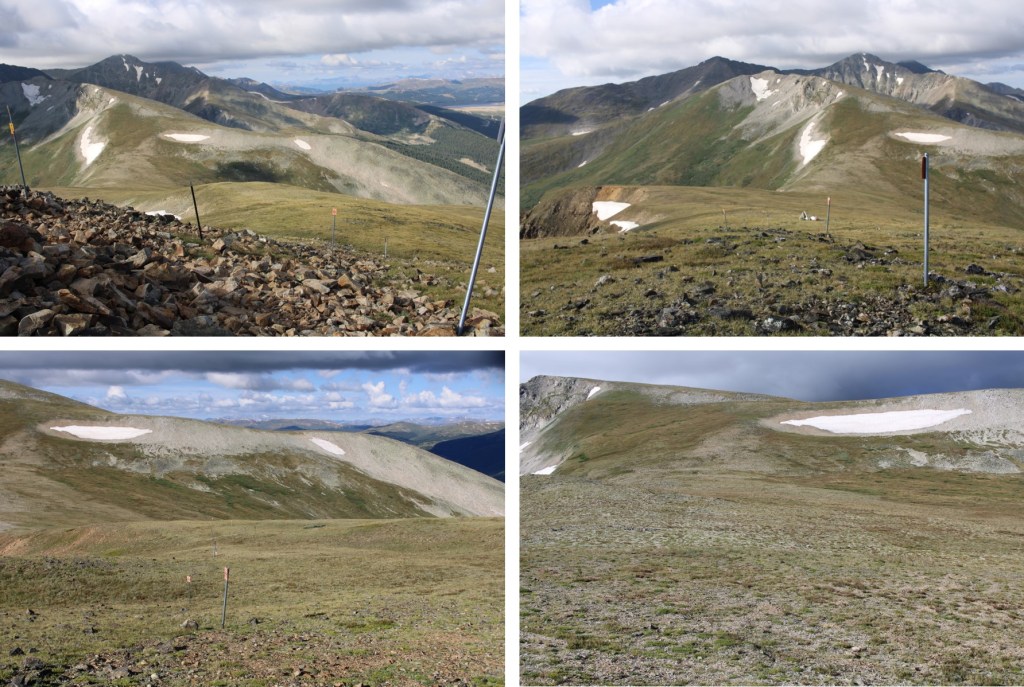
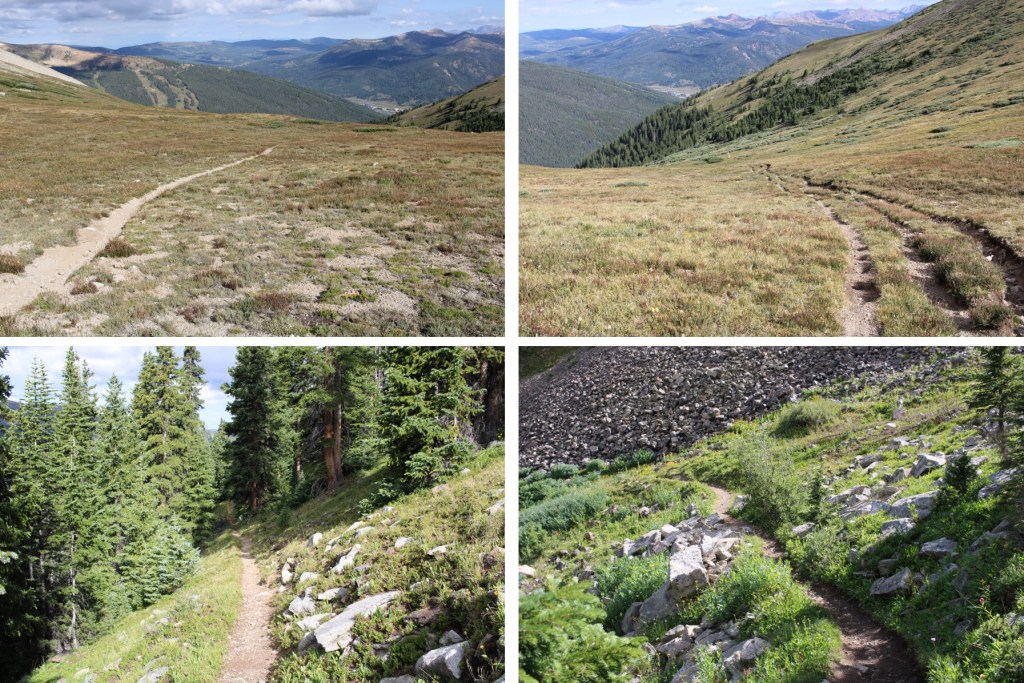
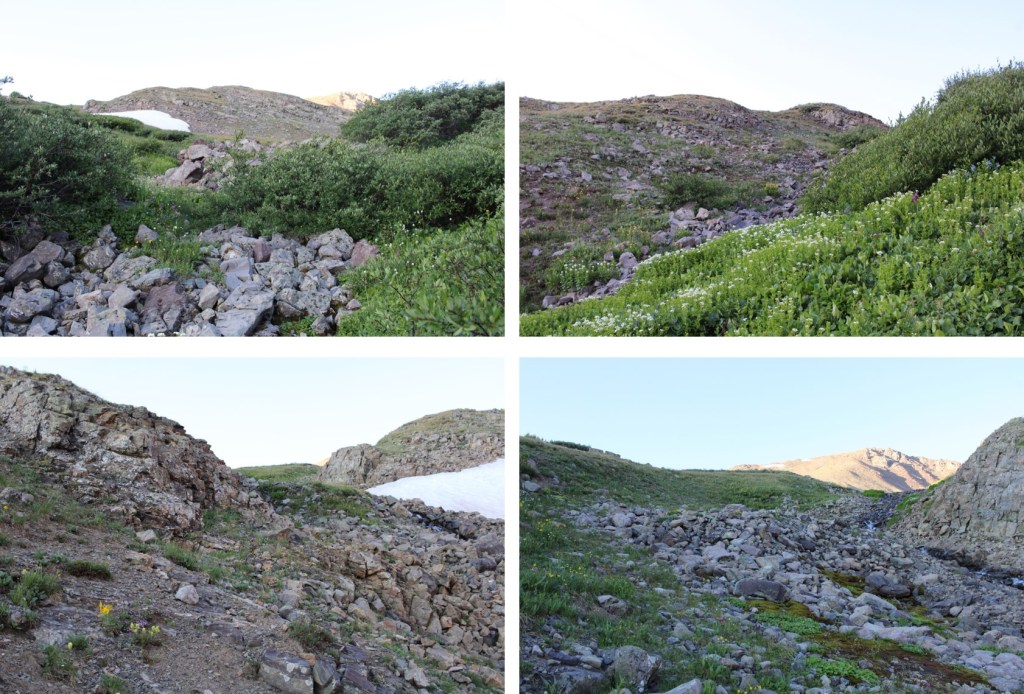
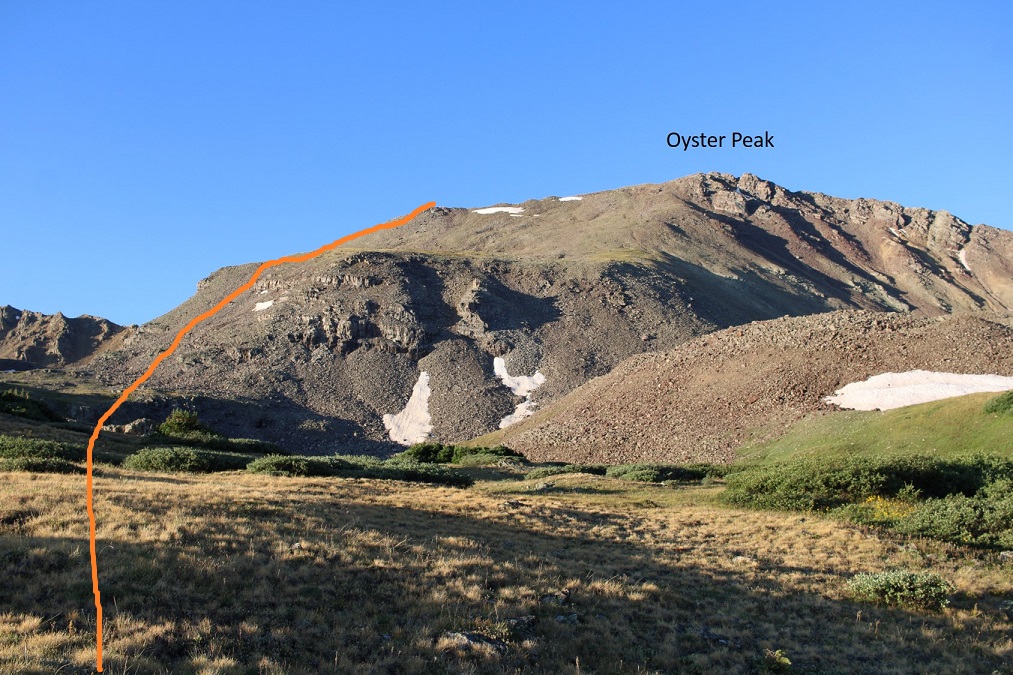
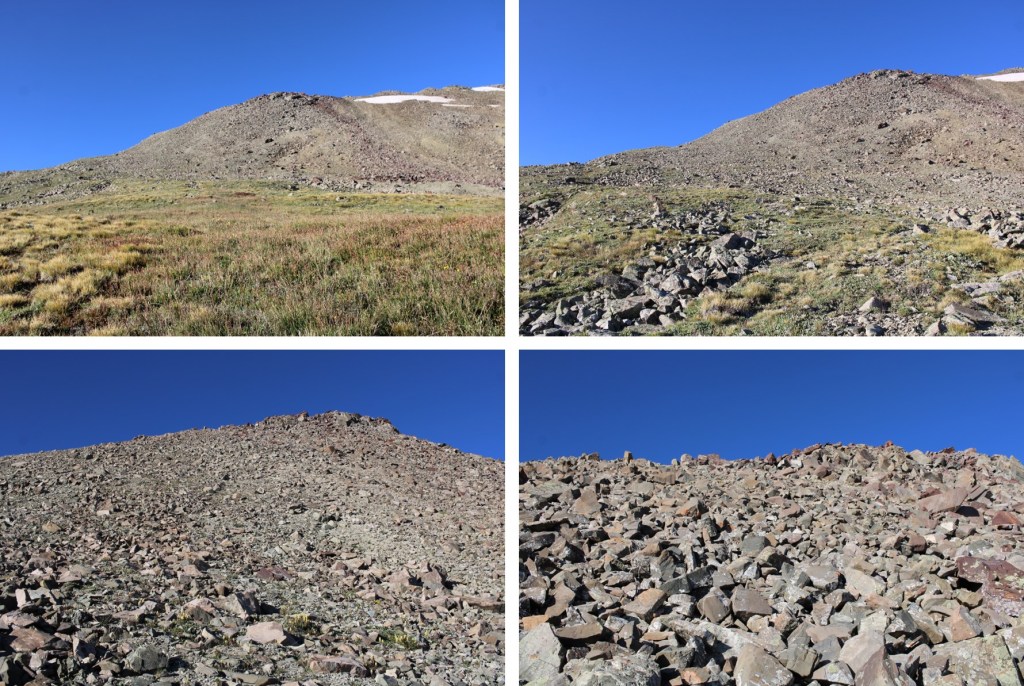
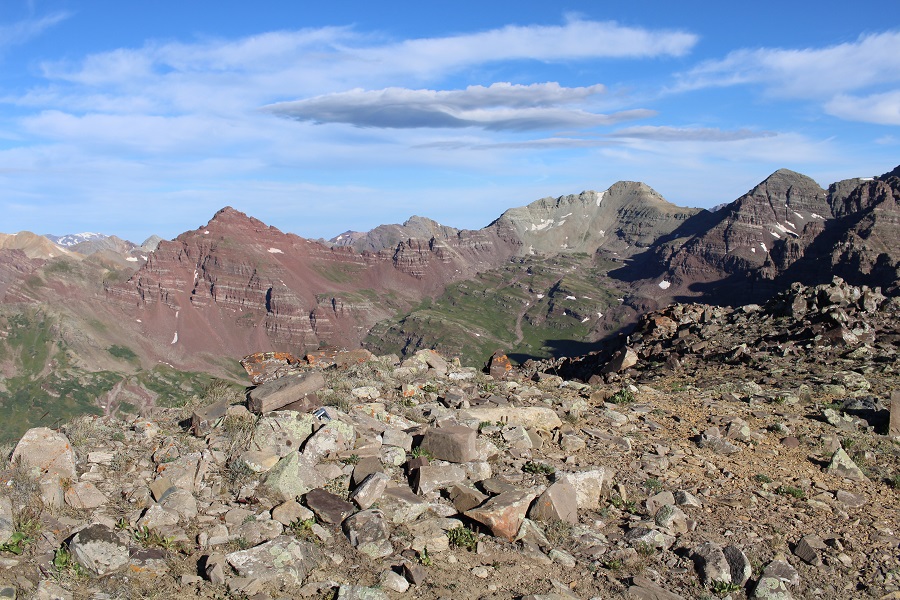
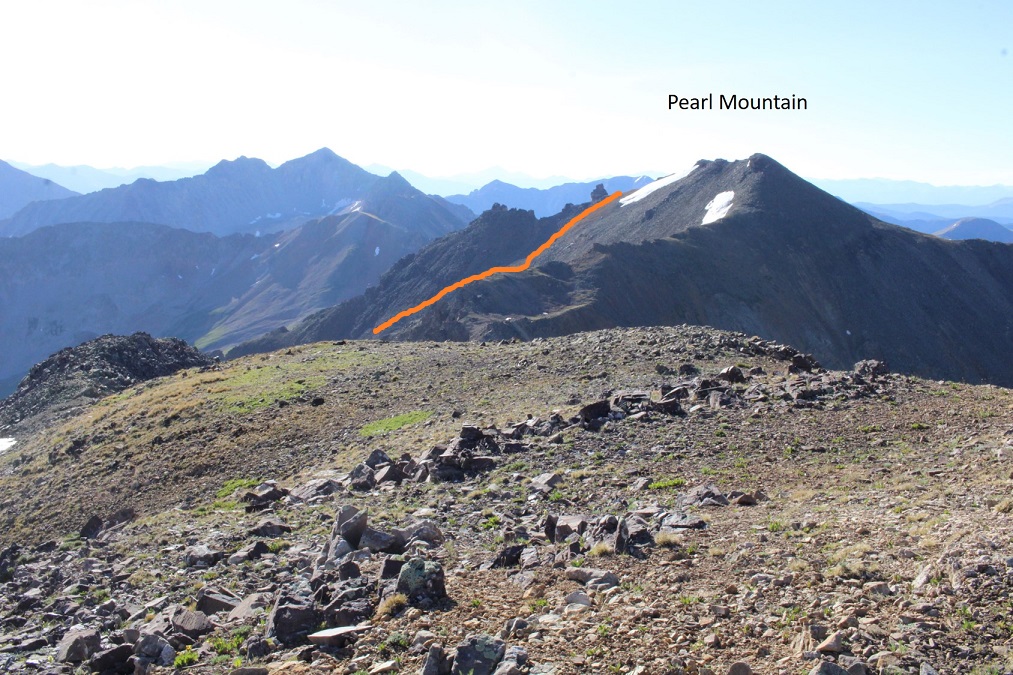
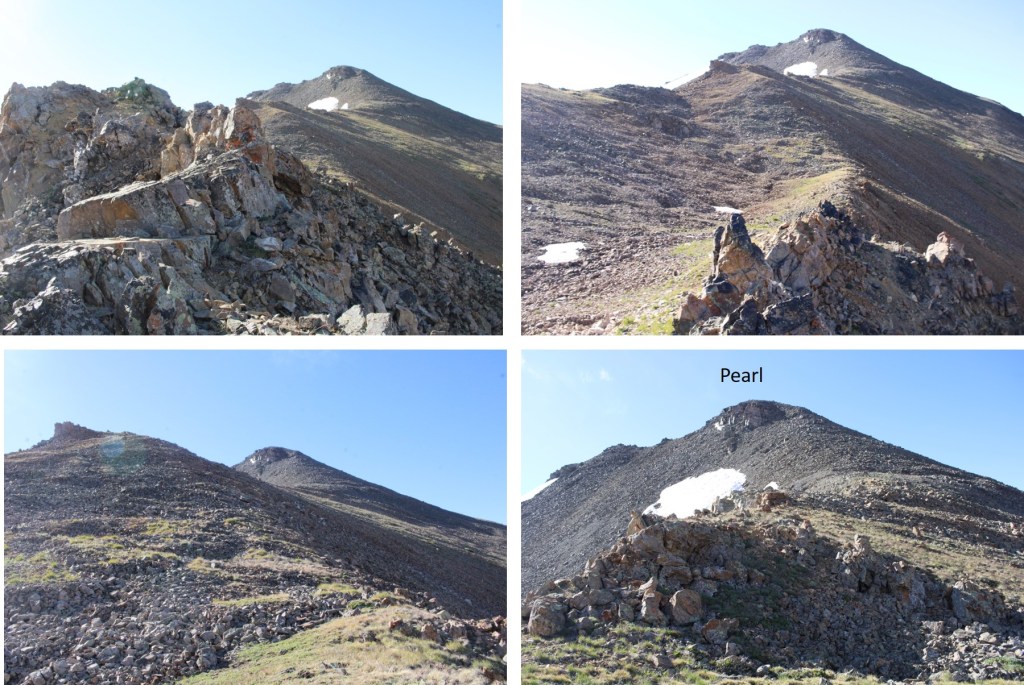
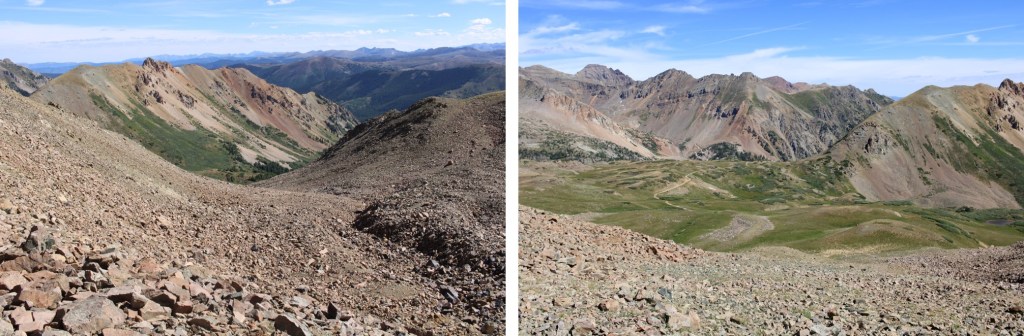
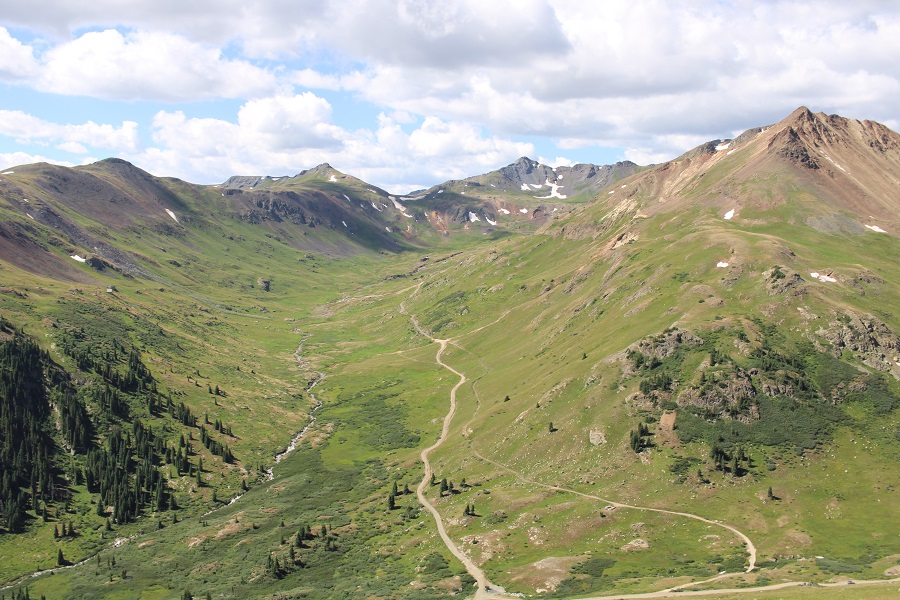
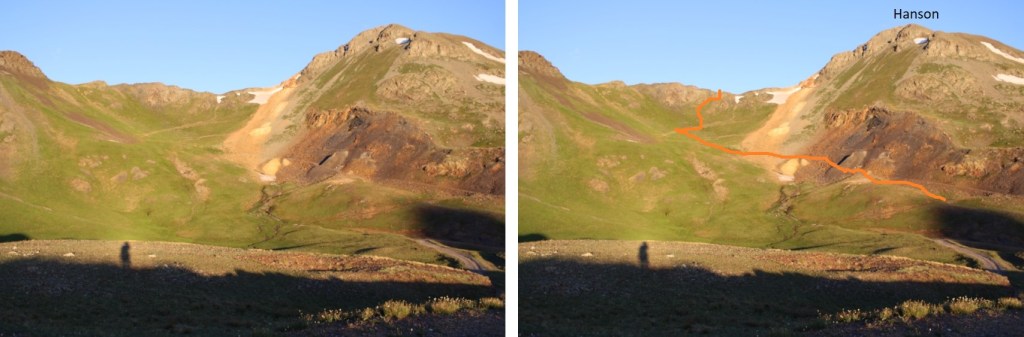
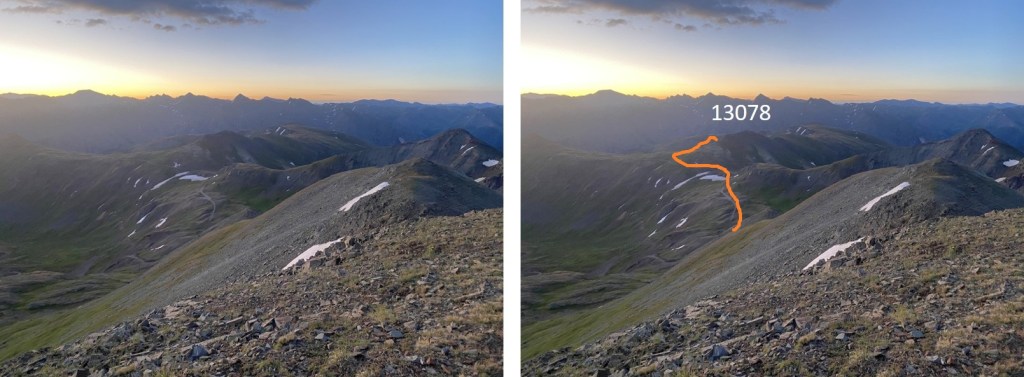
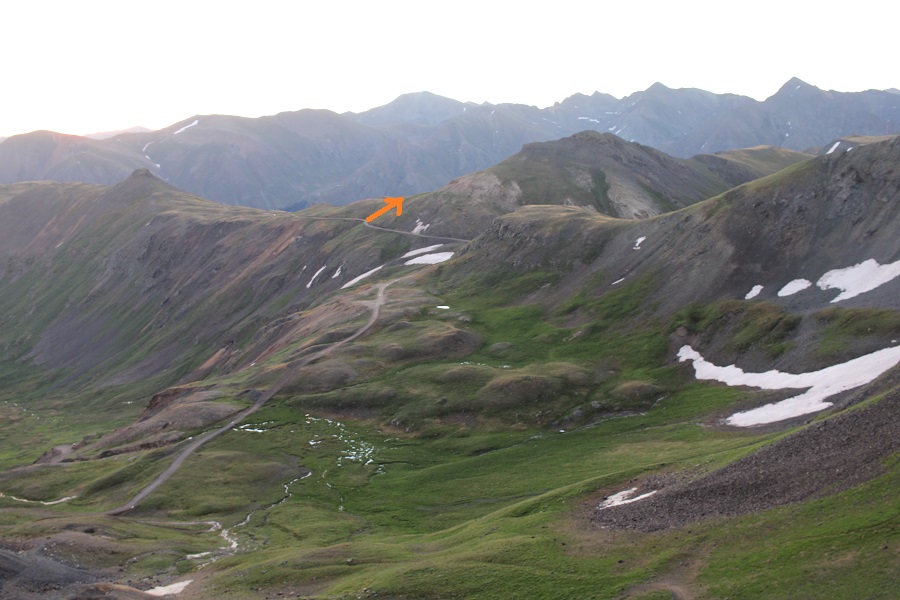
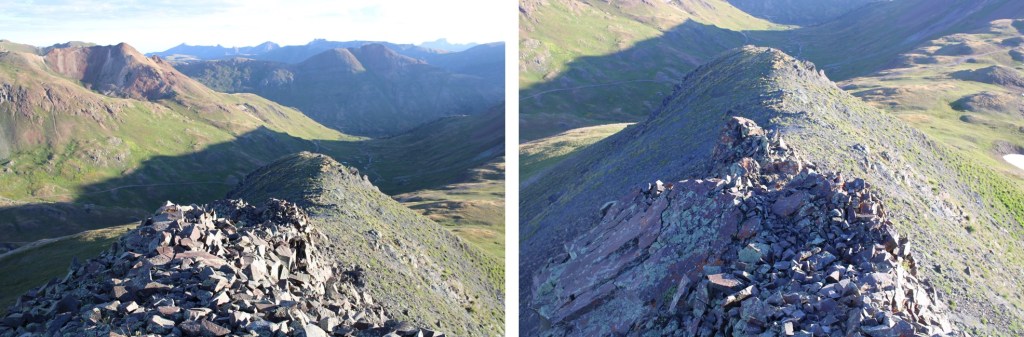
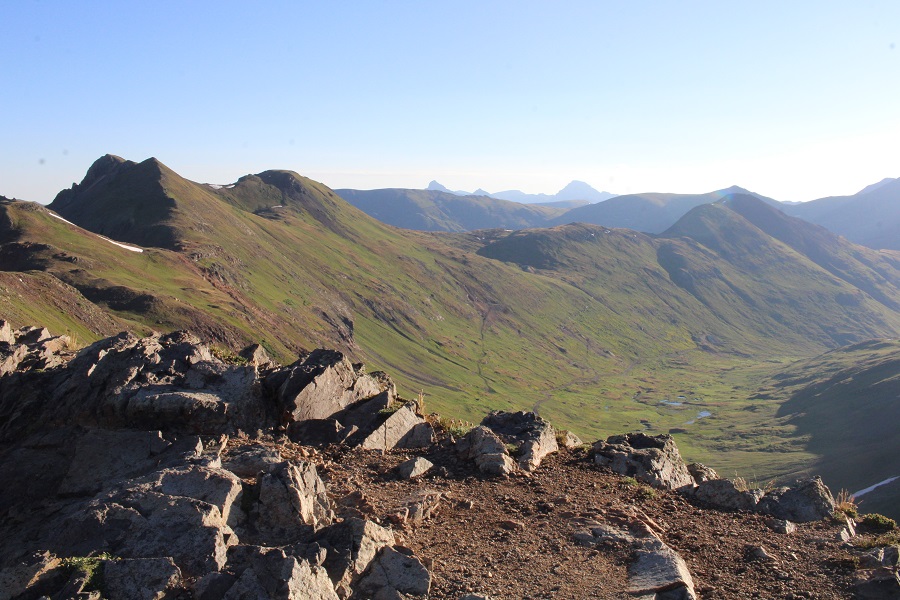
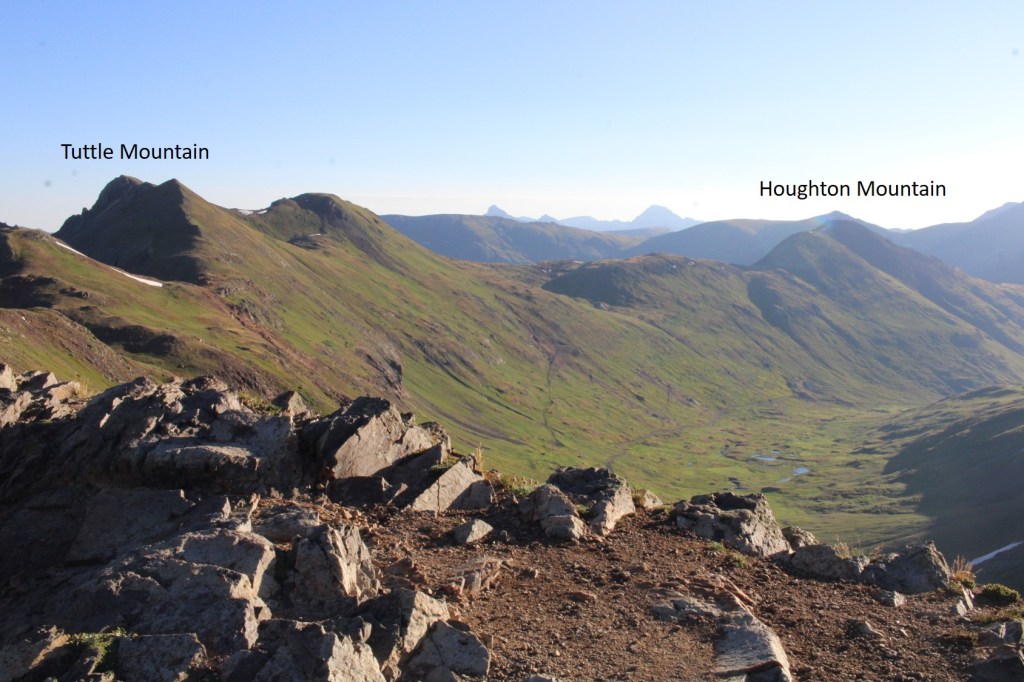
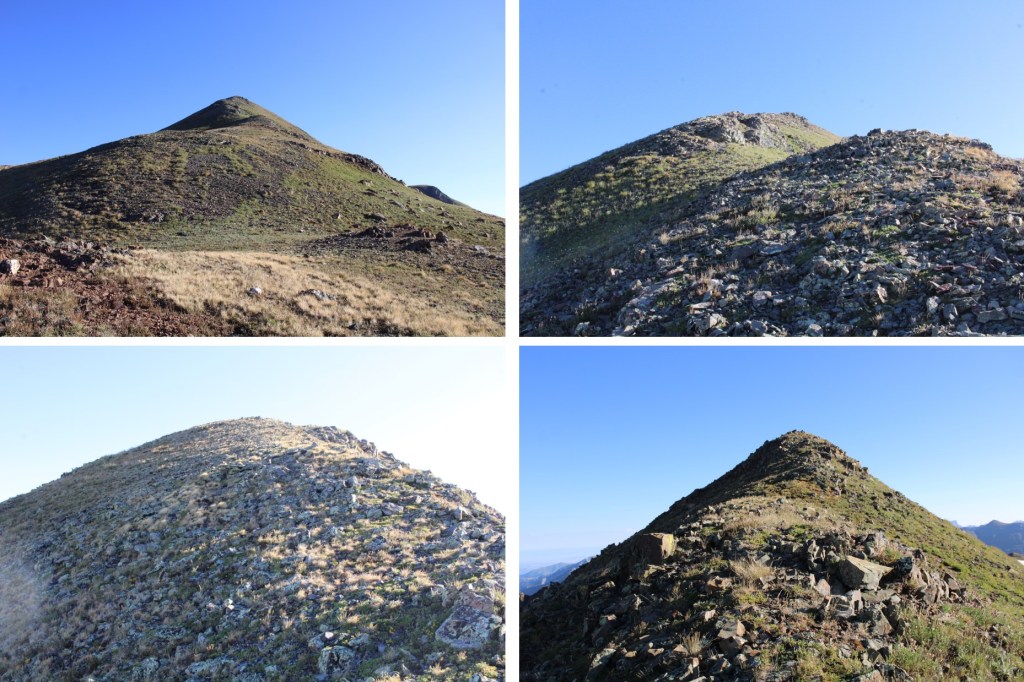
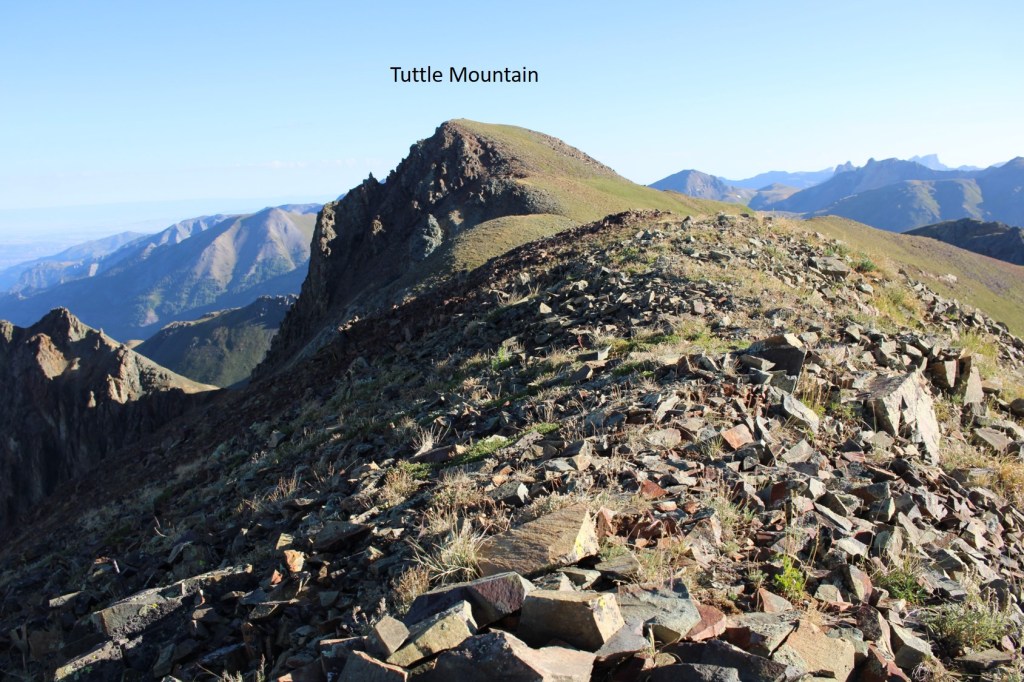
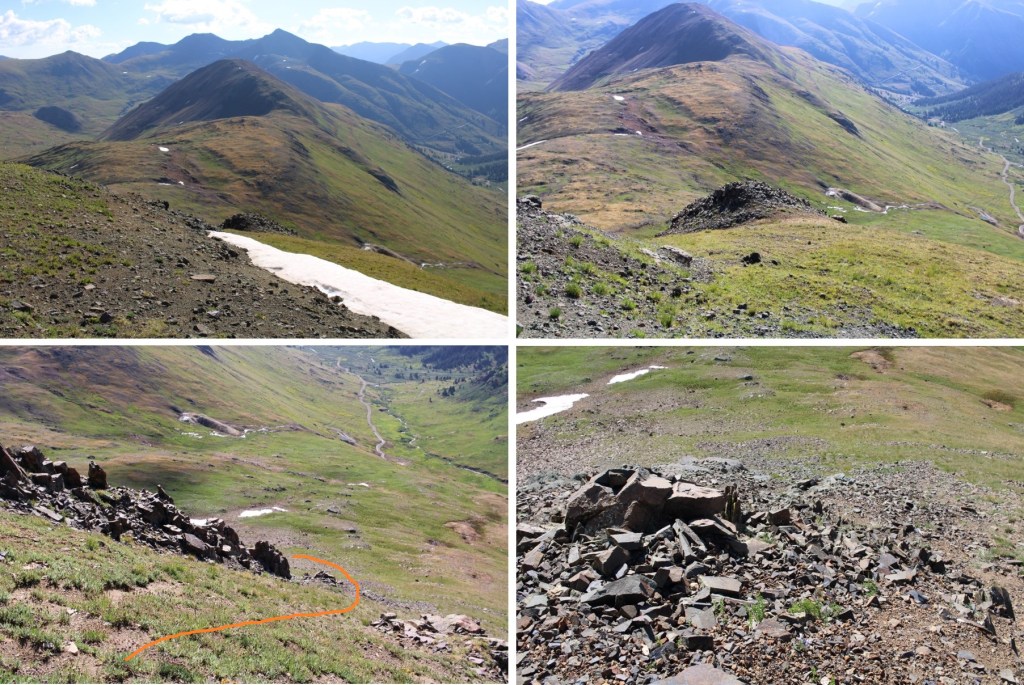
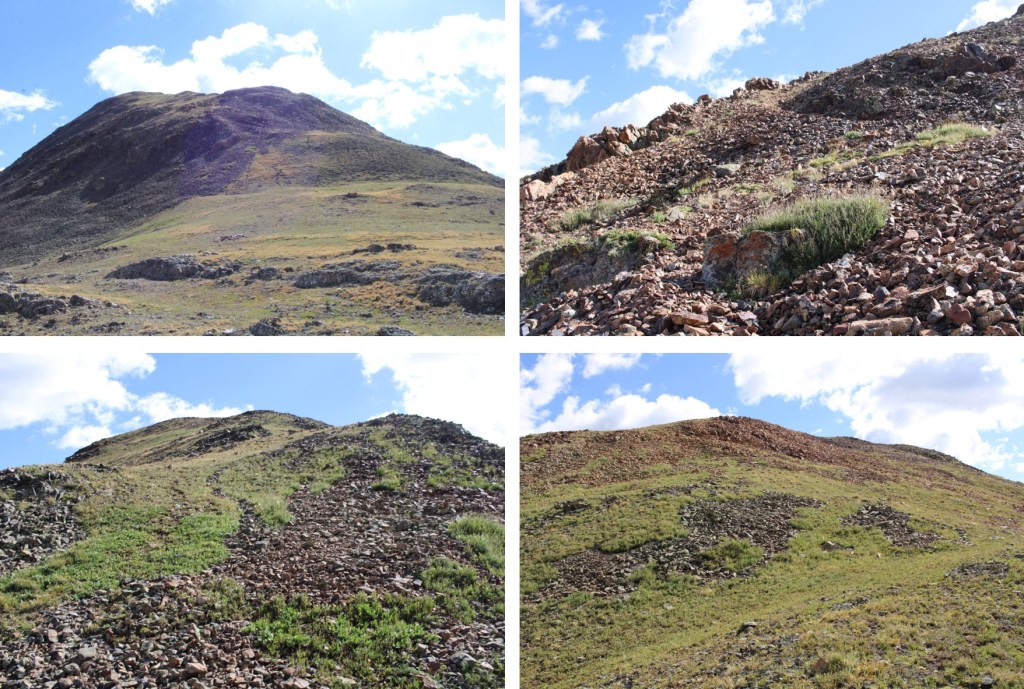
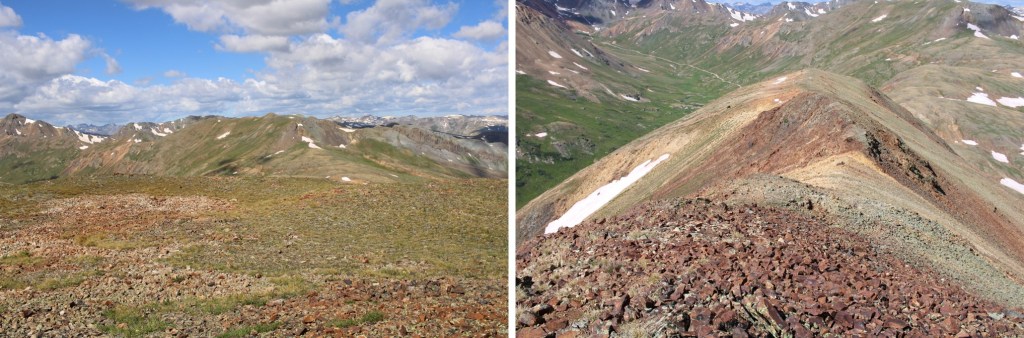
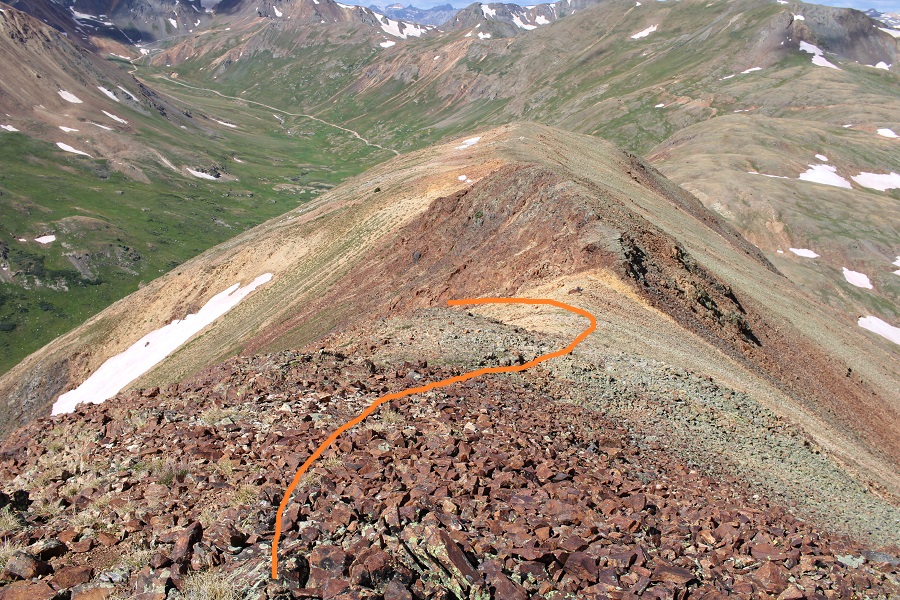
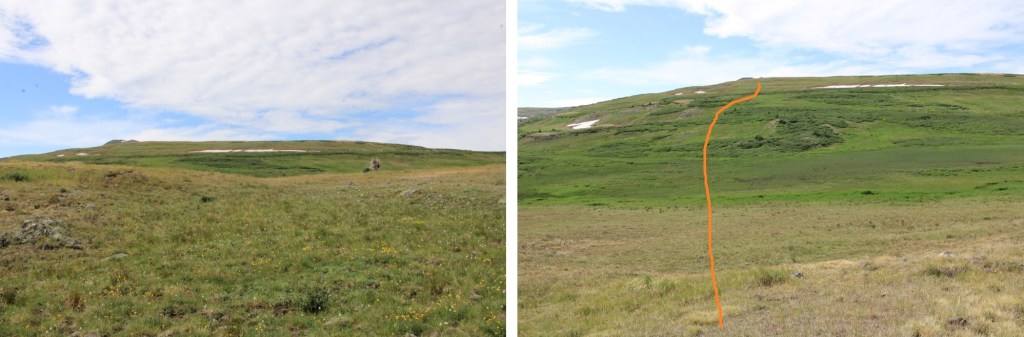
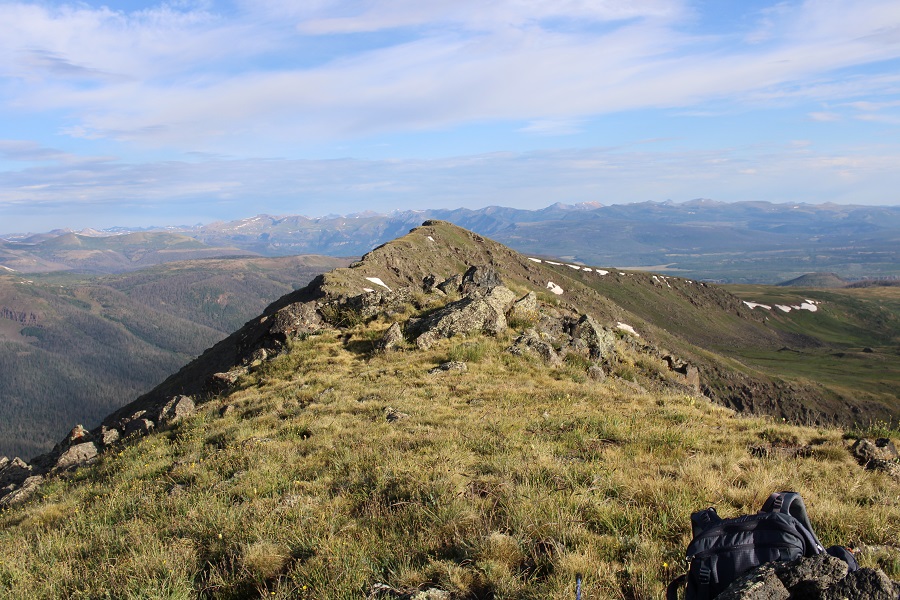
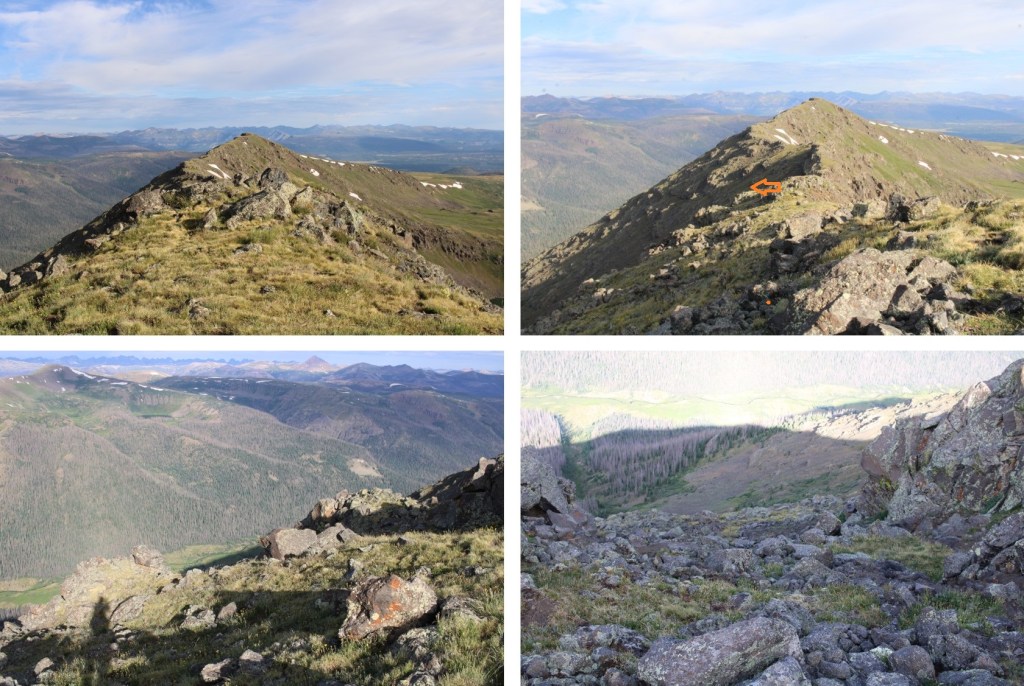
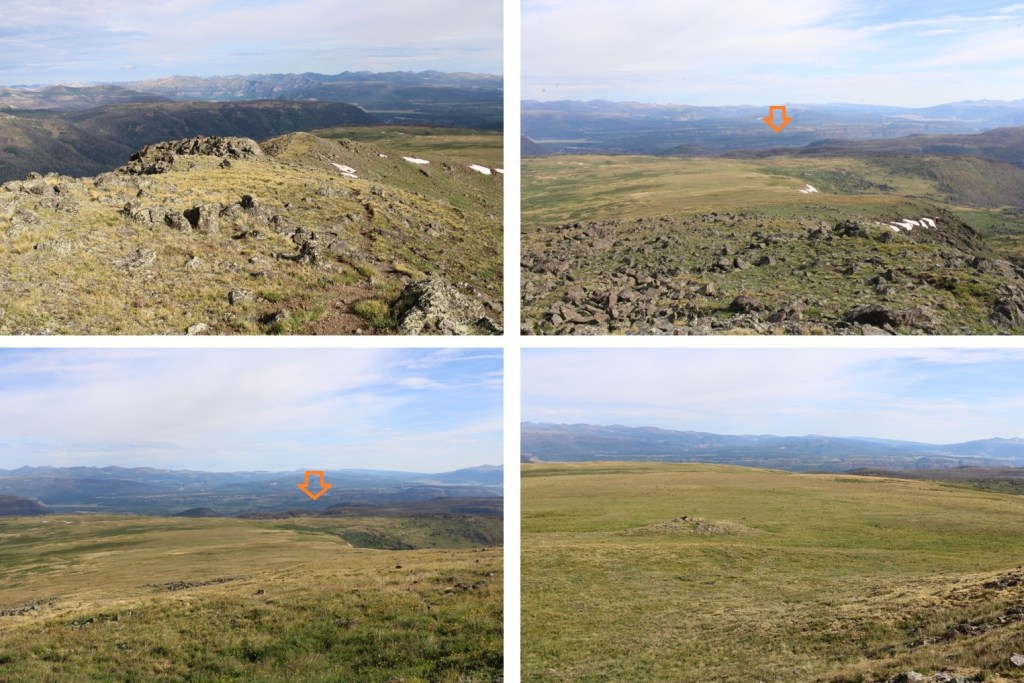
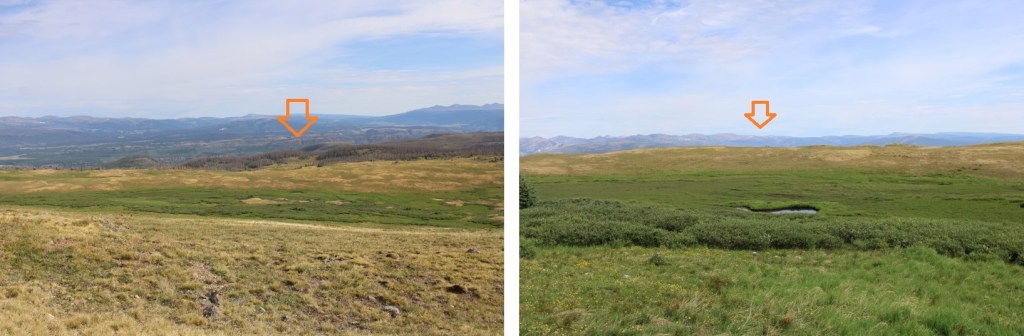
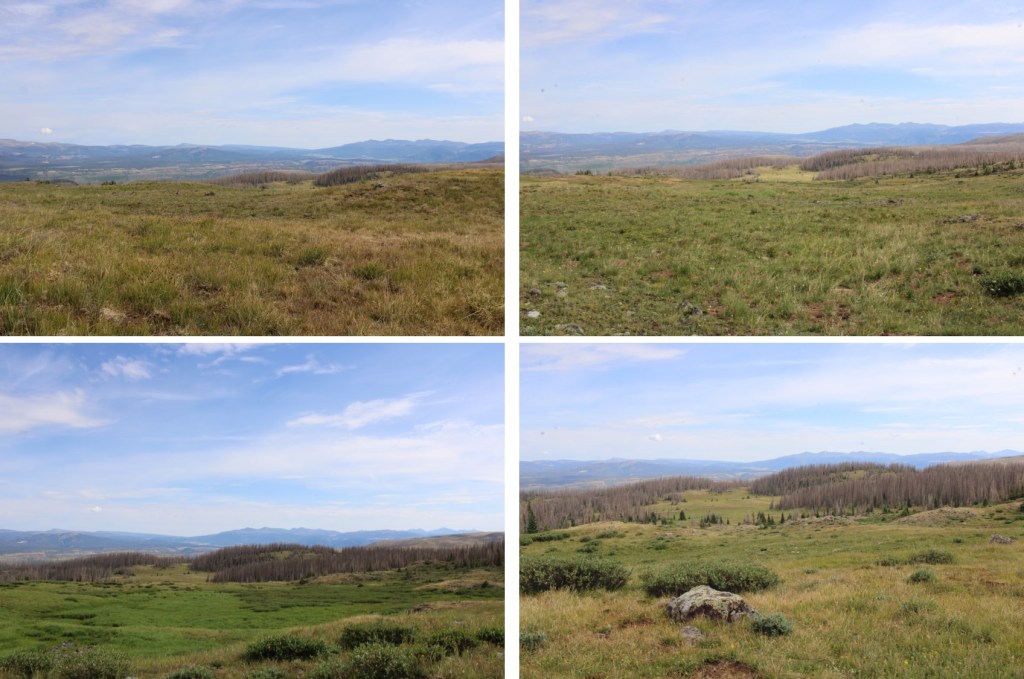
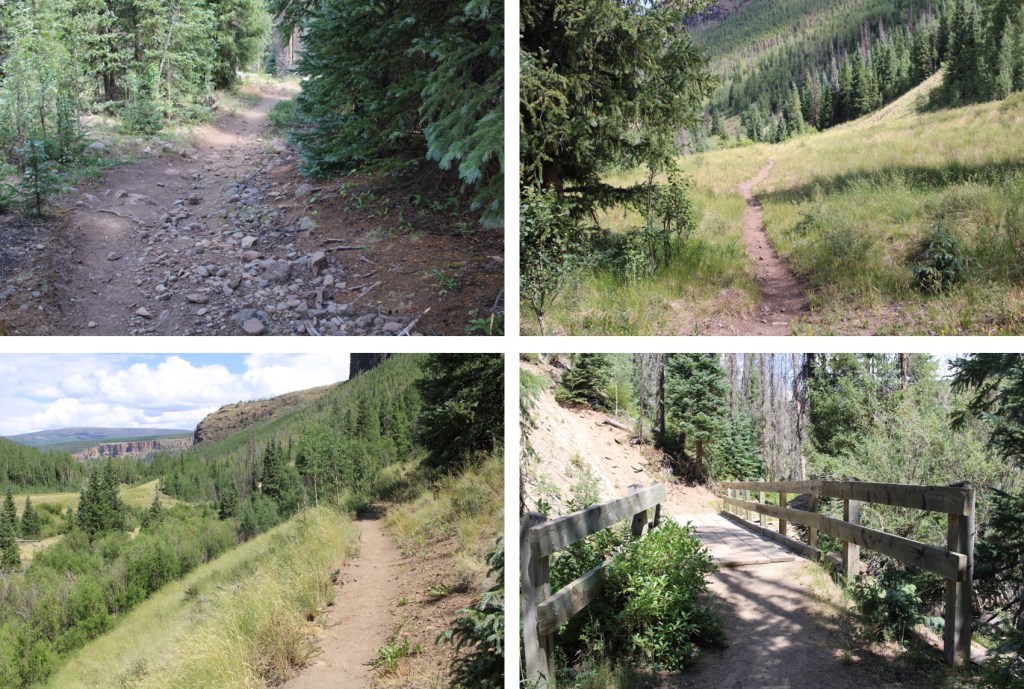
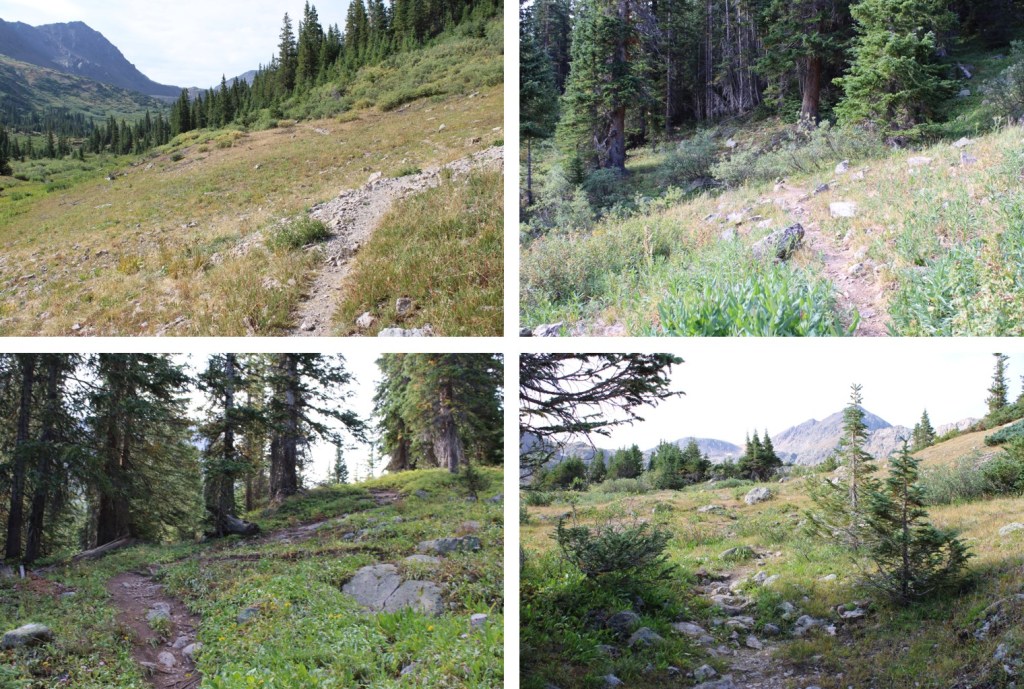
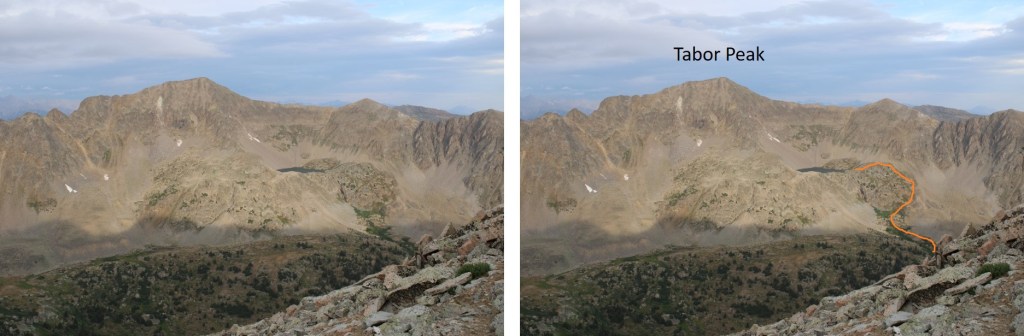
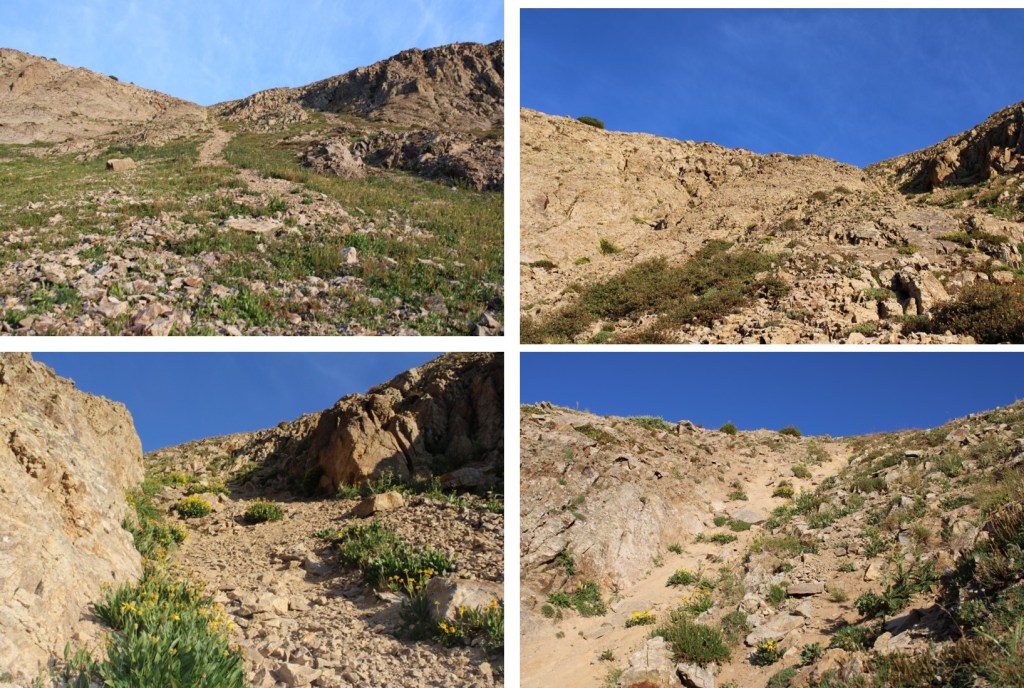
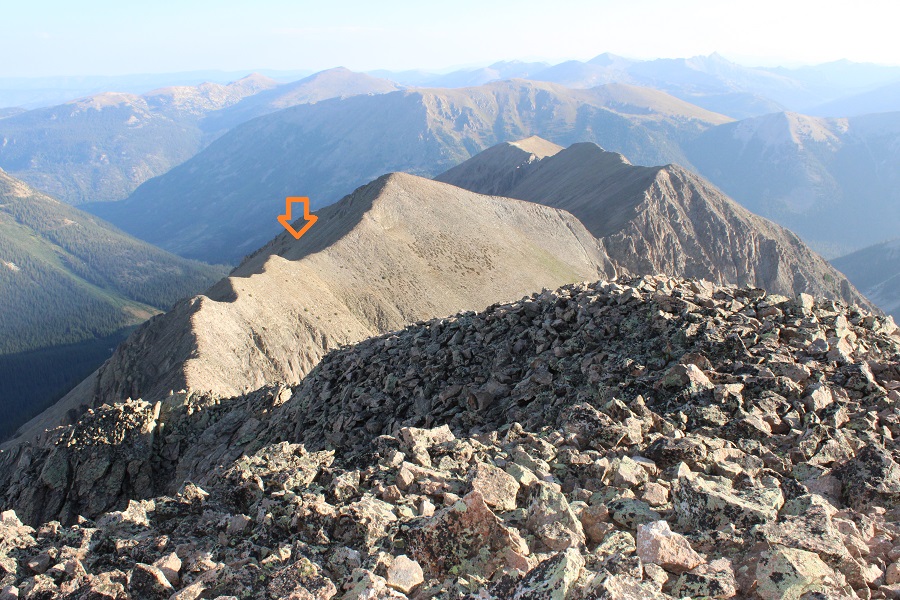
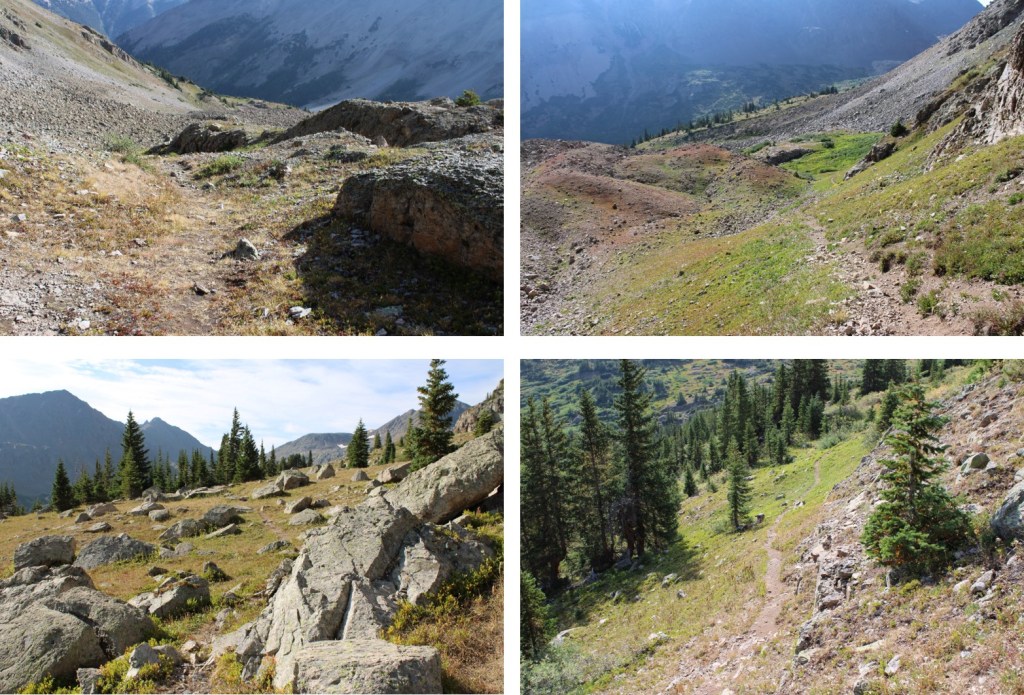
I followed this trail all the way to Tabor Lake. For reference, here’s a view from PT 13102 of the route

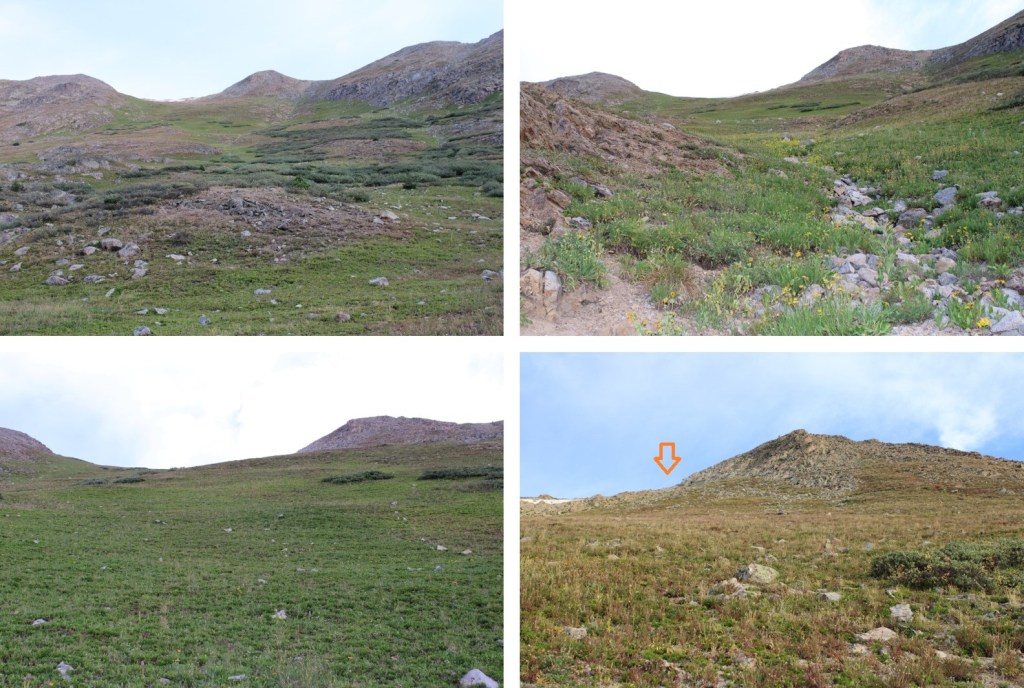
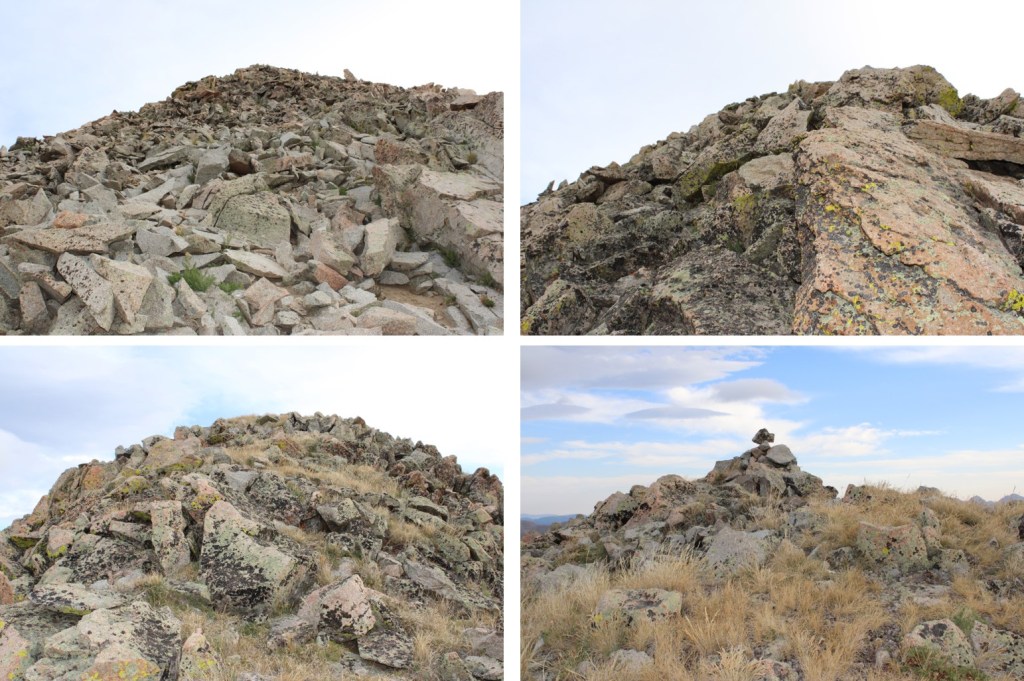
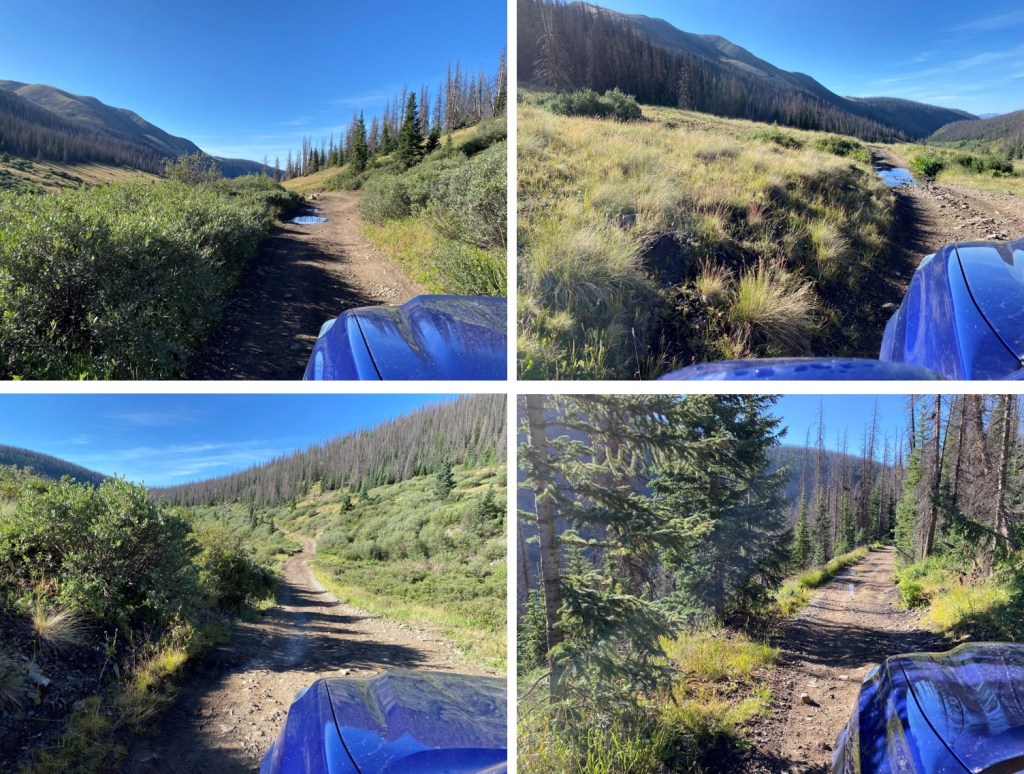
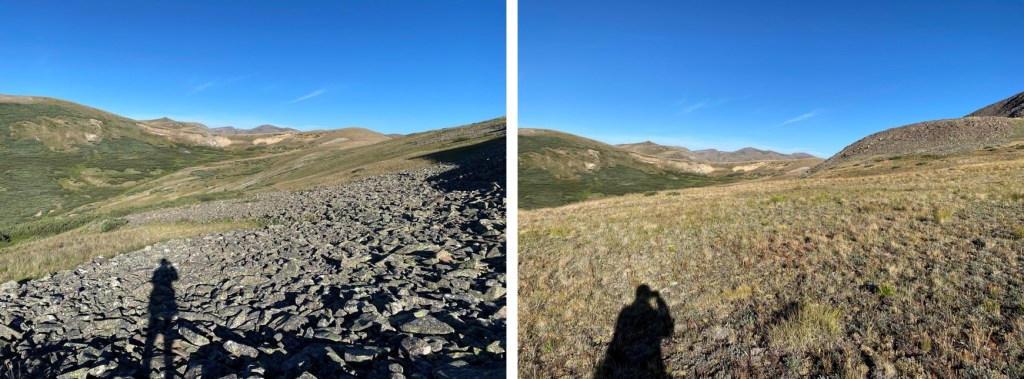
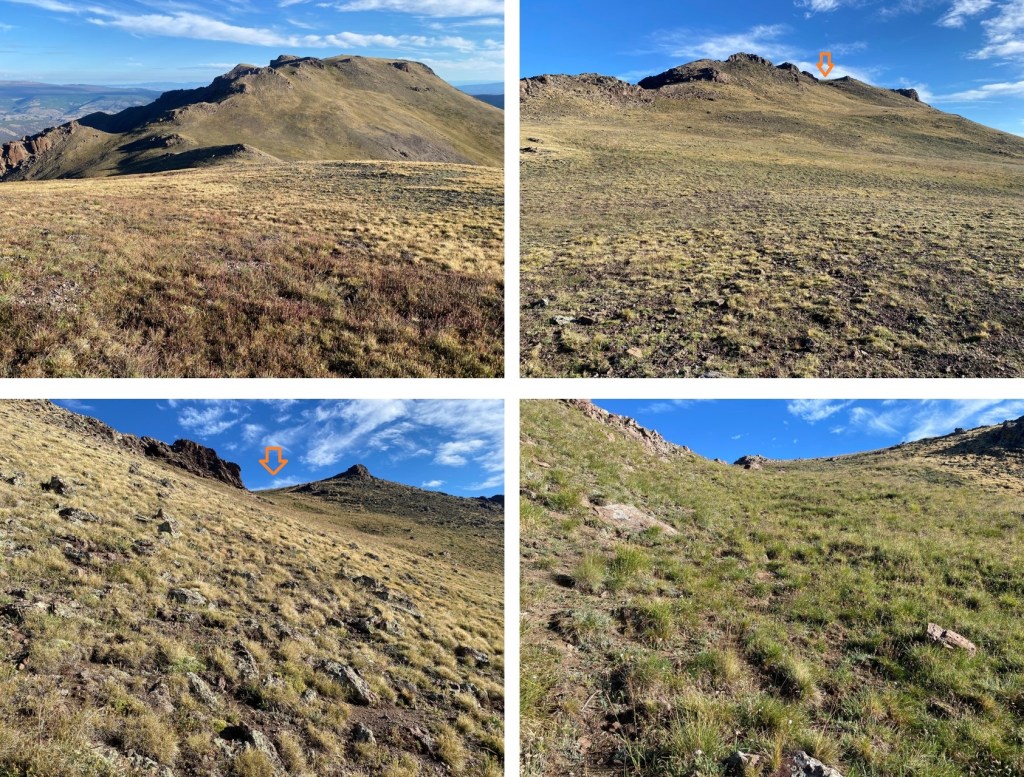
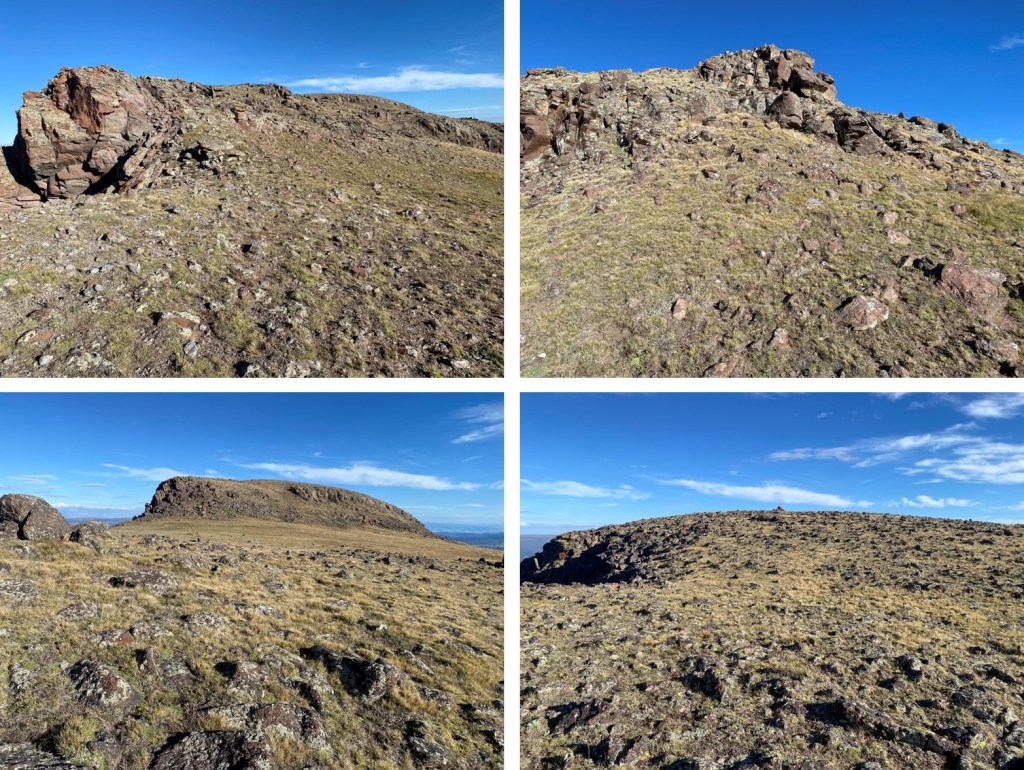
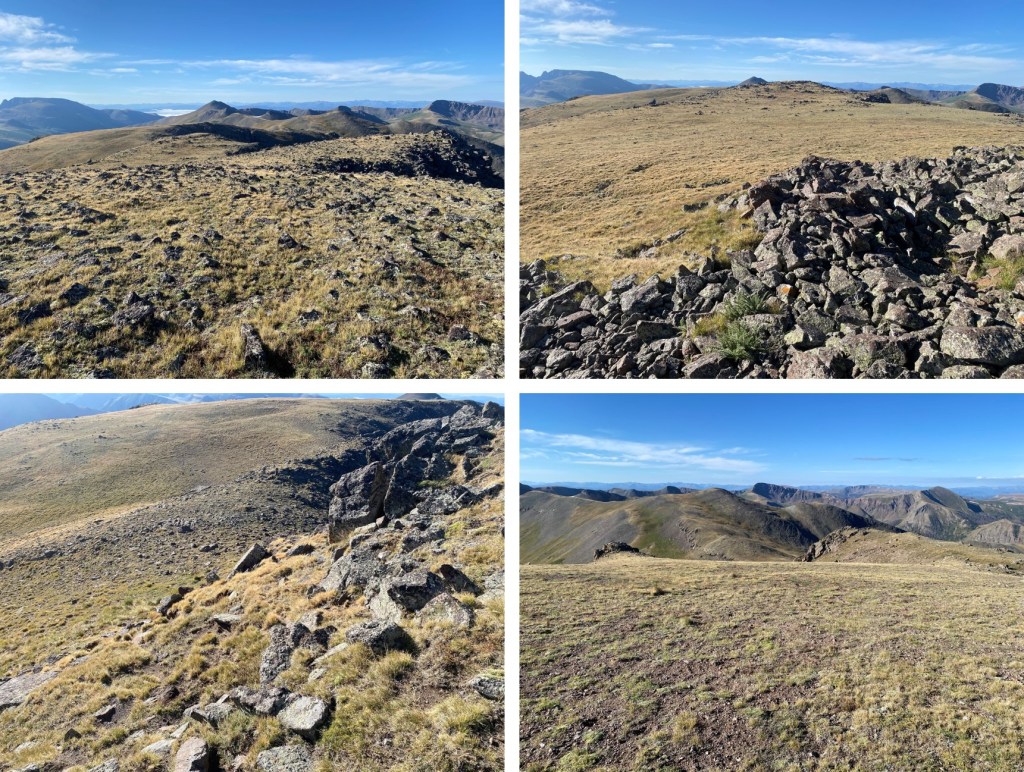
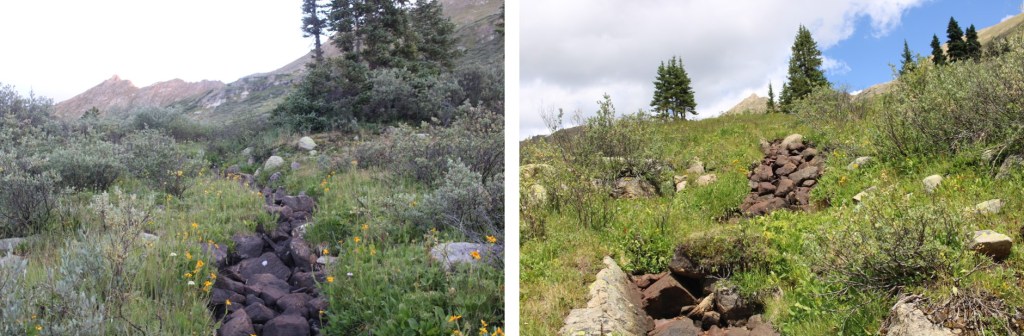
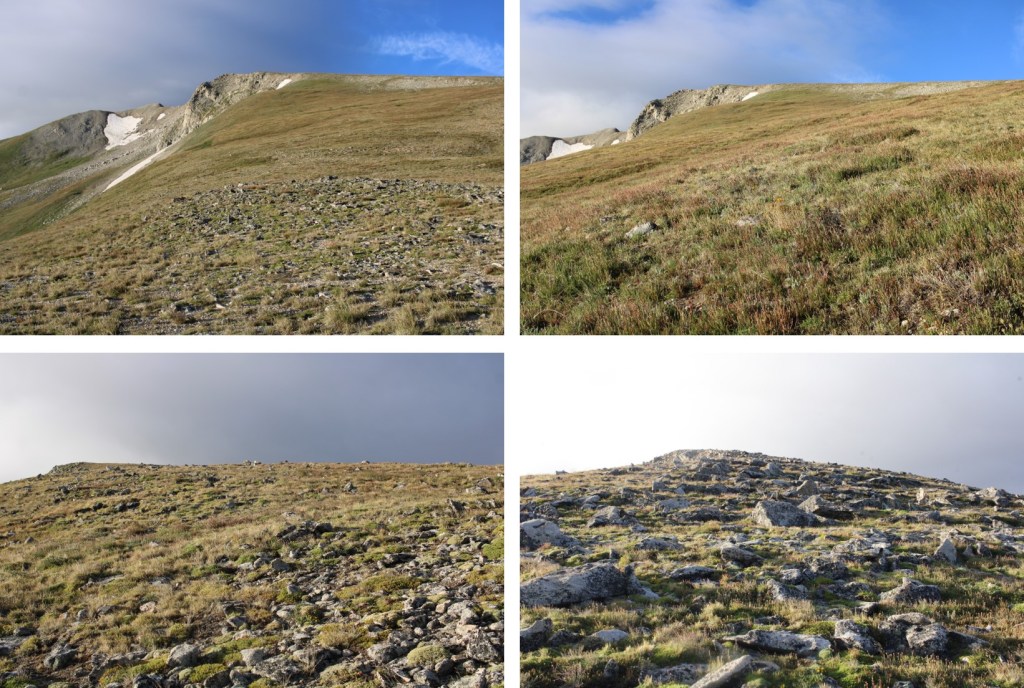
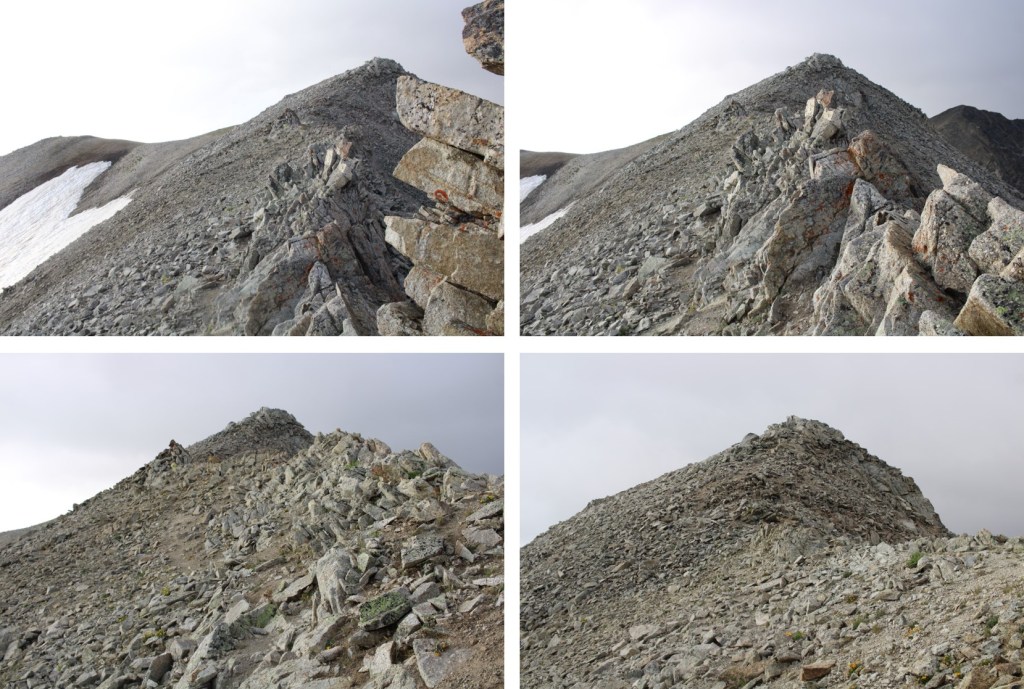
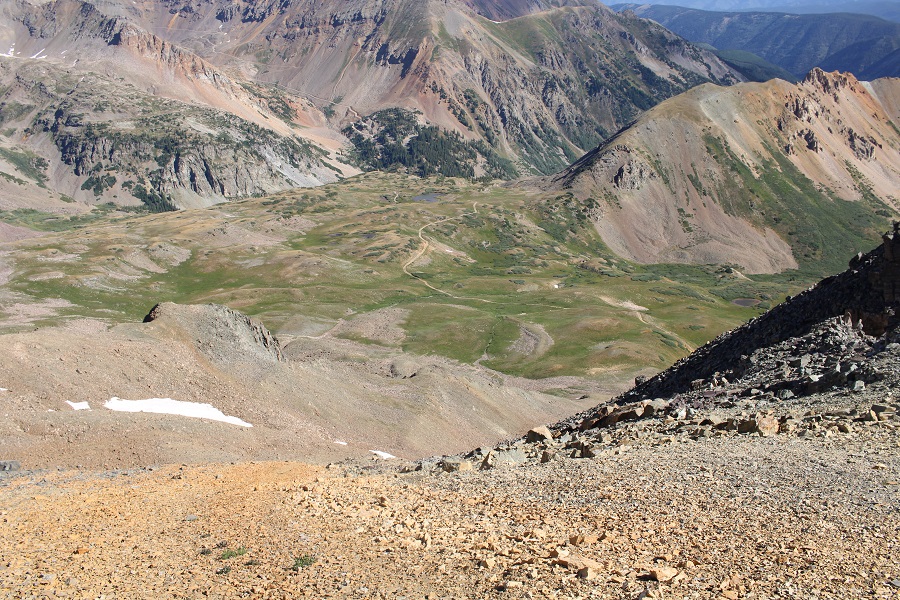
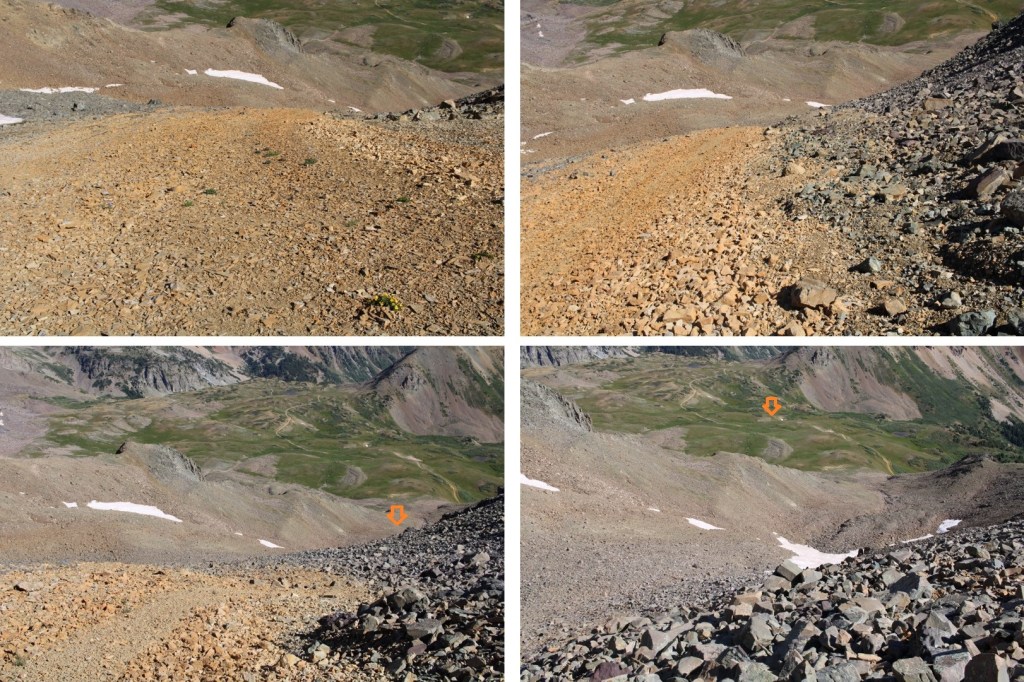
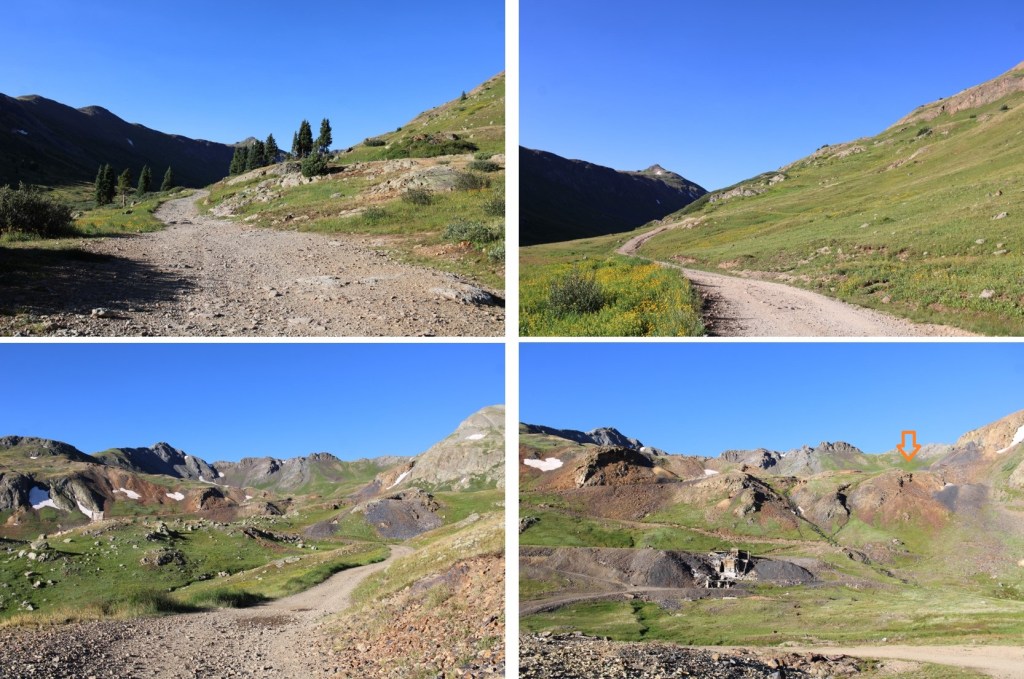
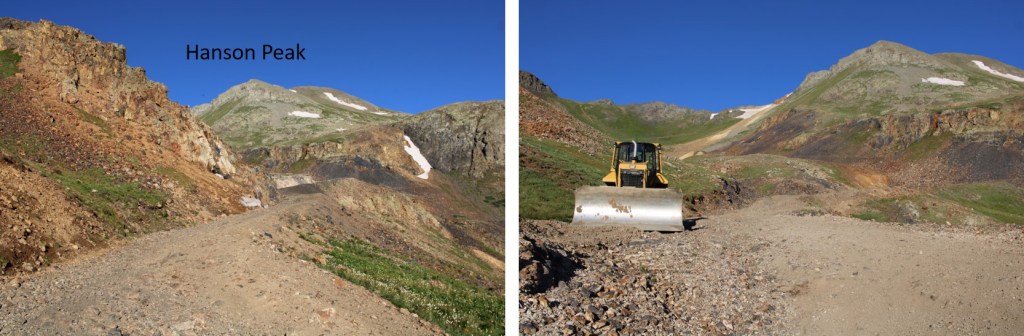
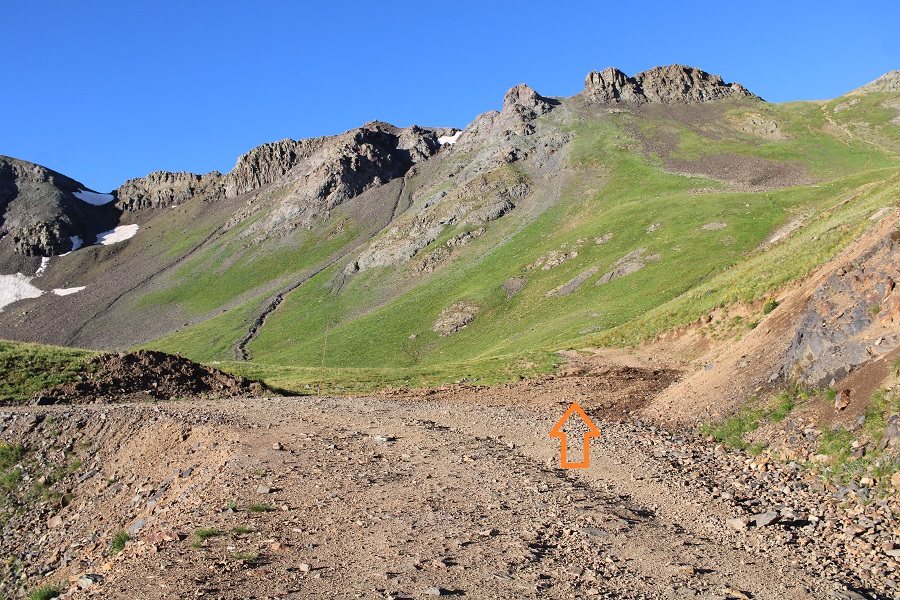
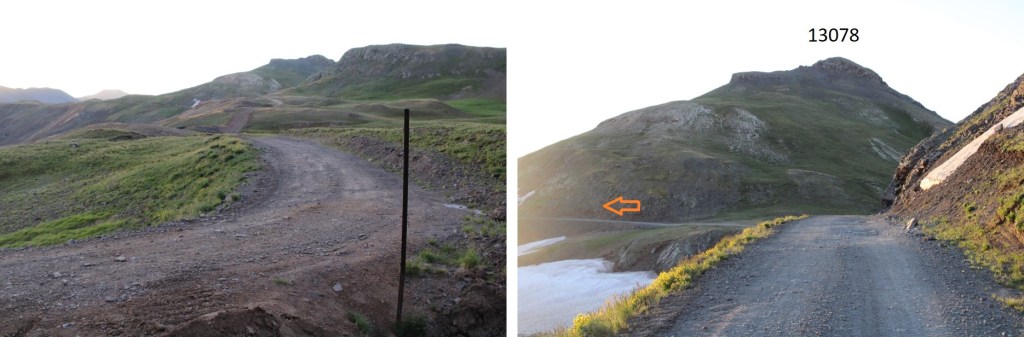
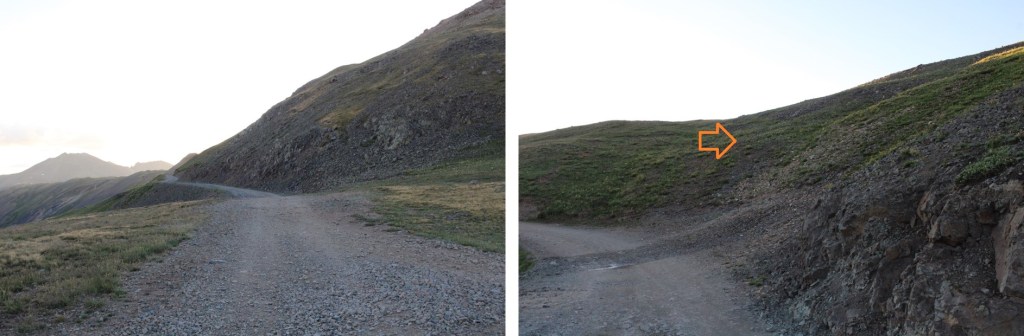
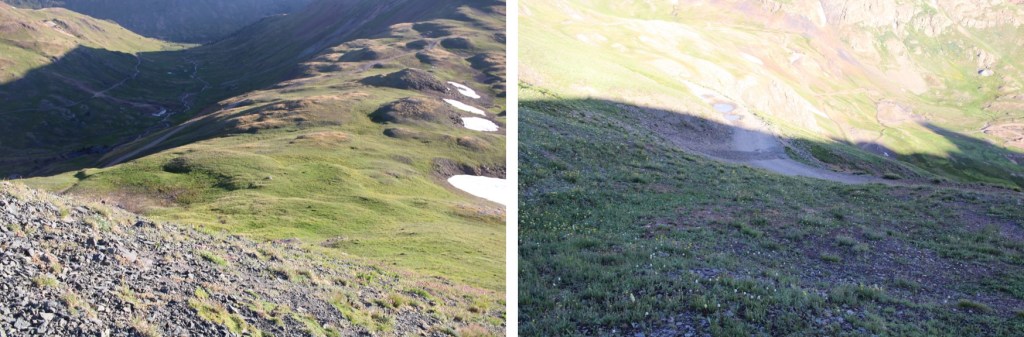
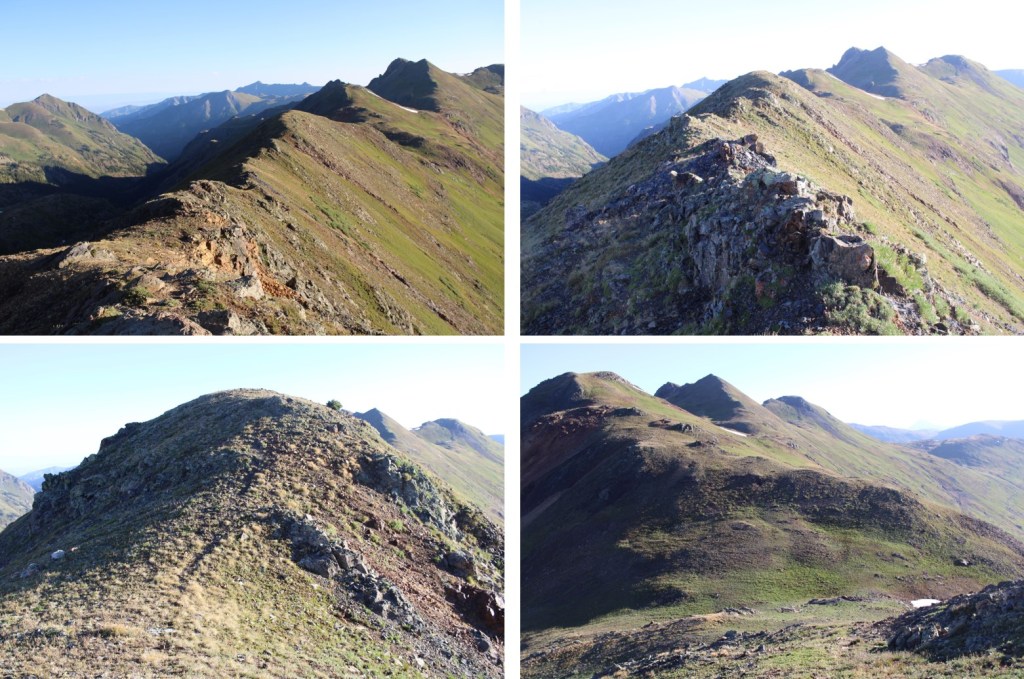
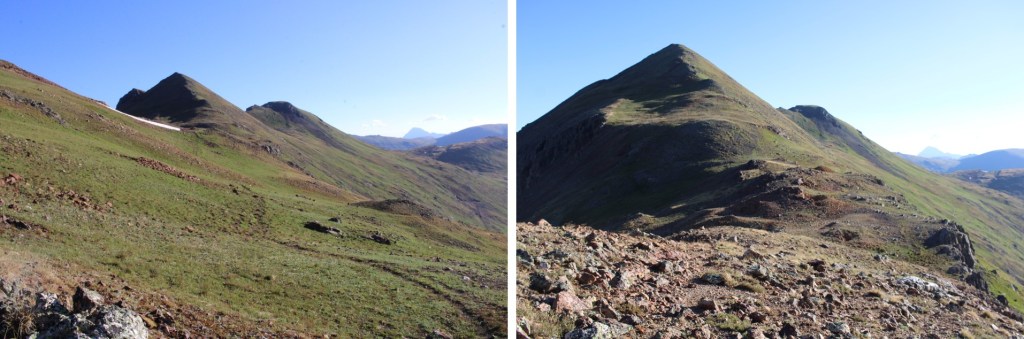
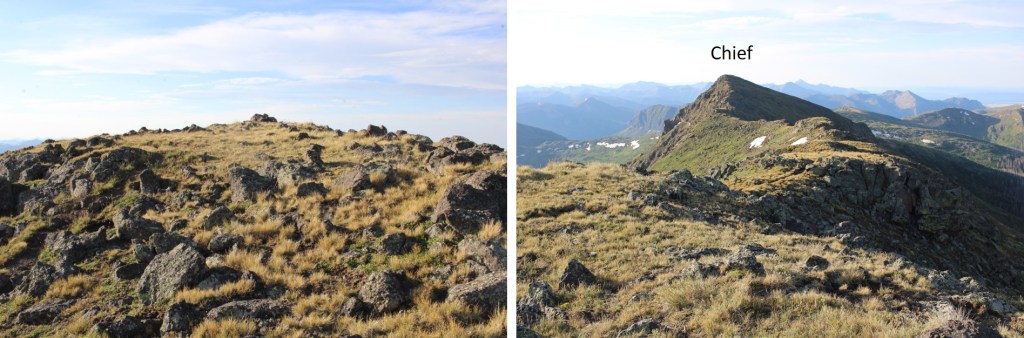
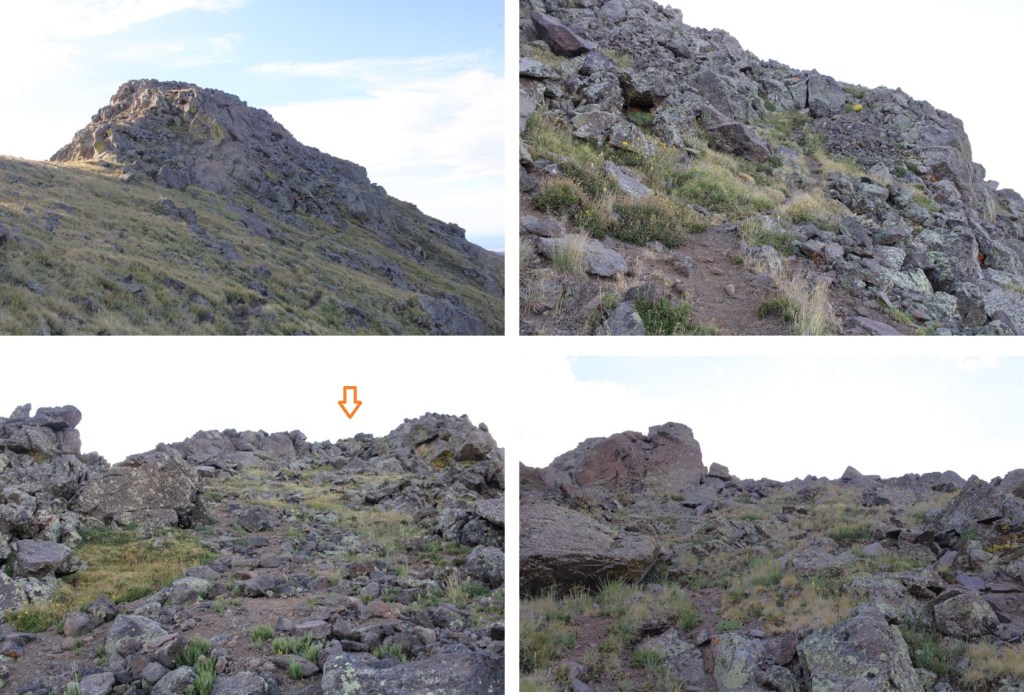
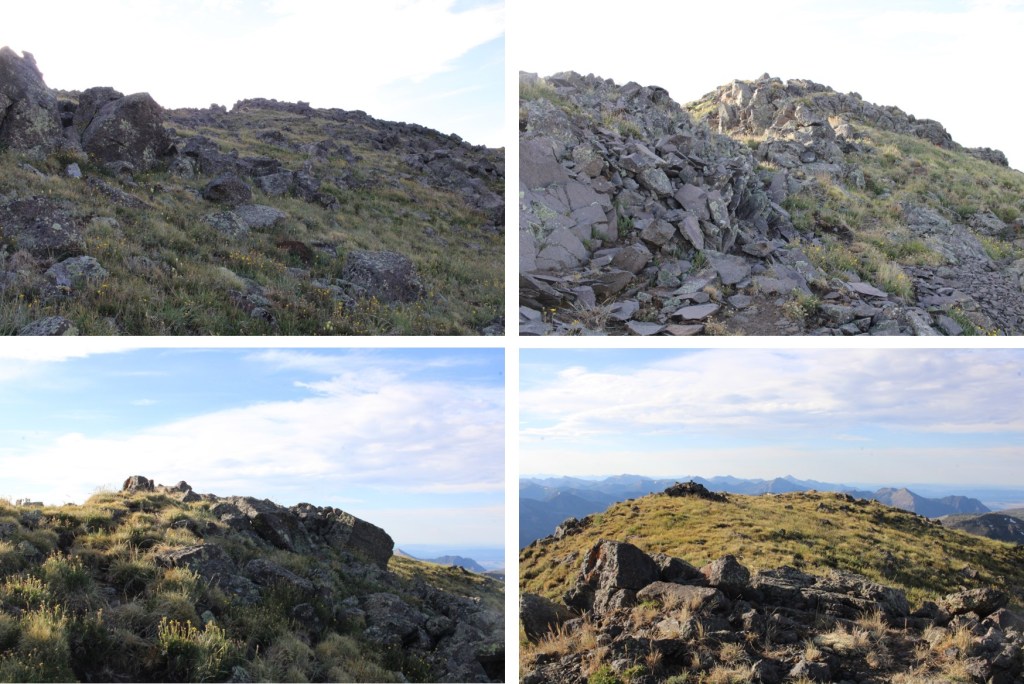
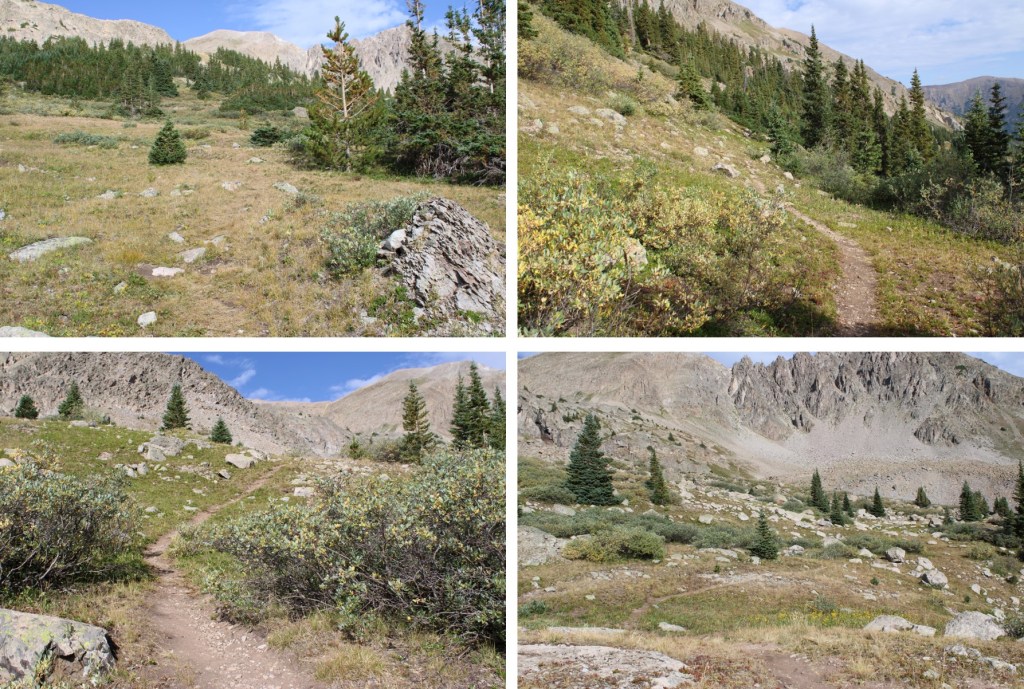
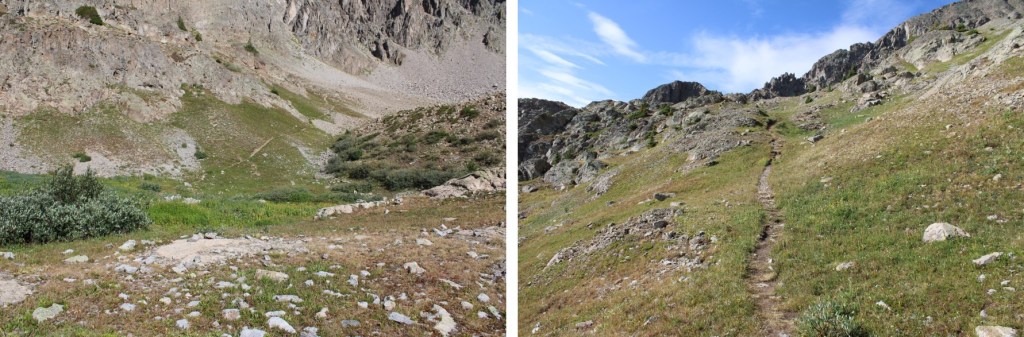
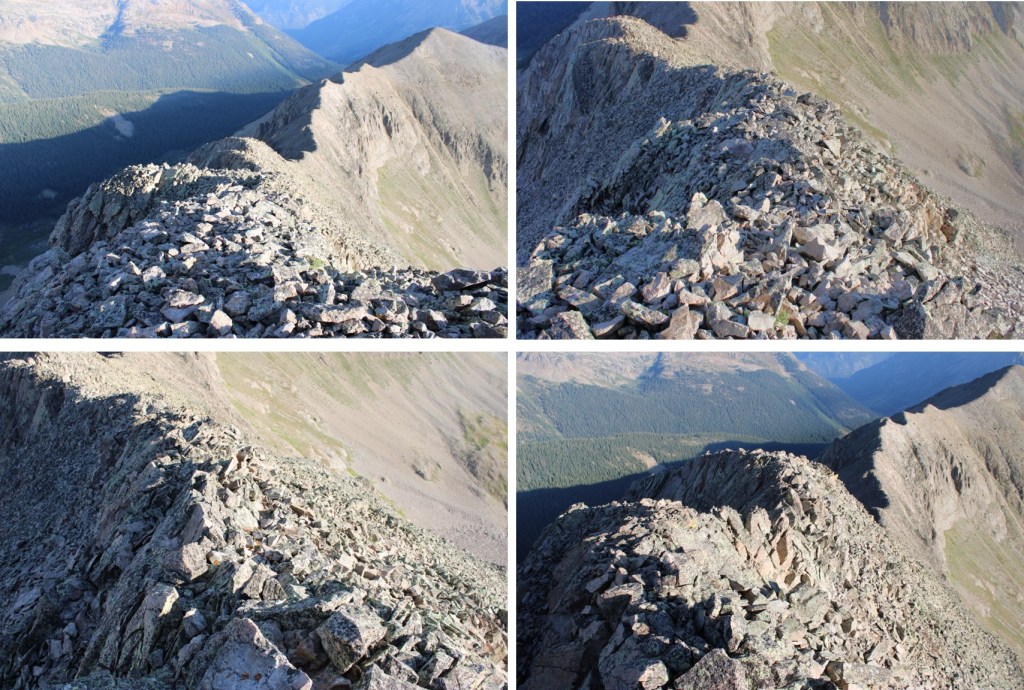
And some pictures of the terrain

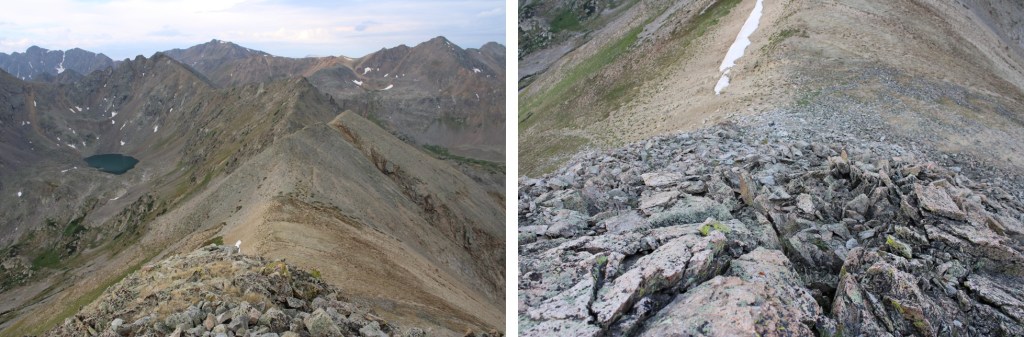
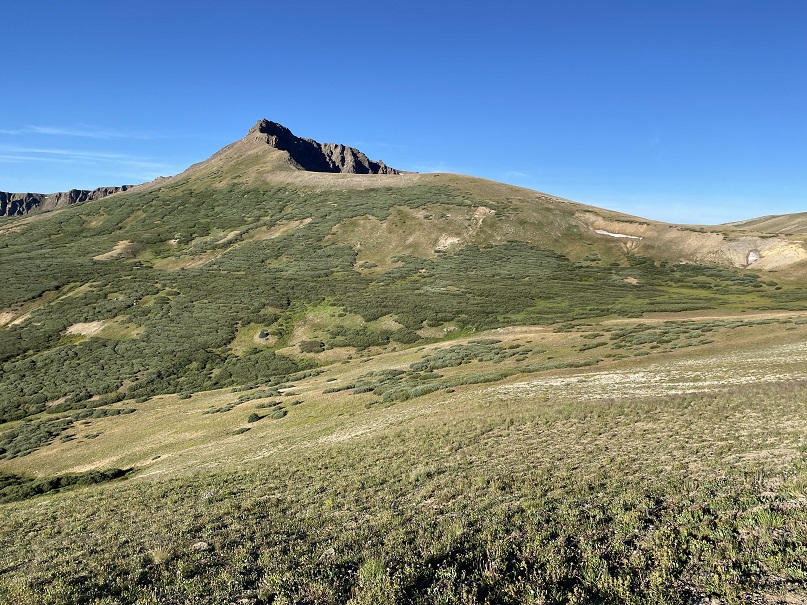
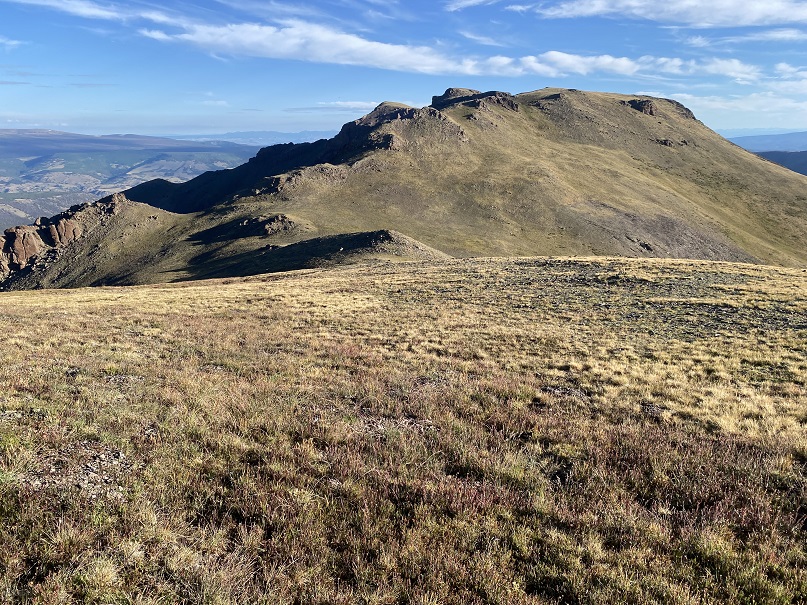
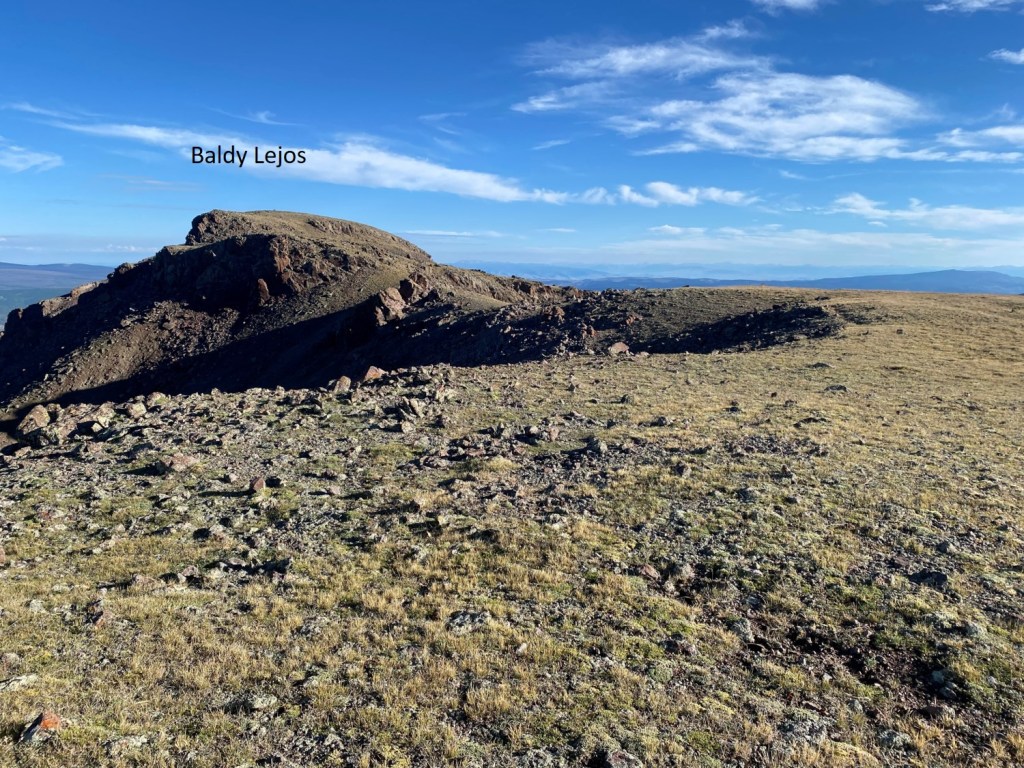
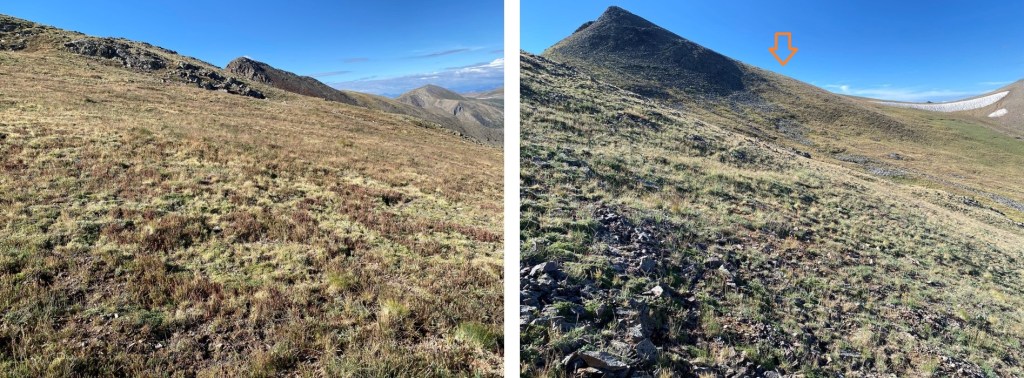
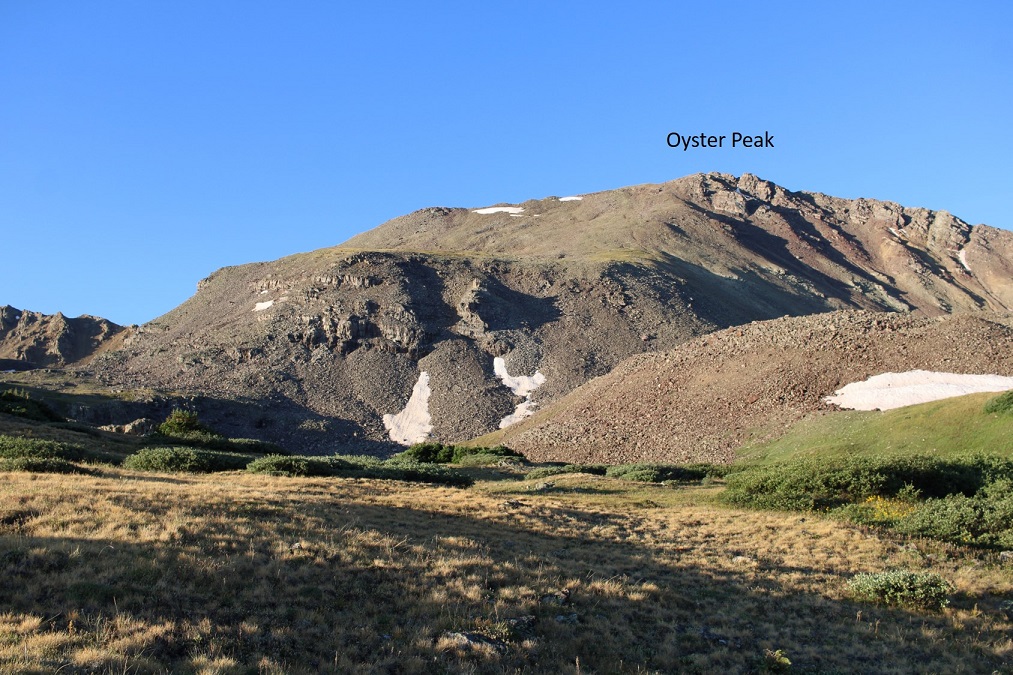
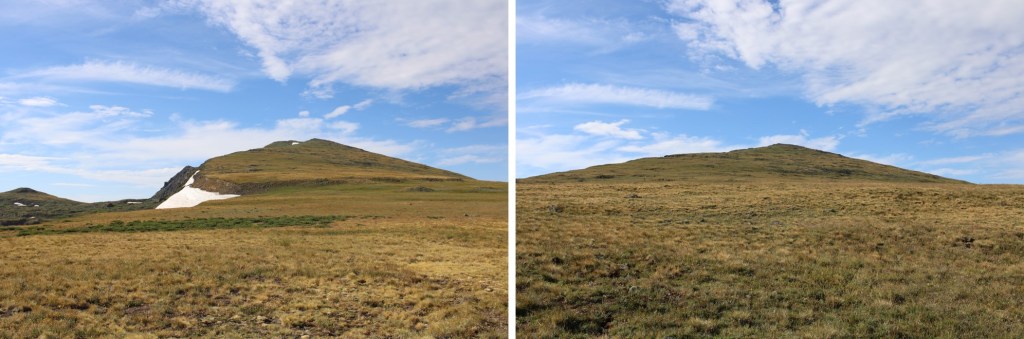
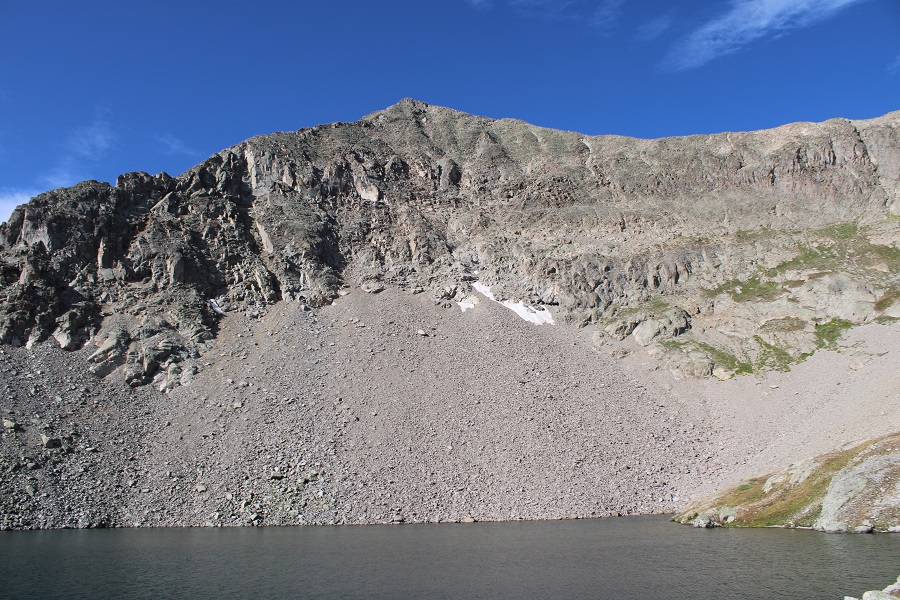
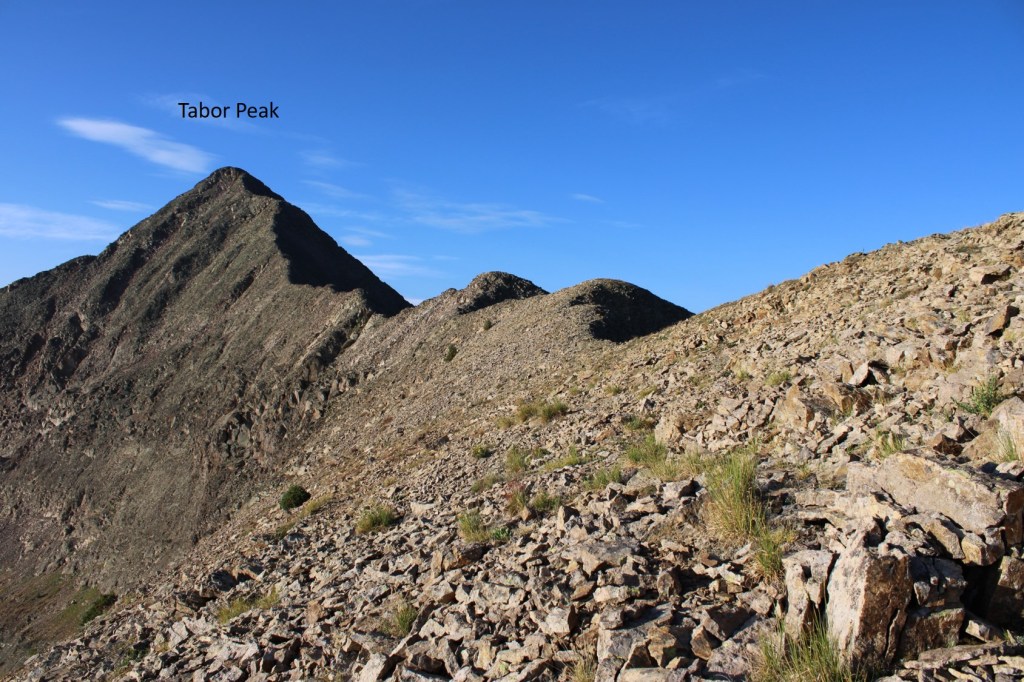
Tabor Lake and Tabor Peak

I skirted the lake to the north

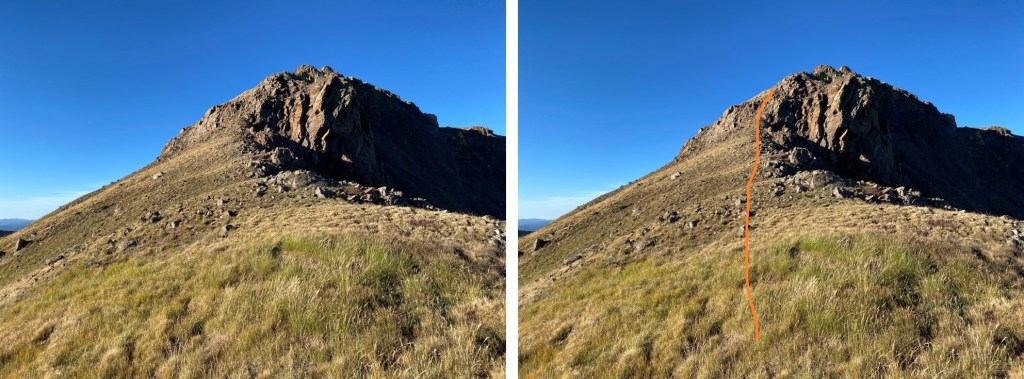
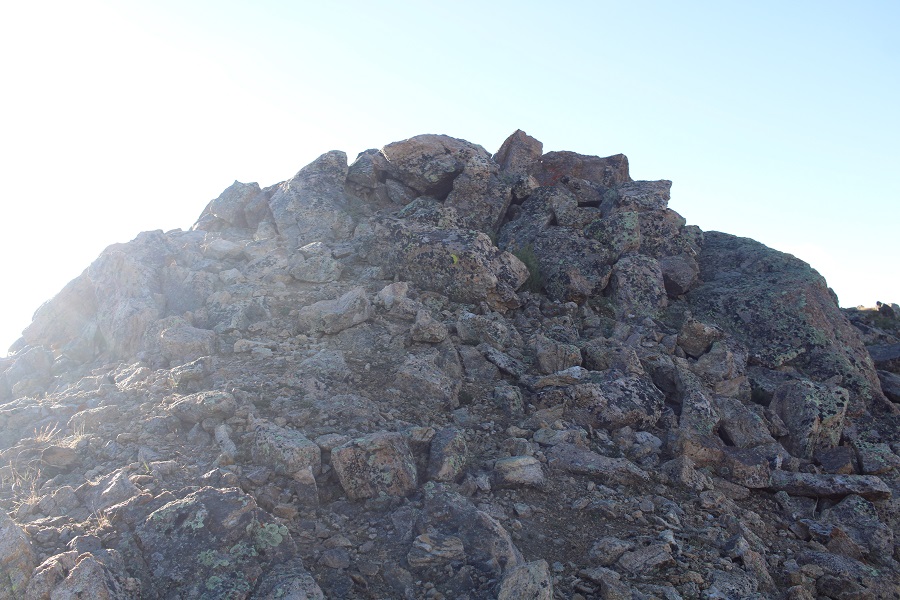
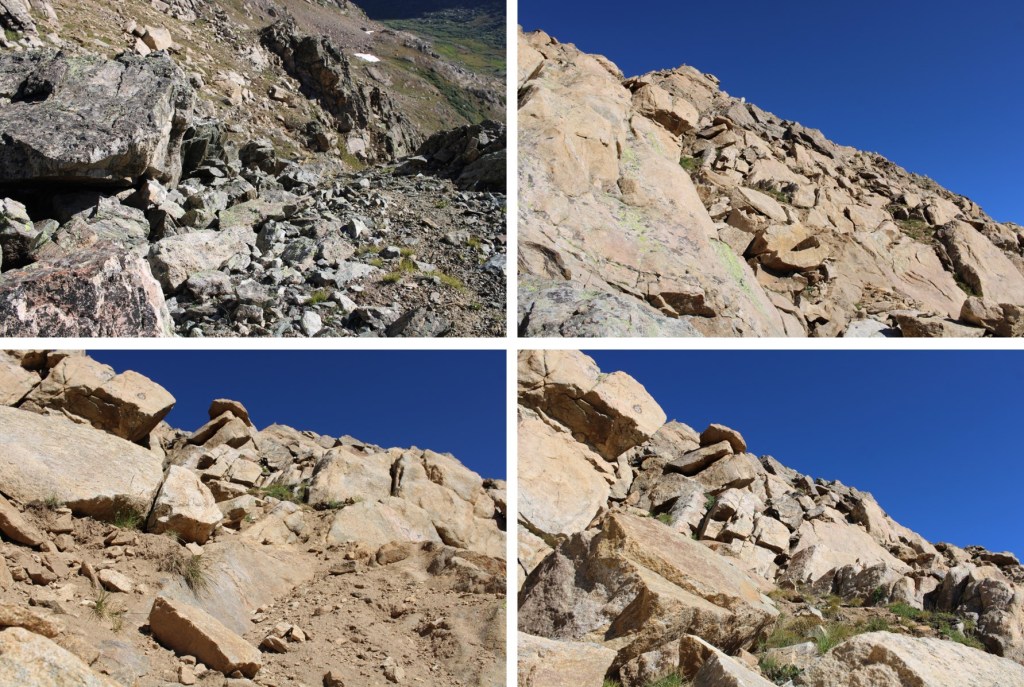
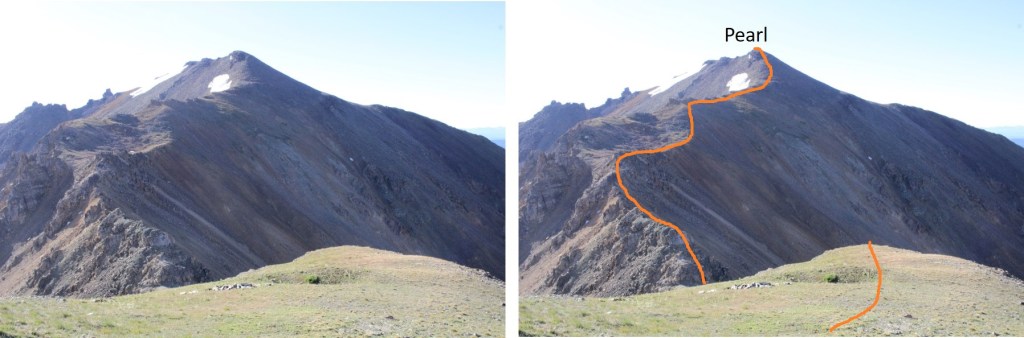
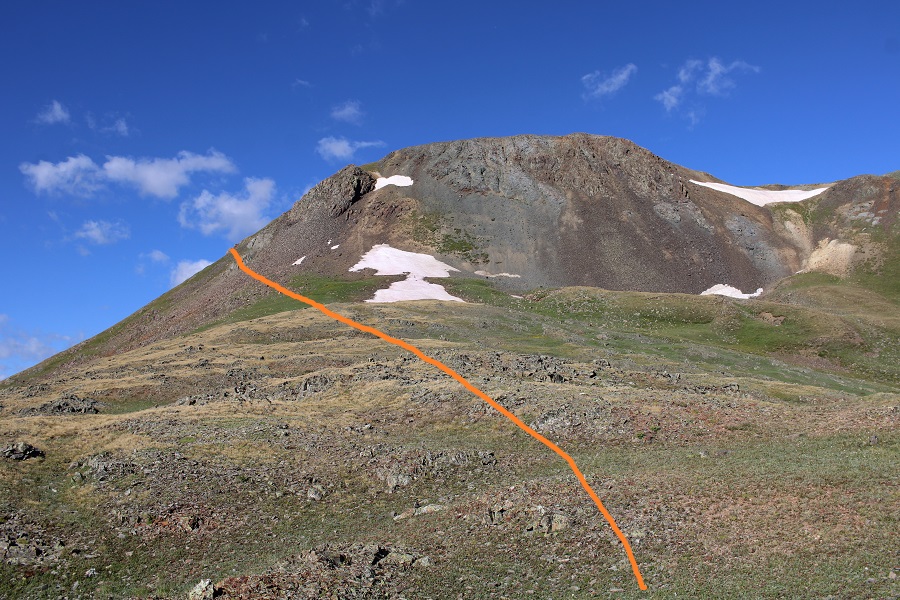
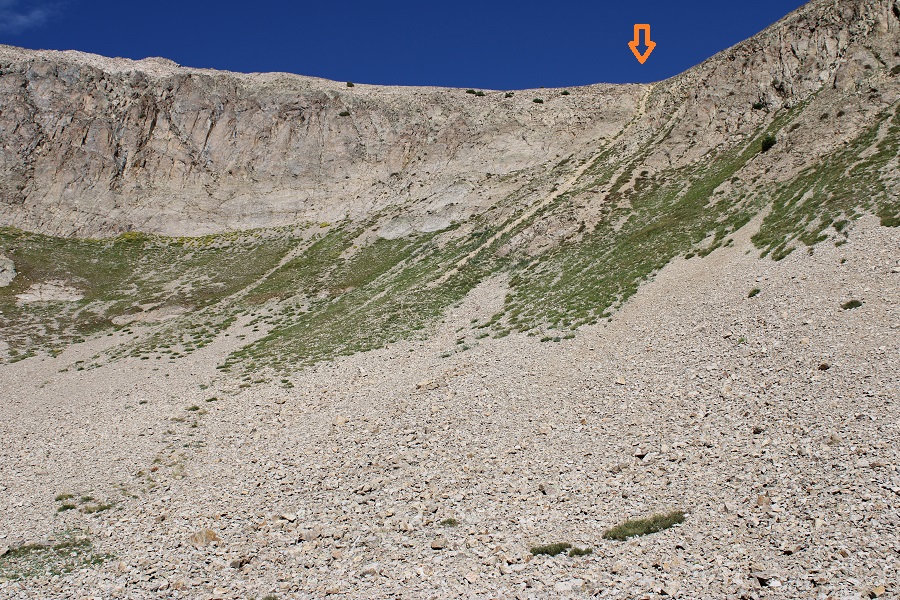
Then sat down and put on my microspikes,  My next goal was to make it to the top of this gully

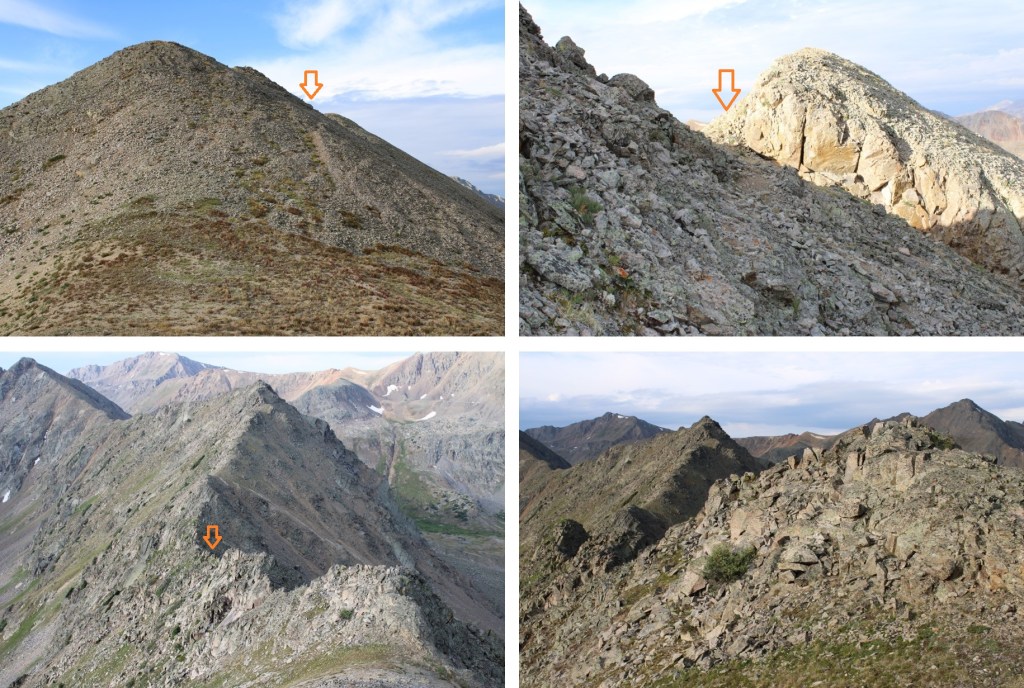
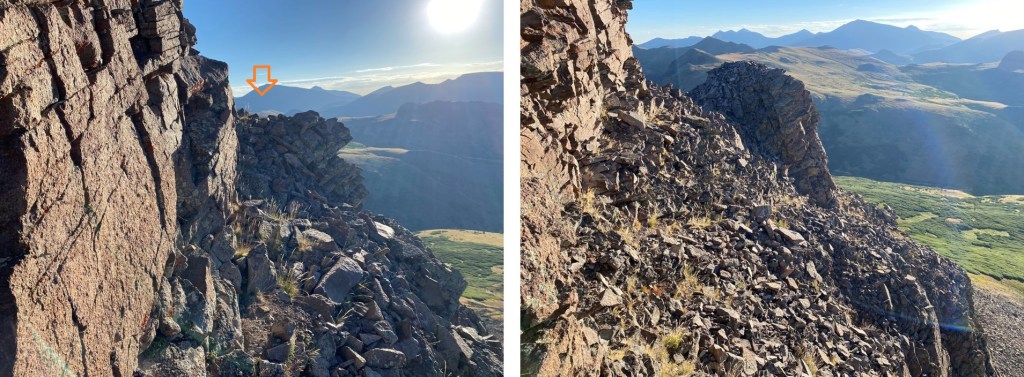
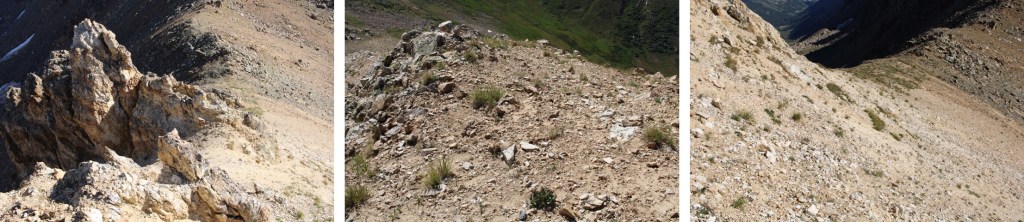
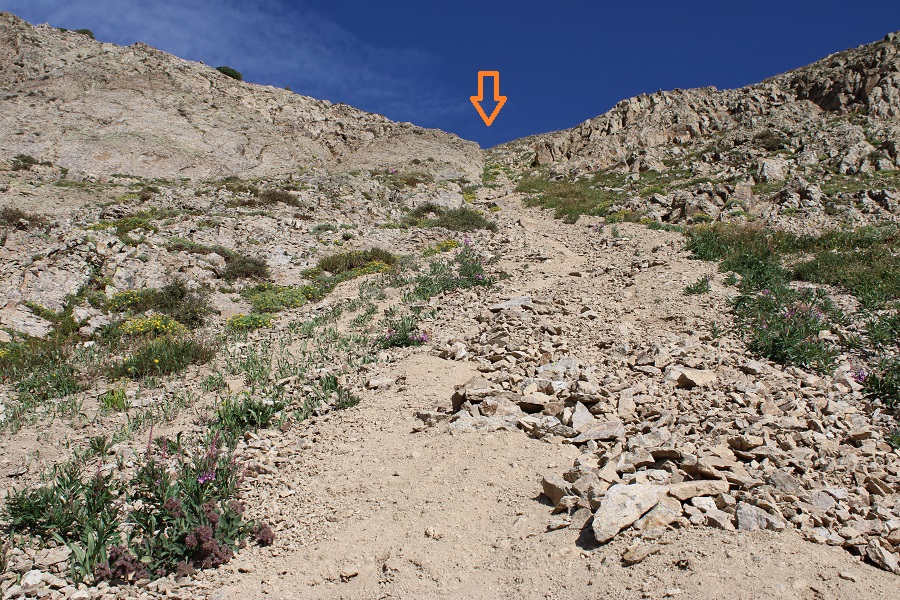
The gully doesn’t really look that bad, and for the first third of it or so, it wasn’t. There was plenty of scree to use for footholds, and it was easy climbing.  However, the further up I went, the less and less scree there was, and more and more hard, compact dirt.  I wasn’t able to get a footing on the dirt, even in microspikes, and ended up ascending via the rocky area to the left.  This was better, but not much. The rock was steep and filled with kitty litter.  I still felt safer on the rocks than I did in the gully.  You can also take the rocks to the right.  I felt this would have been much easier with snow.  Here are some of your options:

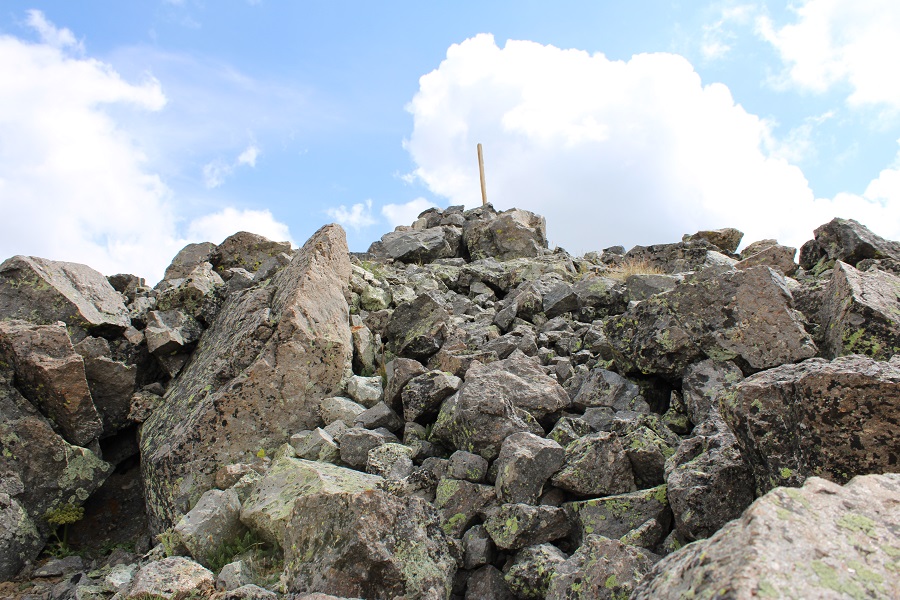
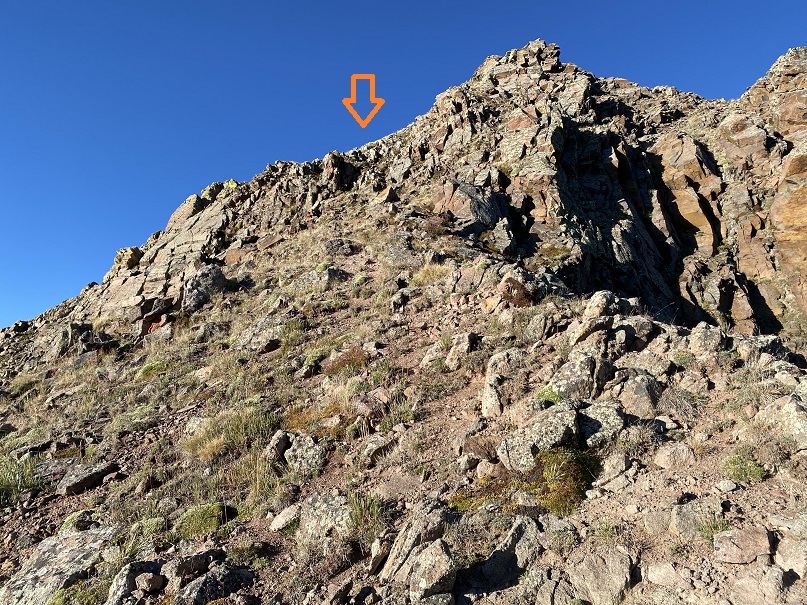
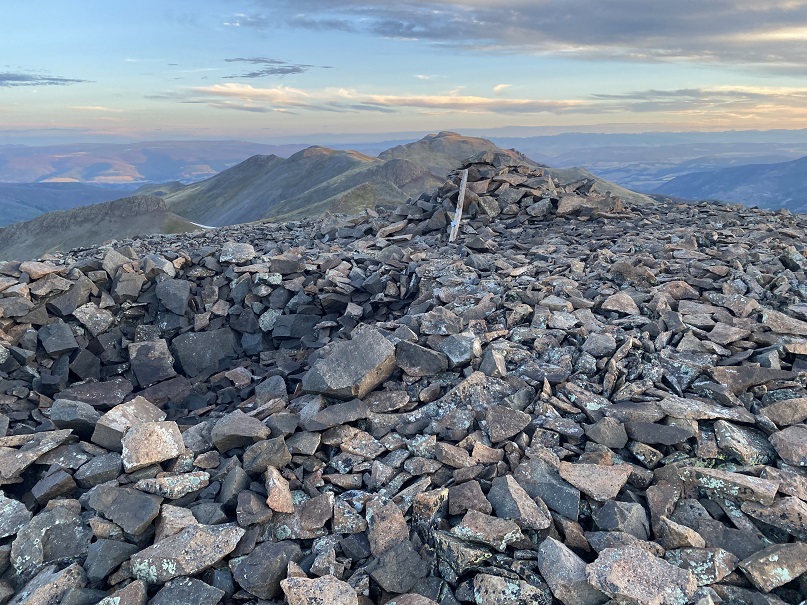
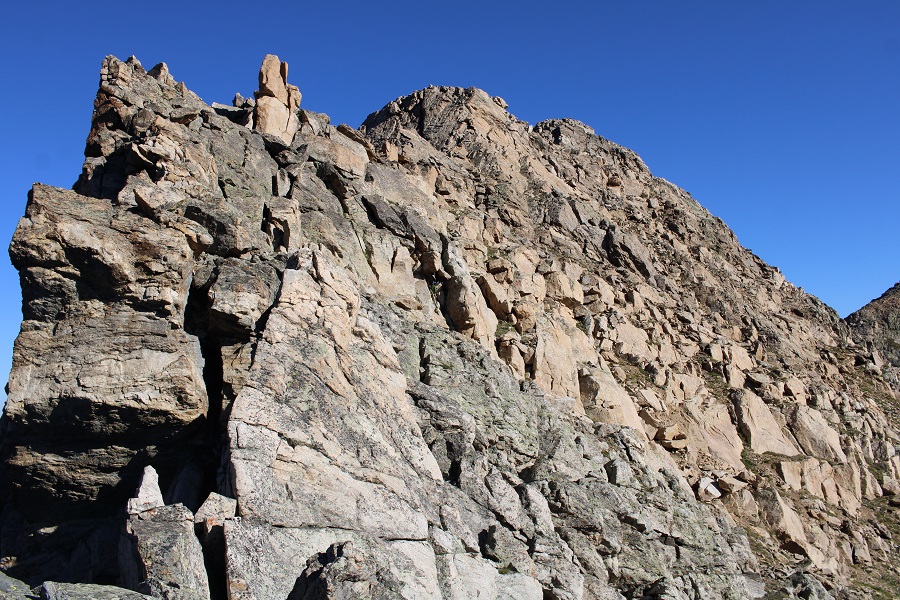
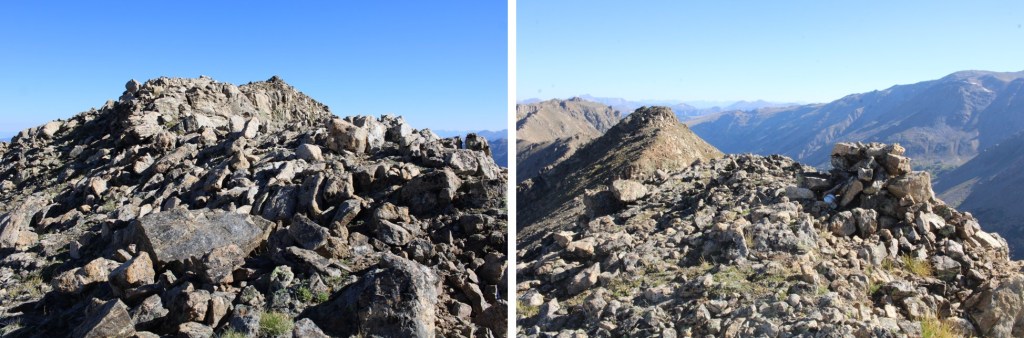
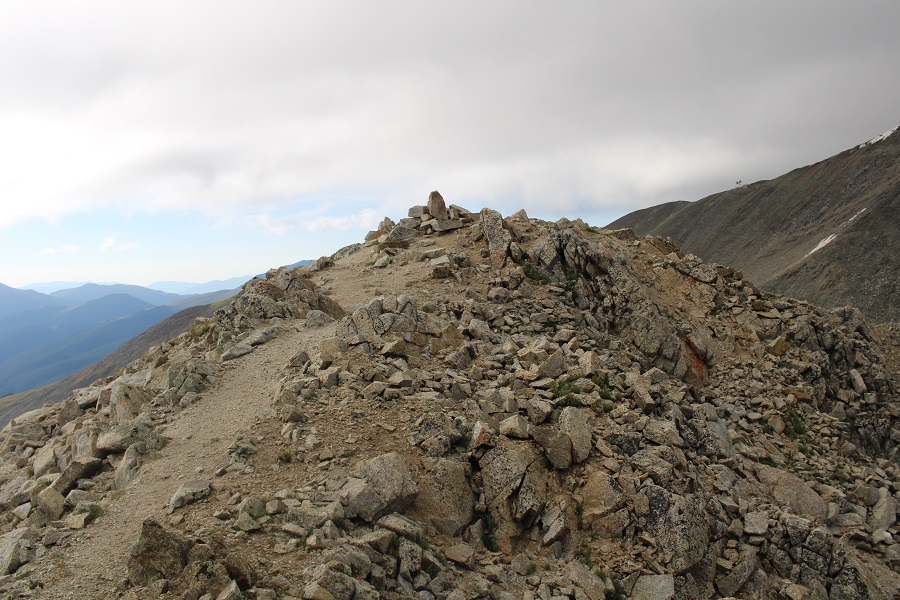
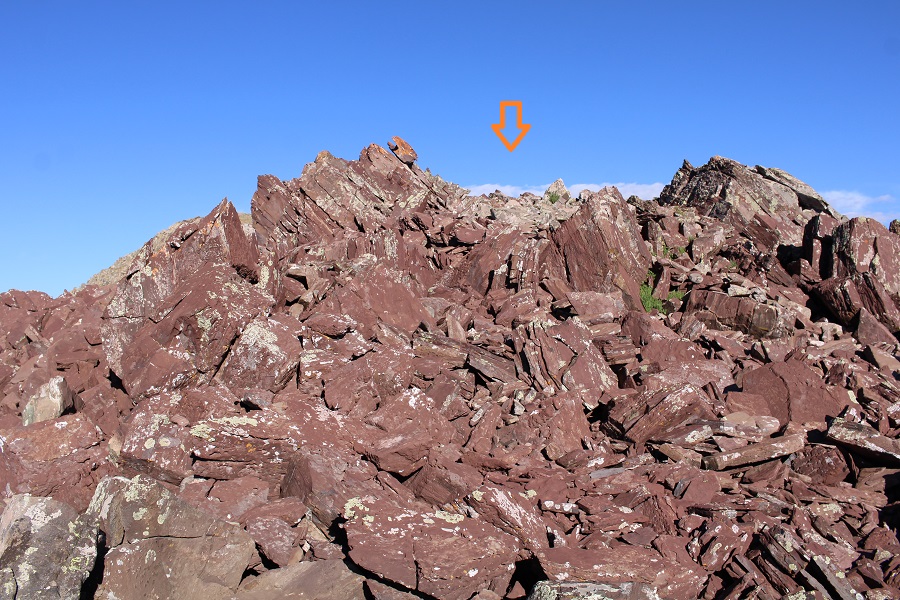
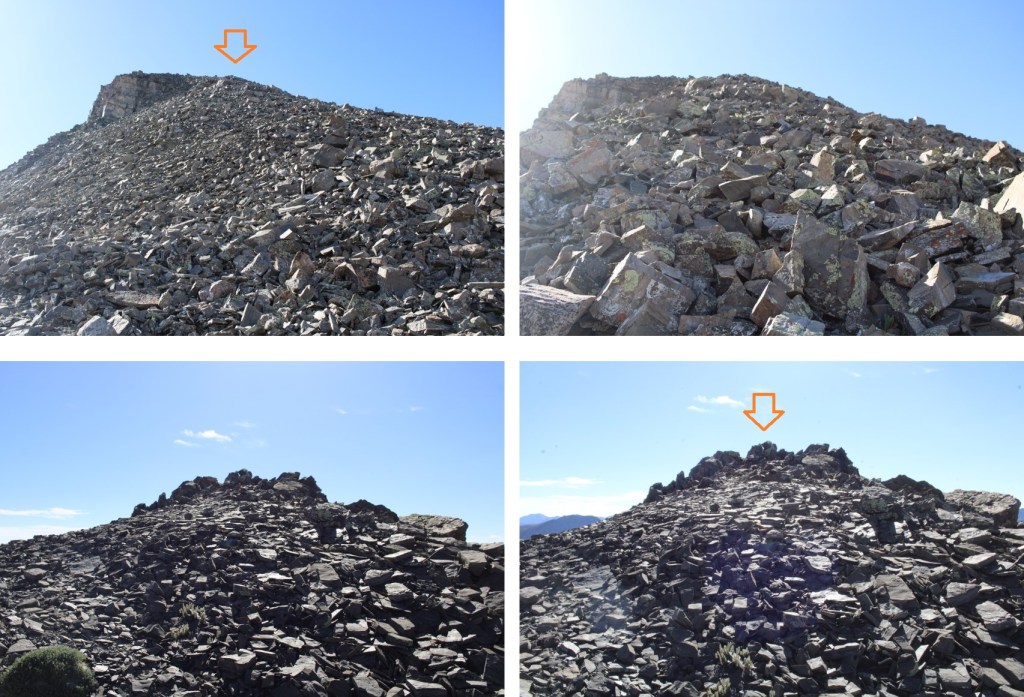
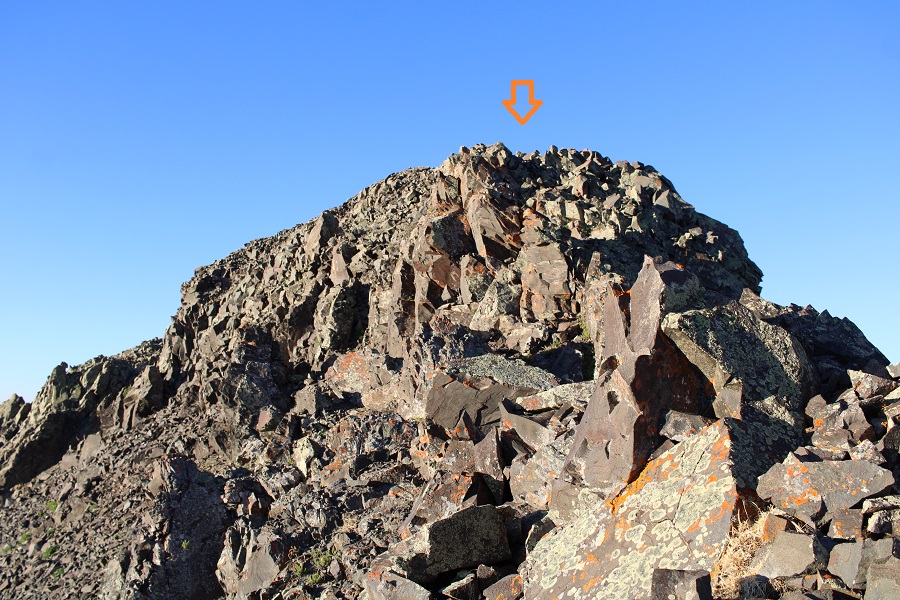
At the top of the gully was a cairn to congratulate me

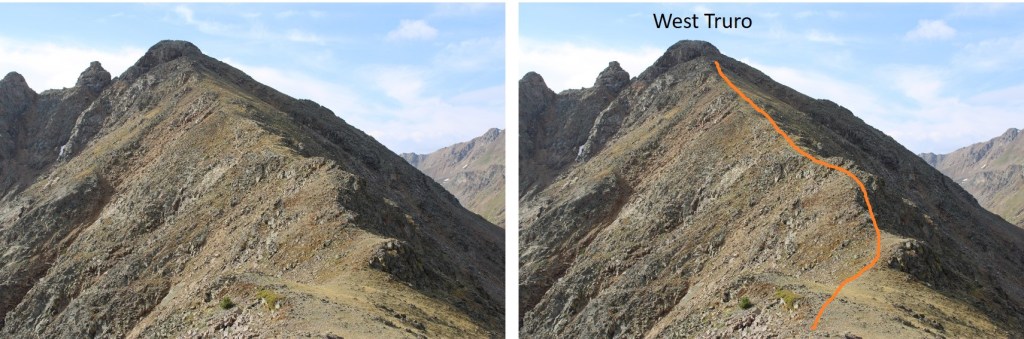
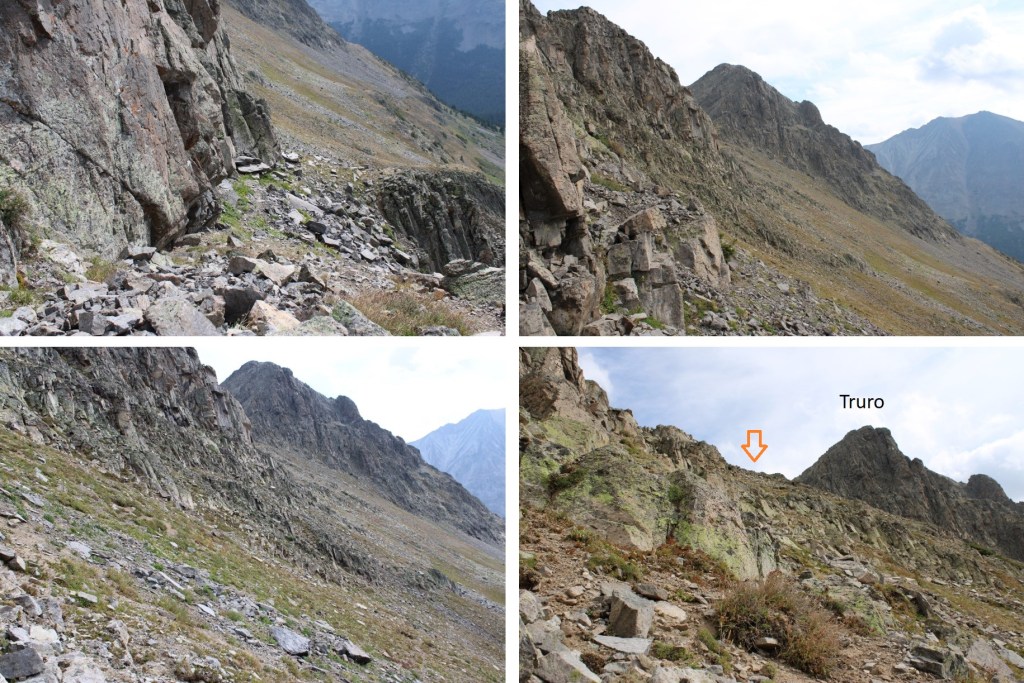
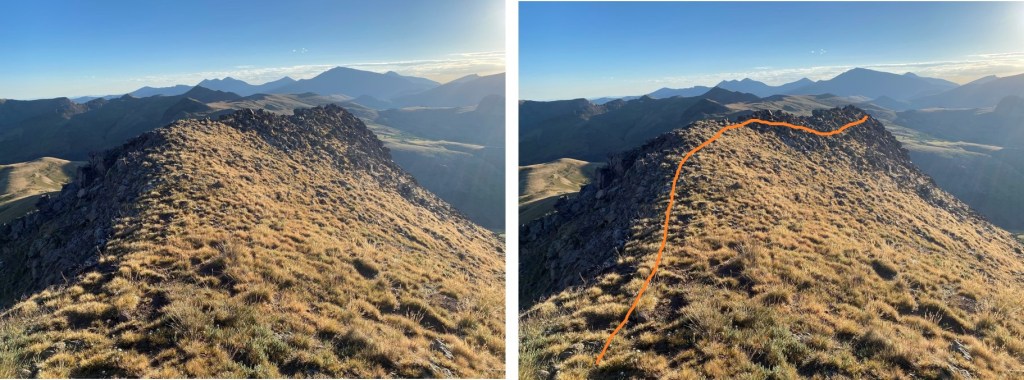
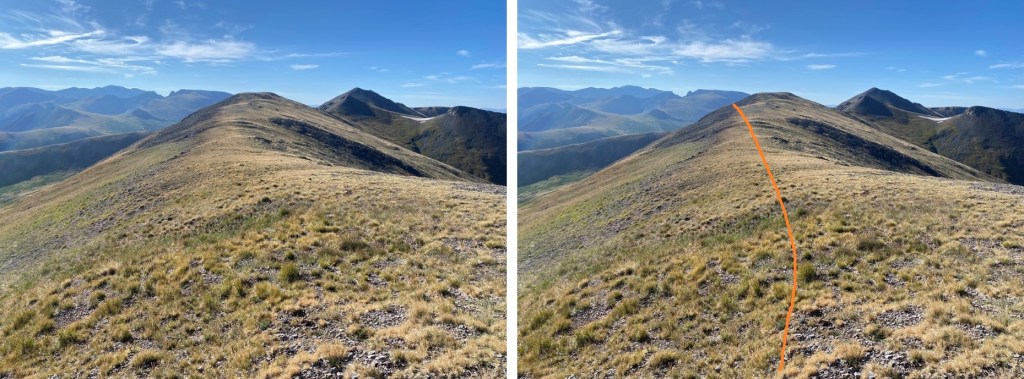
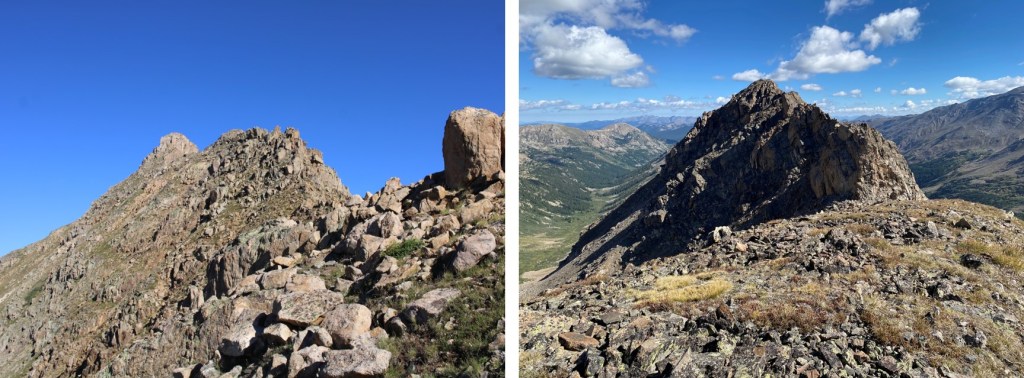
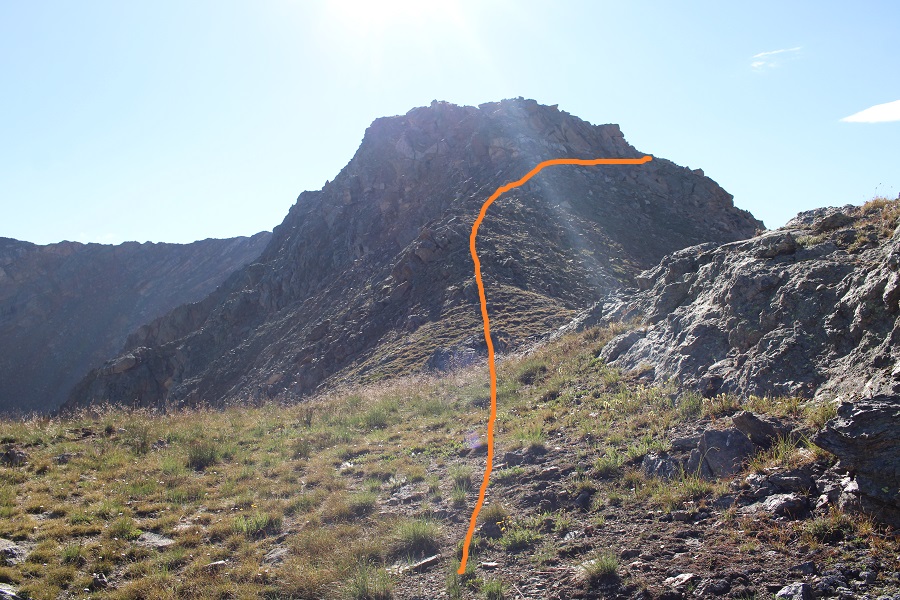
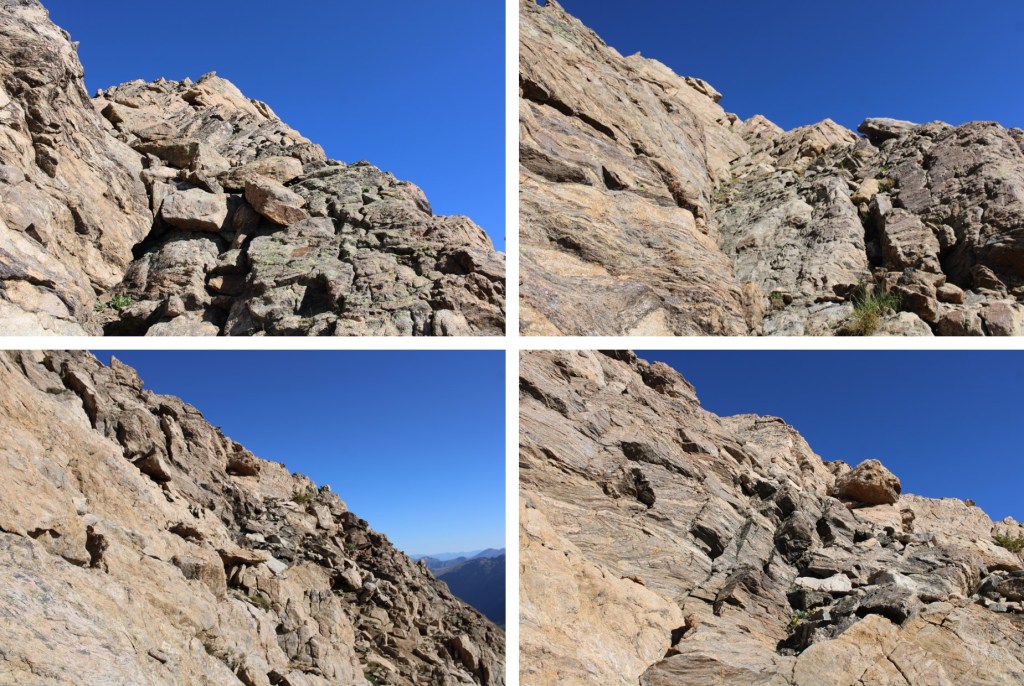
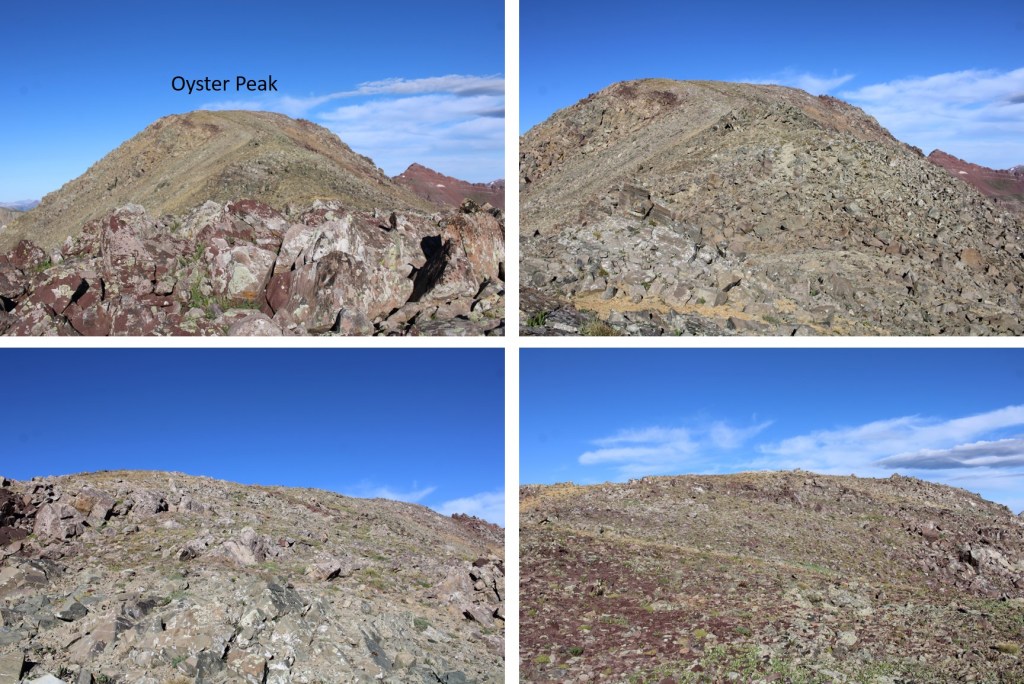
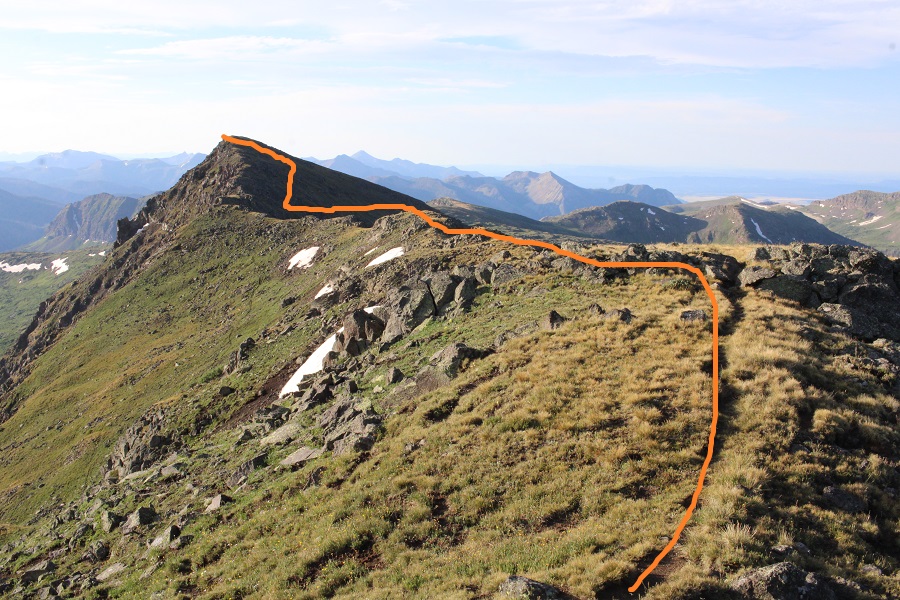
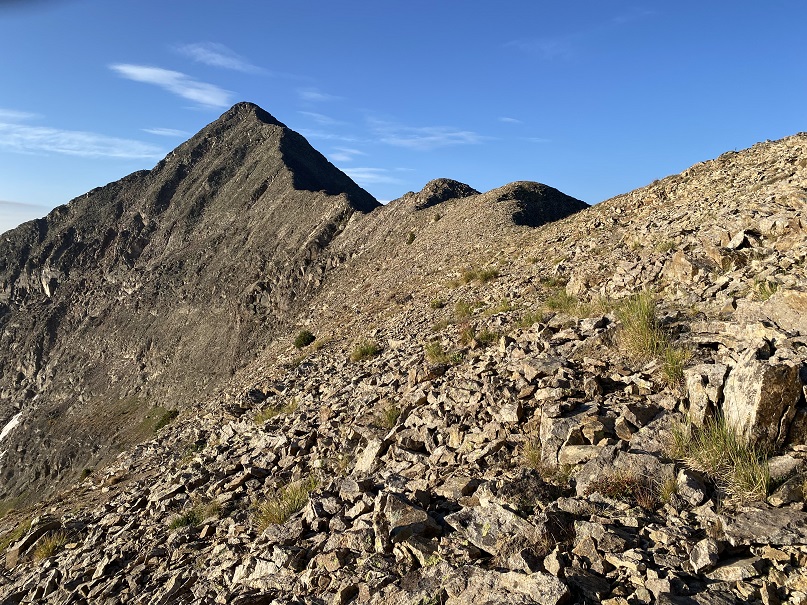
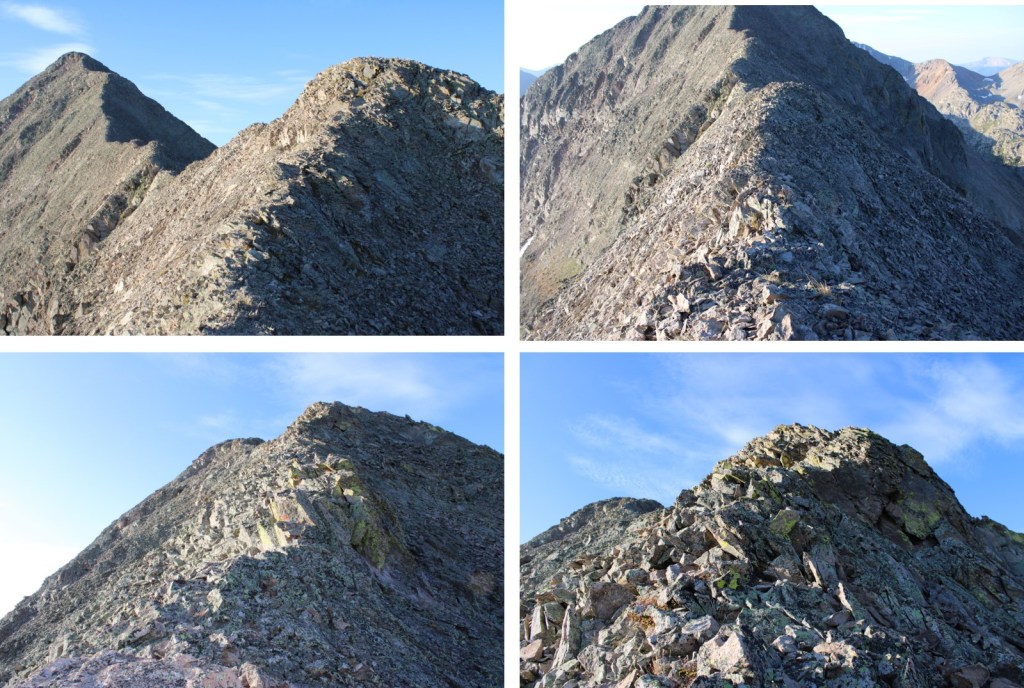
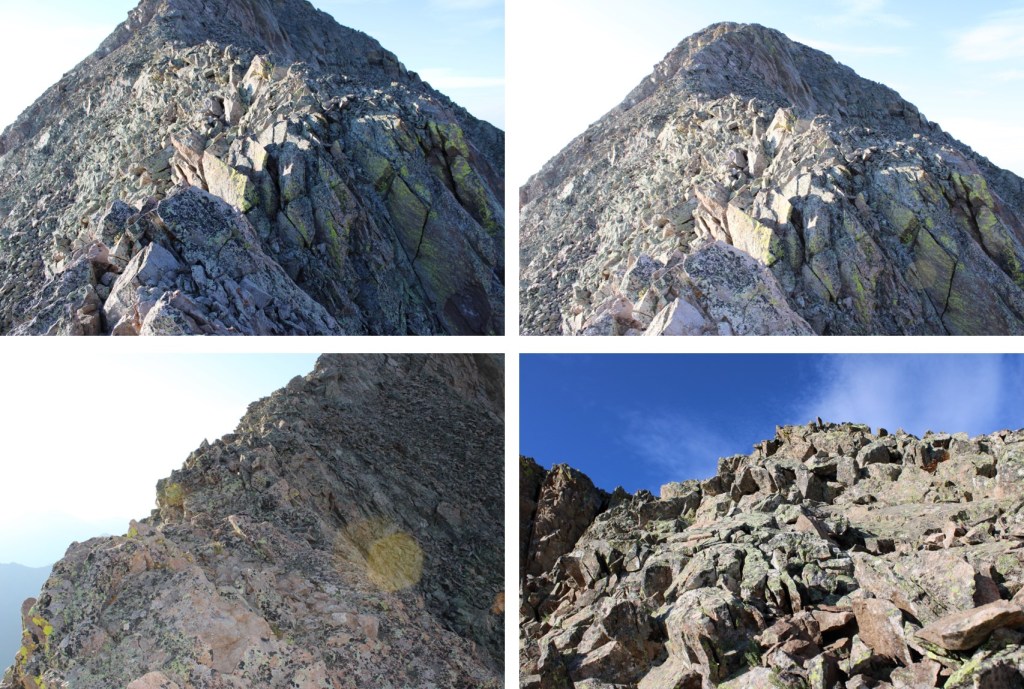
I turned left, and followed the ridge south

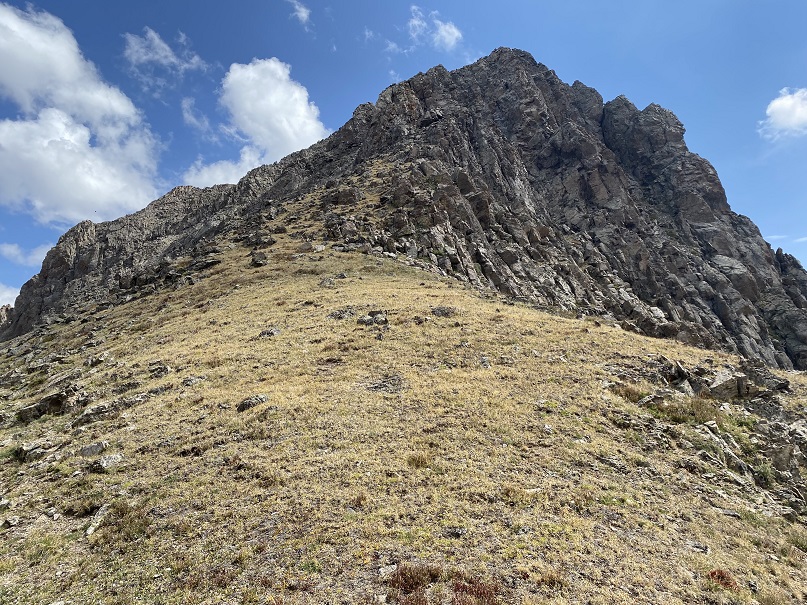
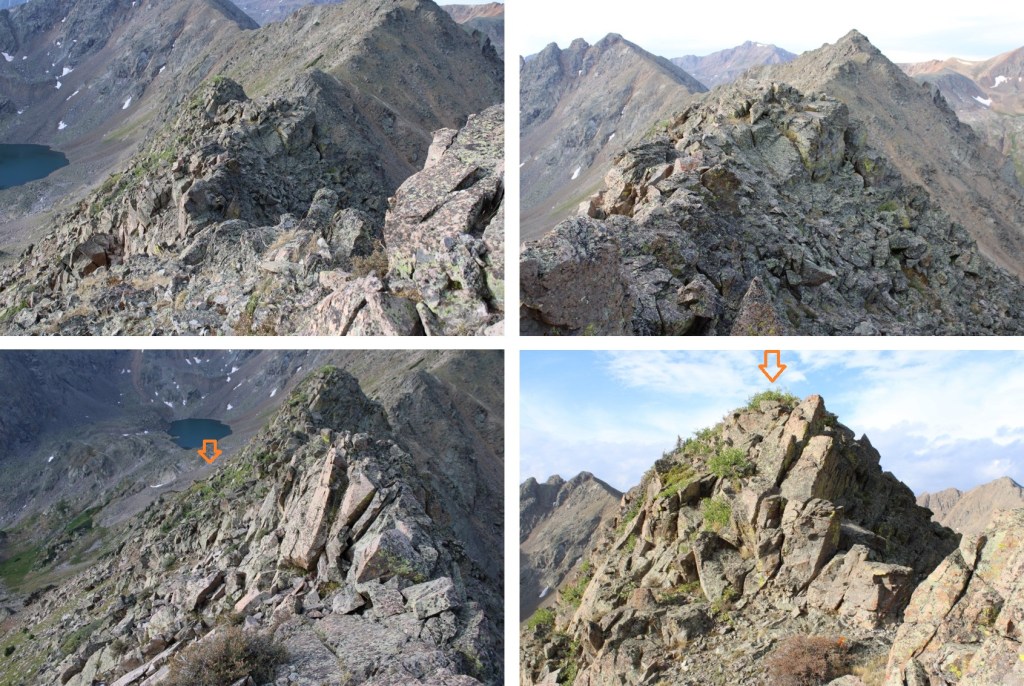
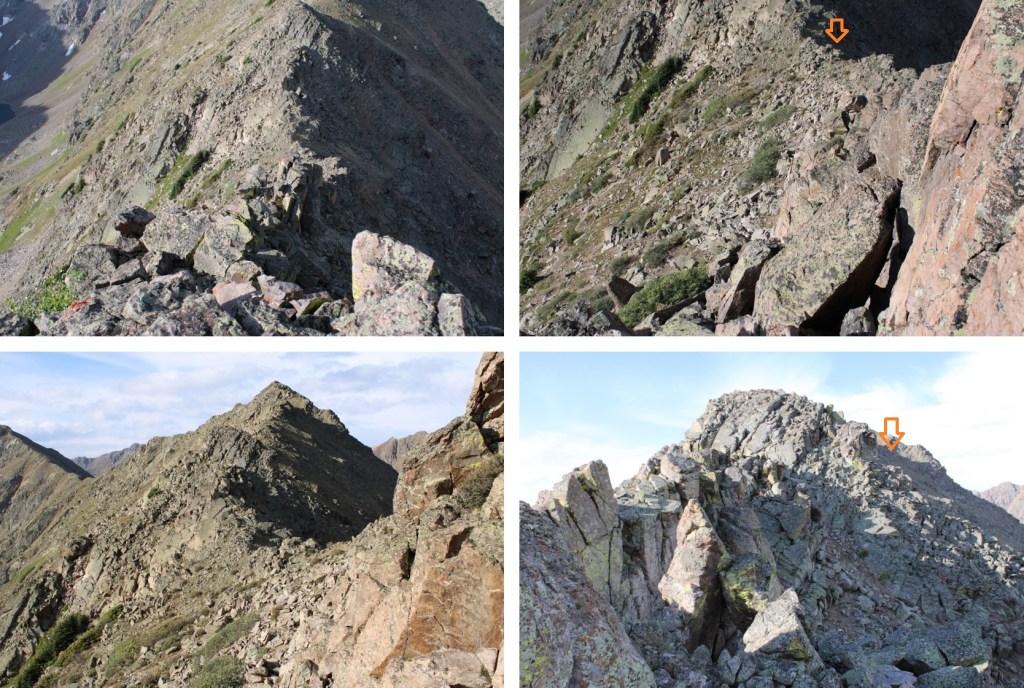
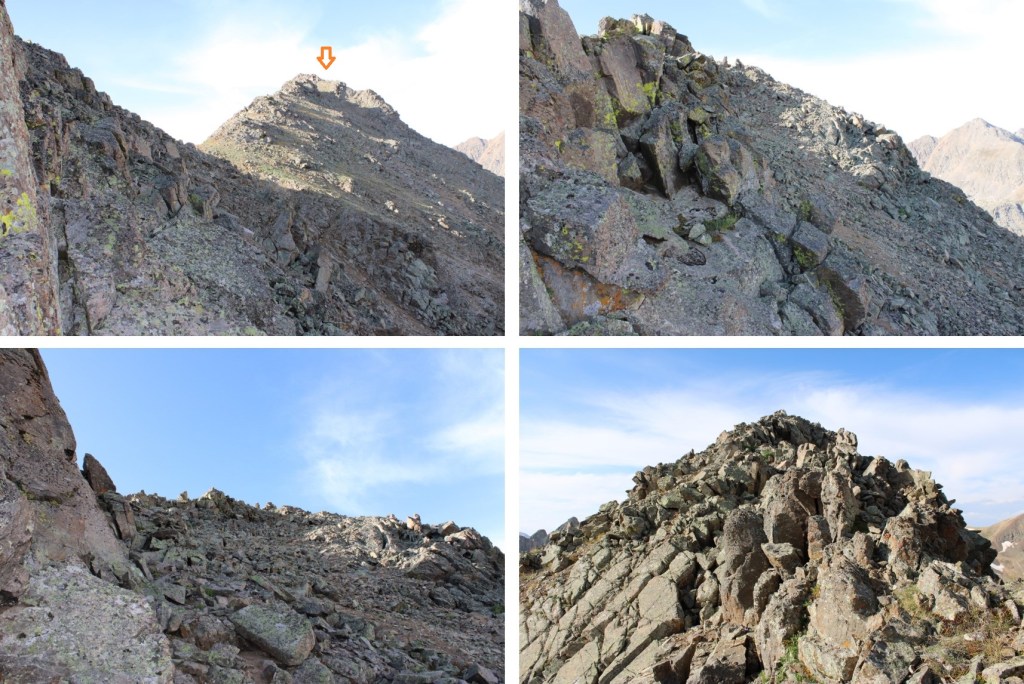
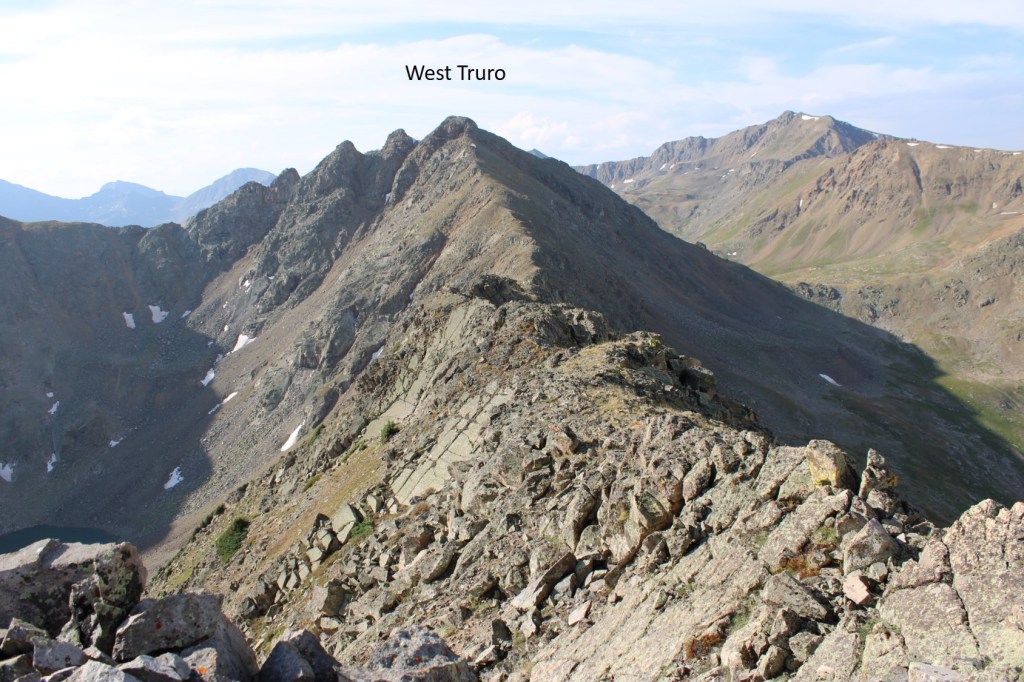
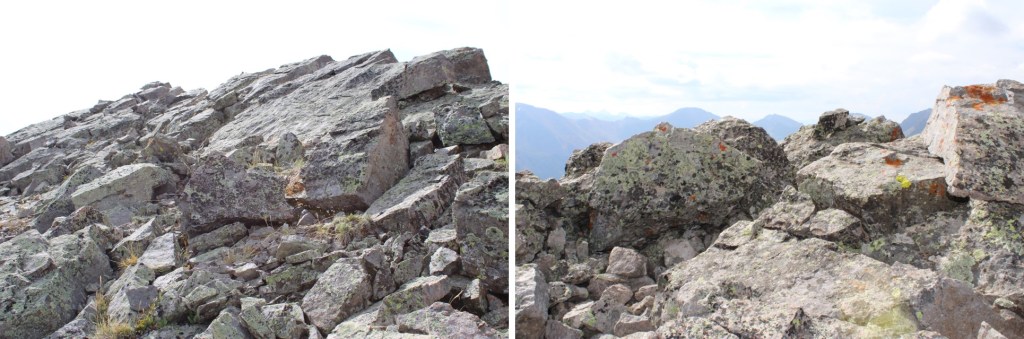
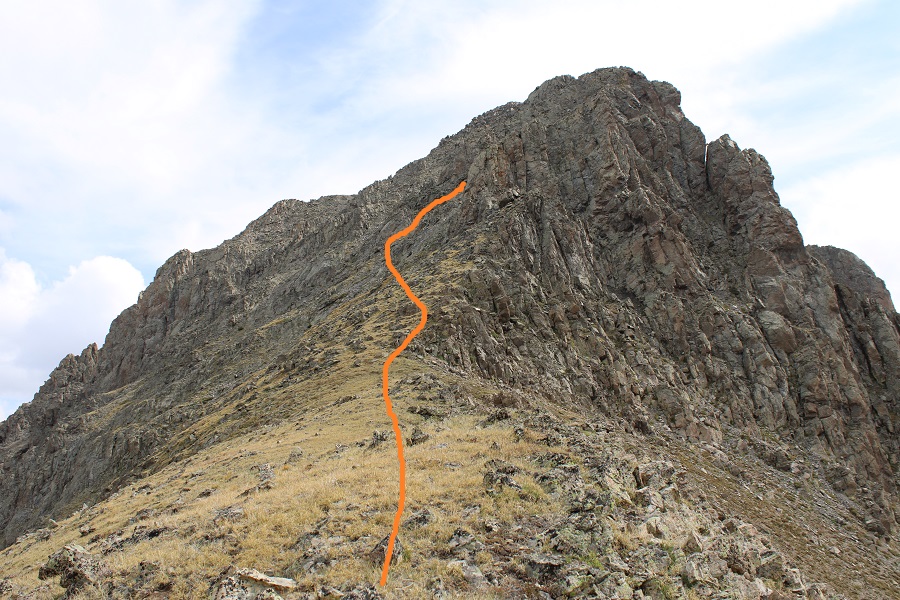
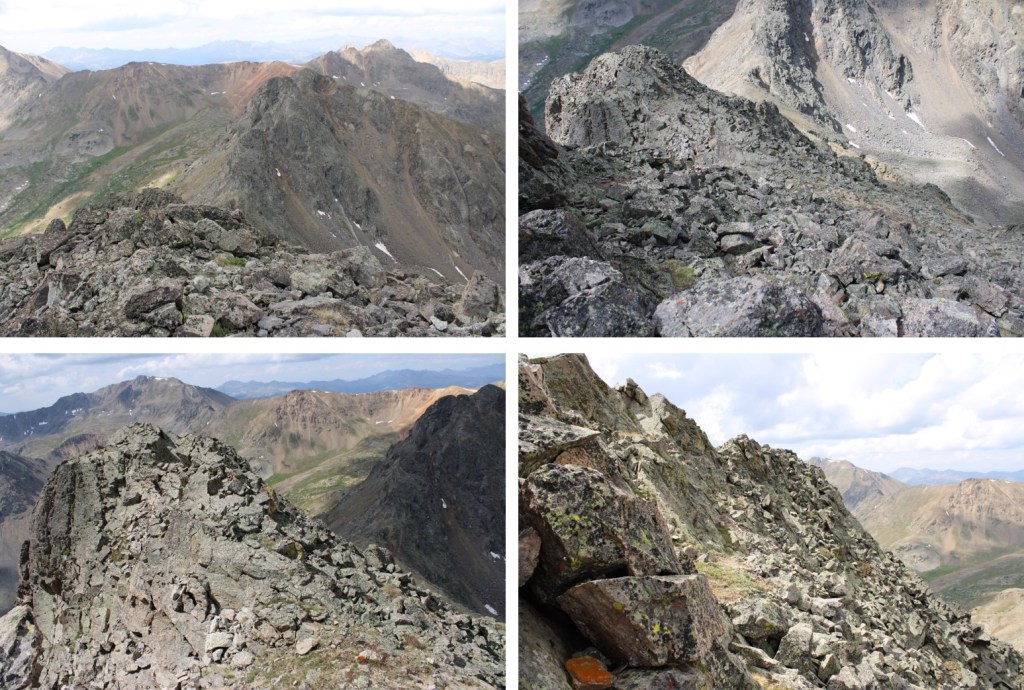
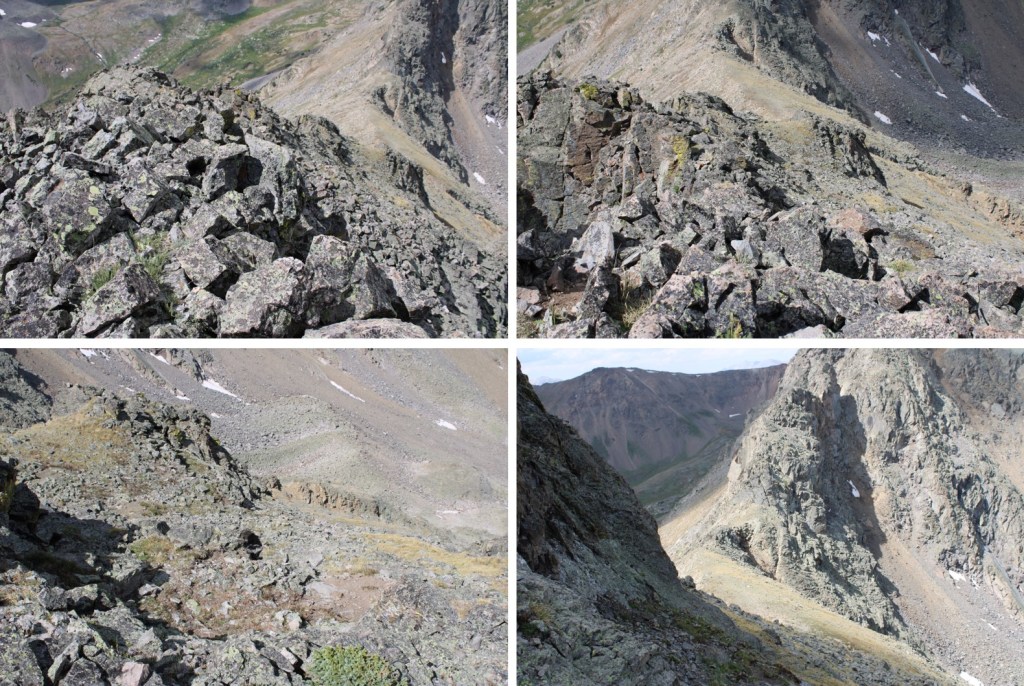
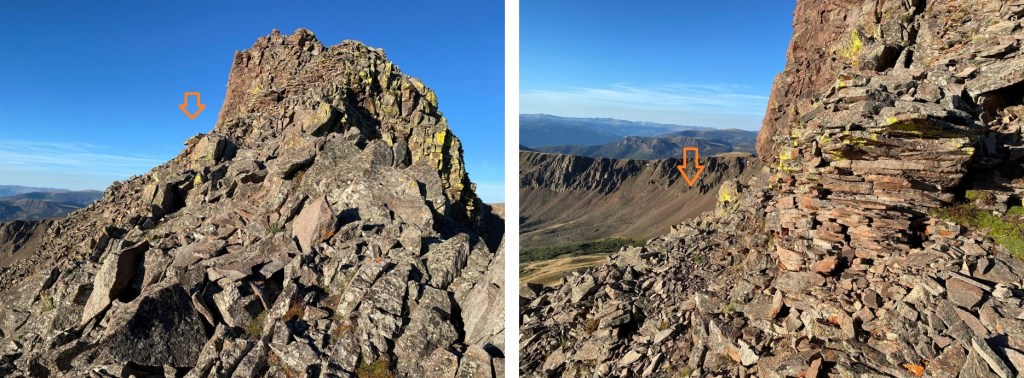
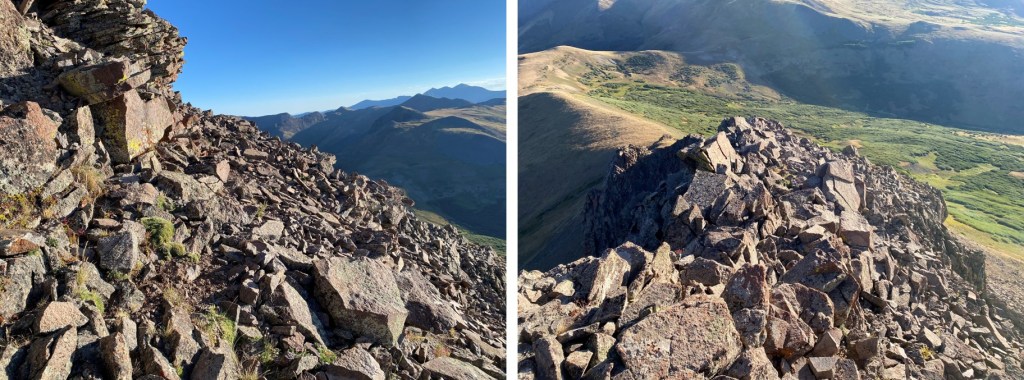
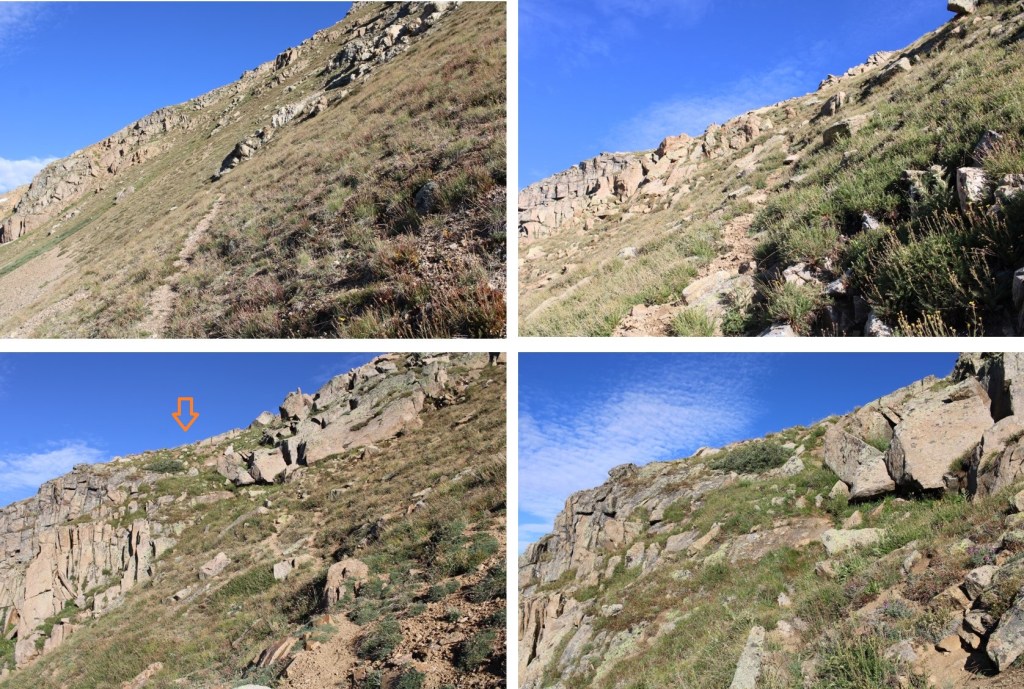
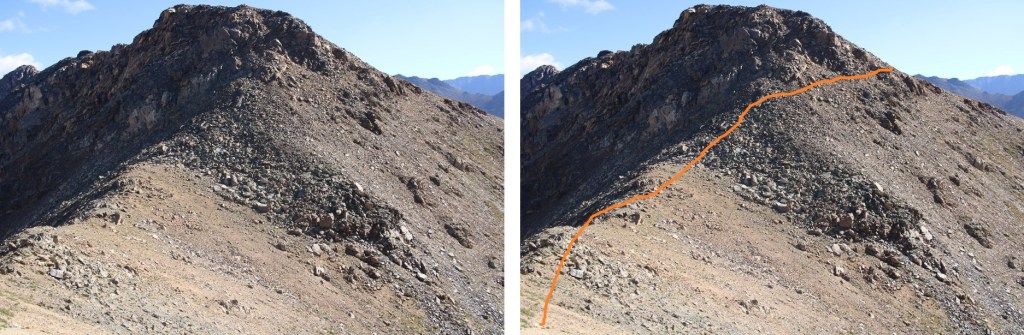
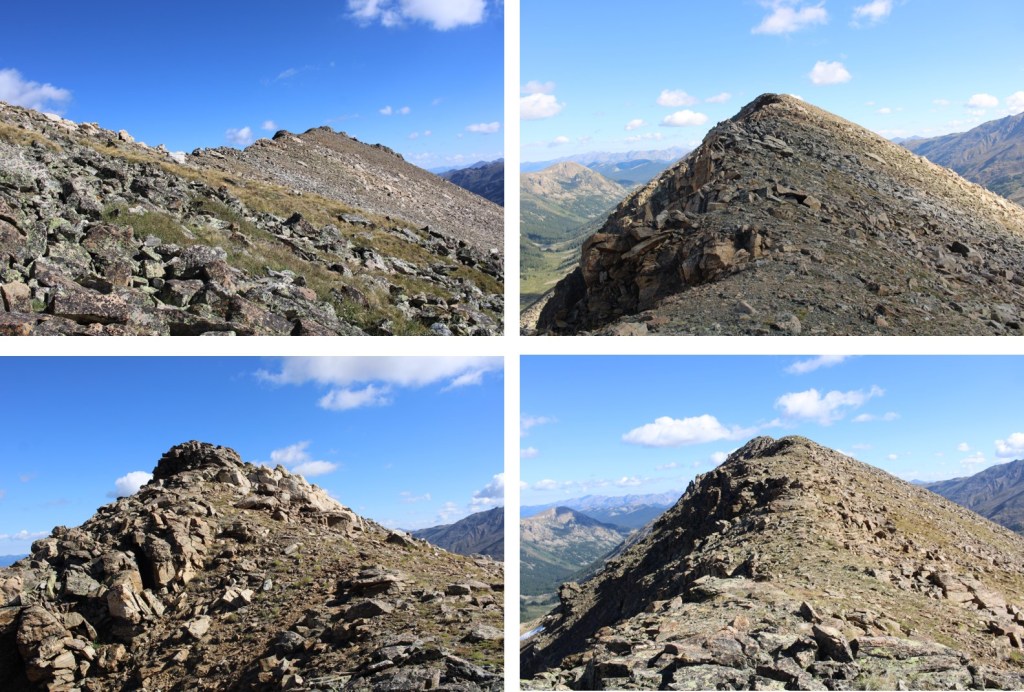
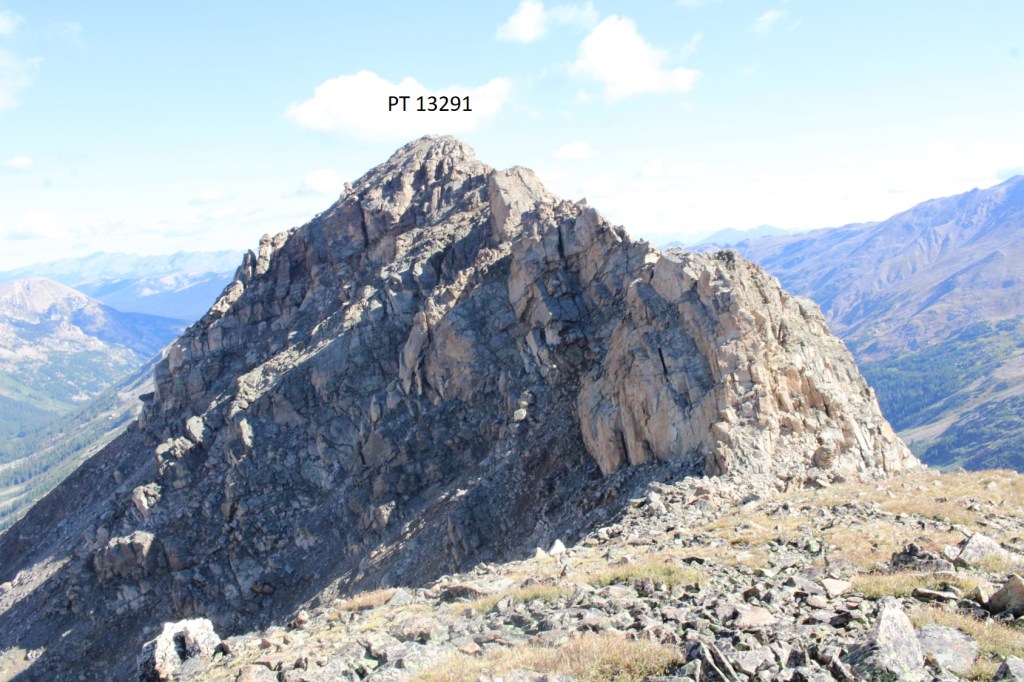
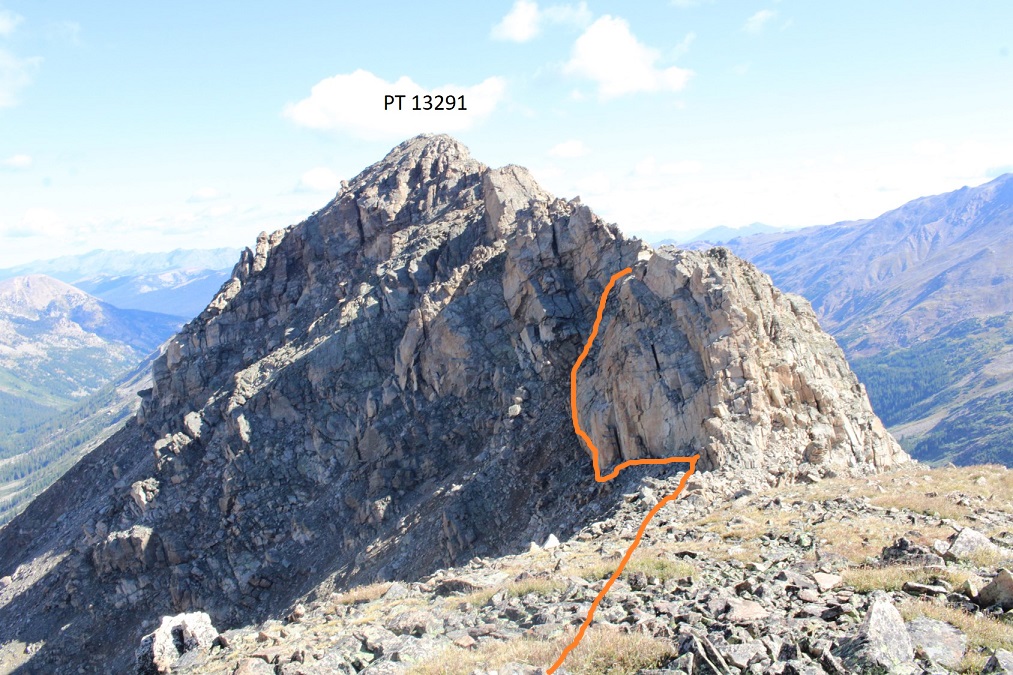
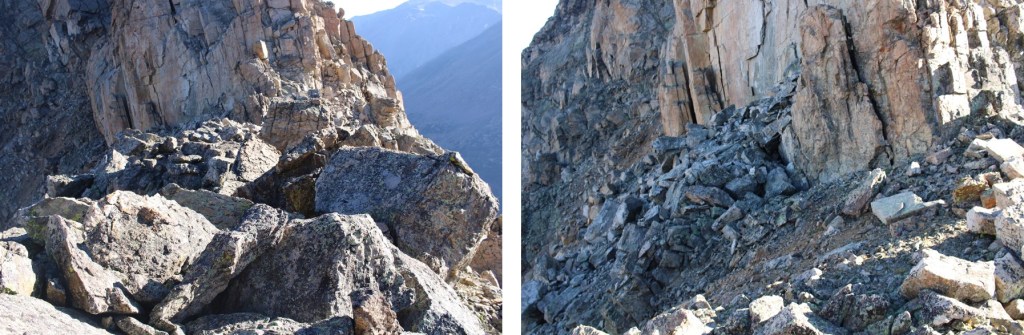
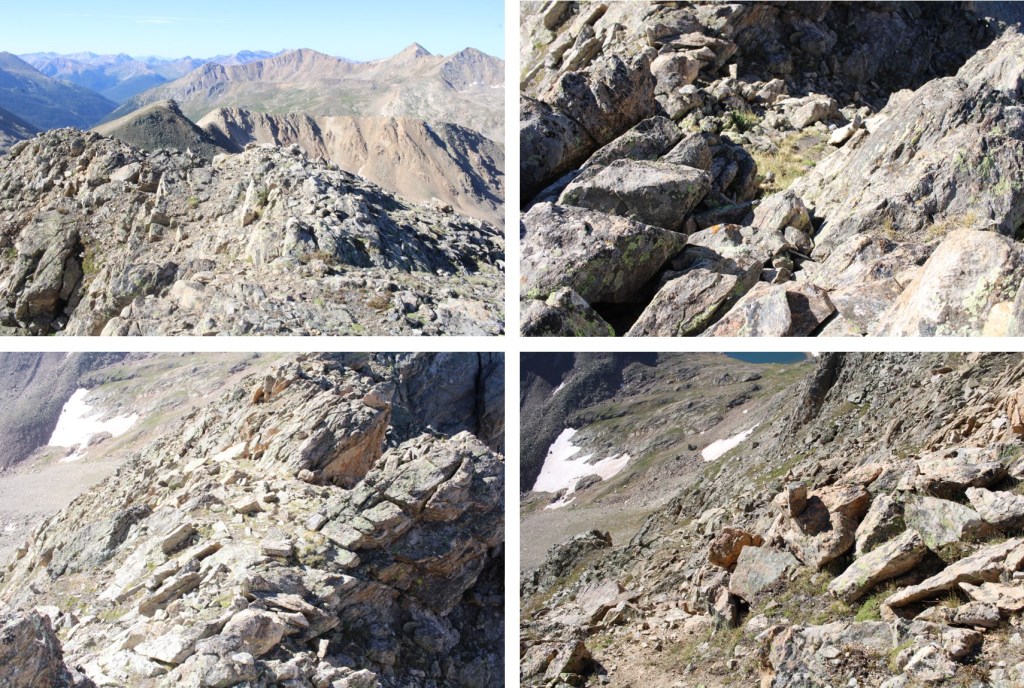
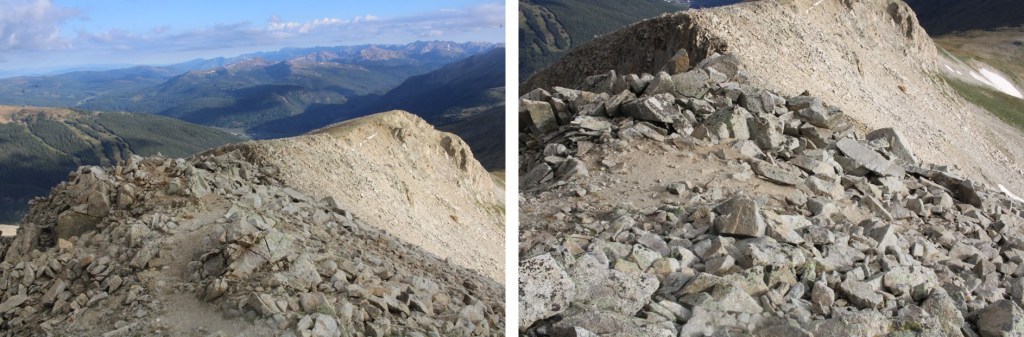
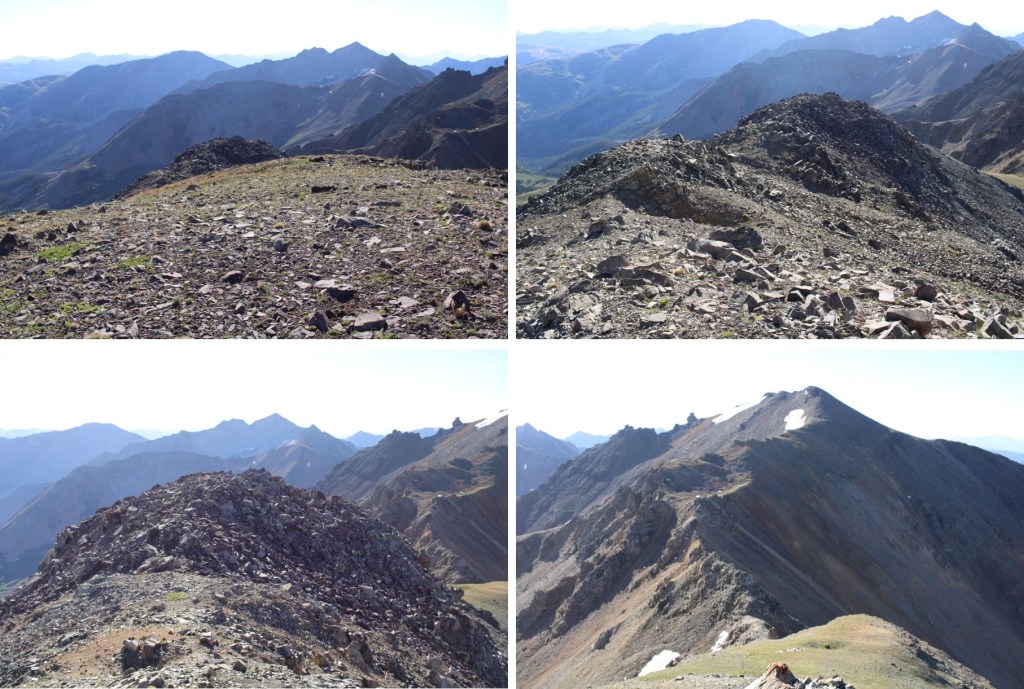
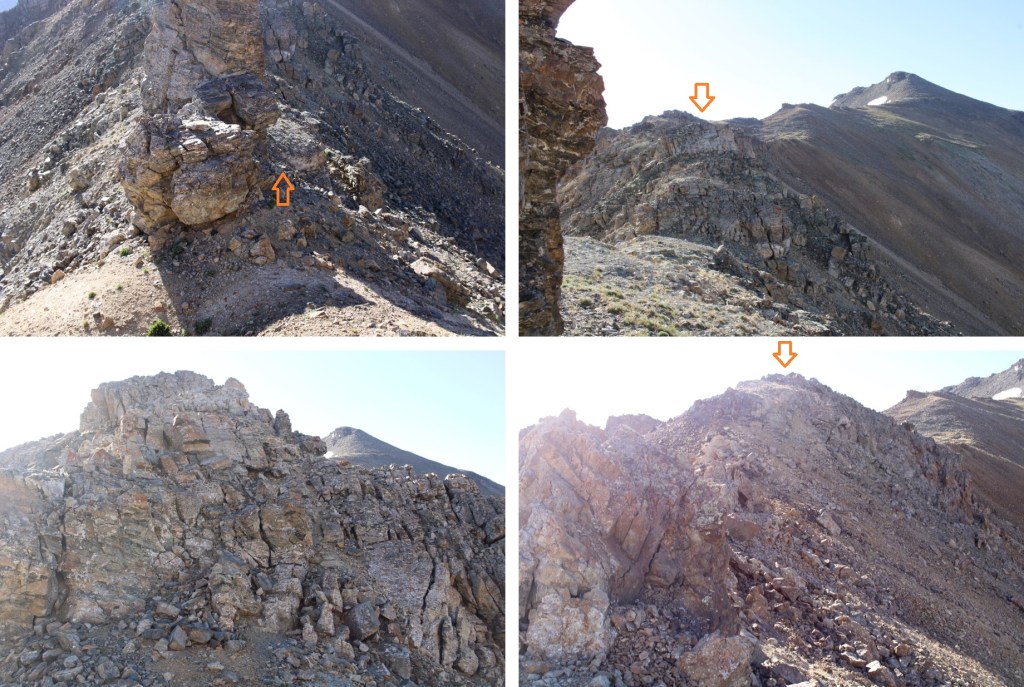
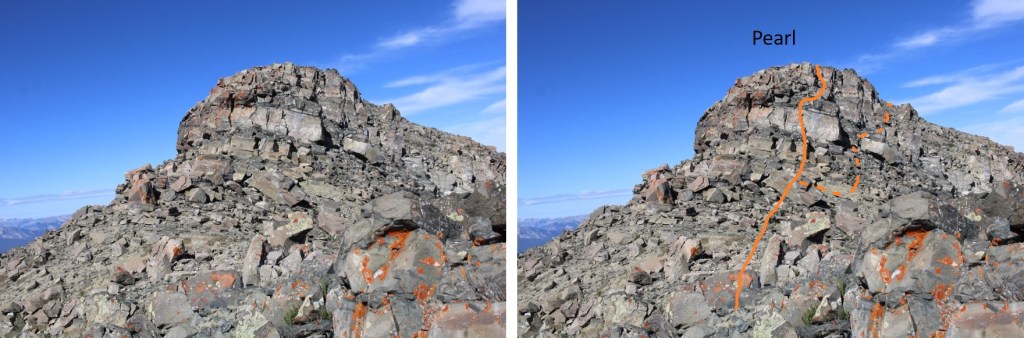
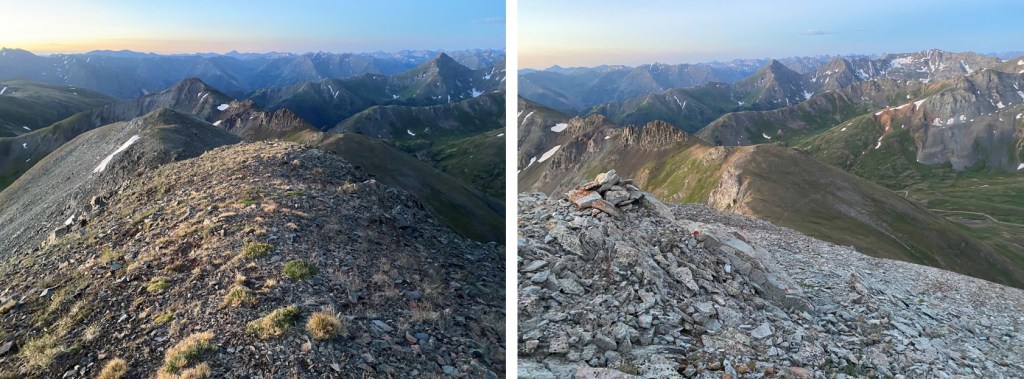
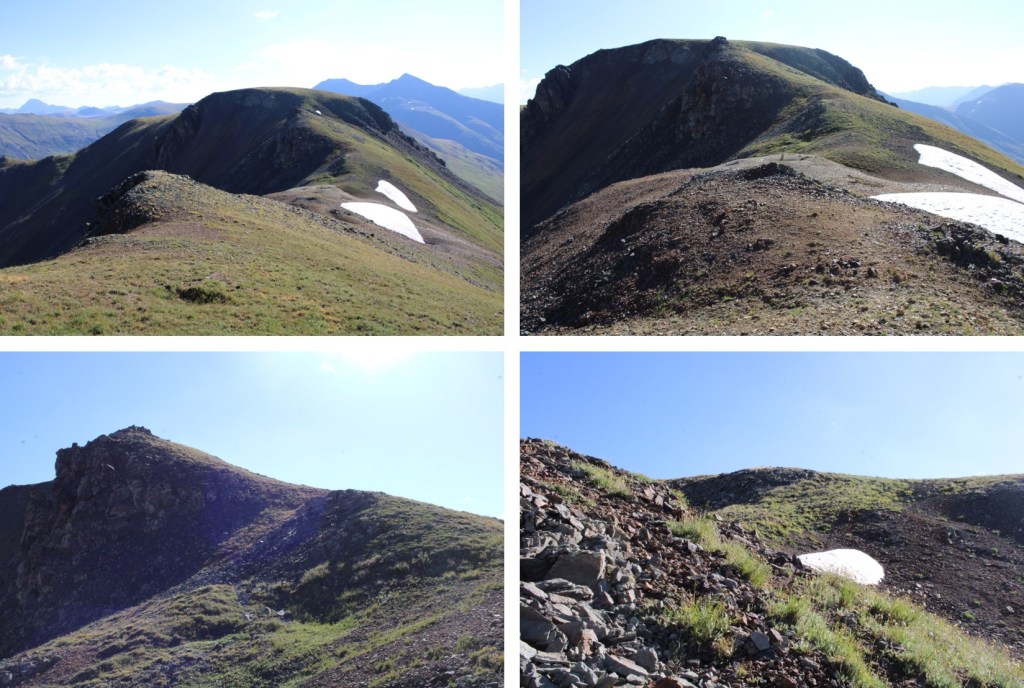
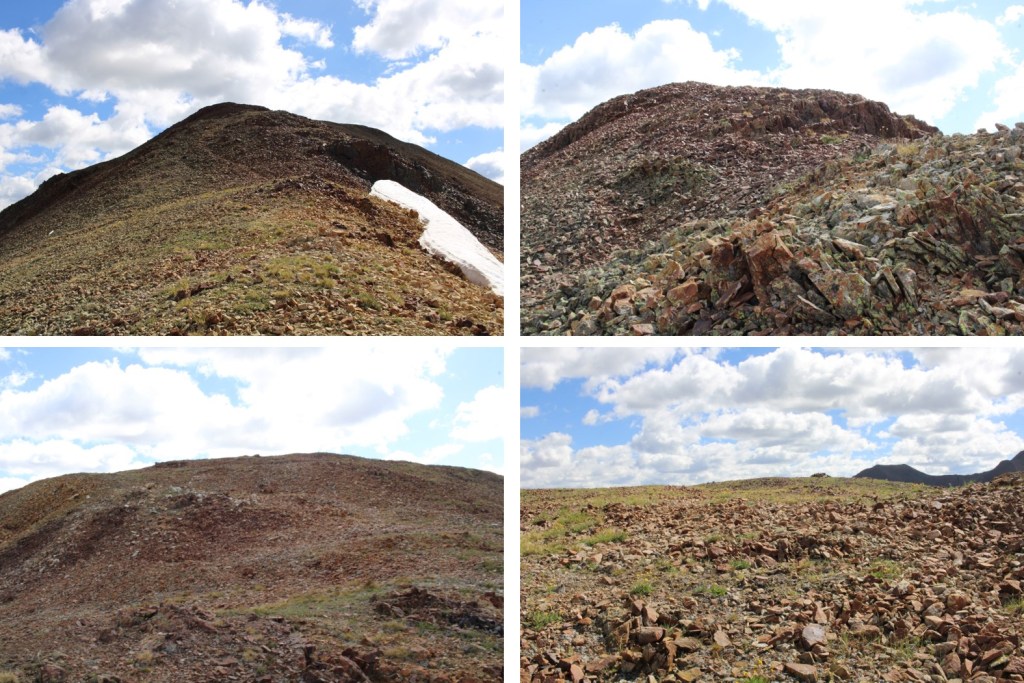
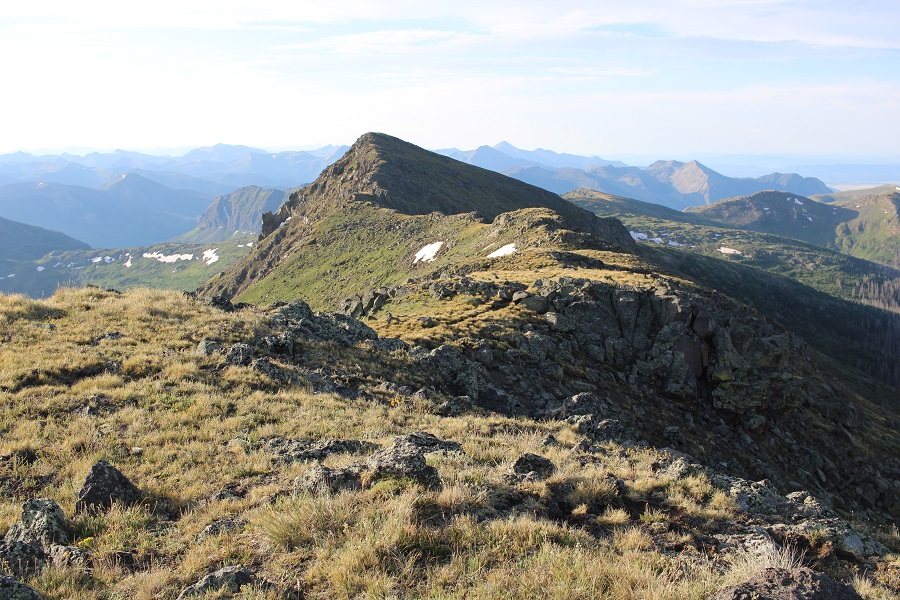
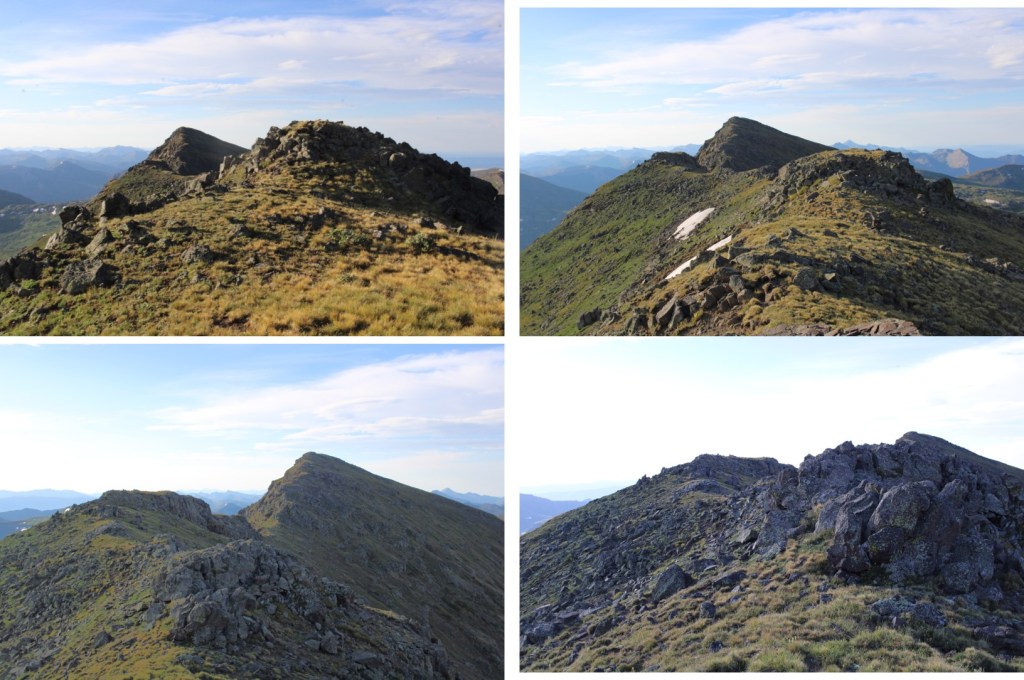
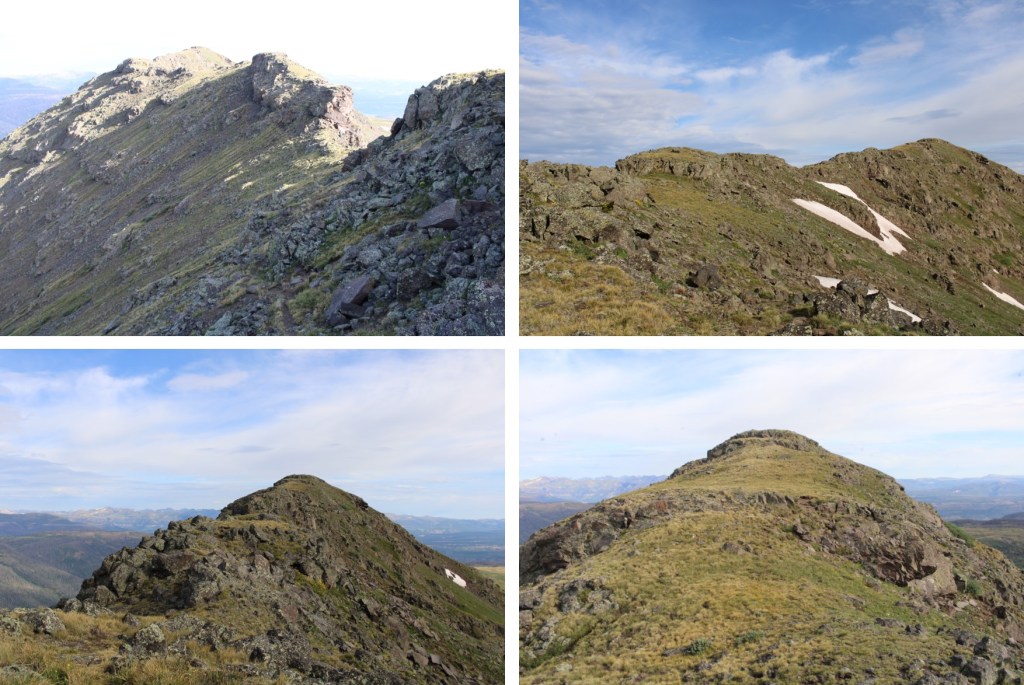
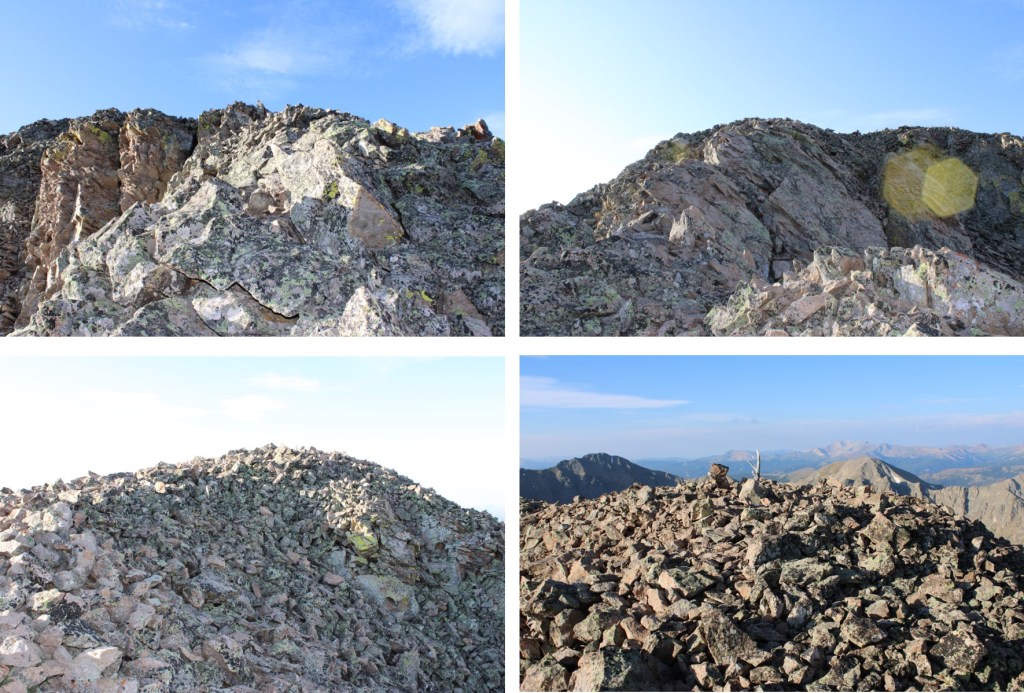
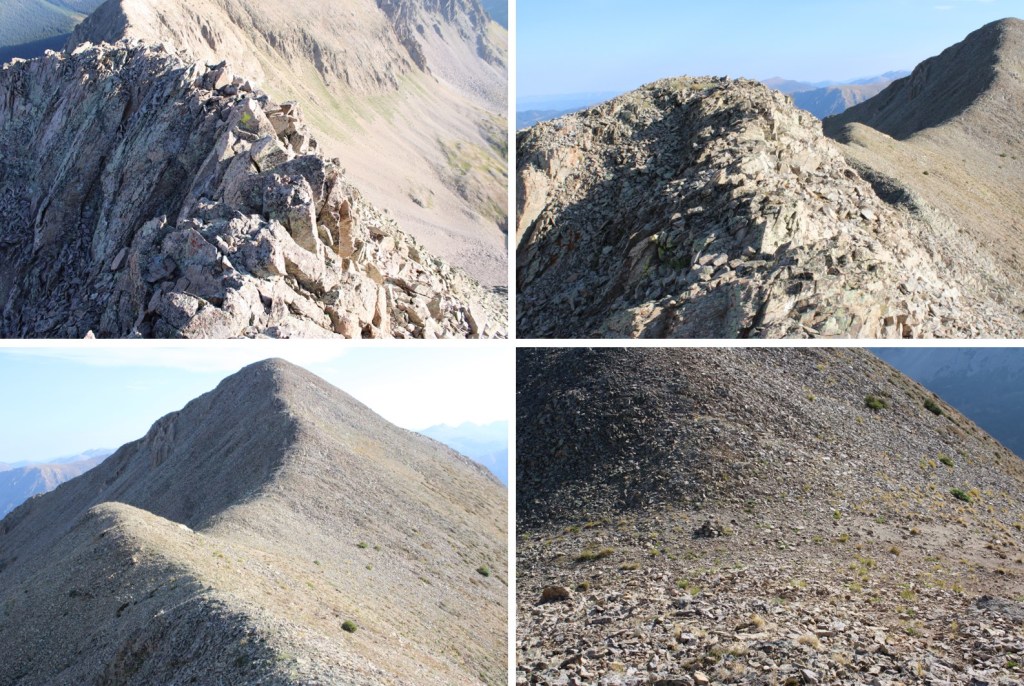
There’s not much to say about route finding on the ridge.  I was able to stay directly on top of the ridge the entire time and kept it at easy class 3.  The rock was chossy and loose, so I had to watch my hand and footholds, and I had to stop a few times due to excessive wind, but it was a straightforward ridge climb.  With exposure.  Here are some pictures of the ridge

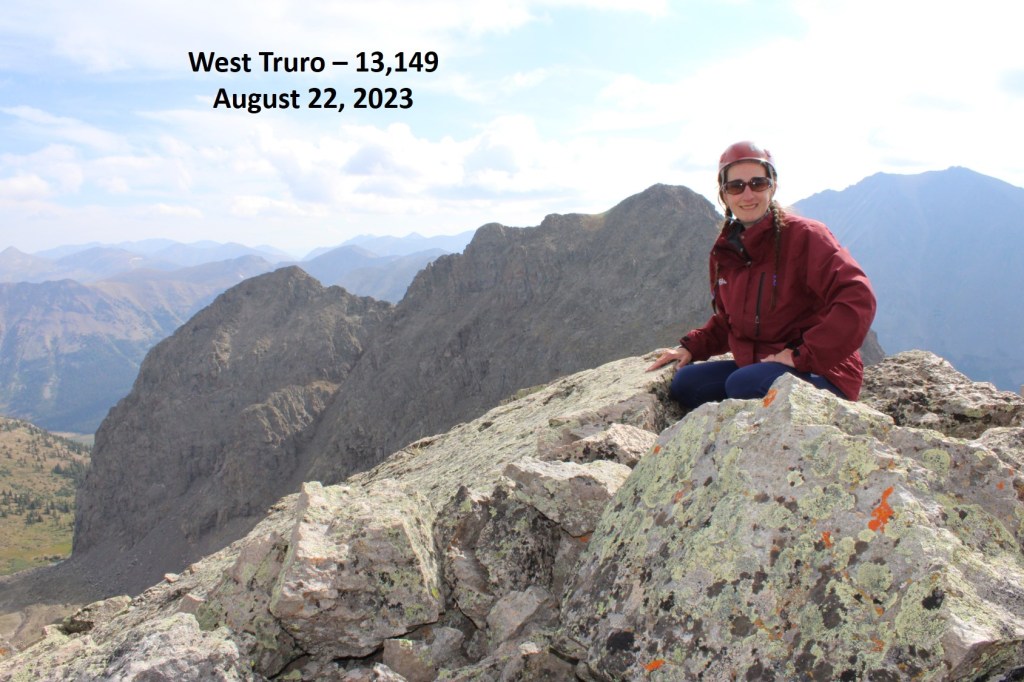
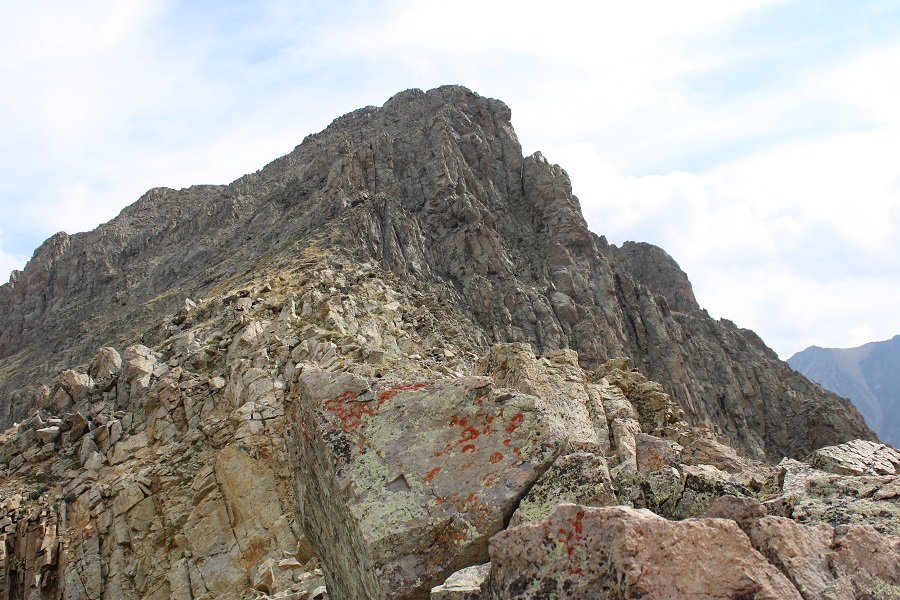
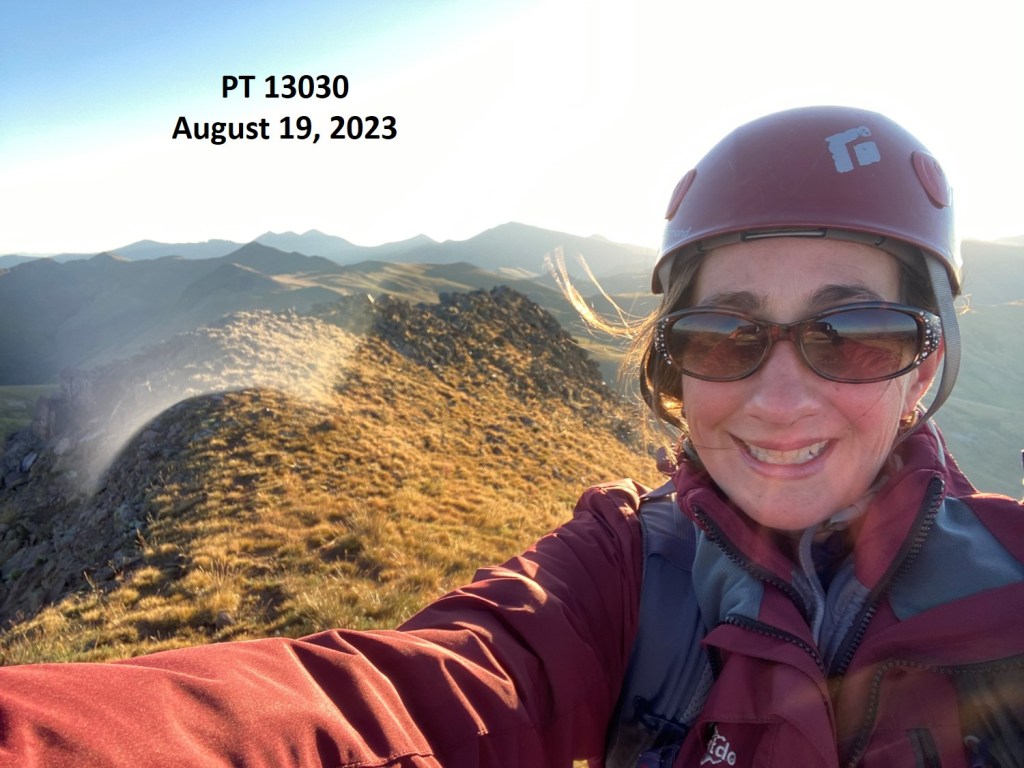
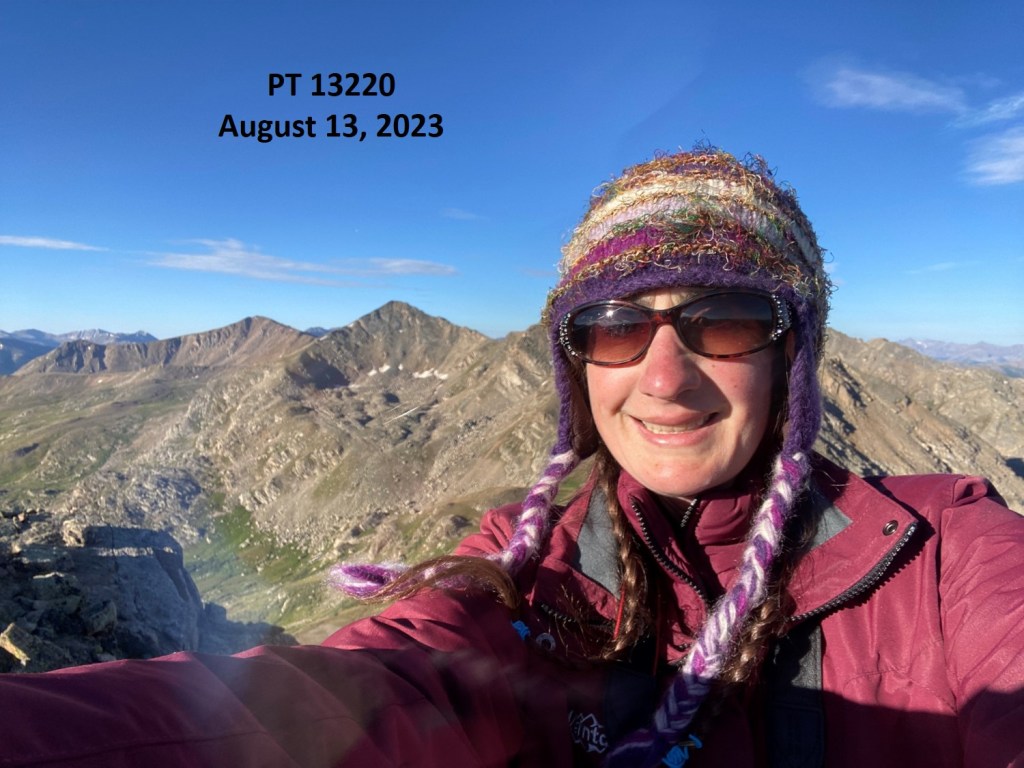
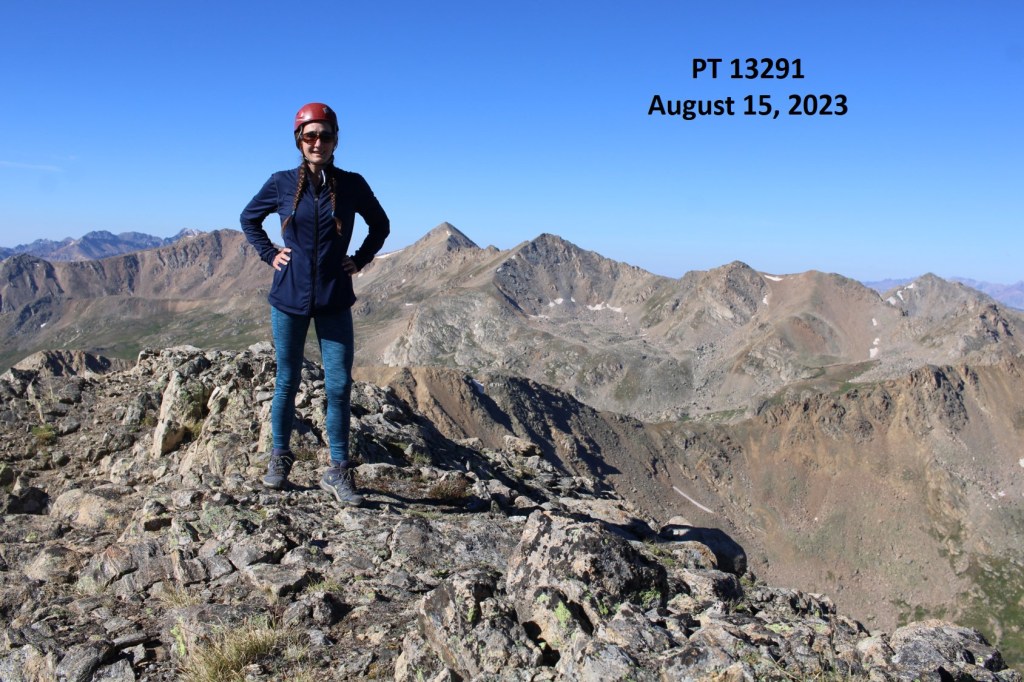
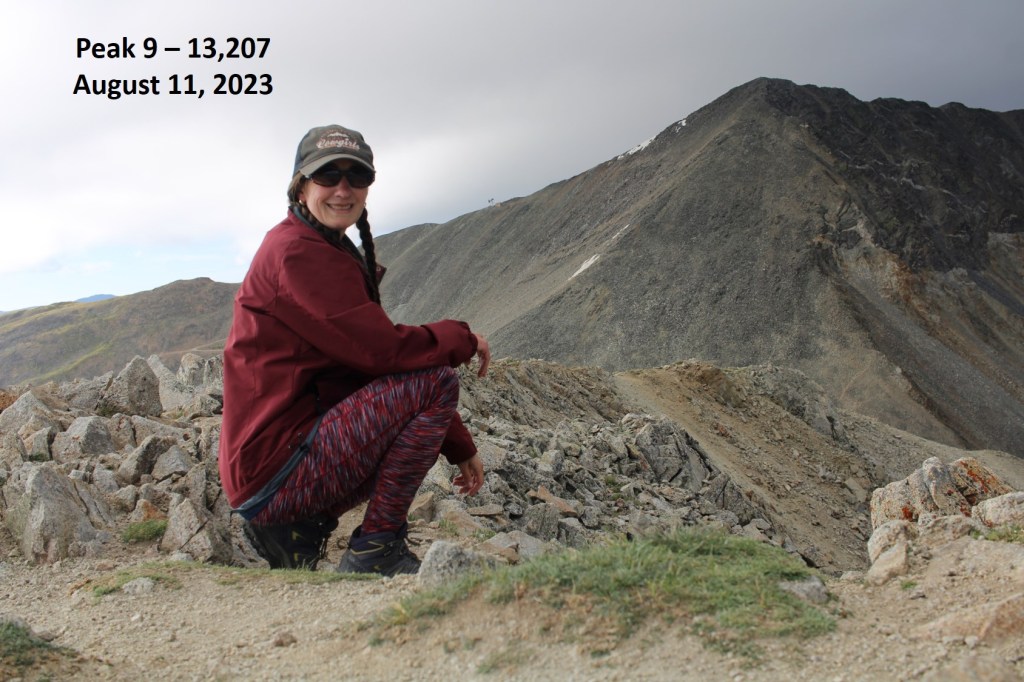
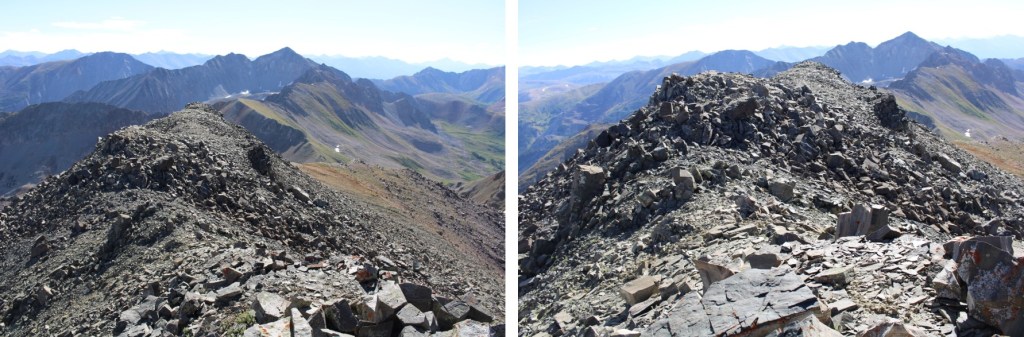
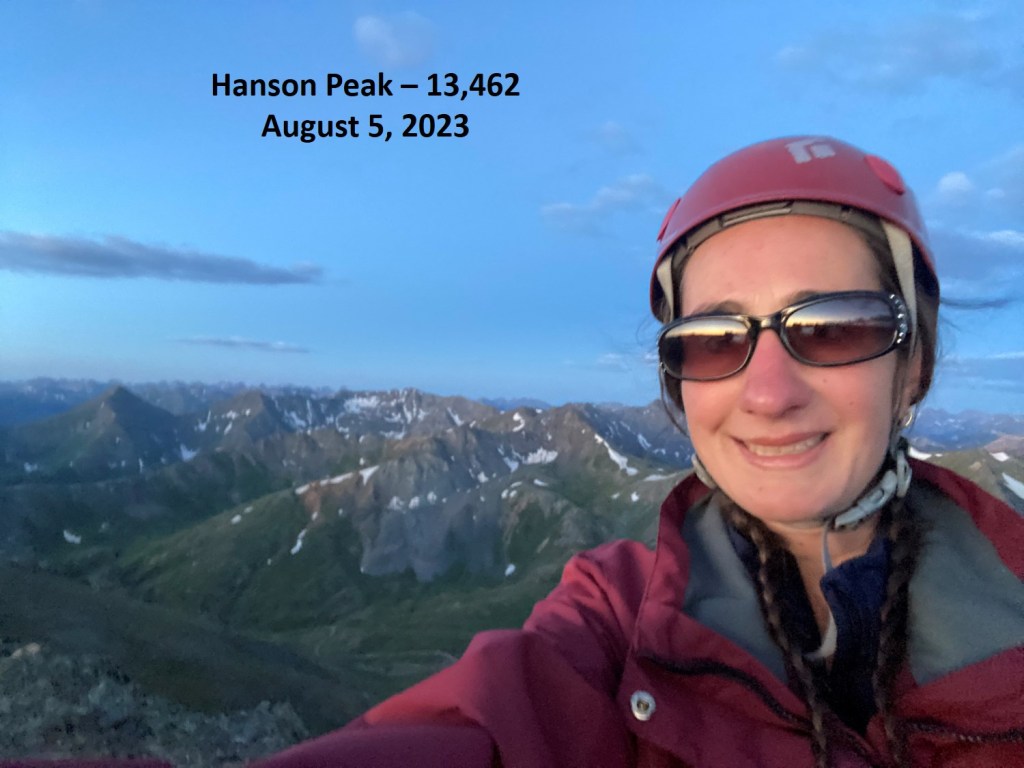
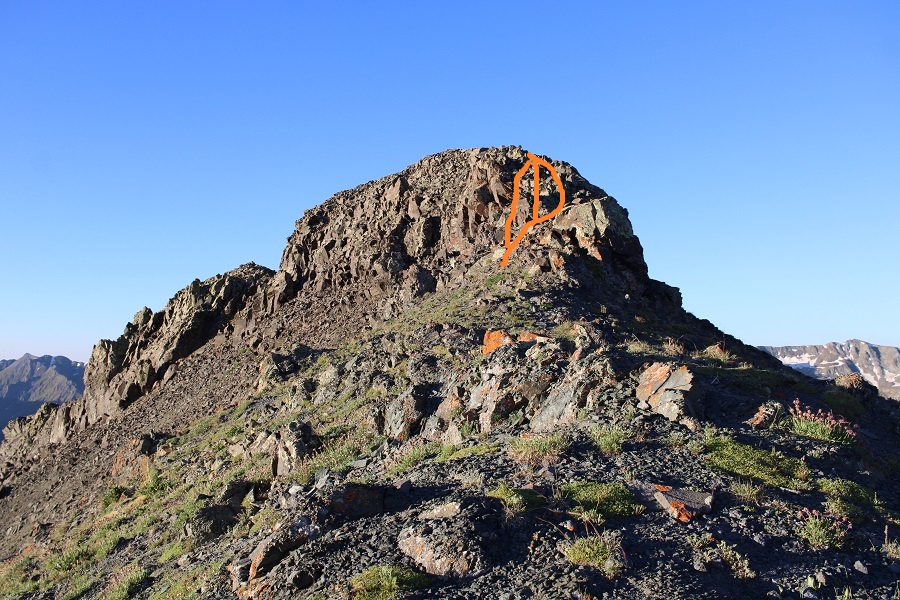
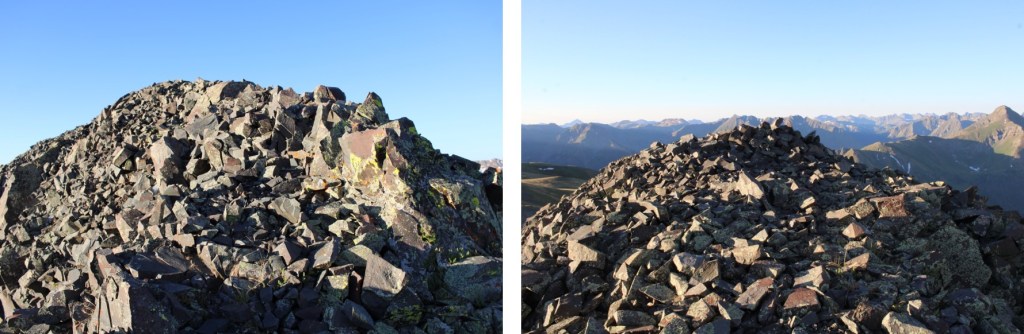
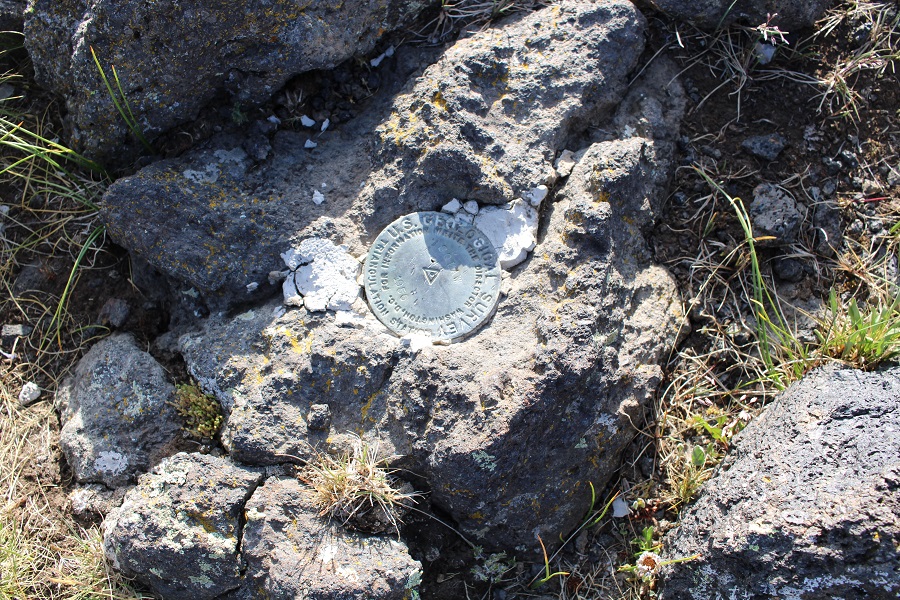
I summited Tabor Peak at 7:50am
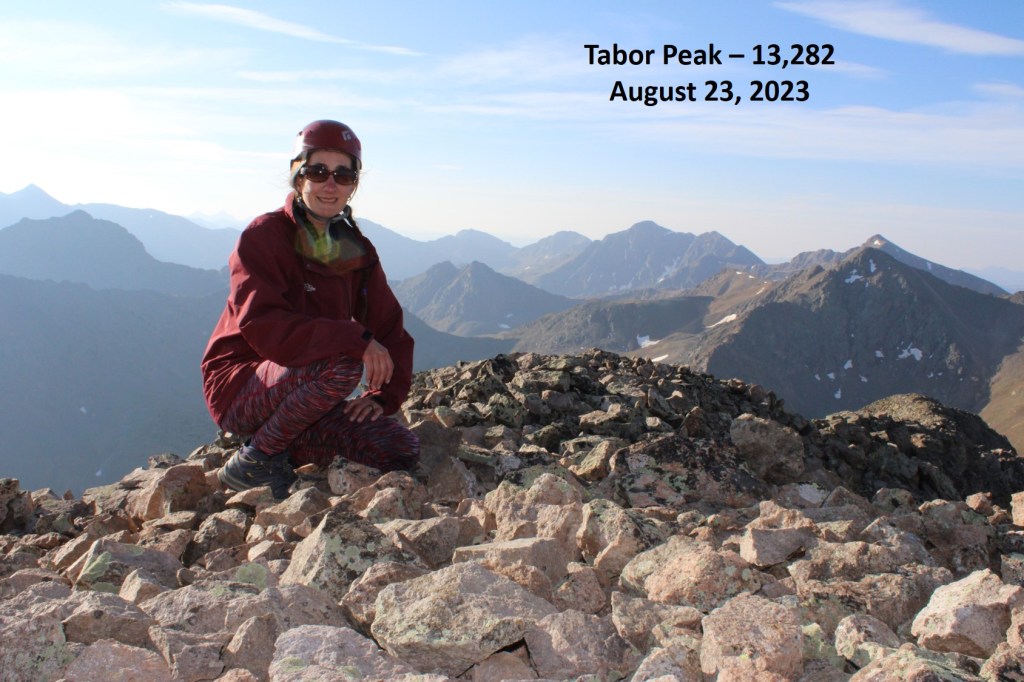
Tabor Peak:

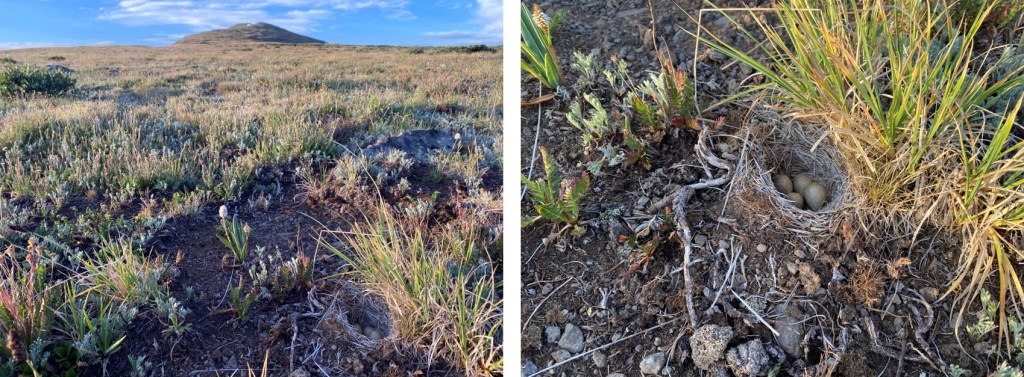
Oh, and this was the summit register.  No pen/pencil, and all the paper was wet.  Maybe the next person can bring a proper one?

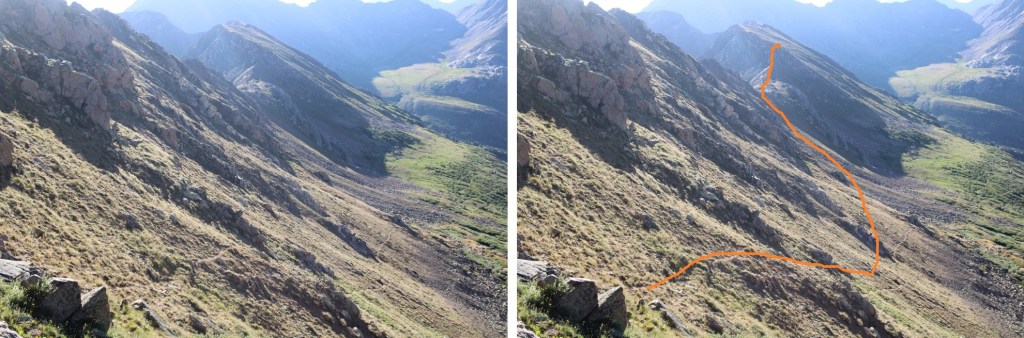
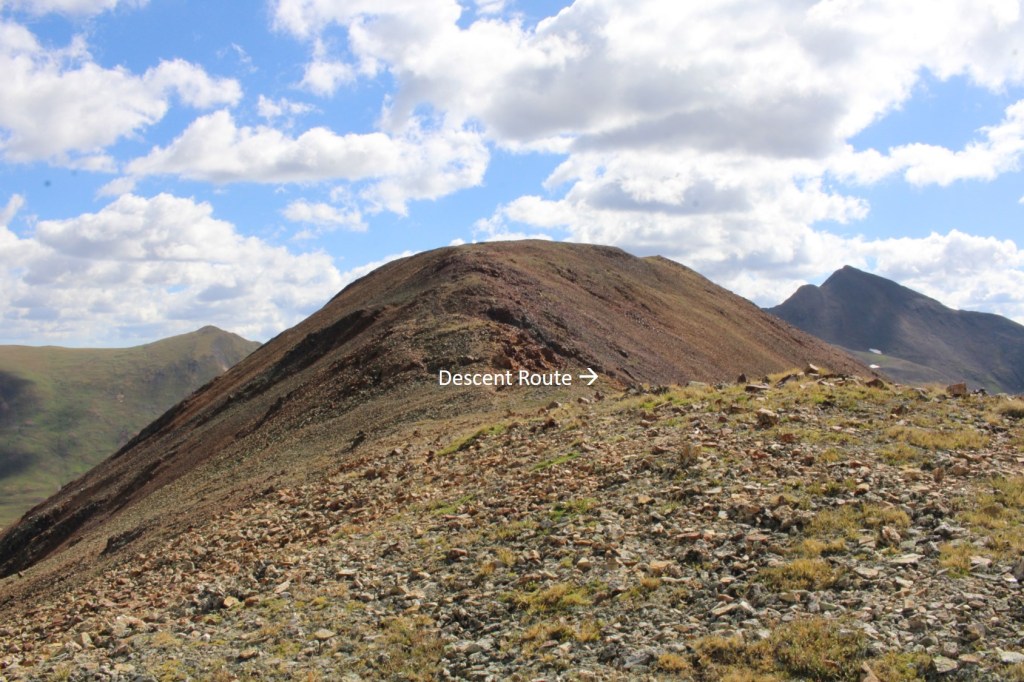
This was an out and back hike for me, so I turned around and headed back down the ridge to the gully

At the cairn I turned right, and headed down the gully towards Tabor Lake.  I stayed on the rocks to climbers right for most of the descent, then took the gully proper the rest of the way down.

I then skirted the lake to the left to pick up the trail back down

I followed this trail back down to the Tabor Creek Trail

Back on Tabor Creek Trail, I turned left and followed it north back to the trailhead

I made it back to the trailhead at 20:15am, making this a 9.72 mile hike with 3055’ of elevation gain in 5 hours, 45 minutes.

On to the next trailhead!

PT 13102, West Truro – 13,149 & Truro Peak – 13,298

RT Length: 8.49 miles

Elevation Gain: 3489’

As I sat down to type this up, I’m already at the next trailhead.  I got out my computer, camera, etc. and set it all up to write a trip report.  Just as I was starting, a huge gust of wind blew through the site, creating a whirlwind of dust.  All that dust is now inside the topper of my truck, as well as all over my computer, bedsheets, etc.  Oh, the joys of living out of your truck!  I swept it up as good as I could, but dirt and dust went everywhere!  My poor electronics.

Ok, on to the trip report.  I parked past Grizzly Reservoir at 10800’ at a nice dispersed campsite to start this hike. 

The drive in was easy 4WD, with a lot of creek crossings and potholes to maneuver. 

I was up and on the trail at 5:45am.  The trail starts at the wests end of the parking area, and almost immediately crosses Lincoln Creek.  I put on my stream crossing shoes and was on my way.

Here is an over view of where you’re going.  There are game trails to get you to the upper basin, but there are a lot of downed trees to contend with.  I just kept heading west, staying right of Truro Creek I could hear in the distance, following game trails as I went

Once I made it up the ridge, I continued west to treeline.

Once I got past the trees, PT 13102 was to the northeast.  It was choose your own adventure to make it to the ridge. 

Here are some pictures of the easy tundra walk to the ridge

I put on my helmet, turned right, and headed north to the summit.  This was class 3, but solid and relatively short. 

I summited PT 13102 at 7:30am

PT 13102:

From here on out, this was a ridge hike to West Truro.  There were sections of class 2 and 2+, but most of it was class 3 and it was slow going, trying to figure out the best route to take.  I believe there are several ways to do this ridge, so you can choose how spicy you make it.  I found I stayed on the ridge proper, dropped to the left, and dropped to the right about equal amounts of time.  Just be forewarned:  once you commit to the route, there are few bailout points. 

I headed southwest back down the ridge.

From here on I was following the ridge basically west.  Since this is choose your own adventure, I’ll highlight a few pictures, and the route I took.

I was now halfway through the ridge to West Truro.  I sat down for a bit of a rest, and looked at the route before me.

This second half of the ridge looked easier than the first, and indeed it was.  For this part of the ridge, I stayed mainly to the right.  Here are some pictures of this easier part of the ridge

Most of the ascent up West Truro from the saddle was class 2 and stayed on the ridge, until just before the end.

There was a short class 3 chimney to scramble (class 4 is to the right), and then a short scramble to the summit.

I summited West Truro at 9:30am

West Truro:

I could see Truro Peak to the northeast of me

Just for reference, this is how I climbed it (although this is choose your own adventure as well)

I wanted to skirt the south side of West Truro to make my way over to the West Truro/Truro saddle, so I made my way back down that class 3 chimney.

At 13050’ I descended down a game trail that led me to a scree filled gully.  I put on my microspikes for this part. 

This is where I was headed, so I lost and then gained elevation back to this point.

From here on our I just hugged the side of the mountain, making my way back up to the saddle.  This is also choose your own adventure, all class 2

Now at the West Truro/Truro saddle, I had a good view of Truro Peak

I stayed to the left on the tundra, and when the tundra ended the class 3 climbing began, and lasted until I made it to the summit.  On the class 3 section I stayed to the right and took the ridge, but it looks like there’s tons of class 3 options here.

Just before the summit I dropped down to the left, then scrambled up.  There are game trails here to guide the way.

I summited Truro Peak at 10:45am

Truro Peak:

I turned and headed back to the Truro/West Truro saddle

From the summit I had the brilliant idea to descend via the gully that goes left (south) and skirt the east side of the mountain to make it back to the trailhead.  My reasoning was I didn’t want to descend the steep, scree-filled east gully back to Truro Lake, and then rock hop for half a mile before hitting a trail.  Solid reasoning, but in implementation, I wouldn’t recommend the route I took.  Bushwhacking at the end proved cumbersome, whereas with the north gully, it would have all been above treeline.  In any event, this is how I descended.  I’d still recommend going right and taking the north gully if you’re ok with a steep, scree filled descent.

I stayed high to avoid the willows, and then dropped down into the trees.  I stayed climbers left of Galena Creek (east), and made y way back into the trees, following game trails where I could and getting whacked in the face with willows where I couldn’t.

I could finally see the dirt road, and made my way towards it, crossing Lincoln Creek in the process. 

Back on the road, I turned left and followed it north back to my truck

I made it back to my truck at 1pm, making this a 8.49 mile hike/climb with 3489’ of elevation gain in 7 hours, 15 minutes.

On to the next trailhead!

PT 13030

RT Length:  7.36 miles

Elevation Gain: 1920’

I started from the West Willow Creek 4WD trailhead at 11550’.  If you don’t have 4WD, park below, just before the road turns to 4WD.  This will add 3 miles and 500’ of elevation total to the hike.

Here are some pictures of the 4WD road in

There are a few dispersed campsites here, and a parking area for about 5 vehicles.

I was on the trail at 5am.  The trail actually continues following the 4WD road, and if you have gotten this far, you can do the next few miles on the dirt road.  I chose to hike in, to get some extra mileage.  I followed 4WD road 505.1 west for 1.5 miles as it climbed into the upper basin.

At the top f the pass I could see PT 13030.  At about 12500’ I left the road and headed for the ridge, staying at about 12,500’ of elevation.

Here’s an overall look at the route I took to the ridge.  CalTopo will tell you there’s a road here.  There isn’t.

And some step-by-step pictures

There’s a small game trail that will lead you up the saddle

Once on the saddle I turned left and followed it south to the rocky area

If you plan on rock scrambling, now is the time to put on your helmet.  I continued southwest up the ridge, following a tundra and rock filled slope

Then I went left, below this large boulder, keeping it class 2

From here you have two options.  You can either gain the ridge for a quick class 3 scramble to the summit, or stay about 20 feet below the ridge to the left, and keep it class 2+.  Here’s looking at the route to the ridge for the class 3 scramble, which is stable but narrow and airy.

And here’s the class 2+ option, heading southwest, and then gaining the ridge

Once on the ridge, it was a quick walk to the summit

I summited PT 13030 at 7am

PT 13030:

I took the class 3 ridge option on the way in, and decided to take the class 2+ option on the way out.  Here’s the route I took back

There are two rocks placed as if they had been a cairn at one point, indicating where to descend from the ridge to keep it class 2.  It’s not obvious, and might not even be a true cairn at all, but it’s a good place to descend.

Then it was back to navigating around the large boulders

And heading back down to the ridge

Here’s an overall look at the route out of the basin

This is the route I took

And some step-by-step pictures. Once I was on the ridge there was a faint game trail to follow much of the way back to the road.  Unlike you’ll see on CalTopo, there is no road here. I stayed above the willows but below the rock rubble.

Ahead of me I could see two roads in the distance.  I was aiming for the closer dirt road

Back on 4WD dirt road 505.1, I followed it east back to the trailhead.

I made it back to my truck at 8:30am, making this a 7.36 mile hike with 1920’ of elevation gain in 3 hours 30 minutes.

On to the next trailhead!

13115, 13005, and Baldy Lejos – 13,118

RT Length:  10.19 miles

Elevation Gain: 2879’

I started from the West Willow Creek 4WD trailhead at 11550’.  If you don’t have 4WD, park below, just before the road turns to 4WD.  This will add 3 miles and 500’ of elevation total to the hike.

Here are some pictures of the 4WD road in

There are a few dispersed campsites here, and a parking area for about 5 vehicles.

I was on the trail at 5am.  The West Willow Creek trail starts at the north end of the parking area, and follows West Willow Creek north on a class 1 trail for 1.4 miles, to Sa Luis Pass and the Colorado Trail.

After hiking for .4 miles, I came to a junction and turned left

Then continued towards San Luis Pass.

At Sal Luis Pass I turned left, and followed the Colorado Trail west.

This was still a clearly defined trail

I could now clearly see PT 13115.  This is the route I took to get there.  I would advise summiting from the southeast, as the north side is very chossy.

I left the Colorado Trail, and hiked on class 2 tundra and rocks to the summit

I summited PT 13115 at 6:30am.  Also, this is where my camera officially died, so it’s selfies at summits until I get a new one.

PT 13115:

To the northwest I could see my other two summits for the day, PT 13005 and Baldy Lejos

I descended the north side of PT 13115 on some loose rocks, and headed over to the point ahead of me.  Note:  this isn’t ranked, but it does have a summit cairn.  It was a class 2 hike to get to the top, but there’s a game trail to the left that will take you around this point.

I crossed the Colorado Trail and headed on over

To my left I could see a game trail below that would get me to my next objective, so I descended this point to the west and picked up the game trail

Following the ridge northwest, following a faint game trail, this is the route I took to the next point on the ridge

I ascended a small gully, then ascended the ridge

It was an easy tundra walk to the summit of 13005

I summited unranked PT 13005 at 7:45am

PT 13005:

To the north was Baldy Lejos. 

This is the class 2 route I used to avoid the ridge

Most of this was on easy tundra

From the top of the small, grassy gully, I could see Baldy Lejos

I followed the ridge to get there

I summited Baldy Lejos at 8:15am

Baldy Lejos:

Now to head back to the trailhead.  I took a slightly different route on my way back, to avoid the extra elevation gain.  I headed back down the ridge to the grassy gully

Instead of re-ascending PT 13005, I stayed on the grassy slope to the left to gain the ridge.  There are some game trails here.

Back on the ridge, I followed it south and then dropped down to the left to descend

I could now see PT 13115, but did not want to re-ascend the unnecessary point, so I skirted it to the right on a game trail

I could now see PT 13115 and the Colorado Trail.  I headed back to the Colorado Trail

I followed the Colorado Trail back to San Luis Pass

And at San Luis Pass turned right onto the West Willow Creek Trail

And followed West Willow Creek trail back to the trailhead.

I made it back to the trailhead at 10am, making this a 10.19 mile hike with 2879’ of elevation gain in 5 hours.

On to the next trailhead!

PT 13220 and PT 13291

RT Length: 11.89 miles

Elevation Gain: 3560’

Full disclosure, I did these peaks in two days.  The first day I got thunder stormed out just before the access gully of PT 13291, and had to turn around.  I came back 2 days later to finish the summit.

I stayed overnight at the North Fork Lake Creek Trailhead, and was on the trail at 5am the next morning.   The parking area has room for about 15 vehicles if everyone parks nicely, as well as some overflow spots on the short drive in.

The trail starts at the north end of the parking area, close to a locked gate.  It’s trail number 1483.

I followed this class 1 trail for 3 miles north into the basin

When I came to a creek, I crossed it and turned left. 

Here there is a faint trail for a few yards, and then it fades out.  I headed northwest into the upper basin.

Here’s an overall view of my route to the ridge

While there was no trail in the basin, I was easily able to follow dried up creek beds through the willows.  Staying on the dry rocks kept me mostly away from the willows, and became a great path to follow.

Once I got past the willows, I aimed for the ridge.  Specifically, this boulder first.

After making it to the boulder, a game trail picked up and took me to the ridge

Once making it to the ridge, I turned right, and followed it northeast to the summit.  This was all class 2.

Here are some pictures of this short ridge

 I turned right at the top of the small gully, and walked to the summit

I summited PT 13220 at 7:45am

PT 13320:

PT 13291 was to the northeast, but to get there I was going to retrace my steps down the ridge first.  I headed back to the ridge.

I picked up the game trail again, and skirted the rocky section that was on my left, and re-gained the ridge on a grassy slope.  Here’s my overall route

Once on the ridge again, I skirted this rocky section to the right.  Resist the temptation to ascend any higher until you get to the tundra and it will stay class 2.  Otherwise, you can go up the rocks at any point for some class 3 or 4 fun.

Now it was a class 2 stroll along the ridge as I headed east.

When I got to this point I put on my microspikes, turned right, and dropped down to navigate the formations.  This was class 2+, but the loose scree and exposure added a layer of fun.

This was my next obstacle.  My first thought was to go right up the center of the gully, but I ended up scouting around and found it was much easier, and still class 2, to skirt around and gain the ridge from the right side.

Back on rocky tundra, I now followed the ridge direct north.  This was all class 2.

At the top of the ridge I got my first good view of PT 13291.  Unfortunately, the first day I was here I had to stop at this point due to time constraints and an impending thunderstorm.  It sucked to turn around, but it was something I had to do. 

The next time I was here, two days later, this is the overall route I took to get past the steep rock in front of me.  Also, this is a good time to put on your helmet if you haven’t already done so. 

This looks loose and fraught with exposure, but the route is actually pretty solid and wider than it looks from a distance.  I started out rock-hoping on stable boulders, then descended west about 100 feet, staying as close as I could to the rock wall, to the base of a gully

At the base of the gully, I turned right and ascended the 100-foot gully.  Climbers left was extremely loose, but the right side was steep but stable rock.  I chose to stay on the stable rock.  There is a cairn (circled) at the base of the gully, indicating where to ascend.

Here’s a view from 13220 of the gully I went up to access 13291.

Now for the fun part!  It was time to scale the east side to the summit.  This is choose your own adventure.  I stayed on the east side the entire time.  The ridge proper looks like it goes at class 4.  I stayed more to the east while climbing.

This is the overall route I took, dropping down about 25 feet, aiming for a break in the rocks, and then heading up the east side, keeping it mostly class 3, but once again, it’s choose your own adventure.

Here are some pictures of the terrain to the summit.  I dropped my pack to make for easier climbing.  It also made it easier to find my way back, as I just aimed for my pack below.

Now the summit was in sight.  There was a short class 4 chimney to climb with solid hand/footholds.

And then a rocky walk to the summit.  There was a summit register, but it was closed so tight I couldn’t open it.

PT 13291

Now to head back down.  I descended the chimney, and headed back towards my pack. 

Then it was up to the gully, down the gully, and around the west side to head back to the saddle. 

Back up to the ridge

And then I followed the ridge, descending it to the left, and curving around the south side.  It’s a good idea to have your microspikes on for this part. It’s class 2+, but the rocks are loose and the angle is steep.

I followed the ridge until I made it to just before where I’d accessed the gully from 13220.  Instead of heading down that way, I descended south into the basin below.  This was the same way I’d ascended earlier that morning.  This would be a good option if just doing 13291. It’s class 2, and led me into the basin.  I aimed for the thinnest section of rock below. The entire time I was hiking down, I was looking for the dry creeks that led me in, knowing they’d eventually bring me back to the creek crossing and the trail.  They were easy to spot from above.

Once in the basin, I followed the dry creeks to the trail

Here’s a look back on my route down from the ridge (and how I hiked in that morning). Taking the dry creeks keeps you away from most of the willows.

Back on the trail, I followed it south back towards the trailhead

Doing the math by combing my two days of hiking, the total for the route in one day should be about 11.89 miles with 3560’ of elevation gain.

On to the next trailhead!

Peak 9 – 13,207 and Peak 8 – 13,005

RT Length:  10.7 miles

Elevation Gain:  4038’

After quite a long wait at the Eisenhower Tunnel I made it to the Far East Lot at Copper Mountain and was on the trail at 5am.  The lot has enough room for hundreds of vehicles, if not more.  The trail starts near the construction area, at the south end of the lot

I crossed a bridge over Tenmile Creek, and the trailhead was directly on the other side

I was following the Colorado Trail.  This was a class 1, easy to follow trail all the way up to the Peak 9/Peak 8 saddle. 

After hiking for 2.3 miles, I came to the Colorado Trail/Wheeler Trail junction.  At this point I continued straight, on the Wheeler Trail

This trail took me above treeline, to the Peak 9/Peak 8 saddle.

From the parking area, it was 3.7 miles to the saddle.  From the saddle the hike became class 2, and I gained around 800 feet to the summit, but it was an easy 800 feet.   I turned right, and headed south up to the ridge on tundra

Once on the ridge I turned left, and followed a slight game trail southeast

The last bit of the hike to the summit can look overwhelming at first, but it can be kept at class 2.  I thought of it as similar terrain to the “16 Golden Stairs” on Pikes Peak Barr Trail, but much shorter (maybe 30 feet or so to deal with).

I dropped down to the left of the ridge, and took a game trail to the summit.

I summited Peak 9 at 7:30am

Peak 9:

It was starting to snow lightly, I’d forgotten my gloves, and I could see sunshine on Peak 8 so I turned around and headed back to the Peak 9/Peak 8 saddle. 

Here’s a look at that rocky section on the way back

Back at the saddle, I headed north, and gained about 600’ to the top of Peak 8.  This was a simple trek to the summit, as I just followed the “Ski Area Boundary” signs.  At times, there was a game trail to follow. 

There was a lot of junk left on this ridge.  It looks like when they put in the posts for the ski area boundary signs, they left their tools behind.  There was also an emergency station, with litters and first aid supplies for injured skiers.

The route to the summit was obvious

I summited peak 8 at 8:30am

Peak 8:

This peak gets a lot of traffic.  There was a wind break with a summit register box filled with old school IDs and medical cards.  Someone had even left a small tube of sunscreen inside.

After leaving a card of my own, I headed south back to the saddle

At the saddle I turned right, and followed Wheeler Trail back to the Colorado Trail

Then I followed the Colorado Trail back to the trailhead

I made it back to the trailhead at 10am, making this a 10.7 mile hike with 4038’ of elevation gain in 5 hours.

On to the next trailhead!

Oyster Peak – 13,316 and Pearl Mountain – 13,379

RT Length: 11.44 miles

Elevation Gain: 3923’

I drove past the town of Ashcroft, and right onto the 4WD dirt road that leads to Pearl Pass.  I stopped at about 9800’ at dispersed campsite #3.  There are 9 total, with signs asking you to only camp in the designated areas.  All first come.  Sites 1 and 2 were taken, so I parked in site 3. 

Here are a few of the other sites.

I was up and on the trail at 5am the next morning.  I followed the 4WD dirt road southwest, towards the Pearl Pass/Montezuma Mine junction.   About a mile into my hike I saw a bear on the trail (it ran away before I could get a picture) so those bear warning signs aren’t a joke. 

At 10200’ I crossed Castle Creek on a log bridge, and continued on

After hiking for 2.5 miles I came to the Pearl Pass/Montezuma Mine junction and went left towards Pearl Pass Road.  There are places to park here as well, and if you have a stock 4WD you should be able to make it to this point.   After this junction it’s modified, lifted (etc.) 4WD only.

I continued on this road as it headed south.  Water from streams above ran down the road.

After hiking for 3.6 miles, and at 11800’ of elevation, I left the road to ascend west, up a game trail through a ravine

This gave me my first good view of Oyster Peak

This is a choose your own adventure route to the ridge.  This is the route I took, keeping it all class 2 (although it was steep at times)

The route was rocky, and most of the rocks were not stable.  Here are some step-by-step pictures to the ridge.

Once on the ridge I turned right, and headed north towards the summit.  This was all class 2.

I summited Oyster Peak at 8am

Oyster Peak:

It was very windy on the summit, and a cold wind for August.  I turned around and looked southeast, at Pearl Mountain

It’s also good to note the descent route from this angle

I continued southeast, towards the Oyster/Pearl Saddle.

Here is my overall route up to Pearl Mountain.  I was able to keep this mostly class 2, with just a few easy class 3 moves, mostly sticking to the ridge.  There were a few spots with exposure, made interesting by the 40mph winds. 

I went left at the end of the ridge to make it to the saddle

Here’s the route up the ridge.  It’s easier than it looks.

The rest of the hike is class 2, on what is loose, rolling rocks.  There are a few game trails through the rocky sections

I summited Pearl Mountain at 9am

Pearl Mountain:

I continued following the ridge east, to an obvious orange gully.  This part of the ridge was sketchier than the first part.  In retrospect, I made some things class 4 when they could have been class 2, but the class 3 stuff was class 3, no way around it.  I stayed straight on top of the ridge

Here’s looking BACK at Pearl, the way I descended was class 4 (solid line) but when I looked back I noticed I could have descended on the dotted line, making it class 2

For the last bit of the ridge before the gully I dipped to the right, to keep it class 2

The gully is obvious, as it’s orange.  I had a small patch of snow to get through first.  I had the brilliant idea to glissade the 10 feet of snow.  This worked perfectly, except when I hit the bottom I ran into a good 8 inches of sticky mud I hadn’t expected.  I was stuck in the mud for a minute until I could pull my boots out.

Ok, now to head down the gully.  I was so glad I was going down this instead of up.  It was seriously steep.  It starts out as scree and ends with microwave sized rocks.  You can see Pearl Pass Road in the distance.  That’s what I was aiming for once I got out of the gully.

Here’s looking back up the gully

My route down the gully

And now back to the road

Back on Pearl Pass Road, I followed it north, back to the trailhead

I made it back to my truck at 11:45am, making this a 11.44 mile hike with 3923’ of elevation gain in 6 hours, 45 minutes

When I made it back, I was surprised to find another vehicle in my dispersed camping spot.  It was especially curious because the next three campsites were vacant.  I’ve been sitting here for the past 3 hours putting together this trip report, and they still aren’t back yet.  Edited to add:  About half an hour later I went to put my computer away, and their car was gone.  I never heard them leave. I’m not sure they knew I was here either.

On to the next trailhead!

Hanson Peak – 13,462 and 13,078

RT Length: 11.42 miles

Elevation Gain: 2913’

I parked at the Animas Forks Historic Site near Silverton.  A couple of notes:  the 4WD road in is 4WD, and it’s crowded!  The site however, is pretty cool.  Lots of stuff to see here, and you can go inside the structures (even the 2 story ones). 

There are plenty of spaces to park.  I chose one, and was on the trail at 3:20am

I followed the 4WD road that started to the northwest of the historic site, leading towards California Gulch

I followed this road west for 1.25 miles, to the Placer Gulch/California Gulch junction

At the junction (no signs) I turned left and headed south towards Placer Gulch

I followed this 4WD road south until I’d hiked a little over 4 miles.  It led me to Gold Prince Mine, zig-zagging up the hillside as it went (orange arrow).

This part was tricky in the dark, but at 12615’ of elevation, there’s a side road that goes further up to another mine.  I took that road southwest. 

Here’s an overview of the route I would take to the ridge, using mainly a mining road, then finding a grassy shelf that led to a short class 2+ gully.

Here are some step-by-step pictures of the route to the ridge.  Once I left the dirt road, I put on microspikes, and kept them on until I made it to the summit and back down to where I’d put them on.

Once on the ridge, I turned right and headed north towards the summit (eventually turning into northwest as I followed the ridge).  I was able to follow game trails to the summit (there are a few of them, pick your favorite depending on conditions and ability).

This was a bit loose, lots of chossy scree.   The actual summit is to the northwest, but going straight up this choss will get you to an easy ridge to traverse to the summit

I summited Hanson Peak at 5:45am, and got to watch the sunrise

Hansen Peak:

From Hanson Peak I could see my next objective, PT 13078, to the southeast.  Notice how the road goes very close to the peak?  I was going to need to get back to that road to summit.  I also didn’t summit this peak the way most people do, but instead took the NE slopes.  I found this to be much gentler terrain.  Here’s an overview of how I summited PT 13078

To get there, I was going to need to make my way back to the 4WD road, so I re-traced my steps back to the ridge

This is where I exited the ridge and descended back down to the mine.  I made myself a tiny cairn (seriously tiny, no more than 5 inches high, but I knew it was there) so I’d know the right gully to take.

Then it was back down to the mine, and back to the road

Back on the road, I turned right and followed it east until I was at 12750’  Here’s a visual of where I started my ascent up 13078

And some step-by-step pictures

From here I could see the actual summit of 13078.  I followed the ridge south to the actual summit. 

There was one short easy class 3 move, and there were three options to do this move to gain the summit.   

I chose to go straight up on the way in, but took a sideways route down.  Here are some of the available options, all easy class 3

Then it was a quick, class 2-rocky ridge walk to the summit

I summited PT 13078 at 6:50am

PT 13078:

Here’s an overview of the route from Hanson Peak, much of this done on mining roads

 I descended the same way I ascended, downclimbing that short class 3 section and heading back to the 4WD dirt road.

Back on the dirt road, I followed it back to the California Gulch/Placer Gulch Junction, past a lot of abandoned mines and mining equipment. 

I turned right at the junction, and headed east 1.25 miles back to my truck

I made it back to my truck at 8:20am, making this a 11.42 mile hike with 2913’ of elevation gain in 5 hours.

On to the next trailhead!

Tuttle Mountain – 13,208 and Houghton Mountain – 13,059

RT Length: 9.63 miles

Elevation Gain: 2935’

I parked at the Animas Forks Historic Site near Silverton.  A couple of notes:  the 4WD road in is 4WD, and it’s crowded!  The site however, is pretty cool.  Lots of stuff to see here, and you can go inside the structures (even the 2 story ones). 

There are plenty of spaces to park.  I chose one, and was on the trail at 5:45am, after it had stopped raining. 

I followed the 4WD road that started to the northwest of the historic site, leading towards California Gulch

I passed a couple of mines in the dark.  Apparently, the crows weren’t happy I was there.  Nothing spooky about this at all.

Crows:

I followed this road east for 1.25 miles, to the Placer Gulch/California Gulch junction, and continued straight towards California Gulch

I continued following this trail through California Gulch for a total of 4 miles, all the way to California Pass.  This was an easy-to-follow 4WD dirt road, that passed a few abandoned mines.

At California Pass, I left the road and followed game trails north along the ridge.  This is a class 2 ridge, and easy to follow

Also, I heard coyotes

I could also see both peaks from here, Tuttle and Houghton

Here are some pictures of that class 2 ridge and the game trails

About halfway across the ridge I took a game trail to go straight towards the peak

Then I ascended this class 2 ridge to the north, leading to a false summit

It was a quick hike to the actual summit

I summited Tuttle Mountain at 8:15am

Tuttle Mountain:

Looking northeast, I could see Houghton Mountain.  Before descending to the saddle, I’d go over this hump, then southeast for a bit to avoid some rock outcroppings. 

Here’s my route down to the Tuttle/Houghton saddle, first heading southeast to avoid the rocks

Then crossing northeast towards the saddle, and up the ridge to the summit.  This is my overall route to the summit of Houghton.  If you like cool rocks, plan to spend a lot of time in the area circled in red.

These are the rocks from Tuttle I was trying to avoid, and the route I took down

Now to head over to Houghton.  This was mostly a class 2 ridge hike through rocky, rolling tundra, littered with a bunch of mines.  It was also choose your own adventure on a wide ridge.  I was aiming for where the orange arrow is pointing.

Oh, and here is a picture of one of those cool rocks I was talking about

For the rest of the hike to the summit of Houghton, there are slight game trails to follow through both the tundra and eventually scree.  I just kept heading northeast, staying to the ridge

Once you see the change from tundra to rocks, notice the top of this gully.  It will be the decent route.

The last push to the summit was rocky, but there were game trails to easily follow

I summited Houghton Mountain at 10am

Houghton Mountain:

Now to head back down.  I retreated the same last rocky section southwest

Then turned left, and descended a gully to the south.  This is an easy, tundra filled gully, just be careful, as there are scree rocks here that have tumbled from above and are loose on the grass (but no scree)

To make this easier, I aimed for the California Gulch/Placer Gulch junction, since it was easy to see (circled in red). 

From the junction, here’s the route I took down from Houghton Mountain

At the junction I turned left, and followed the road east back to Animas Forks

I made it back to my truck at 11am, making this a 9.63mile hike with 2935’ of elevation gain in 5 hours 15 minutes. 

On to the next trailhead!

Chief Mountain – 13,019

RT Length:  16.82 miles

Elevation Gain:  4261’

I arrived at Thirtymile Campground the night before, and slept in my truck at the hiker trailhead.  Knowing this was going to be a hot day I wanted to start early.  I was on the trail at 3:30am.  The trail starts to the south of the parking area, and if you get there in the dark it can be difficult to locate.

There is a register and information board at the true trailhead.  There are two trails here, I took the one that goes to the left, the Squaw Creek Trail

This is an easy to follow, class 1 trail.  I followed this trail, over a bridge crossing Squaw Creek, and paralleling Squaw Creek itself, for 2.3 miles.  This trail has a lot of ups and downs, which wasn’t bad at the beginning of my hike, but made the hike out in the sun miserable.  Here are some pictures of the trail

After hiking for 2.3 miles, I crossed a drainage pipe, and about 50 feet to my left was another trail (difficult to see in the dark).  There used to be a cairn here, but someone tipped it over.

Now on the Fern Creek Trail, I followed it southeast towards treeline.  This was still a class 1 trail, and easy to follow.

I crossed a creek, and continued on through a rather large gulch.  The trail begins to fade here, but as long as you stay to the left of the willows, you should be able to find a trail.  In the early morning hours I saw a mama moose with her baby munching on the willows. 

As soon as I was truly above treeline (which felt like forever) the trail ended.  With no real landmarks to work with, I headed south.  I saw a ton of elk in this area, and would for the rest of the hike.  I’d estimate I saw about 200, ranging in groups from 5 to 30 at a time. 

I kept heading south, still with no visual landmarks, and eventually came to a marshy area and a hill to ascend.  This was muddy and wet, and choose your own adventure.  I navigated the willows and made it to the top of this hill/

From here I got my first good view of Chief Mountain.  I’ll save you the heartache I had when I found out this was the actual peak

The good news was now I had a good visual of where I was headed.  I continued south, towards the obvious ridge. 

This was an easy tundra stroll, but be careful:  Just as you don’t want to step on wildflowers while hiking on the tundra, you also need to be careful of other things on the ground.  Like bird nests

I made it to the top of what looked like the summit, only to find another summit further to the south.  It was an easy ridge hike to that next point.

I made it to the top of this point, and even though there was a cairn at the top and a summit marker, I discovered it was a false summit.  This is the actual summit of Chief Mountain.

No worries though, the entire route is class 2.  There are solid game trails to take for most of it.  Here’s the overall route I took.

I started out by heading straight along the ridge, and took the obvious game trails when I saw them.  They were filled with tracks from all the elk I’d seen earlier.

Here’s the final push to the actual summit. There’s a good trail here, and several options for an ascent route.  There are at least 3 different class 2 what I could only call minor gullies that go to the summit. Choose your favorite and have at it.

At the top I turned right, and headed southeast to the summit

There was a summit marker here as well

I summited Chief Mountain at 7:50am

Chief Mountain:

Looking back at that last point on the ridge, it looked very similar in elevation to where I was now. 

Time to head back.  I descended to the west, heading back to the game trail

Then followed the game trail back to the ridge

From here, it’s really important to get a visual of where you’re headed.  Sure, you’re going to head north on the tundra, but look for a meadow in the distance, surrounded by trees, and keep aiming there.  It will help keep you from getting off route.

I saw more elk on my way down.  They had been enjoying themselves on the little patch of snow when they were alerted to my presence, and ran away.

Elk:

Now to trudge through the marshy-willow area

And head back to the Fern Creek Trail

Now the Fern Creek trail should be easy to follow, back to the Squaw Creek Trail

I turned right at the Squaw Creek Trail, and followed it back to the trailhead. 

I made it back to my truck at 11:30am, making this a 16.82 mile hike with 4261’ of elevation gain in 8 hours.

On to the next trailhead!