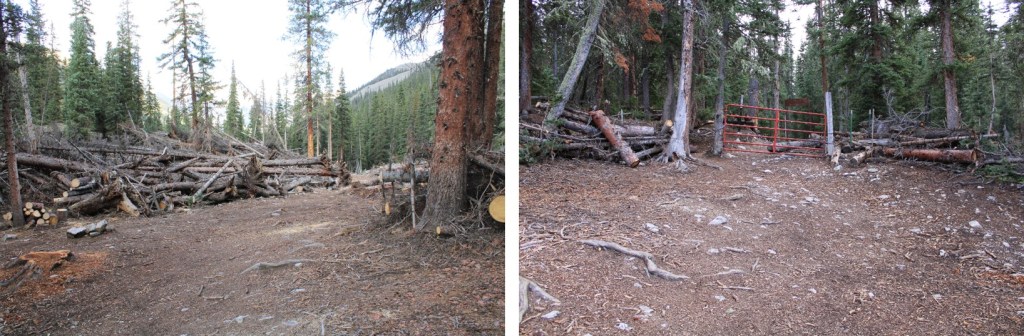
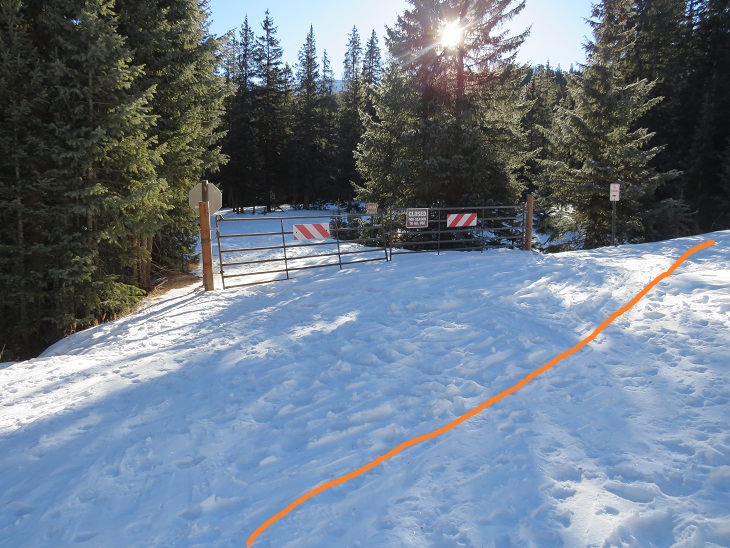
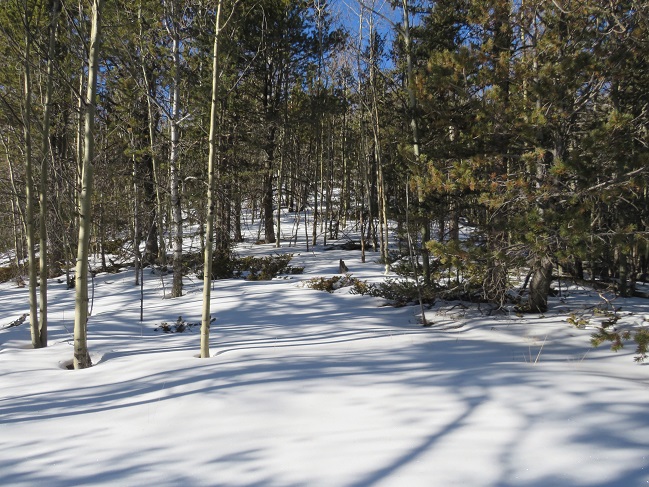
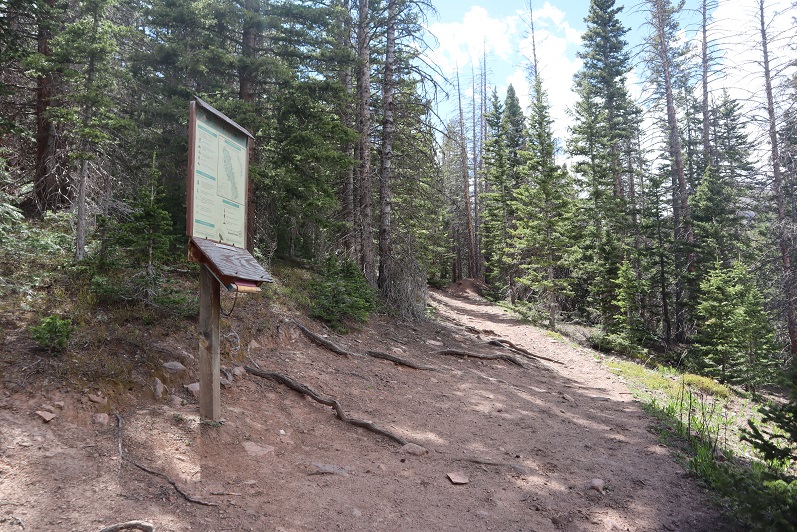
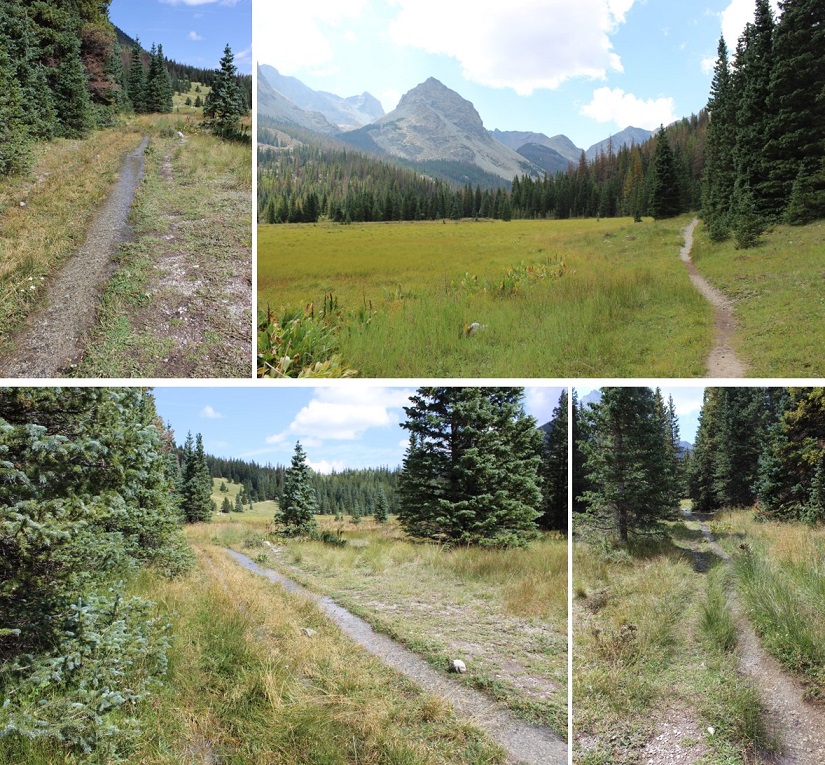
I started from the West Willow Creek 4WD trailhead at 11550’. If you don’t have 4WD, park below, just before the road turns to 4WD. This will add 3 miles and 500’ of elevation total to the hike.
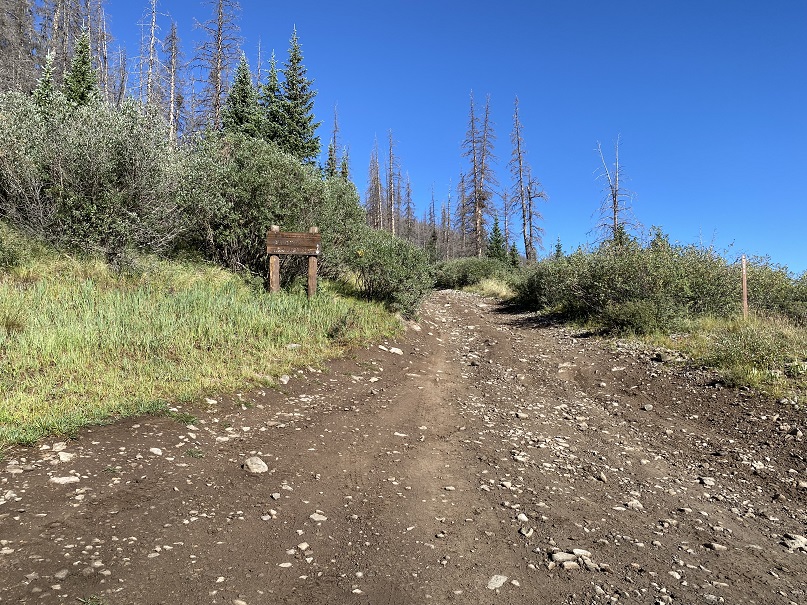
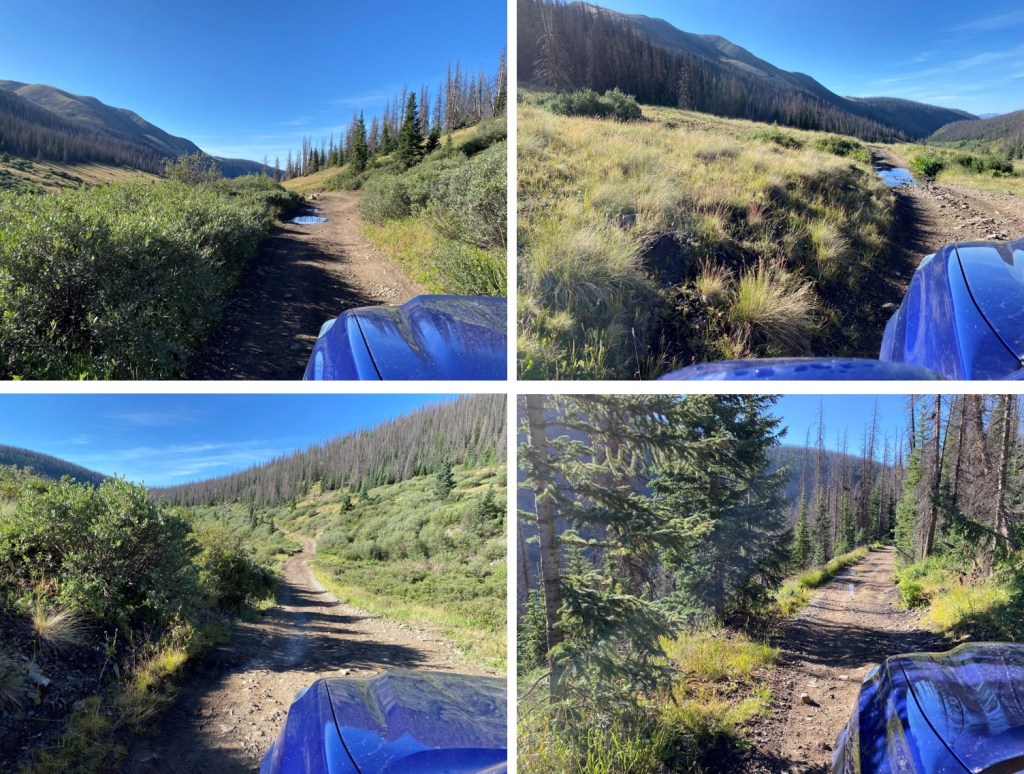
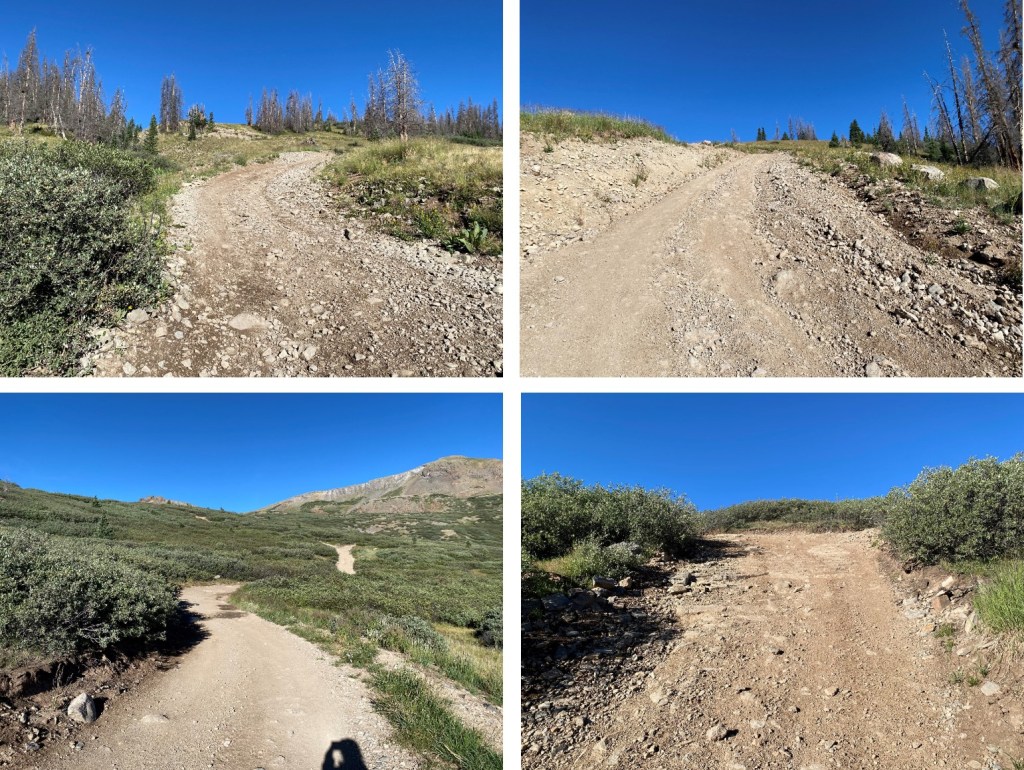
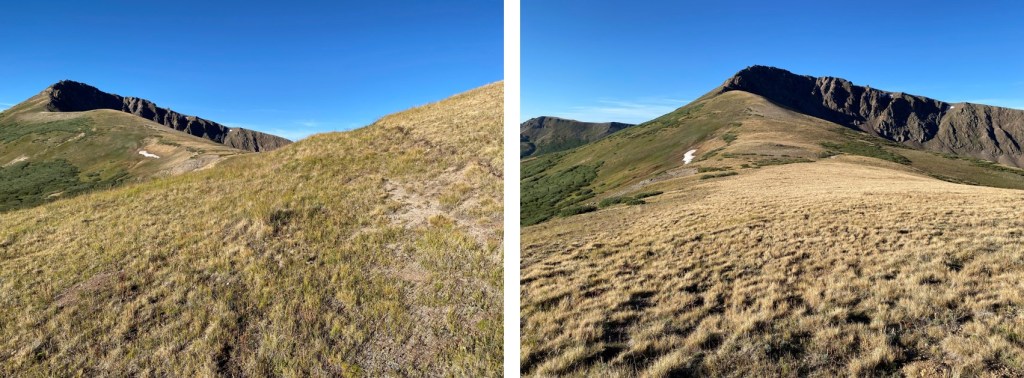
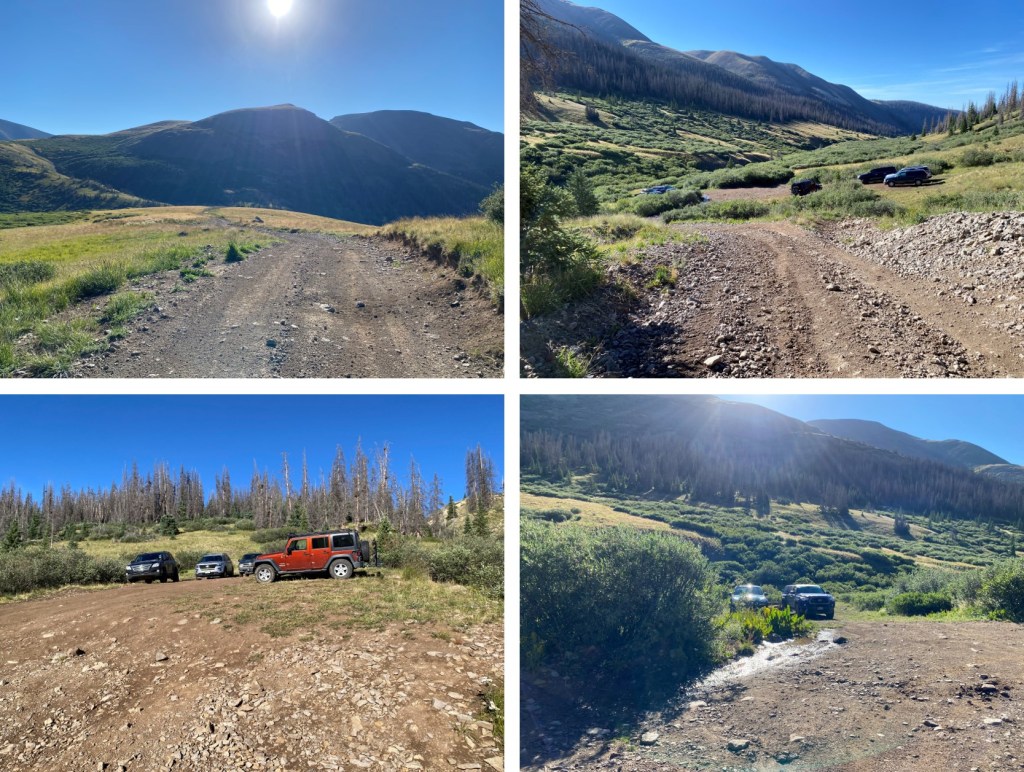
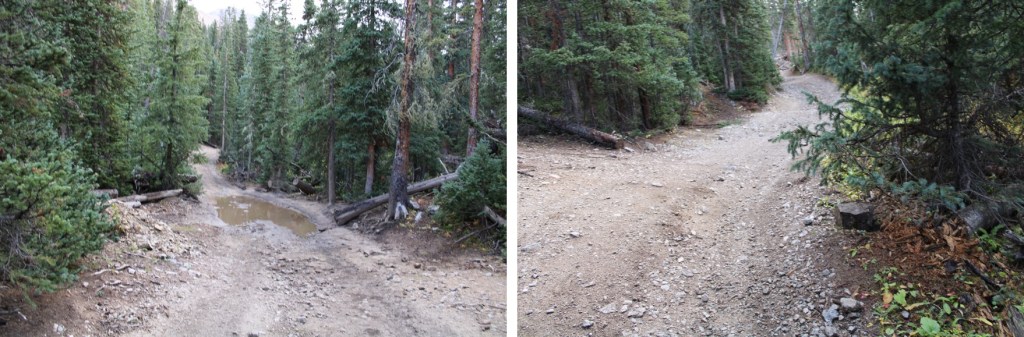
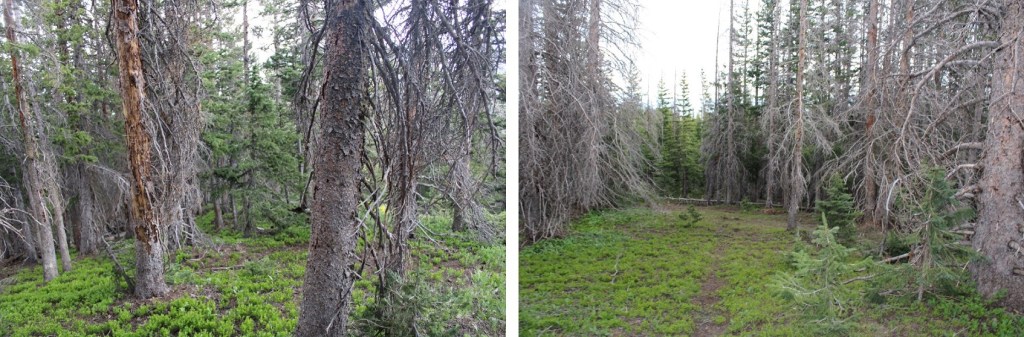
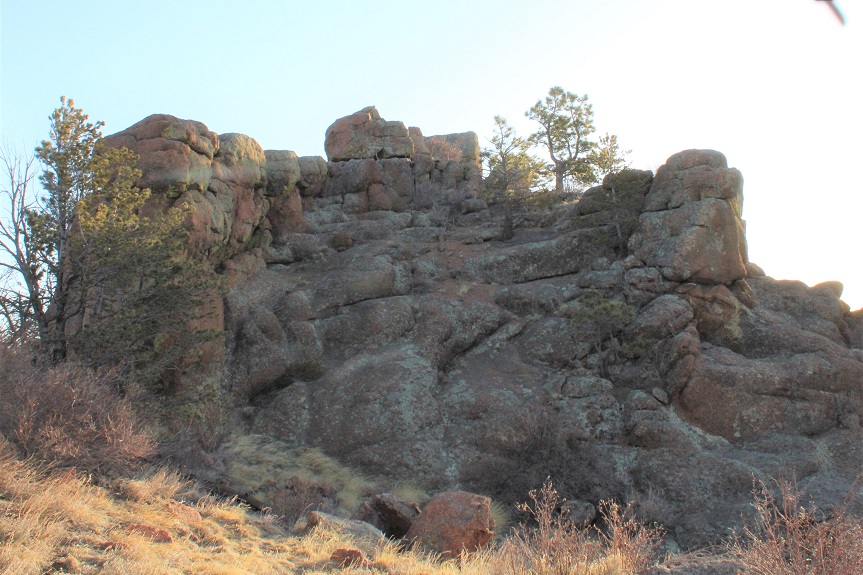
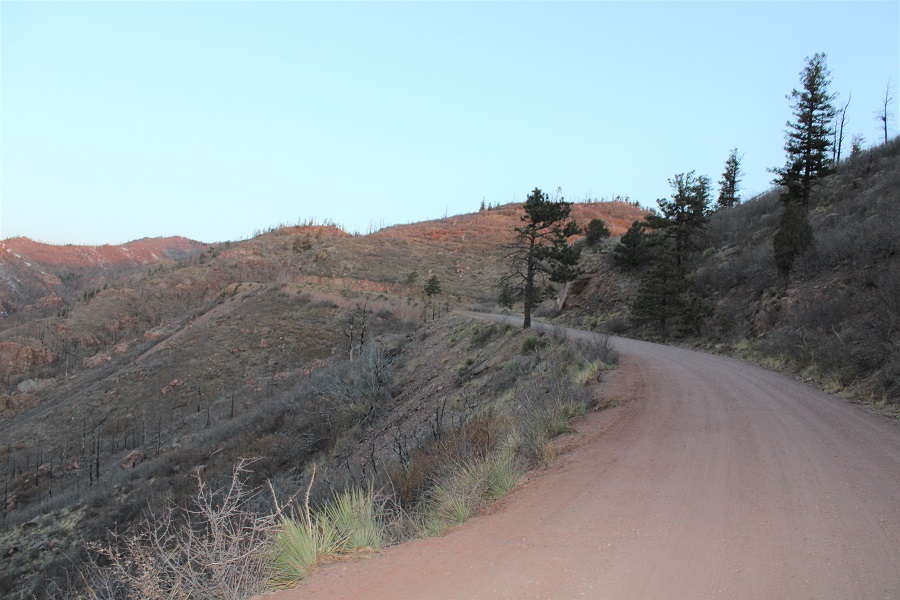
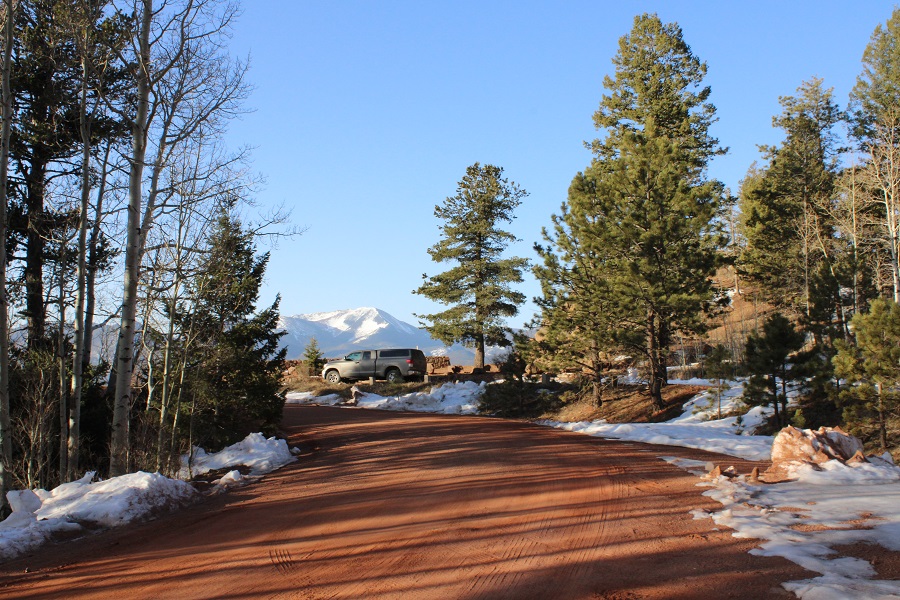
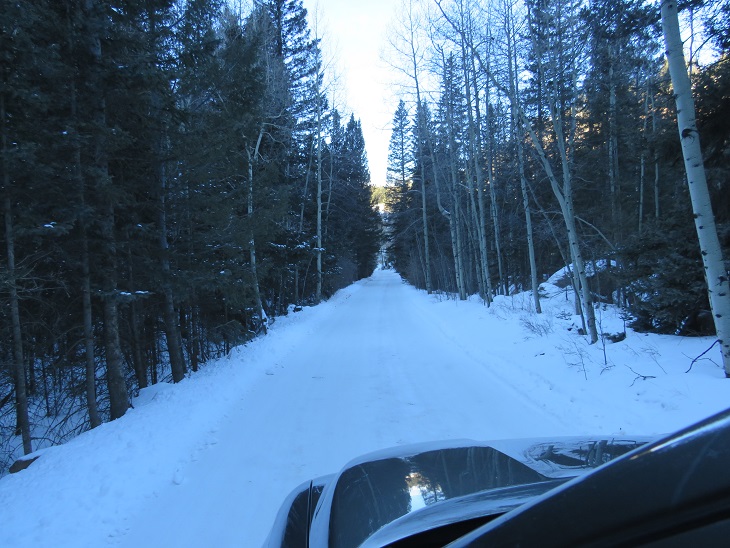
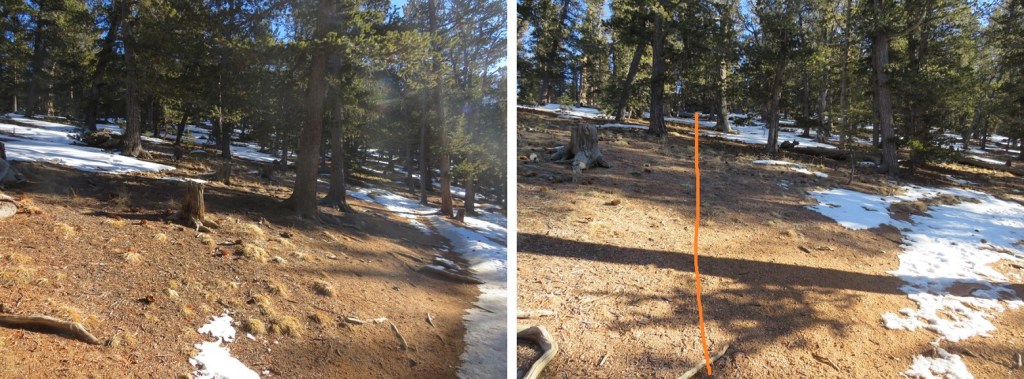
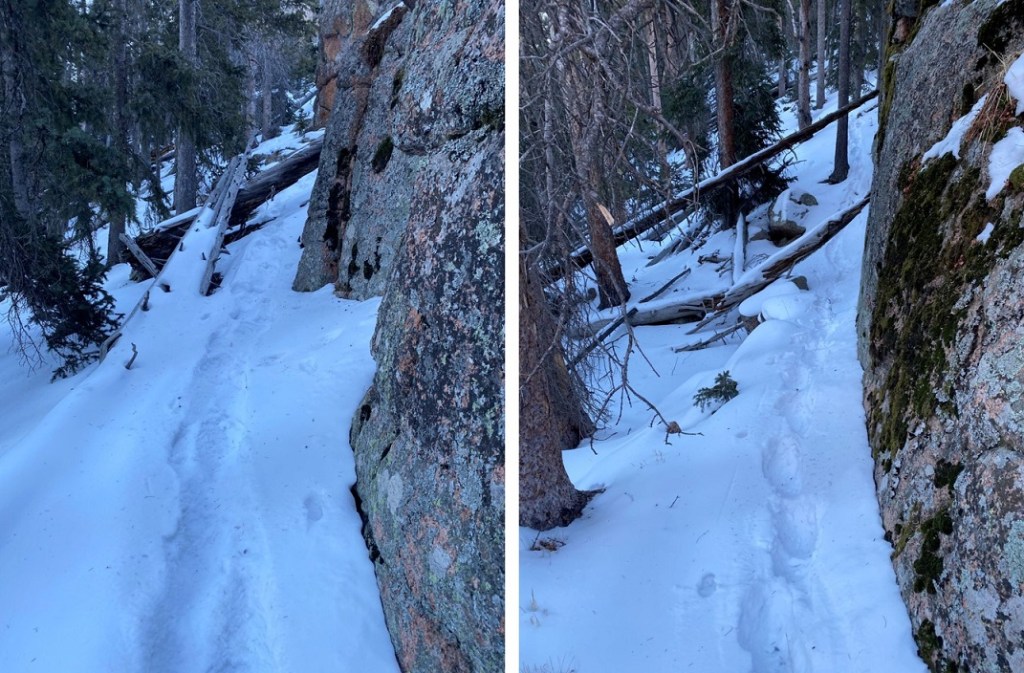
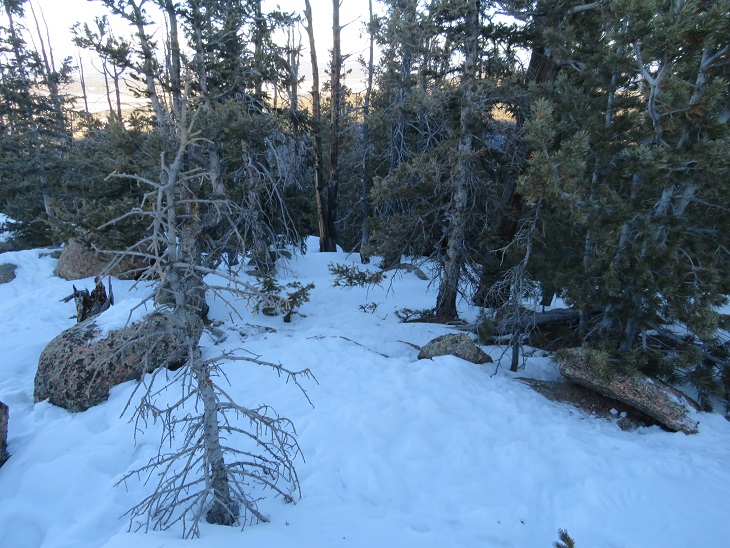
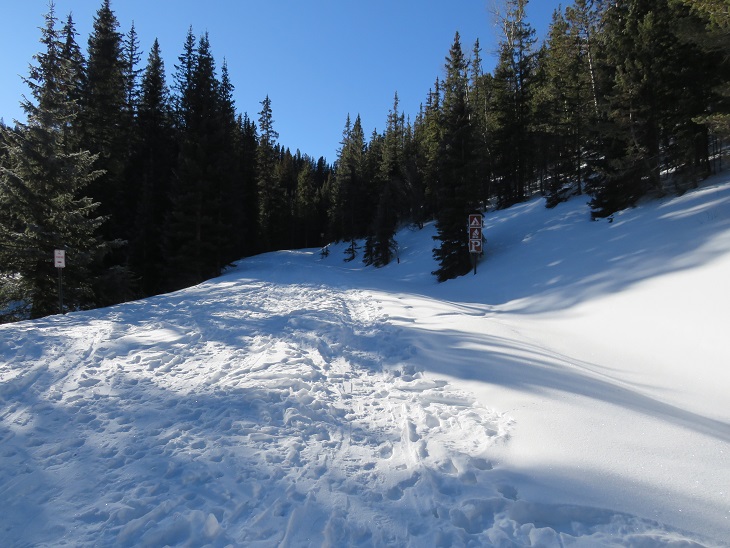
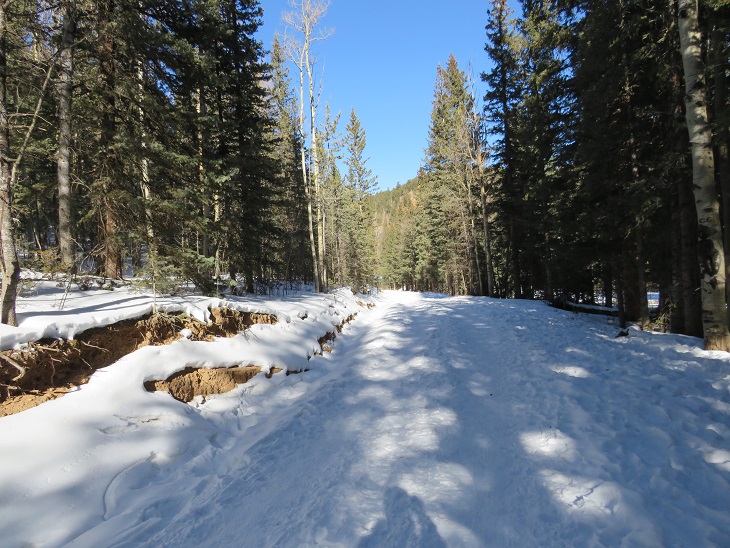
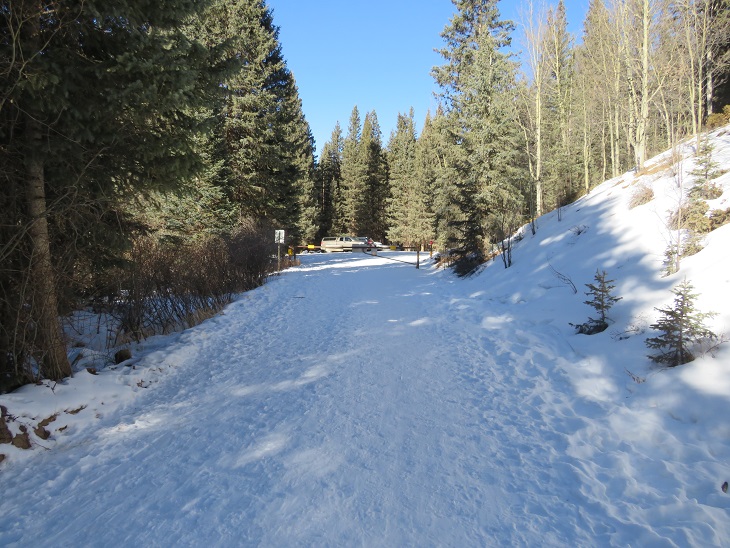
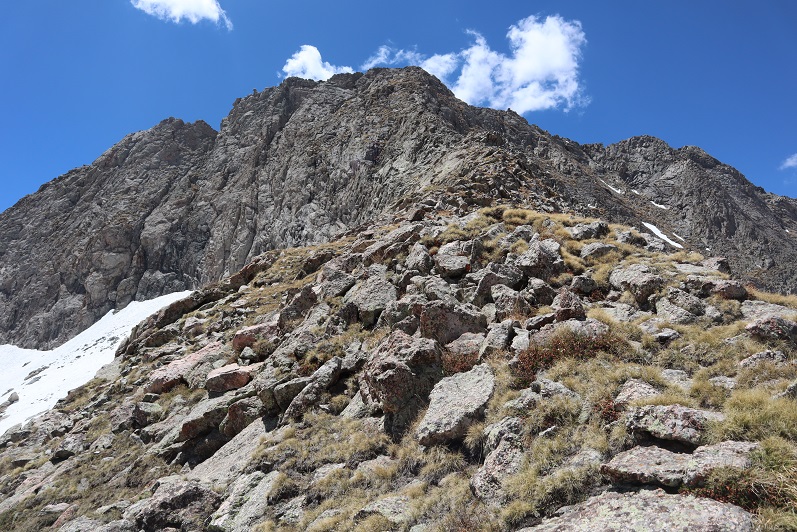
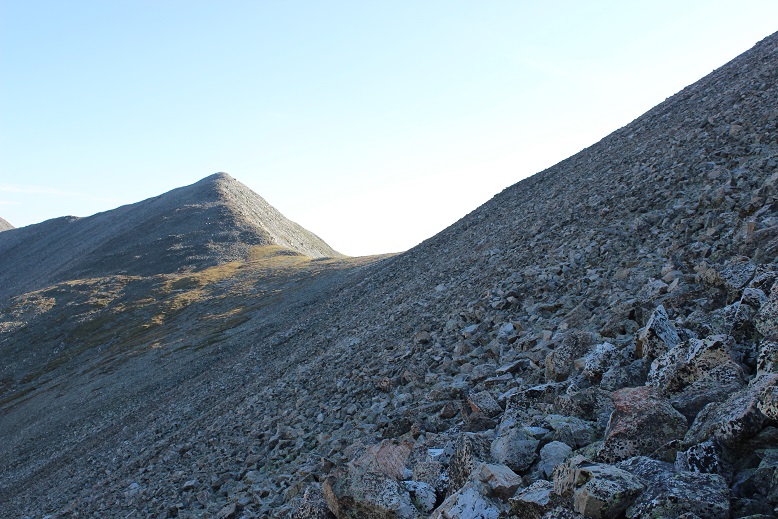
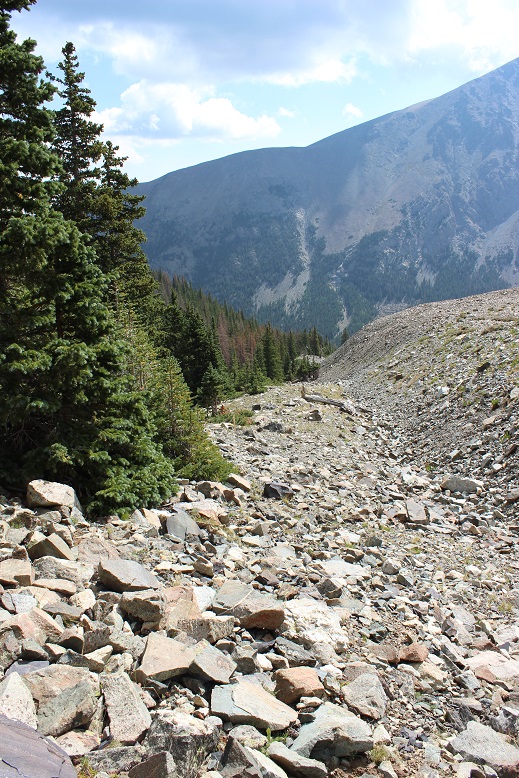
Here are some pictures of the 4WD road in
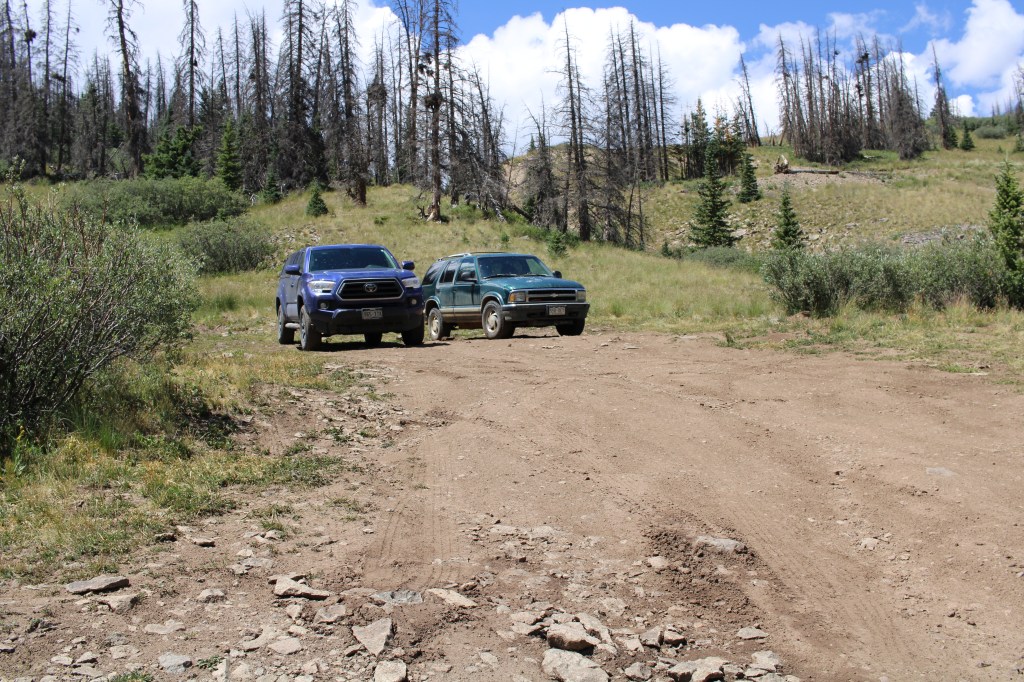
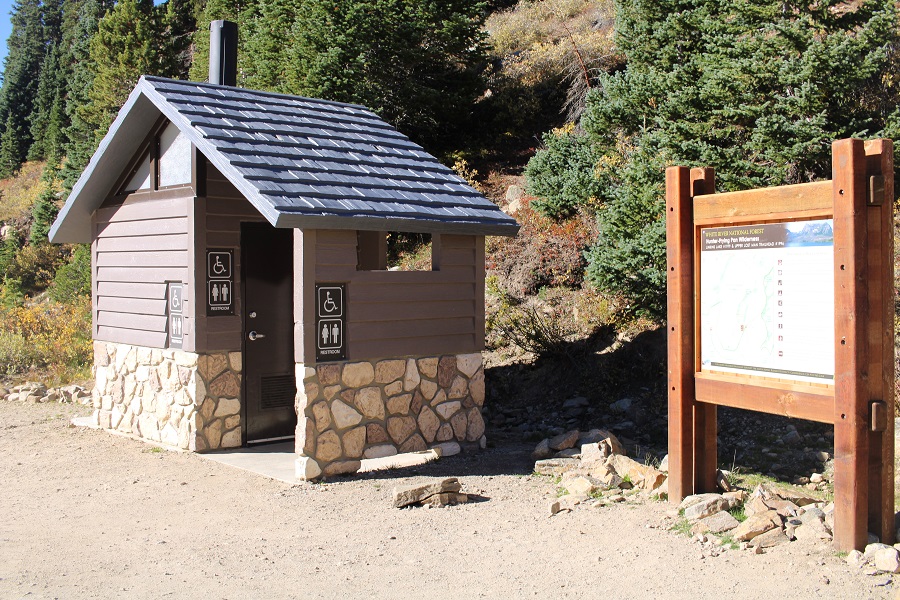
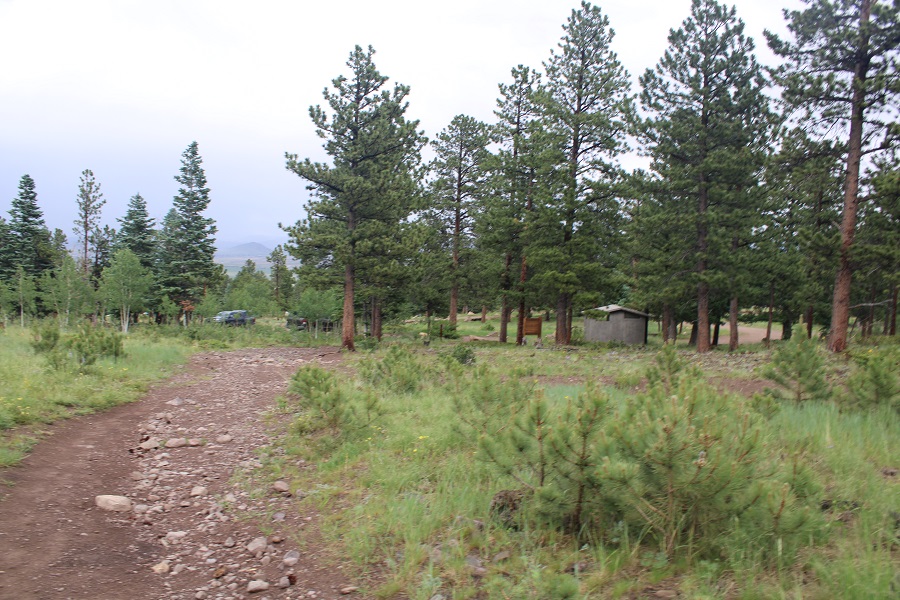
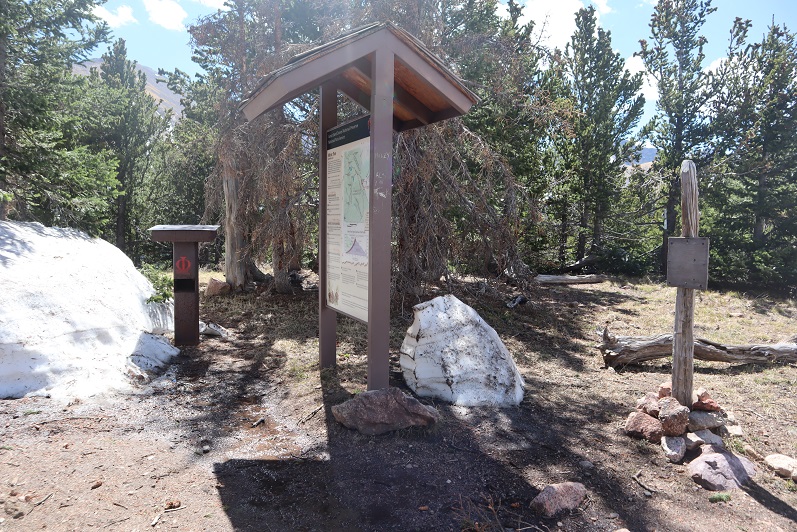
There are a few dispersed campsites here, and a parking area for about 5 vehicles.
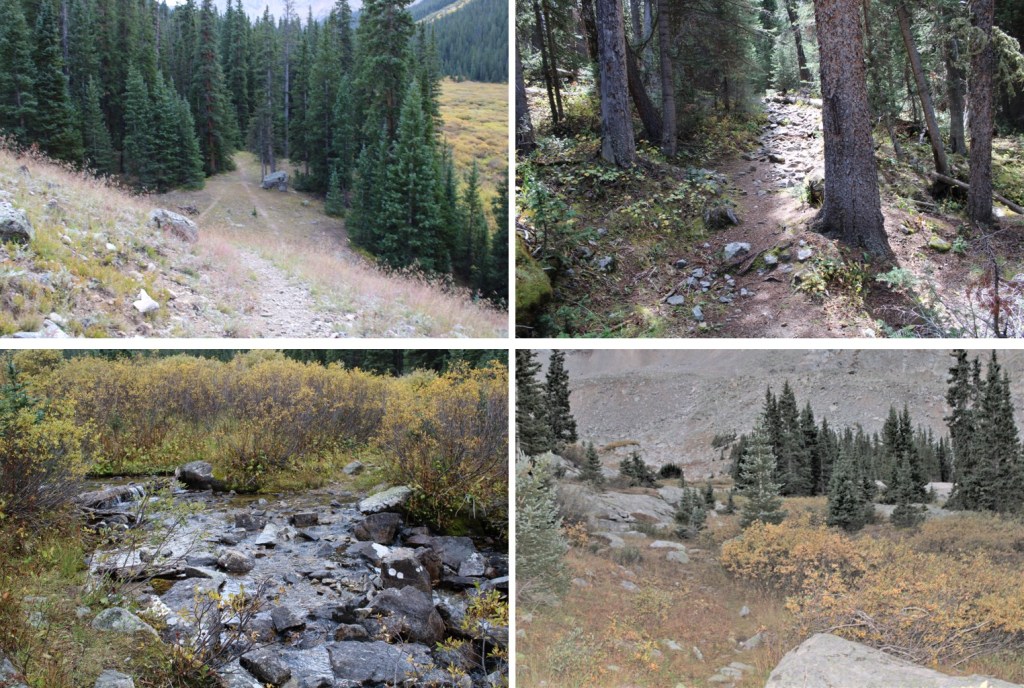
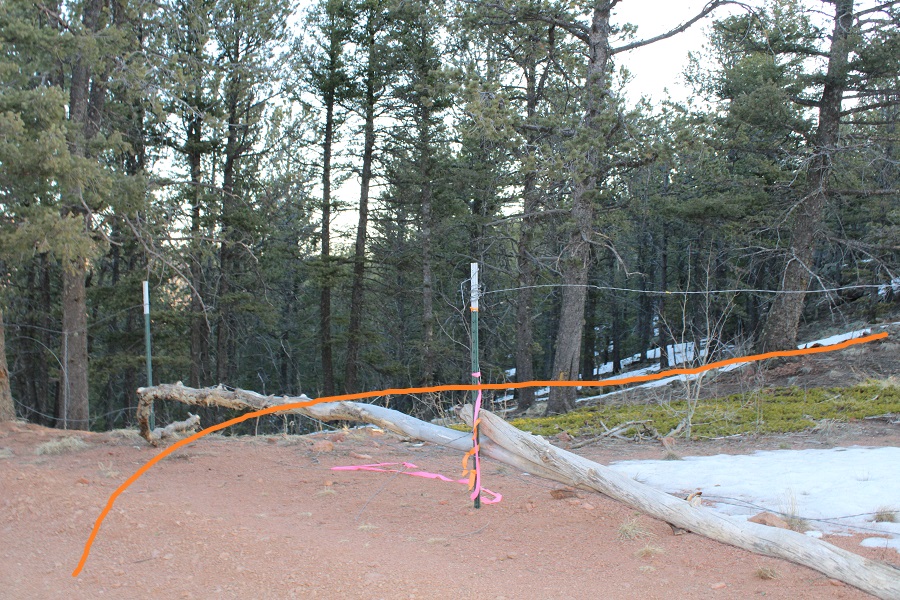
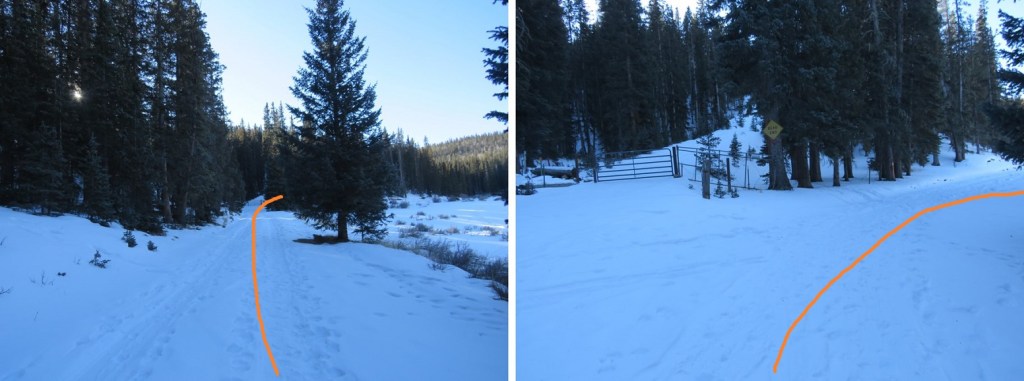
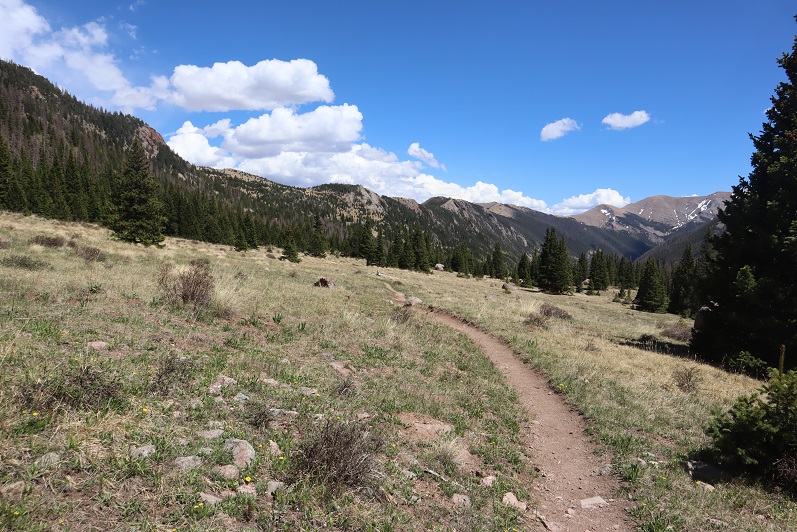
I was on the trail at 5am. The trail actually continues following the 4WD road, and if you have gotten this far, you can do the next few miles on the dirt road. I chose to hike in, to get some extra mileage. I followed 4WD road 505.1 west for 1.5 miles as it climbed into the upper basin.
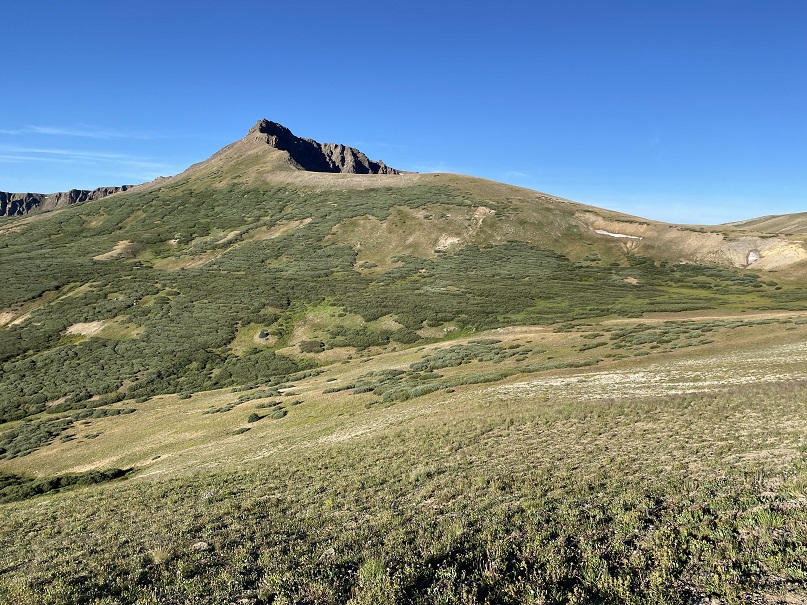
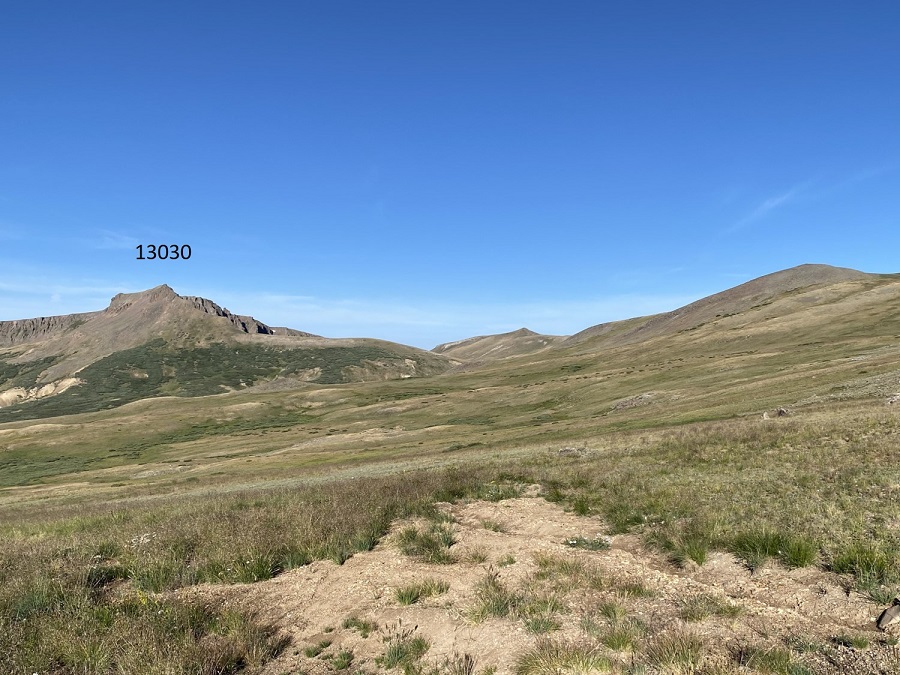
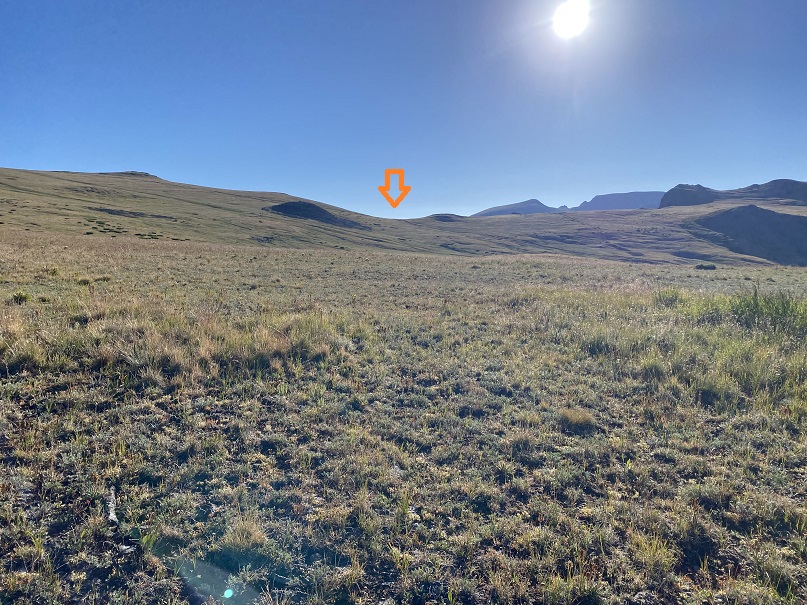
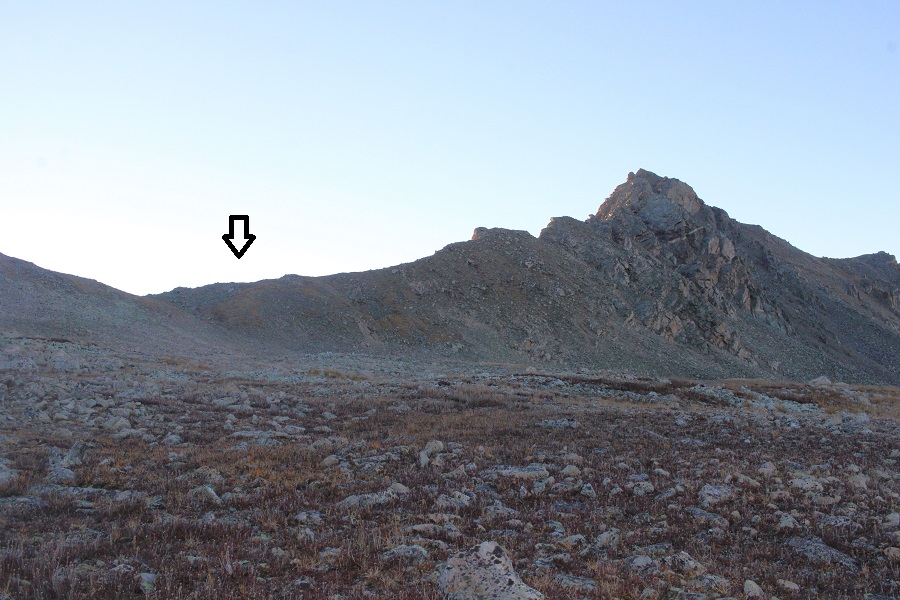
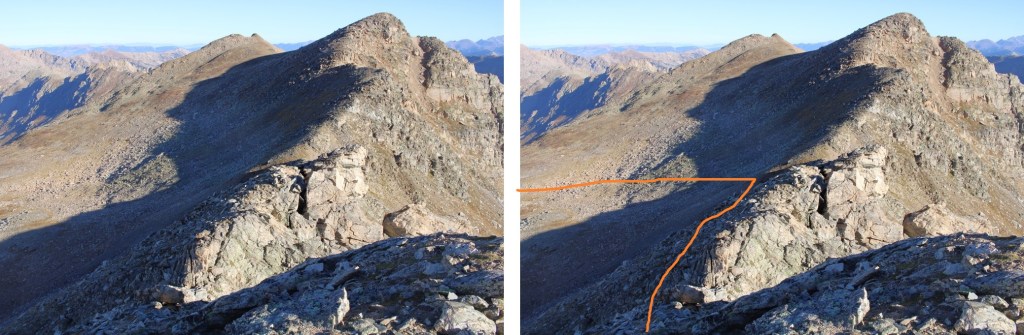
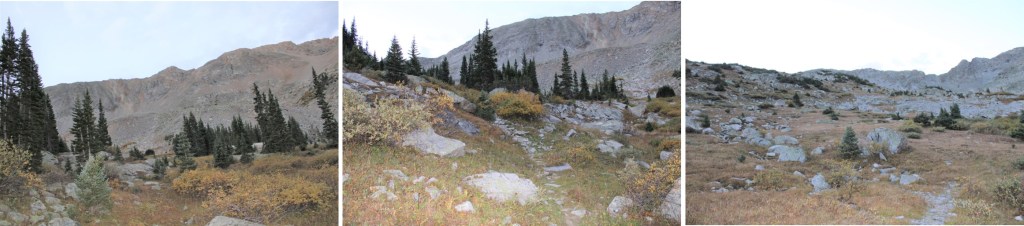
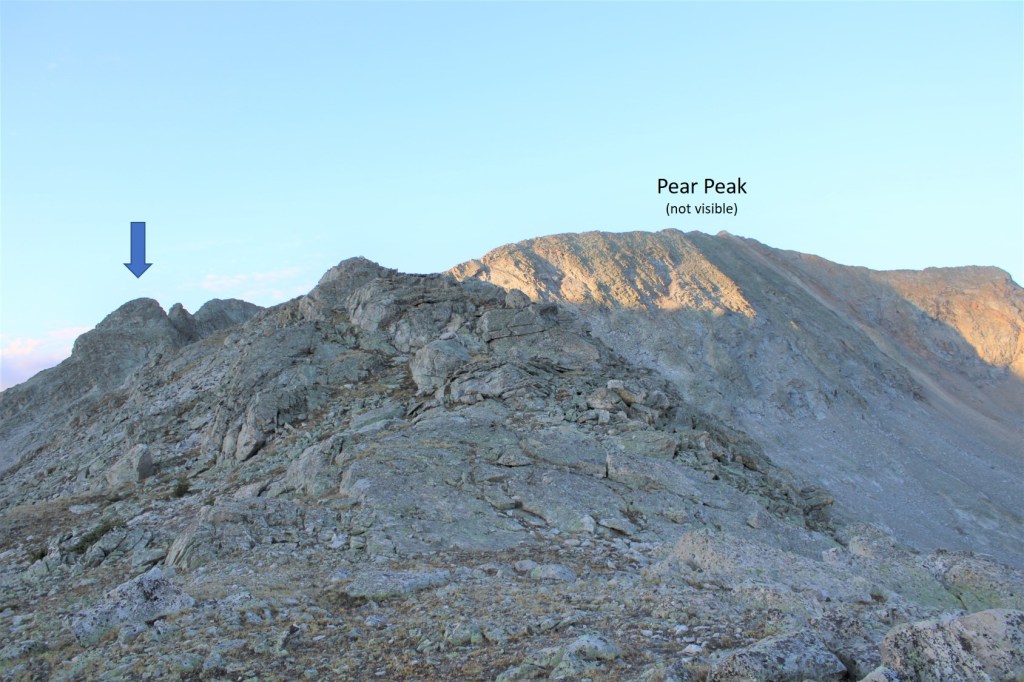
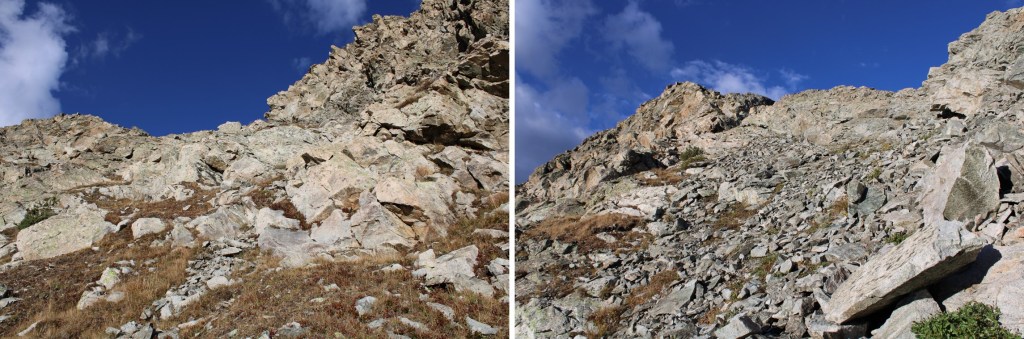
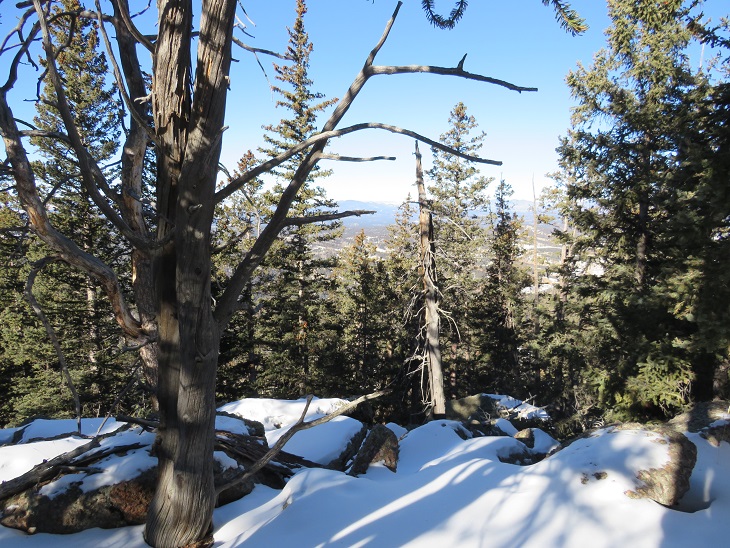
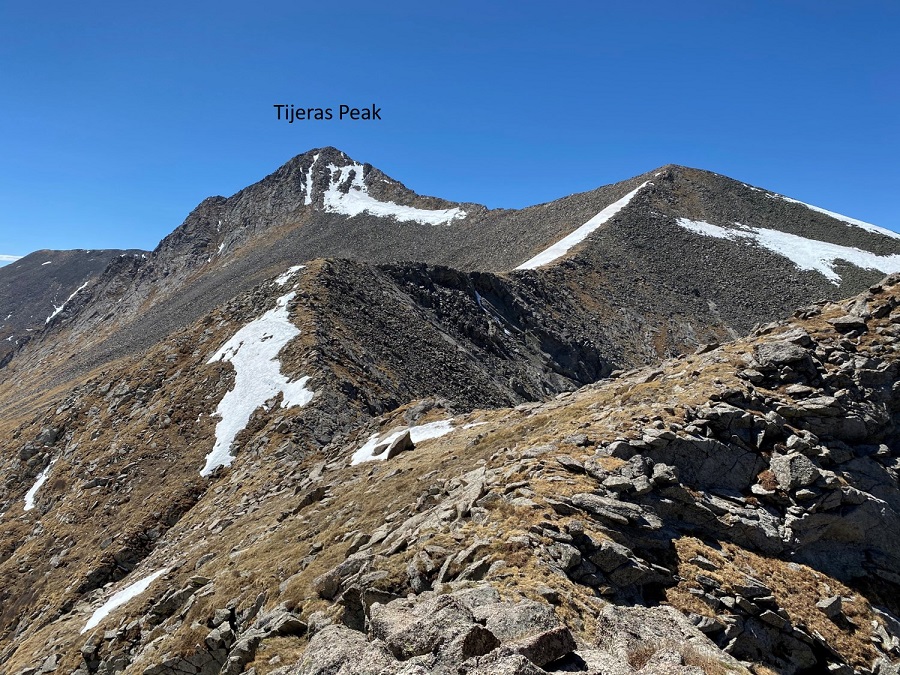
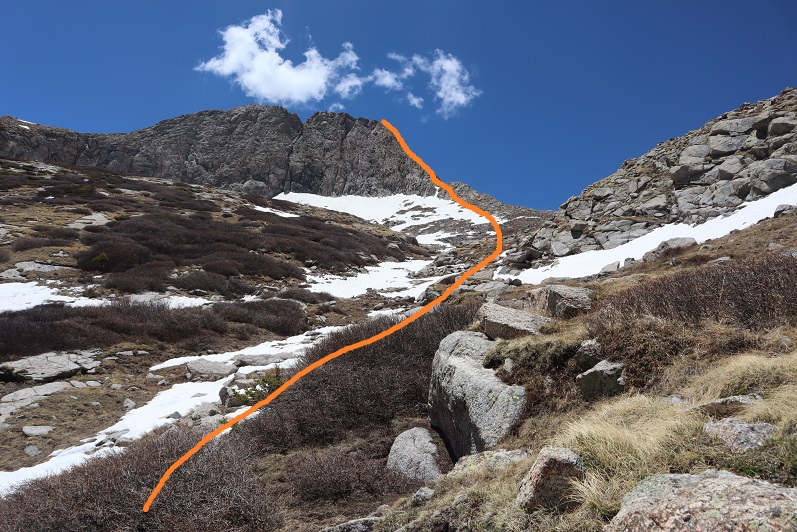
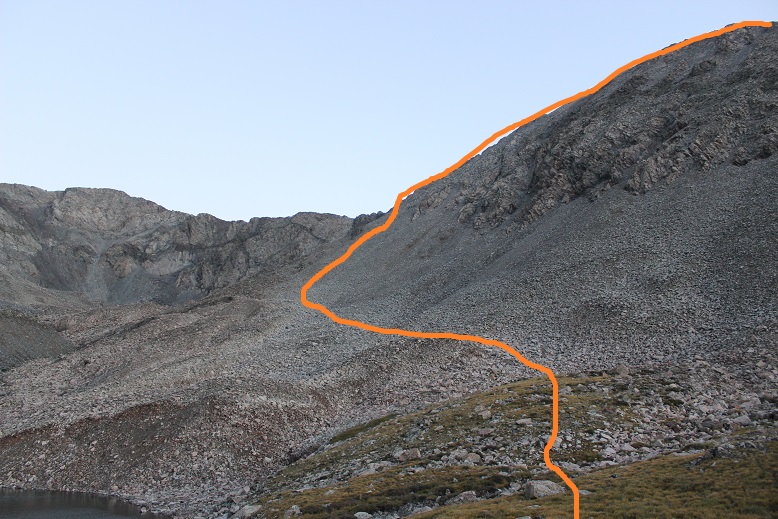
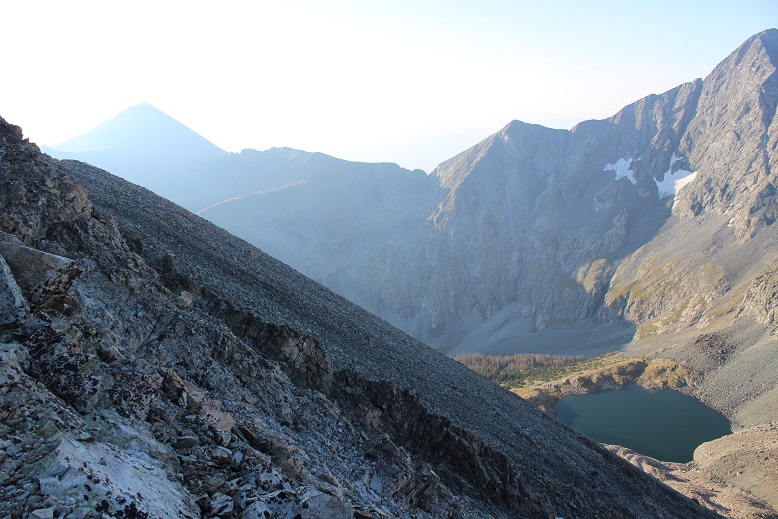
At the top f the pass I could see PT 13030. At about 12500’ I left the road and headed for the ridge, staying at about 12,500’ of elevation.
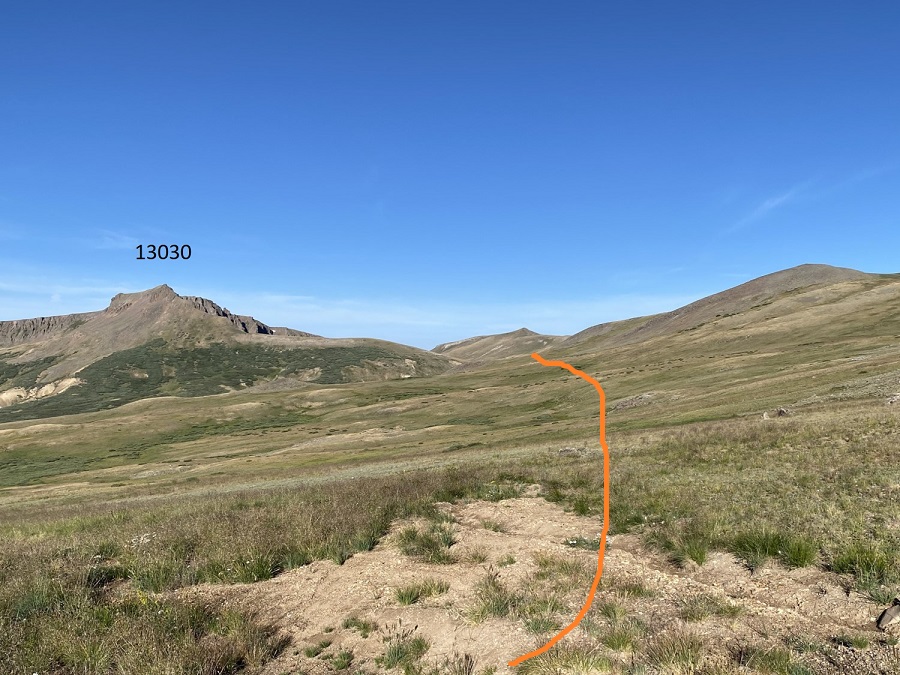
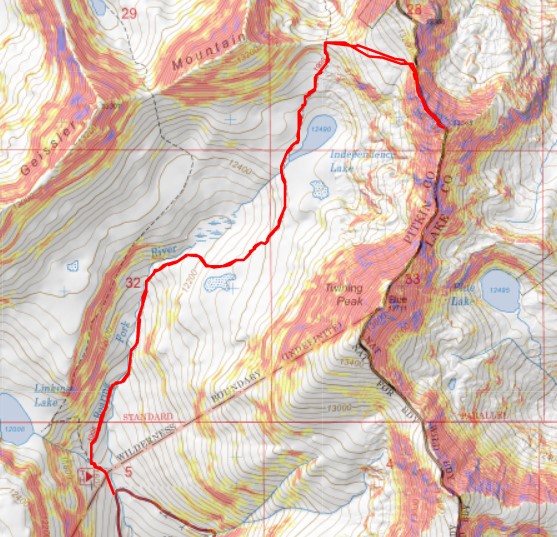
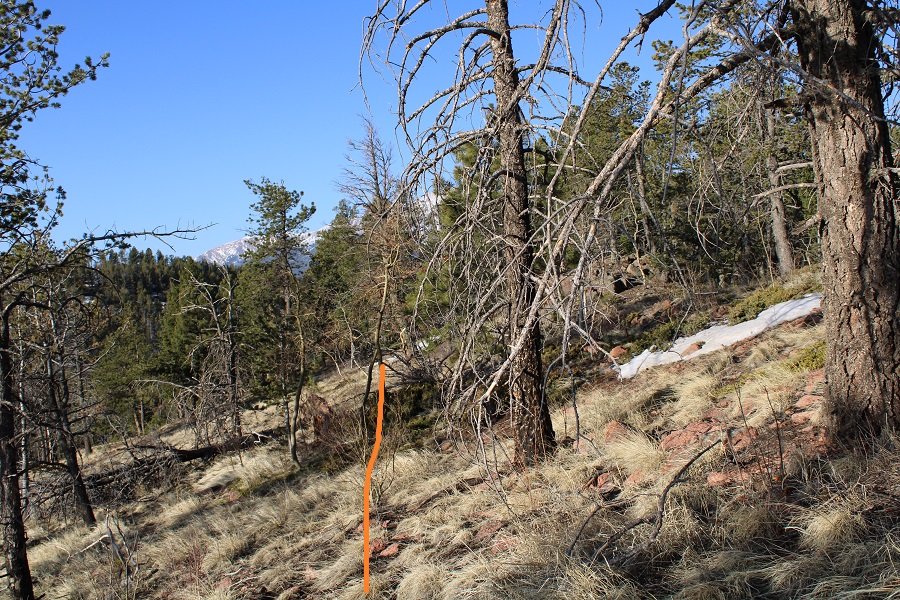
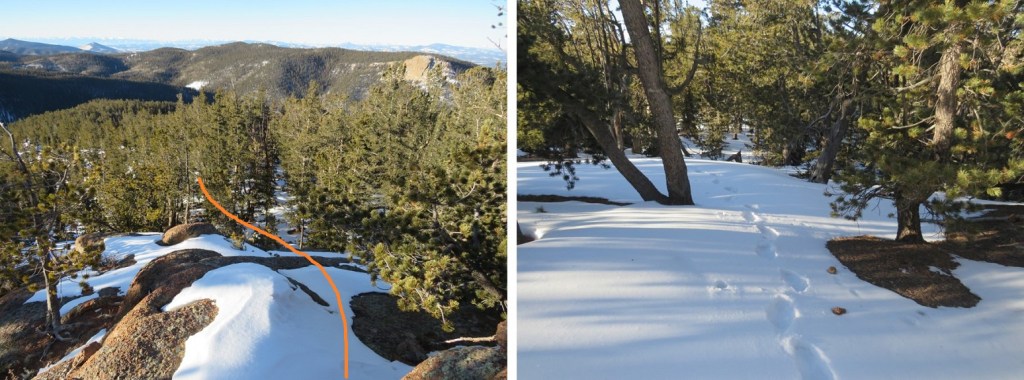
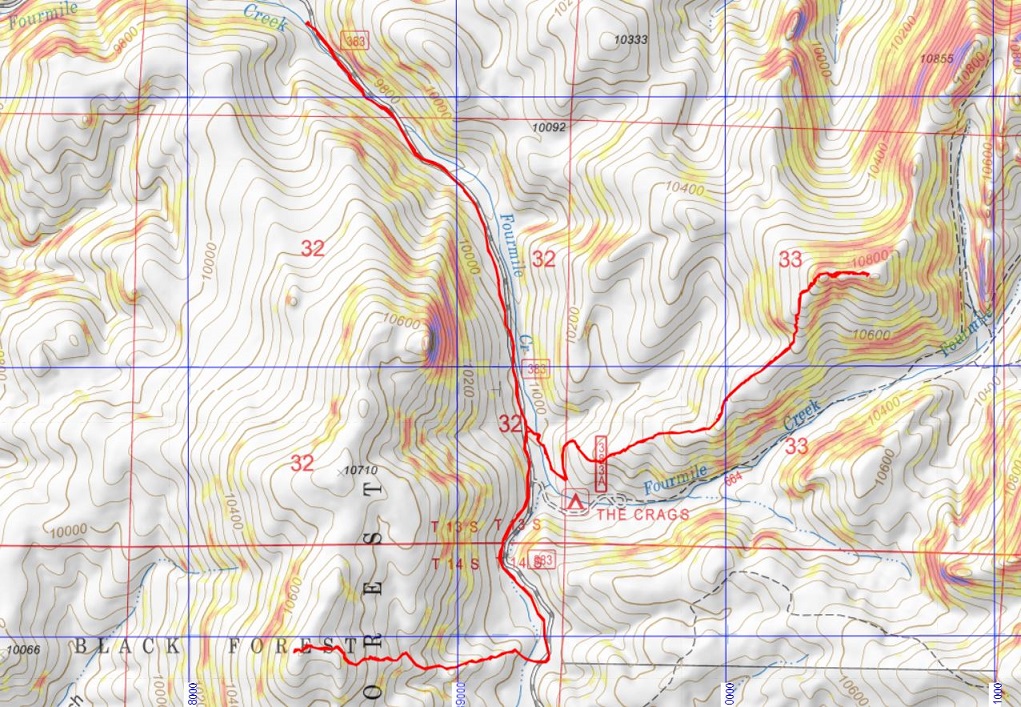
Here’s an overall look at the route I took to the ridge. CalTopo will tell you there’s a road here. There isn’t.
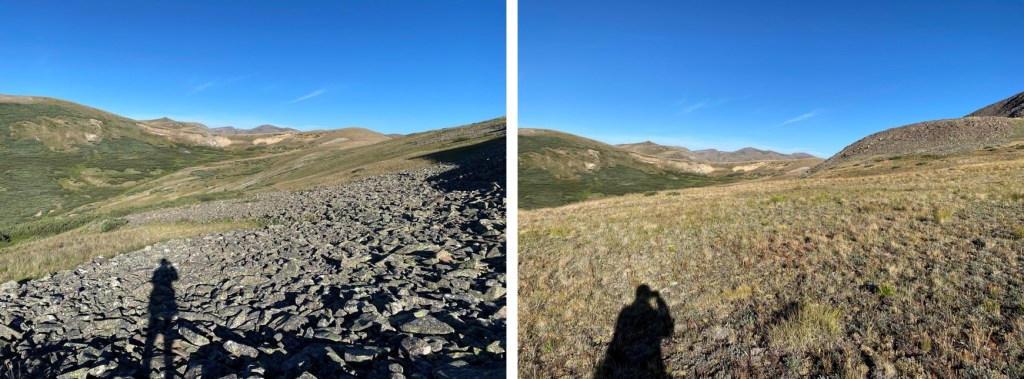
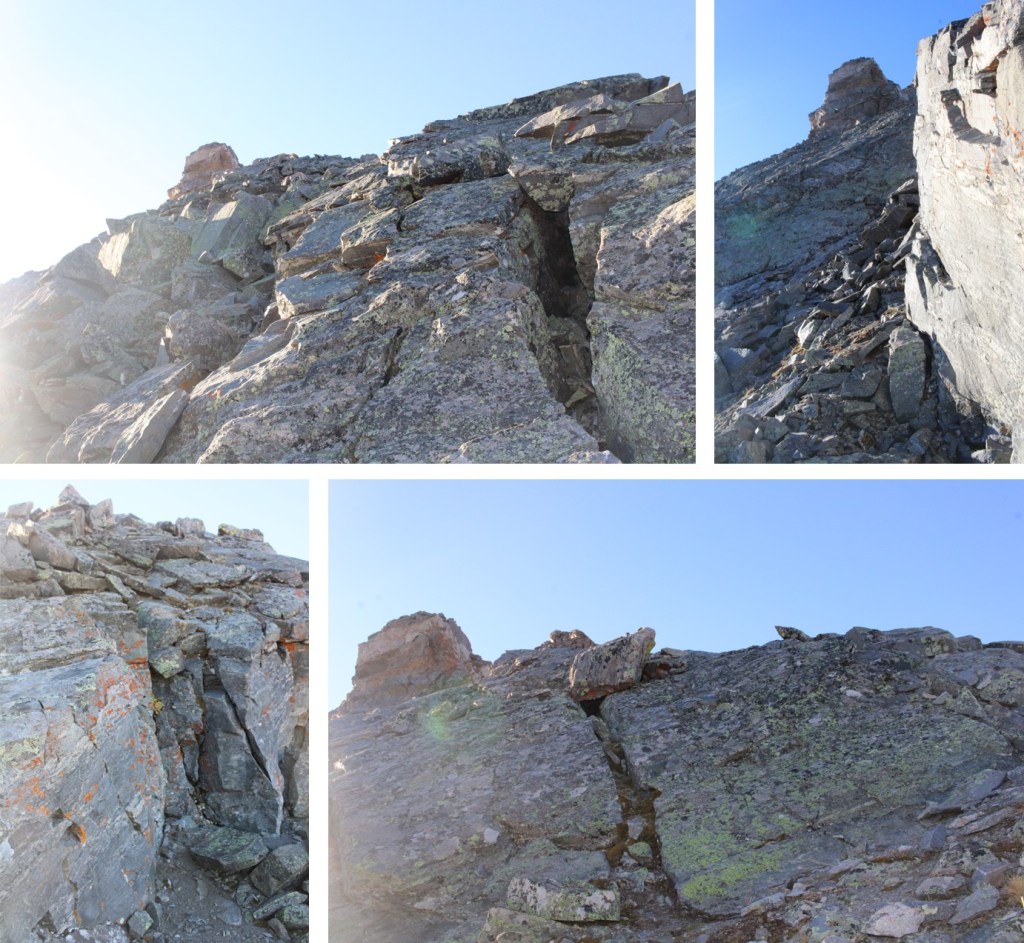
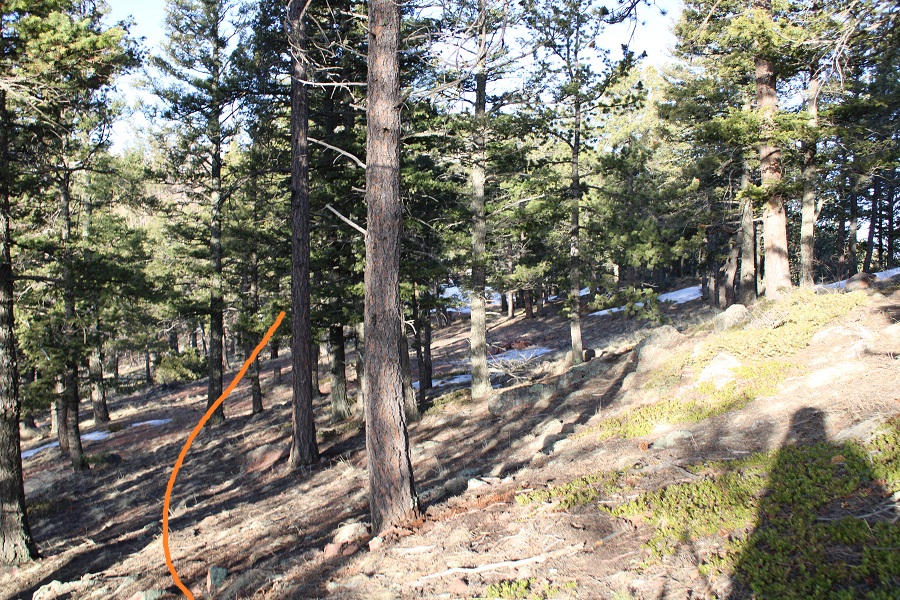
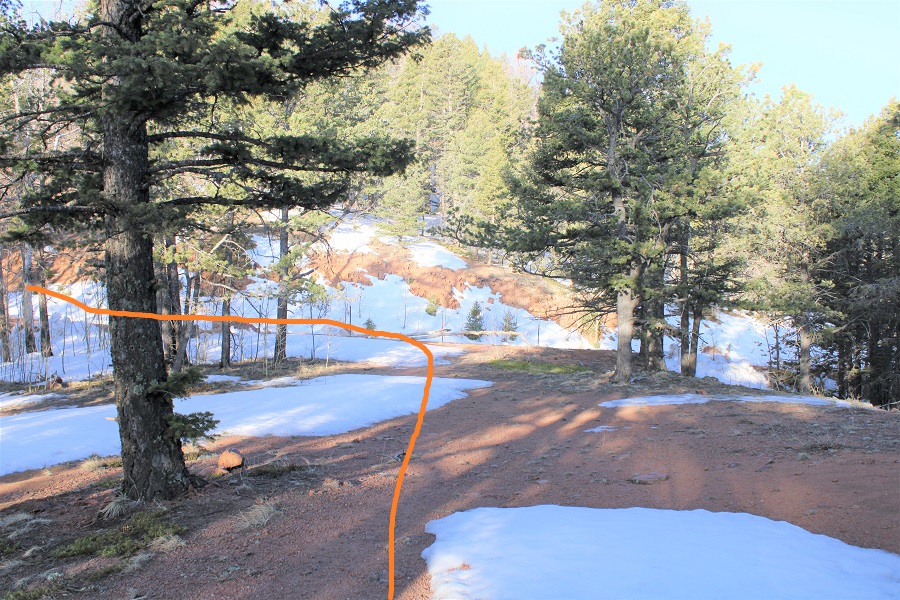
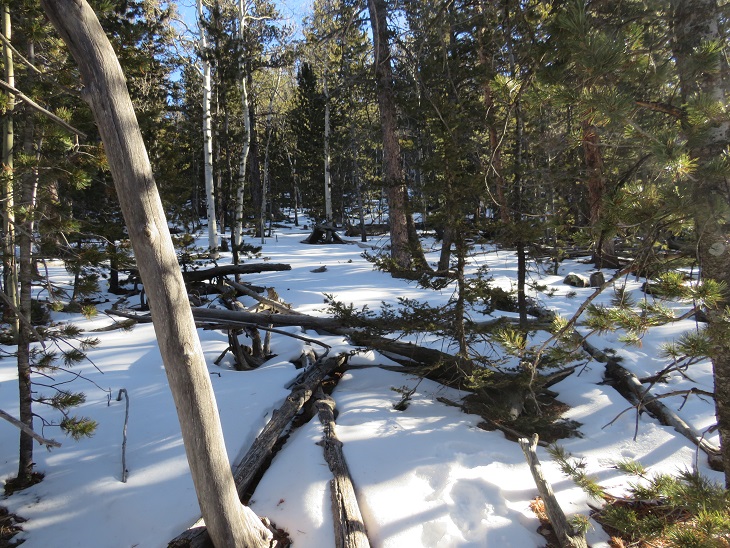
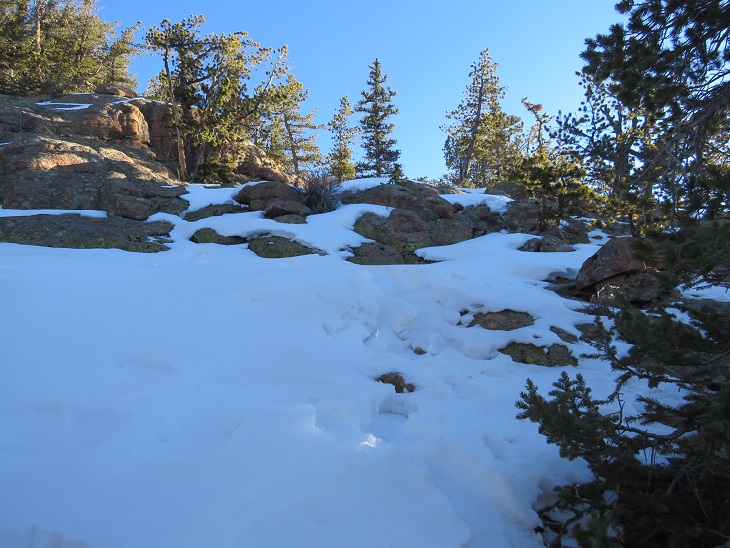
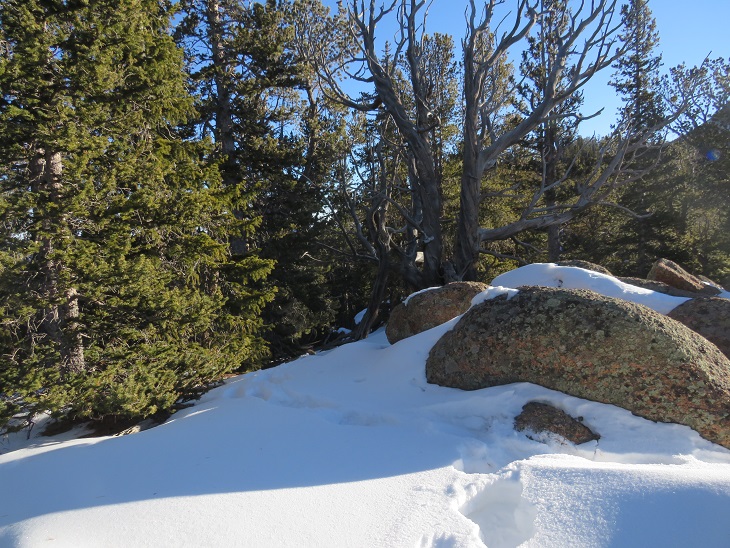
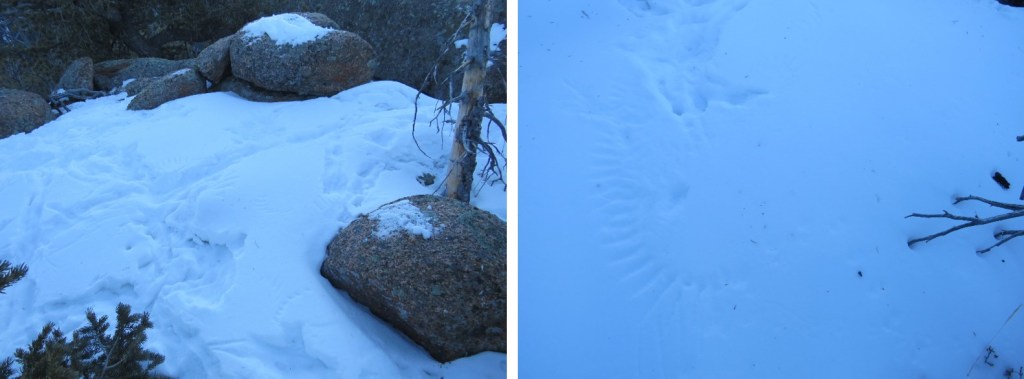
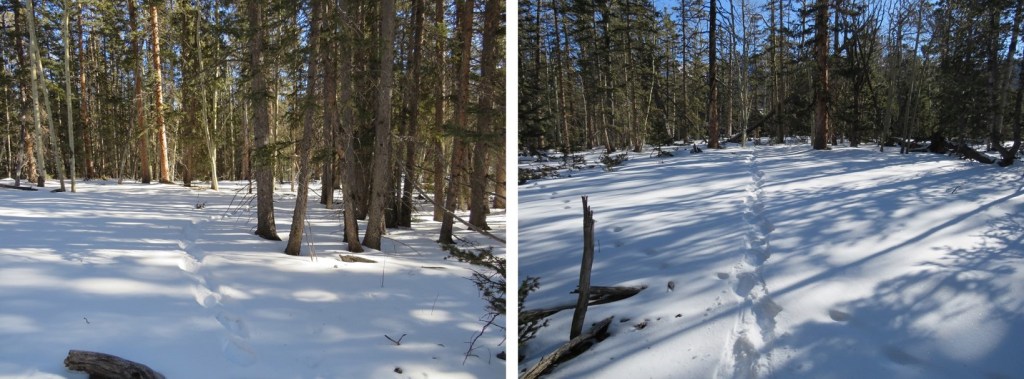
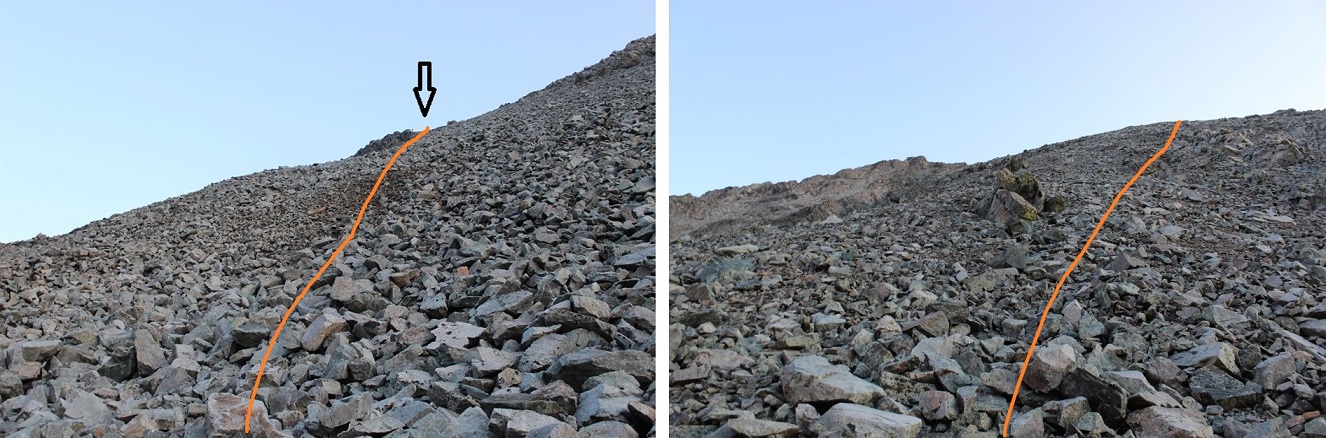
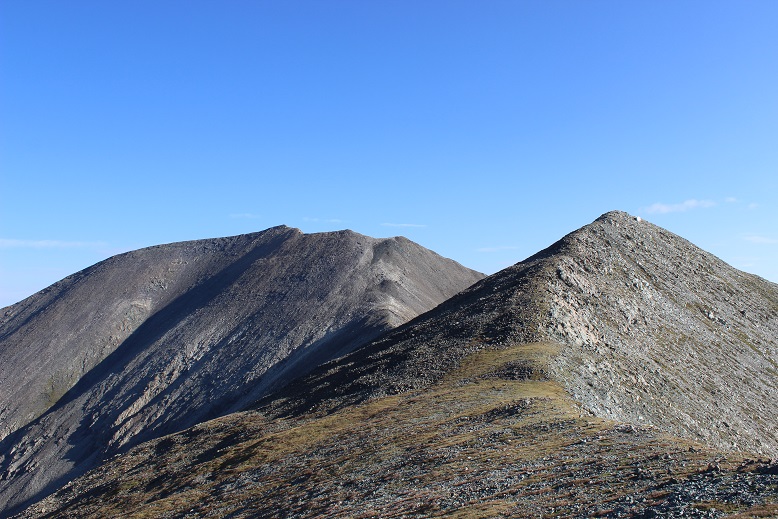
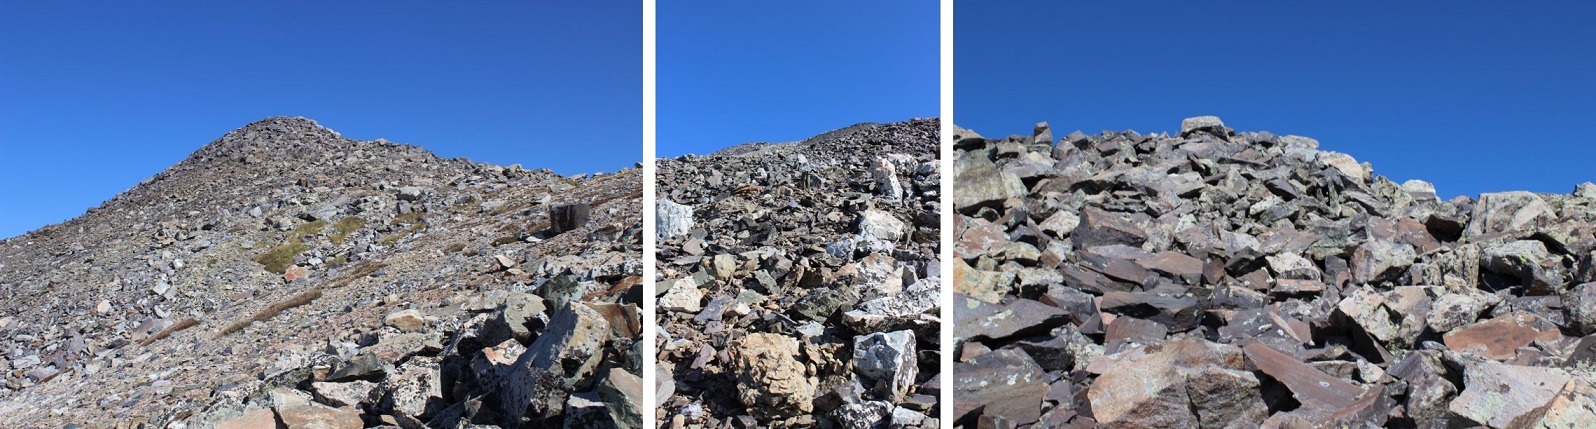
And some step-by-step pictures
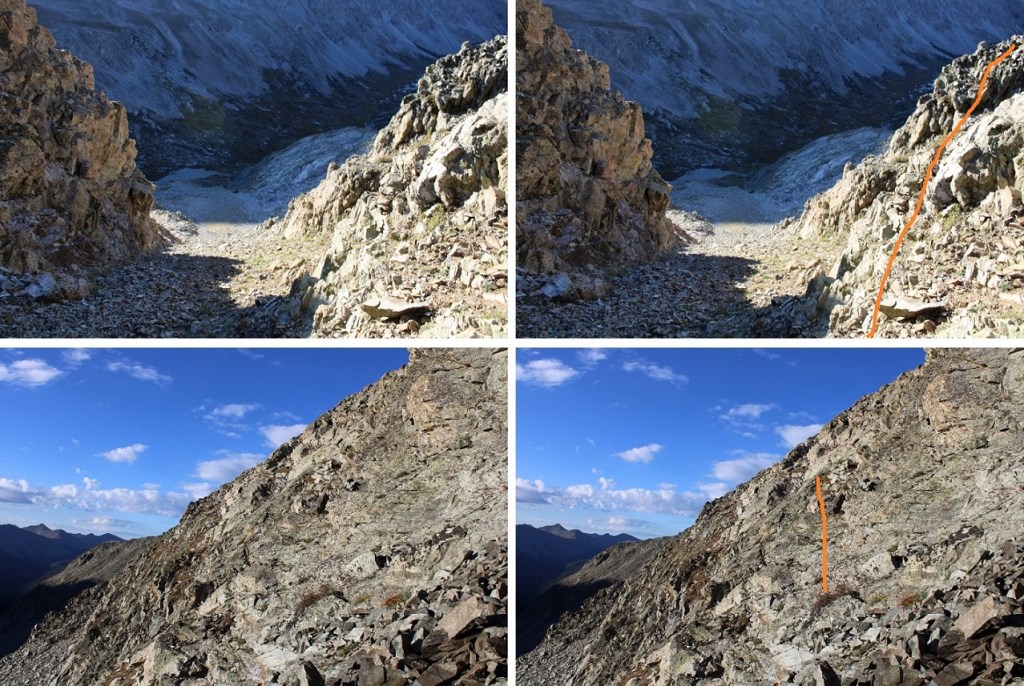
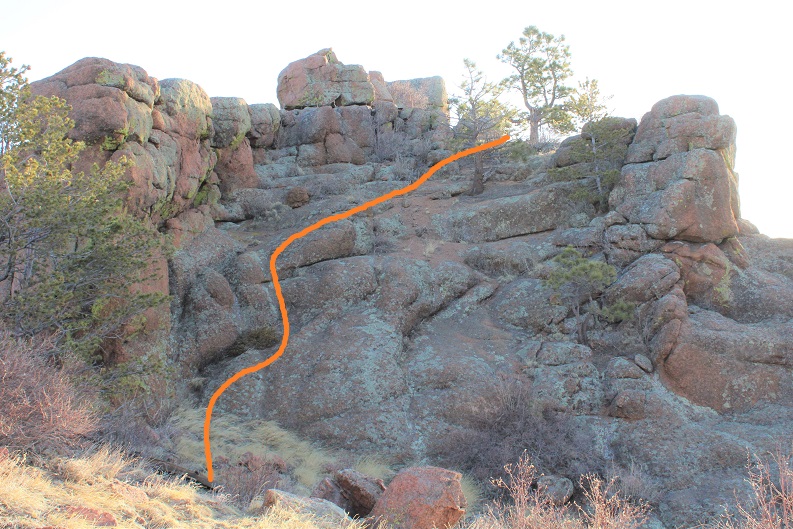
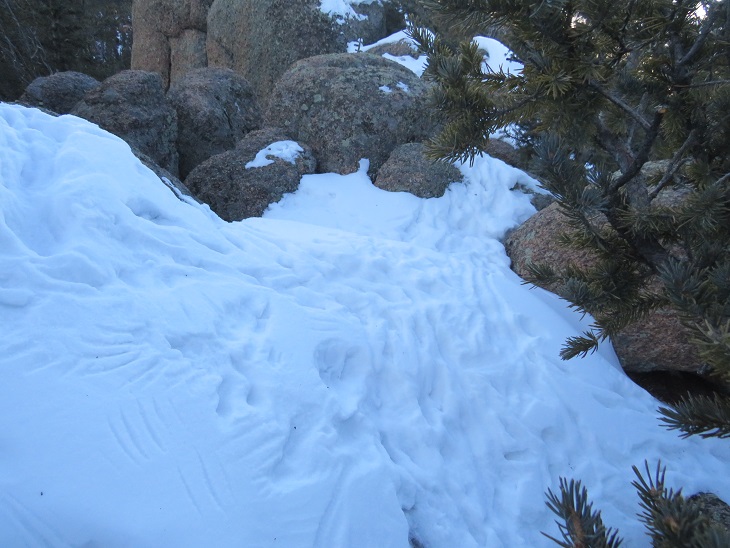
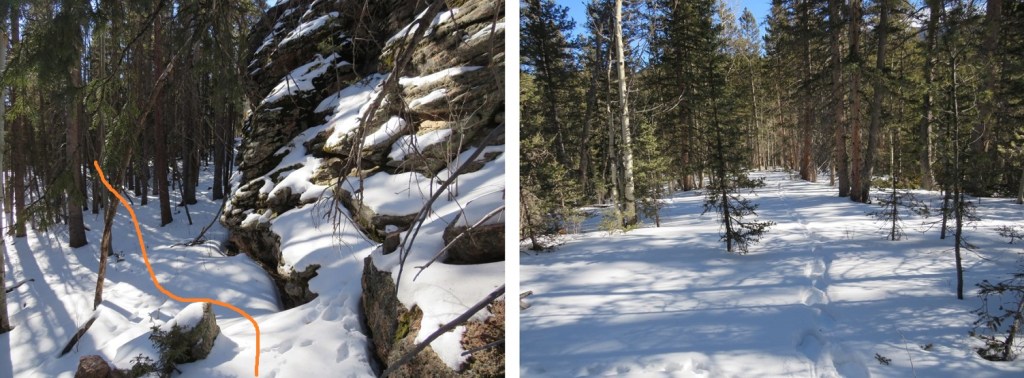
There’s a small game trail that will lead you up the saddle
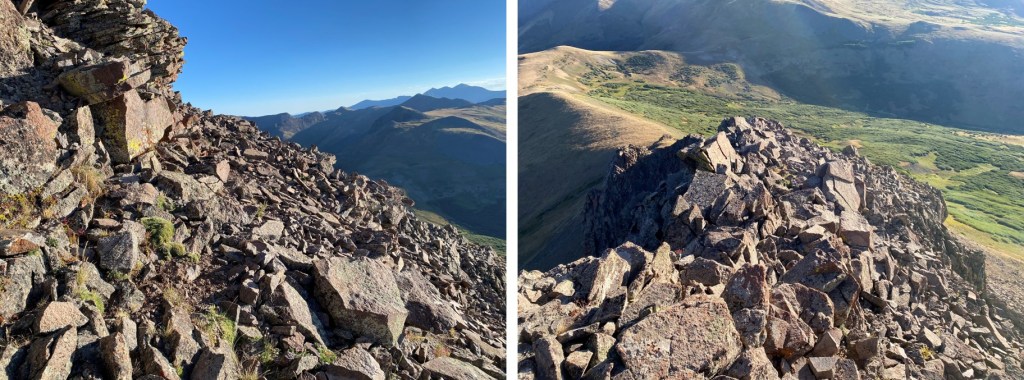
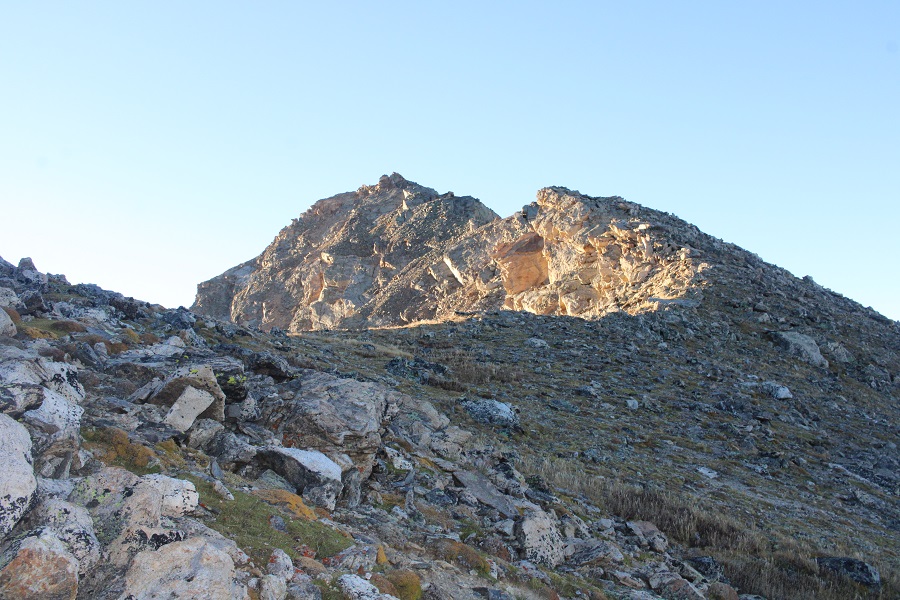
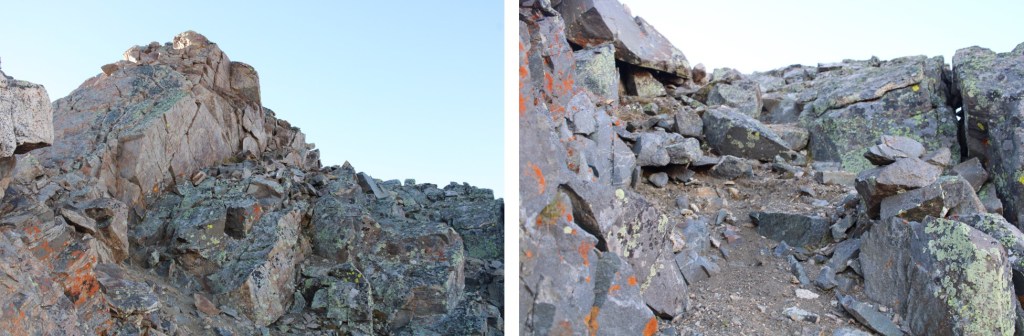
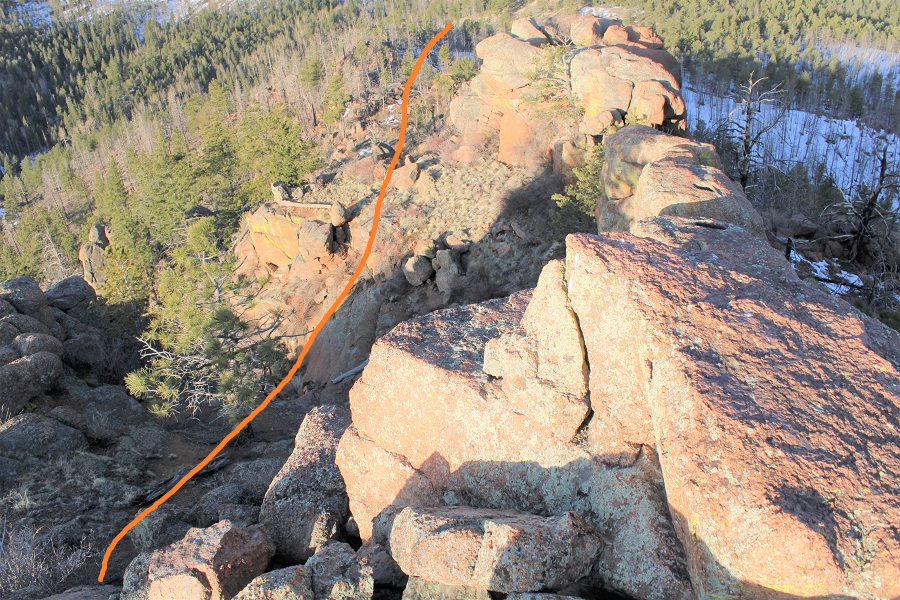
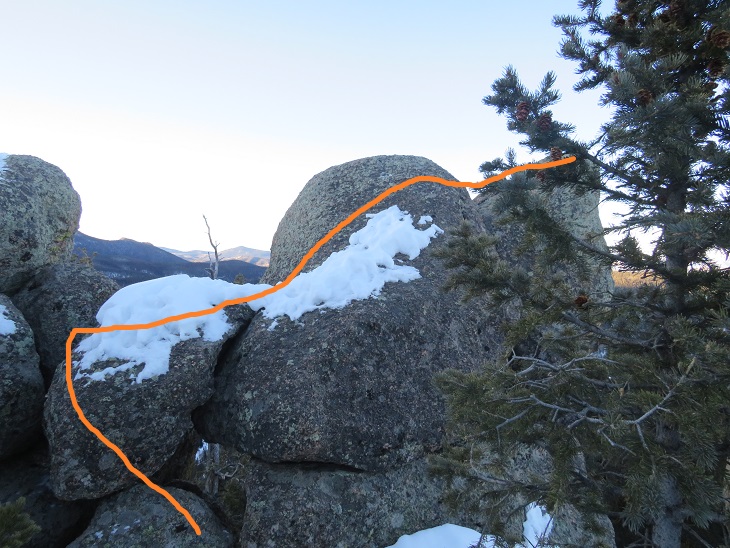
Once on the saddle I turned left and followed it south to the rocky area
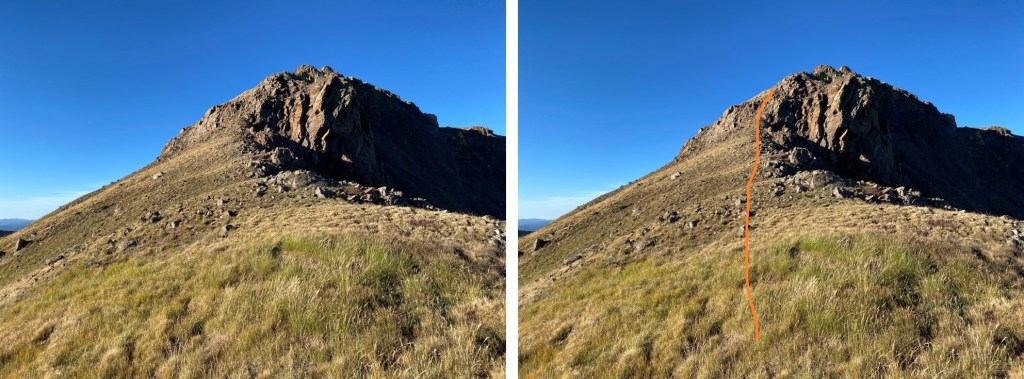
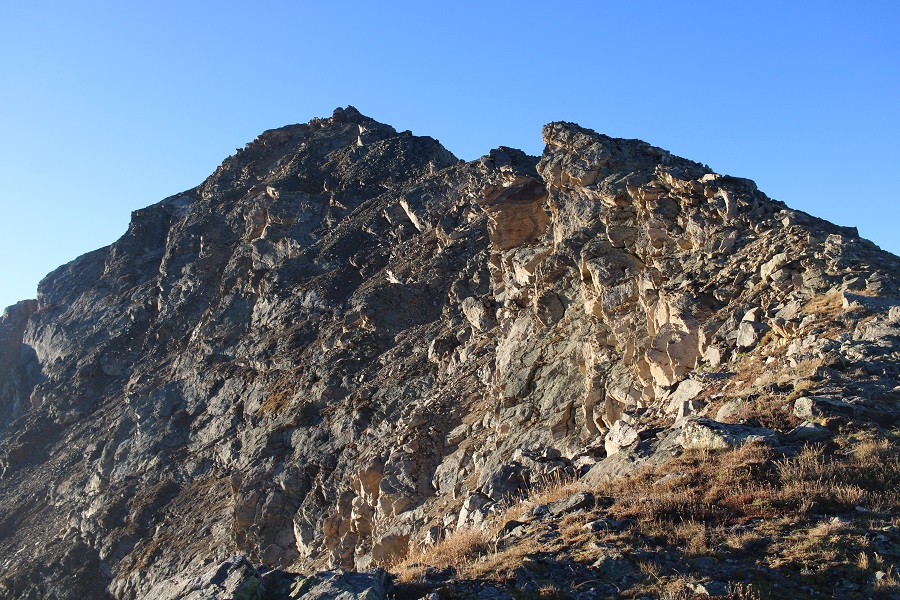
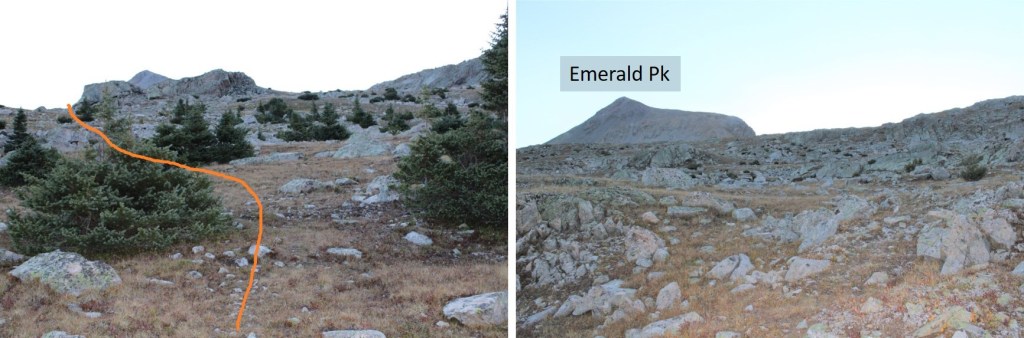
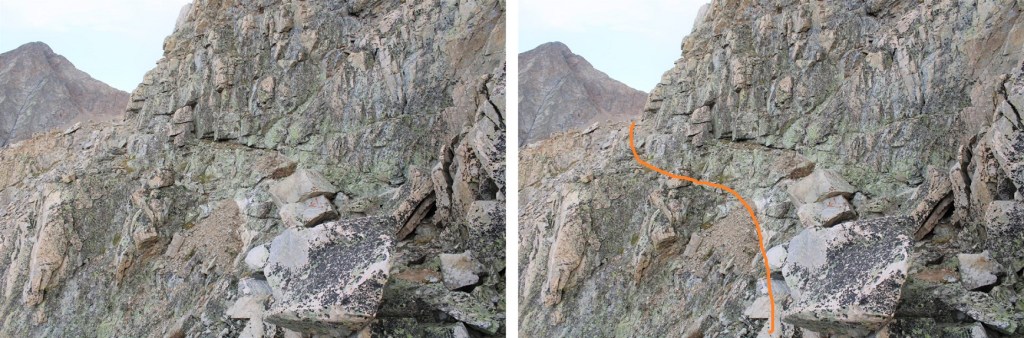
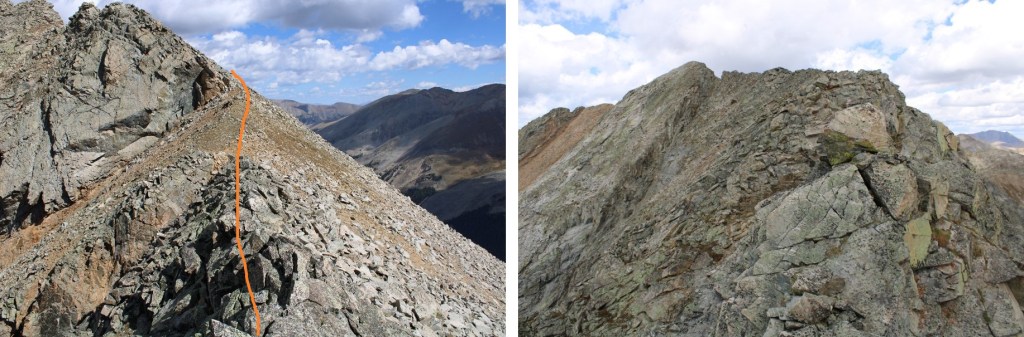
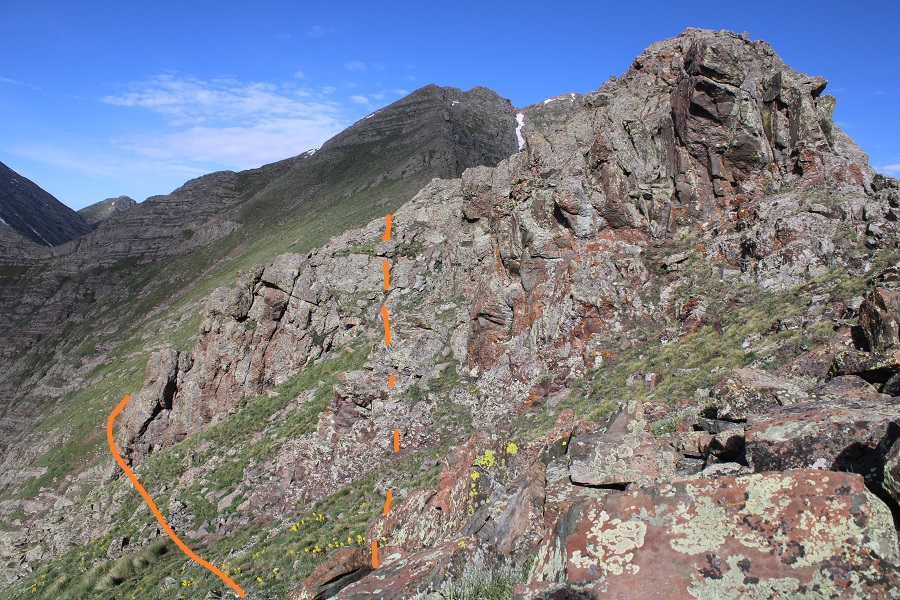
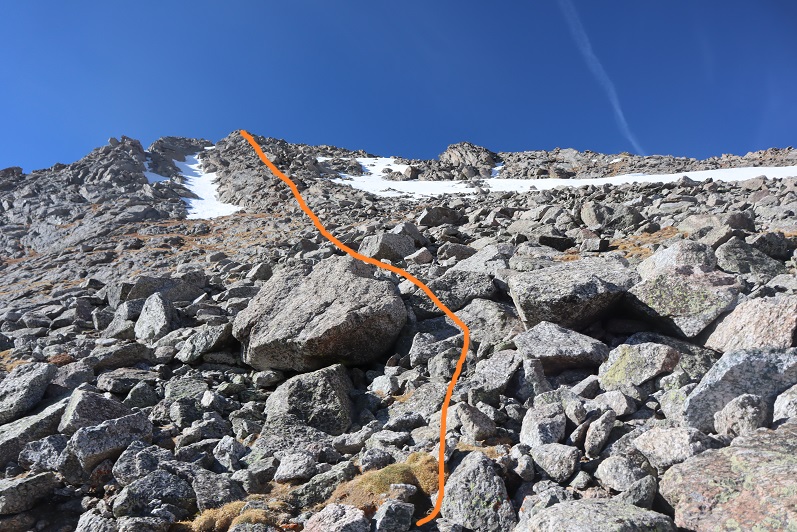
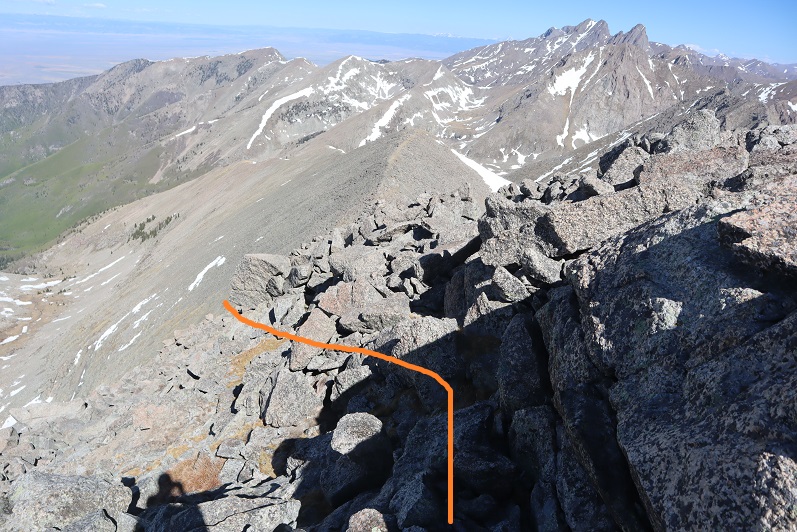
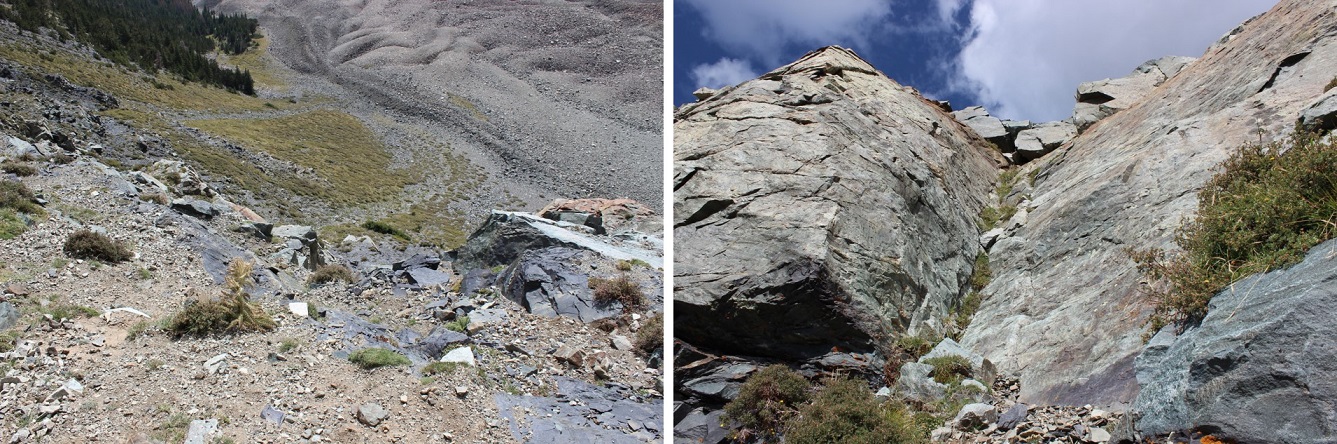
If you plan on rock scrambling, now is the time to put on your helmet. I continued southwest up the ridge, following a tundra and rock filled slope
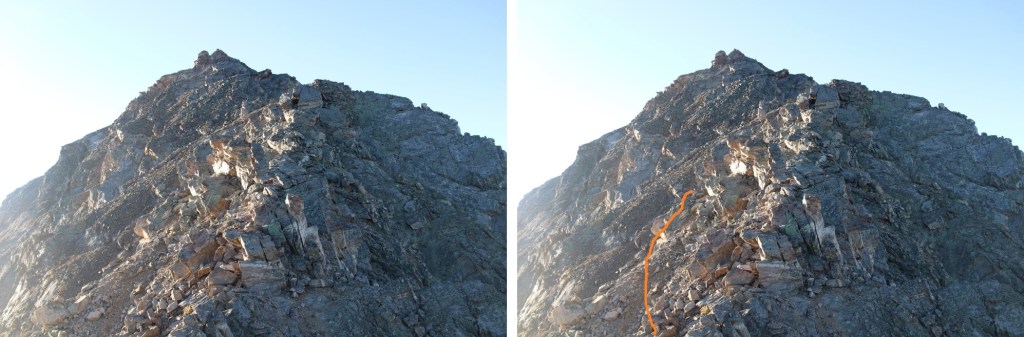
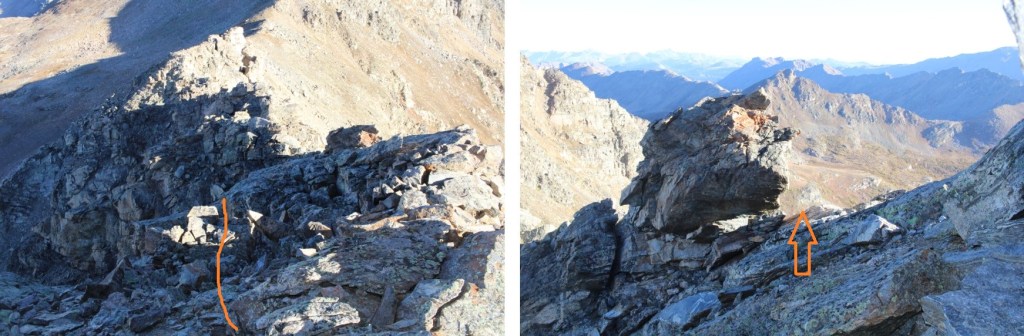
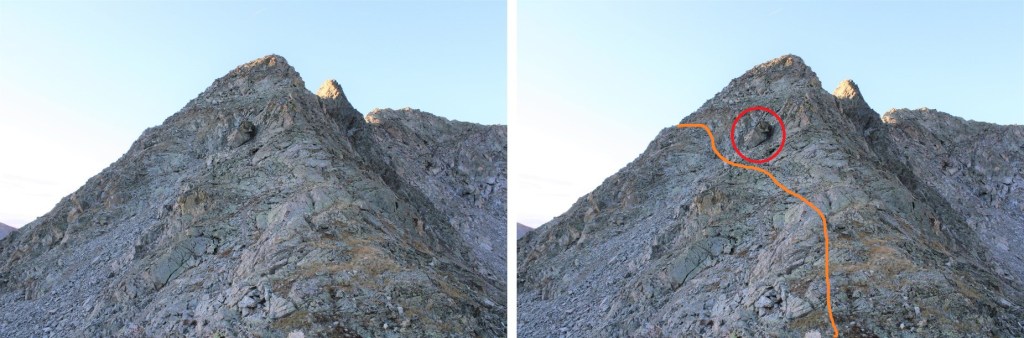
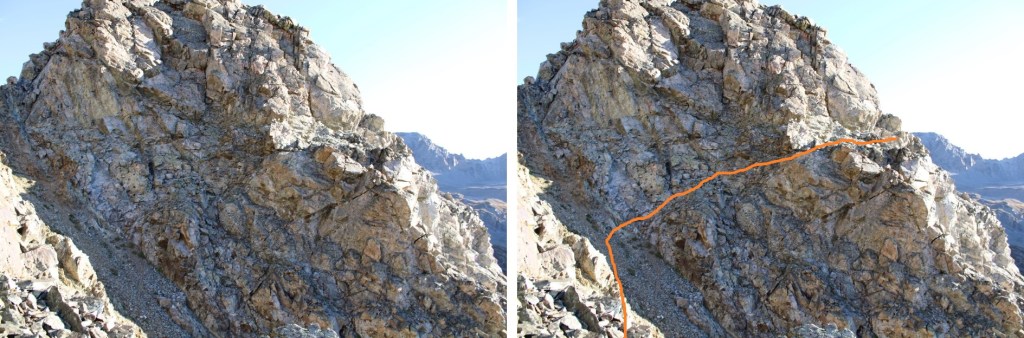
Then I went left, below this large boulder, keeping it class 2
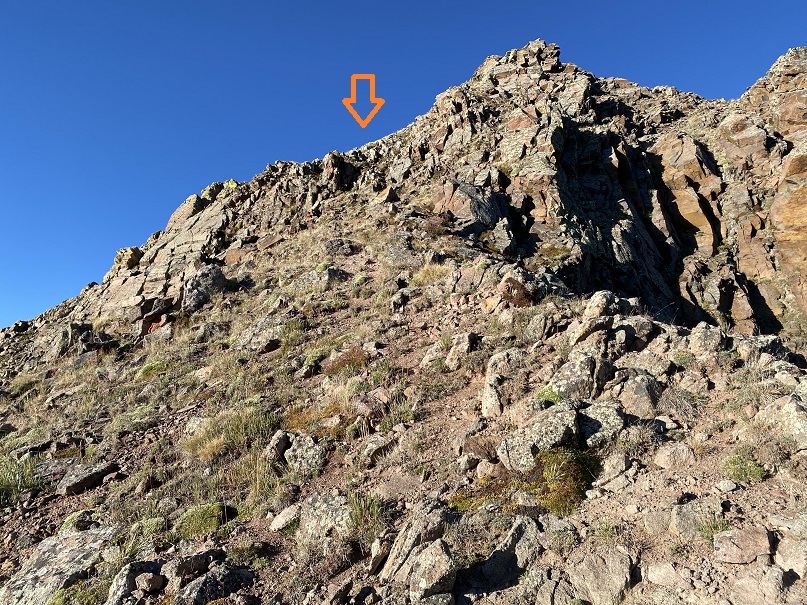
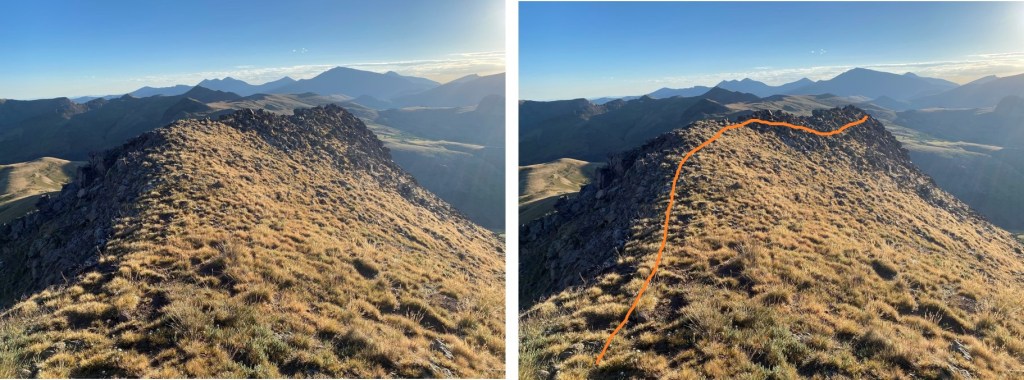
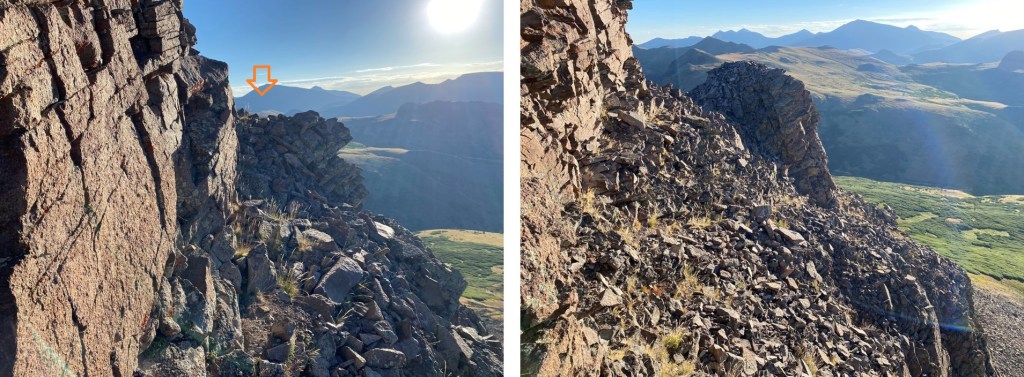
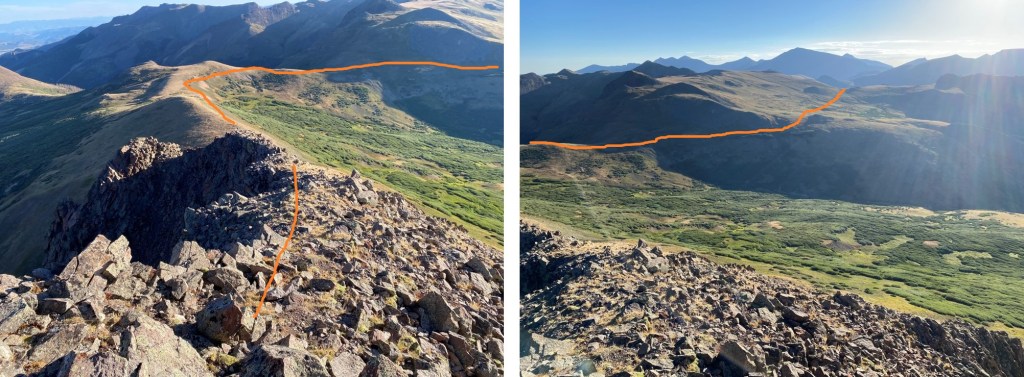
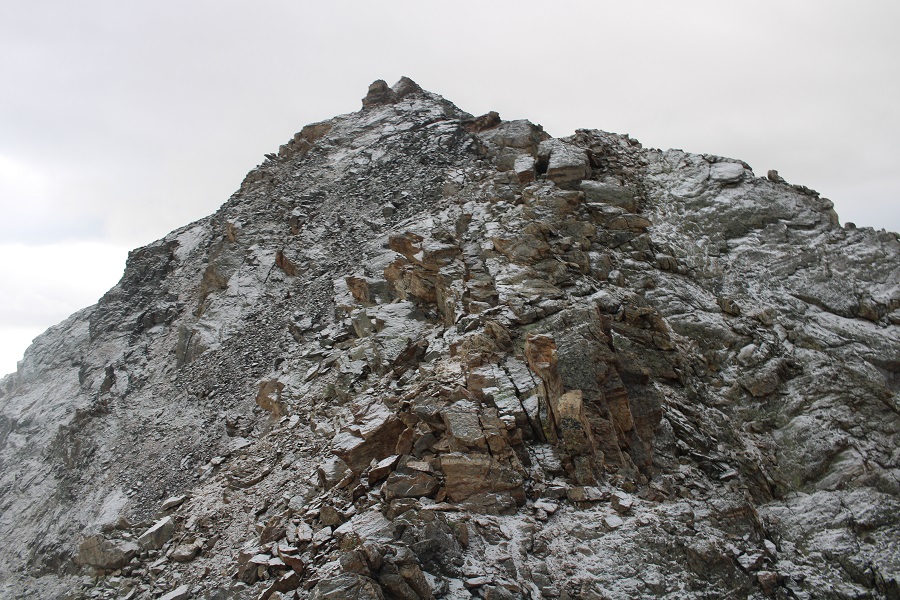
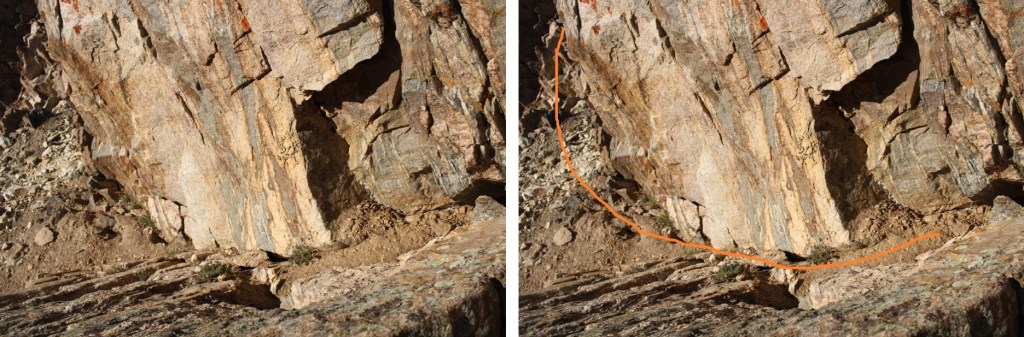
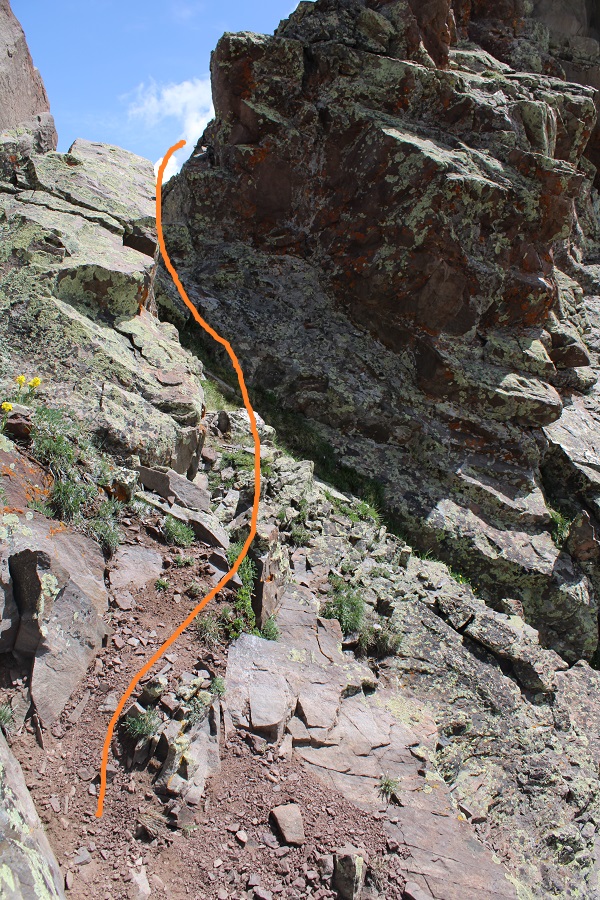
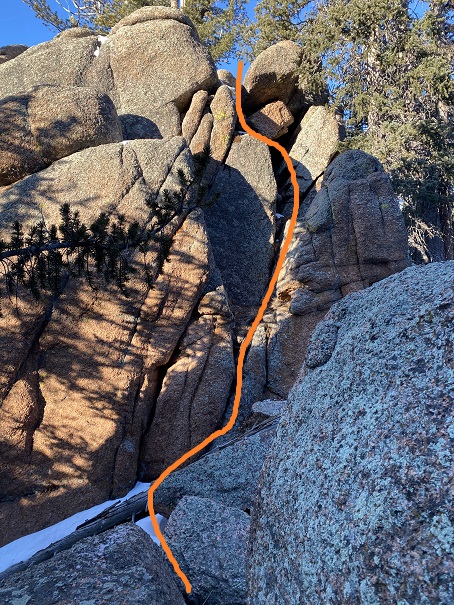
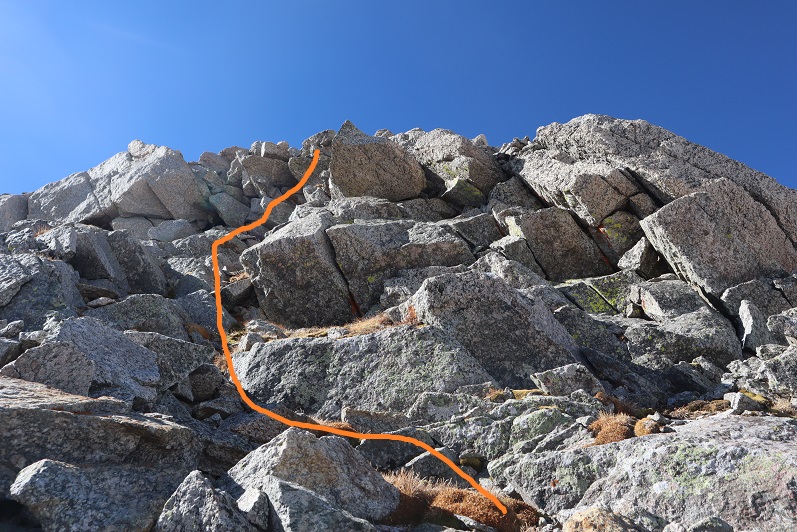
From here you have two options. You can either gain the ridge for a quick class 3 scramble to the summit, or stay about 20 feet below the ridge to the left, and keep it class 2+. Here’s looking at the route to the ridge for the class 3 scramble, which is stable but narrow and airy.
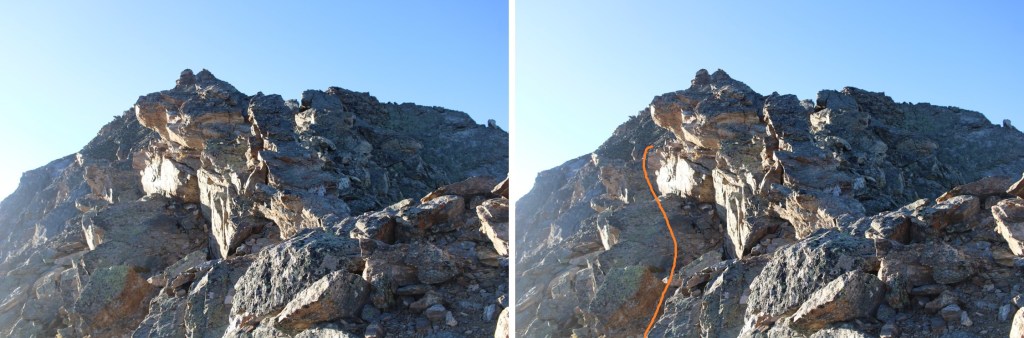
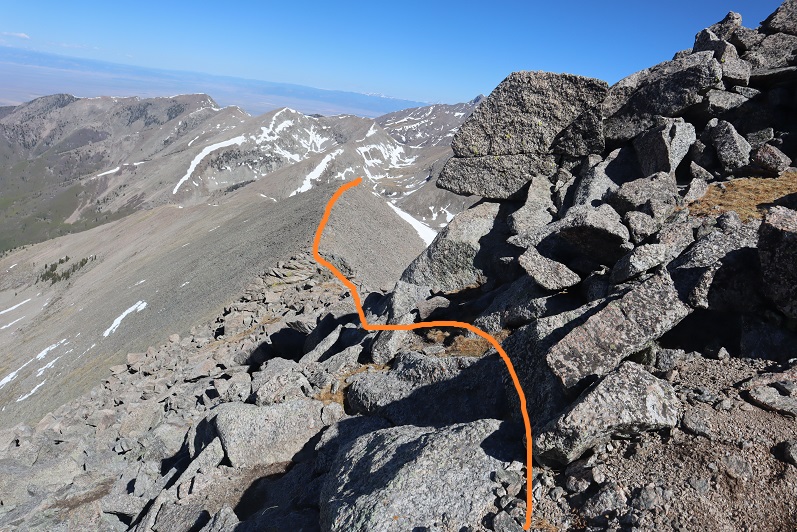
And here’s the class 2+ option, heading southwest, and then gaining the ridge
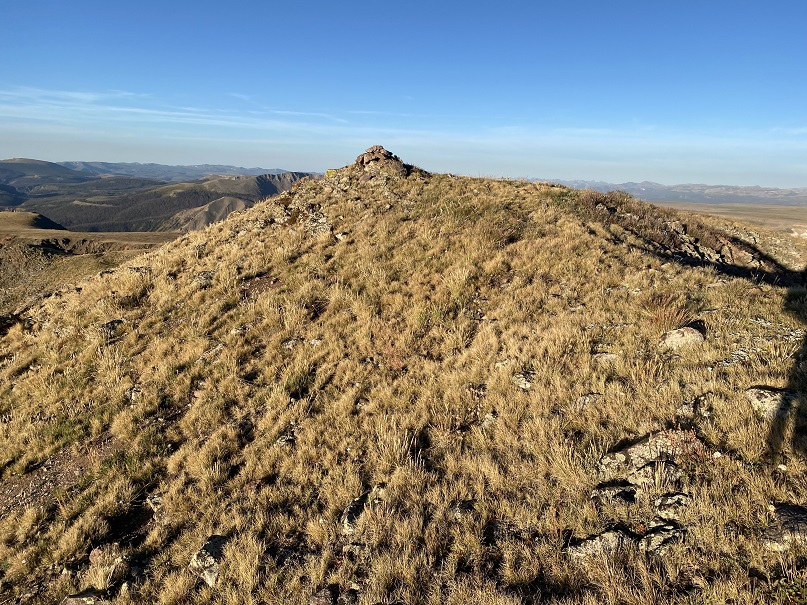
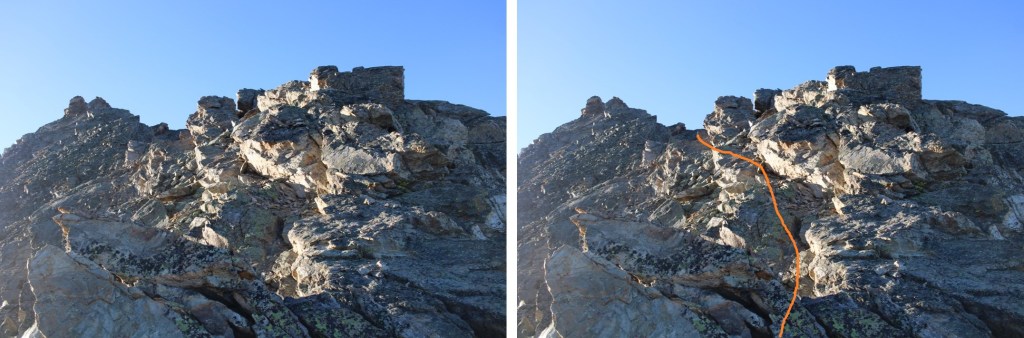
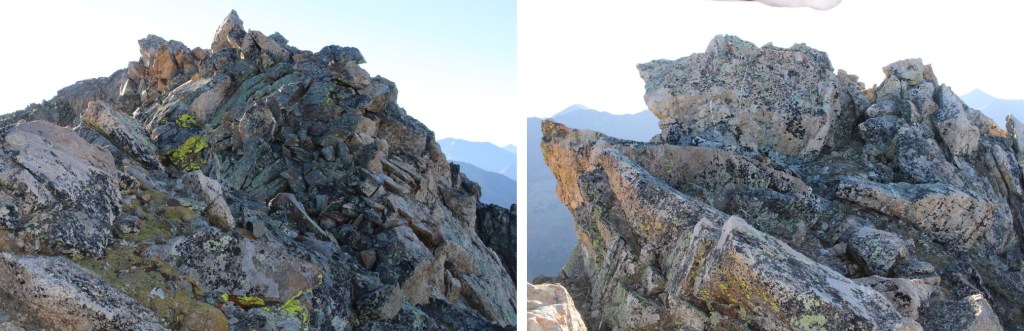
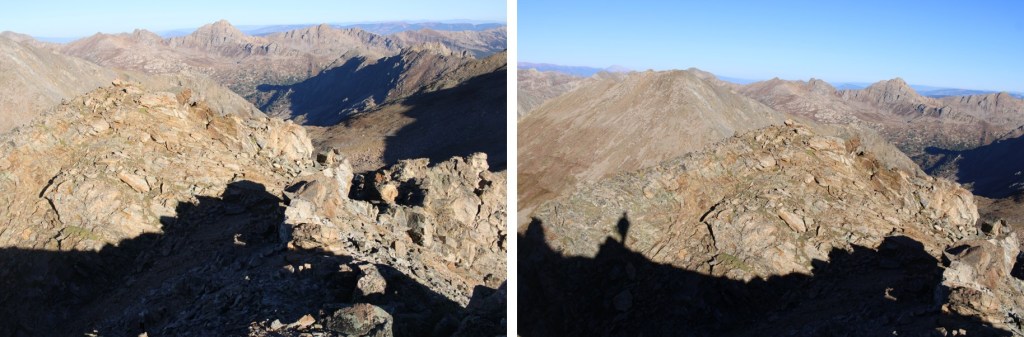
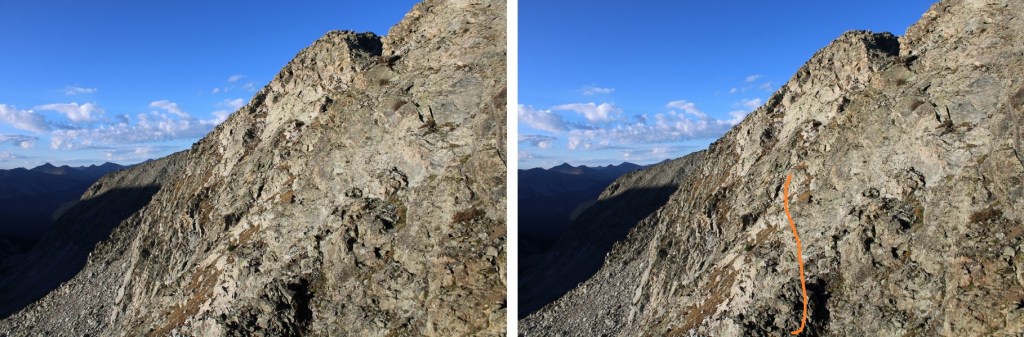
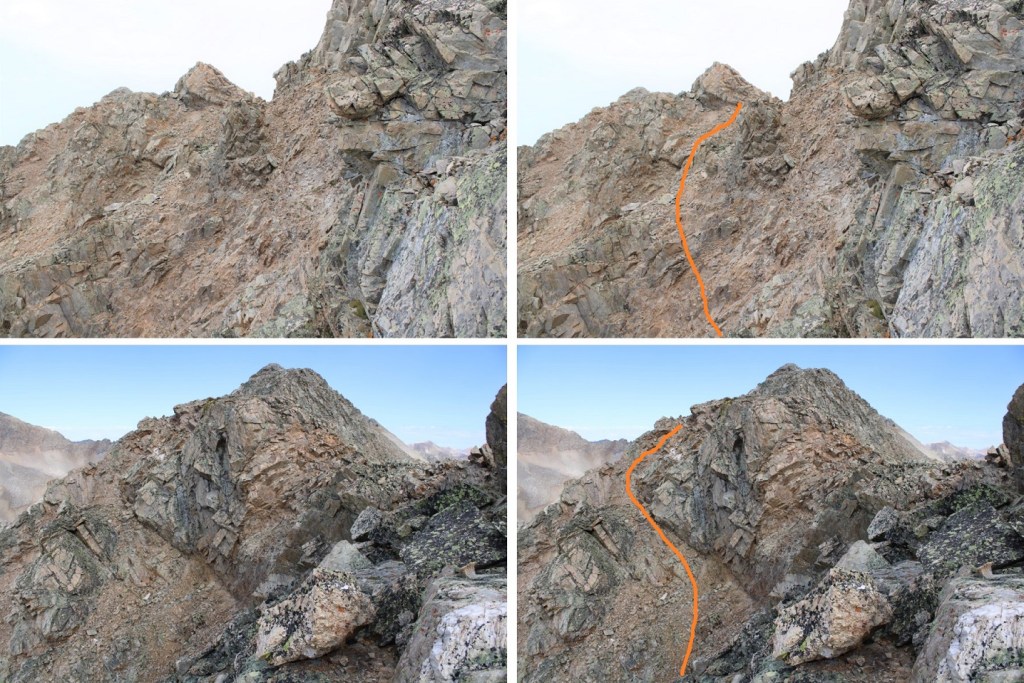
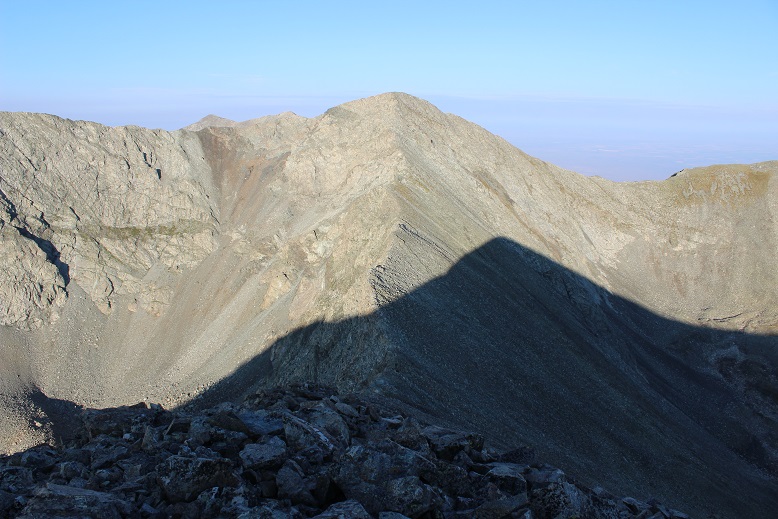
Once on the ridge, it was a quick walk to the summit
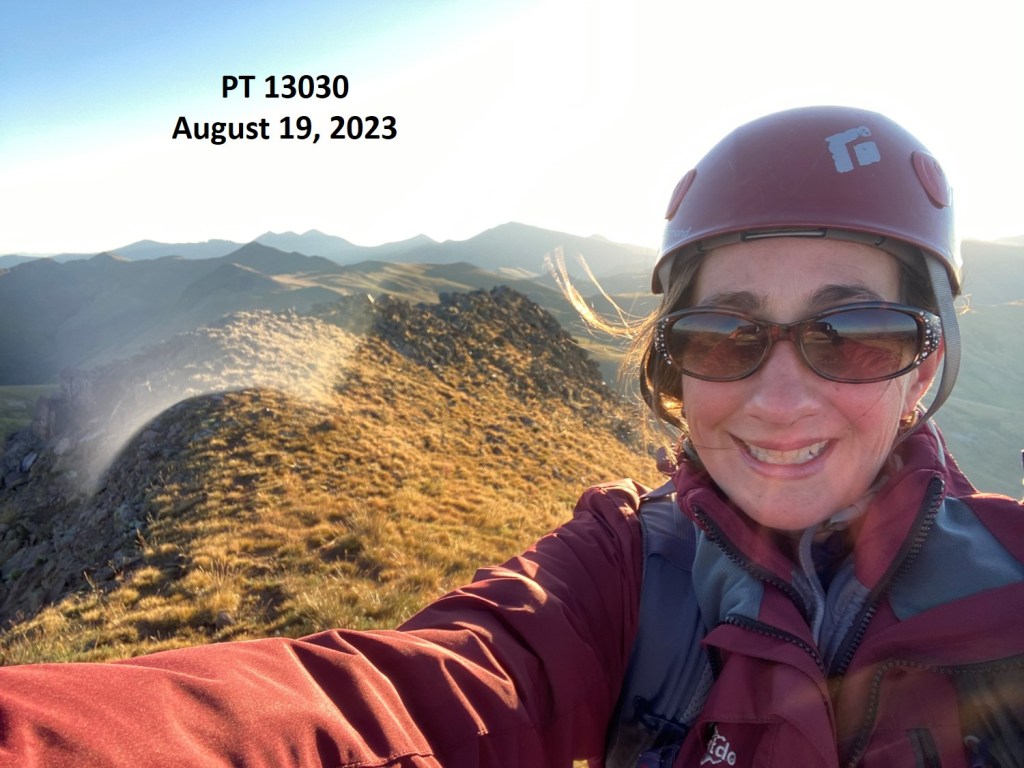
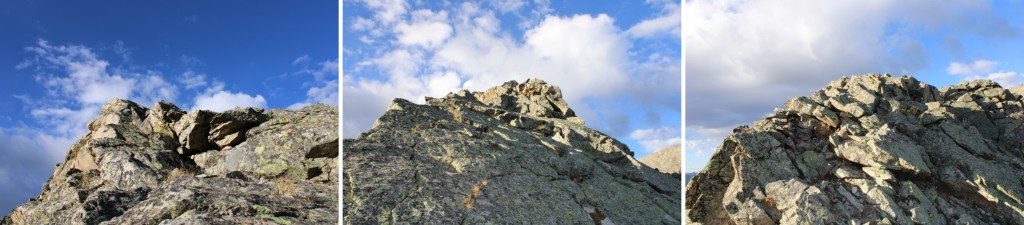
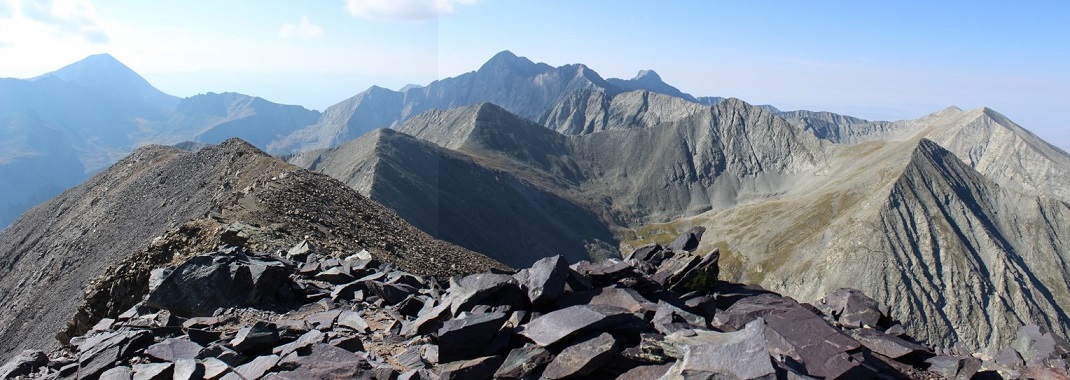
I summited PT 13030 at 7am
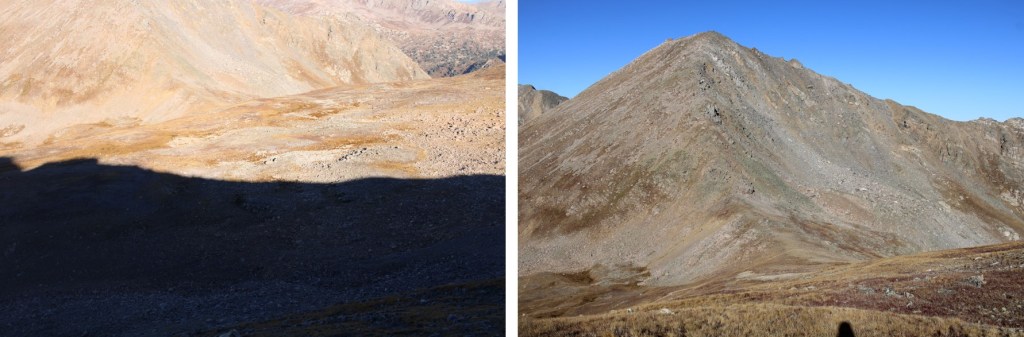
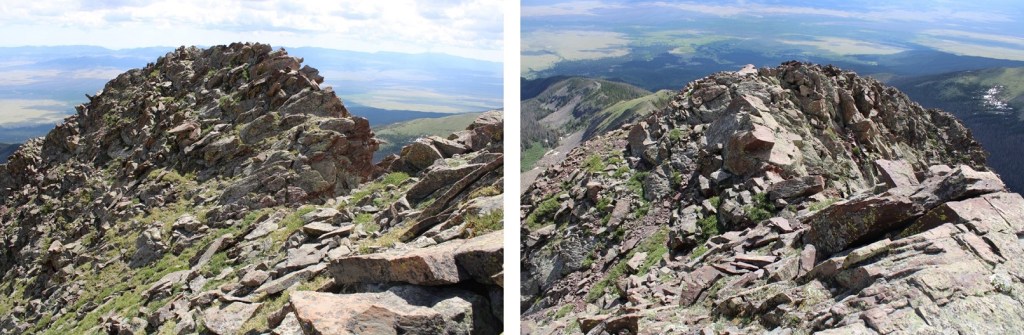
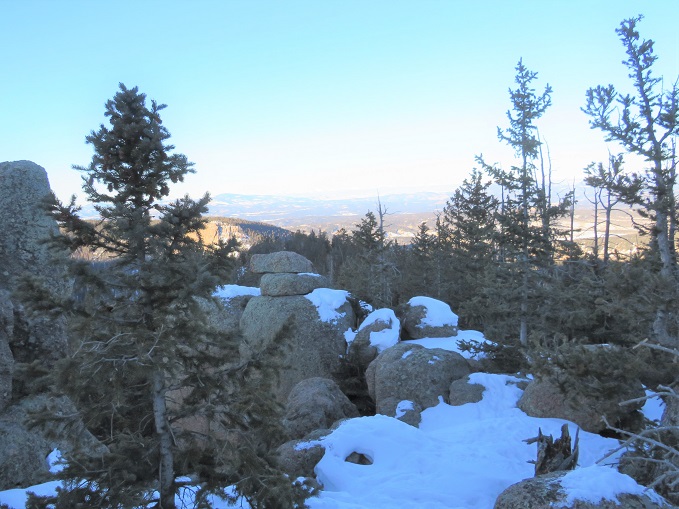
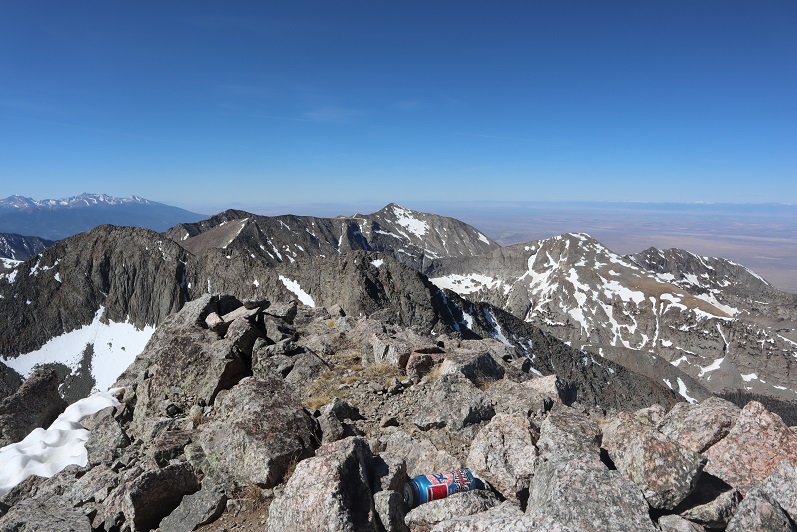
PT 13030:
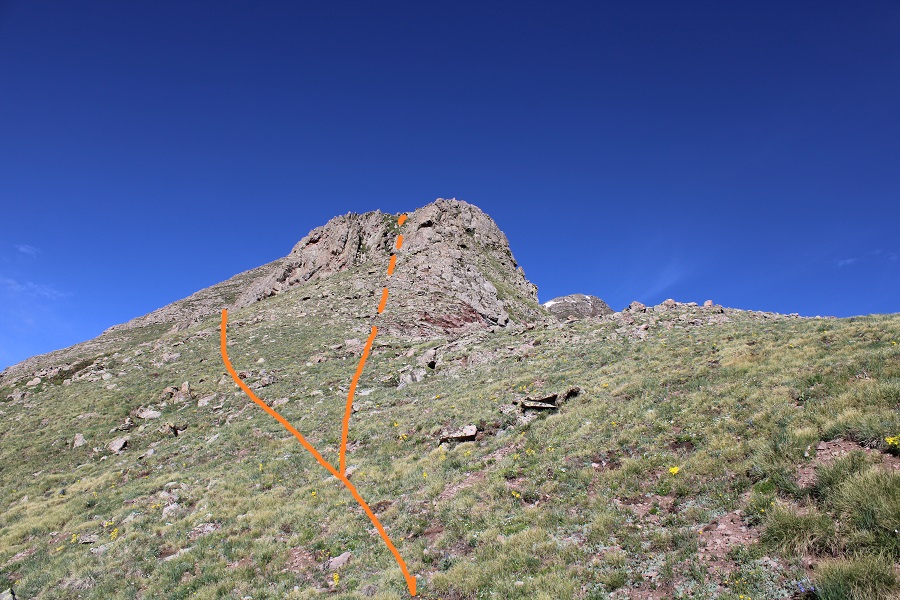
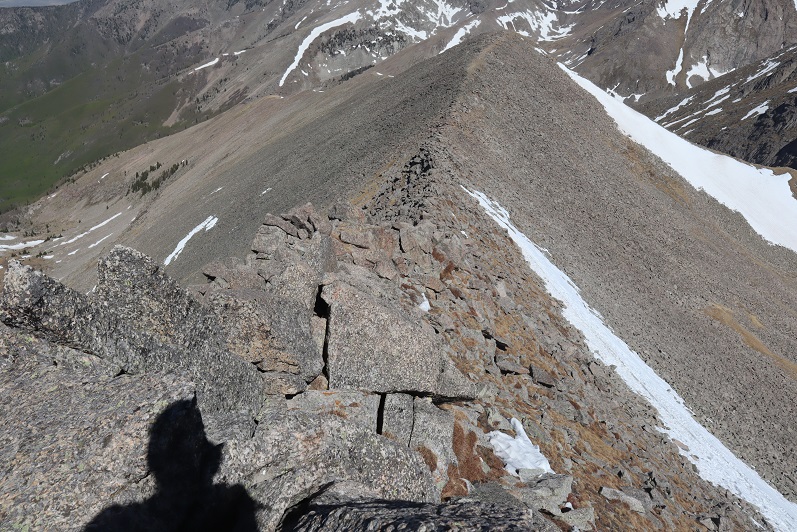
I took the class 3 ridge option on the way in, and decided to take the class 2+ option on the way out. Here’s the route I took back
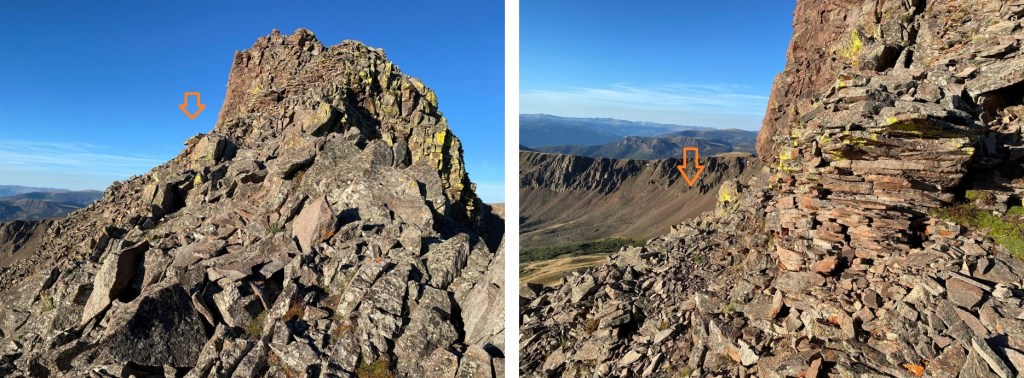
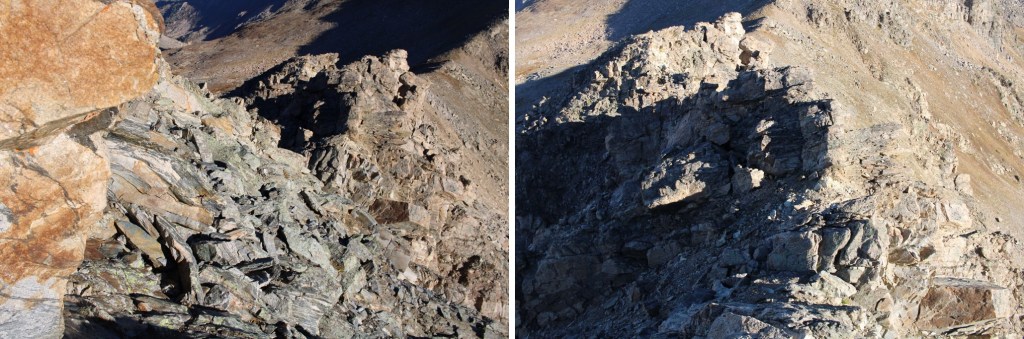
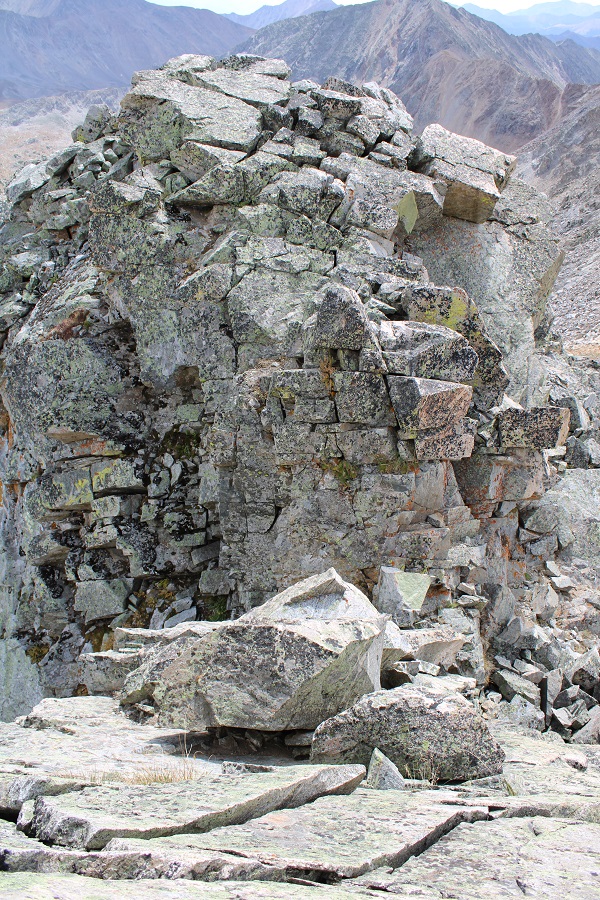
There are two rocks placed as if they had been a cairn at one point, indicating where to descend from the ridge to keep it class 2. It’s not obvious, and might not even be a true cairn at all, but it’s a good place to descend.
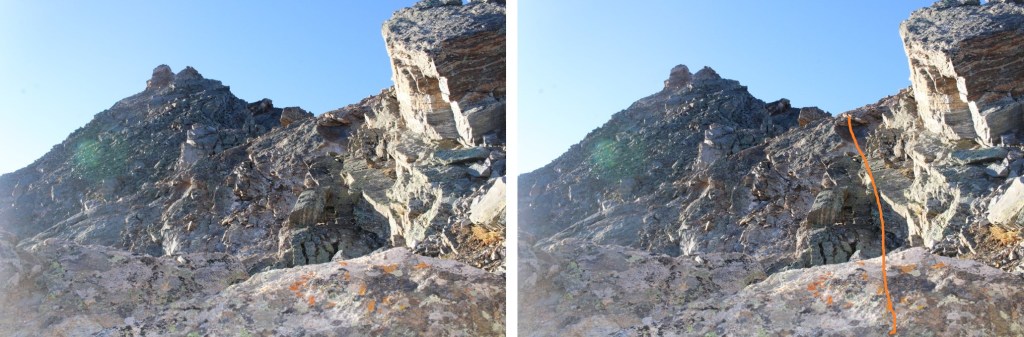
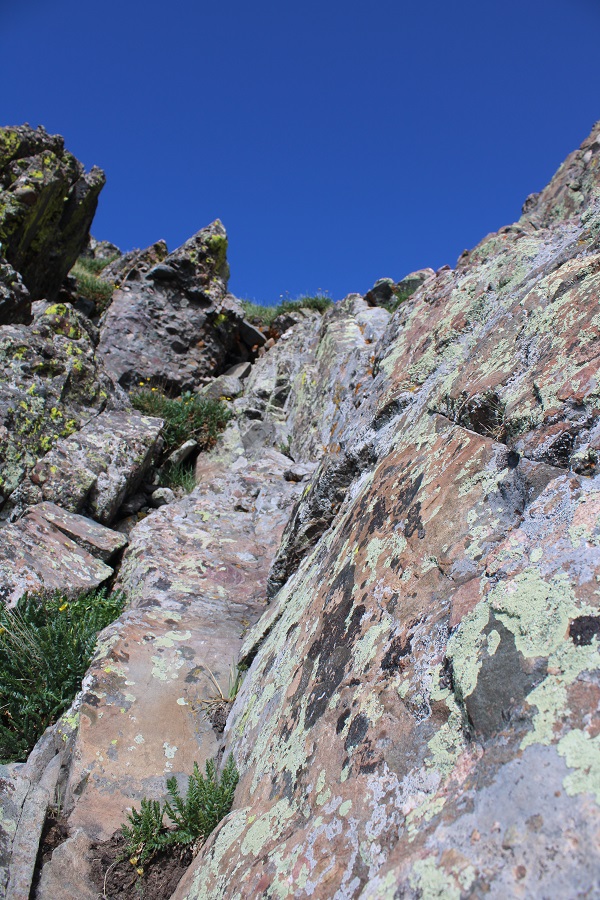
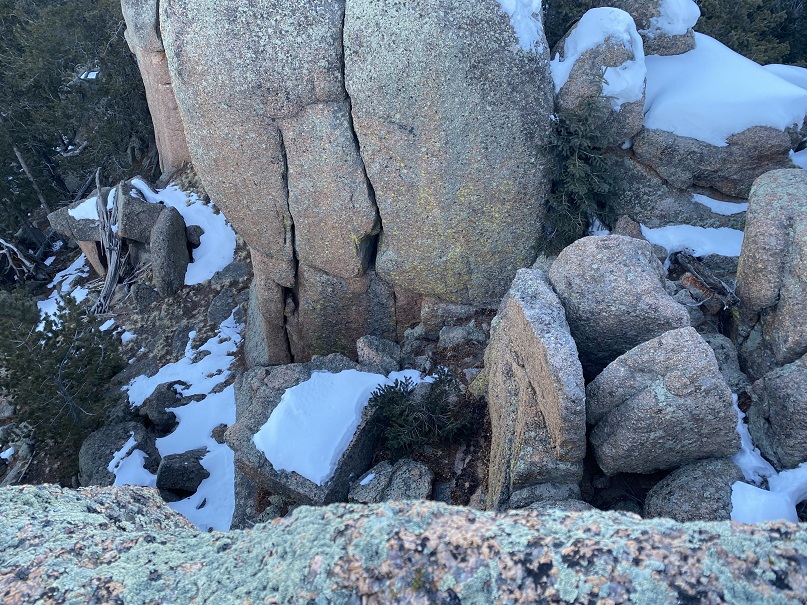
Then it was back to navigating around the large boulders
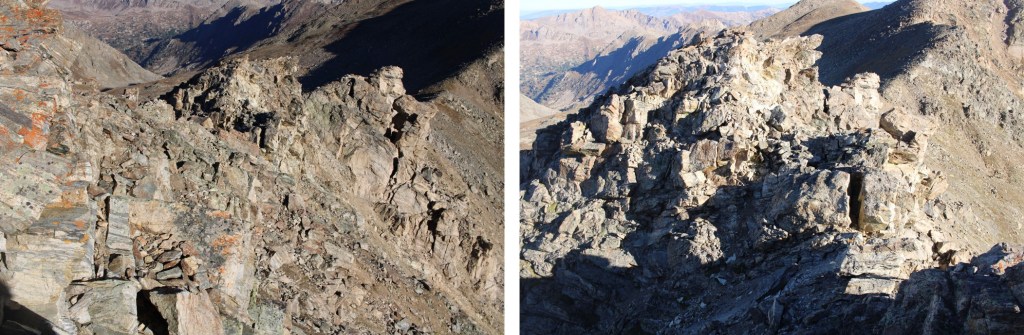
And heading back down to the ridge
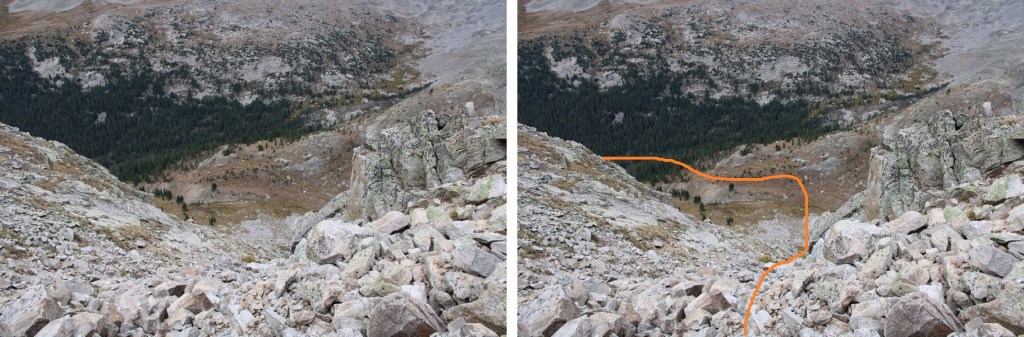
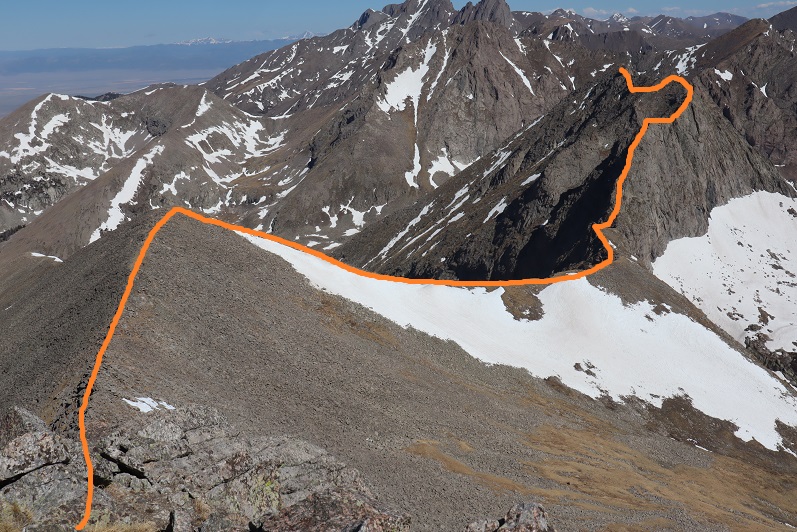
Here’s an overall look at the route out of the basin
This is the route I took
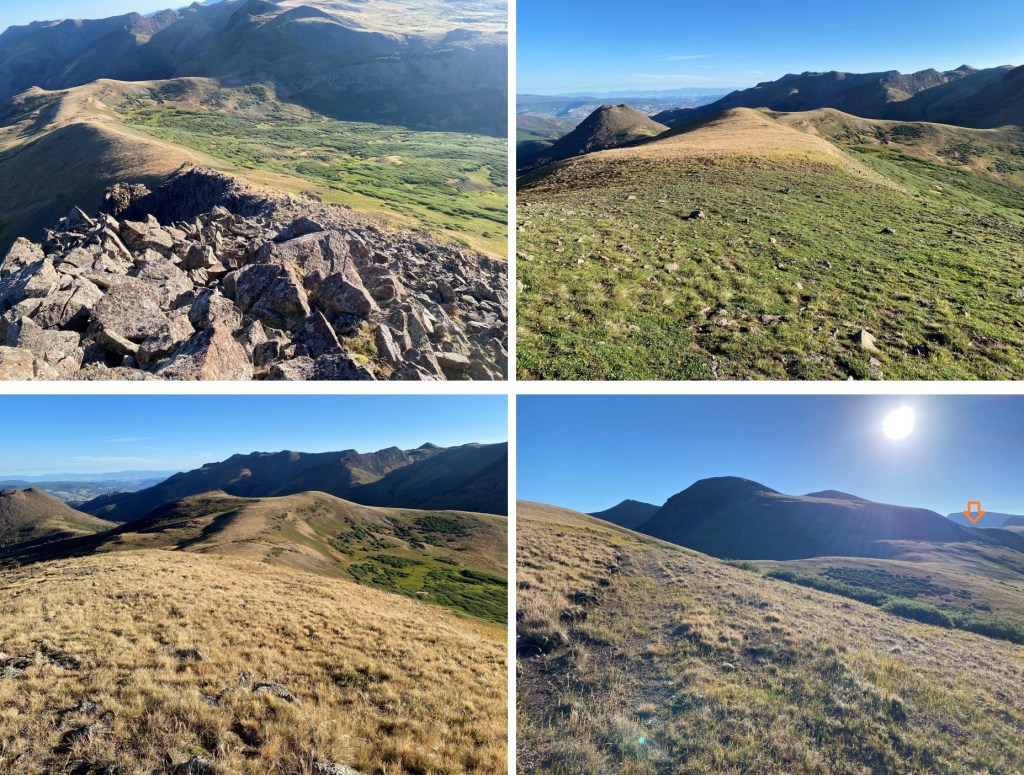
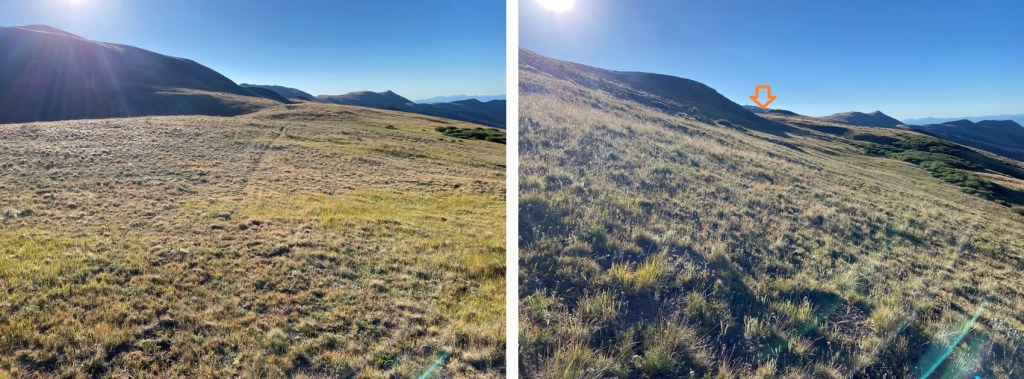
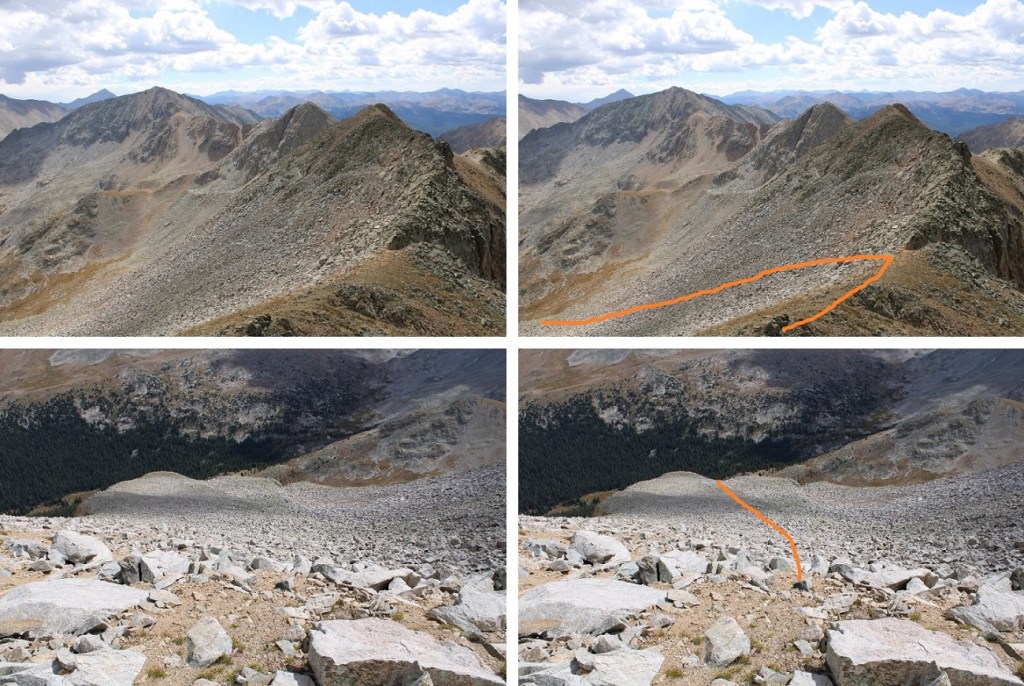
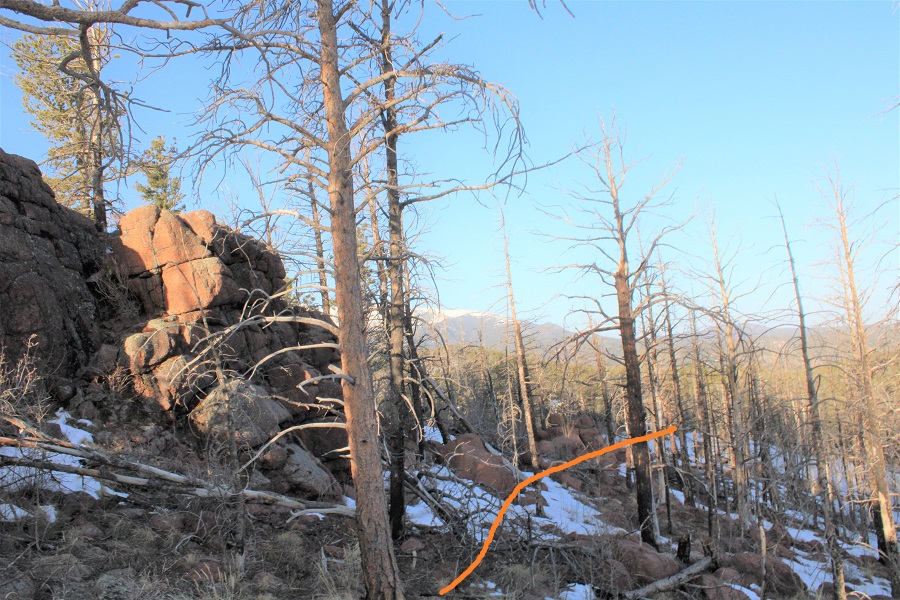
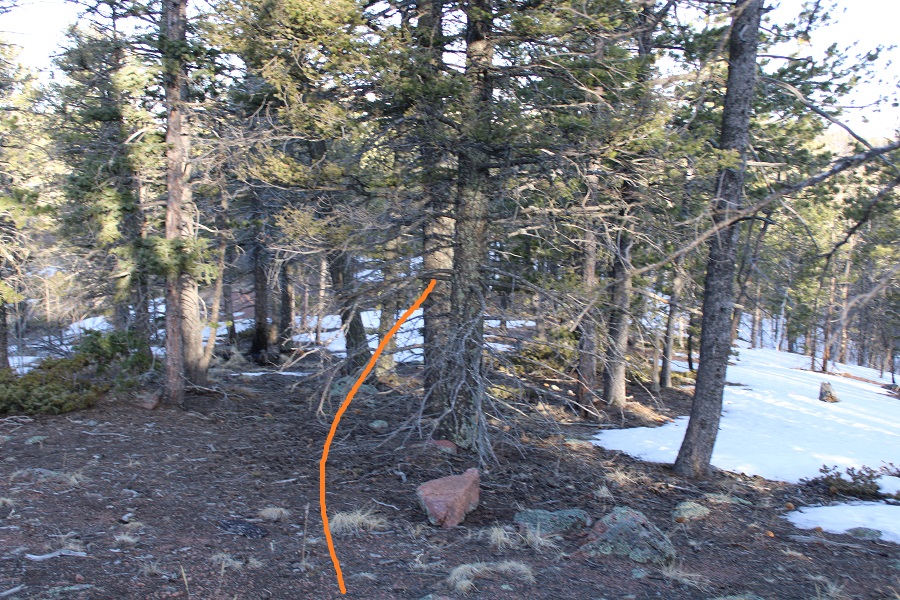
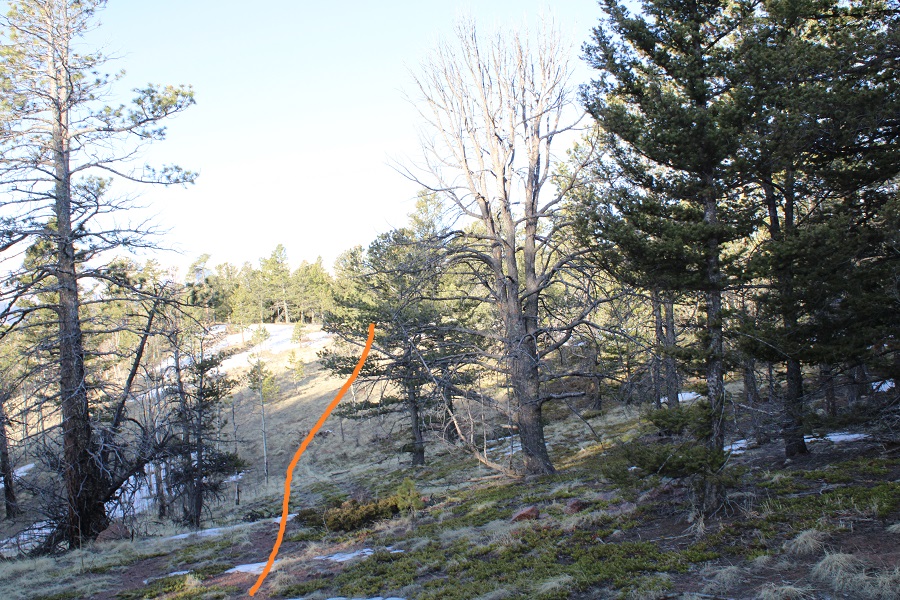
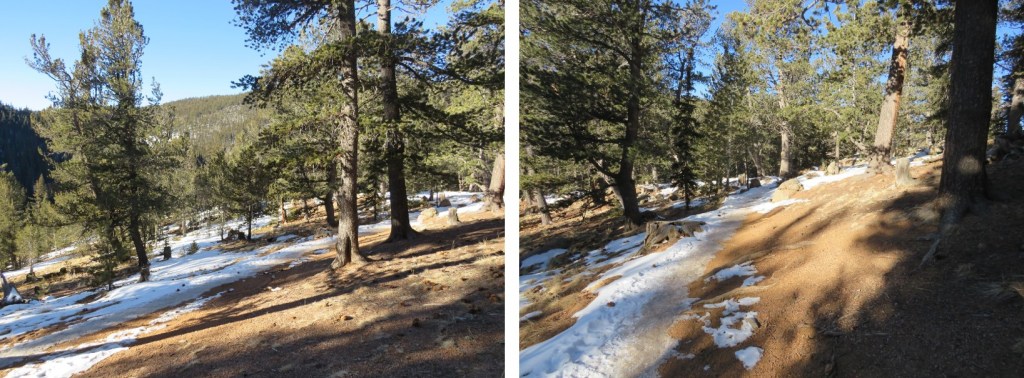
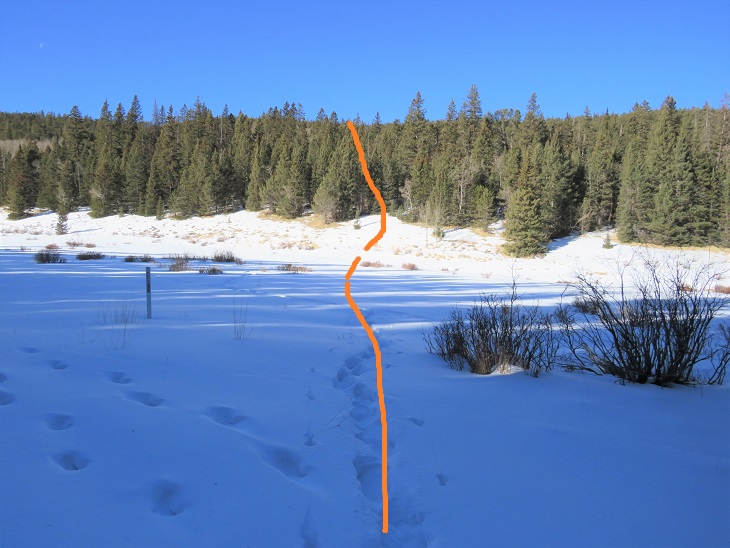
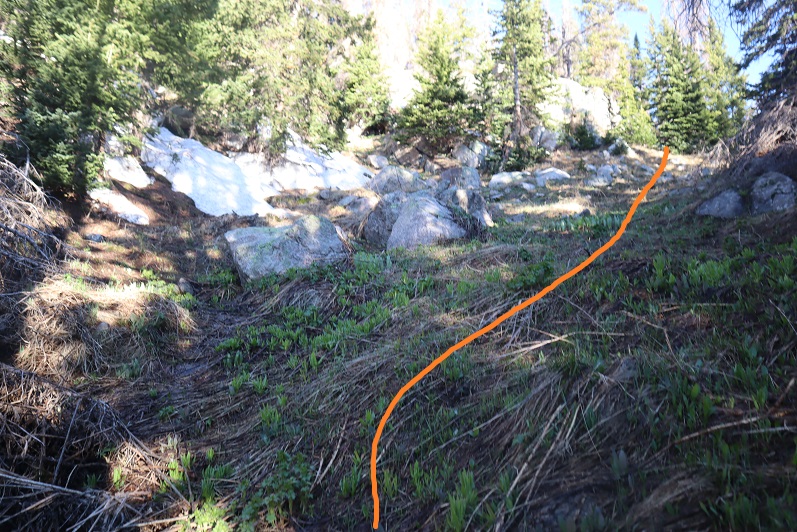
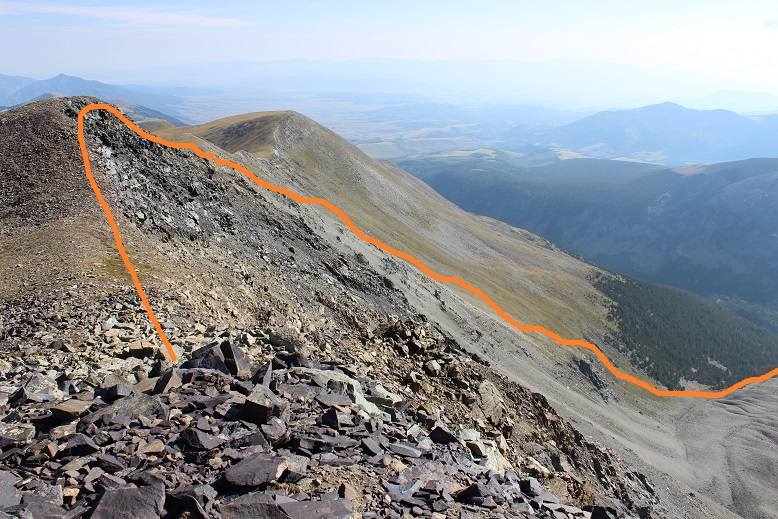
And some step-by-step pictures. Once I was on the ridge there was a faint game trail to follow much of the way back to the road. Unlike you’ll see on CalTopo, there is no road here. I stayed above the willows but below the rock rubble.
Ahead of me I could see two roads in the distance. I was aiming for the closer dirt road
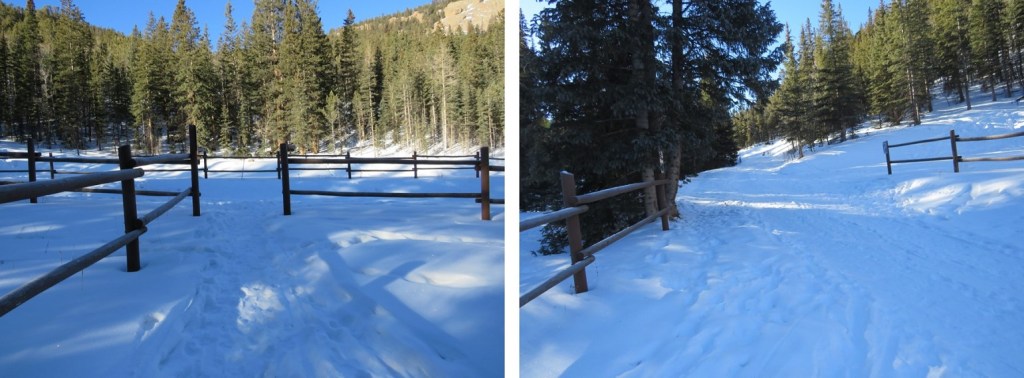
Back on 4WD dirt road 505.1, I followed it east back to the trailhead.
I made it back to my truck at 8:30am, making this a 7.36 mile hike with 1920’ of elevation gain in 3 hours 30 minutes.
This was my second attempt at this peak. On the first attempt, there was unexpected snow the night before, and I deemed the class 3 section too difficult with a dusting of snow and rocks covered in a thin layer of ice.
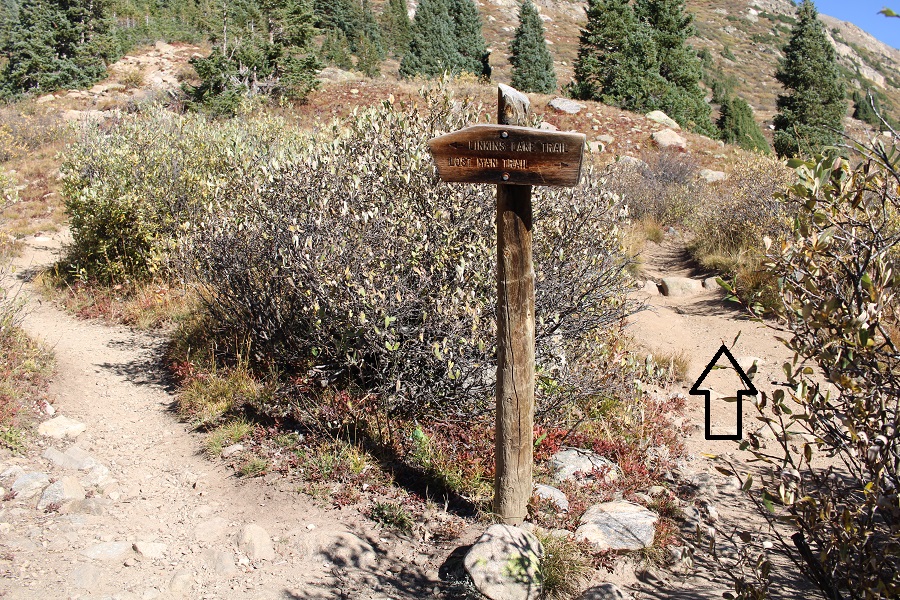
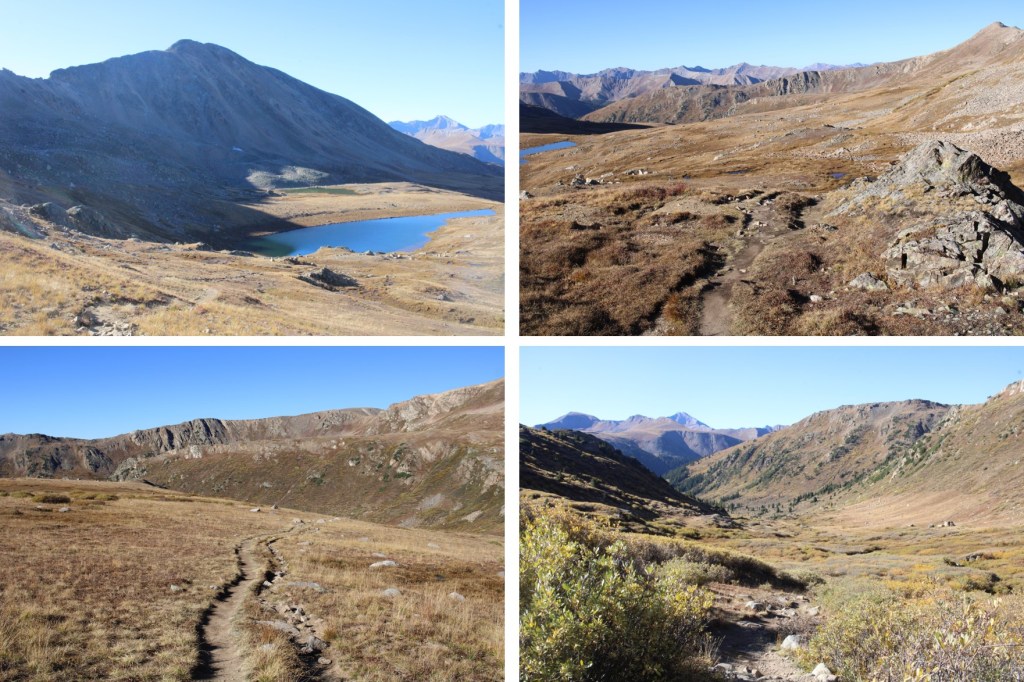
So, I came back a week later, after the snow had melted out, and tried again. I started at 6am from the Linkins Lake and Upper Lost Man Trailhead.
I followed the class 1 trail north, following Trail #1996, Lost Man Trail
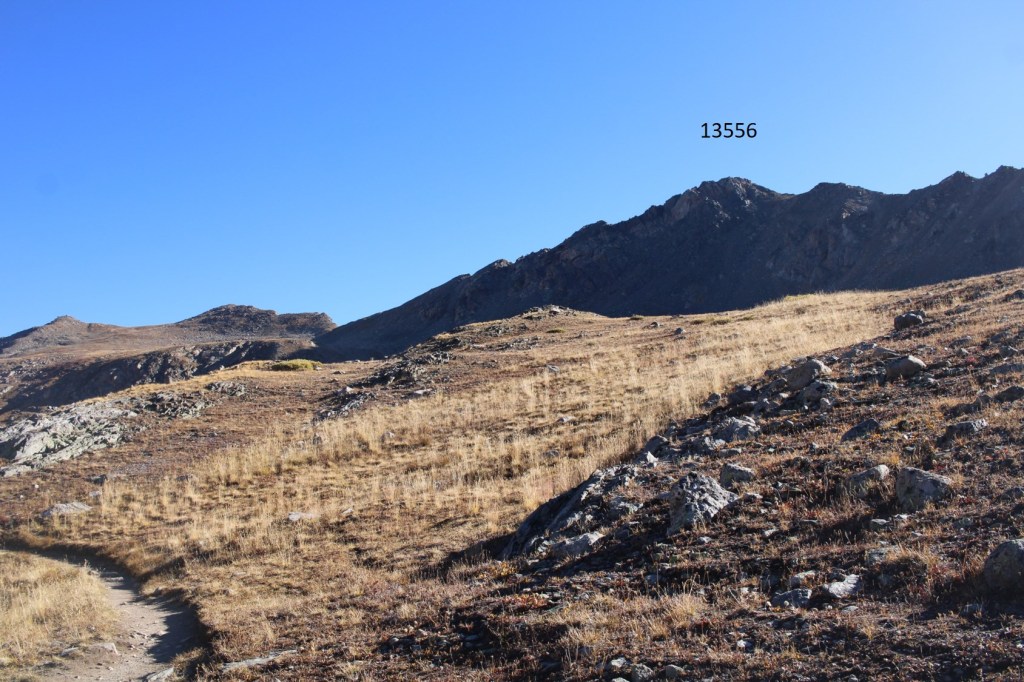
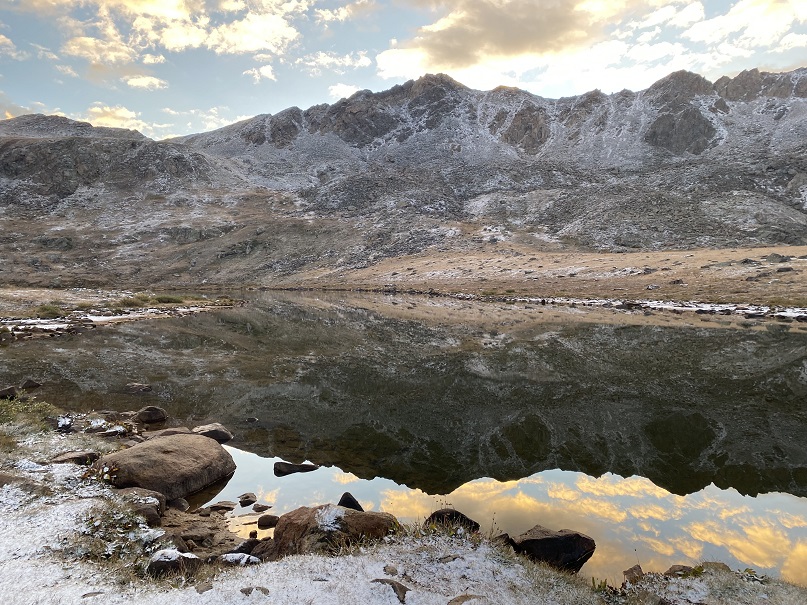
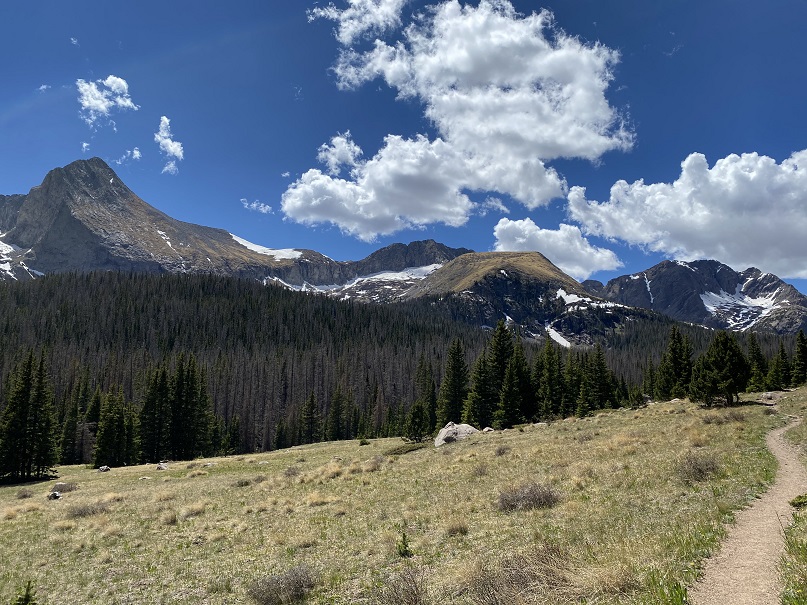
Here’s a glimpse of PT 13556
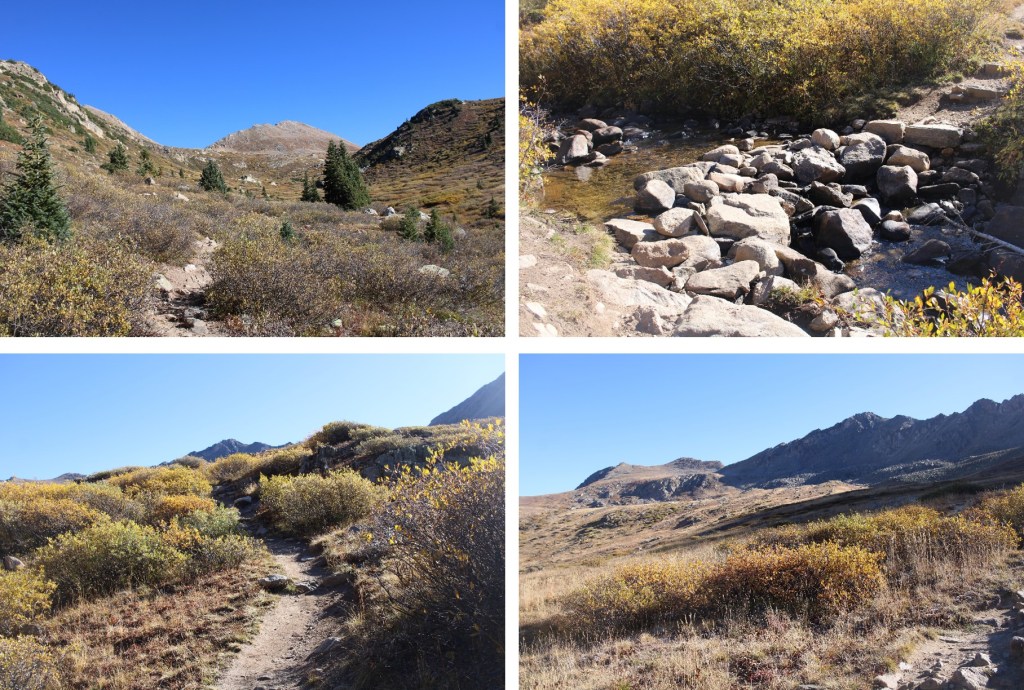
To get there, I’d first have to pass Independence Lake, and make it to the pass, which was about 2.5 miles from the trailhead
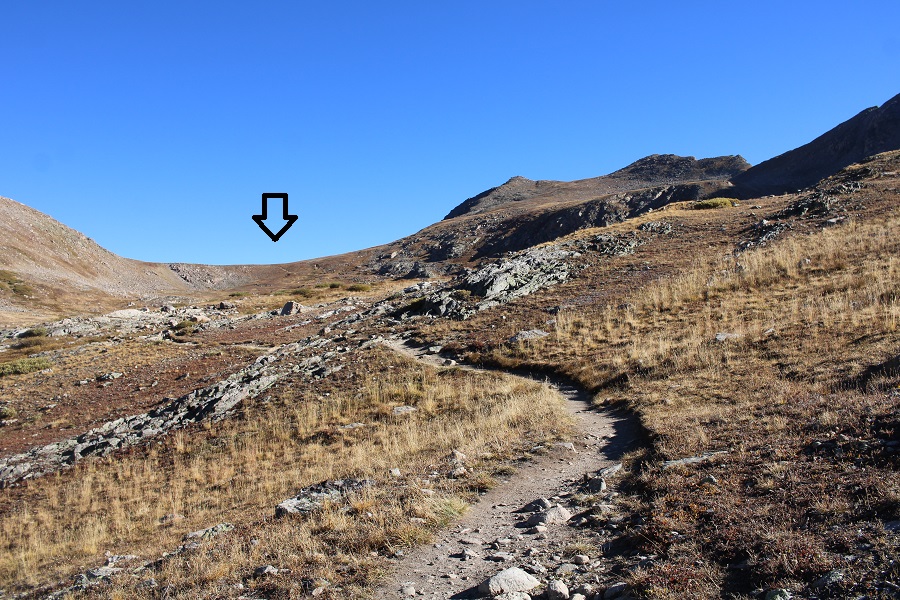
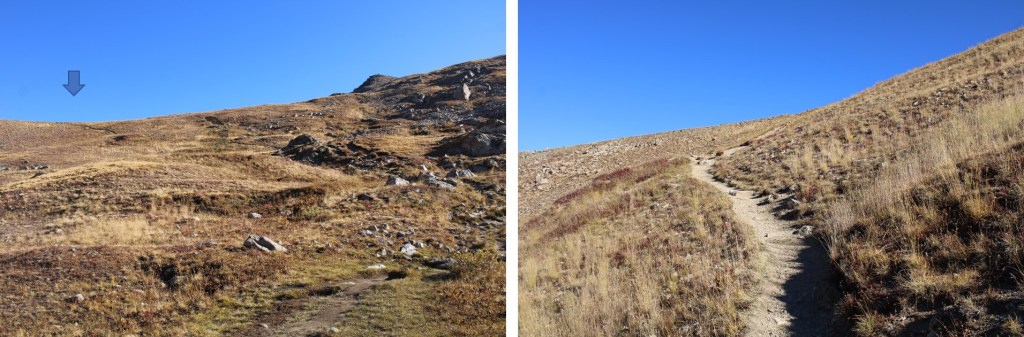
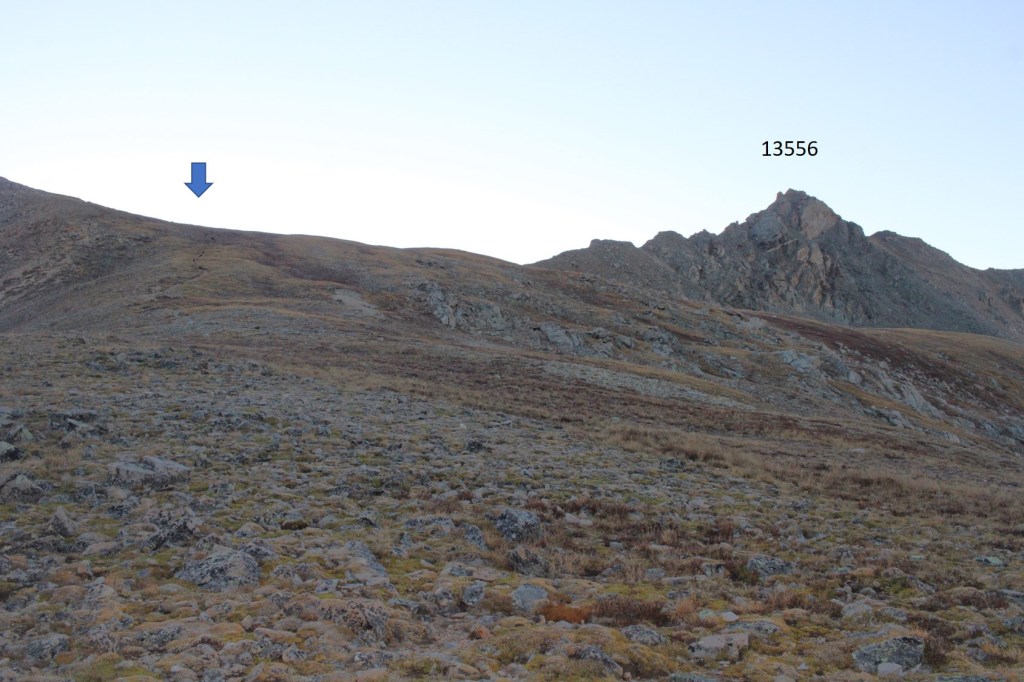
Once at the pass, I turned right and followed a faint trail east that eventually petered out. I was headed for the ridge.
I ascended the ridge, then turned right and followed it southeast towards the summit. Initially, the terrain started out as class 2 and I just followed the ridge
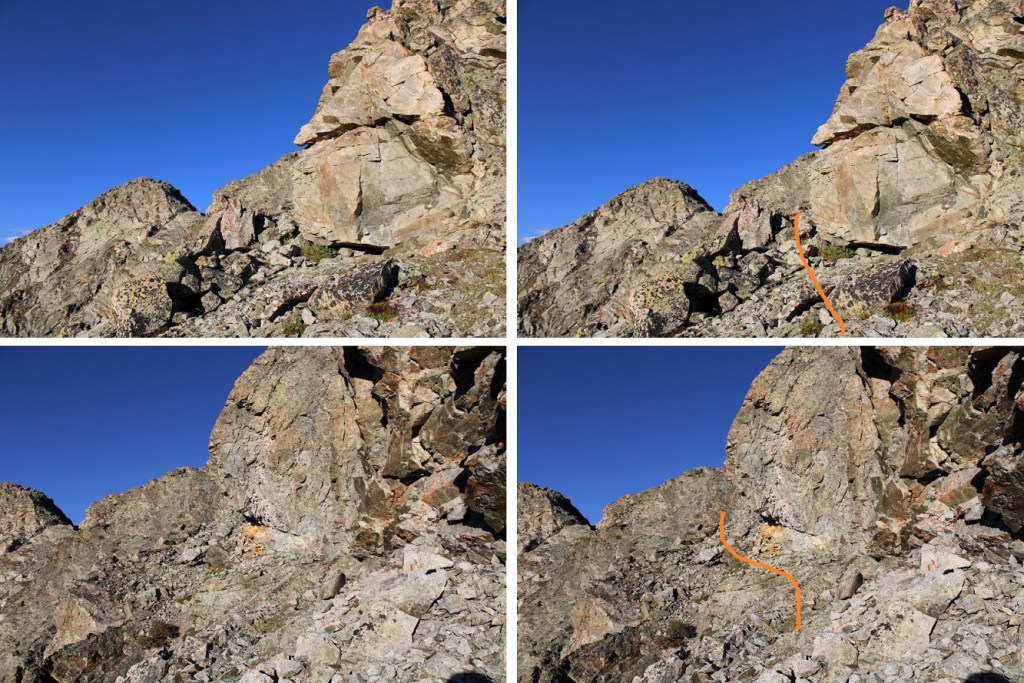
But pretty quickly I was in class 3 territory. Most of the ridge goes at sustained class 3, with a lot of fun scrambling. Here’s the route I took. I initially dipped down a bit, finding a navigable hole in the ridge to pass
Next, I dropped down a few feet, and continued following the ridge
Now for the fun scrambling. This is choose your own adventure, but this is the route I took
Eventually the ridge ran out, and I had to go to the right
Then it was an easy scramble to the summit
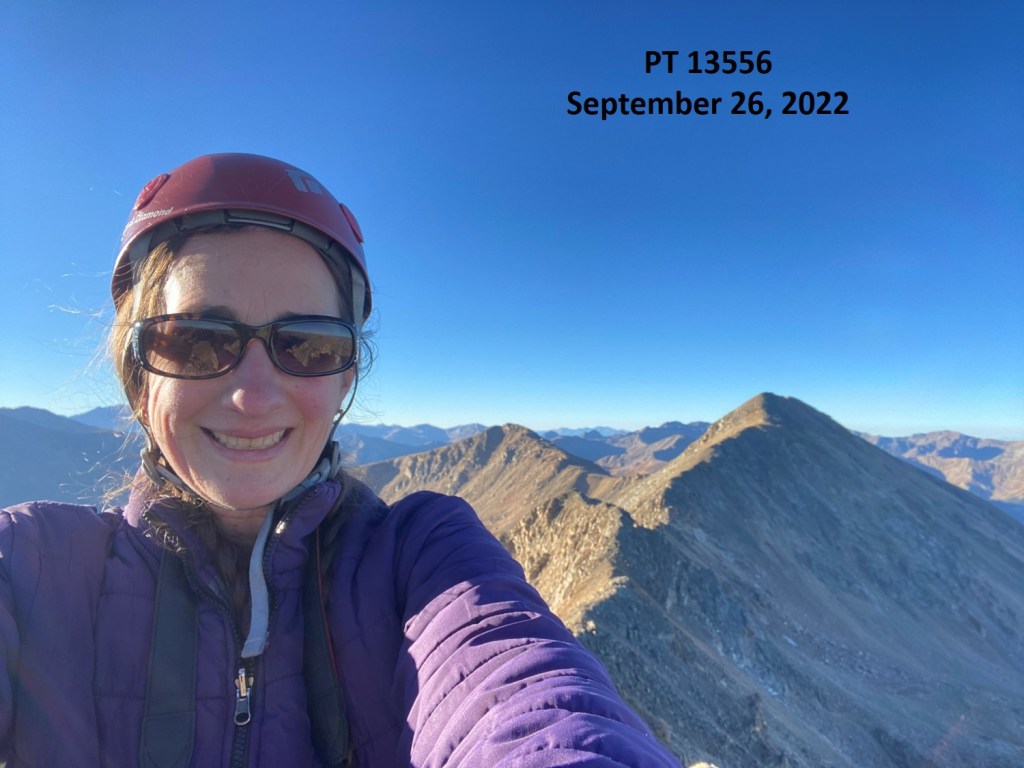
PT 13556:
PT 13556:
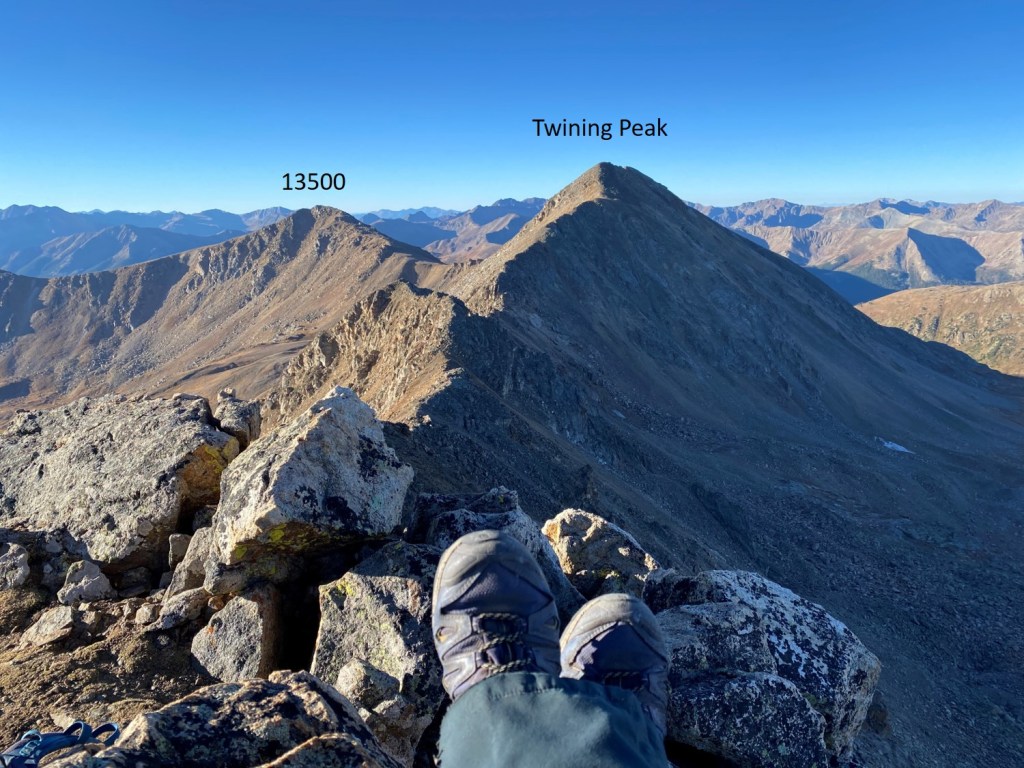
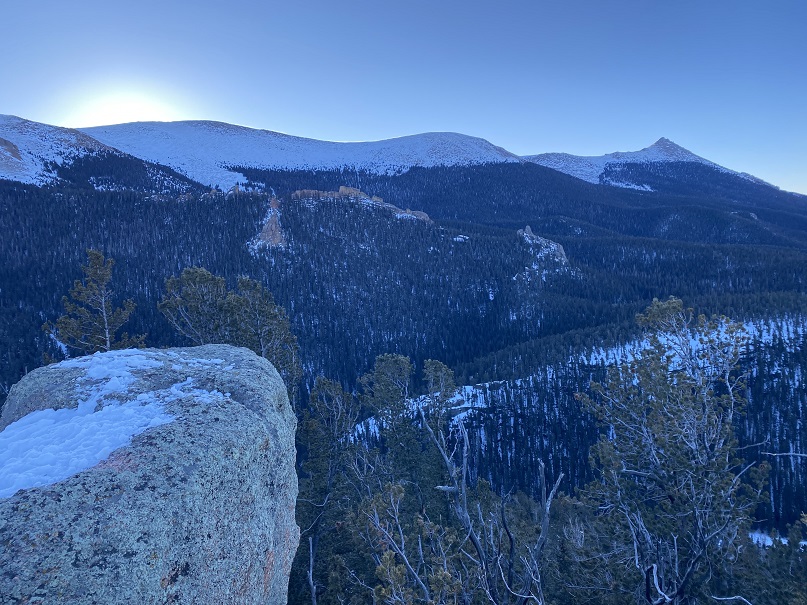
From the summit, I had great views of Twining Peak and 13500 to the south
Now for the route back down. I just retraced my steps, but it looks a lot different heading back than it did going in.
Now back on the class 2 section of the ridge, I took it back to the saddle
Then I turned left onto trail 1996, and followed it south back to the trailhead
I made it back to my truck at 8:45am, making this a 6.51 mile hike with 2015’ of elevation gain in 3 hours, 45 minutes.
While it had been beautiful being there with a dusting of snow last time, I was glad I’d turned around, as I now realized the scrambling on ice would have been dangerous: There just hadn’t been enough snow to provide traction, and the ice had been slippery.
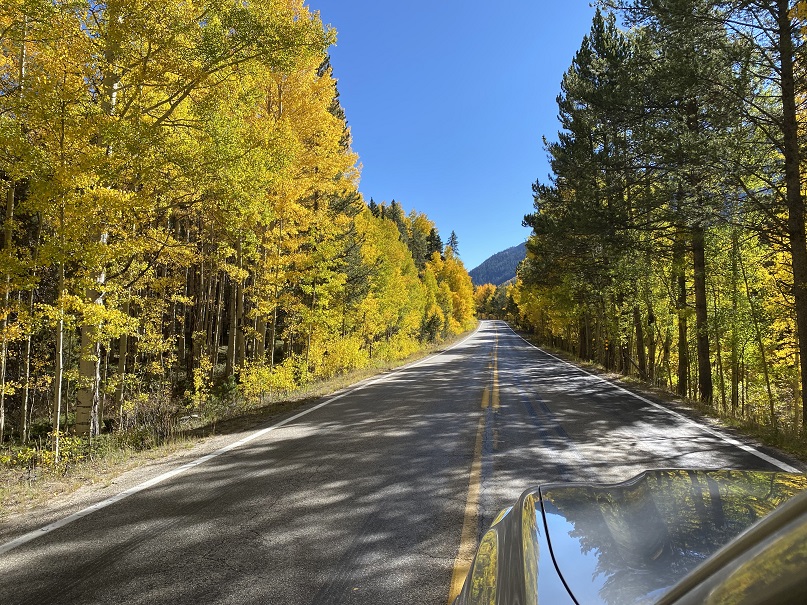
As an added bonus, this time I got to drive home while enjoying the fall colors
I’m not a fan of the Rockdale Trailhead. It’s an adventure in itself, starting with a drive through Clear Creek
And then the road to get to the trailhead is littered with dips and rocks. I feel I’m a pretty good driver on 4WD roads, but I have a hard time avoiding some of the obstacles on this one. If you drive to the upper trailhead be sure of your driving skills/vehicle.
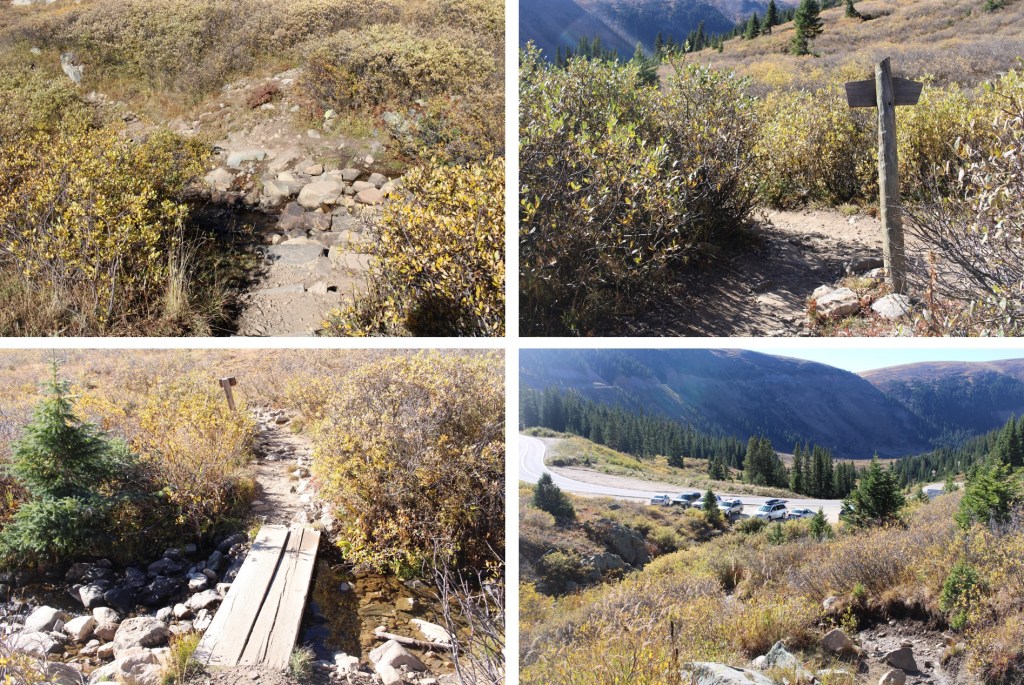
I made it to the trailhead and was on the trail at 5:30am. The trail is class 1, and starts out by heading south along trail 1461.
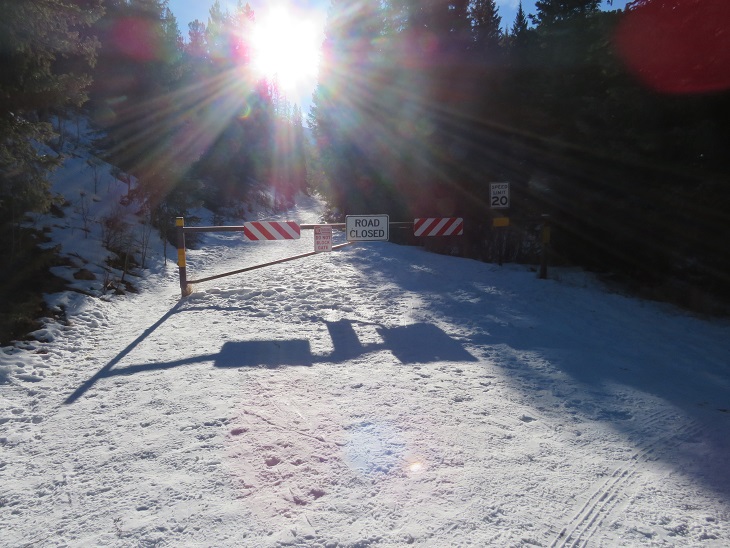
After hiking for less than half a mile I came to the avalanche area. Last time I was here was recently after the avalanche, and it was difficult to navigate. They did a lot of work in this area, and now you can drive a car through it (if vehicles were allowed, that is). I passed around the gate, and continued along the trail.
Just before making it to Clohsey Lake there’s a junction in the road and it becomes a trail. You can take this, or continue taking the road to the lake and pick up the trail on the other side. I chose to take the trail up and over the small mountain
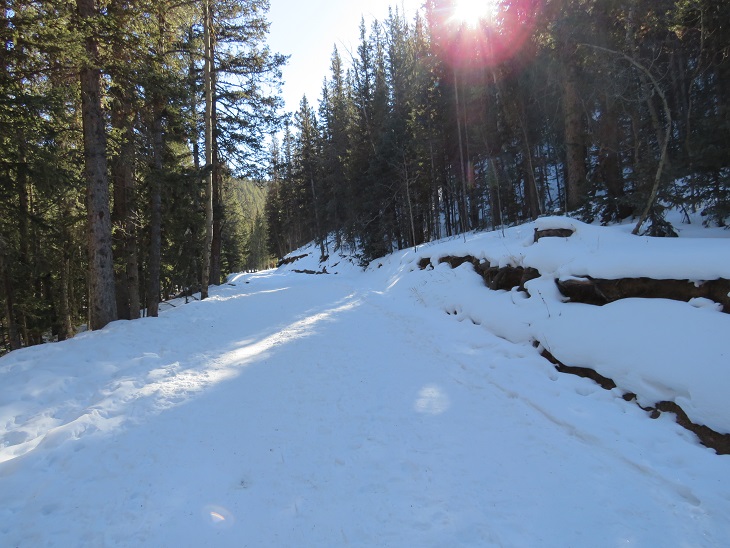
I followed this trail south for 3 miles from where I parked, through pine trees, willows, across streams, and eventually to treeline.
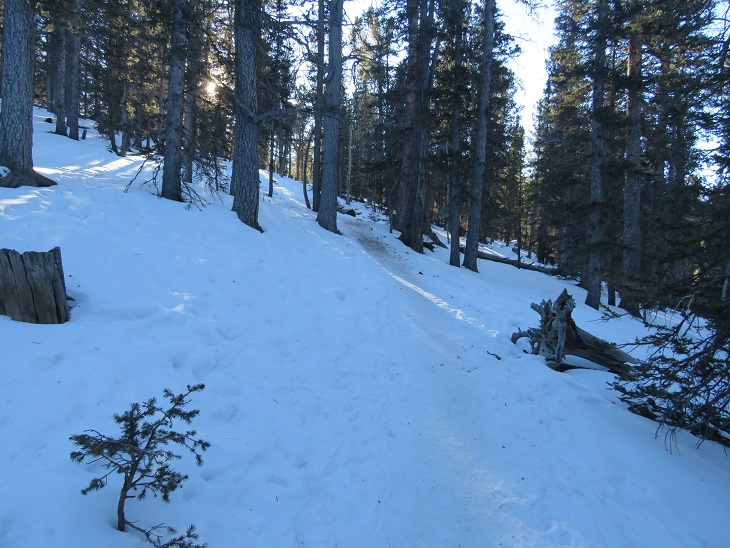
After about 3 miles the trail kind of disappeared/fizzled out. Last time I was here I found cairns to take me to the ridge, but this time I didn’t see any. No worries though, I just kept rounding the hillside, heading northeast towards the ridge. You’ll want to just head towards the ridge, but easier terrain is to your left (northeast).
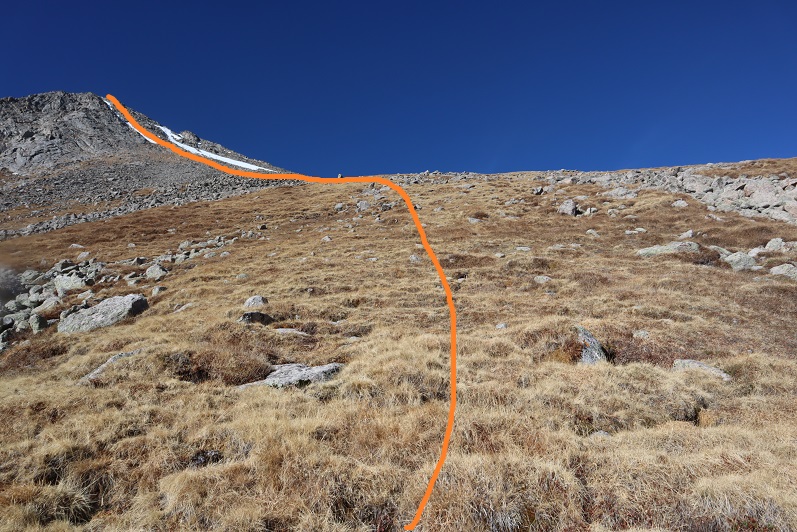
It was 3.75 miles to the ridge. Once on the ridge I turned right and followed the ridge south. I could mainly stay on the top of the ridge, dipping to the left a few times when necessary. I was headed towards the black arrow.
To continue to follow the ridge I had to make it around this point. I aimed for just below the large boulder, then went left, following dirt and scree and hugging the mountainside.
This part was easy, but as I rounded the corner, I came upon gullies full of choss. This area felt class 4. To navigate these, I hugged the gullies, dipping down to cross the first big one, and then remaining level before eventually finding what looked like a game trail to the ridge.
Here’s the view and my route from the first big gully. I stayed level to get across the chossy gullies. It’s harder/steeper than it looks.
Safely across the first gully, here’s looking back at the route I took down
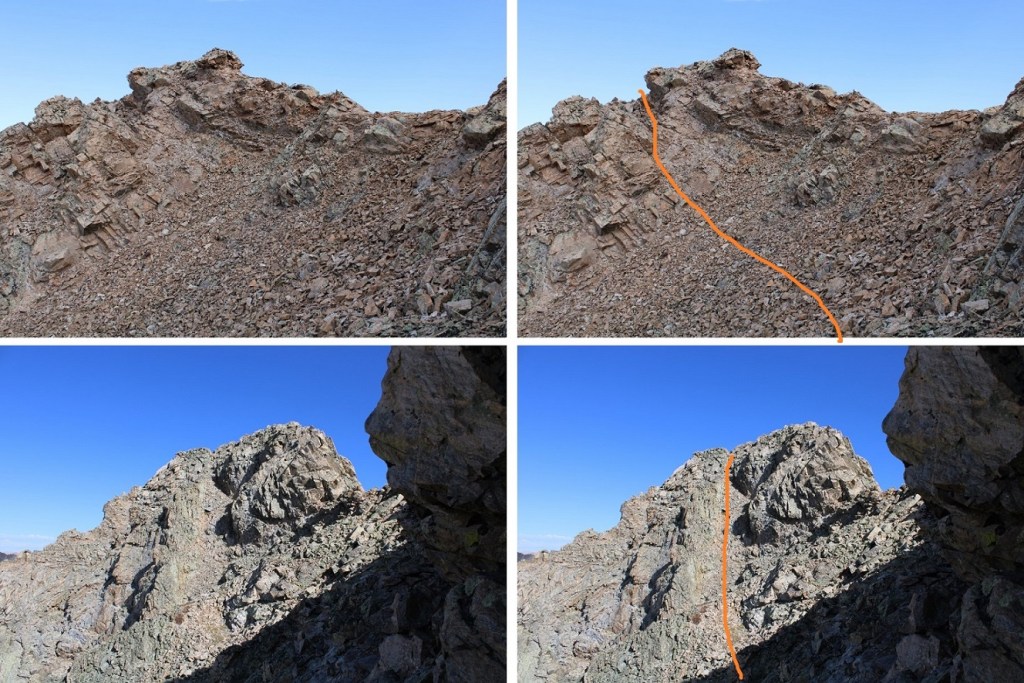
Now I continued at level elevation heading south, until I found an obvious route to the ridge. Until this time the ridge had been rock slabs, spires, and choss, but once it became rocks and tundra I headed up, then turned left to follow the ridge.
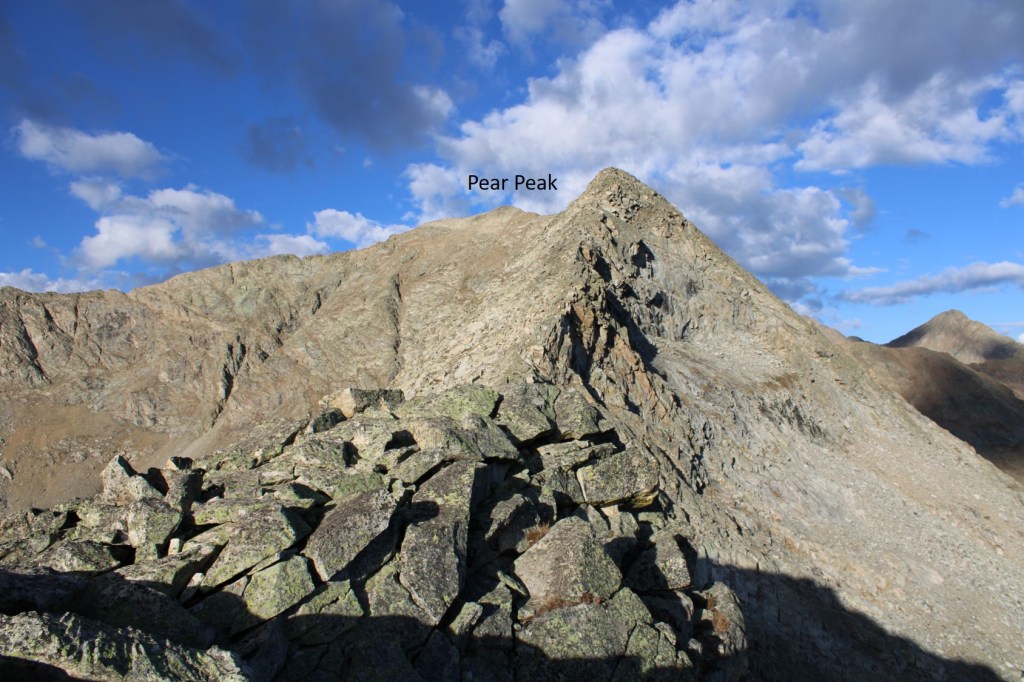
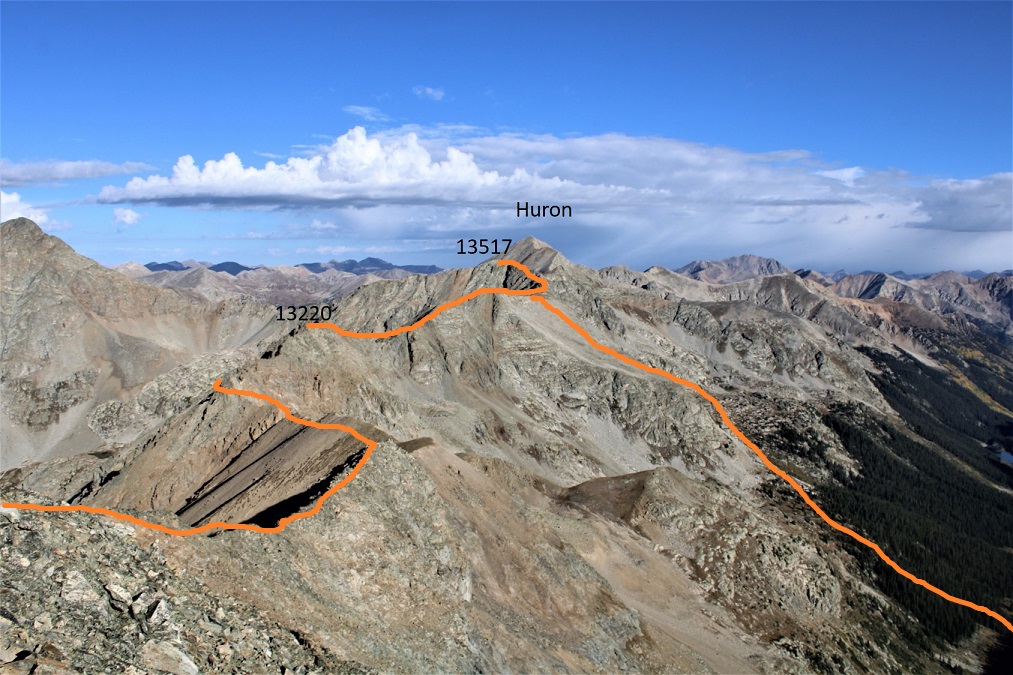
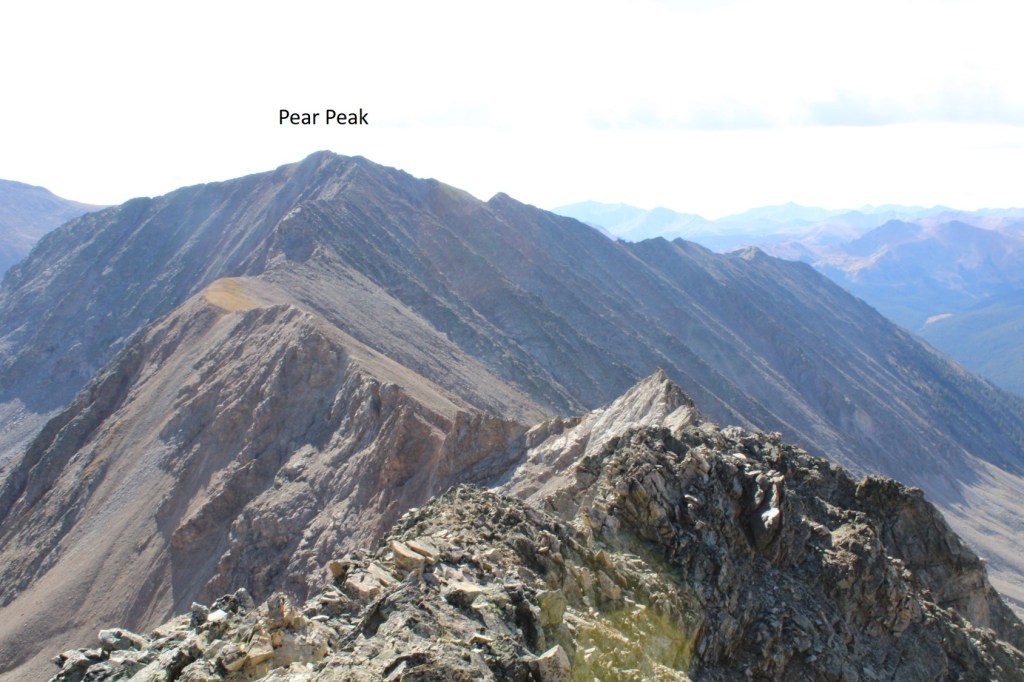
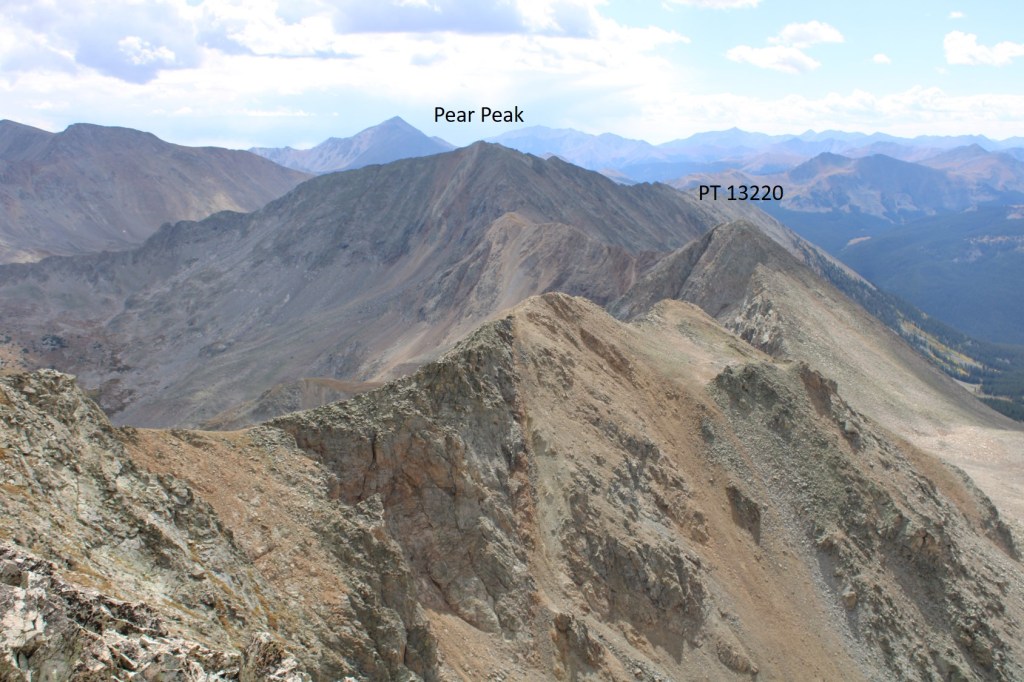
From this point on, the ridge ‘goes’. It’s mostly on large, solid rock, but remember, these rocks can move. It’s about three quarters of a mile from here to the summit of Pear Peak. The ridge felt consistent class 2-3. I didn’t feel there were any class 4 moves on this ridge.
If I ever felt the need to dip off the ridge, I went left. Pear Peak is actually to the left, past the false summit (which isn’t really a false summit because you can see the true summit most of the time)
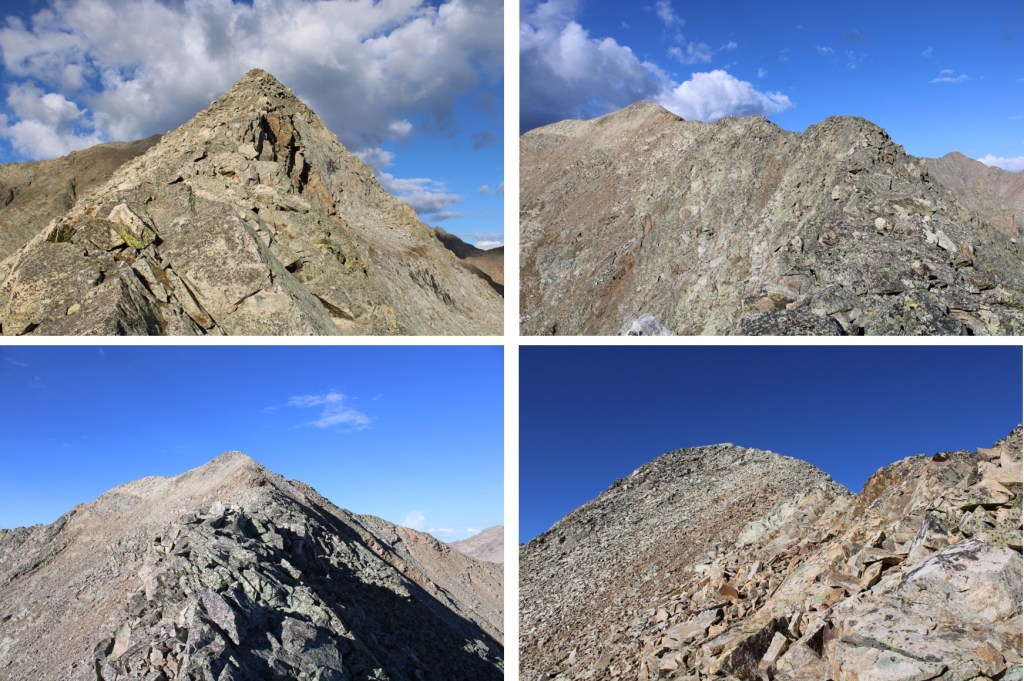
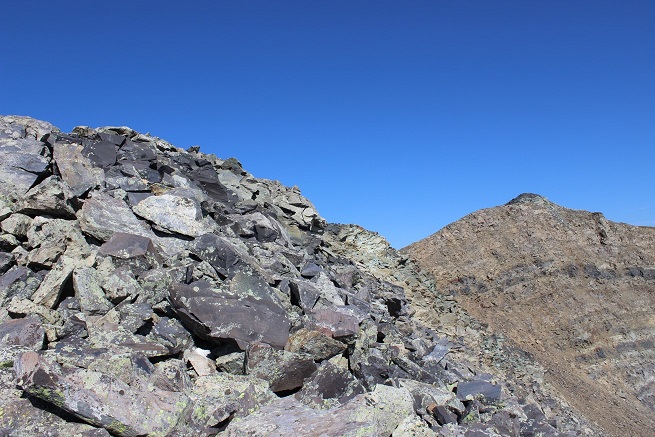
Here are some more ridge pictures
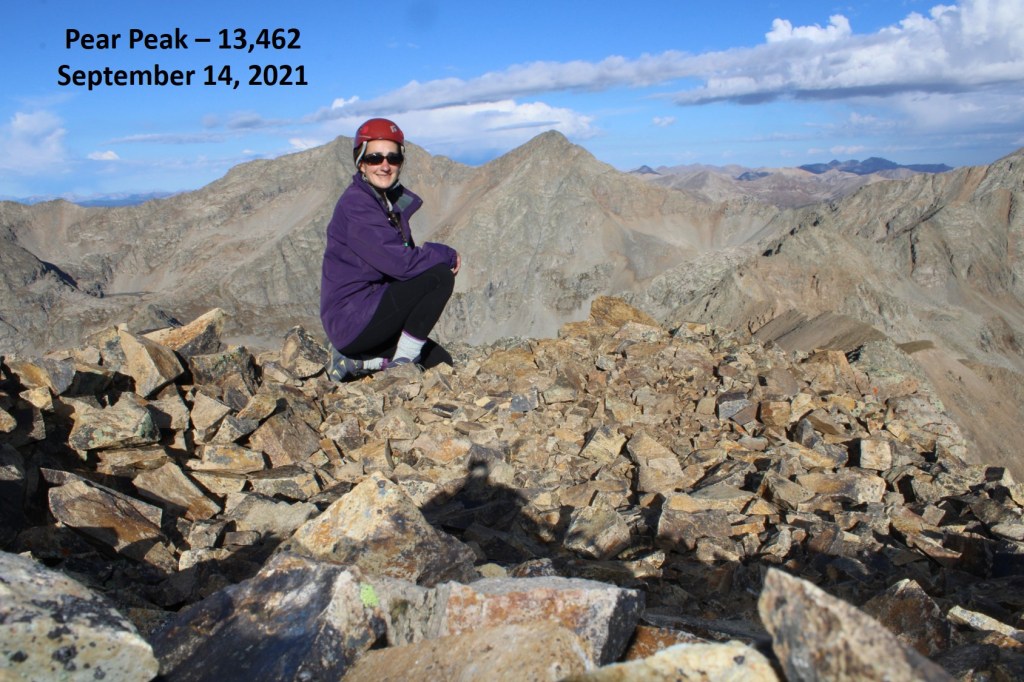
I summited Pear Peak at 8:45am
Pear Peak:
Now the easy part, as I turned northwest and descended the ridge to the Pear Peak/PT 13220 saddle. This was class 2, once again sticking to the ridge and dipping to the left when necessary.
Here’s an overview of the rest of my route, mostly following the ridge, except for a short area on the way to 13220 where I stayed left (more on this later). You also have a good view of the decent route from here. Now’s a good time to study it.
Ok, down the ridge to the Pear Peak/PT 13220 saddle. It’s all class 2, and you’re aiming for a scree filled gully, circled in red
Once you make it to the gully, the choss and adventure begins.
I dipped down into the gully, crossed it, and then stayed level in elevation as I rounded the south side of the peak, aiming for two protruding rocks.
Once I started heading north, I followed game trails up gullies and back to the ridge. This area seemed to go on forever.
Once on the ridge it was class 3 to the summit
I summited PT 13220 at 10am
PT 13220:
Here’s looking back at the route from Pear to PT 13220. It was 1.5 miles from Pear to 13220.
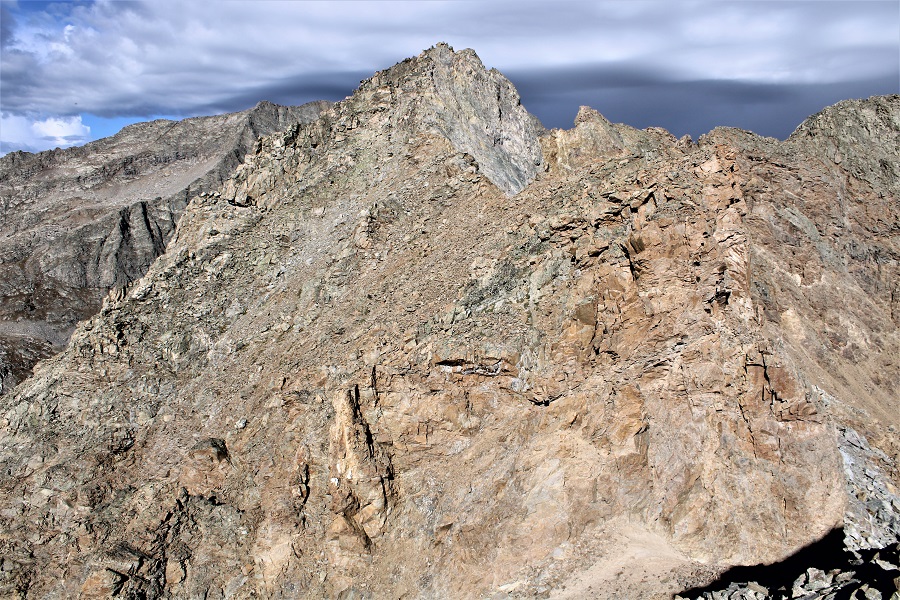
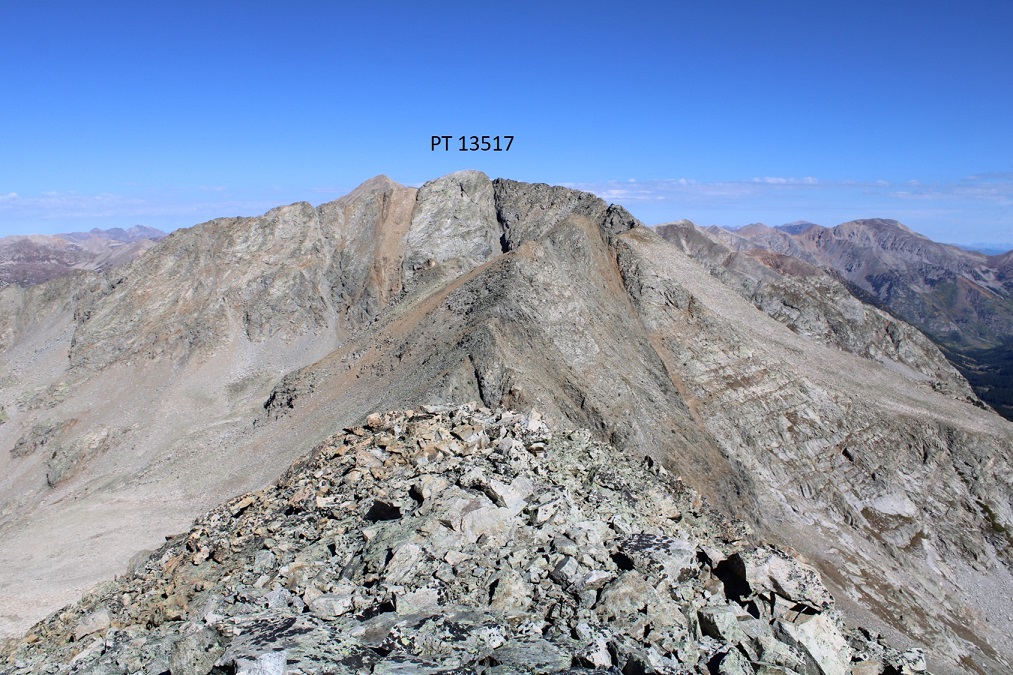
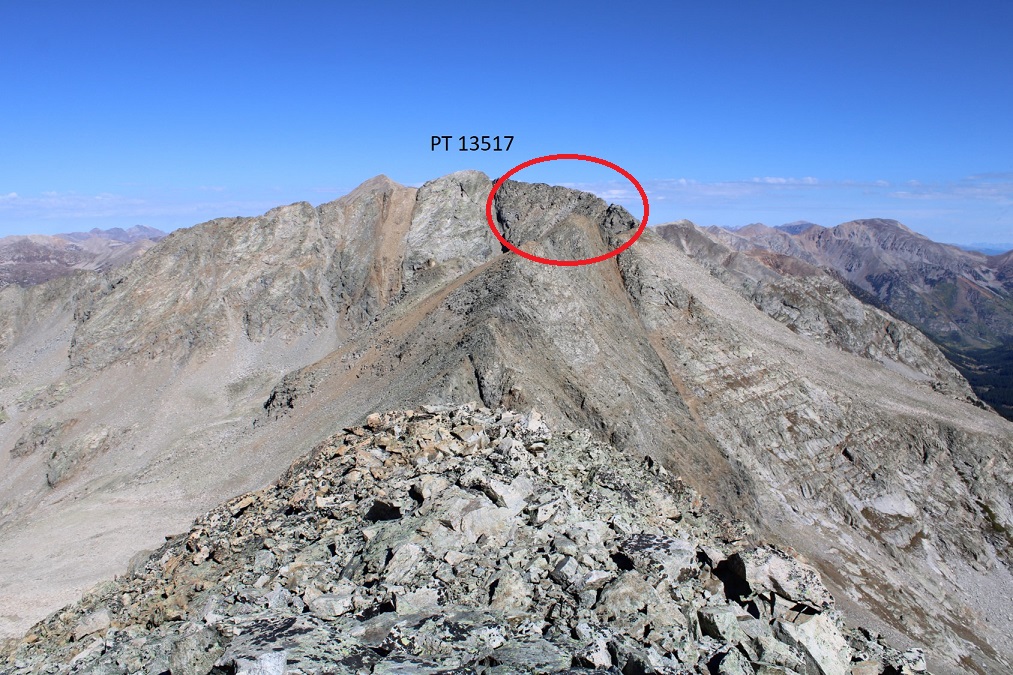
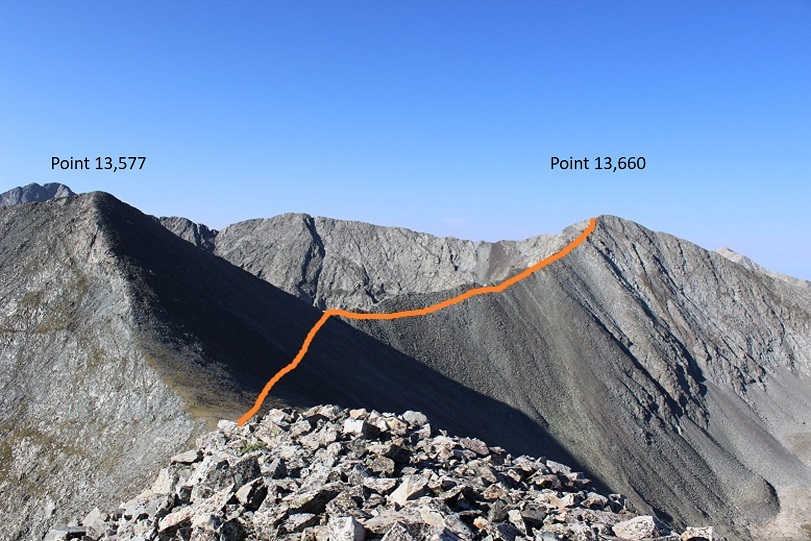
Next up, PT 13517 (more ridge work!)
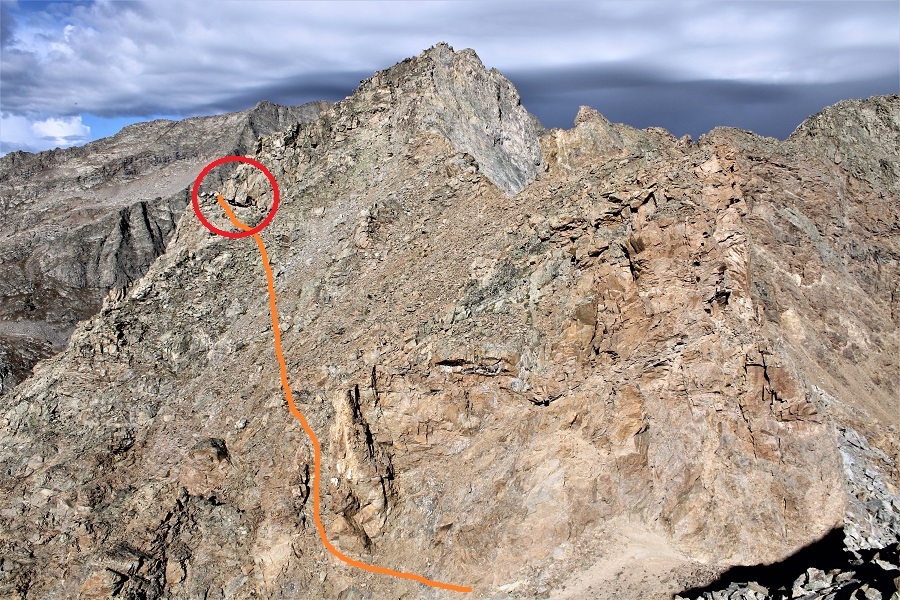
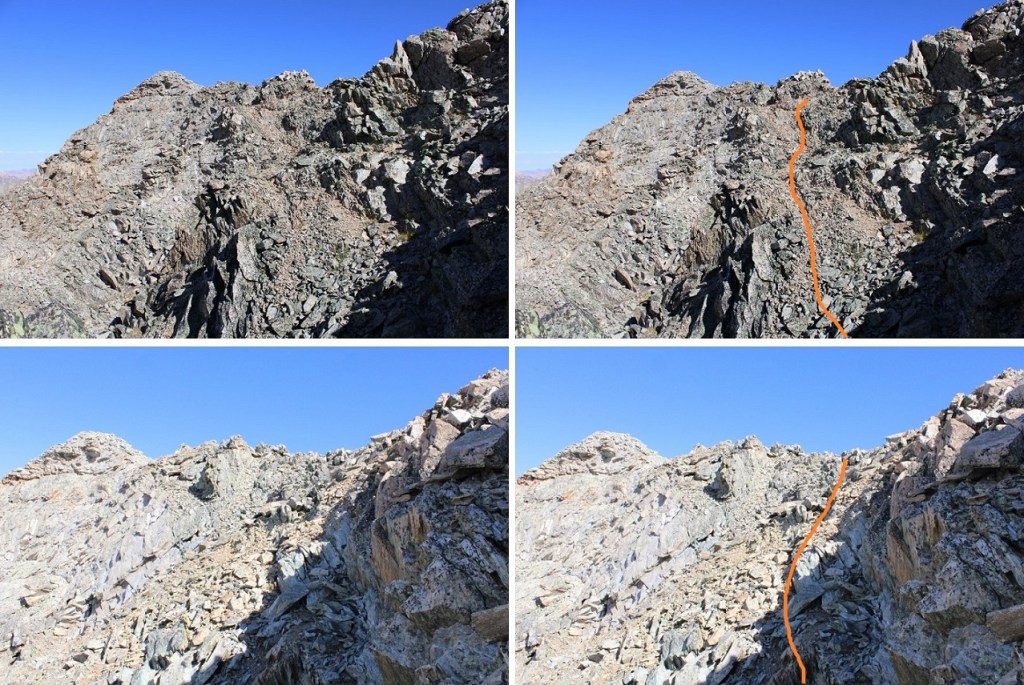
I followed the ridge the entire time. The ridge to the saddle was class 2. The difficult part is the ridge circled in red, which I felt was consistent class 3, with a bunch of class 4 moves thrown in.
The trek to the saddle was mostly on rocks, with a short ridge at the end (yes, you can stick to this ridge too)
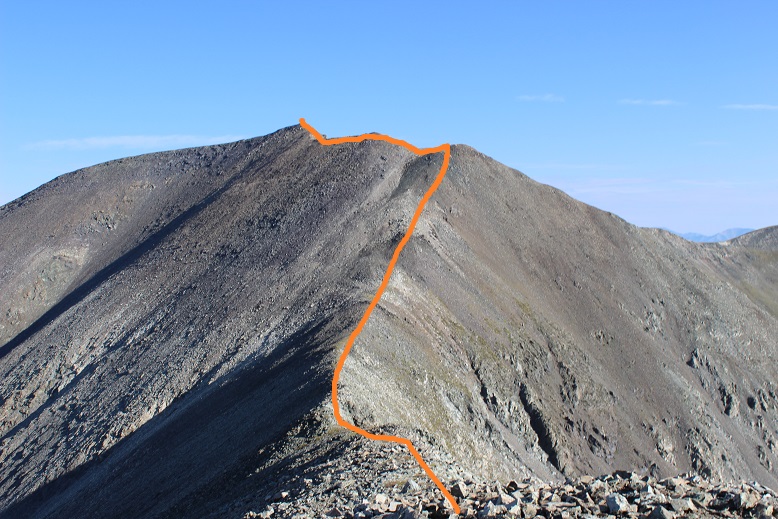
I entered the final ridge by going around to the east, then ascending the ridge by heading northeast.
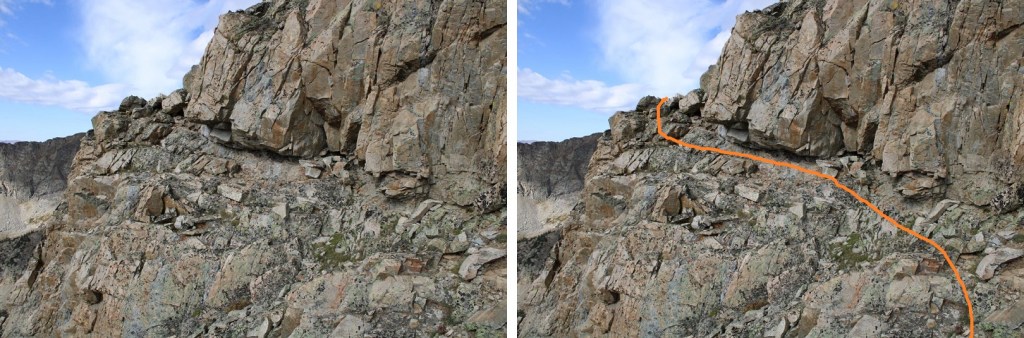
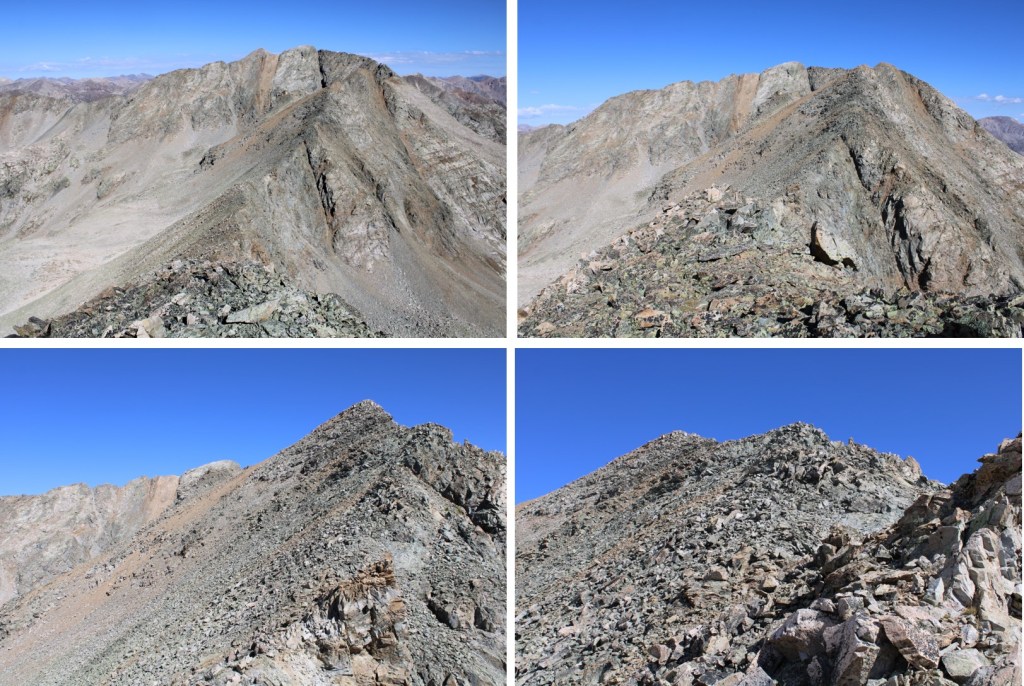
As I said before, this is a class 3 and 4 ridge. There are too many specific moves to illustrate here, as the climbing is consistent, so I’ll just show a few of the fun ones. While the rock looks solid, and mostly is, please be careful of the ones that look solid but roll. If you can’t go straight up the rocks, look for game trails to the left. Nothing should feel over class 4. To put it in perspective, I consider difficult class 4 anytime I need to remove my DSLR camera from around my neck, or put my trekking pole away to climb. I didn’t have to do either of those things on this ridge, but it was the most difficult climbing of the day.
The last little dip before the final push to the summit was class 2
I summited PT 13517 at 11:15am
PT 13517:
PT 13517 was a little over a mile away from PT 13220. Here’s looking back at PT 13220 and Pear Peak
I turned and retraced my steps back to the saddle.
Here’s the other side of that initial class 4 move
Back at the saddle, I headed east, and took the gully to the left down
The gully had scree, tundra, and bounders. I was easily able to find a way down this gully, but it looked challenging to find a good way to go up. I was glad I chose to do Pear first.
Here’s my overall route down the gully, across the small basin (I stayed high here) and back down to the trail. I followed a waterfall northeast, keeping the waterfall to my left to exit so I wouldn’t need to cross the water. This brought me to willows and the trail I’d used to hike in.
The hike out was uneventful, except it rained. I know it looks like it was a beautiful day, but in reality, just before PT 13220 it was snowing, and it rained/hailed/graupeled a bit on my way down. There were also people fishing at Clohsey Lake who had a few dogs. I was about 100 yards from them, but their dog wouldn’t stop barking at me. I’m sure that made for wonderful fishing.
I made it back to my truck at 1:45pm, making this a 11.89 mile hike/scramble with 3995’ of elevation gain in 8 hours, 15 minutes. And now, for the fun drive out!
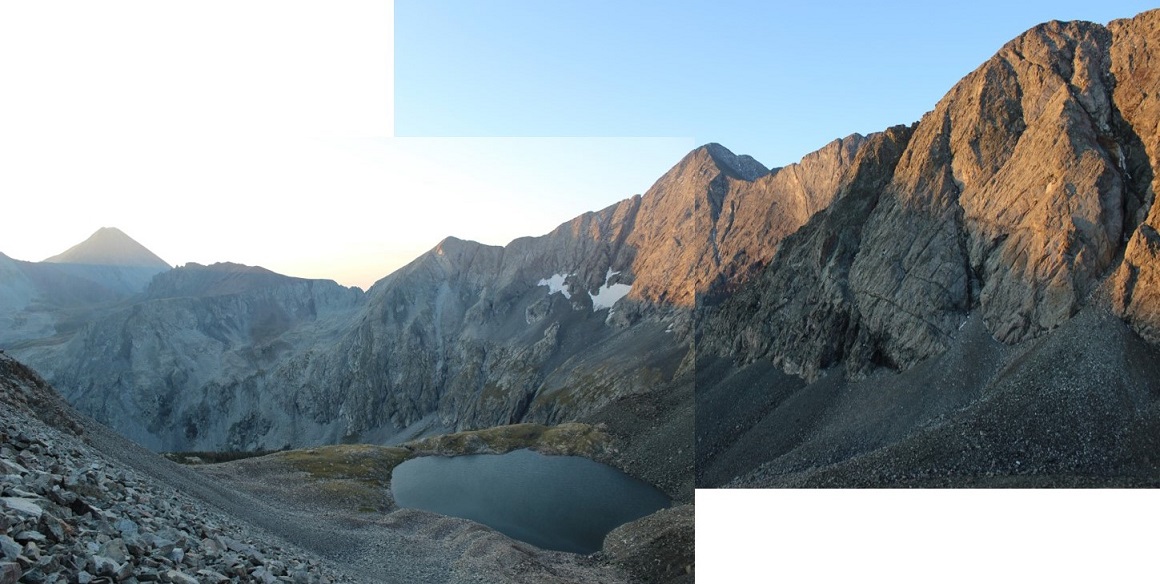
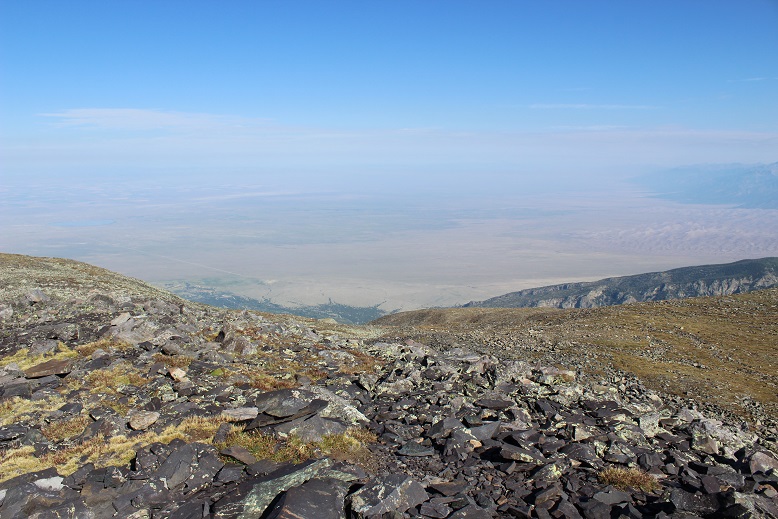
Here’s a view of Clohsey Lake and the basin from Pear Peak
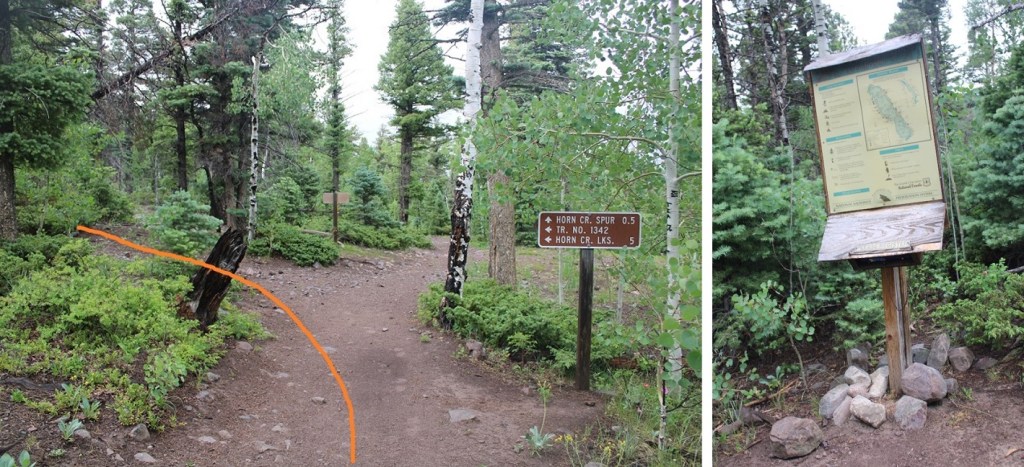
I parked at the Horn Creek Trailhead, the only vehicle in the lot. I’m always surprised at how few people take advantage of the free dispersed camping sites we have in Colorado, especially ones like this with a bathroom. Eager to summit and get back to treeline before the incoming storm, I gathered my gear and was on the trail at 4:30am. The trail starts by following the Rainbow Trail southwest for just over half a mile
Then I turned right onto Horn Creek Trail
I followed Horn Creek Trail for a short distance, about a tenth of a mile, before turning left at the junction towards Horn Creek Lakes. Here there’s a register, that looks to be kept up.
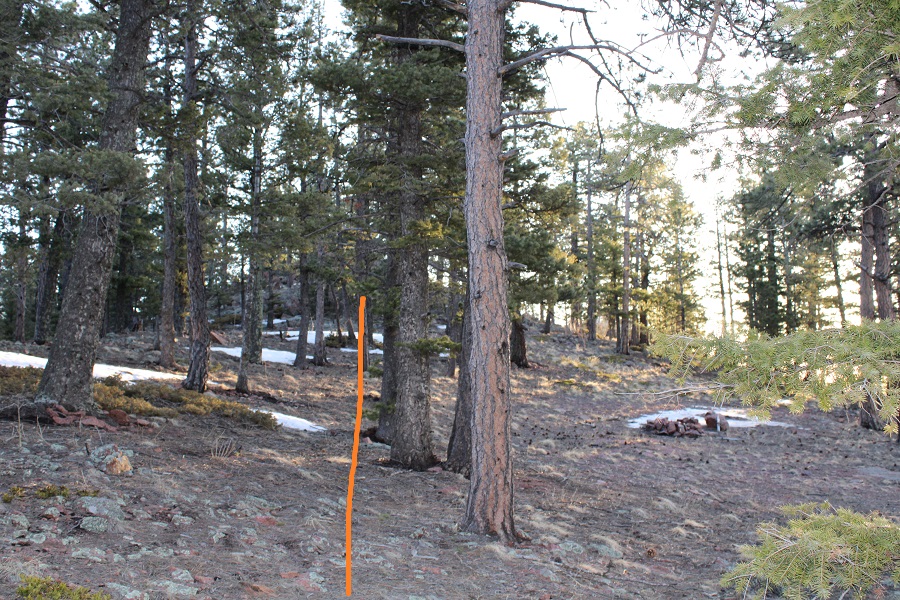
I stayed on this trail for half a mile, before leaving the trail at 9590’ and heading north and then west up the ridge. There is no trail here. I left a small cairn to indicate where I left the trail, but I don’t expect it to be there long, as it was small.
Route finding here can be a bit tricky, but the goal is to gain the ridge. I did this by heading west, through the pine and aspen trees. Every once in a while, I’d come across a game trail. They all fizzled out however. This area is easy to navigate, as there aren’t too many downed trees. I was able to avoid most of them.
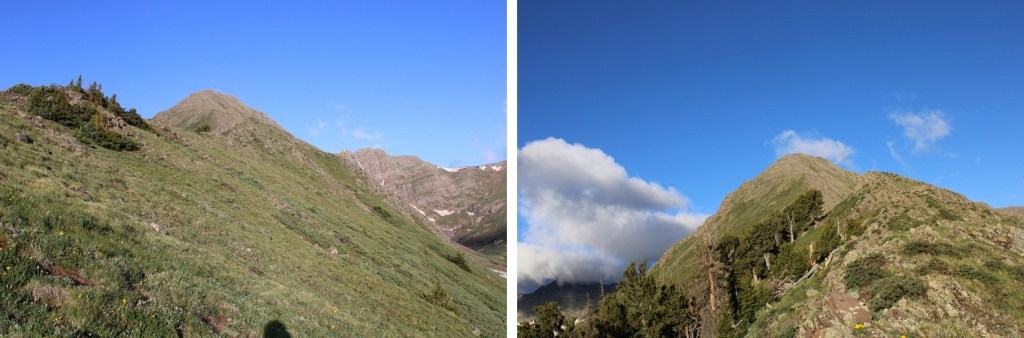
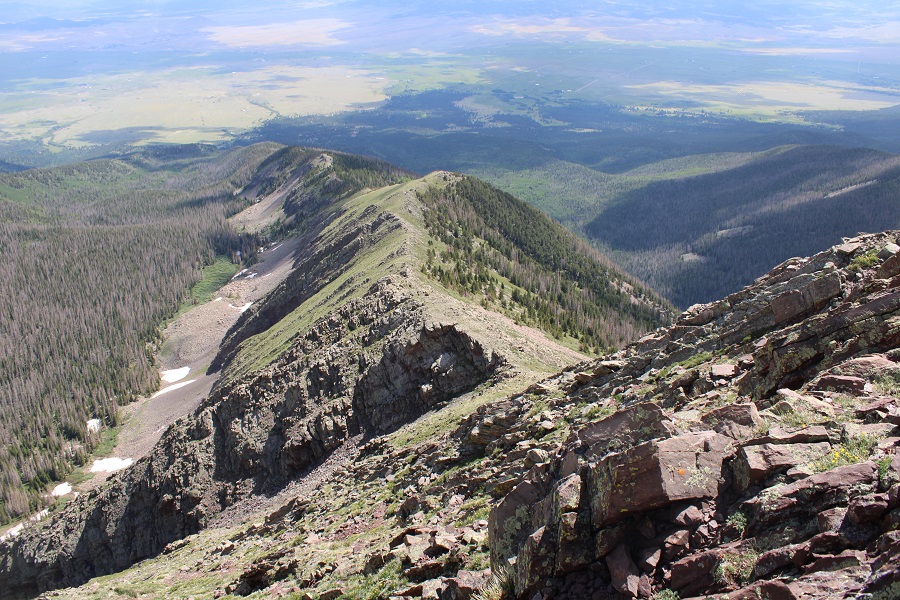
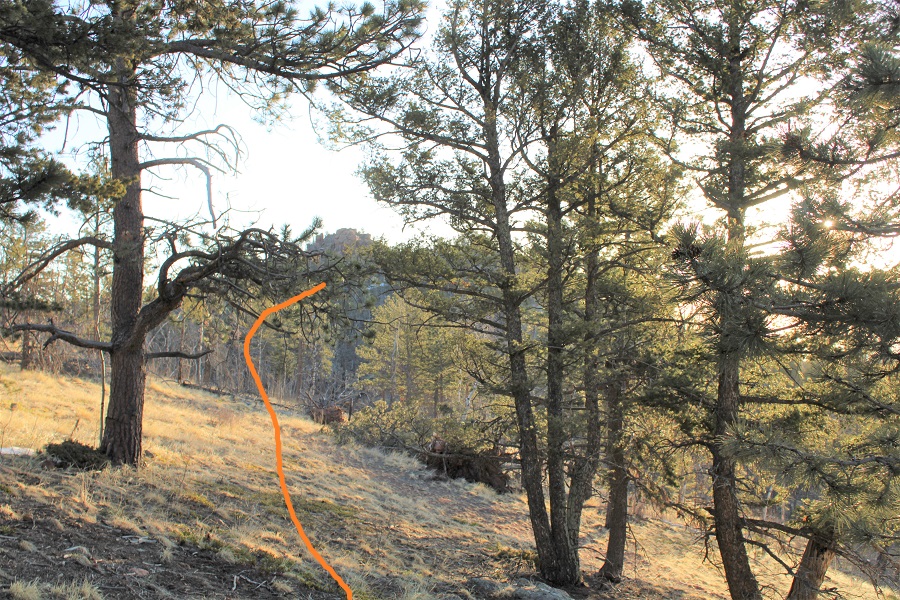
Once I was on the ridge, I followed it southwest to treeline. This is a long ridge, and it seemed to take forever to make it to treeline. Here’s my first glimpse of Little Horn Peak
Like I said, this is a long ridge
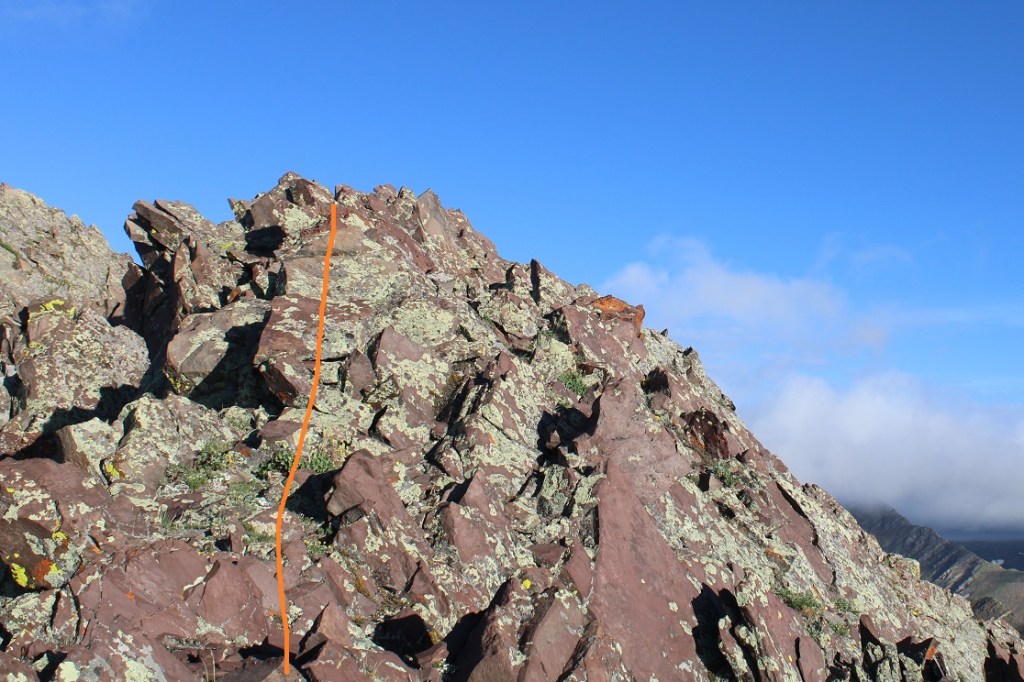
The class 3 fun starts at the top of the ridge, which is a false summit. From here you can see Little Horn Peak’s true summit
My trekking pole isn’t collapsible, so I left it at the start of the class 3 section, put on my helmet, and started heading straight over the ridge. The class 3 section is consistent for another half mile to the summit.
Start out by going straight over the ridge. There is some exposure here.
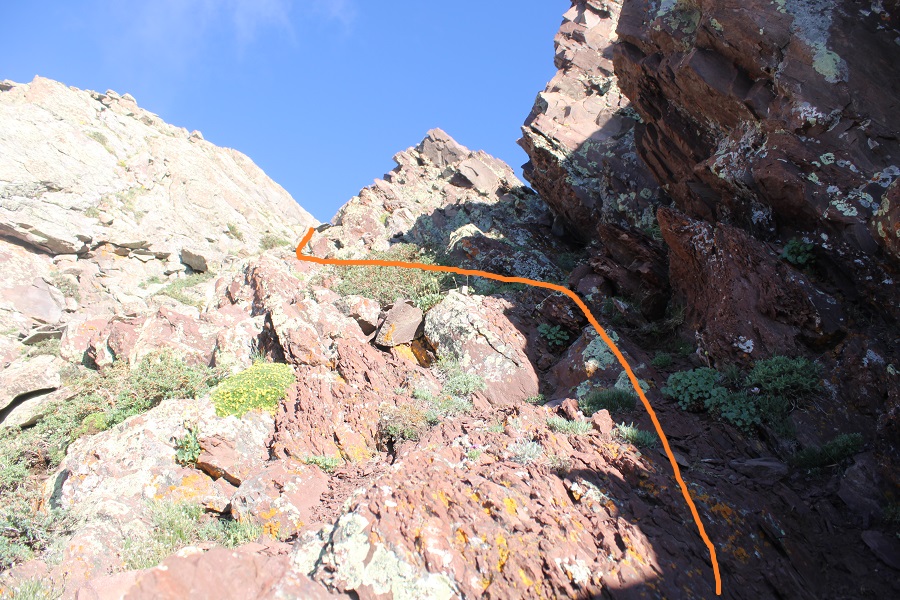
Then you’ll dip down to the right. Look for a notch, go through it, and now you’re on the left side of the ridge.
Go up the gully and cross back over to the right side of the ridge
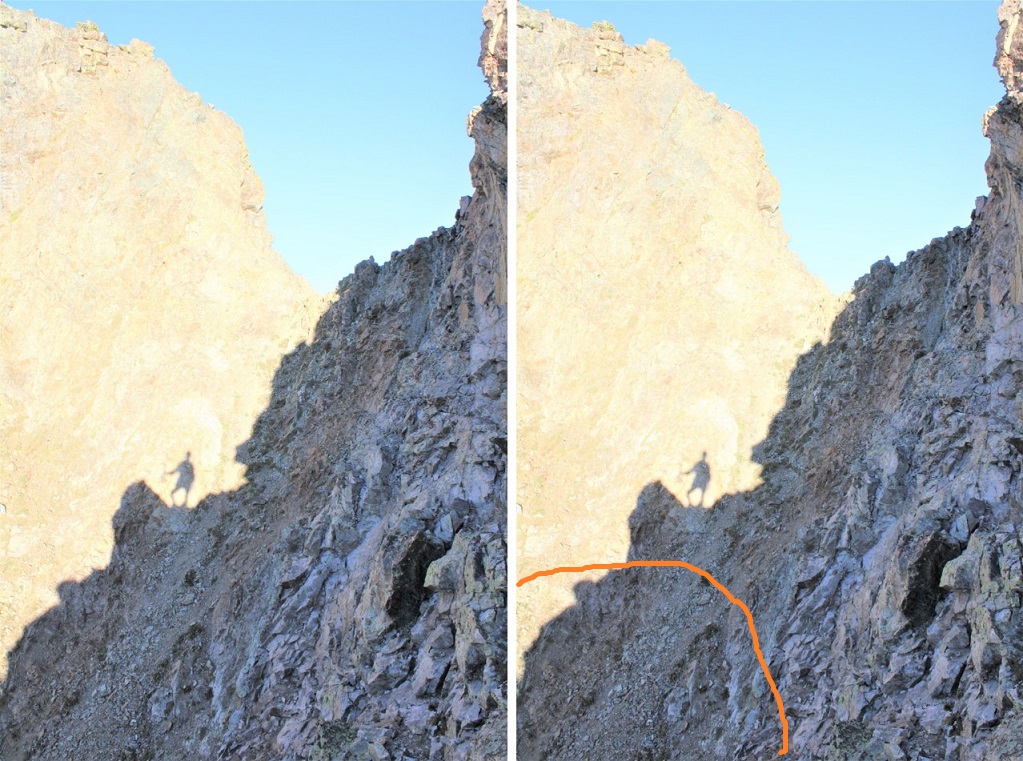
There’s a section of rock to upclimb. This was difficult class 3 / easy class 4 (and much more difficult and committing on the way back down later in the day).
From the top of this section I could see the summit. I stayed on the left side of the ridge from this point on, staying on class 2 terrain.
I summited Little Horn Peak at 7:45am
Little Horn Peak:
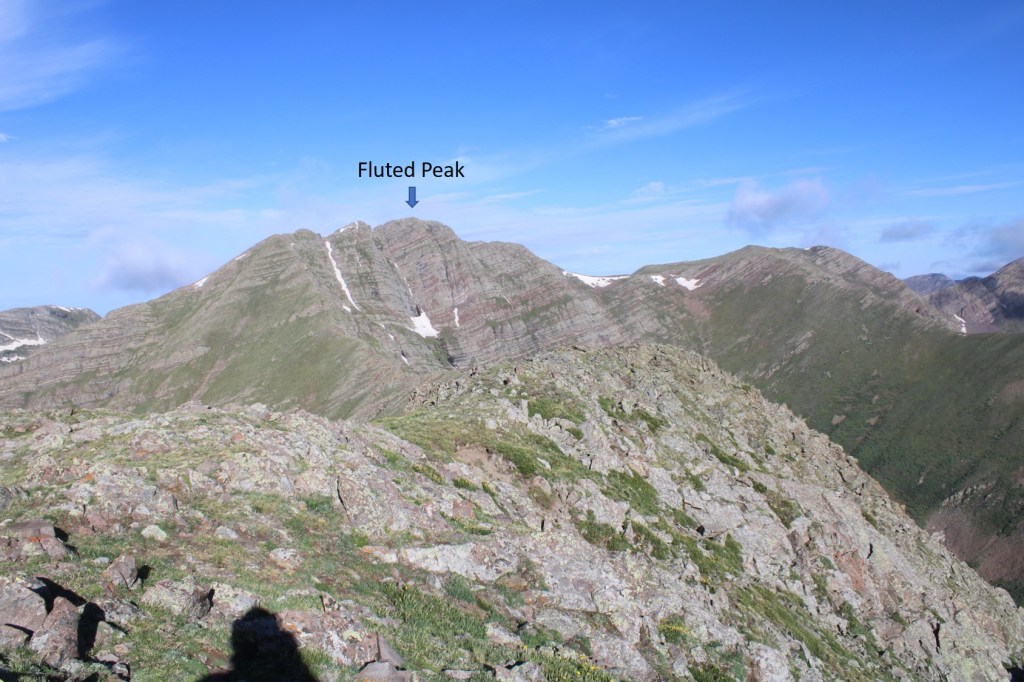
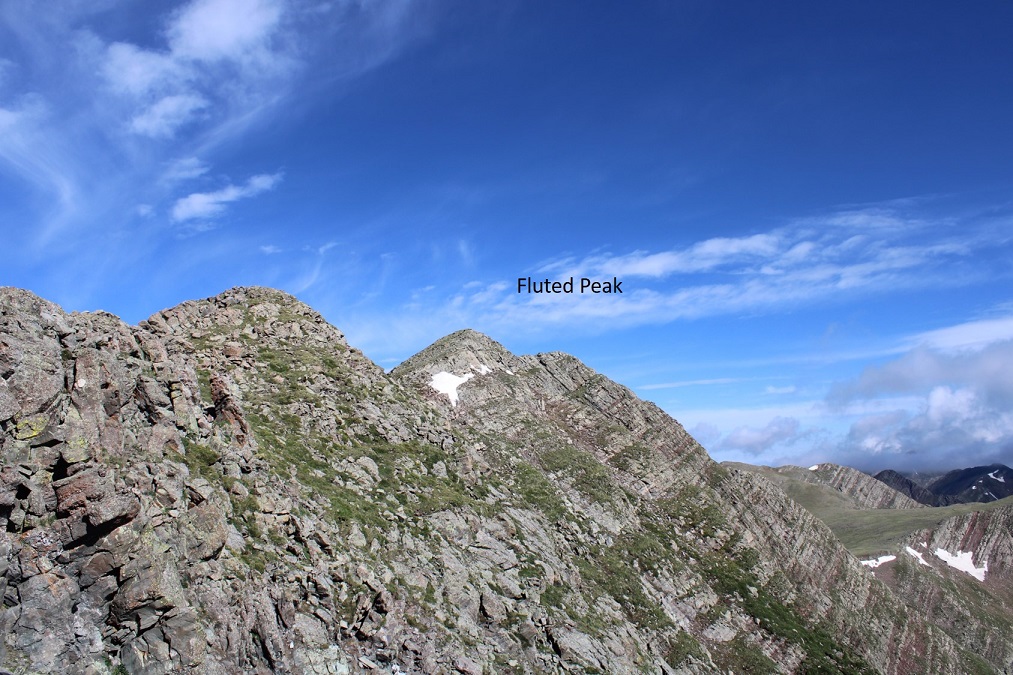
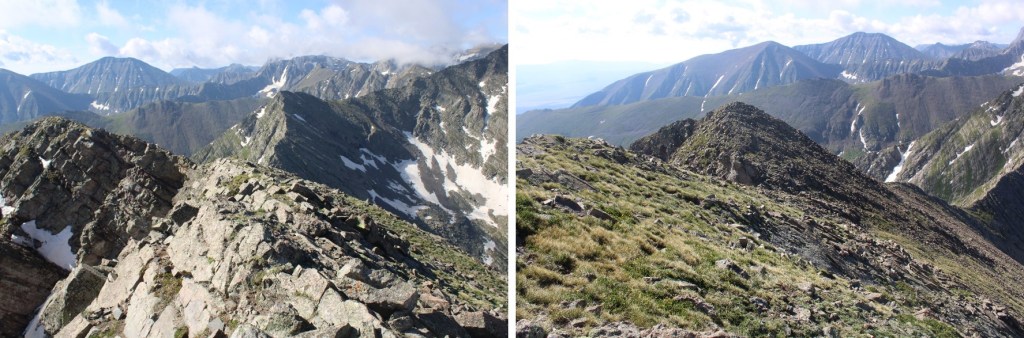
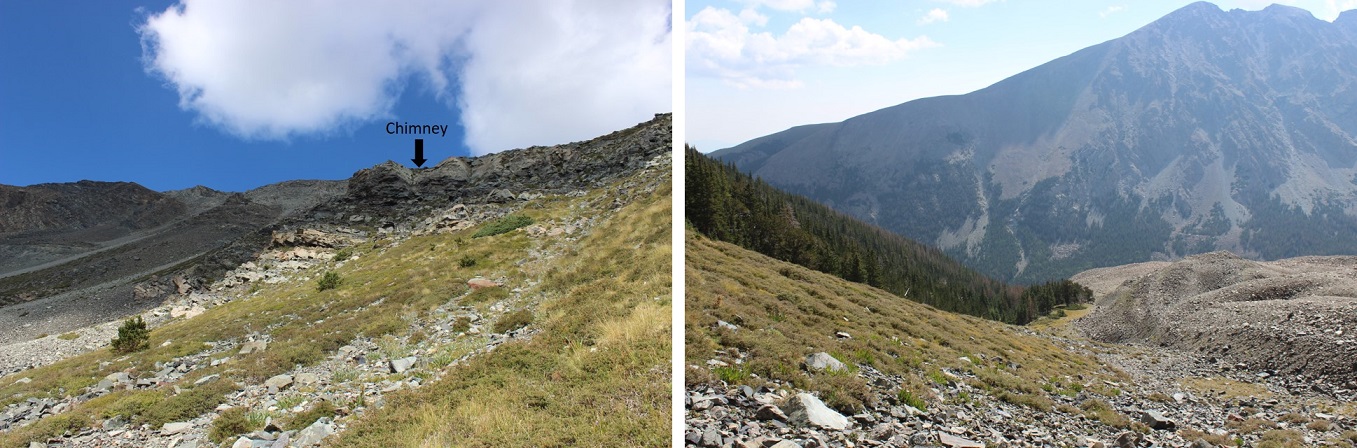
That was it for the class 3 section of the hike. The ridge over to Fluted Peak is class 2 (with the option to go up a class 3 chimney, but it’s avoidable). Here’s Fluted Peak to the west.
This was a simple ridge hike to the saddle. You can’t see them very well in this photo, but there was a mama bighorn sheep with her baby walking up the ridge. The baby couldn’t have been more than a month old.
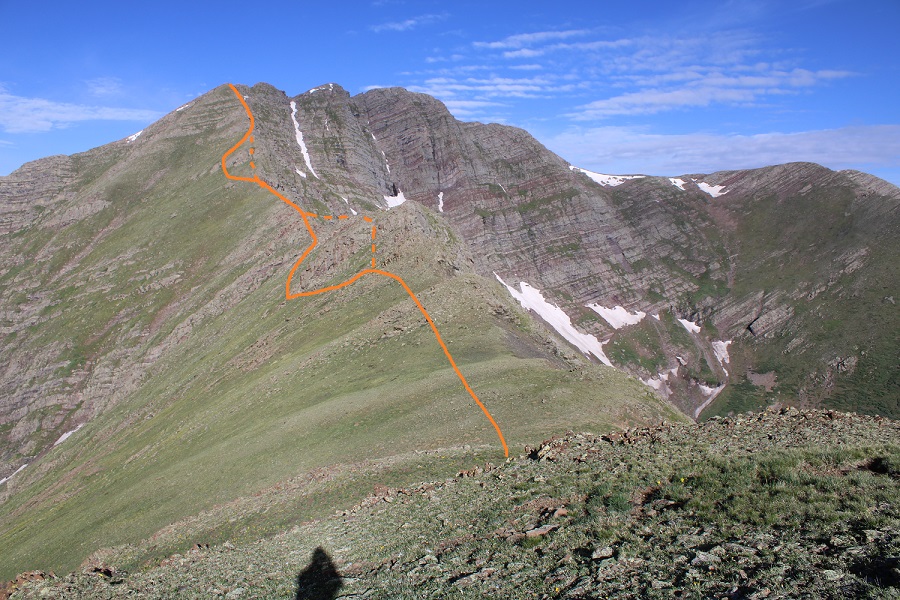
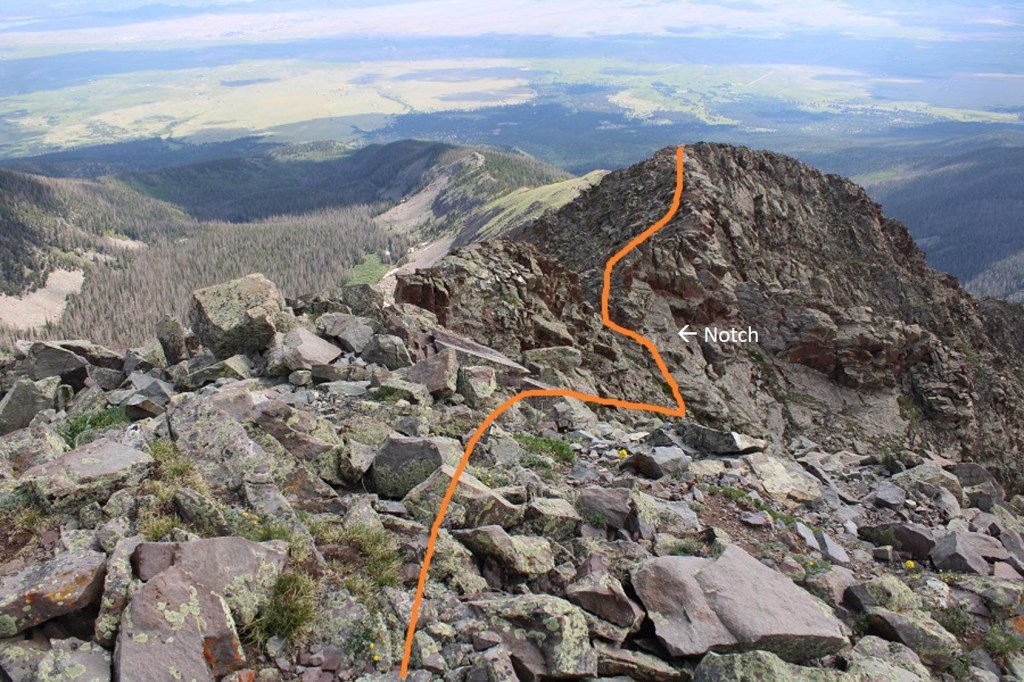
From the saddle, here’s how you keep this a class 2 hike (dotted lines show the class 3 route)
Here’s the first obstacle (class 2 solid, class 3 dotted):
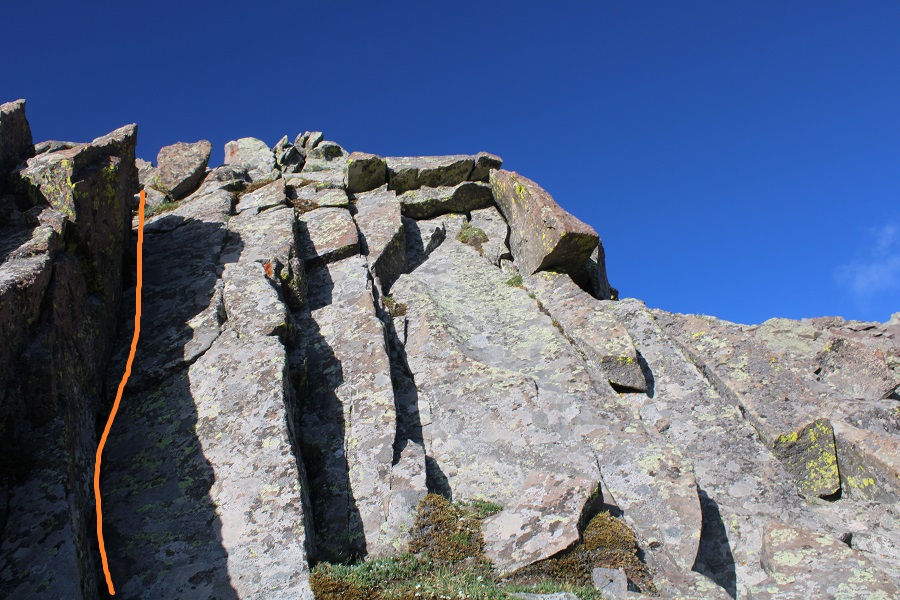
And the second (class 2 solid, class 3 chimney dotted):
Here’s that chimney up close
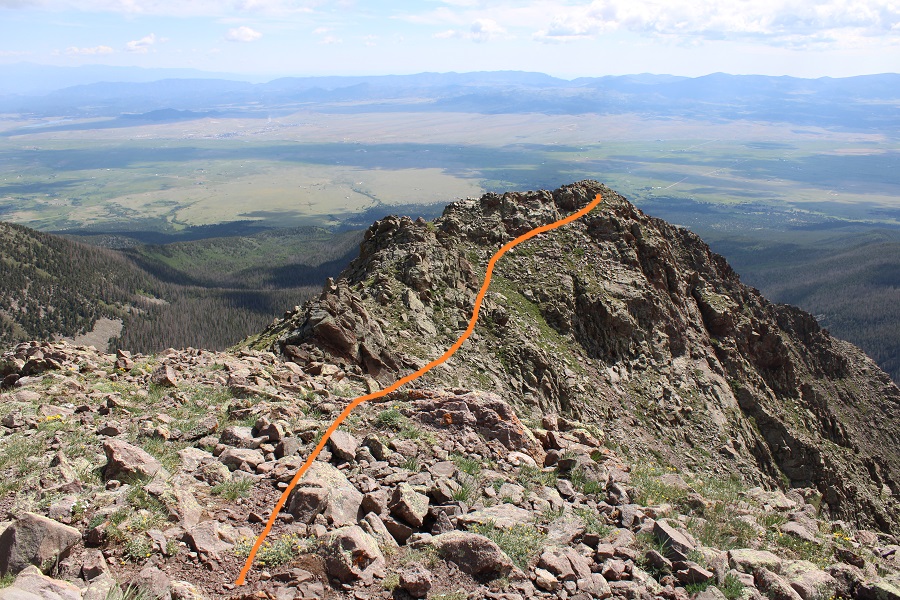
After the chimney, it’s straightforward class 2 to the top of the ridge to the first false summit.
Fluted Peak is actually here
There are two quick false summits to go up and over
And then the final summit
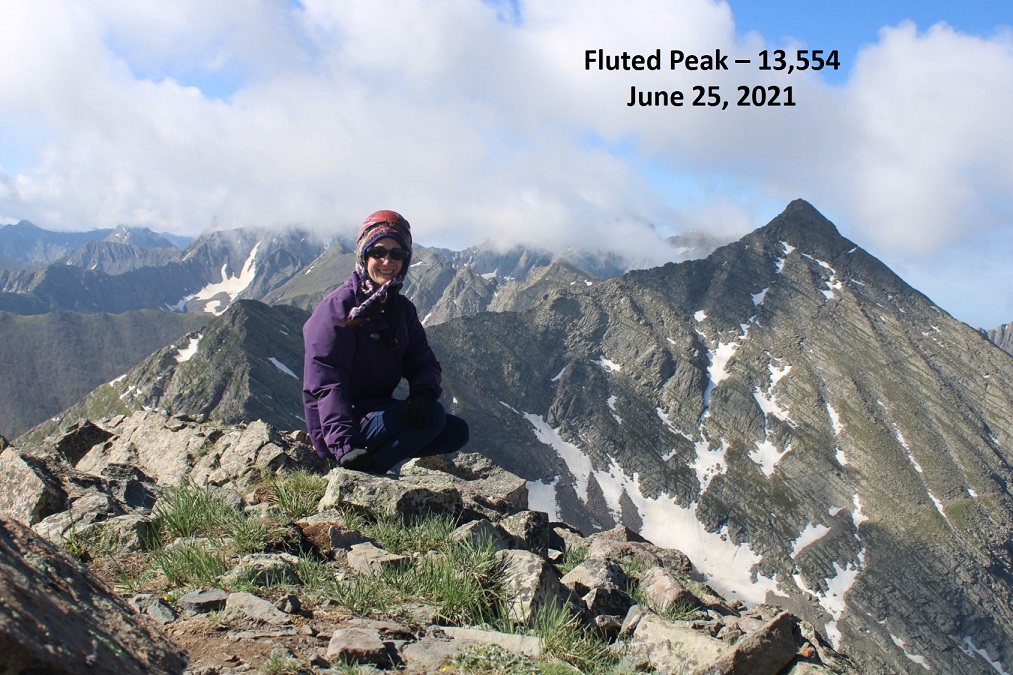
I summited Fluted Peak at 9am
Fluted Peak:
The clouds were coming in fast, so I decided to re-trace my steps and head back to Little Horn Peak (I’ve already summited Horn Peak, so there was no need to make this a loop today). I headed back to the ridge
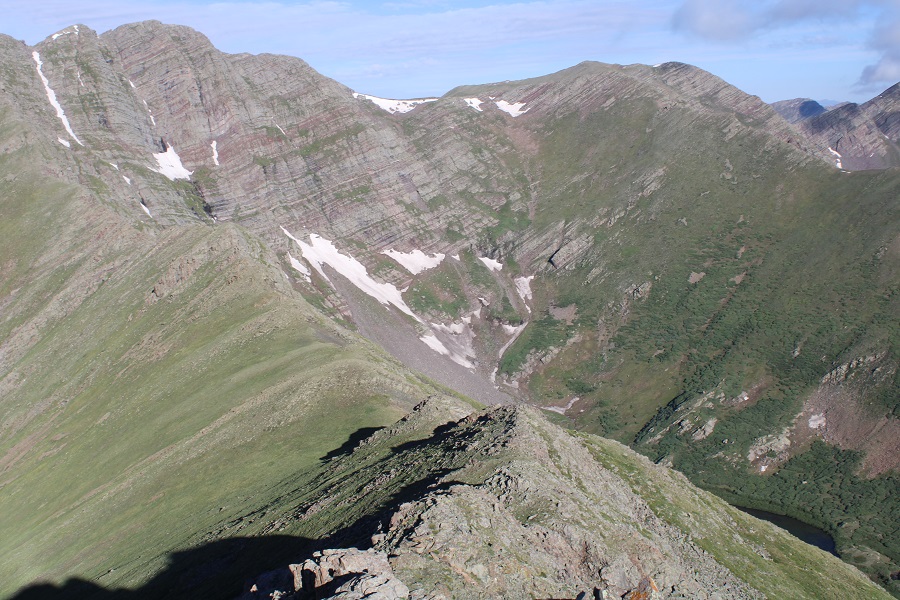
Here’s a picture of Little Horn Peak from the Fluted Peak Ridge
It all stayed class 2 until I made it to the summit of Little Horn Peak
From there It was class 3 again until I made it to the ridge.
Here’s a closer look at that notch
And the last bit of scrambling to the ridge
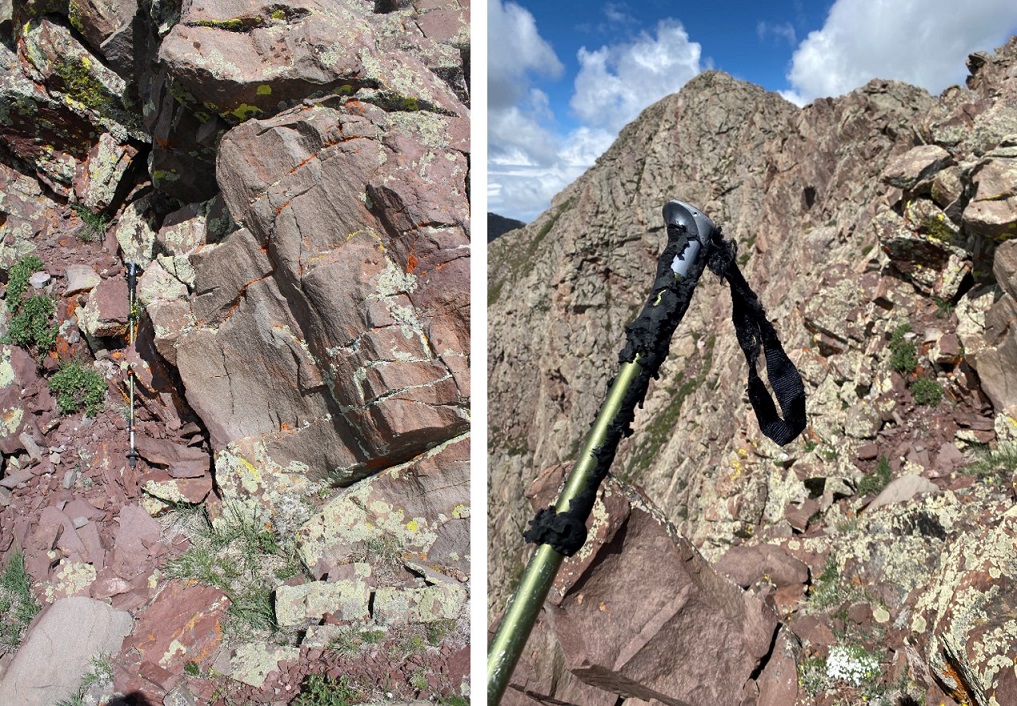
I made it to the ridge and looked around for my trekking pole. It wasn’t where I’d left it. Instead, it was about 15 feet away, at the entrance to a marmot burrow. I picked it up and found some marmot had turned it into a snack. Just adding more photographic evidence to prove the case “Marmots can’t be trusted with trekking poles”.
I sighed, took off my helmet, and headed back down the ridge (yes, I brought the trekking pole down).
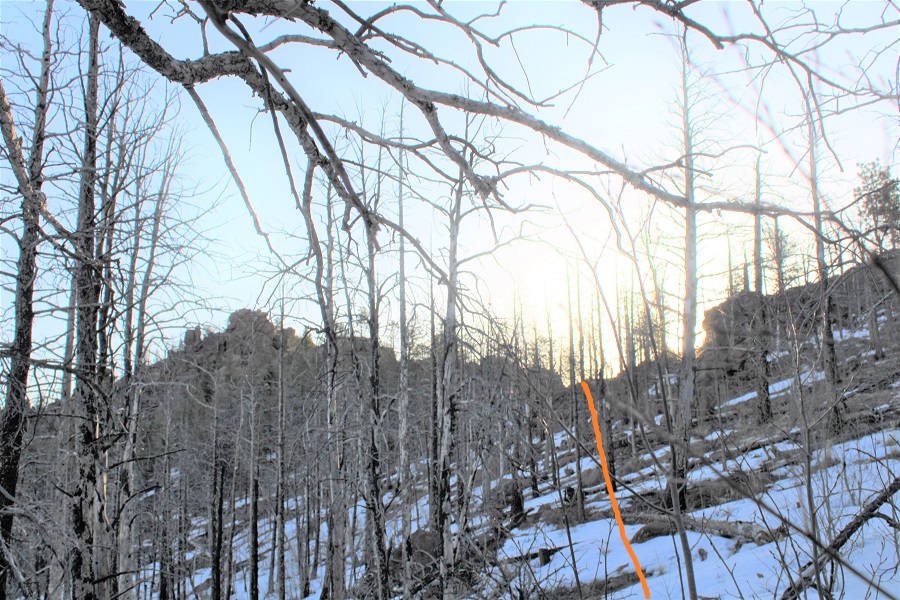
Once back at treeline I turned back for a last view as it started raining.
The rain quickly turned to hail and I had to put my camera away. Here are some pictures of below treeline, in-between bouts of rain/hail. I just kept descending northeast, and when the ridge ended I continued east towards Horn Creek Trail. Once again, I’d pick up game trails and then lose them. A little advice: you should be able to hear Horn Creek flowing below you to your right if you’re going in the correct direction.
Back on the trail I followed it to the trailhead.
I made it back to the trailhead at 1pm, making this a 12.35 mile hike with 5504’ of elevation gain in 8.5 hours. That had been a fun day of scrambling!
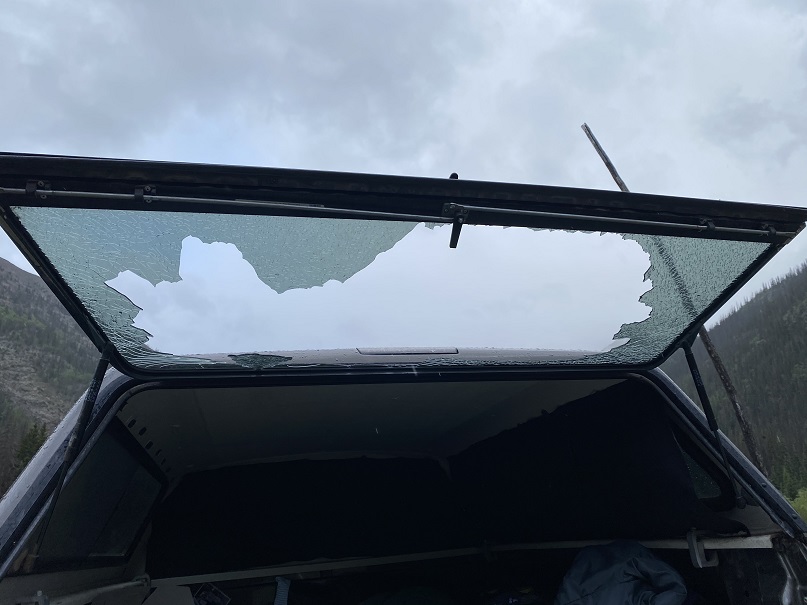
I dried off and headed to the next trailhead. When I got there it was still raining, so I decided to make dinner inside the topper of my truck. I finished, cleaned up, and was sitting down to write notes in my journal when I heard a loud “BANG!”
I looked up, and the back window to my topper crumpled and broke into thousands of pieces. I honestly thought I’d been shot at, and turned around but didn’t see a bullet hole anywhere. Next, I gingerly opened the window, crawled out of the truck and took a look around: no one in sight (but it was still raining).
I assessed the damage, and realized I needed to take care of this asap, so I put on gloves and cleaned up all the broken glass I could, still getting some small slivers of glass embedded in my fingers. Next, I drove to where I could get cell reception, and found the nearest place that would be open the next day to fix the broken glass was 5 minutes from my home, and 6 hours from where I was right now. I sighed: It looked like I had a long night ahead of me.
It turned out the auto glass store couldn’t help me, and told me to go to where I’d originally bought the topper. They couldn’t help me for another 4-6 weeks (and $600), but referred me to another glass shop that didn’t open until Monday. So, a quick trip to Walmart to pick up some duct tape and a tarp and I was able to create a makeshift door that does nothing to keep animals/intruders out, but has done a decent job keeping out the rain. I’m still not sure why the window broke: I was told sometimes there’s just a flaw in the glass. That sounds bogus, but I’m getting a new one soon anyway, and I’ve learned not to get windows in my next topper (I don’t use them anyway). I’m actually more upset I lost out on two days of hiking.
It’s springtime, and in the spring I either travel to state highpoints, or stay local and hit county highpoints. They traditionally open Rampart Range Road every year on April 1, and when I heard the road was open, I decided to take advantage of a beautiful (if windy) day and hit some highpoints. This is the first of 3 El Paso County highpoints I hiked this day.
I started at the southern entrance to Rampart Range Road, near balanced rock inside Garden of the Gods.
As the sun rose, I was able to see a lot of the Waldo Canyon burn scar. It doesn’t look like much has grown back in the 9 years since the fire.
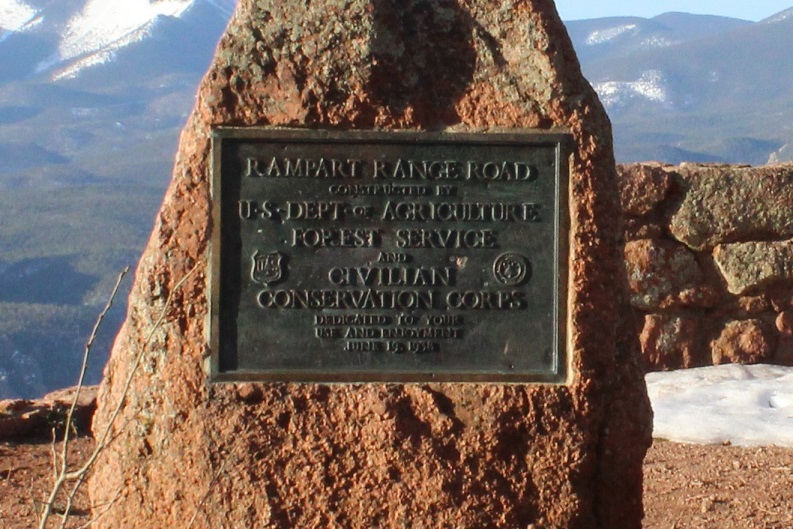
I drove along the 2WD dirt road for 12 miles, and parked at a small parking area for trail 644. There’s a plaque here commemorating the road
I gathered my hear and continued hiking along the road to the trailhead. It was a short distance (less than a quarter of a mile), and in the summer, you might be able to park at the actual start.
The trailhead starts at a bend in the road, marked by broken barbed wire and hot pink surveyor’s tape. On a topo map it says this is 4WD road 300Q. It’s been a very, very long time since this was ever a road. Now it looks like a teenage hangout/camping area, littered with broken glass and discarded remnants of campfire circles.
I headed northeast, following the ridge to the right
I came to a small dip, where I could clearly see the peak
Now I stayed to the left (north) side of the ridge. There were a lot of downed trees, but nothing that kept me from making it to the peak. There was snow here, but not enough to need traction. I did posthole a bit. I aimed for the small saddle
Once at the saddle there was some class 2 scrambling to do to make it to the summit. This is much easier than it looks.
Here’s a picture of the summit
I knew I was at the summit because there was a summit marker. I left a summit register at the marker
And took a picture at the summit with Pikes Peak in the background
It was very windy, so I didn’t stay long, and quickly retraced my steps back to the saddle. Here’s the overall route
And step by step
Back down the dip, where there are some very faint tire tracks that have now become social/game trails
And following the ridge southwest to the road
I then followed the road back to my truck.
This was a quick and simple hike. Here’s a topo map of my route (I parked just before 644):
Since the weather hasn’t changed since I was in the area a few days ago, I decided to get in a quick hike before work. Well, in the middle of work. I got up super early, worked for a bit, and then drove to the trailhead. The road in was still icy, and as I drove in the temperature gauge kept fluctuating between 0 degrees and 1 degree. It was cold!
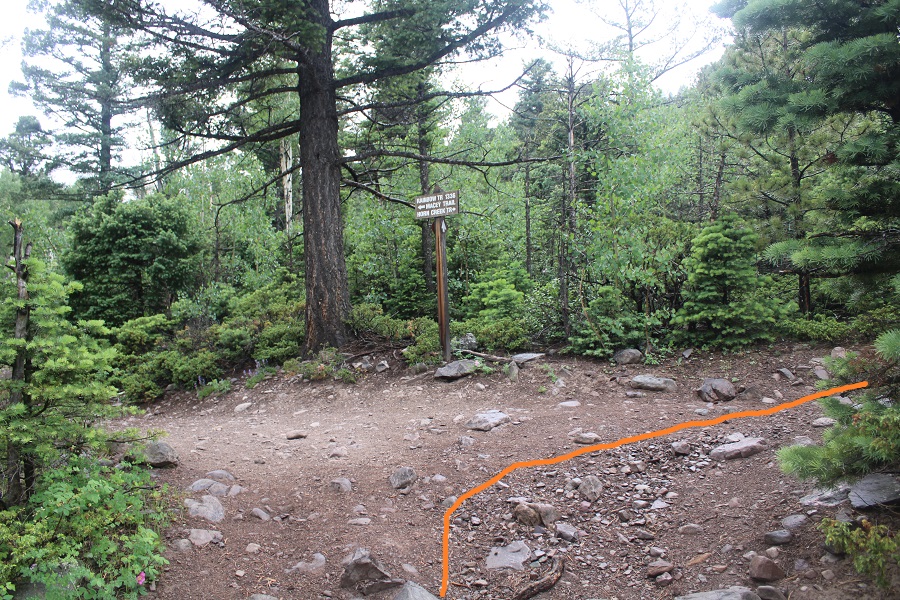
I was on the trail at 6:45am. The trail starts behind this locked gate.
I travelled on this road (383) for 1.15 miles to the Crags Trailhead.
This trailhead will take you all the way to Pikes Peak. Instead, I followed the trail for half a mile, and then left the trail and continued up the ridge.
I was met with about 4 inches of snow, which was awesome! This meant I’d have an easy time re-tracing my steps back down. I followed the ridge as it wound northeast
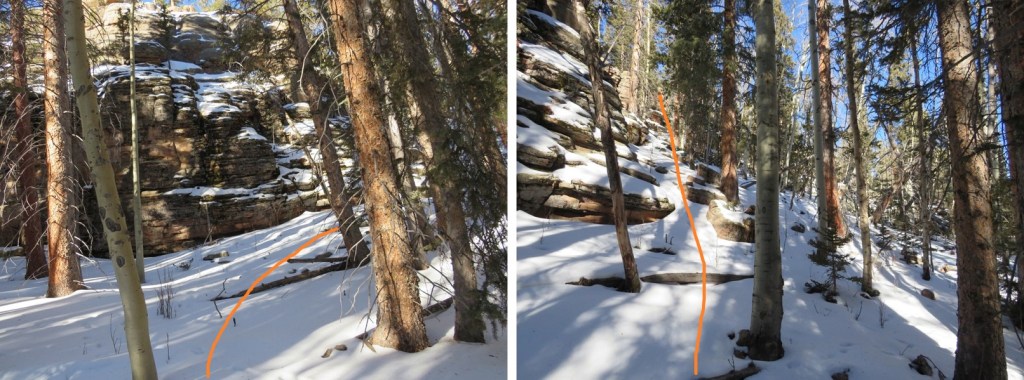
Until I came to a rocky area. This rocky area kind of surprised me, and got more intense as I went on. It was all class 3, but with the snow it became a challenge at times to navigate.
Here I went down the chimney, and then skirted the rock formation to the left. This was the crux of the route.
That was the hardest move. From here it was a simple (but still rocky) trek to the summit.
There was a little bit of rock scrambling necessary to reach the summit.
I scrambled on over to the highest rock and sat quietly, looking down at the exposure.
And back on the way I’d hiked in
The sun had not yet risen over Pikes Peak, so it was still cold
I didn’t sit there long. Instead, I scrambled back down, placed a summit register in the opening between the rocks below the summit, and noticed this place got a lot of bird activity
Time to head back
Here’s that chimney I climbed down. Here’s how to climb back up
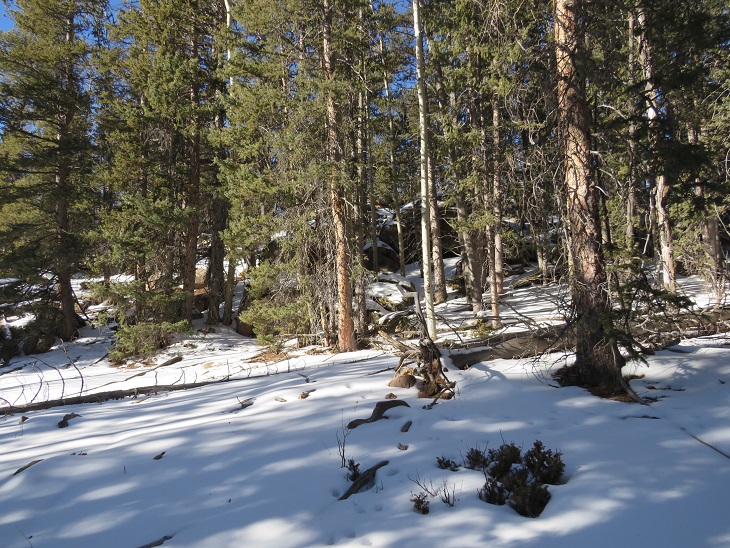
And then I followed the ridge back to the Crags Trail
Back at the Crags trailhead, I continued following the road south, past the Crags Campground (closed for the season)
I followed the road for just over half a mile until I came to a fork in the road and a locked gate to private property.
At the locked gate I turned right and headed west, across a meadow and then up the ridge
This entire hike is below treeline, so it’s difficult to gauge where you’re going. I just followed the rib/ridge west.
I passed some wiki-ups
And came to a large rock formation, which I skirted to the north to avoid
Once past the rock formation I kept heading west towards the highest point I could see
There wasn’t much of a view
I walked all around, looking for the highest rock, and placed a summit register there
And then followed my tracks back down to the dirt road.
Once on the road it was an easy 1.75 mile walk back to my truck and the trailhead
Along the way I saw a couple snowshoeing with their two dogs, who seemed to be quite enjoying the cold. It was now 16 degrees outside, which was a vast improvement on the 0 degrees from earlier this morning. I made it back to my truck at 11am, making this an 8.32 mile hike with 2186’ of elevation gain in 4 hours, 15 minutes.
Since I hadn’t made my 10 mile/4000’ goal for the day I went back home and hopped on the treadmill for a bit before resuming my day.
I’d intended to be on the trail by 4am, but the last 2.5 miles of 4WD road past Grape Creek TH to Music Pass TH took longer than I’d anticipated. It is indeed a 4WD road that requires some clearance. It was better than South Colony Lakes though. I brought snowshoes but decided to leave them in the truck. I was the only vehicle in the very large parking area when I left. I put on my helmet and was on my way by 4:30am.
The trail starts at the west end of the parking area.
The trail is class 1 all the way to the Lower Sand Creek Lake. I came across a (full) trail register quickly
And continued on a well-maintained trail west 1.2 miles to Music Pass, where there was another (full) trail register.
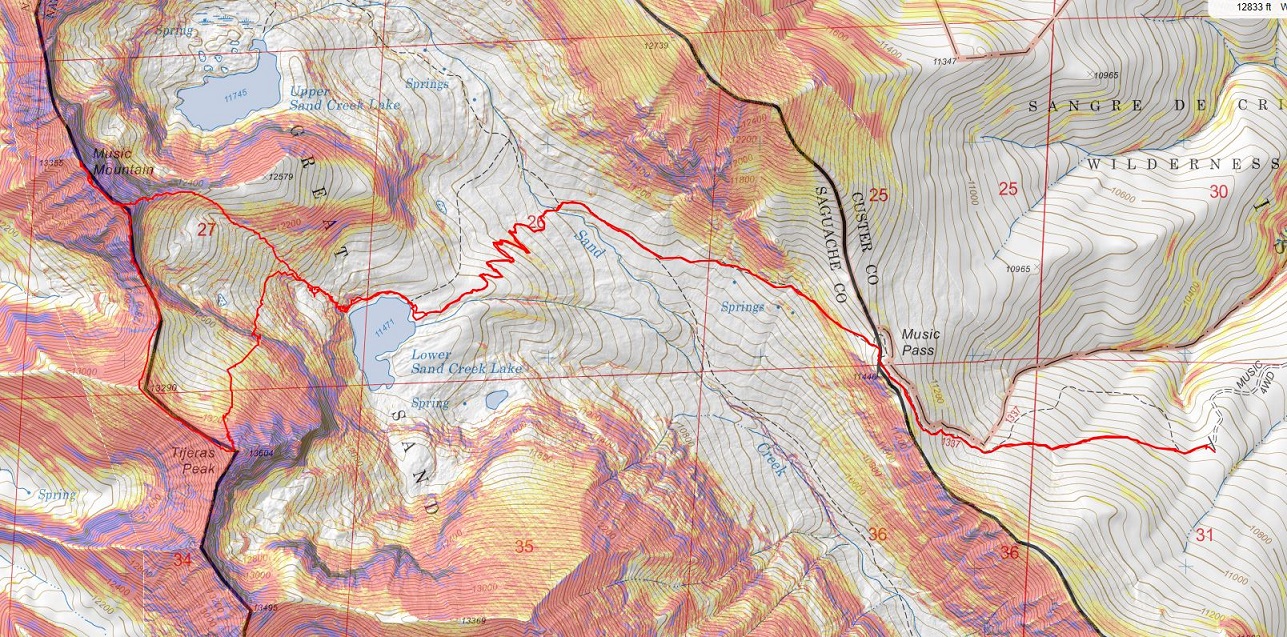
From Music Pass there’s a great view of the entire route:
From Music Pass the trail loses 450’ in elevation as it brings you to the valley below.
Stay straight at the first junction (2 miles)
And turn left at the second (2.3 miles)
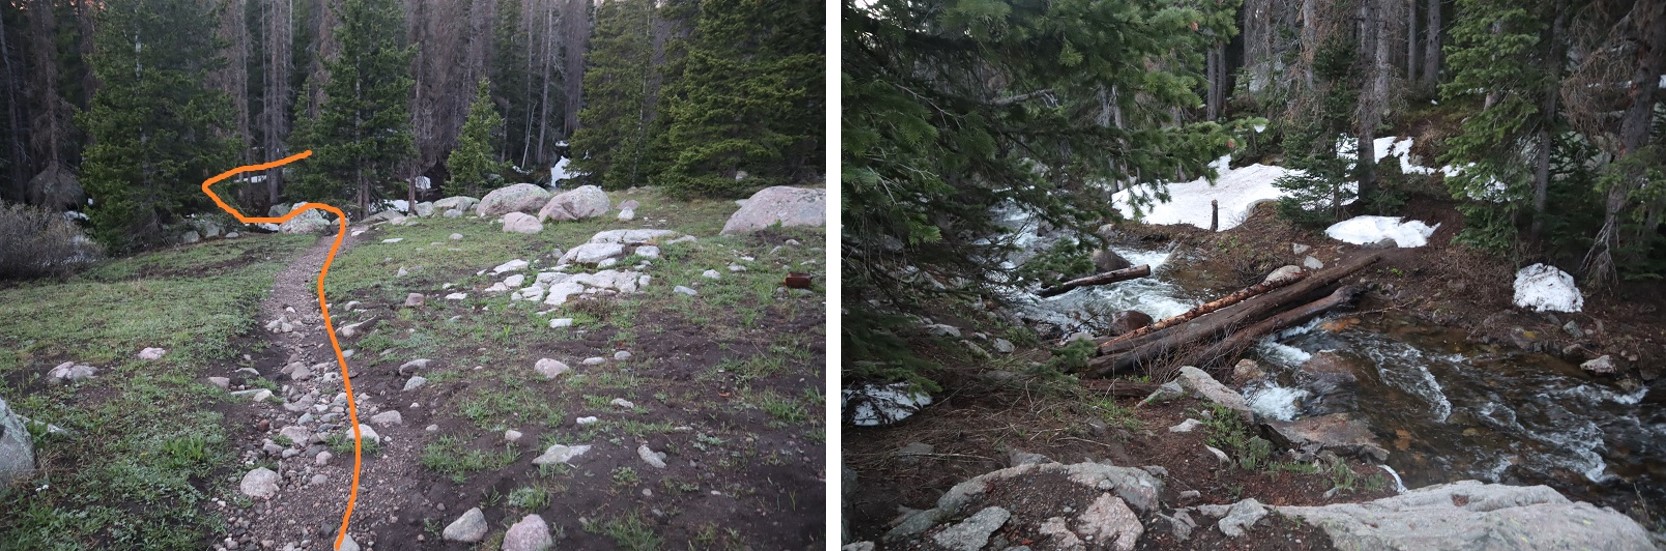
I quickly crossed Sand Creek on a bridge put together by fallen logs, and continued along the class 1 trail
The trail was easy to follow, but, ah, spring conditions. If there wasn’t water on the trail there was snow. More than once I regretted leaving my snowshoes in the truck: It was posthole city at 6am.
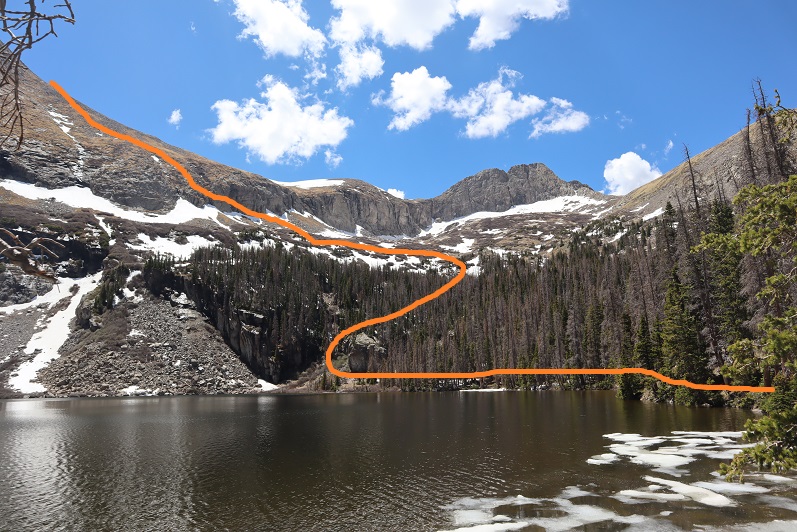
I swithchbacked up to the lake, where the trail ended (or was covered in too much snow to follow). I made it to the lake after 3.5 miles of hiking. My next objective was to skirt the north side of the lake and ascend the gully to make it into the upper basin. Here’s an overview of the route:
Here’s where I began the ascent. Note, that big rock to the left is basically a waterfall. On my way down it was nice letting the water sprinkle over me in the heat. There is a gully to the right that is an actual waterfall with lots of flowing water. If it were winter or no flowing water it could be an alternate route to the basin.
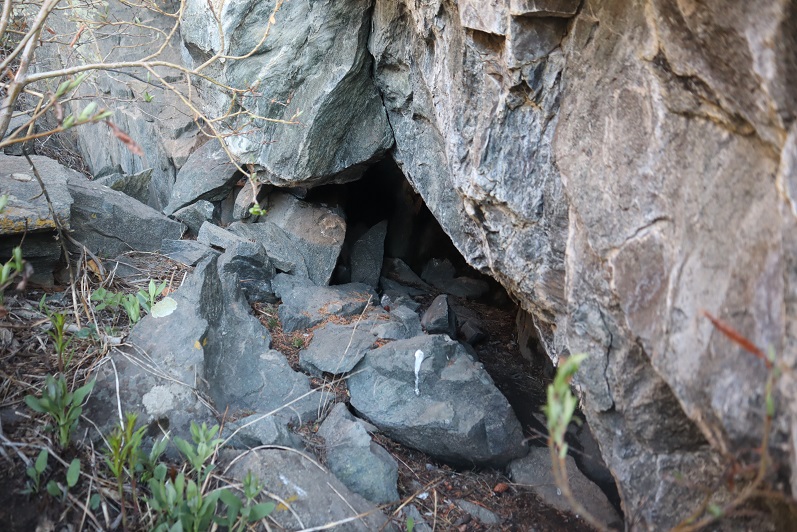
The rock to the right has a huge cave underneath it (big enough for several people to fit inside). It looked perfect for a mountain lion or bear den so I chose to hug the opposite rock more on my return.
The gully only goes for about half a mile before you turn left (south) and cross the basin
There was a lot of snow here, and it was impossible to avoid it. It was still early morning but there hadn’t been a freeze the night before so the snow was soft. Postholing was terrible and I knew it was only going to get worse so I chose to ascend via the first ramp I saw instead of inspecting the others. As I was postholing I aimed for this rock, which was visible above the willows.
I made it to the ramp, a bit displeased to find the snow just kept getting softer. Before making the decision to ascend I made sure I had an exit route. I knew if I ascended here the snow would be too soft to descend, most likely at about the time I reached the top. If I was going to continue I was going to need to make this a loop. I looked over to Music Mountain and the way down, took some pictures for further reference, looked at pictures of the route I’d taken from this morning, and consulted the sky (70% chance of thunderstorms after 4pm today, I so needed to be able to make it down well before then). I saw a viable route to descend via Music with avoidable snow and decided to go for it. Note: you only have two options to ascend and descend this loop, as it cliffs out everywhere else. Before committing know your options. I strapped on my crampons, got out my ice axe, and went for it.
The snow was soft, so kicking in steps was easy (almost too easy at times and I had to re-make them when the snow turned to mush under my feet).
A view from inside, looking up and looking down
Eventually the snow ran out and I scrambled on rock/tundra to reach the top of the ledge. Here’s the route from the ledge to the summit
Note: This is NOT the only route. You could make this easier by hiking to the saddle and then turning left and hiking up the class 2 (possibly easy 3) ridge. I chose instead to go up the face and get in a little scrambling. As with a lot of scrambling routes, there is no exact route; you need to pick it and choose it carefully. Here’s how I went, once again, sticking to the center as much as possible.
The rocks were surprisingly stable, although there were several areas that looked as if they’d recently experienced a rockslide. I made it to the summit at 9:30am
Tijeras Peak:
There was a water bottle summit register at the top, and great views of the surrounding mountains.
I turned northwest to head down the ridge of Tijeras towards its saddle with Music Mountain.
Here’s the route I took in a nutshell
For much of this ridge walk I stuck to the ridge, but there was a time I dipped to the left a little. This is not a simple ridge walk, and did require some scrambling. Nothing that gets your heart going like on the way up Tijeras, but scrambling nonetheless.
Here’s a look back up the ridge of Tijeras
Once down on the saddle the walk to the base of the Music Mountain climb was easy.
Here’s a look at my route down Tijeras and over to Music
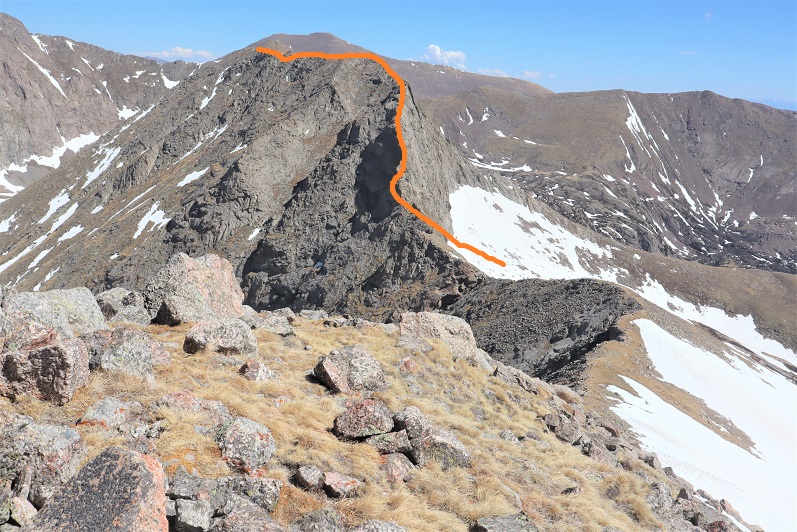
Climbing up Music Mountain was the biggest challenge of my day. The entire route was scrambling that took committed attention to each and every move. Luckily the rock was solid and there were many hand/foot holds. Since I climb solo I was extremely careful and tested each hold several times before committing, which made the process slow. Also, I didn’t look down: This ridge was spicy. I began by going straight up the ridge and staying on that ridge through class 3 and 4 sections, only altering one time to use a gully because I felt the ridge was too dangerous (but I’m sure you can make it go all the way because I had no problem downclimbing the entire ridge). Here’s an overview
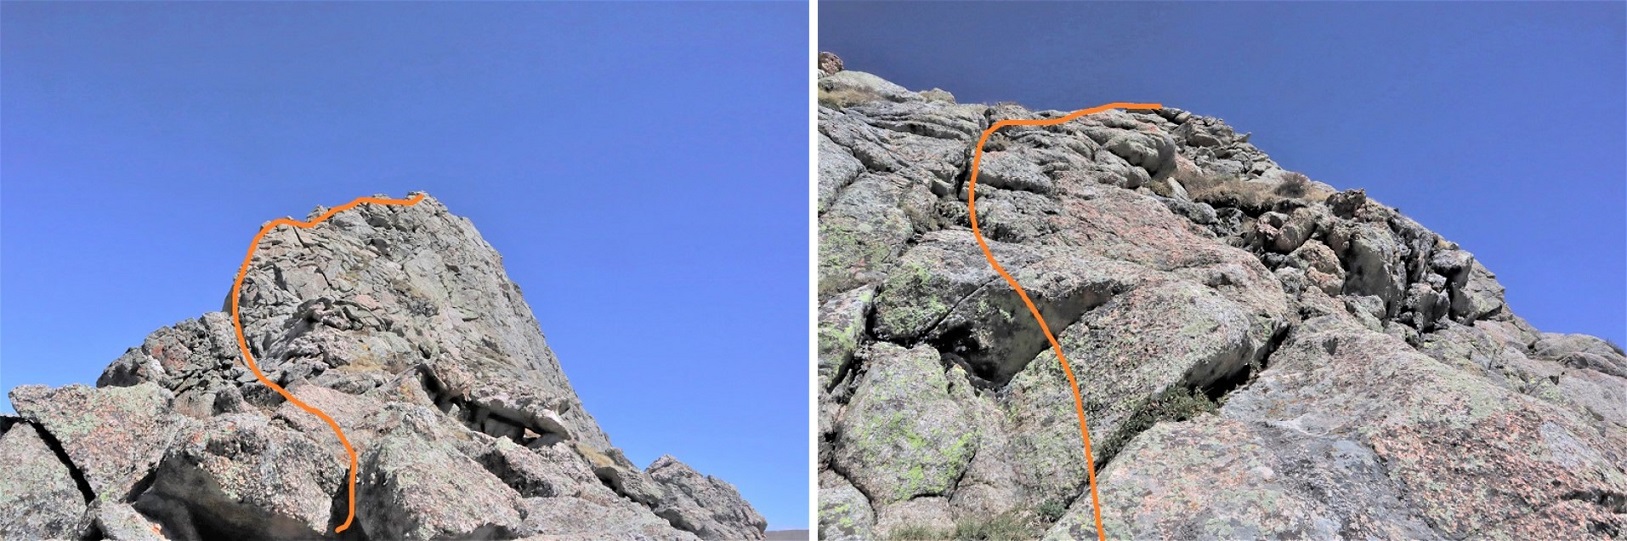
And step by step, straight up and over. It’s more committing than it looks
At the top of the first ridge I saw a lot more scrambling (and what looked like a knife edge from below but really wasn’t) and decided to divert the main ridge by finding a gully to climb instead. This is the area I had no trouble downclimbing.
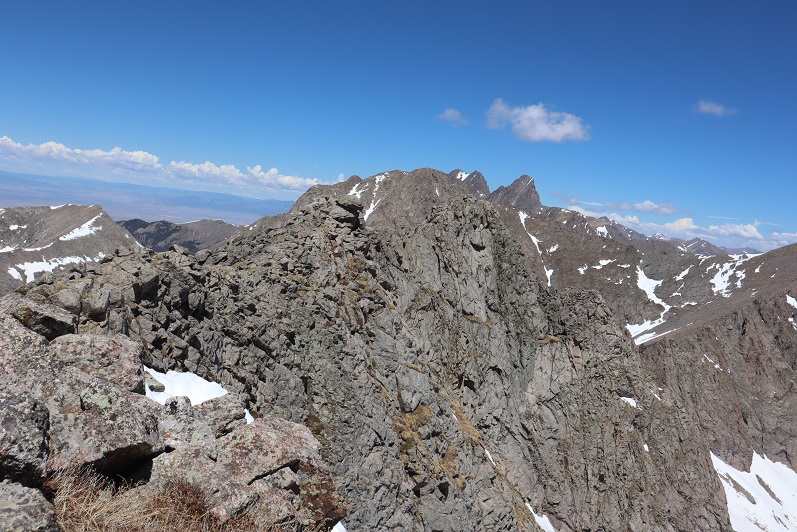
And then more ridge work. I’m standing on one of three ‘highpoints’ on Music Mountain, taking a picture of the other two. This was the easiest part of the ridge
I couldn’t be sure which point was the actual summit of Music Mountain: There was no summit marker/cairn and all three points seemed to be the same height, so I just made sure to hike to the last one. On my way back I took altimeter measurements of all three. Surprisingly, the point in the middle measured highest, and the first point measured lowest. In any event, I hit all three and took a picture at the furthest point because it offered the best views
Music Mountain:
Time to head back. I took Music’s East Ridge down. those grassy ledges and rock faces are steep! Nothing compared to the previous ridges of the day, but they still took careful planning and foot placement. Nothing special to add here except watch out for the gullies and try to stick to the tundra or ridge when possible. Here’s the route I took down
And a look back up at the ridge
Here are the current options for gaining the ledges on Tijeras. I took the smaller one to the left
I made it back down the gully to the lake and followed the trail back to Music Pass
Re-summiting Music Pass was a bit of a buzz kill after such a long day, but this would still be high on my list of most beautiful places to hike. The mountains were absolutely gorgeous!
I made it up to Music Pass and opened the trail register to sign out, but when I did so no less than 10 miller moths flew out at me. I slammed the lid and said ‘no thank you’ and was on my way. There wasn’t really a place to sign out anyway, just a record of who’d been there. I didn’t bother signing out of the second register, not wanting the same experience.
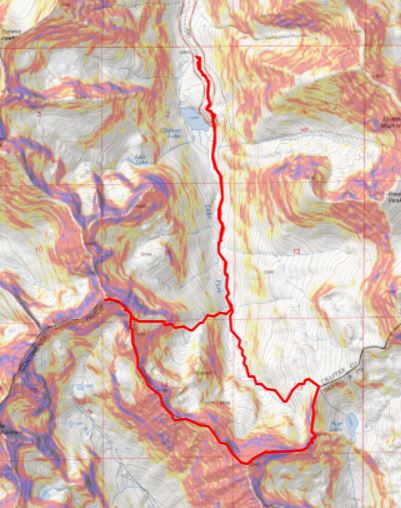
I made it back to my truck at 3:15pm, making this a 12 mile hike with 4587’ of elevation gain in just under 12 hours.
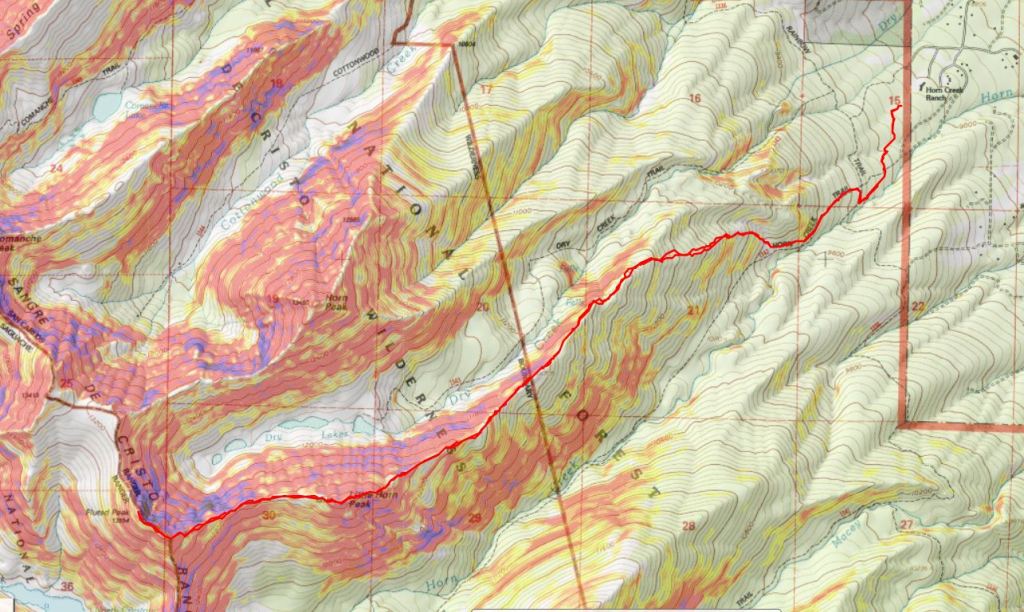
Here’s a topo of the route
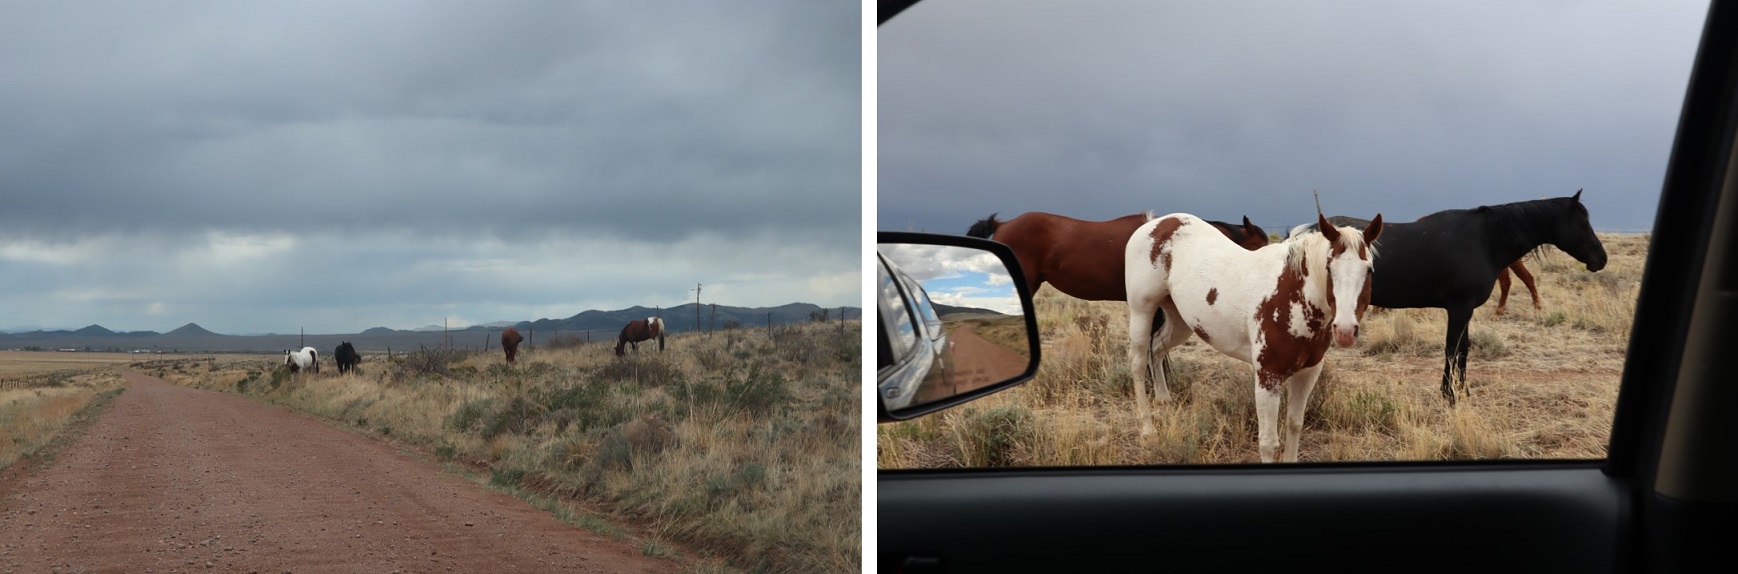
I saw some wild horses on my way out… either that or the horses got out. In any event, we chatted for a bit until it started to rain. It seemed those thunder storms were going to happen today after all!
The weather changed my plans at the last minute, so the hike I’d intended to take in the Sawatch range didn’t happen today. I’m on a time crunch when it comes to my Friday hikes for the next few weeks, so I needed a hike I could complete and still be home in the early afternoon. After a quick weather search, California Peak looked promising. Plus, it has a bunch of other 13ers close to it so I could make the hike longer if I wanted… I just needed to back to my truck before noon.
I made it to the trailhead at 4am without passing a single vehicle on the 69. Oh, and that forest road 580 in seems to take forever!!! I’m always surprised this is labeled as a rough 2WD road. There are several spots I’d love to have 4WD well before the 2WD parking lot (which you aren’t allowed to park at BTW). This is my third time on this road, and the third time with lots of mud puddles…
4WD Road:
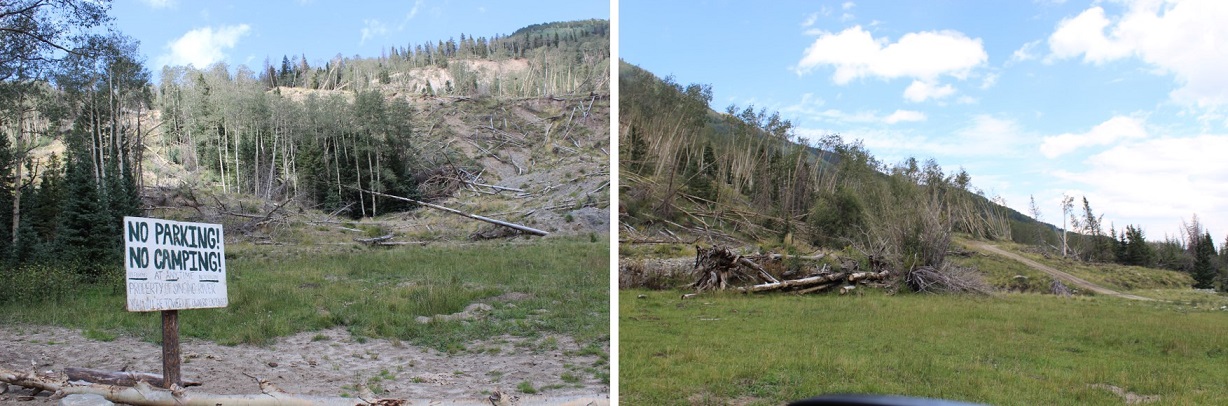
I mean, you could probably do it in a 2WD if you have high clearance and you’re a great driver, but why chance it? And that last hill before the 2WD parking lot? 4WD is totally necessary! Most people want to park in the avalanche area, but these signs tell you it’s not advised:
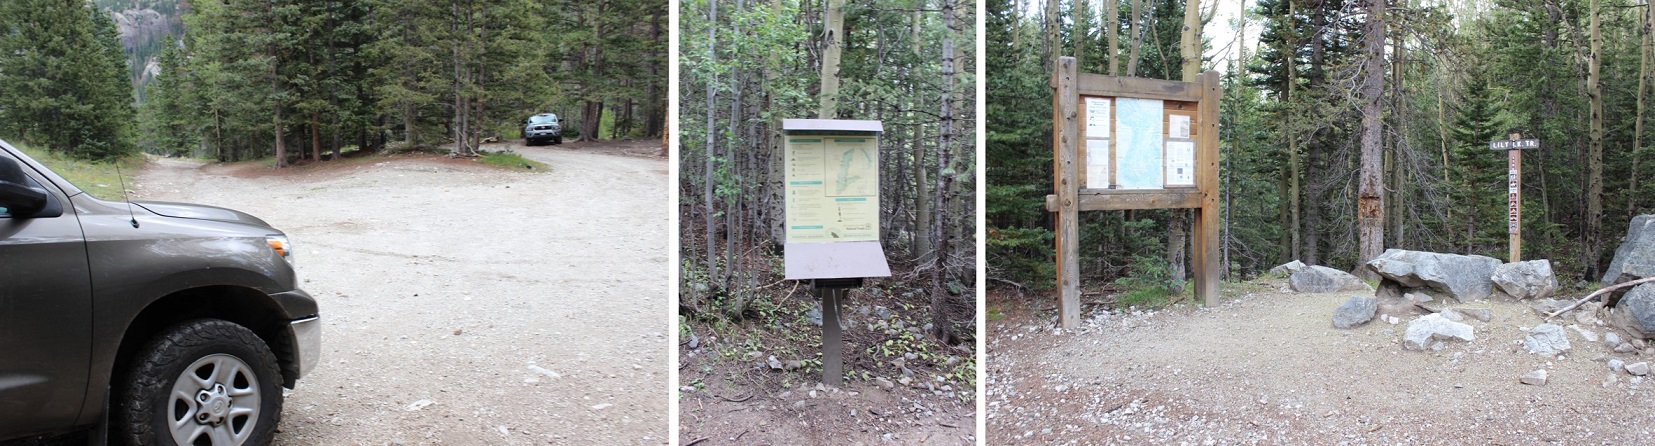
The 4WD parking lot has enough room for about 10 vehicles. There were 2 others there when I arrived (and 3 when I left). I got out my gear and turned on my new tracking app. I’m not a fan of GPX routes, but think it’d be careless not to have one in case it’s needed. There isn’t a GPX file for the trail I wanted to take, so I decided to try and make one. I’ve never done that kind of thing before, but I figured maybe I could make one and help someone out since a lot of this hike is off trail. I started the track, signed the trail register, and was on the trail at 4:15am.
The trail was wet. The sky was clear and I could see the stars, but it had obviously rained (hard) during the night. The trail was pretty much a small river, and all the grass and plants lining the trail were wet, making my pants wet when I brushed them as I walked by (I should have worn my hiking pants instead of my yoga pants). I accidentally stepped in the water a few times and was glad I had my waterproof Salomon’s on (so only my socks got wet above my shoes, but my feet remained dry).
Even though it was a clear night water was raining from the sky too: as I passed trees startled birds flew out of the trees, causing water droplets to rain down on me from above. Since the ground was wet I looked for animal tracks and didn’t see any, so I didn’t expect to see any large wildlife before sunrise. I did hear a rather large animal dash through the creek to the left of me, but it was obviously running away from me. I’m guessing it was a deer. I did see a cool mushroom on the side of the trail too
I missed the first junction that’s supposed to be a mile in, letting me know to turn right, but I’ve missed it every time I’ve taken this trail, so either the signs missing or I take the wrong path, which is a possibility. The trail follows the Huerfano creek but since it overflows onto trails there are several side trails. This is also a heavily used snow shoeing area, so there are tons of paths in and out of the trees. The good news is I saw the second sign and turned right, heading up the hill towards Lily Lake. I was hiking a bit too fast (I wanted to be at the lake around sunrise so I could see the lake) so I slowed down a bit. Just before the lake there was a small waterfall
I passed it to the right, and headed up a hill
And came to Lily Lake
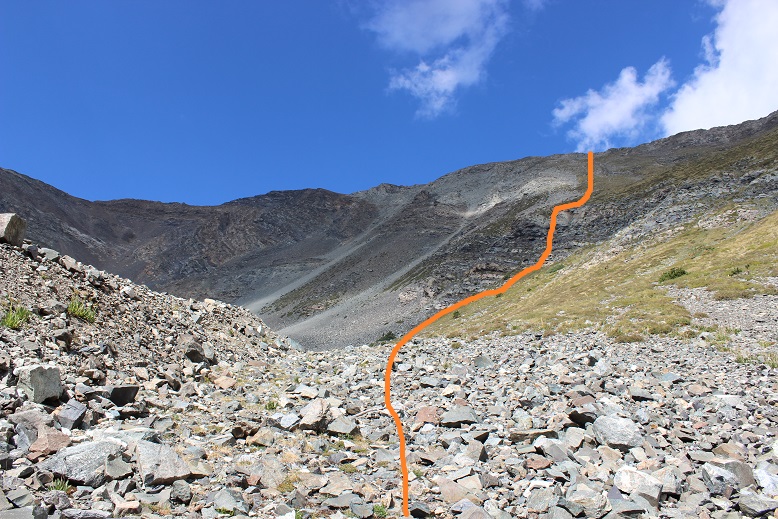
The wind immediately picked up and the temperature dropped. This is also where the trail ended. I’d read this was the “crux” of the route, and I’d agree. There is no path through the amphitheater. The goal is to avoid the loose rock and navigate your way up the mountainside to the right. The trouble is none of the rock is stable. It’s all terribly loose and when one rock falls it creates a rockslide. Think avalanche with rocks. This is rated as a class 2, but I found myself wishing for my helmet. I’d consider it absolutely necessary if I was hiking with someone else. Also, don’t follow anyone else’s GPX route up this mountain. The rocks slide and change quickly, so a route that’s safe today might not be tomorrow (and most likely won’t be next year). You need to use your best judgement and pick your own line. It’s steeper than it looks. Here’s the route I took:
I aimed for the large, stable rock, and once I made it there, passed it to the right, where I was met with larger (unstable) rocks.
I turned around and could see evidence it had snowed a bit last night as well as rained
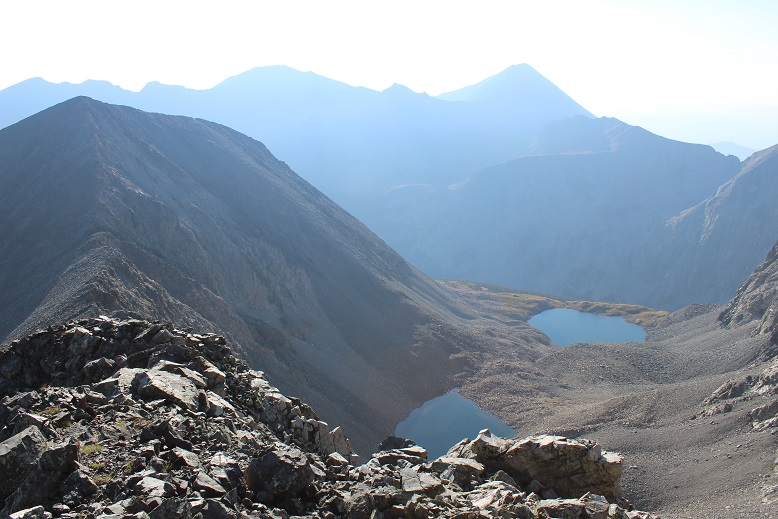
From here I gained the ridge and followed it left to the summit of Unnamed Point 13,577, arriving at 7am.
I turned around to look at the way I’d come up: steep and full of loose rocks.
Point 13,577 is a ranked 13er. Here’s my summit selfie to prove I summited:
And a video:
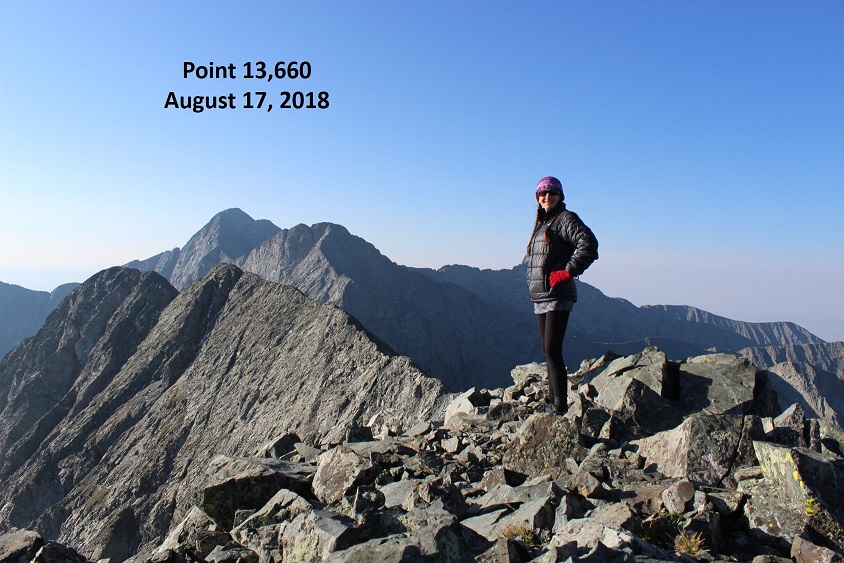
I turned and looked west at Unnamed Point 13,660. This is a bicentennial, and I’d promised myself if I had time I’d do my best to summit this peak as well since I couldn’t find another route for this one (hey, I was here, I might as well make the most of it, right?)
I mentally calculated my time (I was right on time… that crux had taken a lot longer that=n I’d anticipated) and decided to go for it. If it took me too long I could always come back for California Peak another day, satisfied I’d completed 2 ranked 13ers today.
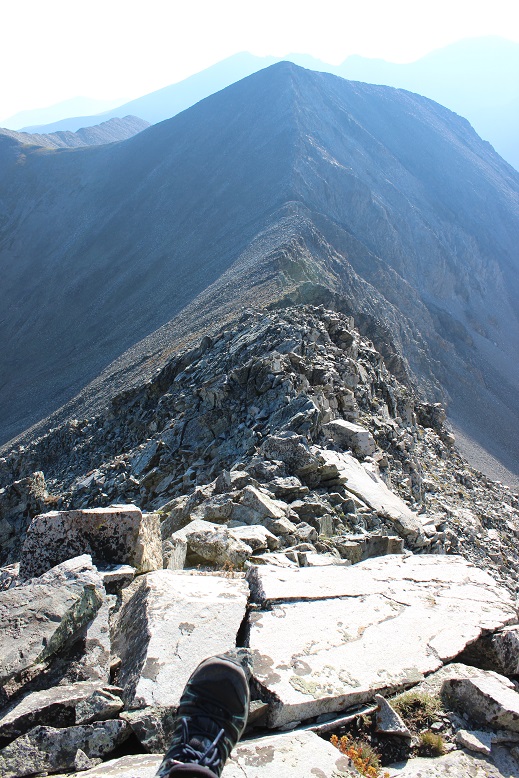
And so I headed towards the ridge. It was a fairly simple hike until I reached the saddle. From here it got a little more sketchy, but nothing over a difficult class 2. Once again I wished I’d brought my helmet. The rock wasn’t sticky at all. In fact, my (really good) hiking boots were slipping and couldn’t gain traction. There were also a few steep spots and areas of exposure. I was able to navigate the entire way by sticking to the ridge, but if necessary stick to the right.
OK, this was actually a lot of fun! The past couple of 13ers I’ve done have been pretty easy, with no real route finding or scrambling involved. This ridge included plenty of careful scrambling.
I made it to the summit at 7:50am and turned back to look at the route and Lily Lake (not sure what the other lake is named, or if Lily Lake is just missing some of its water).
Here’s a summit selfie as proof I summited
And a video:
The last hundred yards or so of that had been worth it and so much fun!!!
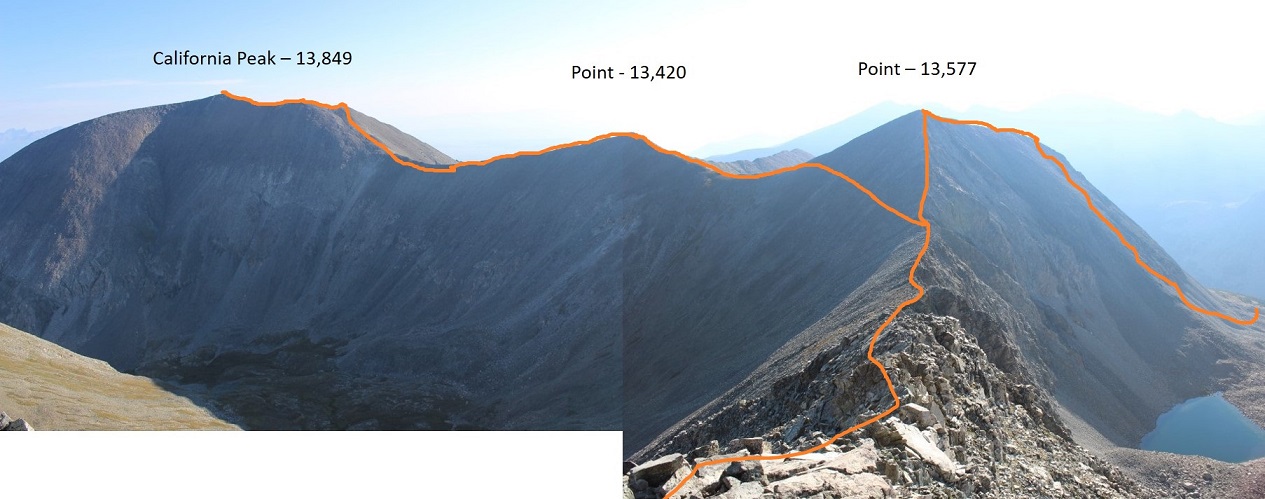
From Unnamed Point 13,660 I could clearly see the route I’d taken and the route I had left. Due to time I didn’t feel it was necessary to re-summit Point 13,577 so I skirted it to the left and aimed for the saddle between it and Point 13,420.
Once again, there is no trail for this hike, so I had to carefully navigate my way across the rocks.
From this saddle it was a quick hike to the top of Unnamed (and unranked) Point 13,420.
I summited at 8:40am to some of the best views I’ve had the pleasure of having all to myself! I could see small lakes in every direction, Huerfano Peak, Mt Lindsey, Blanca, and Ellingwood. Wow!
Video :
Here’s a look back at the route I took from PT 13,550
OK, time to head up California. This ridge was easy to follow, with no obstacles to face and stickier rock than Point 13,660. Here’s the route I took:
The rock was much larger and more stable than before
There was a false summit, but it wasn’t anything too difficult. Here you can see California Peak (to the right) from the false summit
The false summit is also a great place to stop and visualize your path down from California Peak if you are choosing to do the loop (which I highly recommend… that rock up to PT 13,577 is dangerous enough heading up, down it would be treacherous). I’ll discuss this more later, but either take a picture here or get a good look so you know how you’ll approach your descent. You want to aim for where the trees and drainage meet.
The summit of California Peak was curiously flatter than I’d anticipated
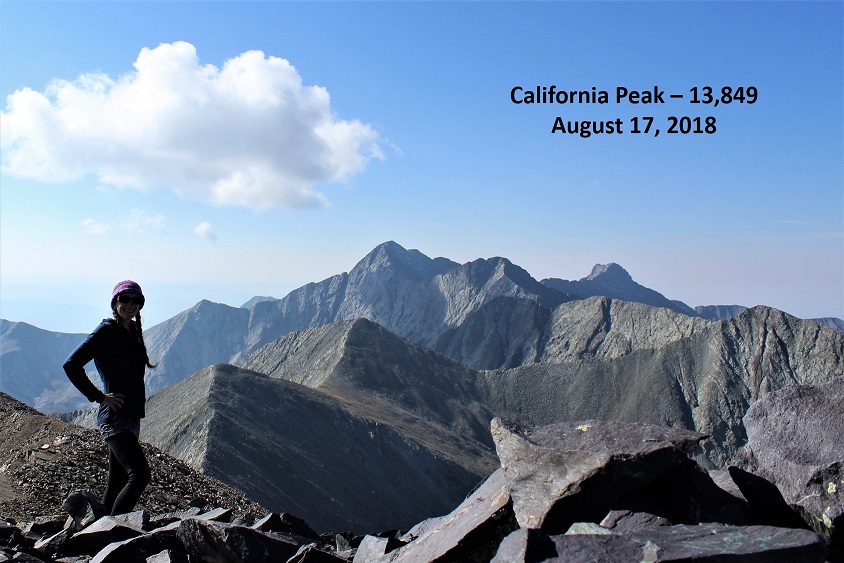
I summited at 9:15am to more awesome and amazing views!!!
Video:
Check out that ridgeline!
OK, your goal is to hike north up and around the horseshoe shape, locate a cairn, and head down (right/east) into the basin. Look for a cairn. You don’t want to descend too soon because it will be full of dangerous rocks.
Standing behind the cairn looking down into the basin you can see where you want to aim: Just where the trees and rocks come together. From there you follow the drainage until you make it to Huerfano creek (and the obvious trail) Here’s a view from the false summit of the path you want to take.
From the top (where the cairn is) your best bet is to descend and angle a bit left to avoid the loose rocks and scree you’ll immediately encounter. Try to stay on the grassy area, but aim for the left of this bump:
Once you make it to the bump you have several options ranging from class 2-4 to navigate your way down to the drainage. Just stay left and head down. I chose to climb down the wide chimney, but you have other (class 2) options as well.
Here’s a picture looking back at the terrain and what still lies ahead of you
In case you’re absolutely crazy and want to do this hike in reverse, here’s how I came down the mountain. Note: if you want to do this in reverse stay to the right (where there’s grass) and avoid the loose rock sections to the left.
This is where the route gets tricky because you’re going to enter the treeline and terrain filled with rocks, slippery wet grass/plants, creeks, and pine needles (deceptively slippery as well). I followed the drainage
Until I came to this
Once again, your goal is to head towards the creek. I did so and quickly the terrain looked like this:
This was actually much more difficult to navigate and took much, much longer than I’d anticipated, but as long as I kept heading east down towards the bottom of the basin I knew I was on the right track. There were dozens of game trails heading every which way, and a few snow shoe trails as well. It wasn’t lost on me if I were to get hurt in this area it would be extremely difficult for anyone to know where I was or to be able to find me (even though I’d let people know I was doing the loop). The area was thick with trees and bushes, most of which got caught in my hair. When I finally made it back and found the trail I did a fist bump! That was awesome, and the most difficult route finding (in the daylight) I’ve done to date. Yes, it was technically easy, but I was super proud of myself!
When I made it to the trail (which was still filled with water BTW) I turned left (north) and headed back towards the trailhead.
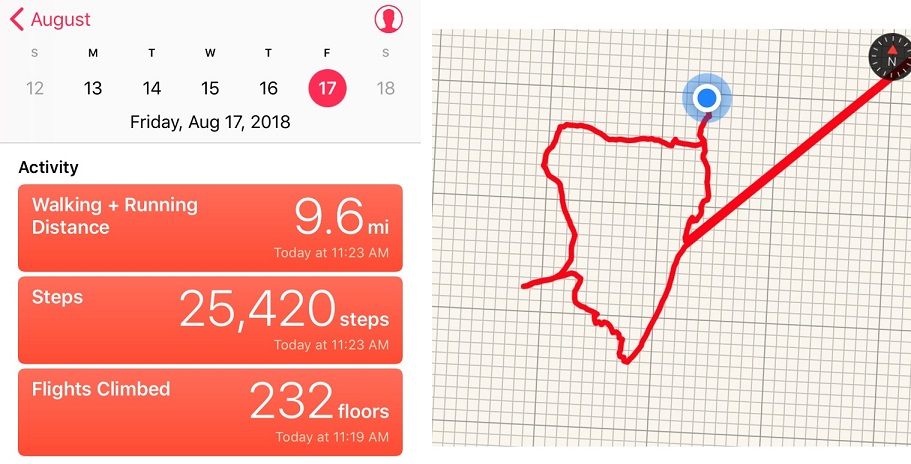
I made it to my truck at 11:15am, 45 minutes earlier than needed to remain on schedule to drive back home and pick up my daughter from school. That made this a 9.6 mile hike/climb in 7 hours. I quickly got out my phone and checked my route. Now, this is the very first time I’ve ever tried to track my route, but I’m pretty sure I didn’t teleport 30 miles away for a few minutes and come back right where I’d been on the trail. Hmmmm. Either something was wrong with the app or I needed more practice with this (probably both). Oh well, that’s what I get for using a free app. So no GPX file this time, but maybe in the future?
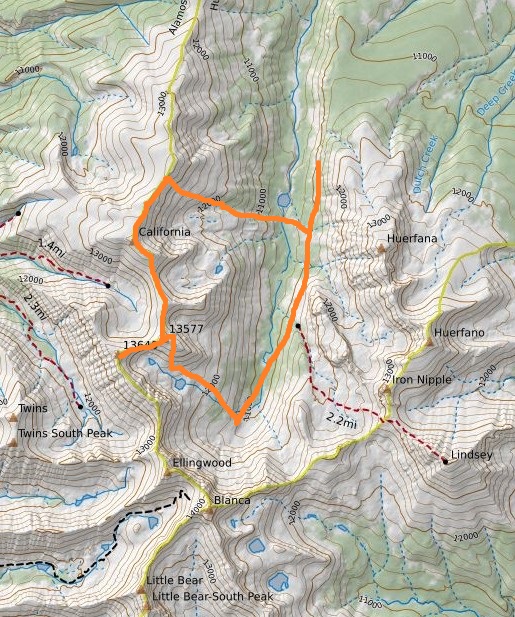
In any event, here’s the route I took on a topo map
This was a fantastic trip! Once again I didn’t see anyone else all day, the views and weather were amazing, and I was able to practice my route finding in an area I was familiar with and didn’t think I could get lost. I loved being able to tag a bunch of 13ers and I felt I learned a lot today. 13ers are amazing!