Peak Fifteen- 13,671

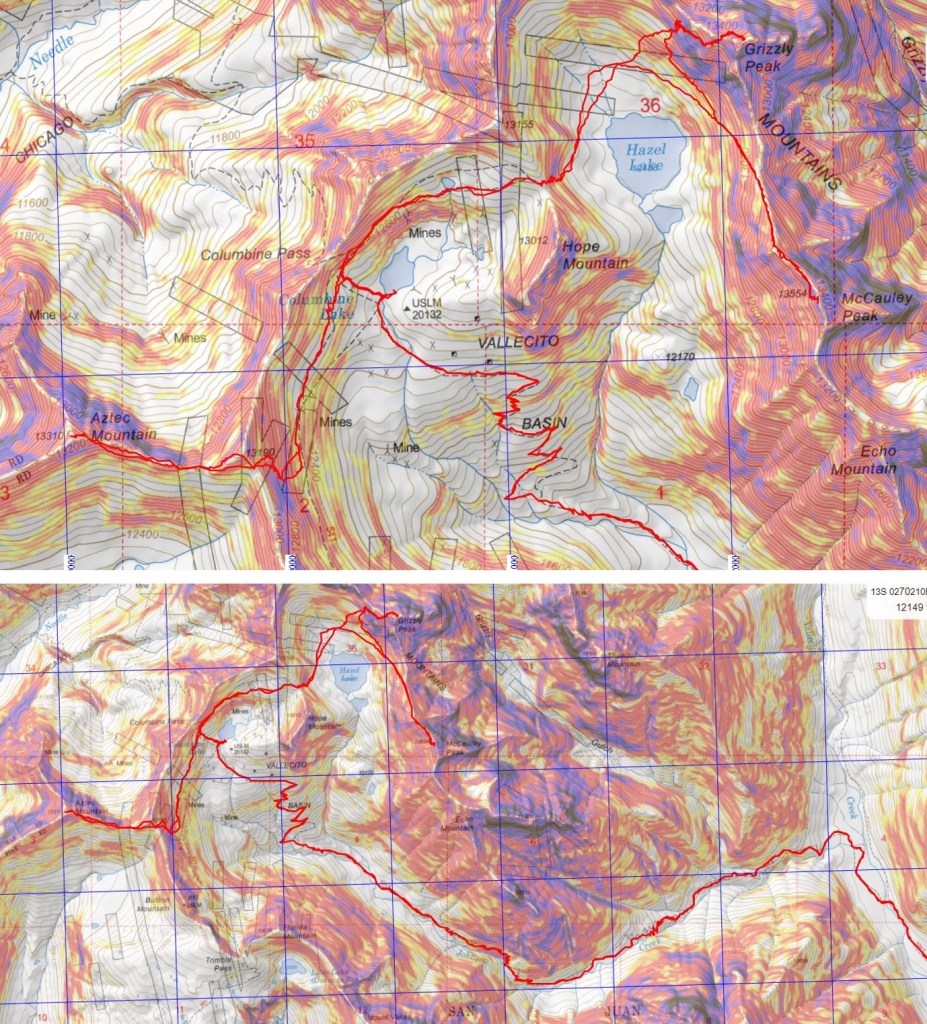
RT Length:  53.34 miles

Elevation Gain:  13765’

I didn’t want Peak Fifteen to be my Bicentennial Finisher. I really didn’t.  In fact, last month I attempted Peak Fifteen, but had to turn around due to several factors:  There was too much water in the couloir and if the section I was in was really class 4… my skills had gone south.  It hurt to hike all the way in from Purgatory and not get a summit, but I knew the conditions weren’t safe.  So, I turned around, went back home, and did more research.

This time, I brought my friend and climbing mentor, Tim.  My thoughts were to climb this peak with him, get the hang of it, and attempt it solo at a later date.  Spoiler alert:  After successfully summiting this peak, I do not think I’ll be attempting it solo. 

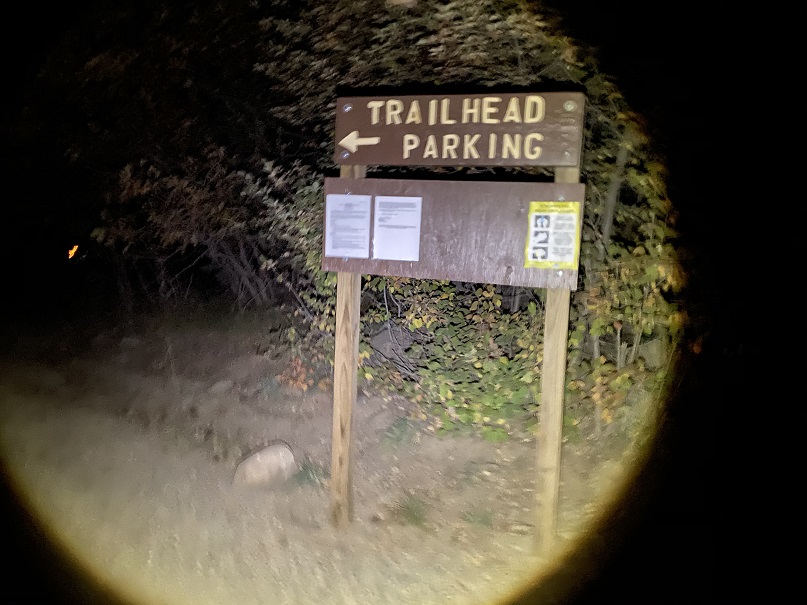
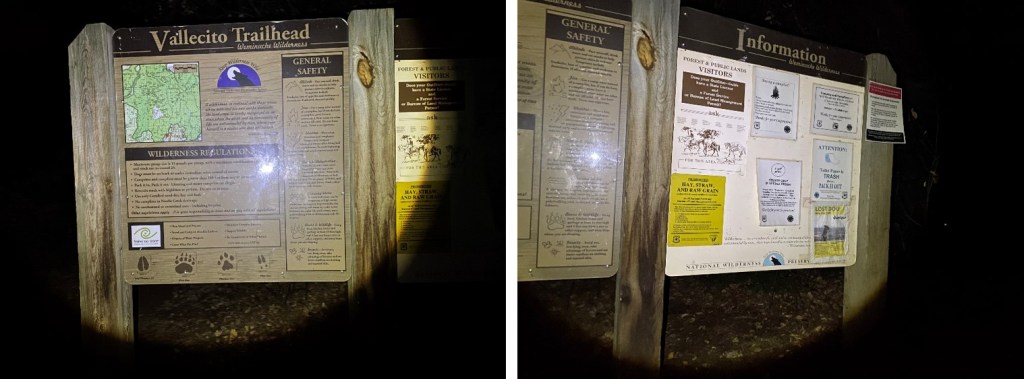
The approach to Ruby Basin can be found here

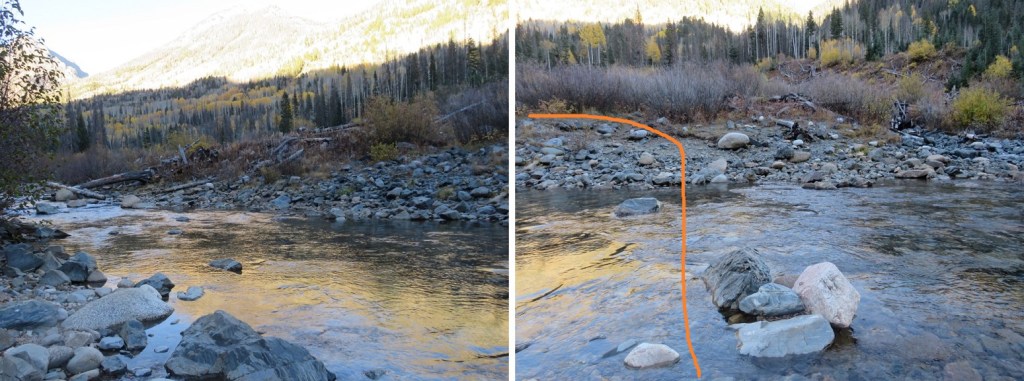
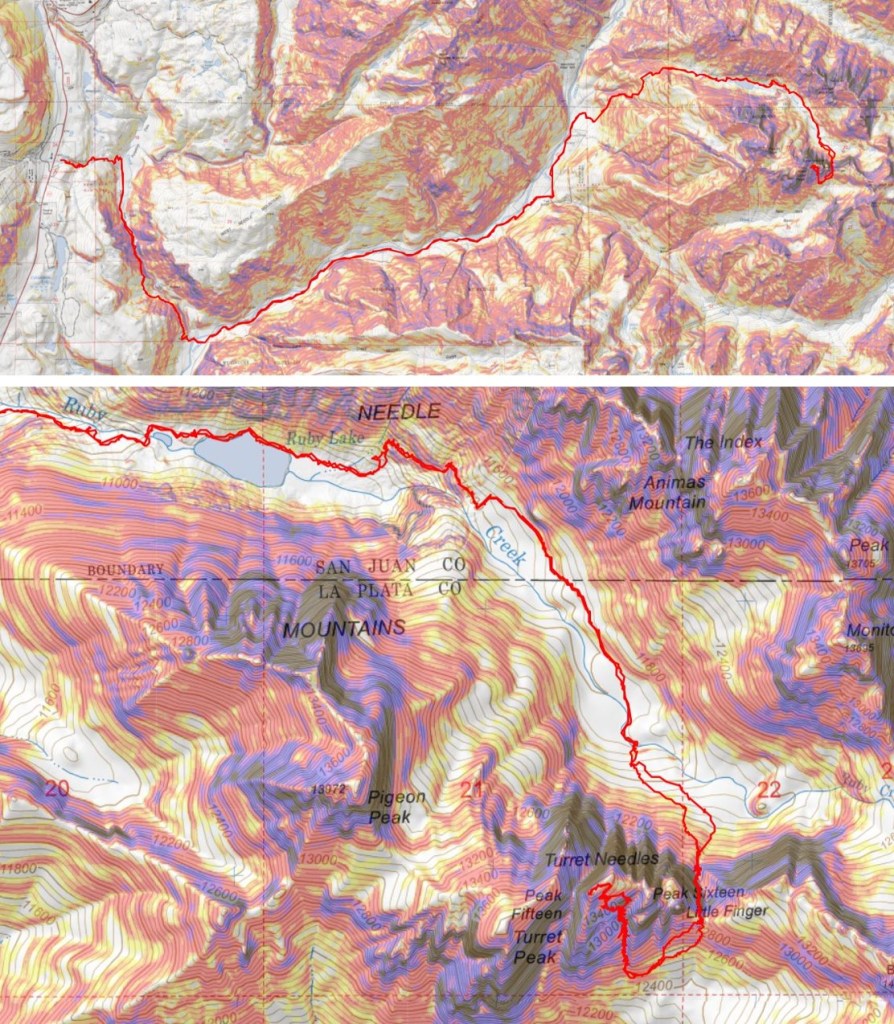
It was a long hike in from Purgatory. We ended up hiking a little slower than anticipated, so we stayed the night at the campsite at Ruby Lake; something I’ve always wanted to do.  It was already dark when we arrived, and I’d only brought one set of clothing, so it was a cold night for me as my sweat turned to ice at night inside my bivy. This made for interesting (zombie filled ) nightmares. 

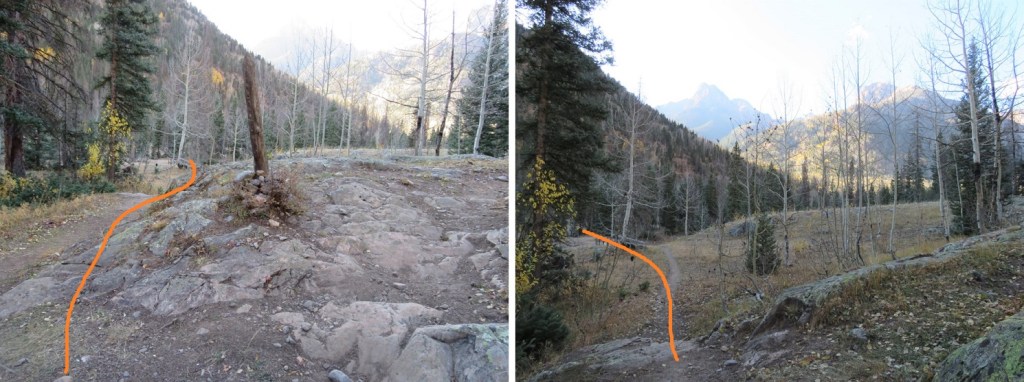
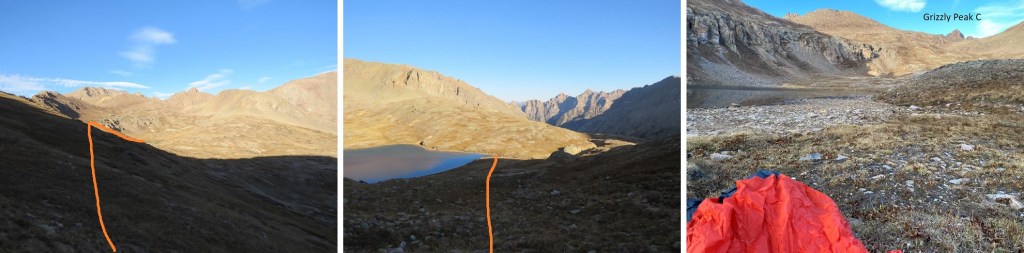
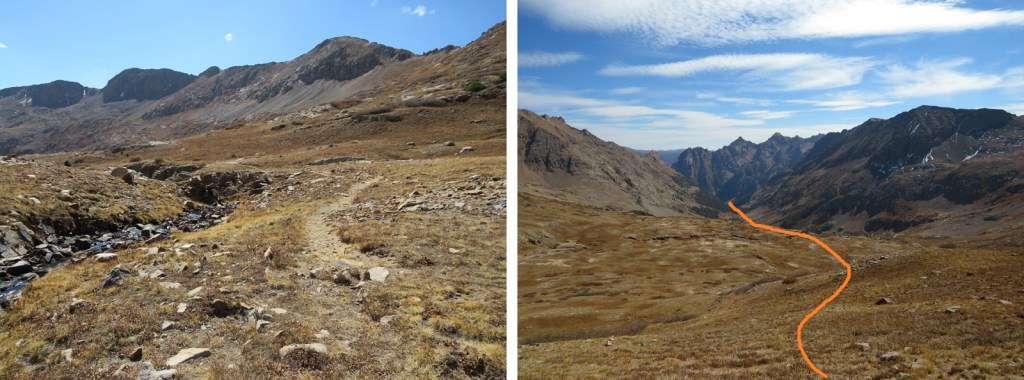
The next morning, we were up before sunrise to be willow warriors and thrash our way into Ruby Basin.  We made it just as the sun rose.

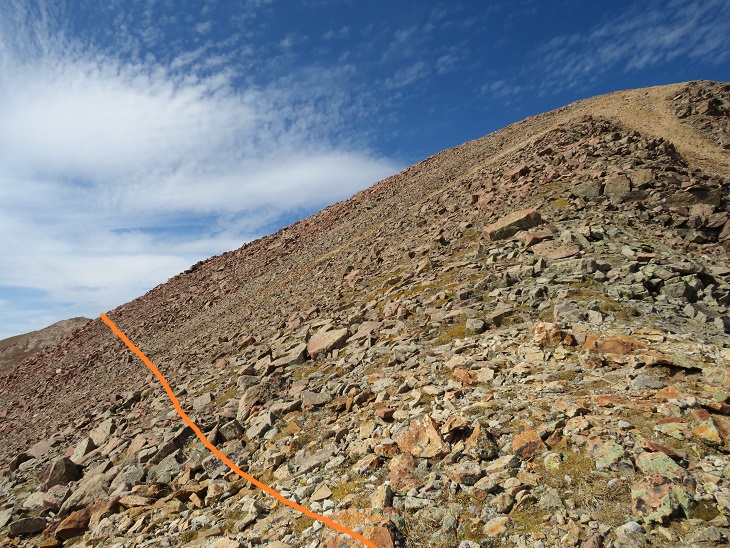
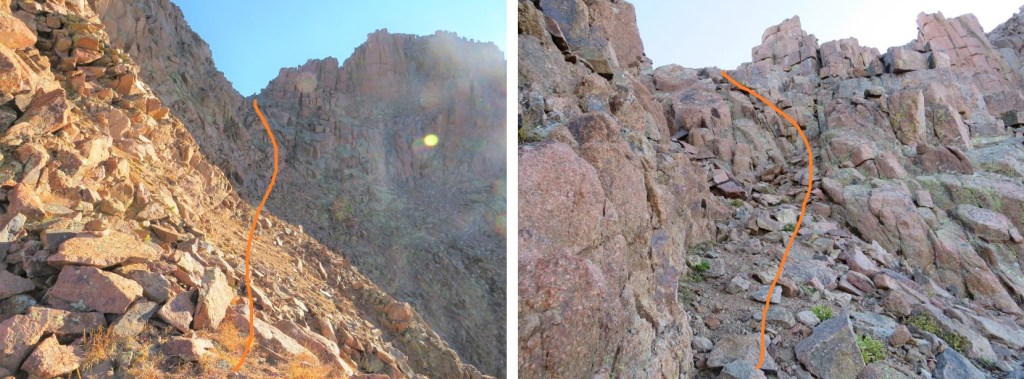
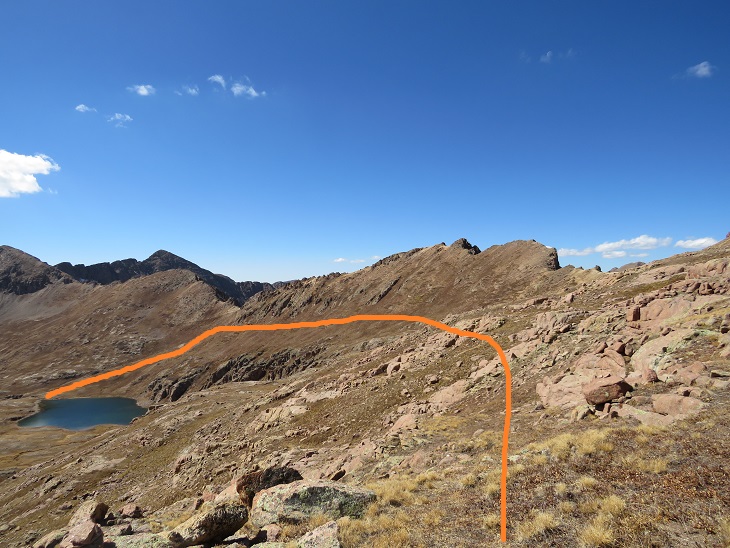
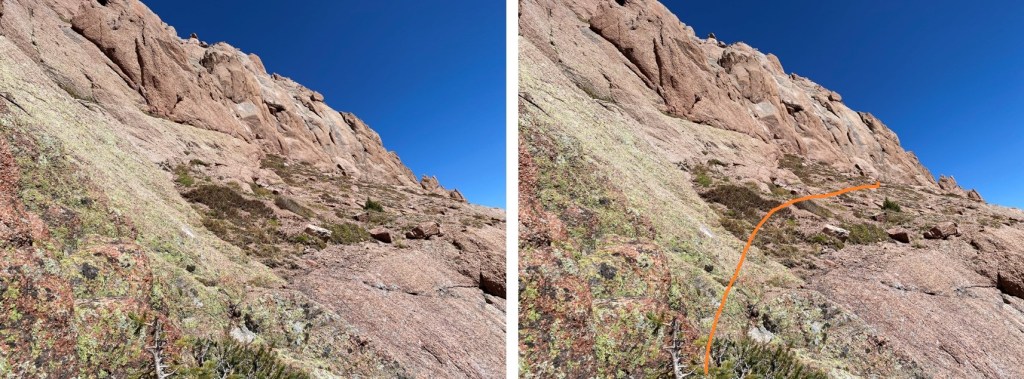
Here’s the route we took up the gully to the saddle. We stayed just above the willows, and hiked southeast across the basin until we were directly below the gully, then ascended the gully.

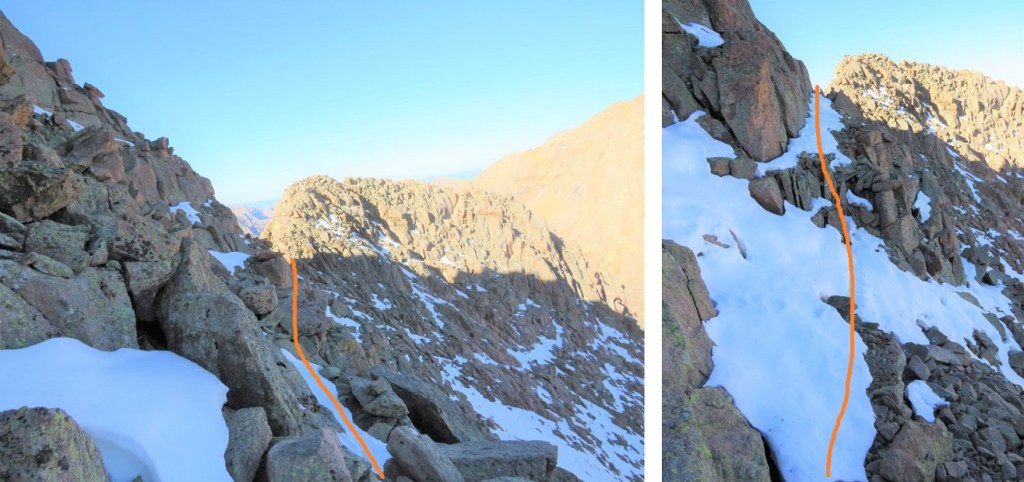
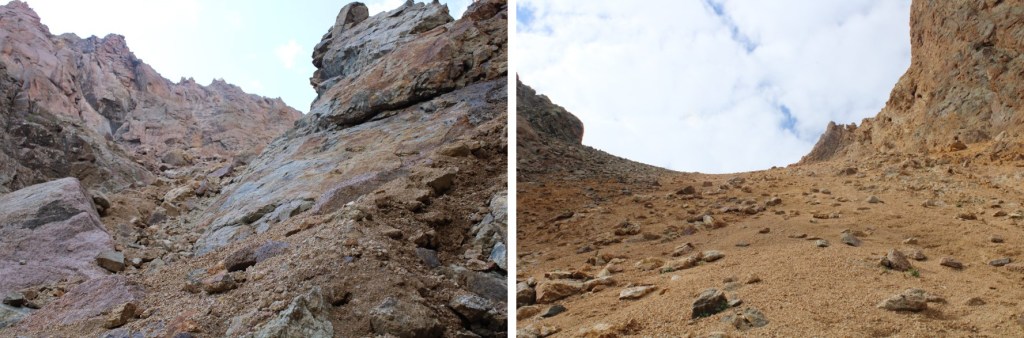
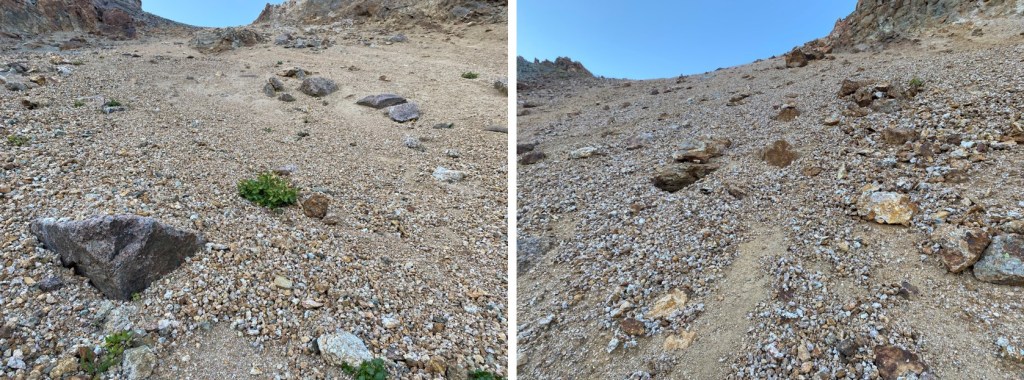
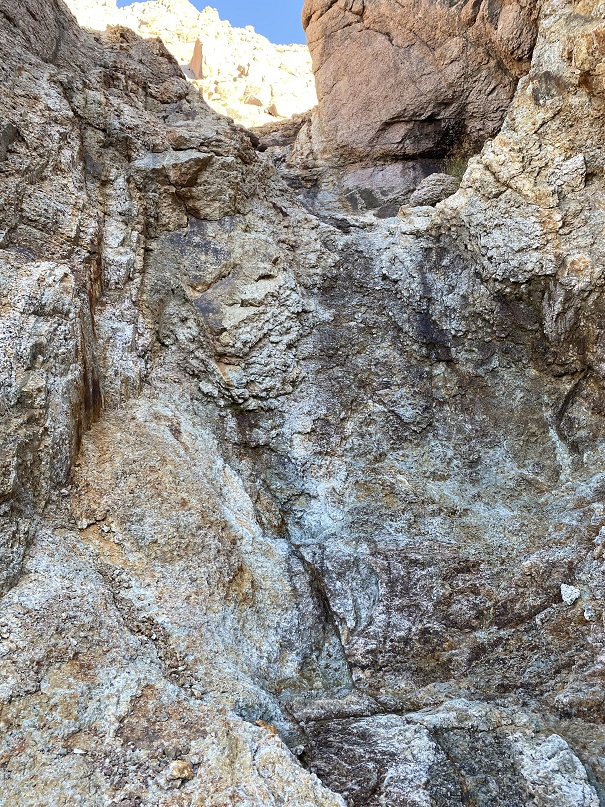
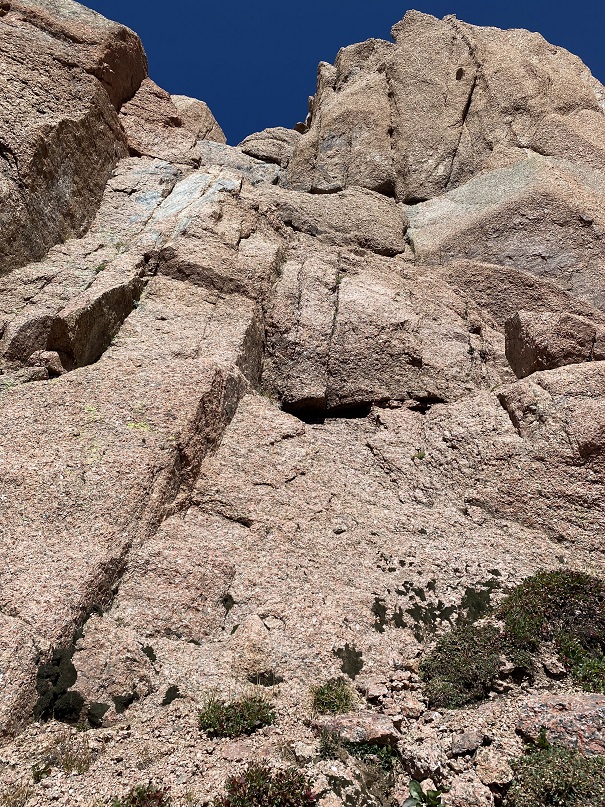
When I was here in August, there was snow under the scree in this gully. Because it was under the scree, I didn’t see it and it caught me by surprise when I unexpectedly sank up to my waist in slush.    Back in August, I made it up this gully by going right, but this time we went left.  It looks like the conditions change here frequently, so pick the line that goes best for you. Also, microspikes help here with the scree (if you don’t use microspikes on scree you’re making it more difficult than it needs to be: get some spikes for summer too).  Here are some pictures of the gully

The second half of the gully is full of large rocks, which eventually give way to scree.  This scree is some of the worst scree I’ve experienced. This is where your microspikes really come in handy.  Back in August I followed fresh goat tracks to the saddle.  Those tracks in September had been used several times and formed nice switchbacks.  However, it appears these tracks are destroyed every winter, and need to be remade every summer/fall.

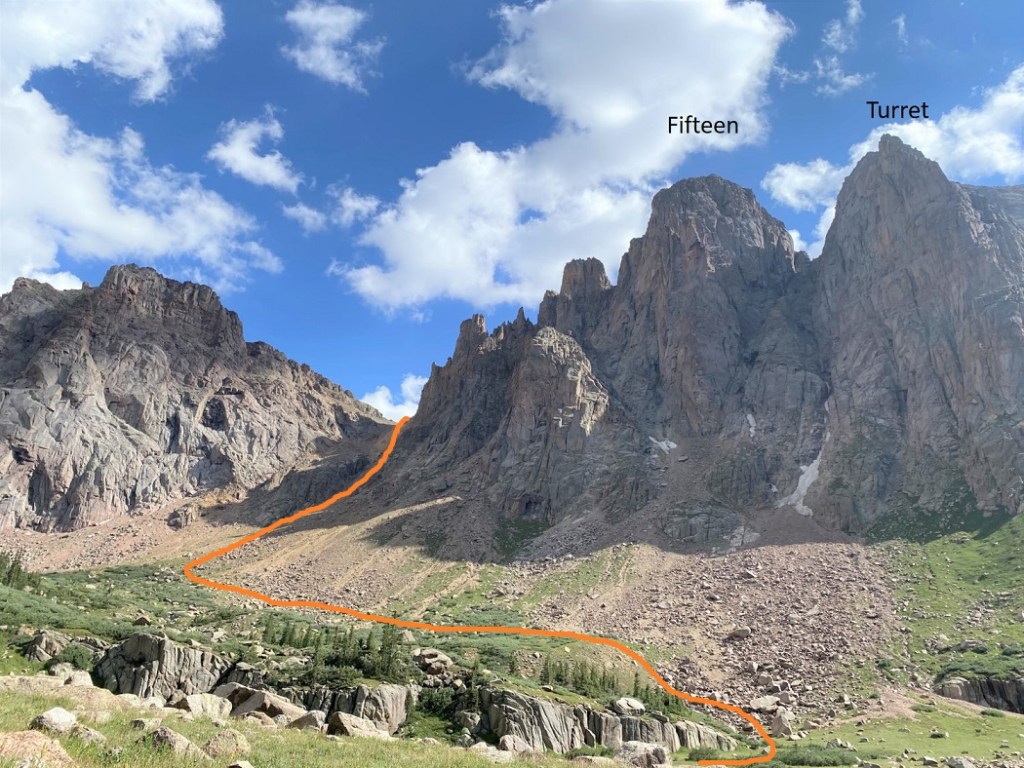
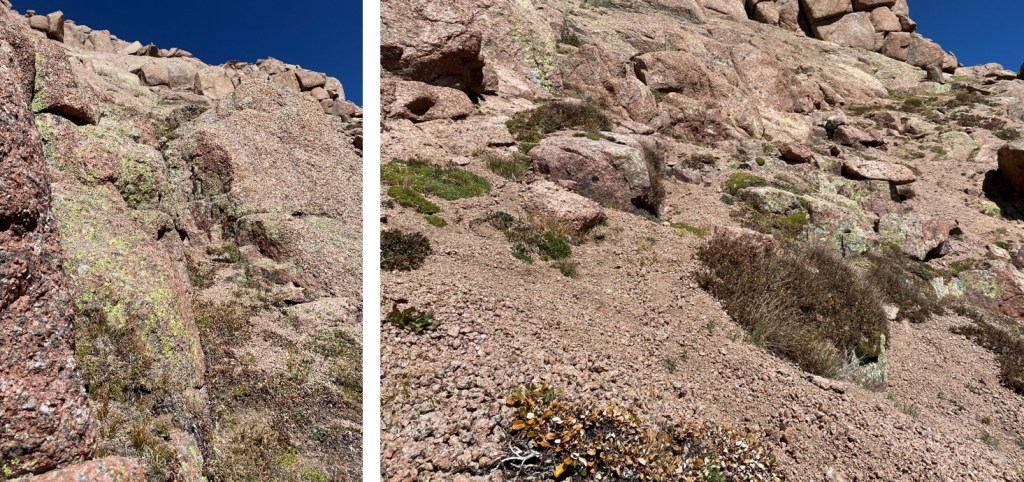
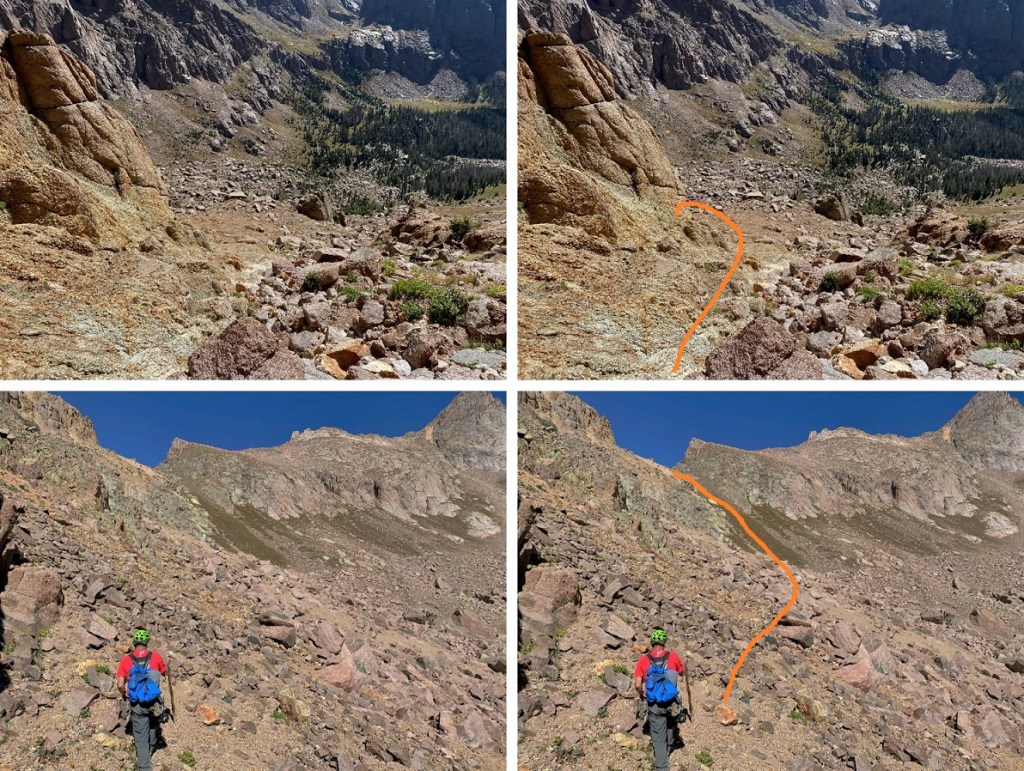
Once at the top of the gully it was time to lose about 350’ of elevation.  We did this by following the scree southwest, staying high but just below the rock outcroppings (we took a different approach on the way back).

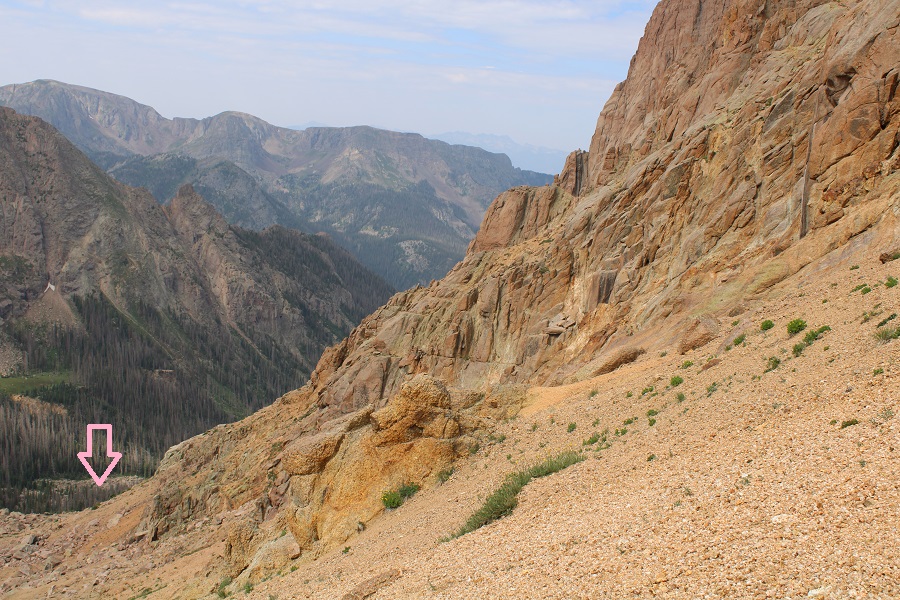
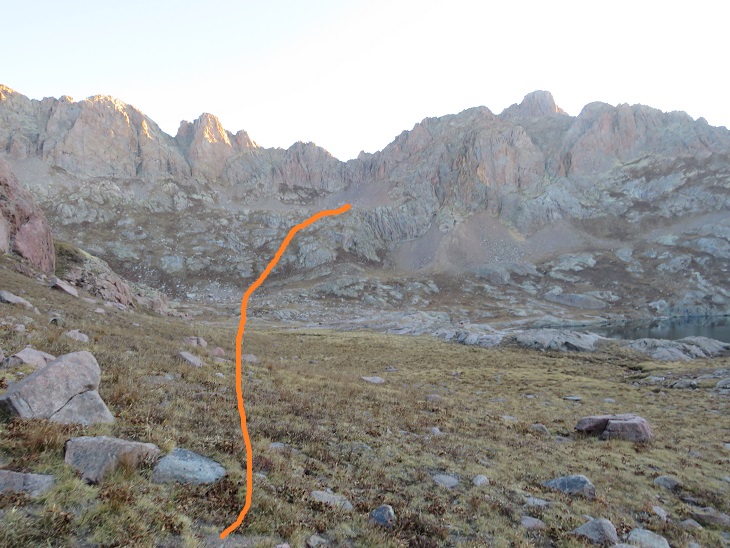
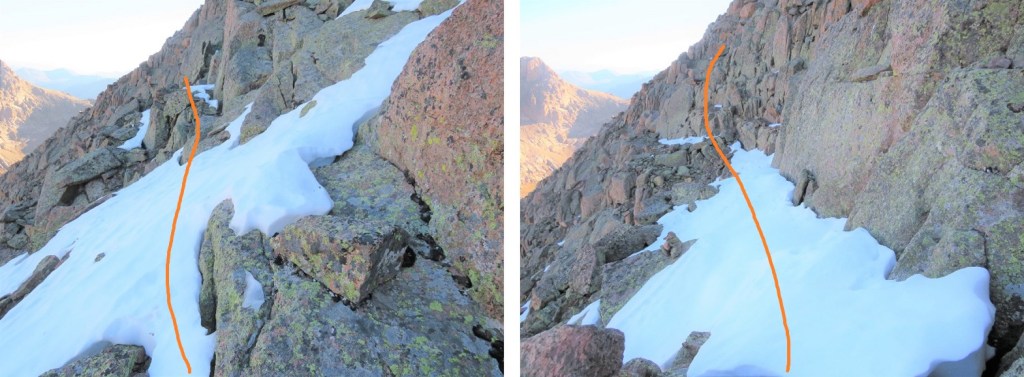
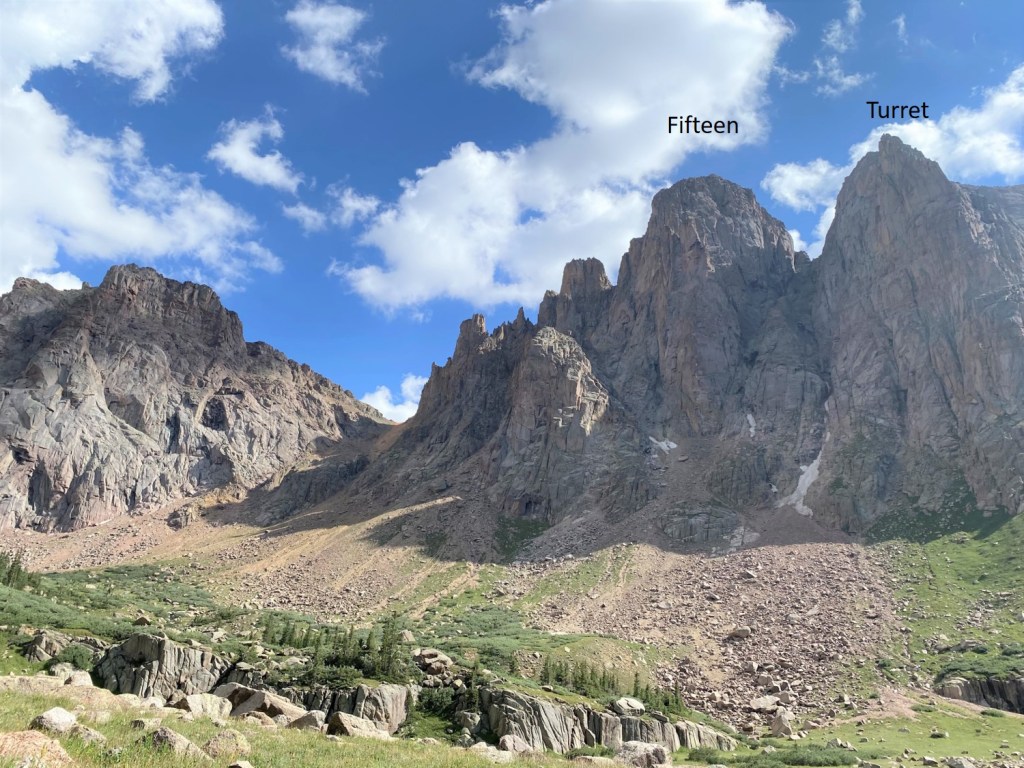
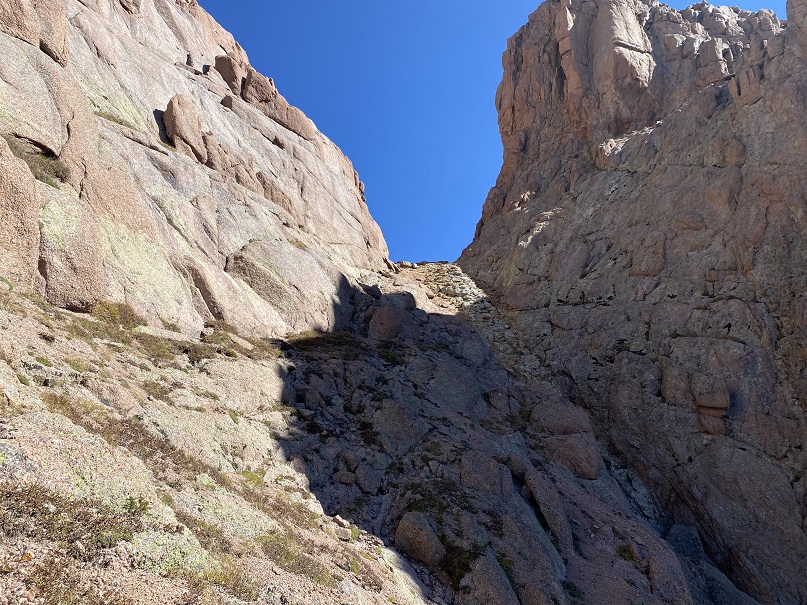
We continued down to about 12,500’, and then entered the Peak 15/Peak 16 gully

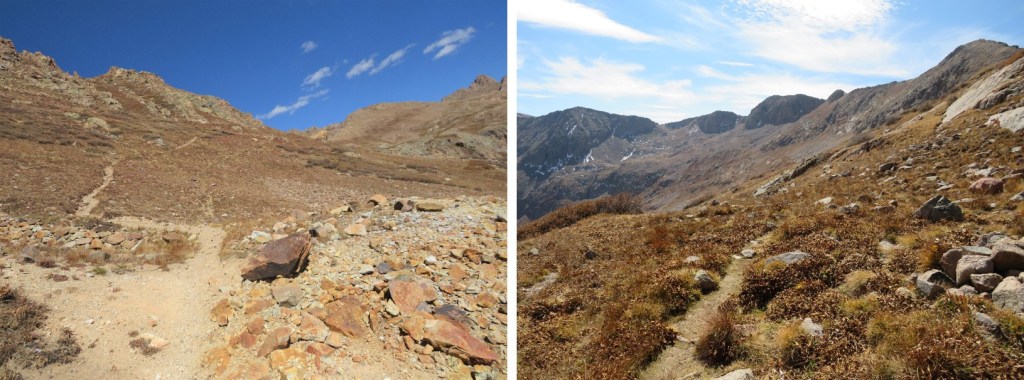
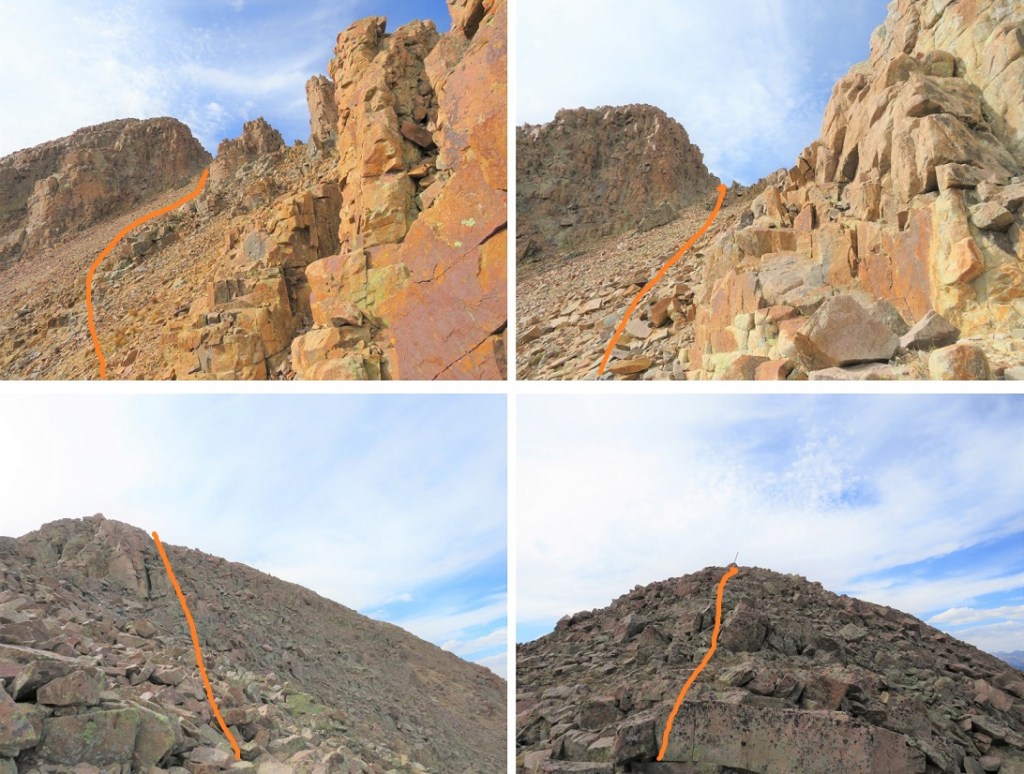
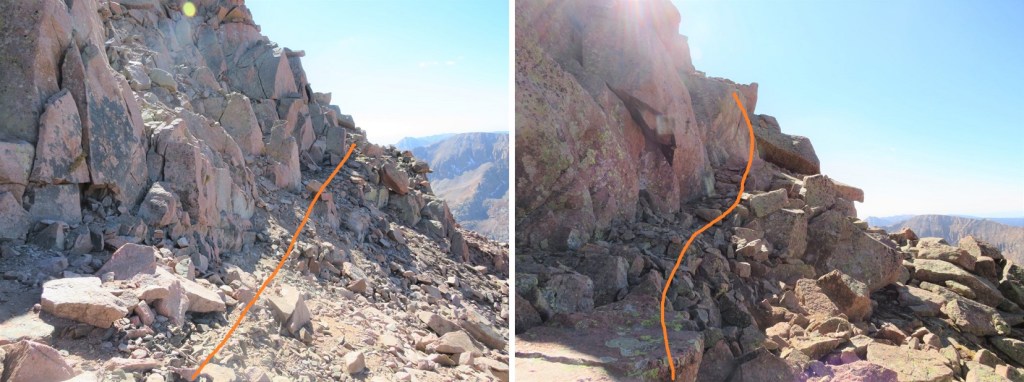
This is the gully you’re looking for.  There are cairns here, and it’s the first, obvious route ‘up’

The first part of the gully is class 3, and just requires some rock hopping.

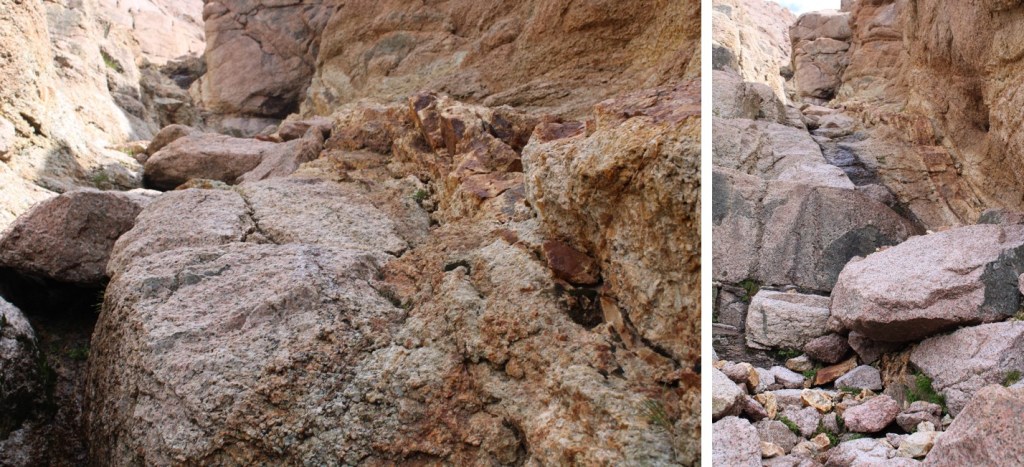
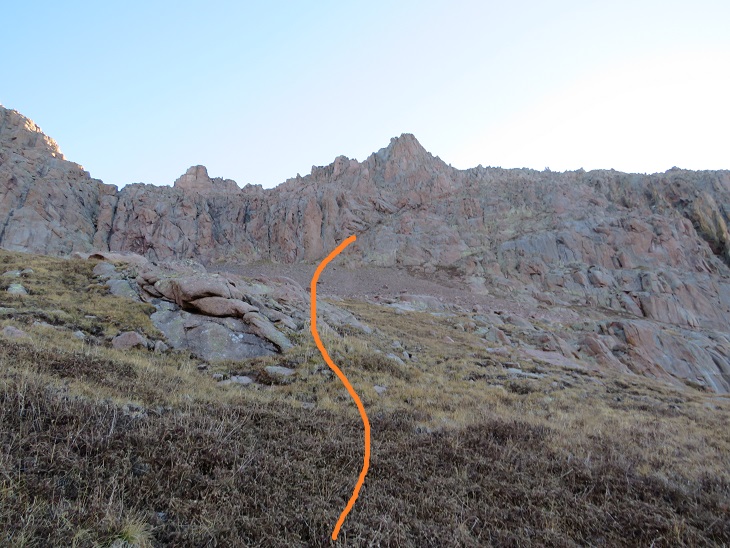
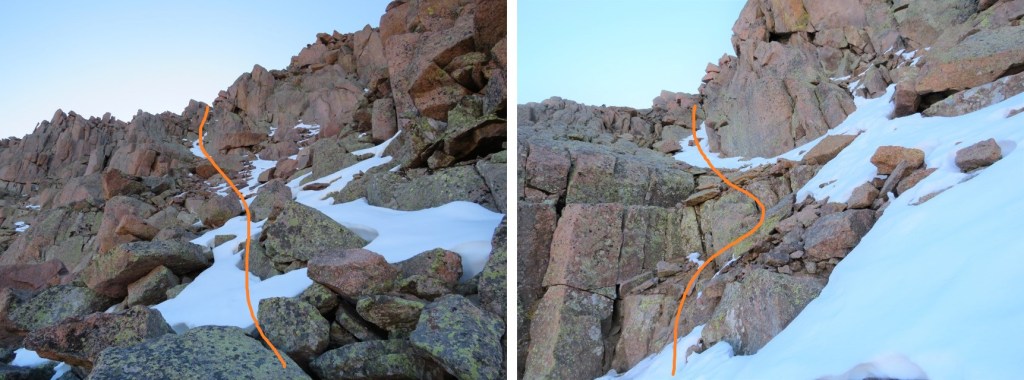
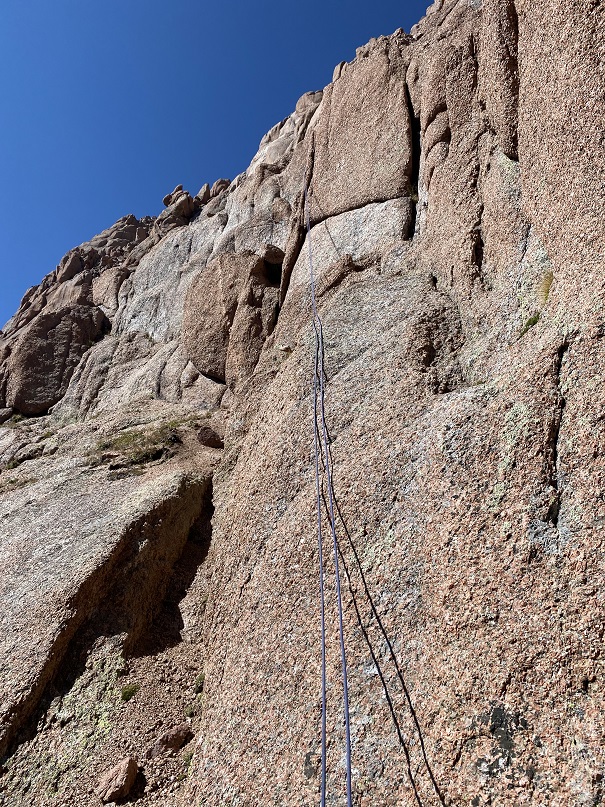
This gully turns into a couloir, and becomes easy to follow, but difficult to climb.  This is the first class 4 section.  There were no good hand/foot holds, as everything crumbled in my hands.  In August it was running with water.  Tim spent some time cleaning away the loose rock, making climbing easier.  Even in mid-September, there was still water here.  Wearing a pack with climbing gear/rope makes the ascent that much more difficult.  

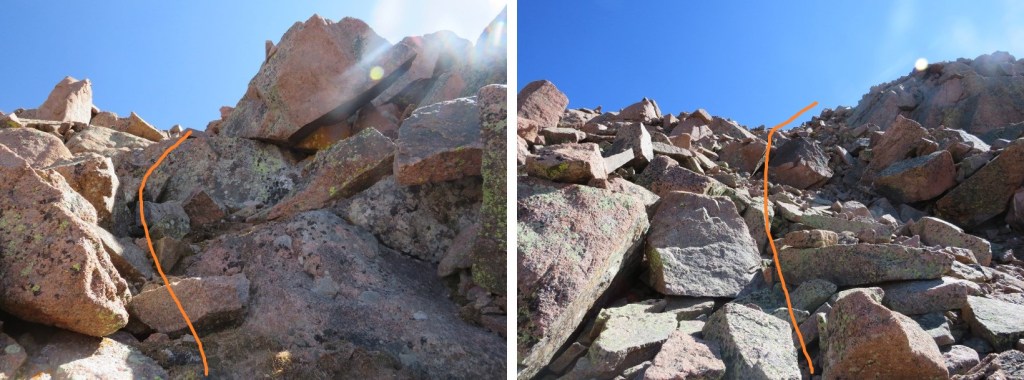
The second class 4 section of the couloir was… more than class 4.  I started up, and when I got about halfway through realized I may have been in over my head.  I couldn’t climb down, so I had to keep going up.  Since I was ‘stuck’ it became a mental exercise, where I told myself “If I can do this while on rope, I can do it off rope as well”, but to be honest it was intense and I didn’t feel comfortable soloing this (but I did).  There was a lot of deep breathing involved.  I’d recommend roping up here, if you can find a way to do so.  Climbing shoes would have been helpful (but they were in my pack…). We both felt this was class 5, not class 4.  I belayed my partner on this section from above.   

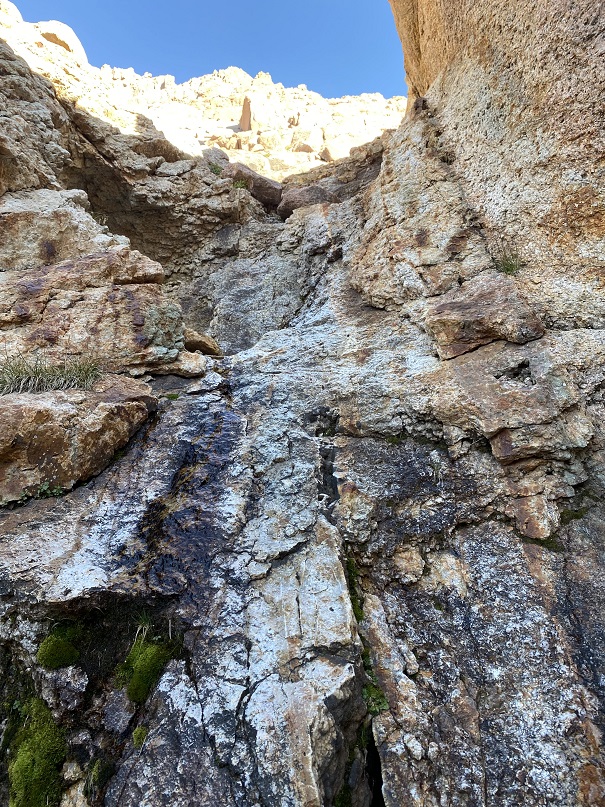
Just above this section there are anchors set up.  It’s good to take note of where they’re at as you’re passing them.  There will be three sets of anchors in the couloir.   Here are some more pictures of the couloir.  A lot of the webbing set up looks faded, but there’s plenty there. We cleaned up some of the older webbing and hiked it out (the stuff we didn’t even need to cut because it was frayed and falling apart).

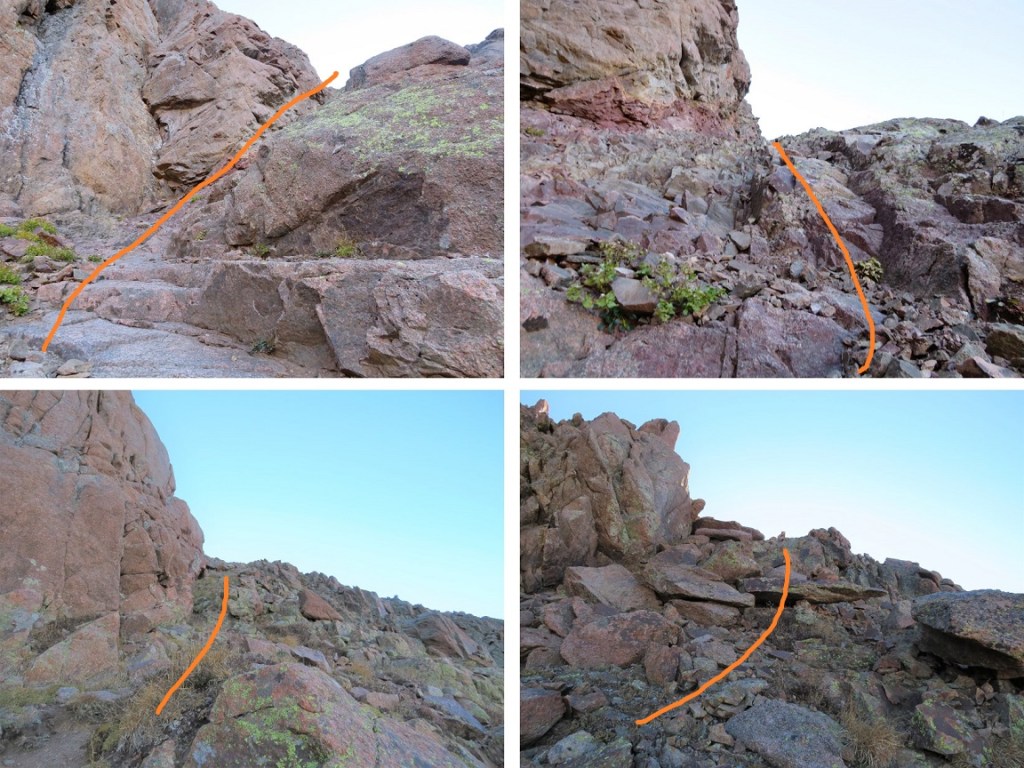
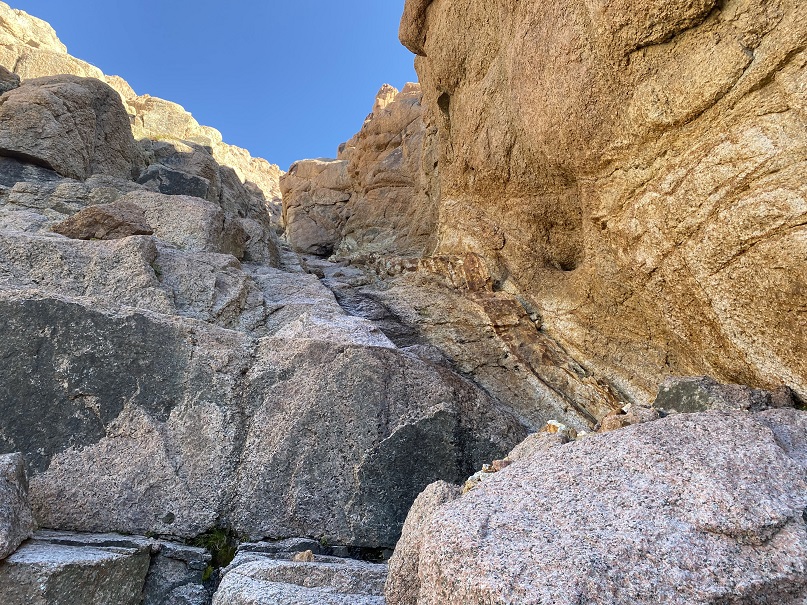
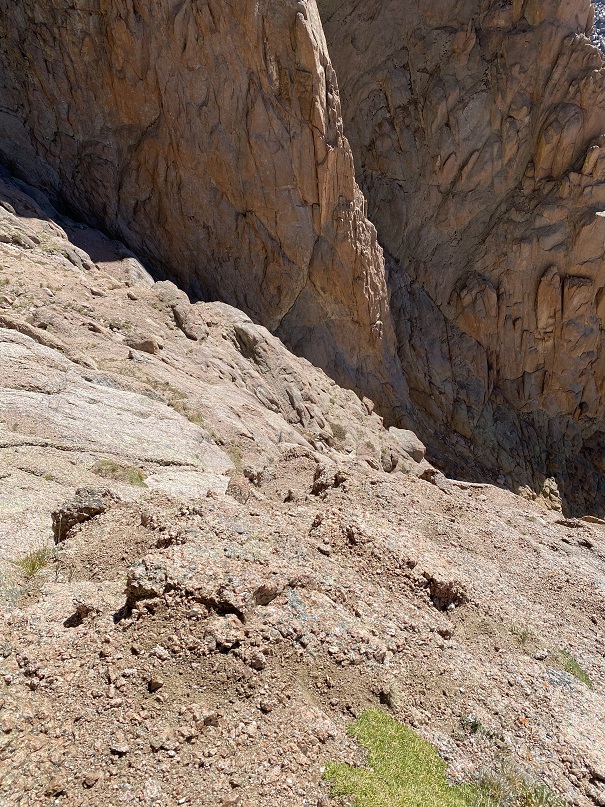
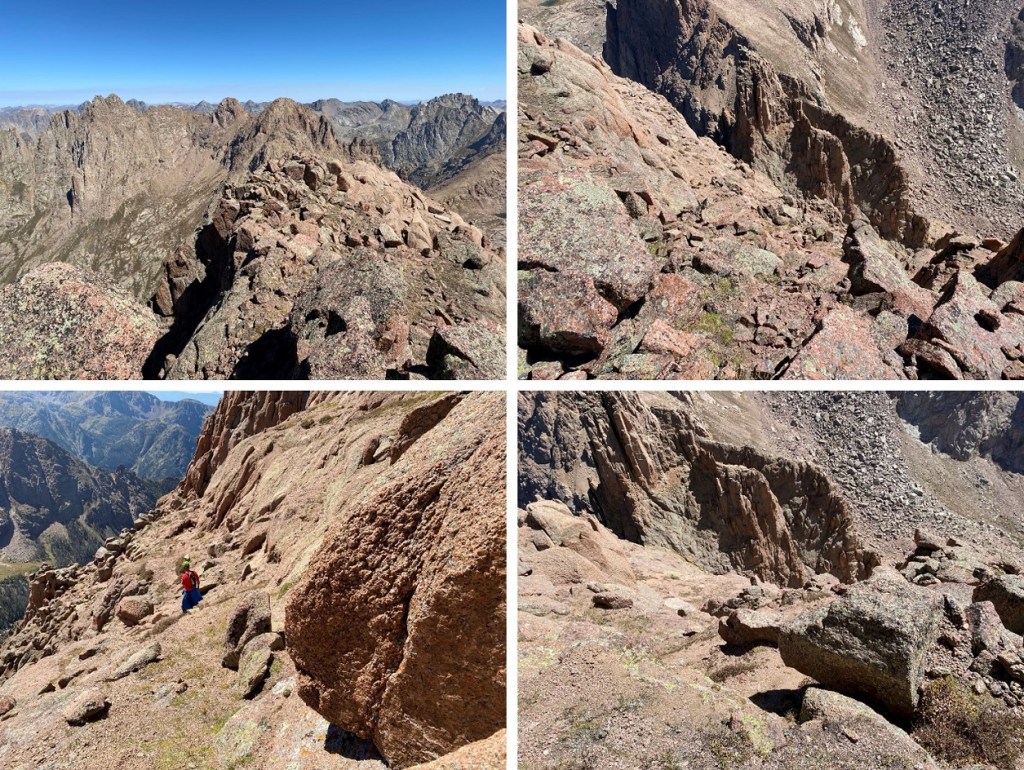
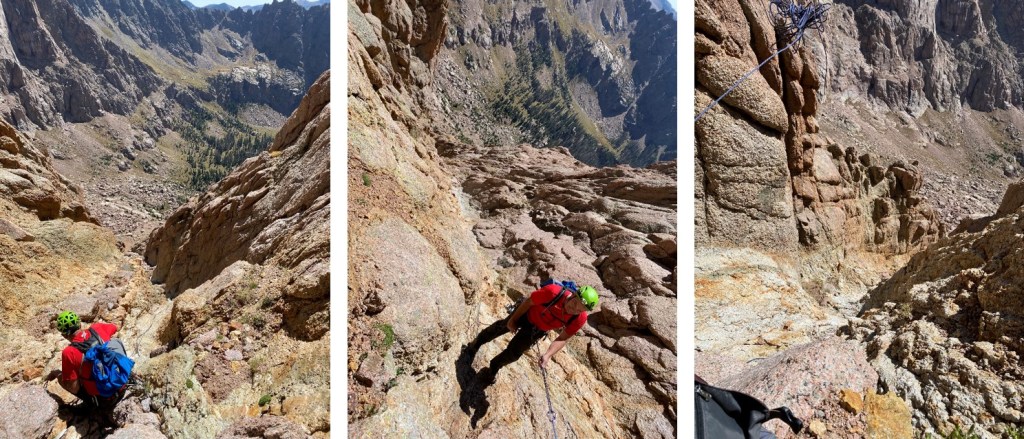
The couloir seemed to last forever.  At 13,050’ we exited the couloir, below the 15/16 saddle, and went left up the ledges to 13,300’.  This was class 3 scrambling with a lot of kitty litter (kitty litter is the name of the game on this climb).  Where applicable, I noted Tim tossed unnecessary obstacles aside, like tumbling rocks and kitty litter, to help clear the route.

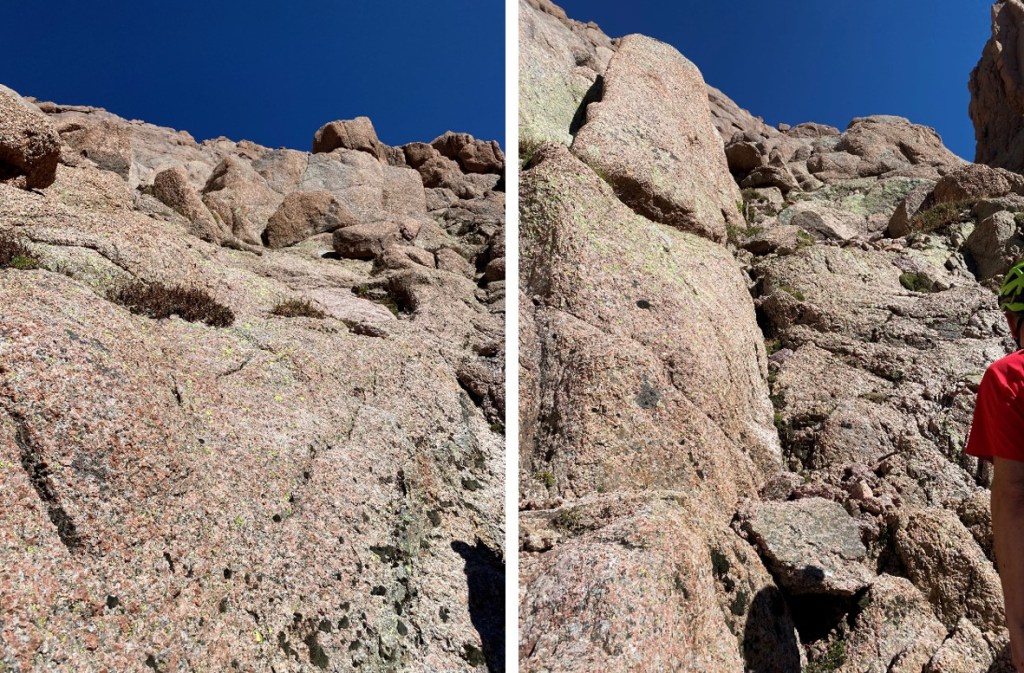
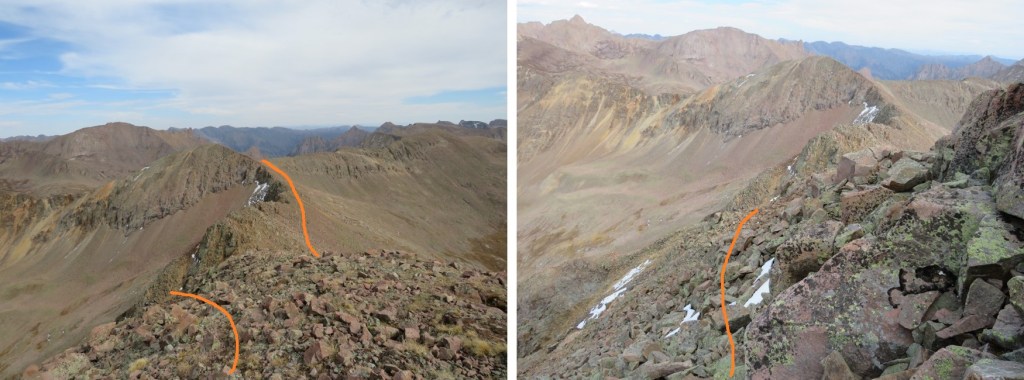
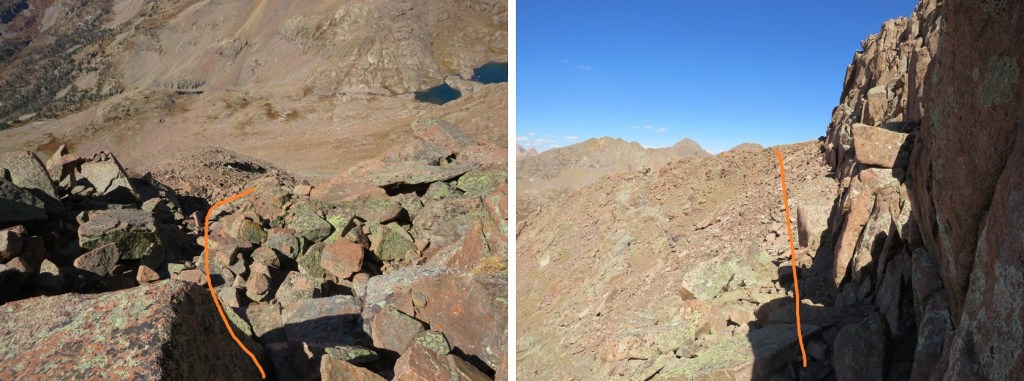
When we were about 50’ below the Peak 15/16 saddle it was time to rope up for the slabs. This picture looks at the saddle, but we were headed the opposite way, left/west (this picture is just a good visual of where you’ll be)

We were headed west, across the ledge system. 

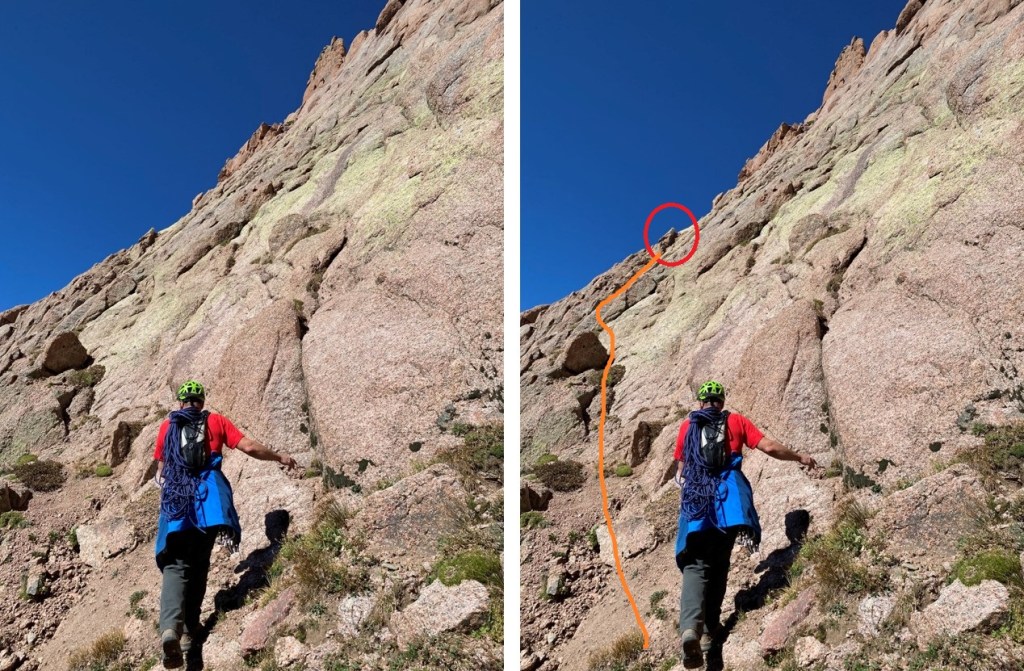
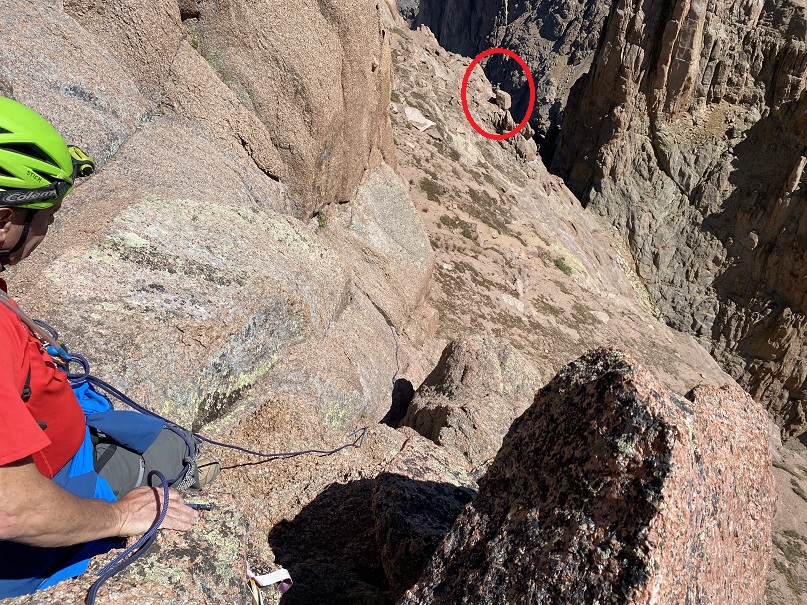
While we were still on level ground, we roped up. Then Tim led the way across the slab.  It was good to get roped up first because there wasn’t a lot of room at the rappel area to do so. Here’s an overall view of our roped ascent and the belay stations.  I put on my climbing shoes, but Tim didn’t feel his were necessary.

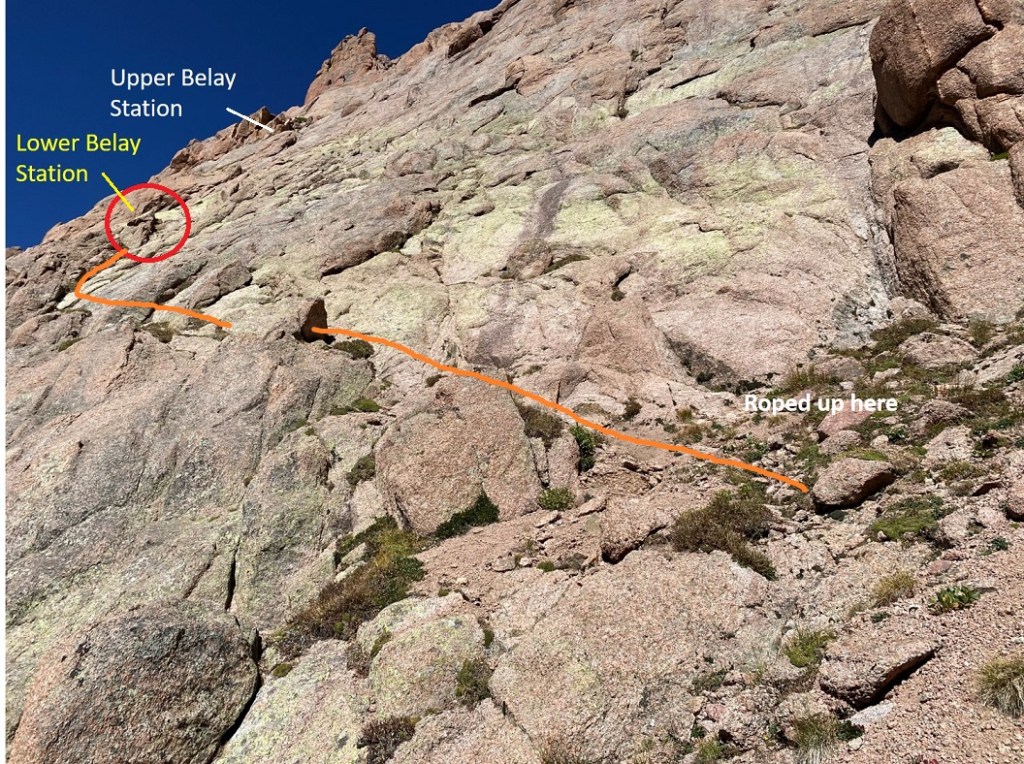
This is what it looked like getting there. We are aiming for the red circle to get to the lower belay station.

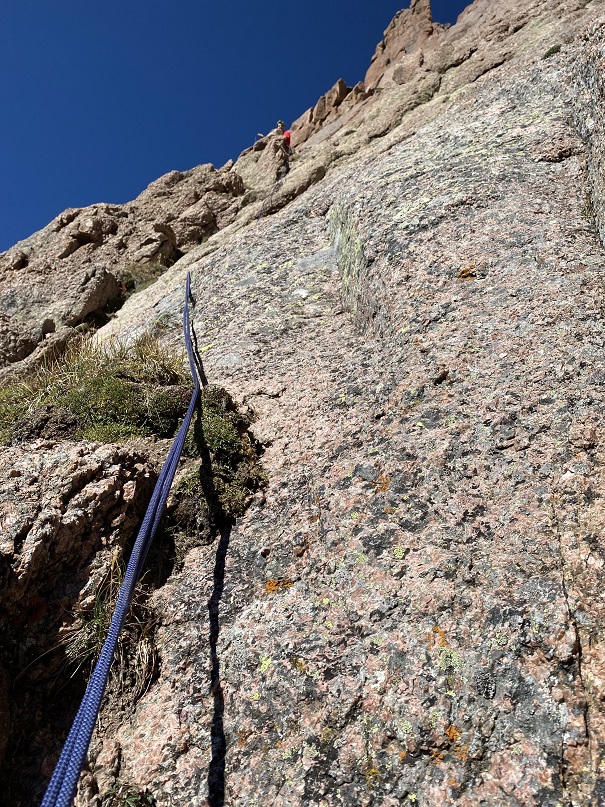
Once at the lower belay station I was set up to belay Tim from below as he set the protection and climbed first. Here’s looking back at the traverse

Oh, there’s some exposure here.

Since Tim’s the more experienced climber (WAY more experienced) I’ll let him describe this part of the route, starting with his overview:

Look for a series of shallow ledges that leads to a three foot wide ledge with a horn big enough to straddle. This is still 4th class terrain, so you can simply belay sitting next to the horn without an anchor.

If you feel you need one, wrap the rope end around the horn three times to make a tensionless hitch or use a cordalette. Bring your second up and have them belay from the three foot wide ledge below you. There will be about three horizontal seams you can place pro in ranging from #3 Camalots to .25. I managed to place five pieces total.

After your last piece you want to head for a shallow V slot next to some bulges. This is the 4th class exit and leads past a rock with a crack in it you could build an anchor in. This is exposed and one could fall from there, and you may be out of gear as I was. Continue then above this to where the steepness of the pitch eases off and there are two scrubby evergreen bushes. You can sling some of the roots for a sketchy, but adequate anchor. Once your second is up, you can both walk to the right towards a large, grassy ledge where the final 3rd class gully is.

I’m not a serious climber:  I’ve been climbing for a few years, but I’m no expert.  I was glad to be roped in, and wouldn’t have wanted to do this part without someone belaying me (or the other way around).  A fall would have been fatal.  Tim called it “poorly protected 5.4”.  He placed 5 pieces of protection.

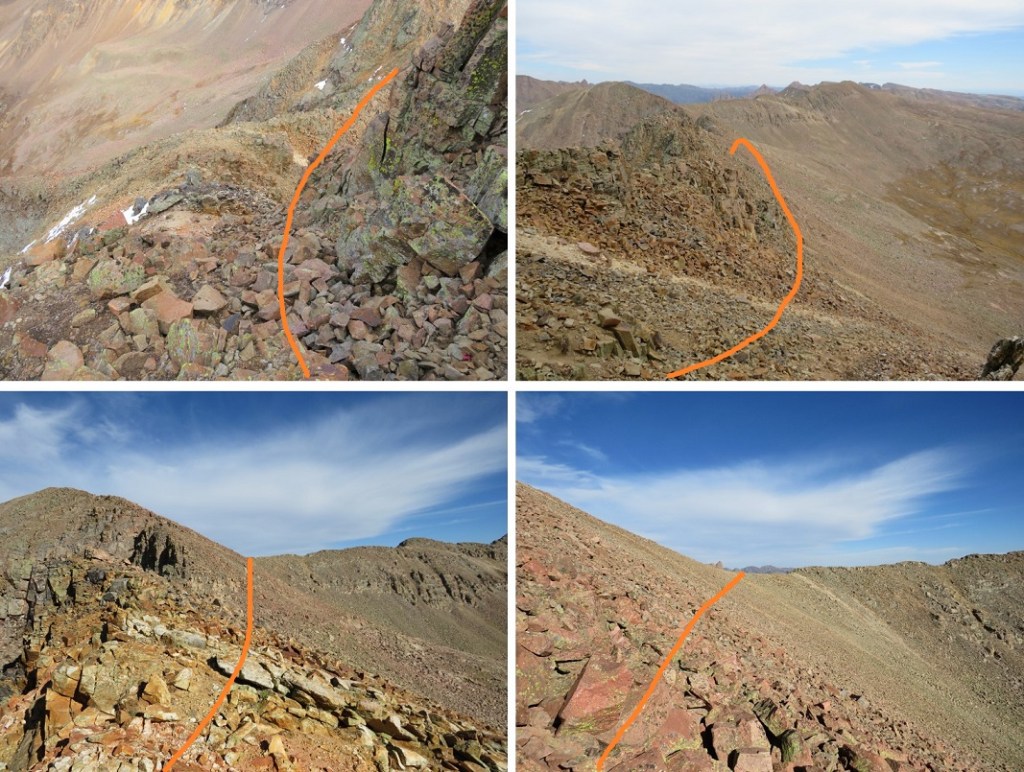
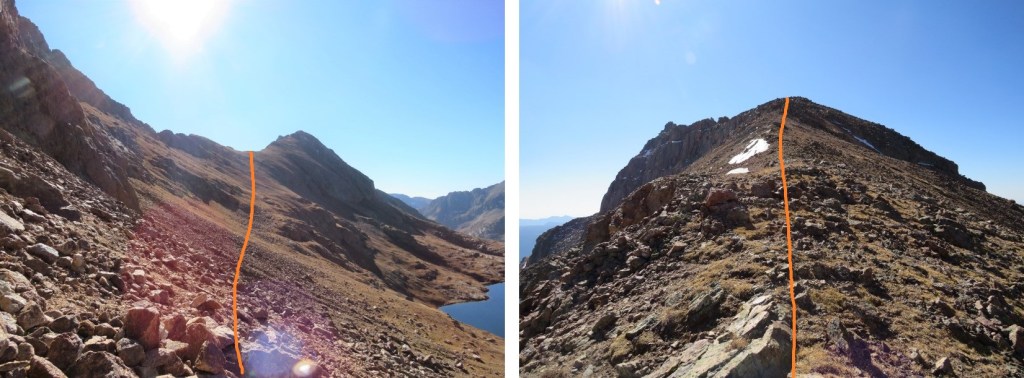
From the upper belay station, we turned right and followed the slopes east, looking for an access gully/kind of a small chimney.

The gully is about halfway to the saddle. This is what it looks like from below

From the east side it’s easier to see.  This is class 3, with a cairn at the bottom.

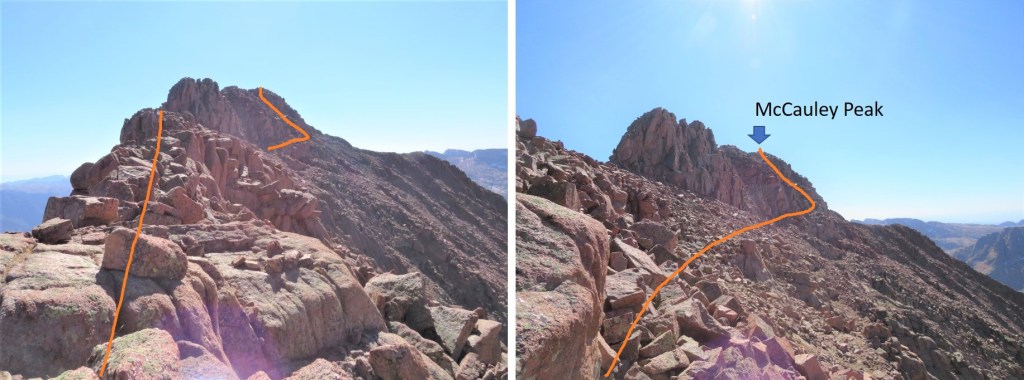
Once up the gully, we followed the ledges northeast to the ridge.  This was “choose your own adventure”, but we aimed for the northeast corner of the ridge

Once the furthest northeast we could go, we ascended the ridge via a short, easy class 3 ramp, and scrambled west to the summit

Final, class 2 scramble to the summit (easier than it looks)

We summited Peak Fifteen at 12.30pm.  Also, yes, it was my birthday, so I was celebrating not only my bicentennial finisher, bust also turning 41.  Woot! 
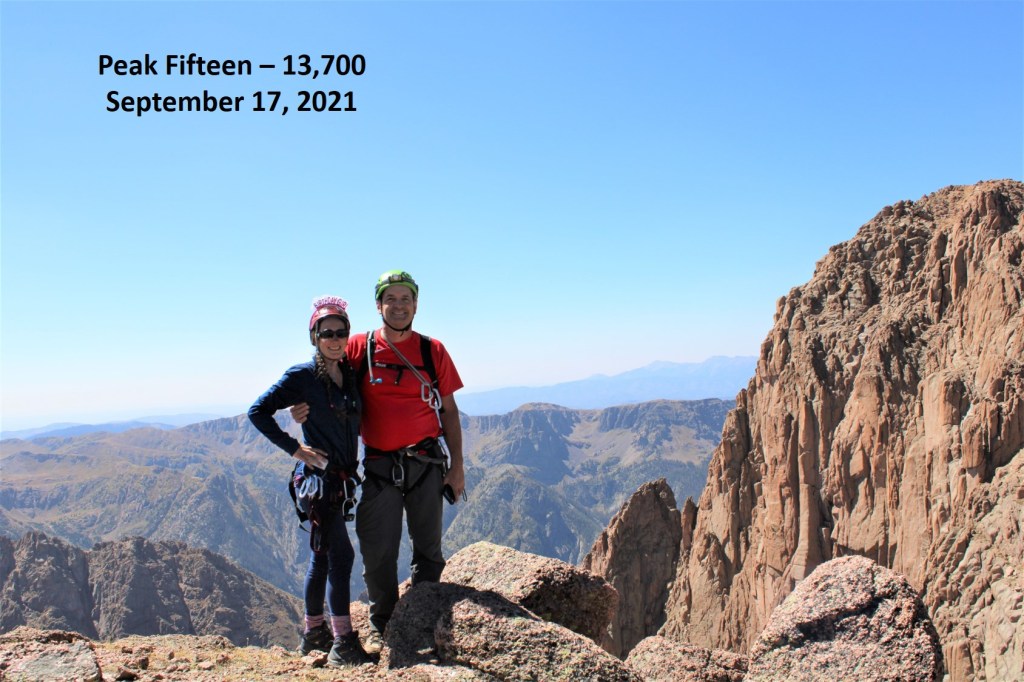
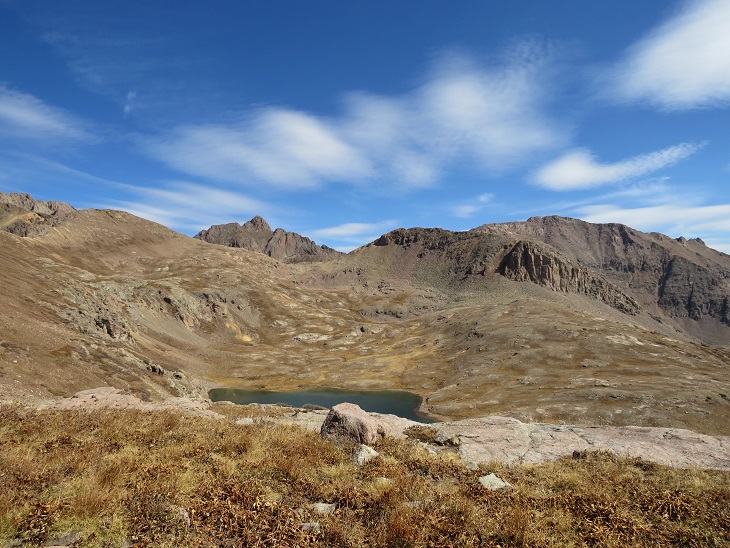
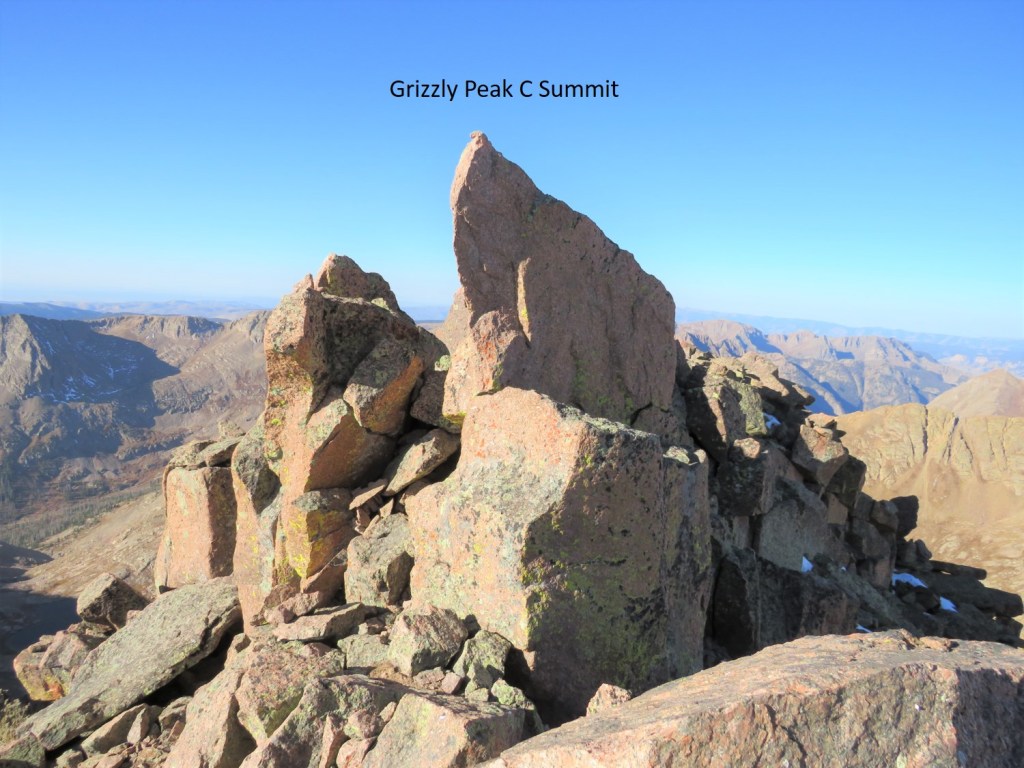
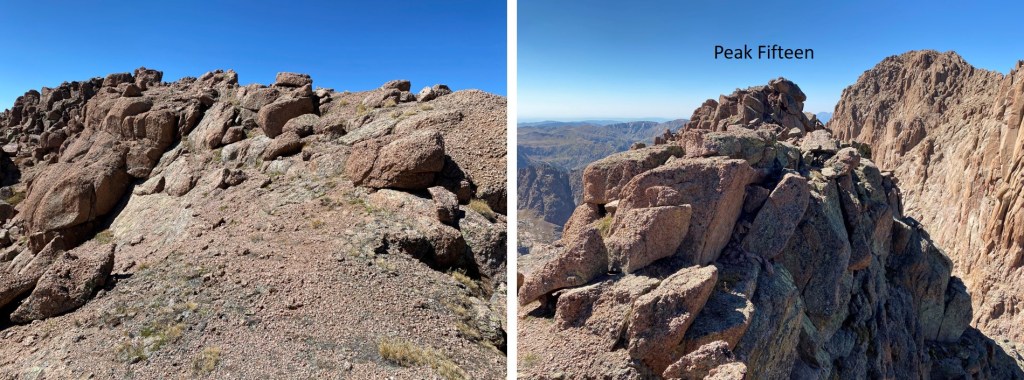
Peak Fifteen: 

We stayed at the summit for quite a while, enjoying the beautiful day and awesome views.  The summit register was a tube, so naturally the paper inside was wet. I added a pencil to the register, signed my WW’s, and we headed back down. 

Note:  we rappelled 6 times before making it to the bottom of the couloir.  That’s a lot of rope work!  There were adequate webbing/rings set up, which held just fine but are bleaching and might need to be replaced next season (see pictures).  We cleaned up some of the ripped/damaged rope and brought it out.   We brought a 60 meter, 7.9mm rope.  It worked perfectly for the ascent and rappelling down, but being smaller in diameter, tended to get stuck in the cracks.  Also, this is where I learned Tim curses when ropes get stuck. 

We followed the ridge east back to the ledges, which we followed southwest. 

At 13570’ we headed back towards the saddle and the anchors.  We rappelled down from the first anchor, and afterwards headed towards the second anchor, circled in red.

The second rappel

Here’s looking up from the bottom of the second rappel

The third rappel brought us to the Peak 15/16 saddle

Here’s looking up and down from the saddle

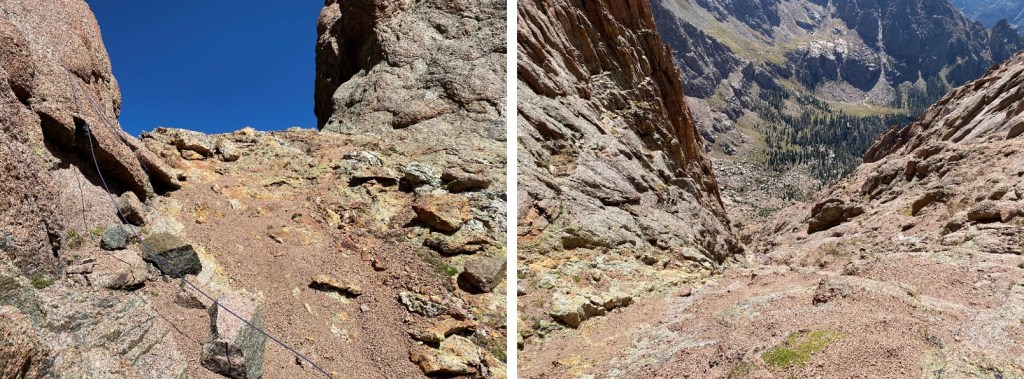
Once at the saddle, we went southwest on slopes, following the couloir to the right

We made our way back to the couloir, and rapped 3 more times to the bottom.   We counted 6 rappels in all.

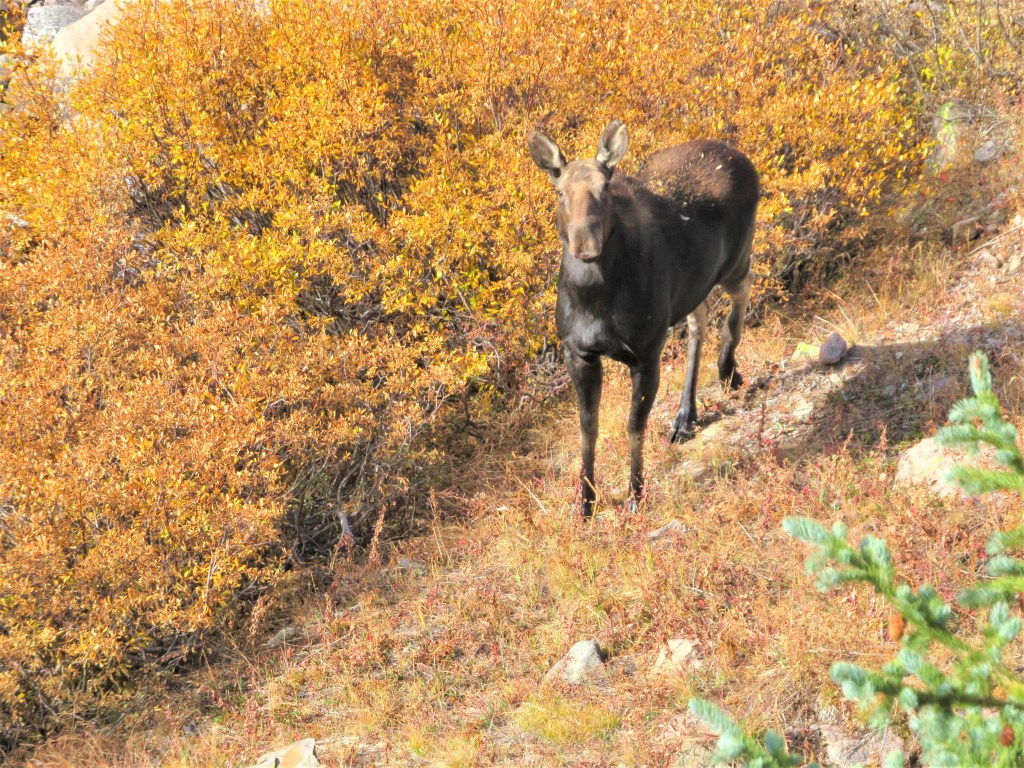
From the base of the couloir, we made our way back to the scree-saddle, this time taking the direct, grassy/tundra approach, to avoid the scree. We saw mountain goats here.

And then back down the scree filed gully, scree surfing to the basin

From the basin we hiked back through the willows to our campsite at Ruby Lake, making it back around 6pm.  Round trip from Ruby Lake to the summit of Peak 15 and back to Ruby Lake made for about a 13 hour day. All that rope work sure took its time!  We celebrated with some whiskey and wine; after all, this was my bicentennial finisher, and it was my birthday… no one got hurt, and, this was much harder than anticipated by both of us for different reasons and we were successful.  All reasons to celebrate!

We made it an early night and were up at 6am to hike back to Purgatory.  The night was much warmer, if only because I didn’t go to sleep in wet, sweat filled clothing.  The hike out went fast, as we talked much of the time.  We made it to the Animas River/Purgatory trail bridge, and were surprised to see people in sandals carrying small children (some of them crying).  Apparently, the train stops at Cascade Wye now for passengers to get off and walk around (not sure if it’s ever done that before?). 

We made it back to Purgatory Trailhead around 2:30pm.  My tracker says we went 53.34 miles, with 13765’ of elevation gain.  

I would like to thank Tim for being my climbing partner and accompanying me on this trek, which I’m sure ended up being more of an adventure than he bargained for!  I believe this climb takes two experienced climbers to complete safely; It was nice to have someone I could trust join me.  In addition, he’s been my climbing mentor, voluntarily taking me climbing and ‘teaching me the ropes’ for years. He’s the one who taught me how to set up anchors, how to climb and rappel safely, and all about proper gear.  I couldn’t have done all the other class 5 bicentennial peaks without his instructions.  I still keep his safety checklist with me in my climbing gear.

I also want to thank everyone who has posted trip reports in general, but specifically trip reports for Peak Fifteen, as for me it was the hardest of the bicentennials.  We all experience hikes/climbs differently, and it was nice hearing the difficulty/route finding levels from other climbers.  If you plan to climb this peak, please take it seriously, and read all trip reports you can find on this peak before attempting a climb, as they all offer great insights. 

And now, on to the next trailhead!

Aztec Mountain – 13,310, Grizzly Peak C – 13,700, McCauley Peak – 13,555

RT Length:  49.5 Miles (CalTopo) 42.61 Miles (Strava)

Elevation Gain:  9166’ (CalTopo) 13428’ (Strava)

Day 1:  Approach, Columbine Lake, Aztec Mountain

After quite a long drive I made it to the trailhead around 9pm.  Just before Vallecito campground there’s a sign indicating trailhead parking is to the left.  I parked, and was surprised I had cell service.  There were several horse trailers in the parking area, and a few vehicles. 

I tried to get some sleep, but my nap earlier in the day had lasted longer than it was supposed to (my alarm didn’t go off, and 30 minutes turned into 3 hours).  So, I read a bit, made a few phone calls, and got to bed later than anticipated.  I was up and on the trail at 2:30am.  The trail starts at the northeast corner of the campground. I started and ended the hike in the dark.  Also, I had my new camera with me, and was interested in how the pictures from today would turn out.

This is a class 1 trail that goes north without any junctions, so it’s difficult to get lost/off track.  I crossed the first two bridges (there are actually 3 if you consider the one that leads you out of the campground but doesn’t cross Vallecito Creek), but made it to the third bridge while it was still dark.  I couldn’t see across the river, and I didn’t want to cross without a visual, so I laid out my sleeping pad and took a nap for 30 minutes until it got light enough for me to see, then I put on my sandals and crossed the river.  I’m glad I waited until daylight:  crossing wasn’t too difficult, the water only went up to my knees, but there were pockets/pools where I could have sunk in the water much, much further.  My advice is to cross this creek (river?) in the daylight.

I continued hiking along the class 1 trail, but the stream crossing was causing me to have a Raynaud’s attack.  Surprisingly, it was in my hands and not my feet.  I kept pumping my fingers and balling my hands into fists, willing them to warm up and stop burning (yes, I realize that was a juxtaposition).  My fingers burned for another 2 hours. I should have stopped and warmed up some water to revive them, but instead I continued hiking until I came to the Vallecito/Johnson Creek Junction.  I made it to the junction after hiking for 10.3 miles, and continued left (west) towards Johnson Creek

This led me over the 4th bridge, where I continued heading west, up into Vallecito Basin. 

Just as I entered the Vallecito Basin I came across a moose. She was just as surprised to see me as I was her.  She was the size of a horse, adorable, and reminded me of a puppy dog, but I gave her space.  After the initial inquisitive look she gave me she pranced off to the trees and watched me timidly as I hiked away.

I continued on, up a thousand or so switchbacks, through the Vallecito basin to Columbine Lake.

It took me 18.5 miles to make it to Columbine Lake.  I made it there at 1pm and decided to sit and take a break for a while.  It was here I realized my biggest mistake of the weekend:  I didn’t have any chapstik.  My lips would be burning until I made it back to the trailhead (and especially after each shot of whiskey).  I snacked on a packet of tuna, filtered some water, and considered my options.  I’d wanted to hike Grizzly and McCauley today, but I didn’t think I had enough time to make it back before the sun went down behind the mountains.  I need to be in my bivy before the sun sets, so this was a serious concern for me.  But I wasn’t tired yet.  I decided instead to leave my large pack here, take just what I needed in a small pack, and summit Aztec Mountain this afternoon instead. 

Here’s an overall view of the route I took to the ridge to Aztec Mountain, as seen from Hope Pass the next day

From Columbine Lake I turned and followed the trail northwest towards Columbine Pass, then turned left when it hit trail 541 (no signage, and in fact I had to wing it for a bit as the trail didn’t quite go through, but it was obvious from below where the trail was and I just aimed for it) and headed south.

I followed trail 541 for .7 miles, and then left the trail and aimed for this grassy area.  My goal was to gain the ridge, and this seemed the best place to do so, as I could see a path on tundra/scree up to the ridge.  After hiking up and down this is the route I’d recommend to ascend the ridge.

The terrain here is steep, and it was slow going, but I was able to ascend the ridge

Once on the ridge I was at a bit of a saddle.  There is no need to head right (north) to gain this point, as it’s not ranked and you’ll just need to head back down anyway.  Instead, skirt the point by heading west.

This will bring you to the ridge that will lead you to Aztec Mountain.  This ridge doesn’t ‘go’.  Staying low is the better option here.  Here’s an overview of the path you’ll want to take

Staying low keeps this class 2.  The final gully is easy to access, and the final scramble to the summit is straightforward

I summited Aztec Mountain at 3:15pm

Aztec Mountain: 

Here are some pictures of the way back down to Columbine Lake

I was chasing the sun, trying to make it to the lake before the shadow of the mountain made it there and cooled everything down.  Between the shadow and I it was pretty much a tie, so I gathered my gear and hiked a bit further into the sunshine and set up camp for the night.

I made it back to Columbine Lake at 5:15pm, satisfied with my choice to hike Aztec Mountain today instead of Grizzly and McCauley.  I was spending the night at 12,300’, with a great view of Columbine Lake.  I went to dry out my feet but my sandals were still wet from this morning (I’d forgotten to take them out and place them in the sun when I left for Aztec).  I ate dinner, filtered some water, heated the water in my jetboil and filled my Nalgene with warm water for the night.  I looked around for my extra pair of socks but couldn’t find them, so I guess my feet weren’t going to dry out tonight.  I placed the water bottle at my feet and looked at my tracker:  it said I’d done 20 miles today.  Not bad.  I snuggled up in my sleeping bag and bivy and looked over at Grizzly Peak.  I thought about the approach tomorrow, jotted some notes down in my journal, put on all the clothing I had with me, and called it an early night. 

It was a long night.  A long, cold night.  I was warm in my bivy and sleeping bag.  Halfway through the night I felt something sniffing my ear.  Seriously. It felt like a dogs’ muzzle and startled me awake.  From inside my bivy I flailed my arm at it, unzipped my bivy, and looked around.  There was no moon but the sky was bright with stars.  I could see the mountains and the lake and rocks and tundra, but no animal.  It hadn’t made a noise when I’d touched it, but I’m guessing it was a fox or a coyote with an ear fetish.  The air is thin at 12,000’.  A few hours later I woke up, noticing breathing was more difficult than usual.  To breathe better I quickly opened my bivy to get in a few gulps of air.  Not only did this not help with my breathing, but when I put the bivy back over my head the condensation from my breath had turned to ice.  Wonderful.  Note to self:  don’t unzip the bivy. 

Day 2:  Grizzly Peak C, McCauley Peak, Descent

The morning couldn’t come soon enough.  Just before first light I re-heated the water in my water bottle, packed my gear and was on the trail with just the essentials, leaving my big pack at the lake.  I took the same trail I’d taken to summit Aztec, but at the junction with trail 541 I went right and followed the trail towards Hope Pass. Here’s an overall view of the route from yesterday’s hike

This part of the hike was on a nice trail, and when there wasn’t a trail there were great cairns.  From Hope Pass I got a good look at Grizzly Peak C, and the route I wanted to take to gain the ridge.  Here’s the overall route I took, aiming for a gully and rock rib that ascends the mountain

I didn’t descend to Hazel Lake, but instead stayed high, aiming for the grassy slopes below Grizzly’s ridge.  There are several ways to do this

From there I aimed for the obvious gully/notch/access point (not sure what to call this?)

This gully/notch/rib is easy to follow to the ridge.  Stick close to the wall and follow it southeast as it hugs the mountainside.  It starts out as class 3 but after the initial solid gully it becomes class 2.  I was pleasantly surprised to find cairns here.

Here’s the last bit to gain the ridge.  Aim for the notch (there are cairns here too).  The last part of this is class 3.

I went through the notch and found snow on the other side.  This wasn’t unexpected, as I’ve spent the past 3 weekends in this area and knew north facing terrain was holding snow.  What was unexpected was the amount of snow, and how it all lined the trail.  It ranged from non-existent to 3 foot drifts, and from bulletproof to sugary.  What’s important for the reader to know is there are multiple ways to summit Grizzly Peak, and tons of cairns to prove it, so I was able to get creative these last 250’ or so to the summit.  I rock hopped where necessary, kicked in steps, and created trenches to get to the summit, always heading up and east.  Here are some highlights.

The last bit to the summit was luckily snow-free, and class 3-4 (the chimney was class 4)

As I made it to the summit I wasn’t sure if the true summit was left or right.  I went right and luckily chose correctly (there was a summit register beneath this point).

I summited Grizzly Peak at 9:15am.  I know some of you are wondering, did I did I sit at the top of the summit point?  The answer is no.  The point was too pointy to sit directly on top of, but I did climb up the summit boulder, sat on it about a foot from the point and touched the top, so I’m calling it a summit.  You can sit wherever you’d like.  I also didn’t take the video from the point, as I do a 360 degree video and wasn’t about to attempt turning in a circle while standing on the point. 

Grizzly Peak C: 

Time to head back down. I down climbed the chimney and headed back, retracing the steps I’d left in the snow to the notch

I made my way back down around the side of the mountain to my entry point

My next objective was McCauley Peak.  I could clearly see the line I wanted to take, up the grassy slopes to the Grizzly/McCauley saddle.  Staying high didn’t cliff out, but there was one class 4 downclimb required in the area circled in red.  If this scares you, you can just go lower initially (the dotted line) and re-gain elevation.

I gained the saddle and headed south along the ridge.  This was all class 2

From the top of the ridge I could see the rest of the route.  There were cairns here indicating I should go low, but the route was no more than class 3 sticking to the ridge.  Here’s an overview of the route I took

The summit is actually the southernmost point.  I rounded the west side of the mountain and found a gully to ascend (note:  all gullies here ‘go’).

There was one class 3 move and then it was all class 2 to the summit

I summited McCauley Peak at 11:30am

McCauley Peak:

It was a beautiful day!  The predicted winds never materialized, so I stayed a little longer on the summit than usual.  Then I headed back down the gully and over the ridge

Here’s the overall route back to Hope Pass

And the route from Hope Pass back down to Columbine Lake (and my stashed gear)

I made it back to my gear at 1:30pm.  I mulled it over, and decided instead of sleeping here tonight I was just going to hike as far back as possible, stopping along the way if need be (there are tons of camping spots along this trail).  I consolidated my gear and was on my way back down the basin towards those thousands of switchbacks.

Back down to Vallecito Creek and its bridges (or lack thereof).  This was much more enjoyable in the daylight.  I was able to appreciate the creek and its depth, and even saw dozens of trout swimming in the deeper pools.

I followed the class 1 trail back to the trailhead, following the creek, and passing a hunters’ camp along the way.  The mules said ‘hi’ as I trekked by.  There were no people to be found.

The whole way back I was prepared to stop and camp, but I was making great time so I just kept going.  I mean, I really, really needed that chapstik.  About a mile from the trailhead my camera stopped working.  It wasn’t until I made it back home I realized the battery had somehow fallen out.  This was weird because the door was still closed, and I only realized it was gone when I opened it to take out the flash card. Luckily I have a spare.  I made it back to the trailhead at 8pm, and found my extra pair of socks sitting nicely in the passenger seat.  I have very different numbers for my stats looking at CalTopo and Strava.  I usually go with CalTopo for numbers for consistency sake, but I’ll just leave these here for you to decide which are more accurate, along with a few topo maps of my route.