Huerfanito – 13,083

RT Length: 9.66 miles

Elevation Gain: 3008’

I moved my truck.  Just a little bit.  I noticed as I was sitting around during the day there was a rather large tree poised to fall directly on my truck if the wind blew too hard, which it was currently doing.  I moved it about 50 feet away, but still in the same area. 

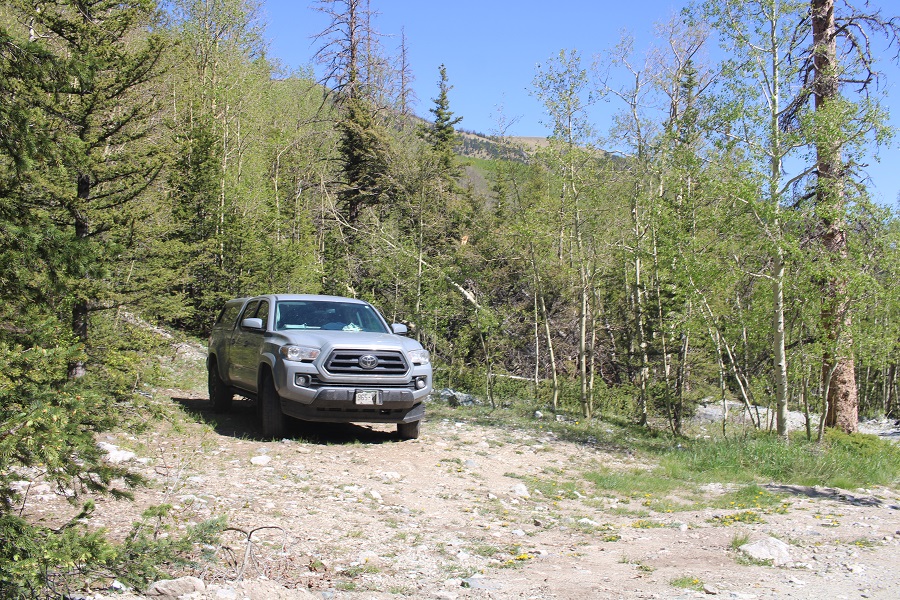
I slept much better that night.  I woke up and was on the trail at 4:30am, following the road south to the Lily Lake Trailhead. 

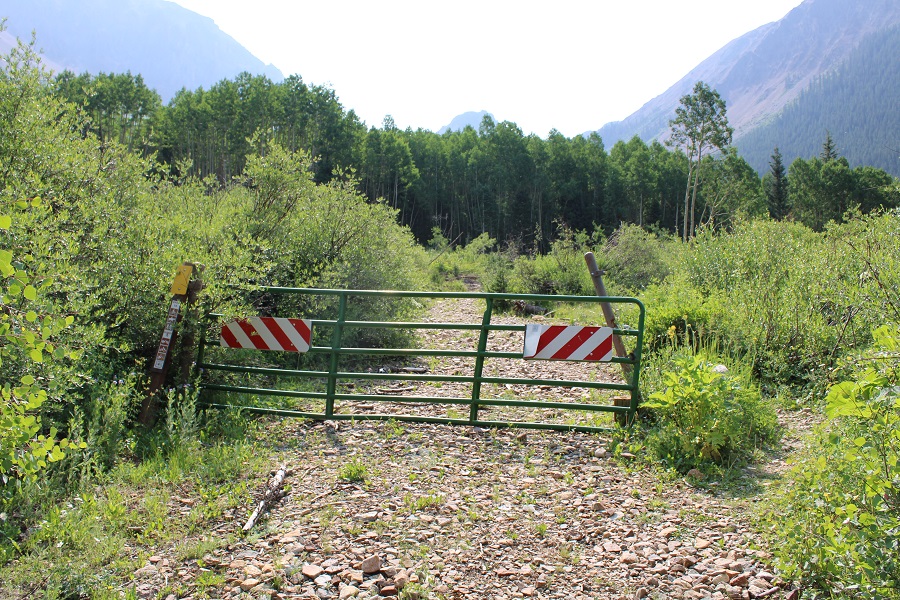
The road was clearer than it was 2 days ago, which I thought was suspicious, because I’d been in the area and hadn’t heard any chainsaws.  The road was cleared almost right up to the trailhead, but the path was tiny.  It looked like it was made just for ATVs, so imagine my surprise when I made it to the trailhead and saw a 4Runner and several trucks parked there (sporting Colorado pinstripes, of course).

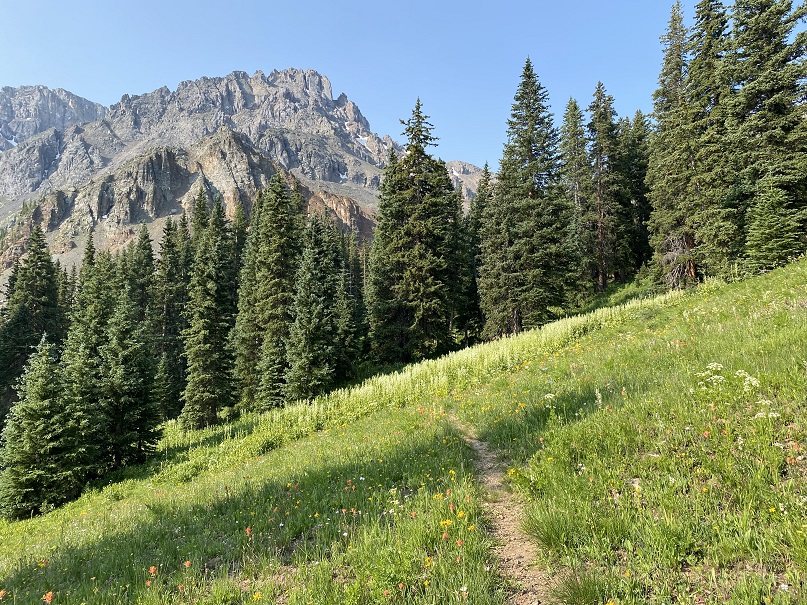
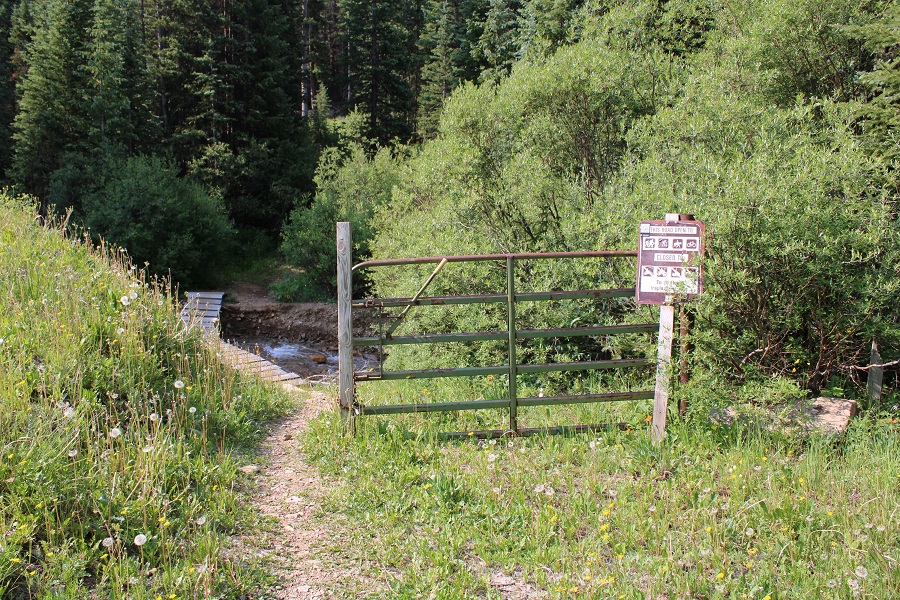
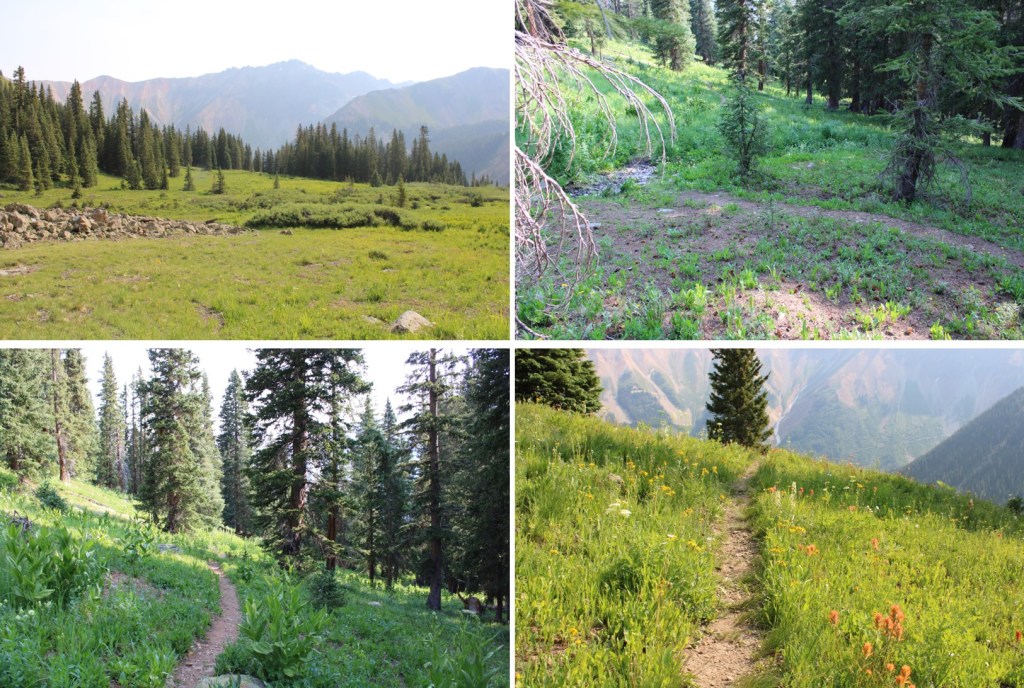
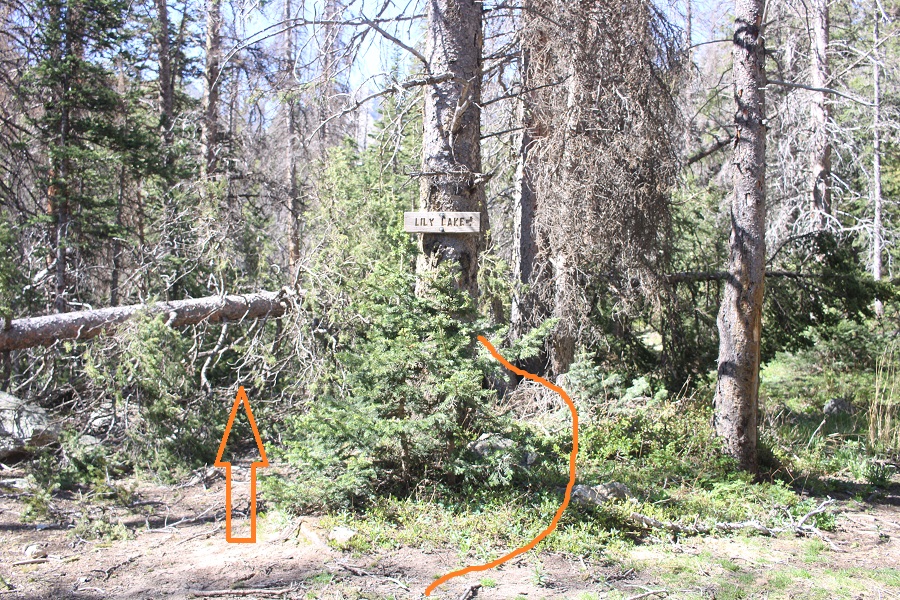
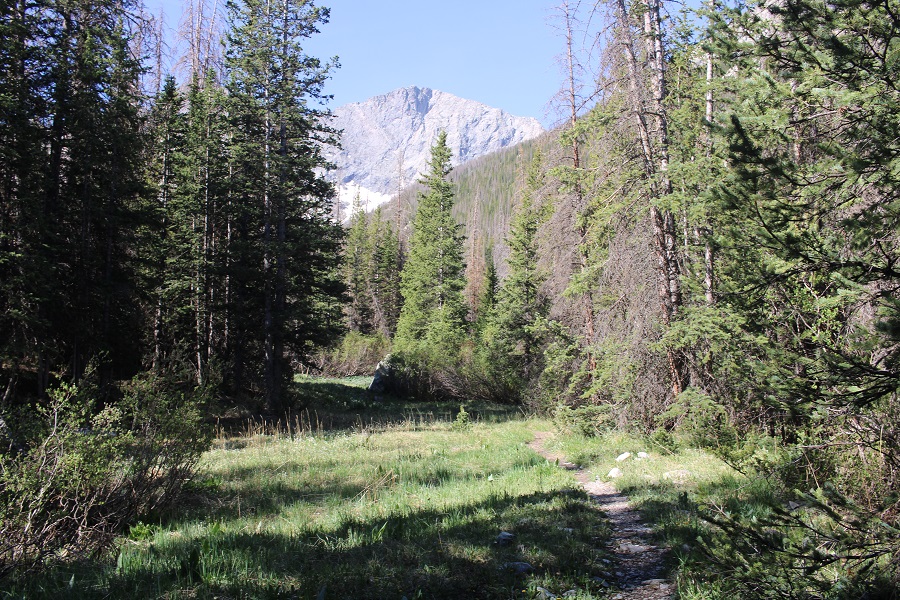
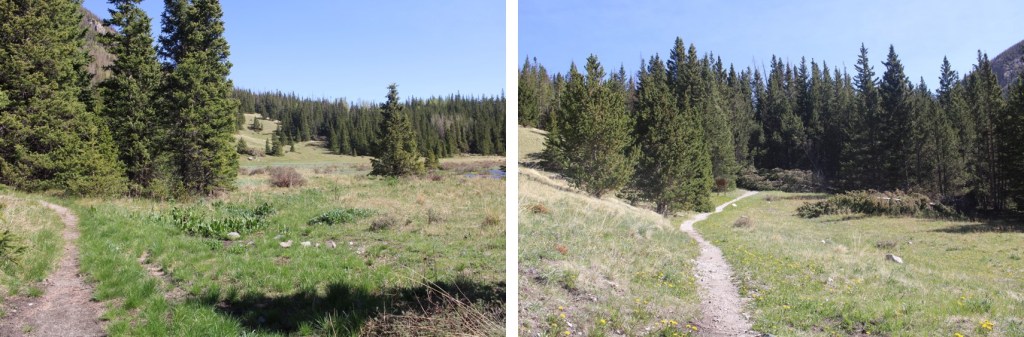
I headed south on the Lily Lake Trail

I signed the trail register and was on my way

While the road in was almost completely free of deadfall, the trail was not.  There were still several large, downed trees lining the trail.

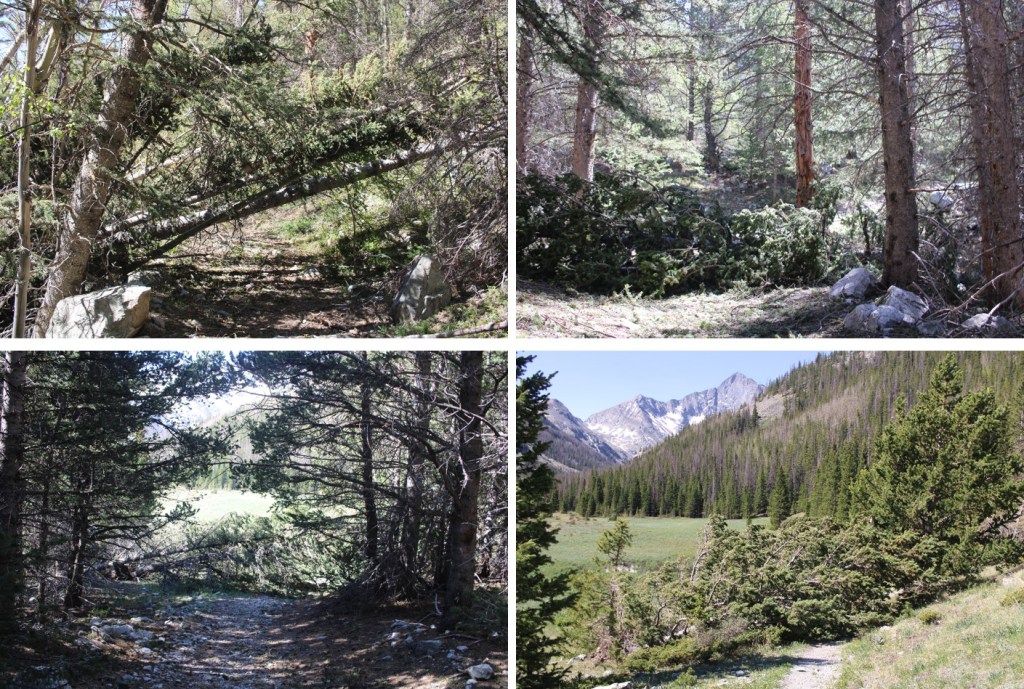
The trail was still easy to follow, with a few minor creek crossings.

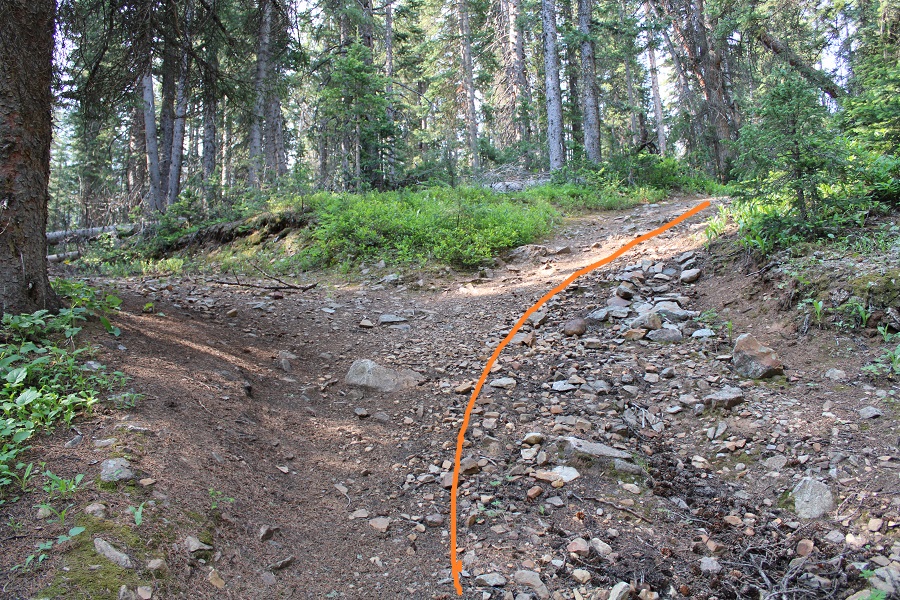
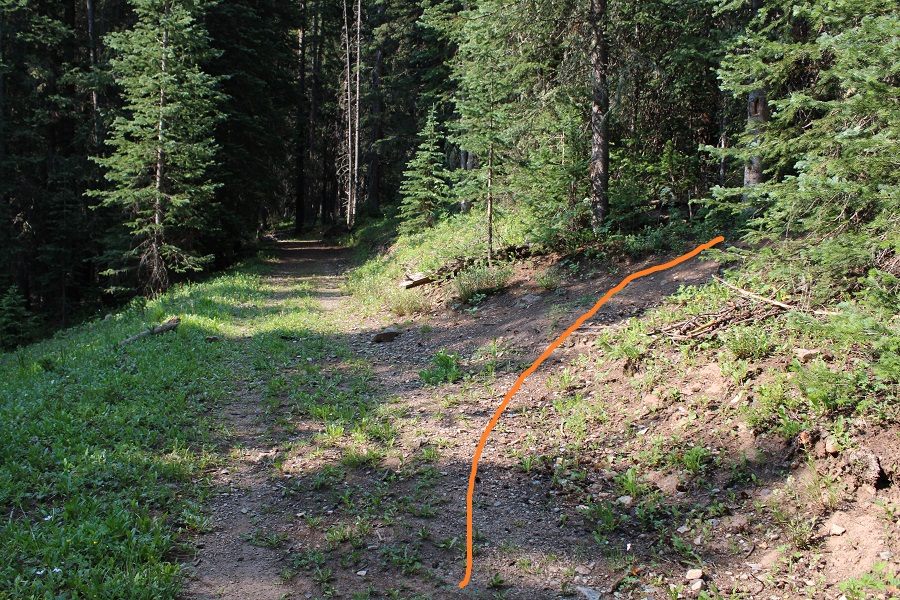
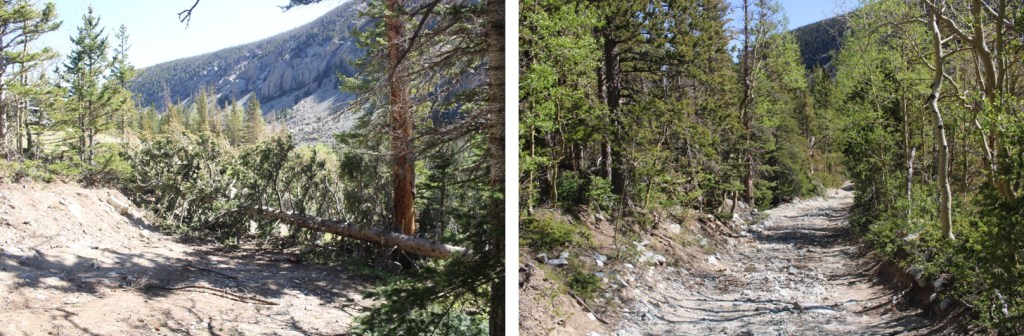
After hiking for 1.85 miles, I came to a junction and continued south, going around this downed tree to find the trail

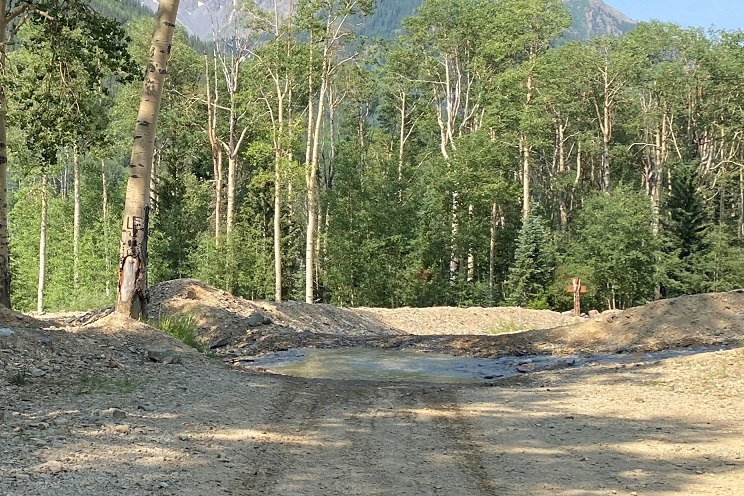
I came to the Huerfano River Crossing, and cursed myself for not bringing my creek crossing shoes.  Luckily, the water only went up to my knees. 

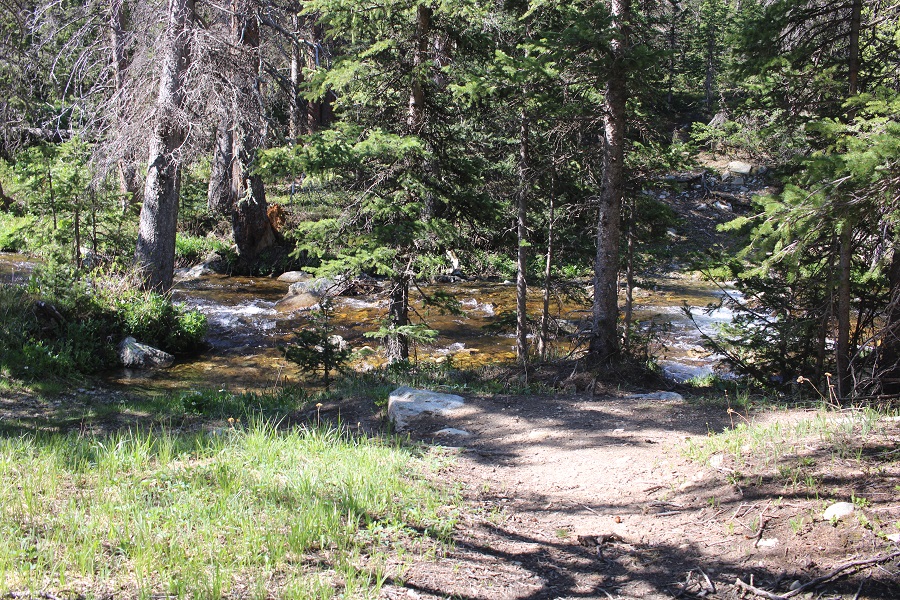
I crossed the river and followed the trail to the right.

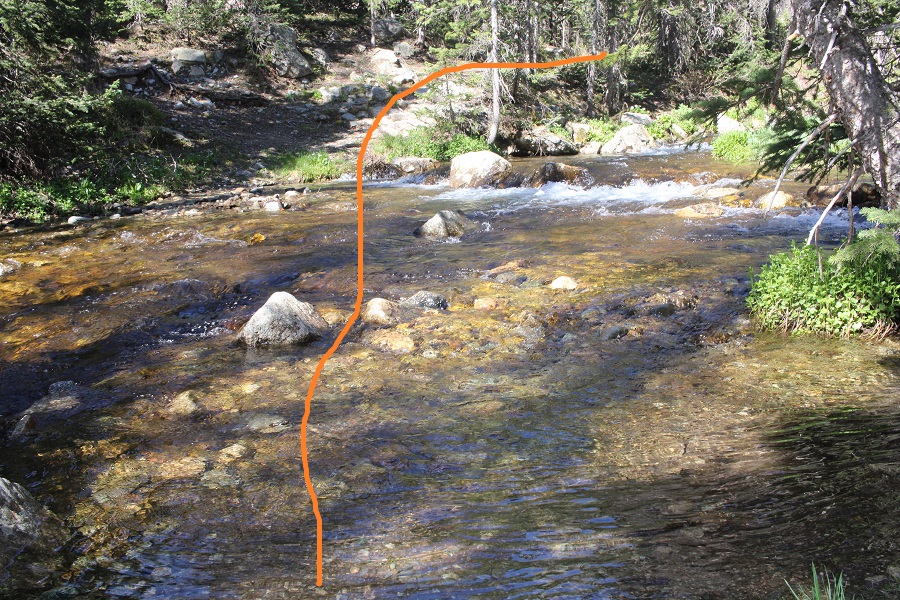
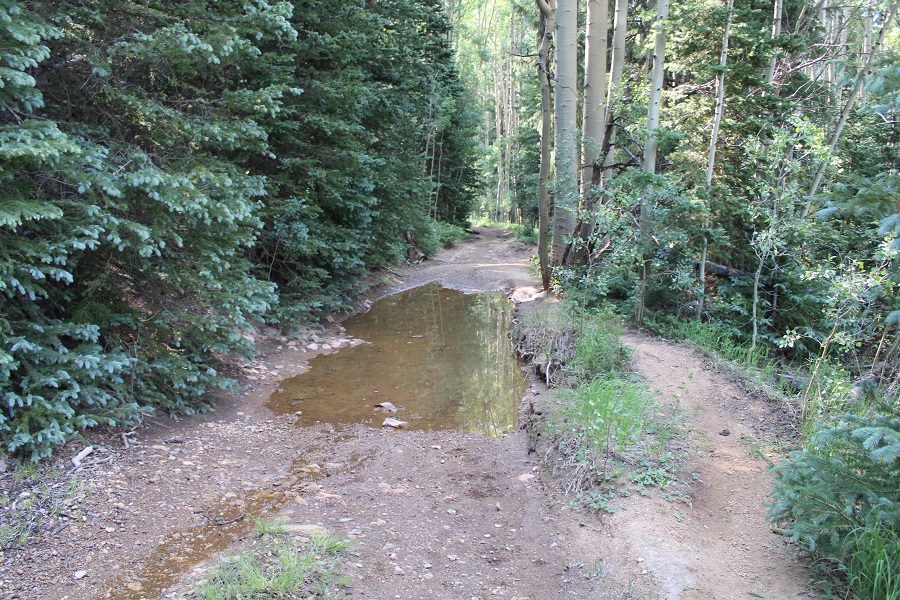
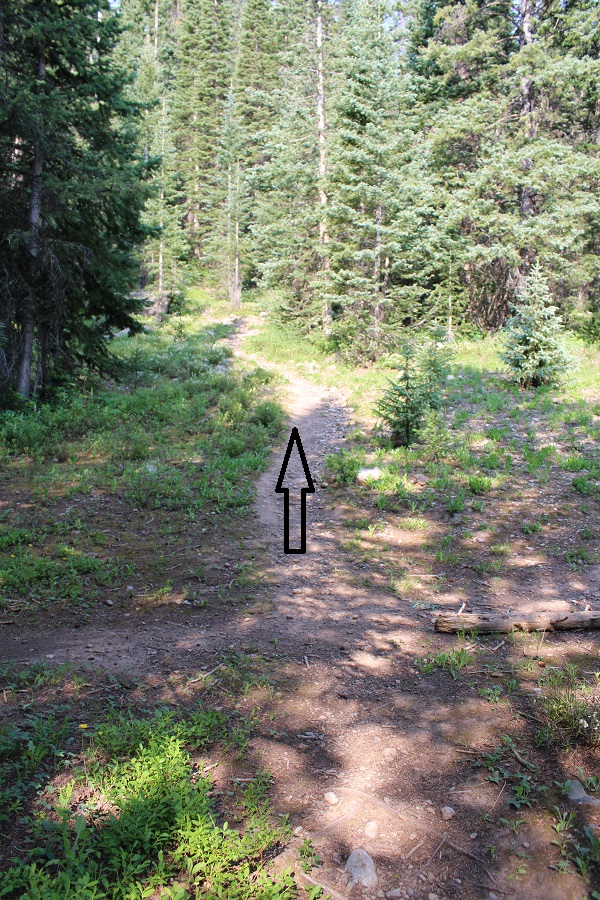
The trail picked up again at the other side, and I had no problem following it south…

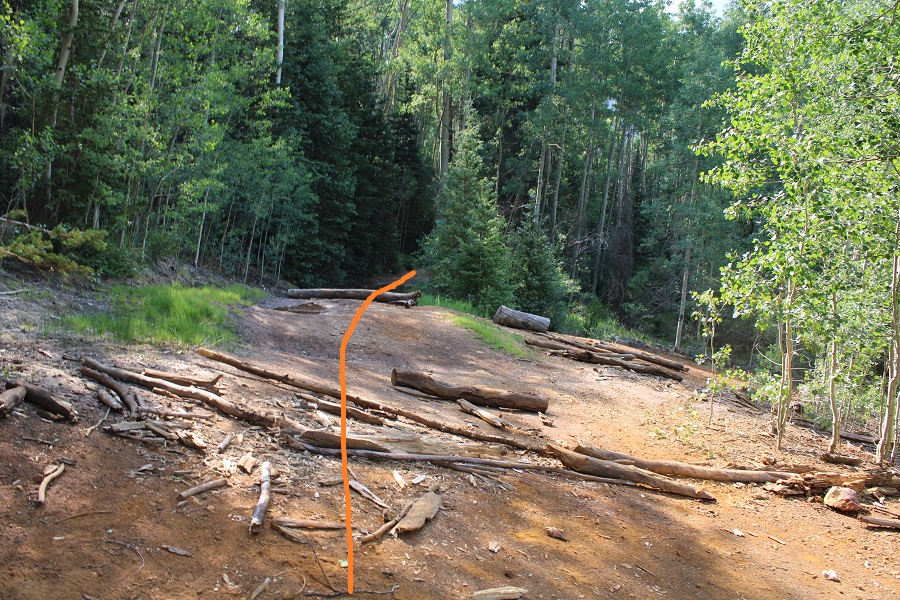
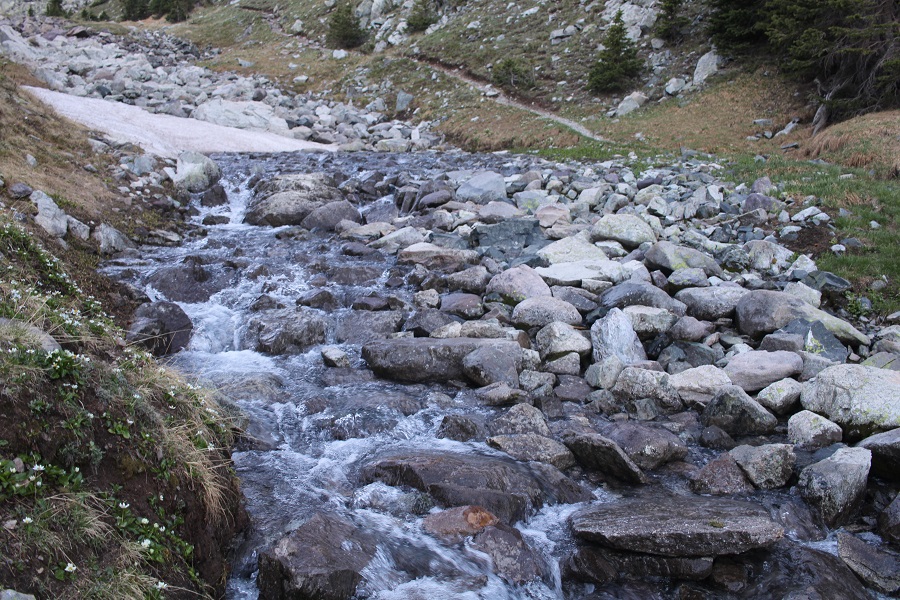
Until I had a problem following it south.  This is where the fun route finding begins.  Right where these trees cross the trail, turn left and go up the little waterfall trickling down.  I was at 10720’ of elevation

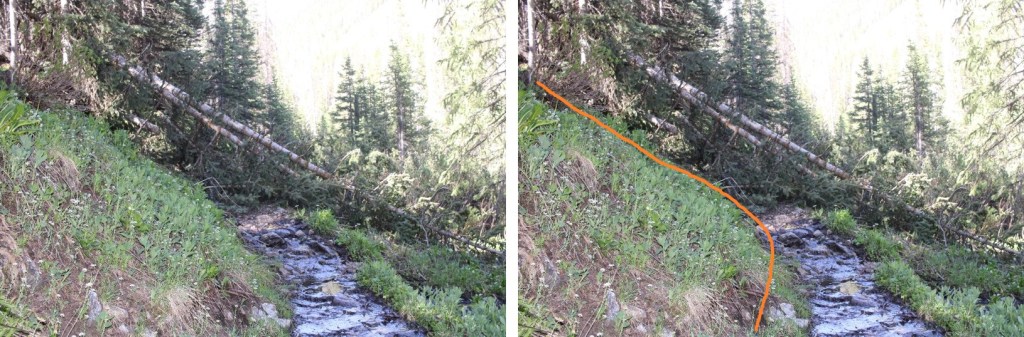
There was a trail here, and I was able to pick it up at times, but there are also tons of social trails. The area hasn’t had much use since the Lindsey closure, and it’s apparent. It would be a good idea to have a GPX file for this area.

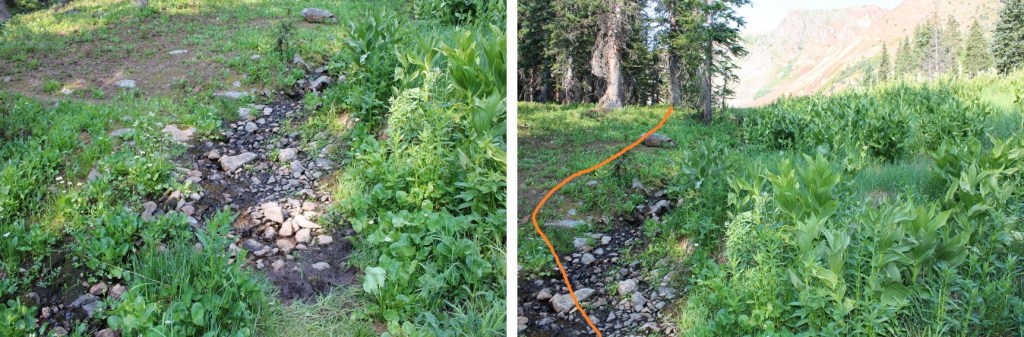
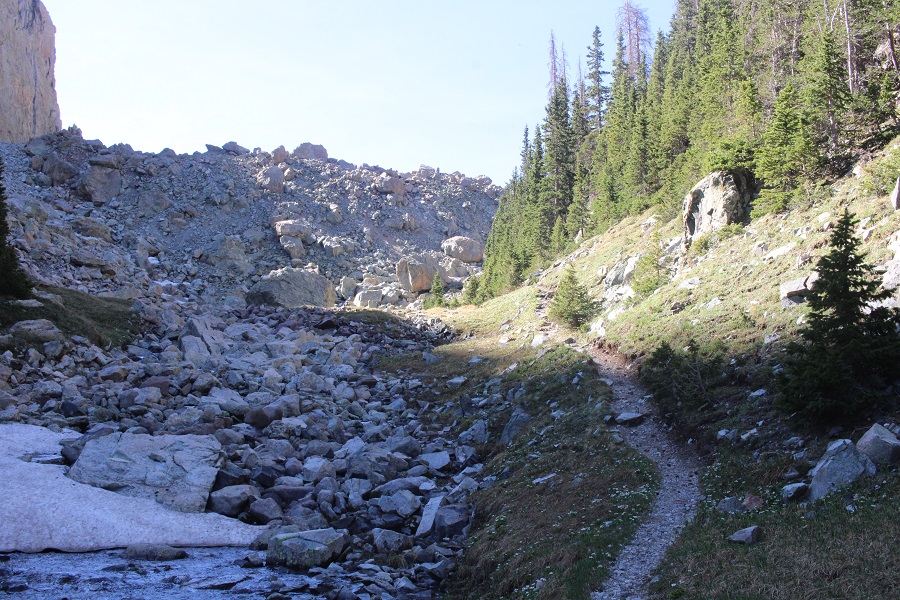
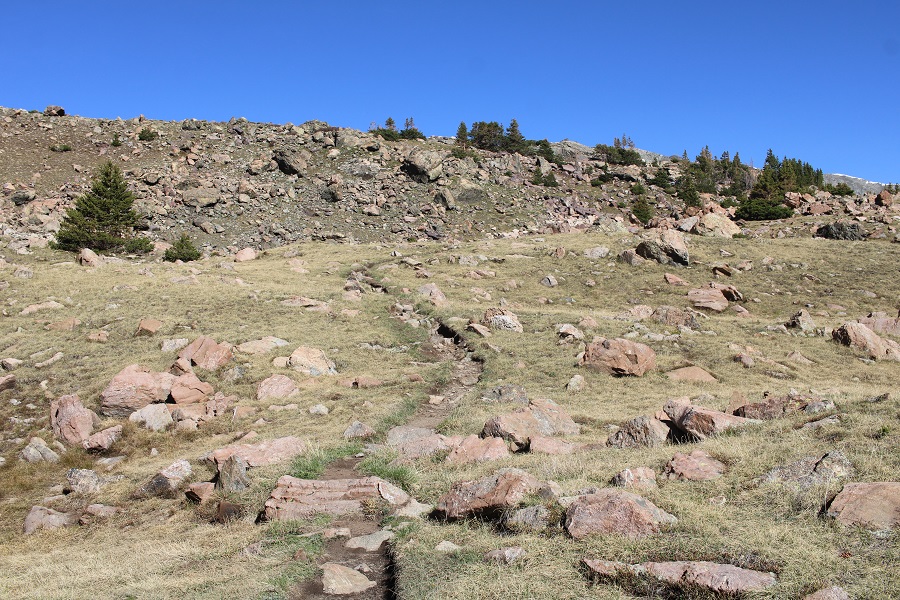
It helps if you follow the boulder field southeast, and keep the stream to your right

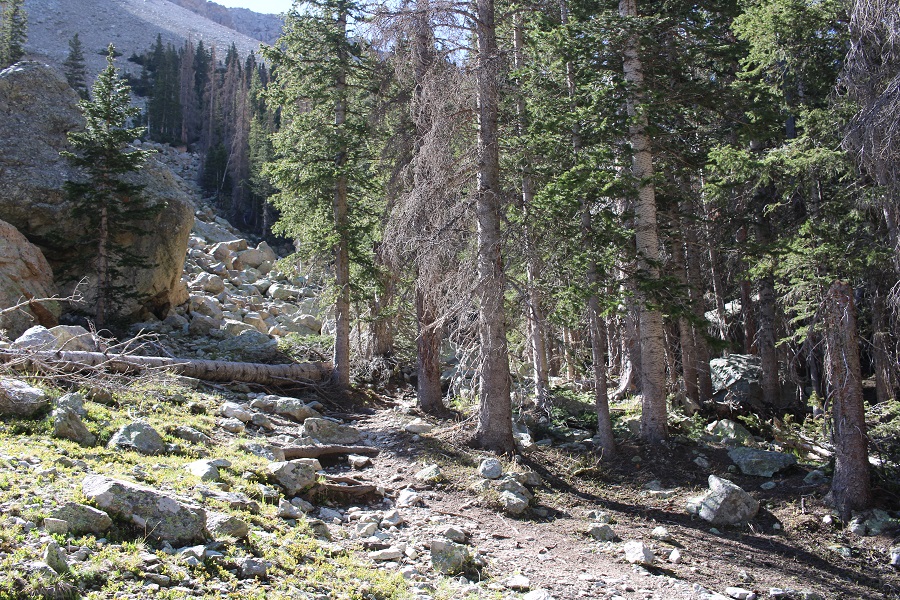
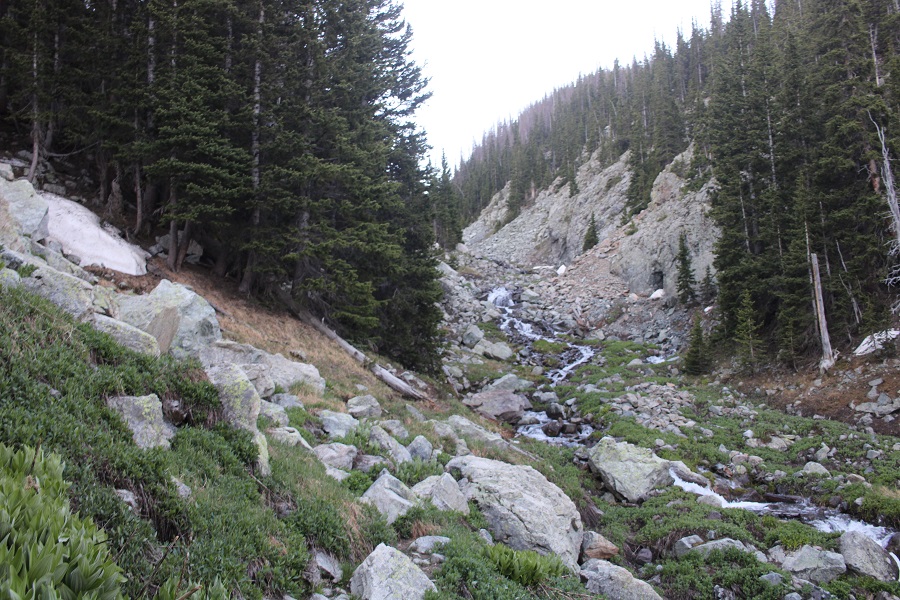
Eventually the trail will cross the creek

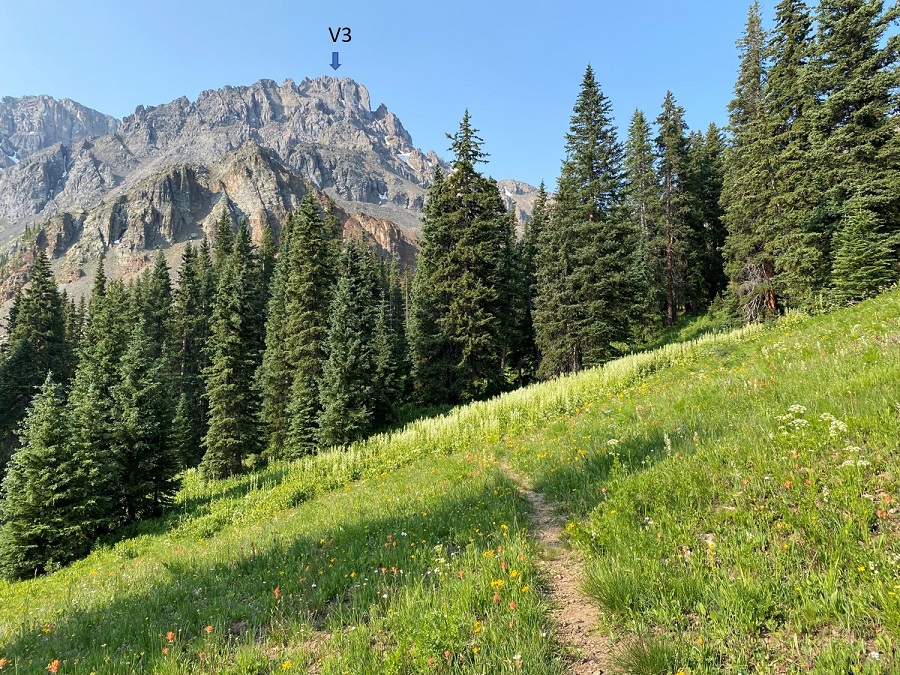
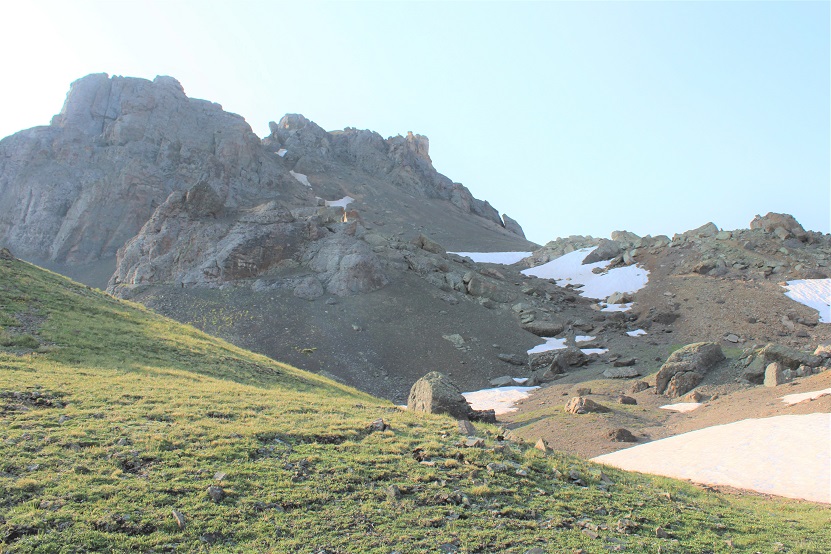
This trail will bring you to the upper basin

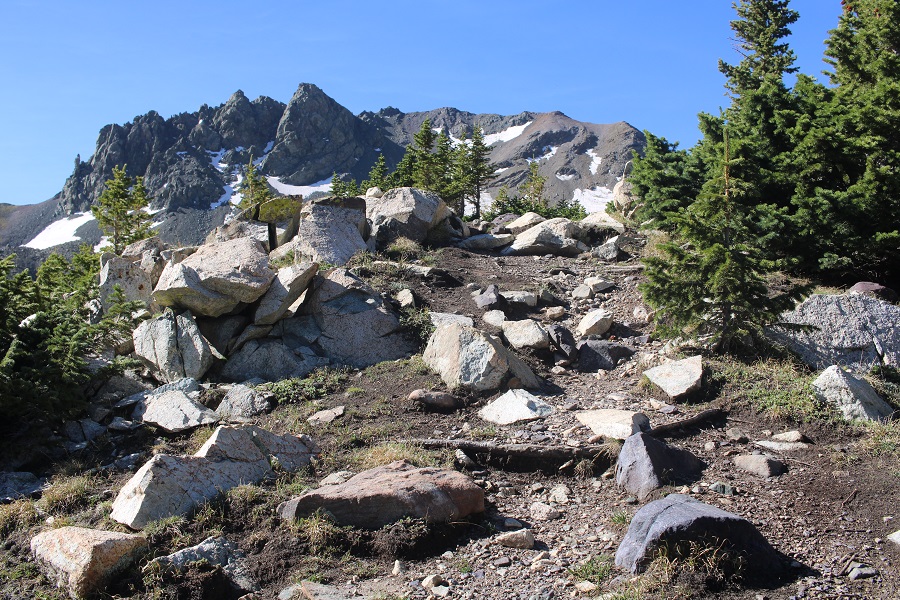
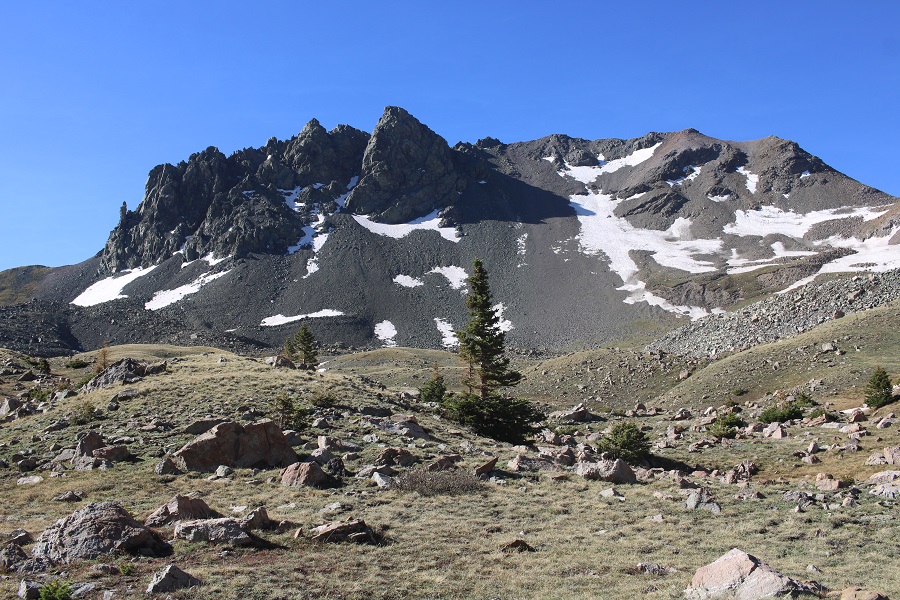
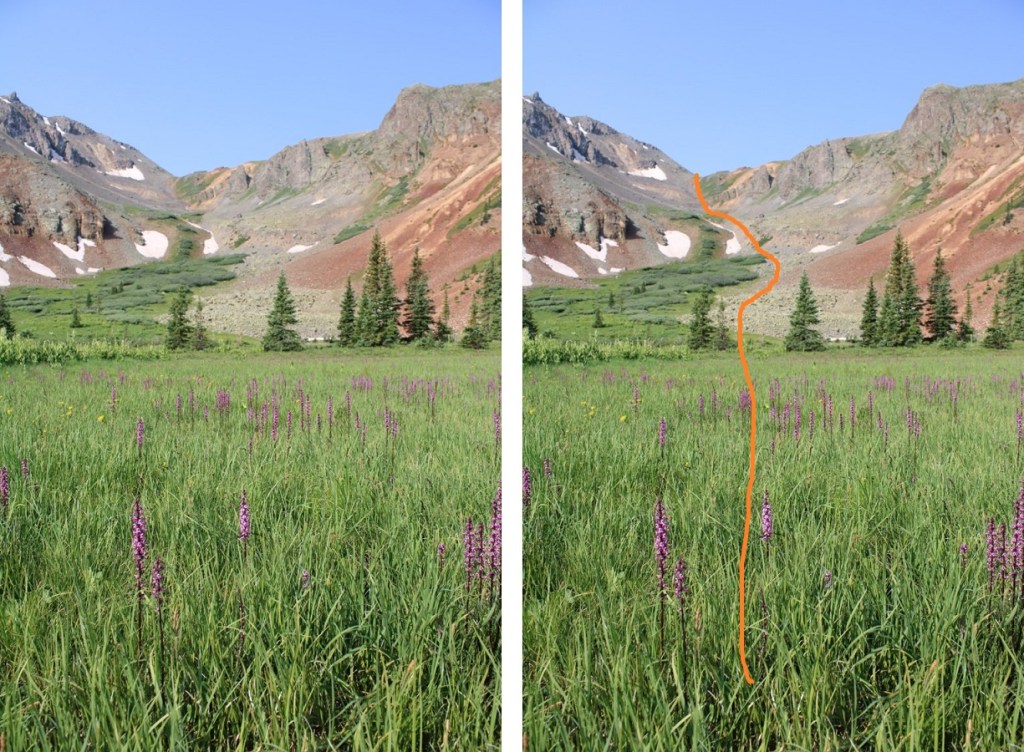
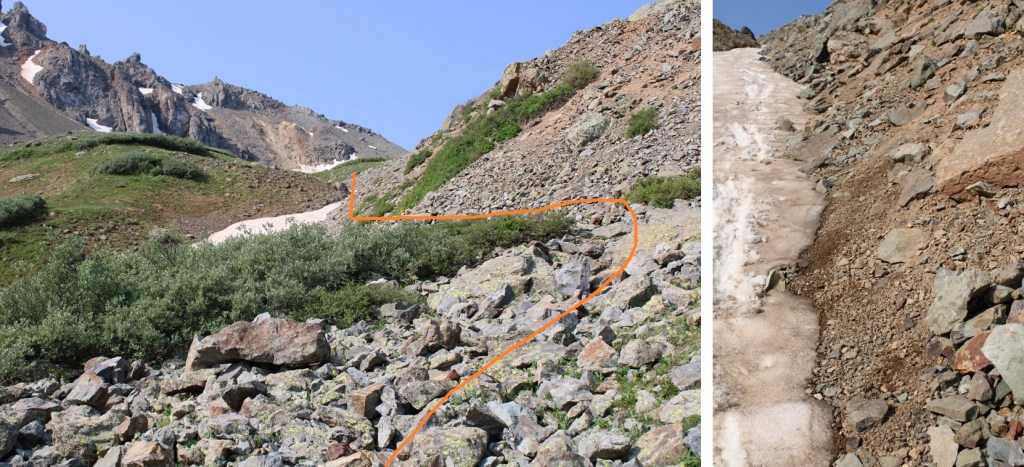
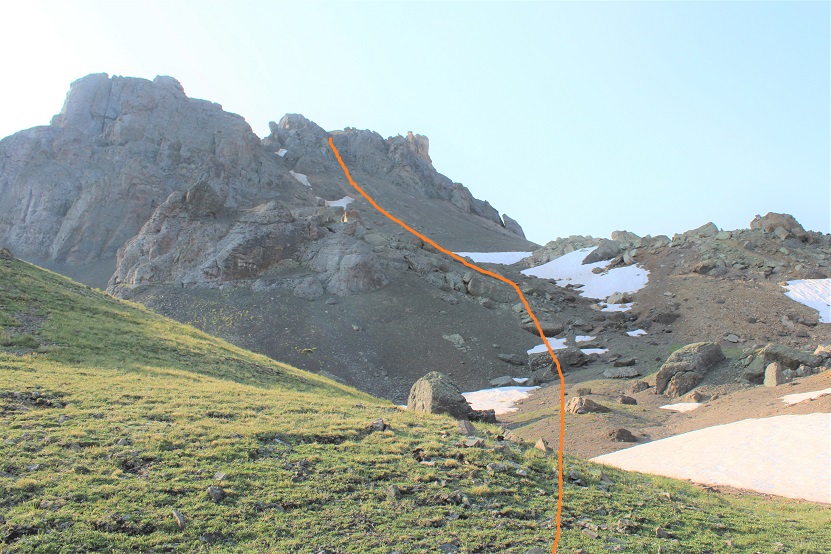
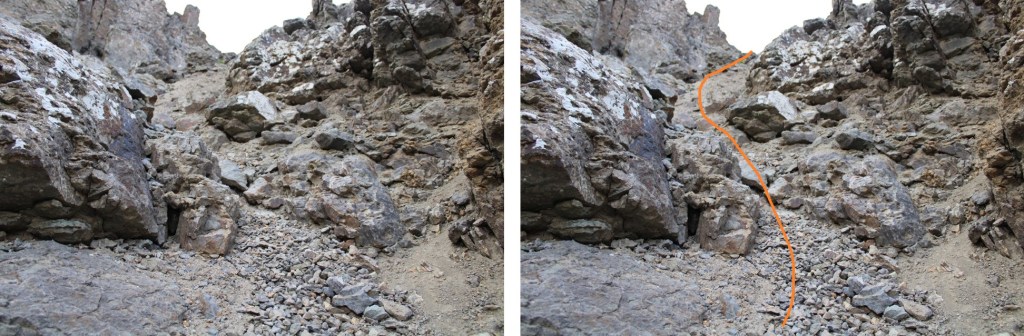
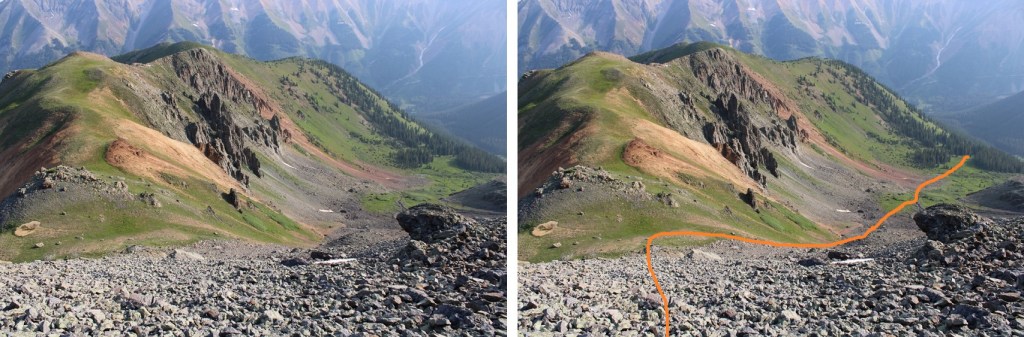
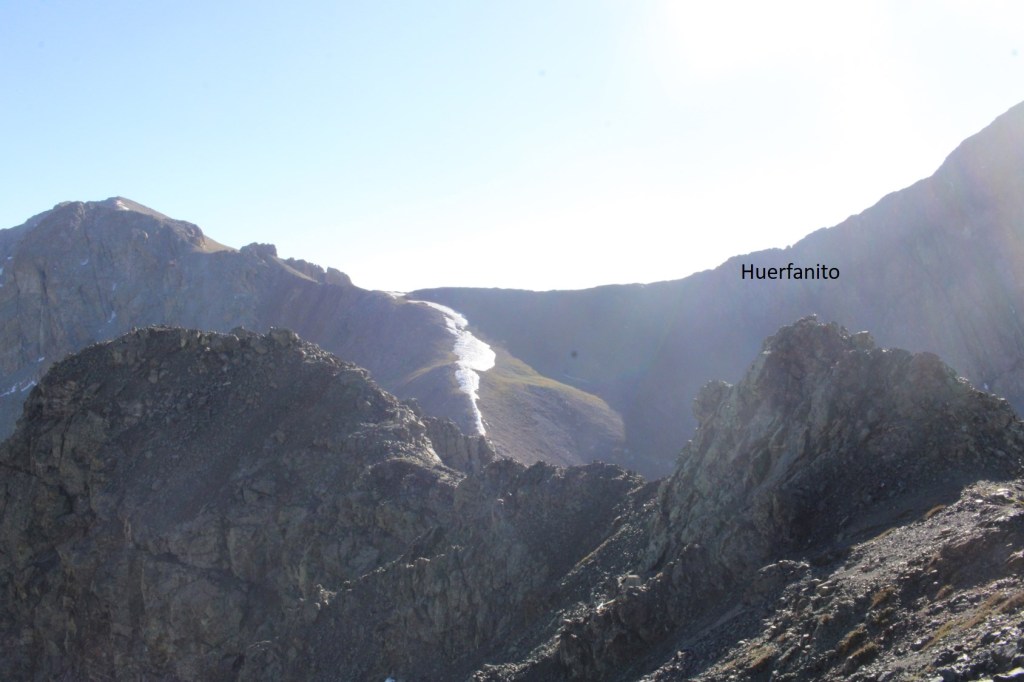
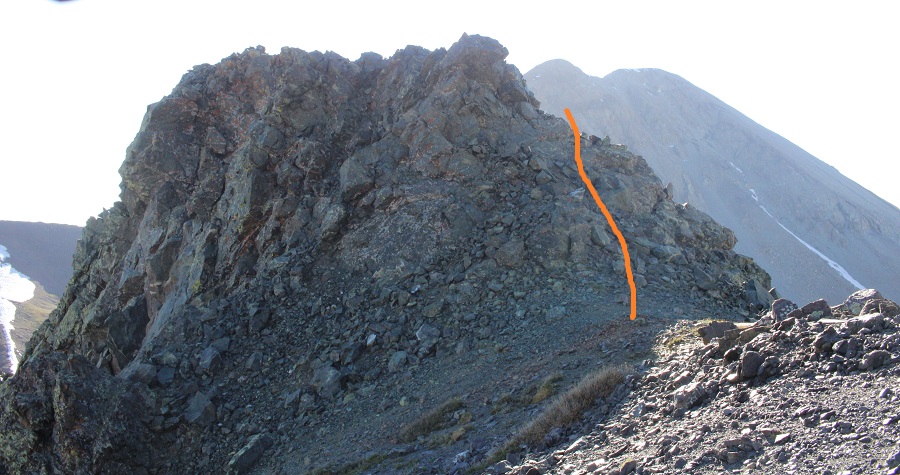
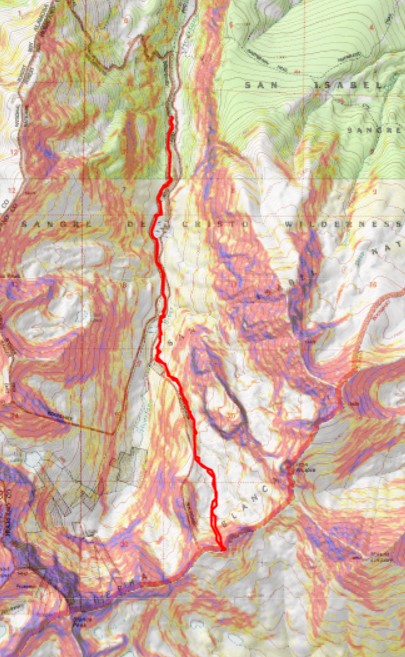
Here’s the route to took to the summit of Huerfanito from the upper basin. I took the dotted route up, the solid route down.  If I had to do this again, I’d take the solid route up and back.

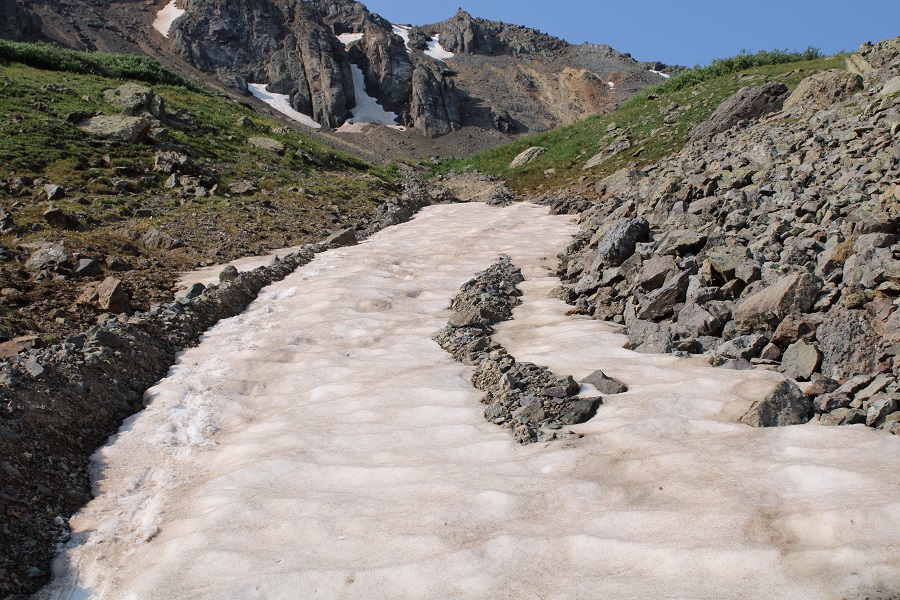
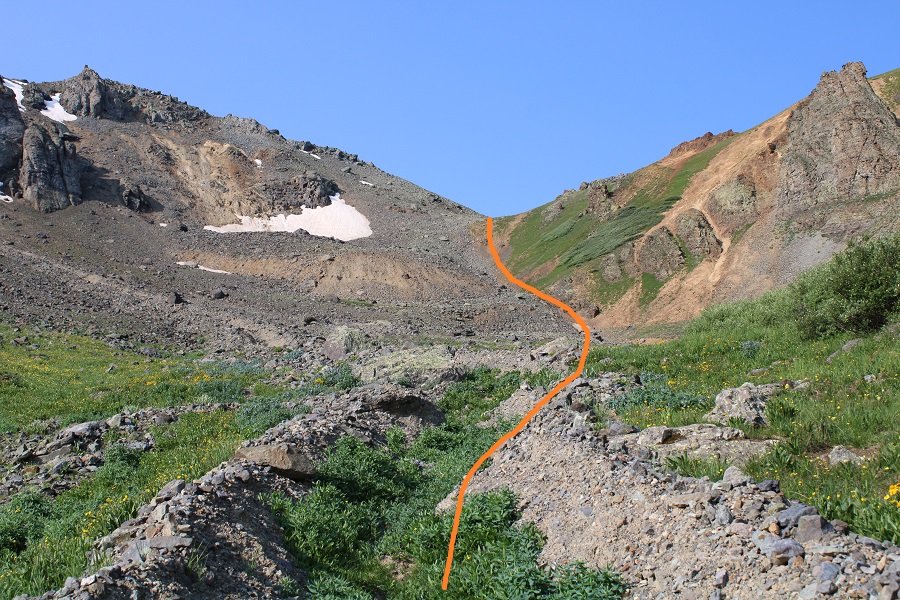
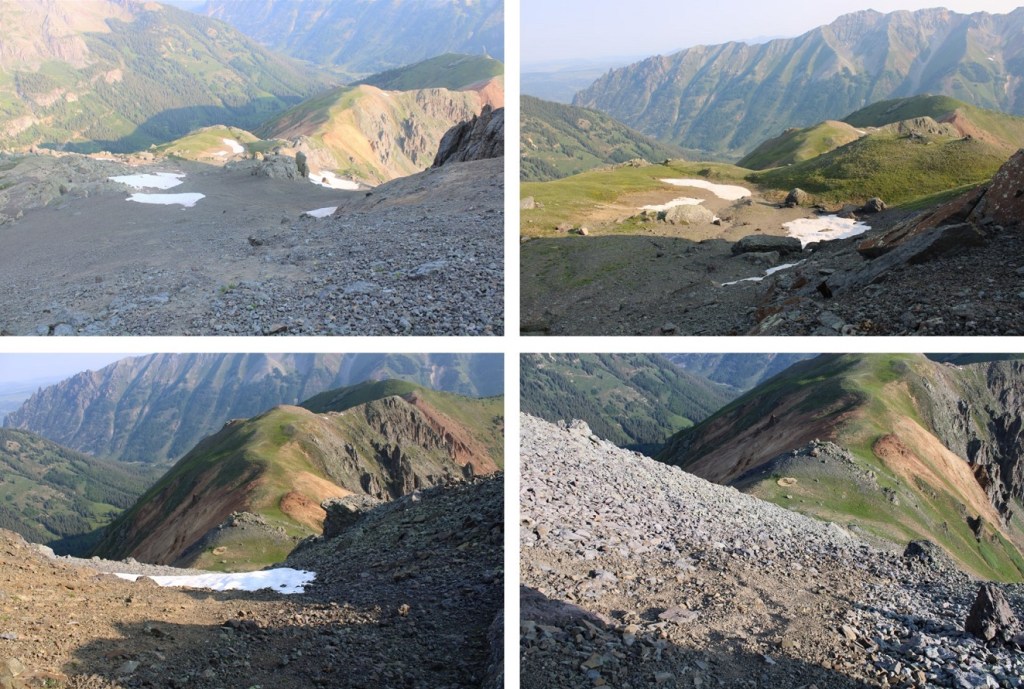
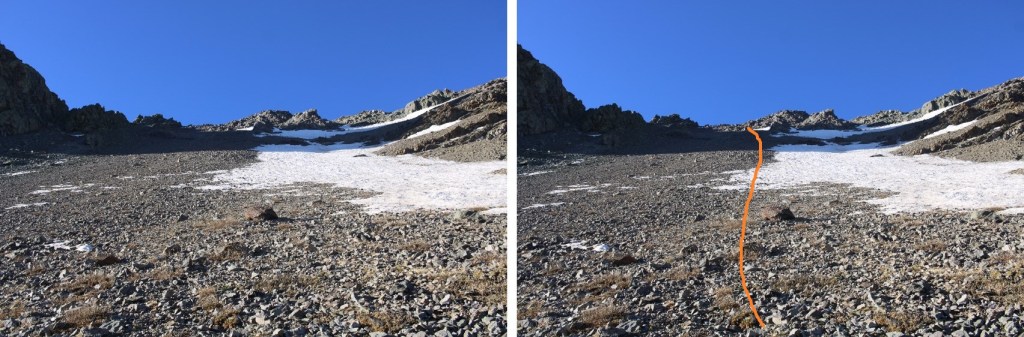
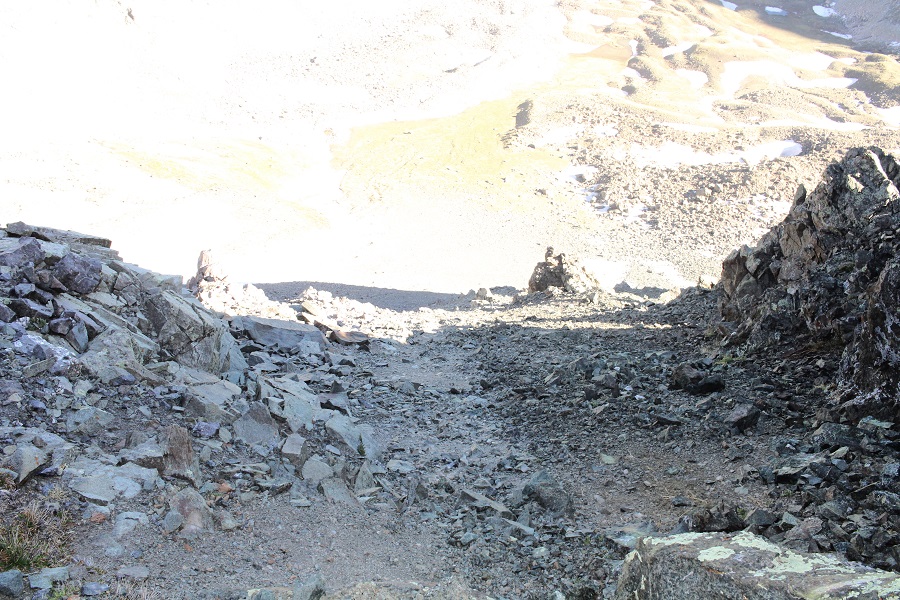
I left the trail at 11995’, and headed south.  When I reached the bottom of the slope I put on my microspikes and headed straight up, following the line of snow.  The scree here was rotten, definitely 2+

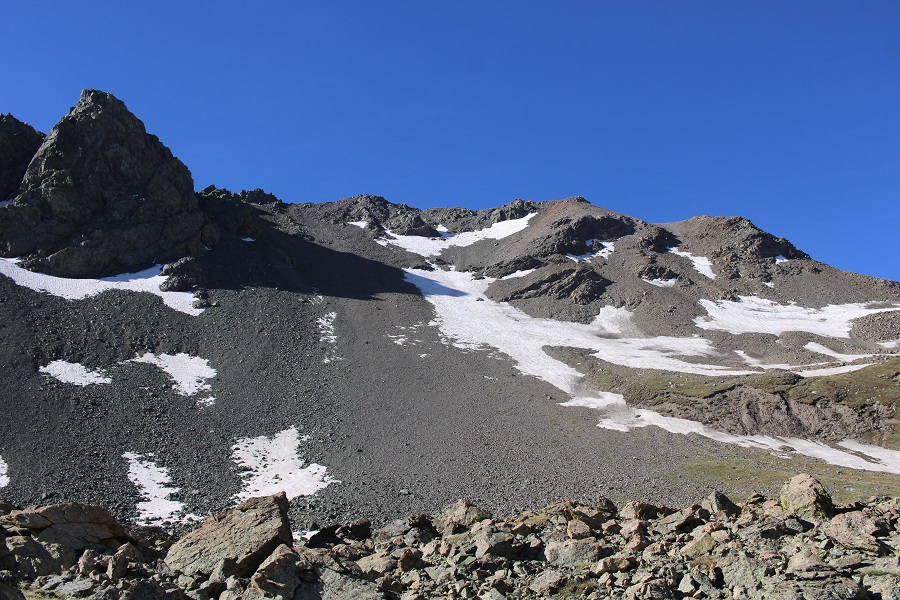
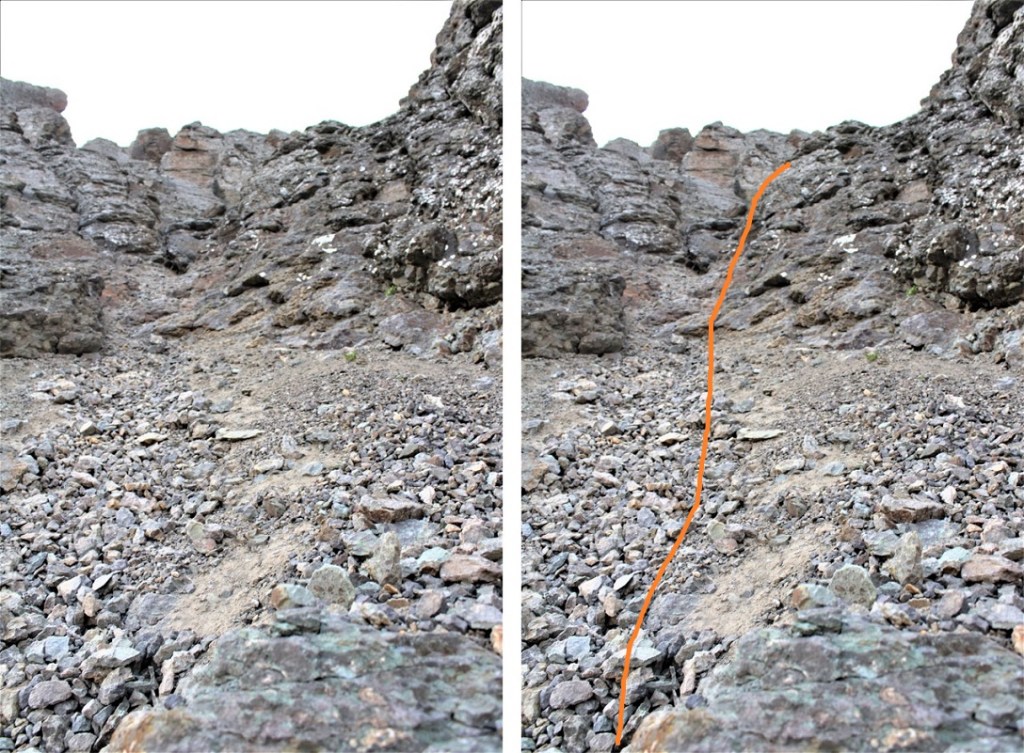
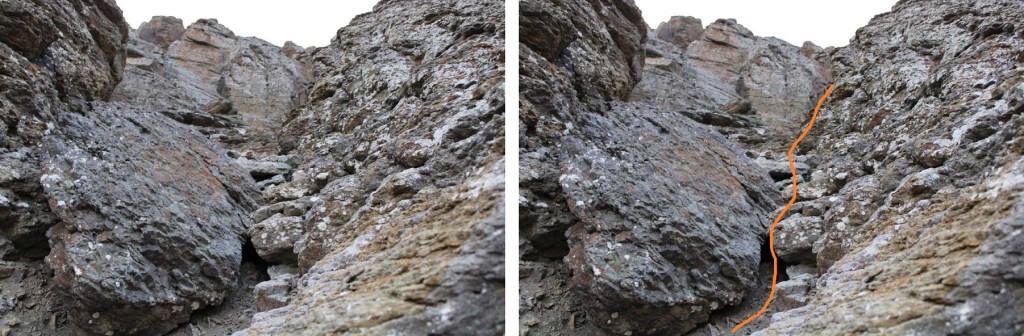
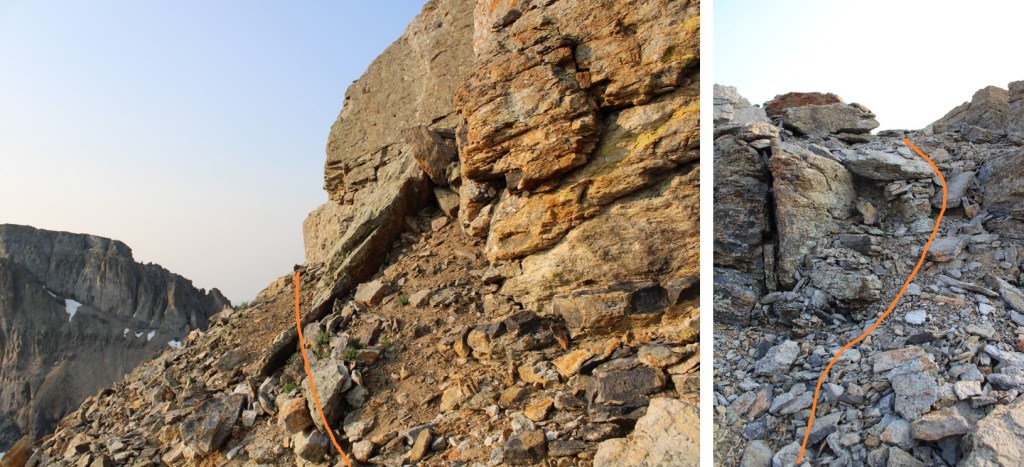
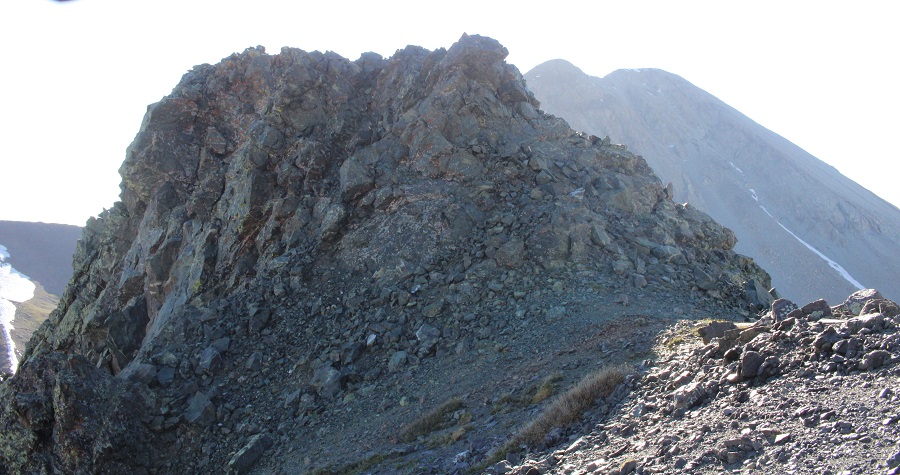
Here are pictures of the route up.  This is definitely choose your own adventure, and I’m sure the conditions change from year to year, so stay safe and have fun!

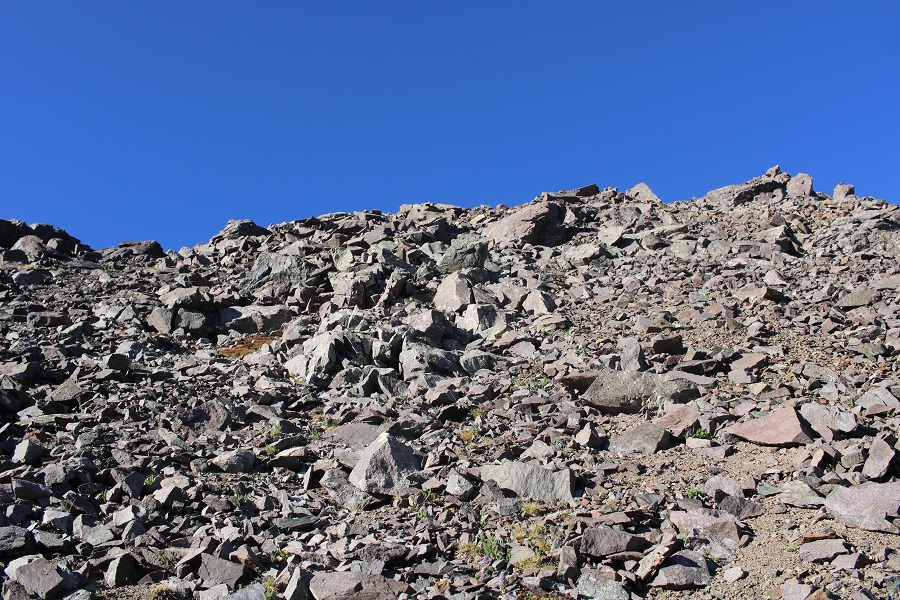
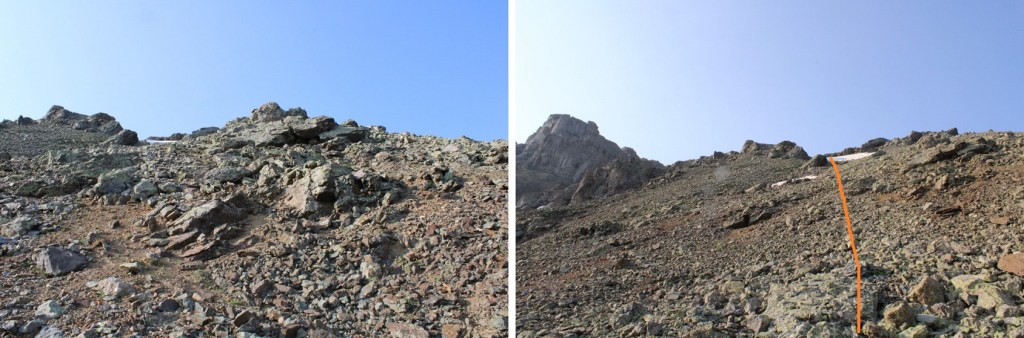
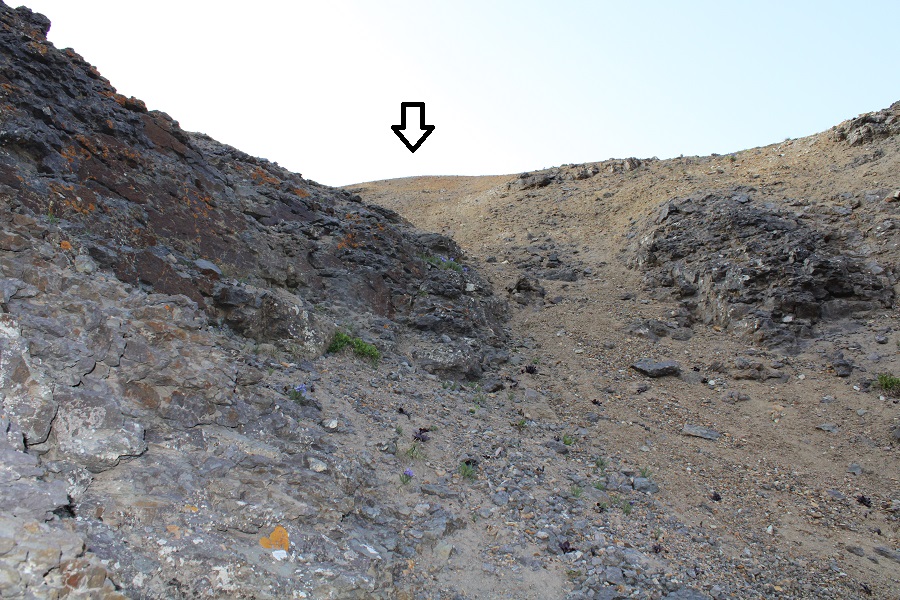
Once at the saddle, I turned and headed left

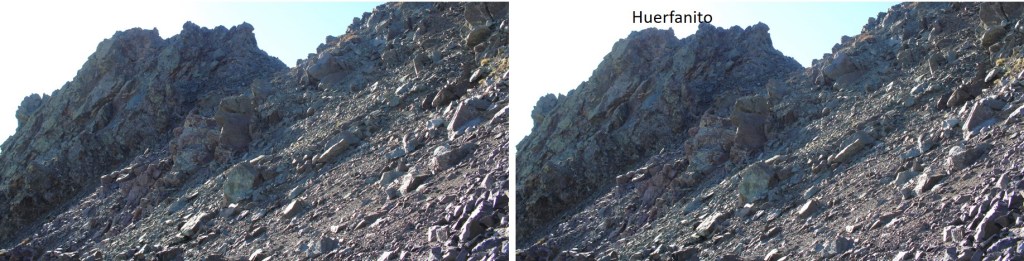
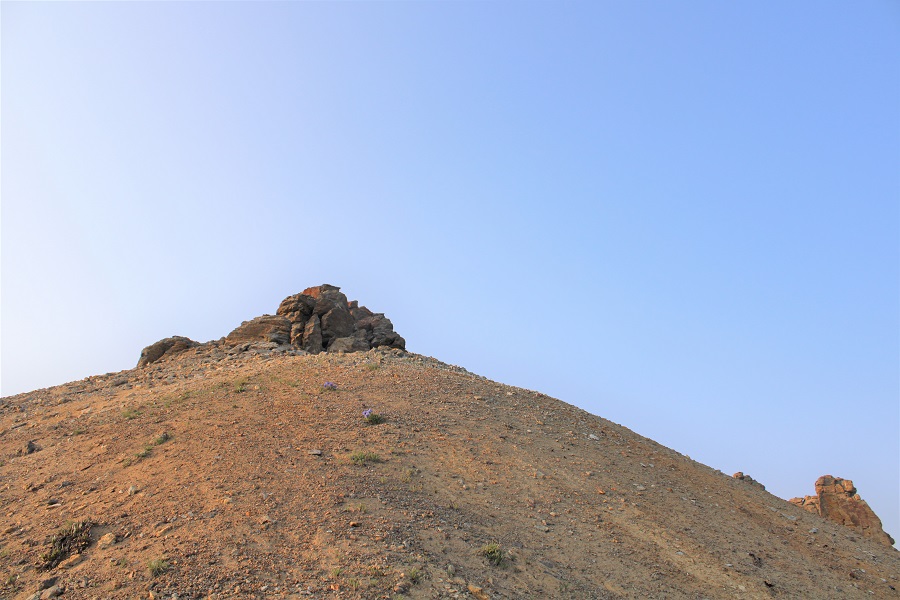
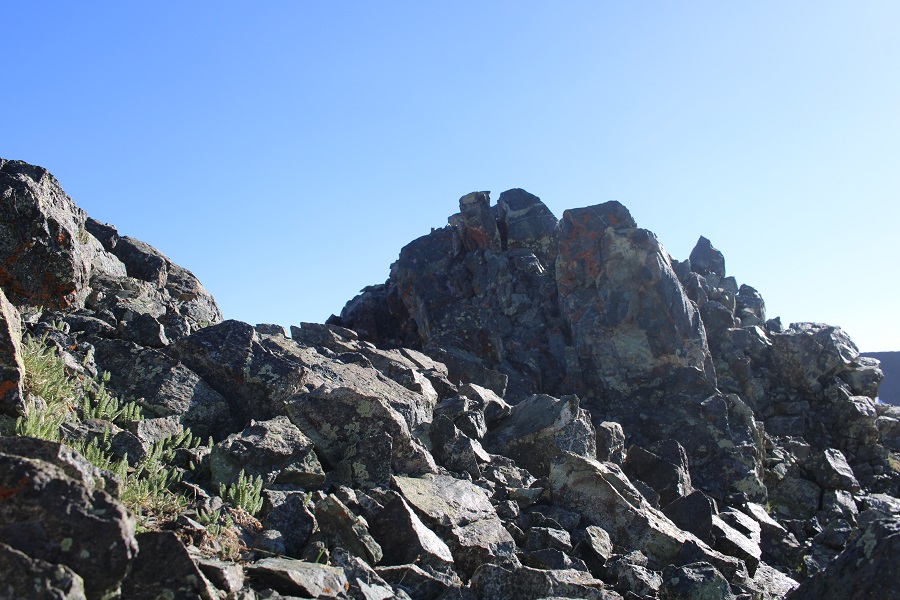
There are a lot of places that look like the summit, but this is the summit block

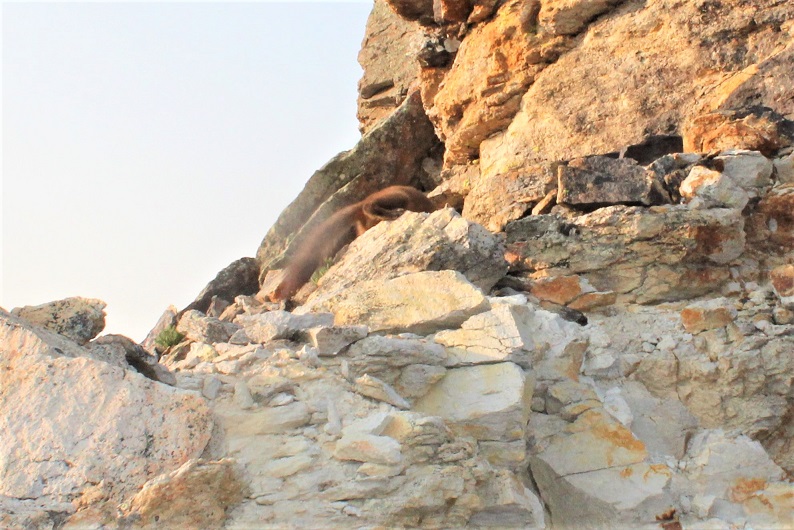
I rounded the summit block to the south and headed east.  This was class 2 to the summit

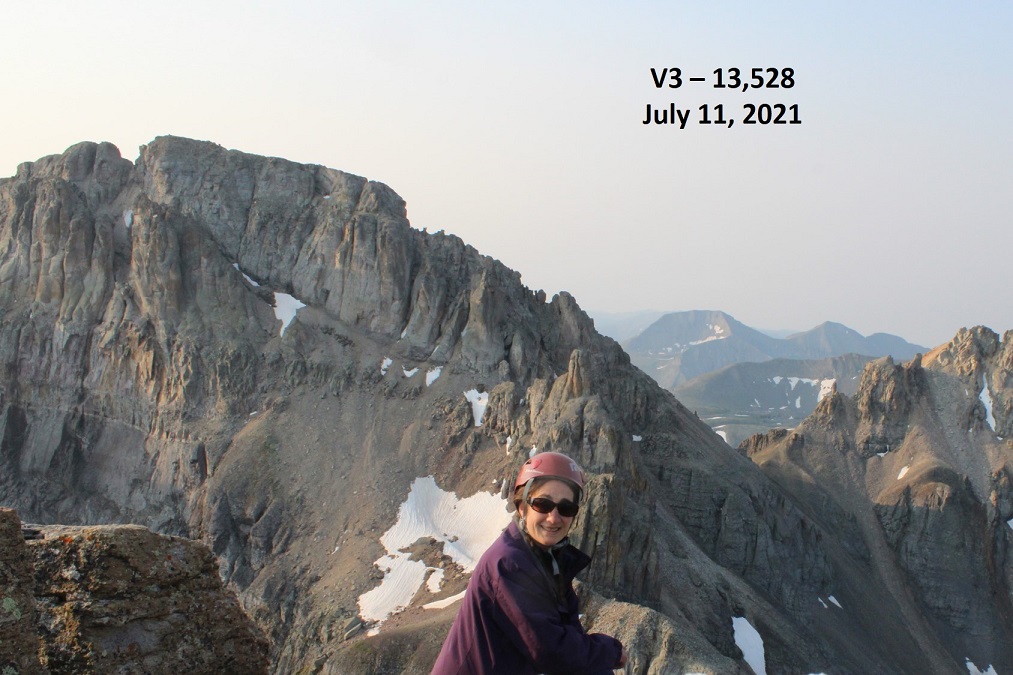
I summited Huerfanito at 7:45am. There was no place to set the camera, so I took a selfie with my phone.
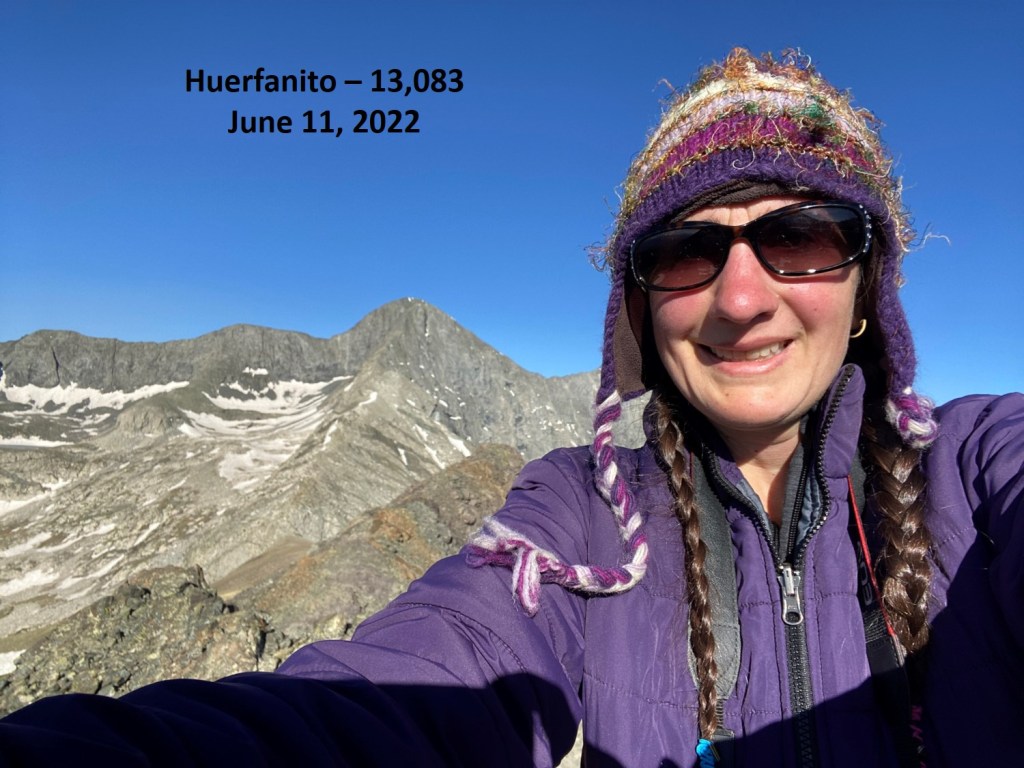
Huerfanito:

While there was a cairn there, I spent a lot of time making sure I was at the true summit of Huerfanito, since I had a lot of conflicting information.  I went back and forth on the ridge, took pictures from every angle, and was certain I was on the true summit.

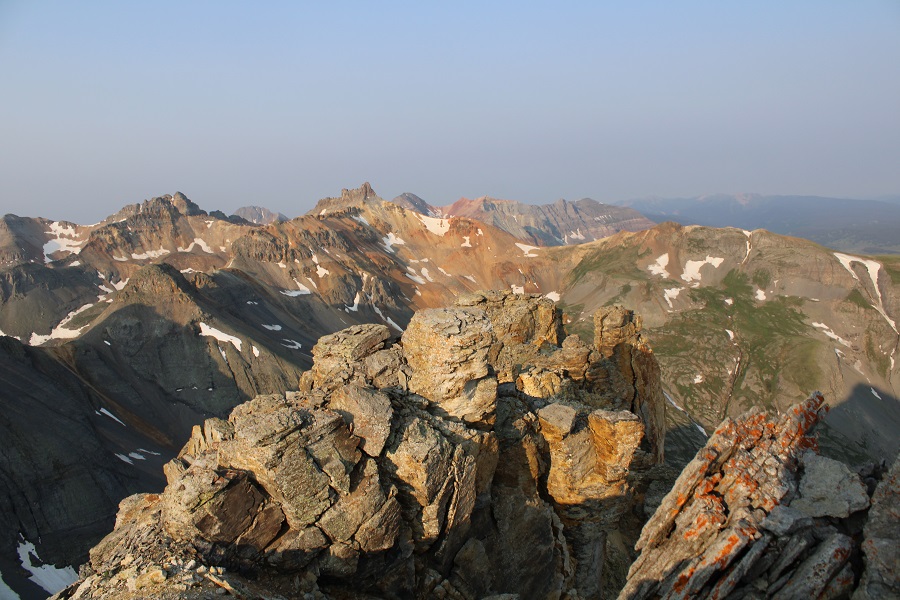
Now to head back down.  I retraced my steps back to the small saddle

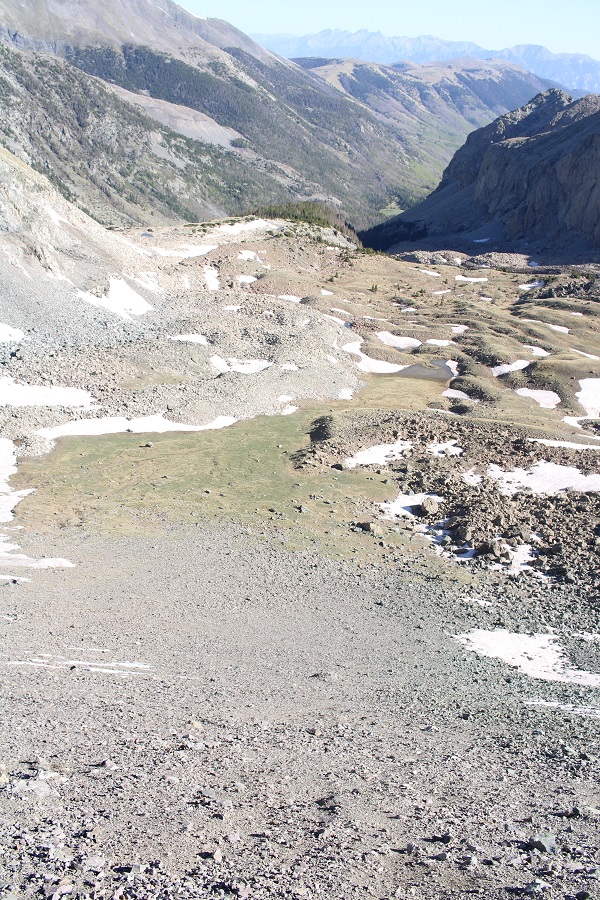
From the saddle I had a great view of my route in, which I would follow back

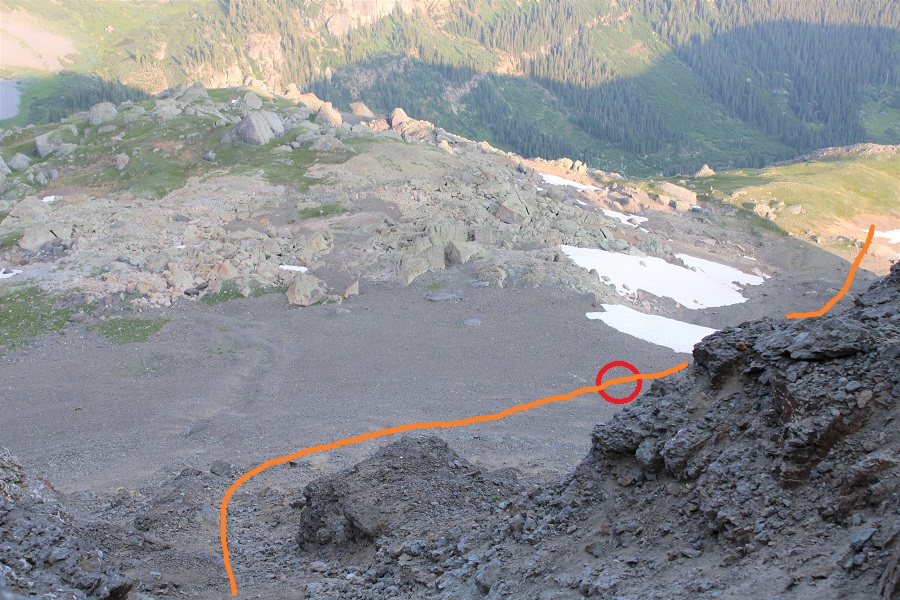
I scree-surfed down the scree.  The route I took on the way down had scree that made for the best scree-surfing I’ve ever done.  I was back down to the tundra in no time.

At the bottom I took off my microspikes, and headed north to find the trail.

I then followed the trail back to the river crossing

I crossed the river, once again taking off my shoes, and then followed the trail back to the trailhead

I signed out of the register, and followed the 4WD road back to my truck

I made it back to my truck at 10:15am, making this a 9.66 mile hike with 3008’ of elevation gain in 5 hours, 45 minutes.

On to the next trailhead!

V3 – 13,545

RT Length:  8.29 miles

Elevation Gain: 3542’

Ophir Pass Road is a serious 4WD road, but the trailhead for this peak can be accessed from the Ophir city side with just a high clearance vehicle.  There were a few small water crossings, but 4WD was never needed.

I parked in a parking area about 1.3 miles east of the town of Ophir, on Ophir Pass Road, in the Iron Spring area.  All the parking spots were taken but 1, and every vehicle was parked there overnight.  This is a popular spot to park to backpack/hike in the area. 

The mosquitoes were out here as well, so I made it an early night and got some sleep.  I was up and on the trail by 3:45am.  The trail starts on a blocked 4WD road to the south of the parking area.

I followed this road southeast and then south, through gates, aspen trees and two stream crossings with easily crossable bridges

After the second stream crossing, I passed below some power lines, turned left to follow the trail, and started gaining elevation.

The hike below treeline was nice, and the trails were class 1, but there were no trail signs or numbers, and several trail crossings.  I’ll do my best to describe the correct route.

I followed a well-defined path south.

At the first fork in the road, I turned right

At the second fork I turned right again, off the road and onto a trail (I’d hiked a total of 1.15 miles at this point)

I hiked west for a few yards, and then came across a trail junction.  I continued heading straight

I was now on the trail that heads south/southwest up the hillside.  This is also where I ran into a porcupine.  Porcupines don’t run, but we noticed each other while we were about 3 feet away from each other:  He quickly turned and waddled away in the dark, showing me his full backside of quills as he did so. 

I continued on this well defined trail

Here’s your first glimpse of V3.  Look carefully, the arrow points to the exact summit, which you won’t see again until you’re there.

After hiking for a total of 2.25 miles and 11350’ I came to a small water crossing over the trail, and a meadow to my right. I left the trail and headed through the meadow.  It was still dark, and there was a camper with a bright headlamp getting ready for the day.  He was confused why I was ‘off trail’ and tried to direct me back to the proper trail.  I assured him I was going in the right direction, apologized for walking so close to his campsite, and nicely told him I didn’t expect to find a trail to the summit.

I was now in a meadow and basin.  There were wildflowers I couldn’t yet see in the dark, and willows I kept encountering.  I found out the hard way to stay right to avoid the willows.  The path is obvious in the daylight.  Here’s the route I took.

And some step-by-step pictures of my way to the saddle, first hopping across a small stream

Staying right to avoid the willows and ascending a small gully that still had snow.  Microspikes were helpful here, both on the scree and snow.

At the top of the gully, I was now in a rocky upper basin.  I crossed a boulderfield and headed towards the saddle.

Here’s a look at the last bit of hiking to the saddle

Once on the saddle I turned left and followed the ridge southeast, staying to the left of the snow.

At the top of this area you can see the crux of the route.  Now is a good time to put on your microspikes and helmet, if you haven’t already.  It’s much steeper than it looks, and the scree isn’t manageable without microspikes (trust me on this one).

Here’s your intended route:

You’re aiming for this gully.  The scree here is steep; a 45 degree angle for an extended amount of time. 

Once at the base of the gully the class 4 climbing begins.  The route is obvious, curving around to the right.  There is really only one way to go:  follow the trail set out for you from the fallen scree.  Also note:  the scree and rocks here are loose. Very loose.  I wouldn’t attempt to upclimb or downclimb this area with another person:  take turns the entire way up and down.  You will be causing screevalanches on climbers below you. 

Here are some pictures from the inside of the gully. Pictures do not do the steepness justice (although the pictures down give you a better perspective).  When heading up, continue climbing southeast.

Here’s a look at the exit of the gully

At this point it became even steeper.  I did not have on my microspikes, lost grip, and slid on my stomach backwards for a full 12 feet.  I seriously thought I was going to slide all the way back down that gully.  I braced myself, and without taking off my pack located my microspikes in my backpack pocket and gingerly put them on while trying to balance without much traction. It was much easier to upclimb once I put on my spikes.  Here is where I aimed

I then turned right, and hiked south towards the summit block. 

I made it to the base of the summit block and was surprised to see a pine marten.  He sat there and looked at me.  I tried to get a picture, but he quickly turned around and all I got was a picture of his tail and backside.  Why are all of my wildlife pictures of animal butts?

Ok, now, don’t let this summit block scare you:  yes, you can upclimb it, but you can also skirt it to the left and follow it around and have a class 2 trek to the summit, which is what I did.

I summited V3 at 7:15am.  There was a lot of smoke in the air from far away fires this morning.

V3:

I was surprised there wasn’t a summit register, so I left one.  It was obvious this peak does not get a lot of visitors. 

I kept my microspikes on for the trek back down, which seemed easier than the trek up.  Here are some pictures of the way back down the gully.  Once again, do this one person at a time, and when you’re done, head far away from the gully, as the rocks will slide and they will pick up speed as they do so. 

Once out of the gully, the scree-surfing will begin.  It’s always fun when you can ride the same pile of rocks all the way down the hillside.

Scree Surfing:

Here’s where you’re aiming.  If you’re doing this with another person, you should be standing far away from the rockslide area while they’re ascending/descending.  I’ve circled a good place to stand out of the way.

And now to hike down the ridge to the saddle, and exit the basin.

I made it back to the meadow, marveled again the wildflowers, and saw the group of campers were almost done taking down camp (I guess the man I talked to this morning was part of a larger group).  I made it to the trail, turned left, and followed it back to the trailhead.

I made it back to my truck at 9:45am, making this an 8.29 mile hike with 3542’ of elevation gain in 6 hours.