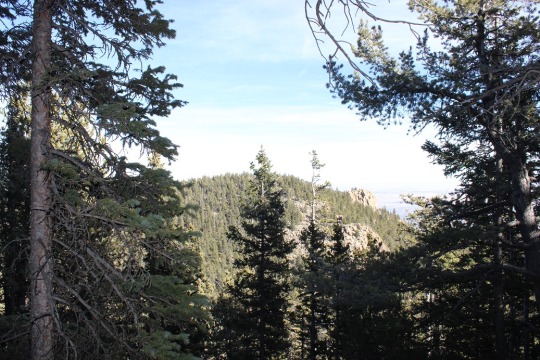
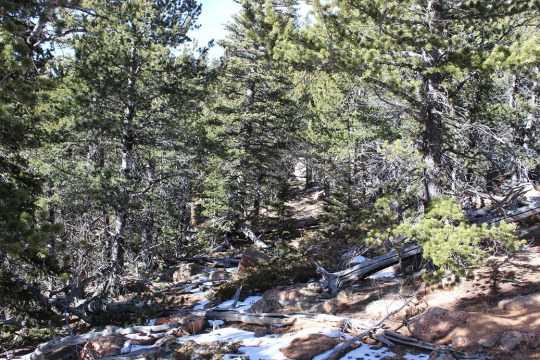
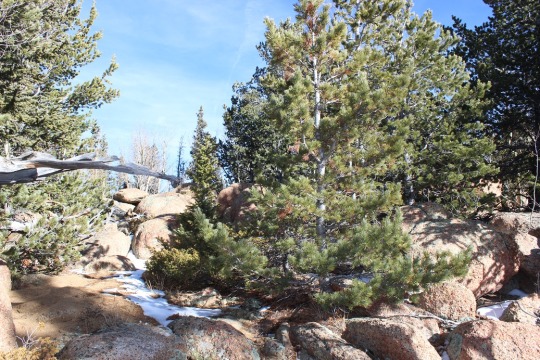
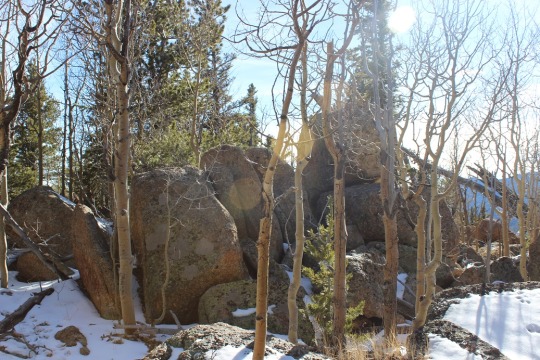
I was looking for a quick hike today because I wanted to be
home by 11am to spend time with my oldest daughter who’s 19 and I feel like I never
see anymore because we have conflicting schedules. Fridays are my hiking days, but they are also
the only time I have free to see my daughter before she goes to work in the
afternoon. She sleeps in really, really
late, so I just got up early and headed to the trail, intending to be back by
noon to wake her up for some mother/daughter time.
I’ve been spending a lot of time in the North Cheyenne
Canyon area recently. I hear they’ll
close the road in for winter at some point, so I’ve just been going to the same
trailhead and hiking different peaks. This
is a pretty popular area, with trails to many different areas, so getting there
early is essential. There’s nothing
really special about Mays Peak or Mt Buckhorn.
They aren’t particularly tall peaks, and they aren’t difficult to find
(they don’t have established trails but they’re both pretty close to the
trail). However they’re on the map and
they’re labeled, so I figured I’d add them to my list of points to see.
I parked at the trailhead at Gold Camp Road and High Drive,
and was on the trail at 8:10am. Here’s
the route I took:
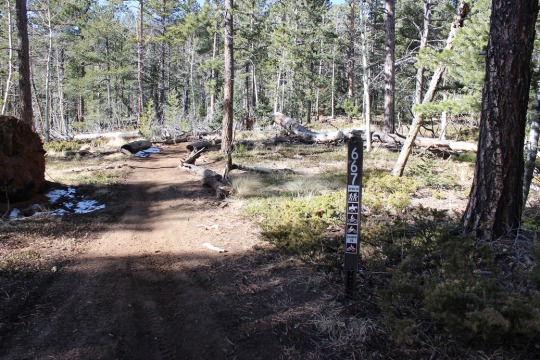
I hiked north on High Drive to just after this sign:
I was at a junction (left is Buckhorn, right is Mays).
I turned right and took this trail east and then curved
north around the mountain. For some
reason it looked like they didn’t want me to take this trail, but it was the
way I’d wanted to go, so I did.
The trail looked established, but it’s not on their trail
maps.
After rounding the mountain and turning north I decided to try
to find my own way up Mays Peak. I know
there’s a trail, but I wanted to practice my route finding, so I turned west and
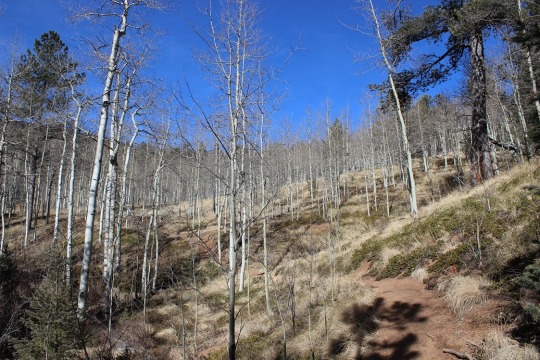
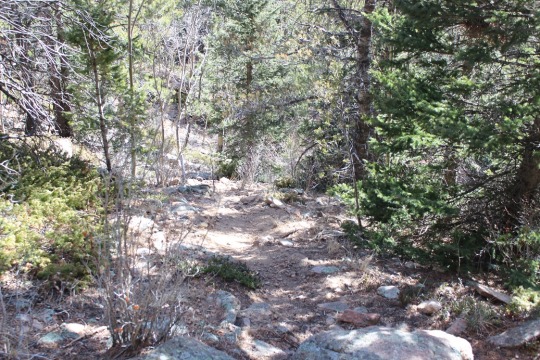
this is what I saw.
I continued west and continued up the hillside. The only difficult part was avoiding those
darn banana yuccas: they’re prickly!
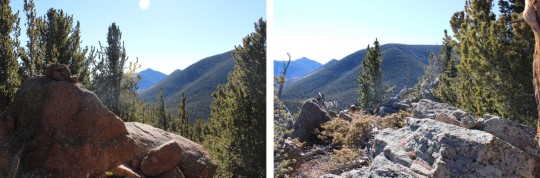
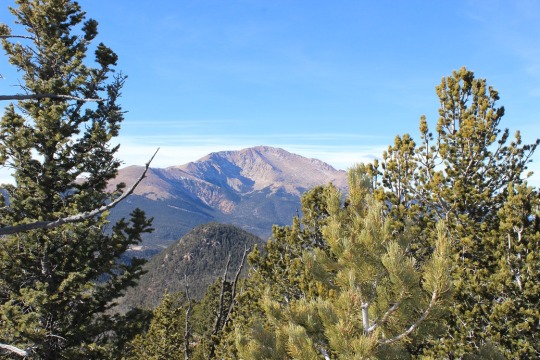
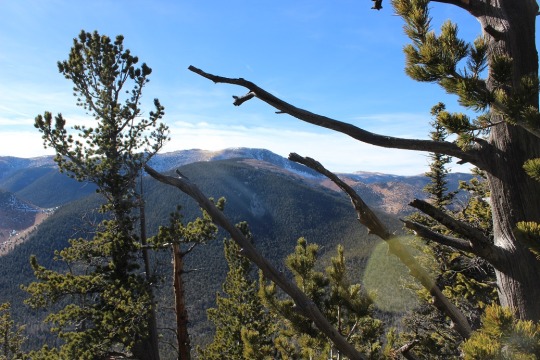
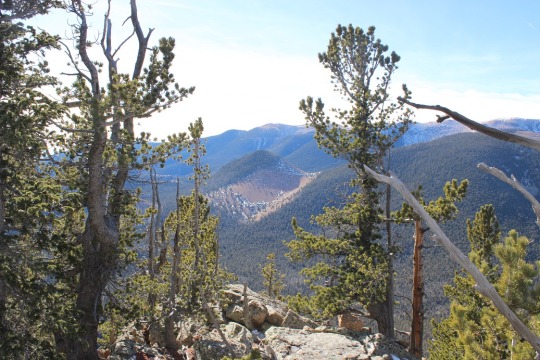
I made it to the ‘summit’ and took a few pictures of the
view (to the north I could see the Waldo Canyon Burn Scar)
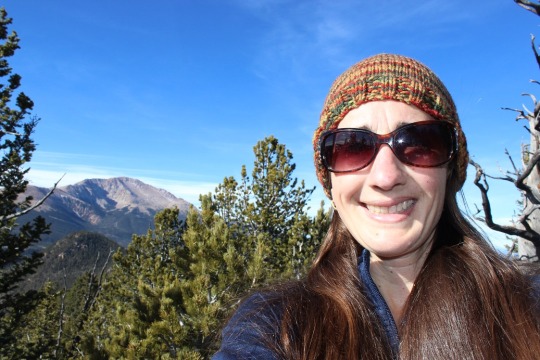
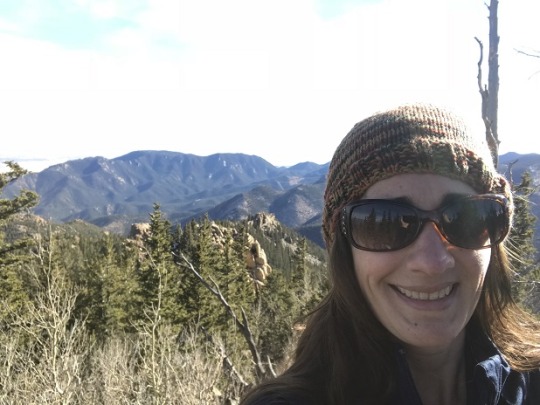
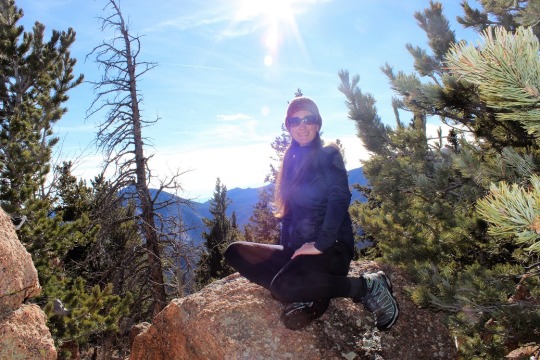
And one of me to prove I’d summited.
Then I was on my way back down to the junction. I took 667 south and around the mountain and
then up the hill.
Once the trail started heading north there was a junction that
was difficult to see and unmarked. You
could go north or west. Mt Buckhorn is
north, so stay straight.
Mt Buckhorn is kind of difficult to find, but just keep
heading north and eventually you’ll get there.
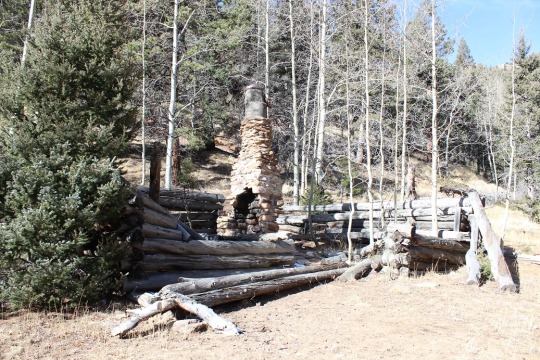
First you pass this rock formation
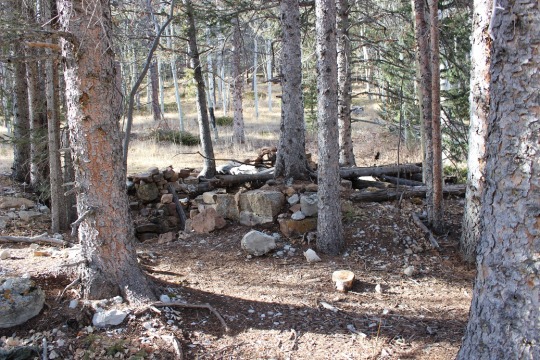
Then you pass a large firepit.
Next you’ll go through a few more
rocks
And another very large crater size fire pit
You’ll know you’re at the summit because you’ll come to a
very large area of boulders that defy explanation of how they got there. These things are HUGE! The actual summit is on top of this rather
large boulder, that requires ropes to climb.
I’d heard this so I’d come prepared with my helmet. However, there was absolutely NO WAY of
climbing this rock without ropes. Trust
me, I spent a good 15 minutes walking all around this thing looking for a
viable route. This rock is much larger
than it looks (you can camp underneath it).
So I put my helmet away and headed back down. I couldn’t believe what wonderful weather we
had today! Here it is, December 1st,
and I’m wearing yoga clothes out on the trail!
It was 65 degrees today in the mountains, with no wind.
There are many trails in this area, so I had options on my
way back down. I decided to take the 667
to the 776, mainly because I wanted to see where it went.
I’d already taken the 667 for quite a ways and knew that
took me to the Kineo cutoff. The 776
took me down to the area just before the 7 bridges trail. I could exit just below the North Cheyenne Creek
or just after the 1st bridge, where it turns into 622 (7 bridges
trail).
I exited here and took Gold Camp road back to my truck, making
it there at 10:30am. The hike was quite
pleasant, and although short (5 miles or so?
Maybe a little more…) I didn’t see many people and I was out hiking in
the sunshine. I was so happy I’d gotten
outside today!
I’ve been thinking about joining a climbing gym for a few
months now, but the closest one is about 30 minutes away from my house.It’s about $60 a month to join, which didn’t
seem too appealing since I just discontinued my actual gym membership.They did offer free yoga classes and one free
massage a month with the membership, which was really appealing, but I didn’t
like the distance.Plus if I were paying
$60 a month to climb I’d be there several times a week, which would mean an
added cost in gas as well. Did I mention I’d have to pay to park too? Ugh!But I really need to develop my rock climbing
skills for my 14er challenge:I need to
feel safer out there while climbing, and that’s only going to come with
practice.
So I did some research, and found a much cheaper option:A ‘punch pass’.I pay up front, get 10 visits, and can use
them for anyone I choose (I can bring a friend with me, etc.).I was trying to justify time for using the
pass when I remembered Thomas has scouts Monday nights directly across the
street from the climbing gym.Duh!I could just go with him to scouts and while
he’s there walk across the street and get in some climbing practice instead of
sitting there at the meeting knitting hats. Brilliant!Why did it take me so
long to figure this out?
Anyway, tonight was my first attempt at this whole climbing
thing.I’ve been to this gym several
times, but I’ve never actually climbed here. I’ve always been a chaperone taking scouts or for birthday parties.I’ve never climbed in any gym before, but I
have been rock climbing at Red Rock Canyon a few times.
Emily went with me. We dropped Thomas off at Boy Scouts and then walked together to the
gym.I bought the punch pass and we used
two immediately. They let us use a
harness and shoes for free (the harness is always free, the shoes were to make
up for the fact we had to fill out liability forms again).
It was Monday night at 7pm, and this gym was packed!There were tons of climbers there!
I found the last cubby open to store our stuff and we put on
our climbing shoes and harnesses.Normally
when I’m attempting something new I stand around for a bit and watch everyone
around me to see how it’s done, but there were so many people I figured it was
best to just jump right in and find a place to climb.
I found an open area and attached the carabineer to my
harness.This was actually a lot more
difficult than I’d thought it would be: It wasn’t a simple push down and turn like I’d expected, and despite
trying my best I never quite got the hang of it.I was able to eventually clip in, but I’m
sure I looked like I had no idea what I was doing, even toward the end of the
night after doing it several times.
Climbing was much easier than I’d anticipated!I made it all the way to the top in no time
at all, and was quite pleased with myself. However, I wasn’t ready to just jump off and let the pulley carry me
down, so I ended up climbing back down the way I’d climbed up, and told myself
I was practicing because while outside I’d need to climb back down the way I
went up (yes, I was lying to myself, kind of).
OK, this was fun!I
was actually able to climb to the top without stopping, and on my first
try!I went to find Emily (she’d been in
the bathroom taking care of a bloody nose) and challenged her to climb with
me.We did a couple of runs together,
and she convinced me to jump backwards and fall all the way down.From the top of a climb I took a leap of
faith and jumped backwards, letting the pulley slowly carry me back down to the
floor.It was actually quite fun!Just make sure you’re actually secured and
clipped in first…
Now on to bouldering, because this was why I was actually
here.This scared me more than climbing
because I wouldn’t be clipped in.Once
again, this was easier than I’d anticipated, and I was able to quickly catch on
and climb up and over the wall(s).I
went to take a break and find Emily. She
was climbing the same area we’d been climbing before, and it was here I realized
something:when climbing the walls you’re
supposed to stick to one color of holds as you progress up.Whoops! No wonder everything seemed so easy! I’m going to have to spend some time learning about different classes
(etc.) of climbing.
OK, so I felt a bit silly about my climbing optimism (no
wonder it’d been so easy!) and decided to try it for ‘real’.I took a few runs, sticking to only one
color, and while it was more challenging I was able to climb them all successfully
except one.I kept trying that one over
and over again, but instead of getting easier it was just getting more
difficult.I was getting tired!I knew what I needed to do, but my arms were
worn out.We’d been at the gym for about
an hour, and I’d been climbing almost continuously.Now even runs I’d done successfully earlier I
wasn’t able to climb.I told myself to
stop now because I was wearing myself out.
I went down the slide one more time (I can’t remember the
last time I went on a slide!) and we changed out of our gear.
All in all I learned a LOT tonight. Everyone was pretty friendly, and even though the gym was packed it didn’t feel too crowded. I want to eventually learn how to belay (including putting on the ropes, etc) and I need to get better at bouldering. I think it will just come with more practice.
Notes: Bring your
sense of adventure and a helmet!
This hike was really pretty awesome! Each time I go out looking for a bit more of
a challenge, and today I found it!
Tuckaway Mountain is listed in the Pikes Peak Atlas, but there is no established
(or even mildly established) trail to the summit. The hike is long, the summit a class 3 scramble
(at least). It really is Tucked Away, and takes a long trail through North Cheyenne Canyon to reach.
I started this hike at 7:45am at the 7 Bridges Trail parking
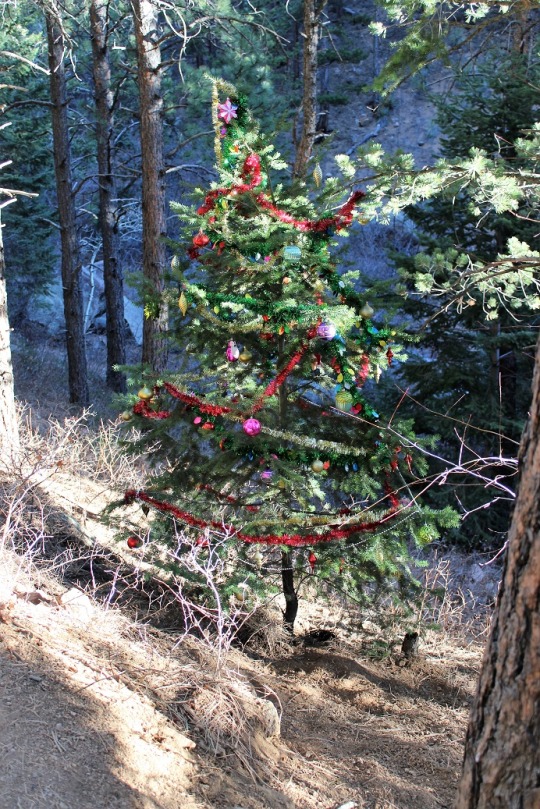
lot. Around the 2nd bridge I
saw a decorated Christmas Tree that wasn’t there two days ago when I hiked this
part of the trail to summit Mt Garfield and Mt Arthur. The tree immediately
brought a smile to my face, and then my next thought was “I hope whoever put
this here takes it down as well” LNT and
all.
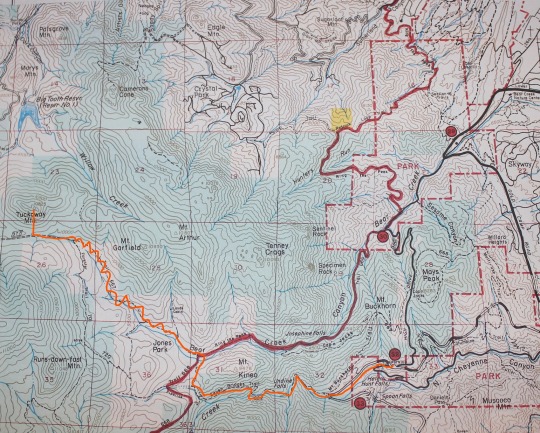
I followed the 7 Bridges Trail to the junction and turned left
onto 667. I stayed on this trail until
it ran into trail 377. This seemed to
take a really long time, probably because of all the switchbacks! My map didn’t mention those, so I put them in
where they’re missing. They go on
forever!
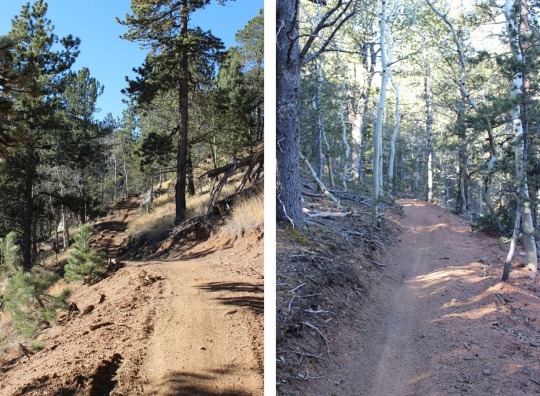
This trail is newly renovated, and seems to cater to
motorcyclists/mountain bikers. I didn’t
see one hiker on this trail all day, but saw 1 group of motorcyclists and 2
groups of bicyclists. They all seemed
surprised to see me.
The wind started picking up around 9500’ and I was glad I’d
chosen to stay below treeline today. Looking
at the topo map I thought once I was close to Tuckaway Mountain the hike would
be easy, but I was wrong. First off, the
mountain was extremely difficult to see, even though it’s late in the
fall. Secondly, it was covered in
rocks!
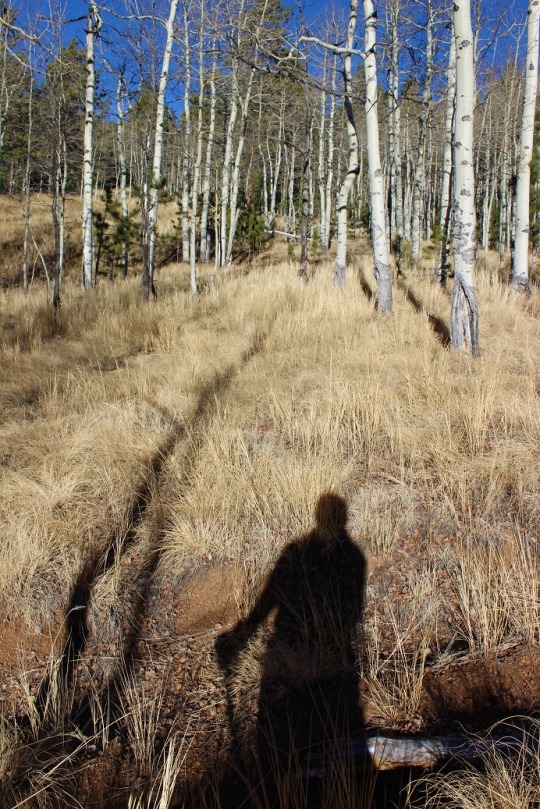
Once I made it to the area directly in front of the mountain
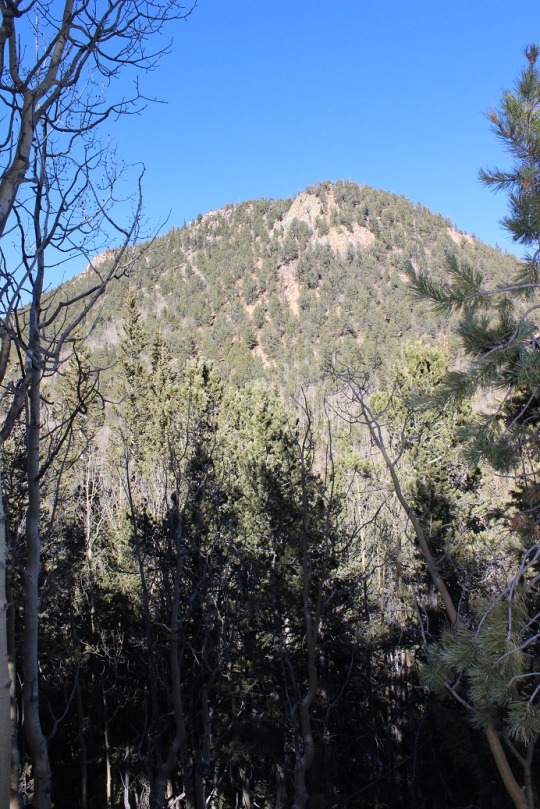
I turned right/north. This is what I
saw:
I decided my best course of action was to really study the mountain,
pick my route, and head up. The entire base
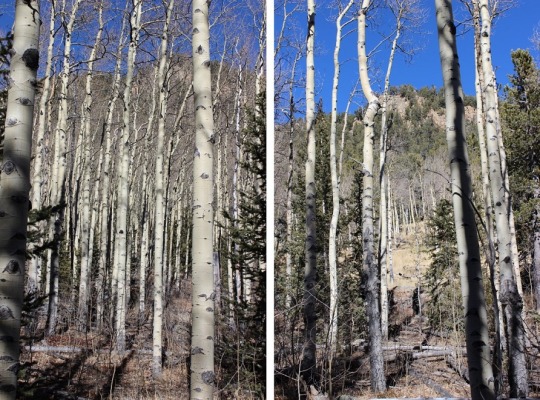
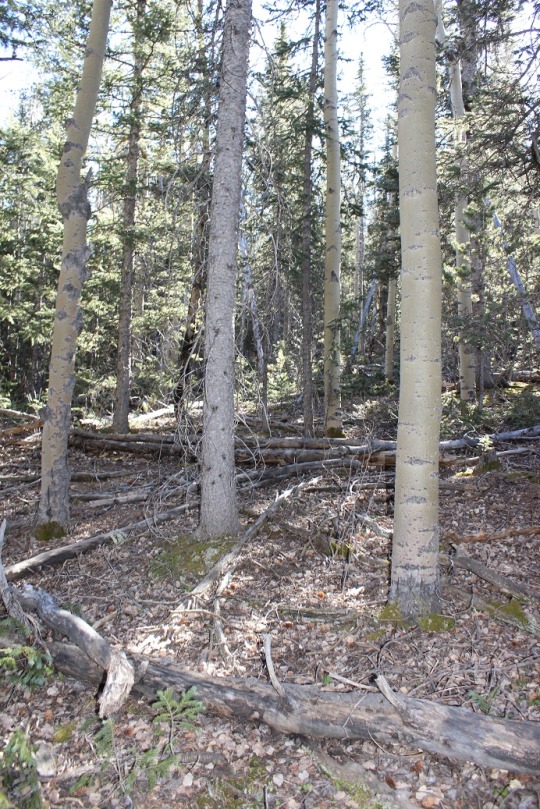
was covered in Aspens, making it difficult to tell where I was going. I didn’t
want to get stuck at a rock outcropping.
I chose to summit to the east to avoid the large
outcroppings, but in reality, you can’t avoid them all. There is no established trail to the top of
Tuckaway Mountain: no trail, no cairns,
nothing. I did some major scrambling,
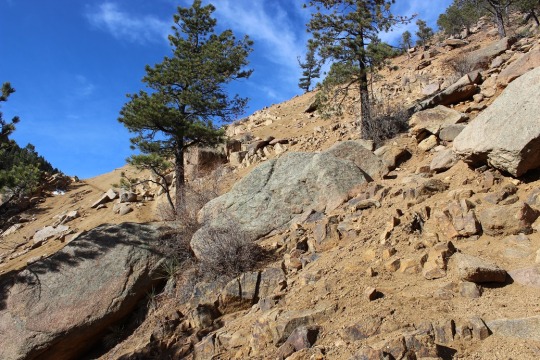
involving all hands and feet at once, as well as some intuition and luck! The rocks weren’t stable, and even the big
ones rolled when I touched them. Where
there weren’t rocks there was scree, and very slippery terrain.
Since I was basically bushwhacking and I couldn’t see the summit
through the trees, I kept stopping every 20 feet or so to look back behind
me. I kept this sandy area in my sights
for my return trip back down.
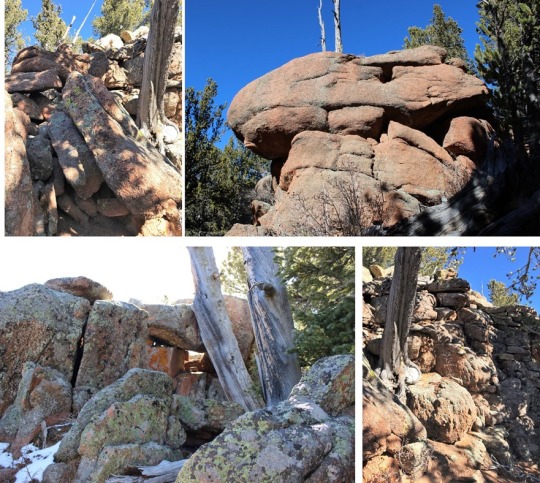
I summited at 10:45am, to a bunch of rocks! The summit was rather long and irregularly
shaped, full of trees, and lots of rocks to scramble on.
I took a bunch of photos from all around the mountain, just because
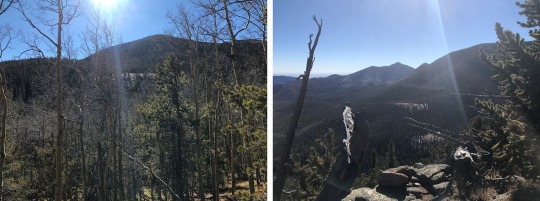
I could, and to show where it’s located in relation to the other peaks in the
area.
Next came the fun part:
heading back down. The trek up
was challenging, and so was the trek back down.
I had to be careful with my footing.
I spent a lot of time lowering my center of gravity and getting stuck
with needles and thorns. My gloves were ripped
in places and covered in yellow Aspen dust by the end. Just an FYI:
pine needles are slippery… avoid patches of pine needles. By the time I’d made it down I was COVERED in
dirt. I really looked like I’d worked
for that summit!
I made it back down to the Aspen grove and was able to find
trail 377 to lead me back. The trek back
seemed a lot longer than the trek in (which seemed long to begin with… I’m thinking
it may be more than 12 miles total now that all the switchbacks are there…). It was mostly downhill, but those switchbacks
went on forever! When I made it to the 7
falls area it was PACKED with people! I
was surprised to see so many families lining the trails. And I mean families! Most groups had over 10 people, over half of
them under 10 years old, most younger than that. It was great to see so many young families
out enjoying the trails, but it was frustrating trying to pass the large groups
who were (understandably) going slow. Gold
Camp Road was full of strollers. The
parking lot that had 6 cars in it when I arrived was overflowing with at least
100 cars: people were parking down at
Helen Hunt falls and walking up! I was
really glad I’d gotten an early start on such a popular hiking day.
I made it back down to the trailhead at 2pm, making this 12+mile hike with 2400′ elevation gain in 6 hours, 20 min (with a lot of summit time!)
Minimal elevation gain, but there is a 250’ descent into the
canyon (and back up and out)
If you want to visit the largest Dinosaur Track Site in
North America be advised: Directions
aren’t available by GPS. So if you’re interested in visiting, here are the
driving directions:
Take US-50 East to La Junta
Turn Right onto Bradish
Turn Left onto E 5th Street
Turn Right onto CO-109
Continue on CO-109 for 13 miles
Turn Right onto CR 802 and continue for
8 miles (dirt road)
Turn Left onto CR 25 and continue for 6
miles (dirt road)
Turn Left onto Service Road 500A for 3
miles and park at the Withers Canyon Trailhead. There are several camping spots here. 4WD is recommended, but unless the roads are
wet a 2WD can make it no problem.
I did a google search on cool hikes in Colorado, and this
hike came up. I’d never heard of it, so
I did some research and thought it would be a fun place to visit. It’s pretty off the grid and a long hike, so
it would have to be an all day thing.
The weather forecast was for 75 degrees today (the day after
Thanksgiving! Amazing!) and I decided it
would be a shame to waste the good weather.
I woke up Emily at 7am and she slept in the car until we made it to the trailhead
round 9:40am.
The trail begins behind the vault toilets, past this gate
Sign your name at the trail register, and turn LEFT here
There are two different routes here: the Withers Canyon Trail is just a short .2
mile look that gives you an overview of the canyon. To see the Dinosaur Tracks you want to turn
left here and take the Picketwire trail.
You’ll come to a gate, and this is where the trail truly
begins.
From this gate you’ll descend about 250 vertical feet down
to the bottom of the canyon, and continue at a pretty level elevation as you
follow the river to the track site.
It may have just been the time of year, but much of the single
file part of the trial was covered in tumbleweeds. This meant for some pretty prickly hiking!
About a mile into the hike we came across an old abandoned
adobe dwelling, complete with an old stove and mattress spring. It was cool to
see original adobe! Emily remarked at
how small the doorways were, which led to a discussion about making due with what
you have, cost-benefit of effort versus utility, as well as better nutrition
and height.
We continued and after hiking for 3.7 miles we came upon an
old Spanish (Dolores) Mission and Cemetery.
We spent some time reading the headstones, calculating
dates, and admiring the headstones themselves.
Emily was surprised she could read and understand the Spanish writing.
We also obeyed this notice:
We came across quite a bit of Native American Rock Art in
the canyon. It wasn’t very well
preserved, but fun to muse about who made them and why they were there. The Native Americans in this area were
nomadic hunter-gatherers who most likely passed through the area hunting game.
After hiking 5.3 miles we’d made it to the Dinosaur Track
site!!! In Dinosaur times this was a
lakebed and popular site for all different kinds of dinosaurs.
The area on our side of the river had just been excavated,
so we were able to see a lot of fresh tracks!
Emily wanted to see if she could fit in a sauropod track…
There were several similar track sites on the other side of
the river, but even though it was late in the season the ‘crossing’ wasn’t
passable.
We spent quite a bit of time going up and down stream
looking for a route, but the water was just not safe. It was really cold, but we felt we could have
done it with water shoes (without them the river bottom was just too slippery with
silt/granite and we weren’t prepared to get our hiking shoes wet and hike back in
wet shoes for another 5 miles). So, if
you’d like to cross the river to see more tracks come prepared to get wet and
be creative with the river crossing.
Emily suggests waders.
We spent about 45 minutes admiring the tracks, and then
headed back. We were greeted by a
tarantula emerging for an evening stroll…
All in all this was a really great hike! It was a bit long, but well worth it, especially in such good weather! It would be a bit brutal in the summer heat or winter cold however, so be prepared!
We made it back to the truck at 3:40pm, making it a 6 hour hike, but we did quite a bit of stopping and looking around at the cemetery, dinosaur track site, and every time we saw rock art.
This trail isn’t an established trail on any map, so I
needed to do a lot of research before heading out. My advice to anyone taking this route: Bring and know how to use a topo map and
compass. Almost all directions I found
were wrong, but the topo map never failed me!
I woke up this morning and it was a bit overcast when I
looked towards the mountains. However,
the weather looked like it’d clear up in an our or so, so I decided to hit the
treadmill for an hour and get in some exercise, shower, and then head to North
Cheyenne Canyon.
I arrived at the trailhead at 9:40am, and was on the trail
by 9:45am. What a difference a few days
makes in trail hiking! There was very
little snow here, where last week there was a good 3+ inches.
I’ve done this part of the hike several times, so I’m not
going to go into detail. Here’s the
route I took:
Park in the lot above Helen Hunt Falls
Take Gold Camp Road West to 622
622 is the 7 Bridges Trail
After crossing the 7th bridge turn right onto 622
and climb up the mountainside, along a scree filled slope, and stay right
through an Aspen Grove.
At the top of the Aspen Grove you’ll come to a
junction.
Turn left (West) onto 667
Shortly after this junction you’ll come to another
junction.
Turn right here onto 622A, and follow the route to Loud’s
Cabin.
Side note: Professor Frank
Herbert Loud (1852-1927) worked at Colorado College as a mathmatician. He wrote mathematical textbooks, and took
many visitors to his cabins in the woods (there are 3), including the writer of
“America the Beautiful”, Katherine Lee Bates.
Most of my information about trails was wrong for this part
of the trek, and I’m assuming this is the reason:
There are many social trials in this area, but when you
reach Loud’s Cabin head north and cross the stream once again. From here you should follow the trail to the
right (east) for a bit before turning back west and closely following the creek
up the mountainside.
This isn’t a real trail, but more of a social trail filled
with scree and lots of cairns. It can be
difficult to follow at times, but as long as you parallel the stream to the
right and make it to the waterfall you’re on the right path.
Eventually you’ll reach the saddle between Mt. Garfield and
Mt. Arthur. This isn’t a saddle like I’m
used to: It’s covered in trees and
vegetation, with no trails. I was
frustrated because the trees blocked the view of both mountains.
This is where I got frustrated. I knew there wasn’t a solid trail to the top
of either peak, but now that I was on the saddle, I still wanted a trail to
follow. I kept thinking of how easy it
would be to get lost in all that vegetation!
I seriously contemplated turning back around and trying this another
time, but I’m stubborn! I’d hiked all
this way, I was very, very close to my intended destination, and wasn’t this
the reason I was hiking here? For a
challenge? How was I going to practice
route finding if I didn’t take a chance?
I looked around again for a trail. Well, there wasn’t one, so I steeled myself
and turned west, aimed for the top, and bushwhacked to the top of Mt.
Garfield. There was a lot of snow and
fallen trees. Here’s what the “path”
looked like:
The views at the top were worth it! Not to the east, because trees were in the
way, but to the west I had a great view of Pikes Peak!
Here’s a view of Almaghre
And one of Runs Down Fast Mountain (one I want to tackle
soon)
I spent about 15 minutes on the summit, and then started my
descent. Since there wasn’t an
established trail I just kind of aimed towards the saddle and kept a view of
Mt. Arthur in sight.
It was fun to see some of my old steps in the snow! That meant I was going the right way. Unfortunately the snow wasn’t consistent
enough to follow tracks the entire way, but it was nice to come across them every
once in a while.
I made it back down to the saddle and seriously contemplated
just heading back. This hike had taken
longer than anticipated and I was running out of daylight. But I was so close! Did I really want to hike another 12 miles
just to summit a peak I was less than half a mile away from? Nope. I headed east up the slop of Mt.
Arthur. This area was much easier to
hike up then the terrain on Mt. Garfield.
There was almost no snow, and a lot of rocks, so I basically just
climbed west, taking care to stay away from the rock outcroppings to the south.
It felt really good to summit! The views here weren’t that great, but I took
a few pictures just because I was there.
Now it was time to head back down. The route was much easier to follow on the
way down than it had been on the way up, mainly because I knew where I was
going.
I made it back down to my truck at 3:15pm.
Stats: 12 miles, 3600’
elevation gain, 5.5 hours total hiking time.
The weather wasn’t all that great for hiking today, so I
took Emily and Thomas somewhere close:
Pulpit Rock. We’ve lived here for
over 10 years and never been to what I’d consider a local landmark. It’s the rock formation you can see from I25
near UCCS that lots of visitors mistake for Castle Rock. There are a bunch of trails to hike this
area, but it was cold and the kids aren’t intense hikers, so we took the easy
way.
The trailhead is right off the freeway. Take Exit 148 and head west, then turn left
on Pulpit Peak. You will immediately see
the dirt parking lot to the right.
The hike is only about half a mile, and there isn’t one
established trail, but dozens of social trails.
Basically you just aim for the top and keep climbing, although I will tell
you it’s easier to climb from the back.
The scenery along the way is beautiful!
There isn’t any exposure until you get to the very top, and
then only if you choose for there to be.
Of course, we played around for a bit.
We probably spent a good half hour on the ‘summit’ before
heading back down.
I’d really wanted to hike above treeline today, but with
anticipated wind speeds of 40mph and windchill of -18 degrees above treeline, I
thought it would be a better idea to stay closer to home. I didn’t set my alarm for this morning, but
woke up at about 7:30am when the cats informed me the sun was up and I wasn’t. Imagine my surprise when I woke up to about 2
inches of snow on my front lawn! Luckily
it was a very clear day and the winds here seemed to be minimal, so I ran for
an hour on the treadmill, took a shower, and answered some emails before
heading out to hike. I was waiting for
the temperature to warm up a bit before hitting the trails.
I made it to the trailhead at around 10:15am. The drive up the canyon was very icy, and
closed to vehicles that didn’t have 4WD.
This was a bit unexpected, as the area looked snow free from both my
house and the road (it wasn’t).
I attempted to hike Mt Kineo earlier this year, but had to
turn back due to lack of sunlight and a visible trail. Today I was just looking for a hike close to
home that could serve as a training hike since I couldn’t get above
treeline. I was also looking for a
successful summit, because it really hurt to have to turn back last time.
I started at 10:30am.
There were about 10 cars in the parking lot, despite the gate being
closed to upward traffic back down at the visitors center (the exit gate was
open, which is what we all took to get in).
The trail started on Gold Camp Road, then after crossing the
North Cheyenne Canyon creek intersected with the Seven Bridges Trail (622). This part of the hike was relatively easy,
although covered in a 2-3 inch layer of snow.
It wasn’t slippery because it was truly fresh snow, but it did slow me
down a bit.
Once I started crossing bridges the trail got much more
icy. It wasn’t icy enough to warrant microspikes
(I had them) but I did need to pay attention to my footing. Much of this part of the trail was in the
shadows of the canyon, and cold.
After passing the 7th bridge it began to warm up
a bit. I took the trail to my right,
turning sharply uphill, staying on 622.
Here is where the elevation gain started to get a bit more
intense, although not difficult. I
crossed a rocky section, and then a section of loose scree. This was my favorite part of the hike!
The trail paralleled a creek, and then turned right onto
trail 622A and continued up a hill that skirted an aspen grove.
At the top of the hill is where I had to turn back last time
due to inadequate information and not enough sunlight. However, this time I was greeted with trail
signs!!! Apparently last time I’d hiked
when the trail was “under maintenance’, so all the signs had been removed. Today they were back!
No, these trail signs did not indicate the trail I needed,
but they did indicate where I was exactly on the map. From the signs I turned right and saw a large
downed tree to the east. This is where
the ‘trail’ to Mt Kineo started. I could
immediately see my mistake from last time:
there are numerous social trails in the area, and when there wasn’t any
snow I traversed more to the left.
Indeed, now there were footprints taking the route I did before. However, I decided to take the trail without
footprints, the one that was now obviously a trail with a few inches of snow
but that I hadn’t been able to see without snow.
It was so cool to be the first one making tracks on this
trail! I knew I was on route, and that I
wasn’t too far away from my destination.
The trail was difficult to follow in areas due to the snow as well, but
every so often I’d come across a cairn and know I was going in the right
direction.
I stayed to the west of the Aspen grove, and soon took the hill
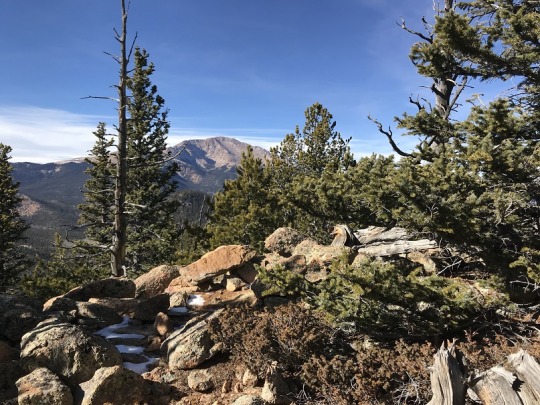
and was on a saddle. Here I had a great view
of Pikes Peak!
I continued up and to the east, and shortly came to a small
rock hill. At the top of these rocks was
Mt. Kineo.
The way up was cold and slippery due to the snow, but not
really difficult (and without snow would have been no problem at all).
I summited at noon, and had great views of Southern Colorado!
I was super proud of myself for making my own tracks and
gaining a summit that didn’t have an established route on a map.
The hike back down was colder than the hike up, and covered
in more shadows. Once I hit the Seven
Bridges Trail the snow had turned to ice along this popular trail due to hikers
packing it down on their way.
I was surprised to see Barron, a scout in Thomas’ Boy Scout
Troop, biking along Gold Camp Road as I was hiking down.
I made it back to my truck at 12:30pm, making this a 6 mile
hike with 2020’ in elevation gain in 3 hours.
Not bad considering the route finding and snow!
Today’s weather was perfect (63 degrees with no wind), which
made it a total shame I didn’t have time to hike. Emily had a football game at noon, which didn’t
give me adequate time to drive anywhere and be back in time to take her. As I was getting ready for bed last night I got
to thinking, and remembered I’d put together a bunch of training hikes last
year that were close and relatively easy to accomplish in a short amount of
time. I pulled out the folder and browsed
through it. Most were about 7-15 miles
in length, which is great, but I only had about 2-3 hours of “free” time and I
was looking for some elevation gain in the process. The last one I looked at was relatively close
(half an hour away) and said it was 4 miles round trip. The only problem was there was no established
route, so I’d need to make my own trail.
I was in!
I dropped off Emily at noon at the stadium (she’d forgotten
her trumpet at school, so today she’d be cheering with the guard from the
stands). Then I drove to the trailhead (which
wasn’t a trailhead). In case anyone
wants to do this hike, here are the directions:
Take HWY 105 west past Palmer Park to Pine Crest. Turn left onto Lower Glenway, then Left at
the dead end. You need to park here and
walk in because there are at least 2 dozen signs that say “no parking” past
this point.
Walk down the dirt road to a gate and cross the gate.
You’ll cross another gate, and this is where the hike
begins.
You basically follow service road 322 until you reach the
lower reservoir. I was surprised to find
a bit of ice/snow on the road.
At the lower reservoir there’s a trail that immediately goes
off to the right. This trail does not go
to Sundance Mountain, but it’s the trail you take.
The trail goes steadily up to the right and into the mountains,
following a stream and a steep scree laden path.
From here on out you need to use your GPS, compass, and intuition,
because there’s no established trail. I
hiked for what felt like a mile along a small creek until I came to a ravine to
my right between two mountains. I knew
Sundance Mountain summit was to my right, so I turned right and headed straight
up the mountainside, being careful to keep the ravine to my left. The entire hike is below treeline, so you
really need to remember which direction you came from and which direction you’re
going. Here’s what the area looked like:
I just kept aiming for the top and eventually I found
it! I came across a summit log and noted
the last person to note in it was from last week (11-6-2017).
I signed my name and realized I was on a trail that looked
like a loop back down the mountain, so I decided to follow it and see if it
would lead me back down. I took a few
selfies to prove I’d ‘summmited’.
From the summit of Sundance Mountain you can see a unique
view of Mt Herman here to the left, and Pikes Peak to the right.
So I followed the trail for quite a while, and it was indeed
a trail that had been used previously.
However, about a quarter mile down it became difficult to navigate. Basically it became a gully that was getting increasingly
difficult to pass due to many downed trees blocking the path. I thought to myself how a helmet and
microspikes would have been helpful, and then got smart. The terrain wasn’t getting any easier, and I
was pretty sure I was going to end up in a serious gully at some point. Where I was was basically the end of the ‘trail’. I didn’t have the proper gear, so I turned
back and re-summited Sundance Mountain.
This was great because I got in extra elevation gain!
The route down was much the same as the route up this
way. I had to navigate, but I just kept
the ravine to my right and eventually found the trail I’d used to navigate in. I quickly made it to the reservoir, and saw
about a dozen people there, fishing. I
could see a lot of tiny trout in the water (no more than 6 inches). I never saw anyone on the trail I took to Sundance.
The route down followed the service road again. I thought what a great route this would be to
snowshoe on in the winter, and mentally filed that information away for a few
months from now.
Here’s the route I took:
All in all this was a great hike, and relatively short in
length. I was proud of myself for
completing this hike because last year I’d taken a similar hike (one with no
established trail) and I’d had to turn back because I didn’t feel confident
enough to route find. My information
told me I’d hiked 4 miles, although I’d guess it was probably closer to 3, with
an elevation gain of 800 feet (although I’d easily say it was over 1000 after I’d
turned around and headed back). The hike
only took me an hour and a half. I want
to come back and explore the area further this Spring, as it looks like there
are a lot of trails to take in this area, and it’s close to home.
Well, I guess the seasons over. I hiked 35 unique 14ers and 2 13ers since June of this year, bringing my total 14er count to 47 (including repeats). I also made several failed attempts of 14ers and successful summits of peaks at 8K, 9K, 10K, and 11K not included in these numbers.
When I started this last June I had a goal of hiking eleven 14ers this year. I more than tripled that goal.Not because I intended to, but because it became really fun:mountaineering became a passion, a lifestyle, and very, very addicting.
Most trails took 3-5
hours to drive to, approximately 10 hours to hike, and 3-5 hours to drive
back. That’s a lot of solo time to think:I loved every minute of it!
I’ve learned a lot too. So much I could easily write a book. Obviously I’m not done learning:Mountaineering is full of continuous learning,
improvement, and reevaluating.
I wouldn’t be exaggerating to tell you my whole world view has changed this summer. We all hear or read certain words and immediately a picture comes to mind of what that word means.We have an association with that word.For example, what do you see in your mind when you hear the word gully, traverse, junction, self arrest, spur, couloir, glissade,basin, post hole, head wall, saddle, pitch, scramble, ridge, cornice, crevasse, chute, narrow, soft, hard, rock wall, scree, river crossing, switchbacks, talus, summer storm, exposure, approach, cairn, chimney, timberline, gain the summit or take the ridge?
Previous to this 14er endeavor I had visions in my head to fill all these words and phrases, but in this past
climbing season these visions have changed. Drastically.They’ve come to life and taken on a world of their own.Now when I see the word ‘basin’ in my head it’s not a drawing on a map, but a full scale area of drainage and rolling hills spanning multiple football fields in length, covered in tundra and alpine flowers. A ‘gully’ is a 4 letter word (more on that later) and ‘exposure’ is something dangerous that could include drastic changes in weather or falling to my death.When I hear the phrase ‘take the ridge’ I see a long narrow mountaintop with steep drops on either side I’m supposed to navigate around towers or rock to get to the summit I wish to climb.I can envision in my mind vividly what each of these words means as an experience, and these experiences have changed me.
I’ll continue to learn, and I’ve learned more than I could ever put into words here, but I’ll give you some of the highlights in no particular order:
Climbing is not the same as Hiking. There is a huge difference between hiking and climbing (and between different types of climbing).All 14ers include a hike, but not all include a climb. I’d say most climbs begin with Difficult Class 2 and include Class 3 and above.A climb requires putting away the camera and using all four appendages to scale a mountain.There were times this caught me off guard, even with proper planning.In essence, climbing is mountaineering, and hiking is just that (hiking).
Hiking /Climbing /Mountaineering takes planning: Successful summits don’t just happen. Driving directions, routes, GPS coordinates, weather, dates, time, ability, etc. all need to be taken care of before the hike actually takes place.Of course, you can just try to do all this on the fly, but I can guarantee you something will go wrong.Things go wrong with even the best of plans, but when you plan you give yourself a bigger degree of success.
When you plug in the coordinates into your GPS and it brings you 200 feet but 10 driving miles away from the trailhead where you no longer have access to cellular data and the GPS keeps unsuccessfully trying to reroute but you HAVE NO DATA and you arrive in the dark it can be daunting, but if you have a printed map available that can get you where you’re supposed to go you’ll appreciate your planning. This happened to me so many times this summer I’ve lost count.
There were several times I found out hours before a hike my booked schedule was now free and I was able to go. If I hadn’t already pre-planned routes, driving directions, etc. I would have missed out on a hike because they take a while to plan.Several times weather derailed my plans at the last minute. Because I’d put together dozens of potential trips I just switched to an area with more favorable weather.Mountaineering takes planning.Plan.
Hike when you can (see above).
It’s not always easy to get up at 2am and drive 4 hours to a trailhead, but I’ve never regretted a hike.If I slept in on all the days I wanted to instead of hiking I would have missed dozens of amazing experiences, all for sleep.You can tell people about your dreams or your accomplishments.As far as I’m concerned, sleep when the weather is bad, hike when you can.
Difficult Class 2 means gully.
I hate gullies.I used to think a gully was a beautiful canyon full of lush landscape, trees, waterfalls, and streams (hello, Fern Gully?) but they’re not.Gullies are alleys eroded by water and snow.They’re usually narrow and steep, formed by loose rock and sand, extremely difficult to find traction on to climb, and the only route up the mountain due to steep rocks on all sides.
The more challenging ones encompass an entire mountainside. They are difficult to climb up, but even more difficult to climb down, as your center of gravity is off and slipping and sliding hundreds of yards to your death or grave bodily injury is a serious possibility.In my opinion, gullies are more dangerous and difficult to climb than a Class 3, and a route that includes a gully is one I try to avoid if at all possible. Wear a helmet and microspikes whether or not there’s snow/ice.
Listen to others.
Ask for advice from others who’ve summited a mountain you’ve yet to summit.I’ve never understood why some people just don’t want to take advice?Everyone has something you can learn from.As far as
I’m concerned, I want to be as prepared as possible when out there dozens or hundreds of miles from civilization (read: help is far away).It’s great to know if there’s a false summit or difficult area that has a trick to get around.Ask hikers hiking down the mountain while you’re hiking up about conditions (etc.) and truly listen to their responses.I can’t tell you how many times I’ve been hiking down a mountain due to weather and tried to warn people hiking up. No one has ever taken my advice, and I know for a fact several of them ended up getting caught in hailstorms above treeline.
Everyone has different comfort levels / risk tolerances. Know yours.
When getting advice from others keep this in mind. Challenge yourself, but don’t be stupid. I’ve taken several routes I know I wouldn’t have completed if I’d been with others because I have a higher risk tolerance than most people.We would have turned back and I wouldn’t have summited.I’ve also taken alternate routes when the one in front of me was too difficult.The bottom line is if you don’t feel comfortable don’t do it just because someone else has.
Climbing time and pace don’t correlate to distance.
Just because you can hike 20 miles in a day near your home doesn’t mean you can hike a 20 mile 14er in the same amount of time. A general rule of thumb for hiking is 2mph, but this varies widely depending on ability, experience, weather, carrying weight, and terrain.Just because you hiked a 7 mile class 1 14er in 3 hours does not mean you can hike a 7 mile class 2 14er in 3 hours.Look at elevation gain and difficulty of terrain before setting out, and remember climbing takes longer than hiking.Think about it:Can you climb up a mile worth of rocks in the same amount of time it would take you to walk the same distance?Probably not.This corresponds with 14ers too, and learning your speed comes with experience.
Keep your pack packed.
This also goes hand in hand with planning. If you never unpack your gear you’ll never need to re-pack it.I always keep my microspikes, sunscreen, gloves, hat, compass, emergency first aid kit, matches, whistle, etc. in my hiking pack.When I get back from a hike I refill my water bladder and replace my bandana (and wash the old one).I never need to wonder where my gear is or if I have it because I always keep it in my pack. This saves me the time and hassle of prepping the night before, and wondering where stuff is.
Have the proper gear.
This is very important.You shouldn’t just head out on a hike up a 14er with just tennis shoes and a water bottle (although trust me, I’ve seen many people do just this).Know what the 10 essentials are and bring them.Use a water bladder instead of a water bottle.Get a good pair of hiking boots, trekking poles, a helmet, microspikes, and all weather jacket.It’s amazing what a difference good shoes and microspikes can make on a trail with just a little bit of snow/ice.If the weather/terrain calls for it, invest in crampons, climbing gloves, and an ice axe (and learn how to use them properly before needing them).It’s extremely frustrating to hike in 10 miles and have less than 1 mile left to the summit, only to have to turn back because you don’t have crampons and you can’t hike any further without them.
Learn to layer.
The weather on the mountains is unpredictable and changes quickly. I’ve never regretted bringing my snow jacket on every hike I’ve been on, even in the summer. And in case this is new to you, NO COTTON!(this means no jeans, cotton socks, cotton t-shirts, cotton gloves, etc.).In case you’re unsure of how to layer, here’s a photo:
Learn how to eat.
I don’t get hungry on the trail as a rule, but every so often the hike takes longer than anticipated and I’m glad I pack food no matter what. While on the trail don’t go for foods that are overly ‘healthy’.During the hike is when you need protein/calories to keep going! Lightweight foods that are high in calories work best.I like to make homemade beef jerky and bring
that with me as a snack, along with some dehydrated bananas and peanuts.When hiking long distances remember the weight to calorie ratio:I’d rather bring along and eat two Reese’s Peanut Butter cups than an apple (even though it’s “healthier” the apple weighs a lot and doesn’t give you the calories you
need to keep you going).
Hike Early.
We’ve all heard to hike early to avoid summer storms, but there are realistically many more reasons to do so than just the stormy and unpredictable summer weather.
You’re generally more rested earlier in the day
In the summer while it’s cold in the morning you’ll warm up fast once you start hiking and it won’t be quite so hot above treeline if you get there earlier in the day.
If something goes wrong you’ll have more time in the daylight to problem solve
You avoid the crowds and actually get a spot at the trailhead to park your vehicle
Colorado sunrises are amazing. Be where you can appreciate them (above or as close to treeline as possible)
If you finish early you’ll have time to celebrate by resting your feet in a stream or head to town for a beer
Making it up is optional, making it down is mandatory.
We’ve all heard this phrase dozens of times, but it’s much more difficult to implement than to say.Nothing hurts more than turning back on a summit, but know your abilities, and make a plan before you ever get into that place where you need to make the decision to turn back.This includes time limits (I need to be at my halfway point by x time to summit today) and weather restrictions (if I hear thunder I’m turning back versus if I hear thunder 3 miles away I’m turning back versus if I’m above/below treeline and hear thunder I’m turning back, etc.).If the terrain is above your abilities or you don’t feel comfortable, know to turn back.The mountain will be there tomorrow, next week, and next year.Make sure you’re there to see it.
Easy and close to Denver means crowded.
Think Mt Evans, Mt Bierdstadt, Quandry Peak, etc. If it’s a class 1 or 2 and less than 8 miles of hiking distance expect to hike with dozens (if not hundreds) of your favorite hiking buddies no matter what day of the year it is.This means limited parking at the trailhead, crowds, fewer animal sightings, blaring music from someone hiking with speakers, hikers that smell like marijuana, seeing people peeing above treeline and summit photos with people you don’t know in the background.Sometimes the drive away from town is worth it.
The mountain is bigger than it looks, and smaller too.
Study your maps and do your research and things will still surprise you. The mountain looks different from far away than it does up close.Sometimes the challenges are bigger than they appear, but often smaller as well.There have been several places that from afar looked impassable, but once I was closer I could see a navigable path. Take the trek one step at a time, and don’t give up or make up your mind until you get there.
If you don’t try you’ll never know.
I got this advice from my 14 year old while going back and forth over whether or not to hike on a particular day when all my information was giving me a 50/50 chance of summiting.When in doubt, go.You can always turn back if you need to, but you’ll wonder forever if you never try.
Weather forecasts are wrong, but check them anyway.
I can’t tell you the number of times I’ve checked and checked and checked the forecast for a particular area only to have it completely different once there. Sometimes this worked out in my favor (anticipated 30+mph winds that never materialized) but often it didn’t (the only cloud in the sky was directly
above the peak I intended to hike, and it was filled with ice and wind).On the other hand, it’s nice to know when it’s expected to thunder and lightning all day or if the wind speeds are
anticipated to be above 50mph.Knowing there’s a 50% chance of hail at noon helps you to make an informed decision about whether or not to continue your hike when you see clouds forming overhead, or even in determining which hike you should take that day.
If there’s water, there’s ice. Especially when it’s dark, just assume everything wet is really ice and can cause you to slip and fall.Proceed with caution.
Ladies: Never let anyone tell you a tampon is unnecessary weight. Never, ever ever.Altitude does weird things to your body, and those around you as well.You might not need it, but you’d be surprised how often you might just meet someone along the trail who does and make a friend. They don’t weigh enough to outweigh the benefits of having one with you, and they can double as emergency first aid supplies (a quick google search can answer any questions).
Carry a bandana (or two). Seriously, these are lifesavers!There are hundreds of ways to use a bandana, not to mention for blowing your nose, for use instead of toilet paper (this is why I said two), or to immobilize an injured appendage.Ladies, also see note above and infer.
Ladies, learn how to pee above treeline.
For guys this is a no-brainer, but for women it can become an issue, as many hikes continue for miles above treeline and if you’re drinking water you’ll need to pee (and there’s no place to hide). Here’s a hint:Find a place to sit and use your jacket to cover your lap. Problem solved!
Learn how to blow your nose without a tissue/bandana/etc.
It’s gross, but along with a trusty chapstik will save your nose/upper lip from getting raw (basically you just plug one nostril with your thumb and blow really hard).Also, don’t do this in the company of others (once again, it’s gross).
Bring along a GPS and a topo map:
And know how to use them!Social trails abound in popular areas and the real trail can get muddied.A GPS is no good if you don’t know how to use one, and a topo map and compass are as well. Practice before you need them on easier hikes closer to home.They can both really save you if you get
lost/stuck on the trail.
Don’t expect an engraved invitation.
What this basically means is don’t expect a trailhead sign to indicate where the trail starts, or even signs along the way indicating which direction to take at a junction.While there are many trailheads with amazing signs indicating you’re at the right trailhead and where the trail begins, this is often not the case for 14ers.Several times I’ve parked (in the dark) at the end of the route and supposed beginning of the trailhead,not able to see where the trail actually begins, or even a sign indicating I’m at a trailhead.Often times you’ll come to an area where several trails intersect and there’s no signage.This is where having a GPS comes in handy.
Don’t expect a trail.
Unless you’re hiking a class 1, there won’t be a trail to the summit. There will be some route finding involved as well as hiking over rocks (etc.) with no established trail. I’m not sure why this as a surprise to me, but it was in the beginning.For some reason I thought I was owed a trail while hiking, but 14ers are a different game and considered difficult and a hallenge for a reason.Learn to use a map and compass and develop some route finding skills.
Sometimes the obvious route is the actual route.
One time I was hiking and met several people along the way.We all knew the cutoff for the peak was
difficult to find, and somewhere in-between two points.I happened to see a cairn wrapped in pink
electric tape, and suggested that was the route to take.Everyone else agreed that was too obvious,
and probably there to indicate the mine behind it.Nope, the pink tape indicated the correct trail.GPS was helpful here as well.
Just because they’re close to each other doesn’t mean they’re the same.
Each 14er is unique, and just because two 14ers are a couple of miles apart or in the same range or ‘connected’ doesn’t mean their routes are similar.Sure, the views, animals, flowers, and stability of ground will be similar, but look at their class rankings:A 2 class can be very different from a class 3, even in the same range.
Buy a 4WD vehicle with clearance.
Extra points if you can sleep in the back.If you’re serious about hiking all 14ers you’re going to need a 4WD with clearance; either that or you’ll need to love hiking an extra 15 miles to get to the trailhead.Many trailheads to 14ers are at the end of serious 4WD roads. If you can’t afford to buy one make friends with someone who has one, or rent one for the weekend.
13er doesn’t mean easier.
Think about it, a 13er could be one foot shy from being a 14er and is still referred to as a 13er (13,999). They’re just as difficult, and often more so because they don’t have established trails and aren’t as frequented by other hikers. Don’t judge.
The way the mountain is facing is important for snow/ice reasons.
Routes facing the west and south clear of snow and ice much faster than routes facing the east and north due to length of exposure to sun and ability to melt snow and ice. Do your research, know which way your route is facing, and plan appropriately. I’ve hiked mountains where one side of the mountain was completely clear of snow (the side you could see from the road), and as soon as I got to the inside hiking area it was like a snow globe.
Weather changes class.
A class 1 hike can easily become a class 2 climb or above in snow. Wind, snow, ice, etc.can drastically change the difficulty of the climb.Know your abilities and be prepared.
Don’t hike to get in shape. Get in shape to hike.
The hike will be a lot more enjoyable if you’re physically up to the challenge.Breathing above treeline is a lot different than breathing below it. When you go above treeline, it’s like you can suddenly feel that the air is thinner. You get tired quicker and it’s harder to breathe as well as you do in lower altitude. Being physically fit makes this transition easier.Use the winter months to work out and build up your endurance.You’ll thank yourself for this later.
It hurts just as much not to hike as to hike. Sometimes you need to make the call not to hike, and that has to be ok. Personally, right now, I’m itching to go hiking this weekend, but the weather isn’t cooperating and I’ve already made other plans. I’m a nervous ball of energy that’s struggling to find an outlet, so I’m going to use this weekend to catch up on sleep, and to plan future hikes.Be prepared for times when hiking isn’t possible, and ways to be ‘ok’ with it.
Every hike/peak/summit has a story: Yours.After a while they’ll all run together and you’ll forget things.Write them down as soon as possible after your hike. Take pictures.Talk about your experiences and share your stories.If you don’t, you’ll wish you did…
Today I wanted elevation gain. This is most likely the last change I’ll get to hike a 14er this year (I promised my mom no more hiking alone between Nov-May) so I wanted to go out with a bang. Weather was pretty stable across Colorado today, but there was a prescribed burn scheduled in the Shav/Tab area that was affecting air quality in the Colligate Peak area, so that excluded a bunch of 14ers. I couldn’t find any recent trip reports (etc. ) on Challenger Point and Kit Carson, but I’d attempted them a few weeks ago and hadn’t heard of any snow in the area since, so I decided to attempt them again, knowing if I failed (again) at least I’d get in some elevation gain.
I remembered thinking last time I hiked Willow Creek trail I’d wished I’d started at 3 or 4am, instead of 6am. It really is an early trail. So I woke up at midnight and made it to the trailhead at 4am. I’m not going to post info about the Willow Creek trail because I’ve done it before (TH and Trail info here: http://wildwandererblog.tumblr.com/post/166343409816/willow-lake).
No one had signed the trail register for days, but the last entry (10-24-2017) stated Kit Carson was socked in. I mentally prepared myself not to summit Kit Carson, but I’d take a look at it just in case (a lot could happen in 5 days!)
I was on the trail at 4:15am, and made it to the lake at 6:00am: It was still dark! Oh no! I’d hiked 4.25 miles in less than 2 hours! Lat time it took me longer, and I couldn’t help but think maybe it was due to route finding? Either that or I wanted to get a jump start on that elevation gain. In any event, I circled the lake in the dark. About halfway up the ridge I heard a loud TWANG! It startled me, as it echoed throughout the canyon. The sound was unique, but I’d heard it before when my cousins and I used to throw rocks on a frozen pond. The lake must be frozen! I bet a pretty big rock/icicle fell and hit the ice!
I continued on in the darkness, hiking slow to allow the sun to rise. Just after I passed the willows I was able to turn off my flashlight. I’d timed this perfectly! Oh, and the weather was great! MUCH BETTER than the last time I was in the area. No wind to speak of this time, but unfortunately, it looked like it had snowed recently.
Take a look at the mountain before me:
In any event, there was no wind, and I could see a lot of snow-free area, so I decided to make a go for it. I couldn’t help but think to myself, as I was halfway up Challenger Point, what a great decision it had been to hike this mountain today! The trail was pretty much free of snow, it was warm, and there wasn’t any wind. Very cool!
Unfortunately, I spoke too soon. When I’d made it about three quarters of the way up the mountain I ran into trouble. The snow up here was covering every single avenue I had to make it to the summit! I could totally see where I had to go, but the path was covered in 5-6 feet of snow and there were no footprints/tracks from pervious hikers to follow. I kept trying to find a snow-free route to make it to the ridge, but it just wasn’t happening. I had microspikes, but they were no good: I’d hike out about 8 steps or so on snow that gave me traction, then all of the sudden, ice skates. Of course I backtracked when this happened.
There were a few boulders I felt I could safely climb up and over, but I did not feel comfortable climbing back down those boulders. I need an exit strategy when I climb, and I wasn’t getting one with these rocks (so I didn’t even attempt it).
I was seriously getting frustrated, traversing in circles trying to find a safe way around these boulders/snow. Have I mentioned I hate gullies? However, I didn’t have evening plans tonight and it was a really nice day. I had plenty of time to figure this problem out. I obviously didn’t have the gear I needed for this climb (Crampons and an Ice Pick/Axe), but I really wanted to summit (safely). The snow wasn’t really that bad, I just couldn’t get traction anywhere. I looked around and thought for a bit. Most of the soft snow was by the boulders. How could I use this to my advantage?
I decided to hug the boulders, and make stairs with the soft snow at their base and around their sides. I’d be able to hold onto the grips in the rock on my way up and down, giving me stability. This took quite a bit of effort, but I needed to make sure I’d be able to climb back down after climbing up. Several times I stopped to make sure these stairs “worked” in steep areas. Success! It was slow going, but eventually I made it to the ridge! Woohoo!
I was so glad there wasn’t much wind today! The ridge wasn’t very wide, but only half covered with snow, so it was easily navigable.
I made it to Challenger Point at 9:15am. Here’s proof of summit:
And a 360 degree video.
Challenger Point was named in memory of the Challenger Space shuttle, and there’s a plaque there to commemorate it.
OK, now I looked over at Kit Carson Peak. It did indeed look like The Avenue was full of snow, but if I’ve learned anything from Mountaineering, everything looks different up close. I decided to hike over and take a look. The worse that could happen would be I’d have to come back for Kit Carson another day, but re-summit Challenger Point today (which would give me more elevation gain! Woot!).
I couldn’t take the traditional route down Challenger to Kit Carson because of that darn snow. It was really hard packed and slippery there. Luckily however, the ridge was pretty dry, so I just followed that down.
When I reached the small saddle between Challenger and Kit Carson I could see the Avenue was indeed full of snow, but navigable. And, an added plus: The snow as soft! I’d be able to get traction! I was on my way.
All I have to say about Kit Carson Peak, even with the snow, was that it was SO MUCH EASIER than Challenger Point! It was very straightforward, had lots of cairns, and was easy to follow.
I made it up Kit Carson at 10:15am. Here’s picture proof I summited
And a 360 degree view
I was fully aware at this point I was only halfway done with my hike. I now had to hike back over Challenger point and back down the mountain.
Oh, this sign says: Danger: Lose Rocks. Many people have died
Hiking back down proved a challenge, but I’m proud to say my stairs worked! A few times I needed to glissade a very short distance (less than 10 feet) to make it to a safe area, but otherwise it was a success! Very slow going, as I didn’t want to slip and fall, but a success nonetheless. The entire hike down to the basin seemed to take forever! Have I mentioned I hate gullies?
I made it back down and crossed the lake, this time in the daylight. I could see where a piece of ice had broken off in the lake, and heard another large rock drop! The lake was indeed iced over, but not completely frozen.
On the way back down to the TH I thought about how Challenger Point is a Difficult Class 2, but Kit Carson Peak is an Easy Class 3. But that was totally reversed when snow was added into the mix! Challenger Point was much, much harder for me today than Kit Carson Peak. In fact, it was the hardest 14er I’ve done so far, even though it technically shouldn’t be. It’s amazing what ice and snow will do to a climb! But I got in that elevation gain, so I’m happy!
Side note: I didn’t see anyone else on the mountain at all today? I was the only vehicle at the trailhead when I got there and when I left…