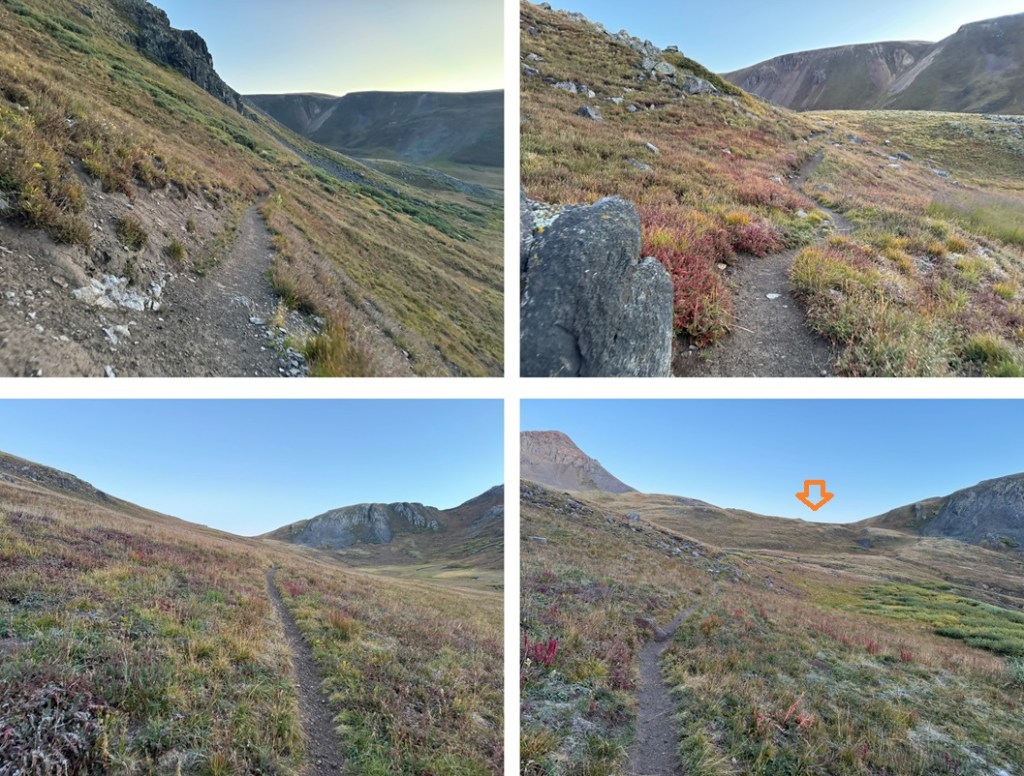
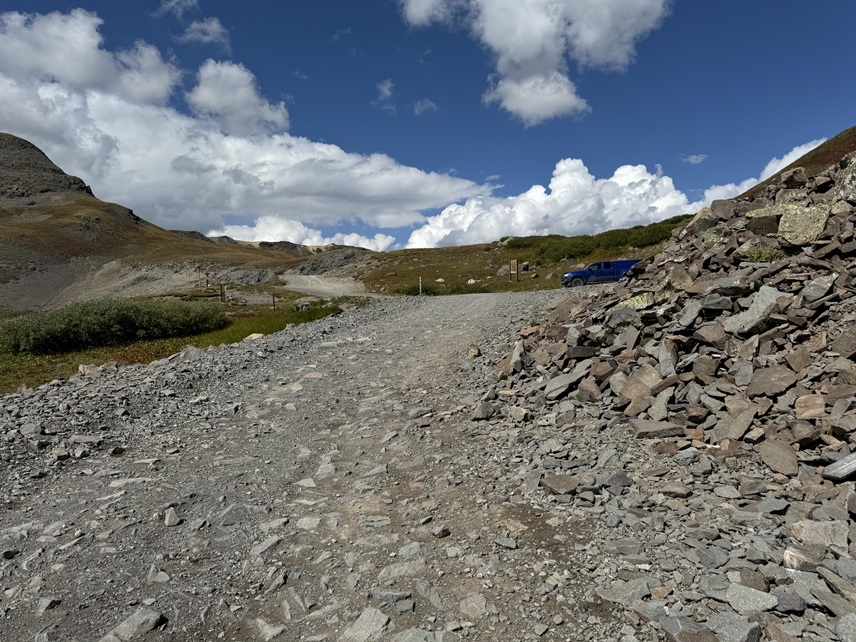
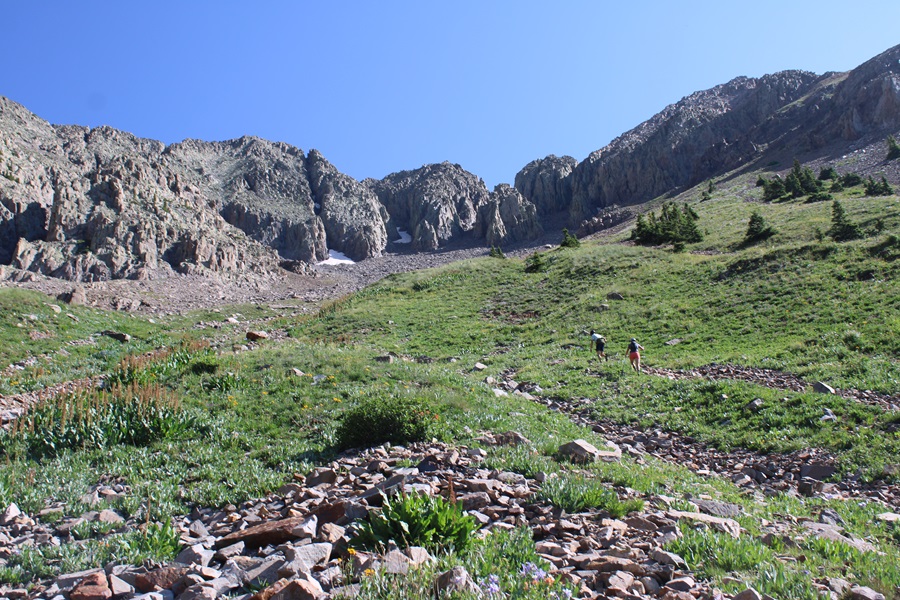
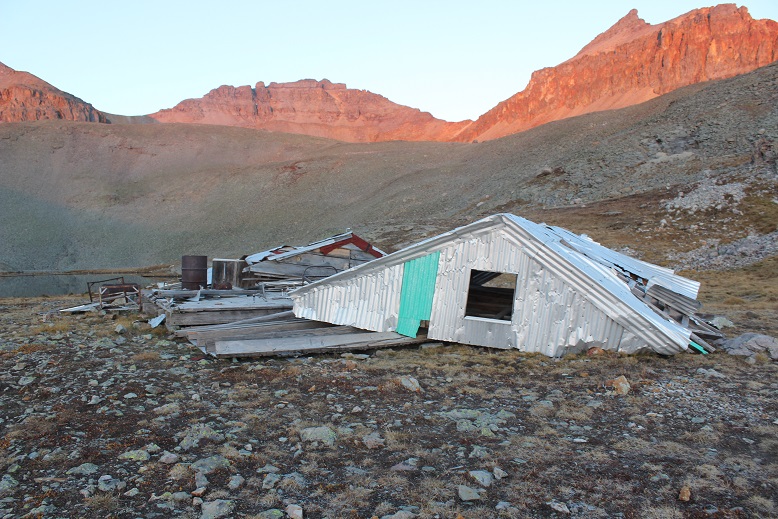
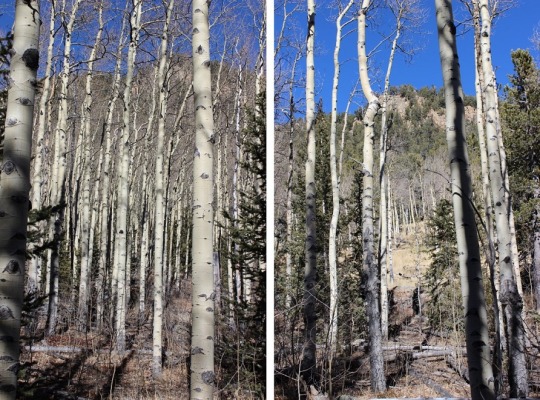
I was parked at Stony Pass, and was up and on the trail at 6:30am, heading east towards the CDT.
I followed the CDT north for 2.2 miles.
At the junction with Moose Gulch, I turned right to stay on the CDT, and continued on the trail until I made it to 12800’.
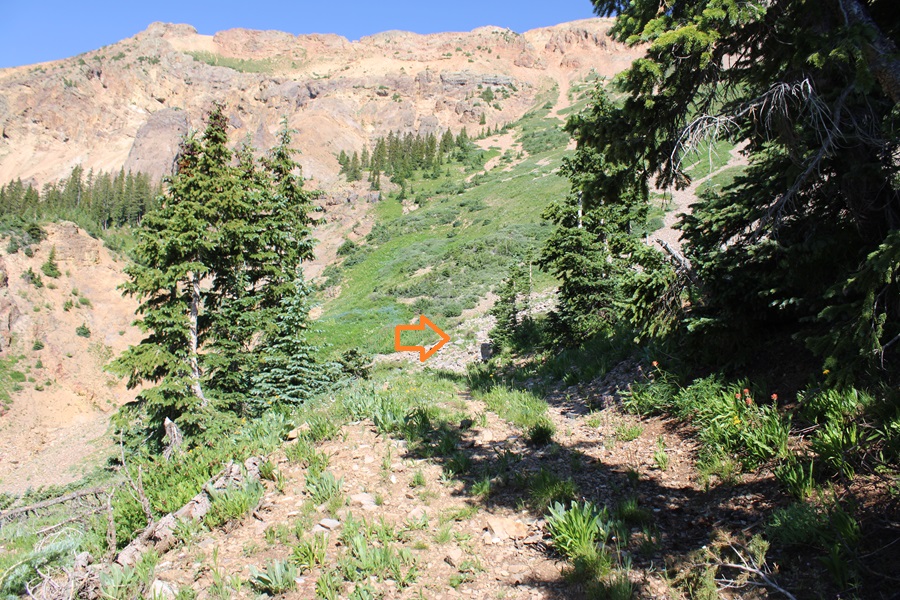
After passing a small pond to my right, at around 12800’, I left the CDT and followed the tundra ridge southeast.
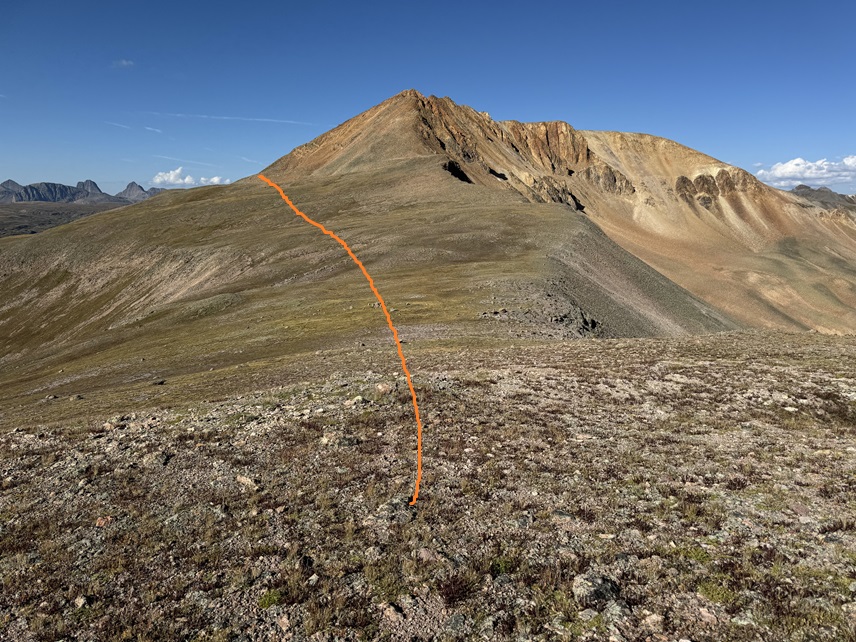
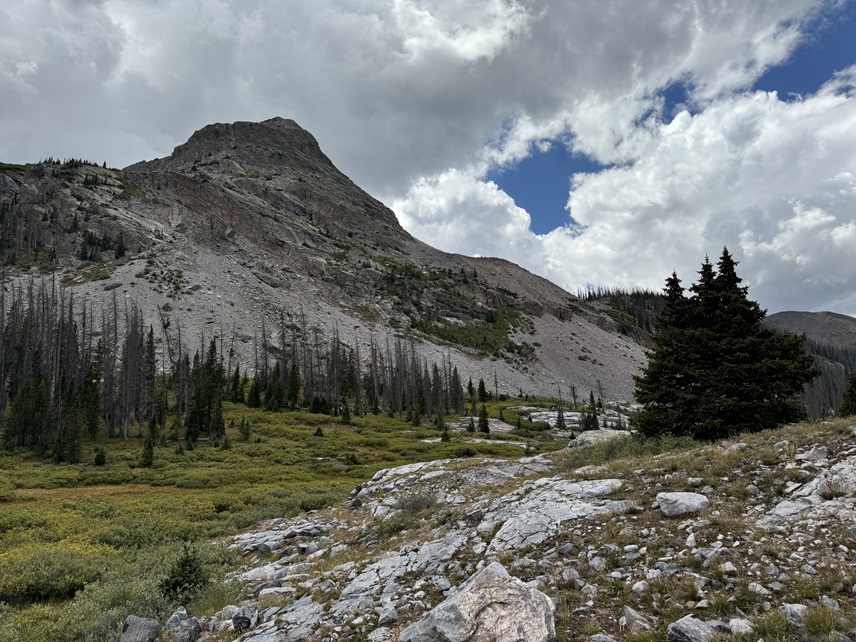
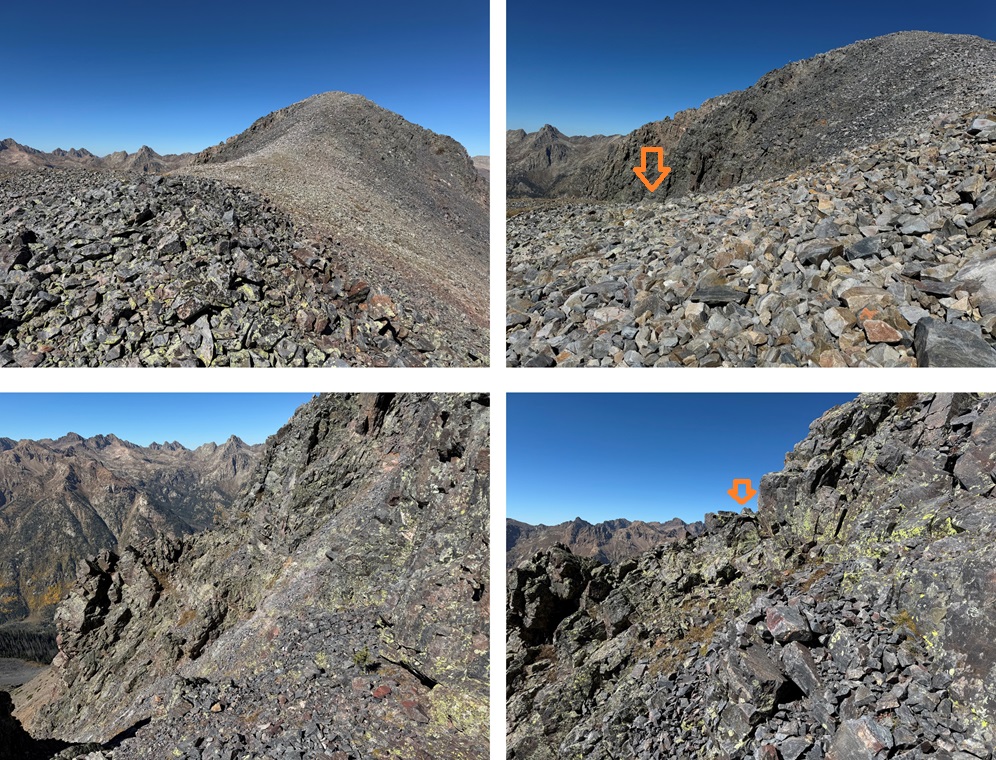
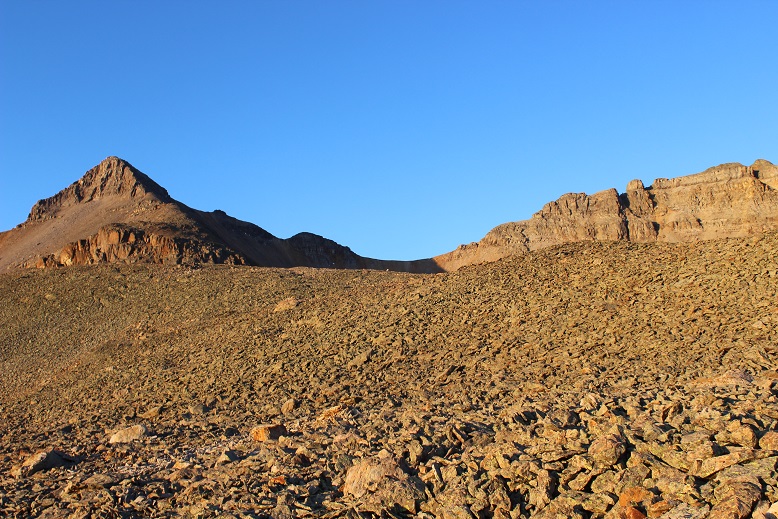
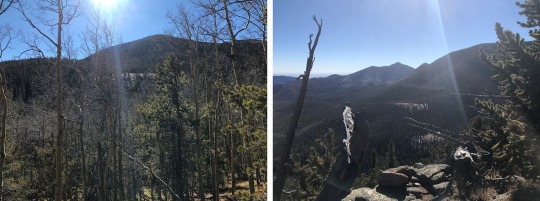
I kept following the ridge, and eventually I could see Sheep Mountain to the southeast. The ridge eventually became a mesa, and the route to the base of Sheep Mountain became obvious.
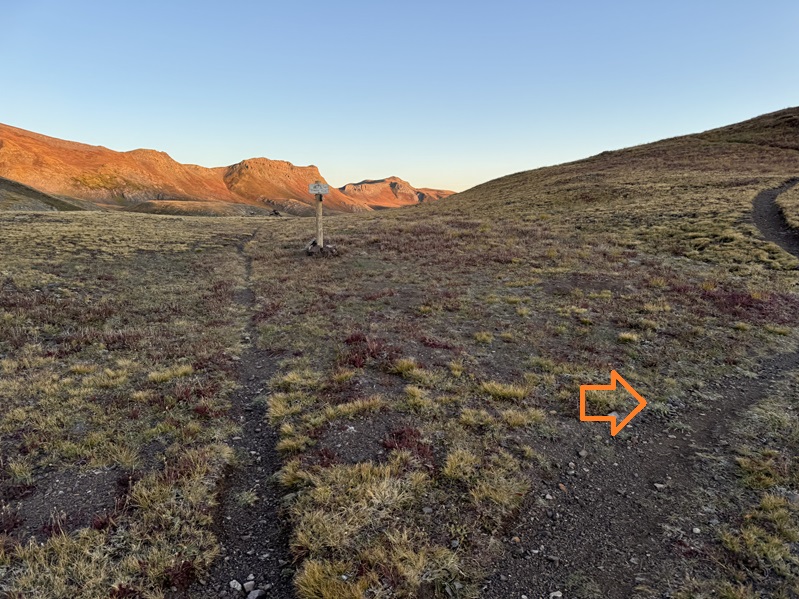
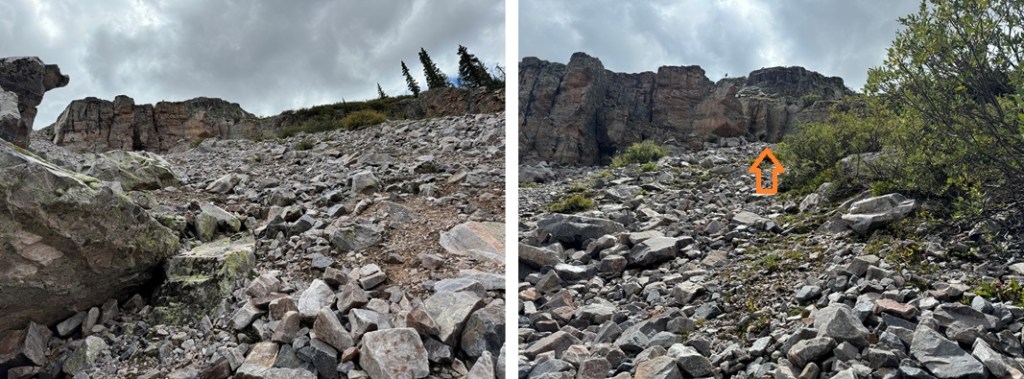
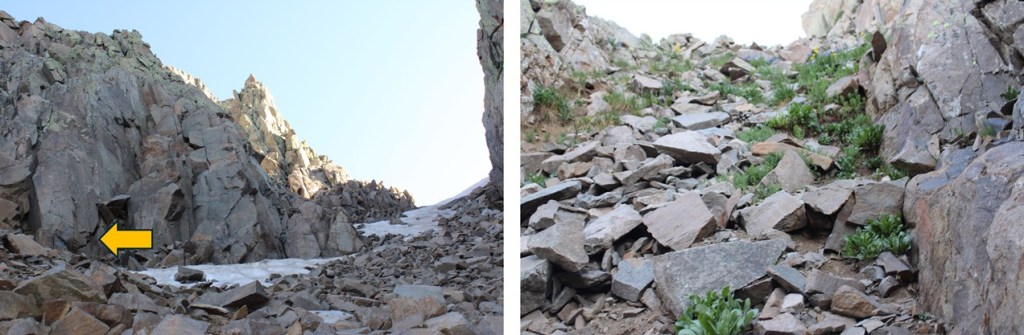
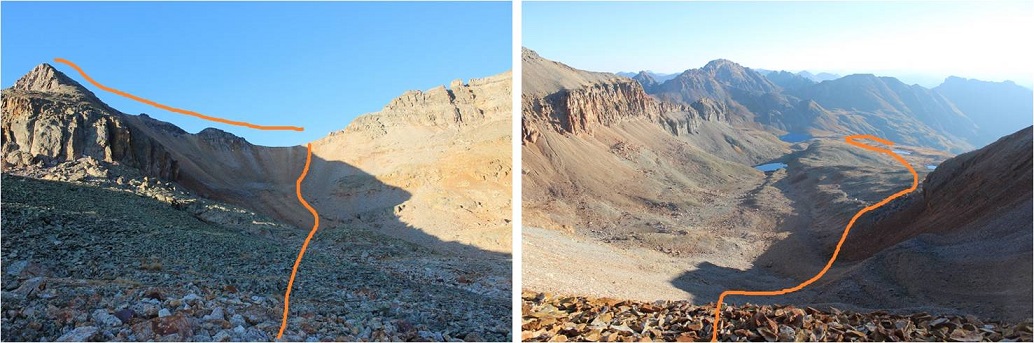
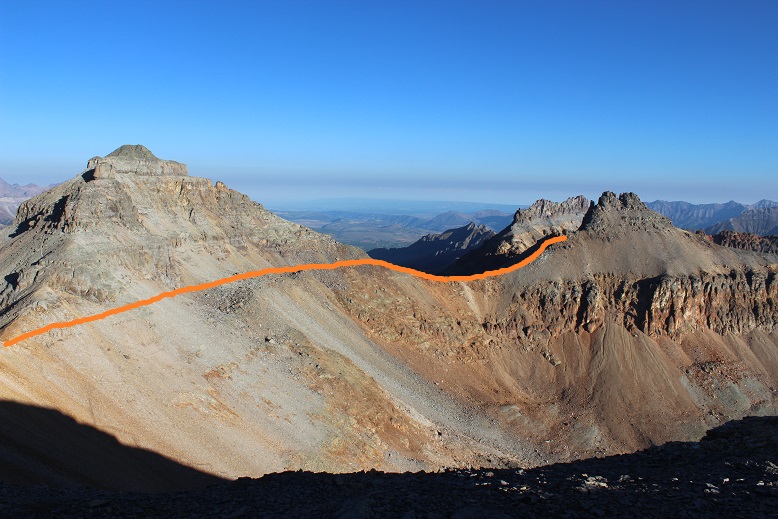
I needed to get to the ridge, and did so on tundra mixed with scree. This is the overall route I took to get to the ridge
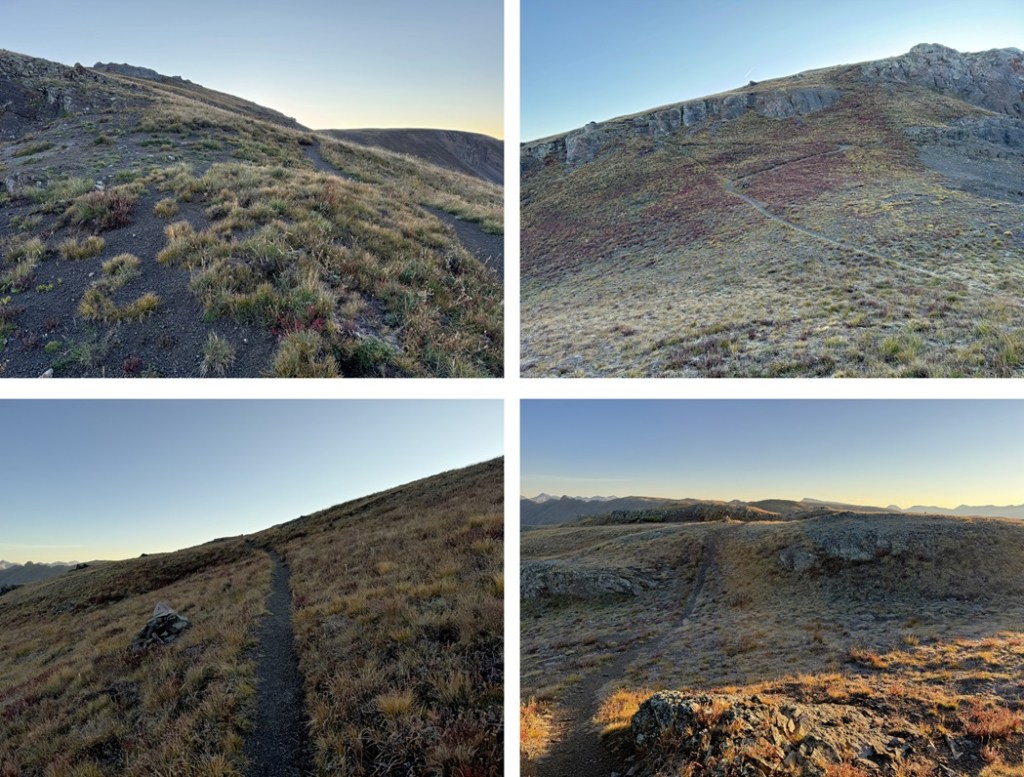
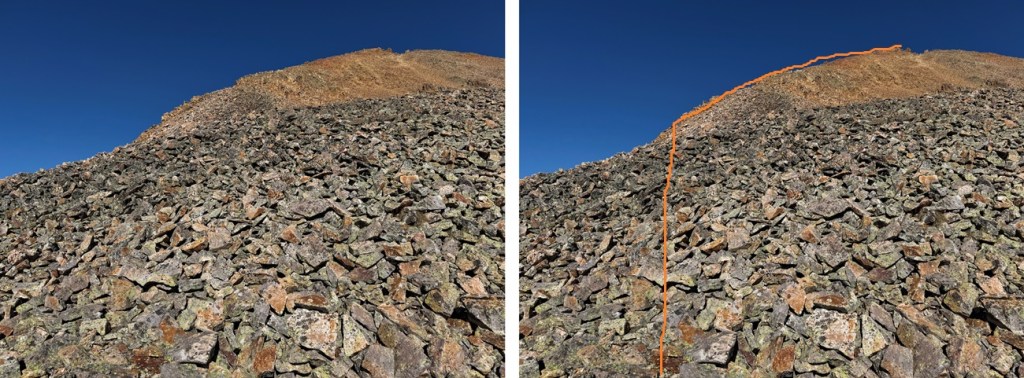
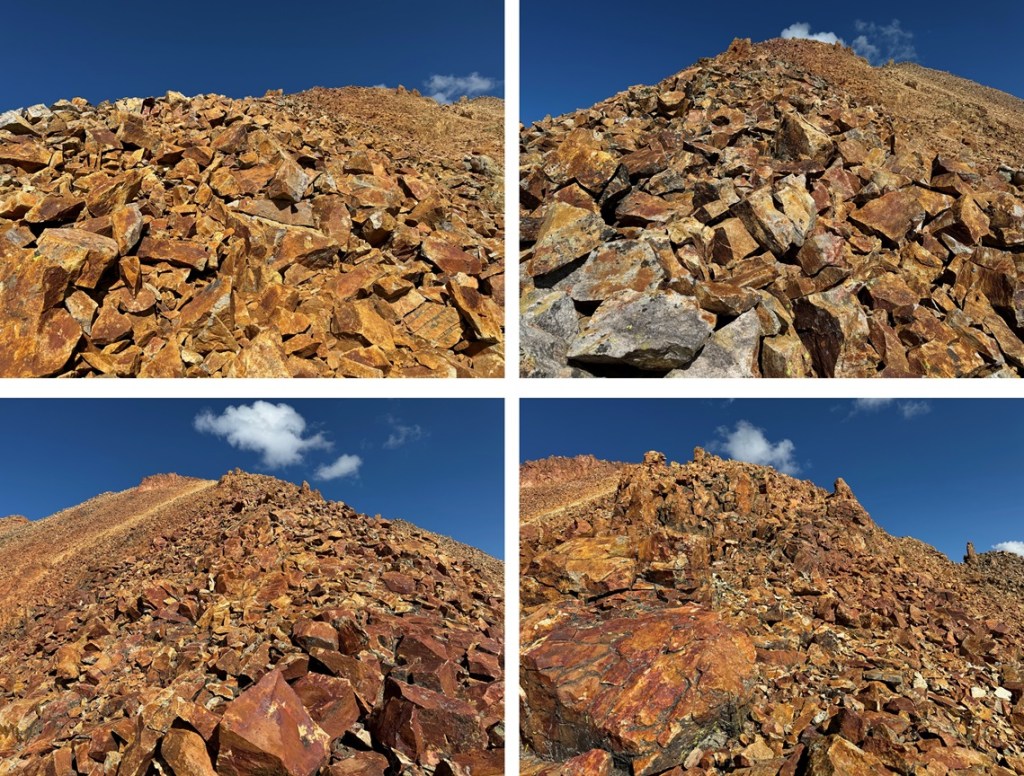
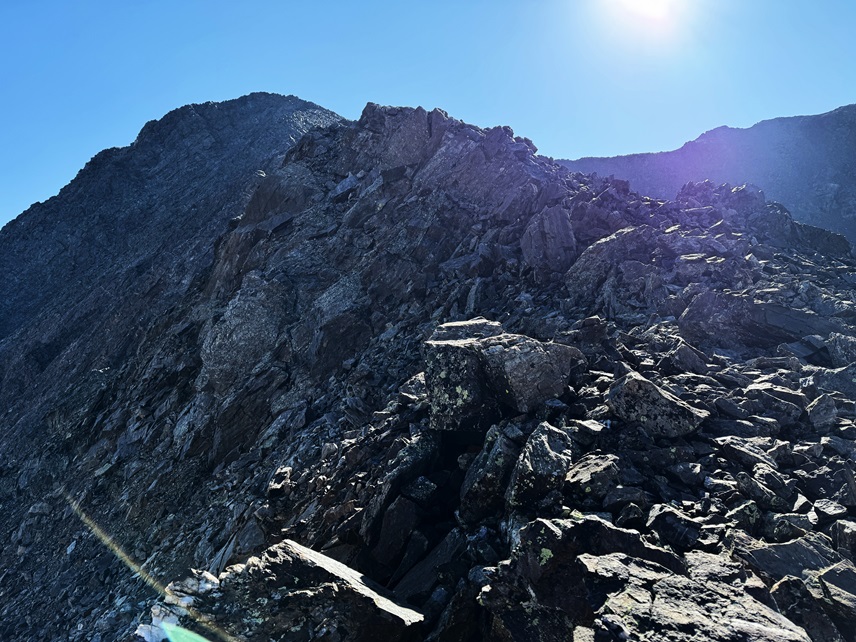
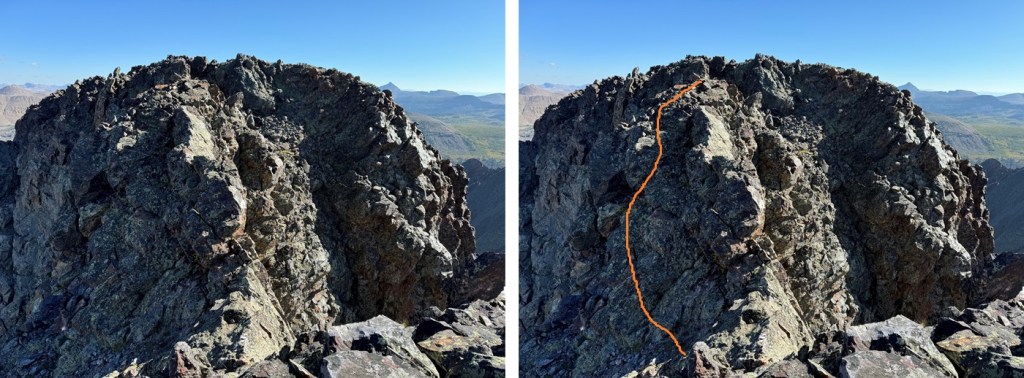
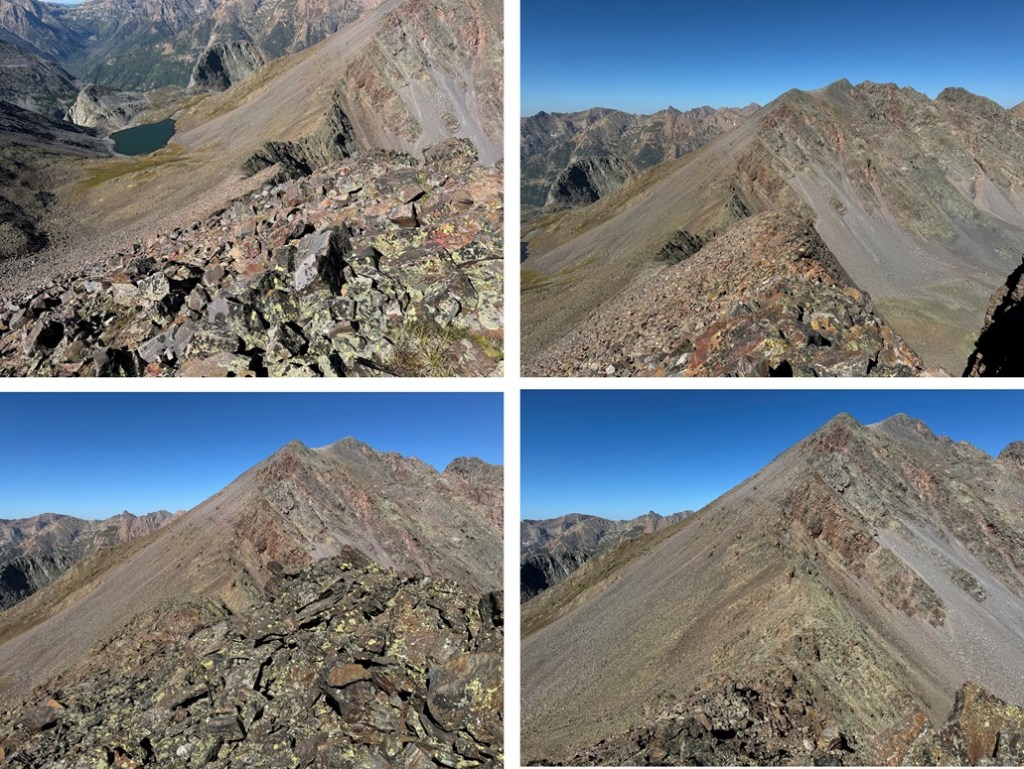
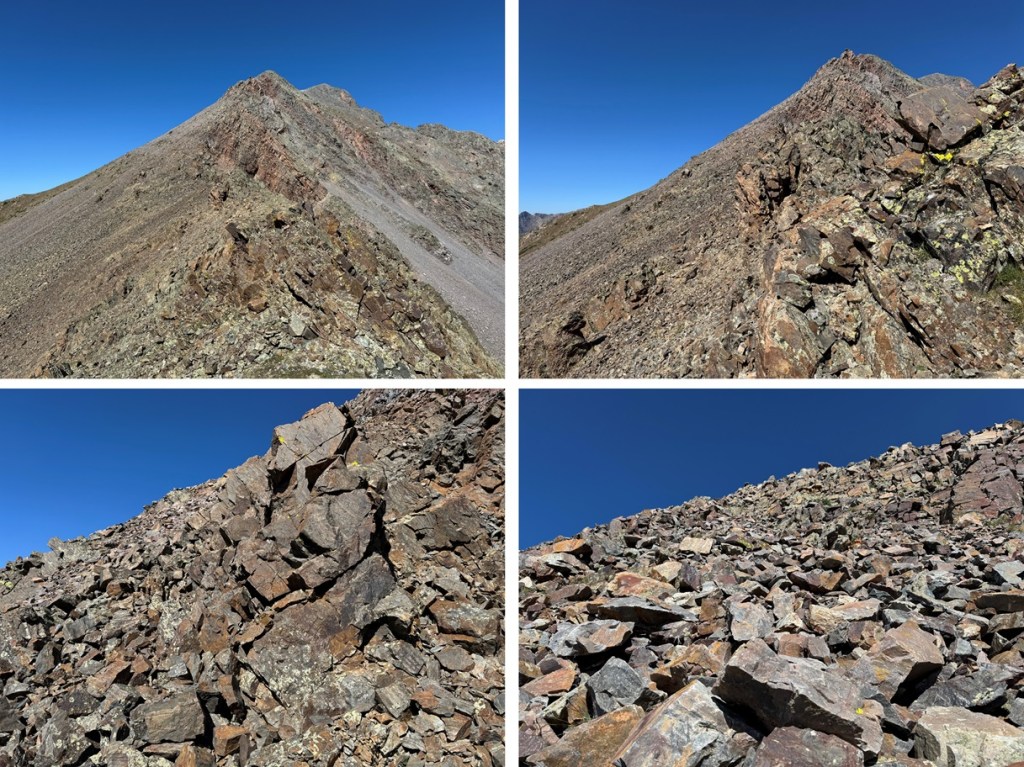
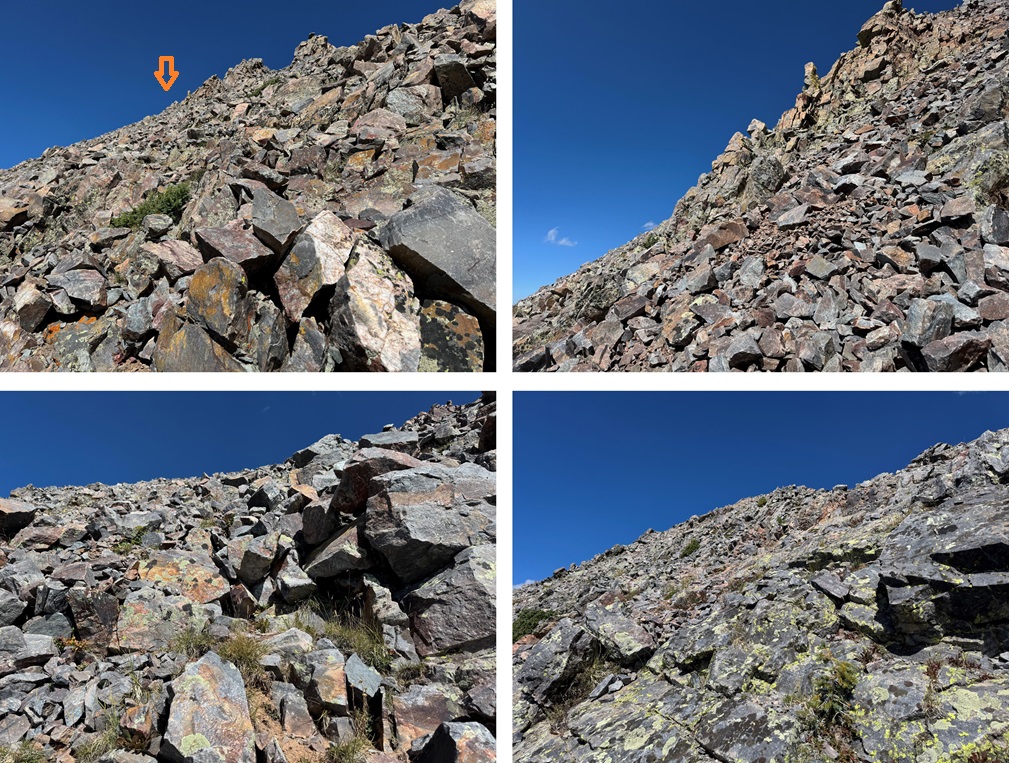
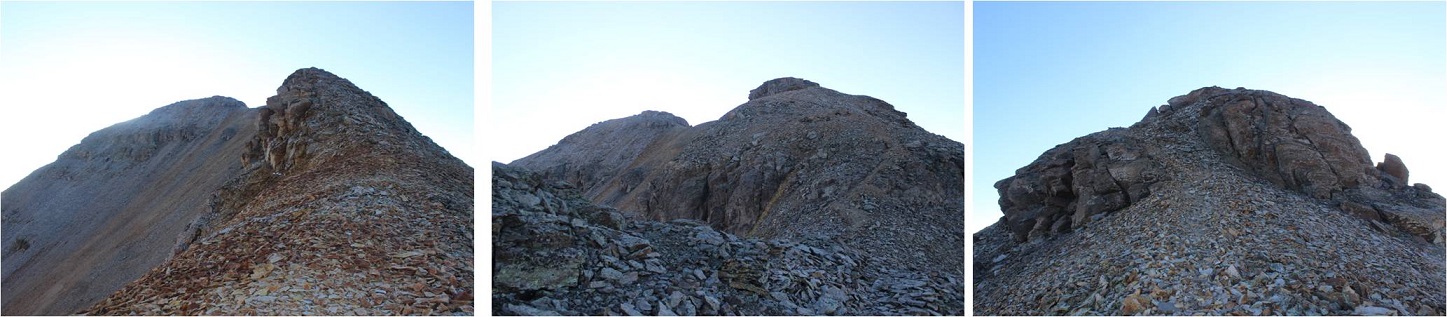
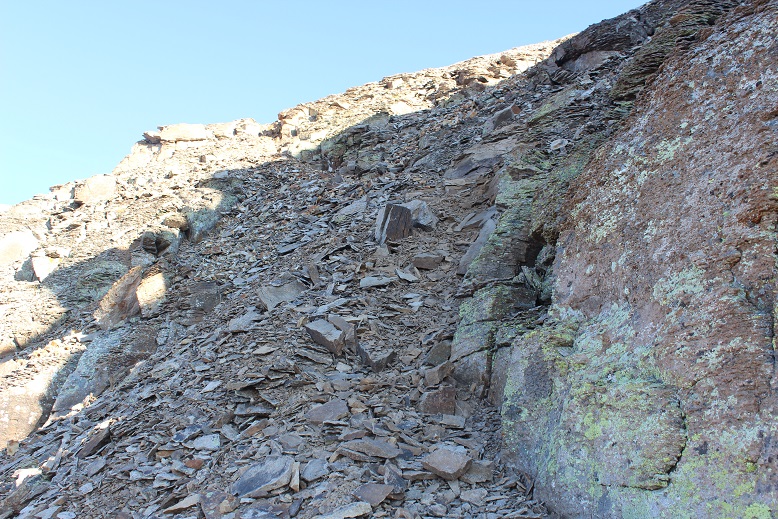
Once on the ridge, I turned left and headed southeast up the ridge. This is where the terrain changed to small talus. It was very loose. The further you climb, the steeper and looser it will be, but you might encounter a game trail to follow.
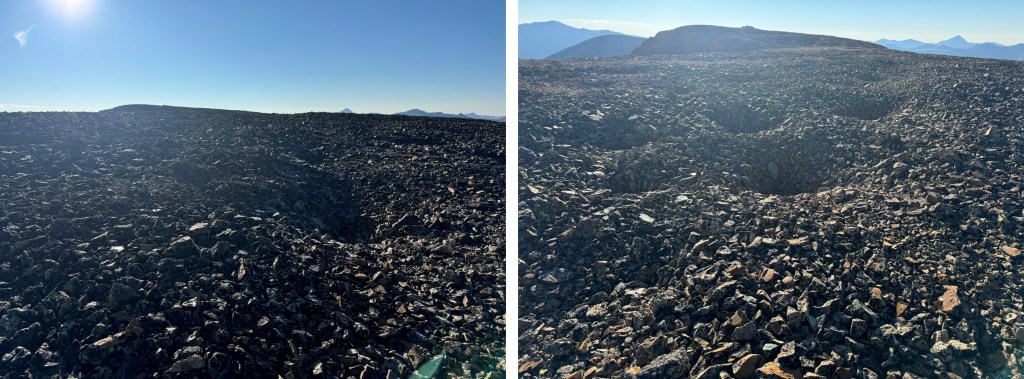
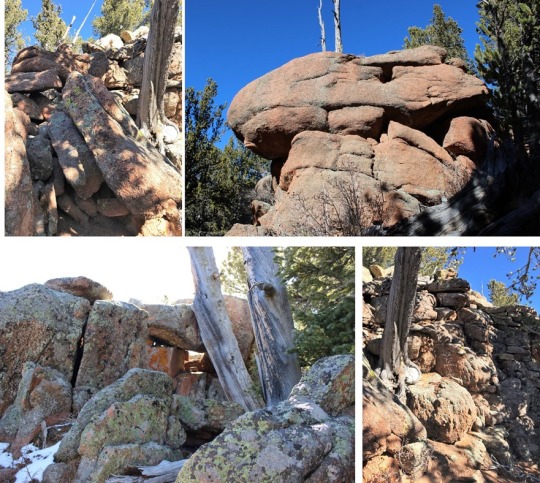
At the top is a wide, flat expanse, full of holes about 5 feet wide. I kept heading east, towards the summit.
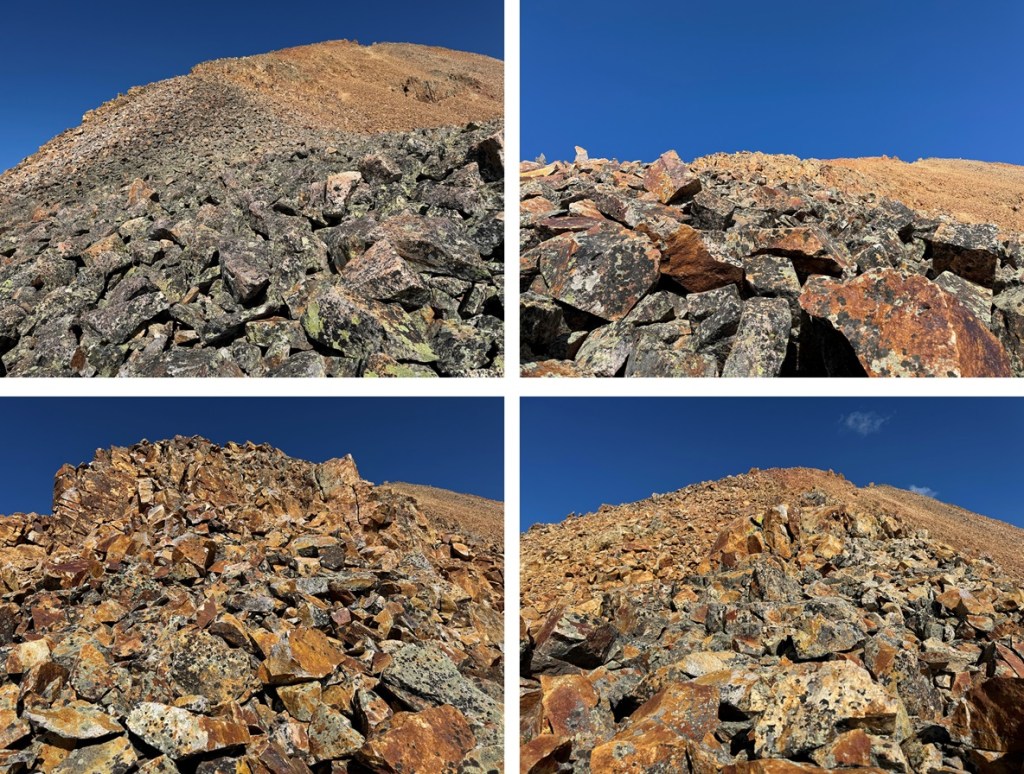
The rest of the route to the summit can be done on the ridge proper and kept at class 2. The only difficulty here is the talus, scree, and exposure that might make it feel more difficult.
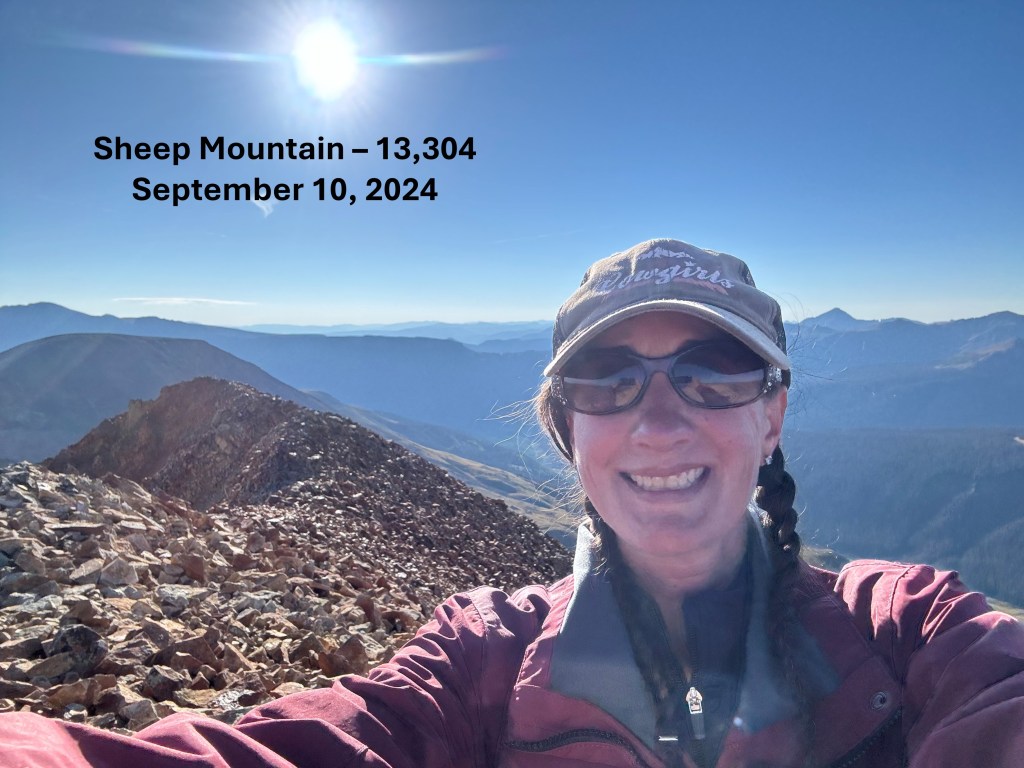
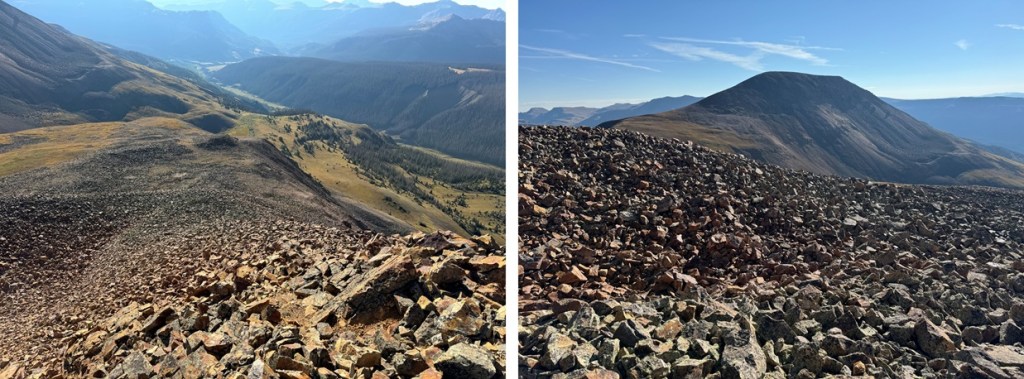
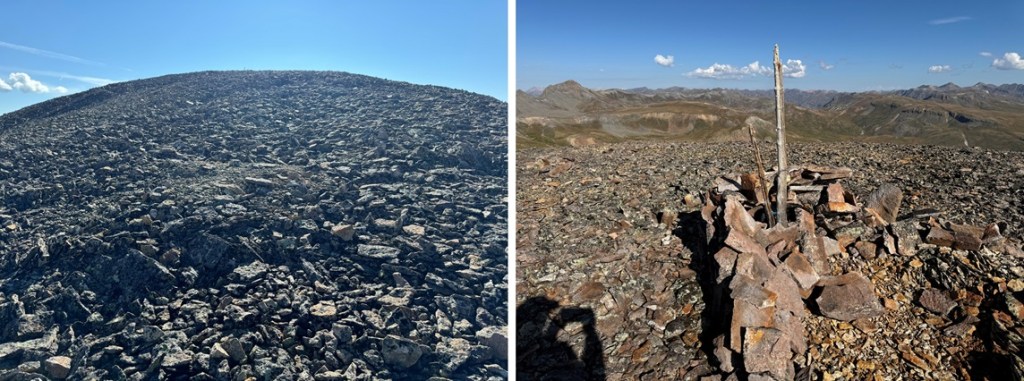
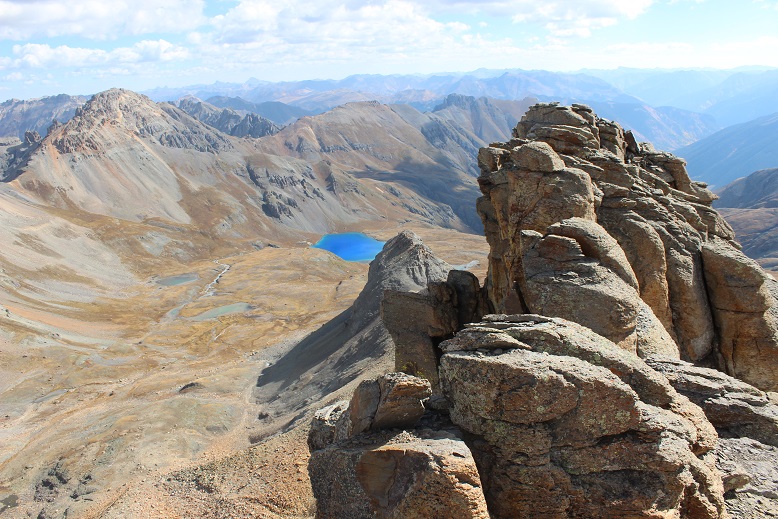
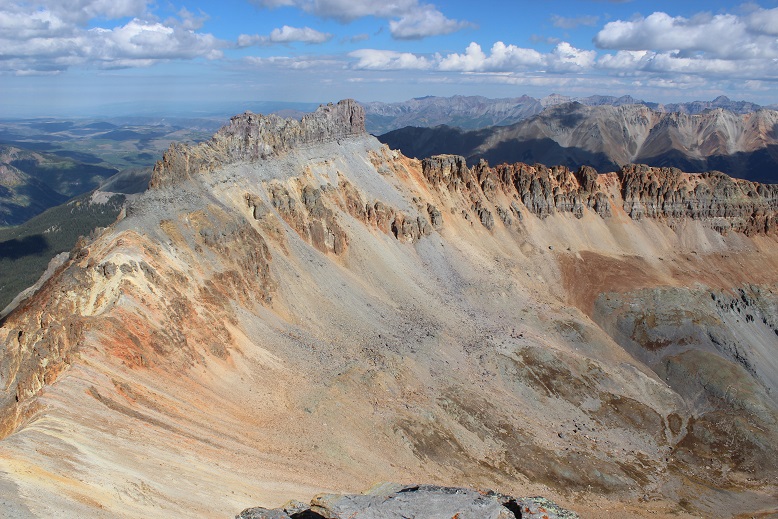
I summited Sheep Mountain at 8:20am
Sheep Mountain:
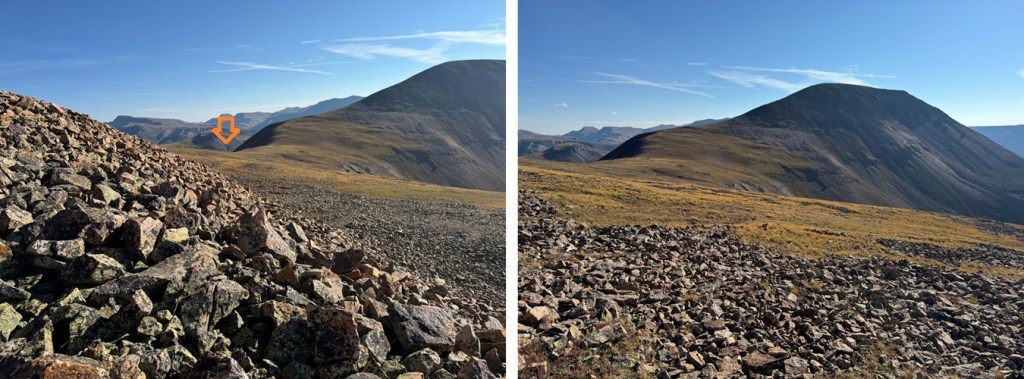
My next goal for the day was Greenhalgh Mountain, to the east
I continued along the rocky, class 2 ridge east
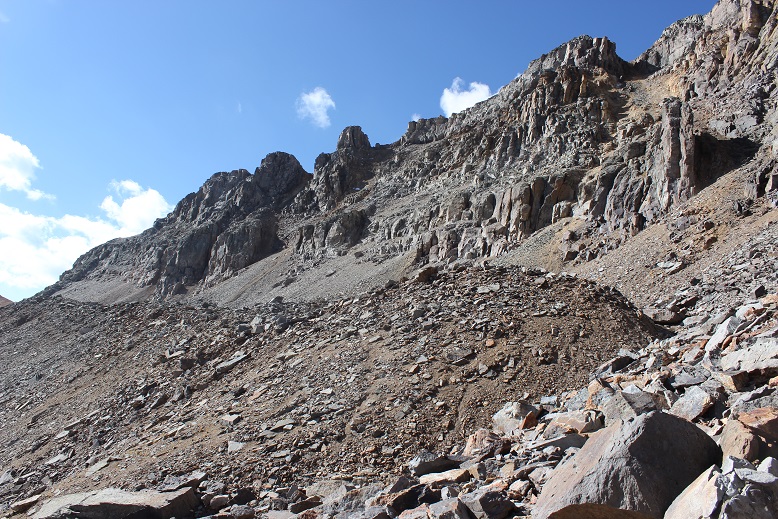
I followed the ridge east, until I came to a dropoff of sorts. Visually, it looked like the scree was continuous and went all the way to the rocks at the bottom. However, that was not the case. I ended up descending about 100 feet on scree, and then everything was loose talus, and steep, so I made my way climbers right to the ridge, and descended that way. If I were to do this again, I would have just taken the ridge to the right. It goes at easy class 3, and there’s talus, but it was much more stable than the talus below the scree. Also, EVERYTHING moves here. More info/pictures to come on my return route of this area.
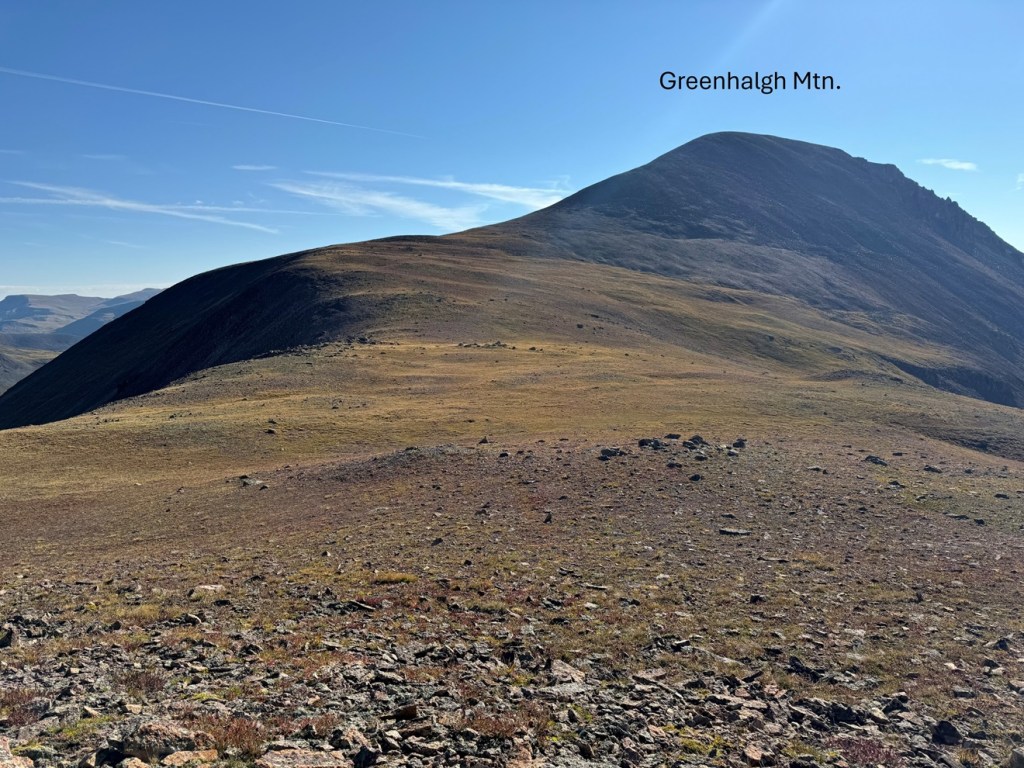
From the bottom of the ridge, I headed northeast towards the Sheep/Greenhalgh saddle on class 2 terrain.
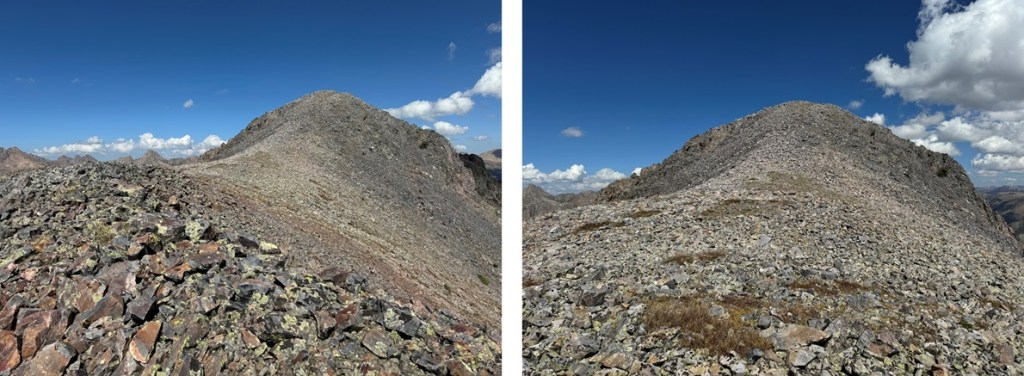
Then I ascended the ridge to the summit of Greenhalgh Mountain. This part of the route was actually very enjoyable, on class 2 terrain, with rocks that stayed put and didn’t roll.
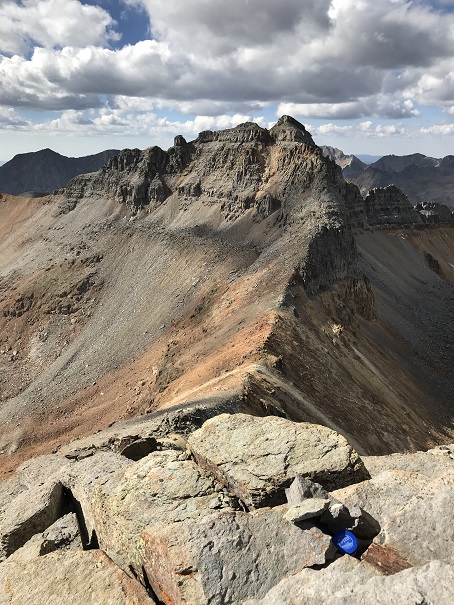
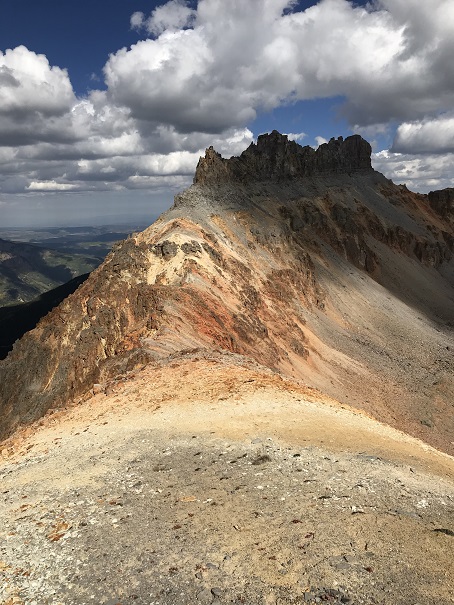
I summited Greenhalgh Mountain at 9:20am
Greenhalgh Mountain:
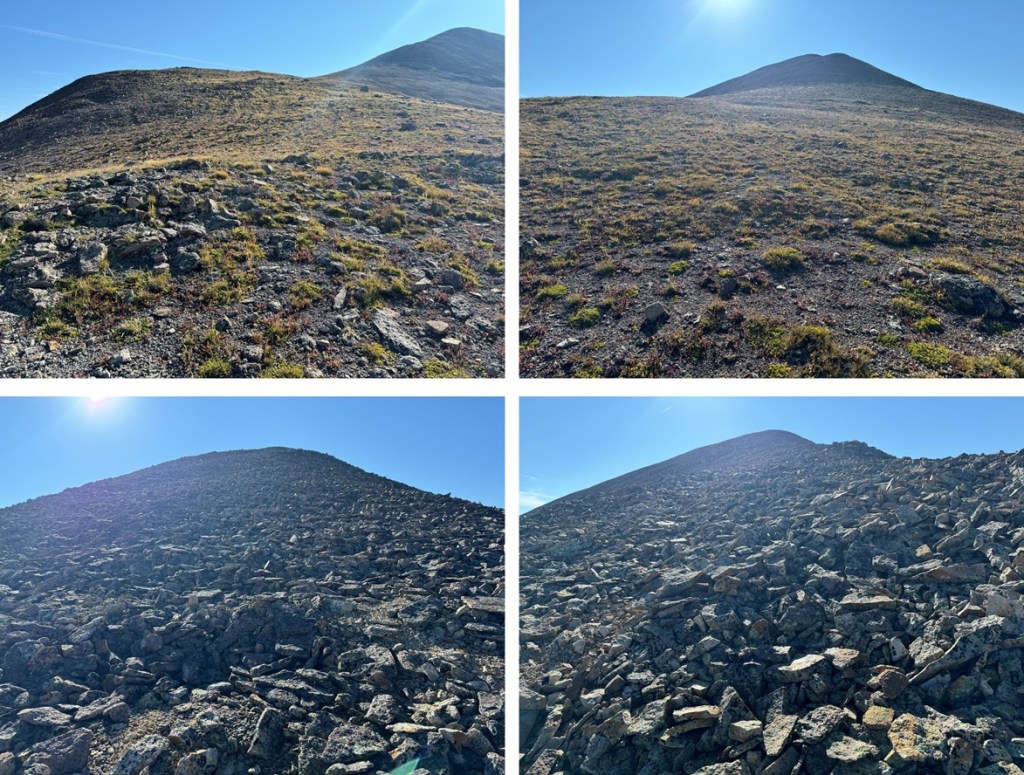
In order to get back to the trailhead, I was going to need to descend Greenhalgh and then re-ascend Sheep Mountain, so I turned around and made my way back to the Greenhalgh/Sheep saddle.
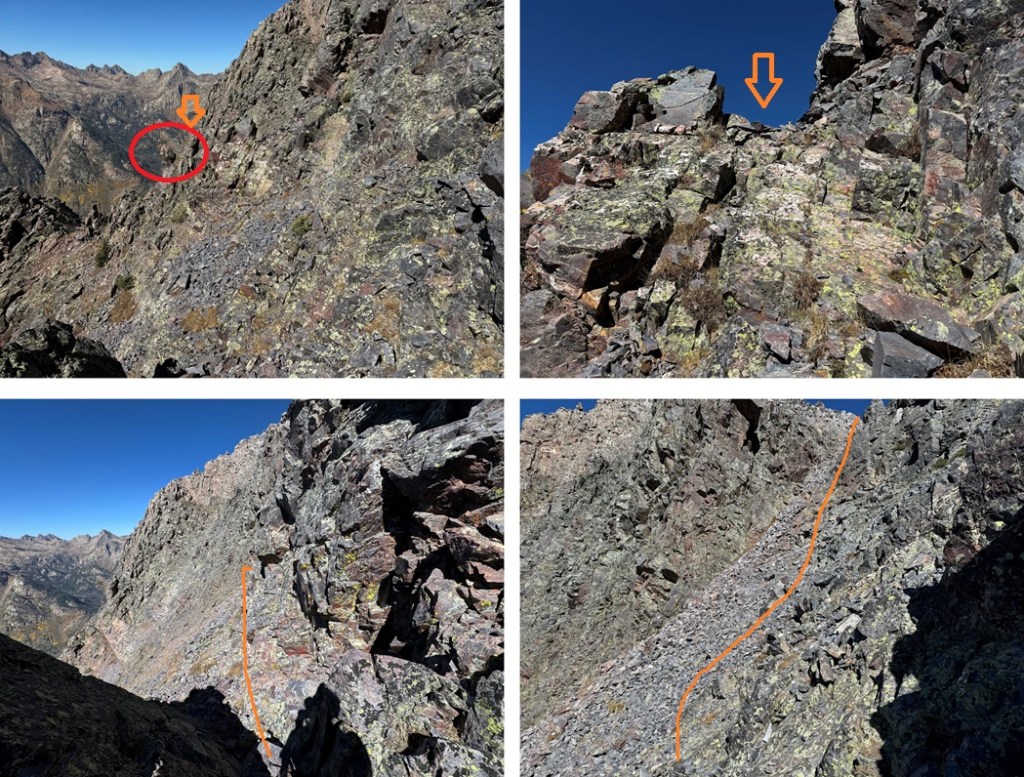
At the saddle, I then aimed for the left ridge of Sheep Mountain.
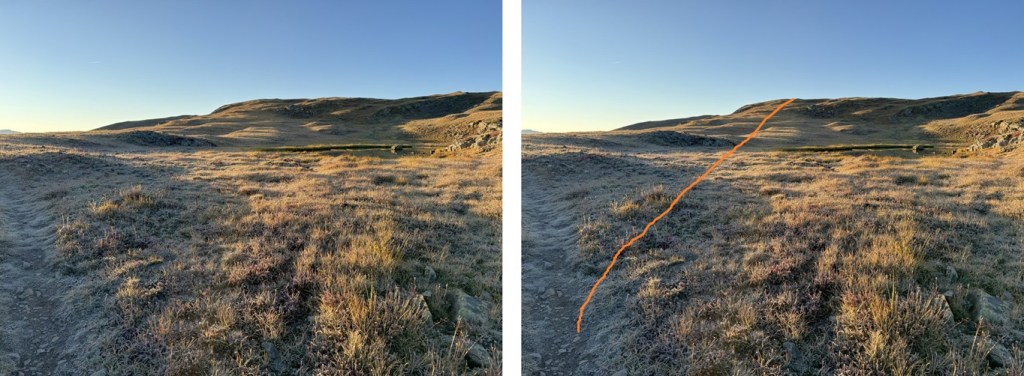
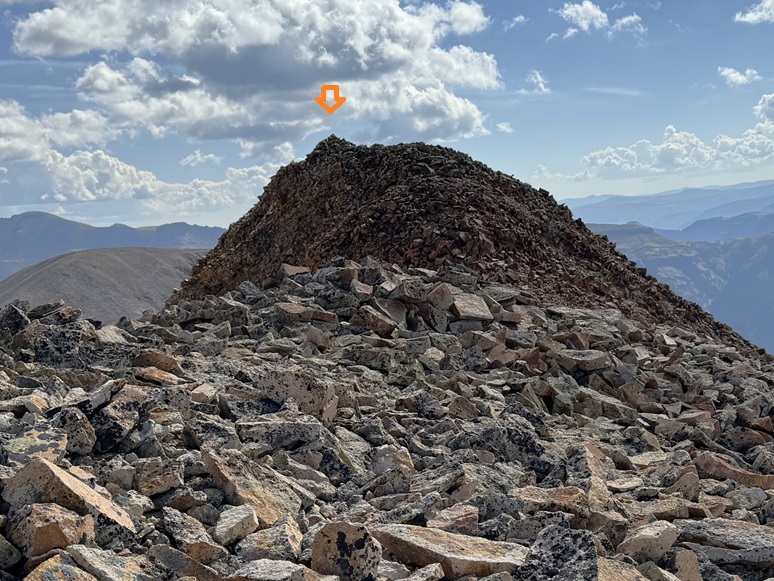
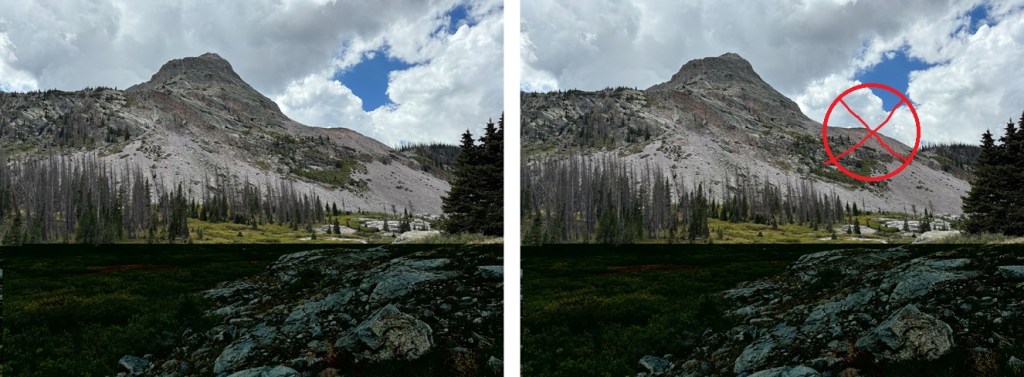
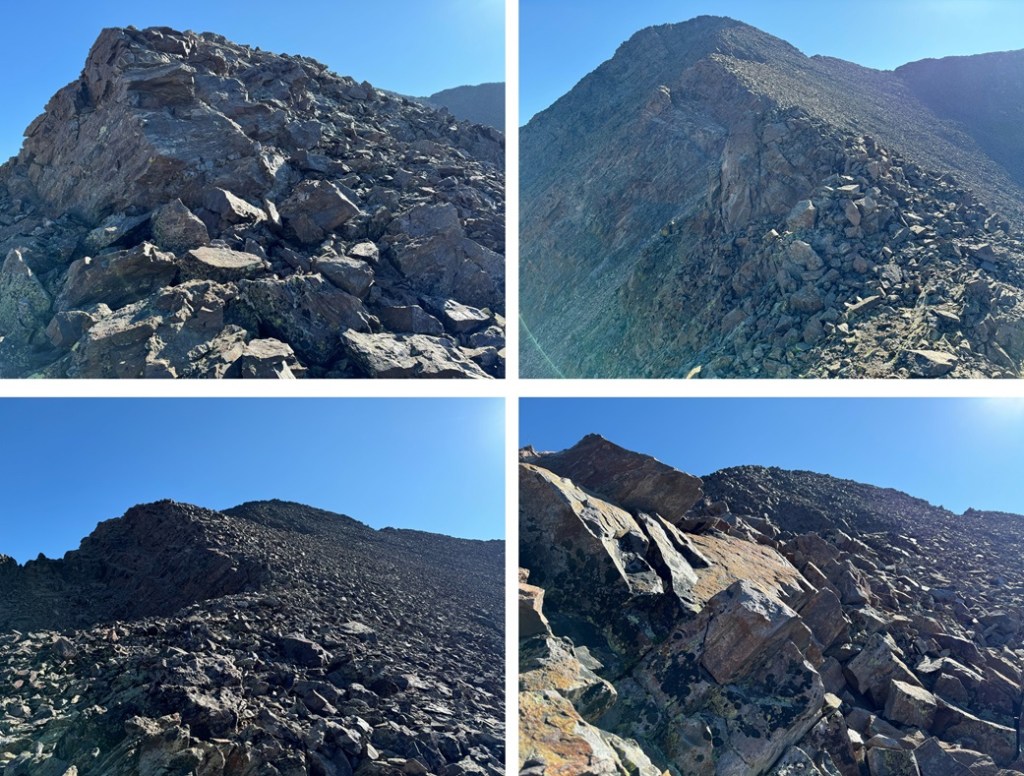
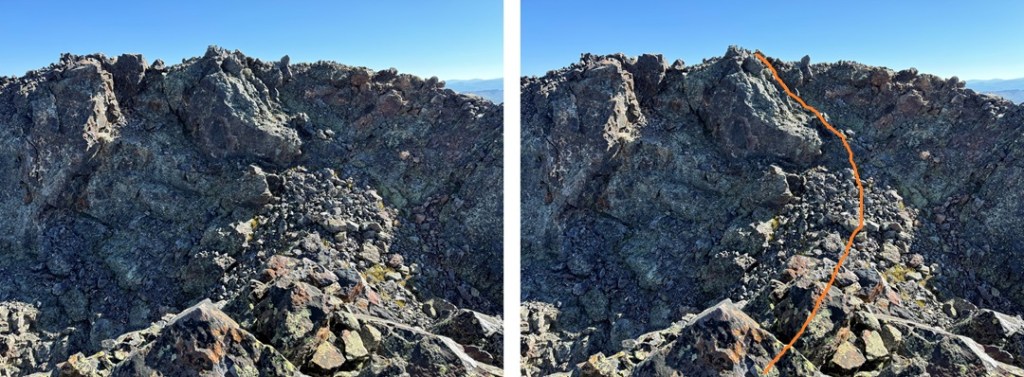
Once there, I ascended the LOOSE rocks up to the ridge, then followed the ridge to the summit. The rocky area went at easy class 3, and is more stable than it looks. In this picture you can see the scree to the center. That’s the way I came down, and I don’t recommend that route. Instead, stick to the ridge.
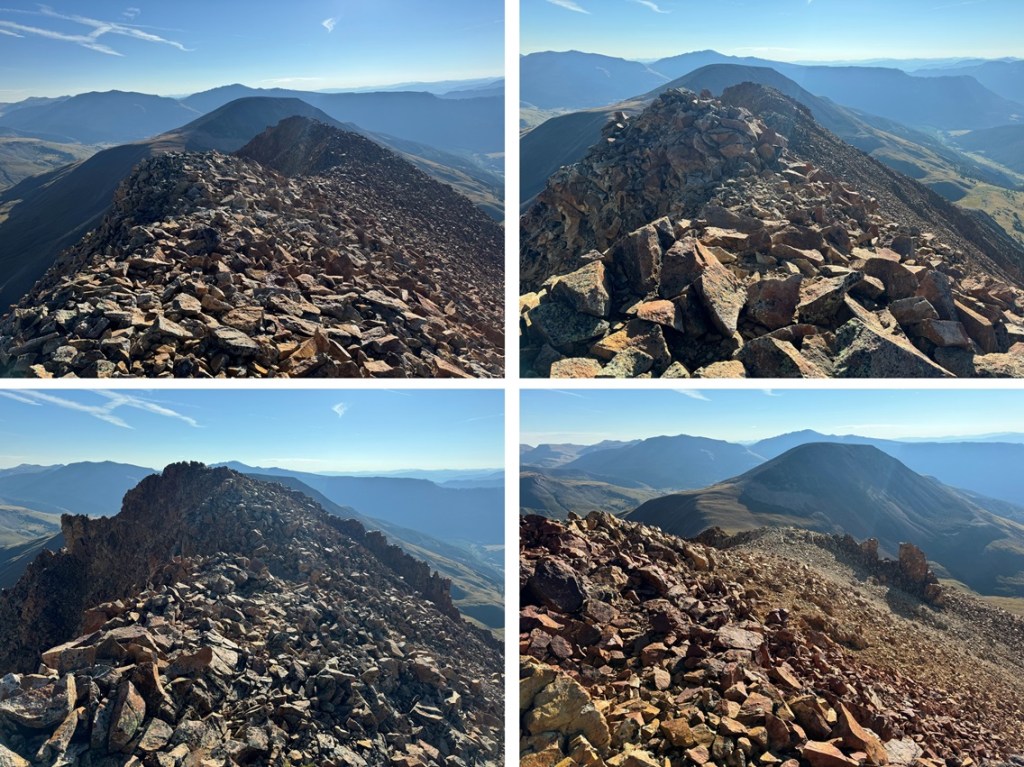
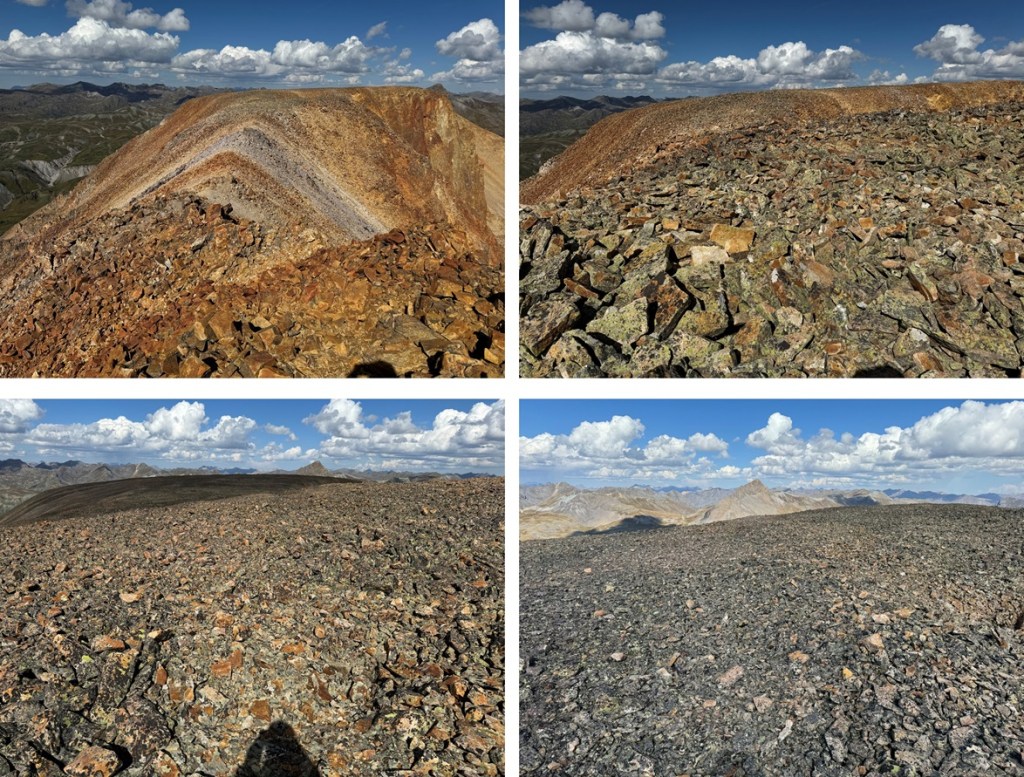
I then turned left, and re-summited Sheep Mountain, following the ridge west,
Then it was back across the hole filled rock field mesa
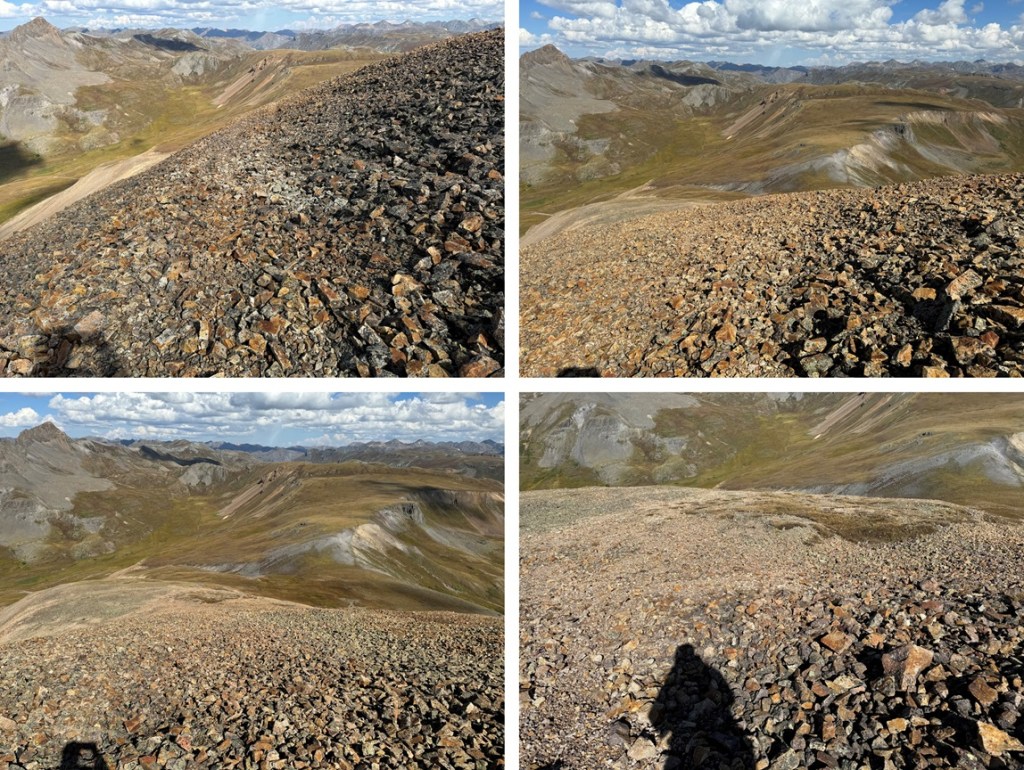
And back towards the tundra mesa I’d hiked in on.
However, when I got back to the tundra mesa, instead of heading back towards the CDT, I turned left and headed towards Stony Pass. I could see the road in the distance, and was able to hike down the entire slope on tundra (except for a brief rocky section where I took a game trail), avoiding the willows.
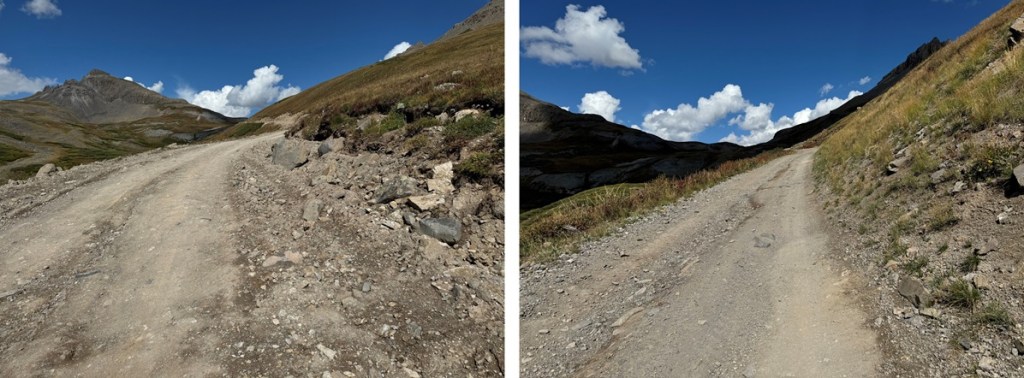
Back on the road, I followed it northwest back to Stony Pass
I made it back to my truck at 11:30am, making this an 8.97 mile hike with 2714’ of elevation gain in 5 hours.
I spent the rest of the day playing Trail Angel for CDT and CT thru-hikers. I met a ton of really cool people from all over the world, gave them snacks, water, and beer, let them re-charge their devices, and had some great conversations. What upset me though, was the Colorado Trail hikers told me I was the first person they’d seen doing trail magic on the trail. Considering they probably only had 2 days left of a 30 day or so hike, this upset me. We can do better Colorado! If you have a free weekend next summer, I’d encourage you to do some trail magic. You won’t regret it!
I came back a month later and was successful in summiting P2. Details below.
Full disclosure, I did NOT summit P2. However, I came very close, and thought I’d share the information I have for those who might find it useful.
I camped at 11330’ of elevation, along the Rock Lake Trail that parallels Rock Creek in the basin just before Rock Lake.
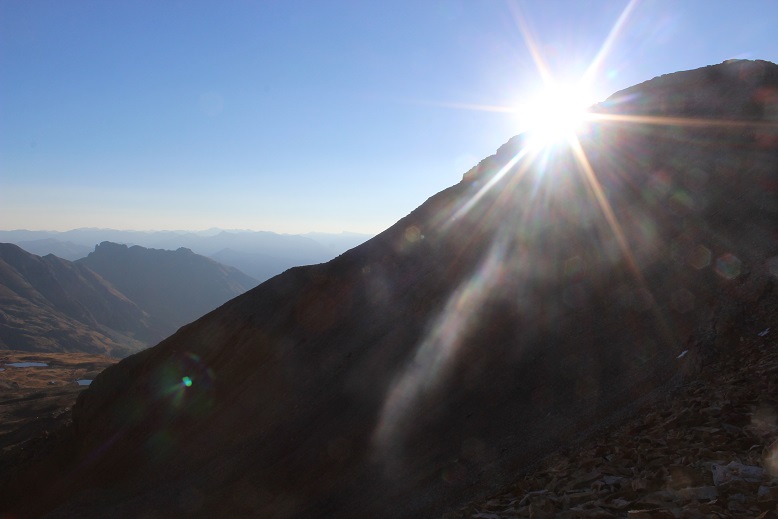
The next morning I was on the trail at 6:30am, heading west. My goal was to gain this ridge, and I did it poorly. I spent way too much time route finding, so I’m going to try to make this easier for you. You need to ascend this ridge, but DO NOT do it here. There is a way to find a weakness and ascend here, which I did, but I was greeted with the steepest, worst scree I’ve ever encountered, where if I’d have fallen, I would have skidded all the way down, over the edge. It was dangerous, and put me at a too high position and I needed to descend anyway.
Instead, start out by crossing Rock Creek (I was able to jump across it) and head for the rocky section.
Parallel the rocky section until you come to just before the waterfall. Then turn left, and head up the scree to what looks like a solid rock wall. There is a very well-hidden access gully here, that will easily get you where you want to go.
Climb up this easy gully, and immediately turn right, and head towards a drainage.
When I made it to the drainage, I followed it west as far as it went, until I was on a small ridge parallelling a pond. There are a few game trails here that will lead you up. Stay in the drainage, which goes from rocky to grassy as it ascends.
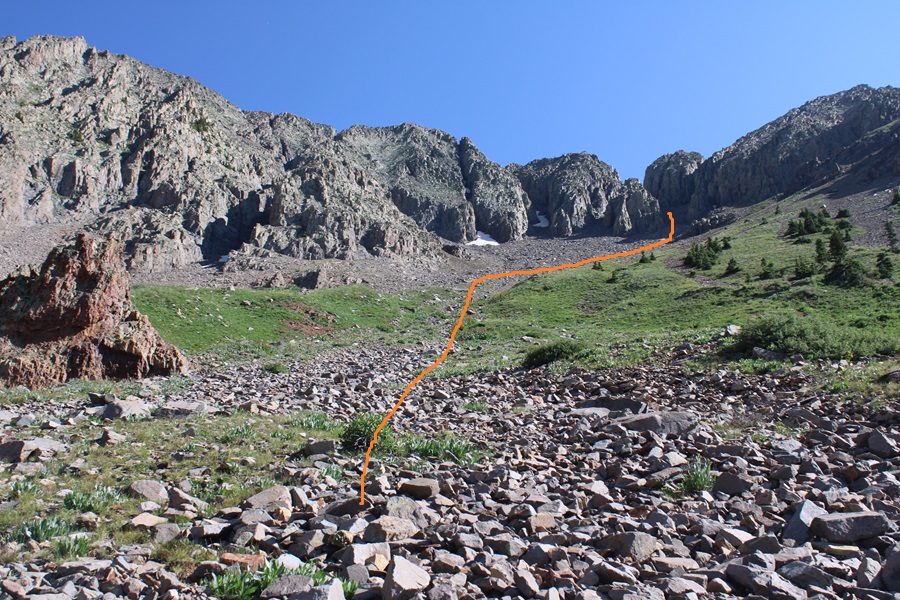
I came to a ridge and turned left. Here I could see a rocky basin. I followed the basin southwest, left, until it ended.
From here you can see two gullies. One leads to P3, the other to P2. I went up the gully to the left, and came down the gully to the right. Both are loose and scree filled. The P2 gully had larger rocks, which would have made it better (for me) to ascend, and the P3 gully had more scree, which would have made it better (for me) to descend. Alas, I ascended the P3 gully, and descended the P2 gully.
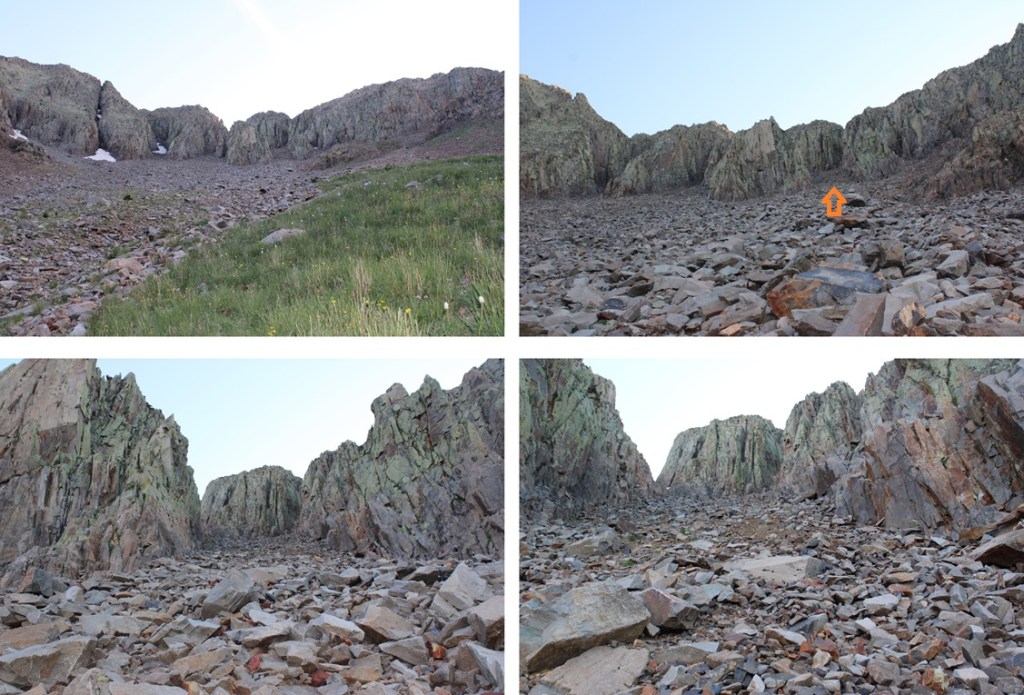
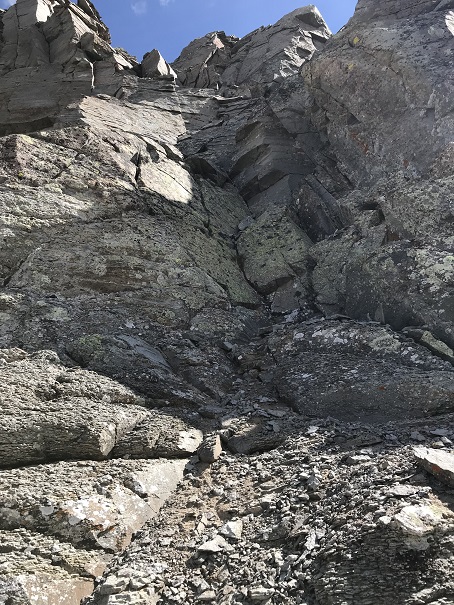
Here are some pictures of the P3 gully. I ascended on scree, sticking close to the rock band, and headed towards the ridge.
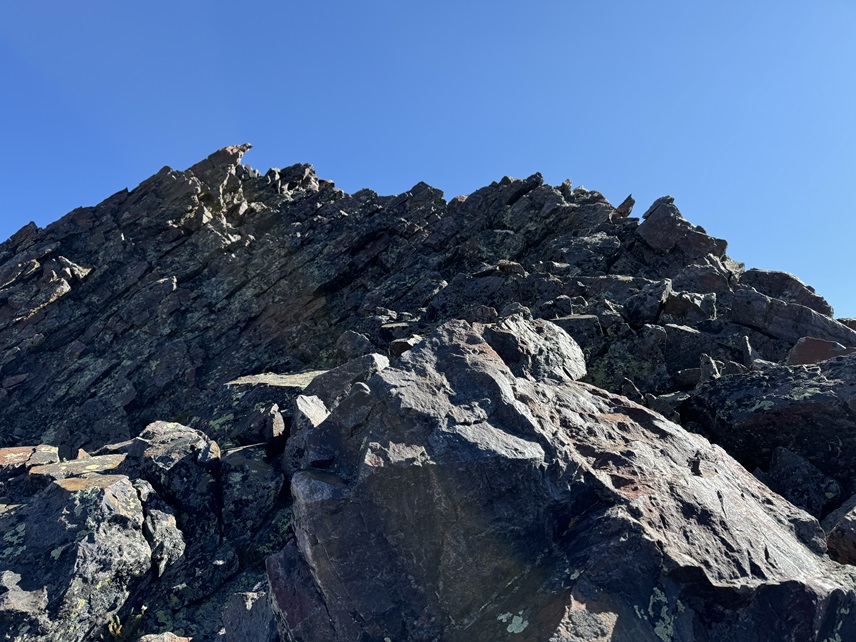
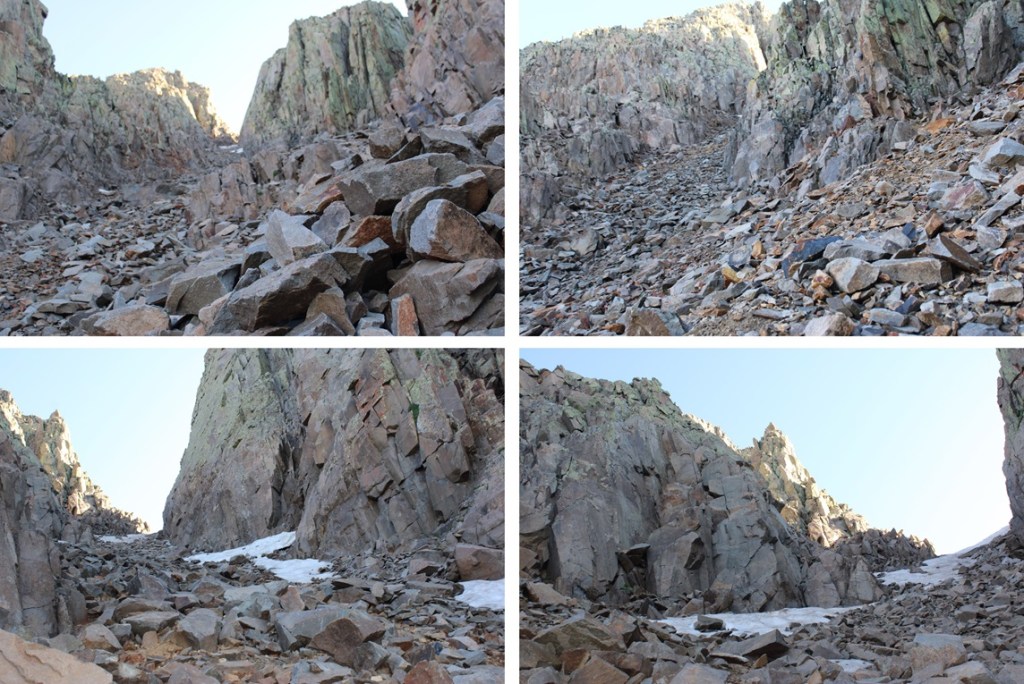
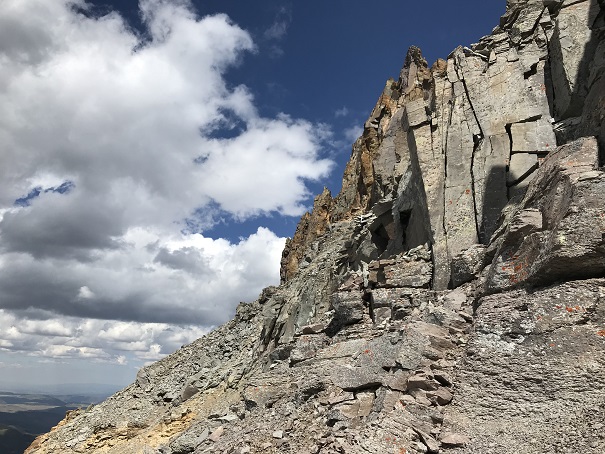
Once on the ridge I turned left, and followed it northeast. While it looks daunting, this was all class 2 on stable rock, and not so stable rock.
Until I got to here. If you haven’t already, now is your time to put on your helmet. From here the rest of the route is exposed class 3 and class 4 climbing. I chose to stick to the ridge. Luckily, the rock here is solid and there are plenty of hand and footholds.
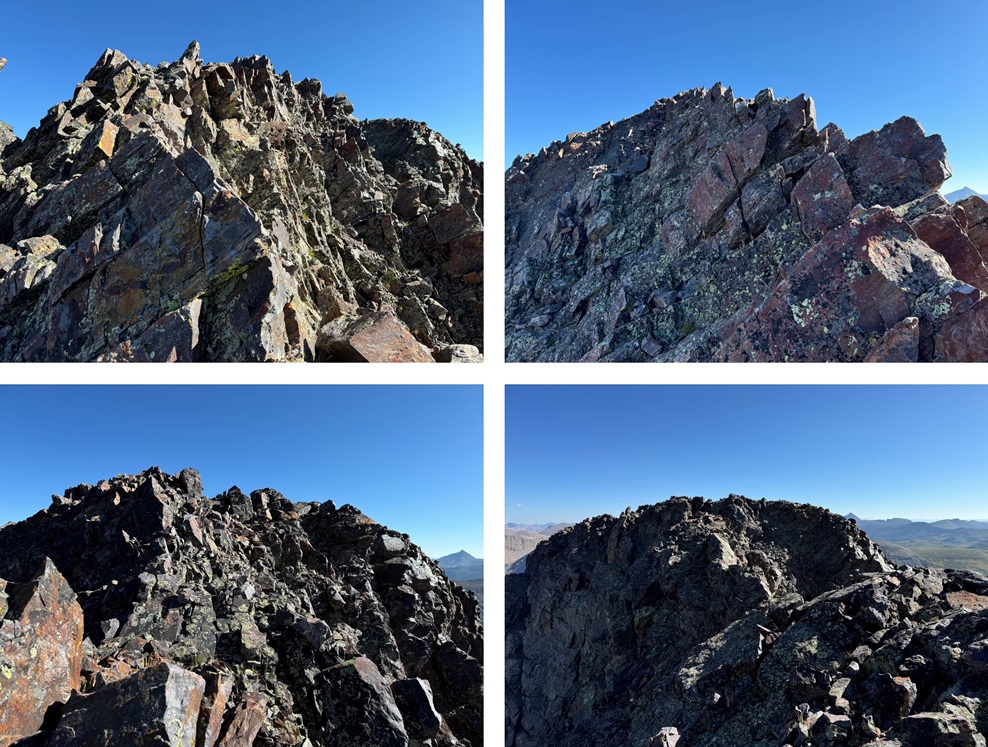
I stuck to the ridge here, so I won’t include direction lines, but I’ll show you a few pictures of this part of the ridge, which I considered class 3
Until I got to here. I felt this was class 4, and the crux of P3. This is the route I took, sticking a bit to the left as I felt there were more holds, but I can see how someone with a higher risk tolerance would have gone straight up the middle.
I could now see the summit of P3. This is the route I took.
I summited P3 at 9:45am
P3:
From the summit of P3, I made my way back to the ridge.
Back on the ridge, I followed it to the P3/P2 saddle
From the saddle, I headed up on talus and scree, following the ridge towards P2, but avoiding the large rock structures to the right.
I then came to a sloping section, with a false summit. I made my way towards the false summit
From the false summit, I could see the true summit of P2 in the distance.
I followed the ridge, and this is what I saw in front of me
The climbing wasn’t what bothered me here. It was that long, yellow rock slab. I’d heard it was maybe 40 feet, but being there in person, it looked double that. I downclimbed a bit to get a better view, and the view didn’t get any better. Pictures DO NOT do this slab and it’s exposure justice.
At this point I had to make a very difficult decision. I do a lot of crazy stuff while hiking solo, but it’s always within my abilities, and I try not to take unnecessary risks. This rock slab was an unnecessary risk, and that’s coming from someone who’s favorite 14er is Capitol because of the knife’s edge. I did not feel safe downclimbing this slab solo, or even with another person present, although I would have tried it going from the opposite direction if I didn’t need to downclimb it again. I had about a 75% certainty if I attempted to downclimb this slab, I would fall. And the exposure wasn’t pretty.
One of the reasons my husband encourages me to hike solo is he knows I don’t take unnecessary risks in the backcountry, and I want to come home safe to him. I also want to be a Grandma someday, and I can’t do that if I die.
I knew there was another way to summit by dropping down to the left, so I got out my cell phone and checked the weather. The 10% chance of rain after 12pm had now become 80% chance of thunderstorms. I wouldn’t have the time needed to route find my way to the summit of this peak and make it back to my tent in time before the storm came in.
So, I turned around at the final crux to the summit and headed back down. I did a lot of scouting around while I was up there and know how I want to attempt this peak next time (I’m thinking of dropping down to avoid the edge or coming in from a different angle). I’ll be back to summit this peak another way.
So, I turned around and headed back towards the P3/P2 saddle.
Just before the saddle I turned left, and took the P2 gully down into the rocky basin.
I then followed the basin back to the drainage, staying mostly to the right of the basin.
When I came to the drainage, I turned right followed it, staying to the left of the pond, back to the ledge, following game trails where I could find them.
Just before making it to the waterfall I headed right, found my access gully, and headed down.
I descended the rocks, then headed back to my campsite.
I made it back to my campsite at 1:30pm, making this a 6.61 mile hike with 2539’ of elevation gain and tons of route finding in 7 hours.
Oh, and that storm? It dumped about 4 inches of slush, rain, snow, and hail on top of my tent in about 2 hours. So now, I had another difficult decision to make: Stay there overnight and wake up at 5am to a tent frozen solid, pack it up, and hike out, or just hike back to Beartown now. For those of you who know me (and my Raynaud’s), you know what I did. I packed it up and headed back to Beartown, hiking in the dark to make it back to my truck in time for my work meeting in the morning. It was NOT a fun hike out, as the trails were now covered in slush (I slipped a few times in the granite rock sections) but I stayed (relatively) warm.
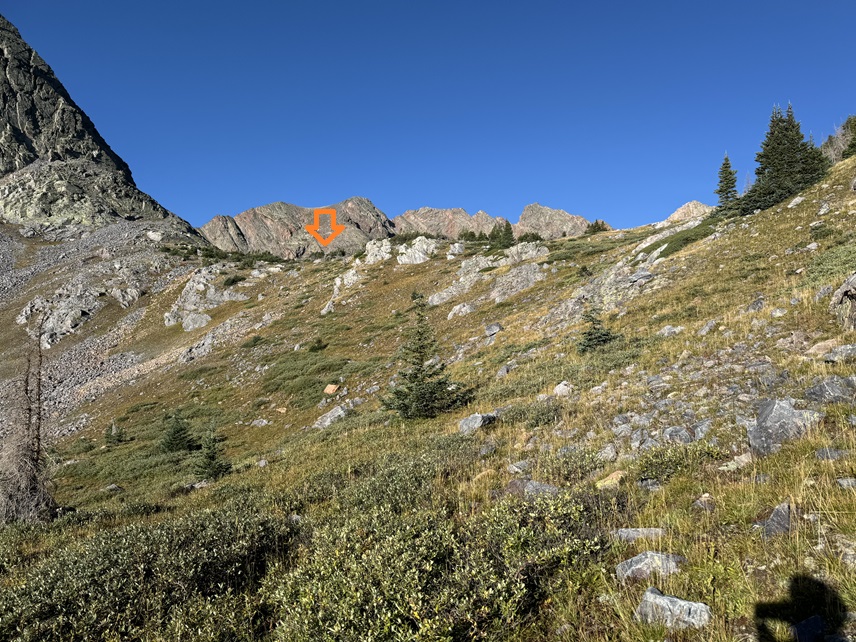
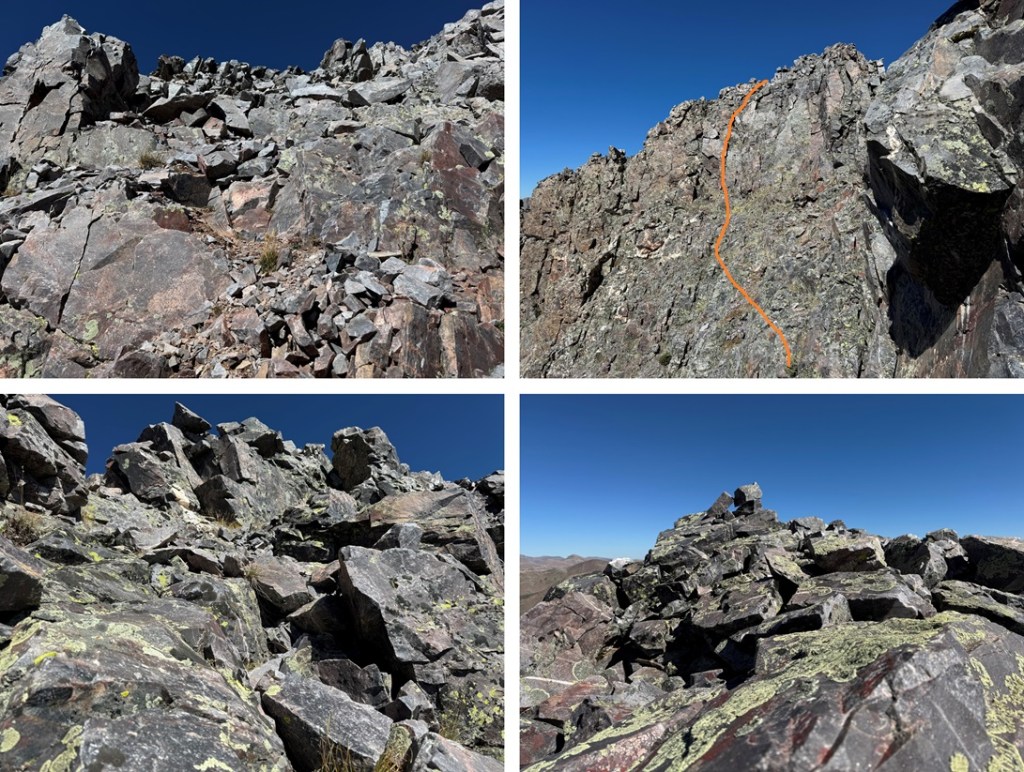
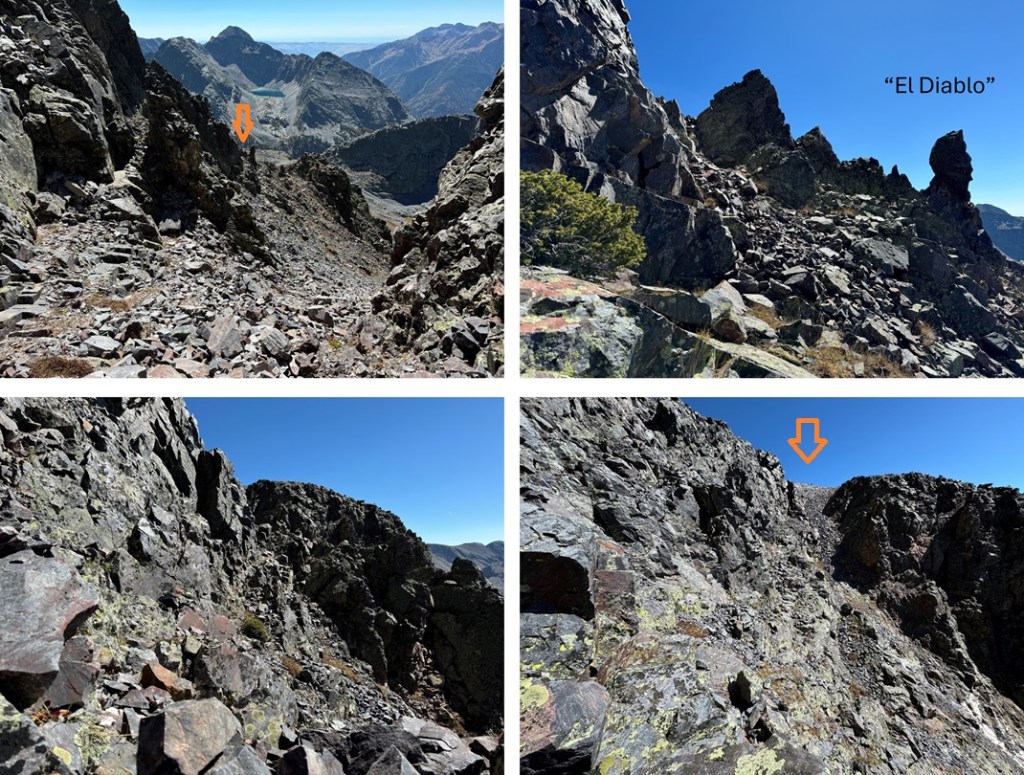
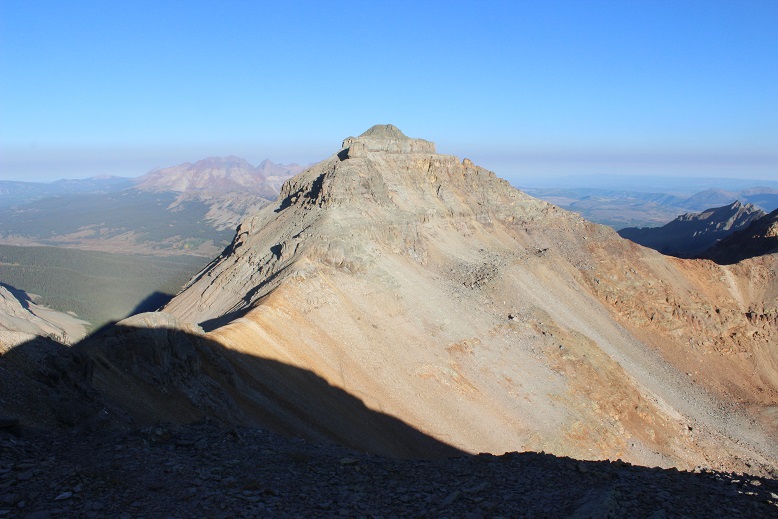
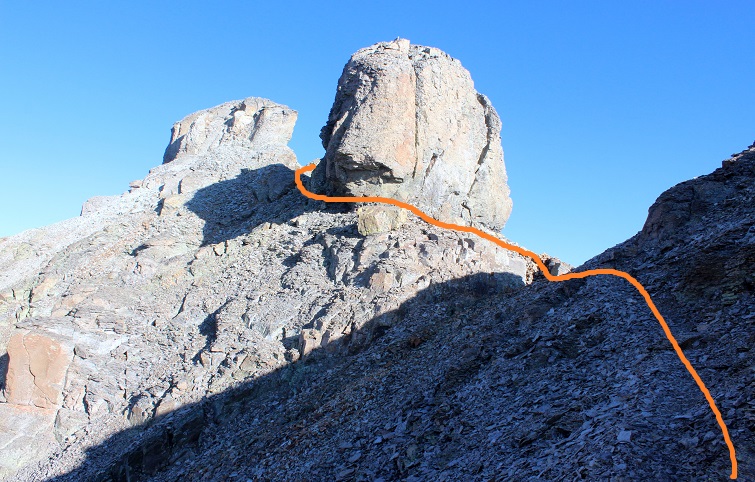
From the saddle of P3 and P2, I followed the ridgeline to 13190’, where you can see the false summit. From below the false summit, I went left (east) and found a gully. I descended this gully, but not all the way. Instead, I stayed high and traversed these rock outcroppings. This route is basically class 3 and choose your own adventure. I stayed high so as not to have to re-gain elevation, and this worked for me. Here are pictures of the route I took:
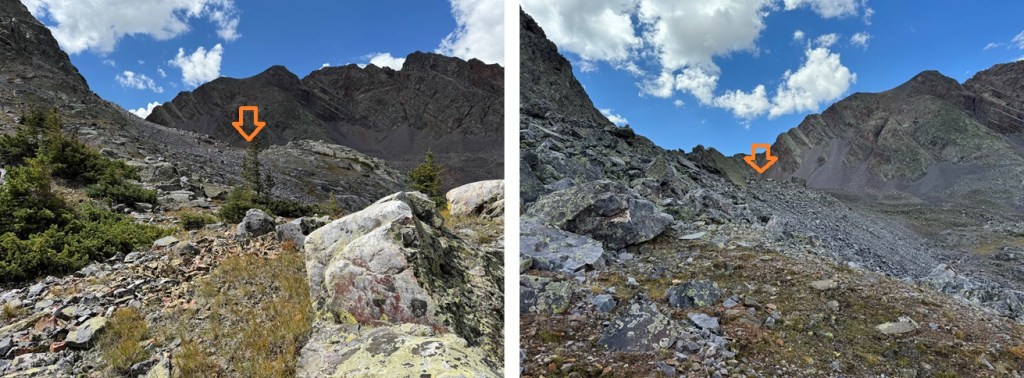
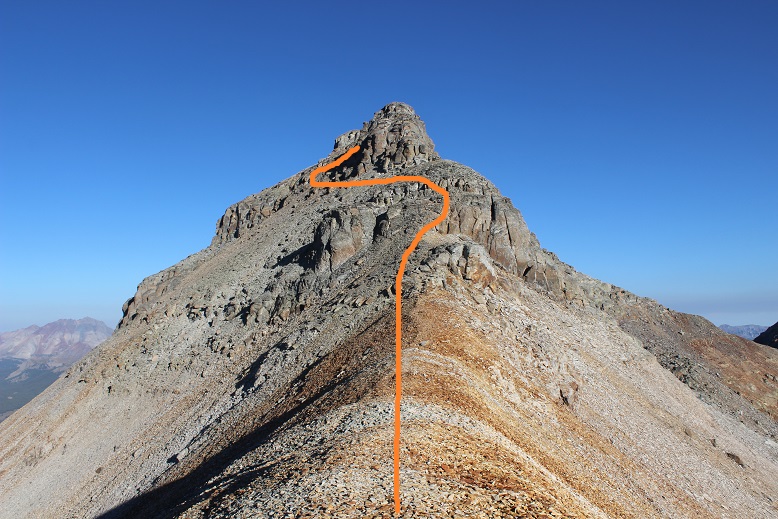
See this rock formation here? While it’s difficult to see from this angle, I’m nicknaming him “El Diablo”, because to me he looks like a lot of things, but also closely resembled my High School Mascot, the Diablo. Yes, my high school mascot is the devil. For middle school we were the Banditos (imagine Yosemite Sam as a Mexican, complete with the mustache and beard, bullet harnesses and a gun in each hand). Alas, after I went there the parents got upset and changed things and now they’re the “Leopards”. The parents keep trying to change the Diablo mascot as well, but the students won’t let them. In any event, I digress. I went to the right of El Diablo on my way in and used him as a spotting point on my way out. After passing El Diablo I could see a large gully to the right. I stayed high on class 3 terrain and climbed the gully, which brought me to the base of the rock slab.
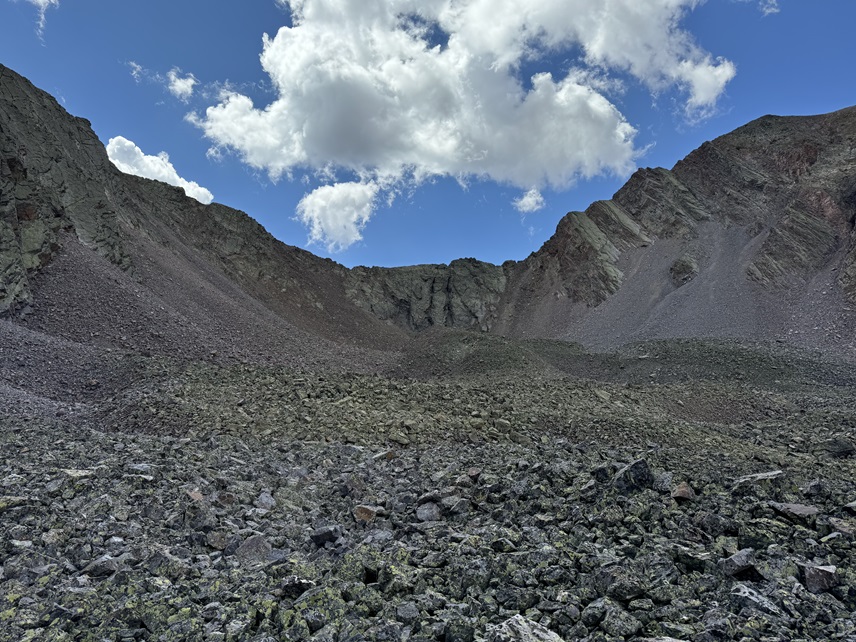
From there, I turned left, and it’s a class 3 climb to the summit. I tried a lot of different routes that others said ‘went’, but I found climbing straight up the face was the easiest way to summit and stayed at easy class 3. Climbing straight up the face is easier than it looks, with lots of ledges. From there I was on a small ridge, and it was 10 feet or so of walking northeast to the summit. Here’s the overall route:
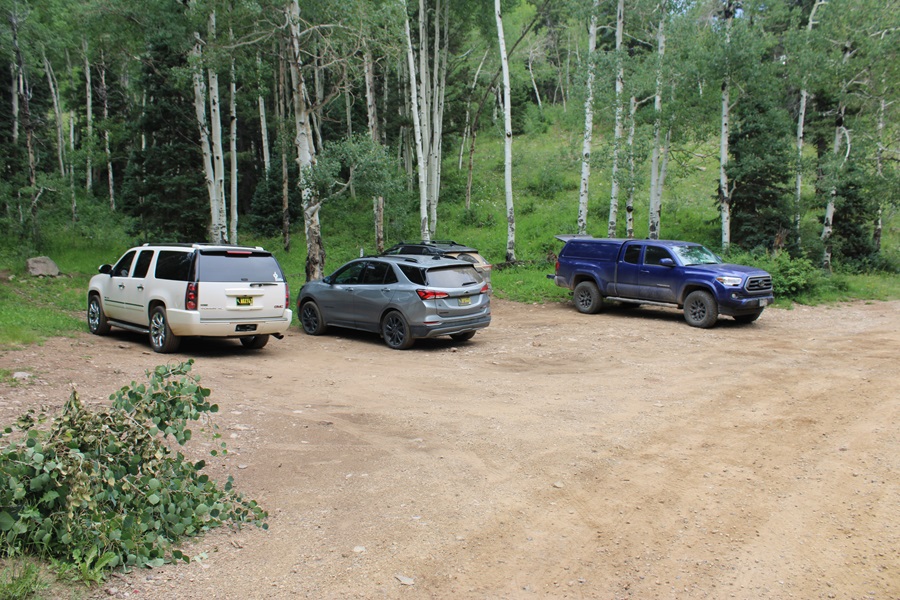
I parked at a turnoff near Boren Creek and124/794 with room for about 5 vehicles if everyone parked nicely. The drive in is dirt 2WD. I was on the trail at 4:30am.
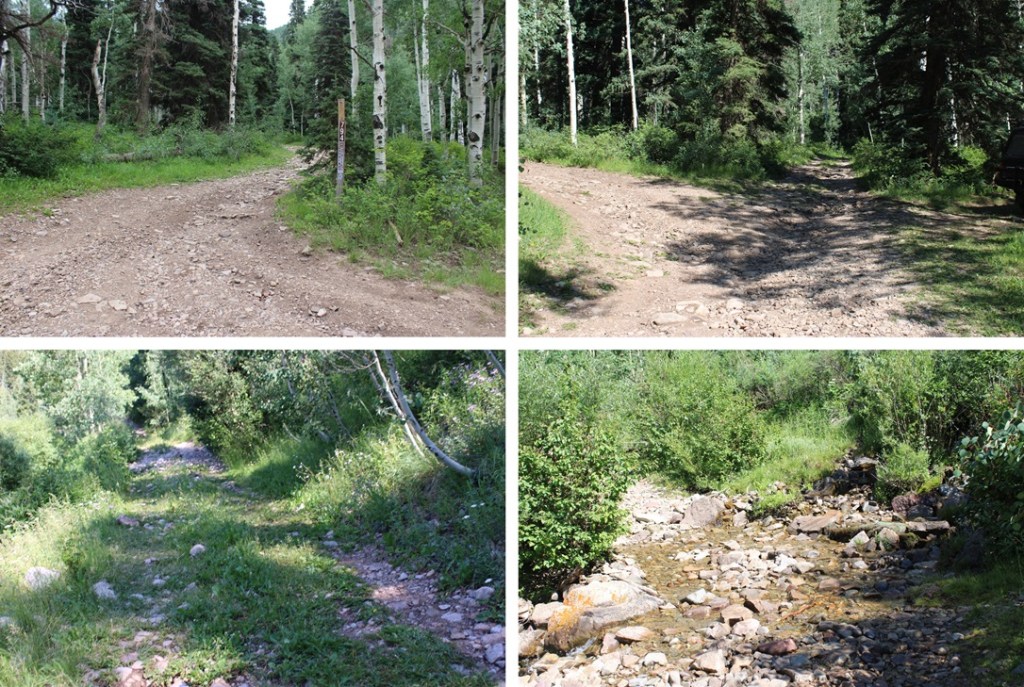
I followed 4WD road 794 for over 3 miles as it switchbacked it’s way northeast, following Boren Creek.
After hiking for around 3 miles I made it to treeline.
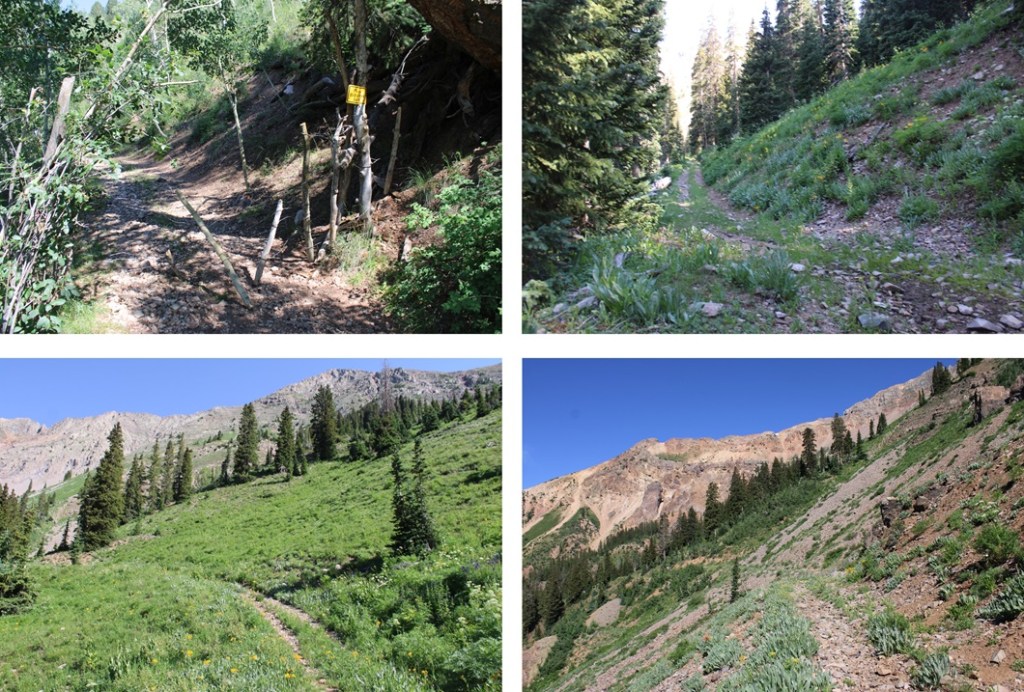
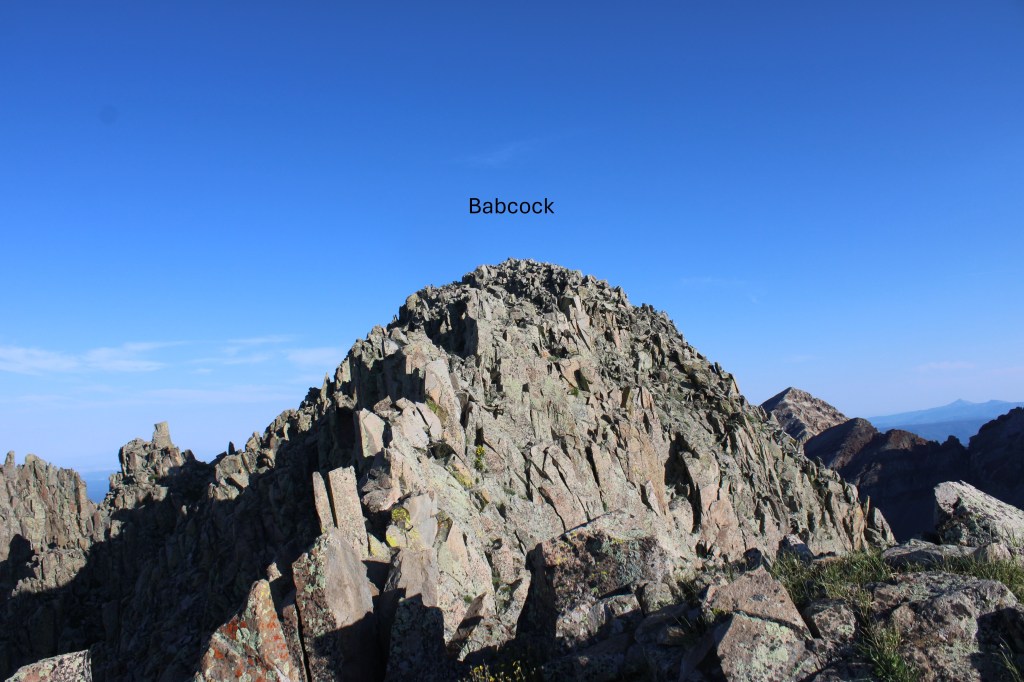
Here I turned right, and could see Babcock Peak to the north.
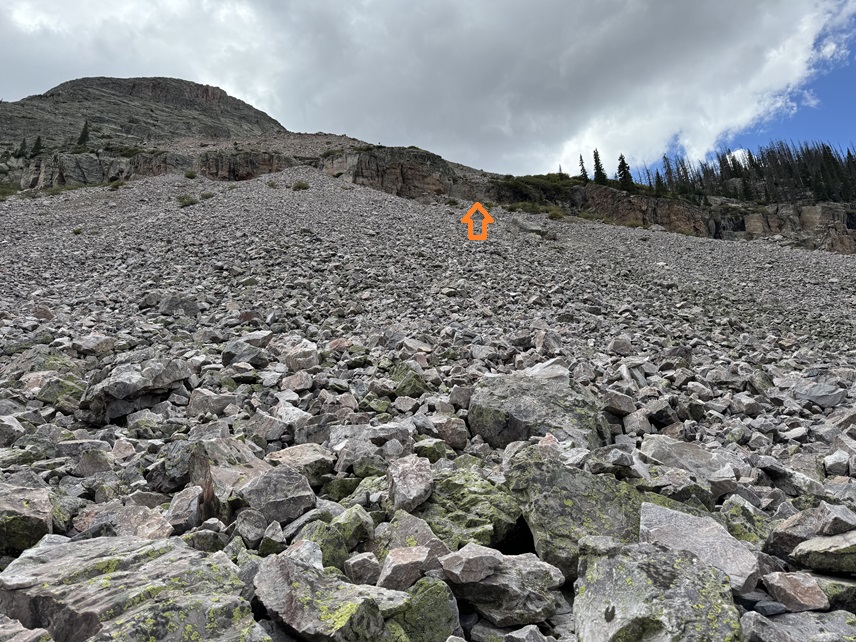
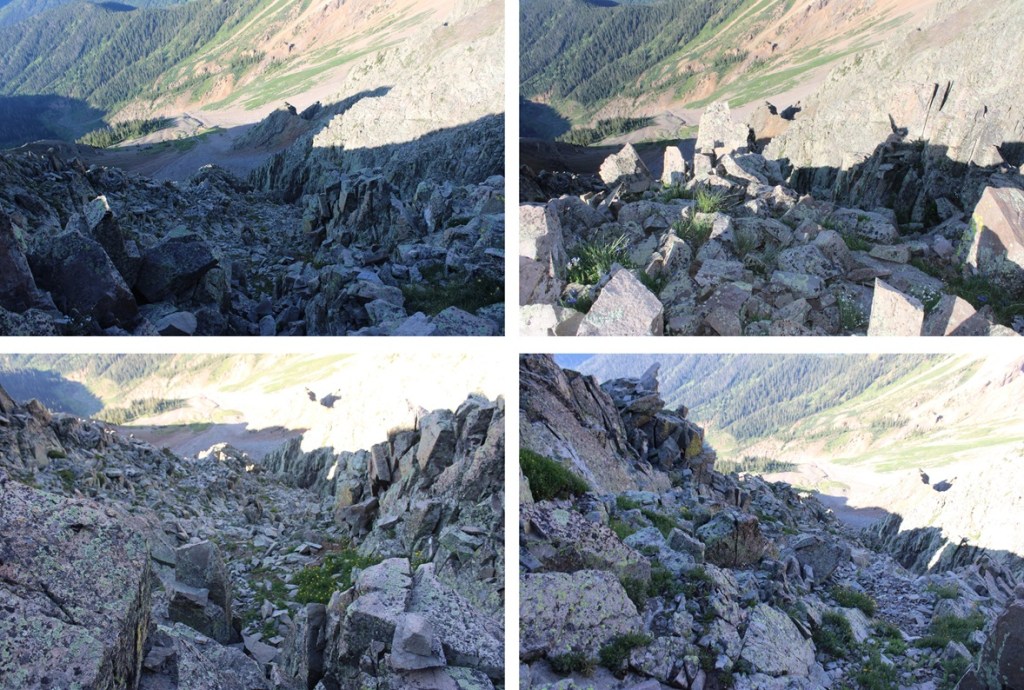
Route finding here was pretty easy. I headed north towards the gully, aiming for the gully to the right. I gained about 1500’ here to the summit in about a mile. This gully is very loose, and full of all different sized rocks. I didn’t stick to one side, but chose whatever route looked best. Here are some pictures of the gully. It’s pretty straightforward.
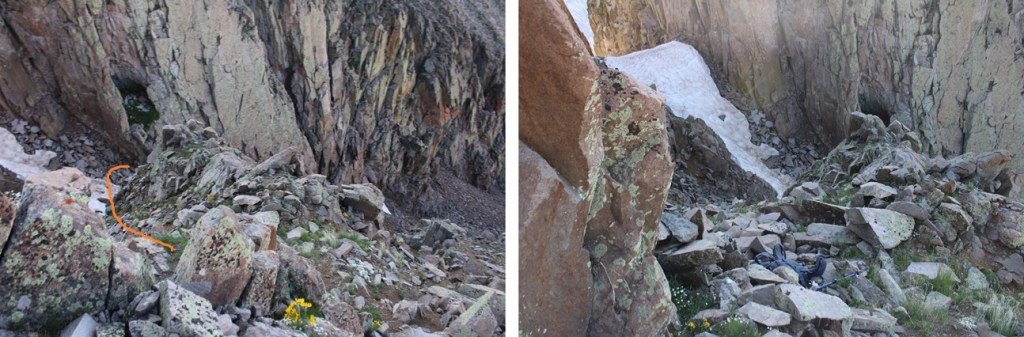
Just before reaching the saddle, I turned left, and ascended this much smaller gully
From here, it’s choose your own adventure to the ridge. Everything is class 3 climbing, and I’m pretty sure there is no wrong way to get to the ridge, as long as you’re heading north/northwest. I can’t say the same for heading down, so it’s a good idea to keep looking behind you for reference points for the way back. Also, pictures were very difficult to put everything into perspective. Right now you should be at the junction of the left and right gullies. Take note of where you are, because this is where you’ll want to descend to on your way down, and as you can see by looking ahead of you, the initial climb to the ridge is steep and it can be difficult to know exactly where you are. Here are some pictures as I made my way up to the ridge.
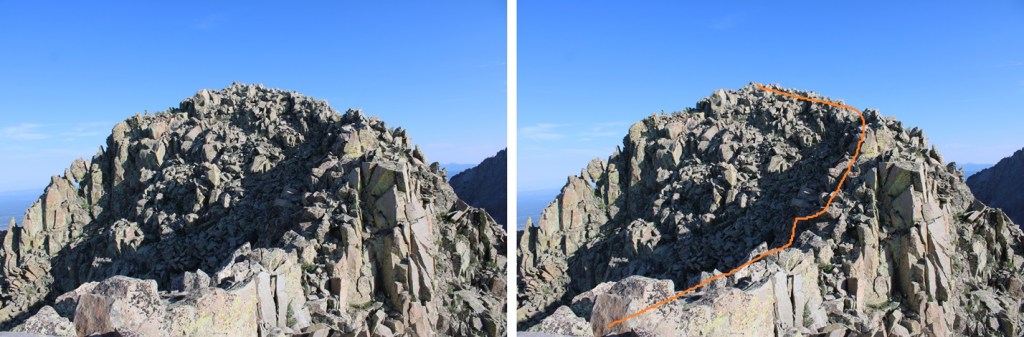
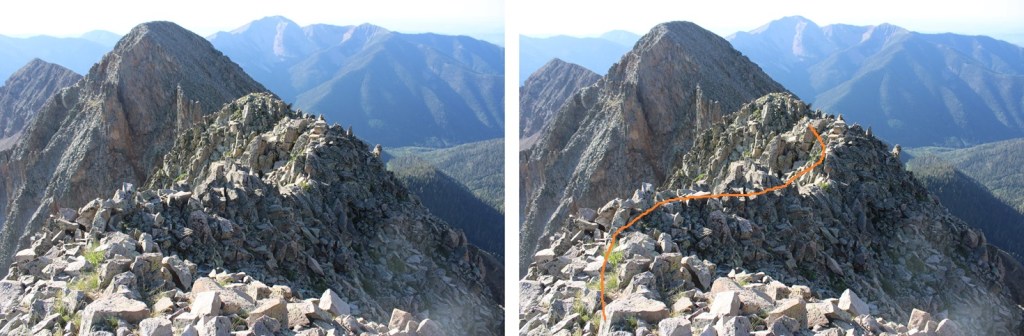
Once on the ridge, I turned left, and headed northwest towards the summit. There was only one ‘tricky’ move, and the rest was class 2.
Here’s the tricky move. Go right here to ascend the ridge. It feels like difficult class 3 or easy class 4, with some exposure.
Then it was a quick ridge hike to the summit, staying on the ridge proper.
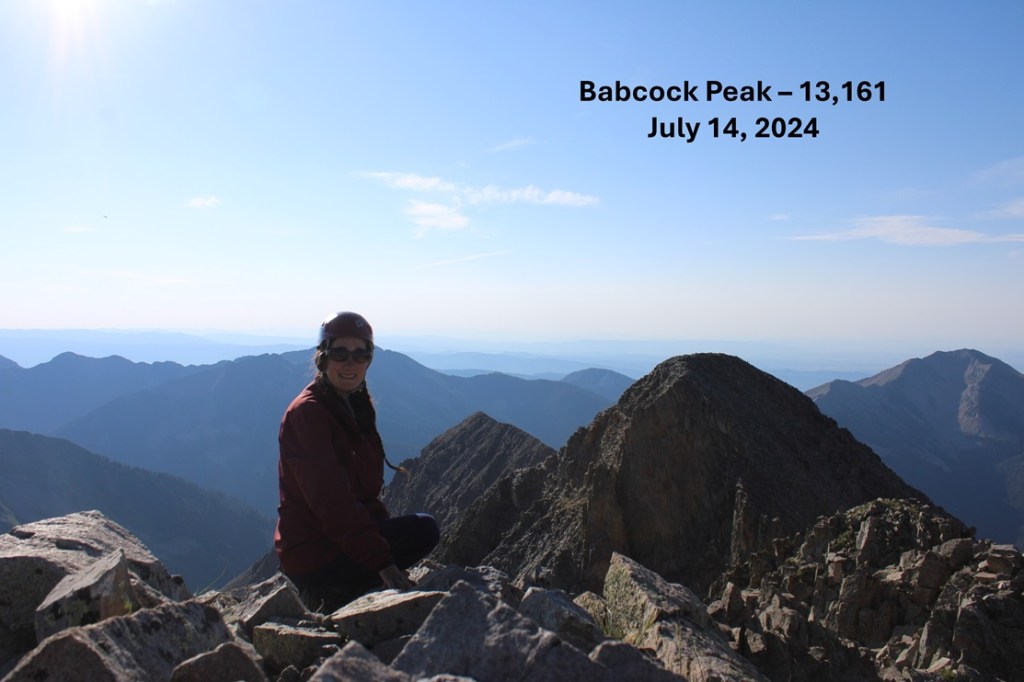
I summited Babcock Peak at 8am
Babcock Peak:
Now to head back down. Here’s a picture of the ridge
And the one tricky section
Now it was time to head back towards the gully. Visuals are good here. When heading down, keep moving to your left as you do so, making your way down to where the left and right gully meet up.
Where the two gullies meet, I turned left and headed down the same gully I’d ascended.
And now, to descend the gully back to the 4WD road
Back on the road, I turned left and followed it southeast back to the trailhead.
I made it back to the trailhead at 10:30am, making this a 9.23 mile hike with 3868’ of elevation gain in 6 hours.
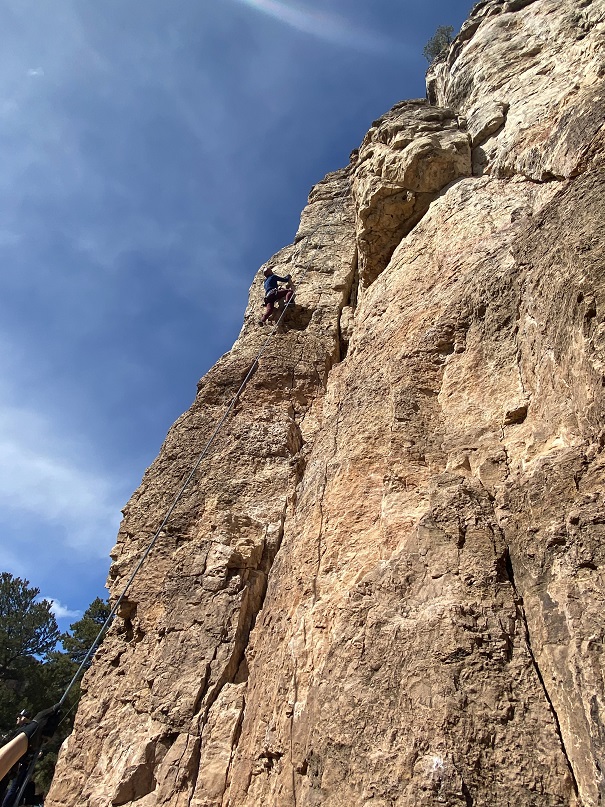
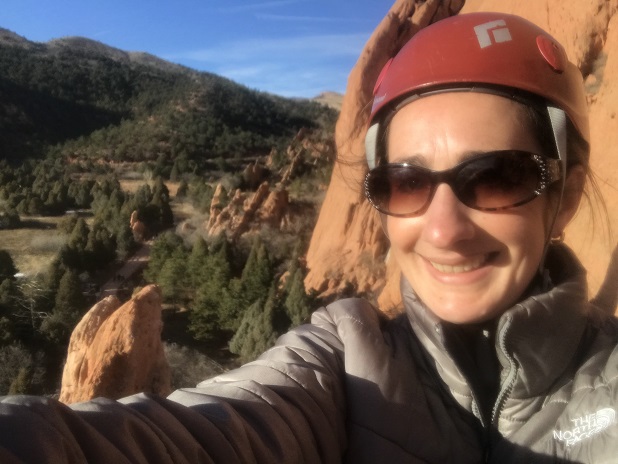
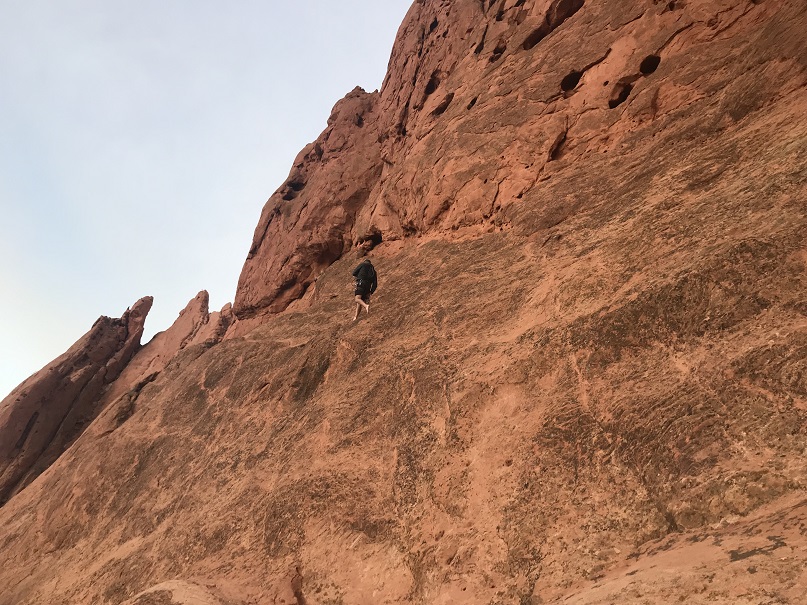
It had been less than a week since the accident at Garden of the Gods, and I was still quite sore, but when Tim asked me if I wanted to go climbing I said yes. I had bruises all over my body, my knees and elbows were scraped up, and my neck was still sore, but I needed to get back in the saddle ASAP, with someone I could trust.
We met in the morning and all drove together (Emily, Tim, and I) to shelf road. This was my first time there: shocking! I know, but I’m more of a solo climber, and if it’s a nice day I’m in the mountains.
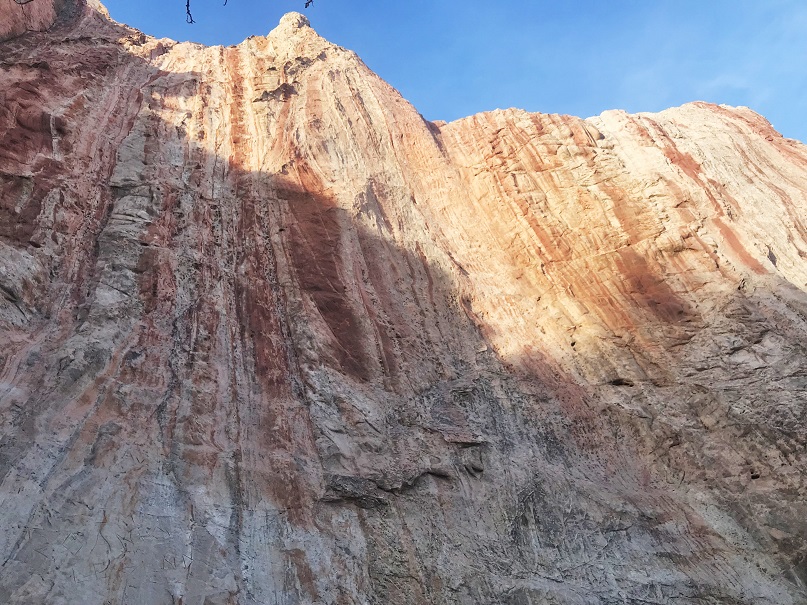
There’s a bathroom at the trailhead and lots of loose dogs running around. This seems to be a popular place to bring your pooch. When we arrived it was cold and windy, so we brought extra gloves and jackets and hiked down the dirt road to The Piggy Bank
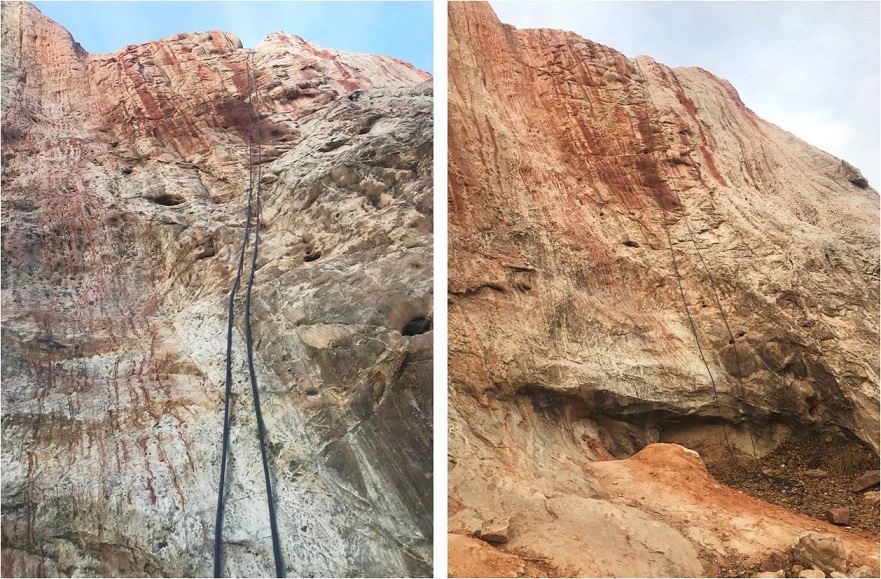
There were a lot of people climbing, but still plenty of spots. We found an empty area, set down our gear, and got ready. Tim asked me to belay him, but Emily wanted the practice, so she belayed while Tim set up the first route.
Then it was Emily’s turn to climb. I let her wear my climbing shoes.
Here’s a video of her on her way down (the people next us were noisy)
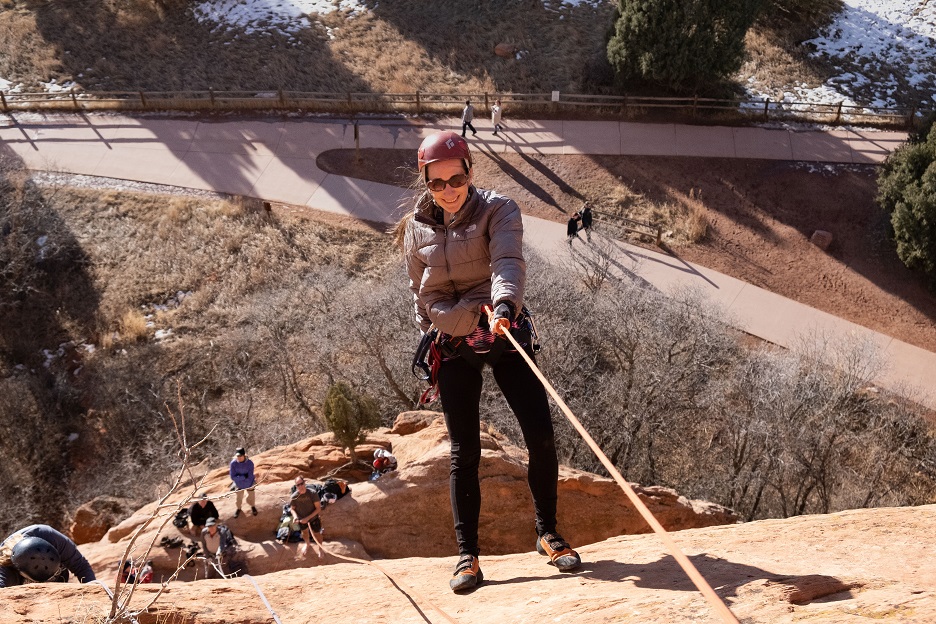
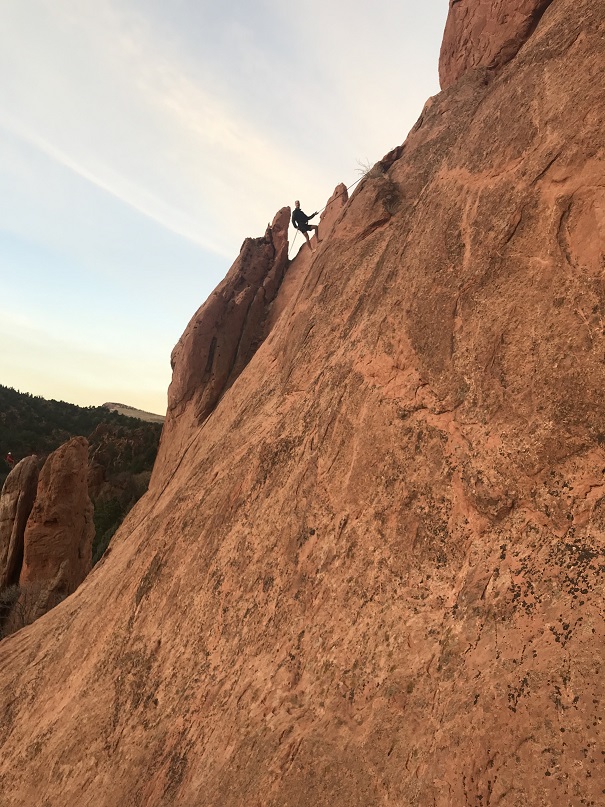
I was up next. I put on my helmet and winced: I had a bruise from wearing it when I fell and every place my helmet touched my forehead was tender. However, I’m proud to say I made it to the top, and back down, without incident!
After my fall earlier in the week I was a bit scared to do this again so soon, but also knew it was necessary. In all, we each got in 3 runs for the day. Tim belayed Emily and I, and Emily belayed Tim (and I helped anchor her while he came back down). It was a great day, warming up as the afternoon went on. I was really glad we made it out! Here are some more picture highlights (the last run was the hardest, but they were all about 5.8).
I was even able to take my jacket off for the last run, which always makes for a great day. Thanks Tim for bringing us out today!
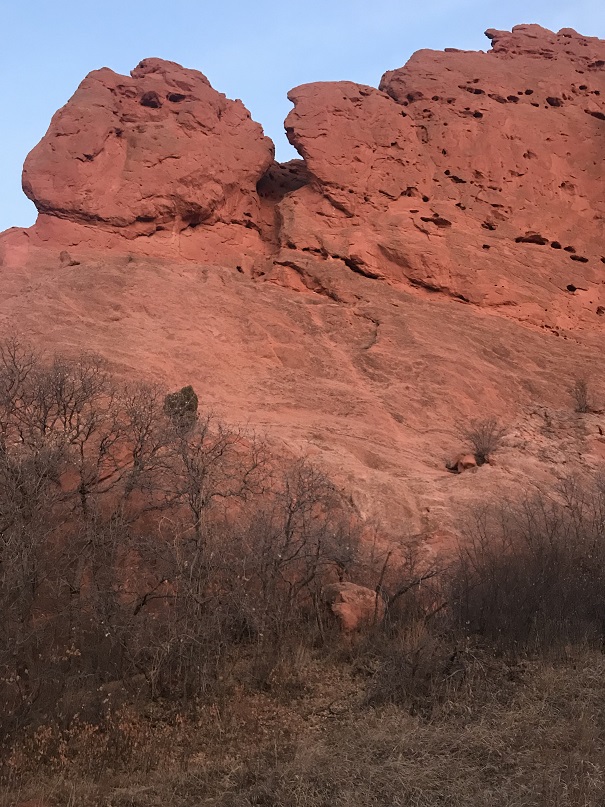
I went rock climbing with a group from church recently. This was super fun but a little out of my comfort zone, as I’m not a big ‘people person’ and usually climb alone. Everyone was super nice and I was able to get in a run on the keyhole route at the Garden of the Gods. It was a bit chilly out (hence the puffy) but as a bonus someone brought homemade fudge (yum!).
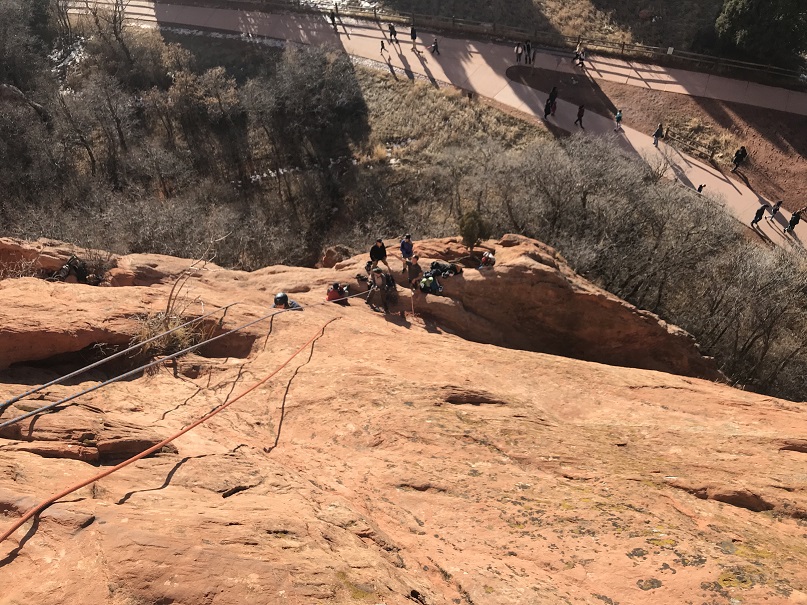
The fun started around 12:30pm with ‘Ralph’s Tree’. You see, Ralph went up first so he could stay up there and take pictures of everyone climbing. Since he was first it was his job to climb up and then throw the rope back down. Well, the rope got caught on a scrub bush and knotted up when he threw it down. It took about 20 minutes for him to sort it all out, but finally he was able to get the rope unstuck and toss it down. We all joked about it and shouted up at him to be more careful with the next rope. Well, you guessed it, the second rope got tangled too, and we couldn’t stop laughing! For a visual, here’s the scrub tree that was the only obstacle that needed to be avoided… and the one that tangled the ropes twice.
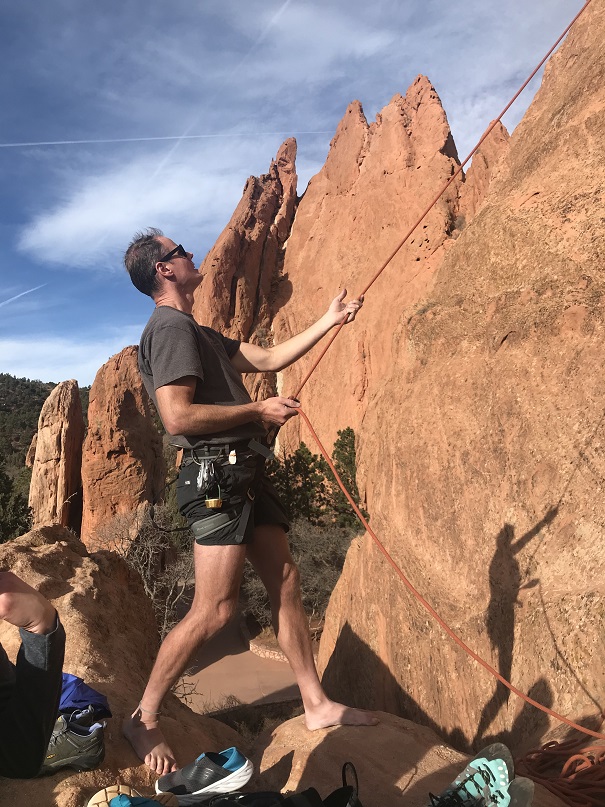
We all had a good laugh about that one and teased him in good fun until the end of the event. Eric was on belay (without shoes, of course) for the orange route and due to the slope of the rock (or lack thereof) the rope near the top had more friction than normal and he had his work cut out for him
Since I was a guest I waited for everyone else to climb first. As I was waiting and watching and enjoying homemade fudge I noticed some climbers to our left topping out at a cool gully (Eric says we can try that one next). Anyway, I thought it was a cool visual so I grabbed Eric’s mirrorless and took a few photos. Don’t they look cool?
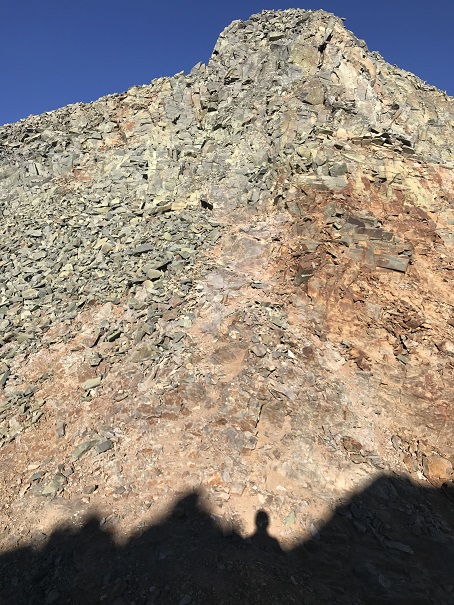
Oh, and while I was there I saw the opportunity to take a shadowselfie I couldn’t pass up.
It was fun watching everyone else climb up, and while they did I took the opportunity to study their routes. Check out Curtis and Connie rappelling down together! Awwww!
A Coopers Hawk decided to perch near us for a while
When it was my turn to climb I was totally ready. I knew which line I wanted to take and just went for it. It actually felt pretty easy. Ralph got a picture of me from above
Once at the top I sat for a minute and enjoyed the view. I could hear the conversations of visitors strolling around below
Of course I got a selfie
And then rappelled back down
I was one of the last to climb (a few people went twice after I was done) and even though it was early the sun was fading fast. It tends to do that with Pikes Peak to the west. I was talking with Eric and decided to get creative with my camera.
All in all a fun time! Afterwards I brought Emily home a pizza and then joined everyone for church.
Oh, and here’s a few photos from Kindergarten Rock Eric and I climbed that one last week but I didn’t post.
And from scoping out Keyhole for this trip
Another cool silhouette sunset shot. That one’s on my list of climbs too.
The weather all over Colorado has been fantastic all month (meaning sunshine like summertime). In fact, Colorado Springs has had more days over 90* this year than it has in over a century. This is pretty surprising for September, and I’ve been doing my best not to waste every opportunity to get outdoors and hike.
Many of Colorado’s 13ers are in the San Juans, which is a good 7 hour drive from my house. The distance makes it difficult for me to make it there on my Friday hiking days (because I usually need to be home by 3pm to pick up my daughter from school). So I promised myself whenever I had 2 days free in a row I’d head down to the San Juans for some hiking, and do my best to hit as many peaks as possible in those 2 days by camping at the trailheads. Earlier this month I hiked Pigeon and Turret in a day, and my plan had been to hike the a few more peaks the next day. That obviously didn’t happen, but I was going to try my plan again of jumping around and trailhead camping two days in a row when I could make it to the San Juans.
The opportunity came faster than I’d anticipated. I found out on a Thursday my entire office (it’s a small office) would be gone Monday and Tuesday the next week, so I’d be working from home. Oh, and Tuesday was my birthday! I looked at the weather forecast (sunny on Monday and 20% chance of rain after noon on Tuesday), and decided right then and there I was making a trip to the San Juans for my birthday. This didn’t give me long to plan my routes, etc. but I was determined to make it happen. Unfortunately there isn’t a lot of recent beta on this area, so I did as much research as I could and told myself I’d just have to wing it.
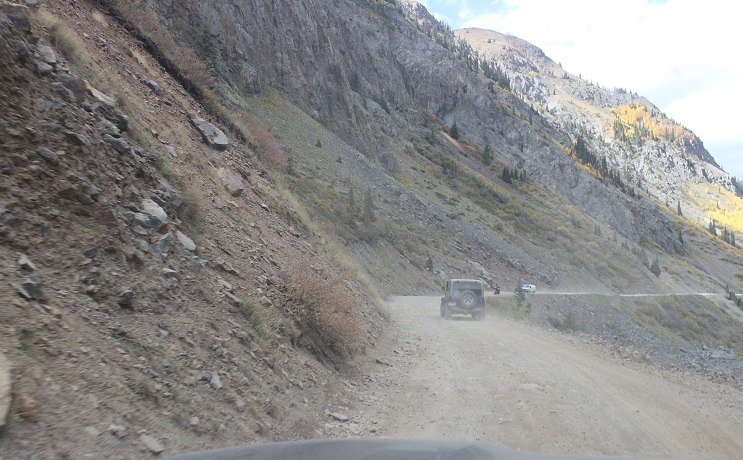
After tucking my kids in for bed I left my house on Sunday night around 8pm and made it to the trailhead earlier than anticipated (3:30am). The dirt road to South Mineral Campground is a 2WD dirt road, well maintained, and at the trailhead has room for about 20-30 vehicles.
Oh, and I’d seen no less than 7 porcupines waddling along the side of the 2WD dirt road in (not all in the same area). Drat: I’d forgotten my moth balls. Oh well, I’d have to cross my fingers this time. The moon was absent but the night sky was filled with millions of stars. I’d arrived early and because I wanted a good look at the basin in the daylight I decided to try and get in an hour nap before starting my hike. I was surprised at how well this worked. I closed my eyes and what seemed like a minute later my alarm rang, indicating it was time to get moving.
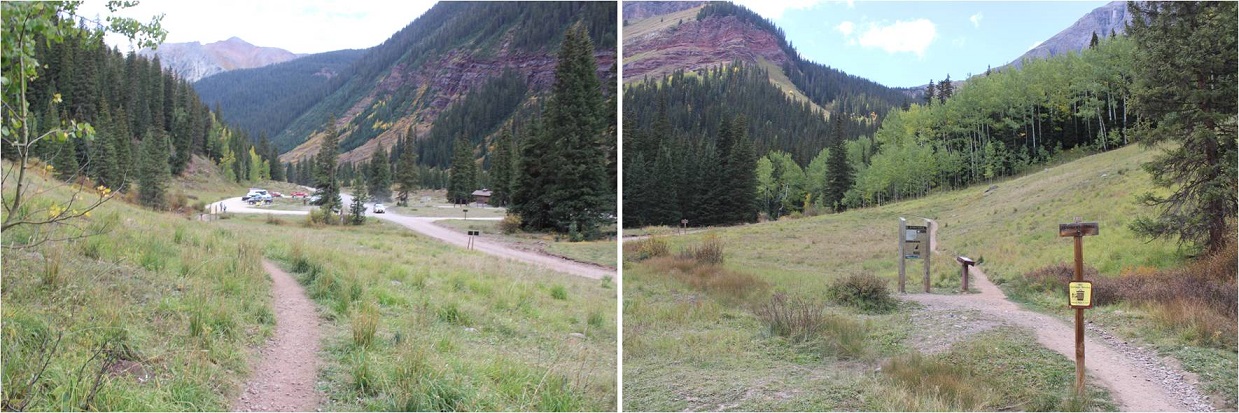
The trail starts on the west end of the parking lot. There’s a trail register to sign before heading out (one of the nicest and well kept registers I’ve ever seen at a trailhead). I started at 4:40am.
I took the Ice Lake Basin Approach, which is a very well maintained trail that crosses a small stream and switchbacks west. It looks like there’s been some recent trail overhaul and maintenance in the area, and even a shifting of much of the trail west, with lots of dead trees/branches covering the old trail. I was unable to find the 4WD parking area that’s been suggested as a possibility for shortening the hike in (I’ve also seen beta indicating this 4WD lot has been destroyed with “no parking” signs in the area now).
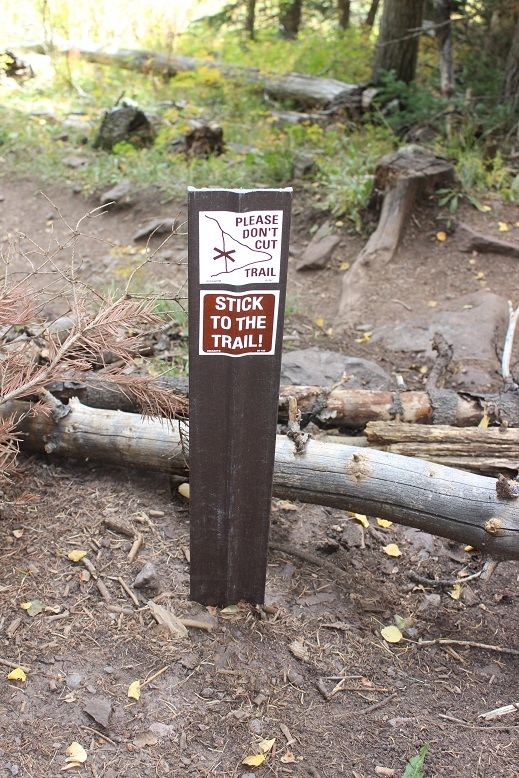
There were dozens of signs asking hikers not to cut trails.
The trail was easy to follow all the way to the Ice Lakes Basin, gaining in elevation steadily.
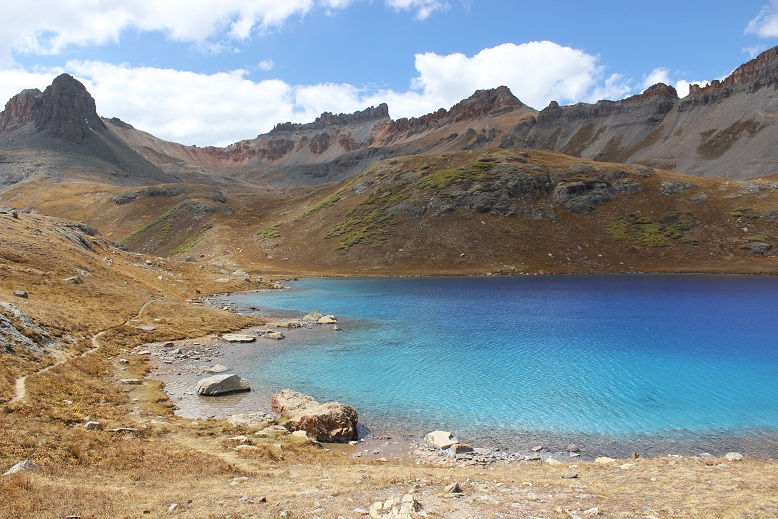
I made it to the Ice Lakes basin while the sun was beginning to rise.
Ice Lakes Basin:
Instead of stopping at Ice Lake I took a quick picture from the trail and turned south and hiked to Fuller Lake. I wanted to see the lake and old cabin. Had I realized how blue those lakes were when I first passed them I’d have taken the time to explore more, but in the early morning light they weren’t yet impressive.
There was a trail the entire way to Fuller Lake.
What I wasn’t prepared for were the amazing reflections of the mountains on the water as the sun rose. Pictures do not do this area justice!
Unfortunately, the cabin has been destroyed, most likely by weather.
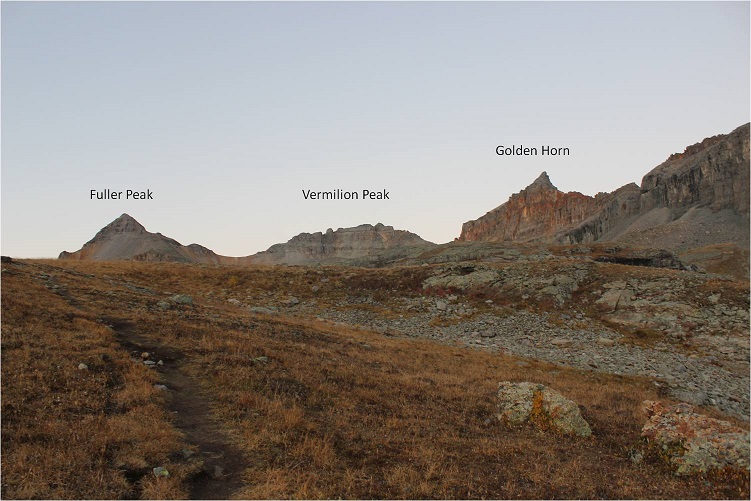
From here there was no trail for the rest of the hike. I could see Fuller Peak to the southeast, and hiked without a trail through the basin towards the saddle of Fuller and Vermilion.
Along the way I saw an old wheelbarrow. Of course this meant a picture was necessary
Here’s the route I took up to the saddle and over to Fuller Peak and a look back down the basin and the way I hiked in as seen from the saddle.
It’s steeper than it looks, and I was glad I was doing this part of the hike before the sun was too high in the sky. The rocks are semi loose talus. Annoying is what they are…
From the saddle turn left (southeast) and follow the ridge to the summit. It’s an easy class 2 hike with several small false summits.
The only downside was I was hiking directly towards the rising sun. It made seeing anything clearly impossible.
I made it to the summit of Fuller Peak at 8am
Fuller Peak:
The views were amazing! I looked back at Vermilion and the route I needed to take to the summit. After returning to the Fuller/Vermilion saddle stick to the ridge
Here’s a view of the route from the saddle. Follow the ridge up and to the left
After you go left you’ll encounter a loose dirt gully. Climb the gully to the notch
At the top of the gully you’ll see two towers. Pass them to the left
And climb another gully
The gullies here seem to go down forever! (don’t worry, this isn’t the one I climbed, but one I wouldn’t want to fall down)
From here follow the rocks to the summit
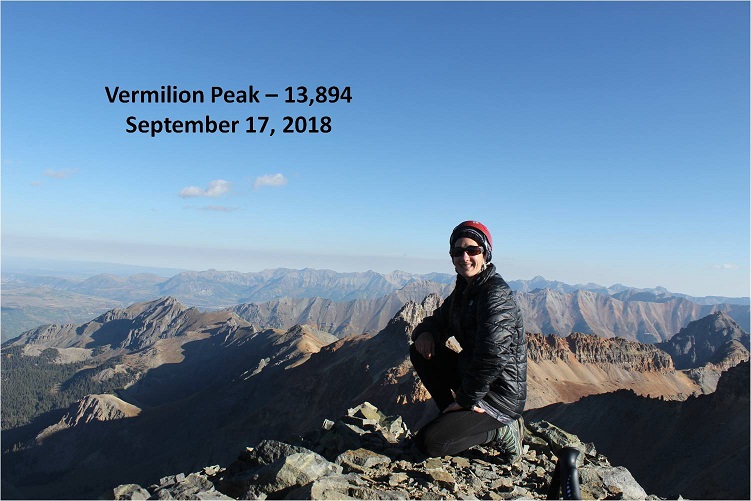
I summited at 8:45am
Vermilion:
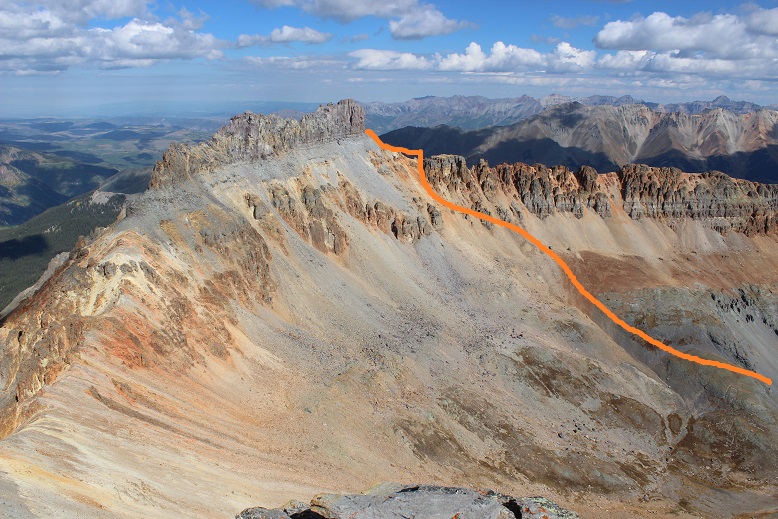
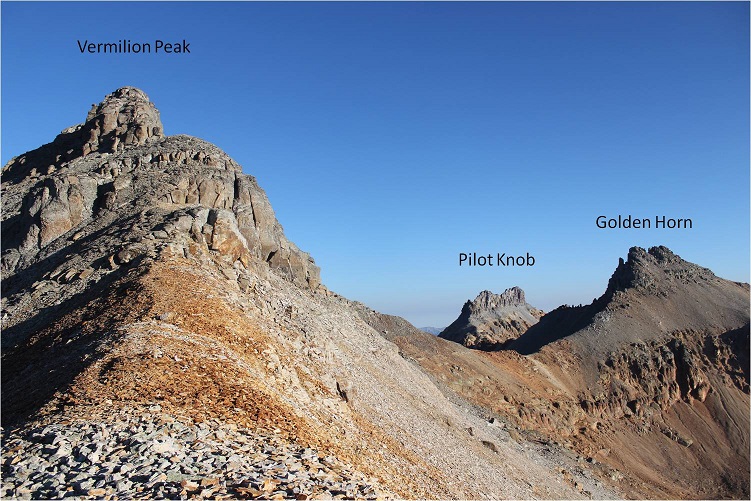
My next task was Golden Horn. I returned to the Fuller/Vermilion saddle and traversed the area on the northeast side of Vermilion between the cliffs and a scree ledge towards the Vermilion/Golden Horn Saddle. You’ll need to descend lower than you think you will. Follow this route (as seen from Fuller)
The scree & talus ledge is wider than it looks, with some large boulders thrown in. The rocks aren’t loose. Here’s a picture looking back from the Vermilion/Golden Horn Saddle
Here’s a look at the route from the saddle.
It’s a pretty straightforward climb, but about halfway up the ridge is when things get spicy. The scree intensifies and it can be difficult to find good footing. Luckily there’s not much exposure.
There aren’t any cairns but the route is obvious. There are two summits to Golden Horn. The summit register is on the summit to the west. Here’s a picture looking back at Vermilion
I summited at 10:15am
Golden Horn:
The views were amazing! I could see Ice Lake for the first time in the daylight and was immediately impressed: I had to make it down there!
My day had been going pretty good so far. It was still morning and I had the rest of the day ahead of me. The only thing that was troubling was the clouds creeping in. It was supposed to be sunny all day. There were way too many clouds for this forecast to be accurate. I had to keep an eye on the weather. I turned and looked northwest: Pilot Knob.
Hmmmm. It looked tempting. The only reservation I had (besides the weather) was beta. I had great information on Fuller, Vermilion, and Golden Horn, but there just wasn’t a lot of data out there on Pilot Knob. At least not much recent data. While planning this hike I’d been short on time and only planned on the three peaks I’d already summited. I mulled it over: I’d done some preliminary research on Pilot Knob (in fact, I’ve done enough on all the bicentennials to know which questions to ask, when I’d like to summit them, which routes I want to take, etc.). I knew I was supposed to summit Pilot Knob from the south and west face, looking for a chimney that would lead to a scramble to the ridge, and there was a crux I really wanted to get a first hand look at (a crack traverse/climb near the summit). Even though you summit from the south the approach is usually to the north (and I was south).
Trip reports last time I checked were few and far between, with the newest being 3 years old. The best beta was years before that. You were supposed to approach from the north and traverse southwest before summiting from the south/west, and I was on the south. I figured I could probably summit today, so I decided to descend Golden Horn the way I’d come by heading back to the Vermilion/Golden Horn saddle and look for a route over to Pilot Knob.
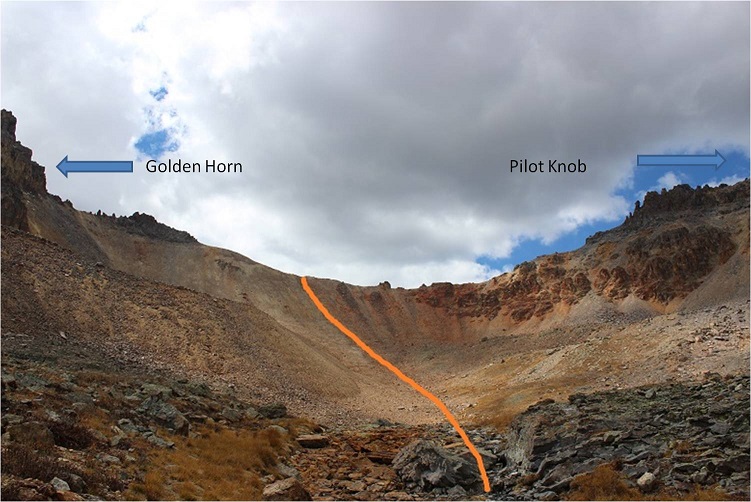
From the saddle I traversed west to the Golden Horn/Pilot Knob saddle.
The first part (before getting to the saddle) was a fun, difficult class 2 scramble. It was the most intense scrambling of the day so far. If you stick to the ridge you’ll do fine.
Here’s a look from the Golden Horn/Pilot Knob saddle, looking up at Pilot Knob
I kept watching those clouds. They were starting to bug me, blowing in and around with what looked like deep blue, rain filled centers. I made it up the ridge of Pilot Knob, and navigated to the southwest to look for a chimney that would lead me towards the summit. Instead I quickly encountered a very loose and scary talus filled gully.
It was obvious several large rock slides have occurred in the area since the last trip report. Many previous trip reports indicated a “well cairned route”. I didn’t see a single cairn, but there had been so many slides in the area they could have been destroyed by one. OK, back to the loose talus. This was unlike anything I’ve ever seen: I’d step on it and a 5 foot wide avalanche of rock would give way, tumbling down below me and gaining speed and larger boulders as it went. The first time it happened it startled me. Two steps later when it happened again I was seriously scared I was going to fall with it and braced myself: unfortunately there was nothing to grab onto.
I knew there was no way I could safely traverse any further west, but I needed to in order to find that rock wall. OK, so this wasn’t going to happen. Maybe I’d accidentally missed the rock wall I was supposed to climb? I’d just turn back and try again. It took me quite a while to backtrack to where I’d started on the south side of Pilot Knob: I was seriously scared I’d fall in an avalanche of talus with every step, but I made it back and decided to try again, thinking to myself traversing the area would be achievable and much safer in winter/spring with consolidated snow and crampons rather than all this talus/scree.
I just needed to gain the ridge. There had to be more than one way? I spent about an hour and a half trying to climb every area I could, but none of the routes I took went all the way to the top, and these were not class 3 moves as described in previous trip reports. They were class 4+ on loose and crumbling rock. Every time I found what looked like a solid route rocks would flake off both above and below me: Rocks the side of softballs and some the size of microwaves. I’d make it 20 feet up the side of a “wall” only to have to turn back and head back down. Rope wouldn’t have helped because none of the towers were stable enough to support a climber that way. I was glad I was the only one out there today.
I’m stubborn, so I did this fruitless climbing up and down walls for much longer than I should have and took more risks than I’m willing to admit to my mom. I even went over to the east side and tried that way. Nope, there wasn’t a way to gain the ridge from either side, and I couldn’t descend the slope and try to make my way to the north side to summit that way (it cliffed out). I was super frustrated. Hmph. I had to remind myself Pilot Knob wasn’t even on my list of climbs for today so I shouldn’t be too disappointed. But I was. I mean, I had hours left of daylight (it was only noon) and I really wanted this summit.
Wait! I know, I’ll just descend into the basin and re-gain the saddle from the north side, traverse southwest and try it that way! I was positive the right rock wall was on the other side of that talus/avalanche gully I couldn’t traverse. I made my way back to the saddle and looked at the route I wanted to take. Here’s a picture of that route from Golden Horn.
I looked up at the clouds, and it was obvious I was going to have to turn back. There wasn’t enough time to descend into the basin and re-ascend to try and summit. Oh well, I need US Grant too. I’d just combine the two the next time I was out here.
I made it back to the saddle and headed down into the basin. Here’s a look back at the route I took
I felt I was getting pretty good at this descending down a scree slope into a basin thing. As I was hiking down I thought to myself how the area looked like it usually held water. It was made up of tiny flat rocks about the size of a silver dollar but an inch thick. The kind you’d usually see on the bottom of a lake or pond. Hmmm. I guess since it was such a dry year there wasn’t any water. I was walking on a lake/pond bed. And it was squishy. In fact, walking across it felt just like walking over a bog. No sooner had this thought entered my mind than realization hit and it happened: I heard a sucking sound as my left foot sunk into the muck up past my ankle (mind you, I was walking on rocks at the time) and was almost impossible to dislodge my foot.
No. No. No, no, no! I know how to get myself out of a bog/quicksand if I have to, but I really didn’t want to end up covered head to toe in mud (I was camping tonight after all and wouldn’t see a shower anytime soon). So I dislodged my left foot and ran as fast as I could, kicking up my heels as I went, trying to escape the mud that was trying to pull me under with each step. All in all it wasn’t that bad: with the running I only sunk up to my ankles, but I could tell if my foot had rested in any one place I’d have sunk much further as the mud had great suctioning abilities. Then I’d really be stuck. I made it to stable ground and let out a sigh. Crisis averted! My shoes and pants were caked in mud, but that was the worst of it. Here are my footprints looking back
I turned east and was greeted with a daytime view of Ice Lake. Wow! This was beautiful!
As I got closer I could see how truly clear the water was.
Ice Lakes:
This was amazing! I stopped for a while, took a bunch of pictures, and then headed on my way back down the basin where I was greeted with aspens changing color. I’d missed them on the way in when it was dark.
There were tons of people on this trail! I must have passed dozens (and it’s a Monday). It was a long 4 miles back down. I made it back to my truck at 2pm. And it never did rain. Oh well, this gave me time to find my next trailhead in the daylight. I took off my muddy pants, socks, and shoes and put on my sandals for the drive. Near the 550 on the road out I got cell service and stopped by the side of the road for a bit to do some work (emails, etc) and text my kids to let them know I was down the mountain and headed to the next.
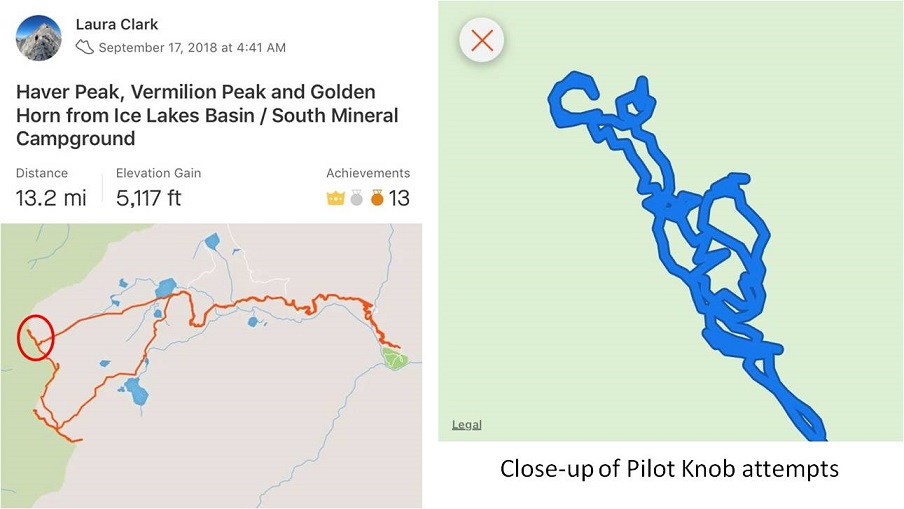
Here’s my route with a close-up of my Pilot Knob attempts. Don’t worry, I’ll be back for this one!
My drive took me through Silverton. I’d heard the fall colors weren’t supposed to peak here for another 2 weeks, but right now it looks beautiful.
I had conflicting directions on how to get to the Burns-Gulch trailhead, so I brought both with me. From Silverton I took County Road 2 past Eureka on a 2WD dirt road, and ate the dust from off road vehicles the entire way. For a Monday afternoon it sure was crowded! Leaf peeping season is definitely in full swing!
I made it to the base of the trailhead on the Animas River and my directions ended. So I pulled up a GPX file of the route to see where I needed to be: about 2 miles up a narrow shelf road.
The road was much narrower and steeper than it looks and filled with bowling ball sized rocks. I took it slow: this road was more difficult than I’d anticipated (but nothing my truck couldn’t handle). I just hoped no one would drive towards me from the top: There was no way I could turn this truck around on such a narrow road, and passing another vehicle wouldn’t be easy.
There was a campsite at the 4WD trailhead at 11,720’ and no other vehicle was in sight. Sweet! It looked like I was going to have the site all to myself for the night.
I got to work making dinner: Mountain House Beef Stroganoff. When it was ready I poured myself a glass of wine in the measuring cup I brought for making dinner, sat back, and enjoyed the view.
Life is good! Sitting in the bed of my truck looking at the mountains was so relaxing. As I was sitting there I heard a creek to my right and got up to investigate. This was wonderful! It was about 10 yards from where I’d parked my truck. I enthusiastically washed my hands in the running water. They were gross from today’s adventure and it felt good to have clean hands and fingernails again. I got up to turn around and head back when my left sandal broke. I mean really broke, like duct tape can’t fix it broke. Drat! I was going to have to tiptoe the 10 yards back to my truck without wearing shoes. The first step I took landed my left foot on a thistle. Wonderful. I made it back to my truck, poured myself another glass of wine and spent the next half hour picking splinters out of my foot (mostly on the heel and arch). I looked around at the mountains: Life was still good!
I got out my maps and route info for the next day and tried to identify the peaks around me and the best route to take (I had several options). I studied my chosen route until I felt it was time to get some sleep: it was starting to get cold.
I decided to sleep in the cab of my truck because I fit perfectly across the back seat and because I could. Two shots of whiskey later I was ready to go to sleep. I laid my head on my pillow and a fly landed on my arm. I thought about how much fun having a fly buzzing around me while I was trying to sleep would be and debated whether or not to open the door to let it out. In the end I decided I’d rather not let all the warm air out in doing so, so I made a deal with the fly: “Fred “(I named him Fred)”If you promise not to buzz around me all night I promise not to kill you right now”. Fred flew away to relax on my steering wheel and I fell asleep thinking this wasn’t a bad way to spend my last day of being 37.
I was invited a few days ago to go to CityRock tonight with a group and climb. My first instinct was to say ‘no’ because I don’t really like groups, but then I remembered these were really nice people and I needed to make friends.
Then yesterday I got bombshell news concerning my divorce and our next court date (I’ve been divorced for 6 years, yet it seems we’re always going to court). This news was pretty devastating, and I knew I’d be very occupied for the next few weeks, so I might as well have fun tonight.
Another reason I wanted to go: There was a guy I’d met at a 14er Happy Hour who asked if anyone was climbing at CityRock on Friday. Without thinking I let him know a group of ‘us’ would be there. He messaged me back to make sure it wasn’t a ‘family’ thing, and said he’d be there too. That kind of obligated me to go.
It’d been a busy day so I didn’t get there until 5:30pm. Immediately I noticed the bouldering wall didn’t have any climb holds. I guess they’re re-doing the wall. I was glad I’d successfully climbed that V3, but I was a little disappointed I couldn’t actually show anyone in person tonight.
Jen and Tim were there, and they introduced me to a bunch of their friends. I’m sorry, but I don’t remember who was who, but I’d recognize you if I saw you!!! I did a few auto-belays, and Tim belayed me a few times. I wanted to go over to the lower bouldering wall to get in some practice before my arms got too tired.
As I was heading back down to the climbing area I heard a girl shouting: “Mom! Mom! Mom!” She was about 14 or 15 years old, and at the top of one of the climbing runs. She was frantic, and realized once she’d made it to the top of the run she’d forgotten to clip into the auto-belay! She’d free-climbed all the way up to the top, and had no way of safely getting down.
This was a very scary situation, and one I never actually thought I’d see: There are signs all over the place asking you to check to make sure you were ‘clipped in’. This girl was definitely in danger. She was at least 50 feet up, and if she fell no one would be able to catch her. Several people wanted to climb up and help her, but if she fell she’d take them down with her.
She was scared, and having difficulty holding on to the wall. She tried holding on to the rope next to her, but that didn’t really work either.
Luckily CityRock had a solution: They clipped a carabineer to the auto belay and released it up to her. She was able to clip in and climb back down. She climbed back down, and didn’t jump (I don’t blame her). Everyone let out a sigh of relief when she made it back to the ground. I couldn’t believe how shook up I was, and I wasn’t the one at the top of the wall without security!
The adrenaline rushing though me didn’t let up for a good half an hour, and it wasn’t the good kind of adrenaline, but the kind that wipes you out. I continued to climb, but without the enthusiasm as earlier in the night.
I saw the guy who said he’d meet me there. He climbed a 5.12, and was super proud of himself. Since I hover around 5.9-5.10 I was proud too!
One thing I learned tonight I really don’t understand is that it’s ok to take breaks while rock climbing. I don’t mean it’s ok to just stop, but you can push yourself away from the wall and dangle for a bit and then resume where you left off. This seems like cheating to me. However, I guess it’s how a lot of people successfully ‘work the wall’. I’d feel better about myself if I did it without ‘falling’.
After climbing we went to a taco place downtown. It was small and there were a lot of us so we had a 30 minute wait. The tacos were good, but the party was split up so it was kind of like I was coupled with Tim and another couple. The conversation was good but not really what I’d been looking for. The tacos weren’t all that great either. Don’t get me wrong, they weren’t bad, but I’m into this ‘trying new things’ thing and they didn’t have anything that looked good enough to try, so I stuck with the carbonara tacos (pretty vanilla).
Before leaving home I gathered my gear and put it all in one
spot so I wouldn’t forget stuff like last time, and then I quickly made dinner
and got changed out of my work clothes and into something I could climb
in. I only had 15 minutes before I had
to take Thomas to Boy Scouts, so I had to be quick. I looked for my moleskin (my climbing shoes
still need to be worked in and I figured I’d take some preventative measures),
but realized it was in my truck and my truck was still in the shop. This whole not having my truck thing is
getting inconvenient! So instead of the
moleskin I put a couple of Band-Aids on my heels and figured that would have to
work.
Tonight I actually didn’t do any bouldering.From the time I arrived until I left an hour
later Tim helped me with climbing.We
started with attaching the rope to the harness with a figure 8 follow through, and
discussing different types of carabineers. Woohoo!I actually know my knots,
so I was excited to be doing something I considered easy.Well, at first it was, but for some reason I
wasn’t able to tie the knot successfully after that.Actually, I did tie it successfully a few
times, but not on a consistent basis. I
told myself it was because I was holding the rope a different way than I usually
do, and looping it through the harness, but that’s just an excuse, and I hate
excuses.Practice is what I need.
I’m not a good student because I get frustrated easily when
I don’t understand something or when I do something wrong.My defense mechanism is to change the subject
and move on as quickly as possible to the next thing.I’m not used to failing, so this knot-tying incompetency
hurt on a personal level and became a challenge and a focus for me the rest of
my night. The more I focused, the worse I did. I’m sure my attitude became
challenging as well.
I’m not sure what was wrong with me, but I kept messing up
the knot, and it’s a really simple one!!! When Tim asked me if I had any rope to practice on at home I tried not
to laugh:My basement is pretty much a
knots and lashing practice area for the girls, with a large 50 gallon bucket full
of ropes of all thicknesses and sizes.Yes,
I’d be practicing (probably as soon as I got home).
Seriously though, I do need some practice.I want to be able to tie the knot without
thinking, and I suppose that was the problem tonight:I was thinking too much about it.
Tim had hurt his shoulder (or so he says) so he belayed
while I climbed.I was able to successfully
complete three runs without falling, although it felt a little weird to just
lean back and have him control my descent. They gym was crowded (although not as packed as it had been the previous
two weeks) and I didn’t want to hit the climbers below me, so I kept grabbing
at the holds on the wall to push myself away from the other climbers.Apparently this is frowned upon.I’m just supposed to fall backwards, pushing
back from the wall with my feet, but this simple act was difficult for me to
do.Another thing to work on!
The climbing shoes weren’t as uncomfortable as I’d thought
they would be, although they were stiff. They fit well, but were bulky in the front (once again, similar to a tap
shoe).I think they’re supposed to be
like that, and after a few minutes I got used to them.However, I couldn’t help thinking how much
easier it would be to just climb barefoot (traction wise).
Climbing actually gets more difficult the longer you do
it.Well, to be fair, I wasn’t taking
breaks, which was probably the problem: I was wearing myself out.After
the 4th run my forearms started feeling tight.I’ve never experienced that before and it was
really a cool feeling.I could have done
without the veins showing though
On the 5th run Tim gave me some advice:Stop for a second and rest.Ha!Obviously
he doesn’t know me very well.Stopping
and resting are two words not in my vocabulary. I wasn’t able to stop (unless I was stuck), but he also told me to shake
out my arms and angle them down when they got sore, which worked amazingly
well!Something so simple gave me extra
strength.This must have something to do
with blood flow.
I tried a new kind of run today:He gave me advice on angling my arms to get
leverage that really helped!(Manteling?)I do push-ups, but will need to do more to
work on my upper body strength.He also
showed me how to dropknee, but I’m not convinced yet it will give me more
height (but theoretically it should).I
was just too tired by that point to try it successfully.
I also need to work on planning out my route.I just kind of go with it and look for the
right color holds.This often means
back-tracking a bit.It would do me well
to stop and plan a few holds ahead instead of just clambering towards the top. I
should use more chalk too.Several times
my hands just kept slipping no matter how many times I tried to reposition them,
and I think more chalk would have helped: that must be why climbers attach chalk bags to their harnesses and don’t
leave them in their cubby with the rest of their gear…
The last run I did was brutal towards the end.I just didn’t have the strength left in my
arms to lift myself up that last bit, and I wasn’t patient enough to just sit
and wait for the strength to come back (I wasn’t sure it would tonight
anyhow).I ‘fell’ three times, and
finally just yelled down to Tim to let me come back down. I think I’m supposed
to say something like “Lower off” but that made me uncomfortable and sounded
weird:kind of like failure.I was only one hold from the top, and it was
the only run I didn’t complete tonight. I think I can do it though, so if they don’t change the holds I’m going
to try it first next time to see if it was just an ‘I’m exhausted’ thing (and
not an ‘I can’t do this’ thing).
When I made it back down I decided to try and practice that
knot again.The hour passed very
quickly, and before I knew it it was past time for me to go:But I wasn’t done practicing that figure 8
follow through!I wanted to be able to
do it with my eyes closed, and consistently every single time I tried it. But
that wasn’t going to happen tonight.Oh
well.I have all week to practice!
Before I left Tim lent me a book to read Mountaineering:The Freedom of the Hills.It’s all about climbing, and full of clarifying
illustrations.I have no time to read,
so it looks like I’m going to have to make time because there is a lot of really
great information in this book and I’ll feel bad keeping it until I give it
back to him (another area for growth… this list keeps getting longer and longer…lol!).
Oh, and lucky me, no blisters!I celebrated by putting my logo on the shoes,
branding them as officially mine 🙂
I’ve been thinking about joining a climbing gym for a few
months now, but the closest one is about 30 minutes away from my house.It’s about $60 a month to join, which didn’t
seem too appealing since I just discontinued my actual gym membership.They did offer free yoga classes and one free
massage a month with the membership, which was really appealing, but I didn’t
like the distance.Plus if I were paying
$60 a month to climb I’d be there several times a week, which would mean an
added cost in gas as well. Did I mention I’d have to pay to park too? Ugh!But I really need to develop my rock climbing
skills for my 14er challenge:I need to
feel safer out there while climbing, and that’s only going to come with
practice.
So I did some research, and found a much cheaper option:A ‘punch pass’.I pay up front, get 10 visits, and can use
them for anyone I choose (I can bring a friend with me, etc.).I was trying to justify time for using the
pass when I remembered Thomas has scouts Monday nights directly across the
street from the climbing gym.Duh!I could just go with him to scouts and while
he’s there walk across the street and get in some climbing practice instead of
sitting there at the meeting knitting hats. Brilliant!Why did it take me so
long to figure this out?
Anyway, tonight was my first attempt at this whole climbing
thing.I’ve been to this gym several
times, but I’ve never actually climbed here. I’ve always been a chaperone taking scouts or for birthday parties.I’ve never climbed in any gym before, but I
have been rock climbing at Red Rock Canyon a few times.
Emily went with me. We dropped Thomas off at Boy Scouts and then walked together to the
gym.I bought the punch pass and we used
two immediately. They let us use a
harness and shoes for free (the harness is always free, the shoes were to make
up for the fact we had to fill out liability forms again).
It was Monday night at 7pm, and this gym was packed!There were tons of climbers there!
I found the last cubby open to store our stuff and we put on
our climbing shoes and harnesses.Normally
when I’m attempting something new I stand around for a bit and watch everyone
around me to see how it’s done, but there were so many people I figured it was
best to just jump right in and find a place to climb.
I found an open area and attached the carabineer to my
harness.This was actually a lot more
difficult than I’d thought it would be: It wasn’t a simple push down and turn like I’d expected, and despite
trying my best I never quite got the hang of it.I was able to eventually clip in, but I’m
sure I looked like I had no idea what I was doing, even toward the end of the
night after doing it several times.
Climbing was much easier than I’d anticipated!I made it all the way to the top in no time
at all, and was quite pleased with myself. However, I wasn’t ready to just jump off and let the pulley carry me
down, so I ended up climbing back down the way I’d climbed up, and told myself
I was practicing because while outside I’d need to climb back down the way I
went up (yes, I was lying to myself, kind of).
OK, this was fun!I
was actually able to climb to the top without stopping, and on my first
try!I went to find Emily (she’d been in
the bathroom taking care of a bloody nose) and challenged her to climb with
me.We did a couple of runs together,
and she convinced me to jump backwards and fall all the way down.From the top of a climb I took a leap of
faith and jumped backwards, letting the pulley slowly carry me back down to the
floor.It was actually quite fun!Just make sure you’re actually secured and
clipped in first…
Now on to bouldering, because this was why I was actually
here.This scared me more than climbing
because I wouldn’t be clipped in.Once
again, this was easier than I’d anticipated, and I was able to quickly catch on
and climb up and over the wall(s).I
went to take a break and find Emily. She
was climbing the same area we’d been climbing before, and it was here I realized
something:when climbing the walls you’re
supposed to stick to one color of holds as you progress up.Whoops! No wonder everything seemed so easy! I’m going to have to spend some time learning about different classes
(etc.) of climbing.
OK, so I felt a bit silly about my climbing optimism (no
wonder it’d been so easy!) and decided to try it for ‘real’.I took a few runs, sticking to only one
color, and while it was more challenging I was able to climb them all successfully
except one.I kept trying that one over
and over again, but instead of getting easier it was just getting more
difficult.I was getting tired!I knew what I needed to do, but my arms were
worn out.We’d been at the gym for about
an hour, and I’d been climbing almost continuously.Now even runs I’d done successfully earlier I
wasn’t able to climb.I told myself to
stop now because I was wearing myself out.
I went down the slide one more time (I can’t remember the
last time I went on a slide!) and we changed out of our gear.
All in all I learned a LOT tonight. Everyone was pretty friendly, and even though the gym was packed it didn’t feel too crowded. I want to eventually learn how to belay (including putting on the ropes, etc) and I need to get better at bouldering. I think it will just come with more practice.
Notes: Bring your
sense of adventure and a helmet!
This hike was really pretty awesome! Each time I go out looking for a bit more of
a challenge, and today I found it!
Tuckaway Mountain is listed in the Pikes Peak Atlas, but there is no established
(or even mildly established) trail to the summit. The hike is long, the summit a class 3 scramble
(at least). It really is Tucked Away, and takes a long trail through North Cheyenne Canyon to reach.
I started this hike at 7:45am at the 7 Bridges Trail parking
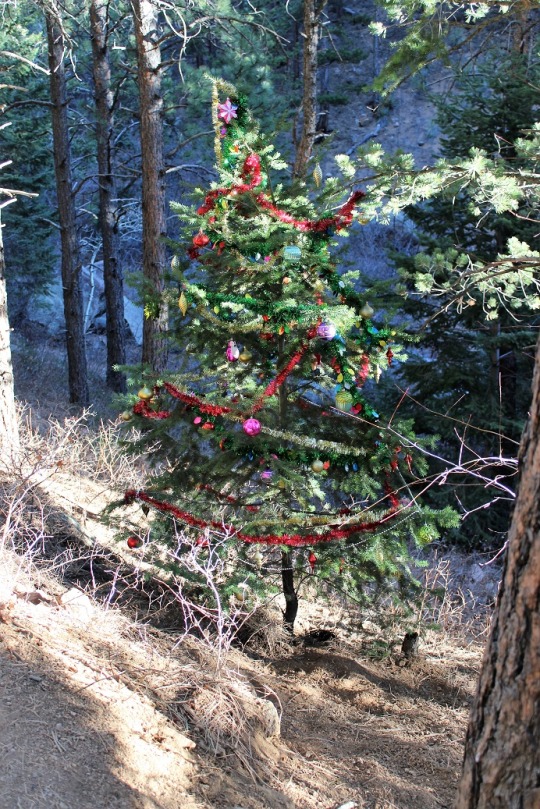
lot. Around the 2nd bridge I
saw a decorated Christmas Tree that wasn’t there two days ago when I hiked this
part of the trail to summit Mt Garfield and Mt Arthur. The tree immediately
brought a smile to my face, and then my next thought was “I hope whoever put
this here takes it down as well” LNT and
all.
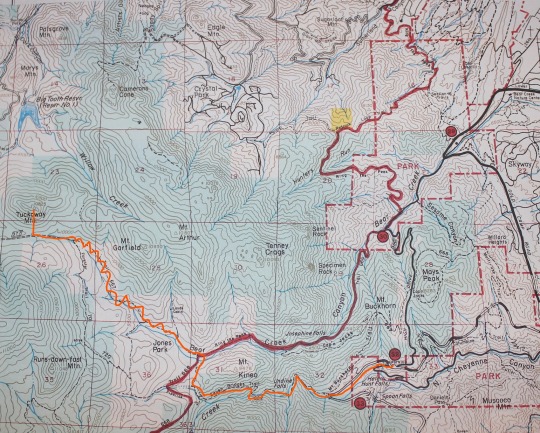
I followed the 7 Bridges Trail to the junction and turned left
onto 667. I stayed on this trail until
it ran into trail 377. This seemed to
take a really long time, probably because of all the switchbacks! My map didn’t mention those, so I put them in
where they’re missing. They go on
forever!
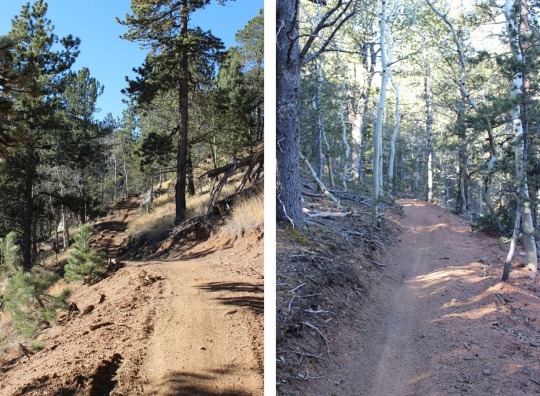
This trail is newly renovated, and seems to cater to
motorcyclists/mountain bikers. I didn’t
see one hiker on this trail all day, but saw 1 group of motorcyclists and 2
groups of bicyclists. They all seemed
surprised to see me.
The wind started picking up around 9500’ and I was glad I’d
chosen to stay below treeline today. Looking
at the topo map I thought once I was close to Tuckaway Mountain the hike would
be easy, but I was wrong. First off, the
mountain was extremely difficult to see, even though it’s late in the
fall. Secondly, it was covered in
rocks!
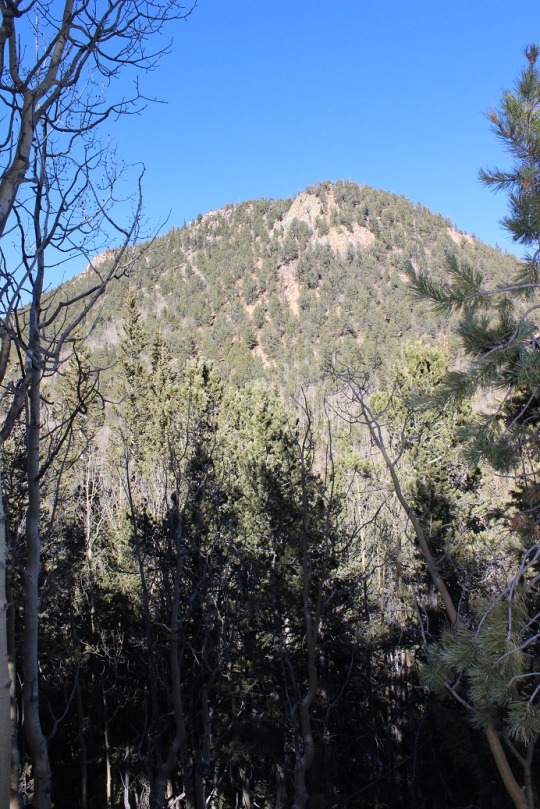
Once I made it to the area directly in front of the mountain
I turned right/north. This is what I
saw:
I decided my best course of action was to really study the mountain,
pick my route, and head up. The entire base
was covered in Aspens, making it difficult to tell where I was going. I didn’t
want to get stuck at a rock outcropping.
I chose to summit to the east to avoid the large
outcroppings, but in reality, you can’t avoid them all. There is no established trail to the top of
Tuckaway Mountain: no trail, no cairns,
nothing. I did some major scrambling,
involving all hands and feet at once, as well as some intuition and luck! The rocks weren’t stable, and even the big
ones rolled when I touched them. Where
there weren’t rocks there was scree, and very slippery terrain.
Since I was basically bushwhacking and I couldn’t see the summit
through the trees, I kept stopping every 20 feet or so to look back behind
me. I kept this sandy area in my sights
for my return trip back down.
I summited at 10:45am, to a bunch of rocks! The summit was rather long and irregularly
shaped, full of trees, and lots of rocks to scramble on.
I took a bunch of photos from all around the mountain, just because
I could, and to show where it’s located in relation to the other peaks in the
area.
Next came the fun part:
heading back down. The trek up
was challenging, and so was the trek back down.
I had to be careful with my footing.
I spent a lot of time lowering my center of gravity and getting stuck
with needles and thorns. My gloves were ripped
in places and covered in yellow Aspen dust by the end. Just an FYI:
pine needles are slippery… avoid patches of pine needles. By the time I’d made it down I was COVERED in
dirt. I really looked like I’d worked
for that summit!
I made it back down to the Aspen grove and was able to find
trail 377 to lead me back. The trek back
seemed a lot longer than the trek in (which seemed long to begin with… I’m thinking
it may be more than 12 miles total now that all the switchbacks are there…). It was mostly downhill, but those switchbacks
went on forever! When I made it to the 7
falls area it was PACKED with people! I
was surprised to see so many families lining the trails. And I mean families! Most groups had over 10 people, over half of
them under 10 years old, most younger than that. It was great to see so many young families
out enjoying the trails, but it was frustrating trying to pass the large groups
who were (understandably) going slow. Gold
Camp Road was full of strollers. The
parking lot that had 6 cars in it when I arrived was overflowing with at least
100 cars: people were parking down at
Helen Hunt falls and walking up! I was
really glad I’d gotten an early start on such a popular hiking day.
I made it back down to the trailhead at 2pm, making this 12+mile hike with 2400′ elevation gain in 6 hours, 20 min (with a lot of summit time!)