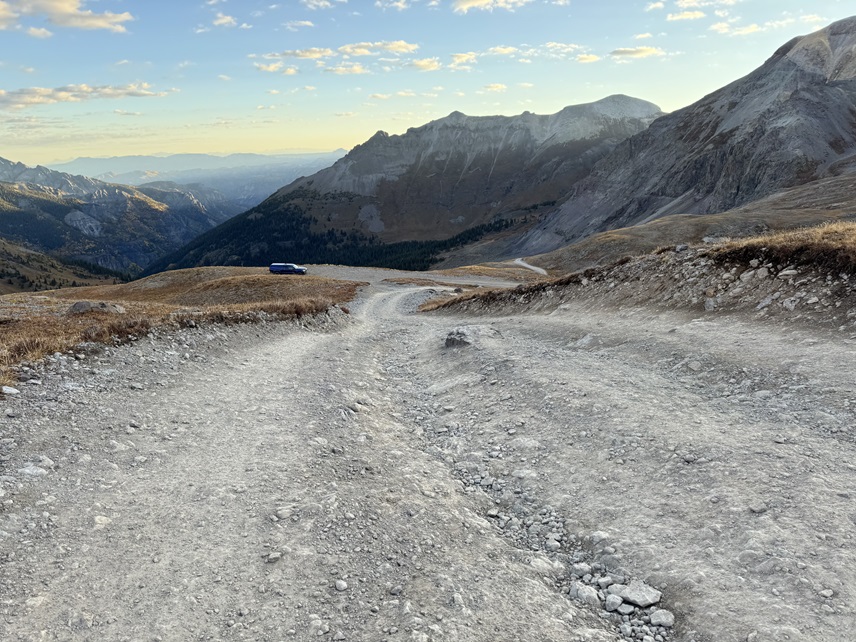
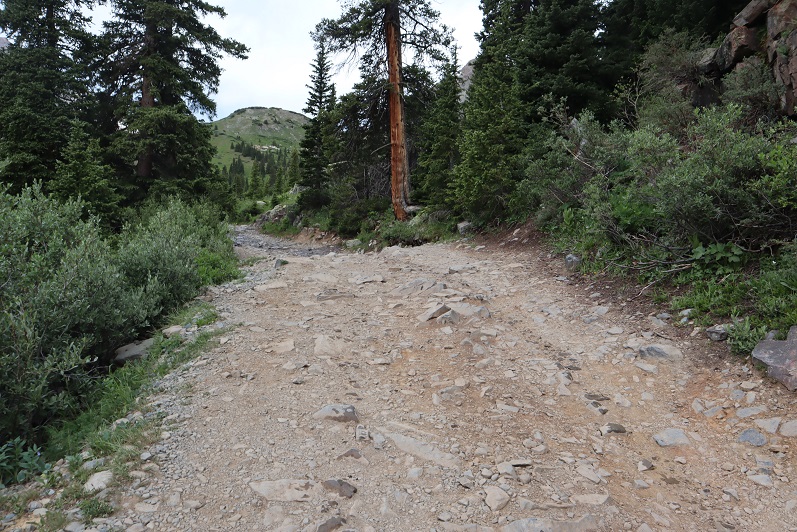
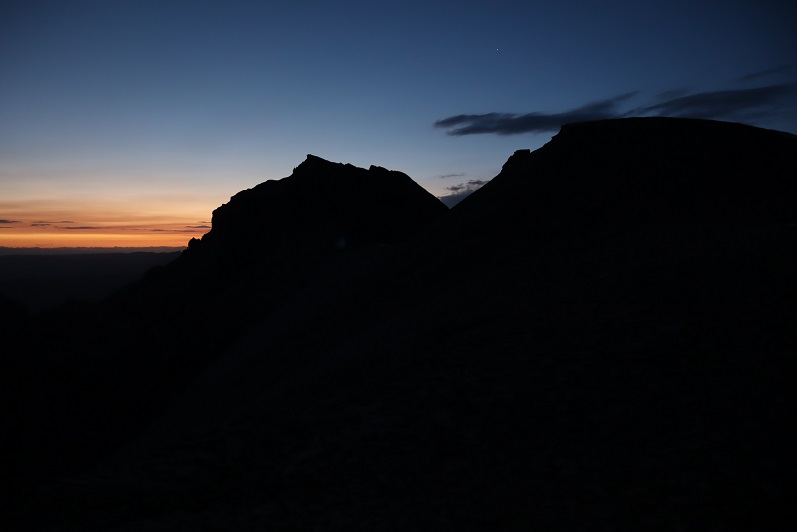
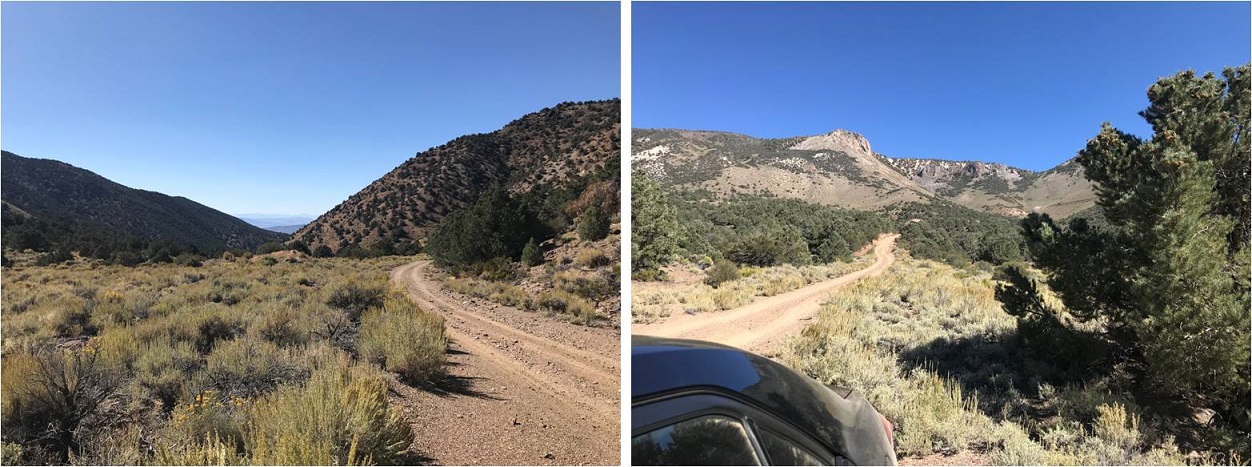
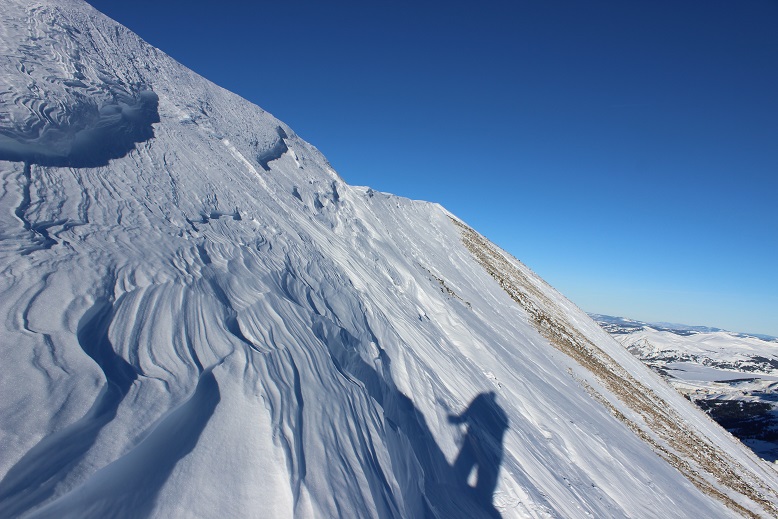
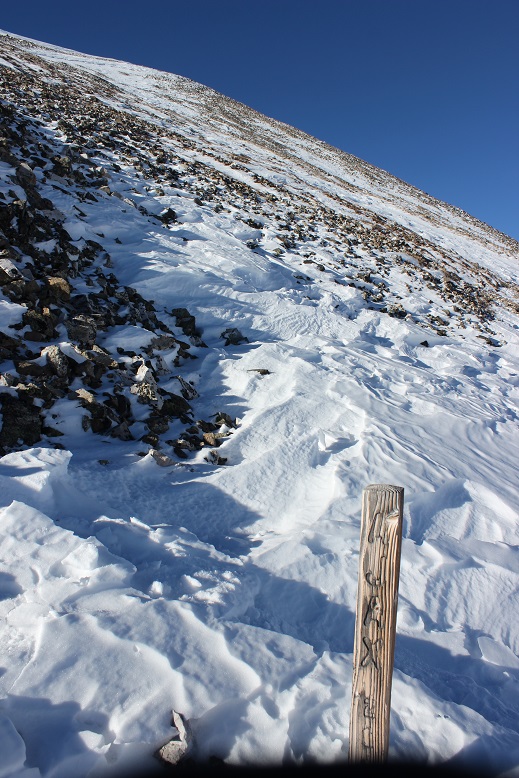
Imogene Pass road is a difficult 4WD road (26A). Be prepared for large rock slabs and narrow shelf roads. I parked below Imogene Pass at around 12500’ at a pull off and was on the trail at 6:40am, as soon as I could see well enough to hike without a flashlight. I started by following the 4WD dirt road towards Imogene Pass. While it had recently snowed in the area, all the snow was sticking to the north slopes, so there wasn’t any snow on my route today. I’ve been in the area a few days, and I’d thought the snow would have melted out by now, but it seems to be lingering on.
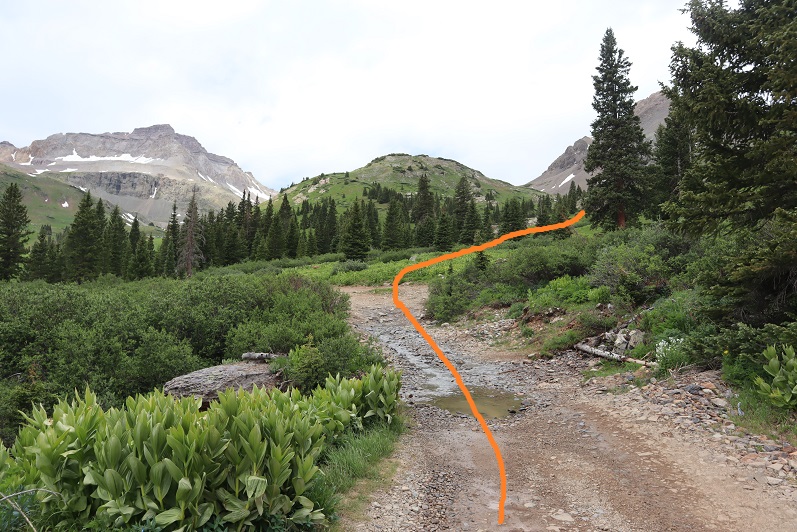
At 12590’ there’s a dispersed campsite with an old fire ring. This is potentially another place to park. Here I left the road and started hiking on tundra southeast towards an obvious saddle.
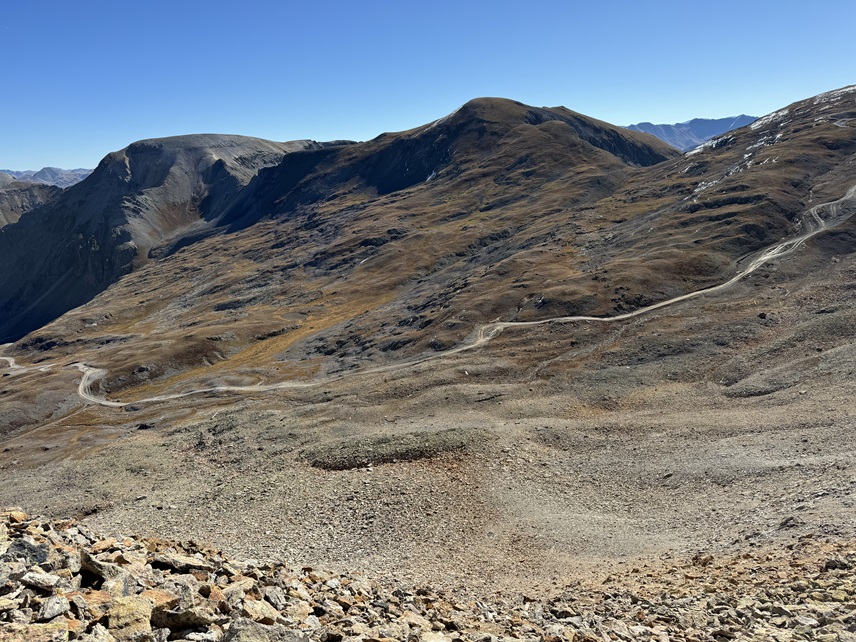
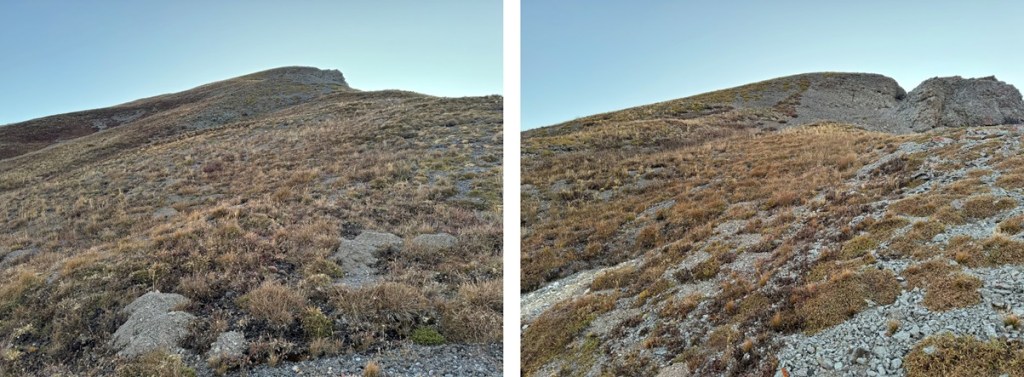
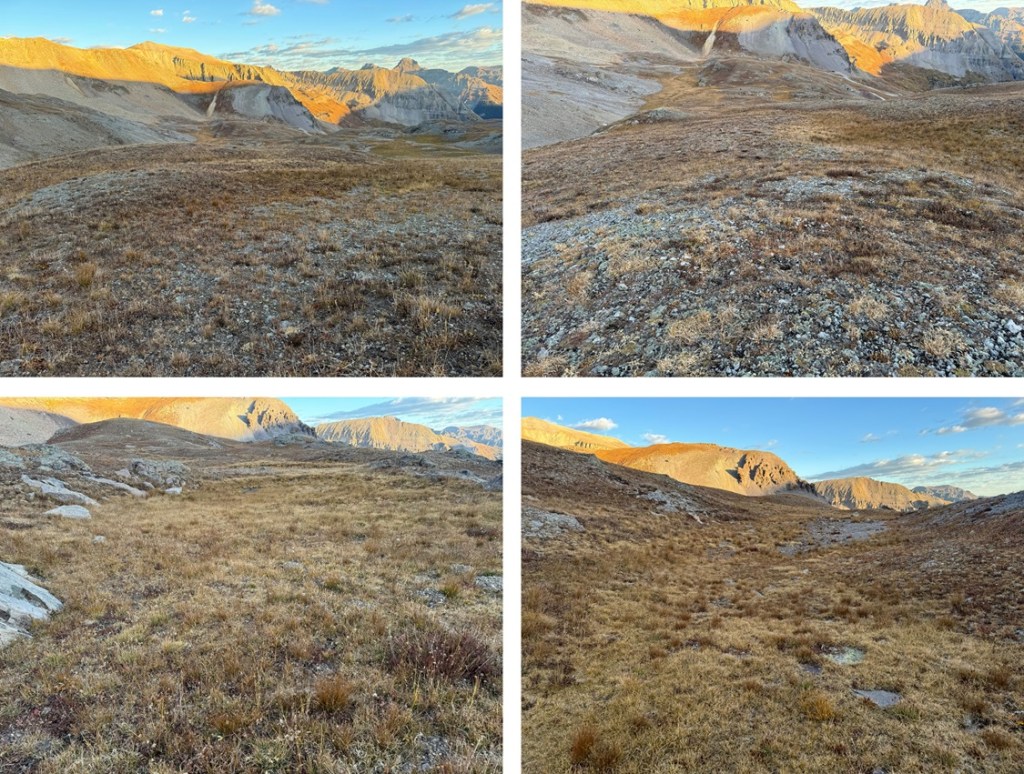
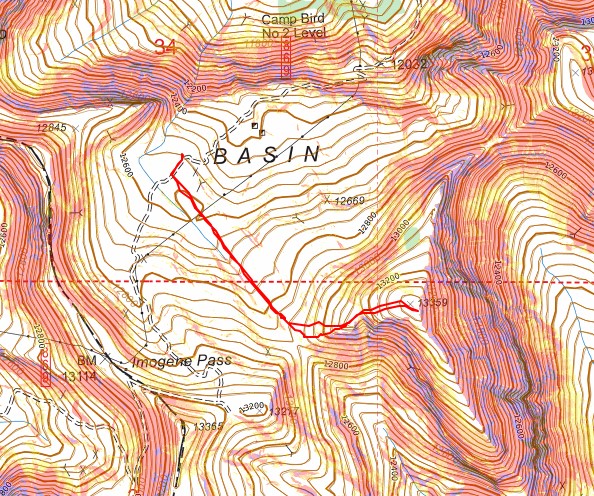
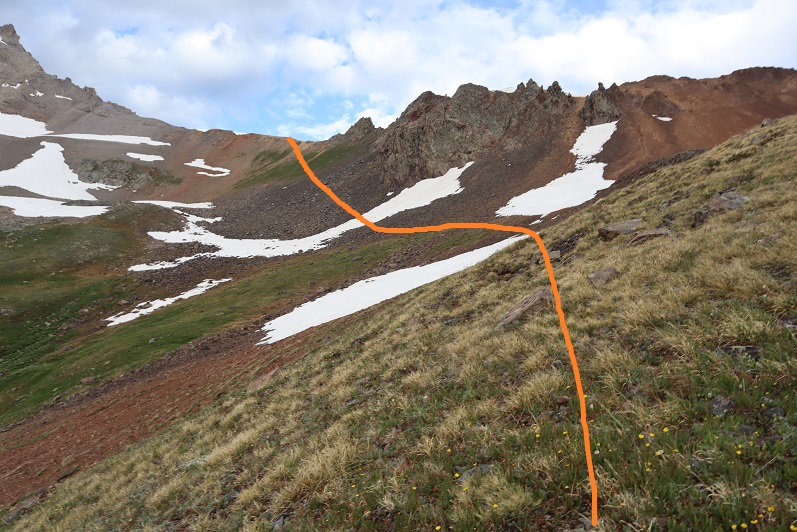
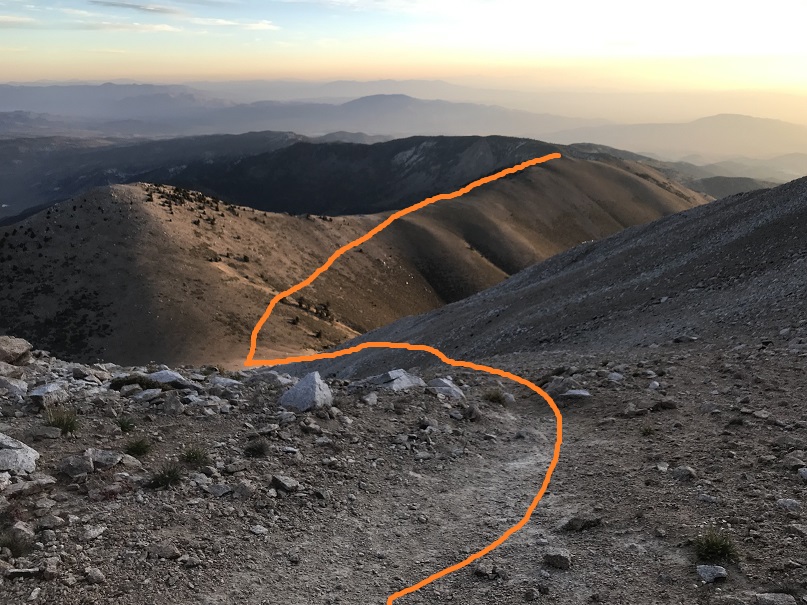
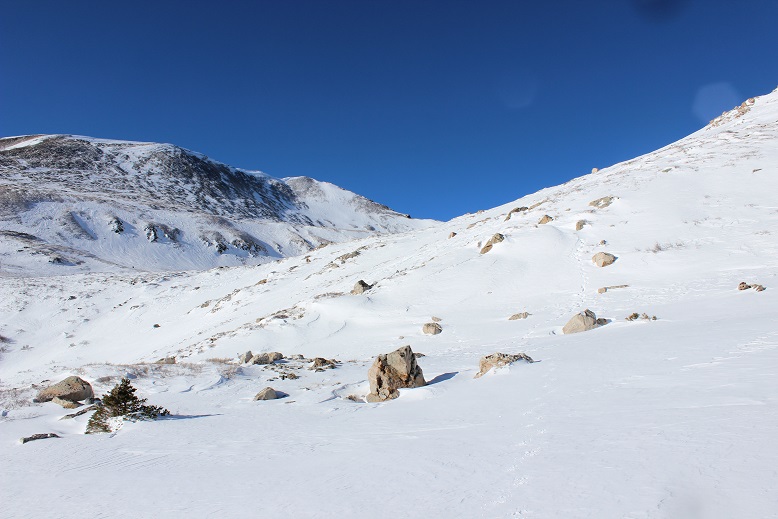
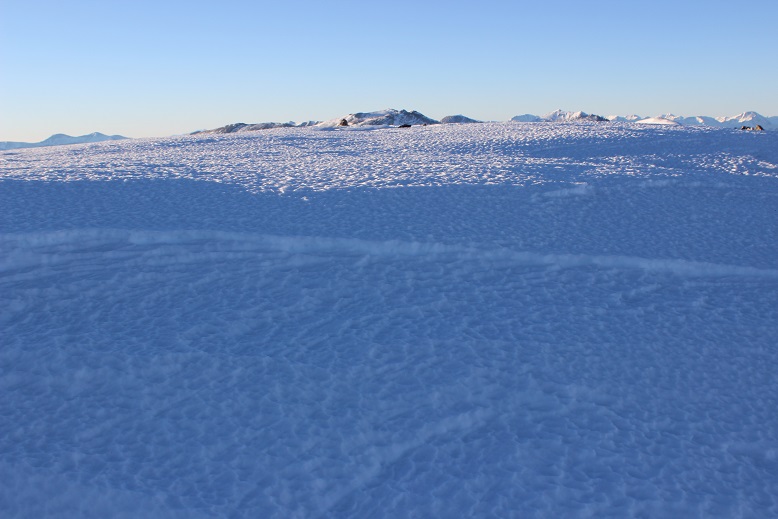
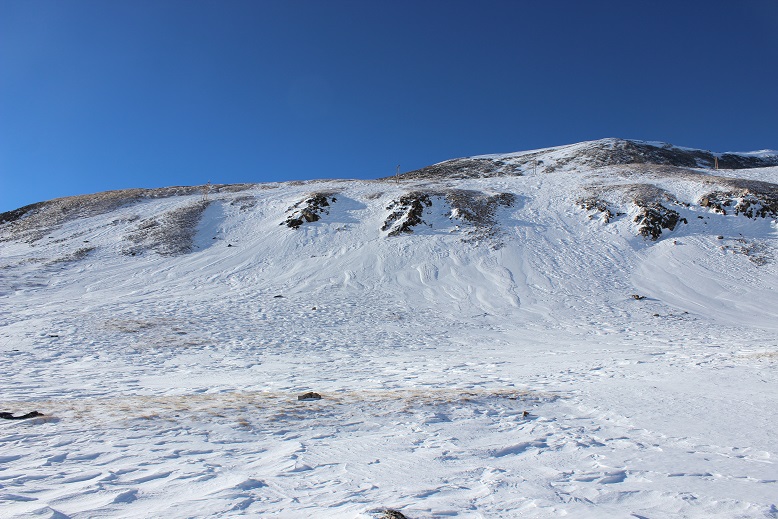
This was a quick and easy hike, all class 2. Here’s my overall route to T7.
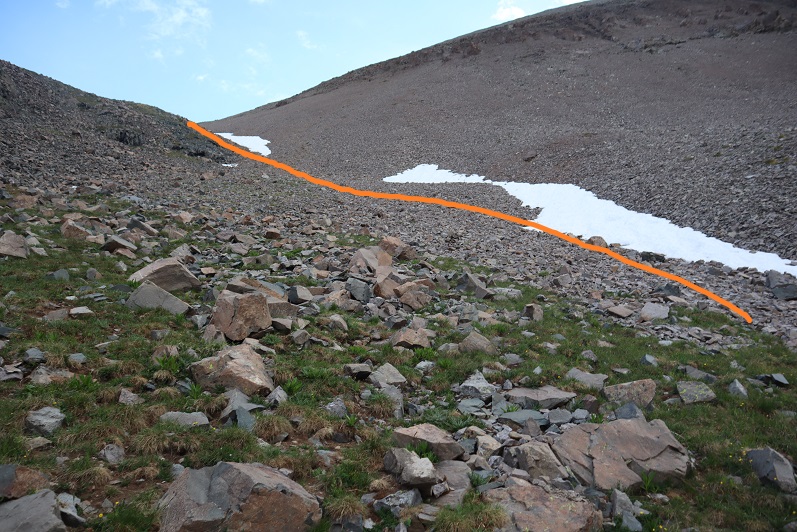
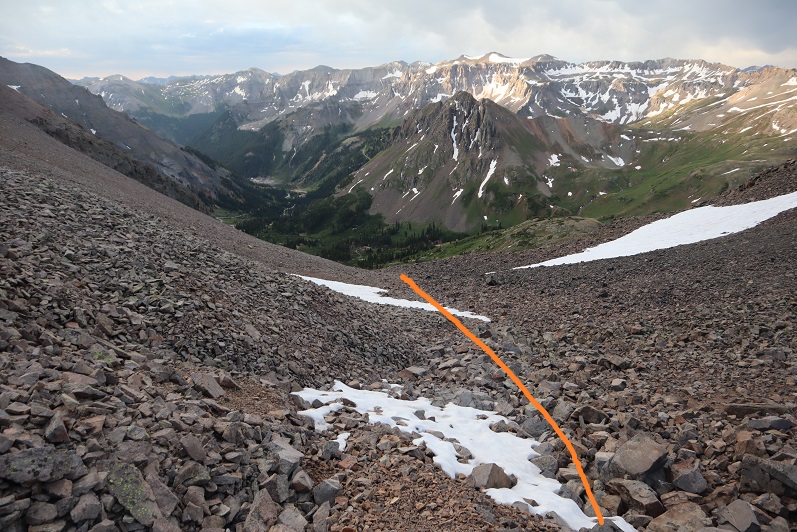
I started by heading southeast towards the saddle, staying to the left and high of the drainage.
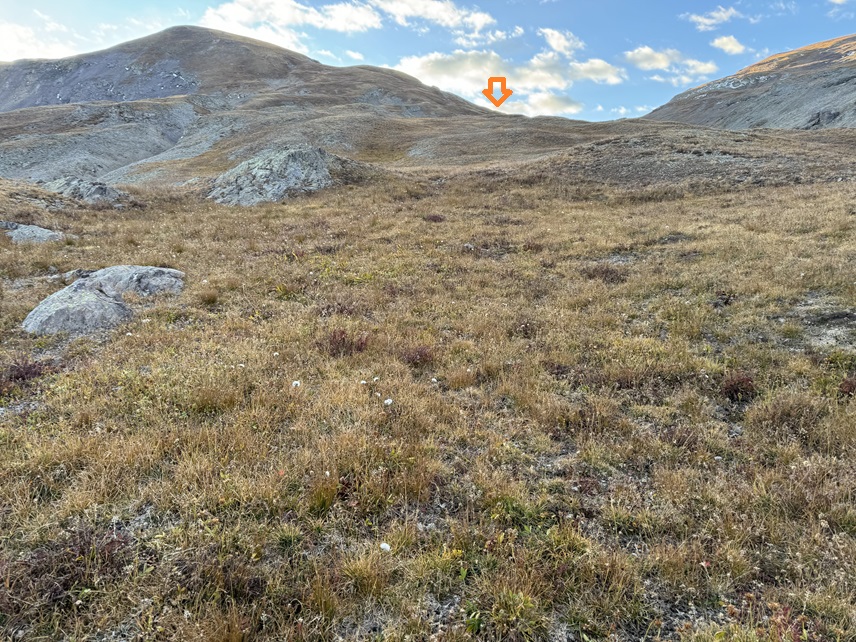
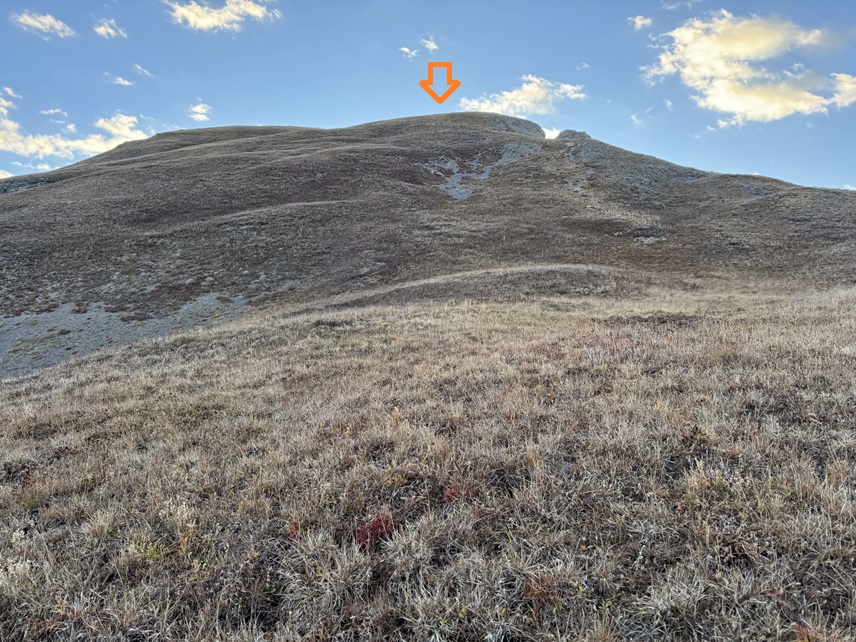
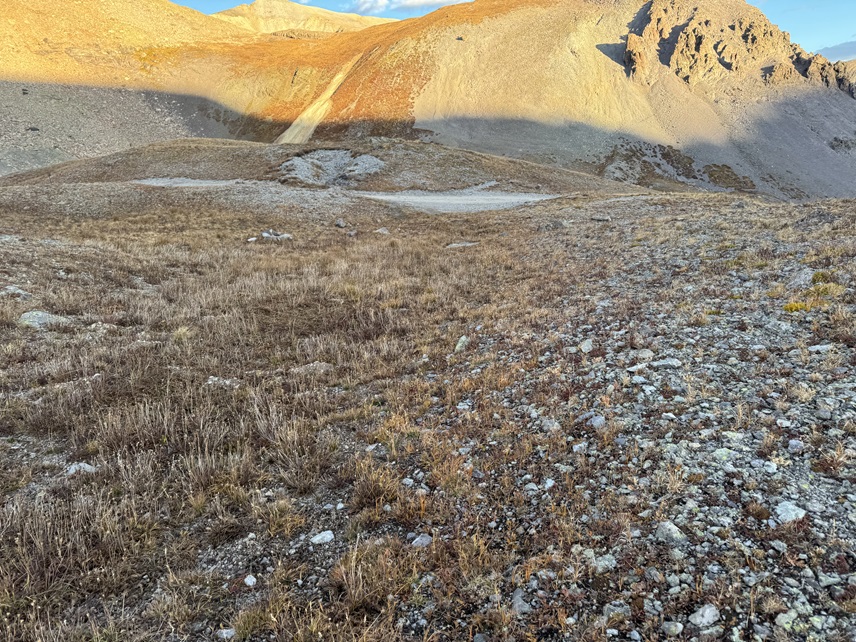
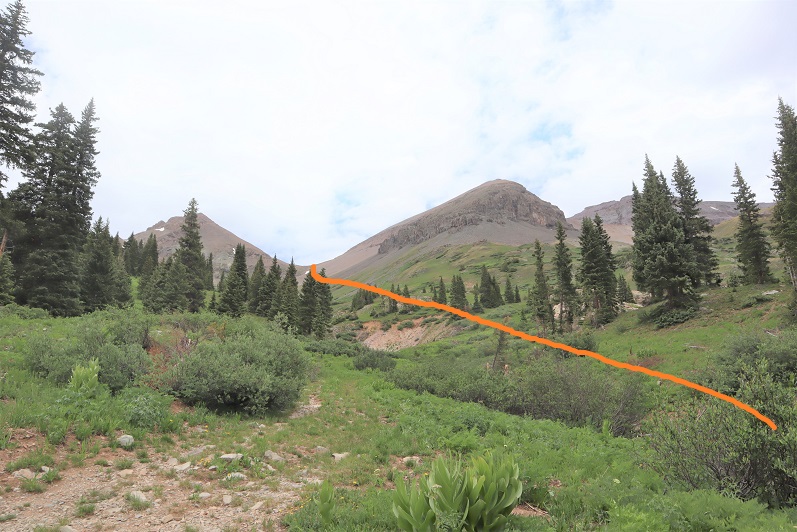
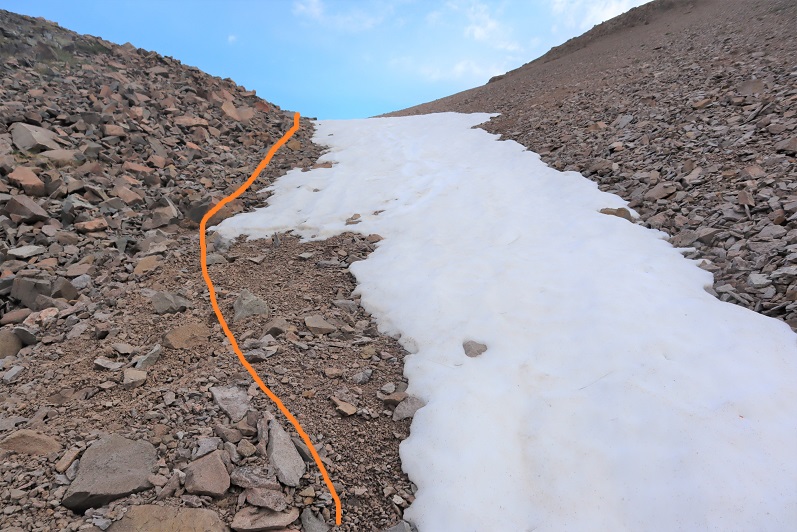
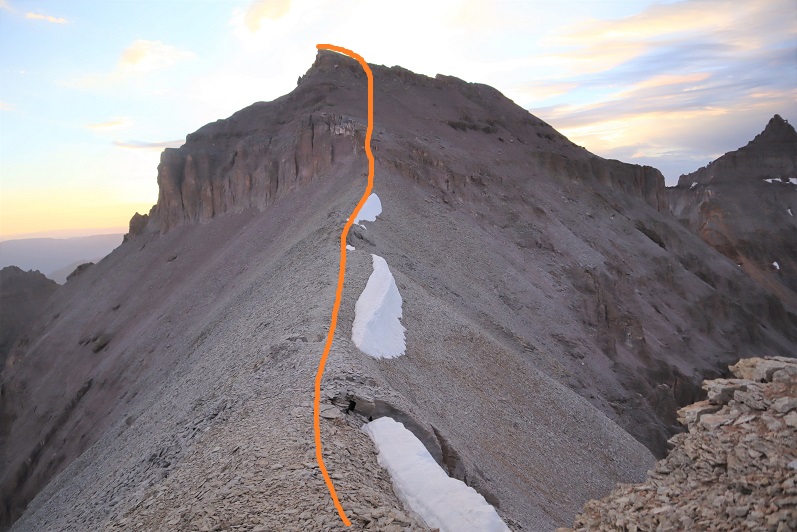
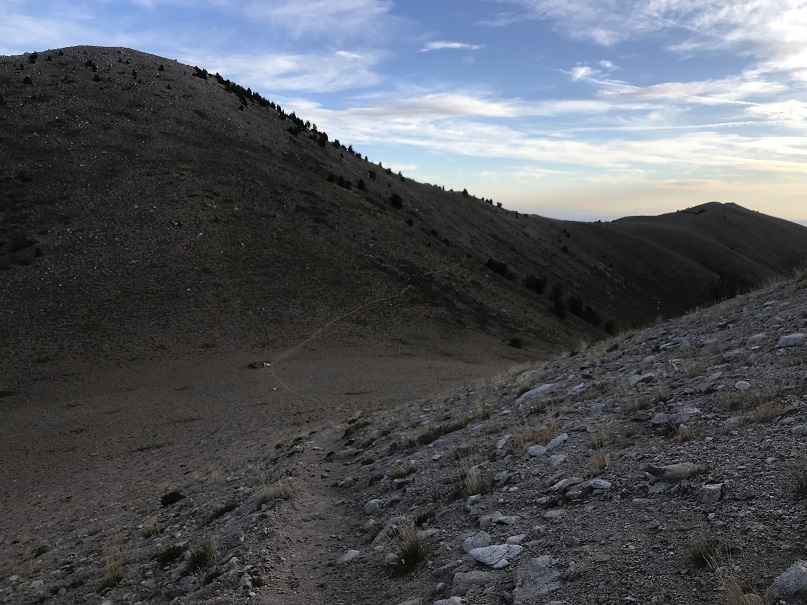
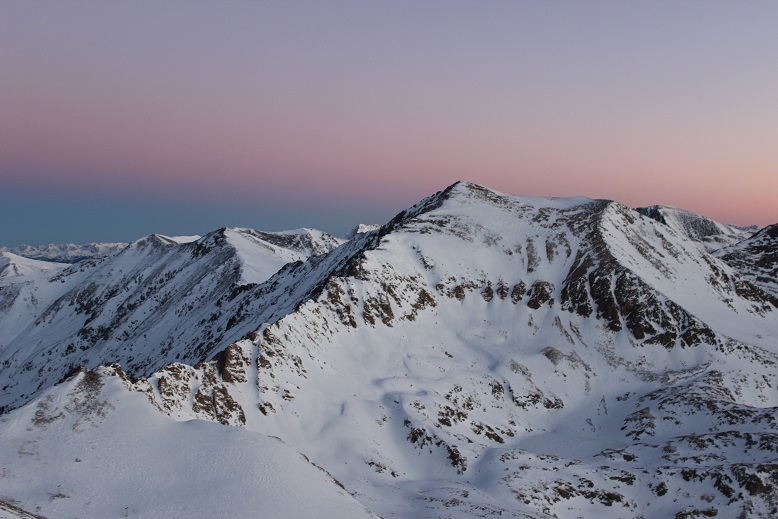
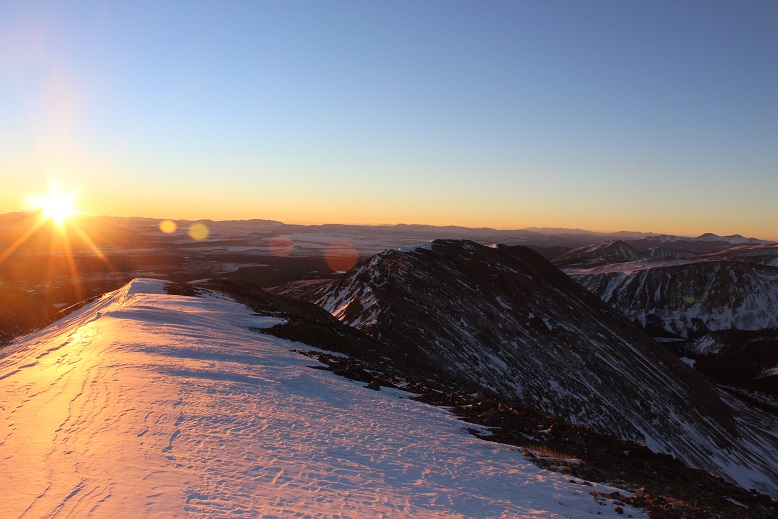
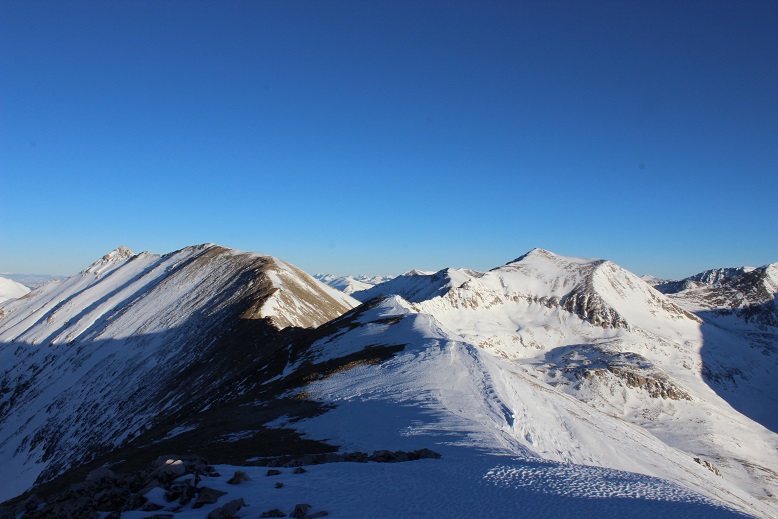
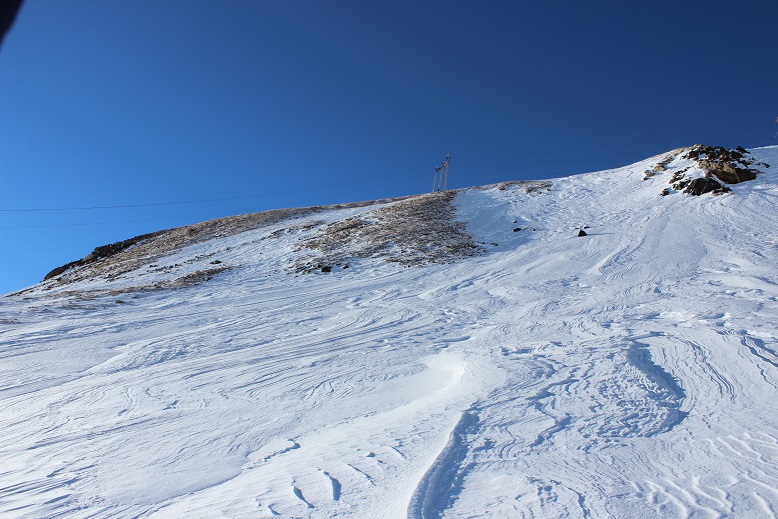
Once I made it to the saddle I turned left and followed the ridge east. As you can see in the pictures, this hike was entirely done on tundra.
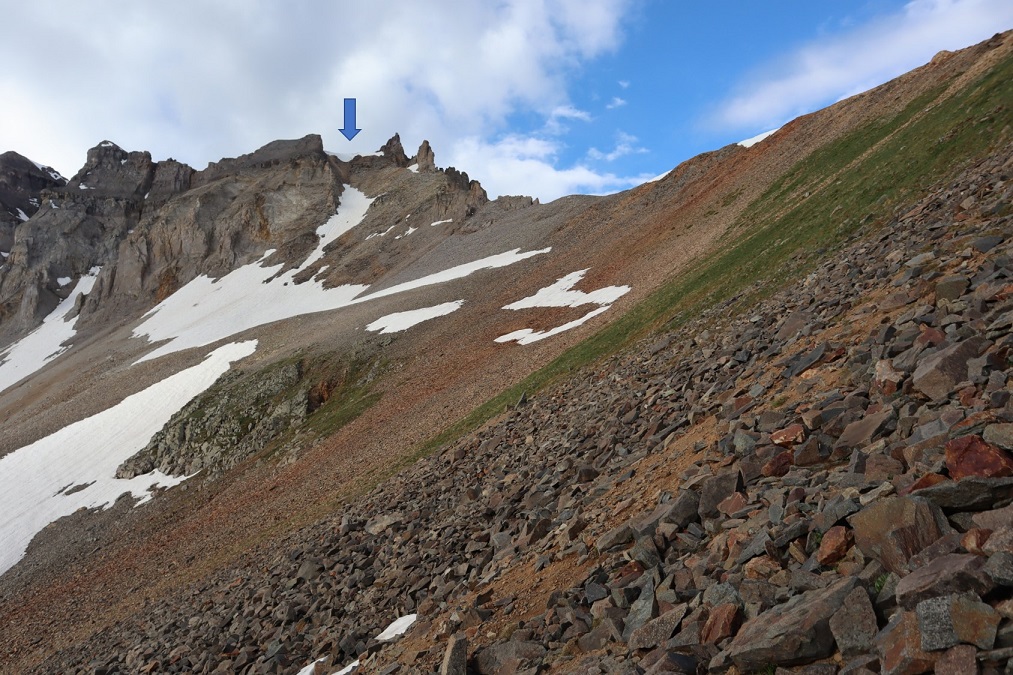
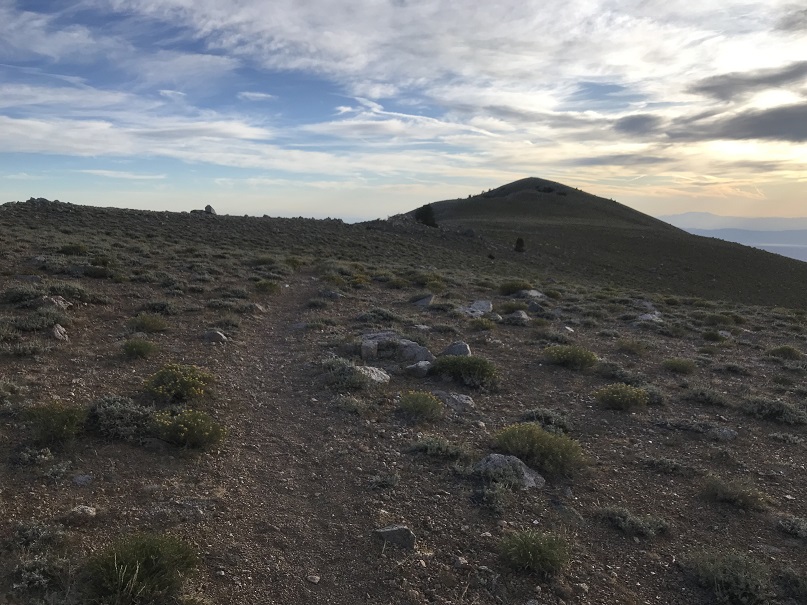
At the top of the ridge, I could see the summit to the east just a few yards away.
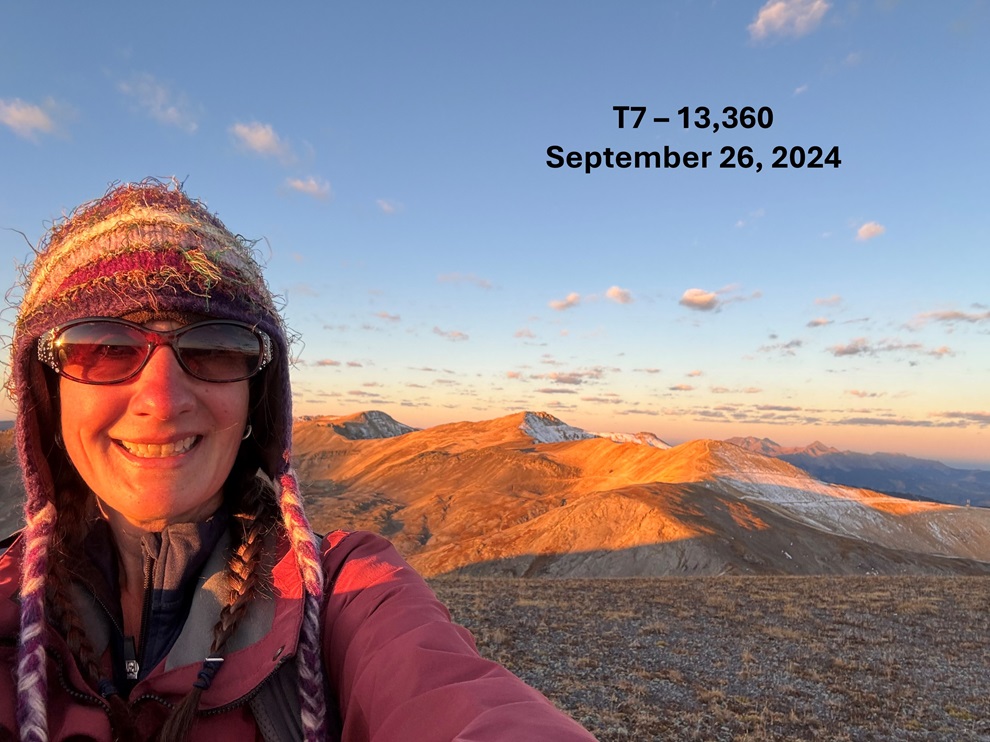
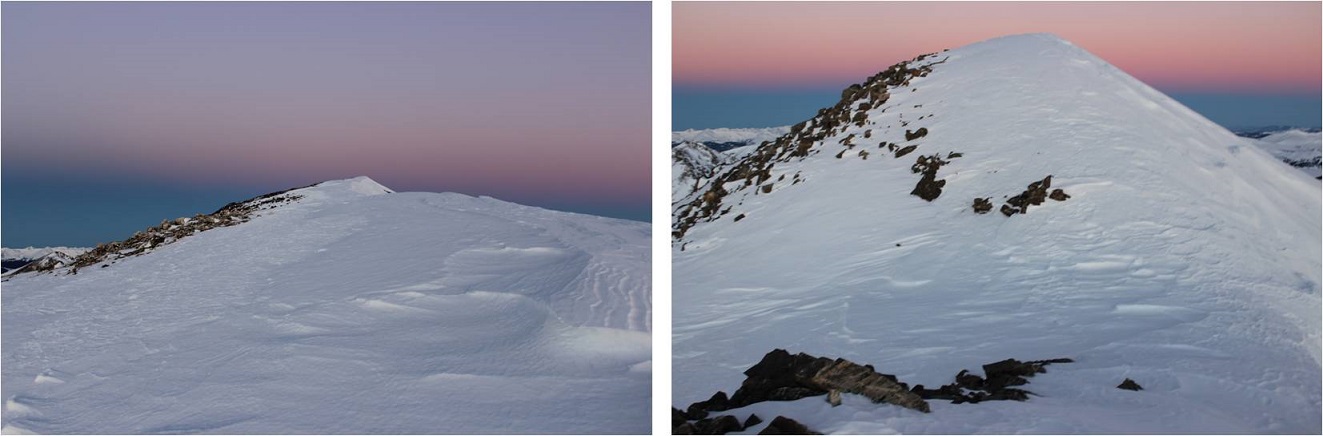
I summited T7 at 7:05am
T7:
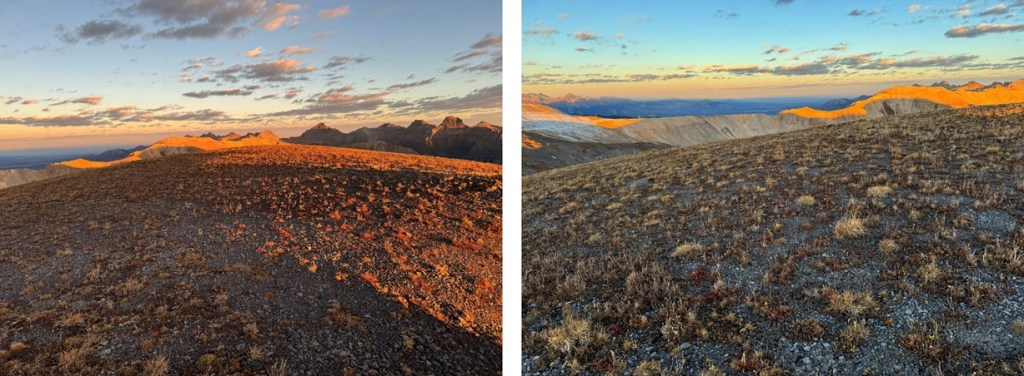
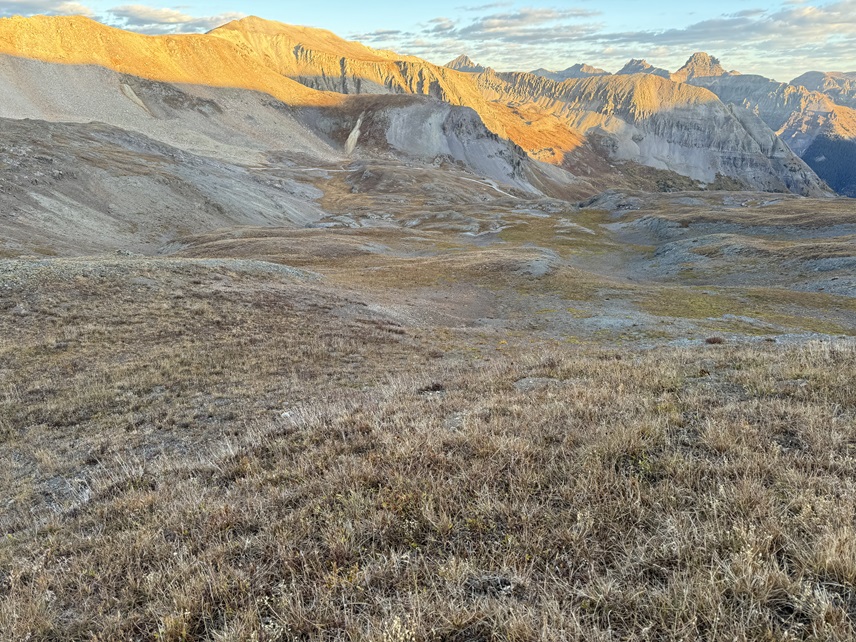
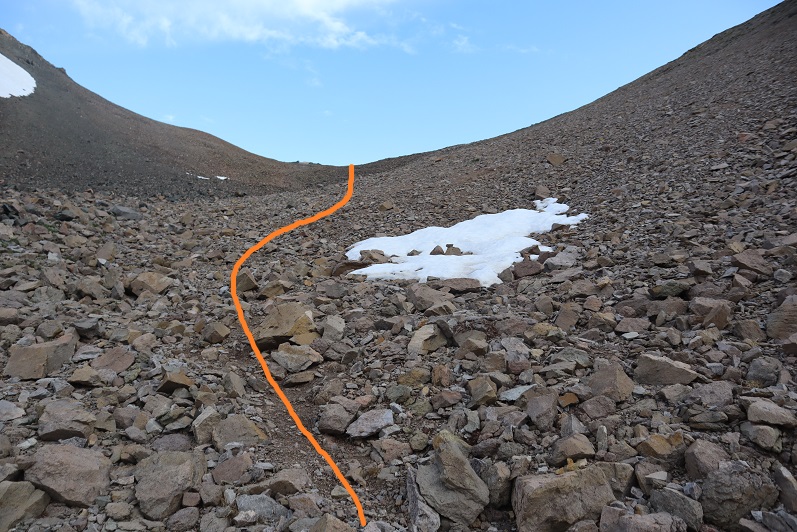
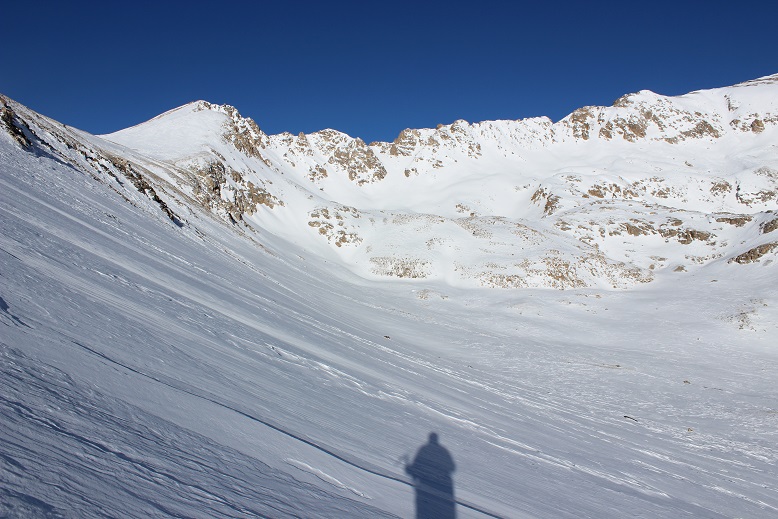
This was a quick sunrise summit for me before work, so I turned and headed back the way I came, towards the ridge. I could see my vehicle below for most of this hike.
I then followed the ridge down to the saddle
Once at the saddle I turned right, and headed northwest back to the road (26A)
Once on the road, I followed it the short distance back to my truck
I made it back to my truck at 7:30am, making this a 1.84 mile hike with 839’ of elevation gain in 50 minutes.
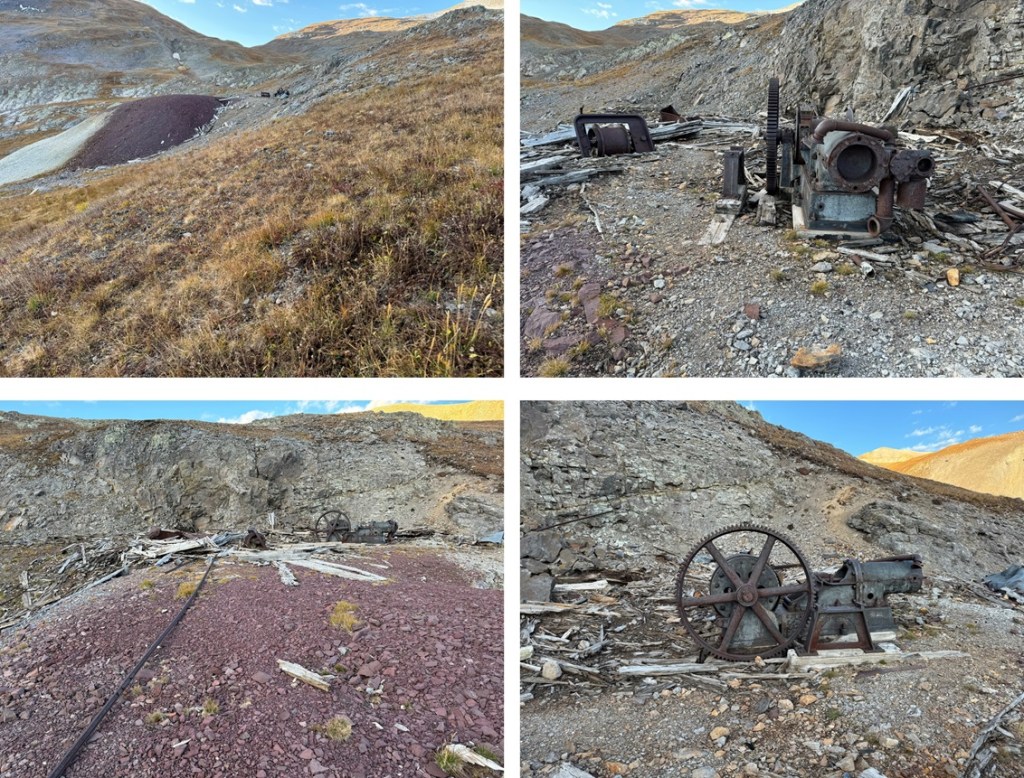
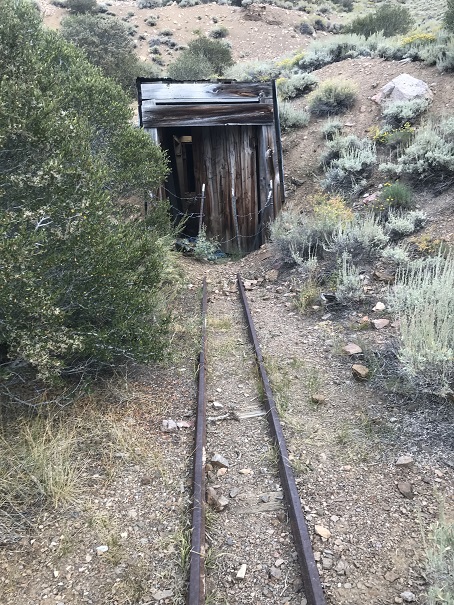
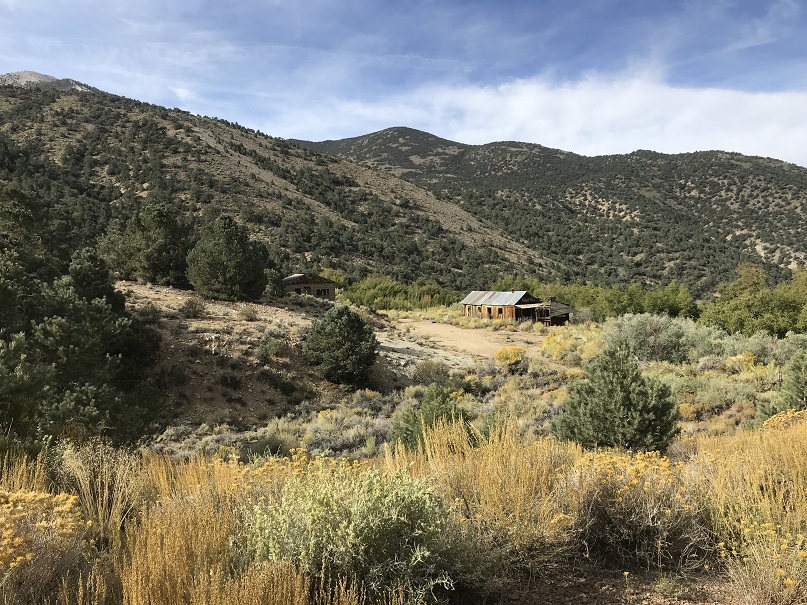
Also, there’s an old mine to check out while you’re there close to where I parked, and several other old relics in the area. A lot of abandoned mines, equipment, poles, old trolley carts, and other artifacts. If you take the time to drive all the way up here, you might as well enjoy some Colorado history as well, and maybe get in a few other peaks? There are several 13ers and more to choose from.
I’m kind of liking this ‘work from home’ thing that’s been going on for the past few months. Today I had a zoom meeting I attended at a Starbucks and then I was off to the Yankee Boy Basin (which I considered an appropriate place to spend the 4th of July weekend). The road to Yankee Boy Basin is easier than I remember. It’s only 4WD for the last mile or so. There’s a little bit of exposure but the road is plenty wide enough to pretend it’s not there.
I arrived at the trailhead and backed into a spot near the bathrooms (P.S. bring your own TP).
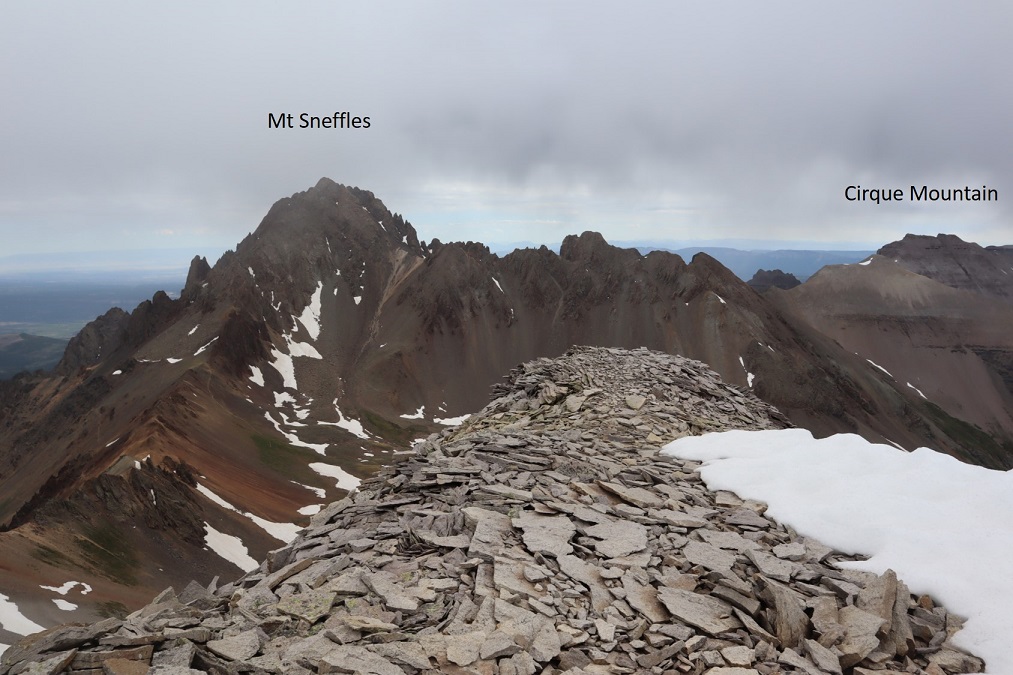
I got out and took a look around at the route I intended to take while it was still daylight. I was pretty sure I wanted to hit Cirque Mountain first, and then cross over to Gilpin Peak. Everything is different in the dark and a good visual in the daylight is helpful.
While I was looking around I heard a couple talking about Mt Sneffles. I went over to ask if they’d seen any snow on Cirque Mountain/Gilpin Peak while hiking. They were staying the night at the trailhead too, climbing Teakettle in the morning. We struck up a conversation and ended up exchanging beers and candy and 14er stories and caps full of whiskey. About an hour later two more of their friends showed up and we huddled around my truck as it rained a bit. When the rain stopped, they went over their gear and practiced some rappelling. They allowed me to tag along. I ended up calling it a night really early (I get up at 3am to work and get tired early in the evening). I’m sure I forgot to say it, so I’ll say it now: It was really nice getting to meet you all! Also, I will never be able to hear the word ‘traverse’ again and not say it twice @climbingcue, @dwoodward13, @hikesingeologictime, & @tallgrass!
I woke up at 3:30am, hit snooze once because I was really warm in the bed of my truck. I was ready to go a little before 4am. Tallgrass came to say goodbye and good luck. I was still groggy (I don’t wake up until about an hour into a hike). Thanks for the beer Tallgrass! I started by following the 4WD road northwest.
After hiking for almost half a mile I turned right and followed the small ridge up to the saddle of Kismet and Cirque.
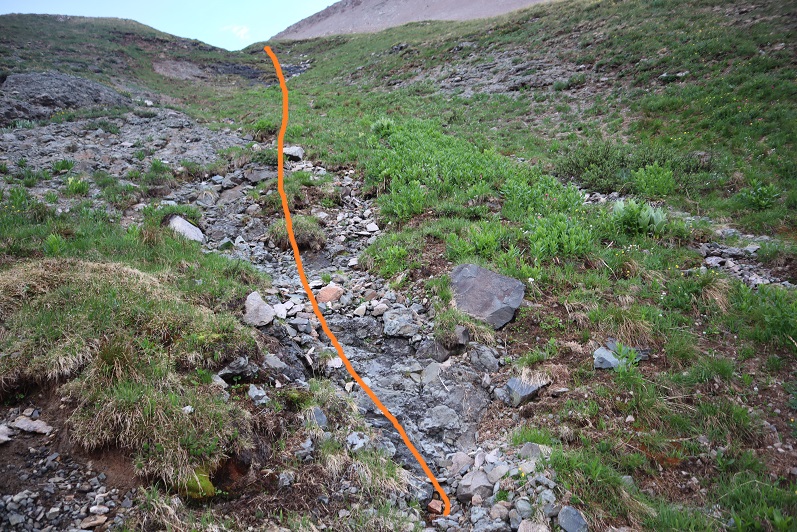
The trail eventually narrowed and I went up a low flowing waterfall type gully
And then followed the scree filled gully to the saddle. All snow was avoidable.
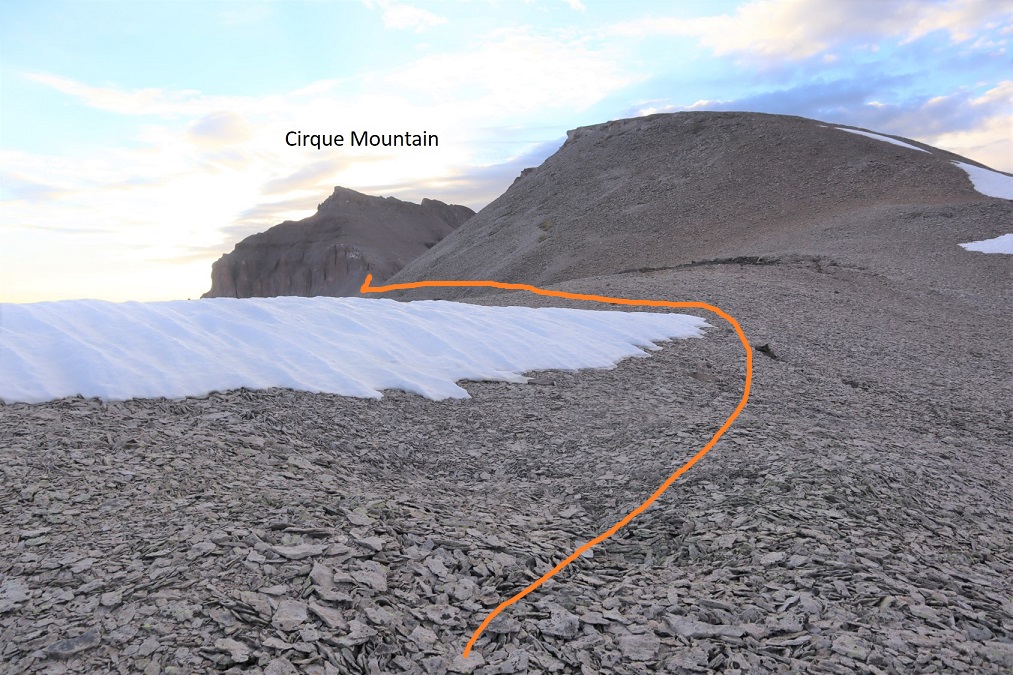
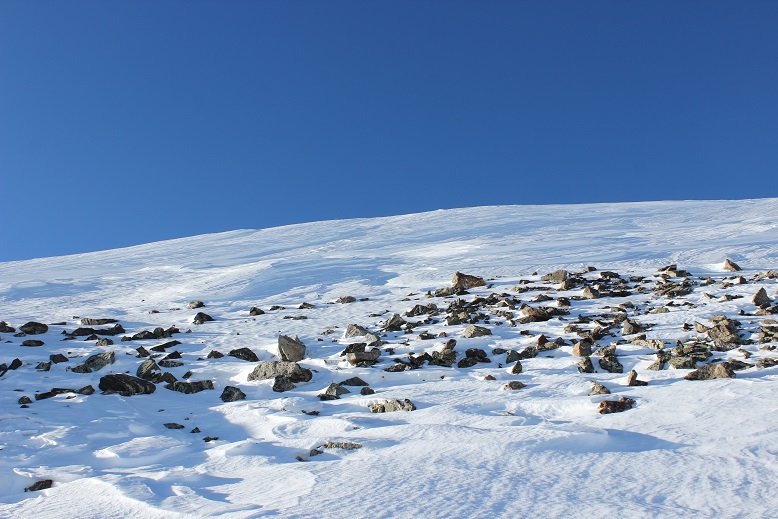
At the saddle I turned right (east) and followed the ridge. Note, the point on the right isn’t a ranked peak. It’s easily bypassed by a trail to the left. I climbed it on my way back just to get in some added elevation and for the views.
I picked up my pace here because it looked like I could make it to the summit for the sunrise. Wow, that part of the hike hadn’t taken as long as I’d anticipated.
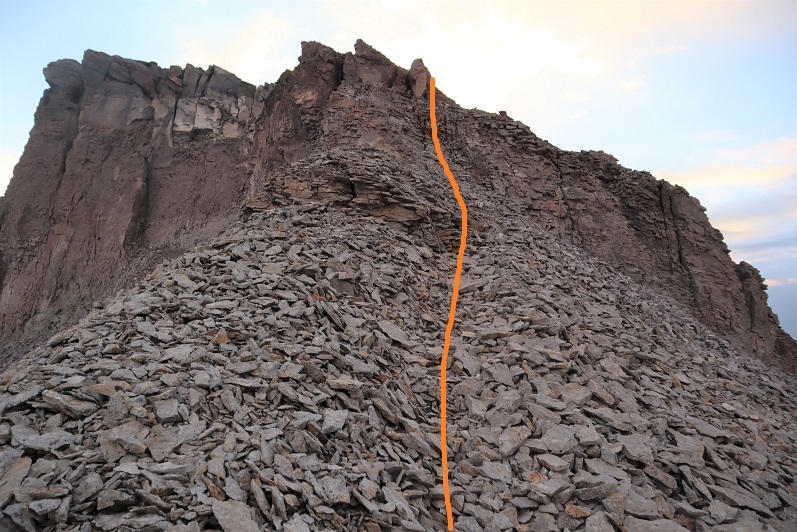
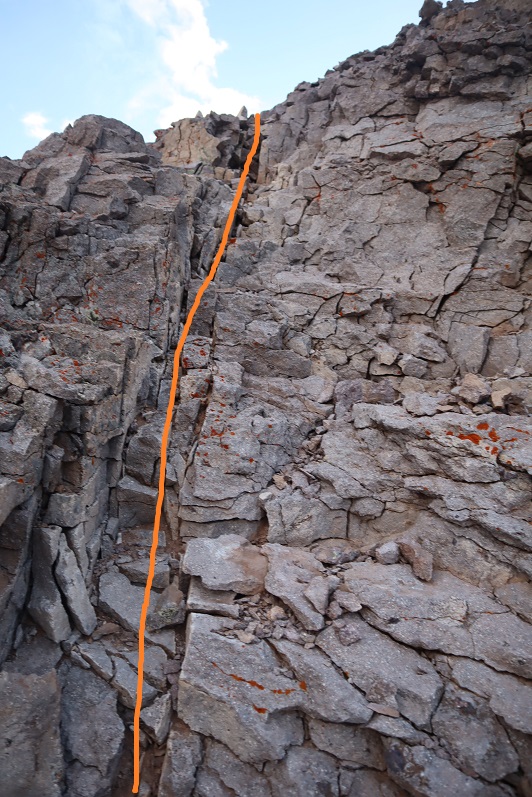
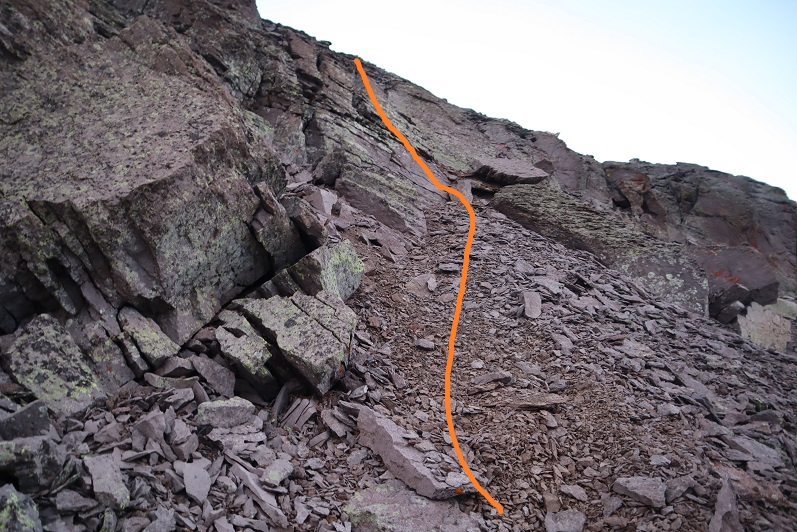
There was some choss and a chimney to climb. I put on my helmet and worked my way up.
There was some route finding for the last little bit as well as some easy scrambling
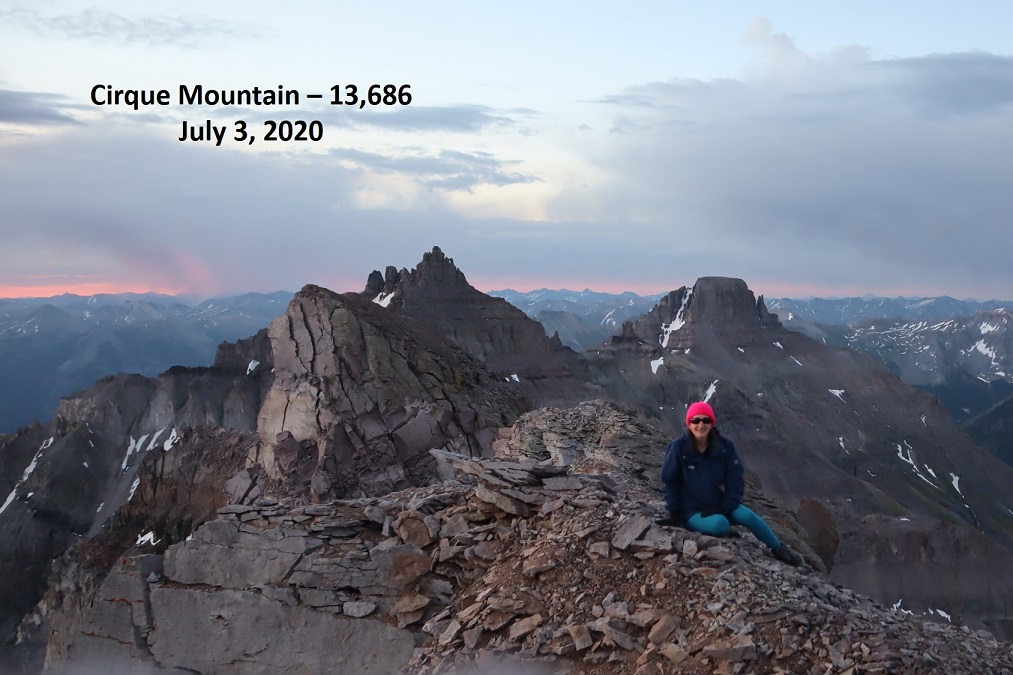
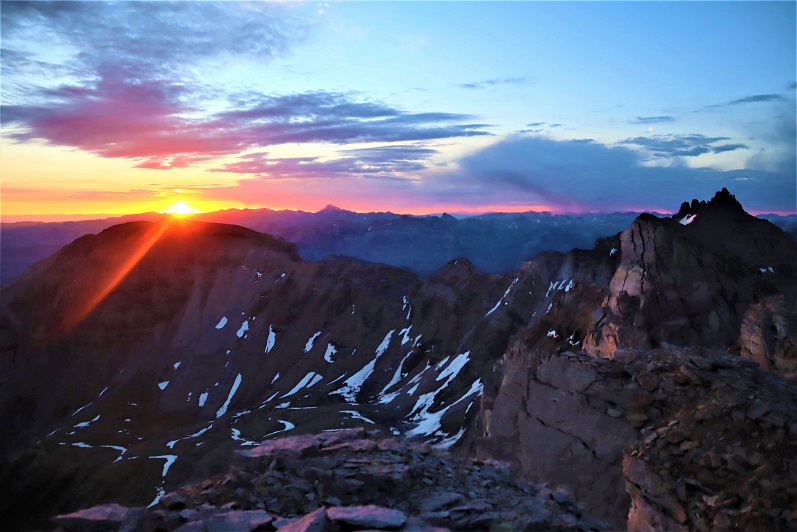
I summited Cirque Mountain at 5:45am
Cirque Mountain:
I made it a few minutes before sunrise and decided to stay to enjoy the show. It didn’t disappoint.
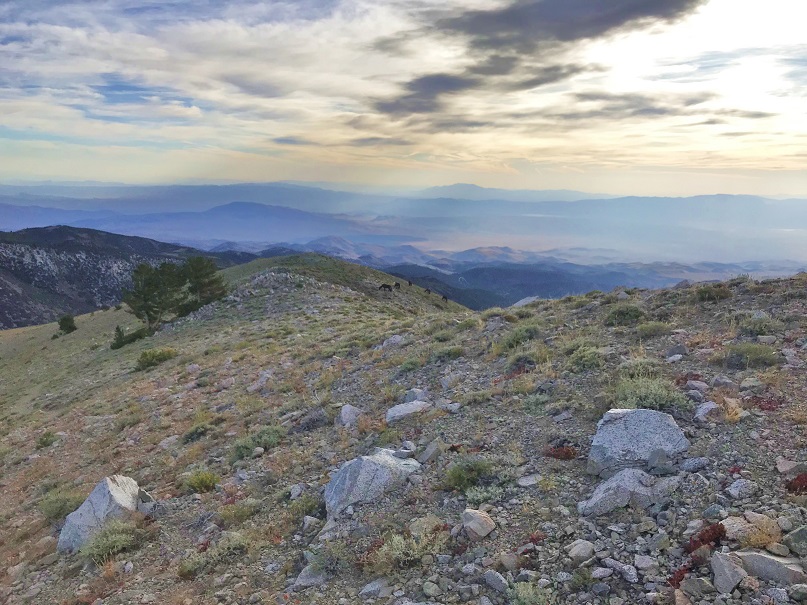
I also had some great views of Teakettle and Potosi to the southeast
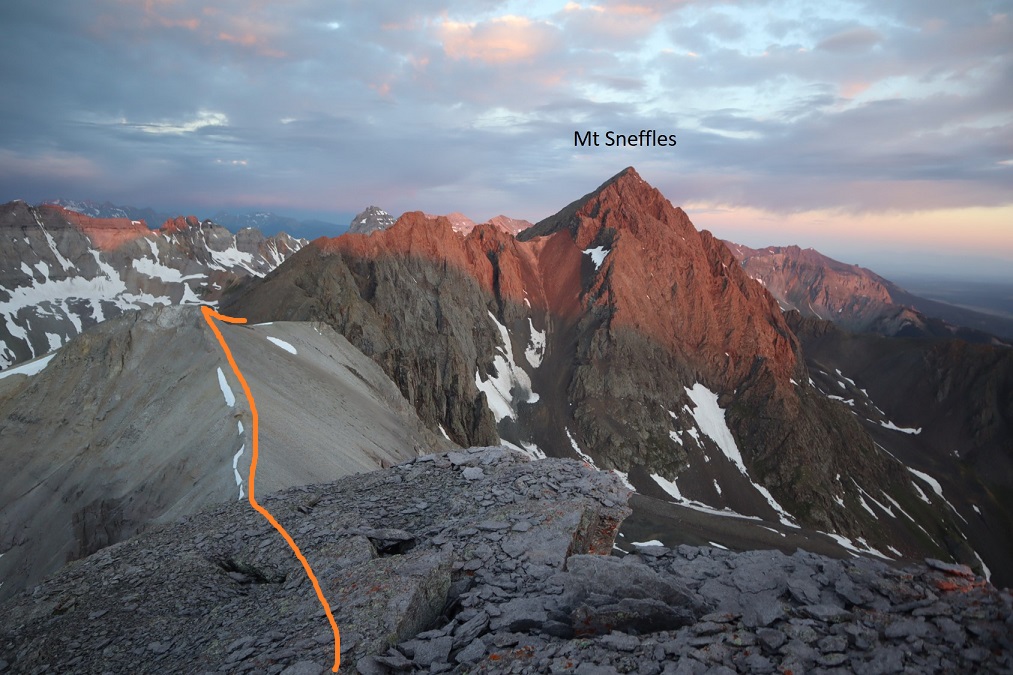
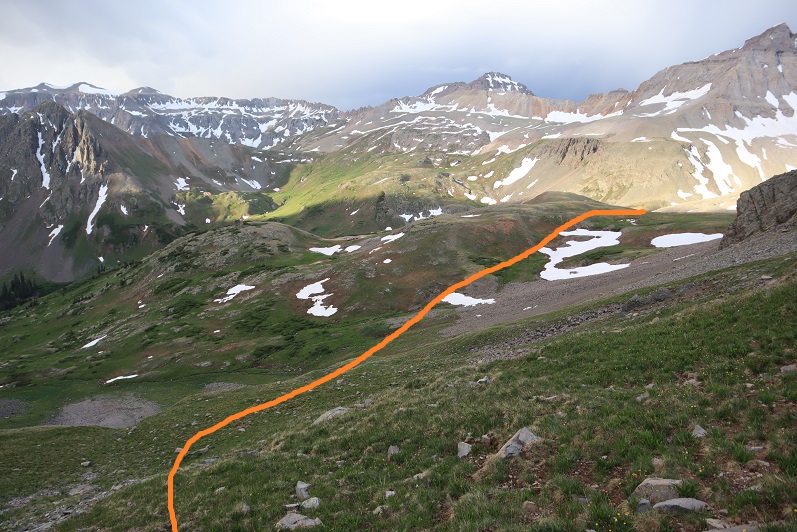
I headed back the way I’d come, and decided to summit the small point and then head back down the gully
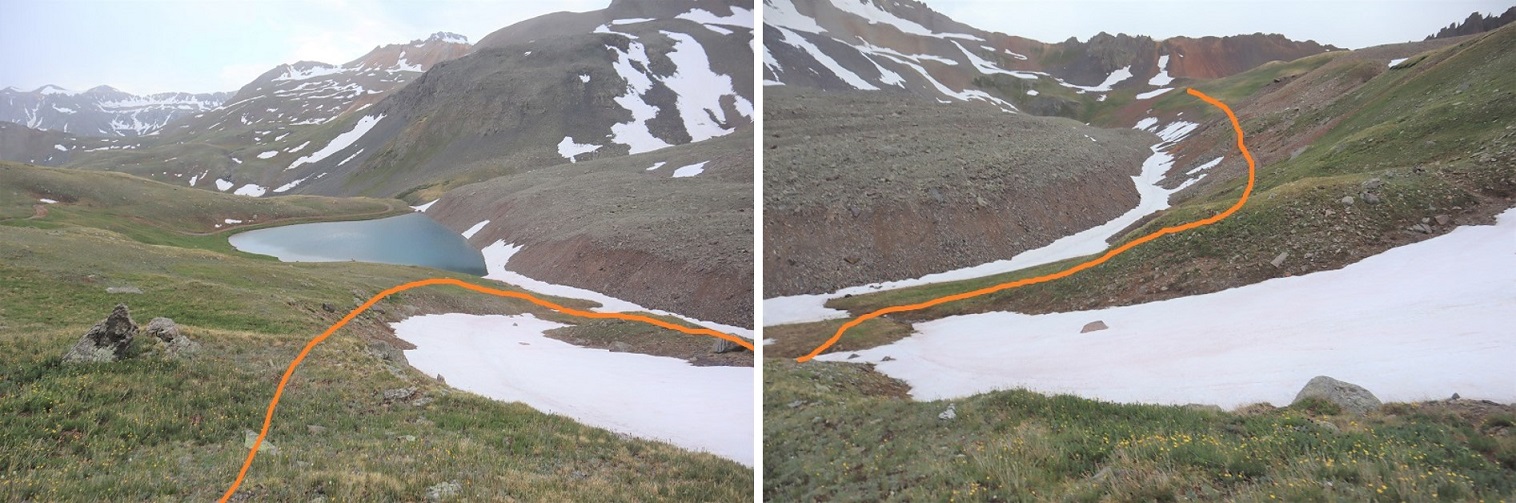
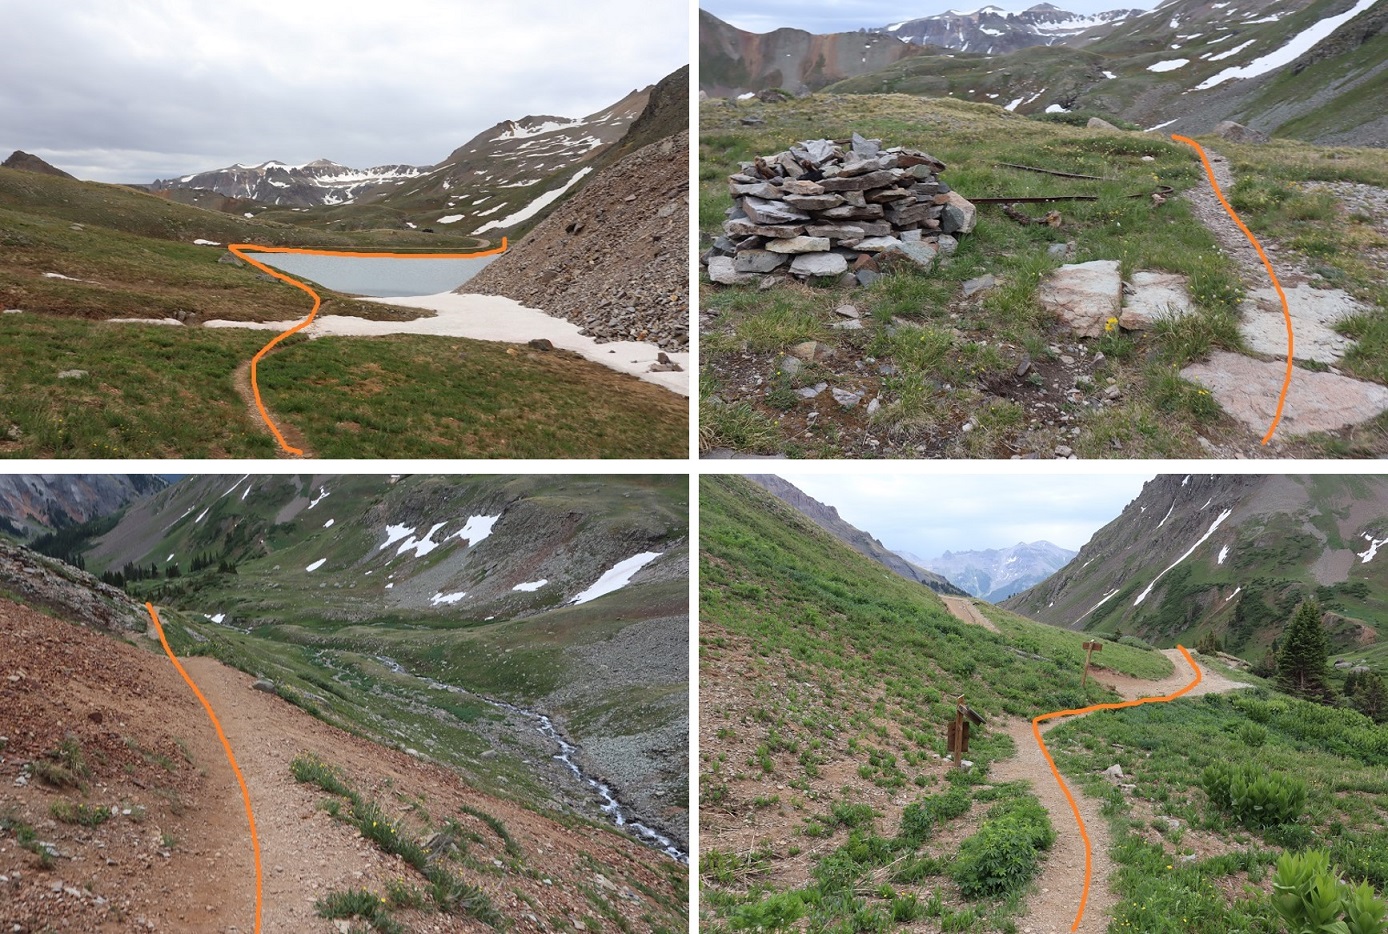
I didn’t go all the way down the gully. Instead when I hit tundra I turned right and headed west until I reached a small pond.
At the pond I hooked up with the Wrights Lake Spur trail and followed it until the first switchback.
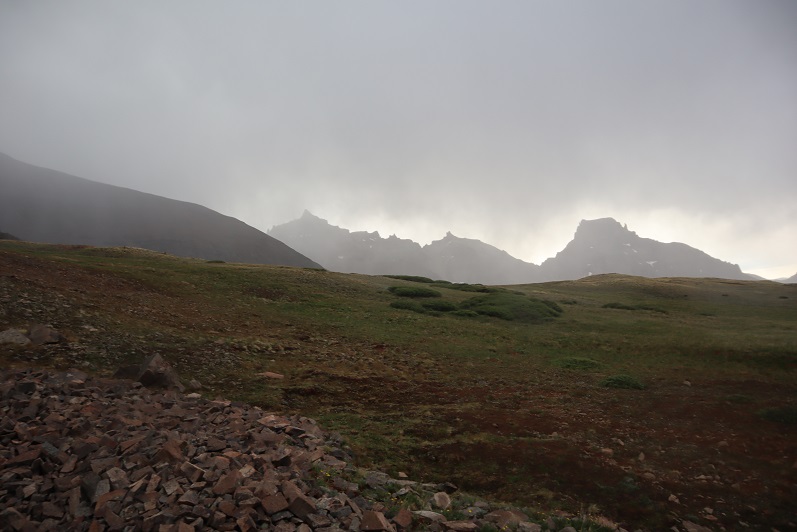
Right about now it started to rain. I looked back on Teakettle and thought about my new friends hiking up there. I hoped they were staying dry.
The trail was an easy to follow, class 1 trail. At the first switchback I left the trail to continue heading west towards the saddle. There was a little bit of snow to contend with here so I put on my microspikes and walked across.
At this point I could see there was a gully I’d have to ascend that was still holding a little bit of snow at the top
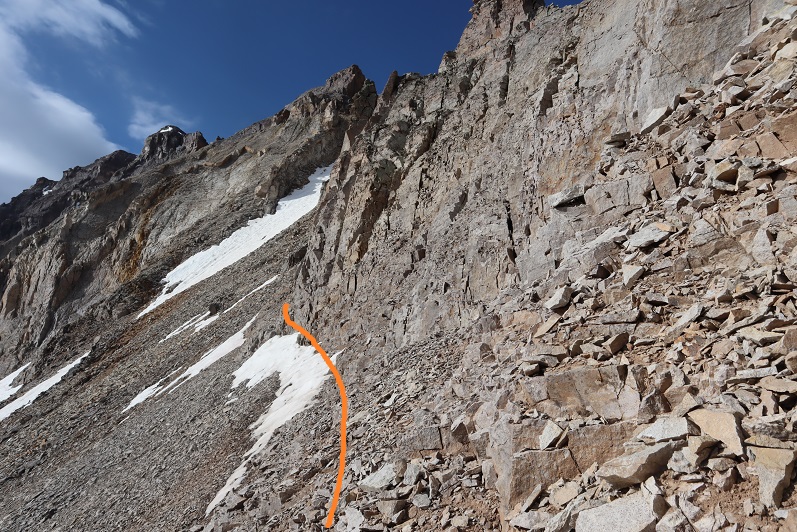
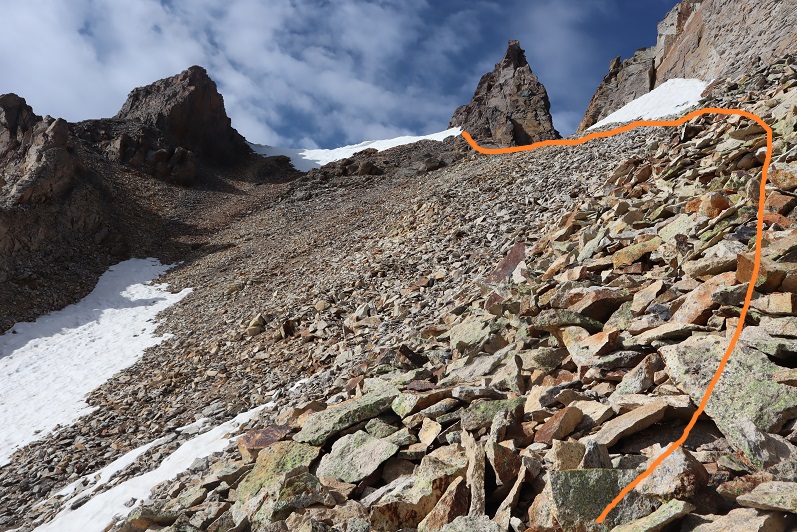
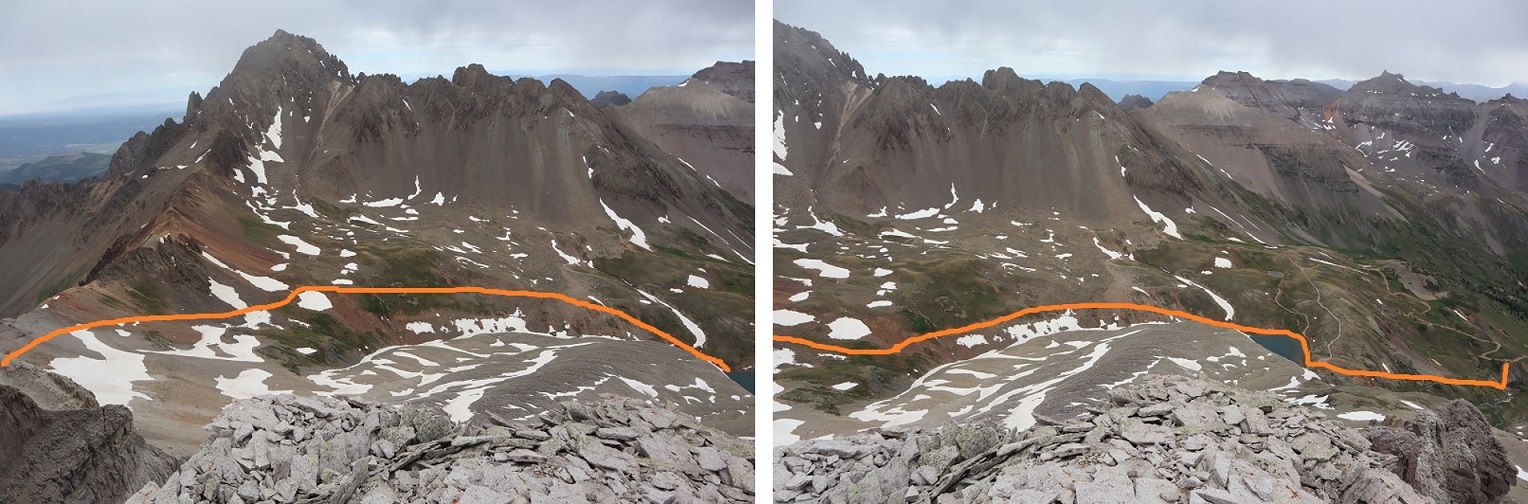
Once on the saddle I followed it south. On the ascent I made the wrong choice and tried to ascend directly up the gully. This got me onto very loose, chossy terrain and took me longer than necessary to figure out. The rocks were the size of toasters and none of them were stable. Large sections would move below me at a time, taking me with them. On my way down I found a better route, so I’ll describe that route here.
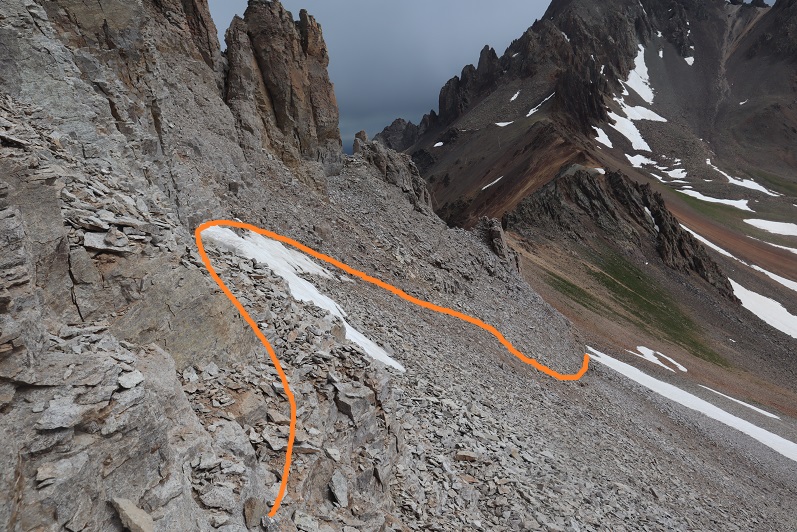
From the ridge, dip down to the left to go around this first obstacle
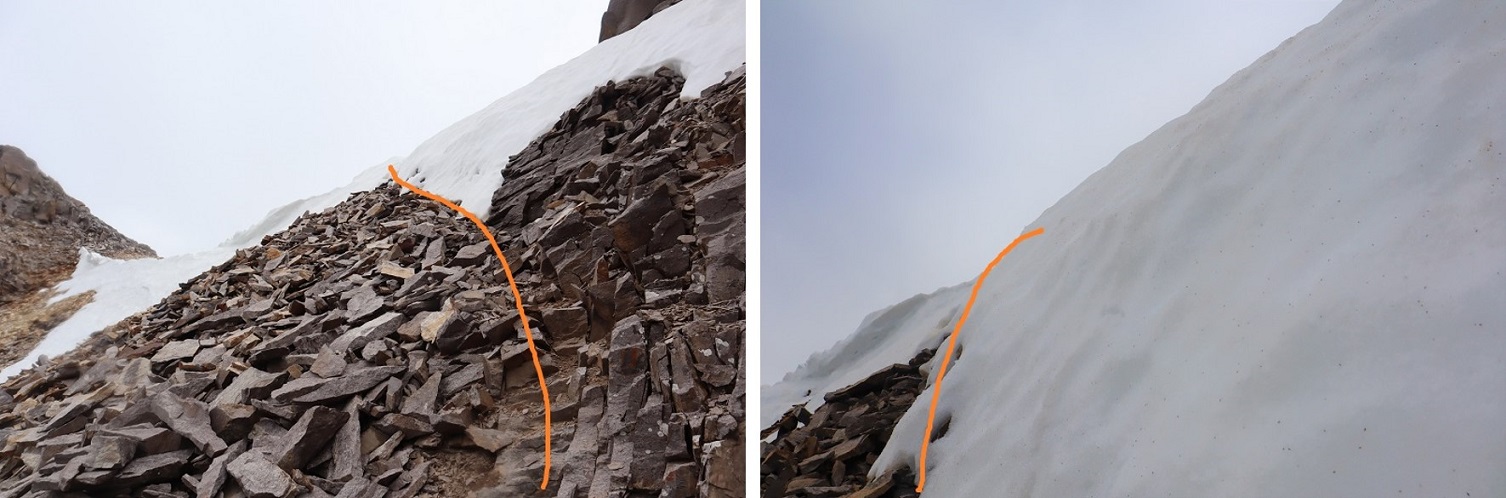
Next, hug the area where the snow meets the rock. I’m pretty sure there’s an actual trail here under the snow
From here I’d wanted to ascend directly up the gully. DON’T DO THAT. Instead, try to make it as close to the ridge as you can
At the small saddle there was snow to contend with (a lot more snow than the pictures suggest). Glad to have brought my ice axe and crampons (something I do on every hike I don’t have beta on) and got to work kicking in steps and climbing over the snow. There was probably 30 feet worth of work to do over the snow at its narrowest point.
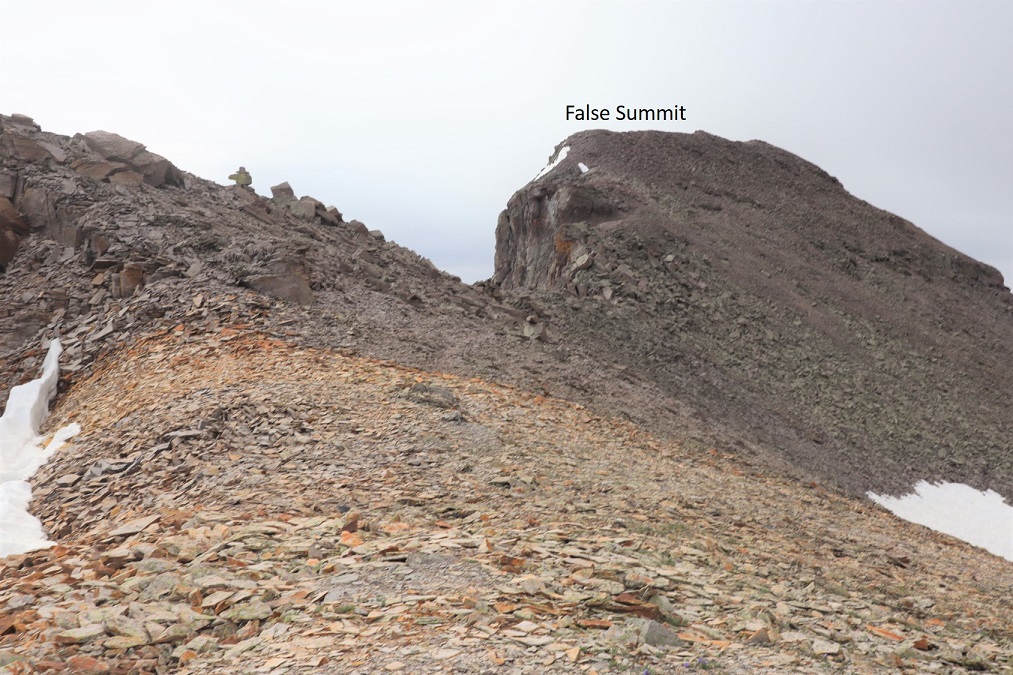
At the saddle I sat down to take off my crampons. From here it was a short trek to the summit, after first going over a false summit. This was all class 2, but I kept my helmet on.
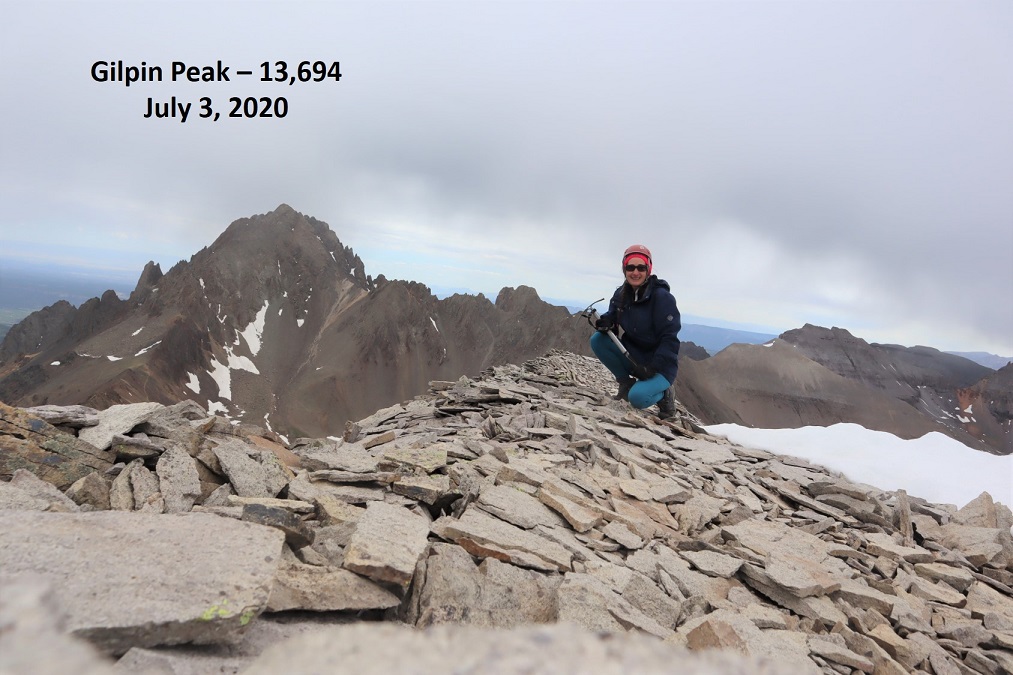
I made it to the summit of Gilpin Peak at 9:30am. It was lightly snowing.
Gilpin Peak:
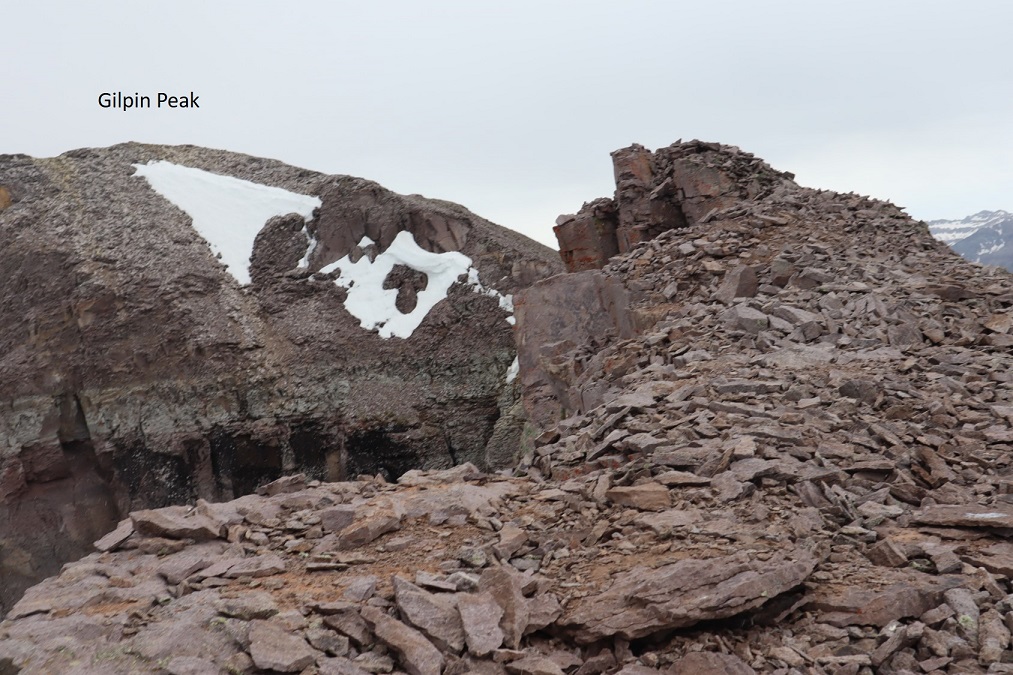
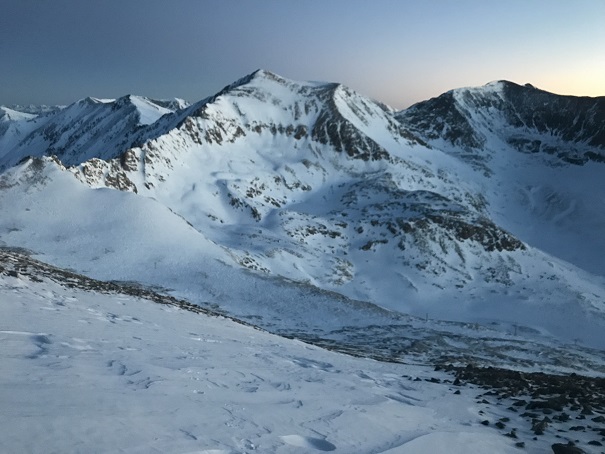
Here’s a look at the route I took out the basin from the summit
I turned and headed back over the false summit and headed back to the saddle
Because I’d already kicked in steps I made the decision to put on microspikes instead of crampons to go down the snow. This was a bad idea, but I didn’t realize it until I was already too committed. I made it down the snow safely, but I was shaking as I did so: crampons provide much more stability than microspikes (duh) and I wasn’t very stable on the downclimb. I relied a lot on my ice axe.
Here’s looking at the ridge back down
I re-crossed the snow below, this time without traction: I boot-slid my way across much of the snow.
I made it back to the trail and there was a family standing there, waiting for me. There was a mom and dad and grandparents with 6 kids who all had to be under 10 years old. They’d been watching my descent, and the father asked if I would show the kids my gear (crampons, helmet, ice axe). The kids were fascinated with the equipment, and proudly told me they were hiking to the lakes. I wished them luck and was on my way.
After making it to the pond I followed the class 1 trail above Sneffles Creek until I made it to a road, and followed the road back down to my truck.
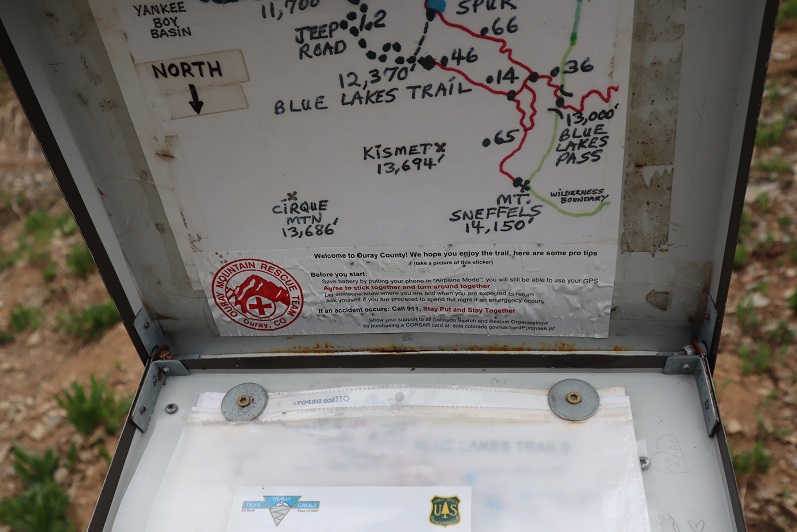
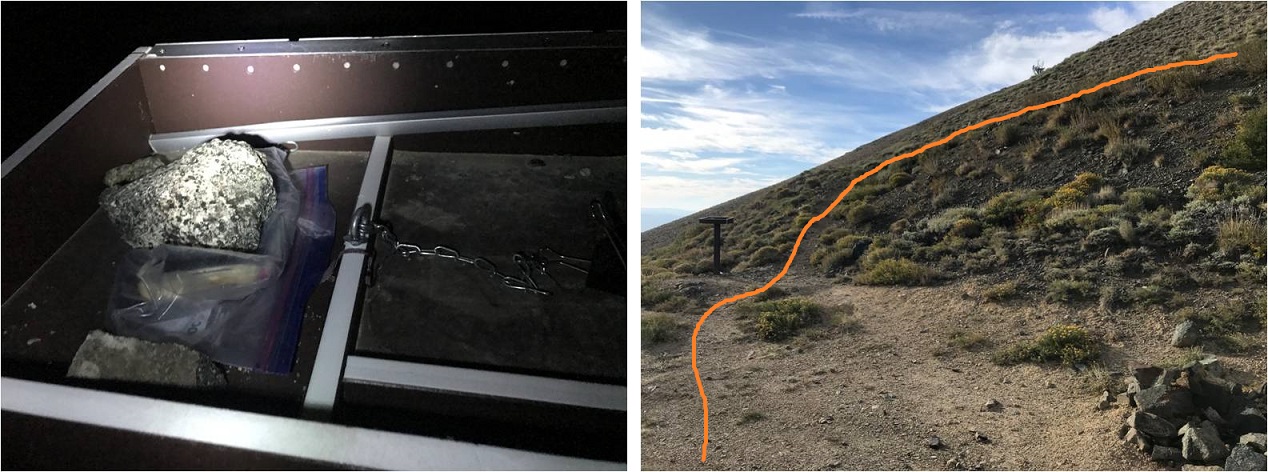
Just before making it to the road I passed what I thought was a trail register. I opened it and found one of the most confusing maps ever! Not only did it not correspond with the visual direction of the peaks, north was at the bottom. This map is going to get a lot of people lost.
I passed a jeep that had gotten stuck. Everyone pitched in to get her un-stuck.
It was easy to follow the 4WD road back to where I’d parked my truck
I made it back to my truck at 11:15am, making this an 11.1 mile hike with 4382’ of elevation gain in 6 hours, 15 minutes.
I still had plenty of time left in the day, so I decided to drive to the next trailhead and attempt another mountain.
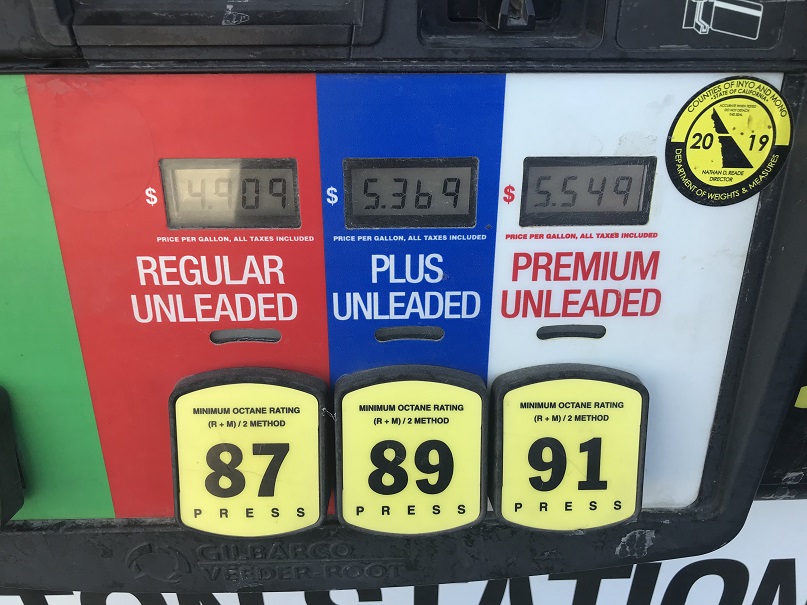
After hiking Mt Whitney I drove my rental vehicle to a Subway, got lunch/dinner, and paid too much for gas
My goal was to drive as close to the Boundary Peak trailhead as I could get in the Toyota Corolla I’d rented. I’d heard a lot of different things about the drivability of this road and since I didn’t have a 4WD or even a vehicle with much clearance (5.2 inches) I was a little worried. About 30 miles from the turnoff my cell phone lost service, and I knew I’d be on my own if I got a flat tire or damaged the vehicle on the 4WD road.
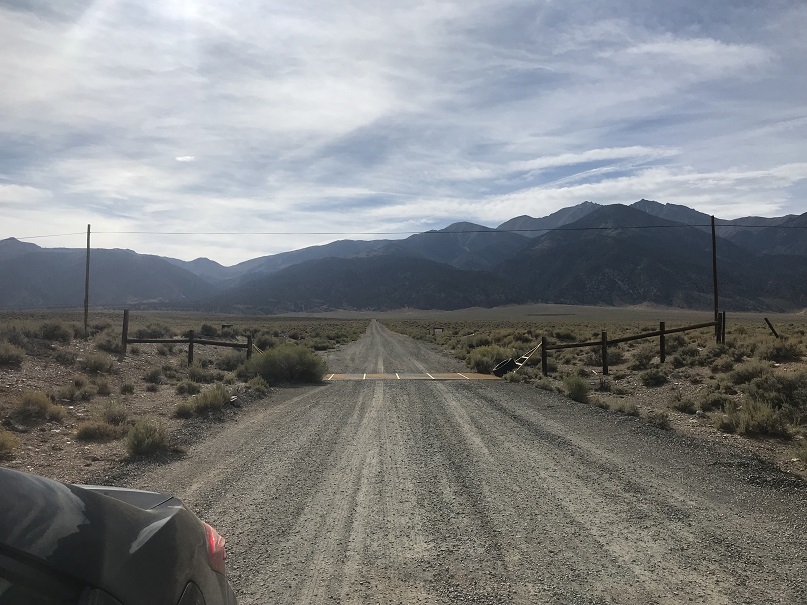
I was pleasantly surprised when I turned off US 6 and this is what I saw
I knew the Queen Canyon Trailhead was about 6 miles from here, and it looked like I’d be taking a well maintained 2WD dirt road for at least the first few miles. The first two miles were flat and relatively easy, and with each passing mile I became more confident and a little more excited to be getting closer to the trailhead.
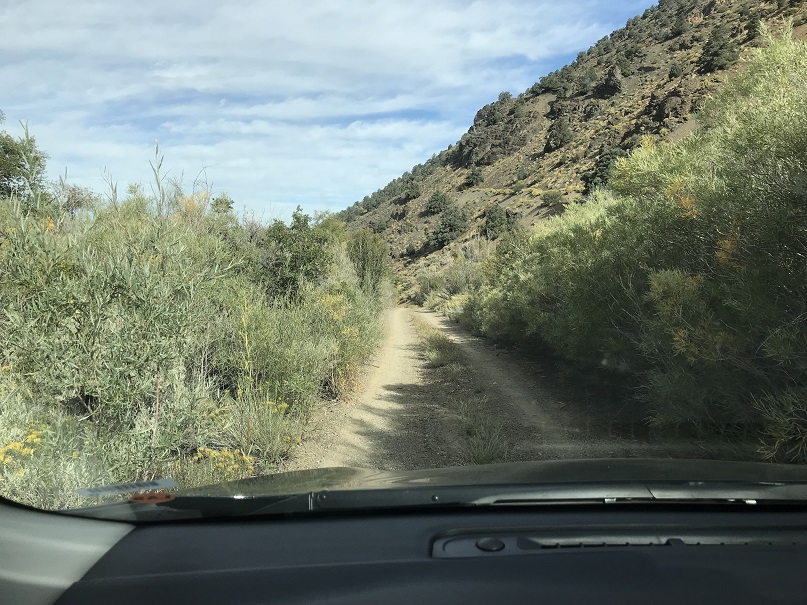
Around the 3rd mile the road became one lane and entered the canyon. I was a little skeptical about the road because I couldn’t see what was ahead of me, but I figured if I couldn’t turn around at least I’d be able to back up. Here the willows brushed both sides of the vehicle as I drove past, and the grass growing from the middle of the road made whooshing noises as it hit the underside of the vehicle.
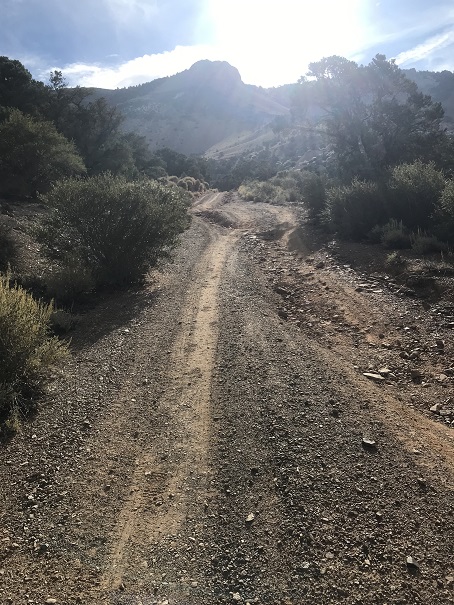
I was beginning to think I’d be able to drive all the way to the trailhead when around mile 4 I came to a roadblock: the road had washed out a little bit and with the low clearance vehicle it became too difficult to navigate. I got out of the car and walked up and looked for a fancy way around that wouldn’t require bottoming out and was unsuccessful. I was a little bummed because this section was so short and the road looked clear if I could just make it past this section about 10 yards long, but I didn’t want to get stuck and I seriously didn’t want to get stuck with paying for damages to the rental vehicle.
So I made a 10 point turn and looked for a spot to park. I was able to find a small pullout (thankfully the vehicle was small) but unfortunately it wasn’t in the shade (there wasn’t any).
I relaxed, ate my sandwich, and pulled out my altimeter: I’d parked at 8220’. I did the math and figured this would add a little over 2000’ to my hike tomorrow and 2 miles each way. I liked those numbers, but they meant I’d only be hiking Boundary Peak and not adding on Montgomery Peak (because I had a plane to catch). I really wanted to get some sleep, but it was 4pm in Nevada in September and 95* outside. I tried to lie down in the back of the Corolla in my sleeping bag but it was just too hot to sleep. Rolling down the windows just invited the flies in, so I tossed and turned for quite a bit. The last thing I remember before drifting off to sleep was seeing a red Jeep race down from the road above and pass by my vehicle. It was the only other car I saw the entire time I was there.
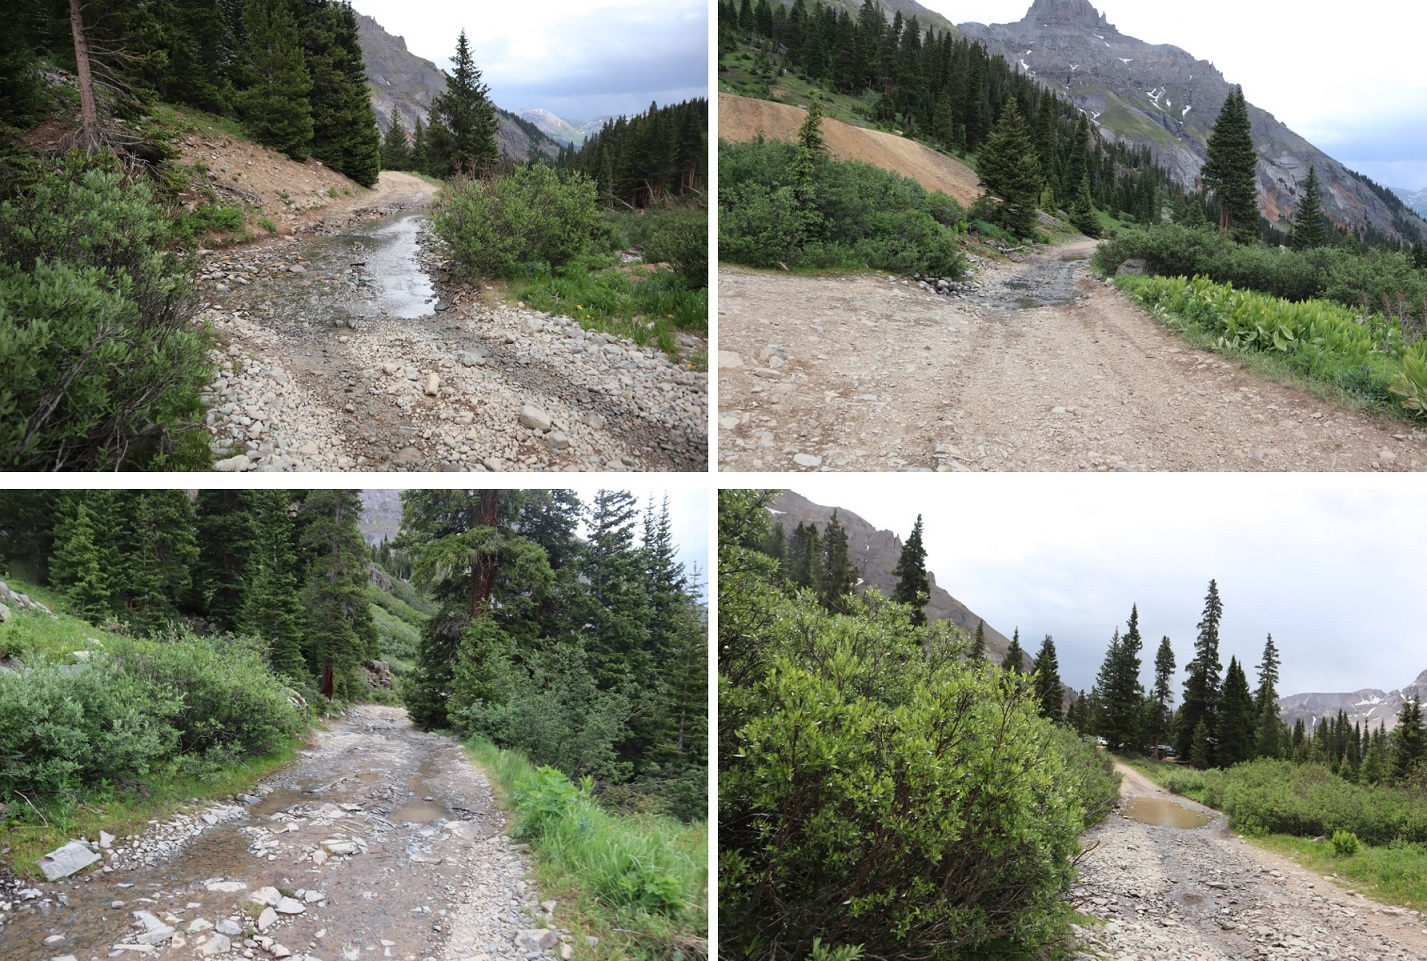
I woke up at 1:30am and was on the trail before 2am. I started up the 1N146 road, forgot to turn on my tracker, stopped, turned it on, and was on my way. The road was very easy to follow to the trailhead; just stay on it and don’t take any turns. In the dark I passed a mine (I noticed on the way back there was a light on inside and wondered at why I hadn’t seen it on my way in).
This mine is at 9010’ and provides a great place to camp before the road becomes 4WD
After the mine there’s still a mile left to go, and the road indeed becomes 4WD, although you could probably do it in a high-clearance vehicle that isn’t 4WD as well. The Corolla never would have made it.
You can see how easy it is to follow the road to the trailhead
As I was walking along the road something bobbled past me and flew like an awkward cross between a bat and a bird. It landed in the grass in the middle of the road, so as I approached it I aimed my flashlight at it to get a closer look. It looked up at me with a round face and large, yellow eyes. It was a fledgling burrowing owl. “Oh! You’re a baby!” I said to the owl. It hopped twice, jumped about 6 feet in the air, and once again awkwardly and silently glided into the brush on the other side of the road. That had been a fun encounter!
The trail starts at the right (south side) of the saddle around 10,000’.
As I made it here I thought to myself “I should have brought my bivy with me”. It doesn’t weigh that much and it would have been a great idea to have hiked up here last night, slept, and started the trail from here. Oh well, next time I’ll add it to my pack on trips like this because it only weighs 1 pound.
I followed the trail a short distance to a trail register that was lacking a lid, arriving at 3:55am. I signed the register, replaced it in the ziplock bag and was off.
The trail begins with about 1000’ of elevation gain as it heads south and switchbacks easily up the hillside
From the top of the hillside it’s a little disappointing as you then spend the next mile and a half losing 300’ in elevation, aiming for the saddle between Trail Canyon Saddle Peak and Boundary Peak.
Here I started seeing horse manure, and quite a bit of it. Initially I thought how crazy someone must be to take a horse up at this elevation, but then I noticed there was a lot of it off trail as well and figured there must be wild horses in the area.
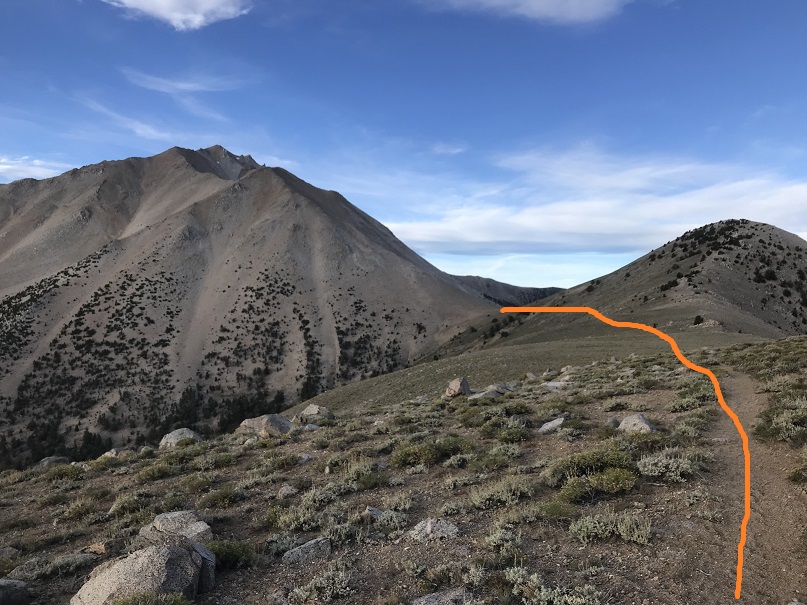
Once at the saddle there’s a cool wind shelter made out of bristlecone pine and rocks and an obvious trail that goes up the mountain.
This is the path the trail takes. It’s obvious in the daylight, but in the dark there were a lot of social trails and I kept getting off trail, yet stayed pretty much on course
Oh, and the top of this hill is NOT Boundary Peak.
Around this time is when my tooth started hurting again. I took some ibuprofen and thought to myself “well, isn’t this fun?”
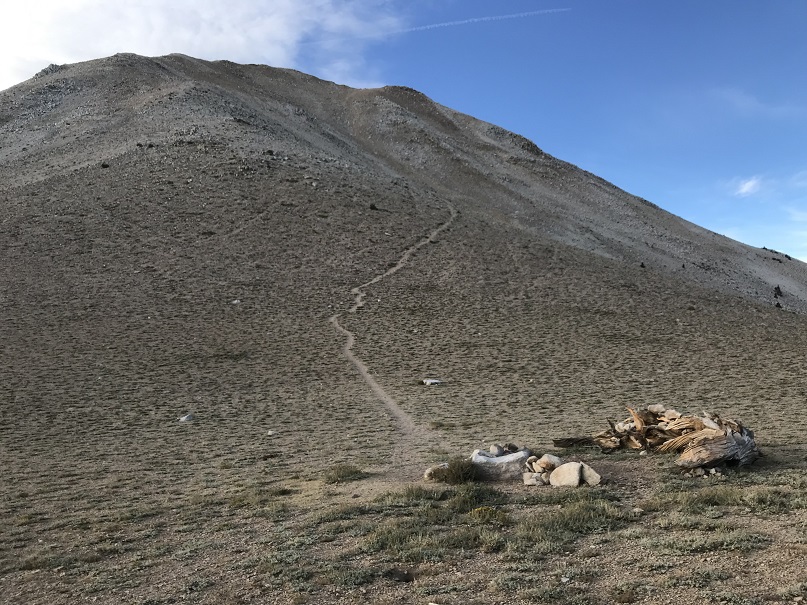
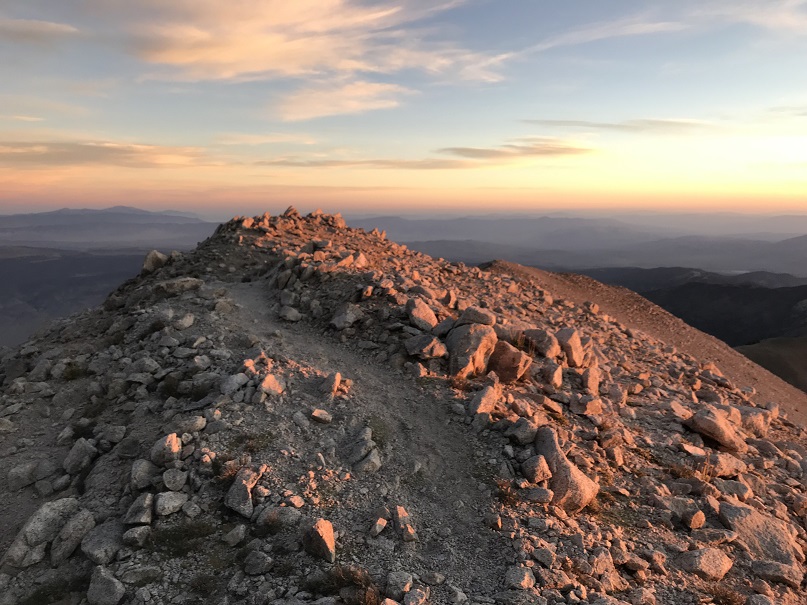
Once you reach the top this is the path before you
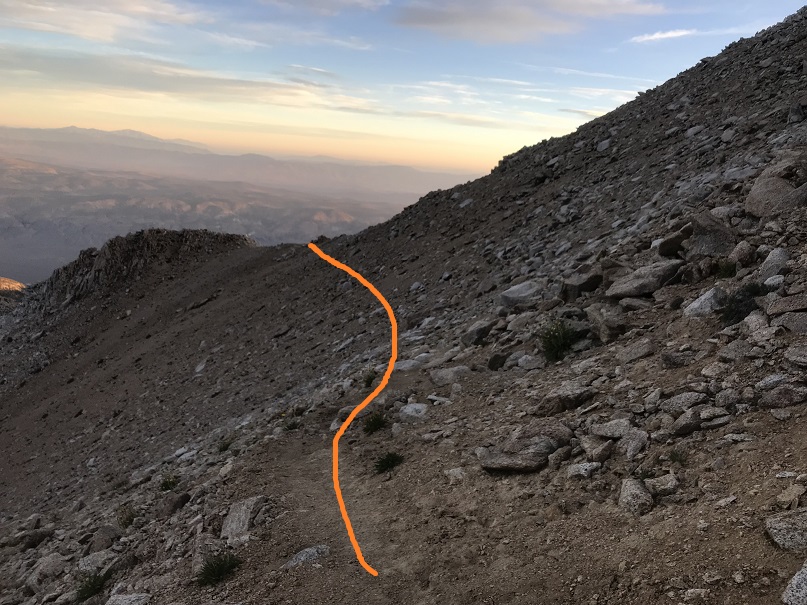
The trail splits a lot in places, but basically follows the ridge to Boundary Peak. It doesn’t matter which path you follow, they all stay at class 2 or below. This is the path I took
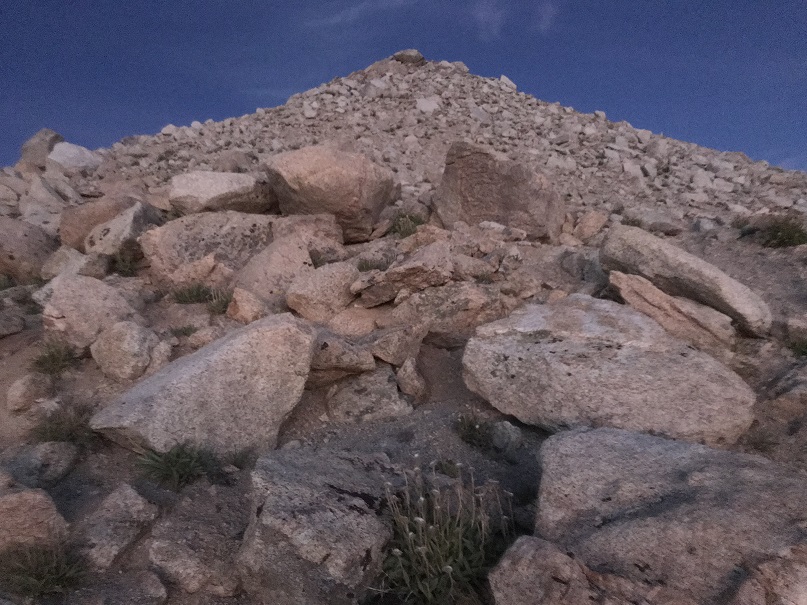
The last little bit to the summit has larger rocks but still stays at class 2
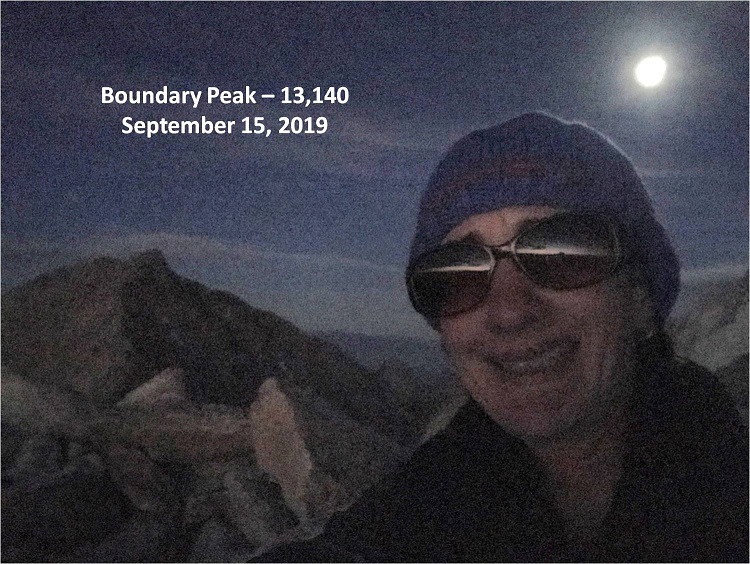
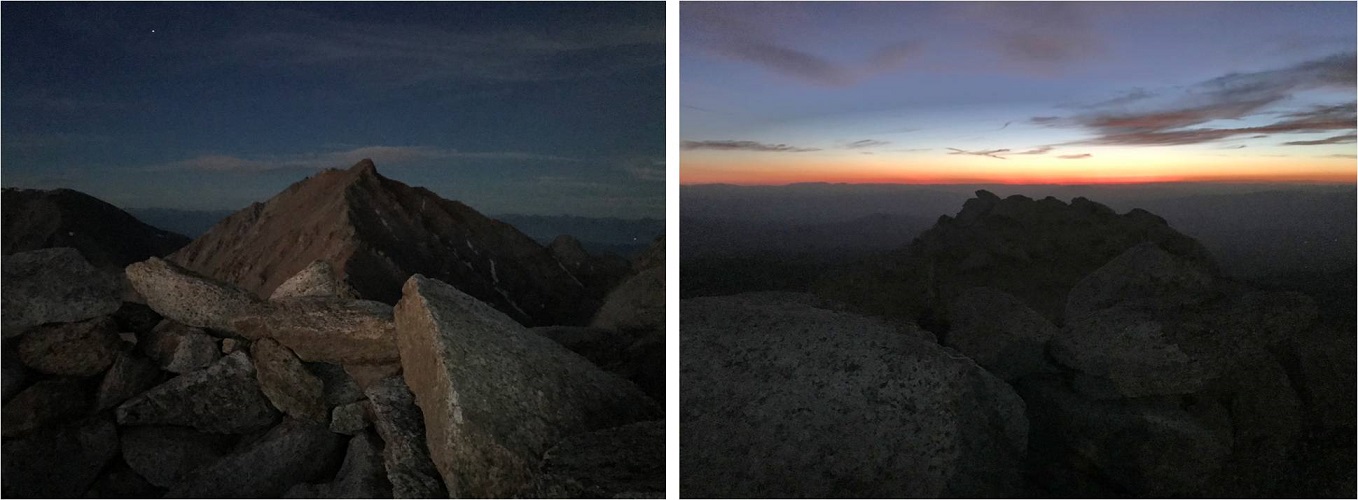
I summited at 6:45am, and the sun still hadn’t risen. My glasses are on to hide the crows feet…
Boundary Peak Summit:
It was very cold at the summit, and since I still didn’t have my new camera I had to keep taking off my gloves to get pictures on my iPhone: my hands were freezing! I took a few pictures and (again) actually signed the summit register. I figured I should eat something so I got out some dried mangoes, took one bite and felt the most intense dental pain I’ve ever felt in my life! Oh no! This was NOT good! Tears came to my eyes and I decided right then and there I was going to see a dentist as soon as I got home.
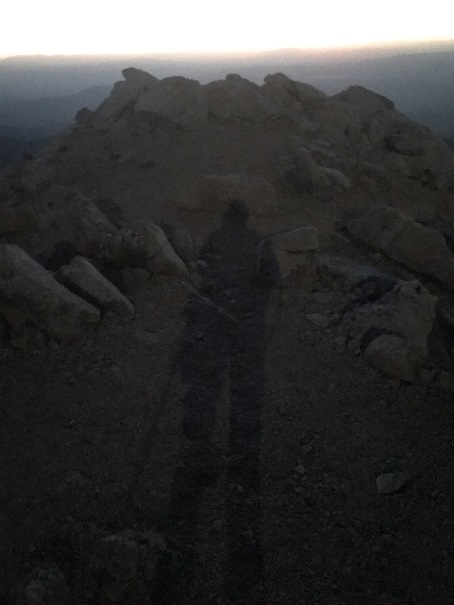
I sat here for a minute and contemplated watching the sunrise, but it was just too cold (and I figured I’d have a great view of it as I hiked back down). The moon was full and extremely bright, so I got a shadowselfie in the moon-glow
I also took some pictures of Montgomery Peak and the summit I was currently on (I lightened them up a bit so you can see detail)
I headed back down, and within about 10 minutes there was enough light to see the path ahead of me. It was so nice to be able to see an actual trail instead of guess where it was in the dark!
I sneezed and my teeth bumped together in the process. The pain was so intense I stood there for 3 full minutes waiting for it to subside. The sun finally rose at 7:35am (which I thought was late, but maybe that’s normal for Nevada?)
I followed the trail back down the same way I came up
Back down to the saddle and then up to regain those 300’ I’d lost
Regaining the elevation actually wasn’t that bad, but I was also lucky the sun had gone behind the clouds and it wasn’t that warm out. It felt like I was hiking in the shade, and at this point my dental pain was more of an annoying dull ache and I was beginning to think the pain was directly related to elevation.
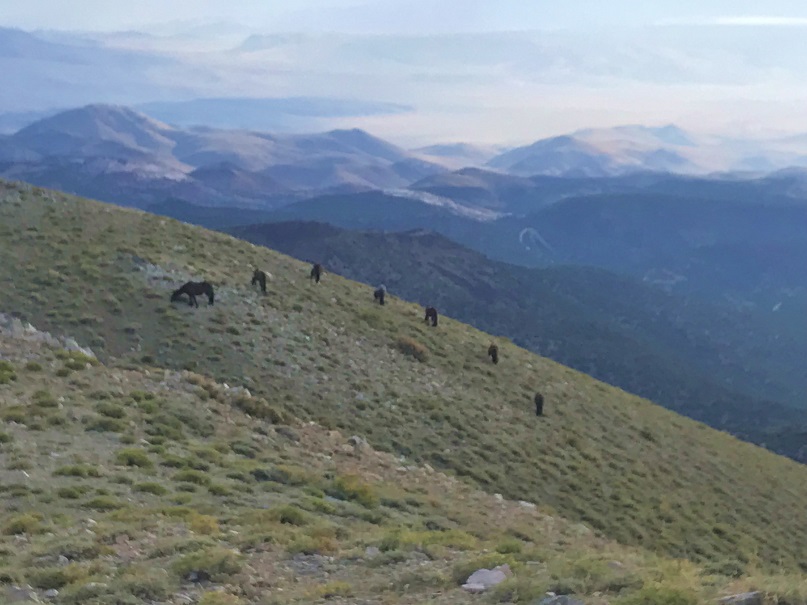
I came across a few deer near the trail, and as I rounded the last bit of hillside I saw a small herd of horses, grazing in a semi-circle on the hill.
Boundary Peak Horses:
I made noise but they didn’t really seem to care I was there. Once again I wished I had my good camera with me and not just my cell phone: these could have been awesome pictures!
From here it was all downhill back to the trailhead
I signed out of the register and headed back down the road to my vehicle.
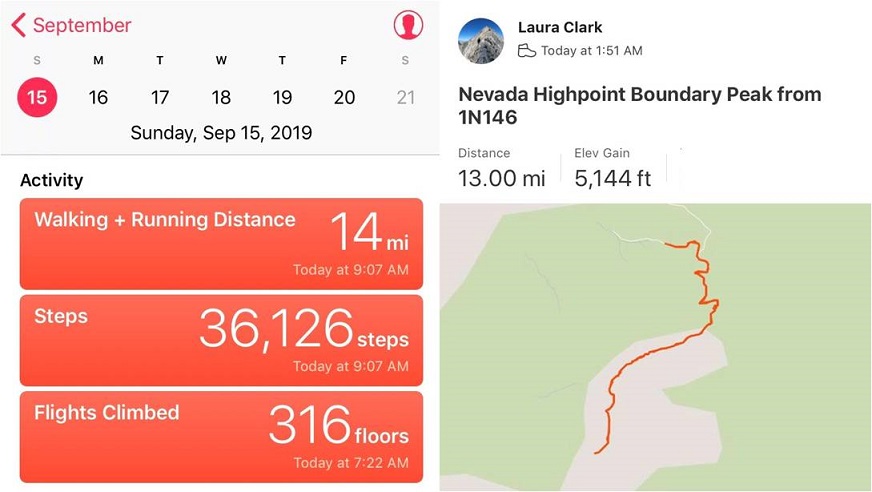
I made it back to the car at 9am, making this a 13 mile hike with 5144’ in elevation gain in 7 hours 15 minutes.
Once back at the car I cleaned up and got ready to head out, saying a silent prayer I didn’t do any permanent damage to the vehicle in the next 4 miles. I knew I’d be ok as long as I just drove slow, and since I hadn’t seen any vehicles since that Jeep last night I wasn’t too worried about the need to pass another car in the tight spots. In the daylight I saw an abandoned house
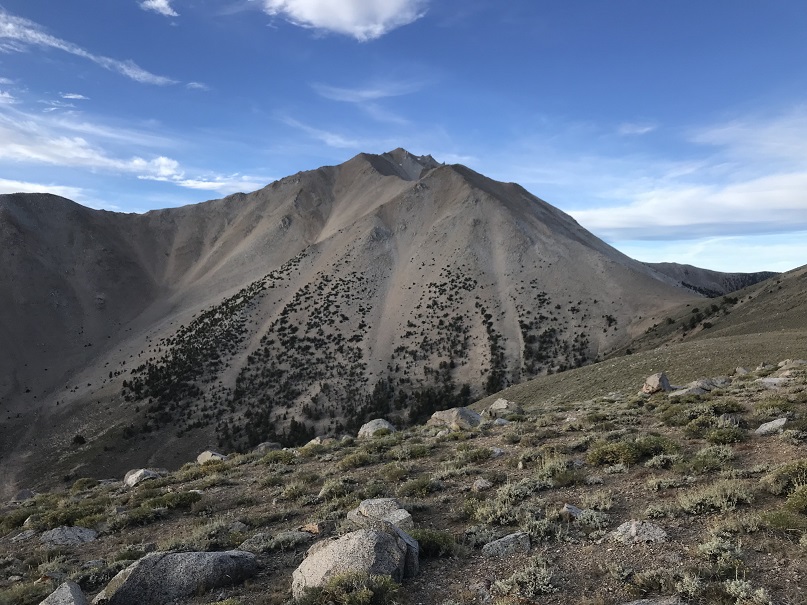
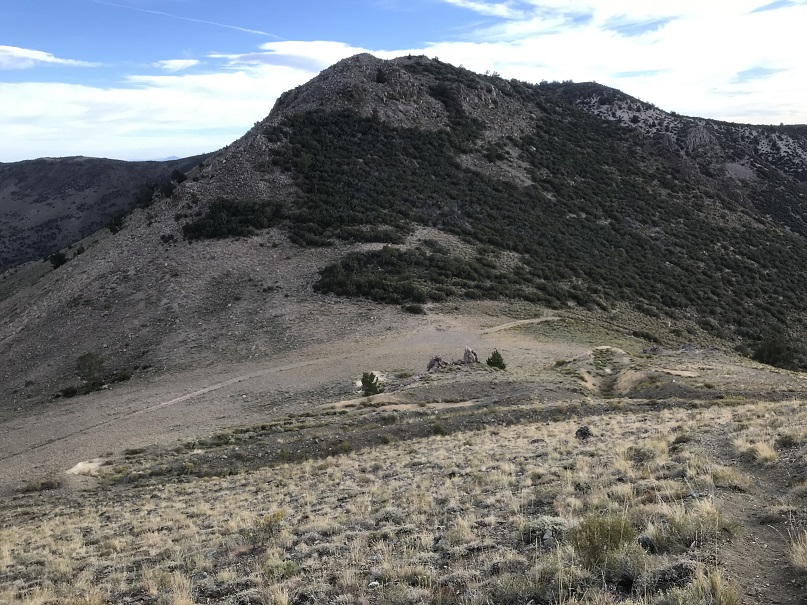
And a really neat view of Boundary Peak
I made it back to US 6 without incident, but the vehicle was quite dirty and had pinstripes from the willows. It was a 5 hour drive from here back to Las Vegas. I spent it with the radio turned up to avoid the constant “not in your lane beeping”. Once in Vegas I looked for a car wash to try and buff out he streaks. It was surprisingly difficult to find one that was open and operating (I found a bunch of closed or non operational car washes however).
After driving around for half an hour I was finally able to find a car wash, paid the $7 and was extremely happy with how everything turned out: no scratches left on the rental car! Woot! Now it was off to return the car (I didn’t have any issues) and to get to the airport early, hopefully to change my flight to an earlier one so I could hike again tomorrow.
My flight didn’t leave until 9pm and I was at the airport by 3pm. I went to the desk to try and get an earlier flight but even on standby they wanted more than double what I’d paid for both tickets combined to take an earlier flight home. I was not ok with this, so I decided to take a shower and eat instead (yes, the Las Vegas airport has showers, if you know where to look).
I spent the next few hours relaxing before my flight home, listening to others talk about what they’d done during their Bachelor/Bachelorette parties that weekend. I was a little upset I’d get back to late to hike the next day, but all in all considered my birthday weekend a win!
I thought I was done with summits for 2018. I’ll be gone next week on a road trip visiting my family in Mississippi for Christmas, and along the way picking up my son from his base in Texas to join us (I’m so glad he got leave for the holidays before transferring to Alaska!!!). I’d just been hiking yesterday, but today I noticed the weather for tomorrow was perfect for hiking as well. I did some mental calculations, and then had this conversation with my youngest (a sophomore in High School).
Me: What are your plans for tomorrow?
Her: I was planning on sleeping in and then studying for finals. And I’d like to get in some rink time if possible.
Me: Do you want any help studying? I did graduate with my undergrad 2nd in my class. And I have an MBA. I’m pretty good at the whole ‘studying’ thing.
Her (with a terrified look on her face): No mom. Just… no. I get straight A’s and have my academic letter to prove it. I’ve got this.
Me: I was thinking of hiking tomorrow, but I’d also like to spend time with you. What do you think?
Her: You should go hiking. That way I can sleep and study. I’ll probably still be sleeping when you get back anyway.
Me: How much studying do you need to do? Is studying more important than sleeping?
Her: Mom, I’m a teenager. Teenagers gotta sleep. At this point I need more sleep than study time.
Me: OK, but that still leaves rink time. How about we go to the rink tonight from 7-9pm, tomorrow I’ll hike, you’ll sleep, I’ll wake you up to study, and we’ll have dinner together.
Emily: Deal.
Woot! It looked like I was going to get one more hike in this year after all! The weather looked great, and my schedule for the morning was cleared. Because of rink time I didn’t make it to bed until 10pm, which meant I only got 4 hours of sleep, but that seems to be the norm for me these days. I’ve discovered the hike is always worth the lack of sleep.
Once again, I woke up at 2am and drove to the trailhead. I encountered a herd of about 40 elk at the same place I had on Friday, and this time I was prepared when I saw them in the center of the road. I slowed down and waited for them to budge, but they didn’t seem concerned with doing so. They were quite happy to stand in the middle of the road and just watch me wait. It seemed I was in more of a hurry than they were. Luckily there were no other vehicles on this road. After two minutes I did something I knew would make them move: I took out my camera. Sure enough, before I got the chance to take picture they’d scattered to the sides of the road. I was on my way!
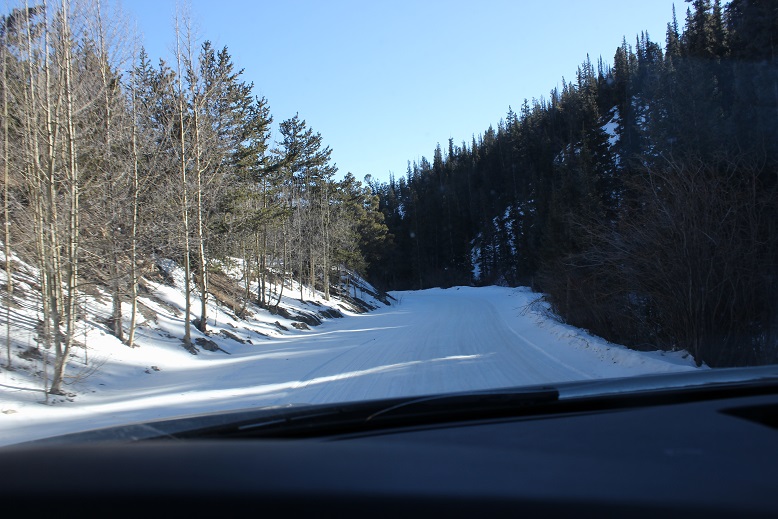
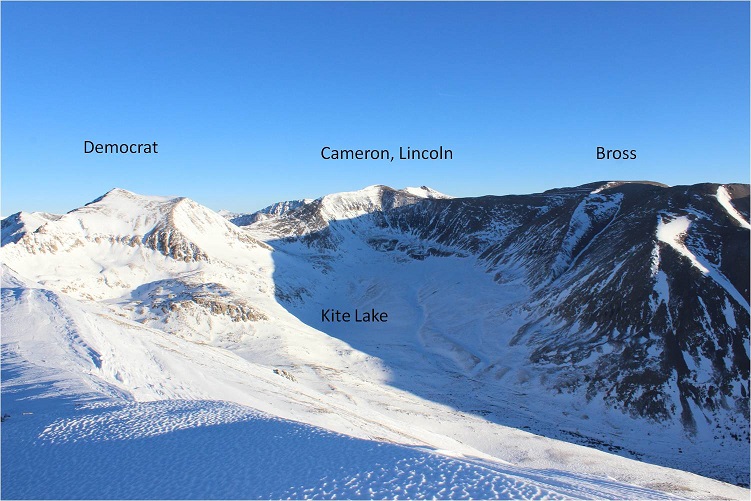
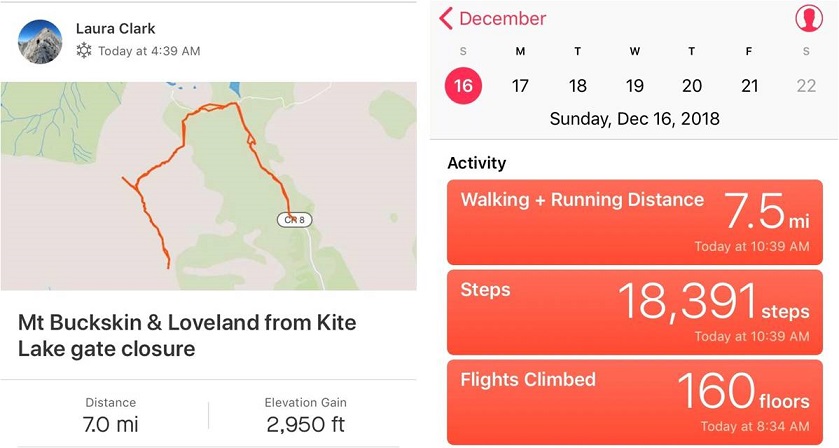
I haven’t been to the Kite Lake Trailhead for what seemed like ages. The last time I was here was back in June of 2017. The 2WD dirt road was icy but clear and plowed up to the gate closure, about a mile from Kite Lake.
This was also a pleasant surprise: I’d expected to park about 3 miles from the trailhead, and here I was, just 1 mile away. This day just kept getting better and better!
There was room for about 5 cars at the gate, if everyone cooperated and parked nicely.
I was the first vehicle there, so I tried to pull up and leave as much room as possible for others. Also, about 40 feet before the gate the road isn’t plowed, and a few vehicles tried to drive past a snow drift and obviously had to turn back. My advice: Don’t even attempt to drive past where it’s plowed. Your vehicle might make it, but there’s no parking in front of the gate so you’ll need to turn around and park lower anyway.
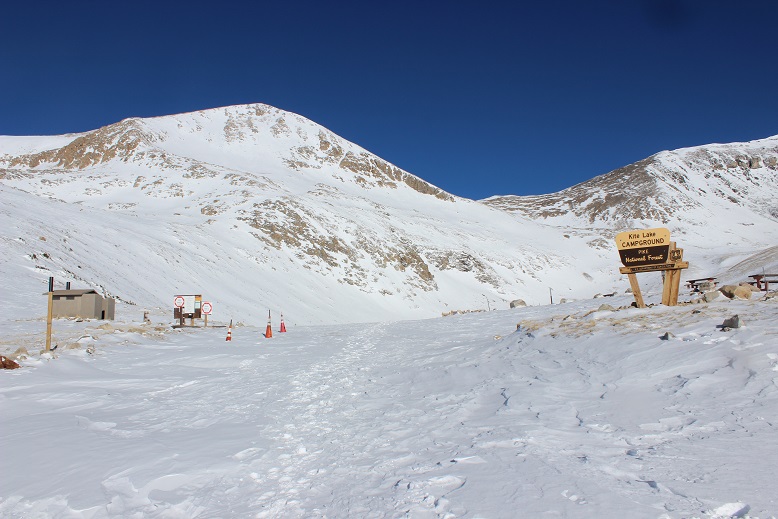
I gathered my gear and began hiking towards Kite Lake at 4:45am. Just after the gate I had to stop and put on my snowshoes. I left them on for the entire hike.
The hike up to Kite Lake was simple: I just followed the road.
The sky was clear with no moon, and when I looked up I often saw leftover shooting stars from Friday’s Geminid Meteor Shower. The only downside was the wind! Wow! It sure wasn’t the forecasted 8mph, and it wasn’t letting up. It was like I was walking headfirst into a wind tunnel: the wind was funneling down the mountains and straight towards me as I trudged towards the lake. I remembered last time I was here the wind was intense as well, and hoped it died down at some point.
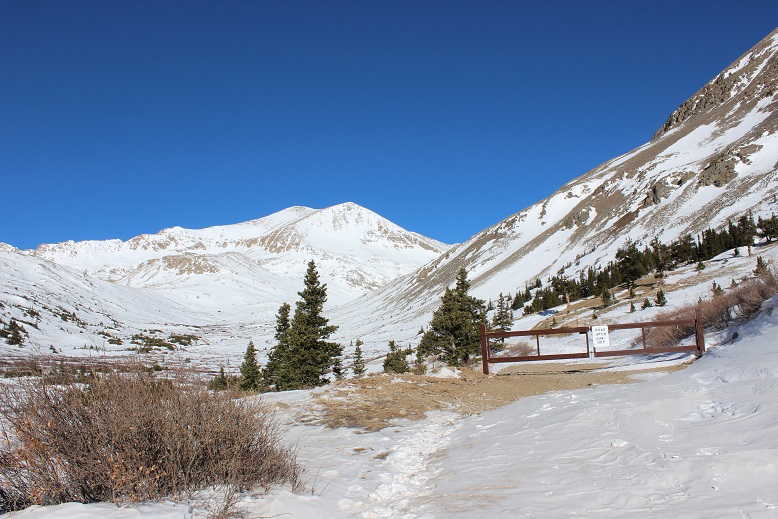
OK, I made it to Kite Lake.
My directions said to look for the trail to Lake Emma, which was supposed to be highly visible behind the bathrooms to the left. Hmmm. No trail was visible, just a lot of snow.
I hiked around for a bit, looking for an obvious trail sign, tracks, path indentations in the snow, etc, and when I didn’t find any I just headed southeast.
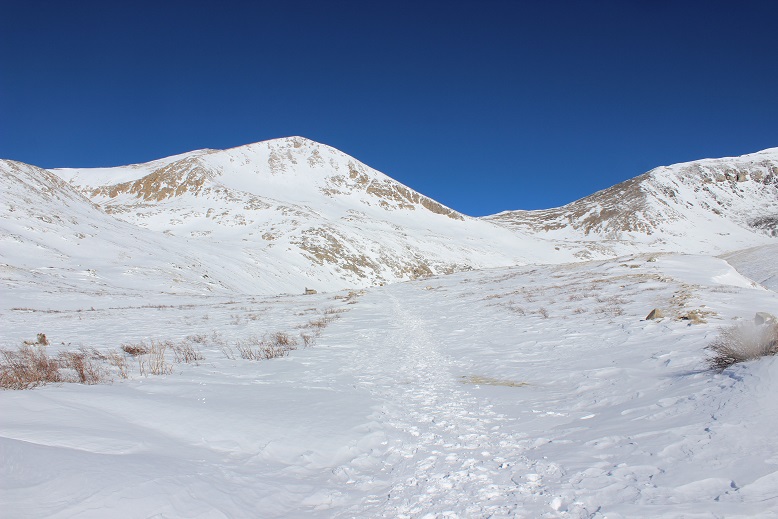
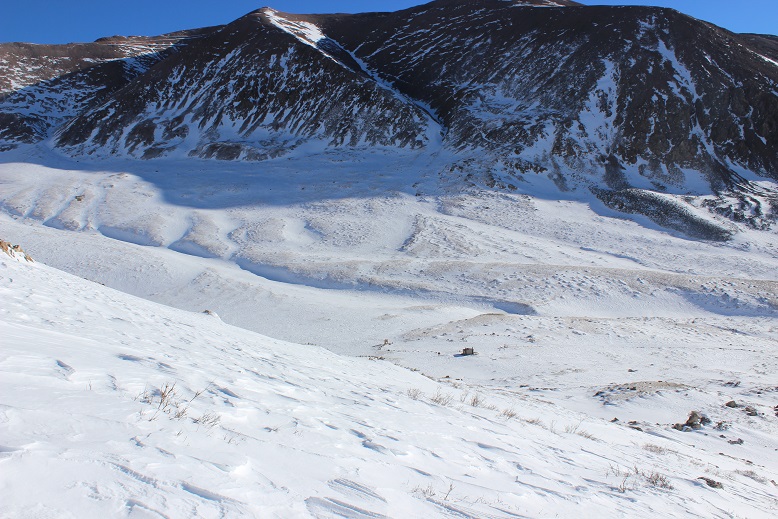
Before long I was in a basin, and thankfully here the wind stopped. Even though it was dark I could tell I was in a basin because the ground was relatively flat, and there were outlines of the mountains surrounding me. I’d been told there were willows here, but they must have been buried under all the snow.
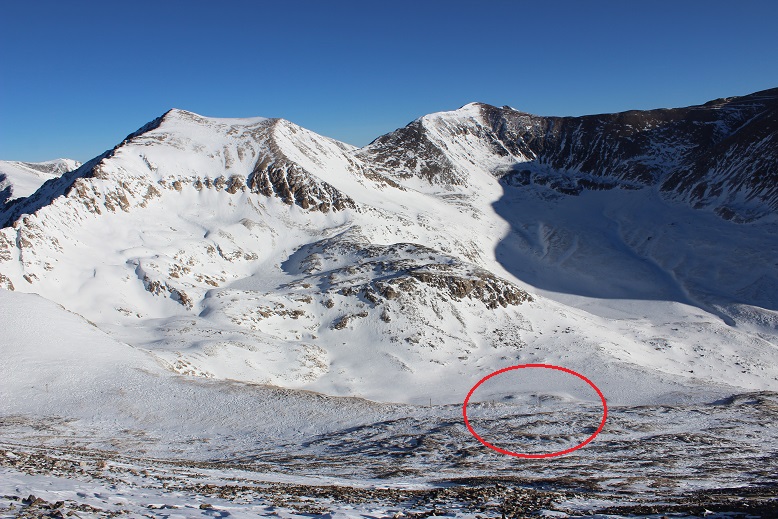
I crossed the basin to the south, squinting in the dark, trying to see Mt Buckskin before me. From the basin I’d wanted to get a good look at Mt Buckskin so I could pick a safe line to climb, but in the dark all I could see was there were a lot of snow covered slopes surrounding me. I couldn’t be sure in the dark how stable/deep/etc. those snow covered slopes were. In fact, I couldn’t see much but lots of white surrounding a few areas of black shapes. I was pretty sure the dark areas were cliffs, and not climbable. Imagine seeing this (which is actually more than I was actually able to see at the time), and trying to decide which path was safest to take.
I kept slowing my pace, hoping the sun would rise and I’d be able to see what I was up against conditions wise. Why wasn’t it getting light out? This would be a whole lot easier if it were light out.
After checking my watch and realizing it wouldn’t be light out for quite some time I decided to aim left, where it looked like there was tundra near the snow. I looked at my topo map and it seemed to have the least drastic slope angle. I figured if I stuck to that path I’d have firm ground to hike up if the snow wasn’t stable. This ended up being an excellent idea. The terrain was quite steep but not as steep as in other areas, and no cliffs. Here’s the route I took. In the daylight I realized I’d made the correct choice.
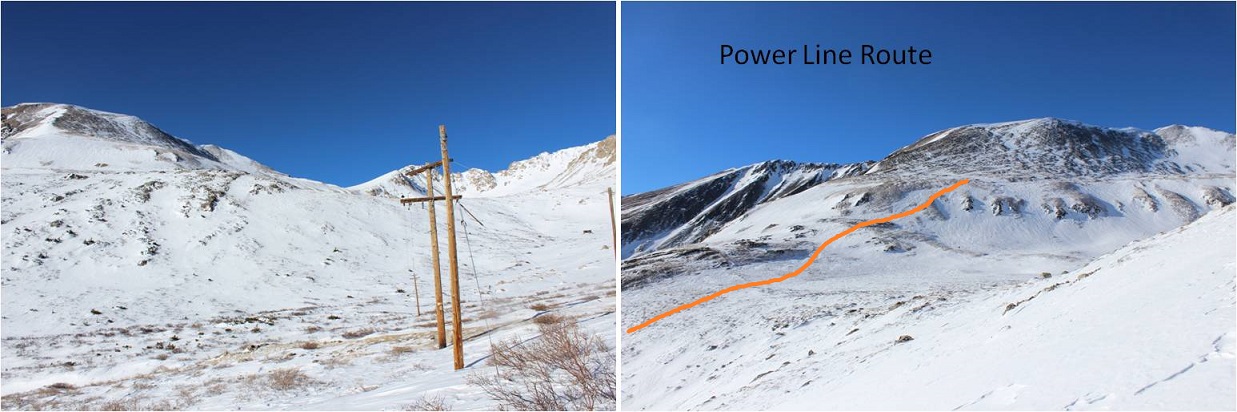
About halfway up the hill I could see power lines in front of me, and decided this would be an excellent point of reference. I aimed for the power line with 3 poles (and discovered later all the others only had 2).
This was a very steep section. Here’s the look back down (from later in the day)
When I made it to the power line I set my next goal of making it to the top of the summit ridge. While the sun hadn’t risen yet, the sky was beginning to get light and I could see better than when I was down in the basin.
Here the snow was firm and I wanted to keep my snowshoes on so I looked for a continuous line of snow to the ridge. Here’s the path I took
Once again, pictures don’t do the steepness here justice.
The snow at this point was consolidated and I was glad my snowshoes had crampons: microspikes wouldn’t have been sufficient. I was also glad I had my ice axe.
After what seemed like forever I gained the ridge just as the sky began to turn pink.
I stopped for a minute to admire the view, and then realized if I hurried I’d be able to make it to the summit to watch the sunrise. I quickly sauntered in my snowshoes the last hundred yards or so towards the summit.
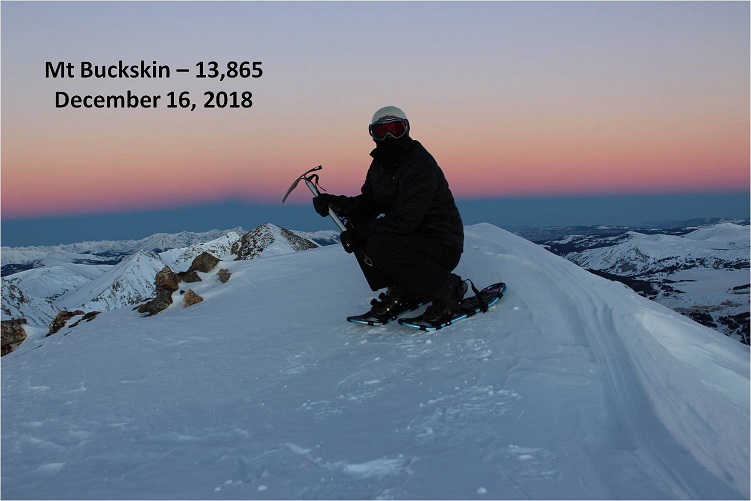
I summited at 7am
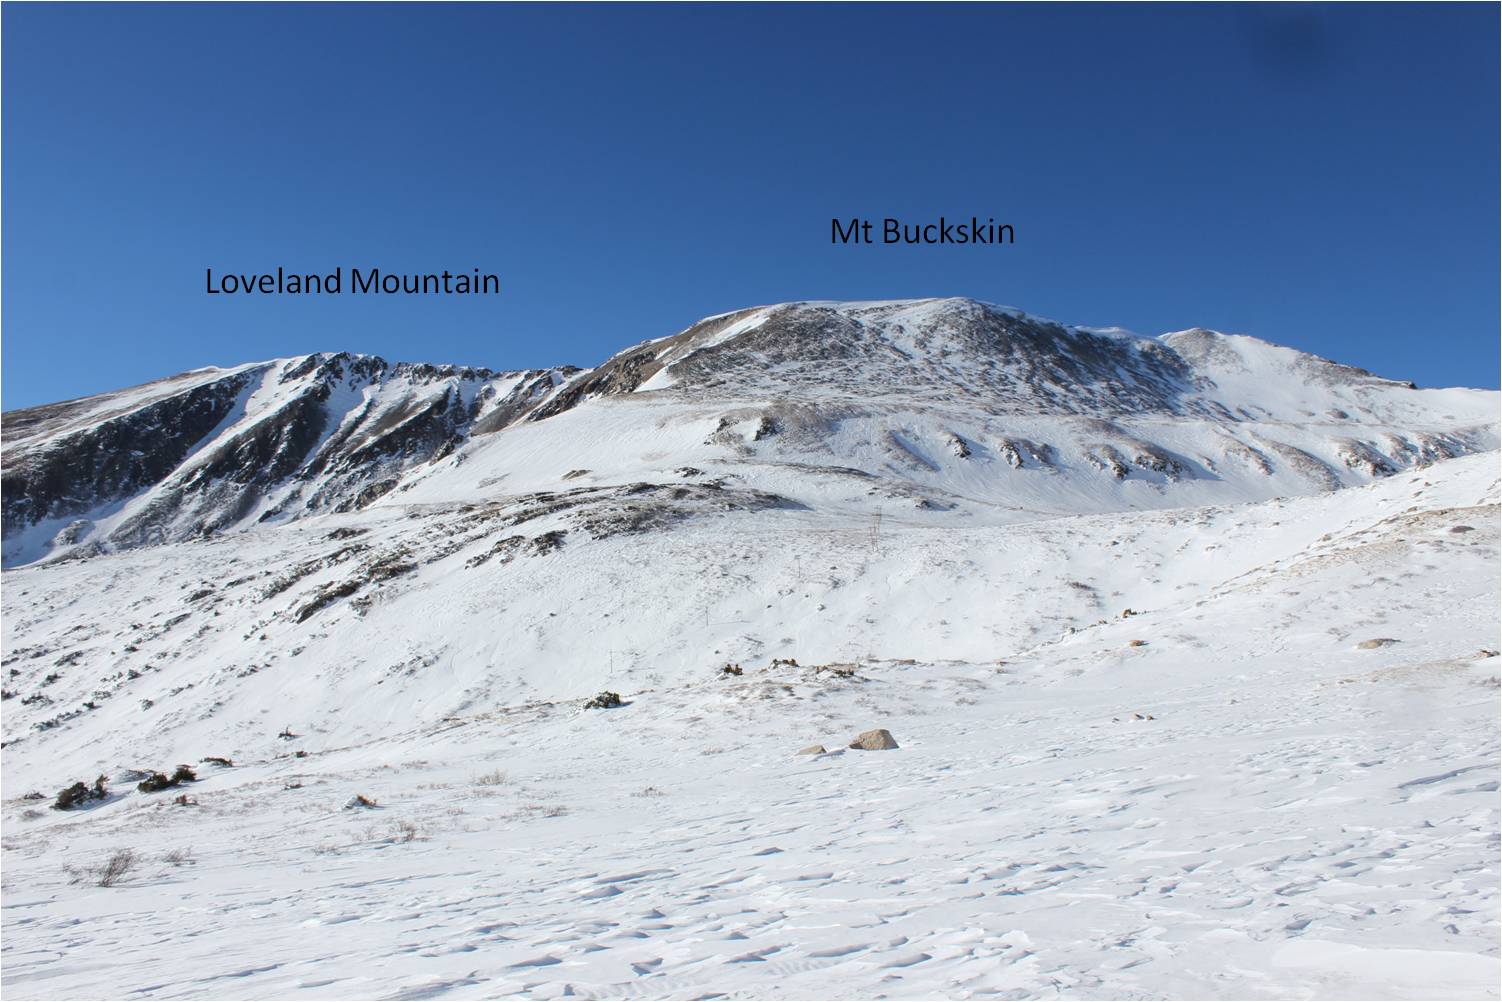
Mt Buckskin:
And yes, I was able to watch the sunrise (it rose directly from behind Pikes Peak, which was cool but not something I was able to capture with my camera)
I also wanted to summit Loveland Mountain today, so I turned and walked back the way I’d come. The trail over to Loveland Mountain looked very straightforward. I could see the path outlined in snow
I made my way to the Buckskin/Loveland saddle, careful not to trip in my snowshoes.
From here there was a rocky section to navigate
And then I had the choice to summit via the trail to the right or the hard packed snow to the left.
I had on my snowshoes, so I decided to take the snow route, which has more snow than it looks like from a distance
I gained Loveland’s ridge and walked to the cairn on the relatively flat summit
I summited Loveland Mountain at 7:50am
Loveland Mountain:
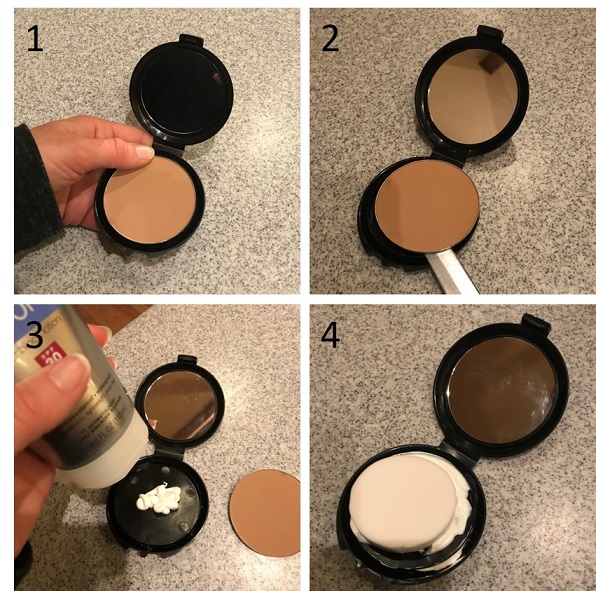
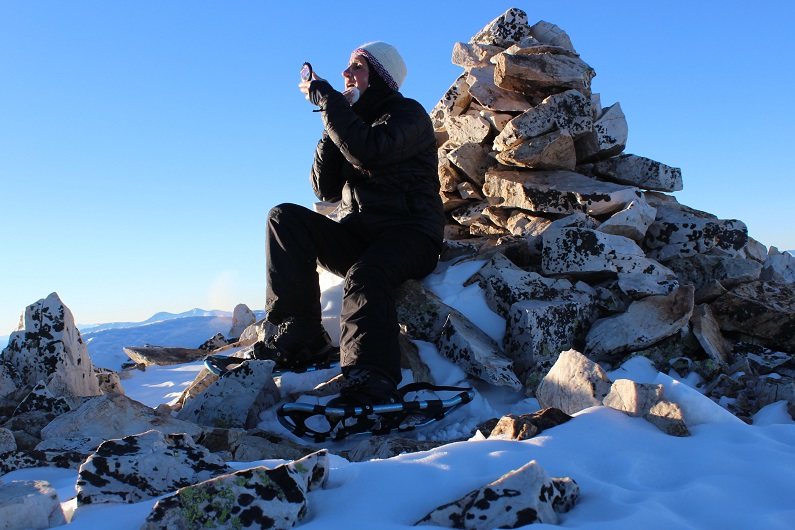
Now that the sun had fully risen it was time to apply my sunscreen. This has been problematic in the past because a tube of sunscreen freezes in the winter above treeline. Using an aerosol spray isn’t practical for obvious reasons (wind) and the sunscreen that comes in a deodorant-like stick doesn’t apply evenly. Yesterday I’d visited my new esthetician and we’d had the usual sunscreen talk. I’d told her I usually just keep my face completely covered when above treeline, since I’m unable to apply sunscreen when it freezes. She told me about something she’d recently heard of, and I decided to give it a try. I went to the dollar store and bought a compact, took out the powder, cleaned the compact out, and filled it with my favorite sunscreen. Then I placed a new compact sponge over it (30 for $1 at the dollar store as well) and let the sponge absorb the sunscreen.
I had the compact in my pocket as I was hiking this morning (inside of a plastic ziplock as well) and now was the time to take it out and see if the sponge had kept the sunscreen from freezing. I sat on the summit cairn, took out the sunscreen filled compact and applied the sunscreen to my face using just the sponge. I was amazed at how well this worked! The sunscreen hadn’t frozen! Using the sponge it was easy to apply the sunscreen to my face, and my fingers didn’t get cold because they weren’t in direct contact with the sunscreen. I hadn’t expected this to work so well. This is life changing. I took a picture to prove to her I’d tried out her idea.
OK, that had been fun, but now it was time to head back down. Here’s a look at the ridge back to Mt Buckskin
Yes, I had to regain some elevation, but at this point I was feeling great so it was no big deal. When I reached the top of the Mt Buckskin ridge I noticed a few cool looking cornices forming (these were small, only a few feet wide)
Here’s a look at the view from the Mt Buckskin Ridge
On my way back down I once again aimed for the power lines, which were much easier to see in the light of day.
Here’s looking back up the slope to Buckskin
From the power lines I headed back into the basin.
And from the basin a look back up at the route I’d taken
Wow, what a basin! In the light of day I could full appreciate how vast it was. I stopped to take some pictures and admire the view
I realized I’d made the right choice in choosing the line I had to ascend Buckskin’s slope, and now aimed for Kite Lake
Once at Kite Lake, and while hiking the road back to the gate, I got a really good view of Mt Buckskin and the path I’d taken to the top. I had the realization this hike would have been much more straightforward in the dark if I’d just followed the power lines up the ridge.
The power lines start on the road and lead up the mountain, avoiding the basin altogether. I’m not sure if they cross private land (etc.) but this seems a much easier option that would have made the hike quicker as well.
In any event, the weather had been perfect today once the wind had stopped. Not a cloud in the sky, and as I was walking from Kite Lake back to my truck it got really warm out and I was able to take off my hat and balaclava.
I made it back to my truck at 10:30am, making this a 7 mile hike with 2950’ in elevation gain in 5 hours, 45 minutes. This gave me plenty of time to drive home, get the truck washed and gassed up for the road trip, and to wake my still sleeping daughter up to start studying. All in all, an absolutely perfect day!
June 11, 2018: This hike has been on my bucket list ever since I discovered it’s the highest mountain on earth when measured from the sea floor. You see, Mountains are generally measured from sea level, in which case Mount Everest (29,028 feet; 8,848 meters) is king. Hawaii’s Mauna Kea, though, rises an astonishing 33,476 feet (10,203 meters) from the depths of the Pacific Ocean floor. Measuring from base to peak, Mauna Kea is the tallest mountain on earth.
We’re here in Hawaii on a family vacation, celebrating my son’s High School Graduation and enlistment in the United States Air Force. My mom and brother tried just about everything to get me not to hike this mountain. They hate that I hike alone, and kept coming up with excuses as to why I wouldn’t be able to go on a solo hike on this trip. (No, they didn’t want to hike with me). You see, we were so busy they just didn’t see how I could schedule it in. I told them I’d make it a sunrise hike (even though I hate those due to hiking in the dark and the cold), meaning I’d be back home no later than 10am, which wouldn’t interfere too much with our day. Well, maybe now we could find time on Tuesday or Wednesday (the only day snow was predicted on the mountain) as those were our late start days.
Then the volcano erupted and changed all our plans. My brother figured the eruption ensured I wouldn’t be able to hike, and let met me know the National Park was closed (our plan for Monday and Tuesday) thinking this would mean I couldn’t hike because the trail would be closed. Fortunately for me I knew Mauna Kea isn’t located anywhere near the National Park. I called the visitors center and Mauna Kea was open. Yes, I could hike all the way to the top, as the current eruption wasn’t interfering with Mauna Kea (although the areas usually erupt together). I saw this as my opportunity and took it! Since we could no longer visit the National Park on Monday I was going to hike while everyone else slept in.
I woke up at 1am. The wind was howling outside. My mom said that was reason enough not to hike because it had been rattling the windows all night and was sure to be intolerable on the summit, but Mountain Forecast said the winds were 5-10mph at the summit, so undeterred I drove to the Mauna Kea visitor’s center.
There were only about 6 spaces in the entire parking lot, with a lot of signage letting visitors know drones were not allowed in the area. When I got there I saw a couple of people in the parking lot with telescopes set up, pointing towards the stars. It was a very clear night, and since there are no big cities on the island of Hawaii and no bright lights to dampen the view the stargazing was phenomenal, even without a telescope.
The visitors’ center webpage (http://www.ifa.hawaii.edu/info/vis/visiting-mauna-kea/hiking.html) had a lot of information about hiking Mauna Kea. A lot of information!!! Most of it would be redundant to someone who regularly hikes 13ers and 14ers. I’d actually say it was overkill, but if you live in Hawaii or are a visiting hiker from sea level you probably could benefit from this information.
I was supposed to sign in at the trail register, but I couldn’t find it? I looked and looked and looked, but in the dark I just didn’t see a trail register. Oh well, my family knew where I was and when to expect me home. The visitors in the parking lot didn’t speak English, so we smiled at each other and I was on my way at 2:30am.
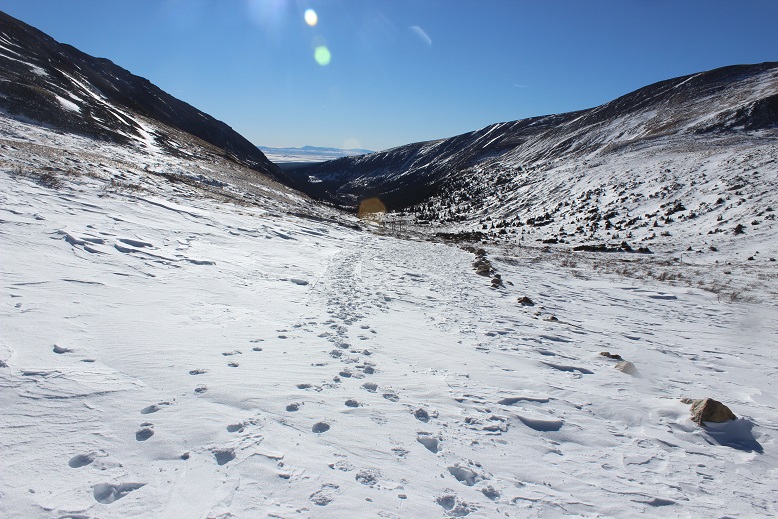
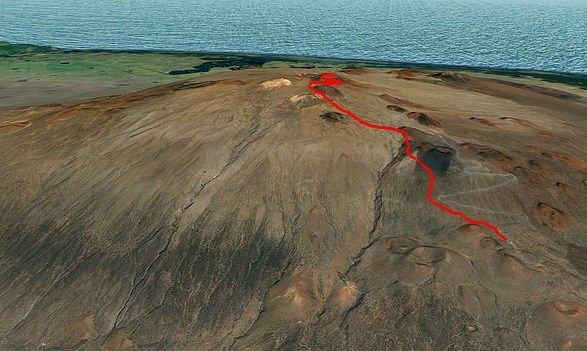
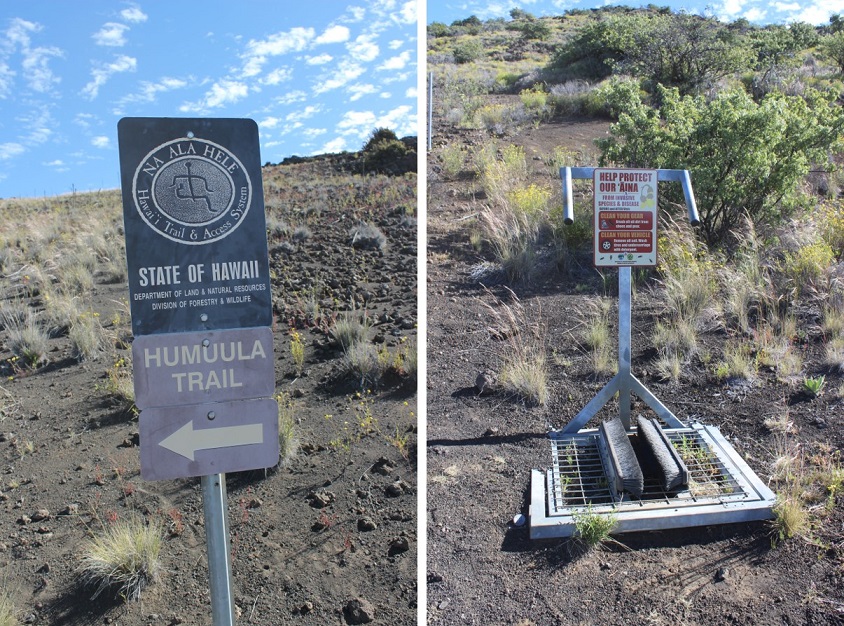
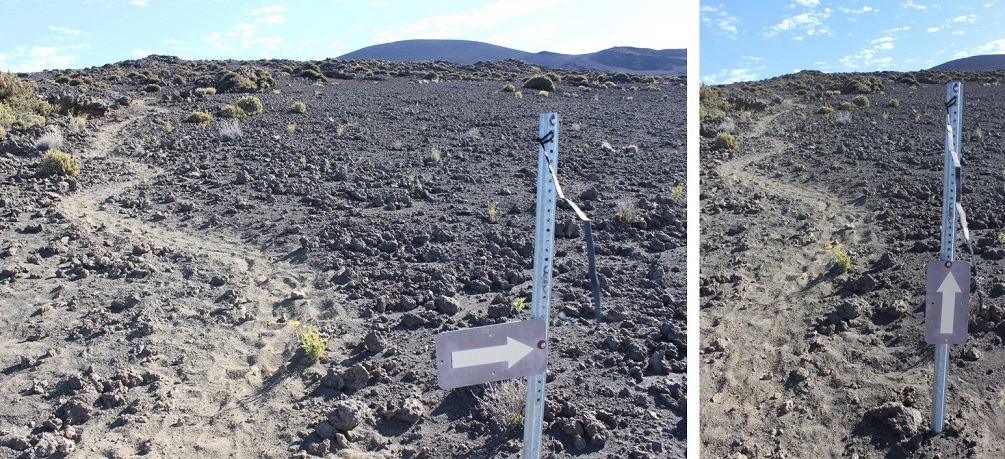
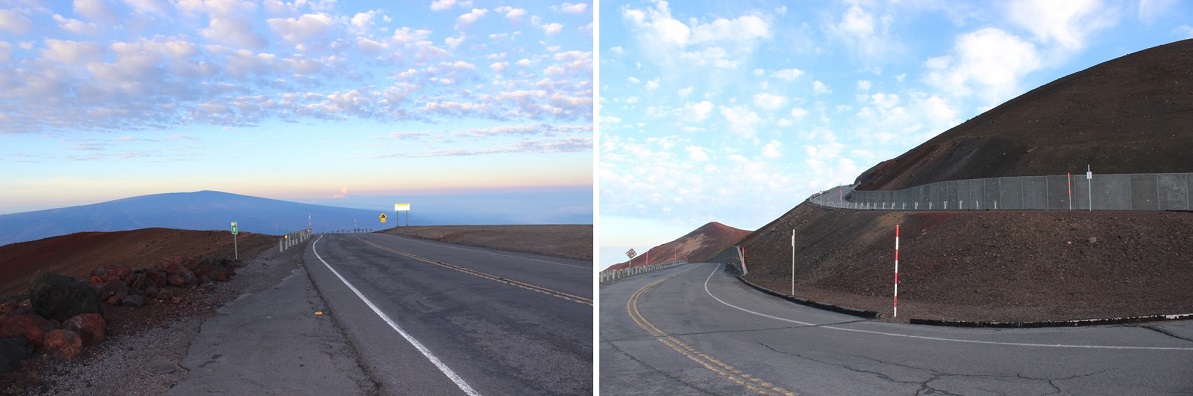
The trail actually starts about 1/10th of a mile up the road from the visitors center. I crossed the road and followed a 4WD trail to the left. The entire trail is located above treeline. It starts at 9200’, but since it’s actually a volcano very little grows on this mountain. I followed an old 4WD trail in the dark that led me to a station set up for me to clean off my shoes. I did so. This was the true start of the trail.
I looked for a trail register here as well but didn’t see one. I hiked about half a mile and came upon another sign. This one was broken and missing most of the information. Just imagine seeing this sign in the dark! I wasn’t sure which way to go, as both right and left seemed like legitimate trails. Actually, they were, but one went up the mountain and the other went back and connected with another road. I took the path to the left (which ended up being the correct path: I fixed the sign on my way down).
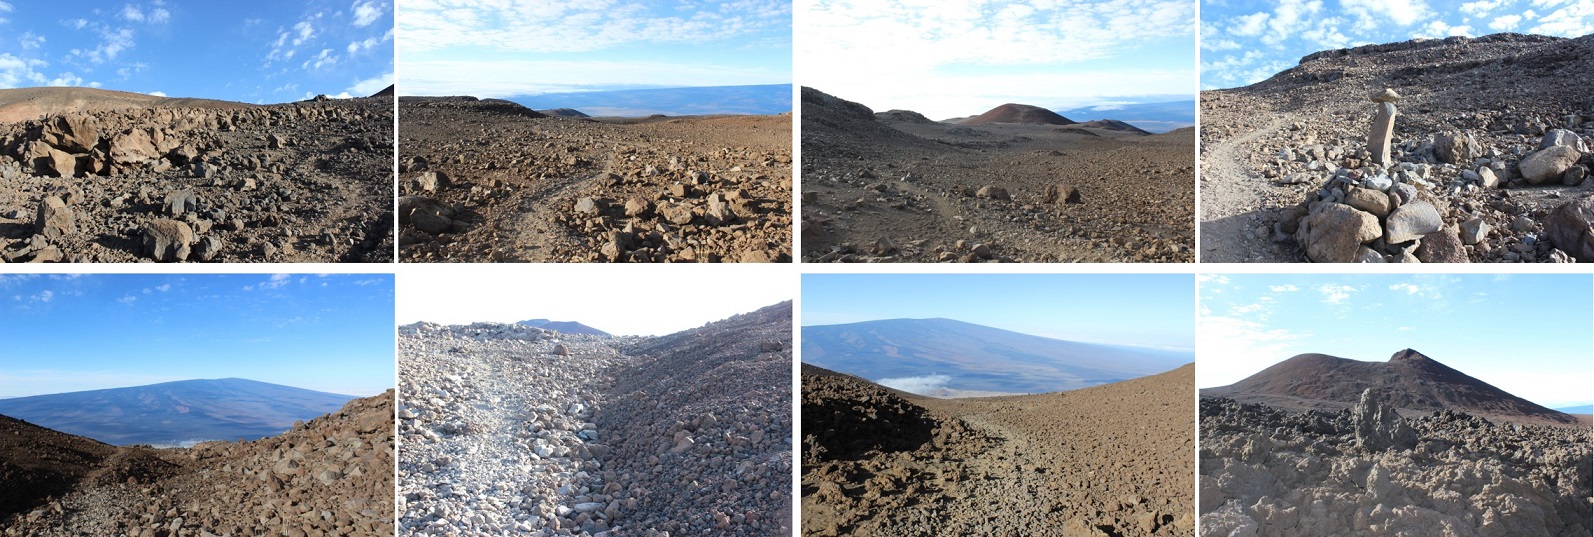
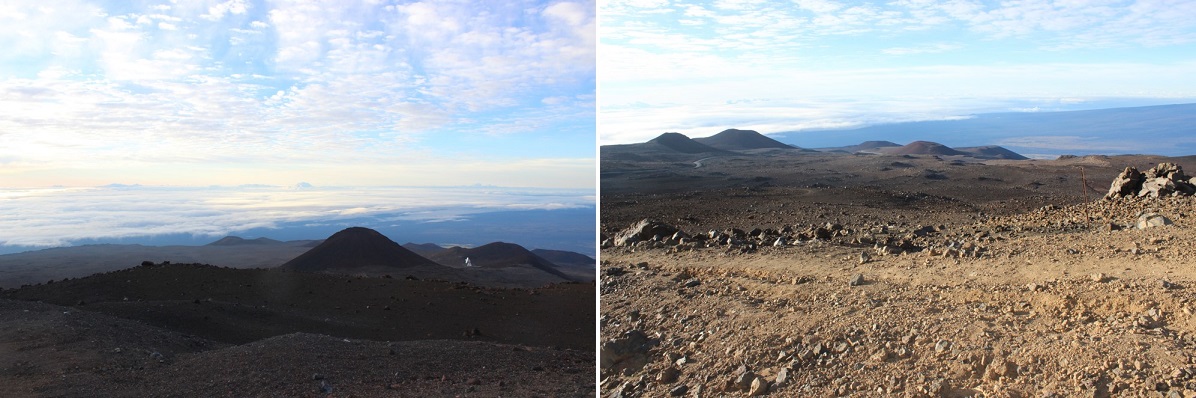
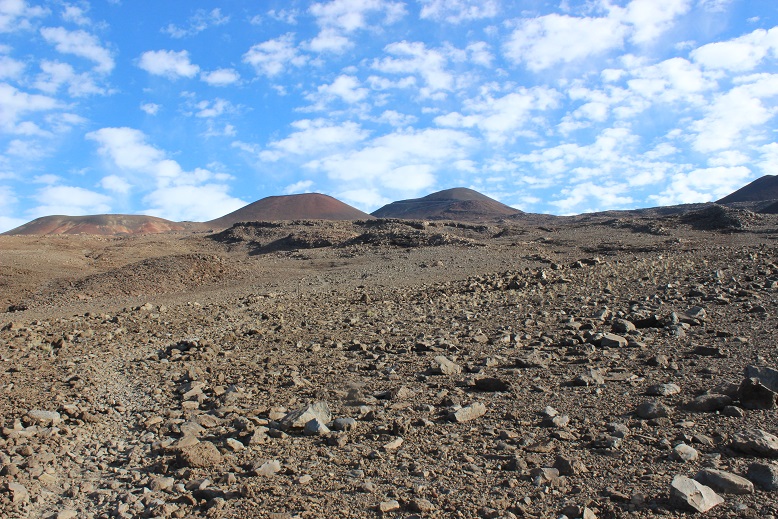
From this point on the trail passed through several different zones of lava, all with varying degrees of rock-like ground cover. It started out as a very sandy beach-like scree
And slowly changed into small rocks, and then medium sized rocks, and then large rocks. The terrain kept changing and changing as I hiked. It was difficult to stay on the trail, as in the dark everything looked the same. There was no clear trail visible in the sand and gravel. On the way back in the light of day however a trail was clearly visible.
There were posts in the ground every 100 yards or so, indicating the trail. The posts let me know I was on track, but varied in where they were placed: sometimes they were in front of the trail, sometimes behind, sometimes to the left or the right. But as long as I was near a post I knew I was in relatively close proximity to the actual trail.
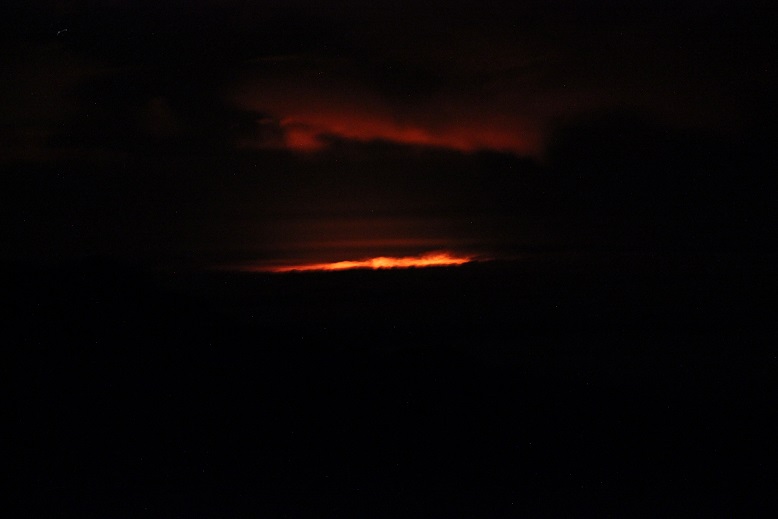
After hiking for about 2 miles I looked back and saw a glow in the distance. At first I thought I was looking at the town of Hilo, but that just didn’t make sense. Hilo should have been further north, and the lights reflecting off the low lying clouds looked more red than what should have been yellow street lights.
The further I hiked the more I kept stopping and looking behind me. Eventually it became clear I was looking at the glow of the volcanic eruption. Wow! What a sight to see! The horizon came into focus and I could see the red glow of the lava in the distance.
Did I mention it was cold? And windy! And really, really cold. And that wind!!! I’d brought my warm weather gear and North Face jacket with me on this trip, getting funny looks from employees at the Kona Airport as I wore it because it didn’t fit in my luggage. But I was praising myself for my foresight now. In fact, even with my snow gloves and knit hat I was shivering. I kept wanting to turn and look around at the lava glow but was too cold to stop and truly appreciate the view for any real length of time. My lips were frozen and my cheeks were numb. I wished it would warm up! I really didn’t like these sunrise summits: All this hiking in the dark and cold takes its toll on a hiker.
This hike seemed to go on and on and on with no clear gain in view. Everything looked the same in the dark: flat and still yet full of shadows. I was gaining in elevation, but it didn’t seem all that drastic. All I could think about as I trudged on was how wonderful it would be to have my family’s blessing and support on these hikes, instead of their constant fear and displeasure each time I go. I shouldn’t feel guilty every time I go on a hike. I’ve come to the realization I’m not going to change their views, so it’s something I’ll need to continue to enjoy for my own sake, and try my best to drown out their disappointment.
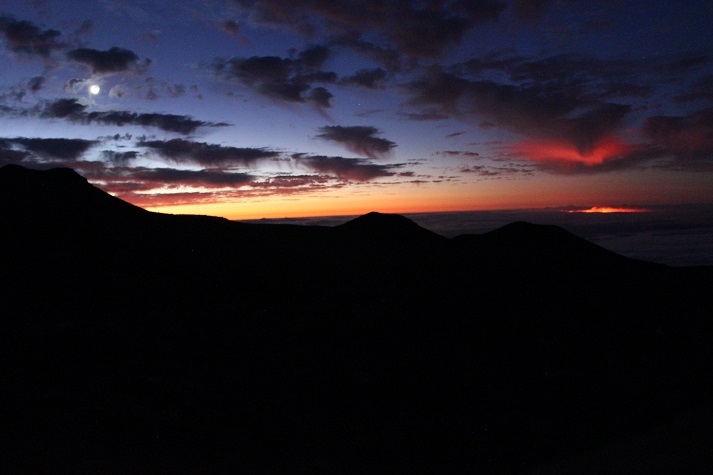
As the horizon started to lighten I saw the headlights from two cars come into view. There’s a paved road you can take to the summit (if you take a special tour and get a pass) that parallels the hiking trail for a bit. These groups must have been visitors on a sunrise tour.
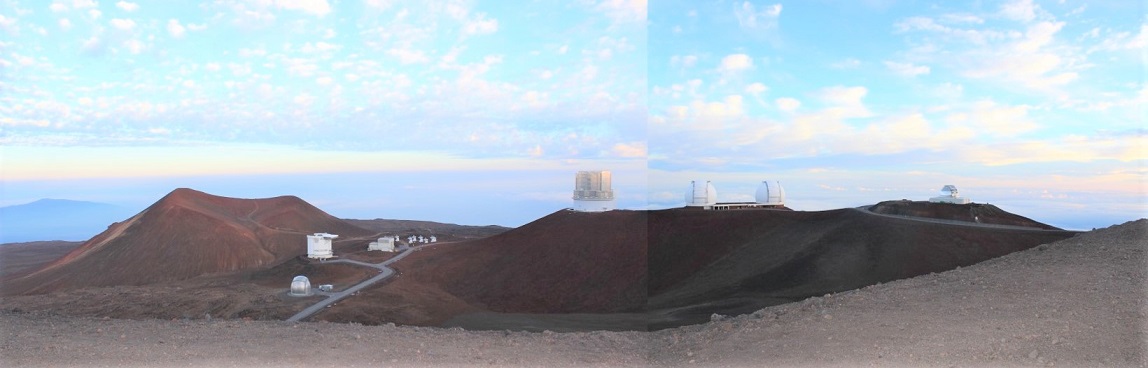
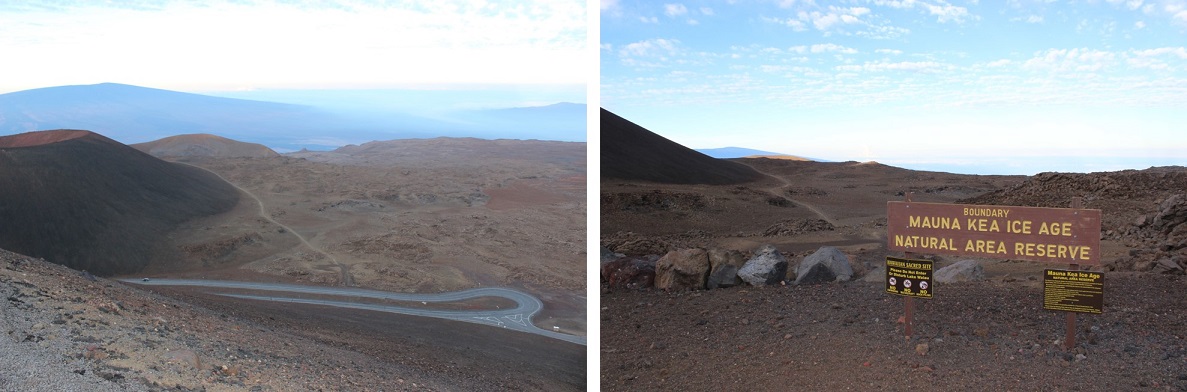
The end of the hike passes through the Mauna Kea Ice Age Natural Area Reserve, and then follows the paved road for the last mile to the summit.
This paved road also takes you to the Observatory.
This was the easiest part of the hike by far: hiking on a paved road is much easier than hiking on uneven gravel. It was my goal to make it to the summit before the sunrise, and it looked like I was pushing it. The trail map said it was 6 miles to the summit, but it had obviously been longer than that, and my timing was off for a sunrise summit.
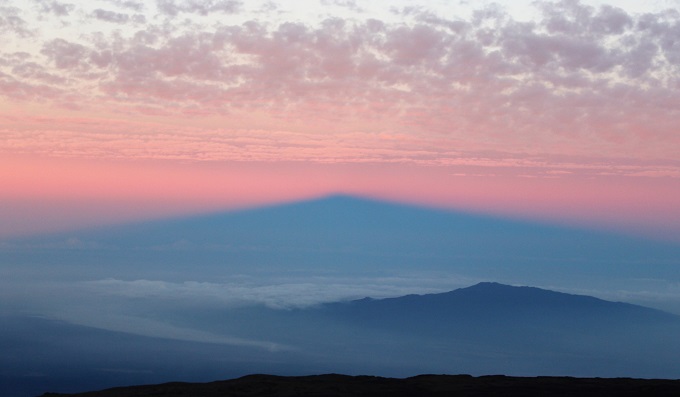
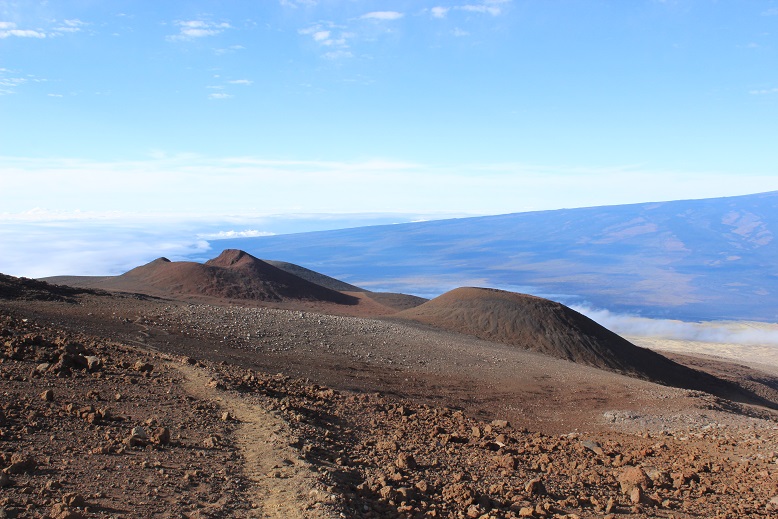
I looked to the left and could see a mountain in the morning light. This picture explains it all: the mountain in the middle is not a mountain at all, but the shadow of the volcano I was hiking, Mauna Kea, in the sunrise behind me.
The sun was rising so I quickened my pace and made it around the last curve. But it wasn’t the last of the hike. I still had a little ways to walk off the paved road to make it to the true summit. This was easy to navigate, only made difficult by the wind.
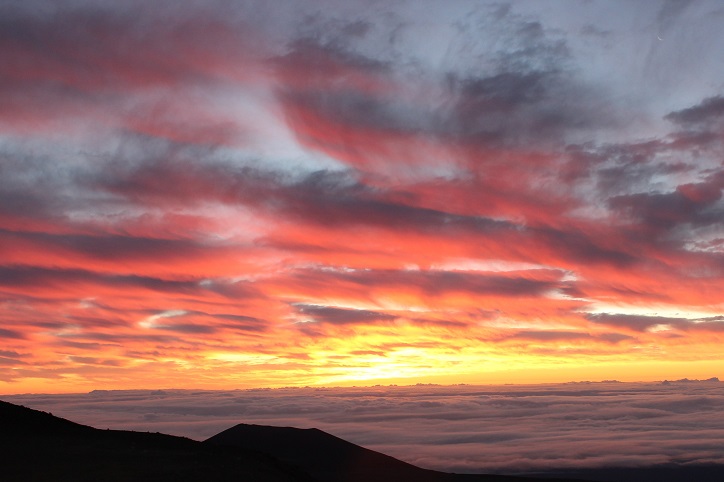
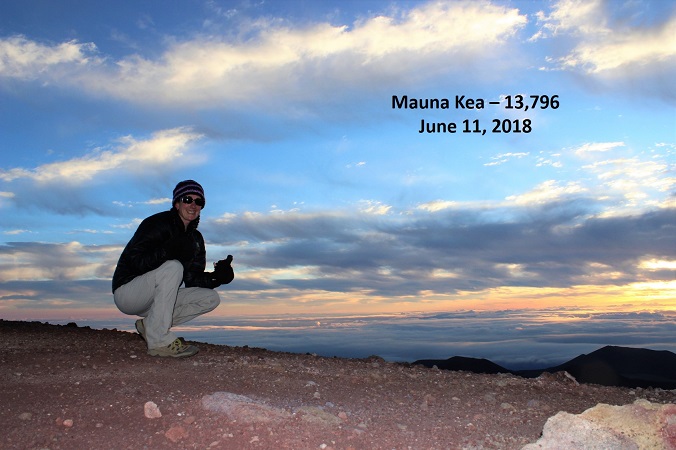
I summited at 5:30am, just as the sun was beginning to rise
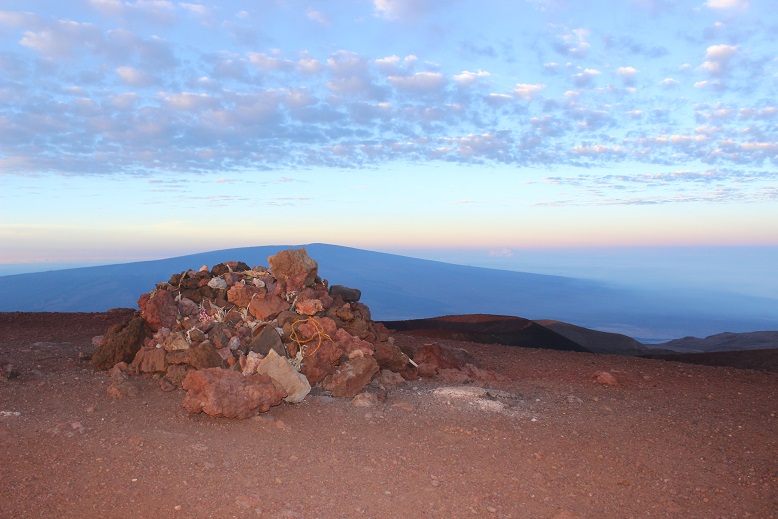
There was a shrine at the summit. I respected the shrine by not standing on it or even touching it, even though it would have been extremely helpful in taking my summit photo.
This site has religious significance to the Hawaiian natives, including who’s allowed to stand on the summit so I tried to remain as respectful as possible.
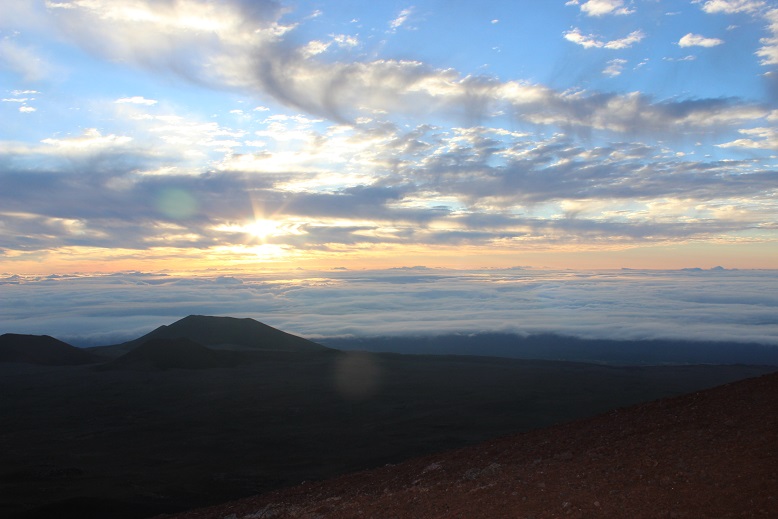
At this point I was above the clouds, looking east towards the ocean.
It was very, very cold and the winds were probably around 40mph, much faster than the 5-10mph predicted. I was completely numb, and headed back down quickly. There were two couples on the paved road looking at the summit, dressed in parkas and huddling together to keep warm. They were respecting the ancient rules and weren’t summiting today (you must start hiking at the bottom to stand on the summit).
Here’s a good picture of where the trail starts back down at the junction of the paved road. If you look at the picture on the left, just as the trail ends it actually gives you the option of turning right and visiting an alpine lake.
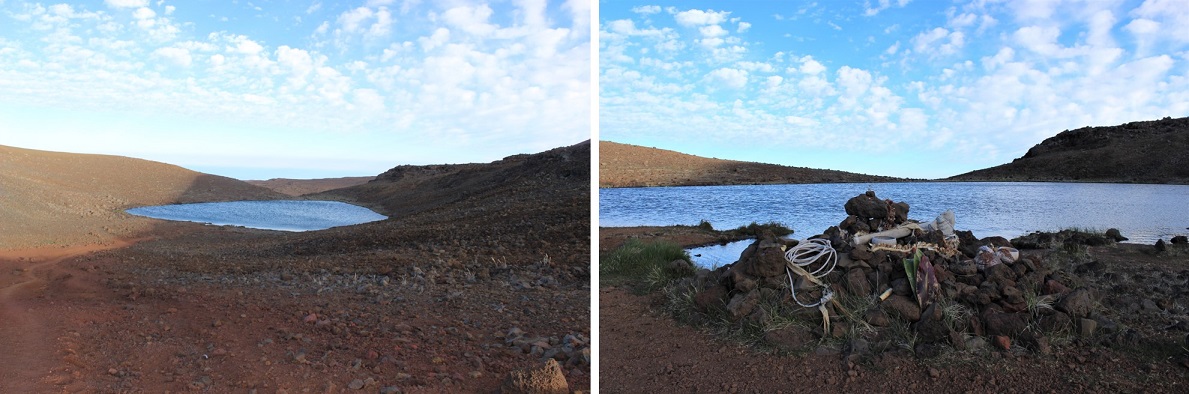
This lake is named Lake Waiau, and sits at an elevation of 13,020’. This lake is also a sacred site. Waiau means “swirling water” in the Hawaiian language, and this phrase is probably meant to evoke the myth that Lake Waiau is the portal to the spirit world or underworld. In ancient times, the ali’i, Hawaiian royalty, would throw the umbilical cord of their first-born son into the lake to ensure their future success as a chief. When I visited the lake today I saw a shrine I expect was used for this purpose.
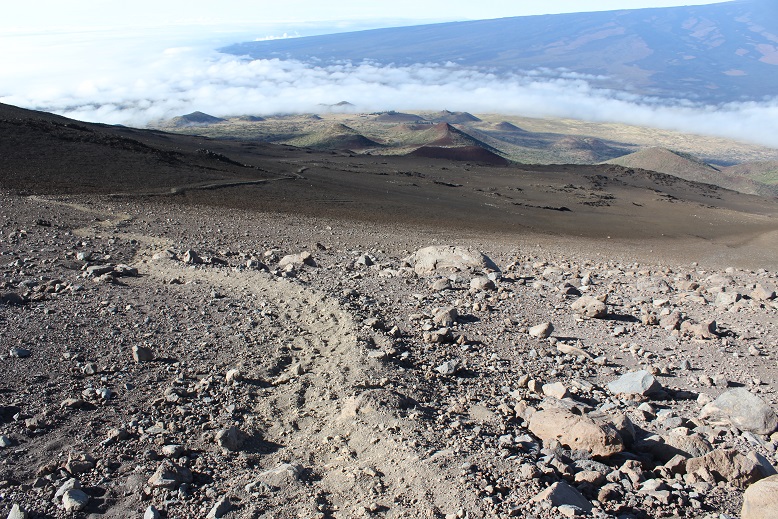
I turned around and descended through the varying degrees of decomposed lava. In the light of day the terrain looked like a moonscape, dry and barren with a large boulder thrown in here and there as if placed by an explosion.
There were several calderas in view, and I thought once again of how Mauna Kea usually erupts simultaneously with Kilauea. There had also been numerous earthquakes on Mauna Kea in the past few days, so I crossed my fingers I’d make it safely off the mountain before another earthquake occurred (side note: several occurred during our stay, with the largest registering 5.4: another eruption is eminent).
I turned around and looked back at the summit, in the light of day clearly being able to see the paved path to the top.
I stopped here to take a quick video of the landscape
The final descent took much longer than I remembered it taking to hike up. It was much steeper hiking back down than I’d remembered as well. I could see the marine layer coming in from Hilo and the rest of my path down to the visitor’s center. If you look closely here, you can see there isn’t a shadow being cast by the sun, but different colors of lava from separate eruptions flowing into one area.
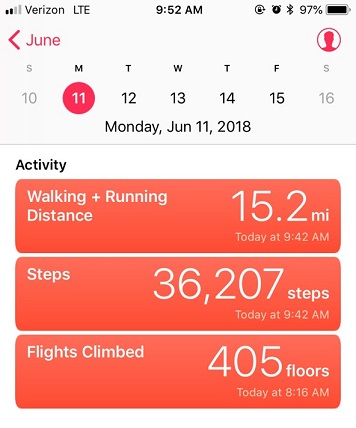
I fixed the broken sign and made it back to the visitors center at 8:30am, making this 15.2 mile trek of 4500+ feet in elevation gain in 6 hours. The website information page says most fit hikers complete the hike in 8 hours. I was feeling pretty good about myself!
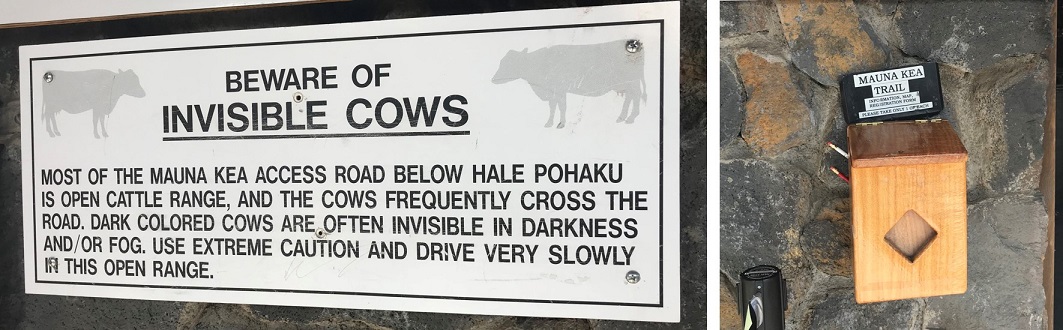
I came back here the next day for the stargazing, and talked with the rangers about their registration box. This was it, located as far from the parking lot as possible, adjacent to the front door around the back of the building. This doesn’t look like any hiker registration box I’ve ever seen, but for those of you intending to take this hike here’s what it looks like. It’s right below the “Beware of Invisible Cows” sign…
I’m glad I did everything possible to make this hike possible, even though my family wasn’t on board with the whole thing. It was truly worth the experience!