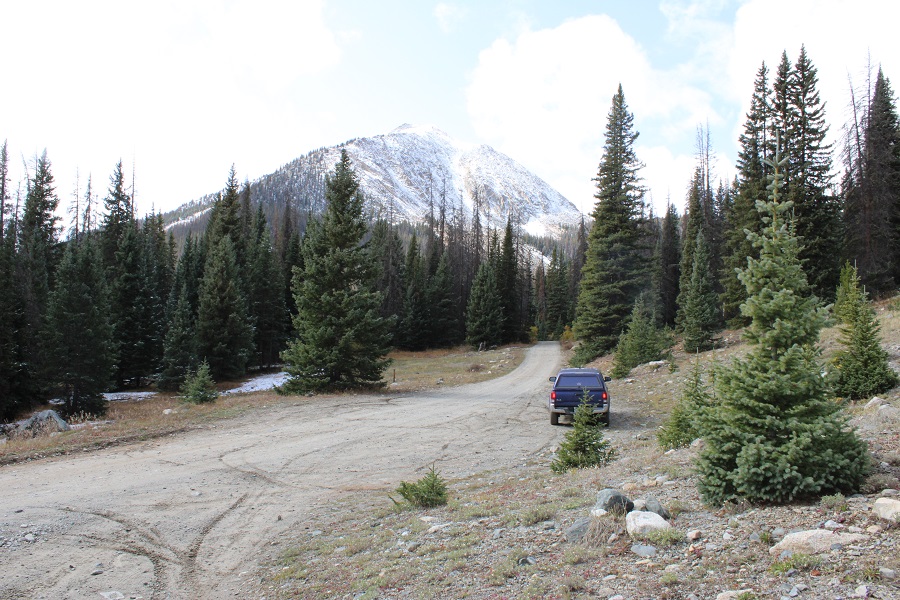
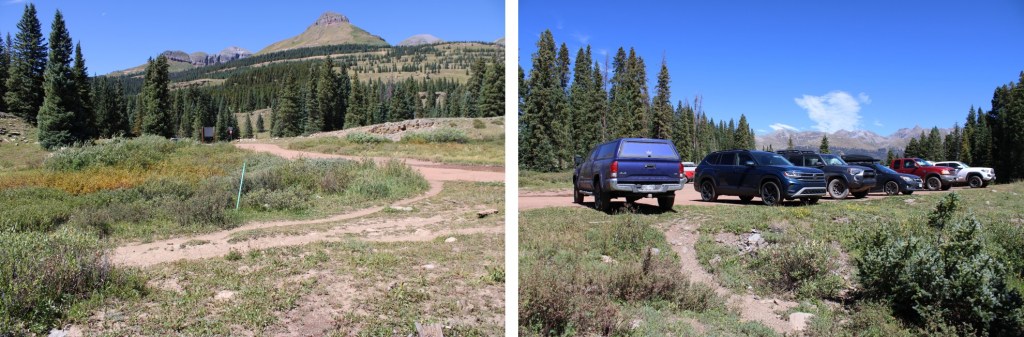
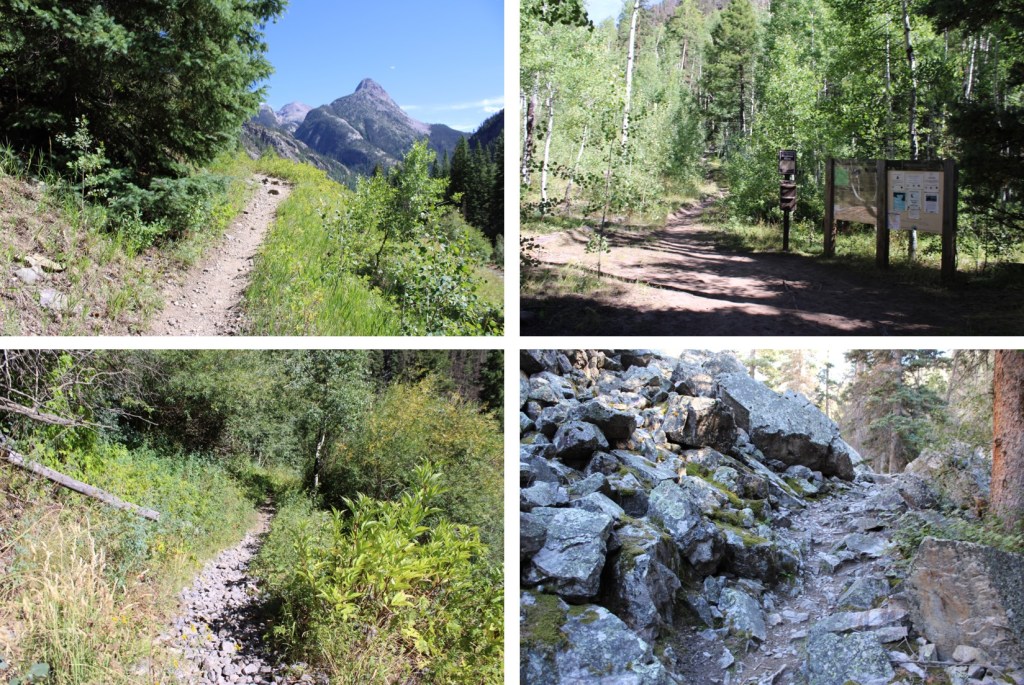
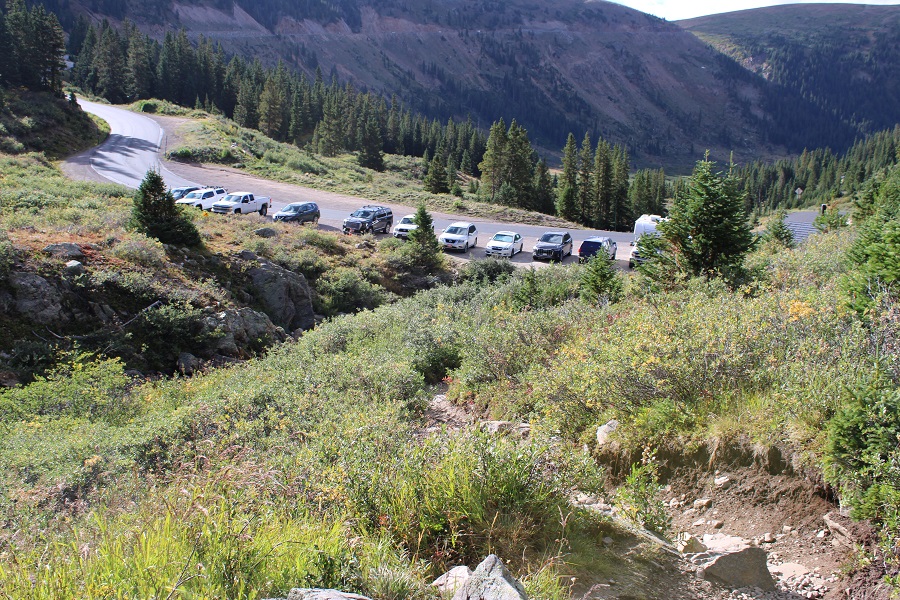
I parked at 10800’, at the junction for 344/349 (Grassy Gulch Road). It’s an easy 4WD road to get there. I have a stock Tacoma, and while the clearance was nice, I never needed to put it into 4WD to make it up the road. There’s an upper trailhead as well, on a more intense 4WD road, with a nice dispersed campsite just before it at 11950’. If you drive to the upper trailhead, the RT Length is approximately 5.8 miles, with 1890’ of elevation gain.
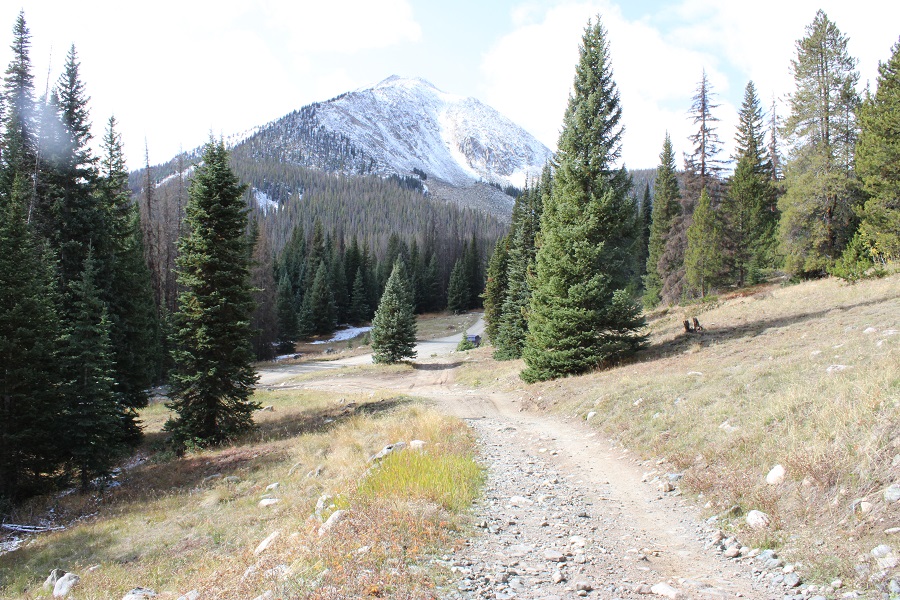
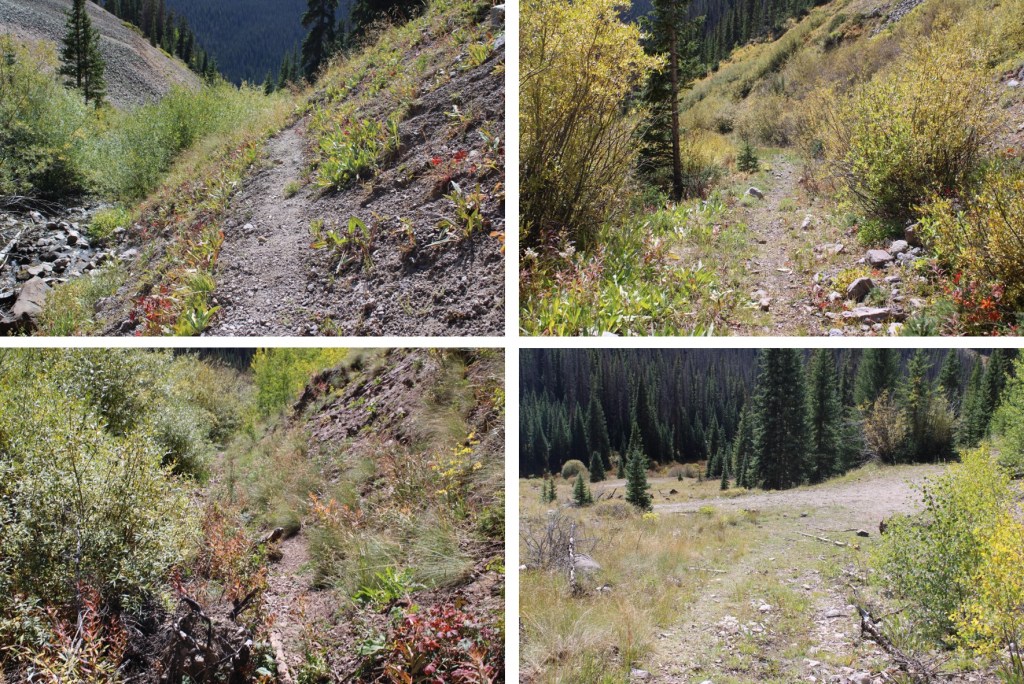
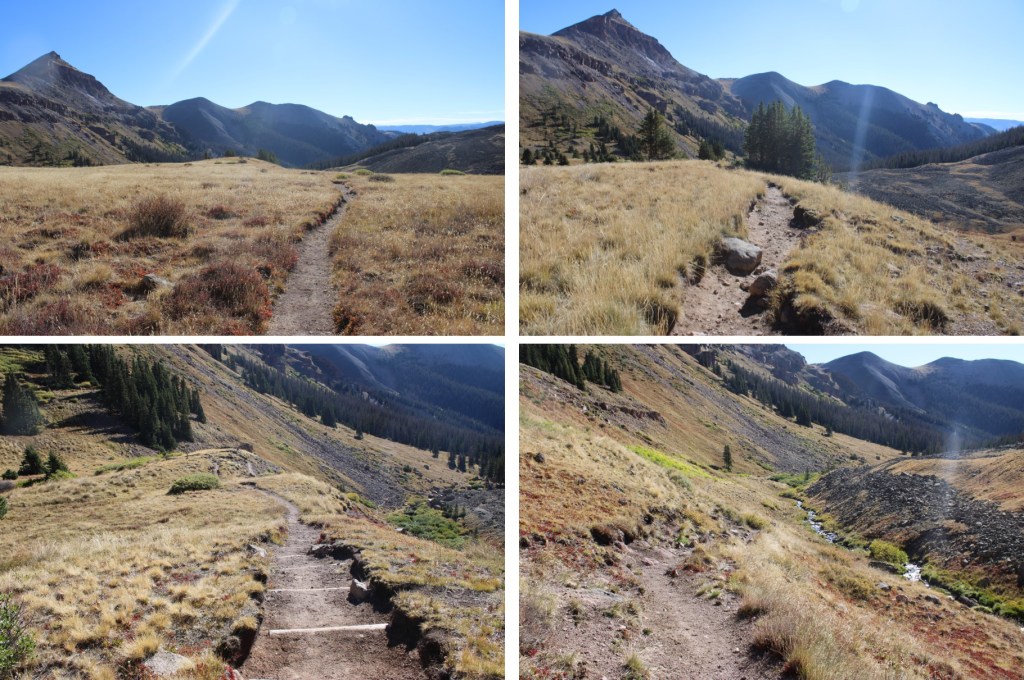
I was on the trail at 6am, following Grassy Gulch Road.
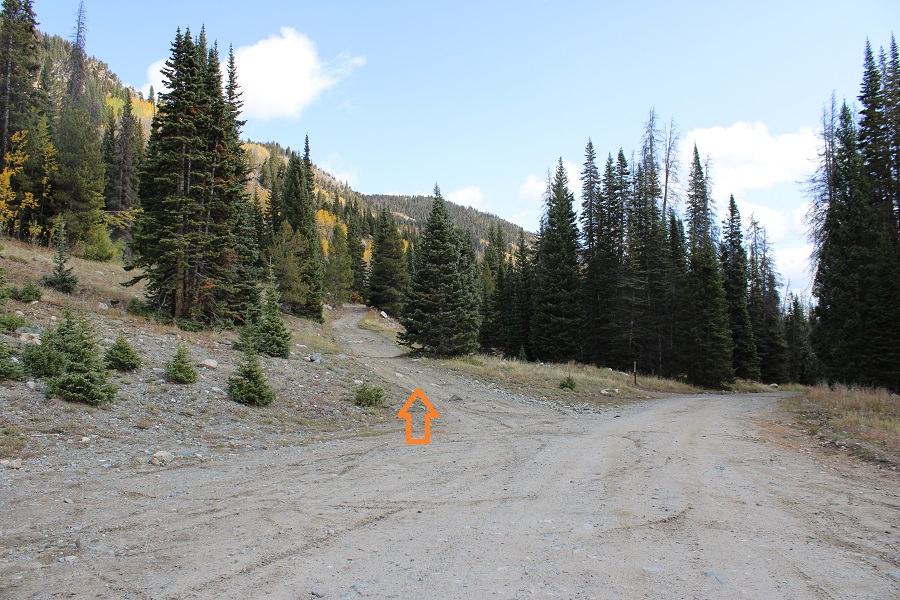
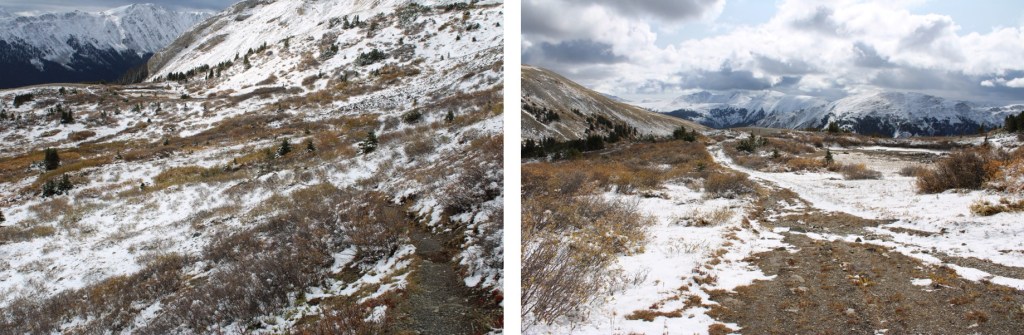
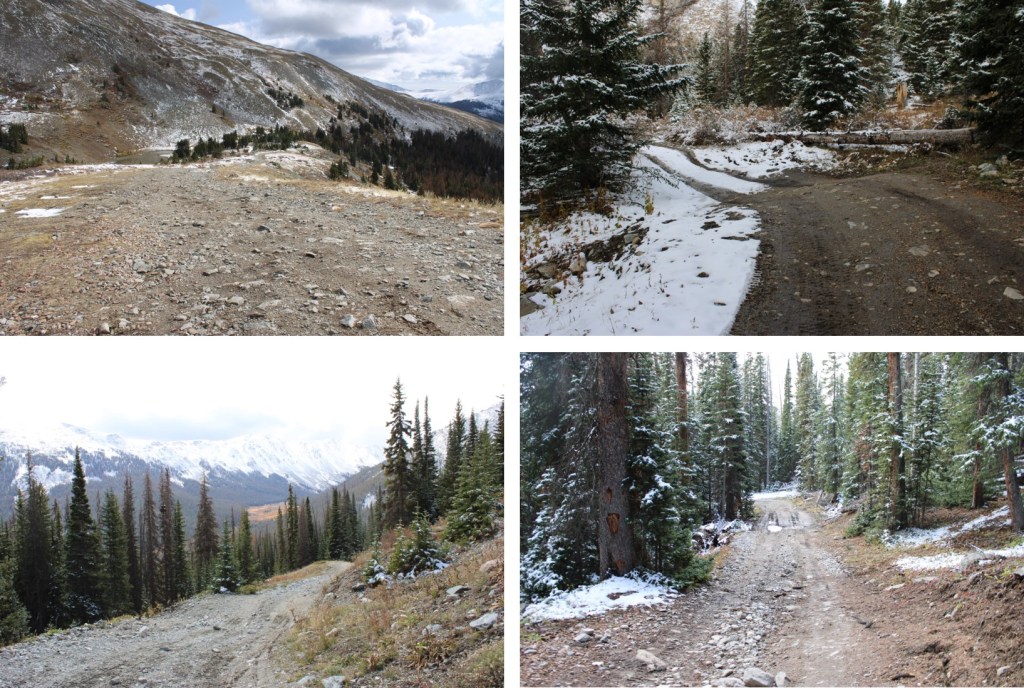
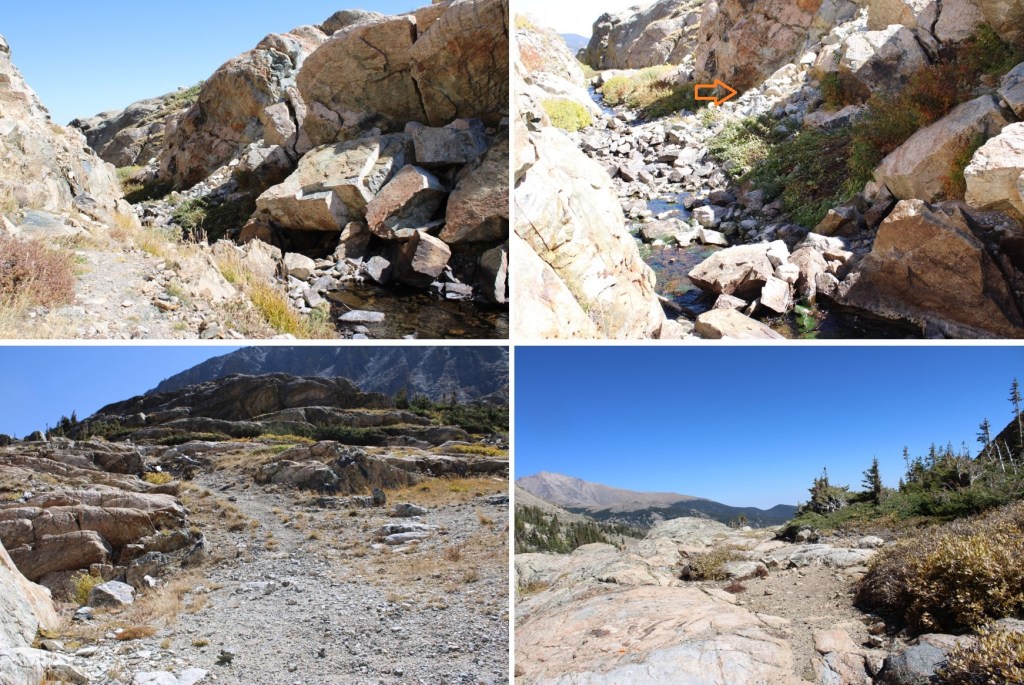
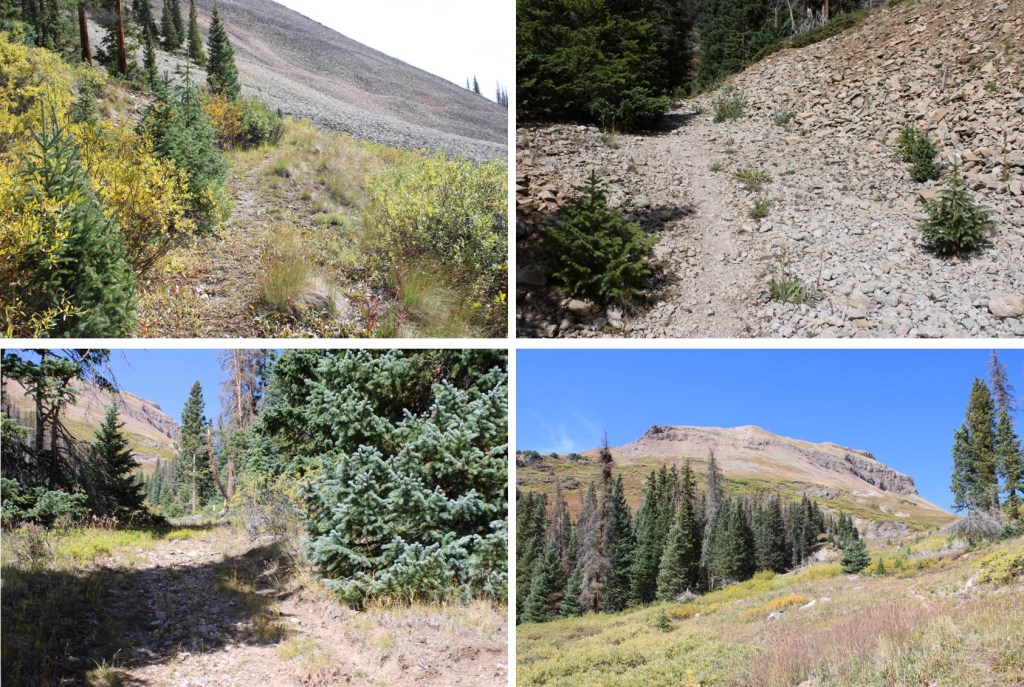
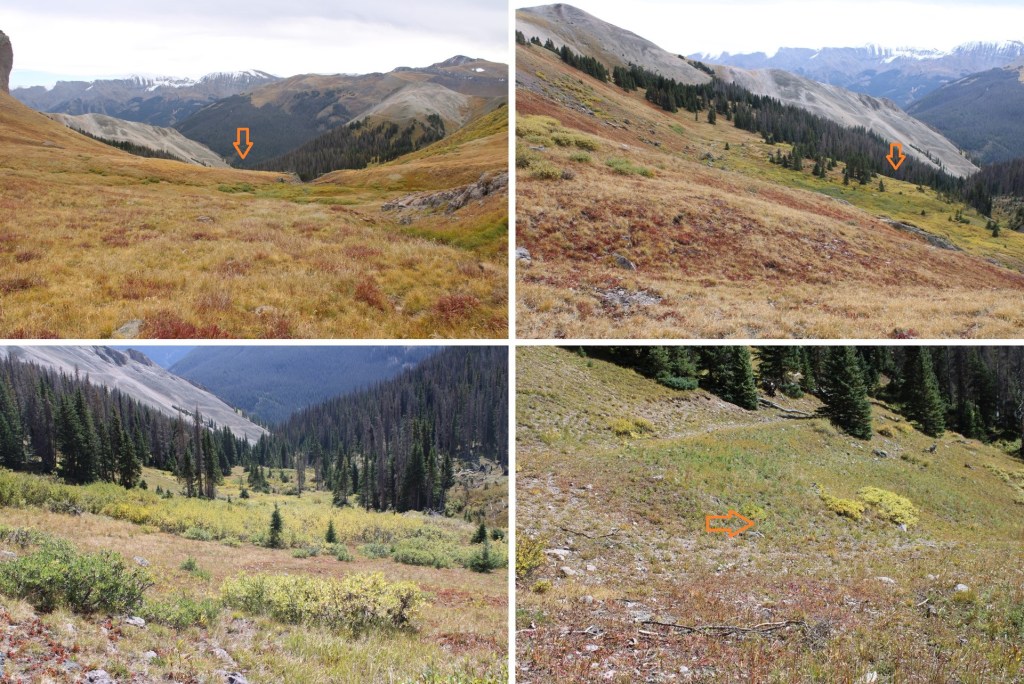
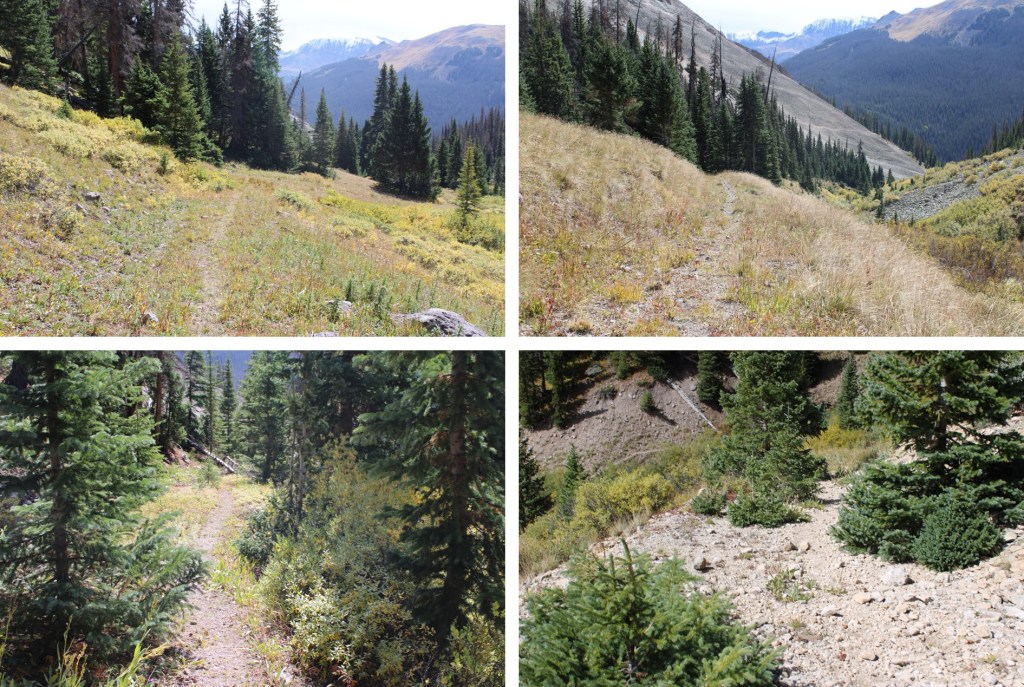
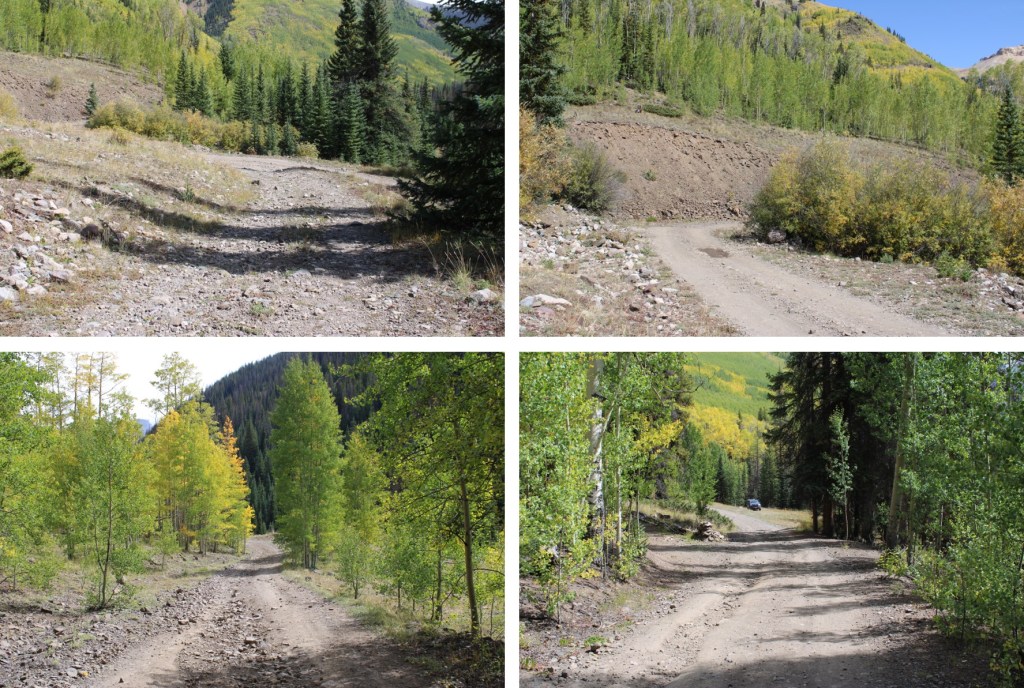
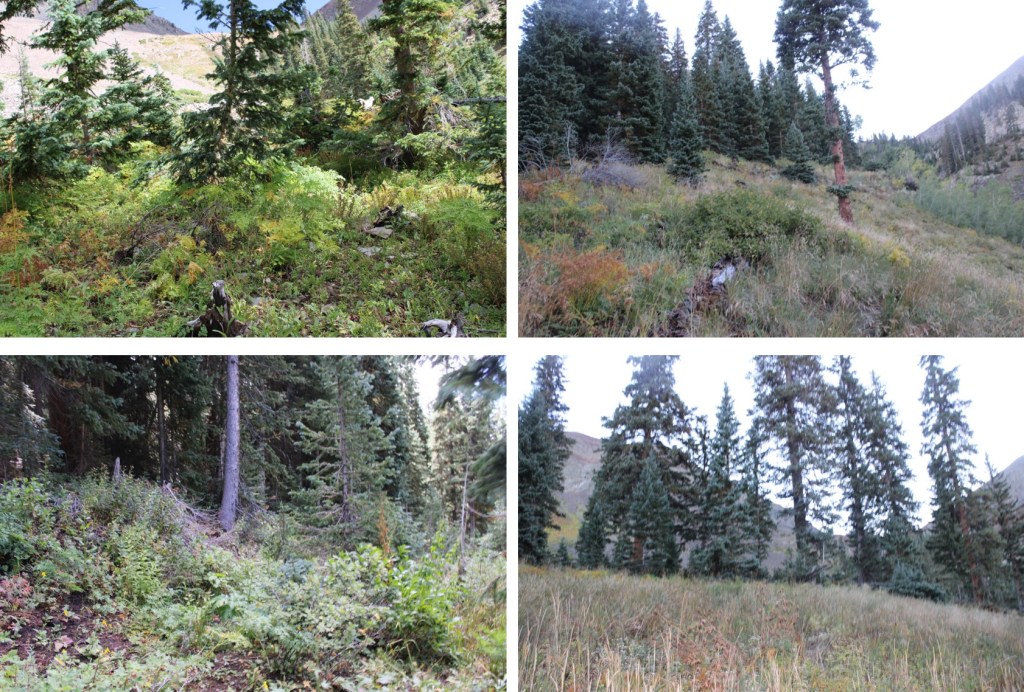
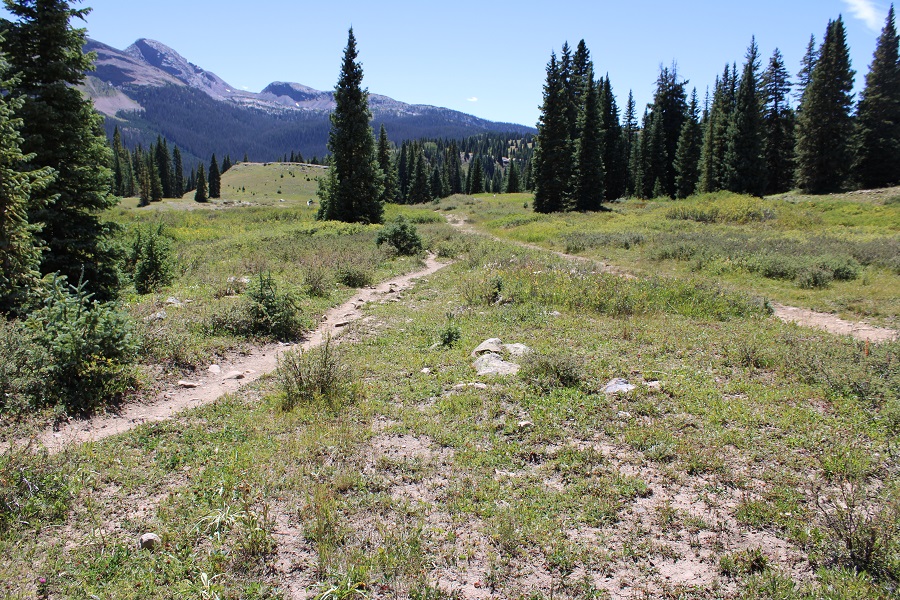
I followed this road to treeline
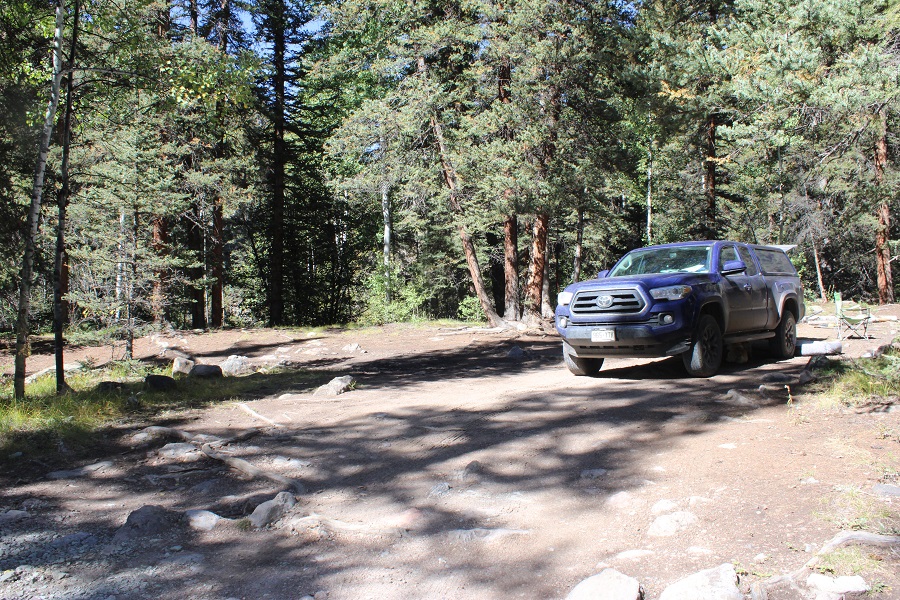
Here’s a picture of the dispersed campsite at 11950 (to the left):
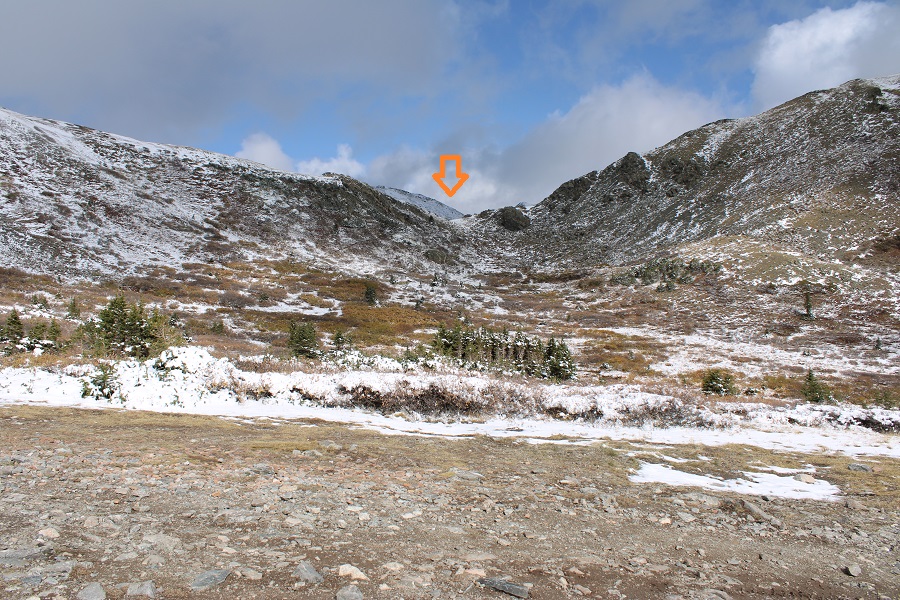
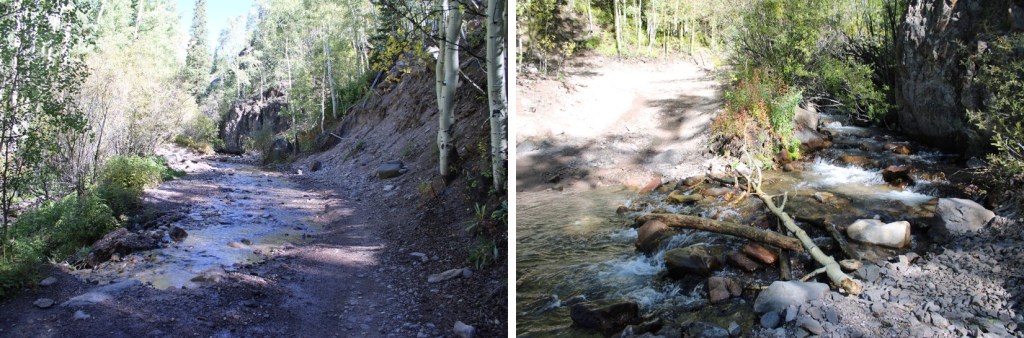
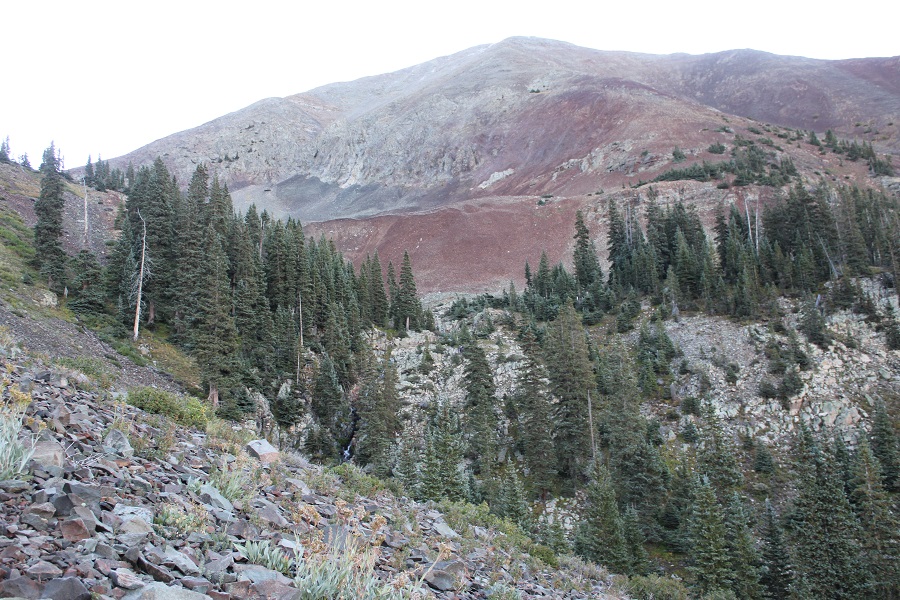
I followed the road up to 12130’
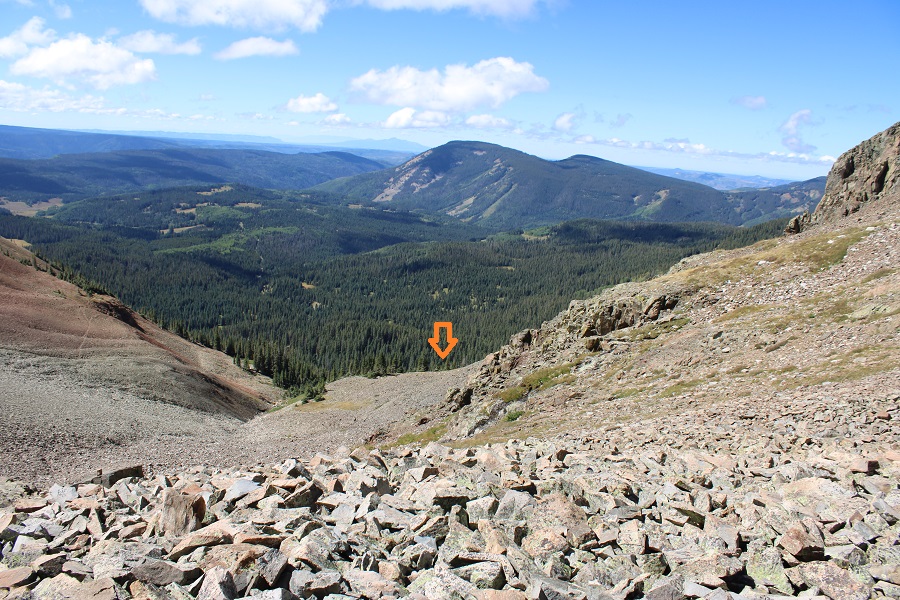
I was headed here
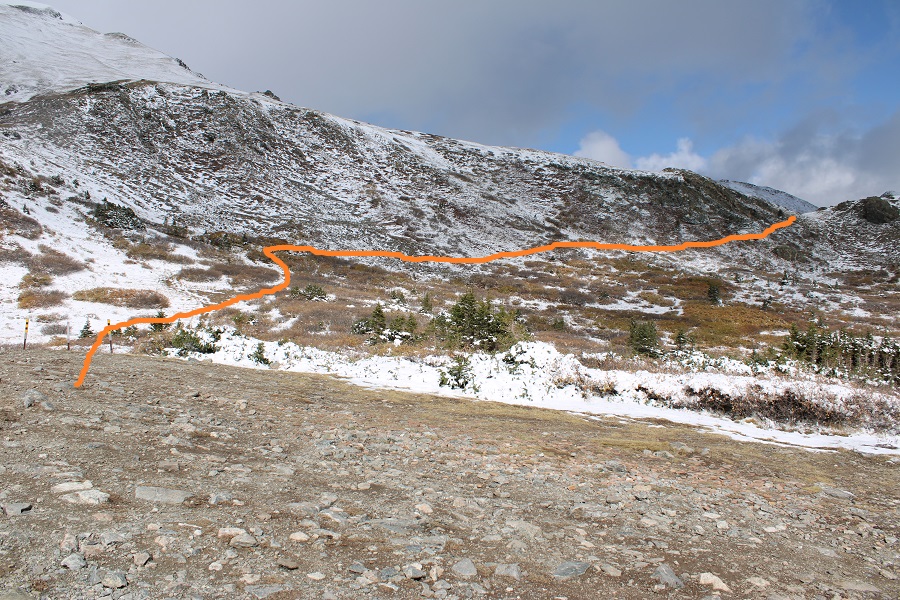
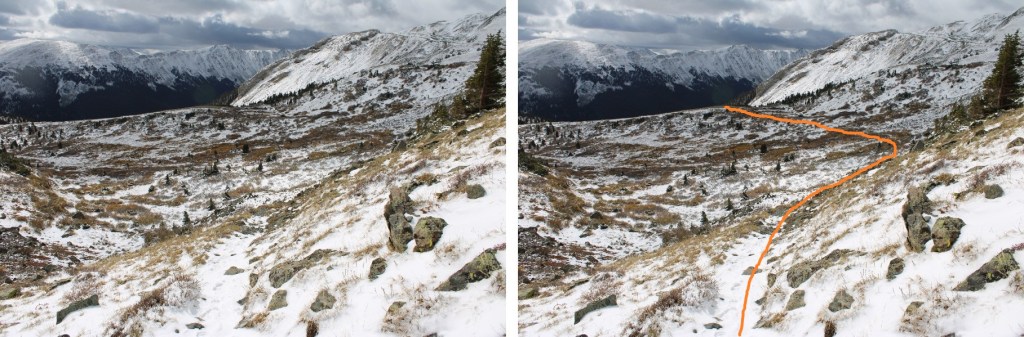
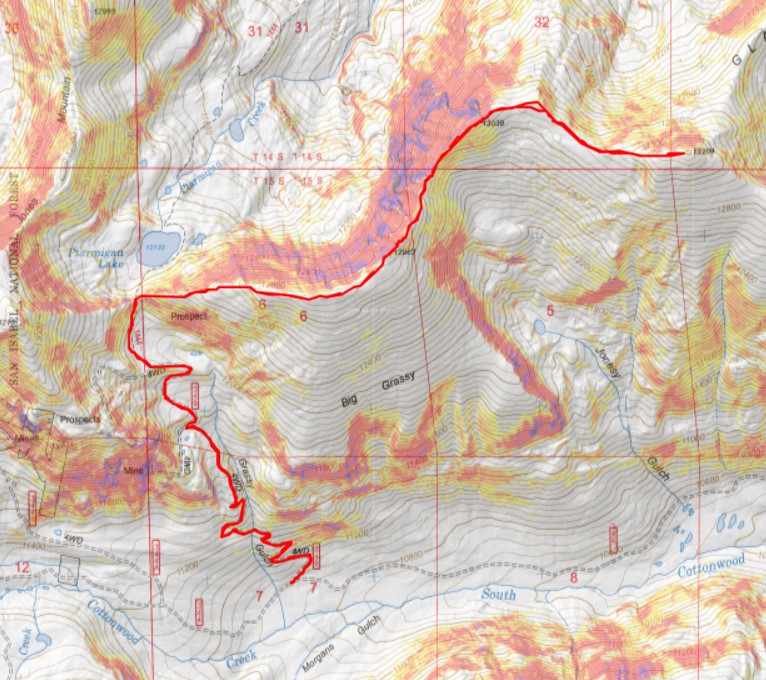
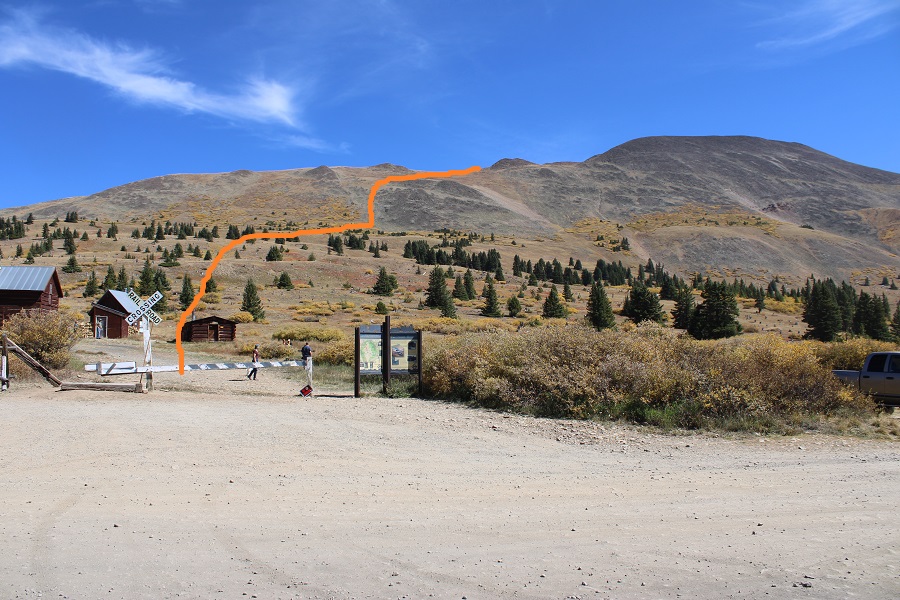
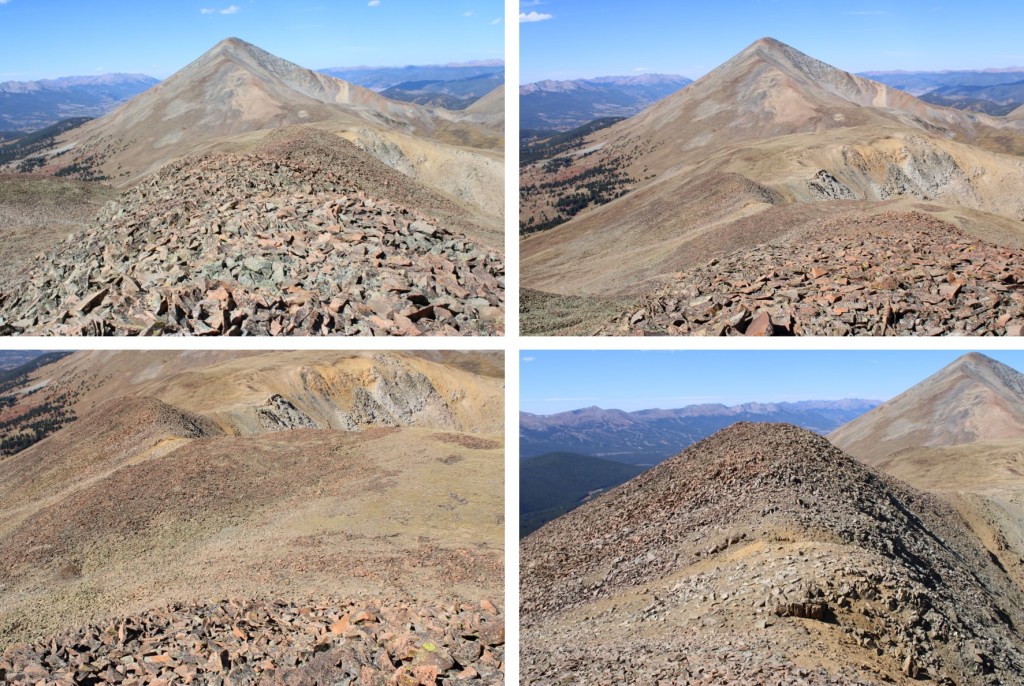
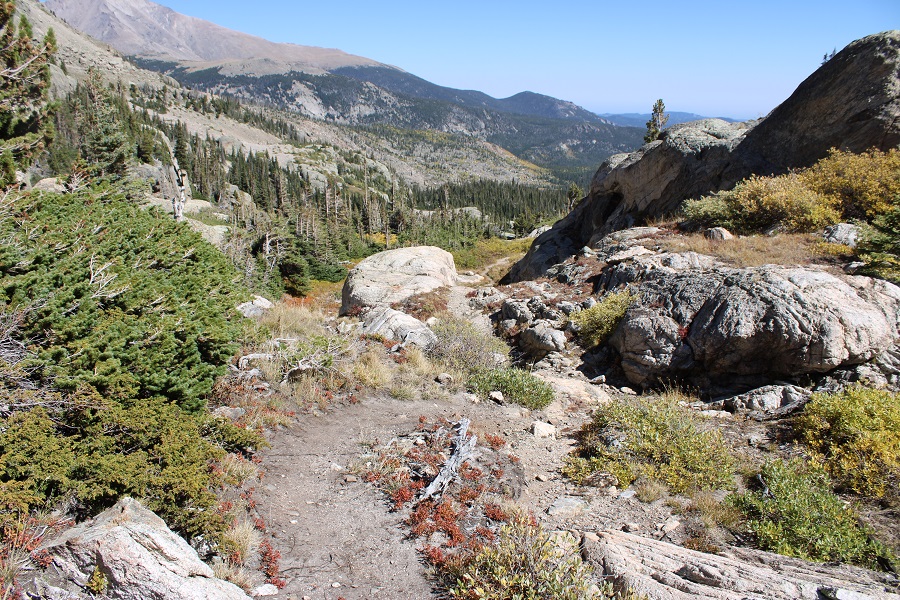
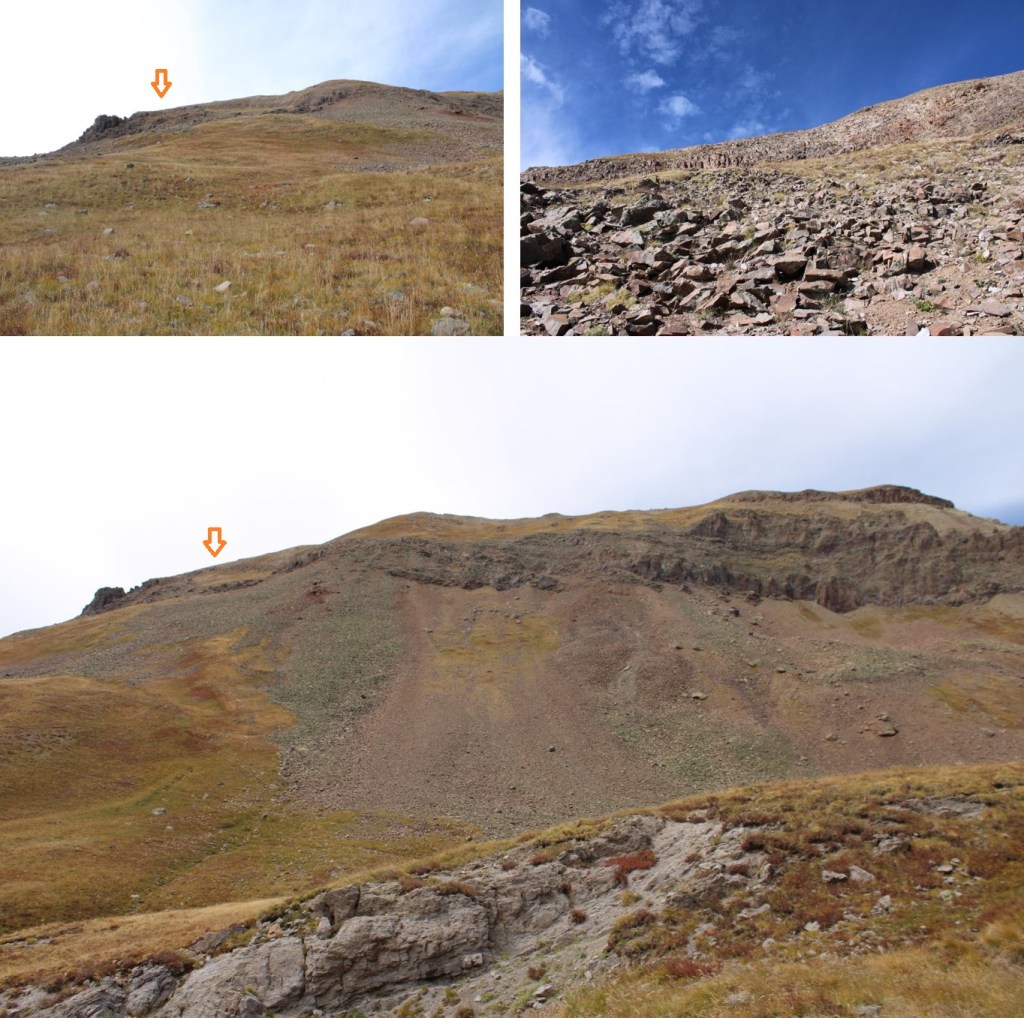
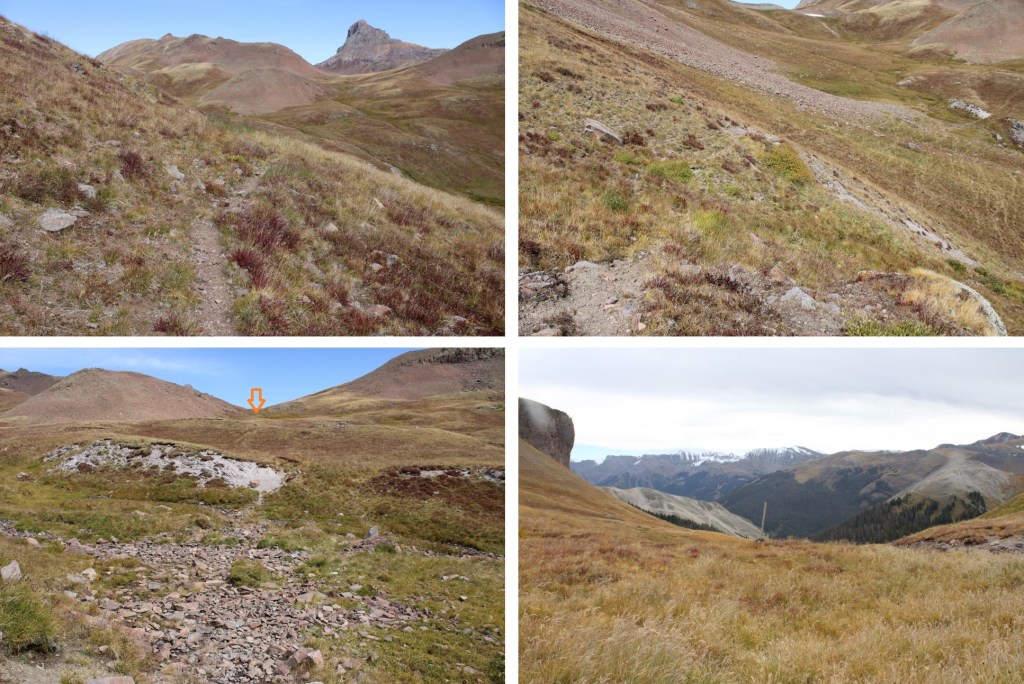
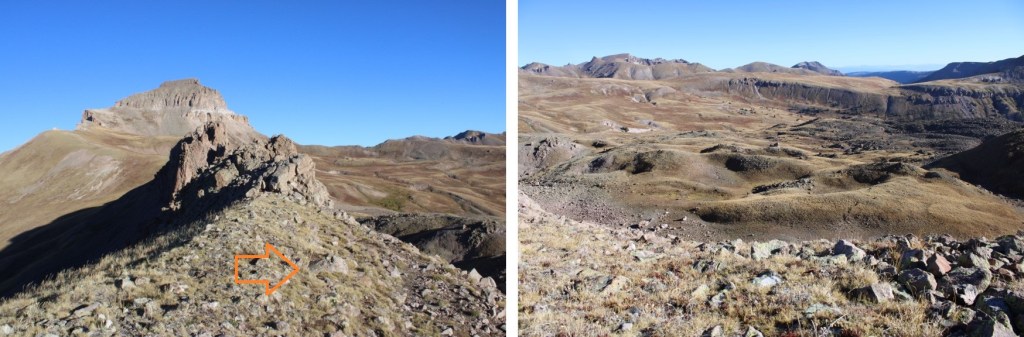
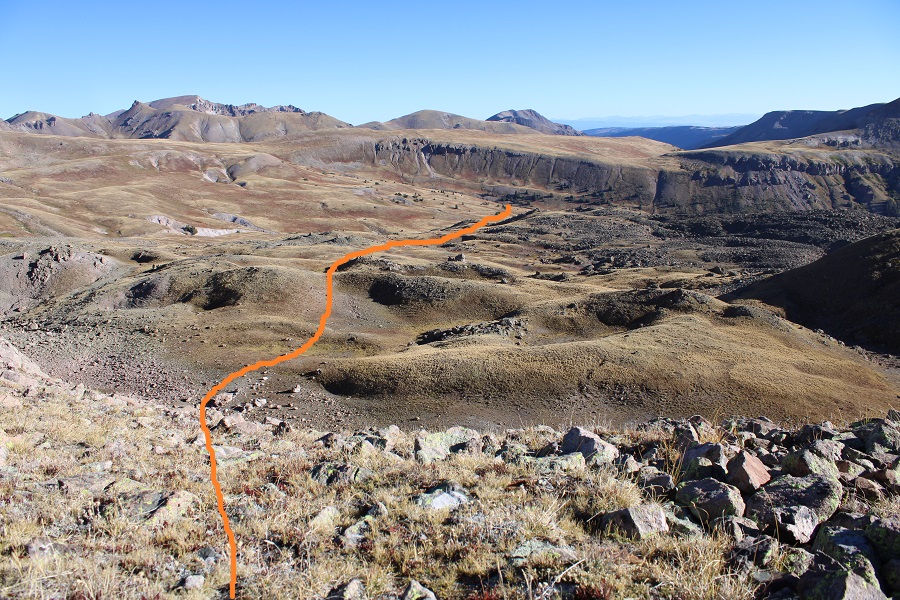
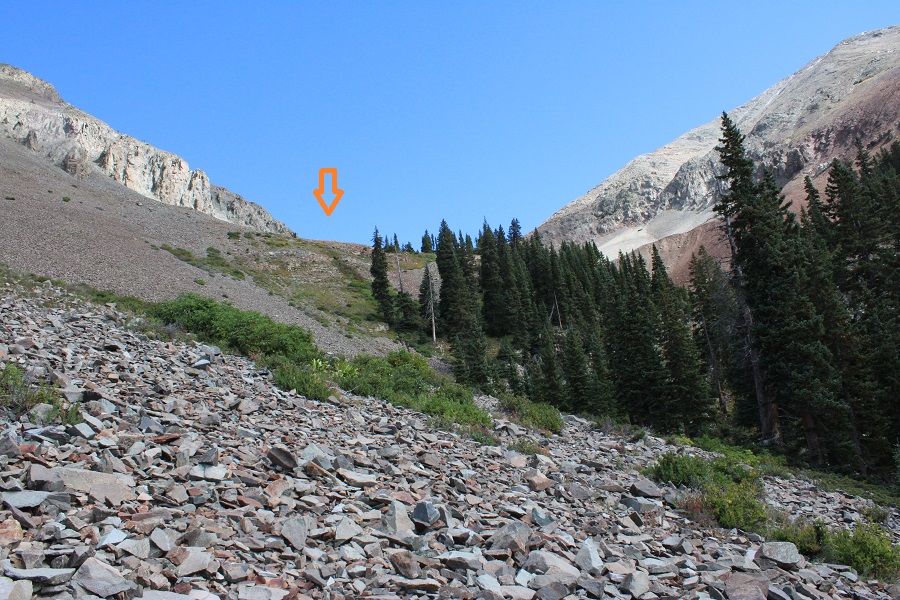
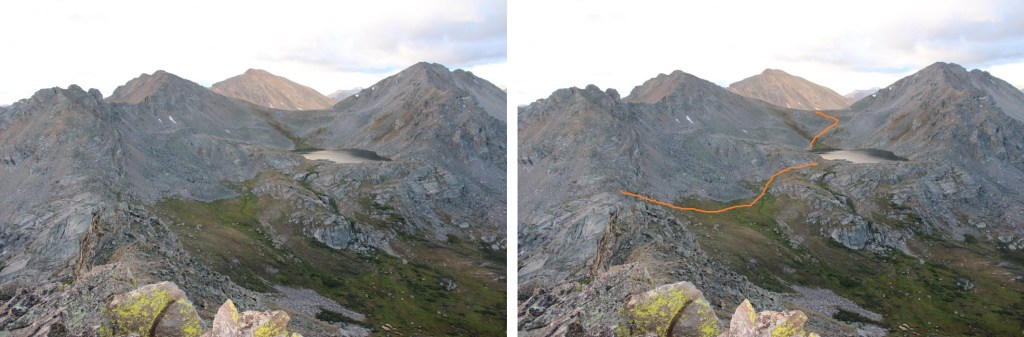
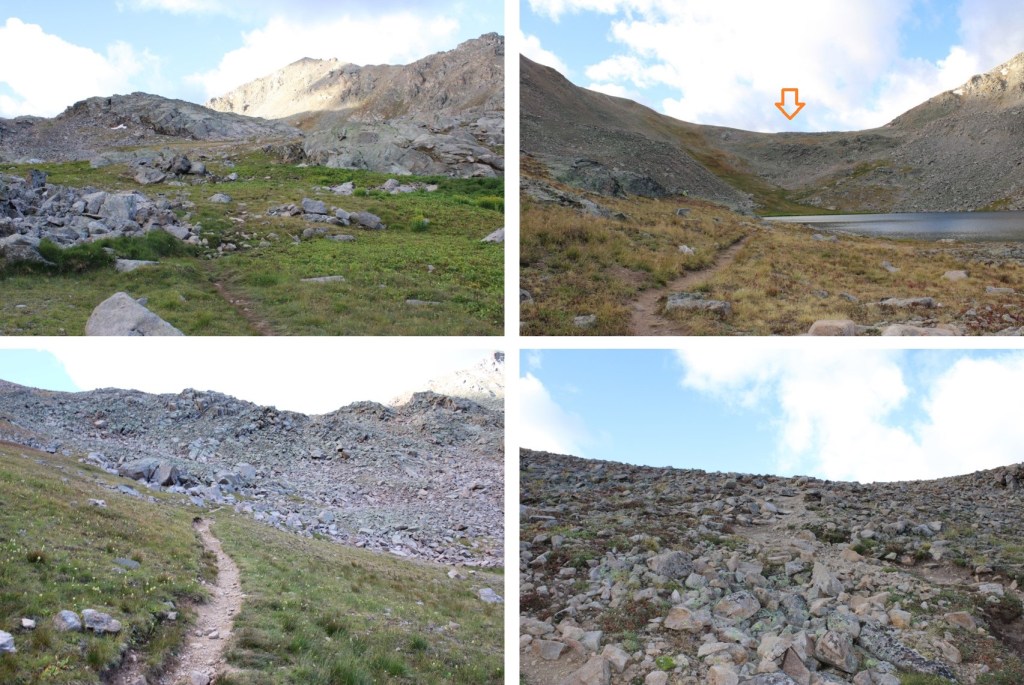
The road continues on, but here trail 1444 picks up. I followed the trail to the saddle. Here’s an overview of the route:
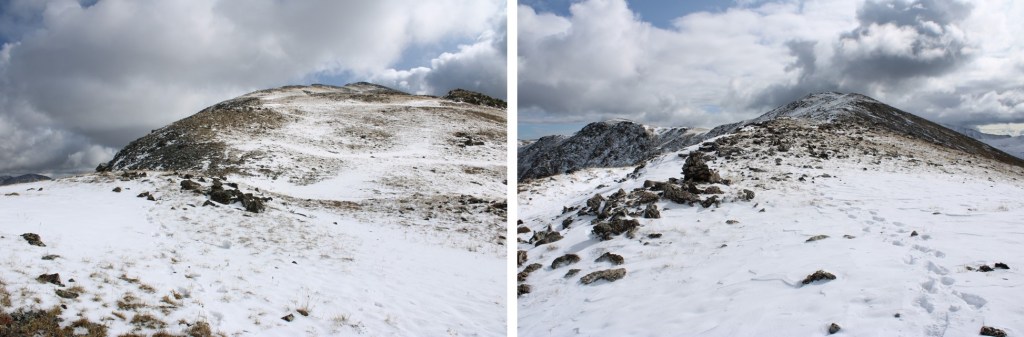
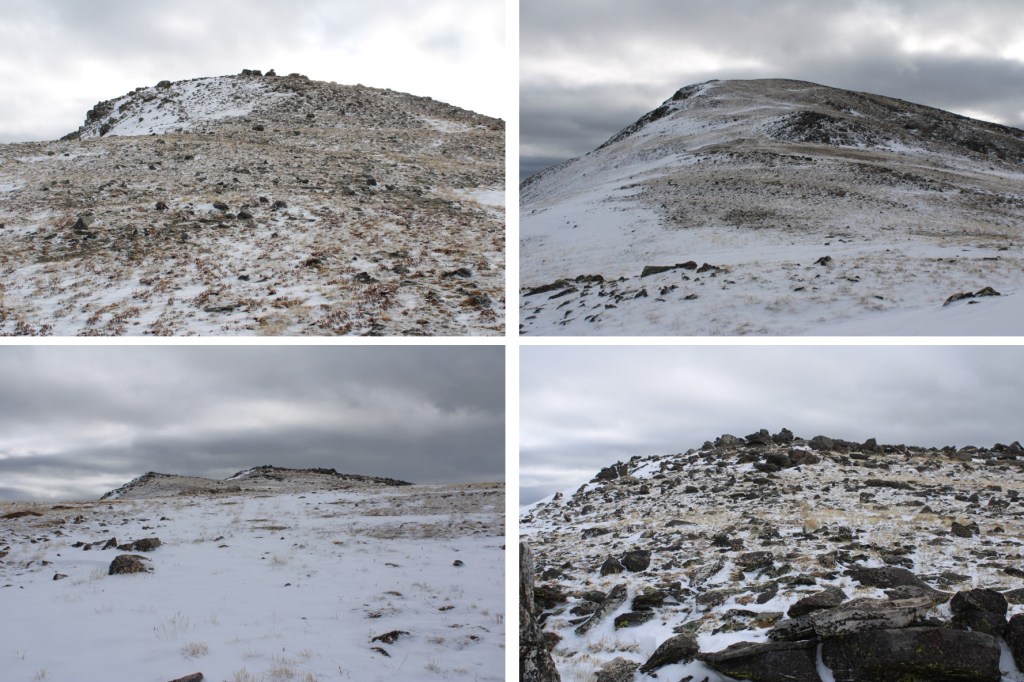
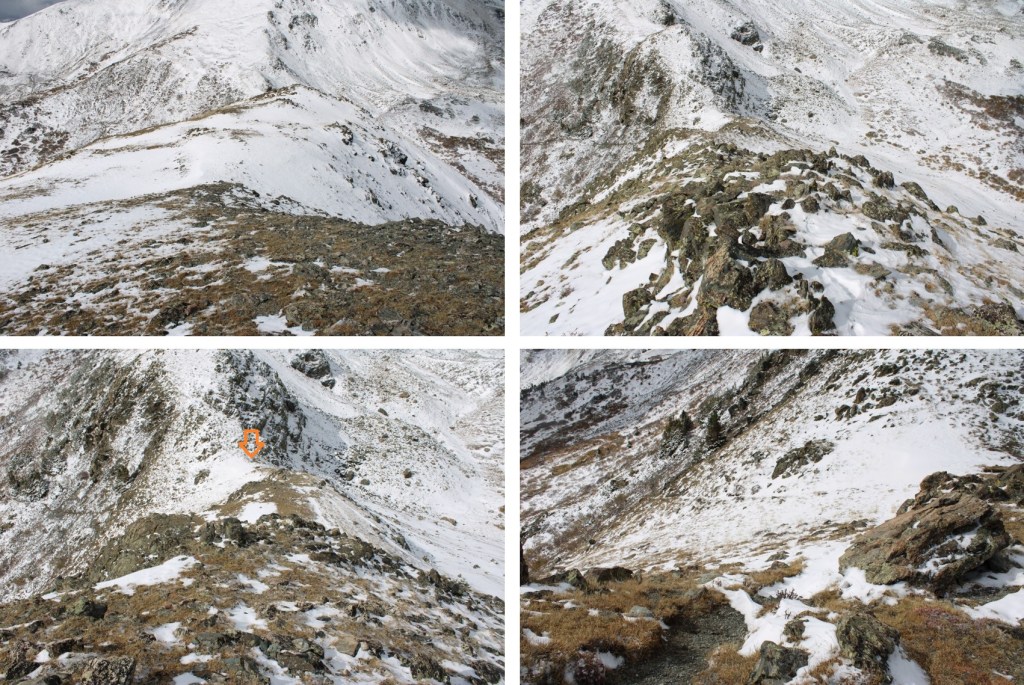
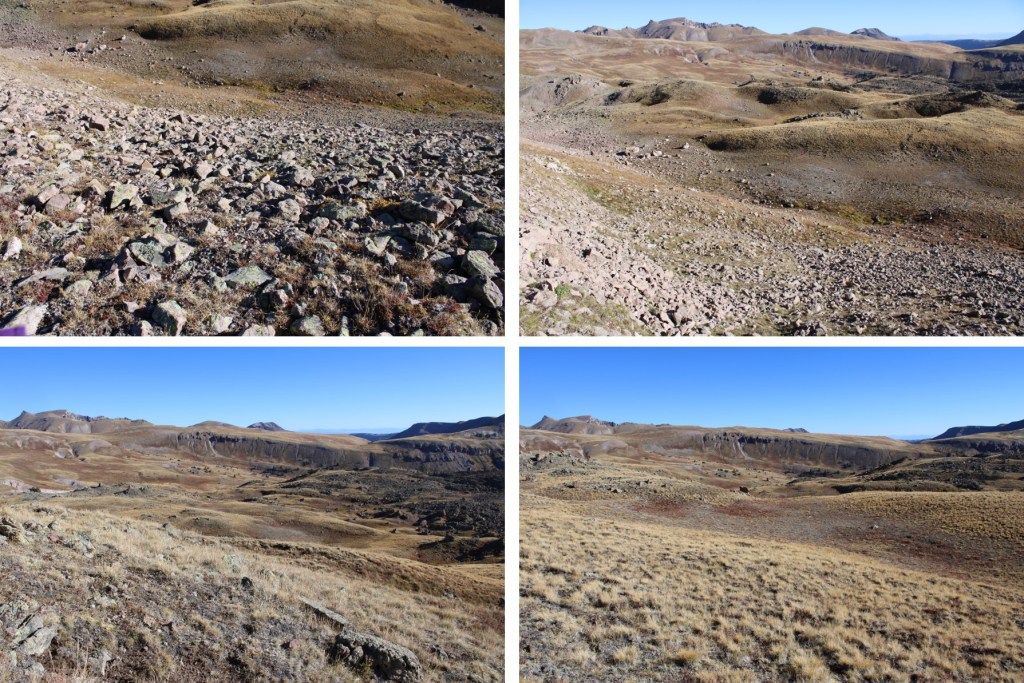
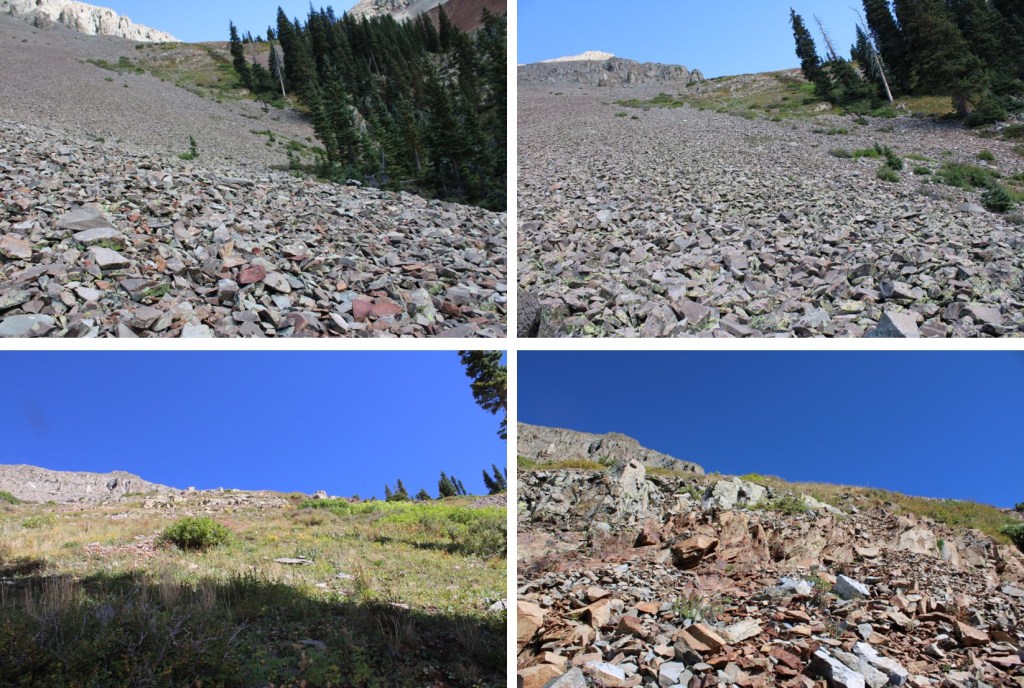
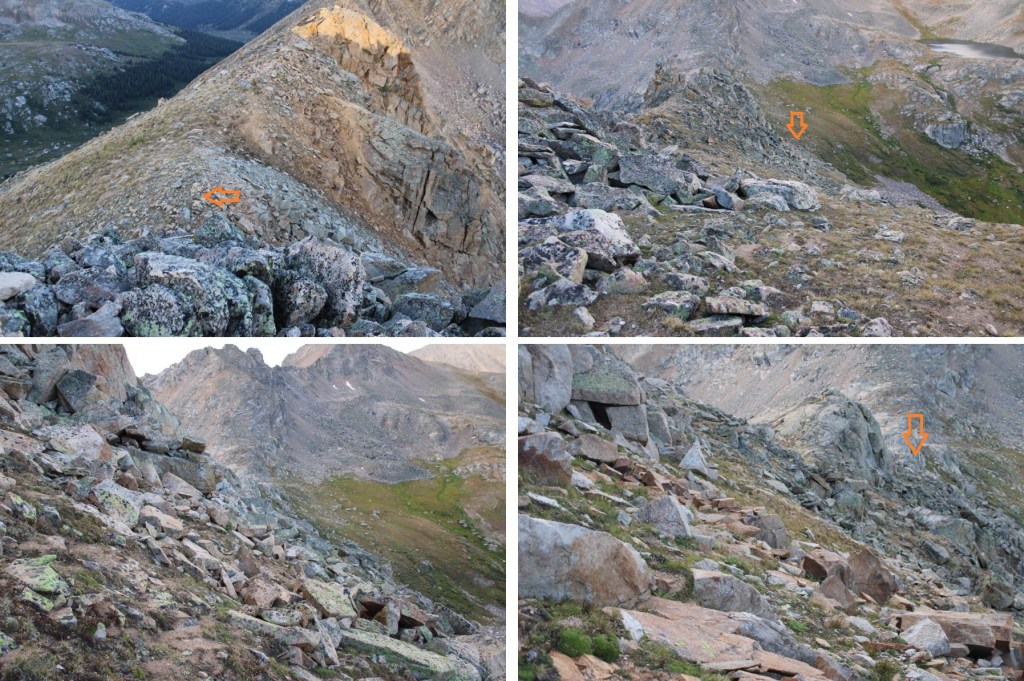
As you can see in the picture below, from the saddle there’s a trail here to the left. I couldn’t tell if it was a game trail or an actual trail, as it was covered in snow, but I followed it to the ridge
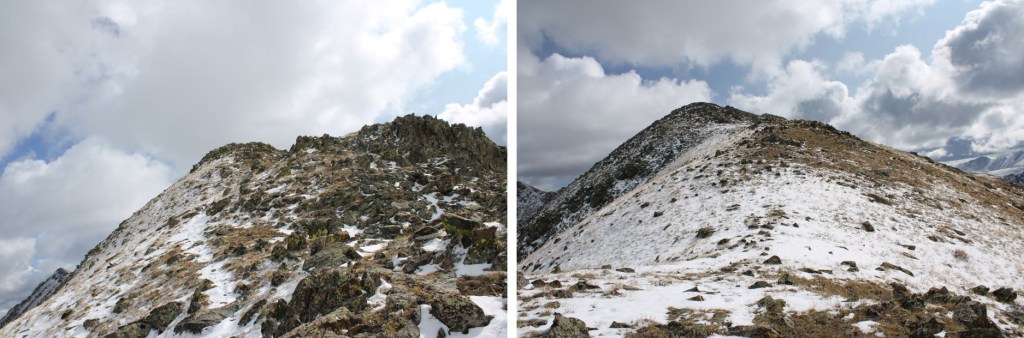
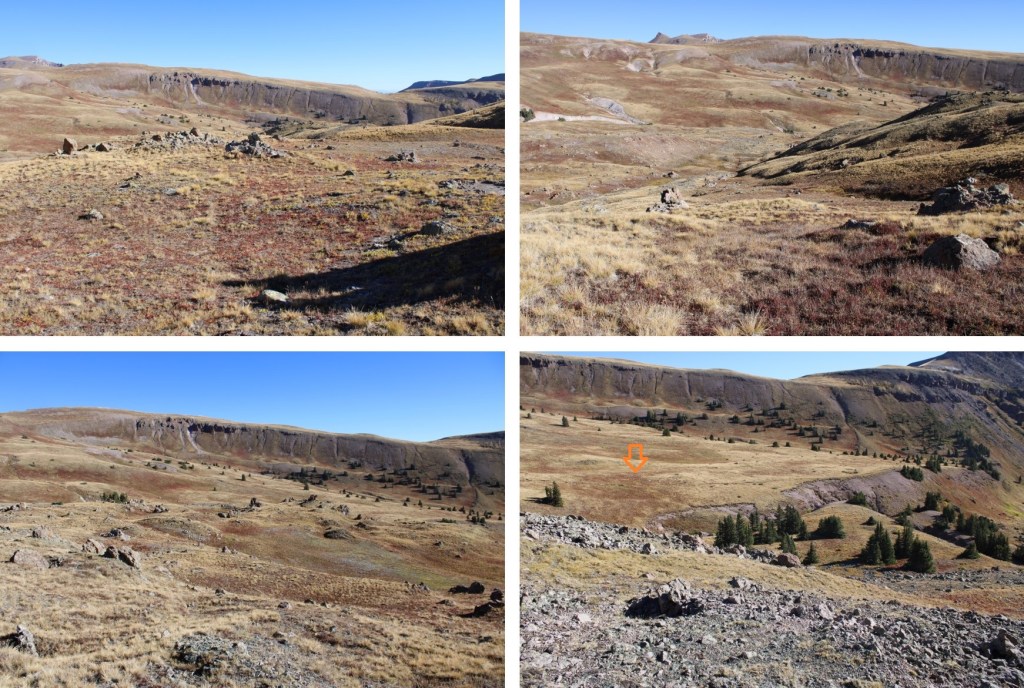
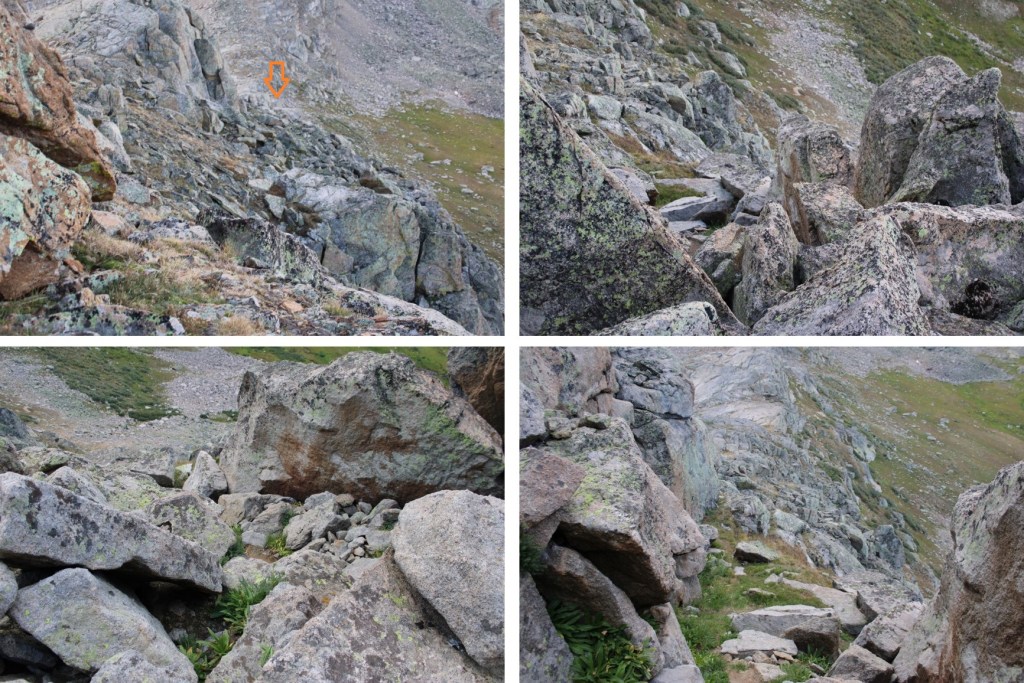
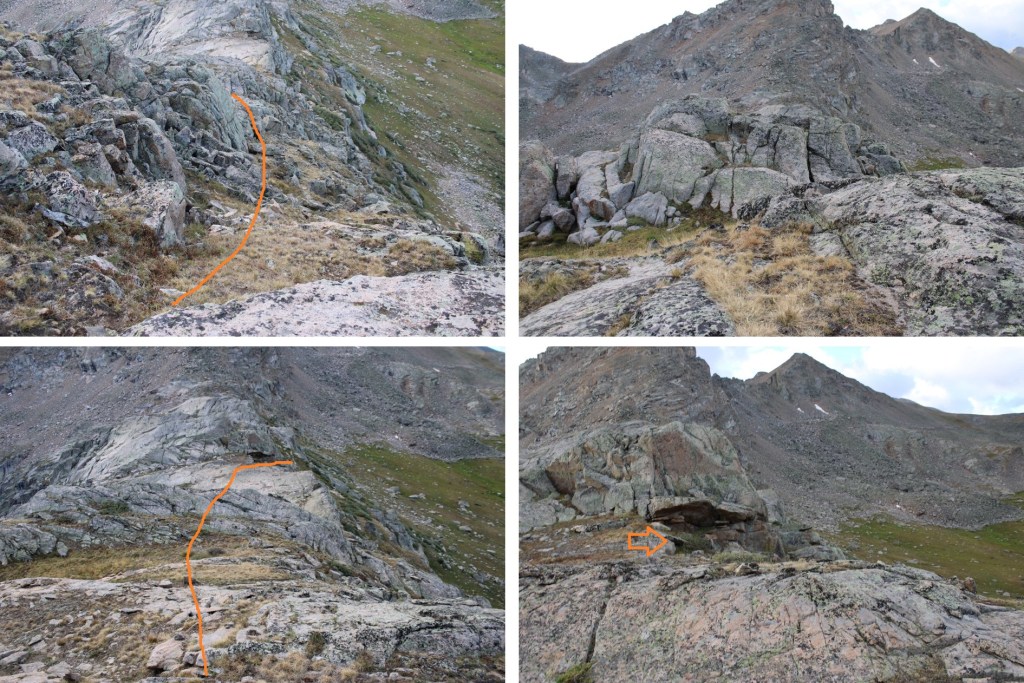
This is the only point on the rest of the ridge I diverged from the ridge. I skirted these rocks to the right to stay on easy terrain, then re-gained the ridge
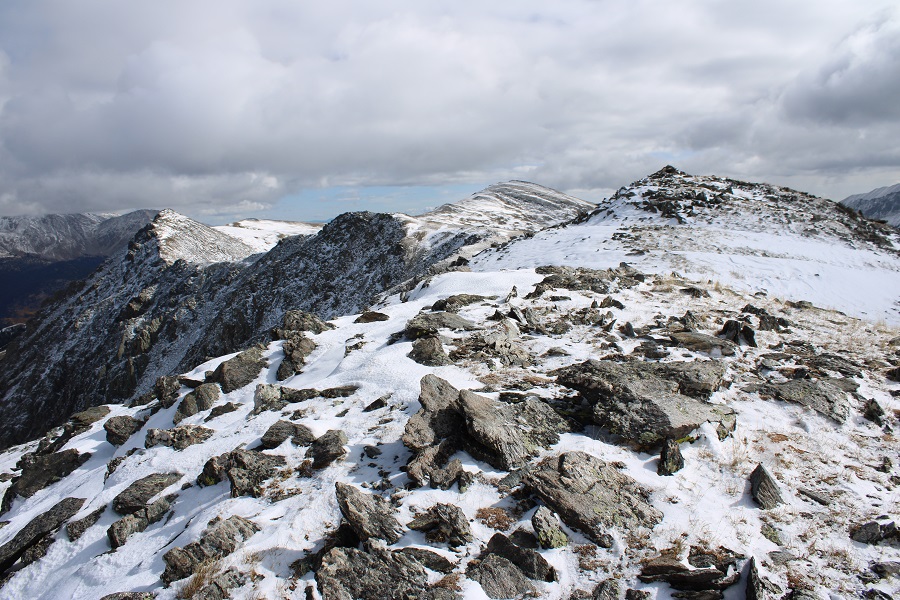
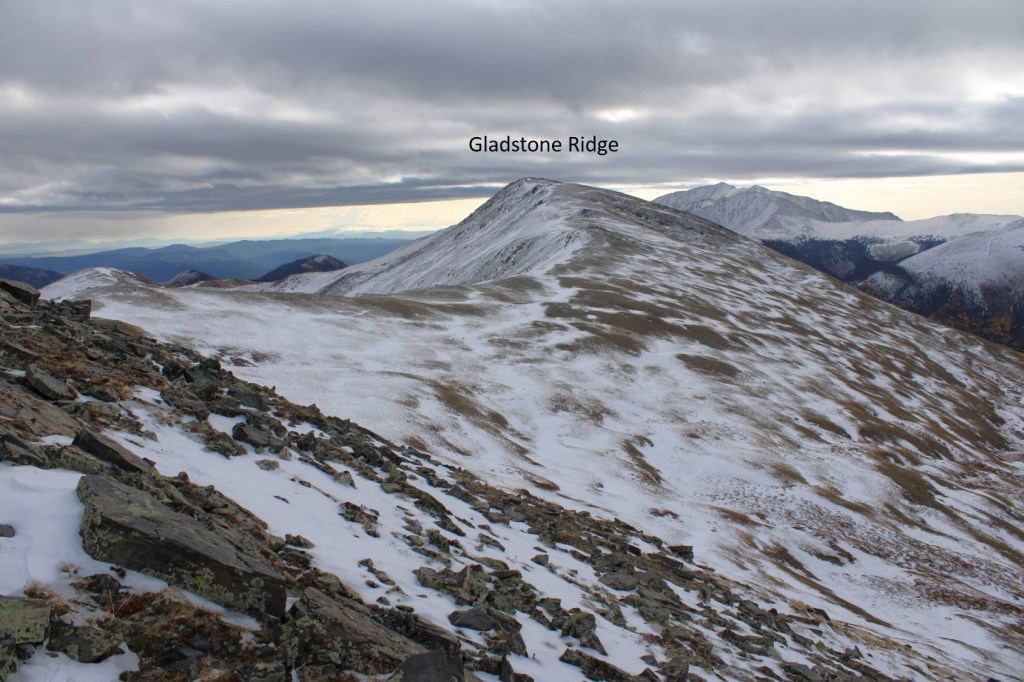
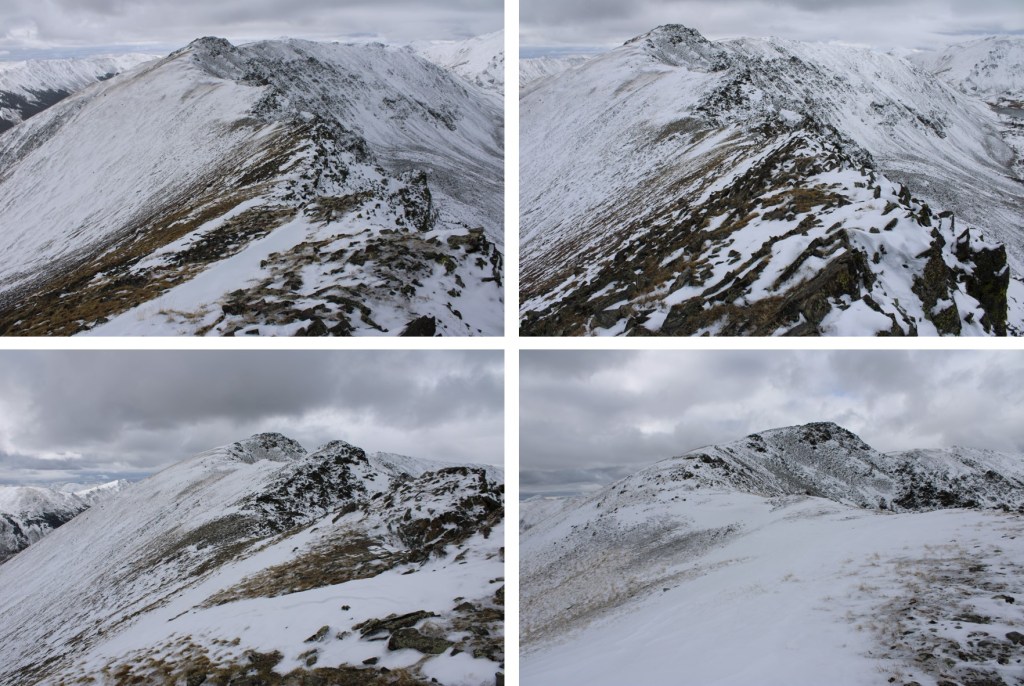
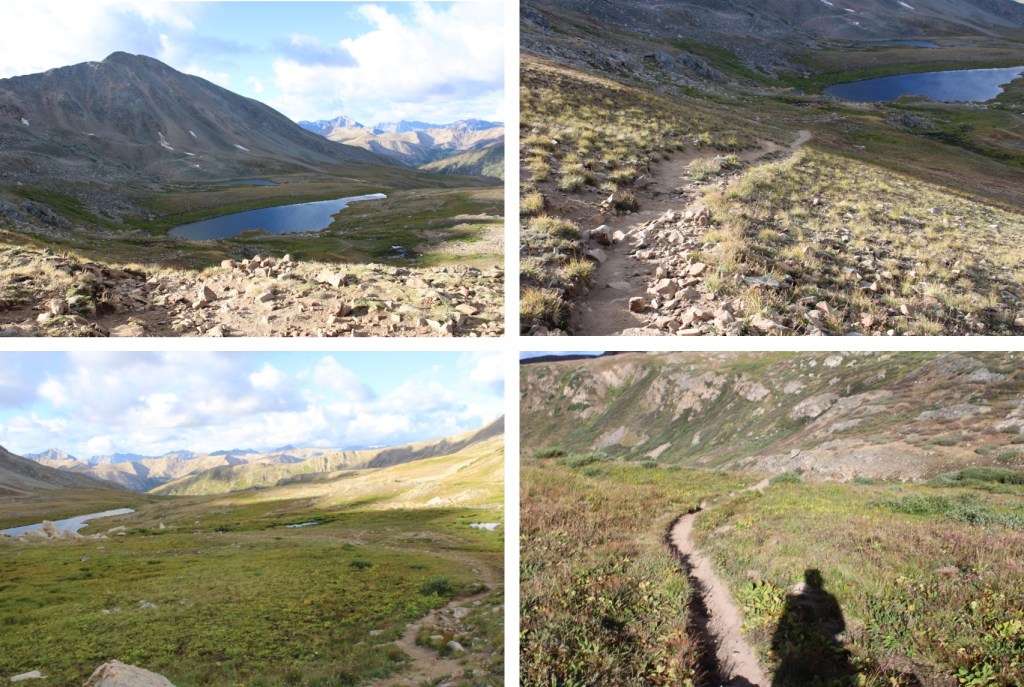
I now had my first view of Gladstone Ridge
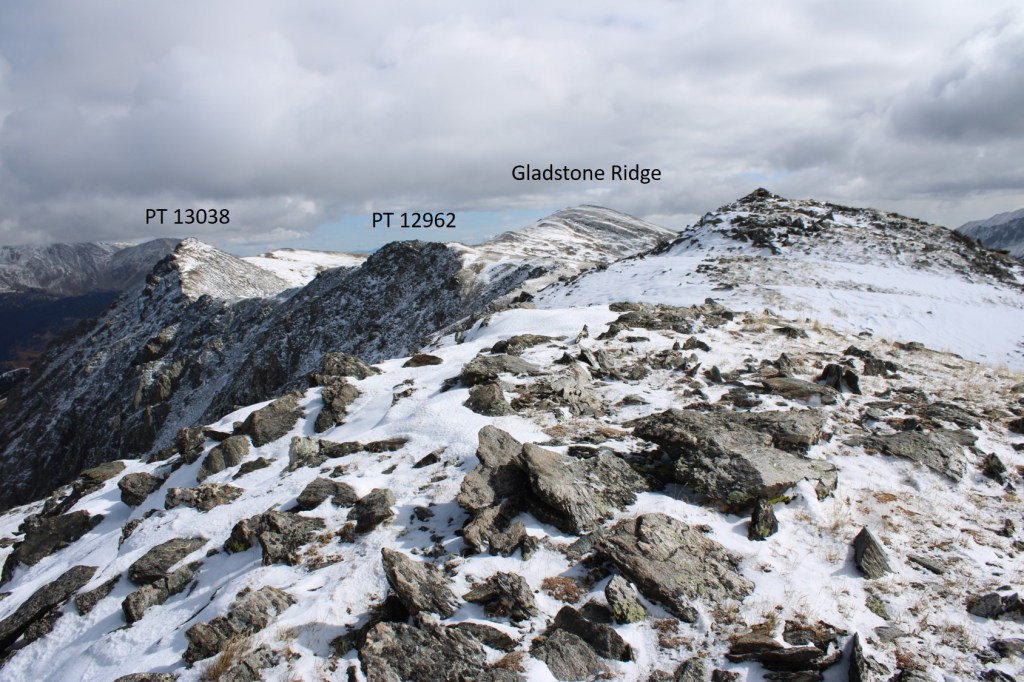
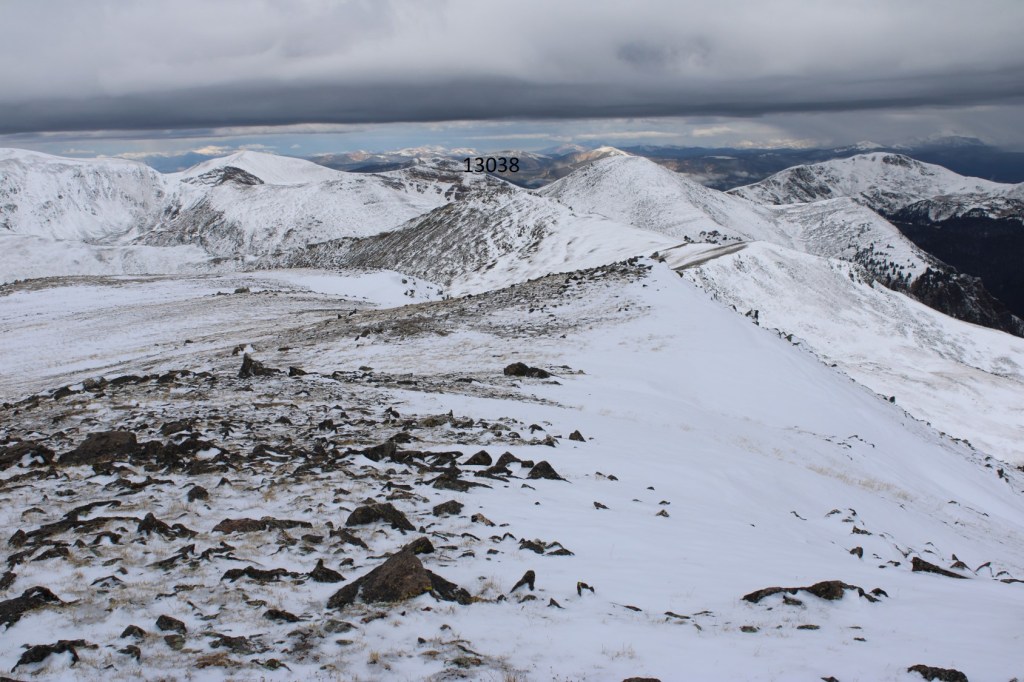
However, it would be a long walk to get there, first traversing over PT 12962, then PT 13038.
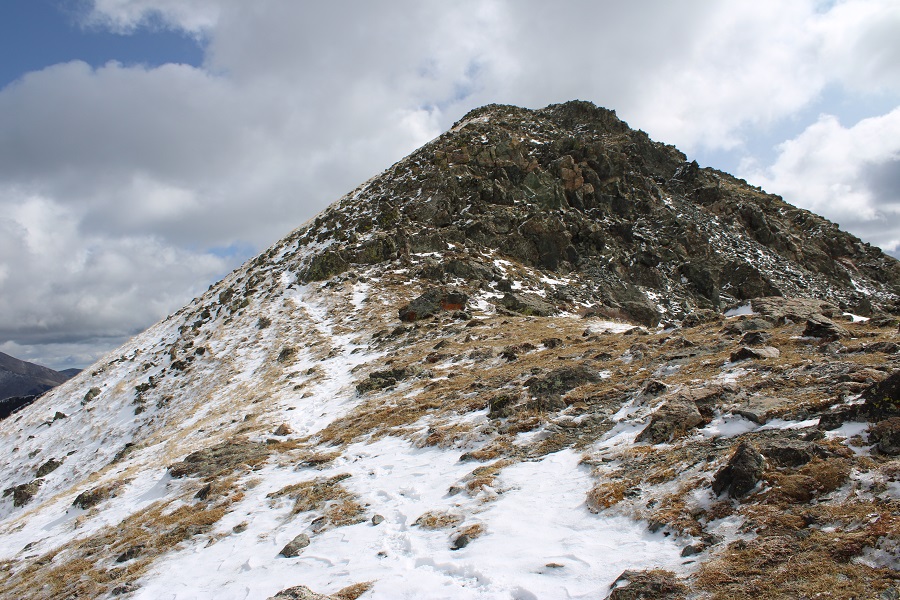
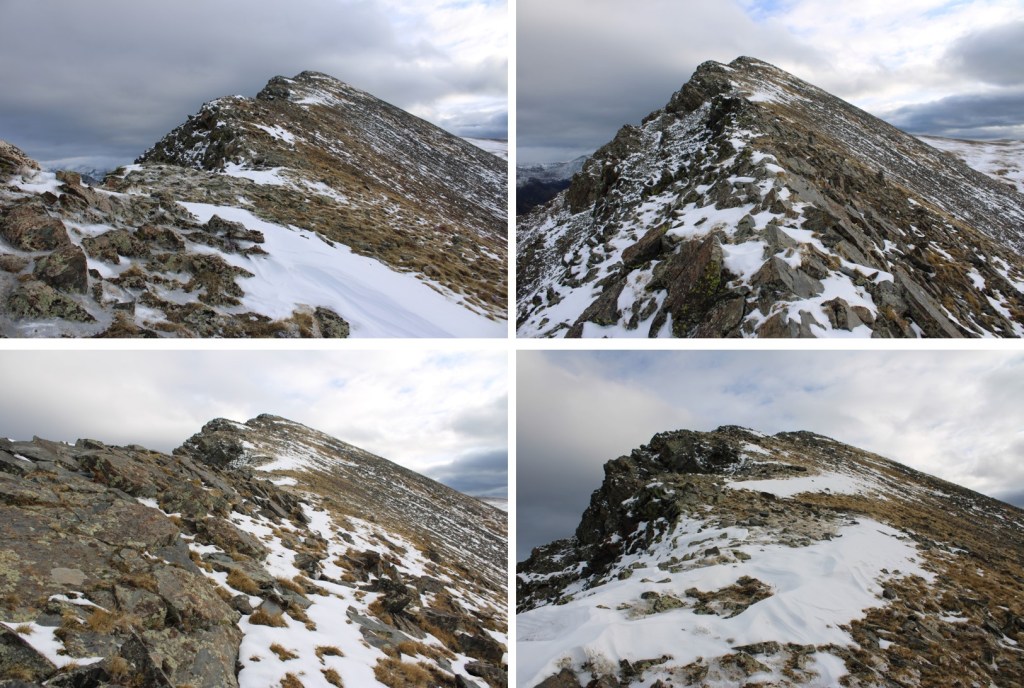
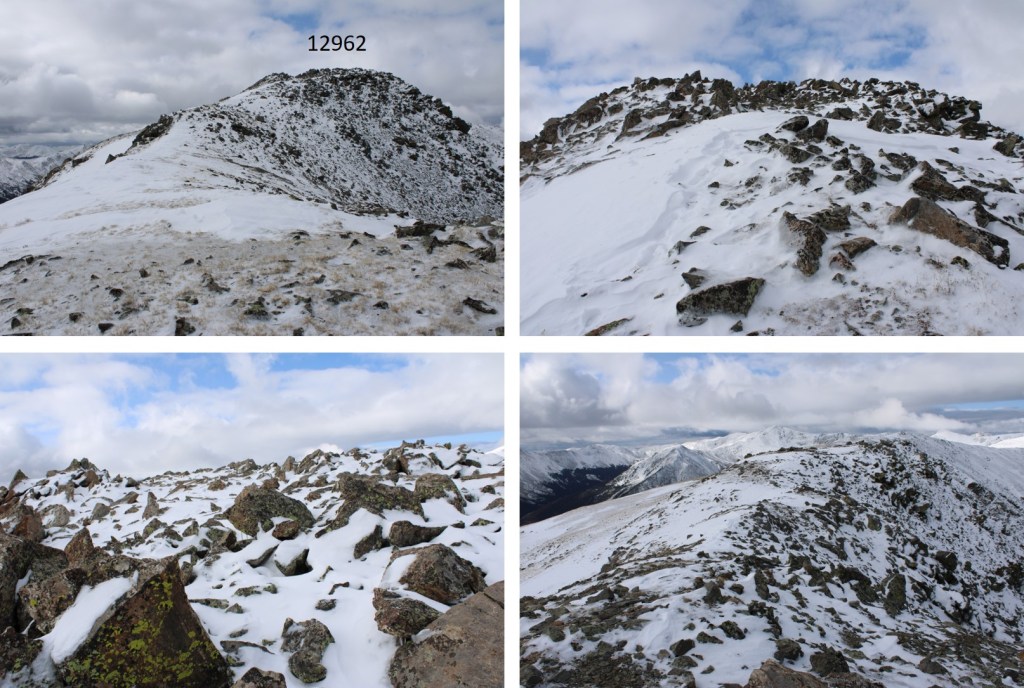
Here’s the route over to PT 12962
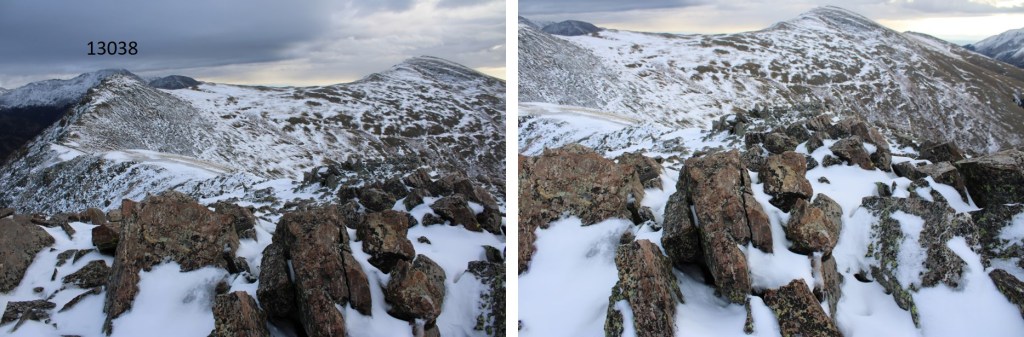
I then descended about 200’ to the 12961/13038 saddle. The terrain here was rocky, and a bit tricky since the rocks were slightly filled in with snow. I had trouble figuring out where the voids in the snow were, so I did my best to rock-hop and avoid the ice on the rocks while doing so.
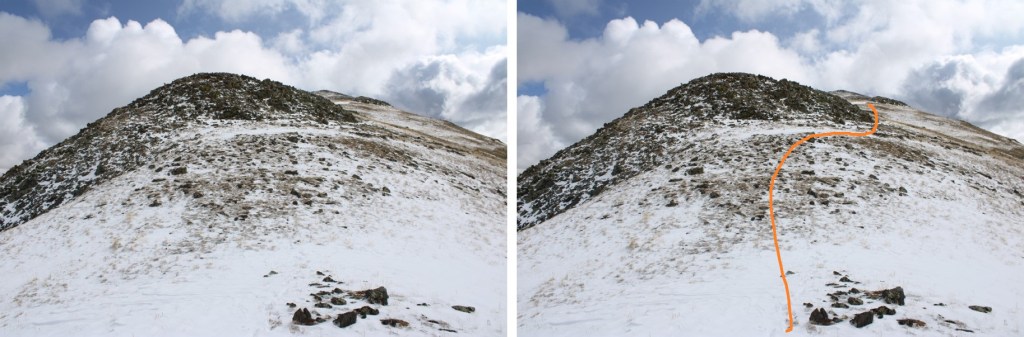
At the saddle of 12961/13038, looking up at my route to 13038, where it’s 240’ up to 13038. In dry conditions, this is a ridge hike, but today I found myself dipping down to the right a bit to avoid the narrow, icy rocks that made the ridge direct.
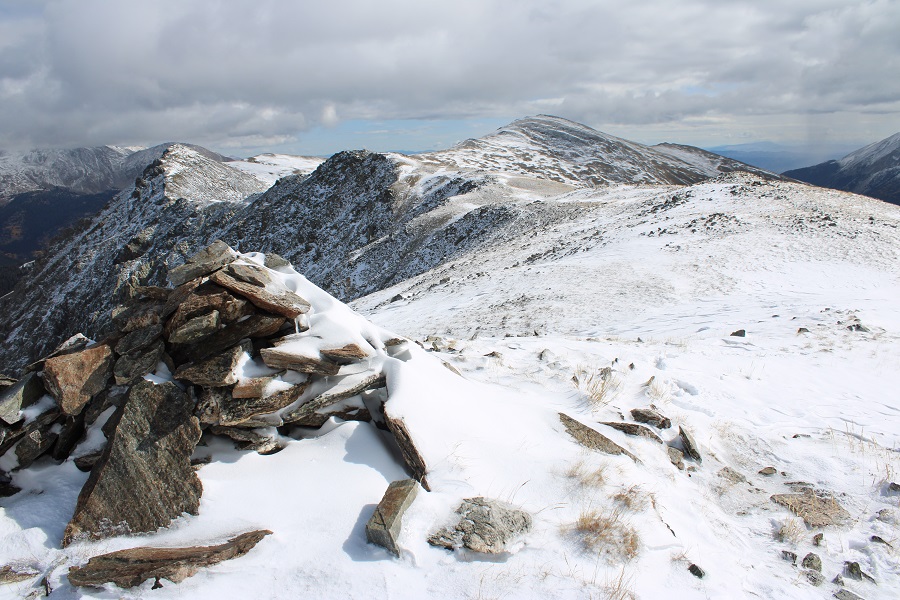
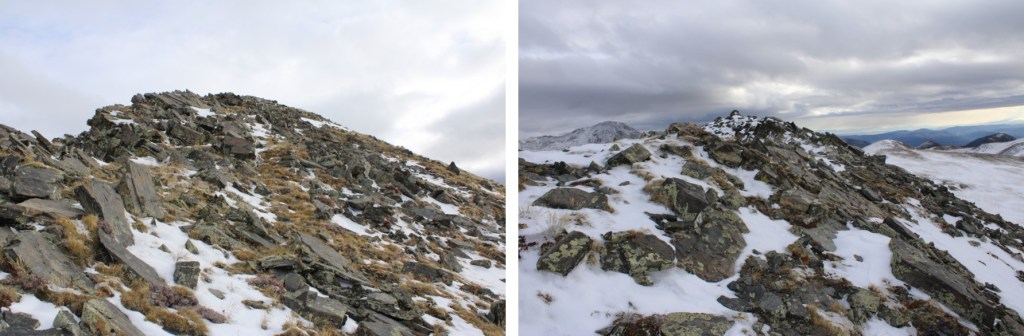
From the top of PT 13038, looking east I could see Gladstone Ridge.
This was a simple ridge hike to the summit.
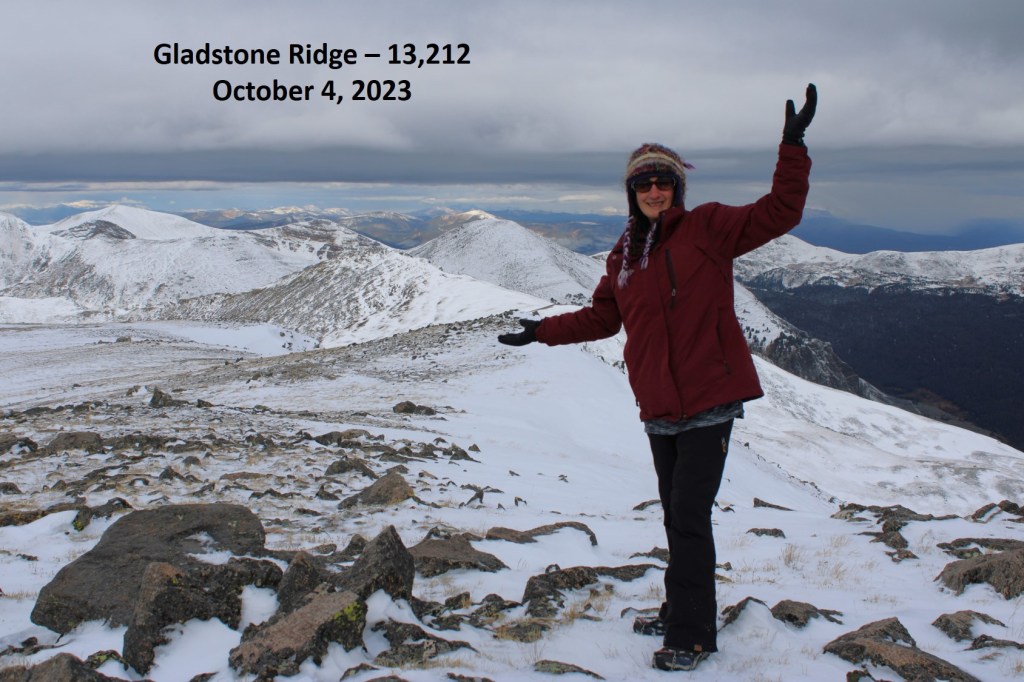
I summited Gladstone Ridge at 8:45am
Gladstone Ridge:
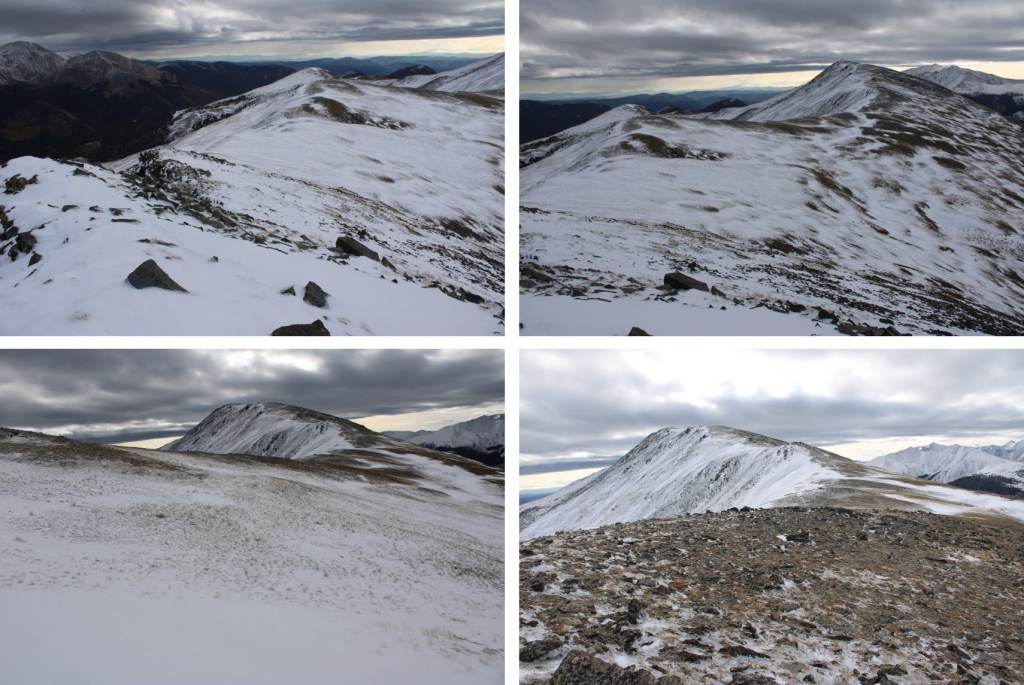
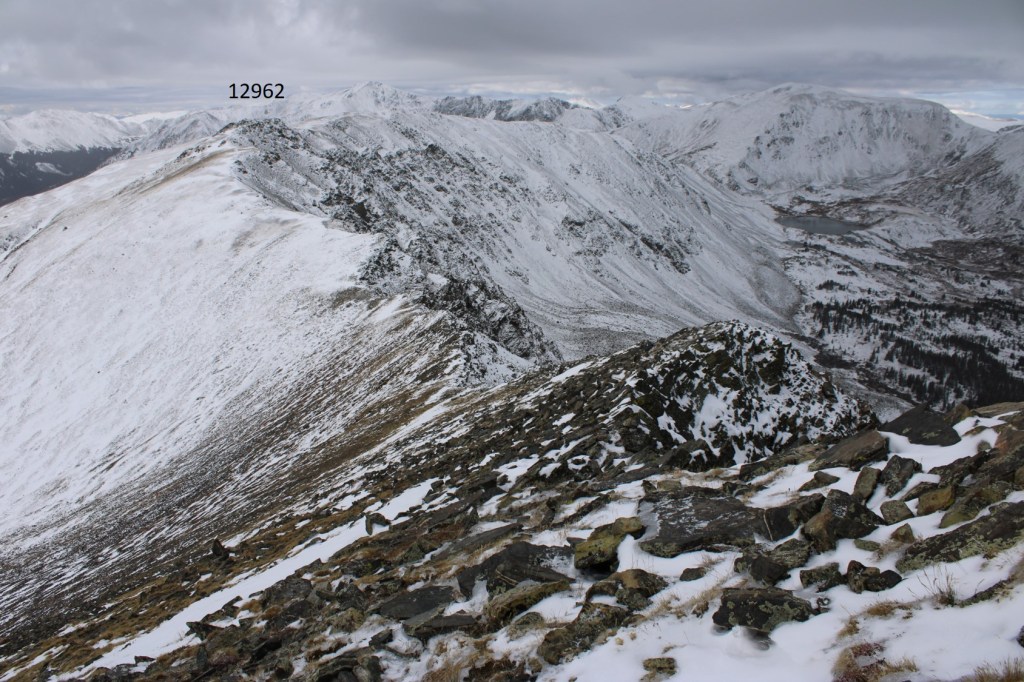
This was an out and back hike for me, so I re-traced my steps, following the ridge back to PT 13038
Then back down the ridge, and up to PT 12962
I then followed the ridge west back to trail 1444
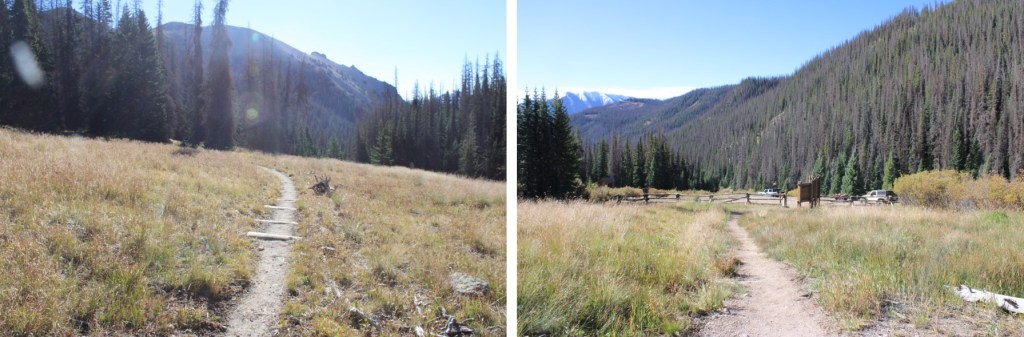
Back on the trail, I turned left and headed towards the 4WD road
I then followed the road back to the lower trailhead
I made it back to the lower trailhead at 11:15am, making this a 10.2 mile hike with 3140’ of elevation gain in 5 hours, 15 minutes.
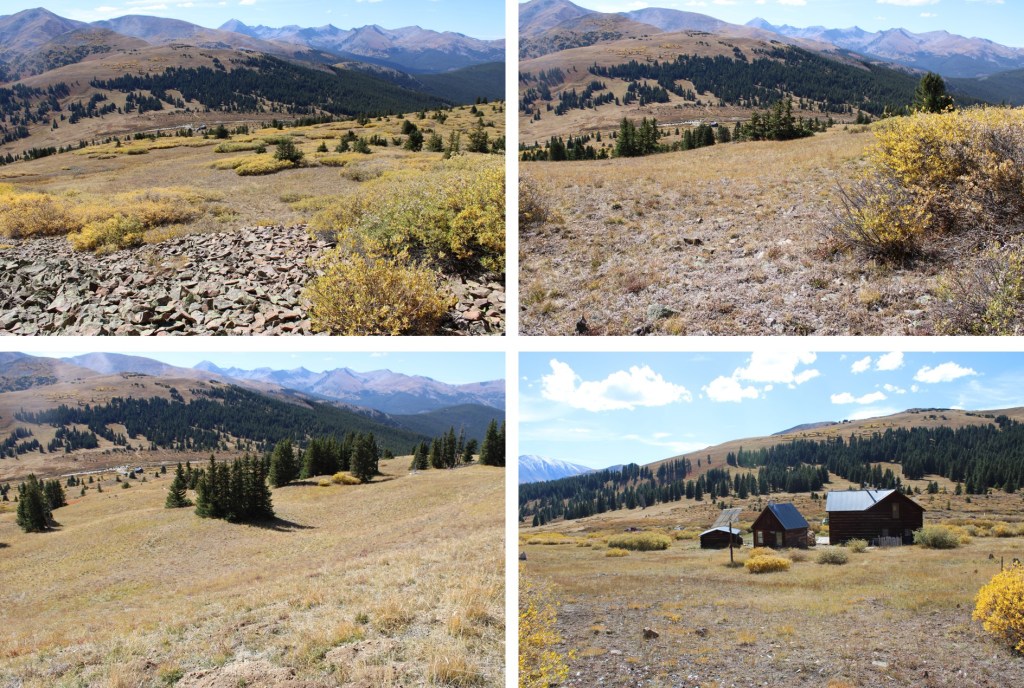
I was meeting some ladies in Breckenridge for a weekend getaway, and to take them up their first 14er. Boreas Pass was along the way, so I decided to make a quick stop to summit Boreas Mountain. I drove up Boreas Pass, and parked at about 11500’. Boreas Pass road is a 2WD dirt road, and easy to navigate.
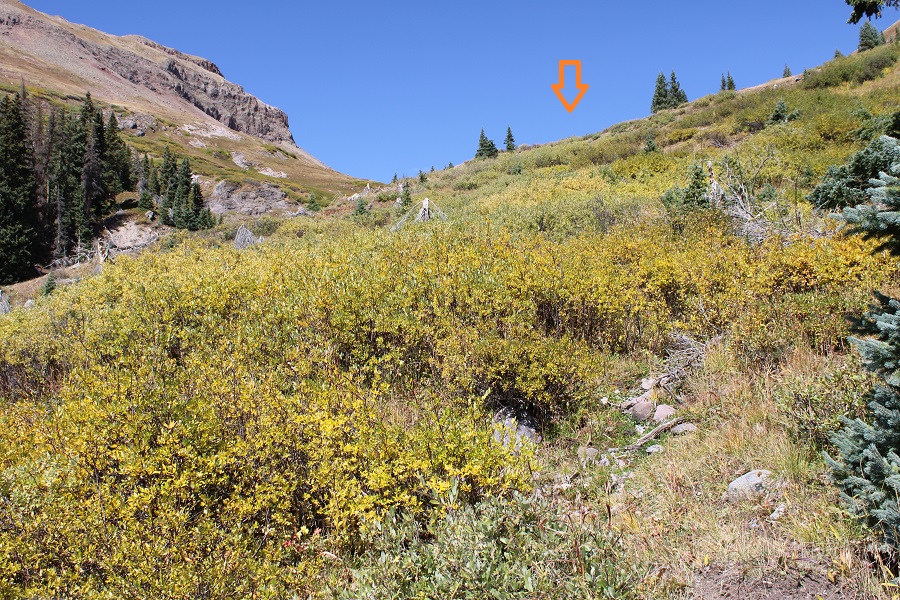
I started by heading east, up the slope to the ridge.
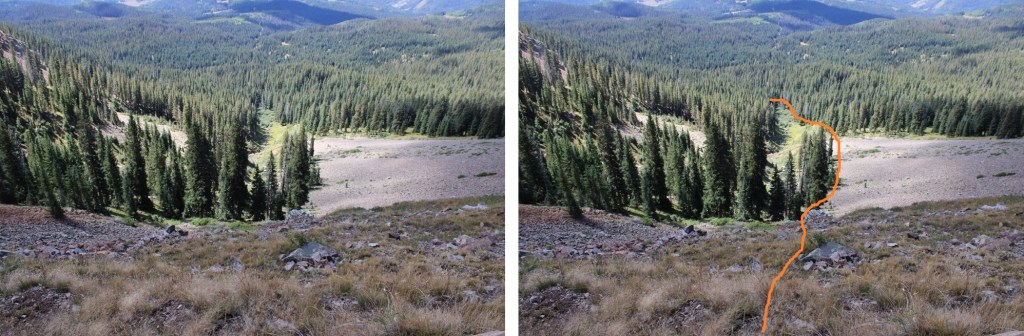
Here’s the overall route I took, staying just to the right of the willows.
And some step-by-step pictures of the route to the ridge. There was some talus to deal with, but this entire hike is class 2.
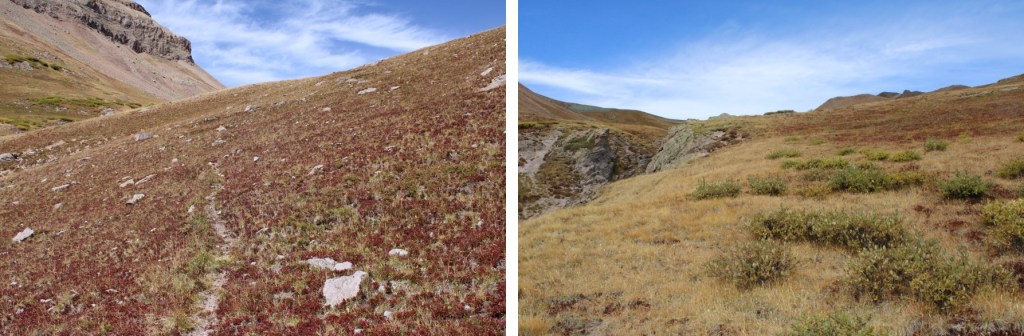
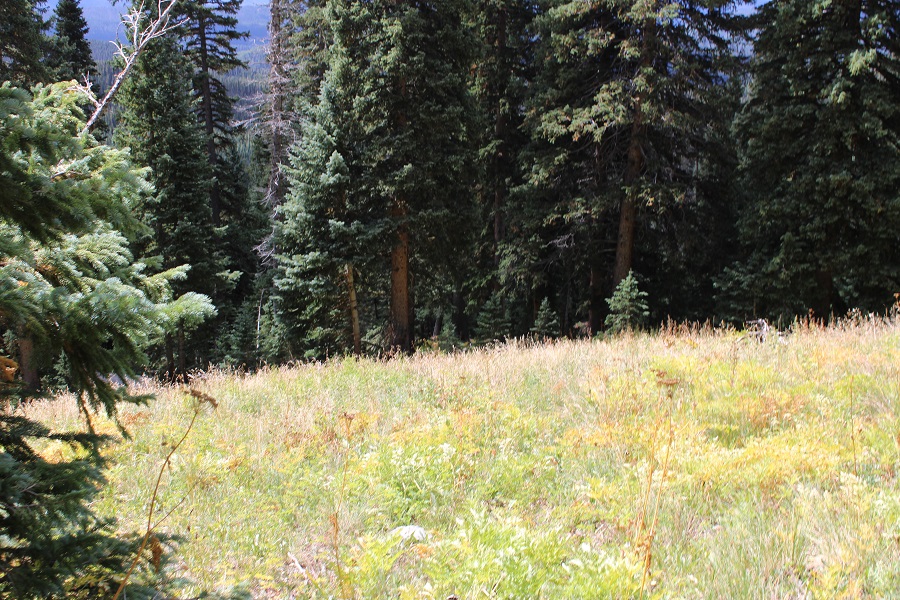
Once on the ridge, I travelled to this point
Now it was a ridge hike on loose rock, heading south. There were game trails to follow, which made route finding easy.
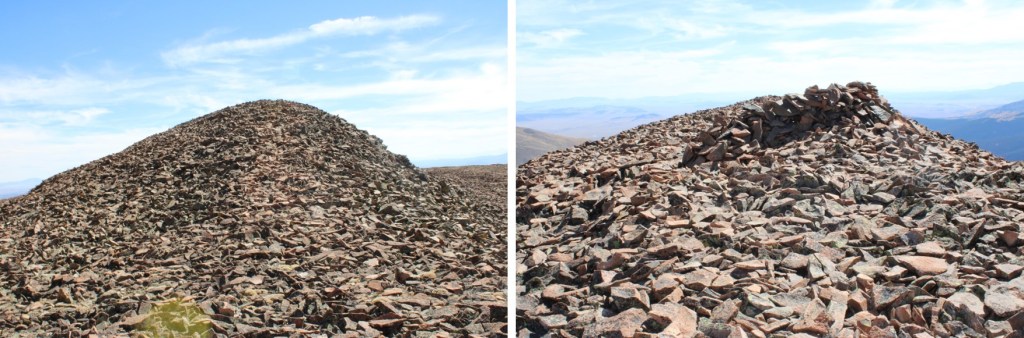
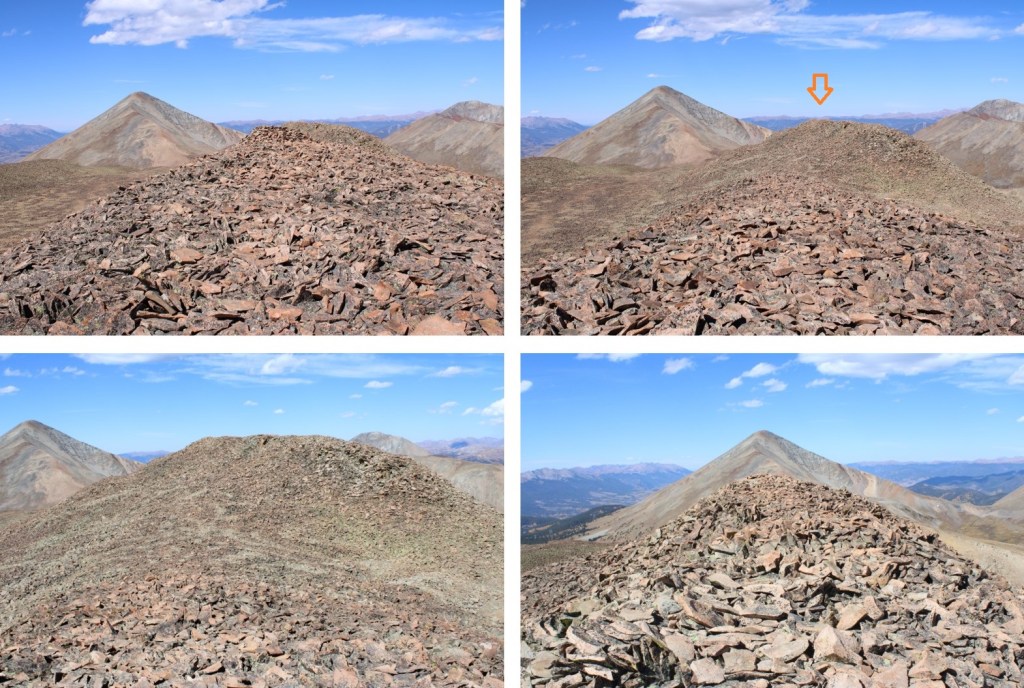
I continued following the ridge south. This part is choose your own adventure as well, as long as you keep heading south you’ll eventually see the summit (currently hidden). There were cairns here, so I followed the cairns
The true summit was difficult to ascertain, as many points looked like the highpoint. When I used my altimeter, the furthest point south was the highpoint, with a wind break at the top (and a summit register).
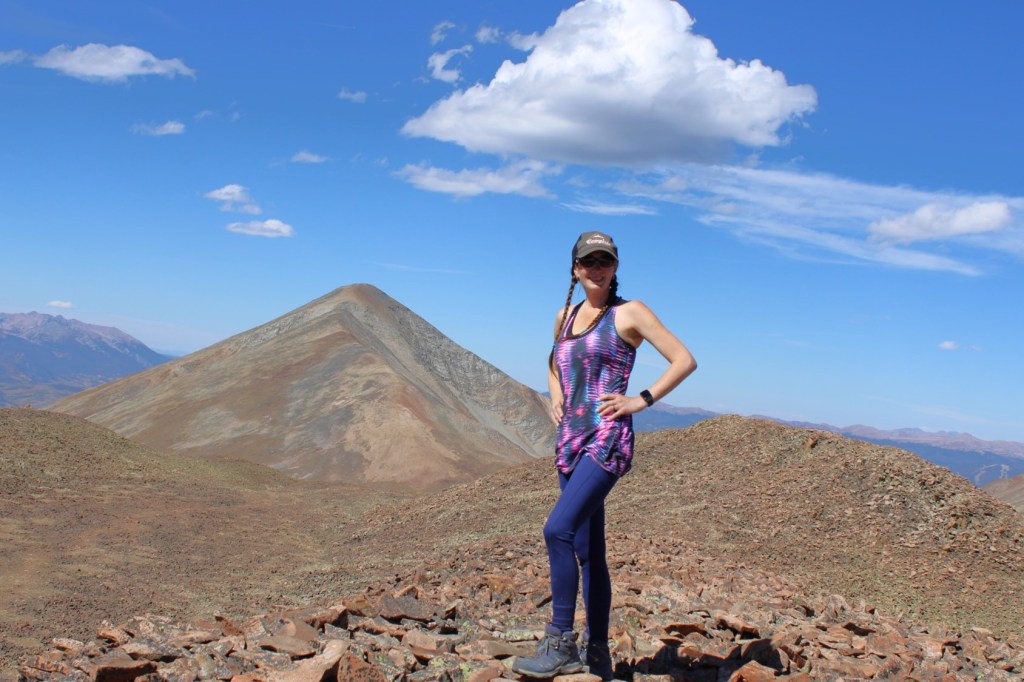
I summited Boreas Mountain at 1:50pm
Boreas Mountain:
I took the same route to descend as I did to ascend, and re-traced my steps
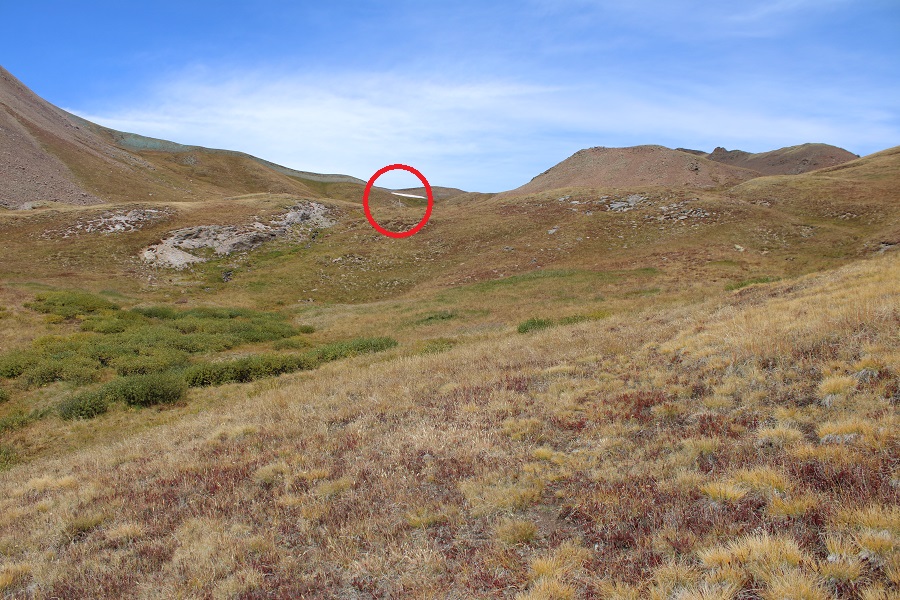
Then I headed back down the slope, once again using the willows as my guide, this time keeping them to the right of me.
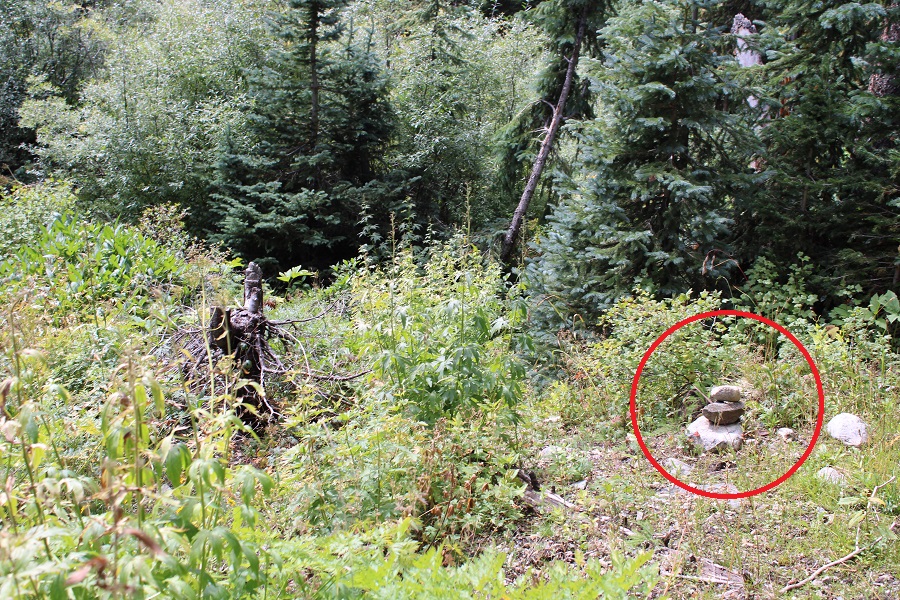
There’s a cairn at the base of the slope that I aimed for (circled in red)
I made it back to the trailhead at 2:45pm, making this a 3.39 mile hike with 1575’ of elevation gain in 2 hours.
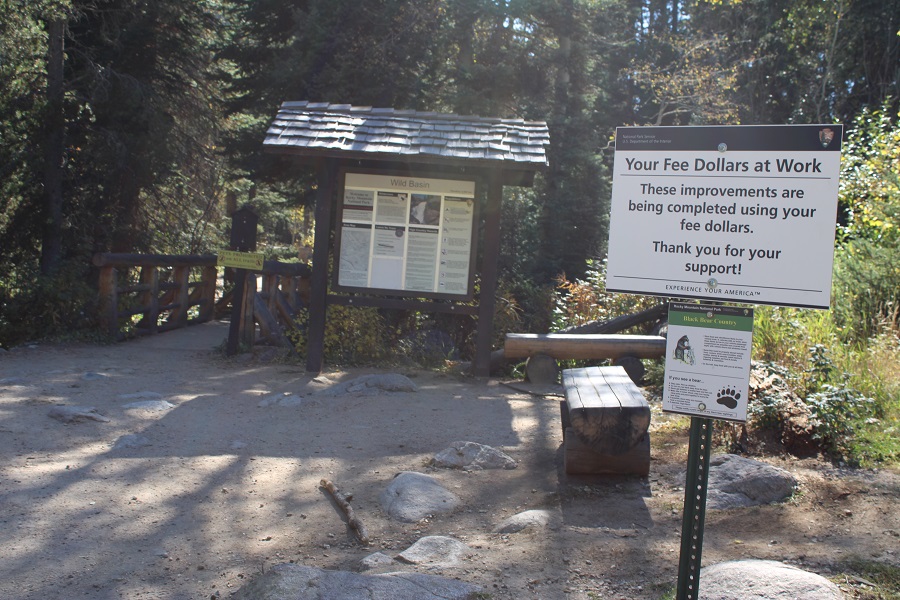
I’m going to do my best to keep this class 2/2+ here. I made it unnecessarily class 3 in areas, but they can be avoided. I started at the Wild Basin Trailhead in Rocky Mountain National Park. I was on the trail at 4am. The beginning of the trail is obvious.
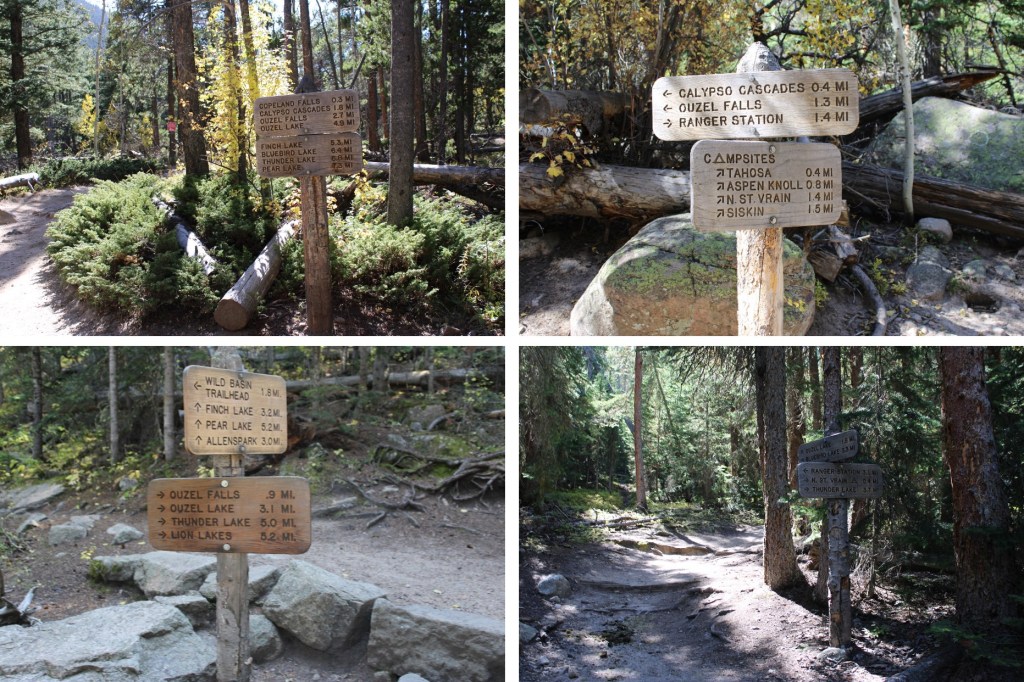
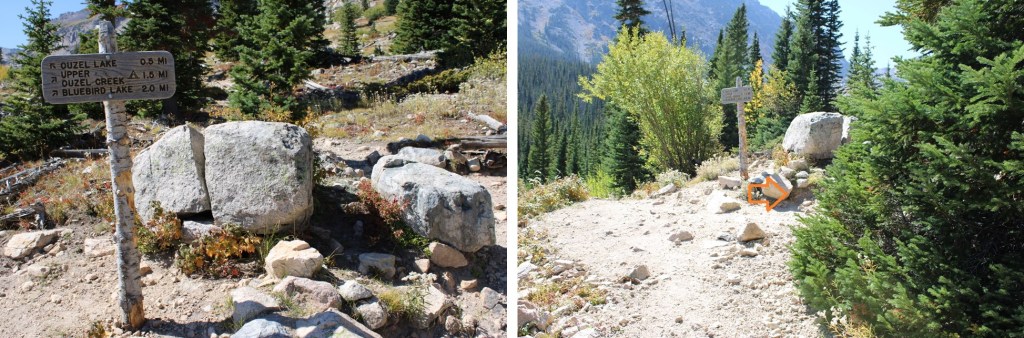
I’m not going to detail the approach to Bluebird Lake, as I’ve already done that in previous reports and the trail is class 1 trail the entire way. Just follow the signs towards Bluebird Lake. If Bluebird Lake isn’t on the sign, follow the one that says Ouzel Lake. The signs say it’s 6.4 miles to Bluebird Lake.
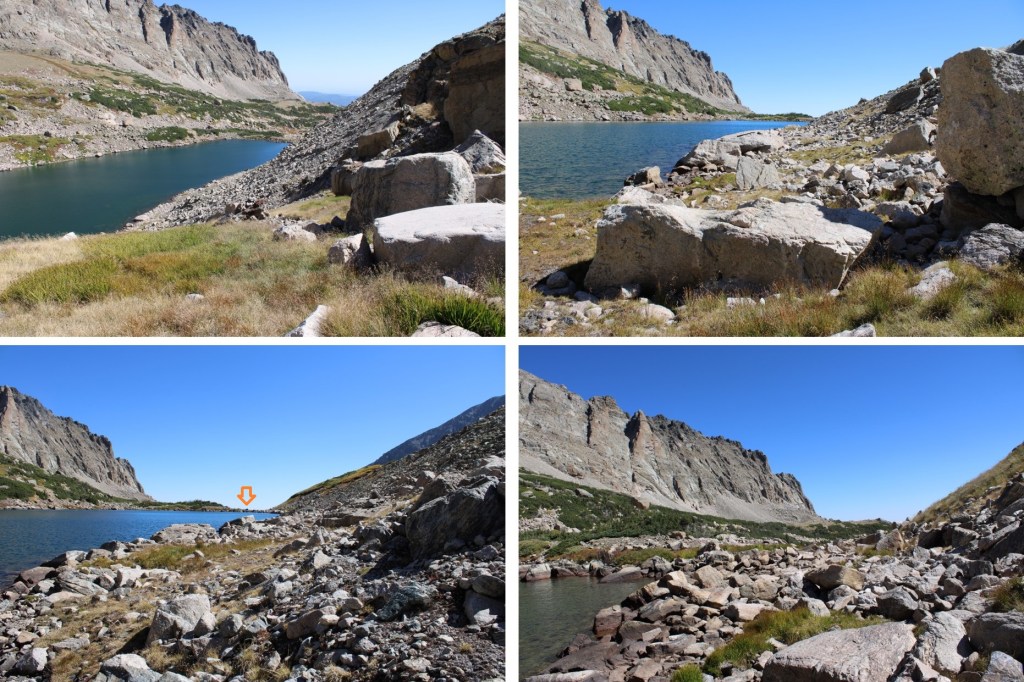
Now the fun begins! The class 1 trail that got me to Bluebird Lake stopped at Bluebird Lake.
I was able to find some faint game trails here, but like I said, they were faint. This was my next objective, a ramp in the distance:
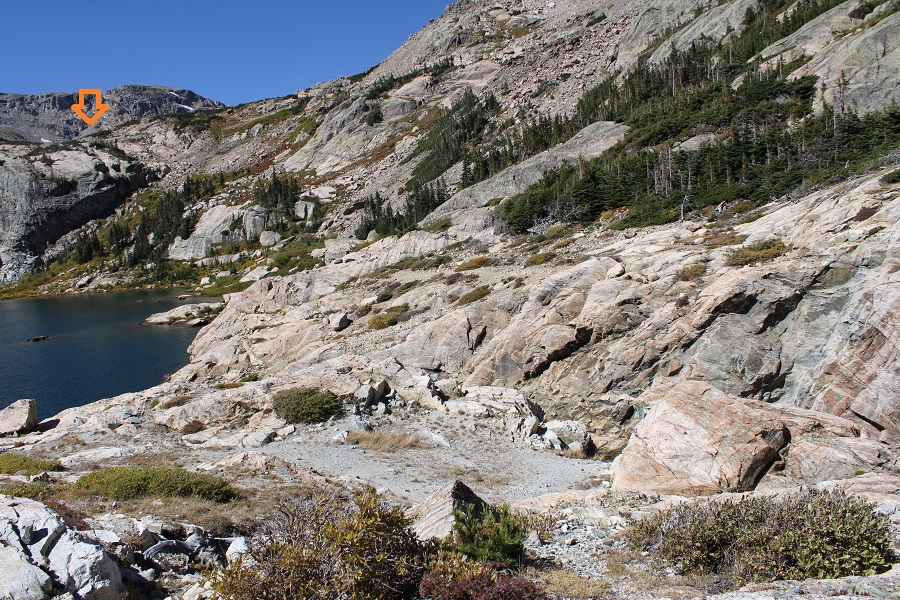
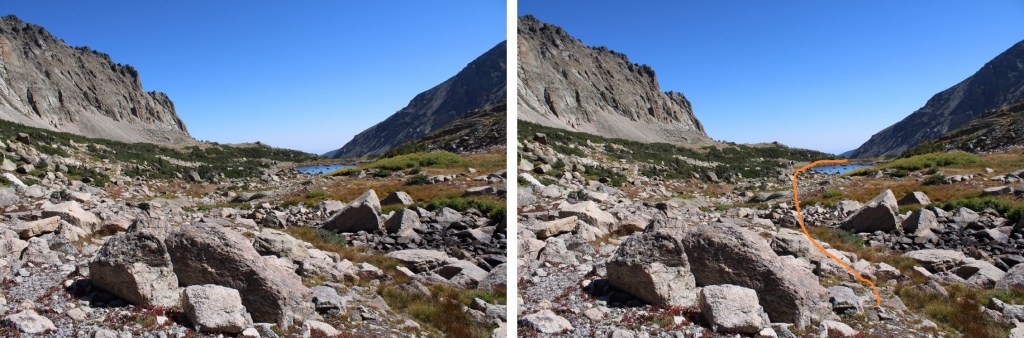
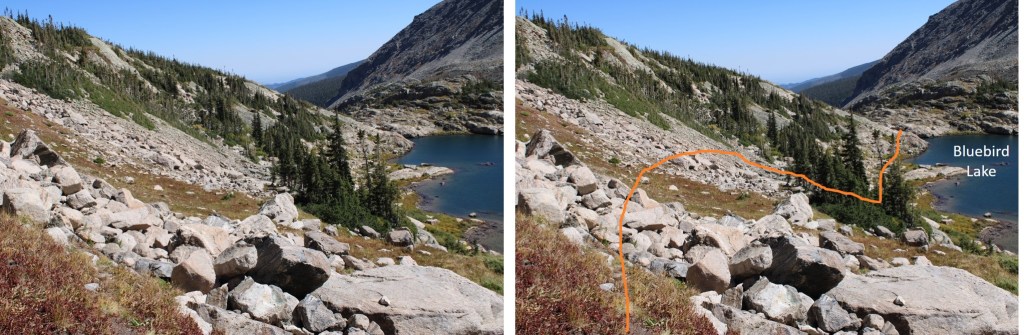
And my overall route to get there.
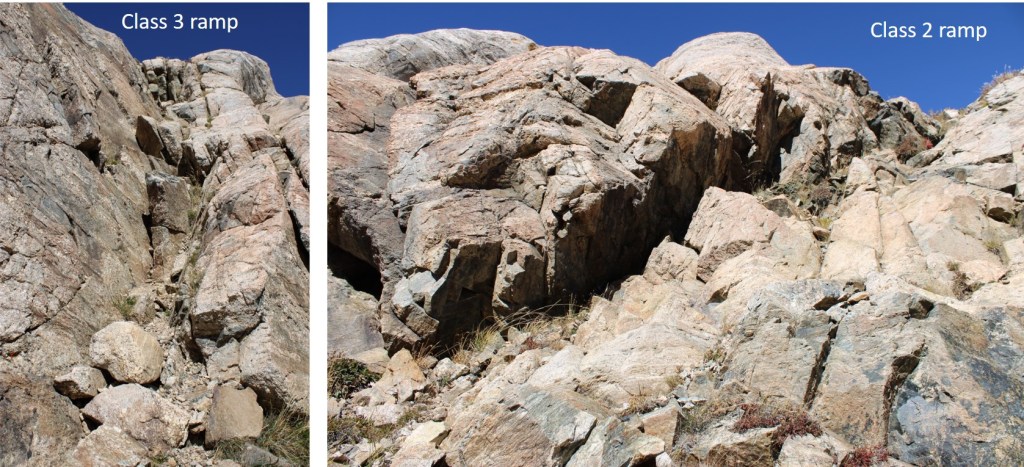
I was able to keep this class 2, but there are class 3 options. First, I descended down to the lake, then ascended a class 2 ramp. There’s an easy class 3 ramp here as well.
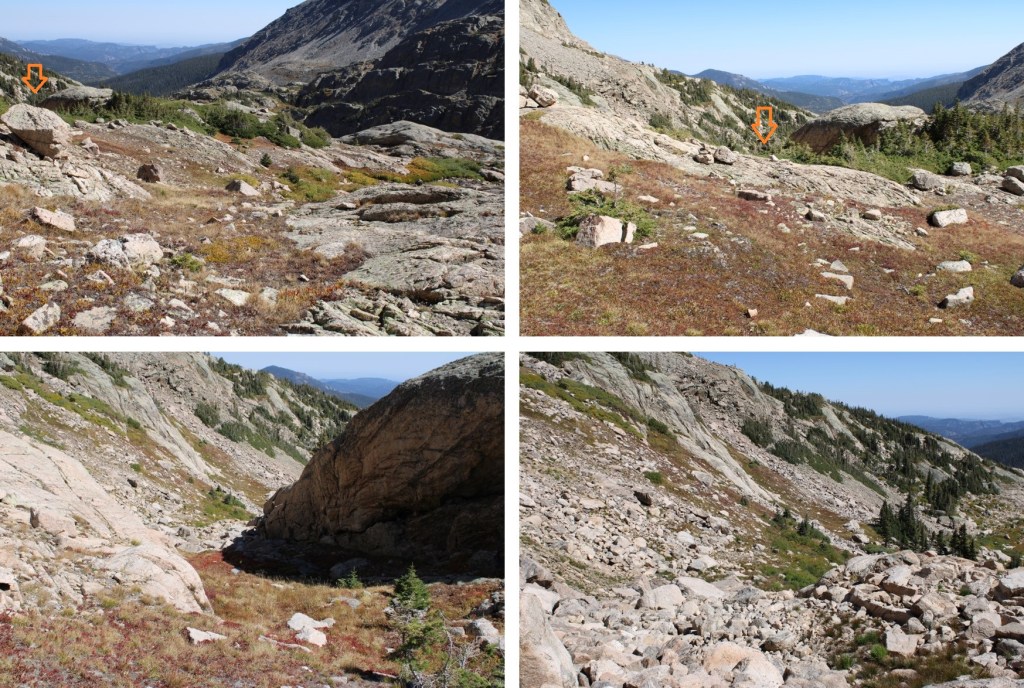
At the top of the ramps was a trail for a short distance heading west.
This is the route I took to get to Lark Pond, aiming for a ramp in the distance
And some step-by-step pictures
Now at Lark Pond, I stayed to the right of the pond to get to Pipit Lake. There weren’t any trails here.
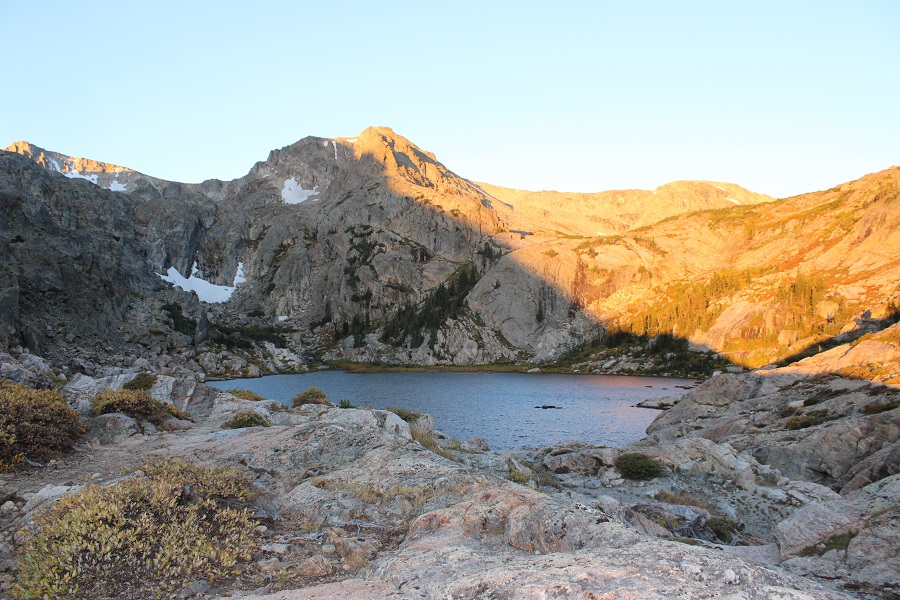
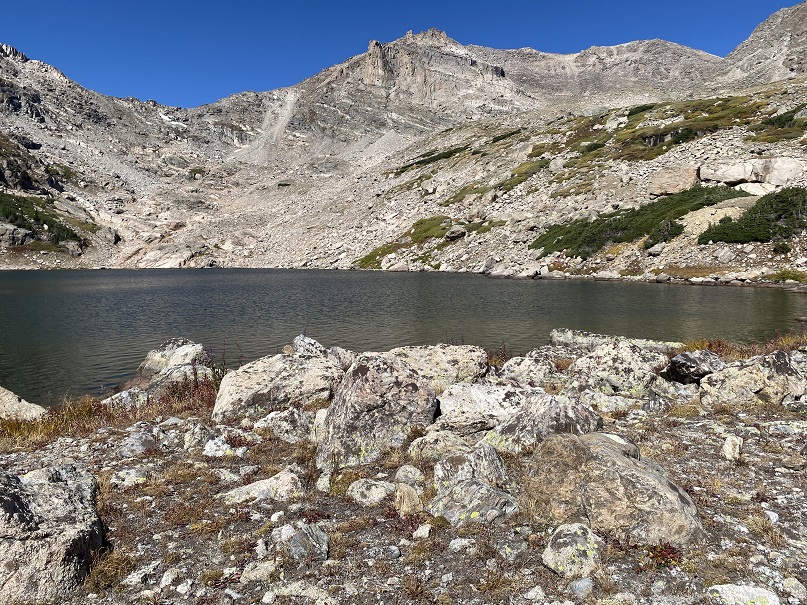
Yay! Pipit Lake!
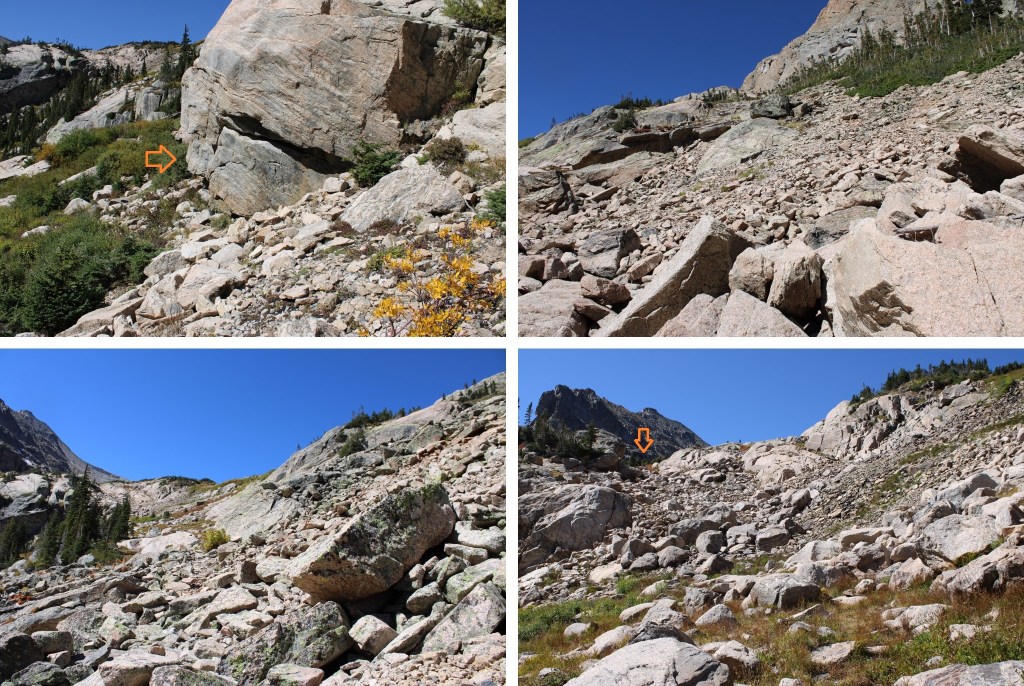
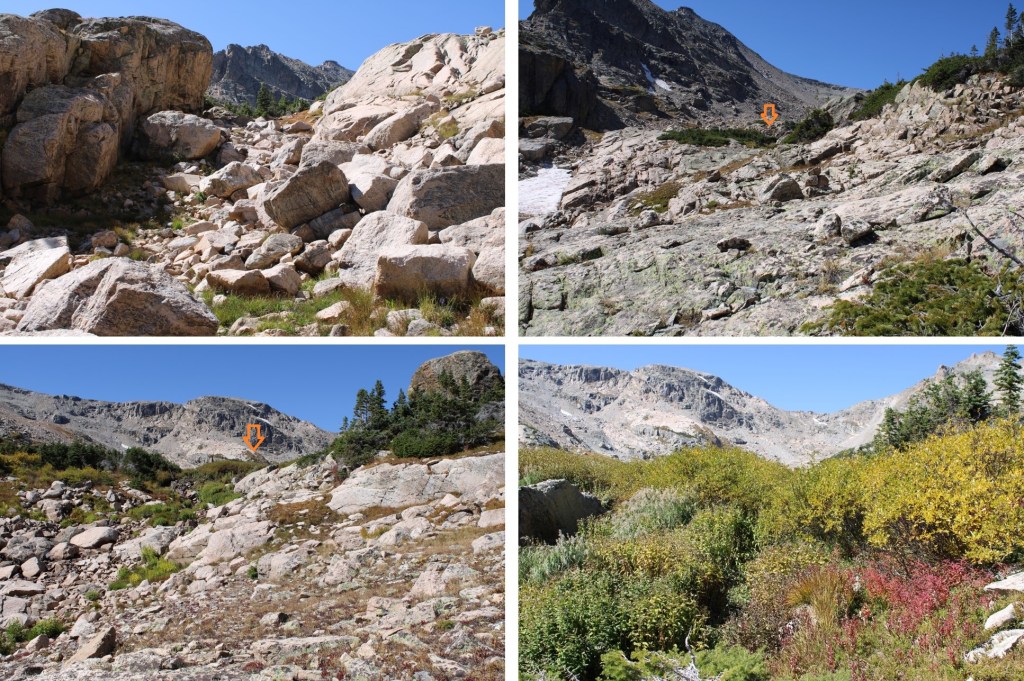
I skirted the left side of the lake, heading towards the grassy gully. This involved rock hopping on stable rock.
If you’re following my GPX file, you’ll note I ascended to the left on the rocky area. I wouldn’t recommend this, as it’s extremely steep. I ended up gravitating towards the rocks to avoid the steepness of the scree, and got into sketchy class 3 territory (lots of very lose rocks the size of bowling balls on top and around larger rocks, forming small, unstable gullies). Instead, this can be kept class 2 by taking the grassy gully up.
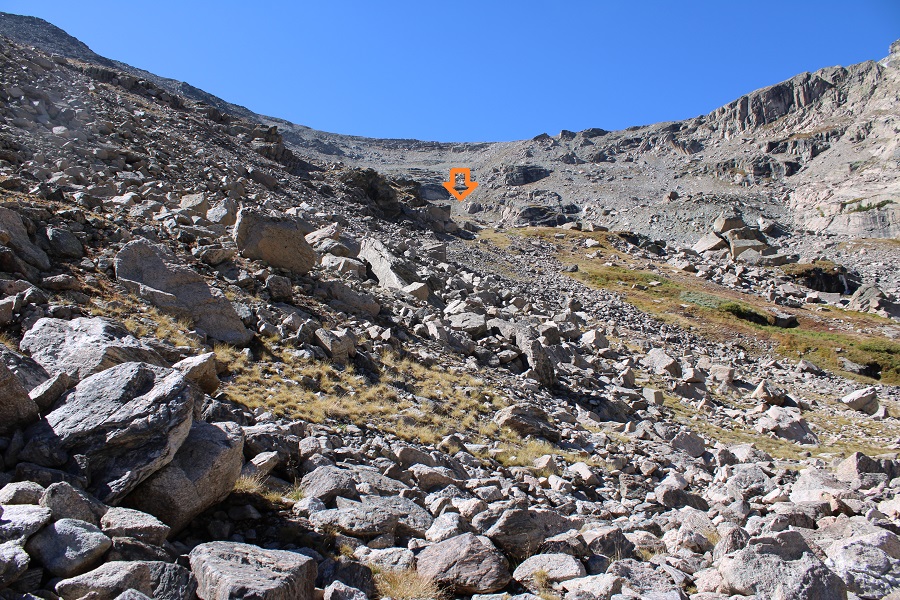
Once at the top of the grassy gully I turned left, and ascended the slope. Yes, it’s steep. This is class 2+, but luckily there isn’t a lot of scree. Instead, these rocks are fairly stable (still check your footing for loose rocks). This is also choose your own adventure. The entire slope goes. It’s about 1200’ of elevation gain from Pipit Lake to the ridge.
At the top of the rock slope I turned left, and walked the short distance to the summit of unranked Ouzel Peak
I summited Ouzel Peak at 9:15am
Ouzel Peak:
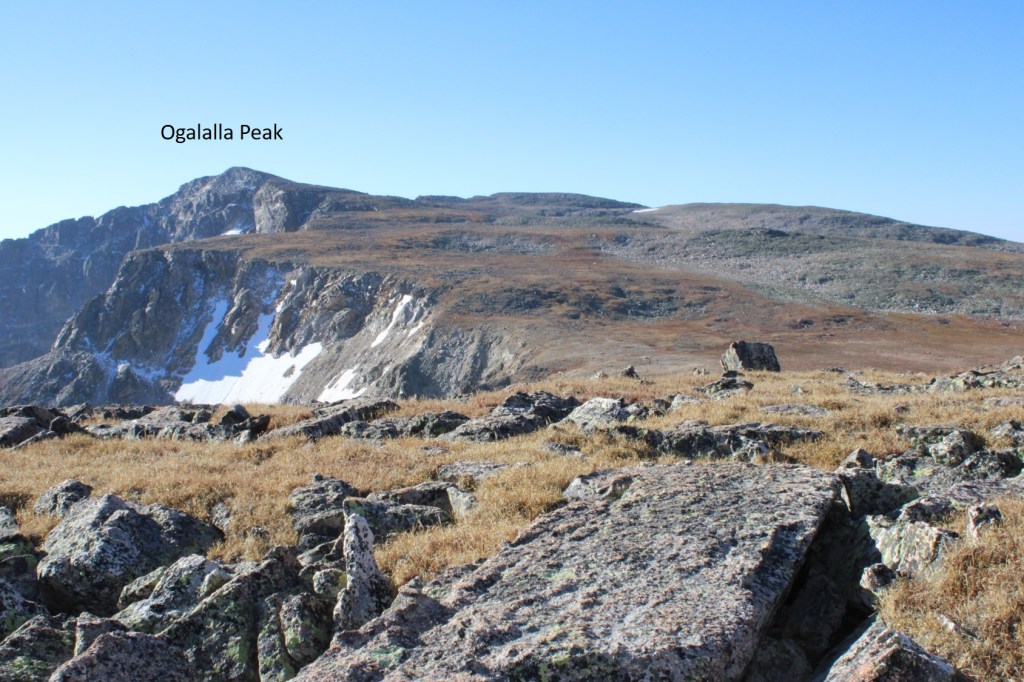
To the south I could see Ogalalla Peak.
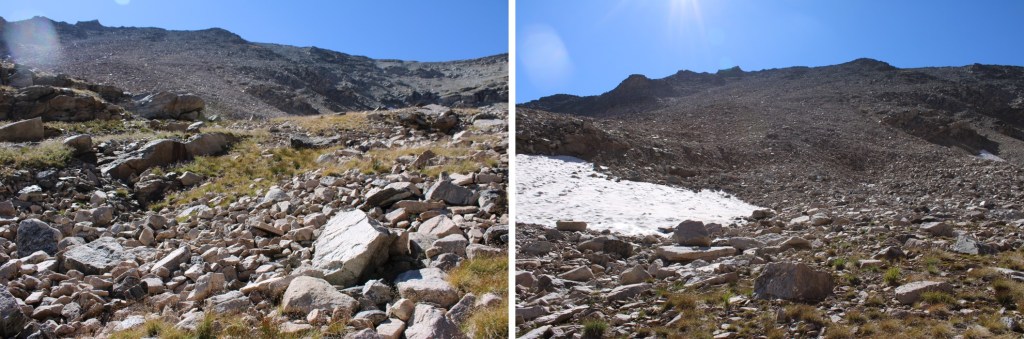
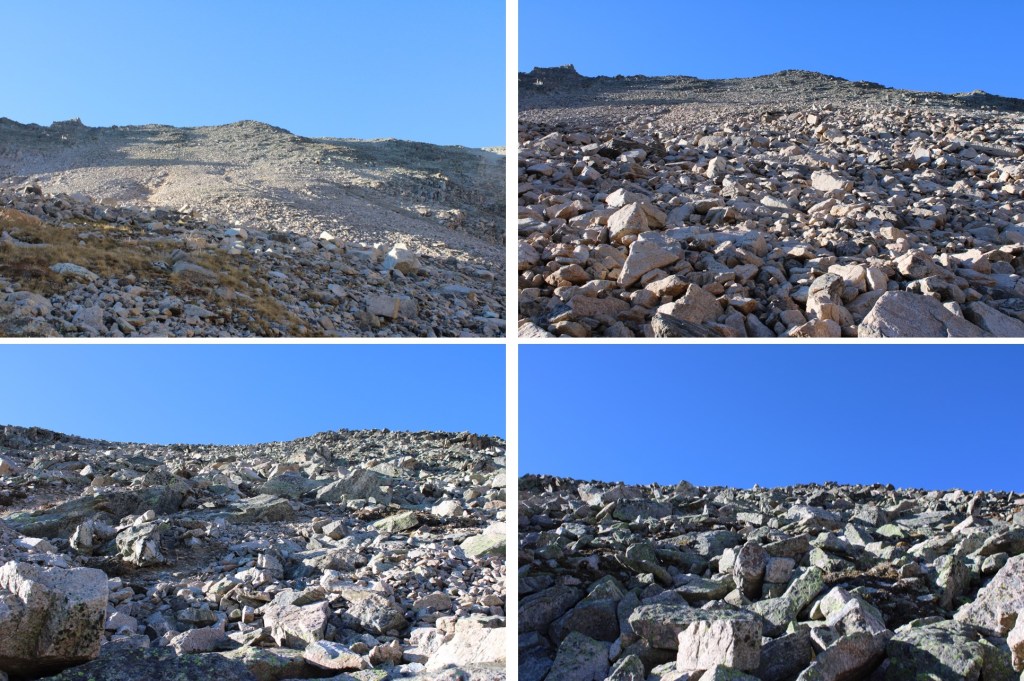
This was an easy tundra trek of about 1.5 miles. First, I descended to the Ouzel/Ogalalla saddle
Then I followed the ridge as I ascended about 670’ to the summit
The final push to the summit was rocky, but class 2
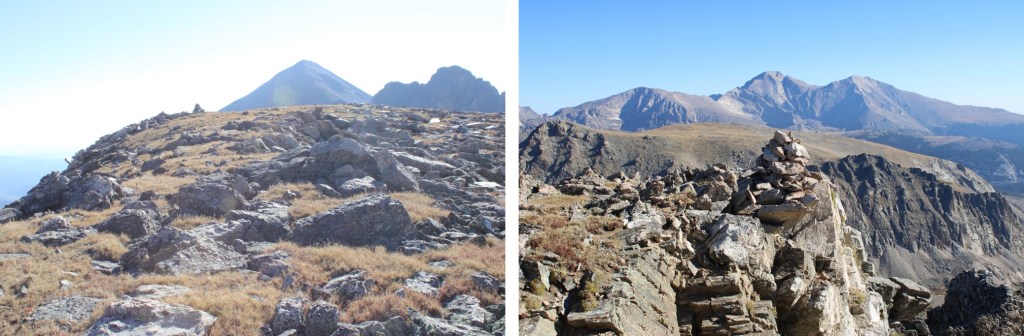
I summited Ogalalla Peak at 10am
Ogalalla Peak:
This was an out and back hike for me, so I retraced my steps back to Ouzel Peak
Then it was navigating the rocks and heading back down the gully to Pipit Lake
At Pipit Lake I skirted the lake to the right, and headed back towards Lark Pond
I stayed to the left of Lark Pond
Then looked for the ramp I’d used to on my way in
Now to make it back to the trail. Here’s the overall route I took
I went down the class 3 ramp this time, facing forward, without too much difficulty.
Then crossed the stream and headed back up to the trail
It was now a class 1 hike 6.4 miles back to the Wild Basin Trailhead. There were plenty of signs indicating the way
I made it back to the trailhead at 3pm, making this a 20.7 mile hike with 5309’ of elevation gain in 11 hours.
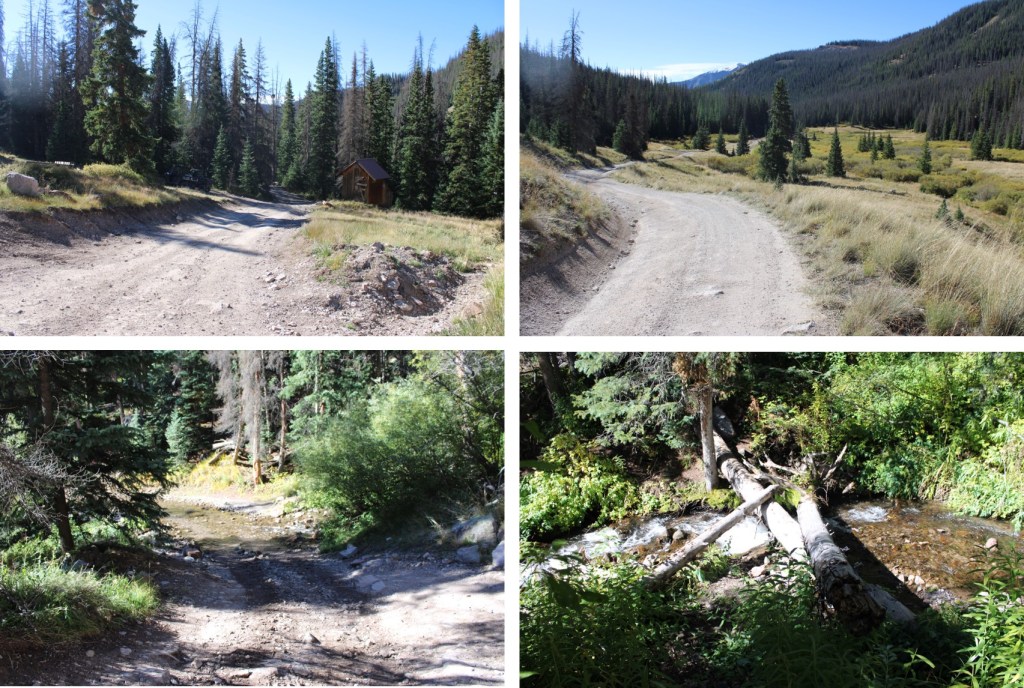
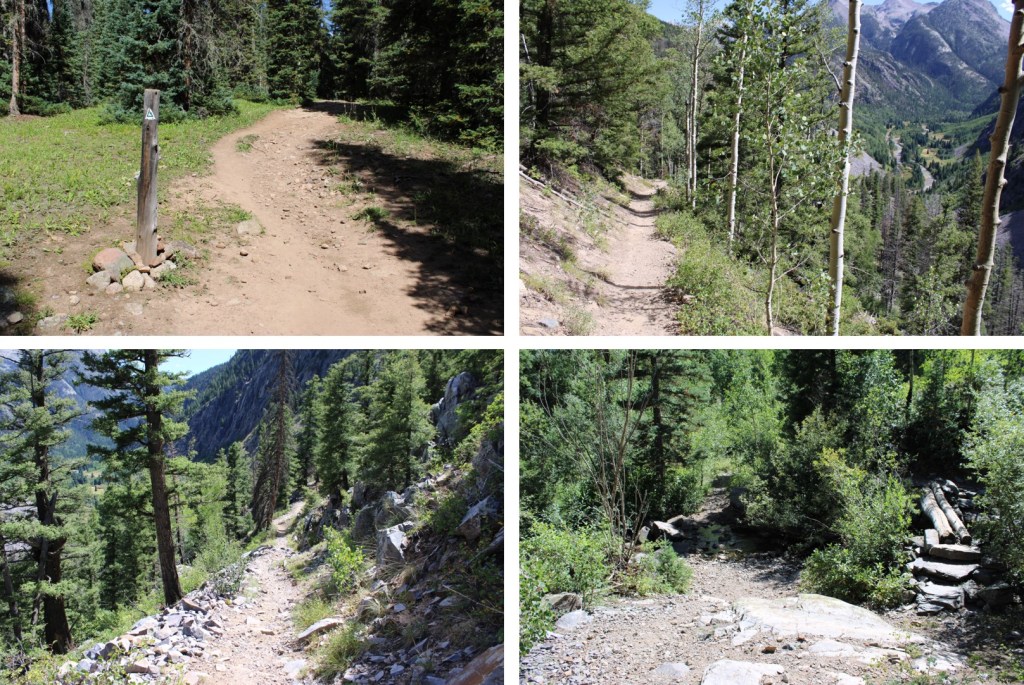
I parked near the lower Matterhorn Creek Trailhead at a nice dispersed camping spot, and was on the trail at 6am the next morning. The trail is an obvious 4WD road, and if your vehicle has made it this far, it will make it to the upper trailhead.
I followed the dirt road alongside Matterhorn Creek to the upper trailhead. There are several dispersed campsites near the upper trailhead as well.
Once at the upper trailhead I continued following the dirt road north
The dirt road is closed at this point, and becomes more of a trail.
I came to a well marked junction and turned right.
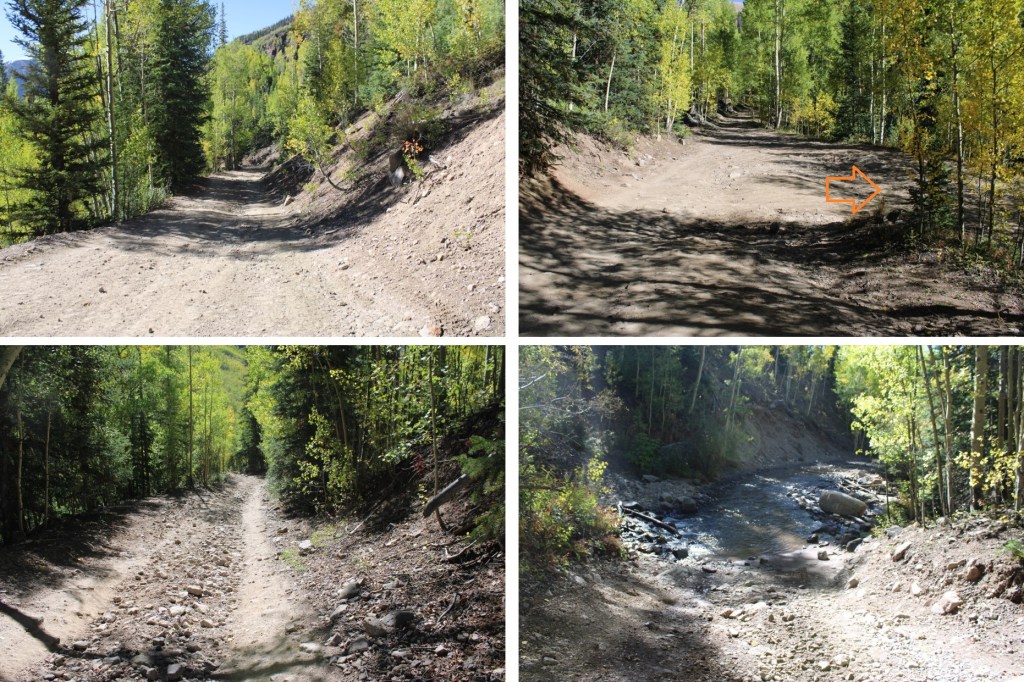
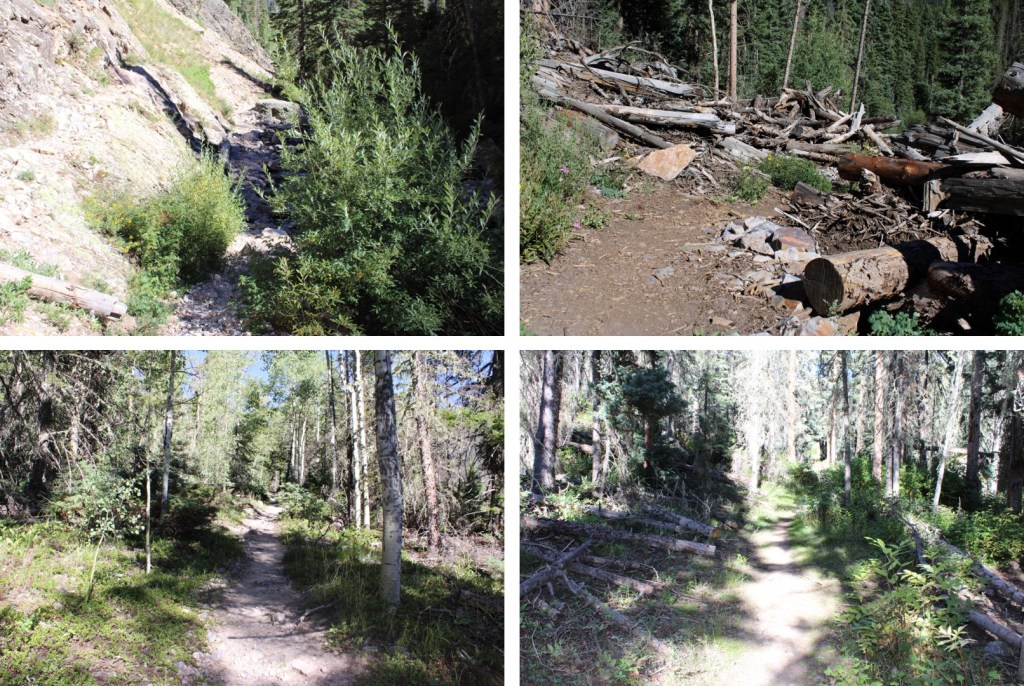
From this junction, to the right you can see the ‘road’ you want to take. It’s grown over, and doesn’t look much like a road, but it’s Ridge Stock Trail 233. This is where you’re headed.
I followed this road all the way to just before treeline. It was difficult to follow at times because it was so grown over and there were quite a few downed trees blocking the trail. The higher up I got, the more difficult the road became to follow, as it looks like elk live permanently in the area. The game trails parallel and cross the road, making route finding interesting.
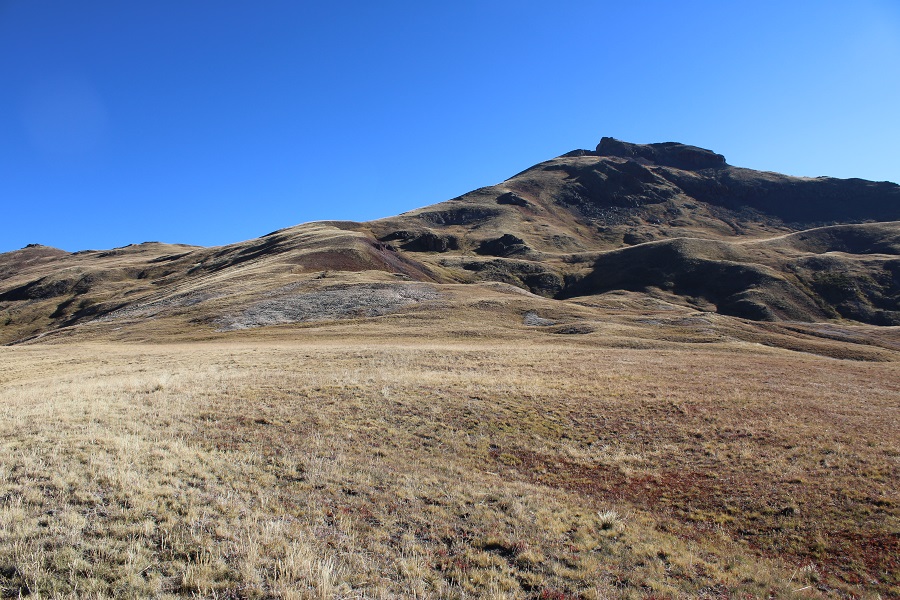
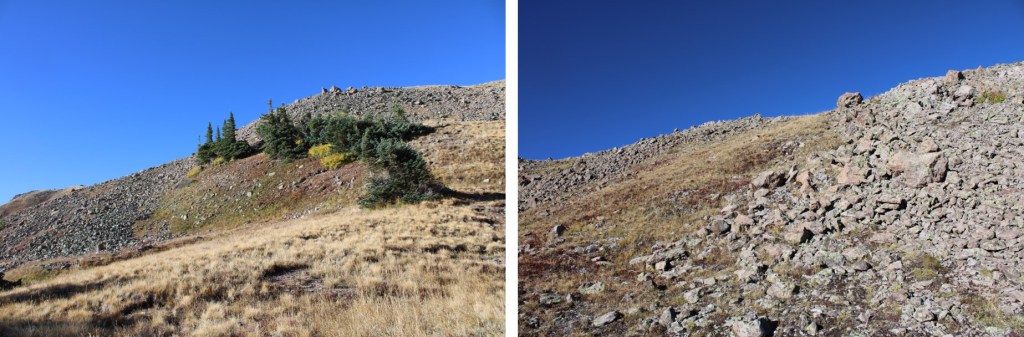
At around 12000’, the road curves around the mountain and I left the road to head northeast along the ridge. I quickly came to treeline.
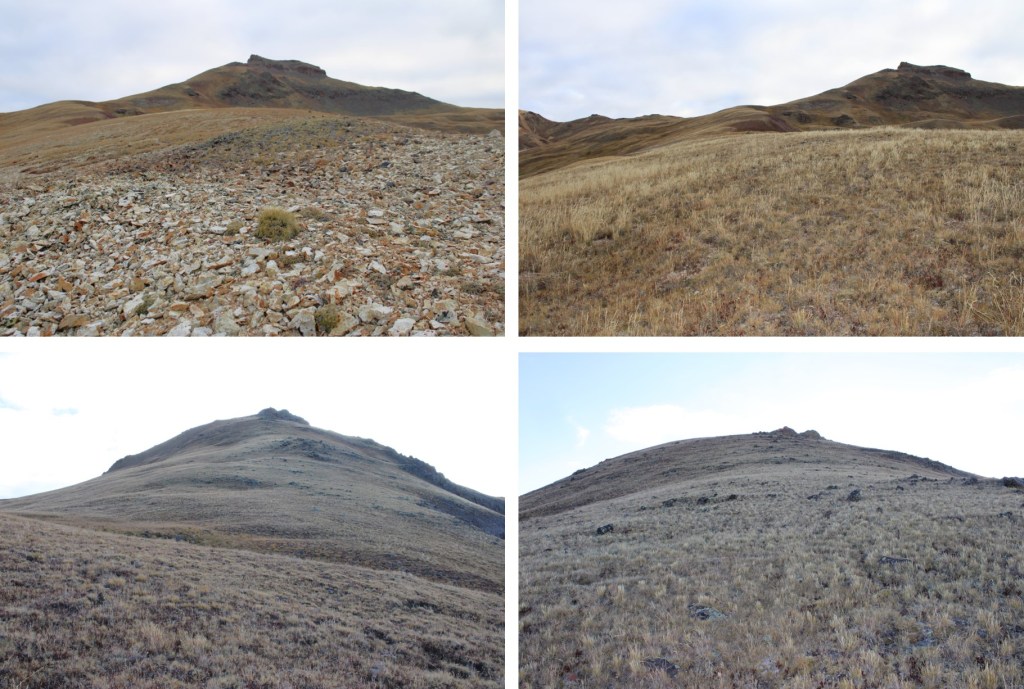
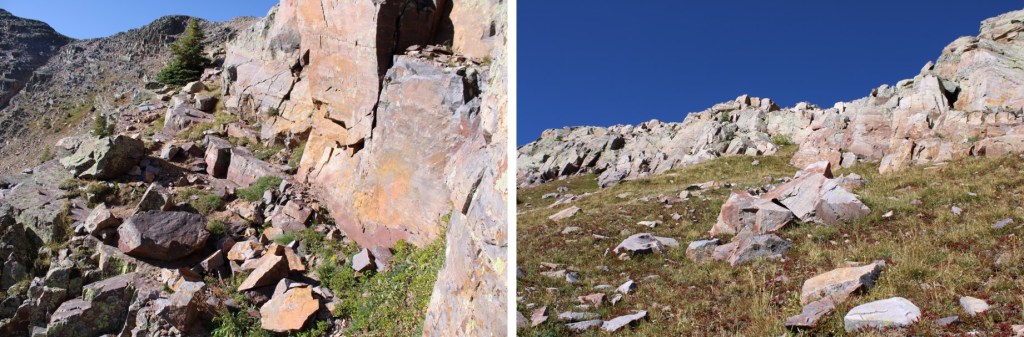
From treeline, this became a class 2 ridge hike. I followed the ridge northeast.
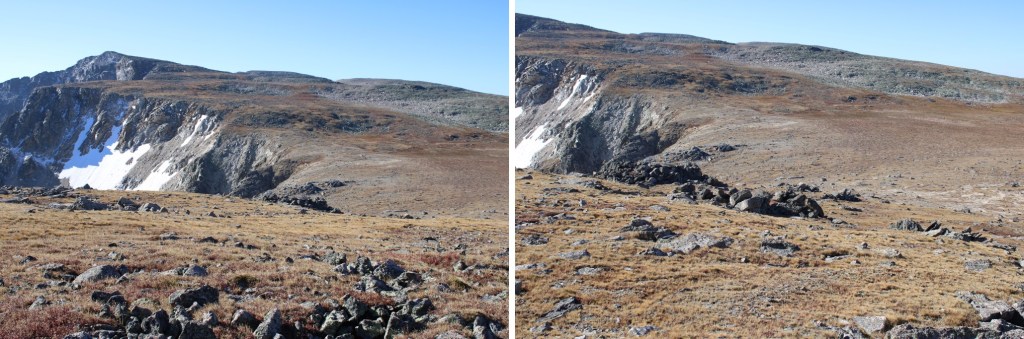
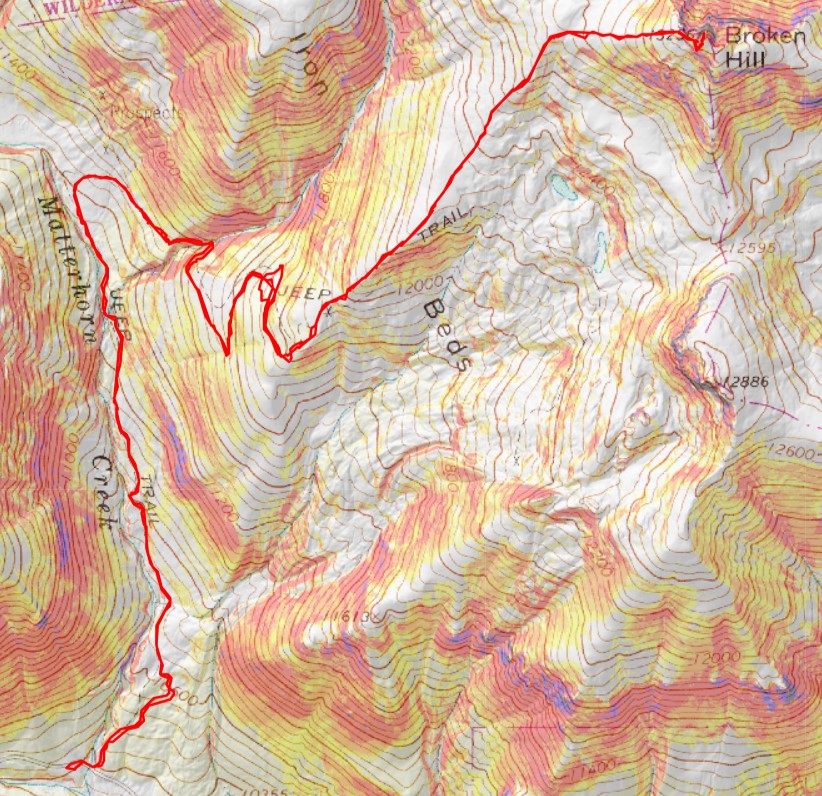
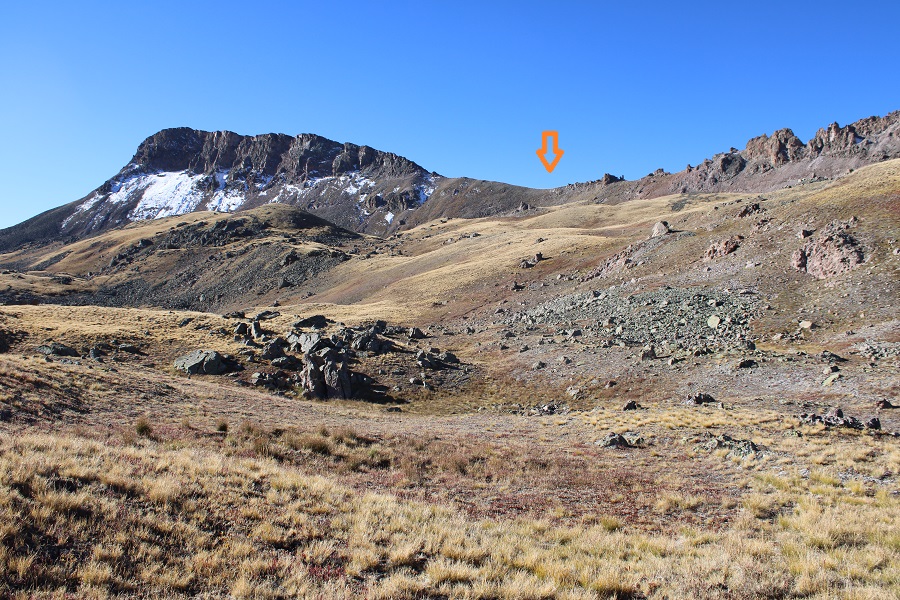
Here’s the route I took to get to the summit of Broken Hill
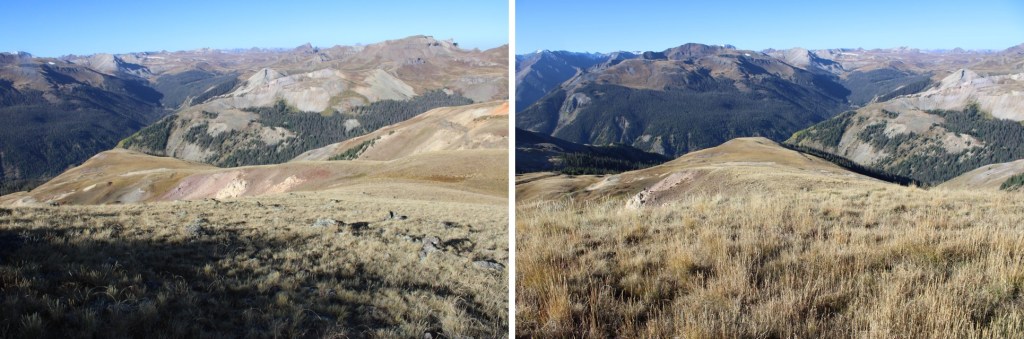
This is a ridge hike on tundra all the way to the base of Broken Hill
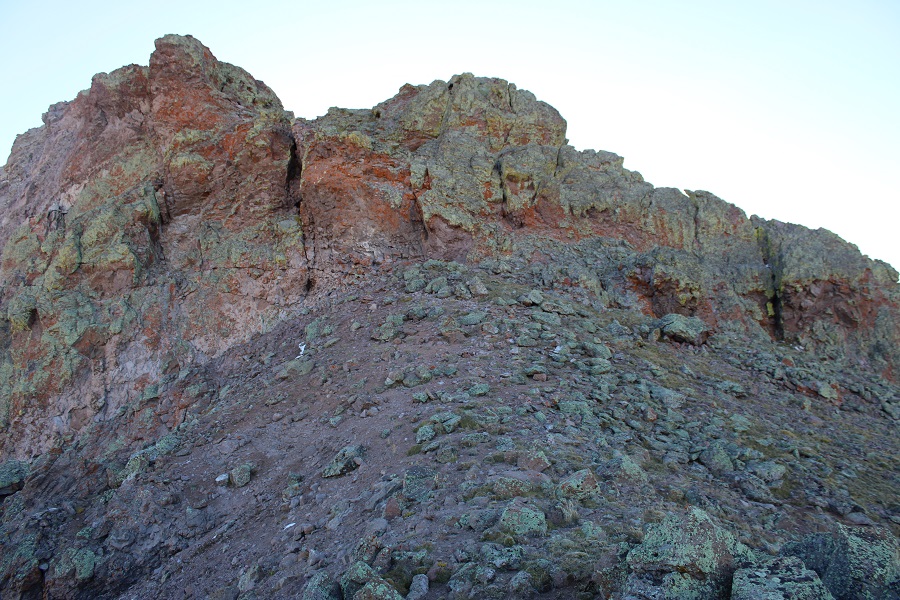
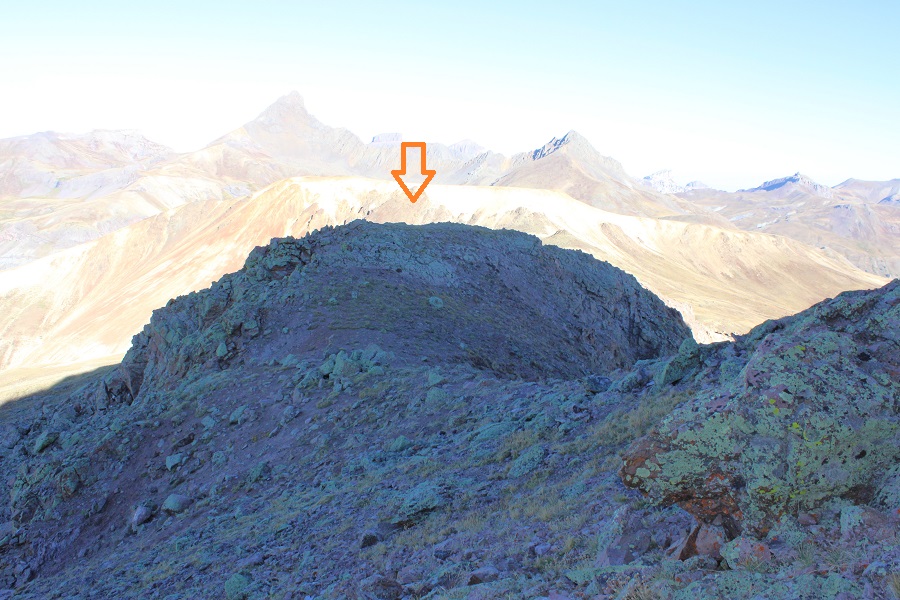
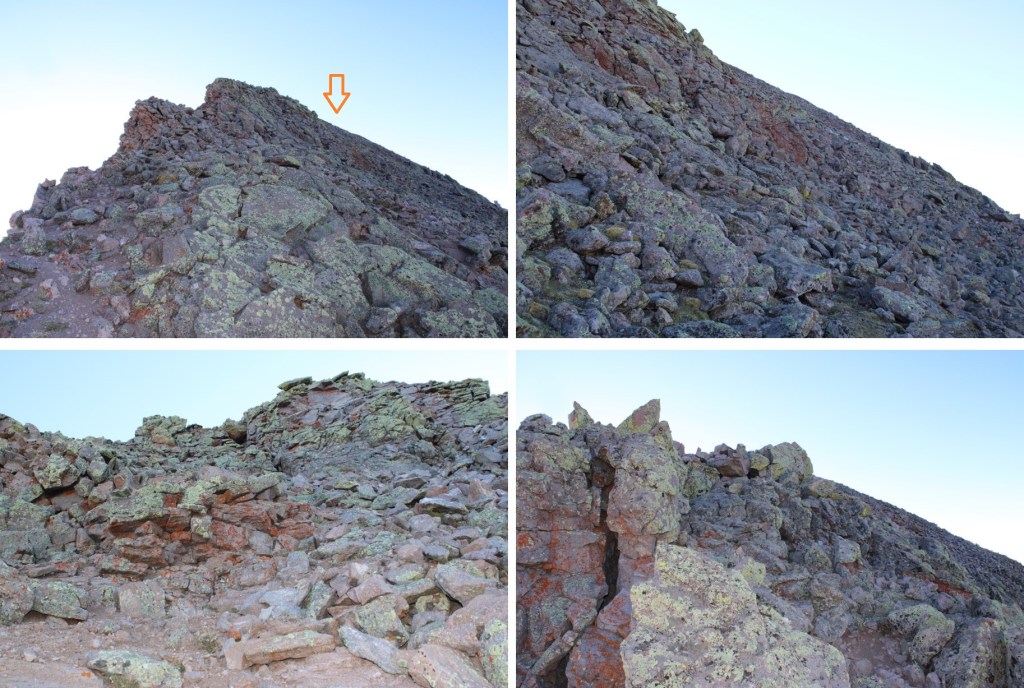
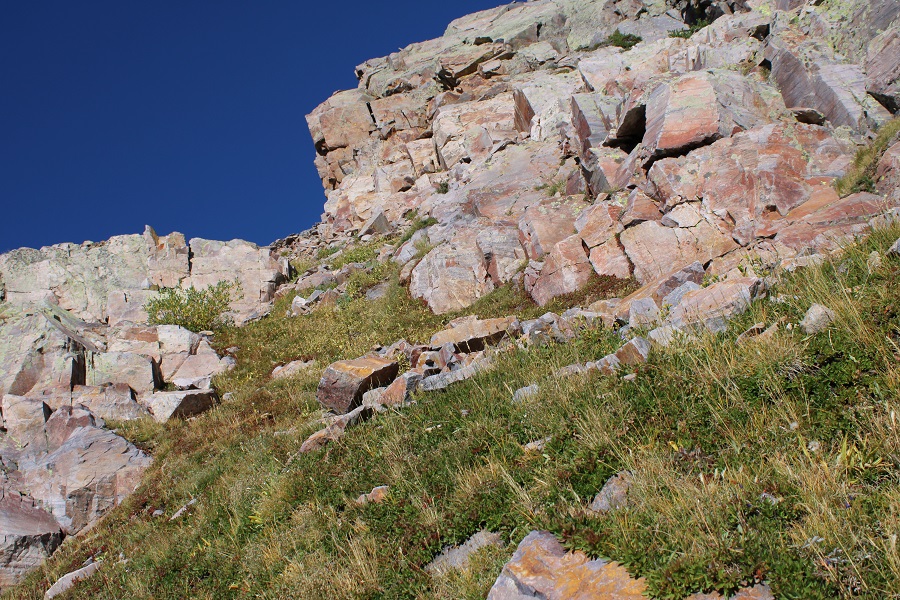
There’s a summit block at the end of the tundra.
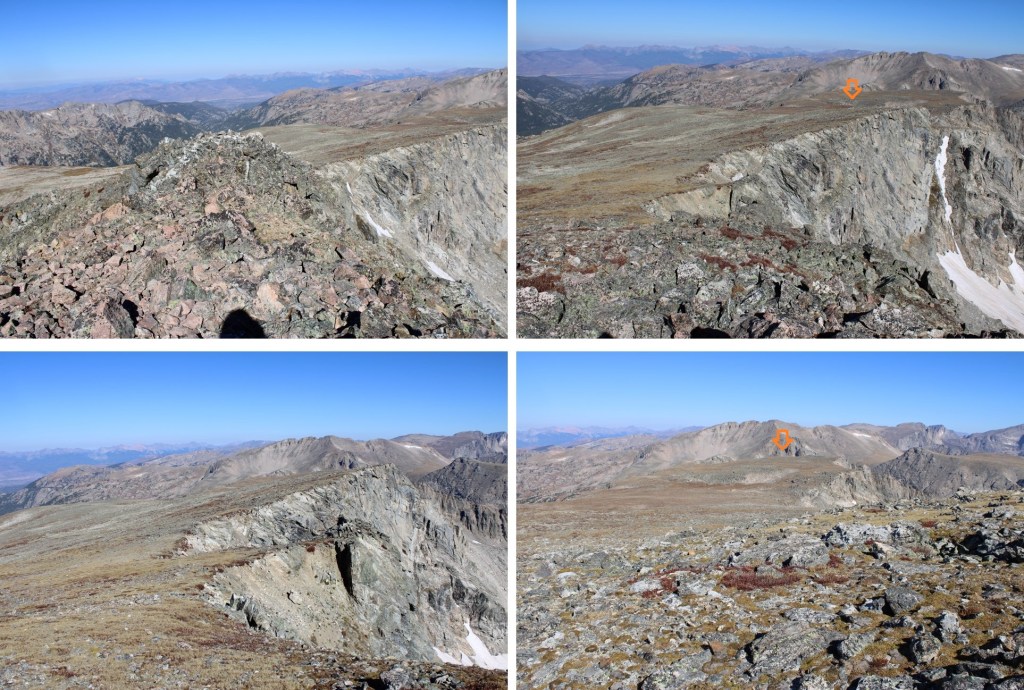
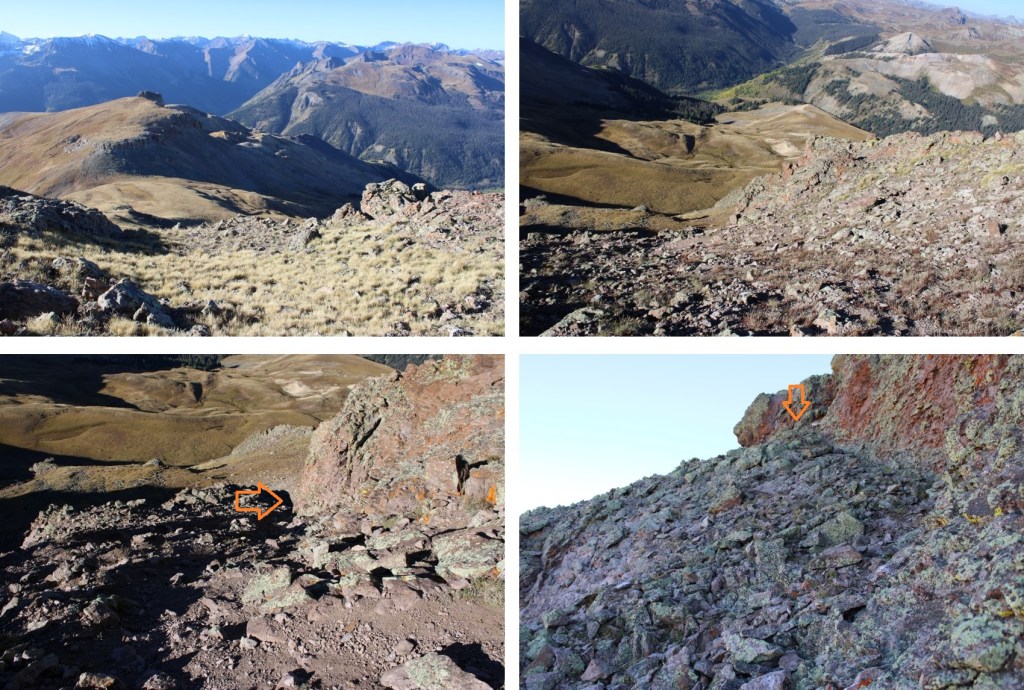
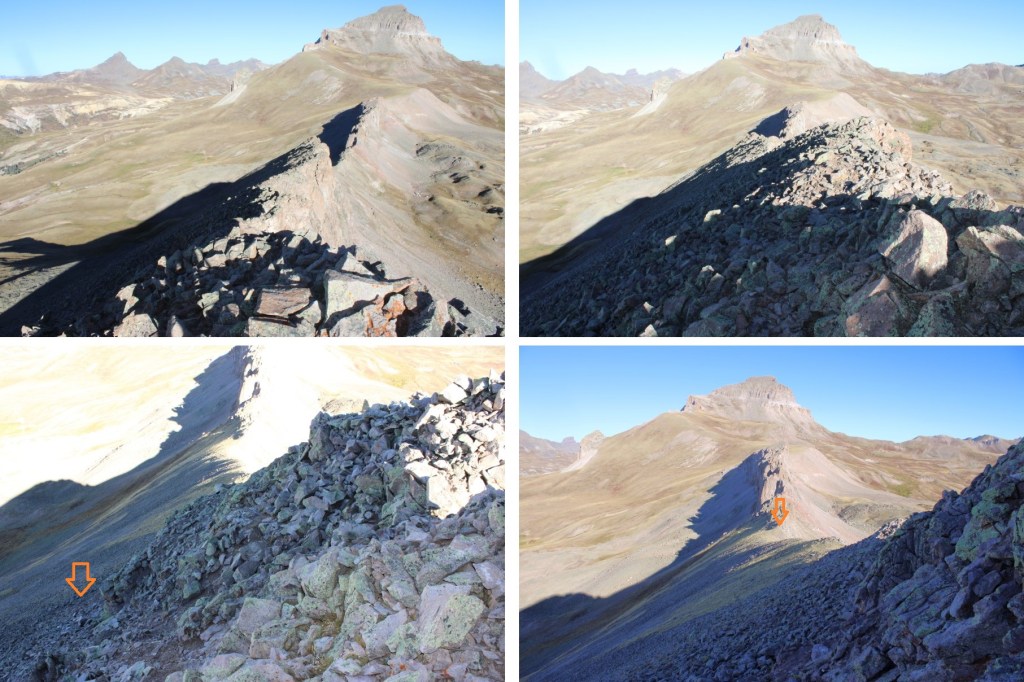
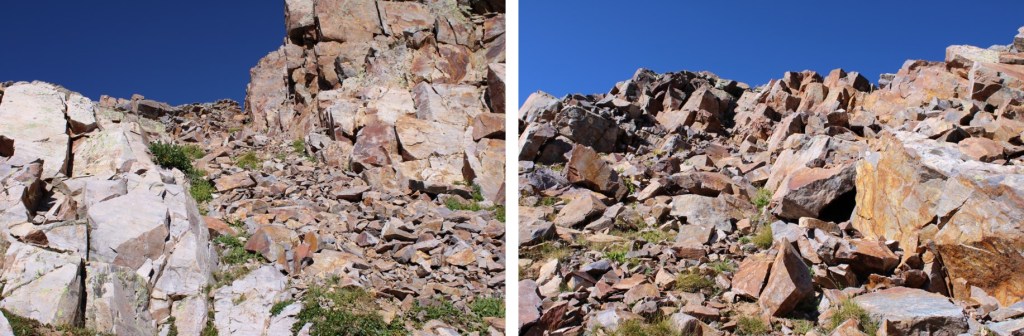
My first thought was to go up one of the class 4 chimneys, but I felt there must be a better way. I scouted around, and found if I headed to the right and around the corner, I could keep this a class 2 hike to the summit. I aimed for here:
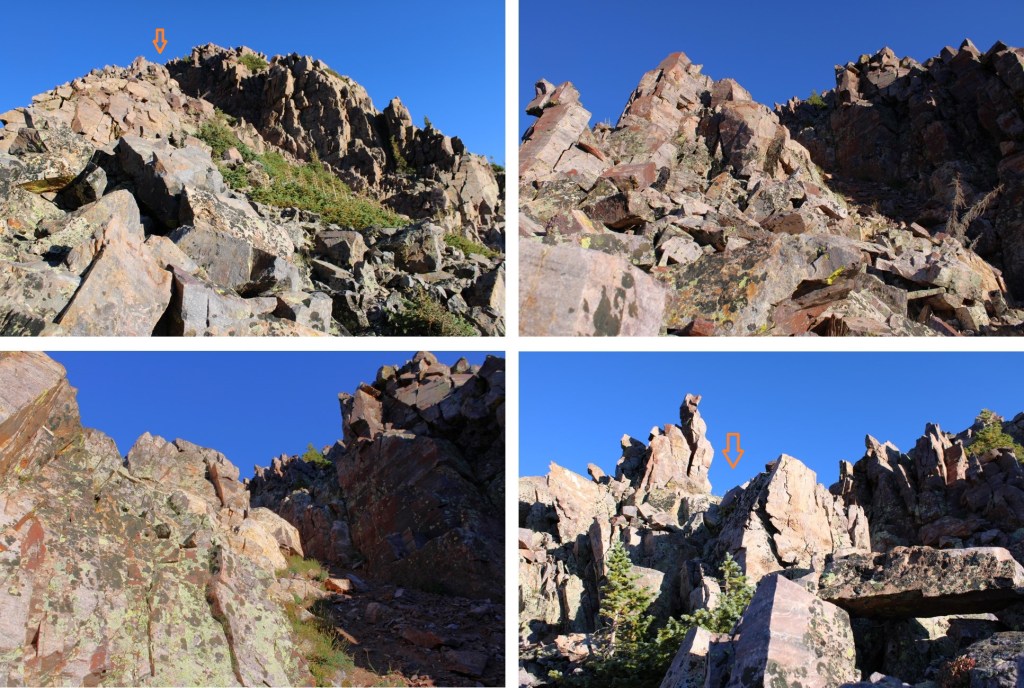
I skirted the mountainside, then headed north on class 2 terrain to the summit
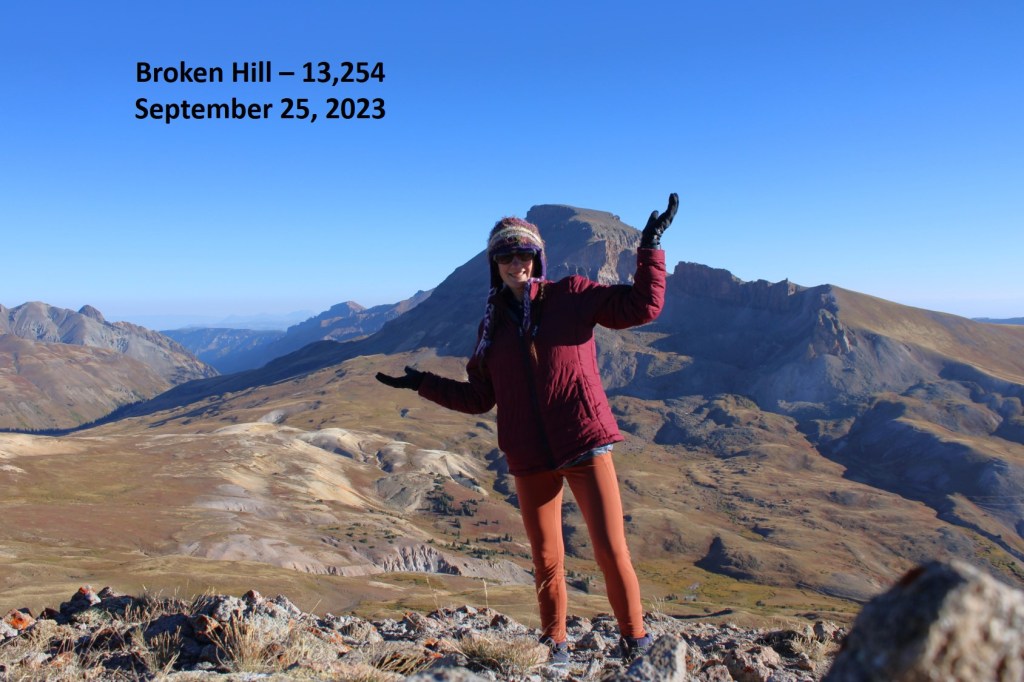
I summited Broken Hill at 8:25am
Broken Hill:
This was an out and back hike for me, so I returned the way I came, down the slope and around the rocks, back to the ridge
Then it was back down the ridge to treeline
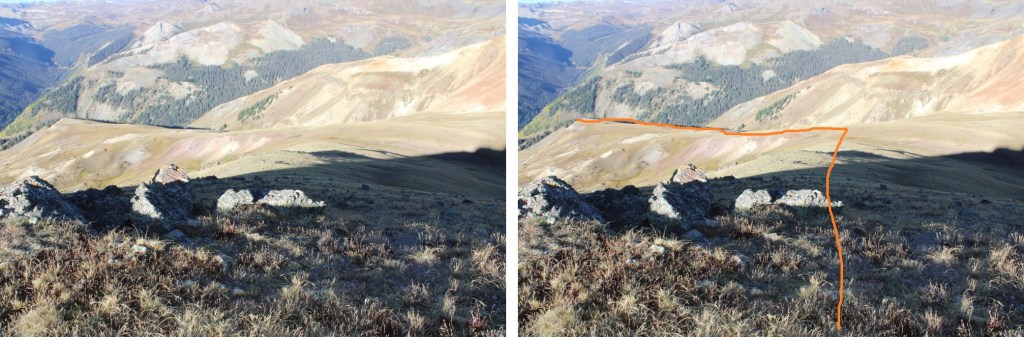
At treeline I continued heading southwest until I came back to the ‘road’
Then I followed the road back to the trail
And took the trail back to the trailhead
I made it back to my truck at 10am, making this an 8.22 mile hike with 2924’ of elevation gain in 4 hours.
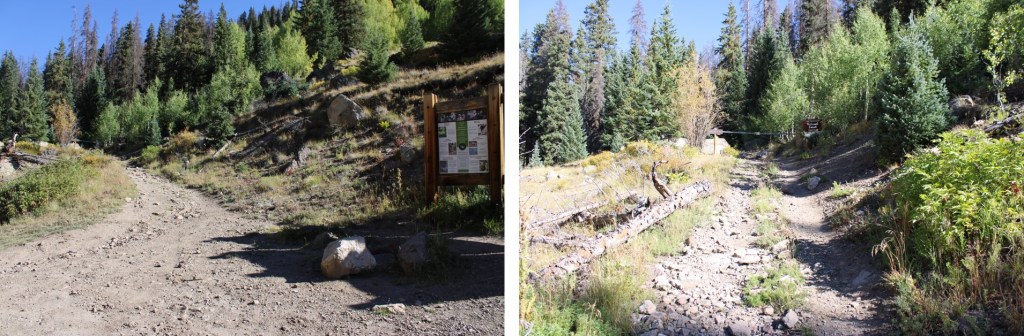
I parked just after the Matterhorn Creek Trailhead because there was a good dispersed camping spot there and it was a good place to stage for the weekend of hikes I had planned. This road requires 4WD. I was up and on the trail at 6am. I followed 4WD dirt road 24 west for .75 miles.
At the very first spur road I came to on the right I took it, and it took me a short ways to the actual trailhead, the Wetterhorn Basin Trail 226. There are plenty of places to disperse camp here as well.
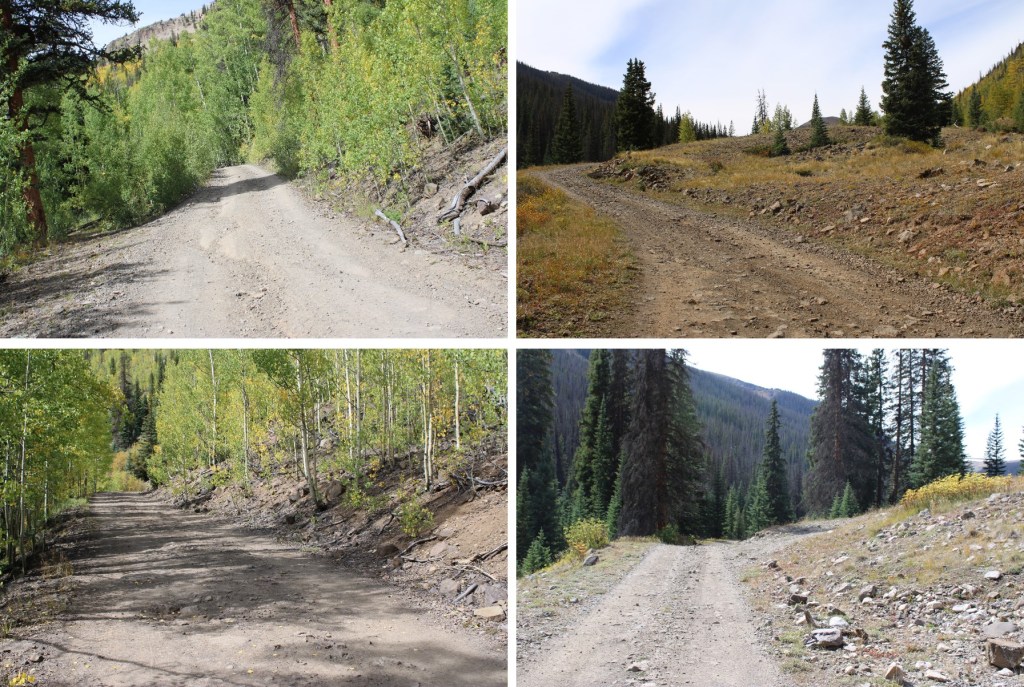
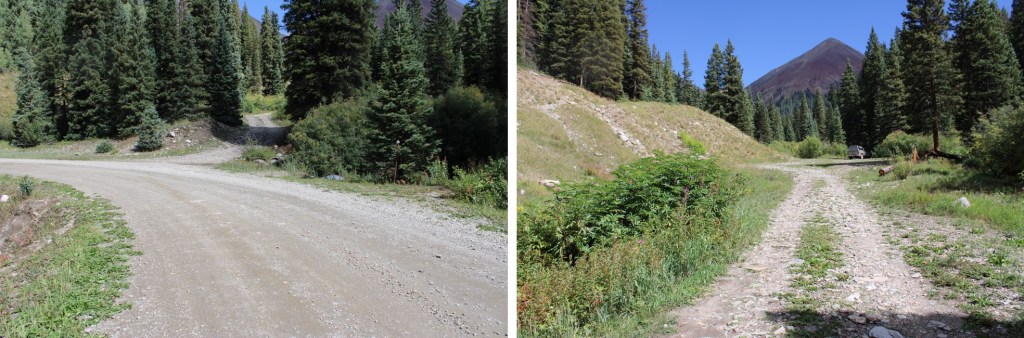
I followed the road to the right if given the option (all the other areas are camping spots).
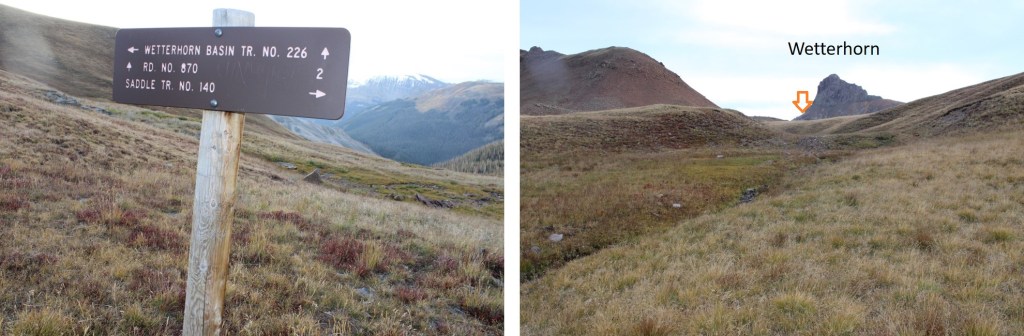
By continuing to follow the road I eventually came to the trailhead sign
While the sign looks new (and indeed, all signs I followed looked new), the trail was overgrown. It looks like at one time it was a road, but it hasn’t been for decades. I went through downed trees, brush, and willows as I followed the trail.
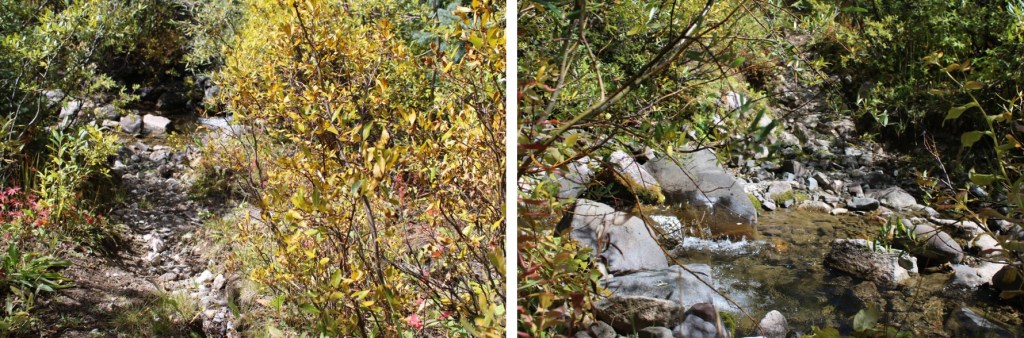
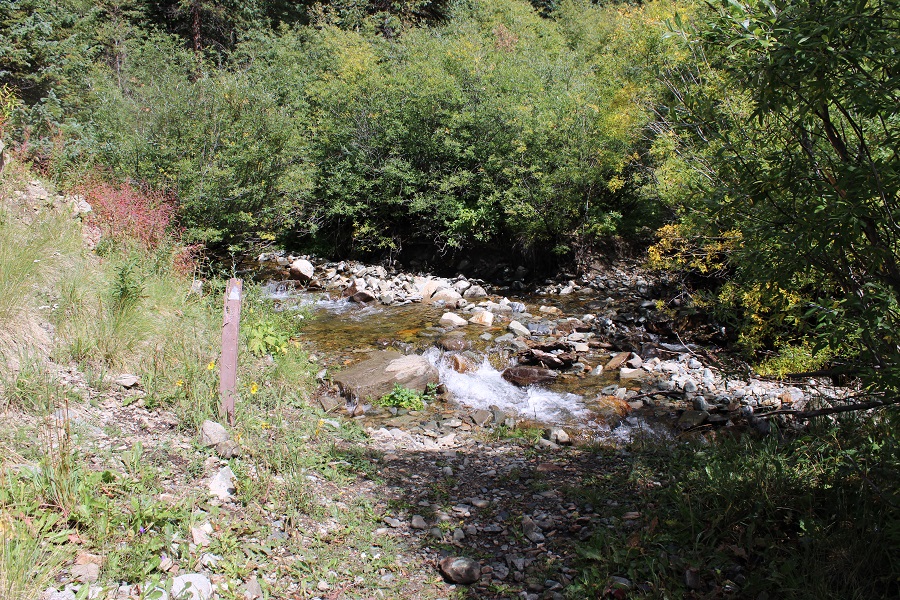
I crossed Mary Alice Creek, and would now stay on the right side of the creek to treeline.
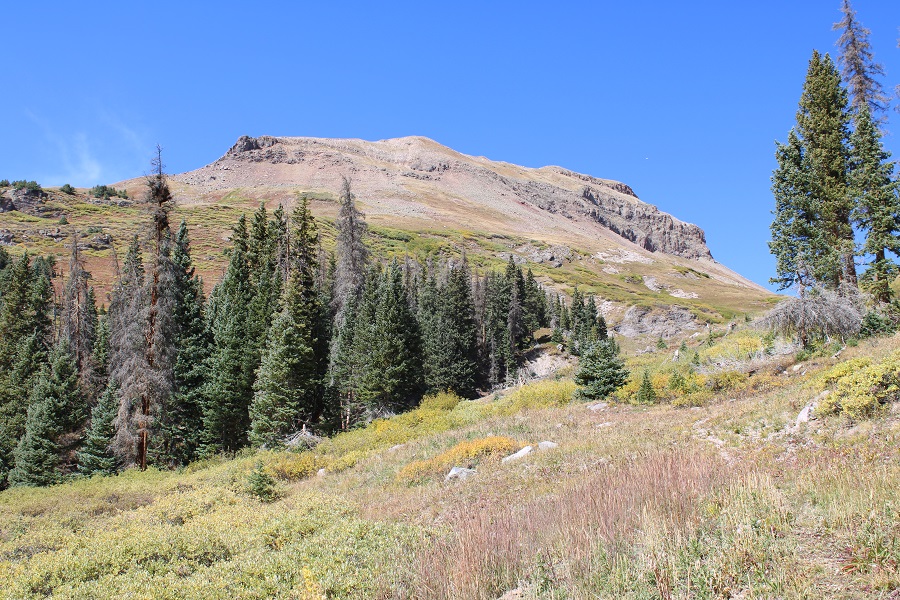
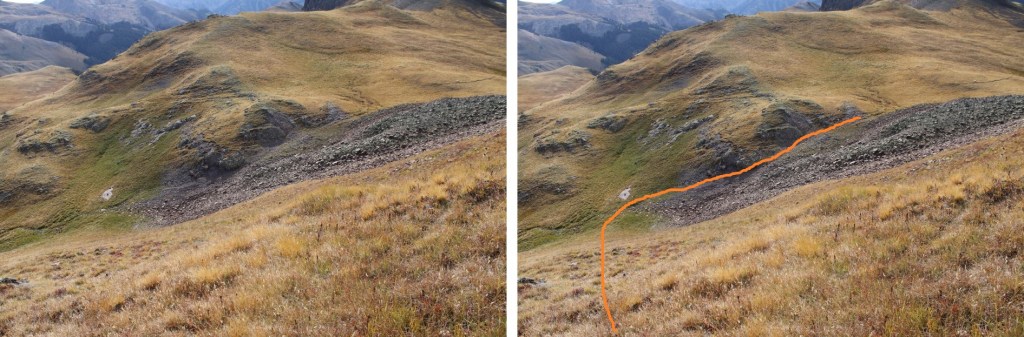
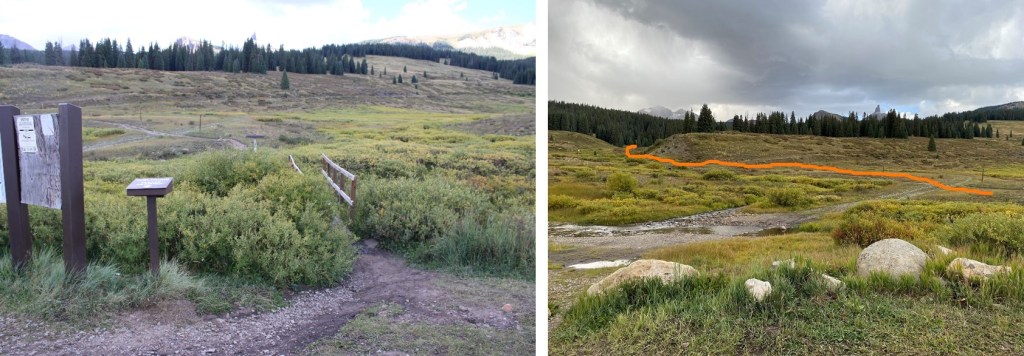
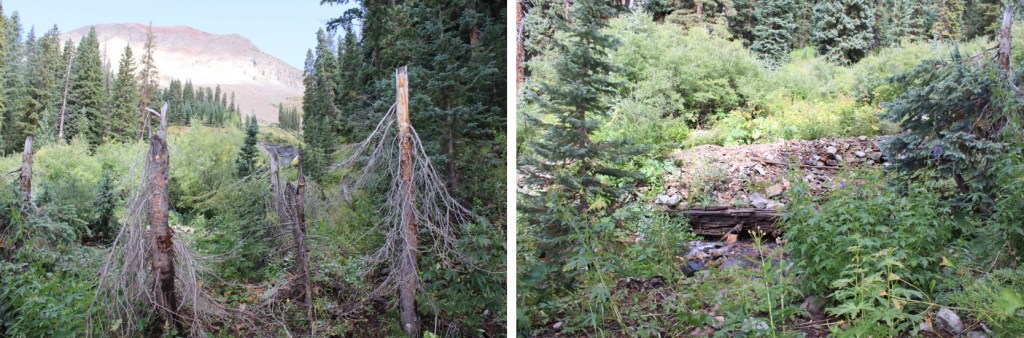
At 11700’, the ‘road’ started switchbacking the opposite direction, and I started bushwhacking through the willows. There were game trails through the willows. The main goal is to stay to the right of the creek. I was headed here:
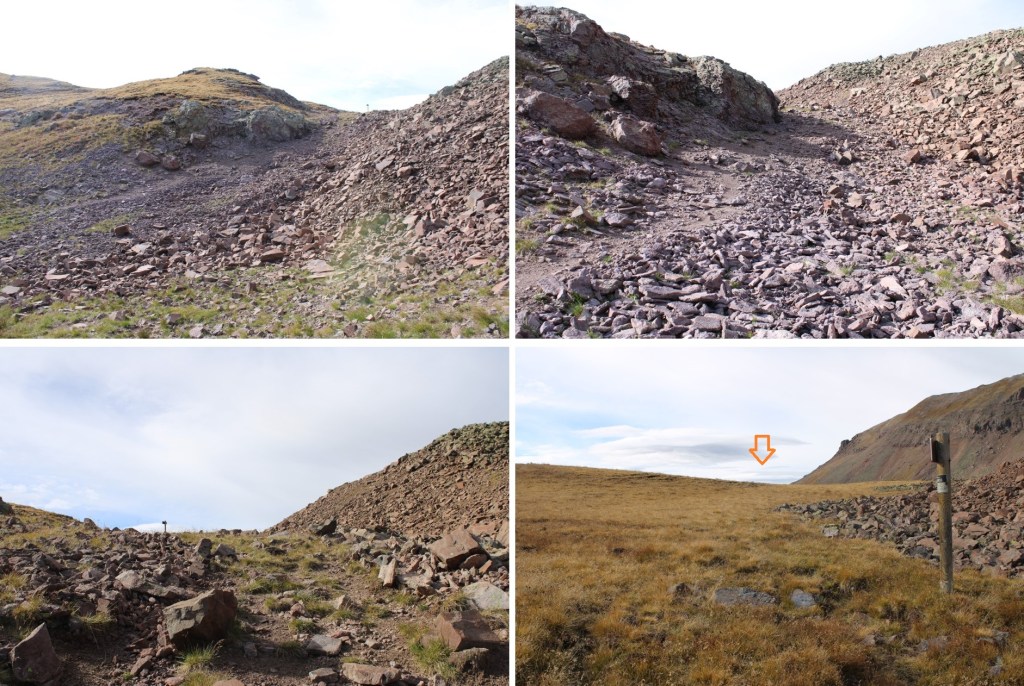
Now above treeline, I continued heading northwest, sticking to the right side of the creek. This was my next goal:
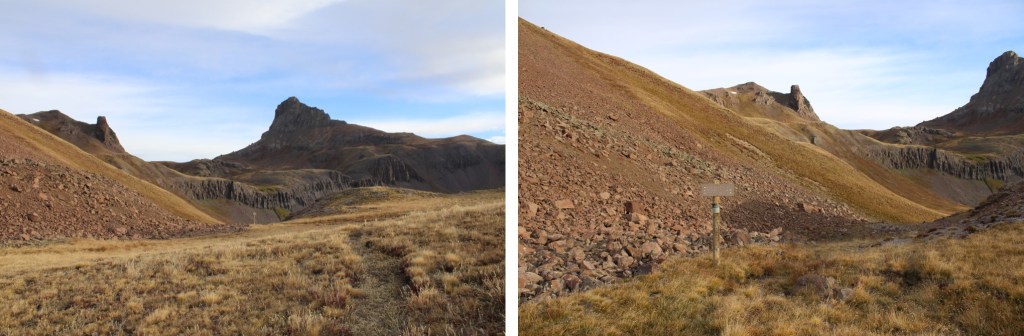
I could see a pole in the distance, and headed towards it
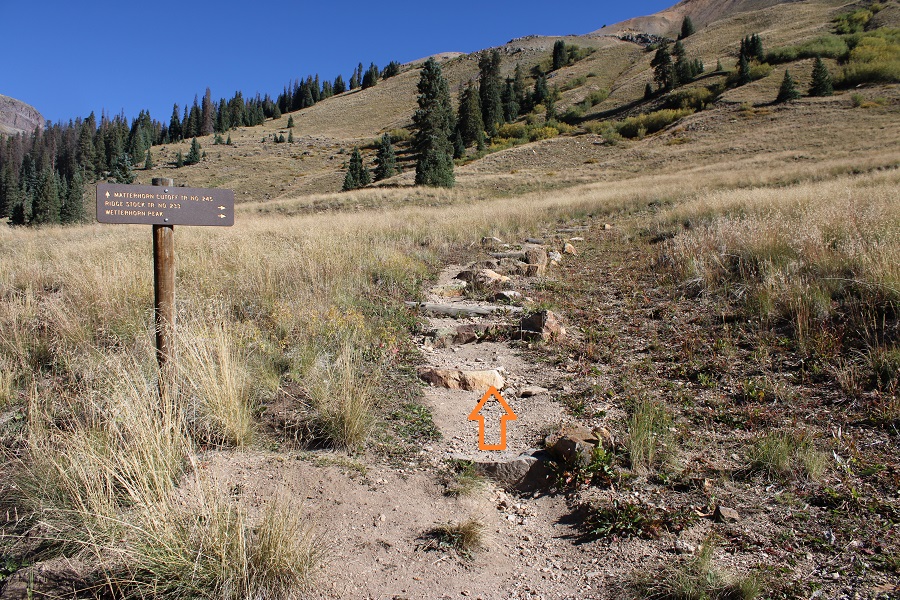
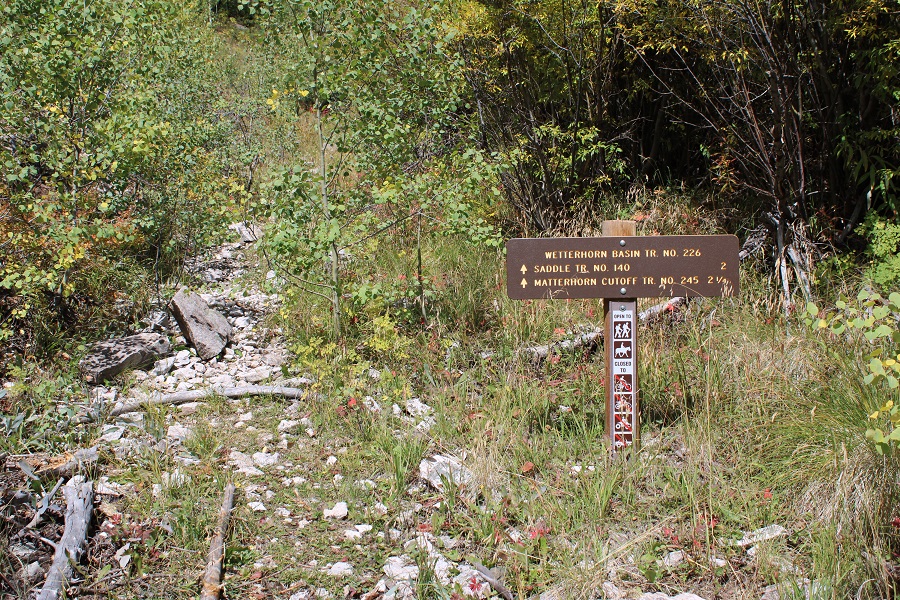
Once at the pole, I could see a trail sign straight ahead of me, and headed towards the sign
The sign indicated there were trails going several different directions, but the trails were very faint. I continued following the Wetterhorn Basin Trail to the right, as it headed northeast.
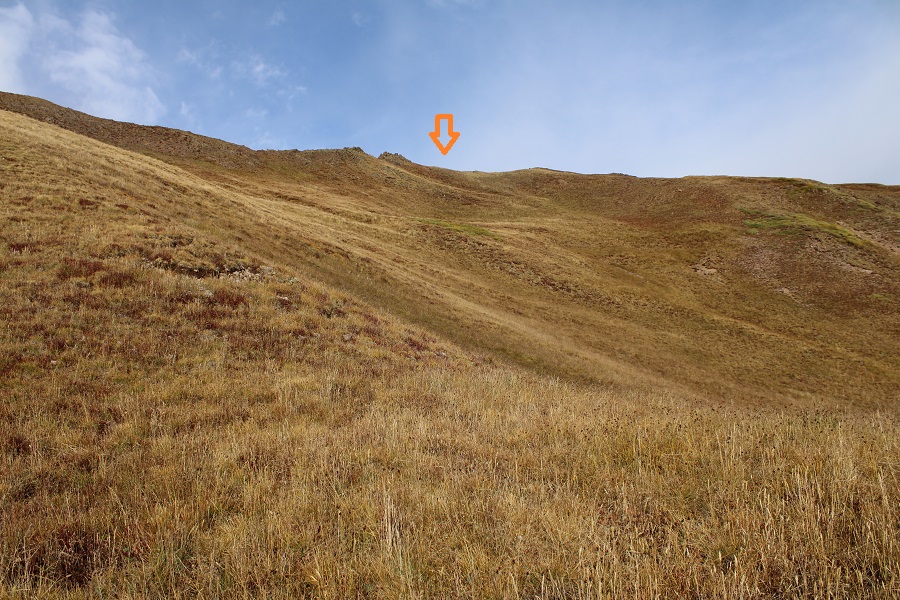
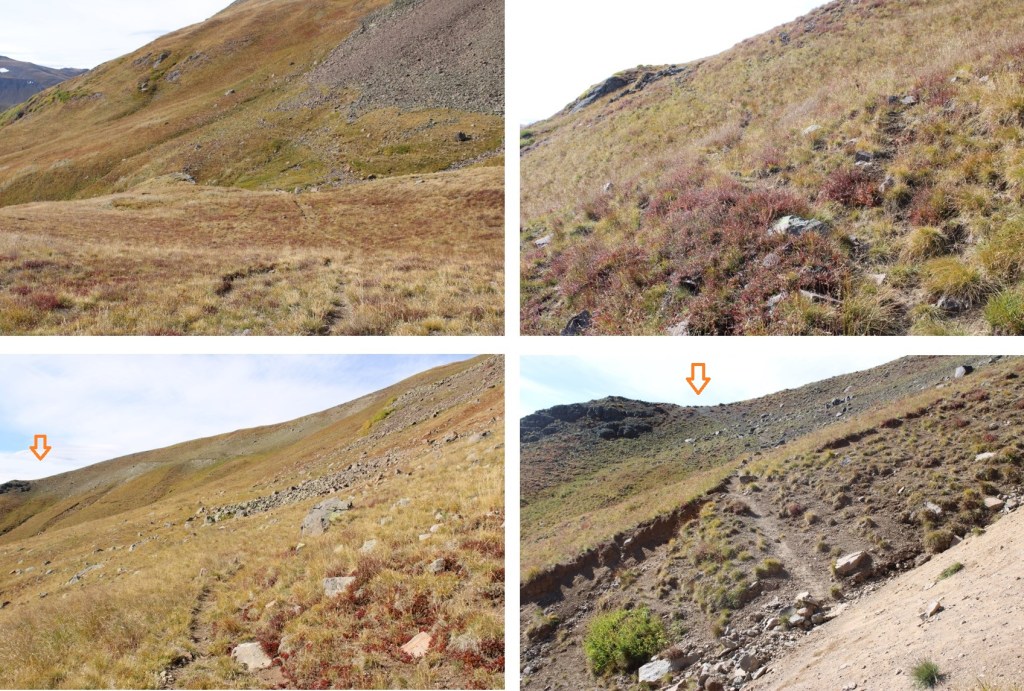
I quickly came to another sign, that directed me to descend into Wetterhorn Basin. Initially I did, but as soon as I could turn left onto the tundra I did and followed tundra to the ridge, heading northwest.
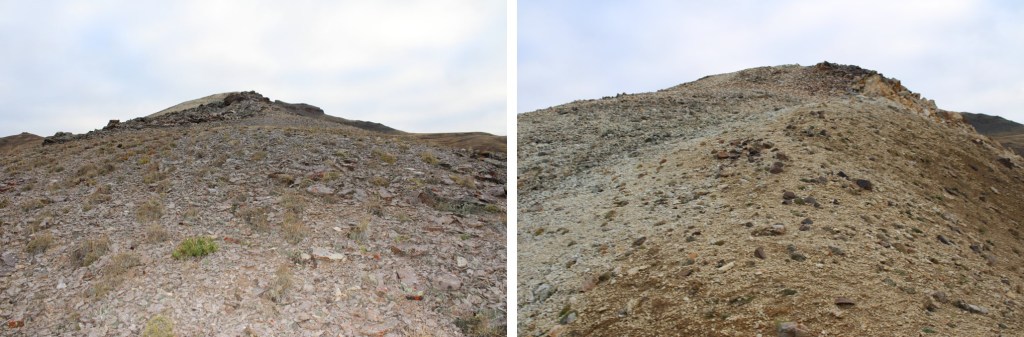
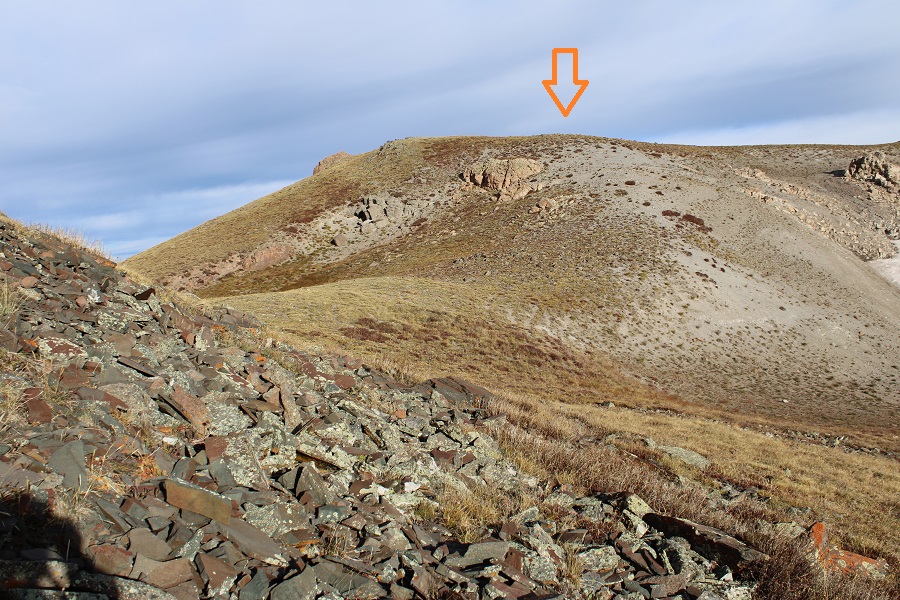
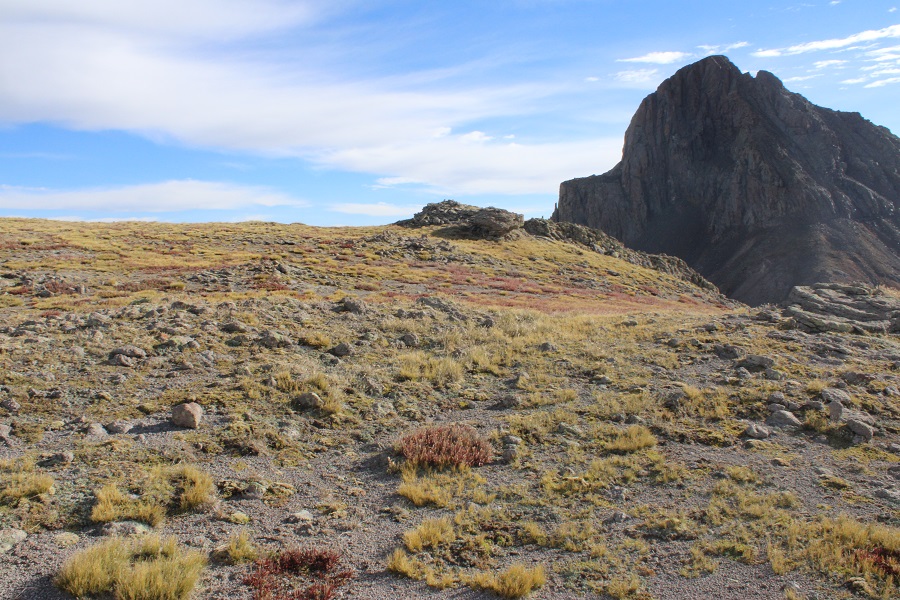
I stayed below the ridge, aiming for this low point, staying on the tundra and below the rocks. This was all class 2.
I stayed to the right of this rock formation, aiming for the ridge
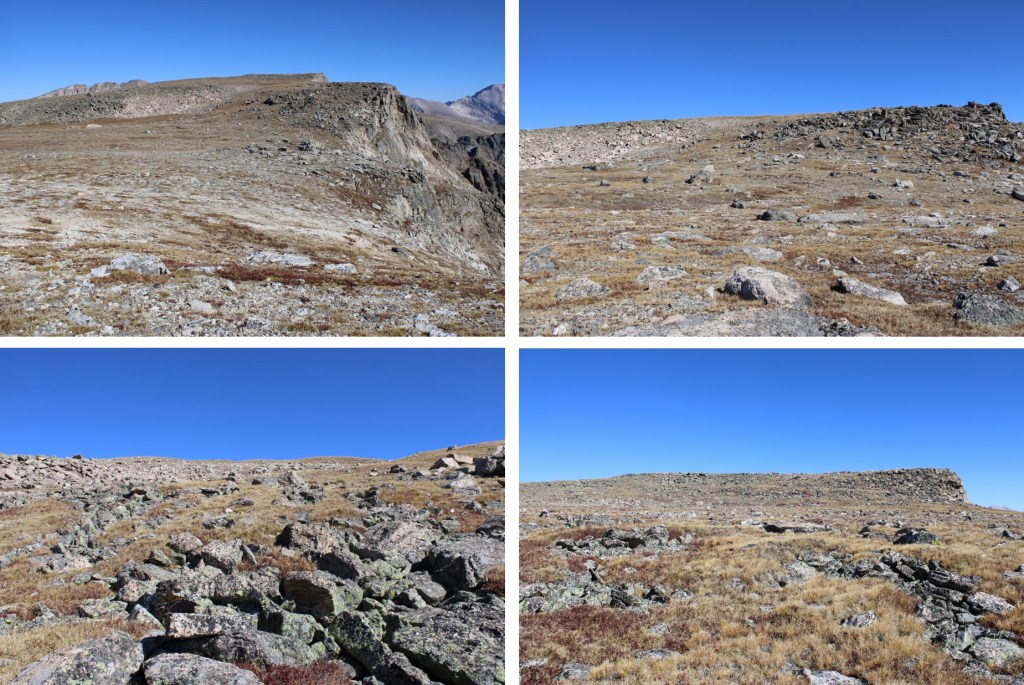
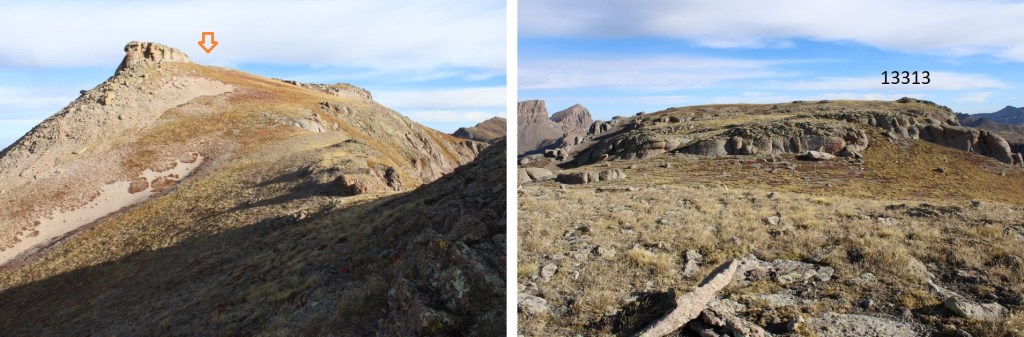
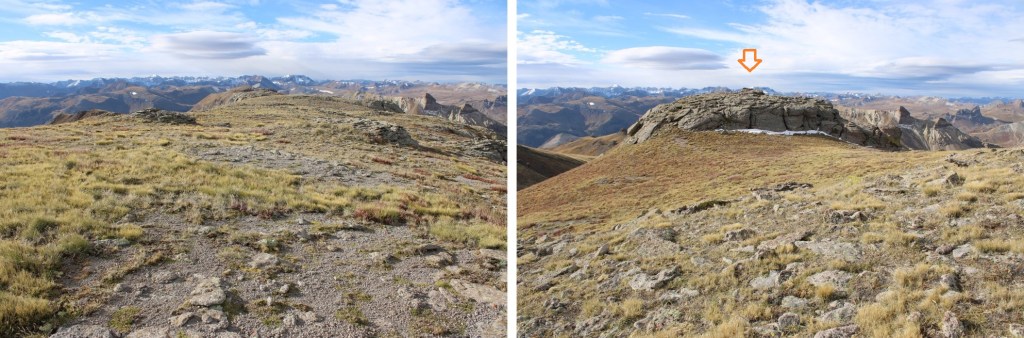
Once on the ridge I followed it north. The actual summit is hidden here. This is a class 2 ridge hike, mostly on tundra, with a few false summits along the way.
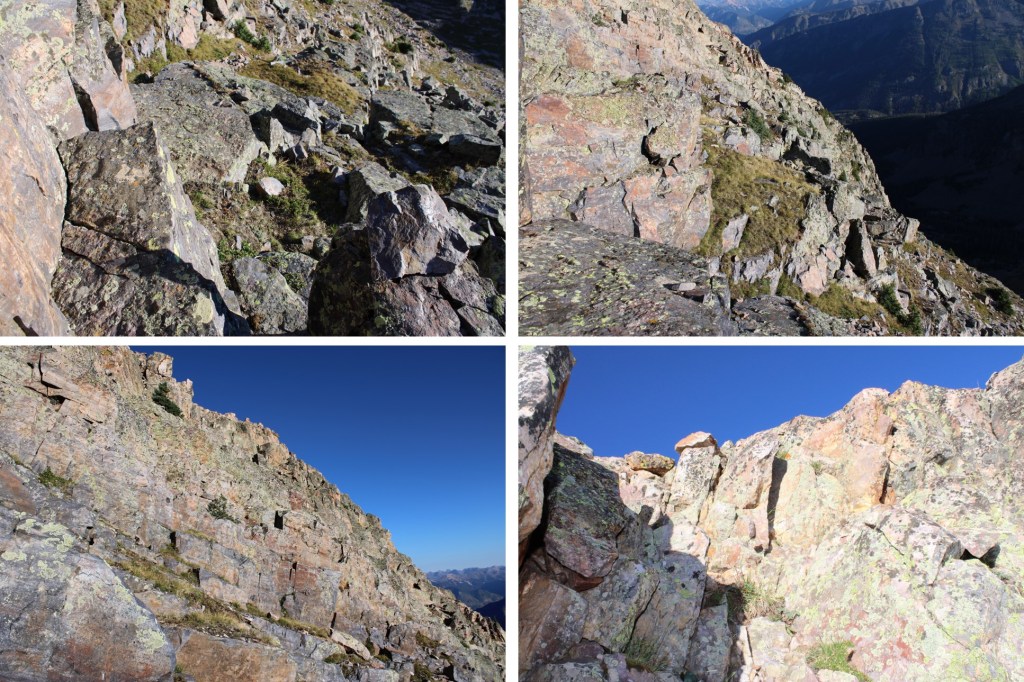
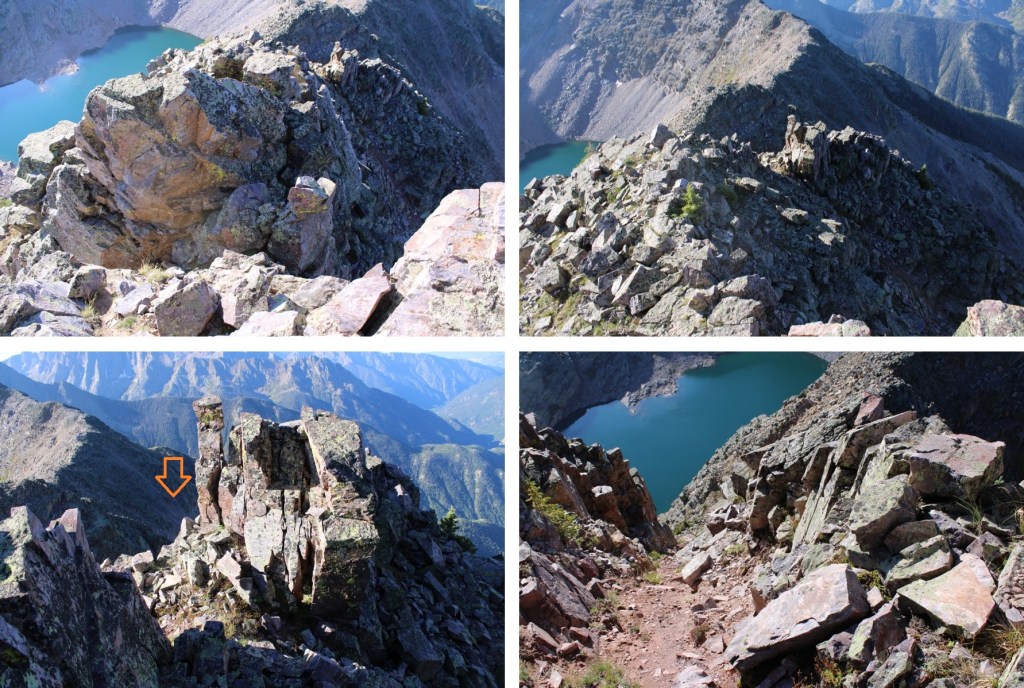
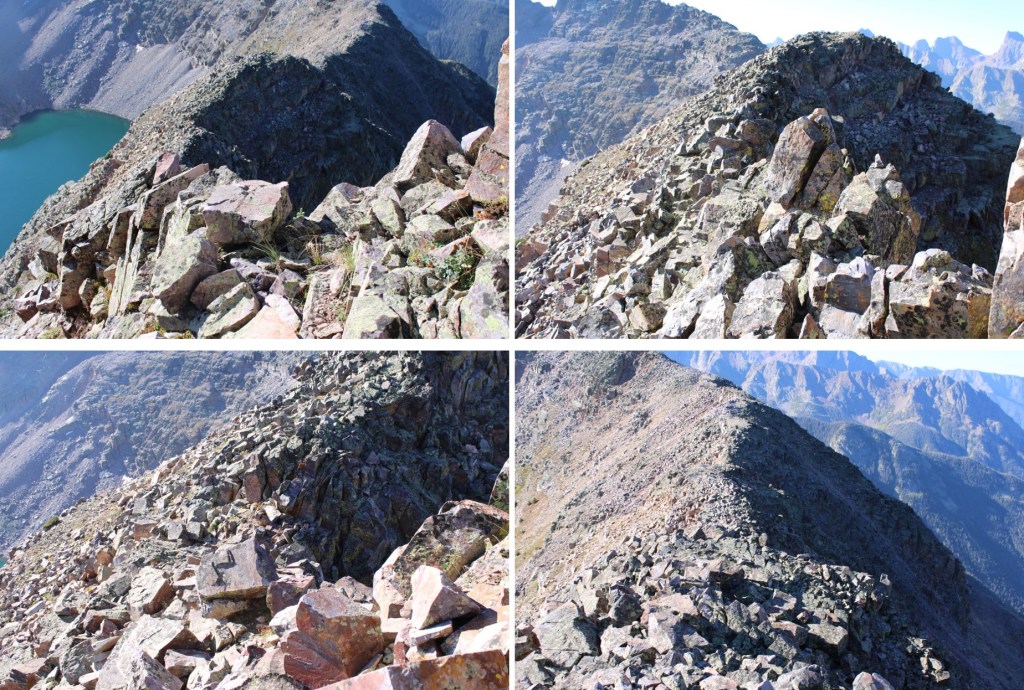
Here are some pictures of the ridge
The actual summit was quite flat, but there was a cairn indicating the summit. I walked all around, just to be sure that was the actual highpoint, and it seemed to be. There was a summit register.
I summited PT 13313 at 8:45am
PT 13313:
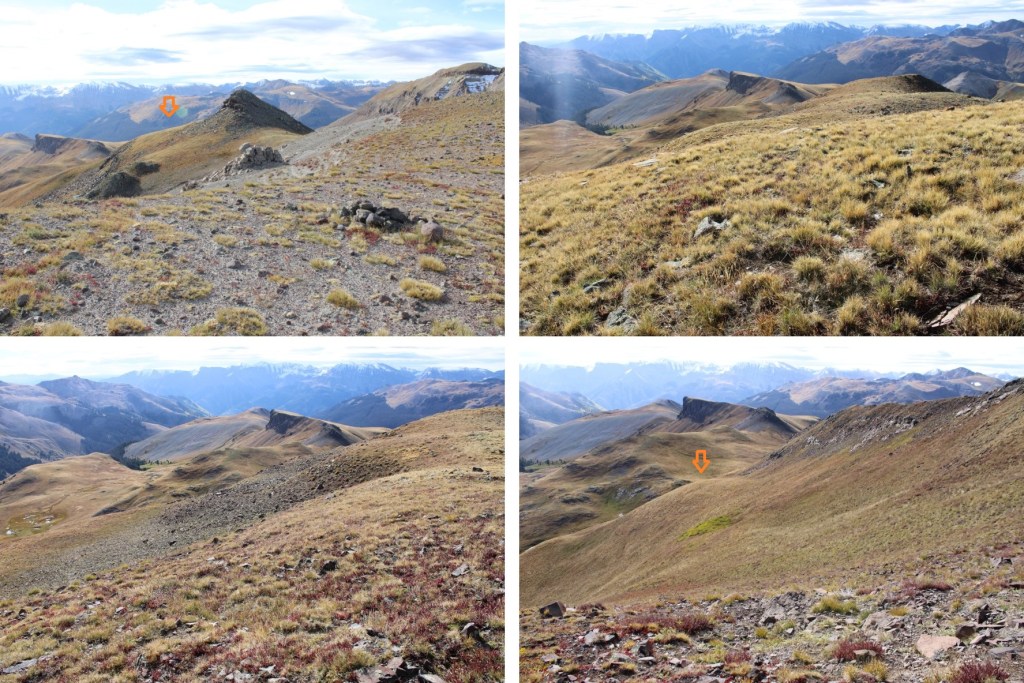
I made my way back the way I’d come, taking a few minutes to ‘summit’ this point along the way because it looked like fun
Here’s an overall view of my route back to the junction. I descended the same way I ascended.
I made my way back to the trail, and followed it back to the junction
This time, instead of taking the Wetterhorn Trail back down to the trailhead, I followed the Saddle Trail south. This was a much better trail, and took me to the saddle of PT 13207 and 12979.
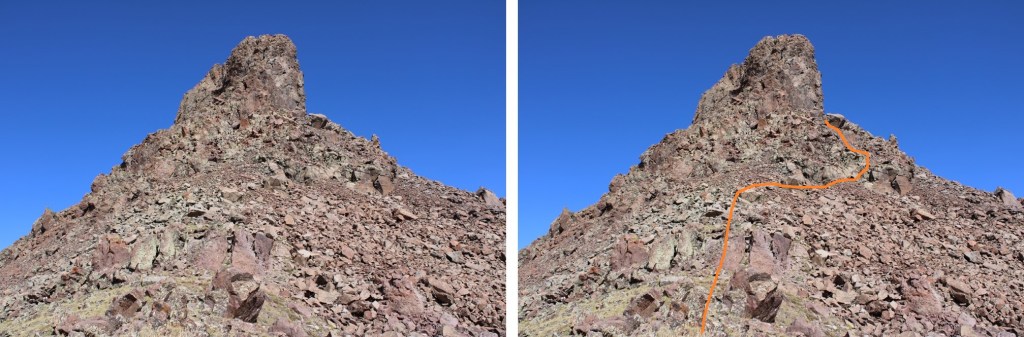
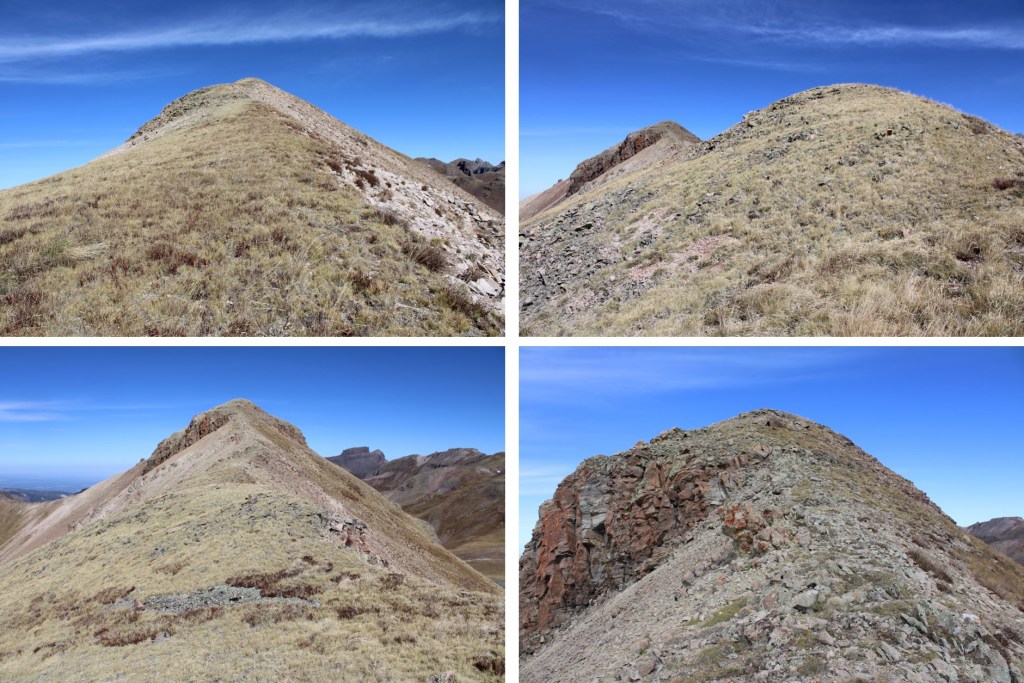
Once at the saddle, I turned right and headed northwest on tundra, towards this rock formation
Getting around the rocks was class 2+. It looks more difficult than it is, but it’s full of loose rocks and scree. Here’s the overall route I took:
This is choose your own adventure, but if you feel you’re in class 3 terrain you’re making it too hard. I skirted the rock to the right, but hugged the side of the rock as well.
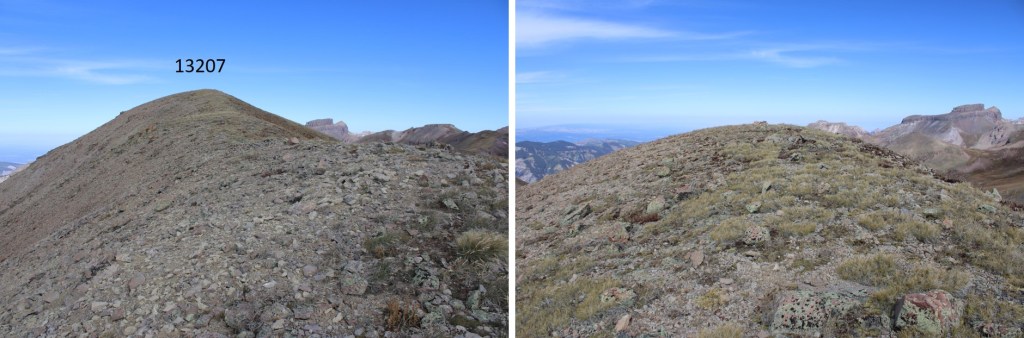
It’s obvious when it’s time to ascend. I then followed the ridge to the summit, with a couple of false summits along the way. All class 2
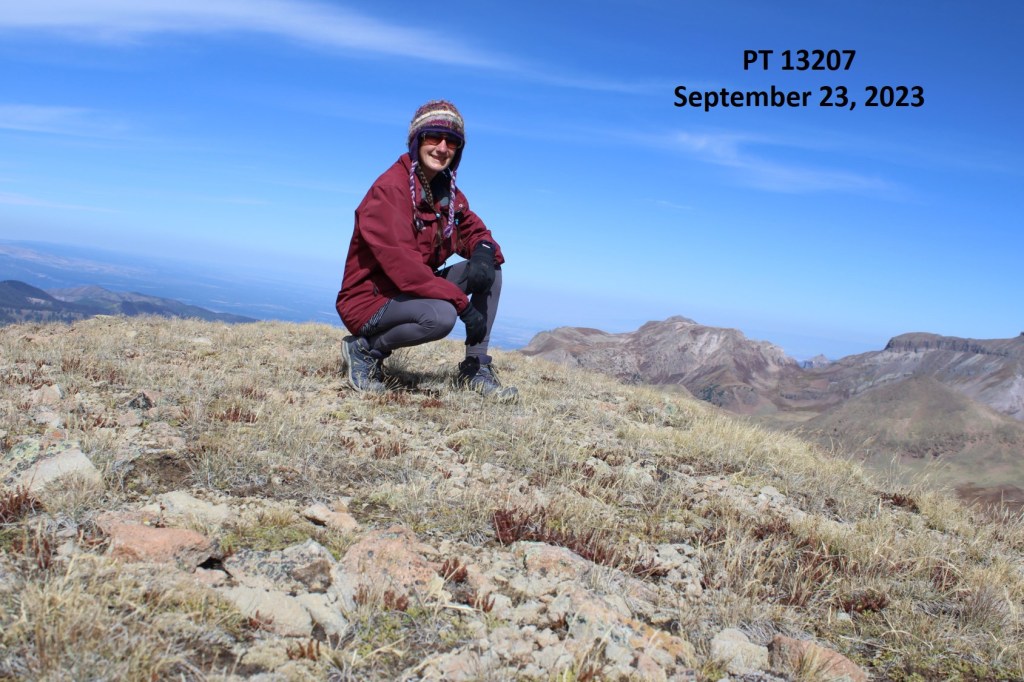
I summited PR 13207 at 11am
PT 13207:
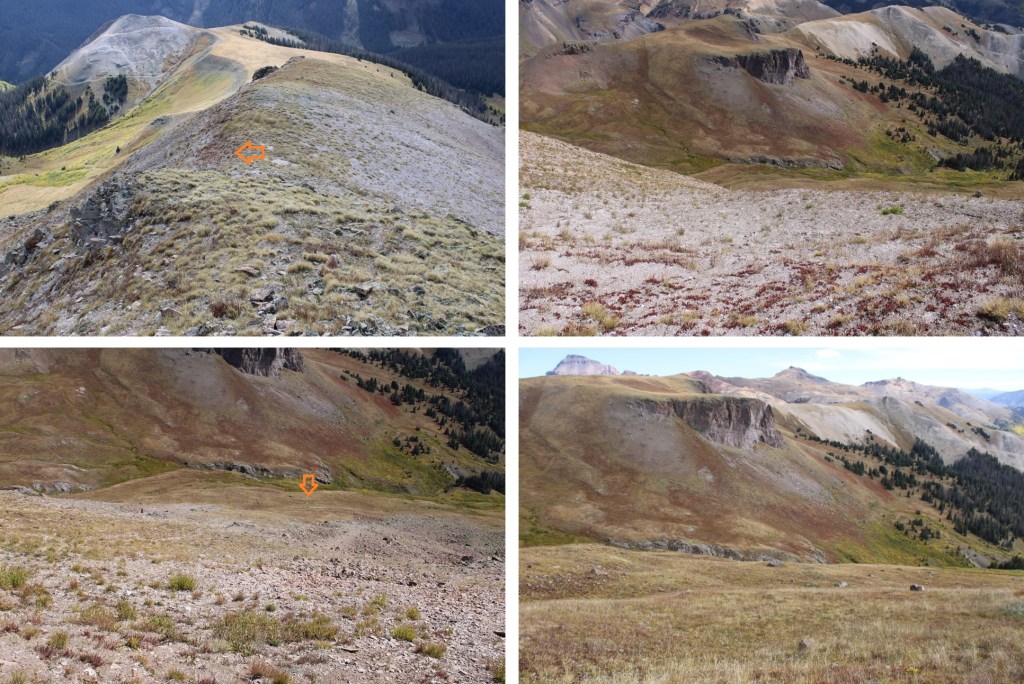
For the descent, I made my way back down the ridge, but wasn’t interested in downclimbing the rocky section.
Just before the rocky section, I turned left, and descended back to the Saddle Trail down talus and tundra. This was class2, and I could clearly see the trail below.
From the bottom, it looks more difficult than it is
Back on the trail, I followed it to the Wetterhorn Basin Trail/Saddle Trail Junction
And then turned right and headed southeast down the basin until I could find the Wetterhorn Basin Trail
I followed the trail back to the 4WD road
And followed the road back to my campsite.
I made it back to my truck at 12:30pm, making this an 11.06 mile hike with 4041’ of elevation gain in 6.5 hours.
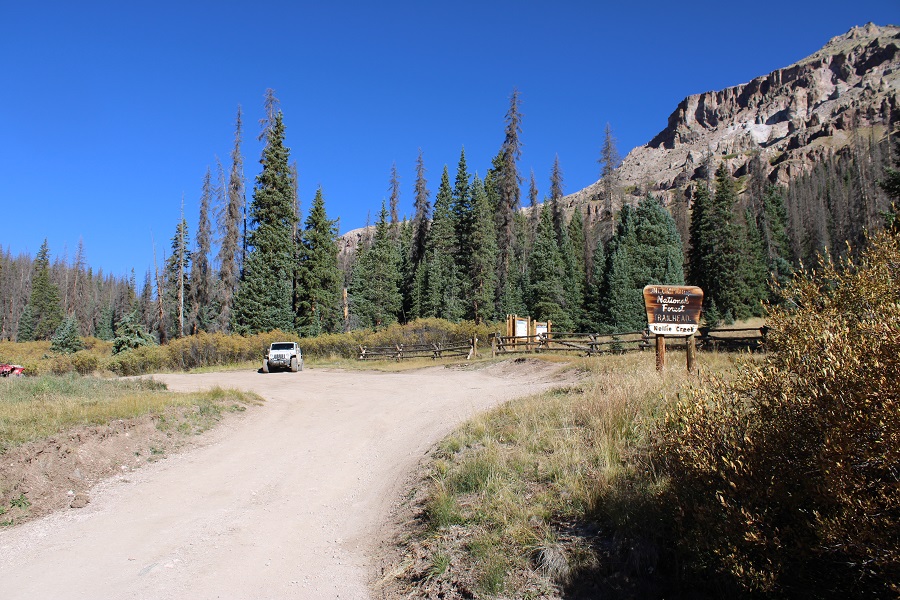
I started this hike from the lower Nellie Creek Trailhead at around 9400’. There are several dispersed camping sites in the area, and it’s a good place to park if you have a 2WD vehicle. I have a 4WD vehicle, but I’ve found it’s no fun passing others on this road, so I chose to park down below.
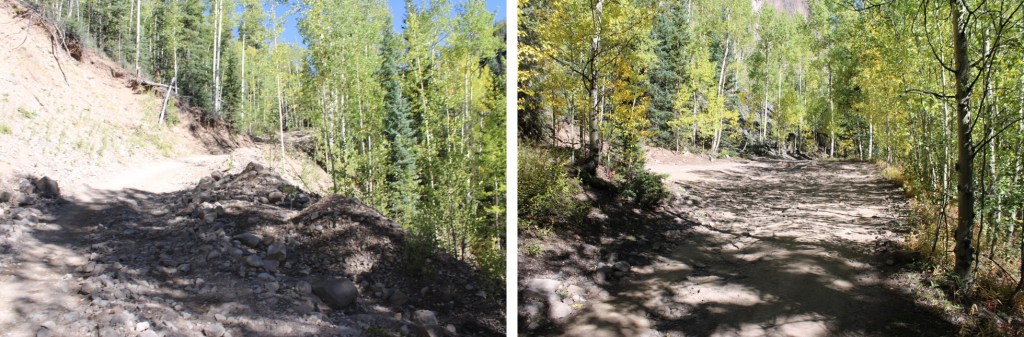
I was on the trail at 5am, following the road as it headed north.
At the first creek crossing I crossed to the right
And when I hit a fork in the road I turned left
Then continued following the road to the second creek crossing, where I crossed on some logs to avoid getting wet
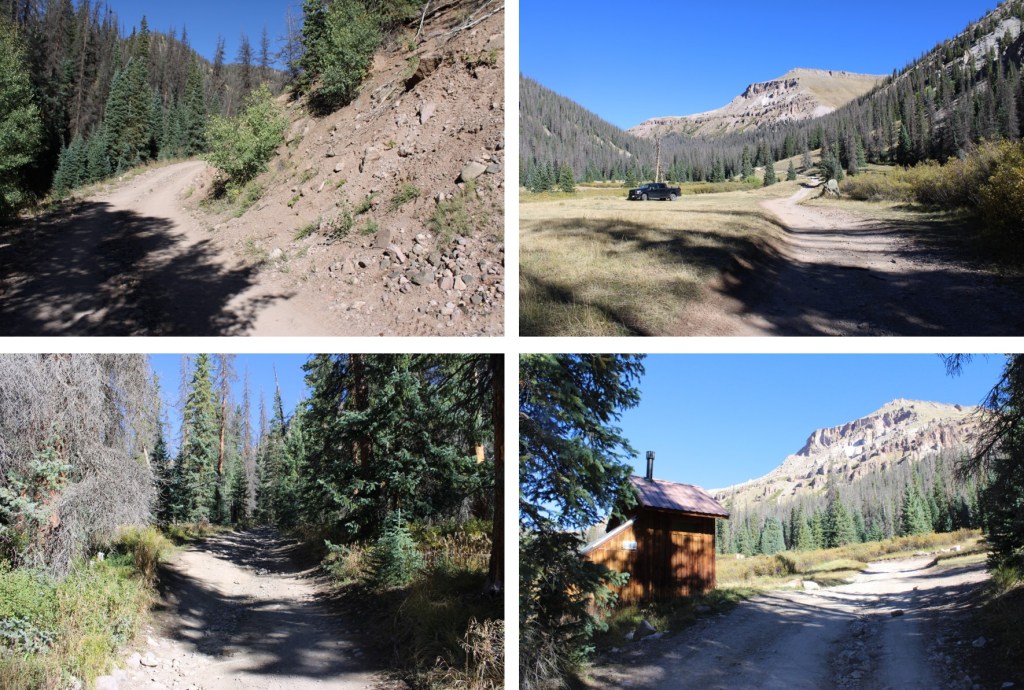
I continued on the 4WD road towards Nellie Creek Trailhead.
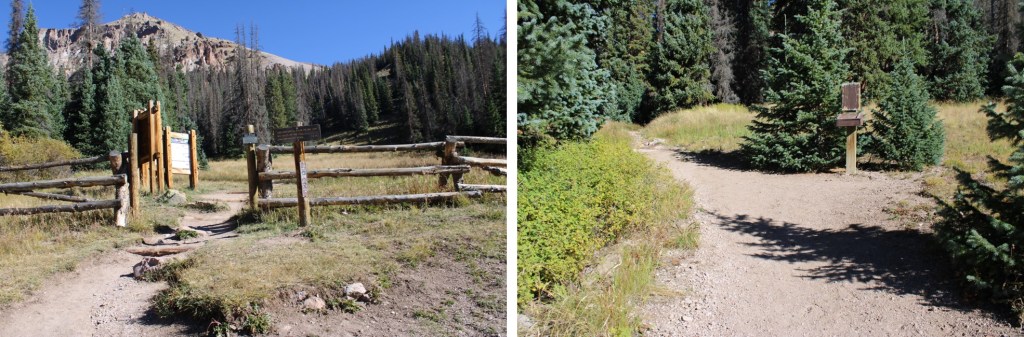
After hiking for a total of just over 4 miles, I made it to the trailhead.
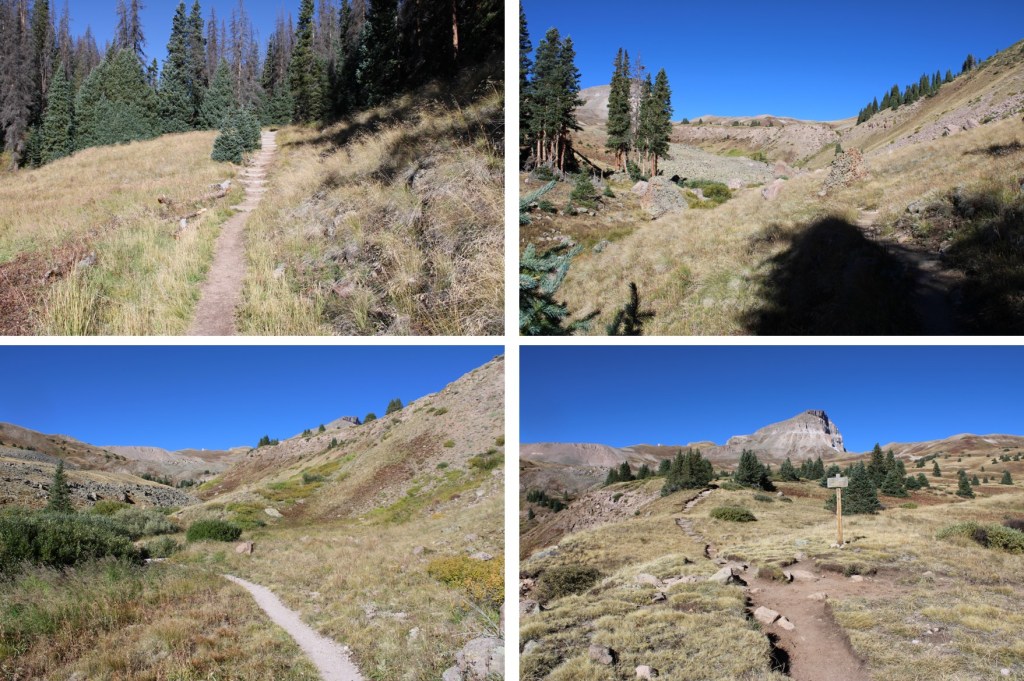
I followed Uncompahgre Peak Trail 239, a well-established, class 1 trail.
I followed the trail as it wound it’s way above treeline
At the junction for Uncompahgre Peak and Big Blue Creek I stayed left, and headed towards Uncompahgre.
The trail was still easy to follow. This is a good time to notice the drainage/creek to the left
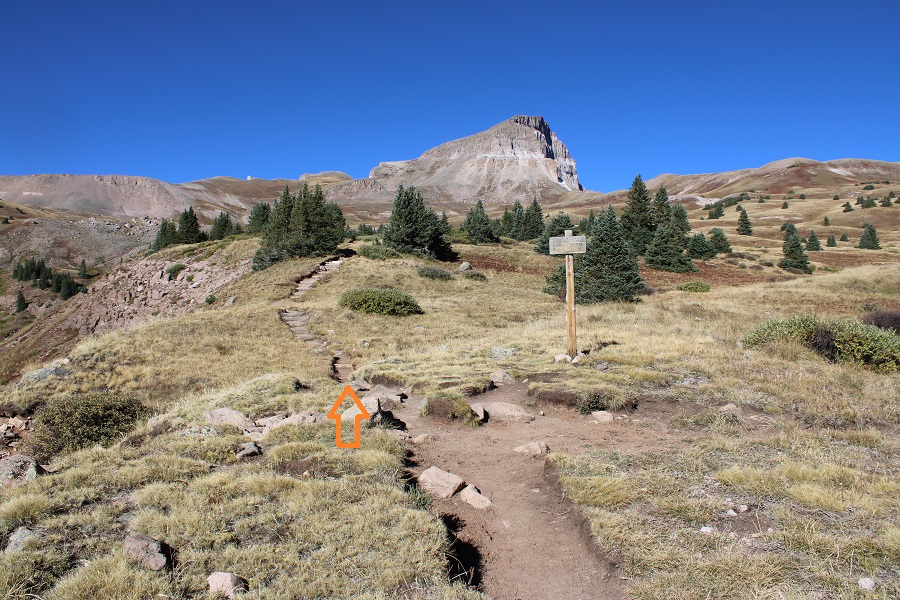
I looked for a low spot on the trail, left the trail, and crossed the drainage. I was initially headed here.
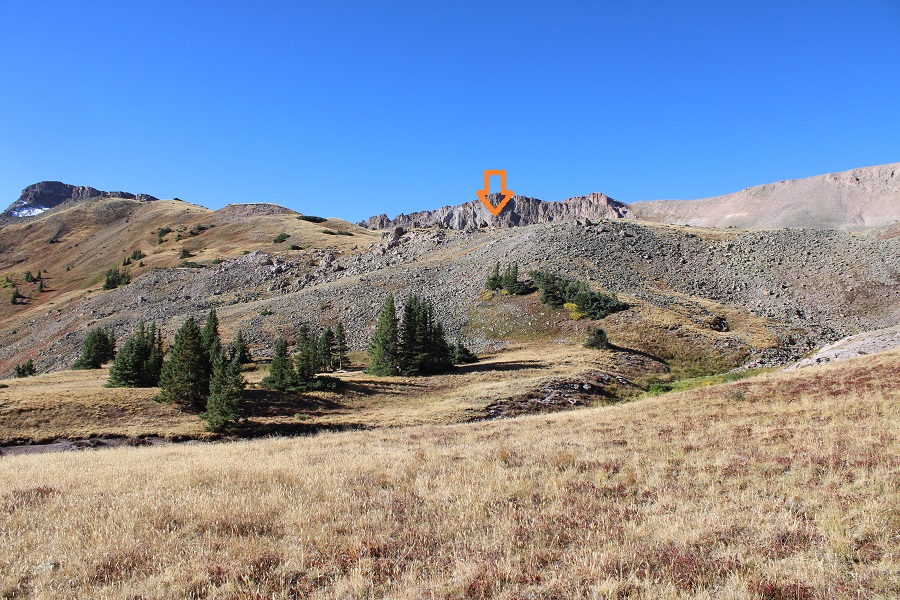
Now the fun begins. You’re going to want to stick to the ridge to the left, but don’t do that unless you want a lot of ups and downs. Instead, head straight up through the middle of the basin here
I was heading towards the low point in the ridge
This is a headwall usually filled with snow. In fact, this was my second attempt at this peak because I was here much earlier in the year when it was filled with snow, and without my ice axe, it was unclimbable. Even without snow, it’s steep, but firm (no scree).
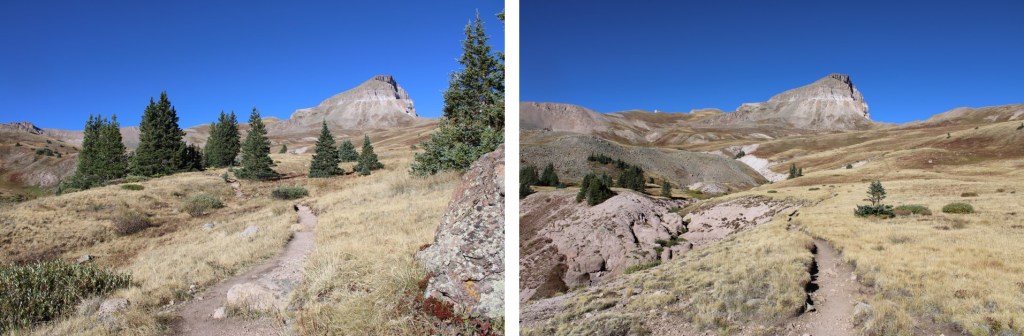
Once on top of the ridge I turned left, and headed towards the summit. At first it was on tundra, but that changed as I headed towards the summit.
The terrain here was full of loose rock. It looked like class 3 in the beginning, but I found if I stuck a little lower to the right I could keep it class 2 and regain the ridge. There was minor scree to contend with. Here’s an overall view of the route to re-gain the ridge.
Back on the ridge, I followed it to the summit. This was all class 2. This is where the wind picked up. While it was a sunny morning, it was very, very cold, with 25mph winds.
I summited PT 13155 at 8:20am
PT 13155:
I headed back the way I came, down the ridge towards the saddle
Just before making it to this large block I turned right, and headed back down the headwall
Here’s an overview of my route in and out of the basin. Notice the rocky areas I avoided.
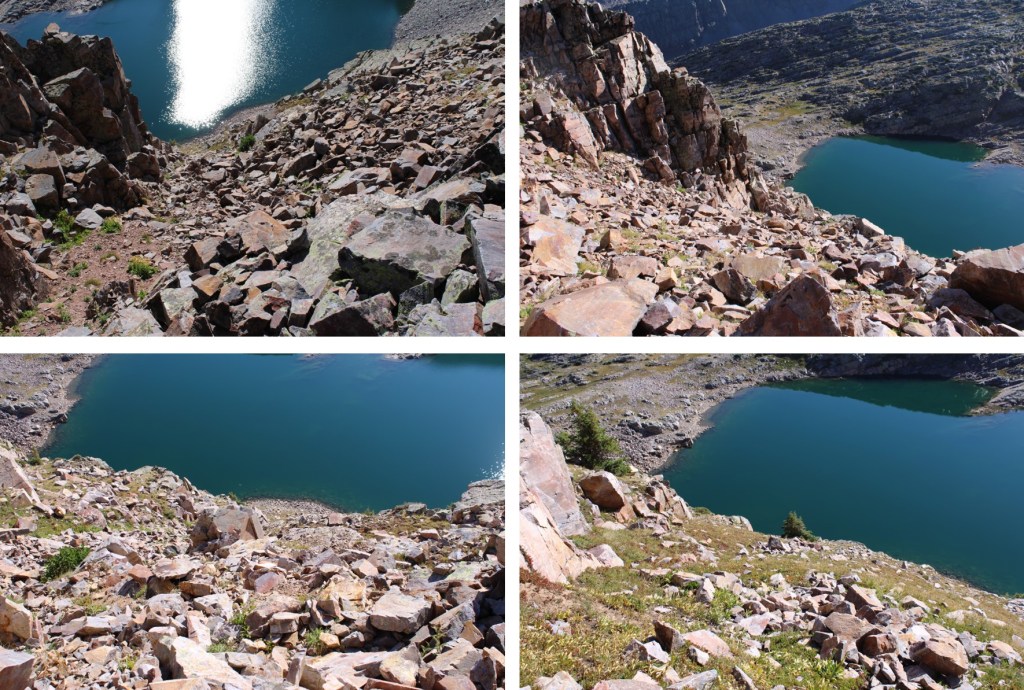
And some pictures as I made my way through the basin and back to the trail
Back on the Uncompahgre Trail, I followed it back to the Nellie Creek Trailhead
I then followed the 4WD road back to the lower trailhead
I made it back to my truck at 11am, making this a 13.8 mile hike with 3800’ of elevation gain in 6 hours
I would like to preface this report by stating I do not consider myself a rock climber. Please don’t use this report as your only information when attempting to summit Lizard Head. There are several, much more detailed reports on this climb that can be found online. I’m hoping to share my experience, and hopefully add what little I can as someone who does not consider themselves a rock climber to the vast array of knowledge that is out there.
On my quest to summit all of Colorado’s 13ers, Lizard Head is the most difficult peak to climb, and with a 5.8 rating, requires ropes not only to descend, but to ascend as well. This is going to be a high-level overview. Please don’t ask me questions like how many cams were used (as many as were needed) or what sized cams (um… the ones that fit?) or what rating areas were (difficult?) as these are not my specialties. I can tell you there were 5 pitches (but this can probably be done in 3 or 4 by more experienced climbers) and 2 70-meter ropes were used (tied together for two rappels). There were several bomb-proof belay stations. If you don’t feel comfortable leading exposed class 5.8 on your own, but still wish to summit this peak, my advice is to hire a guide. San Juan Mountain Guides are the local experts in the area, but there are several companies to choose from.
Thank you for reading!
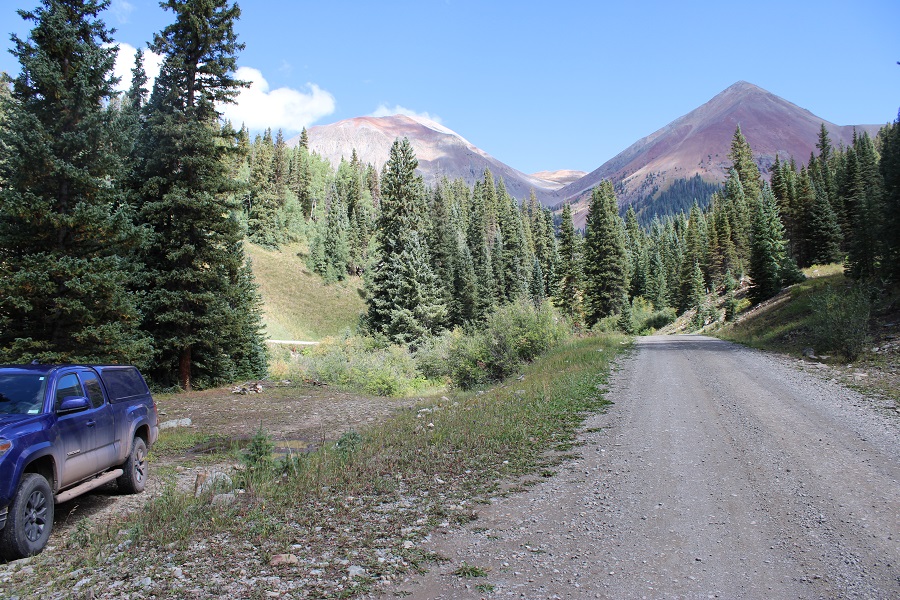
I got to the Cross Mountain Trailhead the night before and slept in my truck. It rained and hailed and sleeted a bit that day, but luckily, as I sat looking over at Lizard Head, it was always in the sunlight. I hoped this boded well for me the next morning.
I spend a lot of nights camping at trailheads/passes, and this one was unusually busy in the middle of the night. Several cars stopped and played music for a while. I’m not sure what they were doing there, as it was pitch black out, but it was my choice to be there, so I accepted their presence.
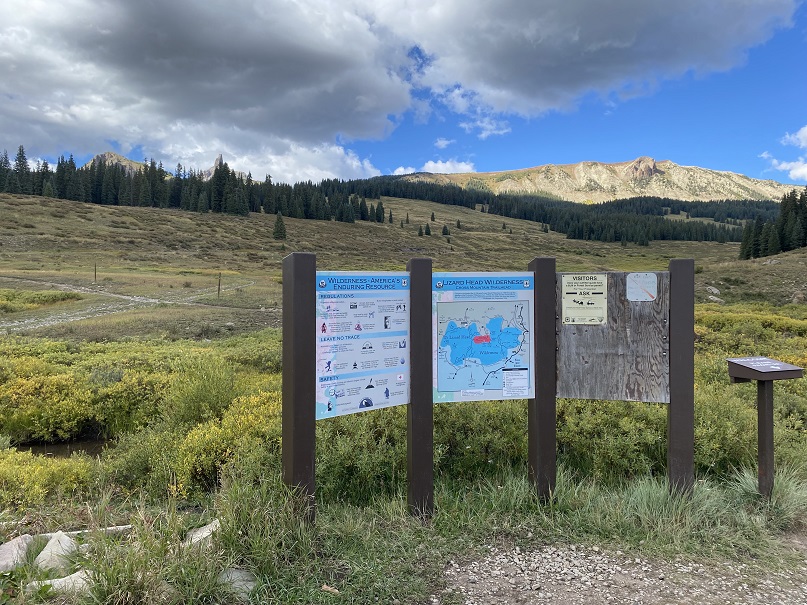
The trailhead starts at the west end of the parking area. It was 29 degrees outside when I left my frost covered truck and set out on the trail at 6:45am.
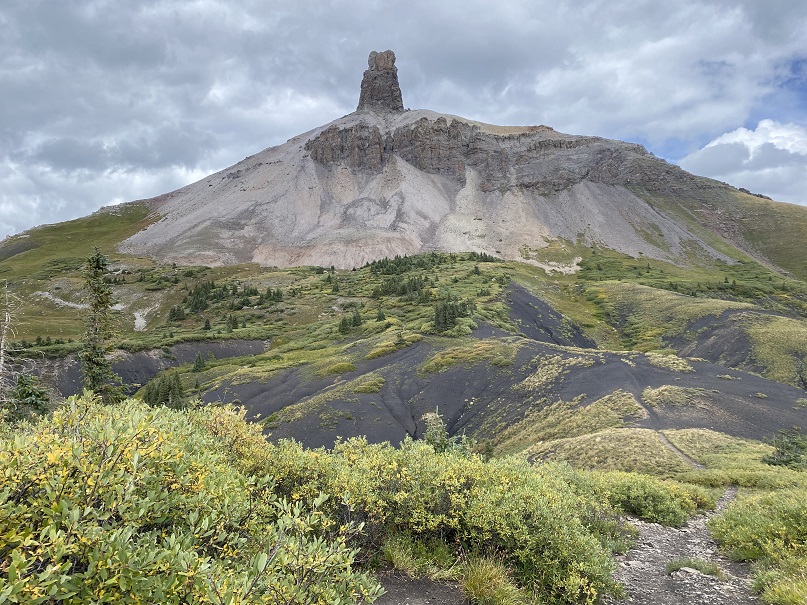
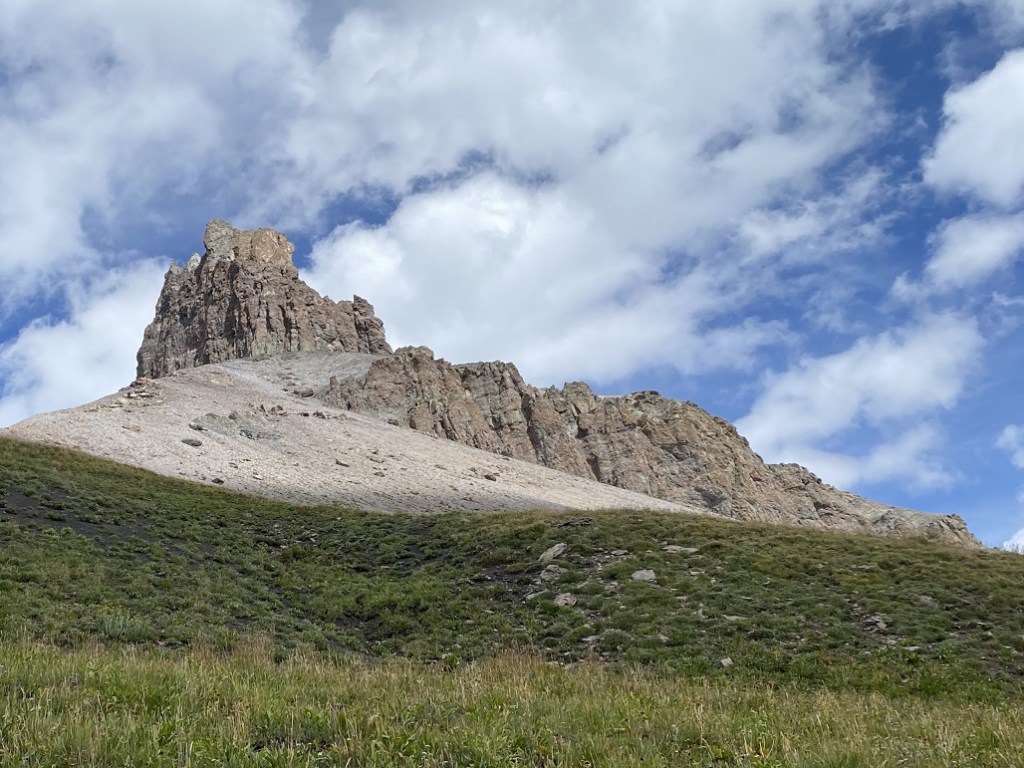
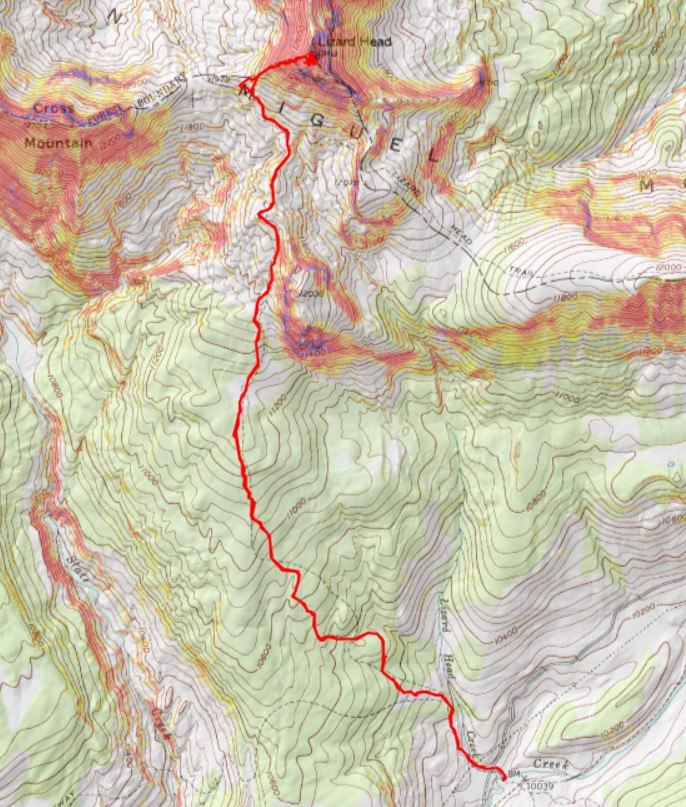
I followed the Cross Mountain Trail on a well-defined, class 1 path for what CalTopo tells me was 4 miles, before being able to see Lizard Head in the distance
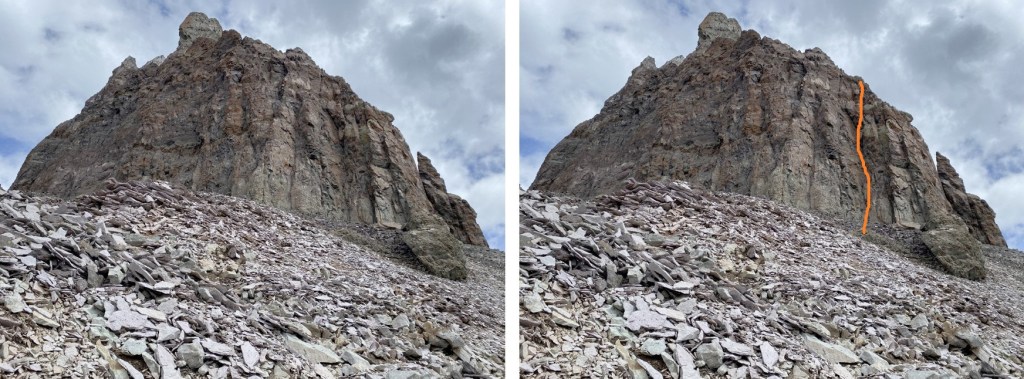
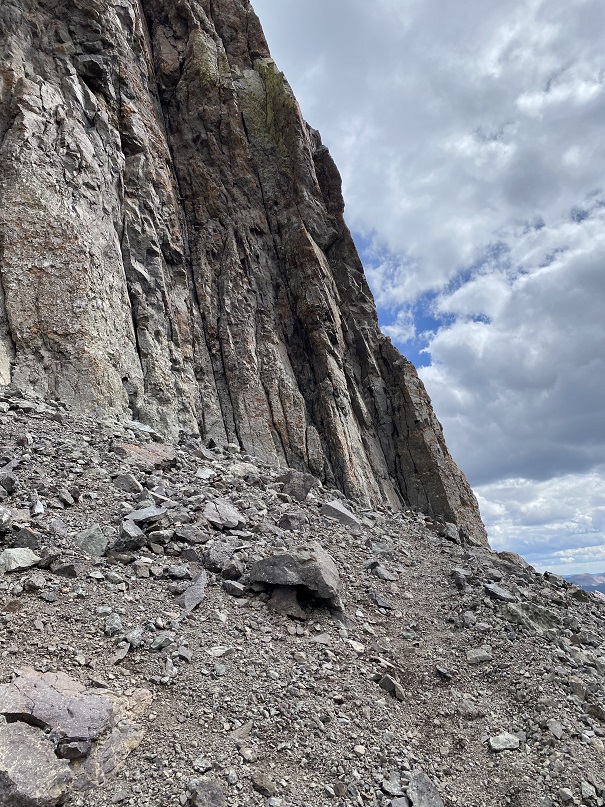
Access to Lizard Head is from the east
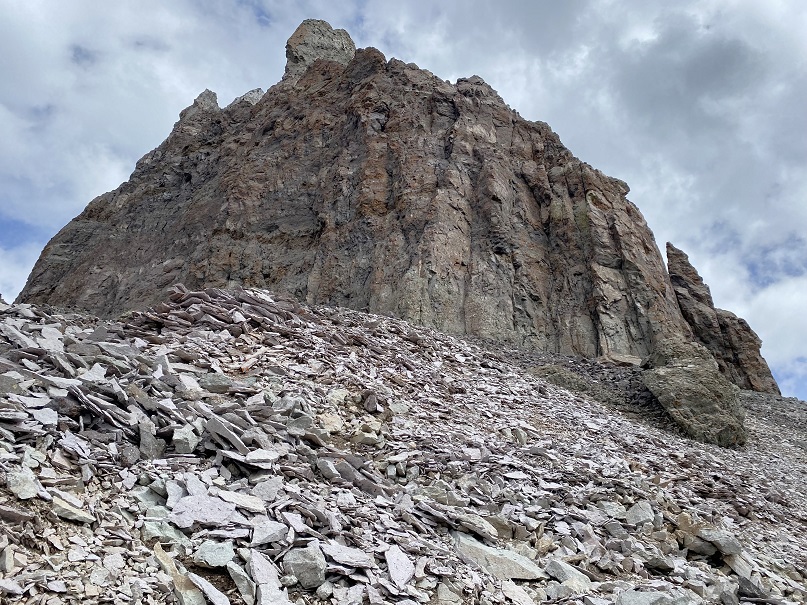
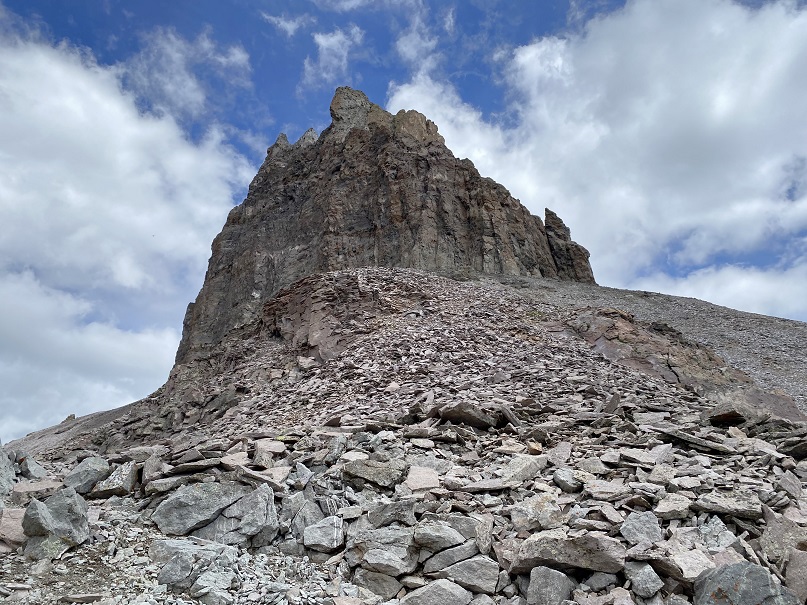
There is a well-defined climbers trail here to the base of the climb on loose talus. The goal was to make it here:
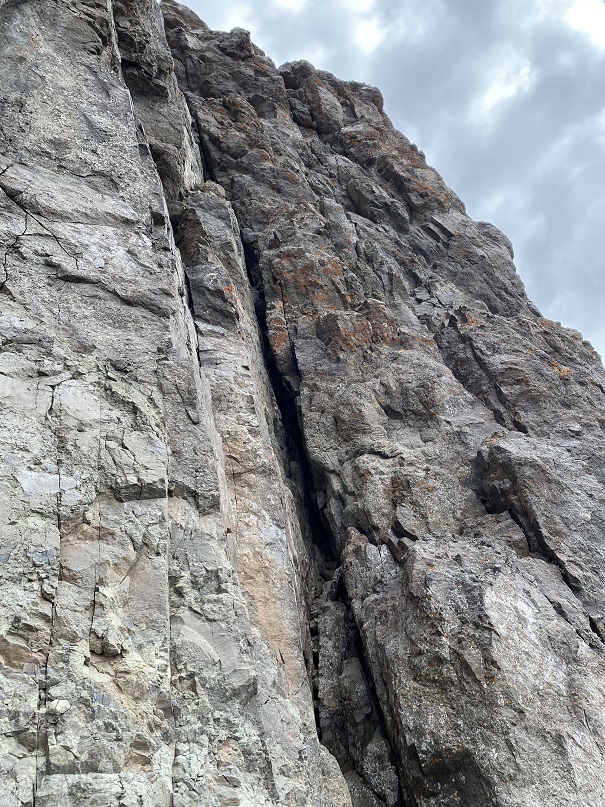
It was very cold this morning, and a little windy. It had snowed two days before, but luckily the snow had all melted out. I was frozen at the beginning of this climb, and didn’t melt out until making it to the summit, when I was finally in the sunlight. I do not have very many pictures of the actual climb up, because I had a really bad Raynaud’s attack and my fingers didn’t work with my phone’s touch screen. Ok, I’ll admit: I was a bit of a wuss, and there was a lot of spoken complaining as I ascended. Several times during this climb I had no use of my fingers, so I used my hands like ice picks to grab hold, hoping they would… hold. I clapped my hands together this morning more than I had keeping time at a color guard/band practice. So, all that to say I don’t have a lot of pictures, but here’s an overview of the beginning route, starting with a left-facing chimney:
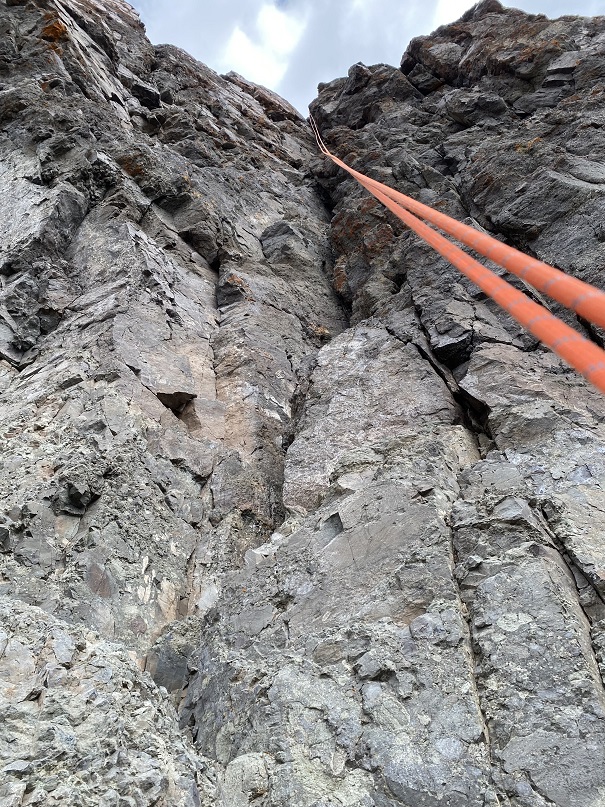
I then encountered a very exposed, less than 2-foot-wide (or less) ramp that went to the left for about 15 feet, then right for about 15 feet. Sorry, no personal pictures of the ramps, but here’s an approximation of what they look like from below:
After the ramps there was some scrambling to do to get to the summit. This was chossy, but not too difficult to navigate.
This is the route I took
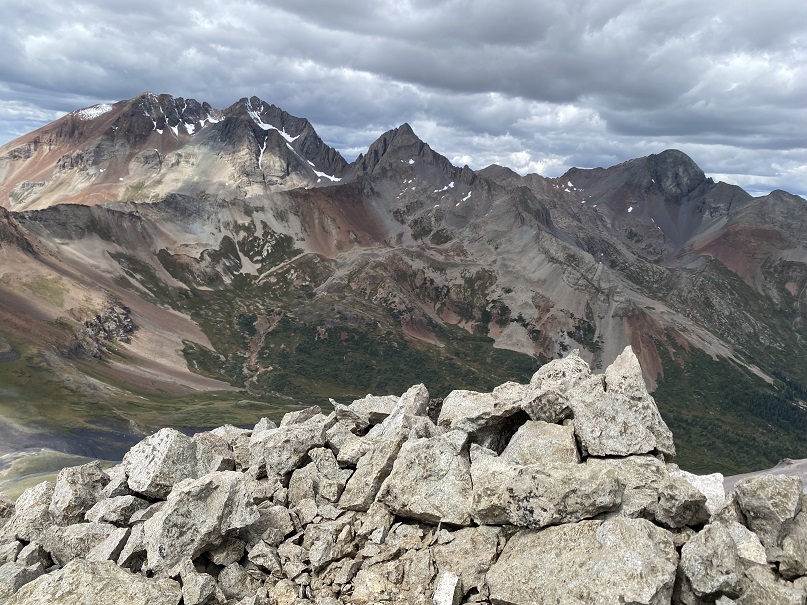
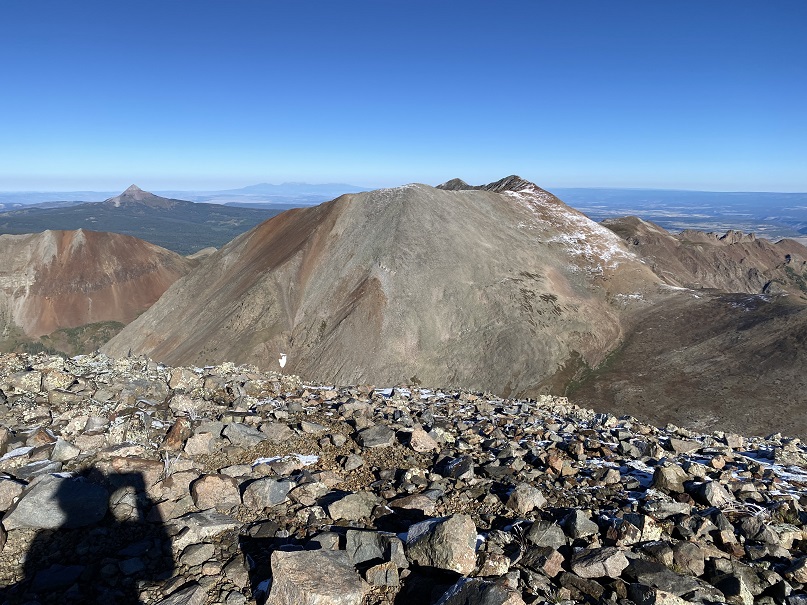
Here’s the view from the summit, looking east
I summited Lizard Head at 12pm
Lizard Head:
There was a summit register, but it was missing its lid. The pages were enclosed inside a ziplock bag that had holes chewed through it, so if the next person could bring a new summit register that would be great. As you can see by my sloppy handwriting, I had very little use of my fingers/no dexterity, so my penmanship was terrible (one of the many reasons I rarely sign registers, but this one felt important).
There were two bomb-proof rappel stations on the way down, which meant two rappels. The first was about 200’, the second about 100’, back down the initial chimney crack I climbed up.
Then it was time to change out of rock-climbing gear, and head back to the trail down that wonderful pile of choss and head back on the Cross Mountain Trail back to the trailhead.
Once again, I apologize for this not being the quality of report I usually like to give out, but hopefully some of the pictures are helpful. Here are more pictures of the peak.
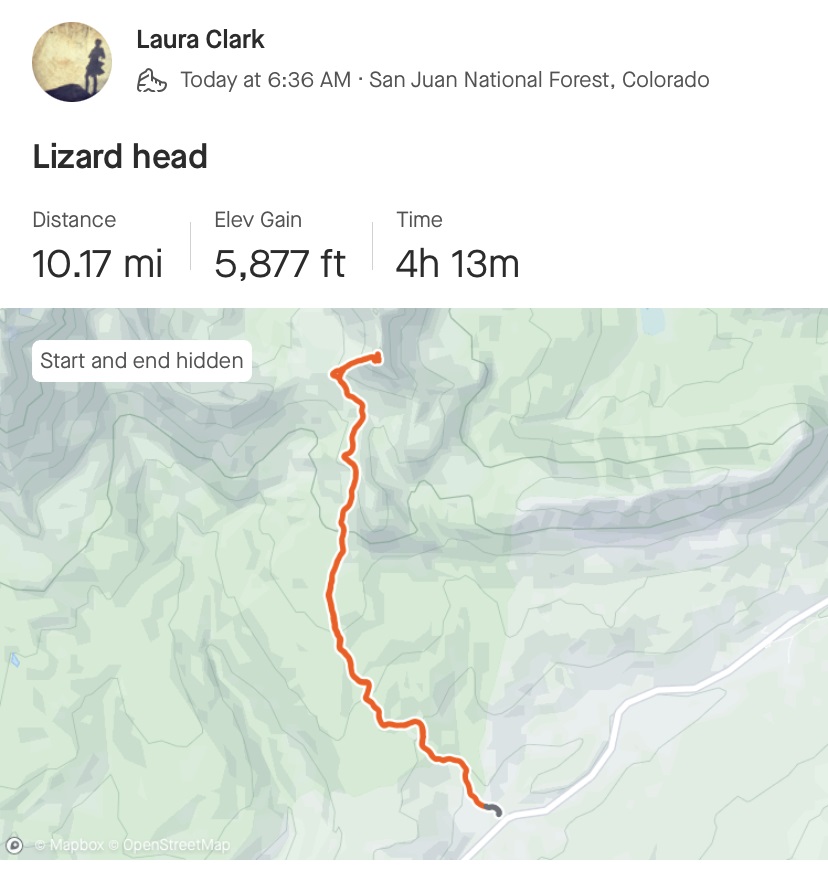
I made it back to my truck at 3pm, making this a 12.86 mile hike with 3566’ of elevation gain in 7 hours, 45 minutes. I believe the mileage seems a little high, but those are the numbers CalTopo gave me. Strava gave me drastically different numbers.
On to the next trailhead!
P.S.: I did indeed have a Raynaud’s attack on the climb, and while I don’t think I’ll loose the tips of my fingers, I do currently have blisters which will probably turn into ulcers on a few of the fingers on my left hand. They currently feel like I touched a hot stove. This is normal for people with Raynaud’s, and totally worth it for me to make this climb!
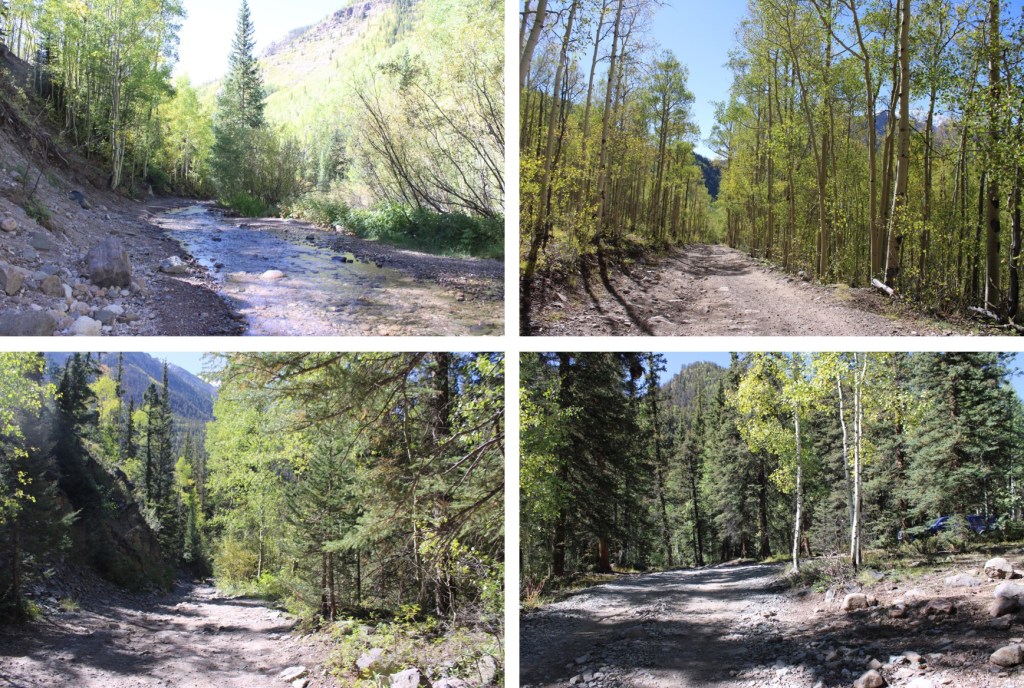
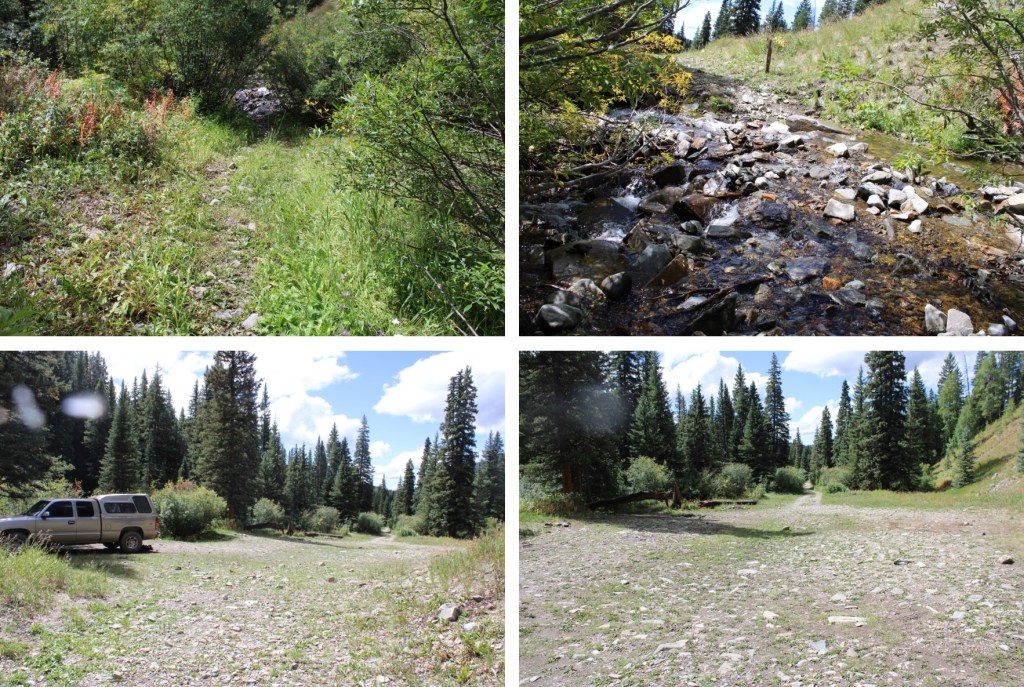
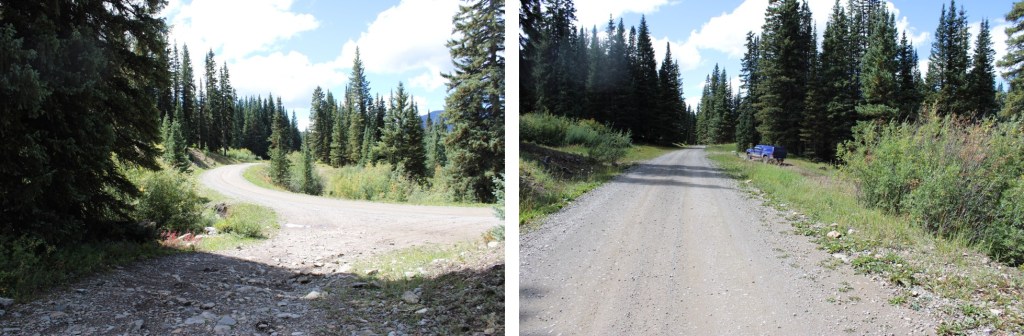
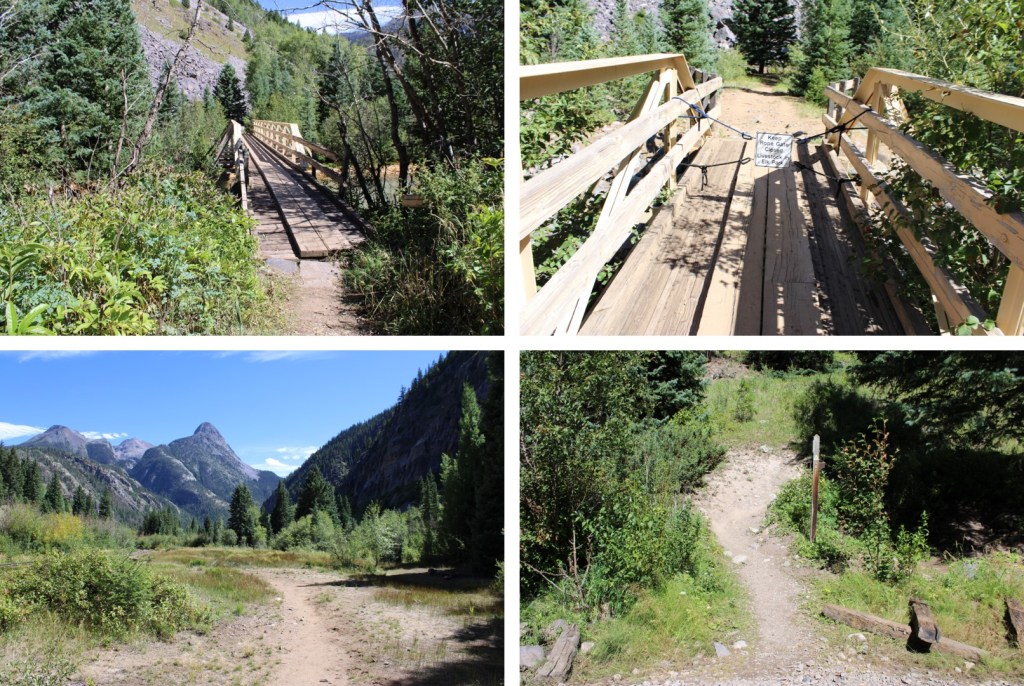
I drove in to the trailhead the night before, on a 2WD dirt road outside of Dunton, CO. This was a nice, wide, 5 mile drive that led me to fish creek (NOT to be confused with nearby Fish Creek Trailhead).
There’s a dispersed site here where I parked, and if you have a 4WD vehicle you can park a little further up the trail (about 50 yards or so) to an area where you can also disperse camp. There are several spots there. Here’s a view of where I parked.
I was up and on the trail at 6:30am. It was a cold morning, with frost on the ground. From the upper dispersed camping area I headed north and quickly crossed Fish Creek
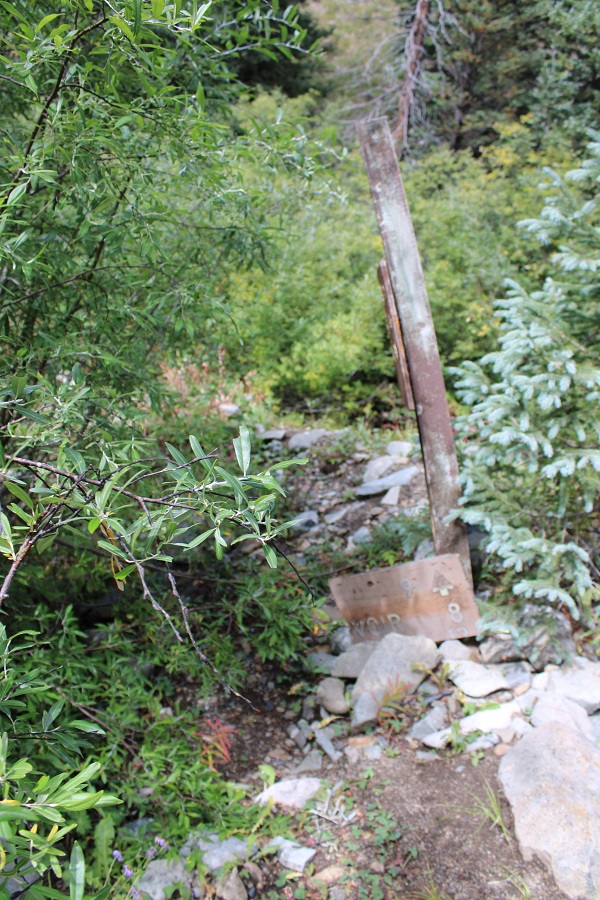
An obvious game trail picked up on the other side. On my way back, I found this sign behind some very overgrown willows. It was difficult to make out, but shows this used to be an actual trail at one point. Now however, it can be difficult to follow.
I followed this trail for 1.3 miles as it stayed to the right of Fish Creek, losing the trail every now and then, and then finding it again.
After 1.3 miles of hiking I crossed Fish Creek
I gained the ridge, and followed it northeast to treeline.
I was trying to avoid this waterfall/gorge area.
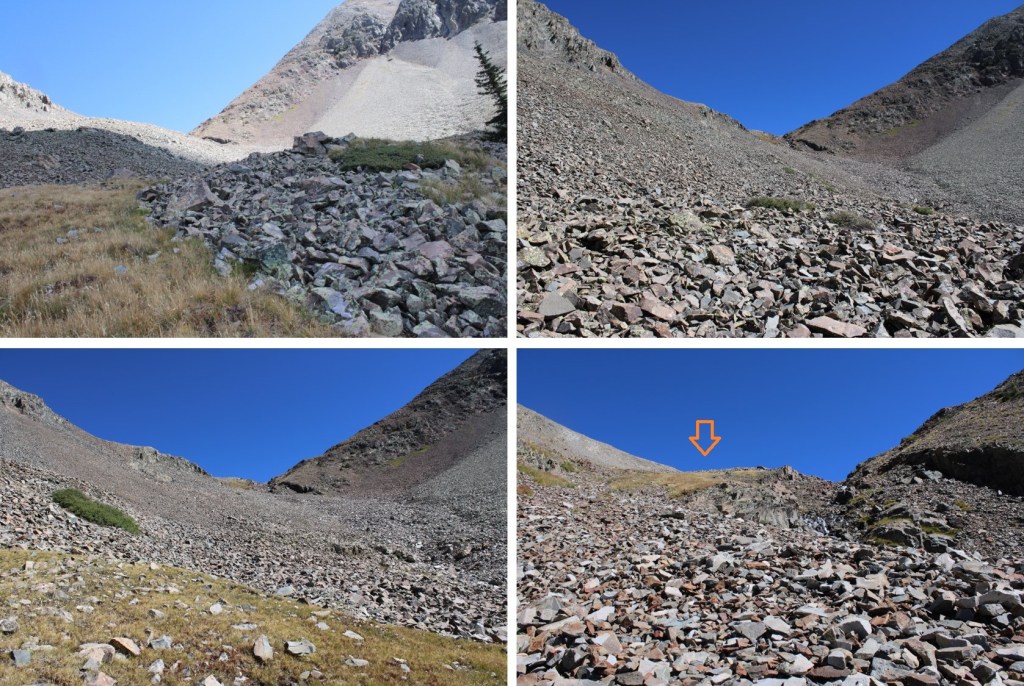
Once at treeline I needed to get here
In the morning I went high, sticking to the talus, and I would not recommend this route. Stay low, and the terrain is much easier to navigate (2+).
I now wound my way northeast through the upper basin, staying to the left of the creek/waterfall on the only available grassy slopes in a very rocky area.
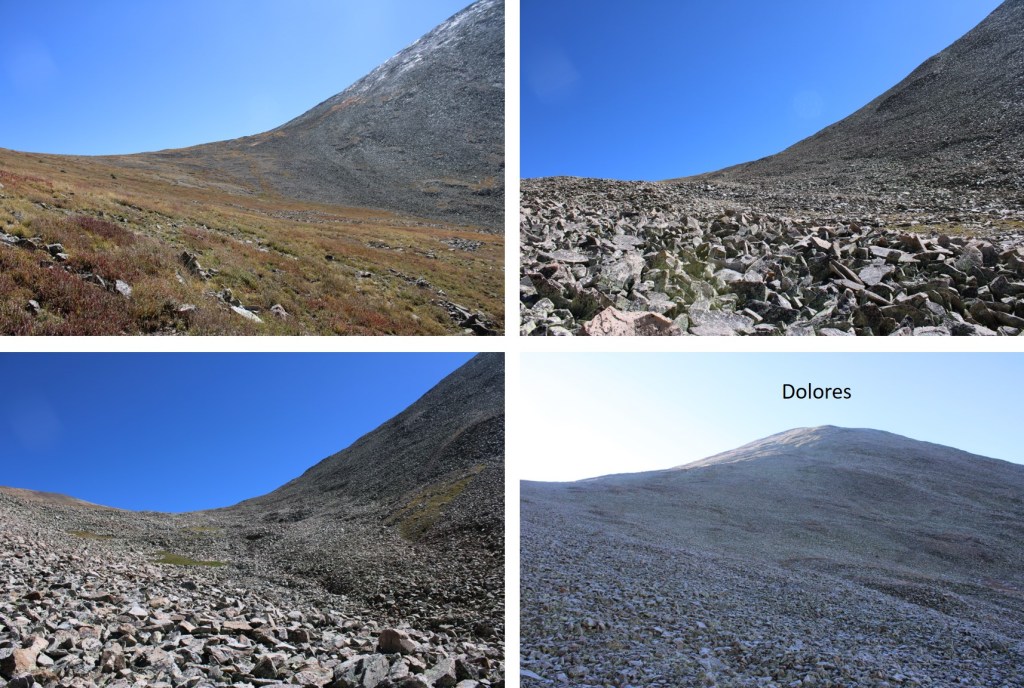
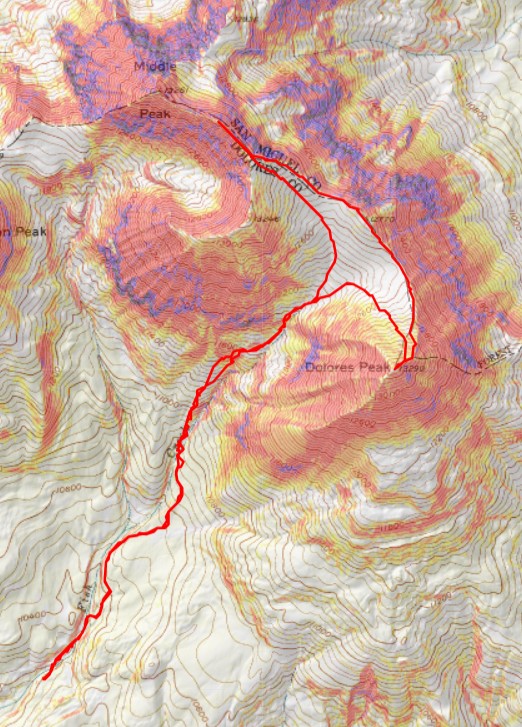
I continued heading up the center of the drainage, towards the Middle/Dolores saddle
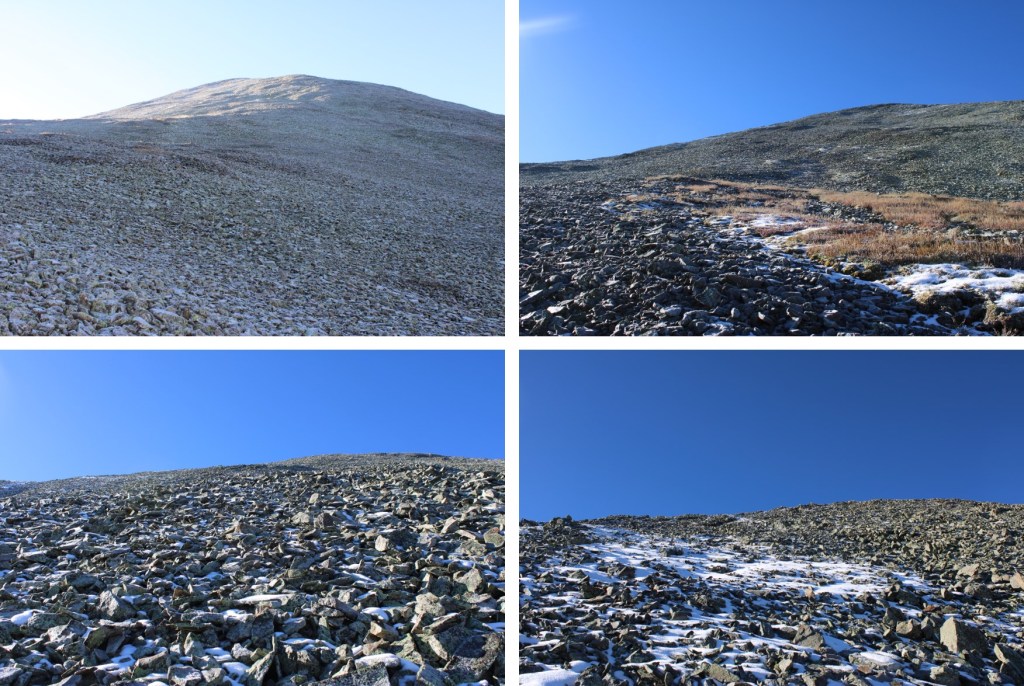
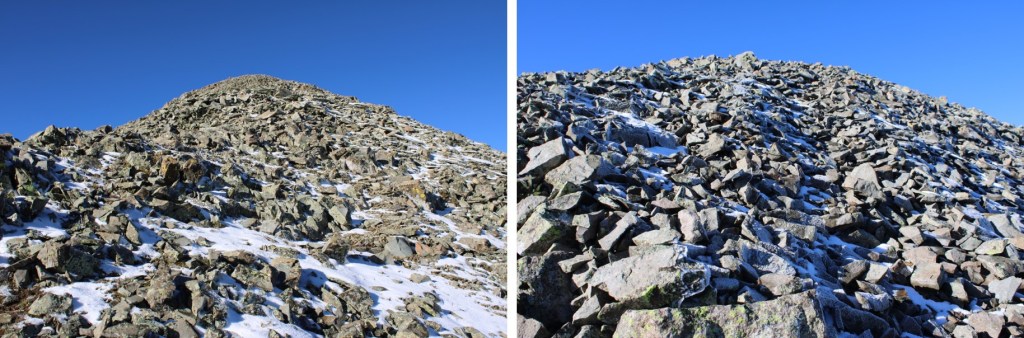
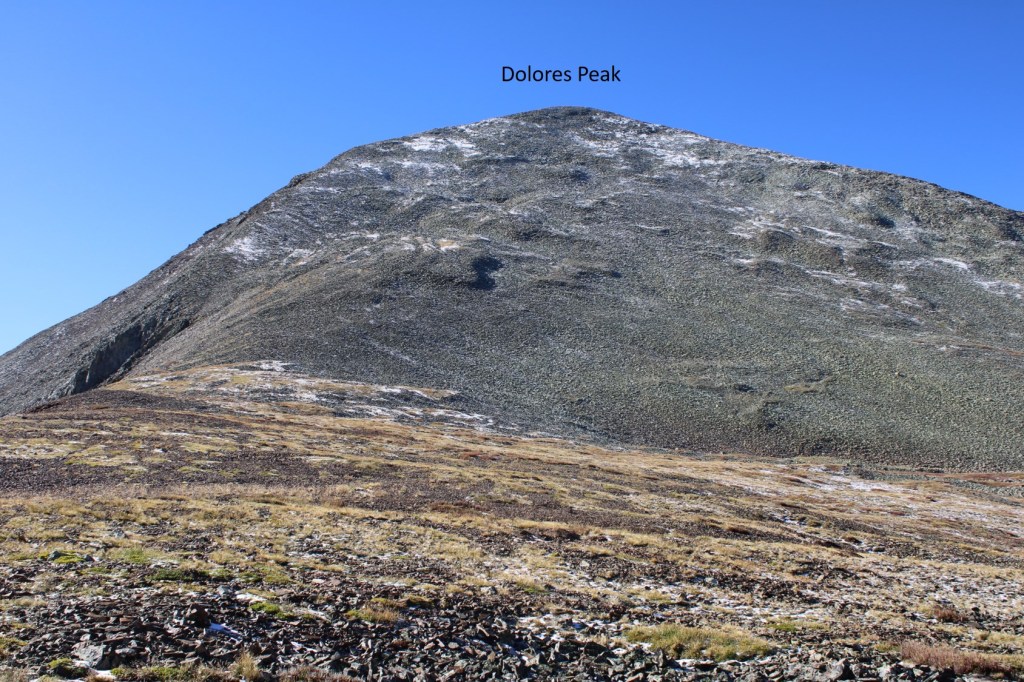
Once at the saddle I turned right to head up the ridge to Dolores Peak. If you stay on the ridge directly, you’ll find game trails through the rock leading to the summit. This is all class 2, choose your own adventure heading southeast towards the summit.
The summit was obvious
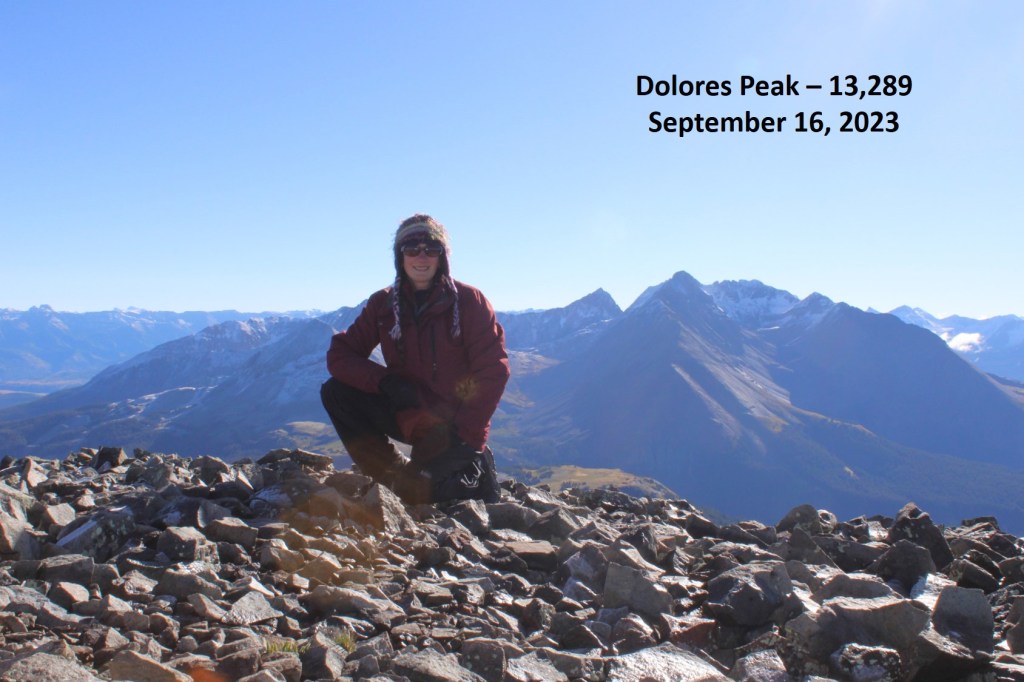
I summited Dolores Peak at 9am
Dolores Peak:
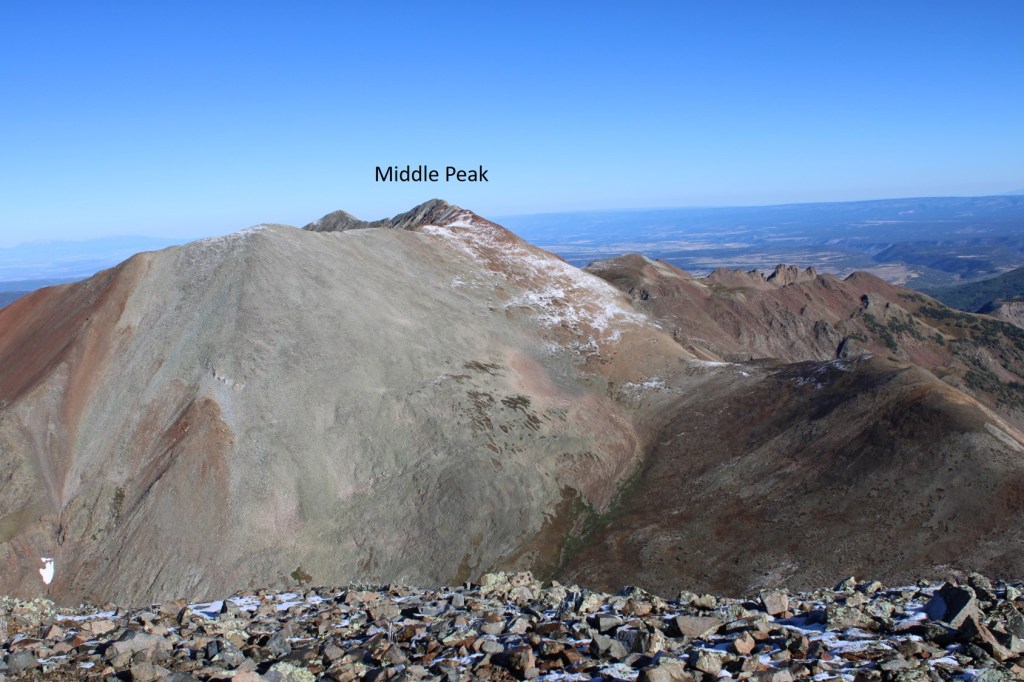
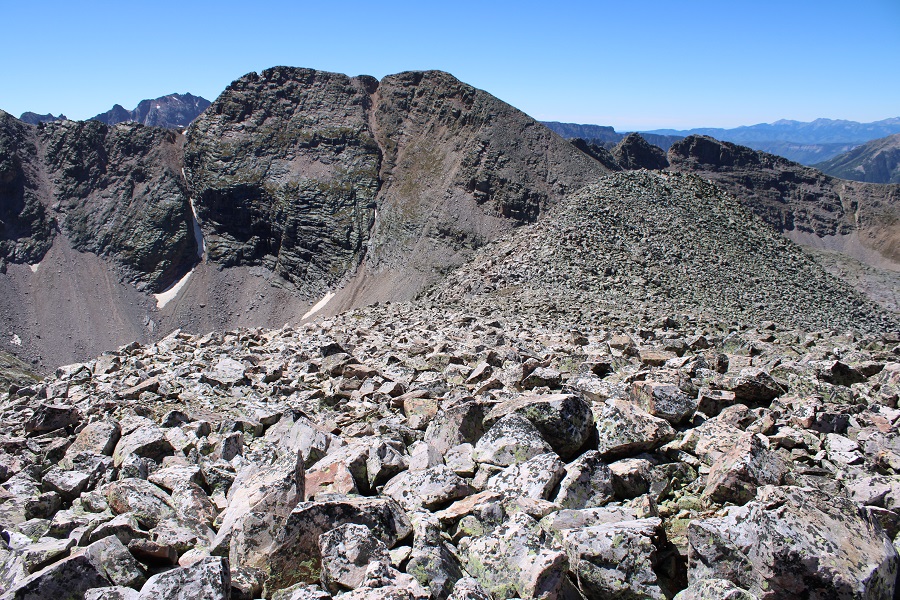
I could see Middle Peak to the northwest
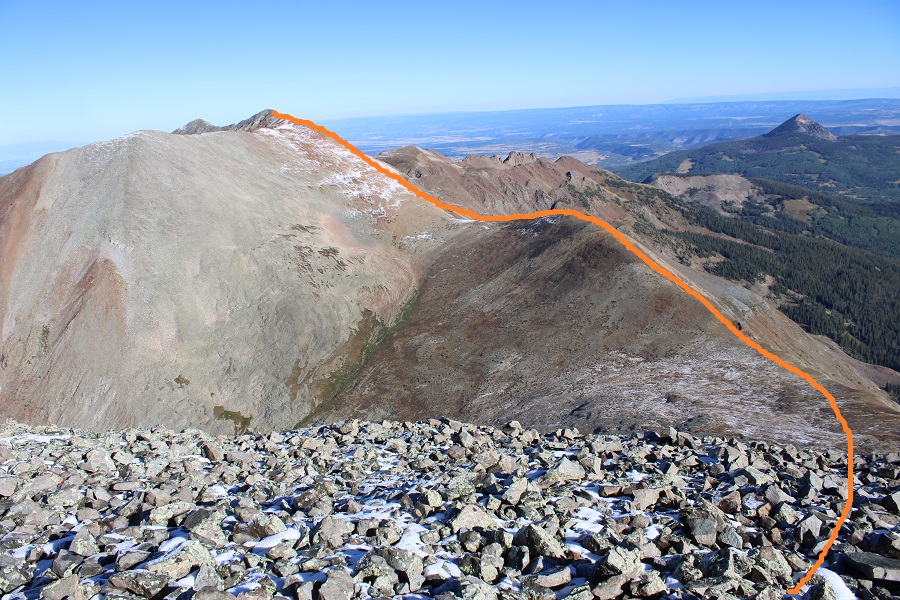
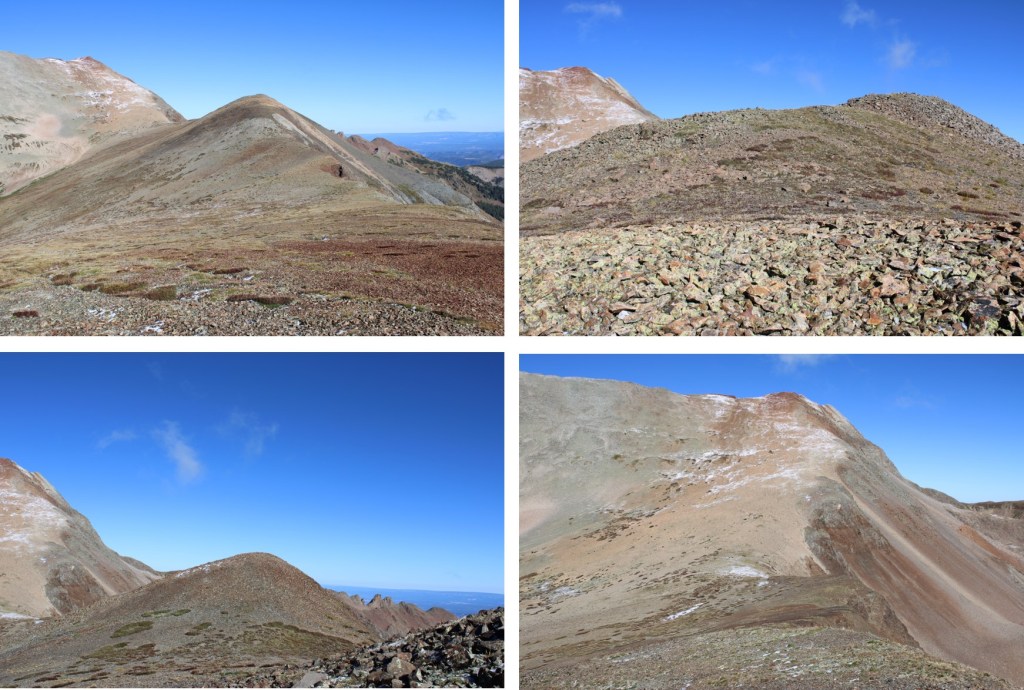
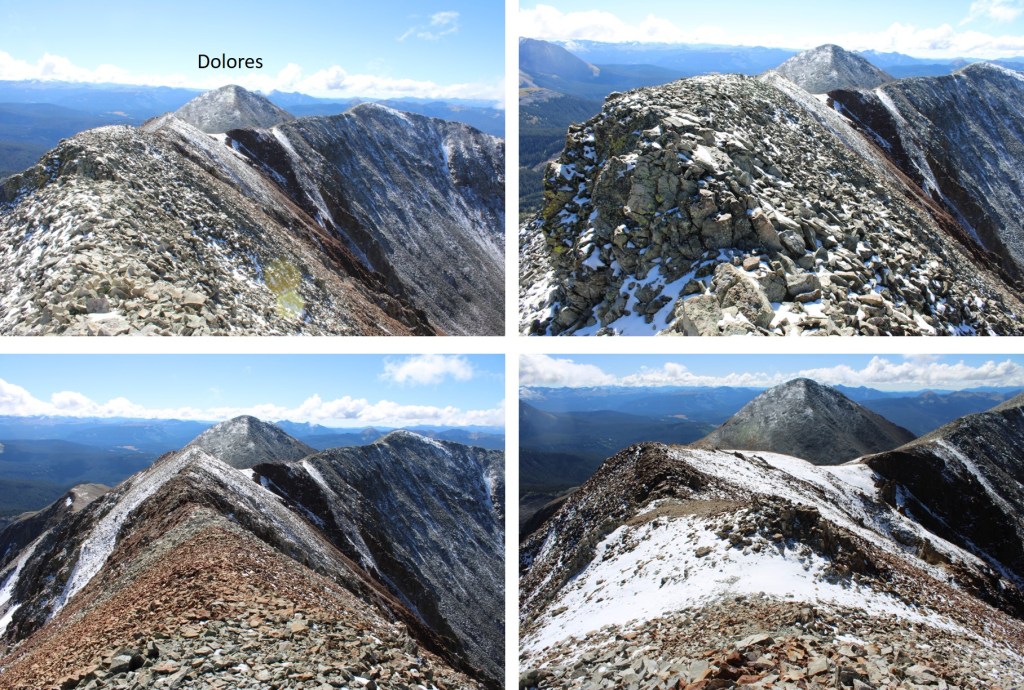
To get there I re-traced my steps back to the saddle, then followed the ridge proper towards Middle Peak. This is the route I took:
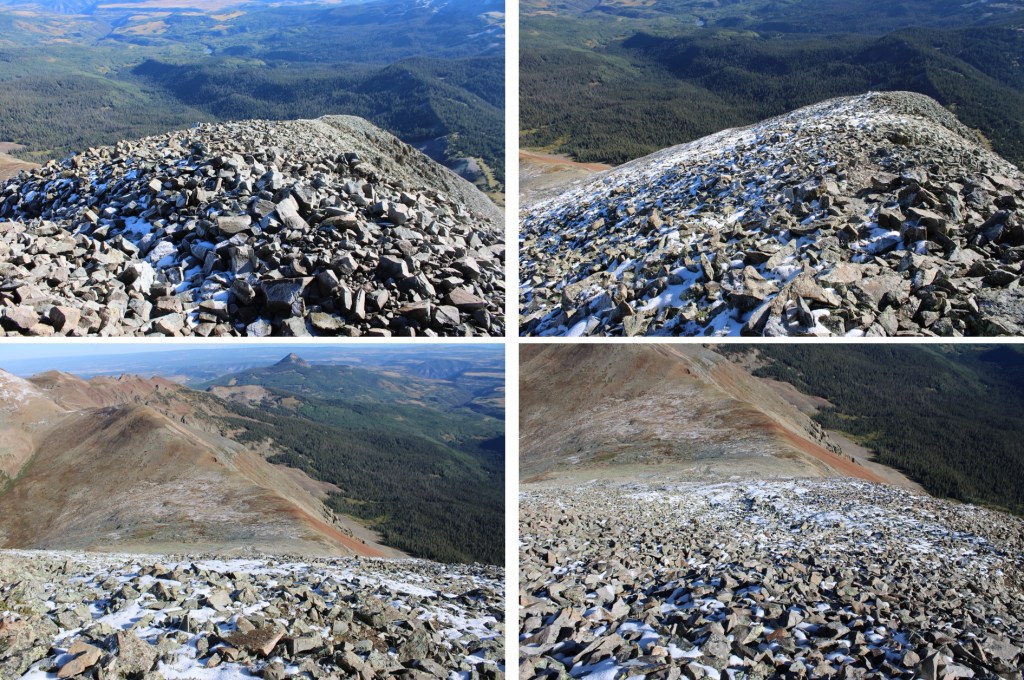
And some step-by-step pictures
Here’s looking back at Dolores from the saddle
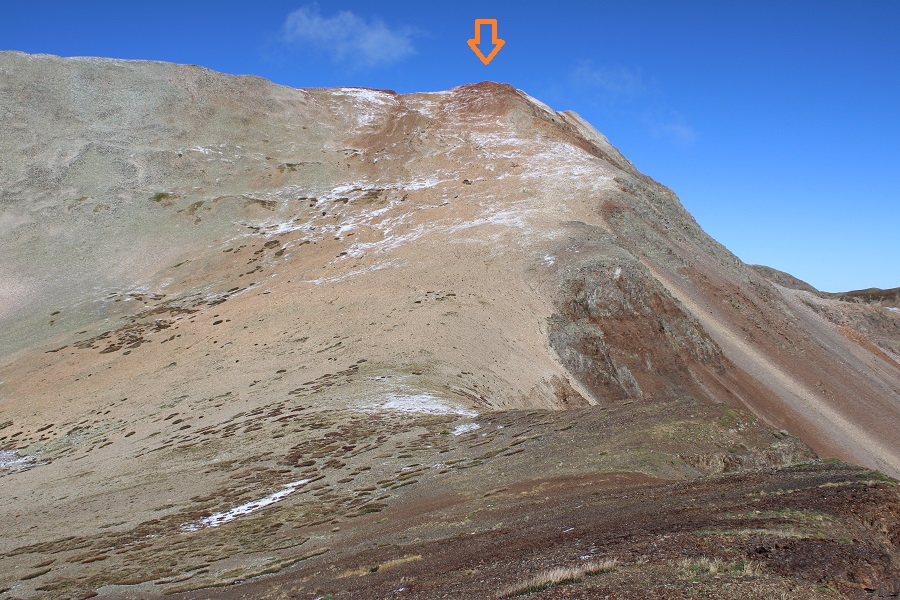
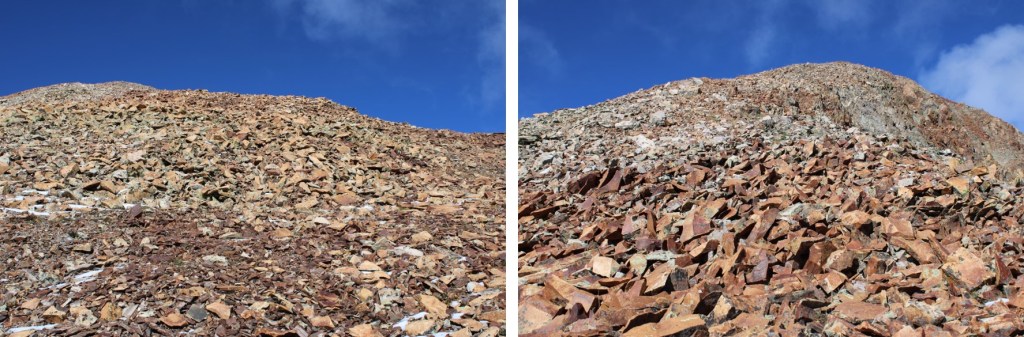
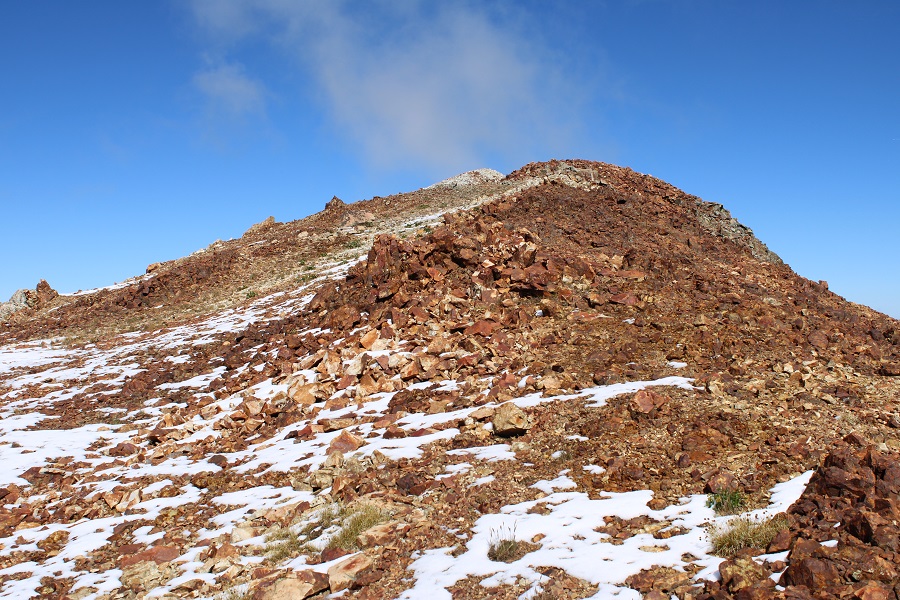
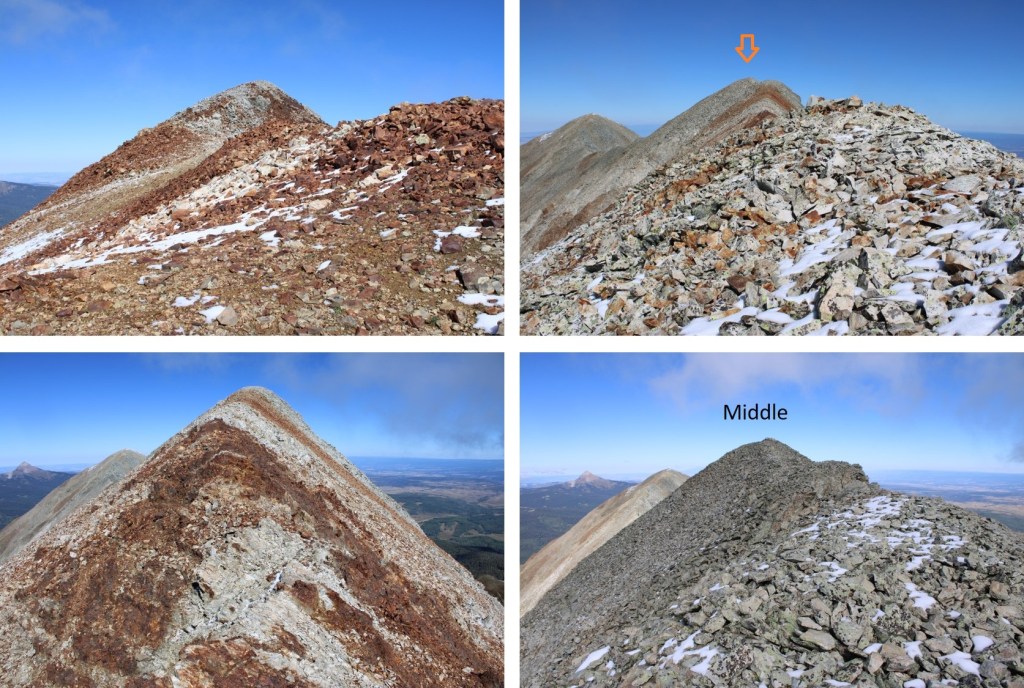
And now to follow the ridge up to Middle Peak. This was all class 2 on talus and scree
This was a false summit, as the true summit was further to the northwest, following the ridge proper. This was all class 2, but with some exposure. The rock was very crumbly.
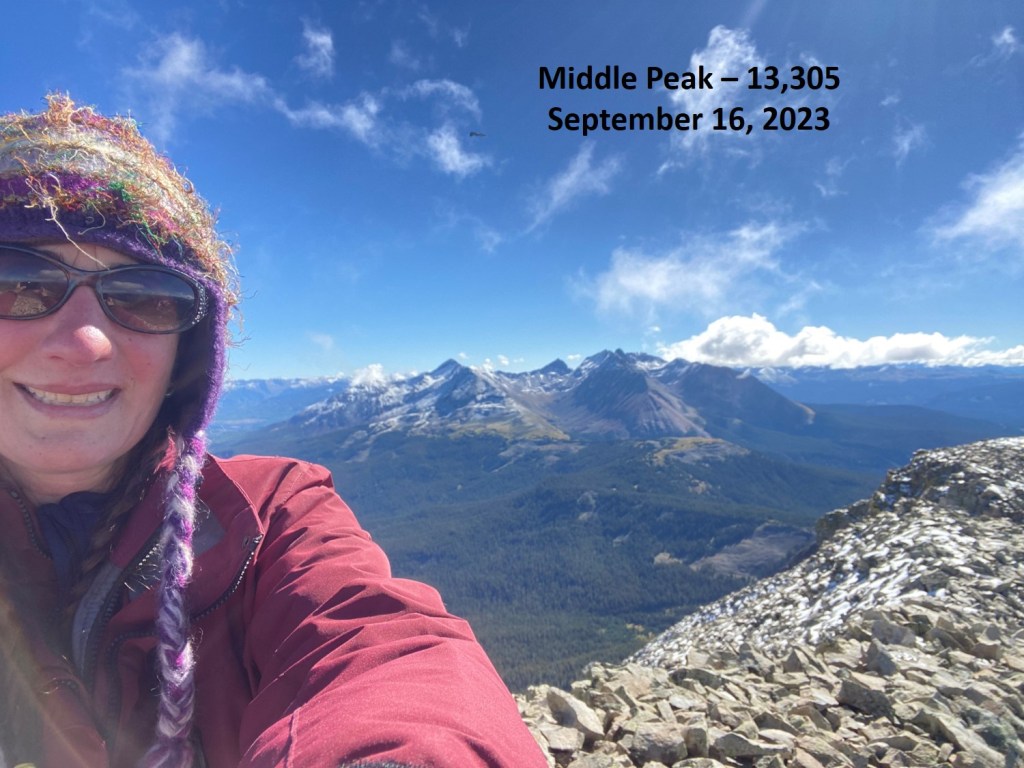
I summited Middle Peak at 10:30am
Middle Peak:
It was now time to head back, so I retraced my steps back down the ridge and into the basin.
Exiting the basin was very straightforward, as I simply followed the drainage down, staying to the right to avoid the waterfall.
Then it was back down that scree slope and into the trees
I hugged the right side of the creek until the ridge made its way to the creek.
I then crossed Fish Creek, and picked up the game trail on the other side. There’s a small cairn indicating where to cross Fish Creek
I followed the faint trail back to the trailhead
Crossing Fish Creek one more time, then walking back down the road
I made it back to my truck at 12:30pm, making this an 8.49 mile hike with 3896’ of elevation gain in 6 hours.
On to the next trailhead!
P.S. You’ll notice on the topo map “Middle Peak” is labeled as being further west than where I summited. Here’s a picture of what the map is referring to, taken from the summit of the ranked Middle Peak. This point sits at 13261’, and is named, but not considered a ranked or soft ranked peak.
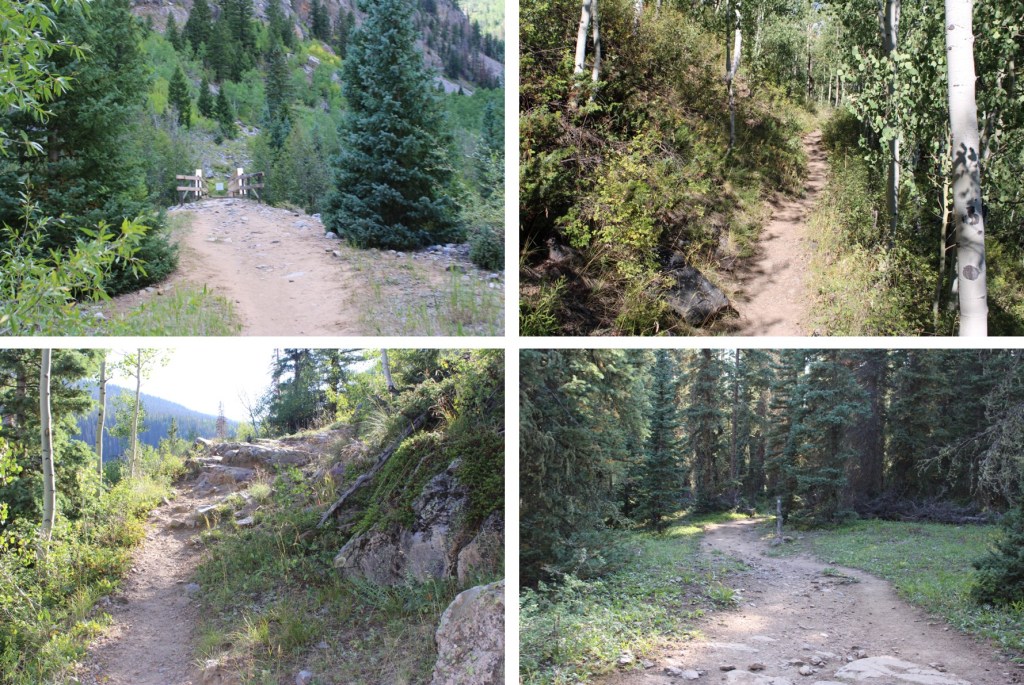
I started from the Molas Trailhead parking area. This trailhead has plenty of parking, and is a popular spot among CT hikers.
The trail starts at the south end of the parking area.
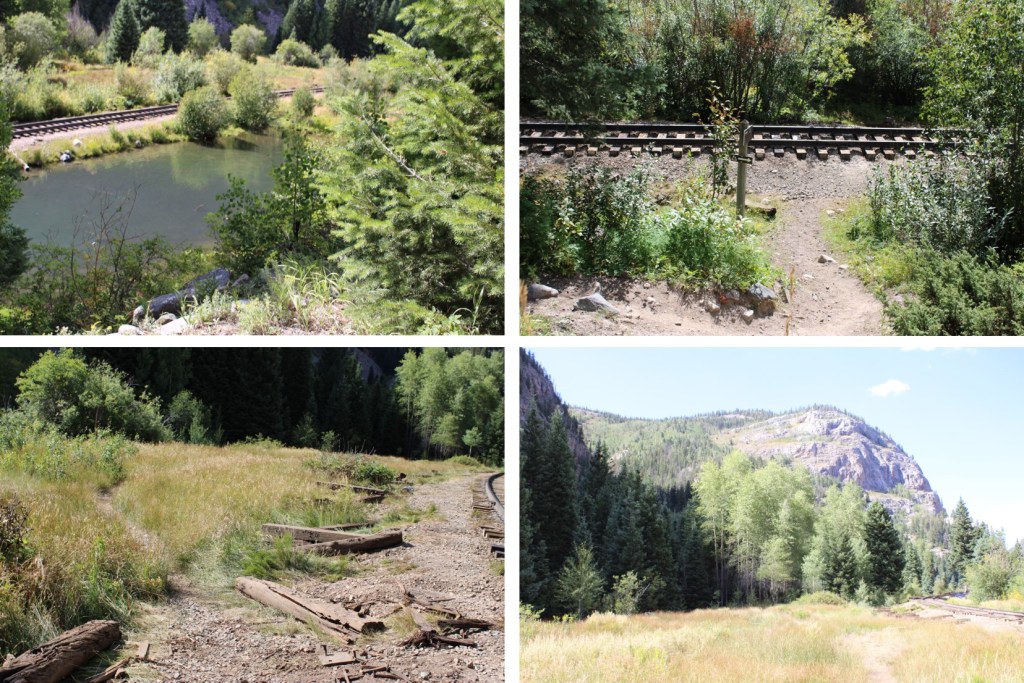
Much of the approach route follows the Colorado Trail, so it’s well maintained and easy to navigate. I followed the trail as I descended 1700’ to the Animas River.
I crossed the river on a well-maintained bridge, and then followed the trail as it crossed the railroad tracks
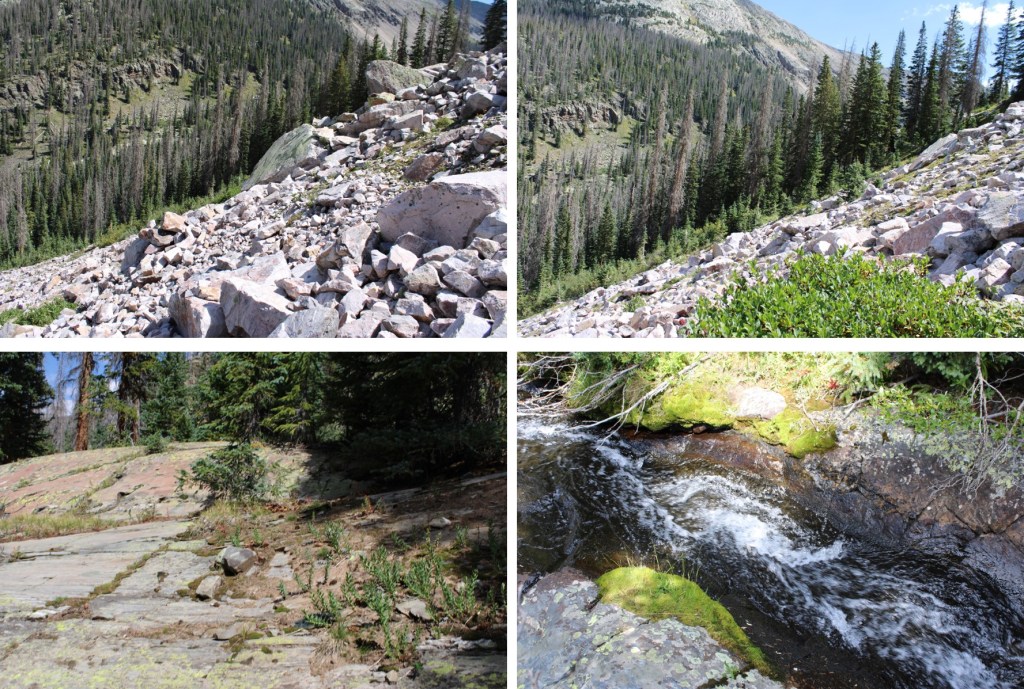
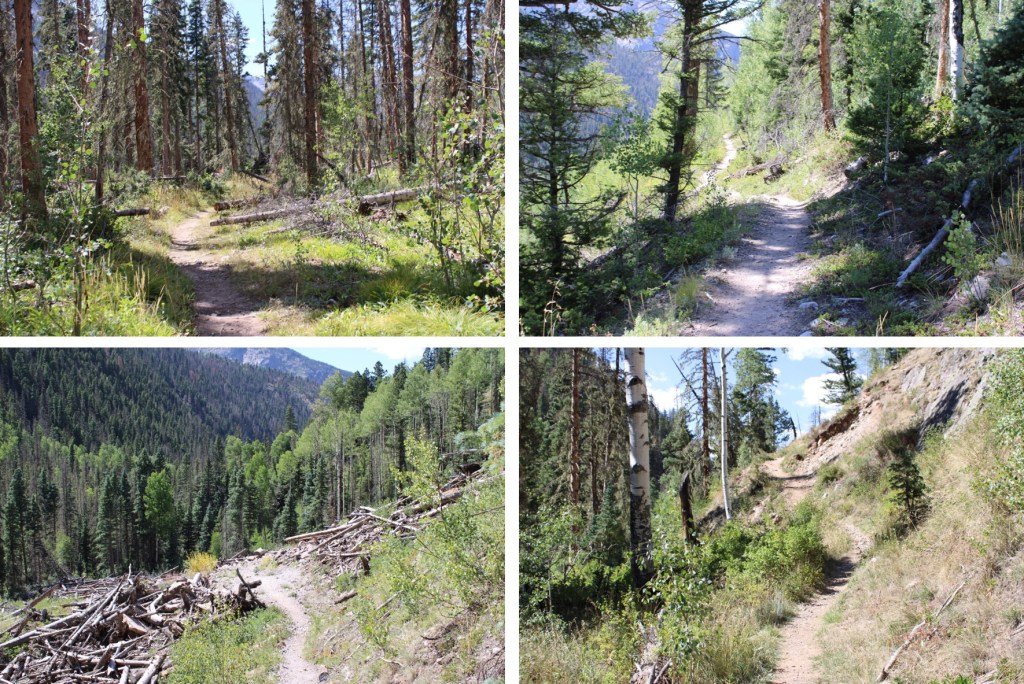
Here is where the elevation gain begins. I hiked along the Colorado Trail east to the Beaver Ponds, following Elk Creek and passing through a couple of cleared avalanche areas. This trail is easy to follow, with no trail junctions.
This part trips people up all the time when headed towards Vestal Basin: Once at the beaver ponds, I turned right off the trail and traversed behind this large boulder. There’s a faint trail here that picks up again once you’re past the ponds.
The trail picks up again after the beaver ponds, but it’s no longer as well maintained as the Colorado Trail. There are fallen trees to navigate, but the trail is easy to see. I followed the trail as it crossed a beautiful creek and headed south.
At 11260’ of elevation I left the trail. There are several options to do this, but here’s a visual of where I was headed.
This is the route I took:
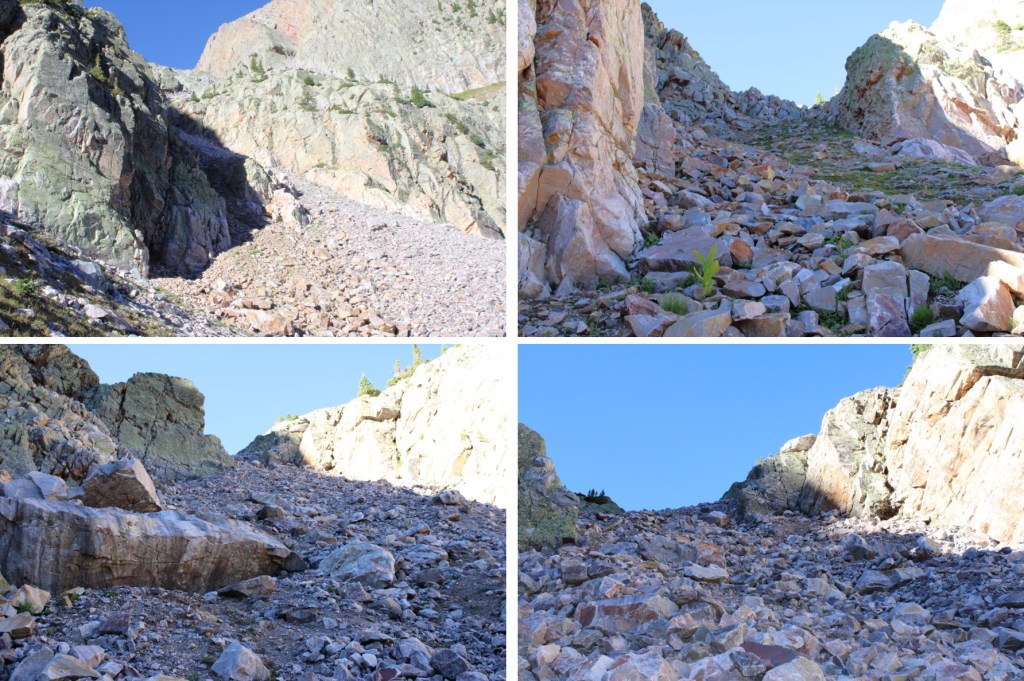
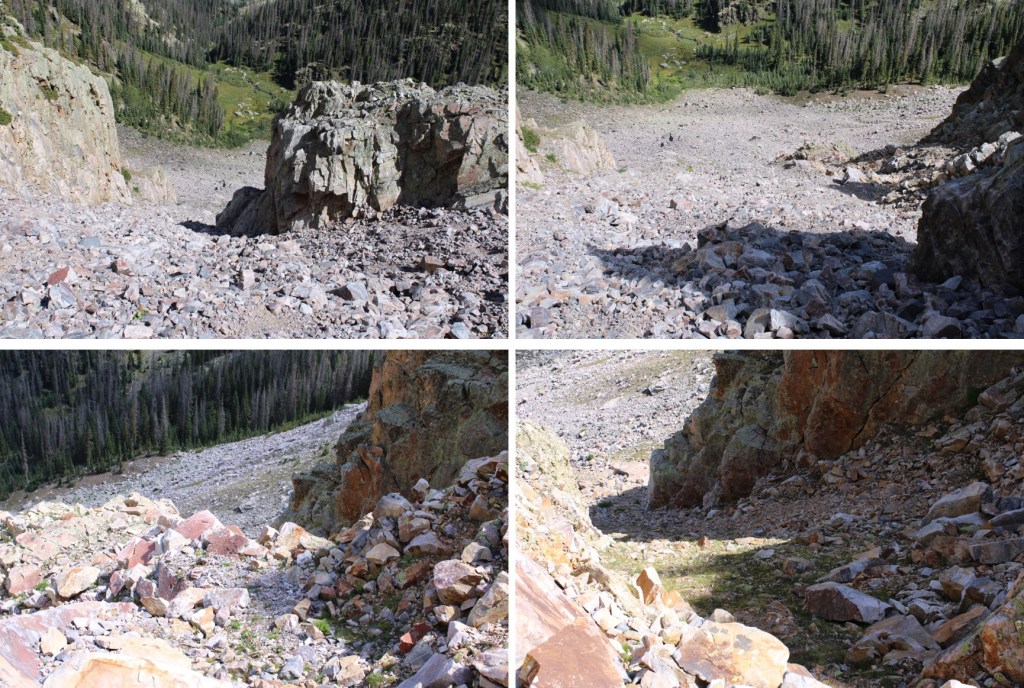
I headed a little further up the trail, crossed the creek at an easily accessible spot, and headed southwest up the slope. However, this is choose your own adventure, and you can climb straight up the talus/scree if that’s your choice. I decided to skirt around it.
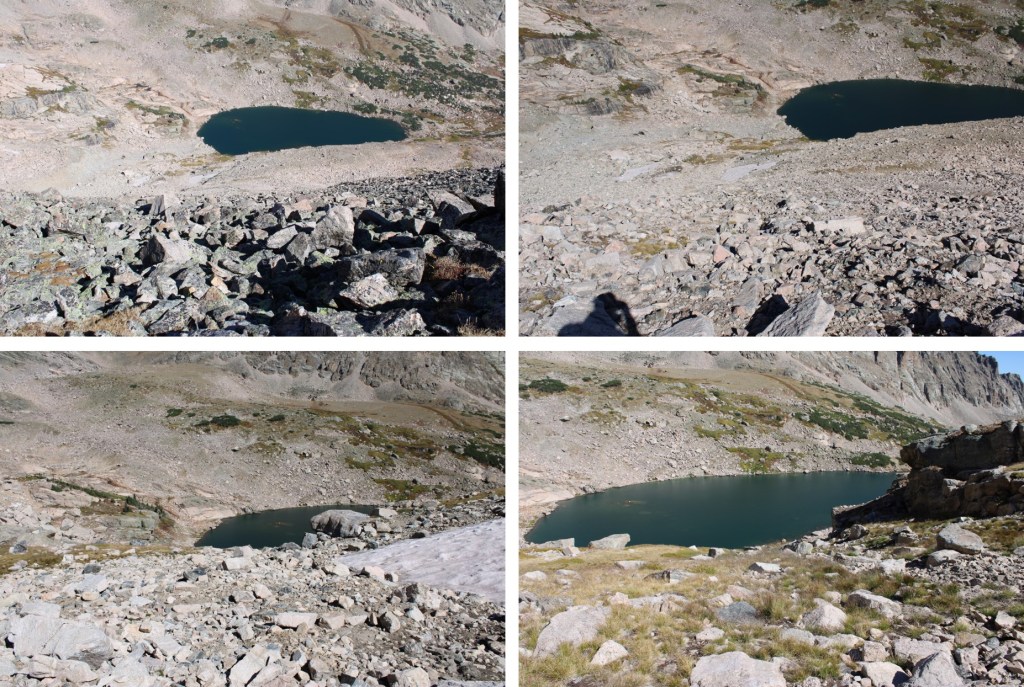
This gully wasn’t too bad as far as gullies go, but I put on my microspikes anyway.
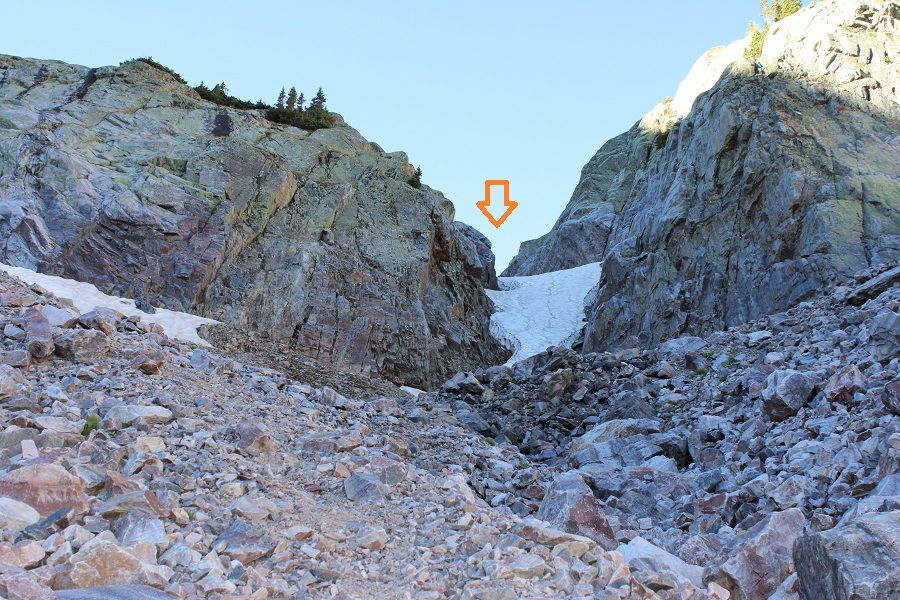
Towards the top I could see quite a bit of snow still left in the gully.
I traversed the gully to the right, finding there was about 2 feet of space where the snow had melted away from the rock. The snow was avoidable until the last 30 feet or so, when I climbed on top of the snow and walked to the top of the gully on several feet of rock-solid snow.
However, if this is outside of your comfort zone, you can also traverse to the left and make it to the top of the gully on more scree. Both routes lead to the same place (I took this route on my way down).
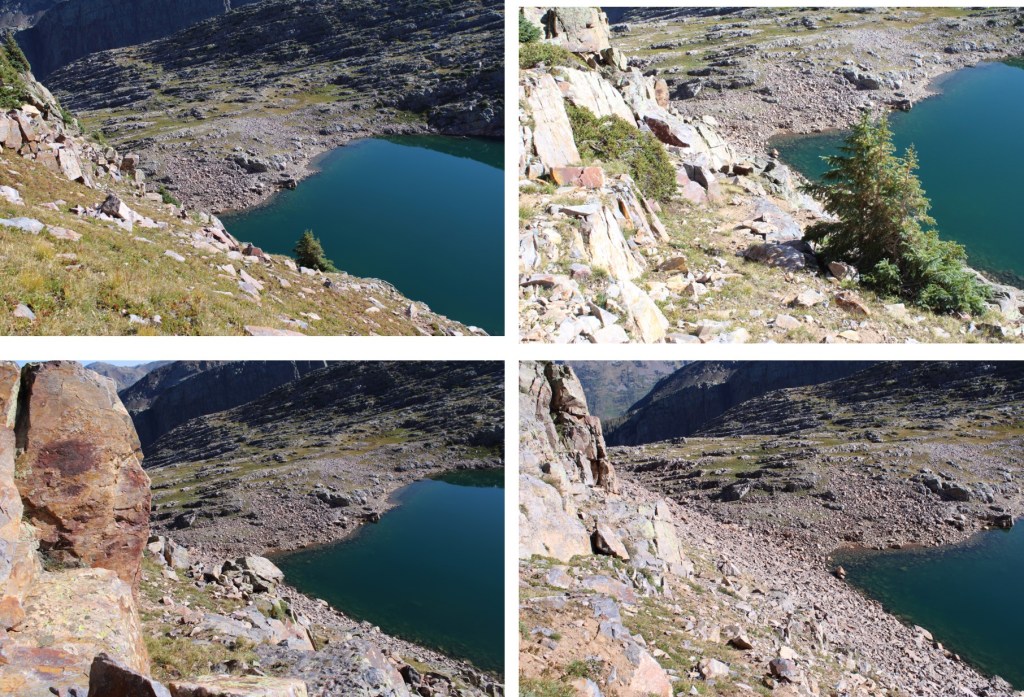
I was now in an upper basin, full of all different sizes of loose rocks. This wasn’t difficult to navigate, but it was extremely time consuming. I was headed southwest, staying to the right.
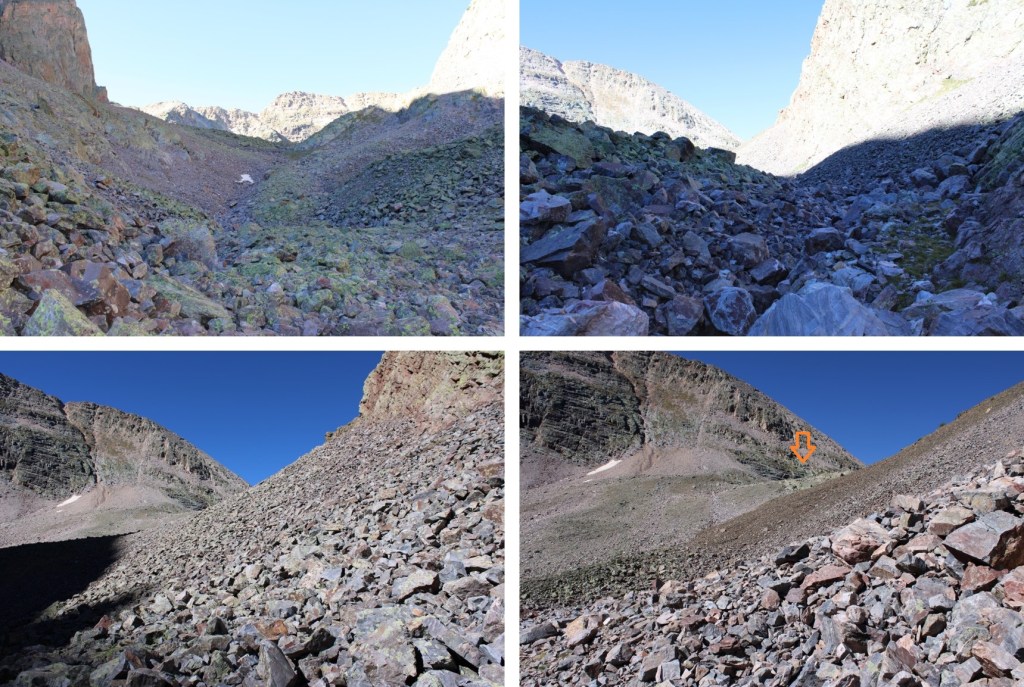
At 12500’ of elevation I turned right to start my climb up Electric Peak’s south side. If you don’t already have your helmet on (I usually put them on for scree-filled gullies) now is the time to do it.
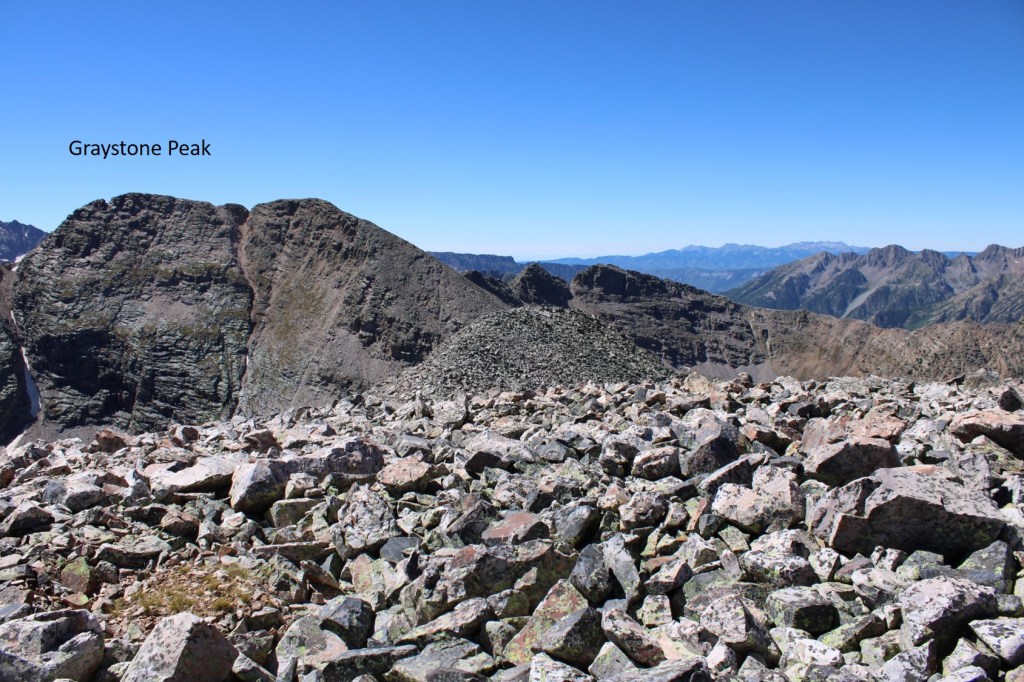
Much of the route to the summit is hidden at this time. I started by climbing up a class 3 gully to the right
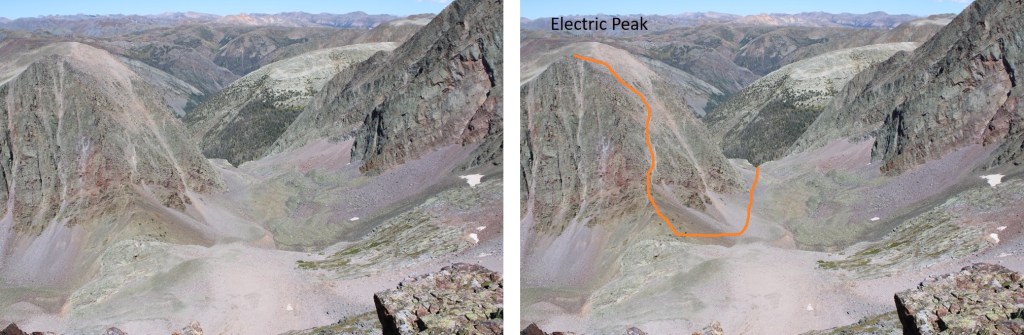
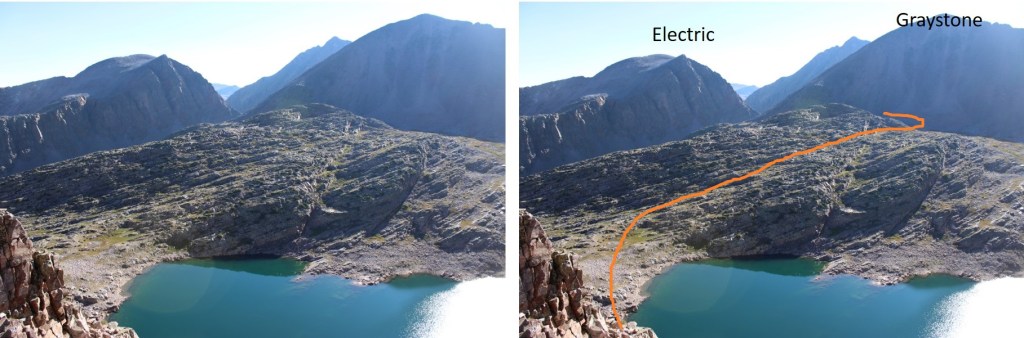
From Graystone Peak, I had a good visual of the route I took, keeping it mostly class 2 after the initial class 3 gully
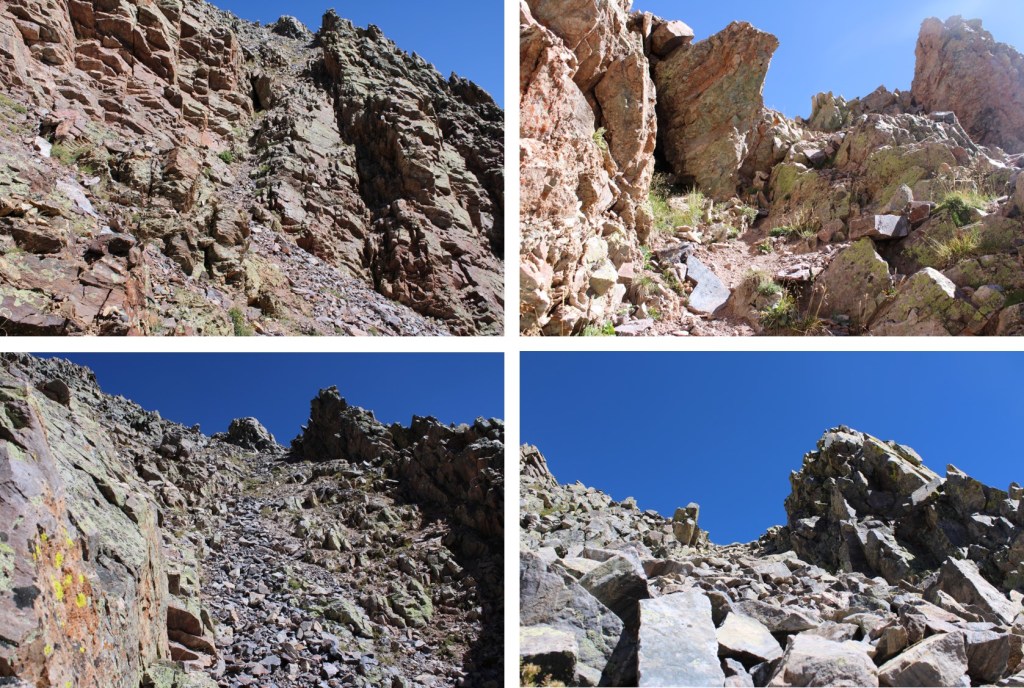
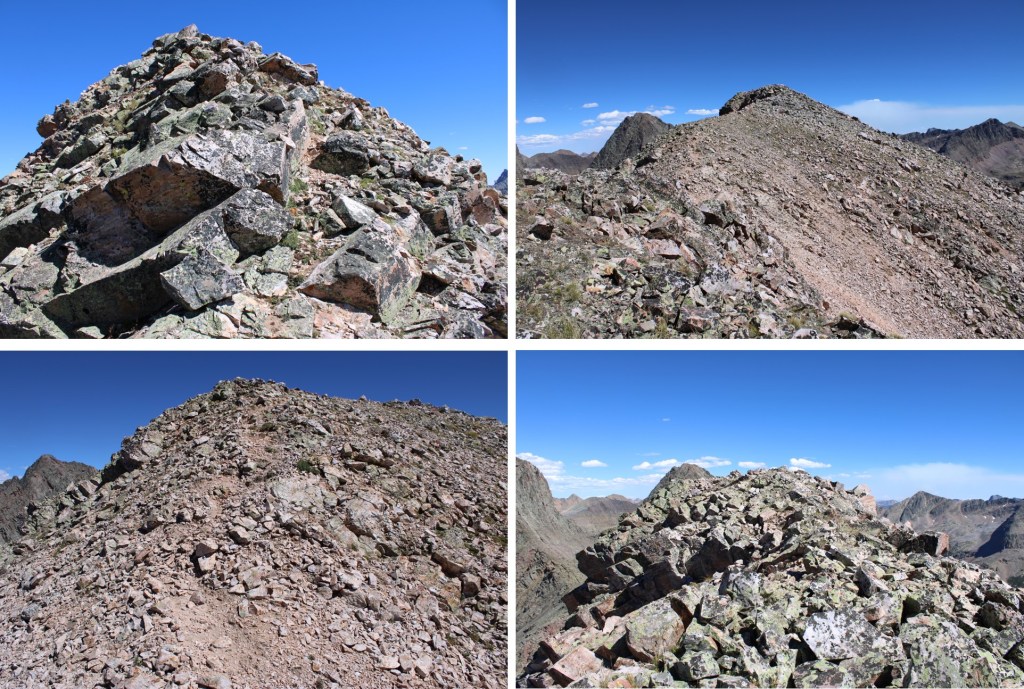
Once on top of this gully, there are several options to make it to the summit. Here are some on the ground pictures. The terrain was rocky most of the way to the summit.
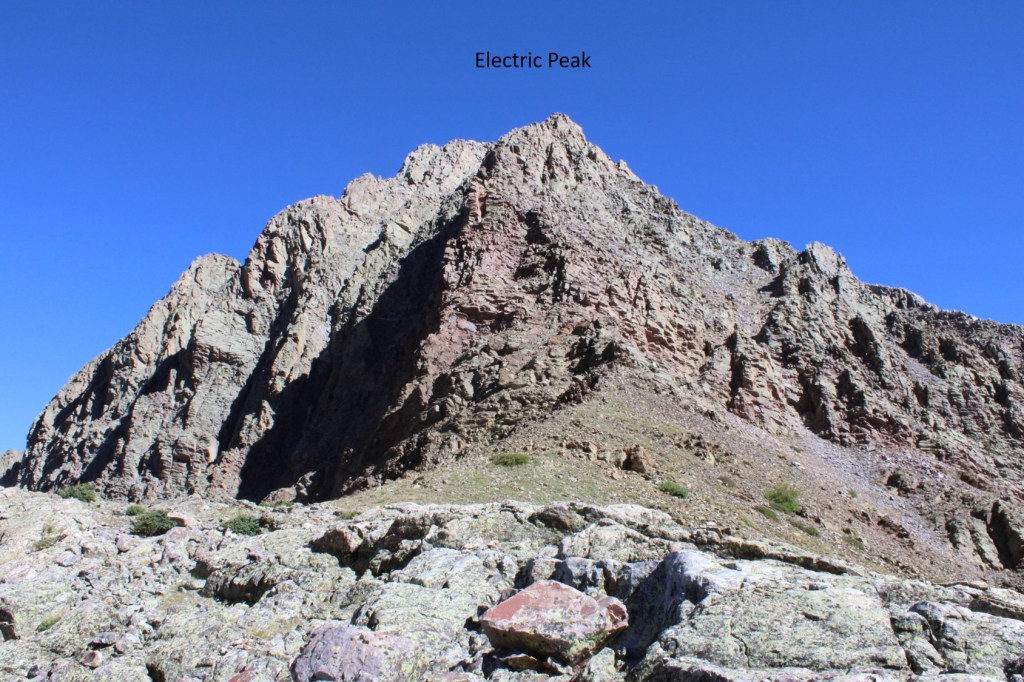
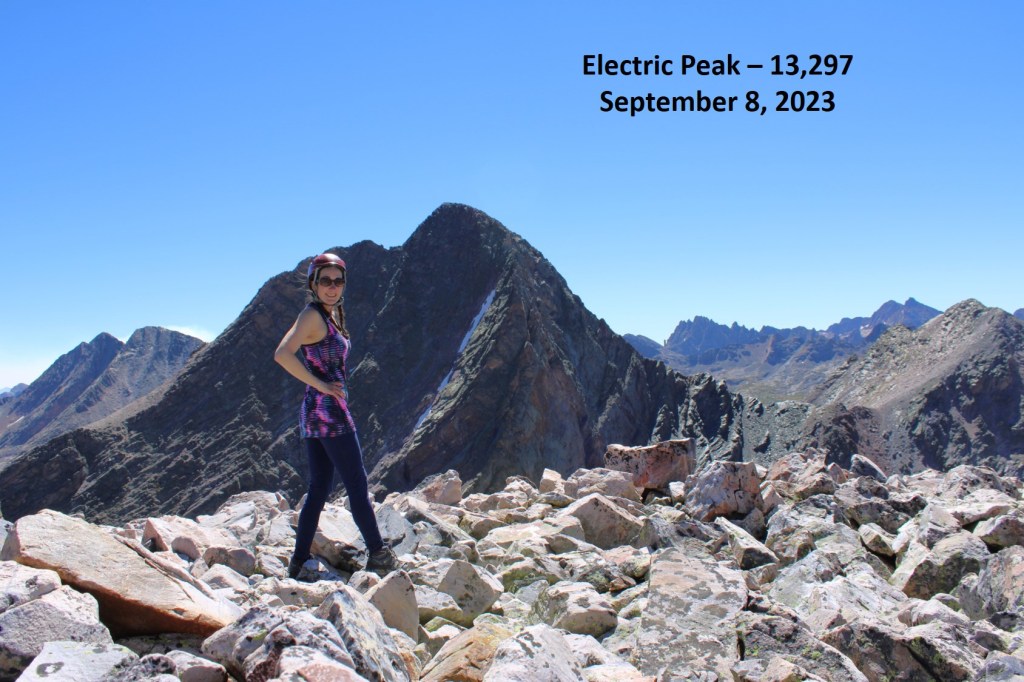
The summit was fairly flat and rocky.
Electric Peak:
From the summit of Electric Peak, I could see my next objective, Graystone Peak, to the south.
I re-traced my steps back to the saddle
Now to head over towards Graystone Peak. I looked east, and saw these wonderful rock slabs.
Traversing up and down large rock slabs is mostly a mental exercise in not freaking out. I kept telling myself “My shoes have got this, trust your shoes. Also, don’t look down”. This is the route I took. There’s no avoiding the slabs.
Another view of the rock slabs, with a little bit of climbing towards the end (which was favorable to the smooth slabs)
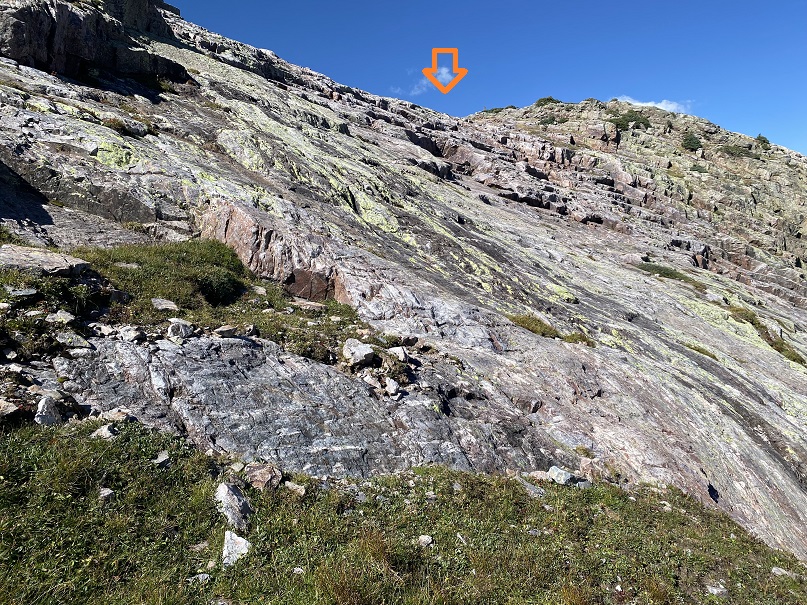
After making it up the rock slabs, I turned left, now ready to scale Graystone Peak
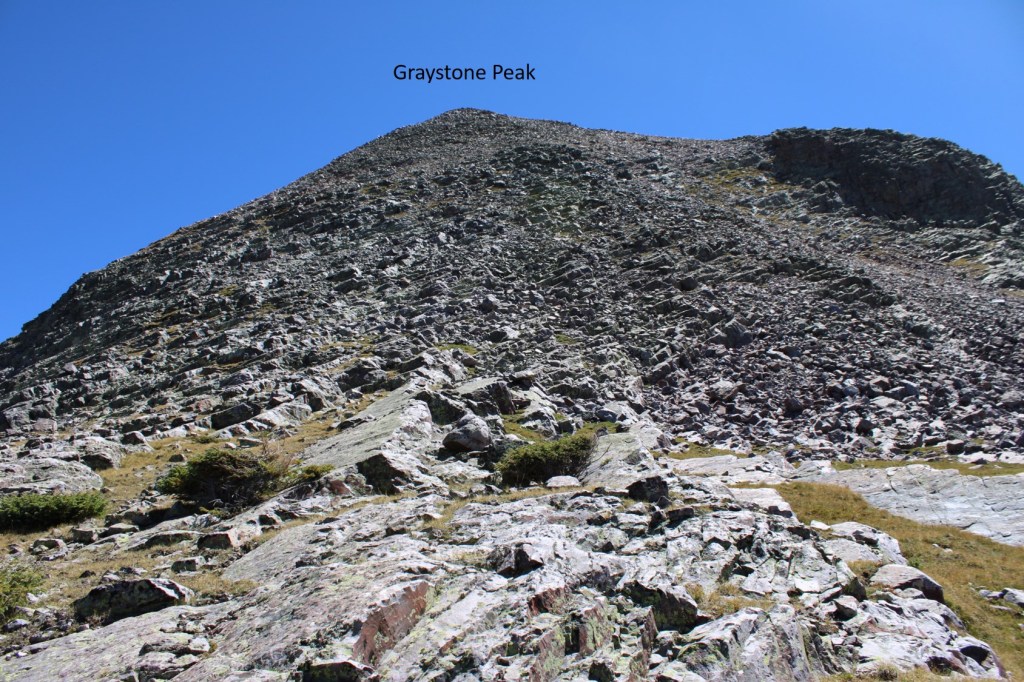
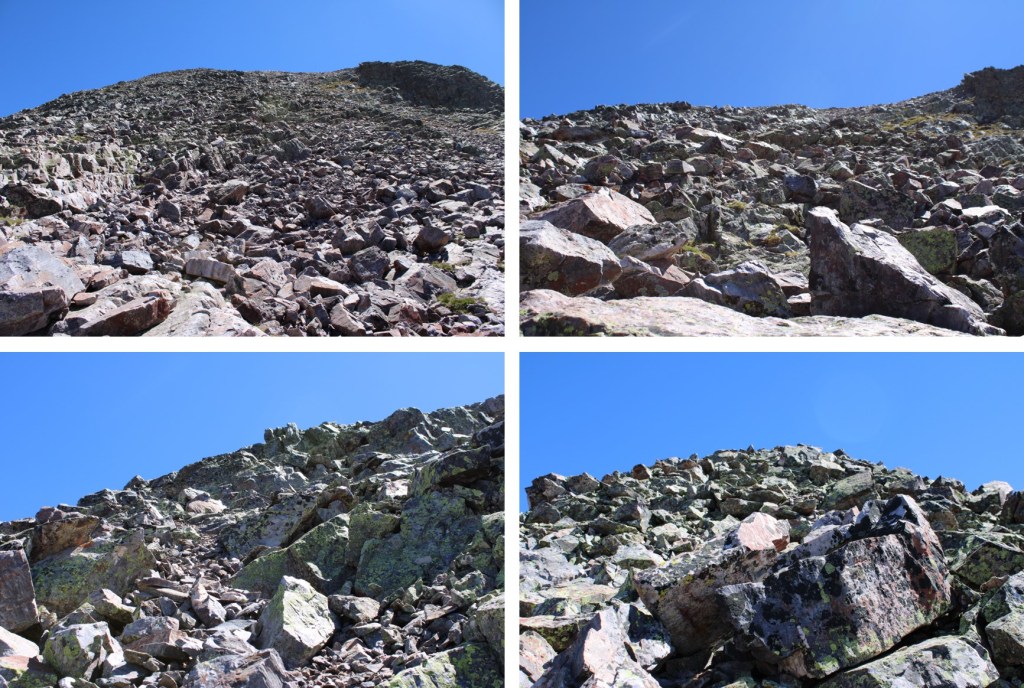
Scaling this peak is exactly what it looks like: straight up the side with a lot of various sized rocks to traverse that are loose. I headed southeast up the mountainside.
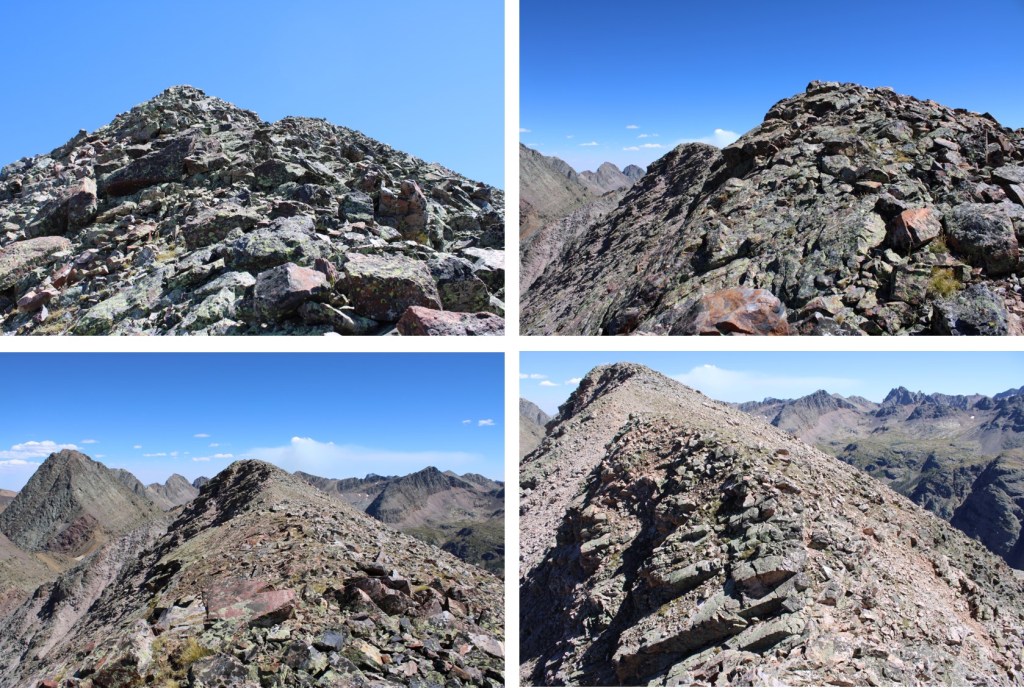
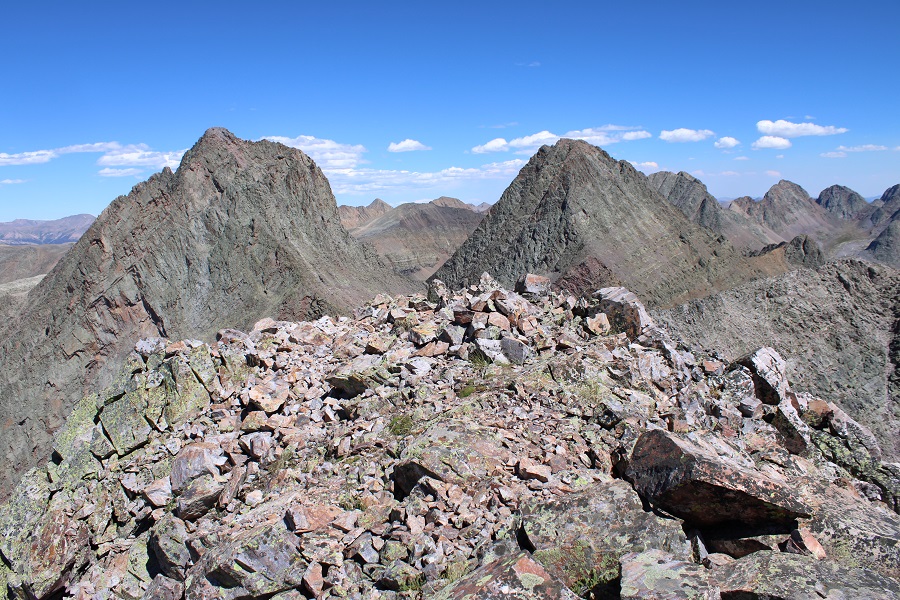
Once making it to the ridge, I stayed on the ridge proper to the summit, with some easy class 3 ups and downs along the way.
There was a large cairn at the summit
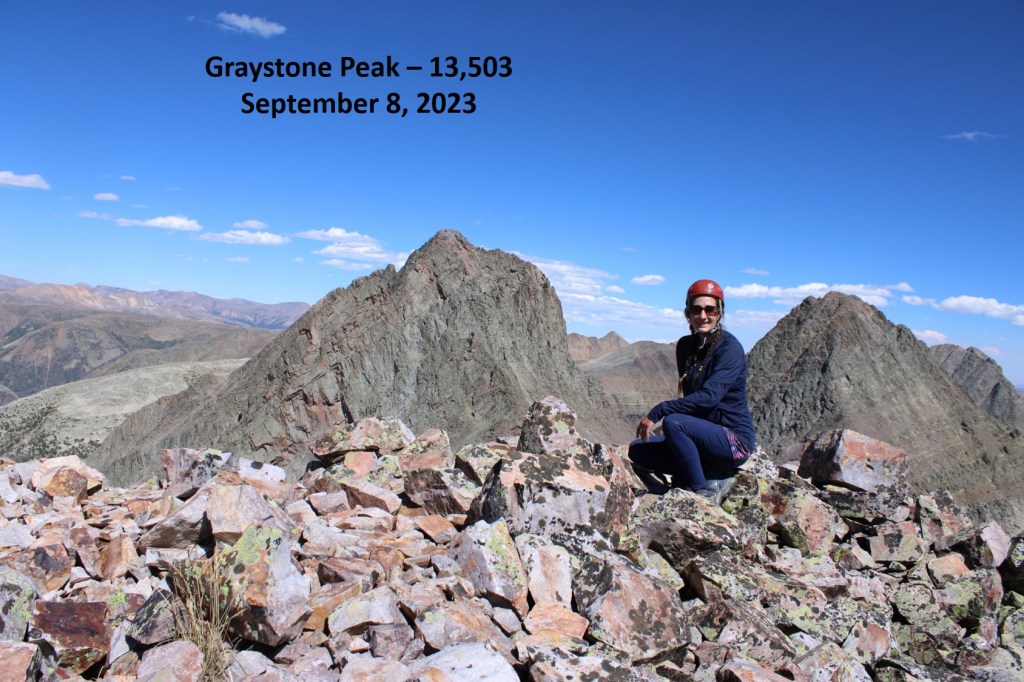
Graystone Peak
I turned around and headed back down the peak the way I’d ascended, doing my best to keep my balance and navigate the loose rocks.
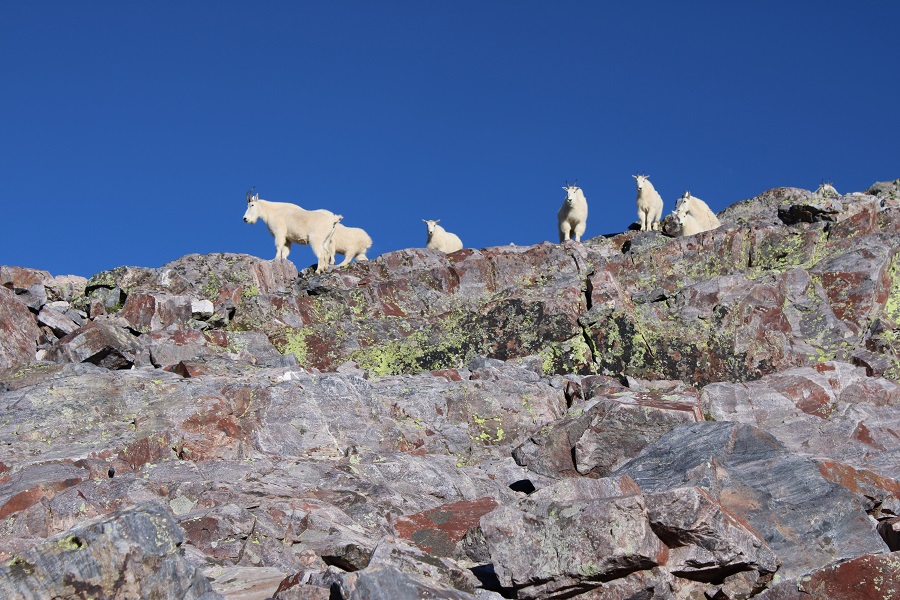
It had been a long day, so once I made it back down to the little patch of grass at the base of Graystone Peak I decided to call it a night and set up my bivy. I dried out my clothes, ate some dinner, and wrote notes down in my journal. Just before settling down for the night, I heard rocks tumbling and then skidding to a halt behind me. I turned around, and about 30 mountain goats were standing on the ledge, about 20 feet away. Most of them dashed away before I got a picture, but they seemed just as surprised to see me as I did them. They were probably headed towards the patch of grass I was using as a bivy site, and seemed a little disappointed to find me already occupying the space. I wish I could have told them I wouldn’t bother them and they were free to stay, as there wasn’t any other grazing areas around, but they all bounded away to find another site.
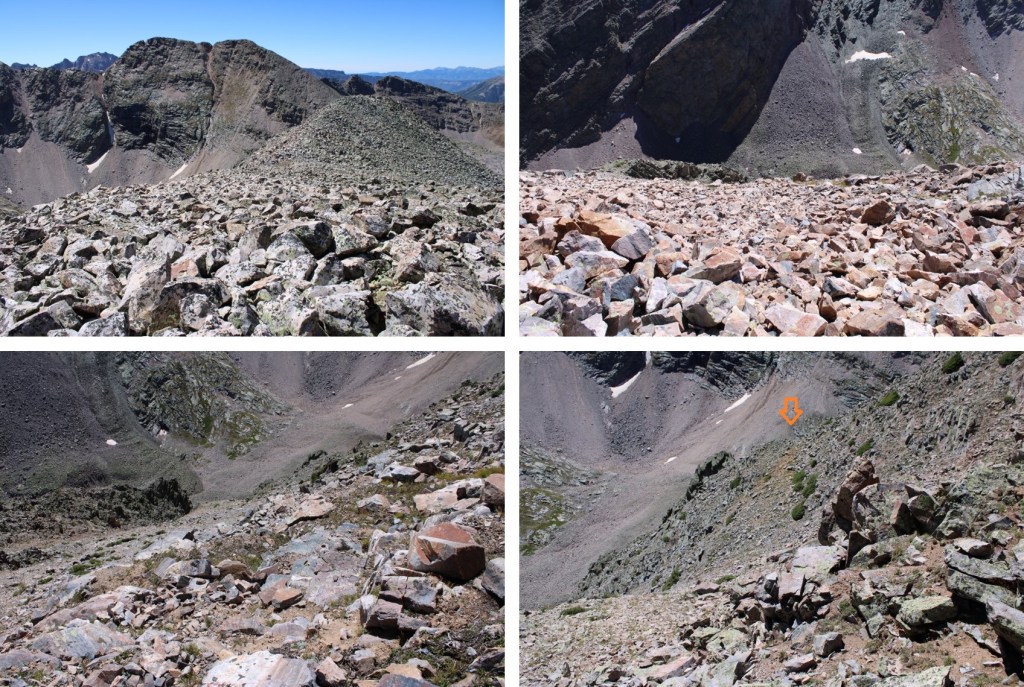
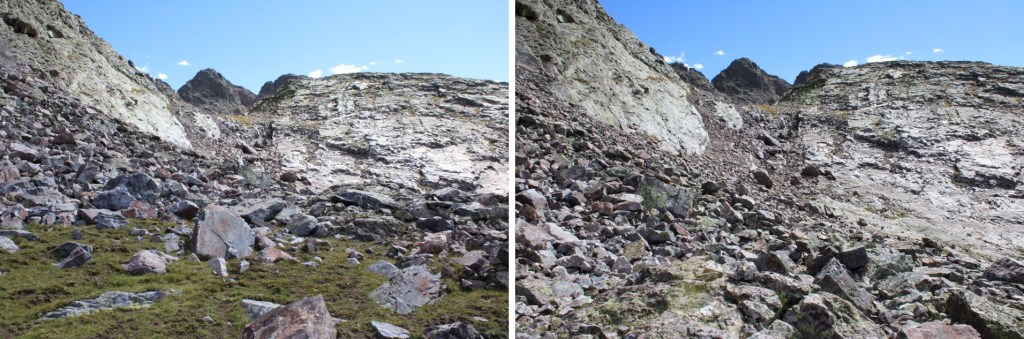
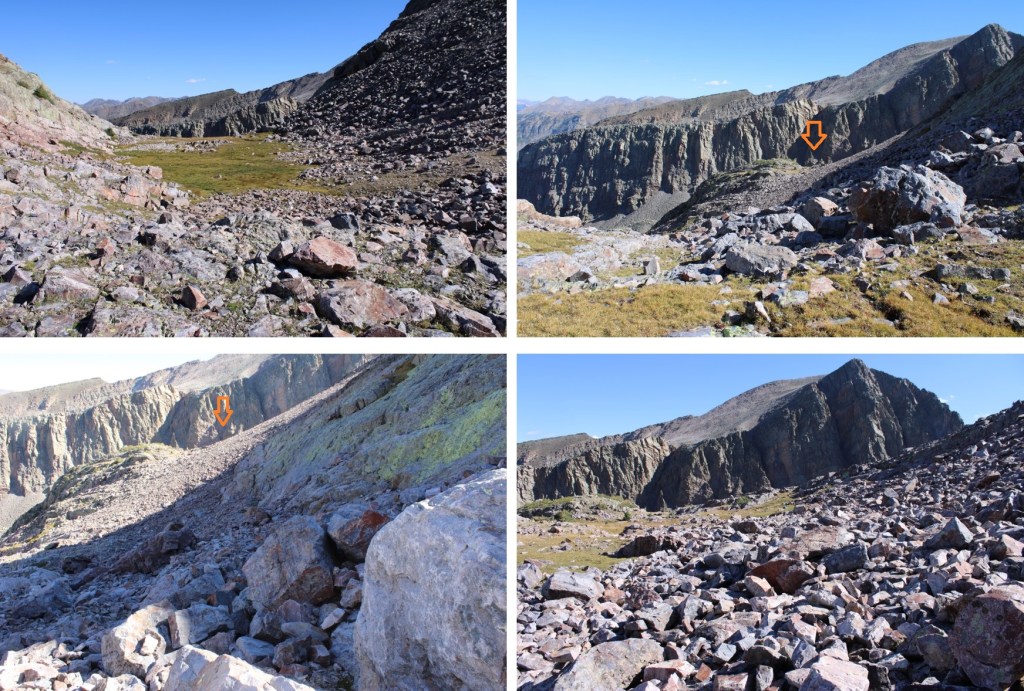
I was up early the next morning and on route to Mount Garfield. Even though this was the shortest of the peaks I was doing this weekend, it was by far the most challenging. Once on the ridge it was consistent class 3 the entire way. I started out by heading southeast around the base of Graystone Peak. I was headed here:
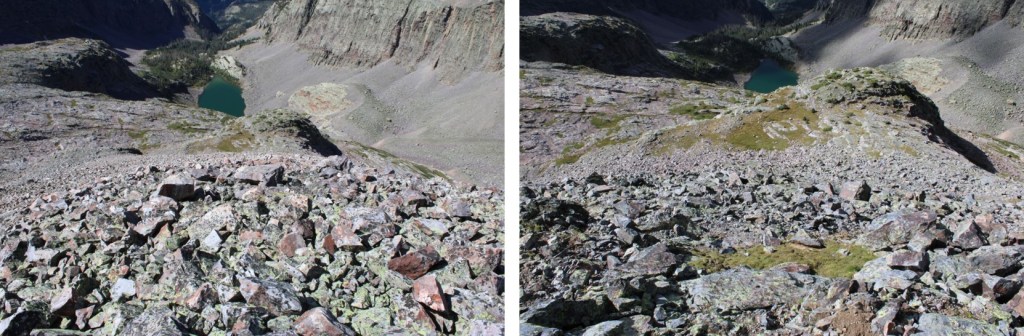
This was a quick and easy gully to climb. Once out of the gully, I passed through an open grassy area and then descended over 300 feet down grassy slopes to the right, towards Garfield Lake.
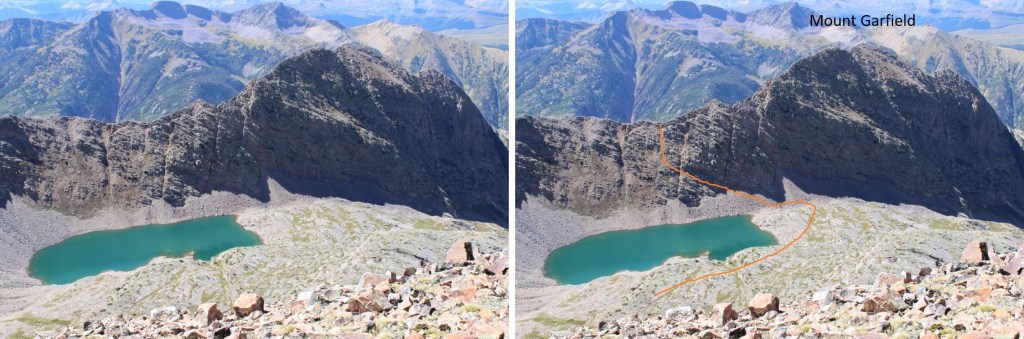
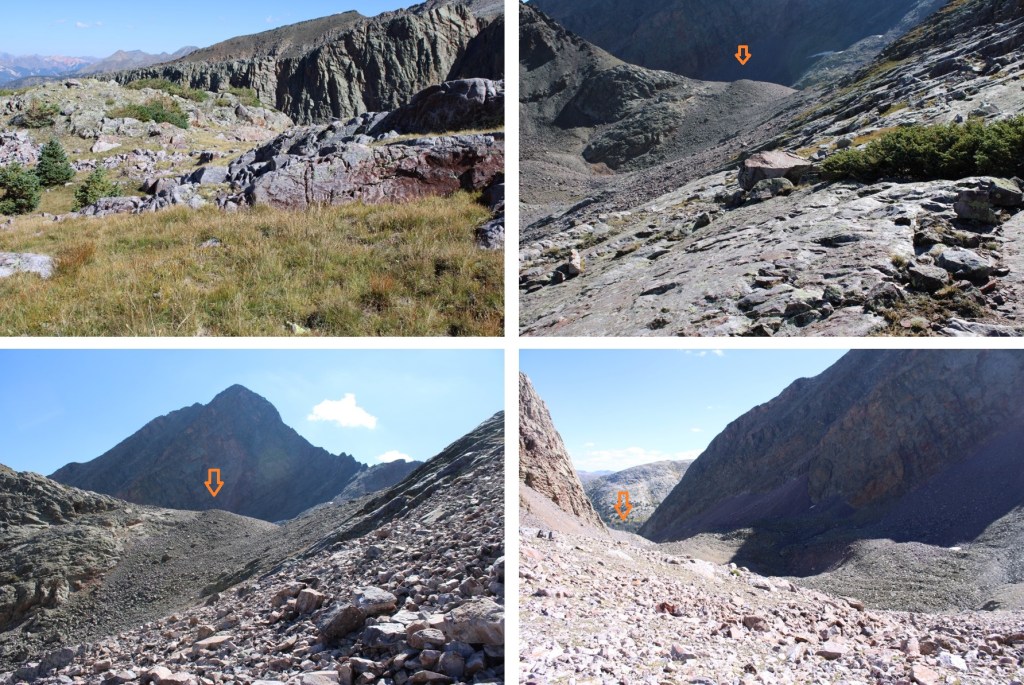
Once at Garfield Lake, I needed to gain the ridge. This can be done in several ways, but this is the overall route I took. There were a couple of nicely placed trees I used as a guide on the ledges. I just aimed for one tree, and then the next. Here’s an overview of the route to the ridge as seen from Graystone Peak
From Garfield Lake, I aimed for the rock ledge with two trees on it, spaced about 300 feet apart. It was class 2 to the ridge.
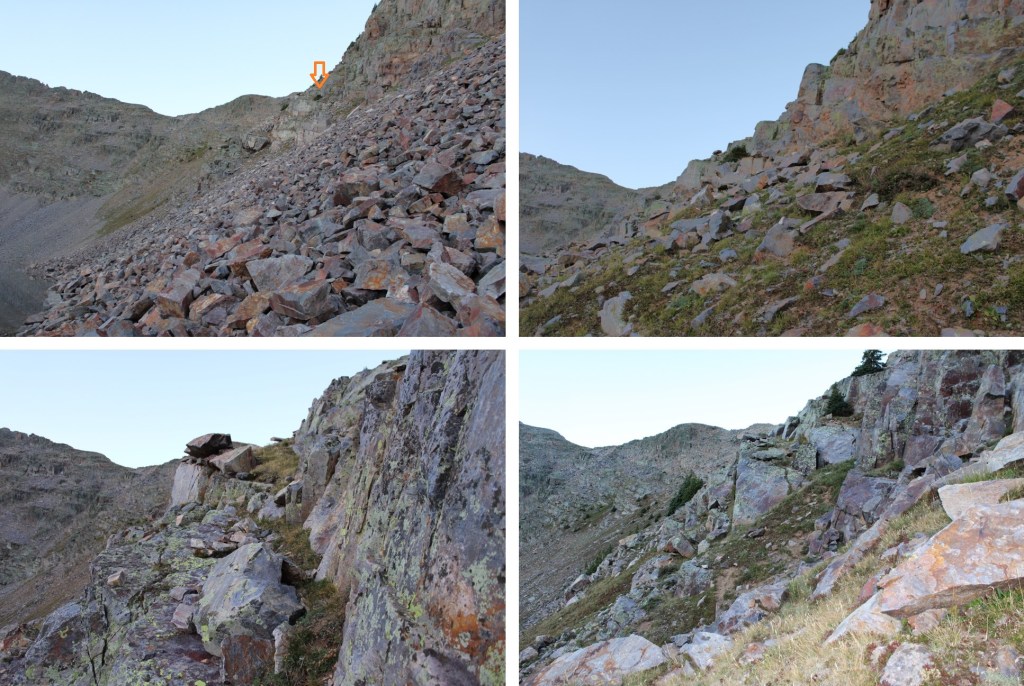
When I’d passed the two trees, I looked up and saw this gully.
I made my way straight up the gully to the ridge.
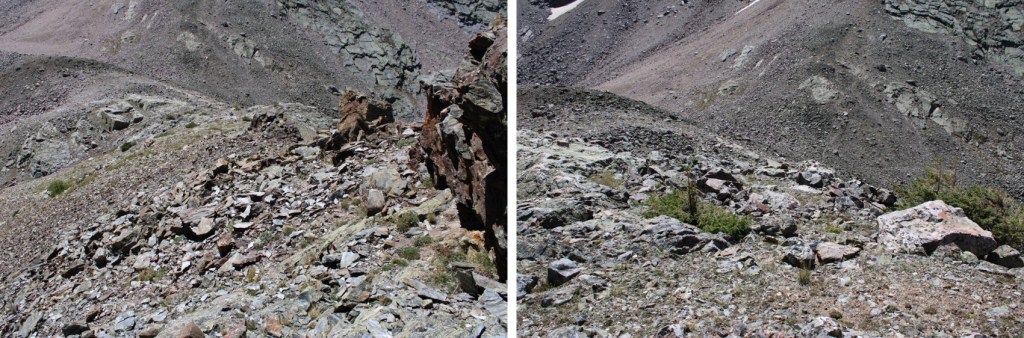
Once on the ridge I turned right, and this became a class 3 ridge hike all the way to the summit. I was able to mostly stay on the ridge, dipping to the right one time. If you encounter a class 4 move, you’re off route. Here are some pictures of the ridge.
I stayed to the left of this gully, climbing up the rocks instead of on the scree.
At the top of the gully I turned right, and continued following the ridge.
The only time I dropped off the ridge was when I came to this large rock. At this point I dropped to the right and descended about 30 feet before re-gaining the ridge.
Back on the ridge, I followed it to the summit, class 3 the whole way
Mount Garfield
Here are some pictures of the route back down the ridge
Then back down the gully to Garfield Lake
Back at Garfield Lake, I took the same route back to the base of Graystone Peak, this time going up the grassy ledges
This was an out and back hike, so I re-traced my steps down the rock slabs, across the rock field, and back down the gully to the trail.
This time, instead of going down the snow-filled gully I went to the right, and descended on scree
Back on the trail, I followed it back to the Beaver Ponds
Then I followed the Colorado Trail back to the Animas River
I crossed the train tracks, and trudged back up to Molas Pass, something I timed just right so I’d be doing later, during the cool part of the day.
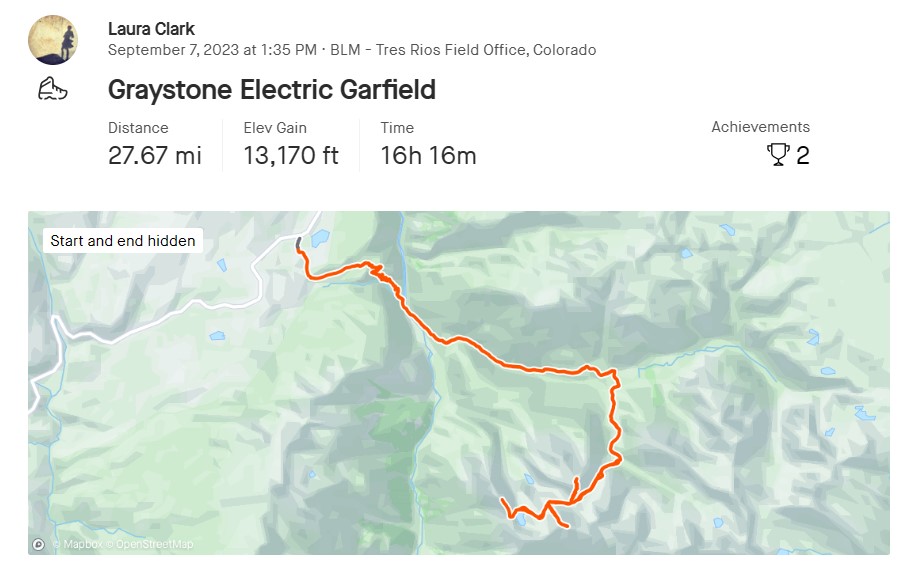
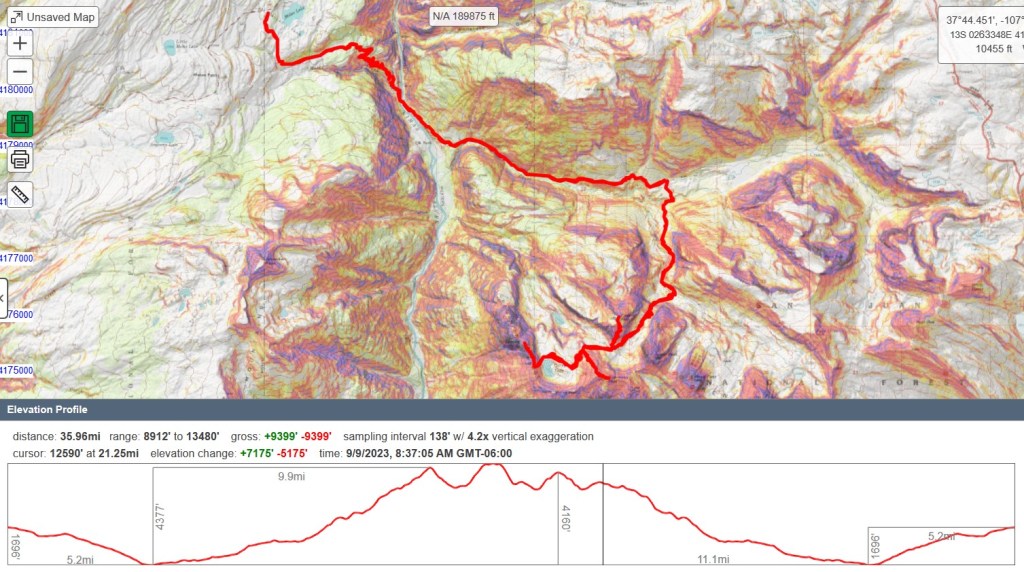
I usually go by CalTopo stats to keep things consistent. CalTopo gave me 35.96 miles with 9399’ of elevation gain, but Strava gave me 27.67 miles with 13,170’ of elevation gain. Take your pick!
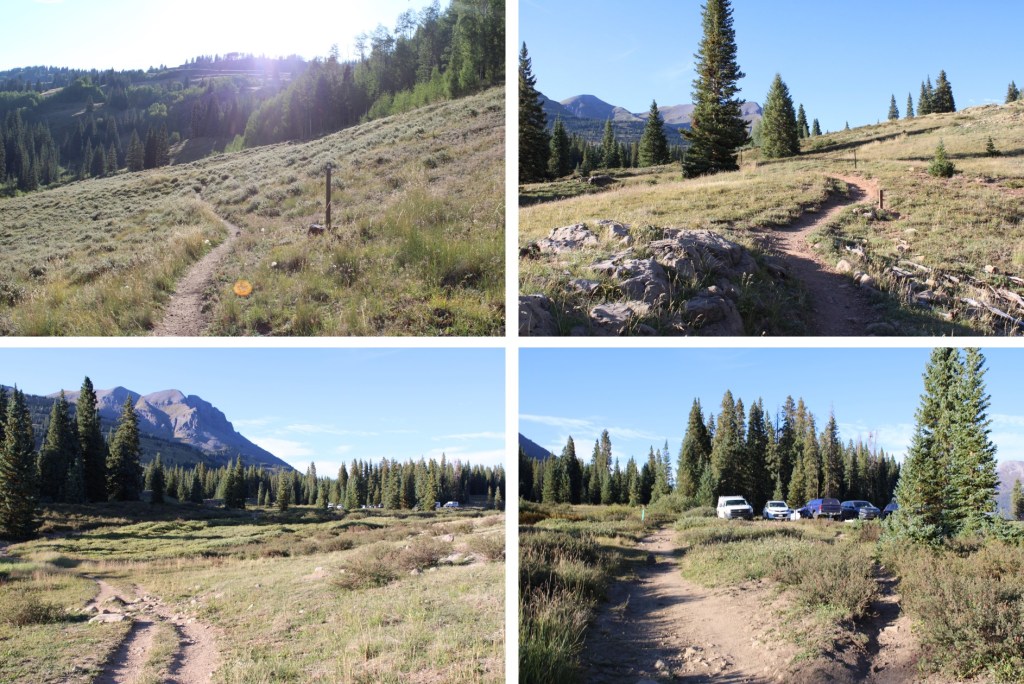
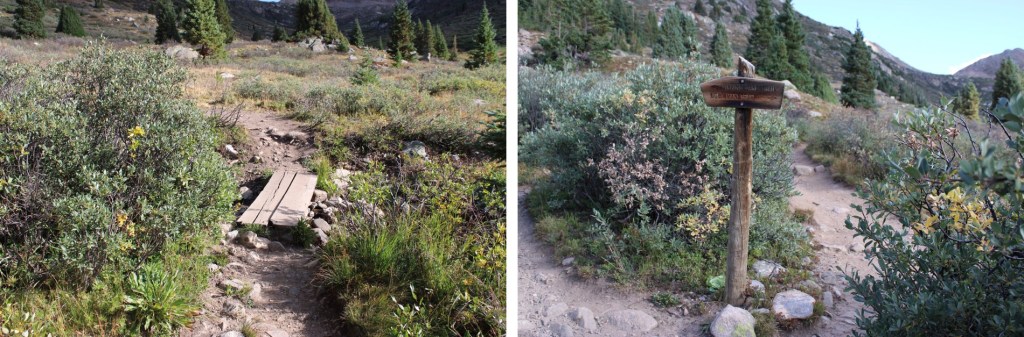
I drove up from my camping spot to the Independence Lake trailhead that morning, and was on the trail at 5am. The trailhead has plenty of parking, and even a bathroom, but parking spots fill up fast. The trailhead is obvious, and starts at the north end of the parking area.
I quickly came to a junction and headed towards Lost Man Lake
I followed this class 1 trail to Independence Lake, crossing over Roaring Fork River on a nice placing of rocks
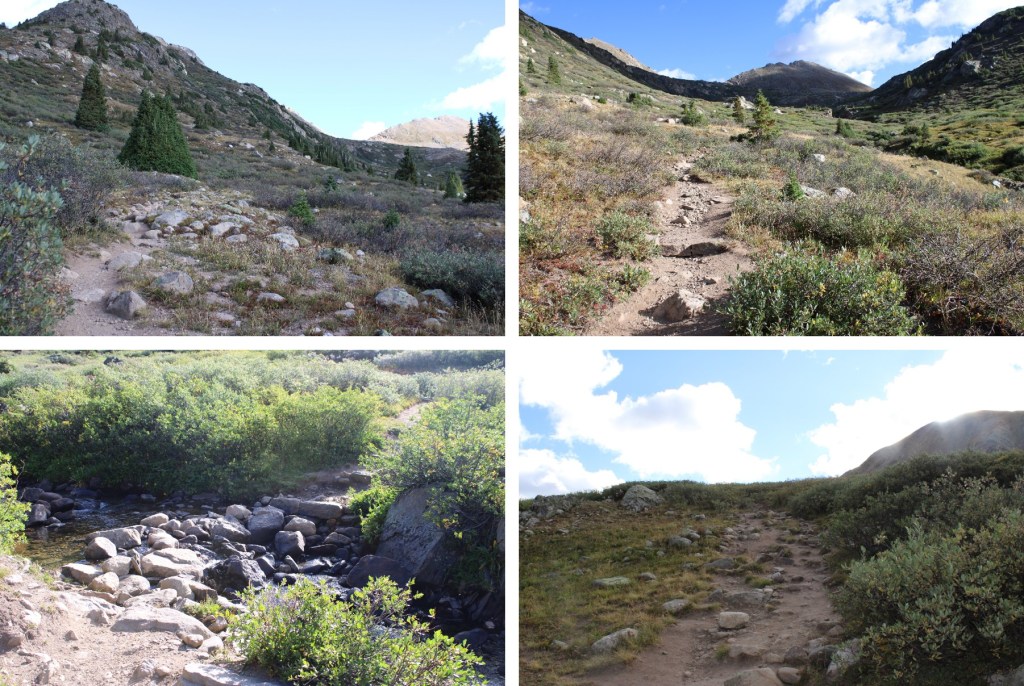
Then continued following the trail to the saddle
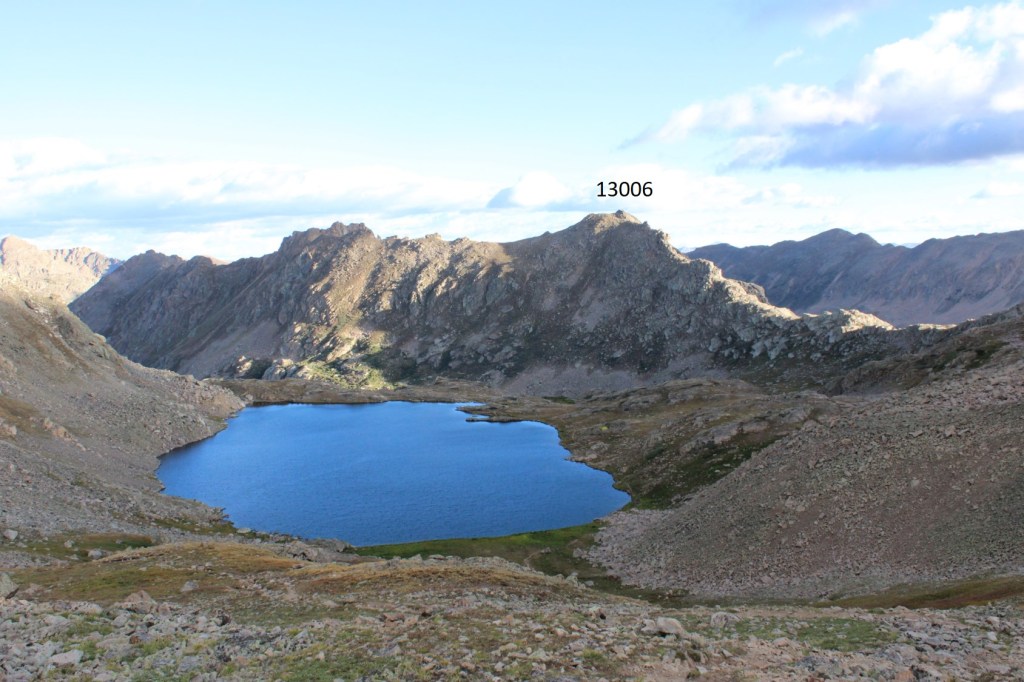
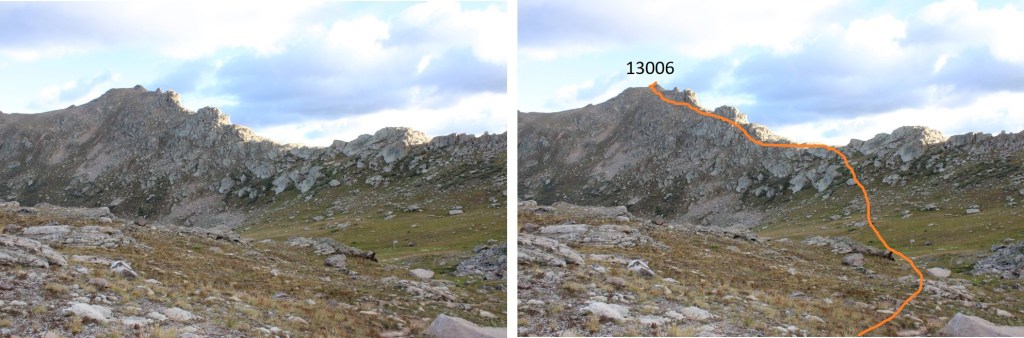
It was about 2.5 miles to the saddle. From here, I could see PT 13006. I lost 472’ of elevation as I descended towards (and past) Lost Man Lake. This remained a class 1 trail.
At about 12320 feet of elevation, I left the trail and headed towards the ridge. This is the overall route I took to the summit of 13006.
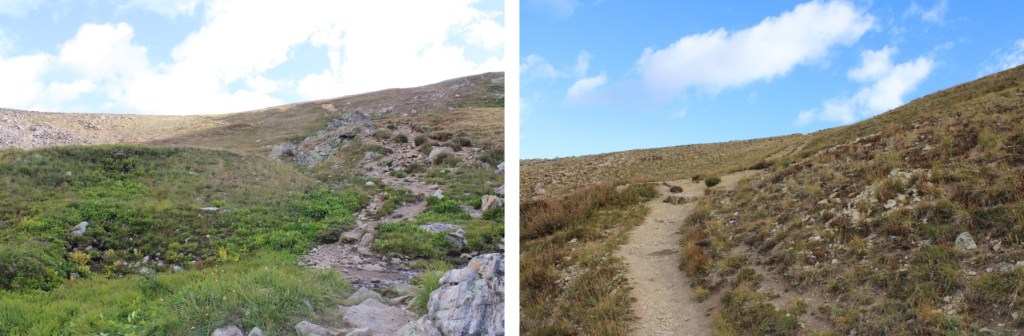
First, to gain the ridge. The willows were avoidable.
Once on the ridge, I turned left, and crossed a few rock slabs. They were class 2, but now is a good time to put on your helmet.
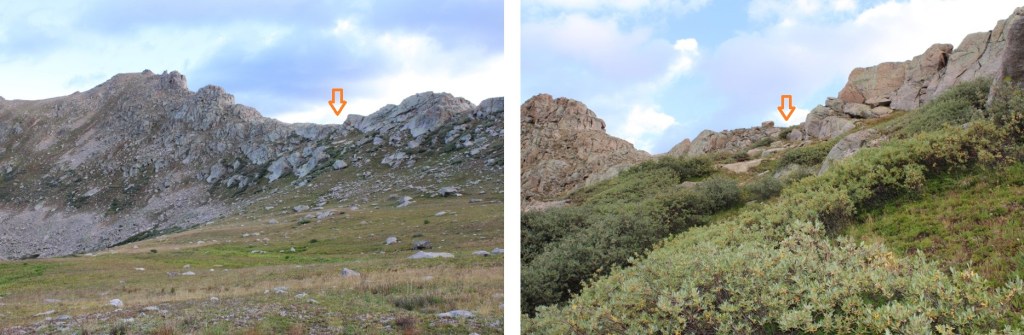
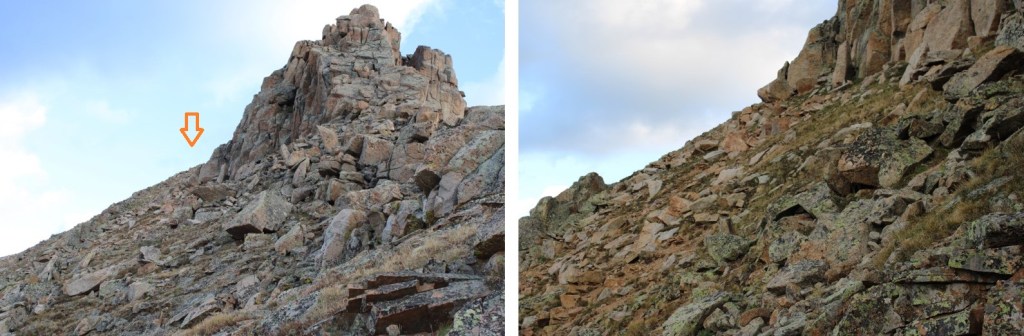
From here on out, I stayed to the left of the ridge. My first objective was to make it here.
I rounded the rock formation to the left
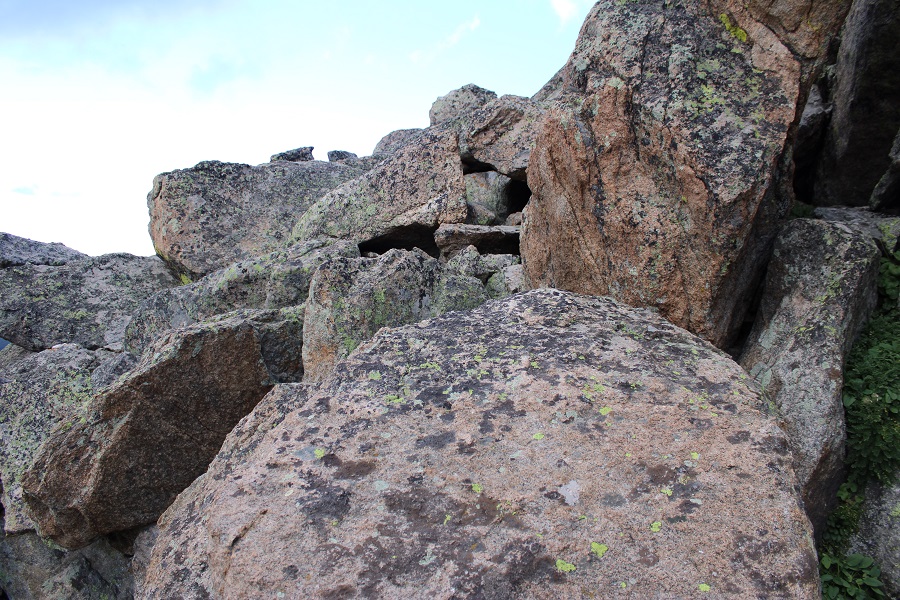
This brought me to some large boulders I had to climb. This was the ‘crux’ of the climb. The boulders are fairly stable, but far apart. I rock-hopped up and across them.
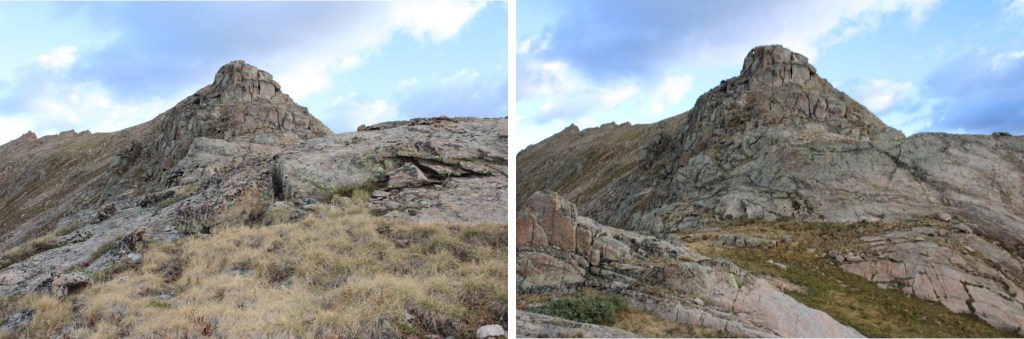
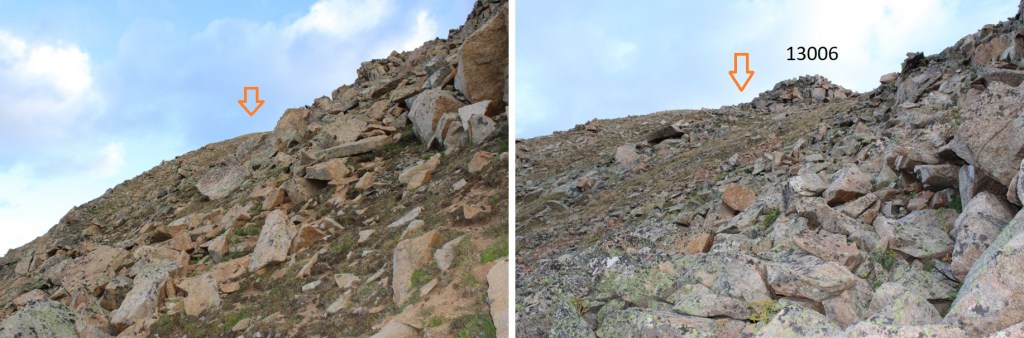
The rest of the hike to the base of the summit was class 2 on tundra. I kept to the left of the ridge, following grassy slopes.
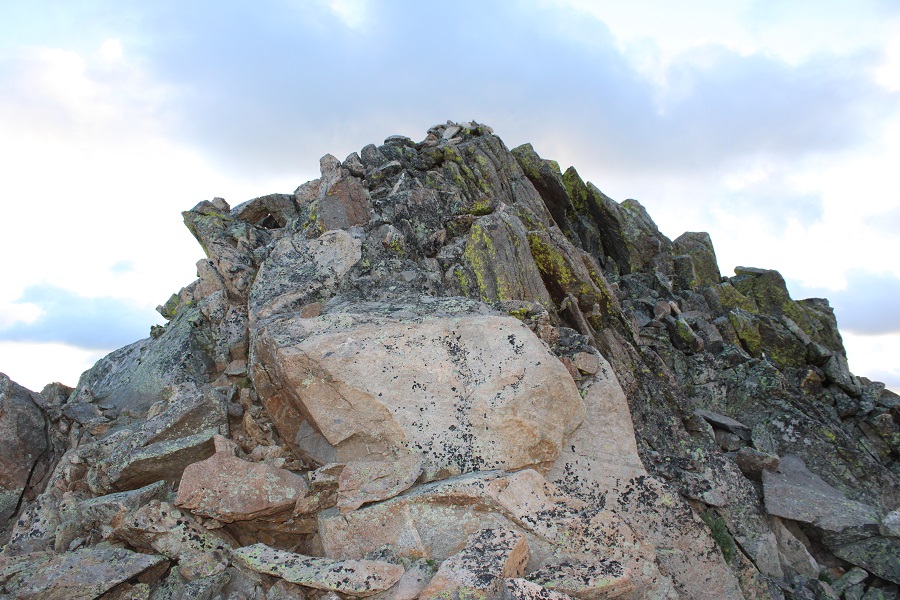
At the base of the summit block, I had about 20 feet of solid class 3 scrambling to do to make it to the summit.
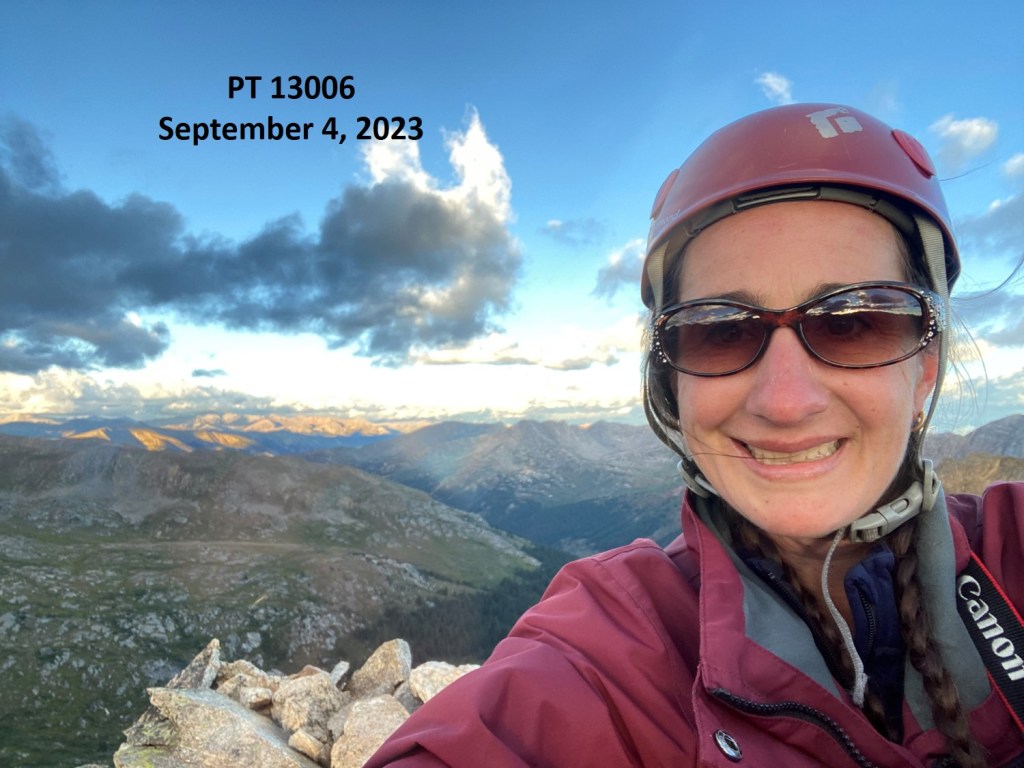
I summited PT 13006 at 7am
PT 13006:
Here’s looking back at the route from the saddle. This is Lost Man Lake
This was an out and back hike, so I descended the same way I ascended. Here are some pictures as I made my way back down the ridge
Then it was back down to the trail
I followed the trail as it skirted Lost Man Lake and climbed it’s way to the saddle
Then continued following it past Independence Lake, all the way back to the trailhead.
I made it back to the trailhead at 9am, making this a 7.95 mile hike with 2429’ of elevation gain in 4 hours.