Len Shoemaker Peak -13,642

1

RT Length:  14.93 miles

Elevation Gain: 4584’


This is the third time I’ve been to Maroon Bells this month.  I was able to secure 3 separate permits, and the past few weeks went with friends to summit North Maroon and Pyramid.  Today I was here to tag a new 13er for myself: PT 13631.  Since I70 is now open (it was closed due to fires) I was the only one driving on HWY 82.  I didn’t pass one vehicle between Granite and Aspen.  It was awesome.  I did see 2 vehicles parked at a trailhead near Independence Pass, and two scruffy porcupines to go with them, merrily munching on the wires underneath.  The owners of those vehicles were not going to be happy when then made it back to their cars.  I’d have gotten out and shooed them, but, you know, they may be slow but they have quills.  I saw three other porcupines waddling along the highway as I drove.  HWY 82 is popular among porcupines.

As I passed the parking structure for Maroon Bells I saw a pear shaped bear butt running away from a trash can and then jump over a fence.  It was cute to see it bounding away (although I kind of wanted to get a picture so I wished it had stood still for a second).

I had a permit to park at Maroon Bells from 12am-4:30pm.  It was 1am when I arrived and I felt it was still a little too early to head out so I took a quick nap.  A large group of hikers passed by at 2:40am and woke me up, so I was on the trail by 2:45am.

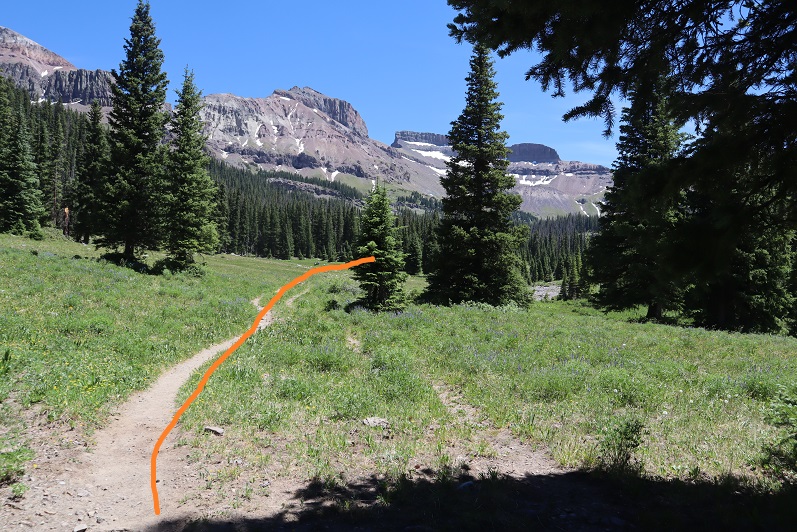
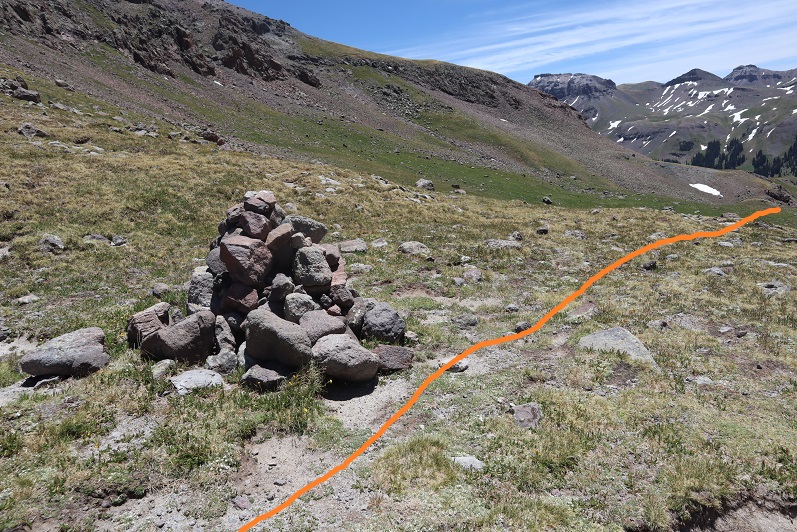
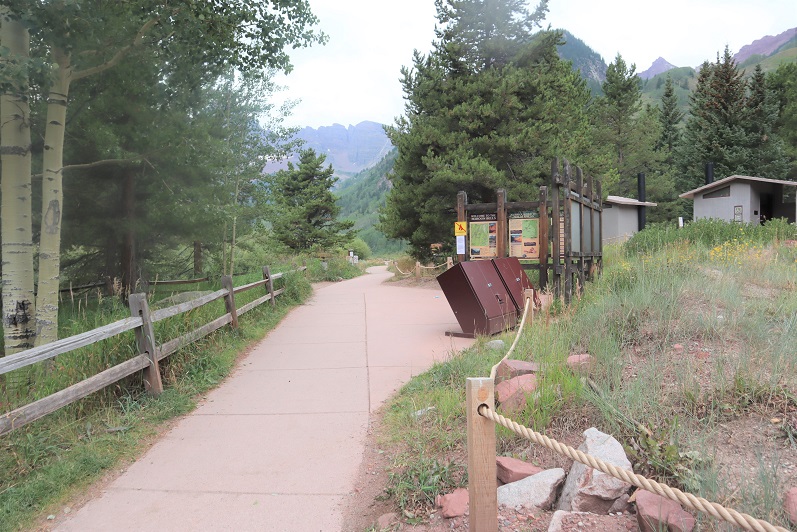
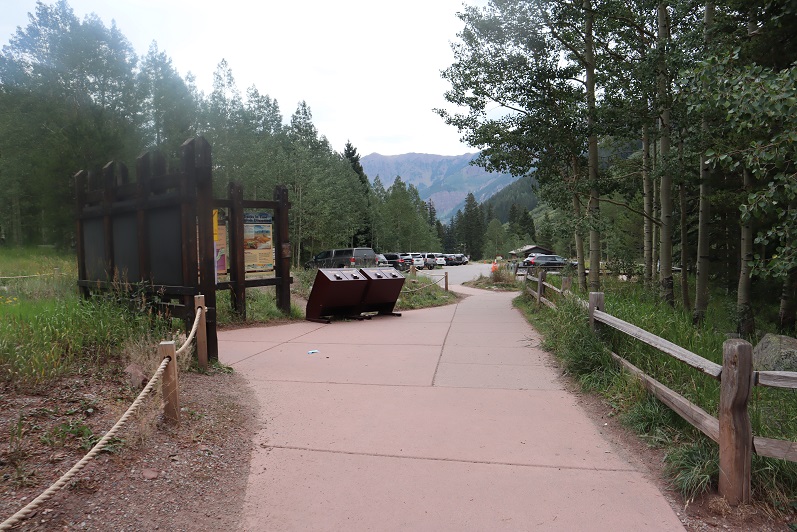
The trail starts at the west end of the parking area

2

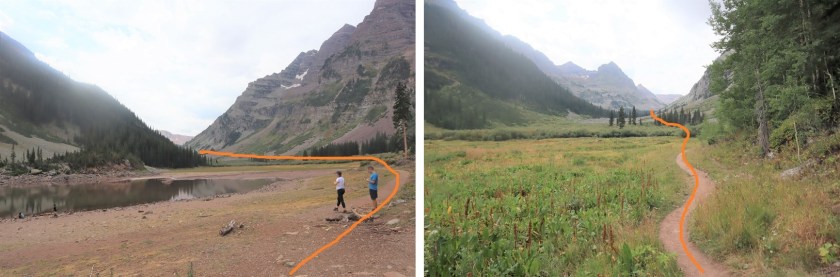
And follows a well-defined path around Maroon Lake

3

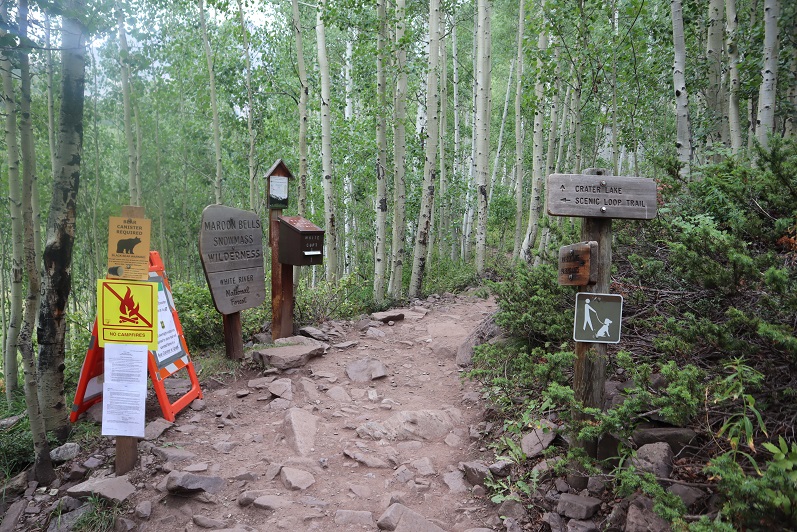
At the end of the lake I followed the trail towards crater lake.  I noted the signs:  One said “bear activity in area” as of August 23 (August 1st had been crossed out) and there was also a sign saying there was a moose in the area.  In the last few weeks I’ve seen a bear standing on the side of the road while taking the shuttle ride out and a moose standing in Maroon Lake, so I knew these signs to be true.

4

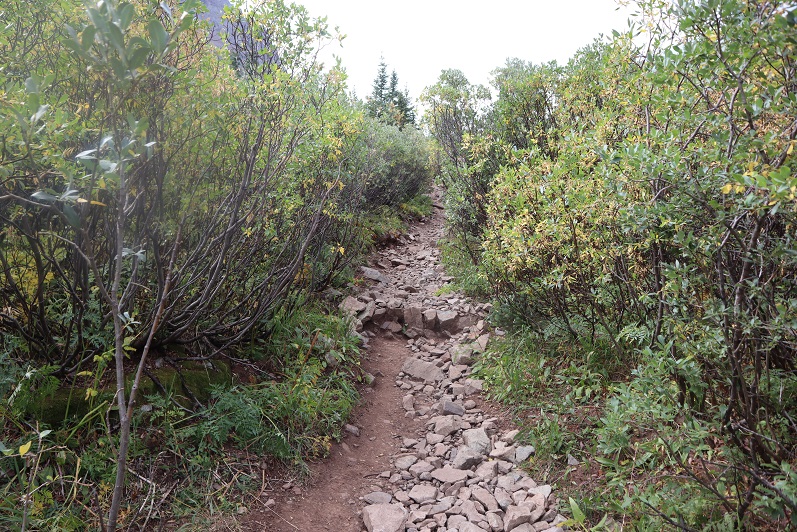
This is a class 1 trail to Crater Lake

5

I turned left at the junction for Crater Lake

6

And then followed the trail (still class 1) around the ‘lake’ and up the basin.

7

I passed a few camping areas while it was still dark.  In one a large man was standing by the trail, bald, shirtless, and in possession of a rather hairy pot belly.  He seemed to be waiting for me to pass by.  Luckily this is a well-travelled trail, especially at this time in the morning when others are looking to summit Maroon Peak (I count the flashlights so I know who’s ahead of/behind me when it’s dark out:  that large group of hikers wasn’t too far away).  I could see him because he had a headlamp shining from his forehead.  I didn’t see his dog, who started barking at me as I neared.  Of course, I jumped.  The man seemed to think it was funny.  I continued on.  Also, it wasn’t funny.  Here’s an overview of the next few steps, as I made my way up to Len Shoemaker Basin

8

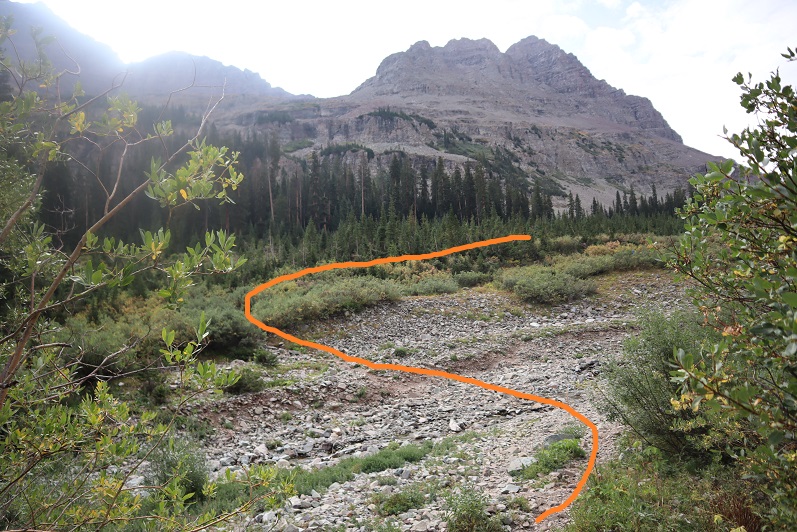
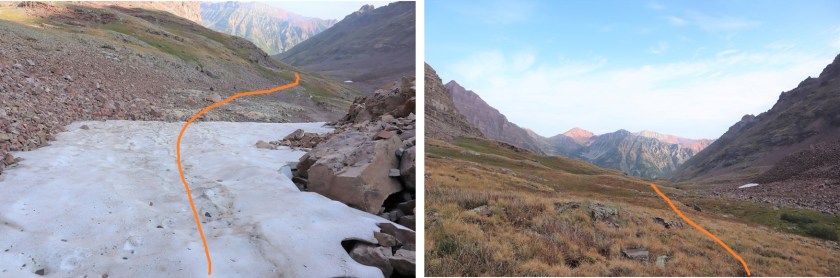
After hiking for 4 miles from the trailhead, and at 10515’ I left the trail to cross Maroon Creek (which at this point of the year isn’t flowing much, but earlier in the season is several feet deep).  There are cairns in the area.  An obvious trail picks up on the other side.

9

10

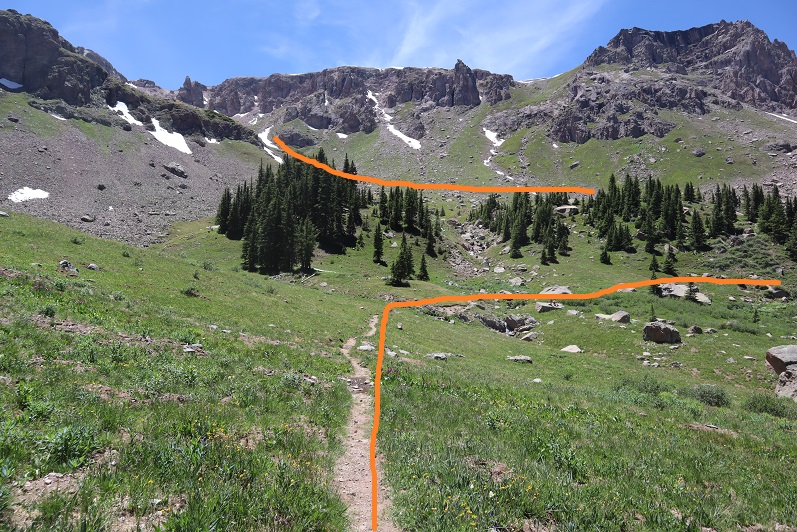
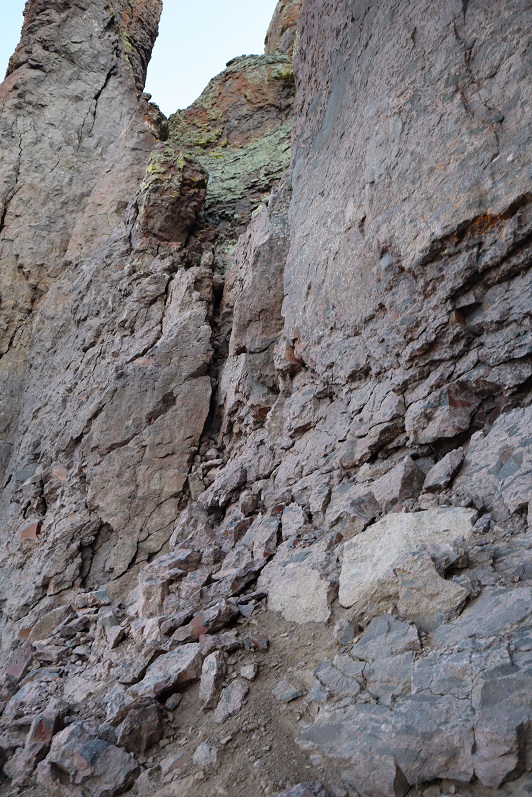
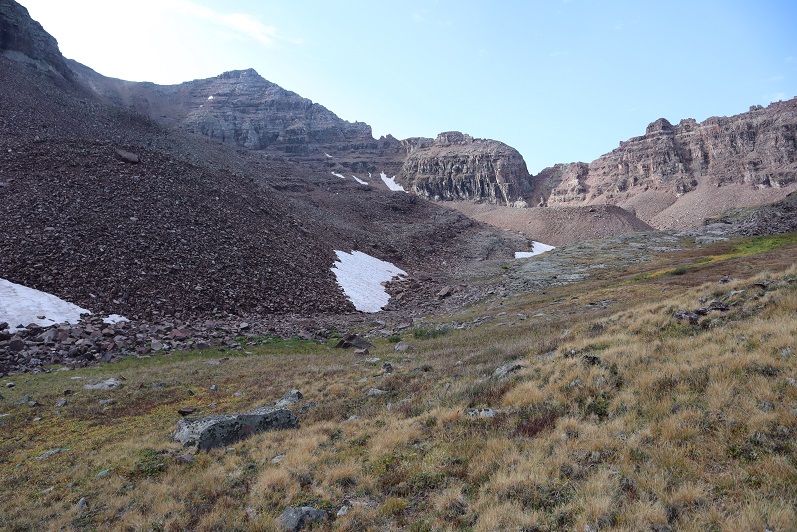
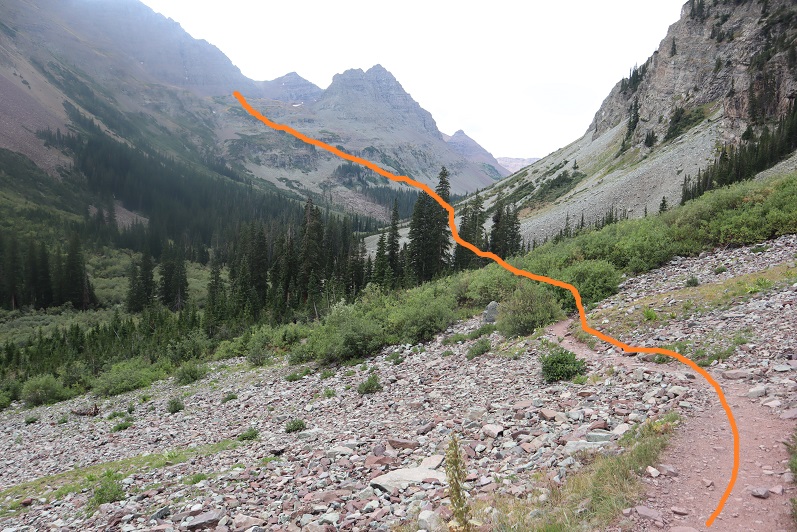
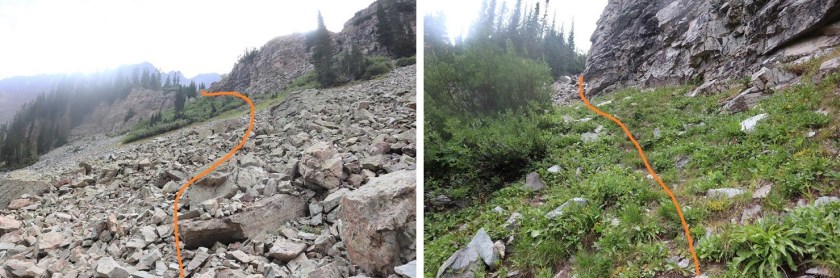
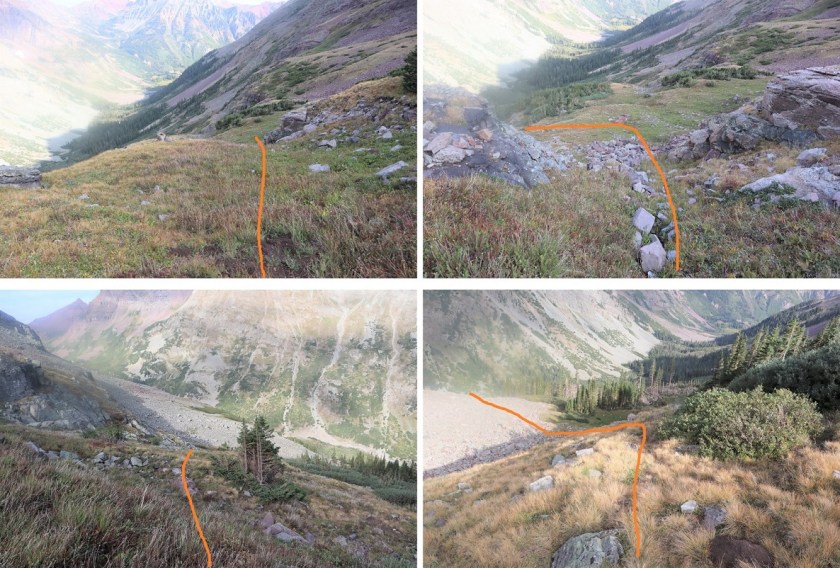
I followed this trail for .25 miles, until I saw a cairn to my left and then followed a very faint trail east through and then out of the willows, and up the side of the mountain, towards the basin.

11

Making it to the basin required ascending a series of gullies.  I’ve been here several times, and the route gets easier to find each time. This time there were plenty of cairns indicating the way.  However, the route sometimes doesn’t seem like it should follow the cairns, but trust me, it does.  Here’s the route step by step into the basin.  After exiting the willows and crossing a small boulder field there is a faint trail behind the next set of bushes/willows that will lead to the first gully.  Now’s a good time to put on your helmet.

12

I ascended the loose gully, staying to the right for more traction

13

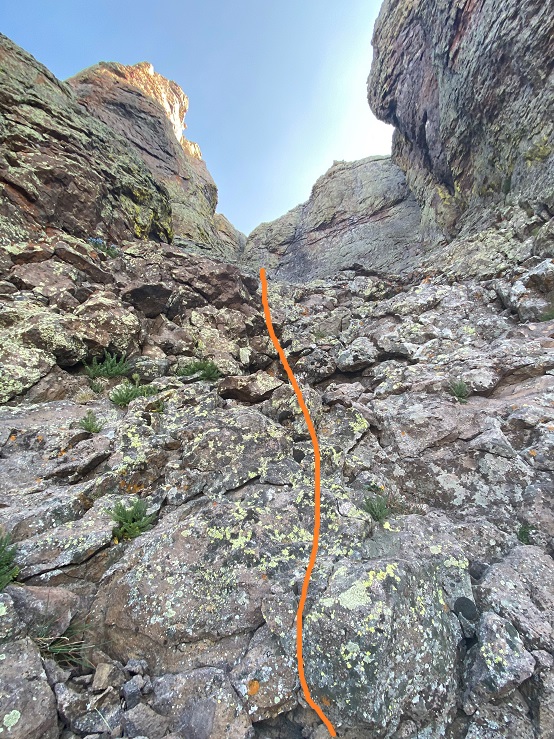
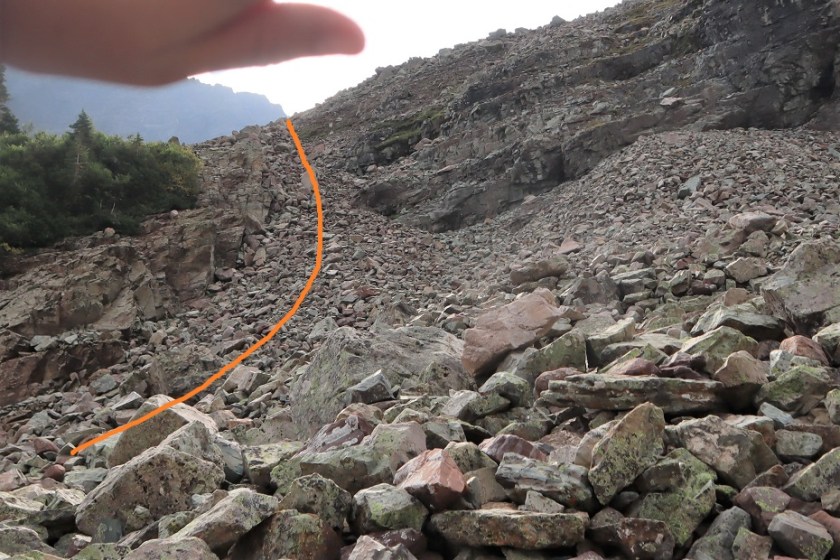
At the top of the first gully you’ll see another gully to your left.  (These are tons of fun in winter BTW, so bring your crampons and ice axe if you expect snow).  Ascend the second gully, this time sticking to the left for more stable ground

14

15

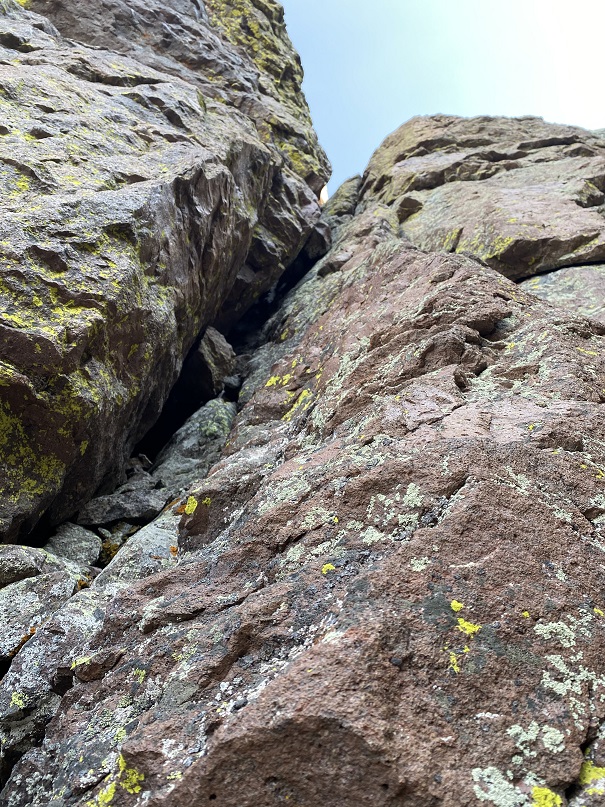
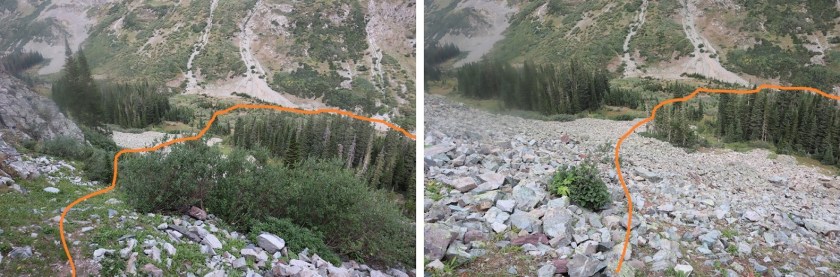
At the top of this gully is… another gully.  Sorry for the hand in this picture:  the sun was at an unfortunate place in the sky while I was trying to take pictures and this was my solution.

16

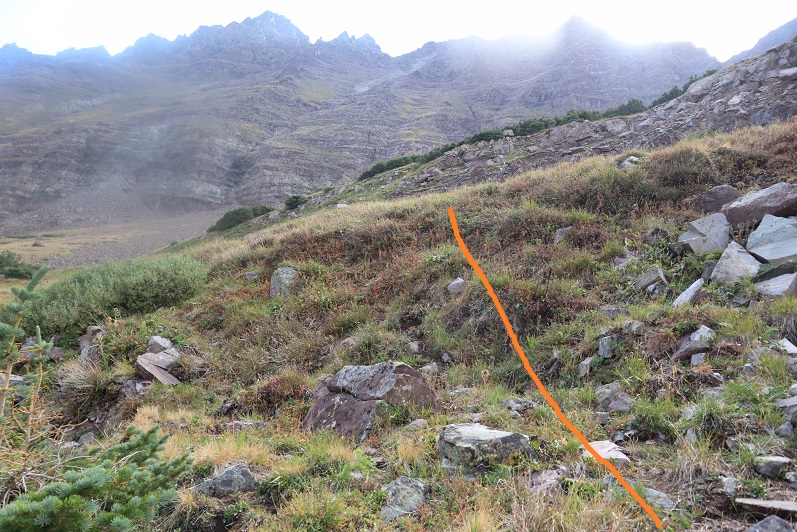
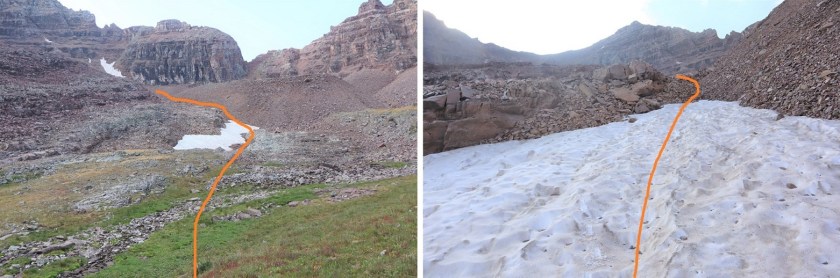
From here I aimed for the grassy slope and went behind it, angling towards the ridge

17

And could see another gully to my left.  (This entire time I was heading east)

18

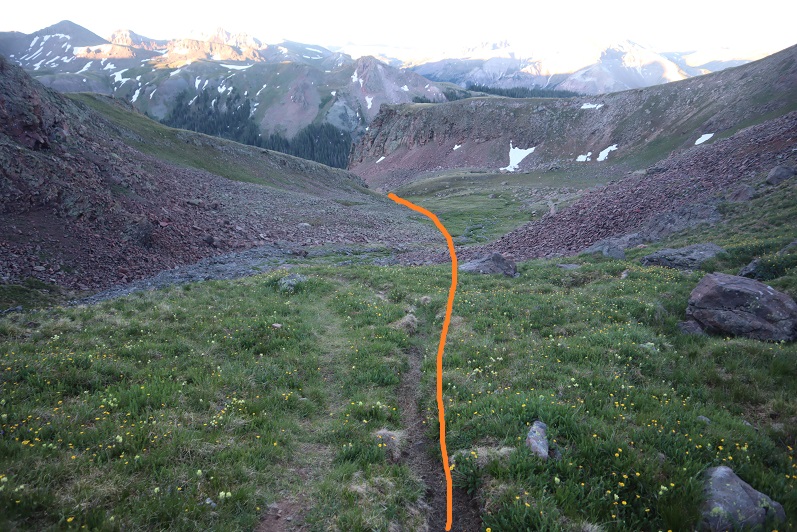
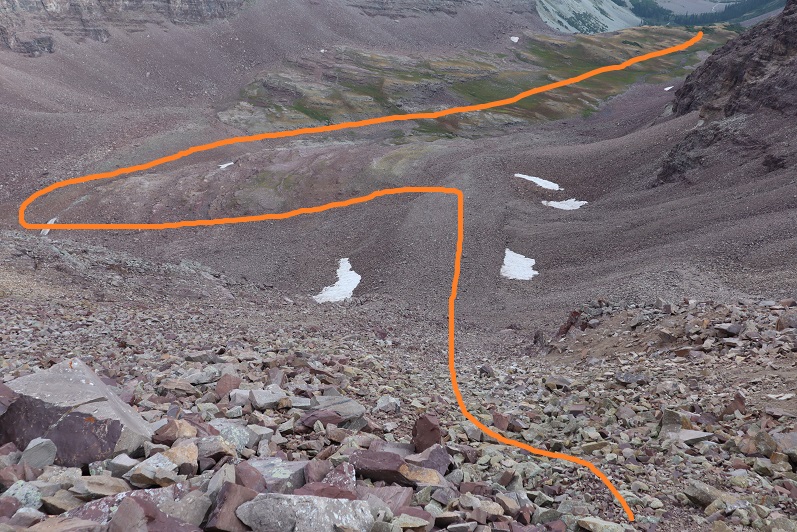
Next, I aimed for the grassy slopes, and the final gully that would take me to the upper basin.

19

20

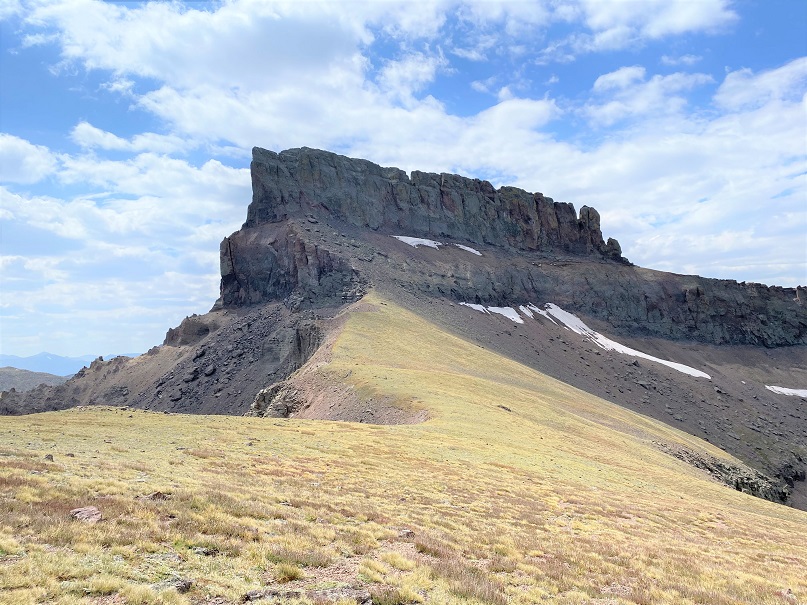
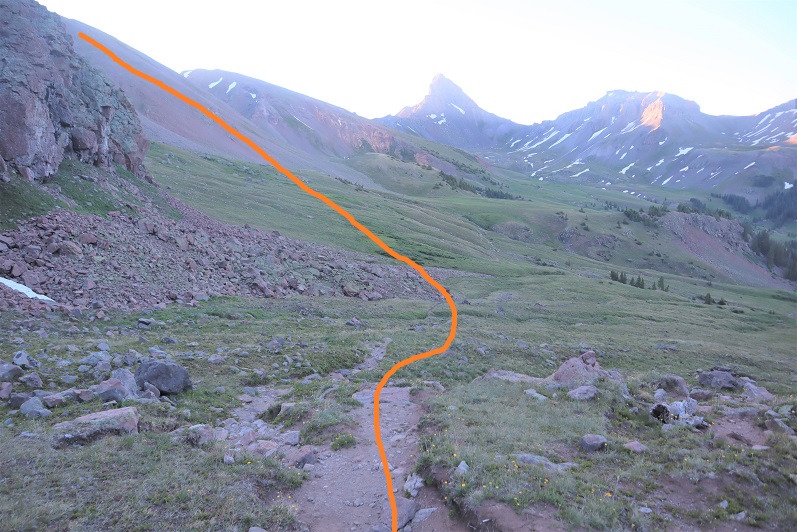
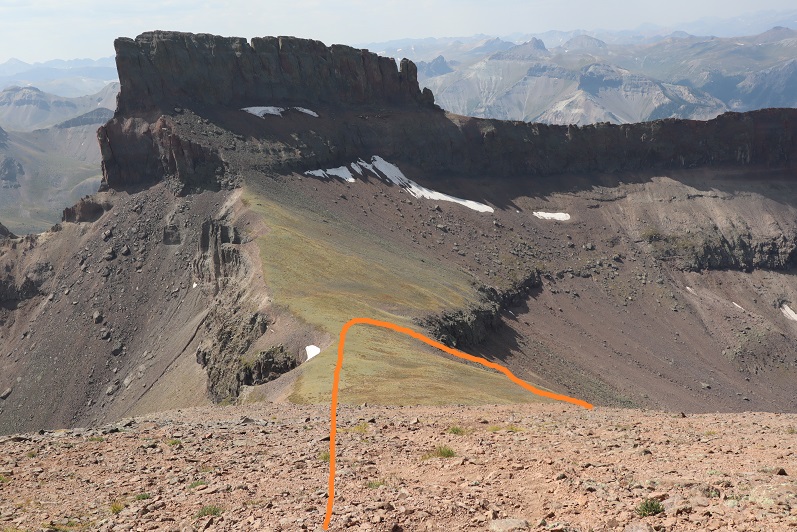
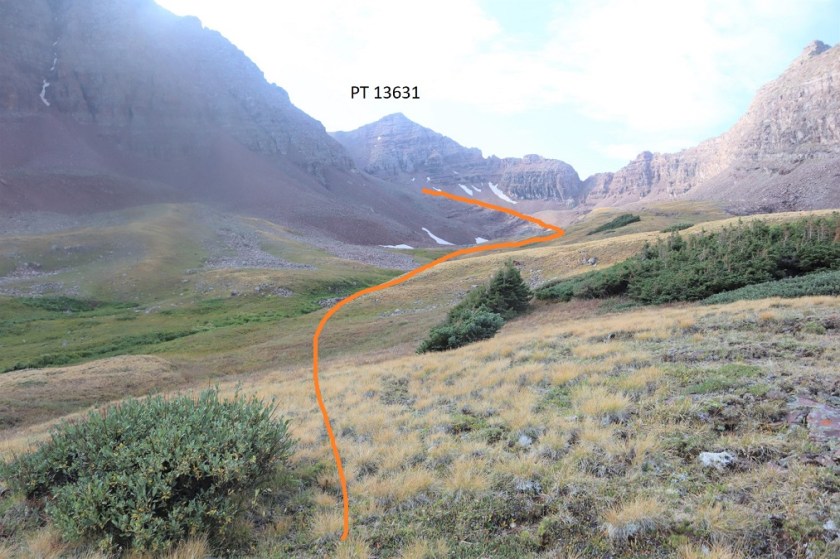
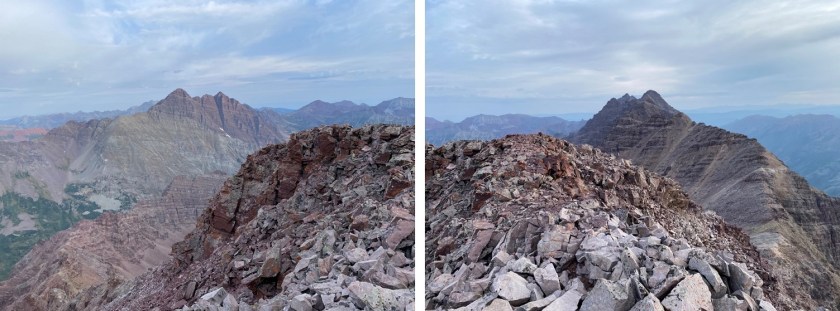
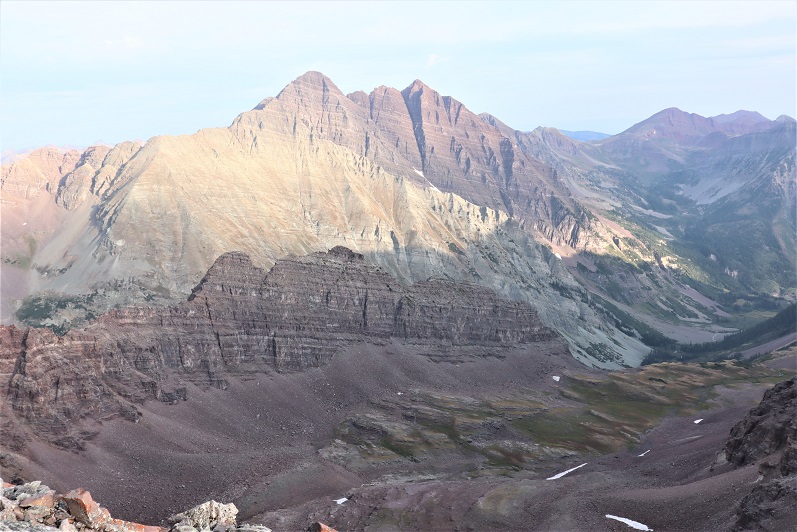
Here I got my first view of PT 13631.  I just followed the basin south towards the end

21

The end of the basin was still holding some snow. This was a light snow year, so I expect there’s snow here almost year-round.  The snow can be avoided, but I just walked over it into another basin

22

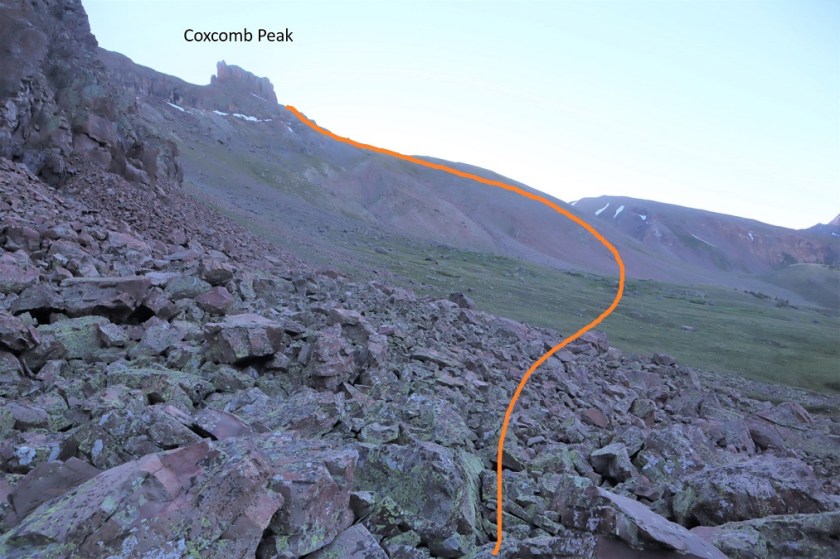
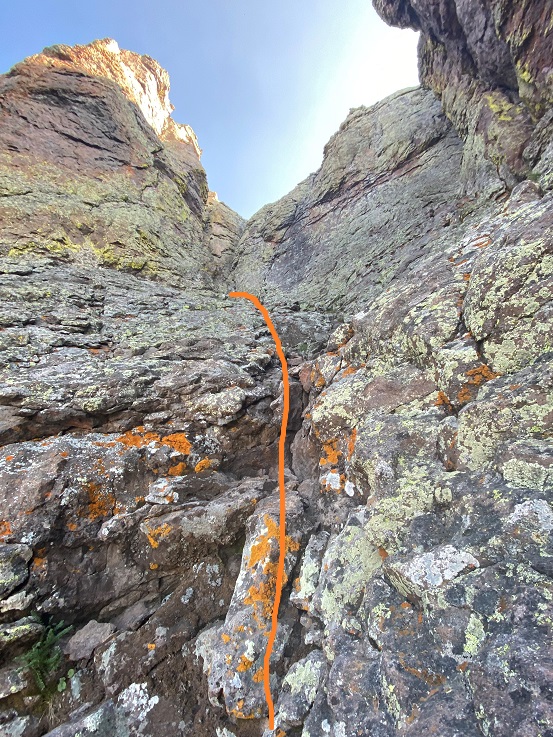
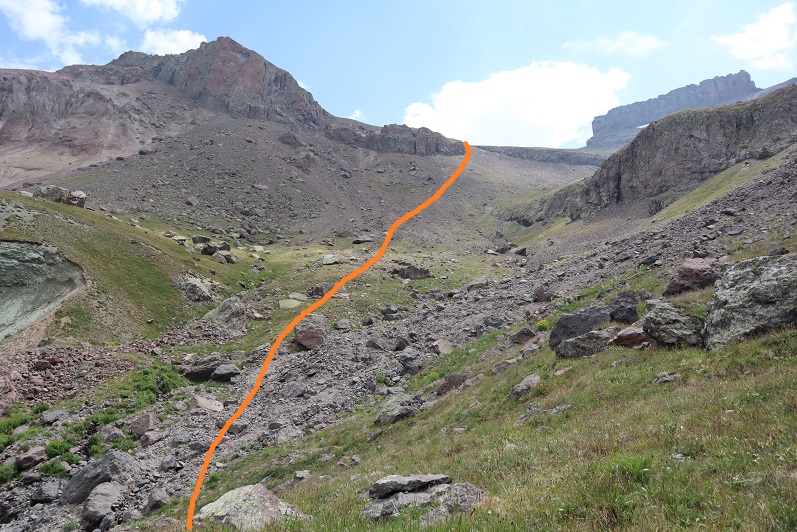
I followed the talus rib towards the base of the gully that would lead me to the saddle of Lightening Pyramid and PT 13631

23

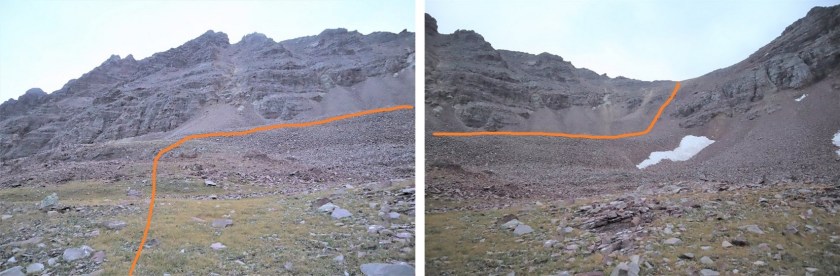
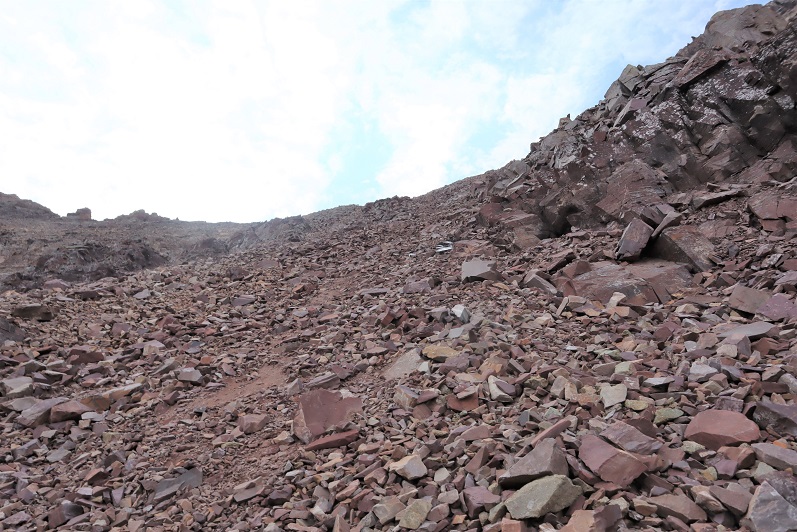
This is the last gully of the day.  It’s class 2 but the scree is loose.  I looked for larger rocks whenever possible.  There is no direct path but there are a bunch of game trails.  No area seems to cliff out, so you can pick your line depending on conditions.

24

25

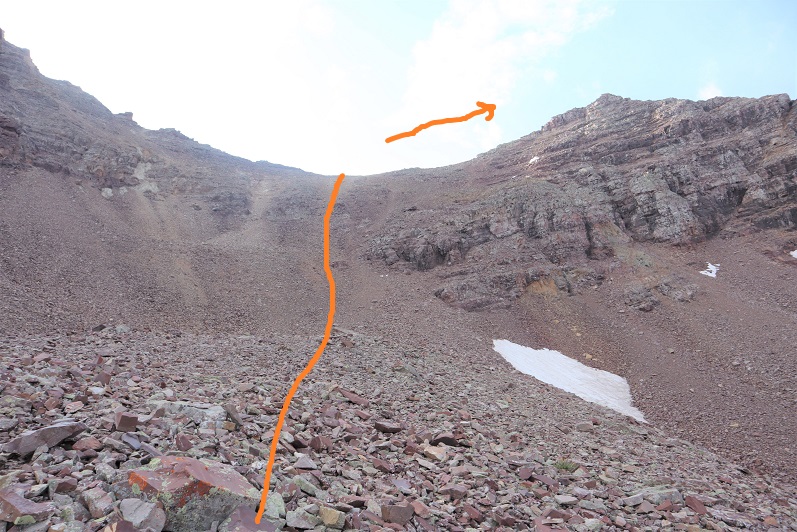
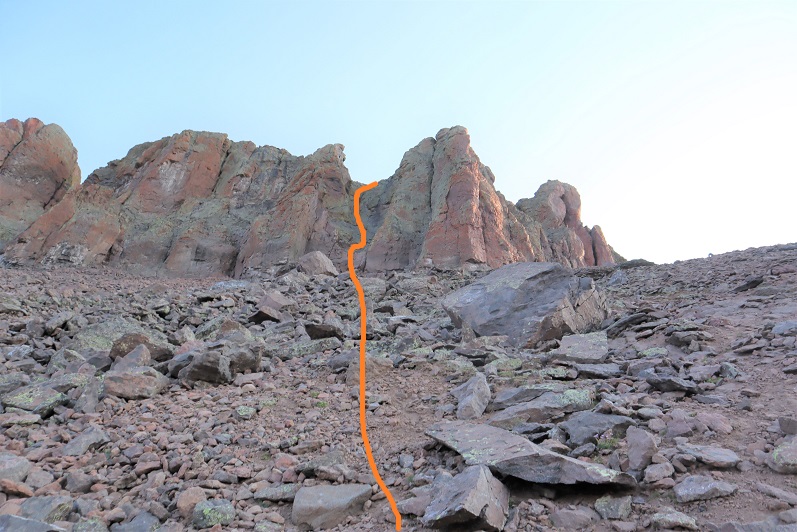
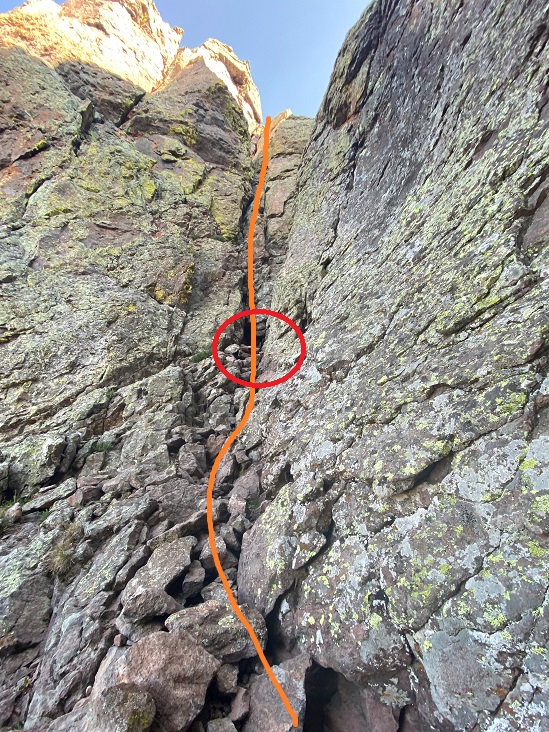
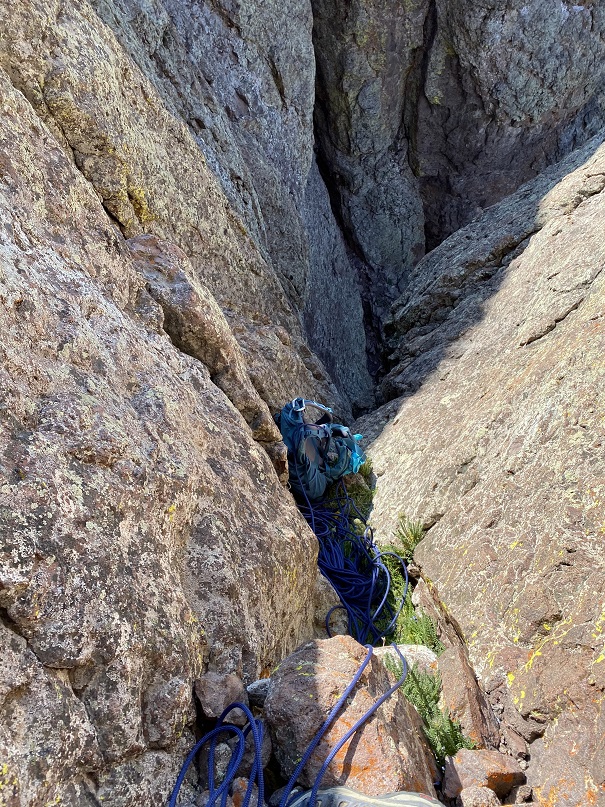
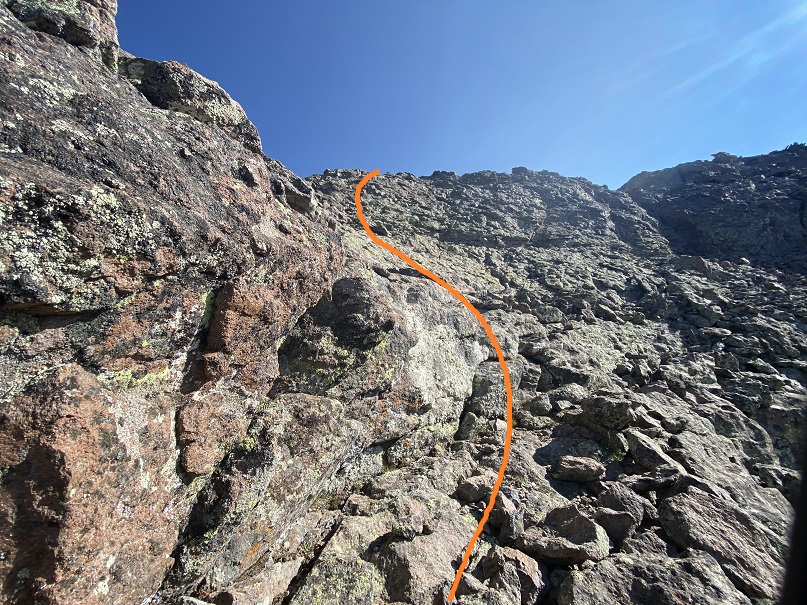
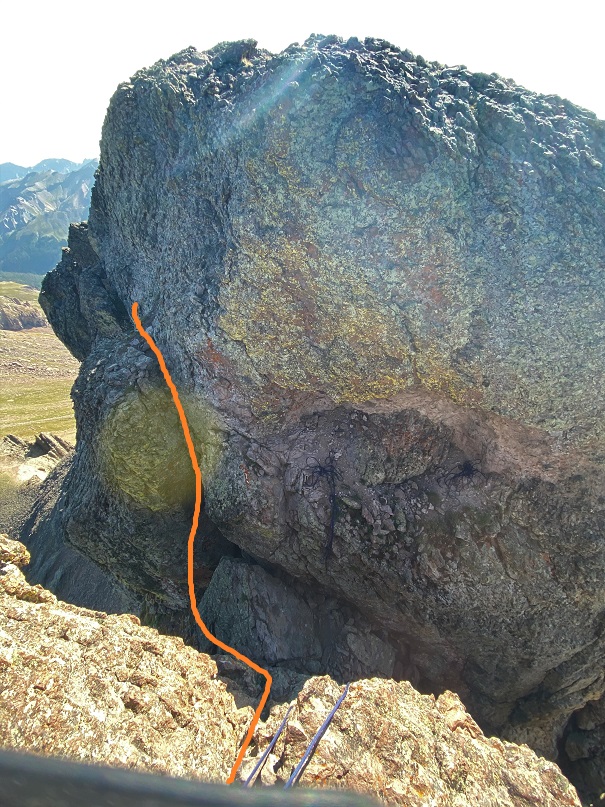
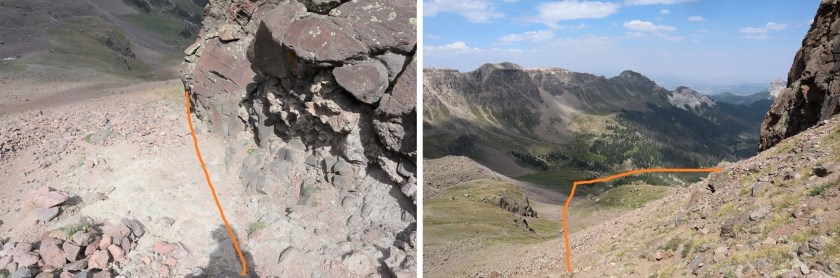
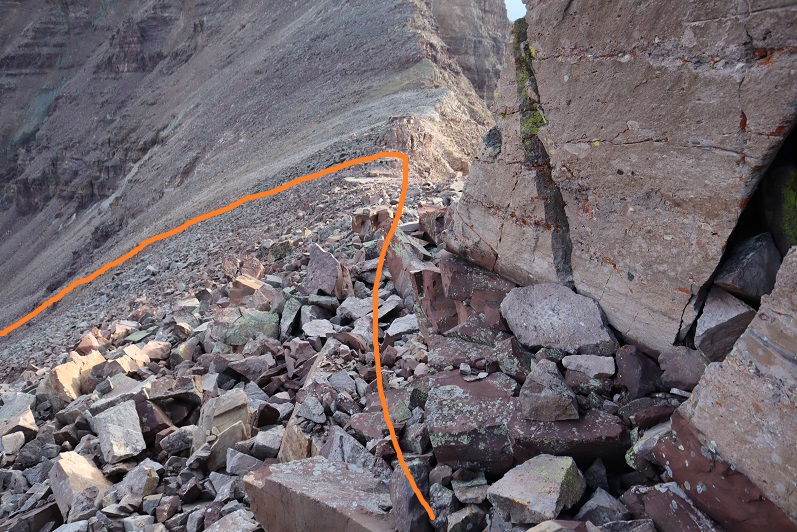
At the saddle I turned right and headed southwest up the ridge.  Most of this was easy scrambling, after first initially gaining the ridge.  To do this I went right, found a class 3 chimney and ascended it.  This was the most difficult part of the entire hike, and I probably could have found a class 2 option around this if I tried harder. I felt this chimney was pretty easy.

26

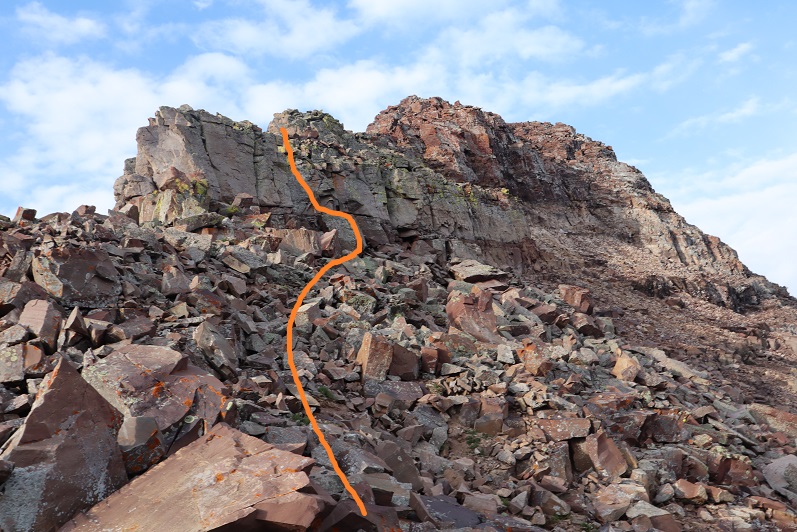
Here’s looking up at the chimney.  There are plenty of hand/foot holds.  It’s only about 8 feet high and all of the rocks are stable.

27

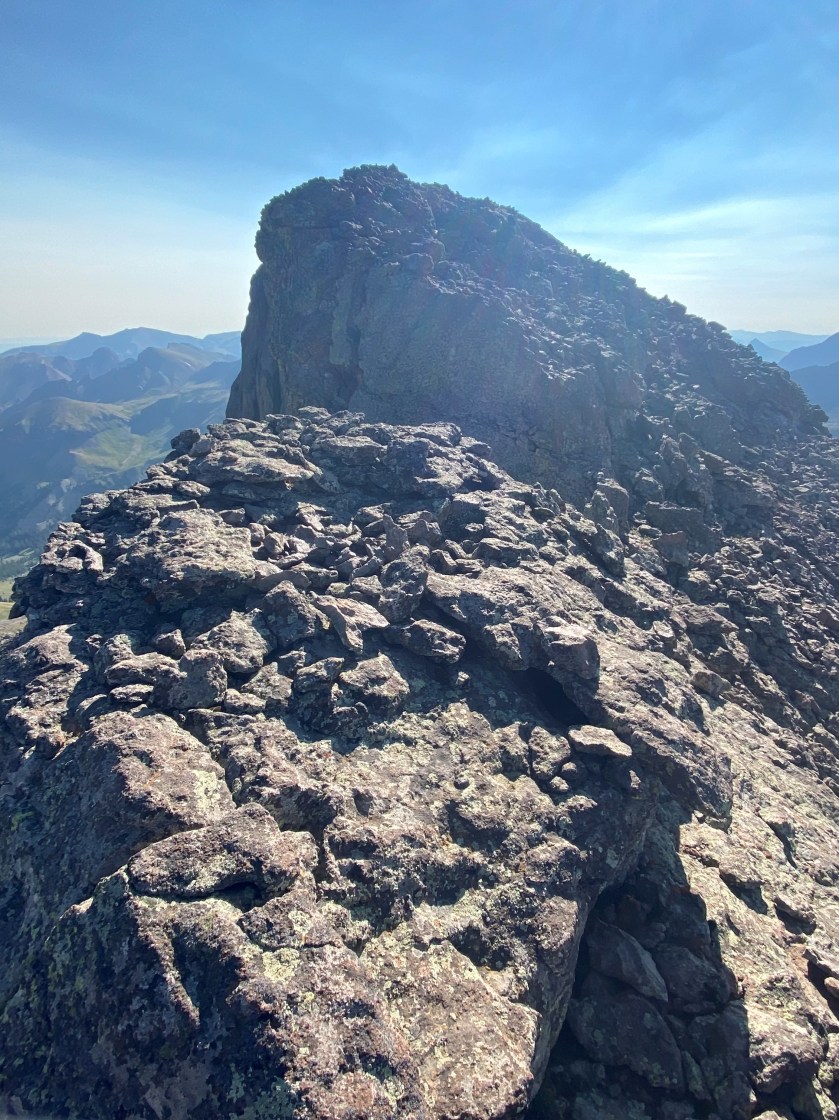
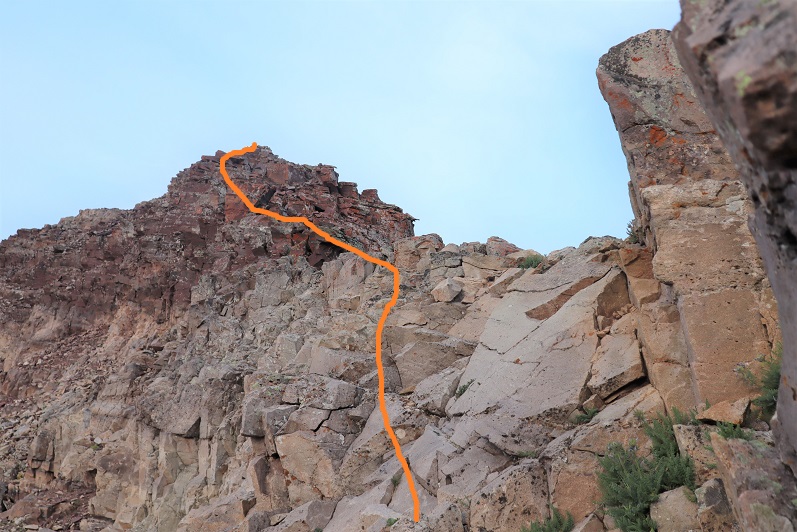
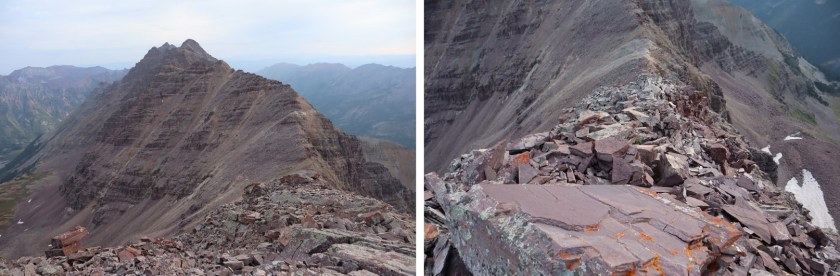
Once on the ridge I scrambled my way to the summit. This is all easy class 3, just scout around for the best route.

28

29

30

The summit is relatively flat.  There’s a summit cairn with two summit registers.  The metal one is closed and has 2 pens inside.  The white one is open (without a lid) and is empty. Bring some paper if you want to sign this register.

31

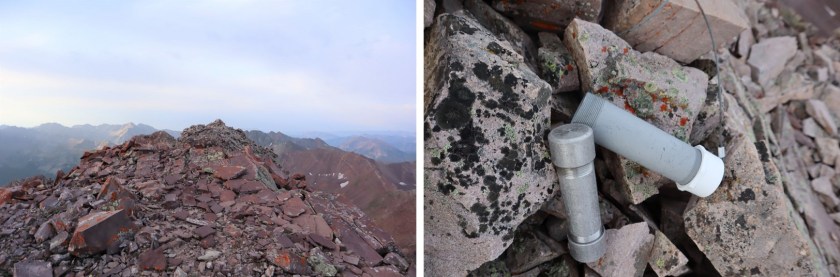
I summited PT 13631 at 7:20am
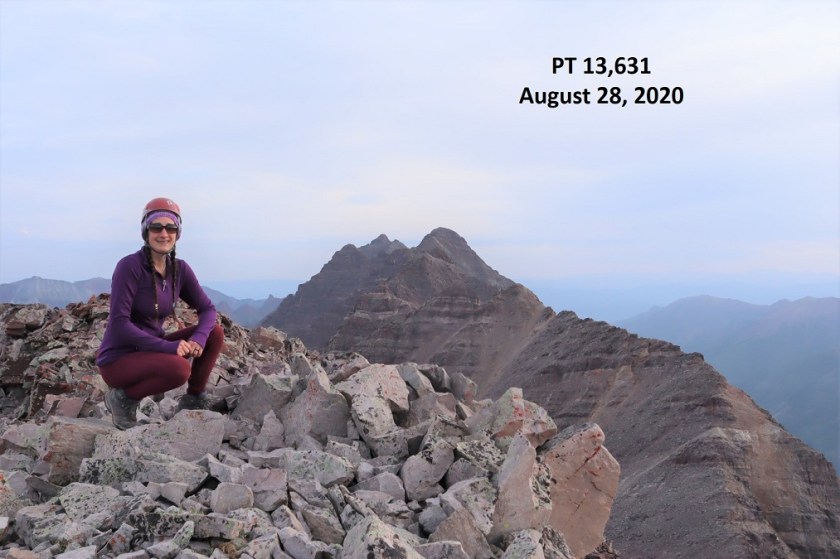
32

PT 13631:

The views were great, but the smoke from nearby fires shaded them a bit.

33

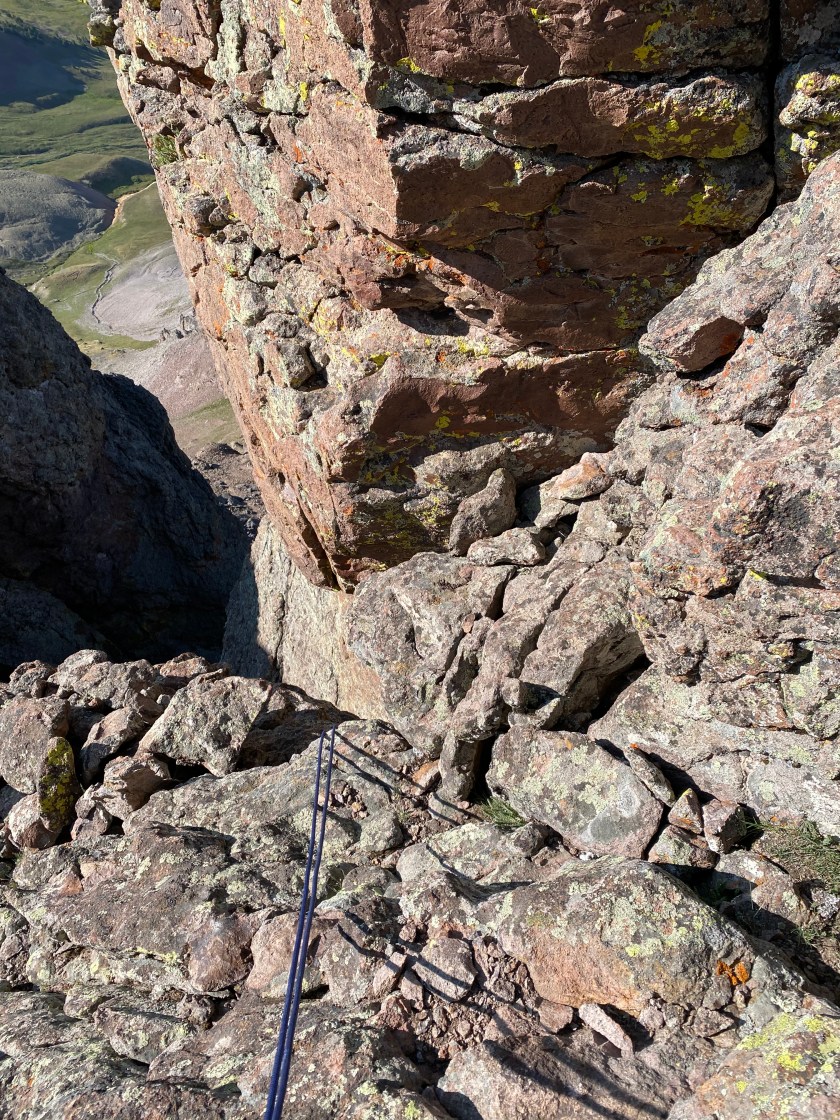
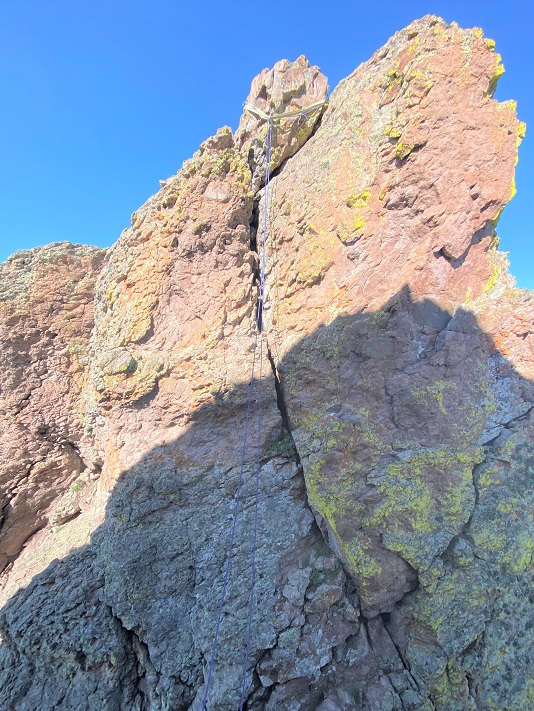
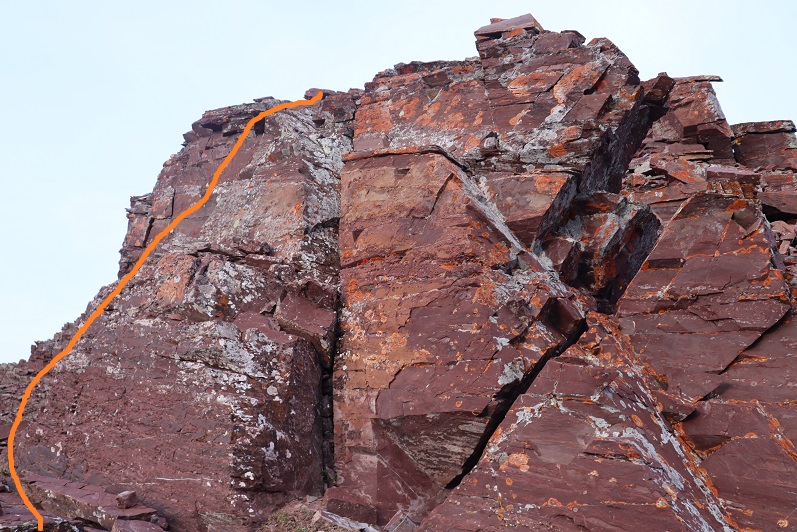
Here’s the route back down the ridge

34

Down the chimney (you can see my trekking pole below for reference)

35

And back around to the saddle.

36

Once again, great views

37

Back down the gully and through the basin

38

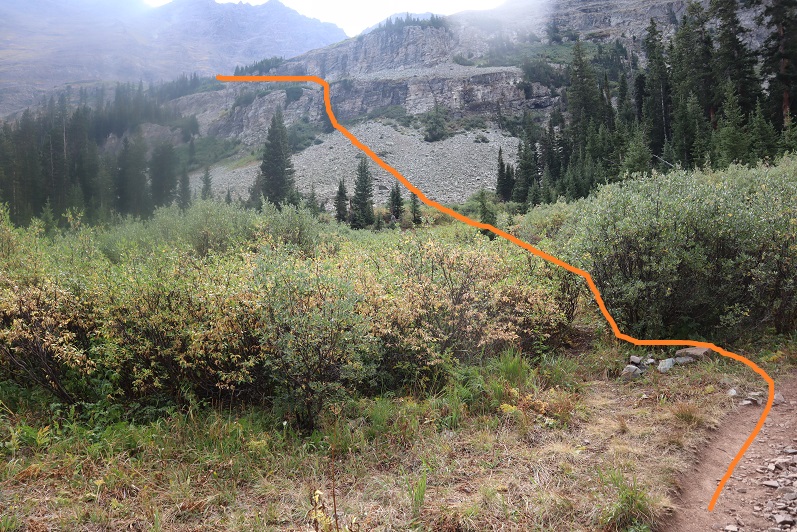
And back down the gullies, following the cairns west along the way.
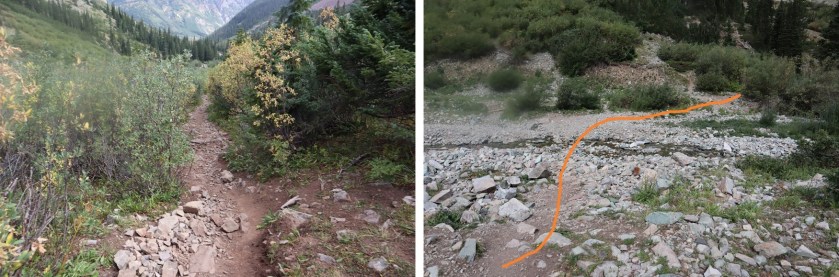
39

40

41

Through the willows

42

Back to the trail that would lead me across the creek

43

And back to West Maroon Creek Trail 1975 and Maroon Lake

44

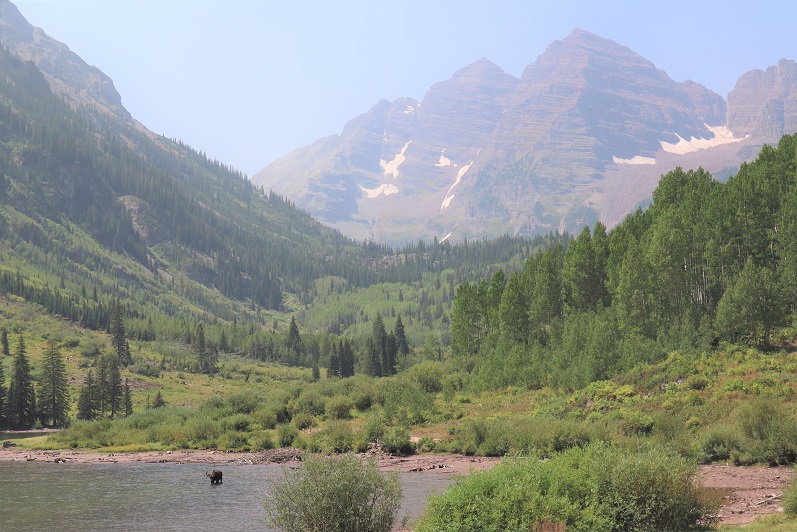
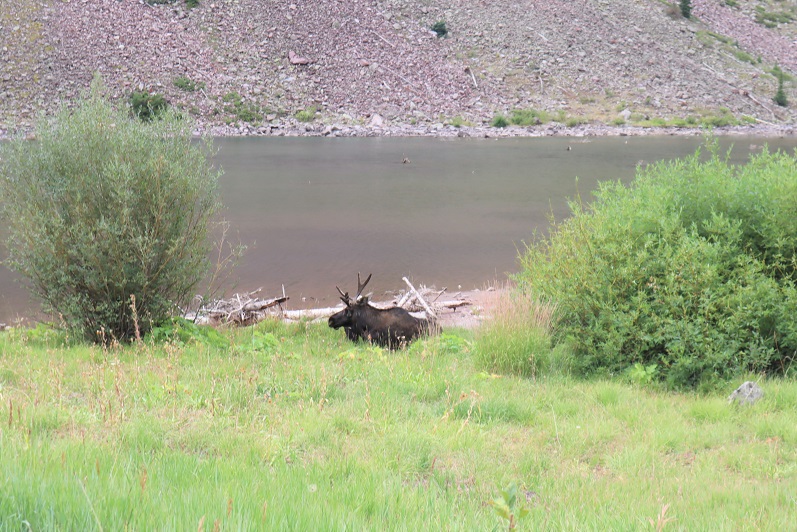
When I was here last week there’d been a moose standing in the lake.  Guess what?  He was still there (this time lounging by the lakeshore).  Pretty cool!

45

46

I made it back to my truck at 11:45am, making this a 14.93 mile hike with 4584’ of elevation gain in 9 hours (with some time spent ogling the moose).

47

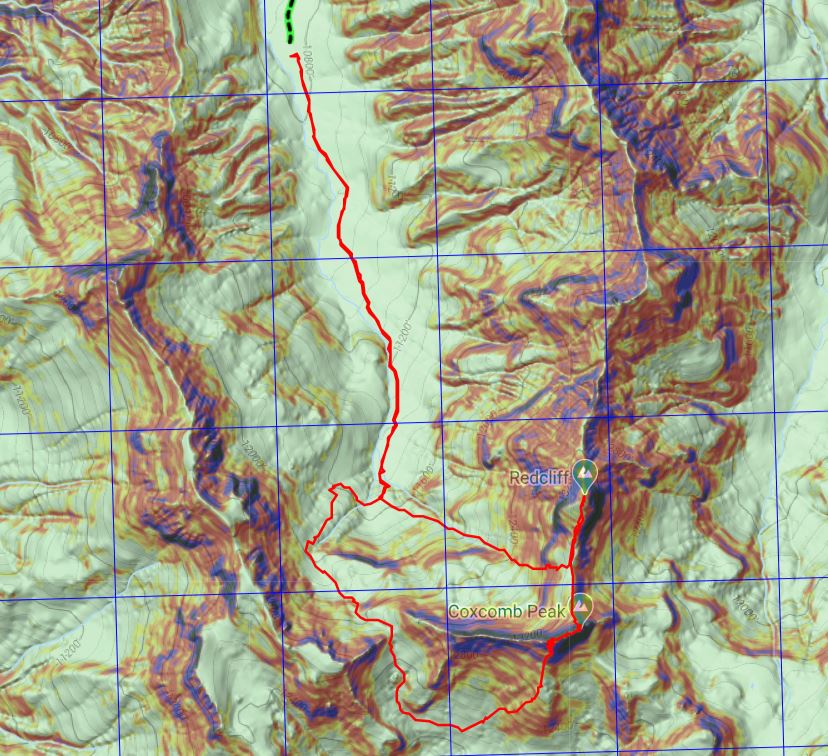
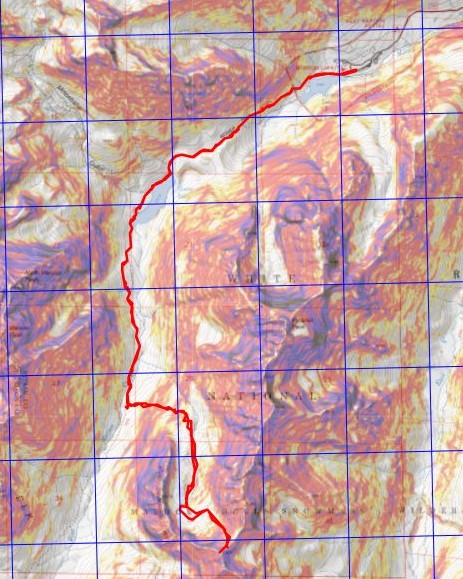
Here’s a topo map of my route.  I have to say, the views were incredible but the peak itself was kind of a letdown.  It had just been too easy, when I’d been expecting the more intense scramble over crummy rock the Elks are known for.  It almost wasn’t worth bringing my helmet, but the moose was an added bonus.

48

On to the next trailhead!


Coxcomb – 13,663 and Redcliff – 13,648

1

RT Length:  13.24 miles

Elevation Gain: 4654’

Climbing Gear included 2  60 meter 7.9mm ropes.

I’ve been up in my head about this peak since my failed attempt last month.  Last time I’d turned around because I wasn’t 100% sure I was in the right area and I was afraid of cliffing out.  All of the information I had on Coxcomb was conflicting (some called areas class 3 and others class 5, etc.) and none of the pictures I had from others lined up with what I was seeing.  After going back home and researching more I realized I had been in the correct area, and now I was ready to try again.

I drove to the Wetterhorn Trailhead and was surprised to see no one else parked in the lot.  The last time I was here there were several other vehicles.  I got out, walked around, and signed the trail register so I wouldn’t need to in the morning.  It was cloudy and windy but on the plus side there were no mosquitoes.

2

I tried to pump myself up for the hike tomorrow, but was still having trouble mentally.  I told myself to just enjoy the hike and focus on learning something, even if I didn’t summit (again).  I got out the book I’m (still) reading:  Death in Yosemite, and noted I was still on the ‘death while climbing’ chapter.  It may sound macabre, but reading about how other, more experienced climbers have died while climbing puts climbing into perspective for me:  gravity never sleeps, and I can never be too careful (which is another reason why I turned around last time).  I like to review potential mistakes so I don’t make them.

A group of three (shirtless) guys in their early 20s walked by, carrying gear and pads.  I stopped them to see where they were headed and they told me they were just out bouldering.  Hmmmm… I didn’t think the area was good for bouldering, but I wished them luck.

I made sure to get to bed early, and wouldn’t you know it, I heard a mouse moving around under/inside my truck as I was trying to sleep.  I guess those mothballs don’t work.  Also, I believe it was the same mouse as last week:  it’s most likely been living in my truck, building a nest, etc.  I was going to need to get some traps asap.

I woke up and was on the trail at 4:30am, taking the same route as last time. There’s an obvious trailhead with a register.

3

I followed the class 1 trail for 3.4 miles up to the top of the pass, and then lost 450’ of elevation as I descended into the basin.

4

5

6

7

8

I’ve heard of others who’ve stayed high here instead of going into the basin, and from my perspective, the rubble and talus and scree aren’t worth it:  I’m ok losing a little elevation, and I’m actually convinced it saves time.   Once in the basin I left the trail, crossed the basin and followed the ridge up to the base of Coxcomb

9

10

There was a little bit of scrambling to get to the base

11

Here’s an overall view of the route up

12

Once there I was happy to see the rocks I’d placed in the chimney were still where I’d put them.  I sat down, put on my helmet, and mentally prepared myself to begin.  Here’s the first chimney

13

I made my way over to the chimney and tried to climb up.  No dice.  I love to boulder, but I haven’t been since COVID started due to the gym being closed and now requiring masks (say what you will, but I cannot work out with a mask on.  I respect the rules however, and thus choose not to go).  All this to say I’m a little rusty when it comes to my bouldering skills.

Ok, so if I couldn’t just climb up I’d do what I did last time:  I took off my pack, attached a rope to the pack and my harness, and tried climbing up without a pack.  The rock was cold and my fingers were stiff and I tried and tried but was unable to climb up the chimney.  What was wrong?  I’d been able to do it last time!  Ugh.  That was when I realized last time I’d worn climbing shoes.  I guess they did make a difference.  Oh well, I was just going to need to get creative.  I tried once again, this time angling myself sideways, putting my thigh into a crack, shimmying around, and pressing into the side of the rock with my inner thigh and hoisting myself up.  This took me halfway up the chimney.  From there I was able to hoist myself up and use my arms to do the rest.  I made it to the top of the chimney, hauled up my gear, and prepared for the second part for the climb.  The red circle is where I ‘sat’

14

The next section was easy class 3.  I re-coiled my rope, put on my pack, and made my way to the base of the next chimney

15

16

This is where I’d gotten stuck last time.  This time however, I was sure I was in the correct spot.  I initially tried to climb this with my pack on, realized that wasn’t going to happen (the pack was too heavy and put me off balance) and decided to try climbing this chimney without my pack.  The red circle is where I took off my pack.

17

Here’s what the climb looks like from there.  Knowing I wouldn’t be able to climb this with my gear, but also knowing I needed my gear to descend I decided to once again tie the rope to my harness and loop it around my pack.  I was very careful to make sure my rope didn’t get tangled, and I had an exit strategy in case the whole ‘rope around the pack thing’ didn’t work in this area.  I wouldn’t recommend this tactic unless you put a lot of thought and planning into its execution, as so many things can go wrong in this scenario.  Here’s a look at the beginning of the route

18

I made it halfway up and stopped.

19

At the halfway point I hauled up my gear to where I was positioned.  I figured this would lessen the chances of my pack getting stuck when I hauled it all the way up, and also gave me a chance to test whether or not hauling the pack would work in an area where I still felt I could downclimb safely.  This tactic proved successful, so I continued on.

20

From the halfway point, here’s looking up at the rest of the route

21

This is a class 5.2 chimney that requires some stemming/fun/creative moves to ascend.  At one point I even used a crack climbing technique to get a good hold with my arm vertically and hoist myself up.  This is the point I wasn’t able to make it past last time, but after talking with others who’d successfully climbed this area I felt confident I’d be able to as well.  There are some sketchy moves, but plenty of opportunities for stemming/hand holds to make the ascent doable.  I was terrified but just told myself not to look down, to focus ahead, and soon enough I’d made it out of the chimney.  Here’s the route I took

22

Once at the top of the chimney I turned and hauled up my gear, feeling pretty pleased with myself for making it this far.  I recoiled my rope and put it in my pack.

23

I’ve heard it’s class 3 after this point to exit the chimney, but it felt class 2 to me

24

Last time I’d been worried I was in the wrong gully. Since I hike solo I’m extra careful, and probably turn back more often than I should when uncomfortable.  One of the reasons I’d turned back here last time was I was worried if I ascended the wrong gully I’d be cliffed out.  It turns out that wouldn’t have been the case, so if you’re worried about cliffing out in this area don’t be:  all chimneys exit in the same area, and it’s solid. Here’s looking back

25

And forward towards the summit of Coxcomb

26

There was still one more obstacle before reaching the summit:  a 25 foot notch I’d need to rappel before upclimbing to the summit.

27

I got out my rope, attached it to my gear and the anchor (which looked solid so I didn’t replace the webbing) and rappelled down into the notch. This is committing because it’s class 5.6 to climb back up.  I’m not a climber, and I knew I wouldn’t be able to upclimb this section on my own:  forward was the only way from here on out.  This last bit included rappelling down, then climbing out of the notch

28

Here’s a look back up at this section from inside the notch

29

I once again retrieved and recoiled my rope, and got ready for the final pitch to the summit.  I went north, following the cairns, and climbed up an easy chimney

30

From there it was an easy walk to the summit

31

I summited Coxcomb Peak at 9:30am.  There was a summit register in a powerade bottle that should probably be replaced.  I didn’t open it, but it looked like the papers were smushed in there.

32

Coxcomb:

I was thrilled I’d made it this far, but I still had the 170’ rappel to accomplish.  I went to work, looking for the webbing and anchor set up.  It was easy to find and still looked good, so I decided to use what was already there.

33

34

I tied my two ropes together with a double fisherman’s knot and threw my ropes.  It was quite windy, and the wind was coming at me, so it took a couple of tries to make sure the ropes made it all the way to the ground.  This was quite frustrating, but worth the extra effort to make sure it was done correctly.  Next, I tested the rope, watched my knot to make sure it was secure, unclipped my safety, and started the rappel.  Everything went smoothly. I even noticed 2 more anchors set up below where I’d rappelled, so if you brought just one rope it would have been enough (the webbing looked old though, and should probably be replaced).

My feet touched the ground and I gave out a “Woot!”  I was so excited!  I’d done it!!!  I’d solo’d Coxcomb Peak, a peak I wasn’t sure I’d ever be able to climb, let alone solo.  I gave myself a minute to let it sink in, and then went about retrieving my ropes.

I had two ropes, one purple, one orange.  I always pull the darker one.  I pulled the purple one and was thrilled when it moved.  I pulled it about 10 feet when it stopped.  Hmmm.  Ok, maybe it got stuck?  So I pulled the orange rope back a few feet, and then tried the purple one again. Once again, it got stuck.  I whipped the ropes and they moved as far as I could see, so one of the ropes must have been stuck up at the very top.  I spent the next hour doing everything I could think of to retrieve those ropes, to no avail.  In the end I made the very difficult decision to leave them there.  I did put a note in the trail register on the way down and I posted to some climbing social media sites about their whereabouts, so at this point I’m fairly confident they’ve been retrieved. It hurt to leave them there, not only because of LNT, but also because this is the first time I’ve used them (besides the initial breaking in).

35

Here’s the rappel

36

I sighed heavily and turned to hike up Redcliff.

37

This was a very short, simple, and straightforward climb. I summited Redcliff at 11:15am

38

Redcliff:

Here’s looking back at Coxcomb.  I’ve circled the notch that needs to be rappelled down and then climbed back up

39

I turned and headed back to the Coxcomb/Redcliff saddle, and then descended west into the basin

40

There wasn’t a well stablished trail here, but the route was easy enough to figure out.  I just aimed for the visible class 1 trail below I’d taken on my way in this morning

41

Here’s looking back at the route from the saddle to the trail

42

And a look at the hike out

43

I made it back to the now full trailhead and my truck at 1:10pm, making this a 13.24 mile hike with 4654’ of elevation gain in 8 hours, 40 minutes.

44

I was thrilled with today’s success, and even though I’d lost two new climbing ropes I drove to the next trailhead on a bit of a high.