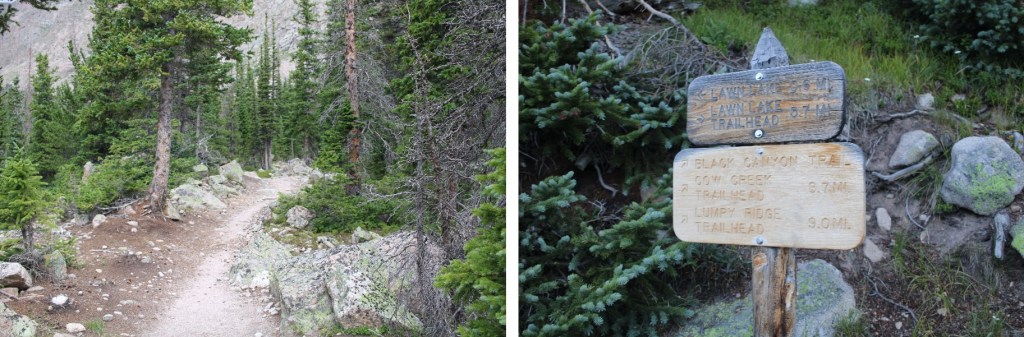
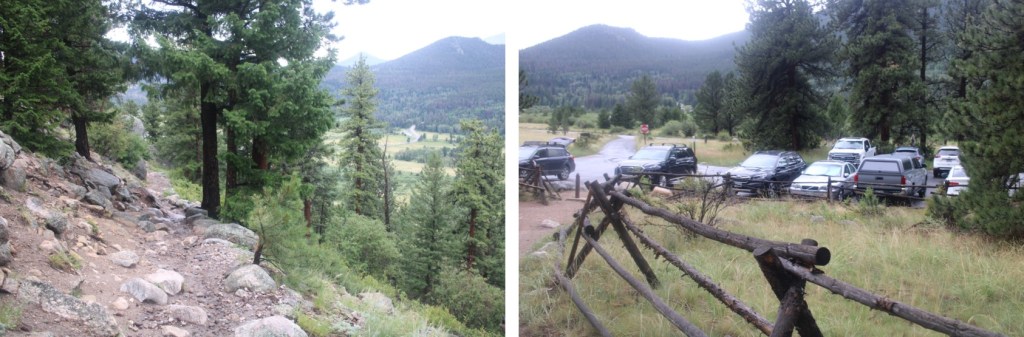
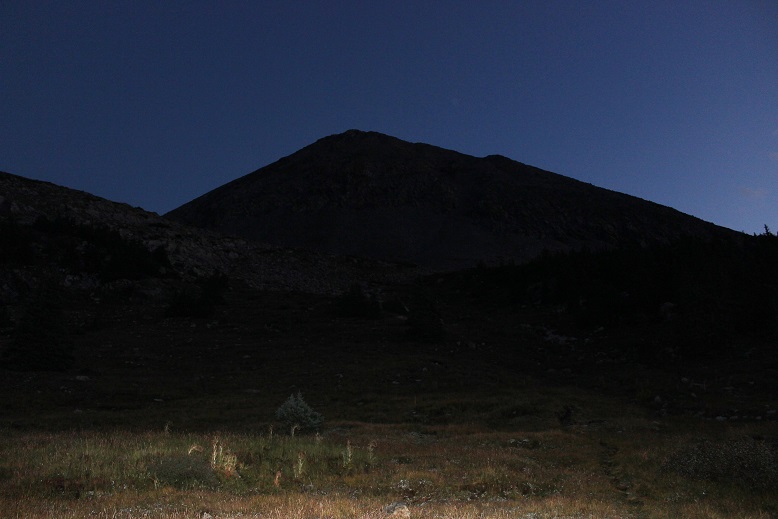
I made it to the Lawn Lake trailhead exhausted. It’s been a fun month, but not one in which I’ve gotten much sleep. I was on the trail at 4:30am.
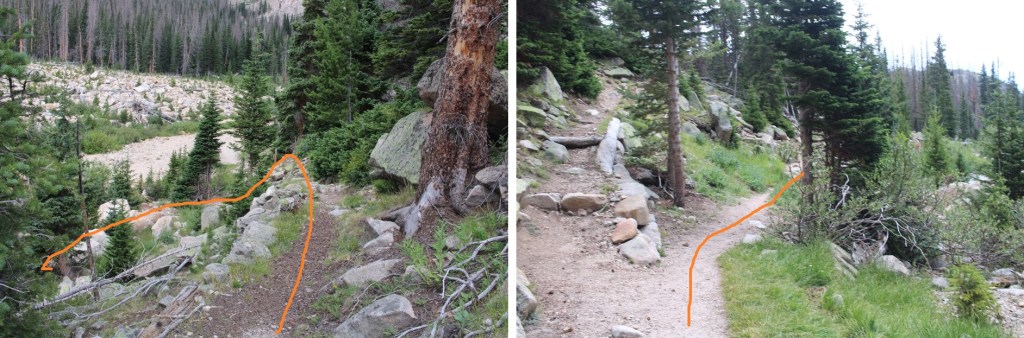
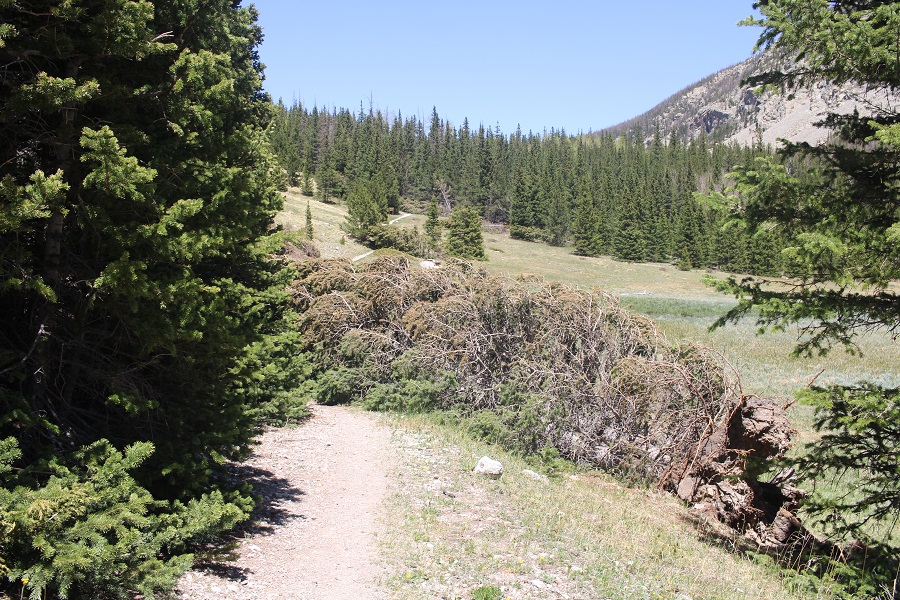
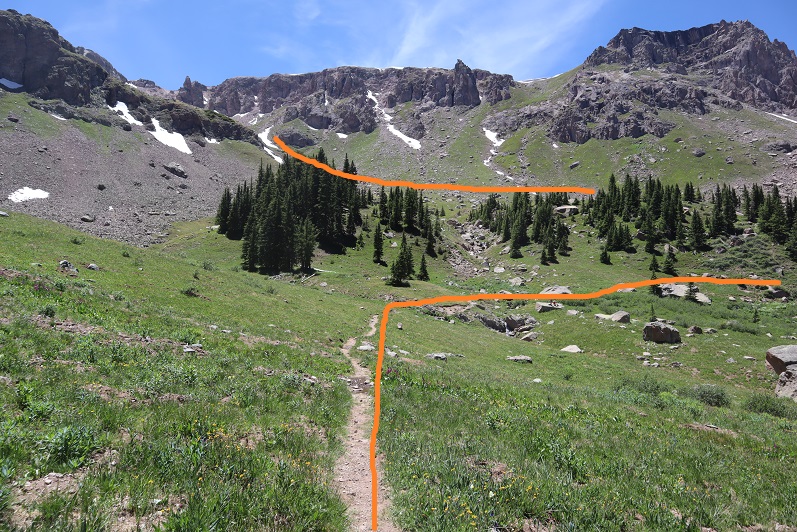
I followed the class 1, Lawn Lake Trail, for 5.7 miles
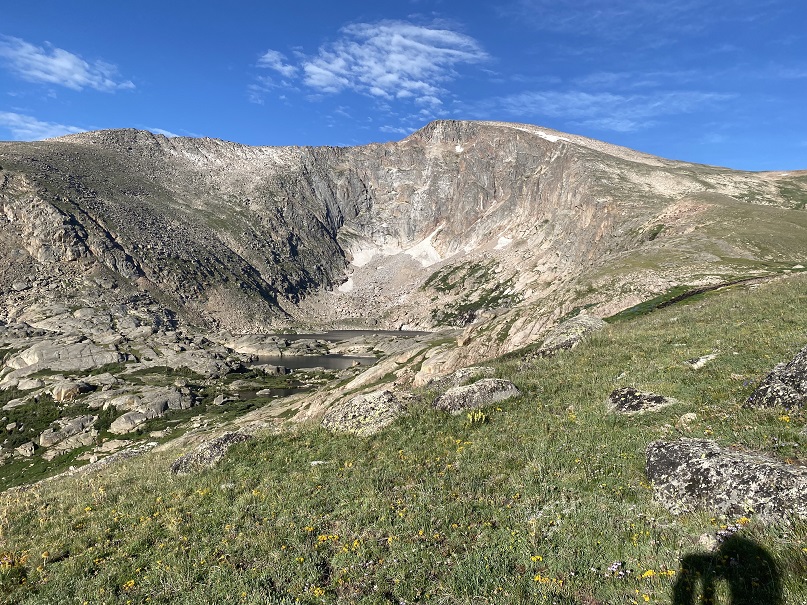
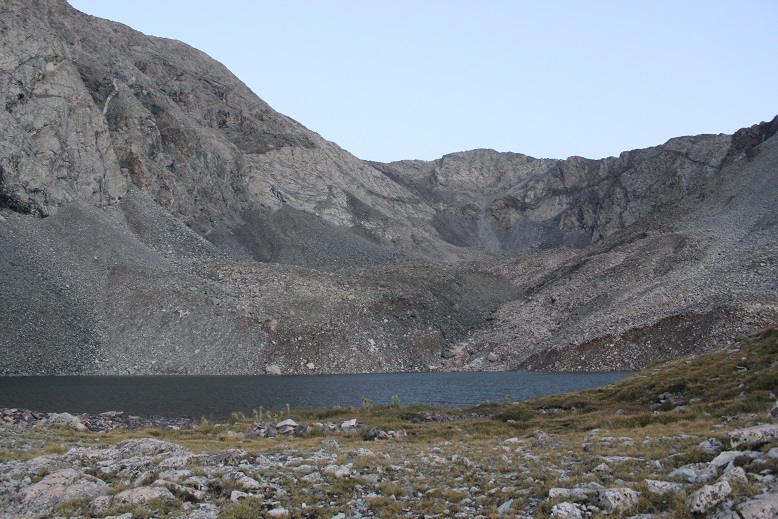
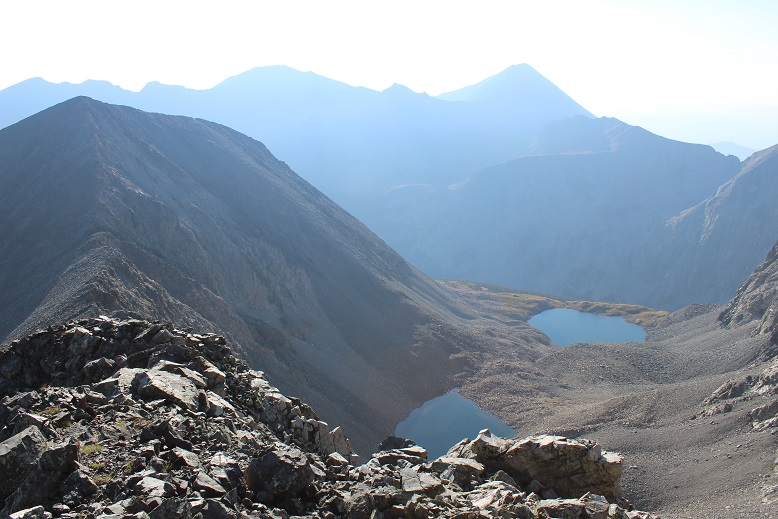
After hiking for 5.7 miles I came to a junction with the Black Canyon Trail, and took the Black Canyon Trail past Lawn Lake, and all the way to the Fairchild/Hagues Saddle.
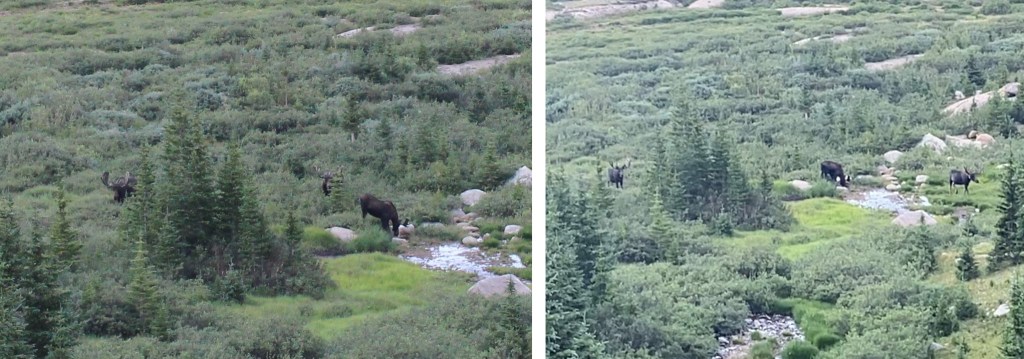
Just after passing the lake I came across 3 bull moose enjoying breakfast. I took a few pictures and gave them their space
Bull Moose at Lawn Lake:
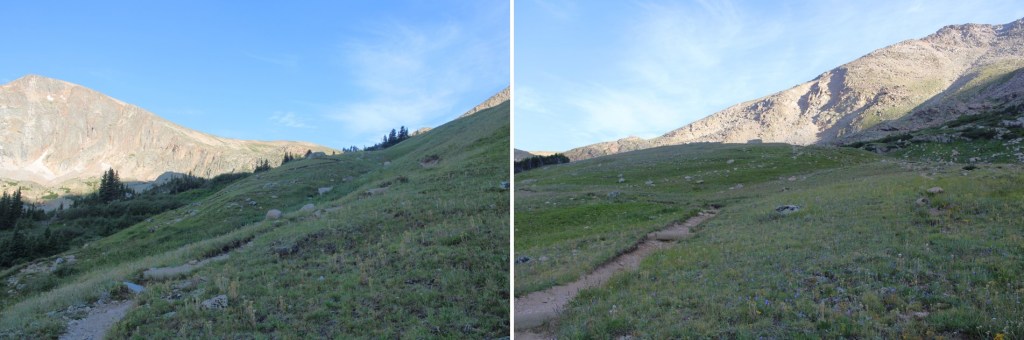
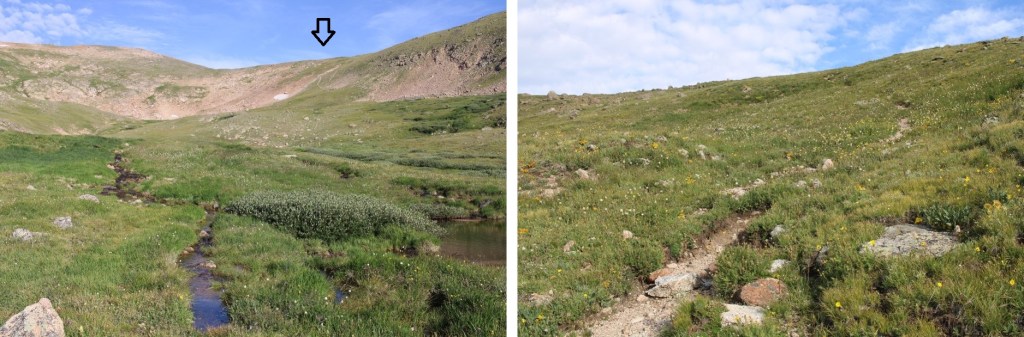
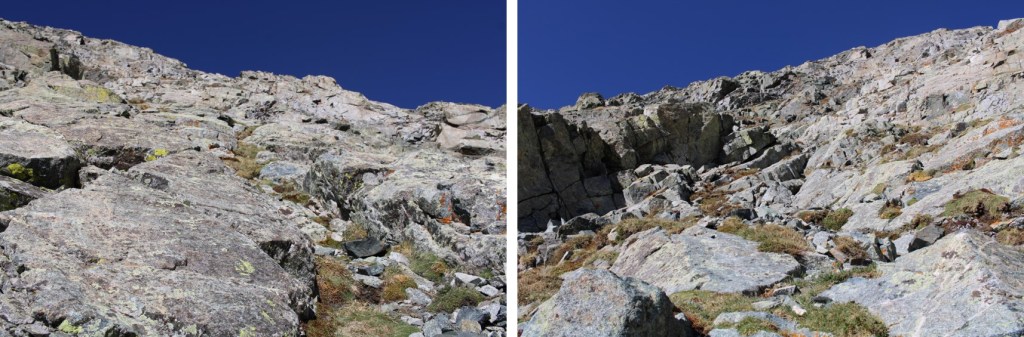
I continued following the class 1 trail up to the saddle
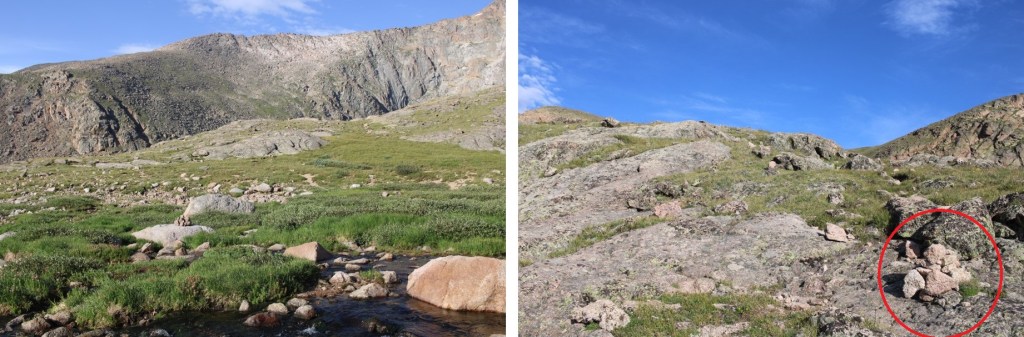
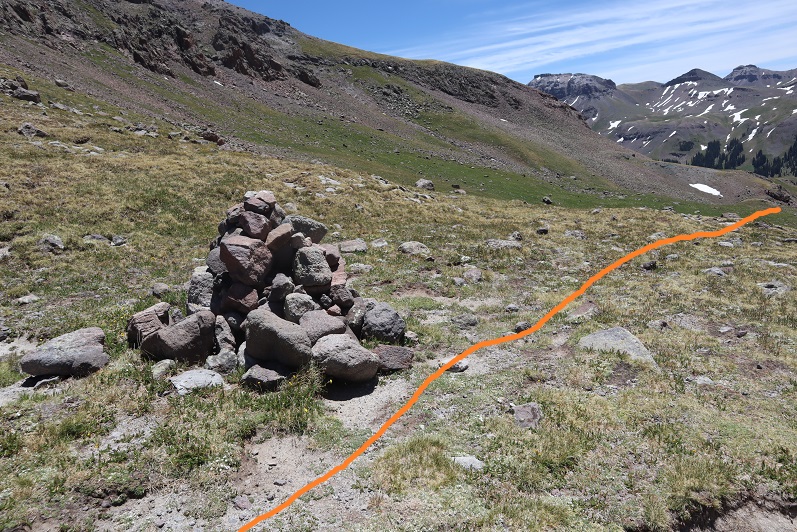
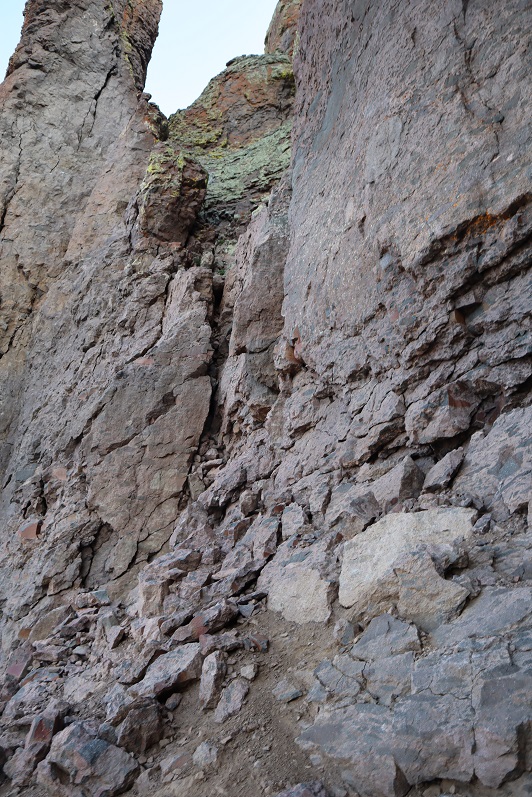
I crossed a small stream. You can clearly see the trail on the other side. The trail became faint in areas, but there were cairns and the trail became easier to see near the saddle.
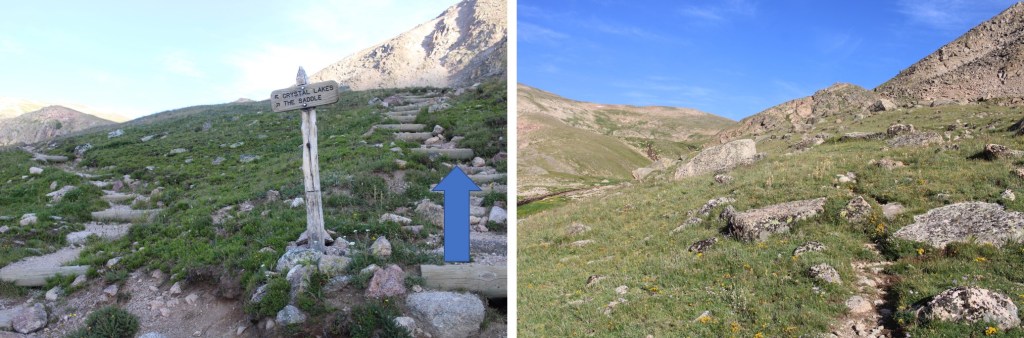
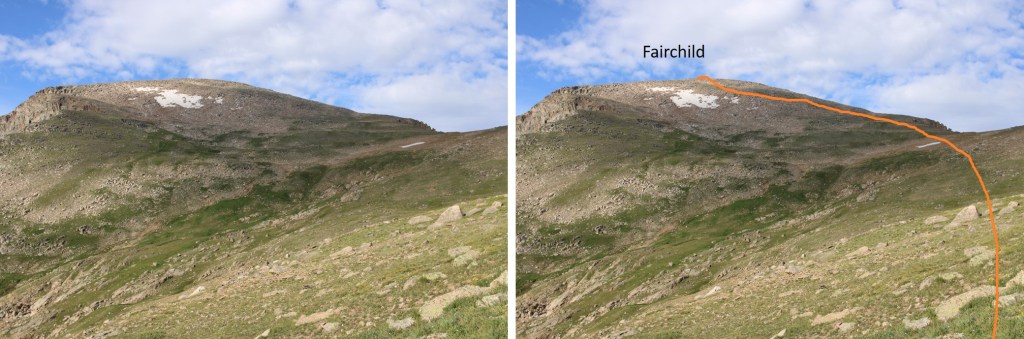
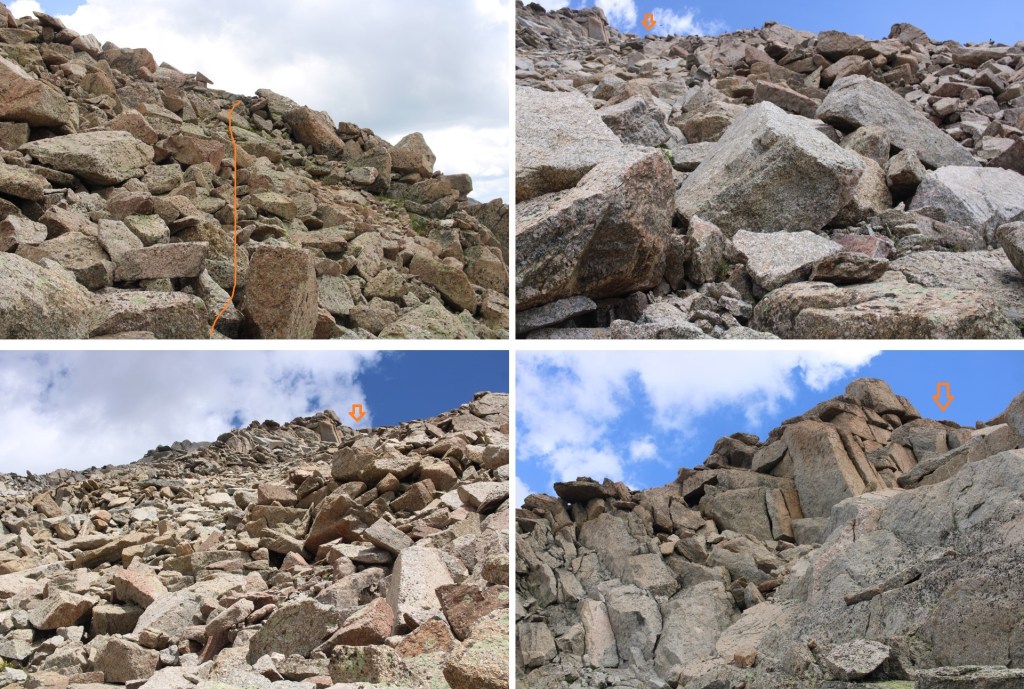
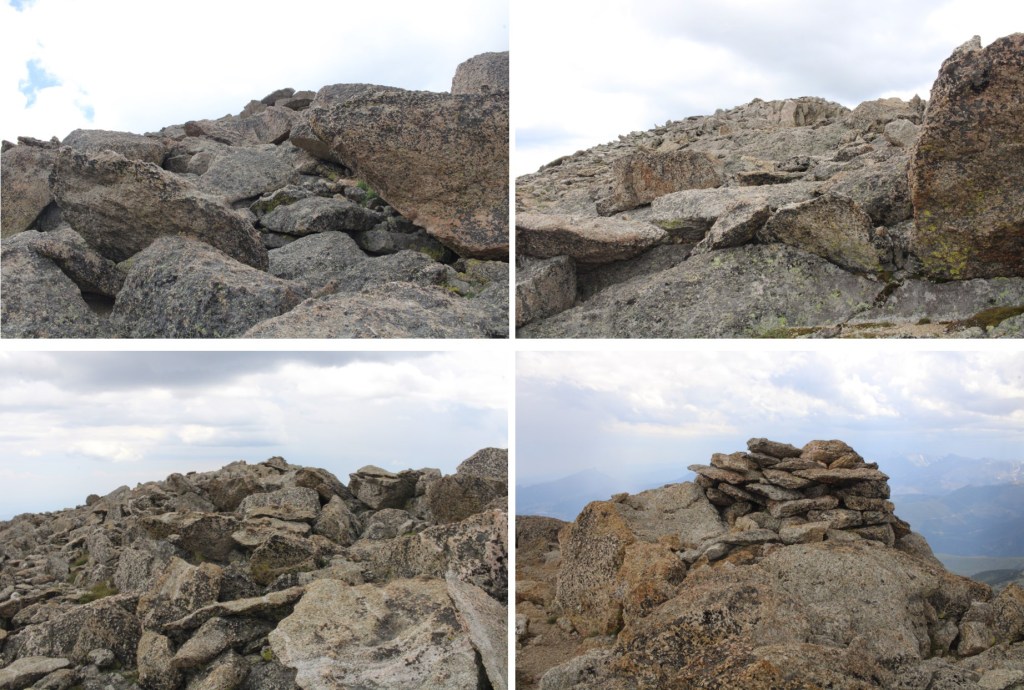
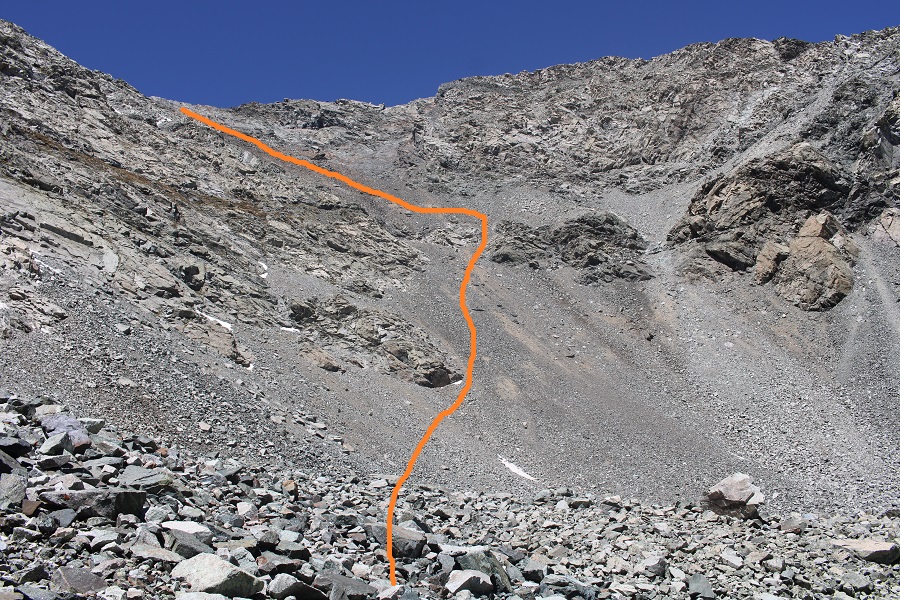
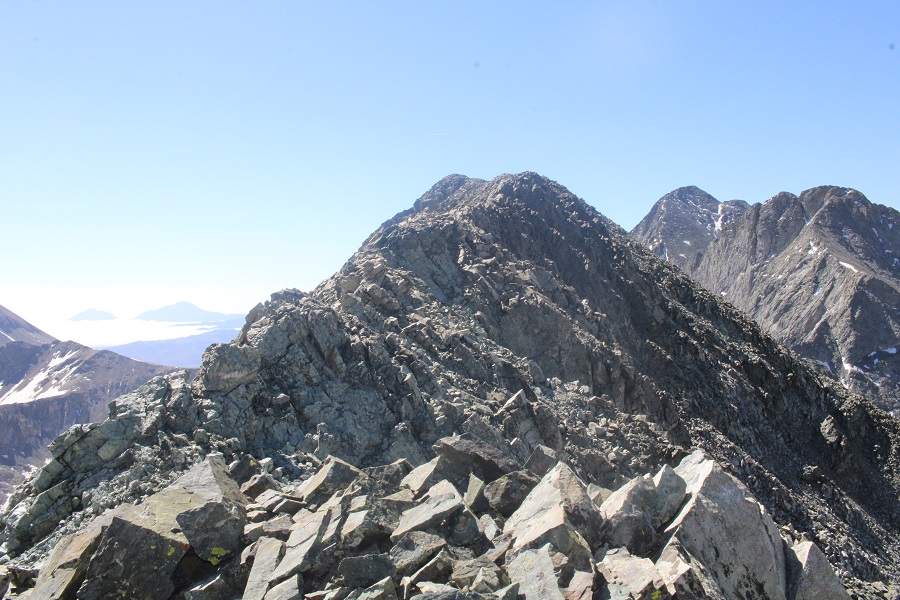
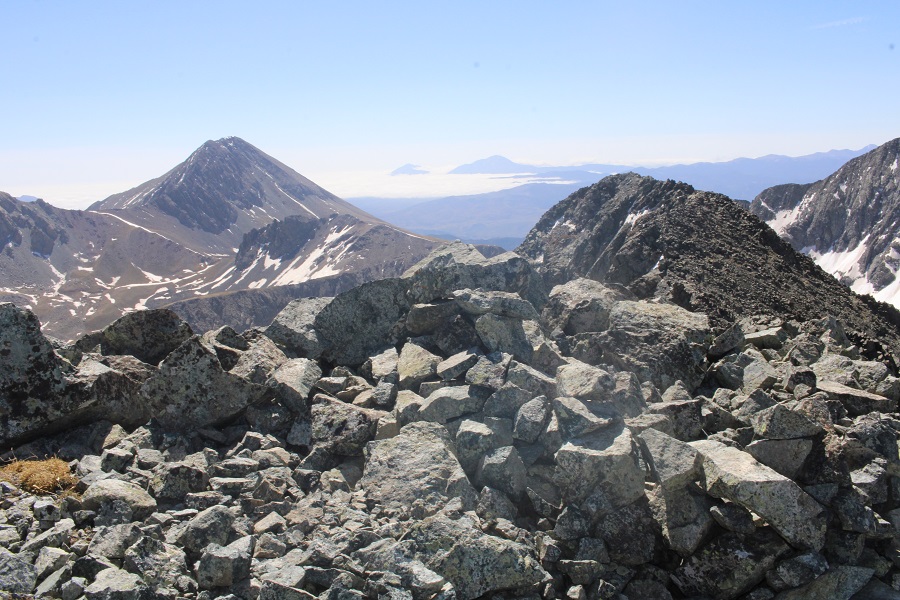
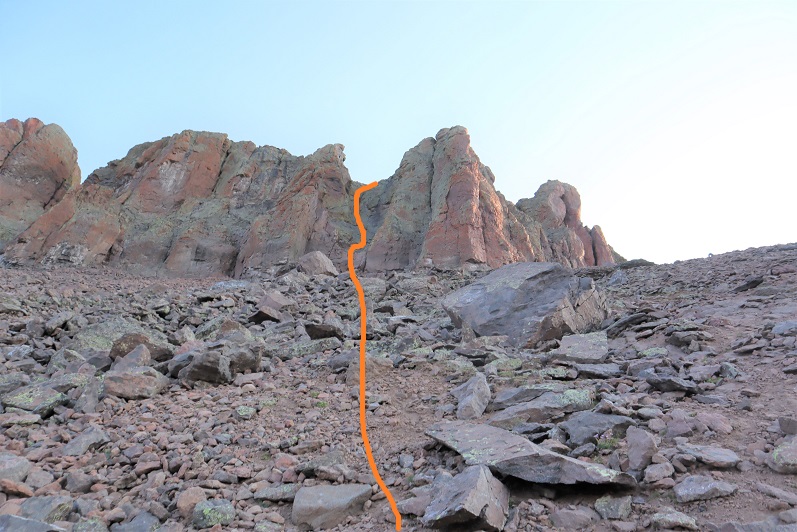
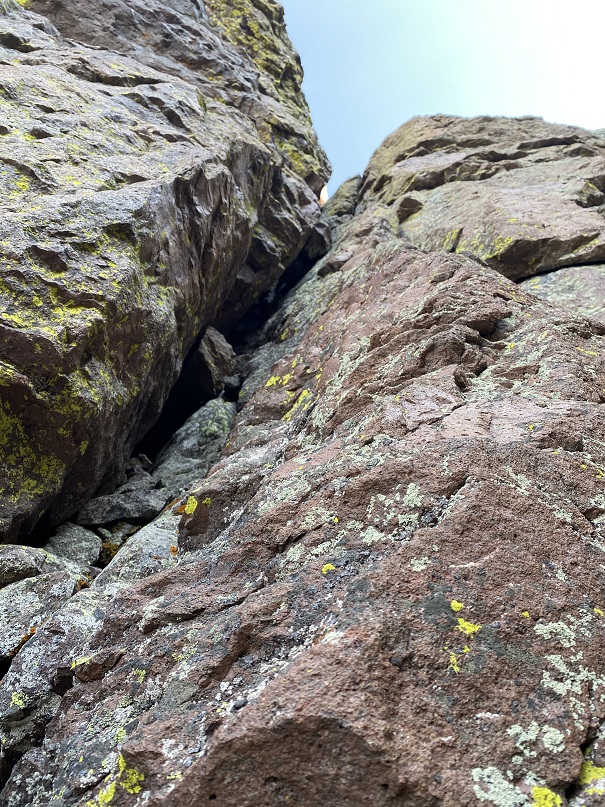
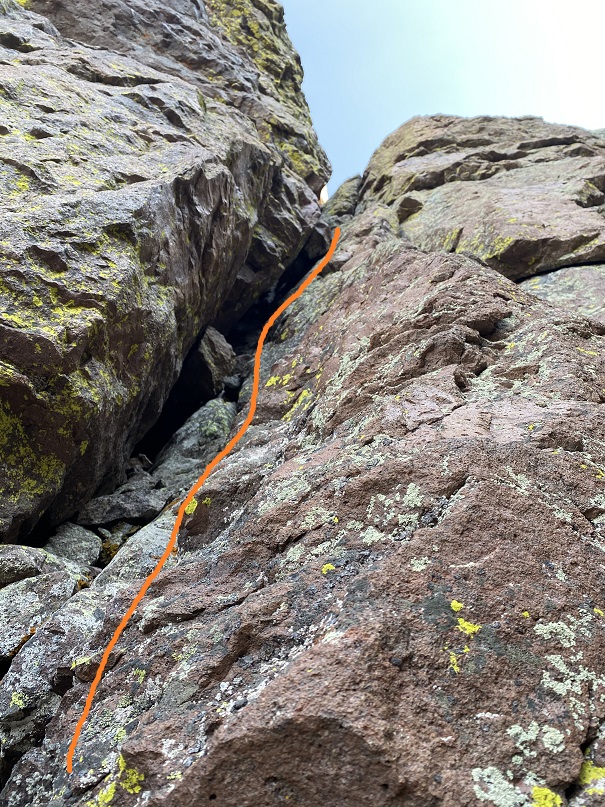
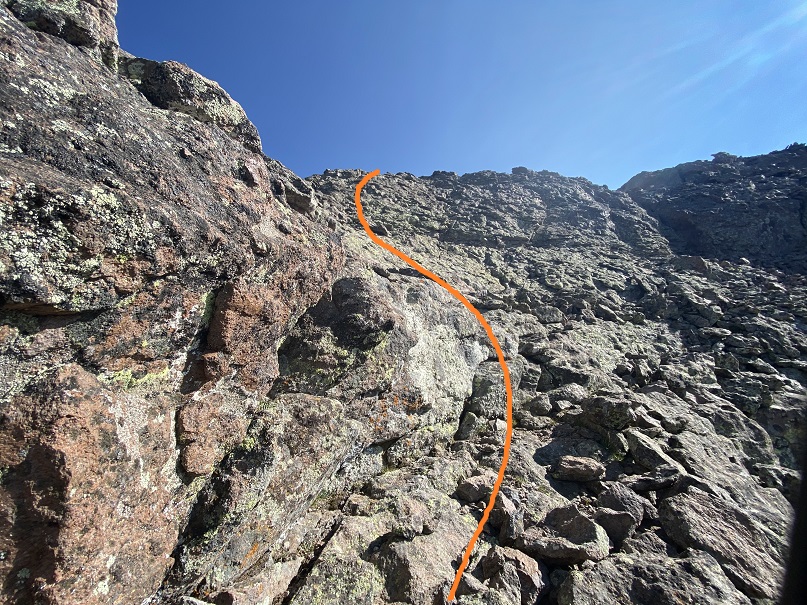
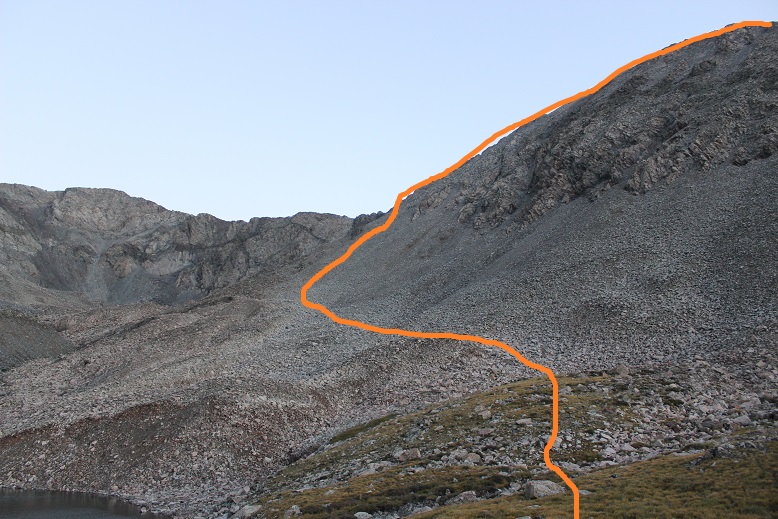
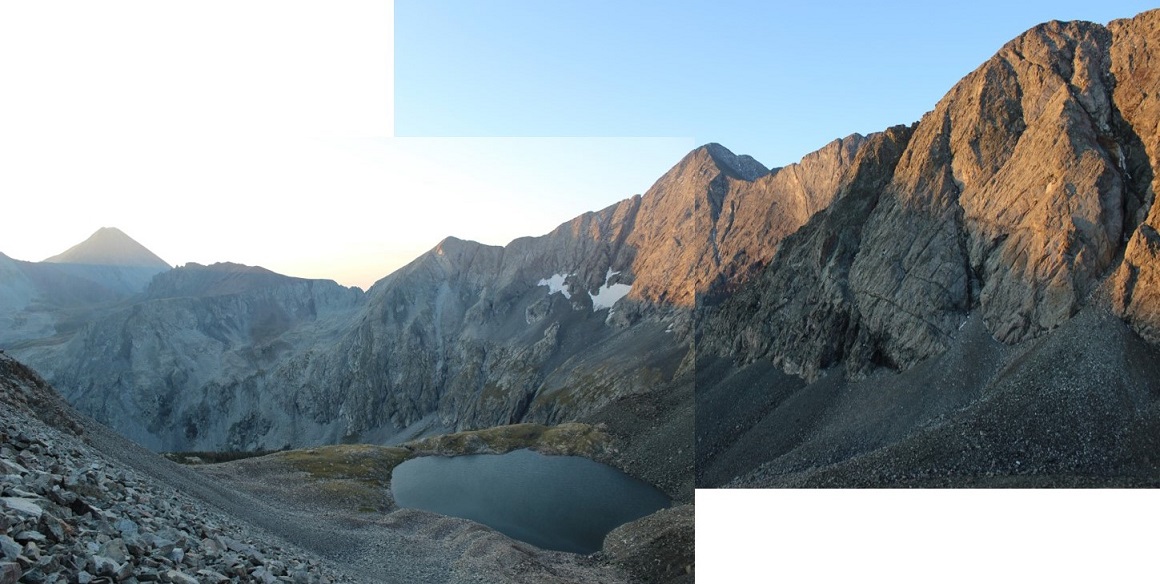
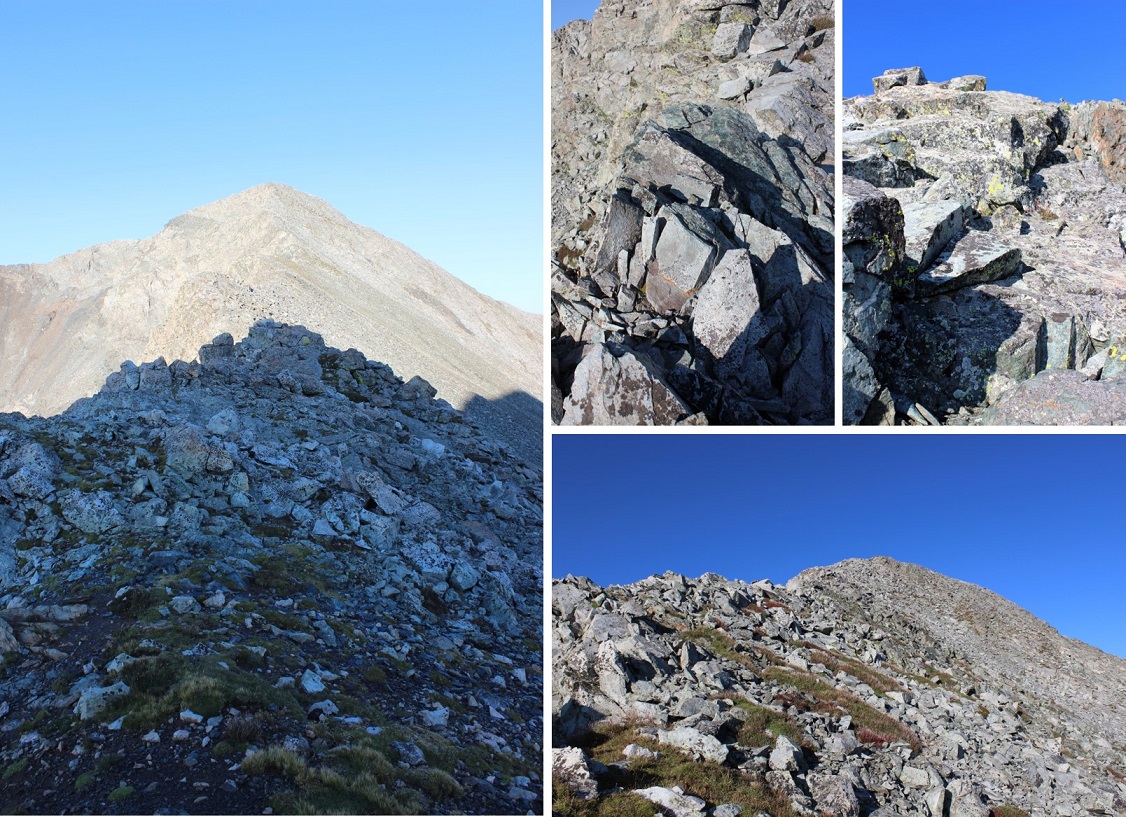
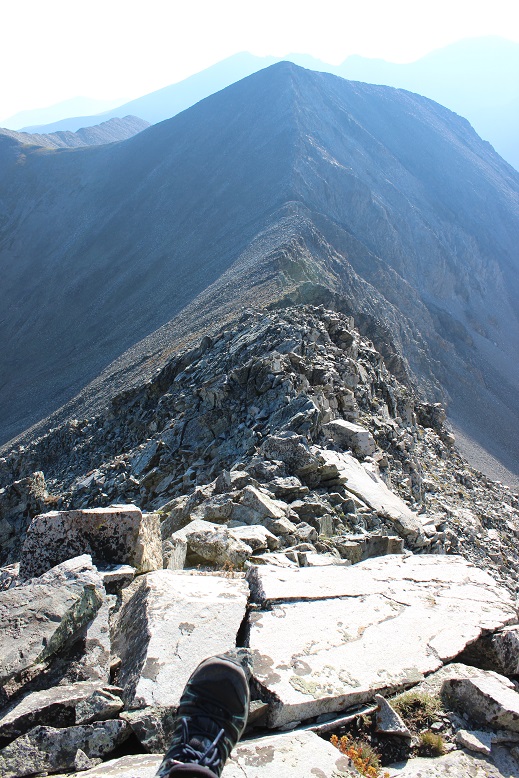
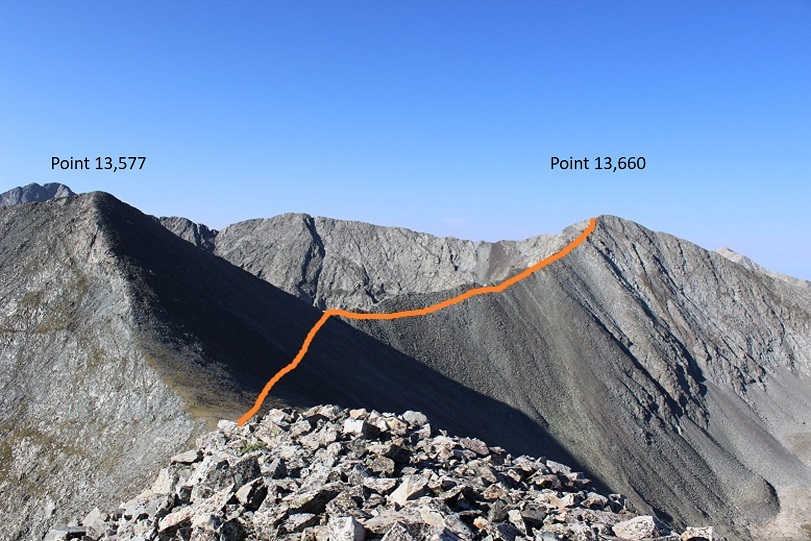
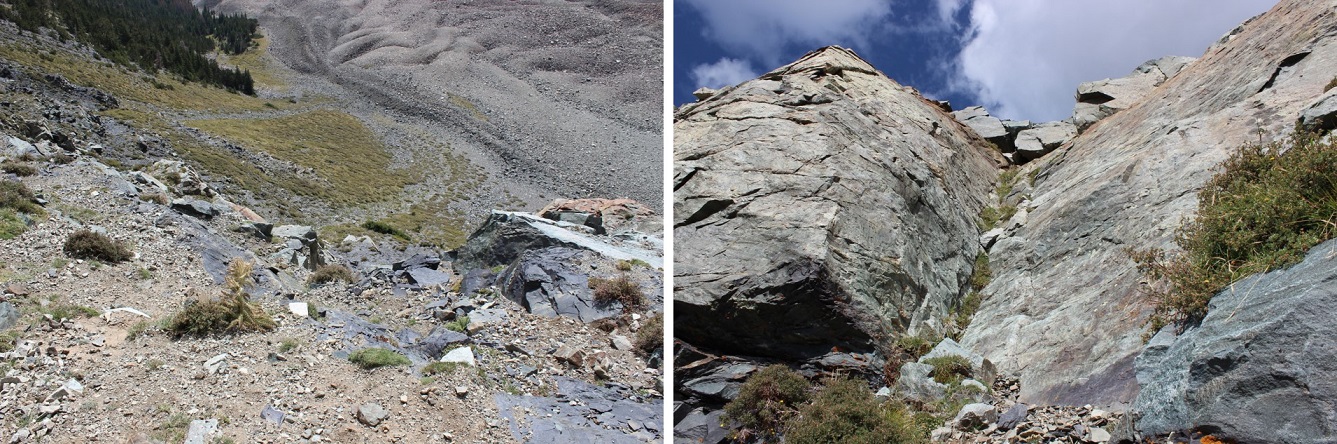
Just before making it to the saddle, I turned left and this is the route I took to the summit of Fairchild, following the ridge southwest
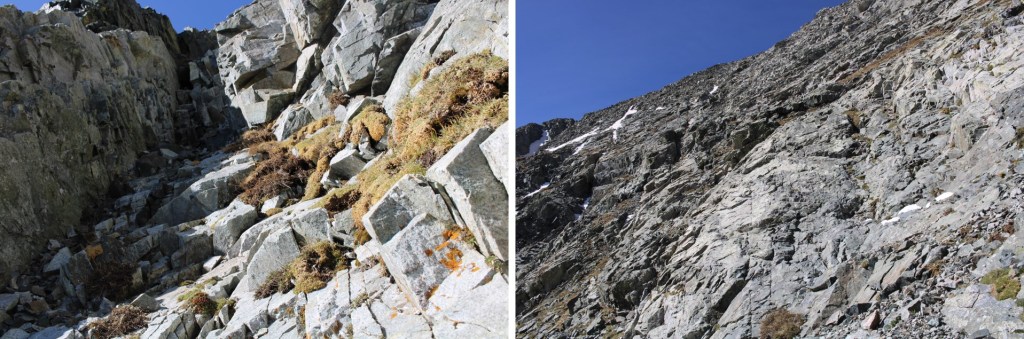
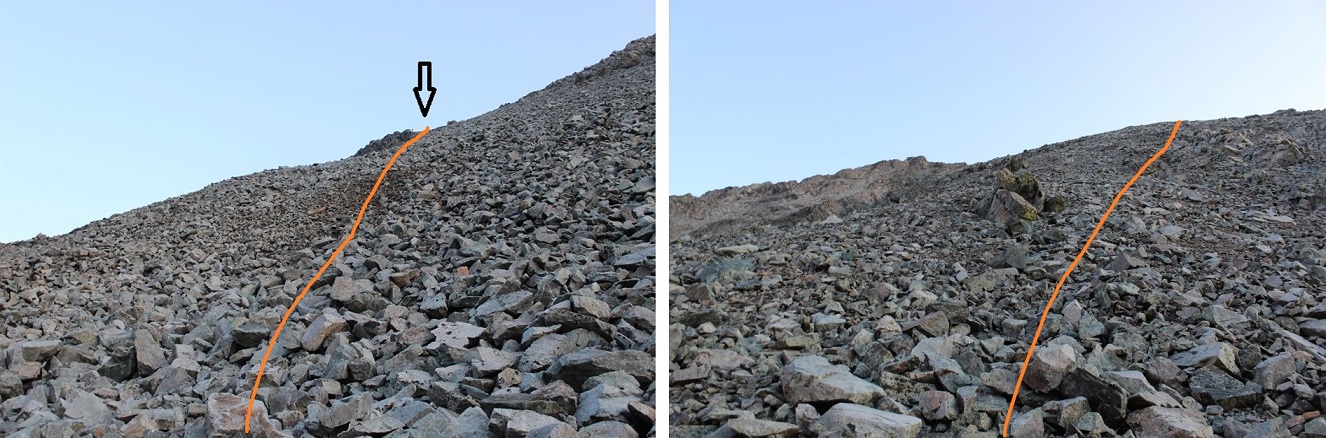
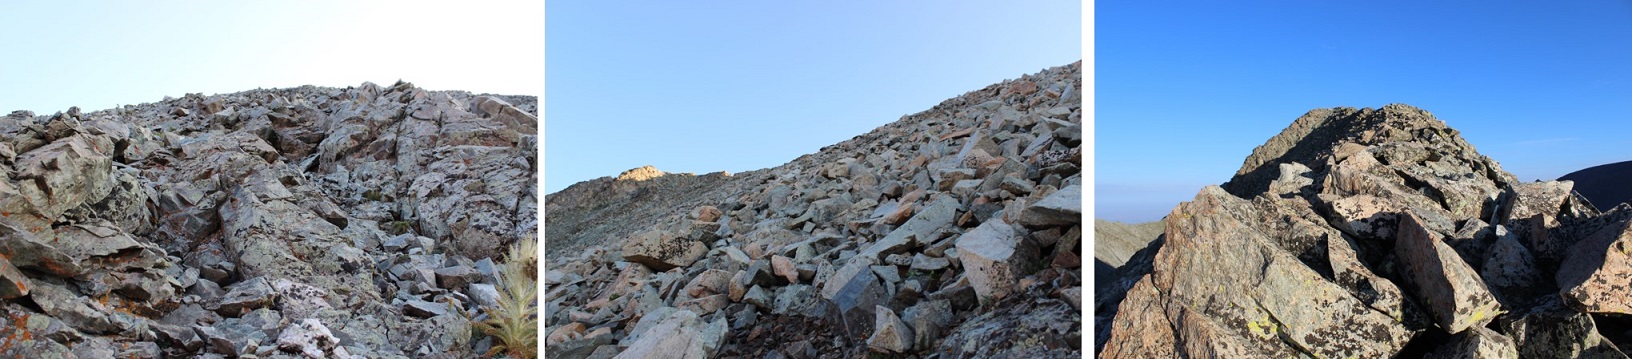
Here are some close up pictures. Note, the boulders become very large near the top. They’re all stable, but larger than vehicles. My hiking shoes gripped the rocks nicely, but they would be treacherous if they’d been wet.
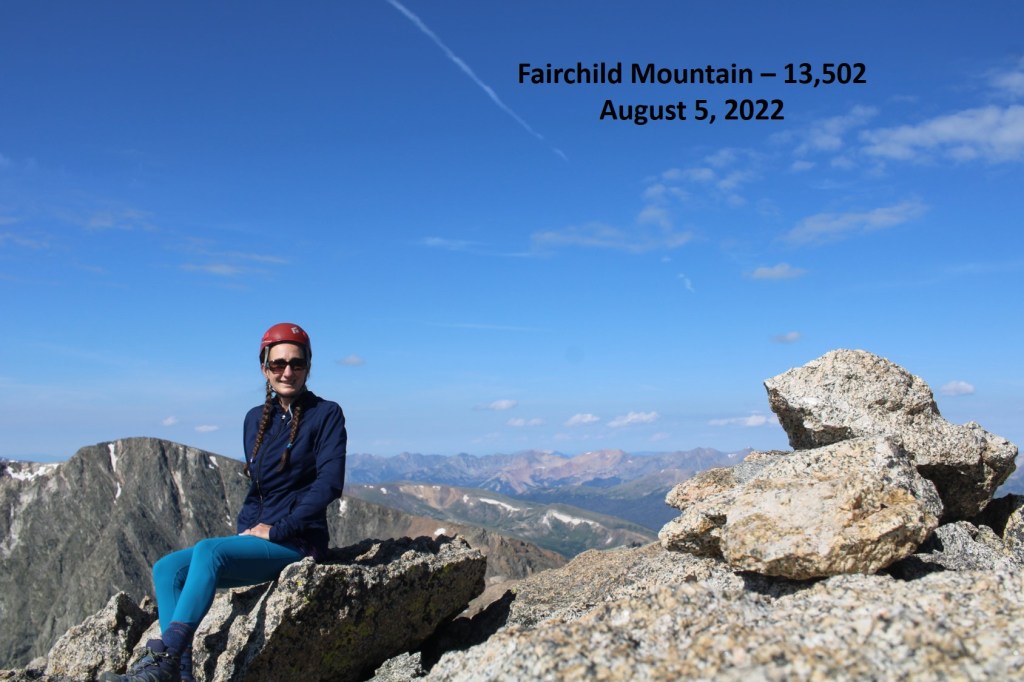
I summited Fairchild Mountain at 9:45am
Fairchild Mountain:
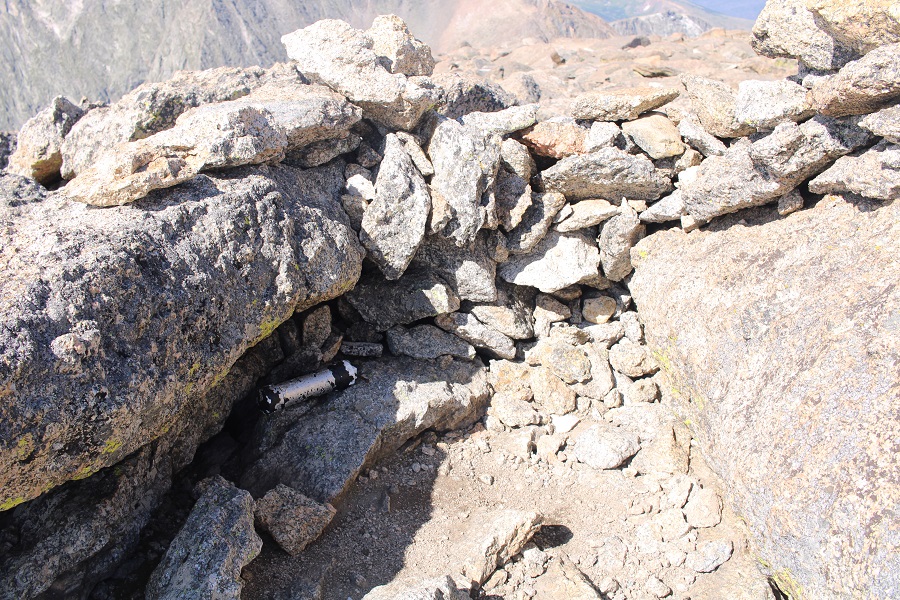
There was a plastic tube summit register I couldn’t open, and a rock wind break at the summit.
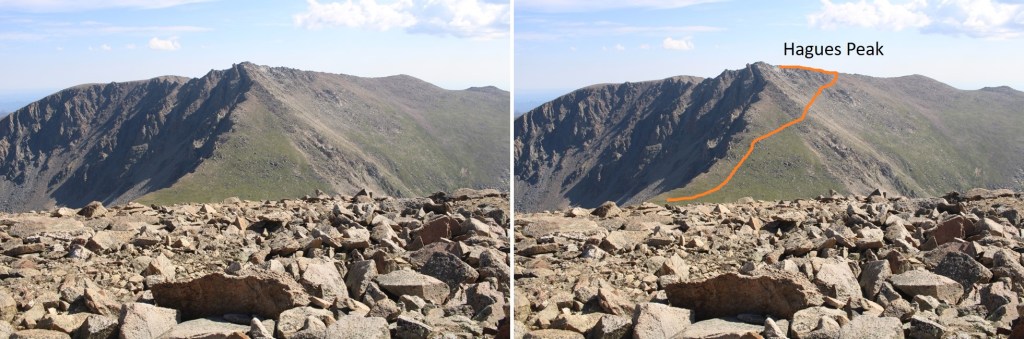
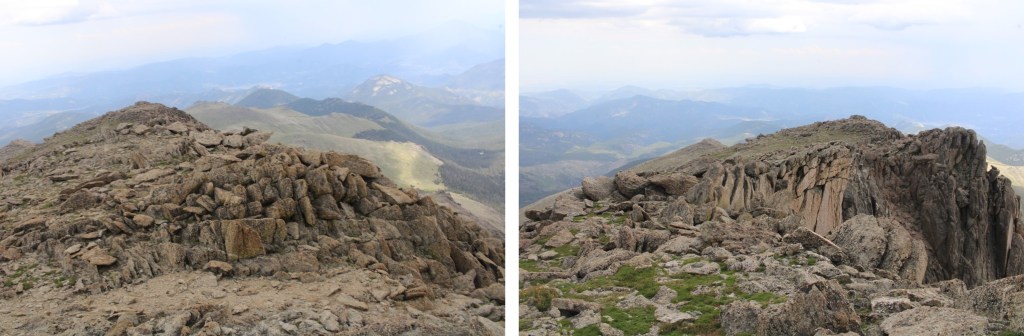
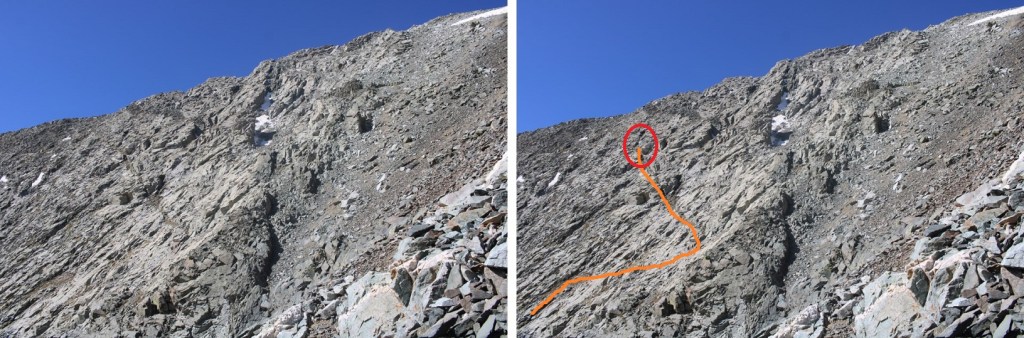
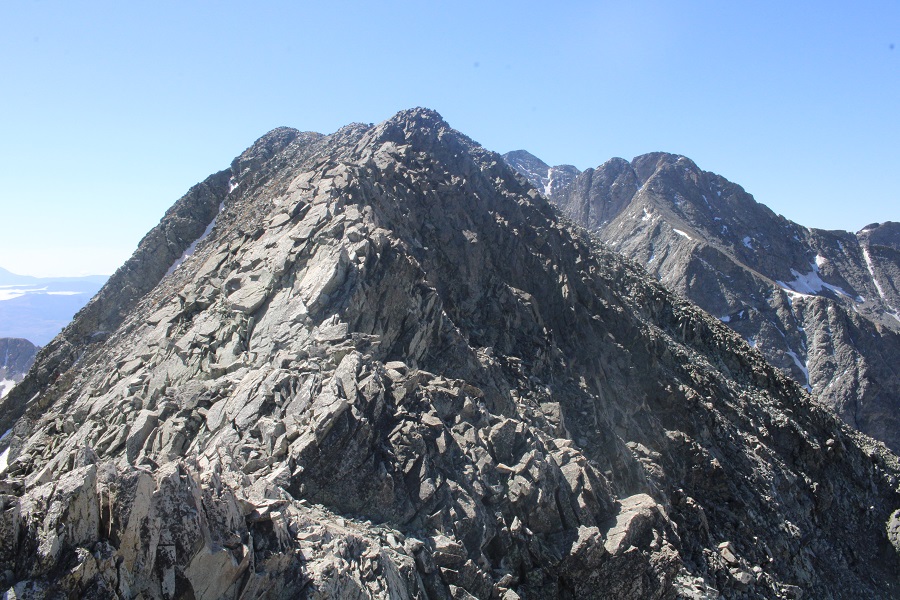
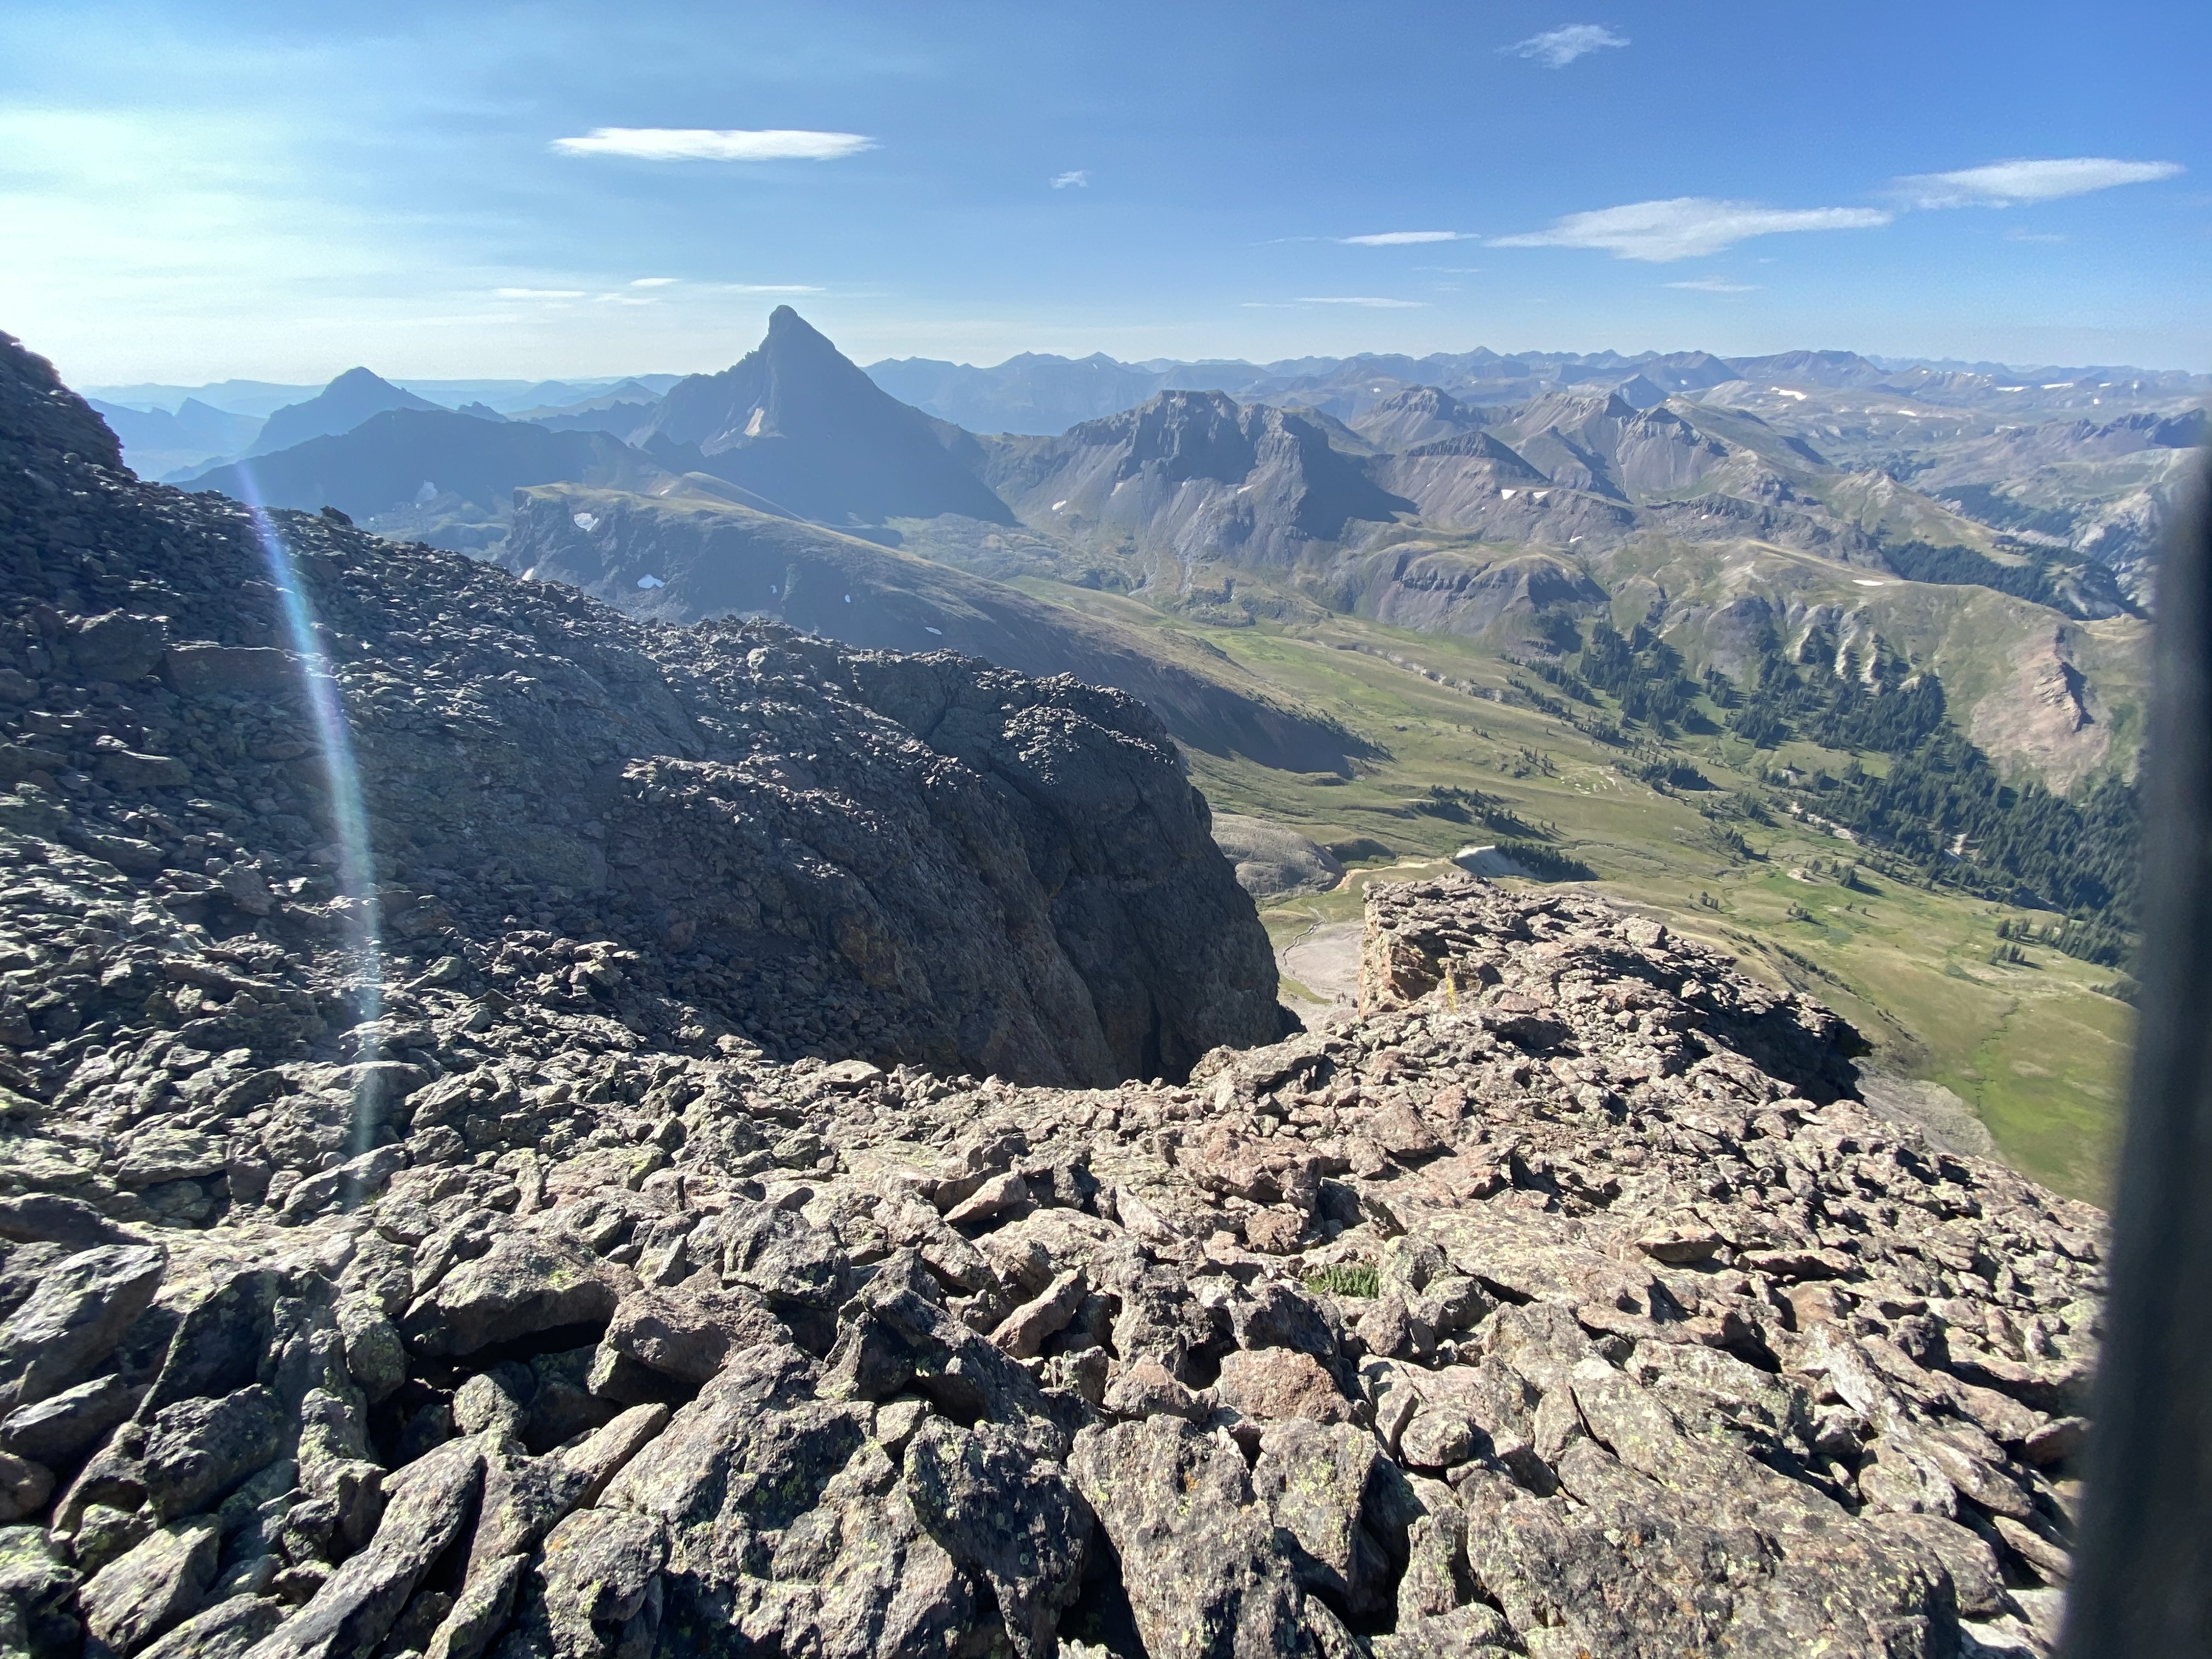
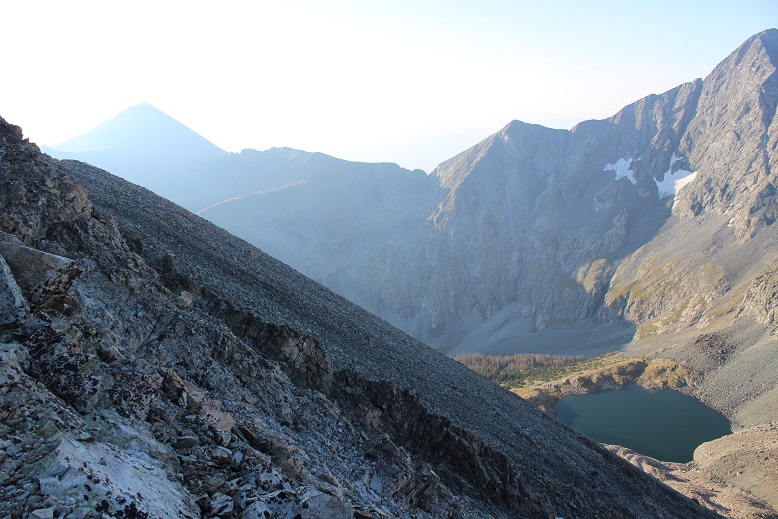
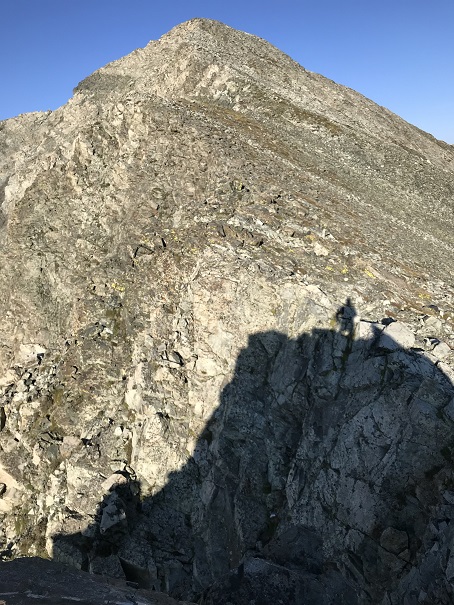
From Fairchild, I looked back at the saddle and could see Hagues Peak, and my route. Now is a good time to get a visual of the way you want to summit, as it’s difficult to see from the saddle/below. This is the route I took, which kept it low class 3, but mostly class 2.
I made my way back to the Hagues/Fairchild saddle
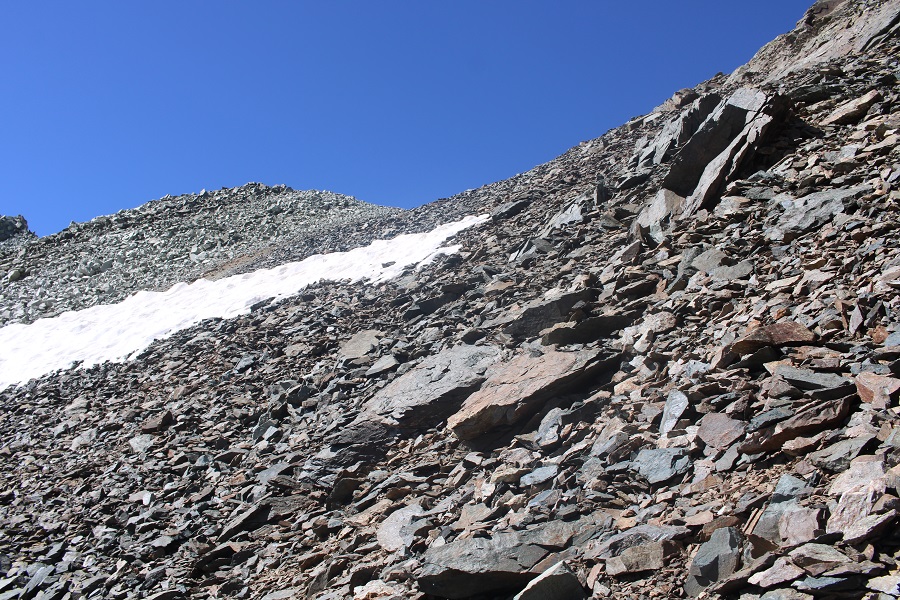
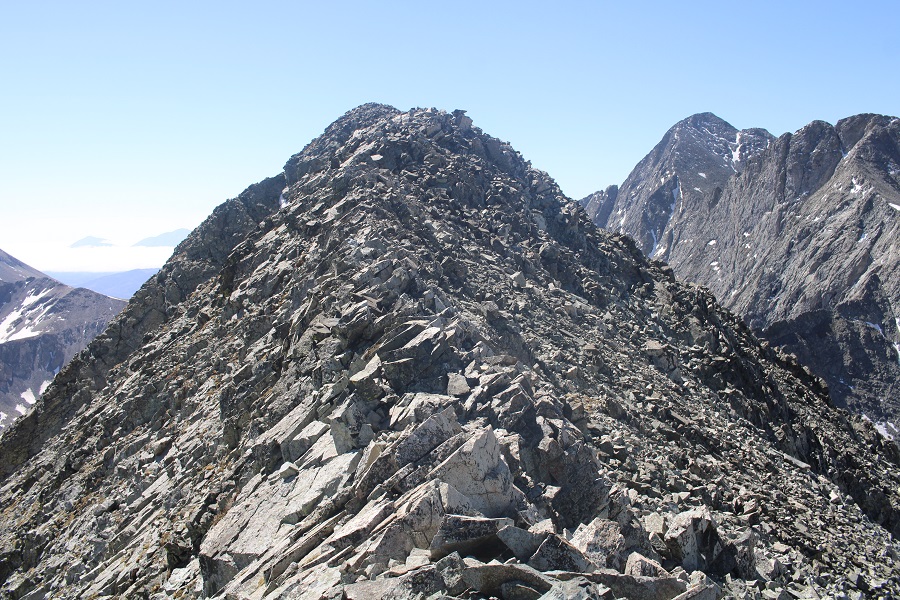
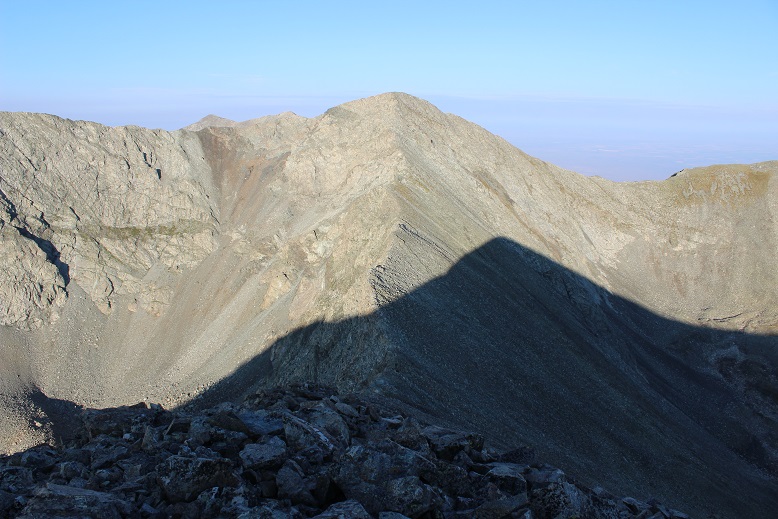
And then followed the ridge until I made it to 12700’.
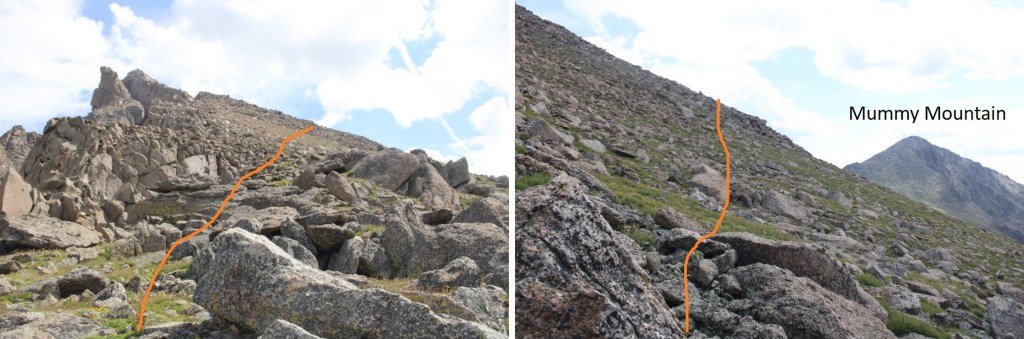
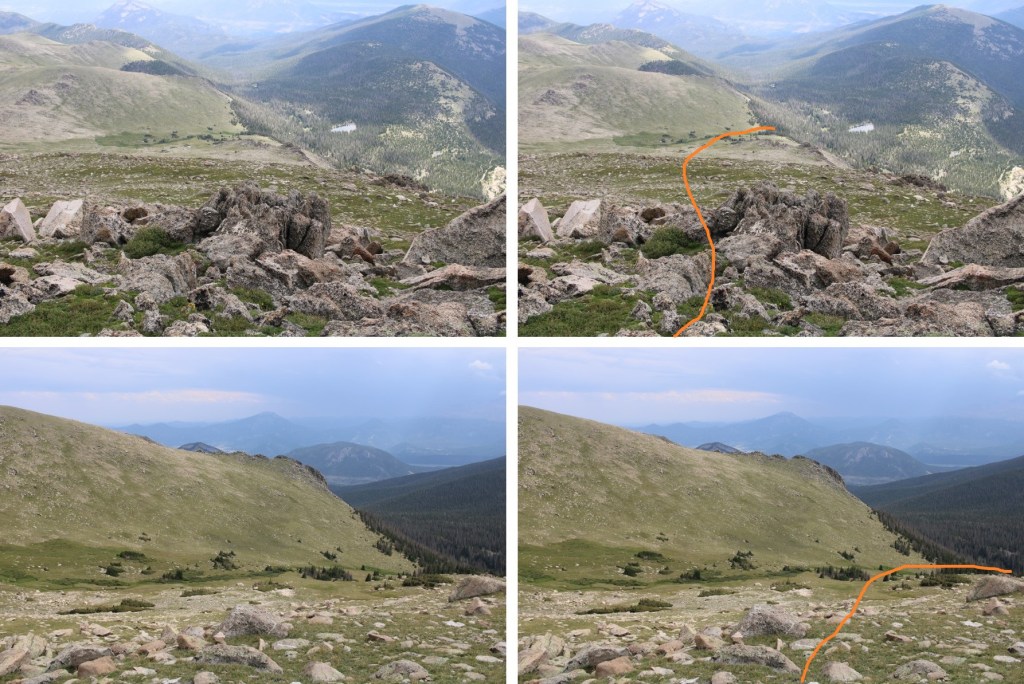
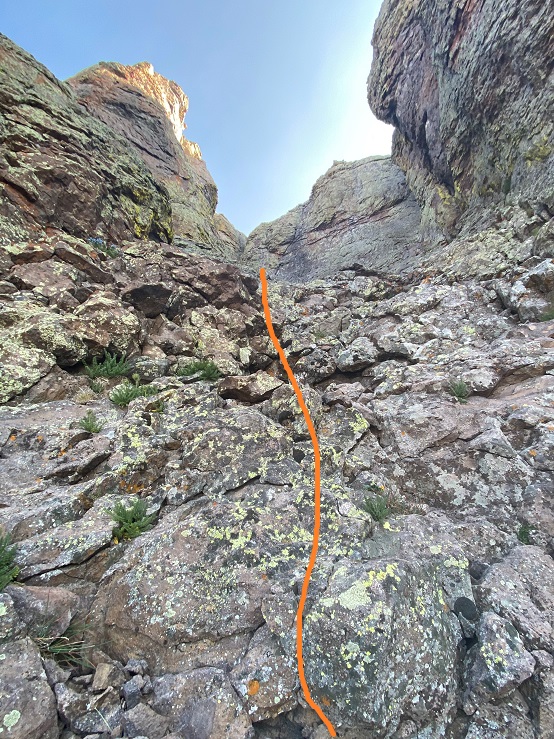
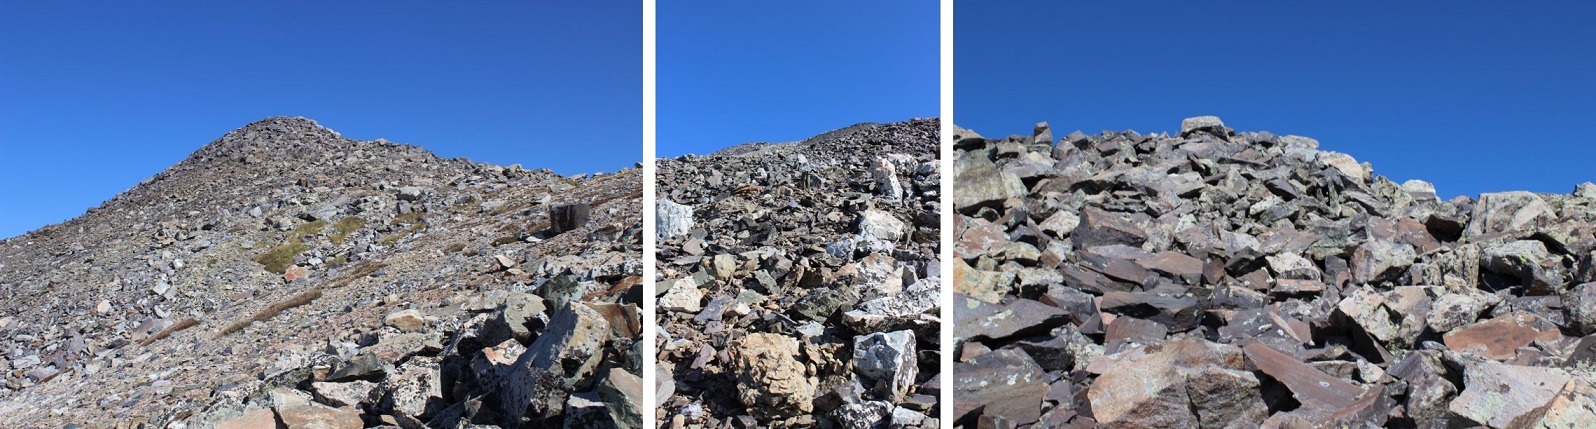
I then headed northeast towards the ridge, staying on class 2 terrain. Here are some close ups of my route
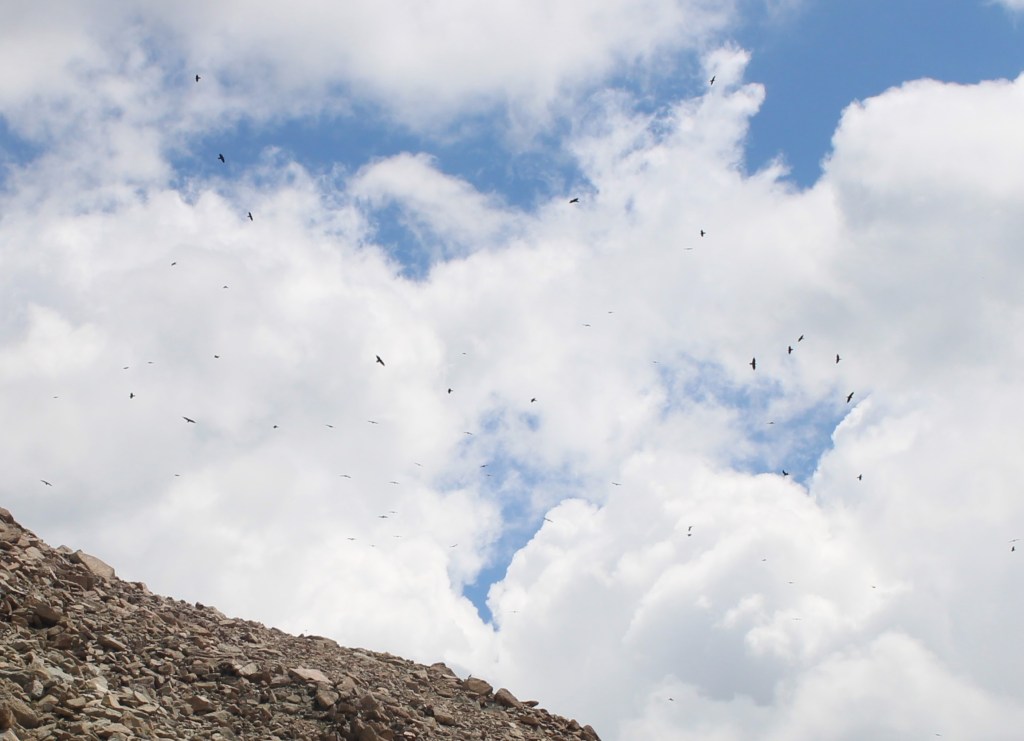
Also, there were more moths than I’d ever seen this far above treeline, and dozens of crows taking advantage of the situation
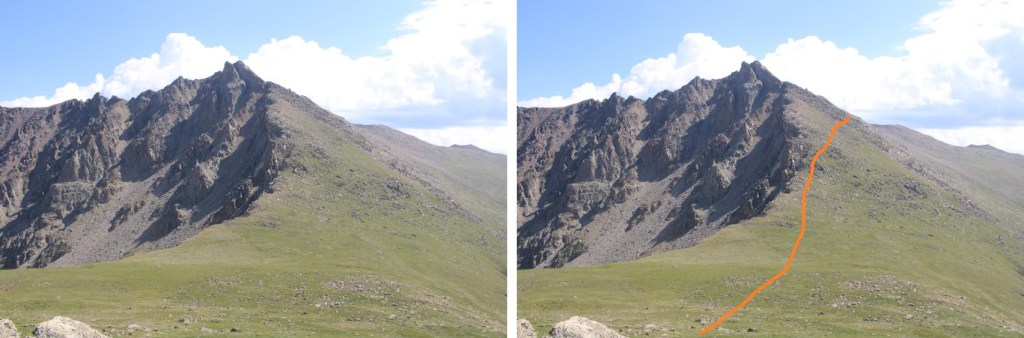
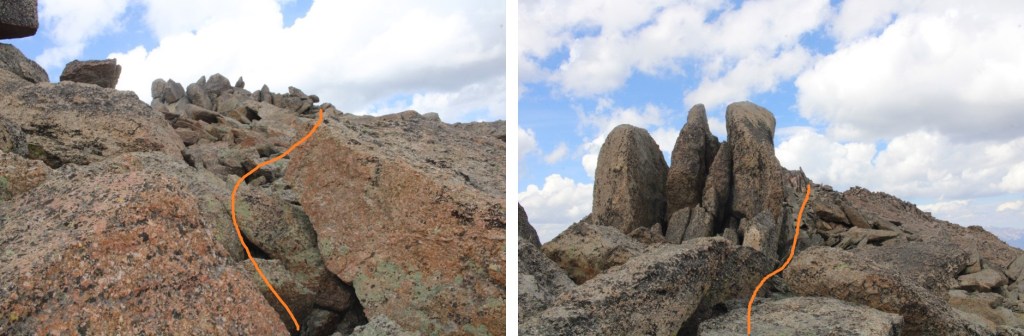
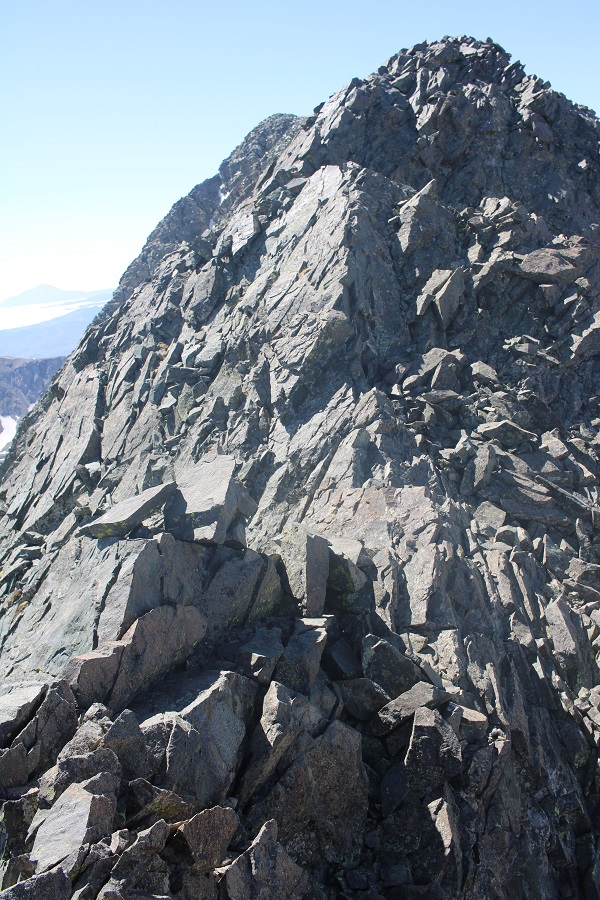
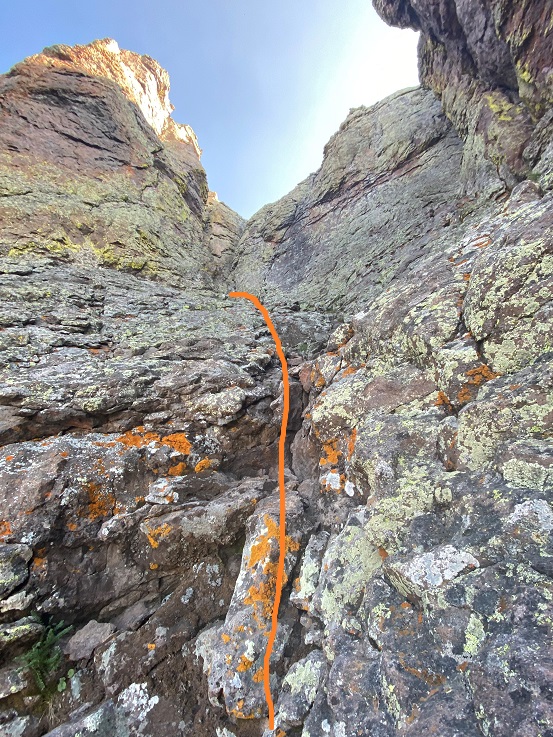
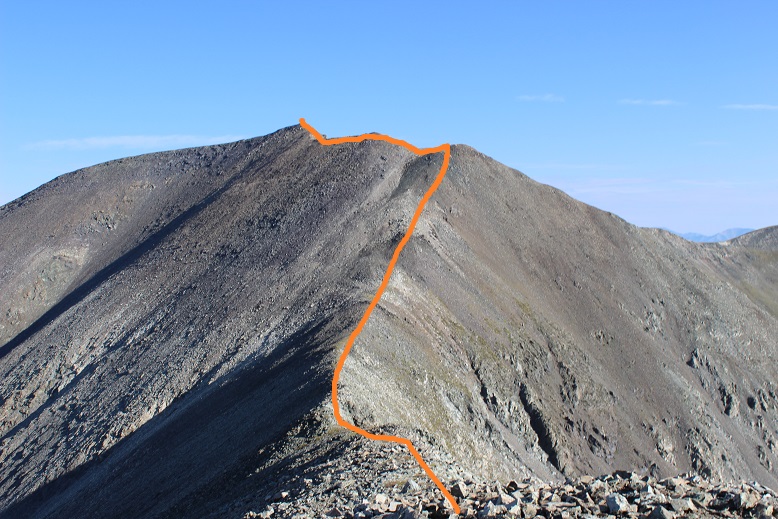
I gained access to the ridge with a few easy class 3 maneuvers.
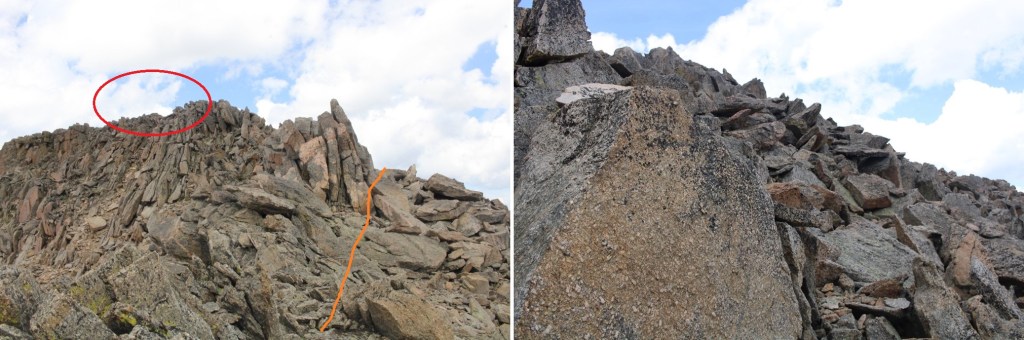
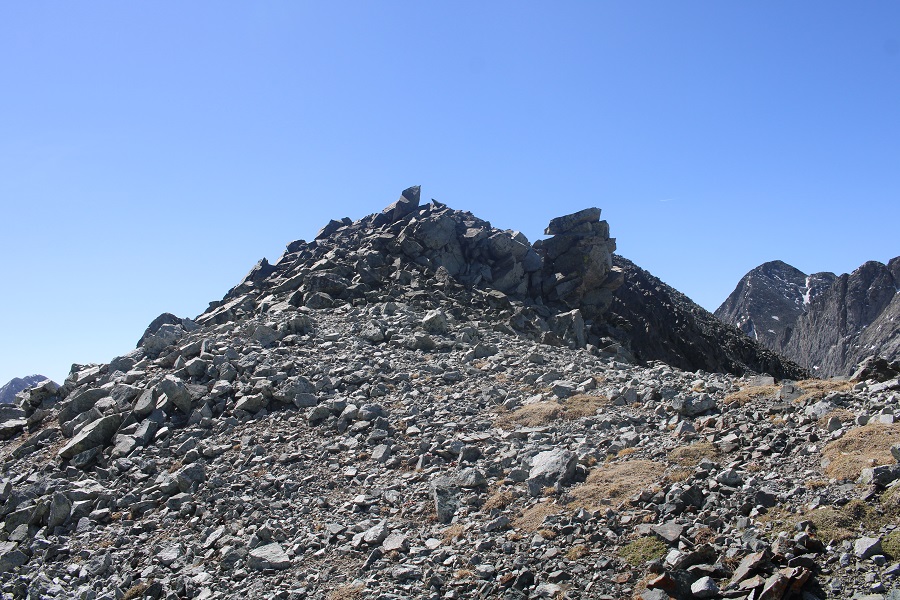
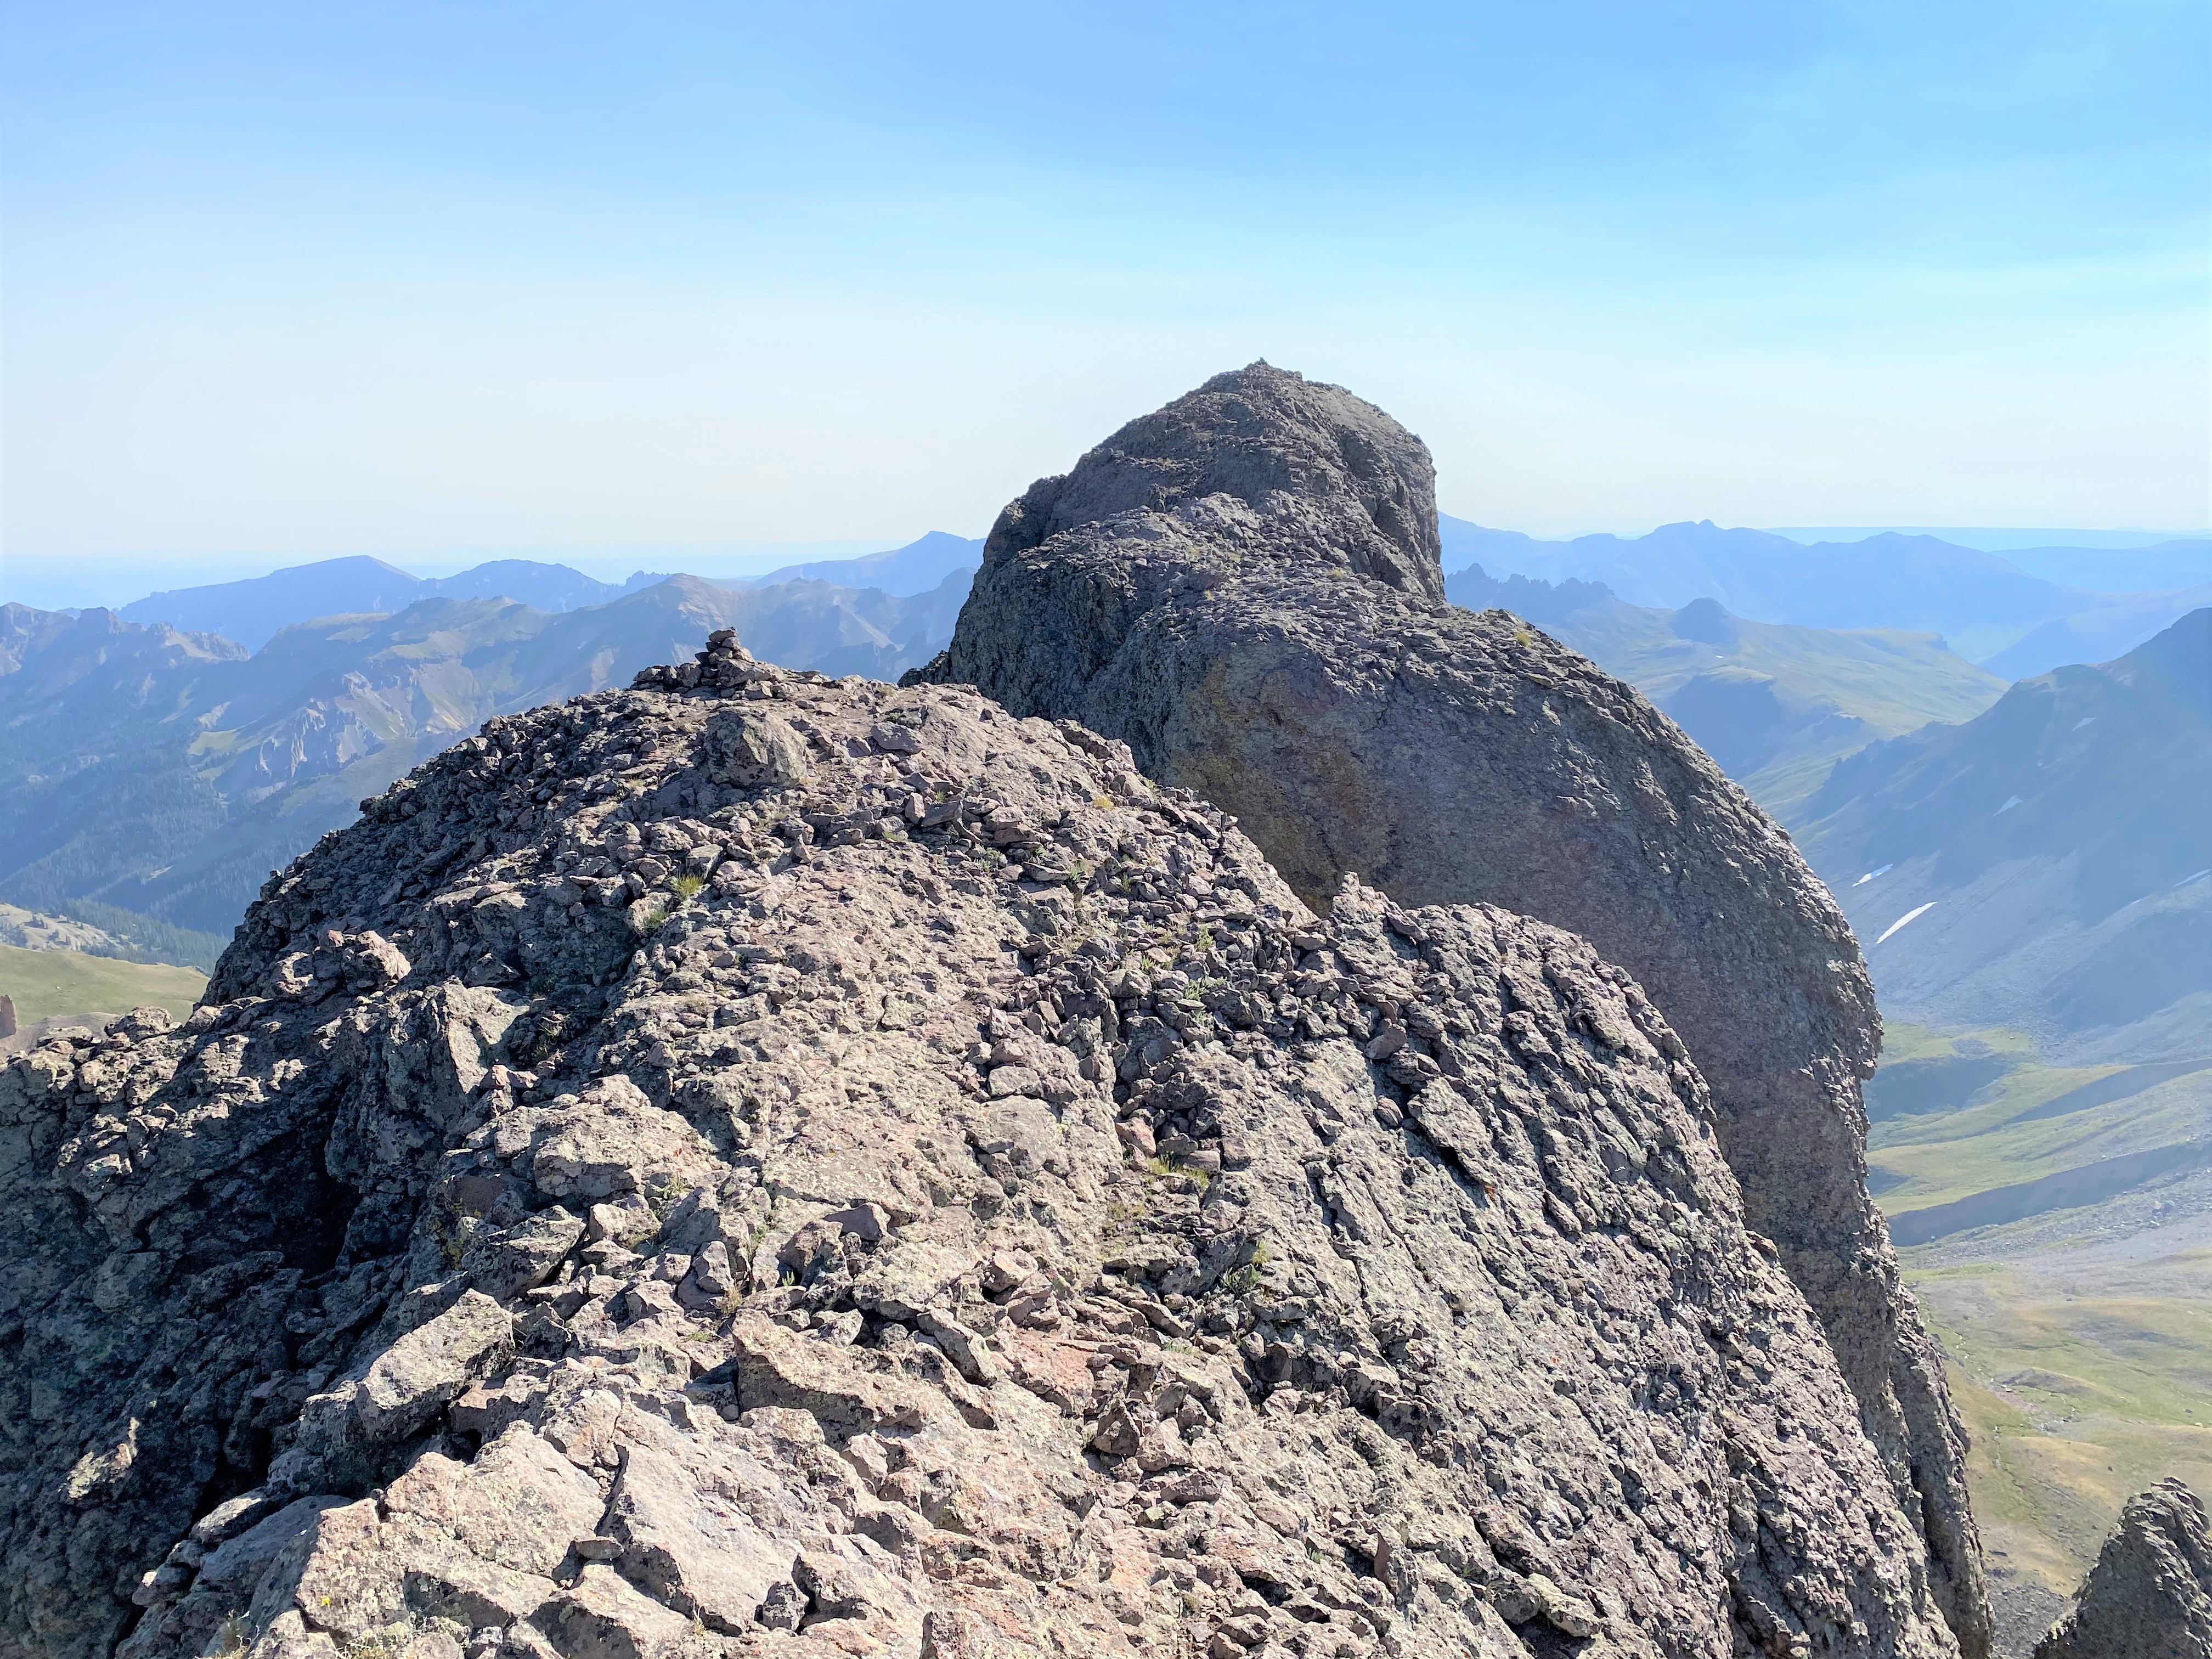
One on the ridge, I turned left and followed it through more easy class 3 terrain west to the summit. If there’s an option, always go right around the boulders.
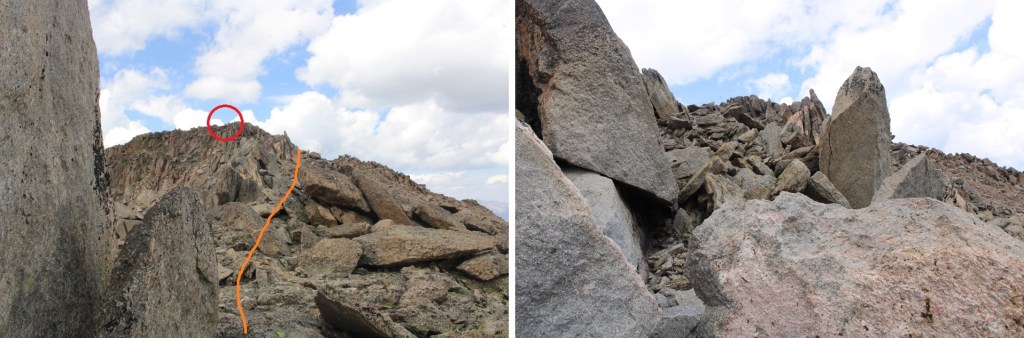
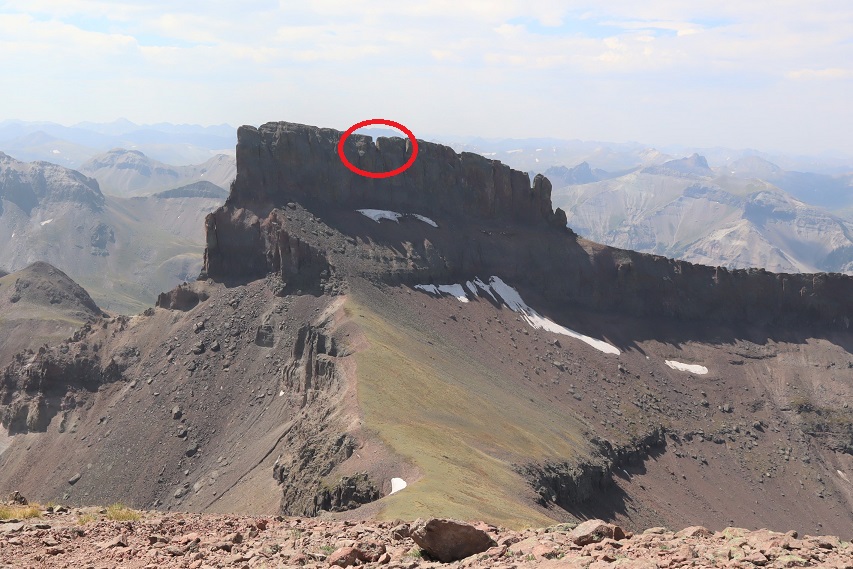
The summit is circled in red
It’s just a little further southwest past the tower
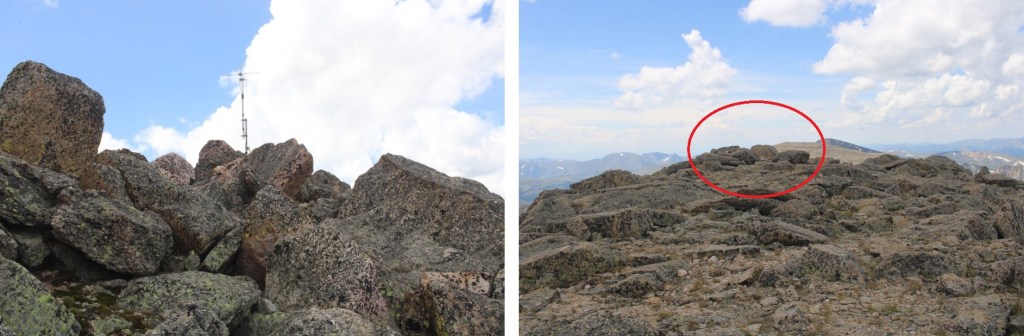
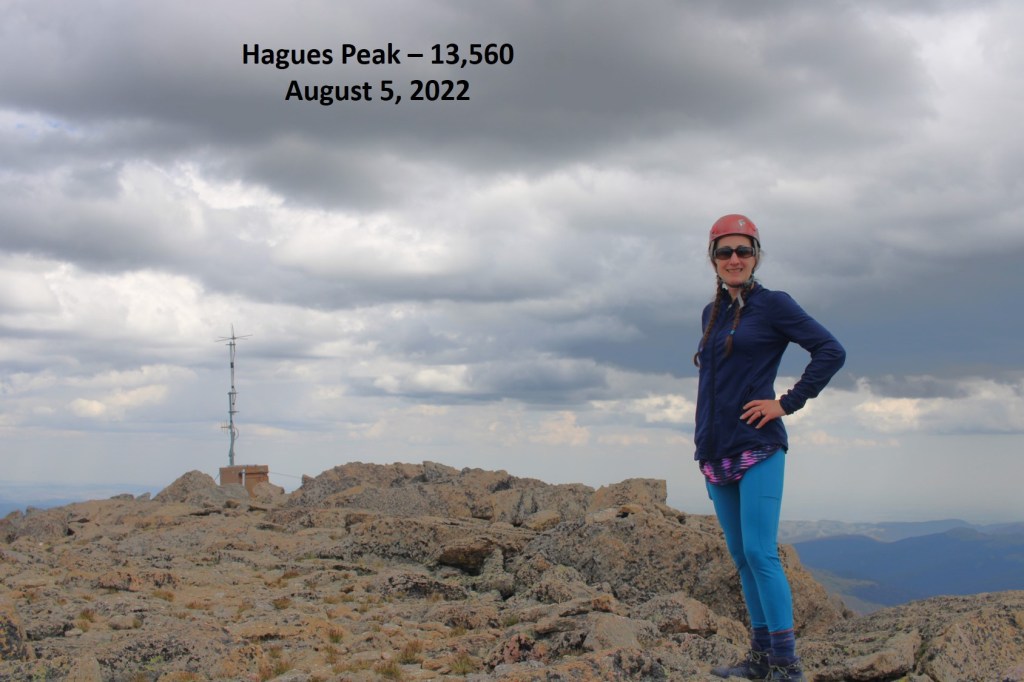
I summited Hagues Peak at 12:25pm
Hauges Peak:
There were several benchmarks/elevation markers, and another summit tube (full of various loose pieces of paper, so I didn’t bother signing one).
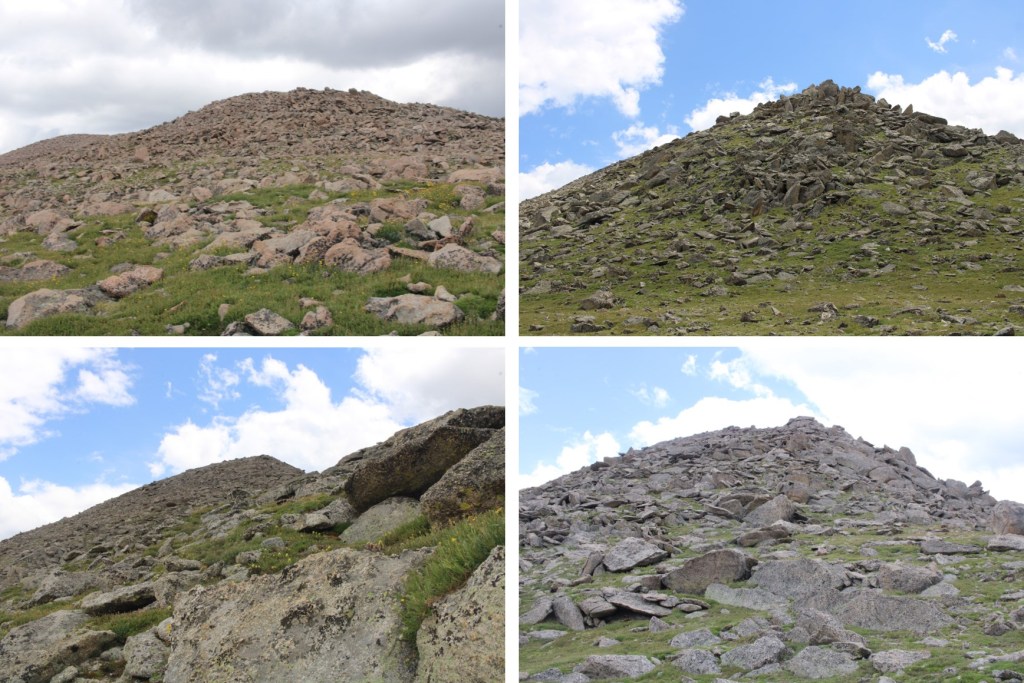
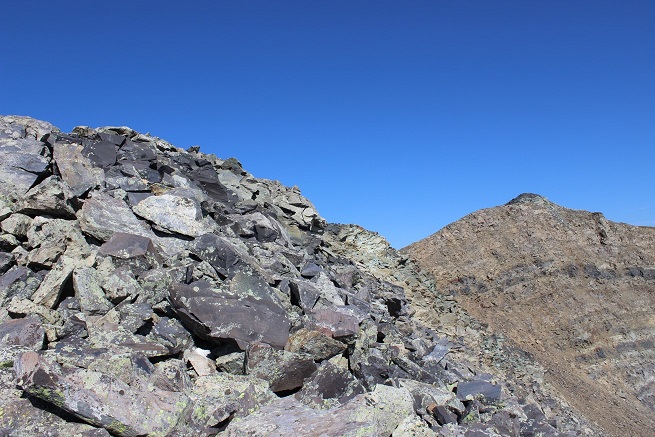
Next on the agenda for the day was Mummy Mountain. I turned and headed back down the ridge the way I’d summited, and then crossed PT 13302, and headed up Mummy Mountain. Here’s my overall route
And some step by step pictures
The terrain became rocky near the top, but this all remained class 2
I summited Mummy Mountain at 2pm
Mummy Mountain:
The weather had held out so far, but on the summit of Mummy Mountain I heard my first clap of thunder in the distance, and wanted to get back down to treeline as soon as possible. I followed the ridge southeast on class 2 terrain.
I aimed for the drainage, and followed it until I made it back to the Black Canyon Trail
I followed the Black Canyon Trail North until the junction with the Lawn Lake Trail
There I took the Lawn Lake Trail back to the trailhead. It rained the entire way. Not the fun, misty rain, but buckets of large water droplets. The sky thundered all around, after large flashes of lightning.
I made it back to my truck at 5:30pm, making this a 24.7 mile hike with 6931’ of elevation gain in 13 hours.
Please note, my stats are off. This summit took some route finding, and additional miles/elevation gain. Your numbers should be lower.
I’ve been going crazy for about a month. It was May 21, while we were getting 2 feet of snow during a spring storm, when I went online to check some summits for an upcoming trip. It was then I noticed I no longer had 200 bicentennials, but 199. I panicked! And of course, did some research. It was then I noticed we now had a new bicentennial, PT 13656. I’d summited what I’d thought were all the Bicentennials last September, and spent the next 7 months writing a book about my journey, which was published May 8th. I knew my completion date still stood because I’d completed the Bicentennials as listed at the time, but it didn’t feel right marketing my book so soon after the change without completing this peak as well. So I didn’t. Instead, I planned.
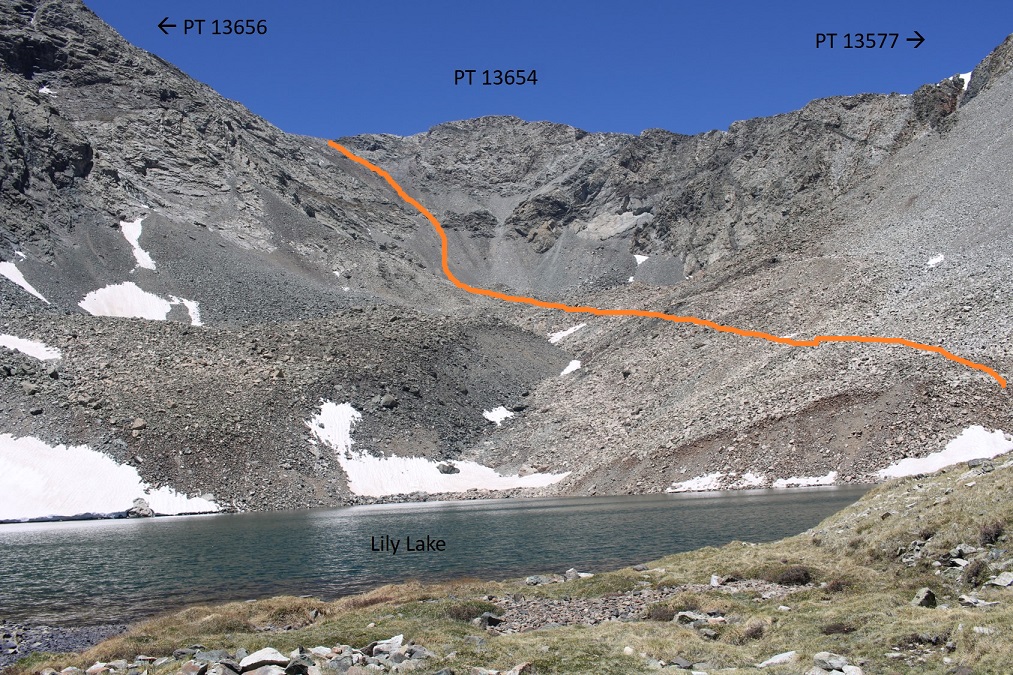
I couldn’t find much information about this peak, so I pulled up my previous trip reports from other peaks in the area, and came up with 3 possibilities of summit options from the Upper Huerfano/Lily Lake trailhead, and upper Lily Lake:
1: Take a line in south to the ridge, which looked like it ‘went’ (It didn’t)
2: Take the gully
3: Summit 13577 and take the ridge to 13656 (I’m glad I didn’t end up needing to do this, as the ridge looked rotten).
I was in Minnesota, hiking its highest point, Eagle Mountain. (Side note: If you’ve ever wanted to experience mosquito swarms of biblical plague proportions, along with questionable foot bridges through swamps teeming with water snakes, this hike is for you!) I was only there because of Charles Mound, the highest point in Illinois. For those of you who know about state high pointing, you know the highest point of Illinois is located on private property, and only open a few days a year. Long story short, I decided to hit this high point instead of PT 13656 because of accessibility issues, but, when I was in Minnesota I checked the weather and did the math, and realized if I drove with a purpose, I’d be able to make it to the Upper Huerfano/Lily Lake trailhead the next day, and could attempt a summit.
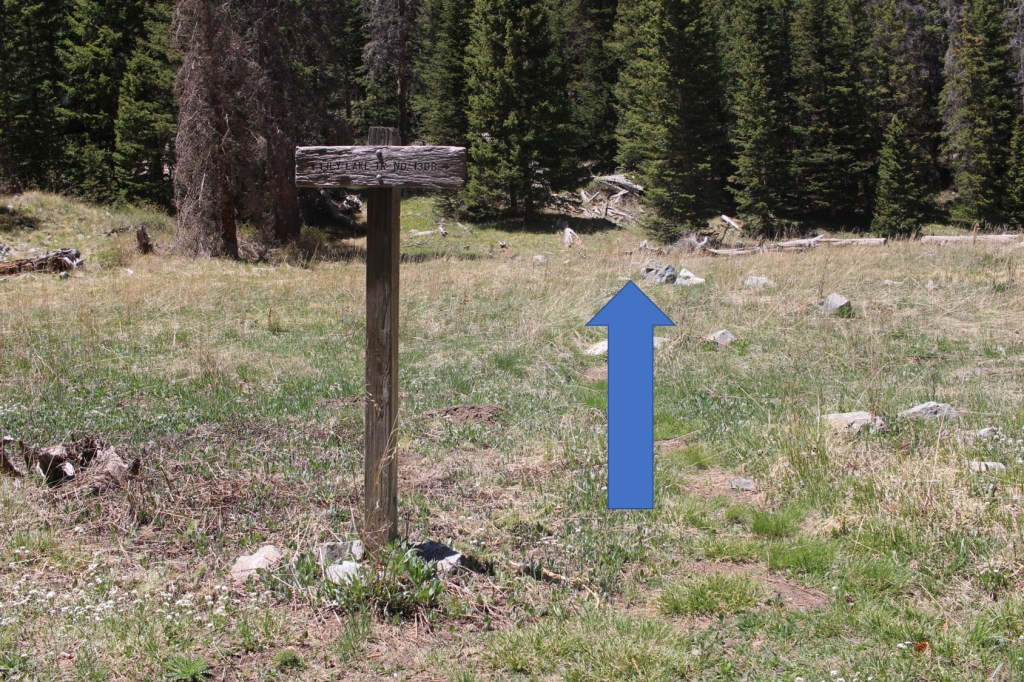
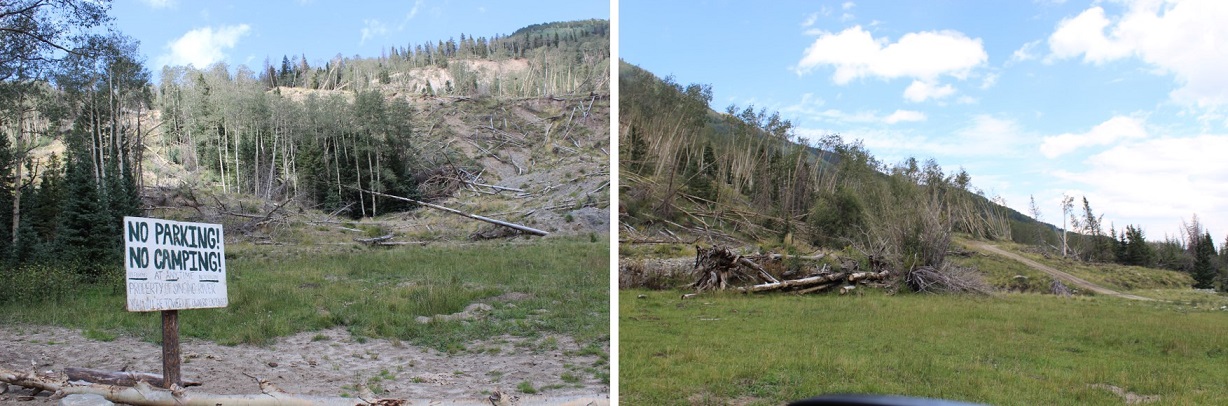
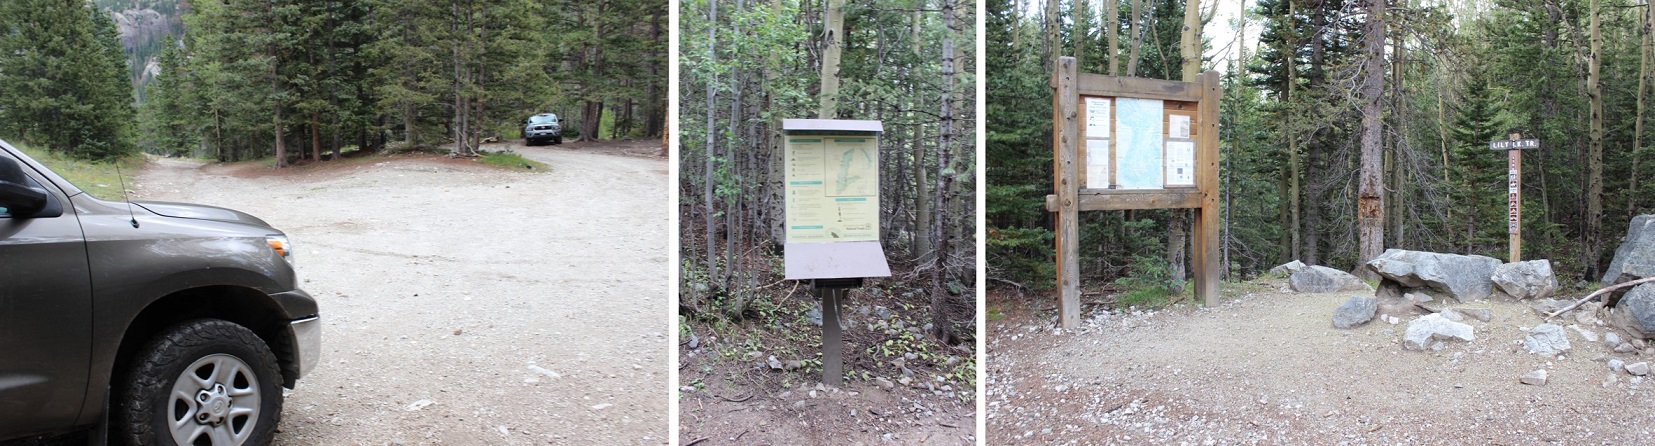
I made it to the trailhead at 4:15am, parking a little lower than necessary because I’d heard there were blowdowns across the road. There were, so this was a great idea. I parked at about 10,200’.
I was on the trail at 4:30am, and followed the 4WD road to the Lily Lake Trailhead. Crews have done a great job clearing downed trees, but there were very few places to pass other vehicles, and honestly, there are still a lot of trees to be cleared.
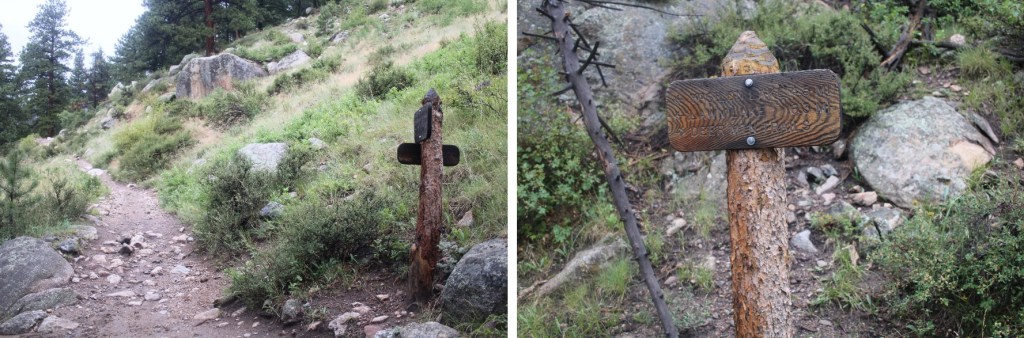
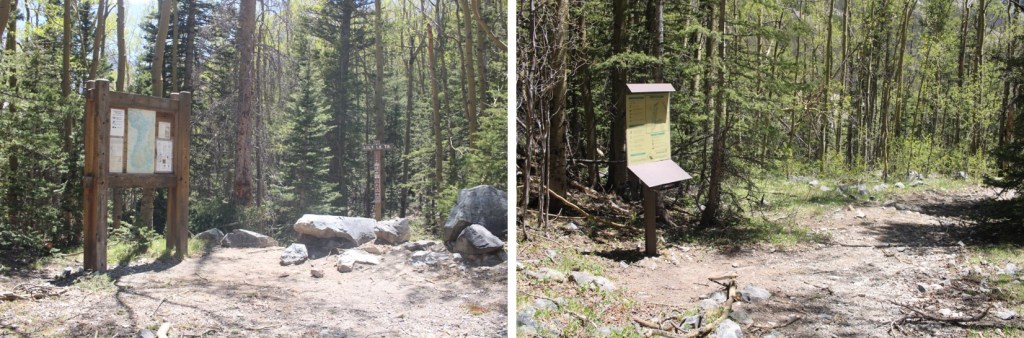
It was about 2.3 miles from where I parked to the trailhead. The parking area as littered with branches, but once the downed trees along the way are cleared, it should be good to go. I signed the trail register, which is in need of more paper, and was on my way.
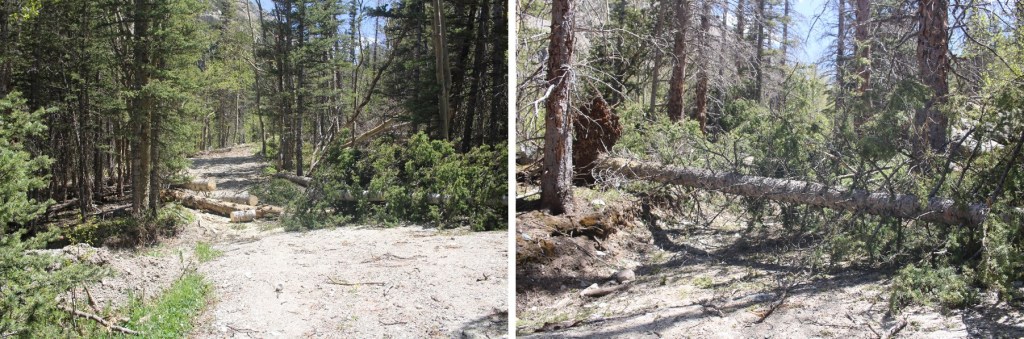
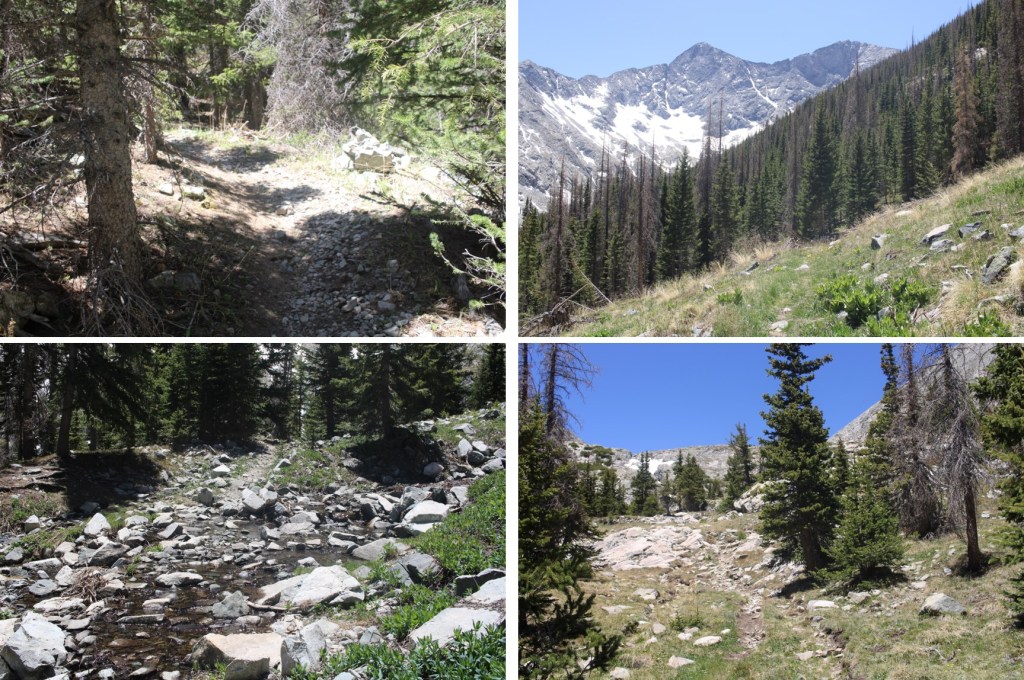
Did I mention the blowdowns? There were quite a few alone the trail as well. They weren’t difficult to navigate around, just a bit annoying. You can see a few here at the beginning
And here are a few more…
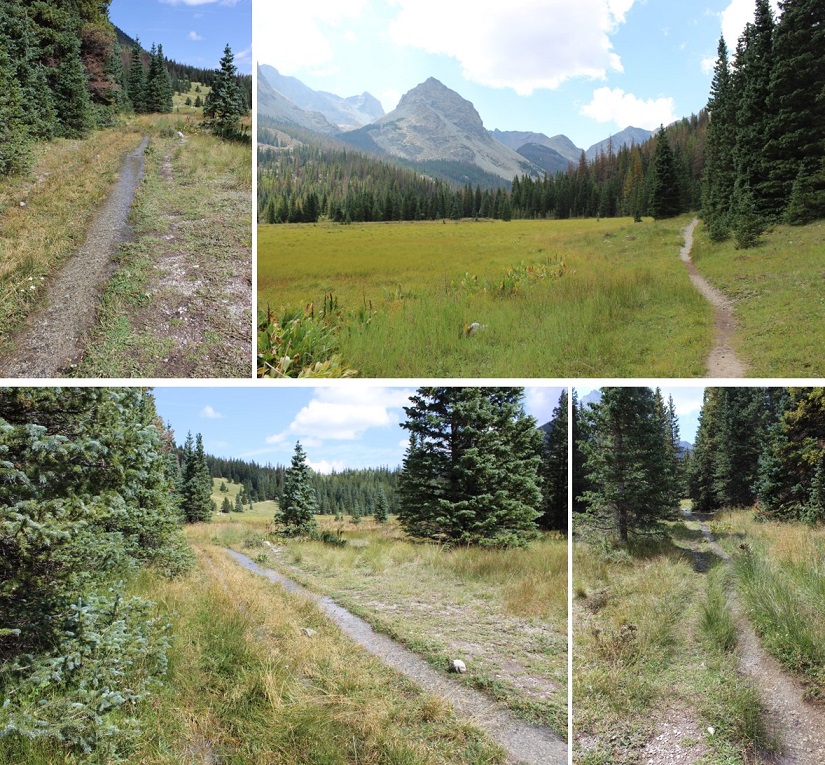
I followed the class 1 (minus the downed trees) trail to the Lily Lake cutoff, and turned right (the path to the left, that goes towards Lindsey, was blocked by a downed tree). This junction was 1.25 miles from the upper trailhead.
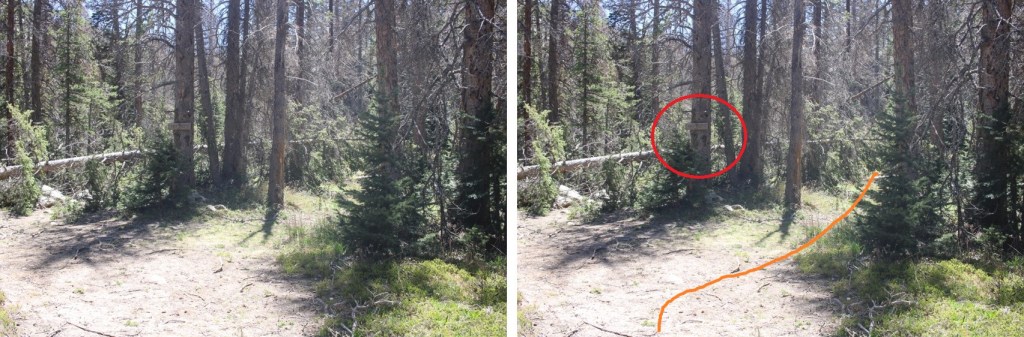
I then followed the trail to another junction, .2 miles away, which is where I made my first mistake of the day. The sign showed the Lily Lake trail as going straight, so that’s what I did, I continued hiking straight. But I should have turned off the trail and headed north at this point. You’d think, because I’ve been on this trail, I would have remembered this, but… I didn’t. I ended up hiking along a path that paralleled the Huerfano river for way too long before noticing my mistake. Here’s some advice: If you see yellow surveyors tape and are heading through avalanche debris but you’re on a trail… you’re on the wrong trail. The good news is they parallel each other, so if you head west, you’ll eventually connect with the correct trail. Here’s the junction and the way you should go:
This trail is easy to follow, and will lead you to Lily Lake
Here’s the final push. There is a trail here, it’s just overgrown.
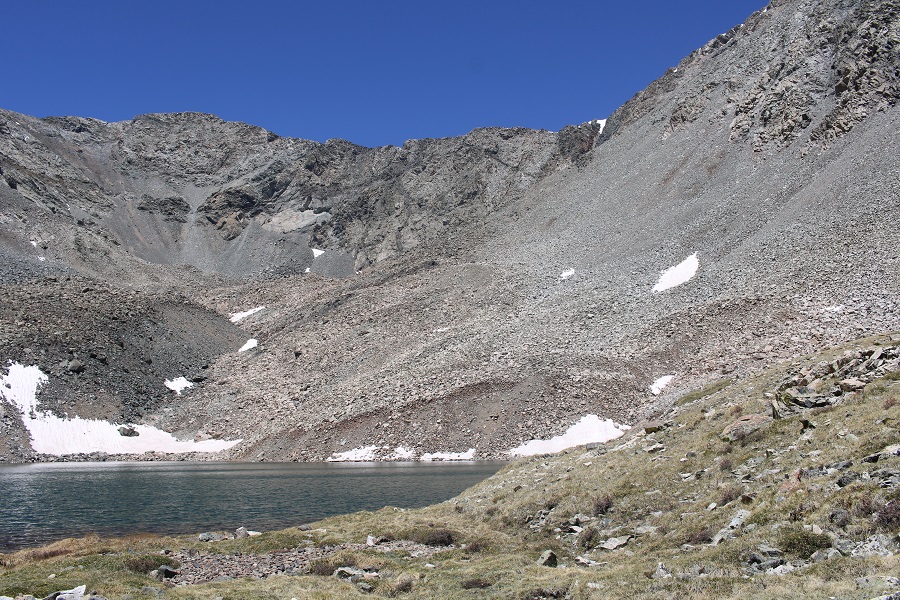
After 4.1 miles of hiking from the upper trailhead I was at Lily Lake, where the trail ended.
Here’s the info you need. This is the route you want to take. Trust me.
Here are some pictures on the way to the upper lake. The rocks aren’t stable, and a lot of them roll, so make sure you watch your step while rock hopping.
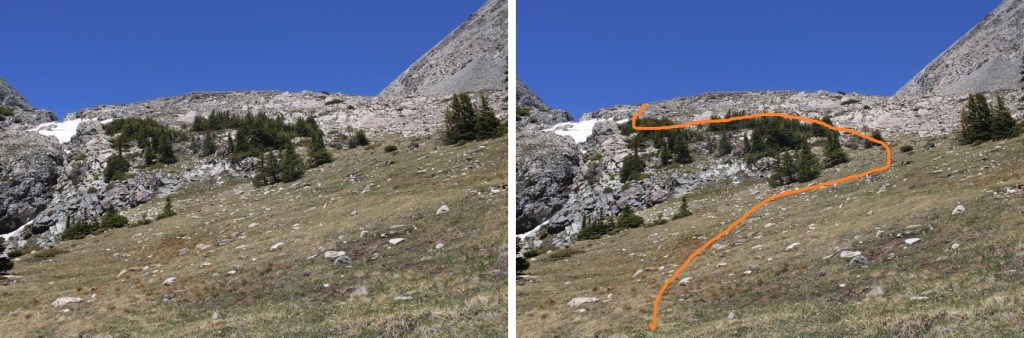
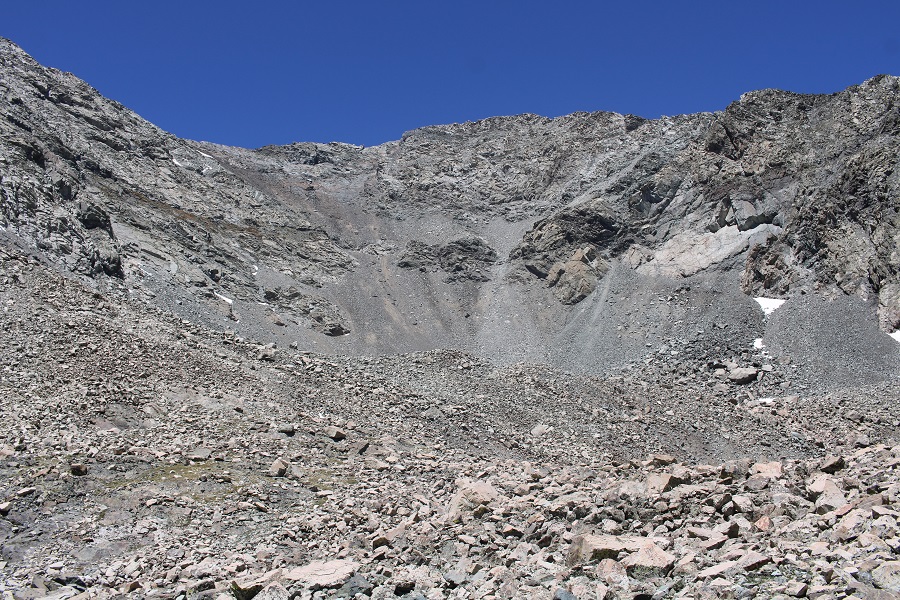
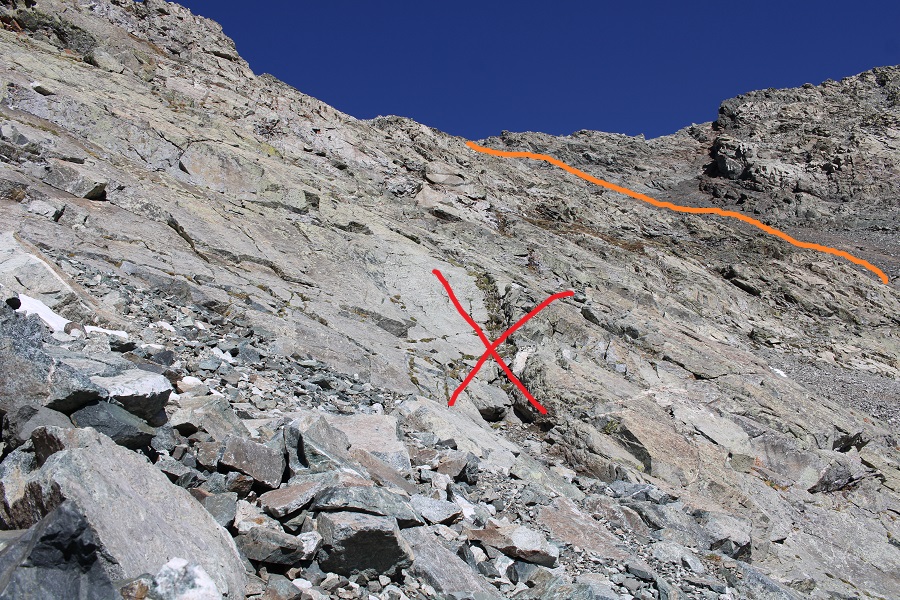
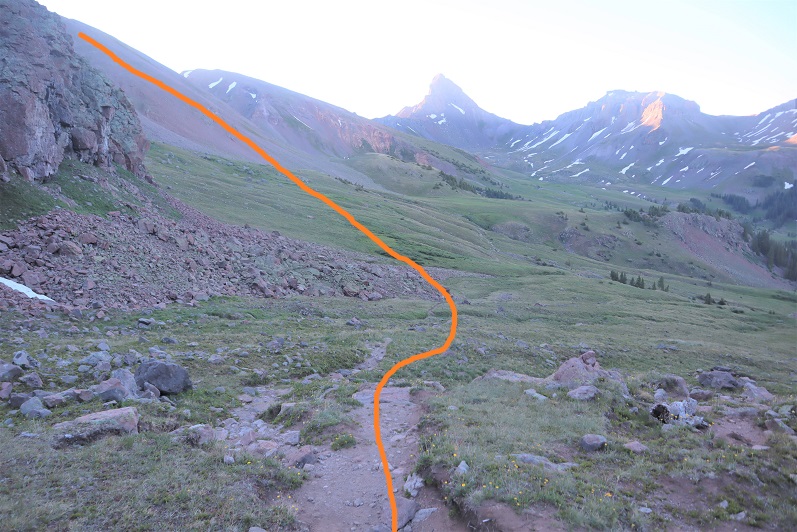
Here’s where I made another mistake. I tried to take a route to the left first, by following a dry couloir and what looked like a line filled with tundra/dirt. This was a bad idea. It started out as class 3, then sustained class 4 (for about 300’). I quickly felt out of my depth as it increased to class 5. I had a helmet, but seriously felt I needed a rope. I got to a place where it was decision time, and decided to descend those 300’ and try a different route. I knew I was close to the ridge, but could not justify the exposure and class difficulty. I reminded myself I had 3 potential routes for this peak, and an event I was speaking at tomorrow talking about managing risk and being a positive mentor to Girl Scouts. I did not feel I could continue on and still remain truthful tomorrow, so I backtracked. Climbing down was much more difficult than climbing up: I had to face the mountain and take it one step at a time. This entire side was sketchy. Please don’t use this route, especially since the gully can be kept at 2+. Here are some pictures of the route you SHOULD NOT TAKE
Instead, here’s what you want to do:
Take the gully! It’s slippery due to the scree, but with microspikes, manageable
I aimed for the 13654/13656 saddle. Once again, slippery scree, but manageable
Here’s a view of that line I was trying to take earlier in the day. The red circle is where I retreated. Once again, don’t take this line!!!
I kept working my way towards the saddle
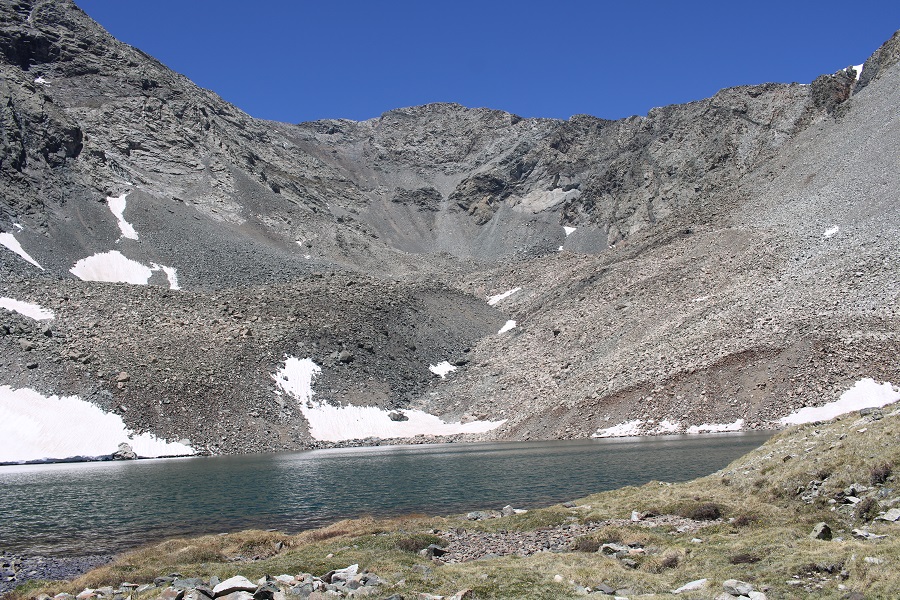
Here’s a view of PT 13656
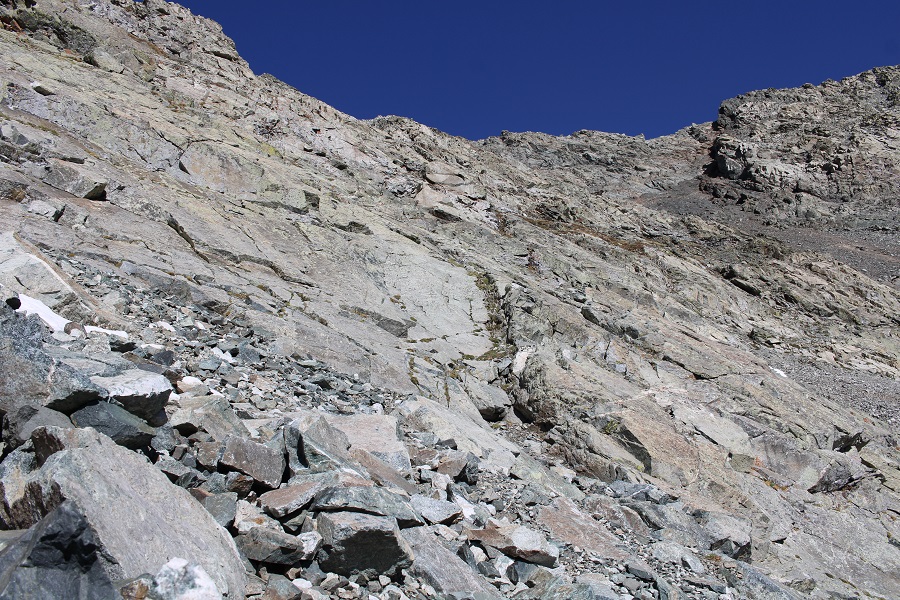
Once at the saddle I turned and followed the ridge southeast. This was all class 3 scrambling. I was able to stick to the ridge the entire time. Here are some pictures of the ridge
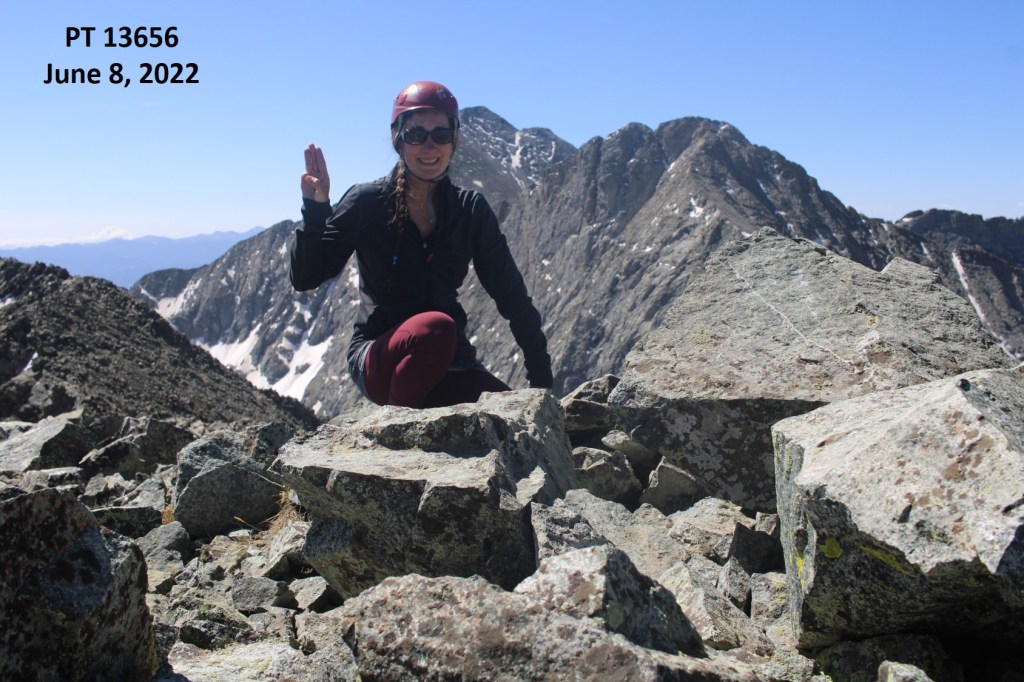
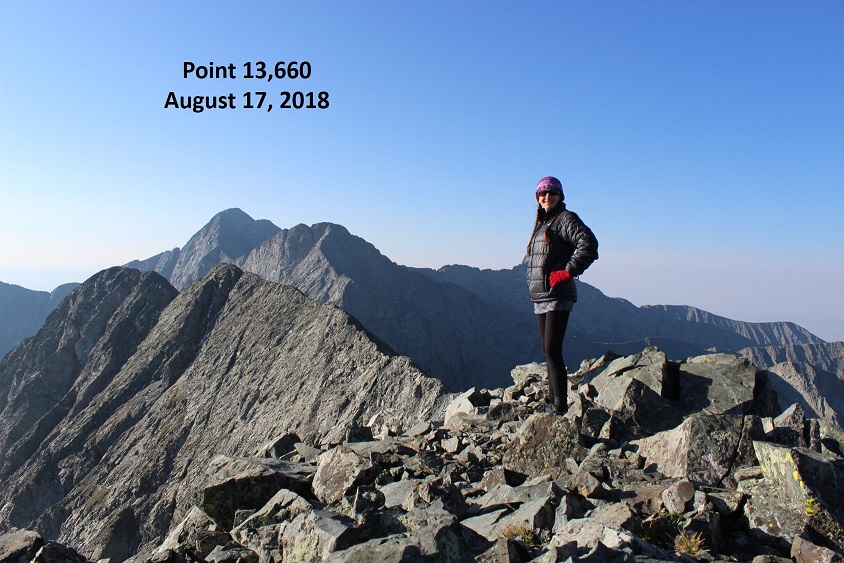
I summited PT 13656 at 10:15am.
I spent a lot of time on that summit, making sure the true summit wasn’t further to the southeast. I pulled up Peakbagger (not yet updated), CalTopo, my Compass (which read 13660) and several other sites. In the end, I determined this was the true peak, and left a summit register.
PT 13656:
The route back was now very straightforward. I worked my back down the ridge towards the saddle
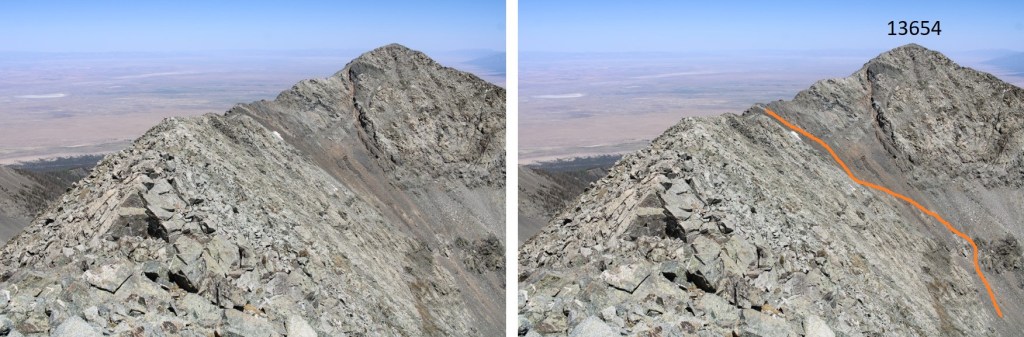
Oh, and the route up to 13654 looks sketchy…
And then scree surfed back to Lily Lake. Once again, this is very loose scree, and I wore microspikes. I consistently had 6 inches of scree sliding beneath me, and as long as I kept up with it, I kept a good pace.
Here’s my route back to the lake
This is where I picked back up with the trail
Following the route back was easy, except for all those blowdowns.
I made it back to my truck at 2:30pm, making this a 16 mile hike with 4031’ of elevation gain and a ton of route finding in 10 hours. I hope this trip report was helpful, and I’m sure you can do this route faster! It felt so good to check this one off the list!!!
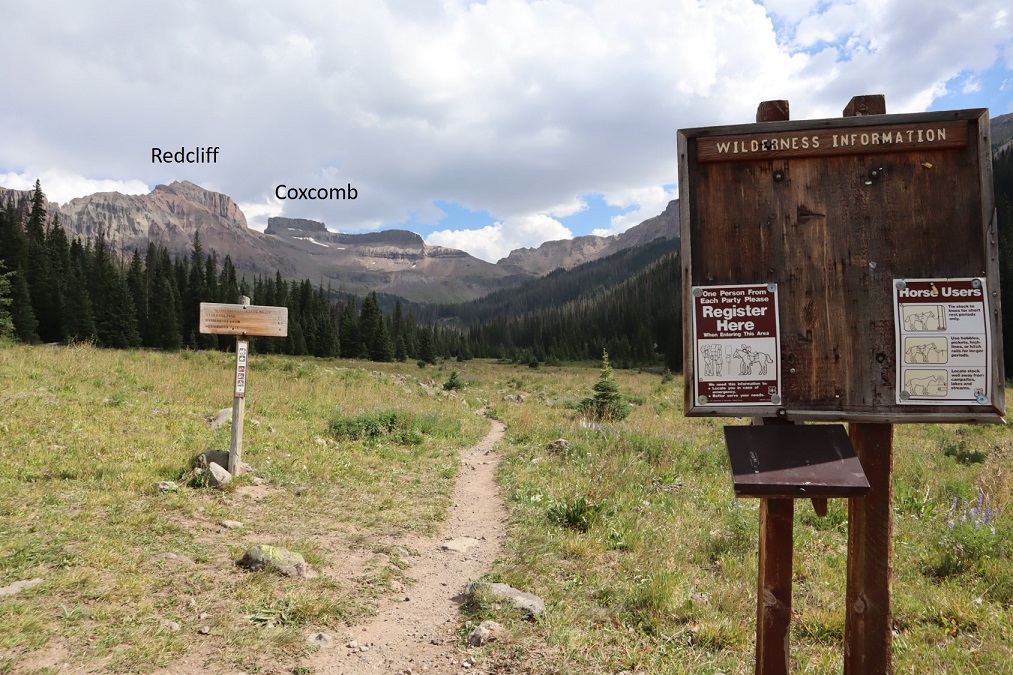
I’ve been up in my head about this peak since my failed attempt last month. Last time I’d turned around because I wasn’t 100% sure I was in the right area and I was afraid of cliffing out. All of the information I had on Coxcomb was conflicting (some called areas class 3 and others class 5, etc.) and none of the pictures I had from others lined up with what I was seeing. After going back home and researching more I realized I had been in the correct area, and now I was ready to try again.
I drove to the Wetterhorn Trailhead and was surprised to see no one else parked in the lot. The last time I was here there were several other vehicles. I got out, walked around, and signed the trail register so I wouldn’t need to in the morning. It was cloudy and windy but on the plus side there were no mosquitoes.
I tried to pump myself up for the hike tomorrow, but was still having trouble mentally. I told myself to just enjoy the hike and focus on learning something, even if I didn’t summit (again). I got out the book I’m (still) reading: Death in Yosemite, and noted I was still on the ‘death while climbing’ chapter. It may sound macabre, but reading about how other, more experienced climbers have died while climbing puts climbing into perspective for me: gravity never sleeps, and I can never be too careful (which is another reason why I turned around last time). I like to review potential mistakes so I don’t make them.
A group of three (shirtless) guys in their early 20s walked by, carrying gear and pads. I stopped them to see where they were headed and they told me they were just out bouldering. Hmmmm… I didn’t think the area was good for bouldering, but I wished them luck.
I made sure to get to bed early, and wouldn’t you know it, I heard a mouse moving around under/inside my truck as I was trying to sleep. I guess those mothballs don’t work. Also, I believe it was the same mouse as last week: it’s most likely been living in my truck, building a nest, etc. I was going to need to get some traps asap.
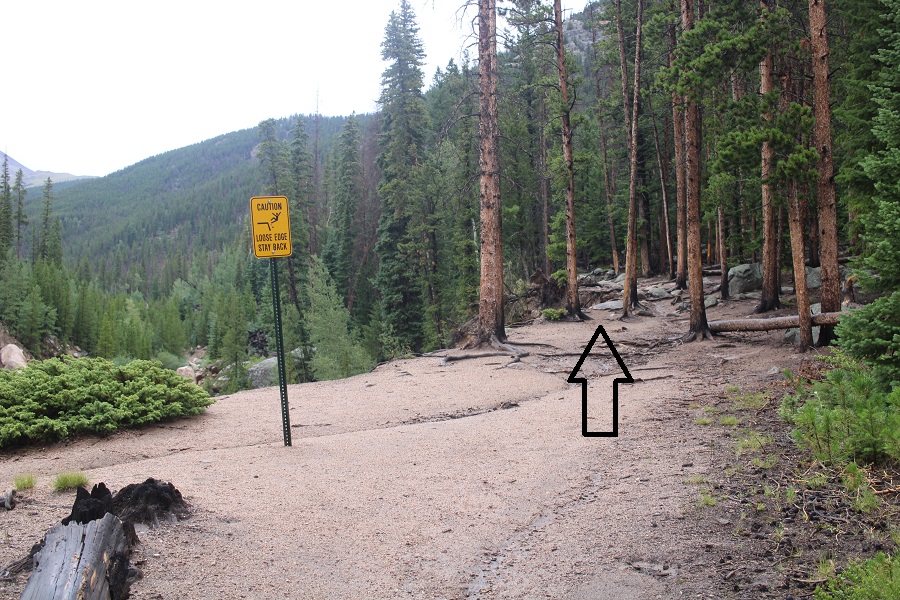
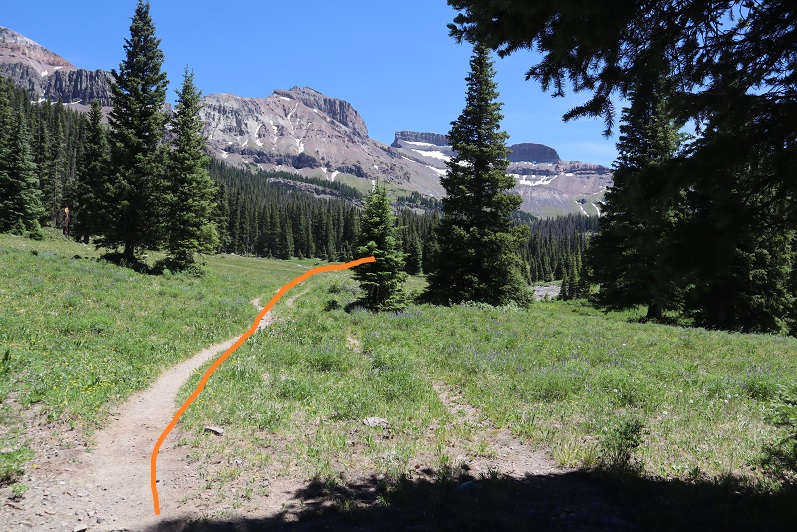
I woke up and was on the trail at 4:30am, taking the same route as last time. There’s an obvious trailhead with a register.
I followed the class 1 trail for 3.4 miles up to the top of the pass, and then lost 450’ of elevation as I descended into the basin.
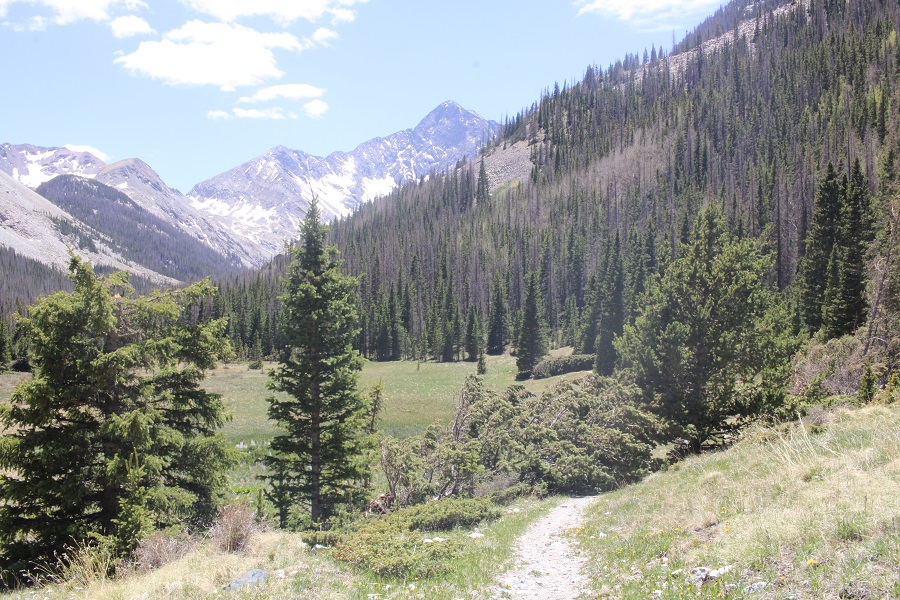
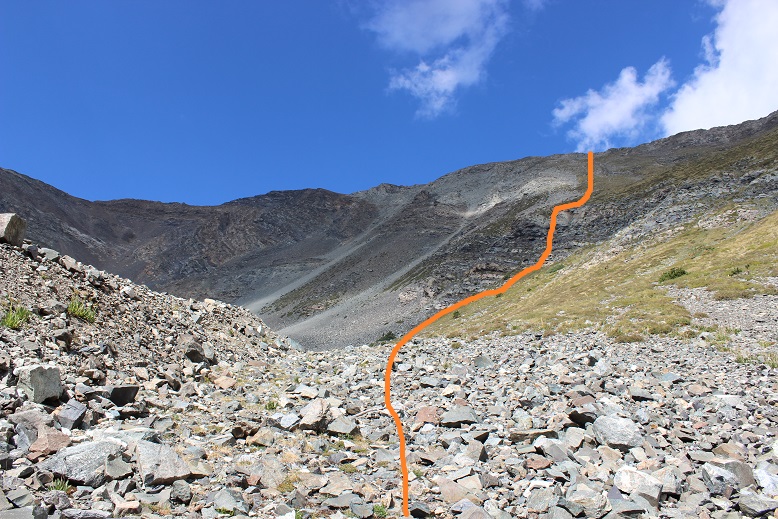
I’ve heard of others who’ve stayed high here instead of going into the basin, and from my perspective, the rubble and talus and scree aren’t worth it: I’m ok losing a little elevation, and I’m actually convinced it saves time. Once in the basin I left the trail, crossed the basin and followed the ridge up to the base of Coxcomb
There was a little bit of scrambling to get to the base
Here’s an overall view of the route up
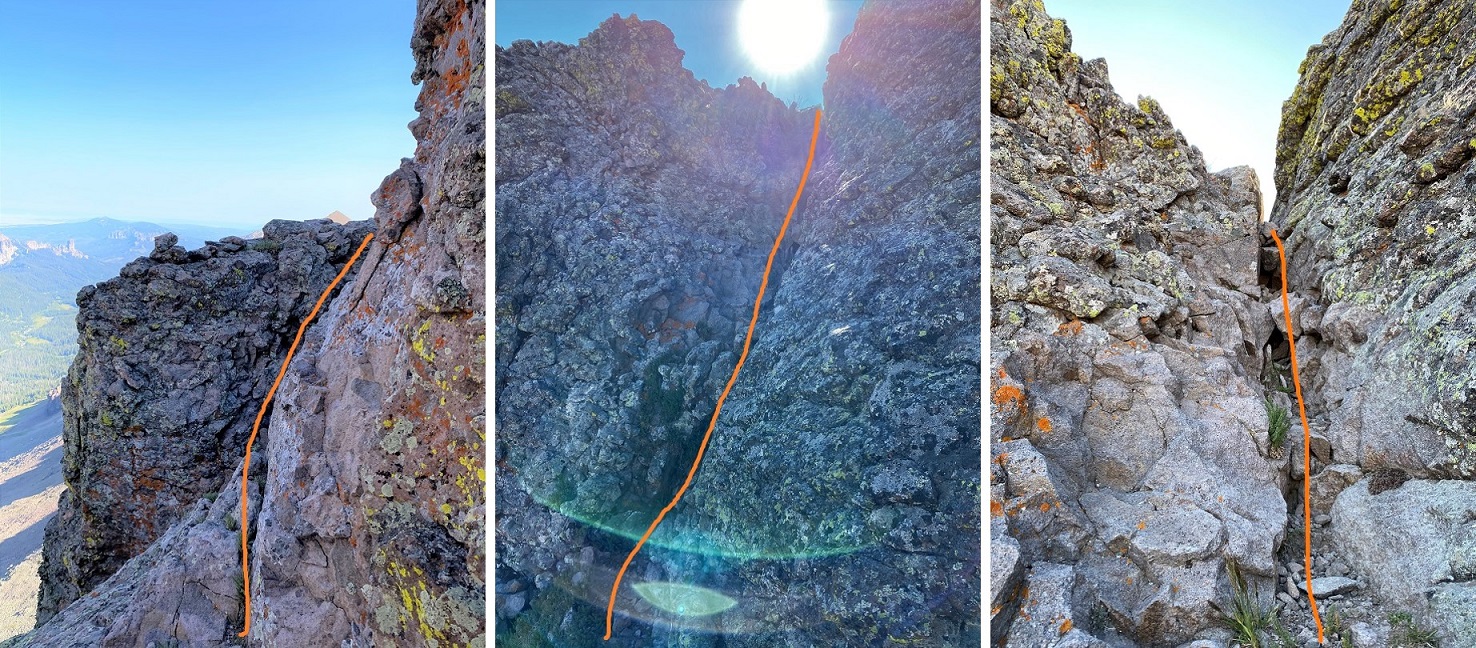
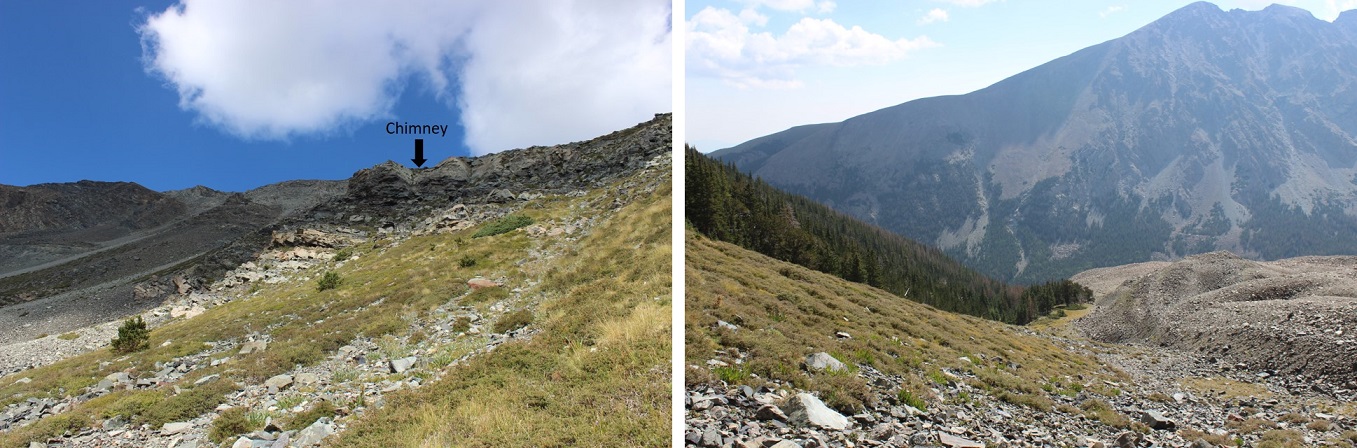
Once there I was happy to see the rocks I’d placed in the chimney were still where I’d put them. I sat down, put on my helmet, and mentally prepared myself to begin. Here’s the first chimney
I made my way over to the chimney and tried to climb up. No dice. I love to boulder, but I haven’t been since COVID started due to the gym being closed and now requiring masks (say what you will, but I cannot work out with a mask on. I respect the rules however, and thus choose not to go). All this to say I’m a little rusty when it comes to my bouldering skills.
Ok, so if I couldn’t just climb up I’d do what I did last time: I took off my pack, attached a rope to the pack and my harness, and tried climbing up without a pack. The rock was cold and my fingers were stiff and I tried and tried but was unable to climb up the chimney. What was wrong? I’d been able to do it last time! Ugh. That was when I realized last time I’d worn climbing shoes. I guess they did make a difference. Oh well, I was just going to need to get creative. I tried once again, this time angling myself sideways, putting my thigh into a crack, shimmying around, and pressing into the side of the rock with my inner thigh and hoisting myself up. This took me halfway up the chimney. From there I was able to hoist myself up and use my arms to do the rest. I made it to the top of the chimney, hauled up my gear, and prepared for the second part for the climb. The red circle is where I ‘sat’
The next section was easy class 3. I re-coiled my rope, put on my pack, and made my way to the base of the next chimney
This is where I’d gotten stuck last time. This time however, I was sure I was in the correct spot. I initially tried to climb this with my pack on, realized that wasn’t going to happen (the pack was too heavy and put me off balance) and decided to try climbing this chimney without my pack. The red circle is where I took off my pack.
Here’s what the climb looks like from there. Knowing I wouldn’t be able to climb this with my gear, but also knowing I needed my gear to descend I decided to once again tie the rope to my harness and loop it around my pack. I was very careful to make sure my rope didn’t get tangled, and I had an exit strategy in case the whole ‘rope around the pack thing’ didn’t work in this area. I wouldn’t recommend this tactic unless you put a lot of thought and planning into its execution, as so many things can go wrong in this scenario. Here’s a look at the beginning of the route
I made it halfway up and stopped.
At the halfway point I hauled up my gear to where I was positioned. I figured this would lessen the chances of my pack getting stuck when I hauled it all the way up, and also gave me a chance to test whether or not hauling the pack would work in an area where I still felt I could downclimb safely. This tactic proved successful, so I continued on.
From the halfway point, here’s looking up at the rest of the route
This is a class 5.2 chimney that requires some stemming/fun/creative moves to ascend. At one point I even used a crack climbing technique to get a good hold with my arm vertically and hoist myself up. This is the point I wasn’t able to make it past last time, but after talking with others who’d successfully climbed this area I felt confident I’d be able to as well. There are some sketchy moves, but plenty of opportunities for stemming/hand holds to make the ascent doable. I was terrified but just told myself not to look down, to focus ahead, and soon enough I’d made it out of the chimney. Here’s the route I took
Once at the top of the chimney I turned and hauled up my gear, feeling pretty pleased with myself for making it this far. I recoiled my rope and put it in my pack.
I’ve heard it’s class 3 after this point to exit the chimney, but it felt class 2 to me
Last time I’d been worried I was in the wrong gully. Since I hike solo I’m extra careful, and probably turn back more often than I should when uncomfortable. One of the reasons I’d turned back here last time was I was worried if I ascended the wrong gully I’d be cliffed out. It turns out that wouldn’t have been the case, so if you’re worried about cliffing out in this area don’t be: all chimneys exit in the same area, and it’s solid. Here’s looking back
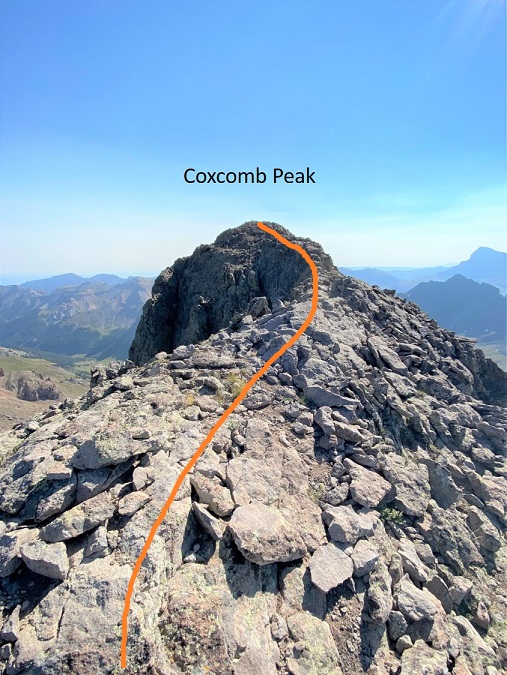
And forward towards the summit of Coxcomb
There was still one more obstacle before reaching the summit: a 25 foot notch I’d need to rappel before upclimbing to the summit.
I got out my rope, attached it to my gear and the anchor (which looked solid so I didn’t replace the webbing) and rappelled down into the notch. This is committing because it’s class 5.6 to climb back up. I’m not a climber, and I knew I wouldn’t be able to upclimb this section on my own: forward was the only way from here on out. This last bit included rappelling down, then climbing out of the notch
Here’s a look back up at this section from inside the notch
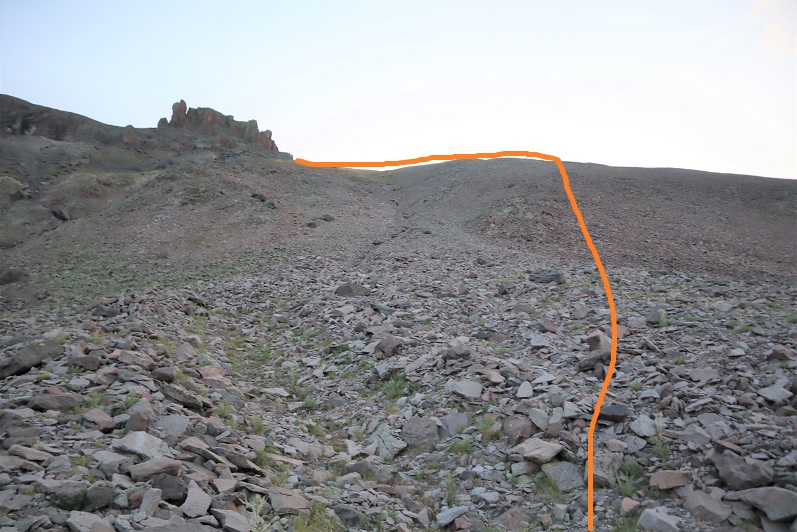
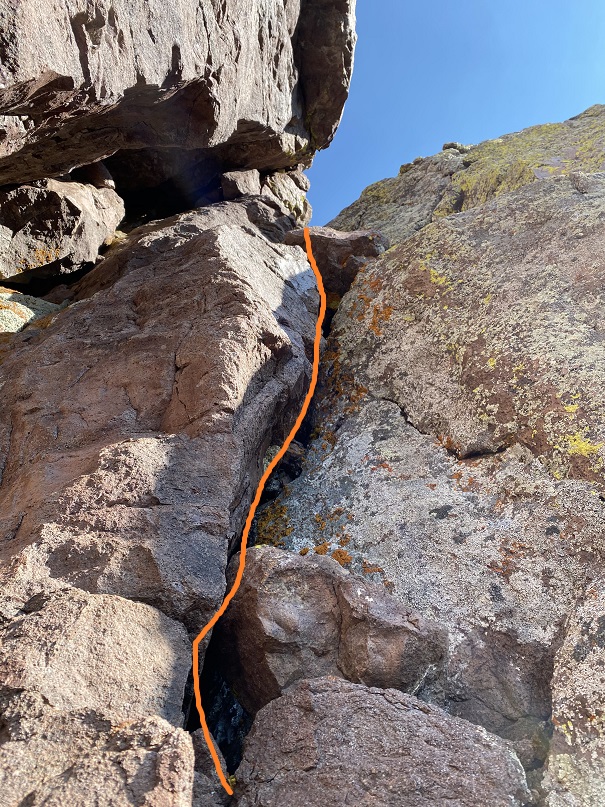
I once again retrieved and recoiled my rope, and got ready for the final pitch to the summit. I went north, following the cairns, and climbed up an easy chimney
From there it was an easy walk to the summit
I summited Coxcomb Peak at 9:30am. There was a summit register in a powerade bottle that should probably be replaced. I didn’t open it, but it looked like the papers were smushed in there.
Coxcomb:
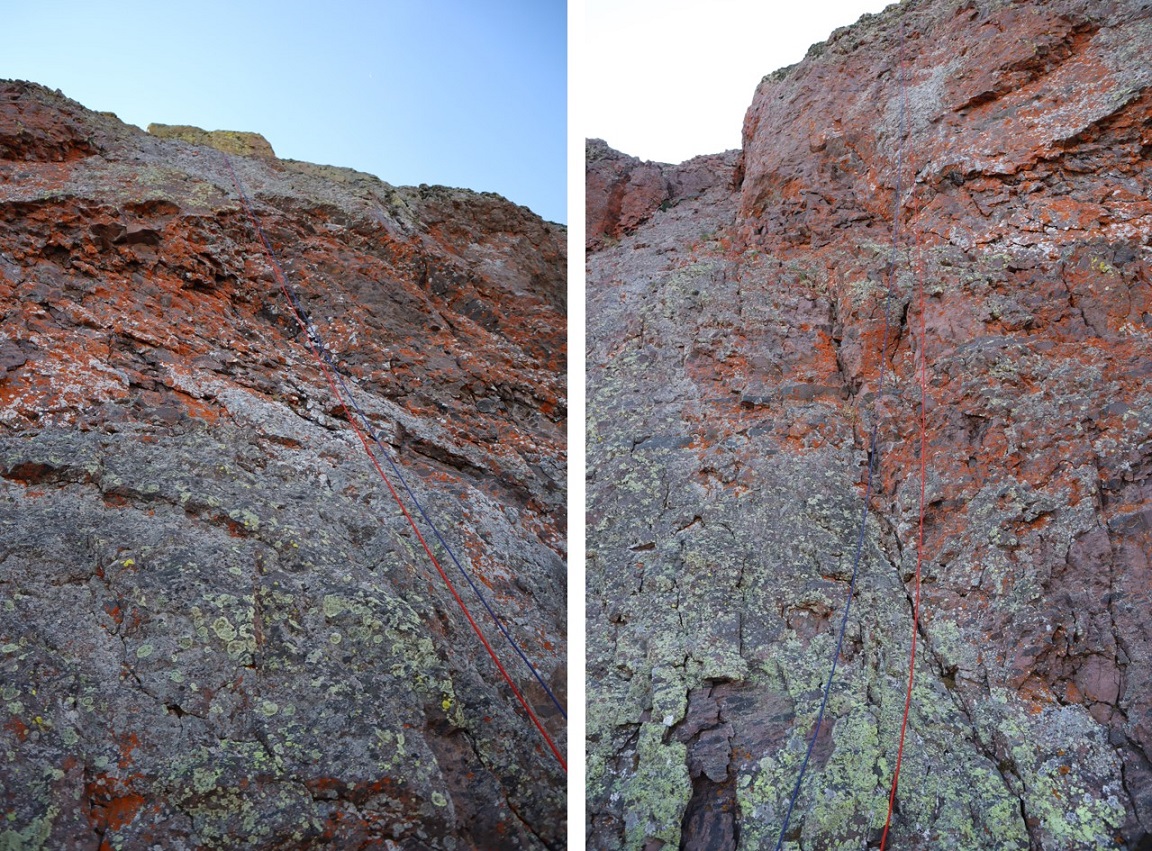
I was thrilled I’d made it this far, but I still had the 170’ rappel to accomplish. I went to work, looking for the webbing and anchor set up. It was easy to find and still looked good, so I decided to use what was already there.
I tied my two ropes together with a double fisherman’s knot and threw my ropes. It was quite windy, and the wind was coming at me, so it took a couple of tries to make sure the ropes made it all the way to the ground. This was quite frustrating, but worth the extra effort to make sure it was done correctly. Next, I tested the rope, watched my knot to make sure it was secure, unclipped my safety, and started the rappel. Everything went smoothly. I even noticed 2 more anchors set up below where I’d rappelled, so if you brought just one rope it would have been enough (the webbing looked old though, and should probably be replaced).
My feet touched the ground and I gave out a “Woot!” I was so excited! I’d done it!!! I’d solo’d Coxcomb Peak, a peak I wasn’t sure I’d ever be able to climb, let alone solo. I gave myself a minute to let it sink in, and then went about retrieving my ropes.
I had two ropes, one purple, one orange. I always pull the darker one. I pulled the purple one and was thrilled when it moved. I pulled it about 10 feet when it stopped. Hmmm. Ok, maybe it got stuck? So I pulled the orange rope back a few feet, and then tried the purple one again. Once again, it got stuck. I whipped the ropes and they moved as far as I could see, so one of the ropes must have been stuck up at the very top. I spent the next hour doing everything I could think of to retrieve those ropes, to no avail. In the end I made the very difficult decision to leave them there. I did put a note in the trail register on the way down and I posted to some climbing social media sites about their whereabouts, so at this point I’m fairly confident they’ve been retrieved. It hurt to leave them there, not only because of LNT, but also because this is the first time I’ve used them (besides the initial breaking in).
Here’s the rappel
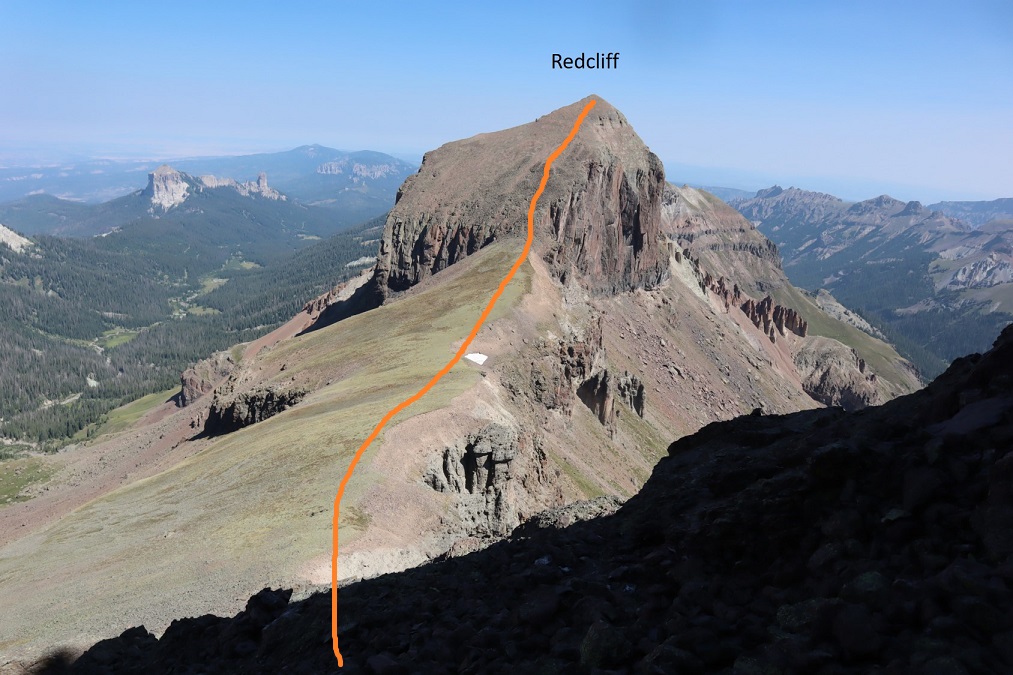
I sighed heavily and turned to hike up Redcliff.
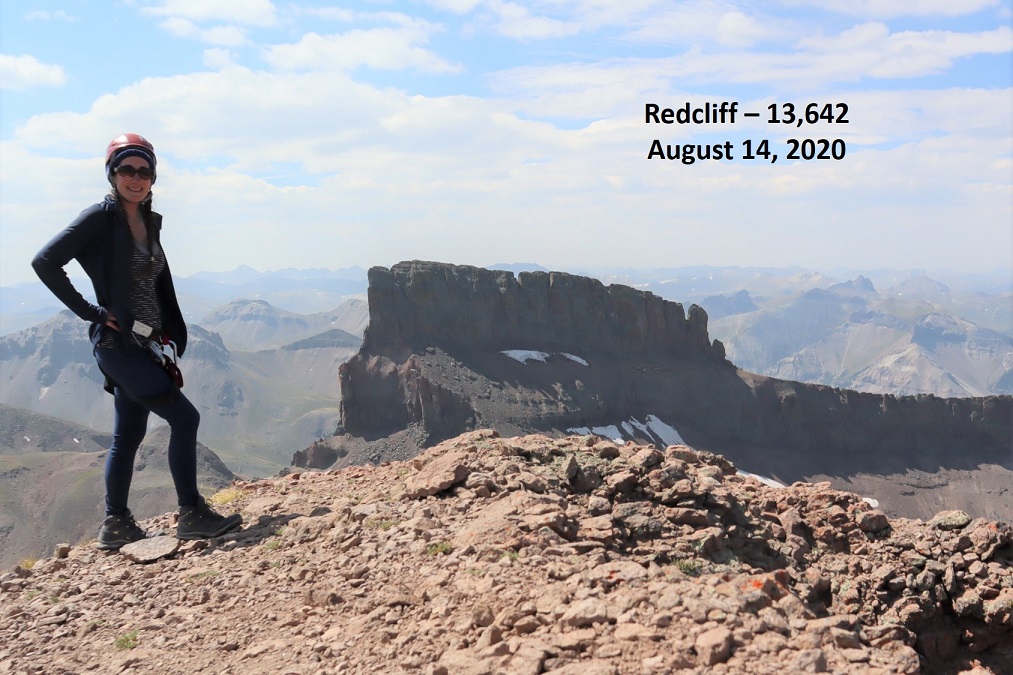
This was a very short, simple, and straightforward climb. I summited Redcliff at 11:15am
Redcliff:
Here’s looking back at Coxcomb. I’ve circled the notch that needs to be rappelled down and then climbed back up
I turned and headed back to the Coxcomb/Redcliff saddle, and then descended west into the basin
There wasn’t a well stablished trail here, but the route was easy enough to figure out. I just aimed for the visible class 1 trail below I’d taken on my way in this morning
Here’s looking back at the route from the saddle to the trail
And a look at the hike out
I made it back to the now full trailhead and my truck at 1:10pm, making this a 13.24 mile hike with 4654’ of elevation gain in 8 hours, 40 minutes.
I was thrilled with today’s success, and even though I’d lost two new climbing ropes I drove to the next trailhead on a bit of a high.
The weather changed my plans at the last minute, so the hike I’d intended to take in the Sawatch range didn’t happen today. I’m on a time crunch when it comes to my Friday hikes for the next few weeks, so I needed a hike I could complete and still be home in the early afternoon. After a quick weather search, California Peak looked promising. Plus, it has a bunch of other 13ers close to it so I could make the hike longer if I wanted… I just needed to back to my truck before noon.
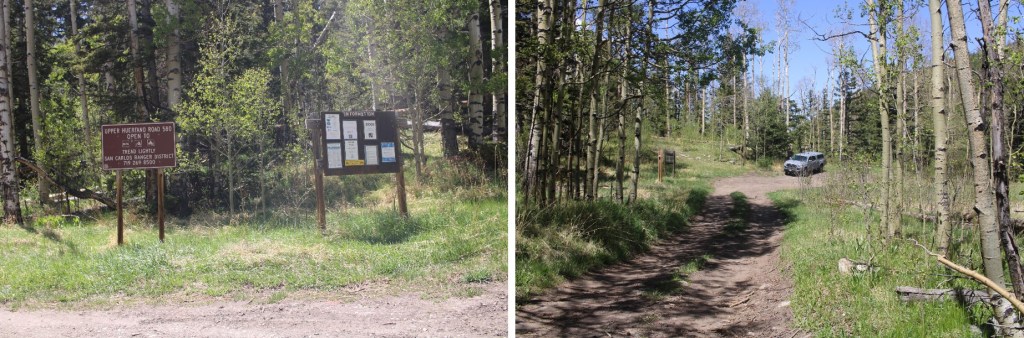
I made it to the trailhead at 4am without passing a single vehicle on the 69. Oh, and that forest road 580 in seems to take forever!!! I’m always surprised this is labeled as a rough 2WD road. There are several spots I’d love to have 4WD well before the 2WD parking lot (which you aren’t allowed to park at BTW). This is my third time on this road, and the third time with lots of mud puddles…
4WD Road:
I mean, you could probably do it in a 2WD if you have high clearance and you’re a great driver, but why chance it? And that last hill before the 2WD parking lot? 4WD is totally necessary! Most people want to park in the avalanche area, but these signs tell you it’s not advised:
The 4WD parking lot has enough room for about 10 vehicles. There were 2 others there when I arrived (and 3 when I left). I got out my gear and turned on my new tracking app. I’m not a fan of GPX routes, but think it’d be careless not to have one in case it’s needed. There isn’t a GPX file for the trail I wanted to take, so I decided to try and make one. I’ve never done that kind of thing before, but I figured maybe I could make one and help someone out since a lot of this hike is off trail. I started the track, signed the trail register, and was on the trail at 4:15am.
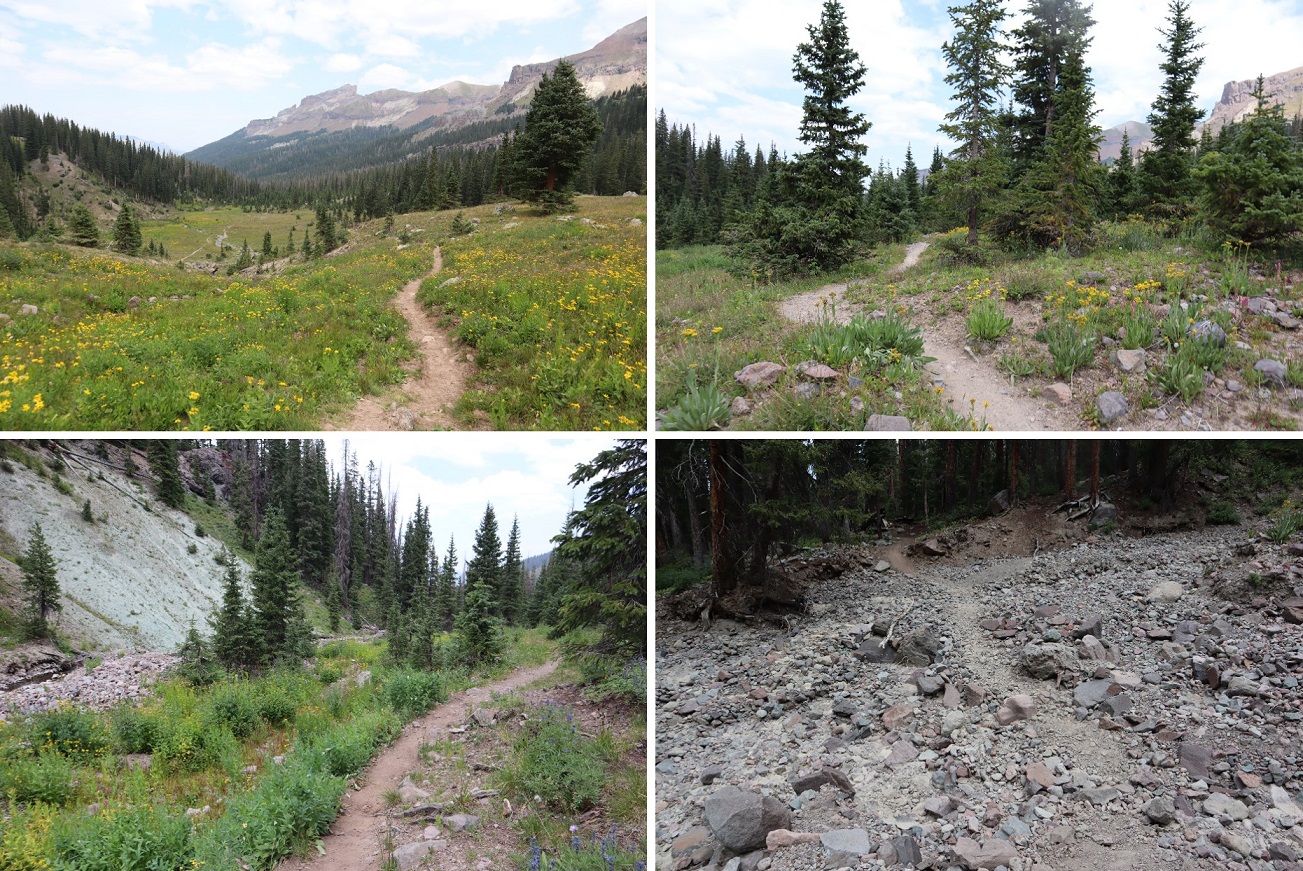
The trail was wet. The sky was clear and I could see the stars, but it had obviously rained (hard) during the night. The trail was pretty much a small river, and all the grass and plants lining the trail were wet, making my pants wet when I brushed them as I walked by (I should have worn my hiking pants instead of my yoga pants). I accidentally stepped in the water a few times and was glad I had my waterproof Salomon’s on (so only my socks got wet above my shoes, but my feet remained dry).
Even though it was a clear night water was raining from the sky too: as I passed trees startled birds flew out of the trees, causing water droplets to rain down on me from above. Since the ground was wet I looked for animal tracks and didn’t see any, so I didn’t expect to see any large wildlife before sunrise. I did hear a rather large animal dash through the creek to the left of me, but it was obviously running away from me. I’m guessing it was a deer. I did see a cool mushroom on the side of the trail too
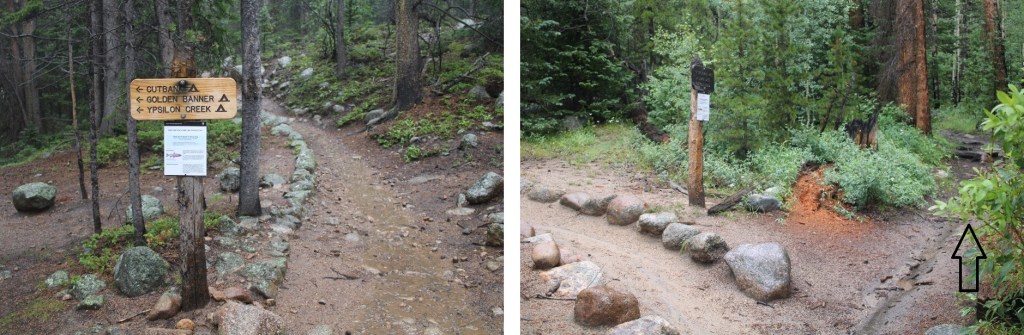
I missed the first junction that’s supposed to be a mile in, letting me know to turn right, but I’ve missed it every time I’ve taken this trail, so either the signs missing or I take the wrong path, which is a possibility. The trail follows the Huerfano creek but since it overflows onto trails there are several side trails. This is also a heavily used snow shoeing area, so there are tons of paths in and out of the trees. The good news is I saw the second sign and turned right, heading up the hill towards Lily Lake. I was hiking a bit too fast (I wanted to be at the lake around sunrise so I could see the lake) so I slowed down a bit. Just before the lake there was a small waterfall
I passed it to the right, and headed up a hill
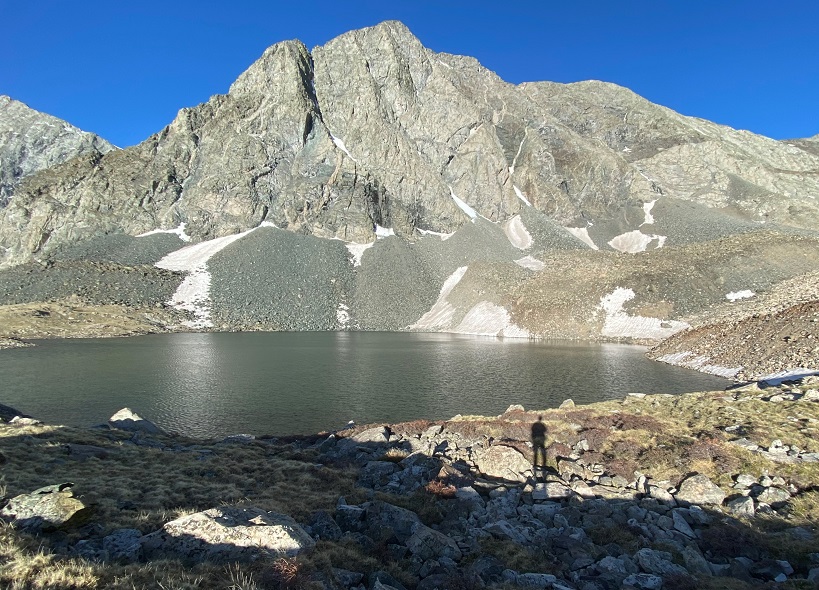
And came to Lily Lake
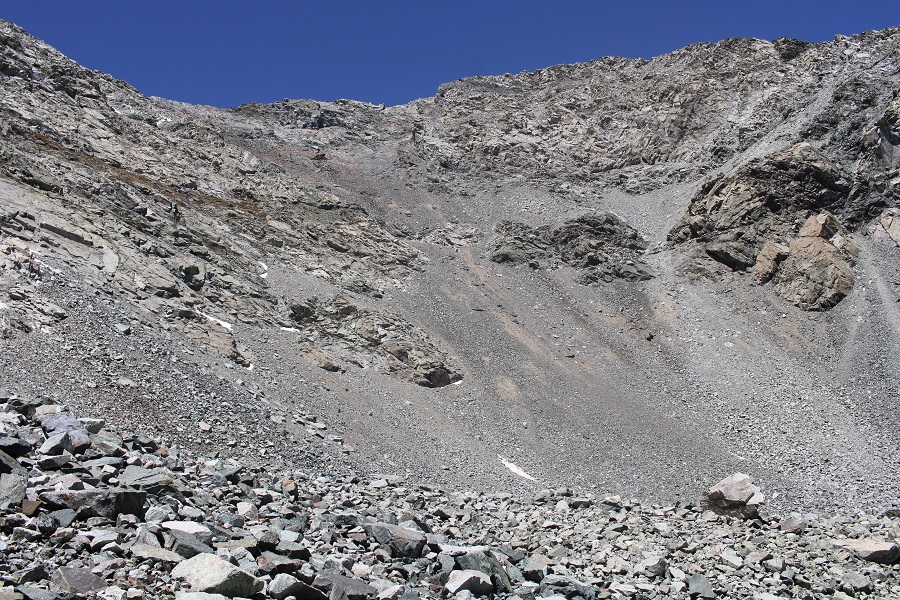
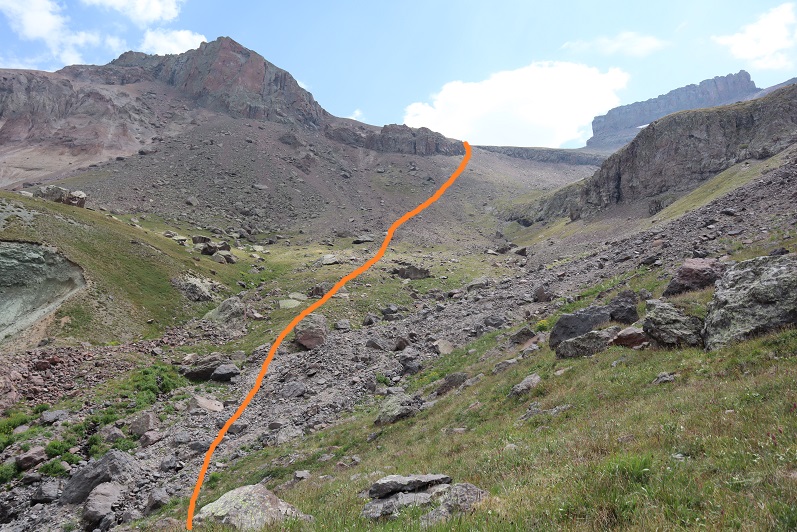
The wind immediately picked up and the temperature dropped. This is also where the trail ended. I’d read this was the “crux” of the route, and I’d agree. There is no path through the amphitheater. The goal is to avoid the loose rock and navigate your way up the mountainside to the right. The trouble is none of the rock is stable. It’s all terribly loose and when one rock falls it creates a rockslide. Think avalanche with rocks. This is rated as a class 2, but I found myself wishing for my helmet. I’d consider it absolutely necessary if I was hiking with someone else. Also, don’t follow anyone else’s GPX route up this mountain. The rocks slide and change quickly, so a route that’s safe today might not be tomorrow (and most likely won’t be next year). You need to use your best judgement and pick your own line. It’s steeper than it looks. Here’s the route I took:
I aimed for the large, stable rock, and once I made it there, passed it to the right, where I was met with larger (unstable) rocks.
I turned around and could see evidence it had snowed a bit last night as well as rained
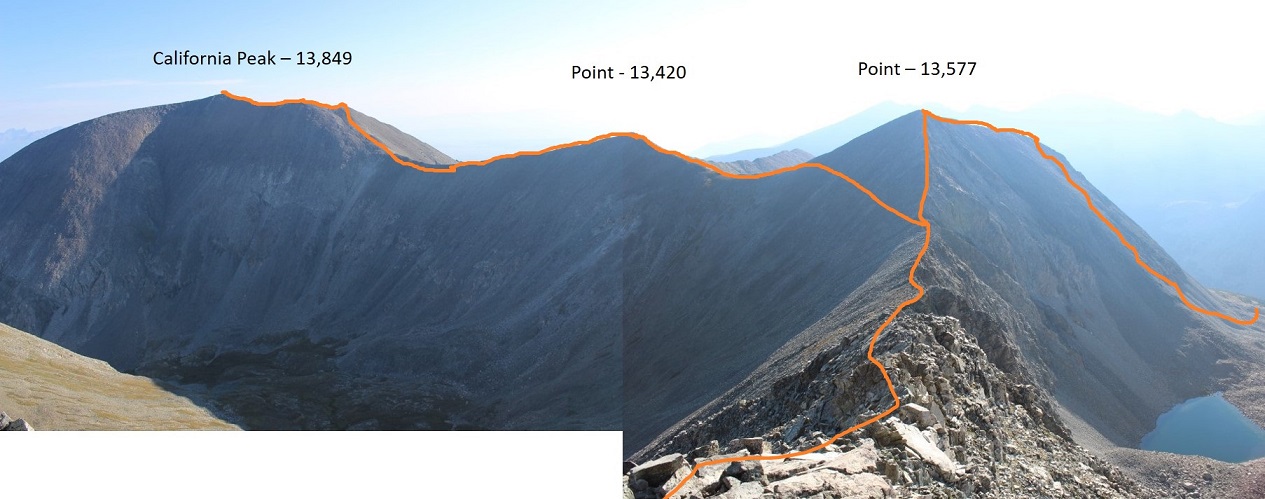
From here I gained the ridge and followed it left to the summit of Unnamed Point 13,577, arriving at 7am.
I turned around to look at the way I’d come up: steep and full of loose rocks.
Point 13,577 is a ranked 13er. Here’s my summit selfie to prove I summited:
And a video:
I turned and looked west at Unnamed Point 13,660. This is a bicentennial, and I’d promised myself if I had time I’d do my best to summit this peak as well since I couldn’t find another route for this one (hey, I was here, I might as well make the most of it, right?)
I mentally calculated my time (I was right on time… that crux had taken a lot longer that=n I’d anticipated) and decided to go for it. If it took me too long I could always come back for California Peak another day, satisfied I’d completed 2 ranked 13ers today.
And so I headed towards the ridge. It was a fairly simple hike until I reached the saddle. From here it got a little more sketchy, but nothing over a difficult class 2. Once again I wished I’d brought my helmet. The rock wasn’t sticky at all. In fact, my (really good) hiking boots were slipping and couldn’t gain traction. There were also a few steep spots and areas of exposure. I was able to navigate the entire way by sticking to the ridge, but if necessary stick to the right.
OK, this was actually a lot of fun! The past couple of 13ers I’ve done have been pretty easy, with no real route finding or scrambling involved. This ridge included plenty of careful scrambling.
I made it to the summit at 7:50am and turned back to look at the route and Lily Lake (not sure what the other lake is named, or if Lily Lake is just missing some of its water).
Here’s a summit selfie as proof I summited
And a video:
The last hundred yards or so of that had been worth it and so much fun!!!
From Unnamed Point 13,660 I could clearly see the route I’d taken and the route I had left. Due to time I didn’t feel it was necessary to re-summit Point 13,577 so I skirted it to the left and aimed for the saddle between it and Point 13,420.
Once again, there is no trail for this hike, so I had to carefully navigate my way across the rocks.
From this saddle it was a quick hike to the top of Unnamed (and unranked) Point 13,420.
I summited at 8:40am to some of the best views I’ve had the pleasure of having all to myself! I could see small lakes in every direction, Huerfano Peak, Mt Lindsey, Blanca, and Ellingwood. Wow!
Video :
Here’s a look back at the route I took from PT 13,550
OK, time to head up California. This ridge was easy to follow, with no obstacles to face and stickier rock than Point 13,660. Here’s the route I took:
The rock was much larger and more stable than before
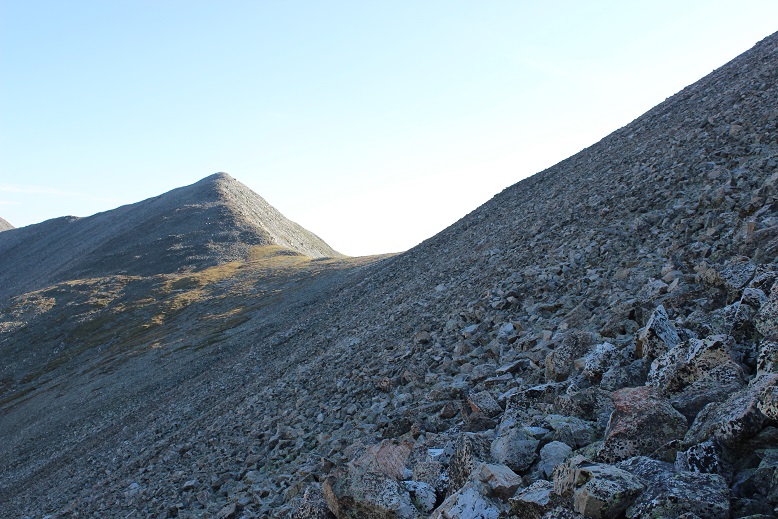
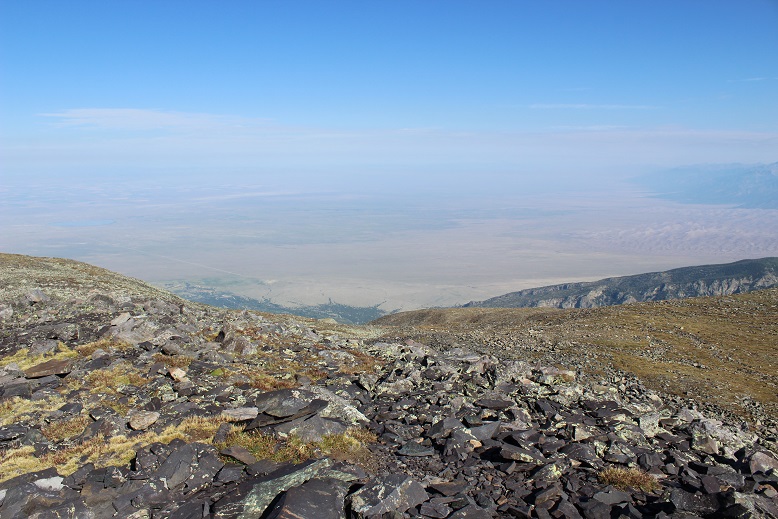
There was a false summit, but it wasn’t anything too difficult. Here you can see California Peak (to the right) from the false summit
The false summit is also a great place to stop and visualize your path down from California Peak if you are choosing to do the loop (which I highly recommend… that rock up to PT 13,577 is dangerous enough heading up, down it would be treacherous). I’ll discuss this more later, but either take a picture here or get a good look so you know how you’ll approach your descent. You want to aim for where the trees and drainage meet.
The summit of California Peak was curiously flatter than I’d anticipated
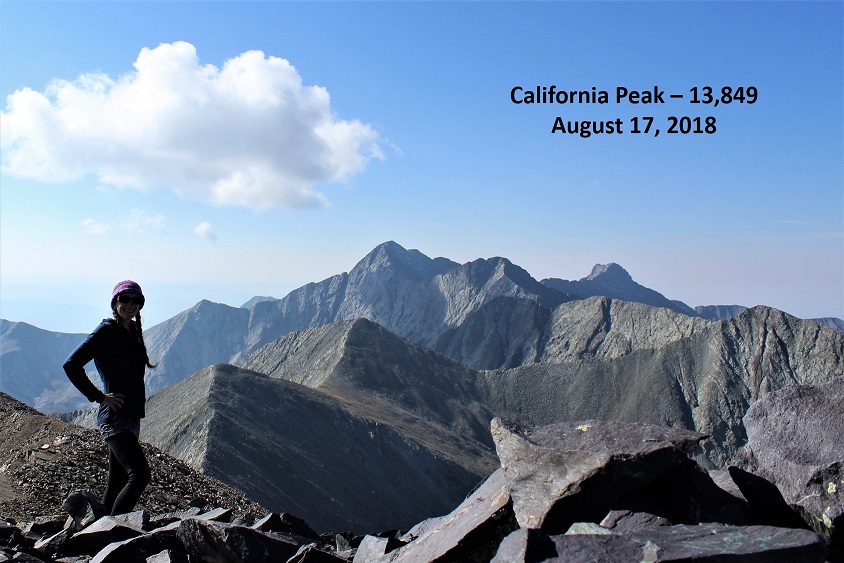
I summited at 9:15am to more awesome and amazing views!!!
Video:
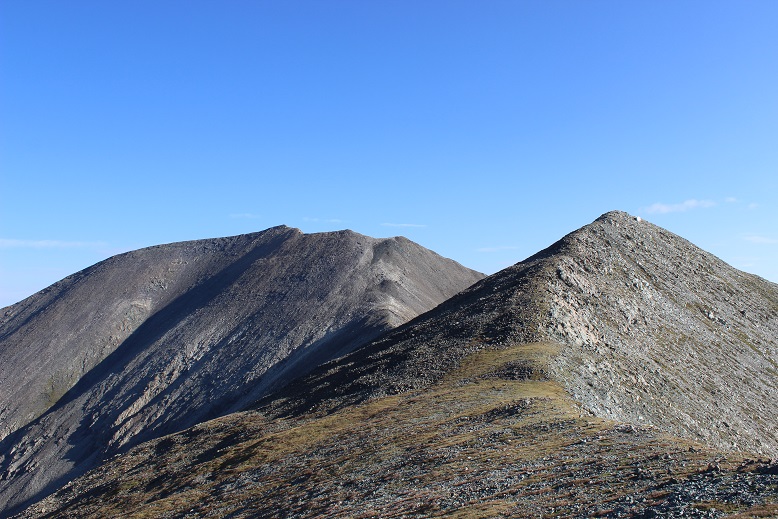
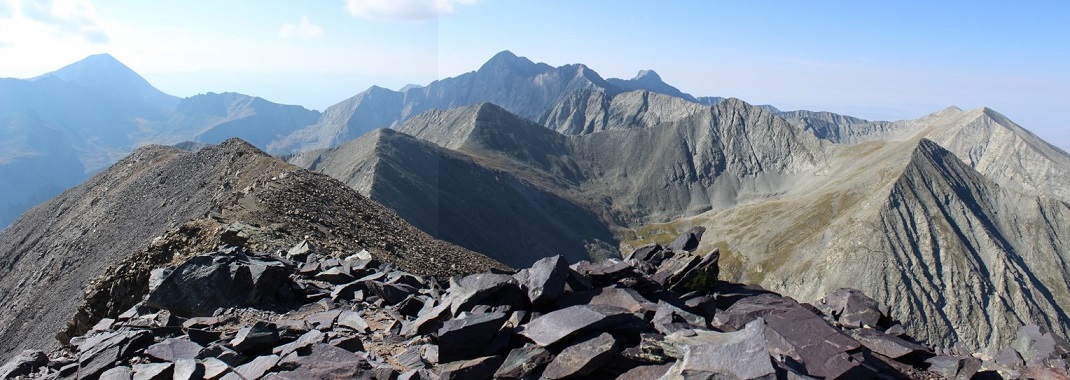
Check out that ridgeline!
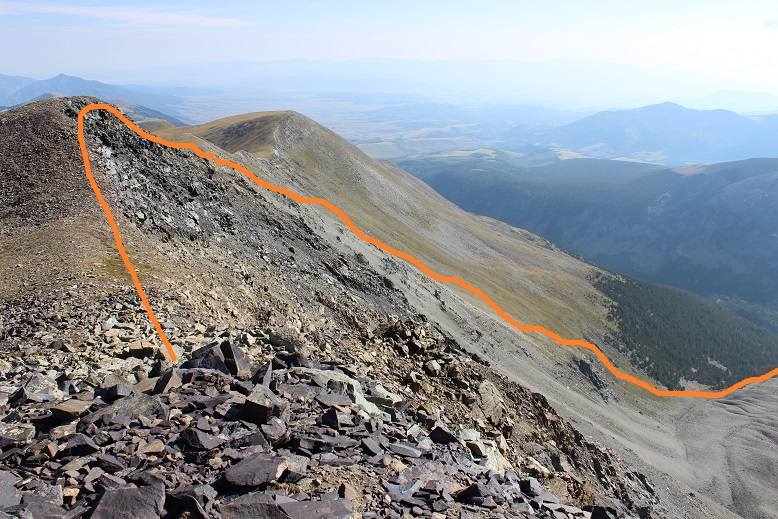
OK, your goal is to hike north up and around the horseshoe shape, locate a cairn, and head down (right/east) into the basin. Look for a cairn. You don’t want to descend too soon because it will be full of dangerous rocks.
Standing behind the cairn looking down into the basin you can see where you want to aim: Just where the trees and rocks come together. From there you follow the drainage until you make it to Huerfano creek (and the obvious trail) Here’s a view from the false summit of the path you want to take.
From the top (where the cairn is) your best bet is to descend and angle a bit left to avoid the loose rocks and scree you’ll immediately encounter. Try to stay on the grassy area, but aim for the left of this bump:
Once you make it to the bump you have several options ranging from class 2-4 to navigate your way down to the drainage. Just stay left and head down. I chose to climb down the wide chimney, but you have other (class 2) options as well.
Here’s a picture looking back at the terrain and what still lies ahead of you
In case you’re absolutely crazy and want to do this hike in reverse, here’s how I came down the mountain. Note: if you want to do this in reverse stay to the right (where there’s grass) and avoid the loose rock sections to the left.
This is where the route gets tricky because you’re going to enter the treeline and terrain filled with rocks, slippery wet grass/plants, creeks, and pine needles (deceptively slippery as well). I followed the drainage
Until I came to this
Once again, your goal is to head towards the creek. I did so and quickly the terrain looked like this:
This was actually much more difficult to navigate and took much, much longer than I’d anticipated, but as long as I kept heading east down towards the bottom of the basin I knew I was on the right track. There were dozens of game trails heading every which way, and a few snow shoe trails as well. It wasn’t lost on me if I were to get hurt in this area it would be extremely difficult for anyone to know where I was or to be able to find me (even though I’d let people know I was doing the loop). The area was thick with trees and bushes, most of which got caught in my hair. When I finally made it back and found the trail I did a fist bump! That was awesome, and the most difficult route finding (in the daylight) I’ve done to date. Yes, it was technically easy, but I was super proud of myself!
When I made it to the trail (which was still filled with water BTW) I turned left (north) and headed back towards the trailhead.
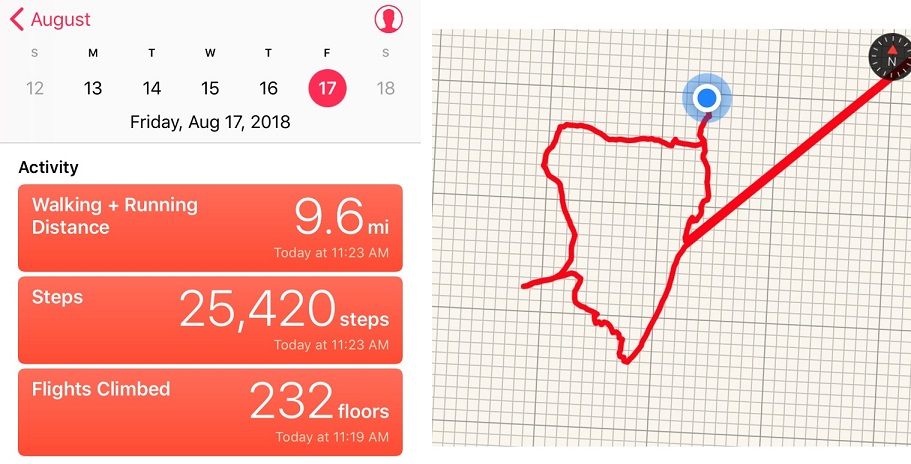
I made it to my truck at 11:15am, 45 minutes earlier than needed to remain on schedule to drive back home and pick up my daughter from school. That made this a 9.6 mile hike/climb in 7 hours. I quickly got out my phone and checked my route. Now, this is the very first time I’ve ever tried to track my route, but I’m pretty sure I didn’t teleport 30 miles away for a few minutes and come back right where I’d been on the trail. Hmmmm. Either something was wrong with the app or I needed more practice with this (probably both). Oh well, that’s what I get for using a free app. So no GPX file this time, but maybe in the future?
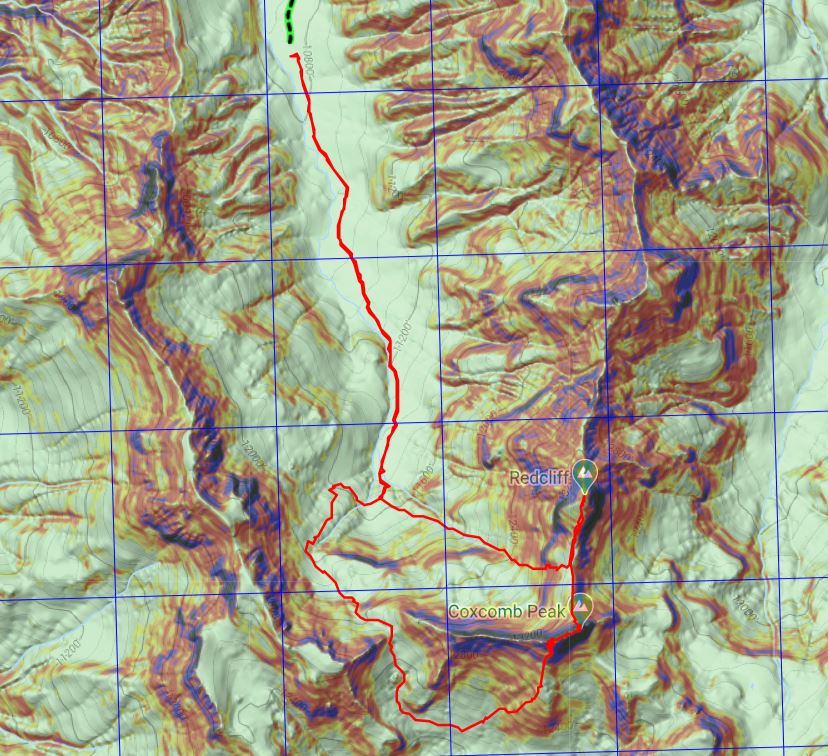
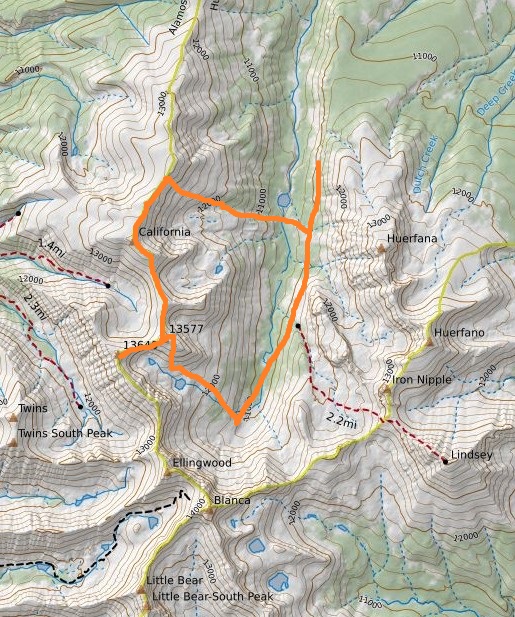
In any event, here’s the route I took on a topo map
This was a fantastic trip! Once again I didn’t see anyone else all day, the views and weather were amazing, and I was able to practice my route finding in an area I was familiar with and didn’t think I could get lost. I loved being able to tag a bunch of 13ers and I felt I learned a lot today. 13ers are amazing!