Sheep Mountain – 13,304 and Greenhalgh Mountain – 13,228

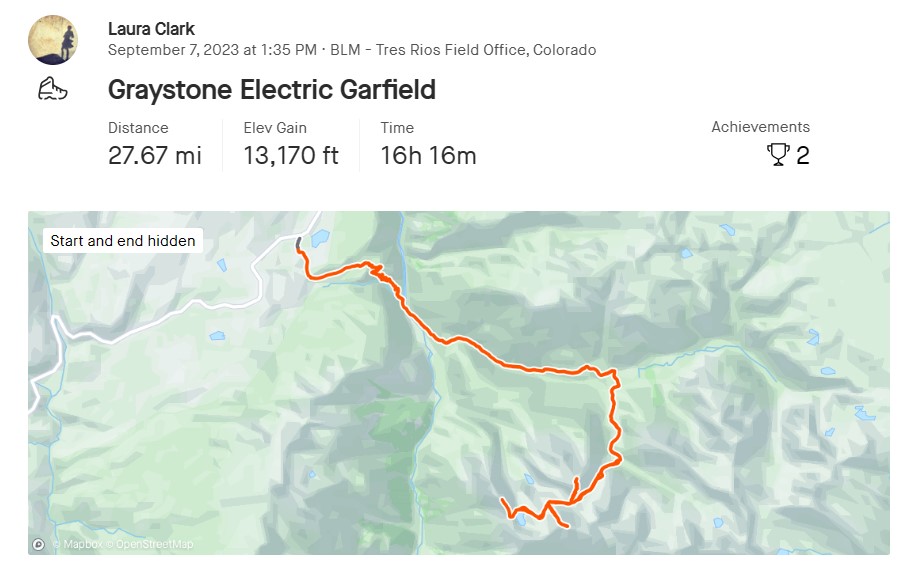
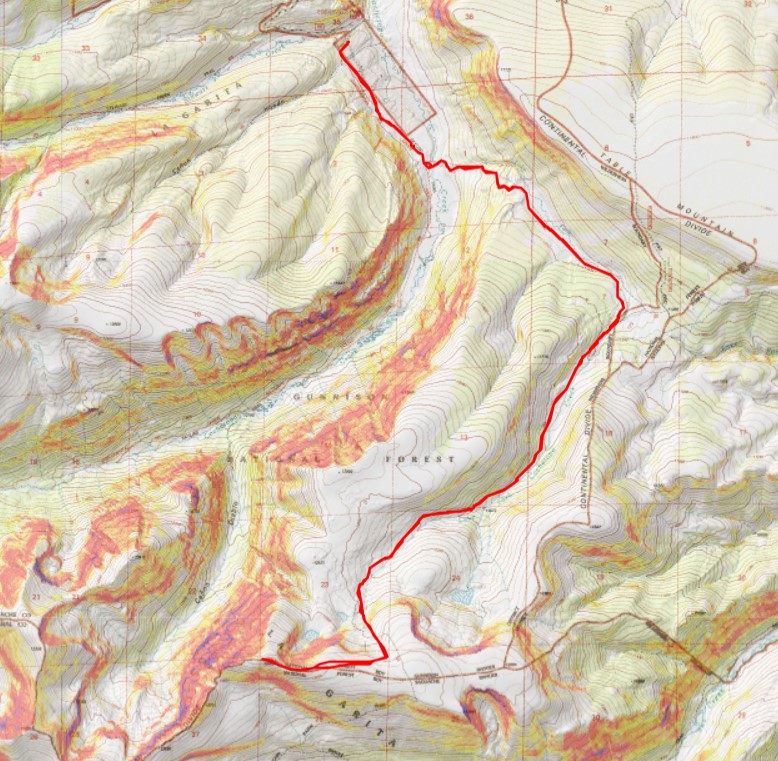
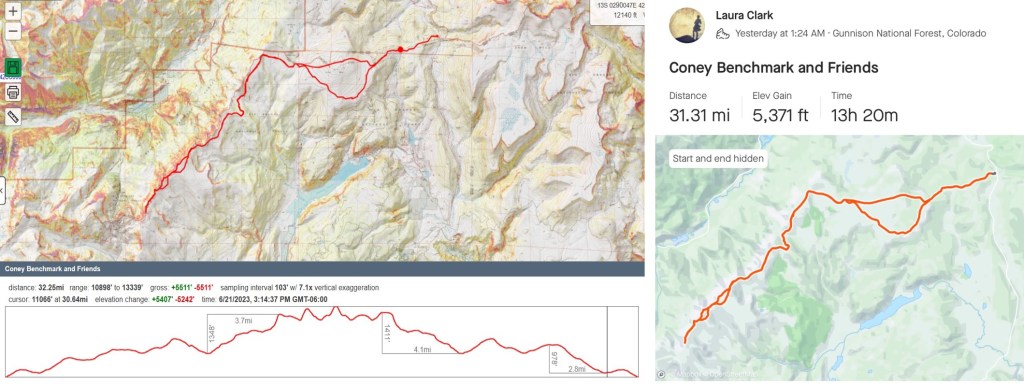
RT Length:  8.97 miles

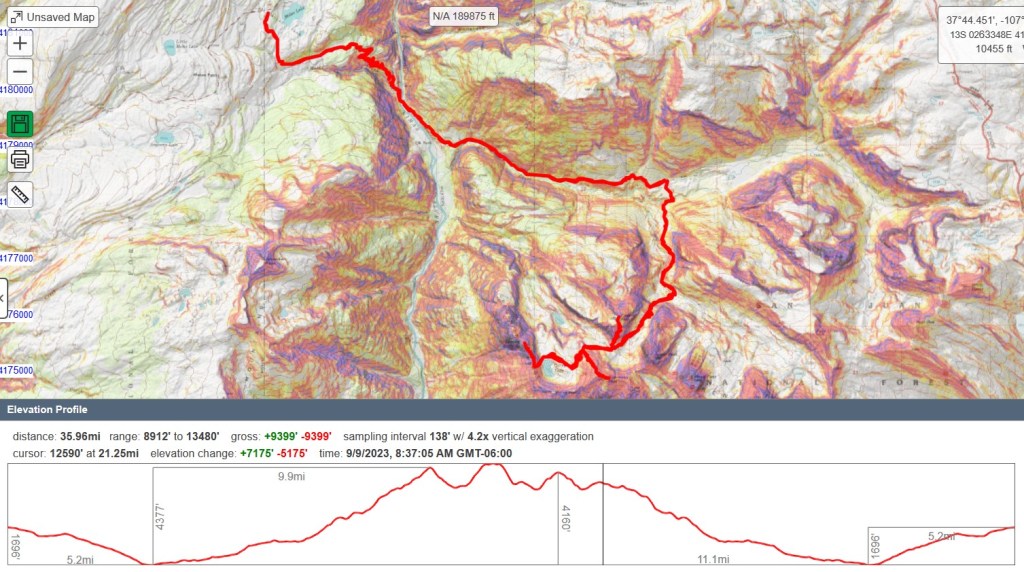
Elevation Gain: 2714’

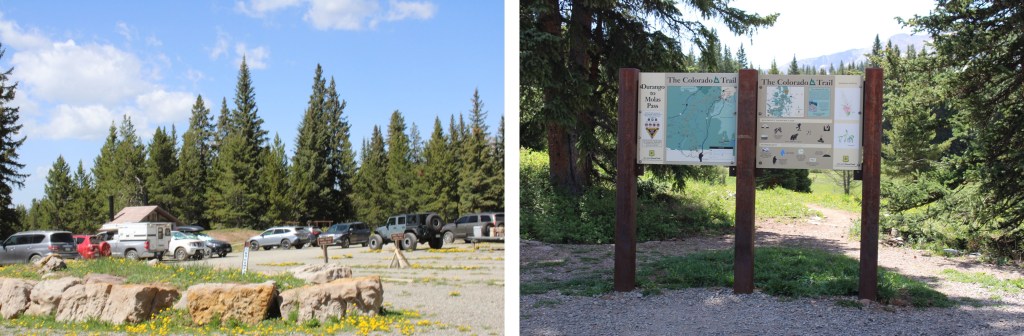
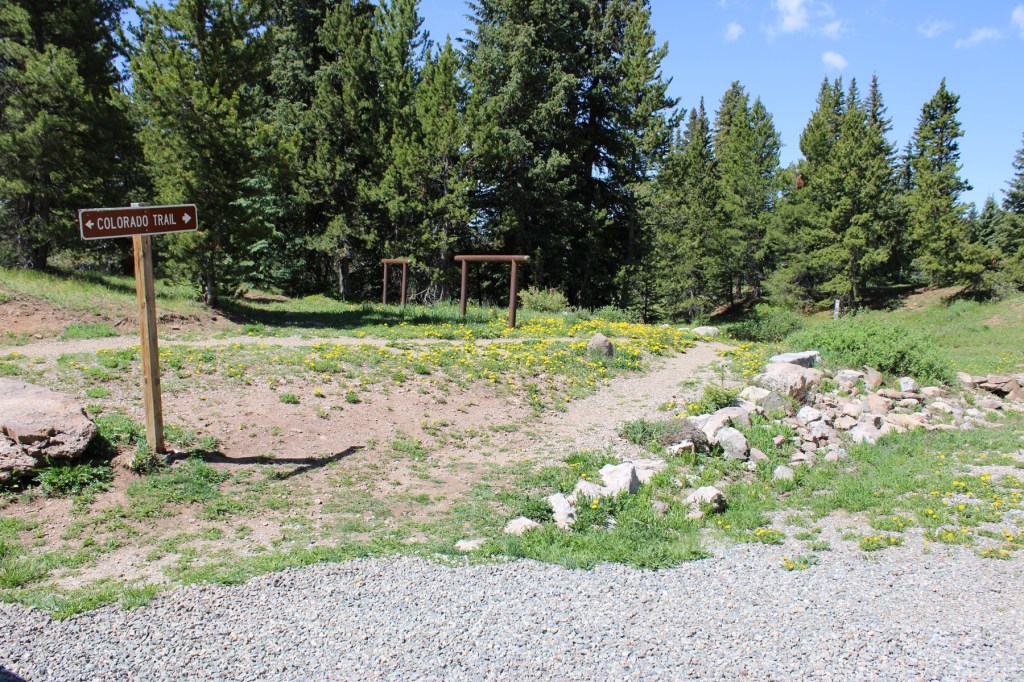
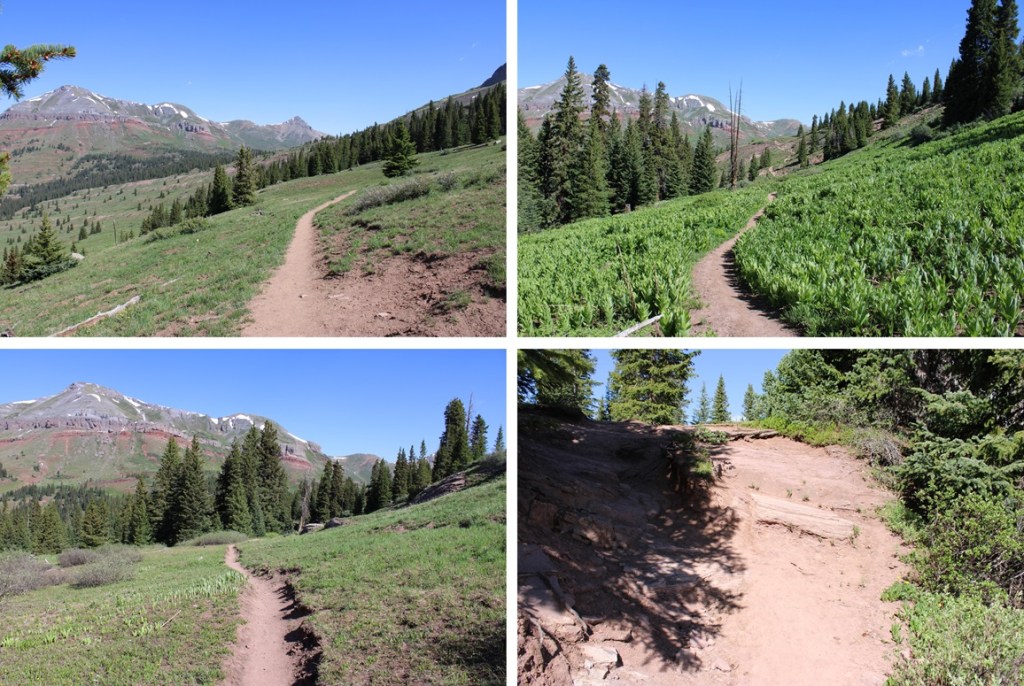
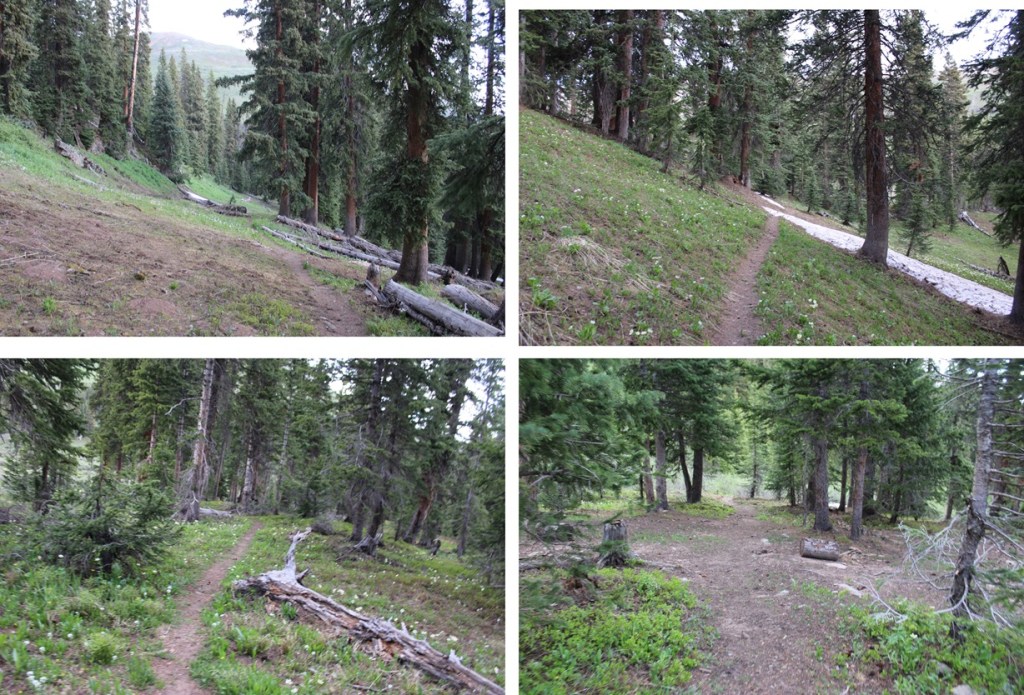
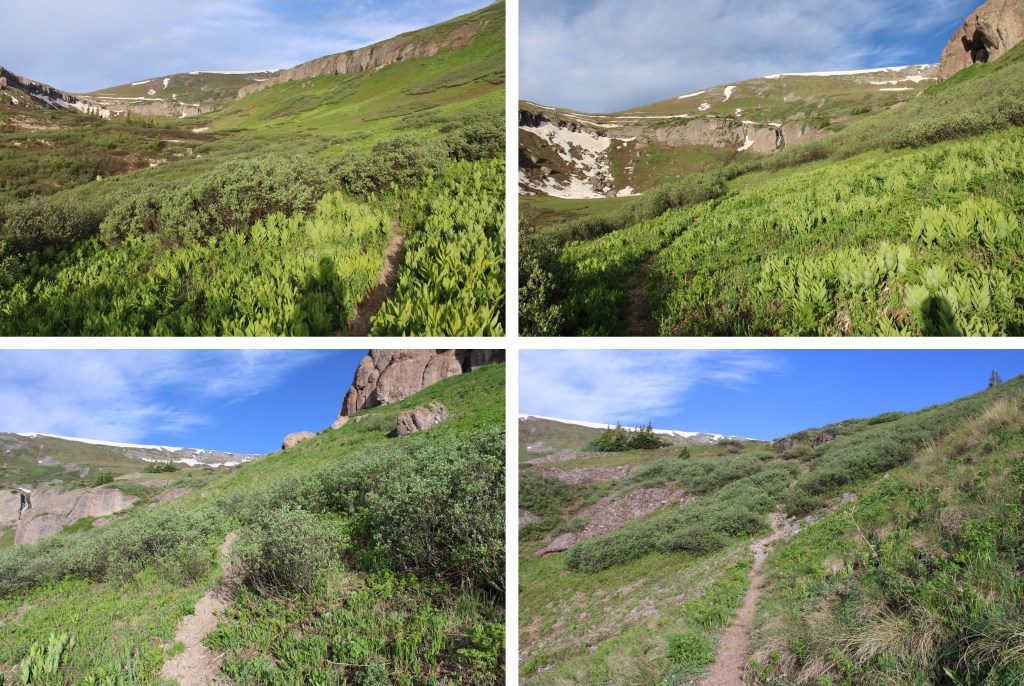
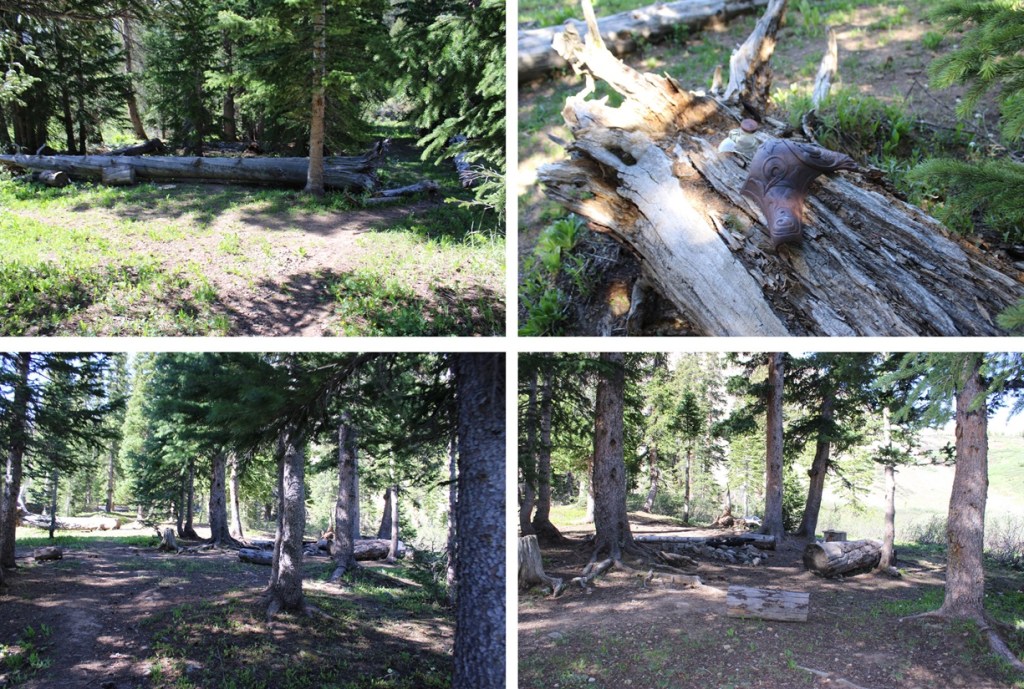
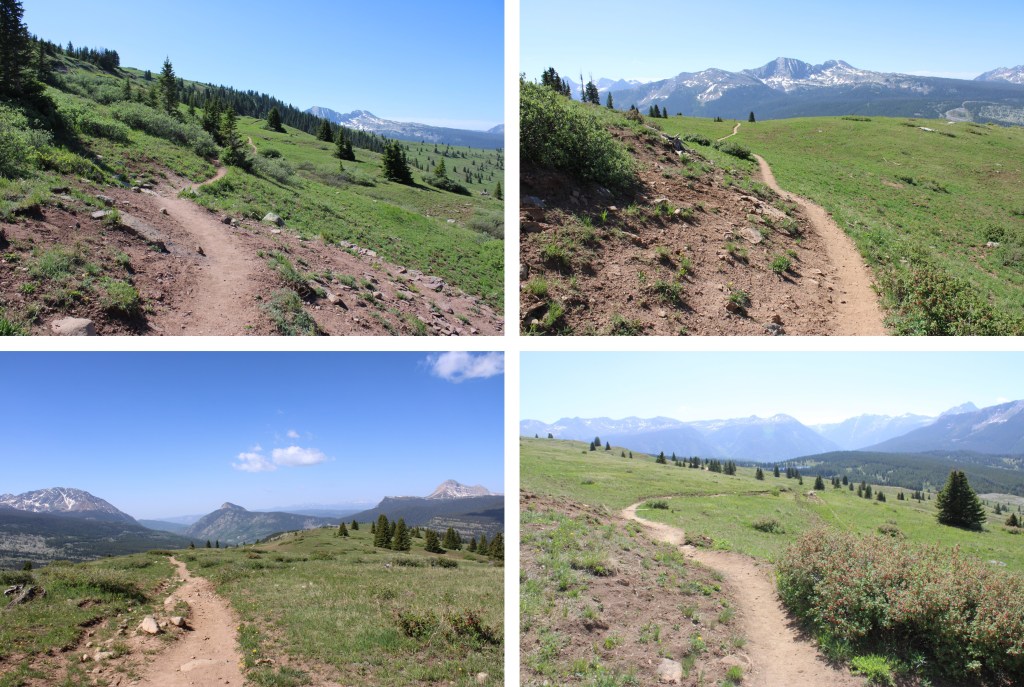
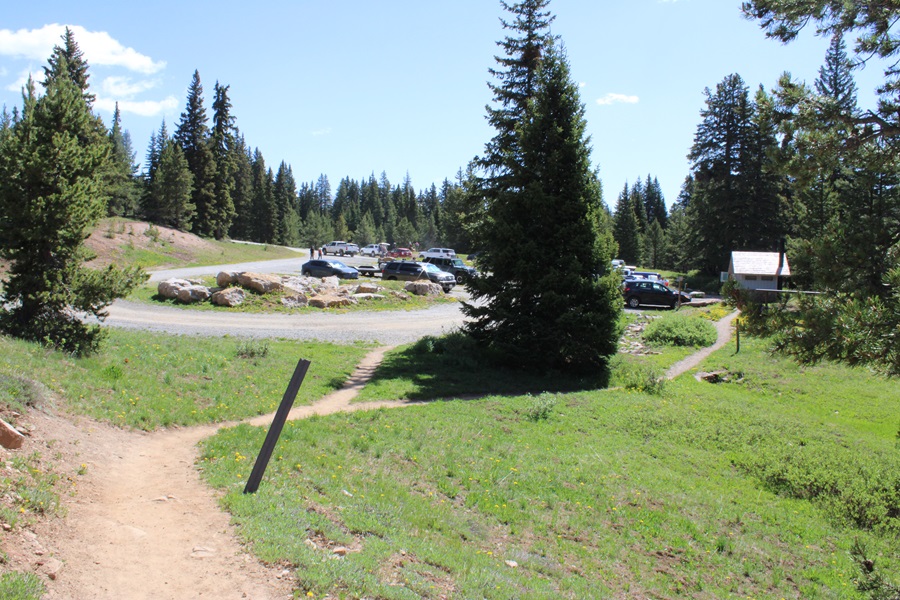
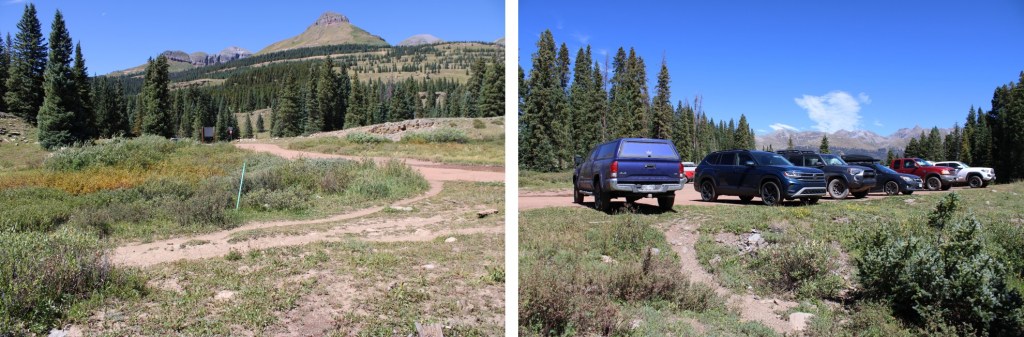
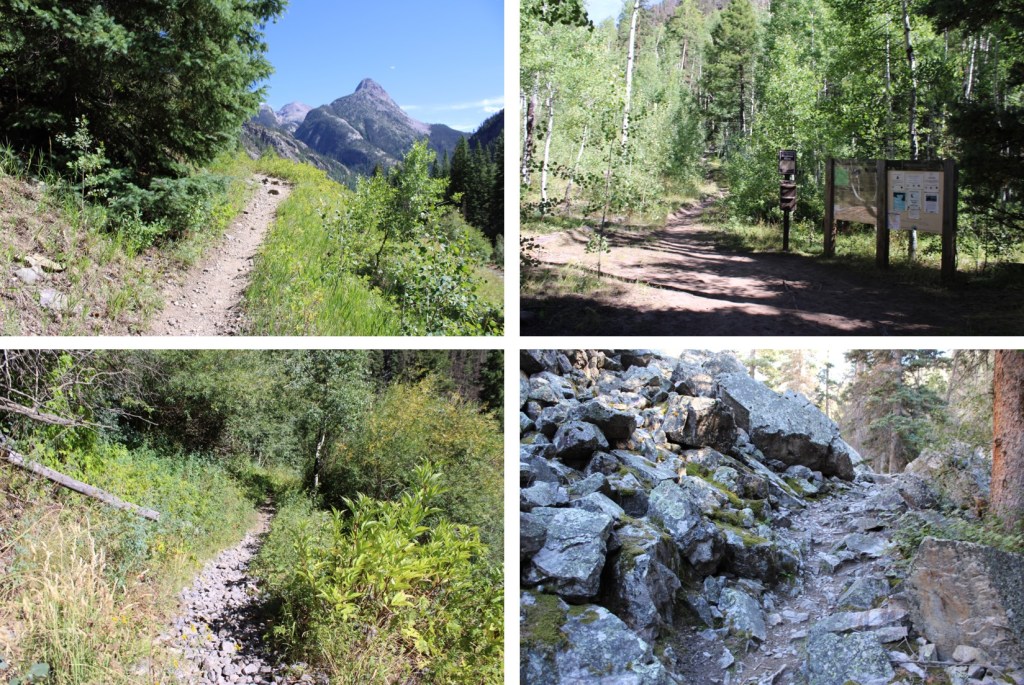
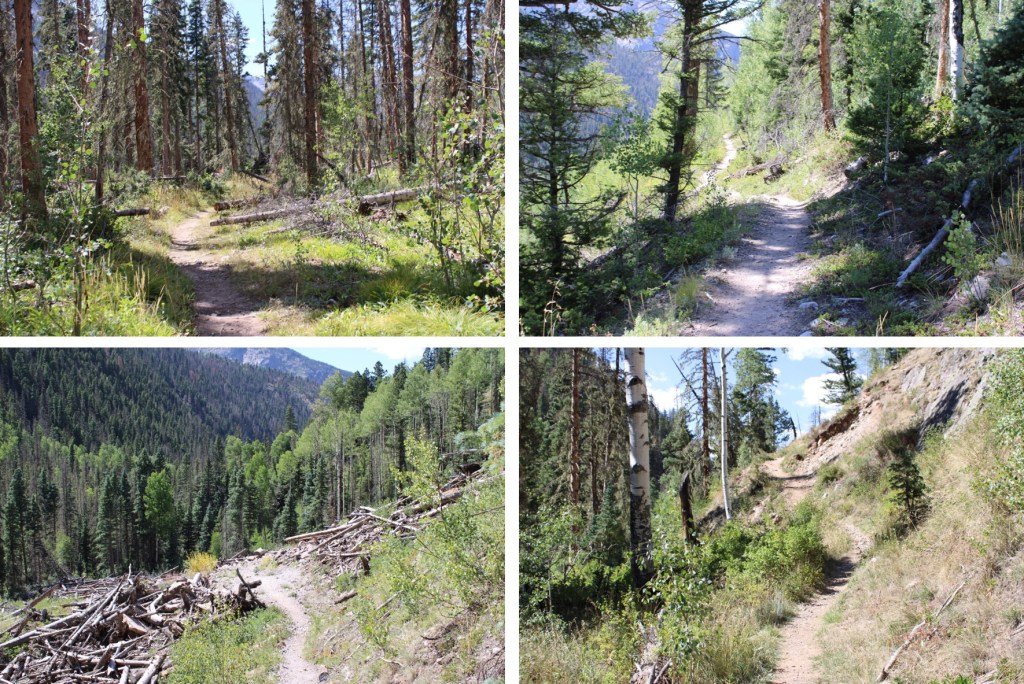
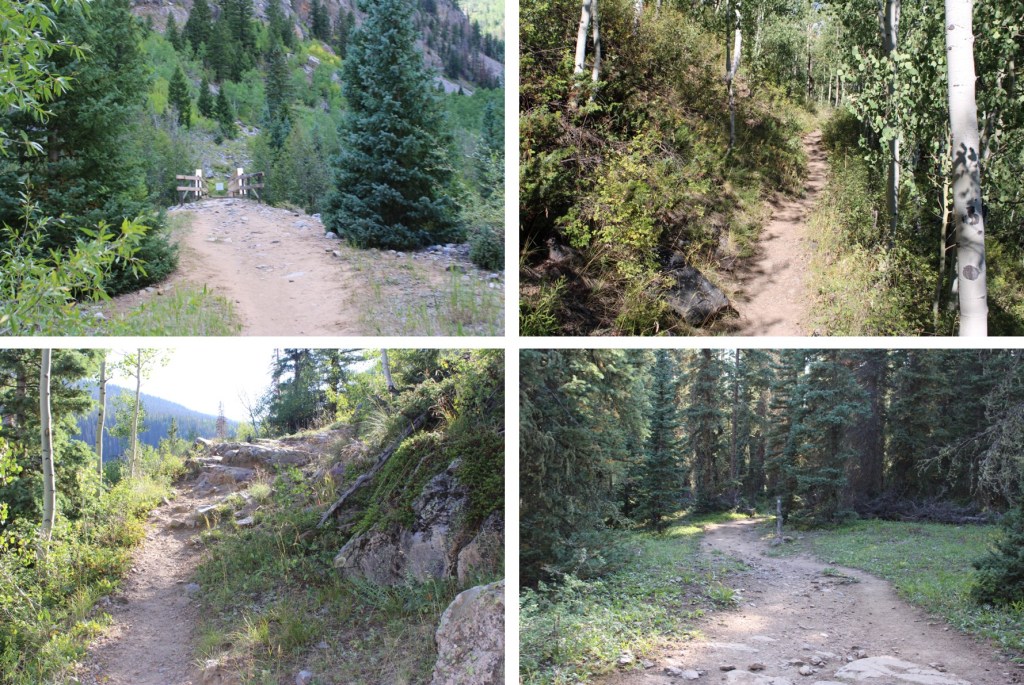
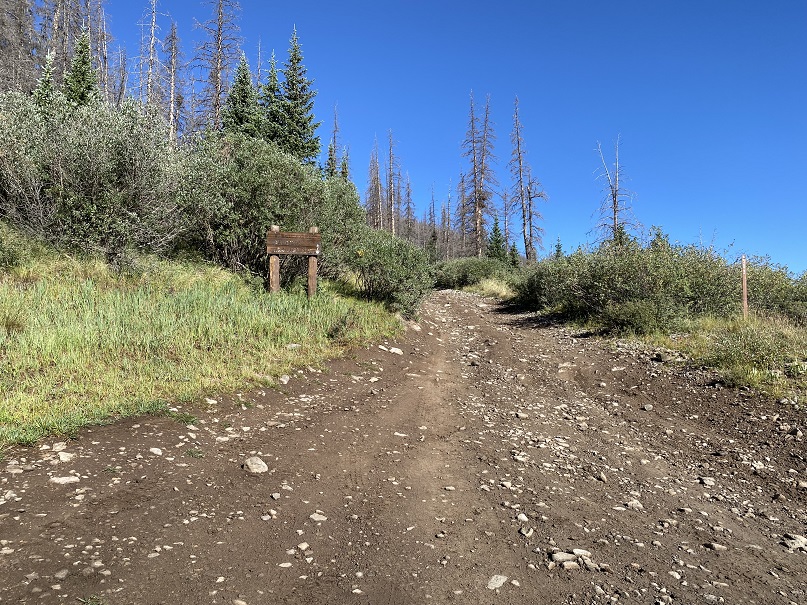
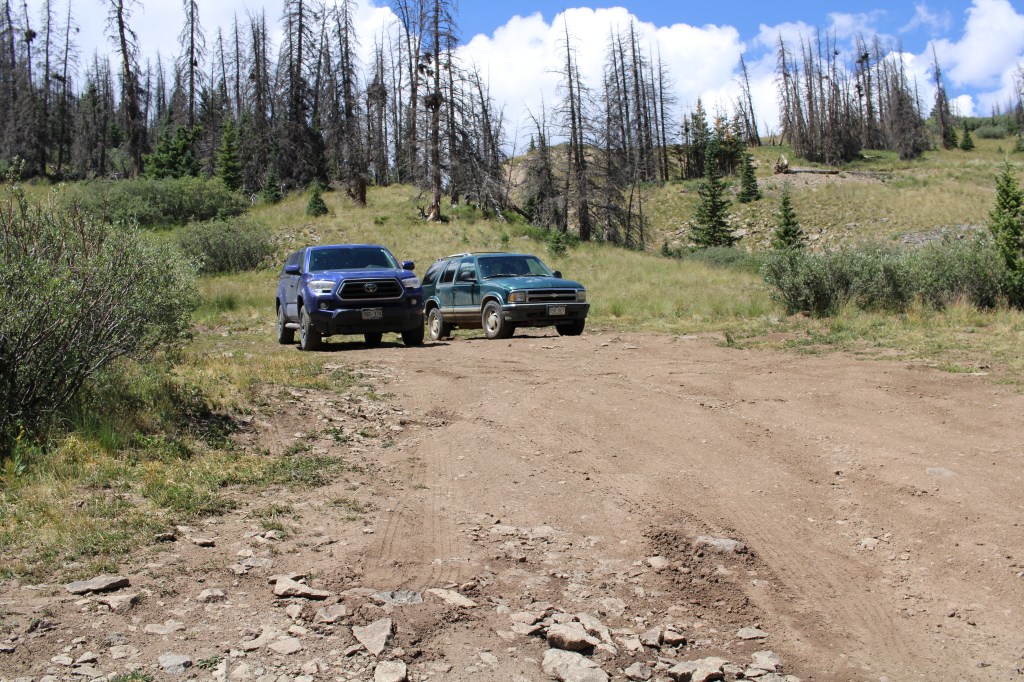
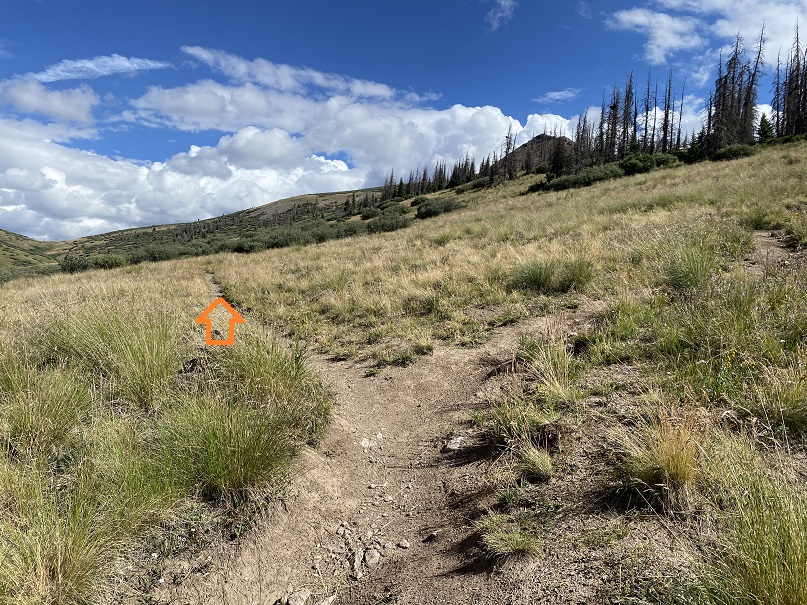
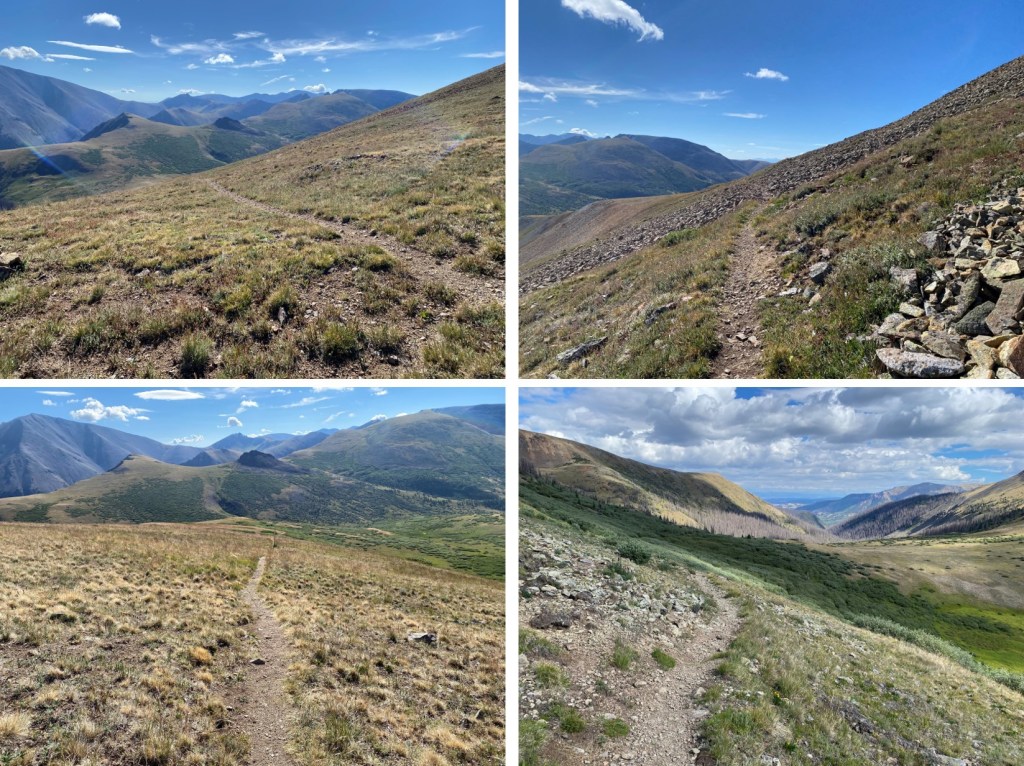
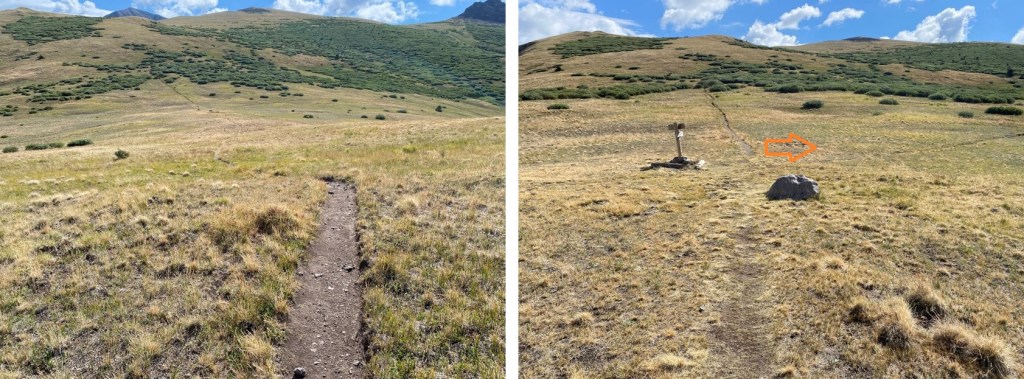
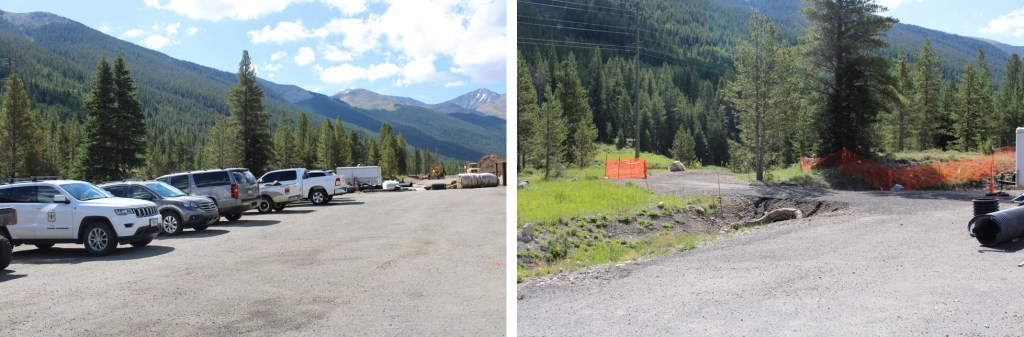
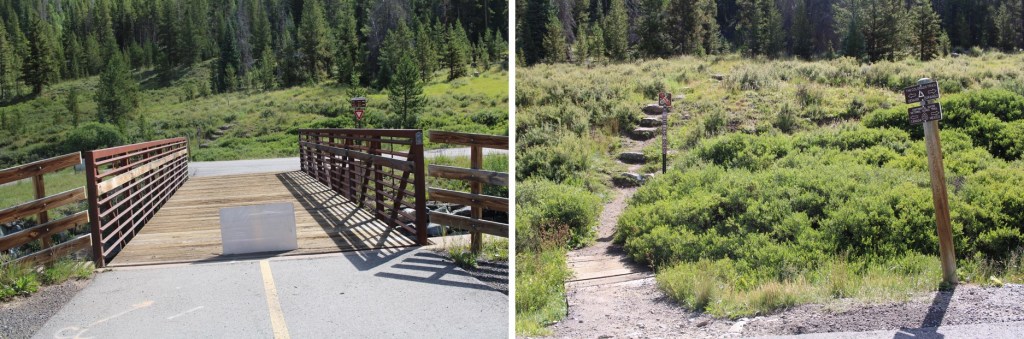
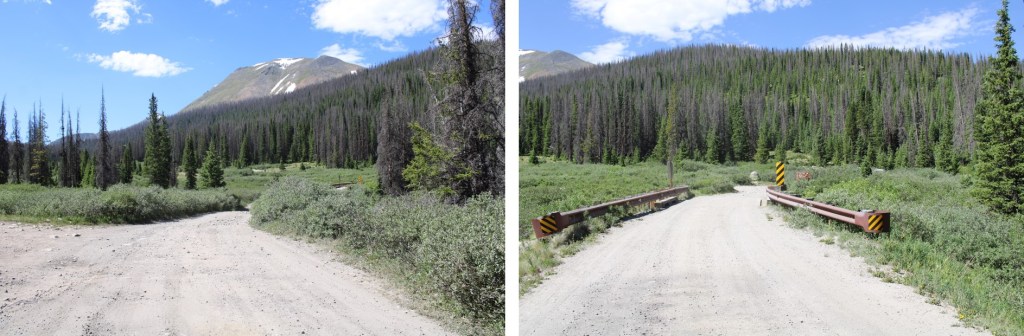
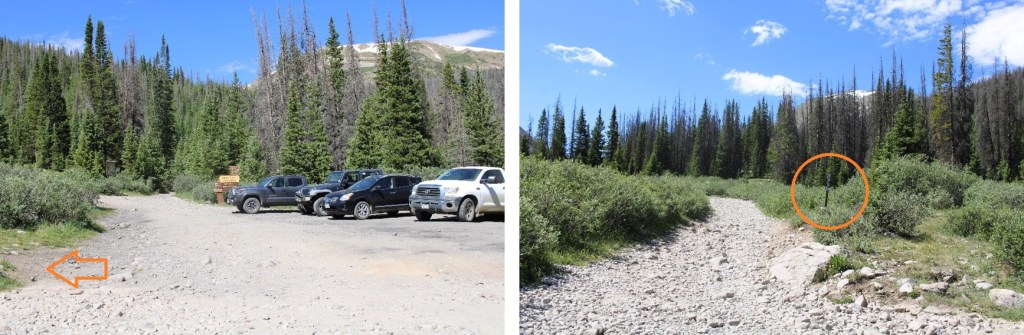
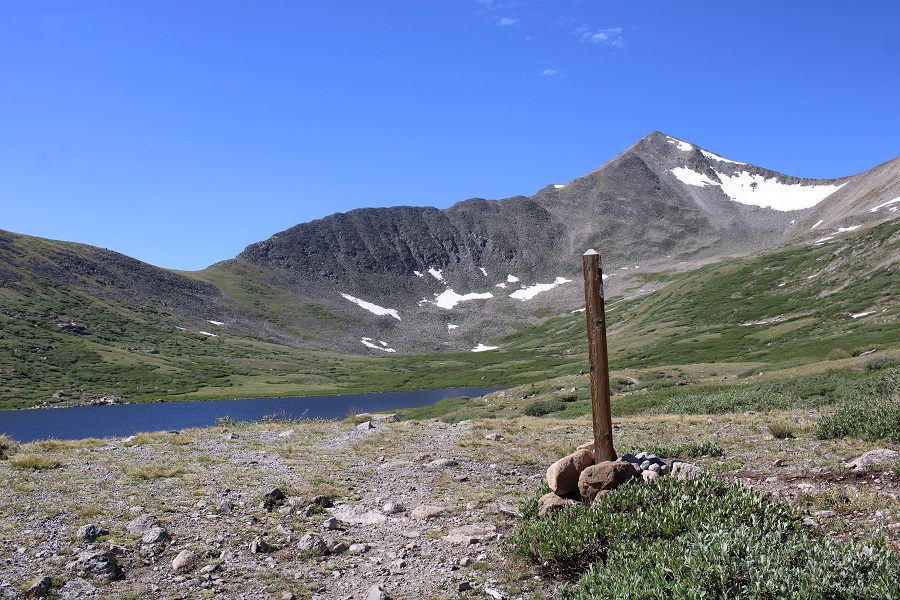
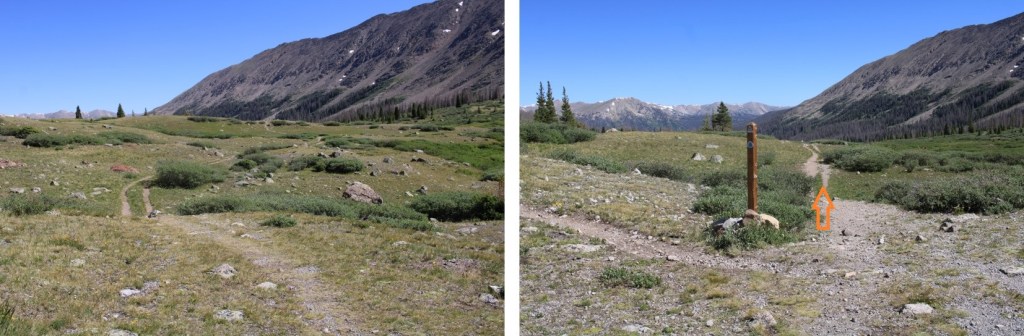
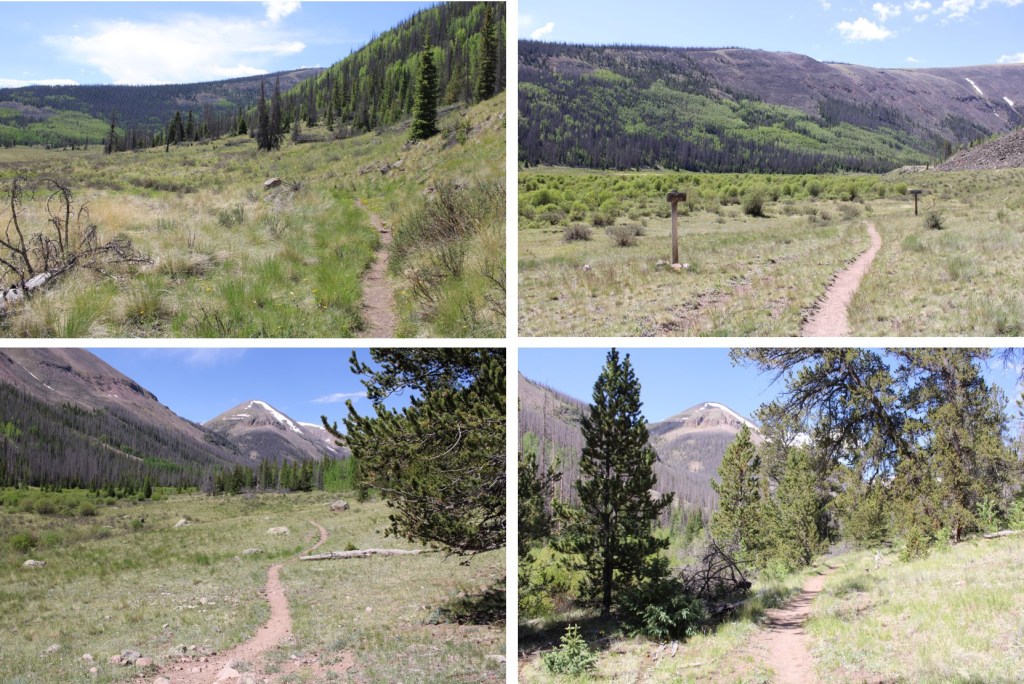
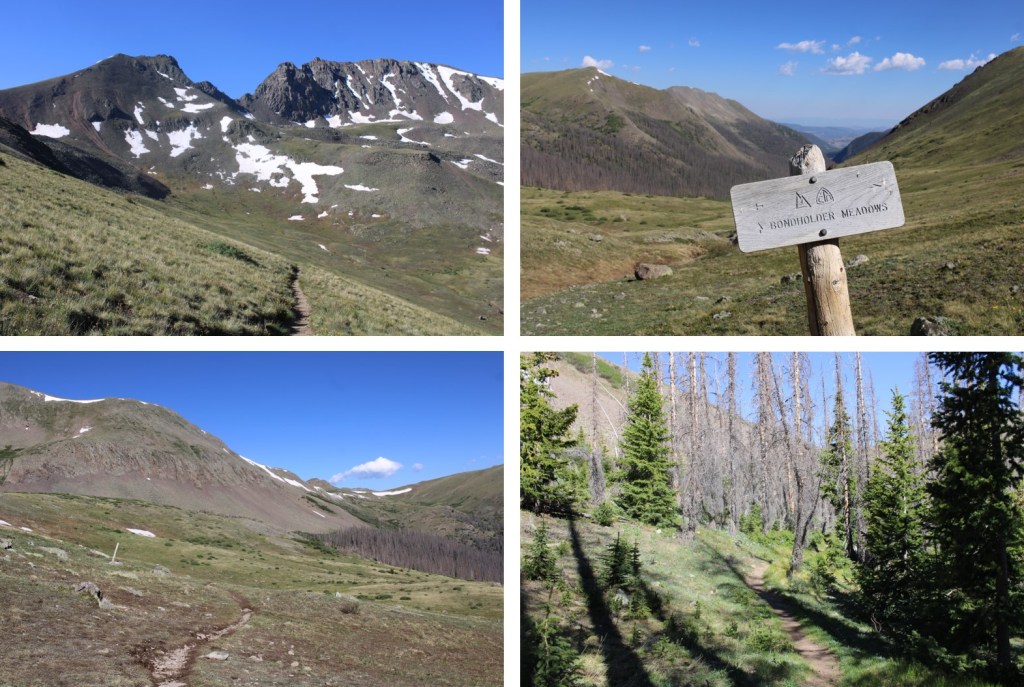
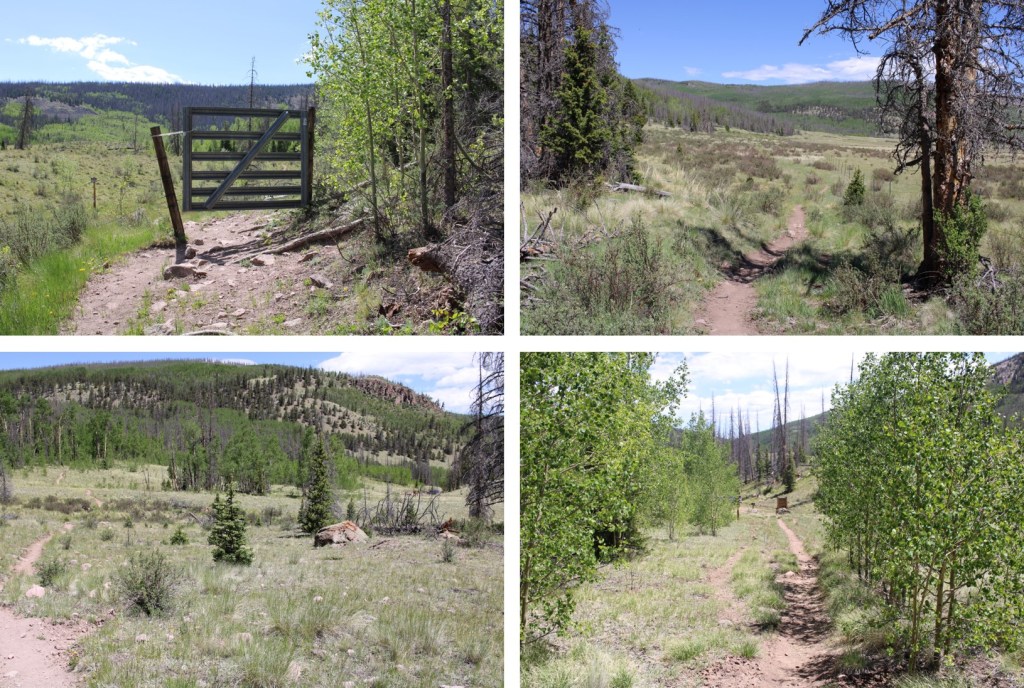
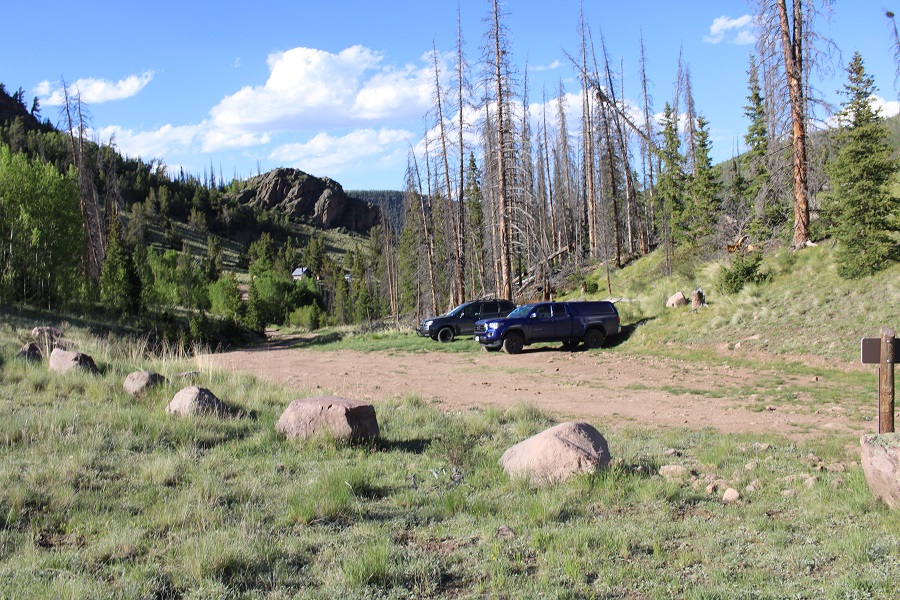
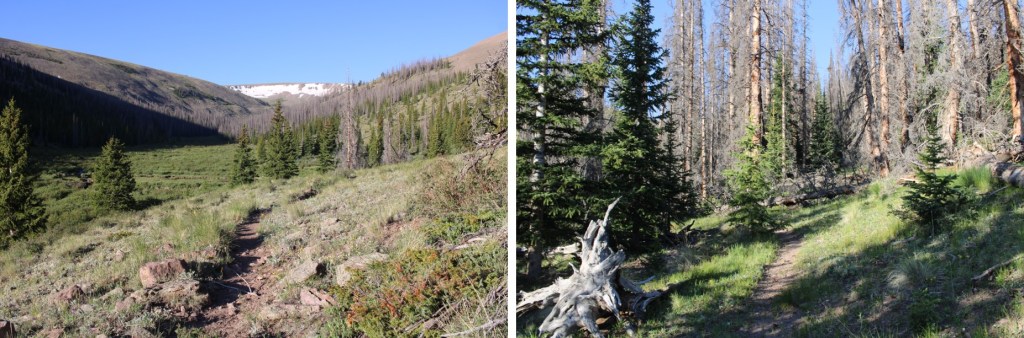
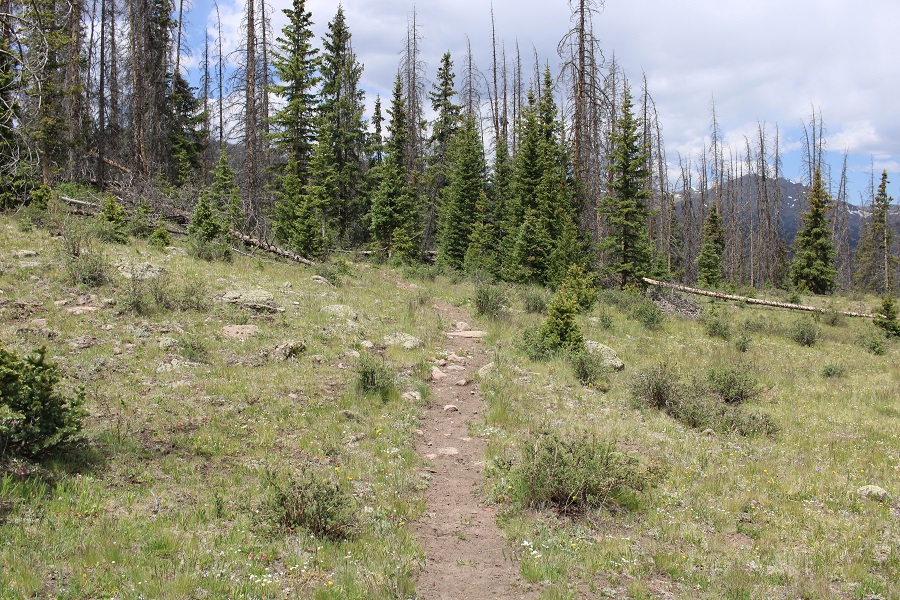
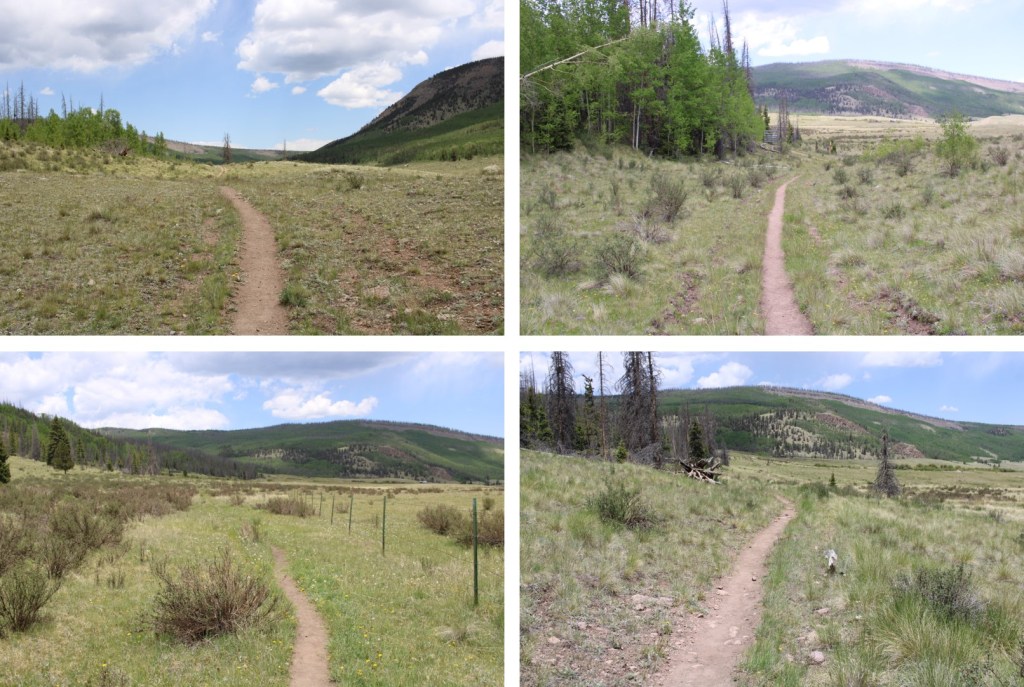
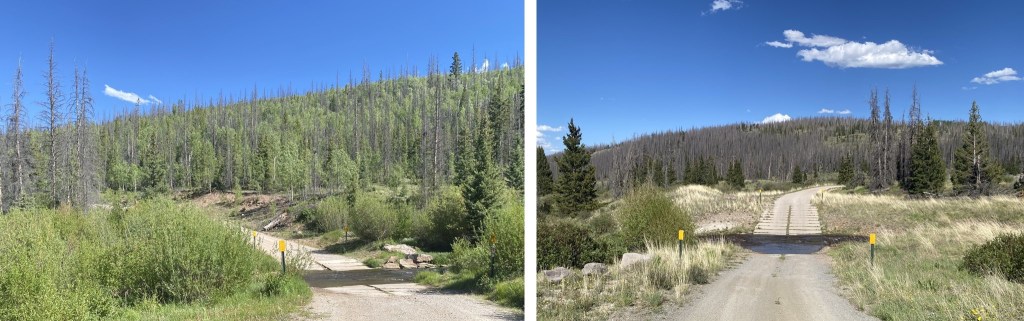
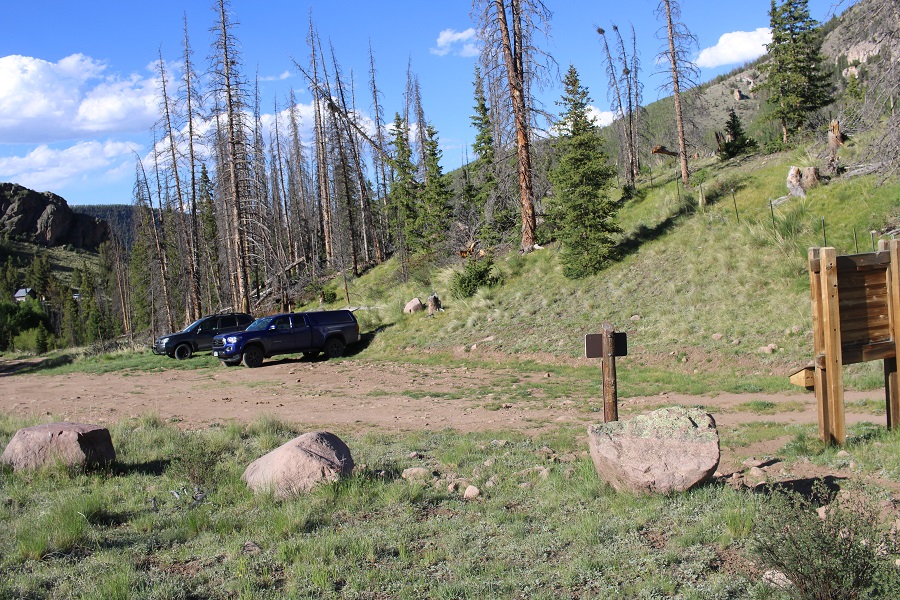
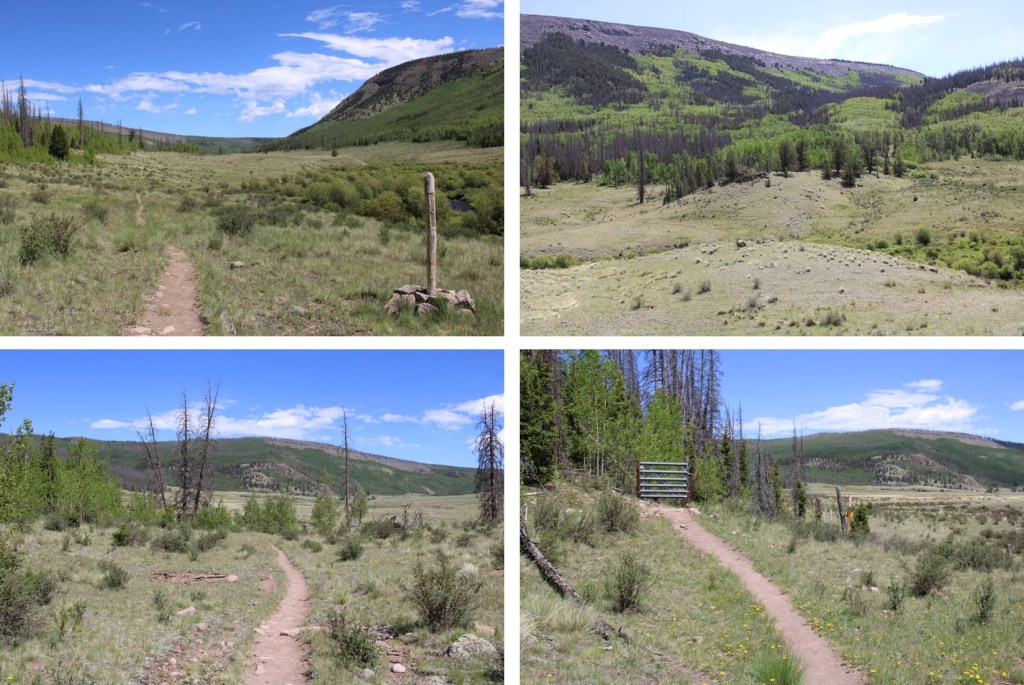
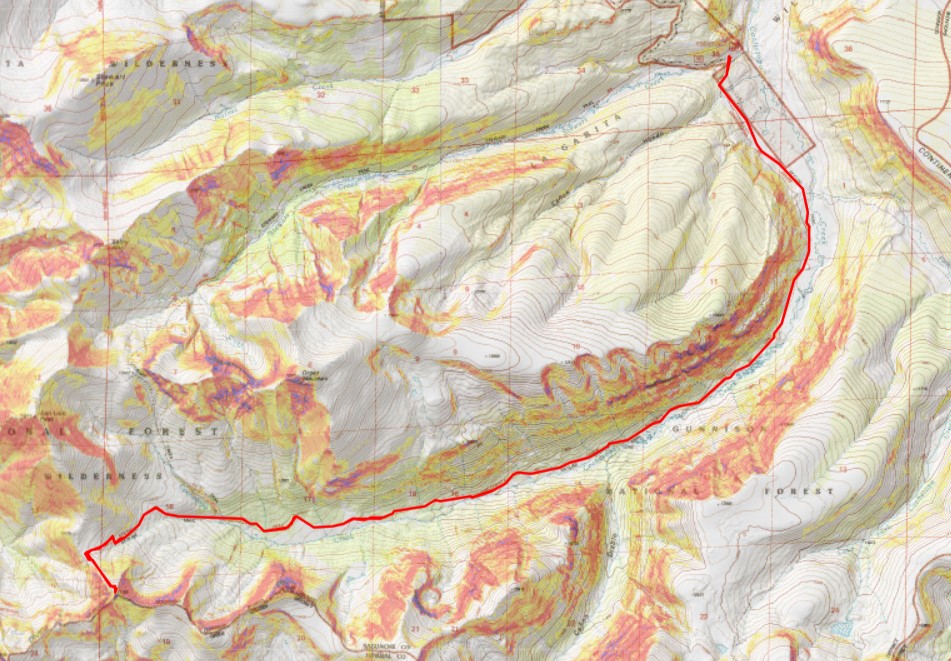
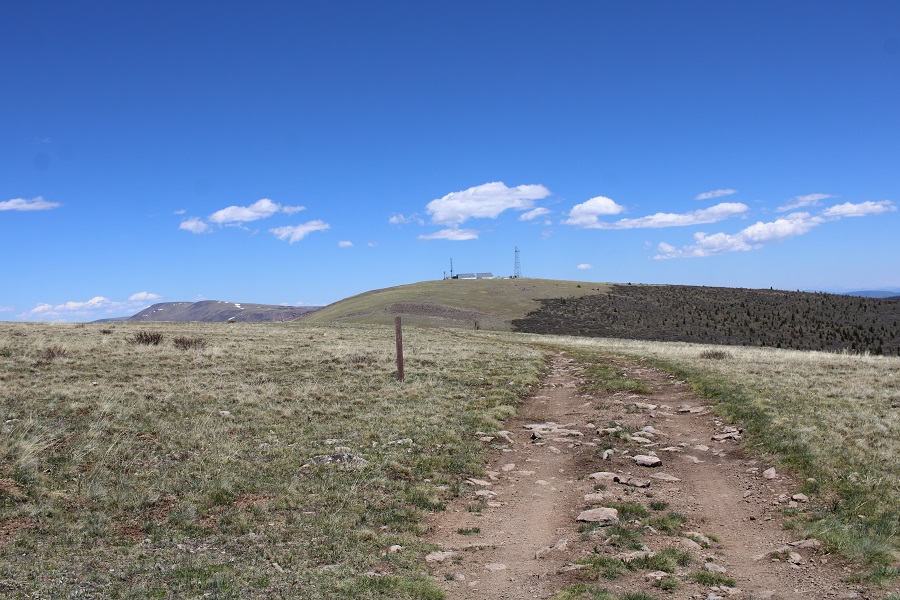
I was parked at Stony Pass, and was up and on the trail at 6:30am, heading east towards the CDT. 

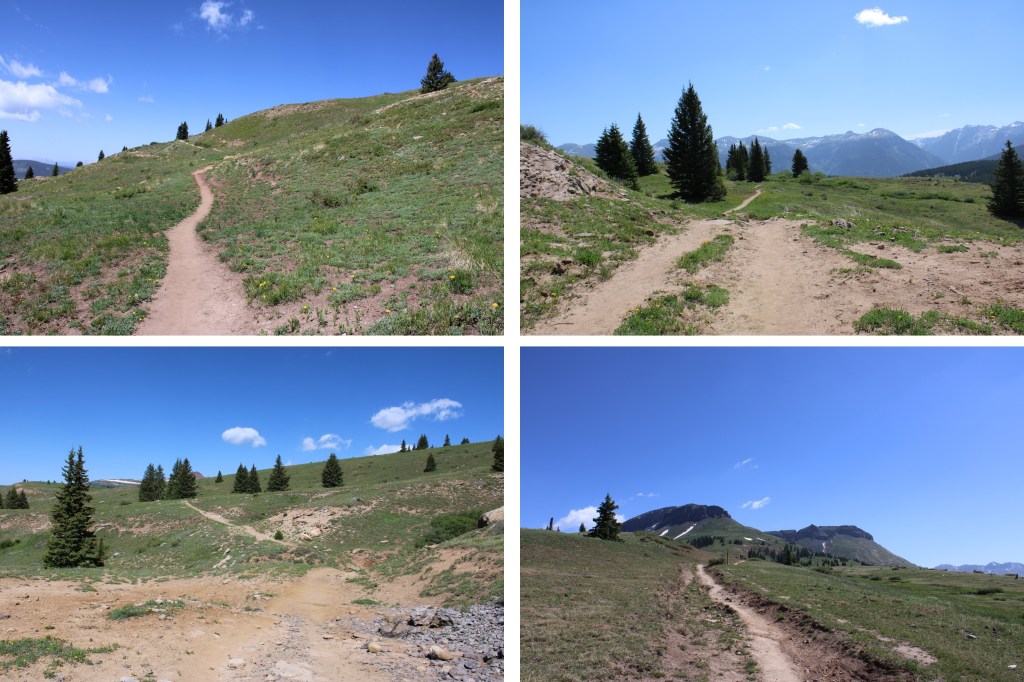
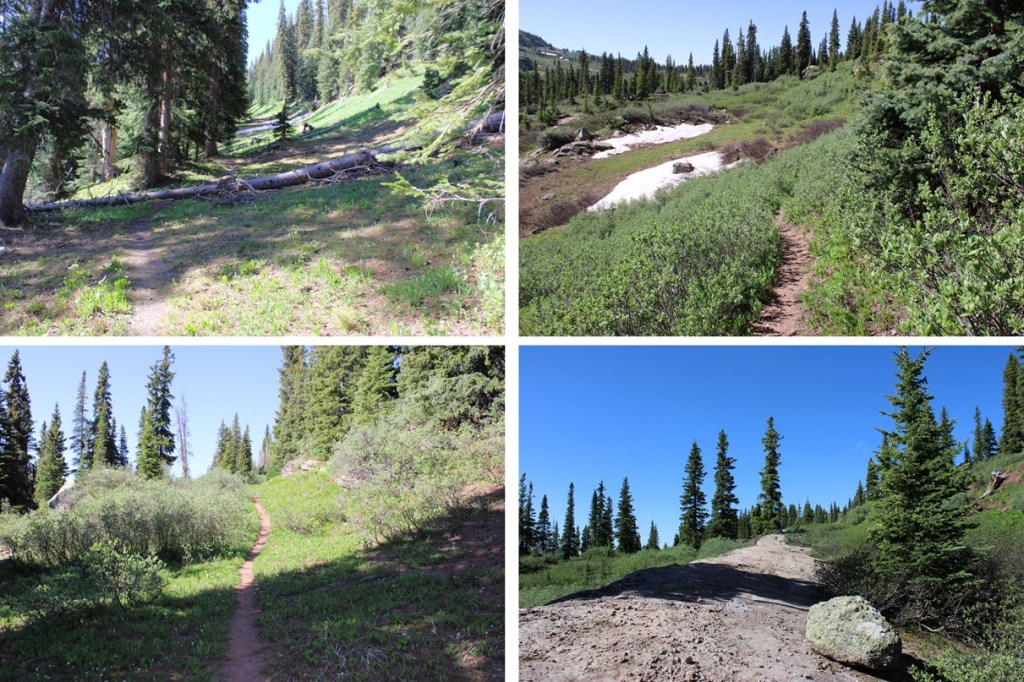
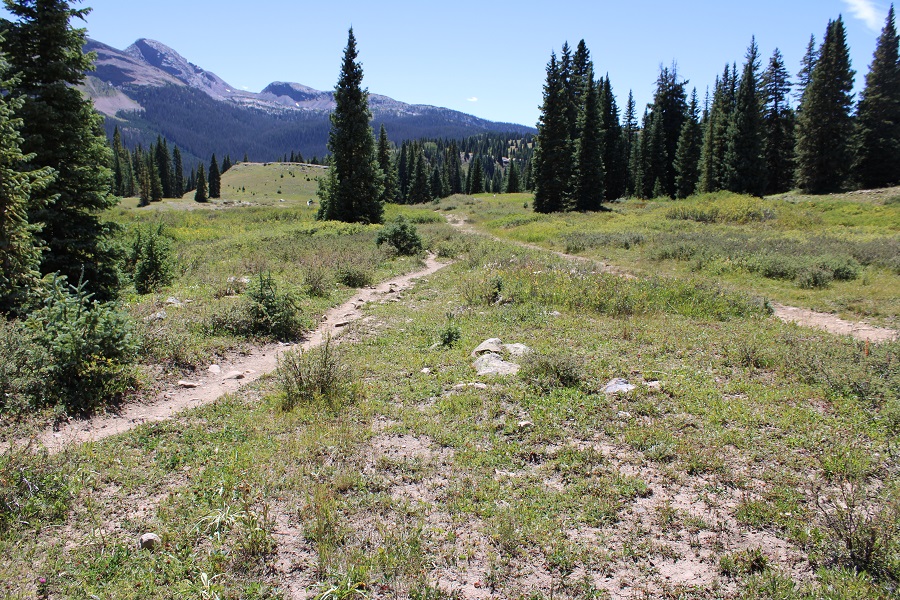
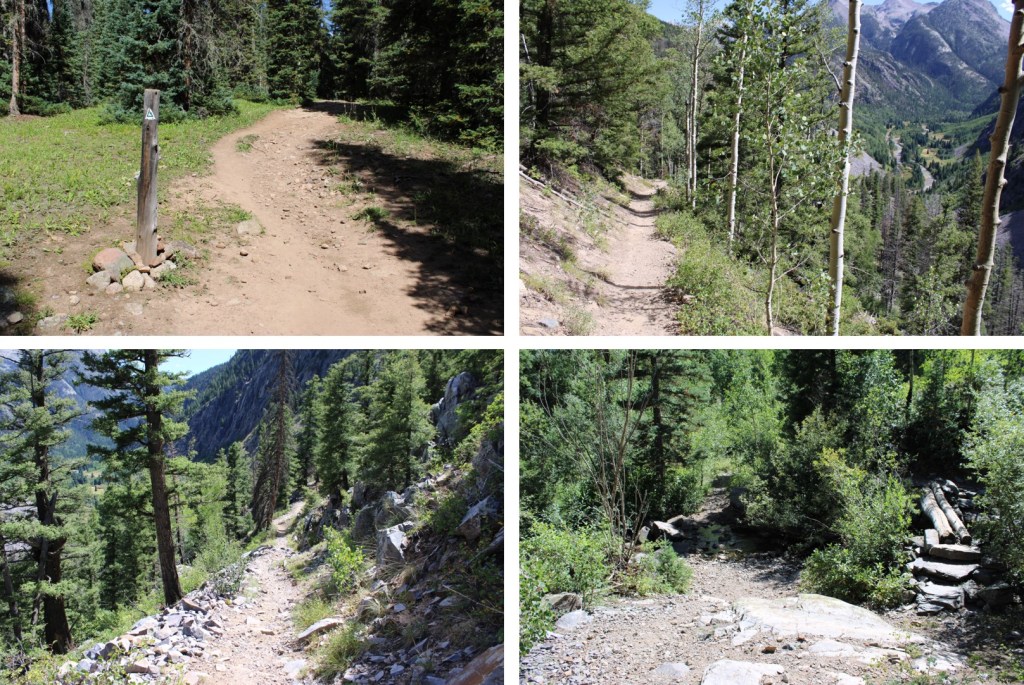
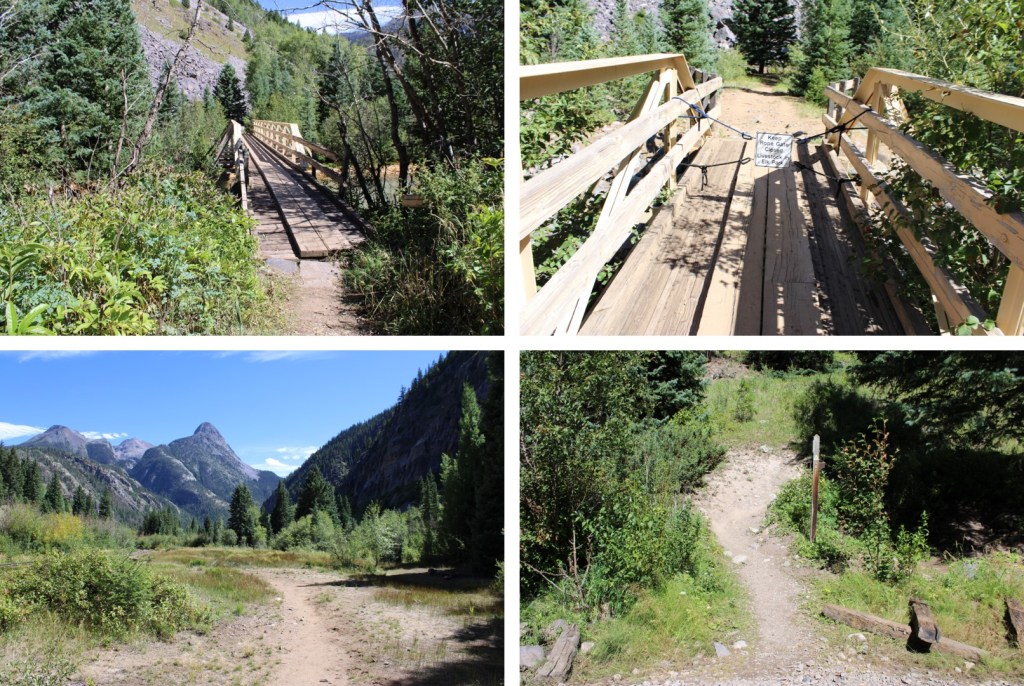
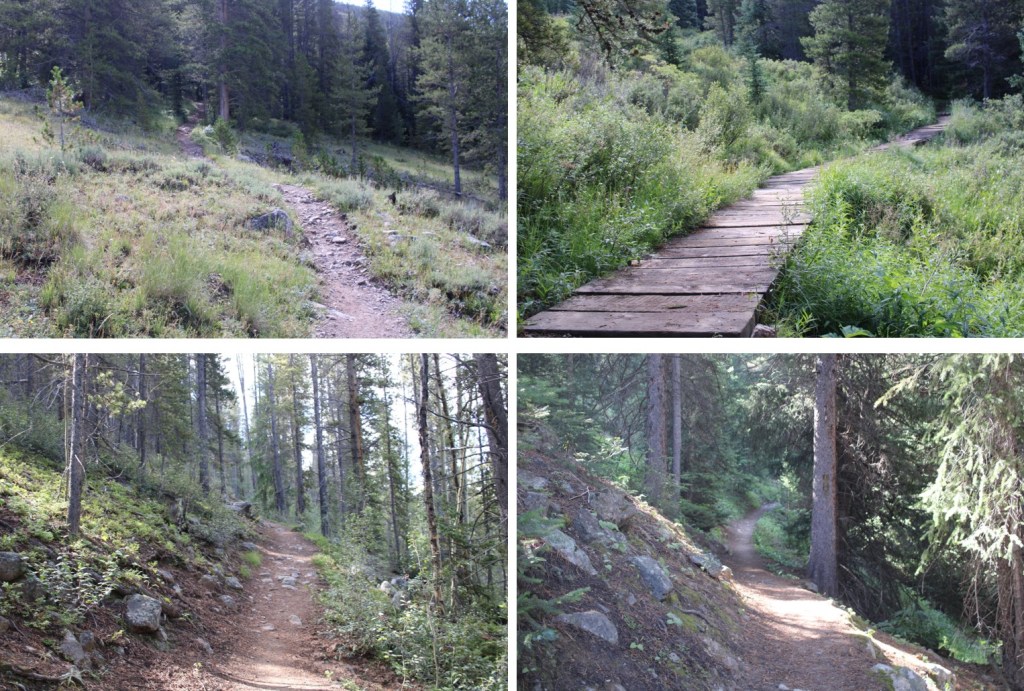
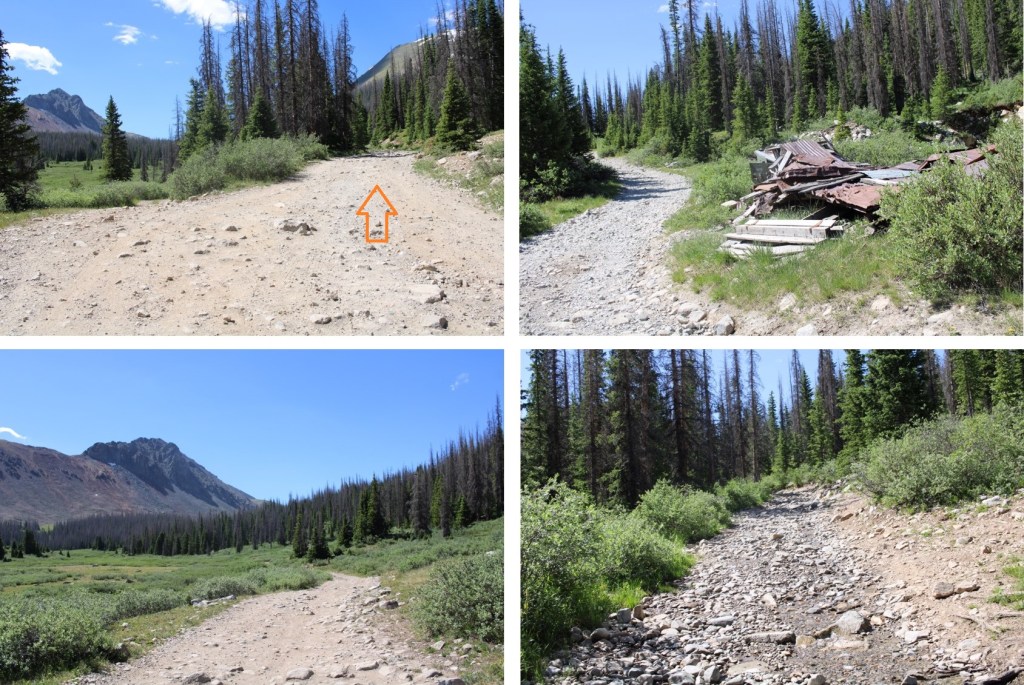
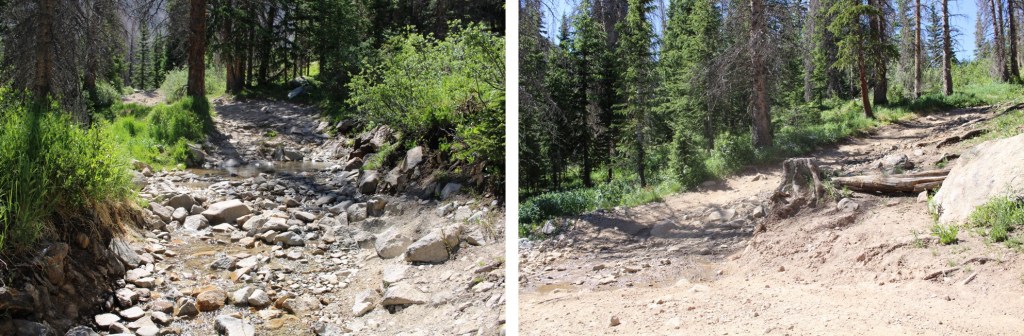
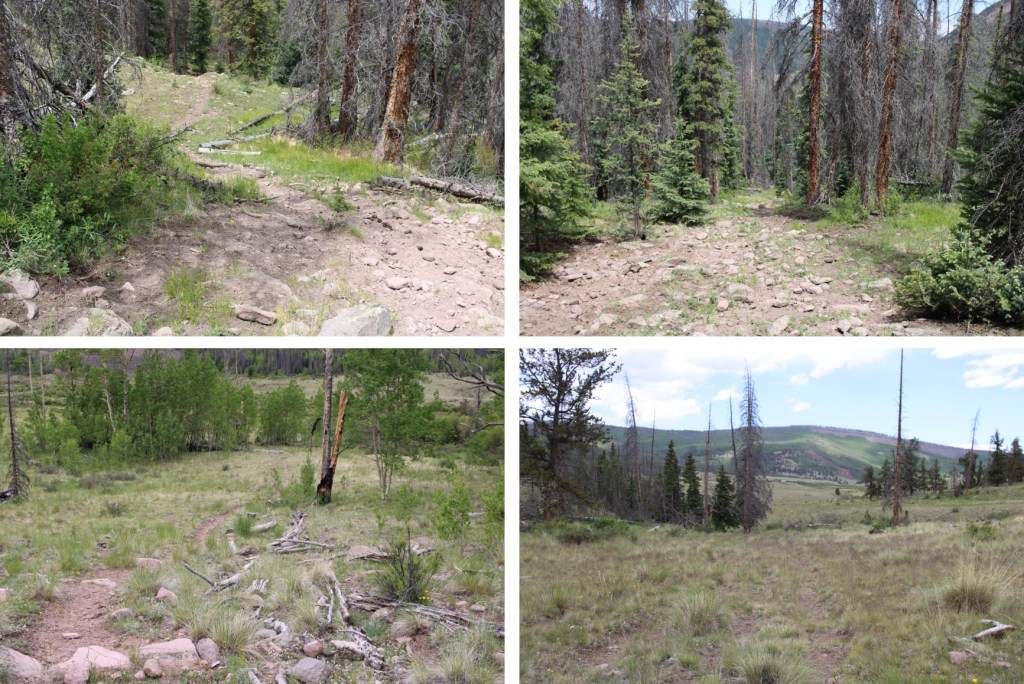
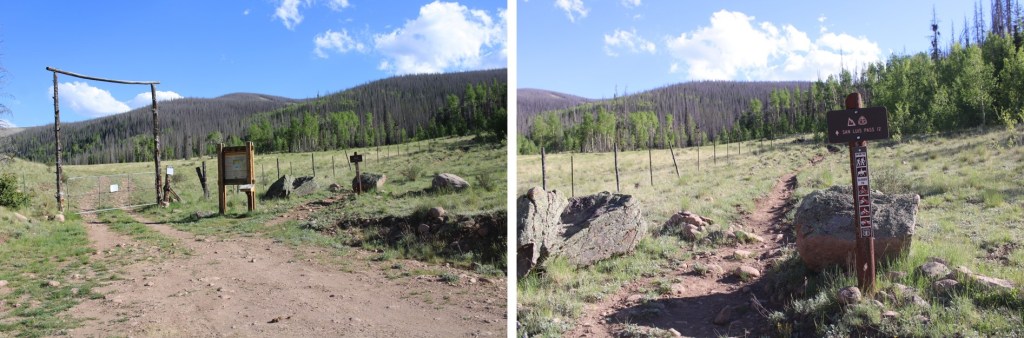
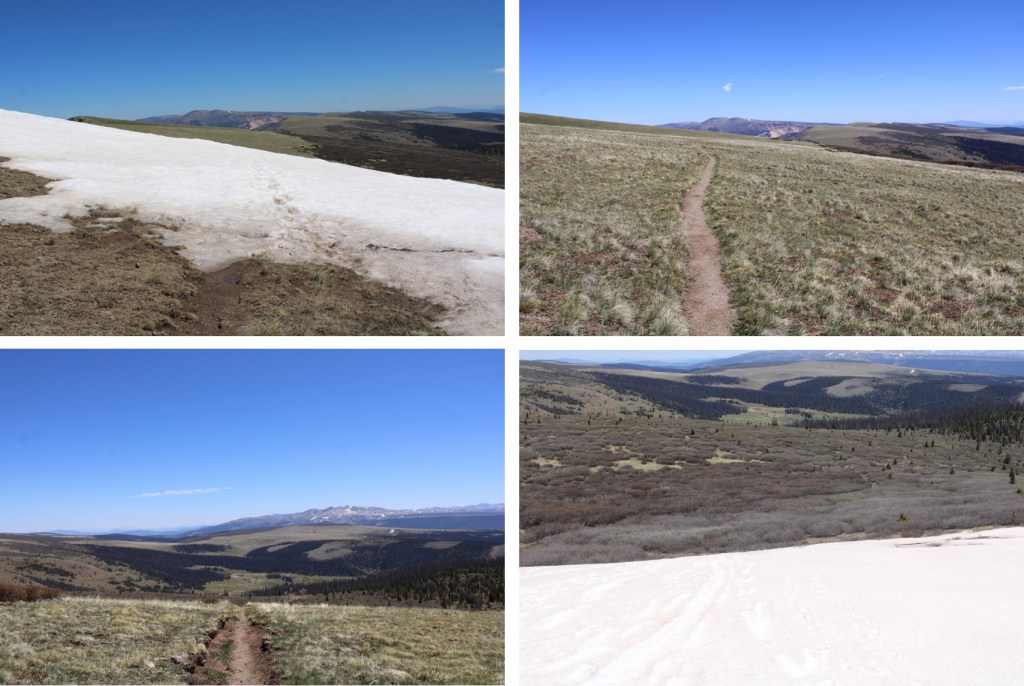
I followed the CDT north for 2.2 miles.

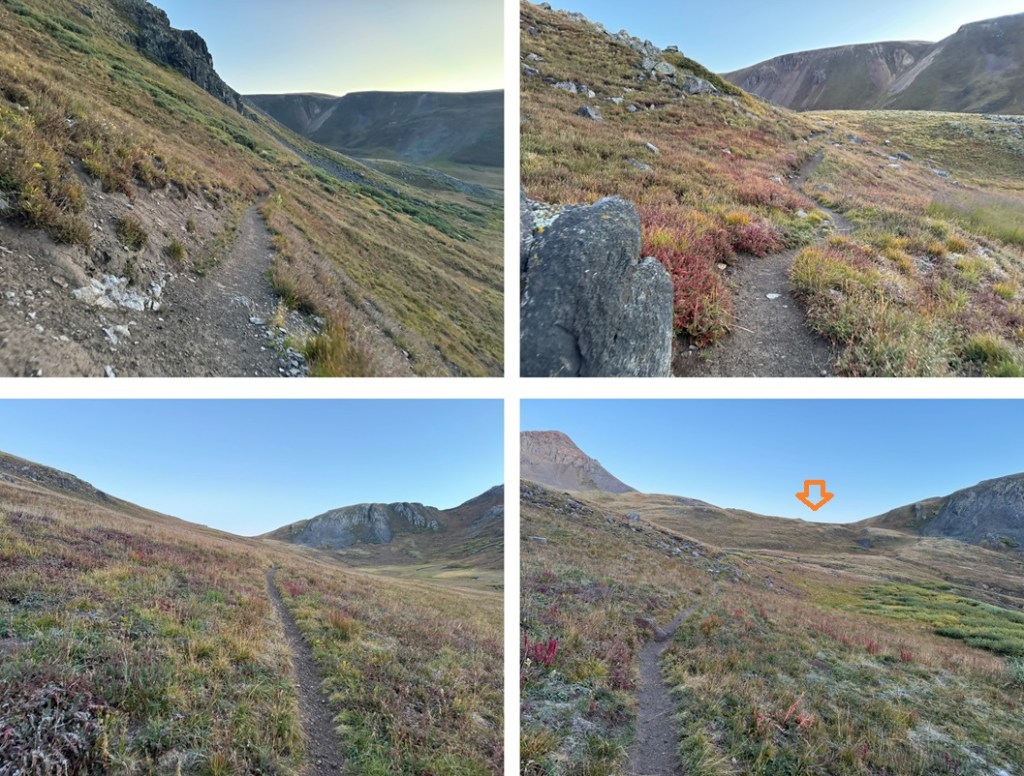
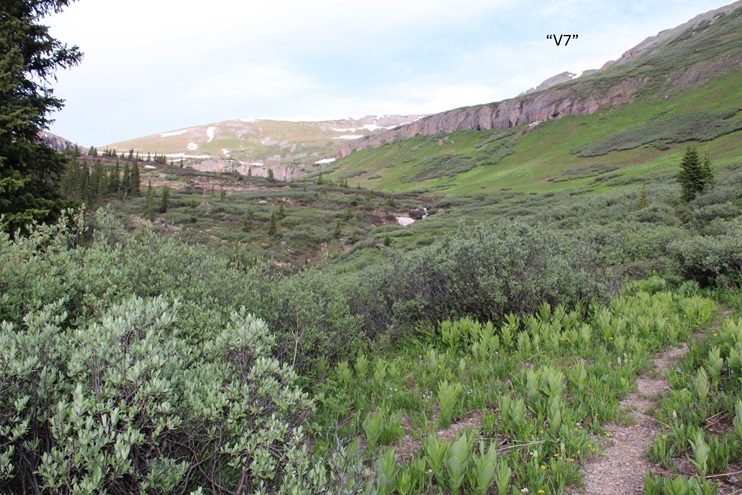
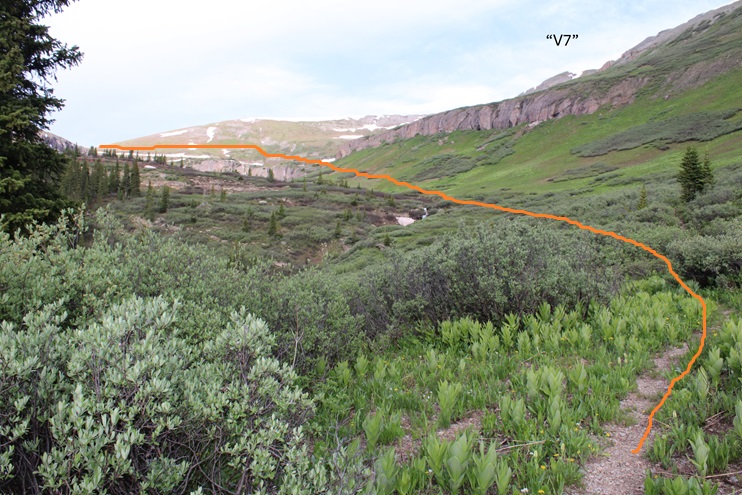
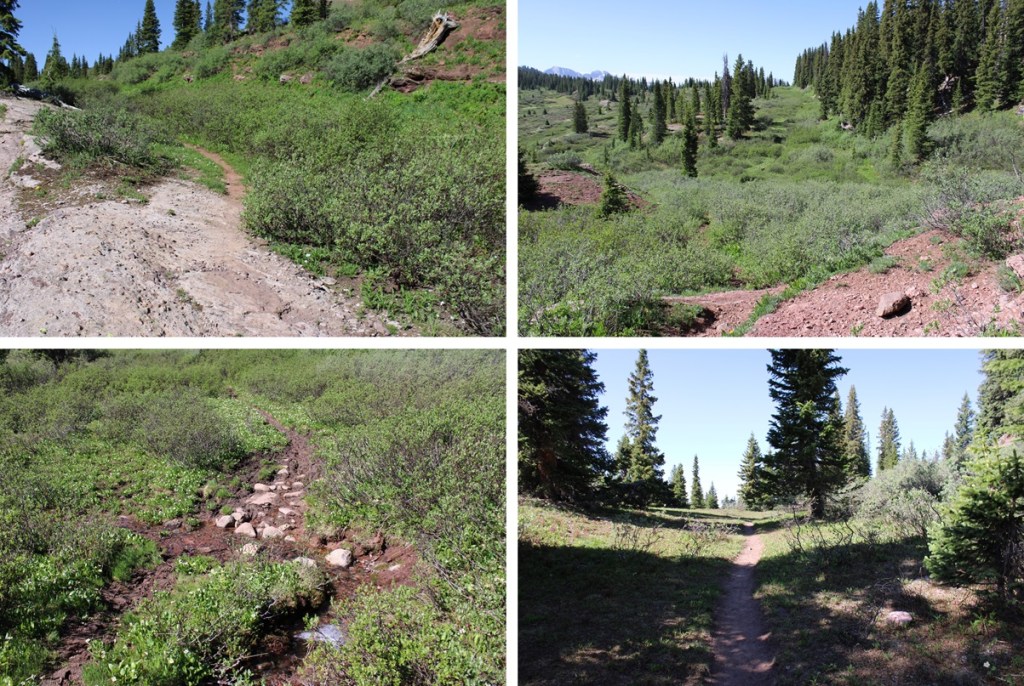
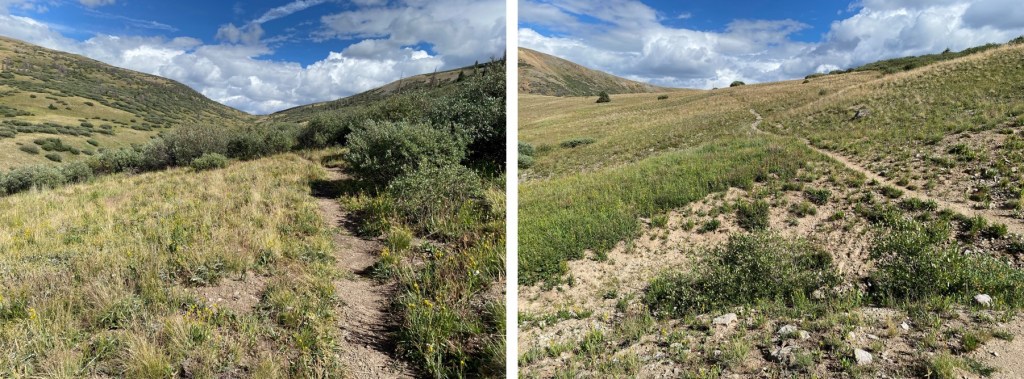
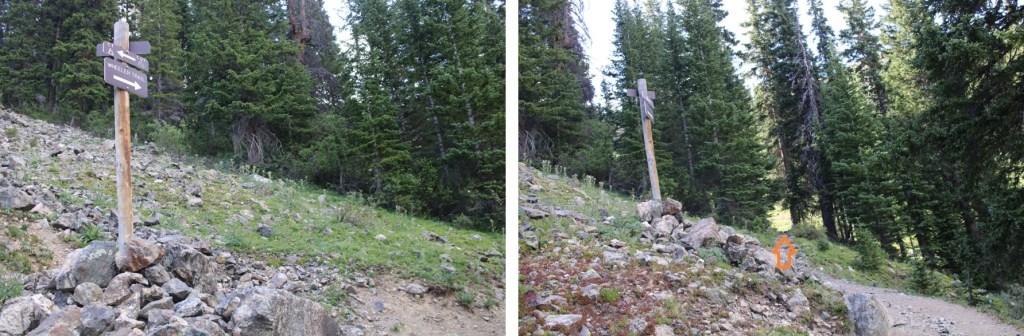
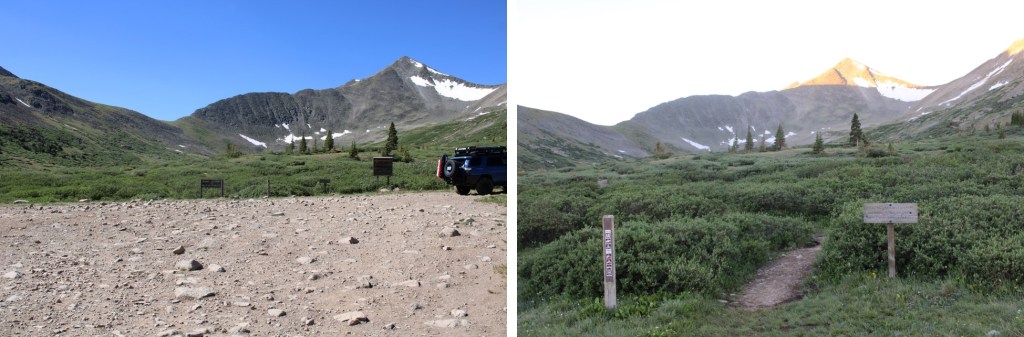
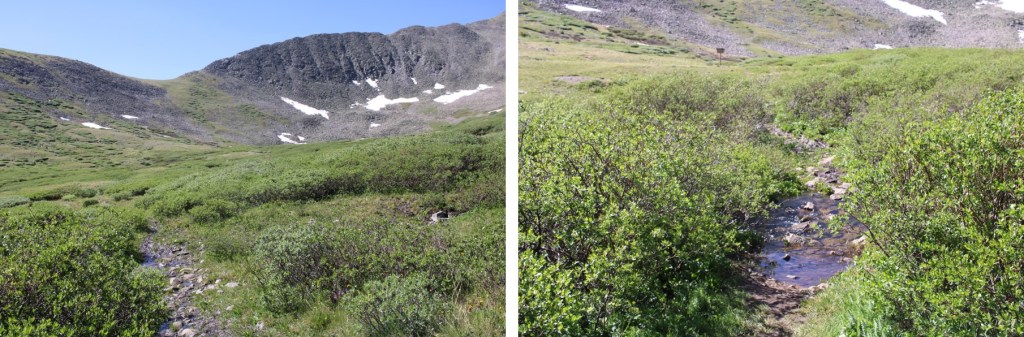
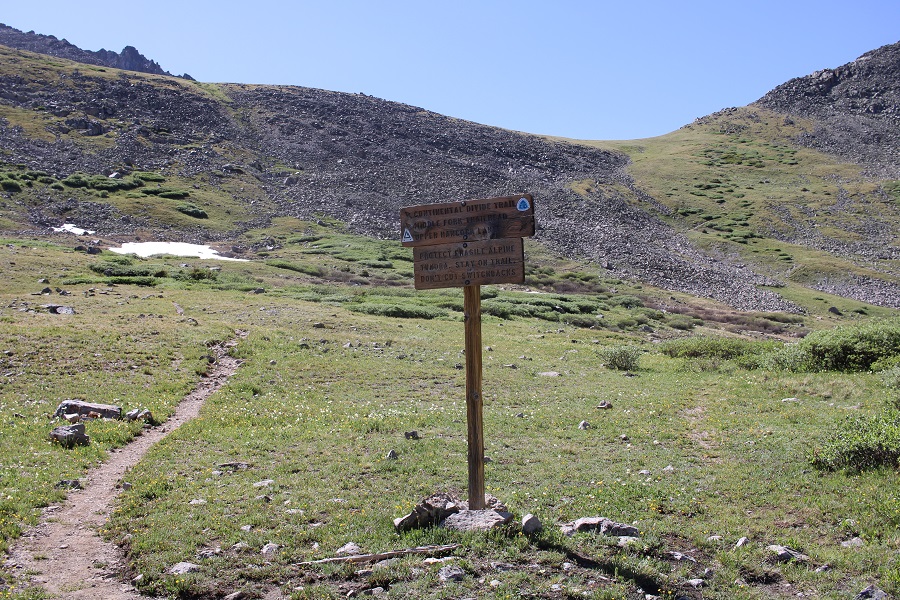
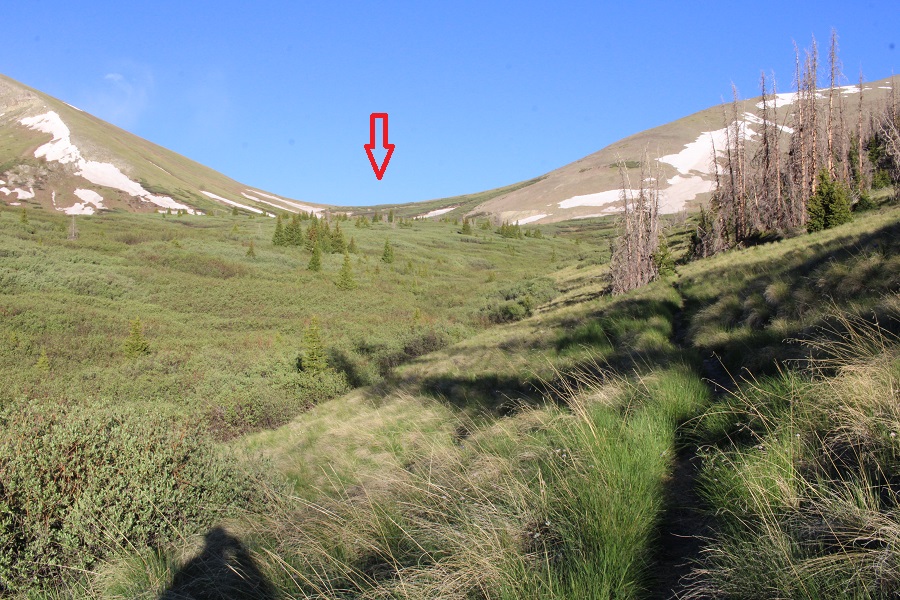
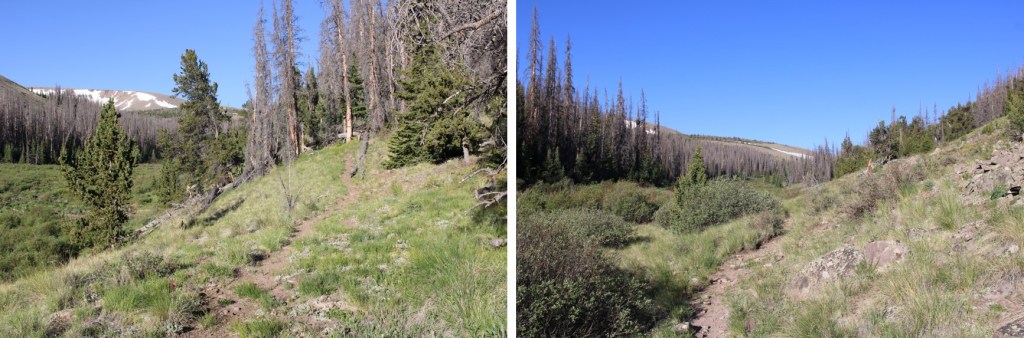
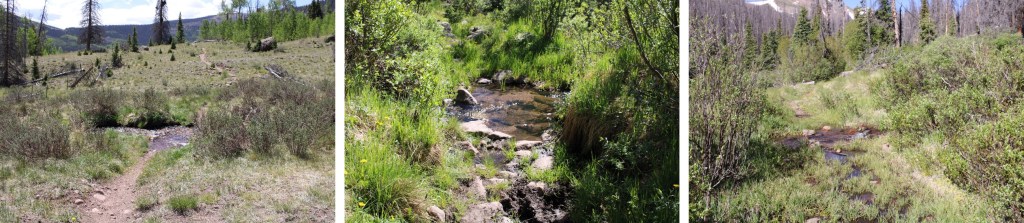
At the junction with Moose Gulch, I turned right to stay on the CDT, and continued on the trail until I made it to 12800’.

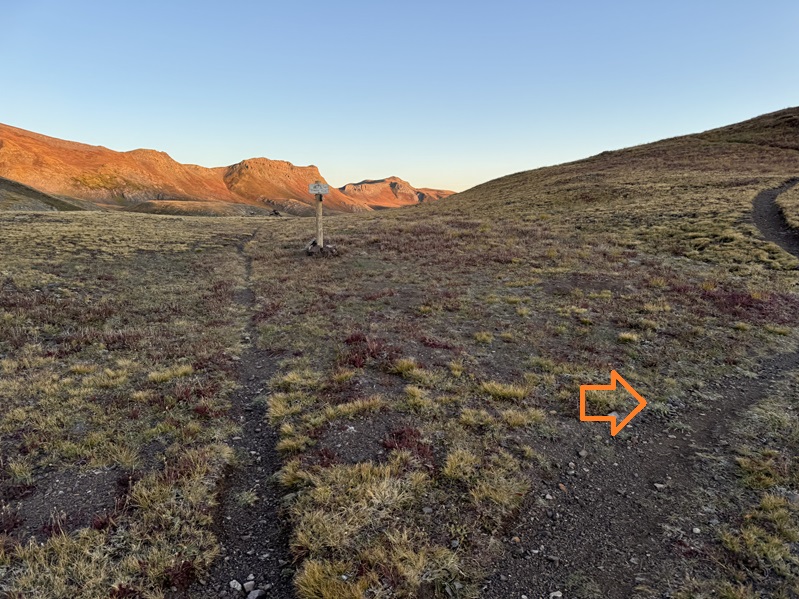
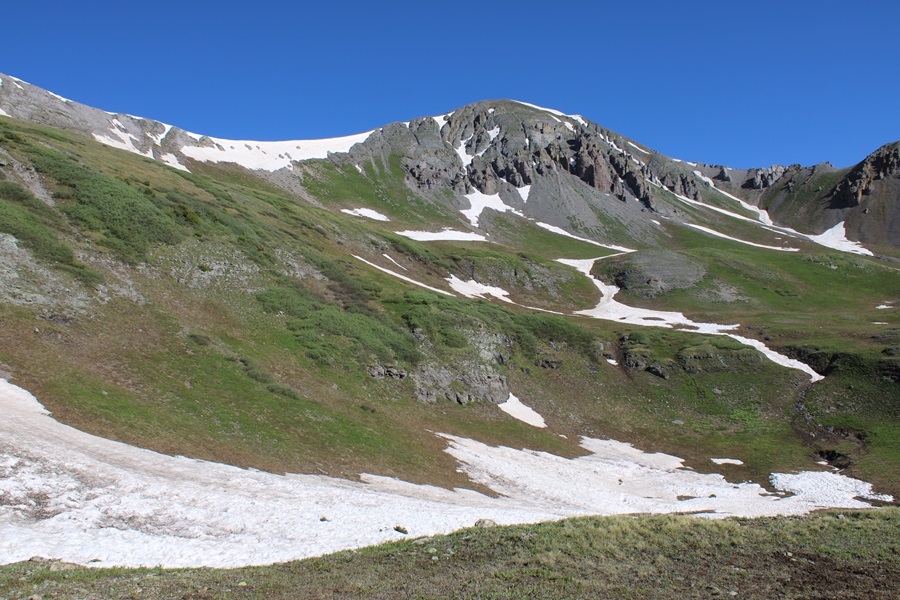
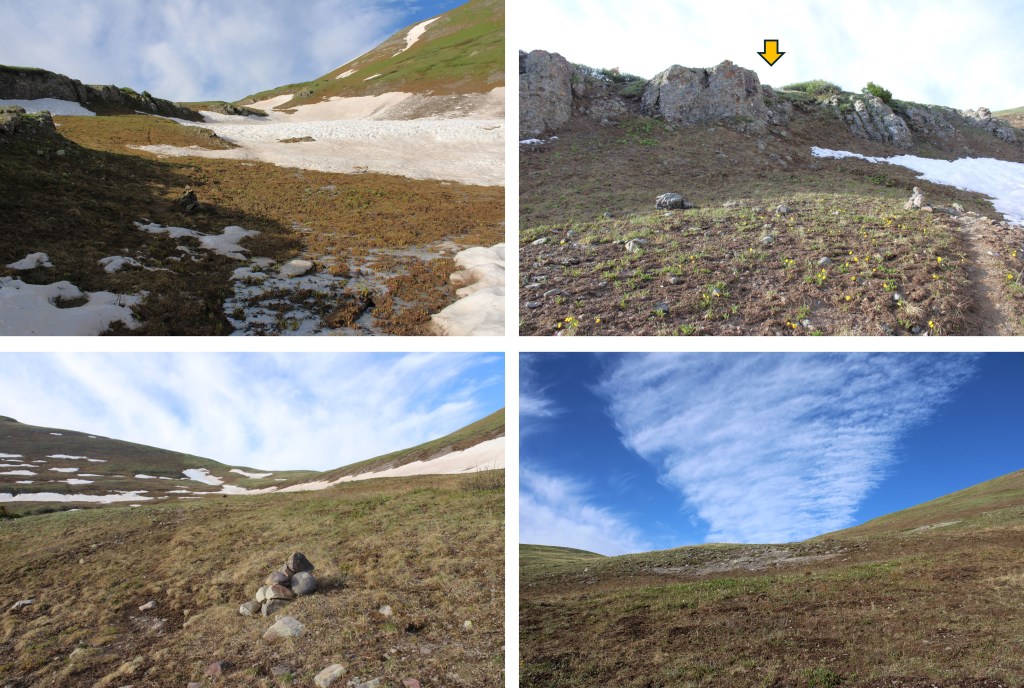
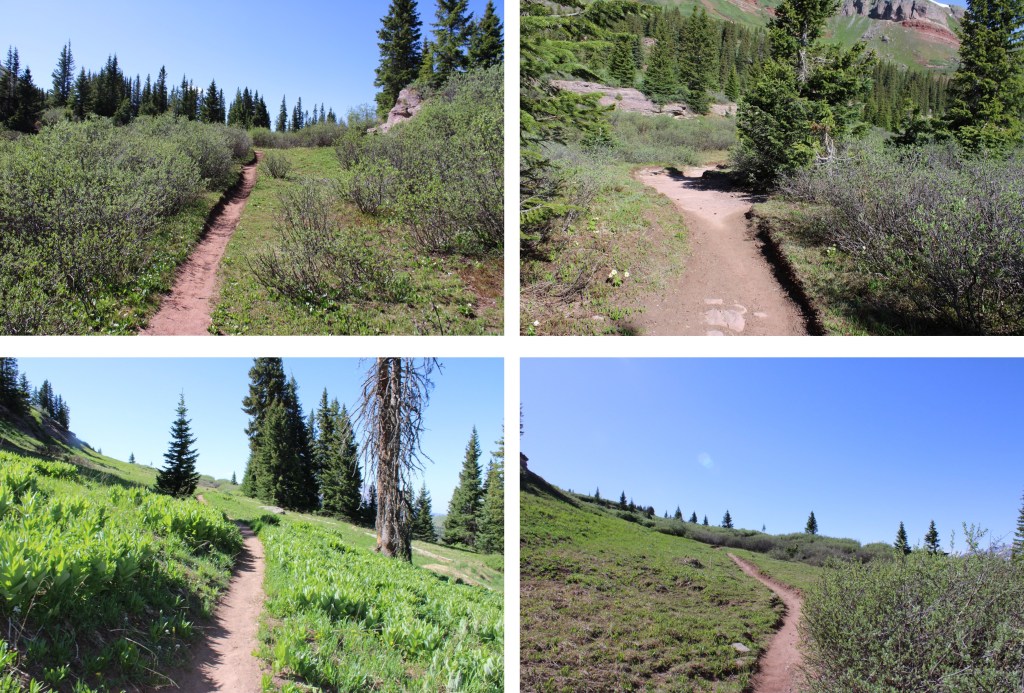
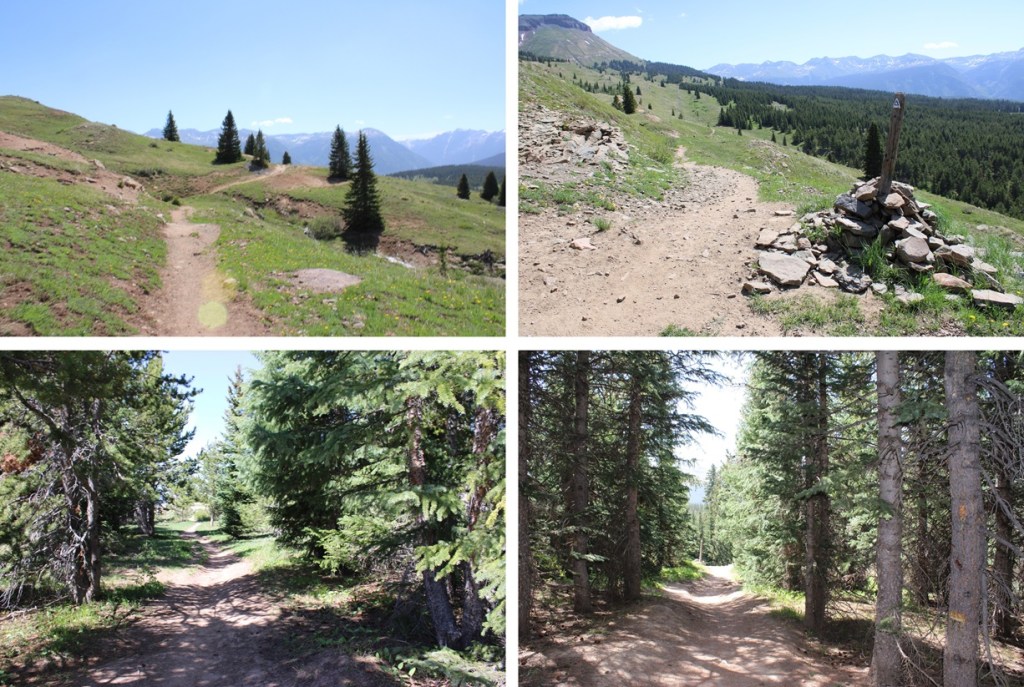
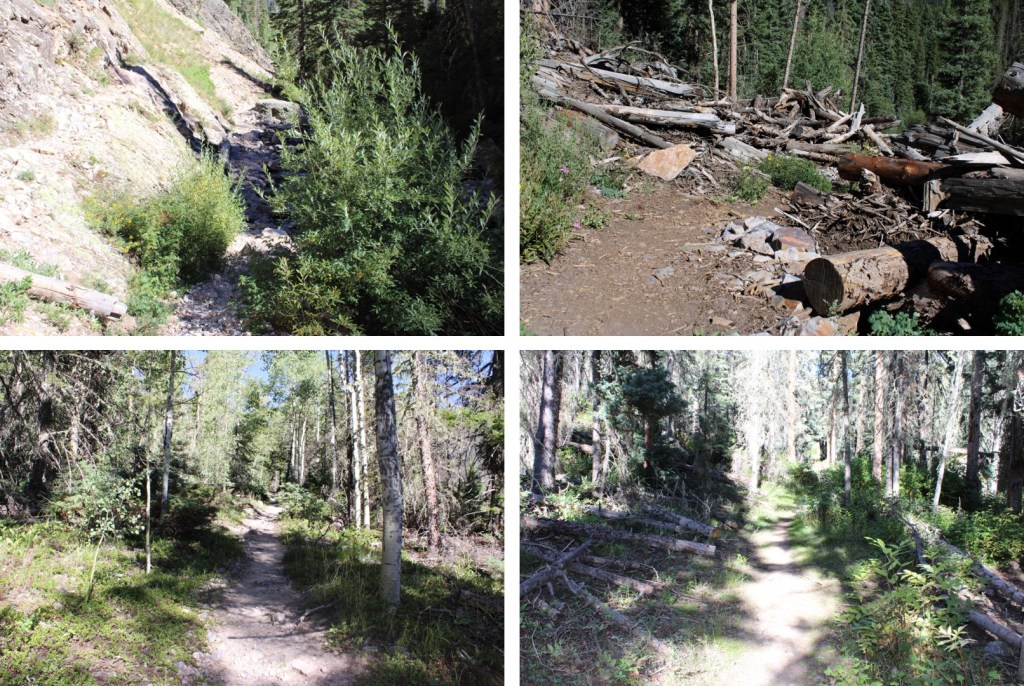
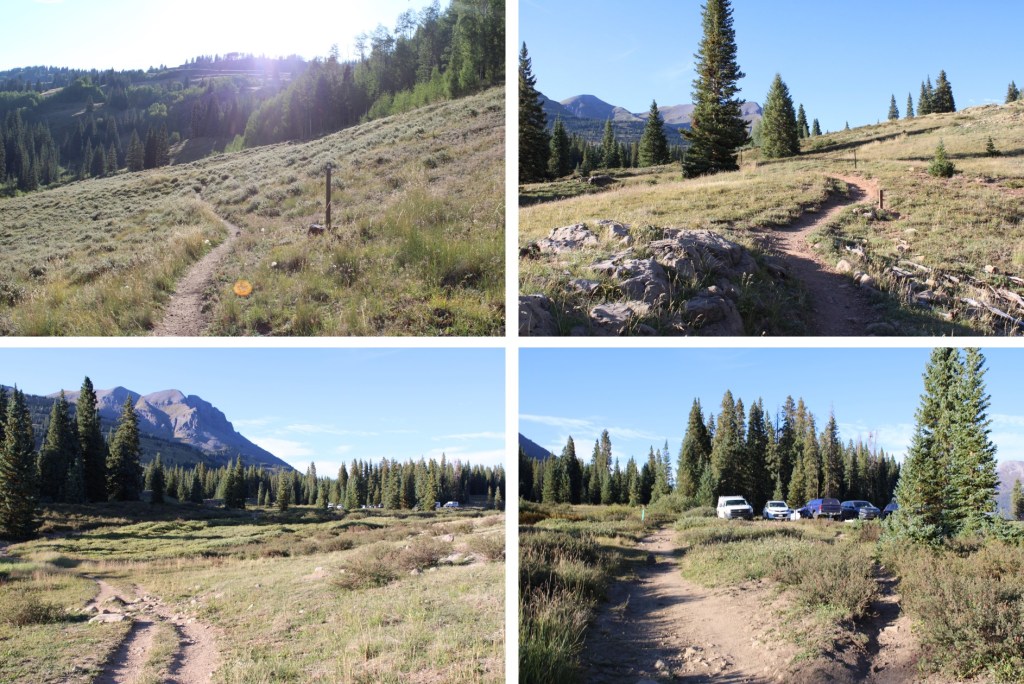
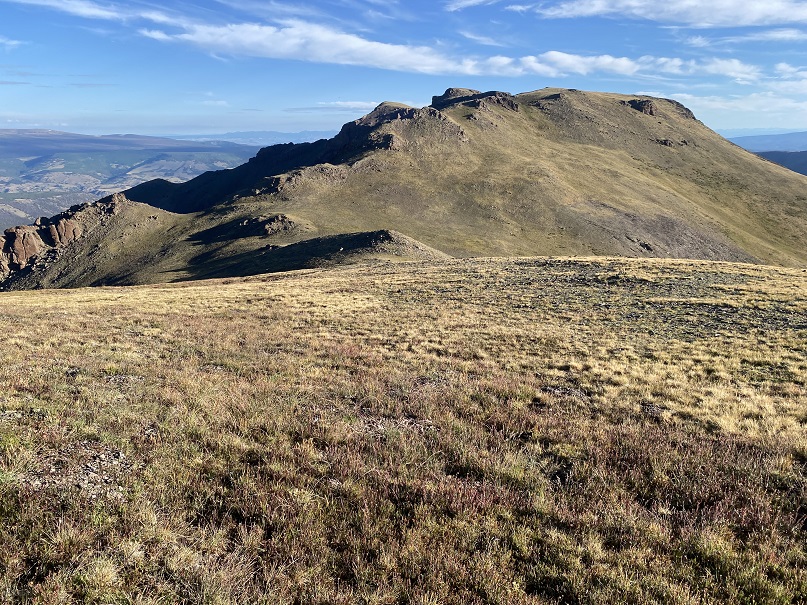
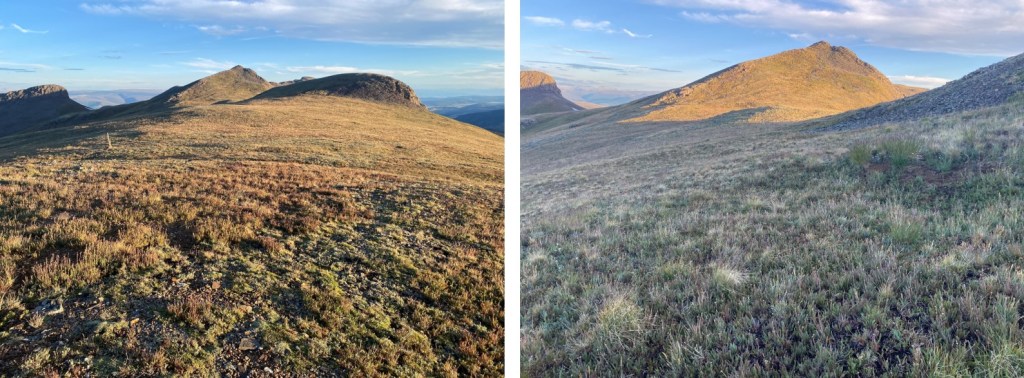
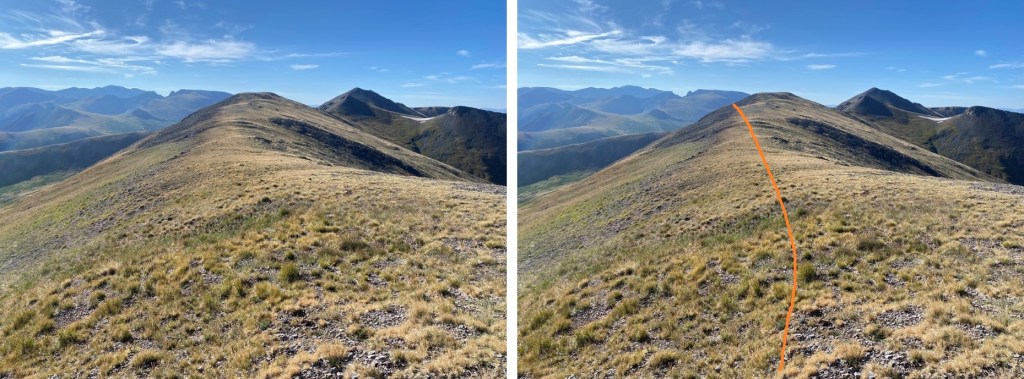
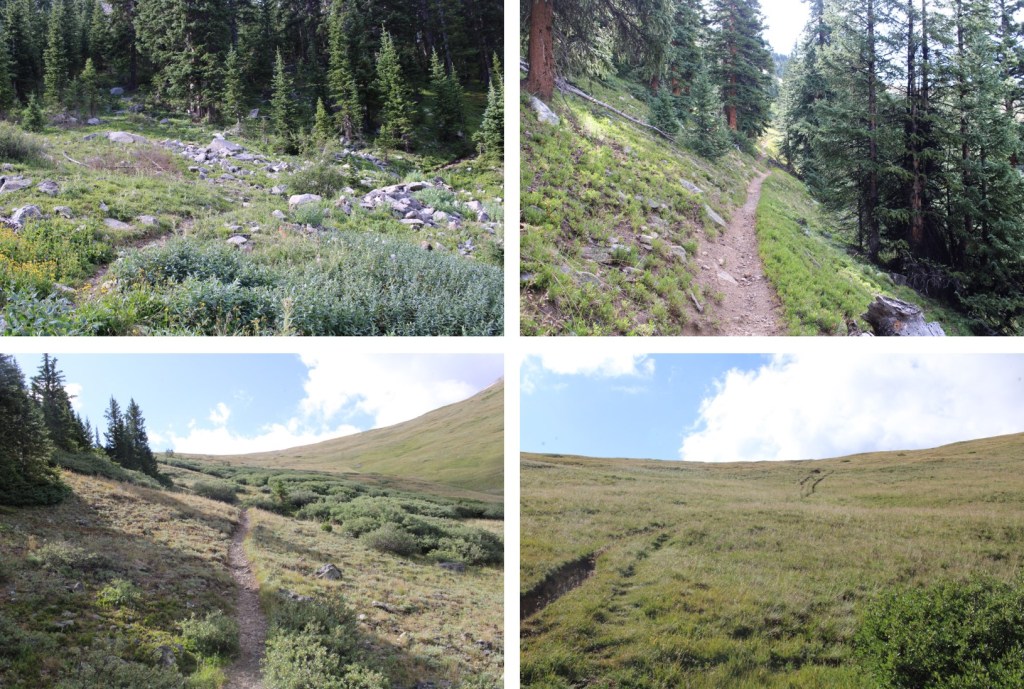
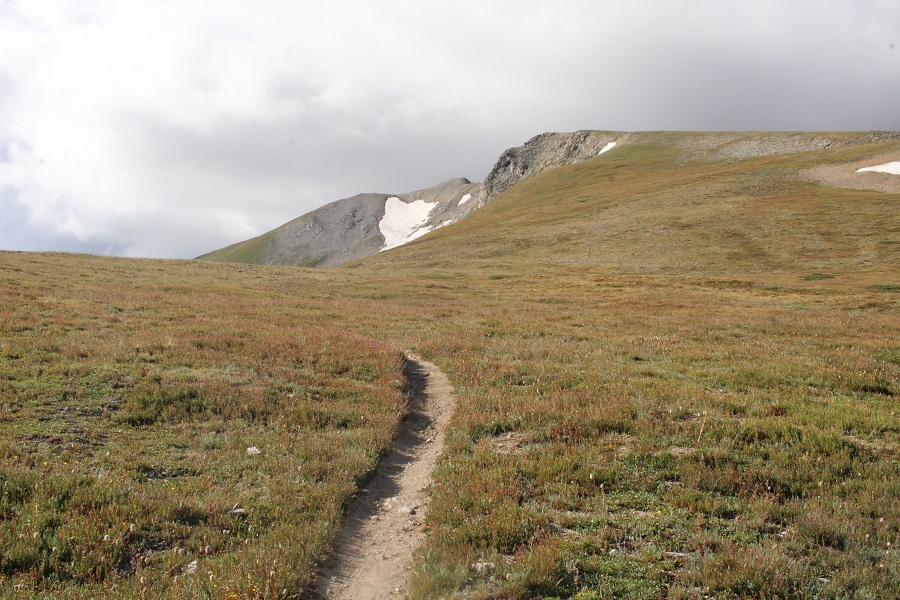
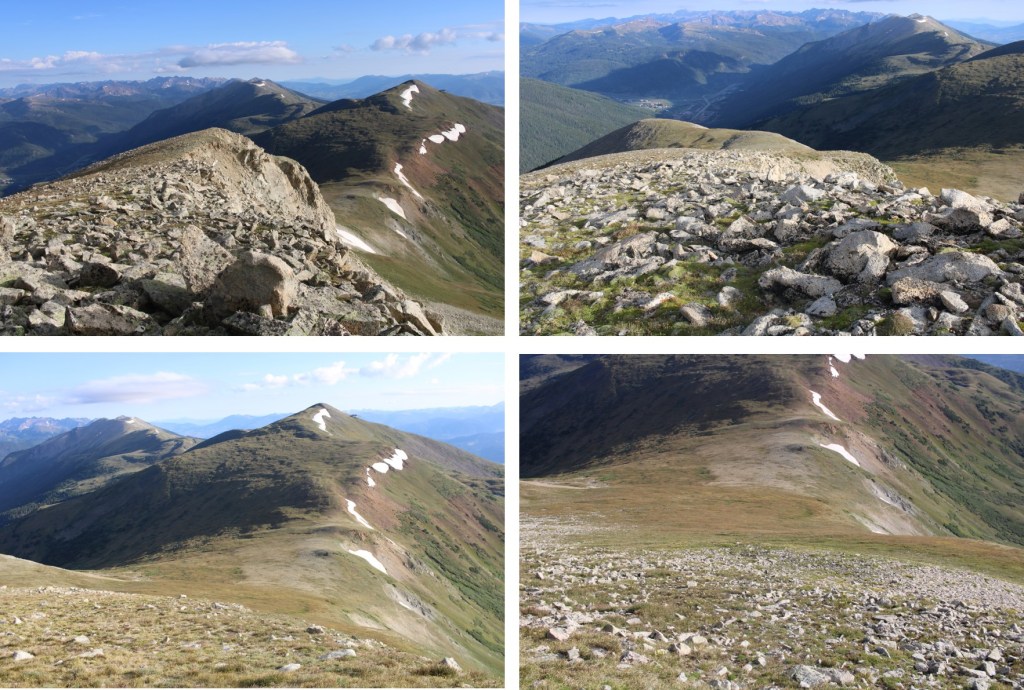
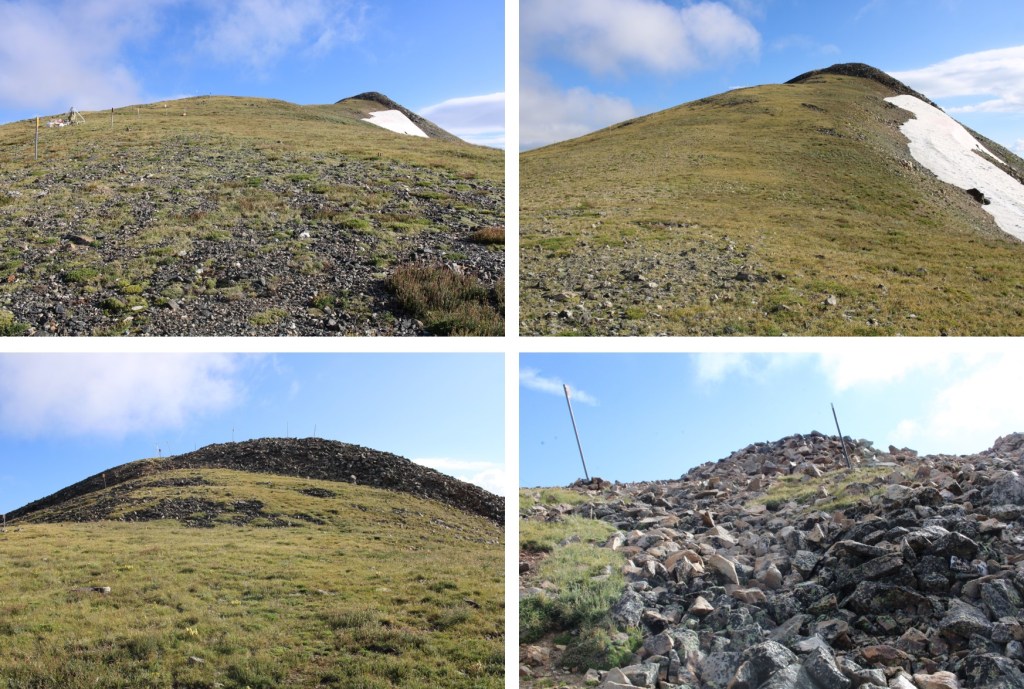
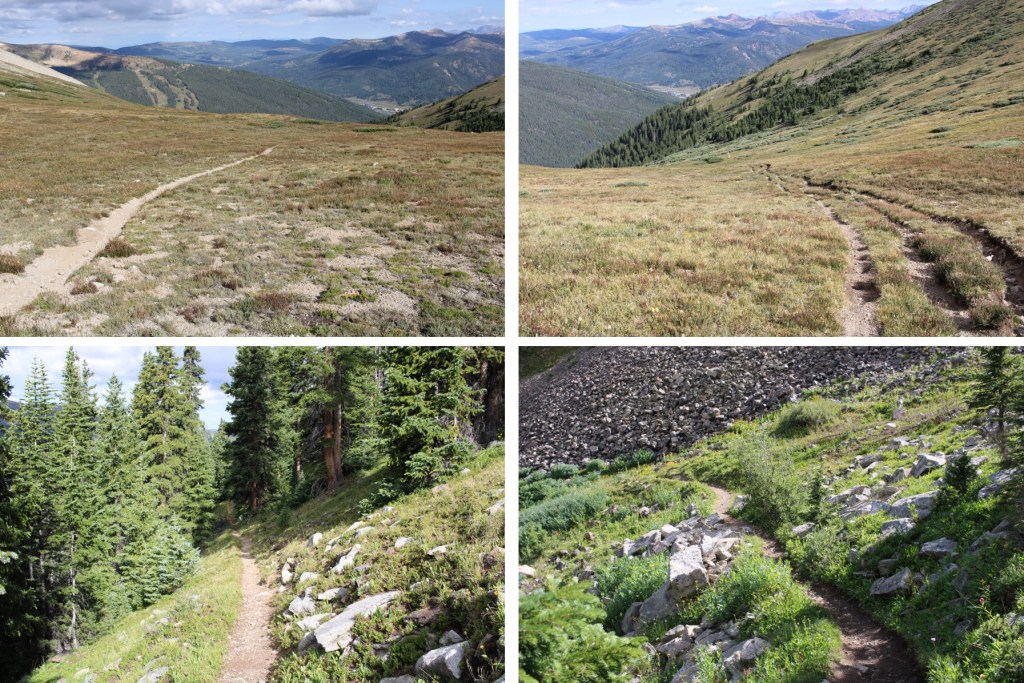
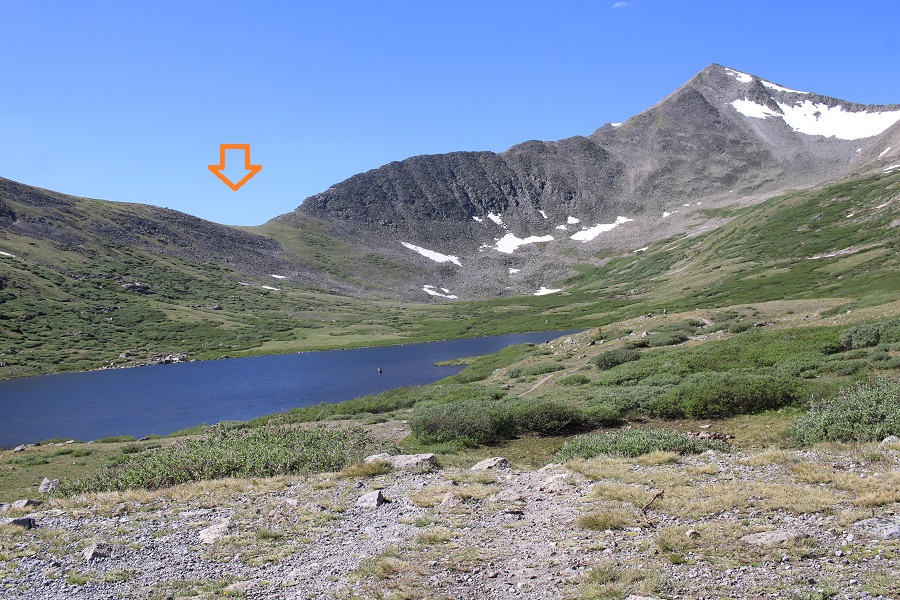
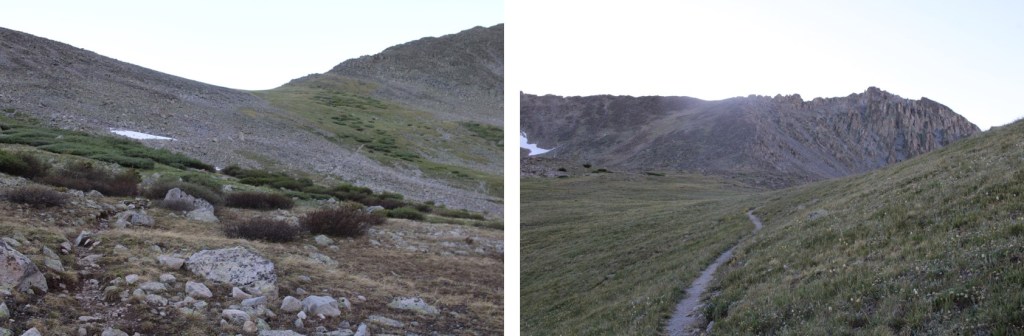
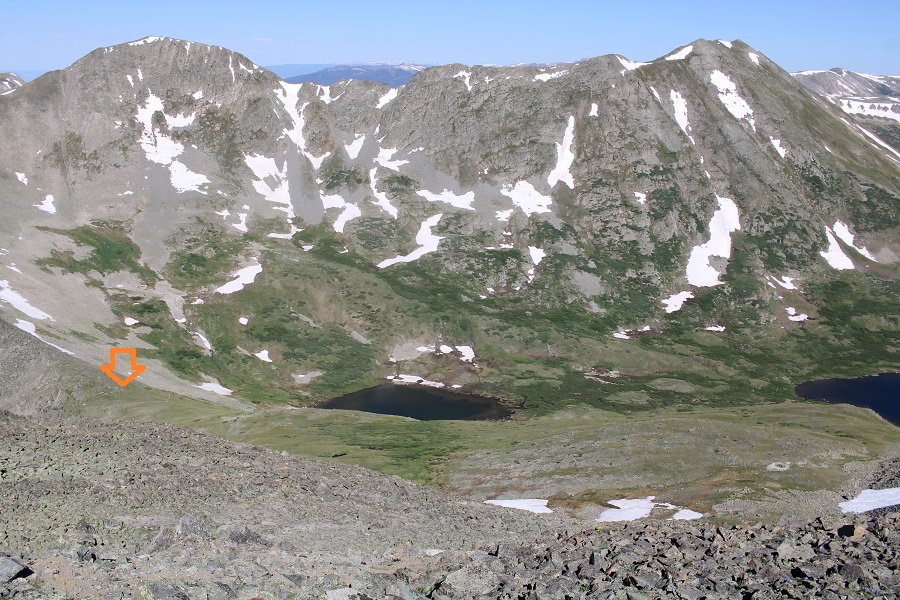
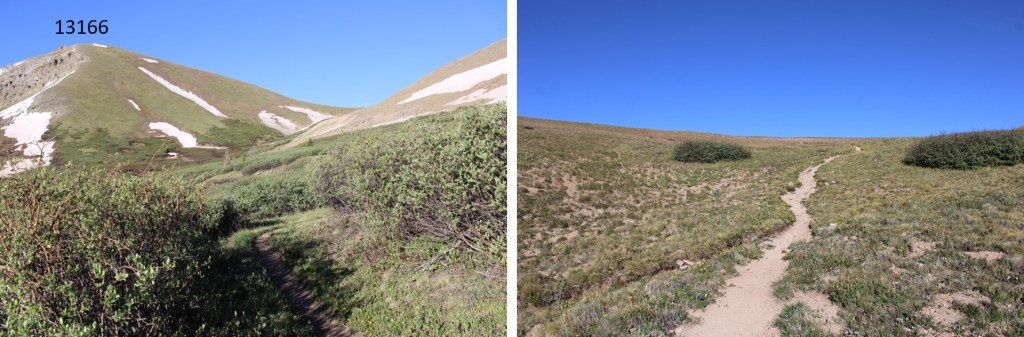
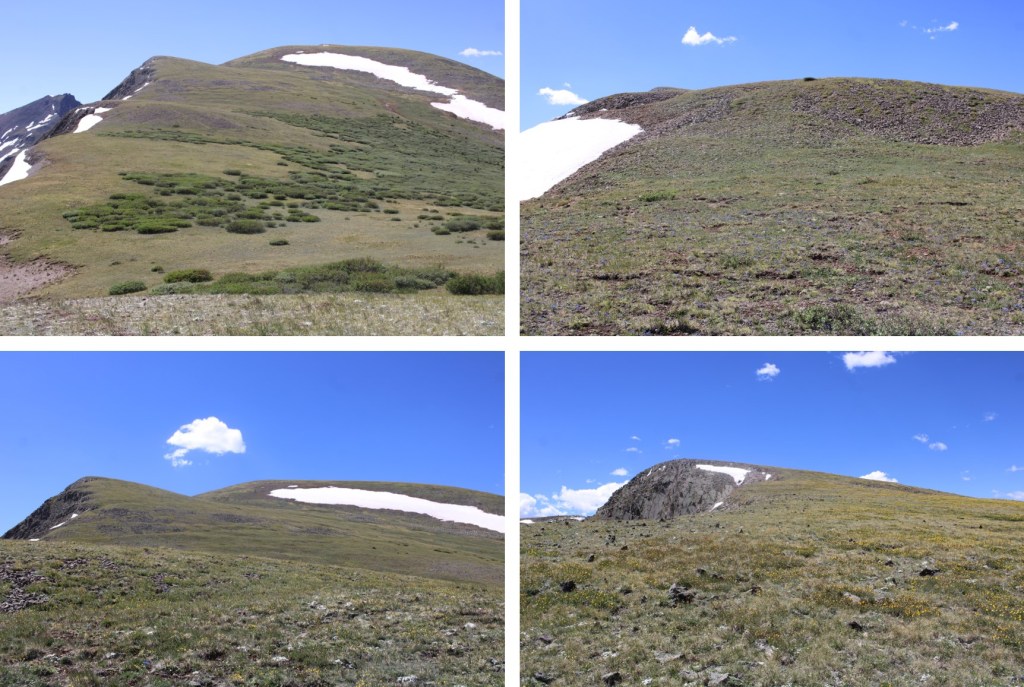
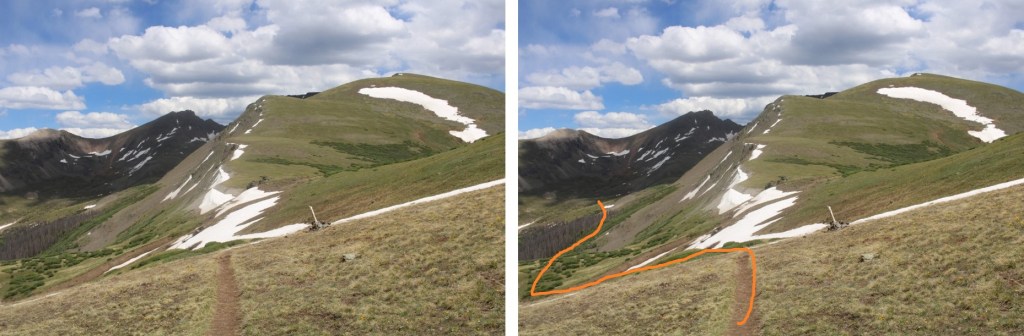
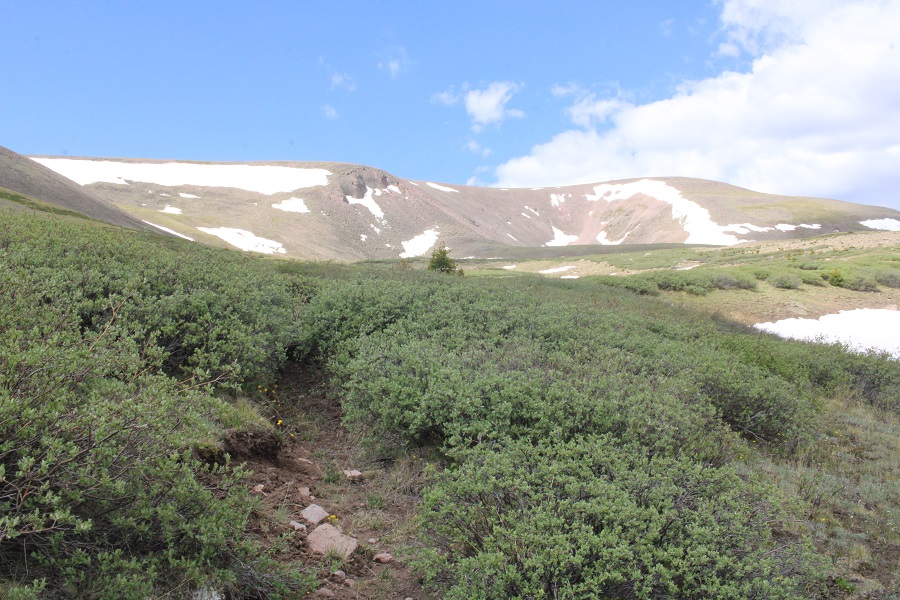
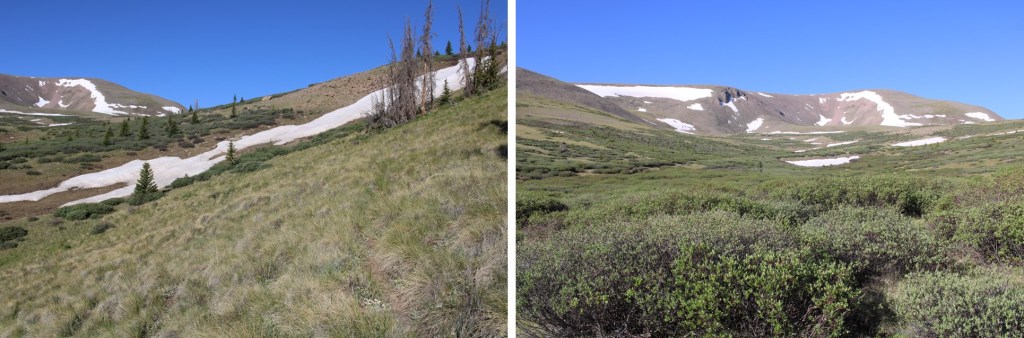
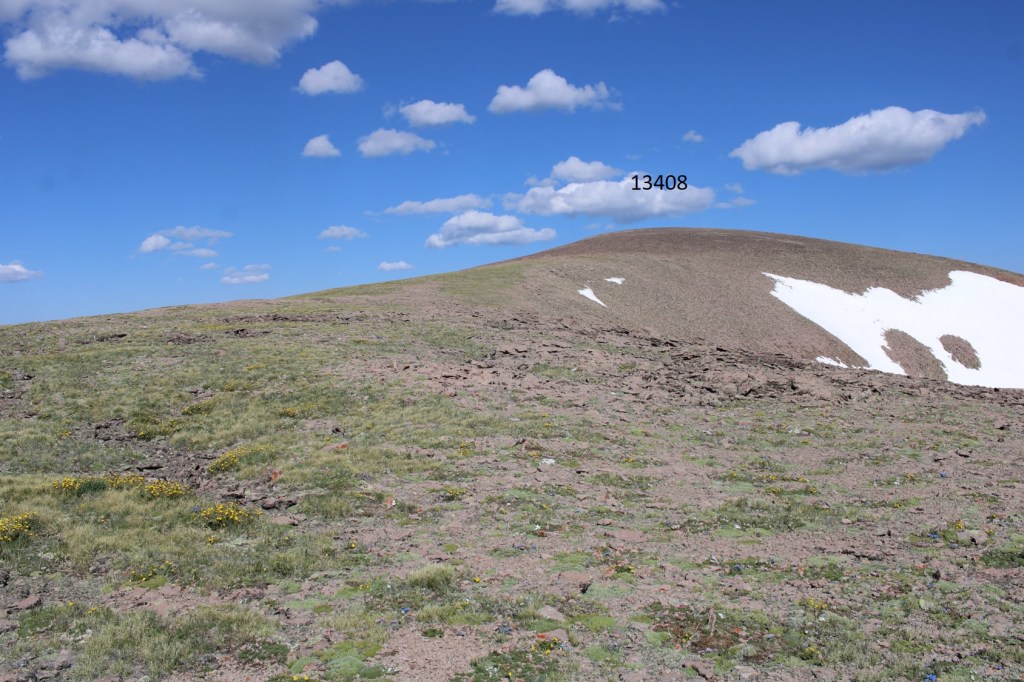
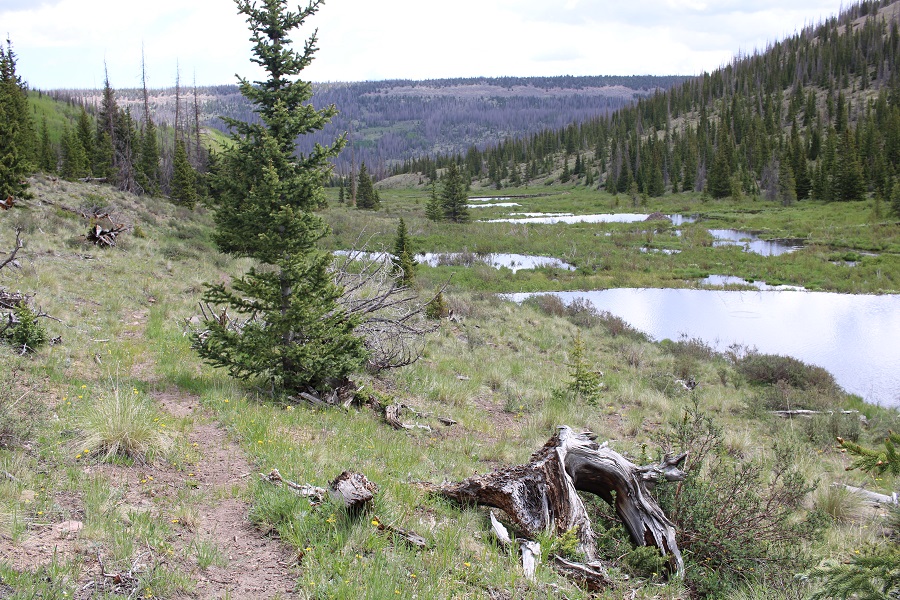
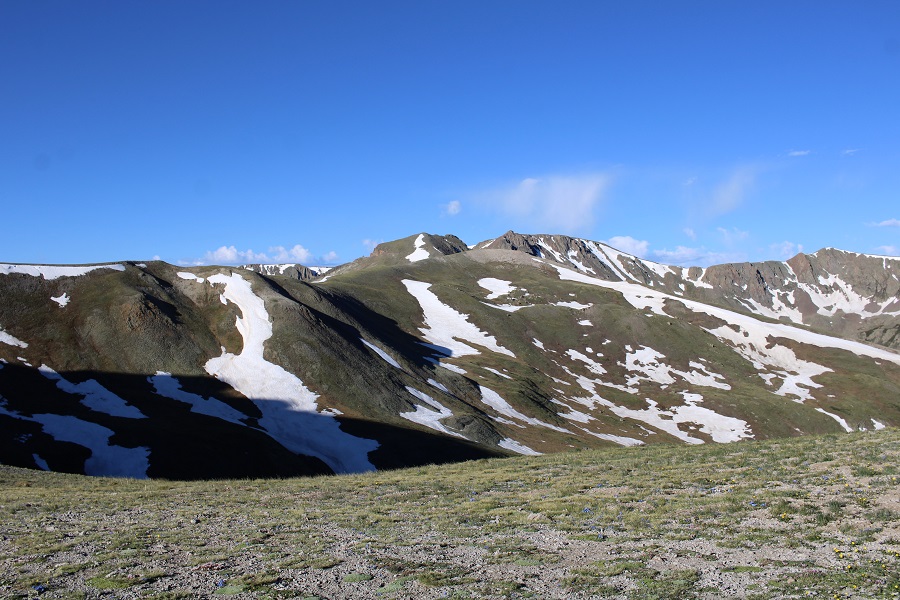
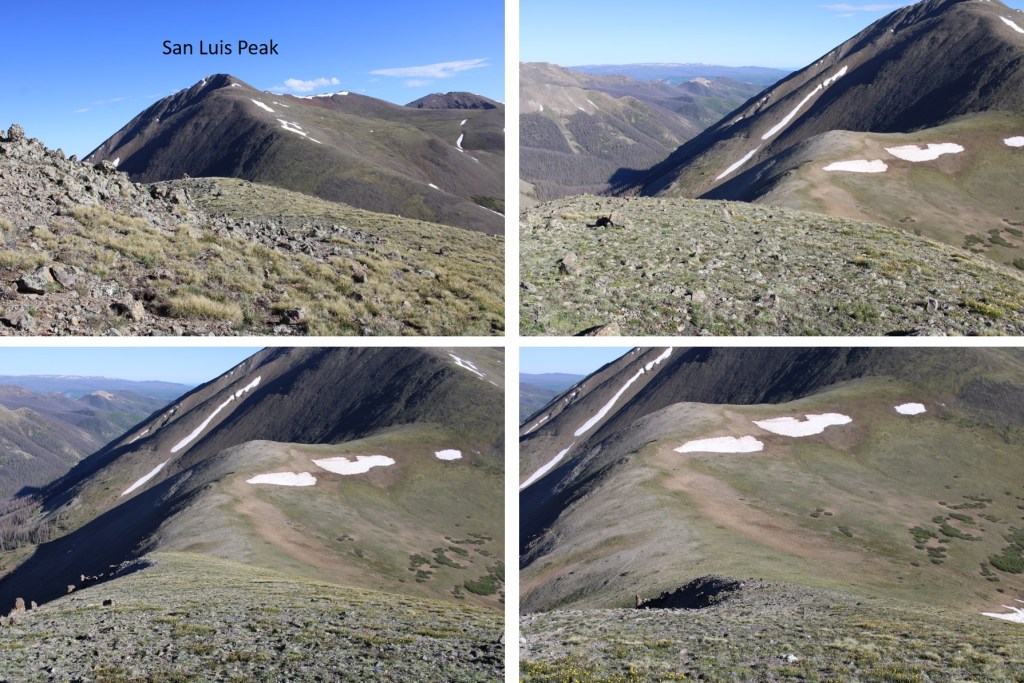
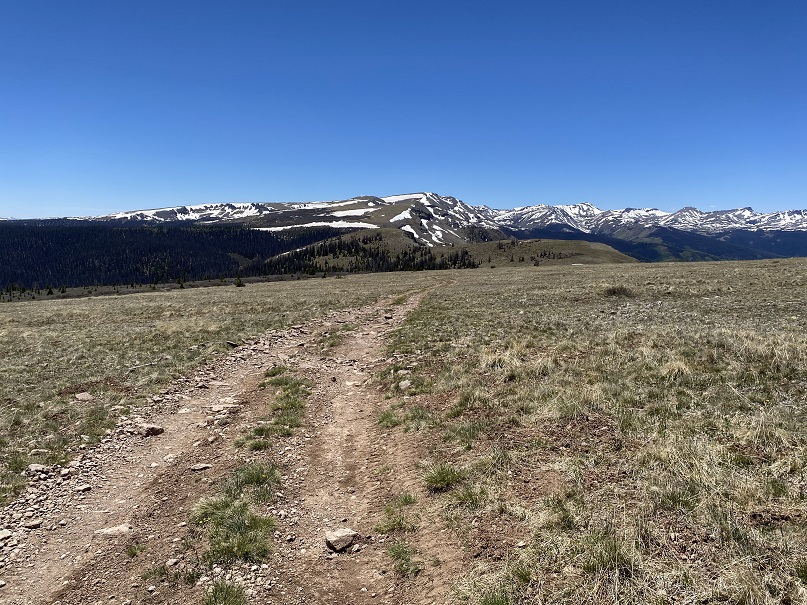
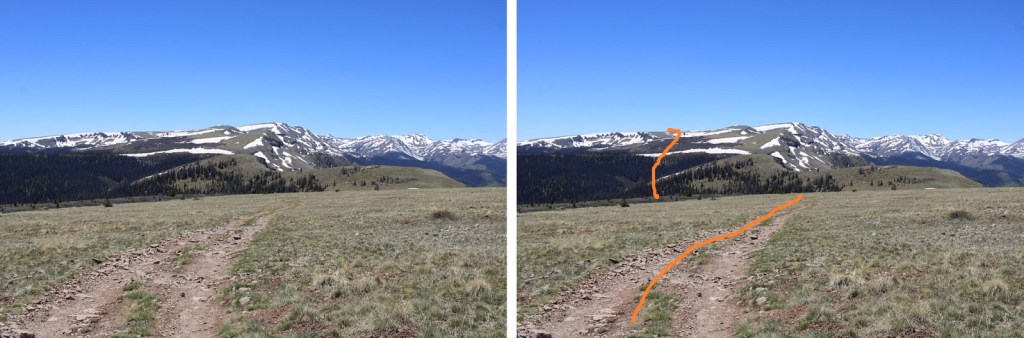
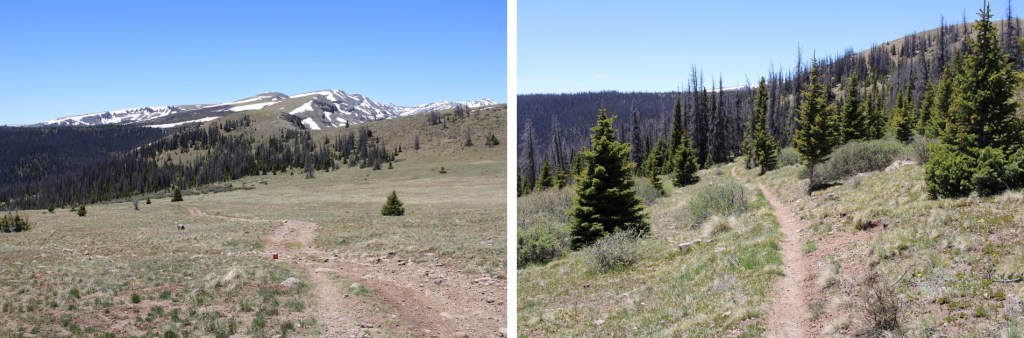
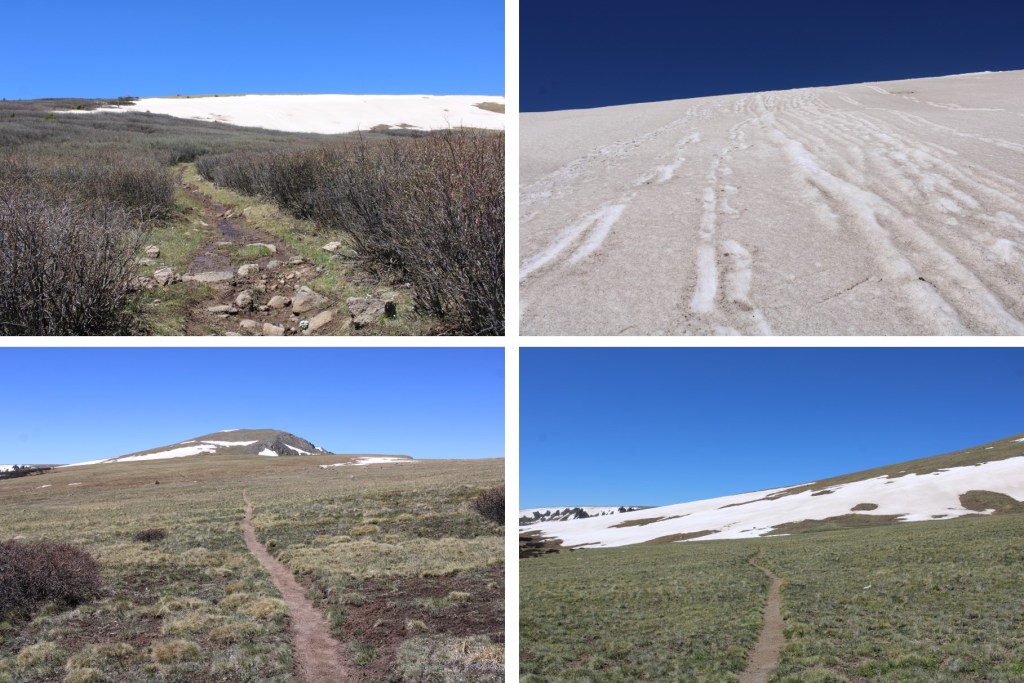
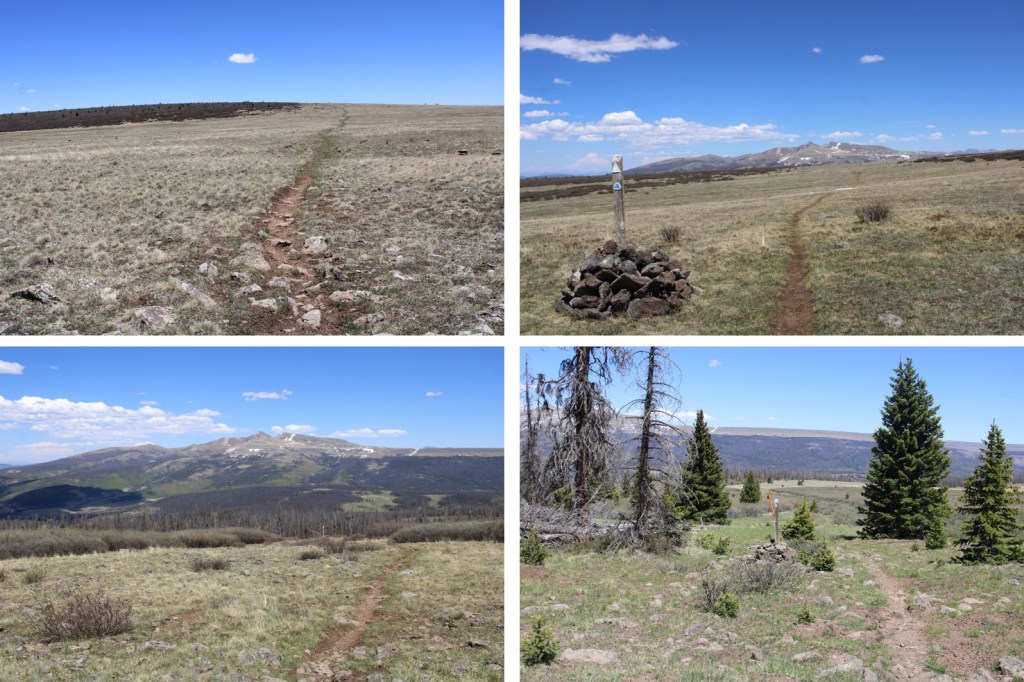
After passing a small pond to my right, at around 12800’, I left the CDT and followed the tundra ridge southeast.

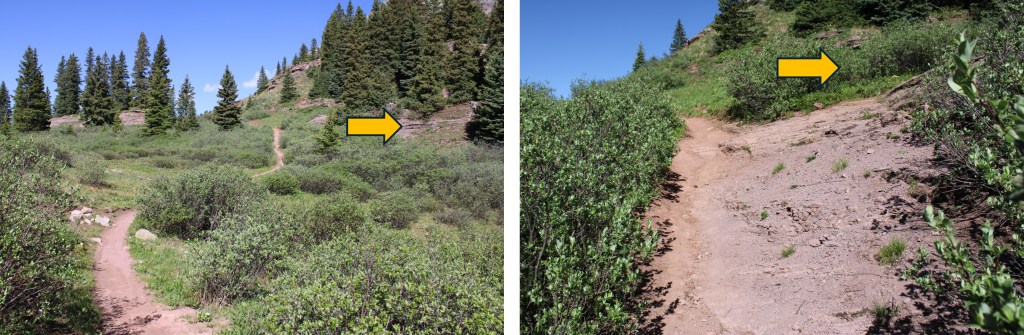
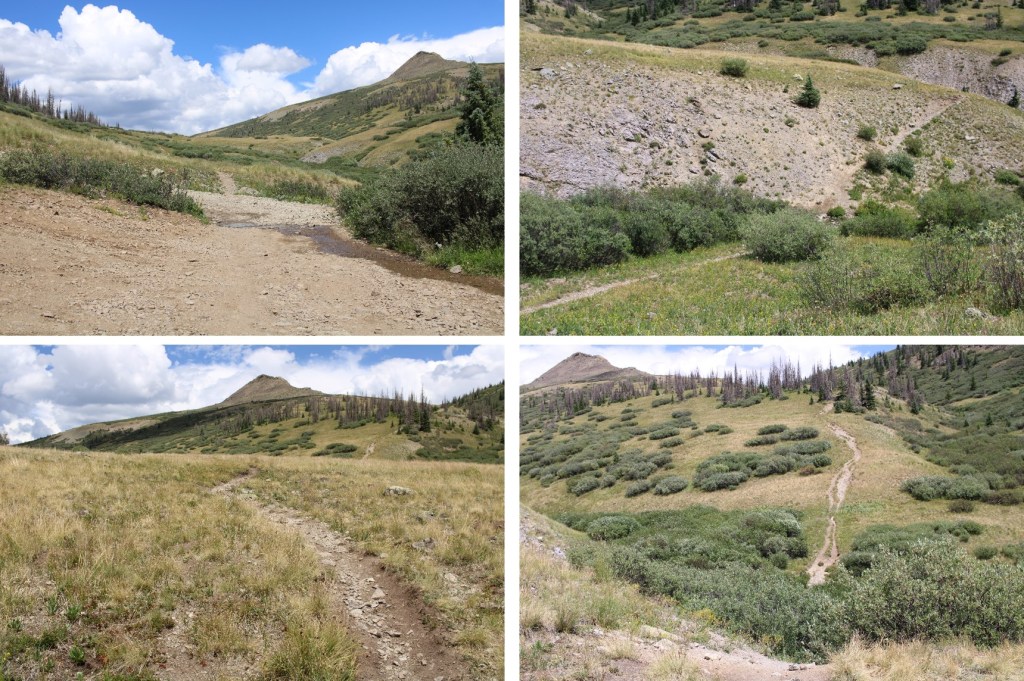
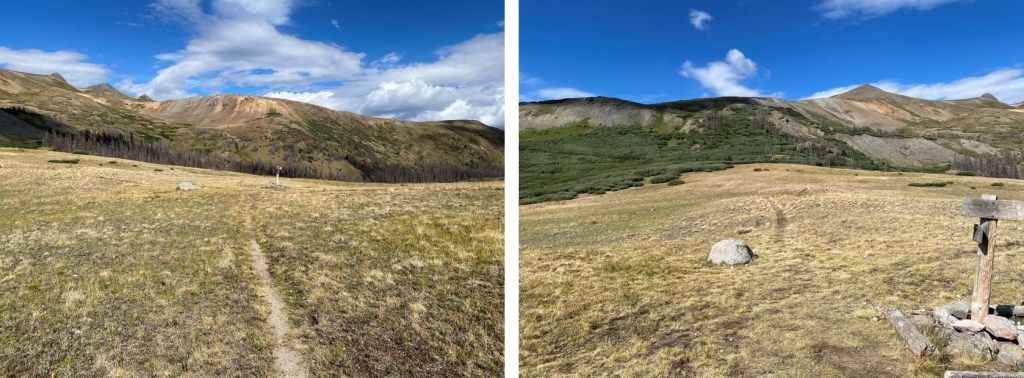
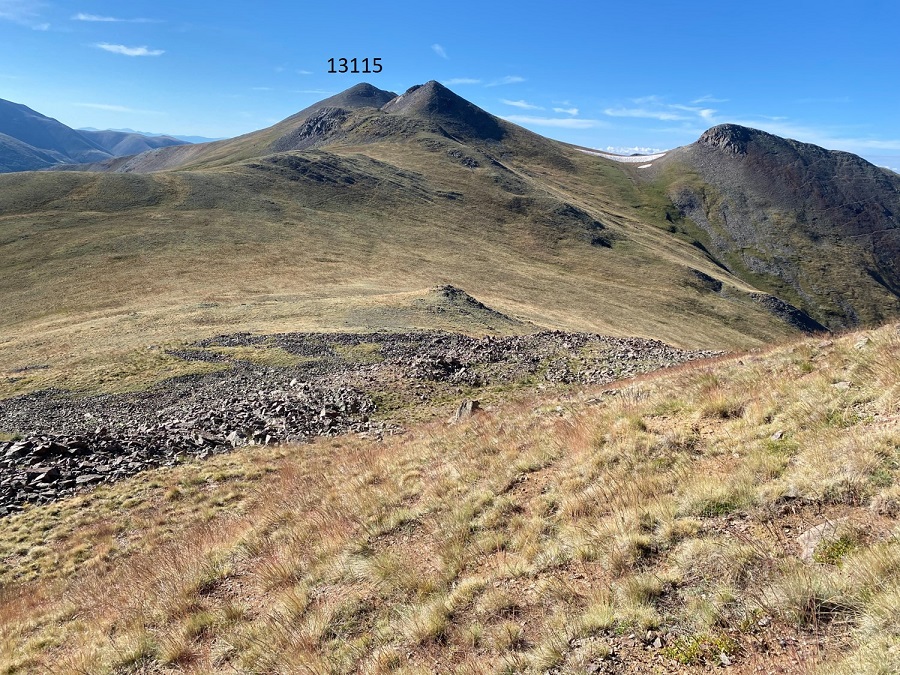
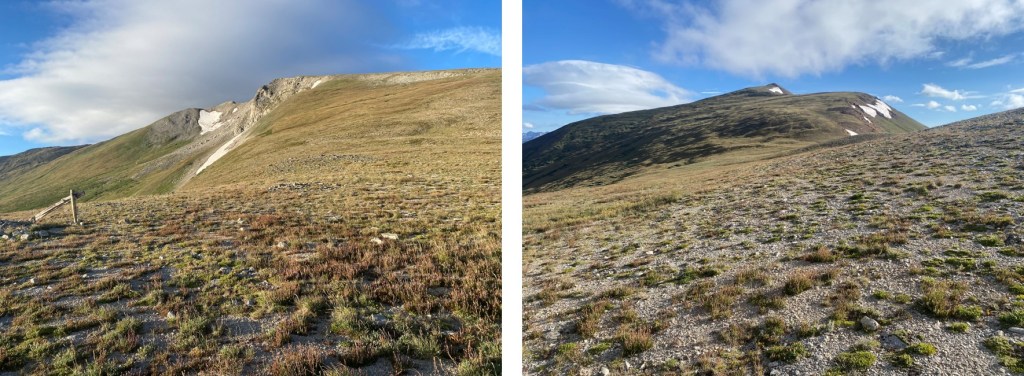
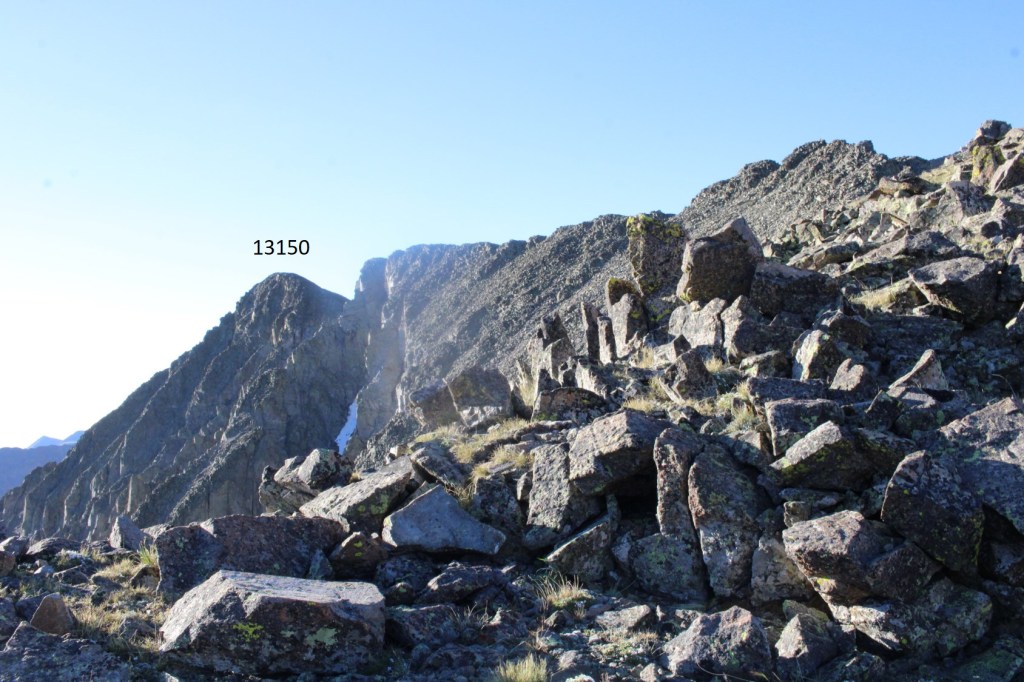
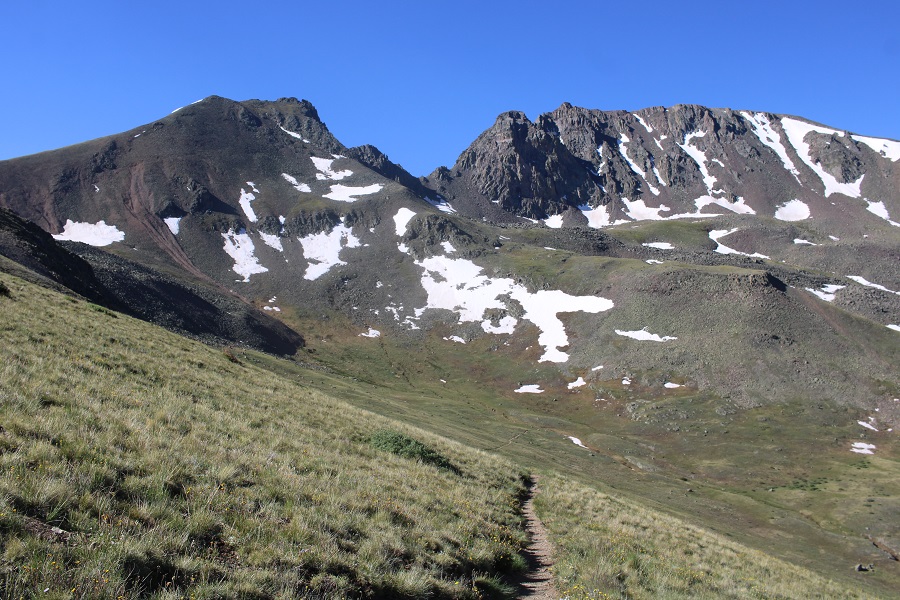
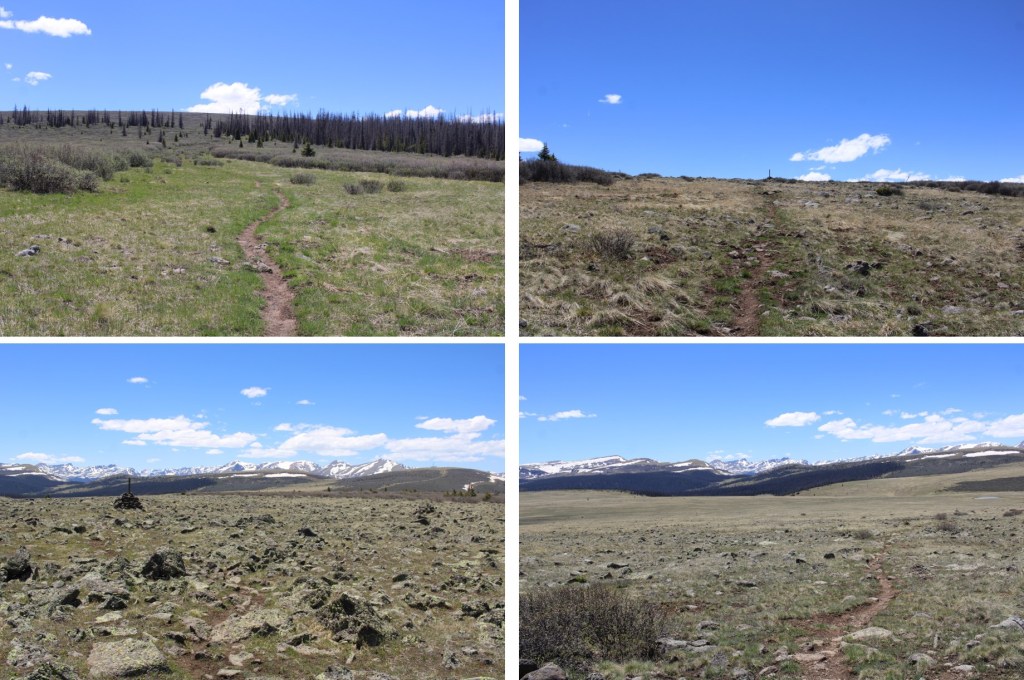
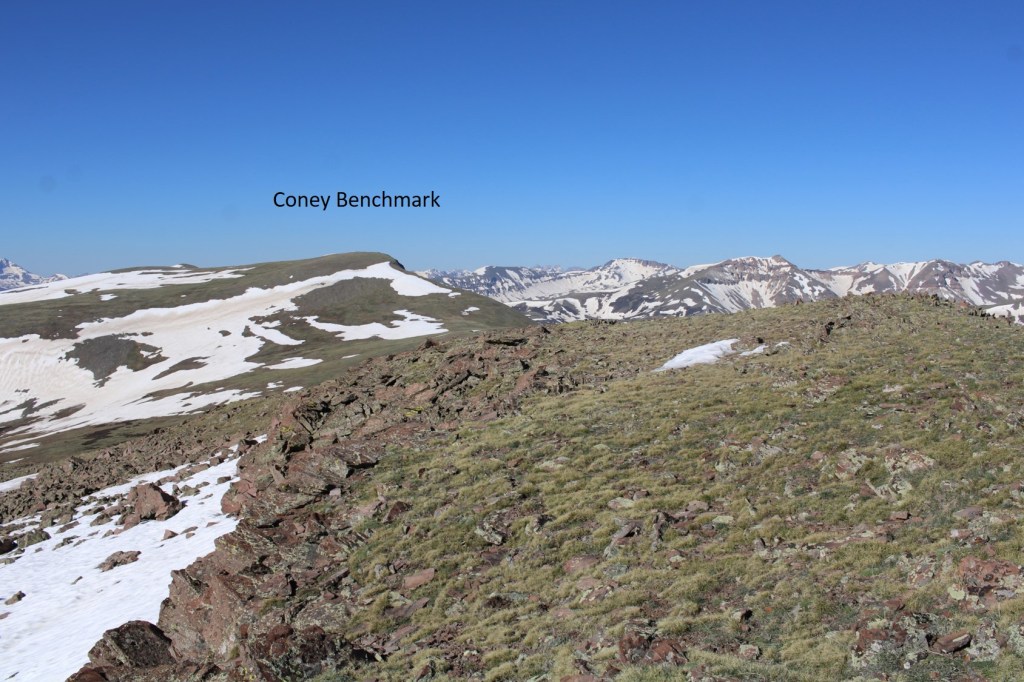
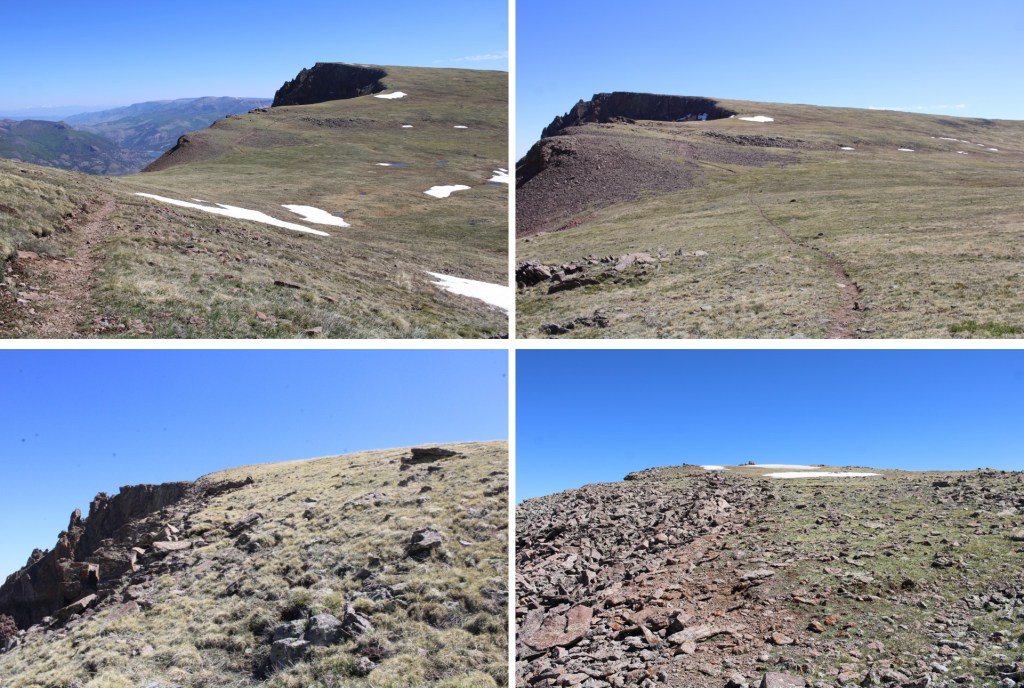
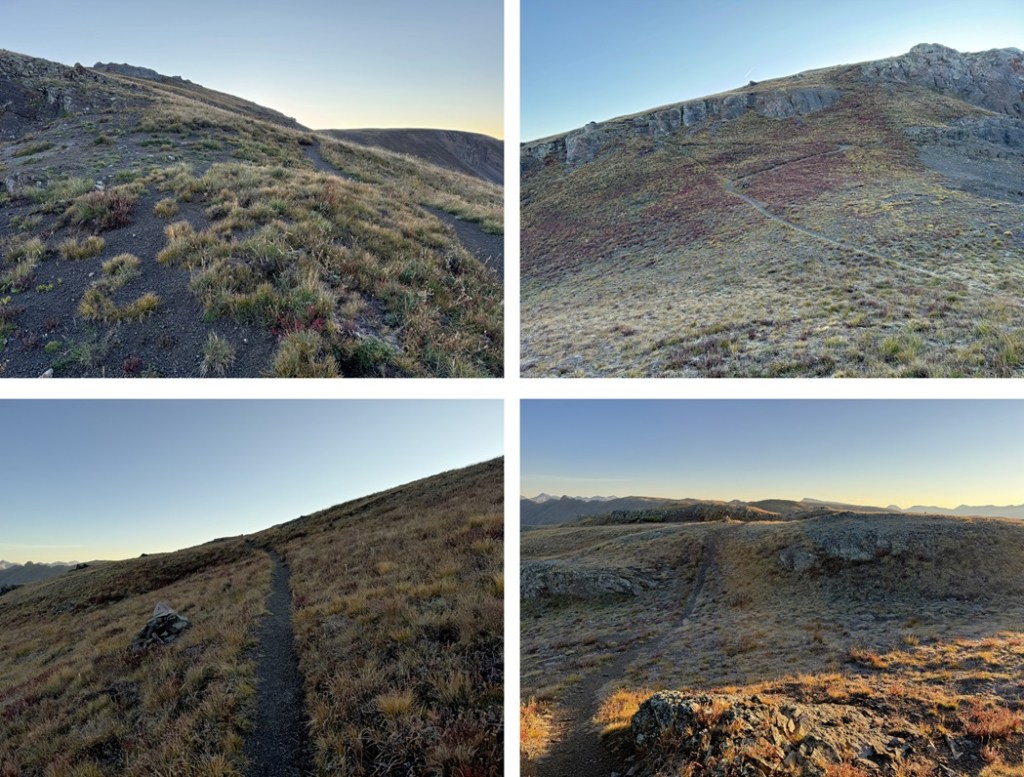
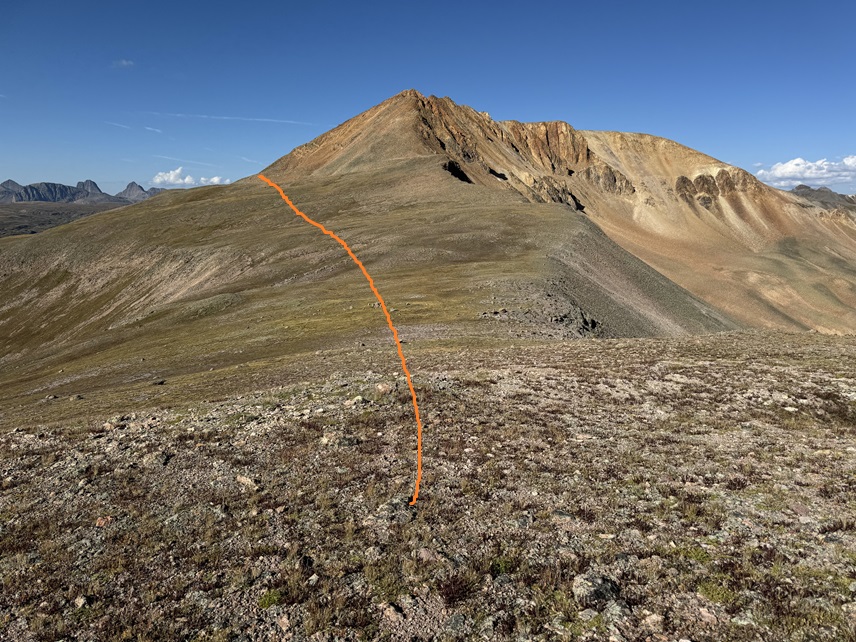
I kept following the ridge, and eventually I could see Sheep Mountain to the southeast.  The ridge eventually became a mesa, and the route to the base of Sheep Mountain became obvious. 

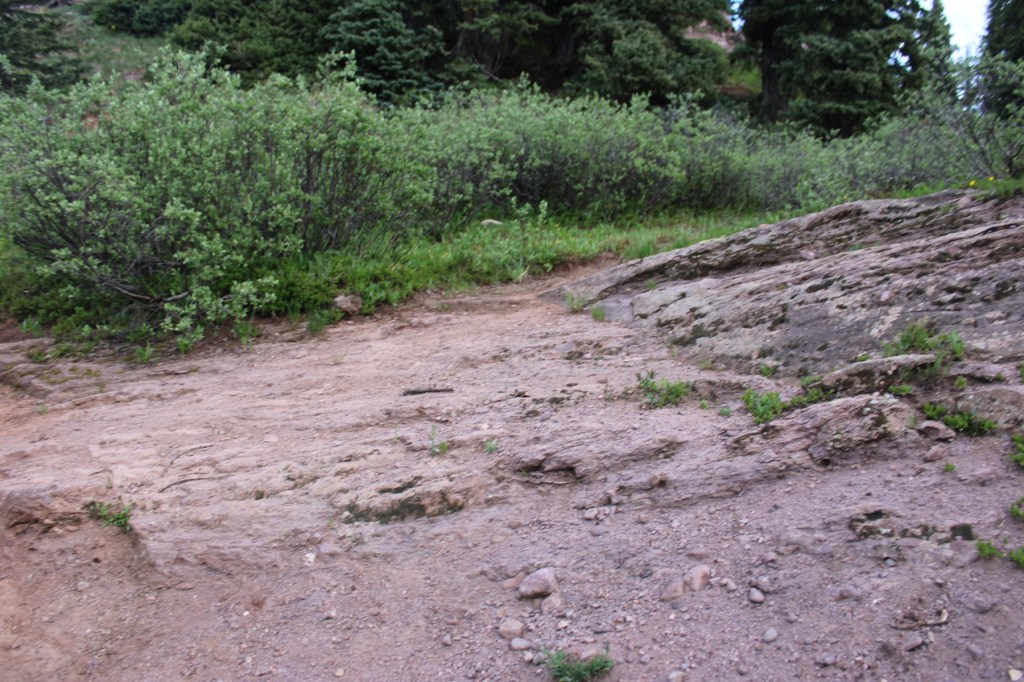
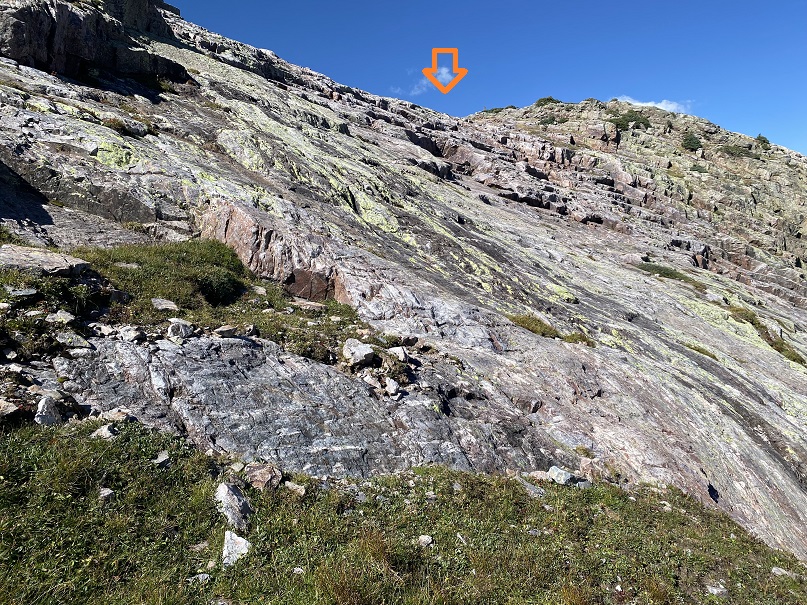
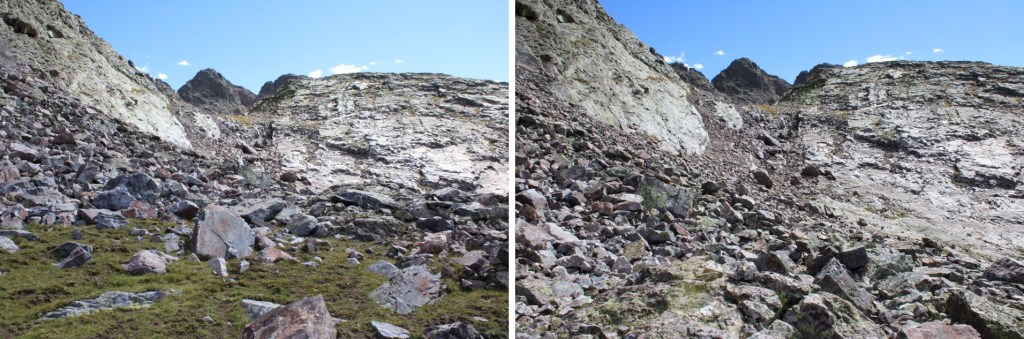
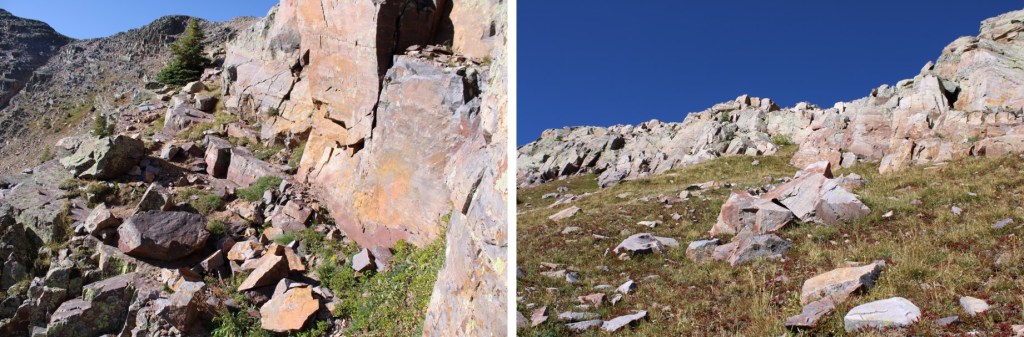
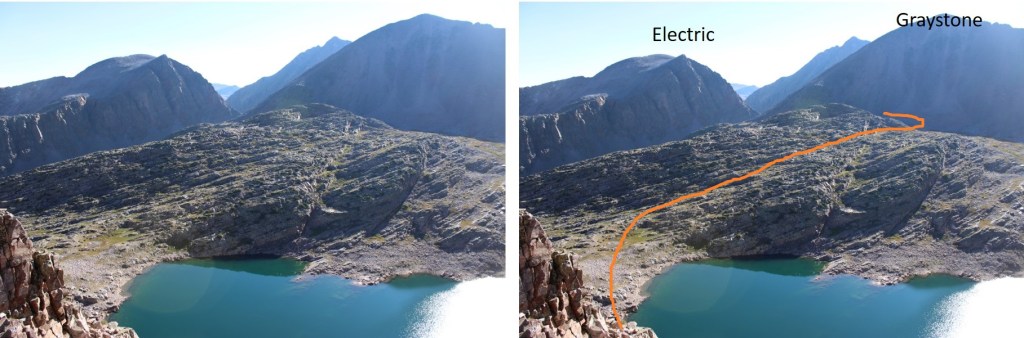
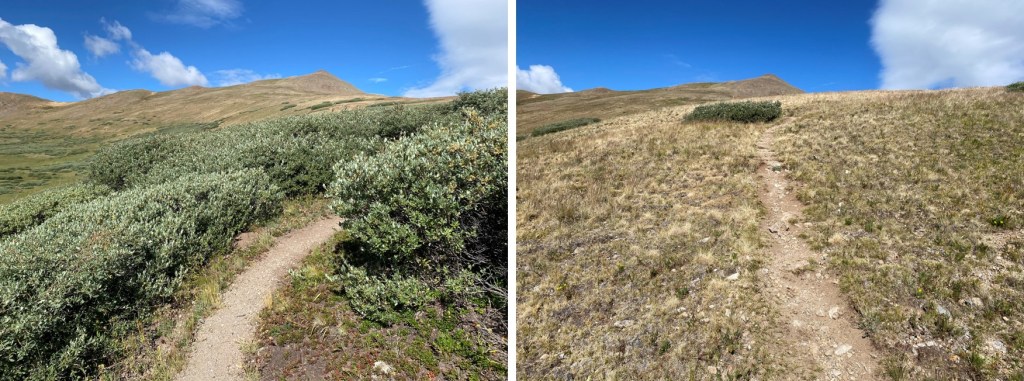
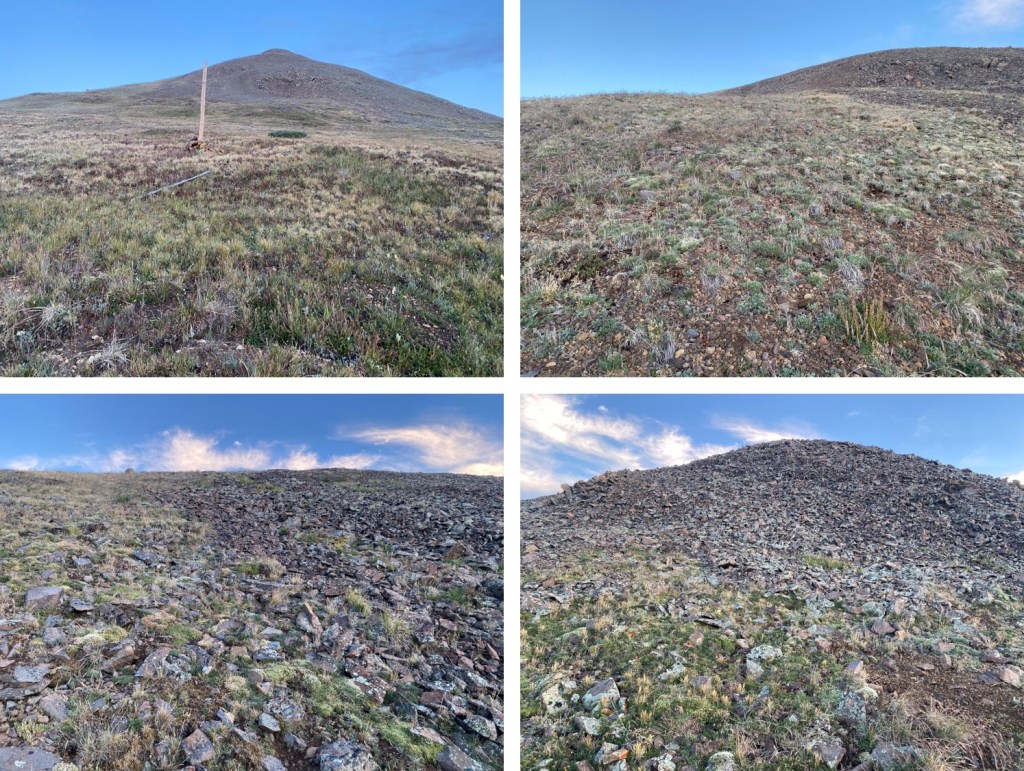
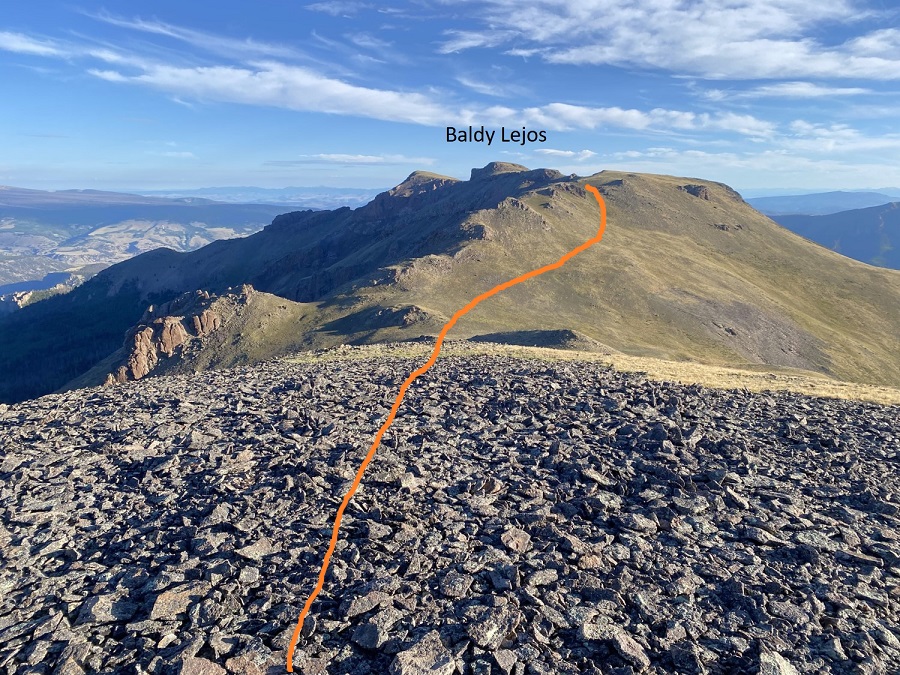
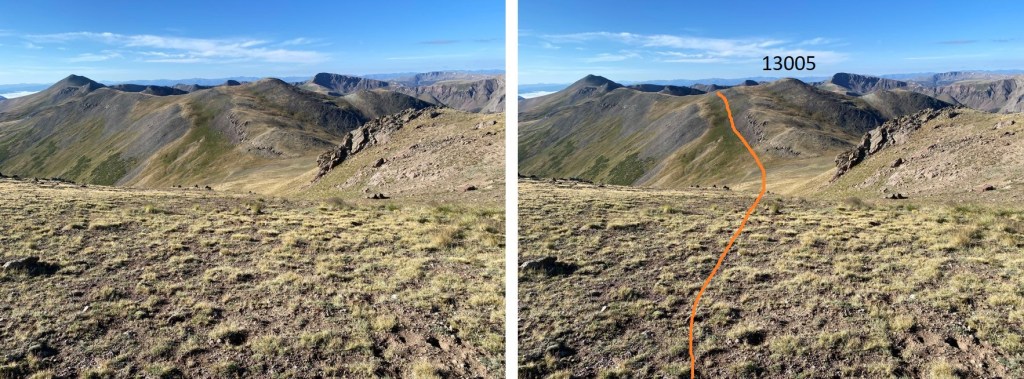
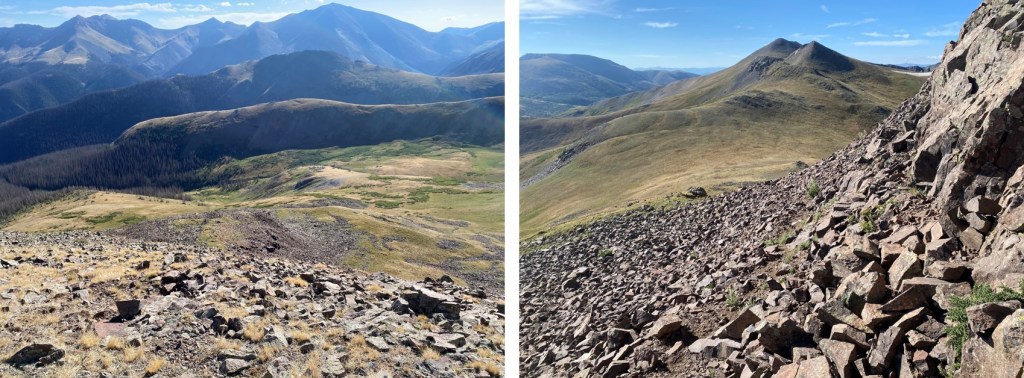
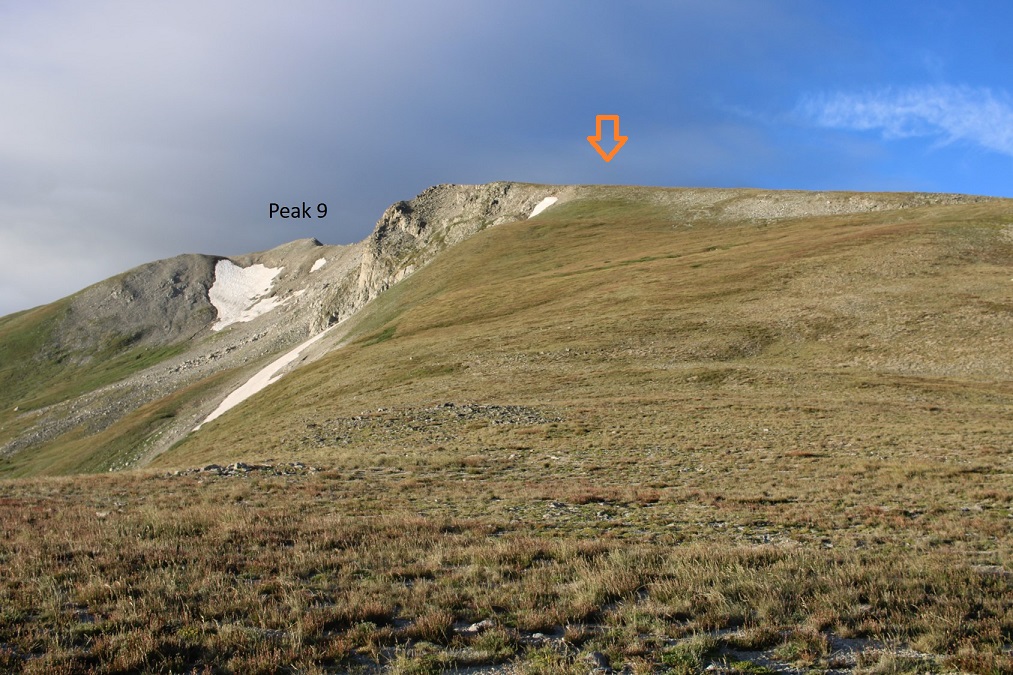
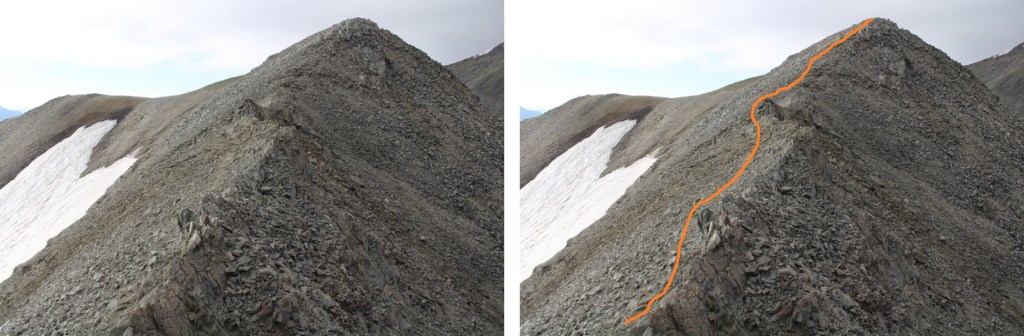
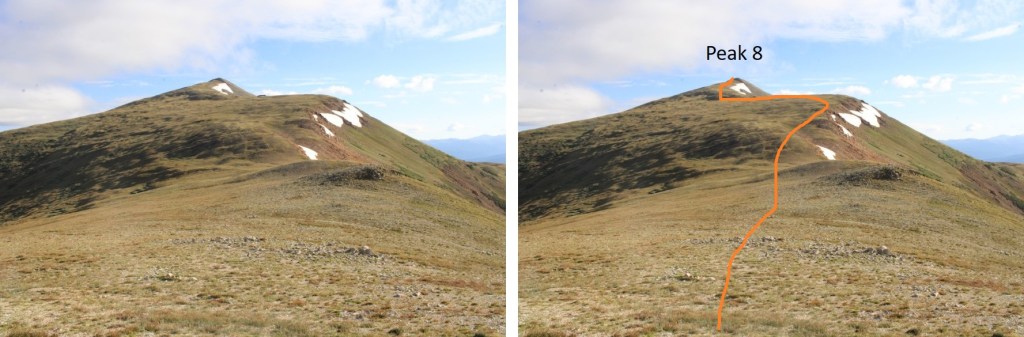
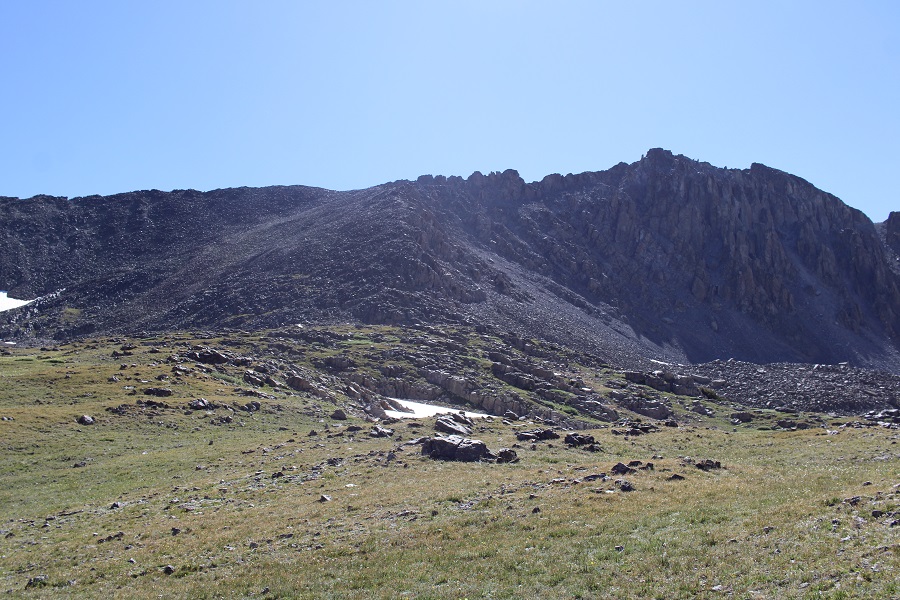
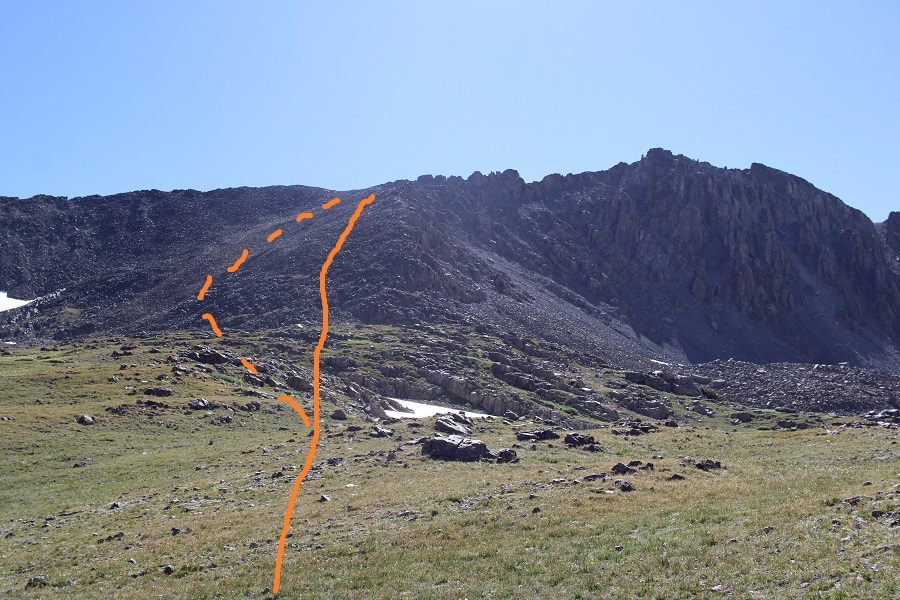
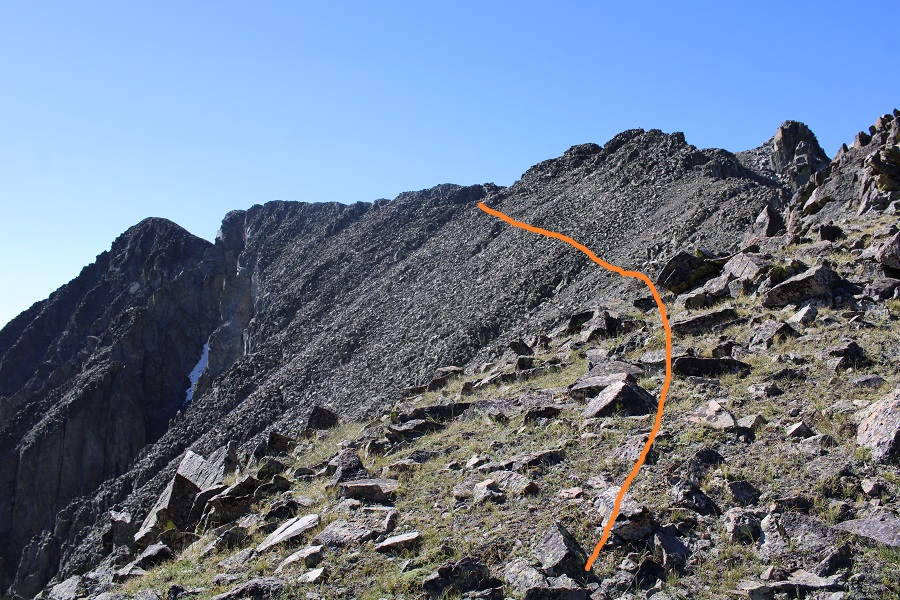
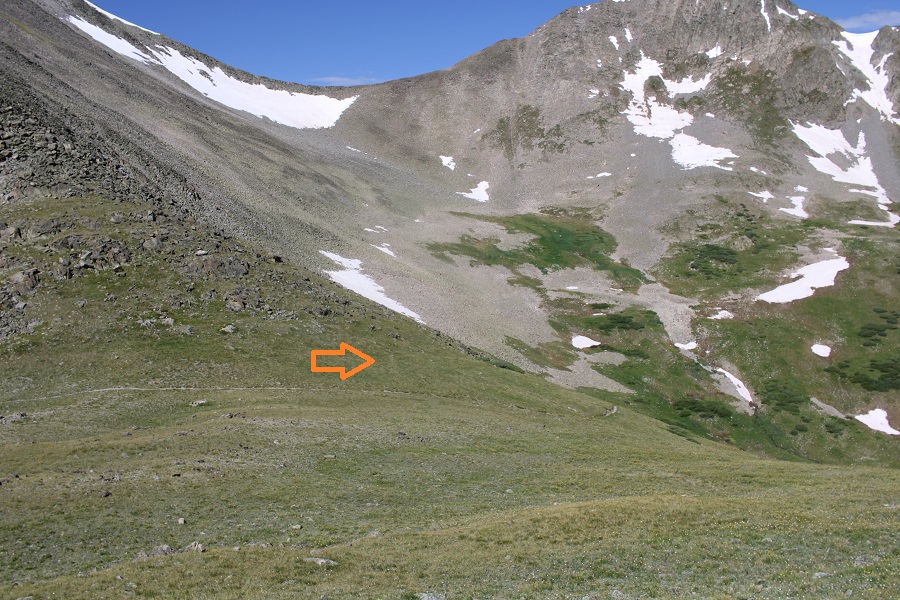
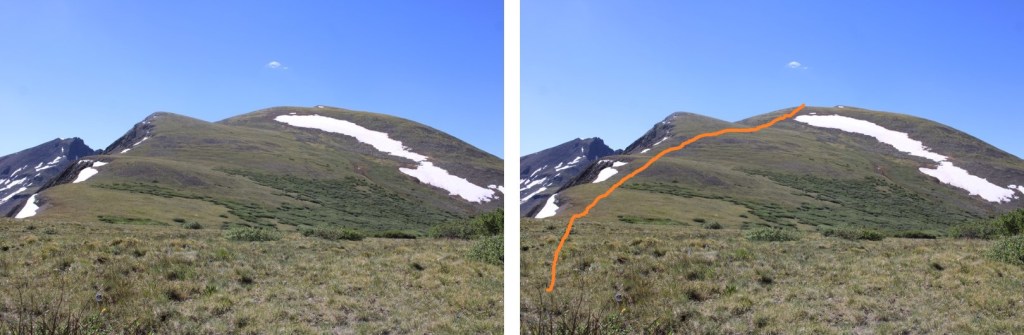
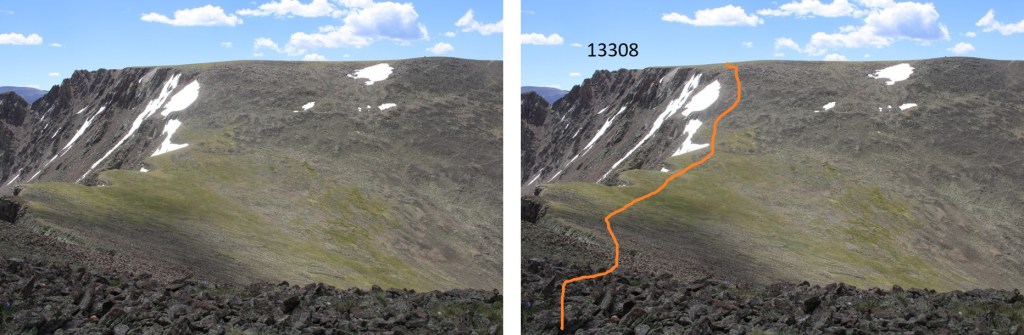
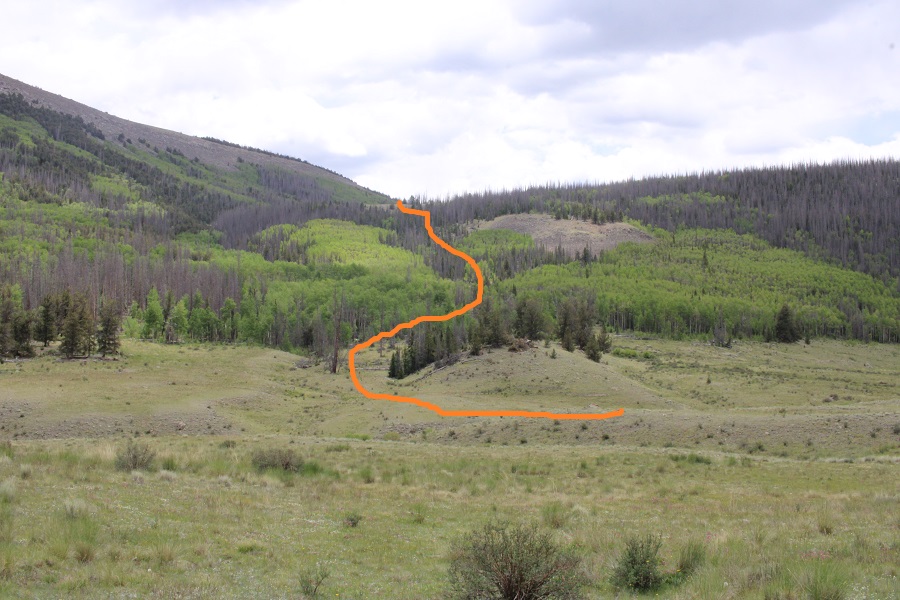
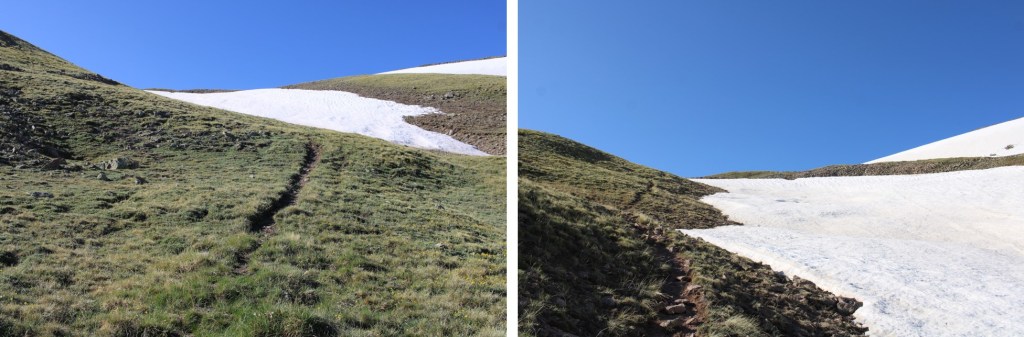
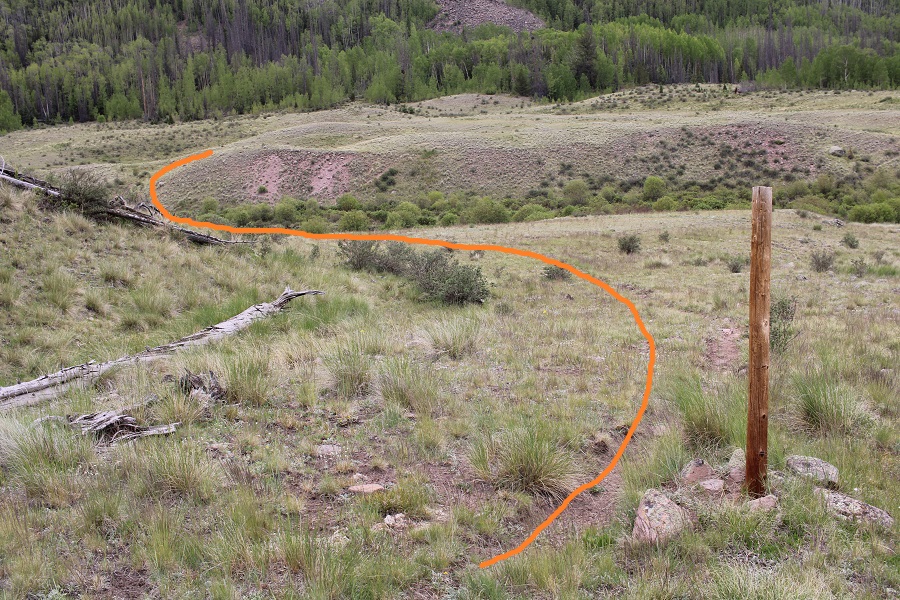
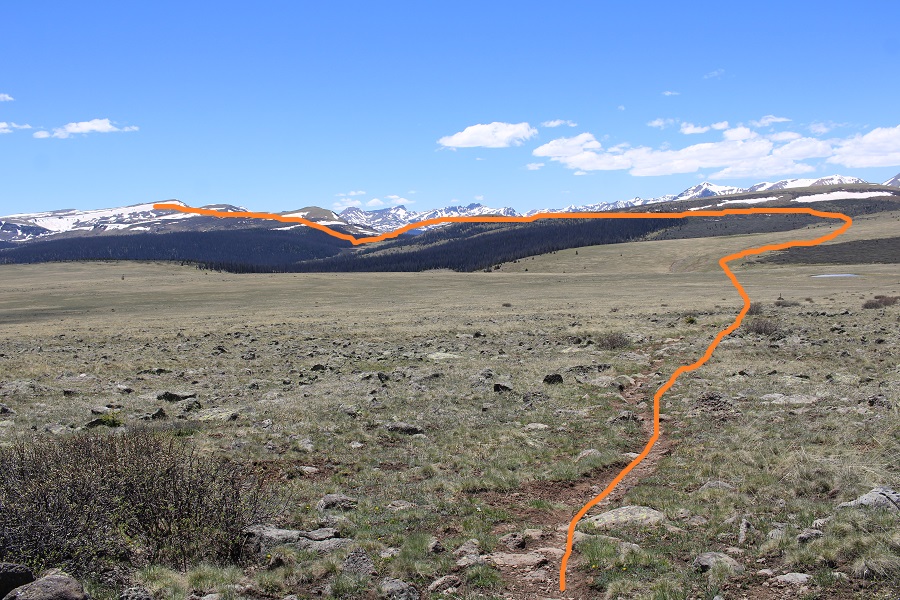
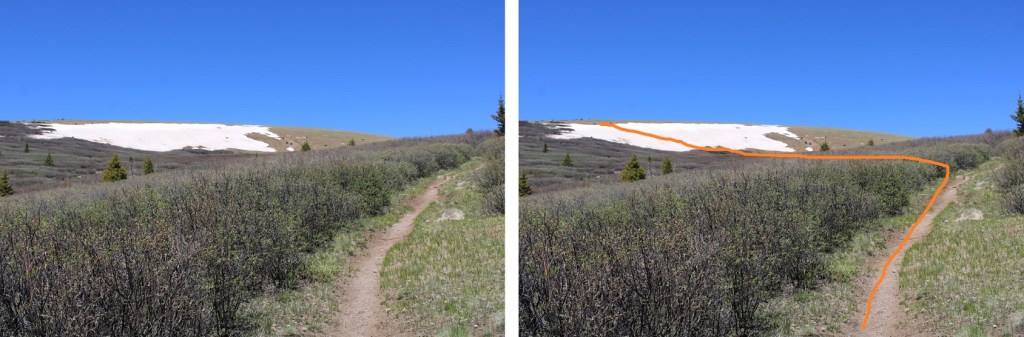
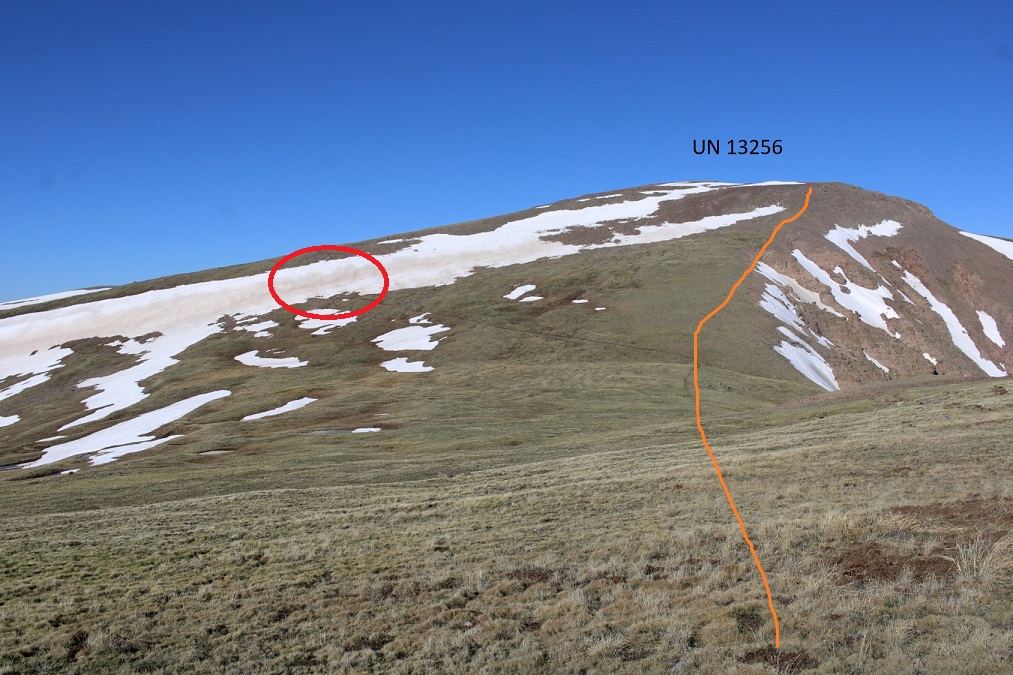
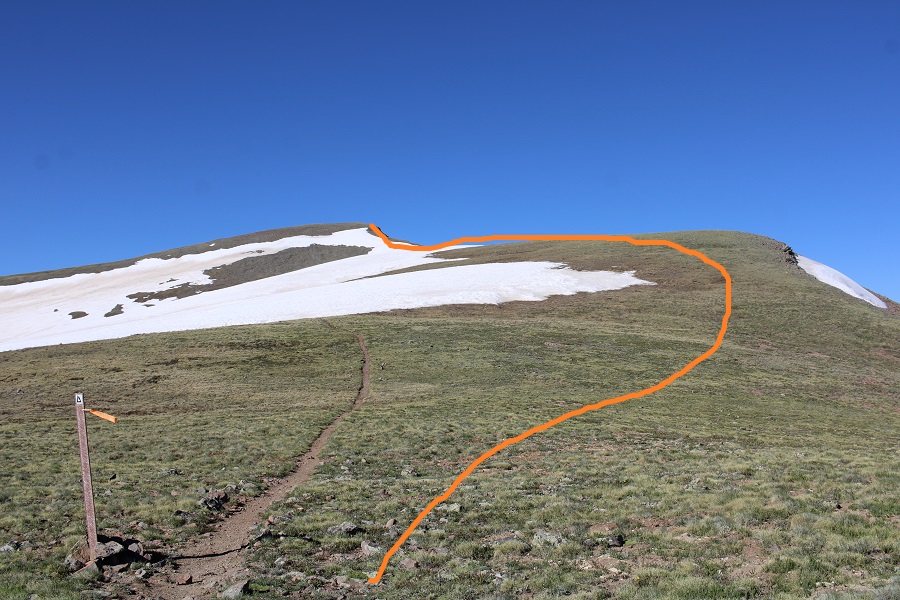
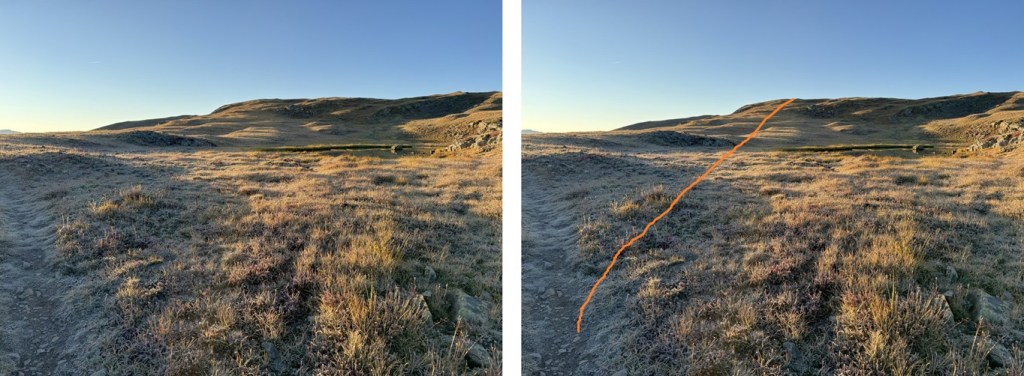
I needed to get to the ridge, and did so on tundra mixed with scree.  This is the overall route I took to get to the ridge

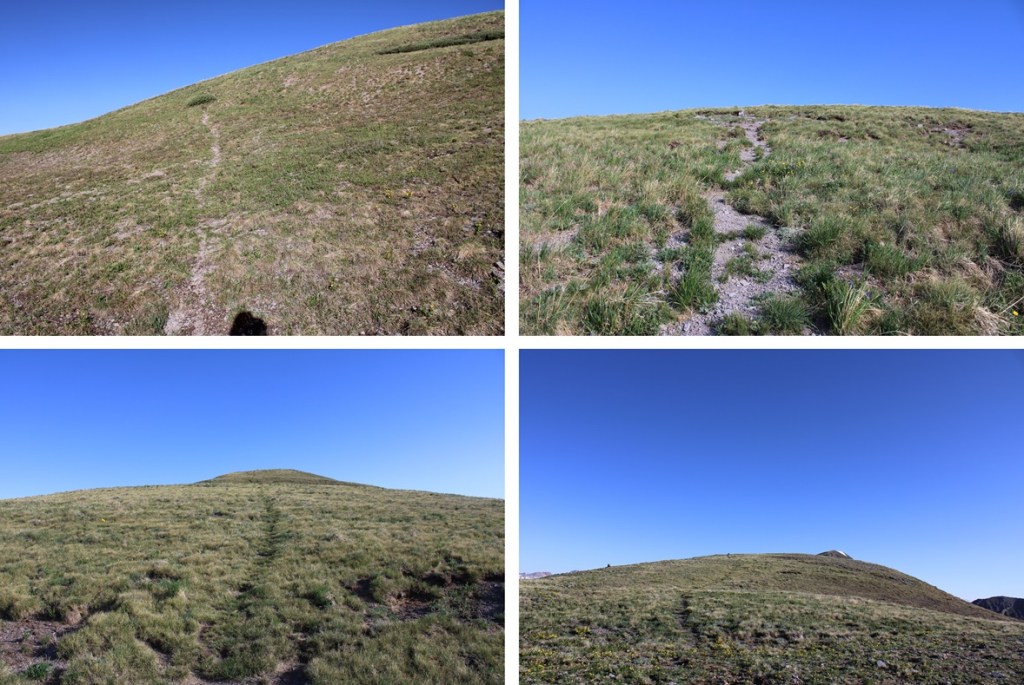
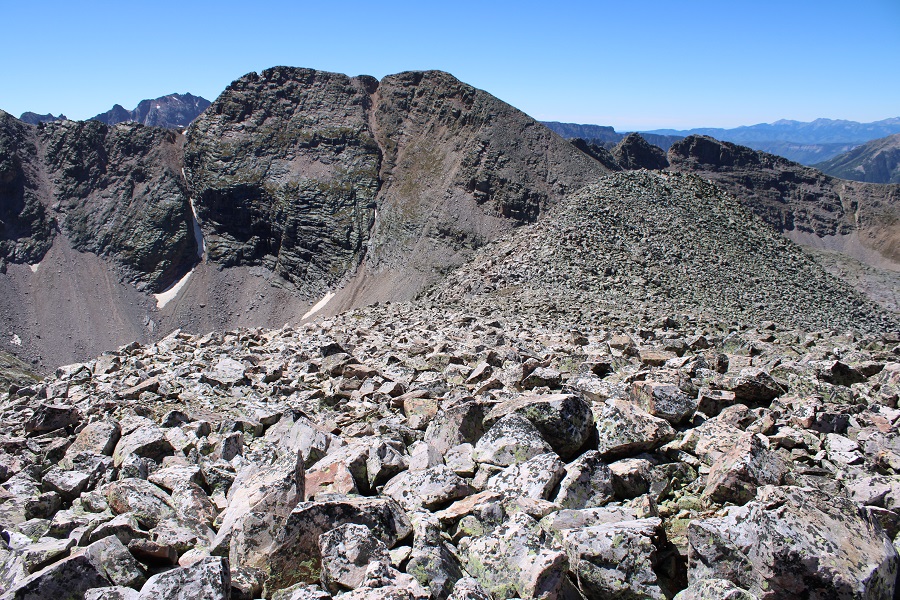
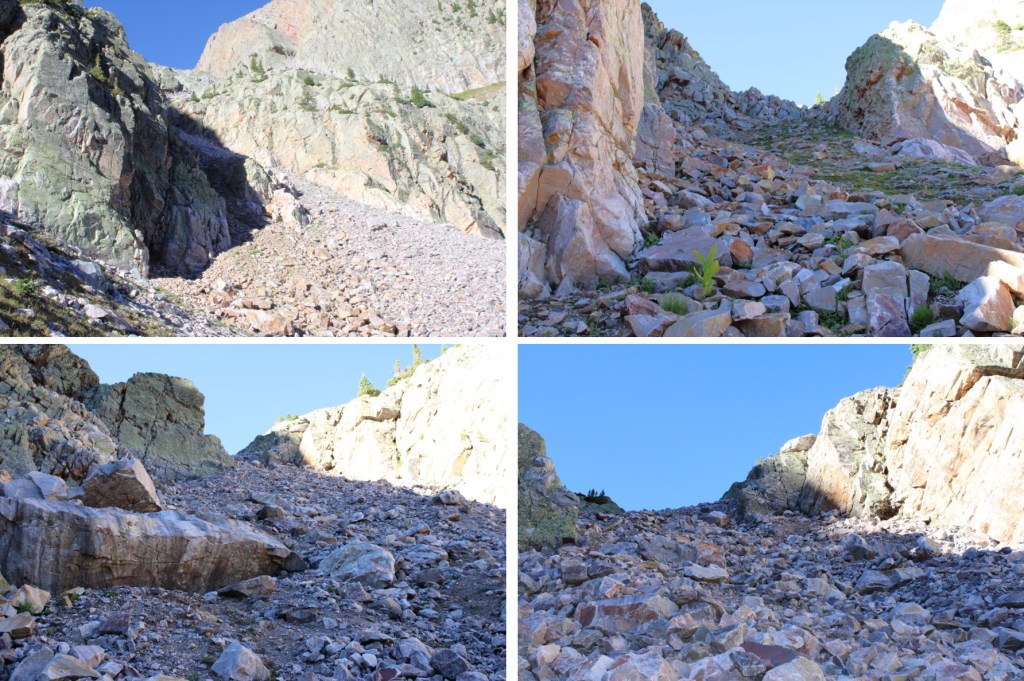
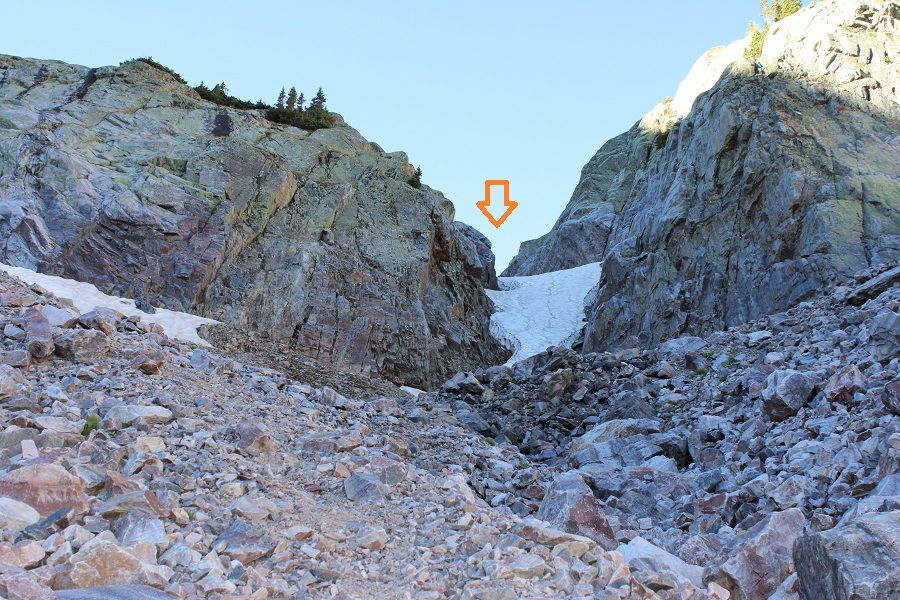
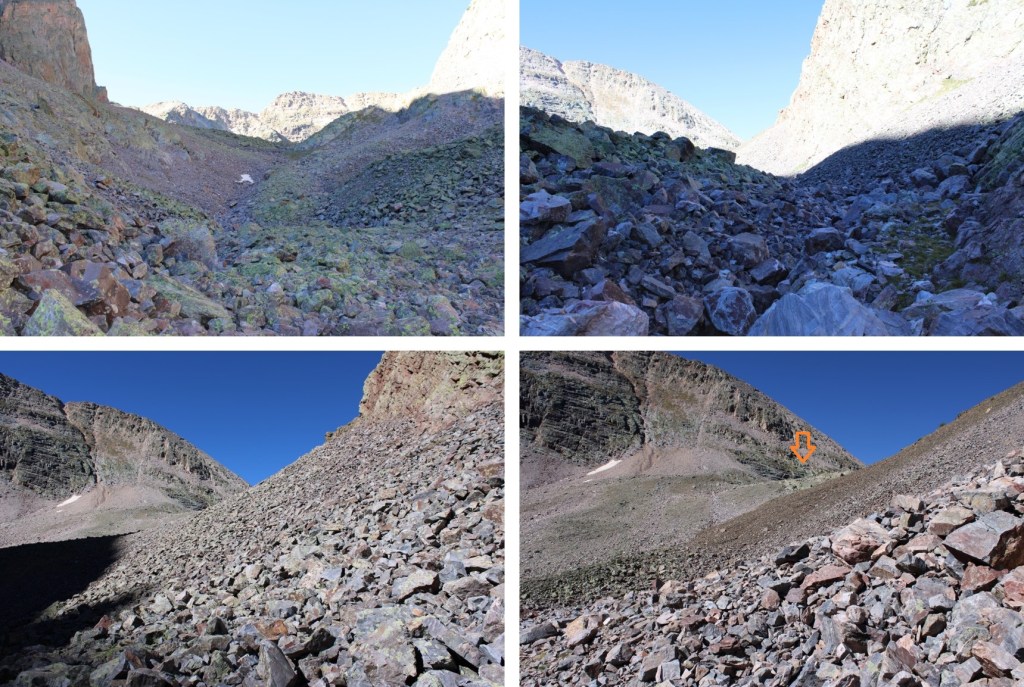
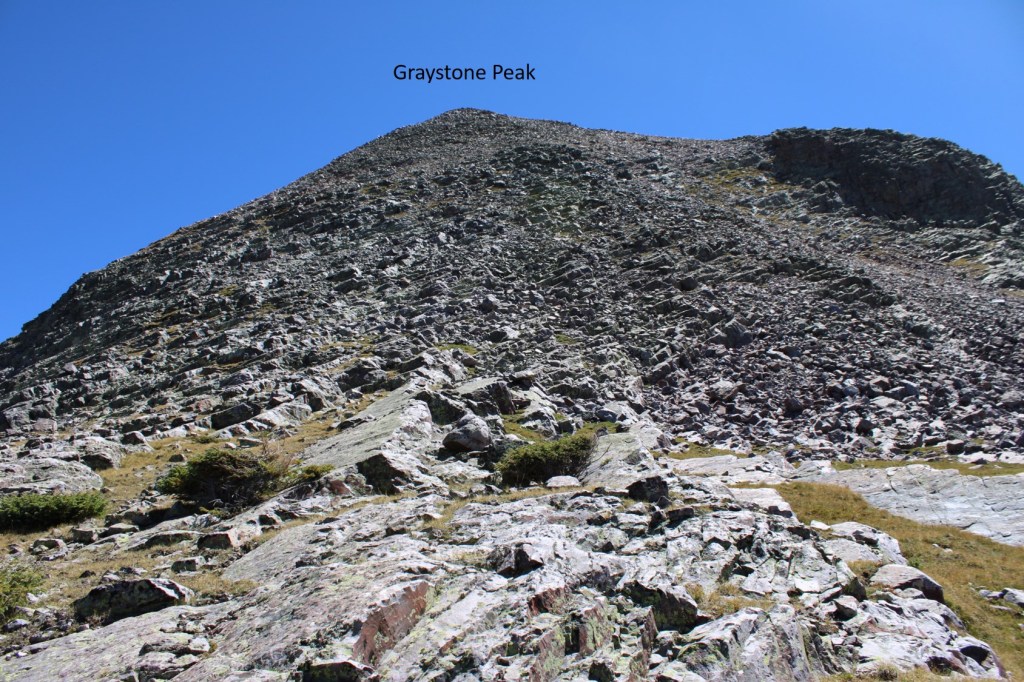
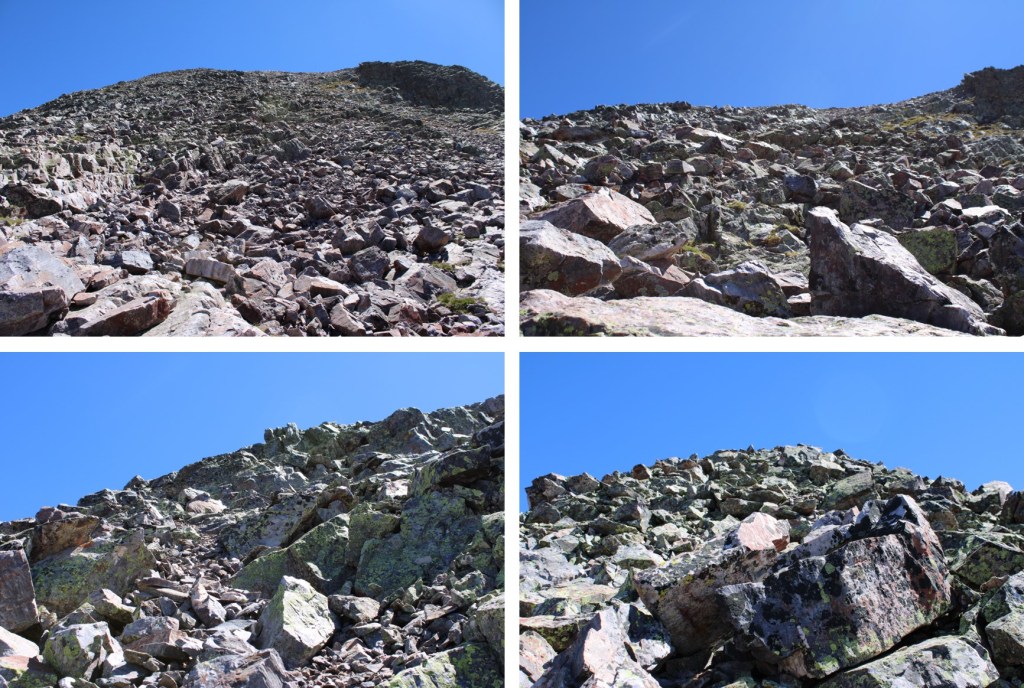
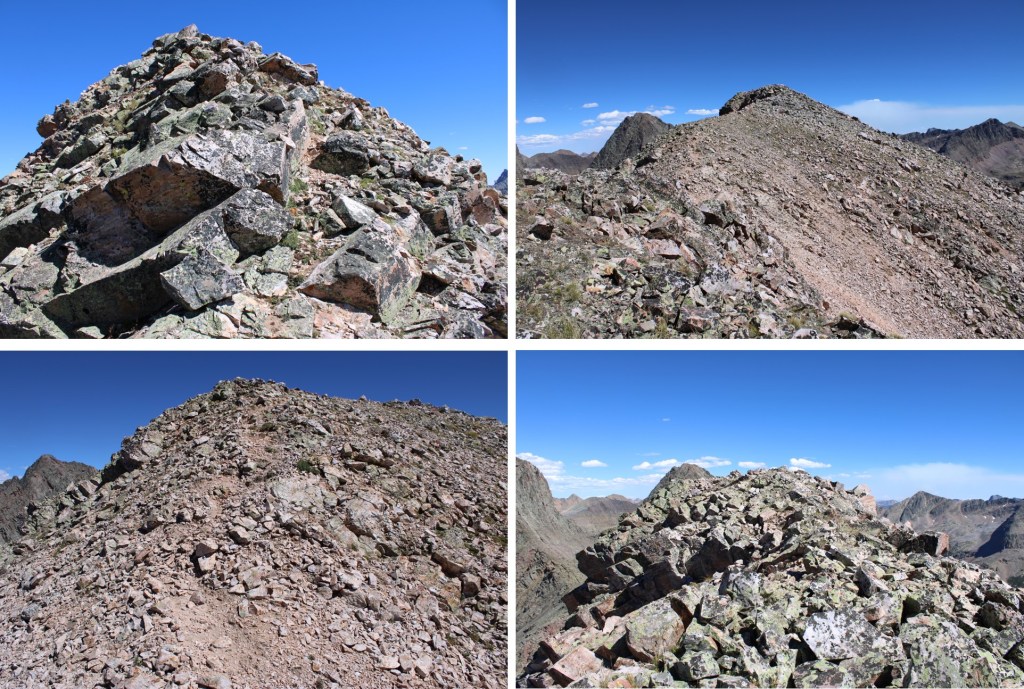
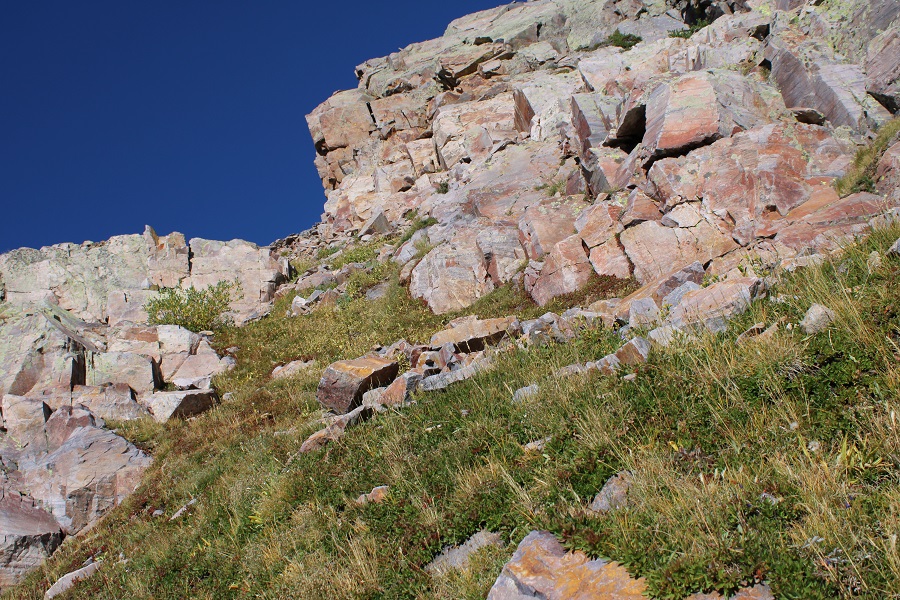
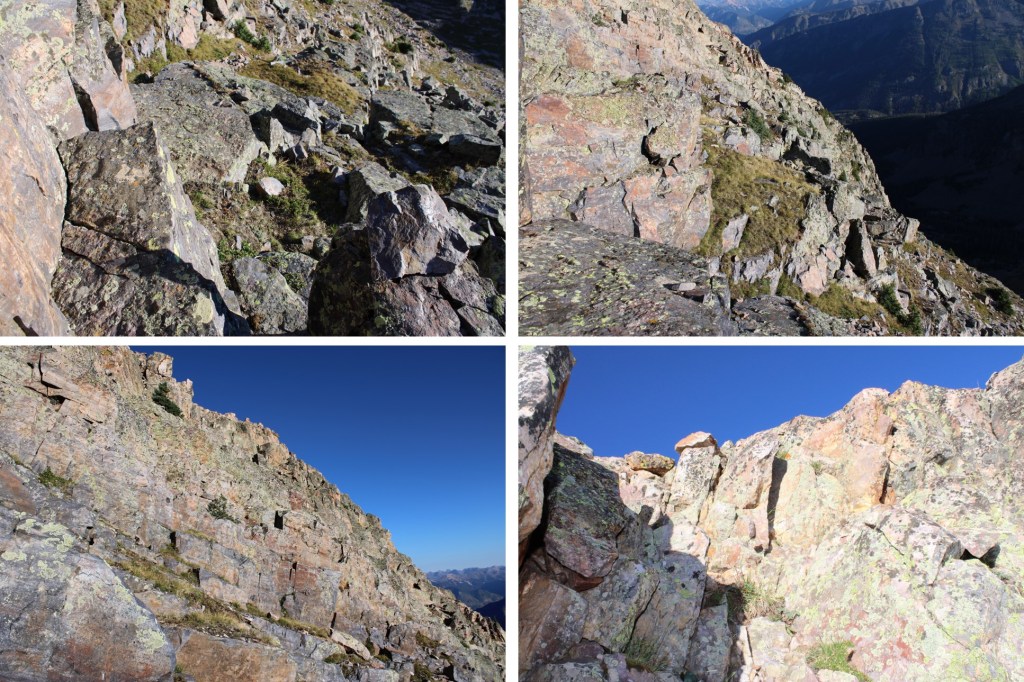
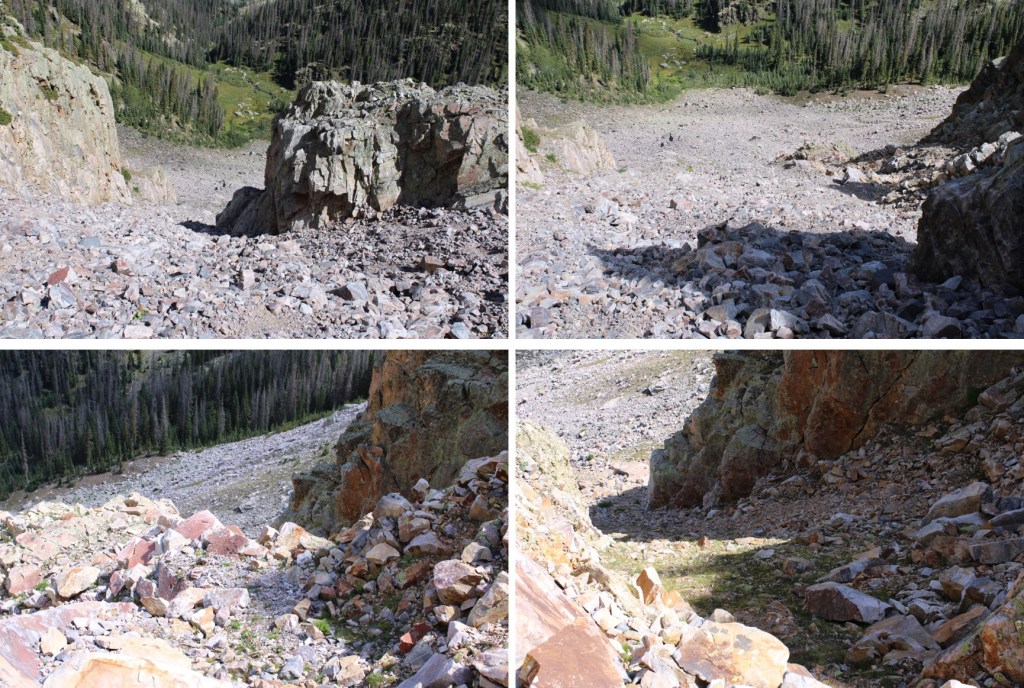
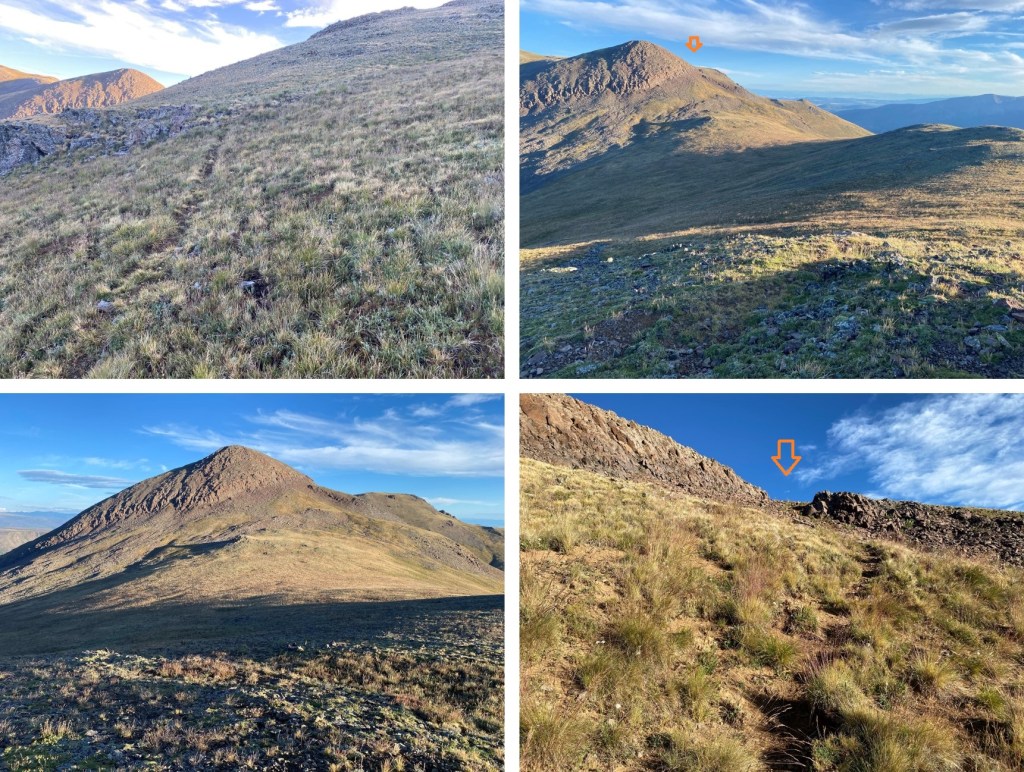
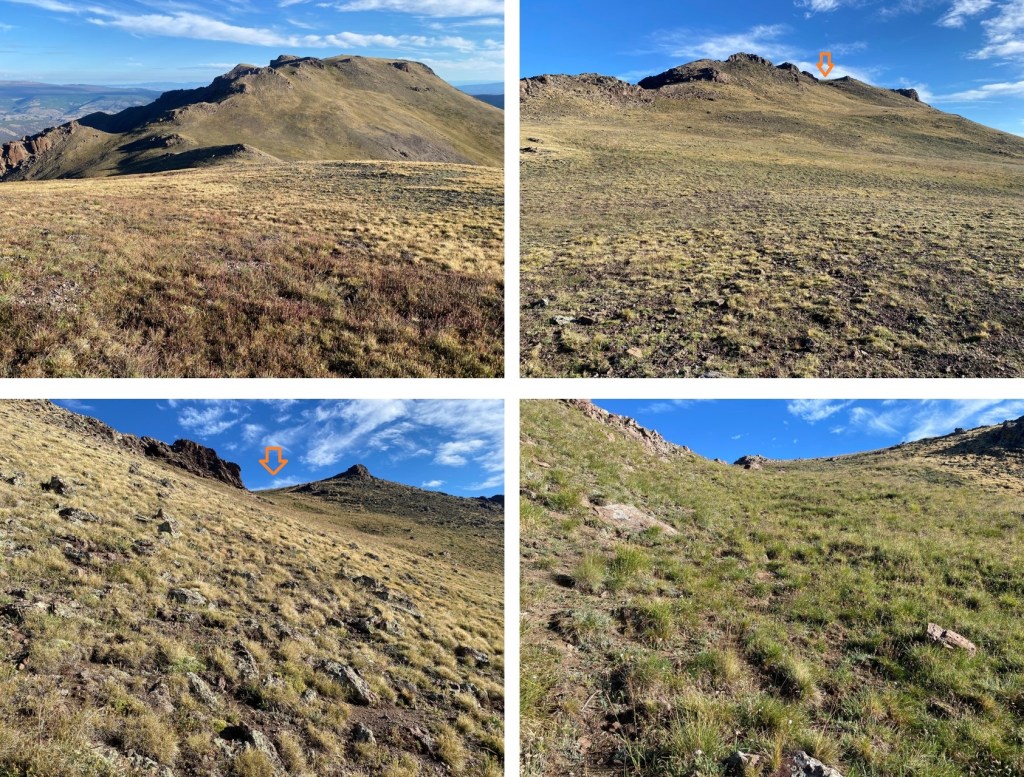
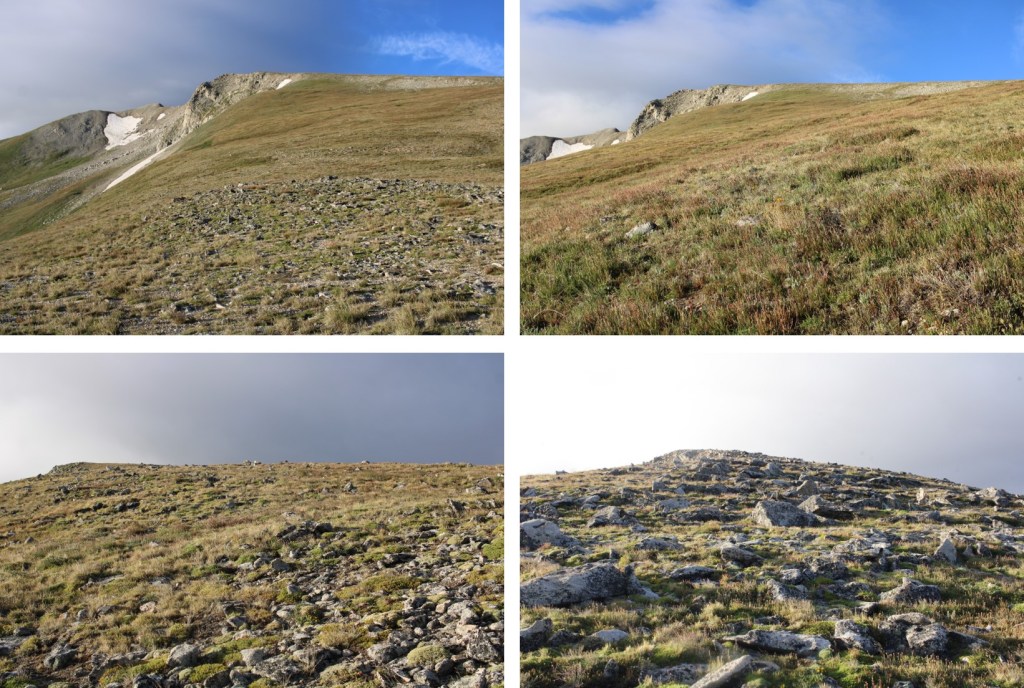
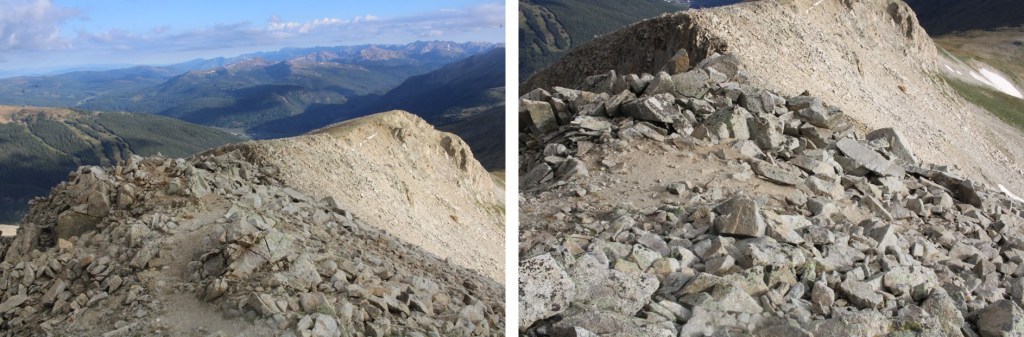
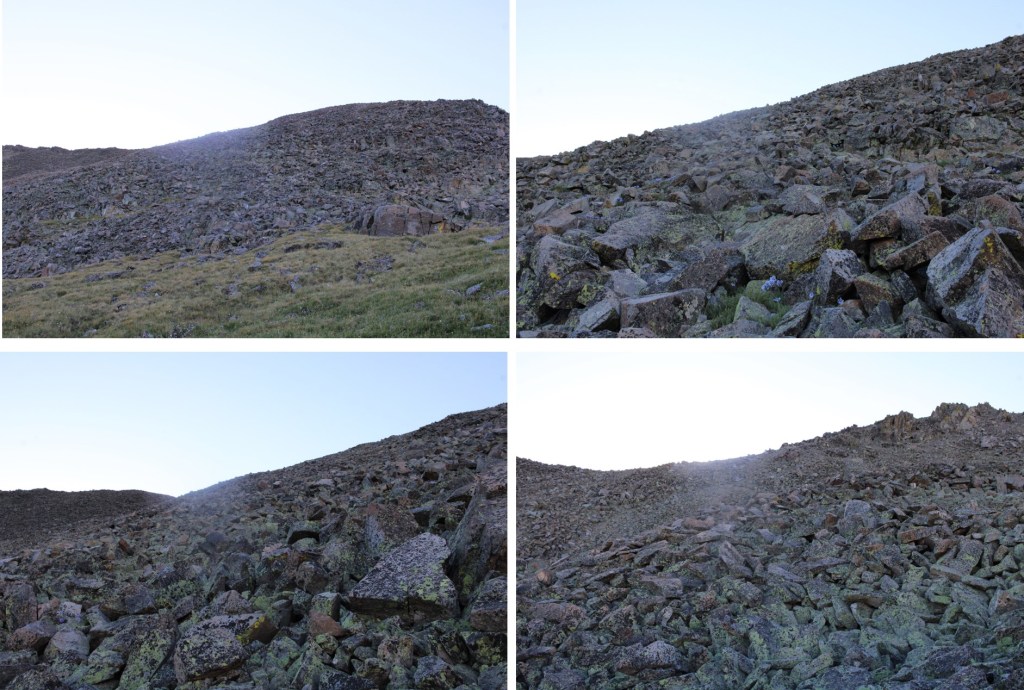
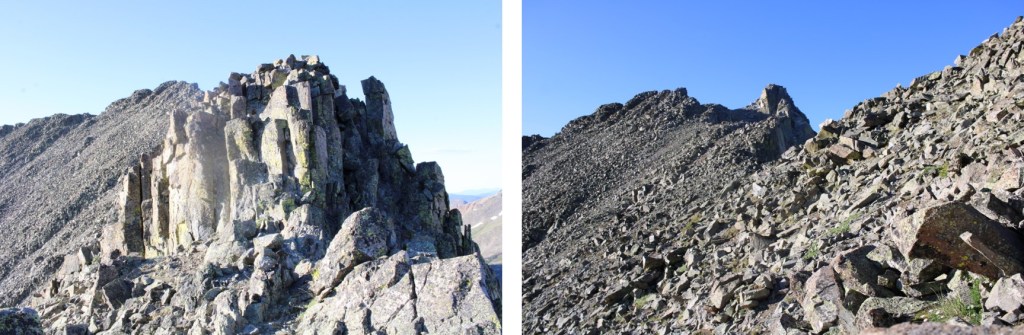
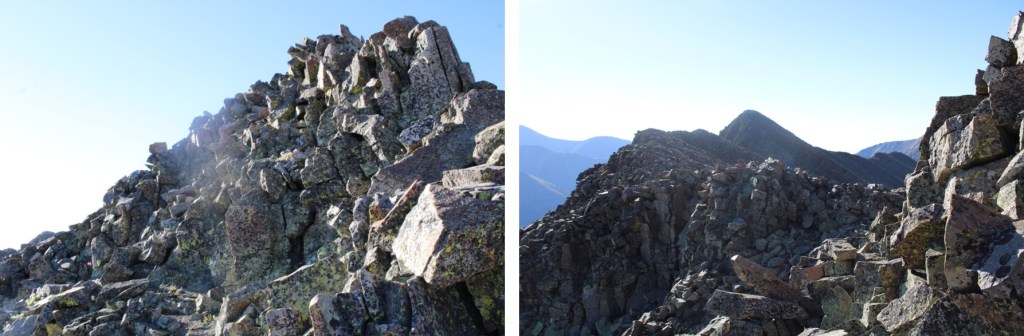
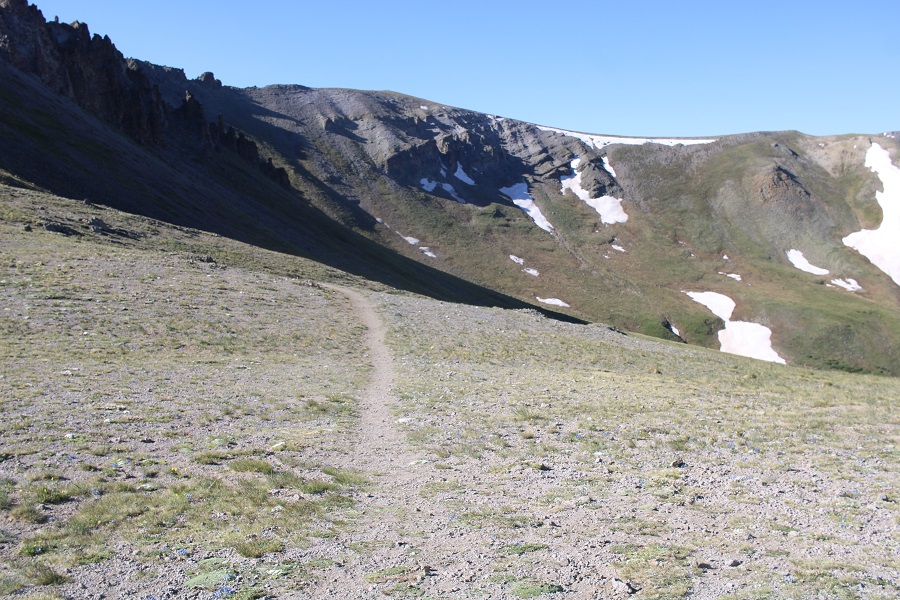
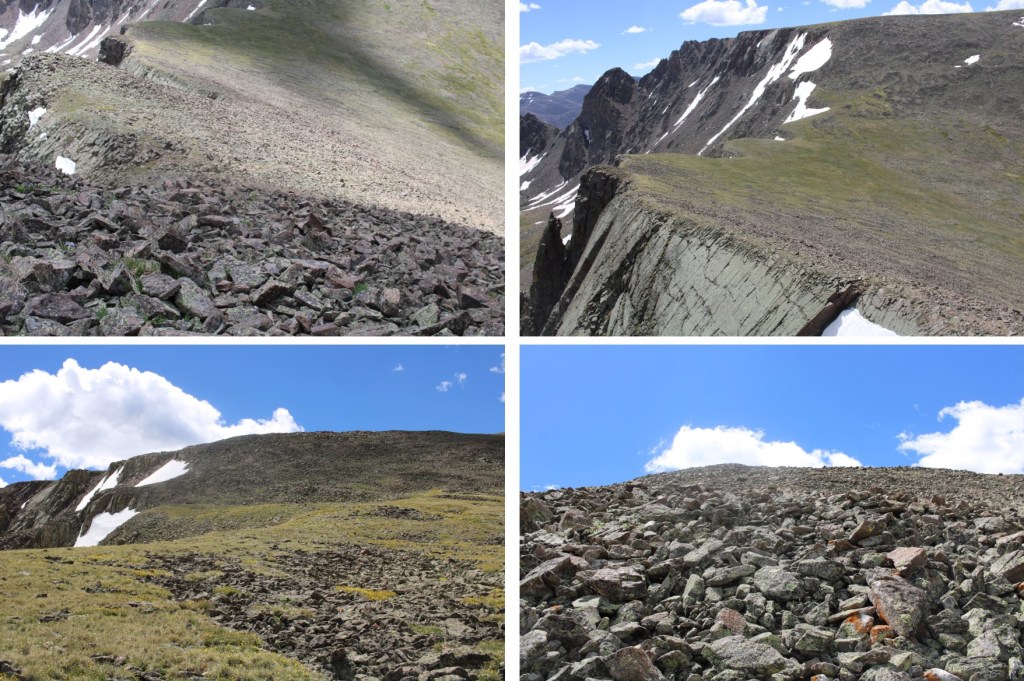
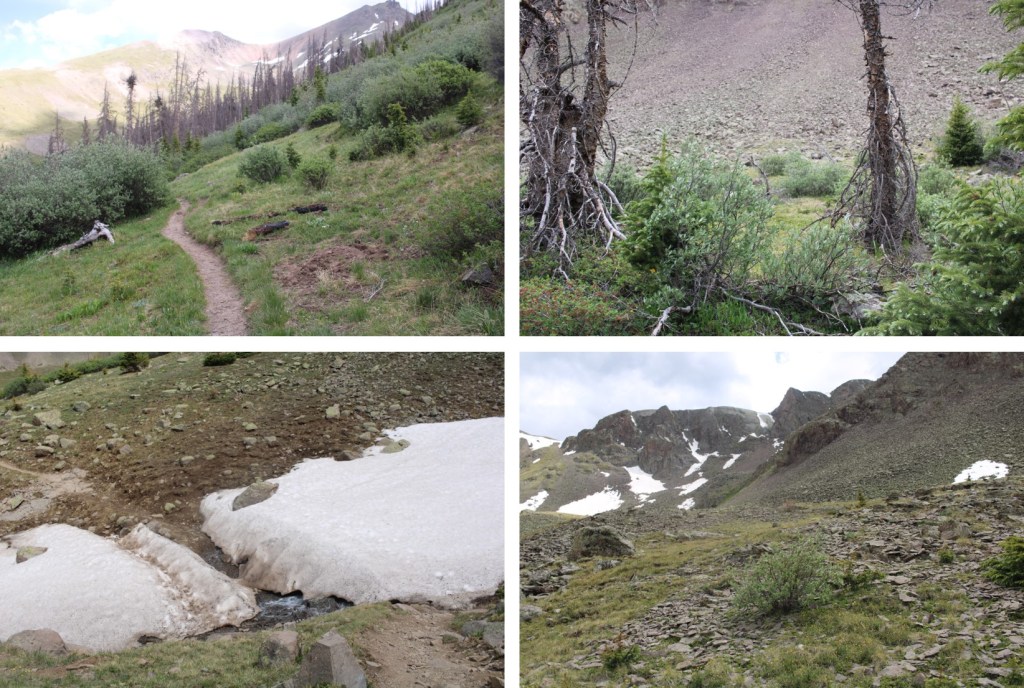
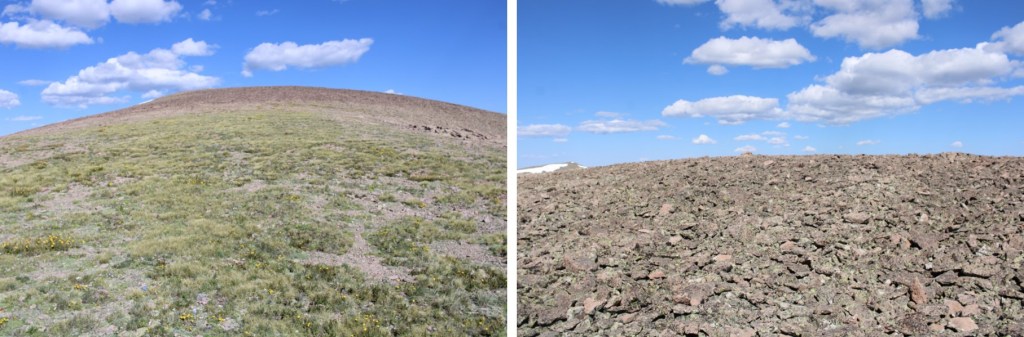
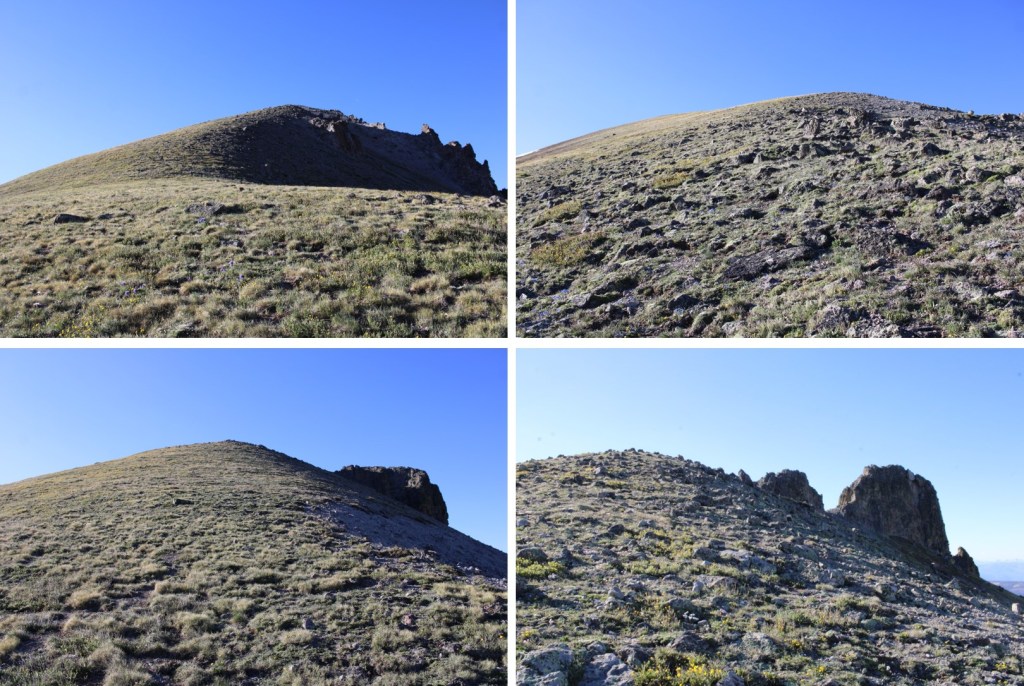
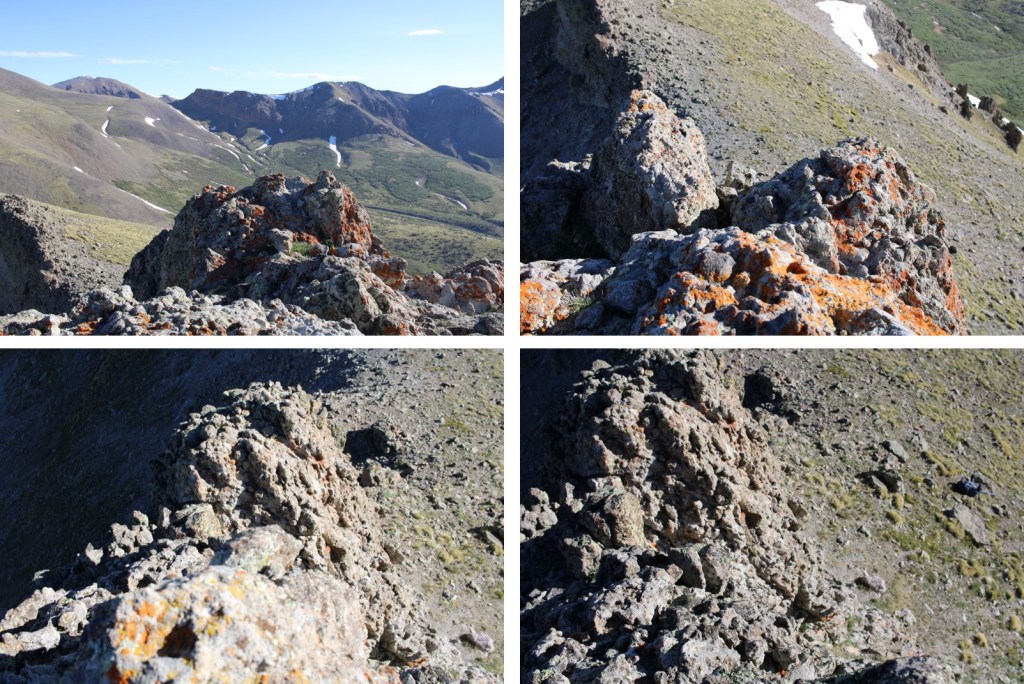
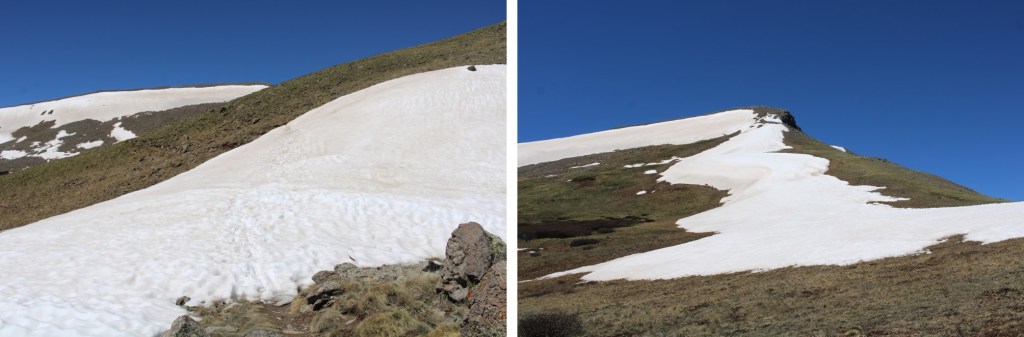
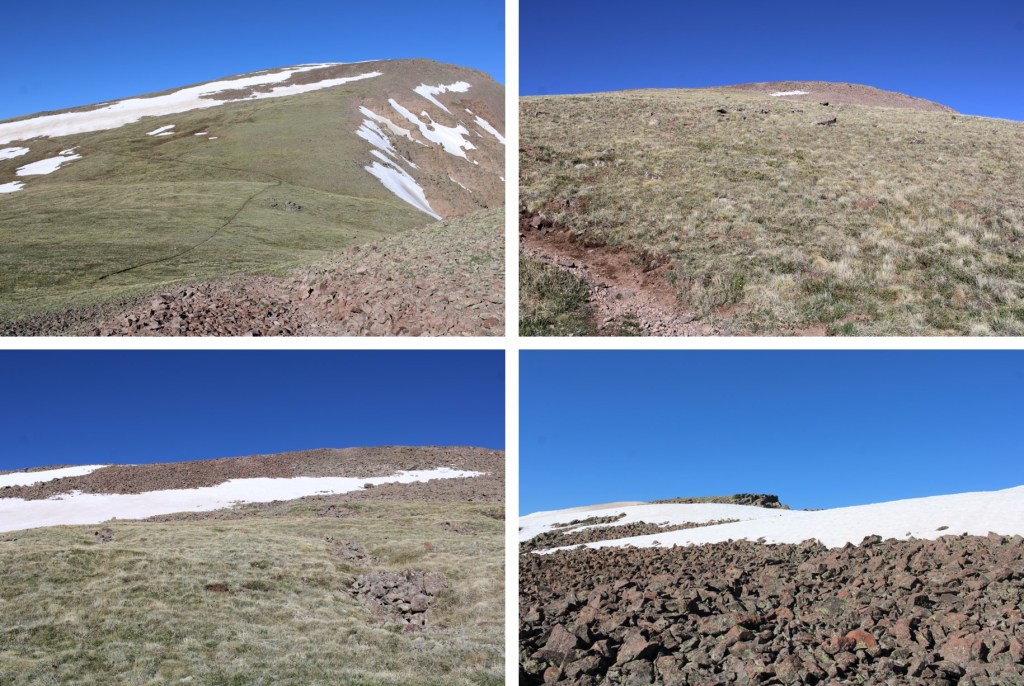
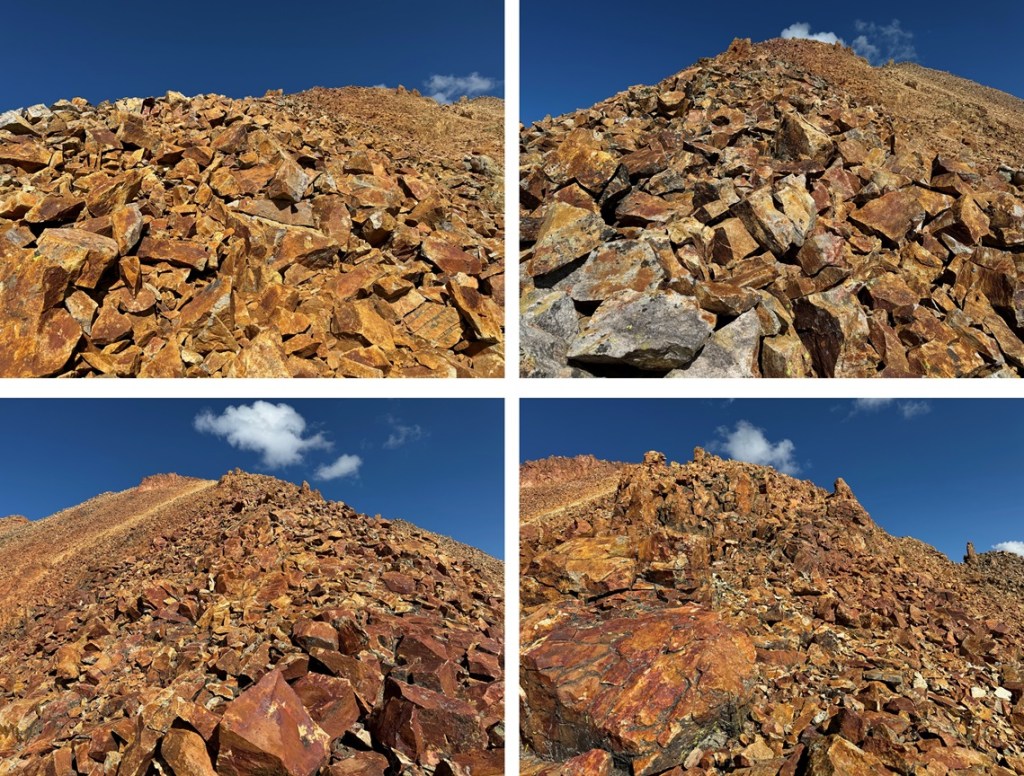
Once on the ridge, I turned left and headed southeast up the ridge.  This is where the terrain changed to small talus.  It was very loose.  The further you climb, the steeper and looser it will be, but you might encounter a game trail to follow. 

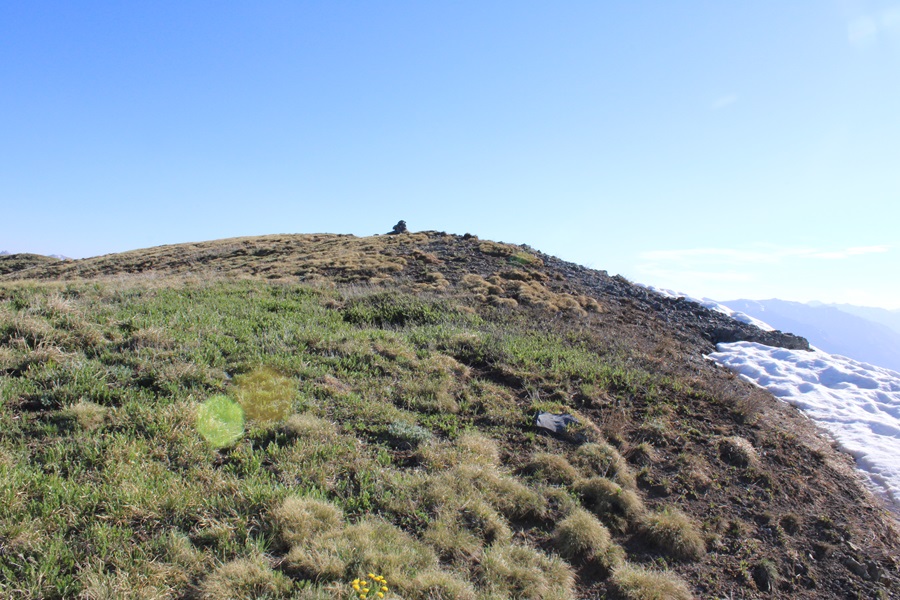
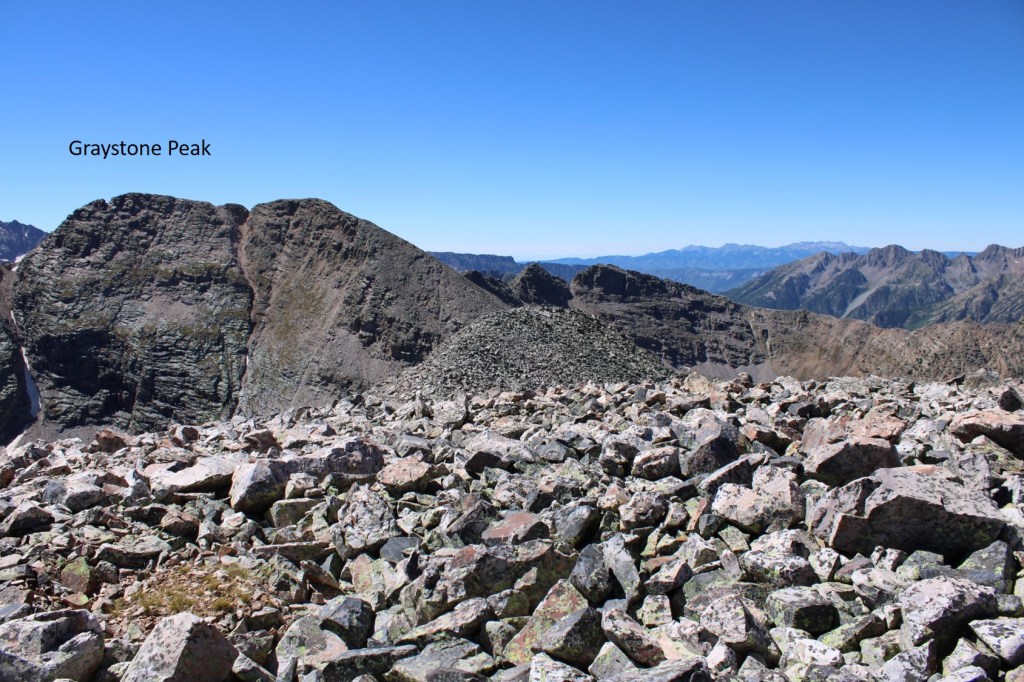
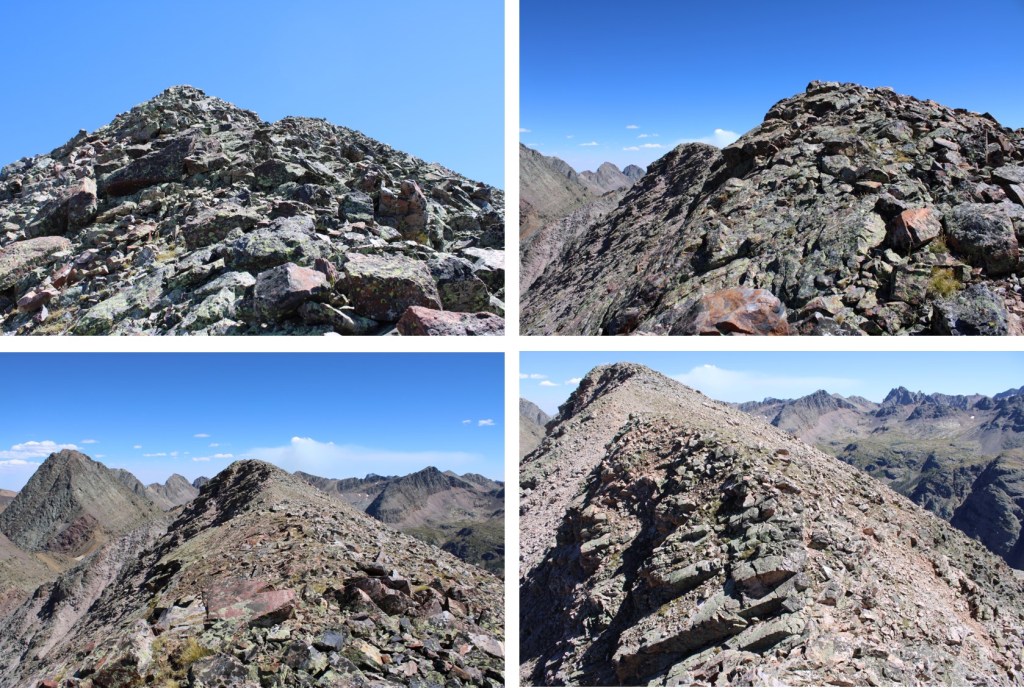
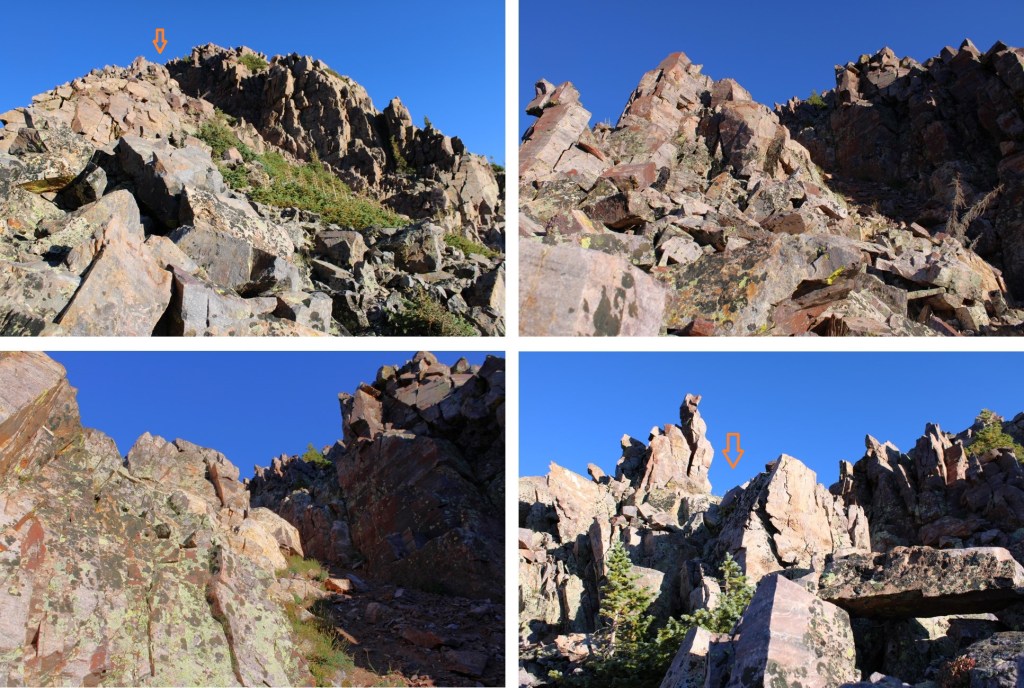
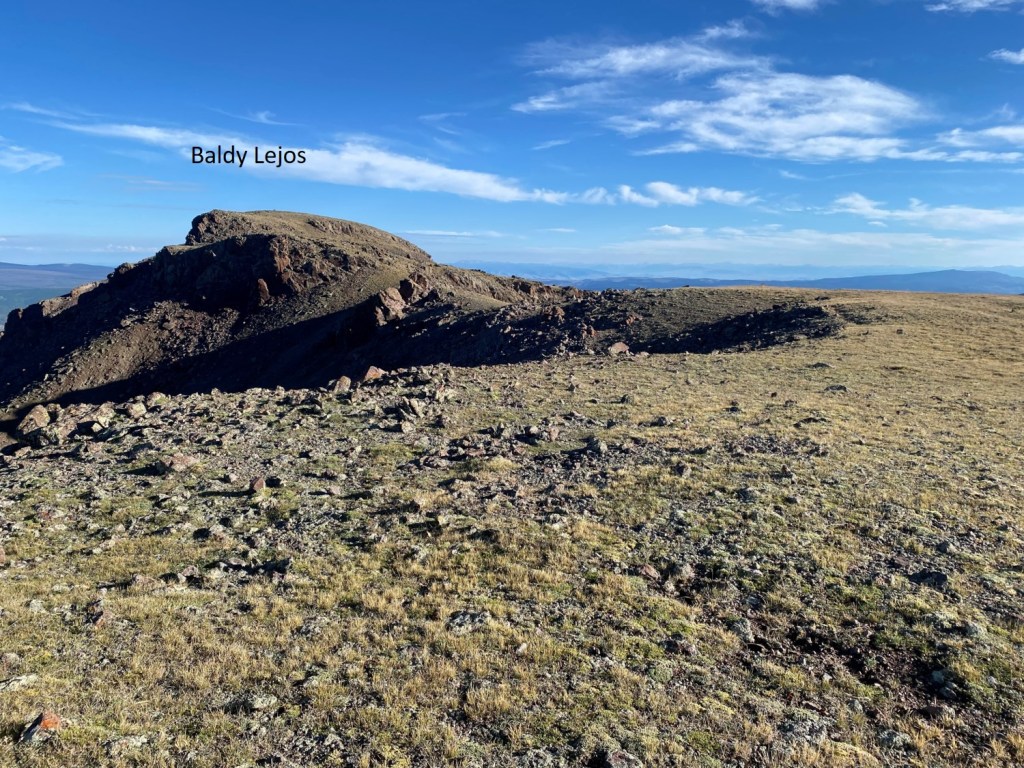
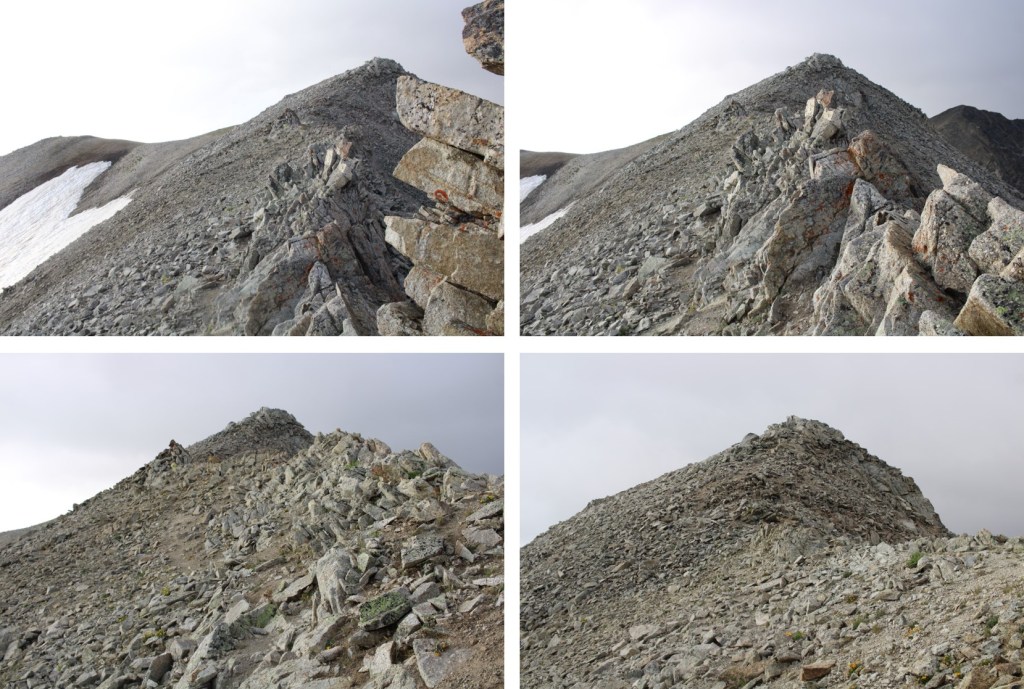
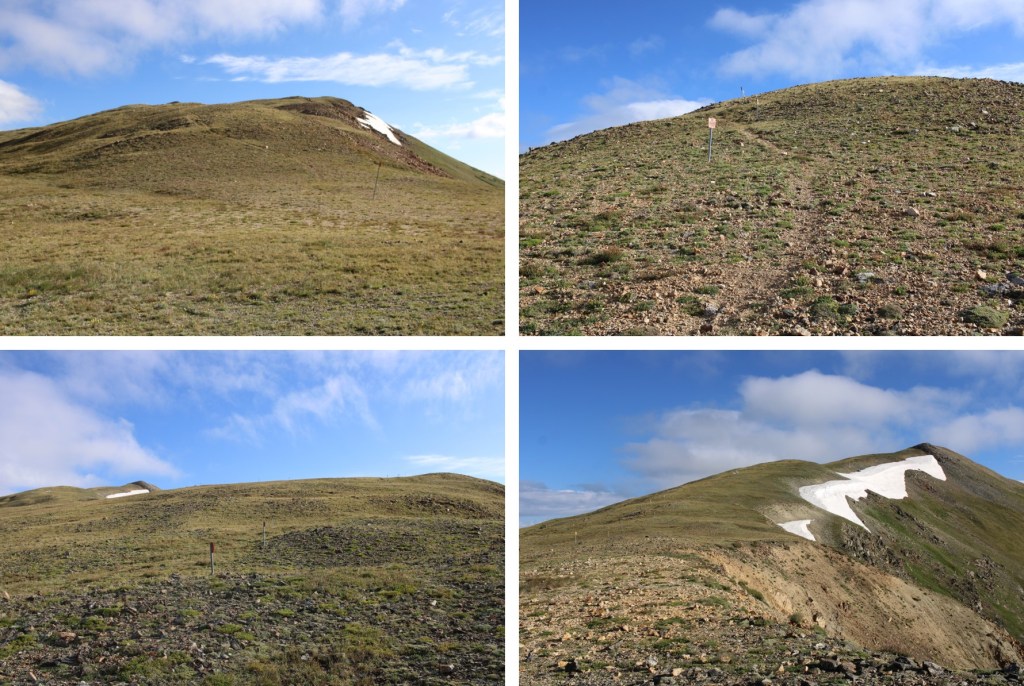
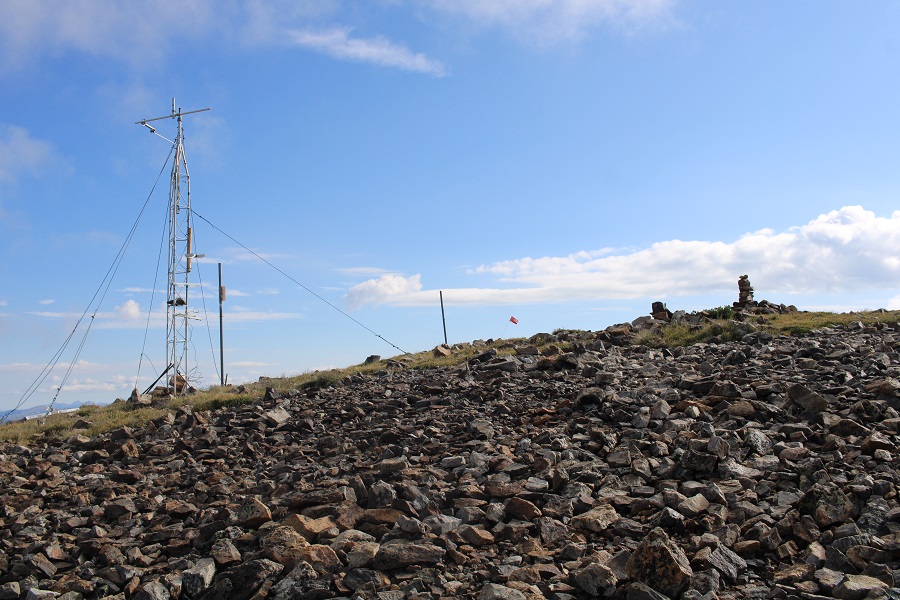
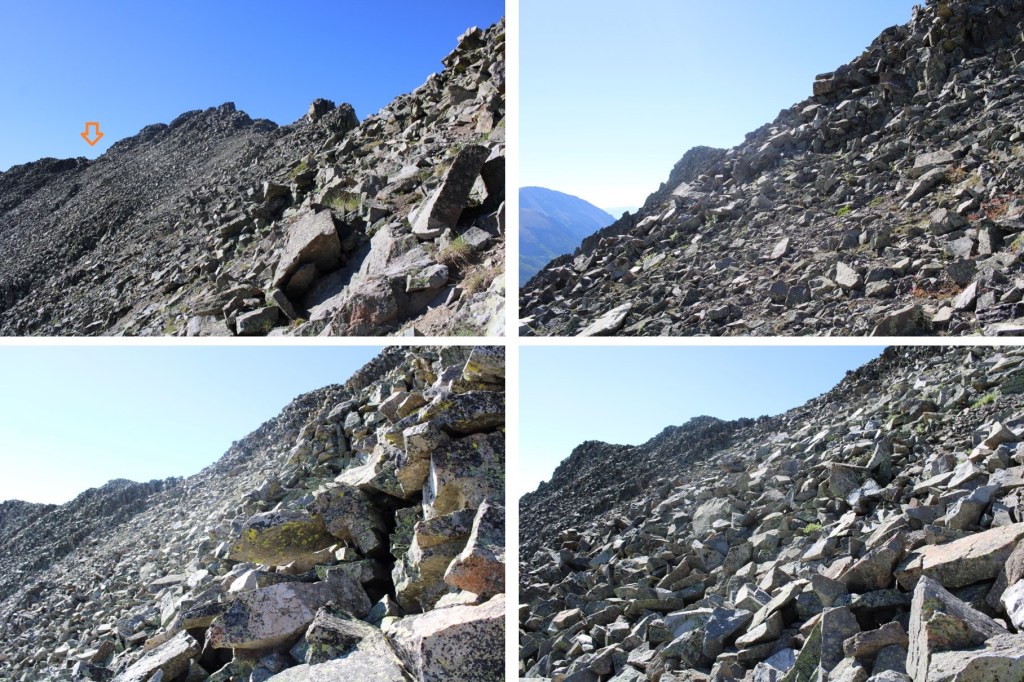
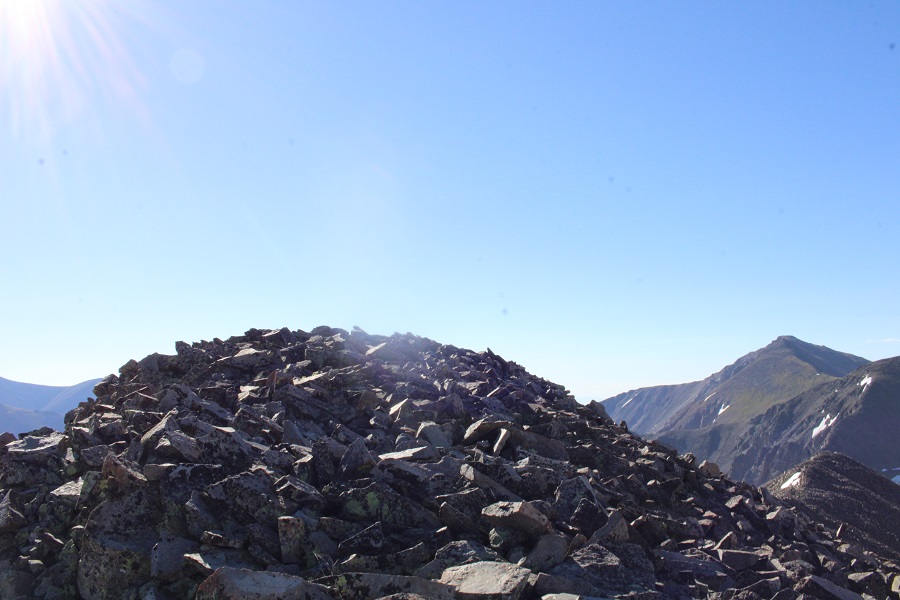
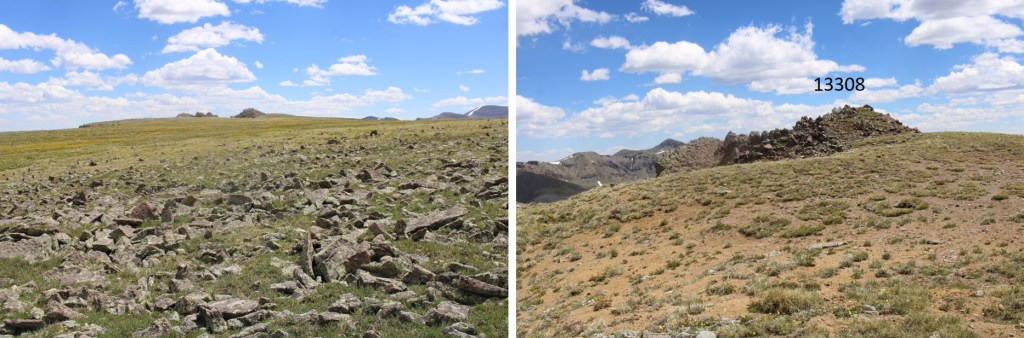
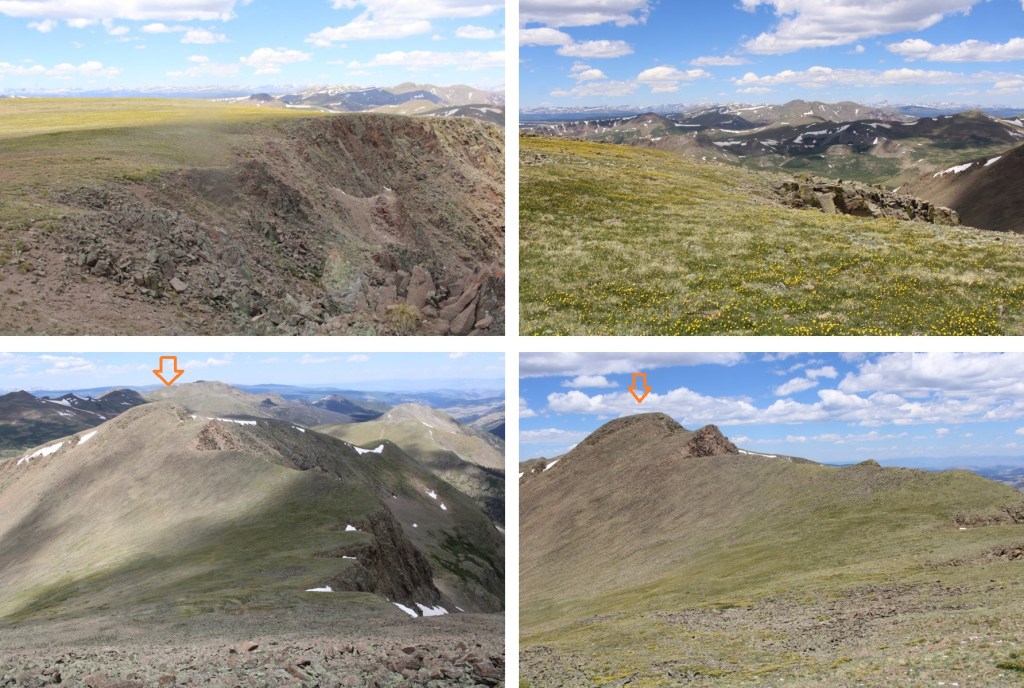
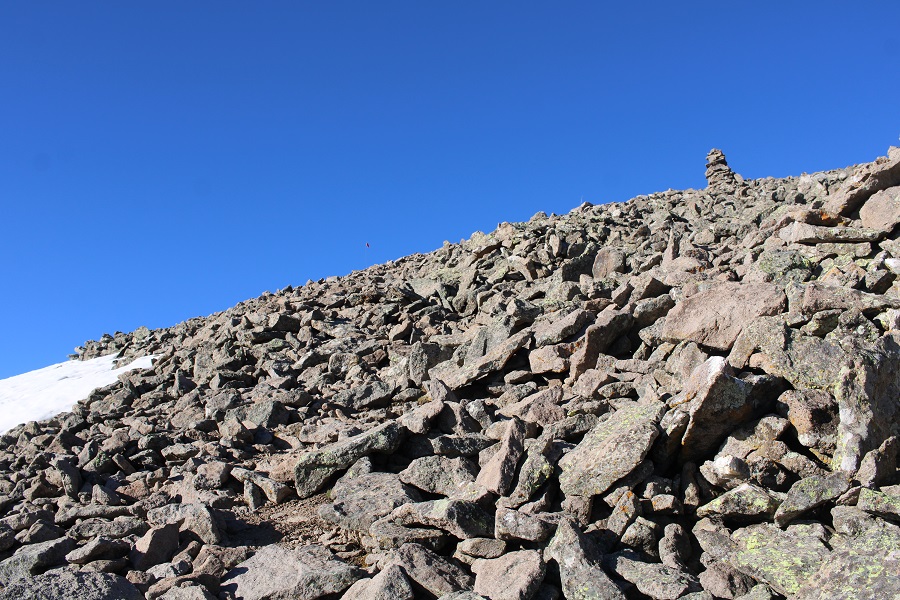
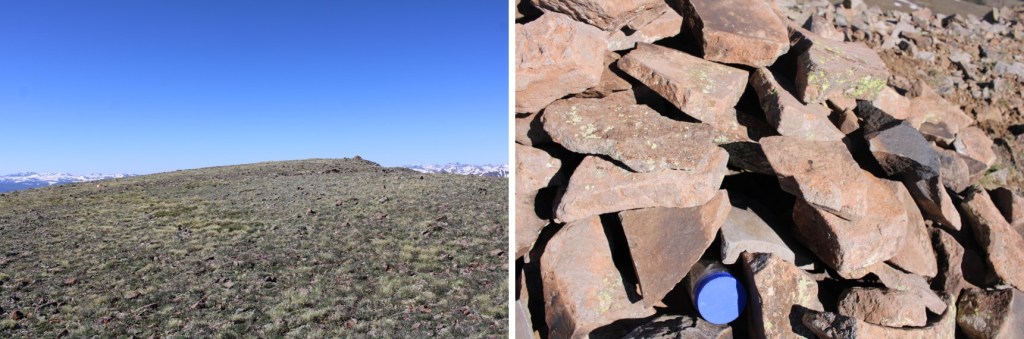
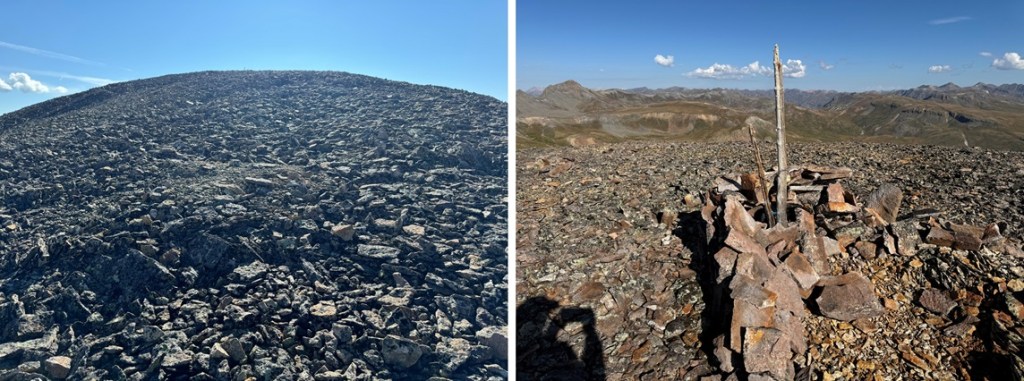
At the top is a wide, flat expanse, full of holes about 5 feet wide.  I kept heading east, towards the summit.

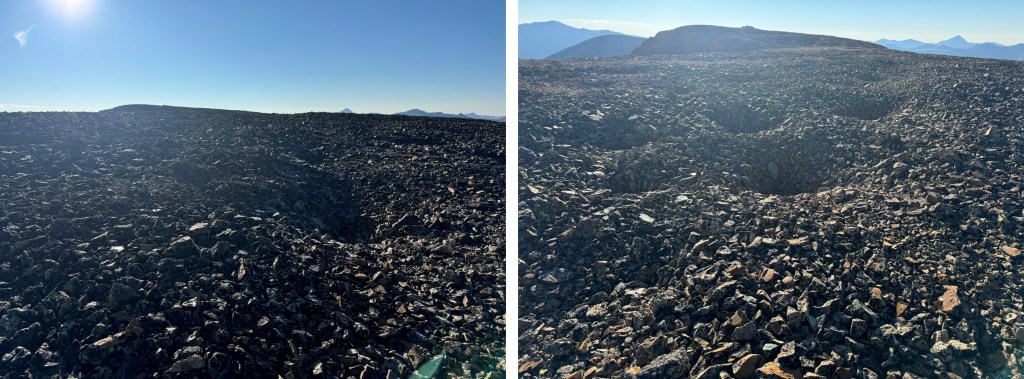
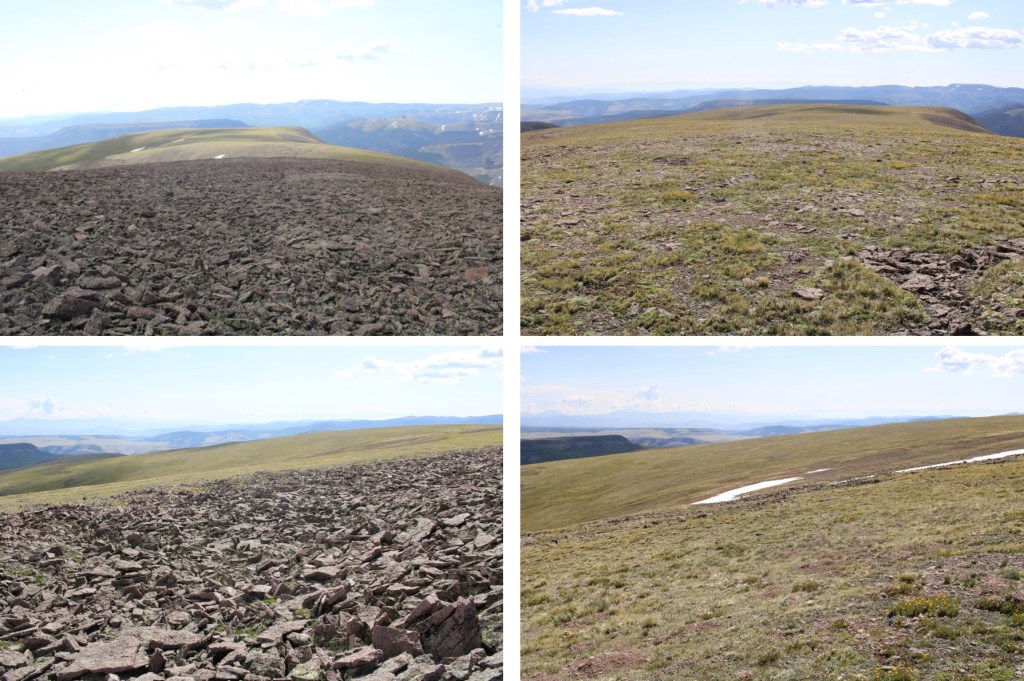
The rest of the route to the summit can be done on the ridge proper and kept at class 2.  The only difficulty here is the talus, scree, and exposure that might make it feel more difficult. 

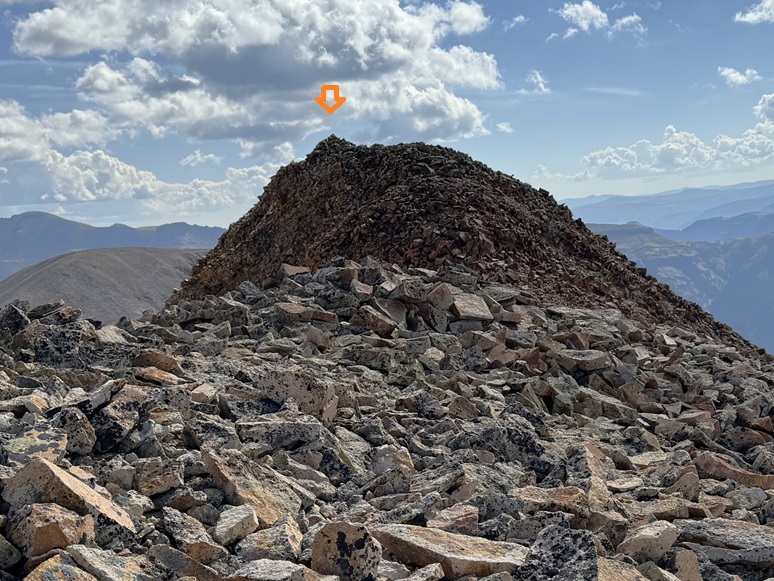
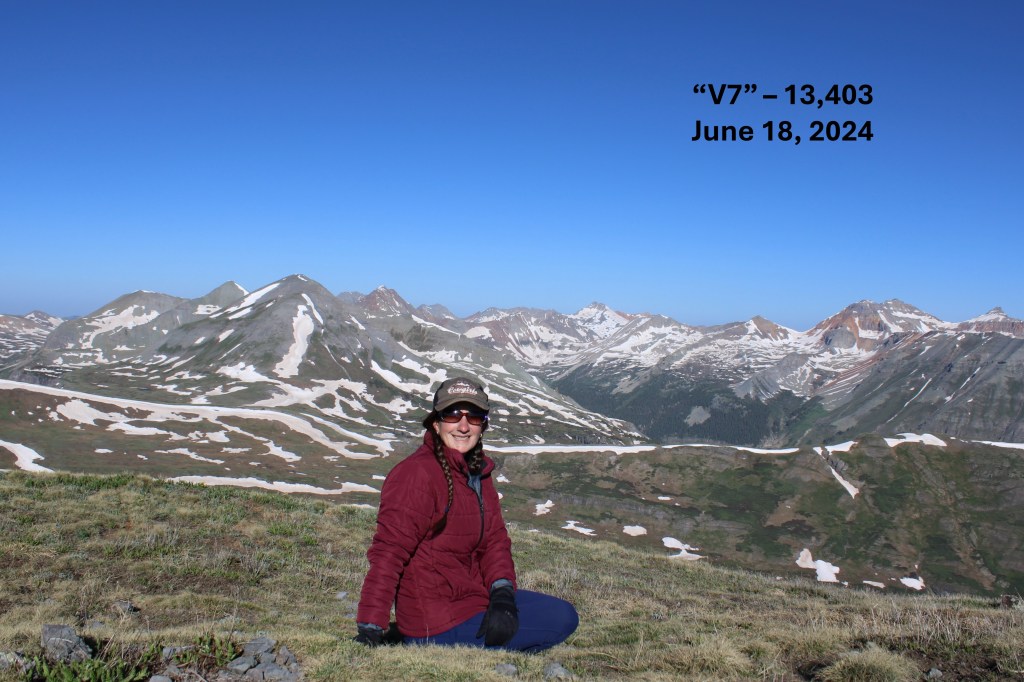
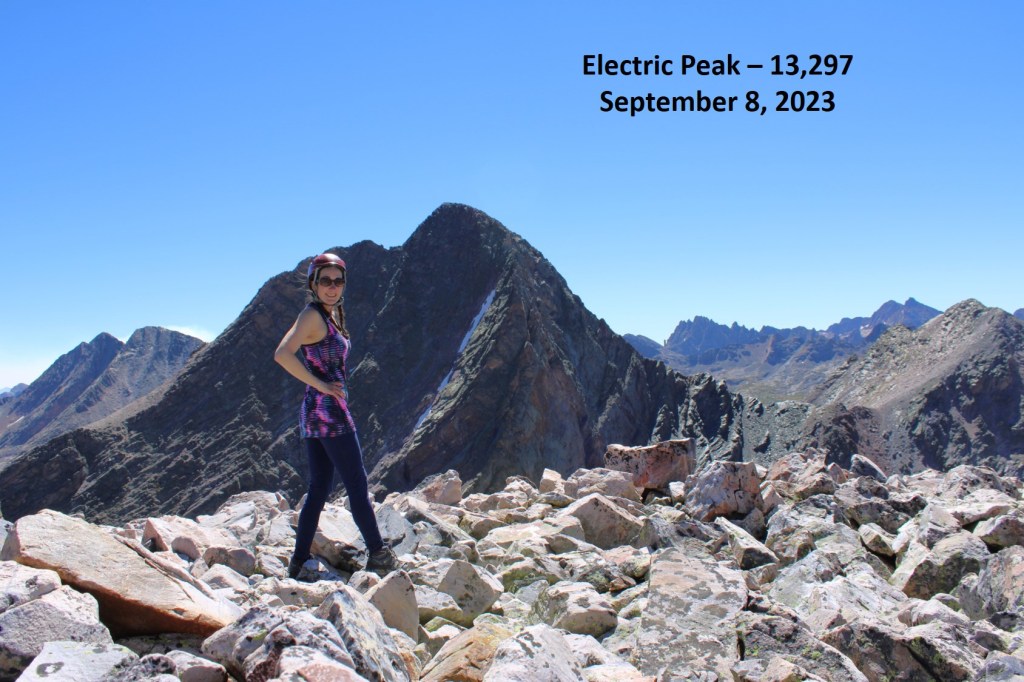
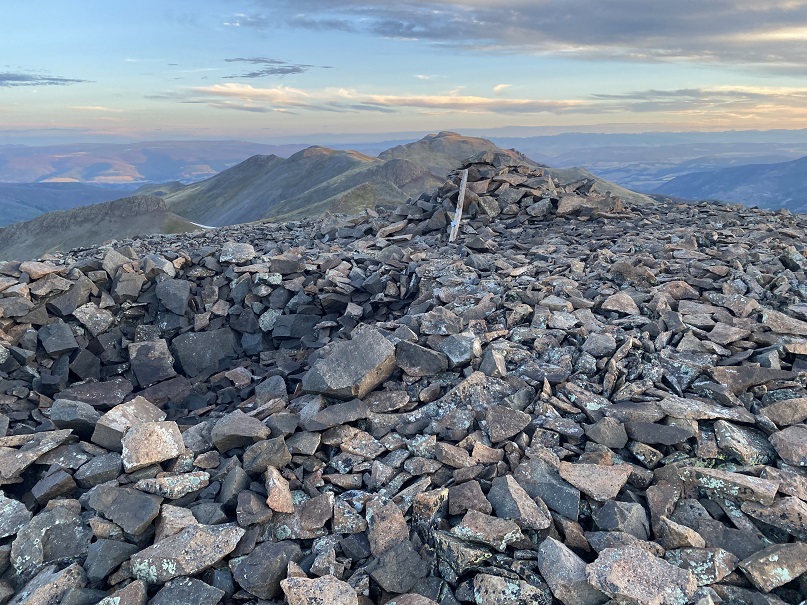
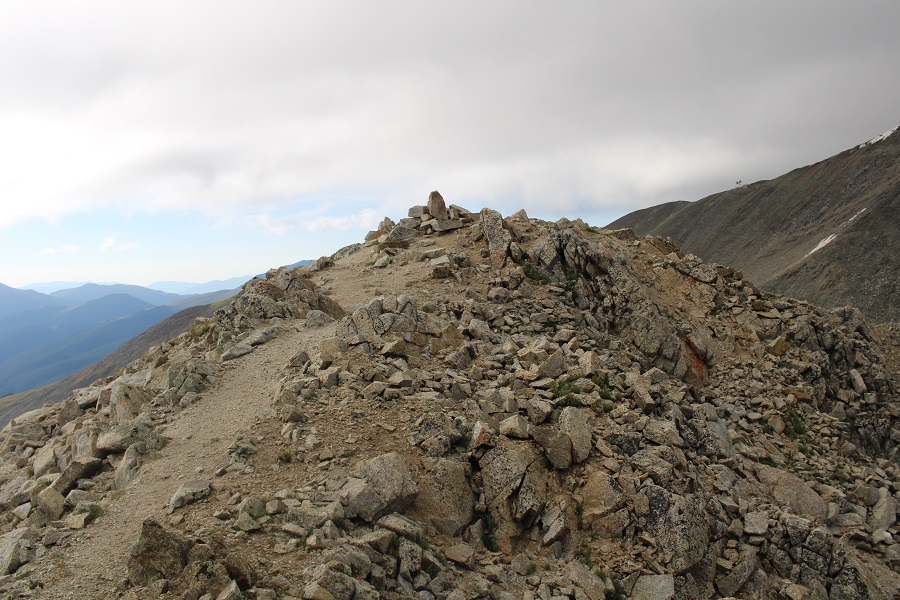
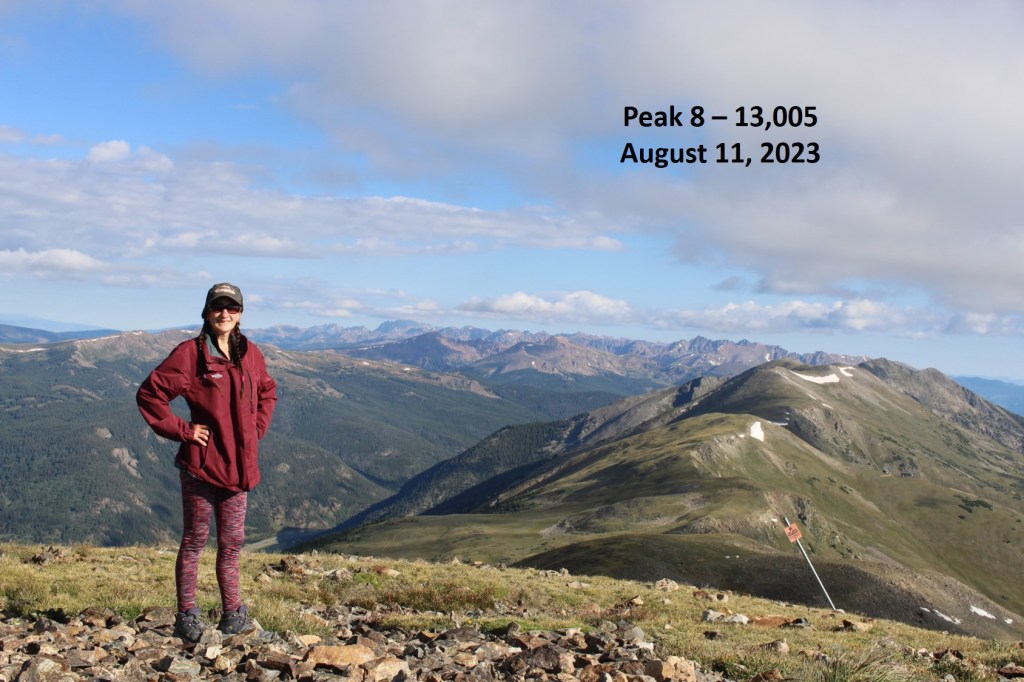
I summited Sheep Mountain at 8:20am
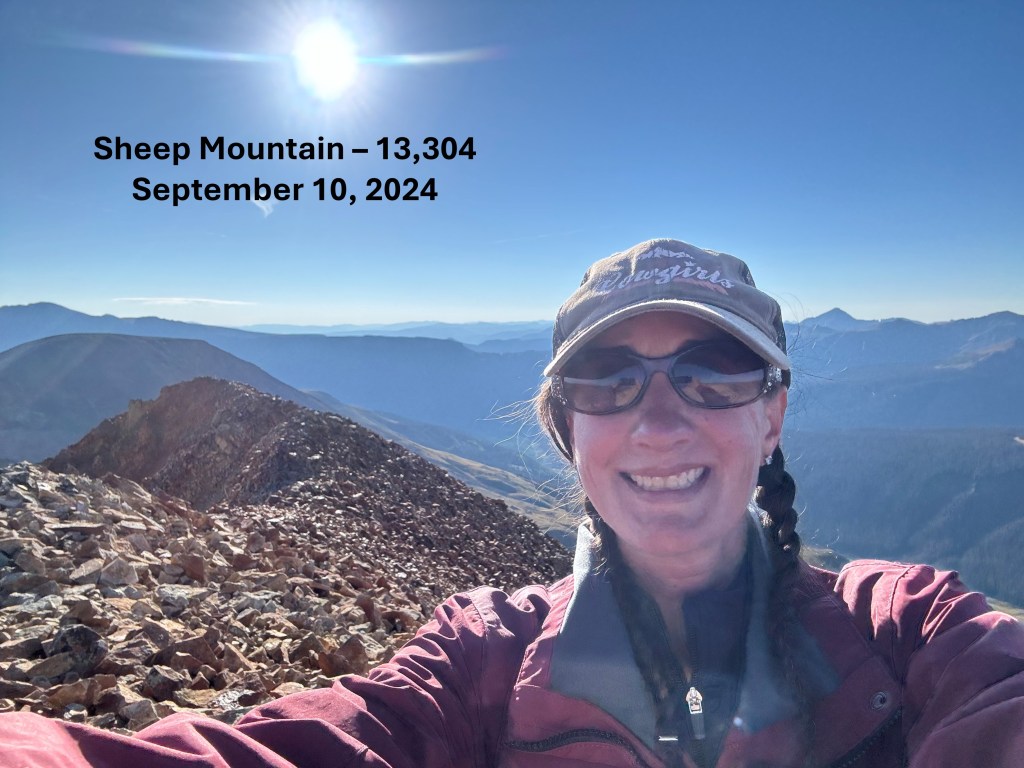
Sheep Mountain:

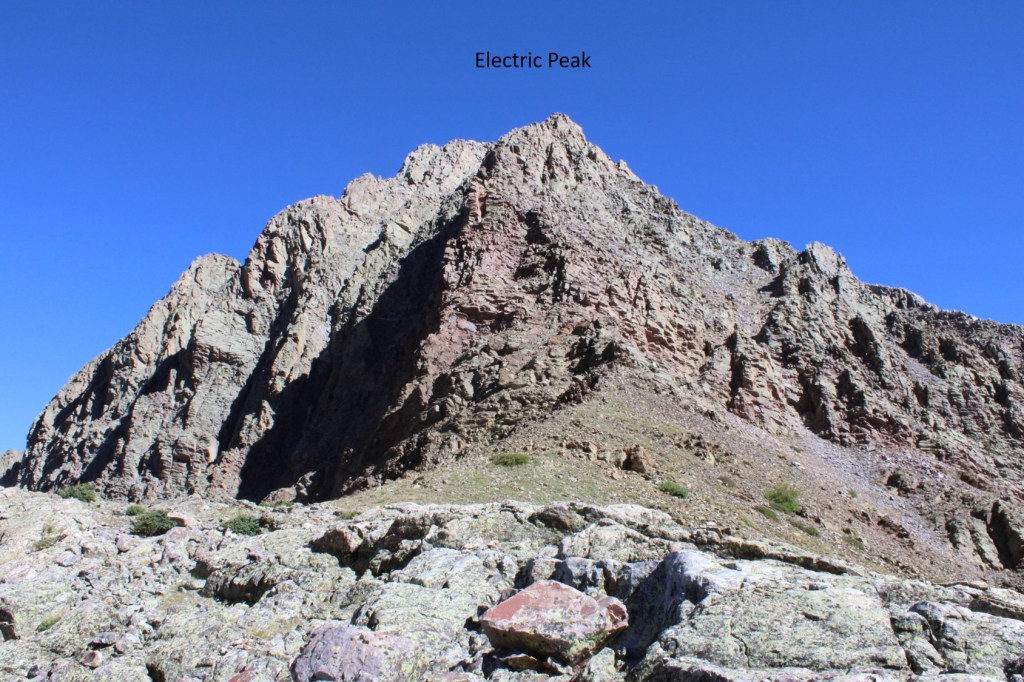
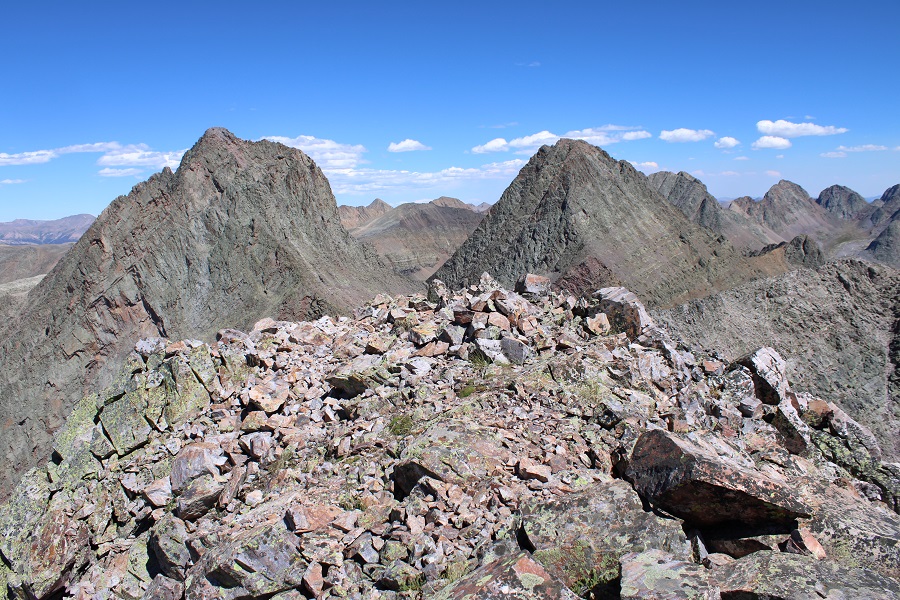
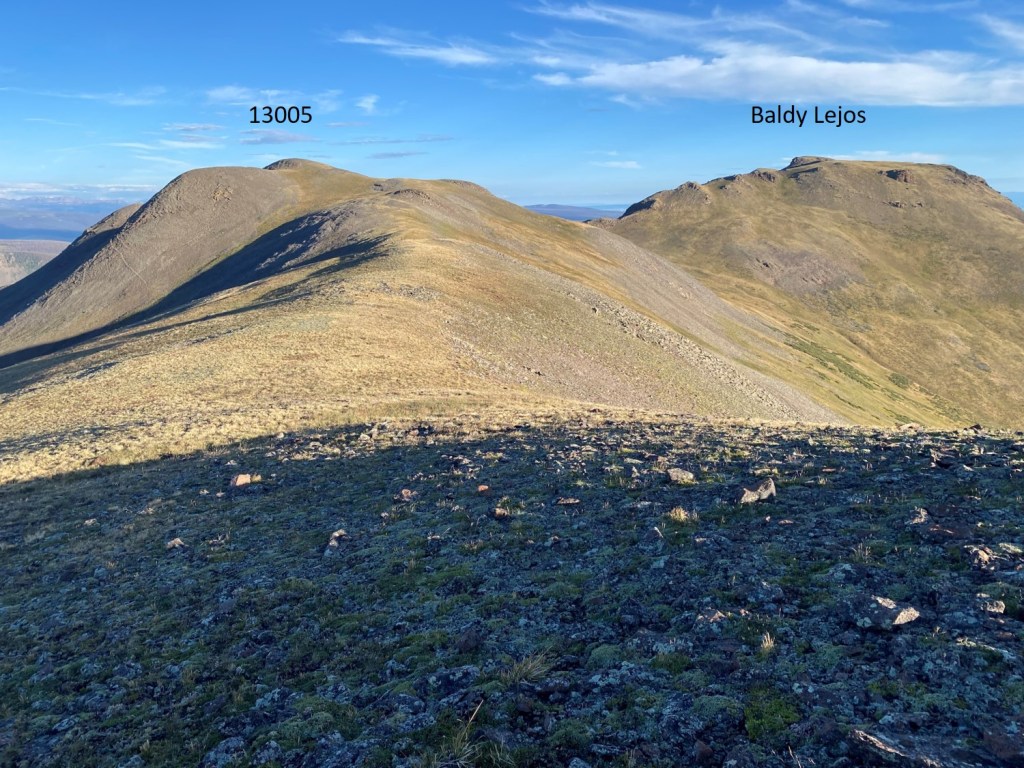
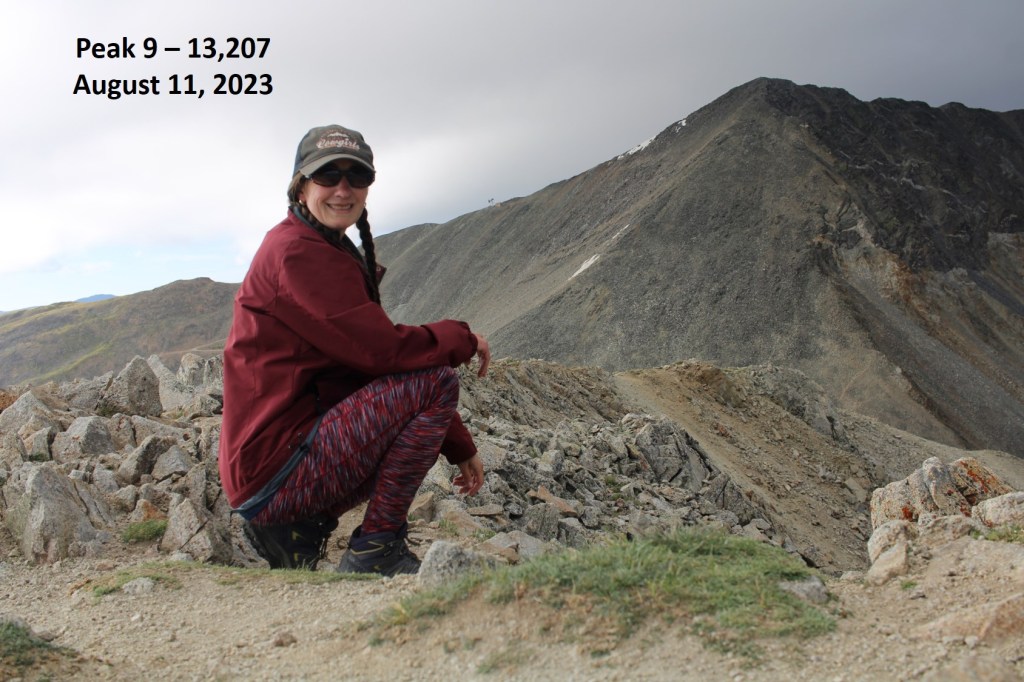
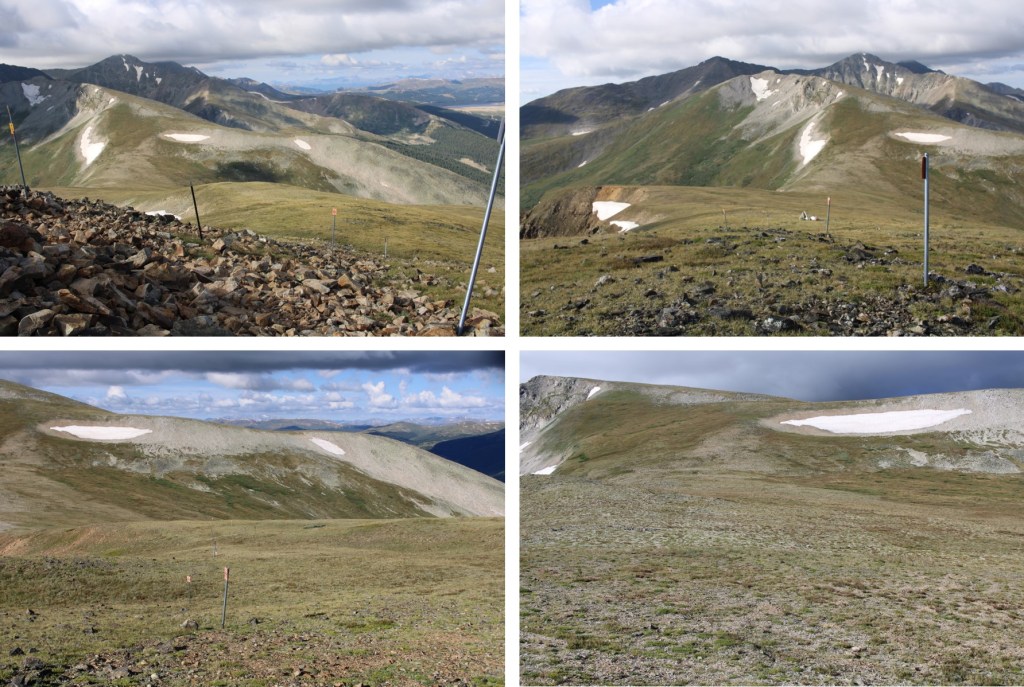
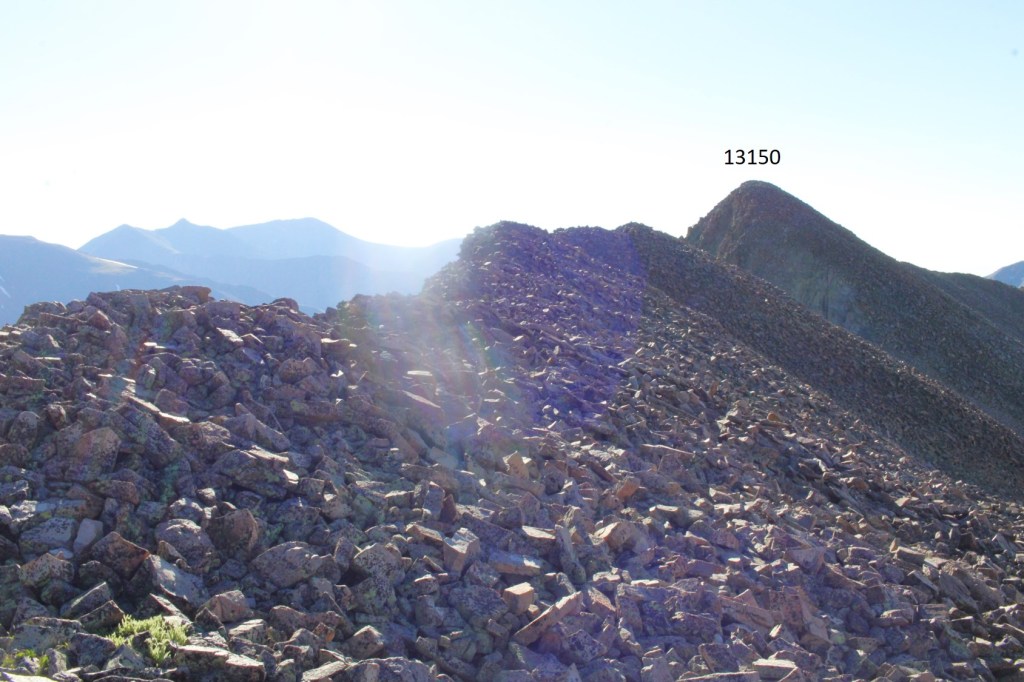
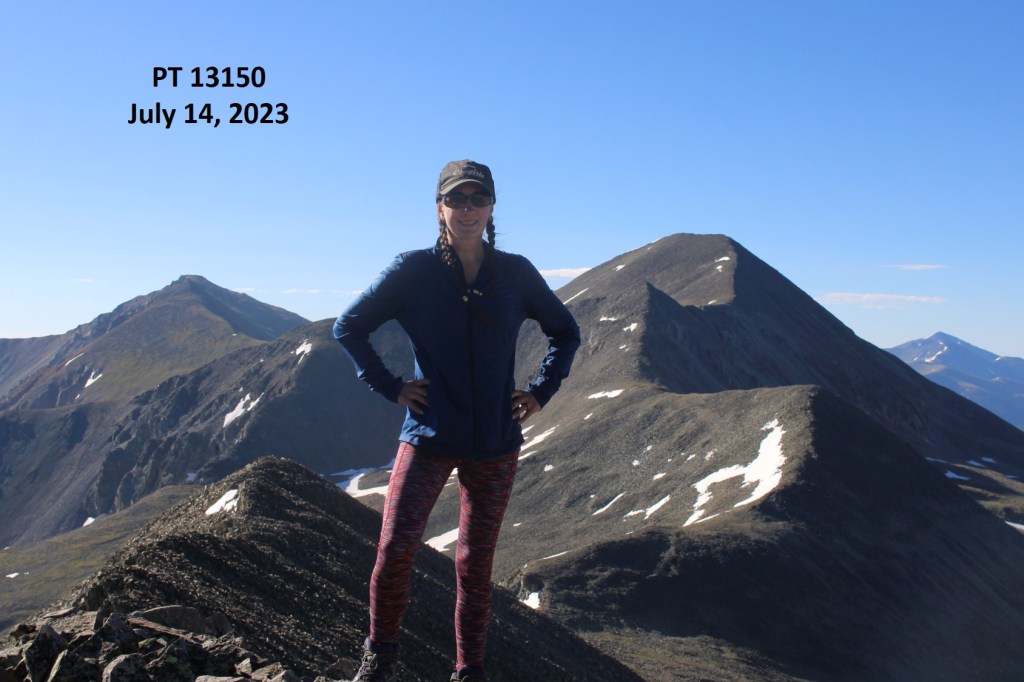
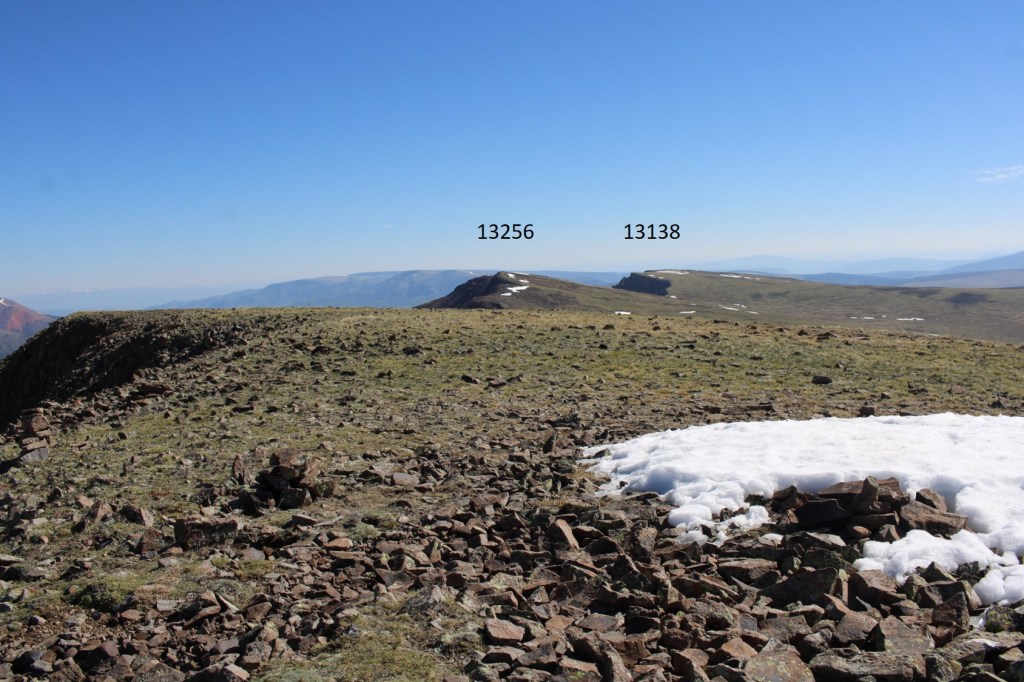
My next goal for the day was Greenhalgh Mountain, to the east

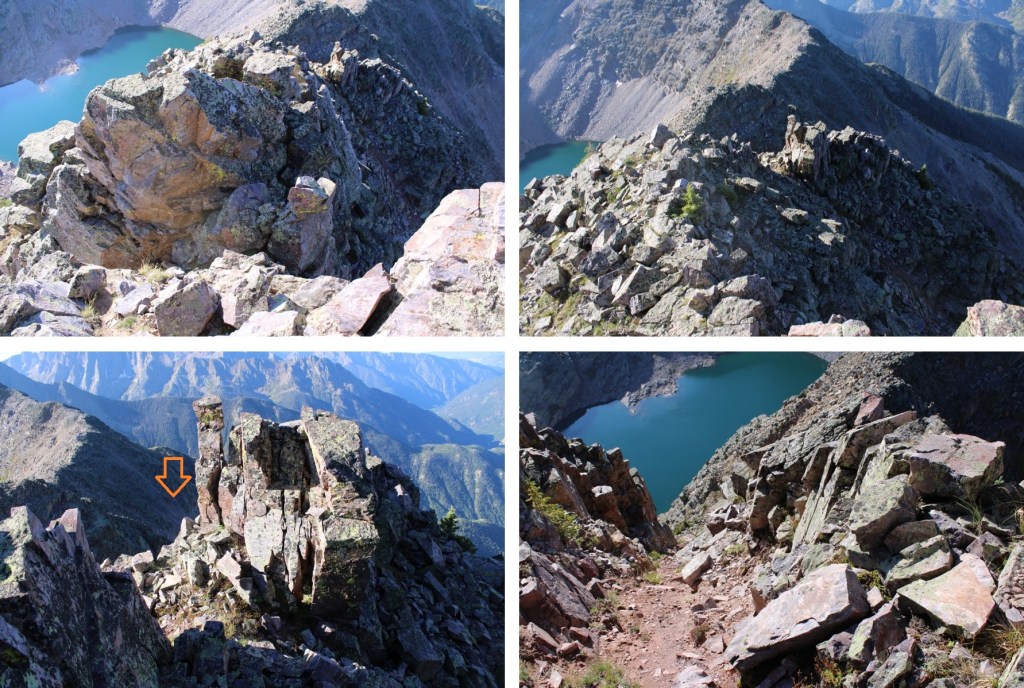
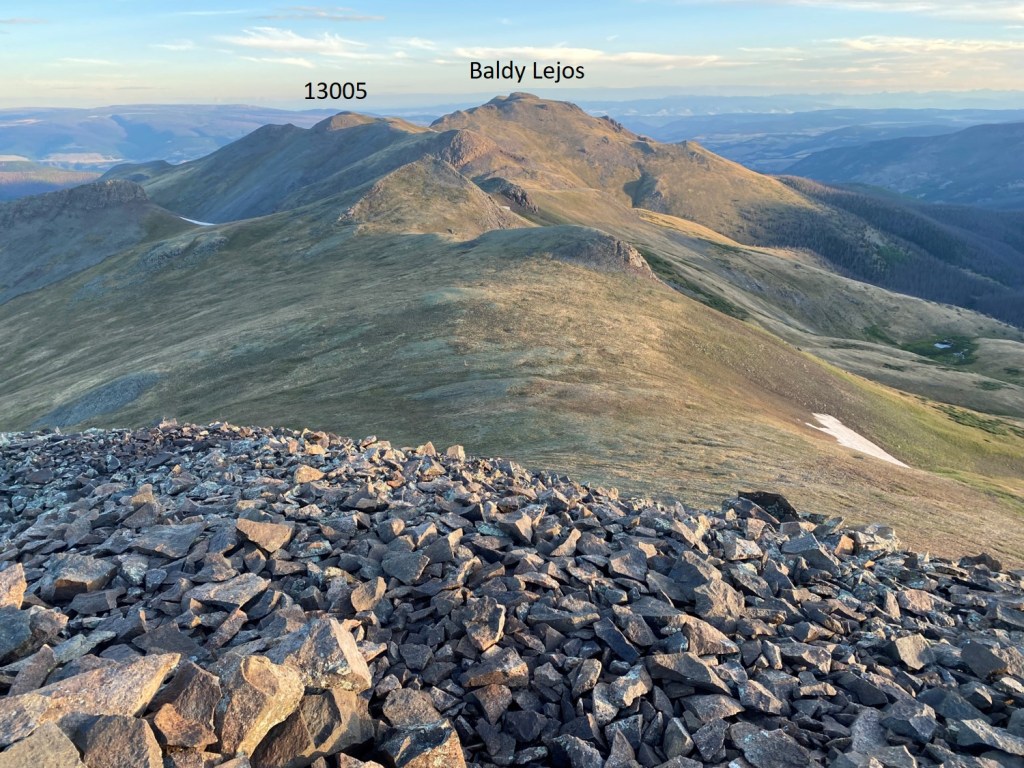
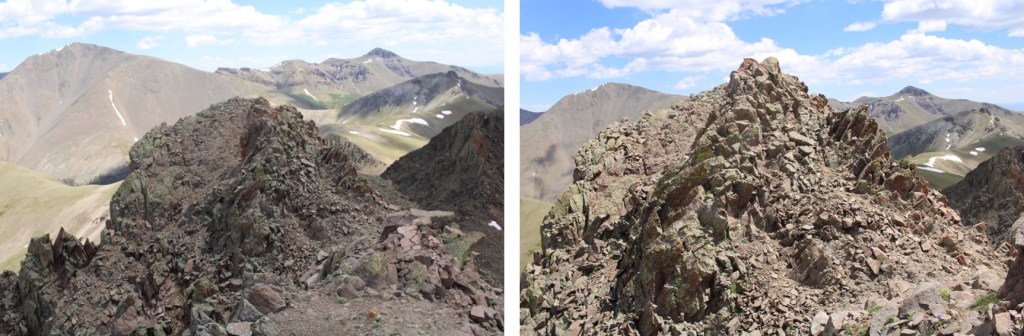
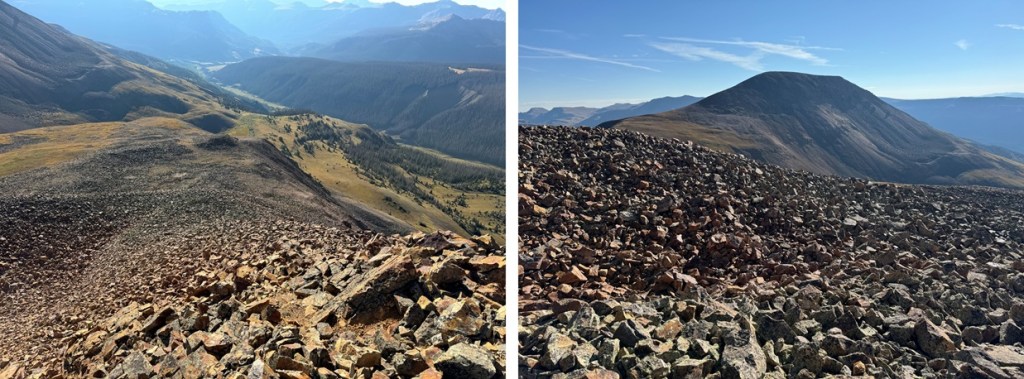
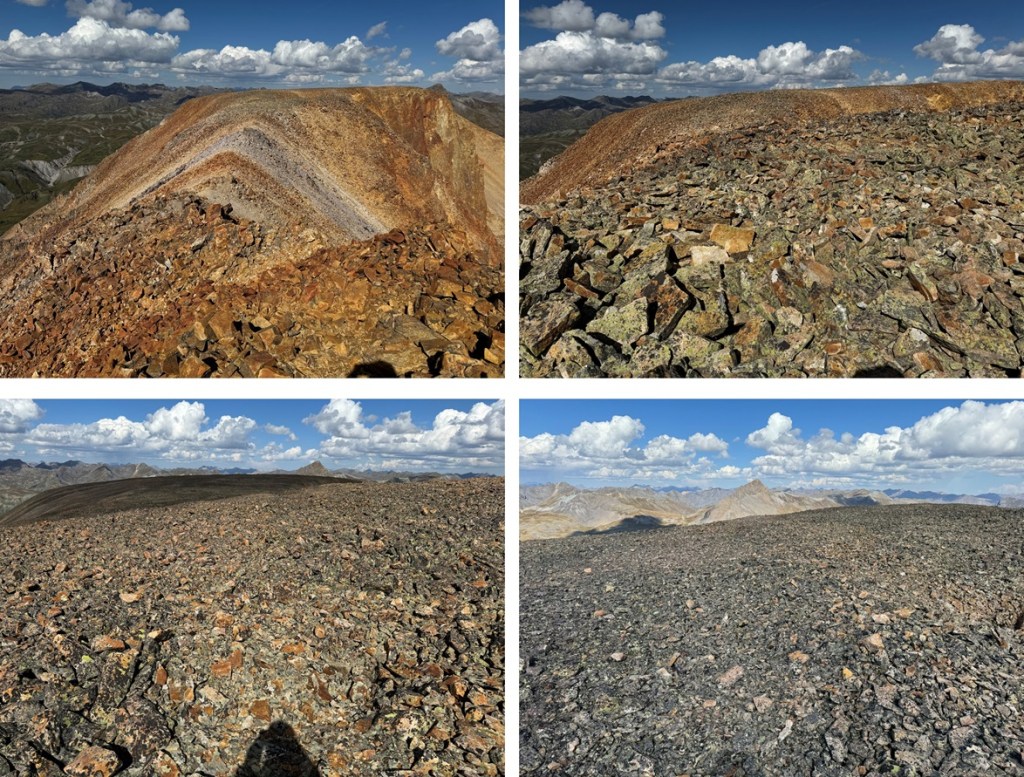
I continued along the rocky, class 2 ridge east

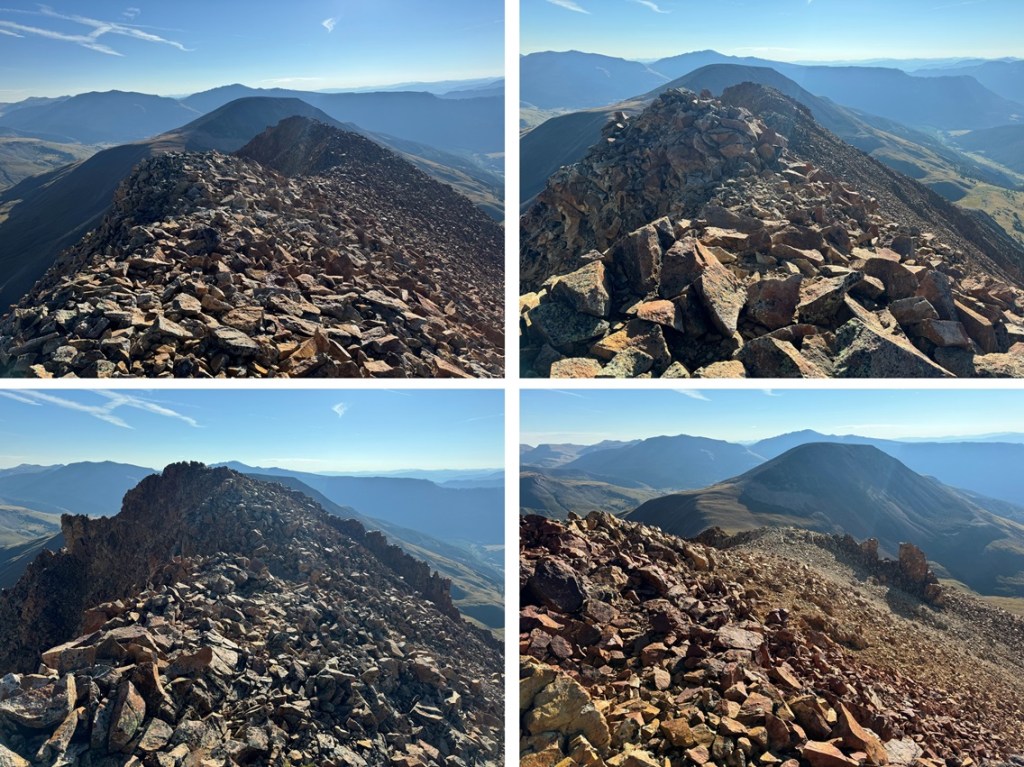
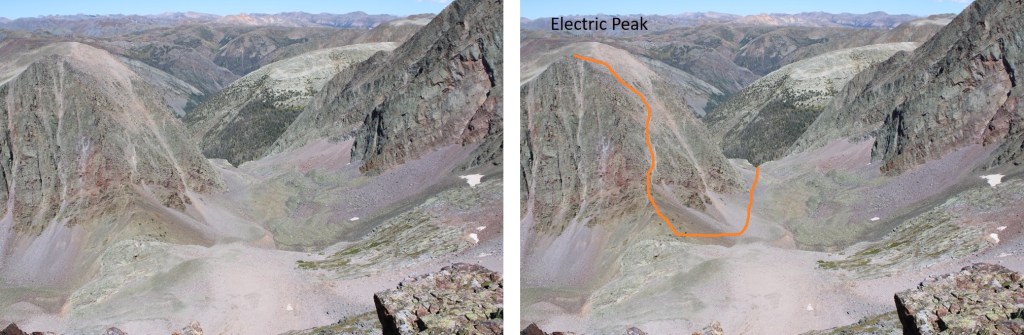
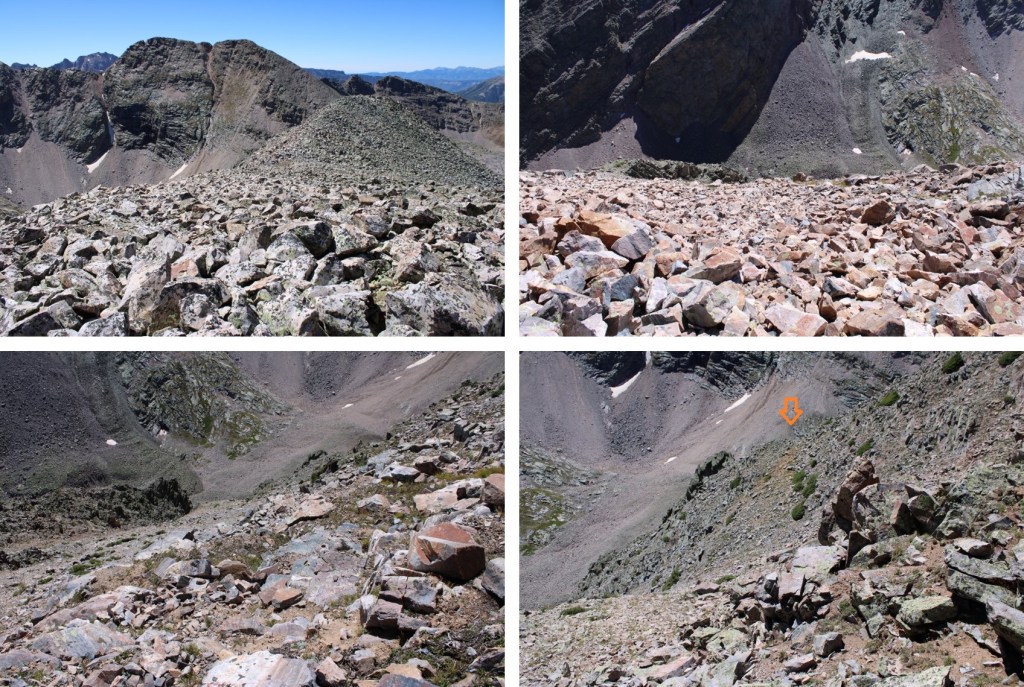
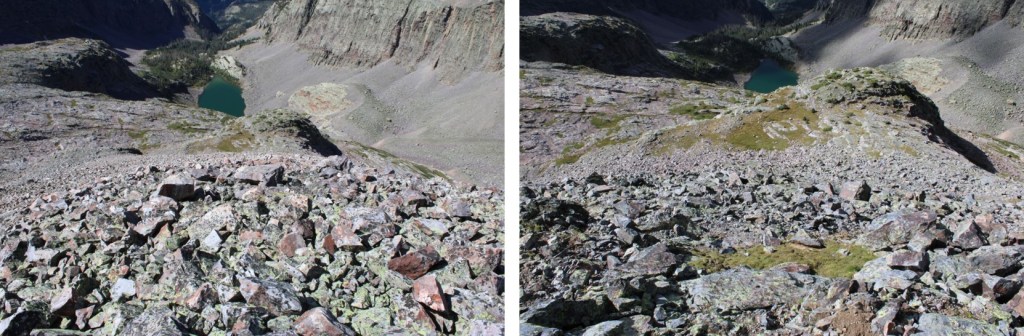
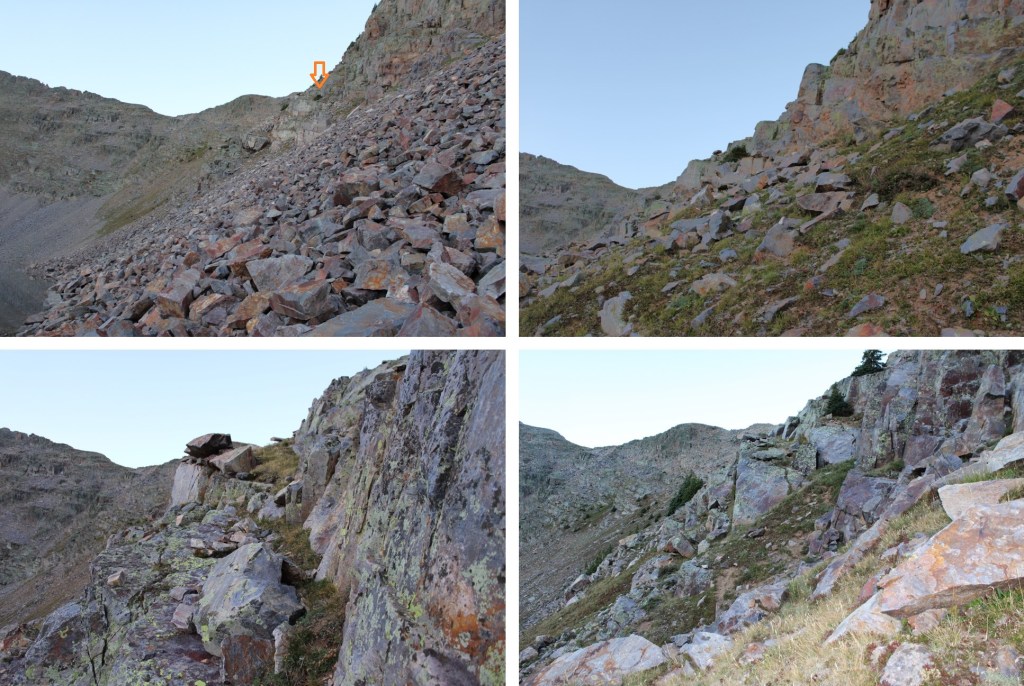
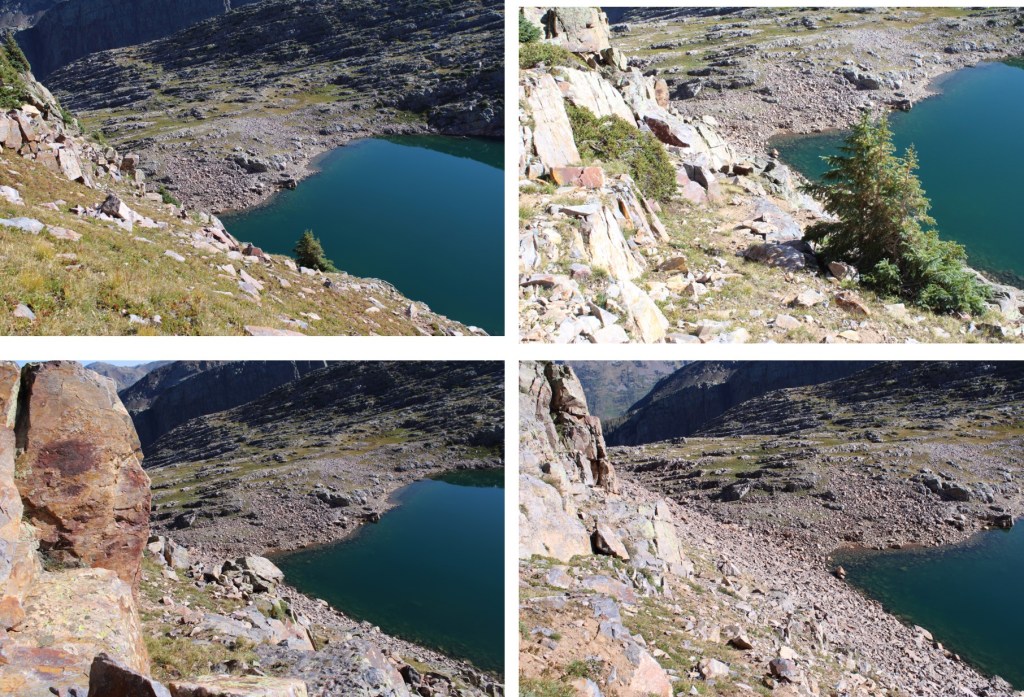
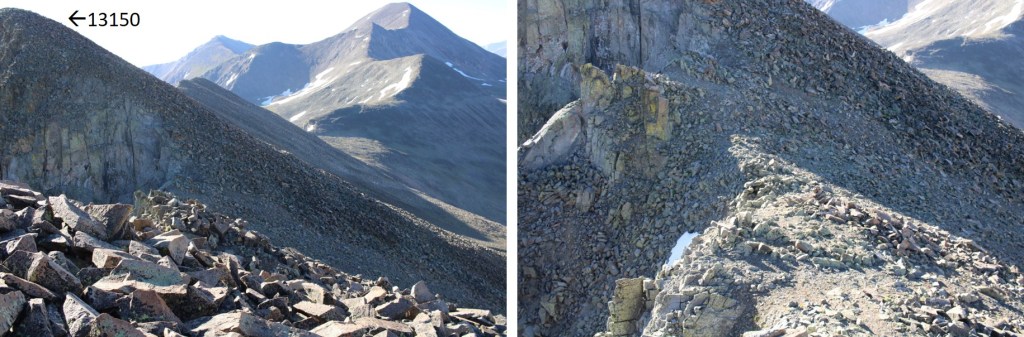
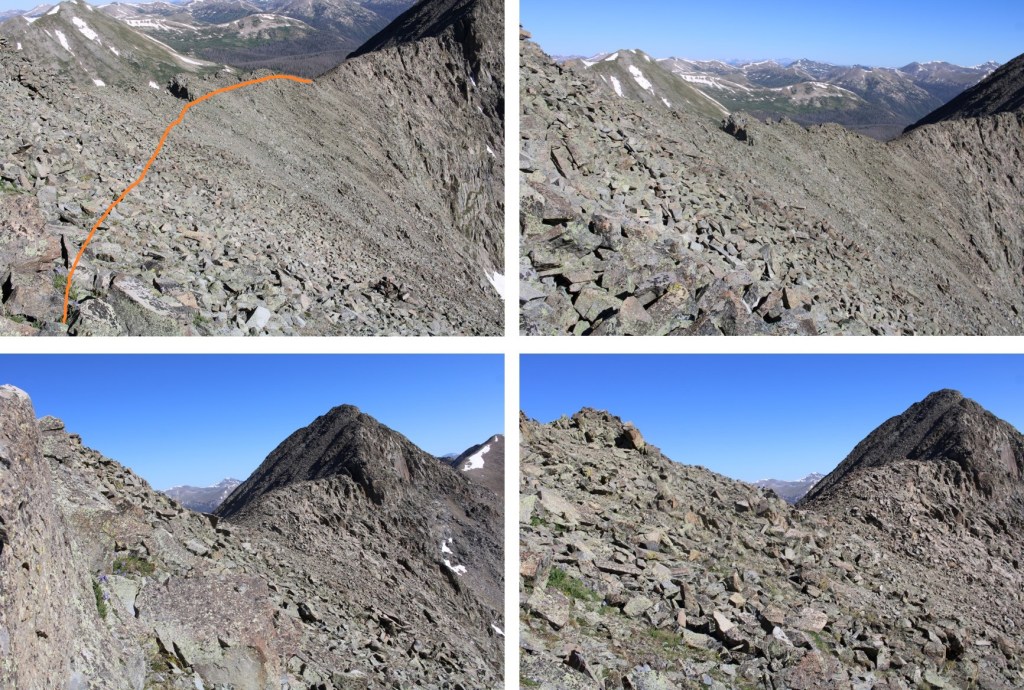
I followed the ridge east, until I came to a dropoff of sorts.  Visually, it looked like the scree was continuous and went all the way to the rocks at the bottom.  However, that was not the case.  I ended up descending about 100 feet on scree, and then everything was loose talus, and steep, so I made my way climbers right to the ridge, and descended that way.  If I were to do this again, I would have just taken the ridge to the right.  It goes at easy class 3, and there’s talus, but it was much more stable than the talus below the scree.  Also, EVERYTHING moves here.  More info/pictures to come on my return route of this area.

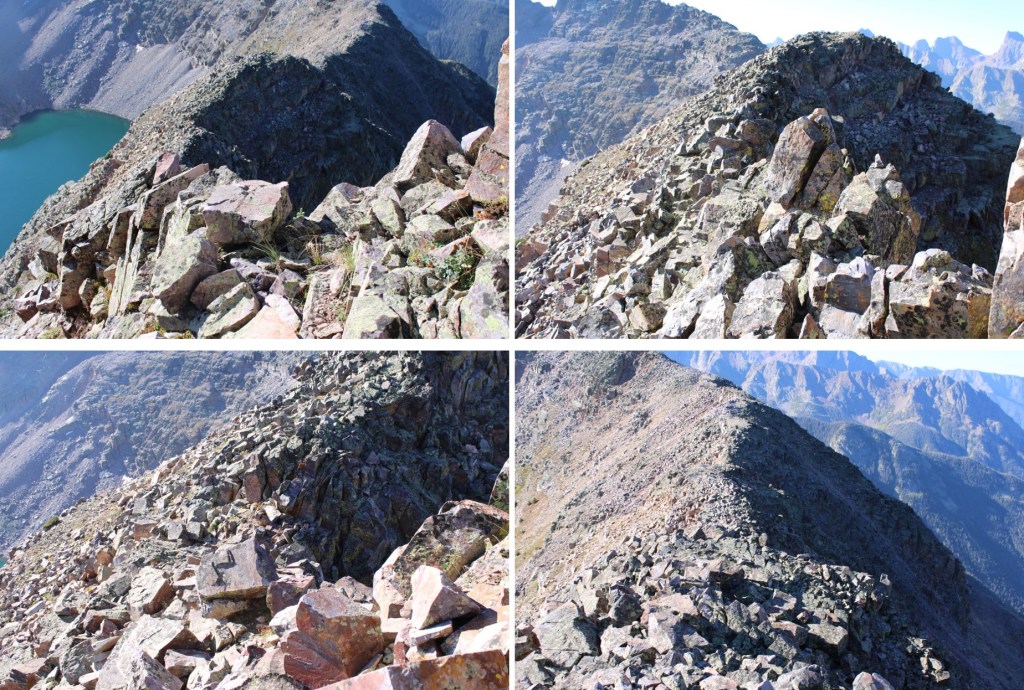
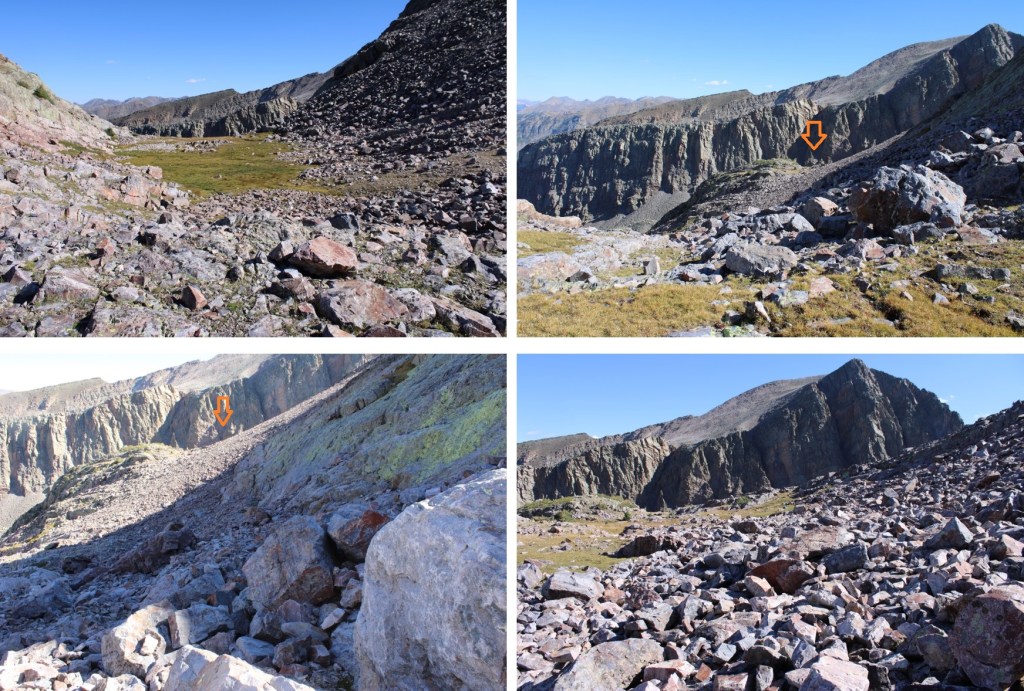
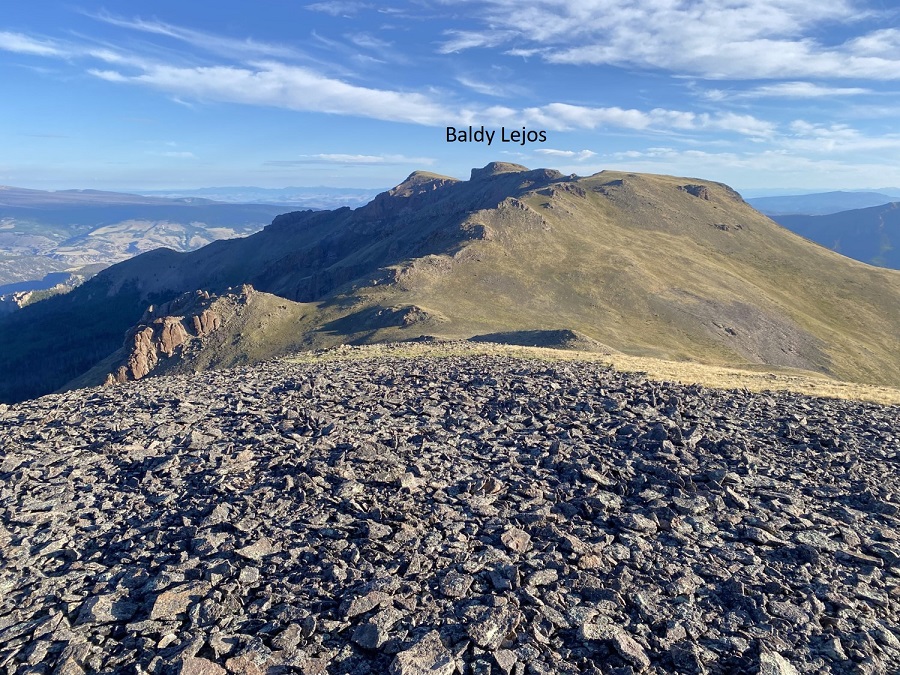
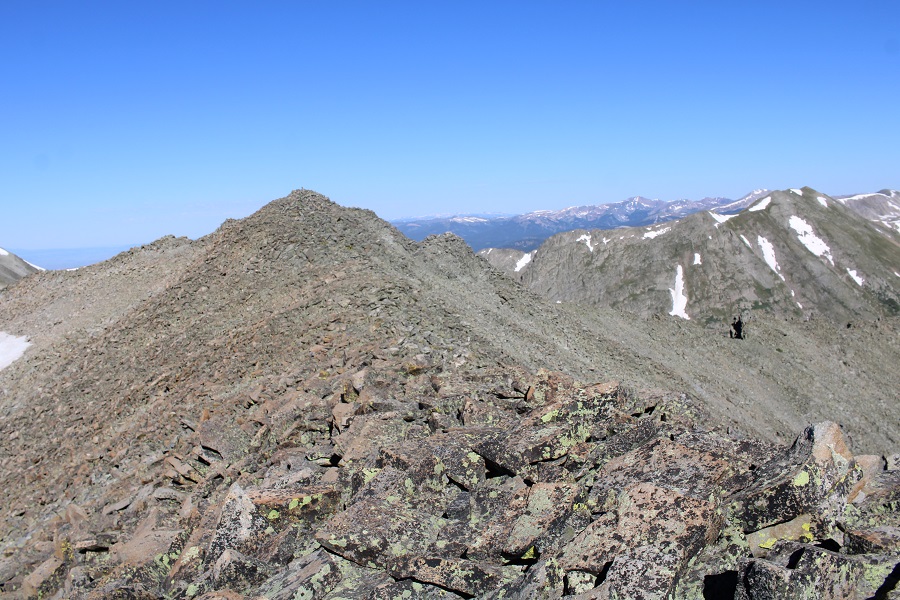
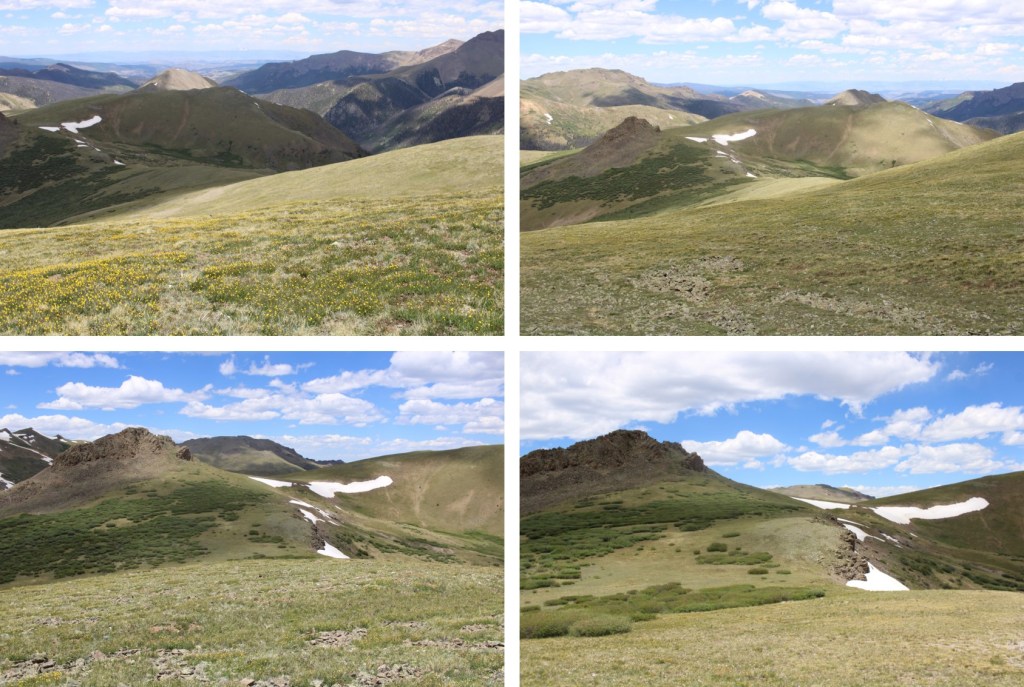
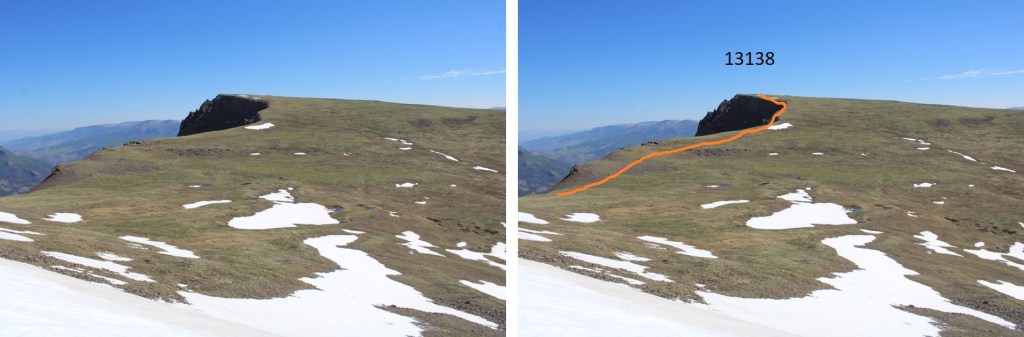
From the bottom of the ridge, I headed northeast towards the Sheep/Greenhalgh saddle on class 2 terrain.

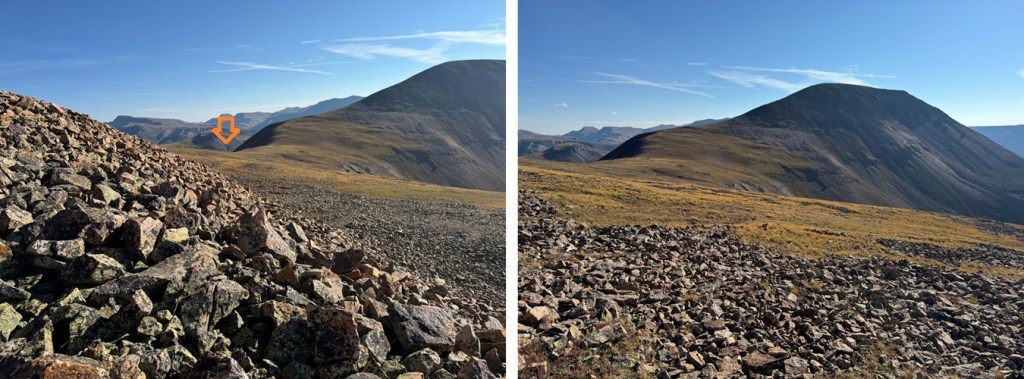
Then I ascended the ridge to the summit of Greenhalgh Mountain. This part of the route was actually very enjoyable, on class 2 terrain, with rocks that stayed put and didn’t roll.

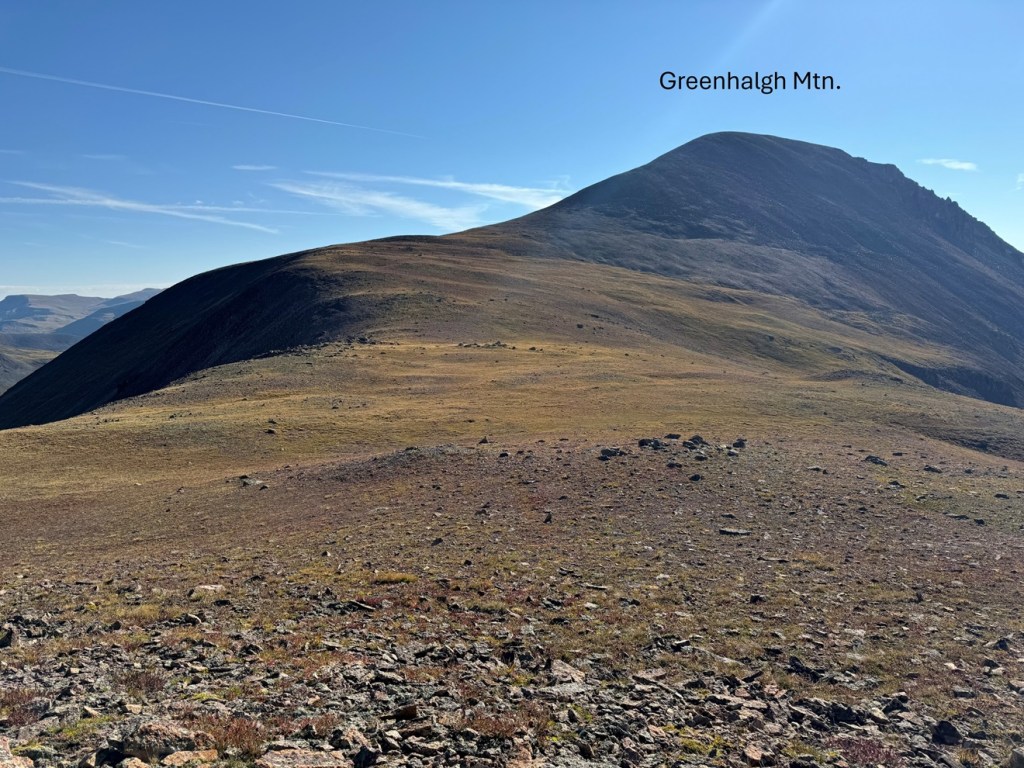
I summited Greenhalgh Mountain at 9:20am

Greenhalgh Mountain:

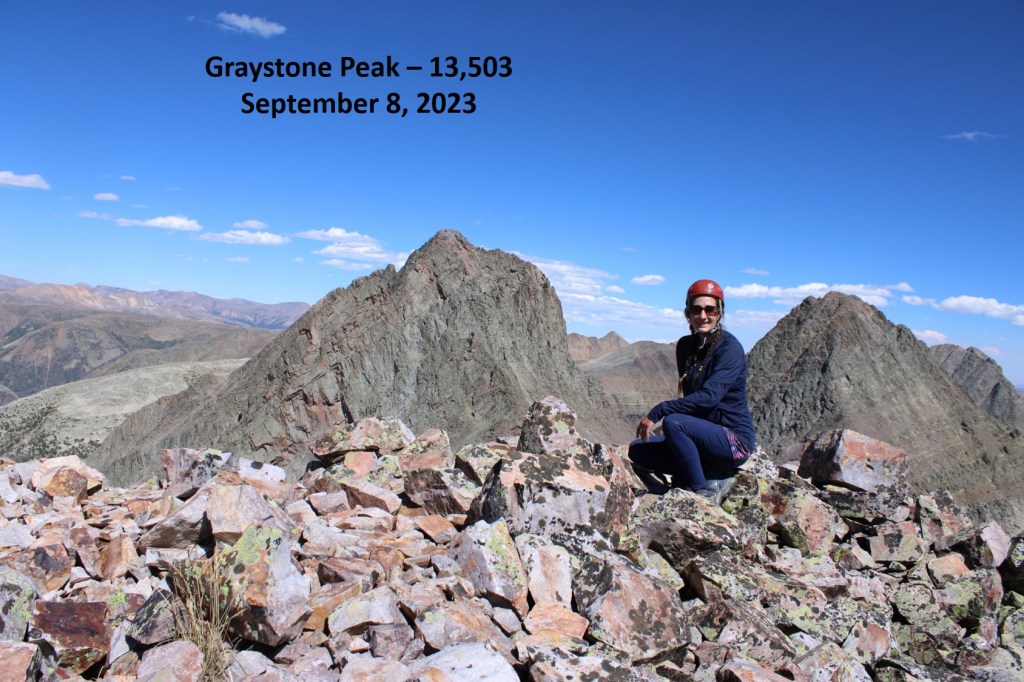
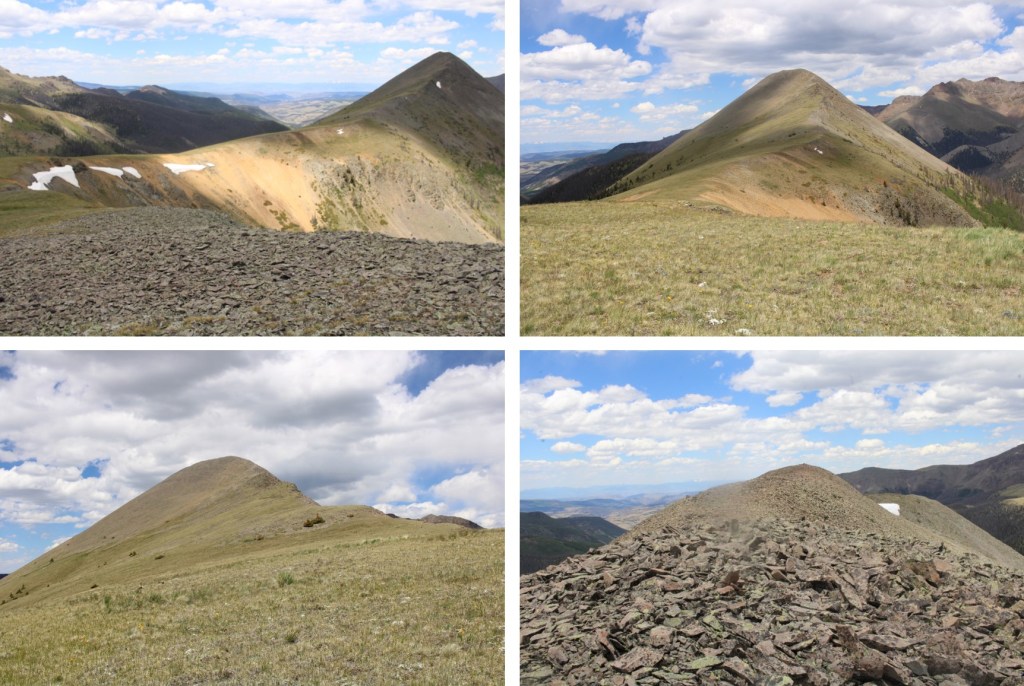
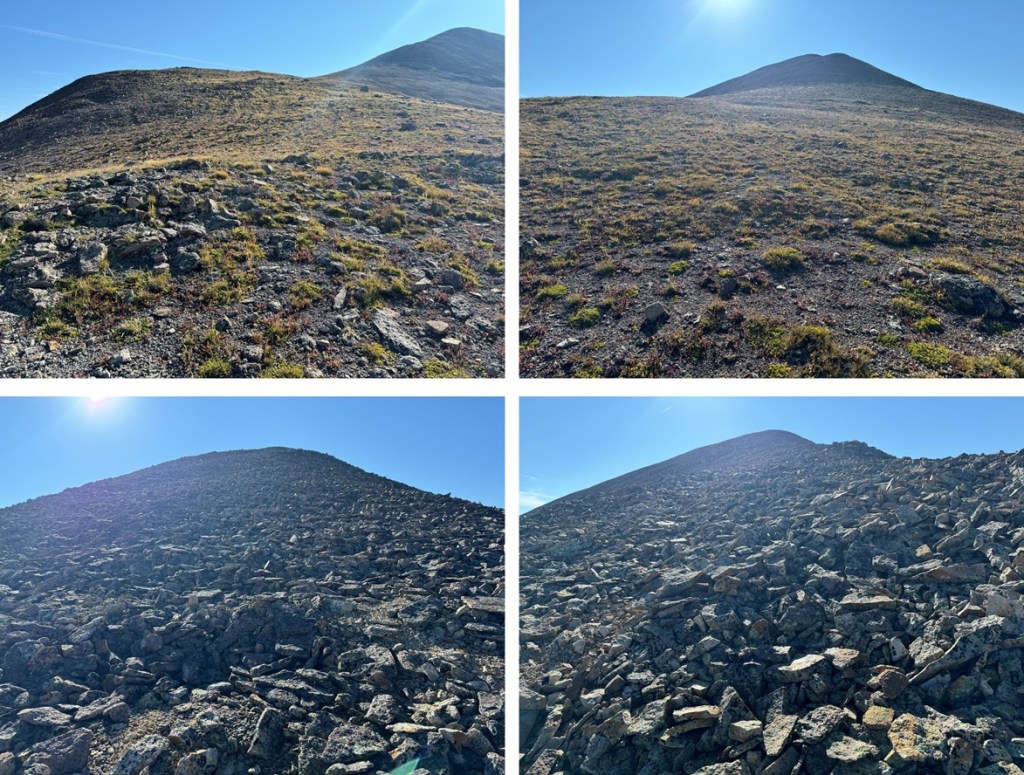
In order to get back to the trailhead, I was going to need to descend Greenhalgh and then re-ascend Sheep Mountain, so I turned around and made my way back to the Greenhalgh/Sheep saddle.

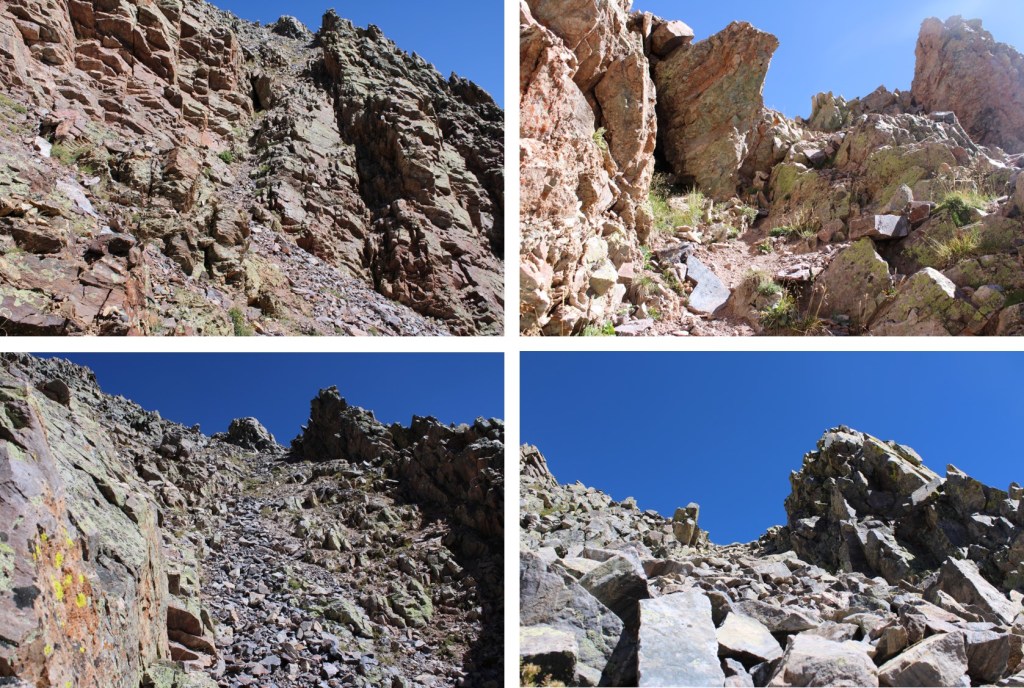
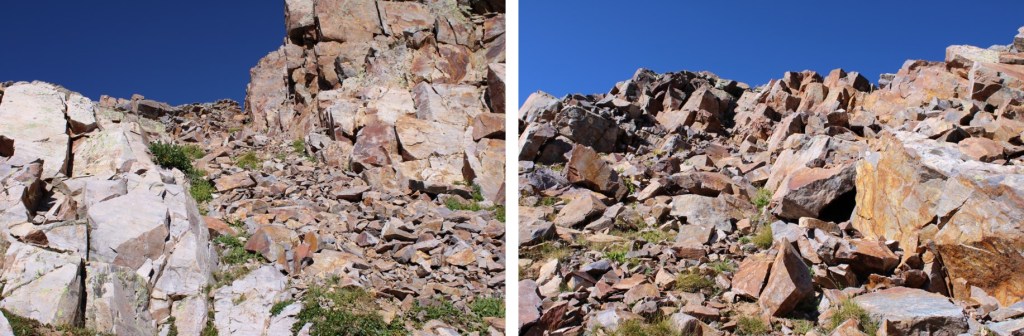
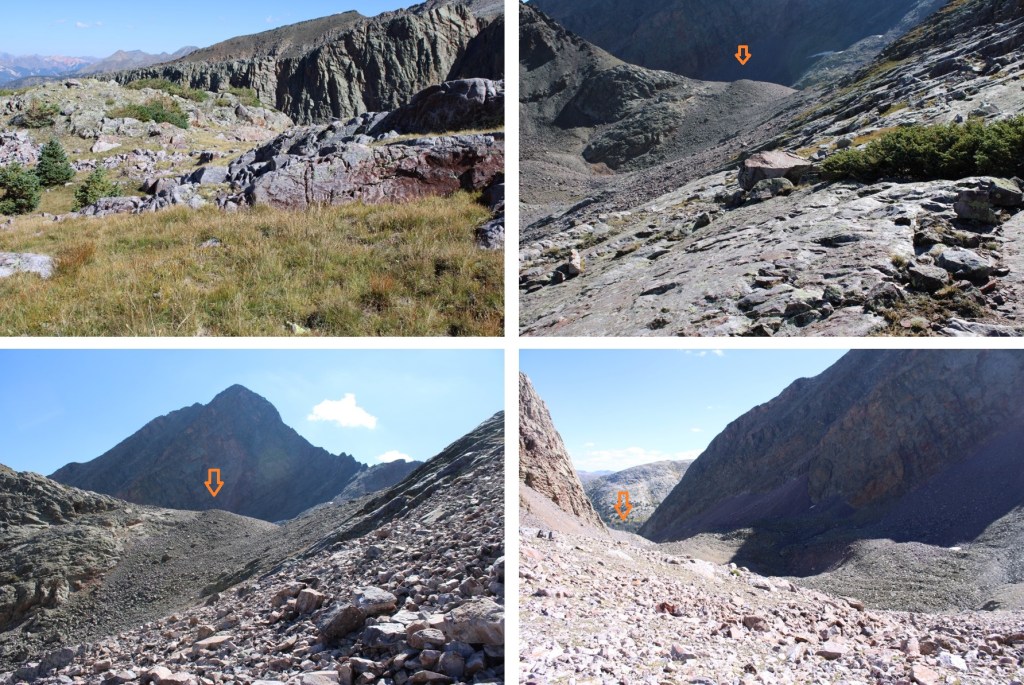
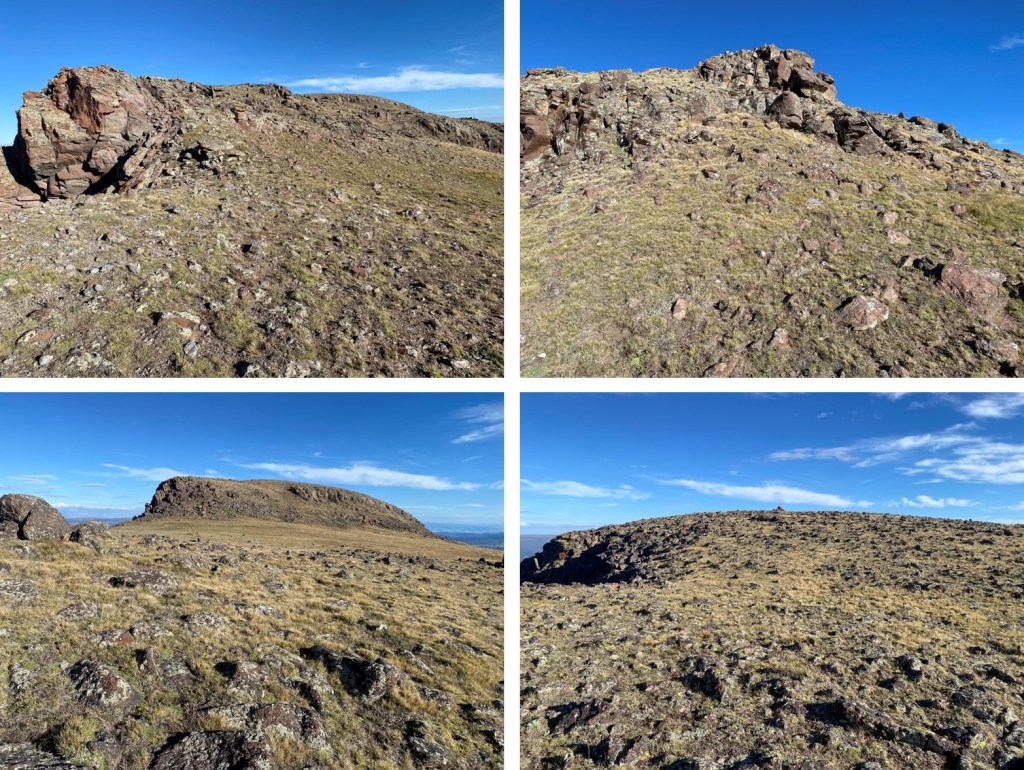
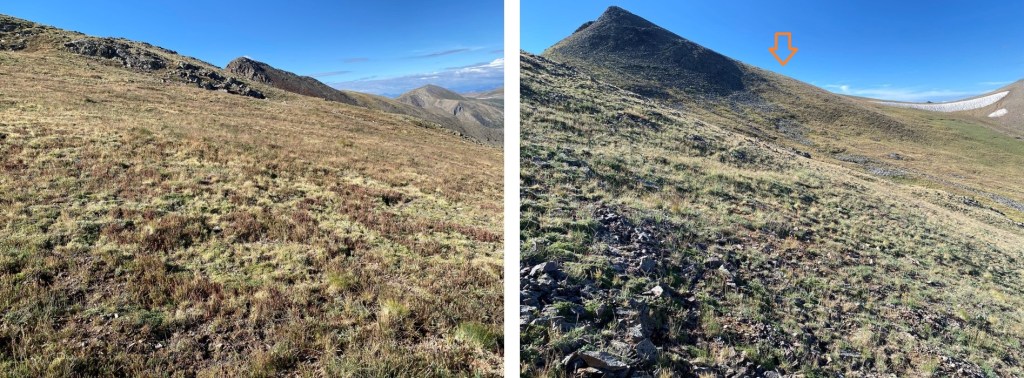
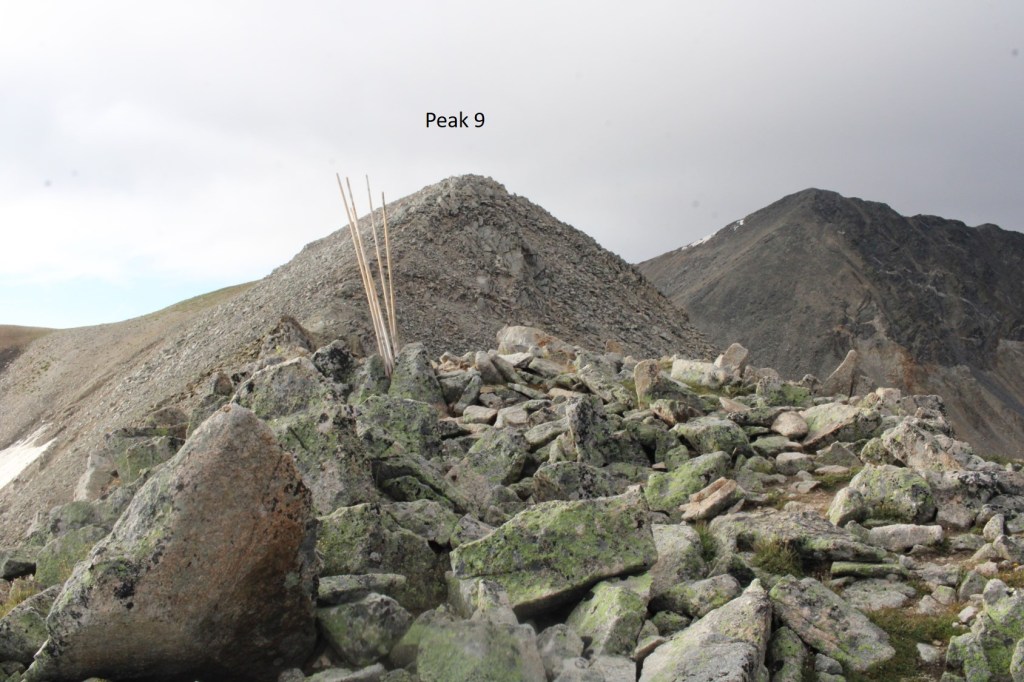
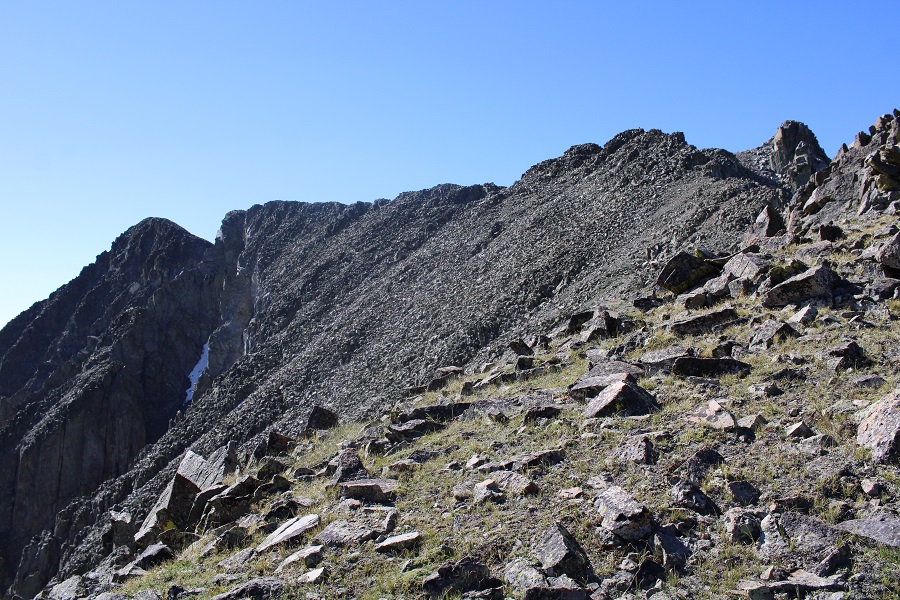
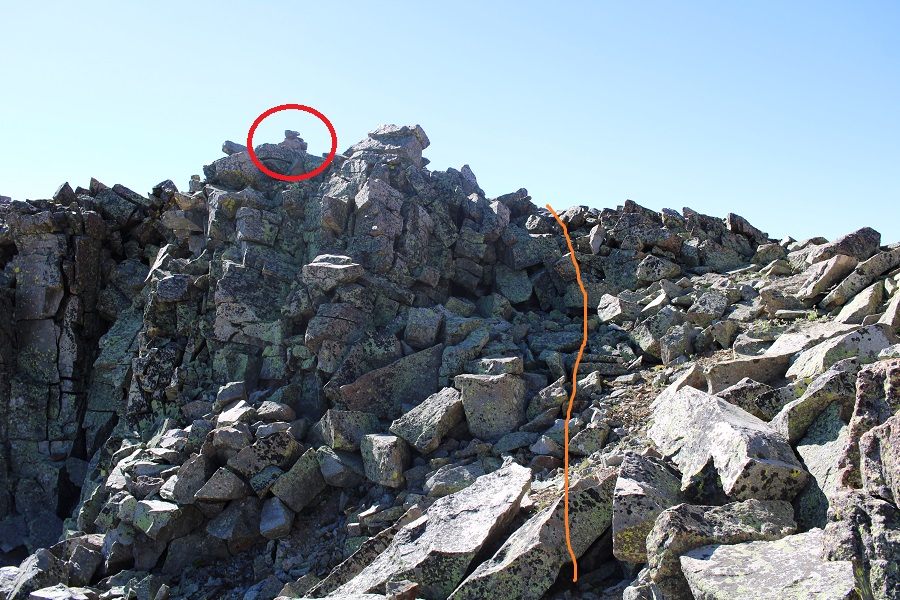
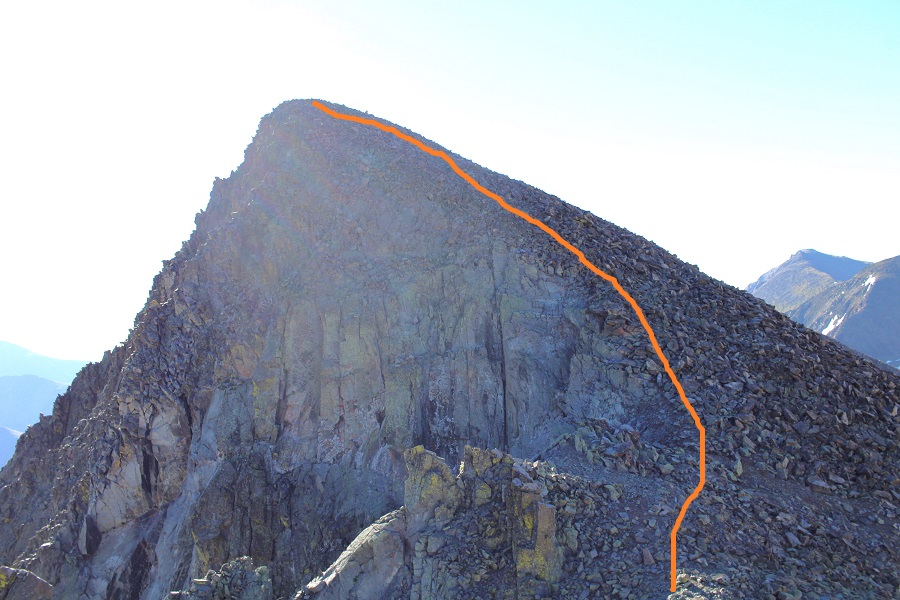
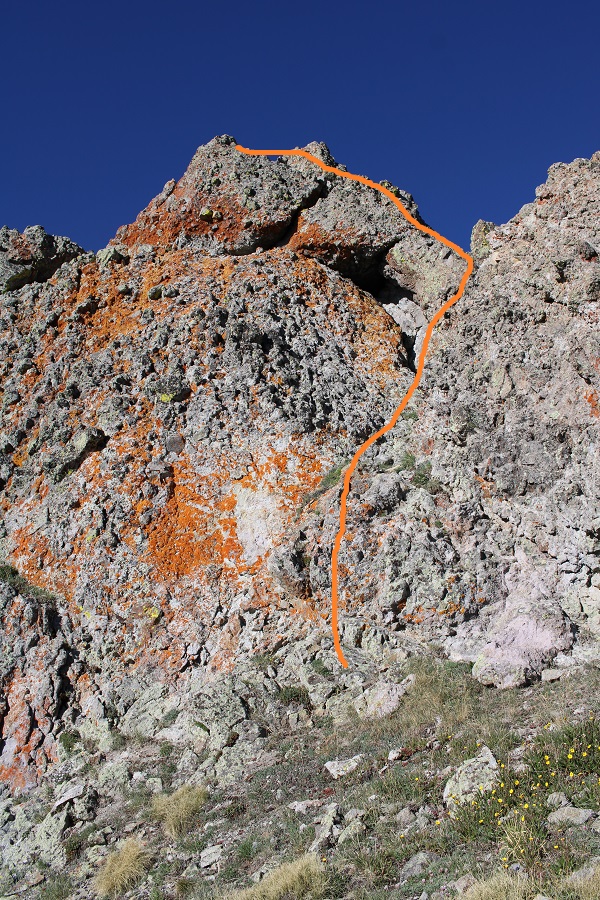
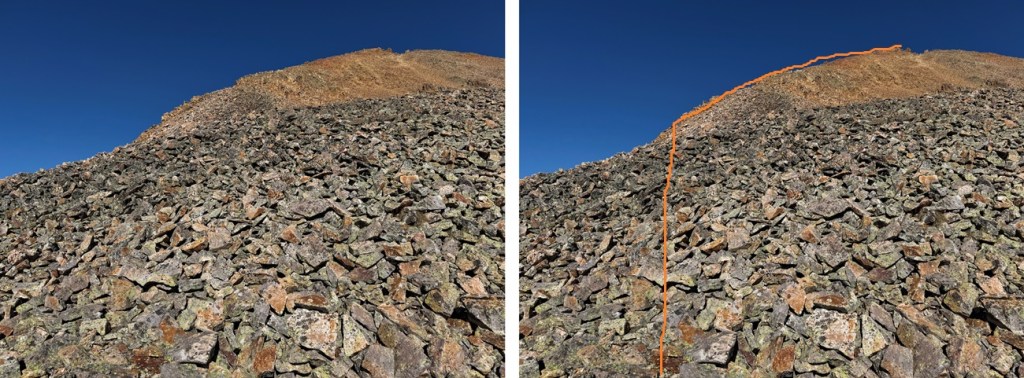
At the saddle, I then aimed for the left ridge of Sheep Mountain.

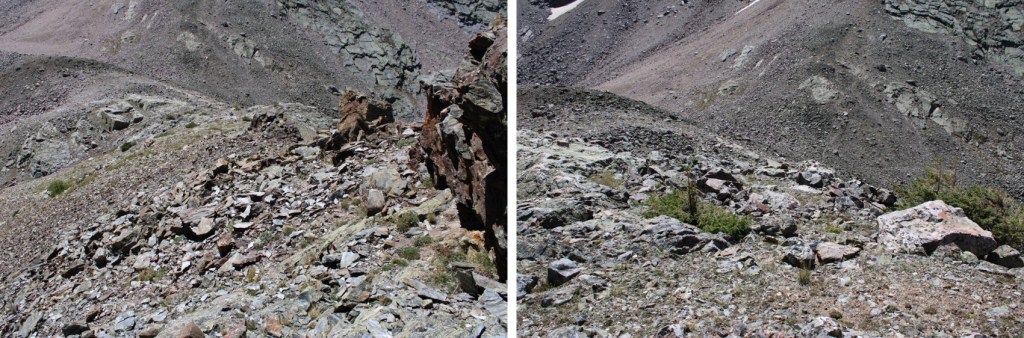
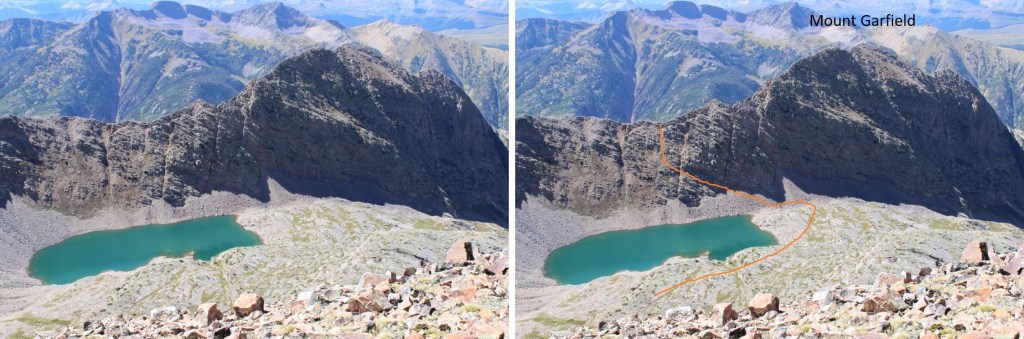
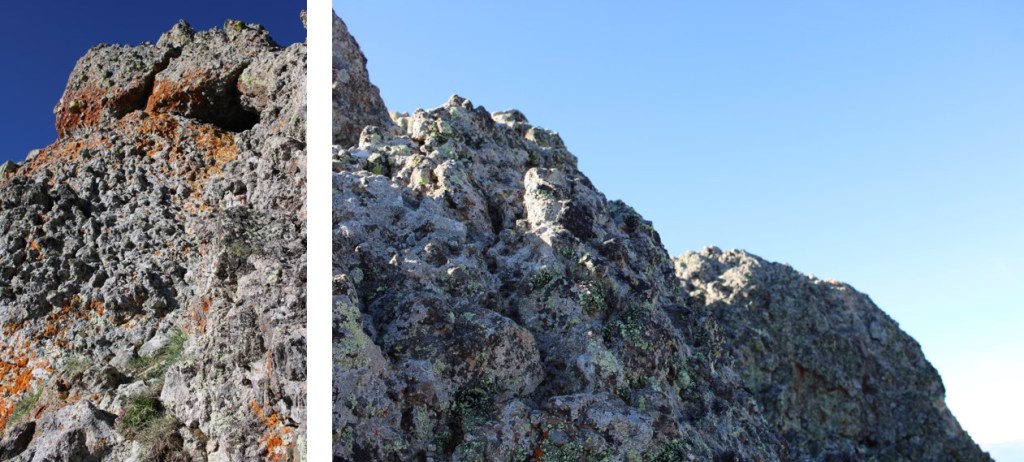
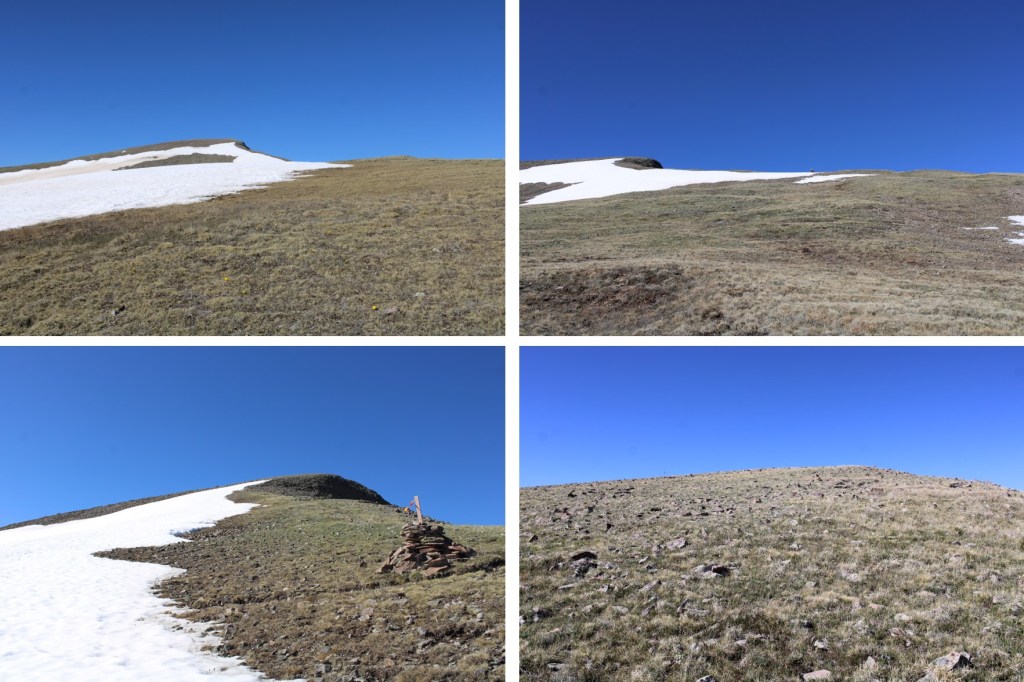
Once there, I ascended the LOOSE rocks up to the ridge, then followed the ridge to the summit.  The rocky area went at easy class 3, and is more stable than it looks.  In this picture you can see the scree to the center.  That’s the way I came down, and I don’t recommend that route. Instead, stick to the ridge.

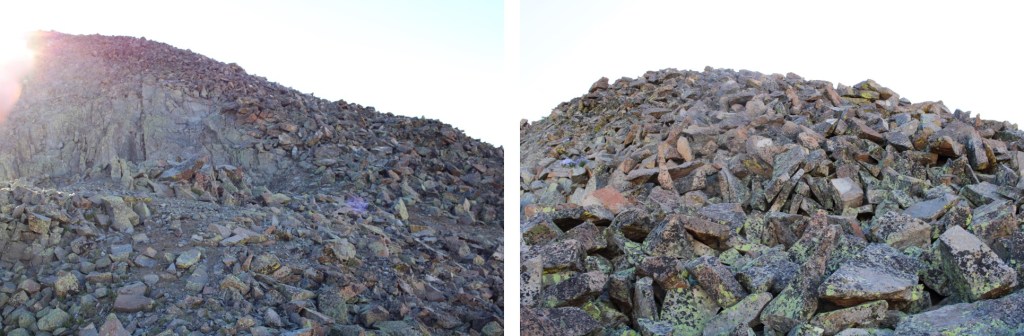
I then turned left, and re-summited Sheep Mountain, following the ridge west,

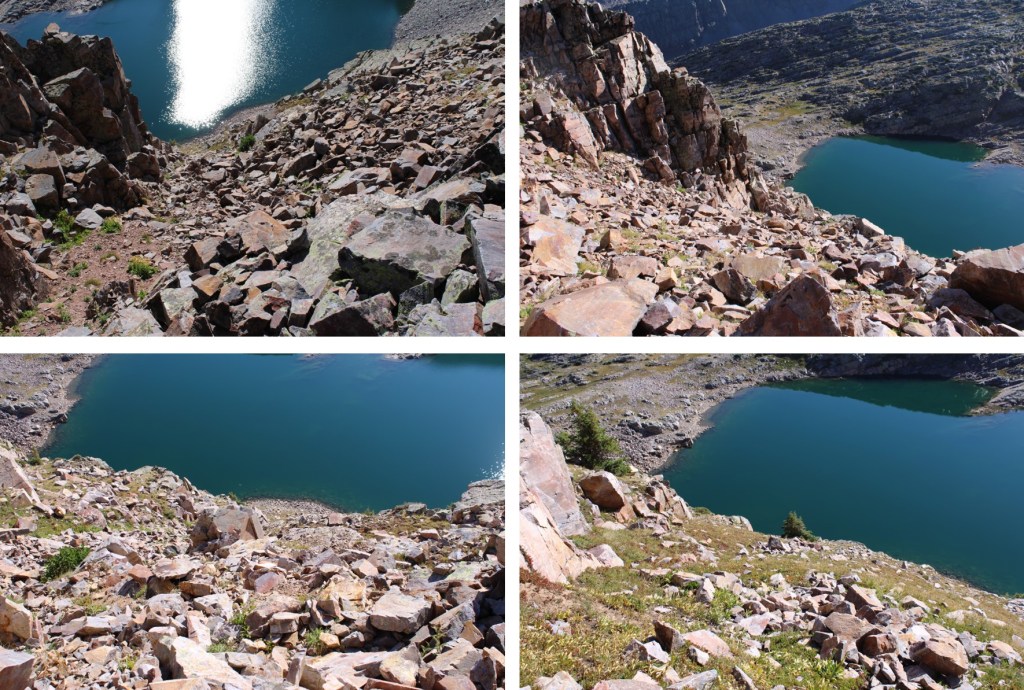
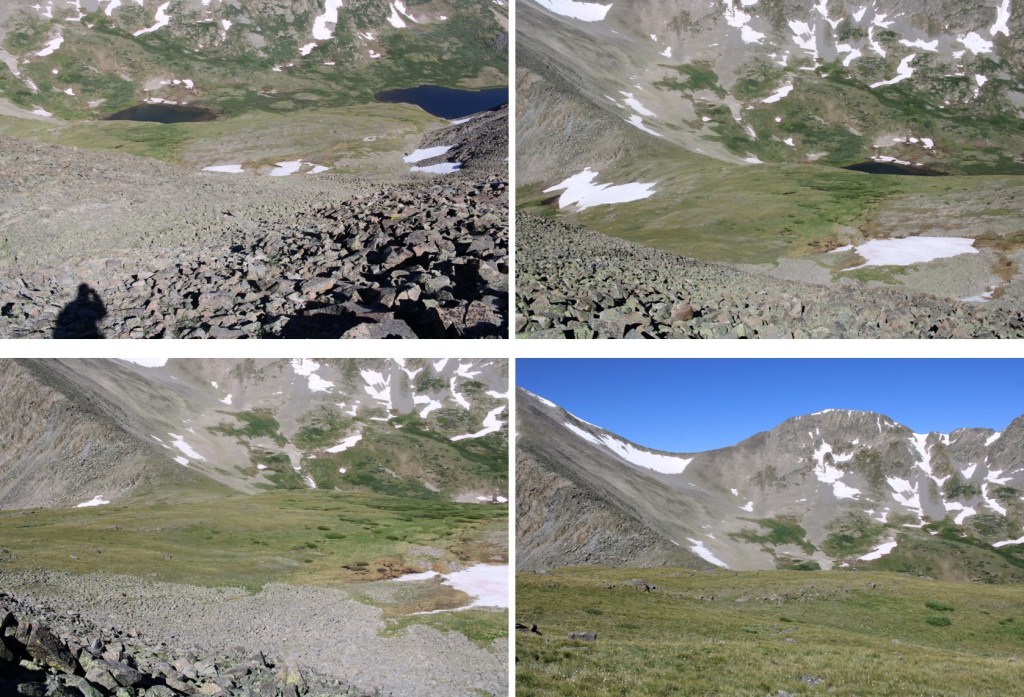
Then it was back across the hole filled rock field mesa

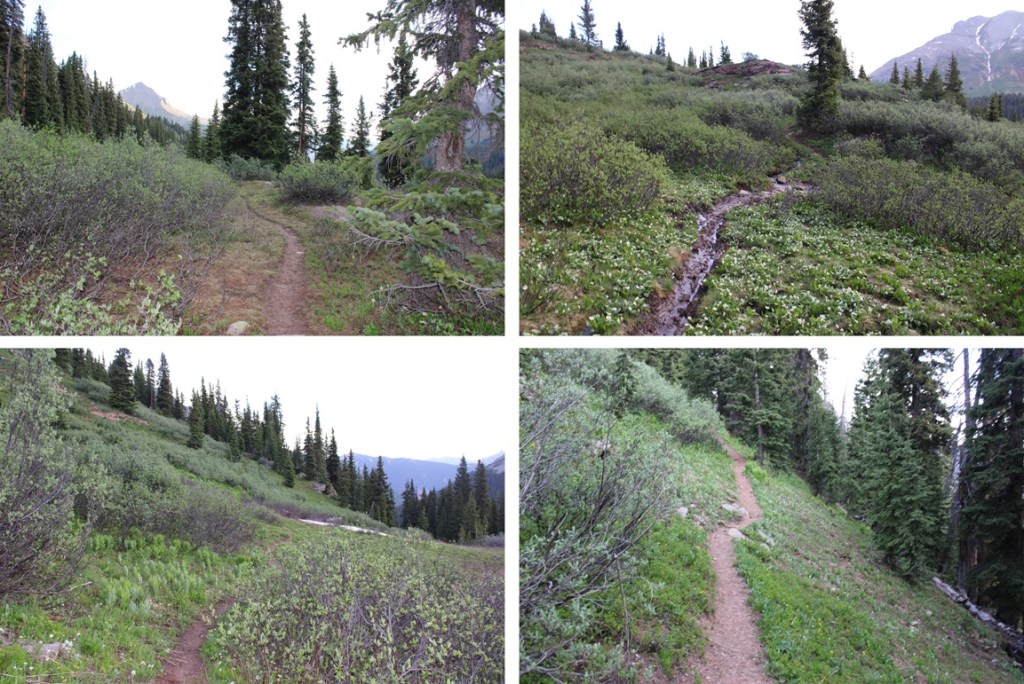
And back towards the tundra mesa I’d hiked in on.

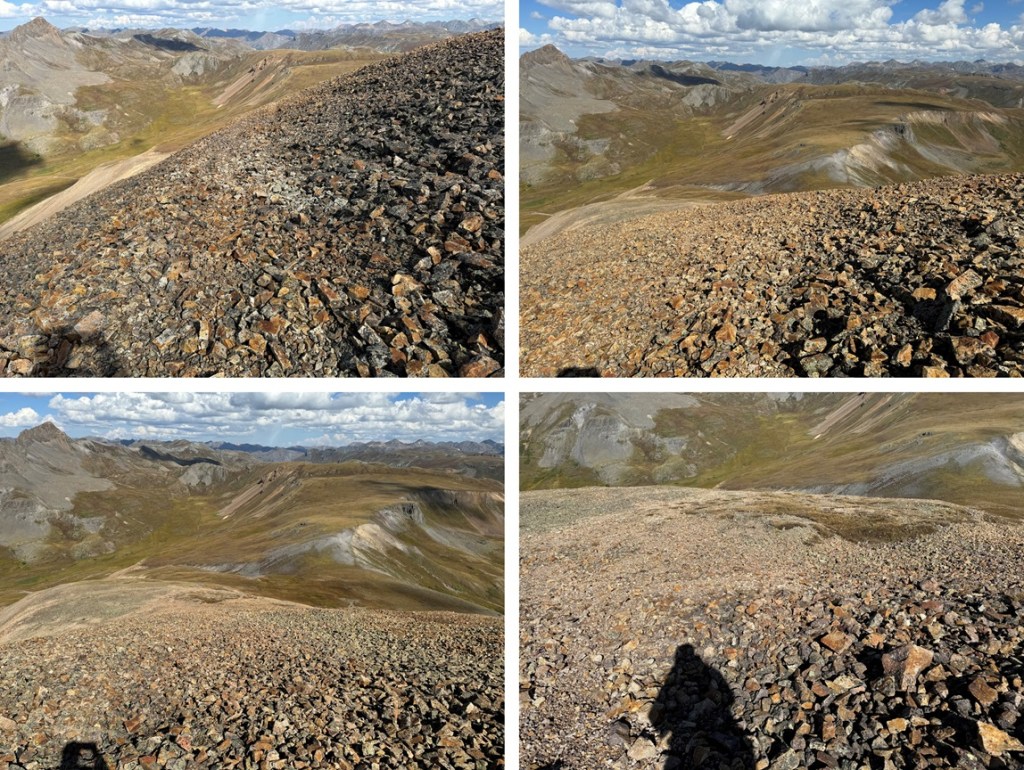
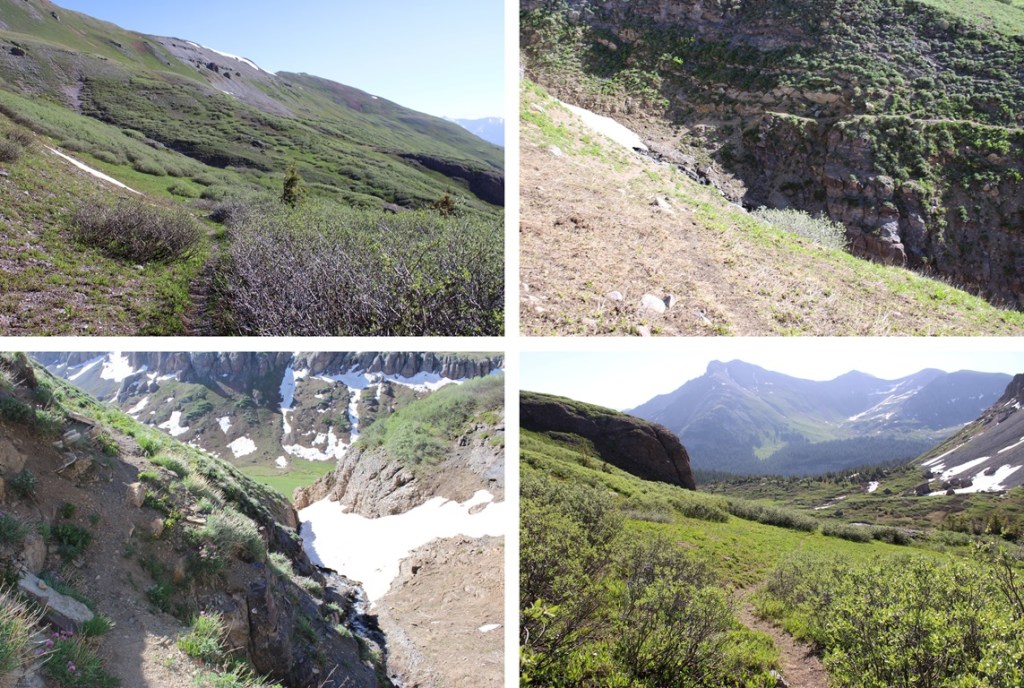
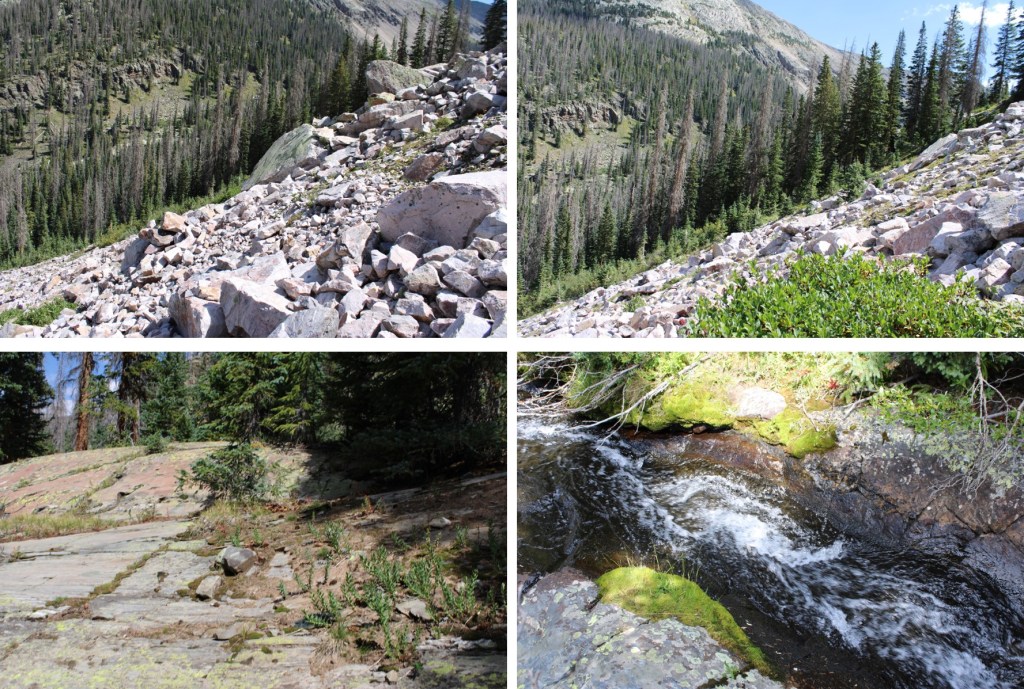
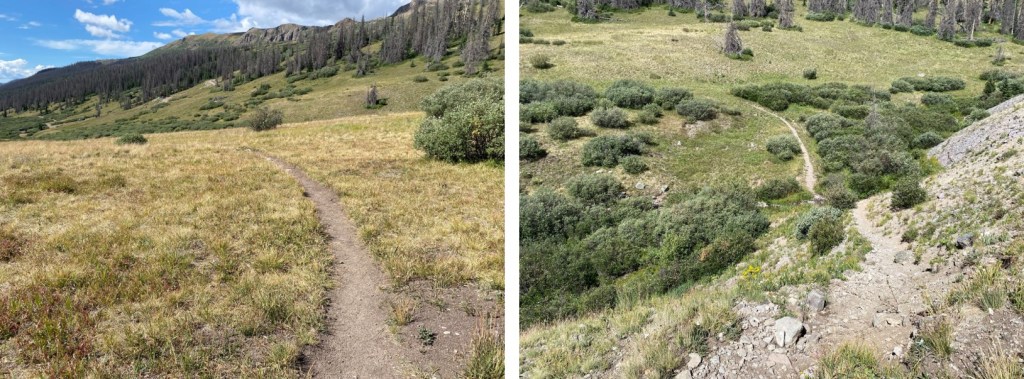
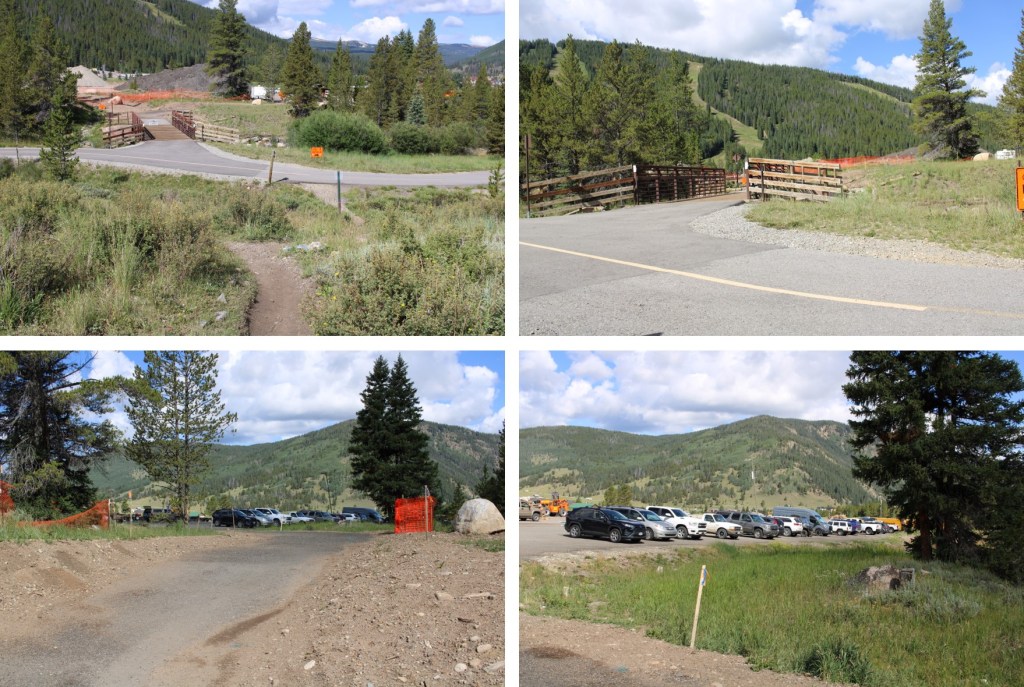
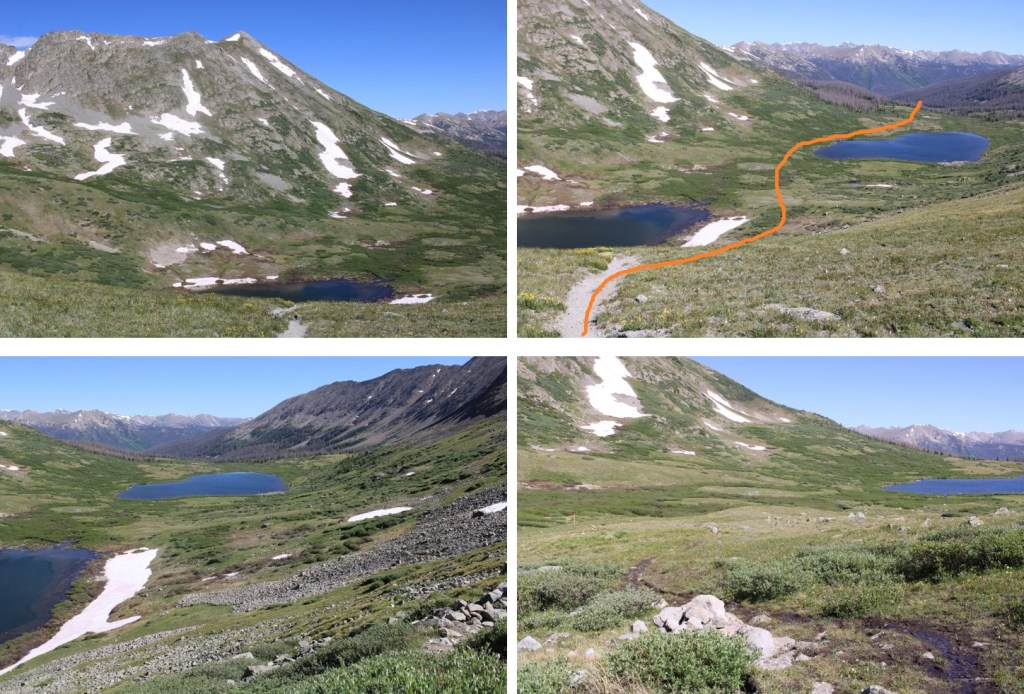
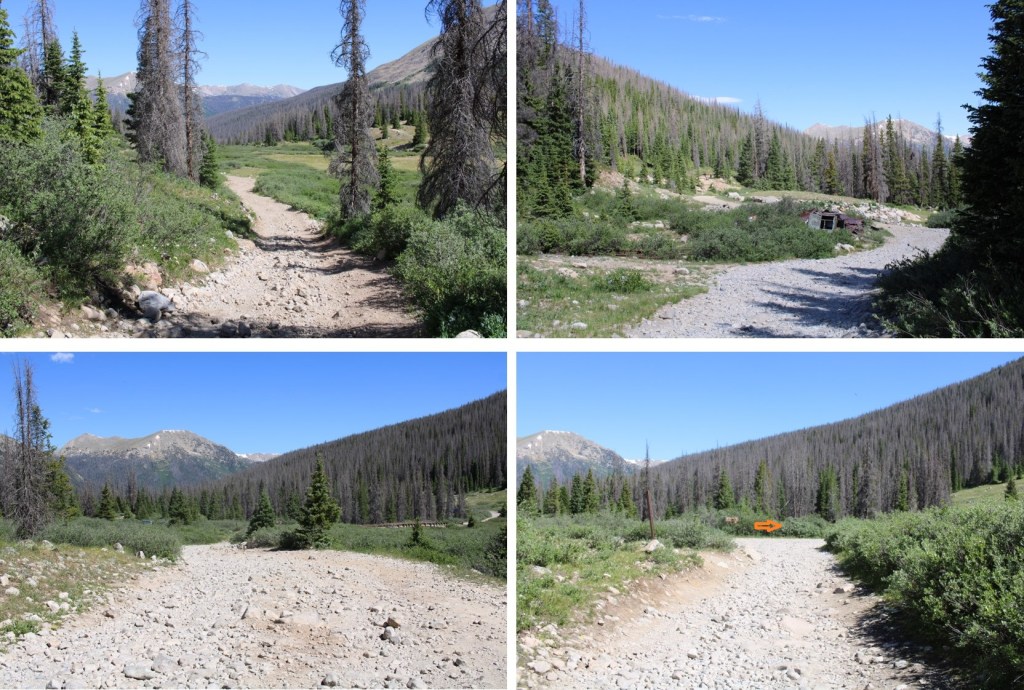
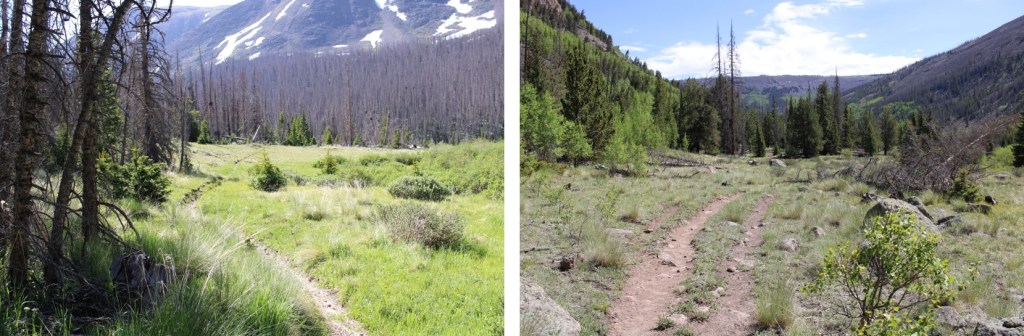
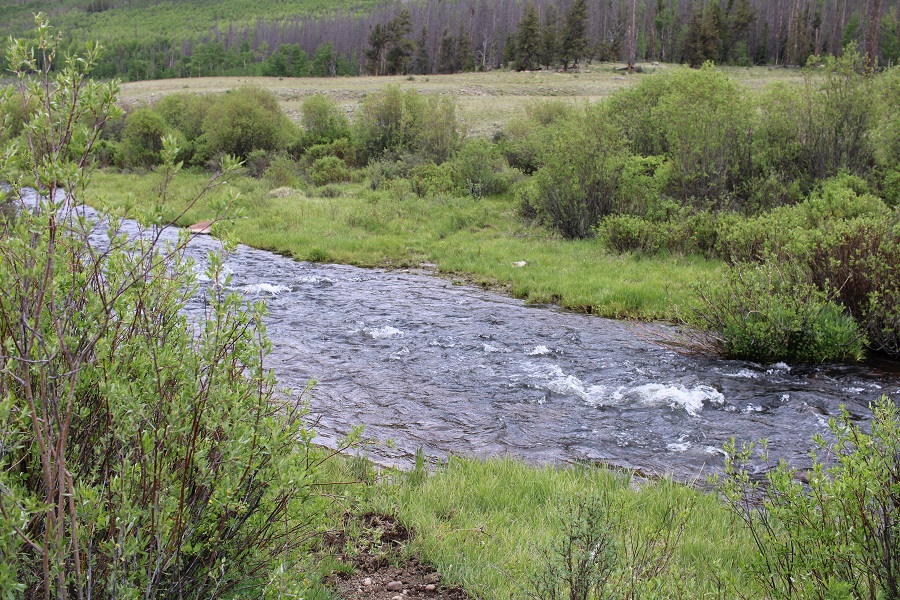
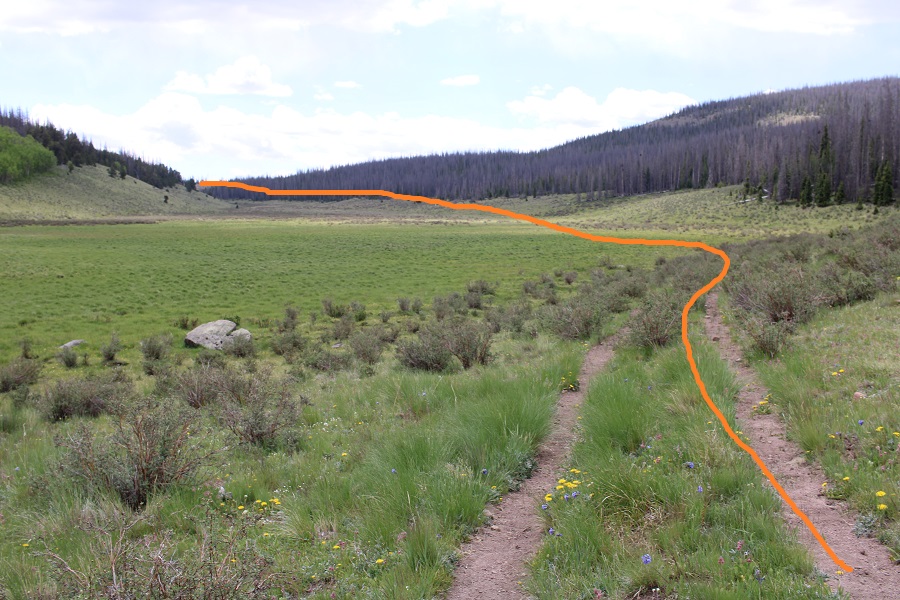
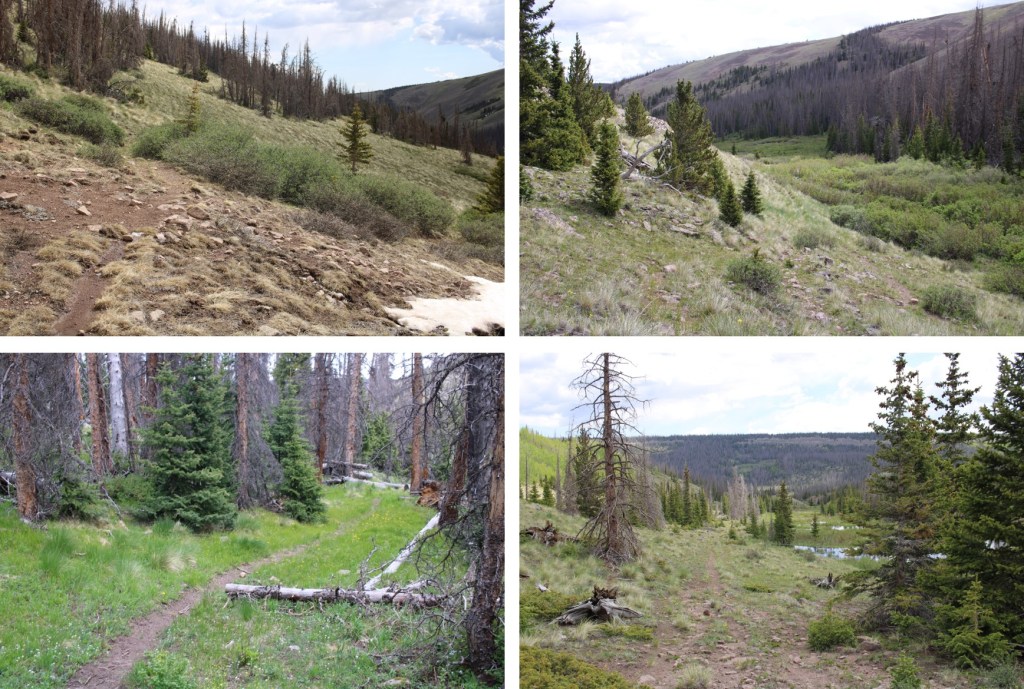
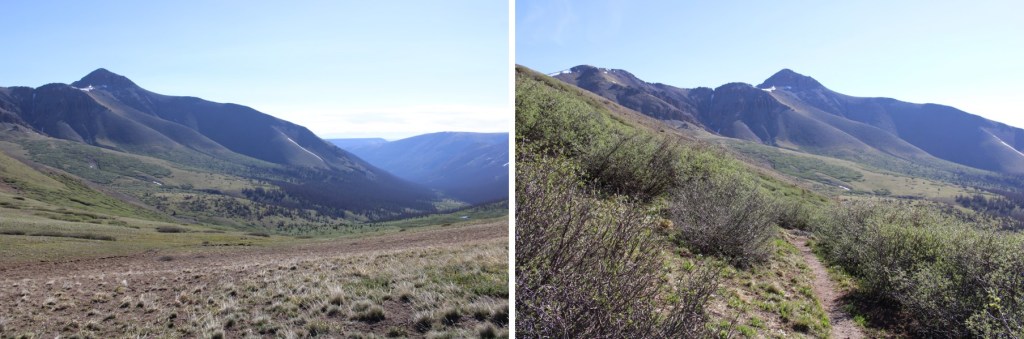
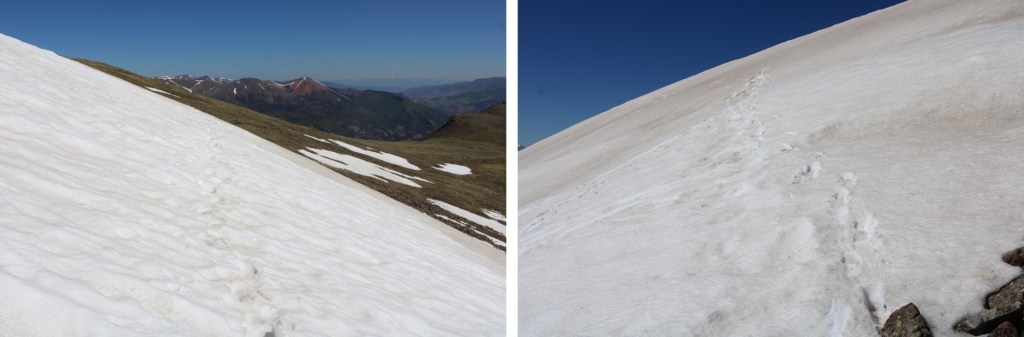
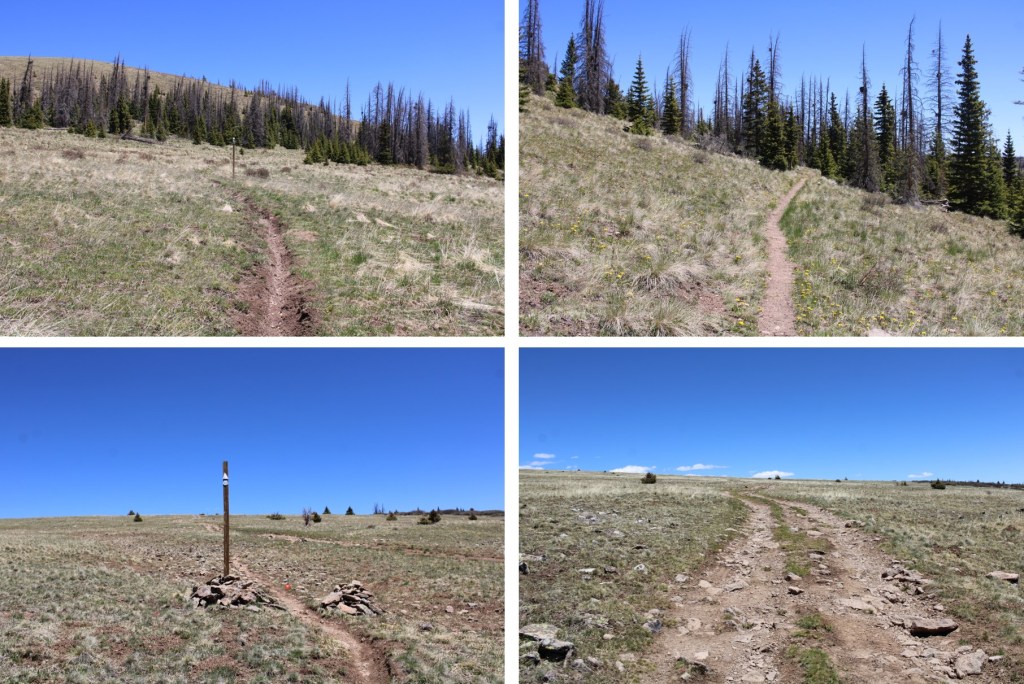
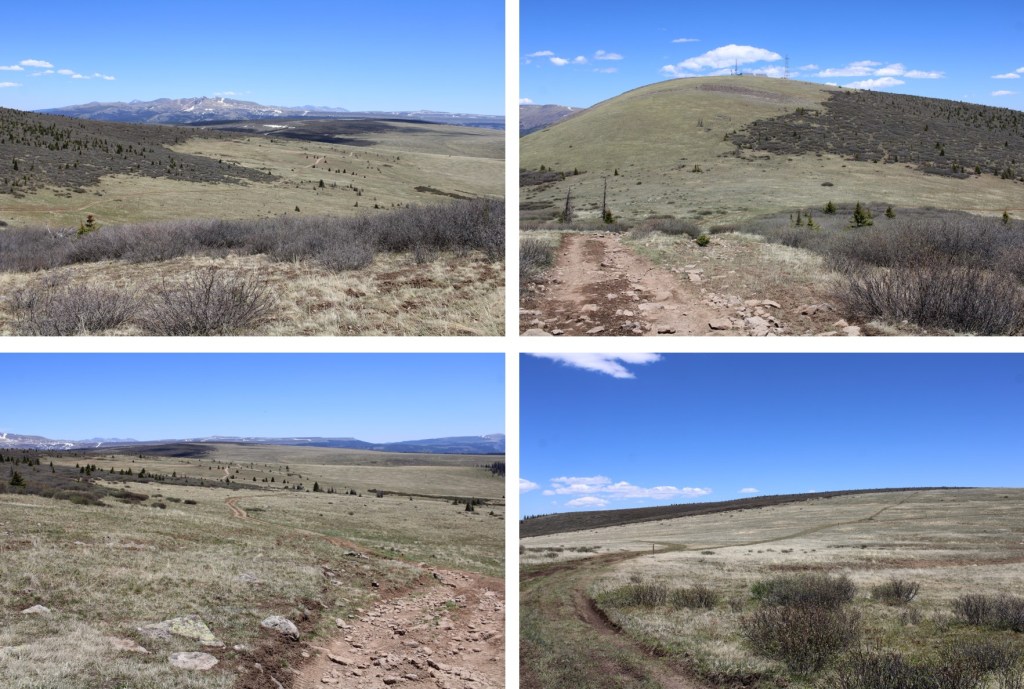
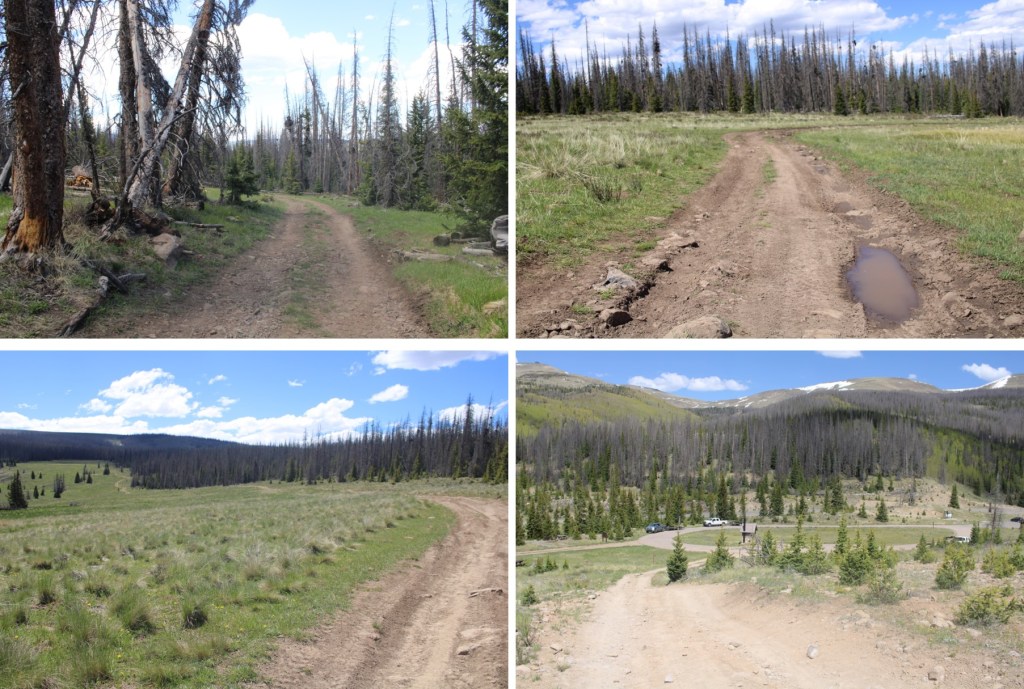
However, when I got back to the tundra mesa, instead of heading back towards the CDT, I turned left and headed towards Stony Pass.  I could see the road in the distance, and was able to hike down the entire slope on tundra (except for a brief rocky section where I took a game trail), avoiding the willows.

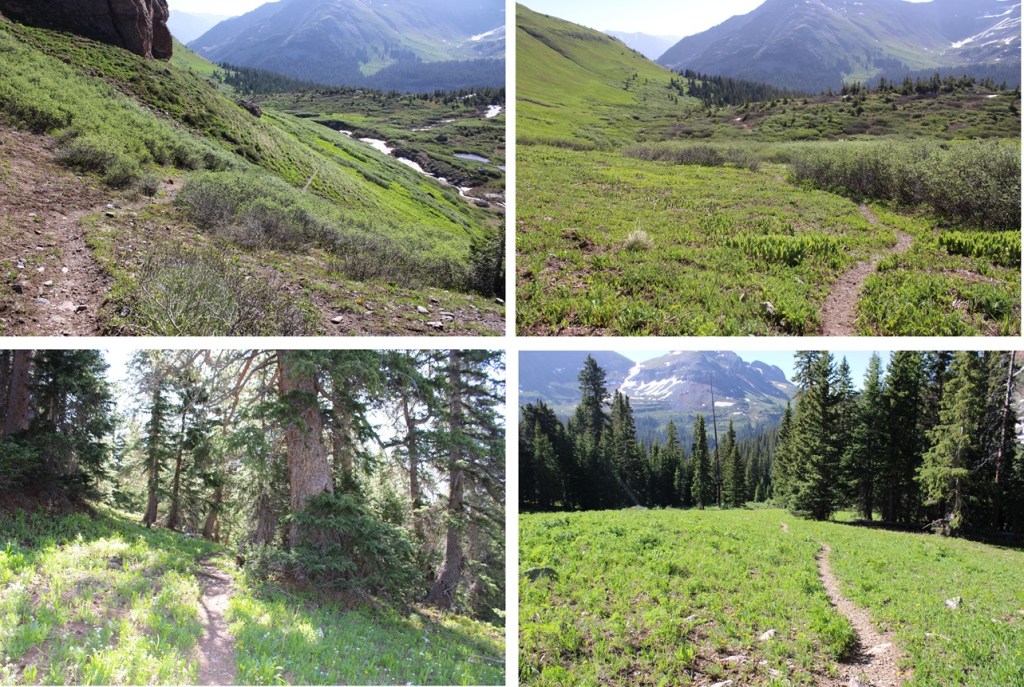
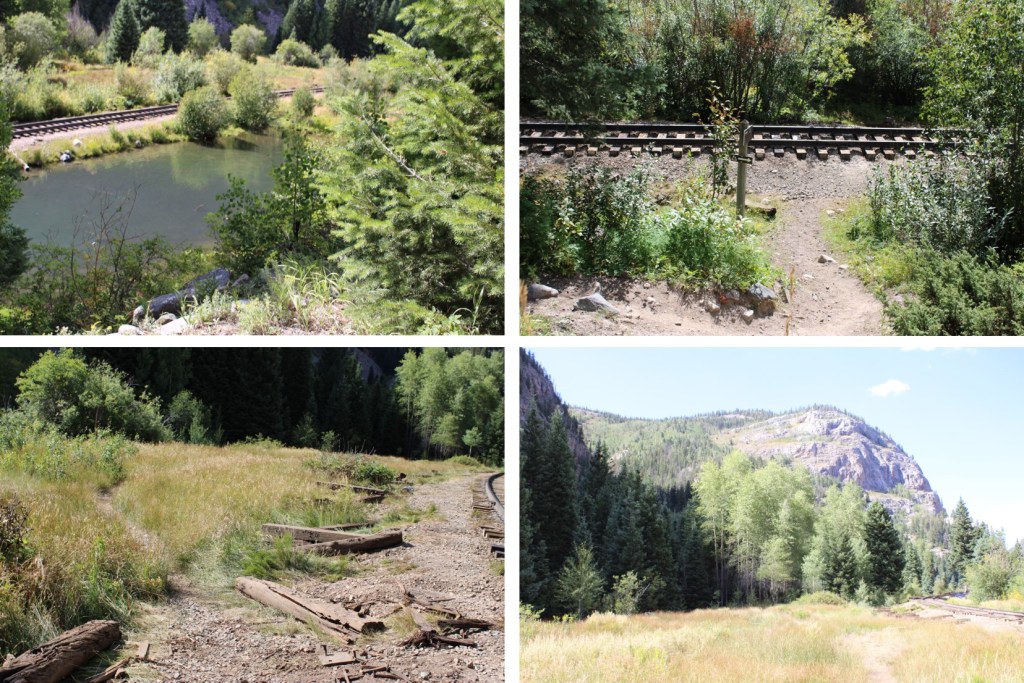
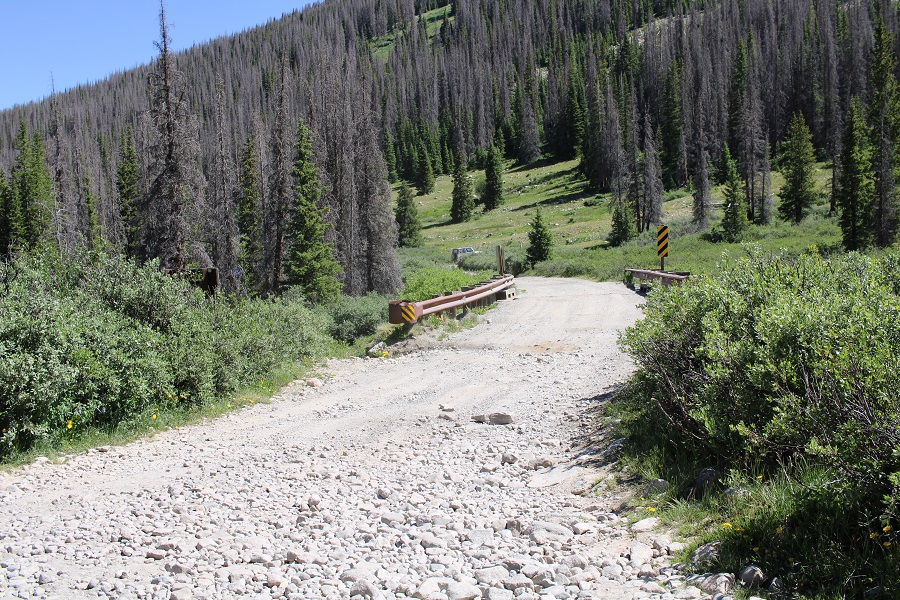
Back on the road, I followed it northwest back to Stony Pass

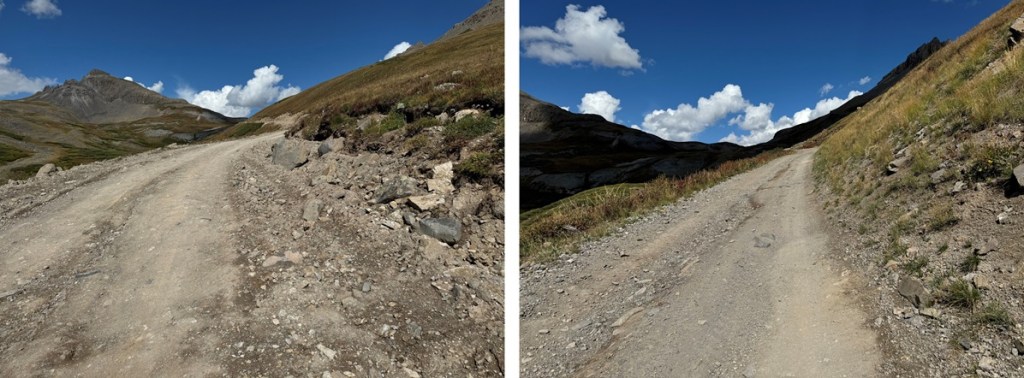
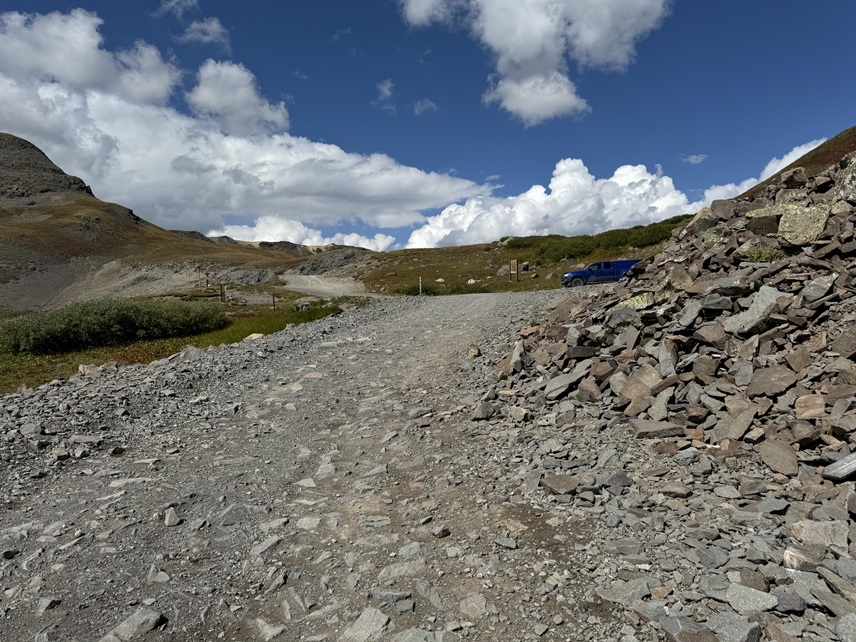
I made it back to my truck at 11:30am, making this an 8.97 mile hike with 2714’ of elevation gain in 5 hours.

I spent the rest of the day playing Trail Angel for CDT and CT thru-hikers.  I met a ton of really cool people from all over the world, gave them snacks, water, and beer, let them re-charge their devices, and had some great conversations. What upset me though, was the Colorado Trail hikers told me I was the first person they’d seen doing trail magic on the trail.  Considering they probably only had 2 days left of a 30 day or so hike, this upset me.  We can do better Colorado!  If you have a free weekend next summer, I’d encourage you to do some trail magic.  You won’t regret it! 

On to the next trailhead!

“V7” – 13,043

RT Length: 13.78 miles

Elevation Gain: 3029’

I don’t know why more people don’t hike this peak.  It’s class 1 98% of the time, the trailhead is easily accessible, the views are amazing, and there’s abundant wildlife.  In any event, I’m recommending it to trail runners especially because it looks like good terrain for trail running.   I felt this peak was almost too easy.

I started at the Colorado Trail Segment 25 Trailhead near Little Molas Lake.  There are several dispersed campsites here, public restrooms (although the women’s side was closed for the season), and tons of parking. 

The trail is easily marked, and starts at the south end of the parking area

I followed this well-defined trail for just under 3.5 miles as it wove in and out of treeline.  (Note, between miles 2-5 of this hike I gained and also lost a lot of elevation).

After hiking for just under 3.5 miles I found myself at the base of PT 12,864.  The Colorado Trail continues to the left, but if you look closely, at the top of the rock formation here there is also a trail to the right.  I left the Colorado Trail and took the trail to the right.

While not named, this is also a well-established trail.  By the looks of all the tire tracks, it’s popular for the mountain bikers.  It took me up and down and around to the north, towards Putnam Basin.

Just before the basin were a few campsites, and a creek to cross. There are a few social trails in the area due to the campsites, so if you’re given the option, go left.

Now at the base of Putnam Basin, I had a clear view of the route ahead of me.  No more losing elevation, I would just be gaining for the rest of the hike.  This is still on a class 1 trail, all the way to the saddle.

This is the route I took

And some step by step pictures of the route:

Just before the ledge that brought me to the saddle there was some snow on the route, so I had to get a little creative.  It’s all straightforward though, and there are several cairns to follow if you cannot see the trail.  I just aimed for the saddle.

Once at the saddle, I turned right and followed the ridge north to the summit.  If you’re lucky, you’ll find a game trail that leads all the way to the summit.  Just make sure you stay on the ridge proper, as there’s a trail that goes to the left as well that will skirt “V7” and bring you towards Twin Sisters.  The ridge is tundra the entire time. 

I summited “V7” at 7:45am

“V7”:

Now to head back down.  This was an out and back hike for me, so I turned around and followed my route in.  I followed the ridge and headed south, back to the saddle.

Here’s a view from the saddle of Putnam Basin.

At the saddle I turned left, and headed northeast, following the cairns back to the trail

I picked up the trail again, and followed it down the basin, sticking to the left side of the basin/creek.

I’d seen quite a few deer that morning.  Mostly from afar, but deer nonetheless.  As I was nearing the camping area near the base of the basin I saw one running towards me in a funny way, and realized quickly it wasn’t a deer, but a bear.  As soon as the bear noticed me, it jumped 90 degrees, and started running the other way.  I kind of got a picture, but it’s fuzzy, as the bear was quick.

I started wondering what the bear had been running from?  About 20 feet later, I realized what it was: I spied a mama moose with her calf. 

I hid behind a tree to watch them while giving them space.  I love watching moose calves, especially the really young ones.  They tend to bounce around everywhere, turning in circles, braying, and excited about life in general.  After this video the calf got really jumpy, but I’d already turned around and started hiking away so as not to bother them. 

Mama moose with calf:

I passed the camping area, and continued following the trail, now headed south (and uphill).

I made it to the Colorado Trail cutoff, turned left, and followed it 3.5 miles back to the trailhead.

I made it back to the trailhead at 10:30am, making this a 13.78 mile hike with 3029’ of elevation gain in 5 hours 15 minutes.

On to the next trailhead!

Electric Peak – 13,297, Graystone Peak – 13,503 and Mount Garfield – 13,087

RT Length:  35.96 miles

Elevation Gain: 9399’

I started from the Molas Trailhead parking area.  This trailhead has plenty of parking, and is a popular spot among CT hikers. 

The trail starts at the south end of the parking area. 

Much of the approach route follows the Colorado Trail, so it’s well maintained and easy to navigate.  I followed the trail as I descended 1700’ to the Animas River.

I crossed the river on a well-maintained bridge, and then followed the trail as it crossed the railroad tracks

Here is where the elevation gain begins.  I hiked along the Colorado Trail east to the Beaver Ponds, following Elk Creek and passing through a couple of cleared avalanche areas.  This trail is easy to follow, with no trail junctions.

This part trips people up all the time when headed towards Vestal Basin: Once at the beaver ponds, I turned right off the trail and traversed behind this large boulder.  There’s a faint trail here that picks up again once you’re past the ponds.

The trail picks up again after the beaver ponds, but it’s no longer as well maintained as the Colorado Trail.  There are fallen trees to navigate, but the trail is easy to see.  I followed the trail as it crossed a beautiful creek and headed south.

At 11260’ of elevation I left the trail.  There are several options to do this, but here’s a visual of where I was headed. 

This is the route I took:

I headed a little further up the trail, crossed the creek at an easily accessible spot, and headed southwest up the slope.  However, this is choose your own adventure, and you can climb straight up the talus/scree if that’s your choice.  I decided to skirt around it.

This gully wasn’t too bad as far as gullies go, but I put on my microspikes anyway. 

Towards the top I could see quite a bit of snow still left in the gully.

I traversed the gully to the right, finding there was about 2 feet of space where the snow had melted away from the rock.  The snow was avoidable until the last 30 feet or so, when I climbed on top of the snow and walked to the top of the gully on several feet of rock-solid snow.

However, if this is outside of your comfort zone, you can also traverse to the left and make it to the top of the gully on more scree.  Both routes lead to the same place (I took this route on my way down).

I was now in an upper basin, full of all different sizes of loose rocks.  This wasn’t difficult to navigate, but it was extremely time consuming.  I was headed southwest, staying to the right.

At 12500’ of elevation I turned right to start my climb up Electric Peak’s south side.  If you don’t already have your helmet on (I usually put them on for scree-filled gullies) now is the time to do it. 

Much of the route to the summit is hidden at this time.  I started by climbing up a class 3 gully to the right

From Graystone Peak, I had a good visual of the route I took, keeping it mostly class 2 after the initial class 3 gully

Once on top of this gully, there are several options to make it to the summit.  Here are some on the ground pictures.  The terrain was rocky most of the way to the summit.

The summit was fairly flat and rocky.

Electric Peak:

From the summit of Electric Peak, I could see my next objective, Graystone Peak, to the south.

I re-traced my steps back to the saddle

Now to head over towards Graystone Peak.  I looked east, and saw these wonderful rock slabs.

Traversing up and down large rock slabs is mostly a mental exercise in not freaking out. I kept telling myself “My shoes have got this, trust your shoes. Also, don’t look down”. This is the route I took.  There’s no avoiding the slabs.

Another view of the rock slabs, with a little bit of climbing towards the end (which was favorable to the smooth slabs)

After making it up the rock slabs, I turned left, now ready to scale Graystone Peak

Scaling this peak is exactly what it looks like:  straight up the side with a lot of various sized rocks to traverse that are loose.  I headed southeast up the mountainside.

Once making it to the ridge, I stayed on the ridge proper to the summit, with some easy class 3 ups and downs along the way.

There was a large cairn at the summit

Graystone Peak

I turned around and headed back down the peak the way I’d ascended, doing my best to keep my balance and navigate the loose rocks.

It had been a long day, so once I made it back down to the little patch of grass at the base of Graystone Peak I decided to call it a night and set up my bivy.  I dried out my clothes, ate some dinner, and wrote notes down in my journal.  Just before settling down for the night, I heard rocks tumbling and then skidding to a halt behind me.  I turned around, and about 30 mountain goats were standing on the ledge, about 20 feet away.  Most of them dashed away before I got a picture, but they seemed just as surprised to see me as I did them.  They were probably headed towards the patch of grass I was using as a bivy site, and seemed a little disappointed to find me already occupying the space.  I wish I could have told them I wouldn’t bother them and they were free to stay, as there wasn’t any other grazing areas around, but they all bounded away to find another site.

I was up early the next morning and on route to Mount Garfield.  Even though this was the shortest of the peaks I was doing this weekend, it was by far the most challenging.  Once on the ridge it was consistent class 3 the entire way.  I started out by heading southeast around the base of Graystone Peak. I was headed here:

This was a quick and easy gully to climb.  Once out of the gully, I passed through an open grassy area and then descended over 300 feet down grassy slopes to the right, towards Garfield Lake. 

Once at Garfield Lake, I needed to gain the ridge.  This can be done in several ways, but this is the overall route I took.  There were a couple of nicely placed trees I used as a guide on the ledges.  I just aimed for one tree, and then the next.  Here’s an overview of the route to the ridge as seen from Graystone Peak

From Garfield Lake, I aimed for the rock ledge with two trees on it, spaced about 300 feet apart.  It was class 2 to the ridge.

When I’d passed the two trees, I looked up and saw this gully. 

I made my way straight up the gully to the ridge.

Once on the ridge I turned right, and this became a class 3 ridge hike all the way to the summit.  I was able to mostly stay on the ridge, dipping to the right one time.  If you encounter a class 4 move, you’re off route.  Here are some pictures of the ridge.

I stayed to the left of this gully, climbing up the rocks instead of on the scree.

At the top of the gully I turned right, and continued following the ridge.

The only time I dropped off the ridge was when I came to this large rock.  At this point I dropped to the right and descended about 30 feet before re-gaining the ridge.

Back on the ridge, I followed it to the summit, class 3 the whole way

Mount Garfield

Here are some pictures of the route back down the ridge

Then back down the gully to Garfield Lake

Back at Garfield Lake, I took the same route back to the base of Graystone Peak, this time going up the grassy ledges

This was an out  and back hike, so I re-traced my steps down the rock slabs, across the rock field, and back down the gully to the trail.

This time, instead of going down the snow-filled gully I went to the right, and descended on scree

Back on the trail, I followed it back to the Beaver Ponds

Then I followed the Colorado Trail back to the Animas River

I crossed the train tracks, and trudged back up to Molas Pass, something I timed just right so I’d be doing later, during the cool part of the day.

I usually go by CalTopo stats to keep things consistent.  CalTopo gave me 35.96 miles with 9399’ of elevation gain, but Strava gave me 27.67 miles with 13,170’ of elevation gain.  Take your pick! 

On to the next trailhead!

13115, 13005, and Baldy Lejos – 13,118

RT Length:  10.19 miles

Elevation Gain: 2879’

I started from the West Willow Creek 4WD trailhead at 11550’.  If you don’t have 4WD, park below, just before the road turns to 4WD.  This will add 3 miles and 500’ of elevation total to the hike.

Here are some pictures of the 4WD road in

There are a few dispersed campsites here, and a parking area for about 5 vehicles.

I was on the trail at 5am.  The West Willow Creek trail starts at the north end of the parking area, and follows West Willow Creek north on a class 1 trail for 1.4 miles, to Sa Luis Pass and the Colorado Trail.

After hiking for .4 miles, I came to a junction and turned left

Then continued towards San Luis Pass.

At Sal Luis Pass I turned left, and followed the Colorado Trail west.

This was still a clearly defined trail

I could now clearly see PT 13115.  This is the route I took to get there.  I would advise summiting from the southeast, as the north side is very chossy.

I left the Colorado Trail, and hiked on class 2 tundra and rocks to the summit

I summited PT 13115 at 6:30am.  Also, this is where my camera officially died, so it’s selfies at summits until I get a new one.

PT 13115:

To the northwest I could see my other two summits for the day, PT 13005 and Baldy Lejos

I descended the north side of PT 13115 on some loose rocks, and headed over to the point ahead of me.  Note:  this isn’t ranked, but it does have a summit cairn.  It was a class 2 hike to get to the top, but there’s a game trail to the left that will take you around this point.

I crossed the Colorado Trail and headed on over

To my left I could see a game trail below that would get me to my next objective, so I descended this point to the west and picked up the game trail

Following the ridge northwest, following a faint game trail, this is the route I took to the next point on the ridge

I ascended a small gully, then ascended the ridge

It was an easy tundra walk to the summit of 13005

I summited unranked PT 13005 at 7:45am

PT 13005:

To the north was Baldy Lejos. 

This is the class 2 route I used to avoid the ridge

Most of this was on easy tundra

From the top of the small, grassy gully, I could see Baldy Lejos

I followed the ridge to get there

I summited Baldy Lejos at 8:15am

Baldy Lejos:

Now to head back to the trailhead.  I took a slightly different route on my way back, to avoid the extra elevation gain.  I headed back down the ridge to the grassy gully

Instead of re-ascending PT 13005, I stayed on the grassy slope to the left to gain the ridge.  There are some game trails here.

Back on the ridge, I followed it south and then dropped down to the left to descend

I could now see PT 13115, but did not want to re-ascend the unnecessary point, so I skirted it to the right on a game trail

I could now see PT 13115 and the Colorado Trail.  I headed back to the Colorado Trail

I followed the Colorado Trail back to San Luis Pass

And at San Luis Pass turned right onto the West Willow Creek Trail

And followed West Willow Creek trail back to the trailhead.

I made it back to the trailhead at 10am, making this a 10.19 mile hike with 2879’ of elevation gain in 5 hours.

On to the next trailhead!

Peak 9 – 13,207 and Peak 8 – 13,005

RT Length:  10.7 miles

Elevation Gain:  4038’

After quite a long wait at the Eisenhower Tunnel I made it to the Far East Lot at Copper Mountain and was on the trail at 5am.  The lot has enough room for hundreds of vehicles, if not more.  The trail starts near the construction area, at the south end of the lot

I crossed a bridge over Tenmile Creek, and the trailhead was directly on the other side

I was following the Colorado Trail.  This was a class 1, easy to follow trail all the way up to the Peak 9/Peak 8 saddle. 

After hiking for 2.3 miles, I came to the Colorado Trail/Wheeler Trail junction.  At this point I continued straight, on the Wheeler Trail

This trail took me above treeline, to the Peak 9/Peak 8 saddle.

From the parking area, it was 3.7 miles to the saddle.  From the saddle the hike became class 2, and I gained around 800 feet to the summit, but it was an easy 800 feet.   I turned right, and headed south up to the ridge on tundra

Once on the ridge I turned left, and followed a slight game trail southeast

The last bit of the hike to the summit can look overwhelming at first, but it can be kept at class 2.  I thought of it as similar terrain to the “16 Golden Stairs” on Pikes Peak Barr Trail, but much shorter (maybe 30 feet or so to deal with).

I dropped down to the left of the ridge, and took a game trail to the summit.

I summited Peak 9 at 7:30am

Peak 9:

It was starting to snow lightly, I’d forgotten my gloves, and I could see sunshine on Peak 8 so I turned around and headed back to the Peak 9/Peak 8 saddle. 

Here’s a look at that rocky section on the way back

Back at the saddle, I headed north, and gained about 600’ to the top of Peak 8.  This was a simple trek to the summit, as I just followed the “Ski Area Boundary” signs.  At times, there was a game trail to follow. 

There was a lot of junk left on this ridge.  It looks like when they put in the posts for the ski area boundary signs, they left their tools behind.  There was also an emergency station, with litters and first aid supplies for injured skiers.

The route to the summit was obvious

I summited peak 8 at 8:30am

Peak 8:

This peak gets a lot of traffic.  There was a wind break with a summit register box filled with old school IDs and medical cards.  Someone had even left a small tube of sunscreen inside.

After leaving a card of my own, I headed south back to the saddle

At the saddle I turned right, and followed Wheeler Trail back to the Colorado Trail

Then I followed the Colorado Trail back to the trailhead

I made it back to the trailhead at 10am, making this a 10.7 mile hike with 4038’ of elevation gain in 5 hours.

On to the next trailhead!

13150

RT Length:  8.32 miles

Elevation Gain:  2188’

I drove up to Hancock Ghost Town outside of St. Elmo and parked my truck in the dark. The road was better than I remembered it:  Dirt 2WD with some clearance needed.  It was just before the Alpine Tunnel Trailhead. If you have a high-clearance 4WD vehicle you’re ok trashing, you can drive it all the way to the Upper Hancock Lake Trailhead. 

I was on the road at 5:30am, following the road south, crossing a bridge, and then turning left onto 4WD road 295.

I followed 295 south for 1.75 miles, where it ended at the Upper Hancock Lake Trailhead

At the Upper Hancock Lake Trailhead there was an obvious trail at the south end of the lot.  I continued following it south, and it eventually crossed and became the Colorado Trail/CDT

On this trail I skirted the west side of Hancock Lake, and the east side of Upper Hancock Lake.  This was an easy to follow, class 1 trail.  I was headed to Chalk Creek Pass.

The trail was wet and muddy, but luckily the water wasn’t too deep.

At this sign I went left, and followed the trail as it switchbacked up Chalk Creek Pass

At the top of the pass, I left the trail and headed east.  It was my goal to gain the ridge. 

There are a ton of ways to gain the ridge.  I took a different way up than I did down. Word of caution: the terrain is rocky and loose. Don’t trust any rock, even the large ones, as they roll. Here are the routes I took, solid line up, dotted line down (but it’s really choose your own adventure).  This is how I would recommend ascending and descending.

Here are some pictures of the route up.  Oh, and there were quite a few spiders/spiderwebs here.  The spiders had bodies about as thick as a nickel, and I probably saw 200 of them or more.  My trekking pole was useful in clearing away the spiderwebs.

Once I gained the ridge, I turned right and looked southeast, and I could see the summit of PT 13150

I made this a ridge hike, and was able to keep it class 3, but on the way back I was able to keep the hike class 2, so that’s the description I’m going to give you.  Instead of taking the ridge, this is the route you want to take, staying level at about 12975’ of elevation:

Here are some pictures of the route

You’re looking for this gully to ascend on the ridge. There’s a cairn at the top.

I gained the gully, and looked east.  I could see PT 13150

This was an easy ridge hike on very loose rock.  I stayed on the ridge.

Then the ridge dipped down a bit before the final ascent

This was once again a loose, rocky ascent

Here’s the route I took

I summited PT 13150 at 8am

13150:

There was a plastic summit register tube, and of course, everything inside was wet.  For the descent, I turned and headed back the way I’d come, but this time I descended via a small gully, then stayed level at 12975’ to make it back to the saddle.  The arrow in the first picture points to where I descended

Here are some pictures of the route to the ridge

I then dipped down, and aimed for the saddle

Here are pictures of my route back to the saddle

At the saddle, I turned left and headed east back down into the basin.  I could clearly see the Colorado Trail/CDT below

Back on the trail, I followed it back to Hancock Lakes

And left the Colorado Trail/CDT to head back to 295

The 4WD road back

I made it back to my truck at 10:30am, making this an 8.32 mile hike with 2188’ of elevation gain in 5 hours.

On to the next trailhead!

For anyone interested, here are a few pictures from the ridge (that you can avoid, if you want)

13,308 and 12,580

RT Length:  31.68 miles

Elevation Gain: 6041’

I drove to the Eddiesville trailhead the night before, and was up and on the trail at 4:30am.  I’ve been in this area for over a week, and was fairly confident I wasn’t going to need microspikes or an ice axe (I didn’t).  The trail starts at the south end of the parking area, and follows the Colorado Trail. 

I followed the Colorado Trail for 8.25 miles, all the way to the San Luis Peak/13166 saddle.  This was a very well-marked trail, which made it difficult to get lost.  Also, there weren’t many trail intersections, also making it easy not to get lost.  I crossed several small creeks and downed trees on my way, and passed through two gates (latched, not locked). 

Here are some pictures of the terrain, which followed Cochetopa creek up the basin.

After hiking for 7 miles, I crossed Stewart Creek

I was now above treeline, and could see the 13166/San Luis Peak saddle. 

The Colorado Trail nicely brought me there.

I would now lose 255’ of elevation as I headed down west, towards another pass, still following the Colorado Trail

Here’s the route

It was all pretty easy, class 1 hiking

I arrived at the next pass, and lost another 460’ of elevation, once again, on a nice class 1 trail.  This one took me through Bondholder Meadows

Here’s the route

After hiking for a total of 12.5 miles, and at 12290’ of elevation, I saw this cairn, and turned left, leaving the Colorado Trail.  I headed south a short ways to the ridge.  There was a little bit of snow here, but spikes (etc.) were not needed.

Once on the ridge, I turned left again and followed it southeast.  Here I stashed my backpacking gear and started hiking with a daypack with just the necessities.  Please keep in mind, what you see here is a false summit.  This was all easy class 2 on tundra.

At the false summit, I could see the true summit of 13308.  I would need to descend about 135’, and then re-ascend another 335’ to make it to the summit.  This area was a mix of tundra and rocks.  I followed the ridge southeast.

Once I reached the top of the rocky ridge I was greeted with Alpine tundra.  I headed east towards the summit.

When I got there, I was unsure if I was at the summit, or if it were the pint further, so I climbed up and down (still class 2) to the summit further east, but when I got there, the first summit looked higher.  When I checked my altimeter, both summits had the same elevation, but when I got back to the first summit, there was a summit register, so there’s no need to climb back and forth.  Here’s the view looking at the second summit

And a view from the second summit looking back at the first

I summited PT 13308 at 11:45am

PT 13308:

I headed back down the ridge to where I’d stashed my gear, first descending, then reascending, then descending again.

Here’s looking at that rocky false summit

From that summit, I could see my next peak, 12580

This is where the wind picked up.  Forecasted winds were 20-25mph, but I’m sure these exceeded 50mph.  I had to hold onto my bandana, as it kept getting blown off my head.  I made my way back to my stashed gear, then back to the Colorado Trail.

Once on the Colorado Trail, I continued following it northwest for about .75 miles

I rounded the side of a hill, and PT 12580 came into view.  I left the trail, and headed towards the summit.  This was all class 2 on tundra, then class 2 on rocks

There was a summit register, which hadn’t been signed in over a year, so I’m thinking this isn’t a very popular peak.  I summited PT 12580 at 2pm

PT 12580:

Now to head back down the trail.  I took the same way out as I did in.   I wanted to sleep close to Bondholder Meadows, but preferably in the trees. 

I ended up hiking further than intended, because the campsites I found were full of very dead trees, each placed perfectly to fall on me wherever I chose to sleep.  With the current wind gusts, I didn’t want to chance it, so I hiked to the very end of the trees, and found a place to camp surrounded by willows, near a creek that still had a little bit of snow.

I set up my bivy, ate dinner, and bedded down for the night.  It was an uneventful and warm night, except for the purring I heard around midnight and the thundering hooves I heard when I woke up.  I never saw either animal.

The next morning I was up and on the trail by 6am, headed northeast along the Colorado trail.  Here are the two passes I needed to go over

At the top of the last pass, now all I had to do was follow the class 1 trail back to the trailhead. 

Here are some pictures the rest of the way back to the trailhead.  I saw a couple of bull moose munching in the willows, but that’s common for this area.

I made it back to my truck at 10am. 

This was a 31.68 mile hike with 6041’ of elevation gain.

On to the next trailhead!

13,408

RT Length: 17.32 miles

Elevation gain: 3326′

Day 2 of my trip staying at Eddiesville Trailhead.  It was even colder this morning than last morning.  I woke up to 33 degrees outside, but needed to get going.  I got dressed and was on the trail at 5:15am.  This trailhead can accommodate up to 10 vehicles if everyone parks nicely.

The trail starts at the south end of the parking area.  This is also a Colorado Trail trailhead. 

I followed the Colorado Trail southeast for about 1.25 miles

Just for reference, you’re eventually headed here

After hiking for 1.25 miles I left the trail.  I turned left, and made my way down to the Cochetopa creek.  If you look closely, you can see the trail on the other side, along with two wooden sticks that probably used to hold signs indicting which trail this was.

I crossed the creek, which was less than a foot deep.

And picked up the 784 trail on the other side. 

I use the term trail loosely.  It starts off as a trail, then turns into kind of a road, then vanishes, then turns into 4 or 5 trails, then vanishes… you get my point.  With careful route finding you should never lose the trail, but it’s difficult in the dark.  Remember that picture I showed you earlier about where you’re headed?  Here’s the overall route through the trees.

Here are some pictures of the way through the trees to the meadow

Once out of the trees I came to a rather large meadow, and followed the trail southeast for 1.25 miles.  There are many trails here, presumably cattle trails.  I always chose the one closest to the trees and was never disappointed. 

This meadow was 1.25 miles long.  At 11,050’, after hiking for a total of 3.3 miles, I turned right and followed the trail southwest to the upper basin. 

This is where the trail gets iffy.  There are a lot of downed trees, and in some places the trail is wide, and in others it looks like a rabbit path, overgrown with grass and wildflowers.  Just keep heading southwest, staying to the right of the Lake Fork Cochetopa creek.  Here are some pictures of the terrain

Once above treeline, I was deposited into a willow filled basin.  There is a trail here, but once you lose it, it can be very difficult to find again.  It’s more of an overgrown game trail.  This is the path I took

Here are some step-by-step pictures

Yep, that’s the trail

I was headed for the gully to my left.  I could see a game trail that would lead me to the ridge and looked snow free (it was)

I made my way up the gully, staying to the left of the snow

As soon as the snow stopped, I turned right and gained the ridge

I followed the tundra and talus filled ridge east to the summit

I summited 13,408 at 9:15am.  Also, as you can tell by my bandana, it was windy.

13408:

Be careful, there’s a lot of bailing wire littering the summit, which is easy to not see and trip on. 

Ok, time to turn back.  I retraced my steps back down the ridge to the gully

Then down the gully into the basin

Through the willows, back to treeline

From there I caught back up with the trail, and took it down to the meadow

There were a lot of beaver dams and lodges along the creek

At the meadow I turned left, and followed the trail back down into the trees

Now the trail was easy to follow back to the creek

I crossed the creek slowly.  In fact, I stood in the middle for a few minutes to cool off my feet

The Colorado Trail was waiting for me on the other side.  I followed it northwest to the trailhead

I made it back to my truck at 12:15pm, making this a 17.32 mile hike with 3326’ of elevation gain in 7 hours.

13166

RT Length:  17.29 miles

Elevation Gain:  3120’

I drove to the Eddiesville trailhead the night before, hoping to get a good look at current conditions in the mountains.  On the way in I saw an old, 1980s brown Tacoma parked on the side of the road, and a man sitting on a rock, watching a herd of sheep.  All the sheep were facing the opposite way (I’ve become a pro at animal butt shots at this point).

Both creek crossings were manageable, and all the downed trees had been cleared off the dirt road.

There was only one other vehicle in the parking area, which fits about 10 vehicles if everyone parks nicely.  No mosquitoes, but tons of flies (they didn’t bite, they were just annoying).

I threw 3 socks full of moth balls under my truck, wondering where the 4th one went (maybe a marmot absconded with it?) and went to bed.  I was on the trail at 4am. The trail starts at the south end of the parking area, and follows the Colorado Trail. 

I followed the Colorado Trail for 8.25 miles, all the way to the San Luis Peak/13166 saddle.  This was a very well-marked trail, which made it difficult to get lost.  Also, there weren’t many trail intersections, also making it easy not to get lost.  I crossed several small creeks and downed trees on my way, and passed through two gates (latched, not locked). 

Here are some pictures of the terrain, which followed Cochetopa creek up the basin.

After hiking for 7 miles, I crossed Stewart Creek

and saw a moose.  I have him his space, even though he was directly on the trail.

I was now above treeline, and could see the 13166/San Luis Peak saddle. 

The Colorado Trail nicely brought me there.

For those of you looking for the current conditions for San Luis pass, here they are.  Still areas of snow on the trail, but passable.

At the saddle, I disturbed a small herd of deer. 

Deer:

From the saddle, I turned left and headed southeast, gaining 525 feet of elevation towards the summit.  This was easy tundra to navigate.

Until I saw this.  Hmmm… I was going to have to go and investigate.  I headed to the east side of the formation, dropped all my gear except my camera, and headed up.  Sorry, no helmet, as I wasn’t aware this was more than a class 2 hike. 

This was easier than it initially looked, nothing worse than rainbow climbing at the gym. The rock was all grippy, sturdy, and had lots of hand/footholds.  The rock was solid, like in the Crestones, but with more and larger hand holds. I’d call this 30 feet of vertical climbing exposed class 3.

Here’s the route I took up, following the orange rock to the ridge, turning left, and crawling on hands and knees to the summit because it was windy (and exposed, and I didn’t have a helmet, etc.).

I summited 13,166 at 8am

13166:

Now to head back down.  I actually just did this feet first, no need to turn and face the wall.  There are plenty of hand and foot placements to use for support.

Back on firm ground, I grabbed my gear, and headed back to the saddle.

Back on the Colorado Trail, I followed it back to the trailhead

Oh, and I saw another moose.  This one was curious, and kept walking towards me, so I didn’t stay long.

Here are some pictures the rest of the way back to the trailhead

Back at the trailhead, I noticed a chipmunk under my truck, seated atop a sock full of moth balls.  So I’m guessing they don’t work with chipmunks.  Oh well, at least it wasn’t a marmot.  I made it back to my truck at 11am, making this a 17.29 mile hike with 3120’ in elevation gain in 7 hours. 

I’d say “on to the next trailhead!” but I’m staying here.

UN 13256, Coney Benchmark – 13,339 & UR 13138

RT Length: 32.25 miles

Elevation Gain: 5511’

I know the traditional way to do this peak is from Carson Pass, but the last time I drove that road I told myself it would be the last time.  I had marmot issues parking at the pass, and lost my 4WD on the way down.  It wasn’t ideal.   Earlier this summer I had attempted to make it to Carson Pass from the bottom of the trail, near where CR 30 and 36 meet.  I was greeted with hoards of mosquitoes, and decided to hike another peak instead. 

This time, I parked at Spring Creek Pass, knowing it was going to be a long day.  What I hadn’t anticipated were all the elevation gains and losses along the way.  The parking lot holds about 20 vehicles if everyone parks nicely.  Another bonus:  It’s a paved 2WD road to get there, and the bathroom was stocked and clean.

I parked and was on my way at 1:45am.  I followed Trail 813/Colorado Trail/Continental Divide Trail for most of this hike.  On the way in, in the dark, I took the 4WD road 547.1, which eventually connected back up with the Colorado Trail, but added about an extra mile.  I followed the very well-marked trail west for  8.25 miles.  Here are some pictures of that well marked trail, as it went in and out of the trees (which it seemed to do the entire hike).

Here’s an overview of the route you can see at this point

After hiking about 8.25 miles, the road curved to the left, and I was now heading southwest.  Here the trail loses about 500’ of elevation as it brings you back into the trees.

I passed through some willows, and continued following the trail to gain the ridge.  This is where the snow began and the trail was no longer obvious.  I was able to do all of this with just microspikes, but on the way back, I really, really wished I had an ice axe.  

Here the trail was again obscured by snow, so this is the route I took to gain this ridge, keeping it mostly snow free

It was rocky near the top, but still class 2, and there was a large cairn to guide me.

The trail picked back up again, and I followed it southwest, skirting below UN 13138

After hiking for 14.5 miles, I could finally see the two ranked peaks I was aiming for today

To avoid the snow on the way up (circled in red) I decided to just ascend straight up the slope.  (I crossed the snow on the way back down, and this is mainly where I wished I’d had an ice axe).

The terrain quickly turned from tundra to rocks (still class 2)

After gaining the ridge, the summit was to the southwest.

I summited UN 13256 at 8:15am.

UN 13256:

To the southwest, I could see Coney Benchmark.  I would lose almost 400’ of elevation to get there.

Knowing the Colorado Trail was down there somewhere, I headed south until I found it.

I then gained 475 feet to the summit of Coney Benchmark.  Here’s the route I took.

This was all class 2 to the summit.

The summit was easy to find, but someone put a plastic summit register at the top, so of course the paper inside was wet.

I summited Coney Benchmark at 9:15am

Coney Benchmark: 

Looking northeast, back the way I came, I could see UN 13256 and UR 13138

I retraced my steps back to the Coney Benchmark/13256 saddle

This time I skirted around 13256 and followed the Colorado Trail

This was the sketchy part, where I wished I’d had my ice axe.  It’s steeper than it looks.

To summit 13138, I made my way to the 13256/13138 saddle, and just followed the ridge.  All class 2.

I summited UR 13,138 at 10:35am

UR 13,138: 

Knowing if I continued to follow the ridge northeast I’d come back to the Colorado Trail, that’s what I did.

I picked up the Colorado Trail, and followed it 13 miles back to the trailhead, losing and gaining elevation the entire way back.

I made it back to my truck at 3:45pm, making this a 32.25 mile hike with 5511’ of elevation gain in 14 hours. 

Check out all that elevation gain/loss!

On to the next trailhead!