RT Length: 11.89 miles
Elevation Gain: 3995’
I’m not a fan of the Rockdale Trailhead. It’s an adventure in itself, starting with a drive through Clear Creek

And then the road to get to the trailhead is littered with dips and rocks. I feel I’m a pretty good driver on 4WD roads, but I have a hard time avoiding some of the obstacles on this one. If you drive to the upper trailhead be sure of your driving skills/vehicle.
I made it to the trailhead and was on the trail at 5:30am. The trail is class 1, and starts out by heading south along trail 1461.

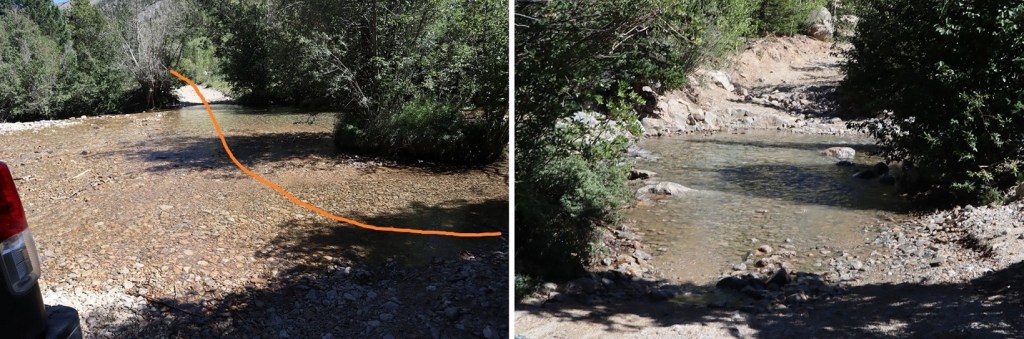
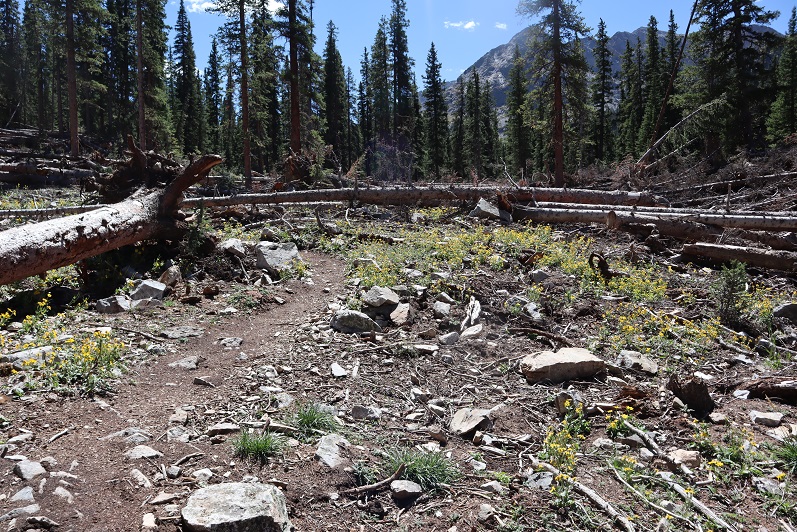
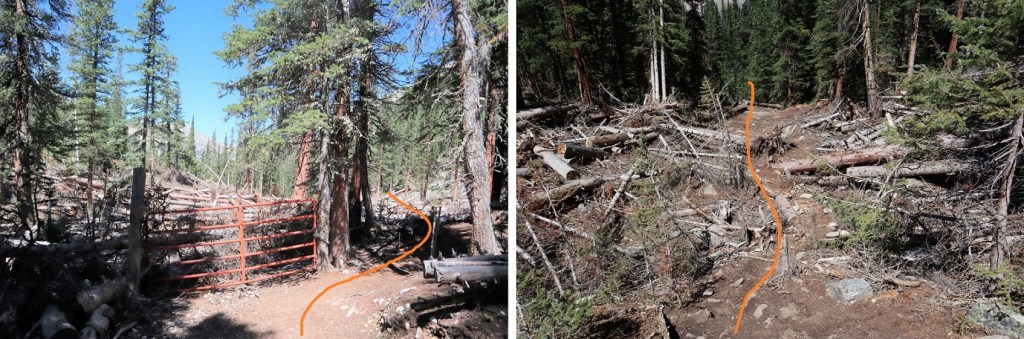
After hiking for less than half a mile I came to the avalanche area. Last time I was here was recently after the avalanche, and it was difficult to navigate. They did a lot of work in this area, and now you can drive a car through it (if vehicles were allowed, that is). I passed around the gate, and continued along the trail.
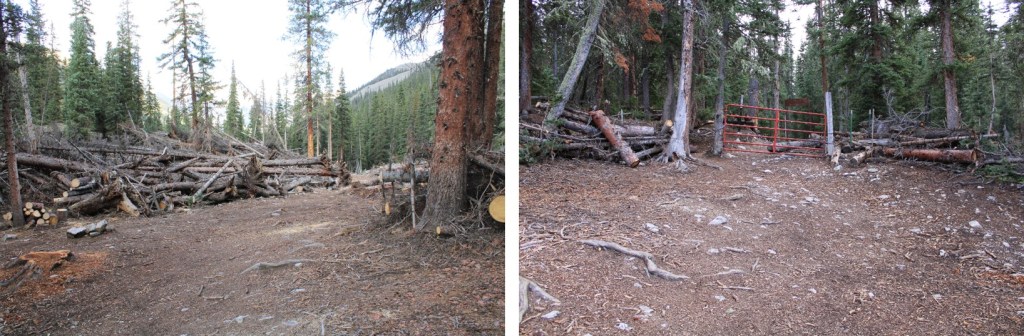
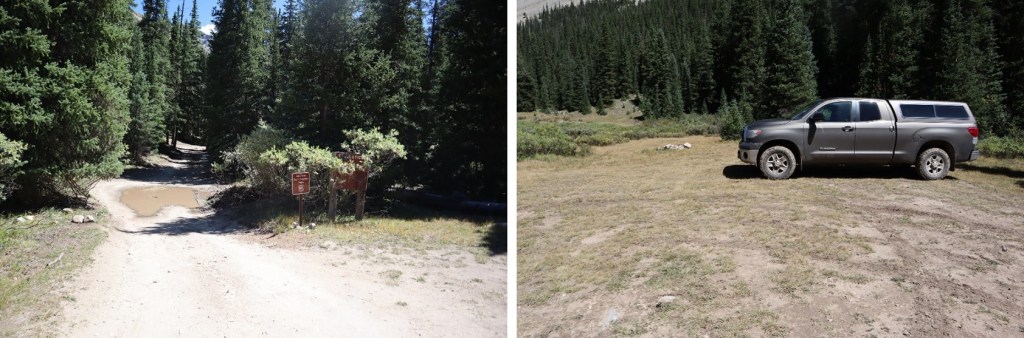
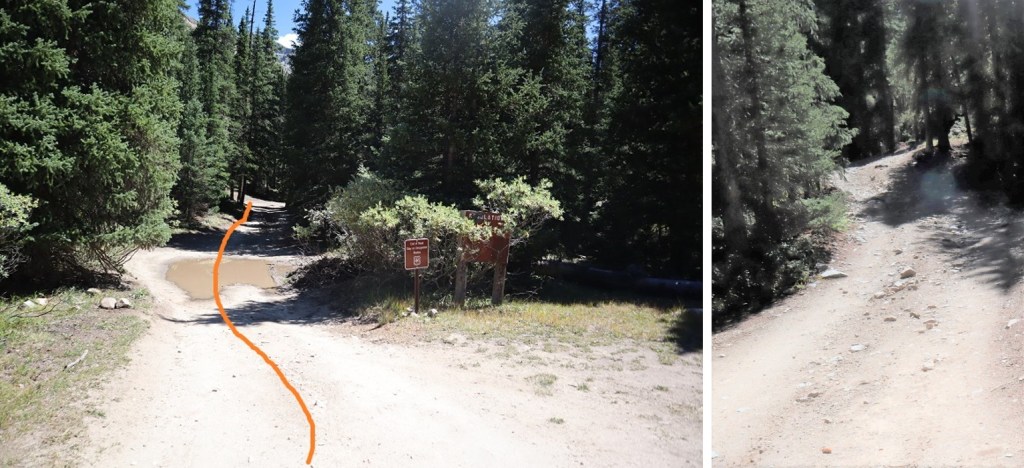
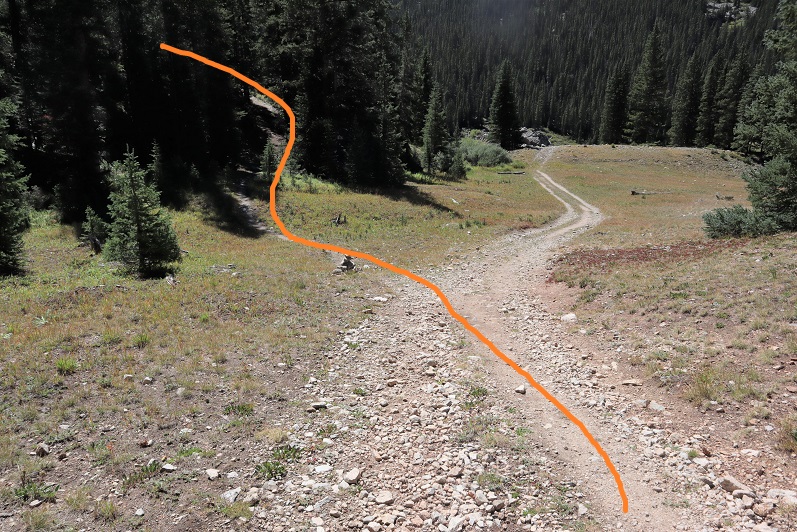
Just before making it to Clohsey Lake there’s a junction in the road and it becomes a trail. You can take this, or continue taking the road to the lake and pick up the trail on the other side. I chose to take the trail up and over the small mountain

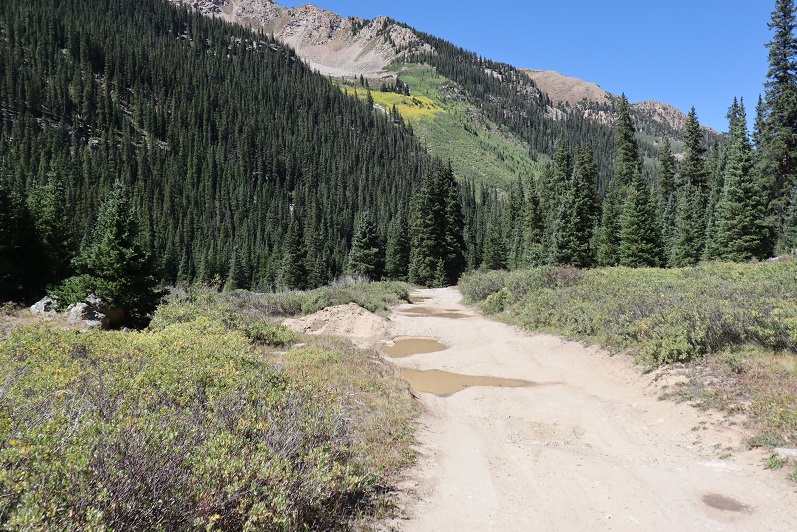
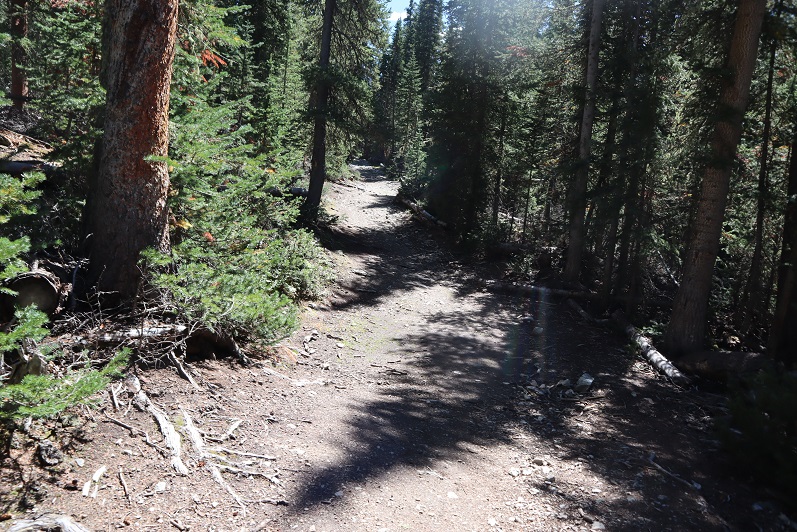
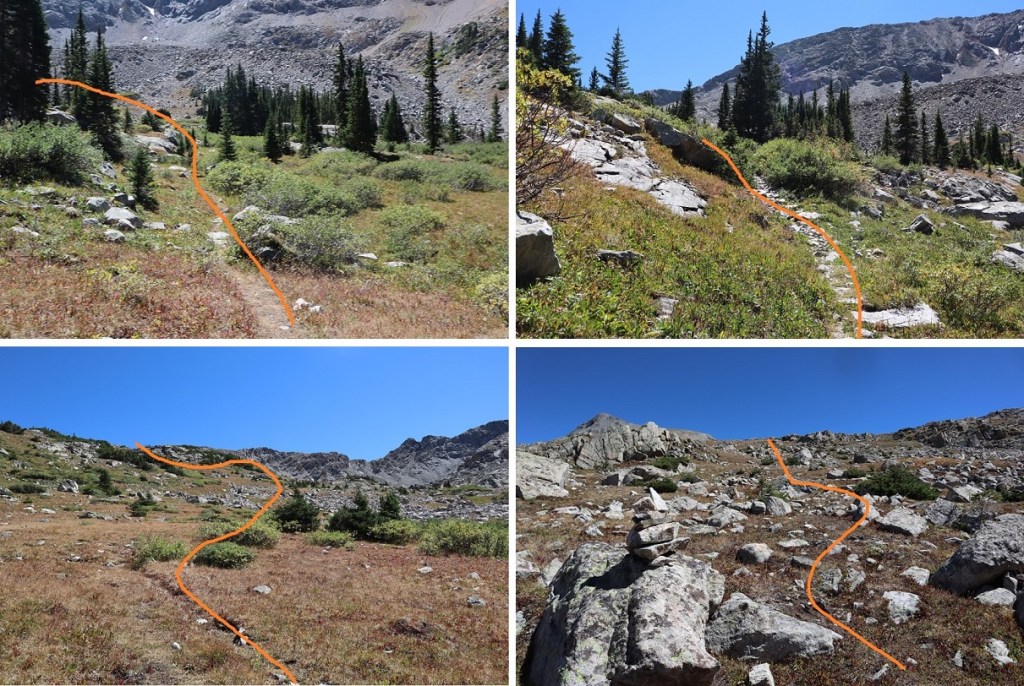
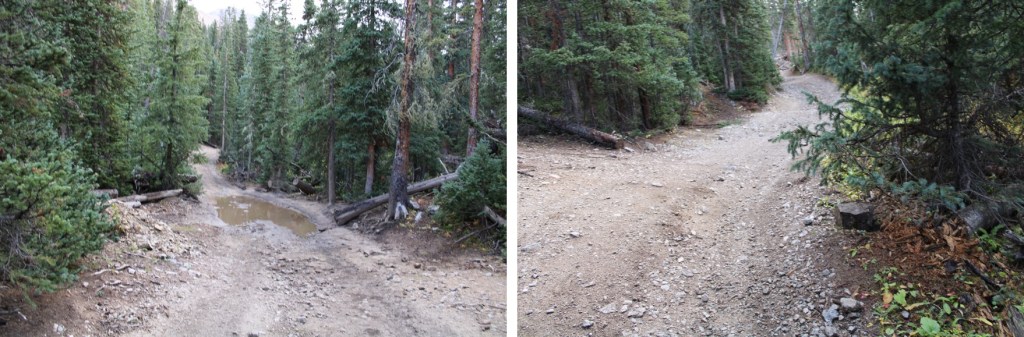
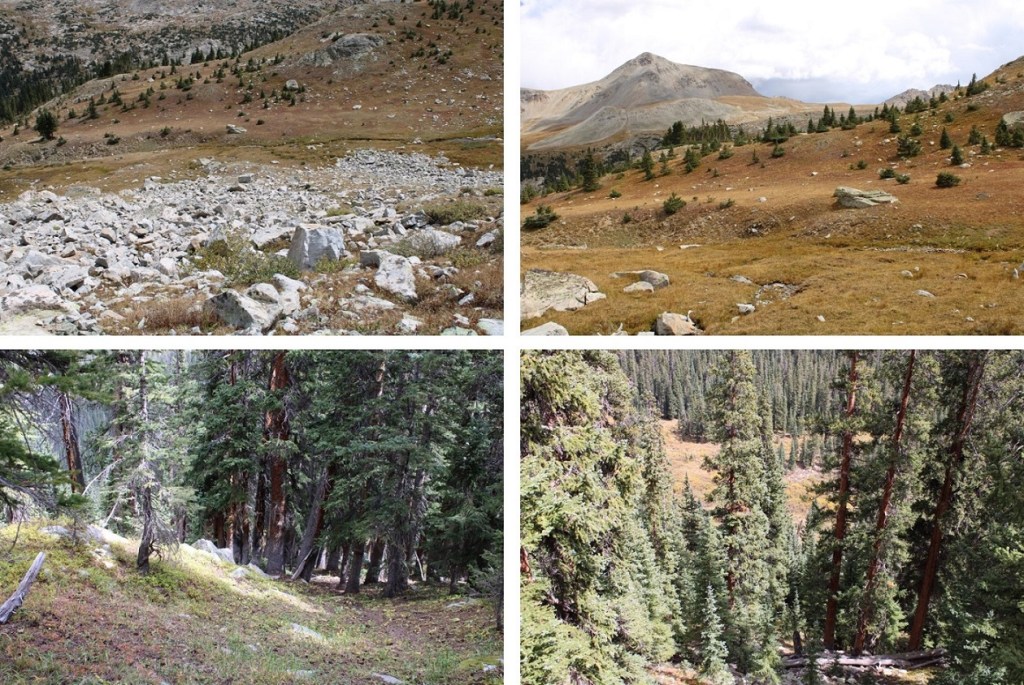
I followed this trail south for 3 miles from where I parked, through pine trees, willows, across streams, and eventually to treeline.
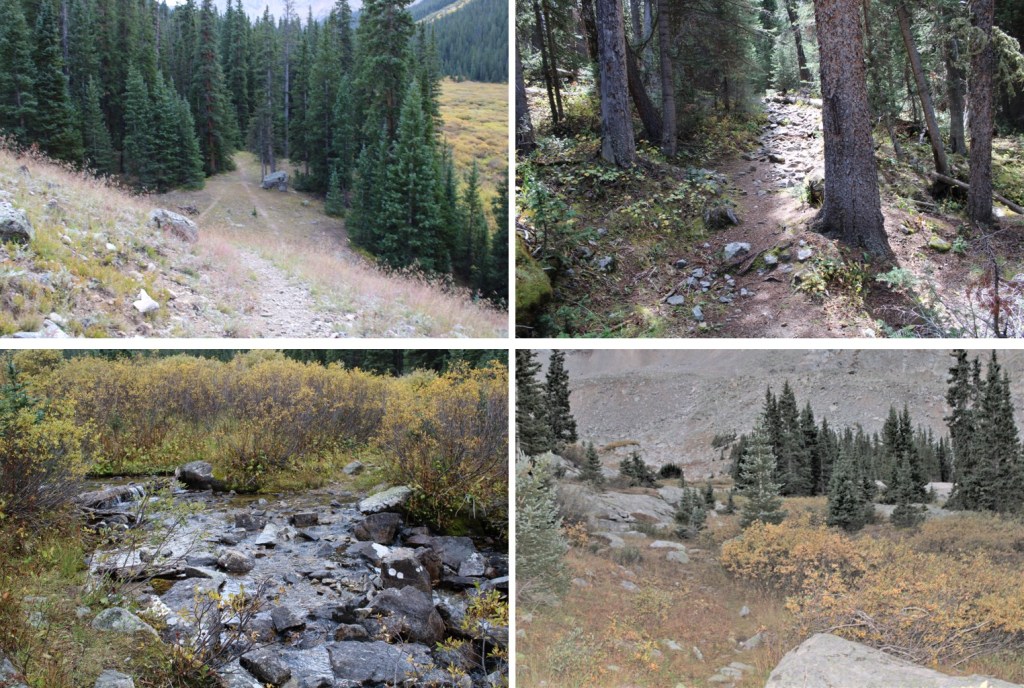
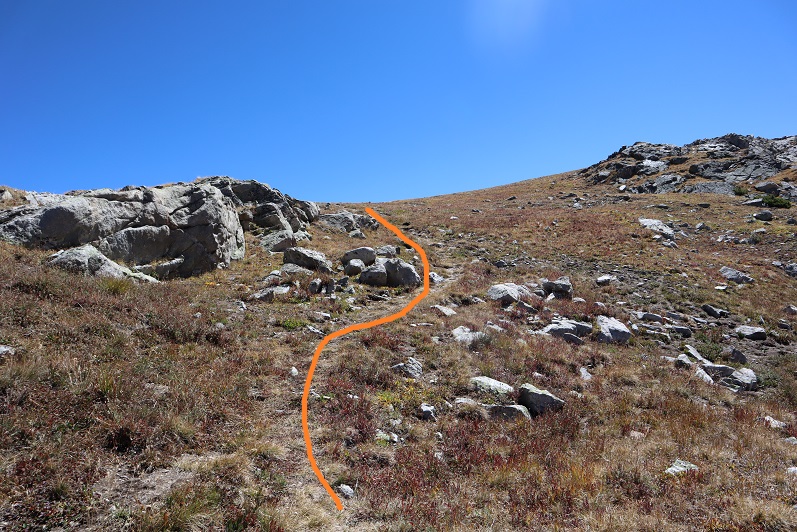
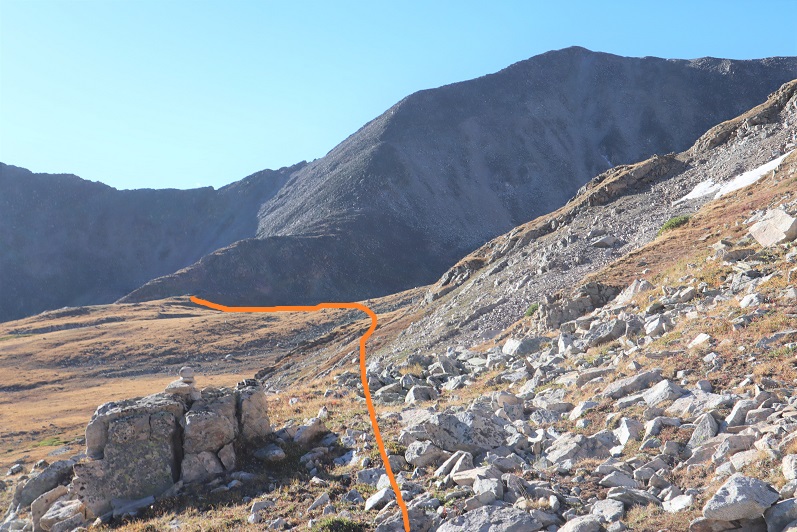
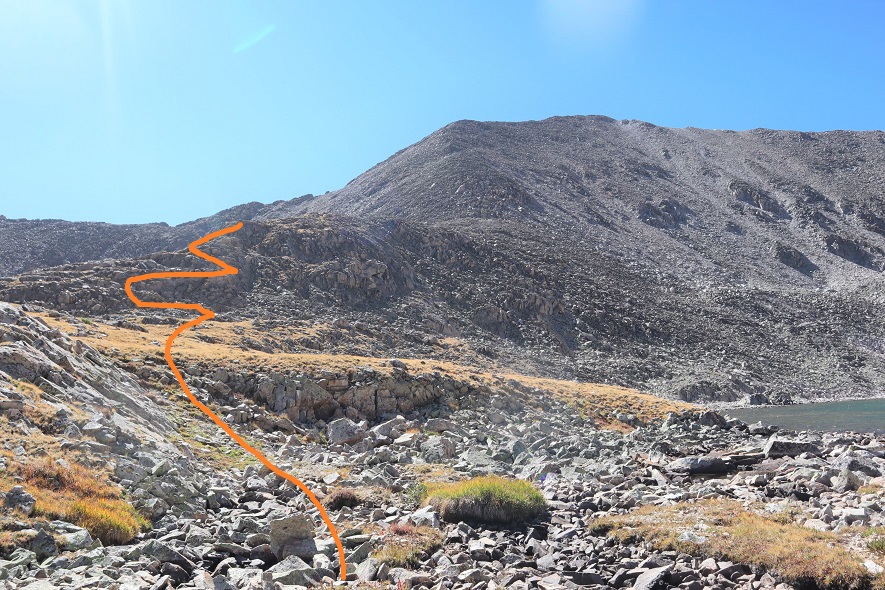
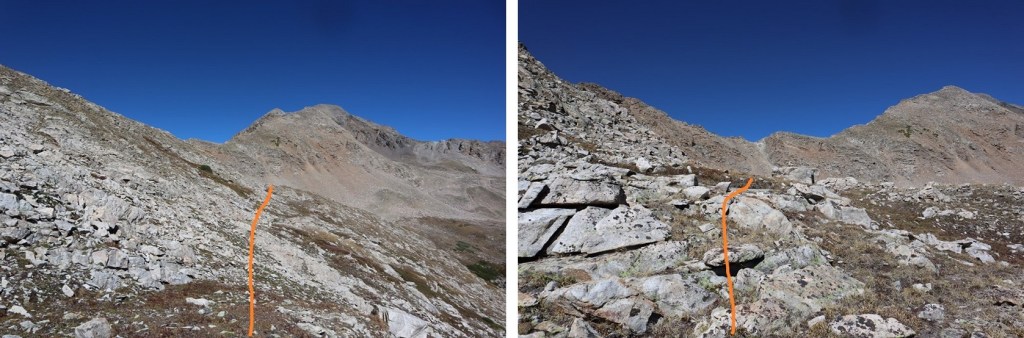
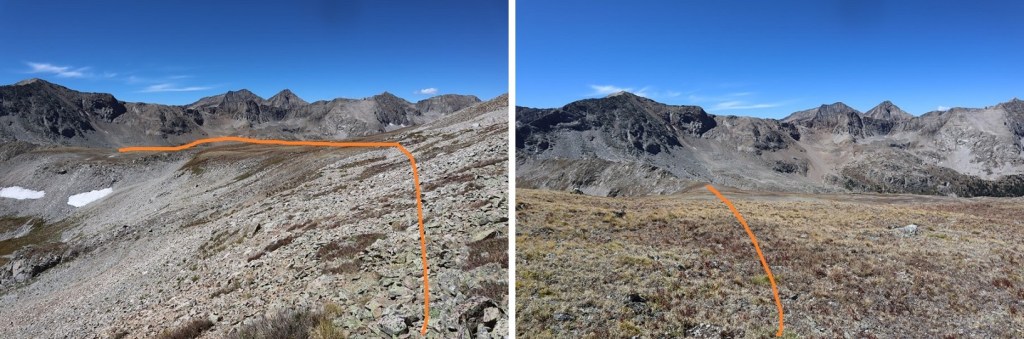
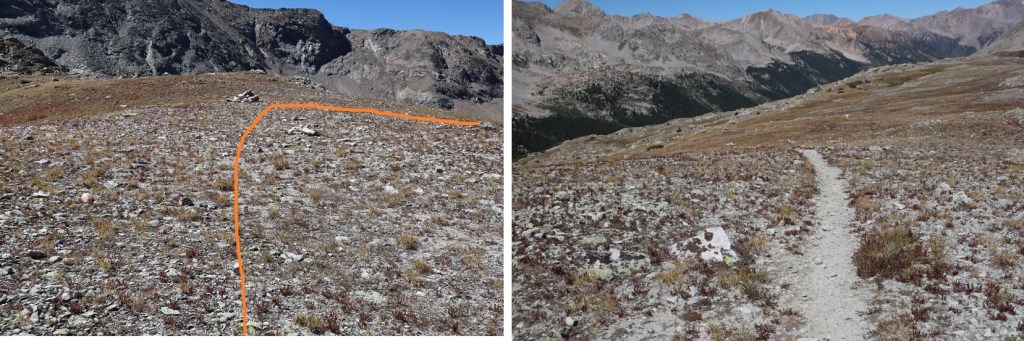
After about 3 miles the trail kind of disappeared/fizzled out. Last time I was here I found cairns to take me to the ridge, but this time I didn’t see any. No worries though, I just kept rounding the hillside, heading northeast towards the ridge. You’ll want to just head towards the ridge, but easier terrain is to your left (northeast).
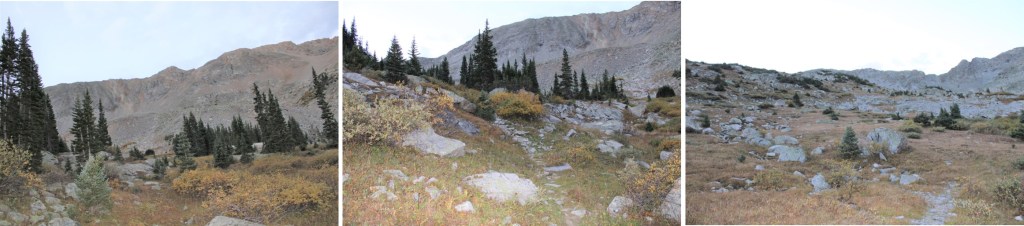
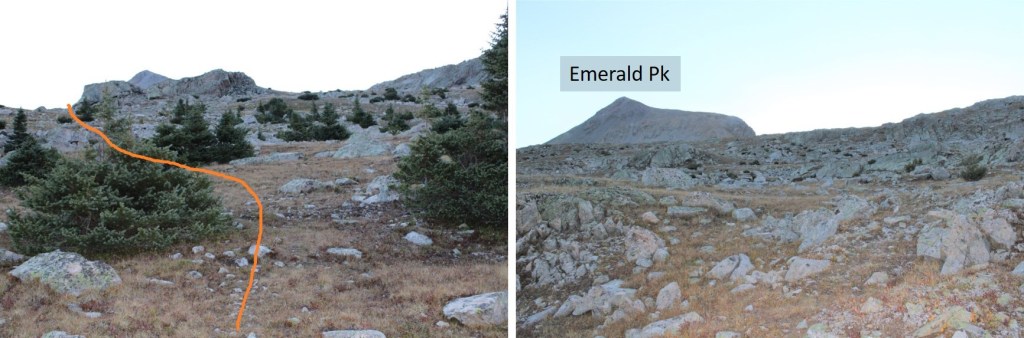
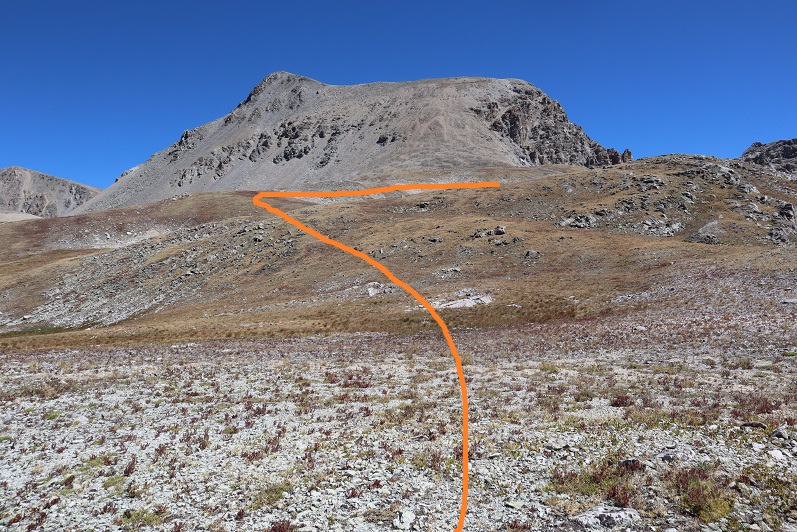
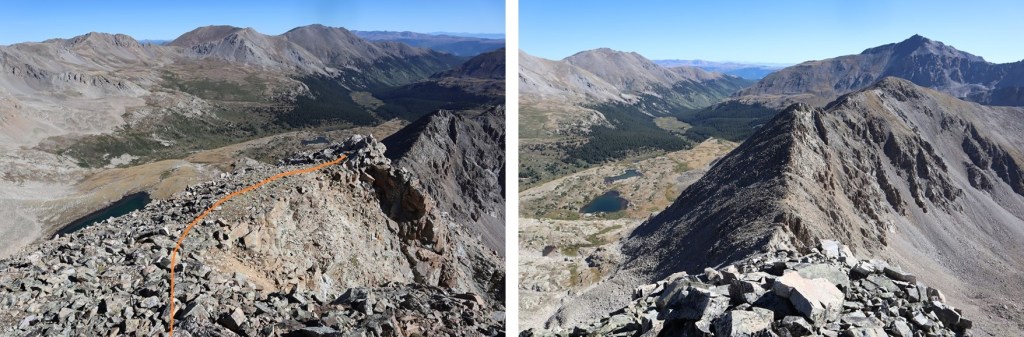
It was 3.75 miles to the ridge. Once on the ridge I turned right and followed the ridge south. I could mainly stay on the top of the ridge, dipping to the left a few times when necessary. I was headed towards the black arrow.
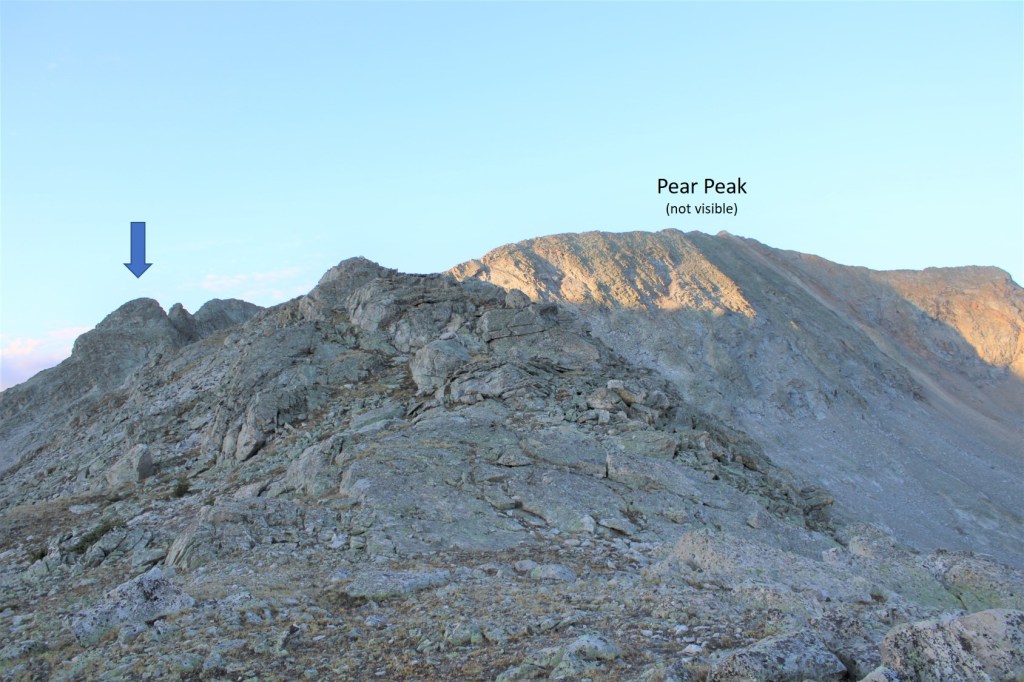
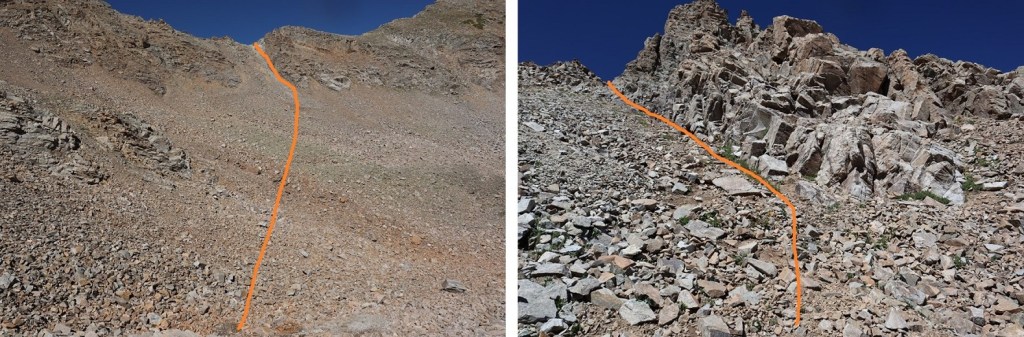
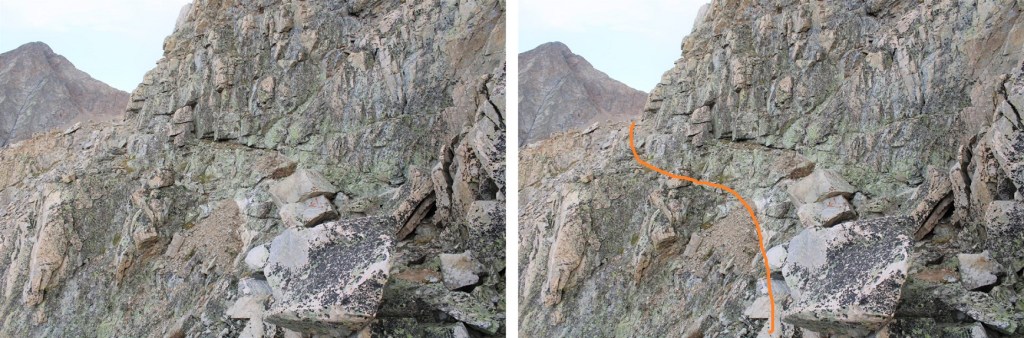
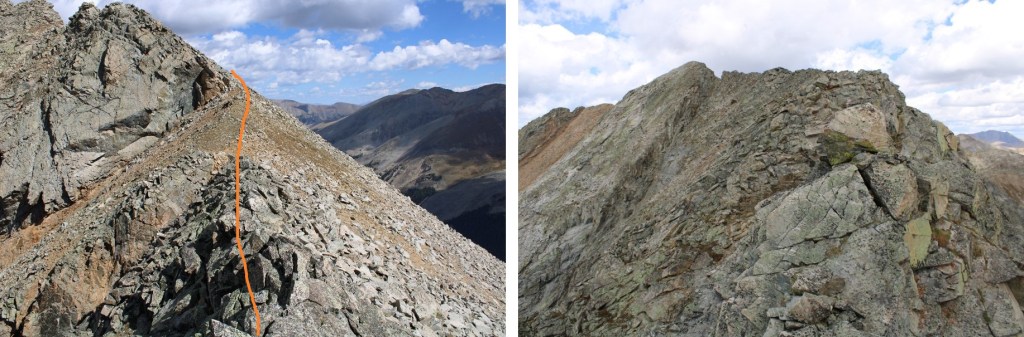
To continue to follow the ridge I had to make it around this point. I aimed for just below the large boulder, then went left, following dirt and scree and hugging the mountainside.
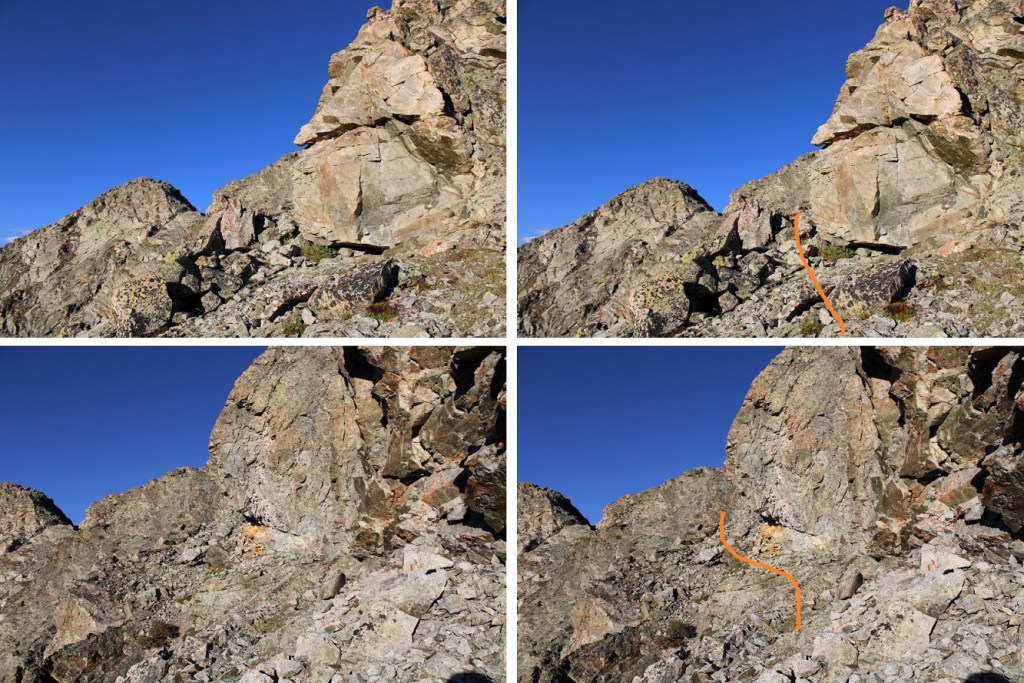
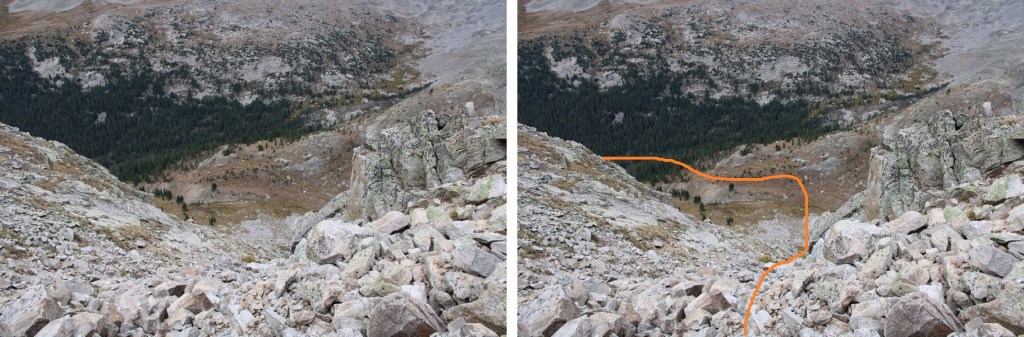
This part was easy, but as I rounded the corner, I came upon gullies full of choss. This area felt class 4. To navigate these, I hugged the gullies, dipping down to cross the first big one, and then remaining level before eventually finding what looked like a game trail to the ridge.
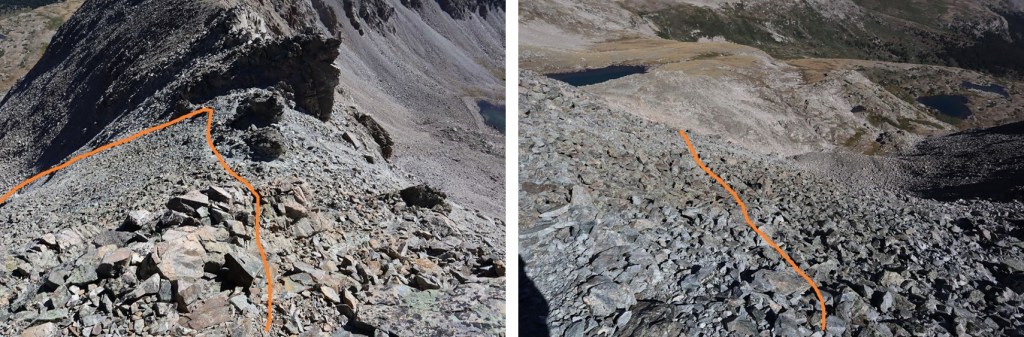
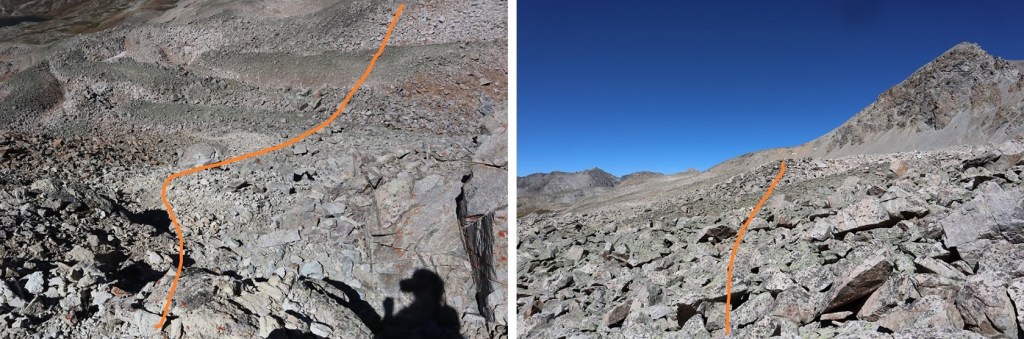
Here’s the view and my route from the first big gully. I stayed level to get across the chossy gullies. It’s harder/steeper than it looks.
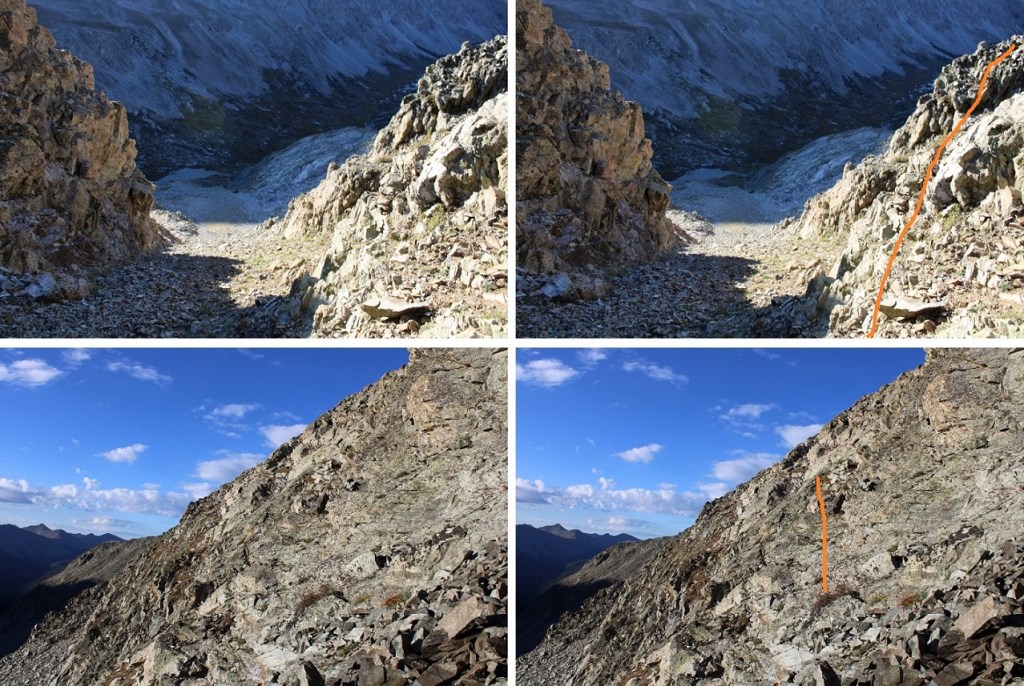
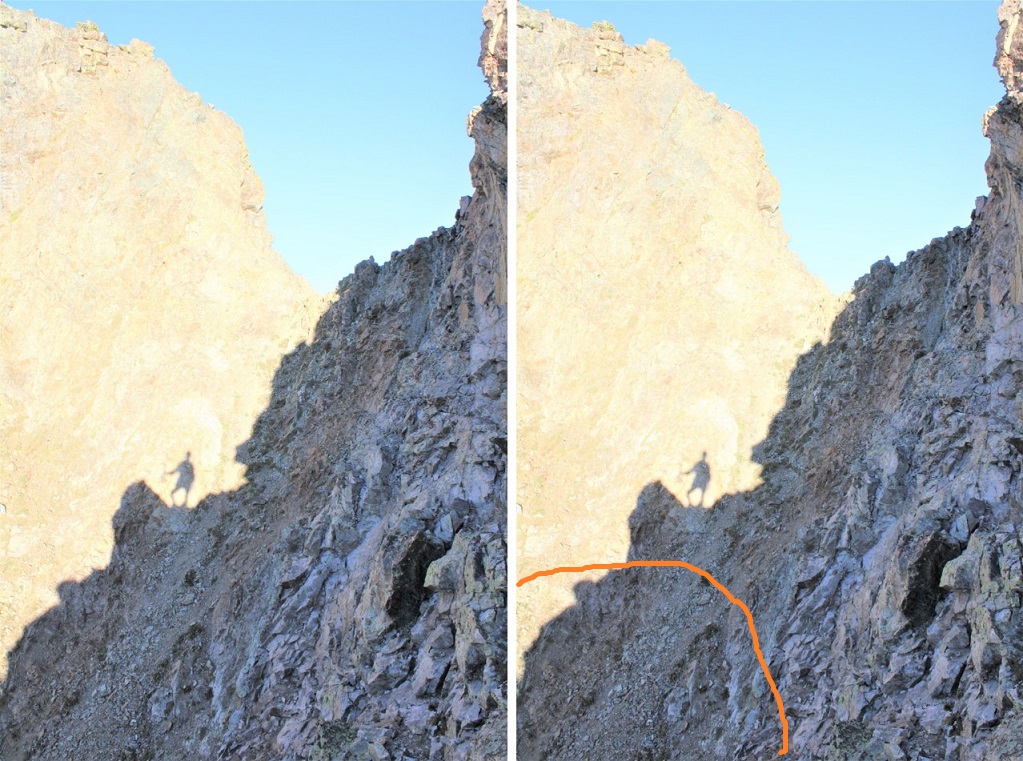
Safely across the first gully, here’s looking back at the route I took down
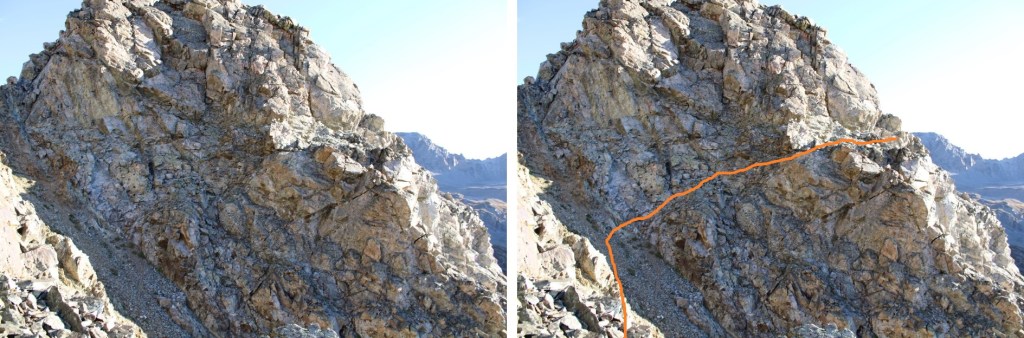
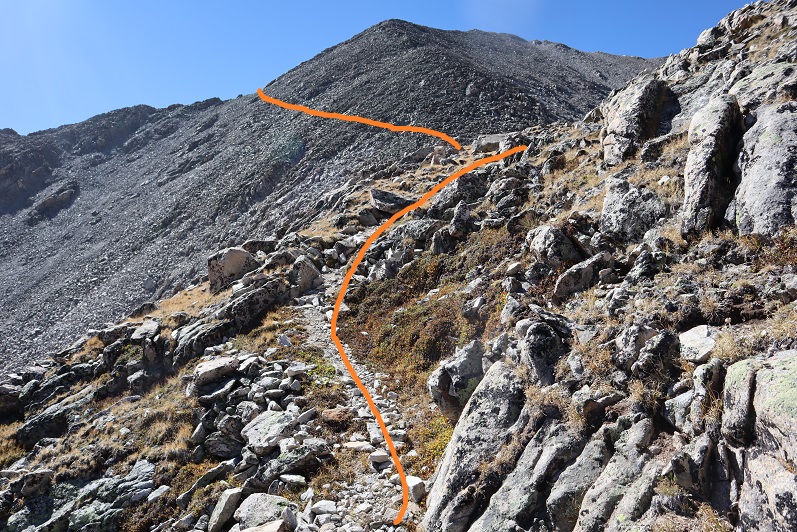
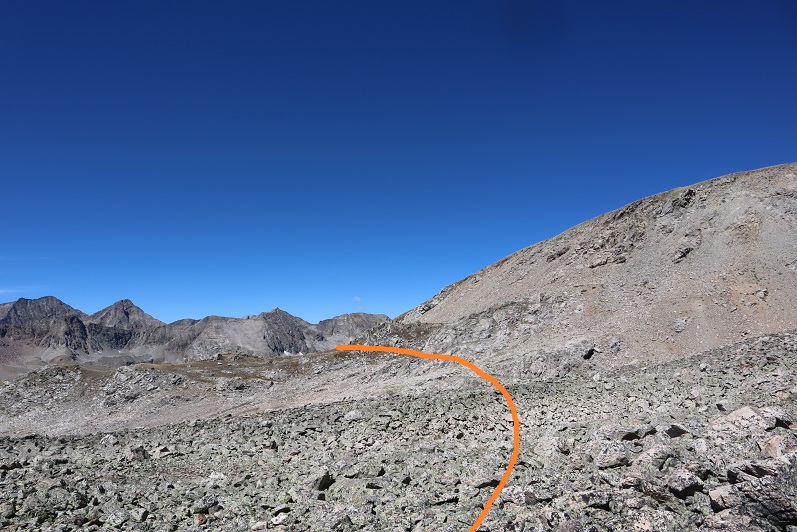
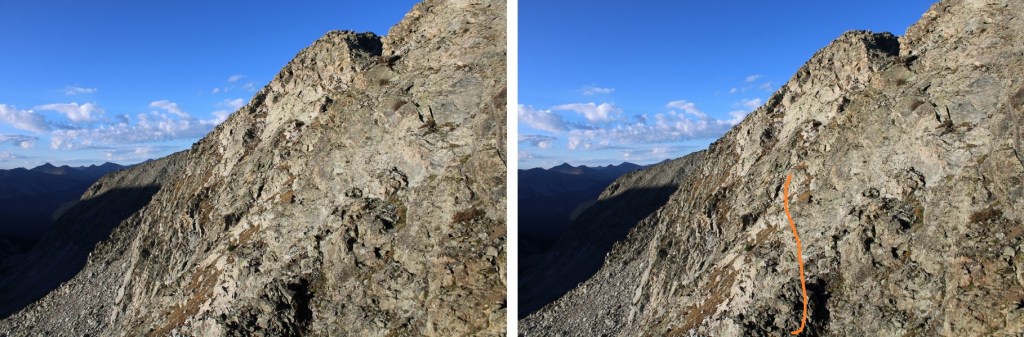
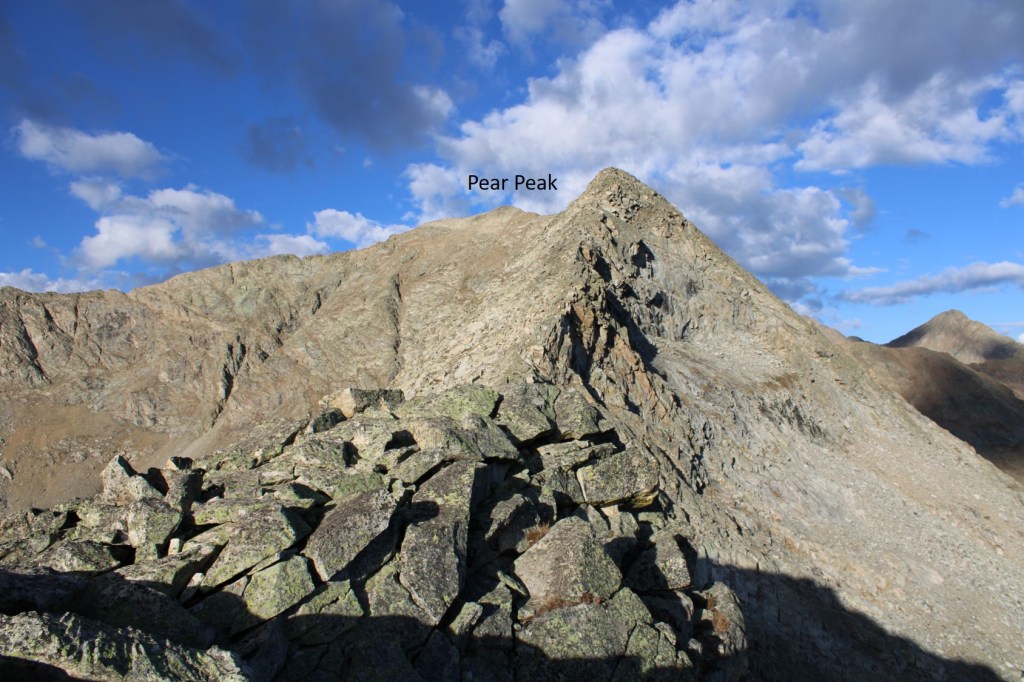
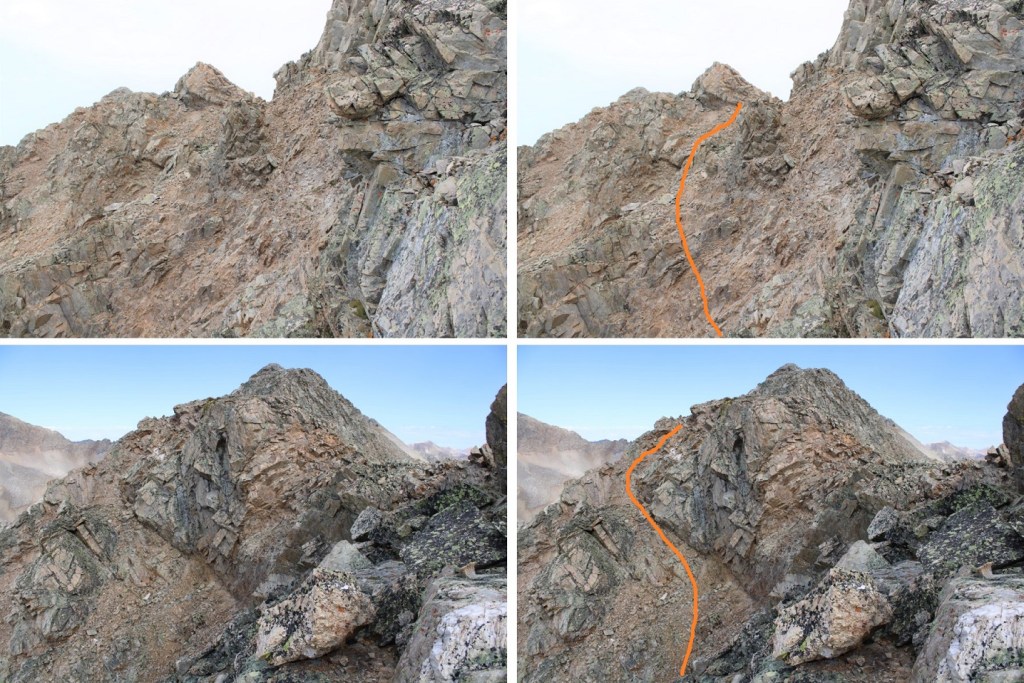
Now I continued at level elevation heading south, until I found an obvious route to the ridge. Until this time the ridge had been rock slabs, spires, and choss, but once it became rocks and tundra I headed up, then turned left to follow the ridge.
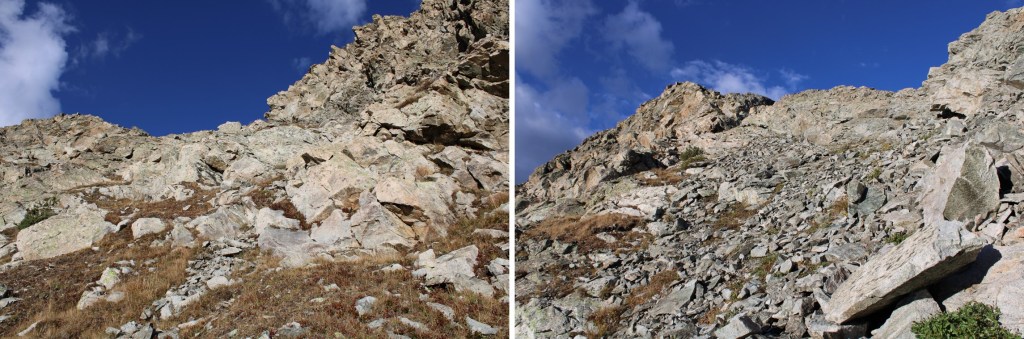
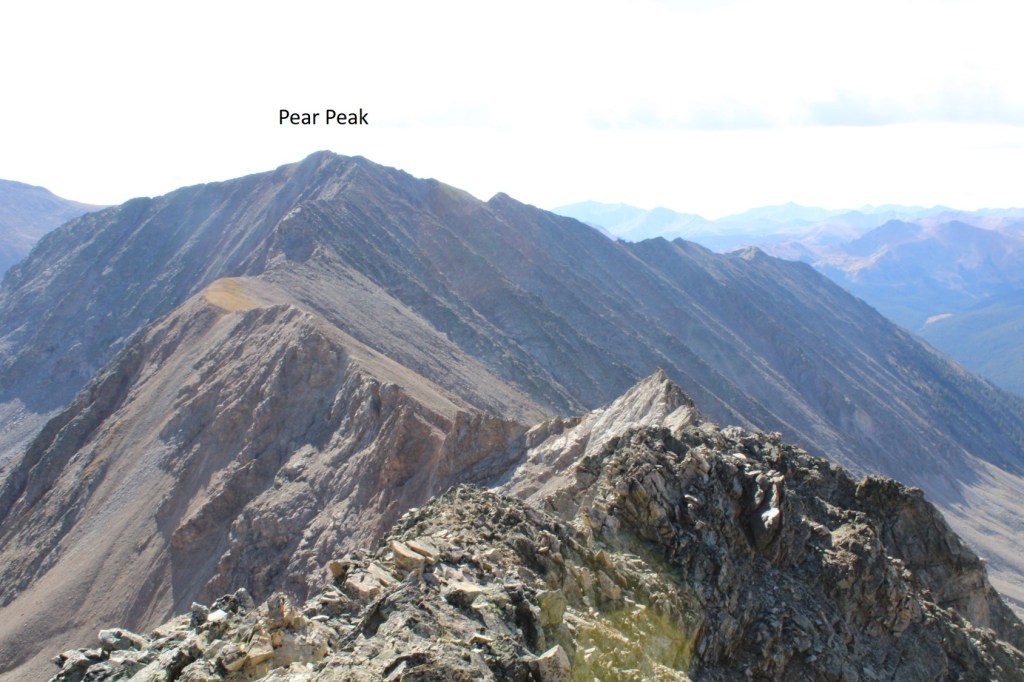
From this point on, the ridge ‘goes’. It’s mostly on large, solid rock, but remember, these rocks can move. It’s about three quarters of a mile from here to the summit of Pear Peak. The ridge felt consistent class 2-3. I didn’t feel there were any class 4 moves on this ridge.
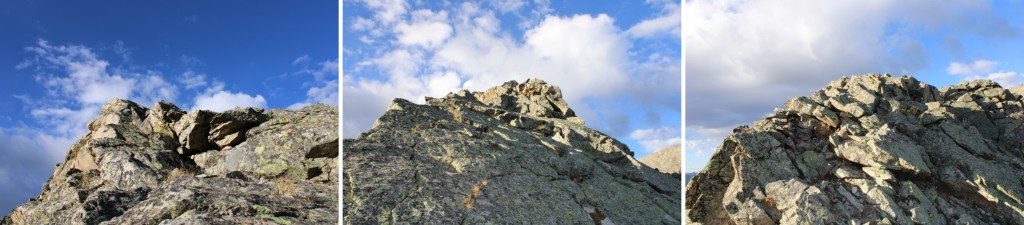
If I ever felt the need to dip off the ridge, I went left. Pear Peak is actually to the left, past the false summit (which isn’t really a false summit because you can see the true summit most of the time)
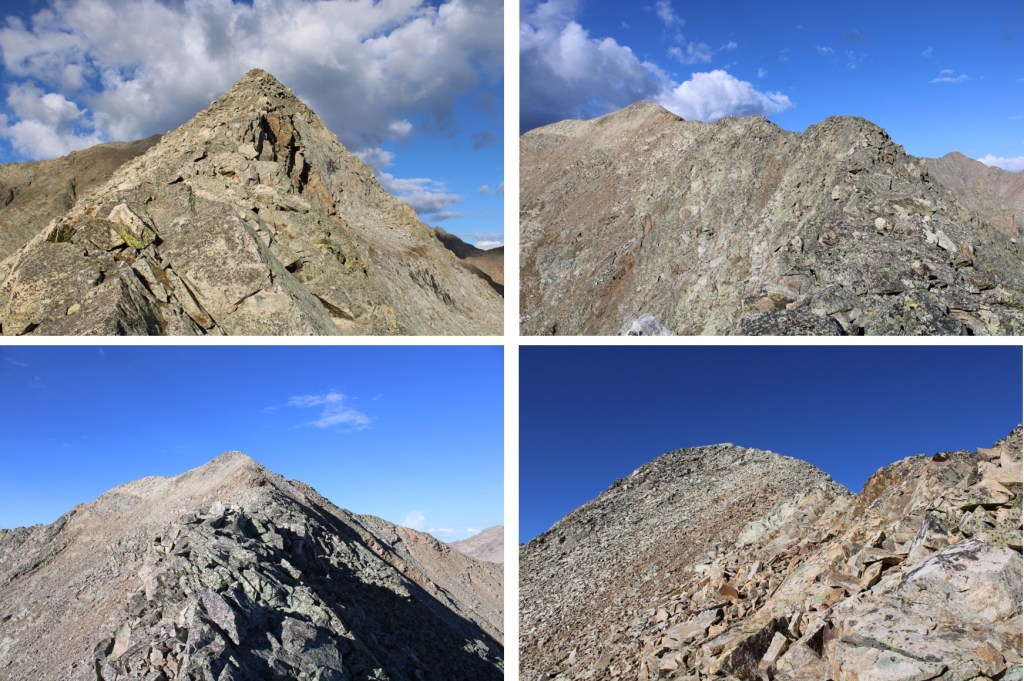
Here are some more ridge pictures
I summited Pear Peak at 8:45am
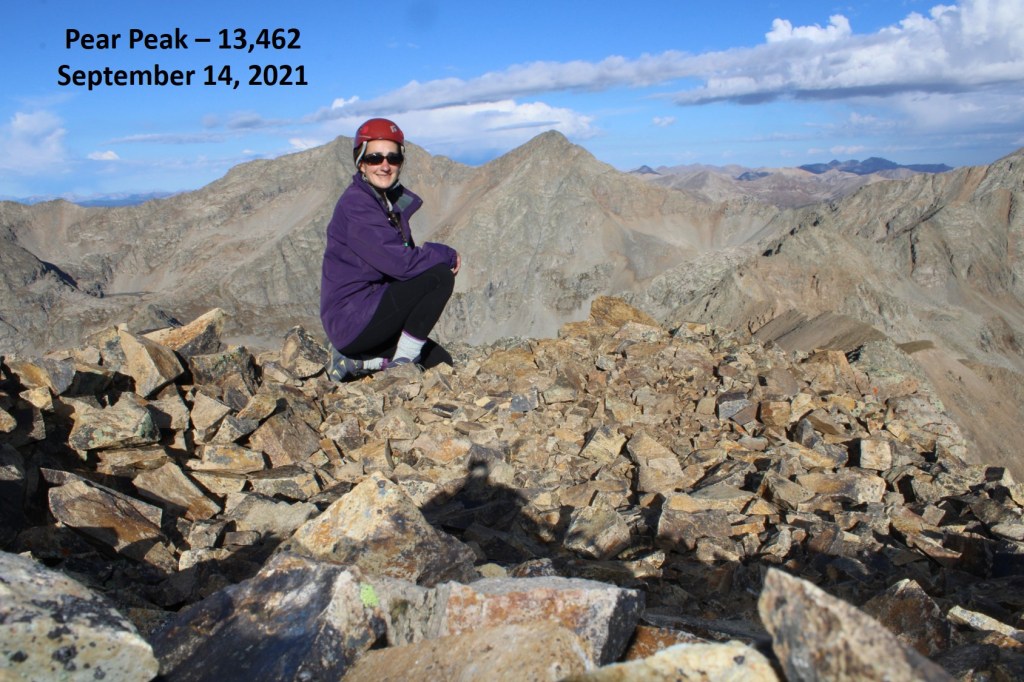
Pear Peak:
Now the easy part, as I turned northwest and descended the ridge to the Pear Peak/PT 13220 saddle. This was class 2, once again sticking to the ridge and dipping to the left when necessary.

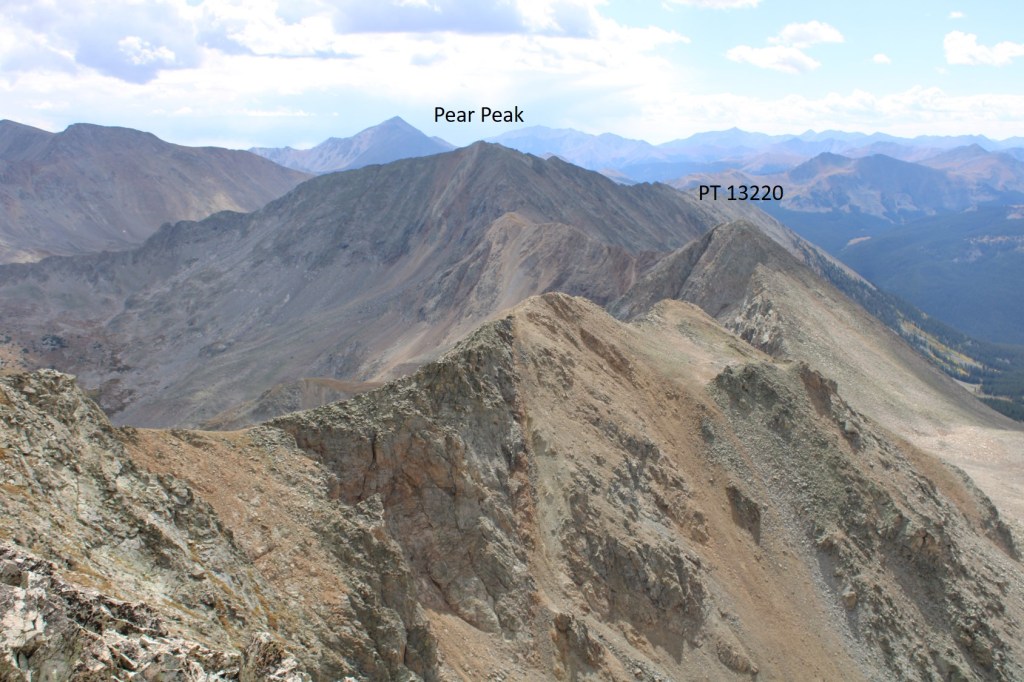
Here’s an overview of the rest of my route, mostly following the ridge, except for a short area on the way to 13220 where I stayed left (more on this later). You also have a good view of the decent route from here. Now’s a good time to study it.
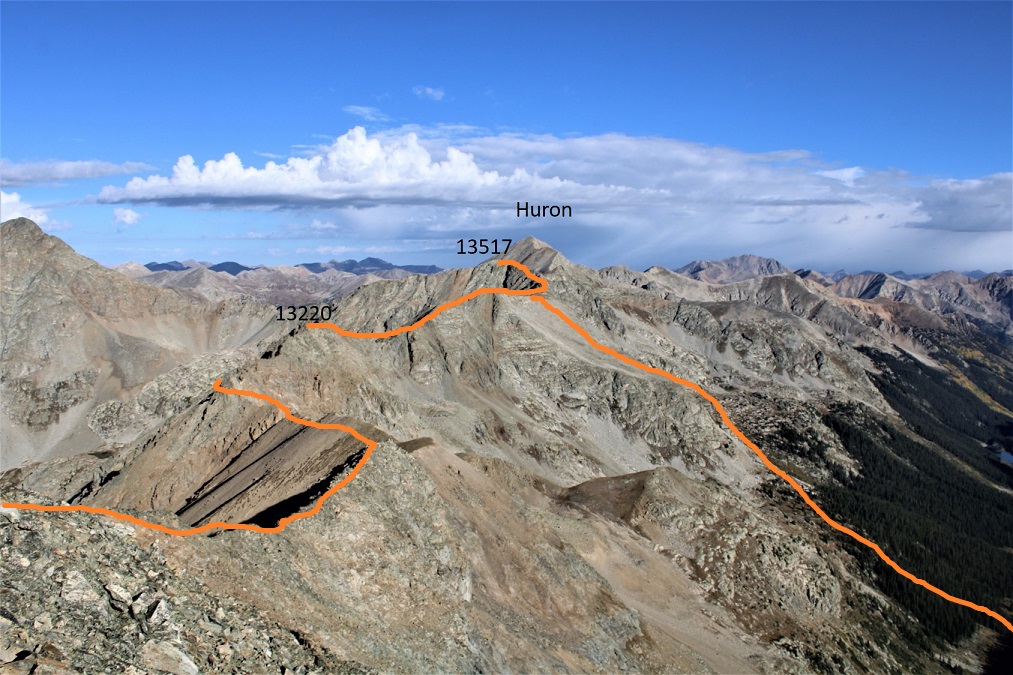
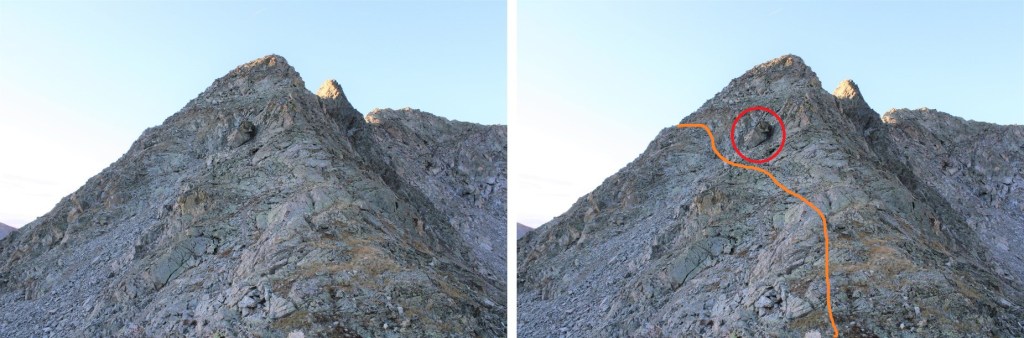
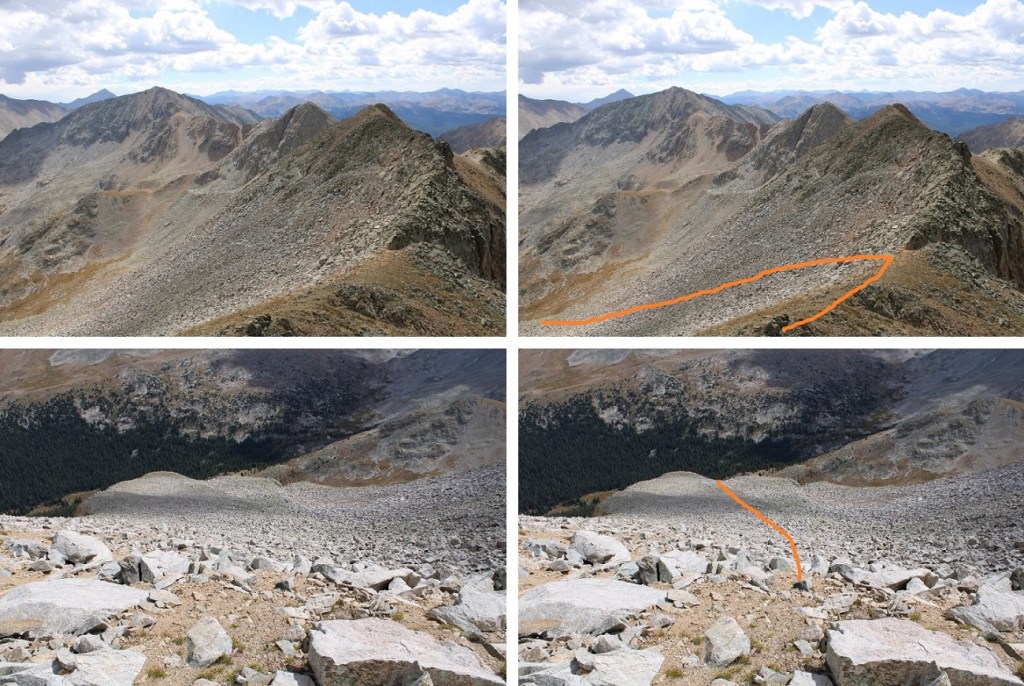
Ok, down the ridge to the Pear Peak/PT 13220 saddle. It’s all class 2, and you’re aiming for a scree filled gully, circled in red

Once you make it to the gully, the choss and adventure begins.
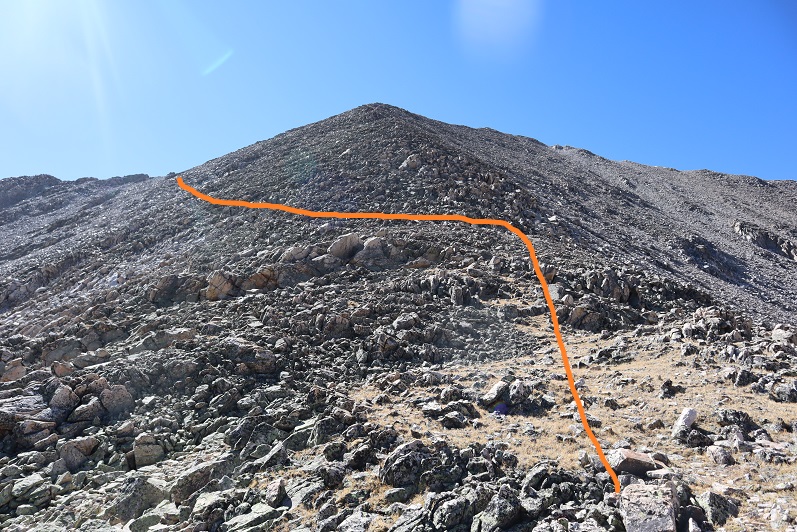
I dipped down into the gully, crossed it, and then stayed level in elevation as I rounded the south side of the peak, aiming for two protruding rocks.
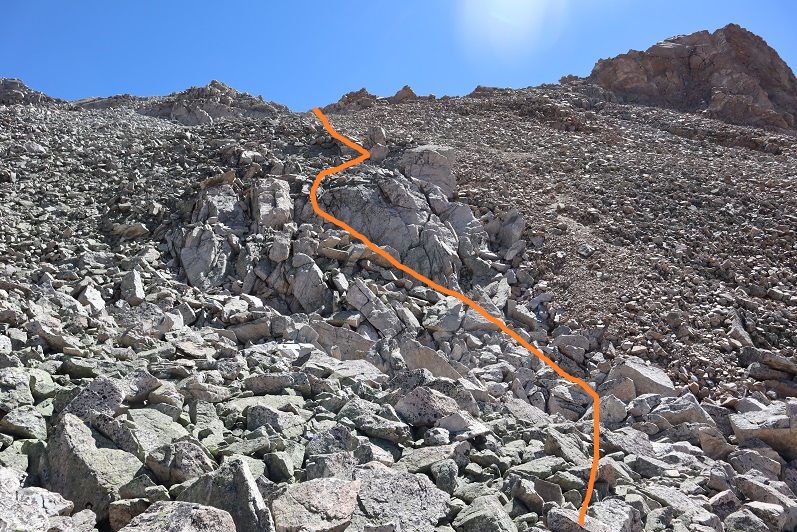
Once I started heading north, I followed game trails up gullies and back to the ridge. This area seemed to go on forever.
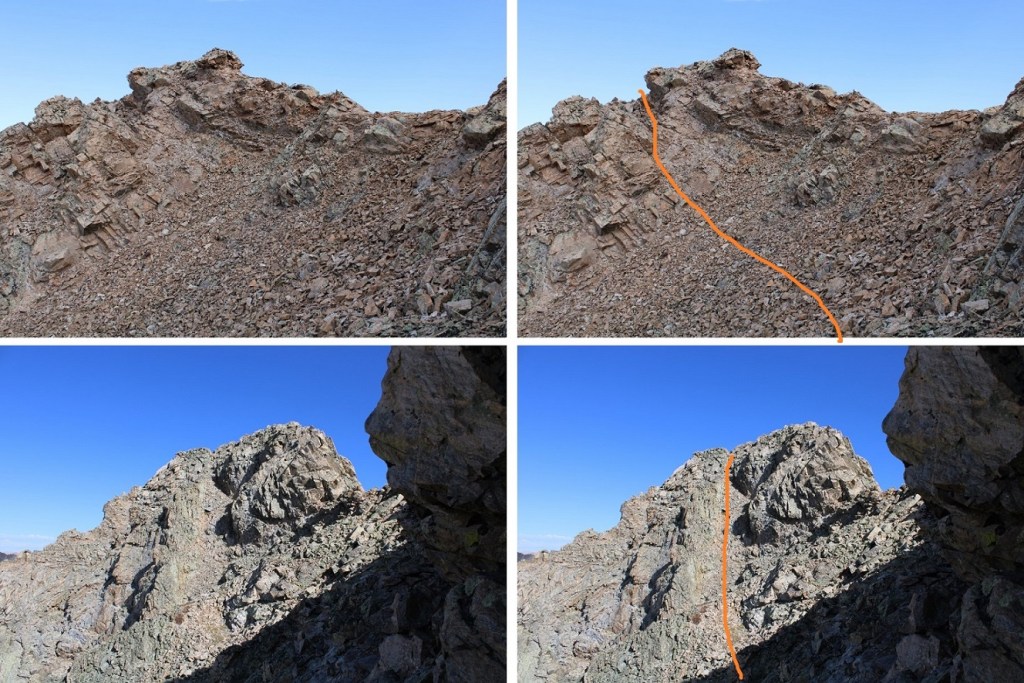
Once on the ridge it was class 3 to the summit

I summited PT 13220 at 10am
PT 13220:
Here’s looking back at the route from Pear to PT 13220. It was 1.5 miles from Pear to 13220.
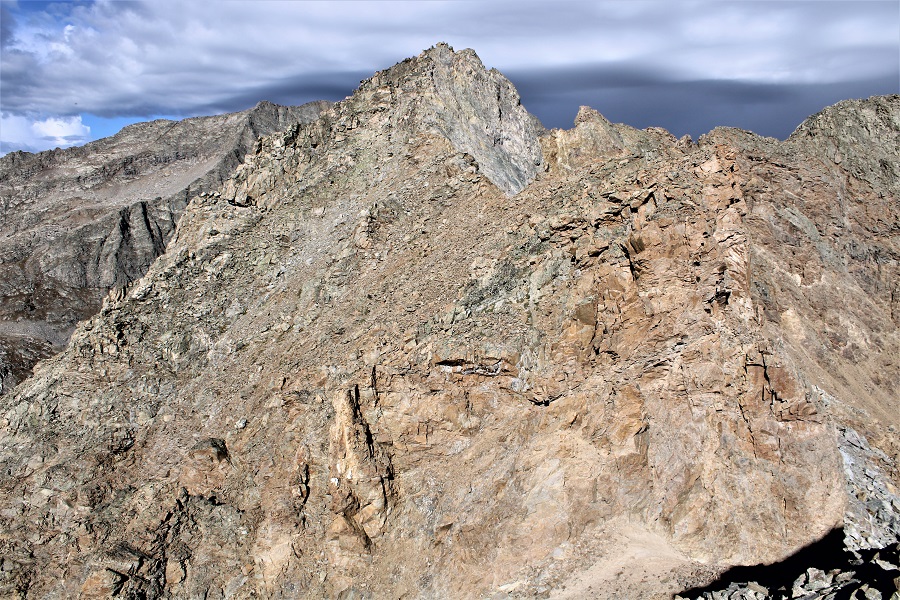
Next up, PT 13517 (more ridge work!)
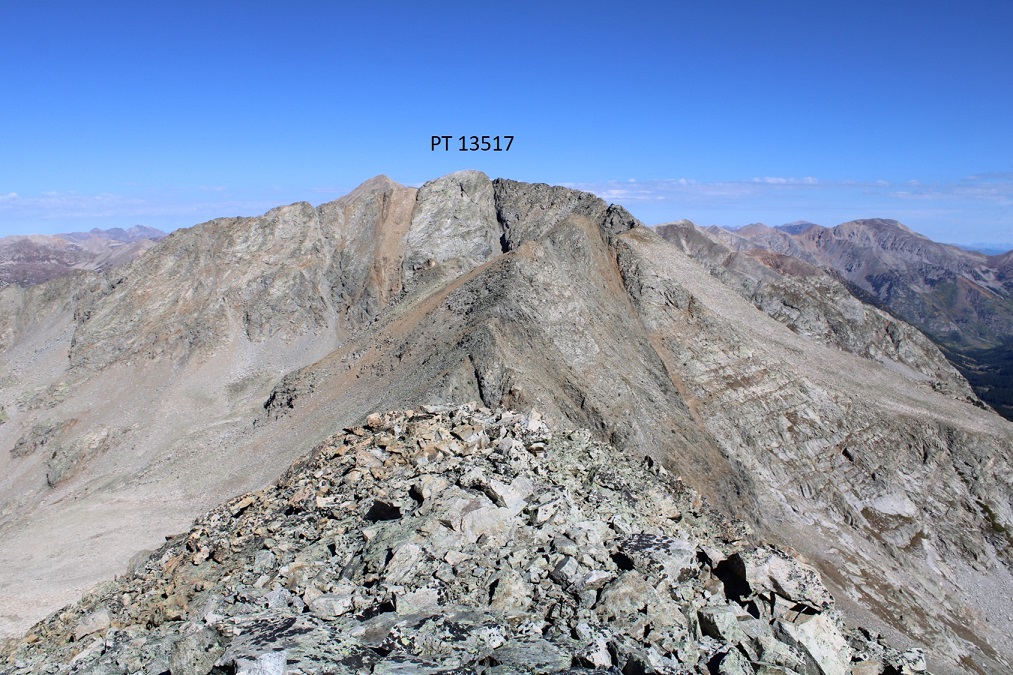
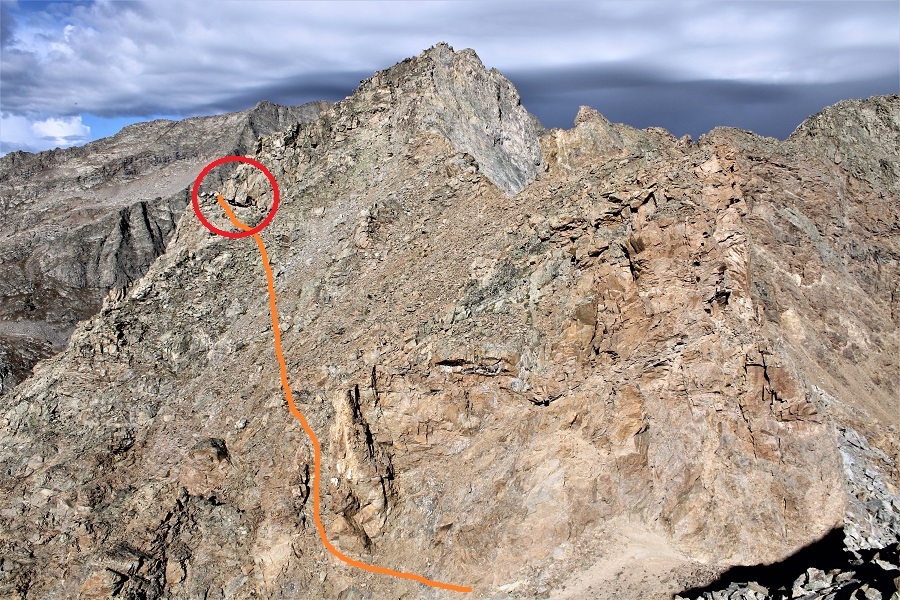
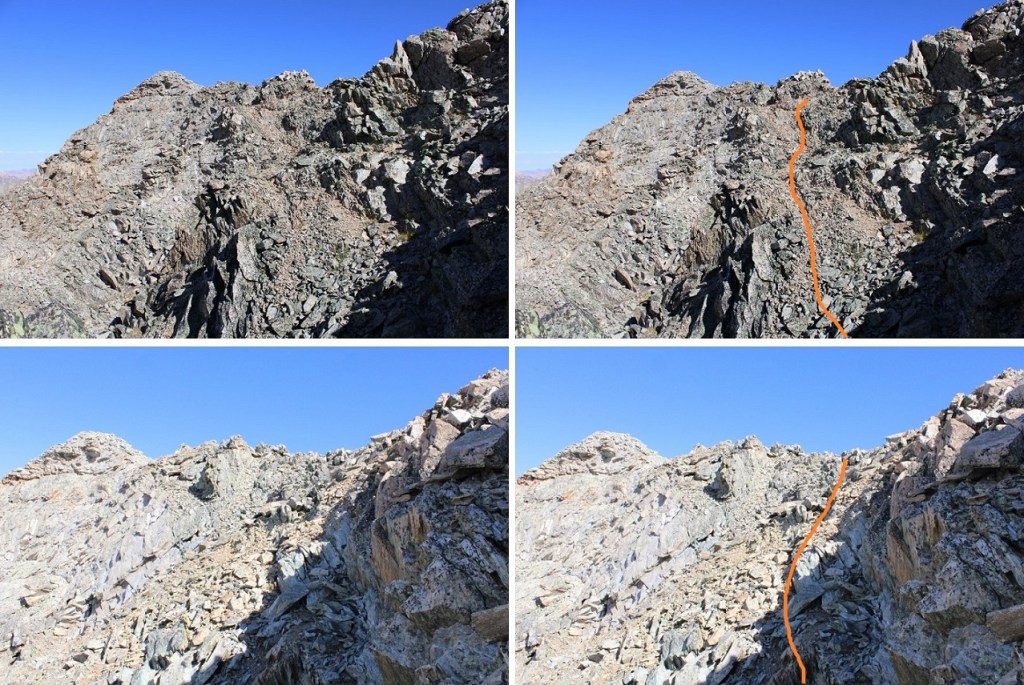
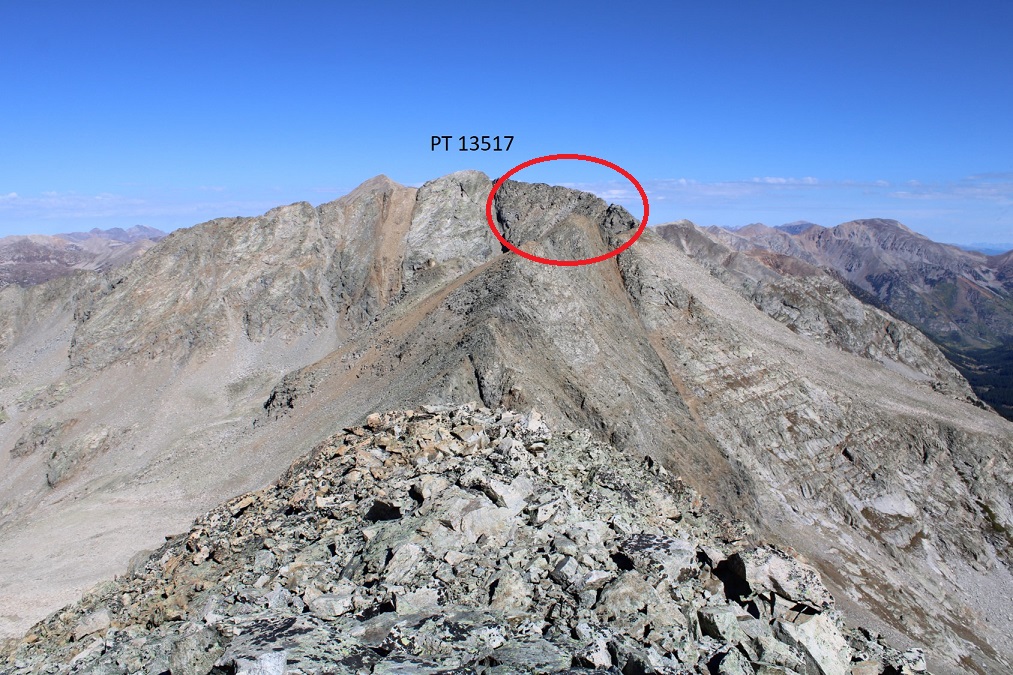
I followed the ridge the entire time. The ridge to the saddle was class 2. The difficult part is the ridge circled in red, which I felt was consistent class 3, with a bunch of class 4 moves thrown in.
The trek to the saddle was mostly on rocks, with a short ridge at the end (yes, you can stick to this ridge too)
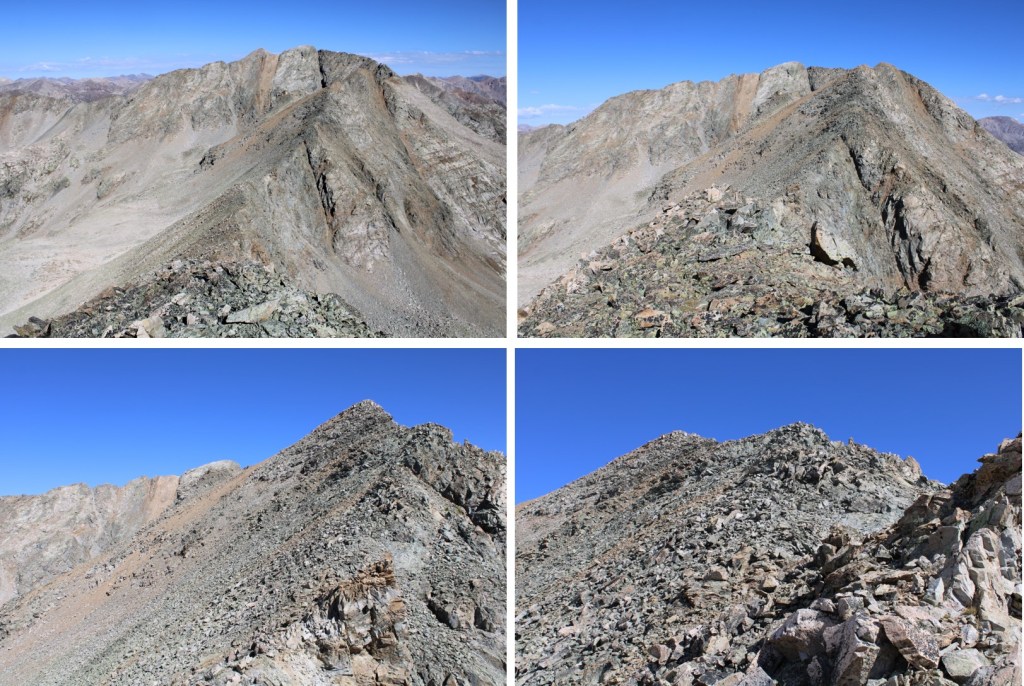
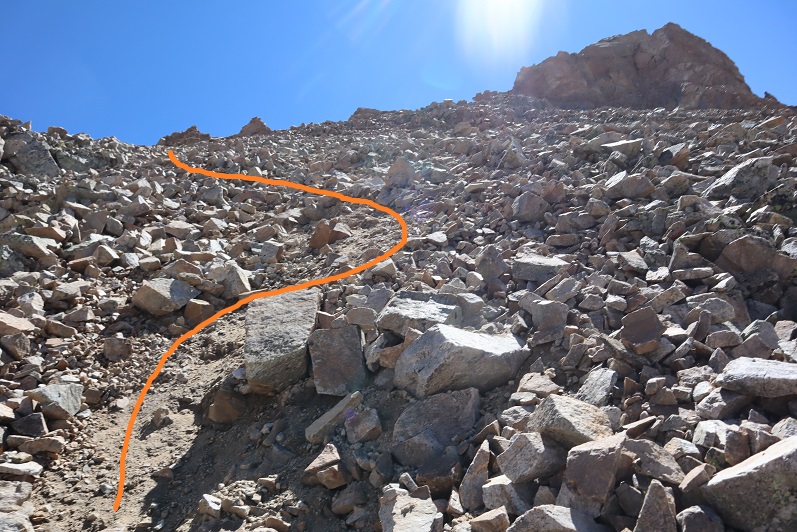
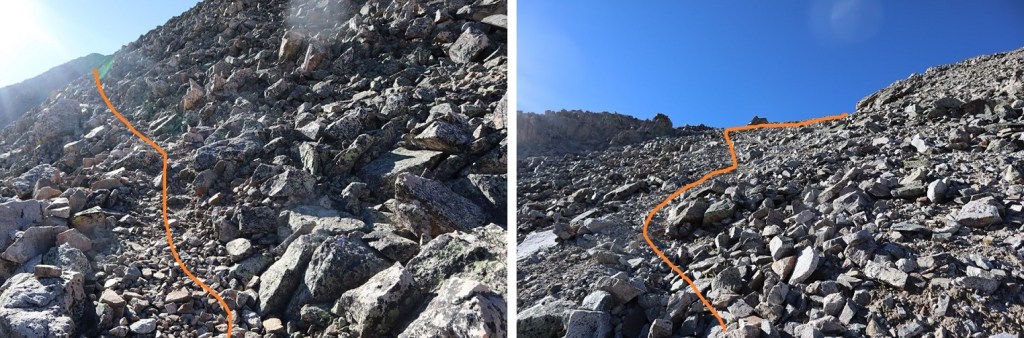
I entered the final ridge by going around to the east, then ascending the ridge by heading northeast.
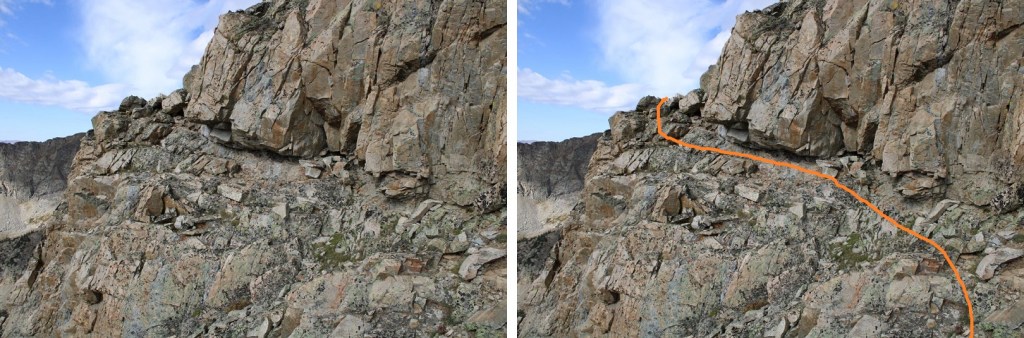
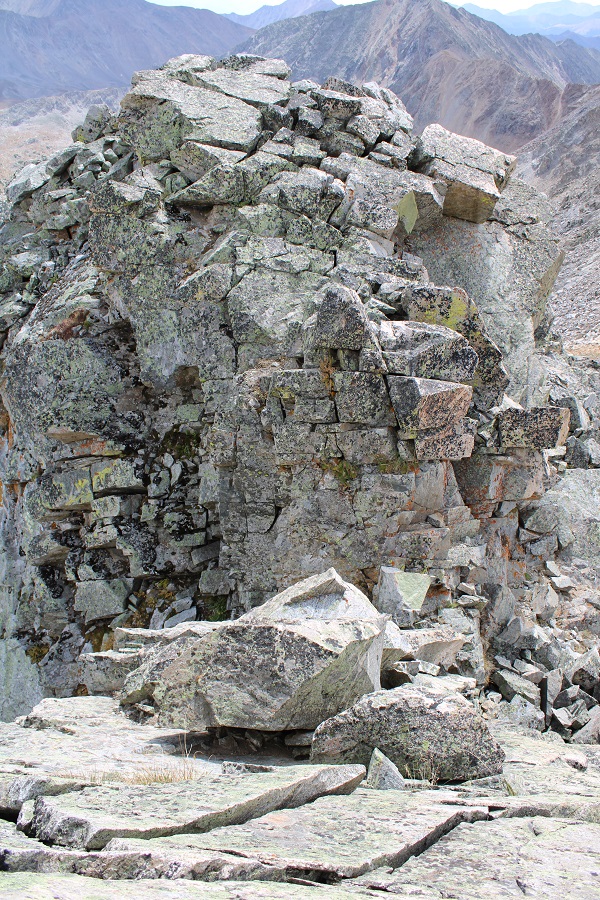
As I said before, this is a class 3 and 4 ridge. There are too many specific moves to illustrate here, as the climbing is consistent, so I’ll just show a few of the fun ones. While the rock looks solid, and mostly is, please be careful of the ones that look solid but roll. If you can’t go straight up the rocks, look for game trails to the left. Nothing should feel over class 4. To put it in perspective, I consider difficult class 4 anytime I need to remove my DSLR camera from around my neck, or put my trekking pole away to climb. I didn’t have to do either of those things on this ridge, but it was the most difficult climbing of the day.

The last little dip before the final push to the summit was class 2

I summited PT 13517 at 11:15am

PT 13517:
PT 13517 was a little over a mile away from PT 13220. Here’s looking back at PT 13220 and Pear Peak
I turned and retraced my steps back to the saddle.

Here’s the other side of that initial class 4 move
Back at the saddle, I headed east, and took the gully to the left down
The gully had scree, tundra, and bounders. I was easily able to find a way down this gully, but it looked challenging to find a good way to go up. I was glad I chose to do Pear first.
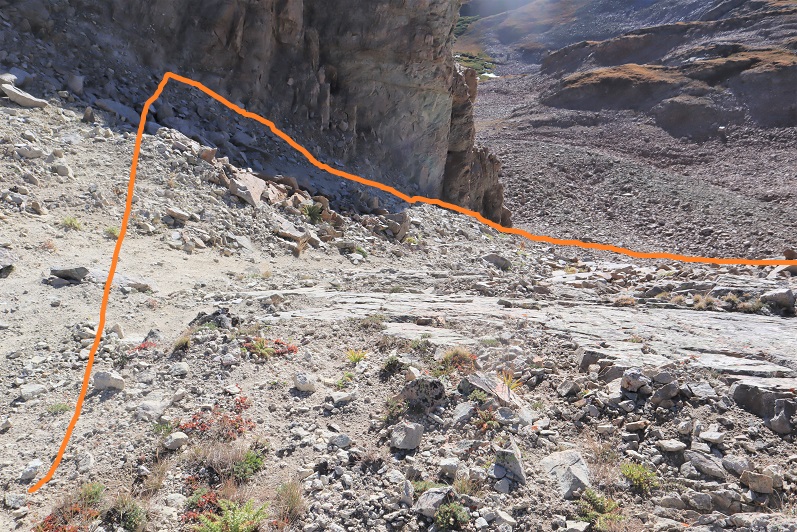
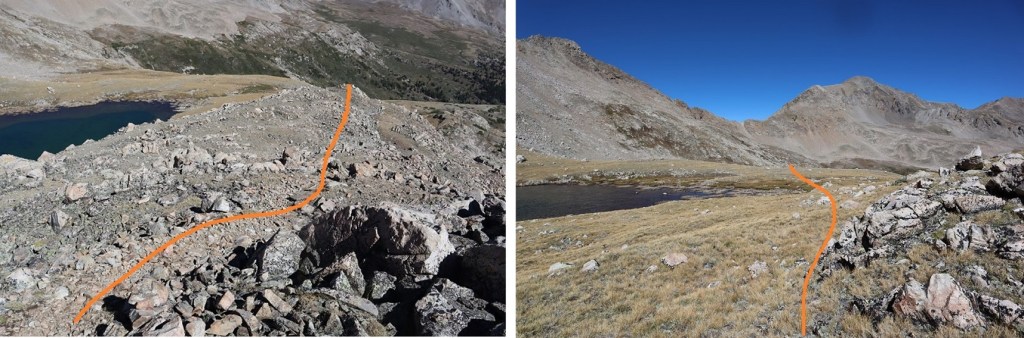
Here’s my overall route down the gully, across the small basin (I stayed high here) and back down to the trail. I followed a waterfall northeast, keeping the waterfall to my left to exit so I wouldn’t need to cross the water. This brought me to willows and the trail I’d used to hike in.
The hike out was uneventful, except it rained. I know it looks like it was a beautiful day, but in reality, just before PT 13220 it was snowing, and it rained/hailed/graupeled a bit on my way down. There were also people fishing at Clohsey Lake who had a few dogs. I was about 100 yards from them, but their dog wouldn’t stop barking at me. I’m sure that made for wonderful fishing.
I made it back to my truck at 1:45pm, making this a 11.89 mile hike/scramble with 3995’ of elevation gain in 8 hours, 15 minutes. And now, for the fun drive out!
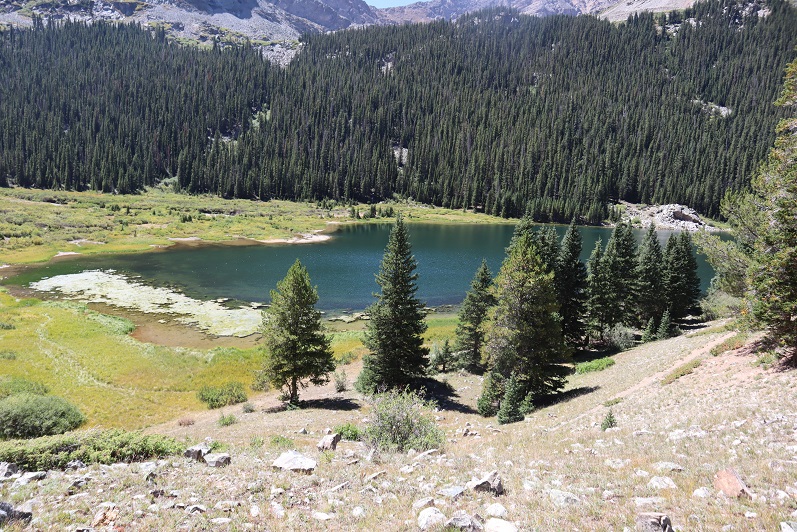
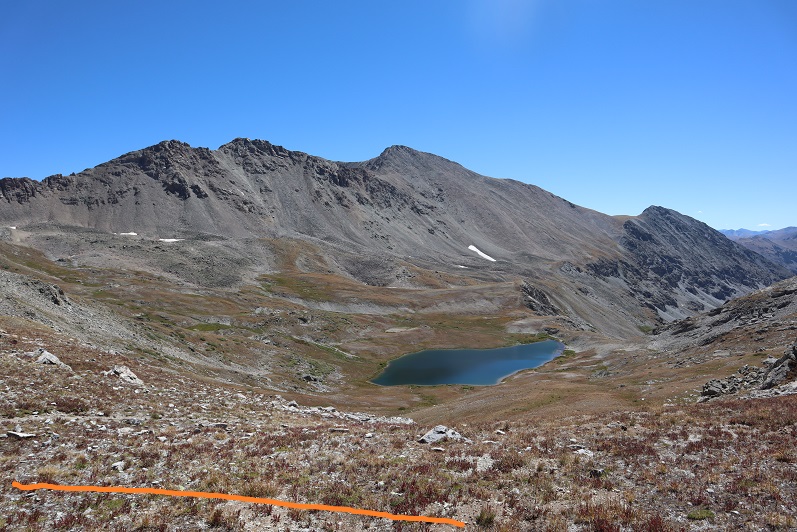
Here’s a view of Clohsey Lake and the basin from Pear Peak