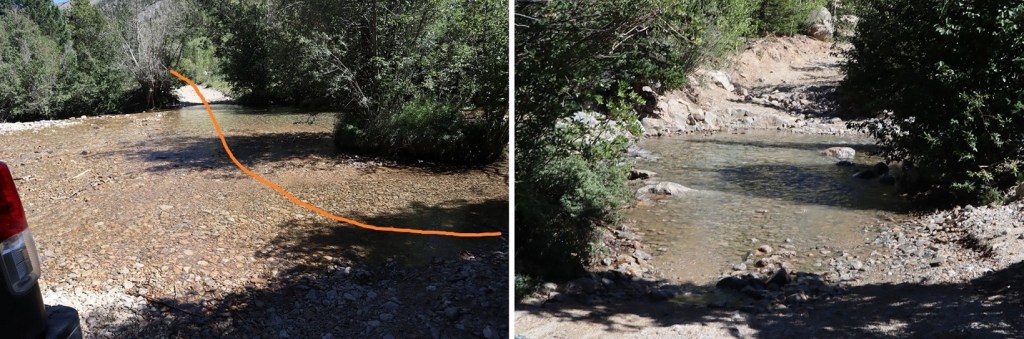
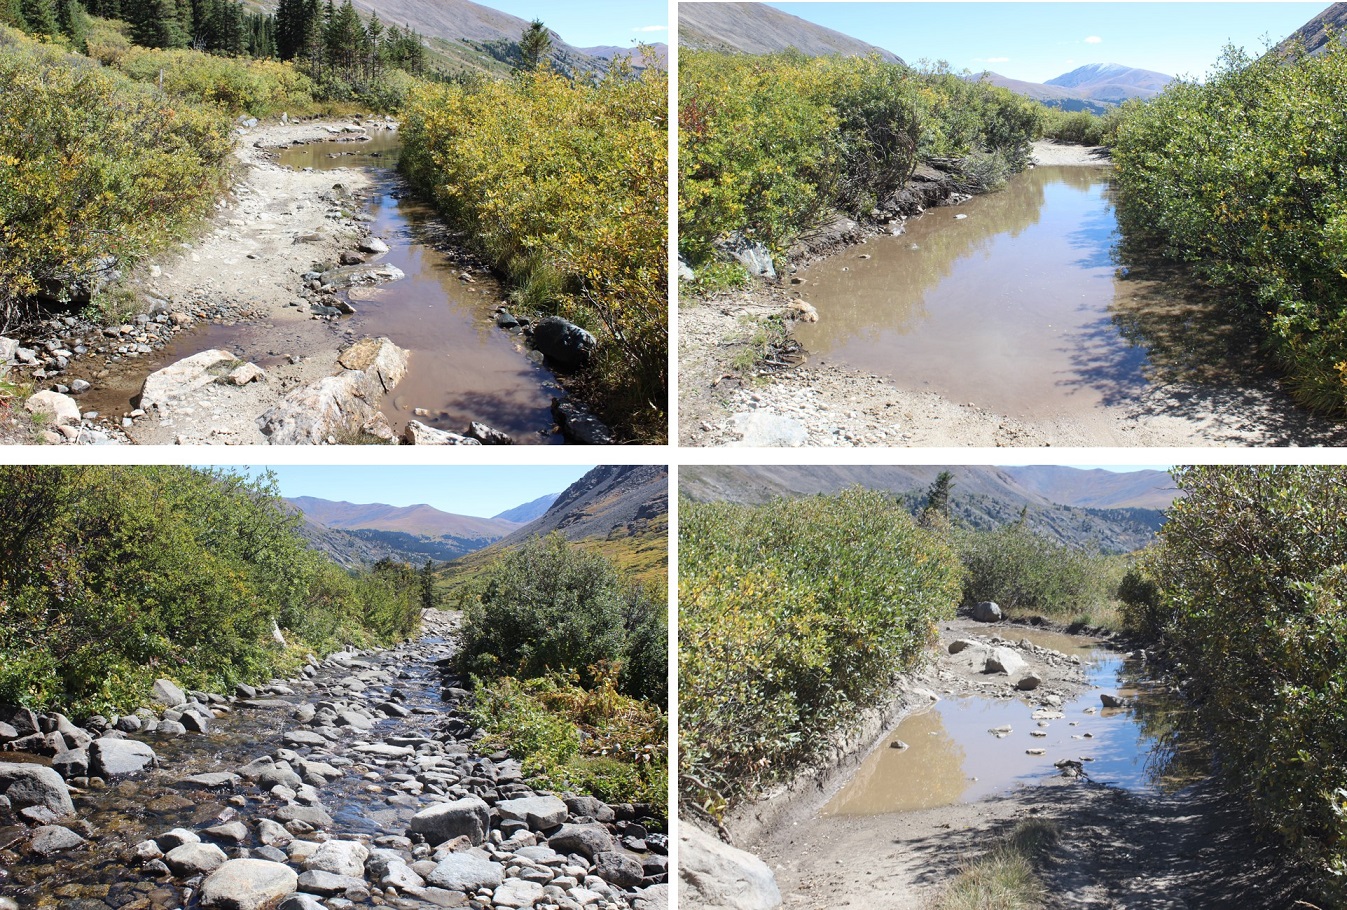
The creek crossings to get to the Rockdale Trailhead were easier than I’d anticipated. 6-8 inches of water weren’t difficult to pass (it’s now September in a lower snow year). In the dark the willows and water made navigation fun. Colorado pinstriping indeed.
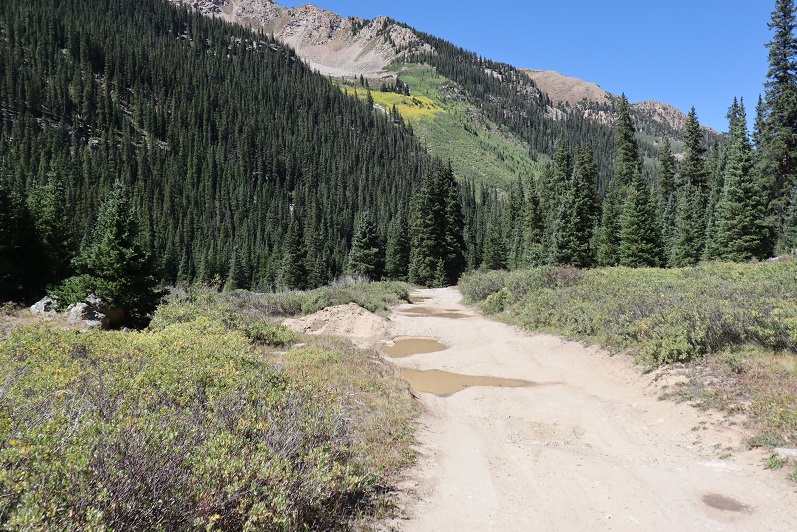
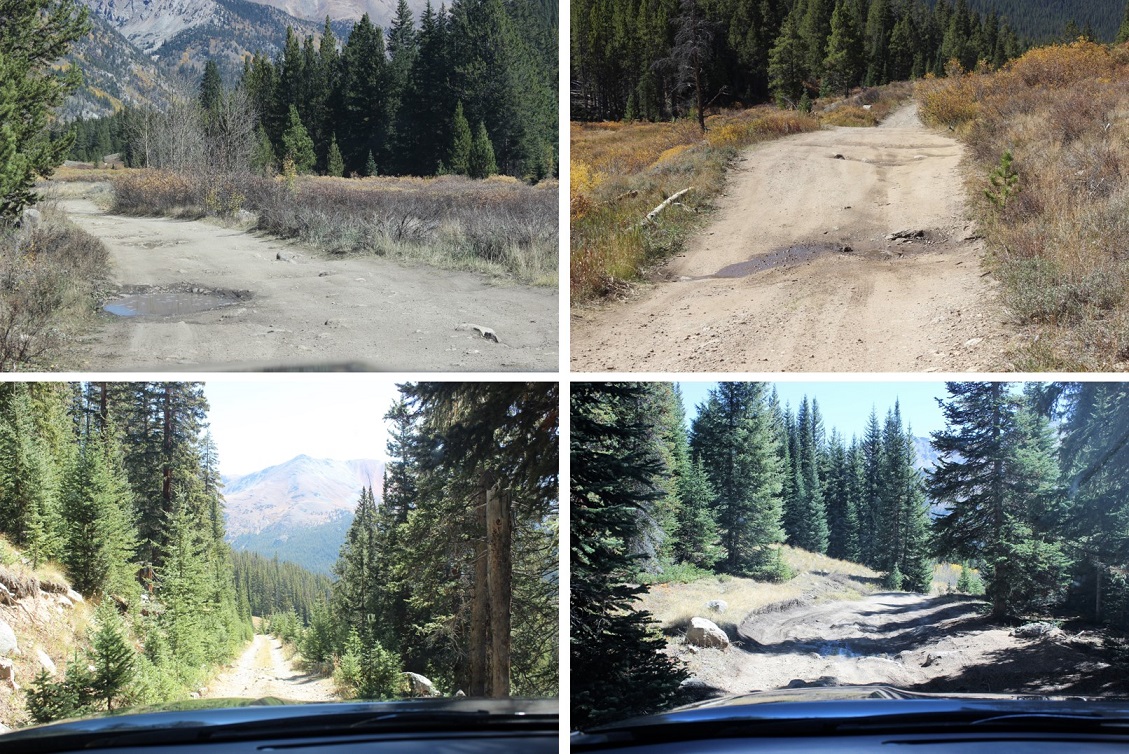
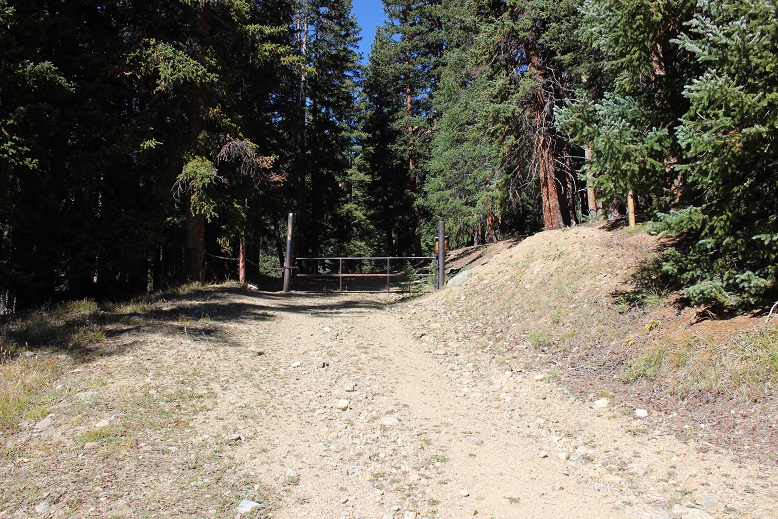
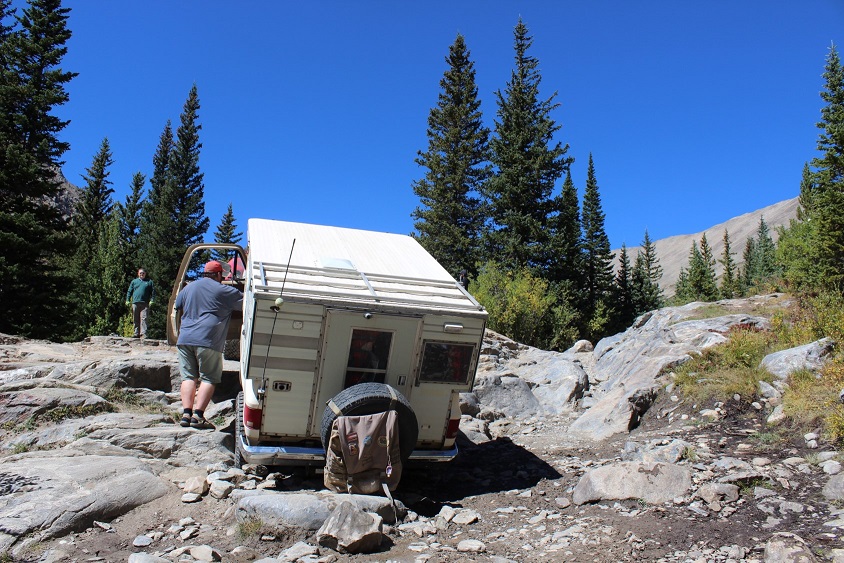
There were only two stream crossings, just at the beginning of the 4WD road, but tons of short ups and downs and puddles. I drove slowly and I’m pretty good at navigation, but still managed to hit the underside of my truck a couple of times (I have a stock Tundra). This picture is from one of the easier areas of the drive. Most of the difficult areas have tree cover, making pictures difficult.
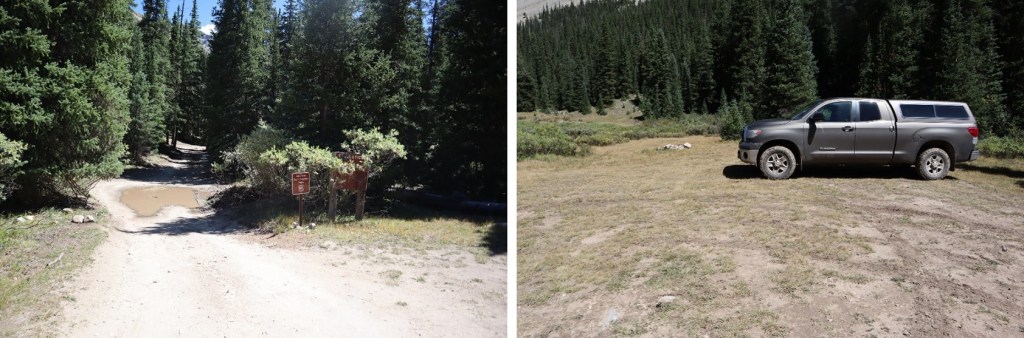
At 10880’ there’s a sign that says the road ends (even though it looks like it goes further). There are several large camping sites here. I parked my truck and got out my gear
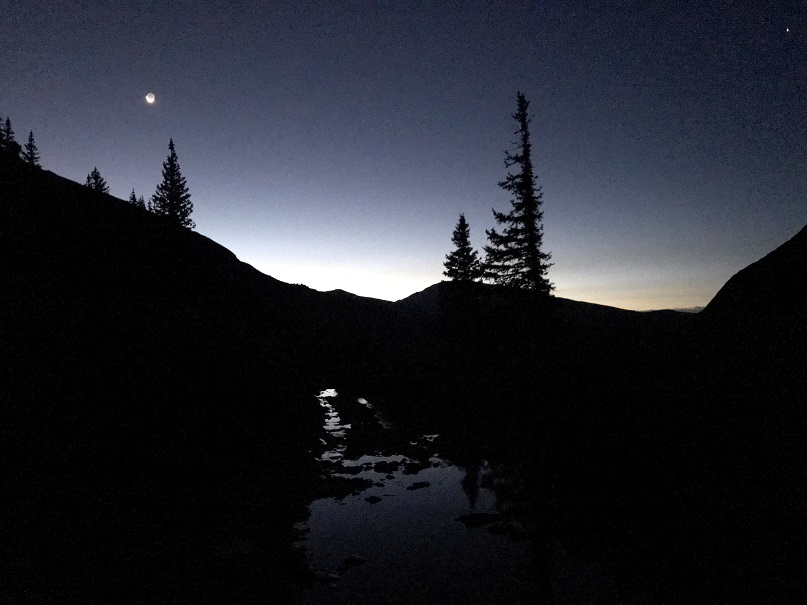
I was on the trail at 5am, following the 4WD dirt road south.
After hiking for .3 of a mile I came to the ‘old’ parking area, now covered by an avalanche. There’s a nice trail through this if you stick to the left.
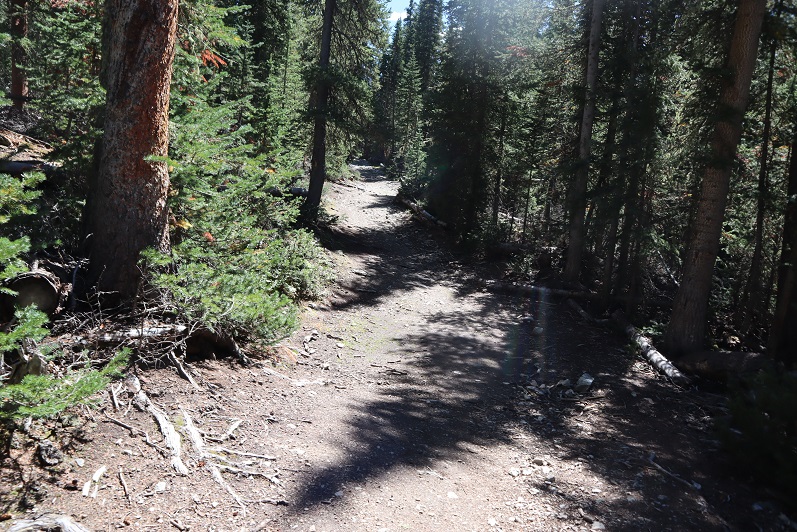
After the avalanche area the 4WD road picks up again
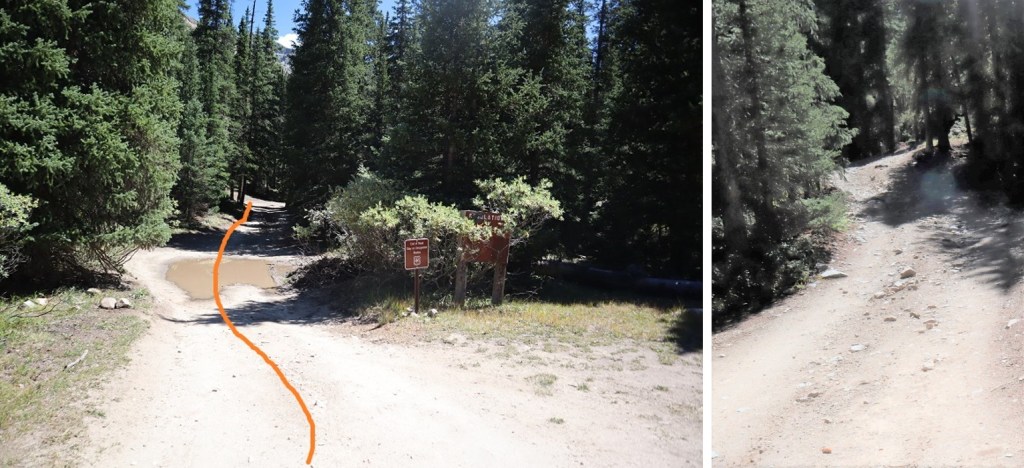
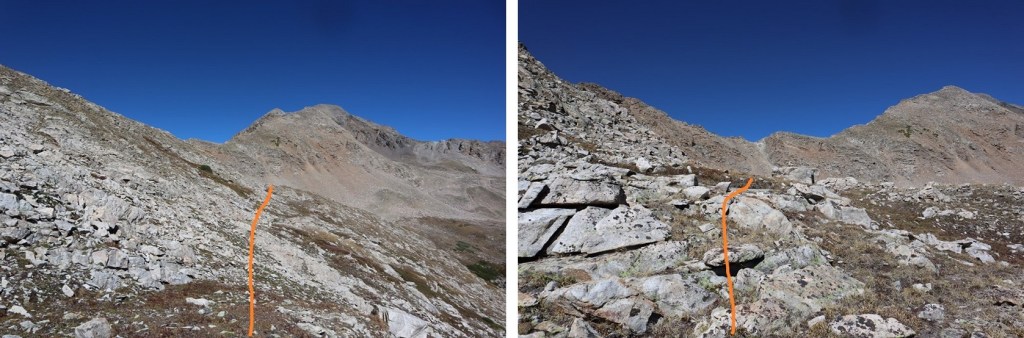
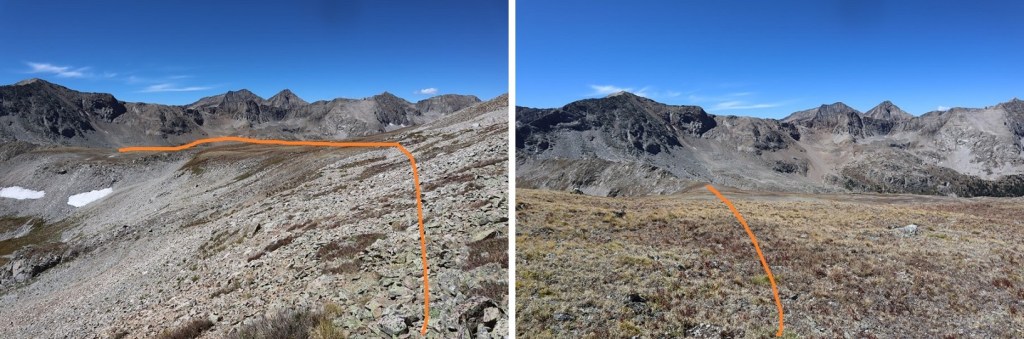
After hiking for .75 miles total I came to the junction of the trail and the road. Both ways go around the lake. I chose to go up and over the hill
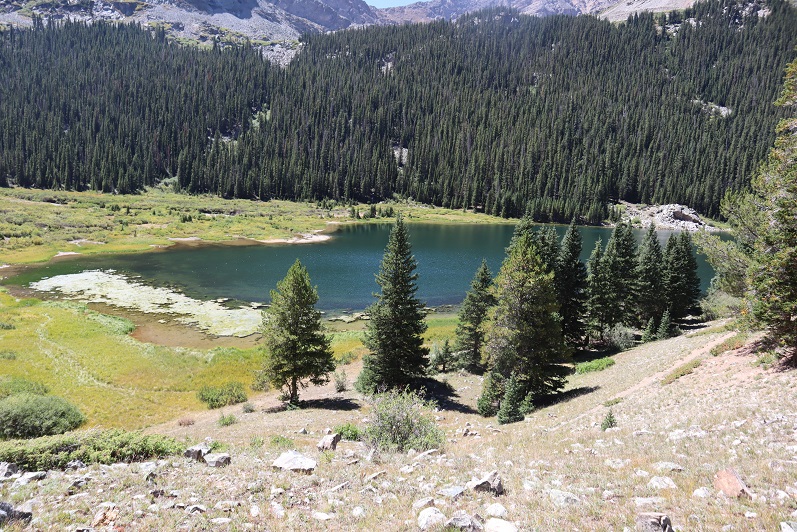
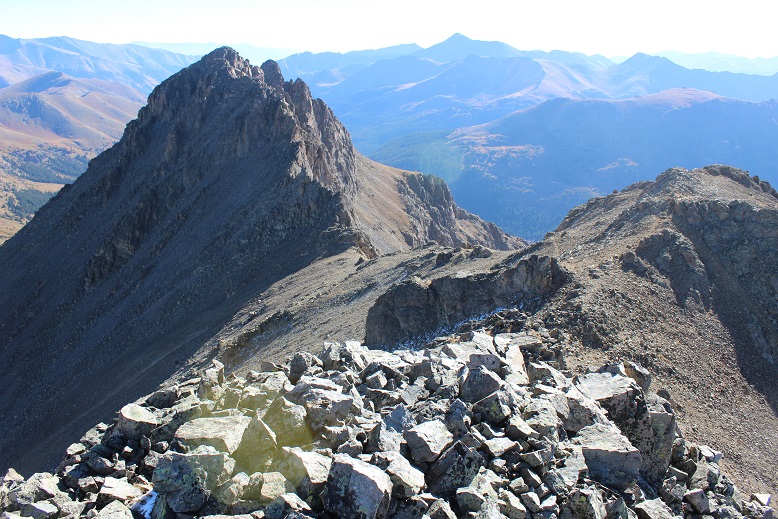
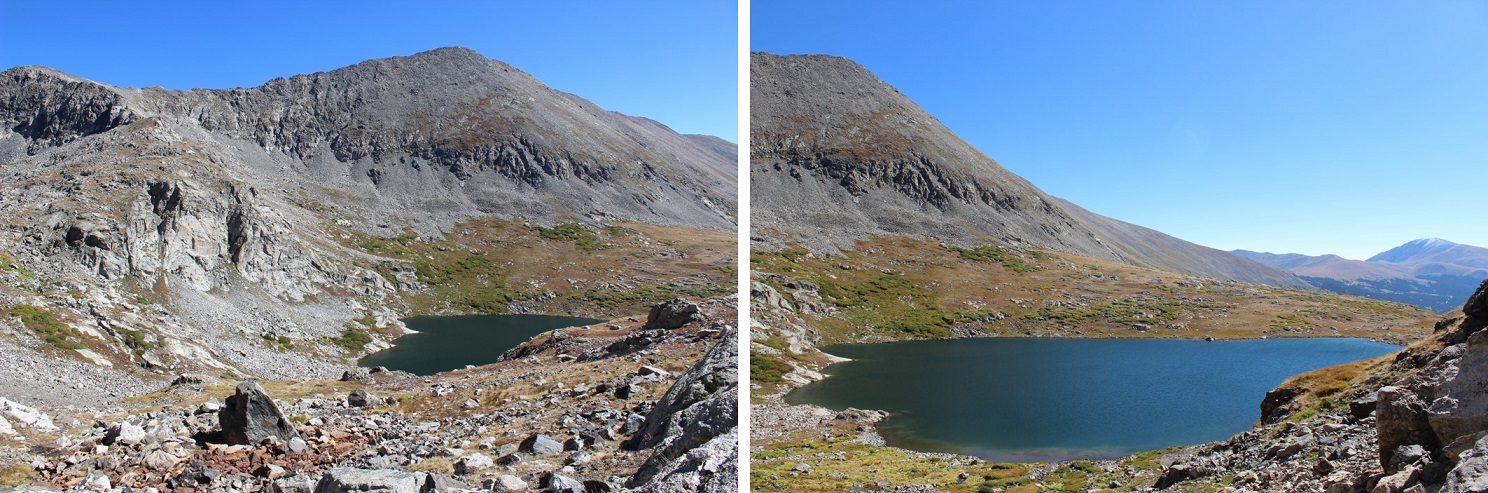
Giving me a good look at Cholsey Lake
And then I followed the trail back down the hill and into the basin.
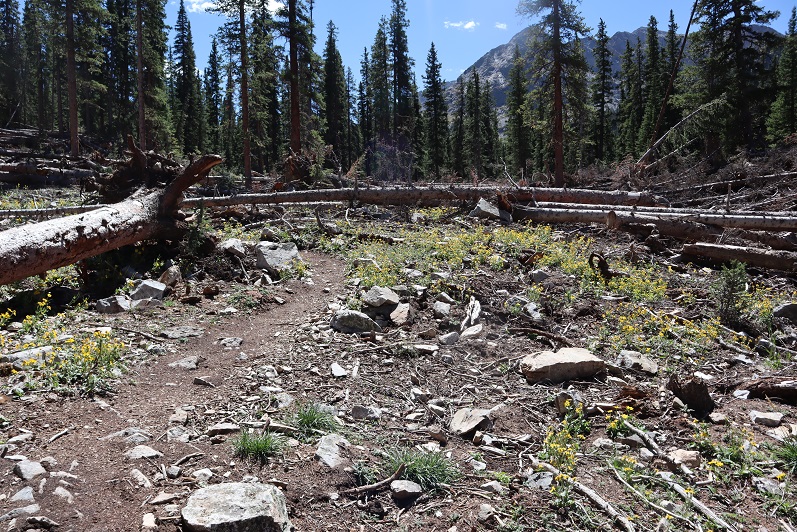
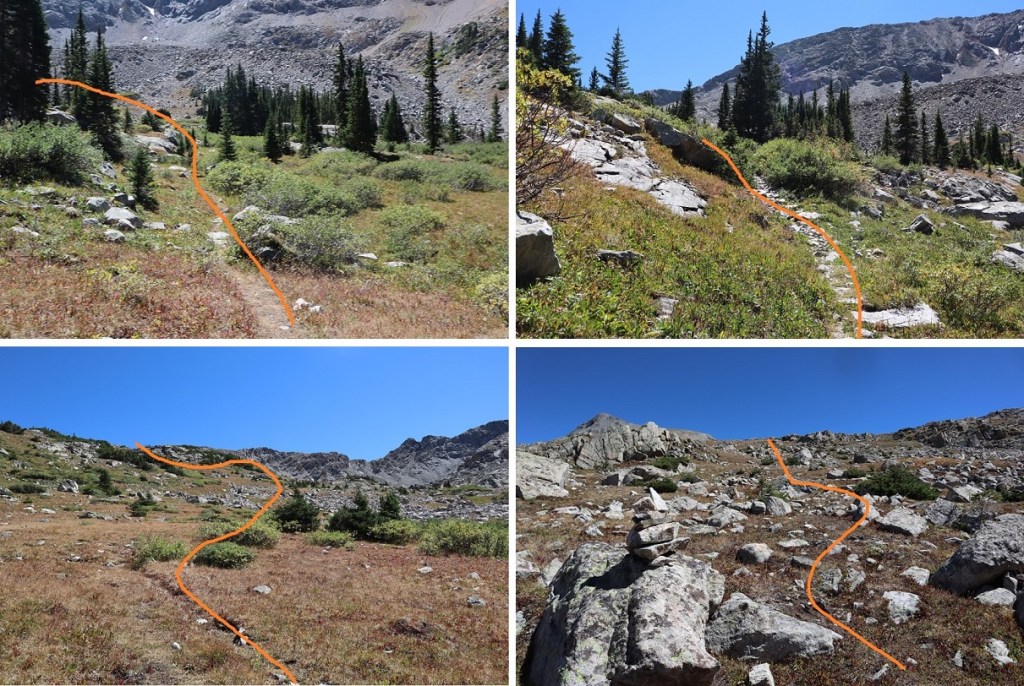
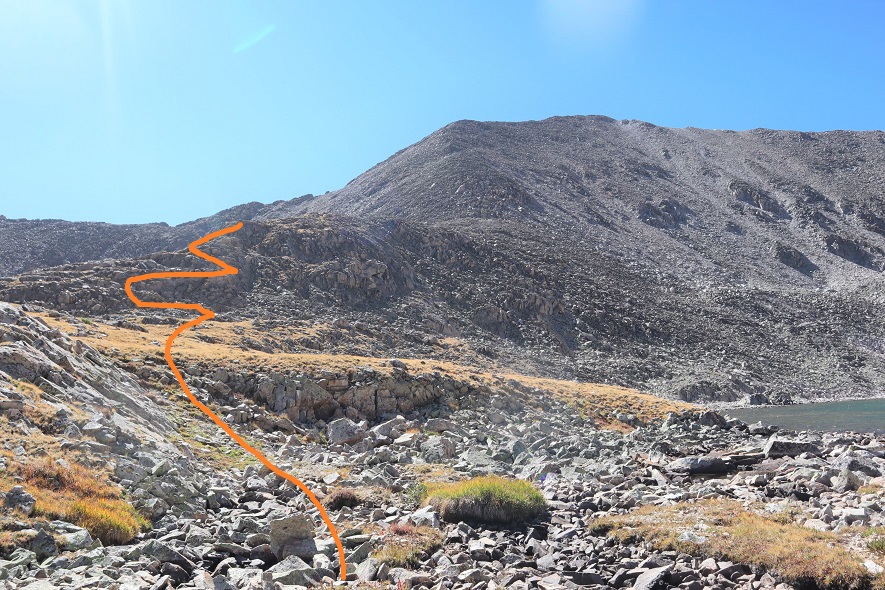
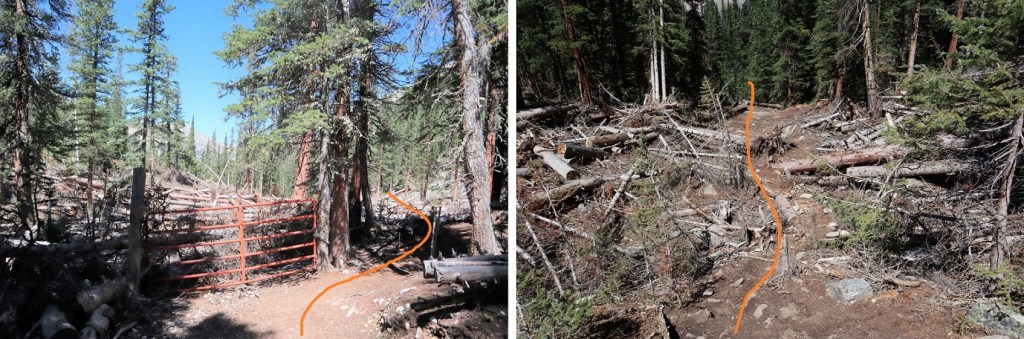
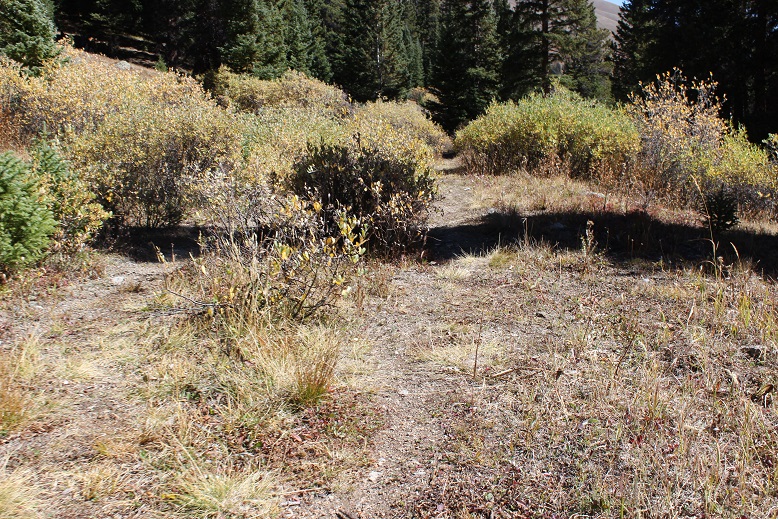
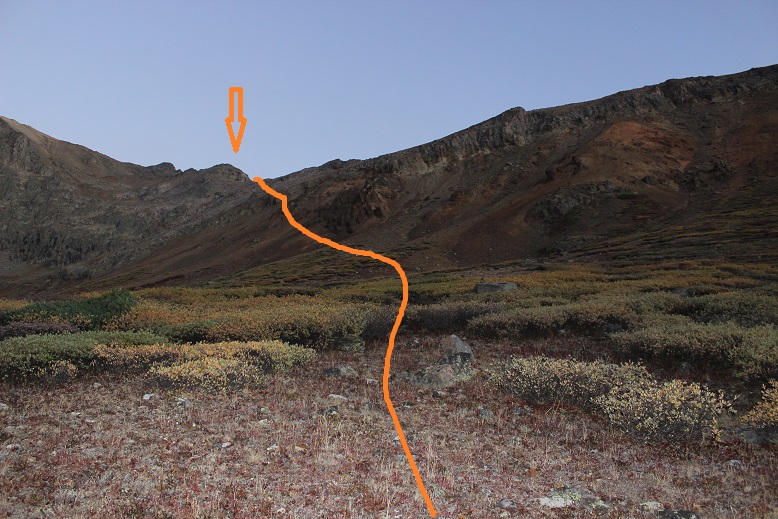
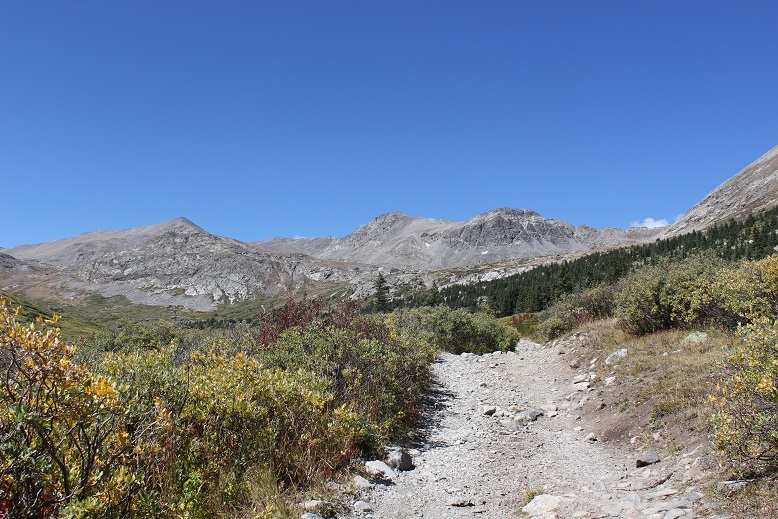
This is a class 1 trail that heads south through pine trees, willows, and some small creek crossings
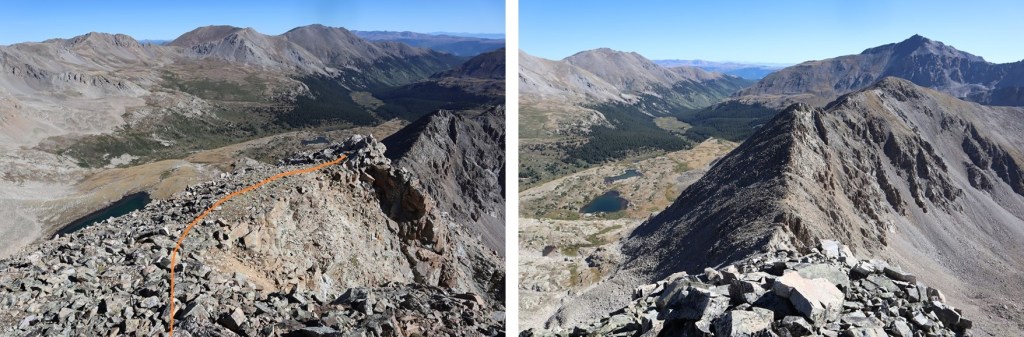
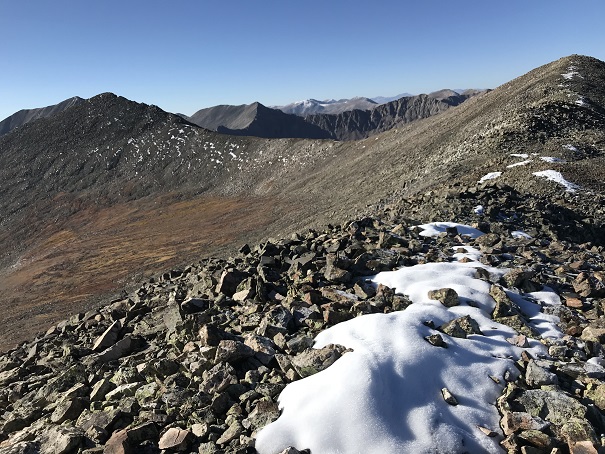
At around 3 miles of hiking the trail started turning left, curving southeast. Here the trail became faint, but there were plenty of well-constructed cairns to guide the way up to the pass at 12,500’. Off to my left I saw a huge bull elk, bounding away.
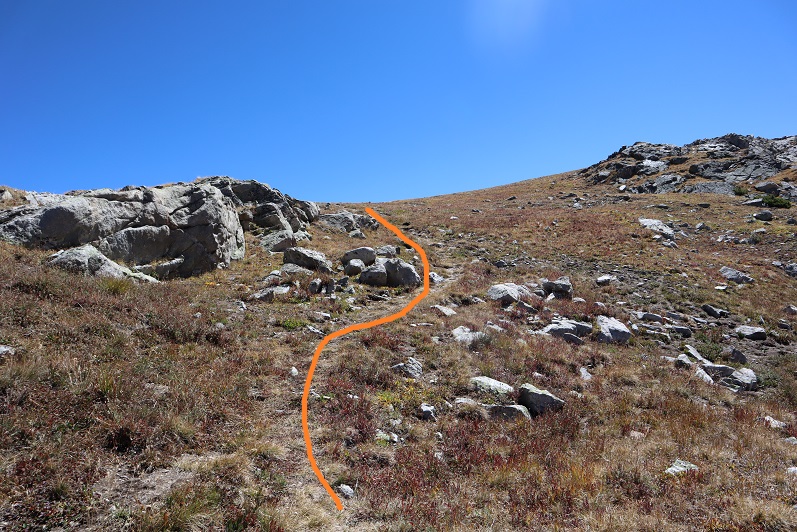
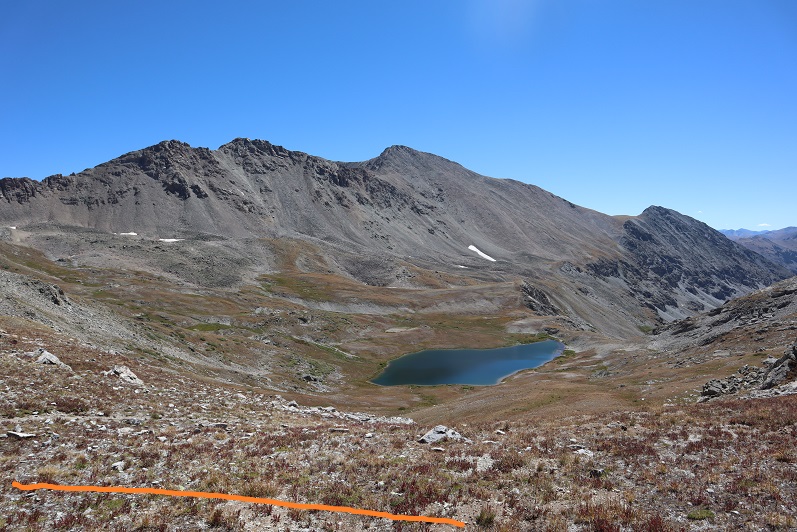
At this point the trail was now gone, but I had a great view of Pear Lake. Pear Lake wasn’t where I was headed however. I turned left and followed the ridge northeast, staying as high as possible.
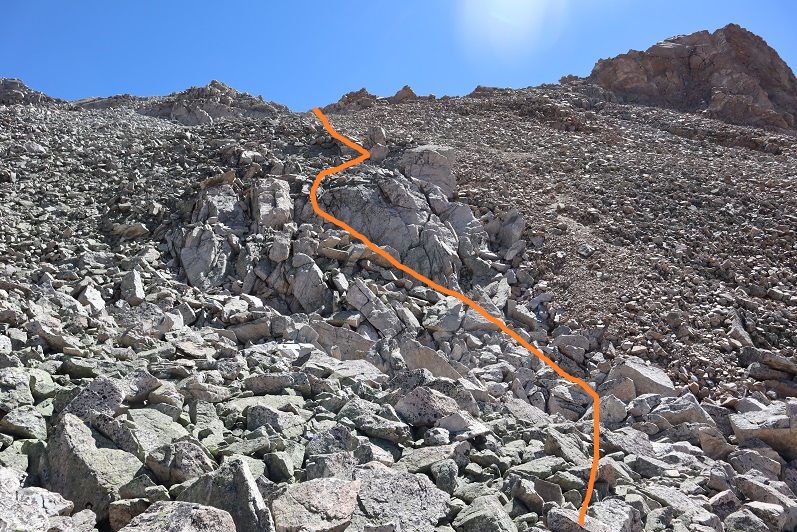
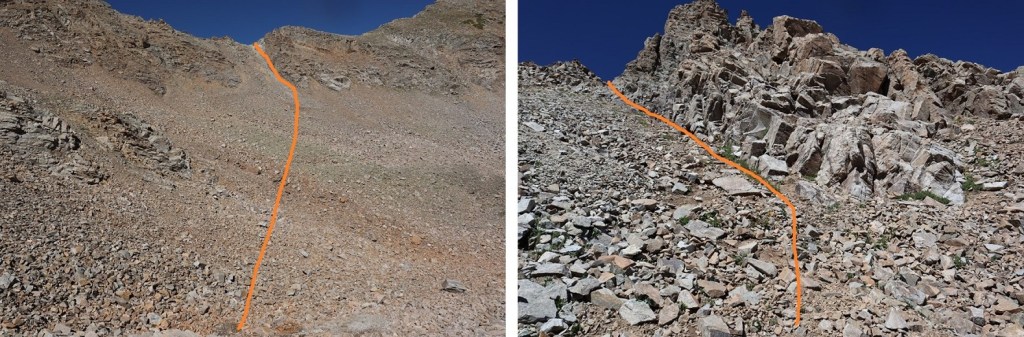
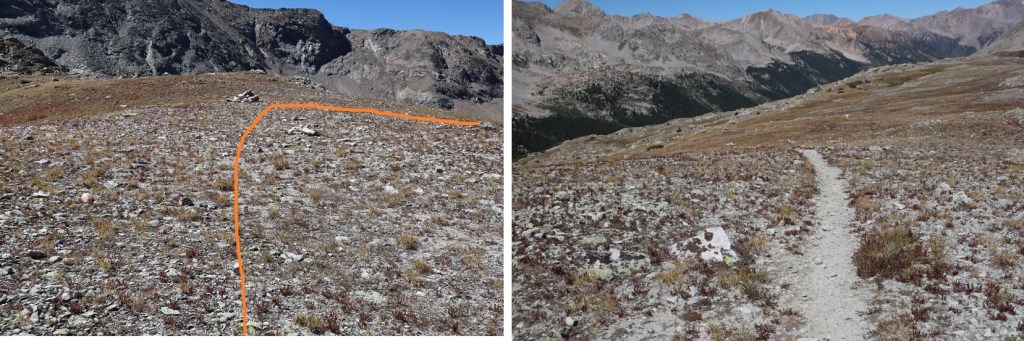
My goal was to aim for this gully. There are a lot of ups and downs here, so I tried to stay high.
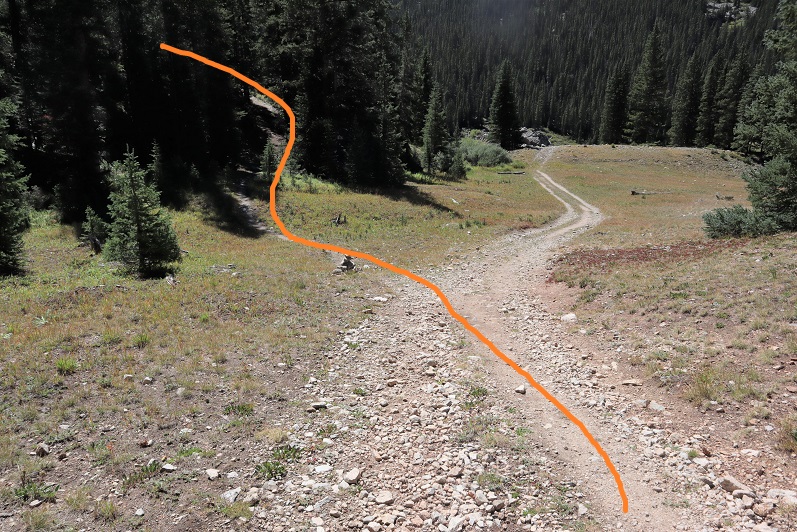
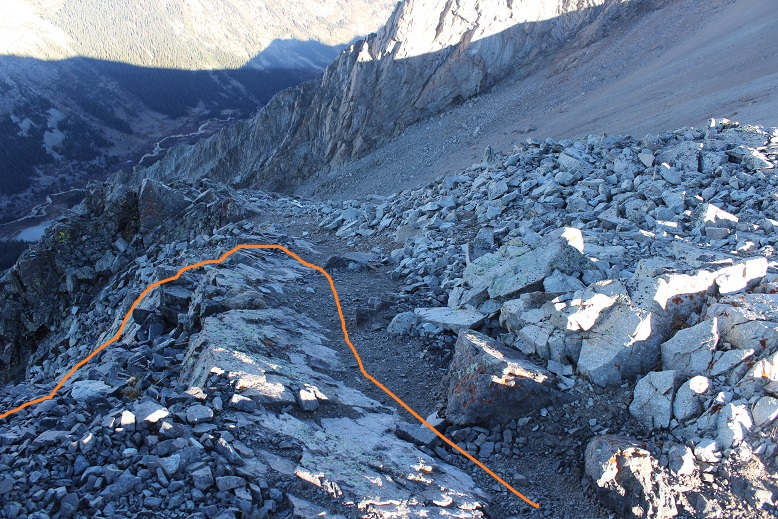
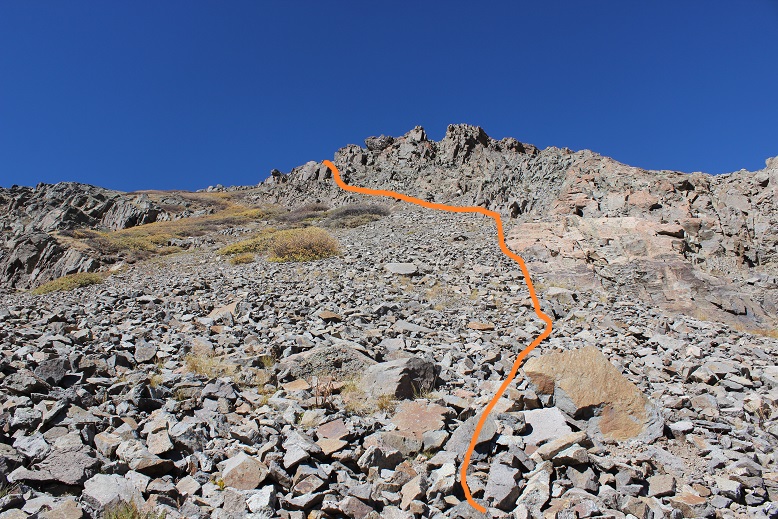
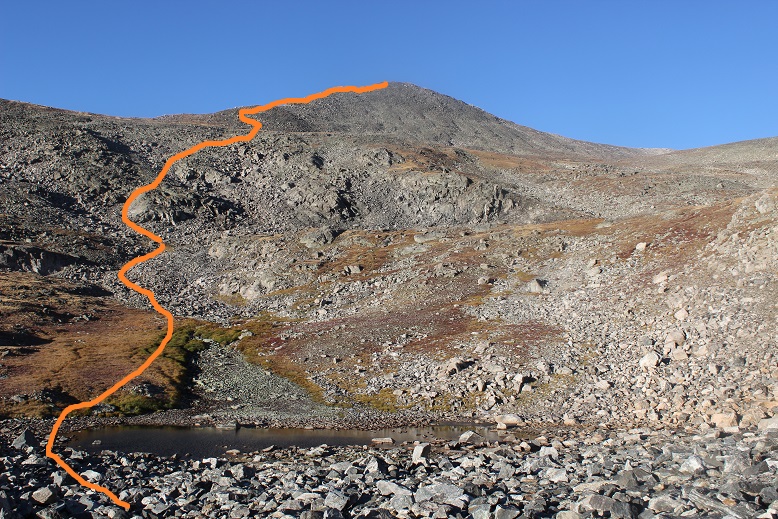
Here’s the path I took, step by step, to get to the gully
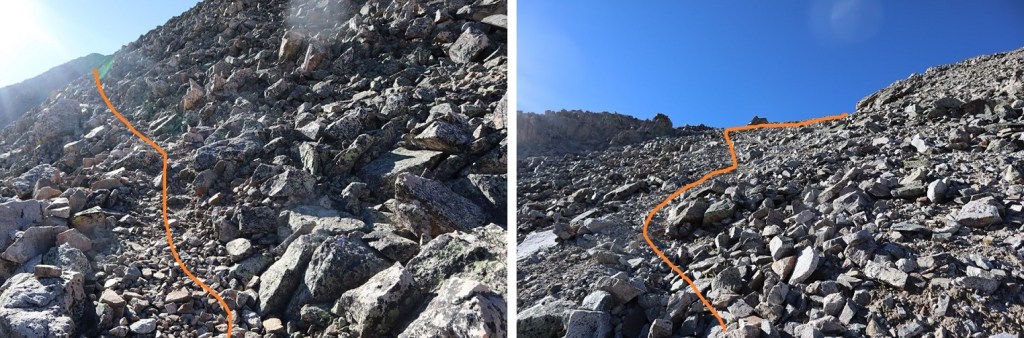
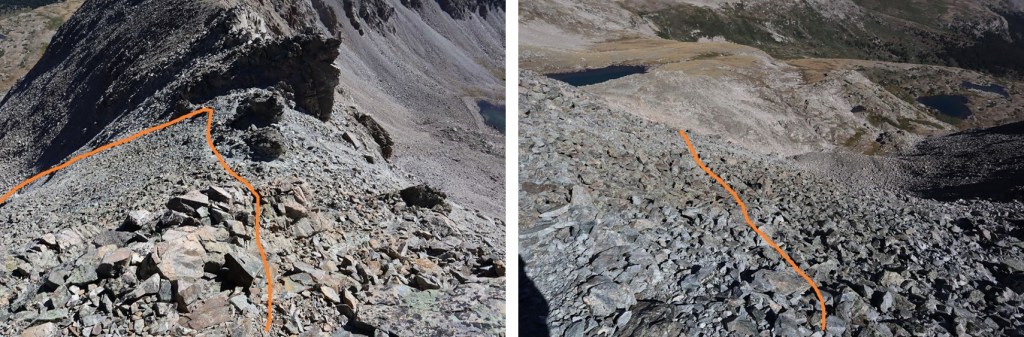
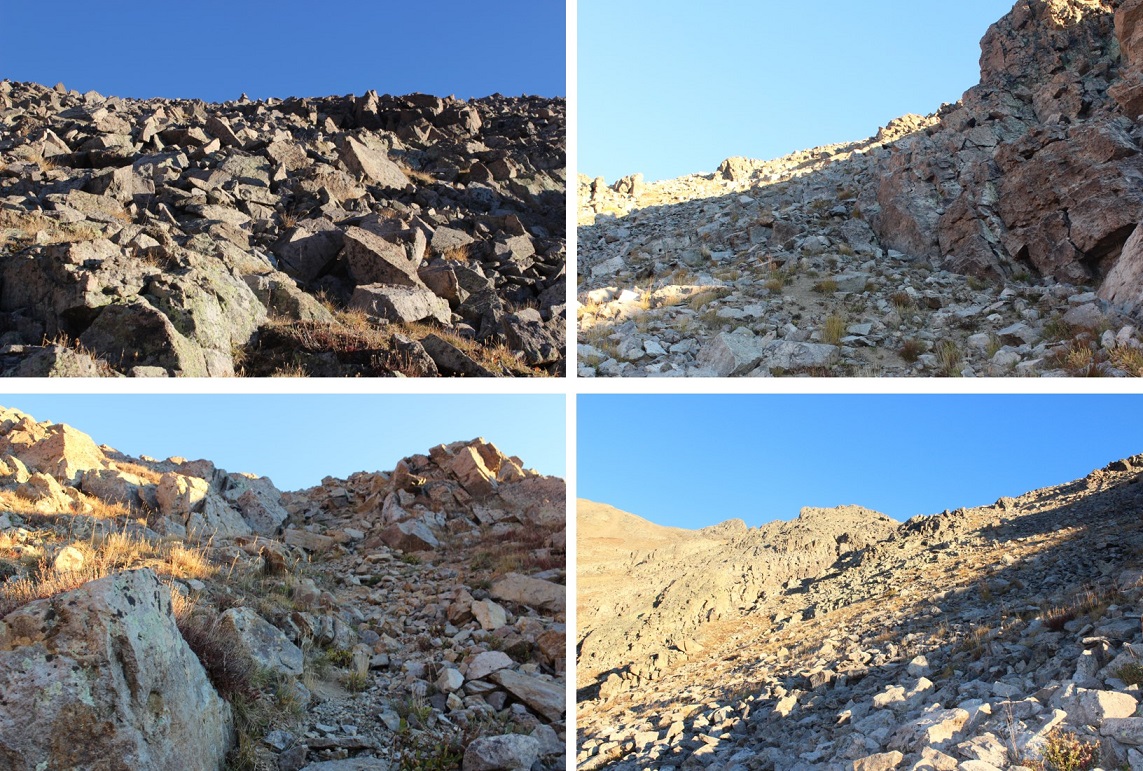
The safest way to approach this gully is to start out by going left around this boulder, and then straight up, following the scree trail
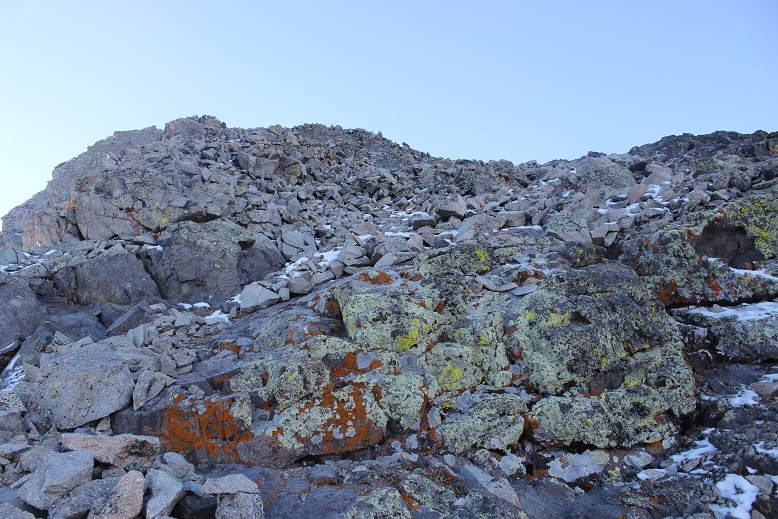
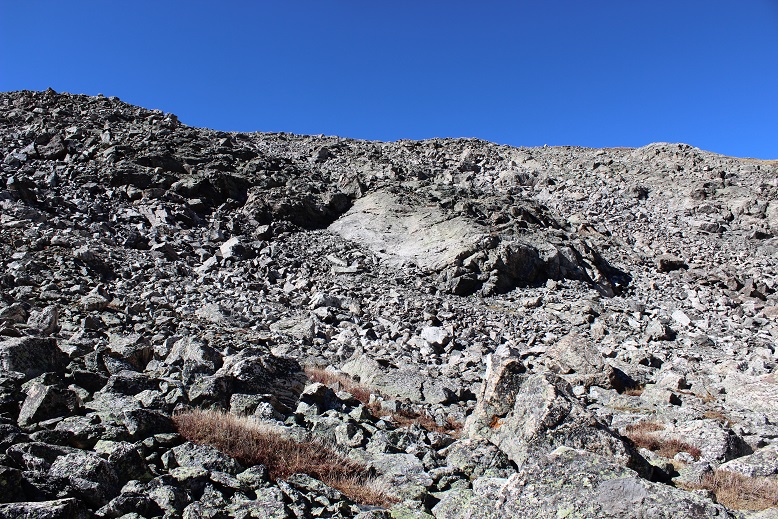
There are a lot of loose rocks here, the kind that cause rockslides, so watch your footing.
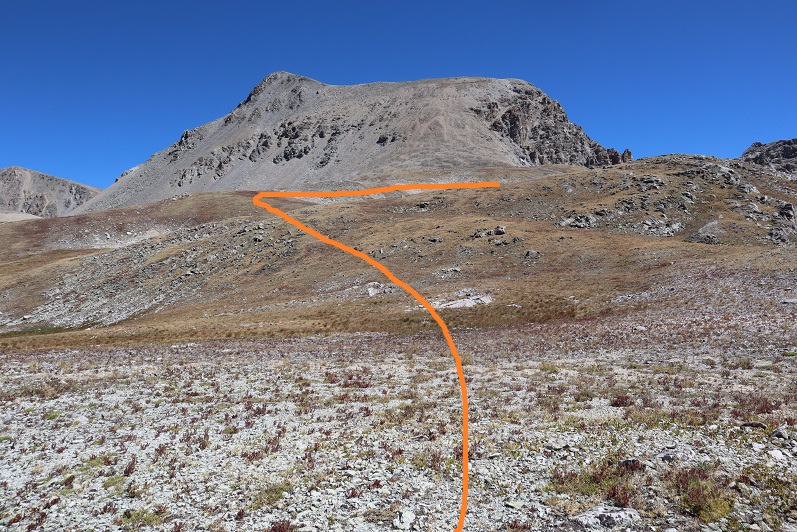
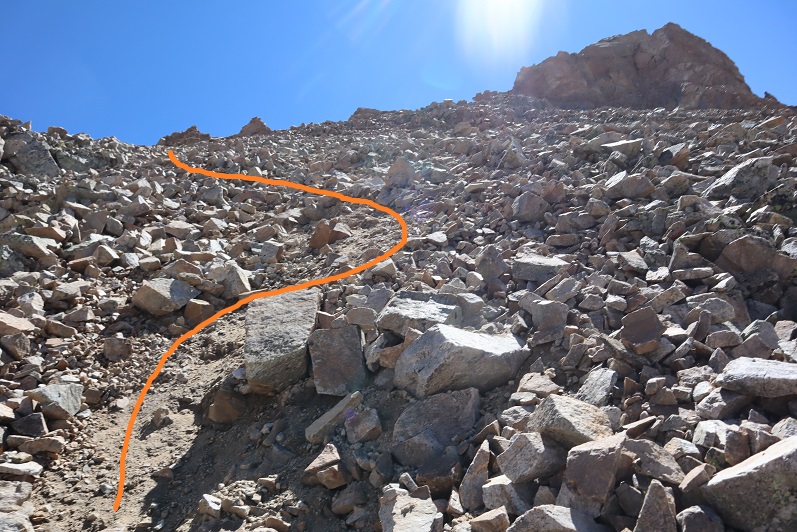
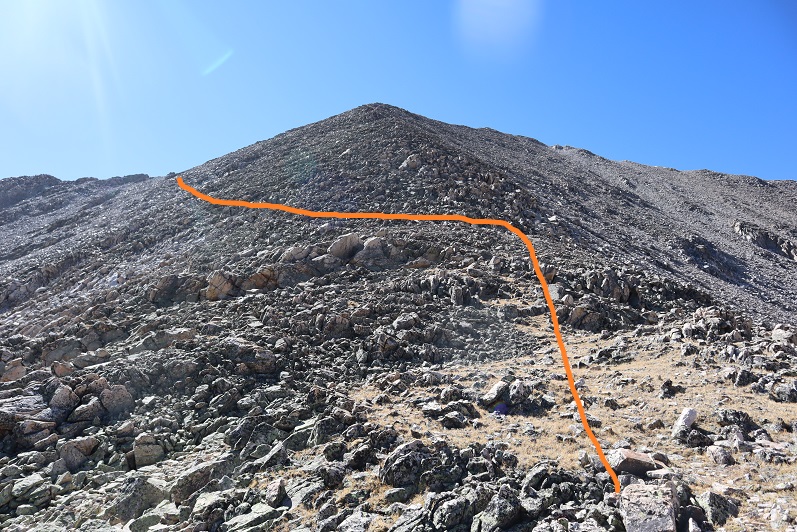
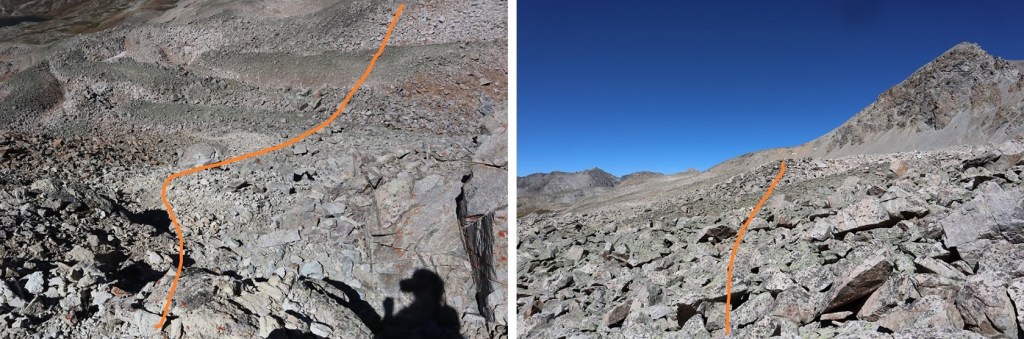
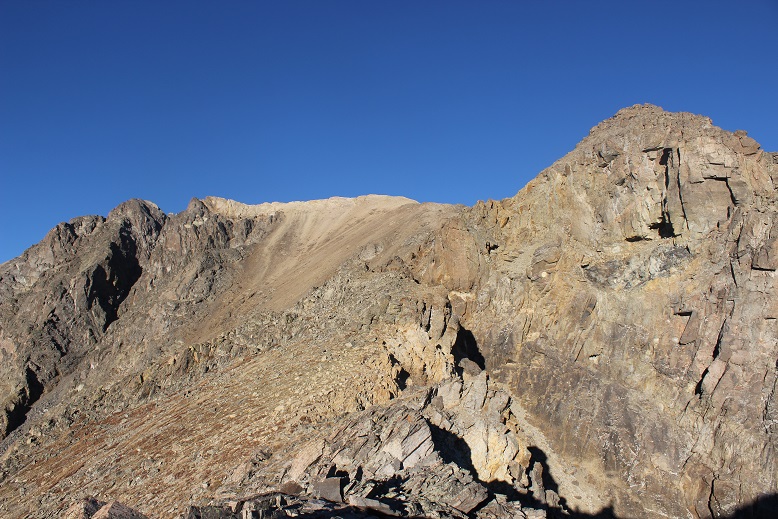
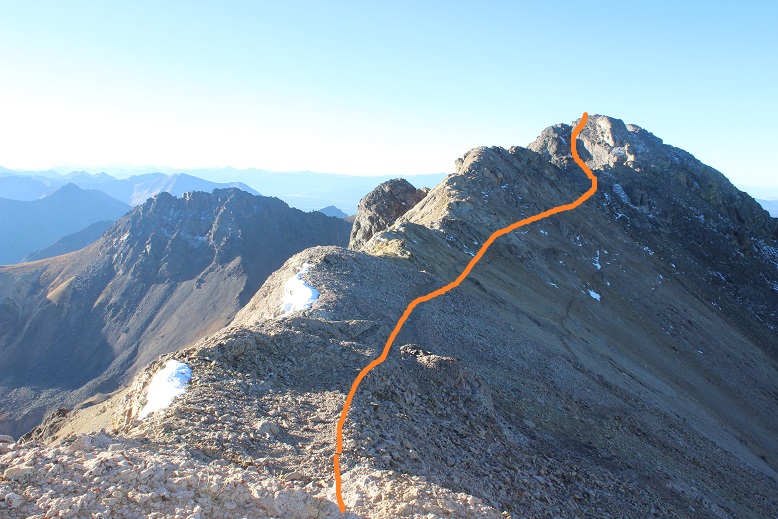
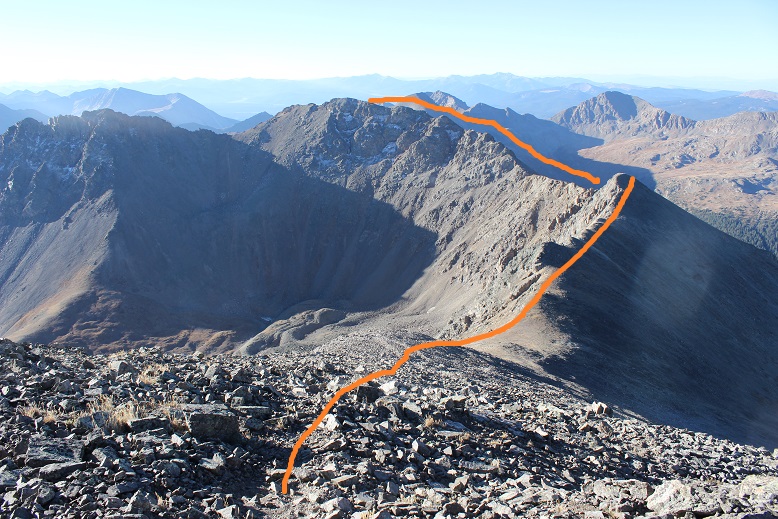
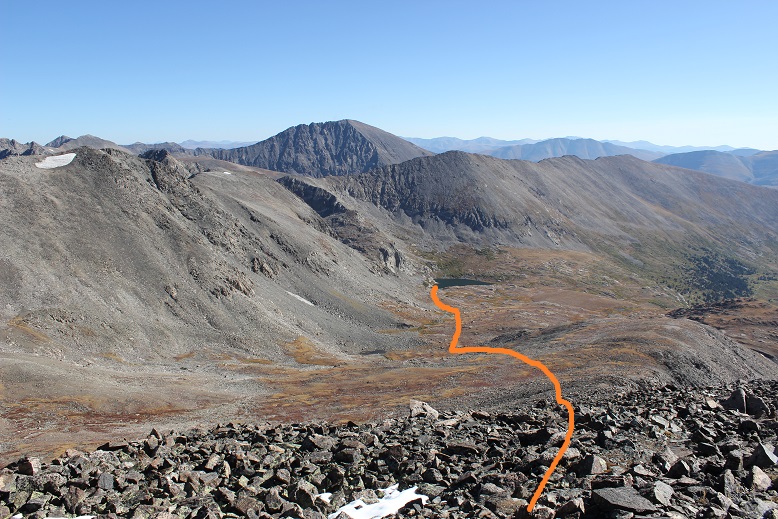
The top of the gully put me at 12,860’. Now it was time to head back down, staying as high as possible, but still losing about 300’ of elevation as I traversed my way over to Magdalene’s ridge. Here’s an overall of the route I took
And step by step: First, down the gully. The most stable area is to stick to the left, near the rock
Then I headed southeast, staying high
The rocks give way to tundra. I kept aiming for the ridge
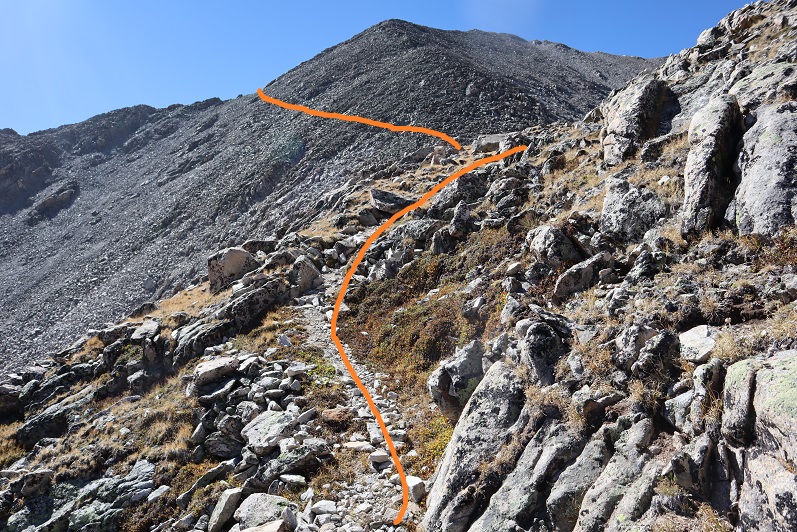
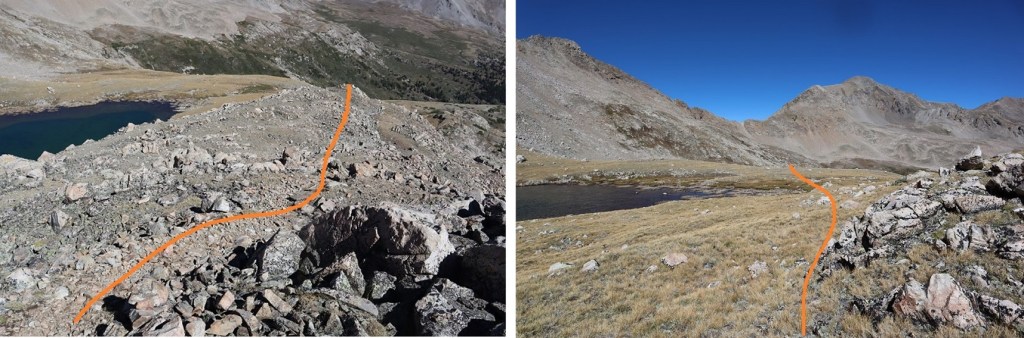
Keeping Silver King Lake to my right, I made it to the base of the ridge. Here there’s a cairned trail that picks up and will lead you to the summit. It starts by zig-zagging up and around the first ledge
Then following the well cairned trail to the saddle
It looks like the trail has been covered in rockfall in areas, but the cairns help to stay on course
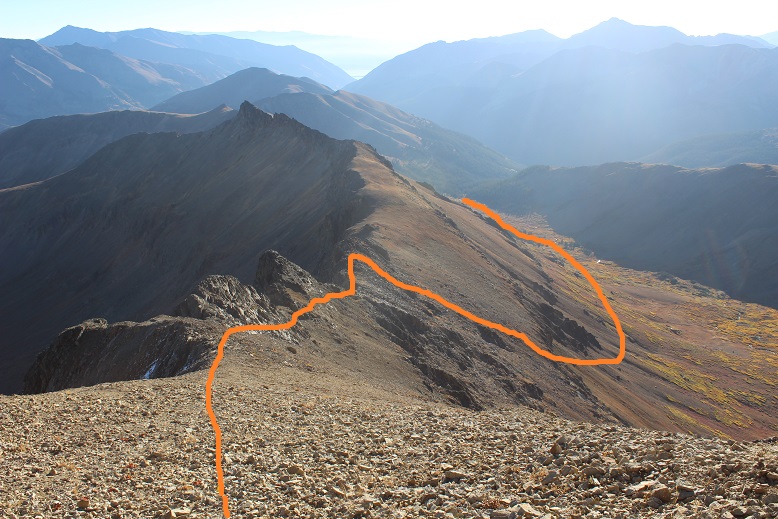
Once at the saddle I turned right and followed the ridge southwest
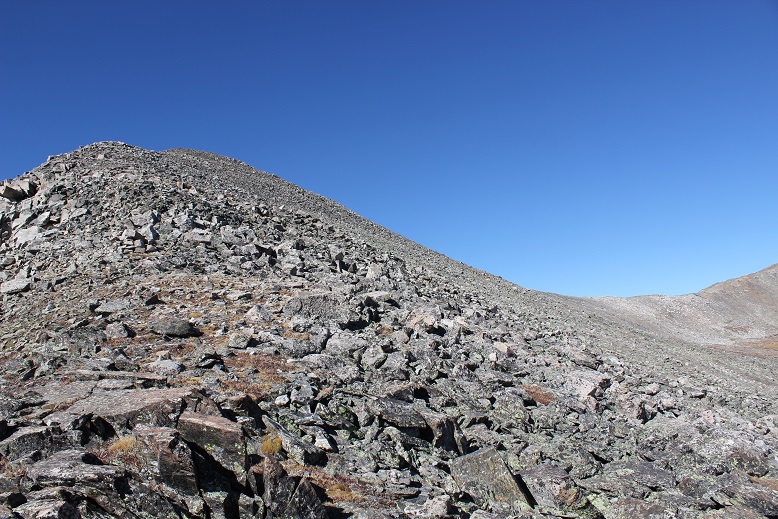
There are several social trails up this ridge, but I was able to summit by sticking to the ridge proper, keeping this class 2
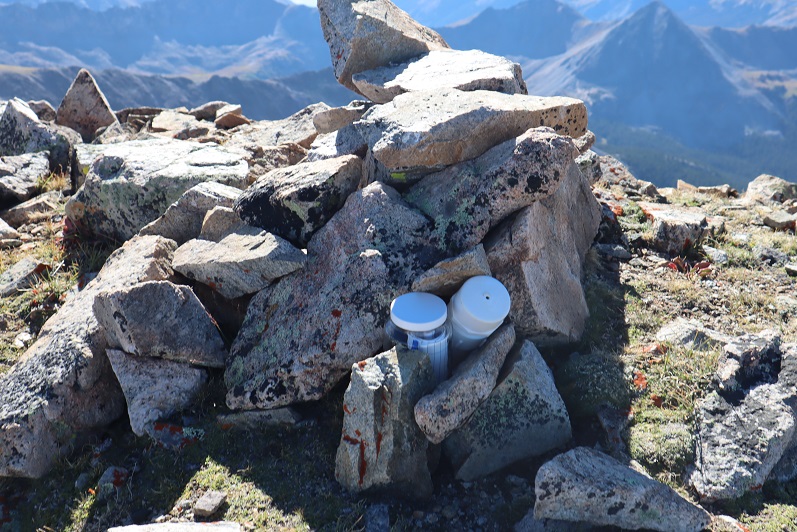
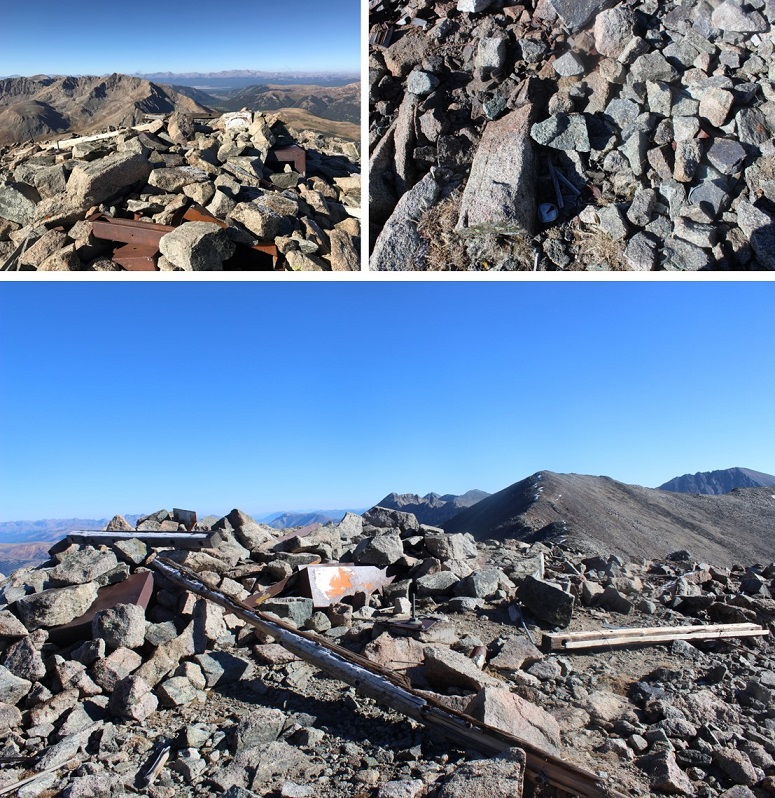
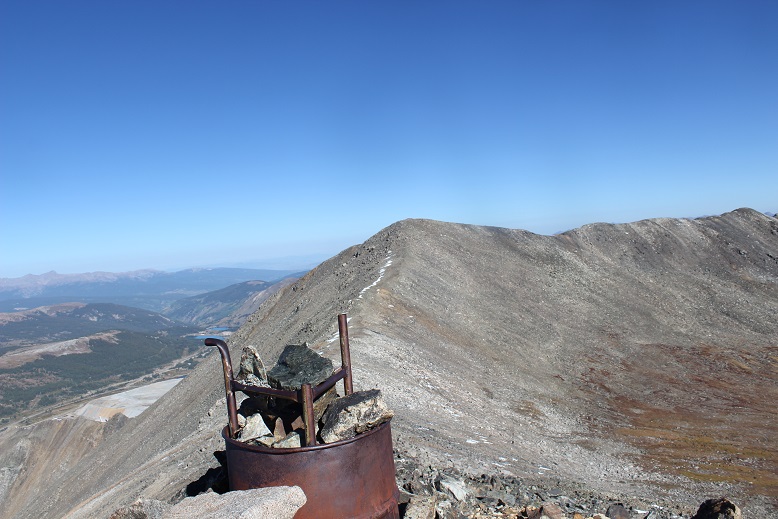
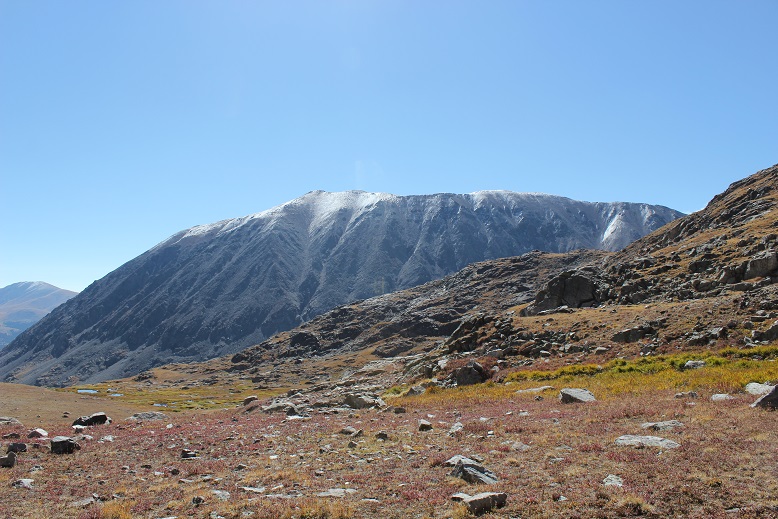
I summited Magdalene Mountain at 9:40am
Magdalene Mountain:
There are 2 summit registers here.
Time to head back the way I came. First, down the ridge
Once at the saddle I turned left and followed the trail back down the mountain
Here’s an overview of the route back to the pass
And step by step:
Here’s looking back up at the gully. Once again, I stayed north to ascend
From the top of the gully, here’s the overall route back to the pass
And step by step. Down the gully and across the rocks
Staying high
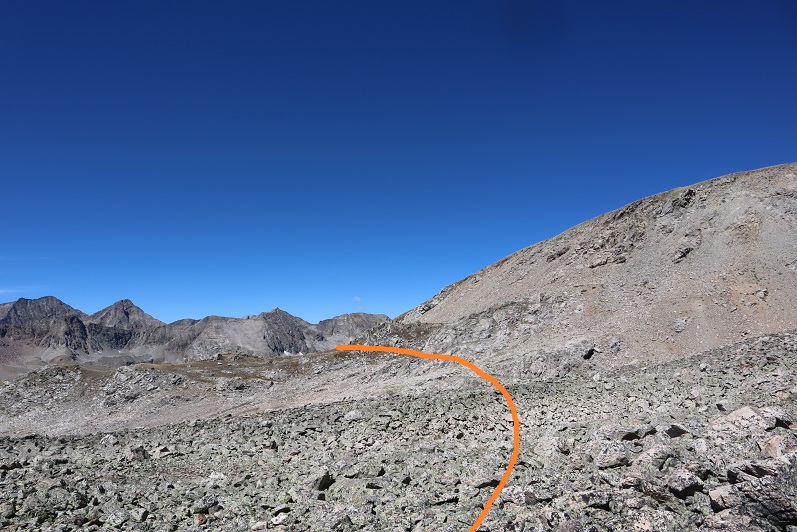
Then taking the plateau back to the pass, where the trail picks back up again
I turned right at the cairns and headed back down to the basin
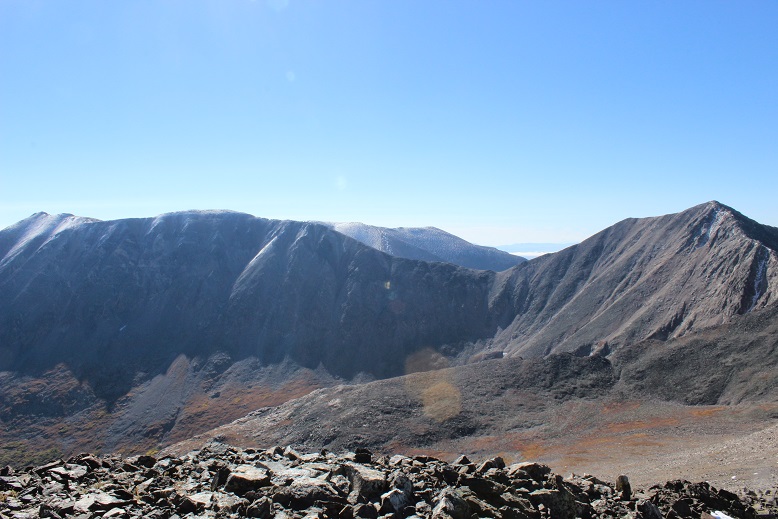
I looked longingly at the ridge that connects Pear Peak with PT 13517. I really wanted to do that ridge today. It was an absolutely perfect day, but I was short on time, as the drive in had taken longer than expected. I had to get back home and finish working for the day. Oh well, it will be a fun adventure in the future. Here are some pictures of the route back down. Spirits high, I rather enjoyed the hike out.
Back to the lake and up the hill
Past the avalanche area
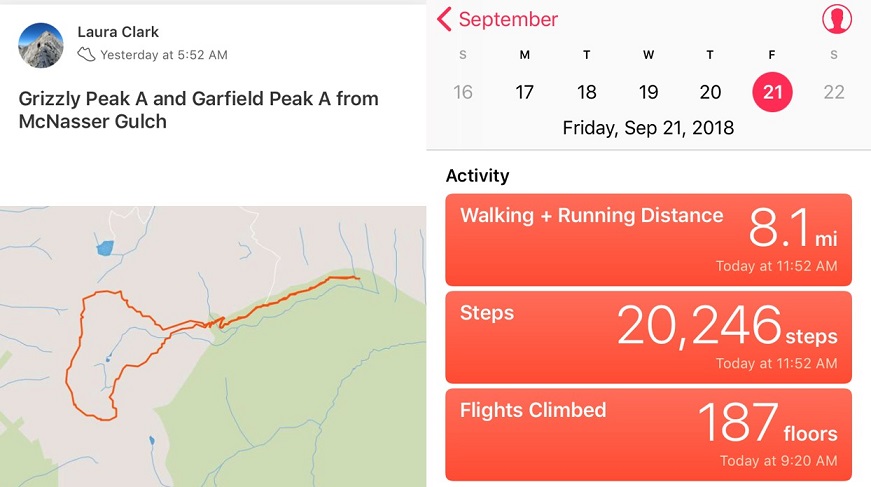
And back to my truck. I made it back to my truck at 2pm, making this a 15.32 mile hike with 4074’ of elevation gain in 9 hours
The road past the La Plata Trailhead is 4WD the entire way to the upper trailhead. In fact, I felt the second 4WD portion was easier in many places than the early 4WD portion. Only one area gave me pause, about half a mile from the 394 junction. The dip in the road was bigger than it looked, wasn’t anticipated and caught me off guard.
I parked in a grassy area just before reaching the gate and started out at 5:45am.
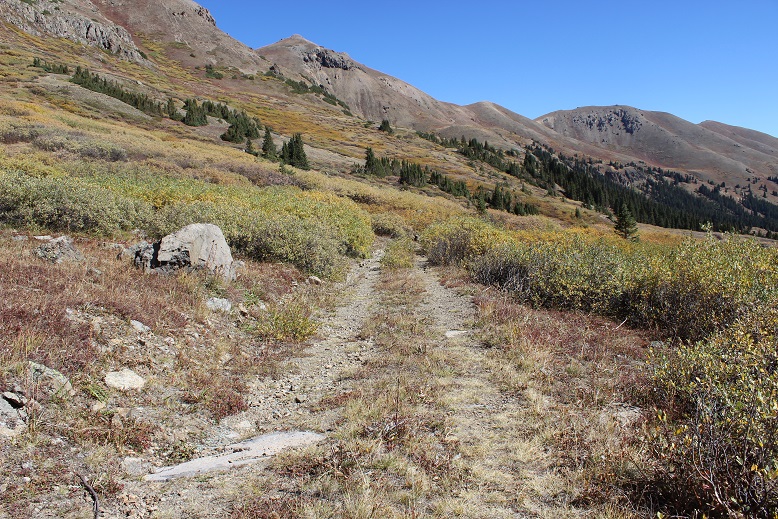
The gate was locked and it didn’t look like anyone had driven on the road past the gate in quite a while. This is where the trail starts.
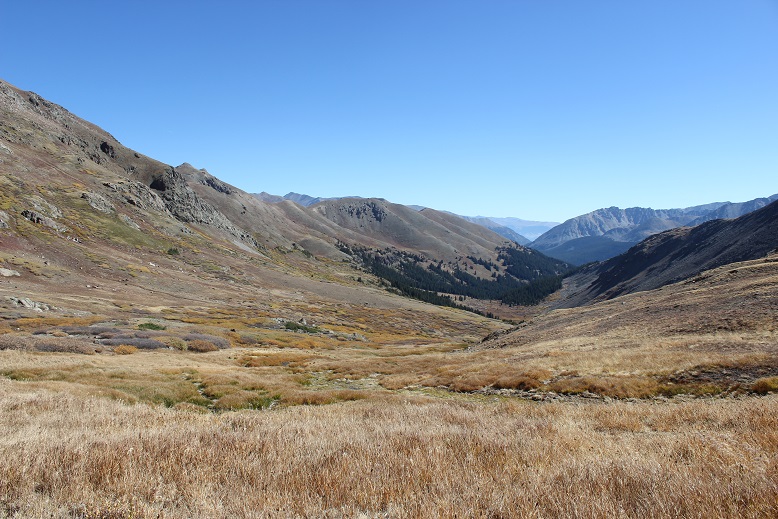
Follow the road west into McNasser Gulch. Almost all of this trail is above treeline, but until you make it to the mine you’re on a trail overgrown with willows.
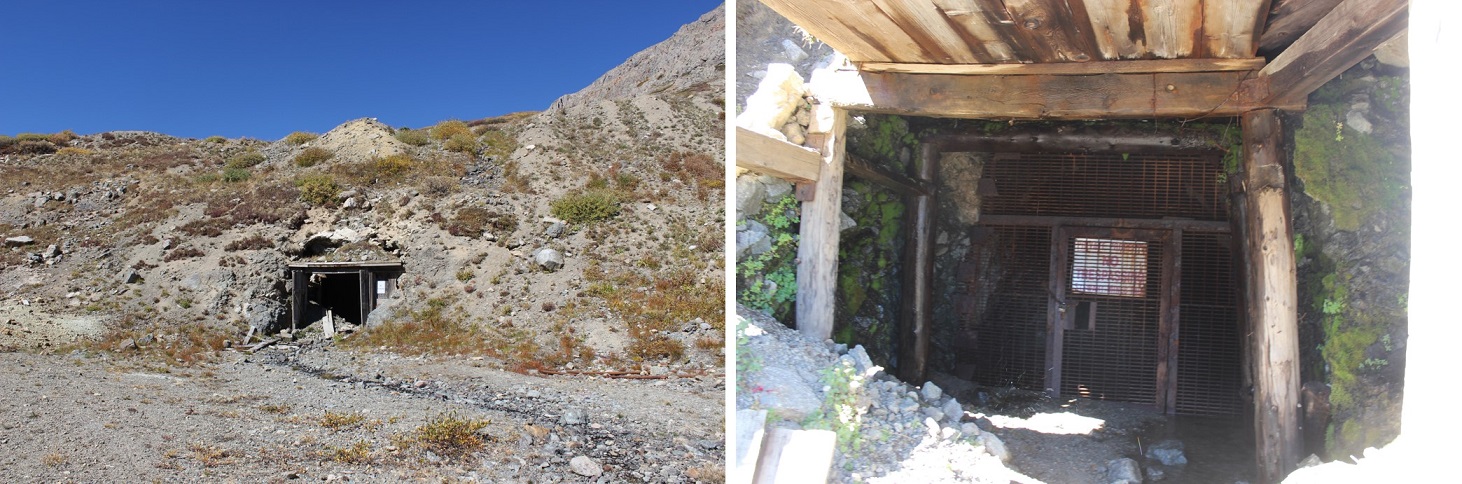
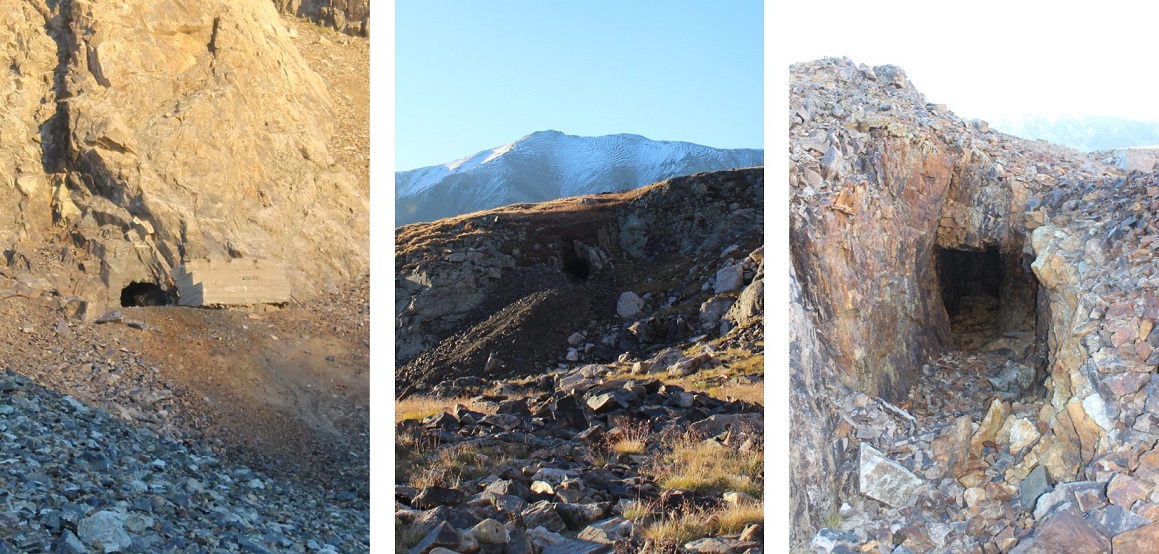
The mining area is at 12,100’. It’s boarded up pretty well, but still looks neat (and operational?).
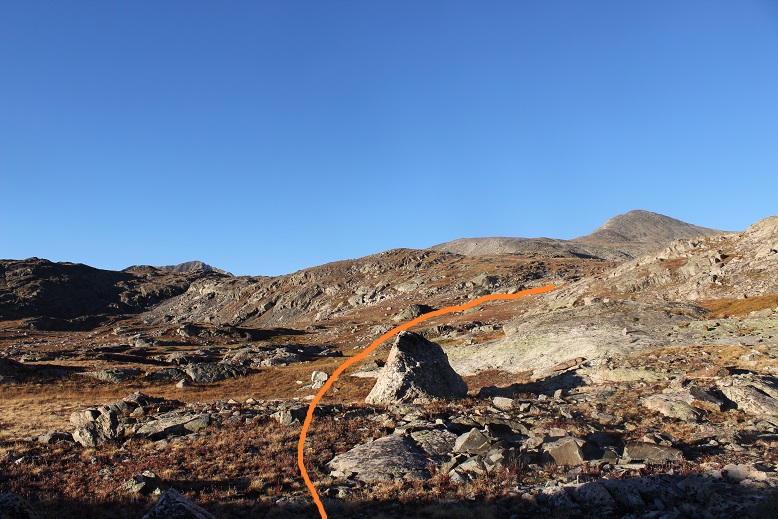
The trail in this area gets kind of fuzzy, but it picks back up again directly over the mine (so make your way around it and head west/northwest/right).
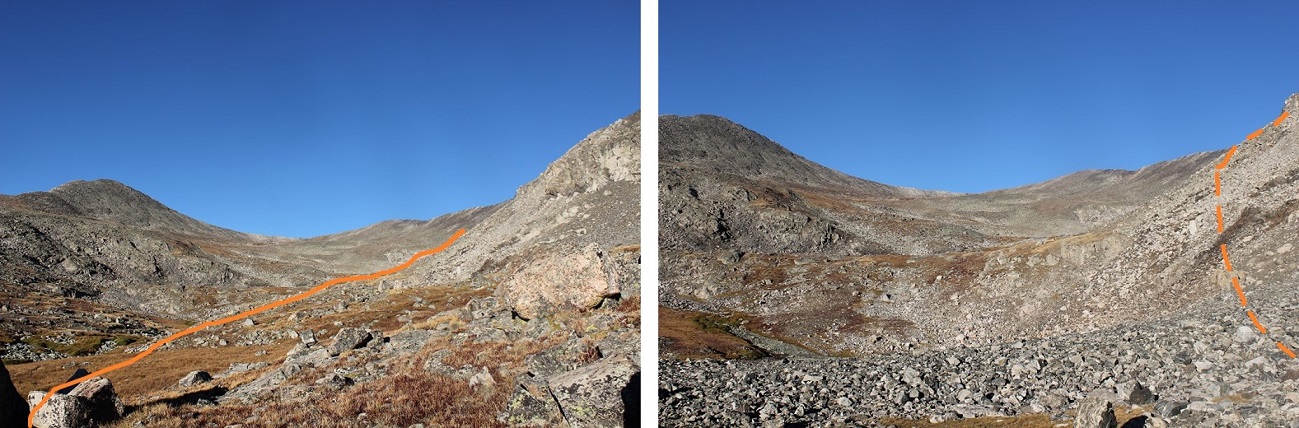
From here there is no trail. Head northwest through the basin towards Grizzly Peak.
After rounding the basin and heading northwest (right) you aim for this bump:
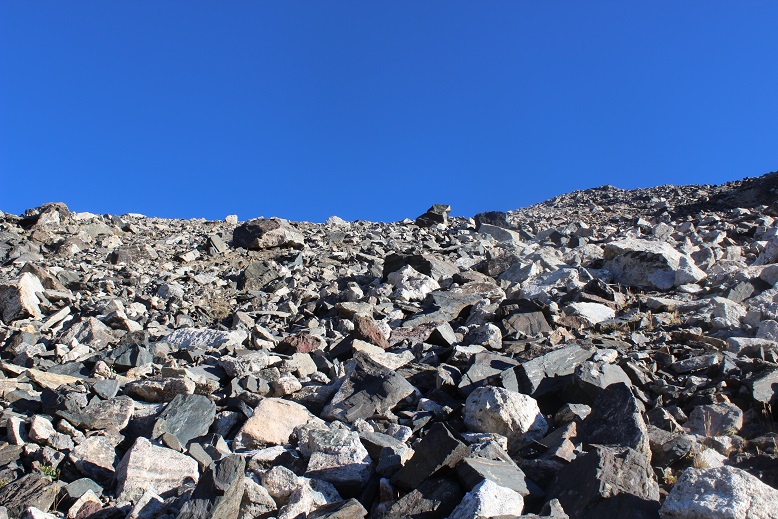
The terrain is much steeper and rockier than it looks. The ground was full of loose sand/scree.
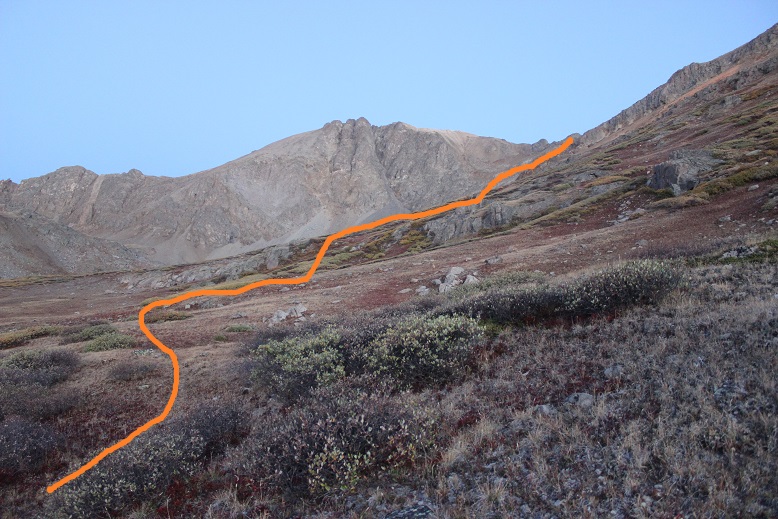
Once you make it to the saddle turn left (west and follow the ridge).
This is done by initially sticking to the ridge crest and then skirting the 3 gendarmes to the left before regaining the ridge and following it to the top. Here’s the view looking back at the route so far
There was just a little bit of snow at the top
The rest of the route to Grizzly is only .2 miles. I followed the ridge to the south. There was an established trail here.
The final pitch was loose and made up of bowling ball sized unstable rocks but easy to navigate
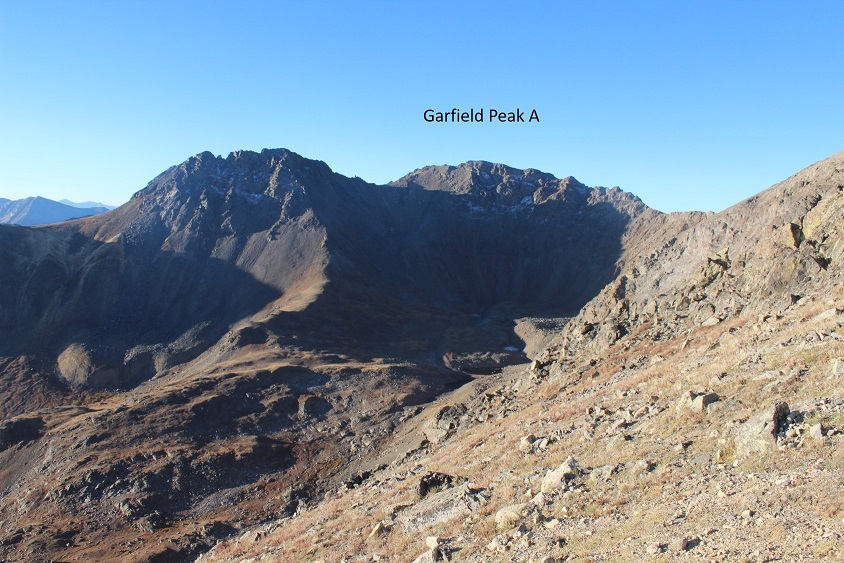
Here’s a view from Garfield looking at the route up Grizzly
I summited Grizzly Peak A at 8:10am
Here’s a picture of Garfield from the summit of Grizzly.
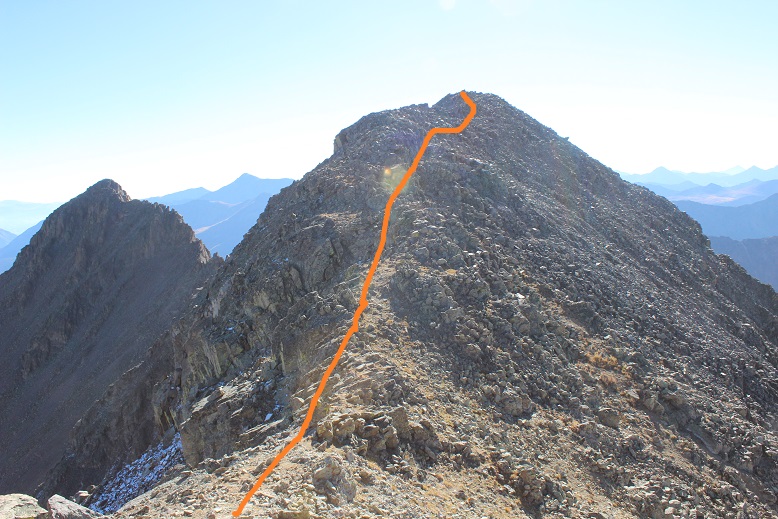
To get there you need to re-trace your steps, but not far. Head back the way you came and about 20 steps down from the summit you’ll turn left (south).
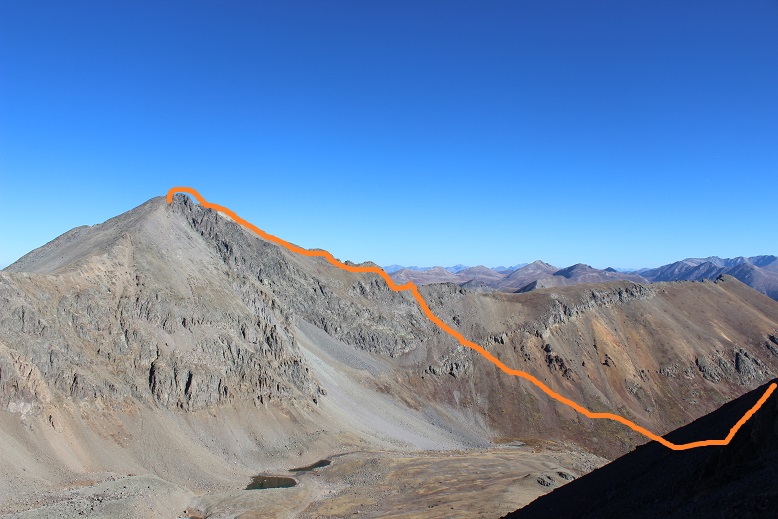
I had to do one class 3 move to get down this part of the ridge, and after completing it realized there was an easier way. Here’s the route from the Grizzly/Garfield Saddle
I followed the trail along the ridge and behind point 13,650. After rounding 13,650 (to the right) I followed another trail around the south slopes and gained the ridge.
From the ridge I climbed to the summit (no trail on this part)
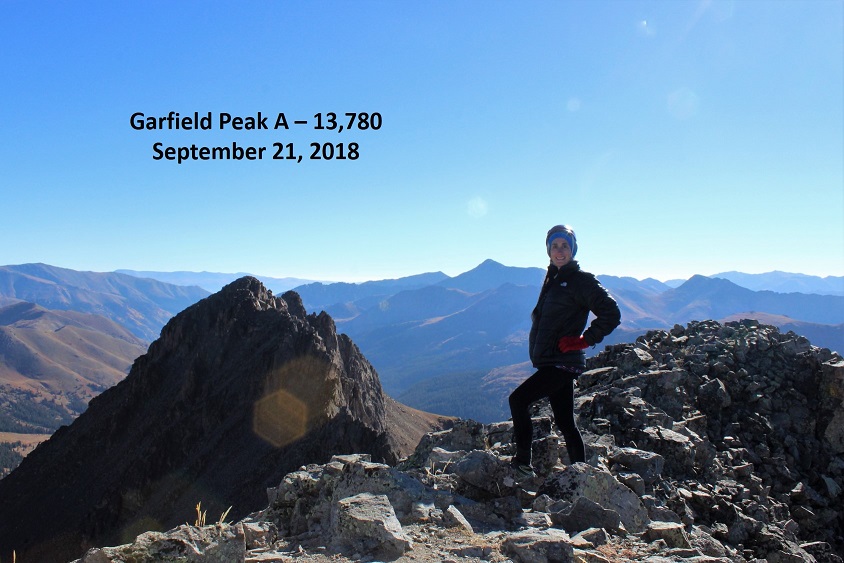
I summited at 9:20am
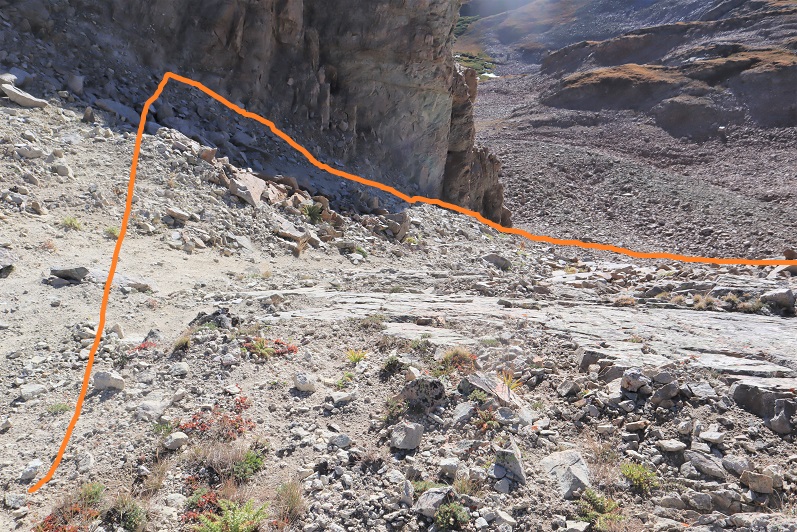
I was done summiting both peaks for the day, but from here the route actually became more difficult. I had a hard time finding a decent path off the summit of Garfield. I’m sure it was a height thing on my part. I could tell where I was supposed to downclimb, but it was a class 4 downclimb I needed a few more inches to be able to achieve. This was very frustrating. I had to backtrack and look for an easier way to Garfield’s Gully. Here’s where you’re supposed to leave the ridge
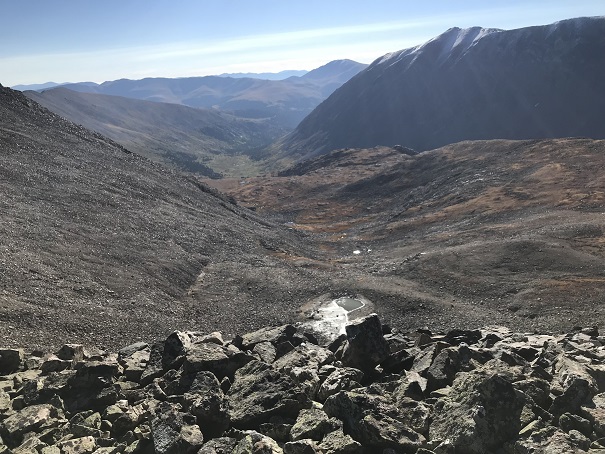
I eventually made it to the saddle. From here you strap on your microspikes and head straight down. There are a lot of trails down, and they all lead into the basin.
This was some of the worst scree I’ve ever encountered. I was so glad I’d chosen to do Grizzly First: there’s no way this would have been enjoyable trekking up (in the snow however it might be easier). If you’ve done the gully on Pyramid or the decent off Bross, this is worse.
It descends 1000’ to a small lake, but just when you think you’re finished with the scree you gain a small ledge and there’s tons more (so don’t get too excited the first time you think the scree’s over).
My advice is to aim (right/northeast) for the rocks near the grassy area. The rocks are stable, where nothing in the gully was. I took the gully and had large rocks tumble down from above me and I had to take cover several times (no one else was out there today, these rocks were just free falling from above). Here’s the route I took (as seen from Grizzly).
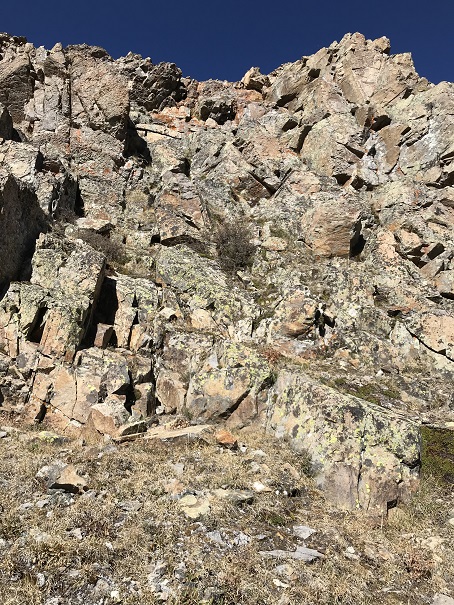
When you reach the grassy basin your troubles aren’t over yet. There’s more scree to traverse, or you can choose to downclimb rock ledges. I’d had it with the scree, so I downclimbed the class 3 & 4rock (which led to more loose talus)
Here’s a look back at what I downclimbed
And a closer look at the climbing
Here’s another look at how I came out of the basin. I took the solid orange line (rocks) over the scree route (dotted)
The good news is after this the hike got really easy! I just crossed the stream and followed the basin back to the mine, where the 4WD road picked back up.
Here’s a look back at the basin
I made it back to my truck at 11:30am, making this 8 mile climb in just over 6 hours
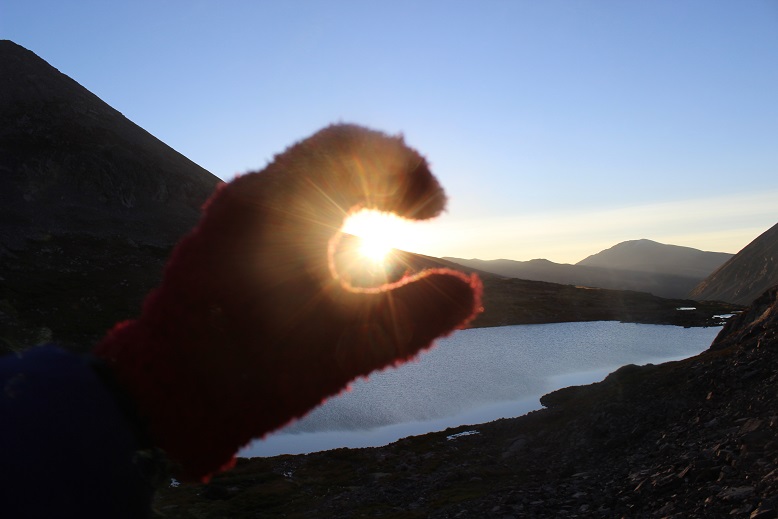
I didn’t want to get up when my alarm went off at 2am. I really didn’t. I rarely ever want to get up when my alarm rings, but today I was extra tired. I really wanted that extra sleep. I reminded myself while it’s typically difficult waking up early for a hike, I always thank myself for it later. So I dawdled and took extra time getting ready, trying to wake myself up. It was supposed to snow last night and there was as 40% chance of snow today, so I dressed in triple layers of pants and double jackets (necessary for me, not for most people). I also had 3 different pairs of gloves.
I drove to the trailhead and actually stopped at a gas station for 20 minutes to sleep for a bit before continuing on: I was more tired than I thought! I felt great after that quick cat nap though.
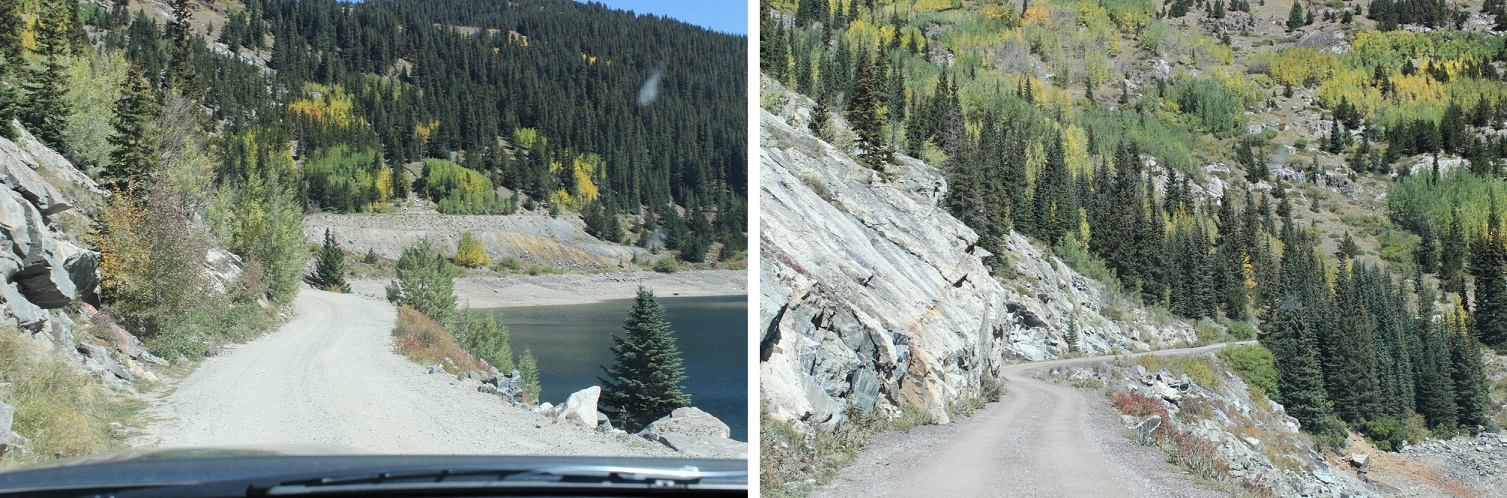
I finally made it to the trailhead at 5am and was ready to go by 5:15am. Already I could tell this was going to be a much different adventure than when I was here last March and the area was covered in feet of snow (https://wildwandererlmc.wordpress.com/2018/03/31/wheeler-lake-12168/). I’d had to turn back at the lake on that trip, but I’d learned a lot! Today the gate was open all the way to the mill, and there wasn’t any snow to be seen anywhere (in the dark that is). The road in is a 2WD dirt road all the way to the mill
There’s plenty of parking all along the way. I chose to park by the mill (the ‘lot’ there holds about 7 vehicles).
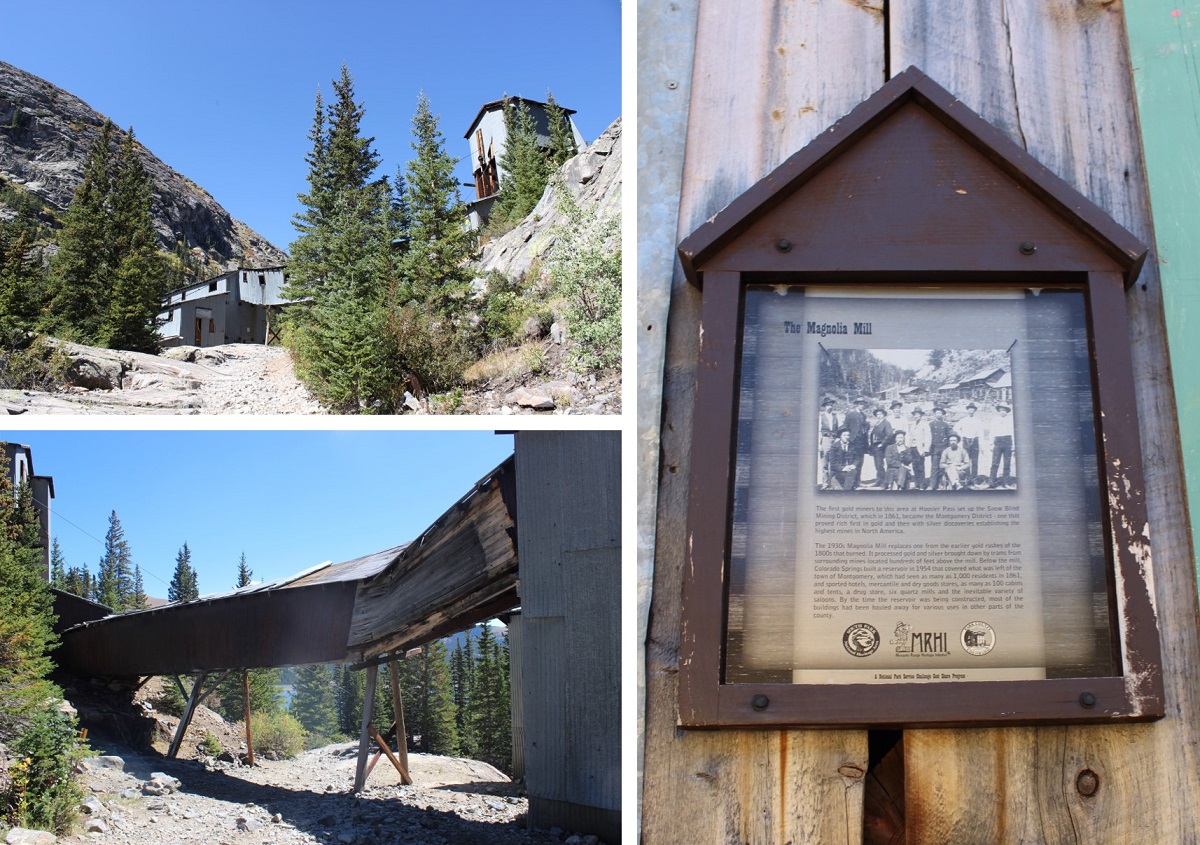
Here are some pictures of the Magnolia Mill, which I swear is going to collapse any minute…
Don’t go past the mill unless you have a heavily modified 4×4 vehicle. You will get stuck. Here are some pictures of the 4×4 road in
And one of a truck getting stuck on my way out
You can follow the 4×4 road all the way to Wheeler Lake: it’s about 3 miles. Wow! Was this a different experience than the snow-covered road I’d encountered back in March! Back then I wasn’t even aware there was a road… I kept looking for trails. It was obvious from my hike today I’d been way off route earlier this year. Way off. And the road had to be under a good 5 feet of snow at the time because these willows which were taller than me now were only about 6 inches high last time I was here. I’d gone in circles in the blowing snow trying to route find my way to the lake (and back). Today was a breeze!
I kept thinking to myself: those rocks are going to be a bugger to hike over on the way back down (they were).
What a difference the season makes! One bad part about no snow? The road was pretty much a river most of the way. Most of the areas of road covered in water had side trails going through the willows so you didn’t need to walk directly through the mud puddles, which I’m sure added to my route confusion in the snow as well.
Oh, but it was still early morning and I was hiking through all of this at night…
It’s about a 3 mile hike from the Mill to Wheeler Lake. I made it to the lake just as the sun began to rise (and thought back on how difficult this trudge had been in snowshoes: there were actual spots that had had exposure with all the snow and I’d been fearful I’d slip and slide down the mountain. Not so today.)
This is where the route ends and the creativity begins. Hike around the lake to the left about ¾ of the way around. You’ll notice an unmarked path left and up a drainage. (There’s no trail, make your own)
I turned back to watch the sunrise and take a Colorado Flag picture of the lake…
There are a lot of mines in the area. I counted at least 6
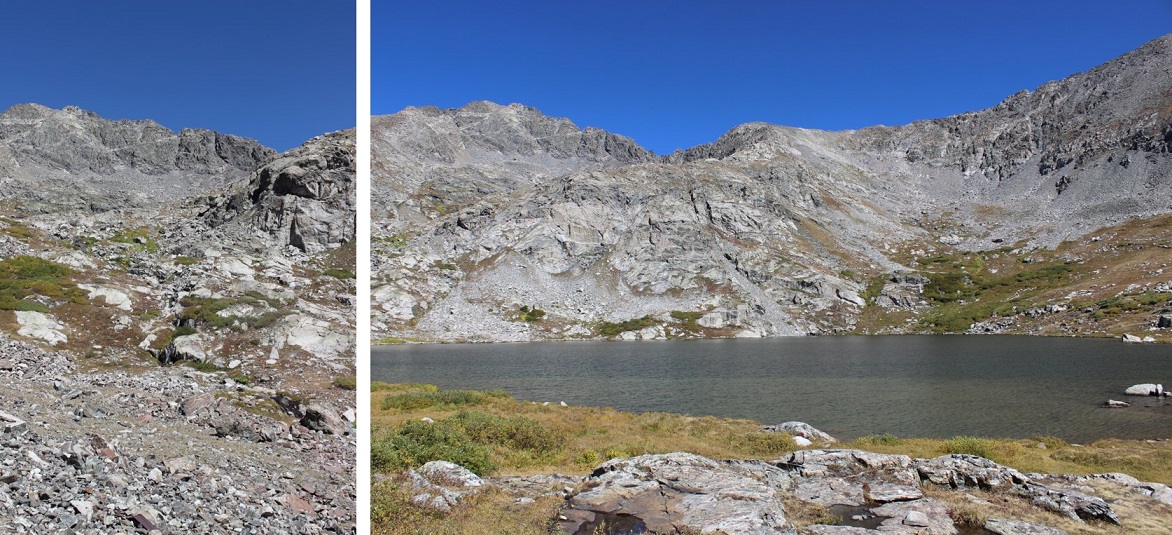
When you get to the top of the drainage you’ll find yourself in a small basin.
I tried to stay higher up to the right, and this ended up being a mistake: Stick to the middle, go up the area with small ponds and waterfalls, and head west.
I was trying not to lose my elevation gain, but all I ended up doing was complicating things with lots of rocks, slowing me down.
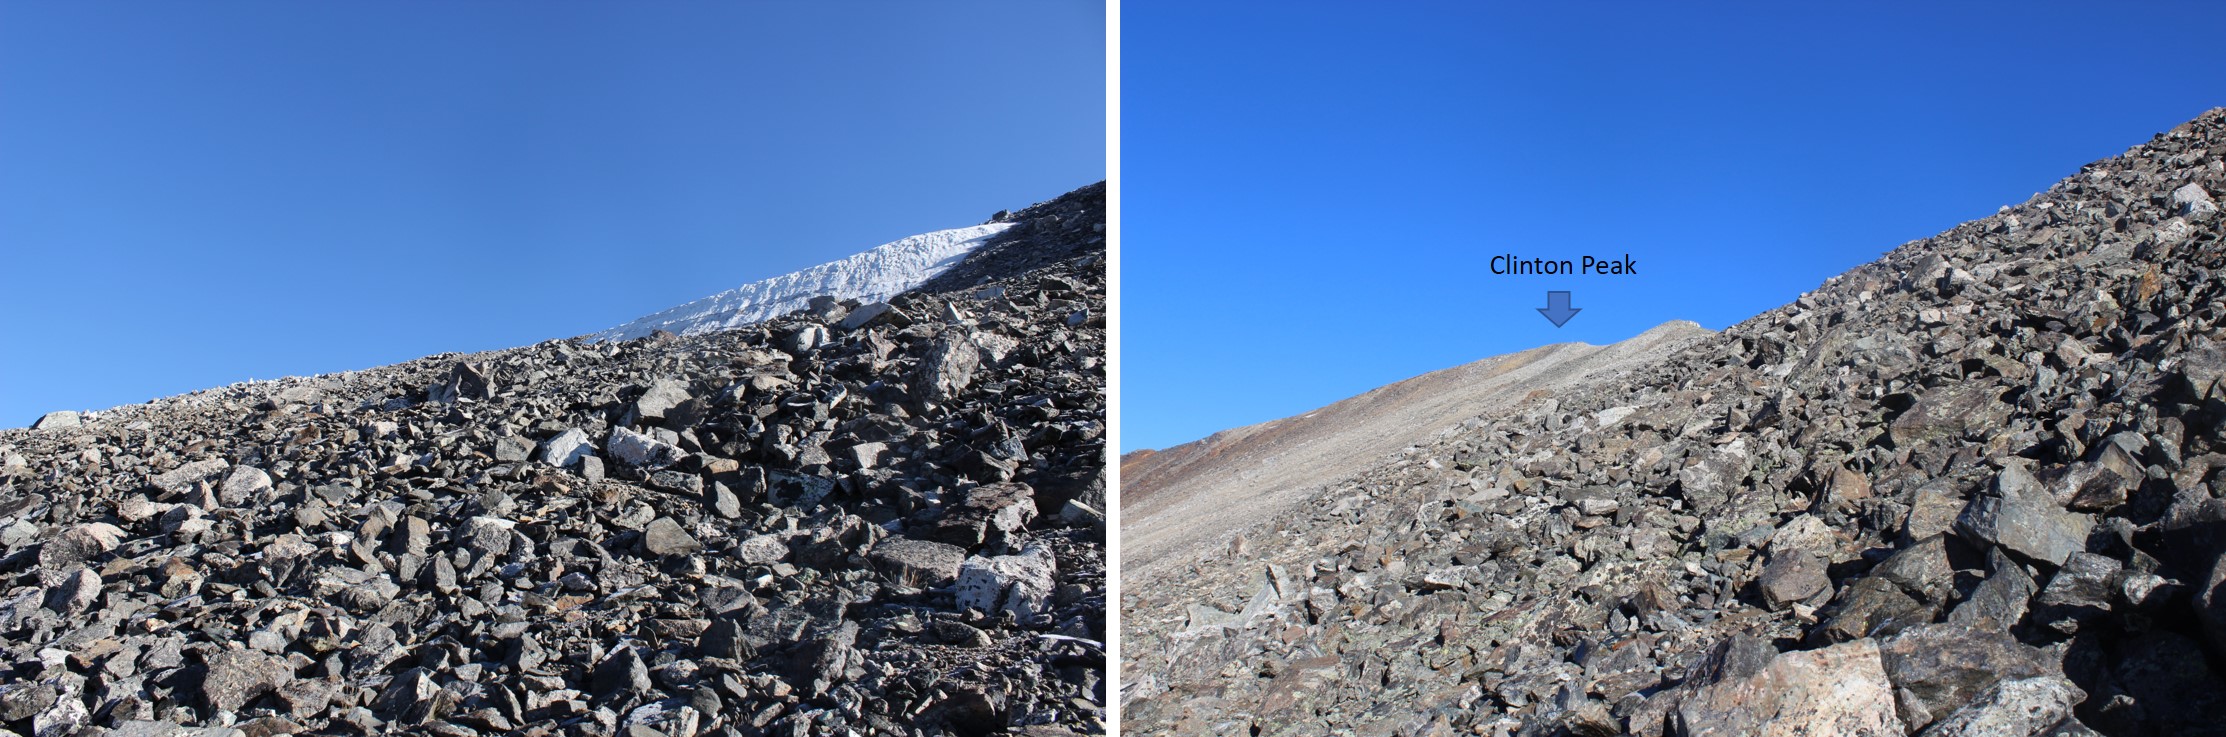
So my route had steeper elevation, lots of loose rocks and scree, and was thus very slow going. I rounded the corner and kept heading northwest. Finally I was able to see the summit! If you’re hiking this too you can breathe a sigh of relief now: the worst of the hike is over (yes, even if you’re doing all 3 summits)
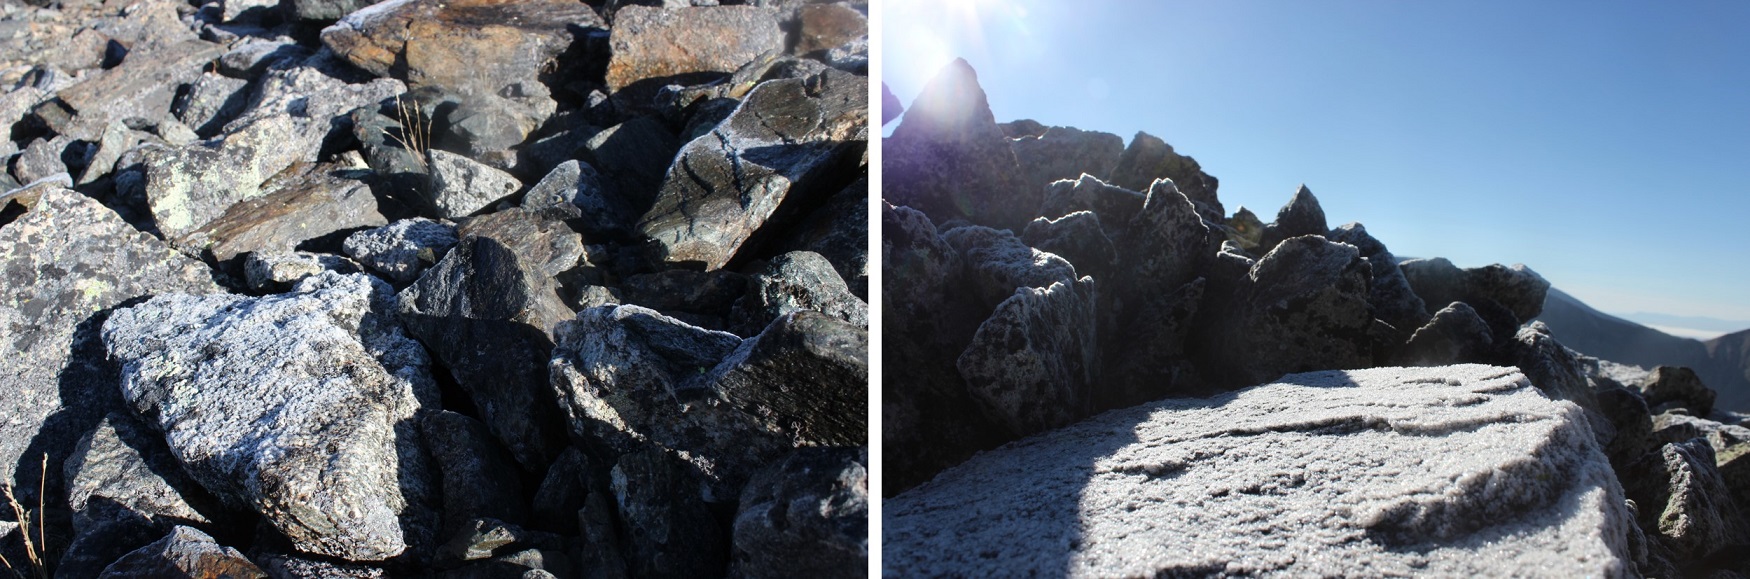
As I rounded the slope the rocks became slippery: everything in the shadows (west) had a thin layer of frost covering it (slippery!)
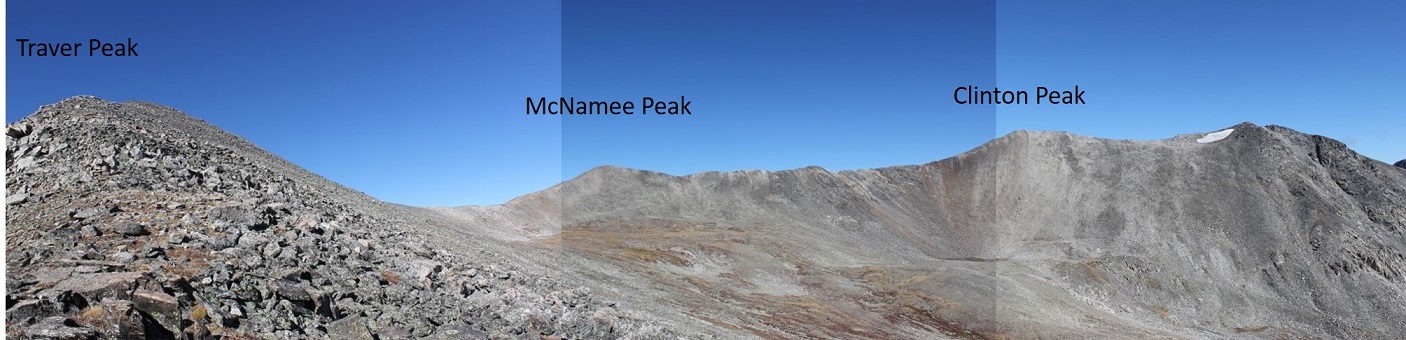
I gained the ridge and followed it to the summit of Clinton Peak.
I turned back and looked at the way I’d come: that had been a steep climb!
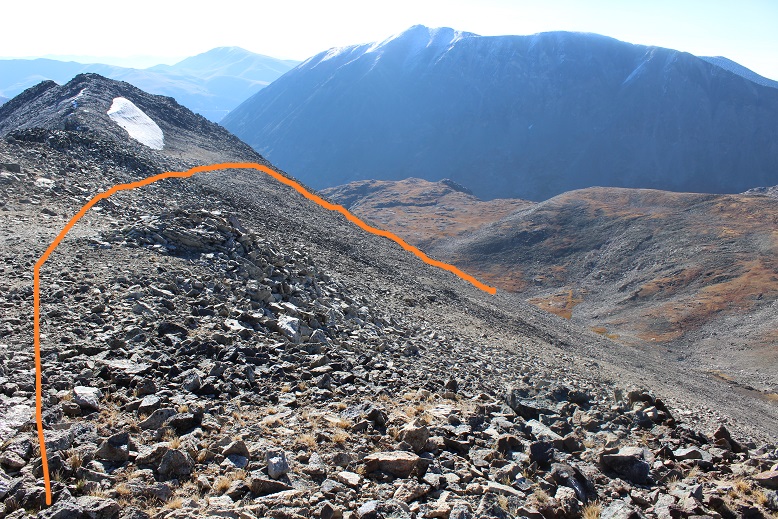
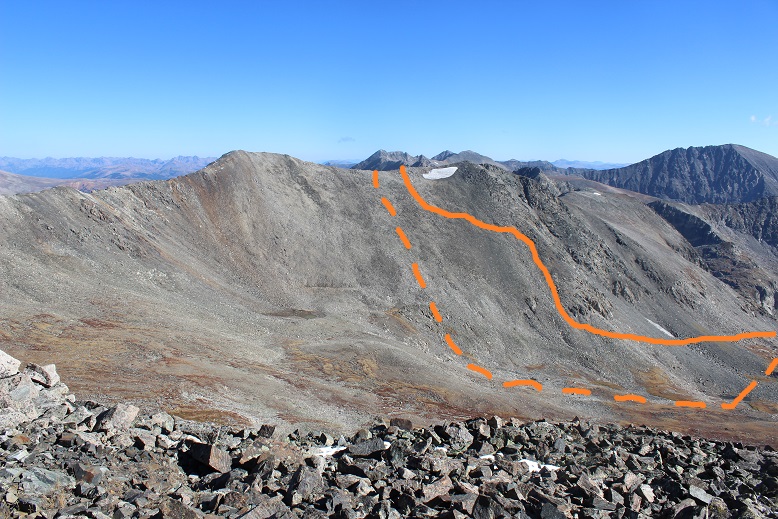
From Traver Peak, here’s a view of the route I took (solid line) versus the one I should have taken (dotted line)
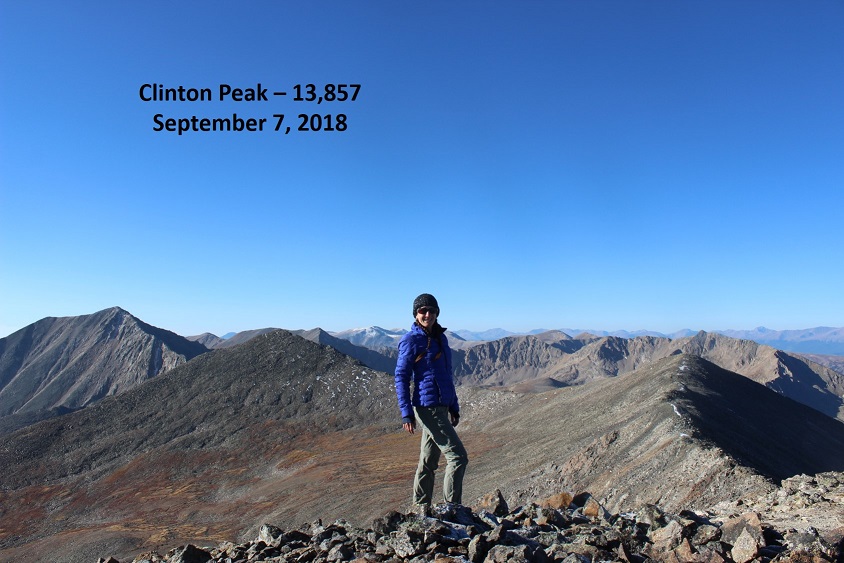
I summited at 8:30am. Here’s proof I summited
VIDEO:
There were a lot of active mines in the area west of the peak and below as well
The rest of the route before me was very straightforward. It was class 2 ‘climbing’, following the ridge.
There were a few large rocks to contend with, but nothing class 3, and all avoidable if you went down the ridge a bit (go left (east) to avoid frost).
There were also small bits of snow, but nothing that got in the way or wasn’t easily avoidable
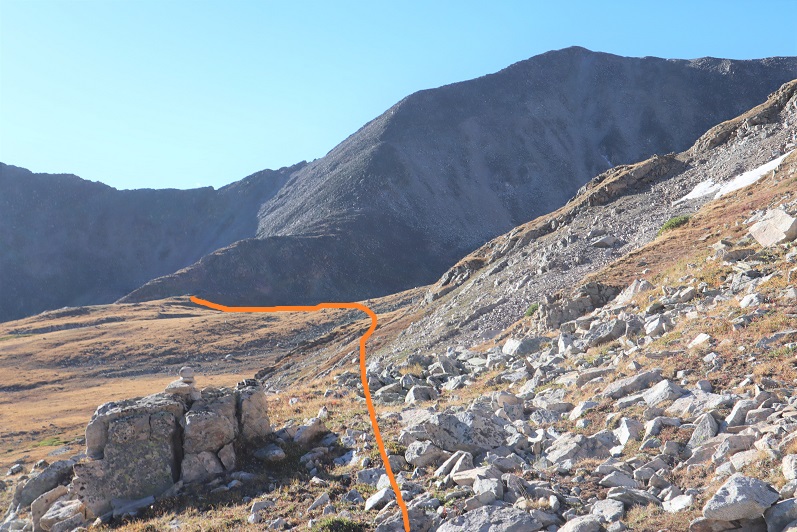
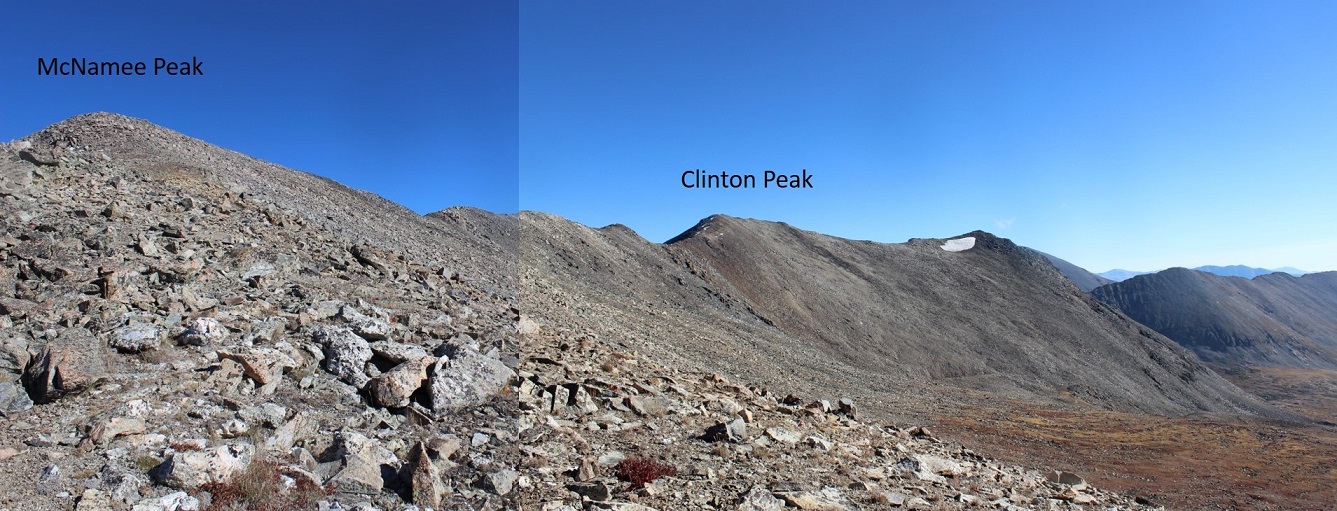
I couldn’t help but think as I reached the saddle of Clinton/McNamee how much easier this hike would have been to just continue straight all the way through the basin up to this saddle. It would have added maybe a mile to the hike (maybe) but also made the elevation gain so much simpler to deal with! I’m sure it would have cut my time down at least an hour.
The path to McNamee was about half a mile and easy to follow. I summited at 9am
VIDEO
There was a lot of mining trash on this summit!
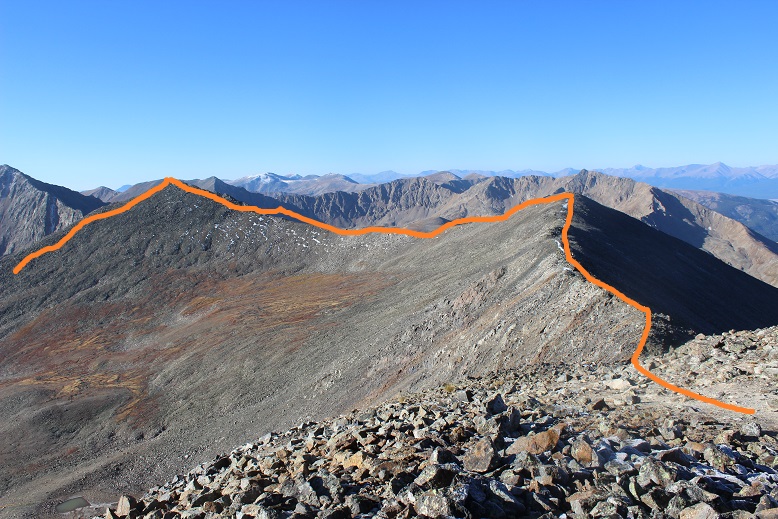
Here’s the rest of the route to Traver Peak
Here’s a picture from the McNamee/Traver saddle looking back on the route so far
Summiting Traver was just a little more difficult than McNamee, but as long as I stuck to the ridge I was just fine (class 2). There were a couple of places I intentionally made it a class 3 climb, but they were completely unnecessary.
There was also a metal trash can full of rocks on the ridge?
I summited at 9:30am
VIDEO
There had been a light dusting on DeCaLiBron the night before
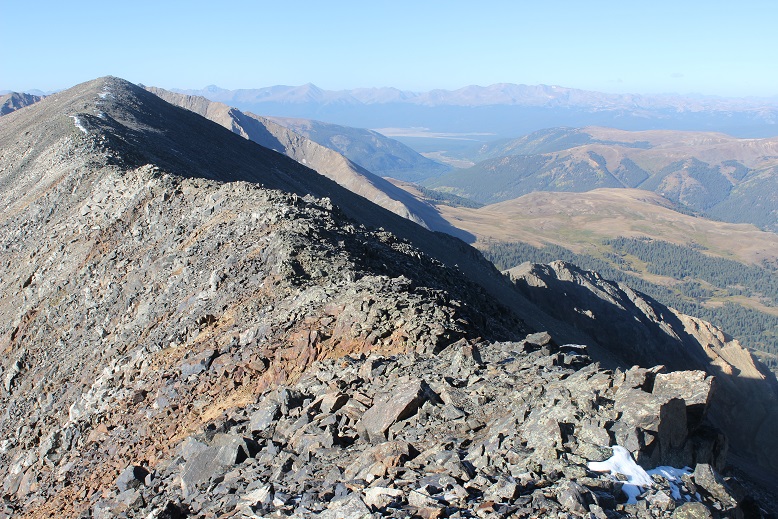
Ok, now it was time to head down. I turned east and looked at my route before me. All I had to do was follow the ridge down and head for Wheeler Lake. It was quite simple really
About ¼ of the way down the ridge I found this survey marker
And halfway down the ridge I saw a large cairn. Or at least that’s what I thought it was until I saw the stone with writing and a date. I couldn’t make out the writing, but the year is clearly 1881. When I got home I looked it up online, and couldn’t find any information about a possible grave/death/etc. It looks like a cairn grave to me (think Oatman family?). Thoughts?
The ridge was easy to follow with medium sized, mostly stable rocks. I couldn’t help but think how much easier it would have been to have done this hike in reverse, instead coming up the east ridge of Traver and down Clinton. My advice to anyone doing this hike: HIKE IT IN REVERSE. Or go up the McNamee/Clinton saddle, over to Clinton, and then back to McNamee and Traver. That trek up Clinton’s south slope is a bugger! And from what I experienced on the easy way down Traver, totally avoidable and unnecessary.
In any event, the cairn is clearly visible from a ways away. It’s a good marker to look for (especially if you’re hiking this in reverse). When I made it to the cairn I headed down the basin, over large rocks and some grassy areas. Before the bottom of the basin I was greeted with some large boulders. I didn’t have to climb down them… but I did.
Here’s the route I took. I obviously could have avoided the boulders by sticking to the north. (Note, this is NOT Wheeler Lake, but a small pond in the middle basin).
All morning and afternoon the weather had been perfect! The skies were clear and I’d way overdressed (no worries, this is better than the alternative). The basin was beautiful, and I got to thinking: Life for me has been extremely difficult in the past and I’ve been through some dreadful things no one should ever have to go through, but today, life is good. I mean really, really good! I’m the happiest I’ve been in years, my kids are all amazing and doing amazing things with their lives, I get to hike every Friday, I paid off my truck this month (woohoo! This means I’m debt free!), and I’ve now completed 28 13ers (think I can hit 30 by my birthday on the 18th?). I was in a great mood, and so glad I decided to go hiking today! (See? I told myself so!)
Here’s where the hike became beautiful. As I was exiting the basin and aiming towards Wheeler Lake I was able to notice all the fall colors. Here’s a look at the North side of Lincoln (14er)
And a look back down on Wheeler Lake
I passed by the waterfall and skirted the lake
Here is where I met back up with the road again. The 3 miles out would have been easier and much faster without all those rocks in the road, but at least route finding was easy!
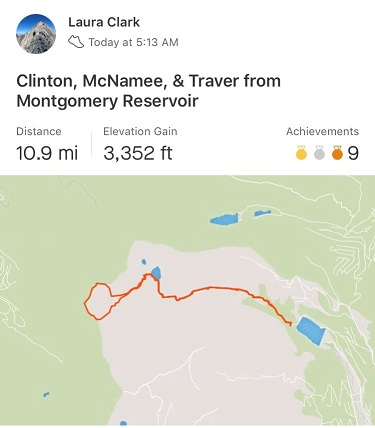
I made it back to my truck around 12:15pm, making this a 10.9 mile hike with 3300’ in elevation gain in 7 hours with lots of summit time.
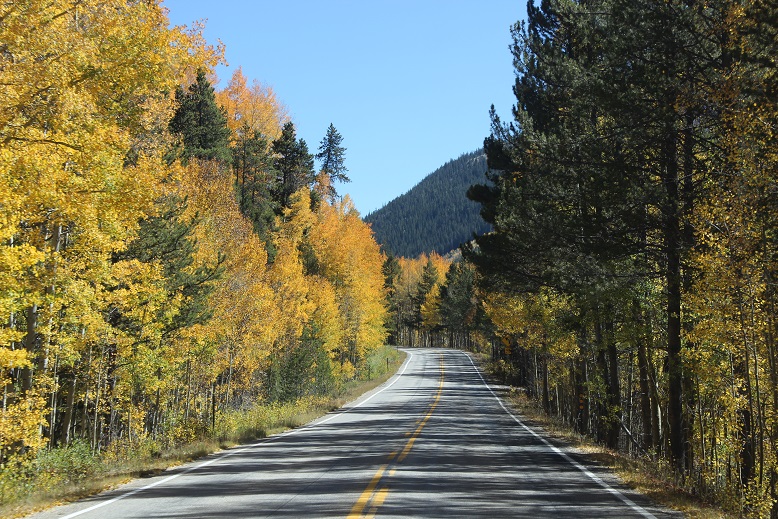
The fall colors are starting to change early this year. The drive through Alma was unexpectedly beautiful!