Crestolita – 13,270

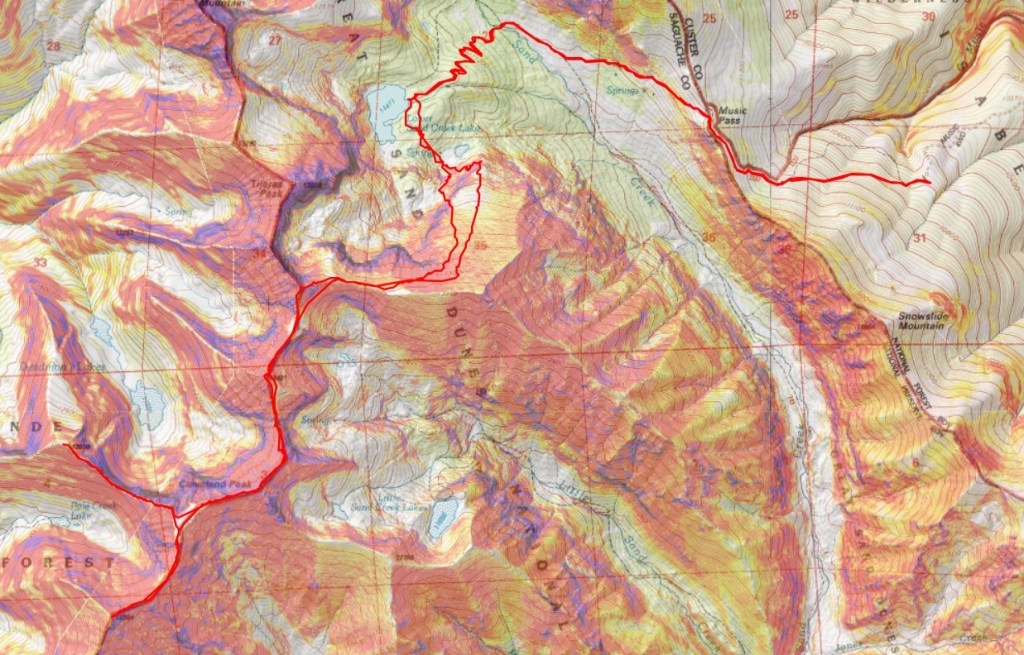
RT Length:  14.33 miles

Elevation Gain:  4842’

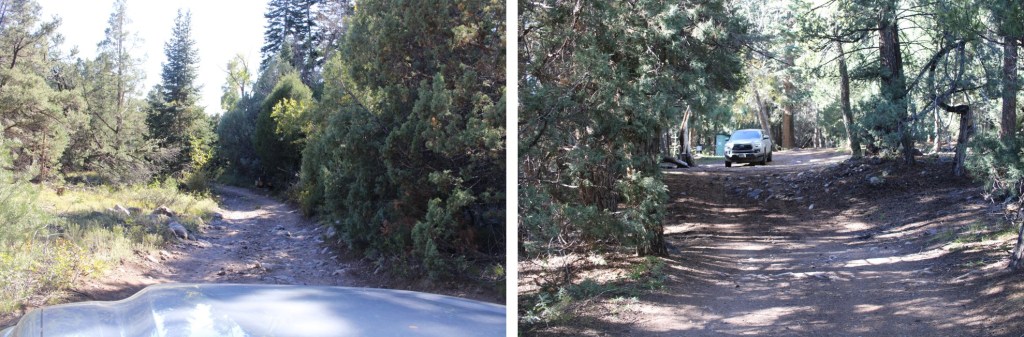
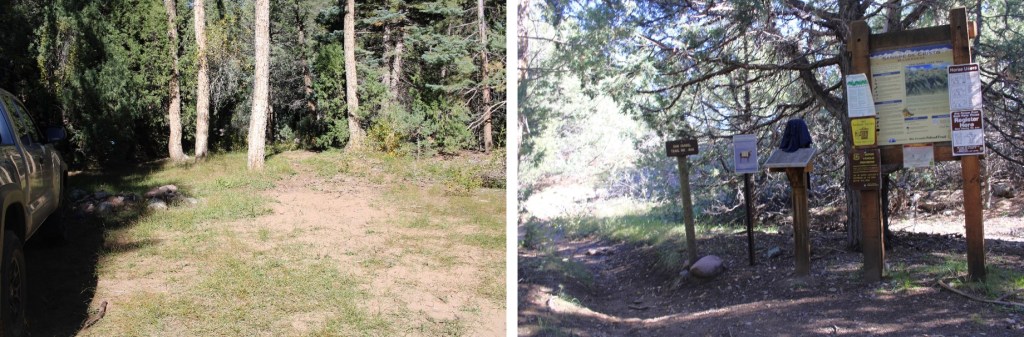
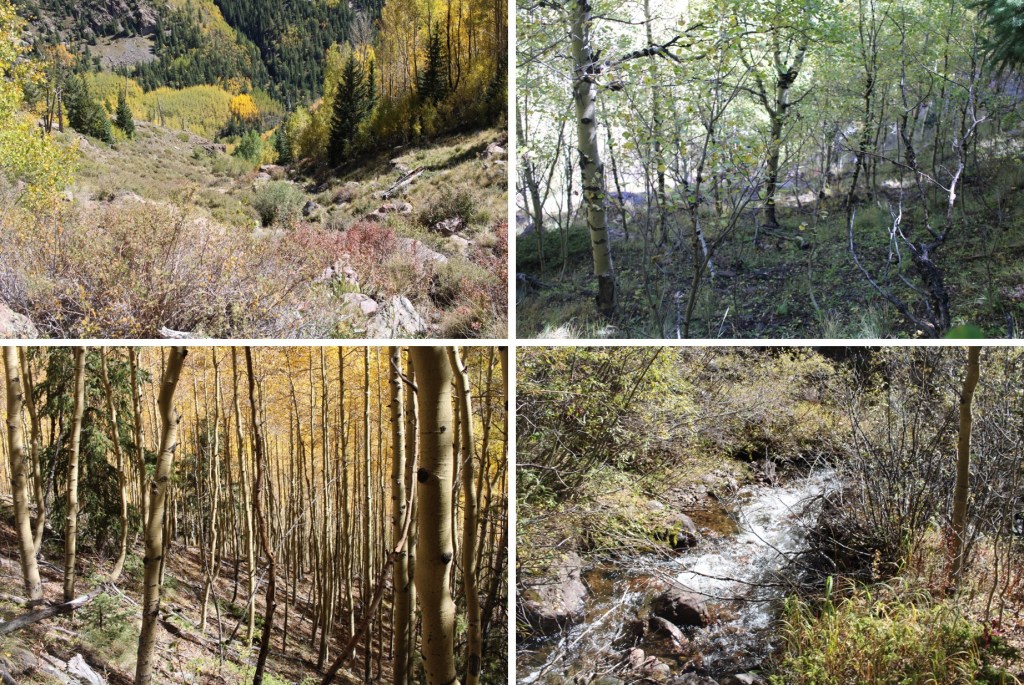
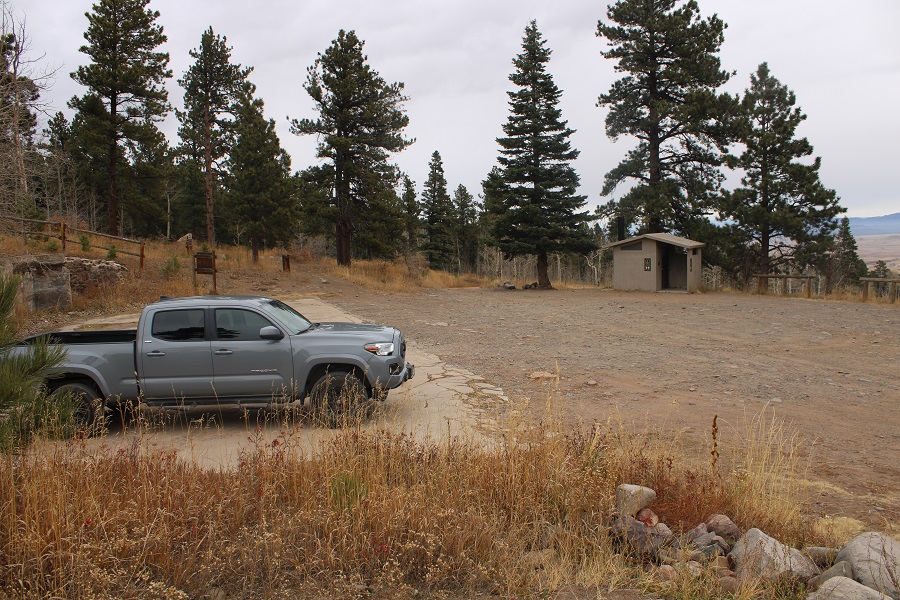
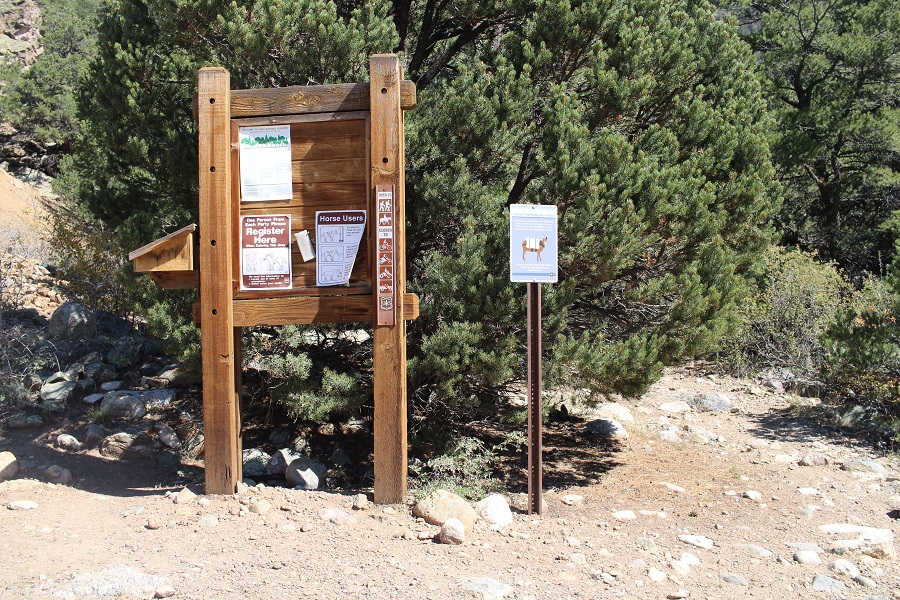
I started from the Cottonwood Creek Trailhead at 4:30am.  This trailhead tends to fill up in the summer, but on this fall day my truck was the only one there. 

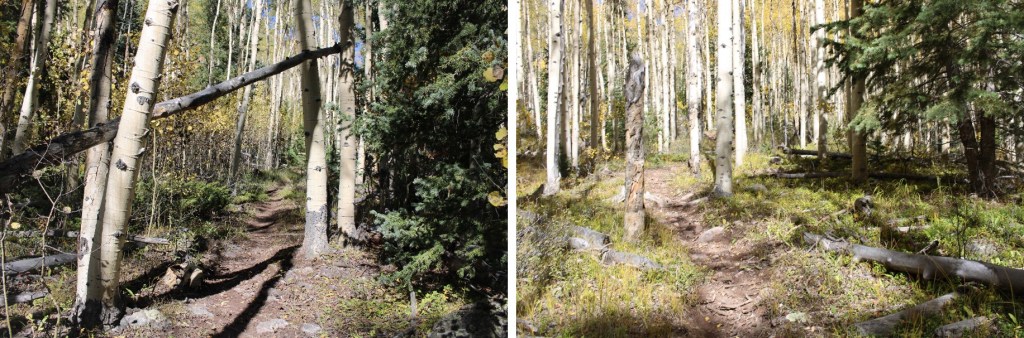
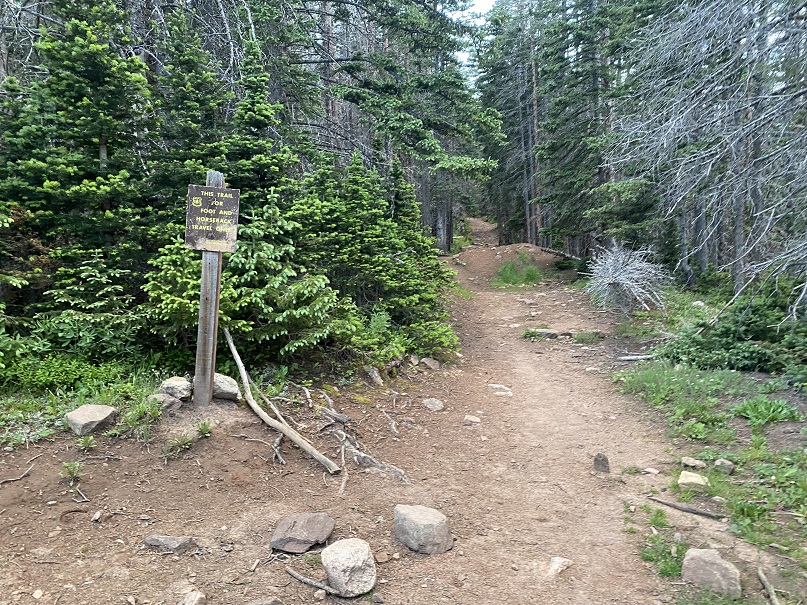
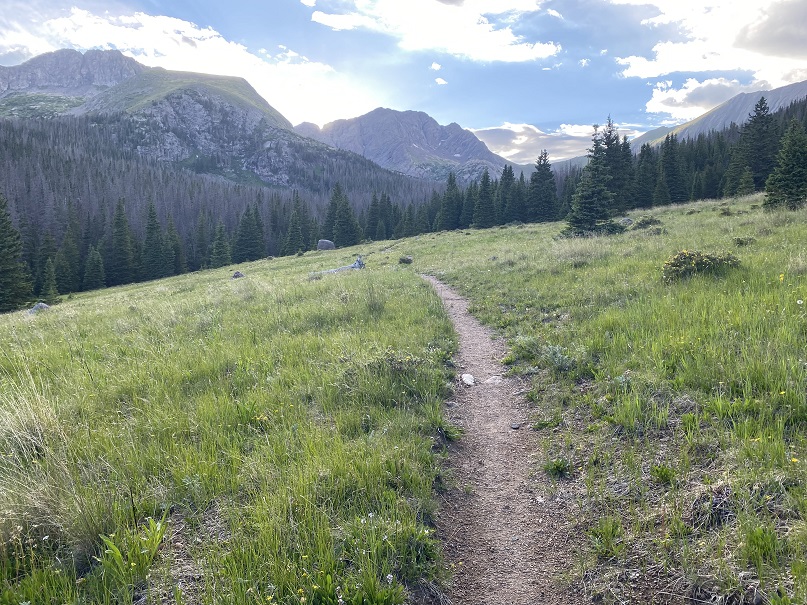
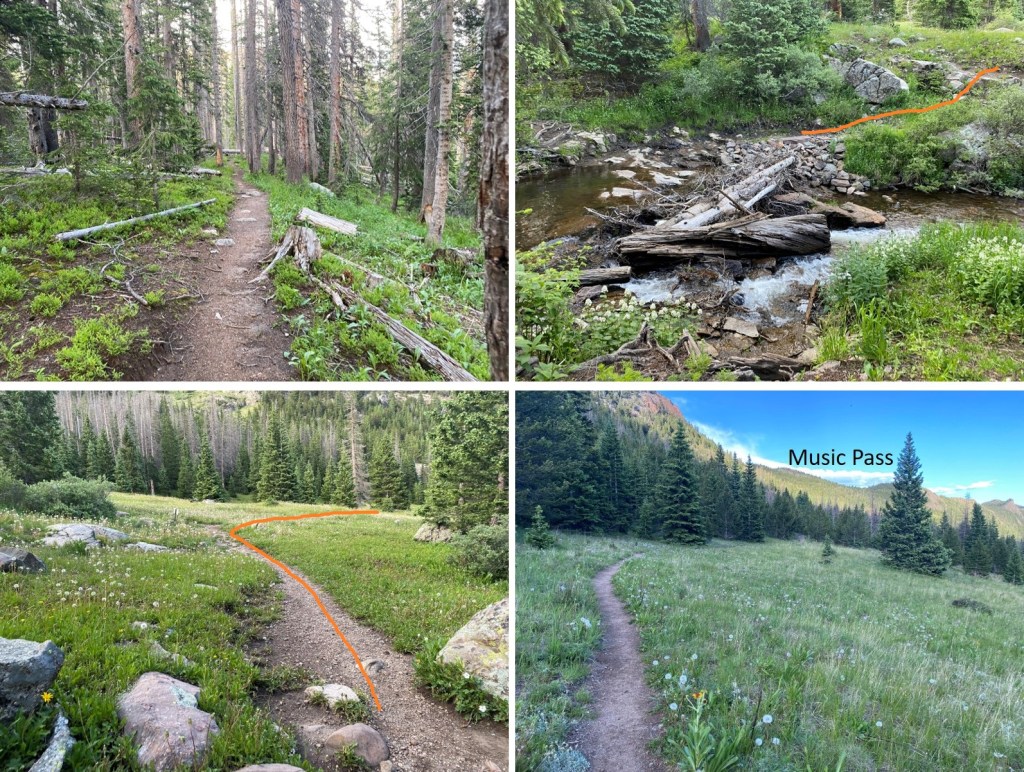
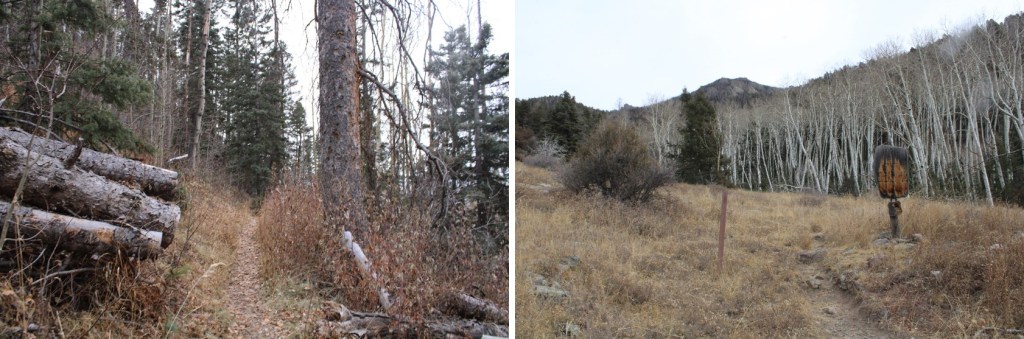
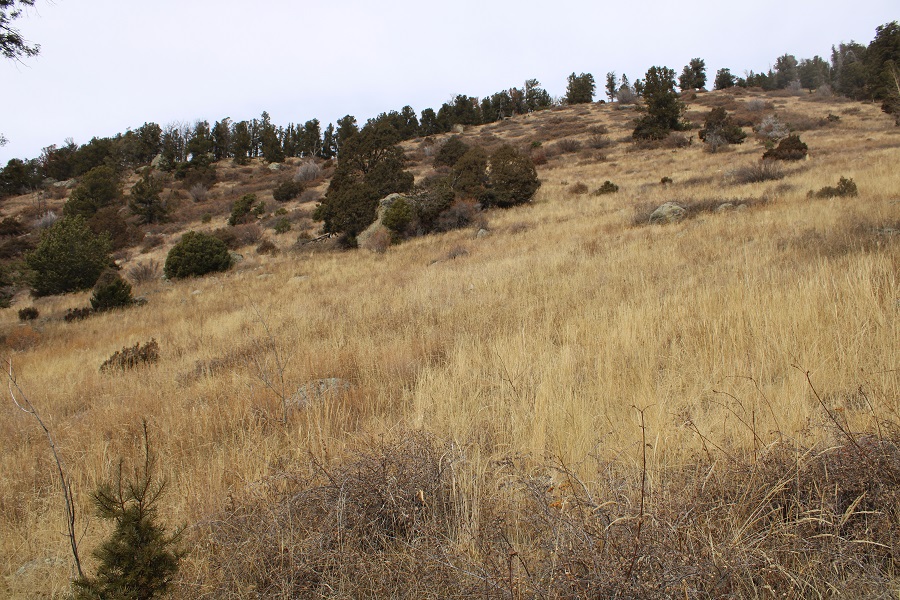
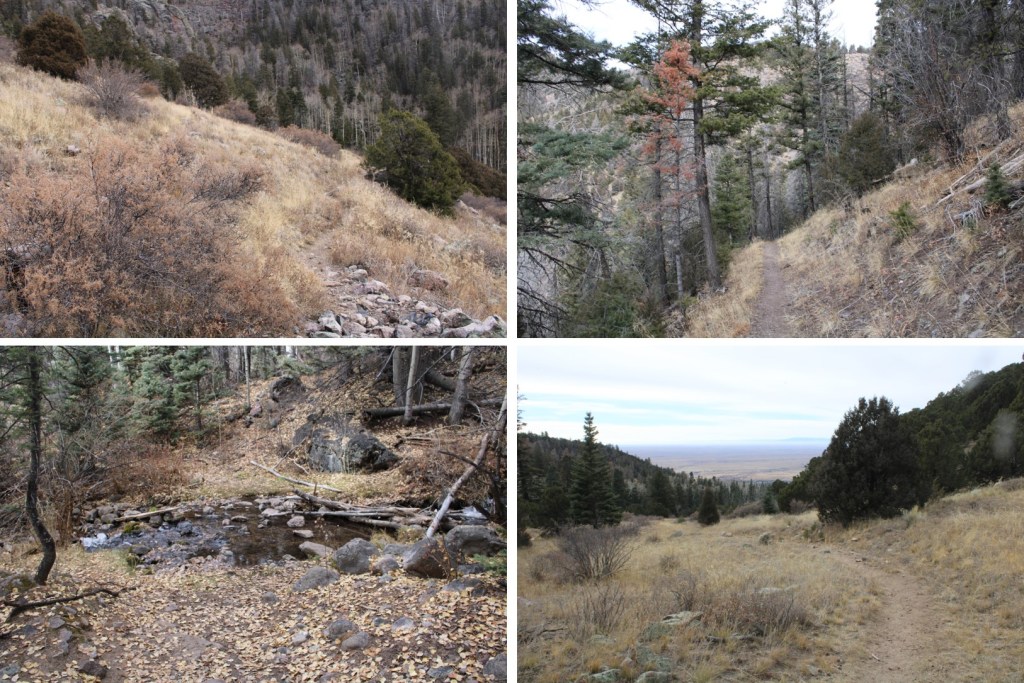
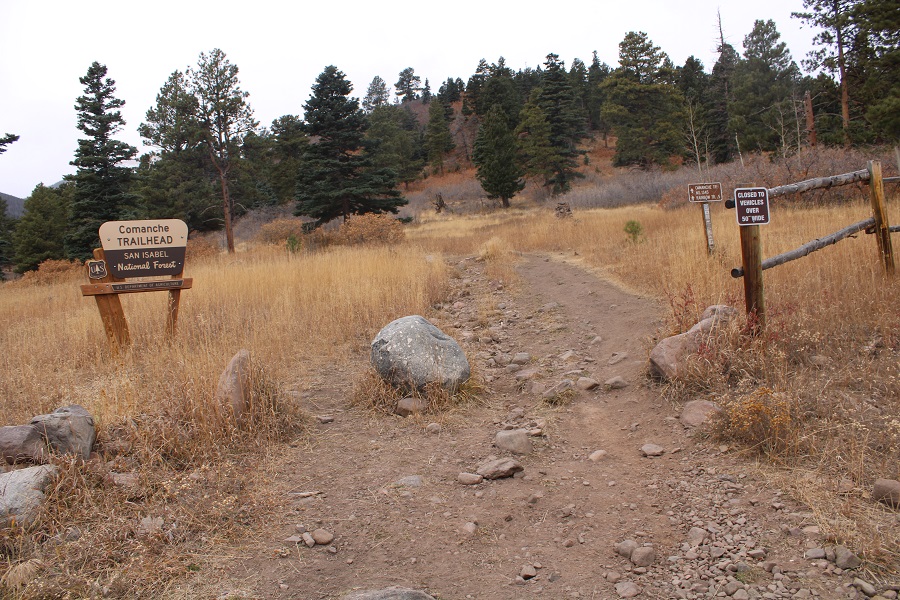
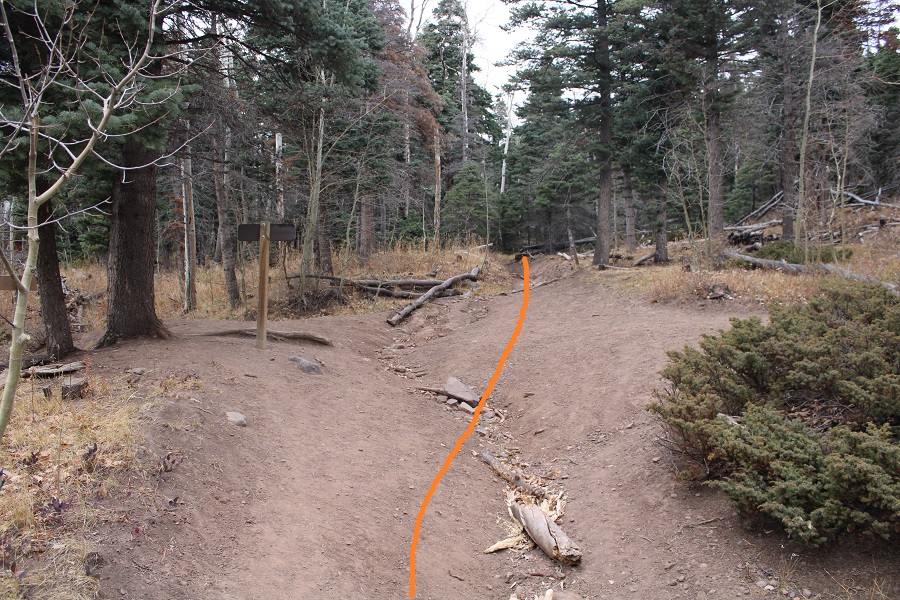
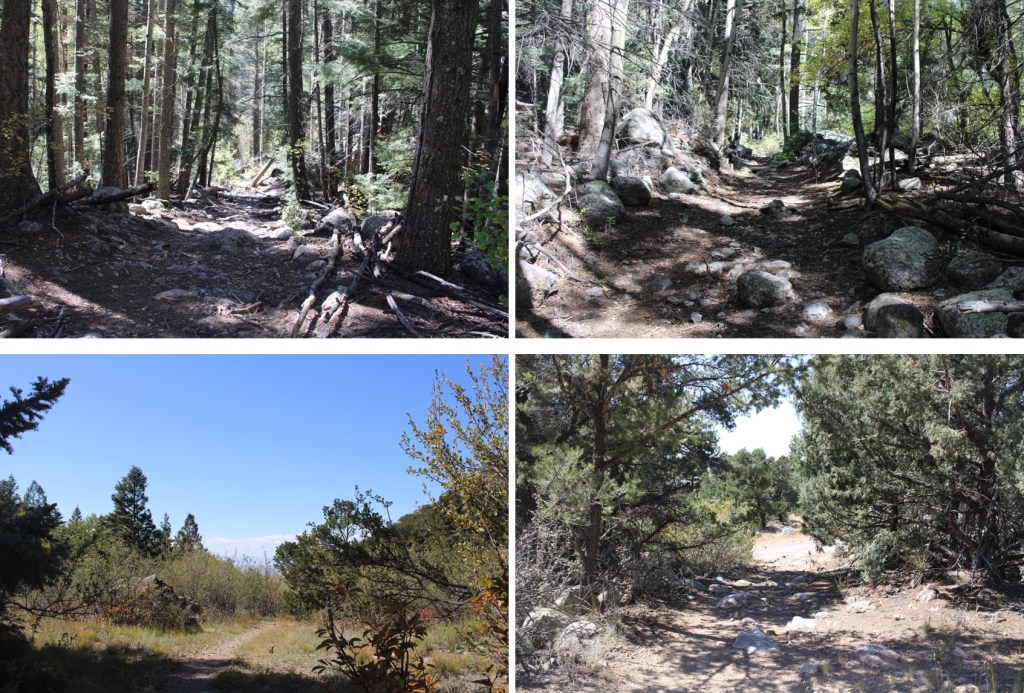
I started out following the class 1 trail east

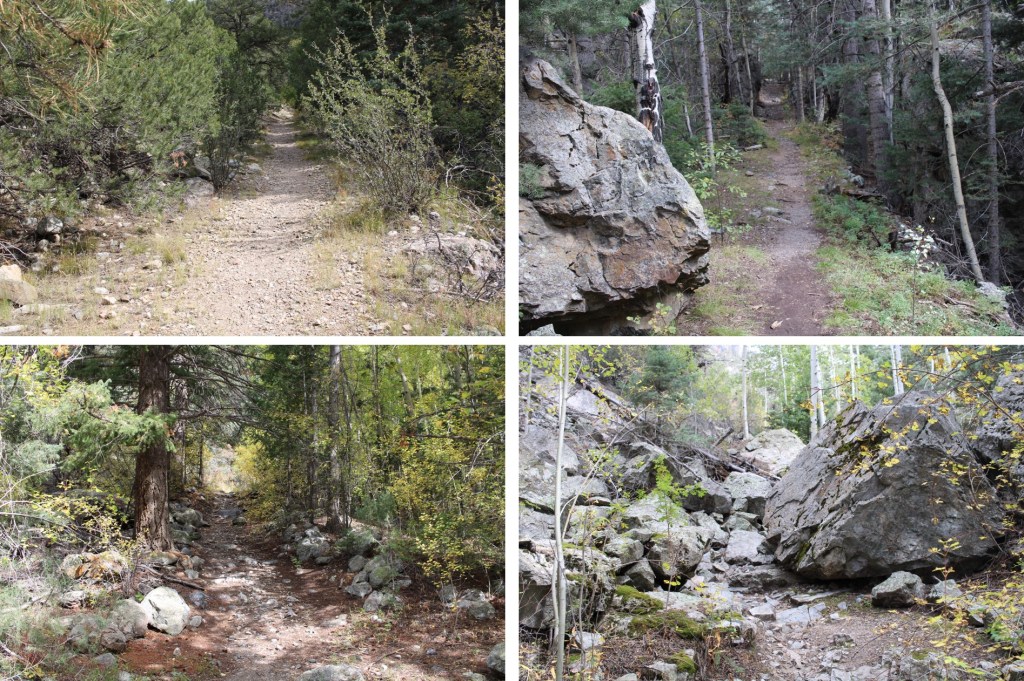
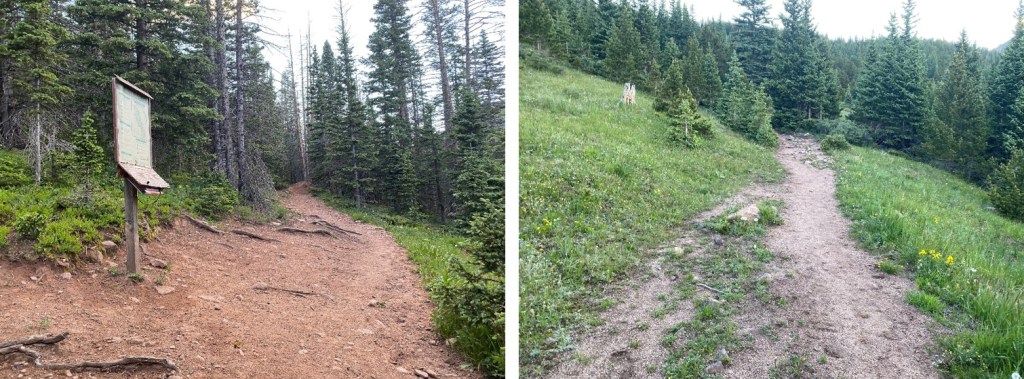
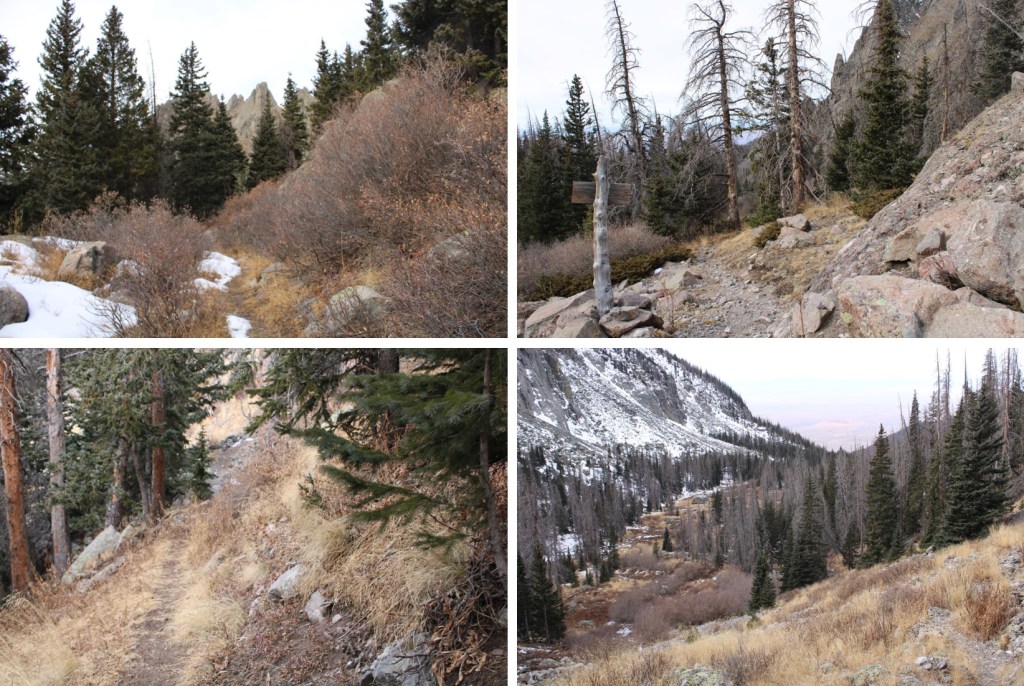
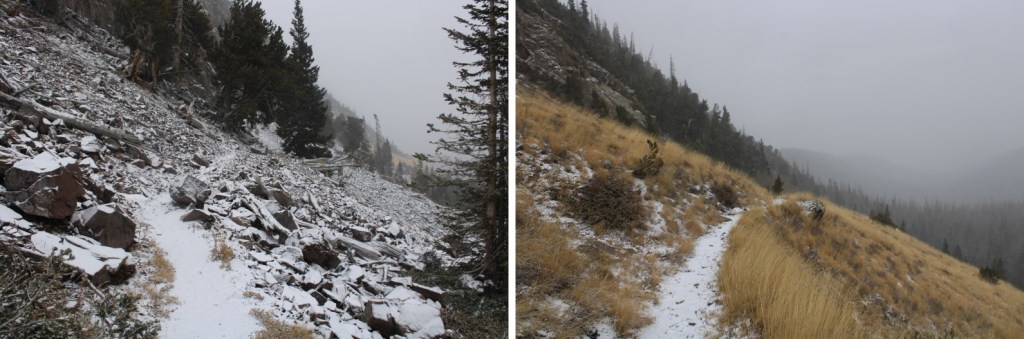
The trail is easy to follow for the first 4 miles

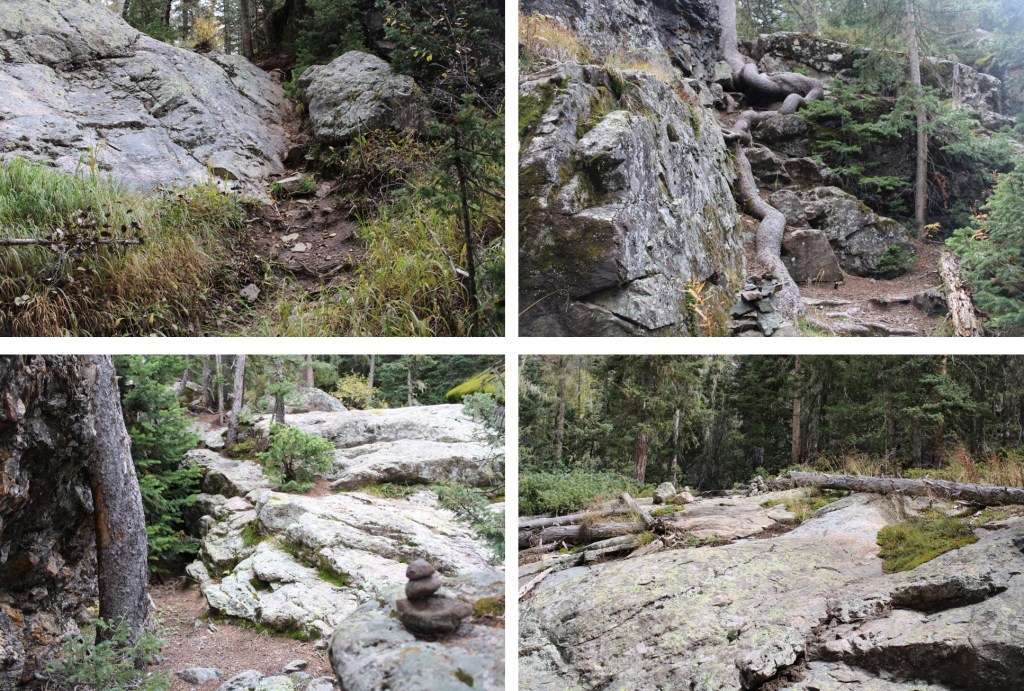
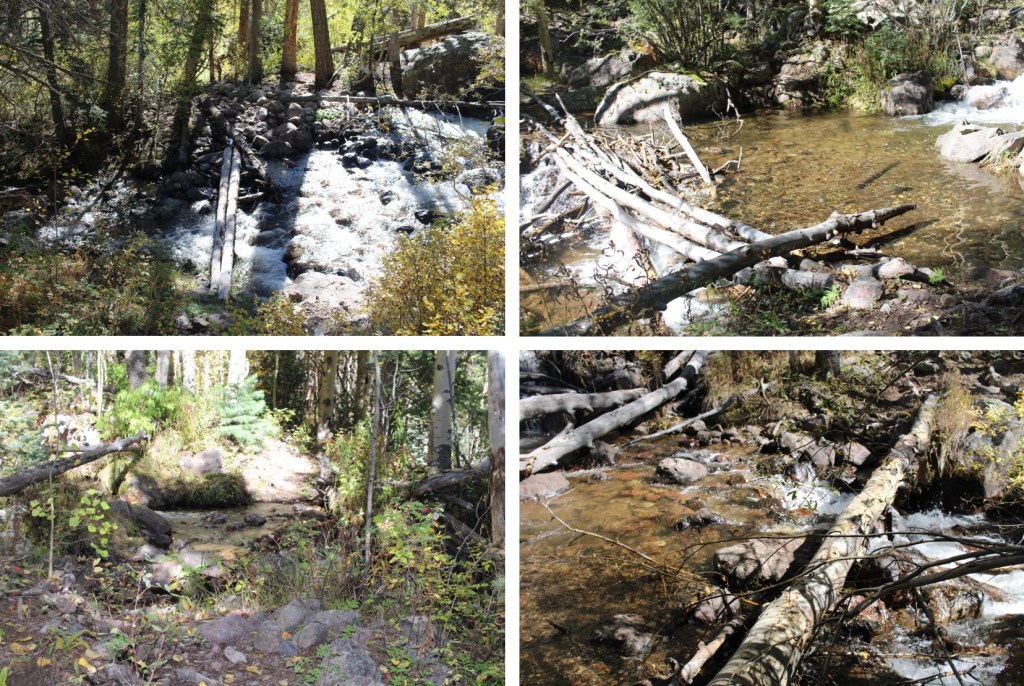
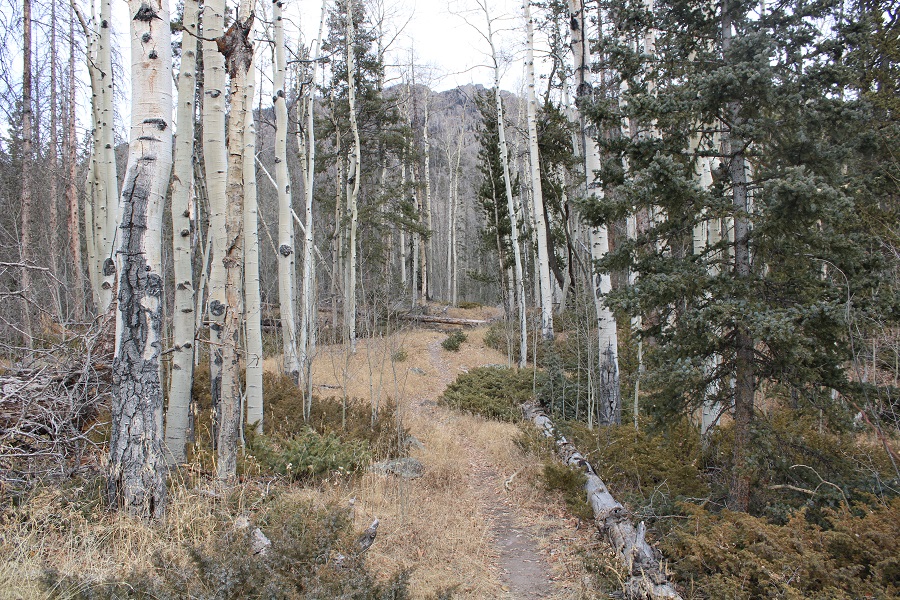
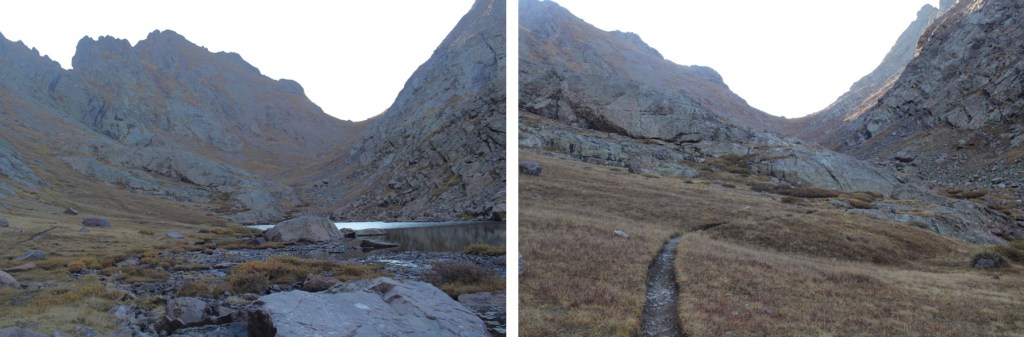
Then I came to what looked like a wall of rock.  This wall goes for about three quarters of a mile, and should not be attempted in wet conditions. There are plenty of cairns here to mark the way.  If you don’t see a cairn, you’re off route.  You head straight up.

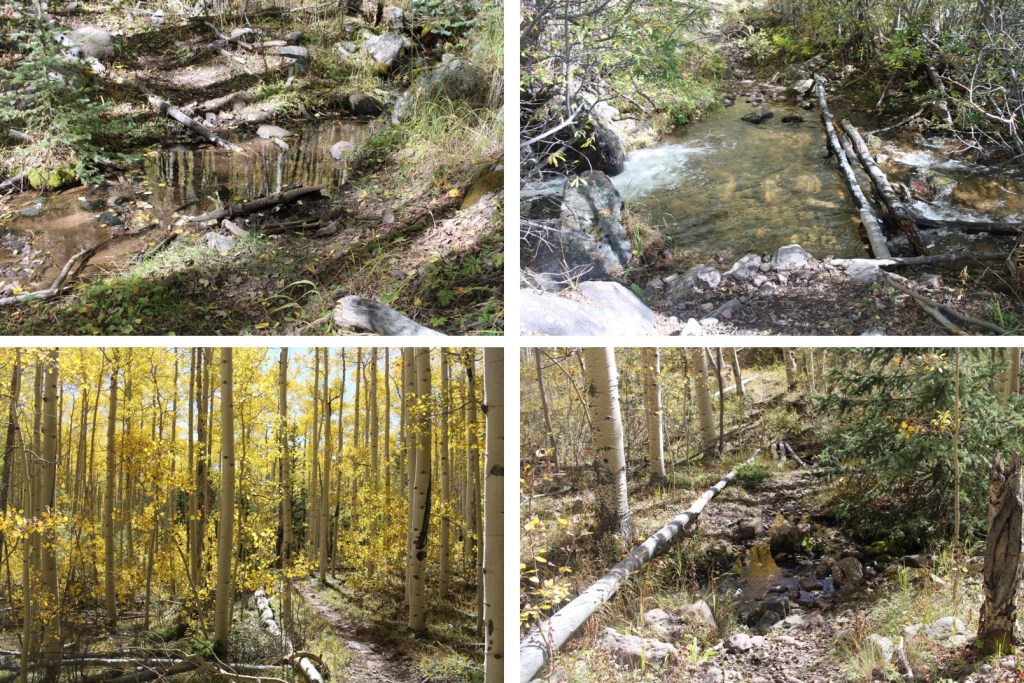
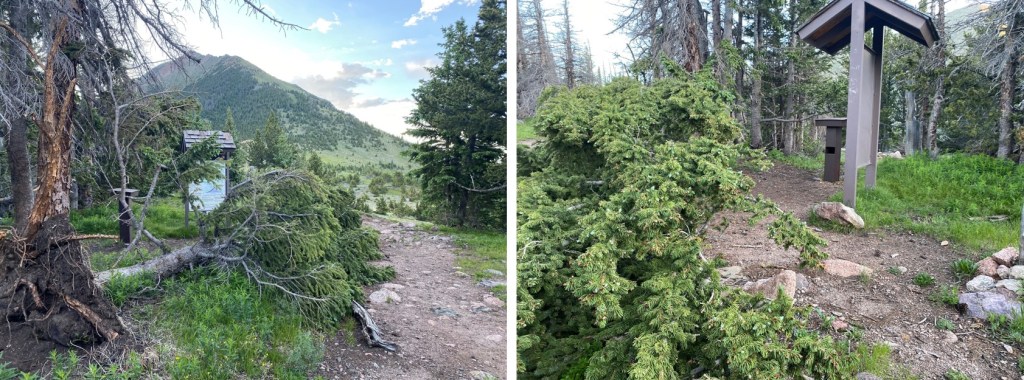
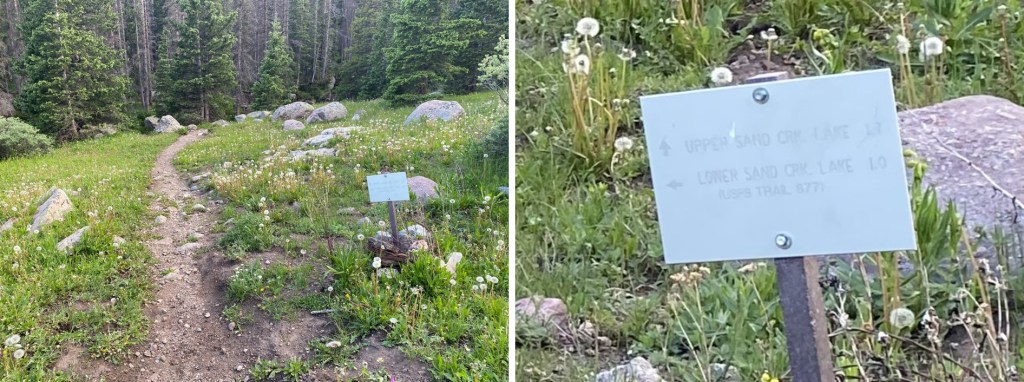
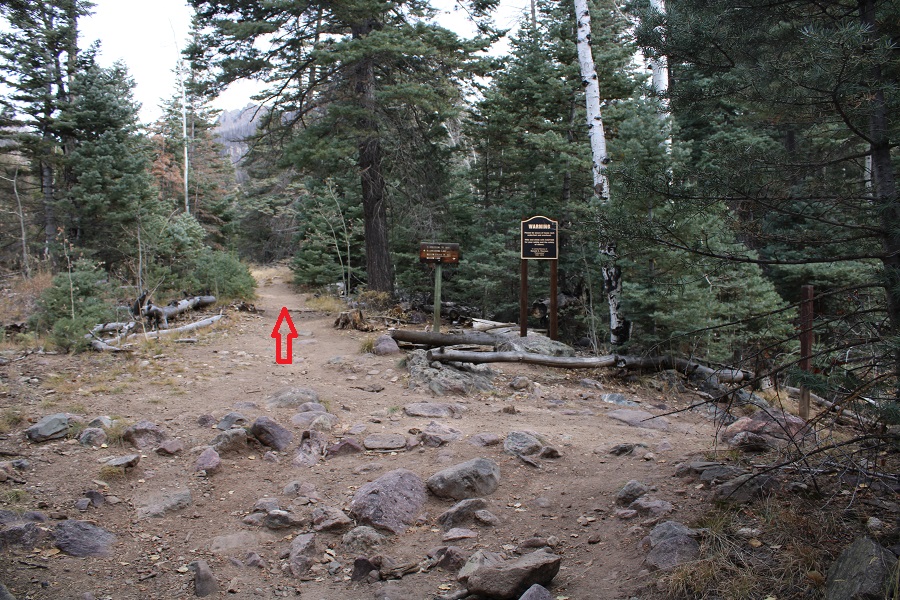
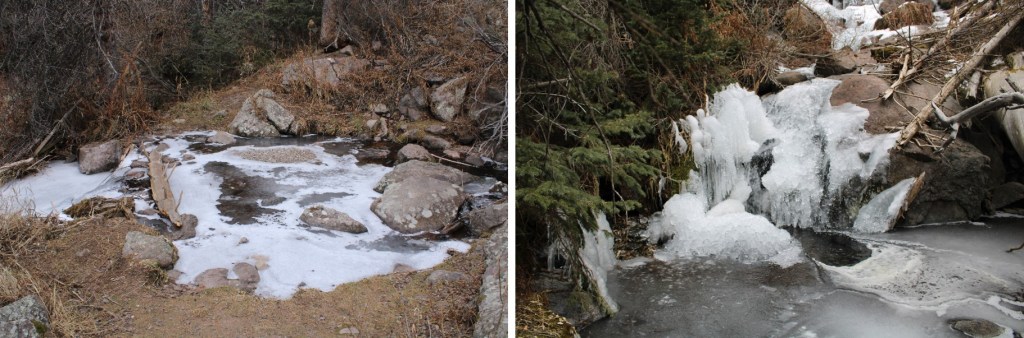
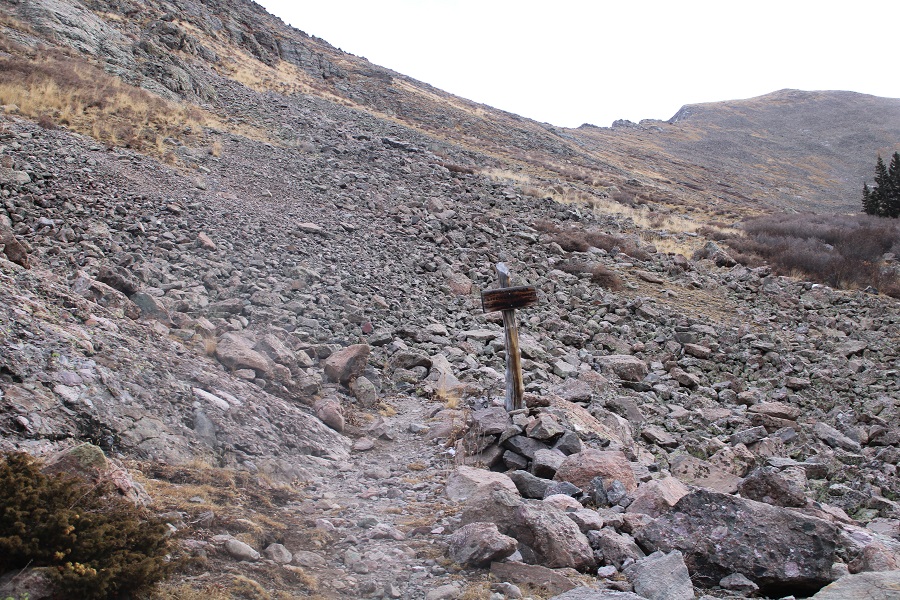
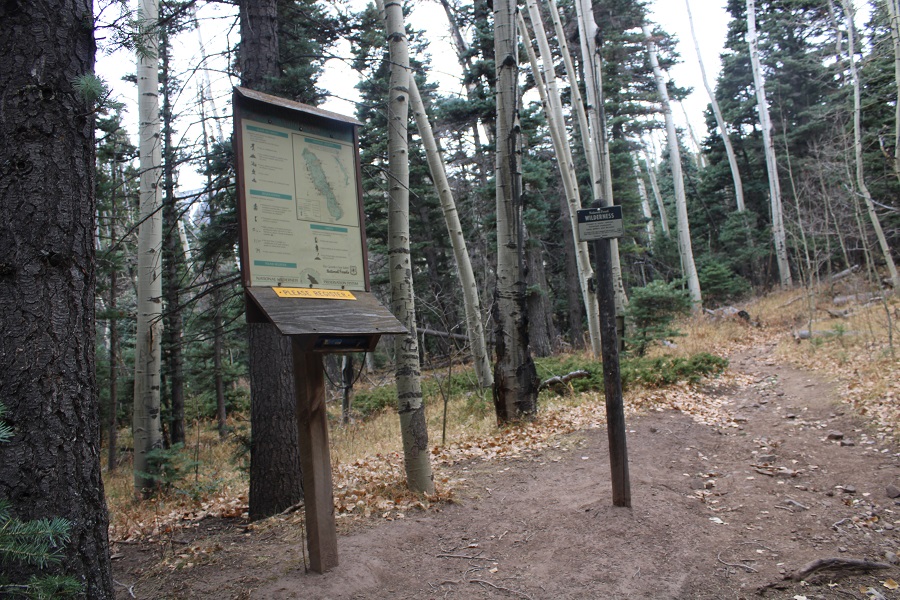
After 4.6 miles I came to a junction between Trail 743 and Trail 861.  It’s not obvious, and there are no signs, so you need to be looking for it.  I was at 11255’.  One trail goes left, the other right, and crosses the creek.  Don’t go right, go left and continue following the trail.

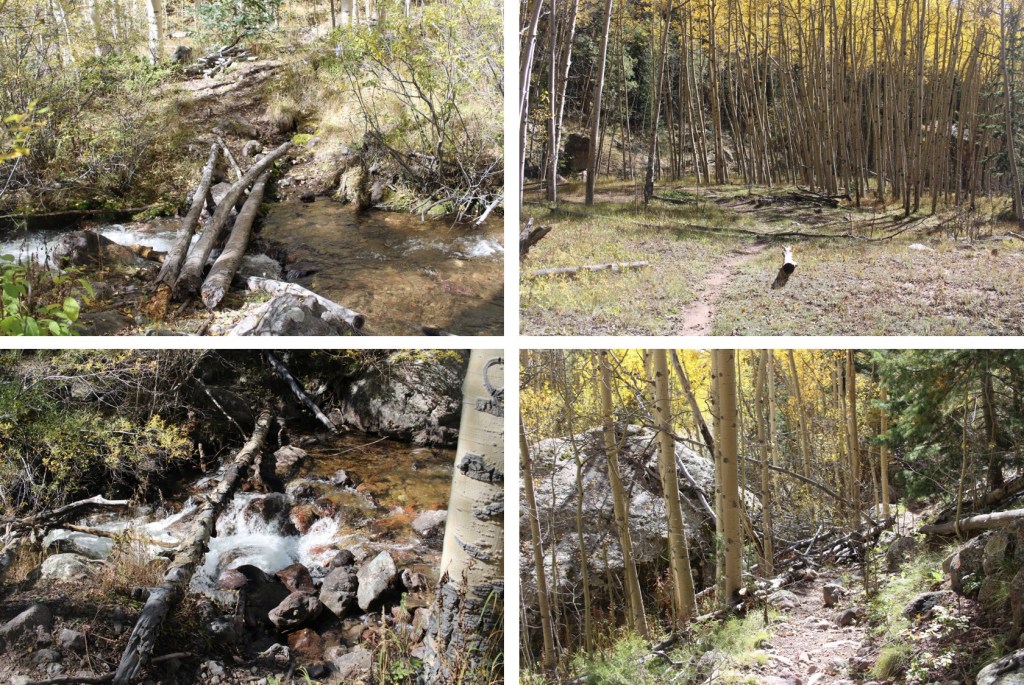
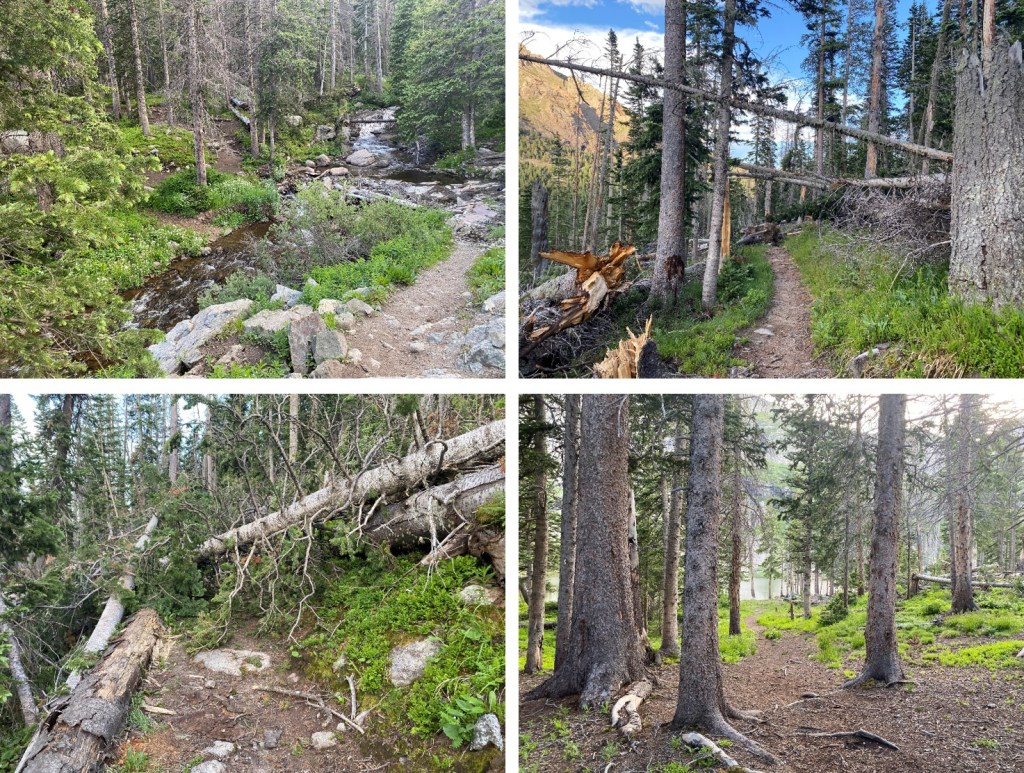
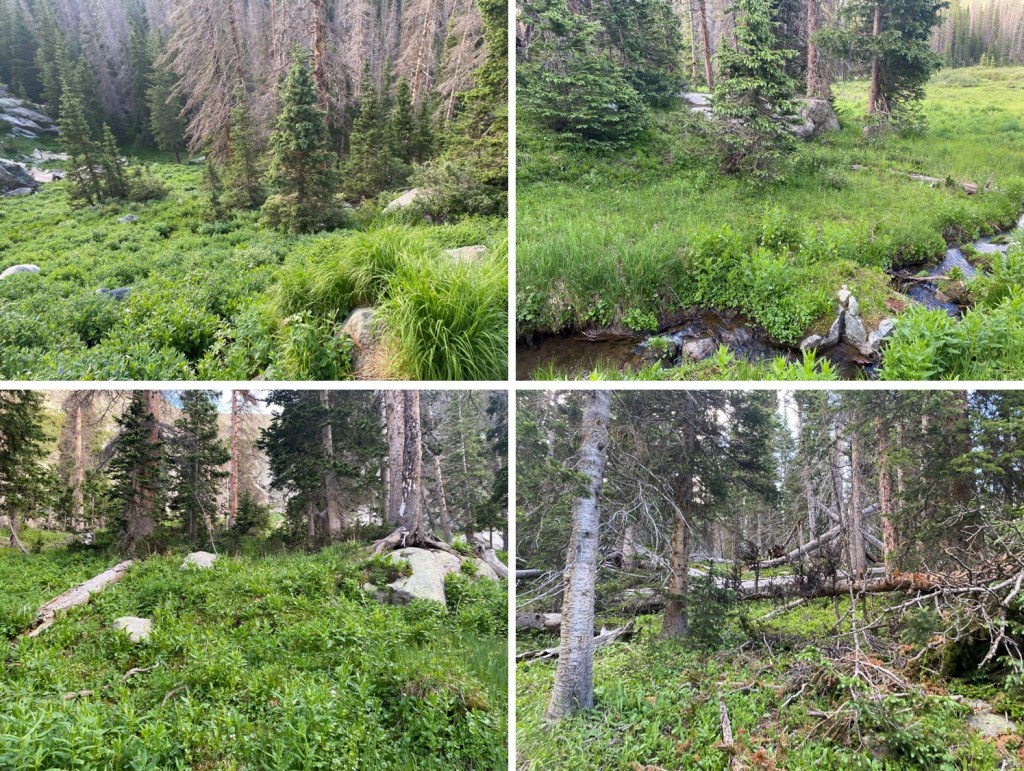
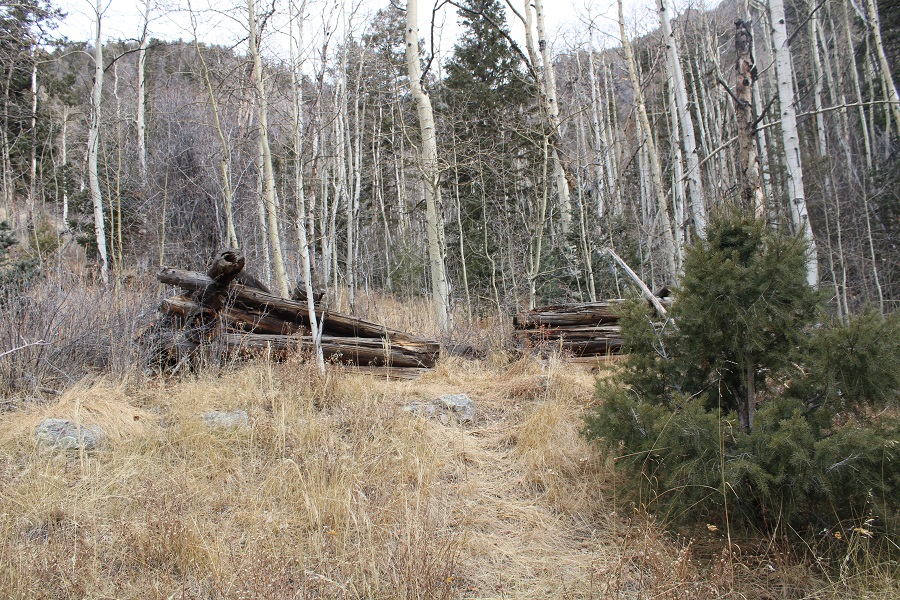
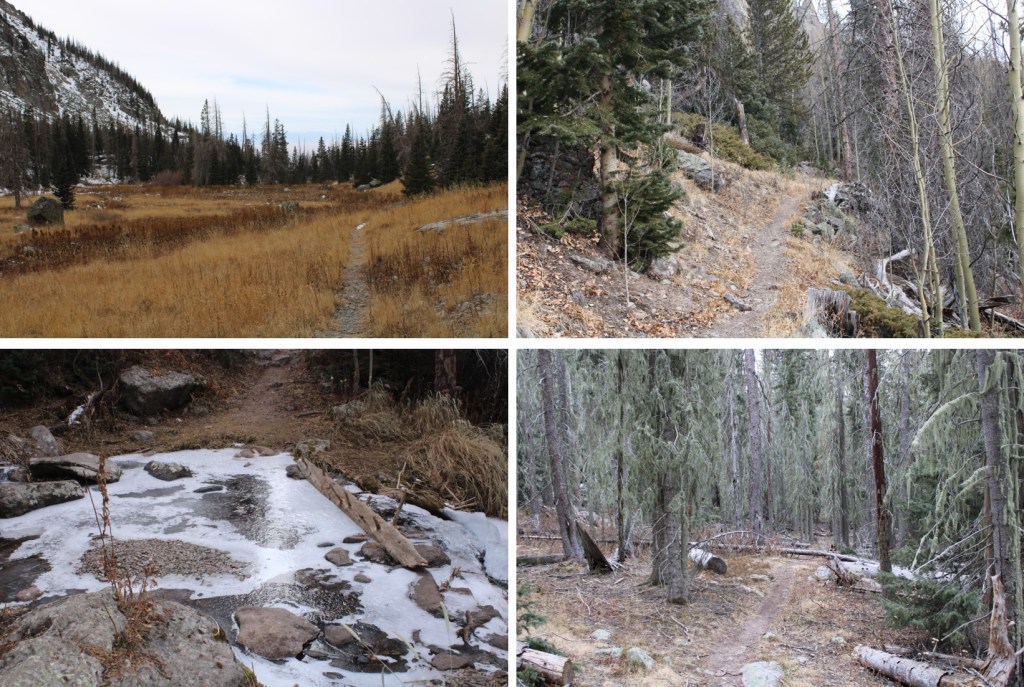
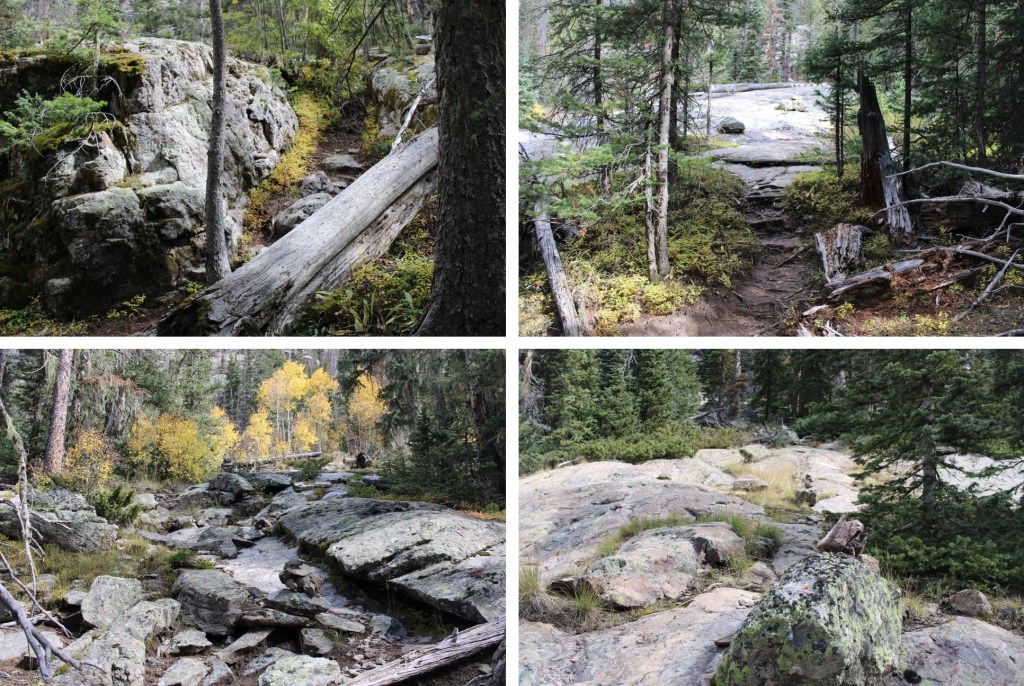
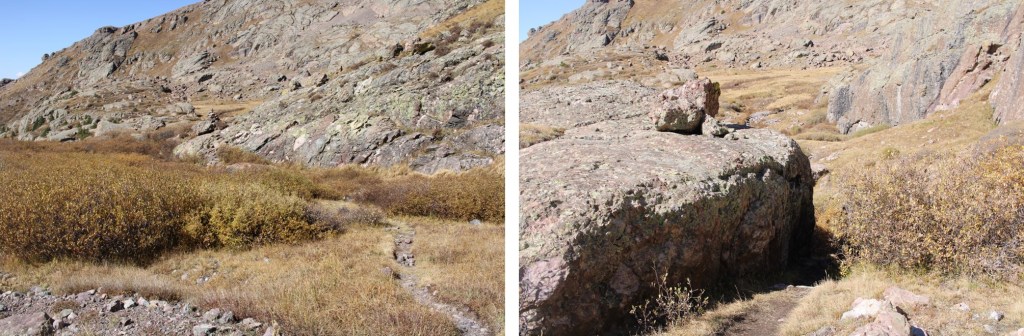
This trail led me to a camping area, with a boulder the size of a house.  The goal is to make it to the upper basin.  There are trails that go on each side of the boulder that will get you there.  There are a lot of cairns in this area. 

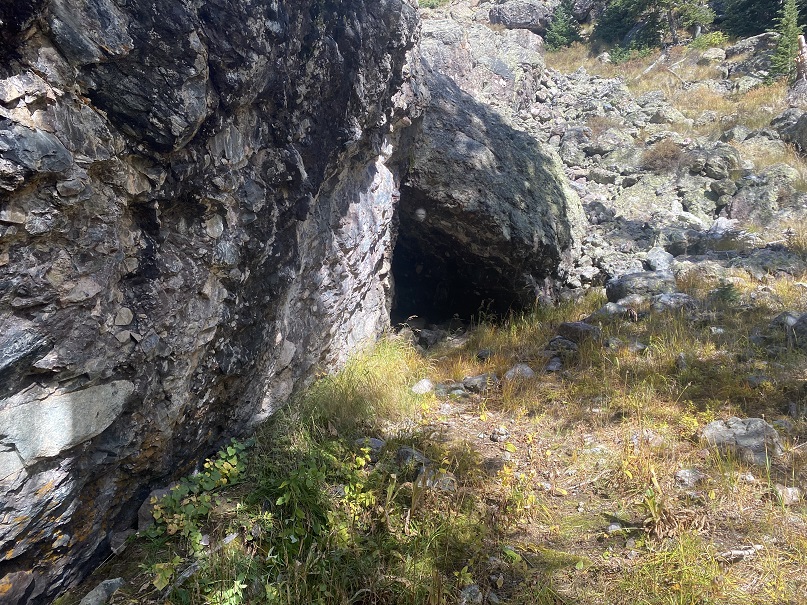
If you take the trail to the right, there’s a pretty cool cave to check out, but be careful:  there was a rather large hornets nest at the entrance this time.

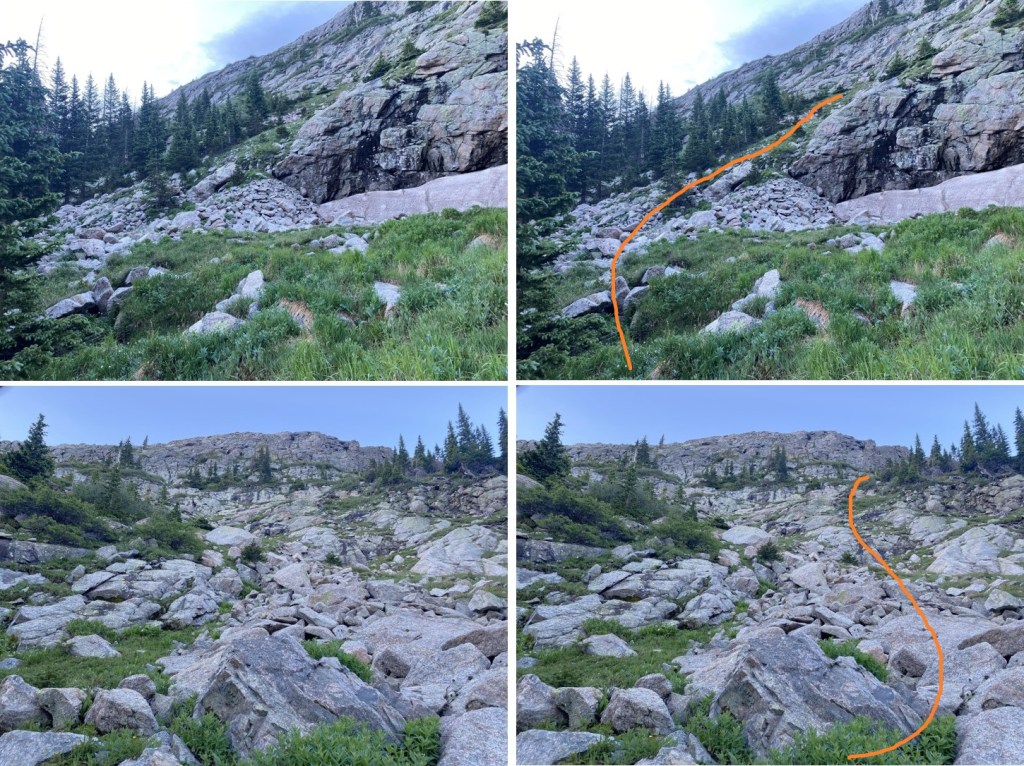
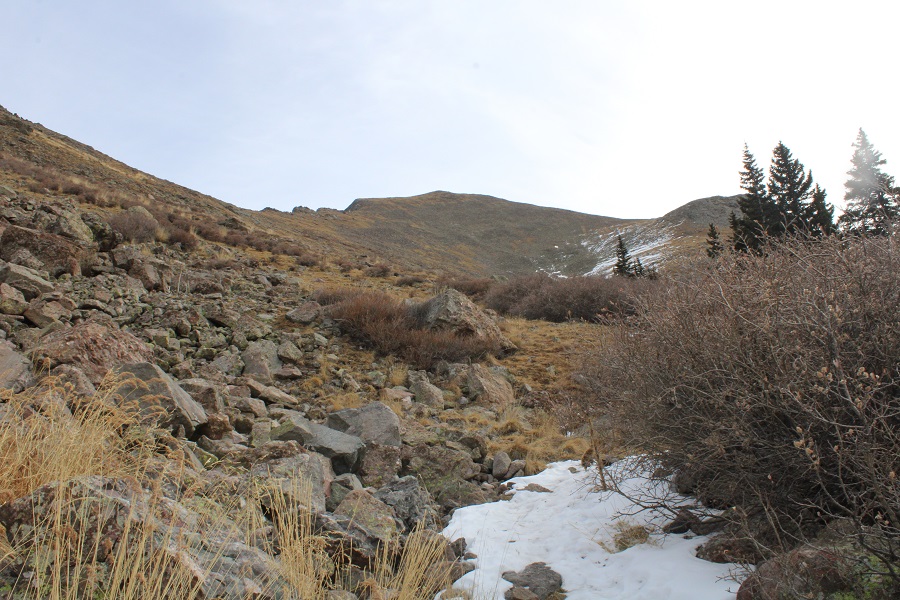
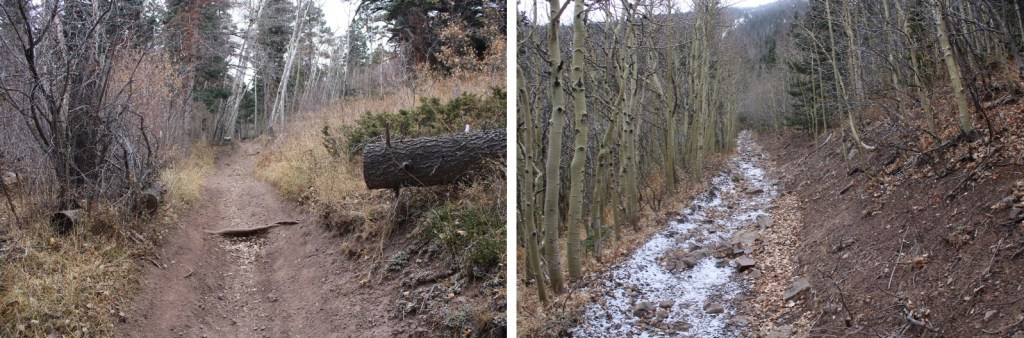
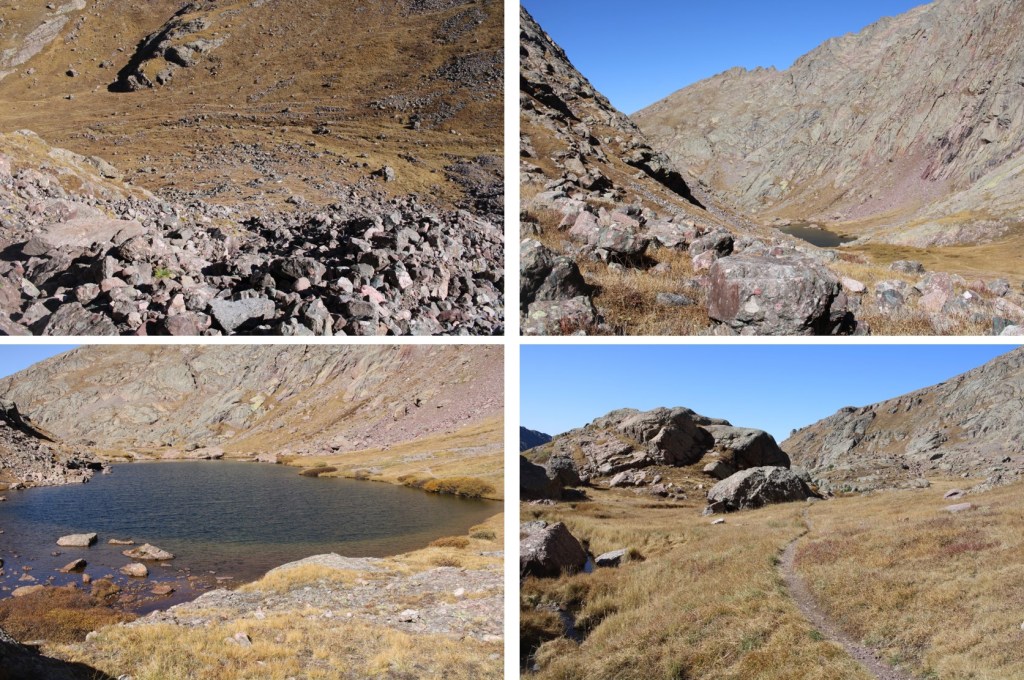
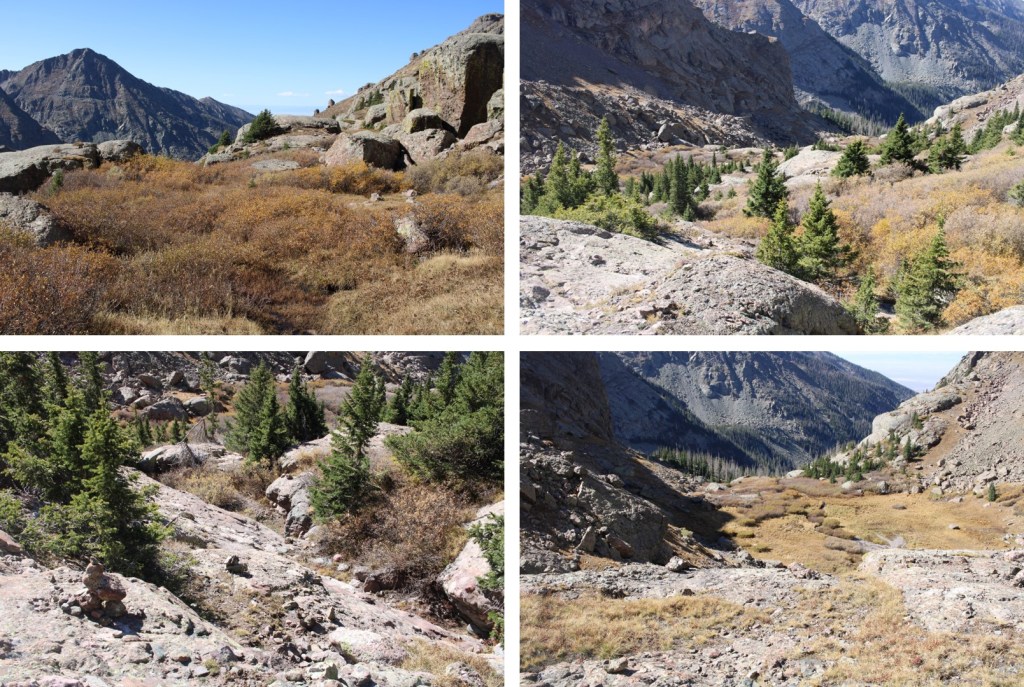
I followed the cairns northeast, through rock fields and willows.

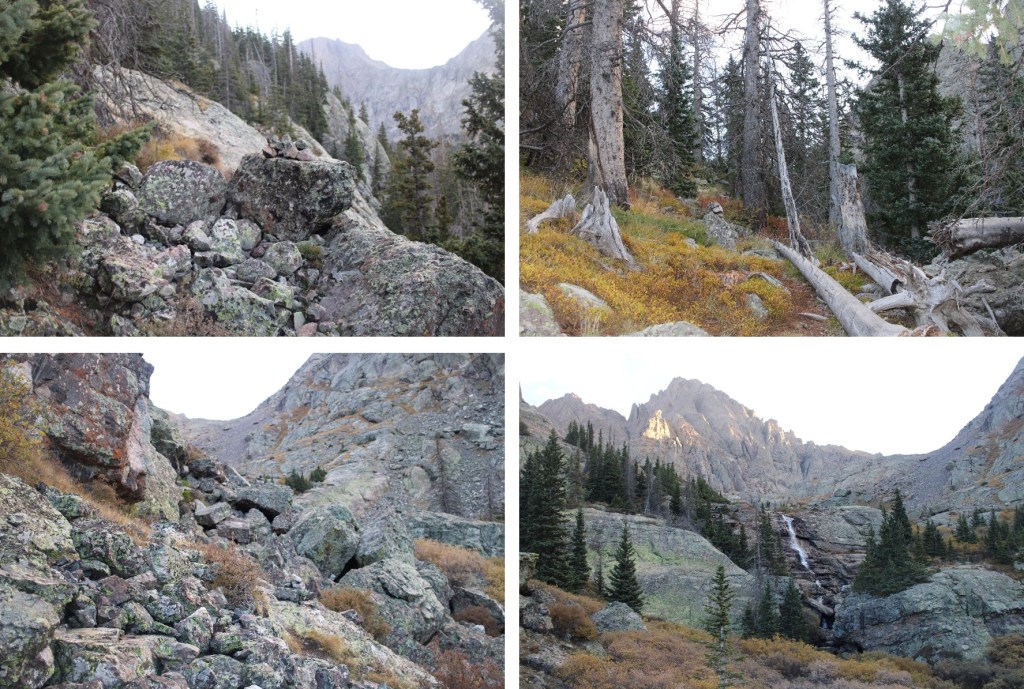
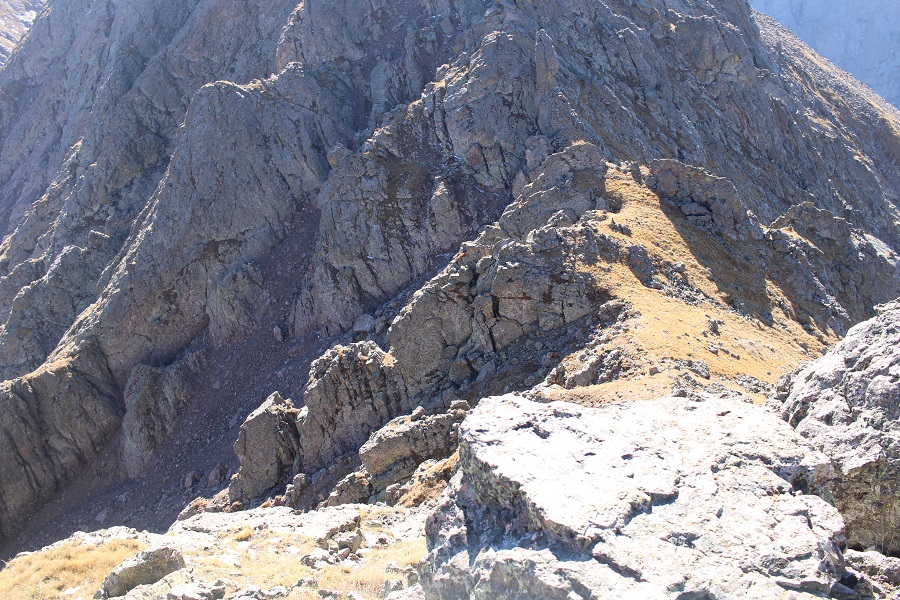
There were a few class 3 moves to do to make it to the upper basin, but plenty of cairns to guide the way

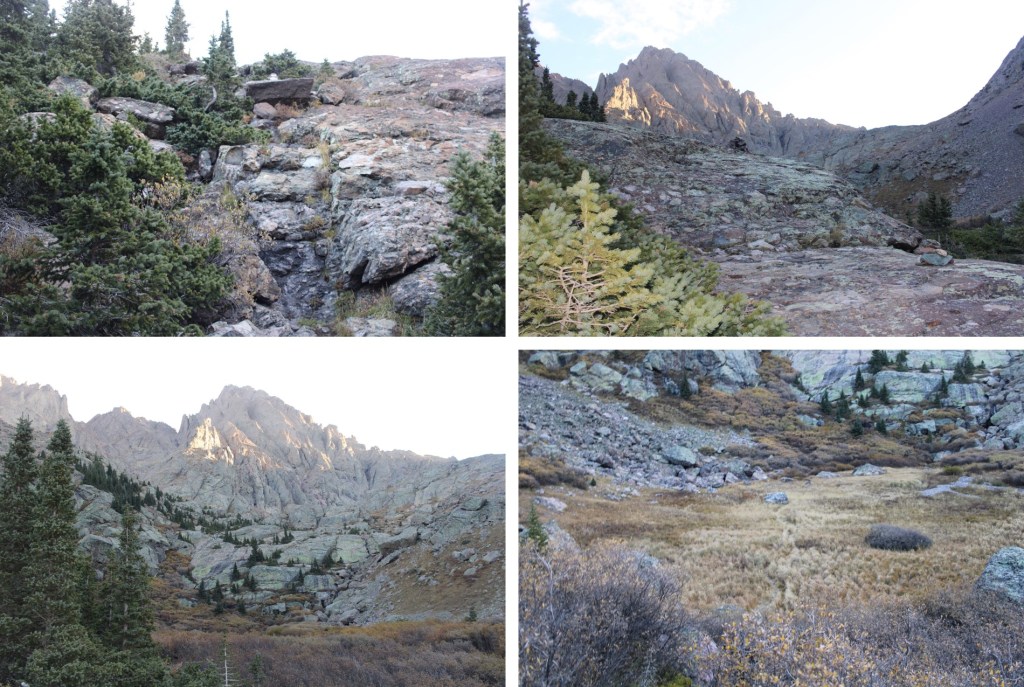
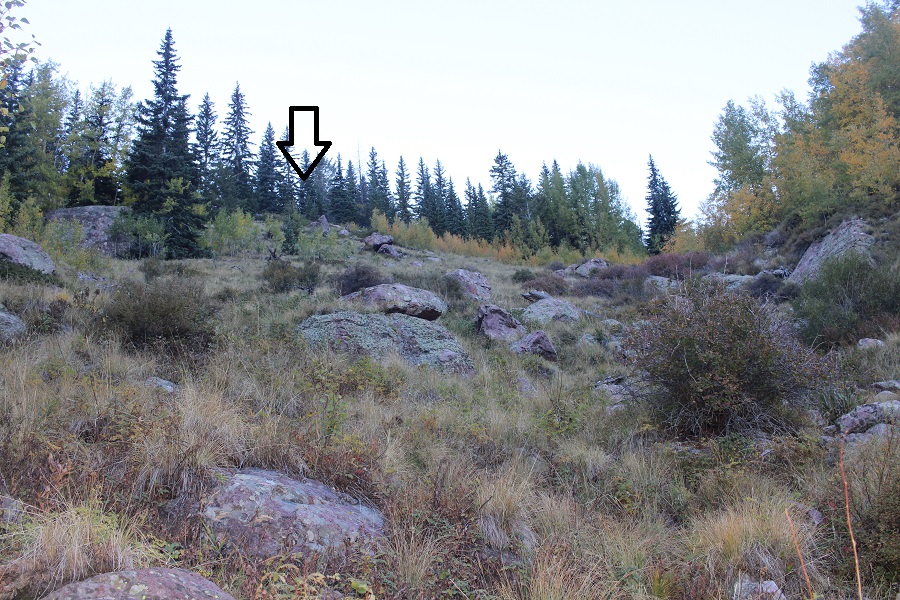
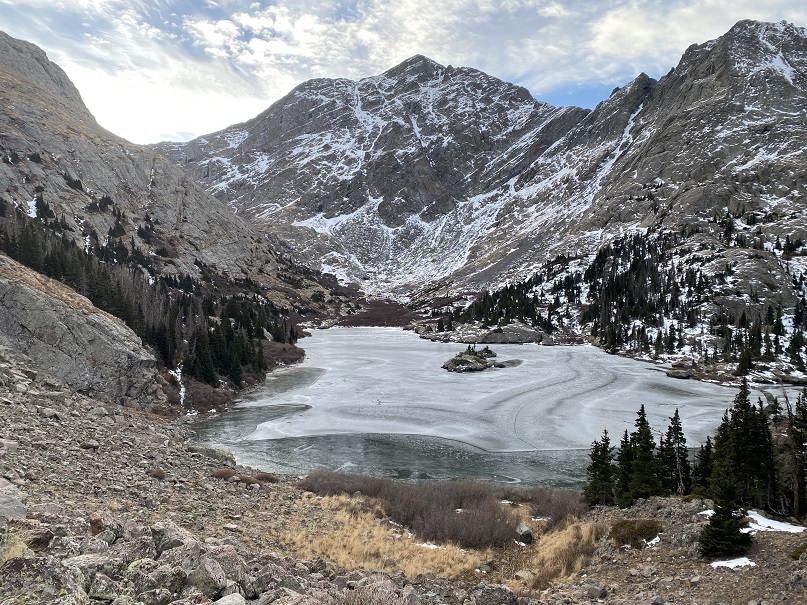
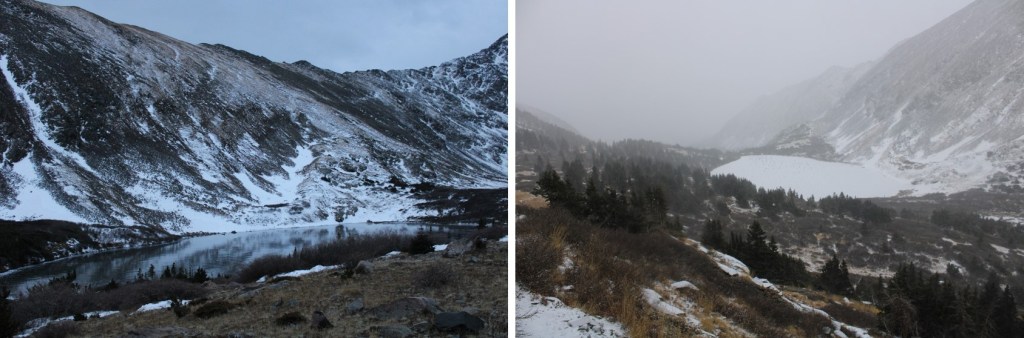
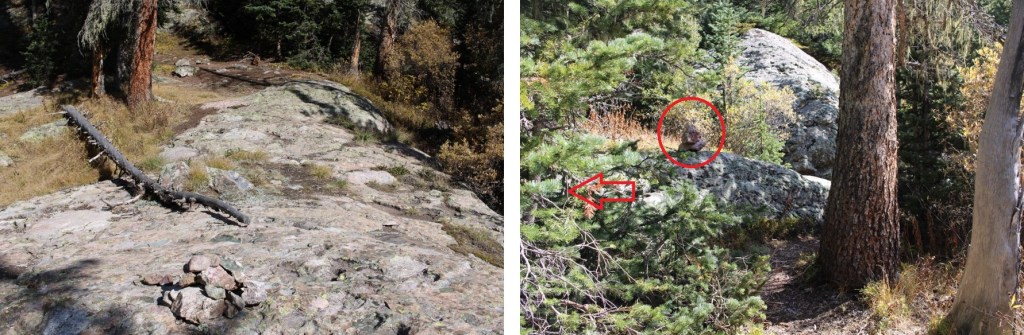
I went behind this rock, and caught up with the trail to Cottonwood Lake, now heading east.

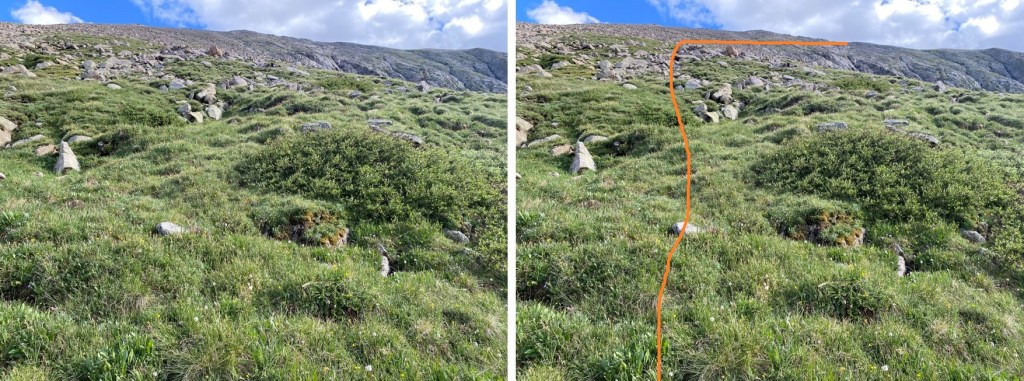
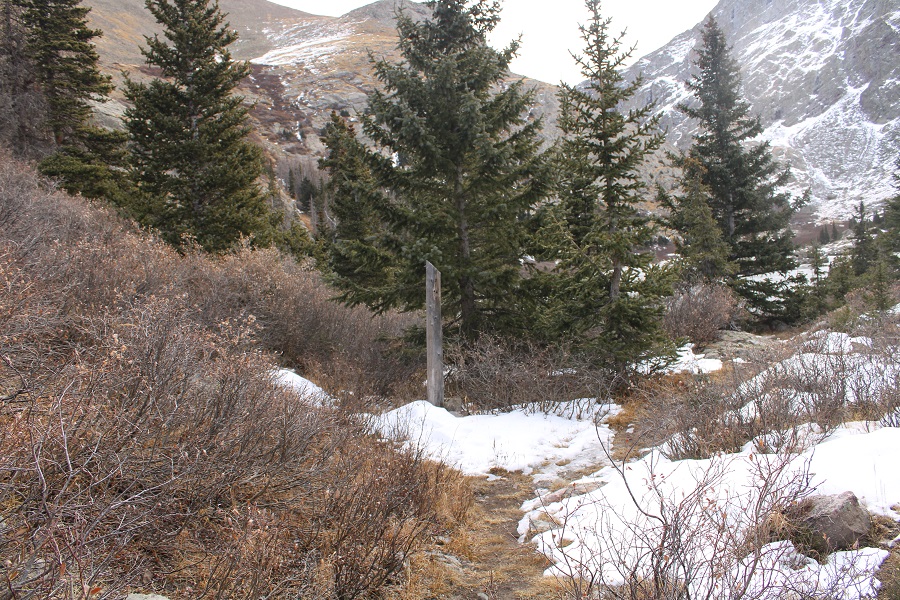
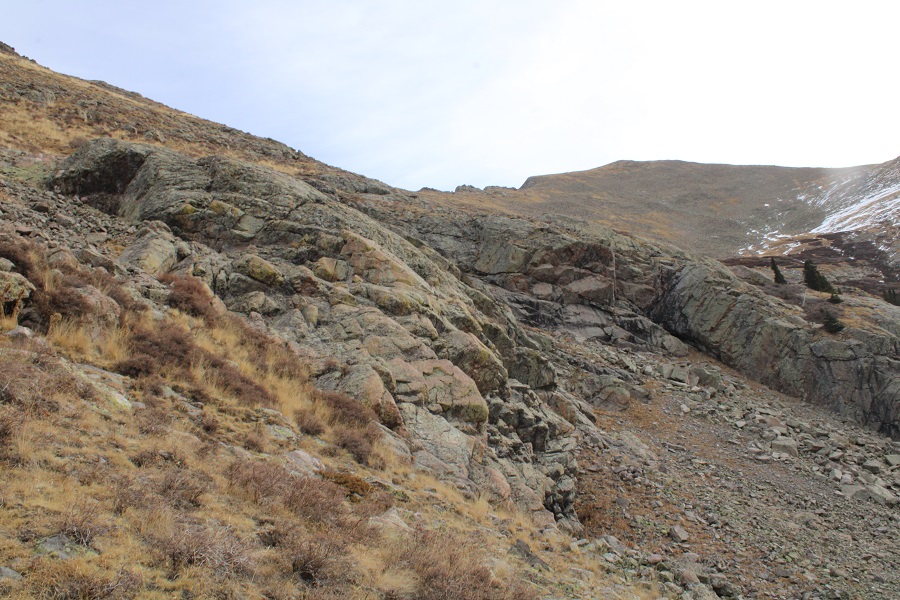
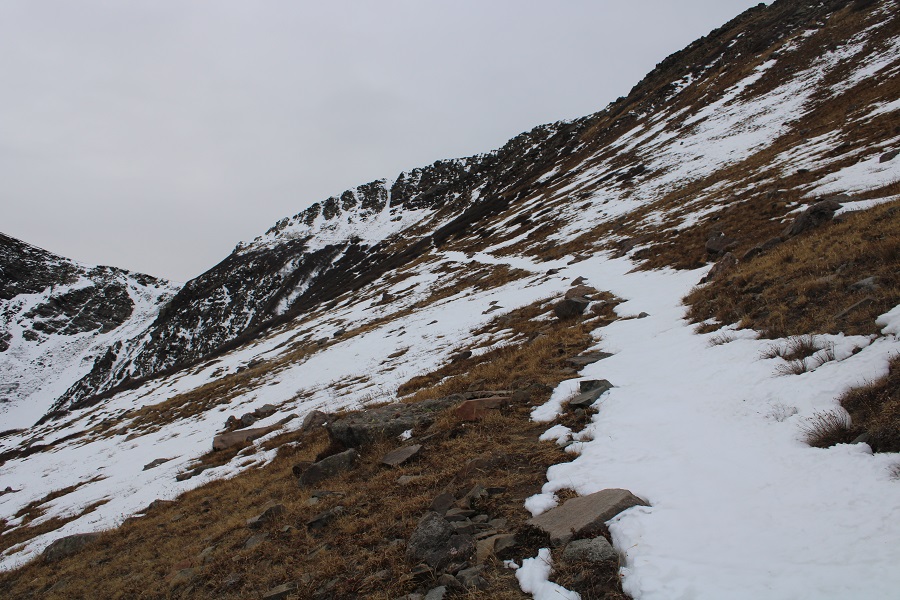
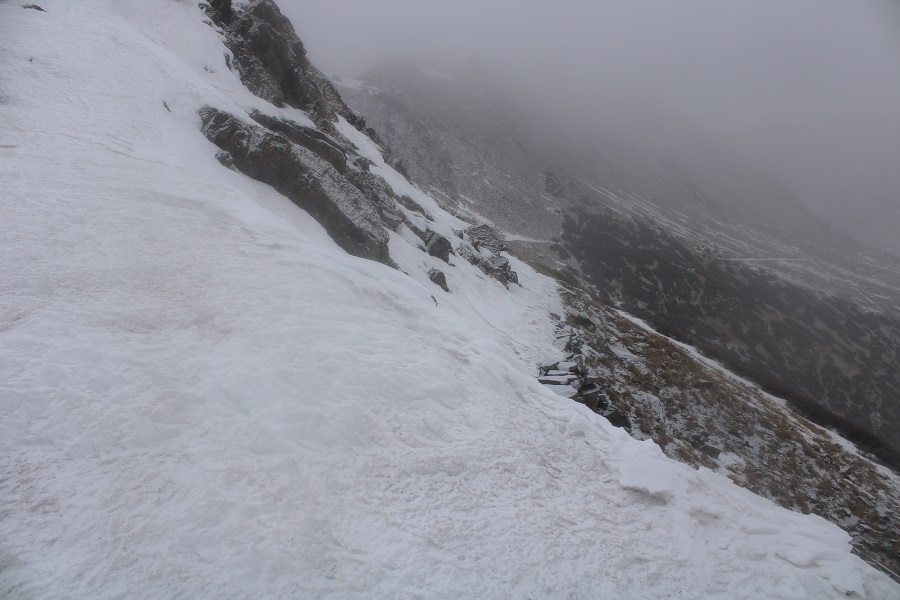
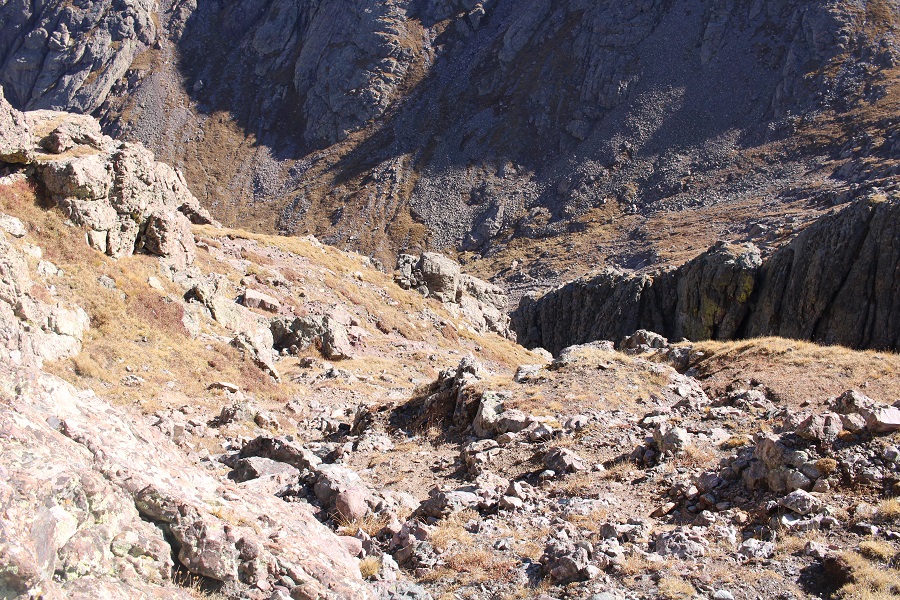
I followed the trail until I was at 12430’, and then turned right, starting up tundra

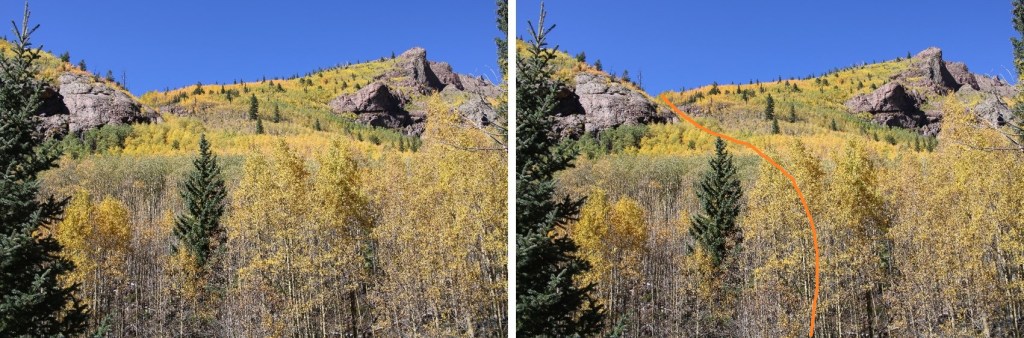
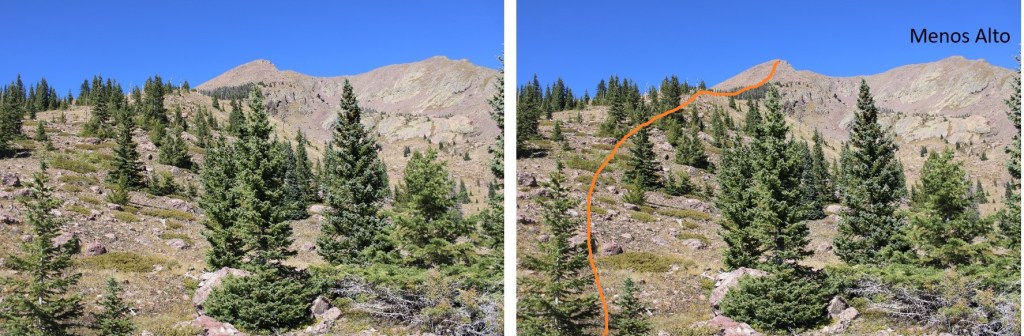
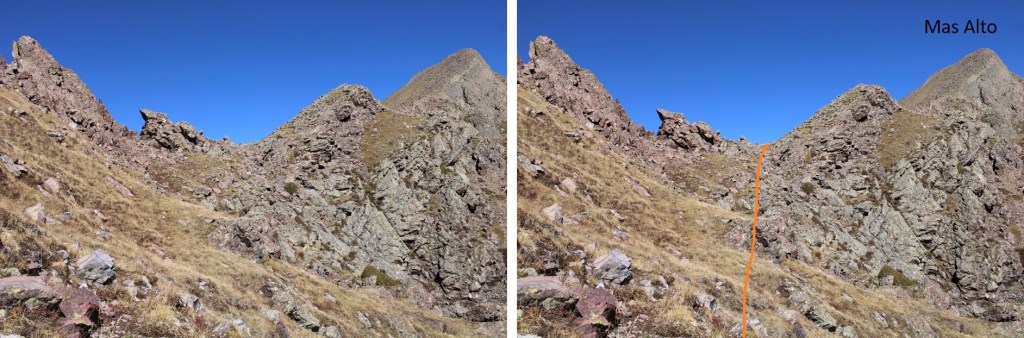
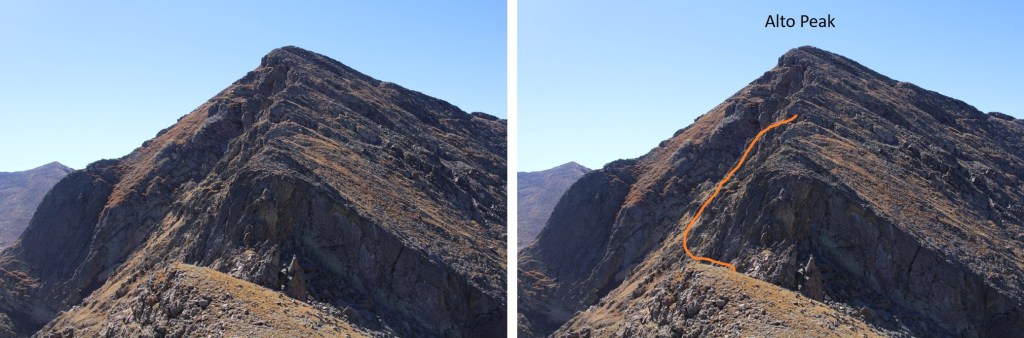
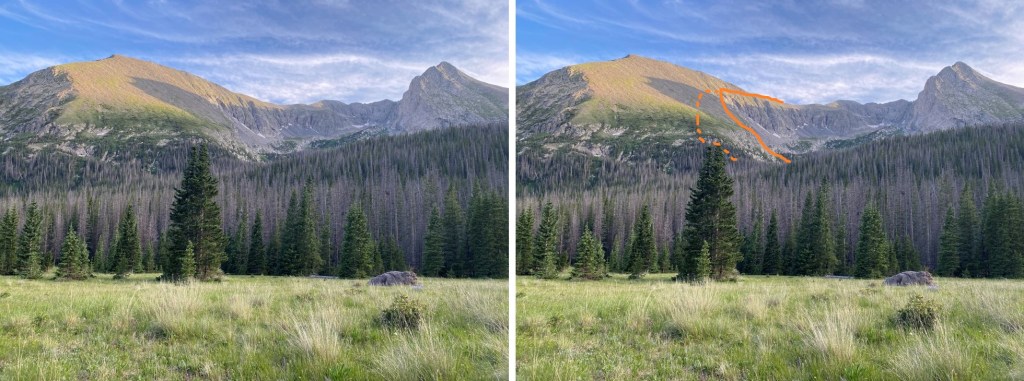
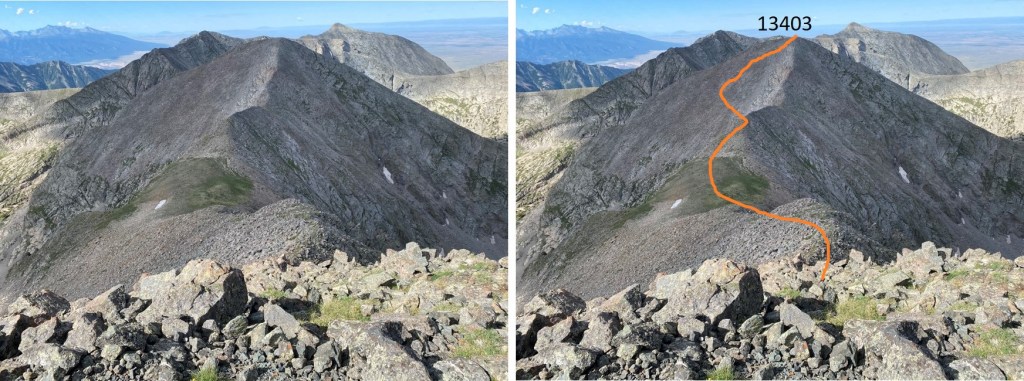
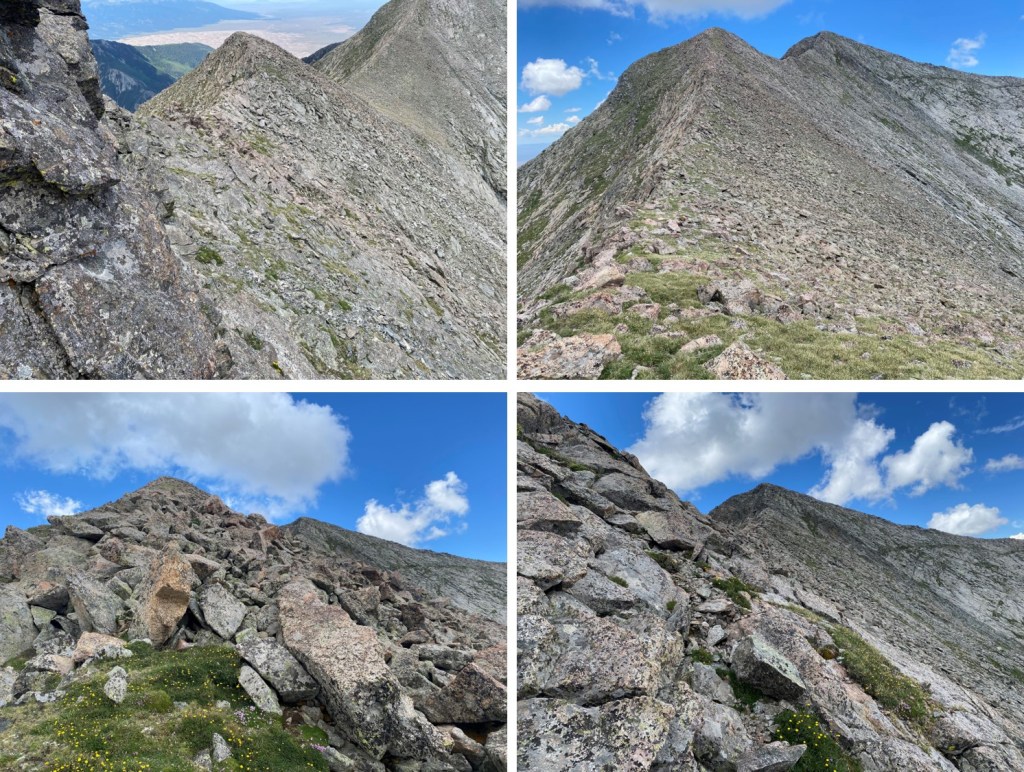
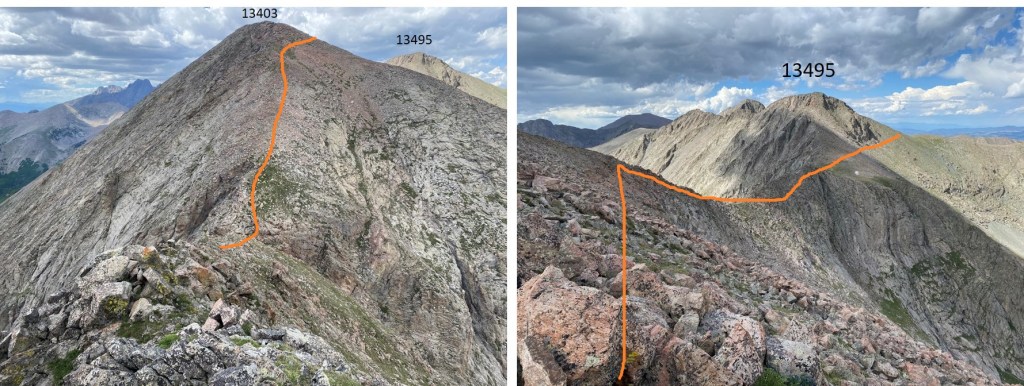
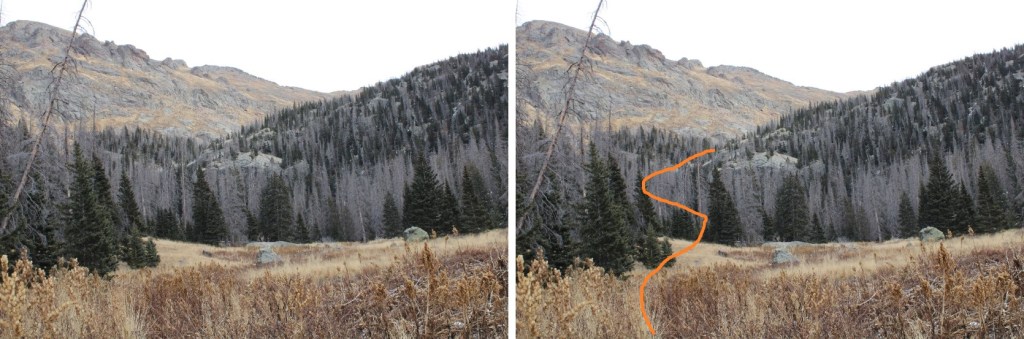
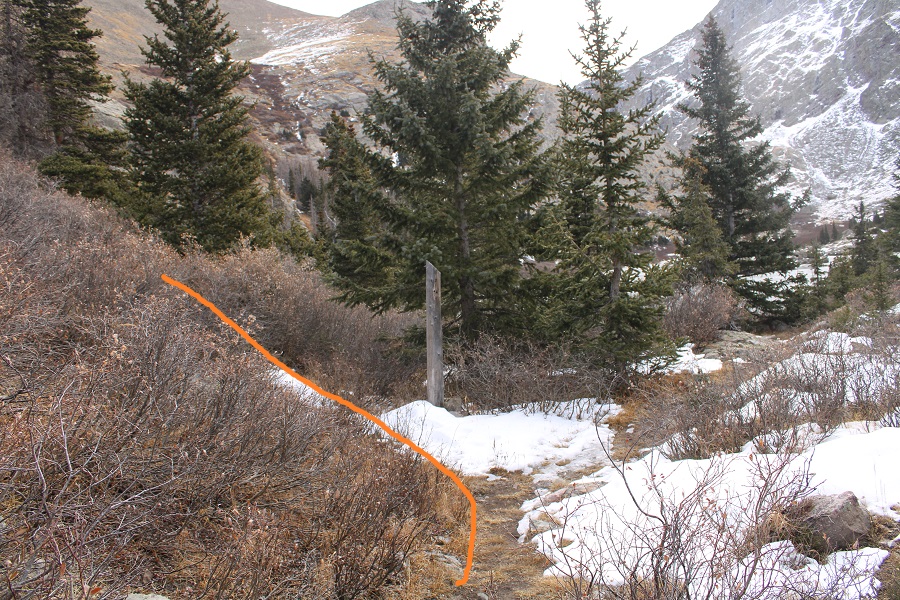
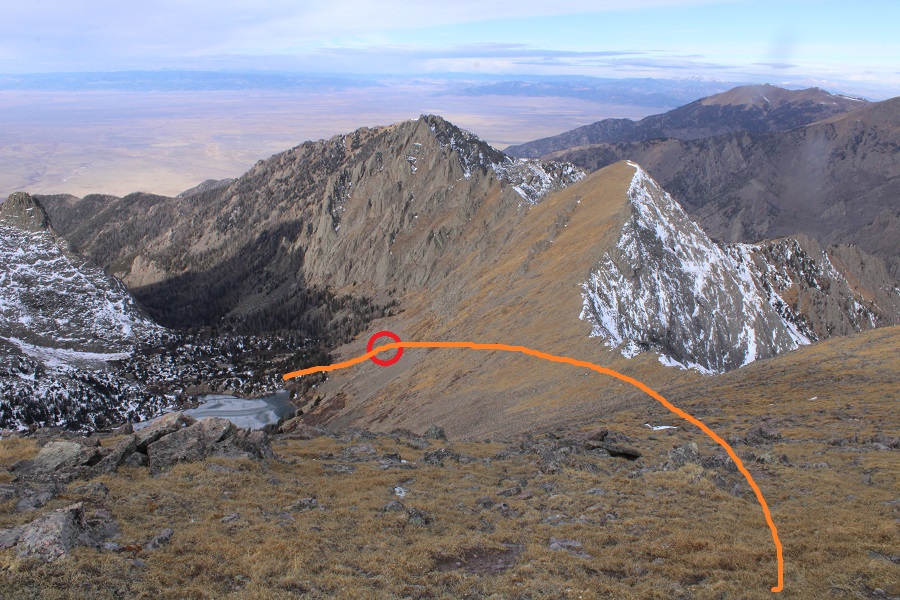
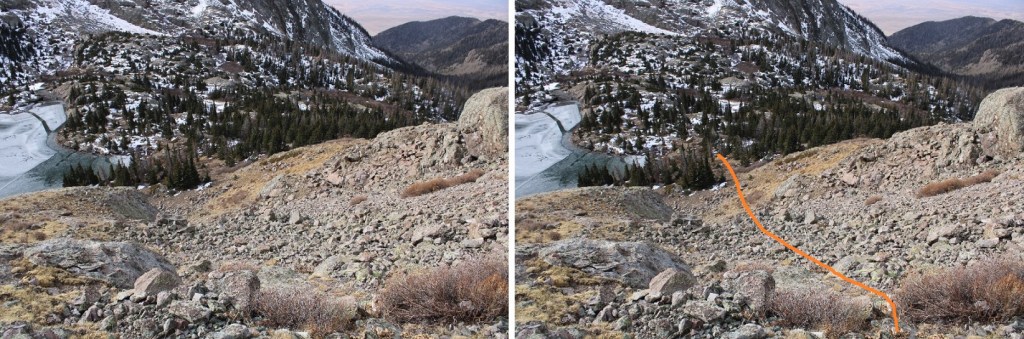
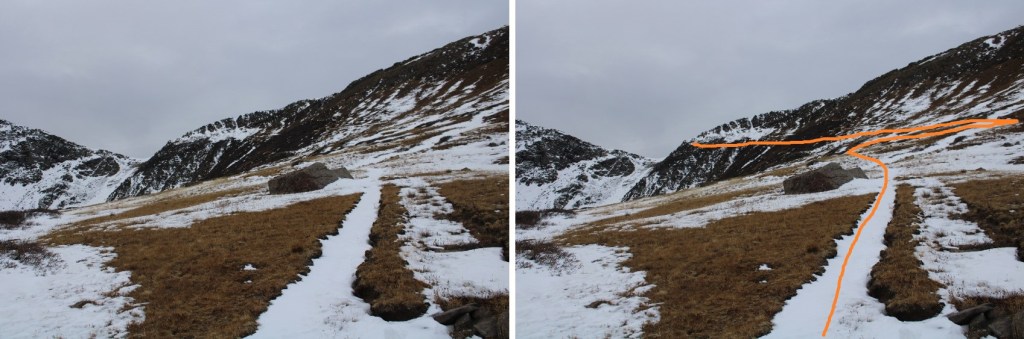
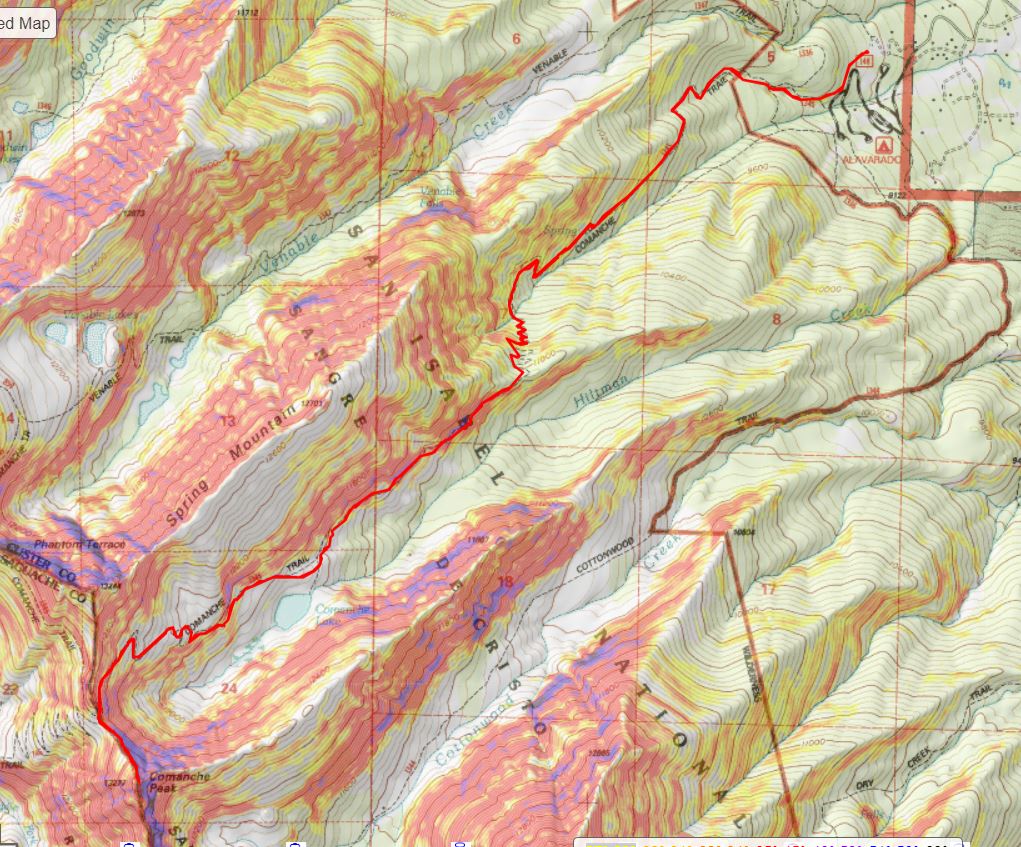
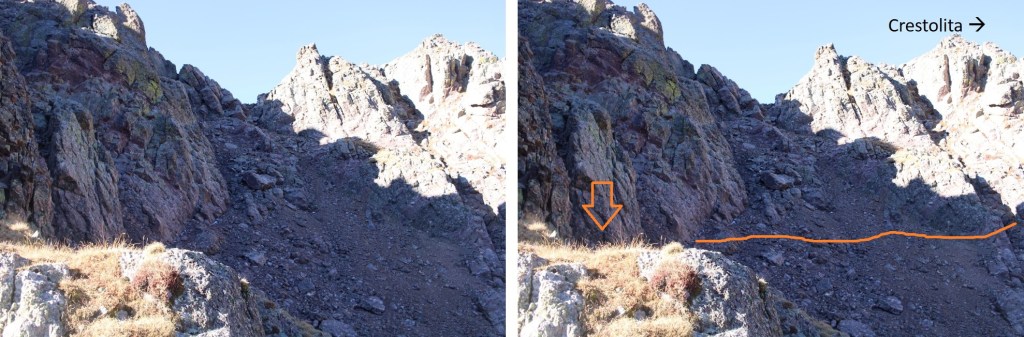
My advice to you is to go straight up the gully, as it stays at class 2+.  I however, did not do this.  I went up the right side.  This goes at class 4, and was unnecessary.  In addition, it included a drop of about 40 feet on class 4 terrain.  I’ll show pictures of the route I took, but I really recommend taking the easier gully.

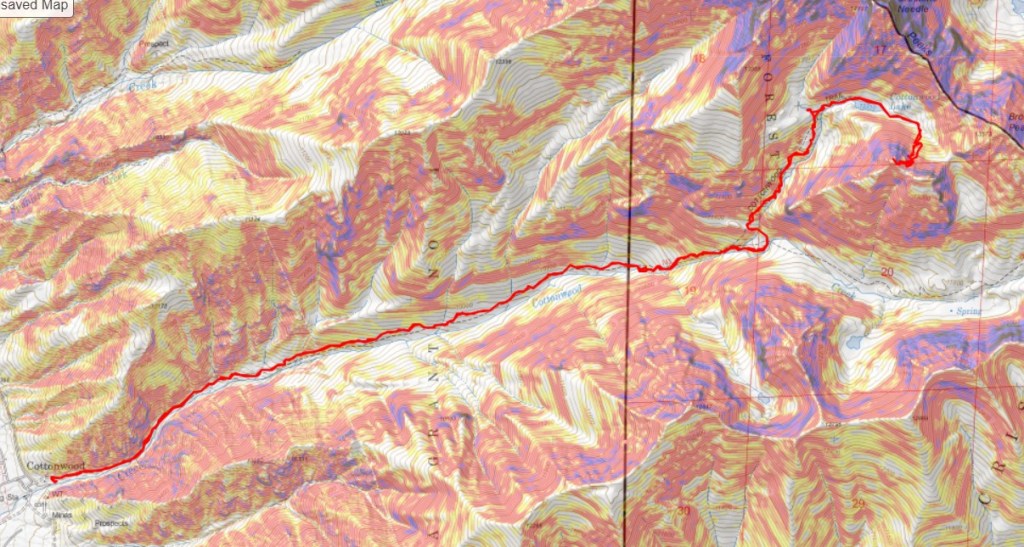
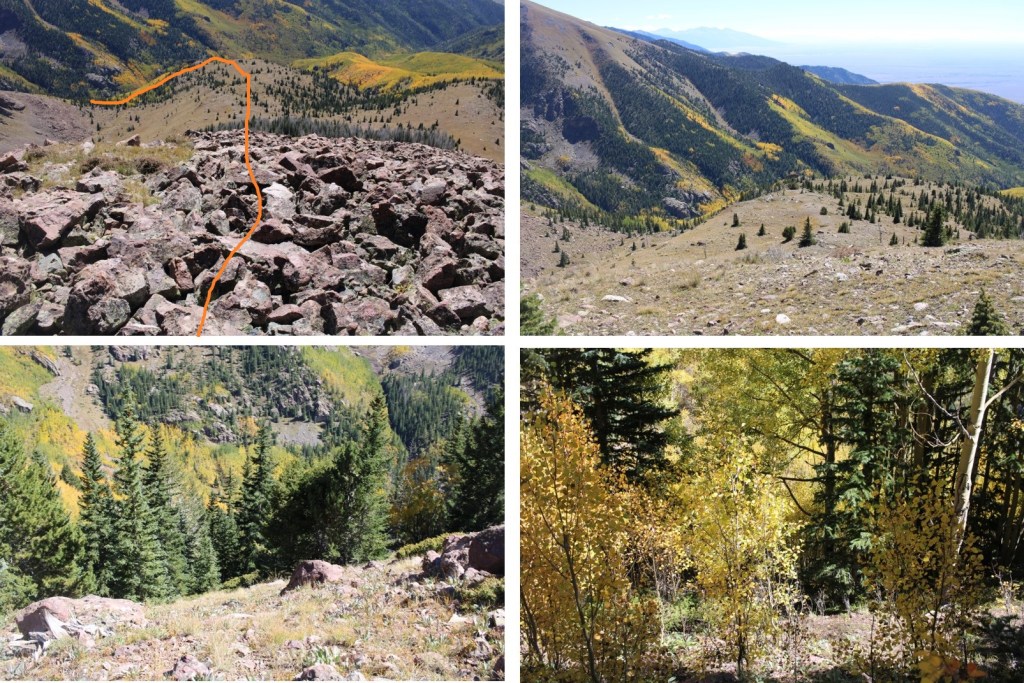
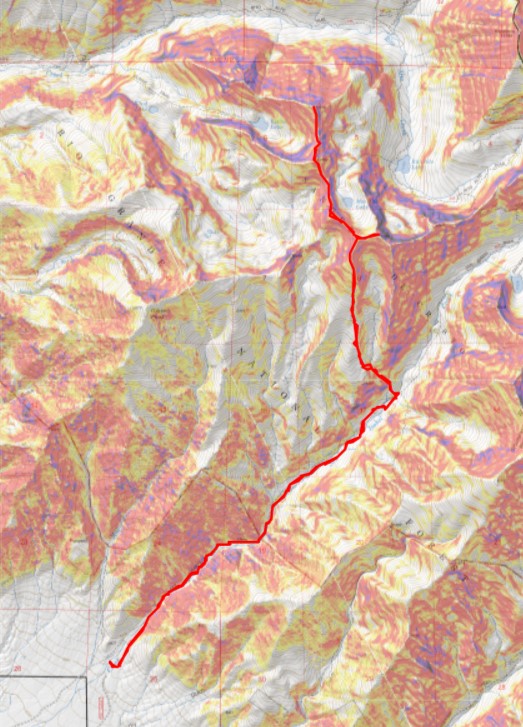
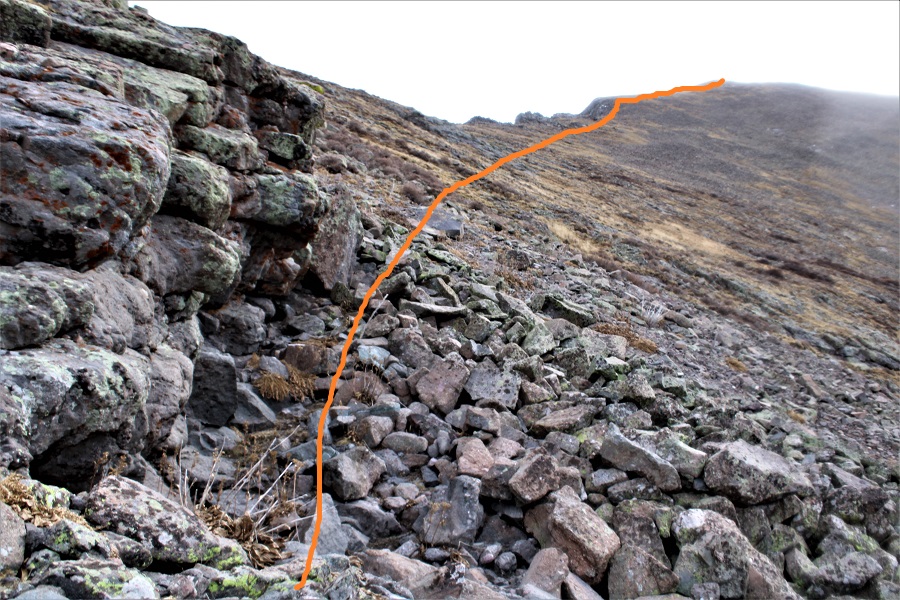
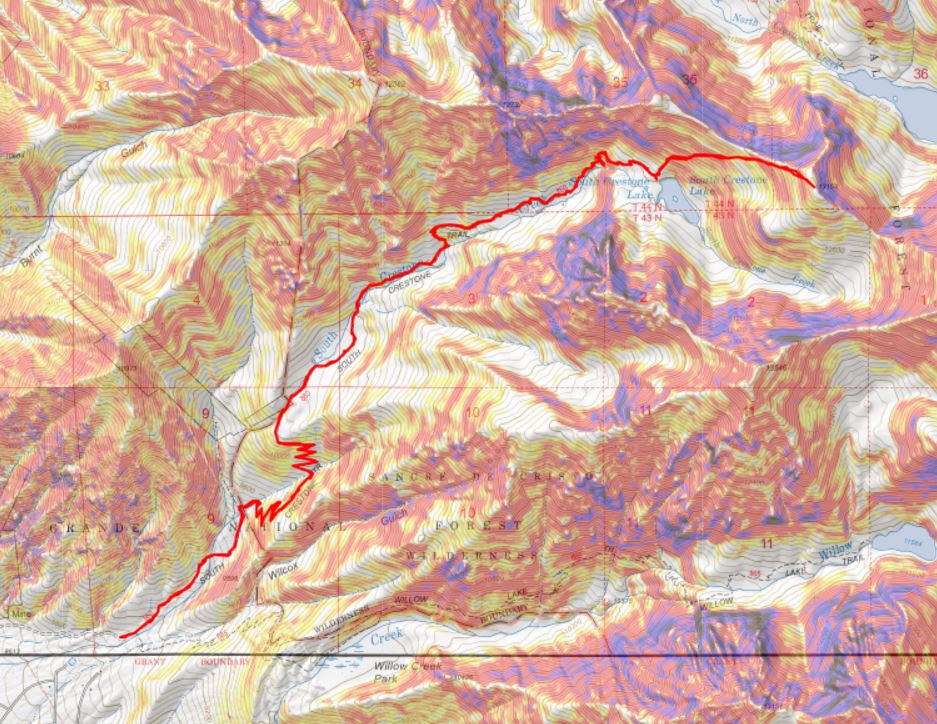
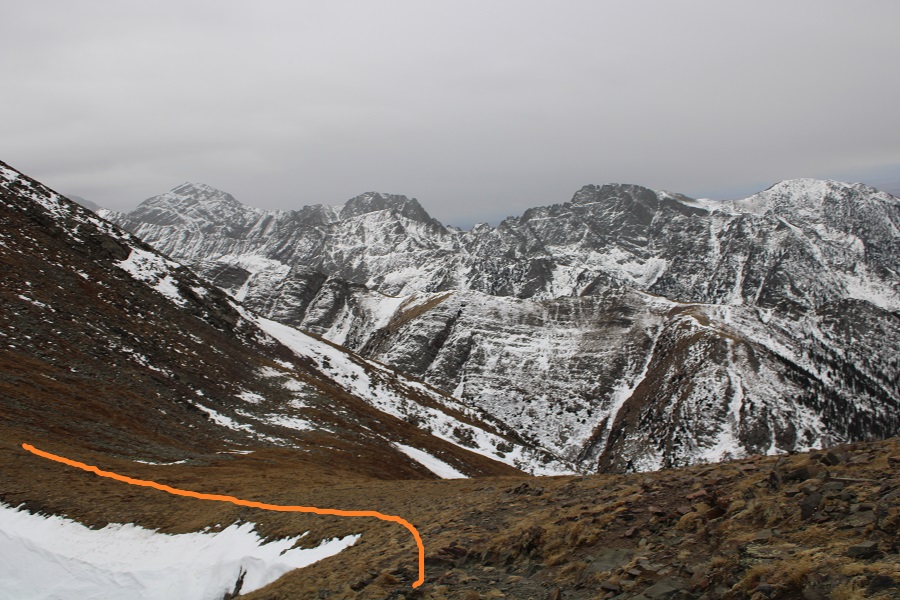
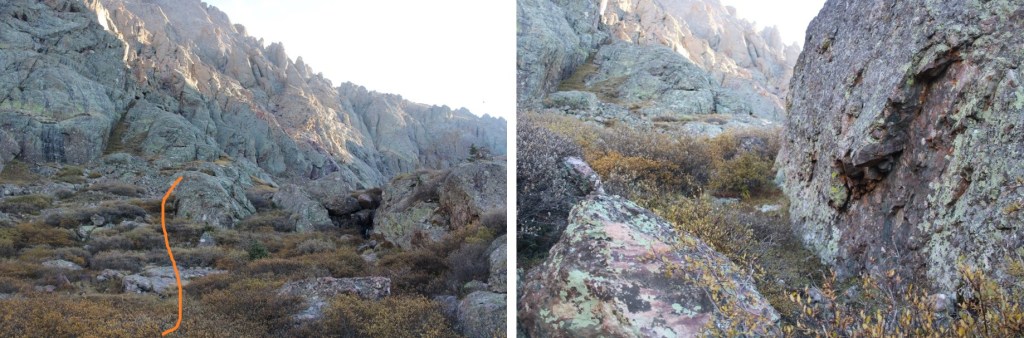
My route:  Solid line up, dotted line down

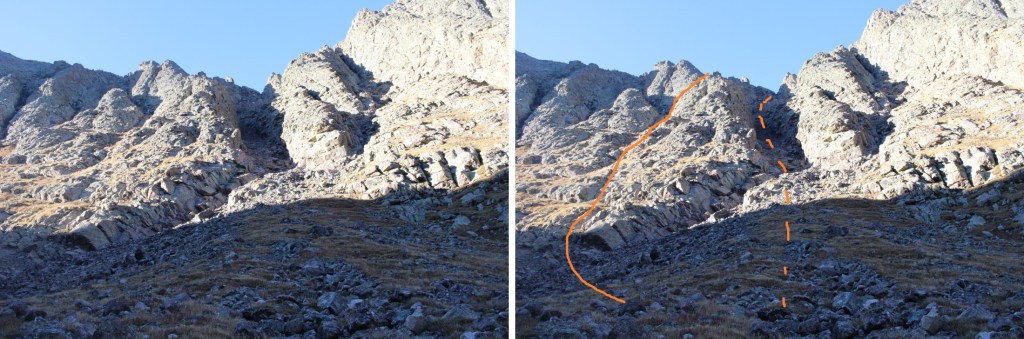
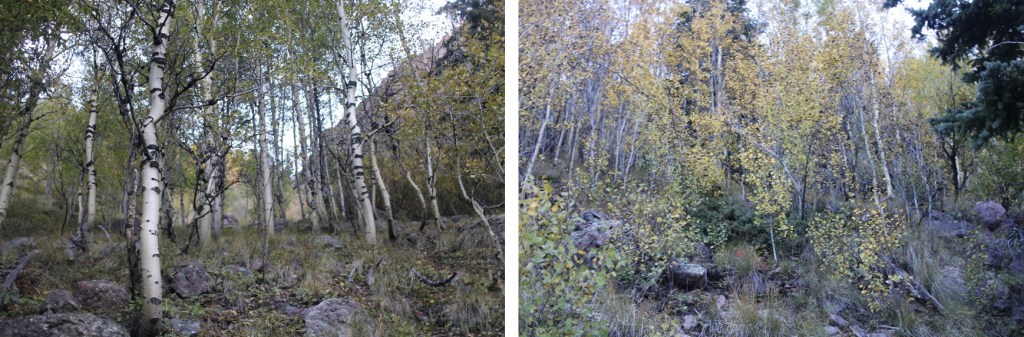
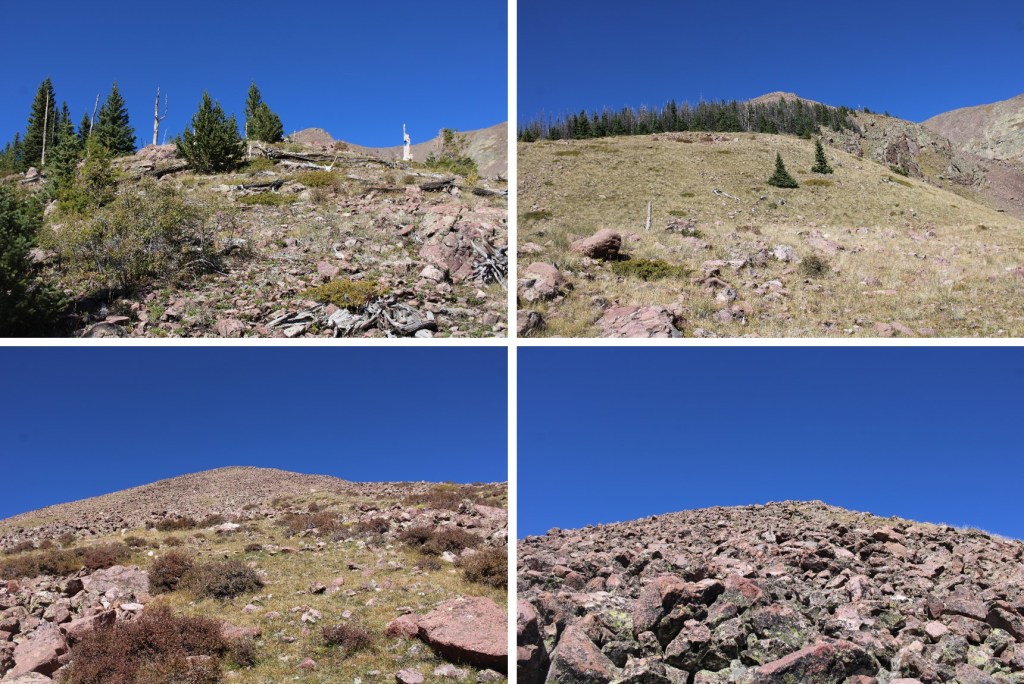
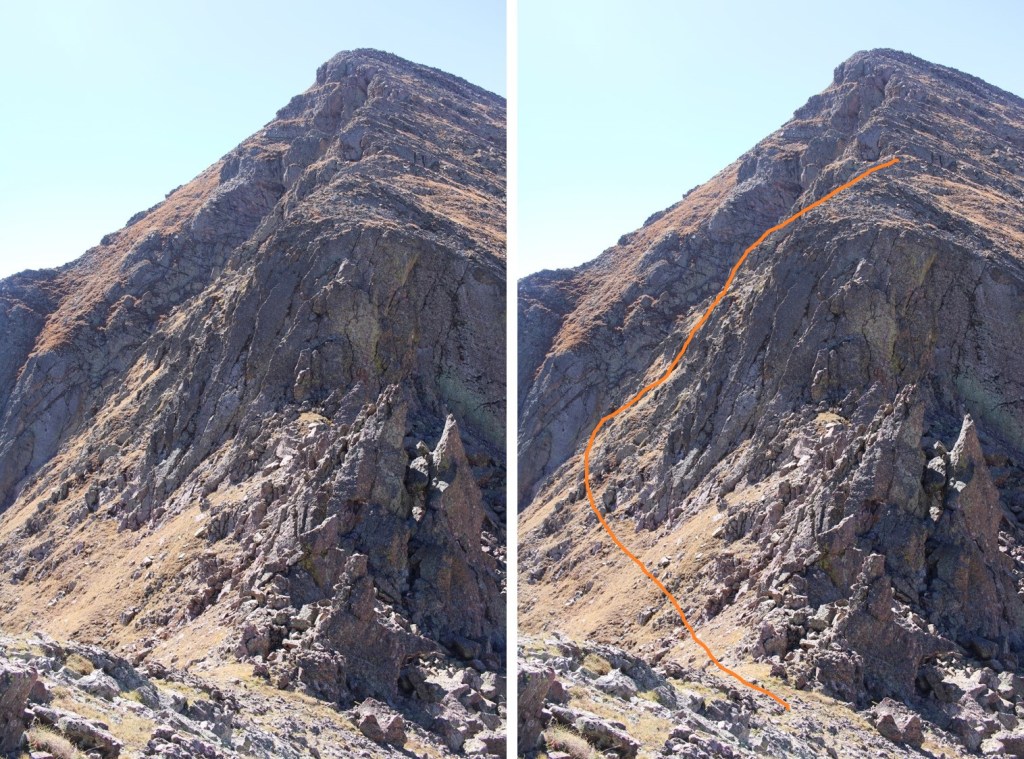
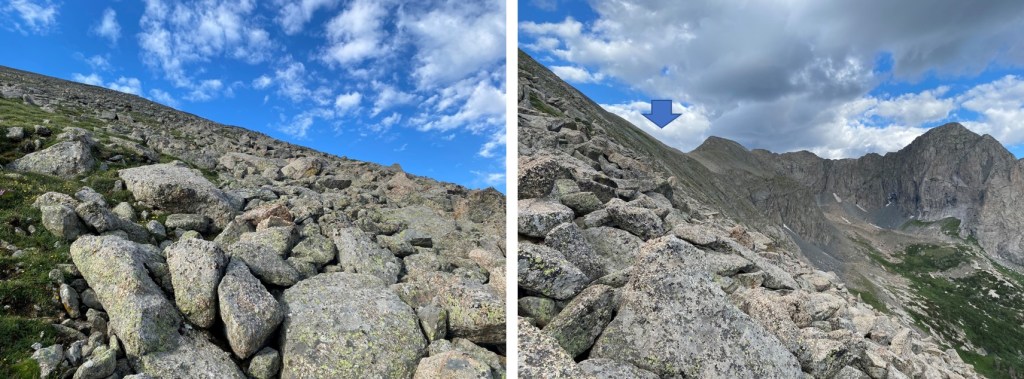
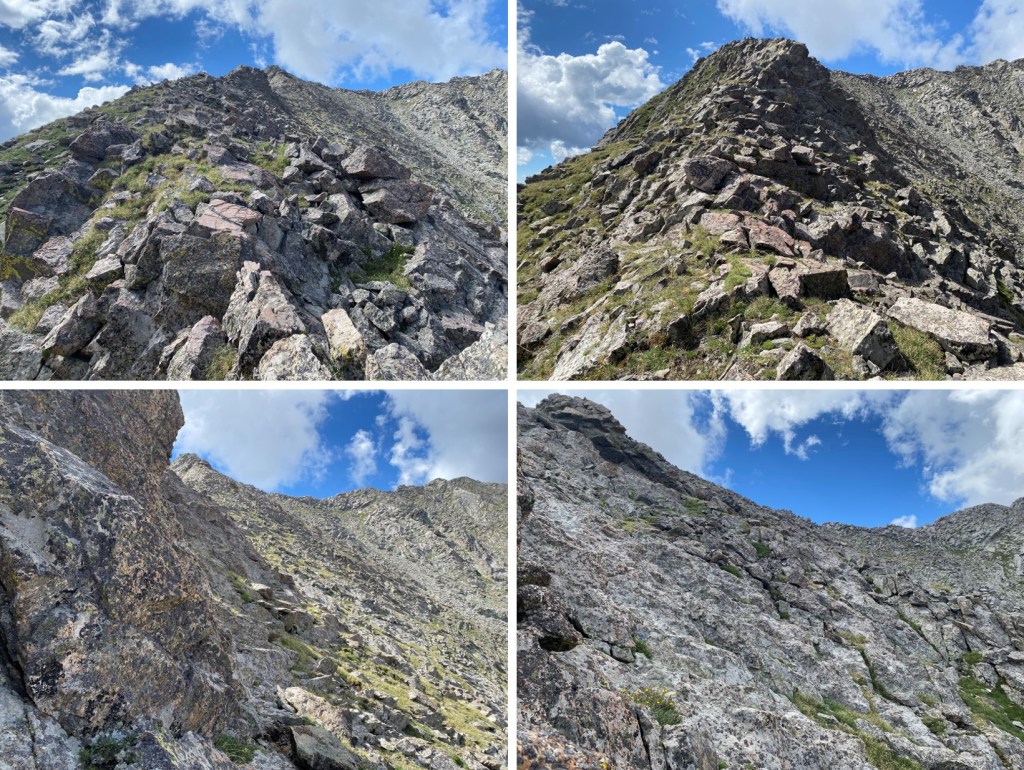
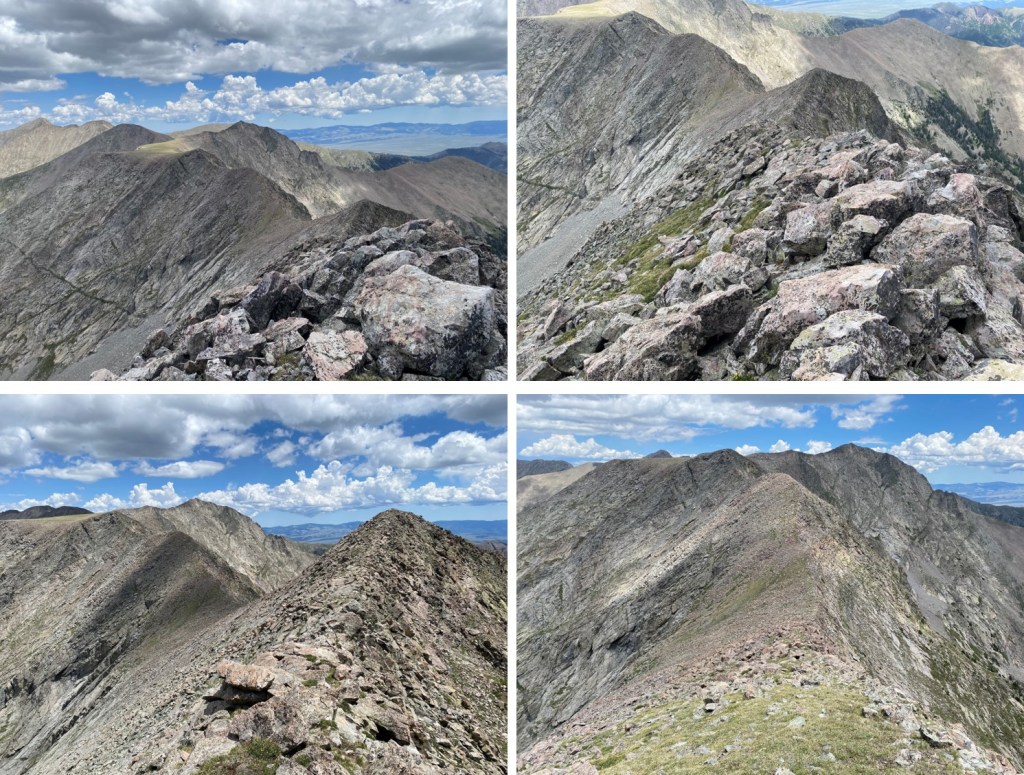
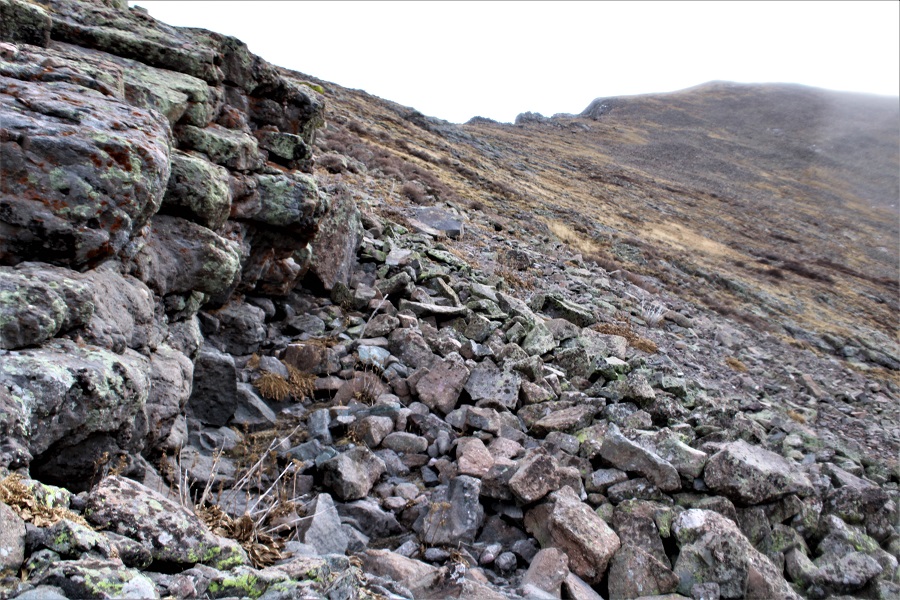
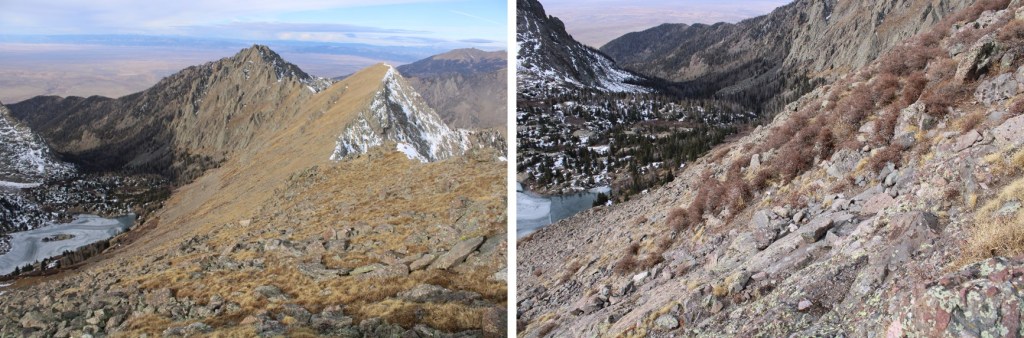
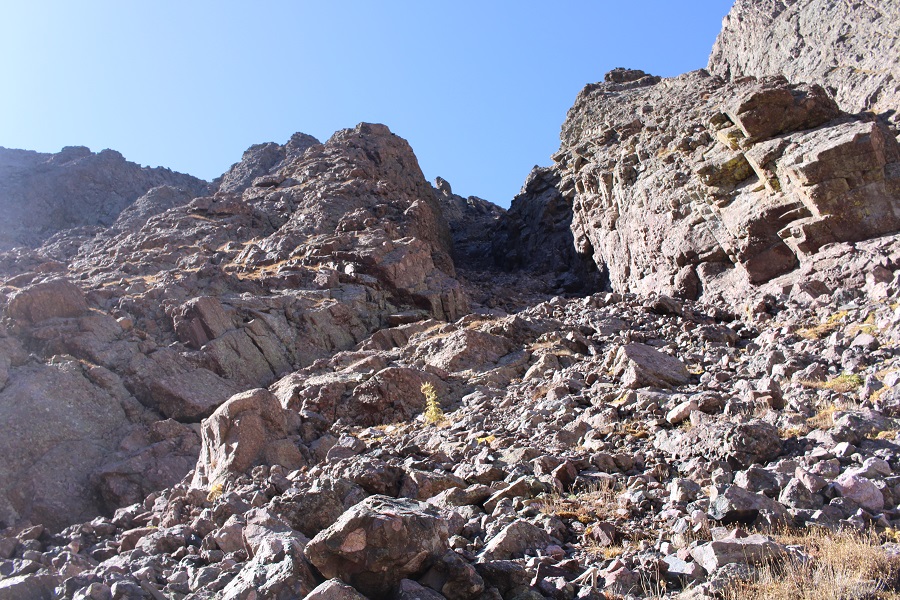
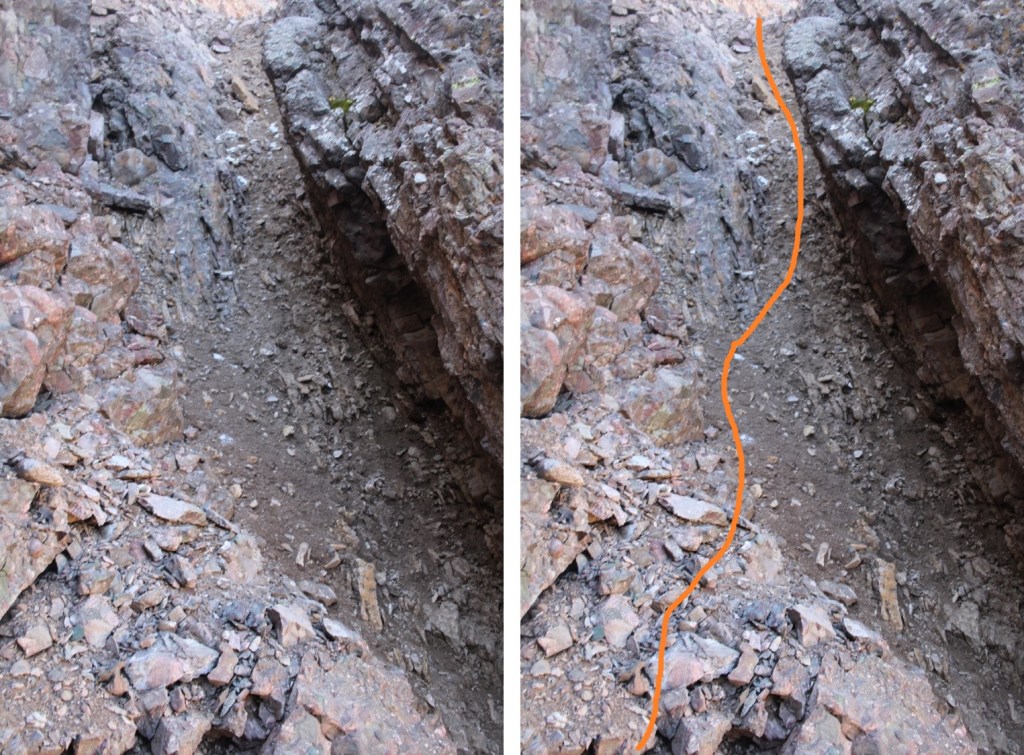
Here are some pictures of the route I took up.  Once again, I do not recommend this

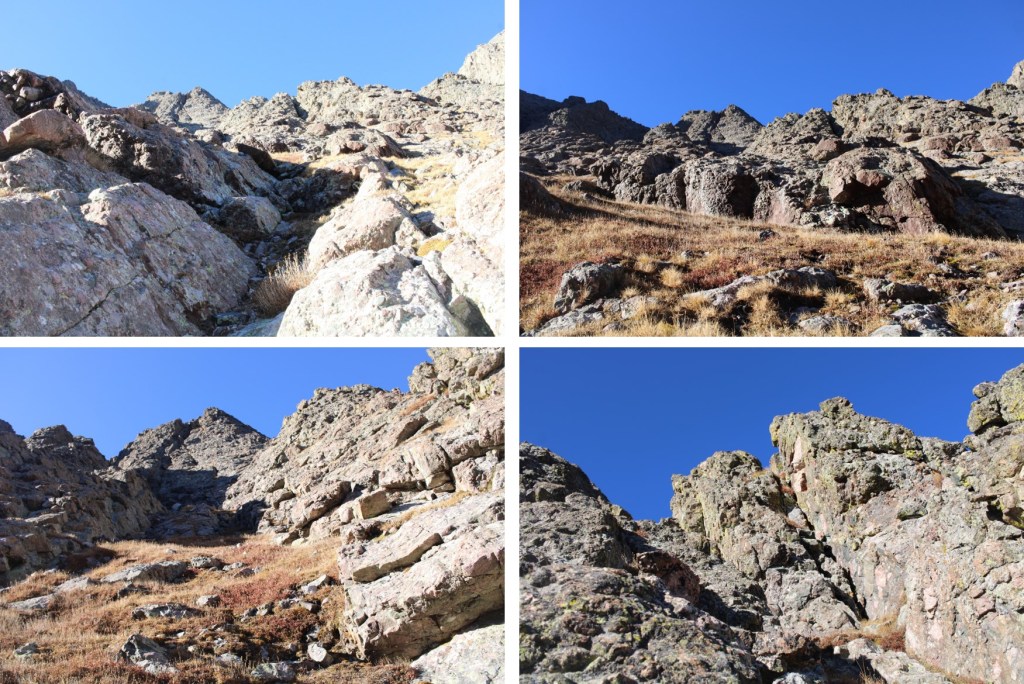
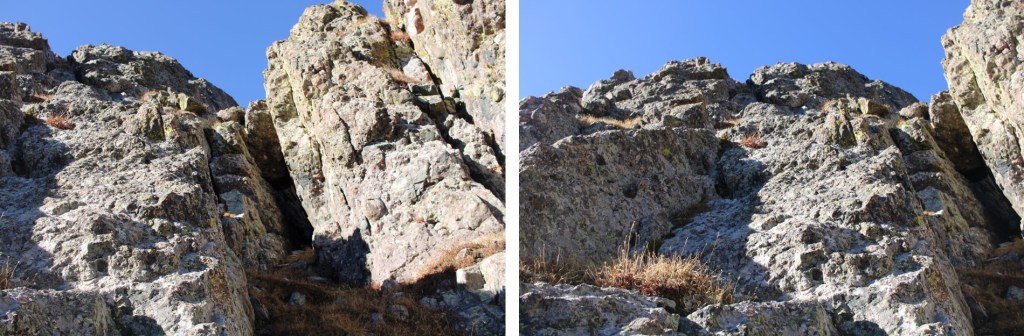
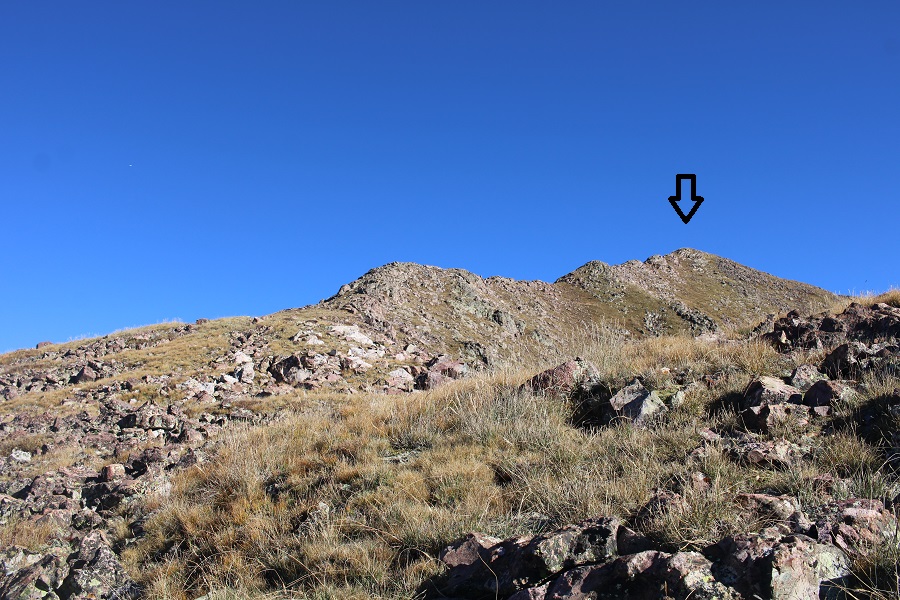
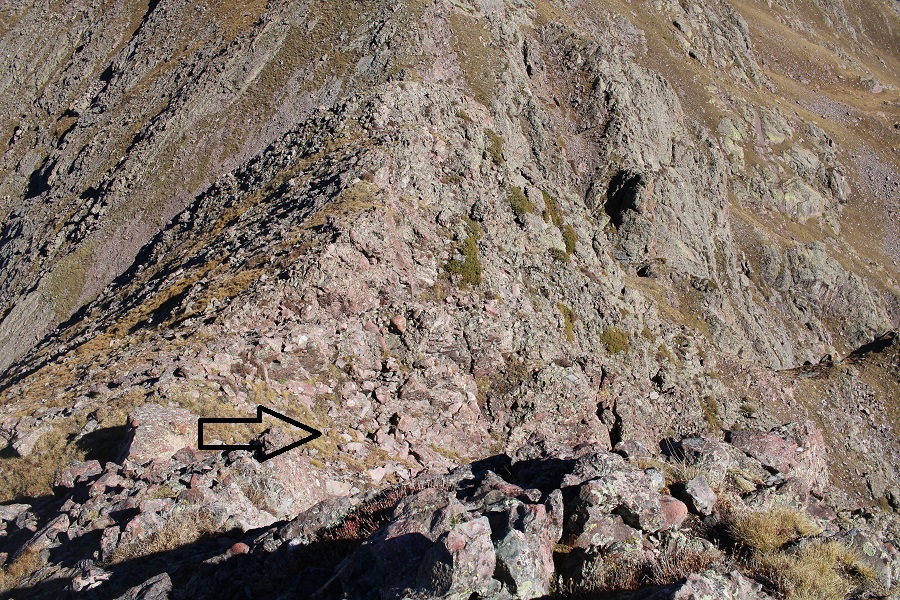
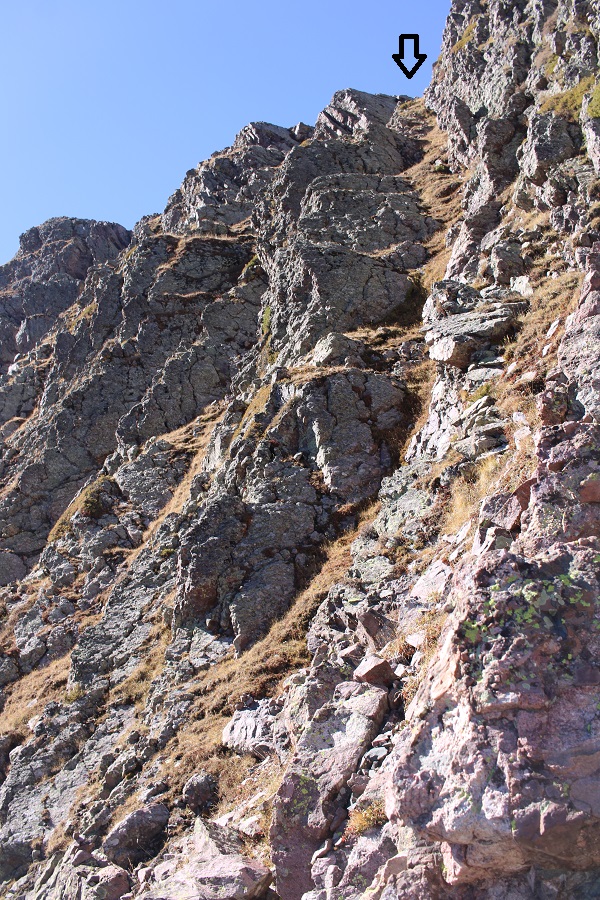
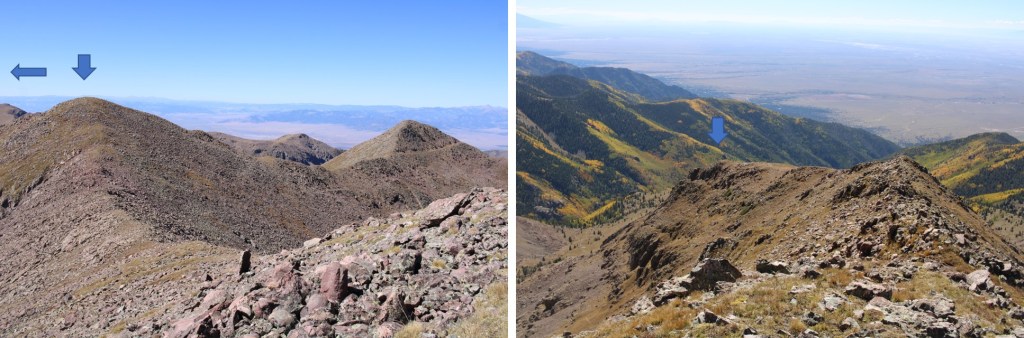
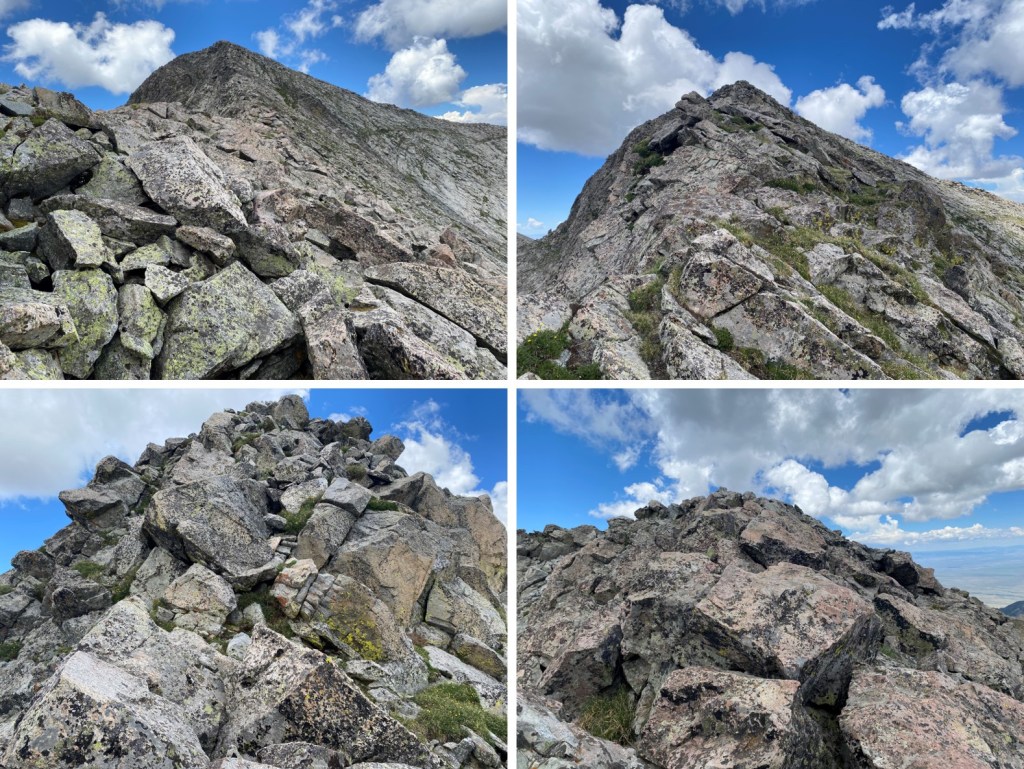
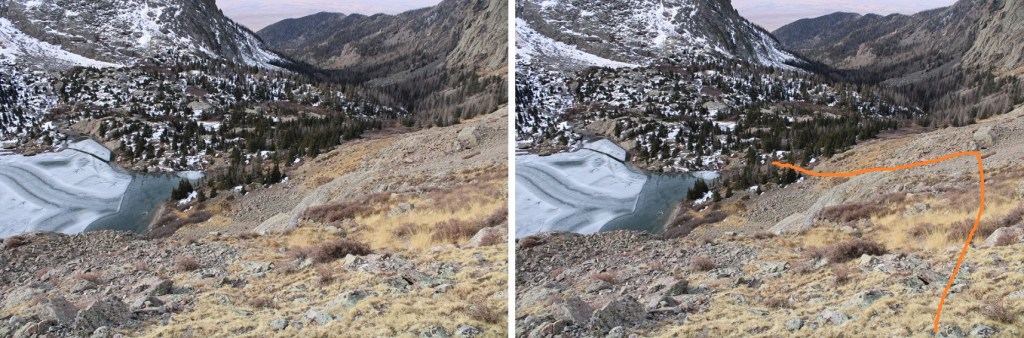
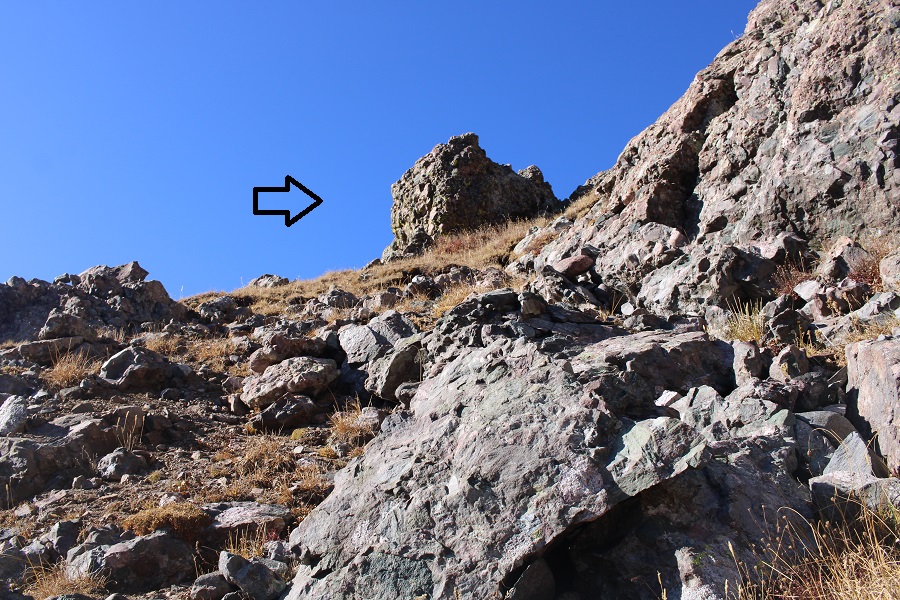
I don’t recommend this route, because this is where it led me:  That arrow points to a 40-foot class 4 chimney I’d have to descend.

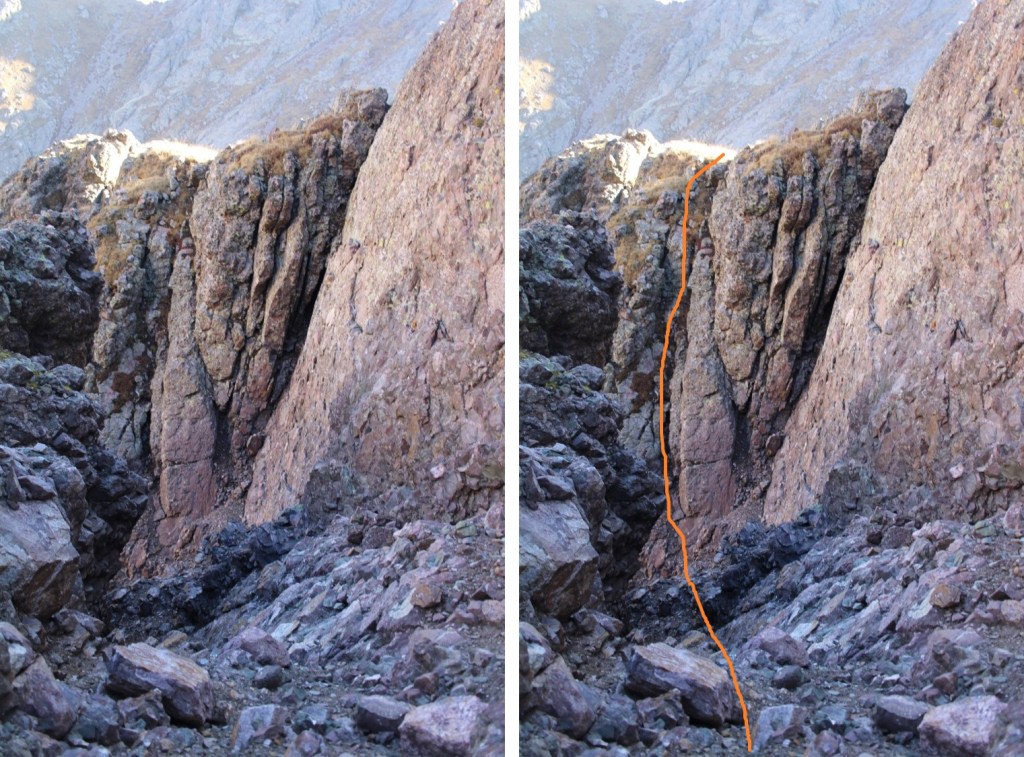
I seriously considered turning back at this point, and trying again with the gully.  After some careful consideration, I realized I could navigate the current terrain. I gingerly climbed down 40 feet, then up another 40 feet

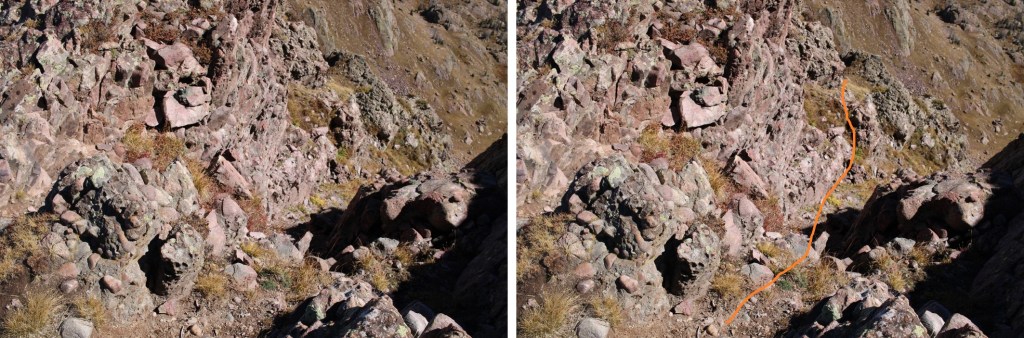
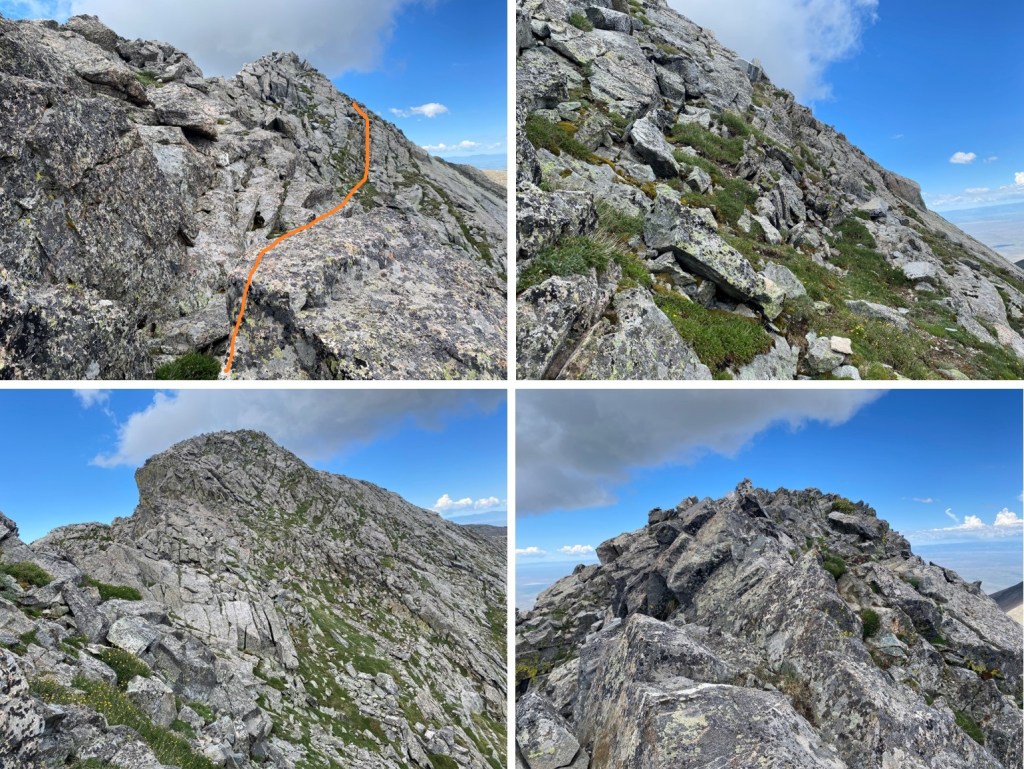
Here’s looking back at that chimney, and the route I took both down and then back up.  Both sides were steep, and I was glad to be wearing my microspikes.

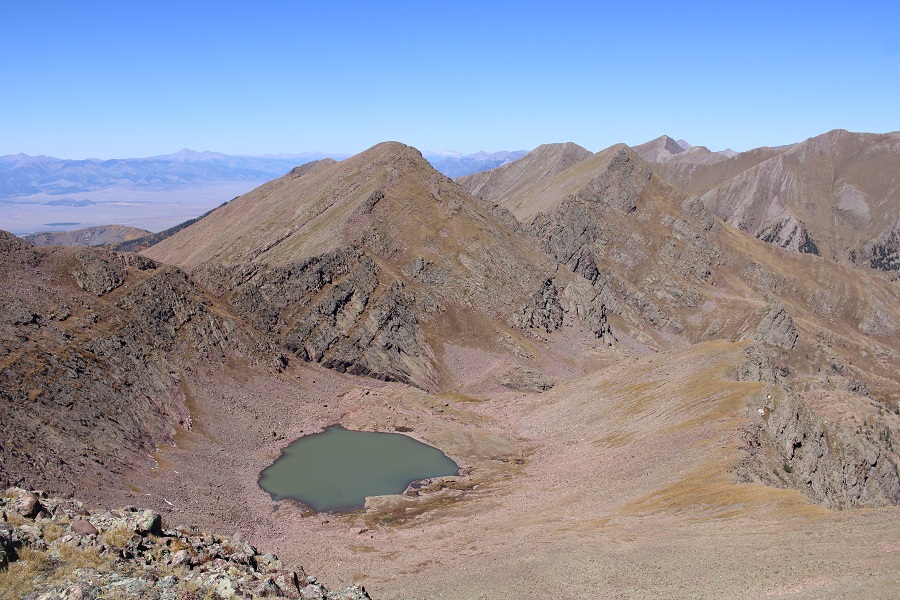
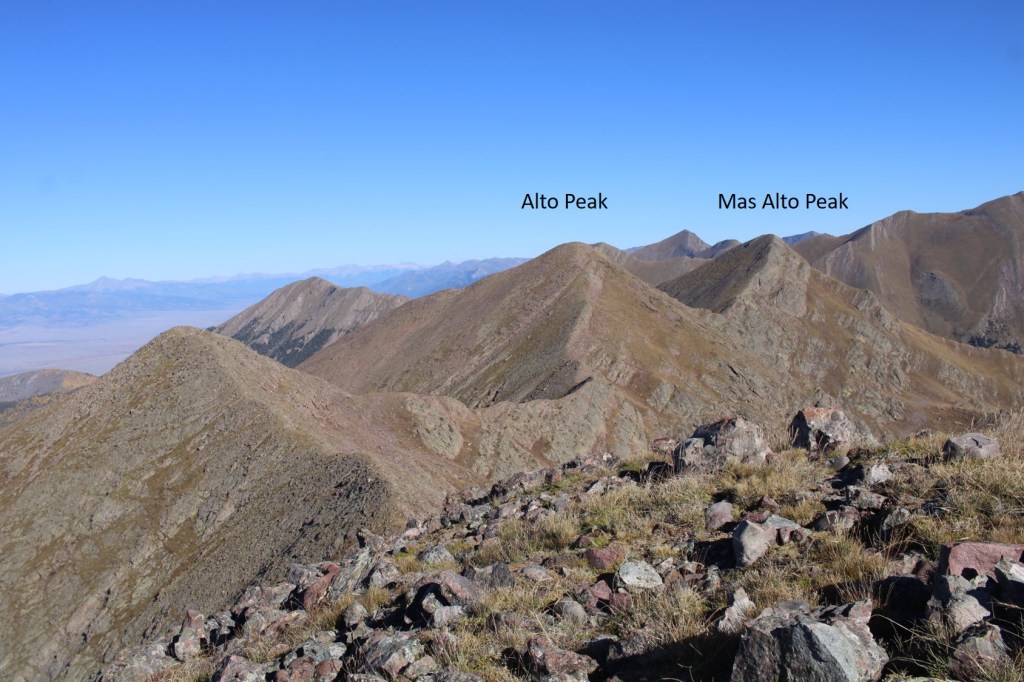
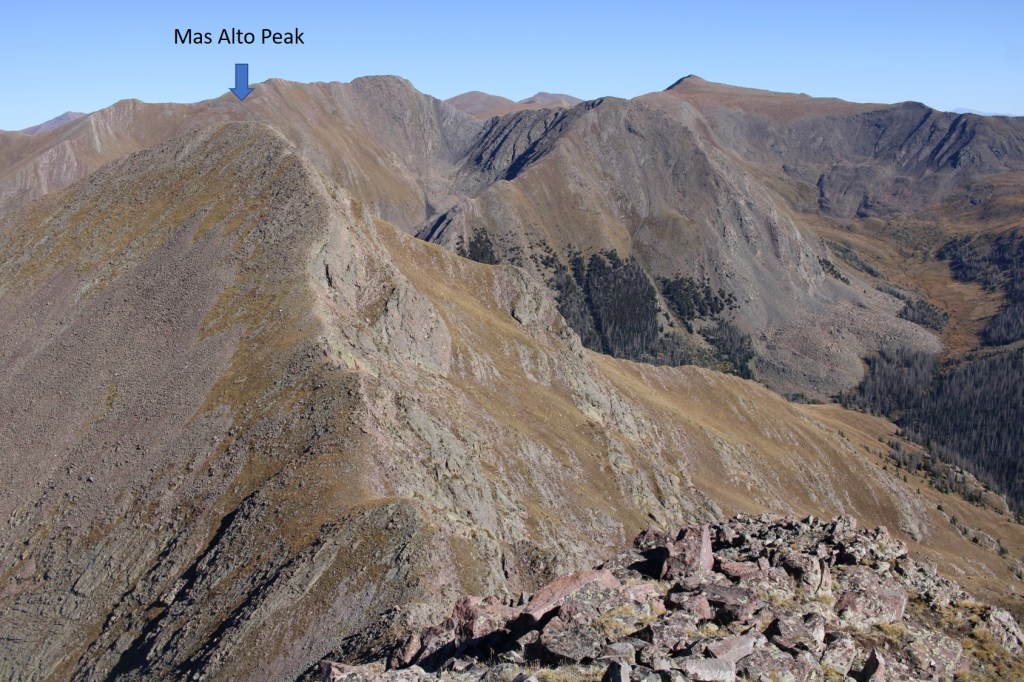
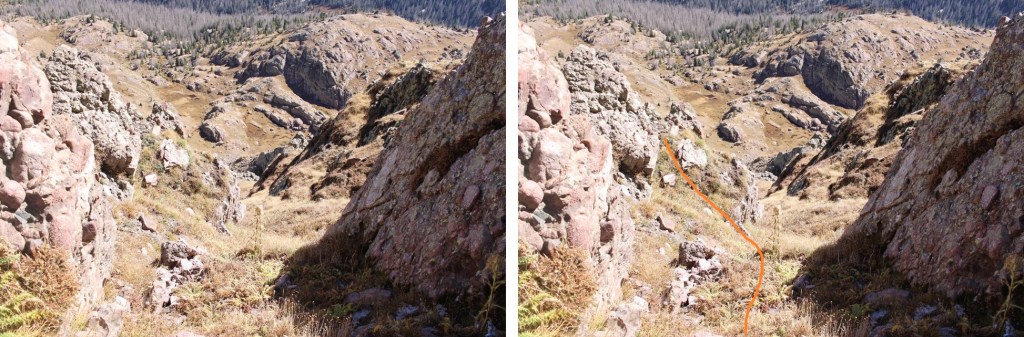
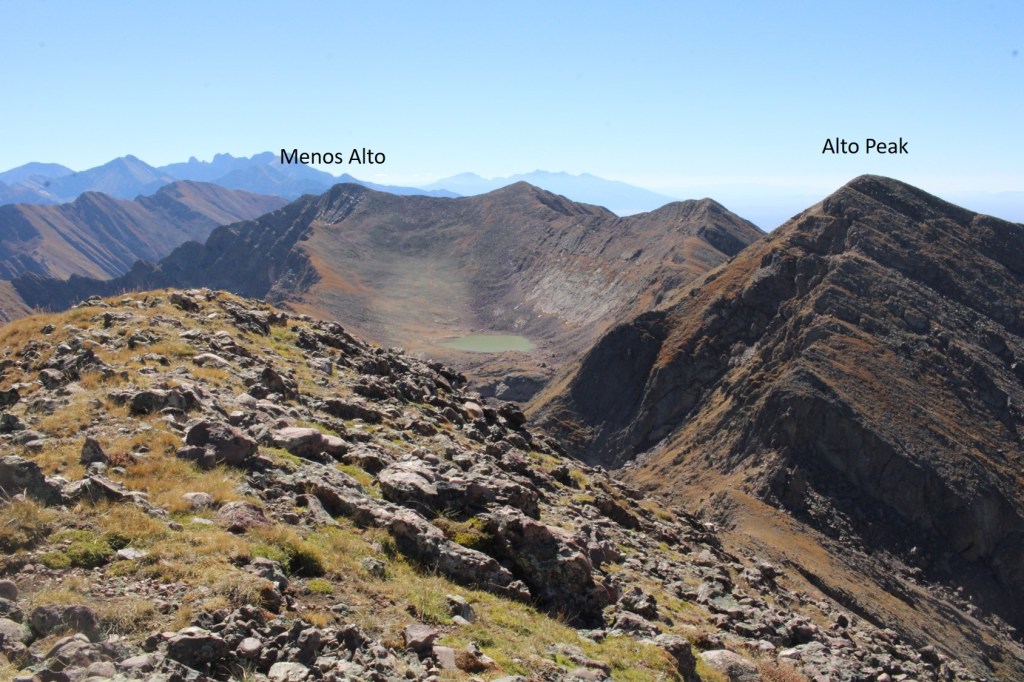
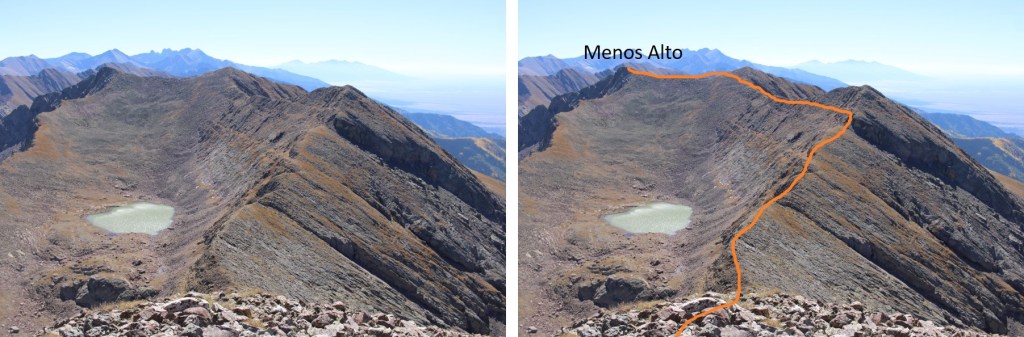
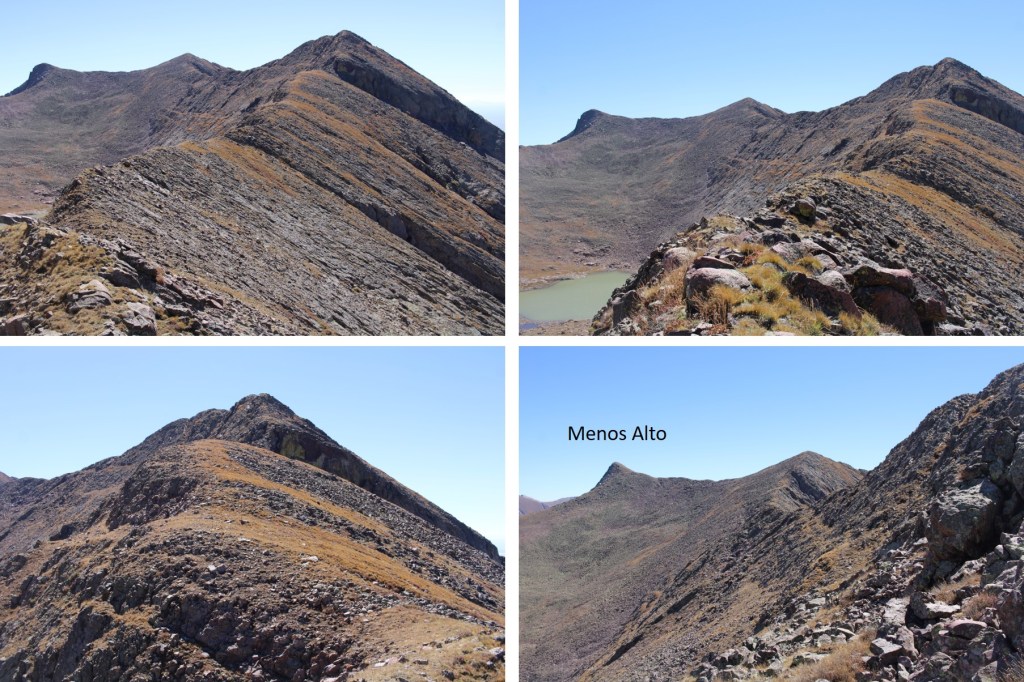
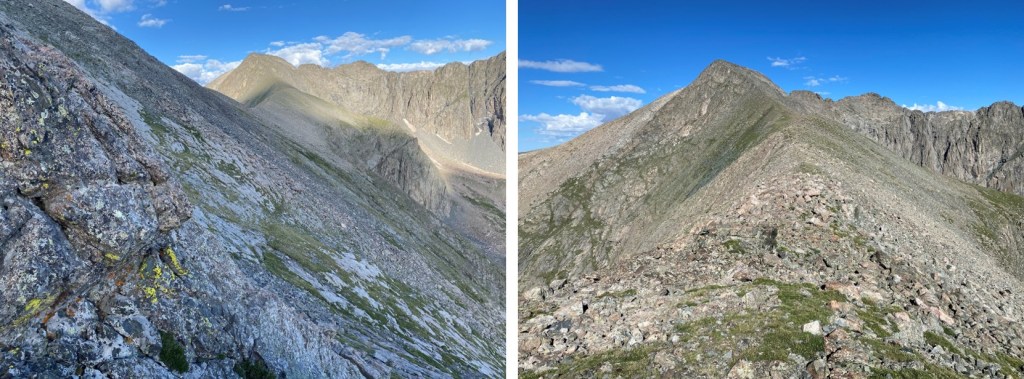
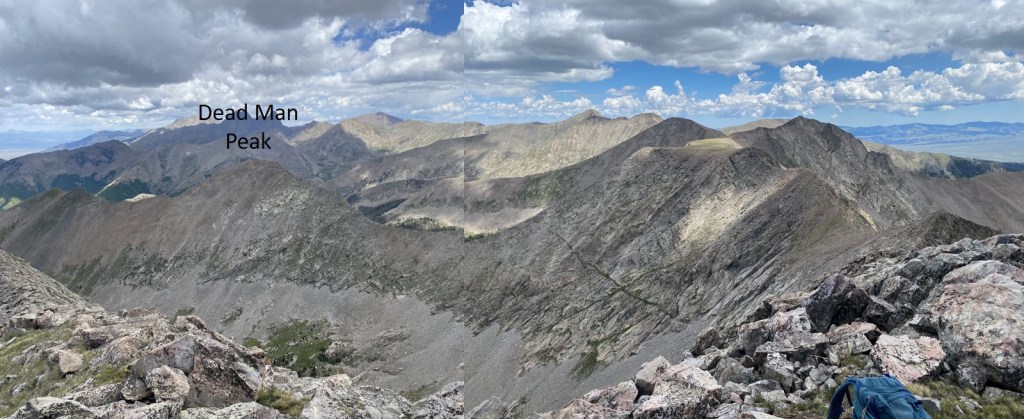
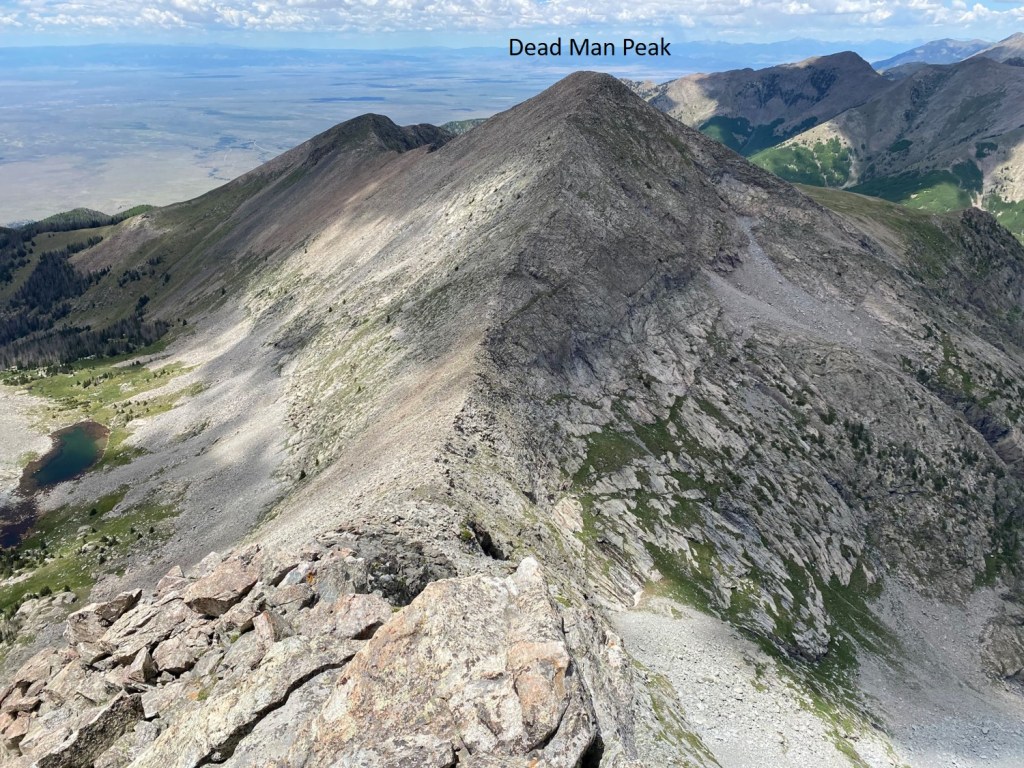
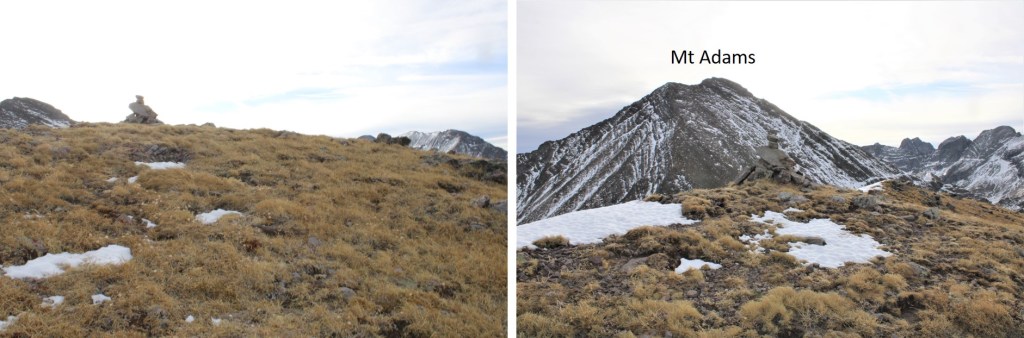
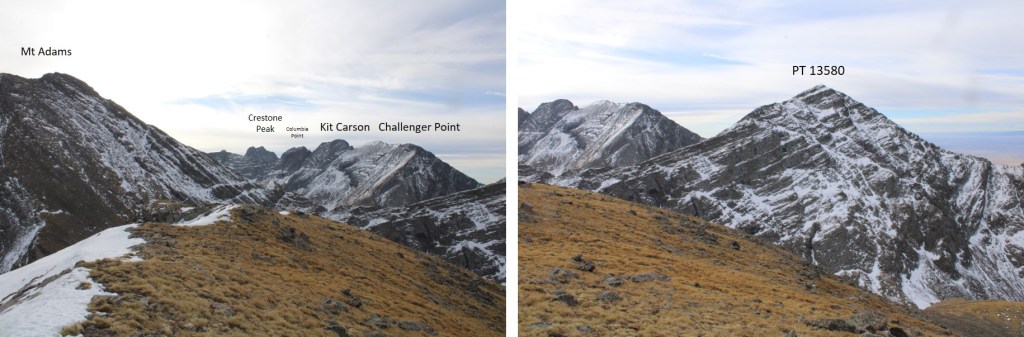
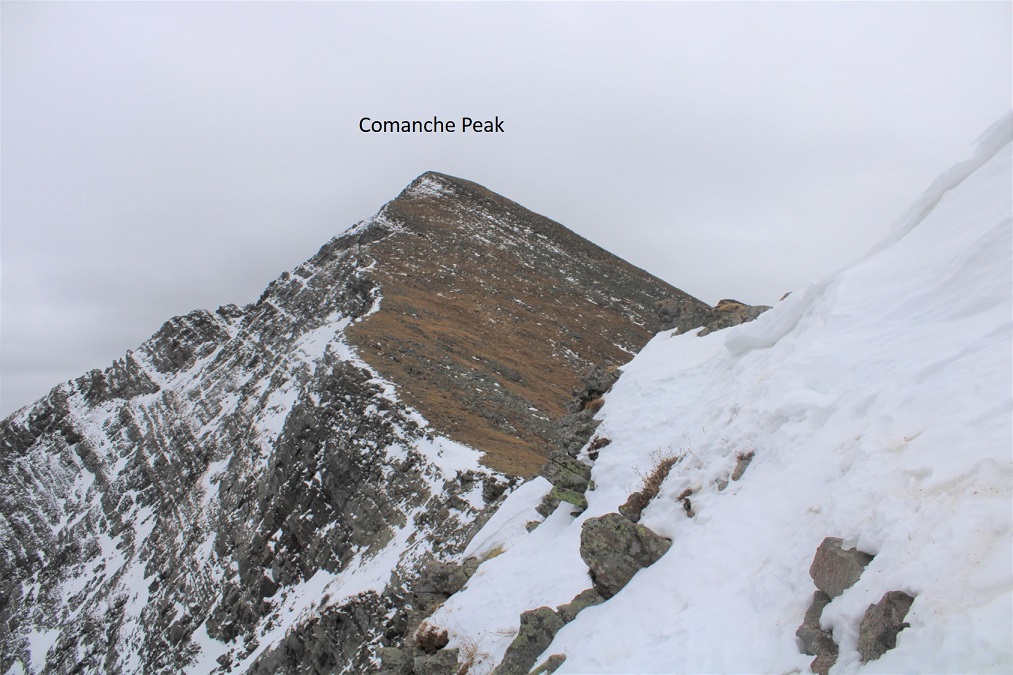
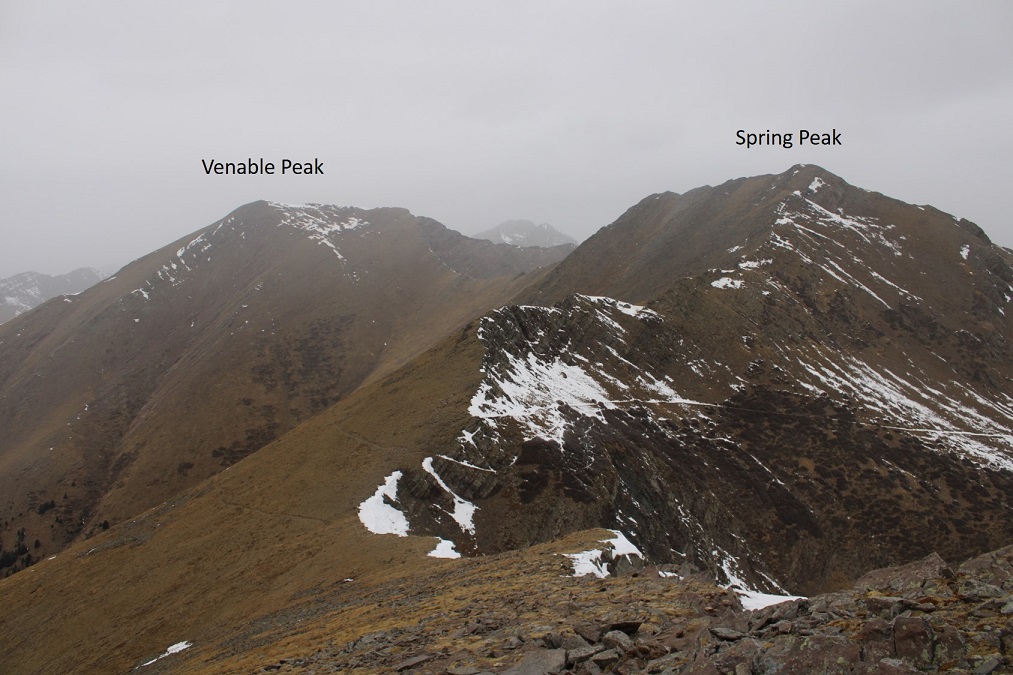
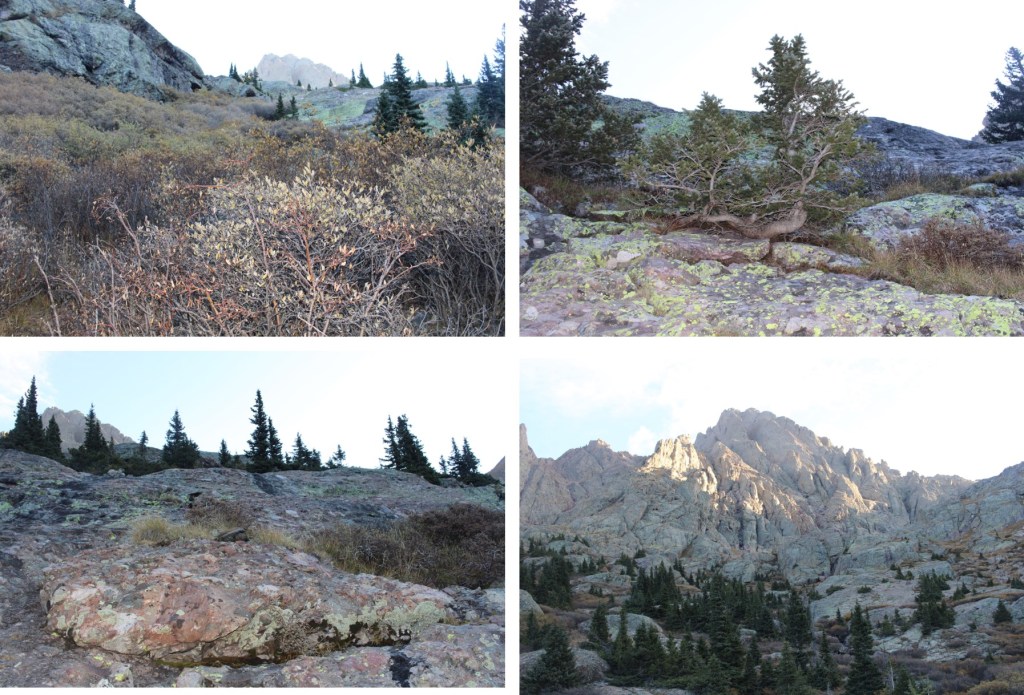
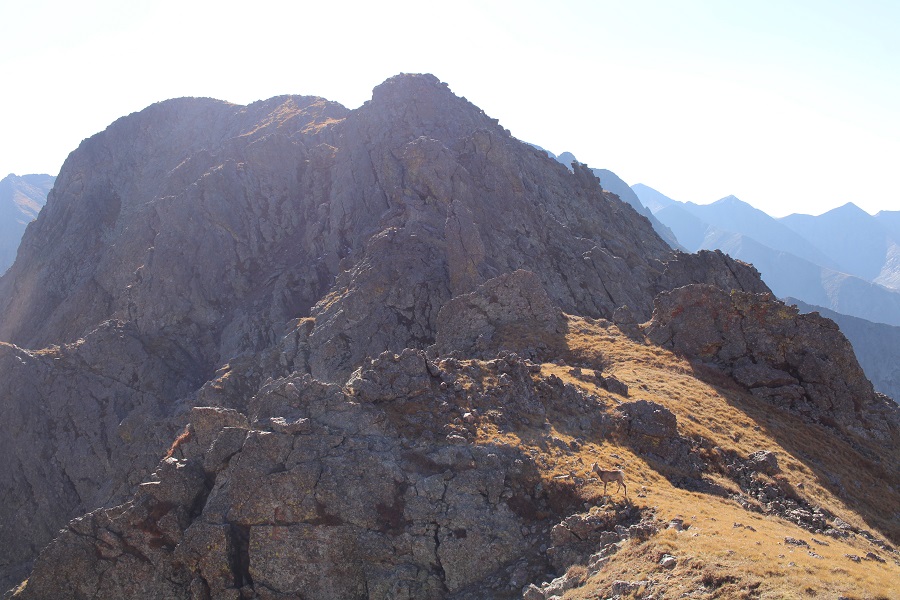
From here, I could now see the route to Crestolita to my right

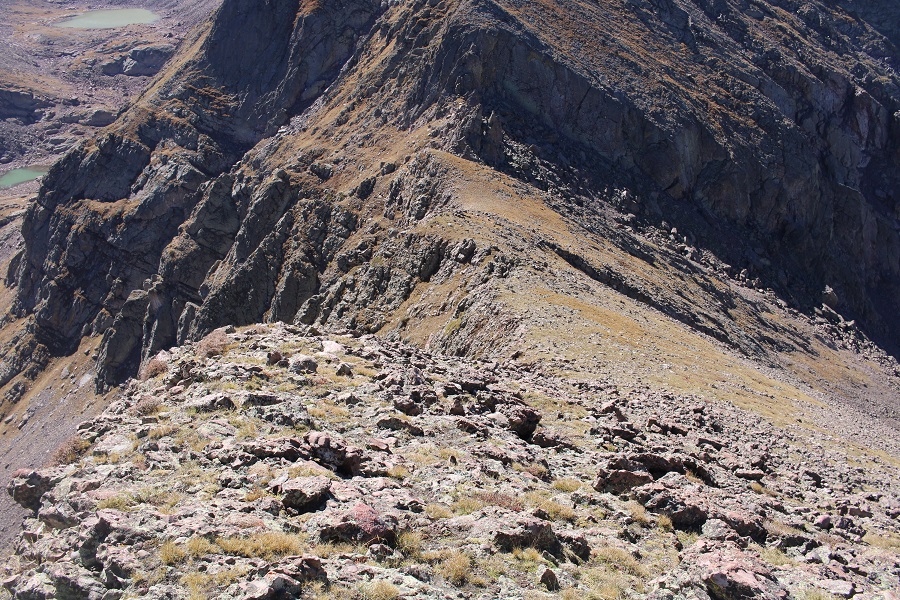
This took some navigating, but the terrain remained at 2+, with some added exposure.  First, I headed to the saddle

At the top of the saddle I turned right

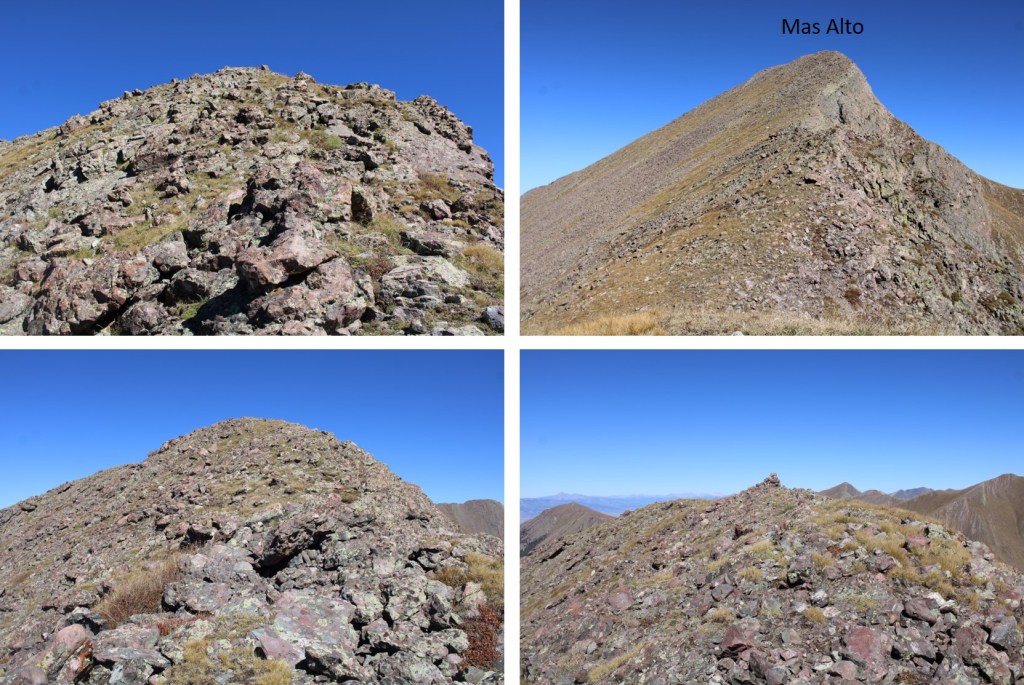
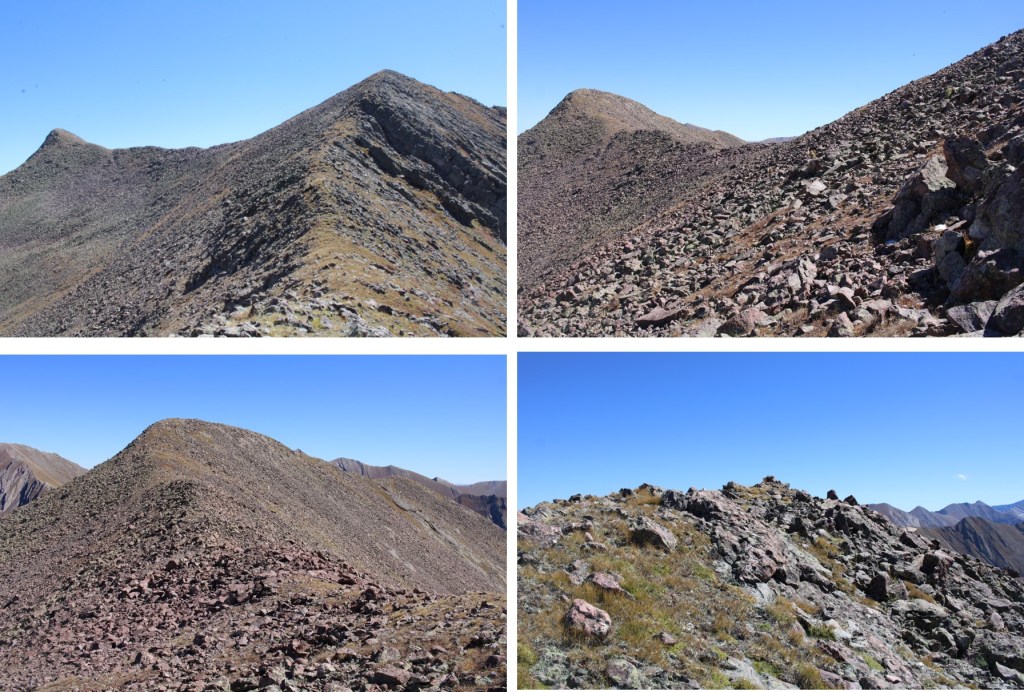
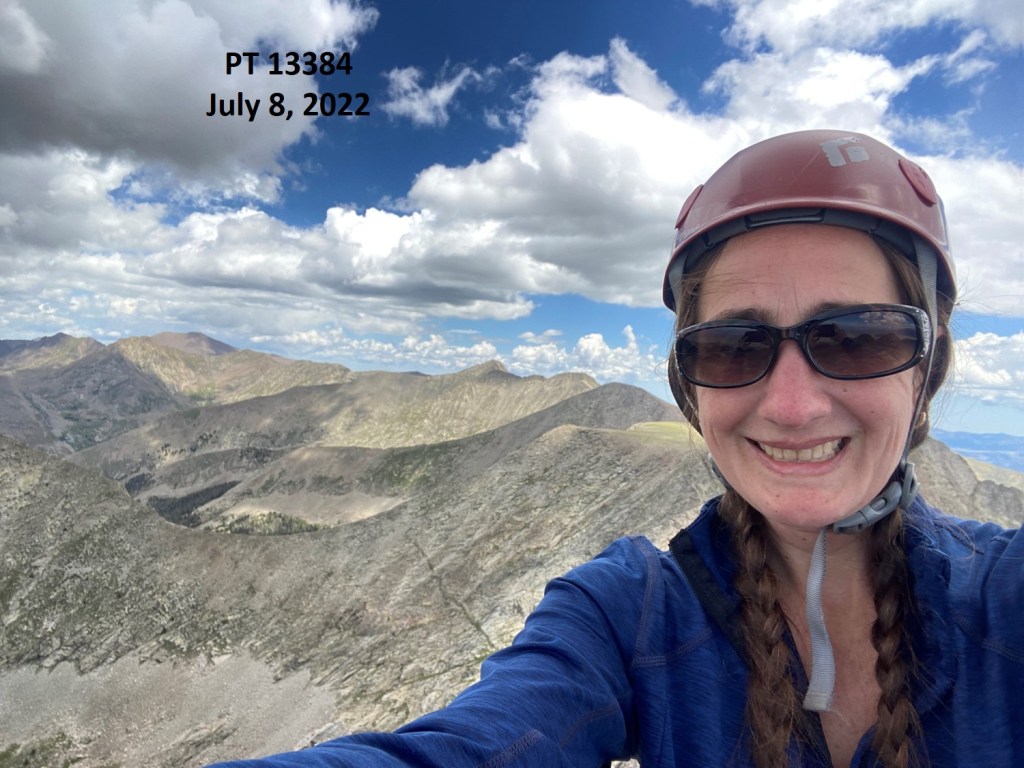
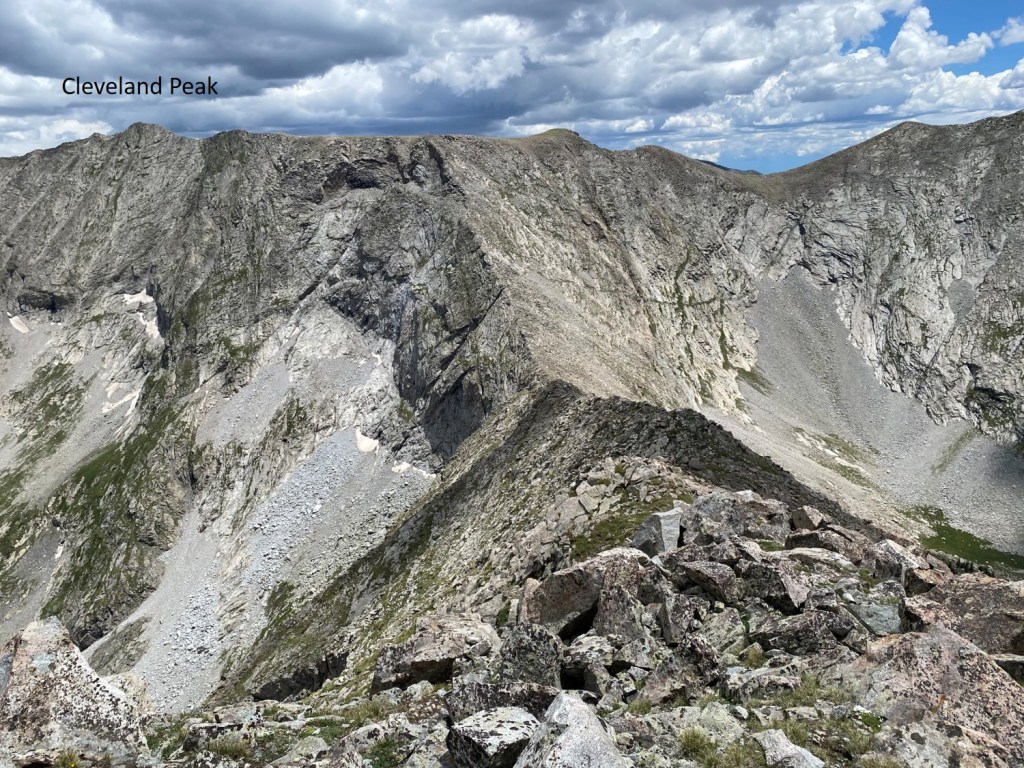
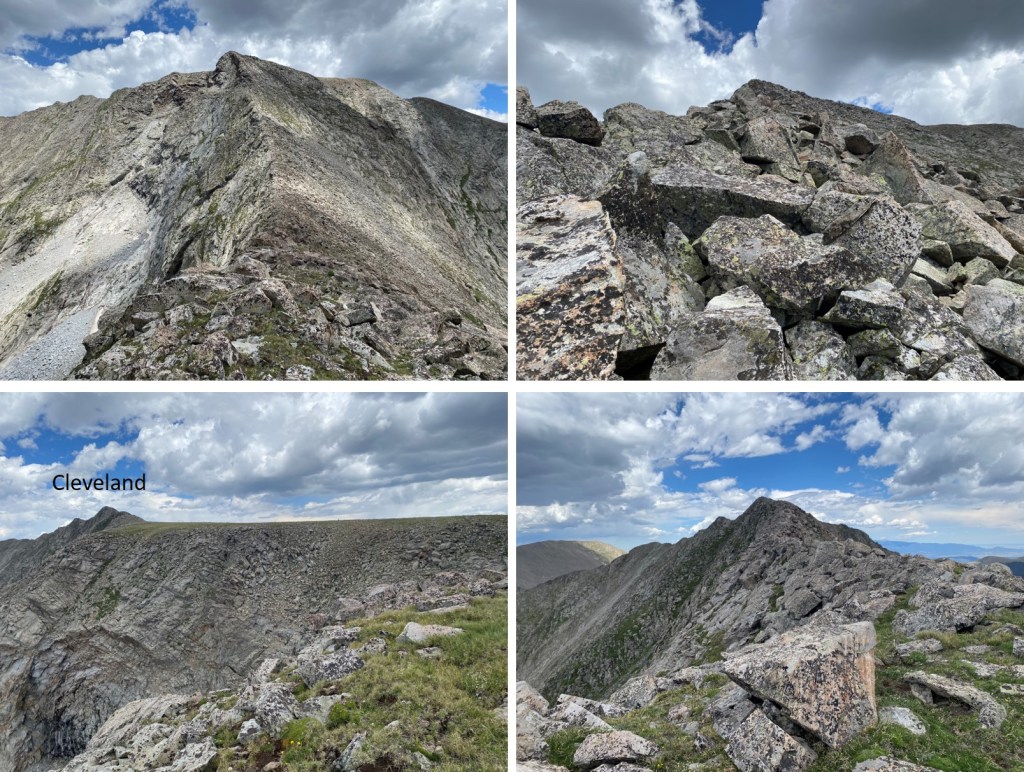
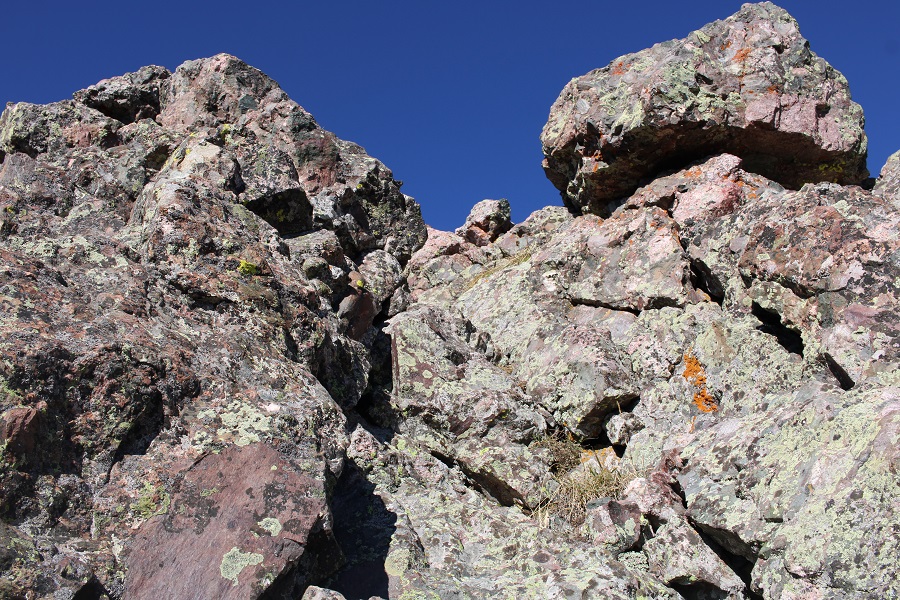
Then it was a fun scramble to the summit of Crestolita

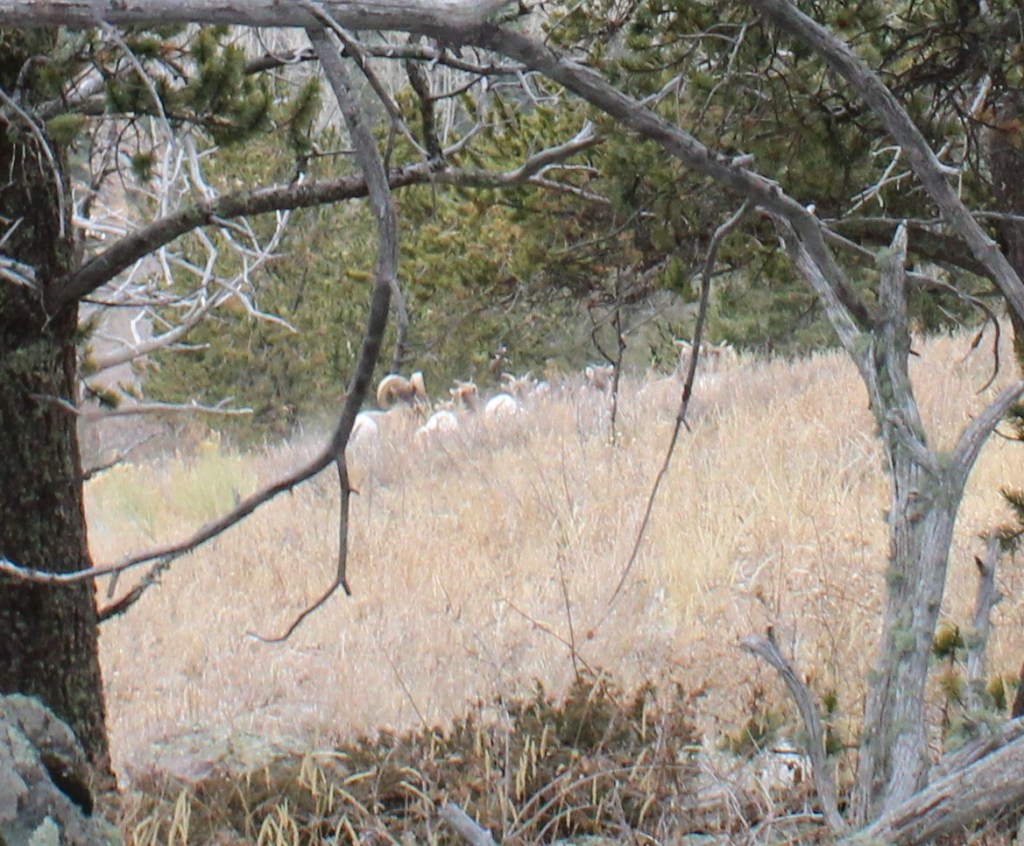
I turned back and saw a bighorn sheep watching me.  She watched me for so long I eventually left her there and kept going.

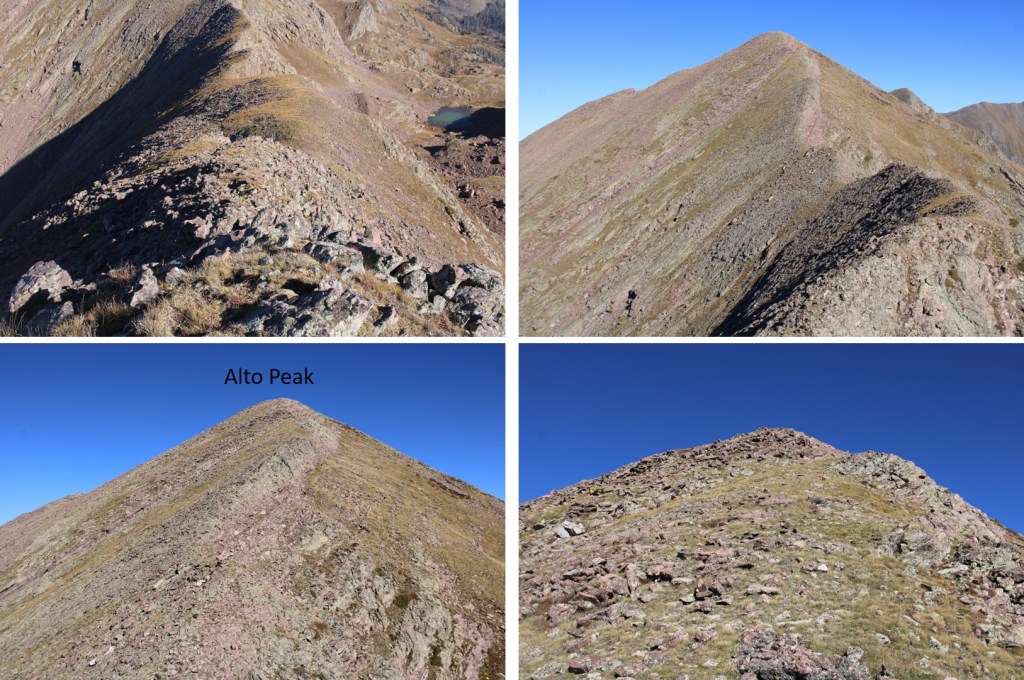
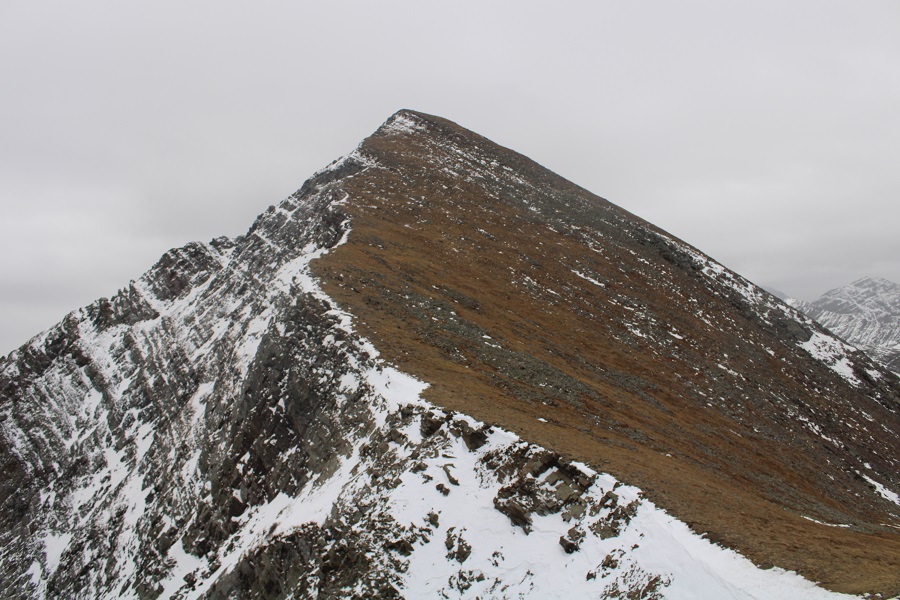
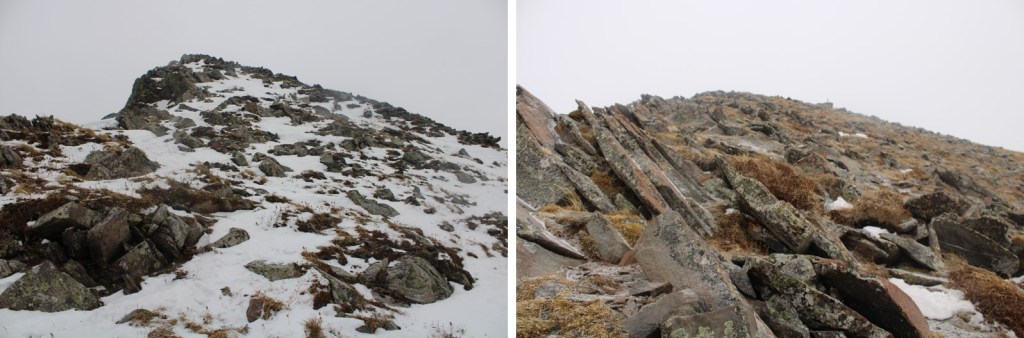
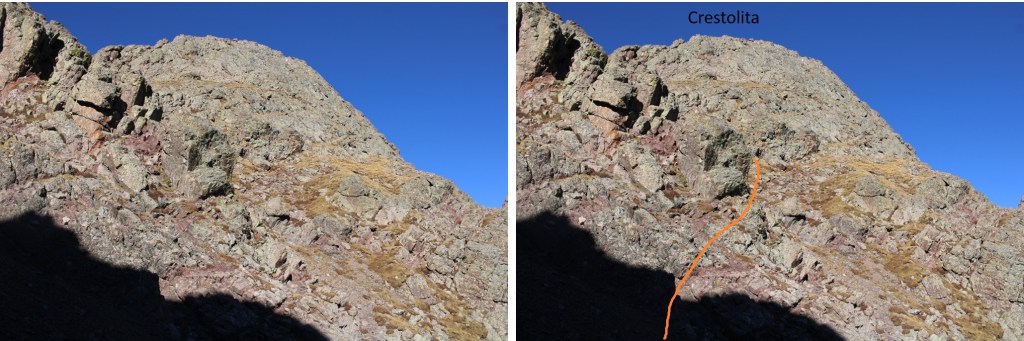
Here’s the last bit before the summit

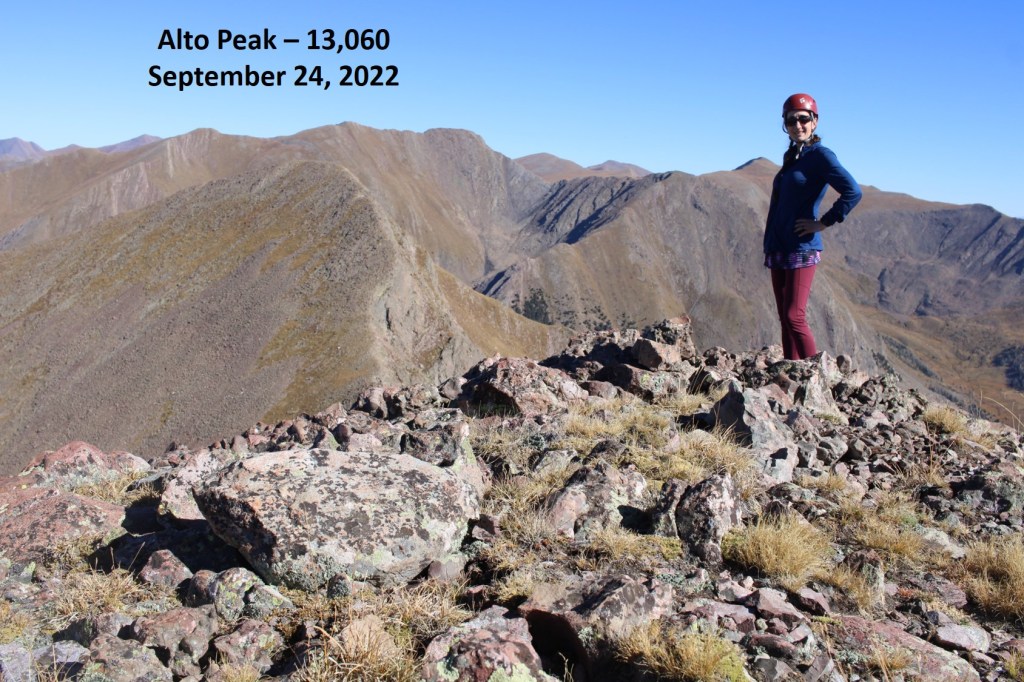
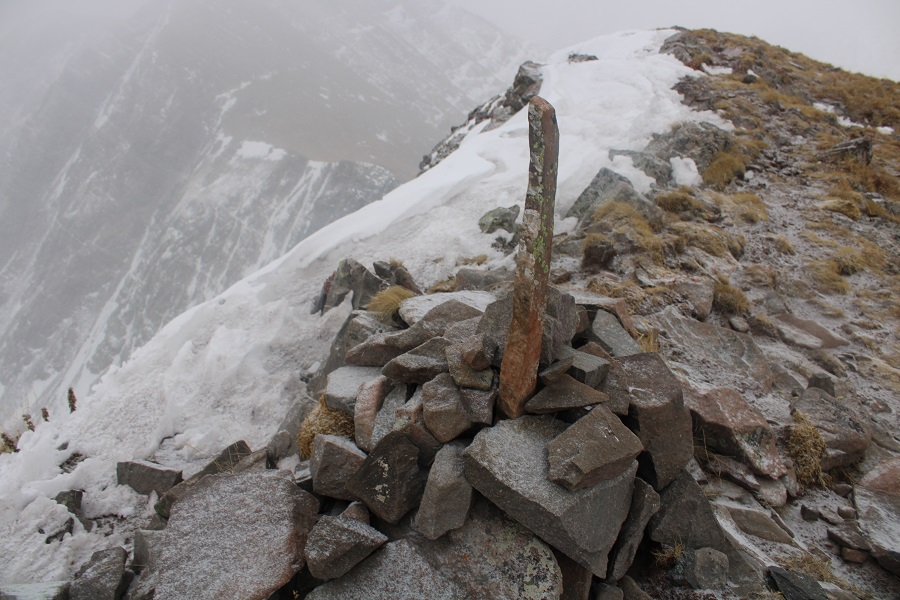
I summited Crestolita at 9:25am
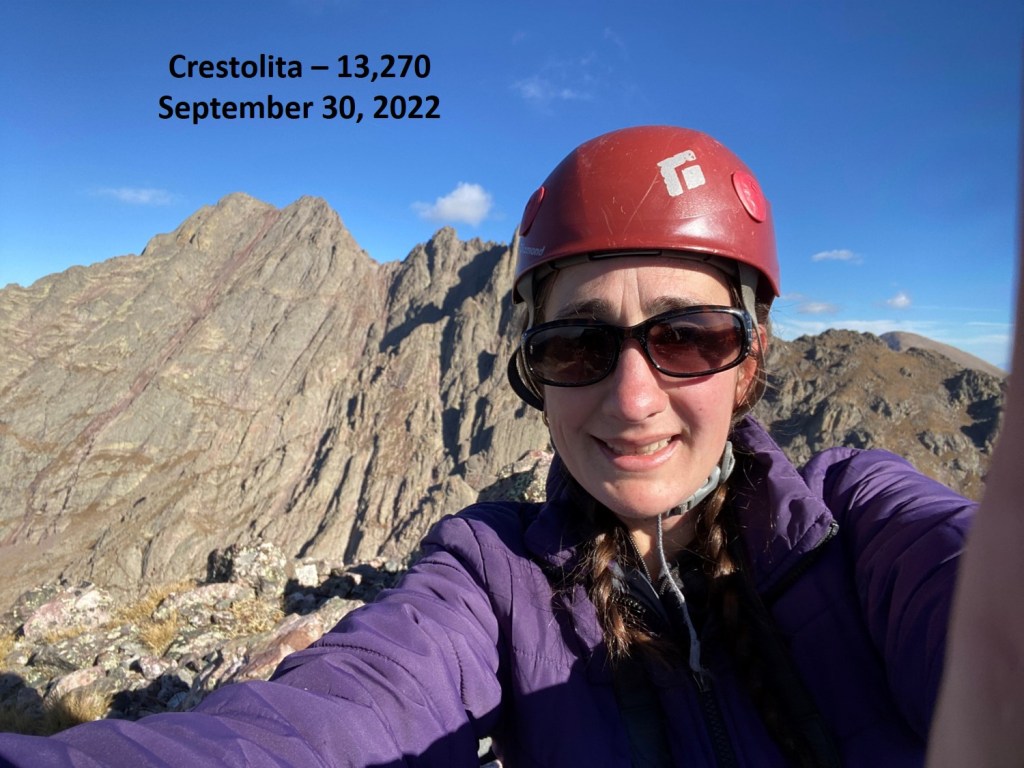
Crestolita:

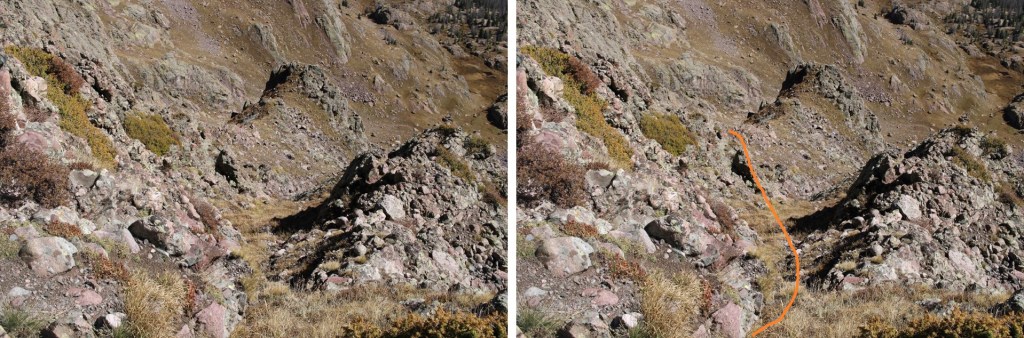
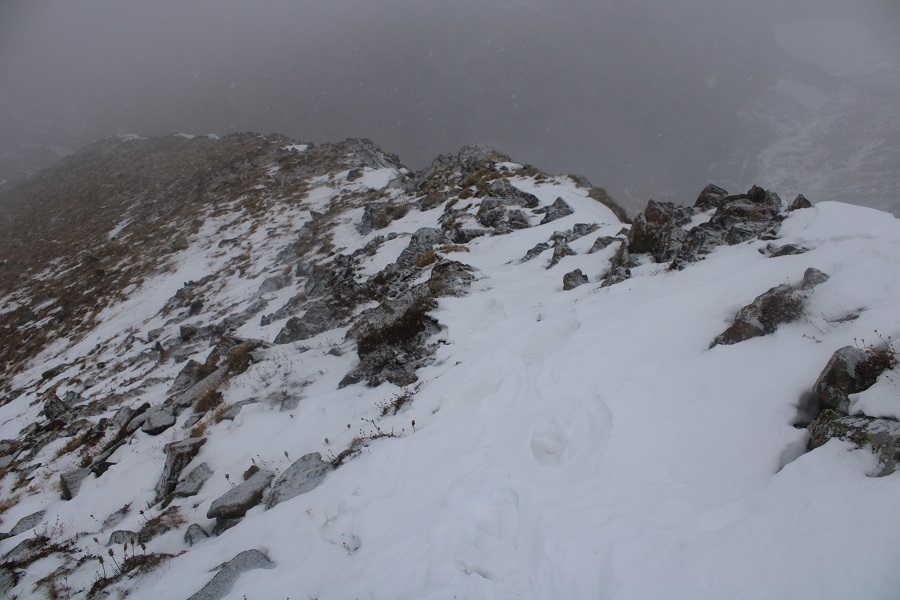
I took the gully down.  There were several options to make this happen.  When I had options, I went right, and wasn’t disappointed.  Here are some pictures of the way I took down. 

First, I made my way back to the saddle

Then turned left, and followed the tundra until it turned into scree

At the base of the gully, I picked up the trail again and took it towards Cottonwood Lake

I once again rounded the large boulder, then followed the cairns back to the trail

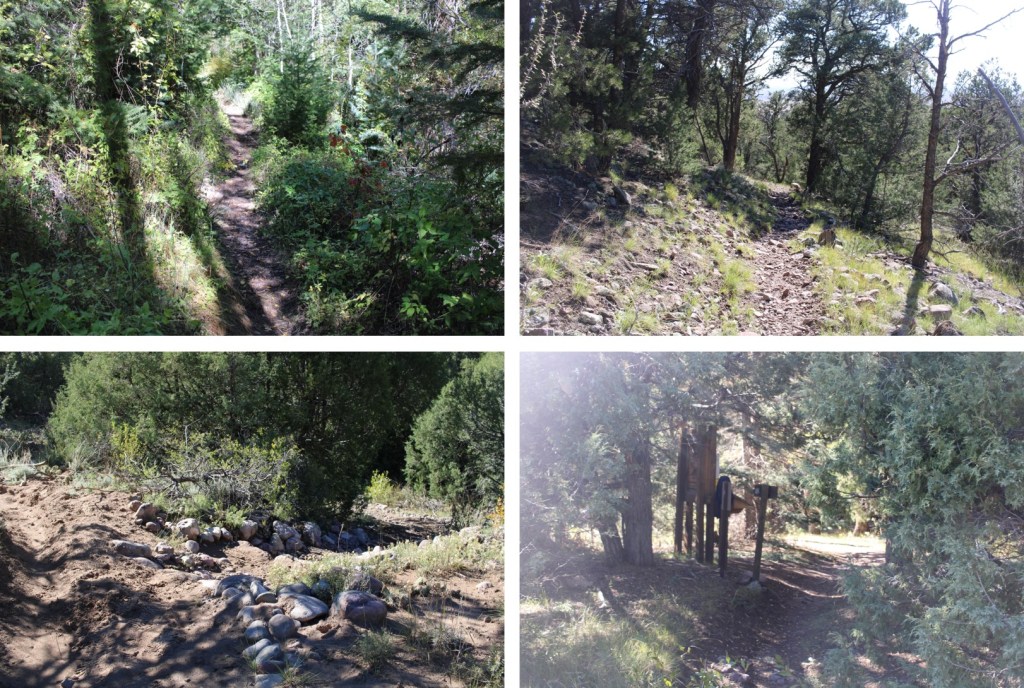
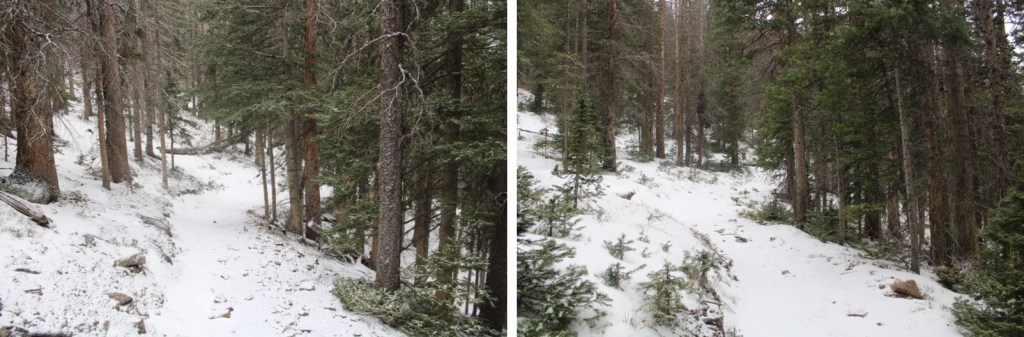
Back at the 861/743 ‘junction’, I followed the trail back down the granite slabs, and through several transition zones back to the trailhead.

I made it back to the trailhead at 1:30pm, making this a 14.33 mile hike with 4842’ of elevation gain in 8 hours. 

Alto Peak – 13060, Mas Alto Peak – 13062, and Menos Alto – 13,031

RT Length:  15.63 miles

Elevation Gain:  6250’

The last mile to the San Isabel Creek Trailhead was 4WD, but there were tons of campsites along the way.  Since it’s hunting season, a few of them were taken and I parked at the end of the road.

There was a faint trail at the end of the campsite that led me to the trailhead

I followed the San Isabel Trail No. 858 East, on a well-defined, class 1 trail.  

There were several creek crossings.  Since it was late September, they were all easily manageable, without creek crossing shoes.  The last time I was in the area I think I counted a minimum of 9 crossings.

After hiking for about 4.4 miles, and at 10450’ of elevation, I left the trail and headed northwest up this drainage.  There was some bushwhacking, as the trees in the slide area seem to be growing back

I crossed San Isabel Creek, and made my way up the drainage

I ended up going back and forth on either side of the drainage, looking for the best route.  There are some minor game trails in the area, but once you make it to the clearing you want to ascend the ridge to your left. 

Once on the ridge, I followed it north. As you can see, Menos Alto is to the right.  However, I’d already summited that peek, so I left it today for last. 

Here are some pictures of the route up the ridge.  It started out as tundra, then I entered the trees for a short bit, and exited to class 2 rock hopping.

I continued following the rocky ridge (class 2) northeast to this point, which is not a summit.

From there, I could see my next two objectives to the northwest, Alto Peak and Mas Alto Peak

I followed the class 2 ridge northwest to the first point, which was unranked

It was then a class 2 hike to the summit of Alto Peak

Alto Peak – PT 13060:

From Alto Peak I was headed north, towards Mas Alto Peak. The route looked straightforward, but I soon found the ridge cliffed out.

The ridge started out as class 2

But when I got to around 12830’ I had to get creative, as the ridge ran out.  I found a gully that looked like it ‘went’, which it did.  I descended northeast down the gully, and set up about several cairns indicating my route.  I was able to keep it all class 2+

Here are some pictures

I descended to 12700’, and then followed the contour of the mountain back up to the ridge

Now back on the ridge, I followed the class 2 terrain north to the summit of Mas Alto

Mas Alto Peak

PT 13062:

Now to retrace my steps back towards Alto Peak, and eventually Menos Alto Peak, by following the ridge south.

Here’s that section I avoided by going down the grassy gully, and the route I took to reascend.

Here are some step-by-step pictures of the route, now well cairned

I re-summited Alto Peak, and then this is the route I took over to Menos Alto… choosing not to re-summit the unranked points and instead taking grassy ledges.

The entire route was class 2.  Here are some closer pictures

The view from the summit wasn’t all that bad

Menos Alto – PT 13031:

And now to make my way back down the ridge

Then back down the ridge to the gully

And bushwhacking back to the trail

Once I made it to the trail, I turned right, and followed it back to the trailhead, still loving those stream crossings

I made it back to my truck at 4pm, making this a 15.63 mile hike with 6250’ of elevation gain in 11 hours.

On to the next trailhead!

13403, Cleveland Peak – 13,414, 13384, & Dead Man Peak – 13,050

RT Length:  23.05 miles (CalTopo), 17 miles (Strava)

Elevation Gain:  7080’ (CalTopo), 9474’ (Strava)

I parked at the Music Pass trailhead the night before, the only other vehicle in the lot until a 4Runner pulled up. 

I made it an early night, and was on the trail at 4am, heading west towards Music Pass.

I passed a trail register, which was full of moths and only one piece of paper.  I didn’t bother signing it.  The trail is class 1 and easy to follow

A tree has recently fallen near the signs at the top of Music Pass.  I continued on the trail and lost 450’ as I descended to Sand Creek below.

Now is a good time to get a look at how you’re going to ascend the ridge from Sand Creek Lake.  Getting up the ridge is not easy.  I would not recommend the route I took up (dotted line).  The easier route is up a gully.  Also note the cliffs you’ll want to avoid.  It’s important to make it to at least 13000’ before traversing to the ridge, as there are cliffs and chutes you’re trying to avoid. This is the overall route I took

After 3.3 miles I took the second junction and turned left.

I crossed Sand Creek and made my way to Sand Creek Lake on the class 1 trail.  There was a lot of deadfall in this area

I made it to the lake as the sun was rising.

At the lake the trail ended.  I knew I needed to ascend the ridge, so I headed south, which required some bushwhacking.

From here I’m going to show you how I descended, as it was much safer than the way I ascended.  At around 11,400’ there’s a gully.  It’s obvious, and the only one.  Follow and ascend the gully southwest and then south.

This is where you ascend the gully. This can be done mostly on grassy ledges. 

Once up the gully, it’s time to make it to the ridge.  You don’t need to go all the way to the top, instead, ascend to about 13000’, then traverse over to the ridge at its lowest point. It’s important to make it to at least 13000’ before heading west to the ridge, to avoid the drop offs and smooth gullies. The terrain here is full of loose rocks.  Every one rolls, so be prepared to wear your helmet and take your time.

It was at 13000’ I unexpectedly awoke a bobcat.  He was not happy with me, but allowed me to take his picture before bounding off.

Bobcat:

I continued heading west, across some tundra and rock filled gullies, towards the ridge.

Once on the ridge, I followed it straight up to PT 13495.  However, this is an unranked point, so there is no need to go there.  Instead, you can skirt this summit and instead head over to PT 13403 (also unranked).  If you decided to go up and over PT 13495, it’s all class 2, both up and down.

From the summit of PT 13495, this was my route up 13403.  The ridge looked like it went at class 3, but I decided to keep it class 2 and ascend the face

And some closer pictures

I summited PT 13403 at 10am

PT 13403:

My next objective was to follow the ridge south towards Cleveland Peak.  Here’s my overall route up (going down I stuck to the ridge, which was class 3 with maybe a few class 4 moves)

I made it down to the saddle, and crossed over on some scree. 

From there I tried to stick to the ridge, but every so often I had to drop to the right.  This is choose your own adventure.  The ridge goes at continuous class 3, easy class 4, and was the most difficult climbing of the day. 

I summited Cleveland Peak at 11am

Cleveland Peak:

My next goal was PT 13384, to the southwest.  There was a little more class 3 ridge work, and then I crossed a plateau and made it to the Cleveland/13384 saddle

Once there, I followed the ridge to the summit.  The ridge goes at class 3

Here are some closer pictures of the ridge

I summited PT 13384 at 12:10pm

PT 13384:

Dead Man Peak was to the north.  To get there, I would have to make my way back to the Cleveland/13384 saddle, re-ascend to the plateau, then head northwest over to Dead Man Peak

I made my way back to the Cleveland/13384 saddle

Re-ascended up to the plateau

Then descended 550’ and re-gained 400’ to the summit of Dead Man Peak.  This could all be kept at an easy class 3 by sticking to the ridge

The summit is circled in red, to the northwest

I summited Dead Man Peak at 1:45pm

Dead Man Peak:

To get back to Cleveland Peak, I had to go back down to the saddle, and re-gain 770’ of elevation

After re-summiting Cleveland, I had the most difficult part of the downclimbing to do to get back to the 13403/Cleveland saddle.   

I was able to stick directly to the ridge.

I did not summit PTs 13403 or 13495 this time, but skirted them to the right

Once I could see Lower Sand Creek Lake, I stayed high on the ridge to pass all the cliffs, then descended straight towards the gully below.

I bushwhacked it to northwest to Lower Sand Creek Lake, then found the trail and took it back to Music Pass

Then followed it back to the trailhead

On big days, I tend to get wildly different numbers from CalTopo and Strava.  CalTopo says I did 23.05 miles with 7080’ of elevation gain, and Strava says I did 17 miles with 9474’ of elevation gain.  In any event, the hike/climb took me 16 hours, 15 minutes to complete.   

On to the next trailhead!

PT 13159

RT Length:  12.1 miles

Elevation Gain:  4530’

I just love the local herd of bighorn sheep in this area!  I’ve seen them a few times, usually up at Willow Lake. It’s neat watching the babies get bigger. They greeted me this time on my way to the Willow Lake trailhead.

The trailhead was deserted for a Friday afternoon.  I sat back, ate some peanut butter off a spoon, sipped some whiskey, and jotted down notes from the day. The bathrooms were still open, clean, and stocked.

Before making it an early night I pre-signed the trail register, red a bit, and headed to bed.  I’m so darn comfortable sleeping in the bed of my truck, it’s difficult to get up and out in the morning.  Oh, and I ‘installed’ new lights, if anyone’s interested:

The South Crestone trail starts from the same area as the Willow Lake trail.

The trails quickly diverge, and I followed the South Crestone trail, heading northeast.

The South Crestone trail (860) is a class 1 trail that will lead you all the way to South Crestone Lake, without any junctions. 

After hiking for 1.6 miles I passed an old log cabin, and started switchbacking up the hillside.

At the top of the swithcbacks the waterfalls started.  They were located alongside the trail, but didn’t impede the actual trail.  Since it was cold this morning, the ice never got a chance to melt (these pictures were taken on my return).

I came to a meadow, and then switchbacked up to the lake

I always know I’m close to the lake when I see the “no camping or livestock within 300 feet of lake” sign.

After hiking for just over 5 miles, I made it to South Crestone Lake

I’d gone too far, but on purpose:  I’d wanted to see the lake.  About 5 yards before the lake, there’s a post near the trail.  I’m sure it was informational at some point, but now it’s just a post (and difficult to miss).

At this post I turned left, leaving the trail.  From here on out, it was a class 2 hike.

As soon as you leave the trees, you have a great visual of the rest of the hike

Here’s the route I took to the summit of PT 13153

First, I ascended this rocky/willowy/tundra filled gully.  Note the rock circled, as it will be your visual cue when you exit. 

At the top of the gully, I stayed on the tundra, avoiding the rock outcroppings both above and below. But was unable to avoid the willows. I just aimed diagonally for the first pile of rocks on the ridge I could see.  There’s no reason to try to ascend directly to the ridge; just keep aiming northeast.

Staying on the tundra will help to avoid rock-hopping

Once on the ridge, it was a simple hike to the summit

I summited PT 13153 at 8:45am.  It was cold.

PT 13153: 

There were some great views of the Crestones

There was a summit register, but it was too cold for me to attempt to open it.  Have I mentioned it was cold and windy? I wanted to get down off the ridge asap. 

Here’s an overview of the route back to the lake.  Remember, just aim for that big rock that signals your decent down the gully

Here are some pictures of the way back to that large rock

Once at the large rock, I descended back down to the lake

This brought me to the class 1, South Crestone Trail, which I followed back to the trailhead

I was really surprised at all the witch’s hair I saw on the trees.  It’s completely taken over in some parts.  In the dark I’d thought the green were pine needles: Not so.

As I rounded the corner, just before descending down the switchbacks to the cabin, a herd of bighorn sheep darted across my path, kicking up dust and thundering down the hillside.  They were too quick for a good picture, but I was 100% sure it was the same herd I’d seen yesterday, and last time I was at Willow Lake (we’ve bonded).  I’ll add this to my growing list of wildlife ‘butt’ shots. 

Here are some more pictures of the trail back to the trailhead

I made it back to my truck at 11:30am, making this a 12.1 mile hike with 4530’ of elevation gain in 6 hours, 30 minutes.

Today had been much easier than anticipated.  I was done earlier than expected, which was great!  Now to head home; my daughter comes back from college for Thanksgiving break tonight, and I want to have her favorite dinner ready for her when she arrives!

Comanche Peak – 13,277

RT Length:  12 miles

Elevation Gain:  4837’

The weather forecast for today predicted a 40% chance of snow after noon, and the snow would be minimal, so I decided to head to the Sangres to do the Comanche/Venable loop.  Spoiler alert: I only got Comanche Peak.  My vehicle was the only one in the lot when I arrived.  I was on the trail at 5am.

I decided to do the loop clockwise, starting with Comanche Peak.  The Comanche Peak trail was clearly visible from the parking area.

I followed the Comanche Trail for about half a mile, and crossed the Rainbow Trail.  I stayed straight on the Comanche Trail.

There was a register and information area

This trail is well groomed and wide.  I followed the trail all the way to Comanche Lake, switchbacking up the mountainside.   

Also, the bears are still awake…

After hiking for 4.25 miles, just before making it to Comanche Lake, there’s a junction.  I continued straight, instead of heading down to the lake

I was headed to the Comanche/Spring saddle

The hike to the saddle continued to be class 1, but what little snow there was had accumulated directly on the trail. On the positive side, the trail was easy to locate!

Just before making it to the Comanche/Spring saddle there was a cornice to navigate.  I got out my microspikes and ice axe, and kicked in steps. 

As I was doing so, I looked to my left and could see Comanche Peak

I could also see weather coming in from the west.  It wasn’t supposed to snow until later in the day, but I could feel the wind picking up, and see the snow coming in.  I’d have to re-assess my hiking plans as I went. 

It was 5.8 miles from the trailhead to the saddle.

After putting away my microspikes and ice axe, I followed the saddle south

It was an easy, class 2 hike to the summit, mostly on tundra or stable rocks. In some areas there were bits of a game/social trail

As I was hiking up the ridge towards Comanche Peak the wind picked up, and it started snowing.  I figured I’d get a picture of Spring and Venable before the snow moved in.  In less than 10 minutes, I could no longer see these peaks.

Here’s a look at the last push to the summit of Comanche Peak

There was a cairn at the summit

I summited Comanche Peak at 8:50am. 

Comanche Peak:

I turned around to head back to the Spring/Comanche saddle, and noted the lack of visibility.

I descended to the saddle, and realized the snow wasn’t going to let up any time soon.  I could have made this a loop, but the pictures would have been useless in a trip report, and navigating a fresh layer of sugary snow on the rocks didn’t sound like a fun time, so I decided to just head back the way I came, making this an out and back hike.  I’d come back later for the other two peaks.

Here’s looking back at the trail from the saddle

And back over the cornice

It continued to snow the entire trek out, but the trail was easy to follow.  A nice layer of snow started to build up on my camera, gloves, eyelashes, backpack, etc. as I hiked out.

Check out the difference in Comanche Lake from earlier this morning

Here are some pictures from the hike out.  It was neat having more snow on the trail on the way out than I’d had on the way in.  The only downside: There had been ice on the trail this morning I could avoid because I could see it.  Now it was covered in a layer of snow and not quite as visible.  I did some slipping and sliding, but managed to remain upright.

It finally stopped snowing just as I made it back to the trailhead, but a look up at the peaks let me know it was definitely still snowing above treeline.

I made it back to my truck at 11:15am, making this a 12 mile hike with 4837’ of elevation gain in 6 hours, 15 minutes.