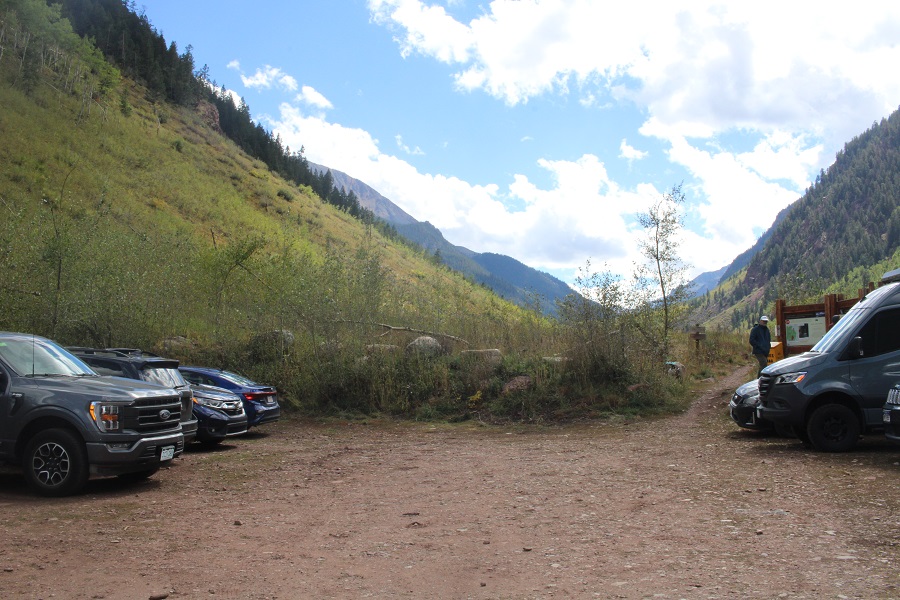
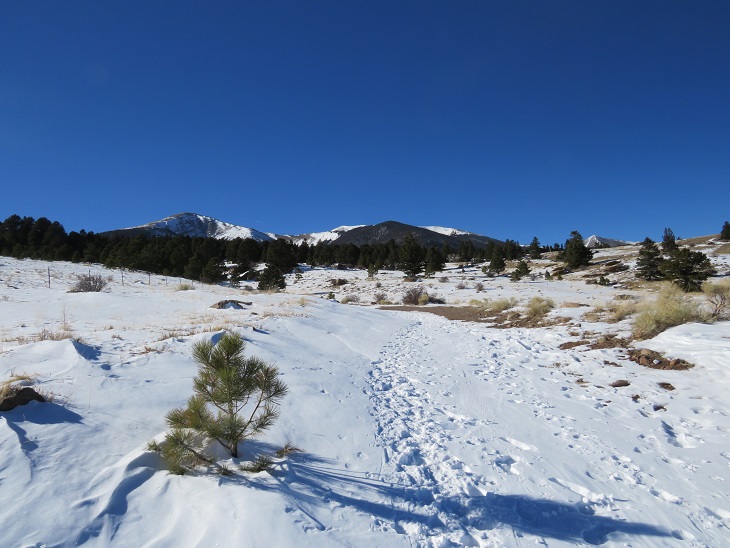
Due to weather, I wasn’t able to summit Hunter Peak along with the rest of the ridge last week, so I was back again to try to summit with the little bit of snow it had received in the past few days. I parked at the Conundrum Hot Springs Trailhead, and was on the trail at 4:30am.
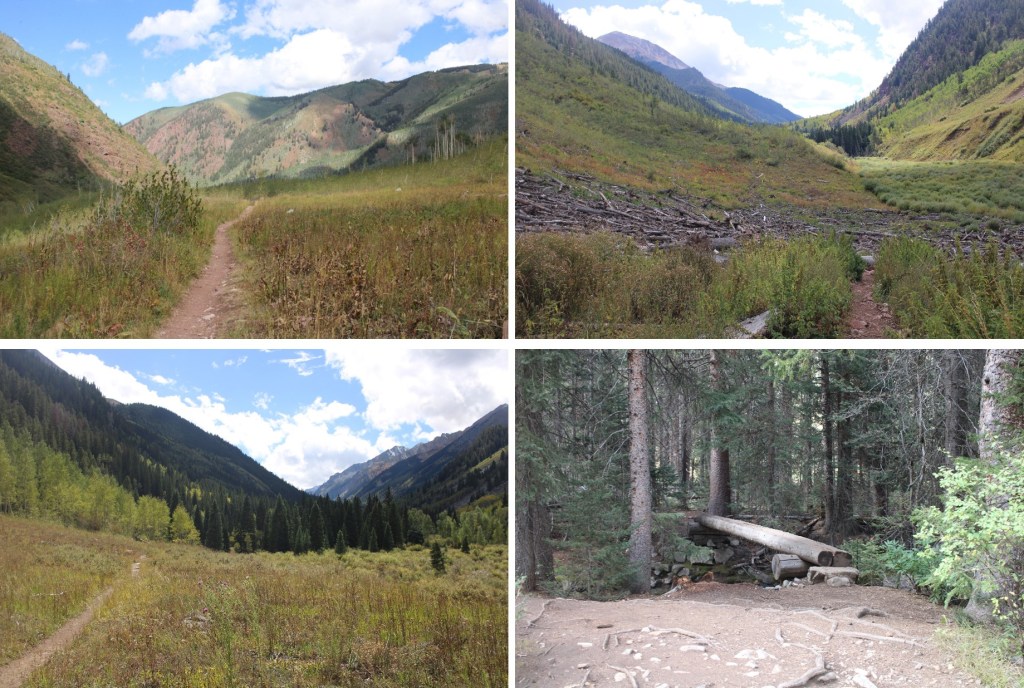
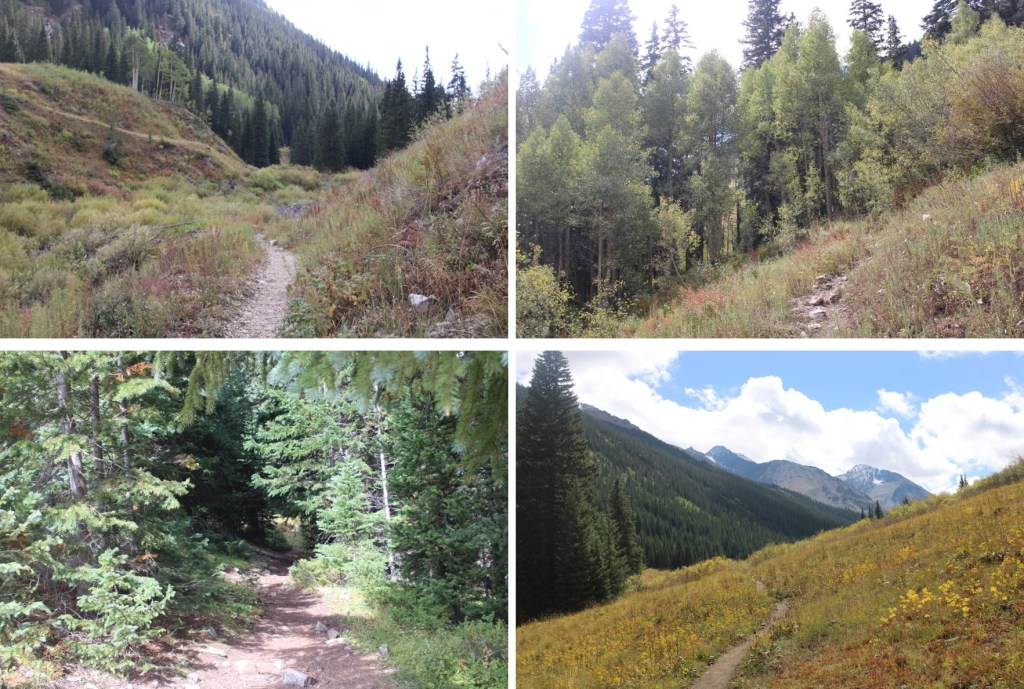
I followed the class 1 trail south for 5.75 miles
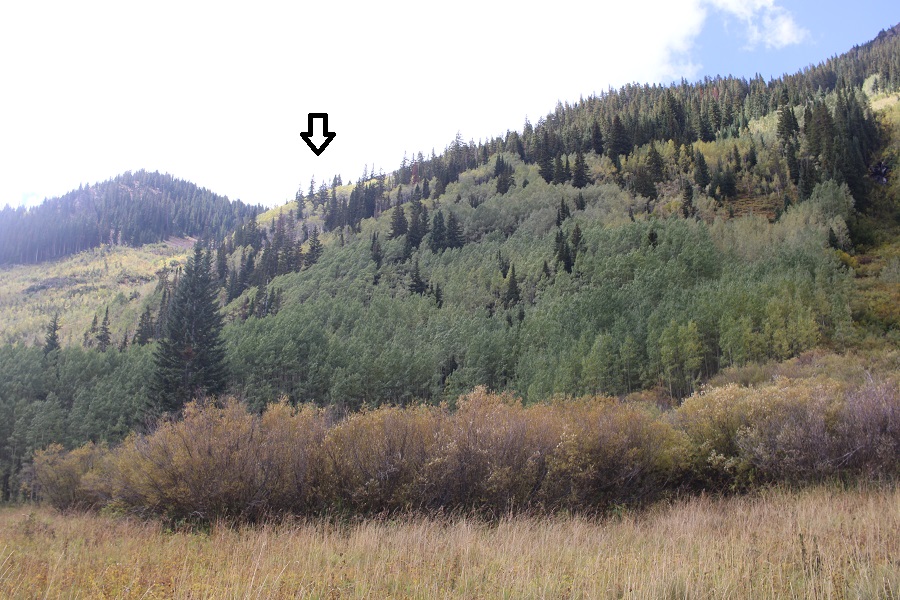
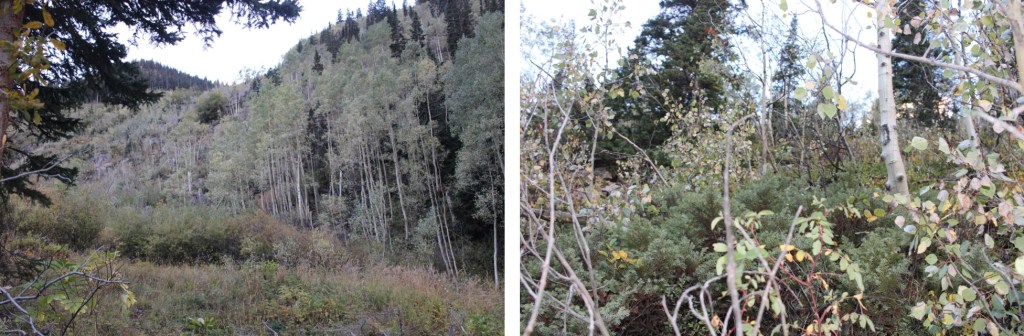
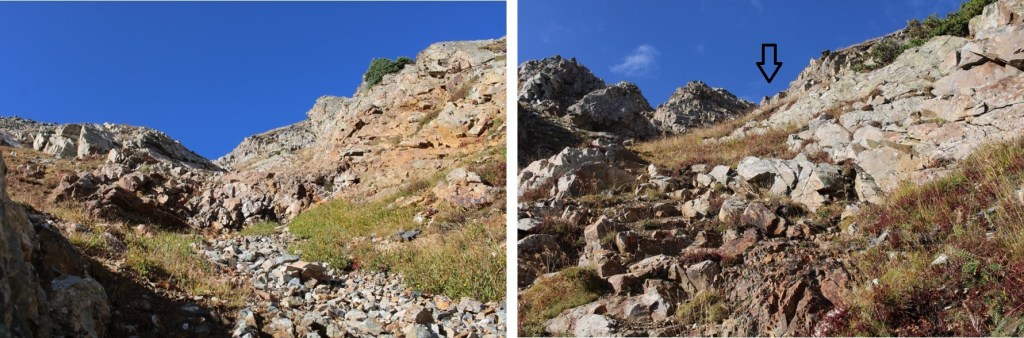
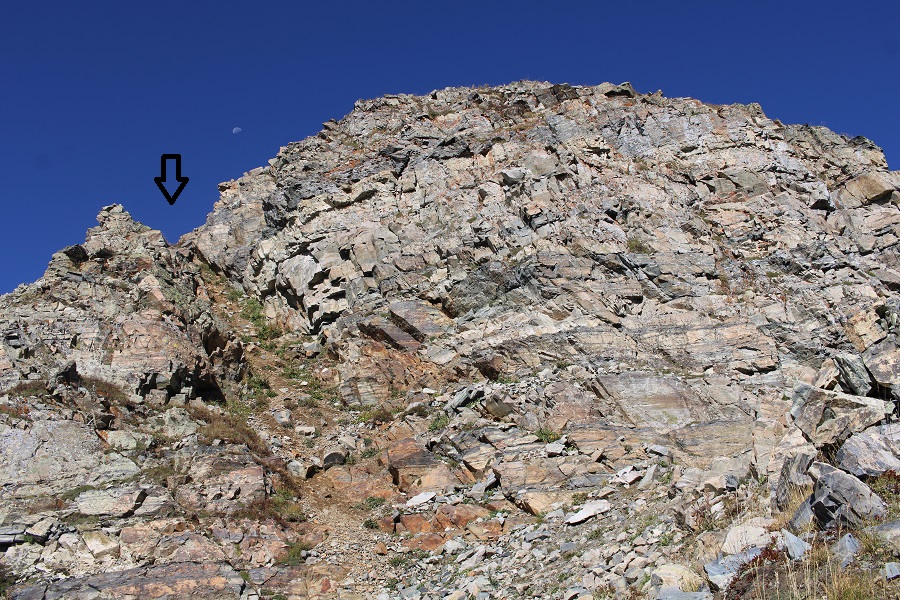
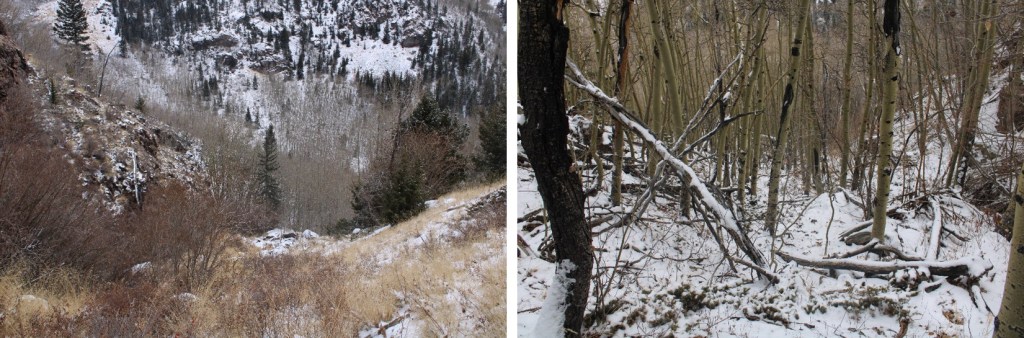
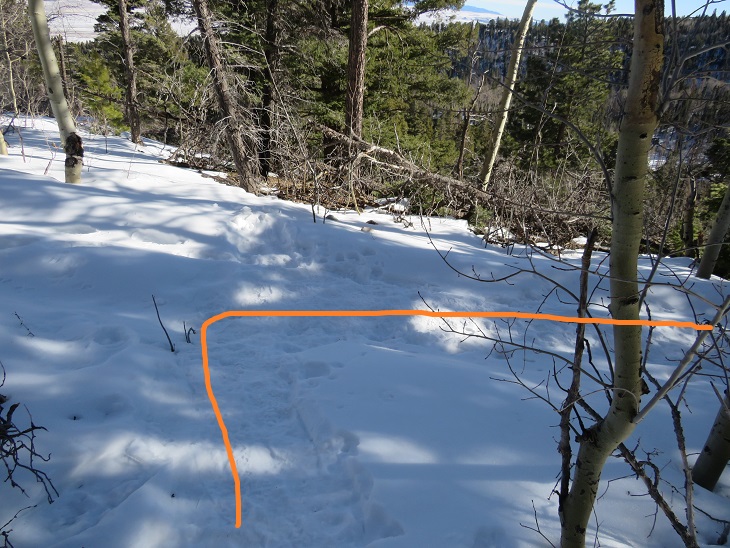
After hiking for 5.75 miles, and at 10040’ of elevation I left the trail and headed west up the hillside, staying in between two drainages. This included a lot of bushwhacking, but I was headed towards the arrow, staying more left, but really just trying to find a route through the trees to get thee. I didn’t see any game trails.
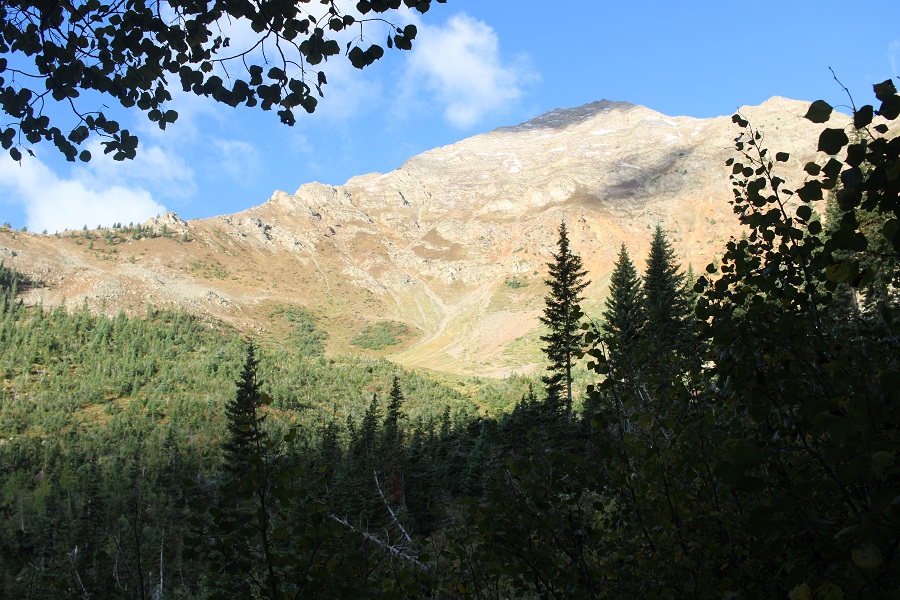
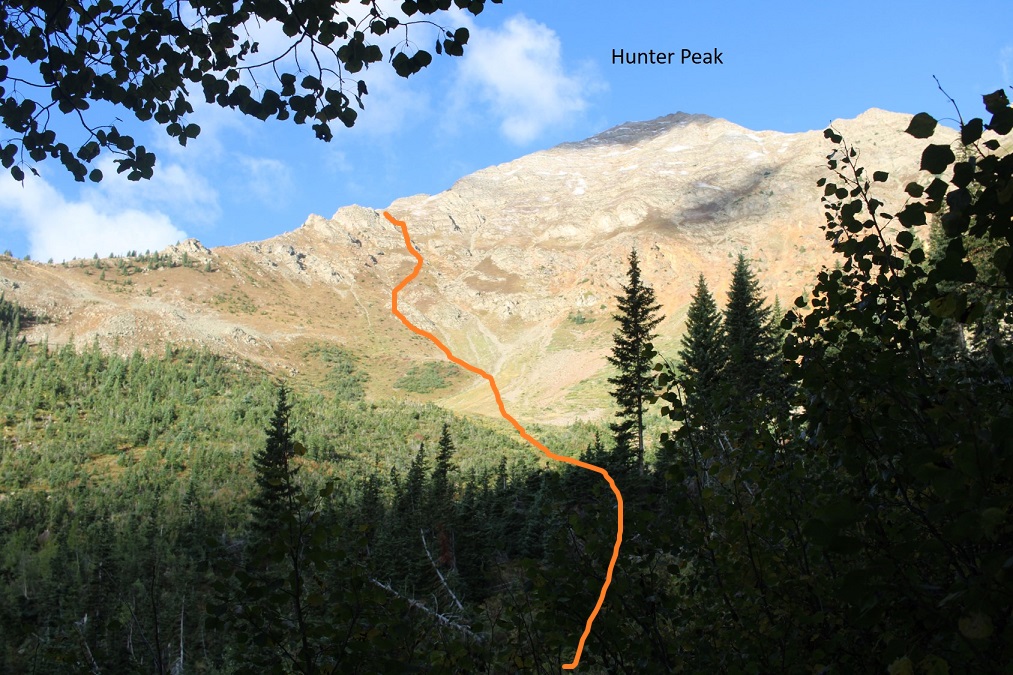
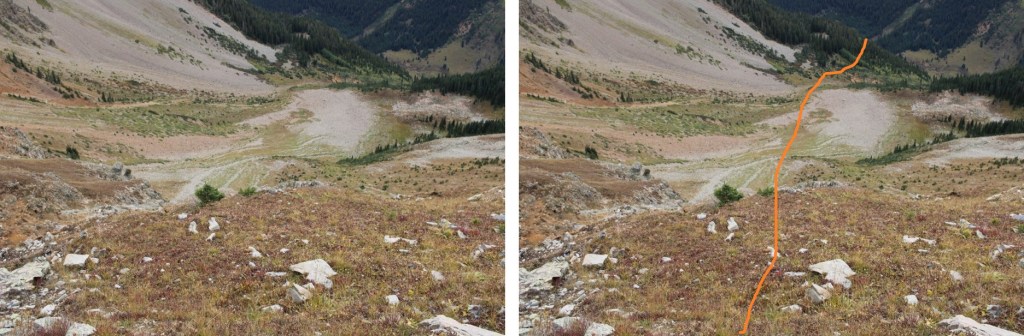
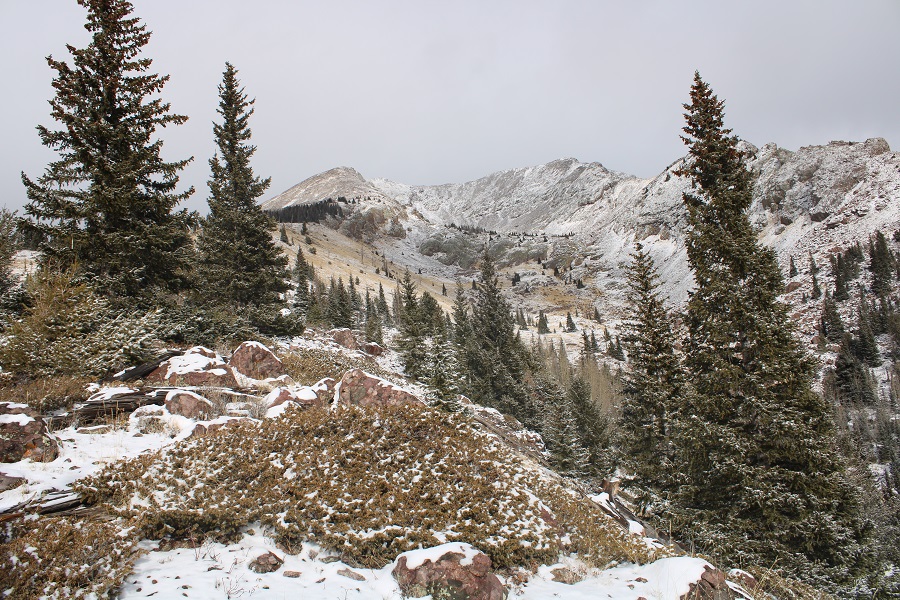
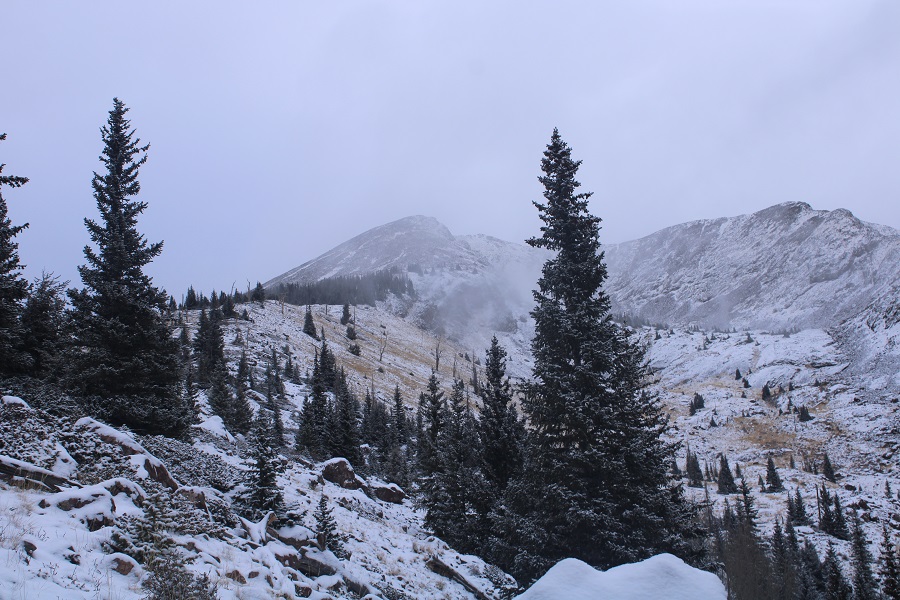
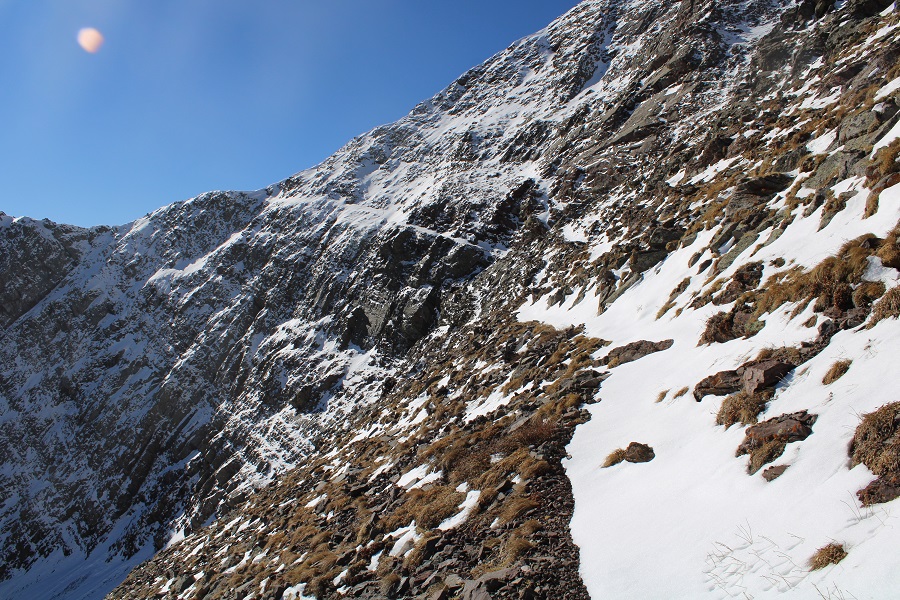
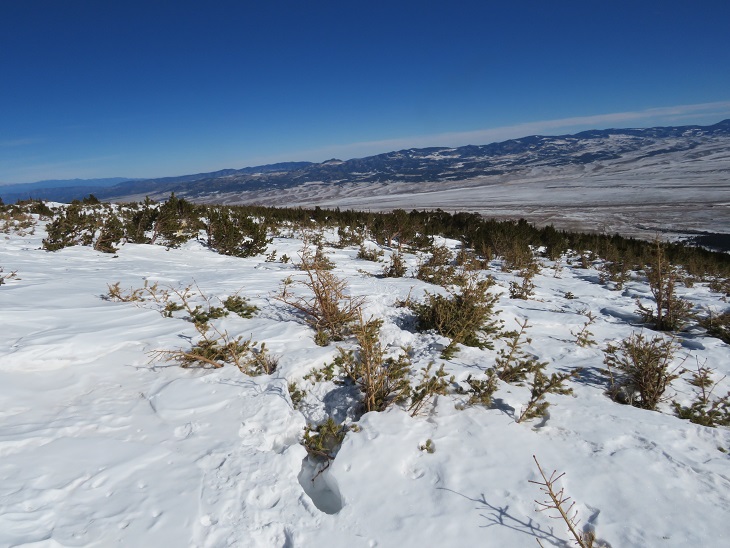
As I made my way out of the trees, I had a good view of Hunter Peak, and my intended route to the ridge
I made my way southwest towards the ridge, entering the basin
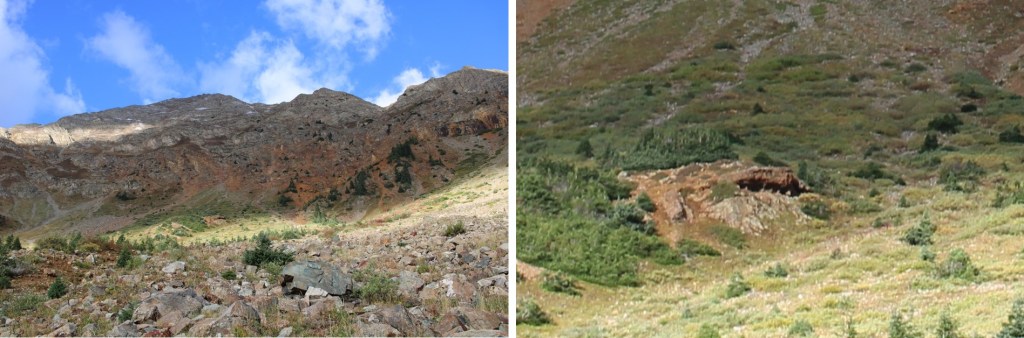
I was about halfway through the basin when I saw a cool cave in the middle. I wasn’t headed that way, but took a picture of it anyway. I thought I saw what looked like a bear standing at the mouth of the cave, but I was too far away to tell
A minute later, I heard talus scattering, and looked over to see a black bear running as fast as it could away from me. It was at around 12000’, booking it towards treeline.
Here’s a video of the bear running away from me. He was quite a fast bear.
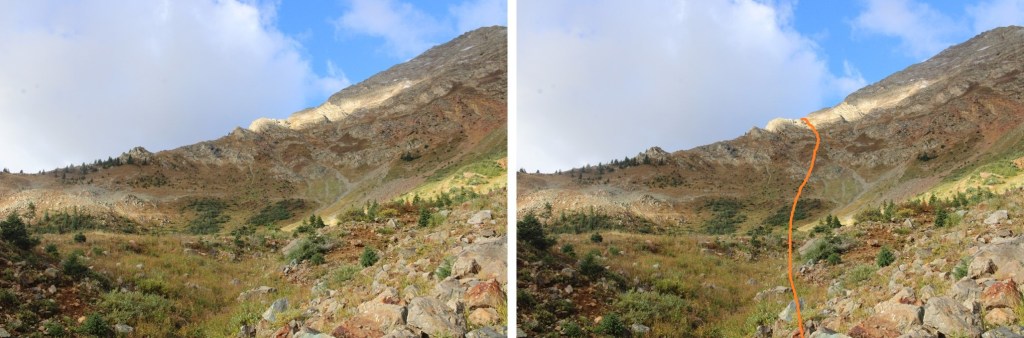
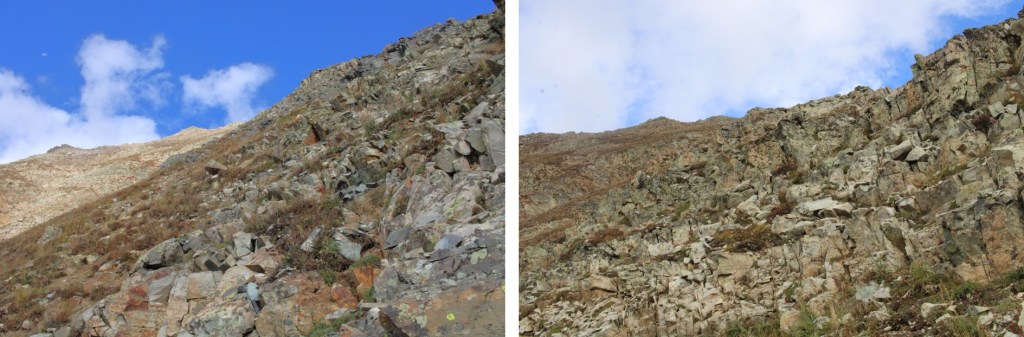
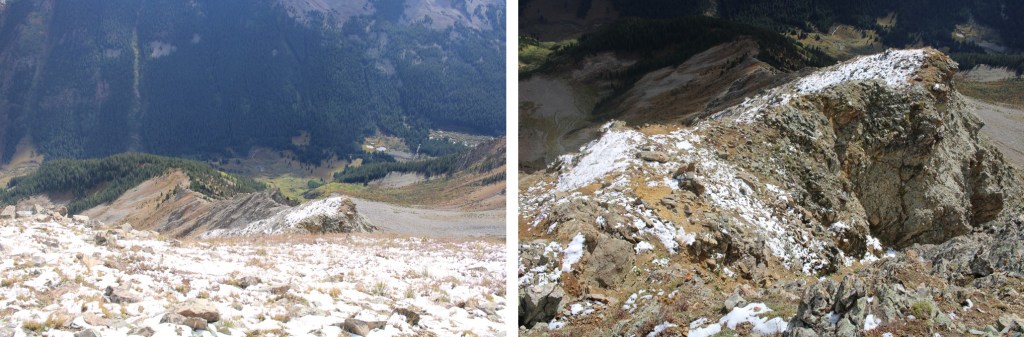
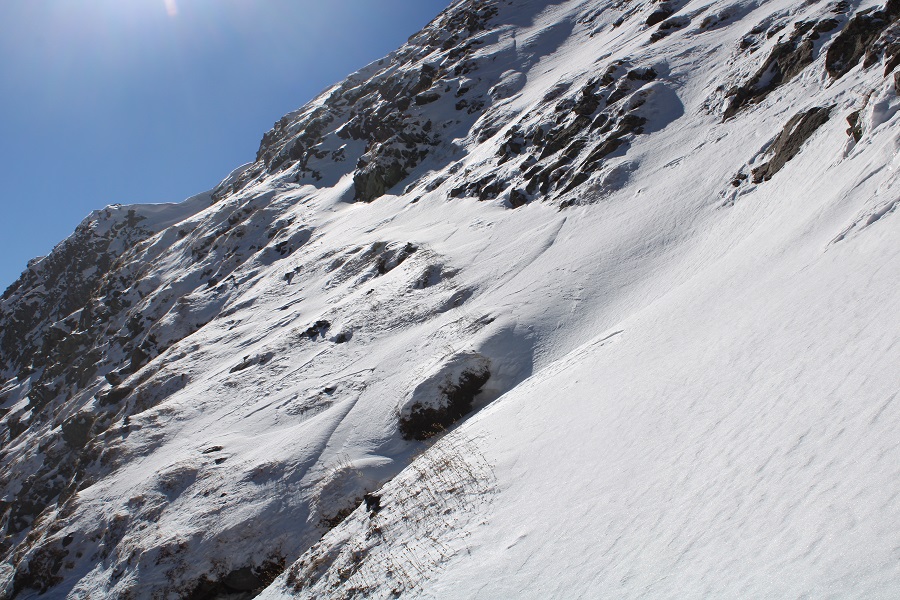
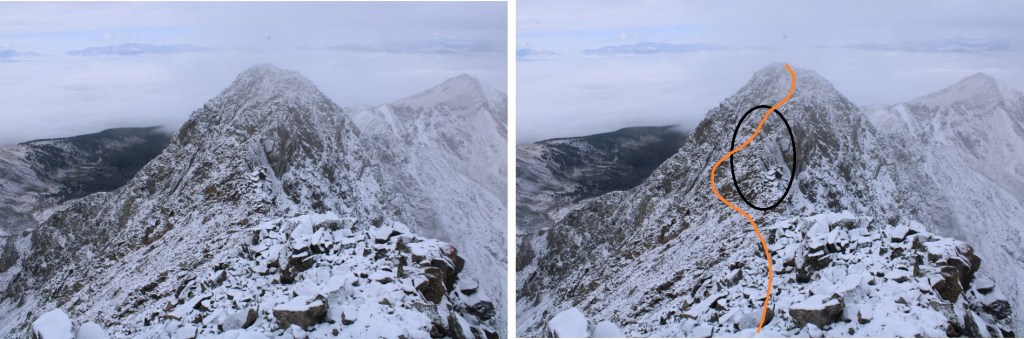
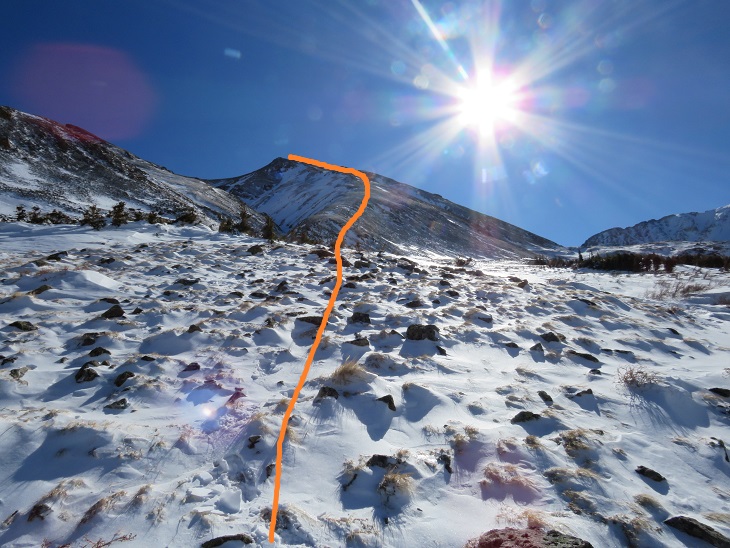
I continued heading towards the ridge. There were several choices for gullies. Here’s the route I took. This was all difficult class 2.
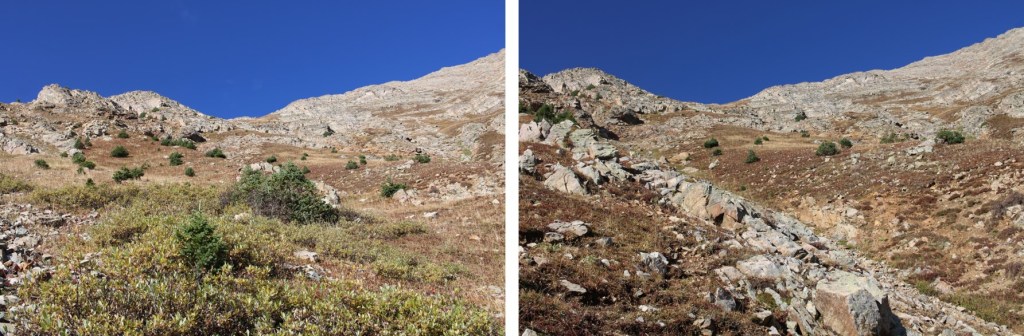
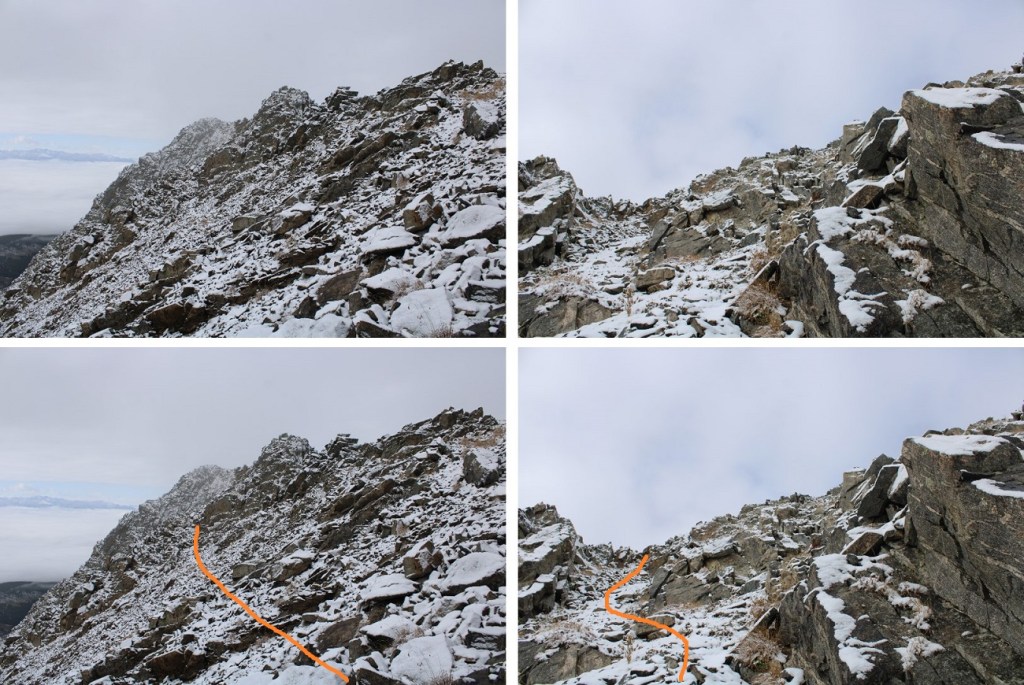
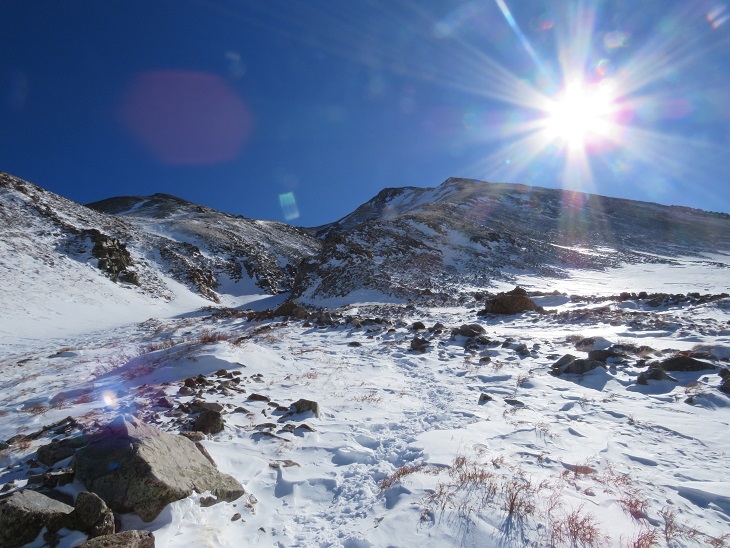
And some step-by-step pictures up the gullies to the ridge.
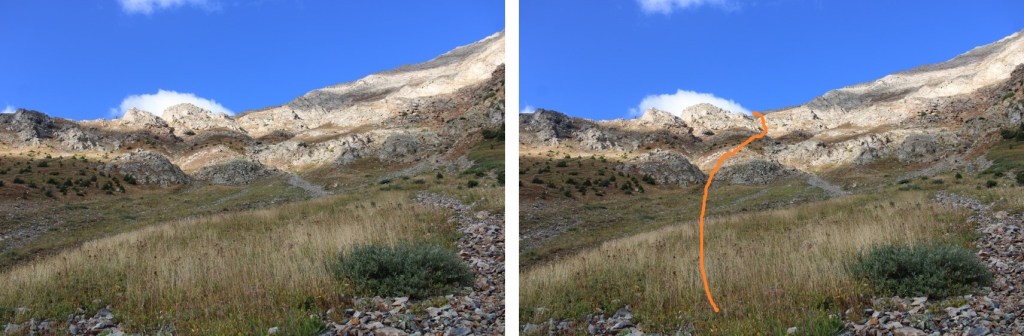
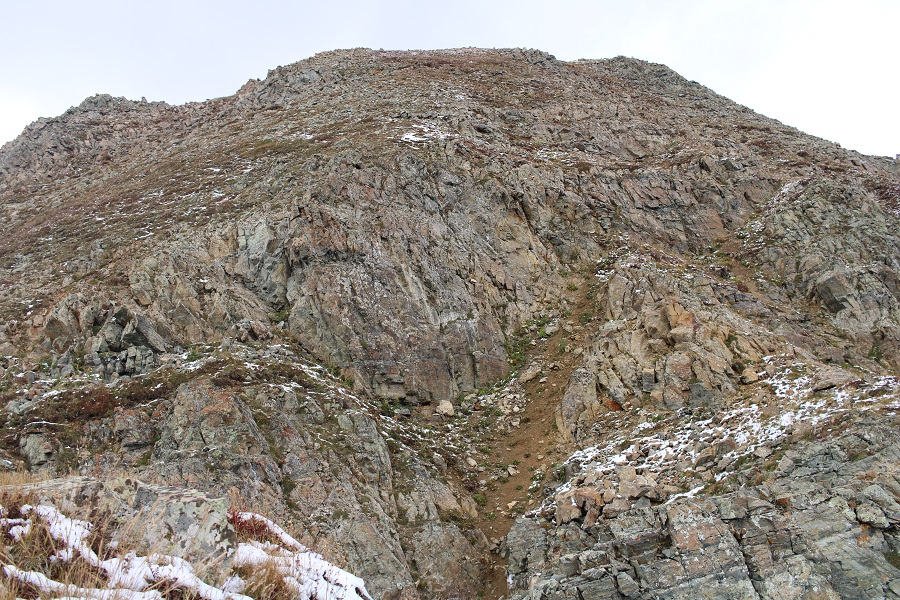
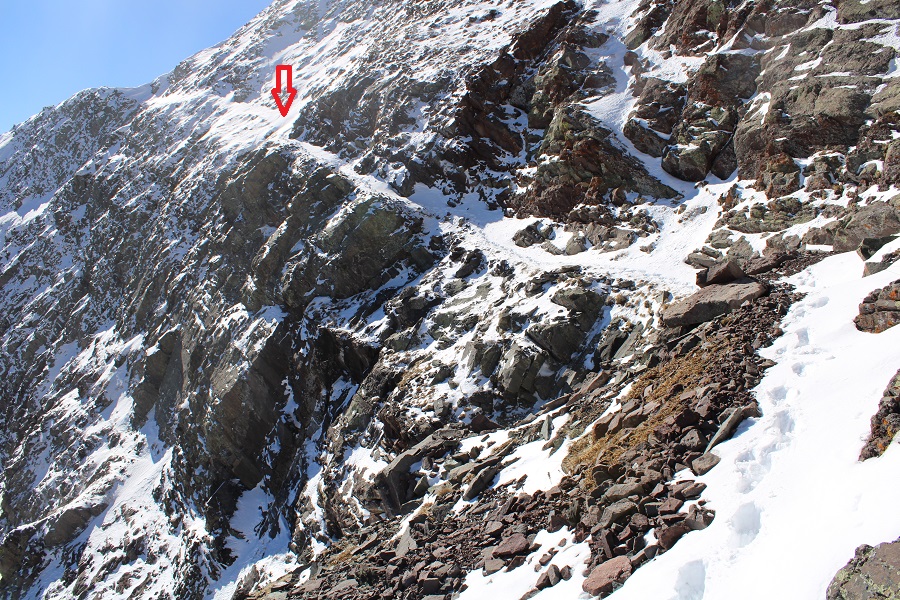
Once on the ridge I turned right, and followed the ridge northwest, immediately going up this gully
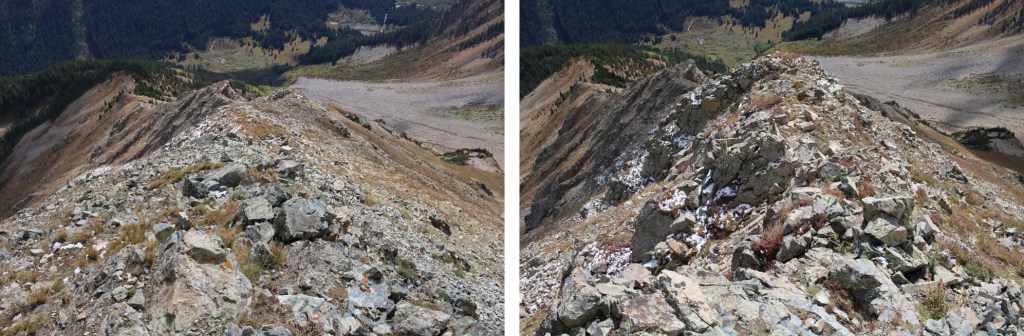
After ascending the gully, I made my way to the ridge, and stuck to it. This was class 2
There was another, final gully to ascend, also difficult class 2
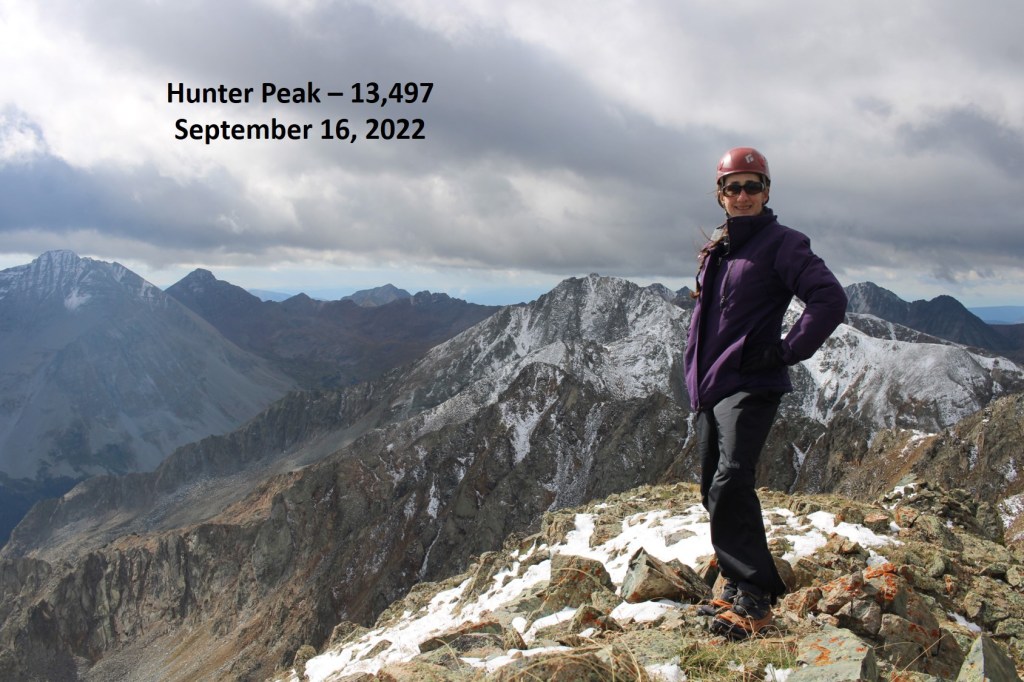
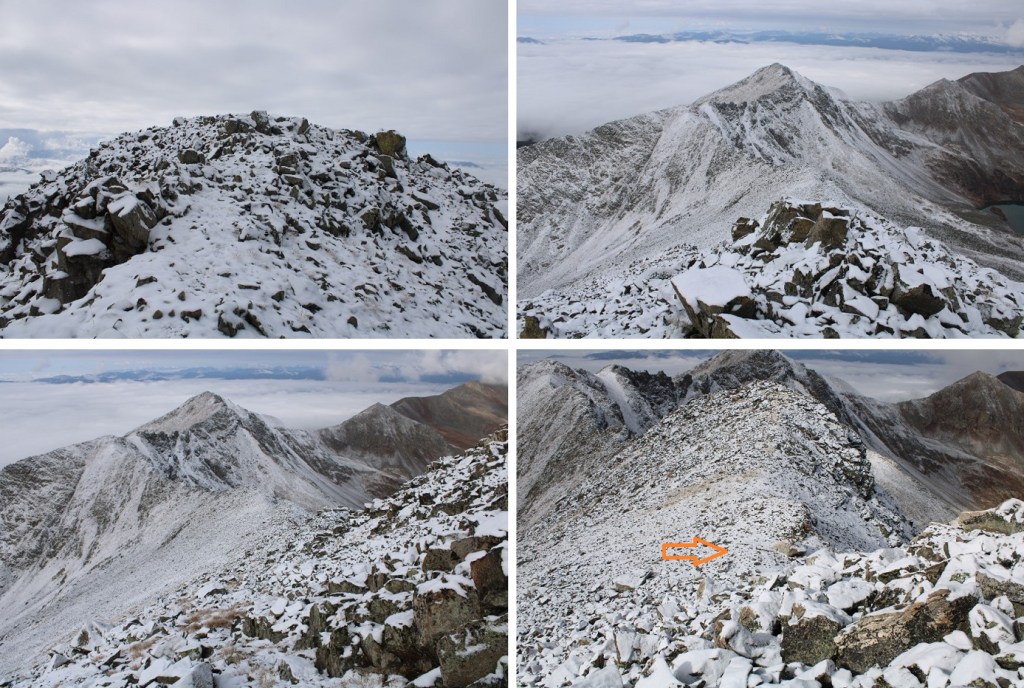
I summited Hunter Peak at 10:30am
Hunter Peak:
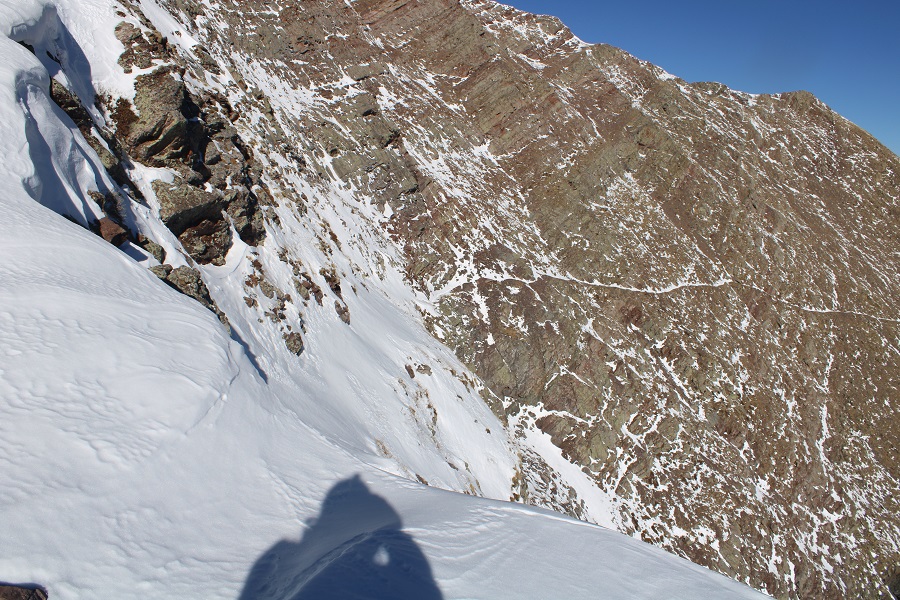
The views from the summit were beautiful!
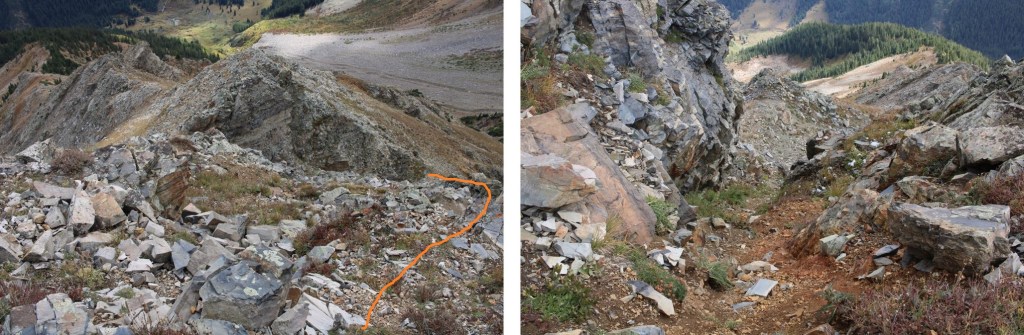
But it was starting to snow, so I retraced my steps back down the ridge and gully
Both ways go, but the red dirt on the right is easier
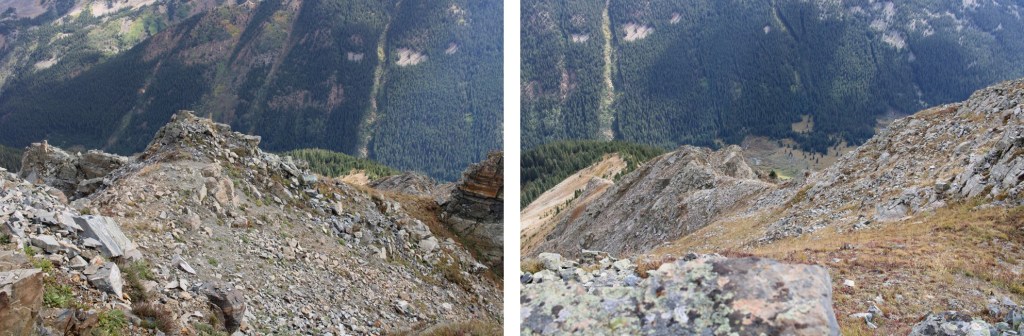
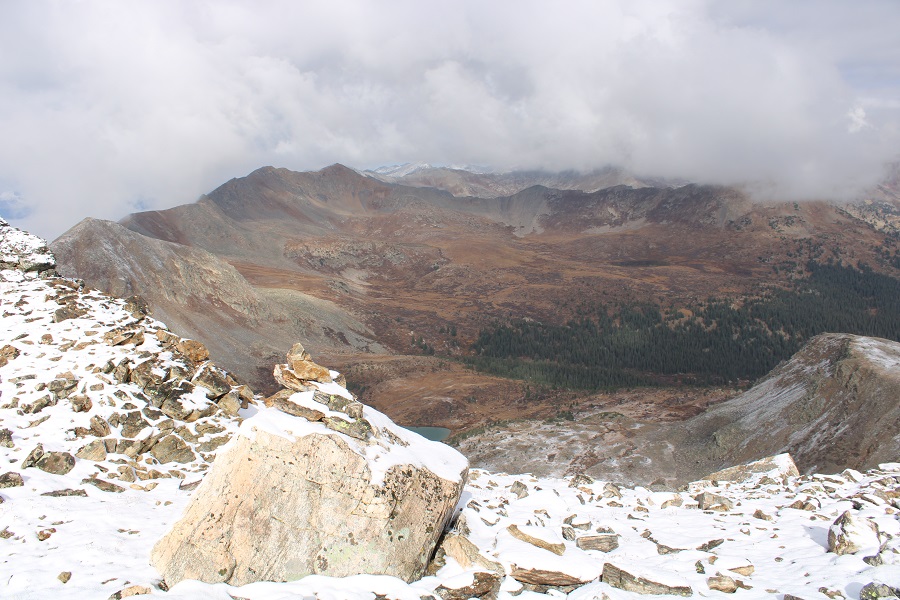
Then it was down and out of the basin
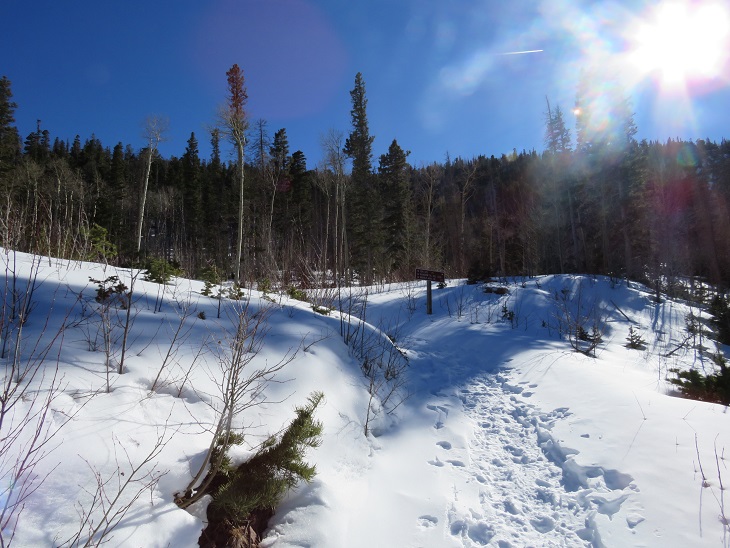
It was starting to snow, so I headed towards that clump of aspens
Then bushwhacked east, back down to the Conundrum Hot Springs Trail
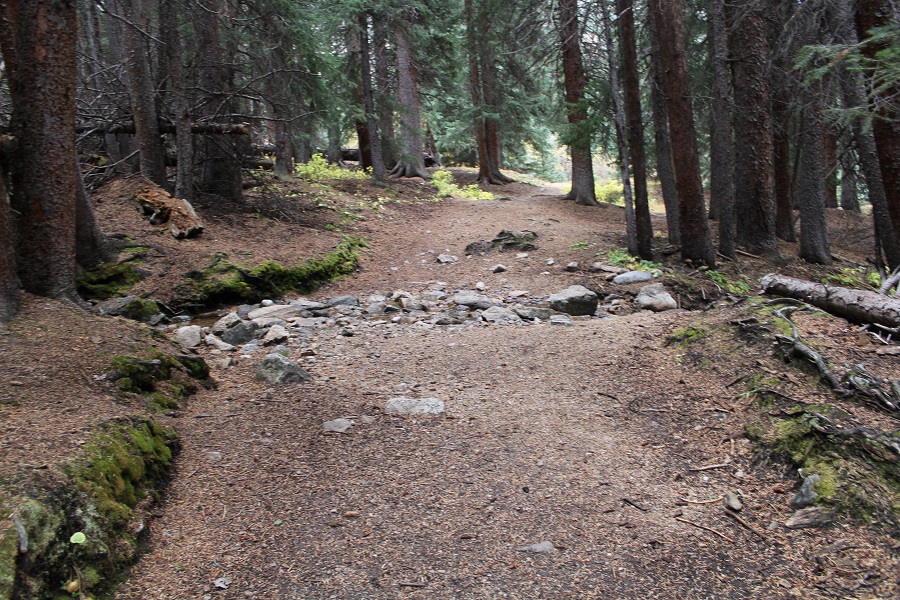
Once on the trail, I followed it north back to the trailhead
I made it back to my truck at 2:15pm, making this a 15.22 mile hike with 4854’ of elevation gain in 9 hours, 45 minutes.
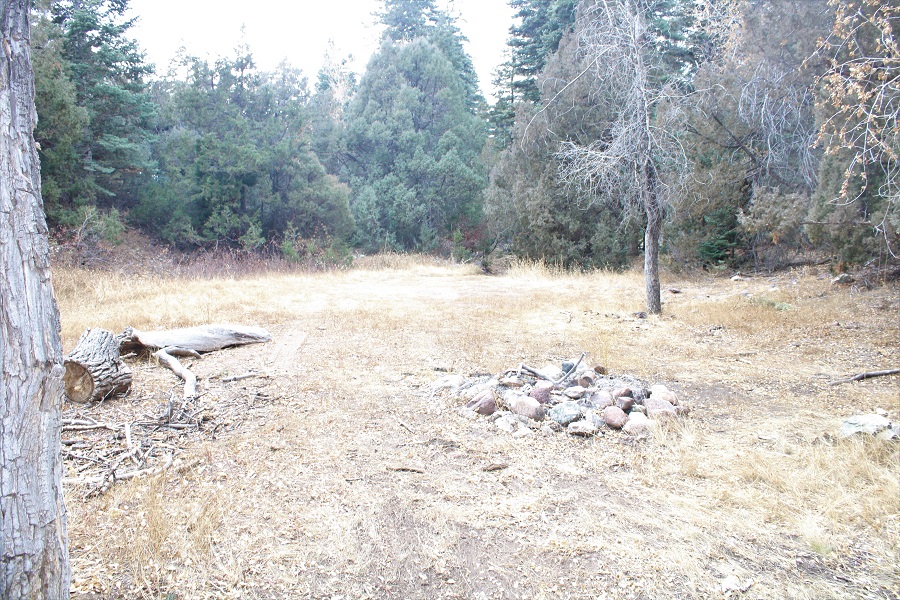
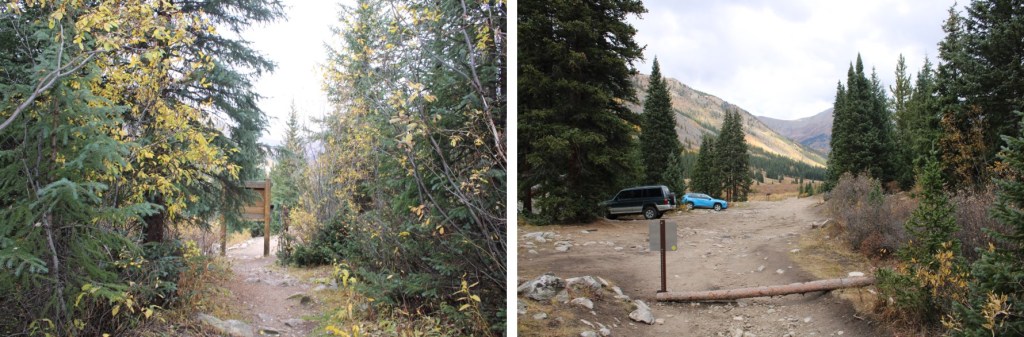
The San Isabel Creek Trailhead has a camping spot directly at the trailhead. I parked a few yards away I a pullout, and was on the trail by 5:15am (after taking a 20 minute nap: I was really tired this morning).
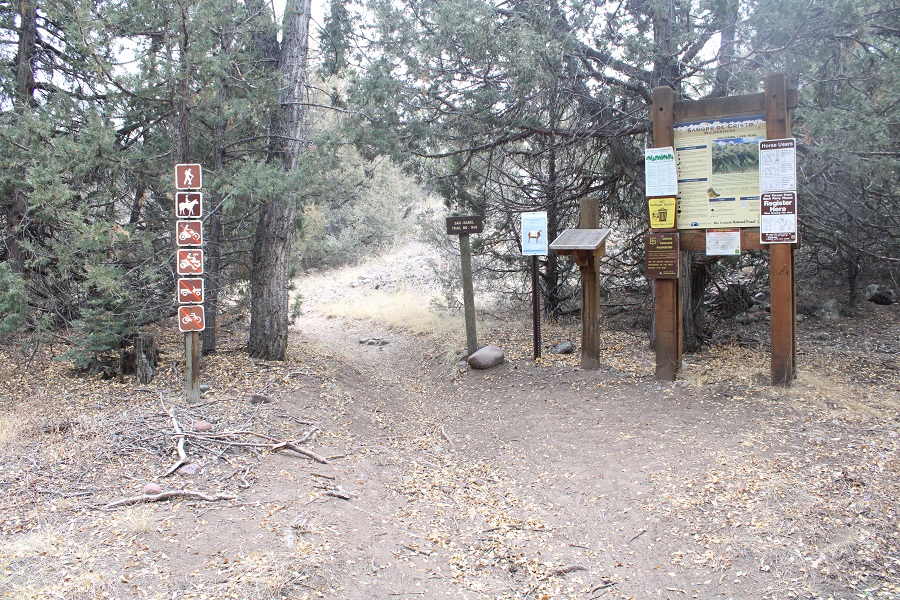
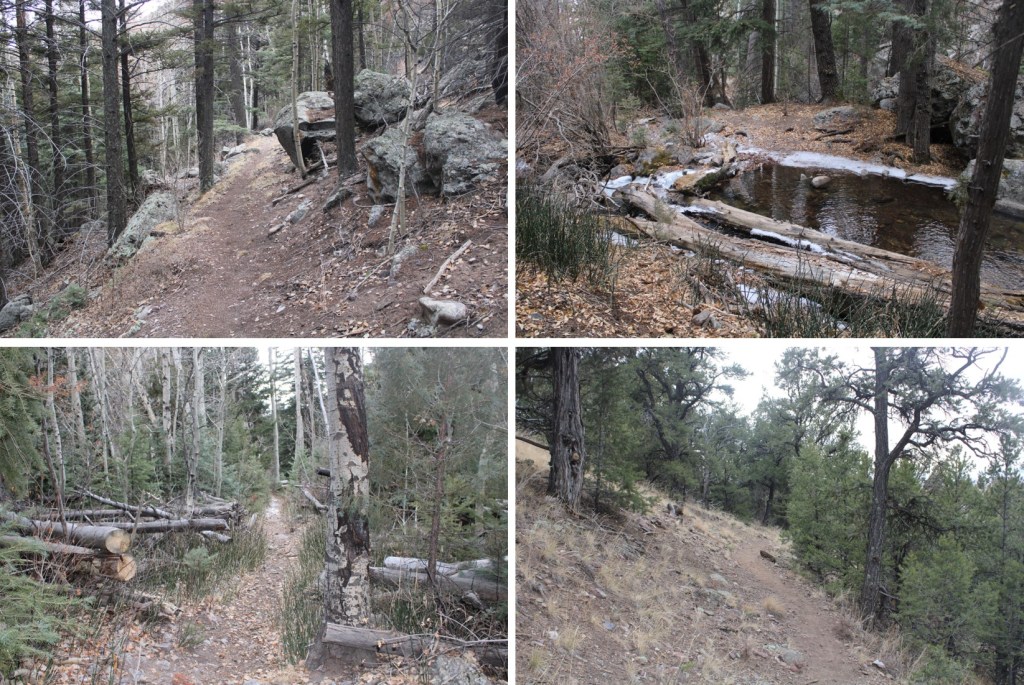
The San Isabel Trail (858) starts at the northeast side of the parking area (side note: the trail register could use a pencil)
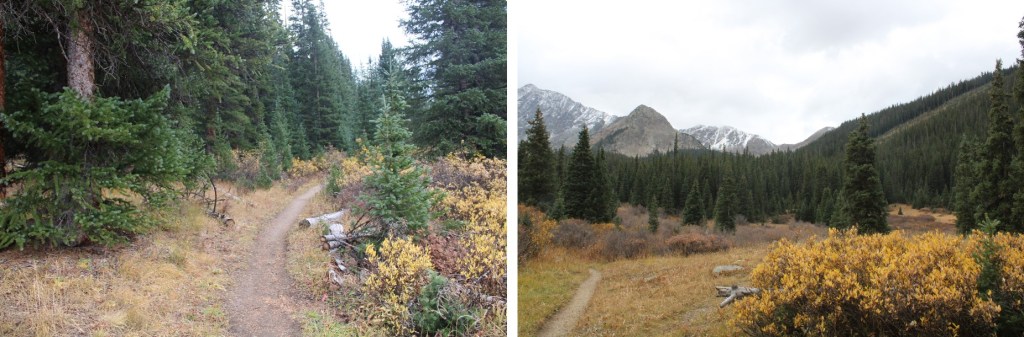
I followed the San Isabel Trail as it headed northeast.
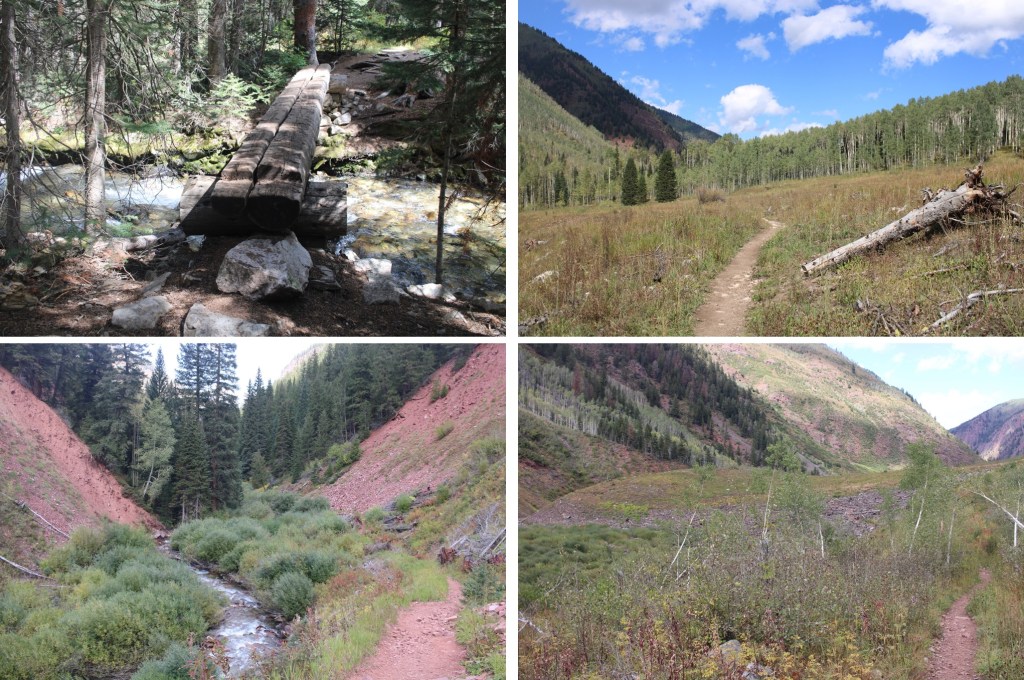
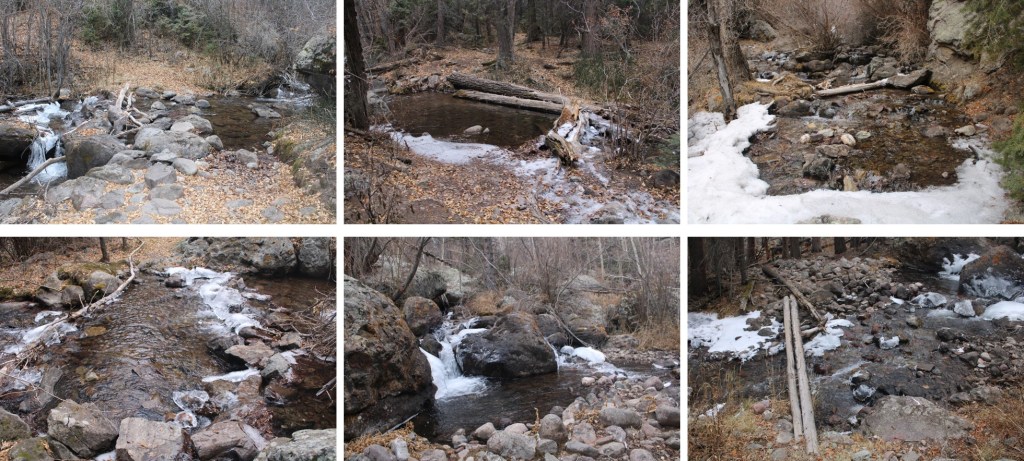
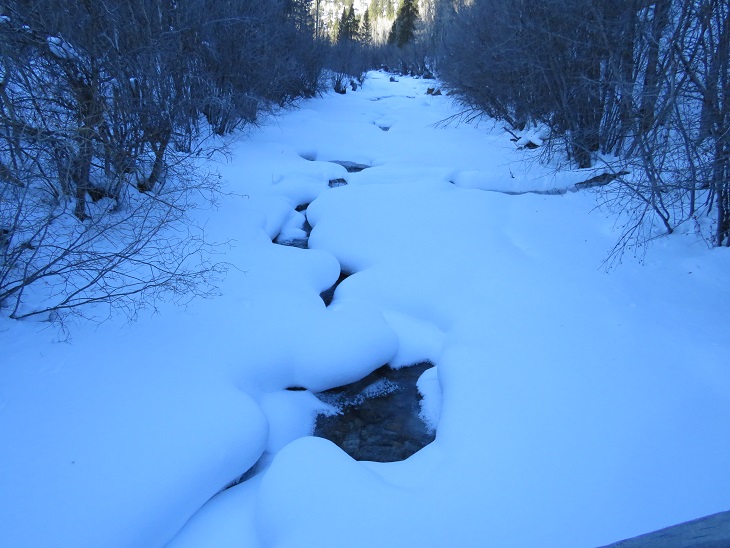
I crossed the creek quite a few times. Creek crossing shoes weren’t necessary, but in the early morning there was a layer of ice on the logs and rocks, calling for some careful footwork. In the afternoon the crossings were easy.
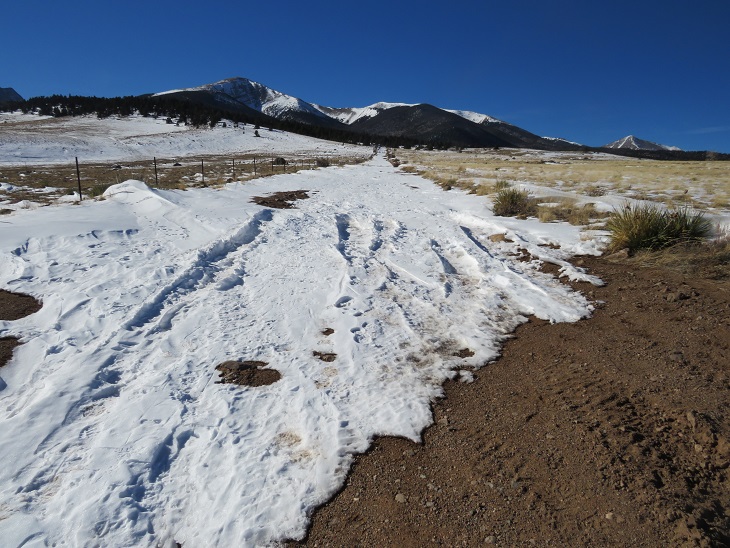
As I hiked, I came across a thin layer of snow on the ground, that eventually became a couple of inches deep. There had been a 20% chance of snow forecasted the night before, and into the afternoon today.
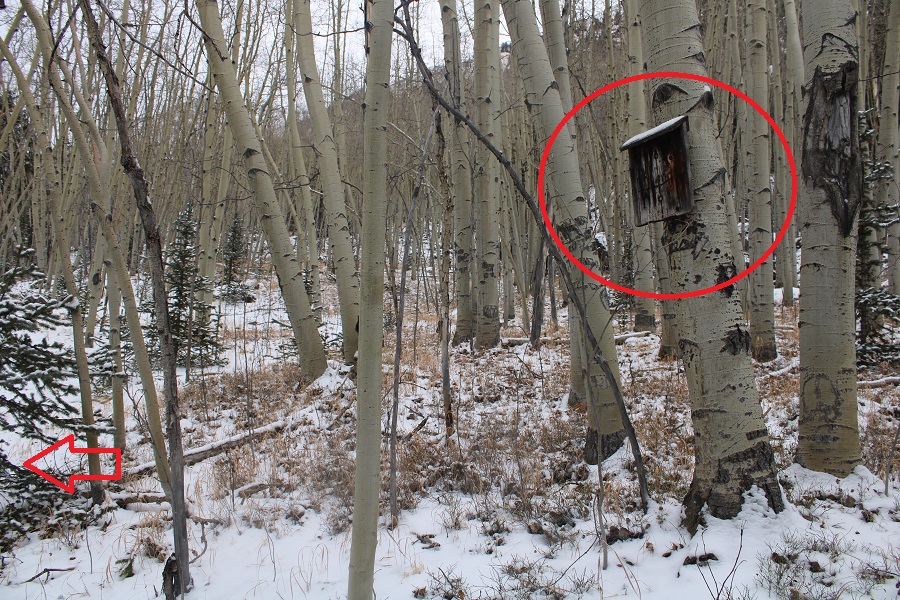
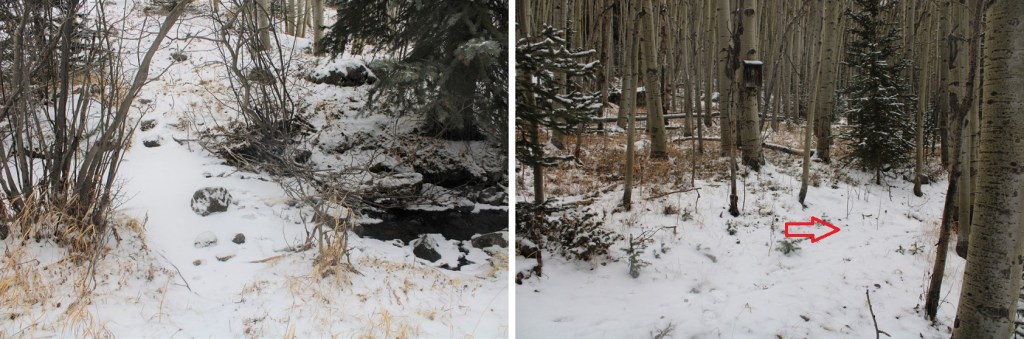
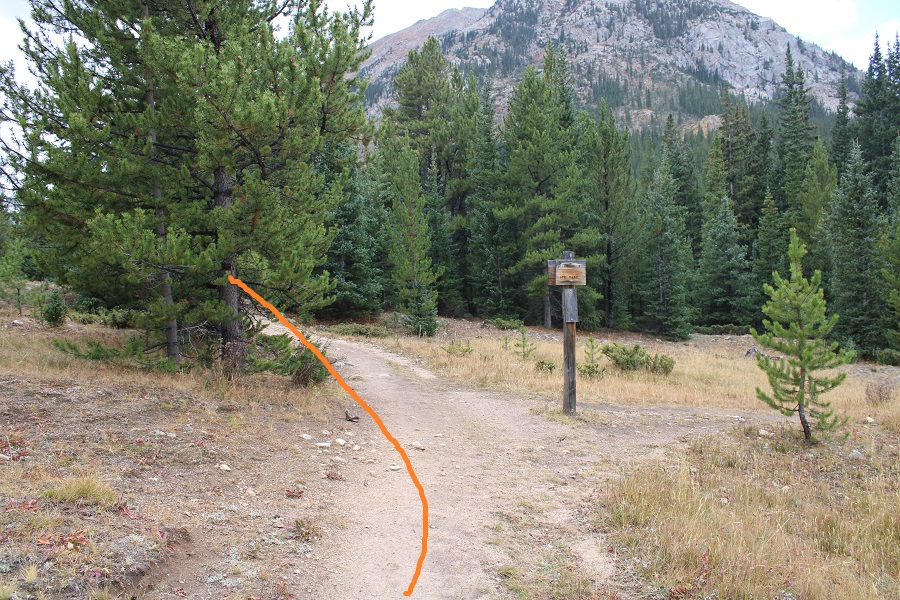
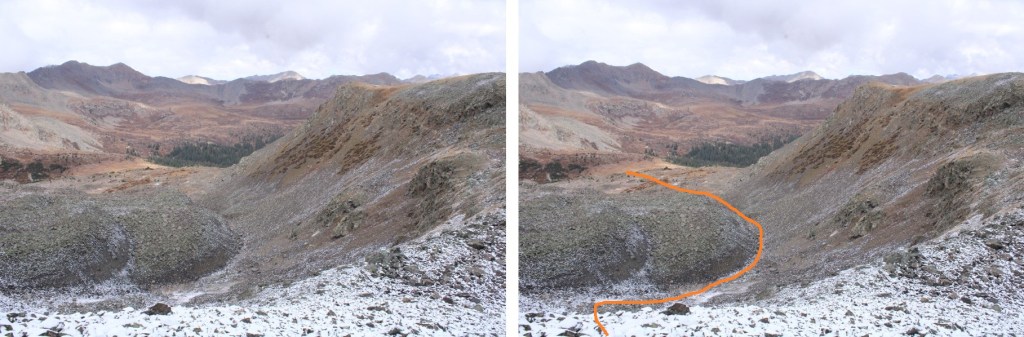
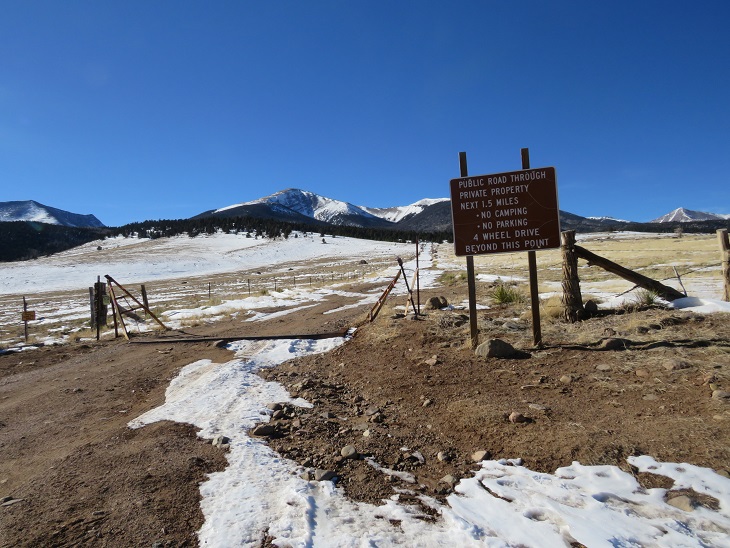
I hiked along the San Isabel Trail for just over 4 miles. At 10,440’ I left the trail when I saw this (what used to be a) sign on my right for Trail 881.
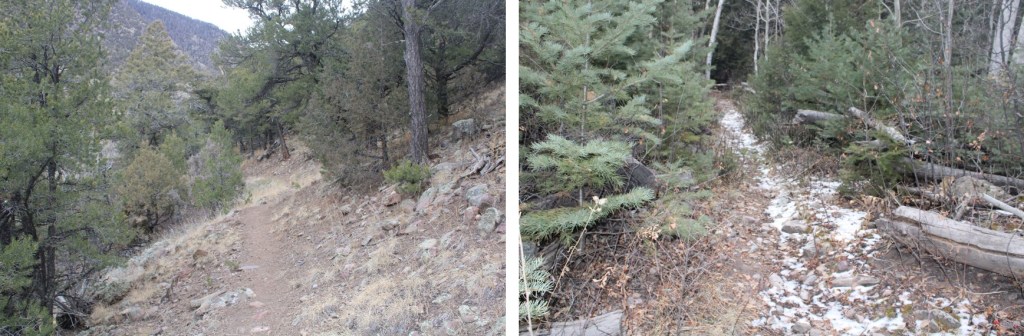
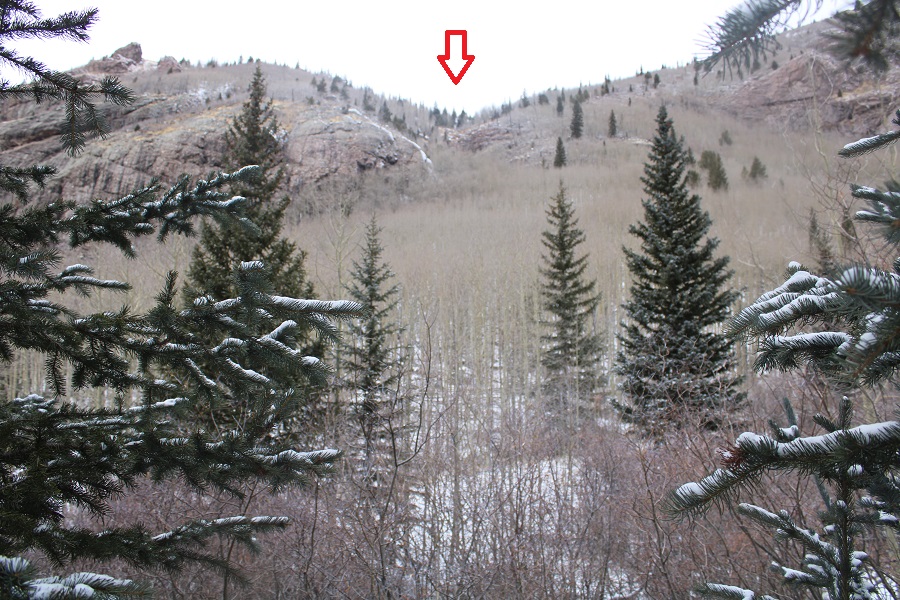
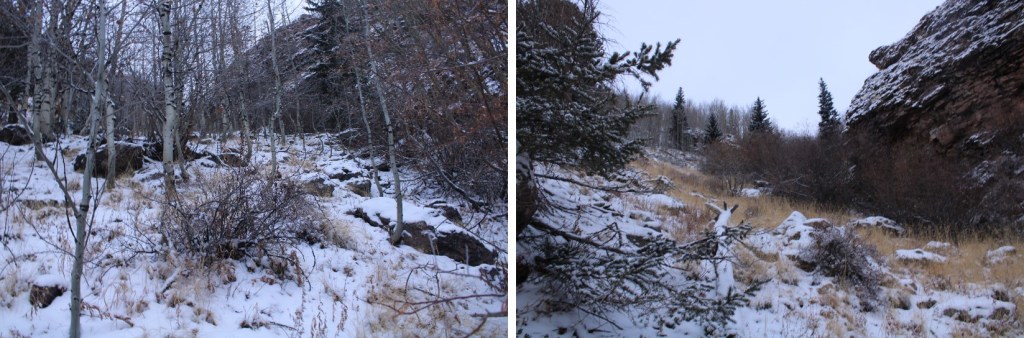
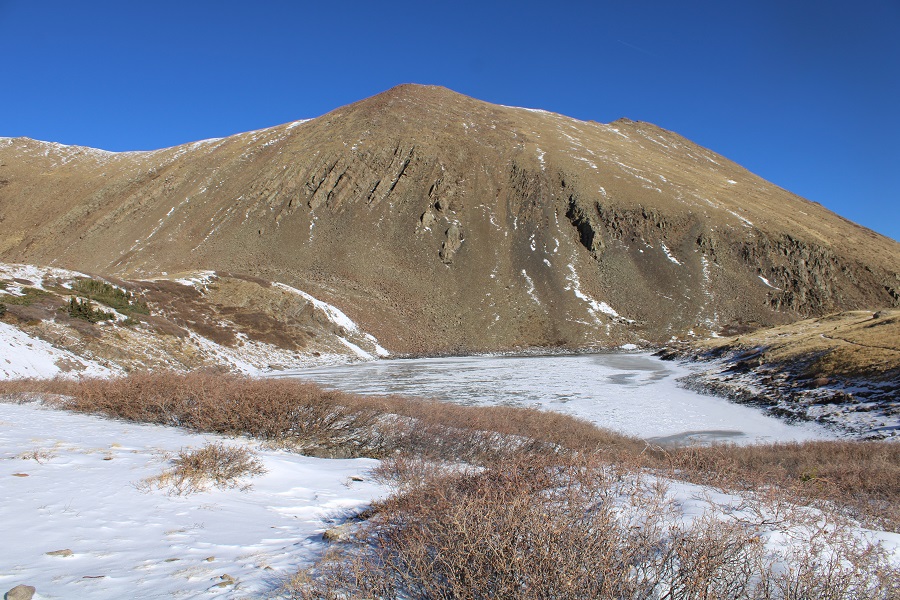
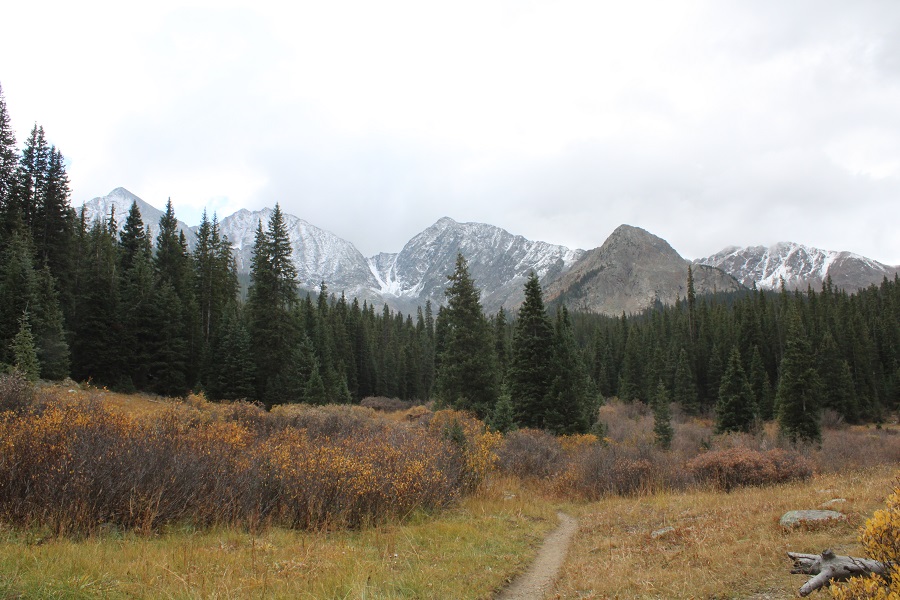
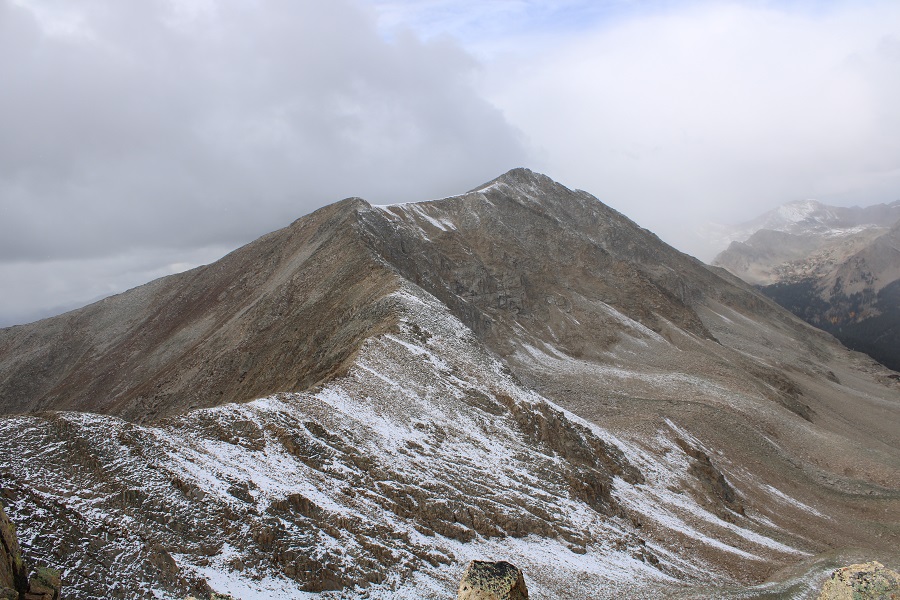
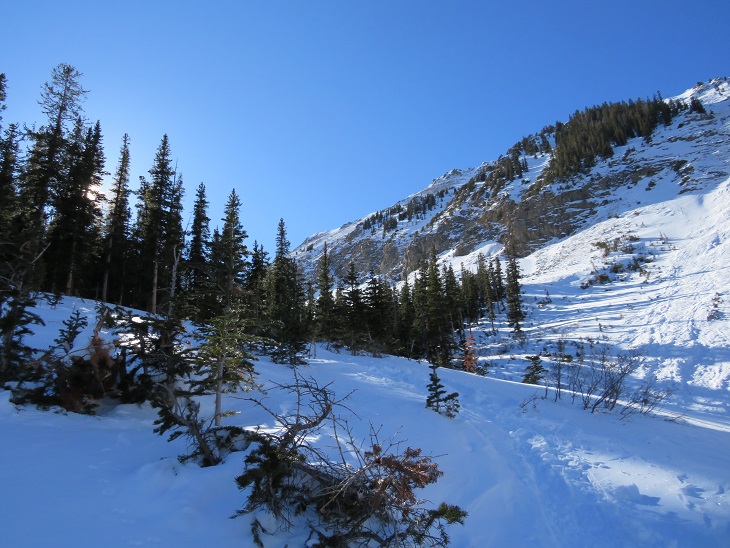
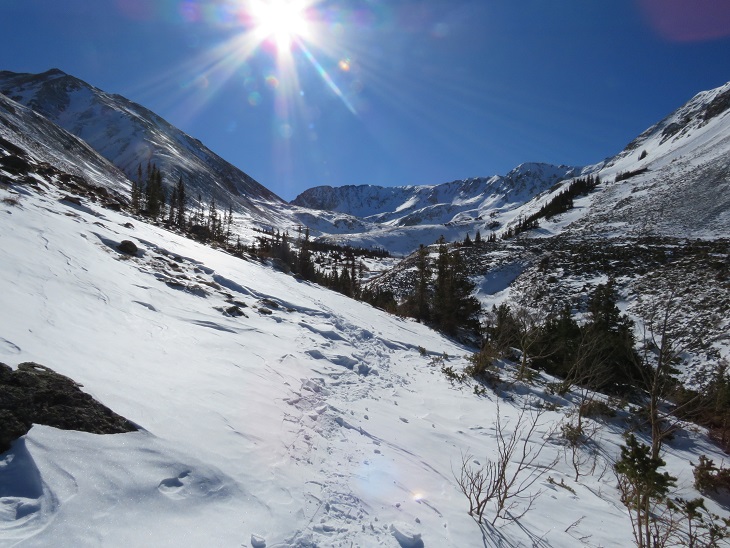
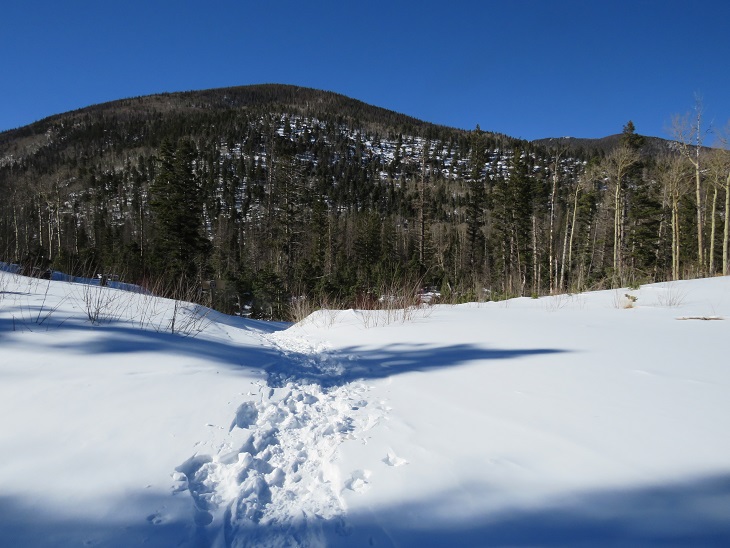
Here I turned left, crossed San Isabel Creek, and headed up the drainage. Here’s where I was headed. As you can see, the ridge cliffs out to the left and right, so it’s important to stick to the drainage.
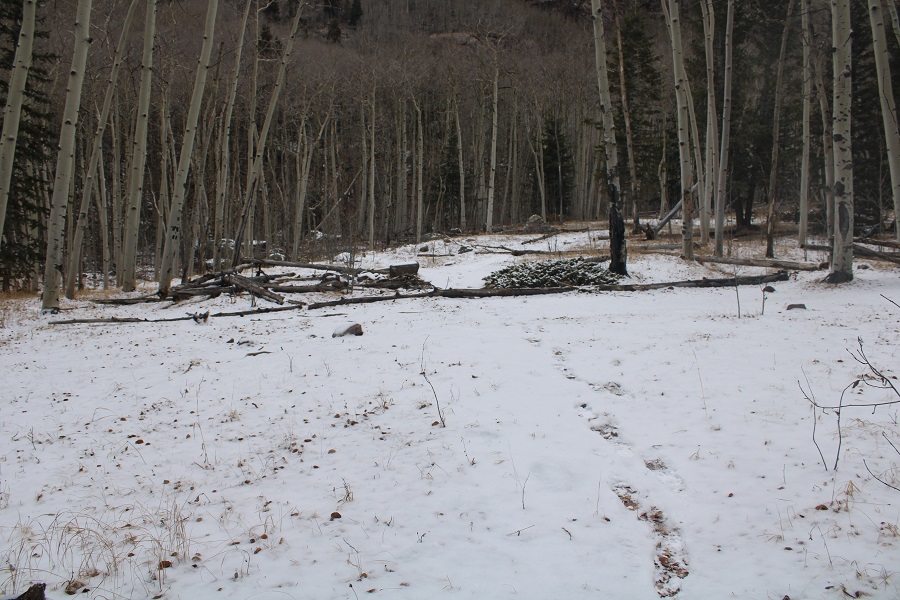
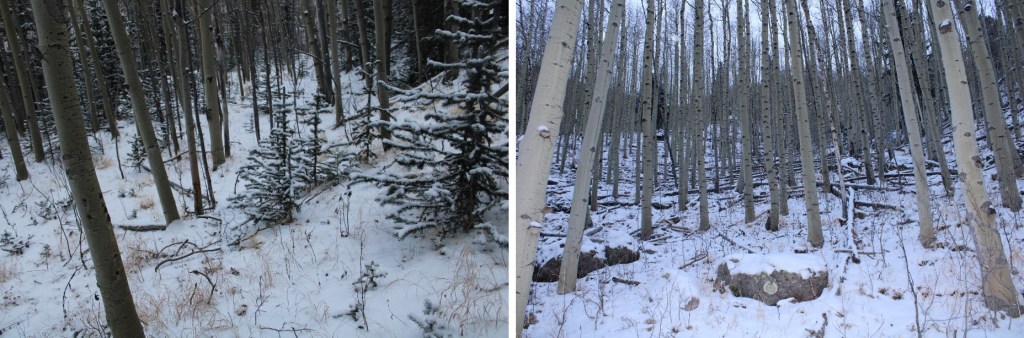
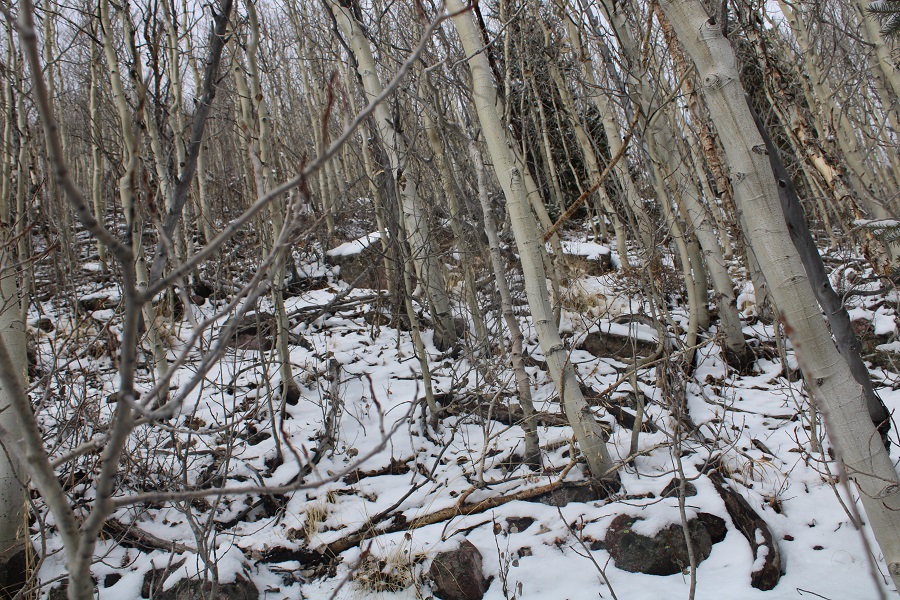
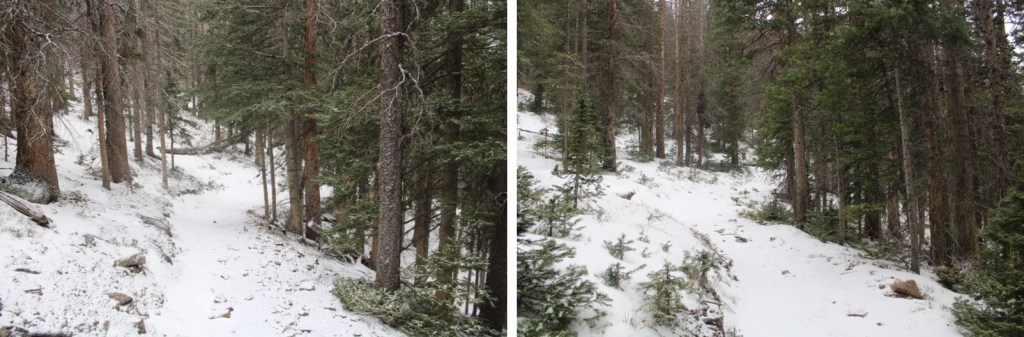
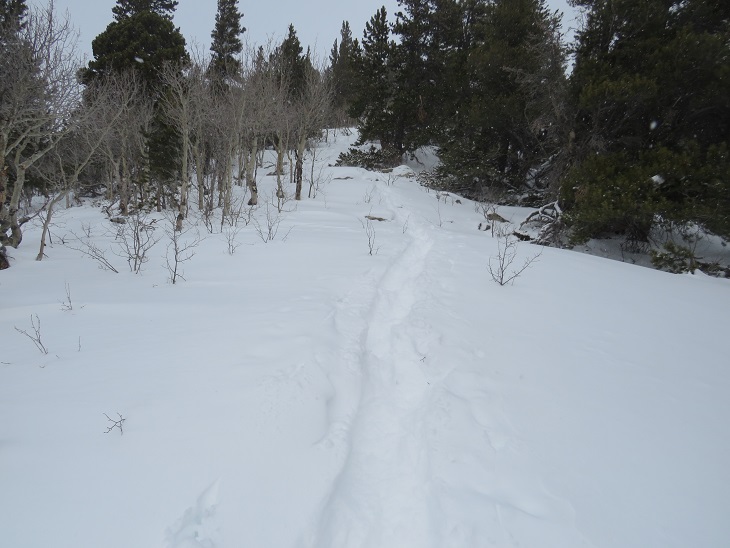
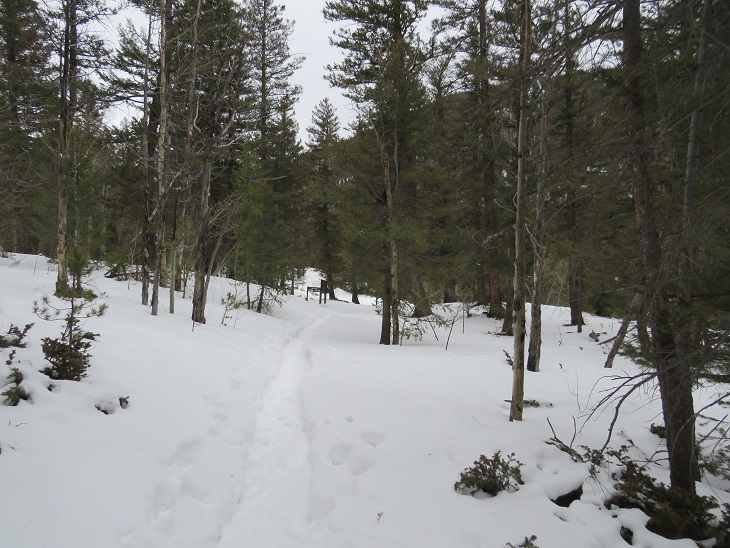
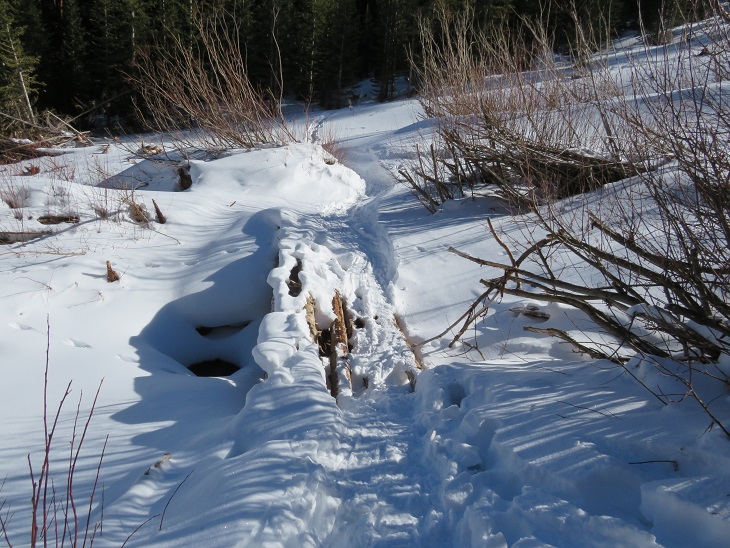
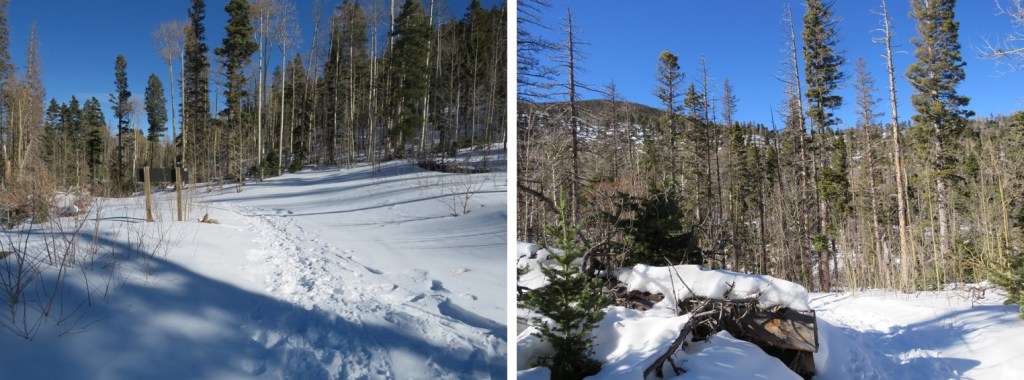
There were a lot of aspen trees here. Since it’s almost winter there weren’t any leaves on the trees. I’m guessing this is a completely different hike with leaves on the trees. Today it was easy to stay in the drainage and hike up to the ridge. I put on microspikes, as the snow wasn’t that deep and the leaf-snow combination was slippery.
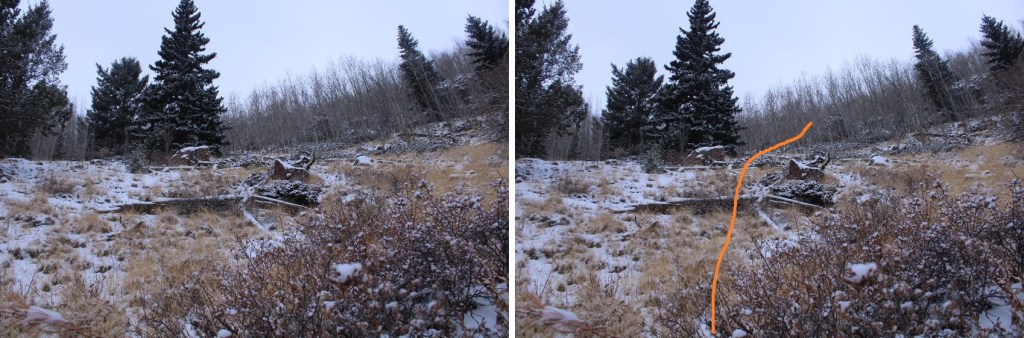
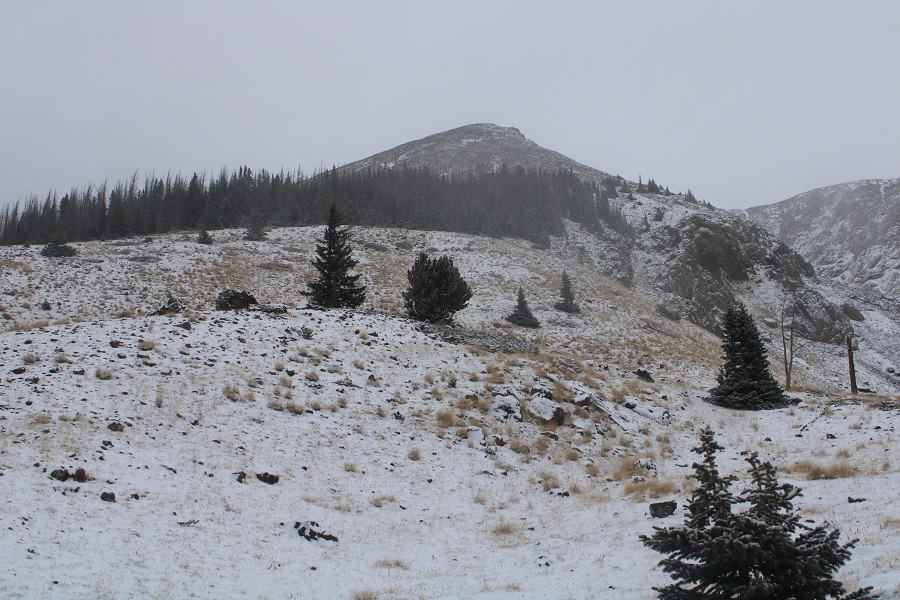
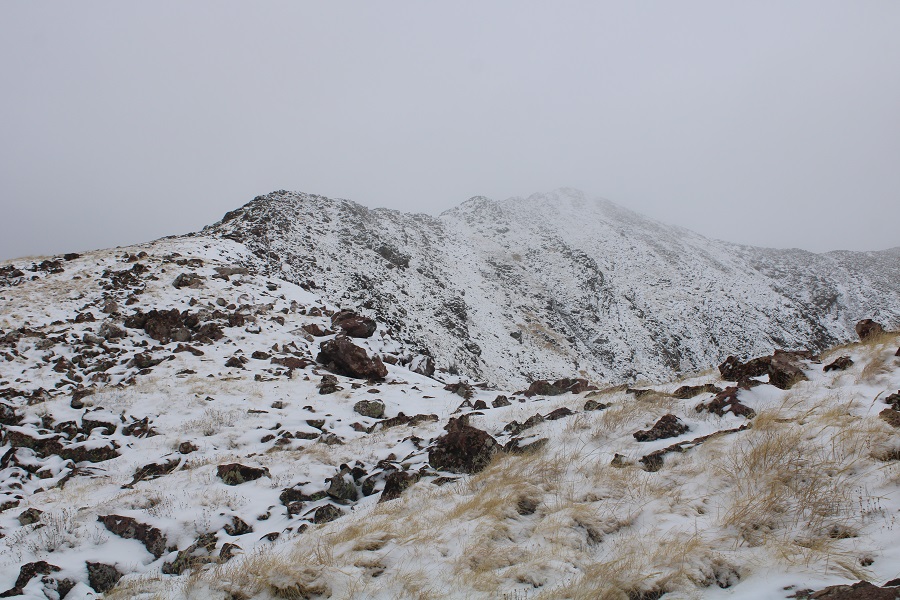
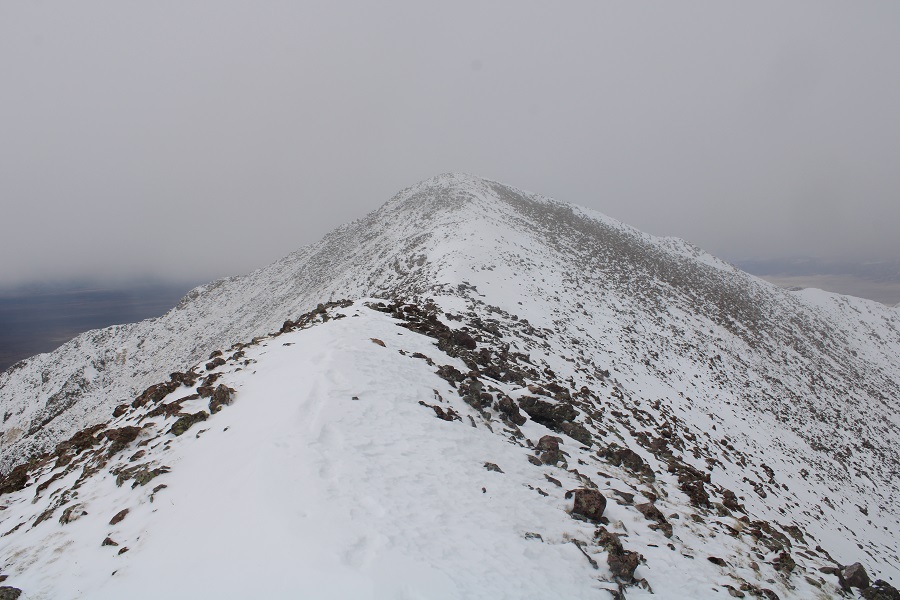
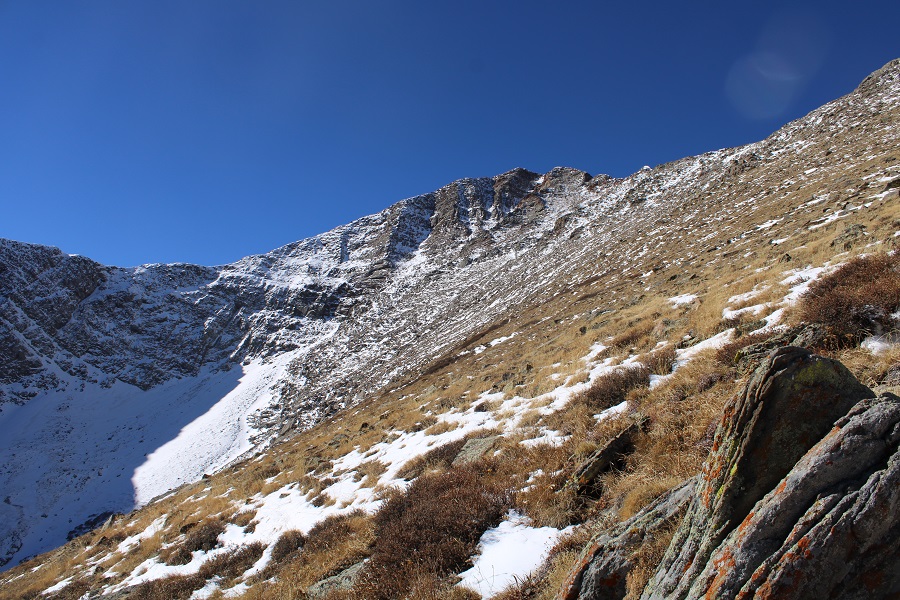
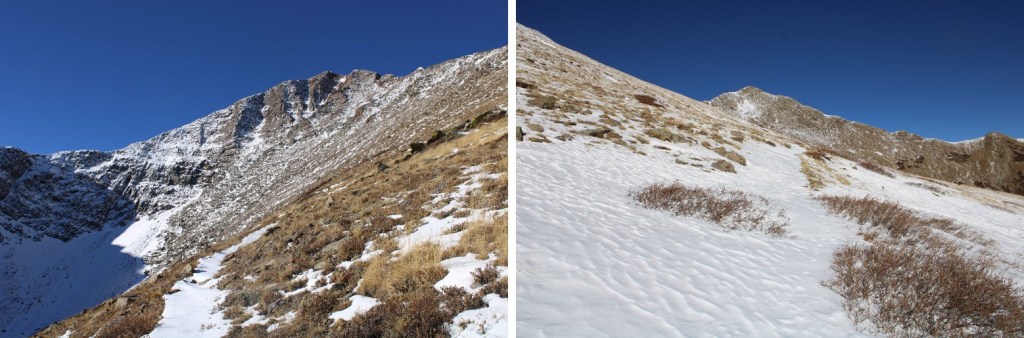
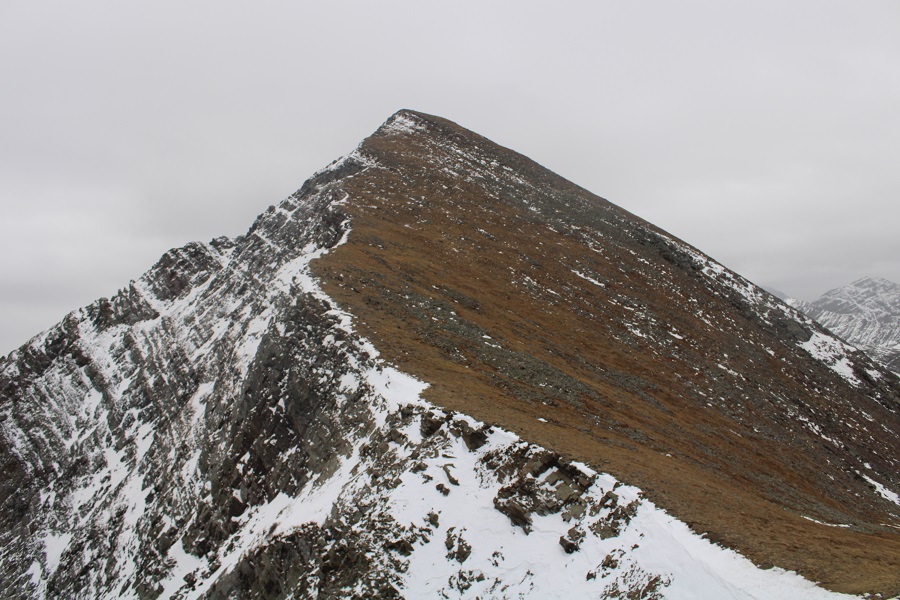
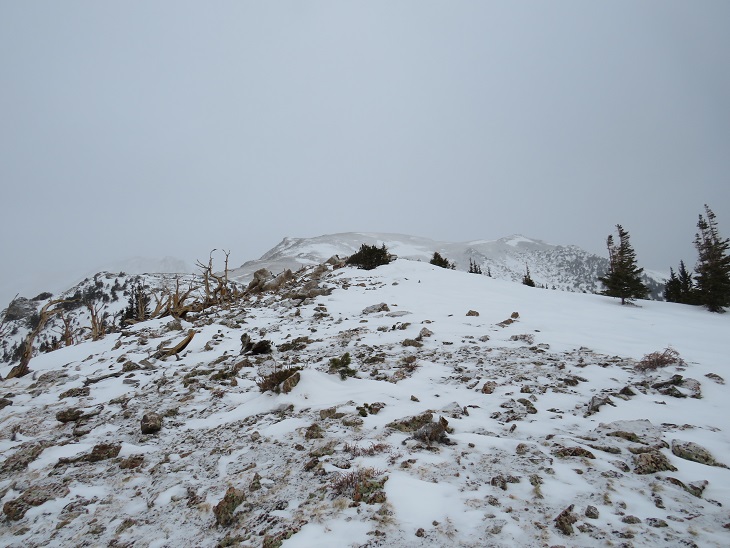
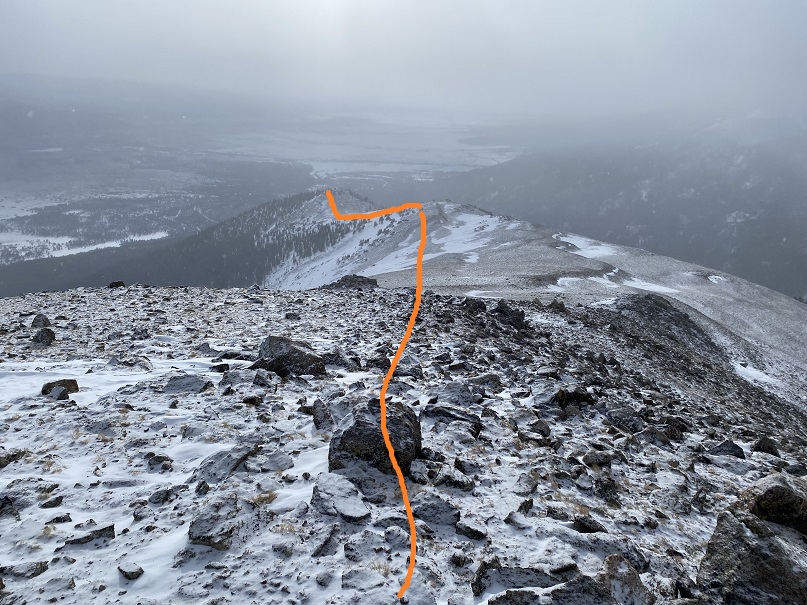
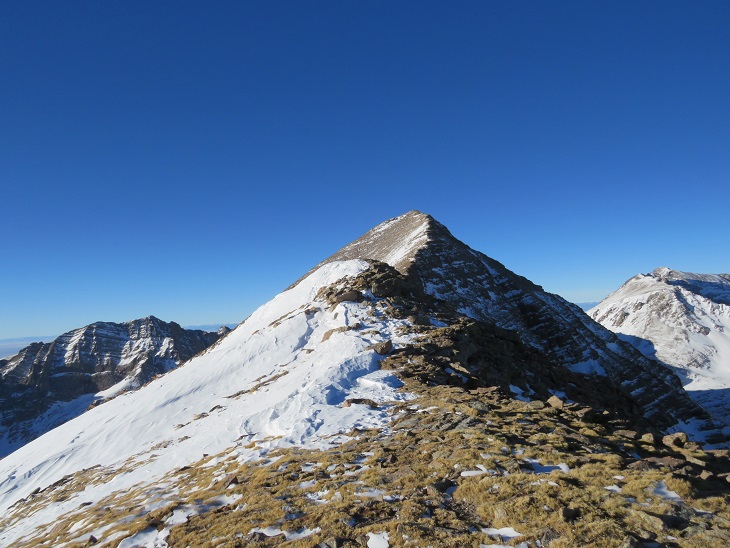
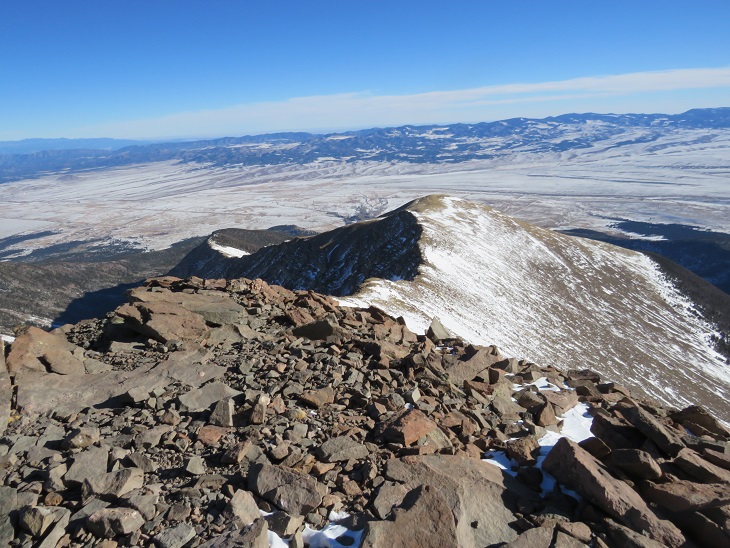
I made it to the ridge and turned right, following the ridge north. The actual summit is to the right.
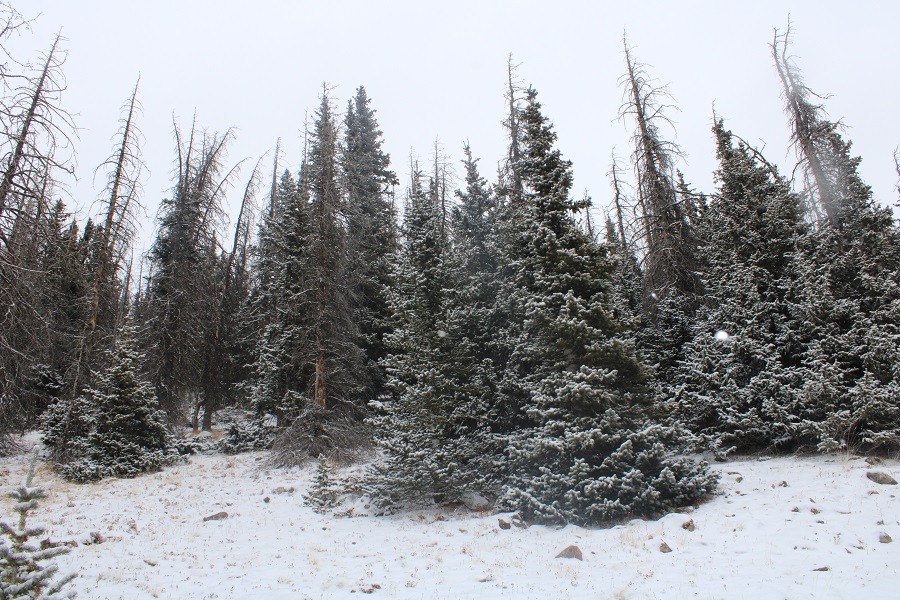
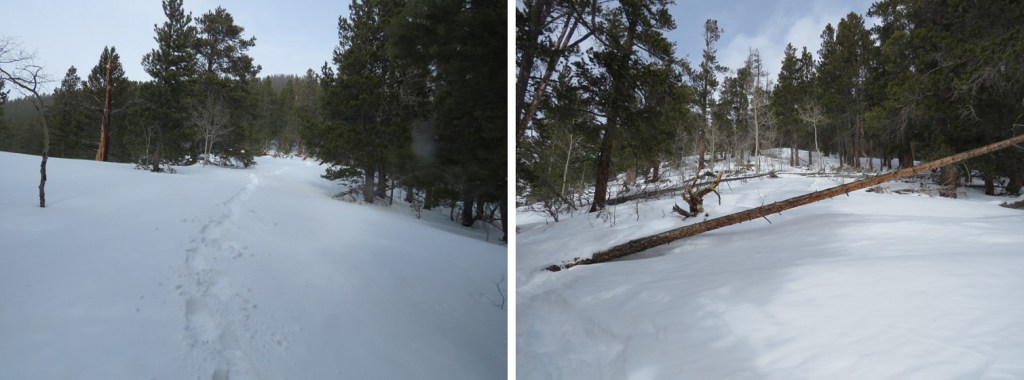
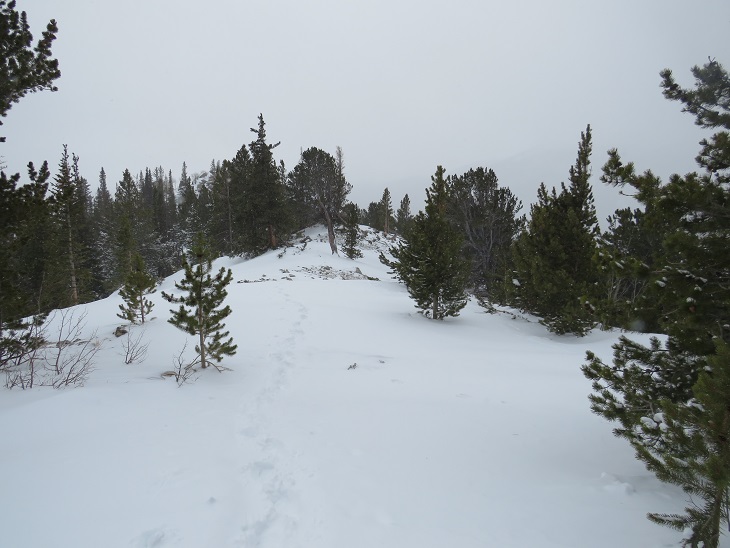
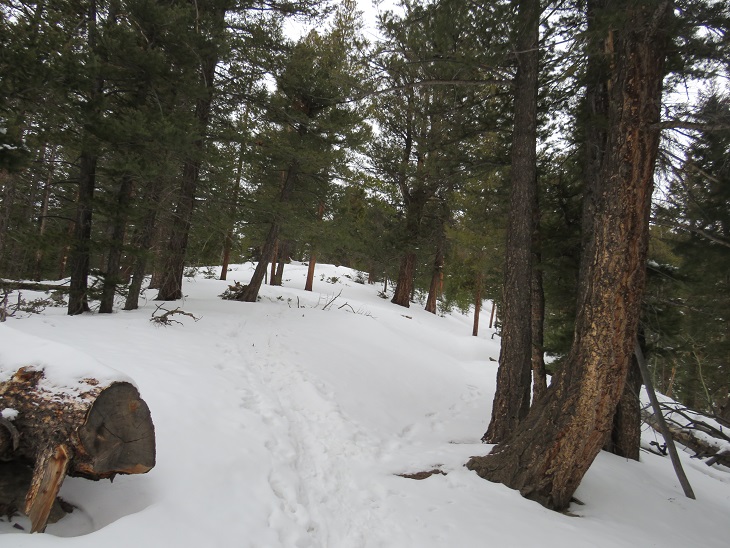
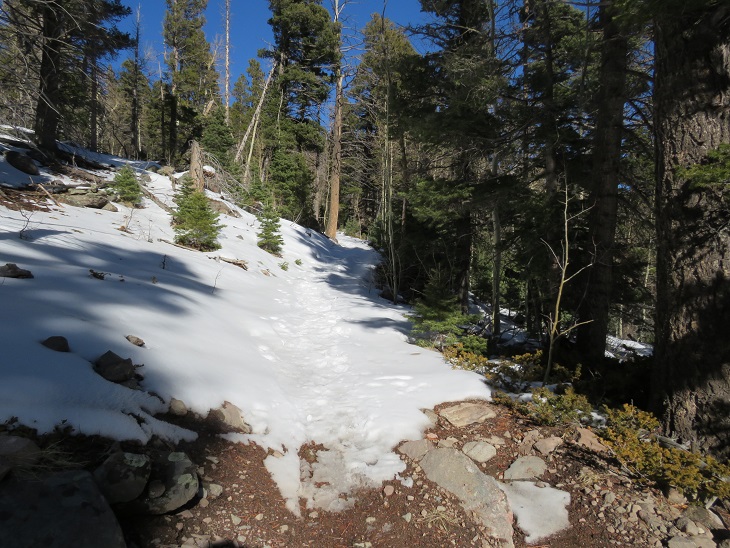
The snow was intermittent as I was hiking. The clouds would clear a bit, and then race back in, swirling the snow around and adding to it. Luckily, following the ridge was easy. I headed towards the pine trees
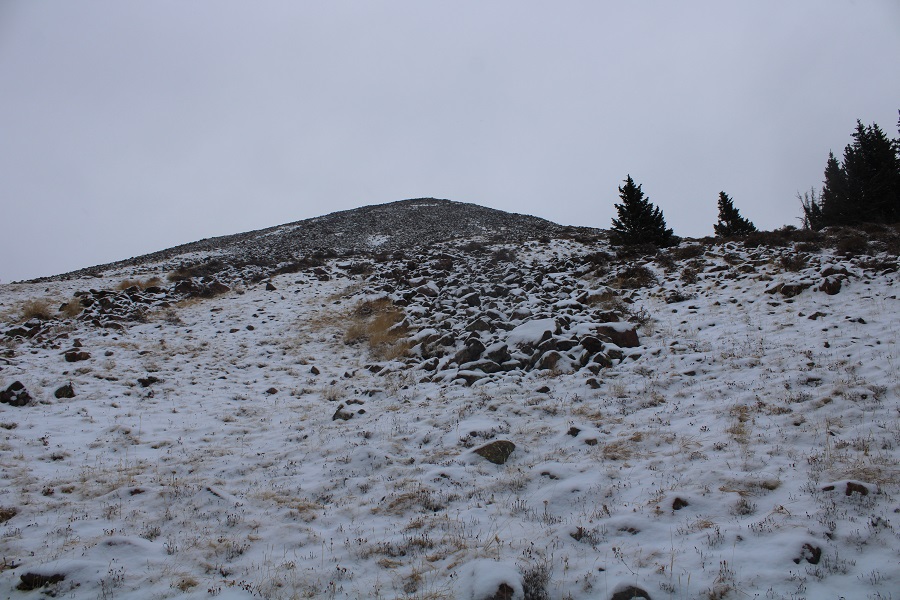
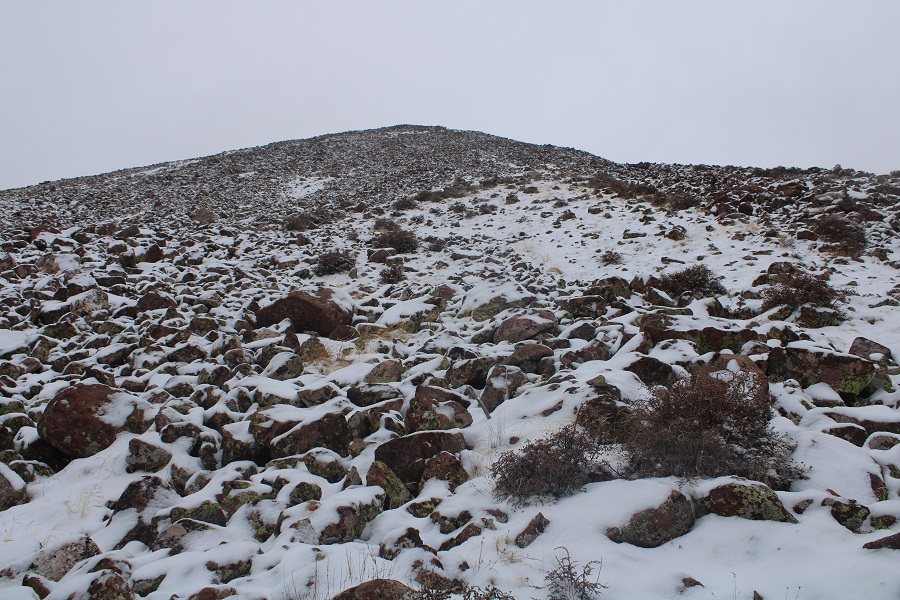
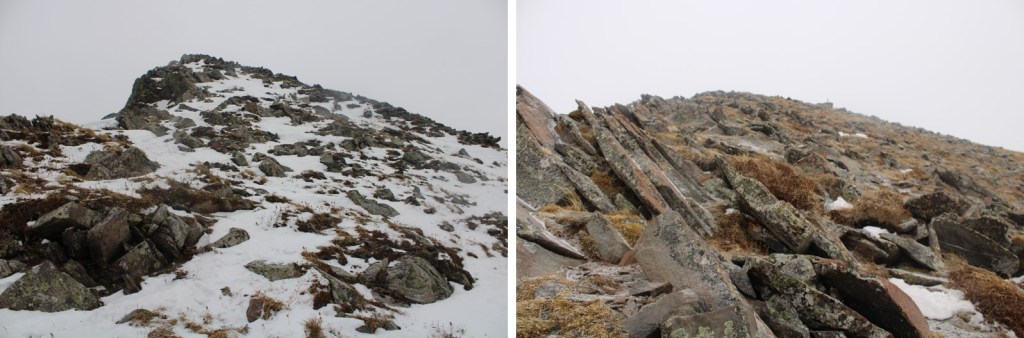
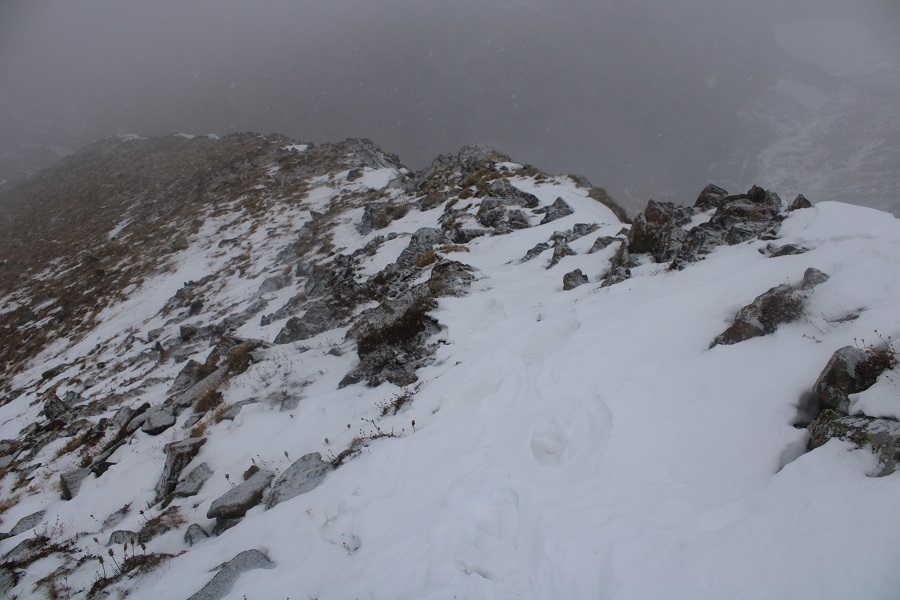
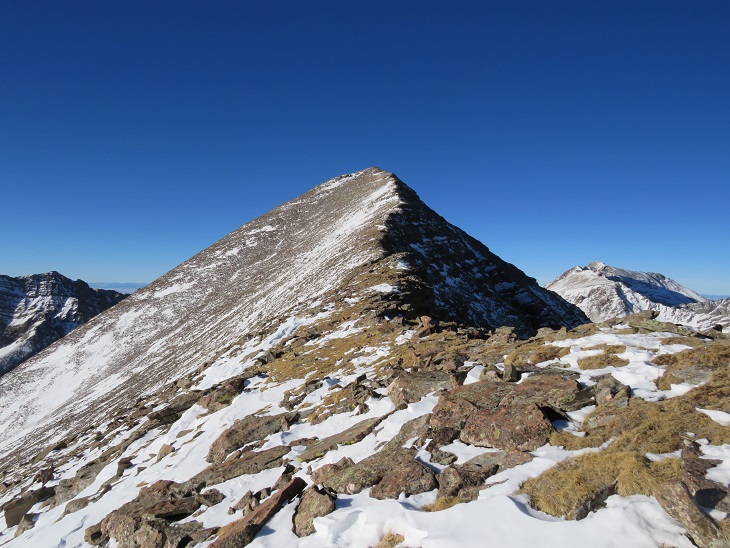
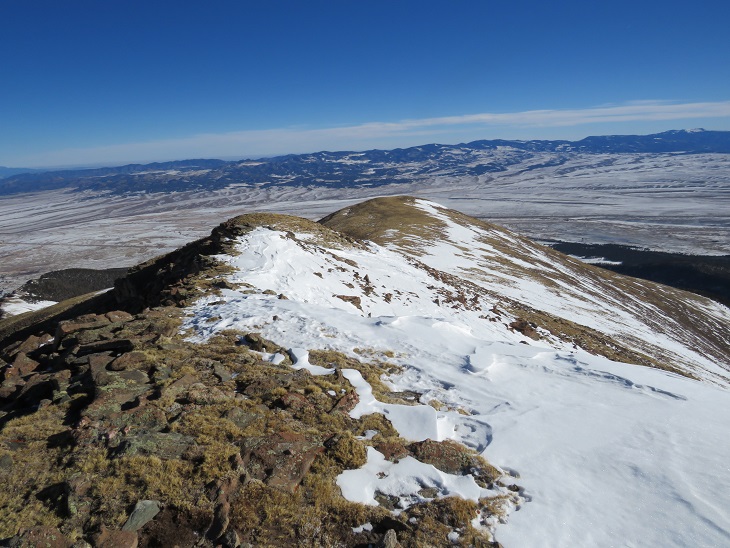
Once past the pine trees the tundra turned rocky. I took this part carefully, as the thin layer of snow made the loose rocks slippery. This is steeper than it looks, but class 2.
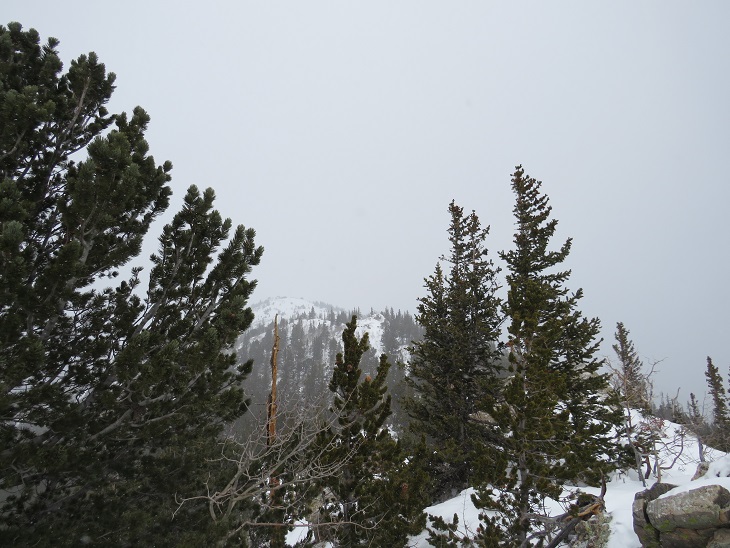
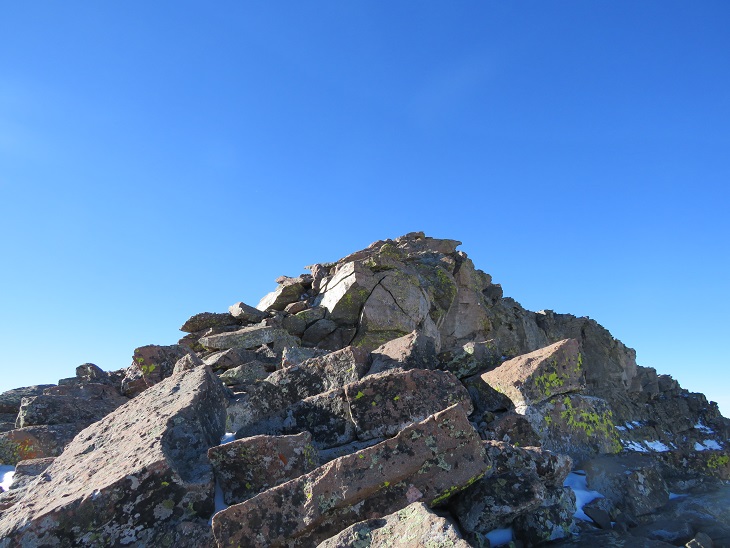
It’s also a false summit (but you already knew that: I didn’t at the time). Here’s the actual summit
I just followed the ridge and its ups and downs. The route was simple, but the wind and snow today gave it some spice. Here are some pictures of the ridge hike
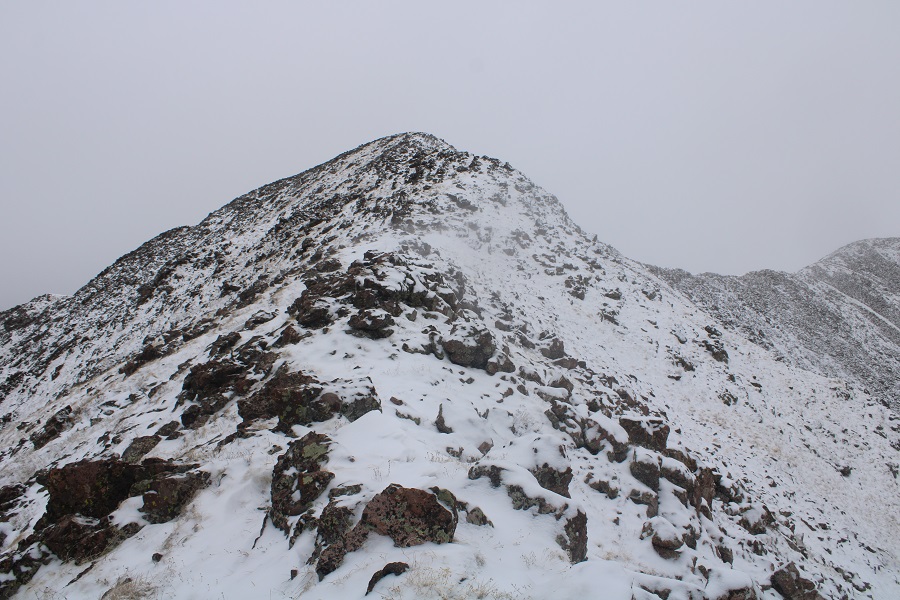
It was now time to head east and lose some elevation (not much, about 75 feet or so) and then gain the summit
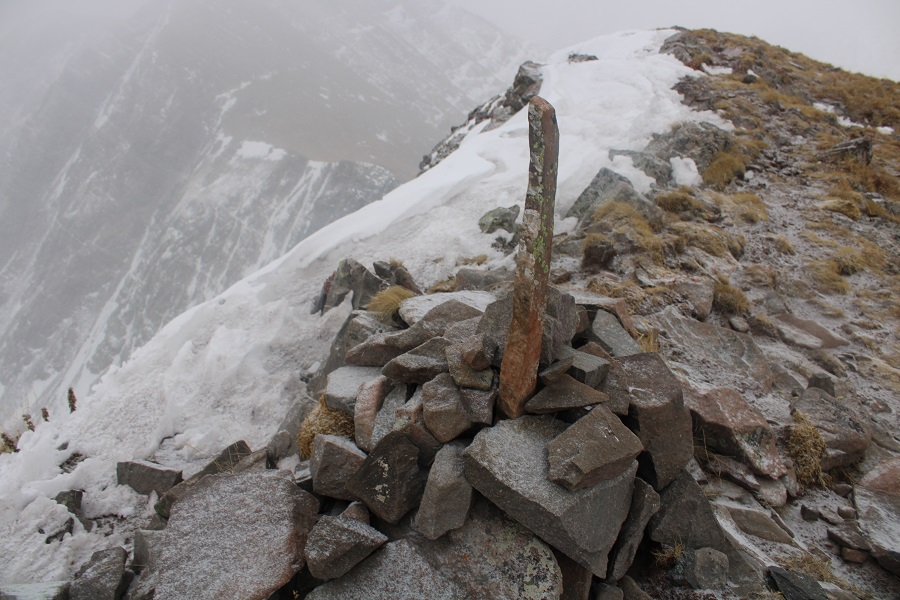
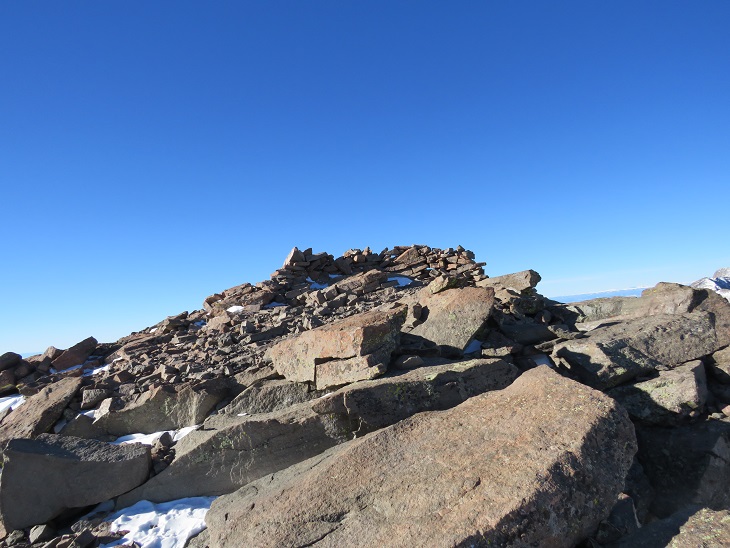
The last bit to the summit was rocky. There was a large cairn at the summit with 2 summit registers. It was windy and cold, so I didn’t open them.
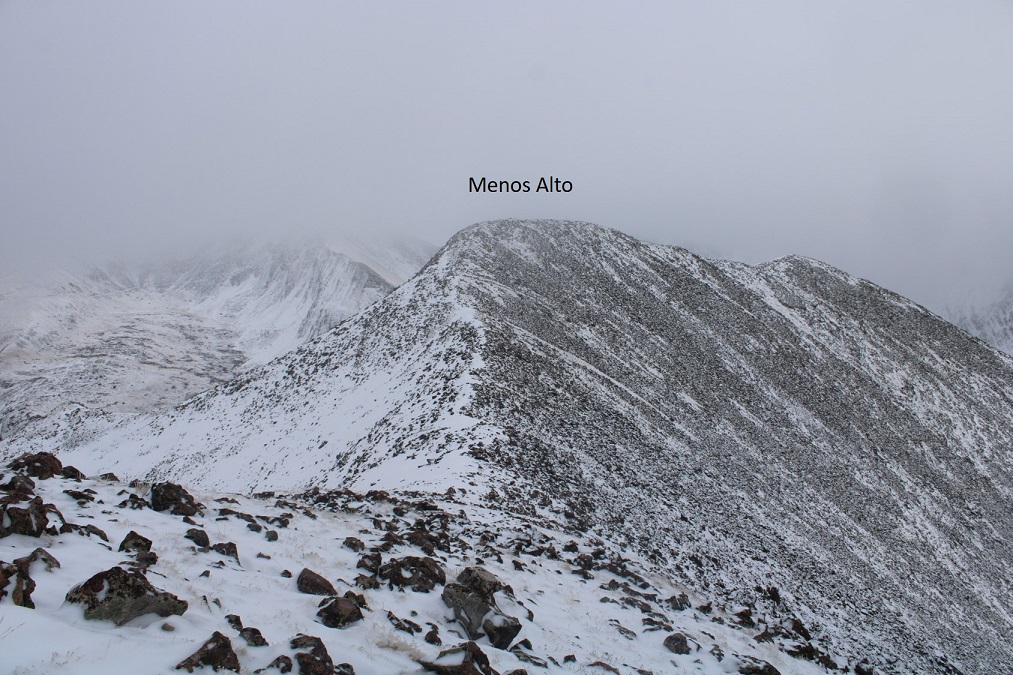
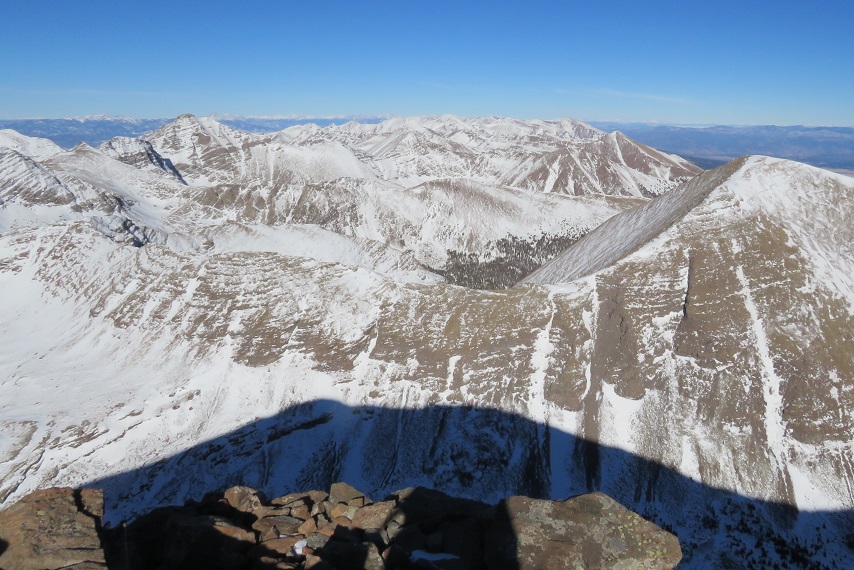
I summited Menos Alto at 10am. The clouds obstructed the views, but we need the snow!
Menos Alto:
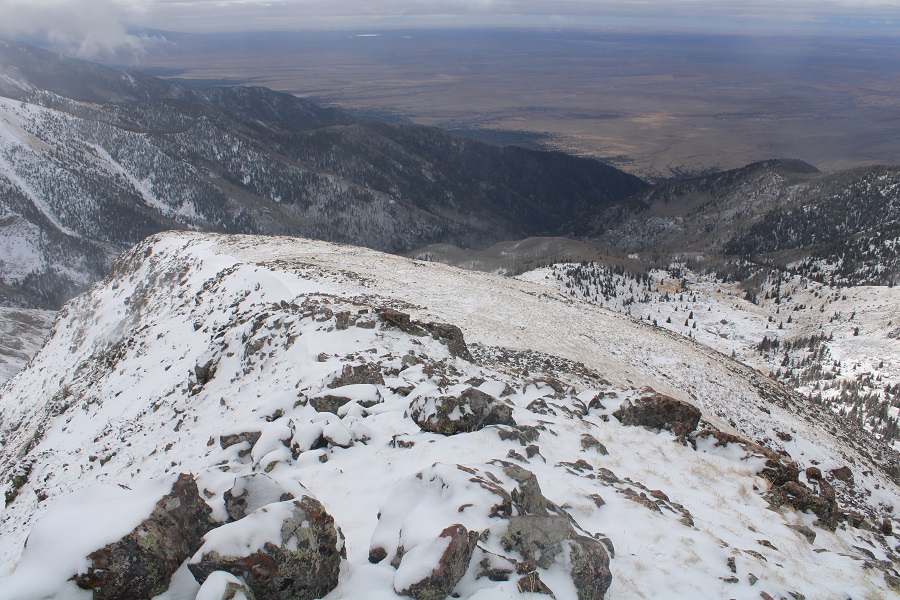
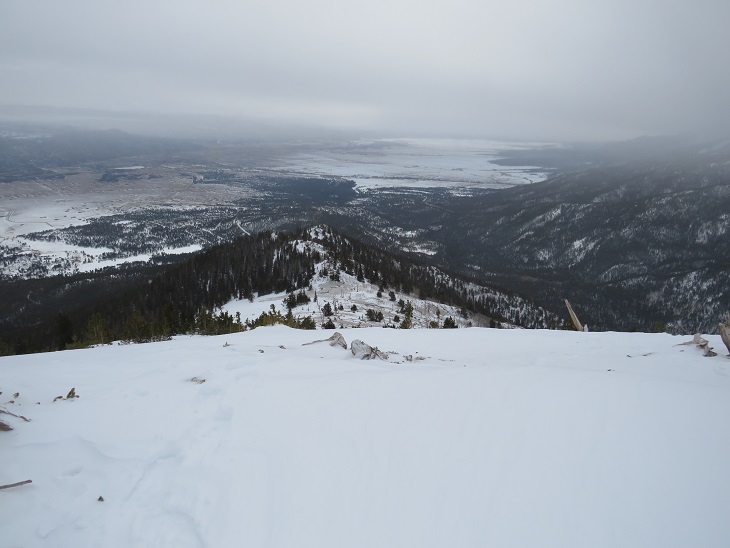
When I started out on this hike snow hadn’t been anticipated. I’d planned on linking up a few other peaks (13060 and 13062) but it didn’t look like the weather was going to let up. I didn’t have a good visual of the conditions, and pictures wouldn’t have much context in a trip report: I’d have to come back for those peaks another day. I turned and re-traced my steps back down the ridge.
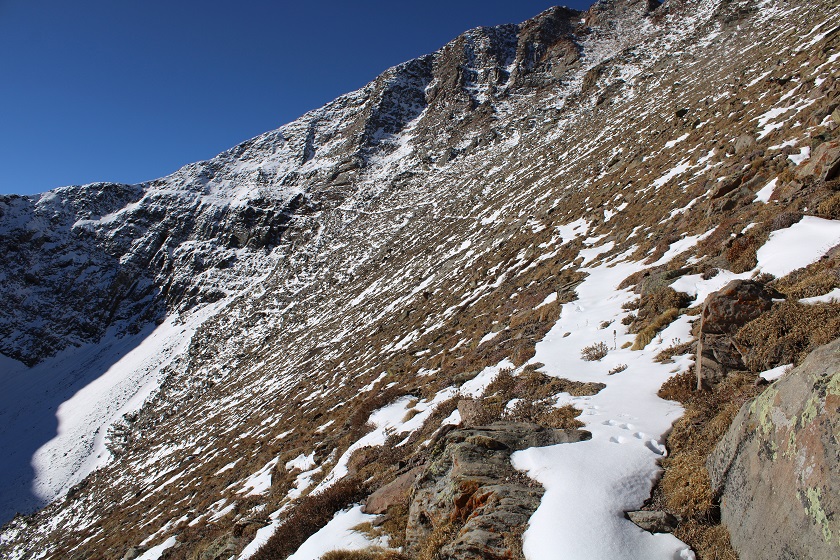
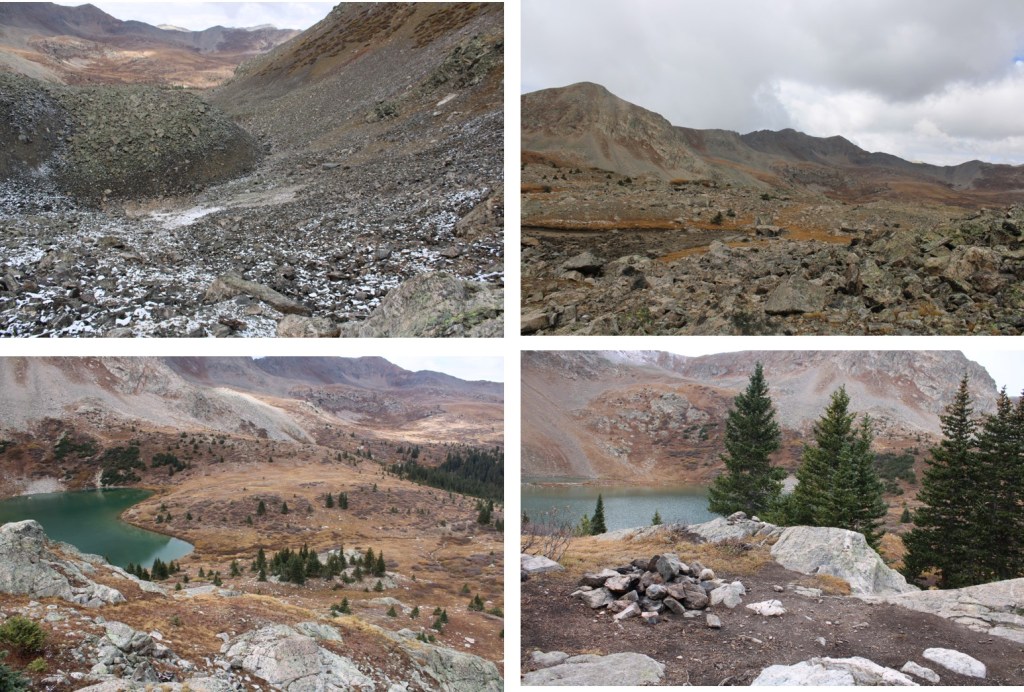
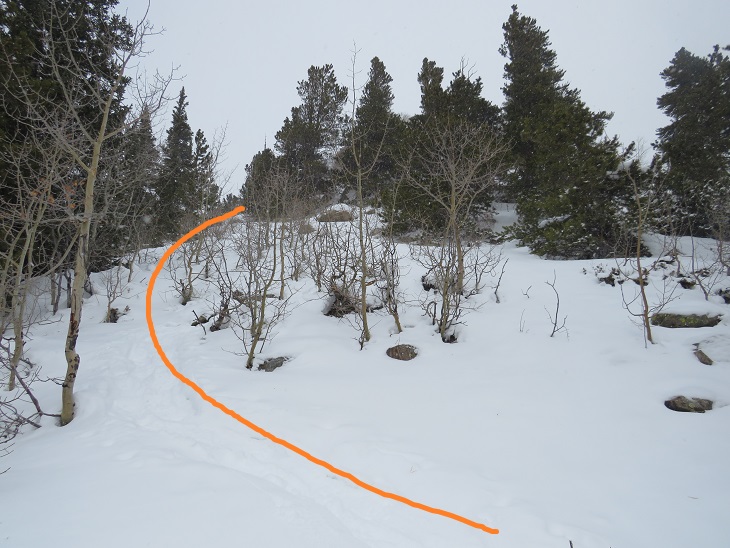
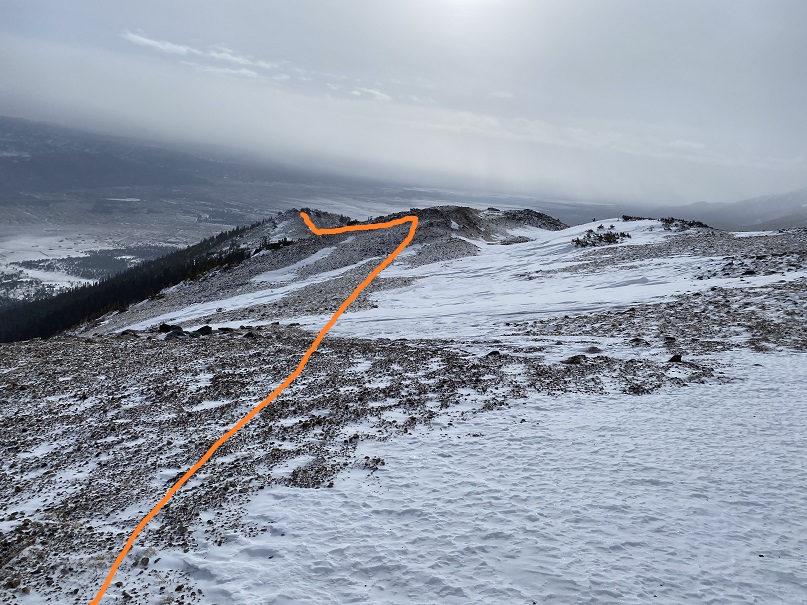
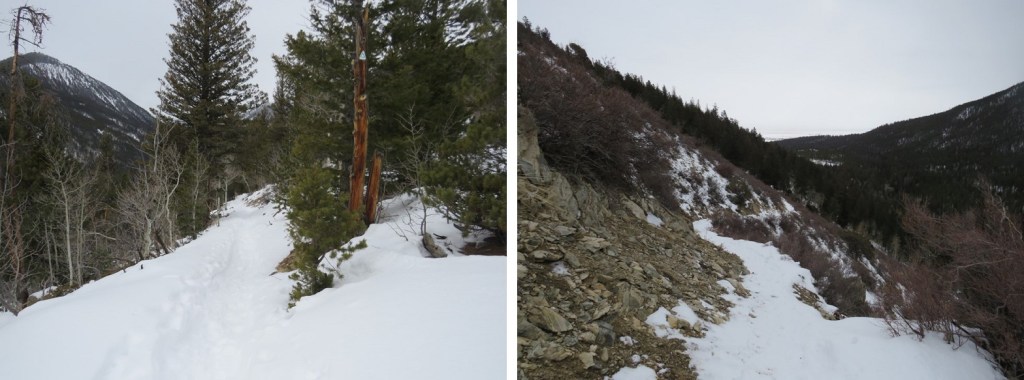
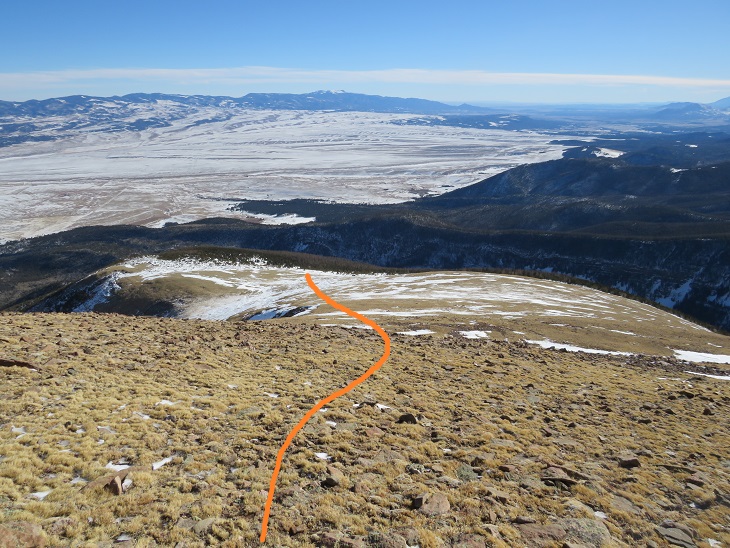
Here’s an overall view of the path I took from the ridge back to treeline. I descended exactly the way I ascended, to avoid cliffing out on the rocks. This was easy, as I just followed my tracks in the snow.
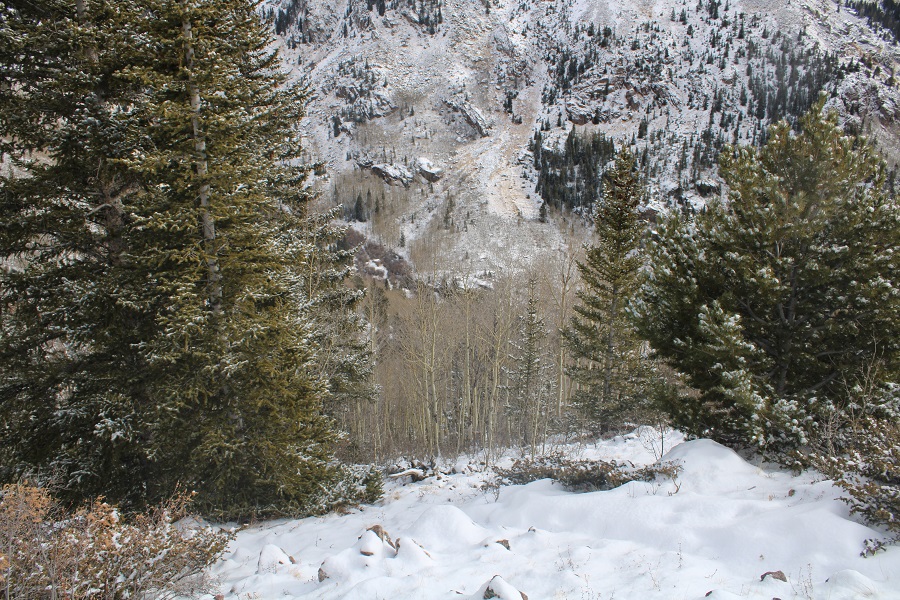
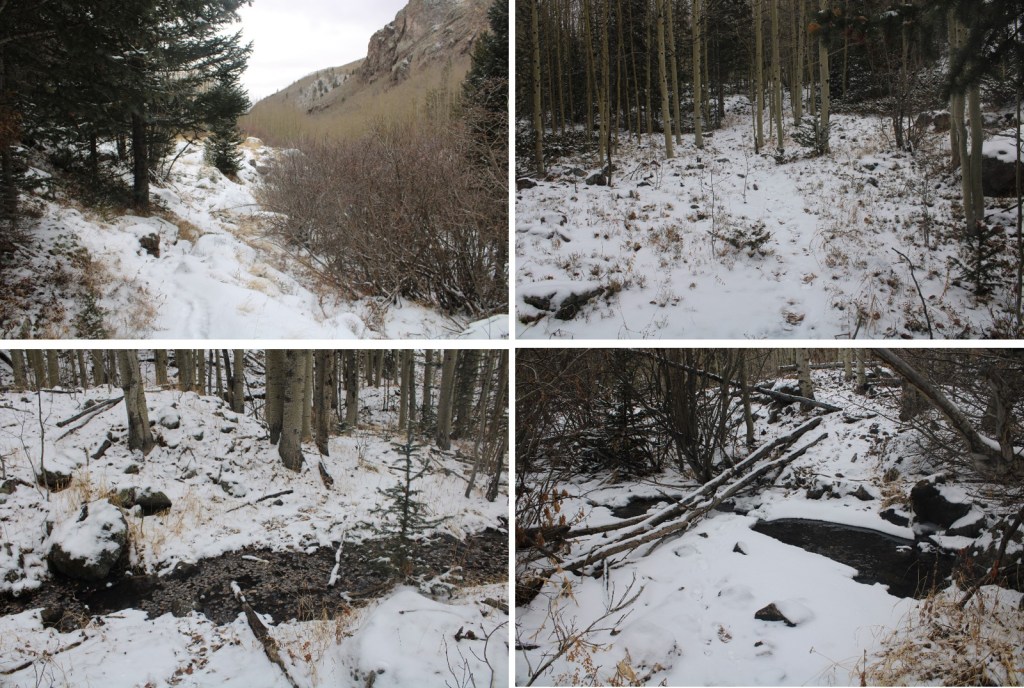
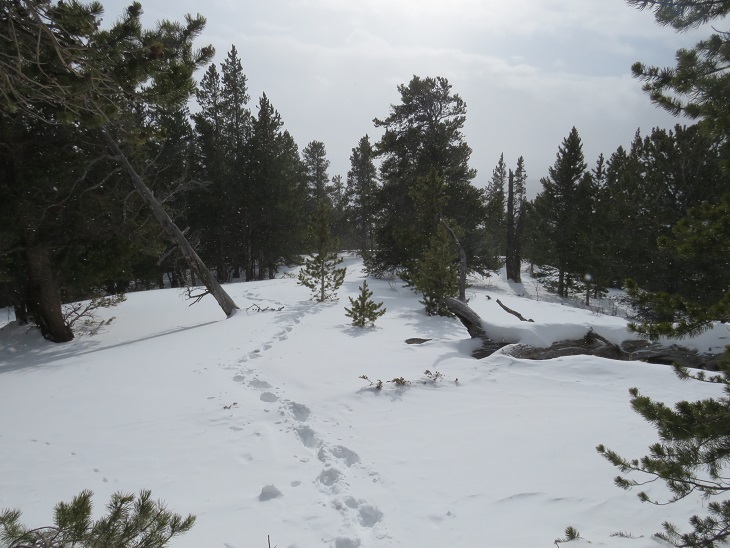
When it came time to descend, there wasn’t much of a visual. Just before entering the trees I noted where the trail was below me, and aimed southeast, following the drainage towards San Isabel Creek and the trail I knew was just beyond.
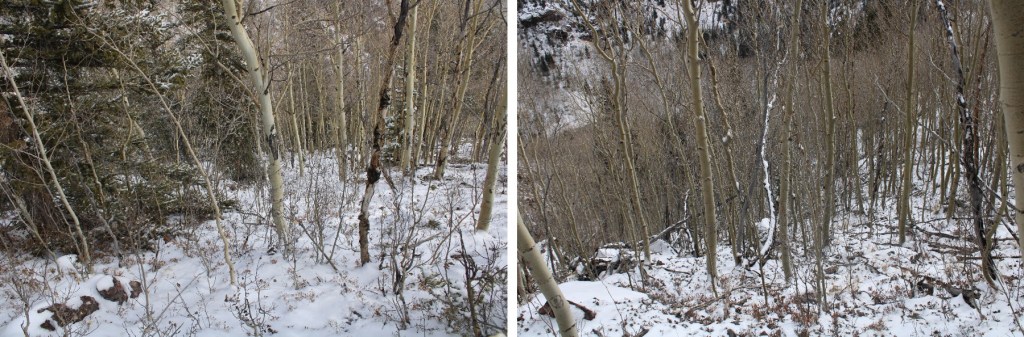
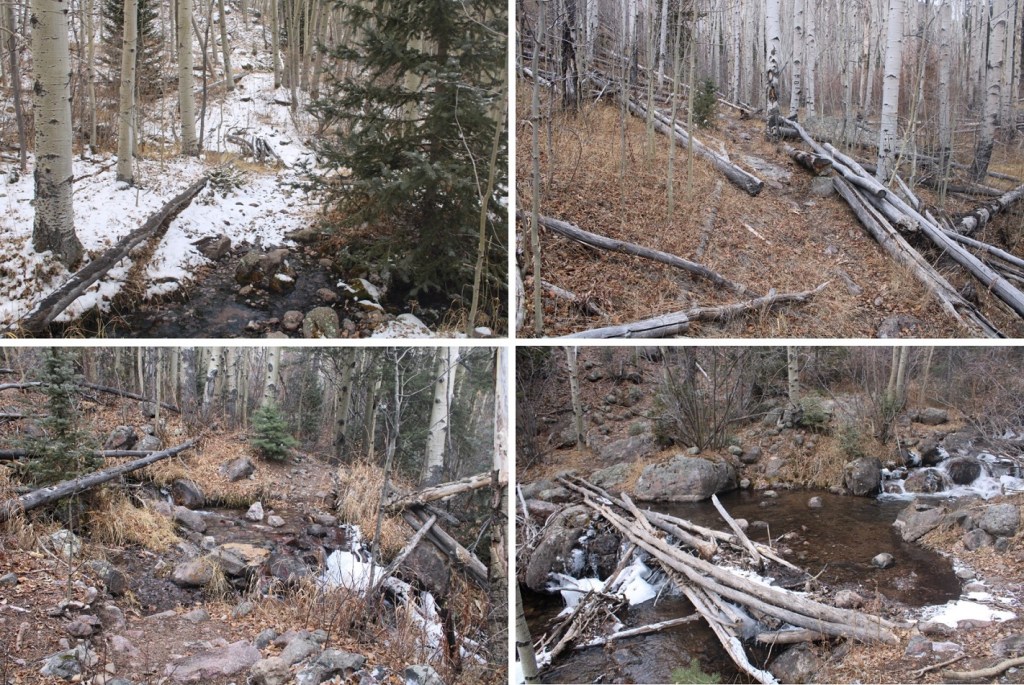
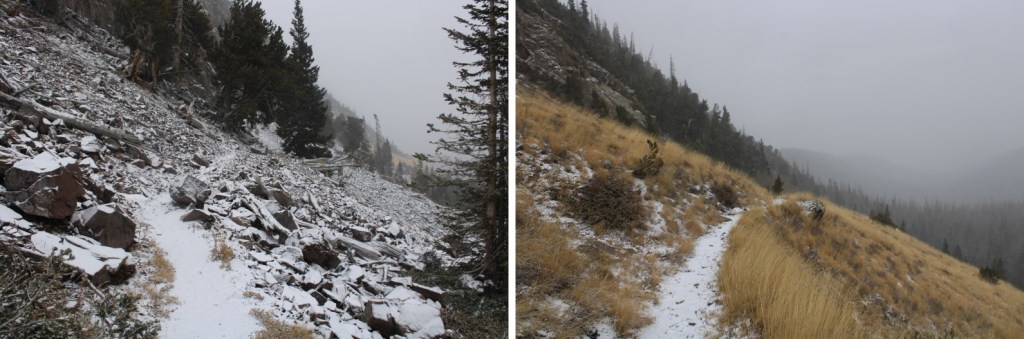
Here are some pictures of my way back down the drainage
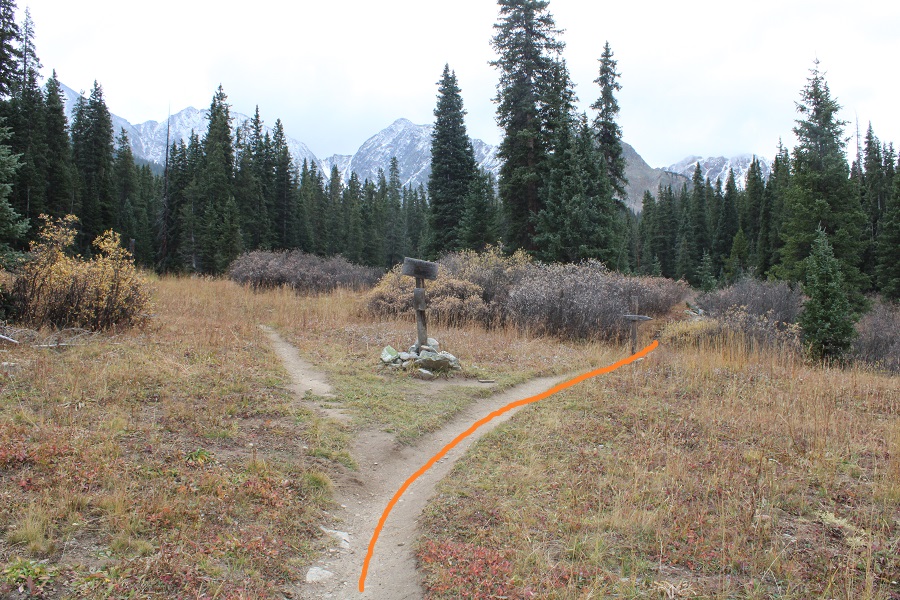
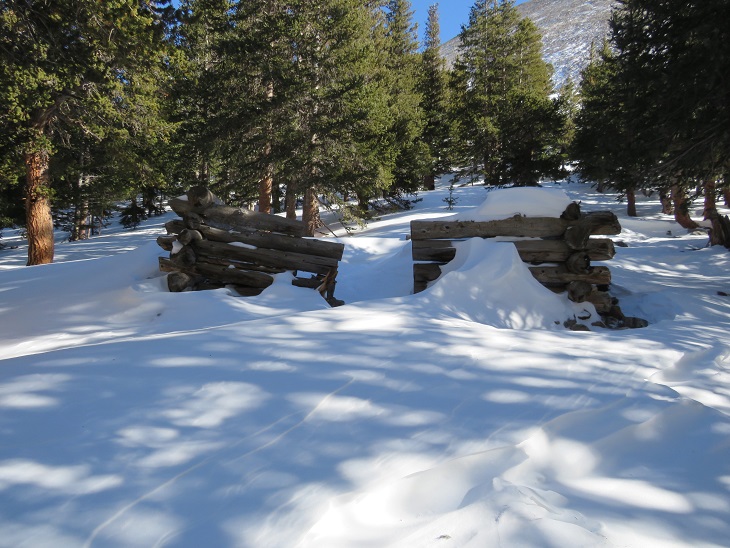
I re-crossed San Isabel Creek, and headed towards the trail. I found the old wooden sign, turned right, and followed the trail 4 miles back to the trailhead.
There were still a ton of creek crossings.
Eventually the snow on the ground gave way to dirt, but it continued snowing until I made it back to the trailhead. Cutting this hike short had been a good idea.
I made it back to my truck at 1:15pm, making tis an 11.91 mile hike with 5143’ of elevation gain in 8 hours.
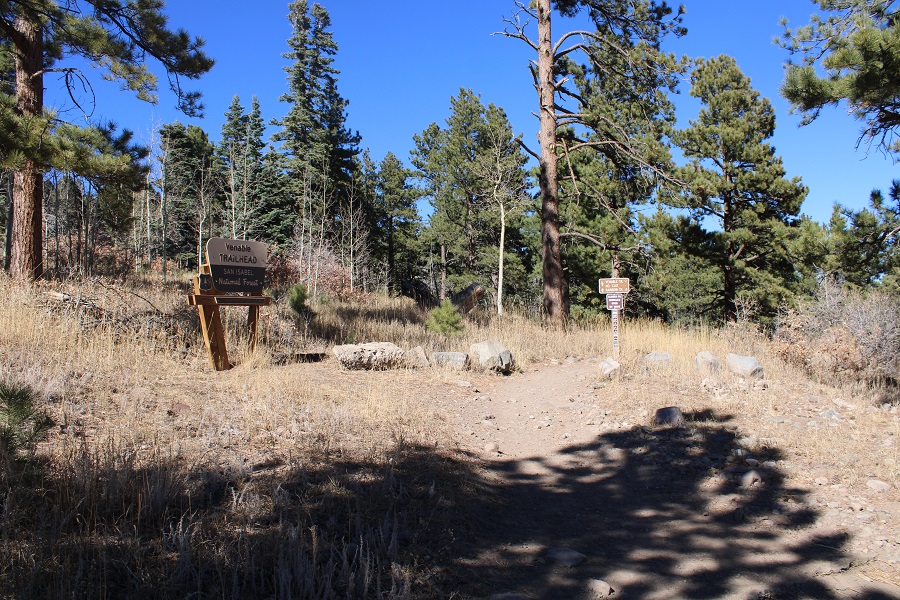
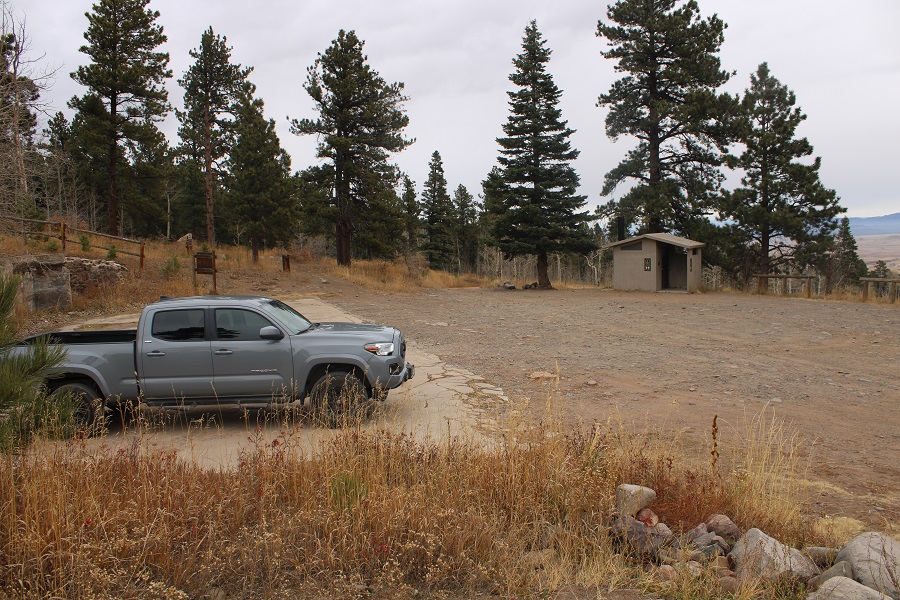
I made it to the trailhead late the night before, and slept in the cab of my truck. Well, I tried to sleep. Unfortunately, there was internet access at this trailhead. This meant I was scrolling through my phone until 1 in the morning. I hit the snooze button three times before waking up to dawn approaching. I threw on my gear, waved at the hunter who just pulled up in the parking area, and was on the trail at 7am. This morning I was taking the Venable Trail, which is clearly marked from the parking area.
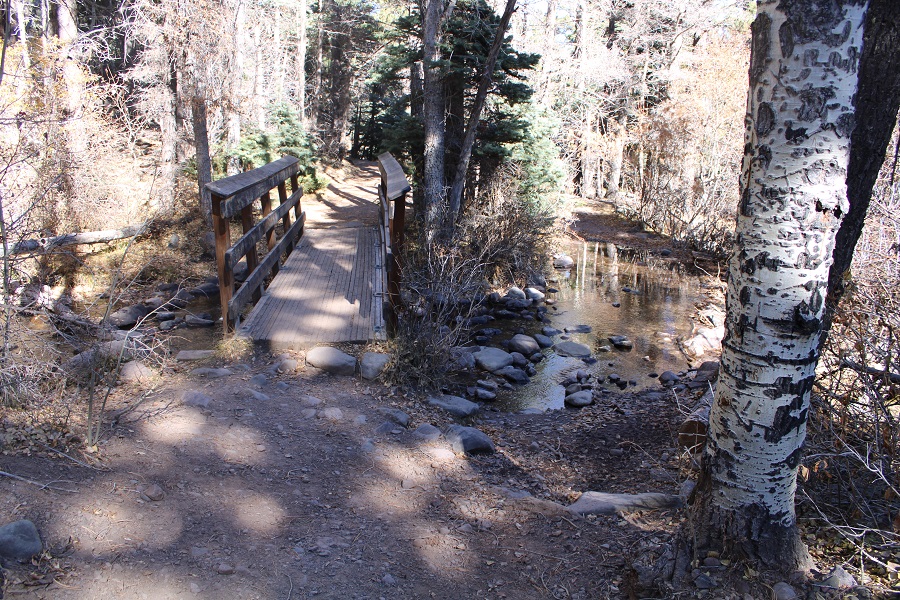
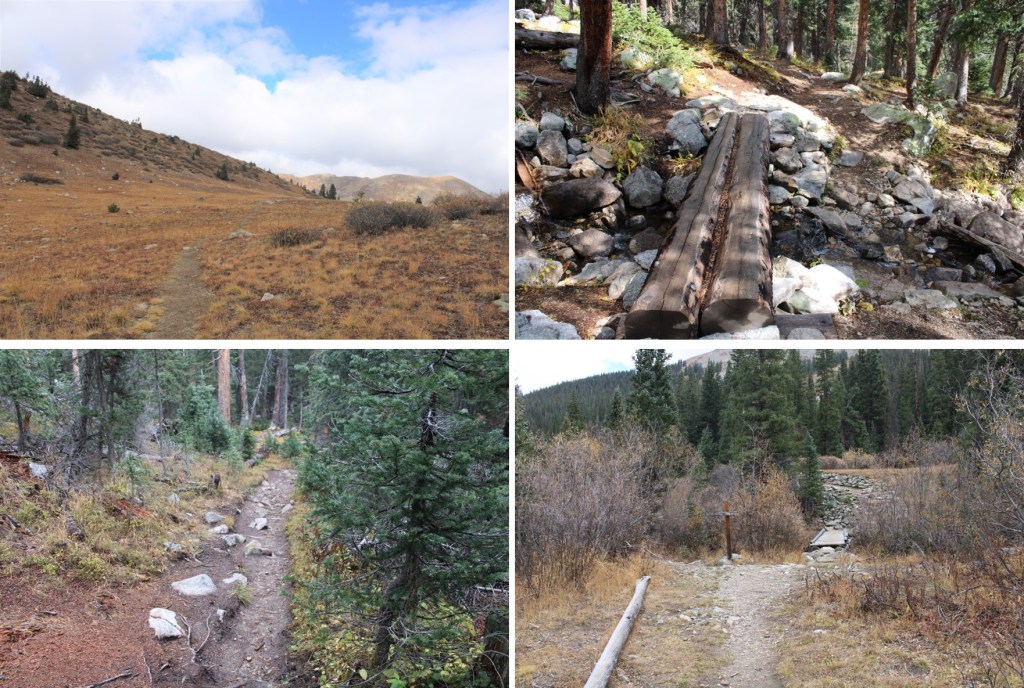
I followed the trail as it crossed over a bridge
After hiking for half a mile, I came to a junction with the Rainbow Trail, and continued straight, following the Venable Trail (1347).
Just after this junction there was a trail register. I signed it, and continued following the Venable Trail southwest
This is a class 1 trail. Today’s conditions varied, from being covered with ice, to being bare dirt, to several inches of snow.
After hiking for 2.5 miles, I came to the junction for Venable Falls. Here I continued straight on the trail, towards Venable Lakes
The trail increasingly became more snow covered, but no traction was necessary. Of course, most of the snow present was directly on the trail. This is where I was headed
I rounded this hill (lower Venable Lake is to the right)
And after 5 miles of hiking, I made it to the lower Venable Lake
I kept following the trail
After hiking a total of 5.5 miles I came to what I assumed was a junction (it was covered in snow and the sign was missing: only a post remained). I turned left and took Comanche Trail (1345) towards the pass.
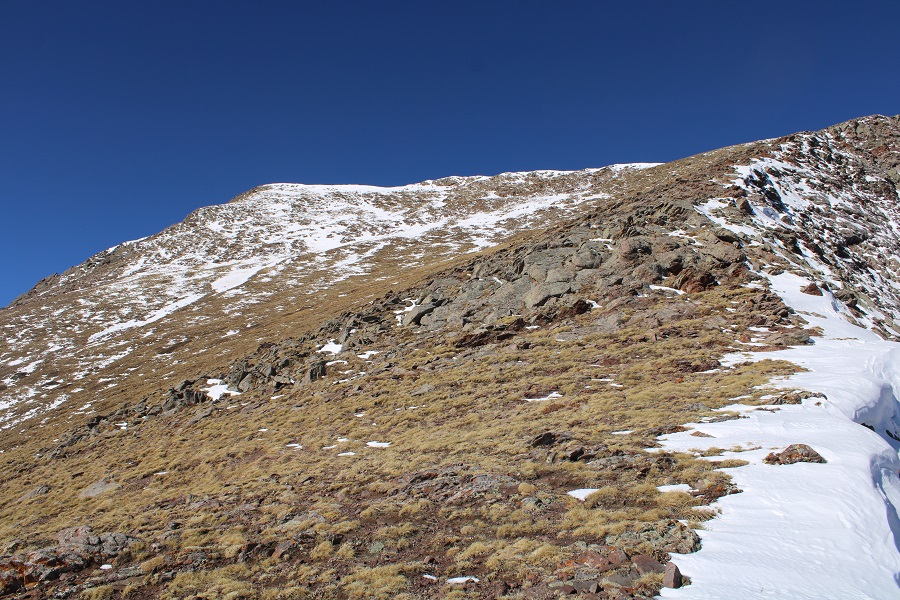
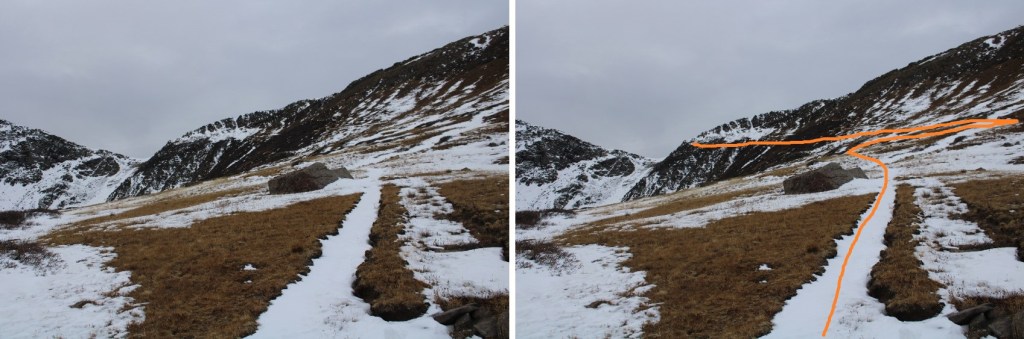
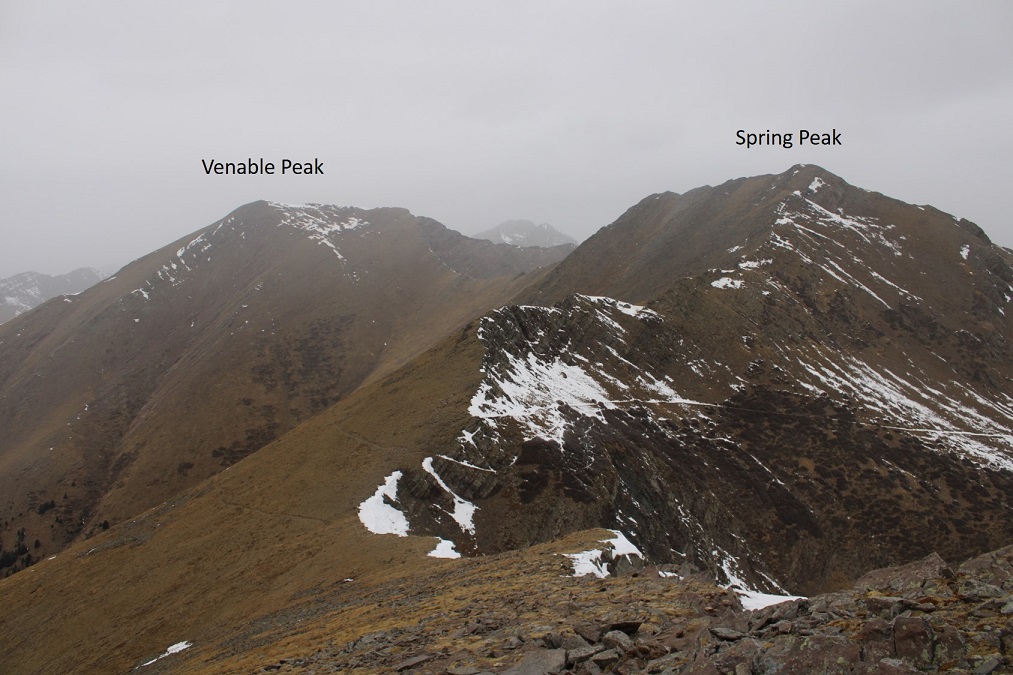
I now had a good view of the rest of my route to the pass
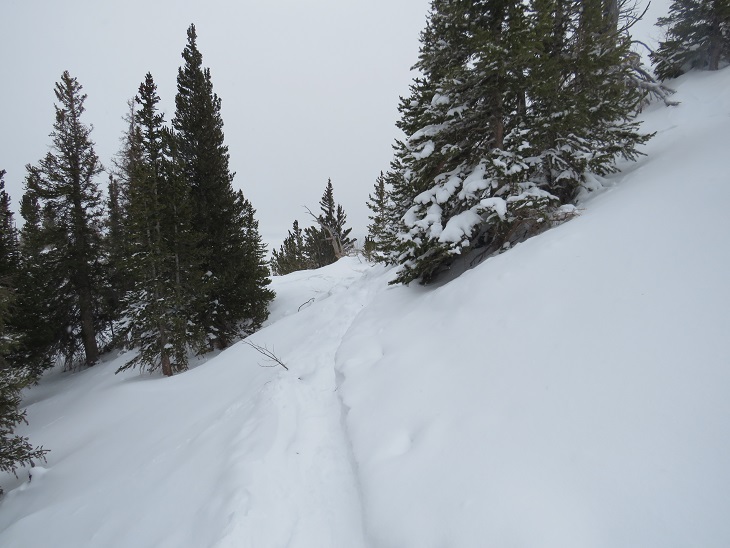
More and more snow started accumulating on the trail. It was sugary, so I put on my microspikes. I had snowshoes, but the snow was so sugary they wouldn’t have made much of a difference.
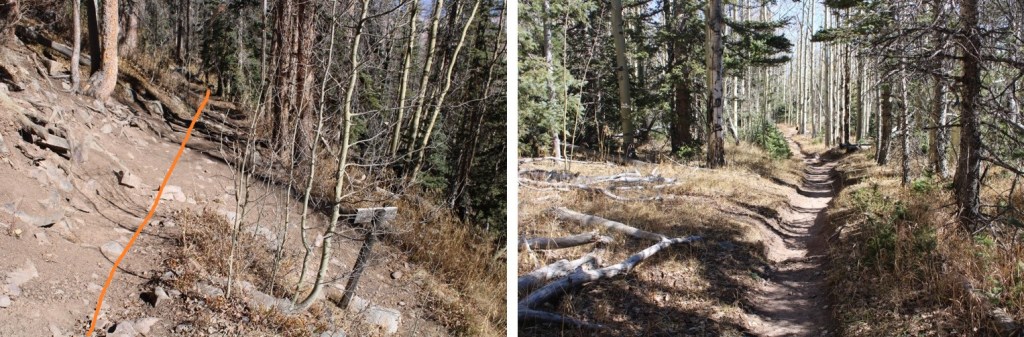
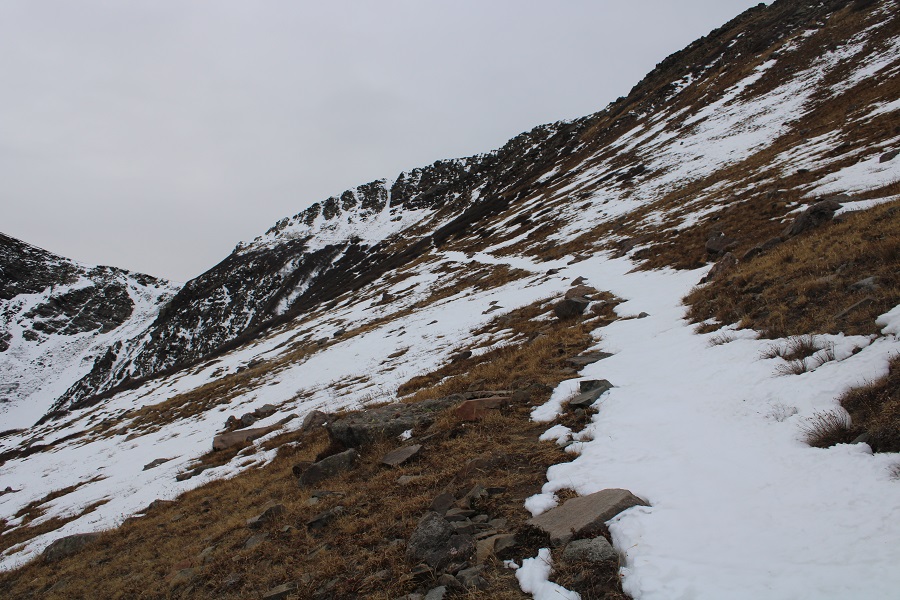
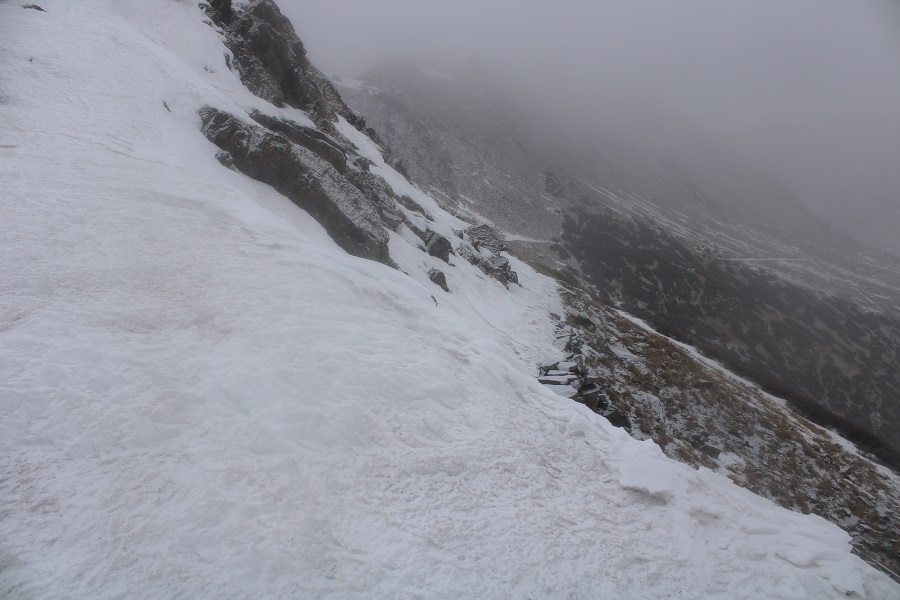
It was slow going, and I had to spend a lot of time making a solid path in some areas through the snow, doing my best to hug the cliff, not entirely sure how wide the trail was. I was doing find until I got to this area:
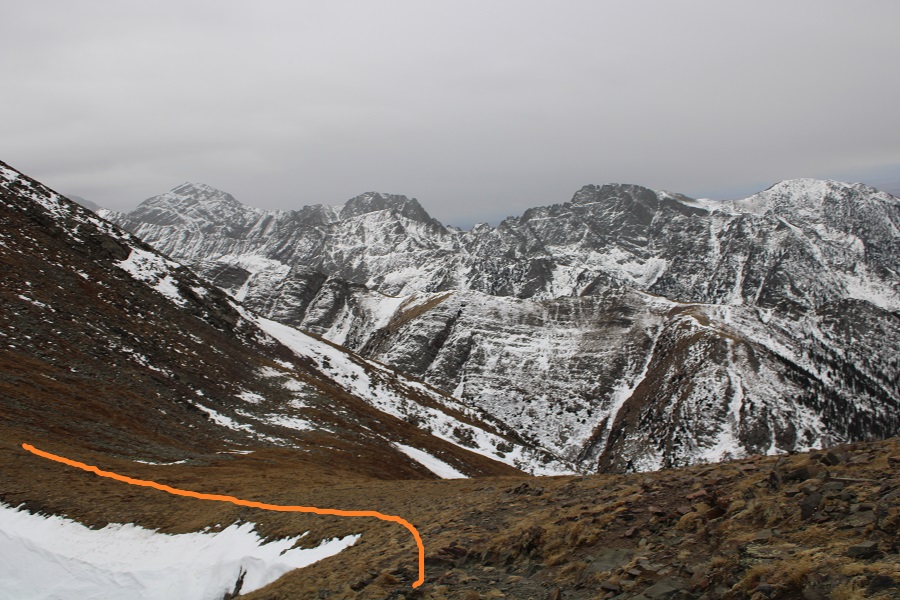
I was about 200 feet from the pass, and the snow drifts were now taller than I was. I kept seeing snow slide down below my feet, over the cliffs, and made the decision to turn back. It hurt to turn back, but I knew it was for a good reason: I’m out here solo, and while I might have made it past the snow/cornice to the pass, I couldn’t have done so safely, and a fall would have been fatal. The red arrow is where I turned around. You can see the tracks where I stopped
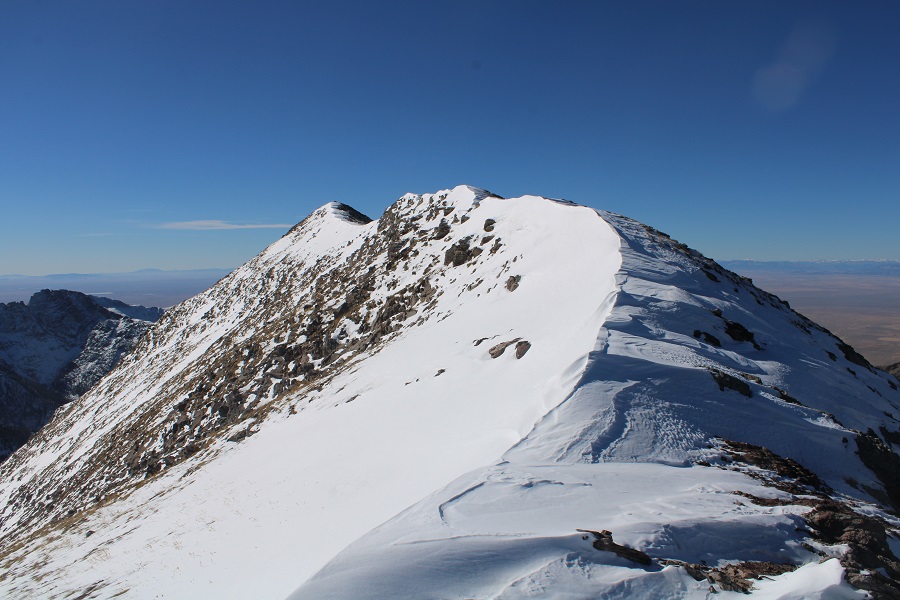
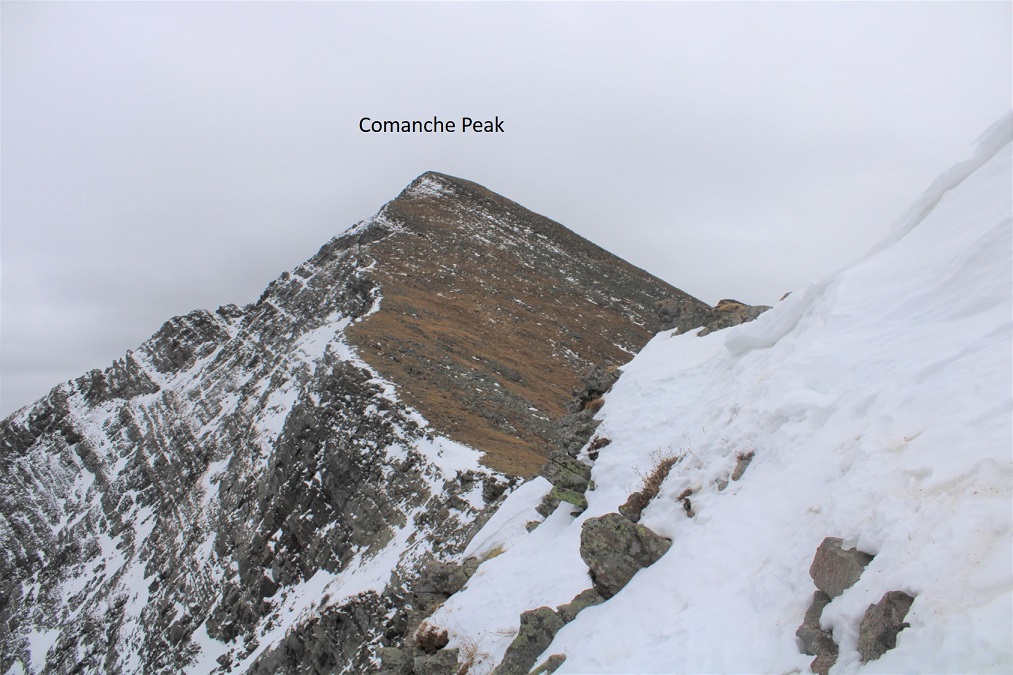
Just for reference, I was able to summit this peak via the Comanche trail the next day. Here’s what the pass looked like from above
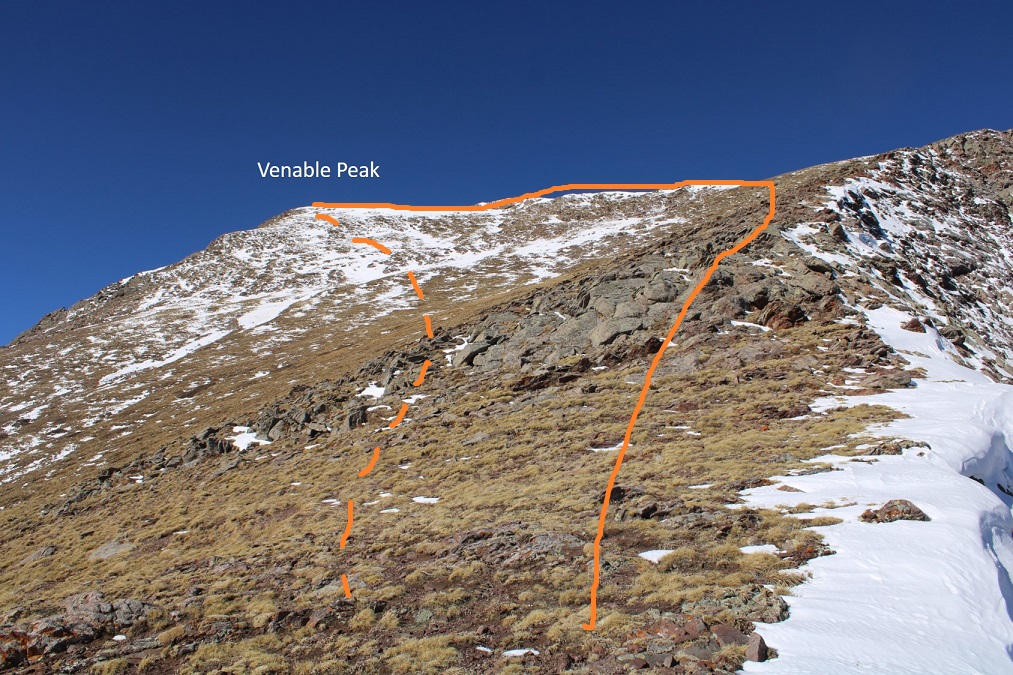
And look at how close I’d been to the summit of Venable!
For those of you interested in taking this route, this is how I summited Venable the next day. I took the solid line up, the dotted line down. Both were class 2 (although the ridge had quite a bit of snow)
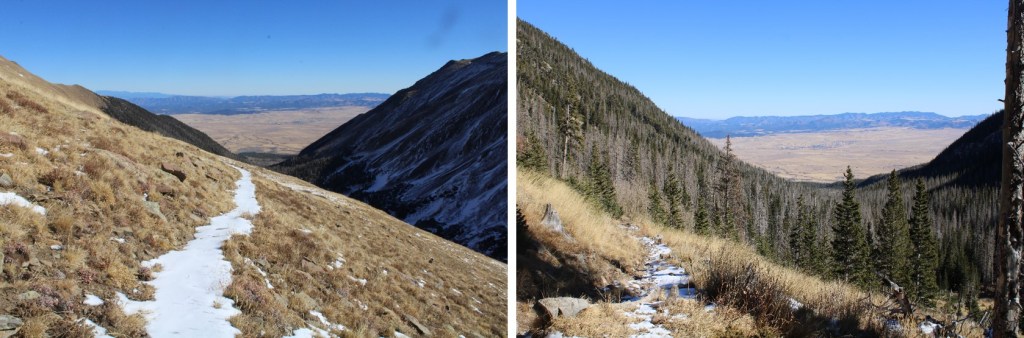
However, I wasn’t summiting today. Instead, I turned around and hiked the 6 miles back to the trailhead.
On my way out I made plans to hike Venable and Spring from the Comanche Trail the next morning. Added bonus: I didn’t have to drive to another trailhead, since the Venable and Comanche Trailheads share a parking lot. I made it back to my truck at 12:30pm, which gave me plenty of time to read, drink whiskey, talk to hunters, and get some rest before tomorrow’s attempt.
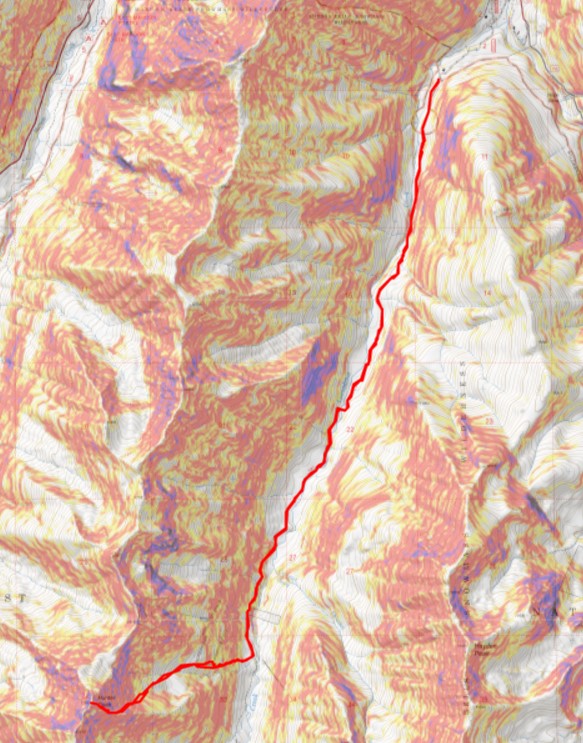
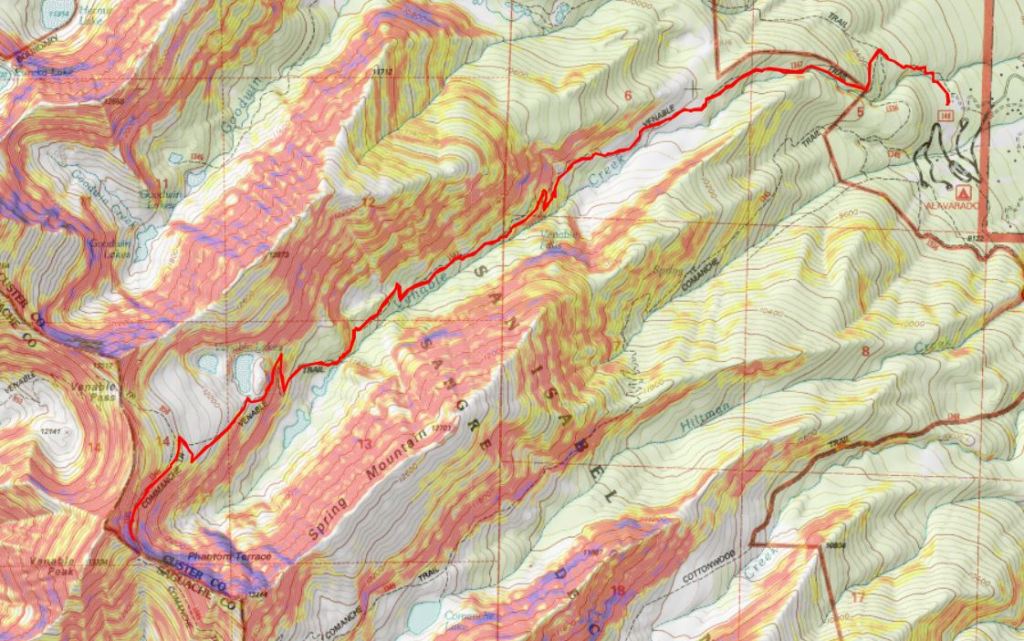
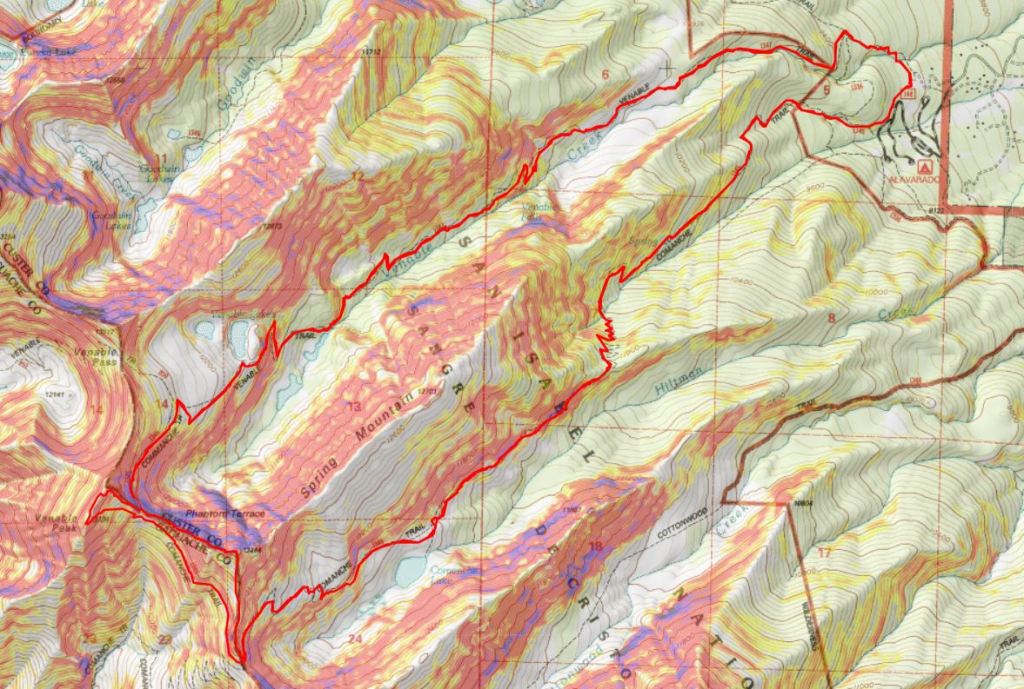
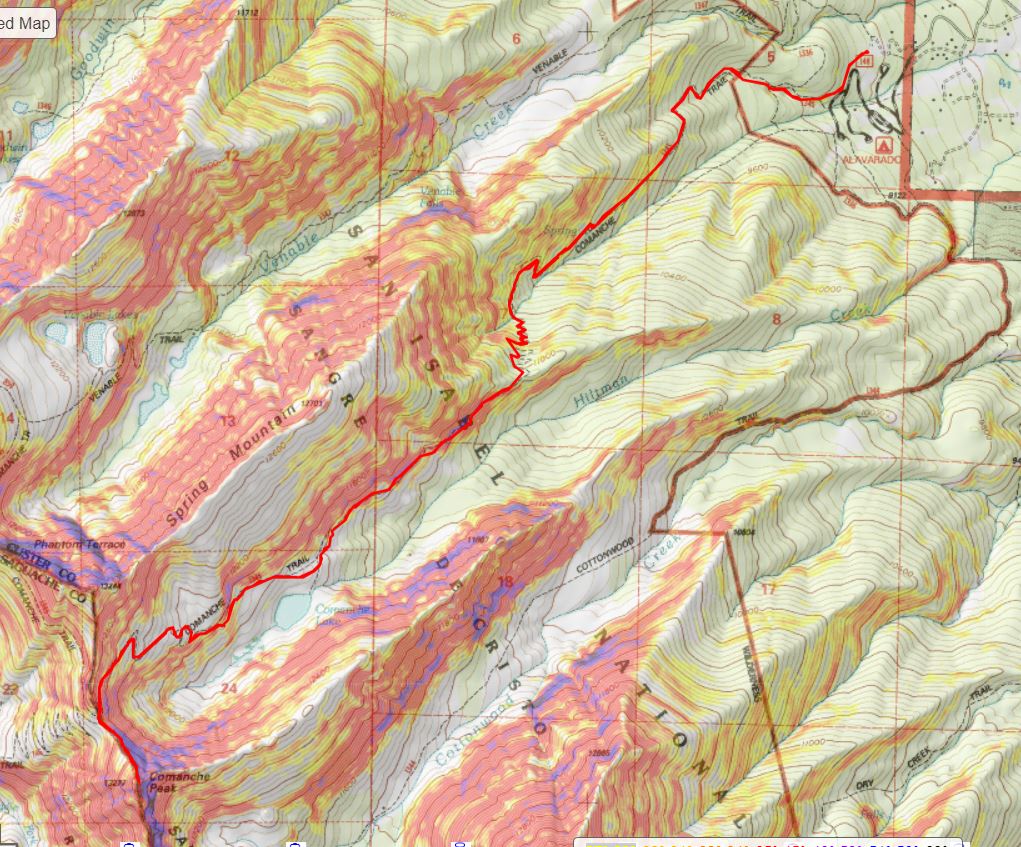
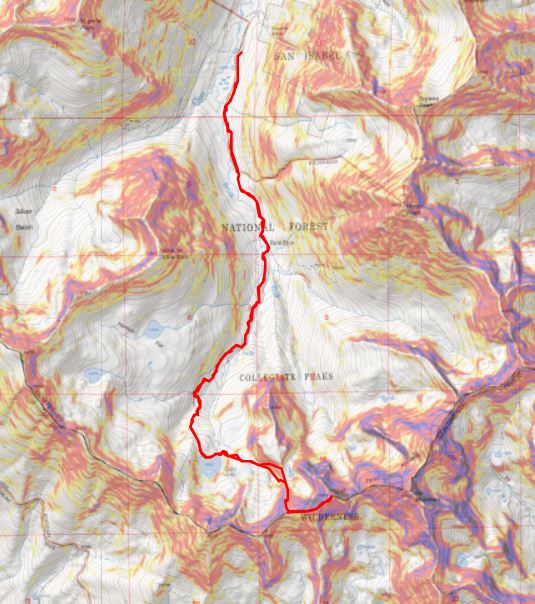
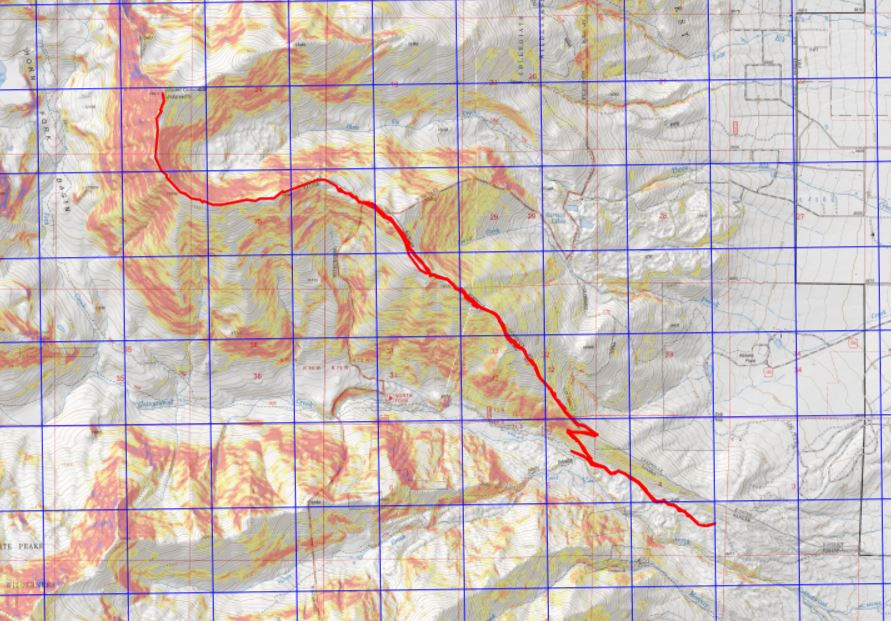
Here’s a topo map from today’s attempt, and another along with the route I took the next day
You can find my successful Venable trip report here.
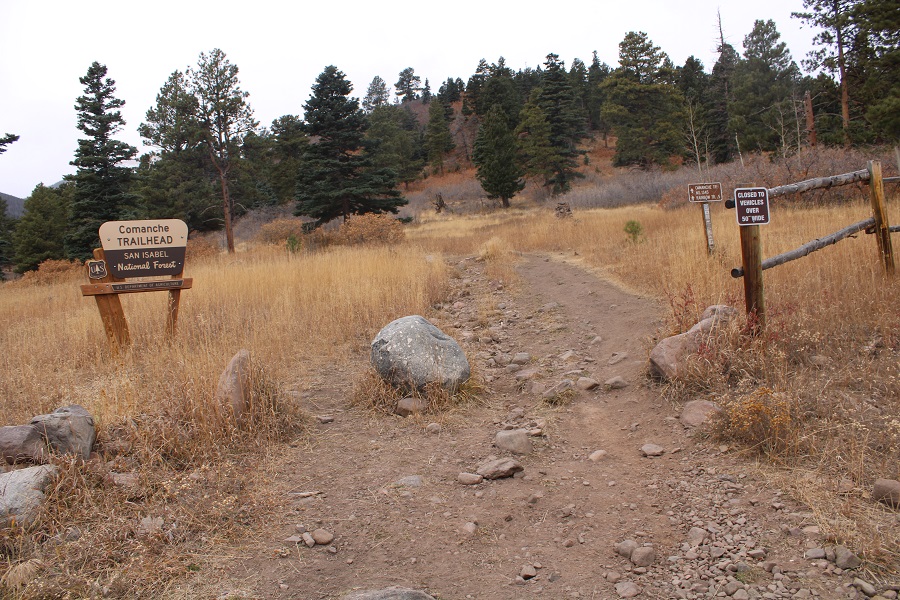
The weather forecast for today predicted a 40% chance of snow after noon, and the snow would be minimal, so I decided to head to the Sangres to do the Comanche/Venable loop. Spoiler alert: I only got Comanche Peak. My vehicle was the only one in the lot when I arrived. I was on the trail at 5am.
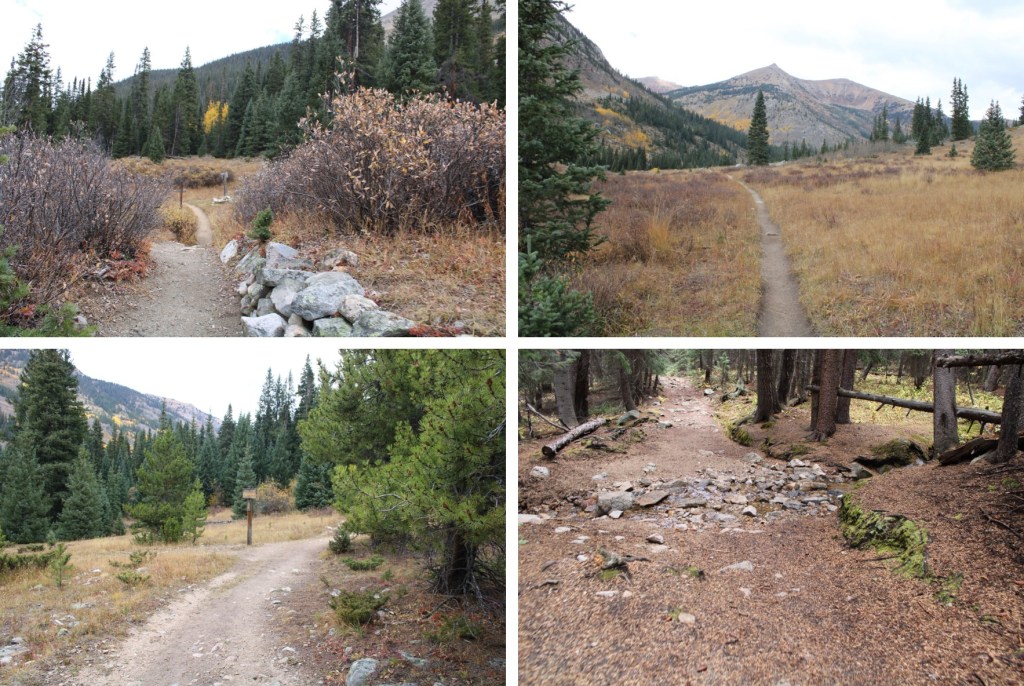
I decided to do the loop clockwise, starting with Comanche Peak. The Comanche Peak trail was clearly visible from the parking area.
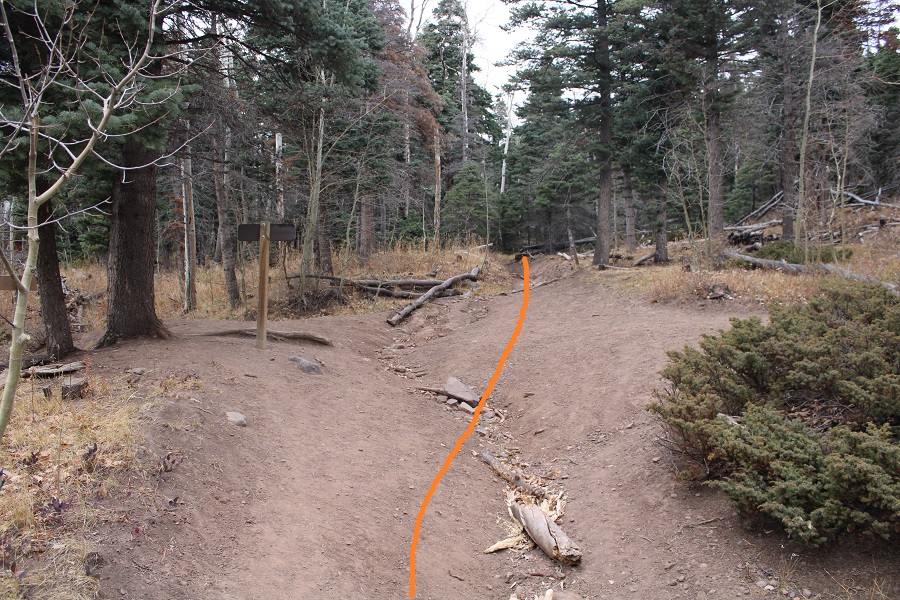
I followed the Comanche Trail for about half a mile, and crossed the Rainbow Trail. I stayed straight on the Comanche Trail.
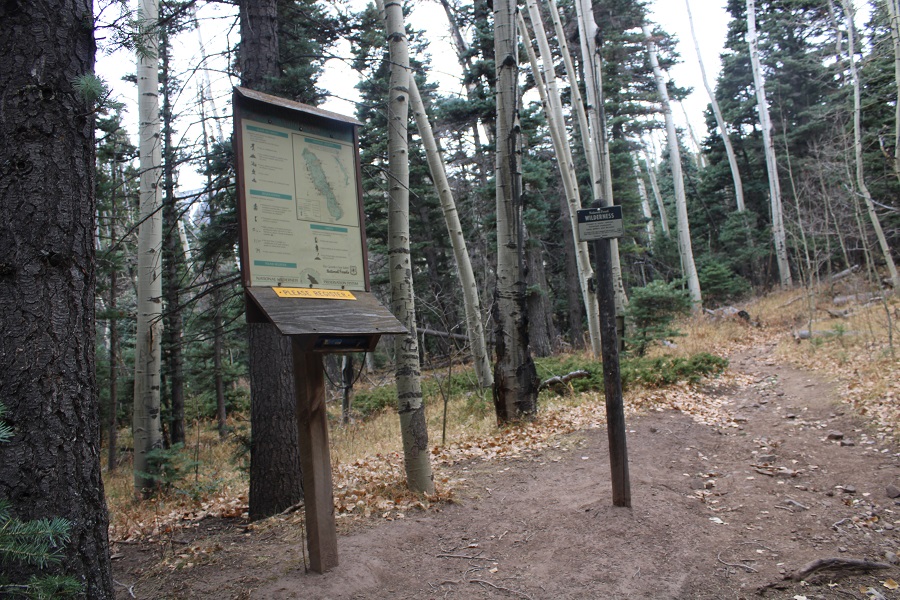
There was a register and information area
This trail is well groomed and wide. I followed the trail all the way to Comanche Lake, switchbacking up the mountainside.
Also, the bears are still awake…
After hiking for 4.25 miles, just before making it to Comanche Lake, there’s a junction. I continued straight, instead of heading down to the lake
I was headed to the Comanche/Spring saddle
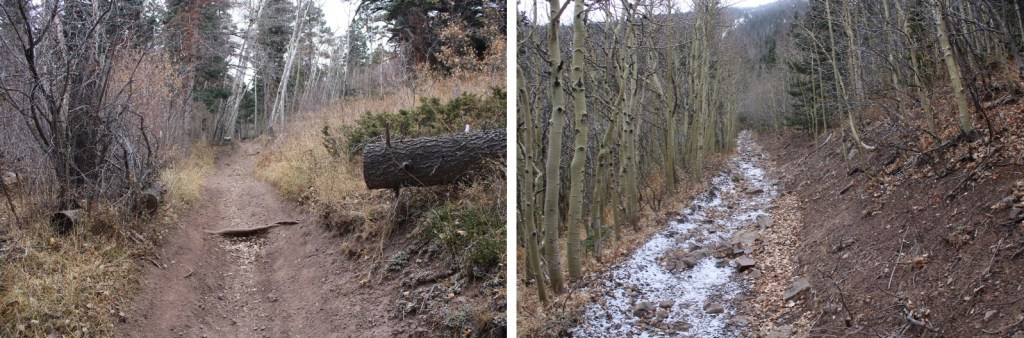
The hike to the saddle continued to be class 1, but what little snow there was had accumulated directly on the trail. On the positive side, the trail was easy to locate!
Just before making it to the Comanche/Spring saddle there was a cornice to navigate. I got out my microspikes and ice axe, and kicked in steps.
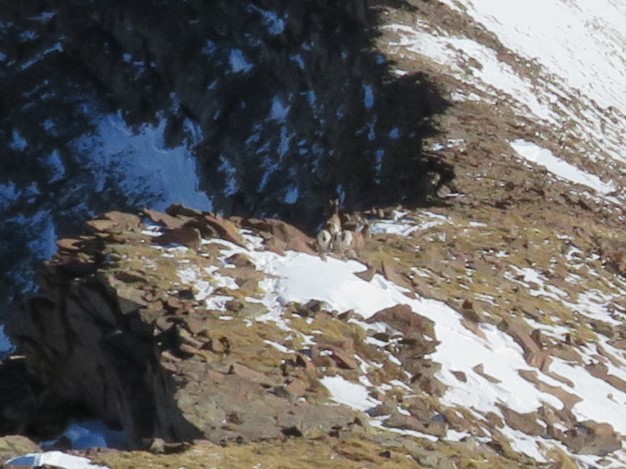
As I was doing so, I looked to my left and could see Comanche Peak
I could also see weather coming in from the west. It wasn’t supposed to snow until later in the day, but I could feel the wind picking up, and see the snow coming in. I’d have to re-assess my hiking plans as I went.
It was 5.8 miles from the trailhead to the saddle.
After putting away my microspikes and ice axe, I followed the saddle south
It was an easy, class 2 hike to the summit, mostly on tundra or stable rocks. In some areas there were bits of a game/social trail
As I was hiking up the ridge towards Comanche Peak the wind picked up, and it started snowing. I figured I’d get a picture of Spring and Venable before the snow moved in. In less than 10 minutes, I could no longer see these peaks.
Here’s a look at the last push to the summit of Comanche Peak
There was a cairn at the summit
I summited Comanche Peak at 8:50am.
Comanche Peak:
I turned around to head back to the Spring/Comanche saddle, and noted the lack of visibility.
I descended to the saddle, and realized the snow wasn’t going to let up any time soon. I could have made this a loop, but the pictures would have been useless in a trip report, and navigating a fresh layer of sugary snow on the rocks didn’t sound like a fun time, so I decided to just head back the way I came, making this an out and back hike. I’d come back later for the other two peaks.
Here’s looking back at the trail from the saddle
And back over the cornice
It continued to snow the entire trek out, but the trail was easy to follow. A nice layer of snow started to build up on my camera, gloves, eyelashes, backpack, etc. as I hiked out.
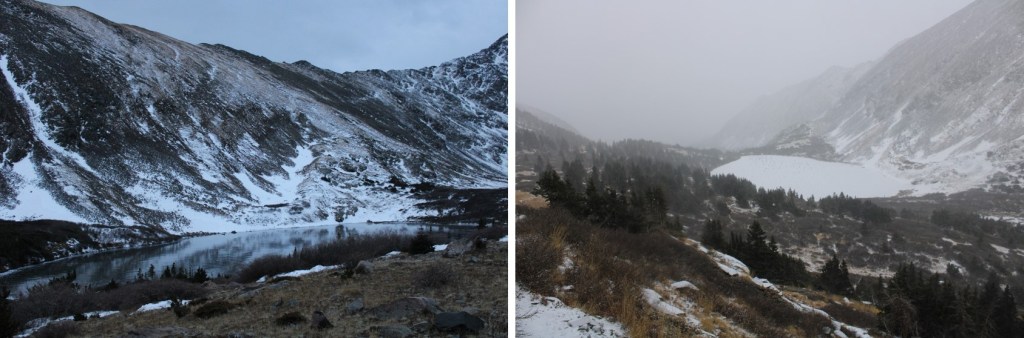
Check out the difference in Comanche Lake from earlier this morning
Here are some pictures from the hike out. It was neat having more snow on the trail on the way out than I’d had on the way in. The only downside: There had been ice on the trail this morning I could avoid because I could see it. Now it was covered in a layer of snow and not quite as visible. I did some slipping and sliding, but managed to remain upright.
It finally stopped snowing just as I made it back to the trailhead, but a look up at the peaks let me know it was definitely still snowing above treeline.
I made it back to my truck at 11:15am, making this a 12 mile hike with 4837’ of elevation gain in 6 hours, 15 minutes.
I was the only one at the Lake Ann/Huron Peak trailhead at 5pm on a Friday, and I was thrilled! The 4WD road to the upper trailhead was a little rougher than I remembered it, but the drive had been worth it to be the only one there. I jotted down some notes from the days hike, sipped some whiskey, and looked at notes for tomorrow. It was still light out when I curled up in the back seat of my Tacoma and drifted off to sleep to the sound of pounding rain: that meant fresh snow on the peak tomorrow!
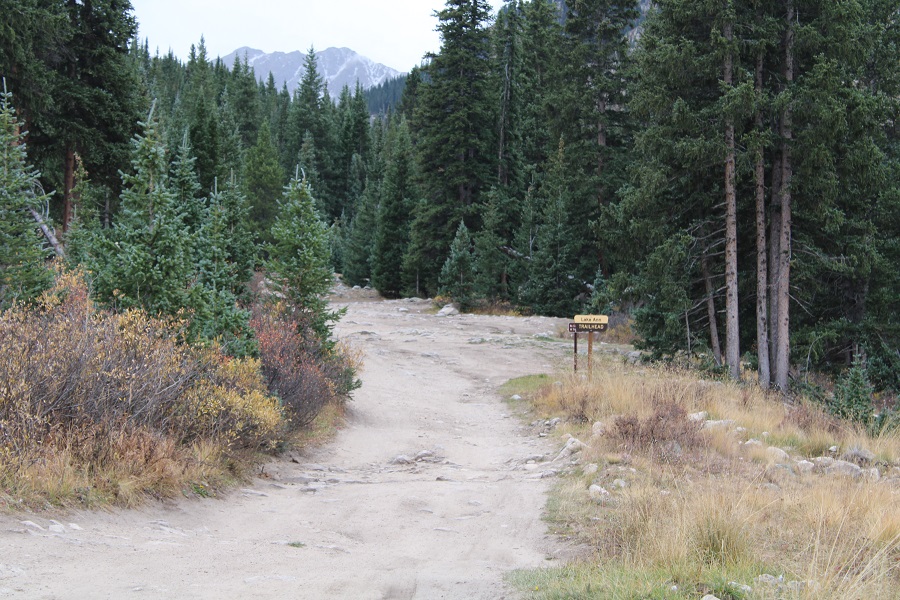
I woke up and things seemed dry outside, which was odd for the amount of rain I’d heard last night. I put on my winter gear anyway and was on the trail at 5:30am. The trail starts at the south end of the parking area, and continues heading south, towards Lake Ann. Be sure to take the Lake Ann trail, NOT the Huron Peak Trail
I hiked 4 miles south along a class 1 trail to Lake Ann
Stay left at this crossing
At the second crossing I went right
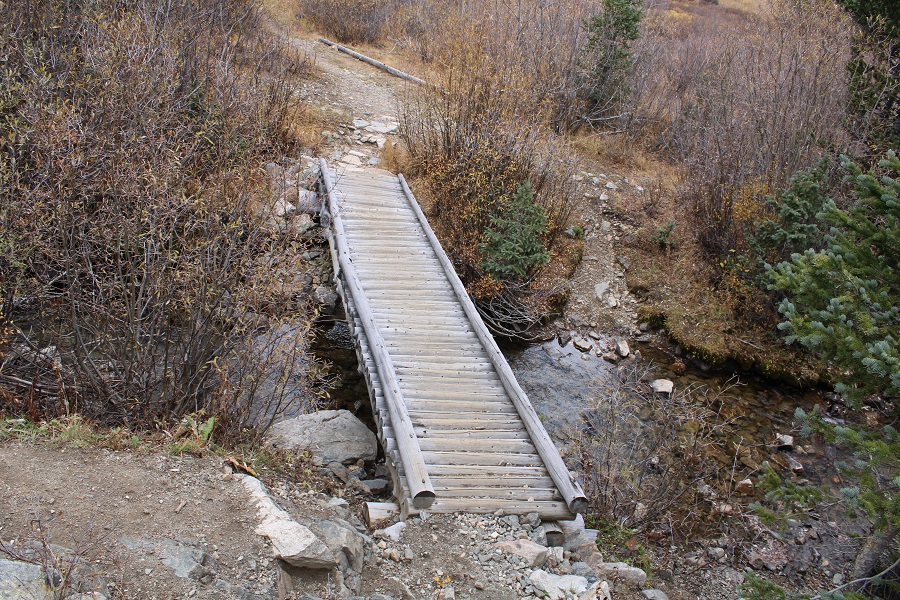
And crossed a creek on a ‘pretty-solid’ bridge
Finally, I started gaining elevation as I made my way towards Lake Ann
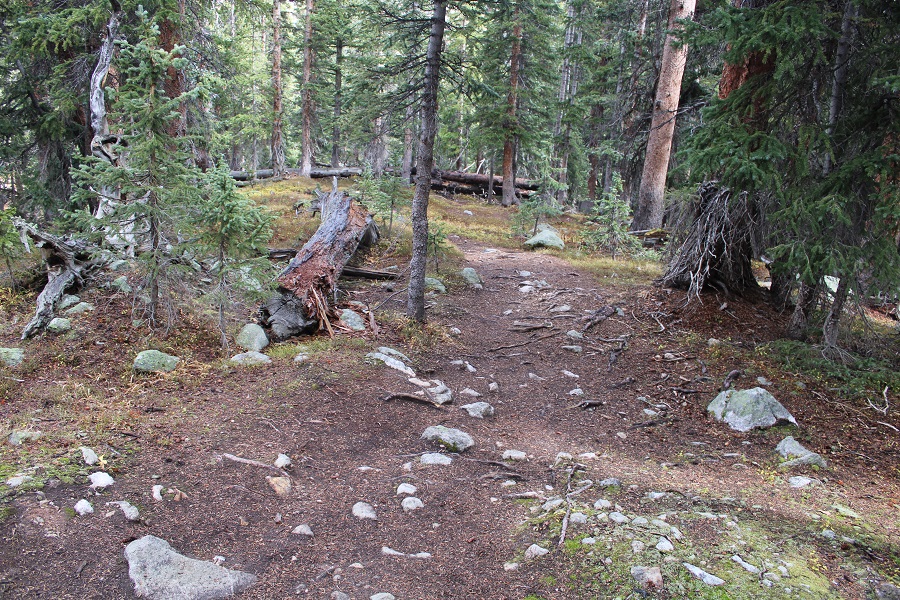
Just after making it to treeline, go left at this junction.
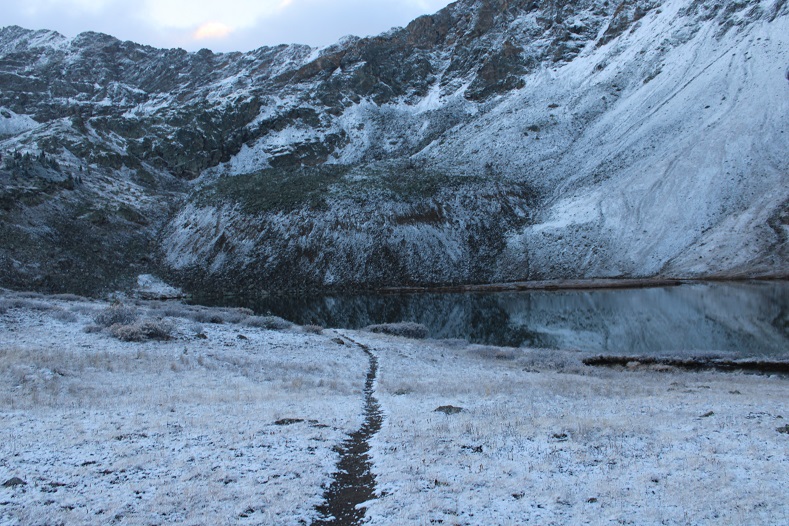
And you’ll arrive at Lake Ann
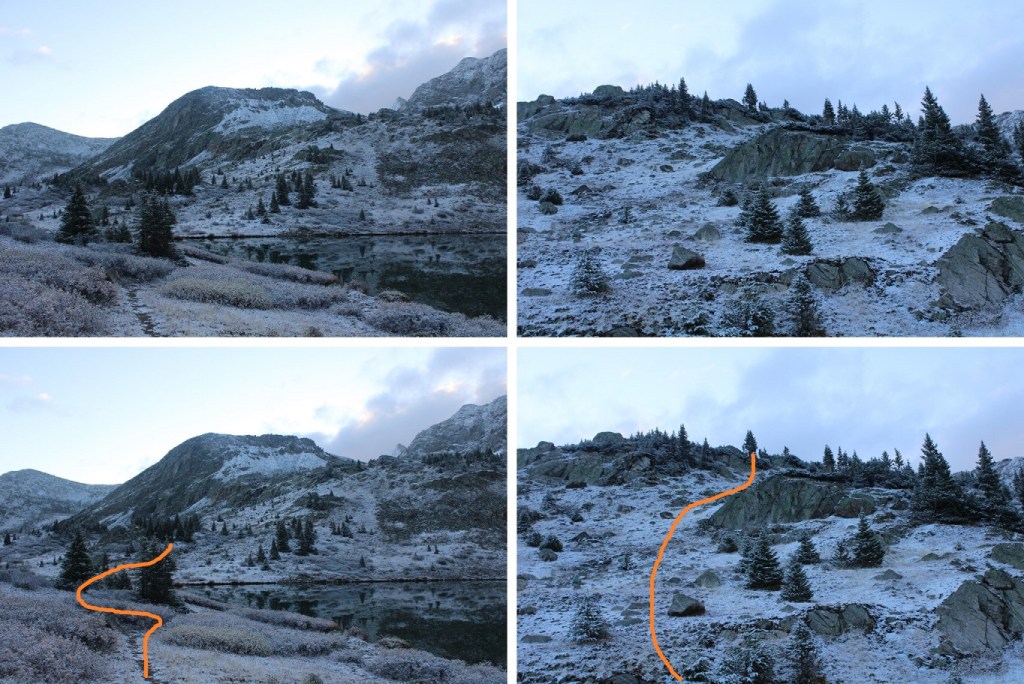
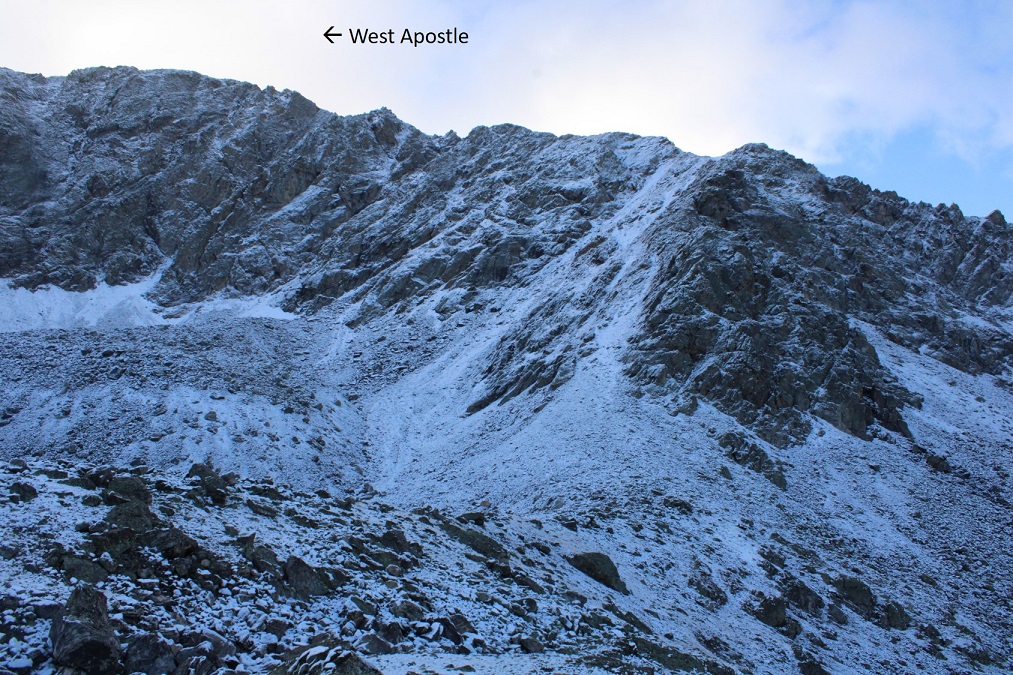
The goal is to skirt the north side of the lake, and enter the upper basin
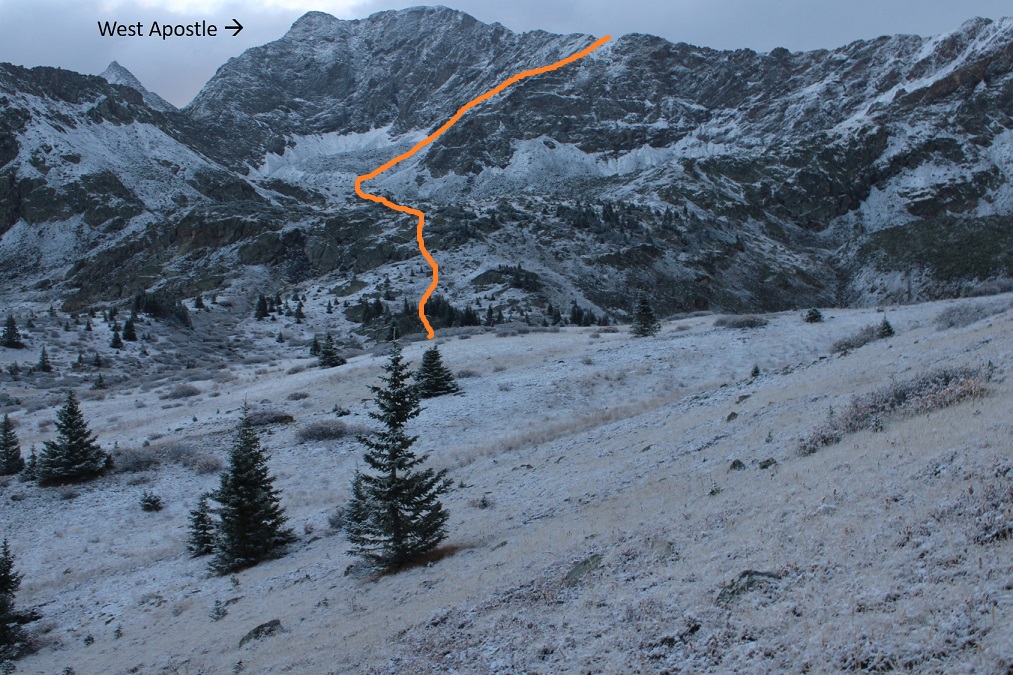
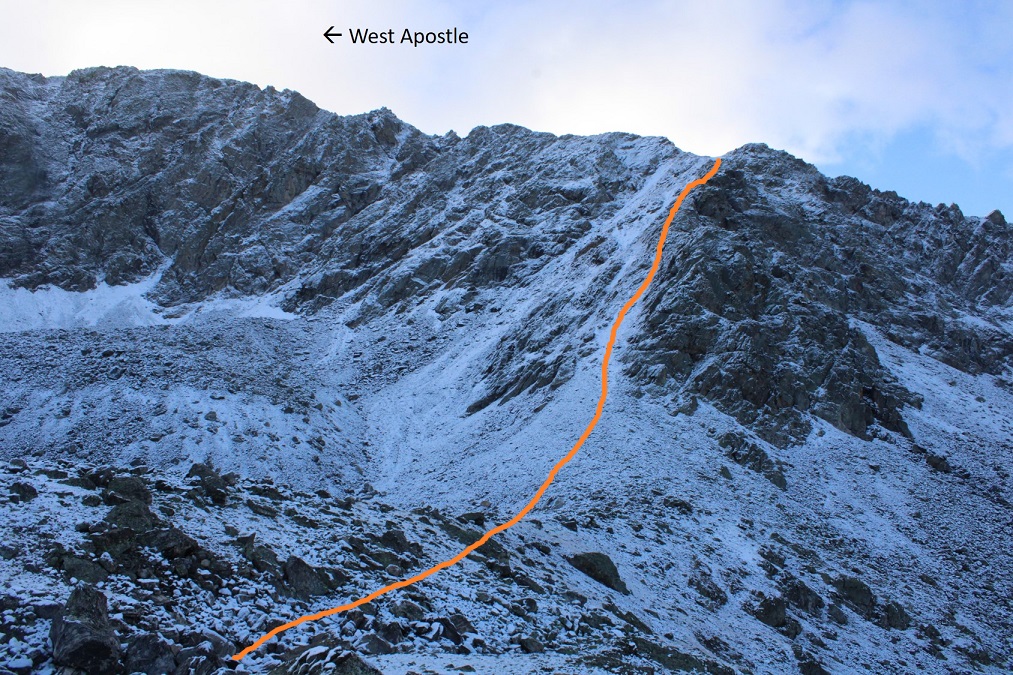
Here’s an overview of the route
And some step-by-step pictures into the upper basin
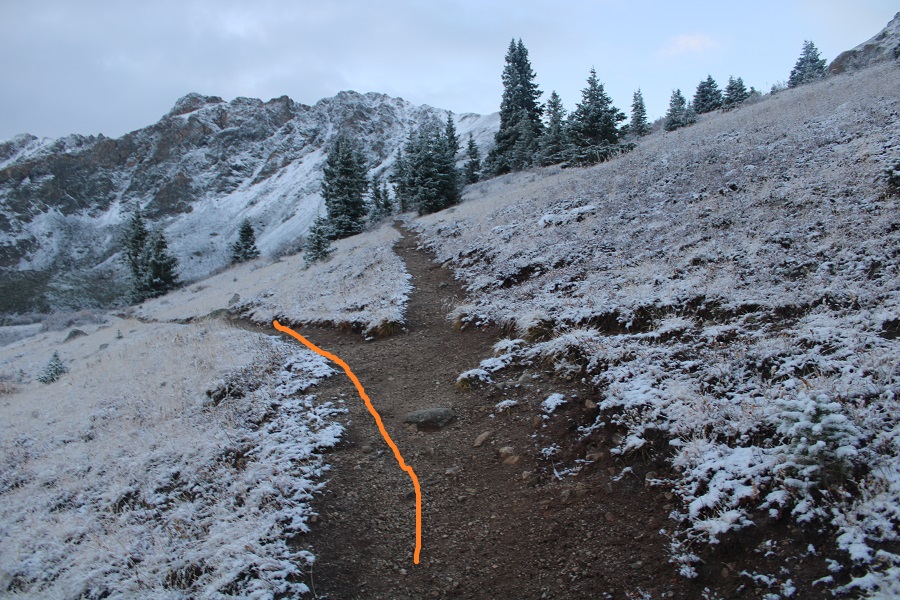
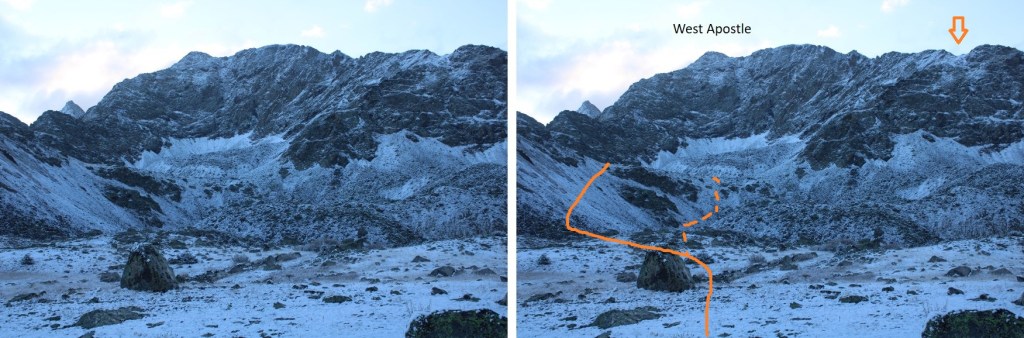
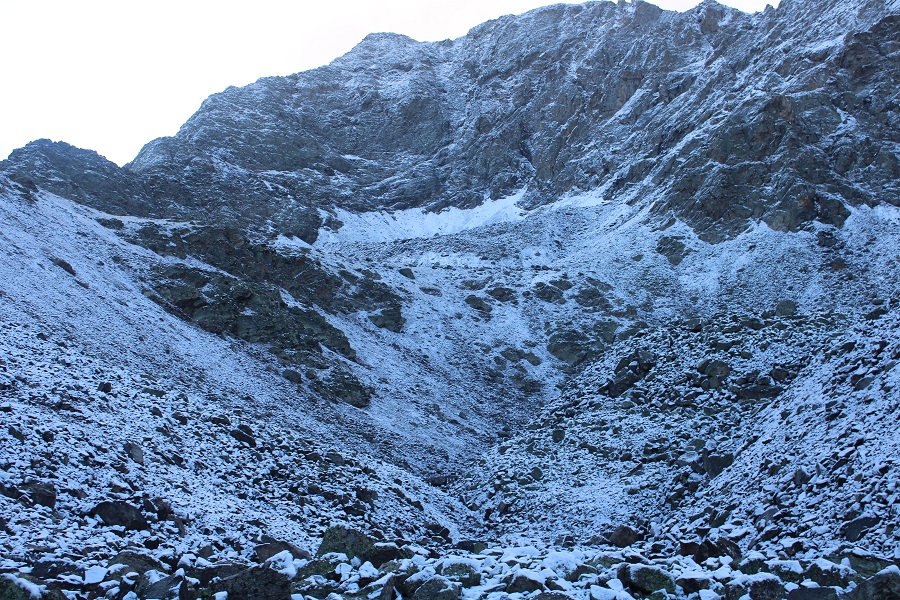
Once in the upper basin I aimed to ascend the amphitheater. This can be done multiple ways. I decided to stay left on the way up (solid line), and follow (very faint) game trails, and I went right on the way down (dotted line). The orange arrow is where you’ll eventually be aiming.
Here’s another picture of the amphitheater
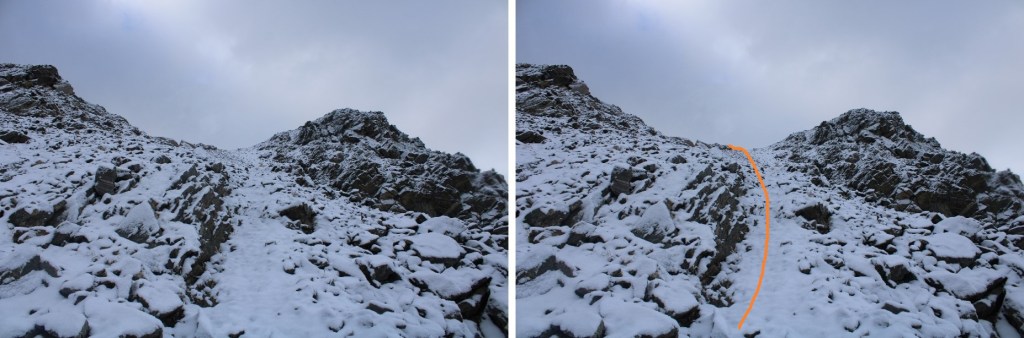
Once at the top of the amphitheater I was in another basin. I turned right, and followed the ridge. I’m sure the best way to ascend this gully is straight up the gully, but today there was unconsolidated snow blocking that route. Even with microspikes I wasn’t able to get traction the gully direct, so I took the rocks to the right.
Here are some closer pictures of the gully
At the top of the gully I went left
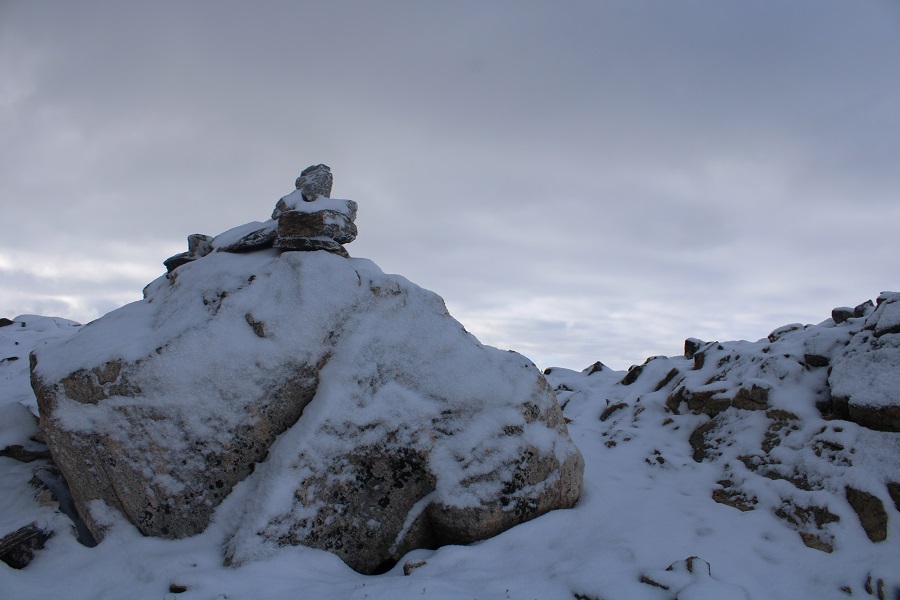
Which brought me to the ridge (and a cairn!)
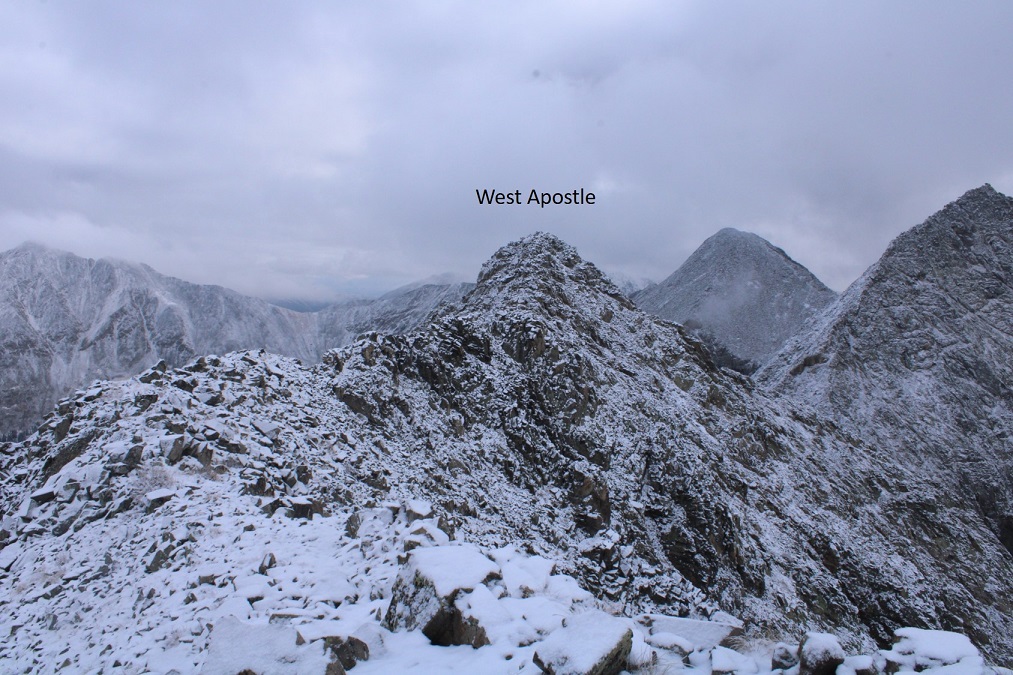
I turned left and followed the ridge northeast. This is a class 2 ridge, which I was able to stay on the top of the ridge to hike most of the way.
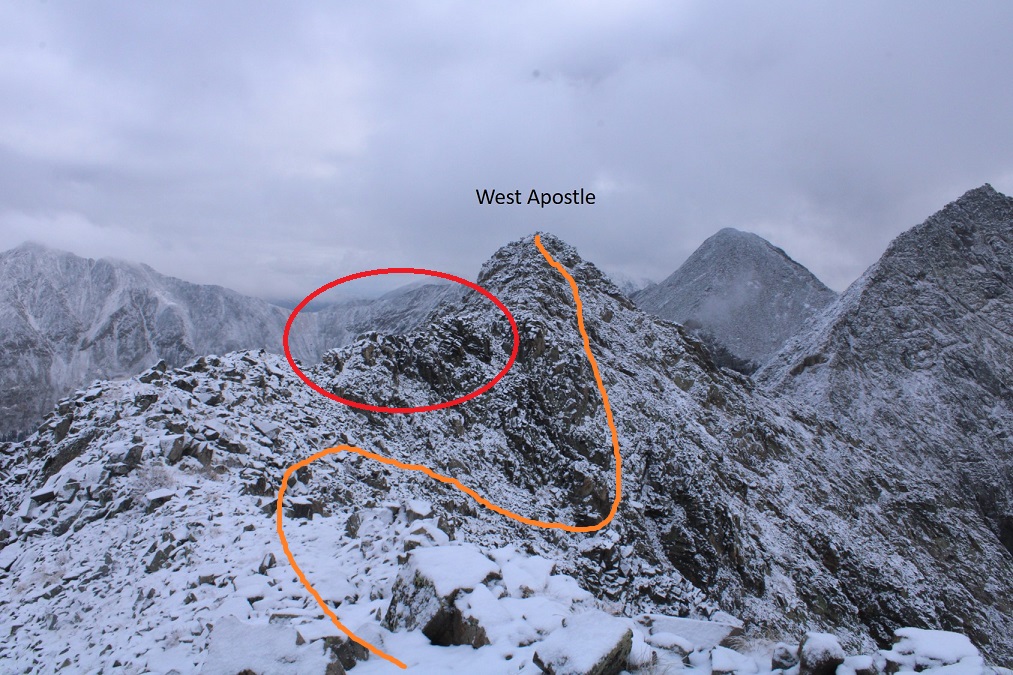
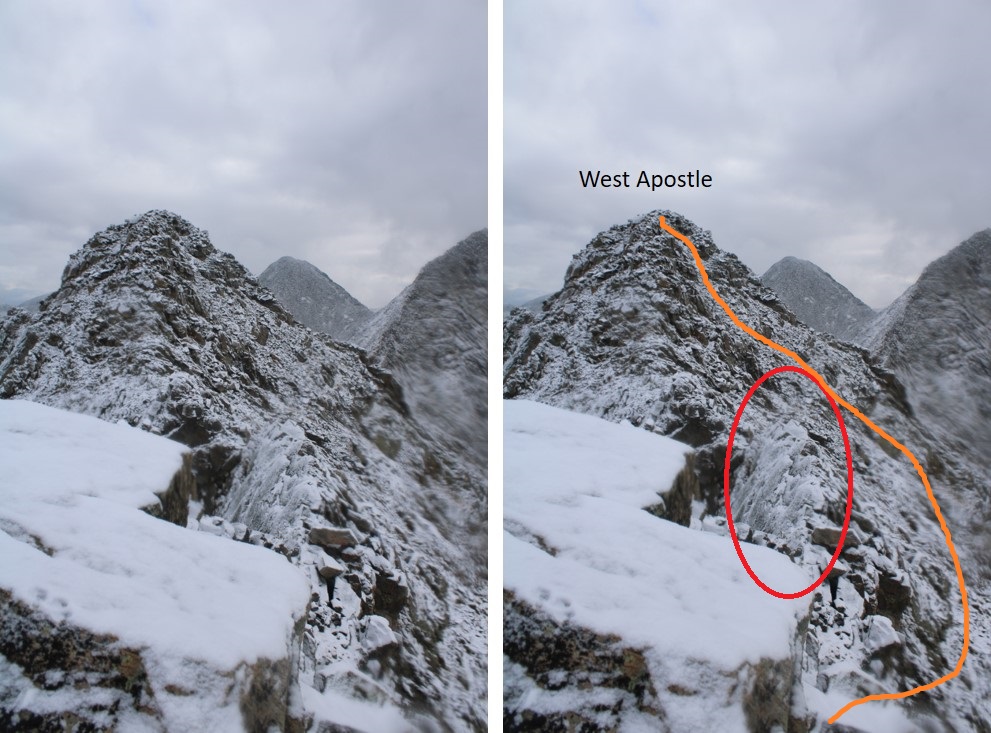
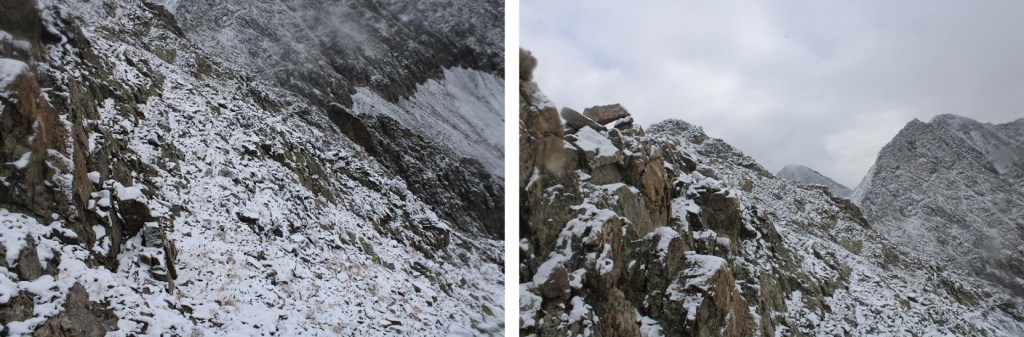
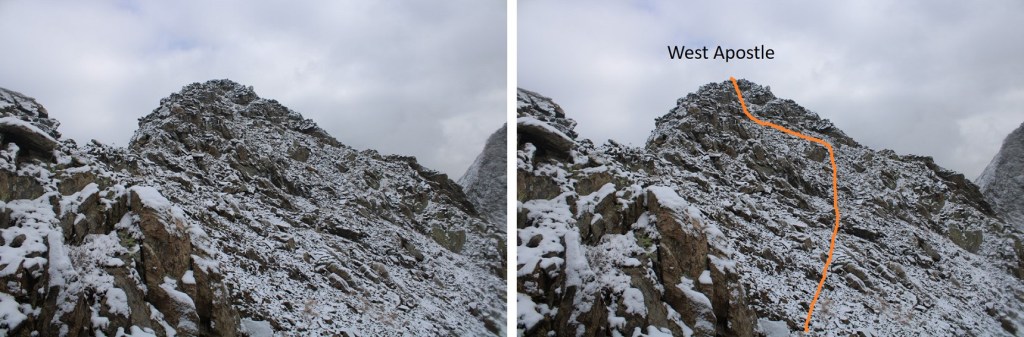
Here it gets a little dicey. If there hadn’t been snow, I would have taken the ridge all the way to the summit. However, with the snow and ice today things were slippery, and the exposure was real (to the left). I decided to dip down to avoid some of the worst of the exposure. I did this a little later than I should have, as it as getting spicy already. The area with exposure is circled in red. This is how I summited West Apostle
Here’s a picture of the ridge
And this is the exposure I was avoiding
So, I dipped down to the right and kept it class 2
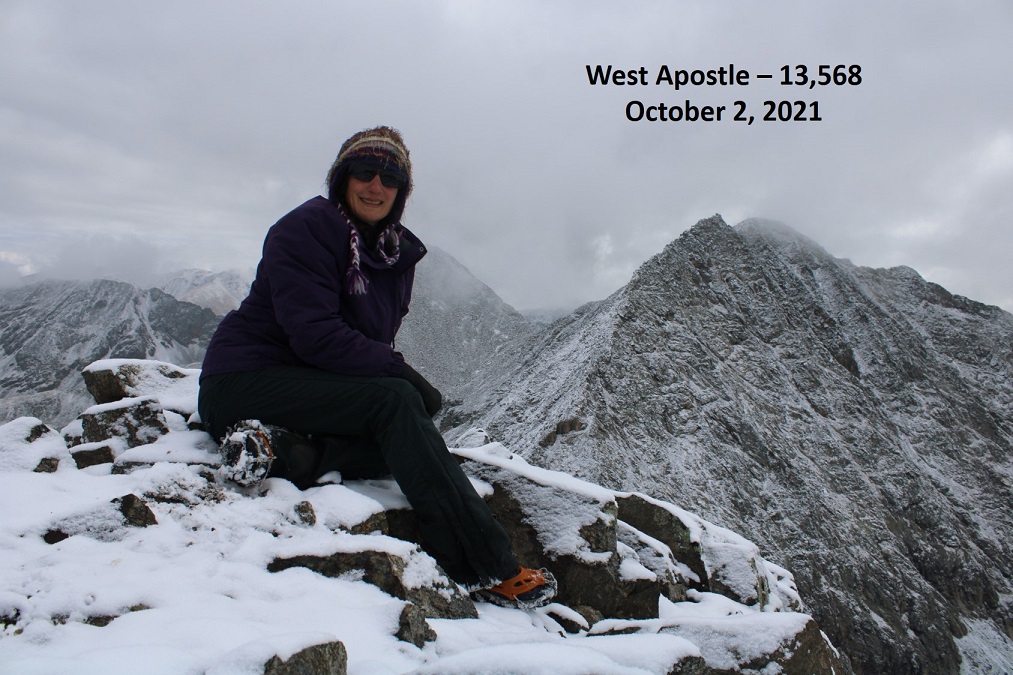
I summited West Apostle at 9:30am
West Apostle:
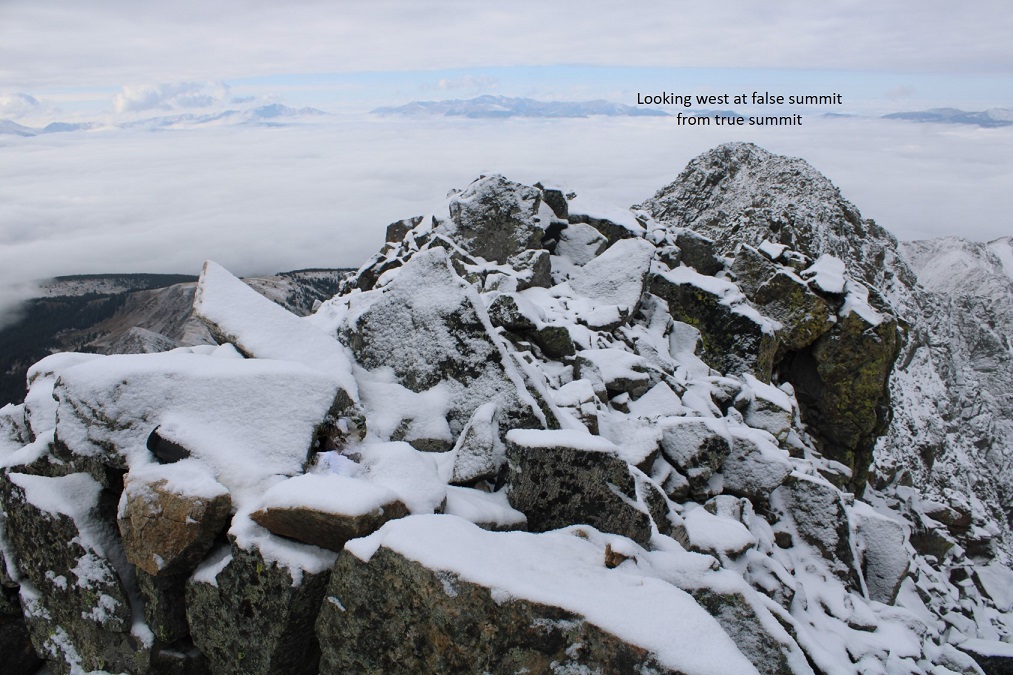
There was a summit register, but it was a pipe one missing its lid, so I replaced it with a jar. Here’s looking back at the false summit
I headed back the same way I summited, heading west, avoiding the area with exposure
Here’s what that looks like after dipping down
Back on the ridge, I followed it to the saddle.
The cairn was helpful in finding the correct exit from the ridge in all this snow.
I made my way back down towards the gully, staying as much to the west as possible, avoiding the gully direct and sticking to the rocky area.
I then re-entered the basin, and headed west towards Lake Ann
Back at Lake Ann, it was easy to pick up the class 1 trail and follow it back to the trailhead.
I made it back to my truck at 12:30pm, making this a 12.04 mile hike with 3575’ of elevation gain in 7 hours.
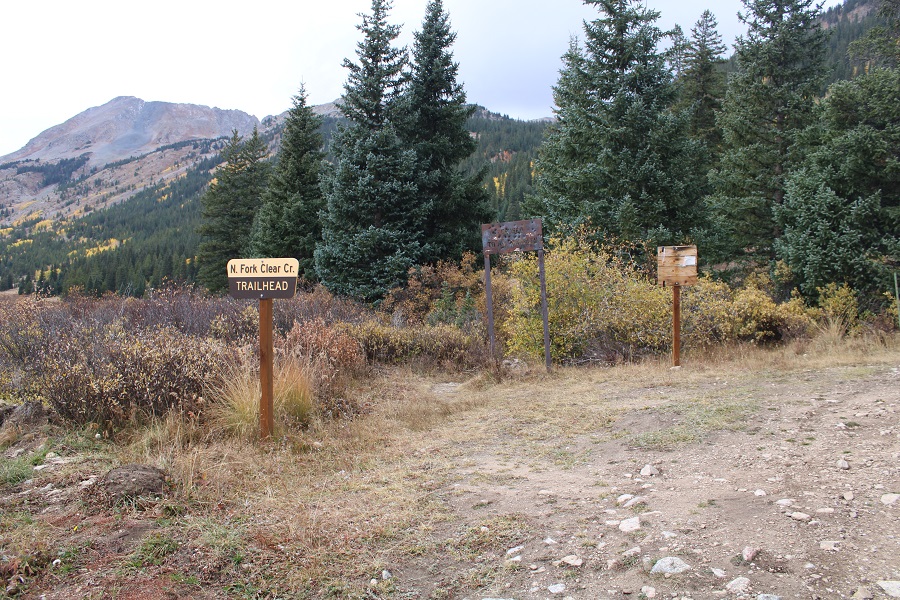
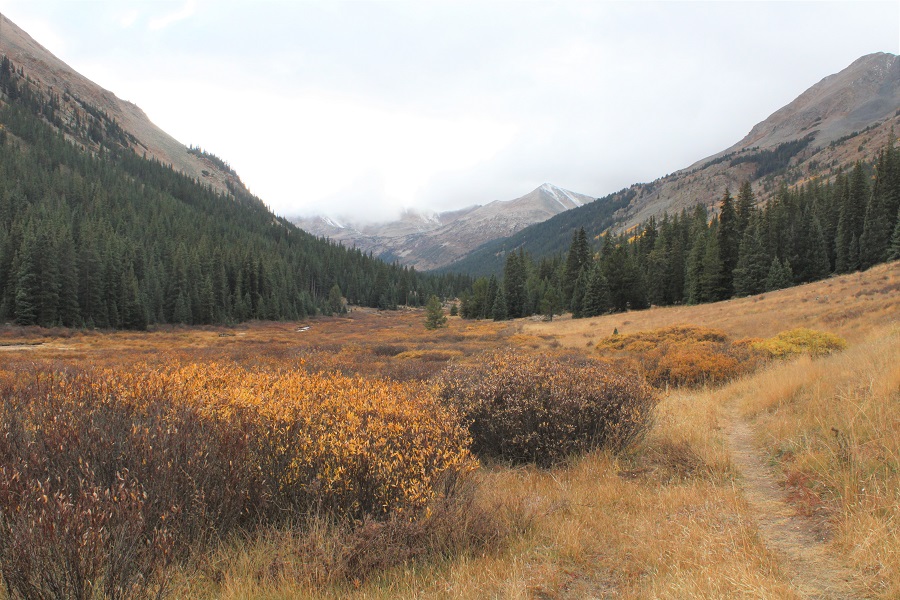
Snow had been forecasted for today, but not until later in the afternoon. I made it to the North Fork Creek Trailhead on an easy 4WD road, and it was foggy out. I was hoping the fog would lift as the sun came up, but it ended up snowing off and on all day. Luckily there was no wind, so the snow was actually enjoyable (if annoying because I couldn’t see very far). I was on the trail at 5:30am.
I followed North Fork Creek Trail for 2.75 miles southwest to treeline at 11,250’, without gaining or losing much elevation. I never crossed the creek.
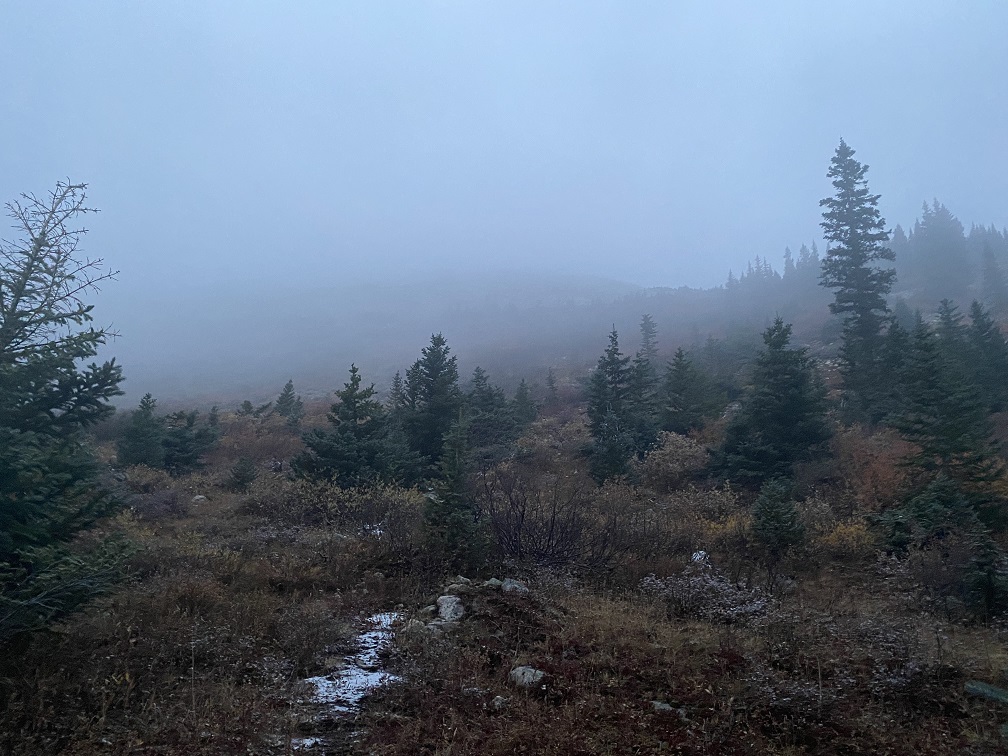
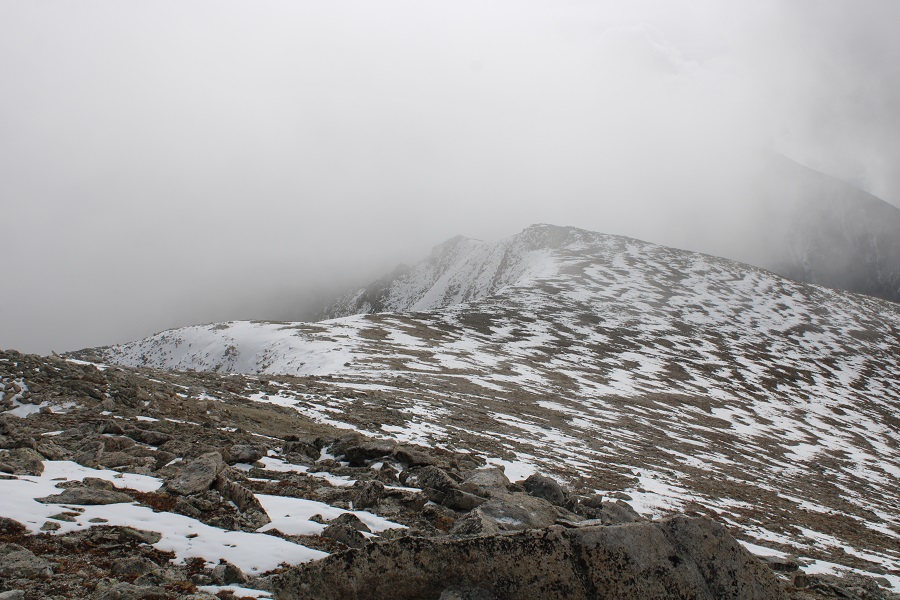
Here the trail stopped. I’d hoped by now the sun would have lifted the fog, but unfortunately, it started snowing instead, and visibility wasn’t great.
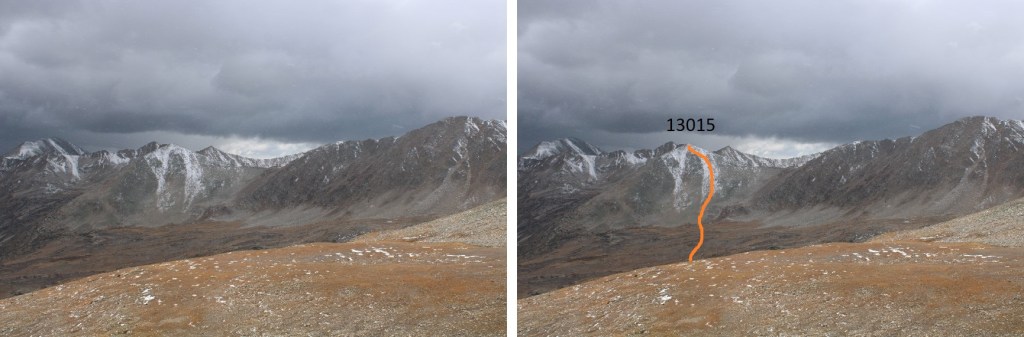
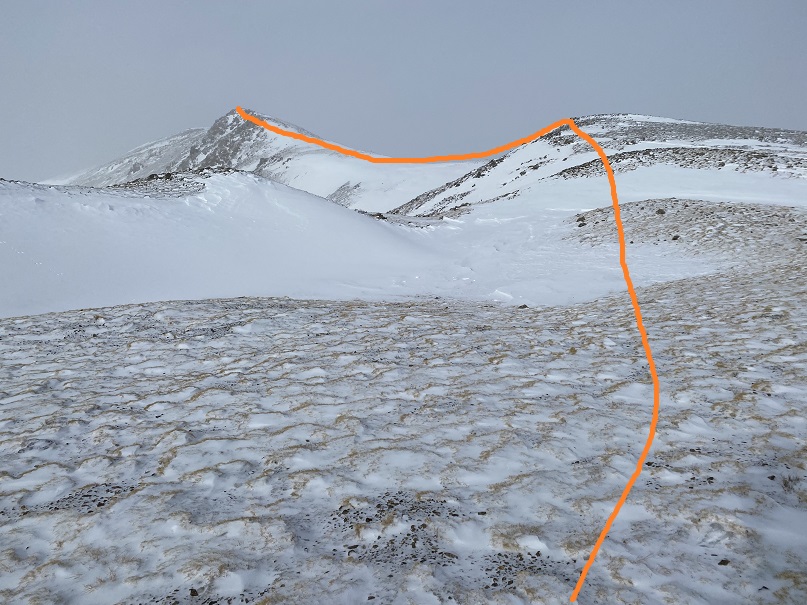
Here’s a view of the route I took to the ridge, from back on the trail later in the day
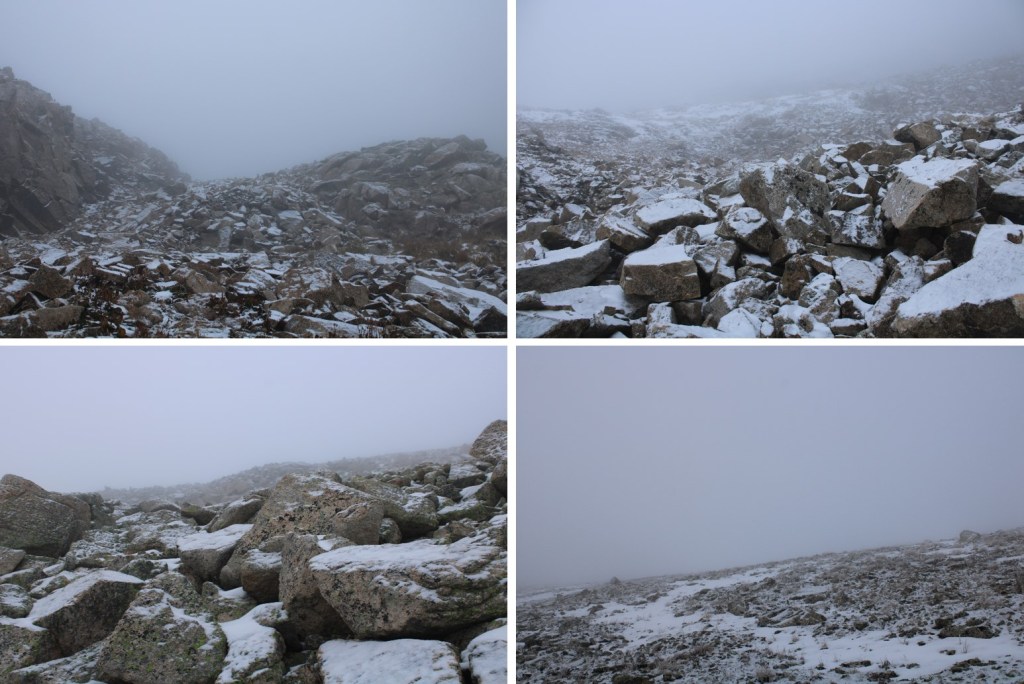
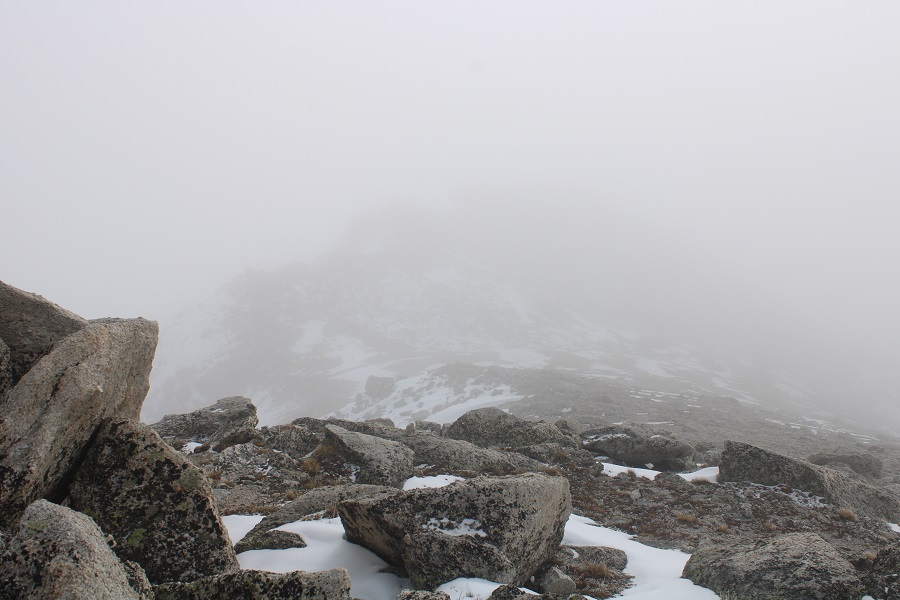
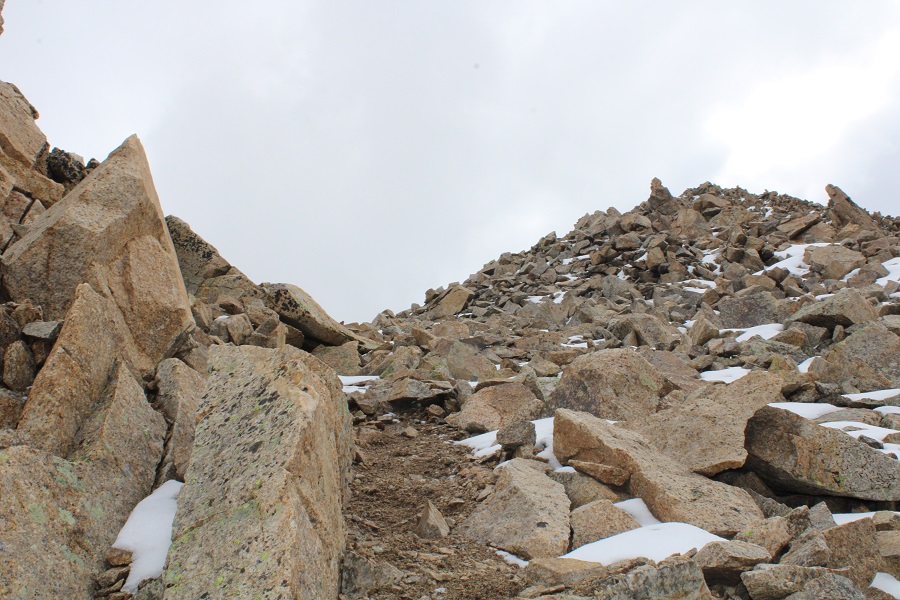
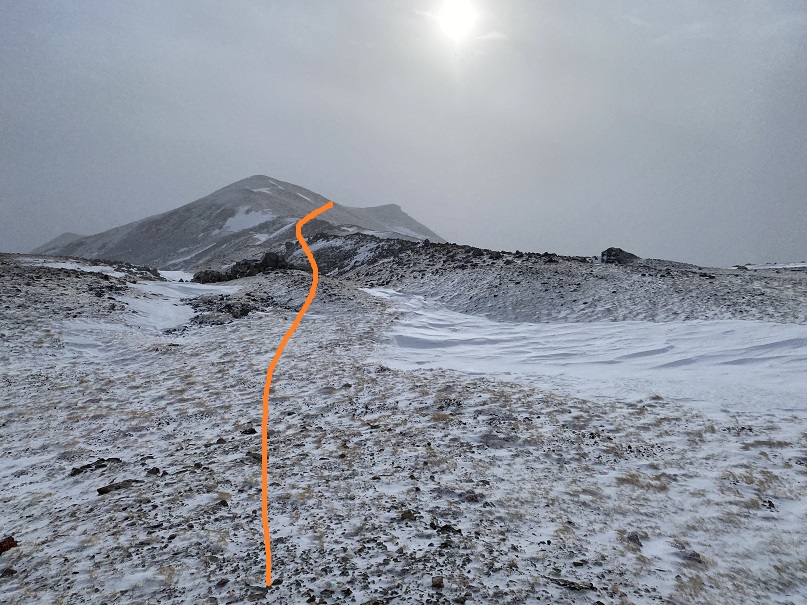
I followed the path of least resistance and headed southwest towards a rocky gully and the ridge (better pictures later). There was a fog, so I didn’t get great photos, but here are some pictures of what I could see:
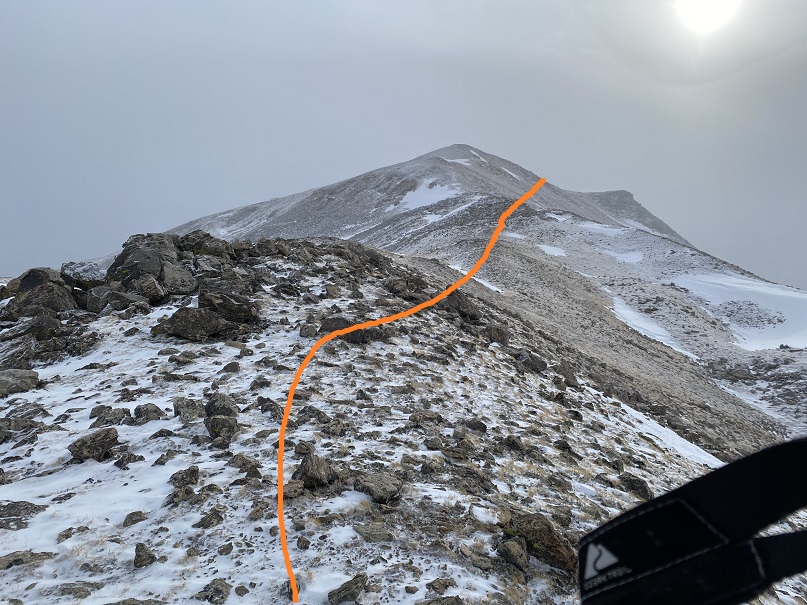
The rocky gully area brought me to the ridge between point 13050 and 13015. I couldn’t see far, which was frustrating, but I knew to continue following the ridge southwest. Luckily, I came back to this spot later I the day, so I have clear pictures of this part of the hike. The rocks here rolled. In the morning they were icy, so I had to be especially careful.
I followed the ridge towards 13050. This ridge was easy to follow, even when it was snowing. I stuck to the ridge proper, only dipping down to the left one time. This can all be kept at class 2.
Once at PT 13050 I turned right and headed northwest towards Jenkins Mountain, first losing about 230’ of elevation.
This was another ridge hike, where I briefly dipped down to the left to avoid some rocks
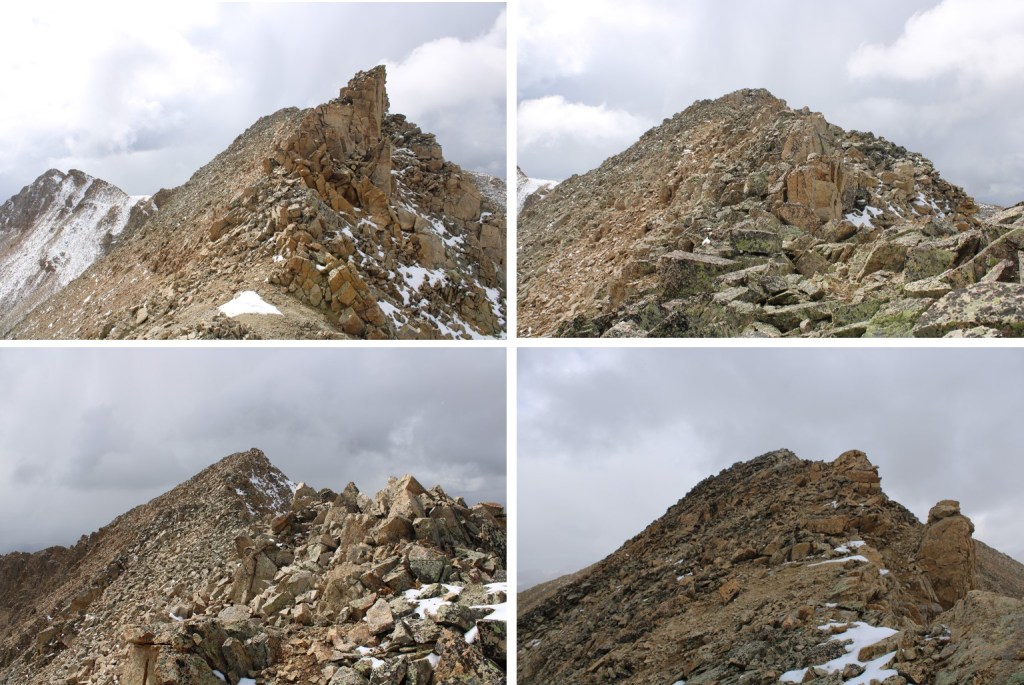
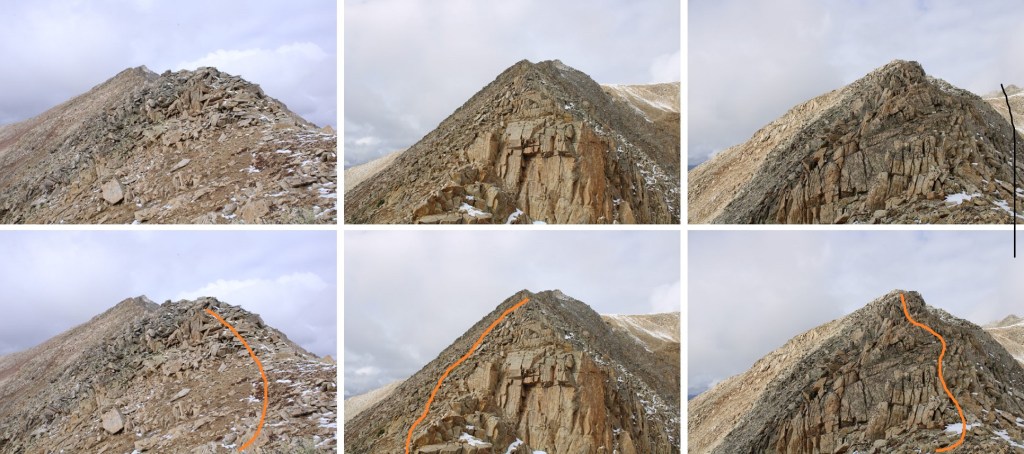
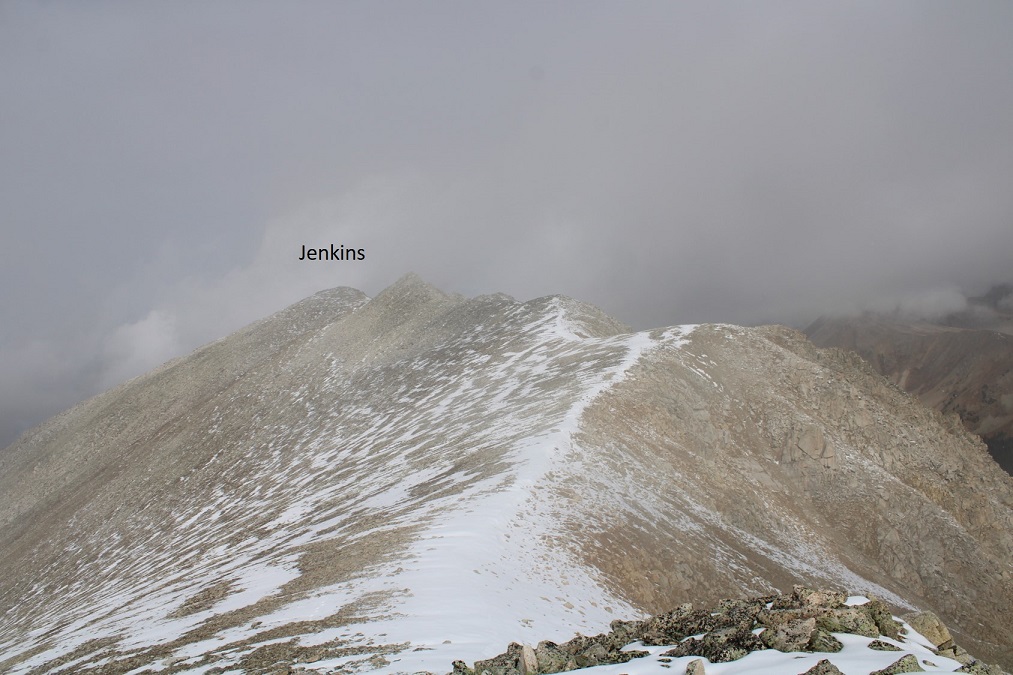
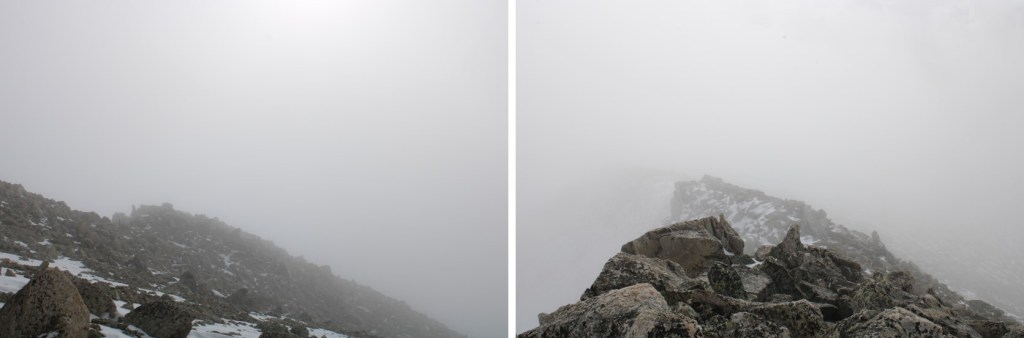
Here are some pictures of the ridge, up to the first “false summit”. If you can’t stay on the ridge, dip down to the left.
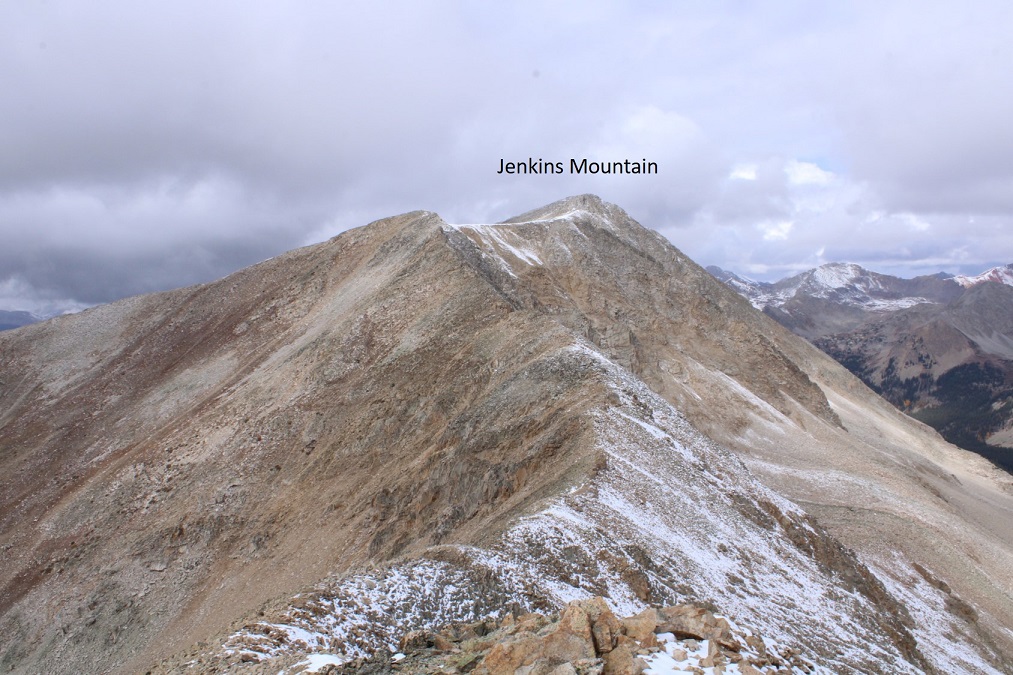
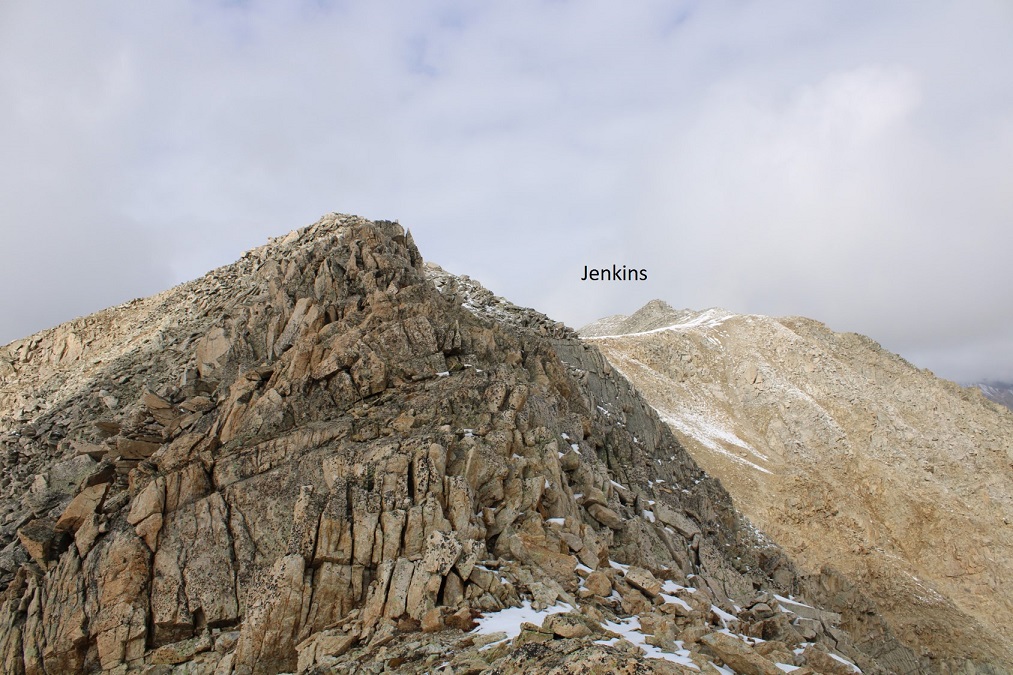
From the top of the false summit, I lost a little bit of elevation, but it was an easy ridge hike to the true summit of Jenkins Mountain. I’m sure this would be a piece of cake on a clear day. Today however, the ridges were frustrating because I didn’t have visuals of how far they ‘went’
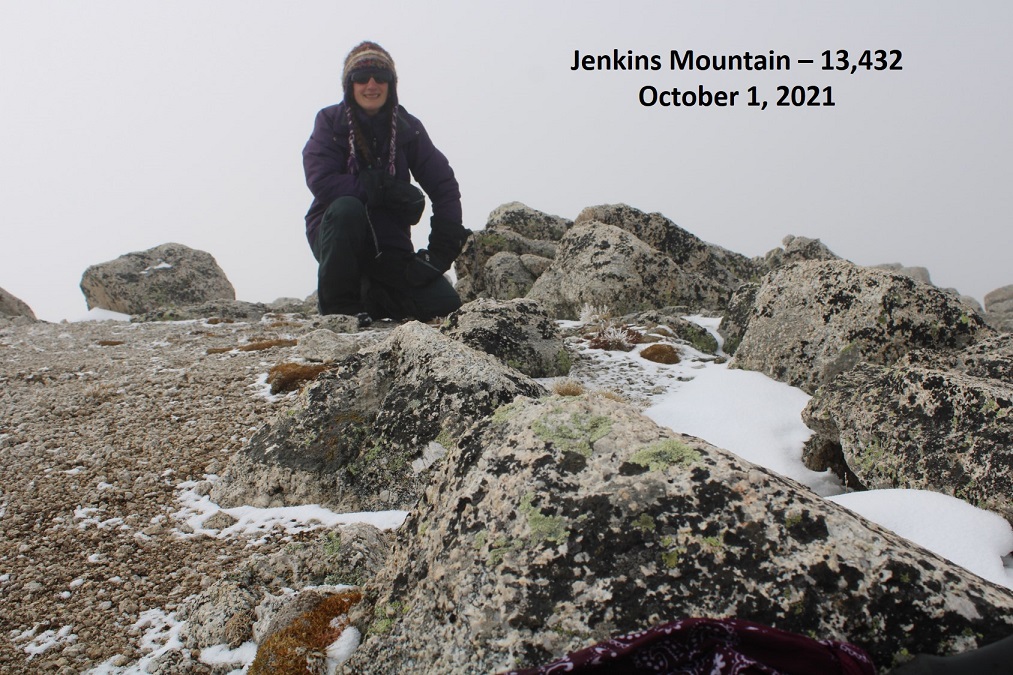
I summited Jenkins Mountain at 10am
Jenkins Mountain:
I was happy to see it looked like the weather was starting to improve. There was a summit register. I turned and headed back towards PT 13050.
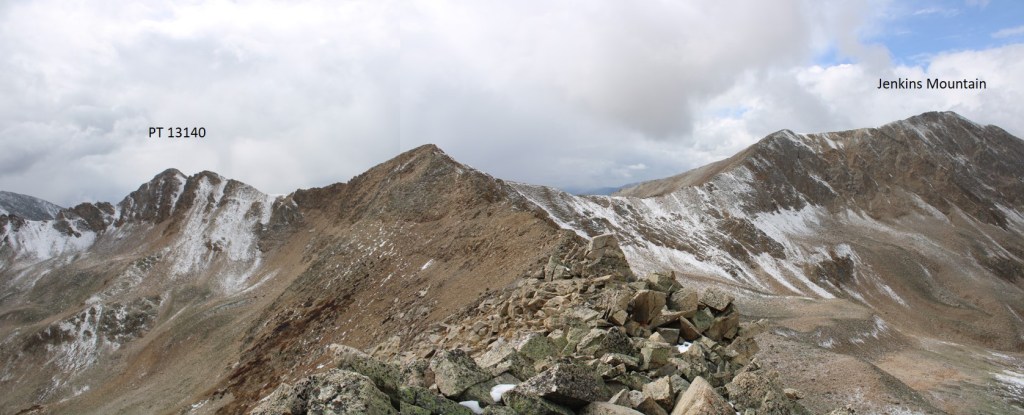
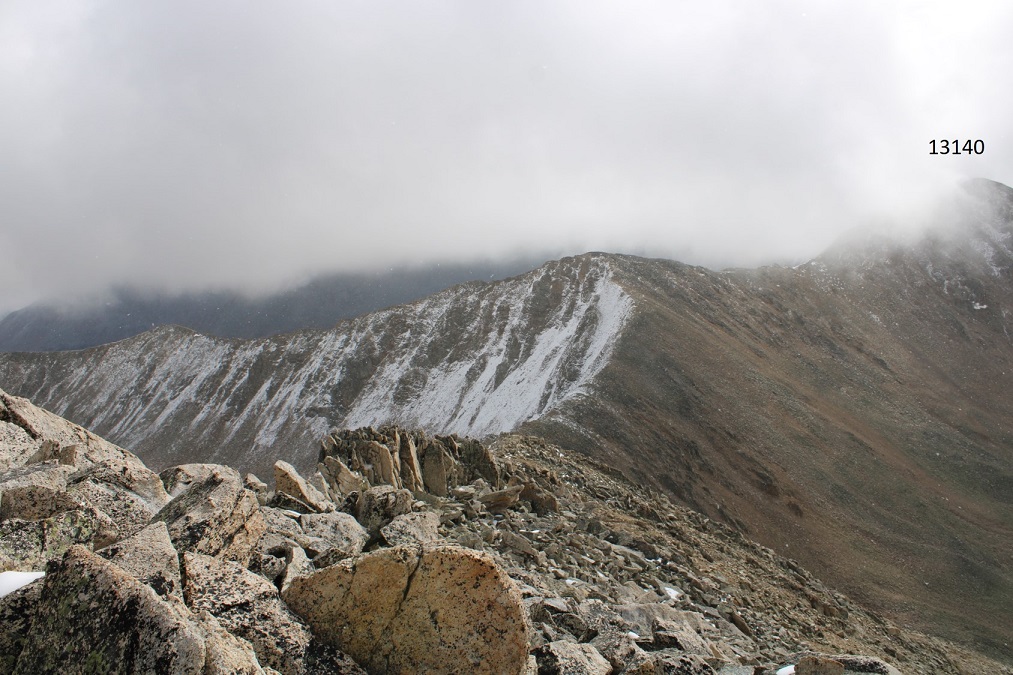
Halfway down the ridge I could see PT 13050, as well as PT 13140
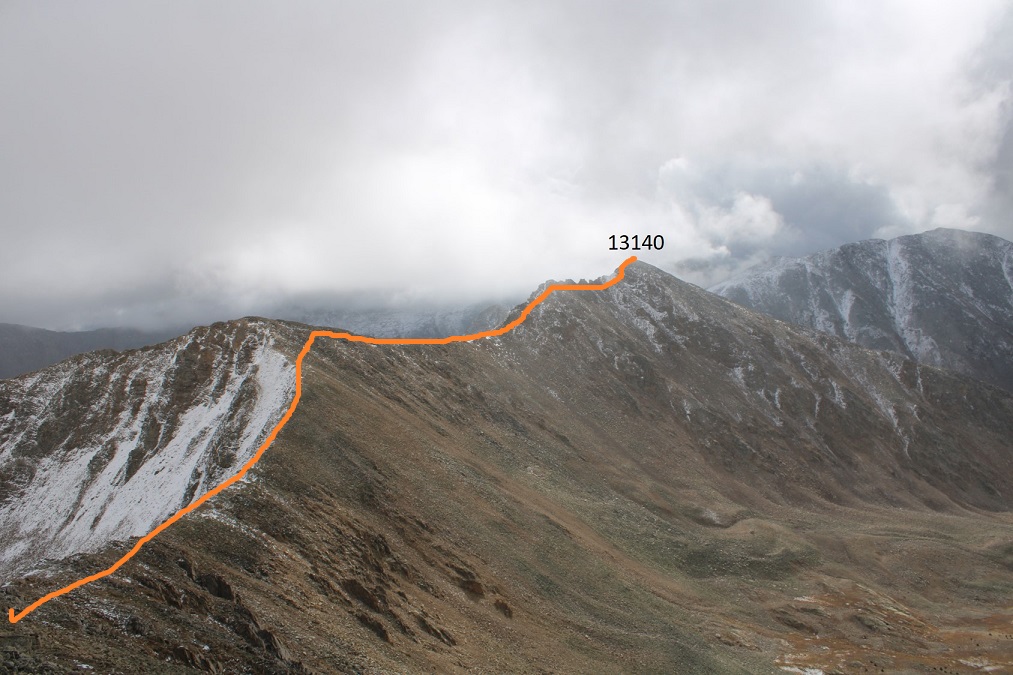
I didn’t completely re-summit PT 13050. Here’s an overview of the route I took to PT 13140
And some step-by-step pictures
I could stay on top of the ridge for most of the ridge; it wasn’t until the end I needed to dip right.
After the false summit I needed to dip down and lose about 75’ of elevation
I regained the ridge
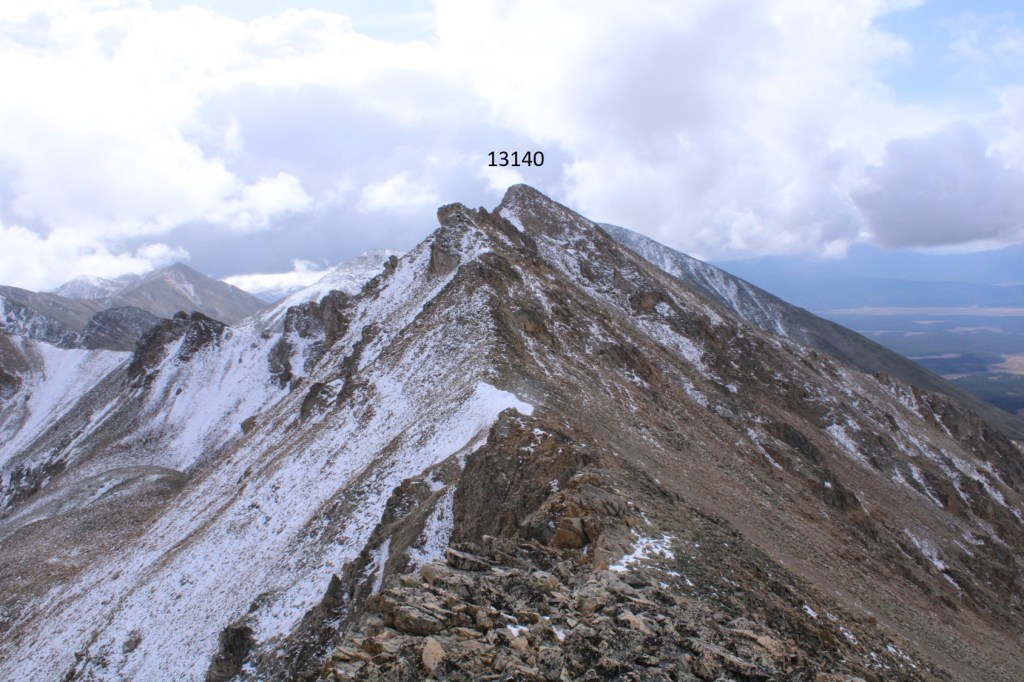
And this is how I summited PT 13140. I’m sure there was some sort of a trail here, but it was currently covered in snow. The last few feet are ‘choose your own adventure’, all class 2.
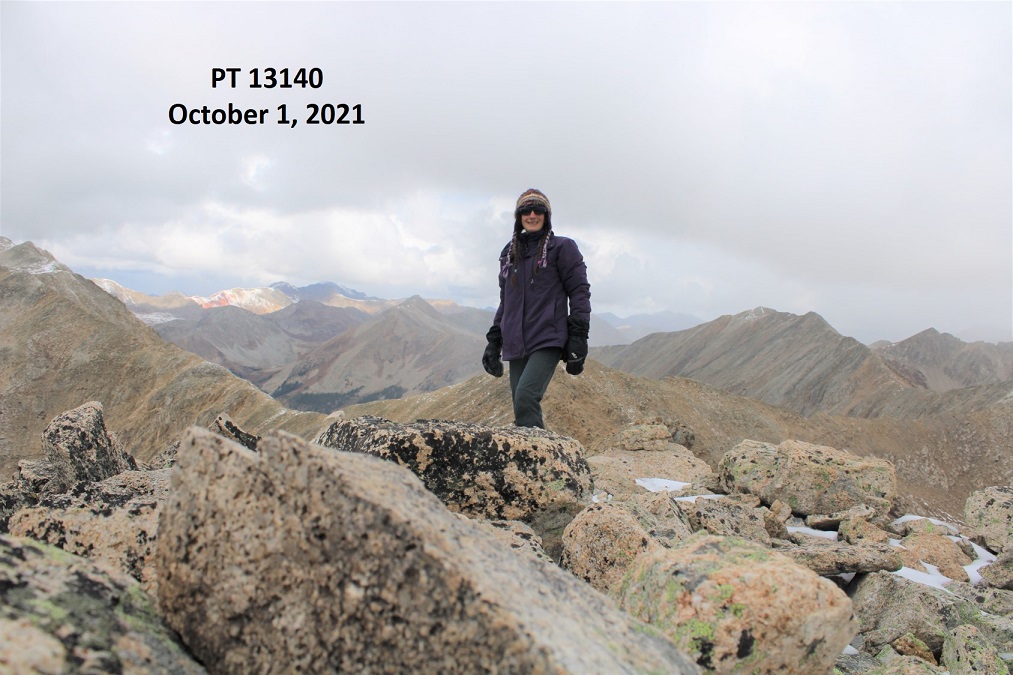
I summited PT 13140 at 11:30am
PT 13140:
From the summit, here’s looking back at the trek from Jenkins, as well as the next few points for the day
For reference, this is how I gained the ridge to the saddle between PT 13050 and 13015. It’s kind of a ridge itself.
And another view, from PT 13140, looking back at how I exited the basin and gained the ridge. I headed back to PT 13050.
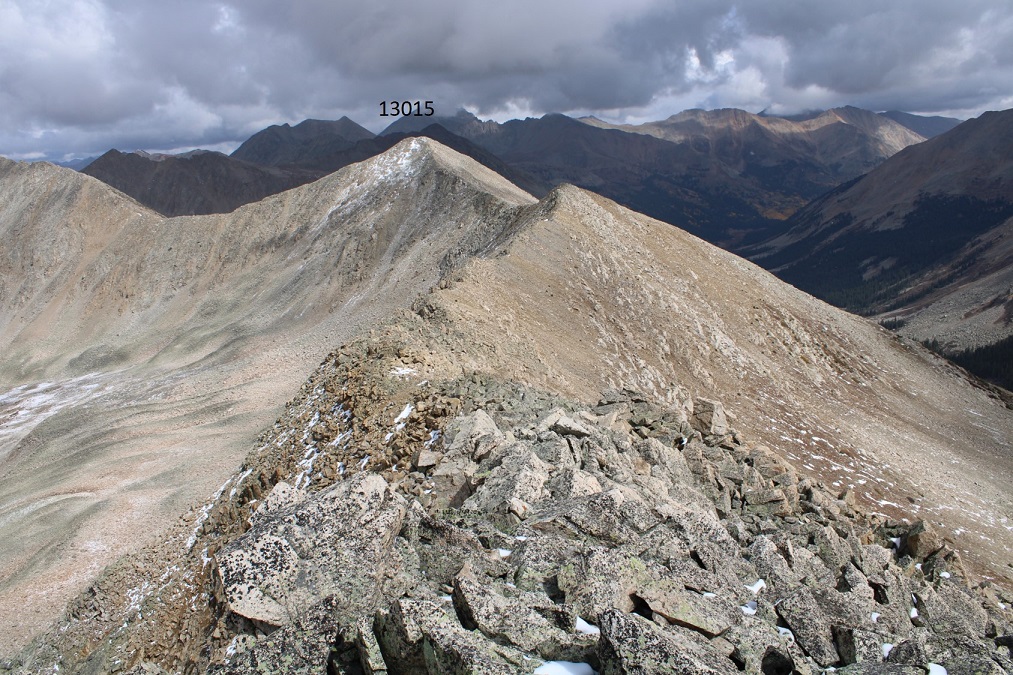
Here’s looking northeast at PT 13015 from 13050.
This was a class 2 hike all the way to PT 13015
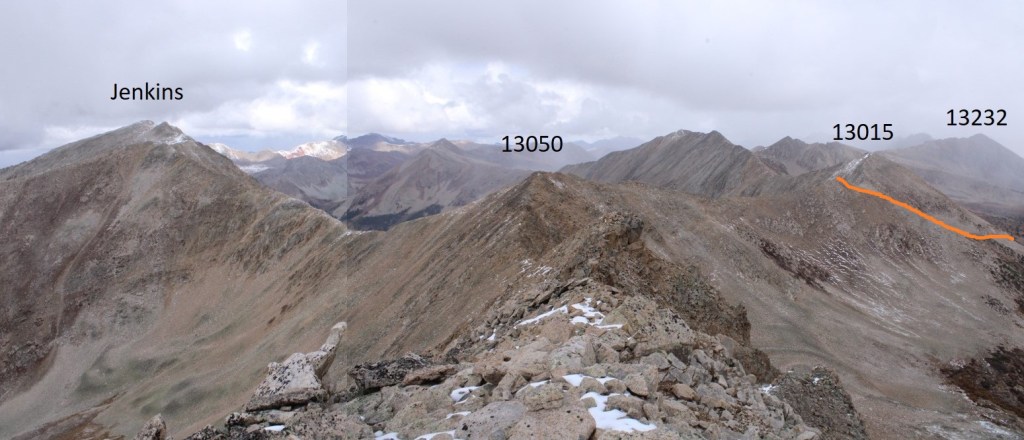
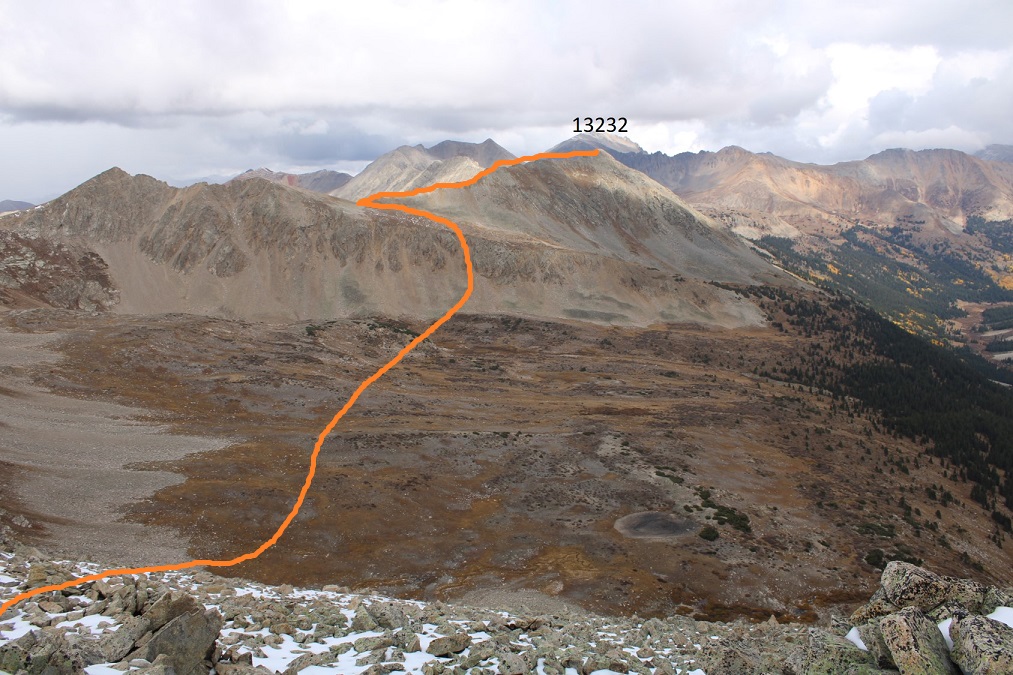
From the summit of PT 13015 I could see my next peak: Pt 13232.
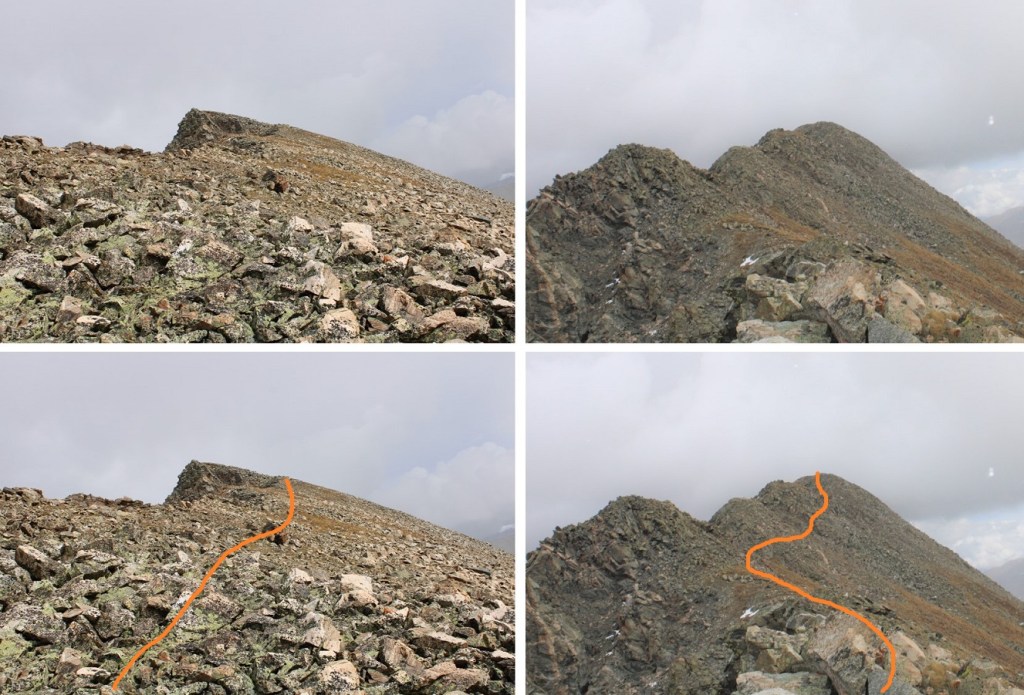
This is the route I took to get there:
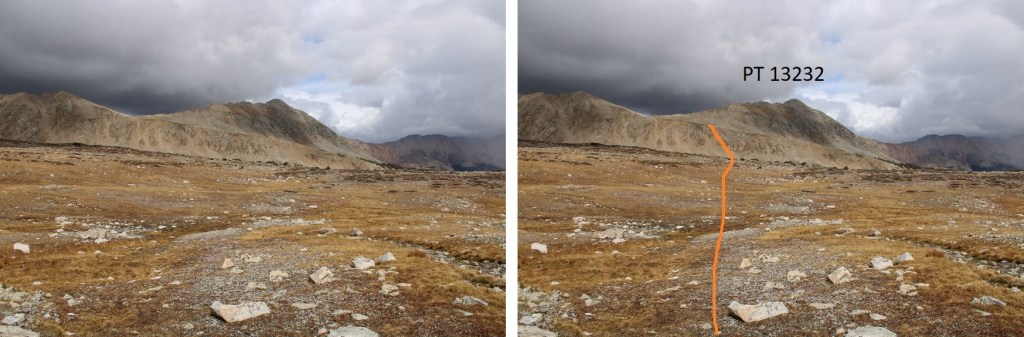
This route had me turning and following the ridge for a short distance northwest, descending a scree, rock, and snow filled gully, crossing the basin, finding another gully and ascending it to a slanting plateau/ramp, taking the plateau to the ridge, and then following the ride to the summit. Here are some step-by-step pictures:
I lost 850’ of elevation, heading int the basin
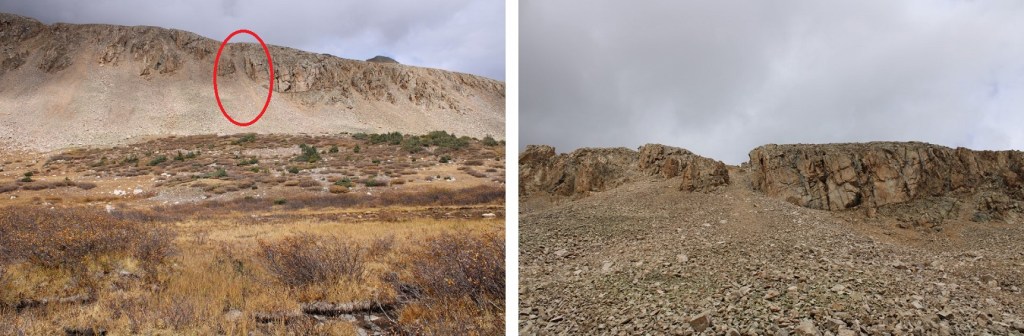
I then headed northeast and crossed the basin, heading towards an access gully (alternately, you can lose more elevation, skirt the then re-ascend the ramp, but I wanted a more direct route.
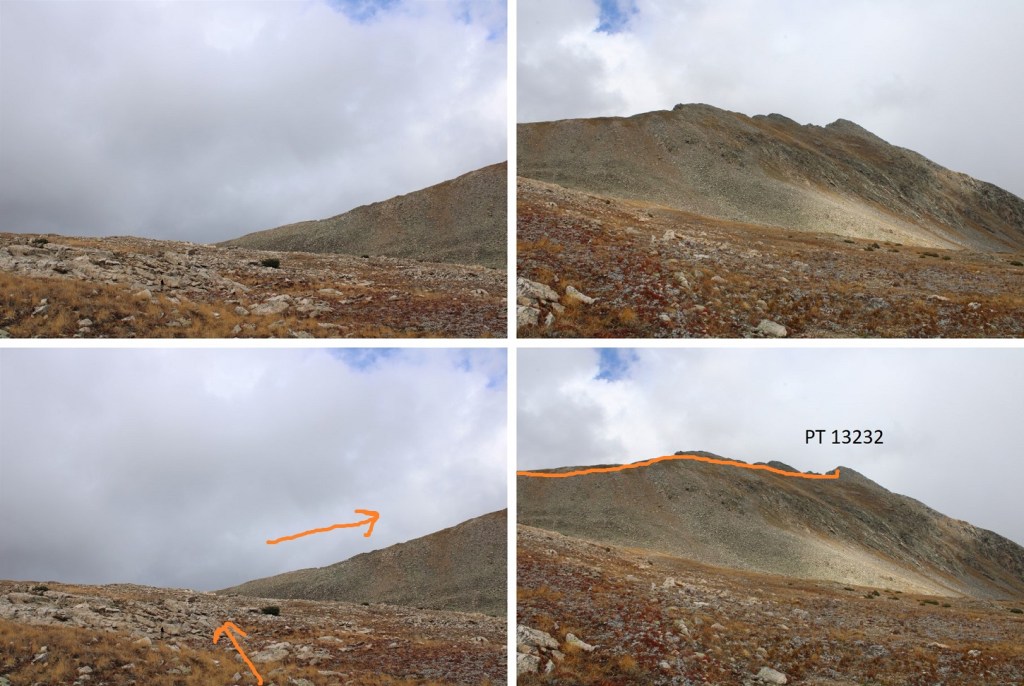
Here’s a closer look at that gully. It was as 2+ gully, but wasn’t technical at all.
At the top of the gully I turned left and headed towards the saddle, then took the ridge to the summit (all class 2)
Here’s looking back at the way I took down and across the basin from 13015
The ridge was rocky, but easy to follow. I tried to stay where the rocks met the tundra.
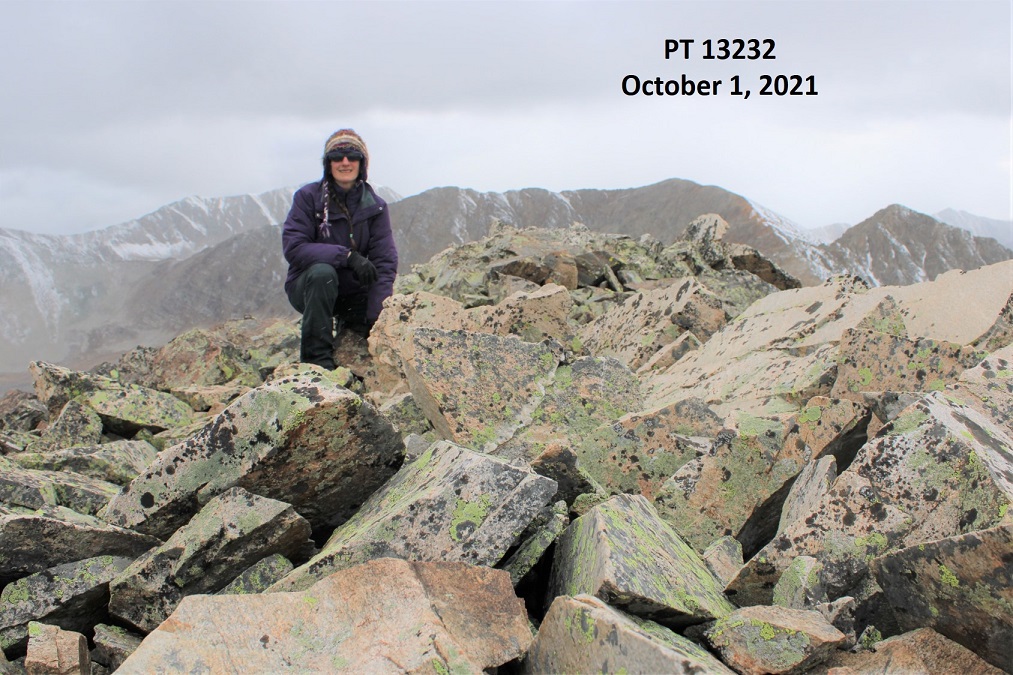
I summited PT 13232 at 2:45pm. It was now snowing, but it was a nice, gentle snow.
PT 13232:
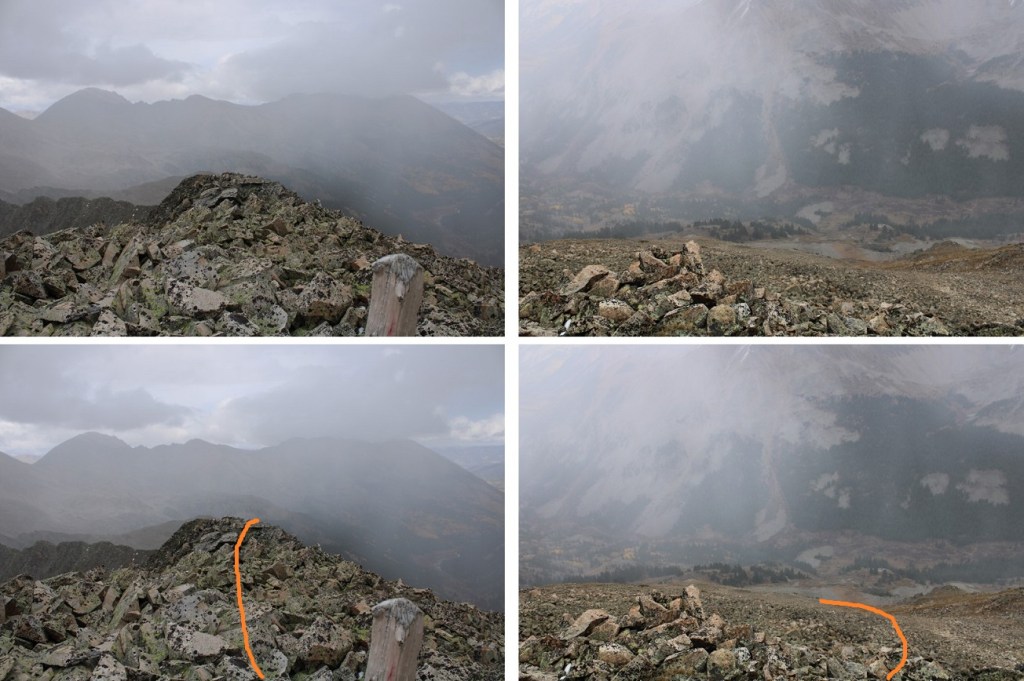
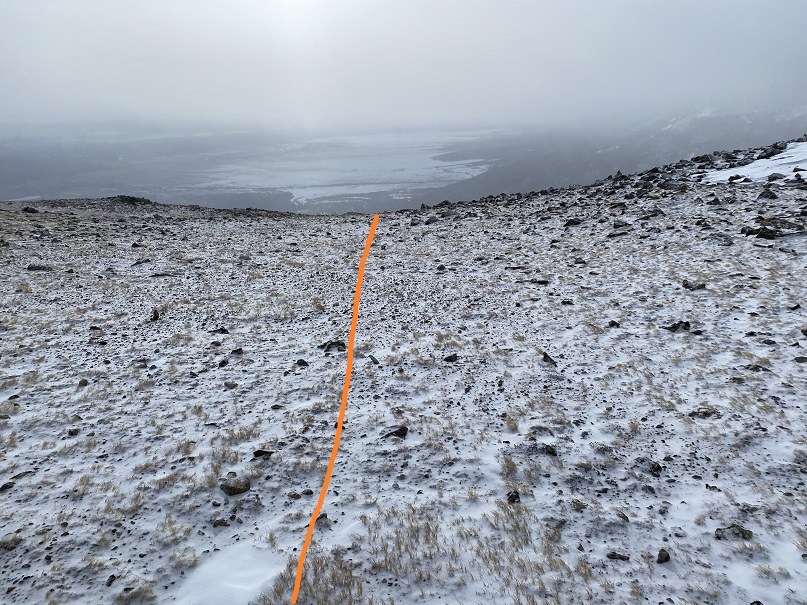
I could see the trailhead from the summit to the northeast: now I just needed to get there. I descended the ridge to the northeast. Not far, just a few yards, found a scree filled gully, and took that to tundra. I then aimed northeast towards North Fork Lake Creek, until I found the trail and followed it back to the trailhead.
Sorry for the foggy pictures here: I was in the clouds and it was snowing much of the day. The trailhead is circled in red
I descended to the north, and round a gully to take down heading southeast, and turned left at the tundra
I then headed northeast towards North Fork Lake Creek
For reference, here’s looking up the gully I took down from PT 13232
Once on the trail I followed it back to the trailhead.
I made it back to y truck at 4:30pm, making this a 13.75 mile hike with 5322’ of elevation gain I 11 hours.
The drive from North Dakota got easier as the miles went on. It started out with lots of snow, but by the time I made it to Custer State Park the snow had ceased. Once in the Black Hills I stopped at a Subway to get a sandwich, and a Starbucks to get my mug. I was surprised at how many establishments in South Dakota were closed. I’m hoping they were closed because it’s off season, and not due to Covid. I stopped at the Ranger Station to pay the entrance fee, and was surprised to find it was $20 (that seems kind of steep for a day visit).
I had wanted to ask if it was ok to sleep in my vehicle overnight, but there was no one at the Ranger Station. There was an information pamphlet, and I scoured it, looking for information on camping, or if I could stay overnight and boondock. It said curfew was 10pm-6am (strictly enforced) but other than that, no rules on sleeping in my truck. I paid the $20, which gave me entrance to the park for 1-7 days, and drove to the Sylvan Lake picnic area. I drove around looking for a spot, only to find the parking lot almost full. The dirt lot was inaccessible due to mud, and there seemed to be an awful lot of people walking around.
I finally found a spot I could back into, and realized why the lot was full: the local police were handing out food and supplies (laundry detergent) to local Lakota. I saw them with boxed up meals, lining up to receive them and eating them in their vehicles before driving off.
Sylvan Lake appeared frozen, and I was astonished to see a family, 2 parents with young kids, walking single-file over the ice. It’s currently spring and because it was so late in the season I was worried for their safety, but they weren’t the only ones doing this: I saw several more parties venture out onto the ice, and all left unscathed. They made me nervous.
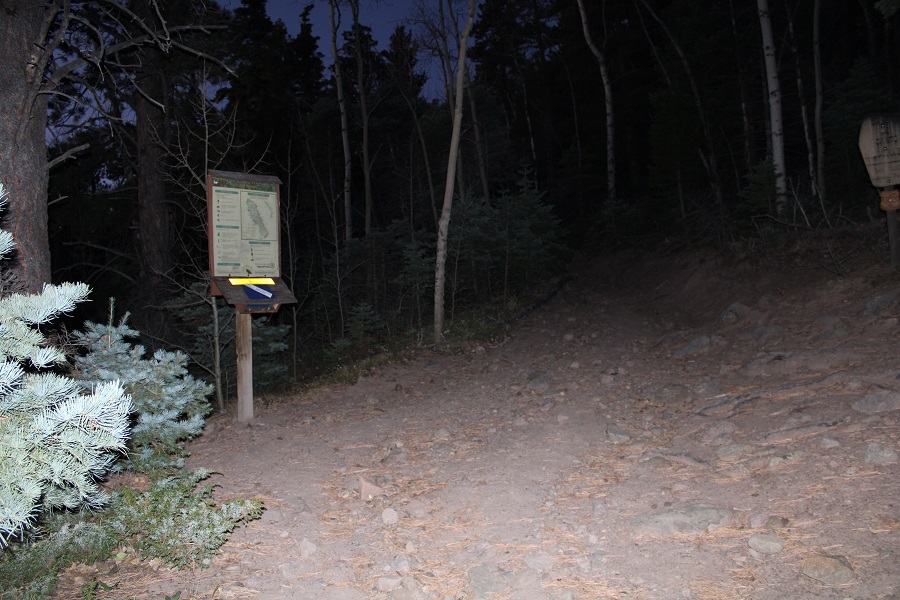
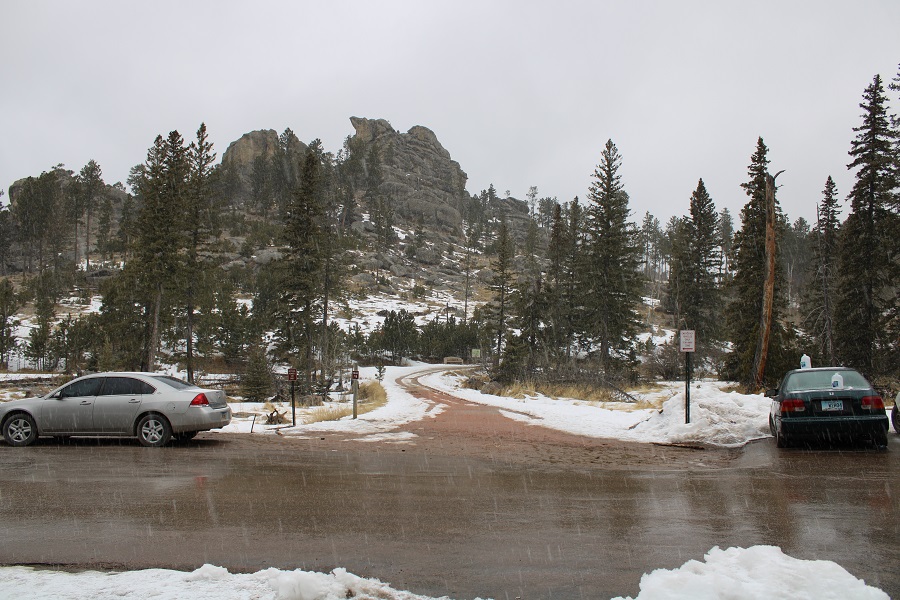
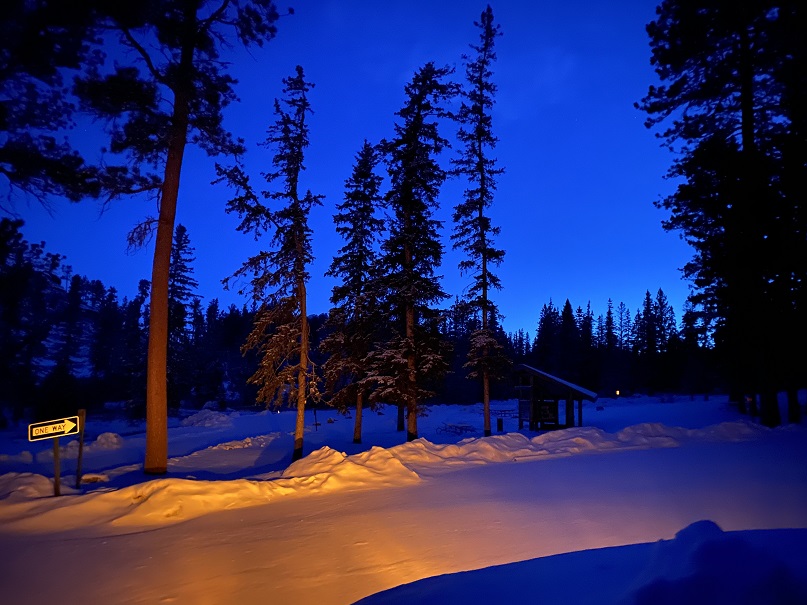
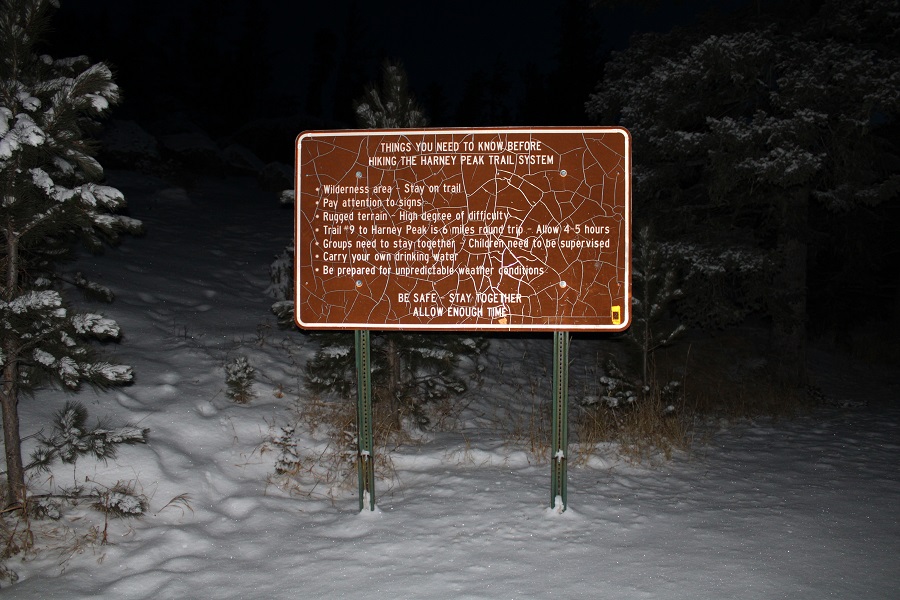
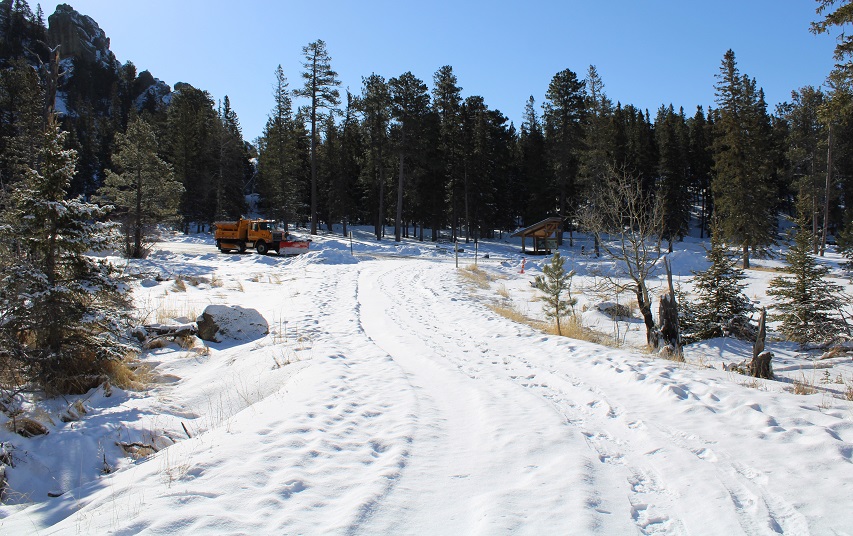
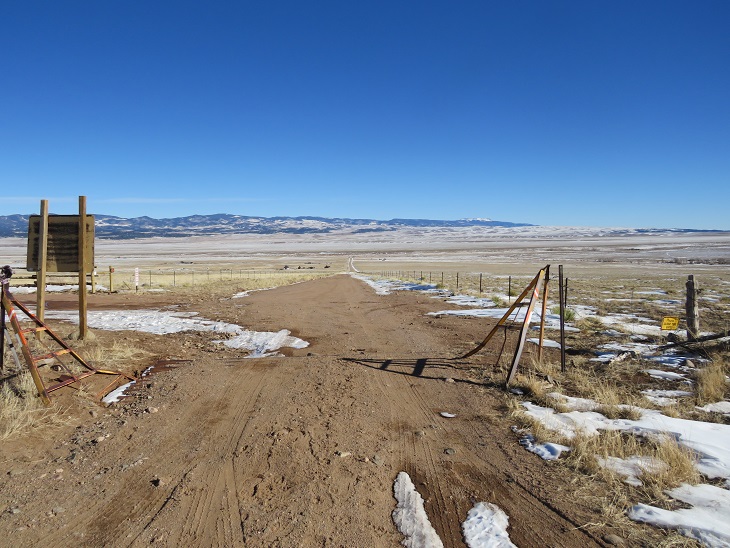
I sat in my truck and ate my sandwich and people watched as I jotted down the day’s notes in my journal. I got out and walked around to find the start of the trailhead, and it started to snow. Here’s a look at the trailhead entrance in the daylight
I went back to my truck and decided to read until it was time for bed.
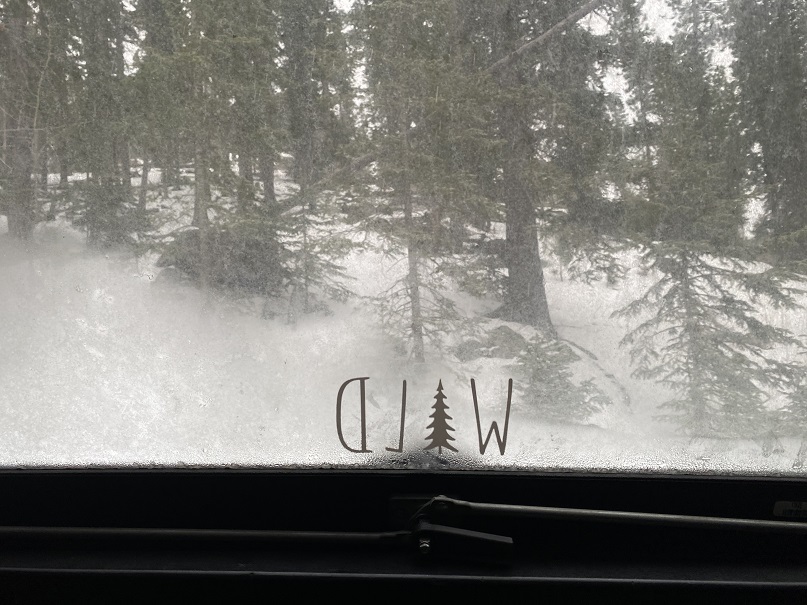
I watched the snow, and turned on my heater for a bit as I read
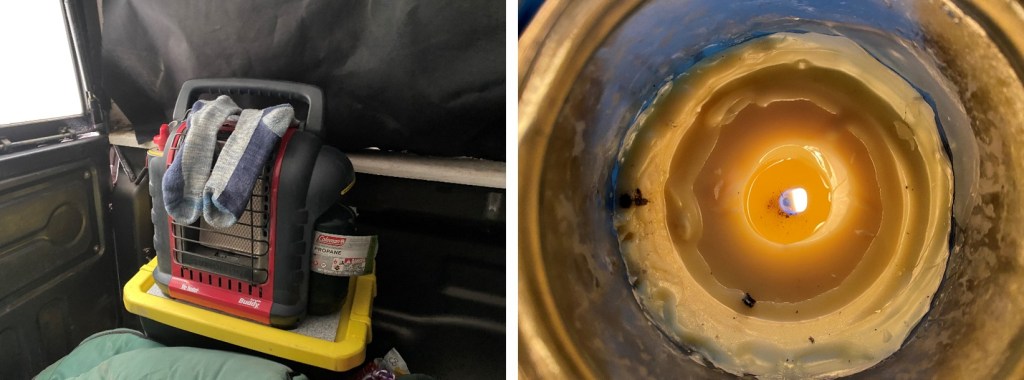
I have a heavy-duty indoor heater, and it usually works so well I only keep it on for a few minutes before turning it off. I also lit a candle because I like candles, and even learned a little something: When the heater burns up all the oxygen the candle will go out. Also, matches won’t light. This reminded me a bit of a canary in a coal mine, and I found it useful information. I turned off the heater and was able to re-light the candle about 5 minutes later, using a flashlight in the meantime. I used the turned off heater to dry my socks (I LOVE this heater!!!)
As the sun began to set the snow picked up and the parking lot emptied. I heard a couple of Canada geese fly in, and then honk to each other for a good half hour. I enjoyed some whiskey and thought to myself how cool it was to be inside of this metal box, deep in the Black Hills, as it was snowing. With the heater off I could now see my breath.
I went to bed prepared to face the frigid night, and also the hike in the morning: I was wearing my fleece lined pants, puffy and outer jacket, mountaineering gloves, balaclava, and wool hat. I snuggled under my 3 sleeping bags and crocheted blanket, and fell asleep.
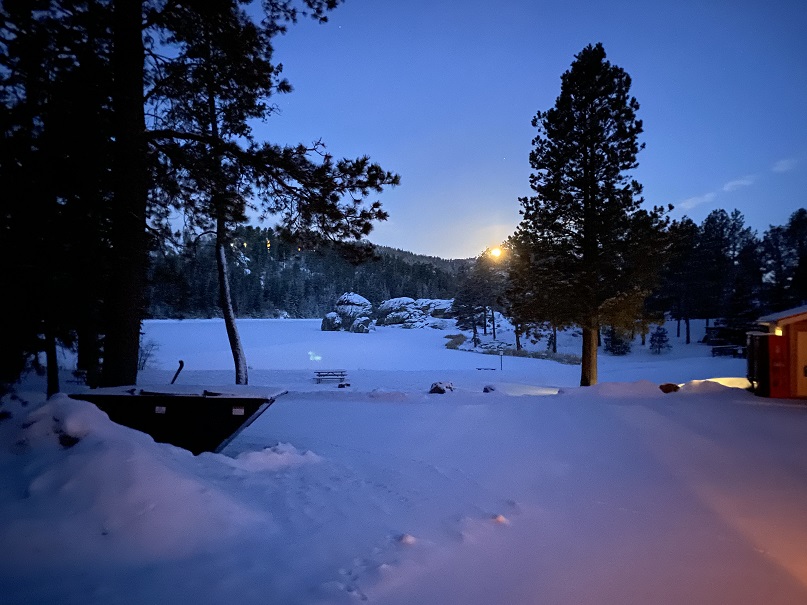
I didn’t wake up until my alarm went off at 5:30am. I peeked outside, and the moon was just setting over the ridge behind Sylvan Lake. Also, there was much more snow than I’d anticipated! I was glad I’d decided to park here overnight, because I’m not sure what the drive in would have been like this morning (but I could guess: not fun). Funny how a 20% chance of snow can turn into 4-6 inches.
I went to open my back window, and it wouldn’t budge. Hmm. I must have locked it last night? I turned the handle to unlock the window, and it still wouldn’t move. That’s when I realized the ice and snow had frozen the window shut! Oops! I just needed to make sure it was indeed unlocked, and was then a little more forceful. I pried open the window, and stepped out into several inches of fresh snow. I actually got in from the passengers’ side door, so as not to get snow on the front seat while I got ready. I turned on the truck, blasted the heater, and had my windshield wipers clear away the snow while I put on my hiking boots and ate a few dried mangoes for breakfast. The truck’s thermometer said it was 23 degrees outside. Not bad: I’d been warm all night.
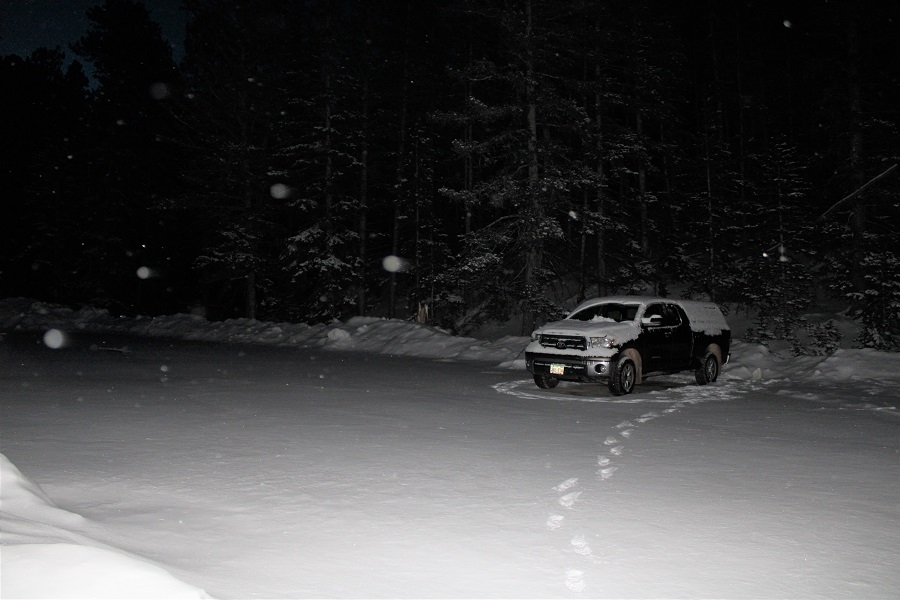
When I went to bed there were still dozens of vehicles in the lot, but now, my truck was the only one.
I was waiting for the sun to rise, but as soon as it was light enough for me to see without a flashlight I hit the trail, around 6am. But first, I used my scraper to clear off my truck, to make my exit easier later in the day.
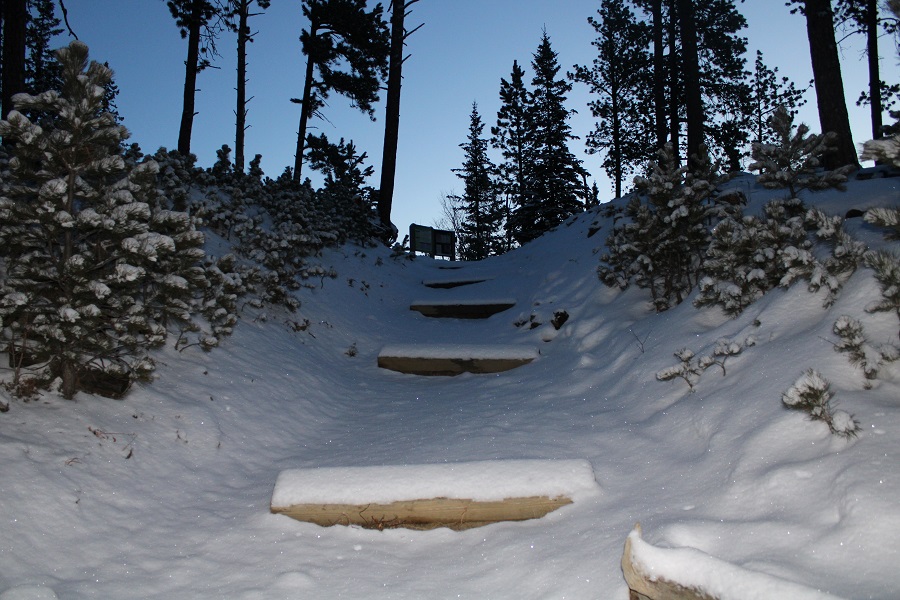
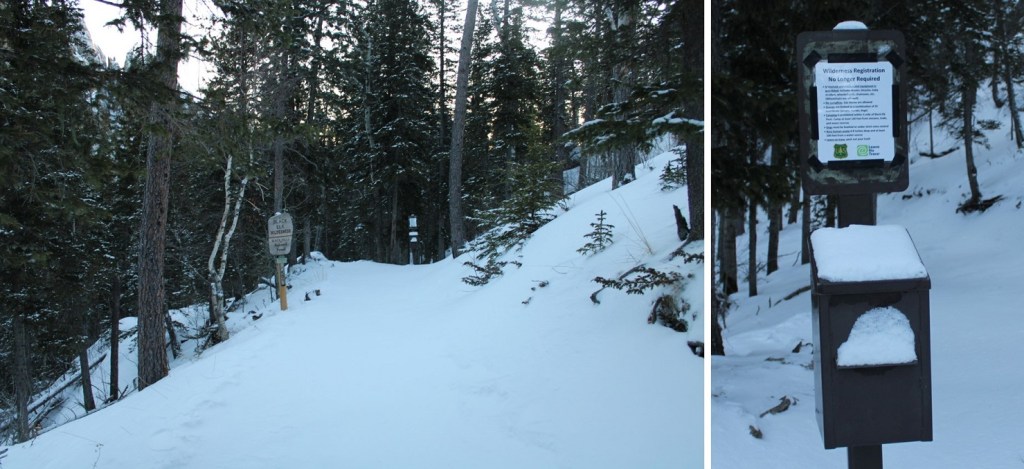
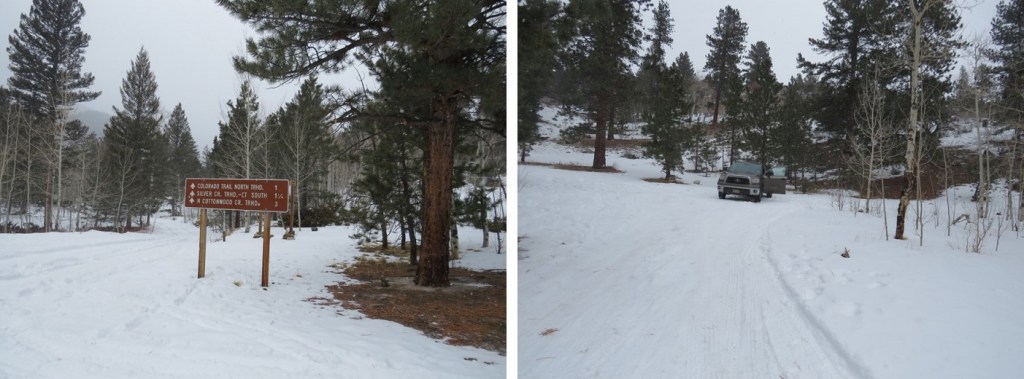
I took my snowshoes and ice axe just in case (they weren’t needed) and headed out to find the trailhead
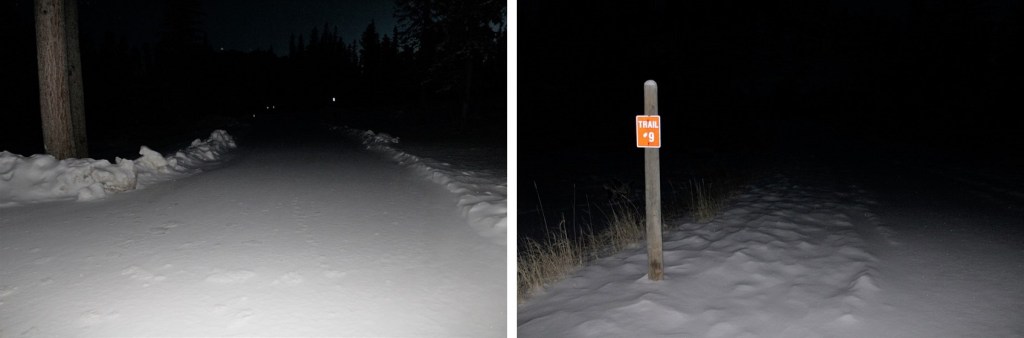
The trail to Elk Peak has several different names: Elk Peak Trail, Harney Trail, and Trail #9. They all go to the summit.
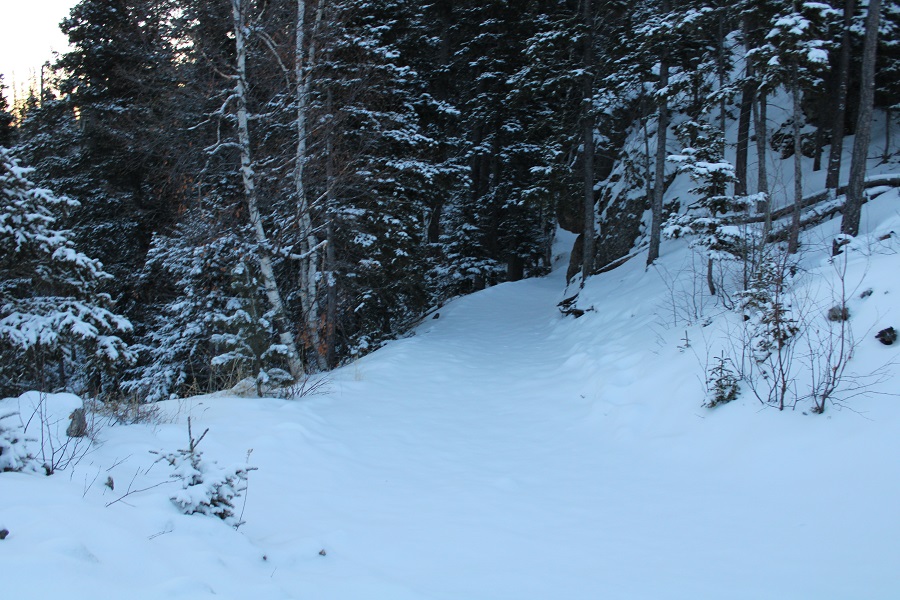
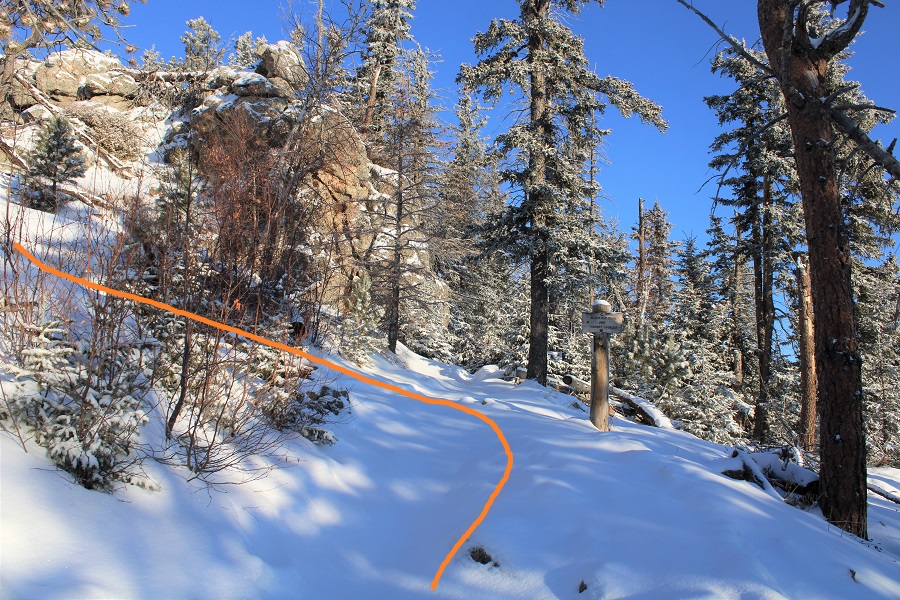
The trail was covered in snow, so I wasn’t sure if it was a trail or a 4WD road, but one thing was for sure: it was easy to follow, even with snow.
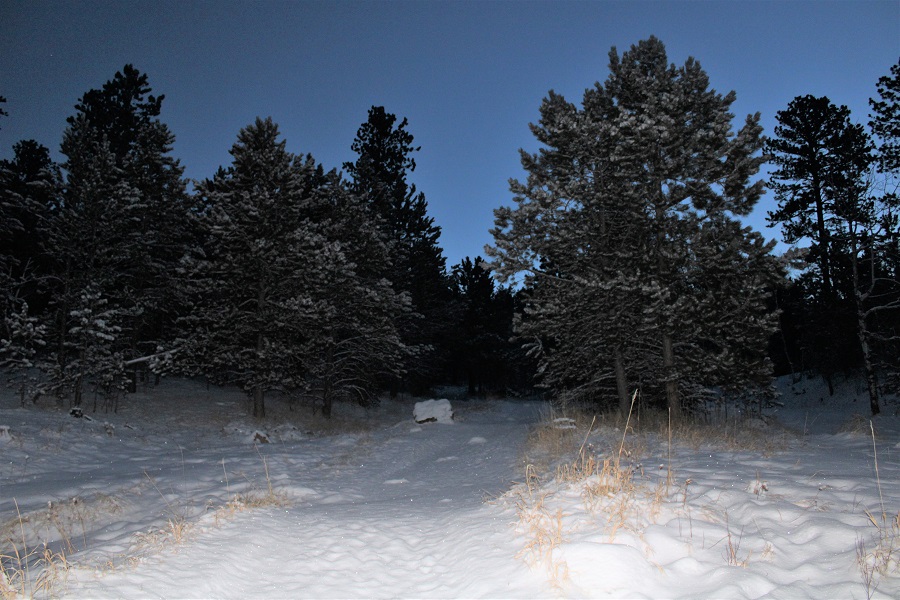
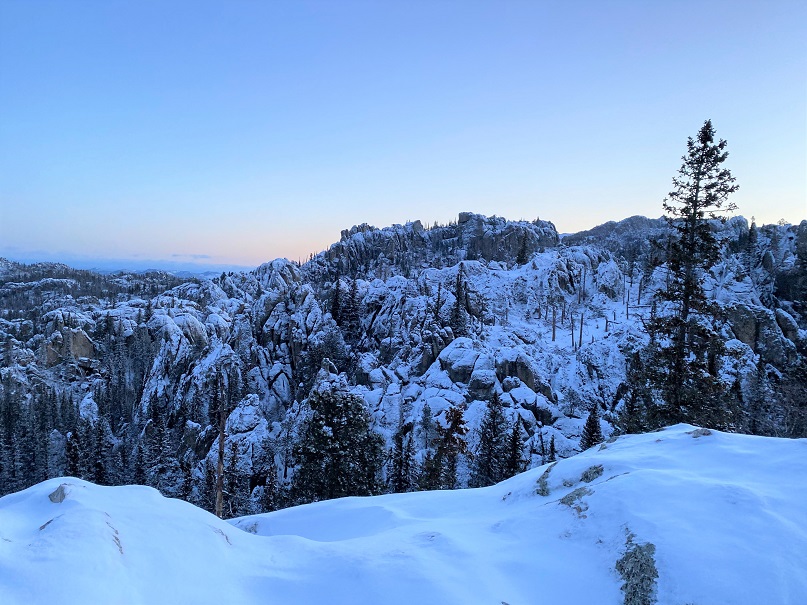
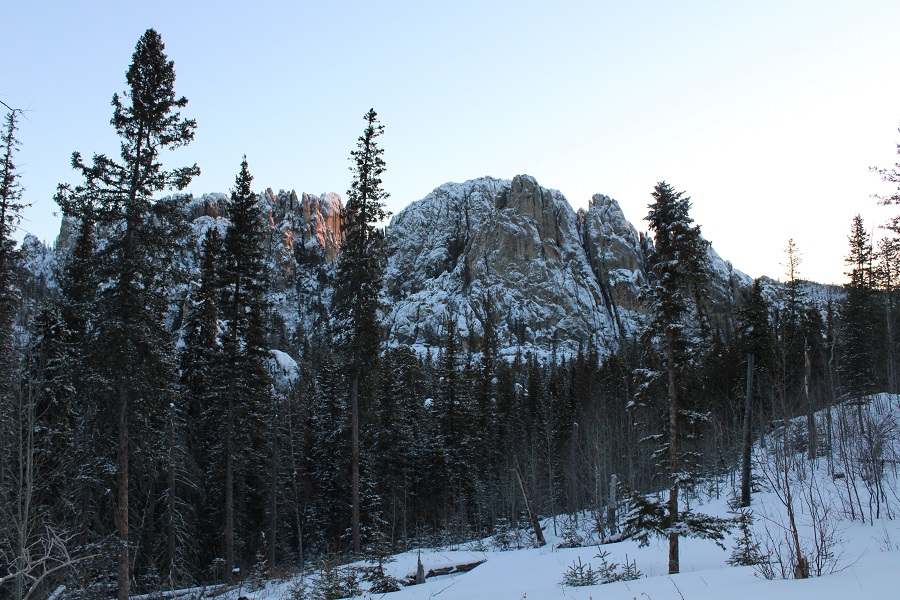
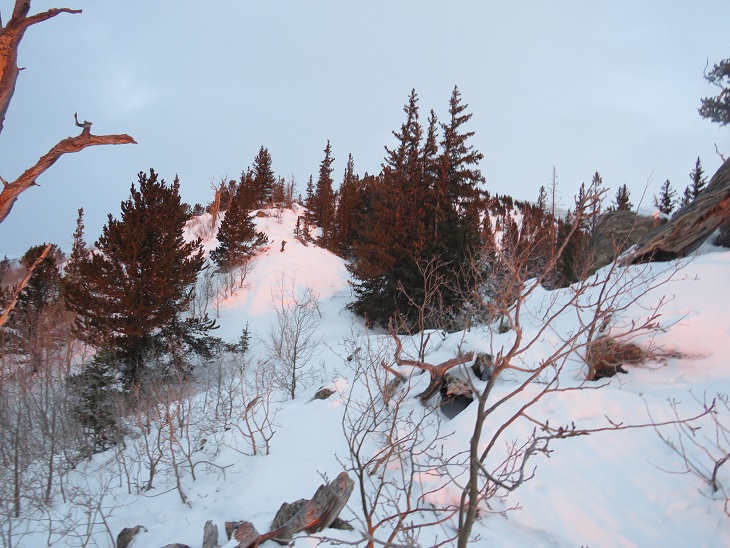
The views were beautiful as the sun began to rise
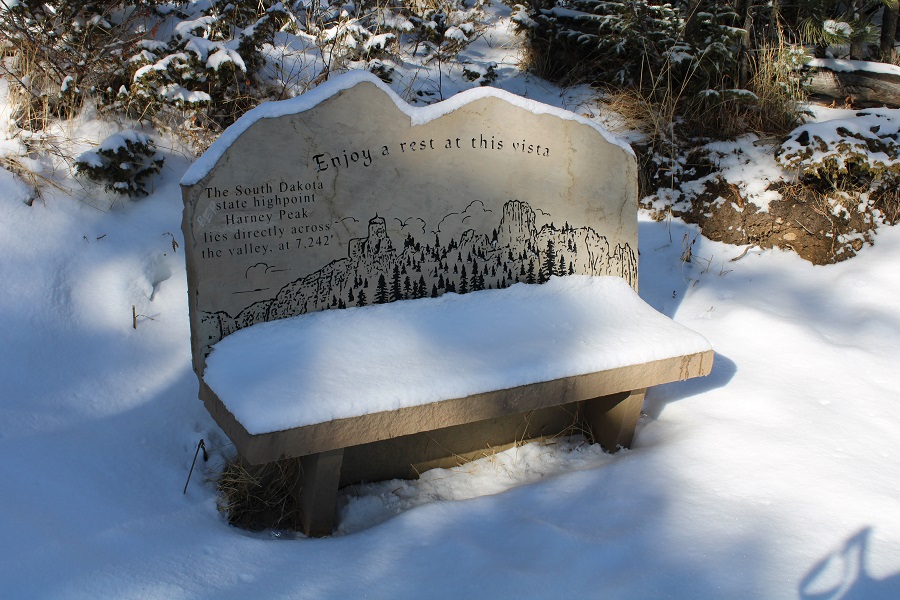
I continued following the class 1 trail, and came across a bench
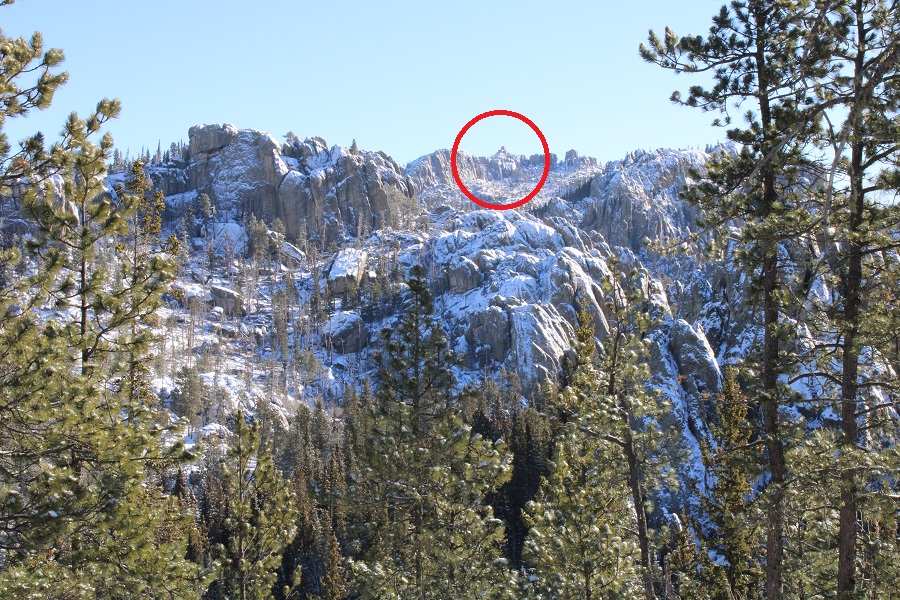
Directly across from the bench you can see the summit tower (Harney tower). This is the 1 mile mark of the hike.
I continued on, and started seeing Lakota tobacco ties/offerings on the trees. Tobacco ties are basically prayer ties. They are to be thought of as a physical manifestation of a prayer. Each color of cloth represents something. Within the Lakota culture, a white cloth is used for a prayer for healing, a red cloth is used for our ancestors and a yellow cloth is used for giving thanks. Blue and green cloth can also be used.
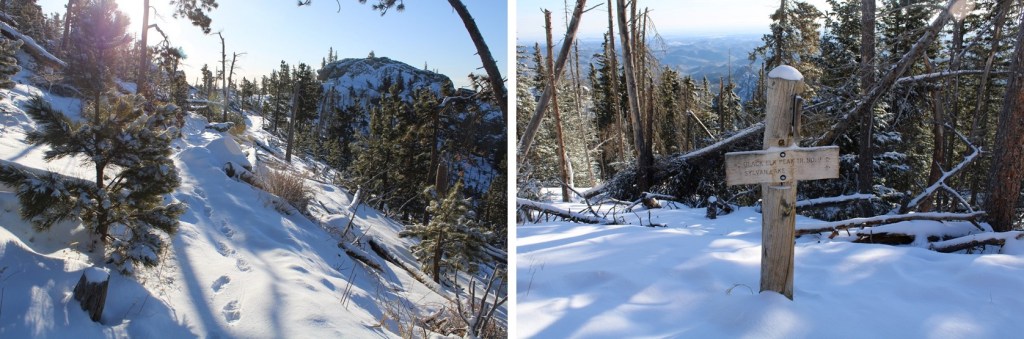
I continued on, breaking trail
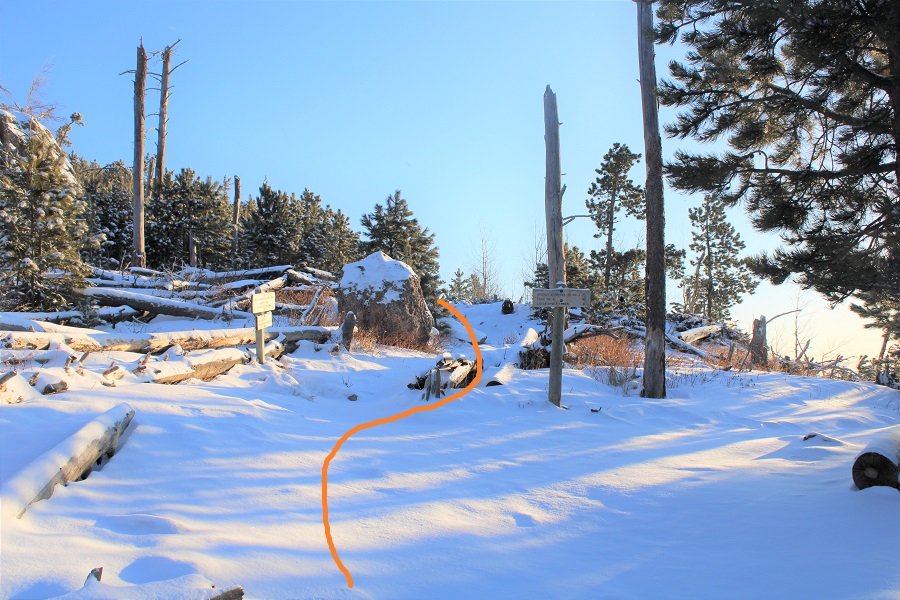
Until I came upon this sign. From here the trail lost 250 feet of elevation, before gaining elevation again
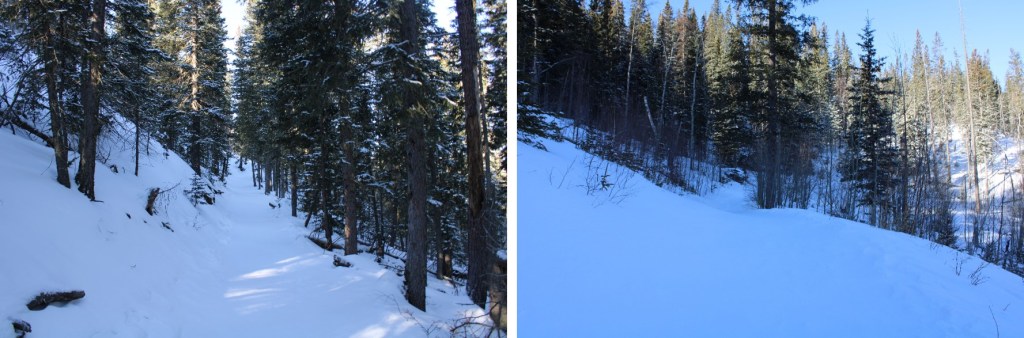
One thing about this hike: I loved being in the trees, but all the views were obscured.
The trail was very clearly marked, just be sure to stay on the Elk Peak Trail, Harney Trail, and Trail #9.
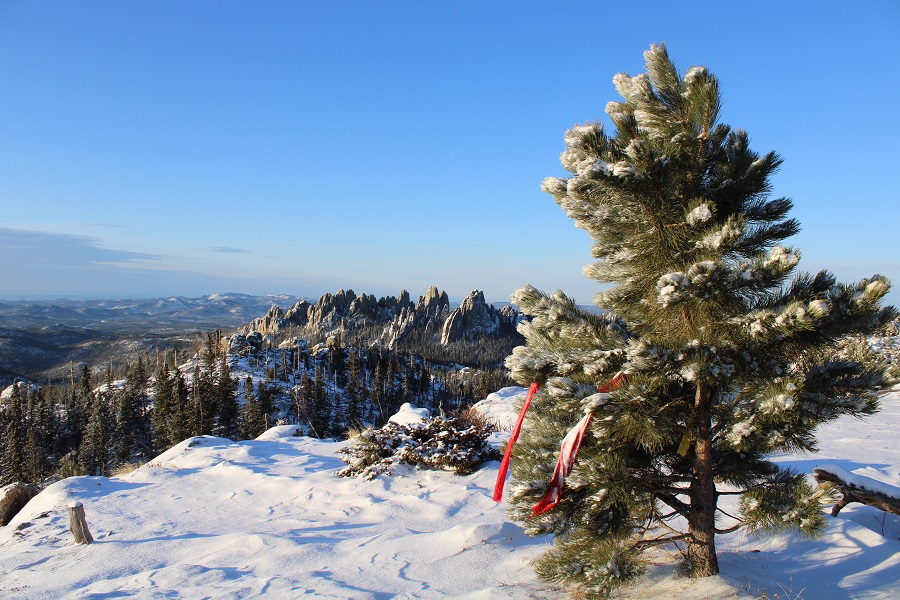
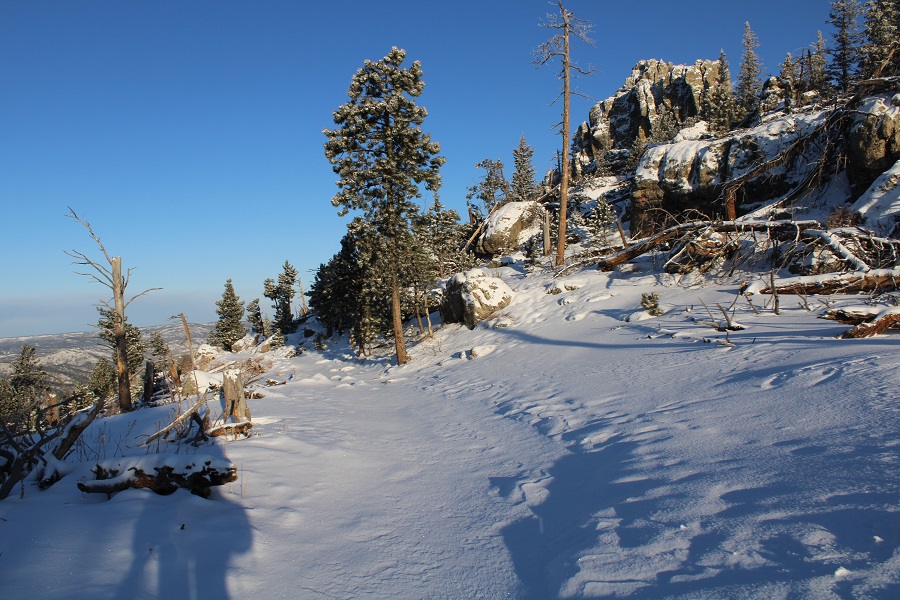
I came to a small plateau with a view and more prayer offerings. This is where the wind started picking up
Now I was headed north
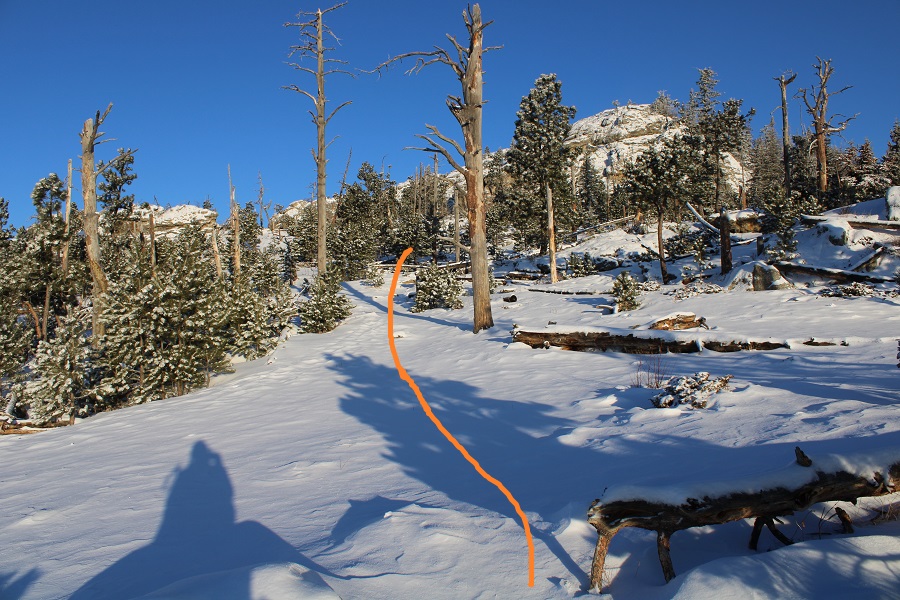
Note, go LEFT at this sign, as going straight won’t take you to the summit
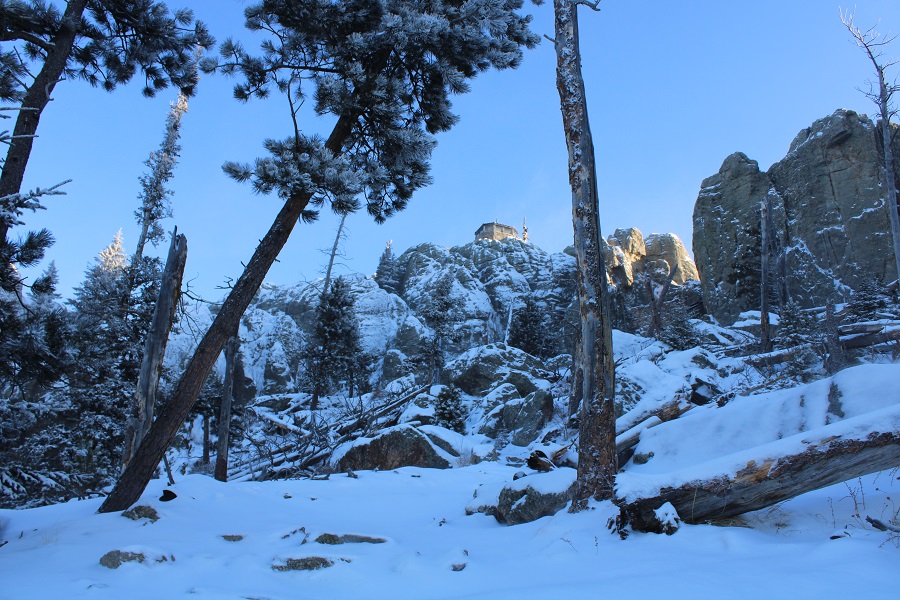
I rounded the west side of the peak
And then had a clear view of the tower
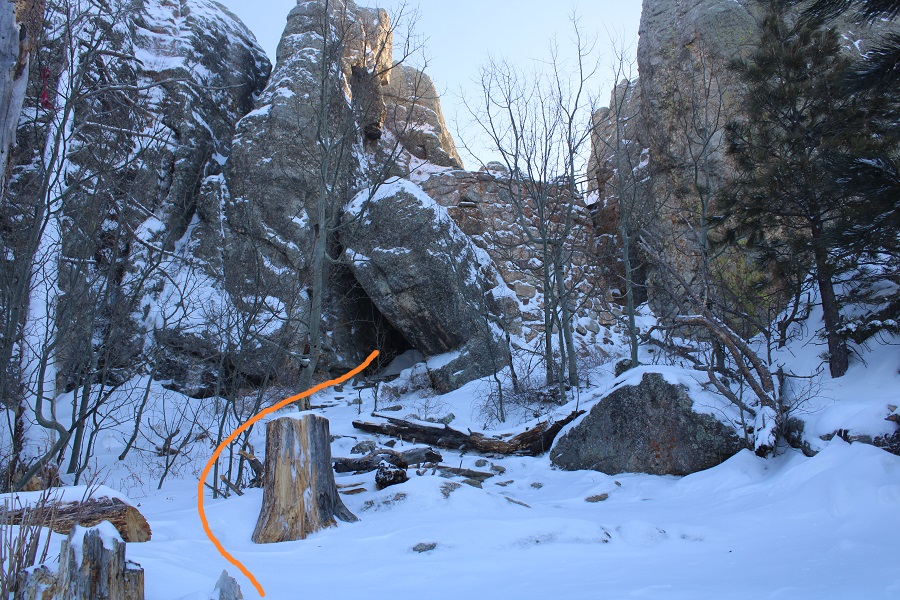
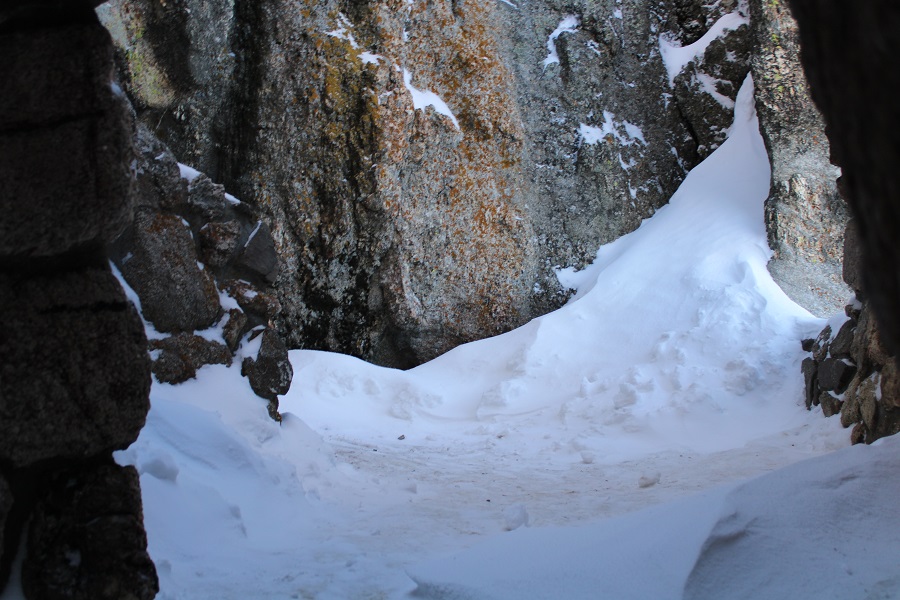
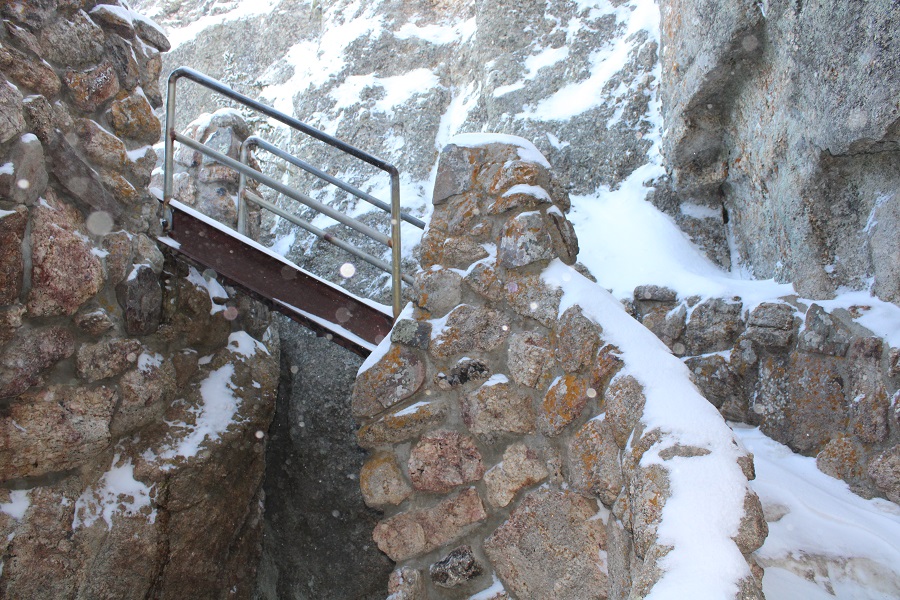
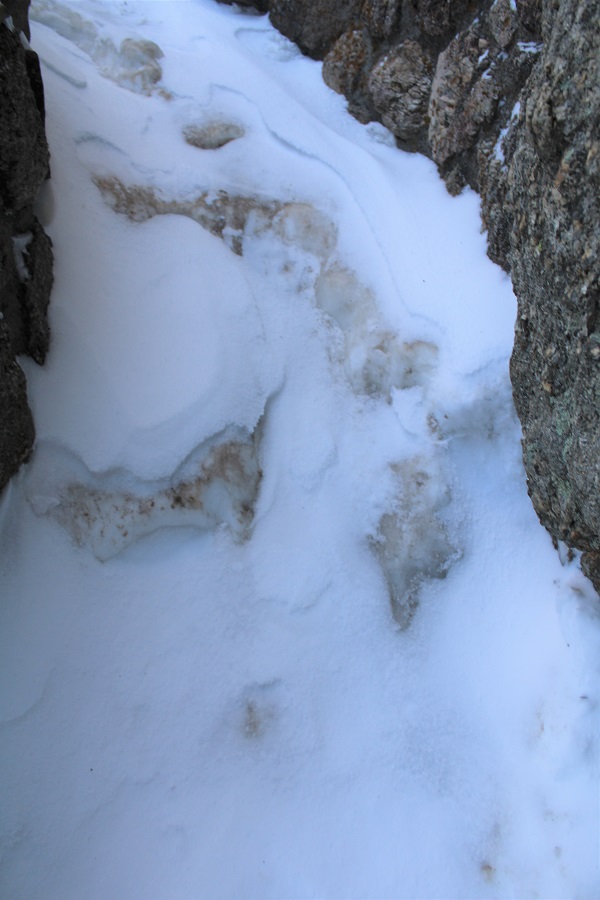
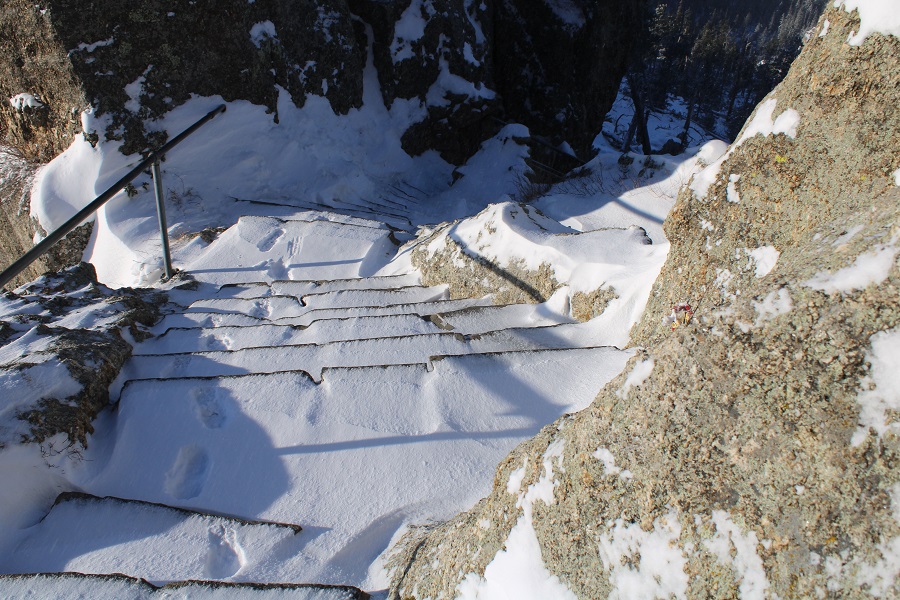
To get to the tower I headed northeast, going through this rock, and up the stairs. This is where it got really icy: the ice was over a foot thick, and slippery, similar to a metal slide covered in ice. Microspikes and good balance are required here
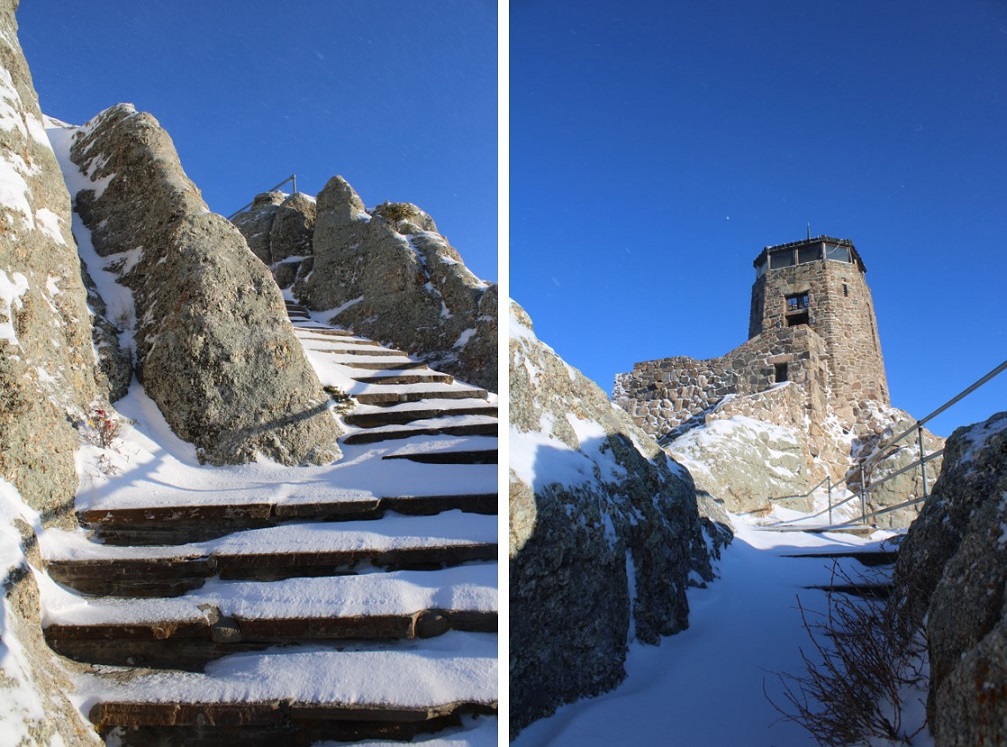
This led me to some slippery steps, and the summit tower.
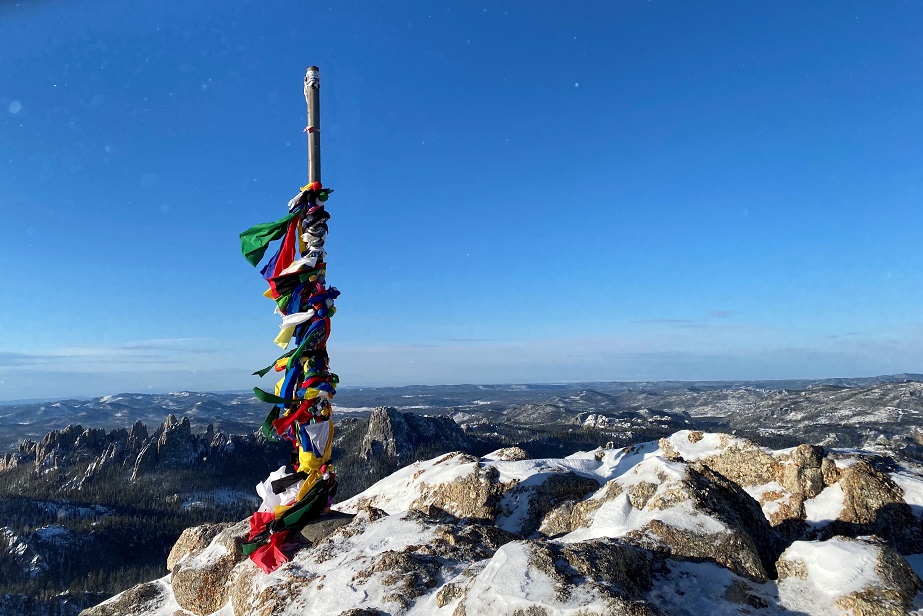
Just below the summit area was a pole with a lot of offerings. It made for a great summit photo
It was really, really windy on the summit area. I’m guessing 40-50mph winds.
I continued on, climbing up the tower stairs. Just for reference, the true summit is here. I scrambled there and sat on top just to say I’d summited. (For anyone thinking the true summit is across the way, click here).
Here’s a video from the Harney Tower
More views of the summit area. I was all over that summit, and let me tell you, the wind just kept getting worse.
Time to head down. I was careful on the snow/ice filled steps not to slip
Then I followed my footsteps back down
After hiking for about half a mile I was surprised to encounter another hiker! He’d started at about 6:30 this morning, and had been following my tracks the whole way. He said the roads were terrible, and I hoped they were plowed before I made it back. I wished him luck and continued on my way.
From here in areas the wind had covered both my tracks and those of the other hiker, but the trail was still easy to follow
When I made it back to the trailhead there was a snowplow there, clearing the parking area.
The area around my truck was nice and clean!
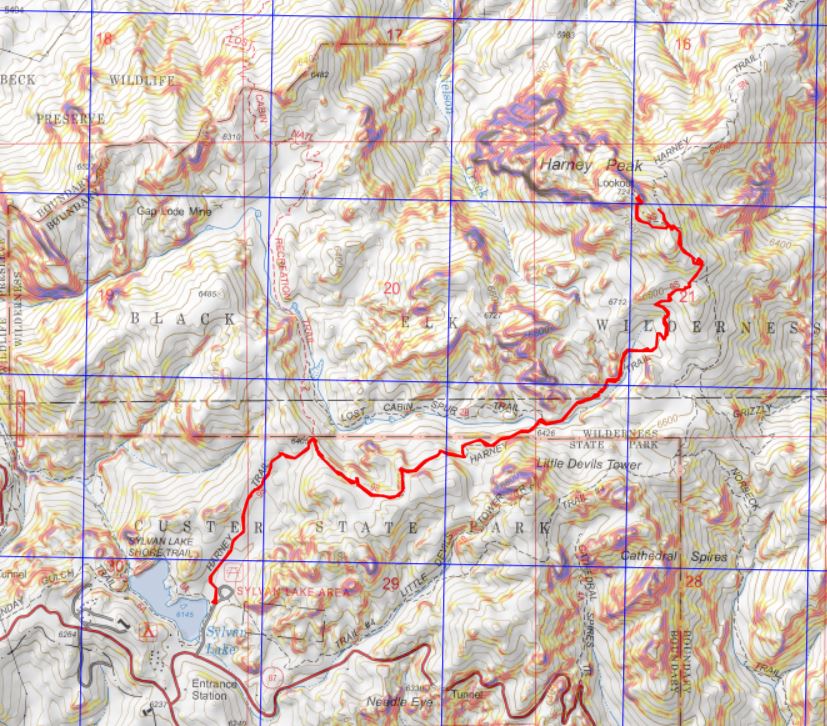
I made it to my truck at 9am, making this a 7.65 mile hike with 1732’ of elevation gain in 3 hours. Not sure why the sign says it should take 4-6 hours to complete? I did it in 3, while breaking trail through the snow, and spending quite a bit of time on the summit taking pictures. Also, it’s longer than their stated 6 miles (closer to 7.5 miles round trip). Here’s a topo map of my route
All in all, I was really pleased I’d chosen to take this road trip! It was still really early, so I started my drive south to Nebraska, for my third highpoint of this trip. I only hoped there wasn’t too much snow…
I’d already summited 3 peaks this week, but with my being so close to 100 14ers and winter weather moving in I really wanted to try to get in one more summit. I did a lot of weather watching: the storm kept changing areas, times, wind speeds, etc. I finally settled on Mt Columbia because I haven’t done it yet in winter and someone said they’d trenched it earlier in the week (remember, my motto this year is not to let a trench go to waste).
I didn’t make it all the way to the Harvard Lakes Trailhead on the drive in. There was too much snow and I ended up backing my truck up for about half a mile to find a good parking space. I parked here. There’s room for 2-3 vehicles if everyone parks nicely.
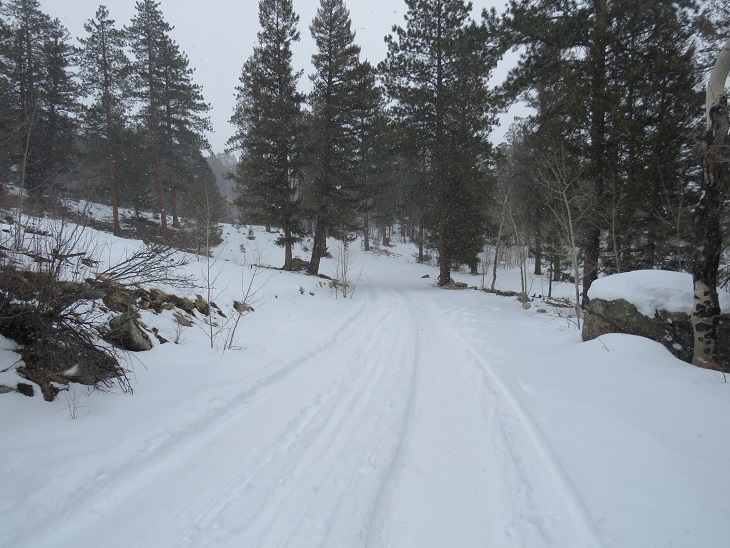
I gathered my gear and started hiking along the road. It’s about a mile from where I parked to the Harvard Lakes Trailhead along this road. Alost as soon as I started hiking my flashlight stopped working, so I had to get out another. When that one stopped working as well I walked for a bit in the dark, then sighed and got out my emergency charger/flashlight. It was then I realized I’d missed the trailhead, so I had to backtrack a ways. I was also very glad I’d decided to turn around/head back when I did on my drive in: the road isn’t driveable to the trailhead.
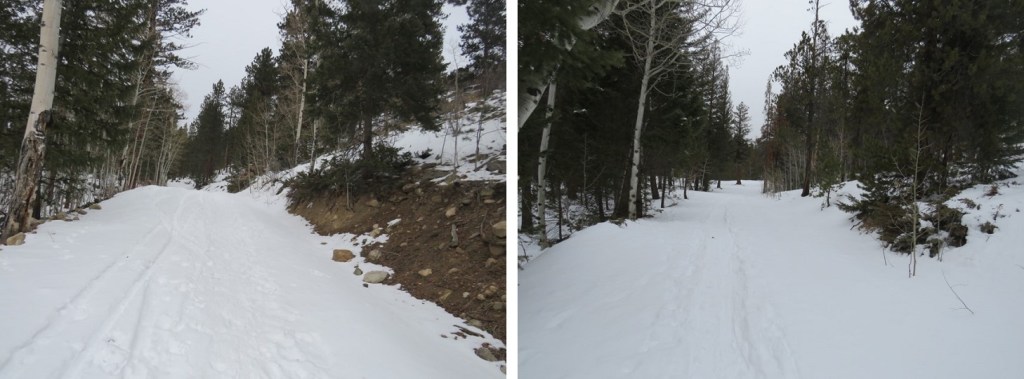
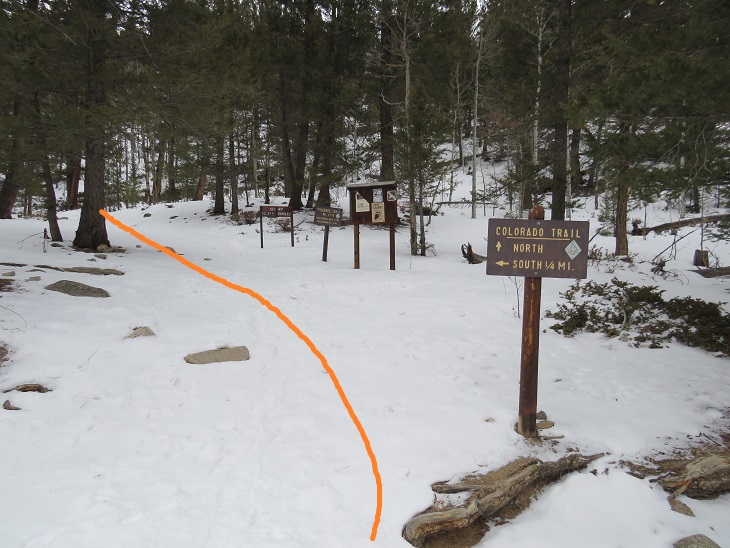
I made it to the proper trailhead, and followed the Colorado Trail as it switchbacked up the side of the mountain.
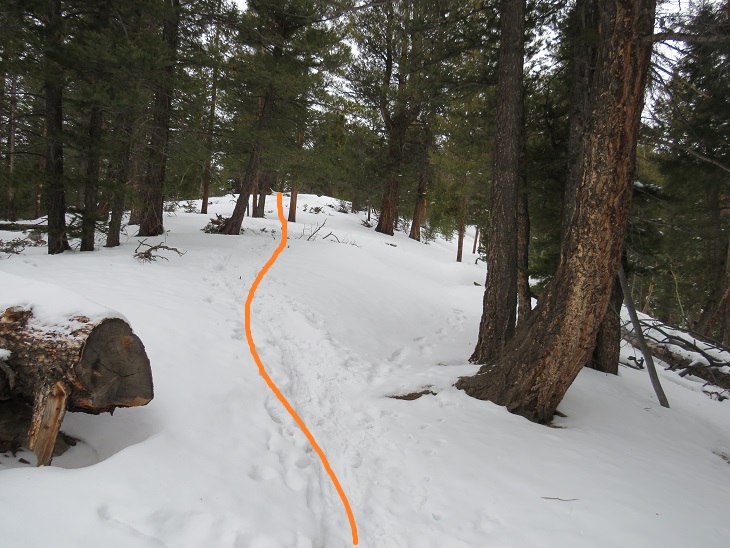
After hiking on the Colorado Trail for .8 miles I left the trail and followed the ridge. Luckily, this part was (mostly) already trenched.
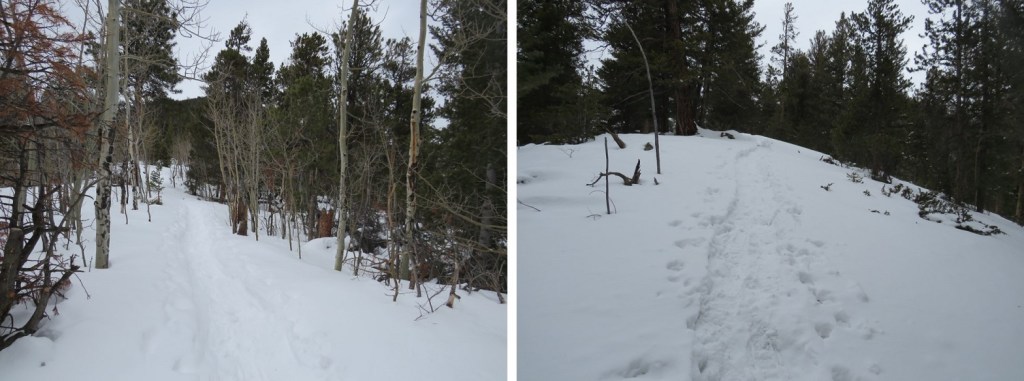
From here on out it was a ridge hike. I followed the ridge to treeline (about 1.25 miles). Some of the area below treeline was trenched, but there were many areas under several feet of snow. I was stubborn and reused to put on snowshoes, postholing up to my waist several times.
Also, it takes forever to get to treeline!
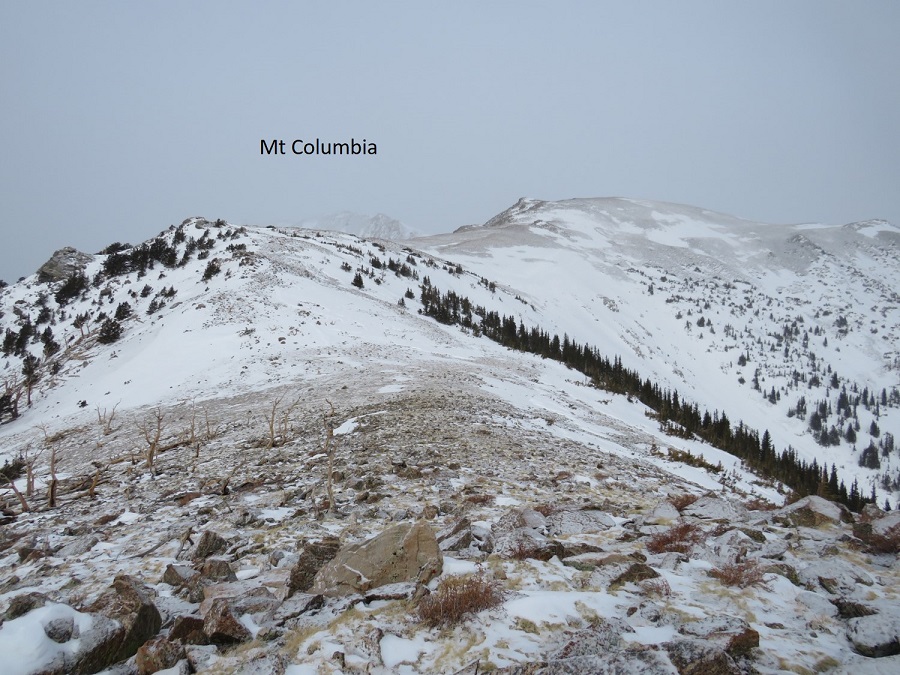
Finally, it became impossible to go any further without snowshoes, so I put them on, just before making it out of treeline. Here’s a good overall view of the route above treeline. It’s important to note the true summit is still not visible (it’s behind that ridge, to the north).
Now this became a ridge hike, above treeline. I could see the clouds moving in, and indeed, it was snowing off and on. The wind was also picking up. Taking off my snowshoes, I followed the ridge as it wound northeast. First heading towards point 12042
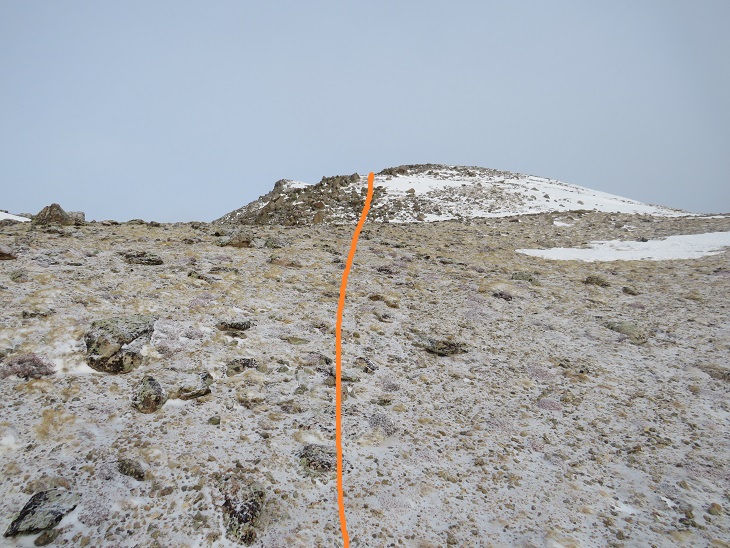
Once there, I lost some elevation, and the ridge split. I don’t think it matters which side of the ridge you take. I went right, since there was less snow there. Here’s an overview of the route
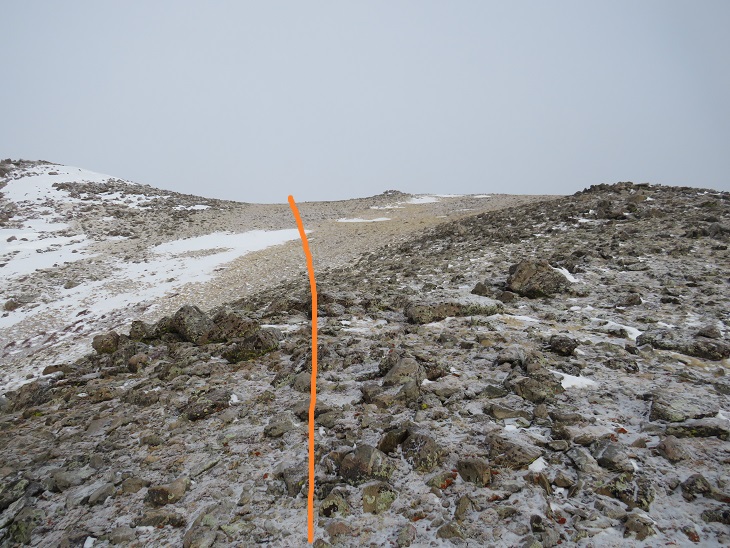
My camera died here (due to the cold), so I started using my phone. Here are some more close-up pictures
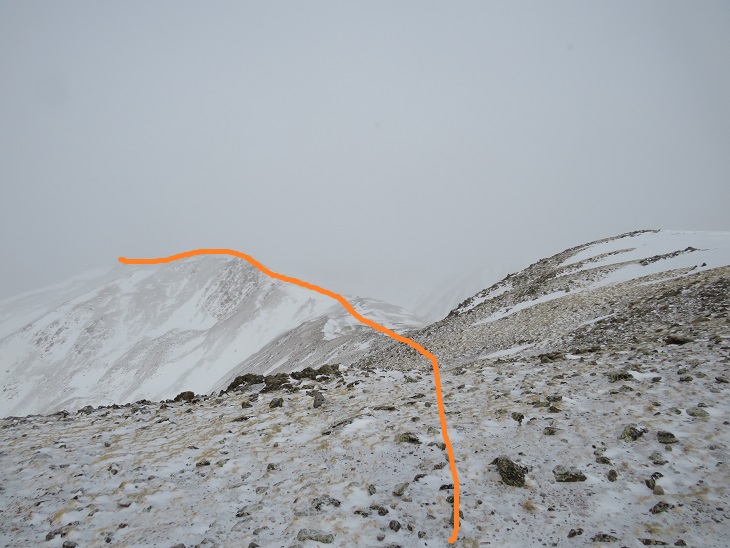
Around this point the wind became unbearable, and I could no longer take off my gloves to take pictures with my phone, so I don’t’ have any from this point on. Also, as you can tell, the weather moved in and you wouldn’t have been able to tell much from the photos anyway. What you need to know about the rest of this hike is it’s further than it looks, it’s all class 2, the ridge goes on forever, and what you think is the summit… isn’t. The summit is actually the northernmost point, not what looks like the summit from below (that’s PT 13544). It’s a rocky summit, and I couldn’t find a summit marker (but I also didn’t look for one).
The wind didn’t let up, and I summited in whiteout conditions. It seems the 50% chance of snow after 11am was happing at 9am. I tagged the summit, turned around, and retraced my steps down that long ridge. My fingers and toes were burning inside my socks and glvoes. I had on ski goggles that kept fogging up, and I had to be careful of my footing since I couldn’t see much in front of me. As I got further down the ridge the weather let up a bit, and I could see my way back (these pictures were actually taken from my way in).
I put my snowshoes back on and kept them on for the rest of the hike. The snow started picking up again, especially as I made it back to treeline.
I made it back to the Colorado Trail, and followed it back to the road
And now to follow the road back to my truck
Along the way I was passed by a cross country skier. He seemed impressed I’d just hiked Mt Columbia, especially since it was now snowing quite a bit. I’m not gonna lie, I was a little worried about my drive out. I wished him well as I took off my snowshoes and kept trudging along the road.
Just as I made it back to the trailhead I turned and saw a white dog running towards me, no owner in sight, clenching a deer leg in its mouth.
The skier said it was his dog, assembling a deer one piece at a time. His wife soon followed after the dog, they packed up and were on their way. I made it back to my truck at 12pm, making this a 14.28 mile hike with 5498’ of elevation gain in 9 hours.
The snow was really falling, so I got out of there quickly. The roads weren’t as bad as I’d thought, and completely clear by the time I made it to town.
In the end, I was glad I’d hiked today, but will most likely do this one again to get better ridge pictures. I should have picked a better weather day.
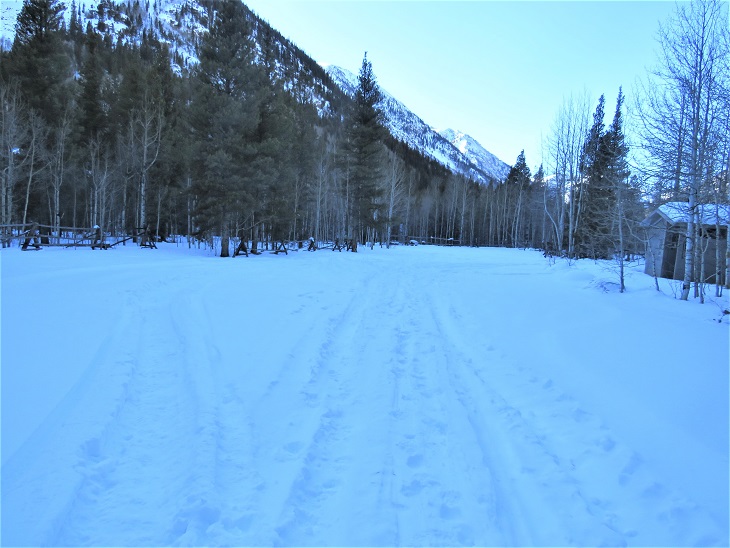
The last 3 miles to the Missouri Gulch trailhead were terrible! So bad I asked SkydiverHiker to drive. We were sliding in the ruts and eventually found a turnout about .7 miles from the trailhead and stopped there. This ended up being a fabulous idea, since the trailhead was too covered in snow to park. It looked like someone had tried and it took them quite a while to get out. This is the road to where we parked (easy until the plowing stopped)
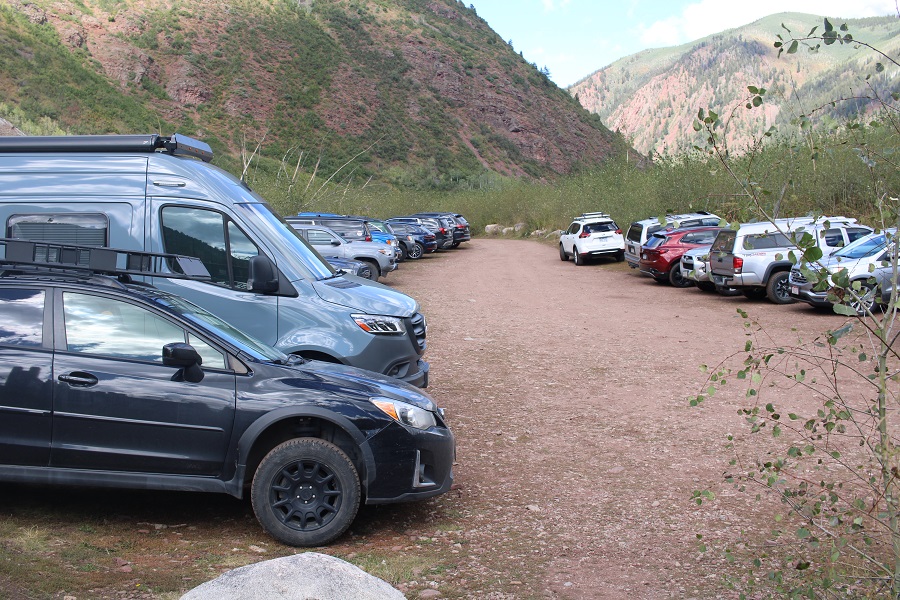
Parking further away changed our plans a little, as it added an hour onto our trip. We decided we’d probably just hike Mt Belford today, and leave Oxford for another day. We were on the trail at 5:15am. Here’s a look at the Missouri Gulch Trailhead Parking area
We crossed clear creek and started ascending the side of the mountain wearing microspikes. We saw some elk tracks here, but luckily, no mountain lion tracks this time.
Once in the avalanche area the trench stopped. We crossed the drainage on some sketchy, snow covered logs
Then stopped for a bit to put on our snowshoes. These pictures were taken later in the day on our way back down, so you can see the trench. We put that trench in! I’ve done this hike several times, so I knew to aim for the trees, heading south
Once in the trees the trench picked up again until the cabin
Once past the cabin the trench stopped again. The wind in the gulch is fierce and I’m sure blows away trenches nightly that are made during the day. No worries though, we just headed through the gulch (still wearing our snowshoes) towards Mt Belford’s Northwest Ridge
As we were trying (unsuccessfully) to avoid the willows, I heard ptarmigans chirping, but couldn’t see them. Then, all of the sudden, a ptarmigan busted out from under the snow and walked away. It was here I learned ptarmigans huddle near the willows and stay in their air pockets when it snows to stay warm. They can do this for days, as their food source is under the snow as well. It was so cool to hear them calling to each other throughout the day!
We continued through the basin, only taking our snowshoes off once we reached the ridge. From here we followed the ridge to the summit.
I’m making this sound MUCH easier than it was. This is probably one of my most difficult winter summits to date. With my Raynaud’s I need to keep moving to stay warm, and while SkydiverHiker was doing an excellent job keeping up, we still stopped more than my body would have liked. In fact, about halfway up the ridge I was seriously thinking about turning back: my fingers and toes were burning and the wind was more intense than predicted. With windchill it was at least -20 degrees. We discussed turning back, and decided to continue on (Skydiver Hiker needed a ‘win’ today, and I wouldn’t let him go on without me). SkydiverHiker dropped his and we continued on up the ridge. I continued with my pack because I had an ice axe and essential gear. This continuing on included a lot of intense feelings and emotions, and there was some crying involved and also some nausea. Have you ever hurt so much you felt nauseous? Both SkydiverHiker and I felt that way today. But at least the pain told me I hadn’t lost anything to frostbite. While mountaineering is certainly physical, it’s emotional and a mind game you play with yourself as well. I felt as if I were dying every step of the way, not because I was tired, but because I felt my fingers and toes were on fire. I was dry sobbing at times.
We trudged to the top, where my camera stopped working (I really need to find a better cold-weather camera) so the photos we have are SkydiverHikers from his phone. About 20 yards from the summit SkydiverHiker laid down and didn’t want to get up. I didn’t know this, but his back had been really, really hurting him. This laying down right now was (of course) unacceptable, so I made him get up and lead the way to the summit.
We didn’t stay long, just long enough to get a photo of the summit marker, and then we were on our way back down.
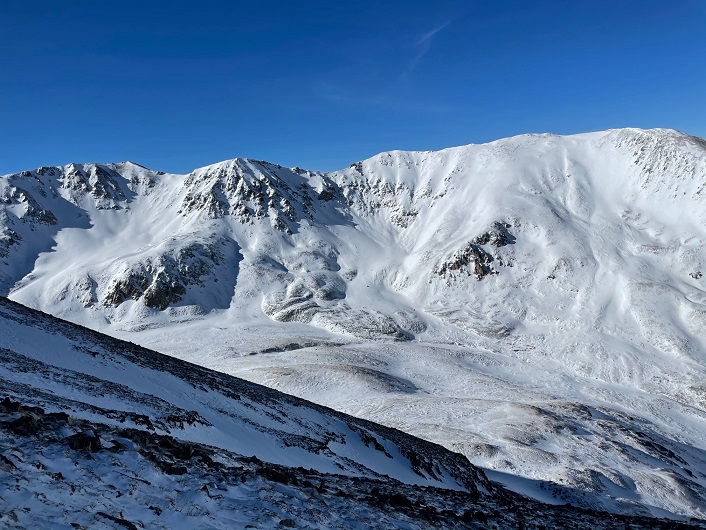
Let me pause here to show you the great views of Missouri Mountain
The screaming and crying continued until we made it to where we were hiking in sunlight, near the base of the ridge. It’s amazing how the warmth of the sun made me feel better, even when it was still well below freezing. Once at the base of the ridge we donned our snowshoes once again and headed back out of the gulch, following our morning trail.
As we warmed up our spirits lifted and we were once again thrilled to be out here hiking. This is one of the most beautiful places in Colorado to hike, and we had it all to ourselves. Well, it was us and the chirping ptarmigans. We hiked back past the cabin and through the avalanche area, took off our snowshoes, and continued back to the trailhead in better spirits. Yes, this is a mental game.
We made it back to the truck at 1:15pm, making this an 11.15 mile hike with 4764’ of elevation gain in 8 hours.
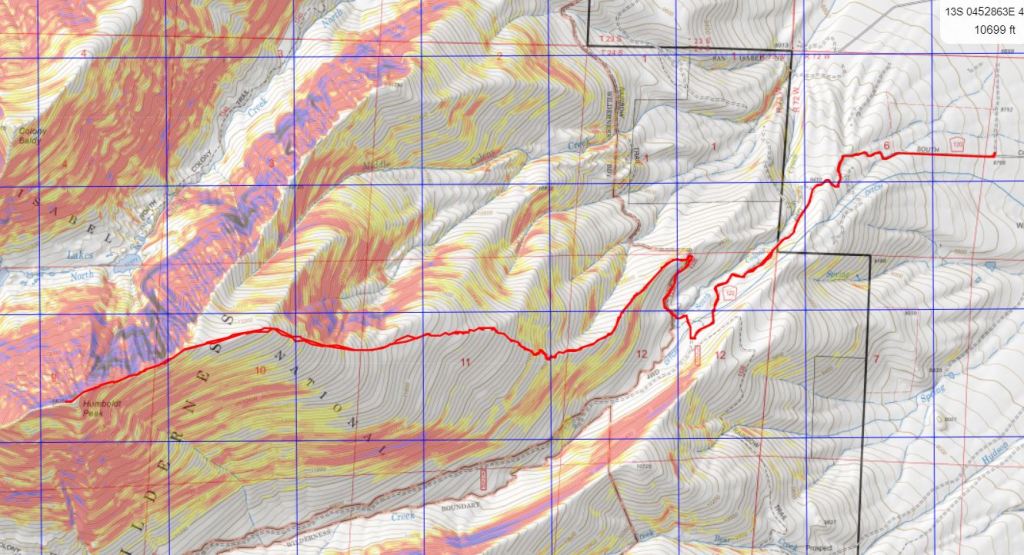
This was my third time hiking Humboldt, but my first time in calendar winter. The last time I was here there was a terrible wind that was causing the snow to become clouds, and I couldn’t see the summit when I arrived (or my own 2 feet). This time I was here for better pictures of the route, and to count it as an official snowflake. I arrived at the South Colony Lakes lower trailhead and was the only one in the lot when I parked my truck. I put on my gear, using only microspikes as my footwear, and was on the trail at 4:30am. As usual in winter, the snow started just past the 2WD parking area. I always find it amusing to see how far the tire tracks try to go up the road. This time, they didn’t go far.
The snow on the road started right away, but there was a good trench. I followed the road for 2.3 miles to the junction with Rainbow Trail. It was still dark out, and as I rounded the last corner of the trail where I could still ‘see’ the trailhead I noticed there was another car parked there. It seems there would be hikers about a mile behind me today. Also, my flashlight started flickering. Time to change the batteries!
At Rainbow Trail the trench spiked, one side going towards Marble Mountain, the other towards Humboldt Peak’s East Ridge. There weren’t any tracks headed further down the road to South Colony Lakes. I turned right and followed Rainbow Trail for .5 miles.
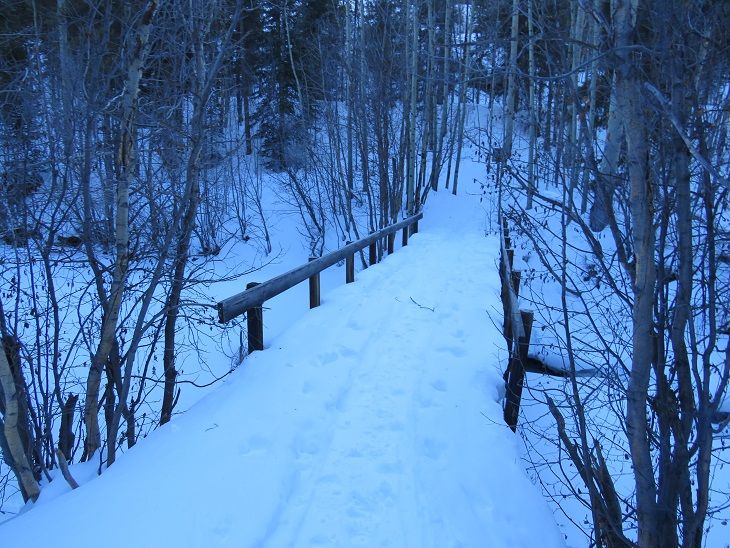
I quickly came to a bridge, then took the trail to the top of a slope
At the top of the slope I was thrilled to see there was a trench in place leading up the ridge. Last time I did this hike I’d had to trench it myself, and it had taken quite a bit of work. Today, I was going to poach someone else’s trench! Woot!
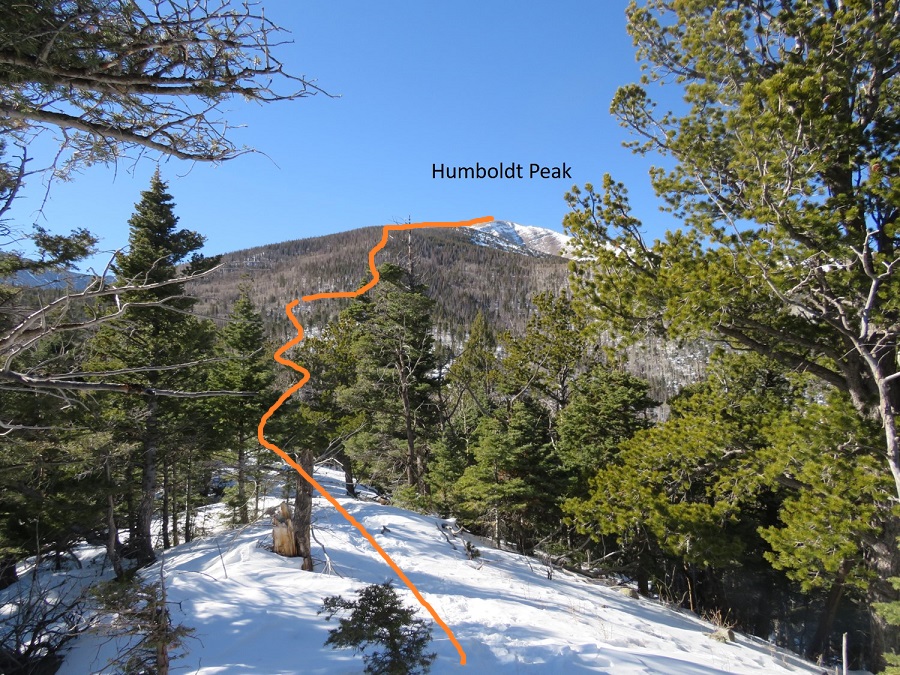
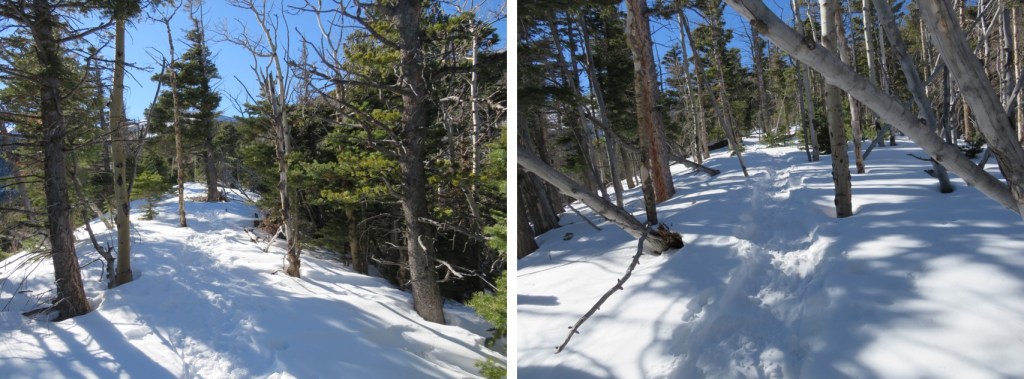
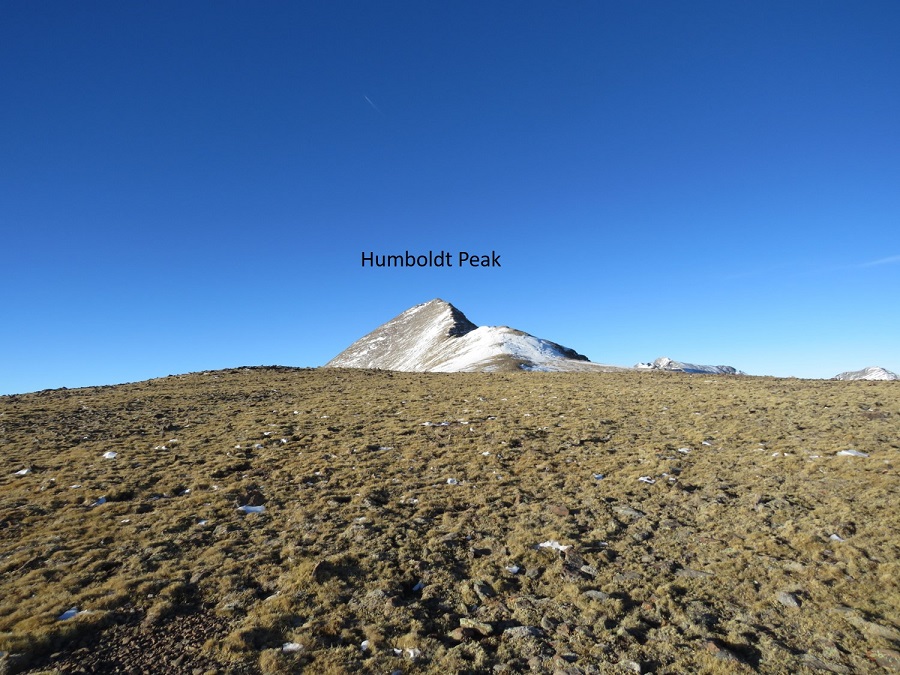
And what a trench it was! I followed it as it for 2 miles as it ascended the east side of the ridge, all the way to treeline. Here’s an overview of the route up to Humboldt Peak
If you keep heading west and stick to the rib/ridge, it will take you to treeline. I could hear the wind above the trees, and got a bit anxious for the above treeline part of the hike.
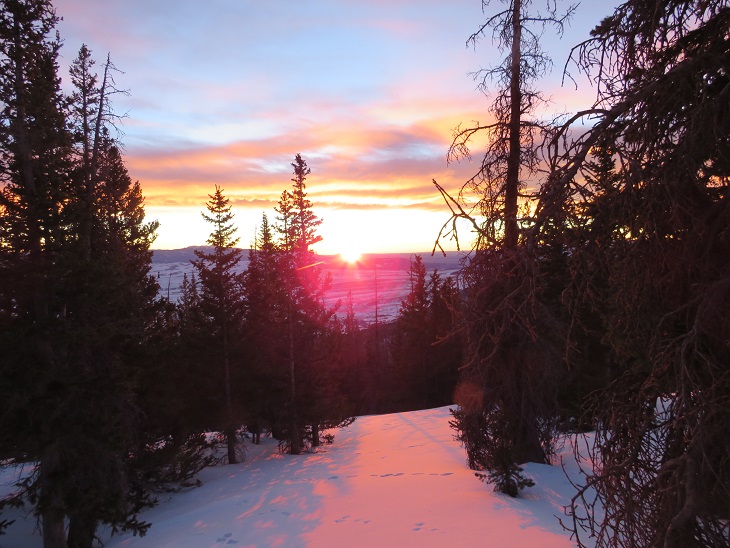
As I hit treeline the sun started to rise. I took a few minutes to enjoy the view. (side note: there were a lot of rabbit tracks here)
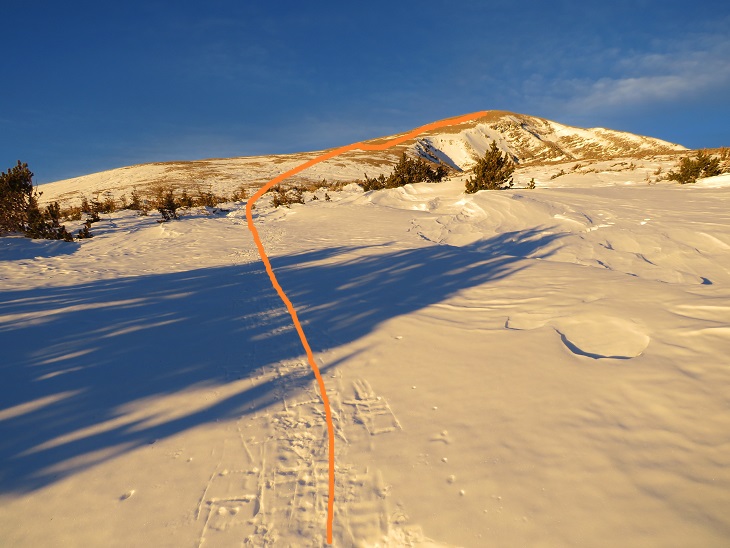
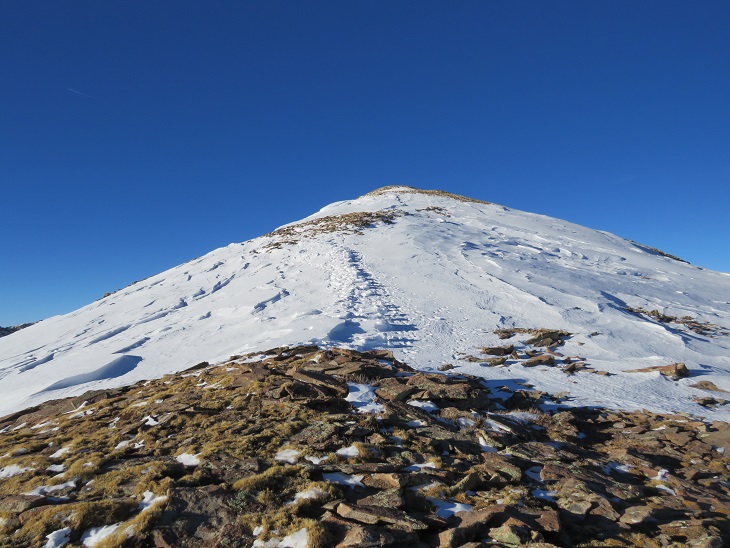
The trench ended near treeline. I could see where it was supposed to go, so I kind of re-trenched it as best I could wearing just spikes.
Here’s the general overview of my route up the ridge
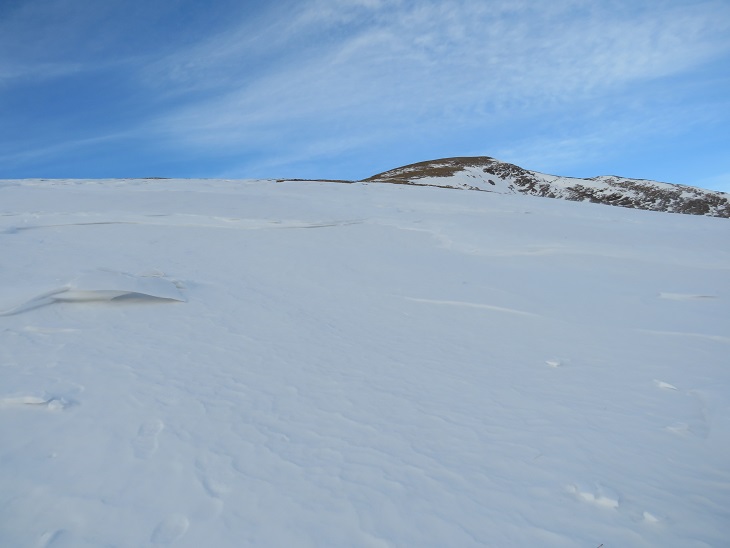
The wind had been intense all morning, but once I was above treeline it became difficult at times to even stay upright. So much for the forecased 11-17mph winds! I’d started early to avoid the most intense winds that were supposed to start around 11am, but it seems they started a little early. I had to hunker down at times and turn away from the wind, which turned the snowflakes into glass, and was side-stepping as I hiked just to stay in a straight line. I tried to take pictures, but unfortunately, wind is invisible. I kept my gloves on and was glad I’d put on my balaclava at the trailhead. Here are some pictures of the ridge.
Here I noticed some bighorn sheep in the distance. They also noticed me and trotted off.
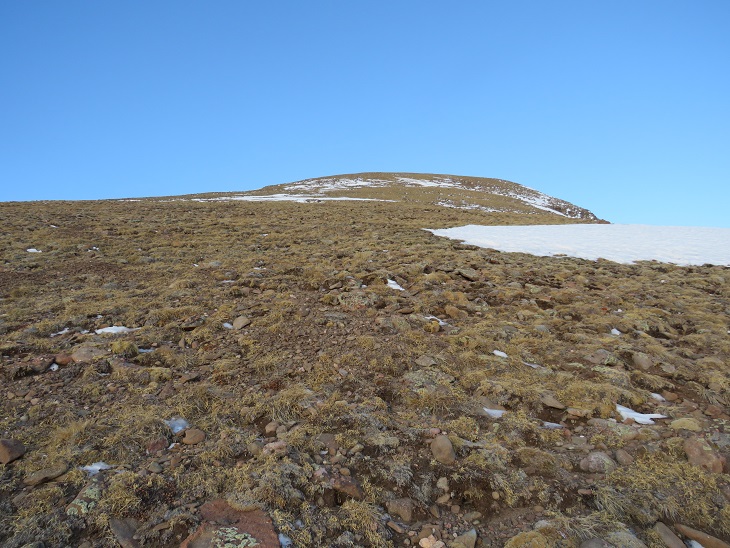
At the top of the ridge was another ridge, so this had been a false summit. Here’s the actual summit of Humboldt Peak. It’s a straightforward ridge hike to the summit, nothing above class 2.
Here are some pictures of the ridge. There was some snow, but it was all firm enough not to need traction
On this part of the ridge the wind really picked up. I had to hide behind rock structures to get out of the brunt of it, and the noise it made as it came up and over the rocks was creepy. The balls of my feet were frozen at this point (due to Raynaud’s) and it felt like I was walking with large rocks in my shoes (I wasn’t, it was just the ball of my foot that had frozen). Several times I hunkered down to maintain my balance, but it was still a straightforward ridge hike.
I knew I’d made it to the summit when I found the wind breaks. I never saw a summit marker, but I don’t think there’s one here?
I’ve summited Humboldt Peak twice before, so I knew I was at the summit at the first wind break, but I walked further west for better pictures.
I summited Humboldt Peak at 9:45am
Humboldt Peak:
The views of the Crestones/Sange de Cristo range were beautiful!
Time to head back down the ridge
The wind was still fierce, and I was worried I was getting a nasty windburn in all the areas my balaclava didn’t cover. The wind speeds weren’t supposed to be this high, so I’d left my goggles at my truck. Note to self: next time, bring the goggles. On my way back down the ridge I saw the Bighorn Sheep again. They quickly turned when they saw me and headed over the mountainside. There was a big drop on the other side, and I was surprised I couldn’t see them again when I passed.
This was a simple ridge stroll, or, it would have been, without the wind
Here’s looking at my route back down the ridge to treeline
Here I met some hikers heading up. The wind had died down considerably by this point, so I figured they had the better weather of the day (I found out later it picked back up again, and they said their summit was just as windy as mine). My feet started to de-thaw, and I had a minor Raynaud’s attack: think insane pins and needles as the blood started flowing again. It lasted about 30 minutes, and to combat it I just kept hiking. On a positive note, I could feel my toes! Finding my tracks back to the trail was a bit of a challenge, but I came across them eventually.
Then I followed the trench back to Rainbow Trail. I should have put on snowshoes here, as I postholed ever 30 feet or so, but I really didn’t want to stop. I was just glad I’d started early enough in the day not to need snowshoes (spikes worked just fine). Anyone heading back down later than me would need snowshoes.
Once back at the trail I followed it a half mile to South Colony Lakes Road
Once on the road I hiked the 2.3 miles back to the trailhead, noticing a lot of dog tracks along the way. As I neared the trailhead I saw a couple walking with two beautiful dogs. It seems they were out on a day hike, and I thought this was a great idea, as it was a beautiful day below treeline.
Here’s a look at the trailhead on my way back. Easily 2WD accessible.
I made it back to my truck at 1pm, making this a 14.02 mile hike with 5563’ of elevation gain in 8.5 hours.
Unfortunately, when I made it back to my truck I could hear the conversation the couple with the dogs were having. The man kept cussing at his female companion, and the dogs, over simple things like an overturned water bowl. To me there’s no need for vulgar words, and he was using multiple ones in each sentence he uttered. I felt the urge to say something, but no one else in his party seemed to mind his behavior, so I kept it to myself. I’m not sure why women allow themselves to be treated that way?
The Humboldt Peak Summit Sticker can be bought here