I really wish I would have linked up this peak with PT 13164 when I did it in 2019, but then it wasn’t a known ranked 13er. In any event, today was a long day, so I was getting an early start so I could drive back home for work the next morning.
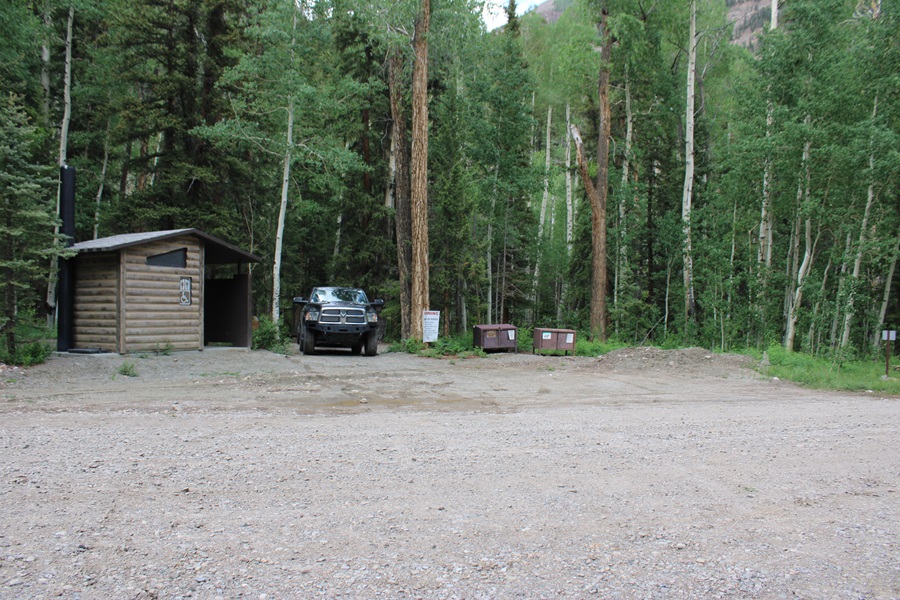
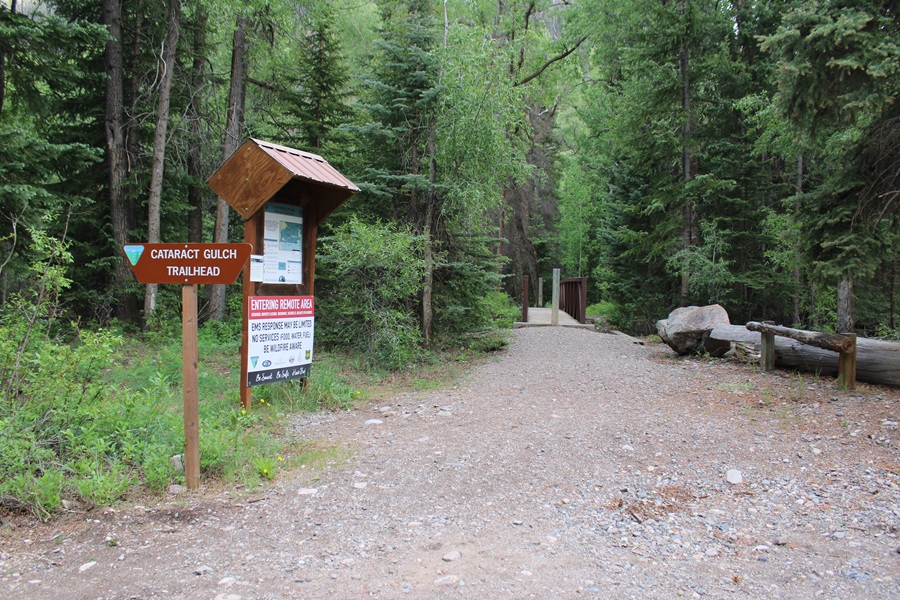
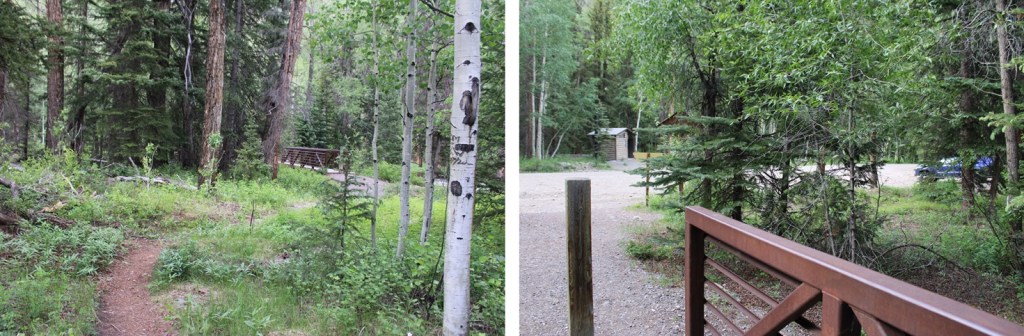
I parked at the Cataract Gulch Trailhead and was on the trail at 3:30am. The trailhead has several parking spaces, dispersed campsites, and bathrooms.
The trailhead is clearly marked, and easy to find.
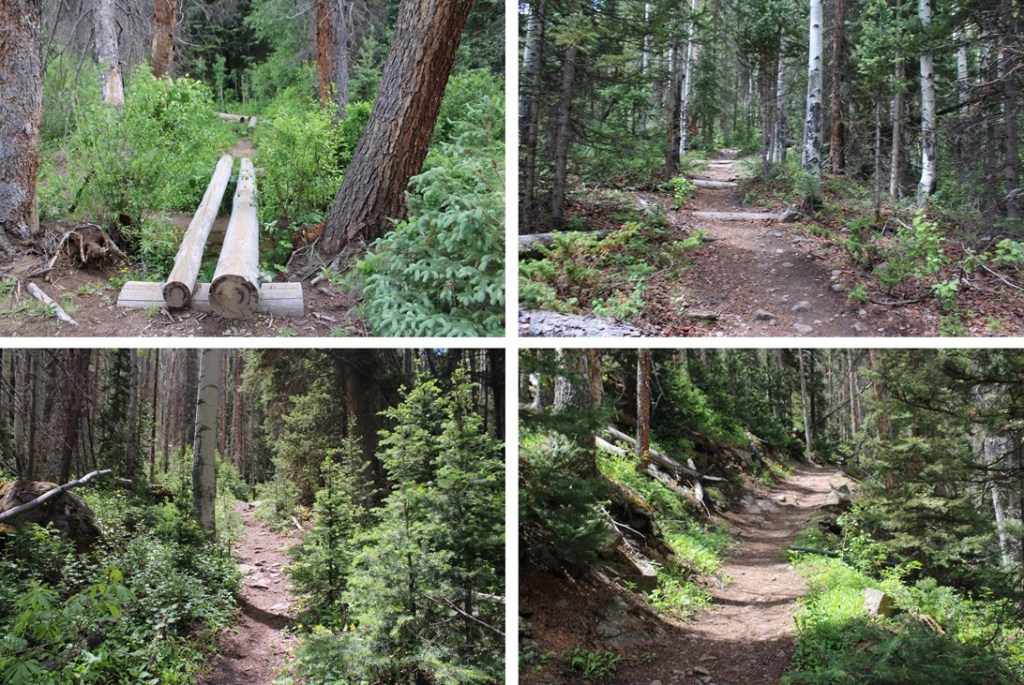
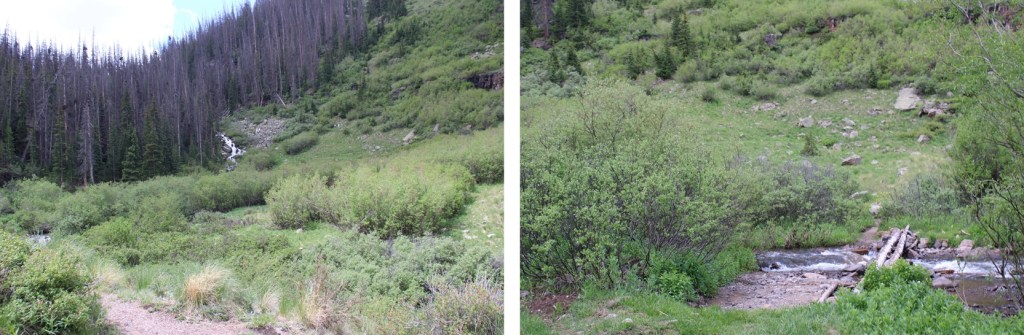
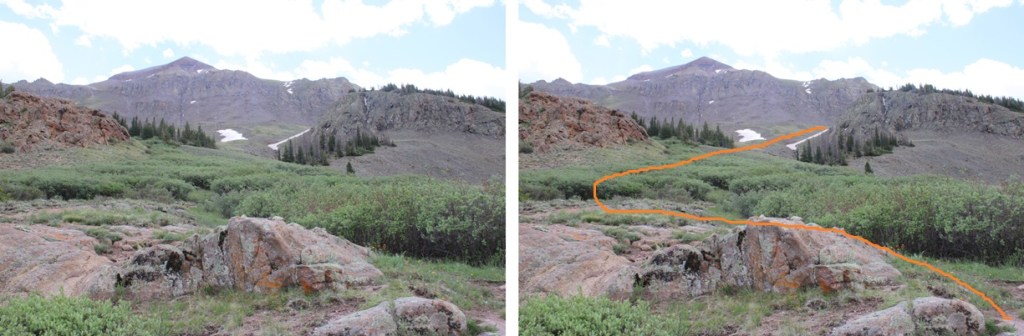
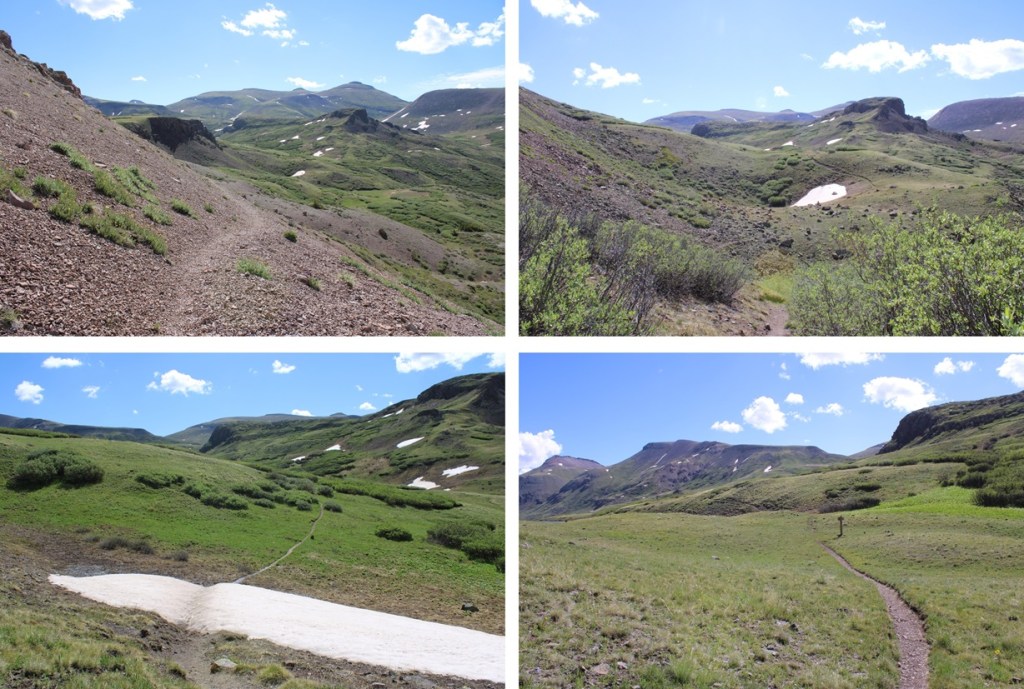
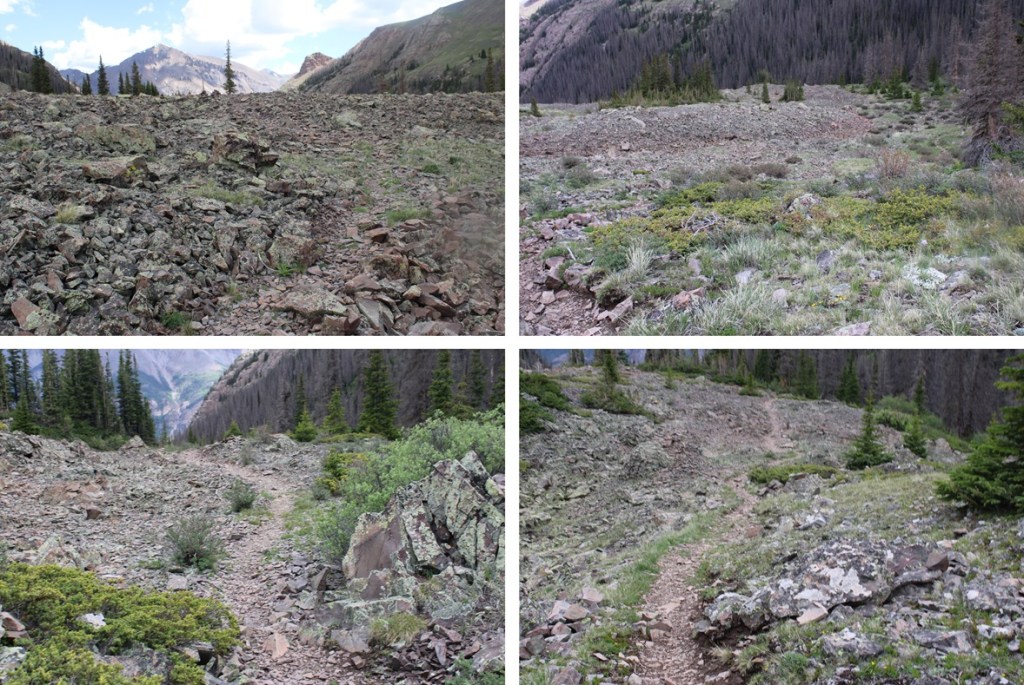
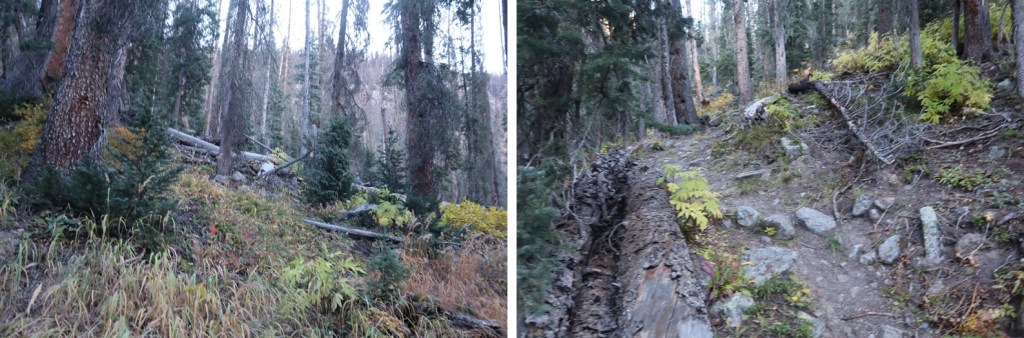
I followed the class 1 Cataract Gulch Trail south, towards Cataract Gulch.
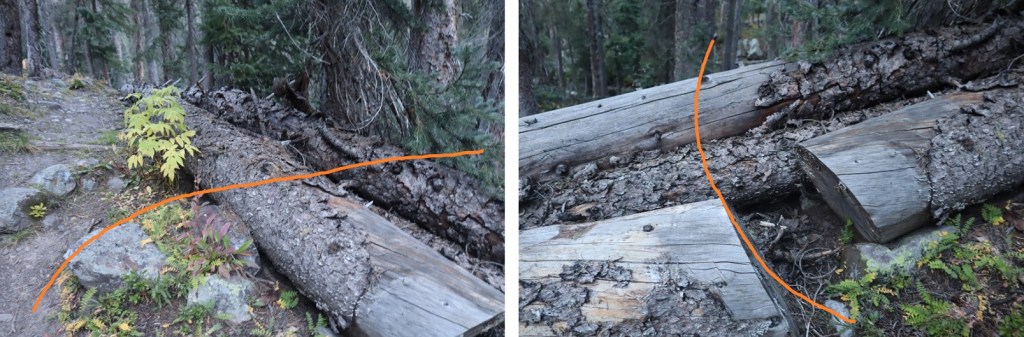
There were several downed trees on the trail, but it was easy to navigate.
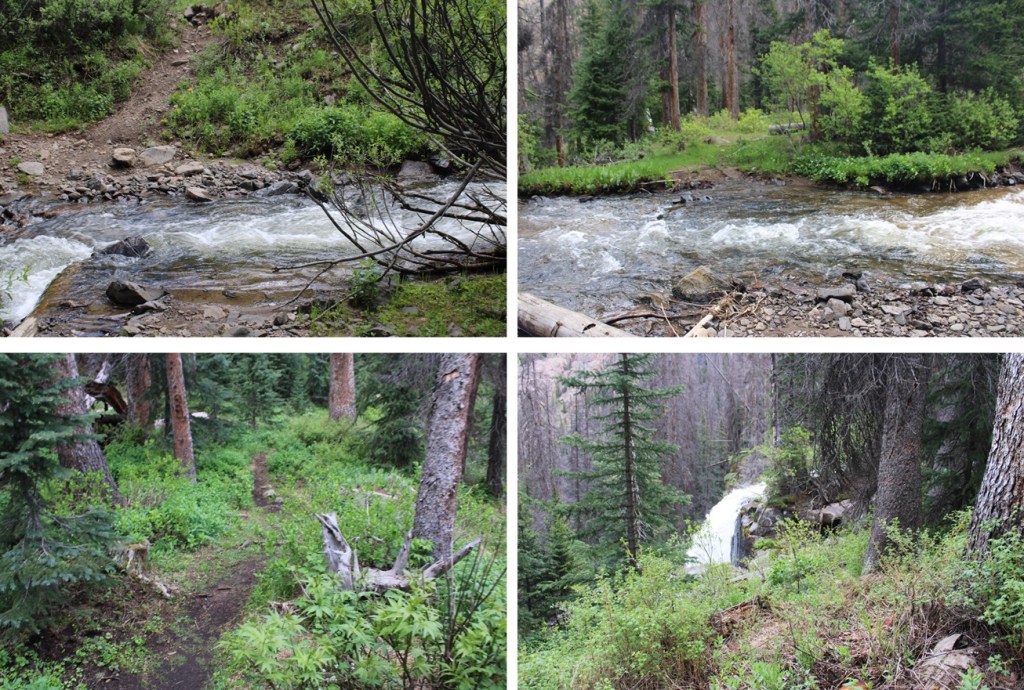
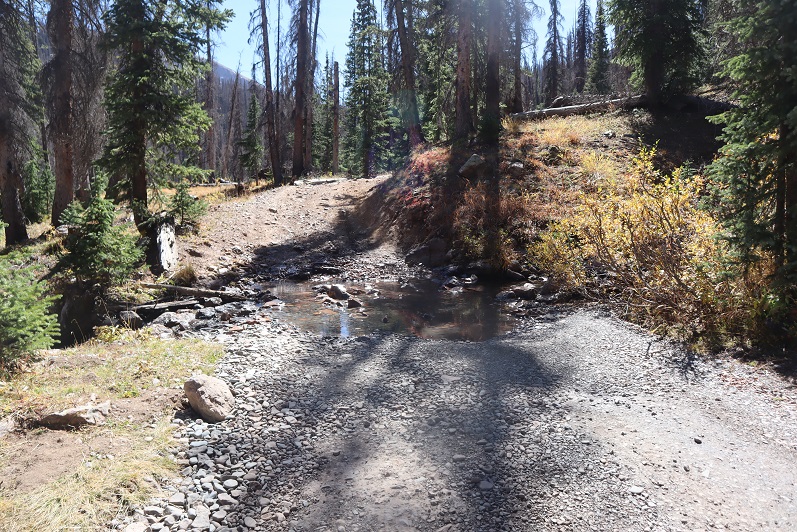
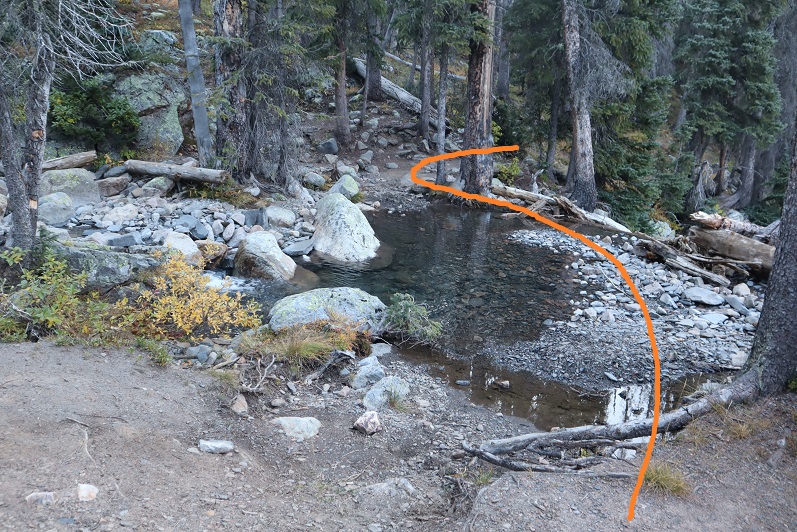
Just before reaching the waterfall about 2.5 miles up the trail, I crossed the creek on a couple of logs.
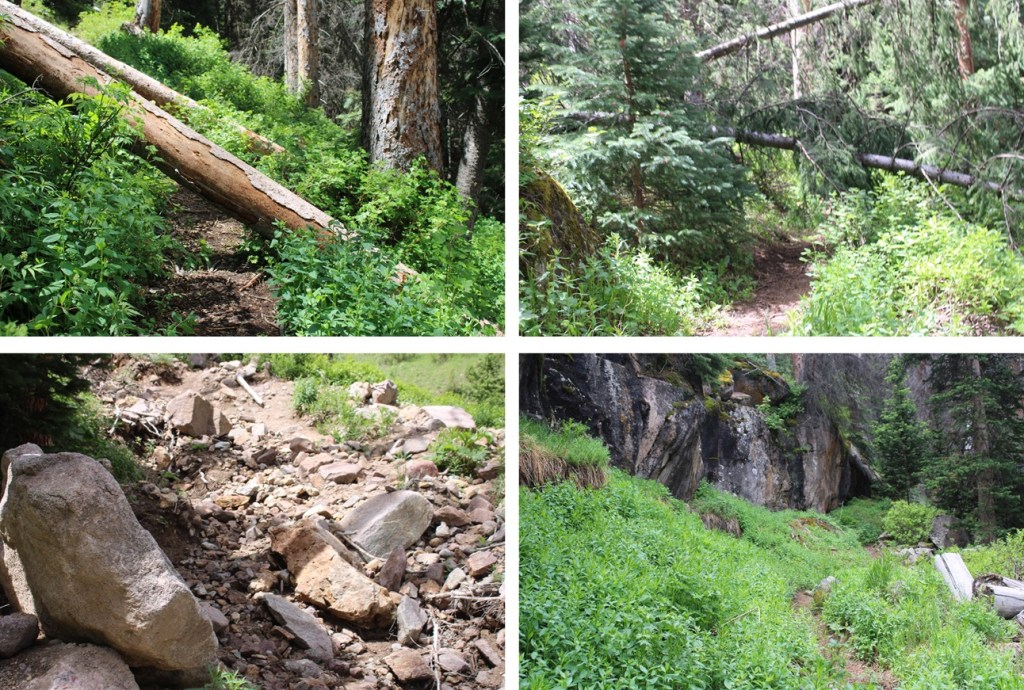
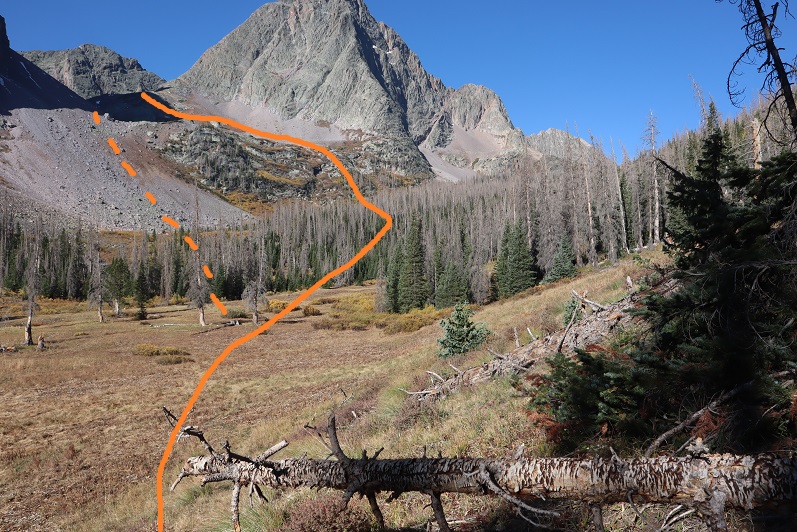
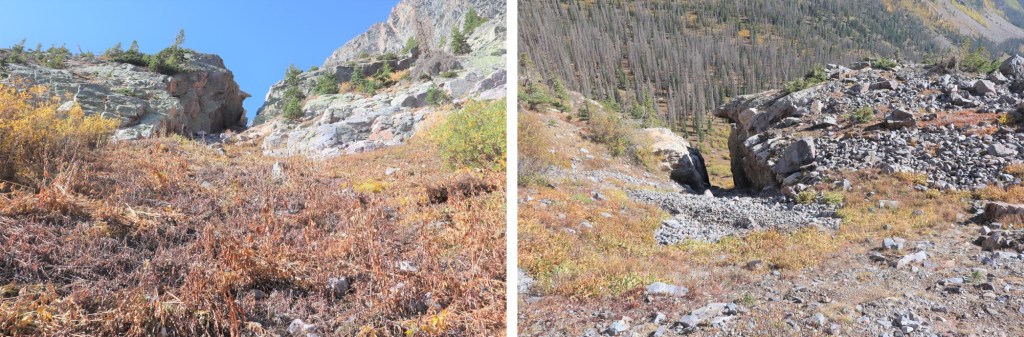
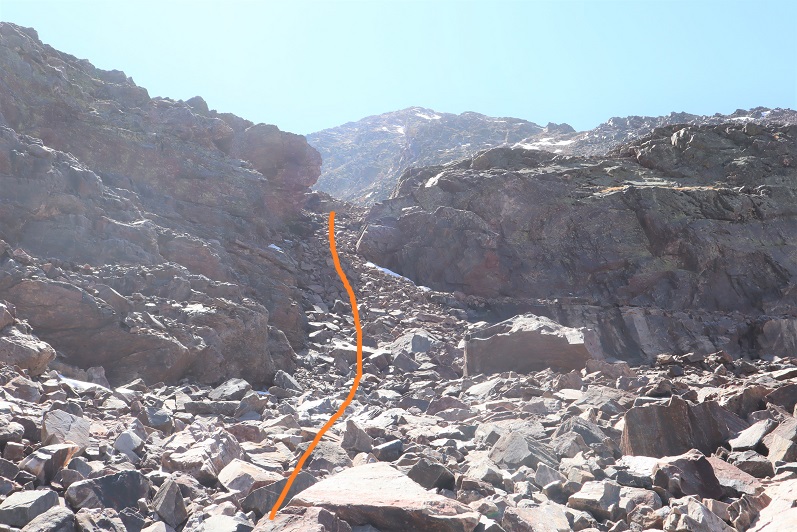
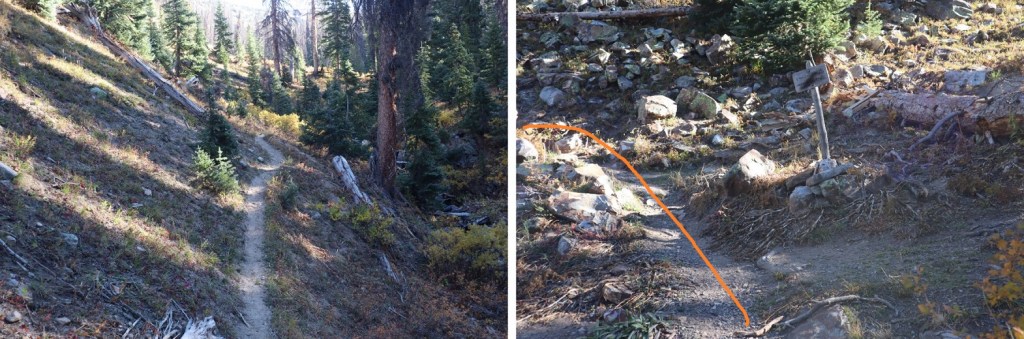
This is where many people get lost. I headed up the slope, and there was a large tree blocking the path. I went left, navigated willows and some boulders, then regained the trail.
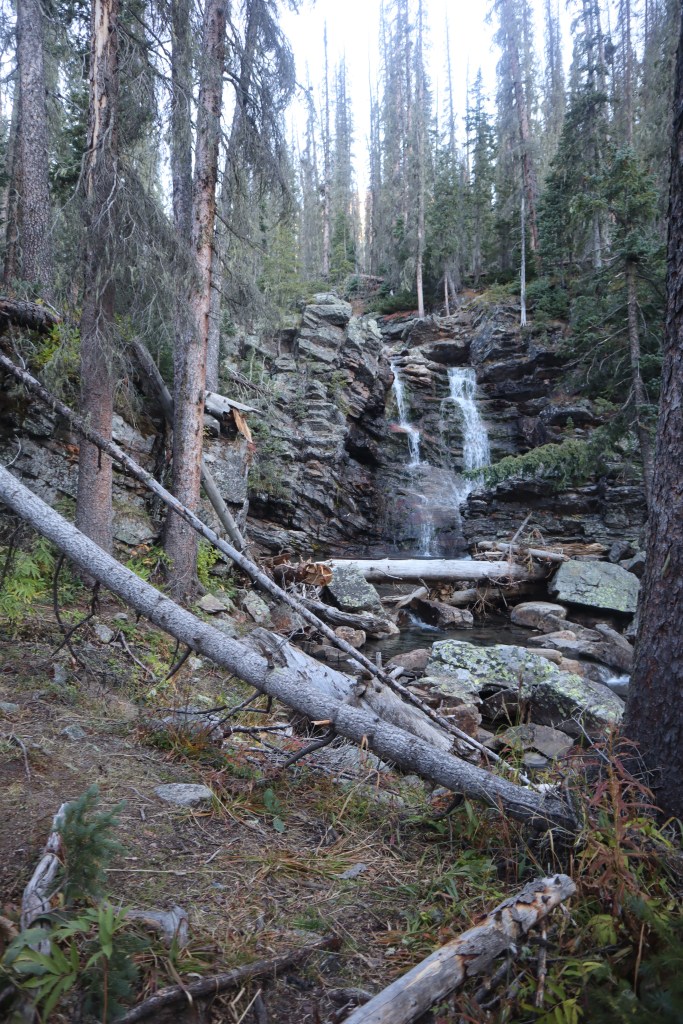
I could now see the waterfall clearly. A lot of people continue straight here, towards the waterfall, following the social trails. Instead, look for a trail to the right that goes up and behind the waterfall.
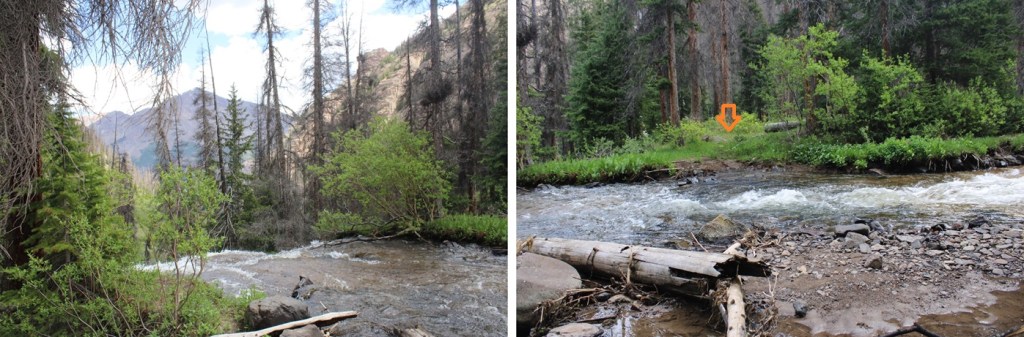
Next, to cross the creek. I crossed directly above the waterfall. Probably about 10 feet from where it drops off. At night I knew where to cross because there are little reflecting circles on the trees across from the water that glow when you shine your flashlight across them. The water was running high today, and I didn’t want to go over the edge, so I crossed carefully. The water was up just past my knees.
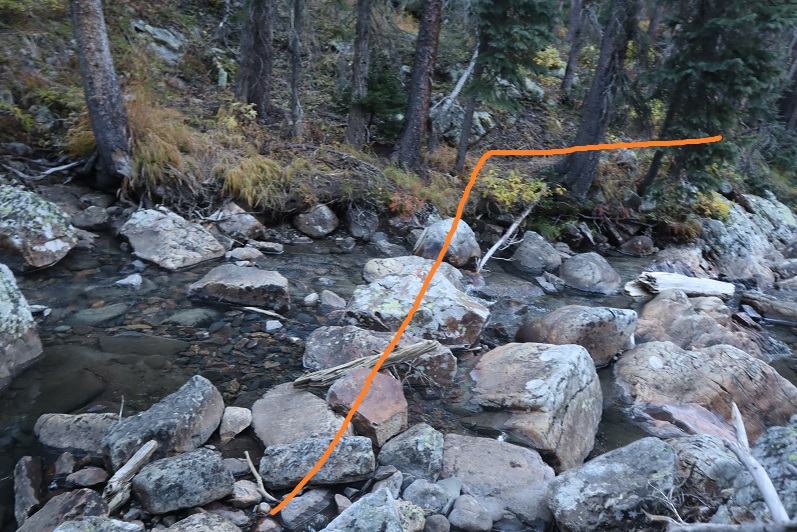
I picked up the trail on the other side, and quickly came to a second creek crossing.
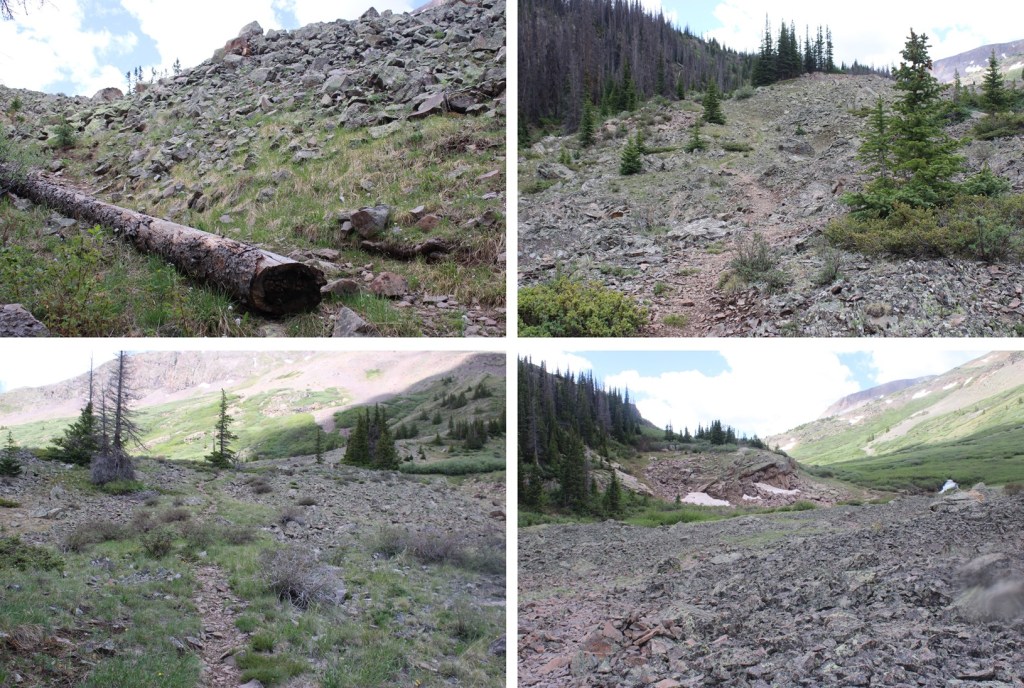
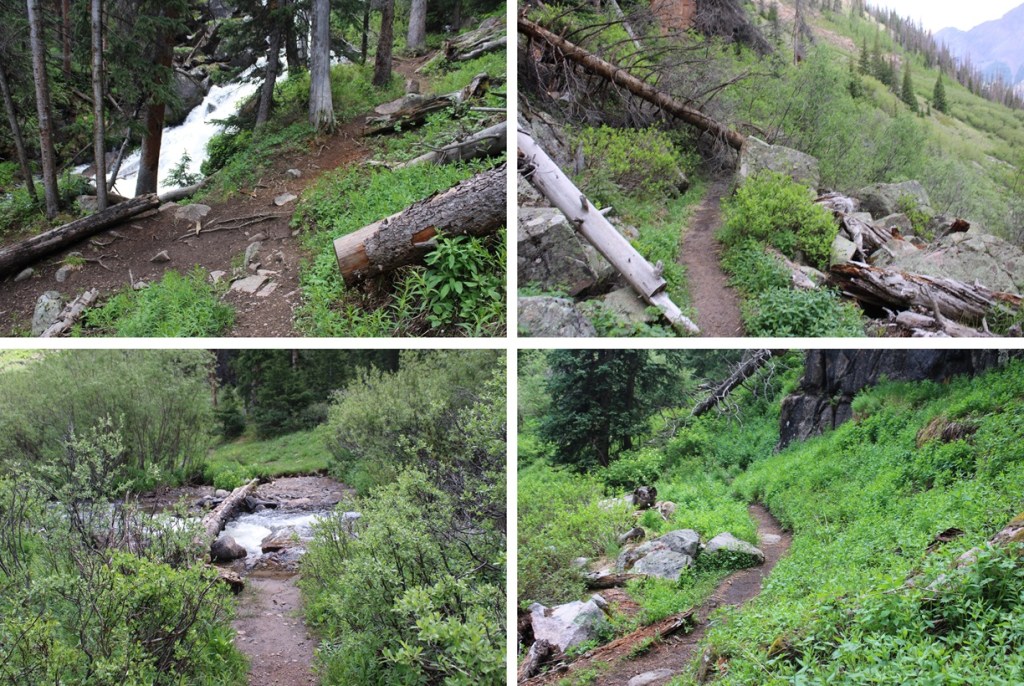
I picked up the trail again on the other side, and ascended through a cairned, rocky area.
This led me to my final creek crossing of the morning.
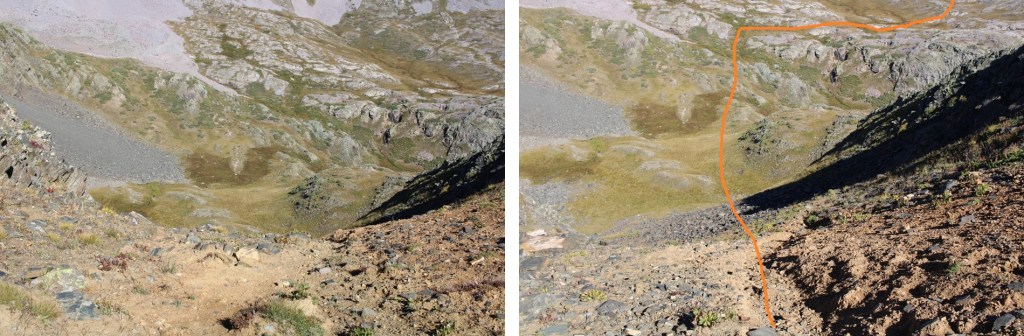
I crossed the creek one more time, and picked up the trail on the other side. It led me up and around to the left, behind boulders and through a small canyon.
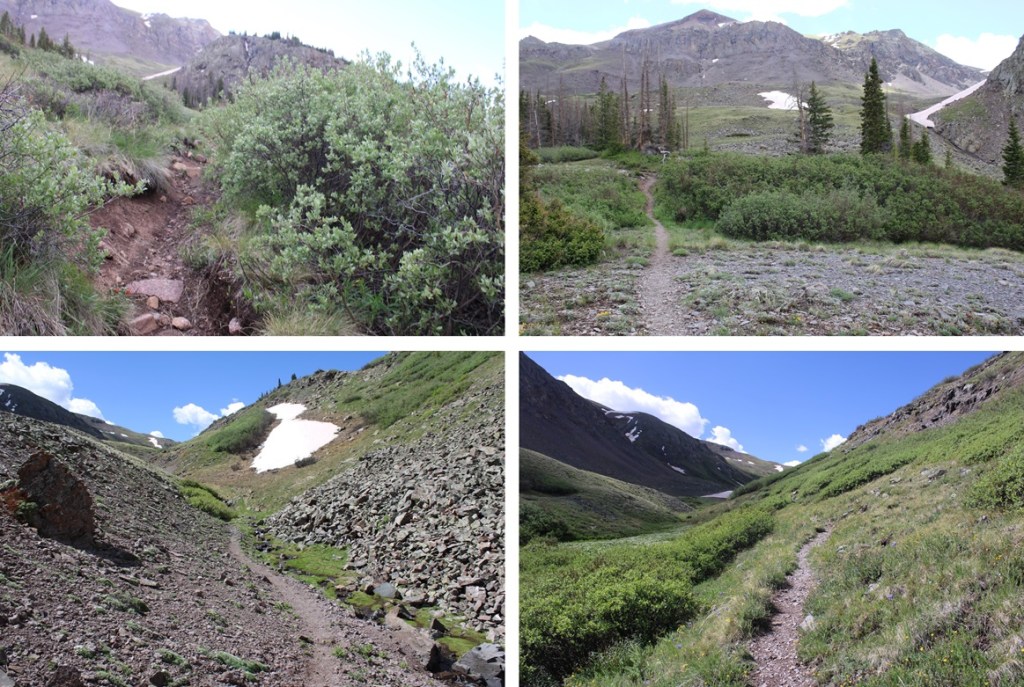
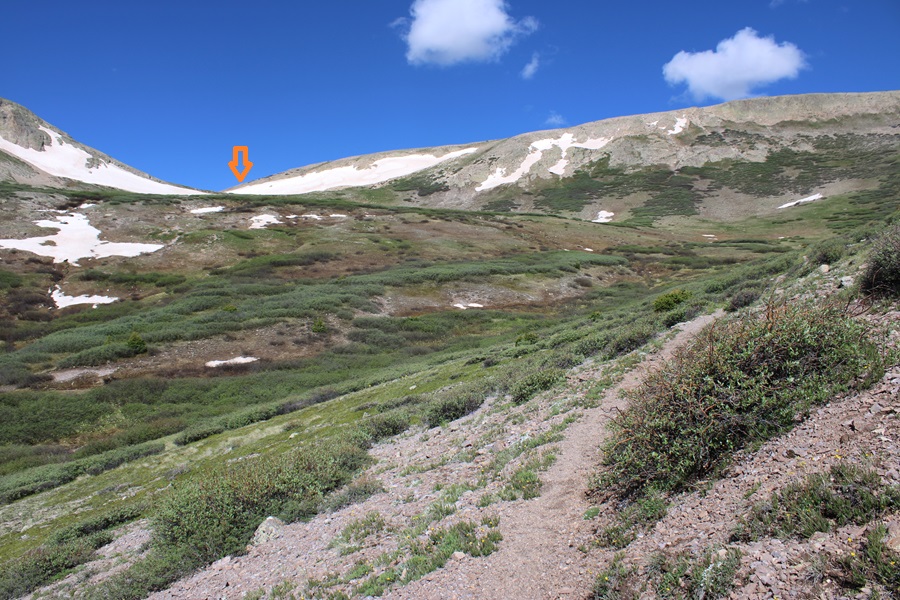
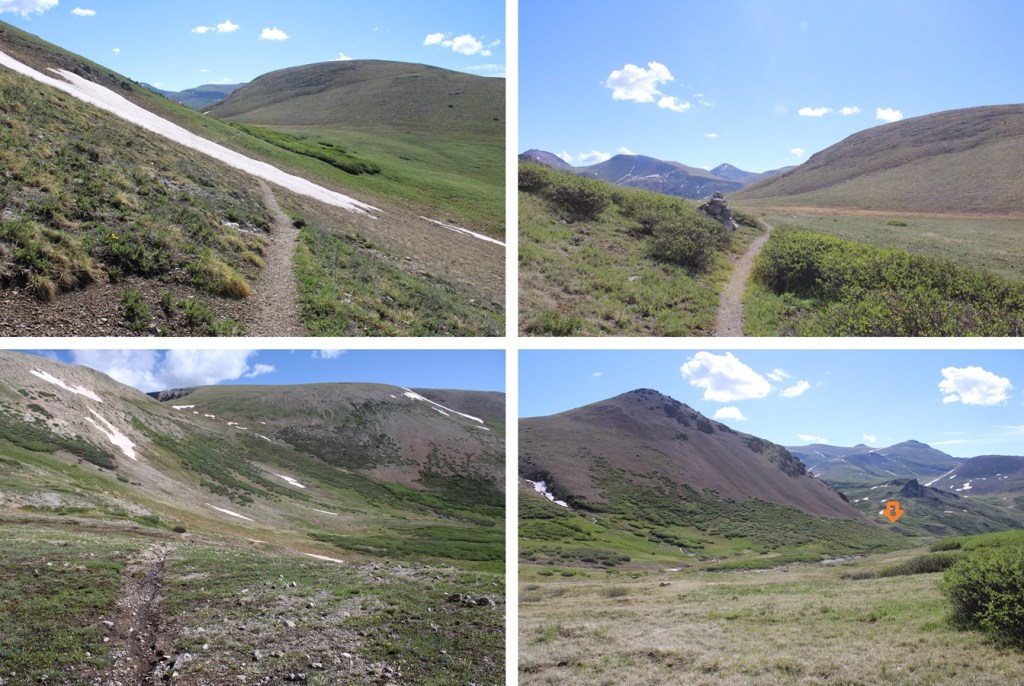
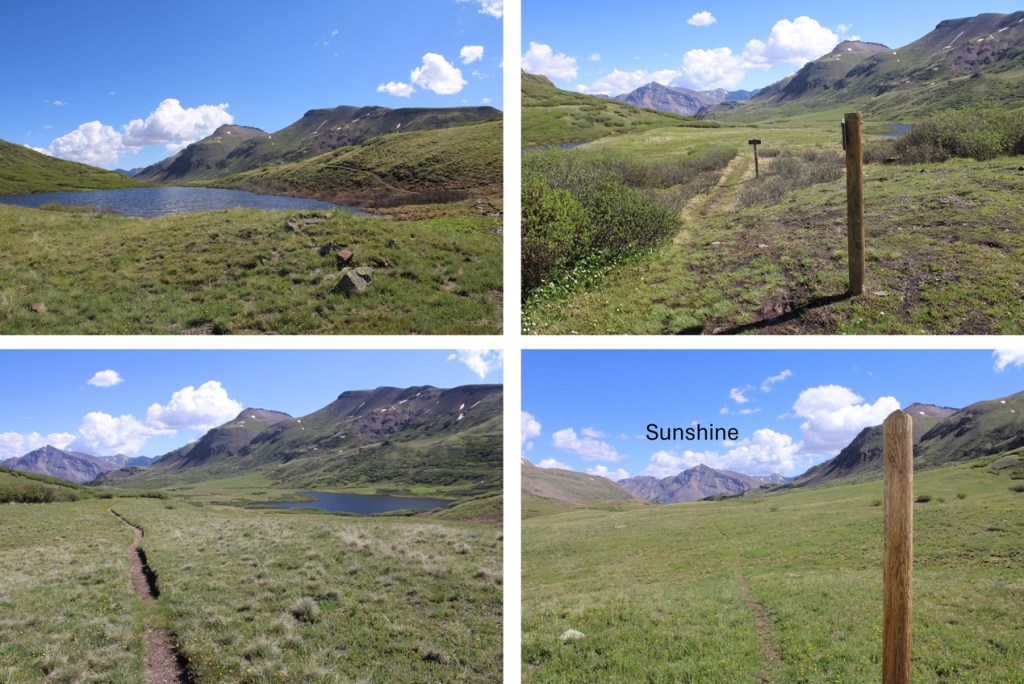
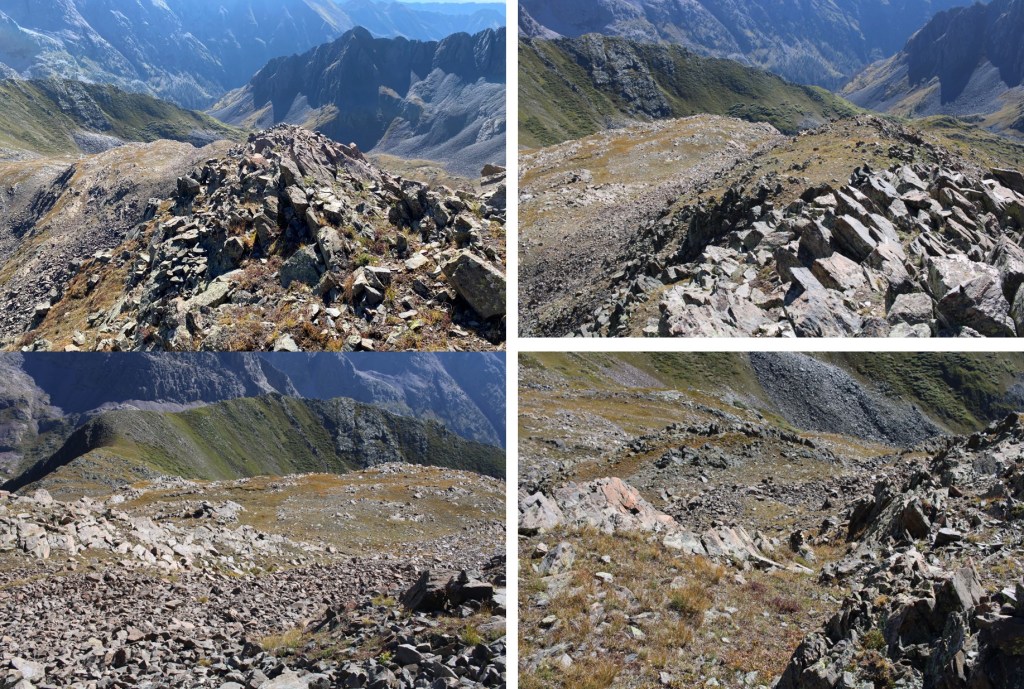
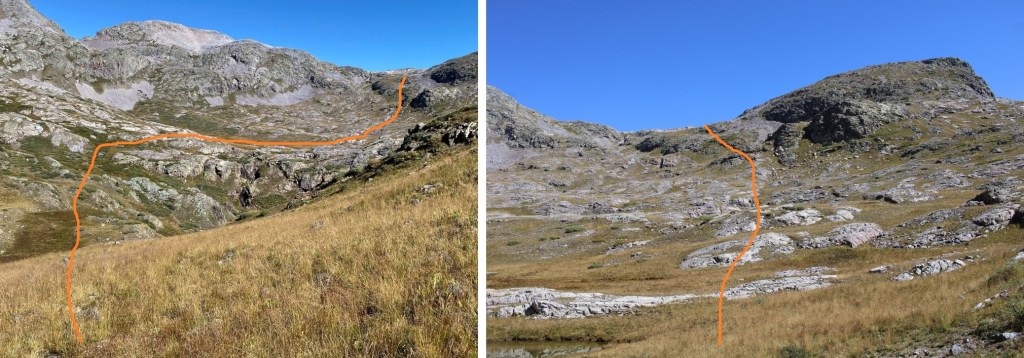
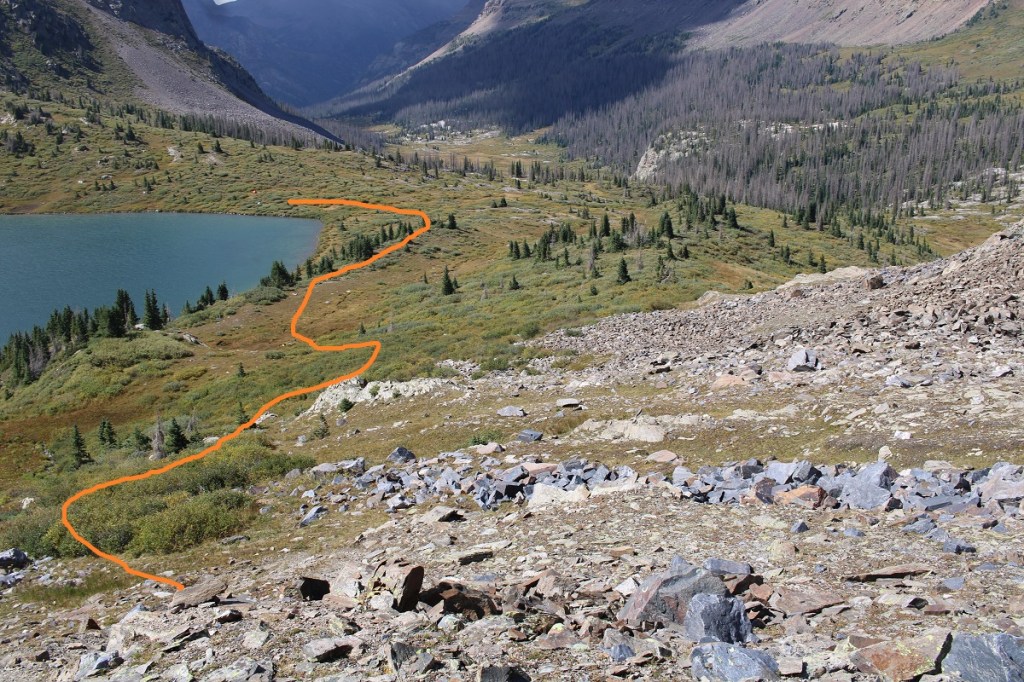
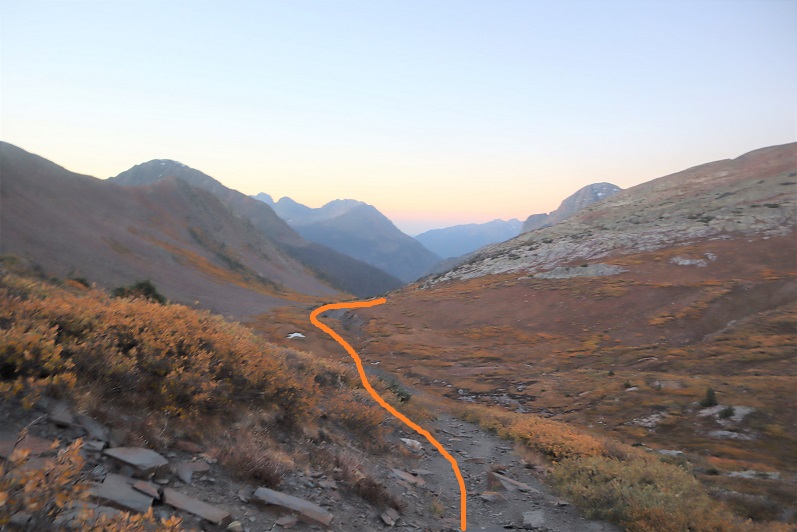
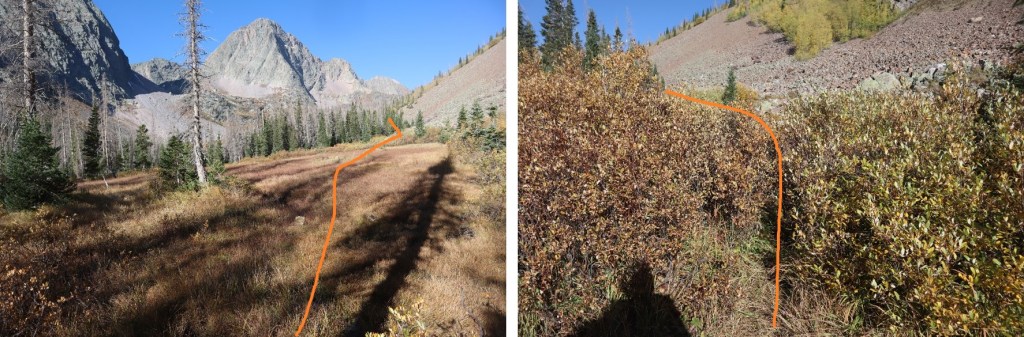
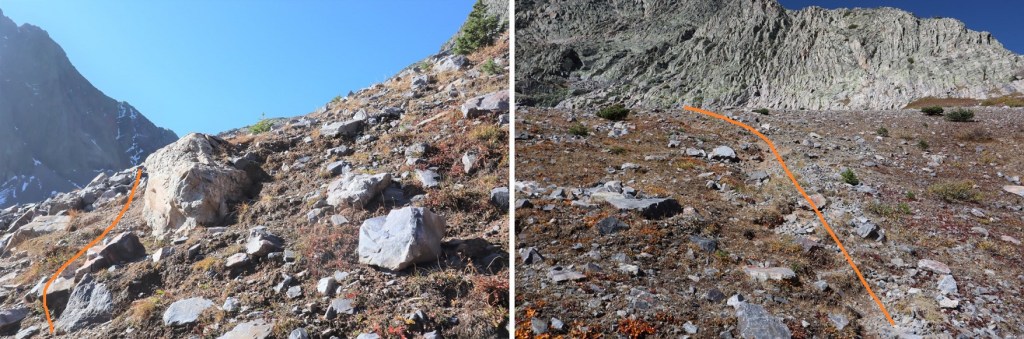
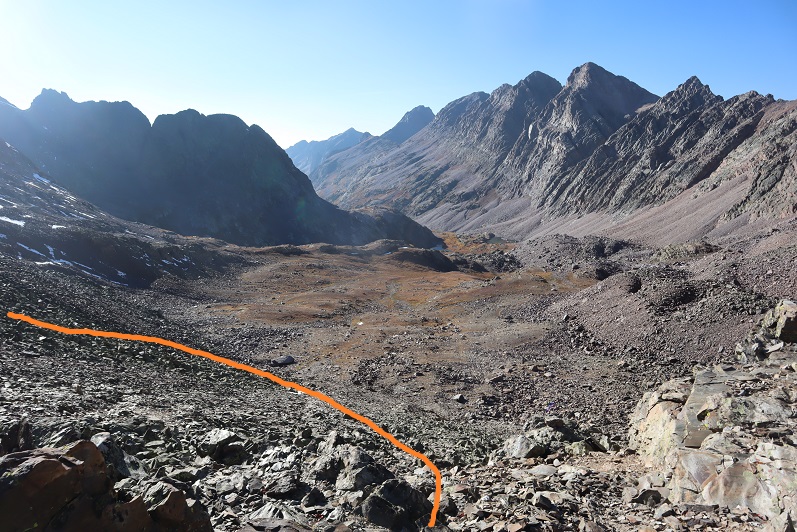
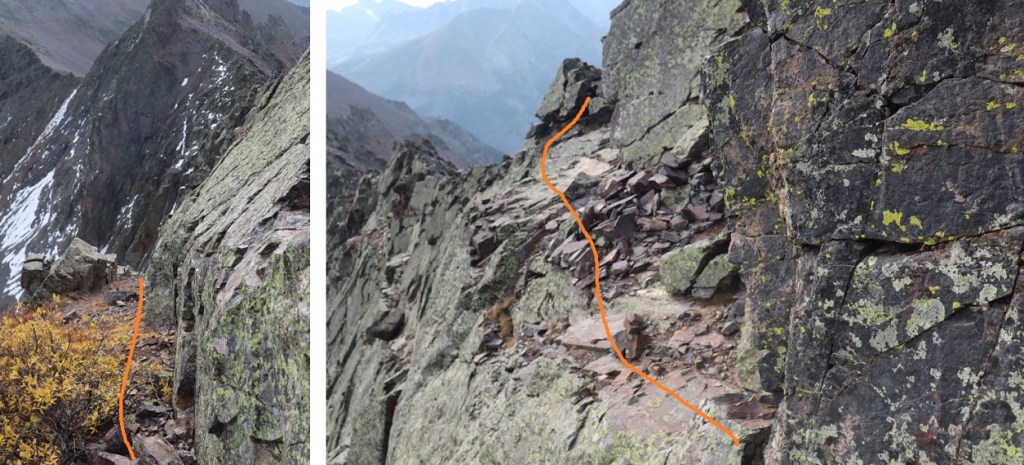
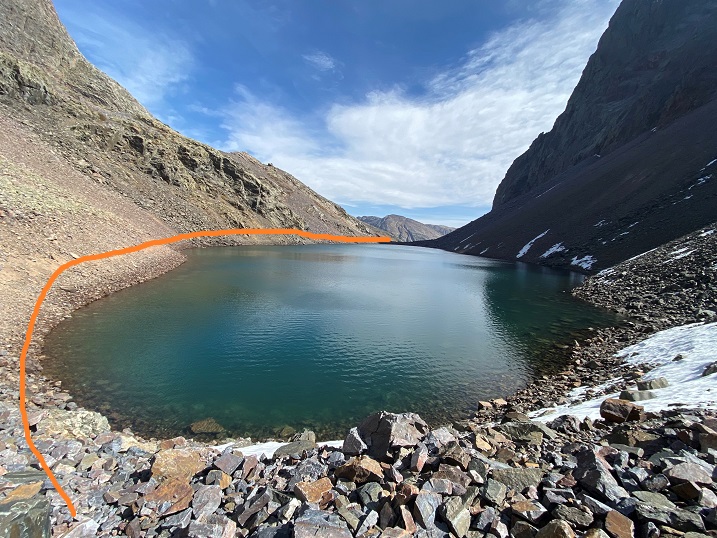
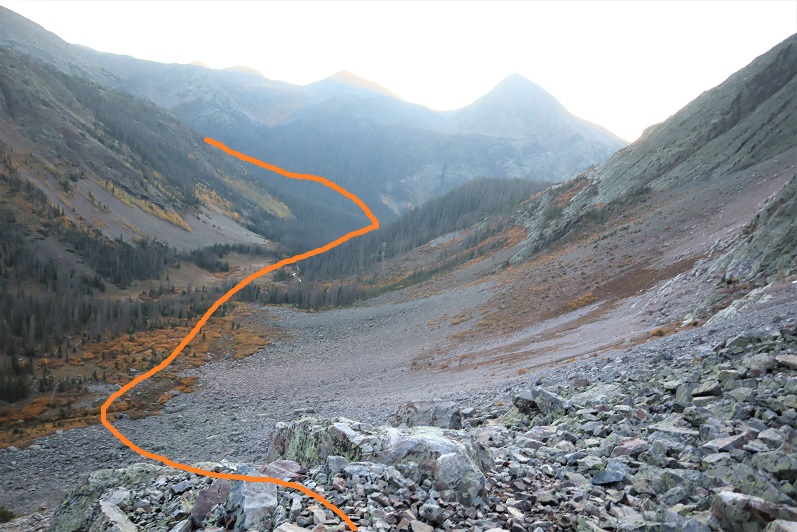
I was now headed south towards Cataract Lake. There’s a pretty good trail here, but every once in a while it gets overgrown. The trail slopes slightly downward as it goes across the tundra and through the willows. There are posts to help guide you if you lose the trail. I was headed here:
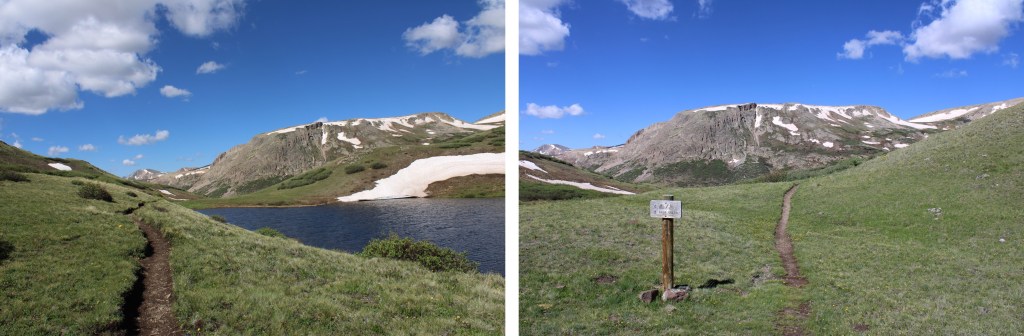
I passed Cataract Lake to my left, and a small lake to my right. Here the trail picked up with the Colorado Trail, and I followed it right, west, towards Cuba Gulch.
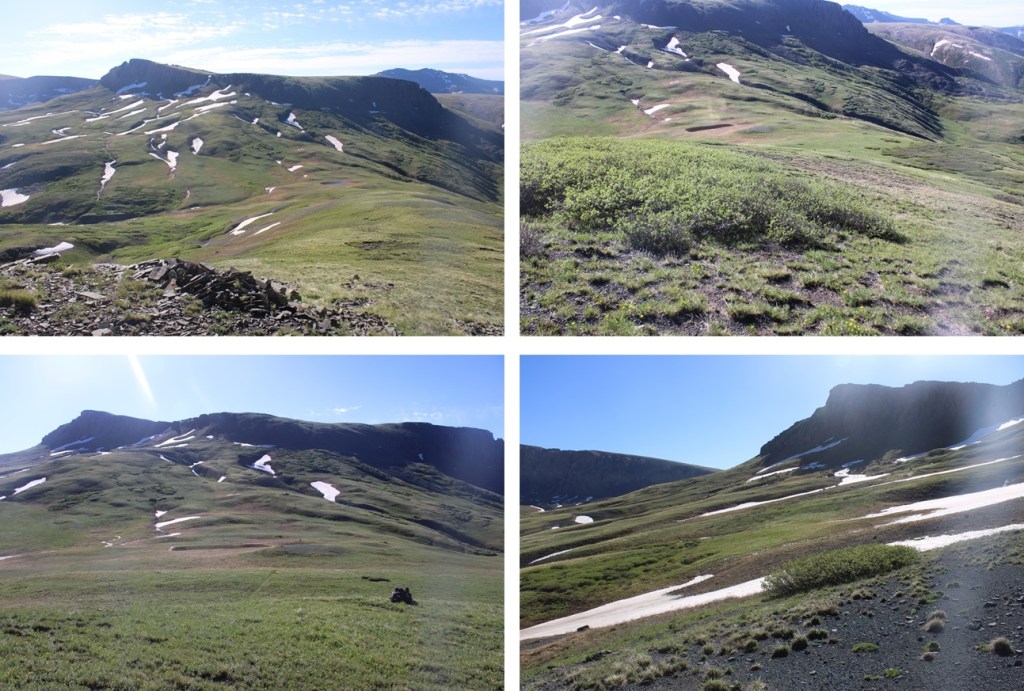
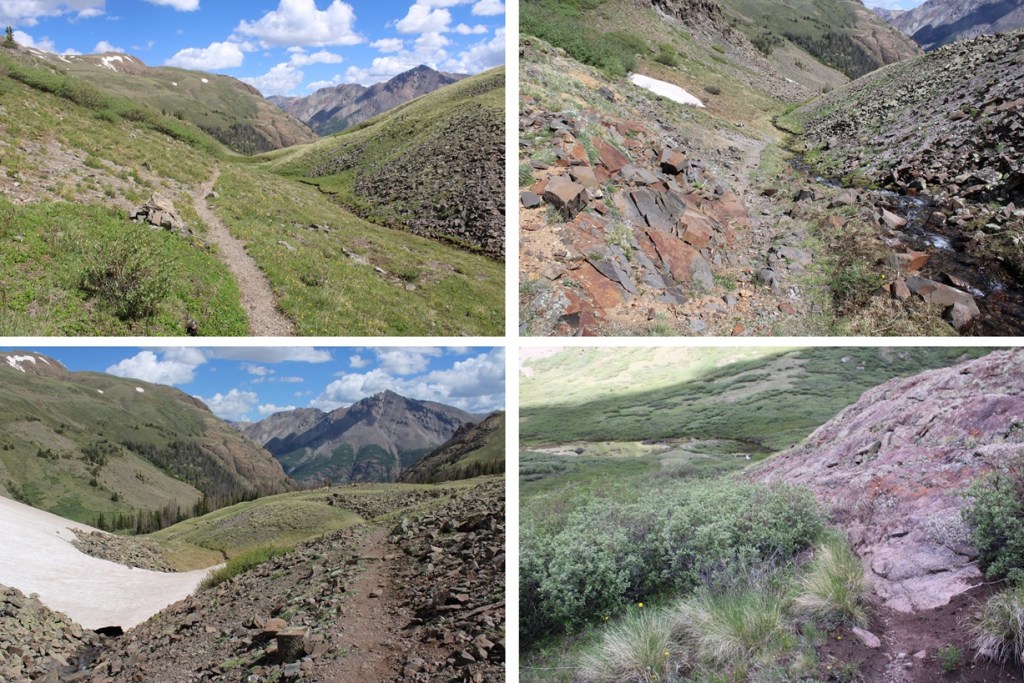
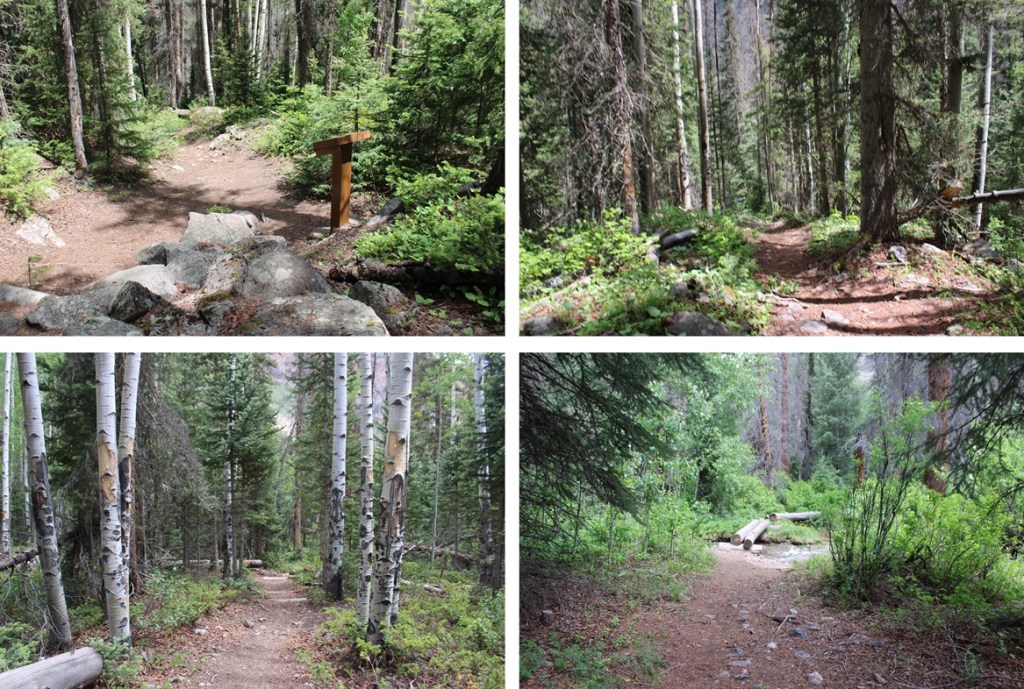
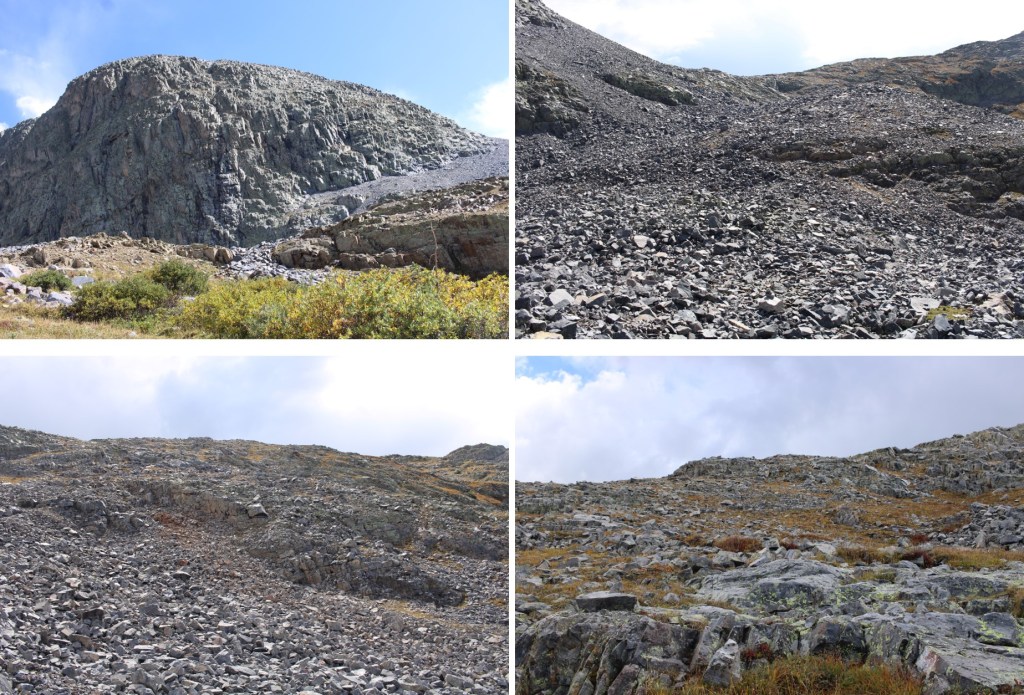
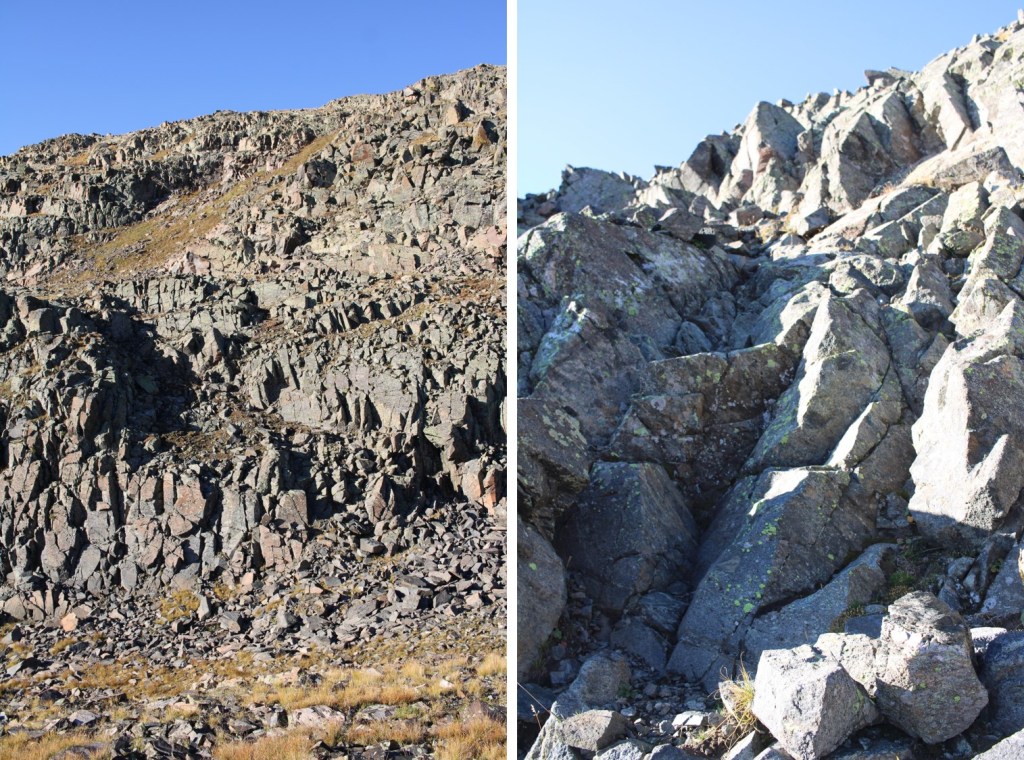
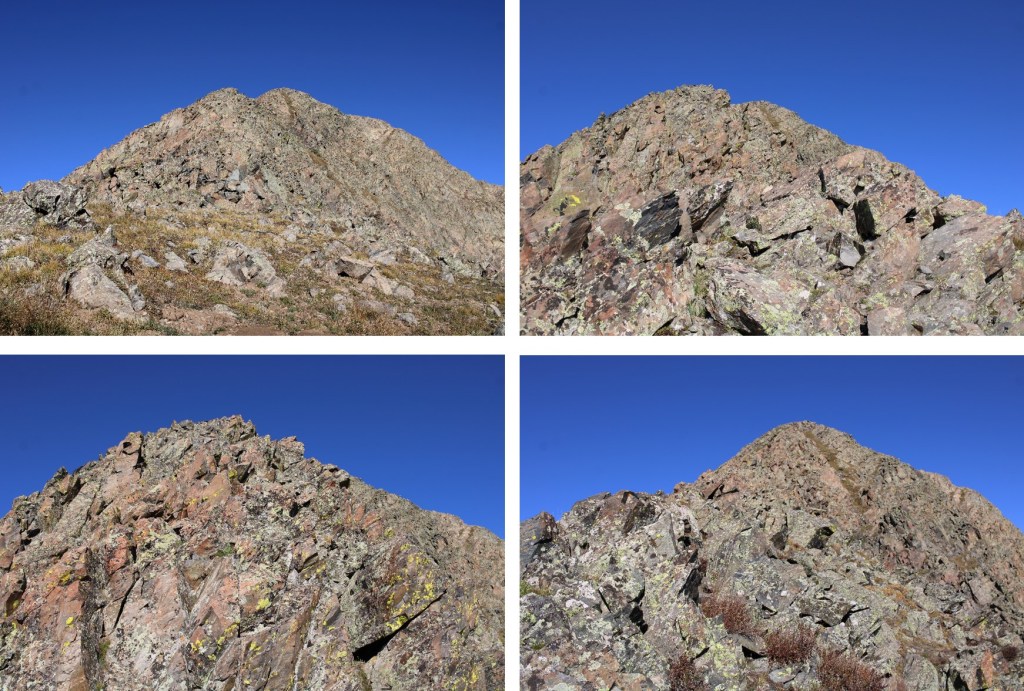
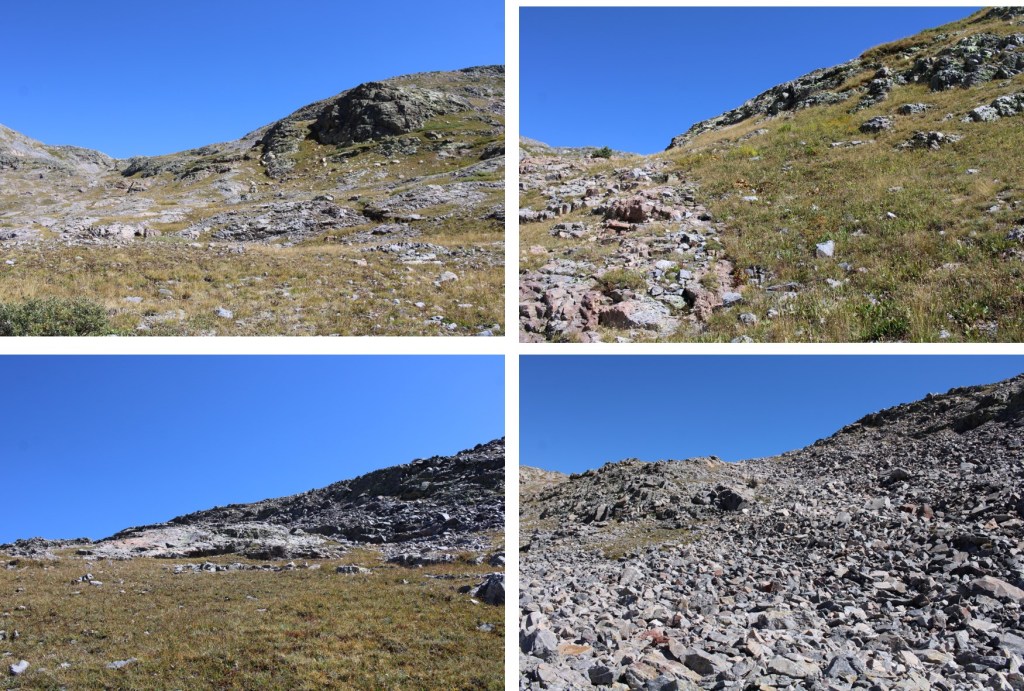
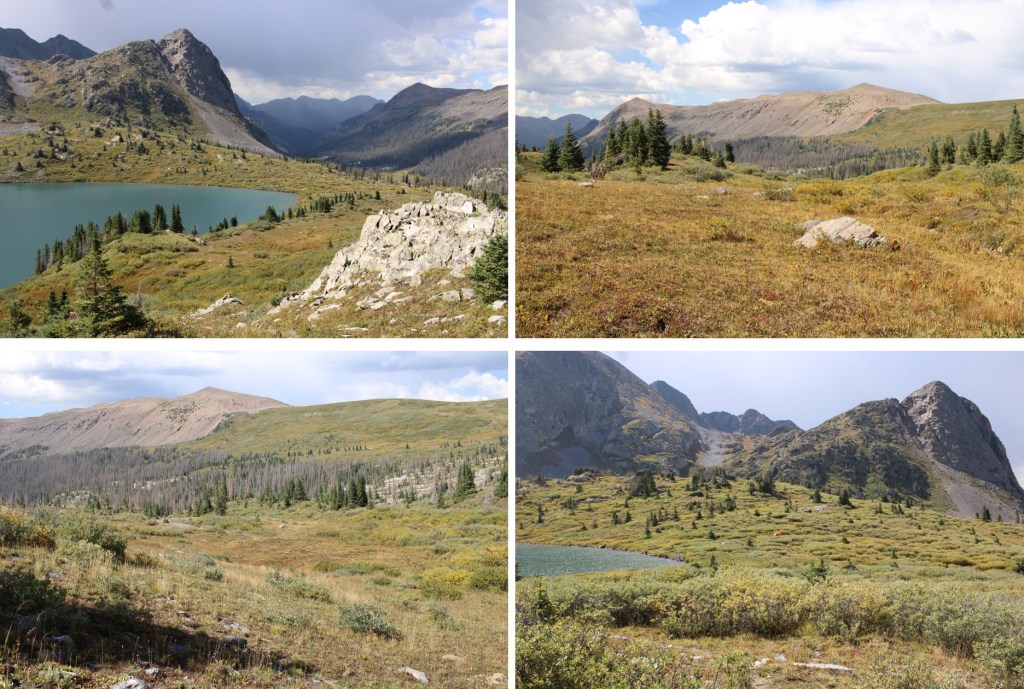
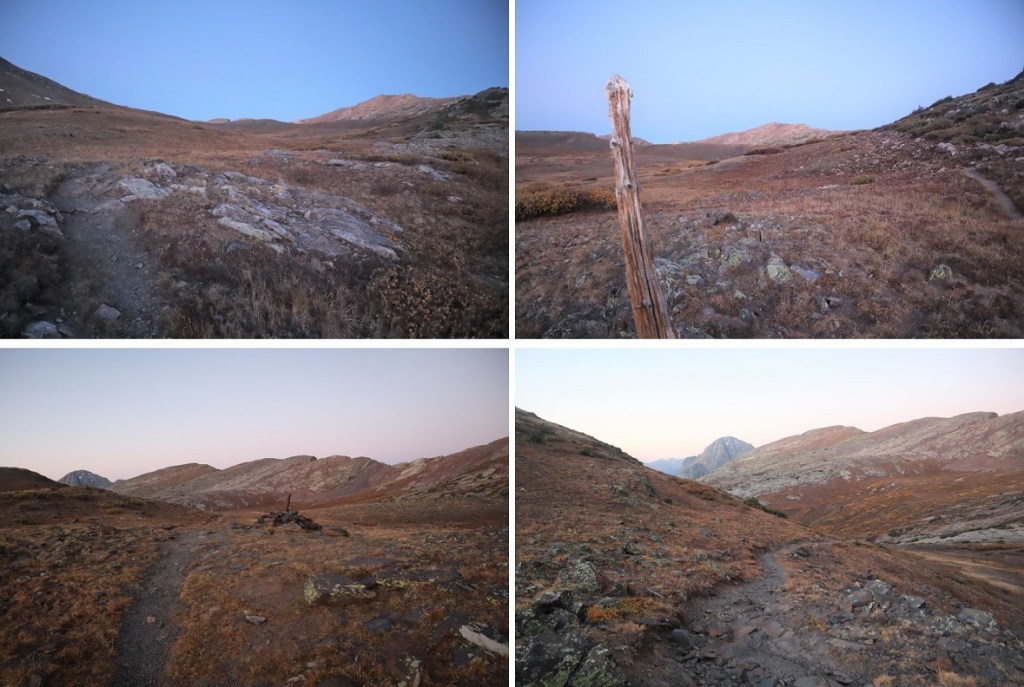
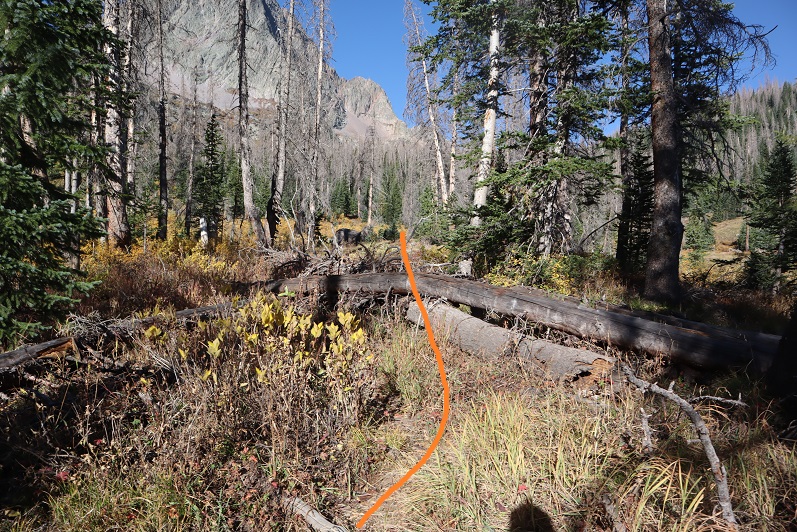
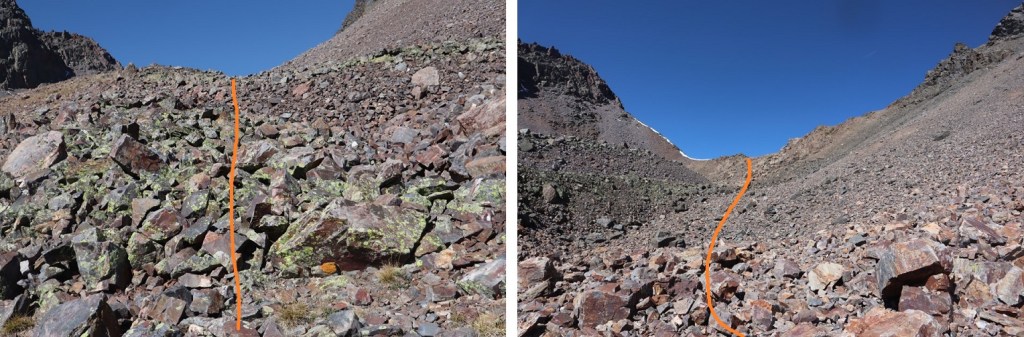
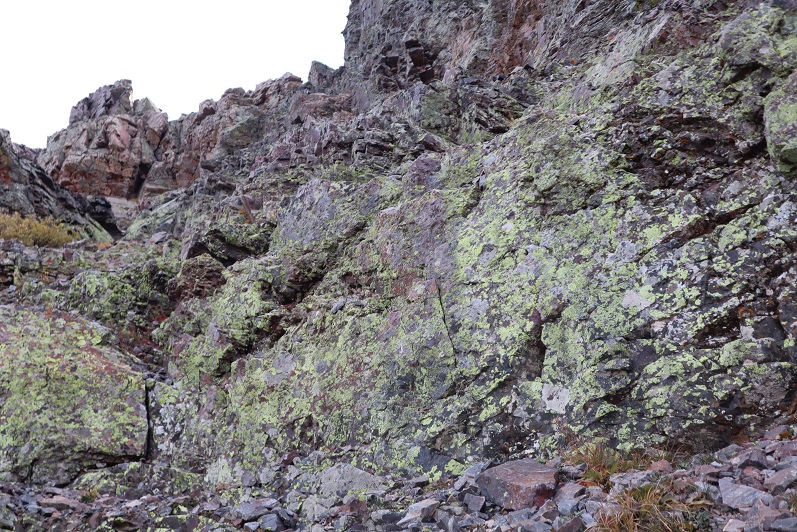
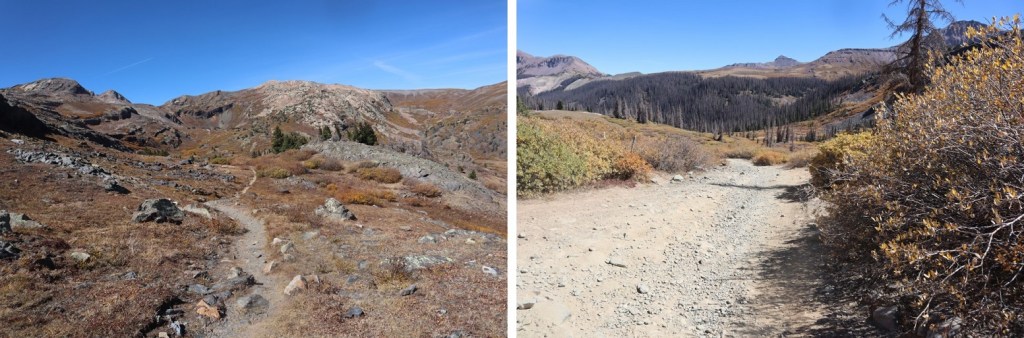
I stayed on the Colorado Trail (East Fork Middle Pole Trail) for most of the rest of the hike. Here are some pictures of the trail.
The trail meanders it’s way to a saddle:
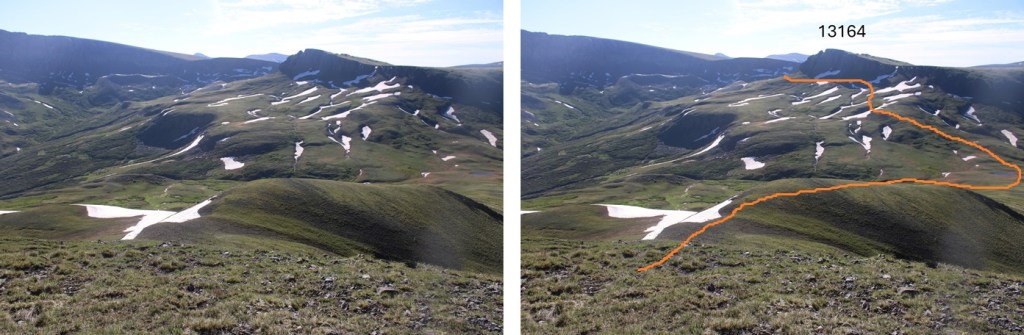
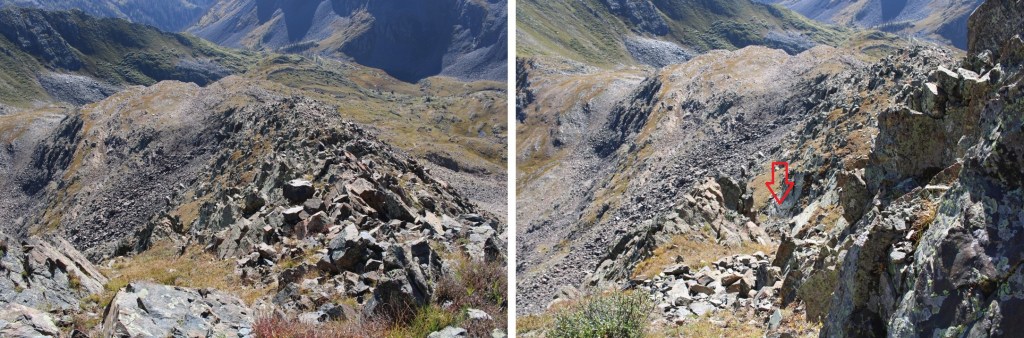
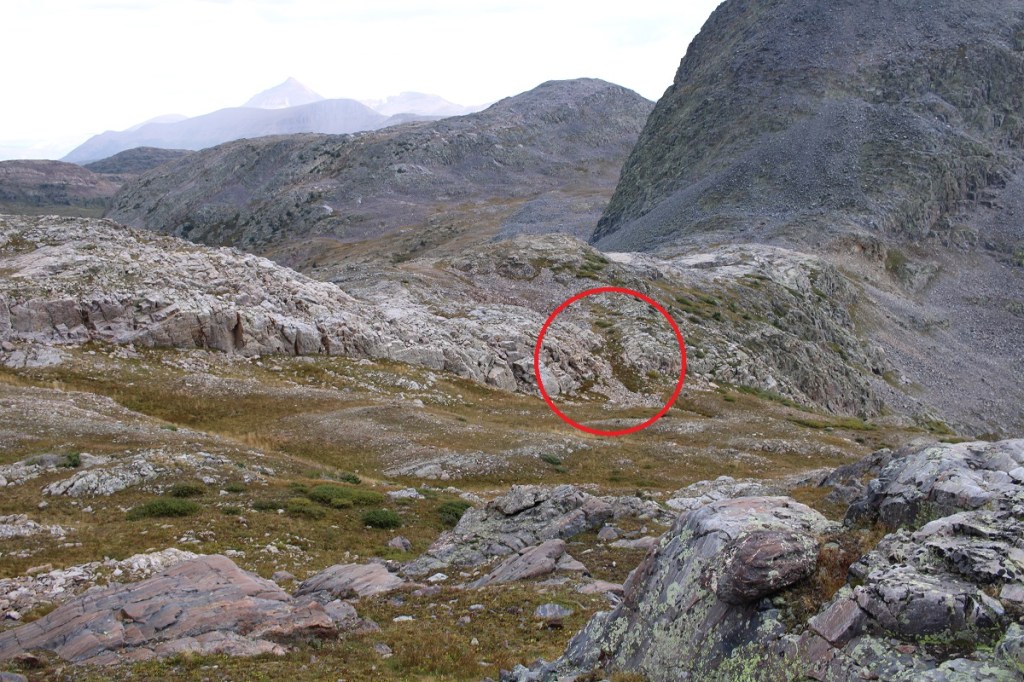
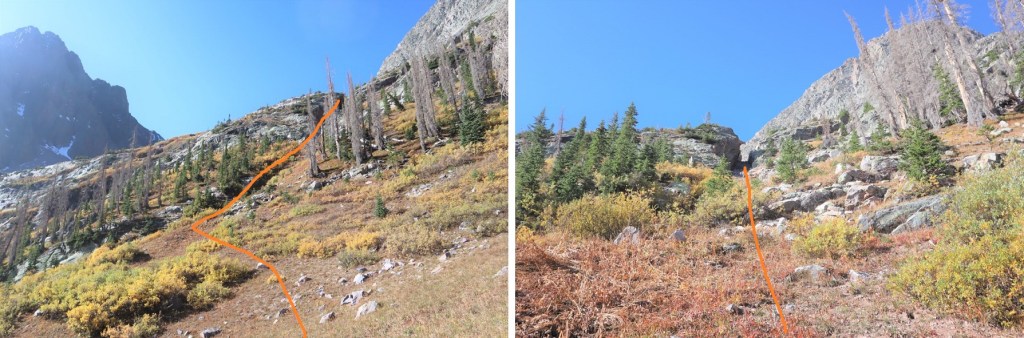
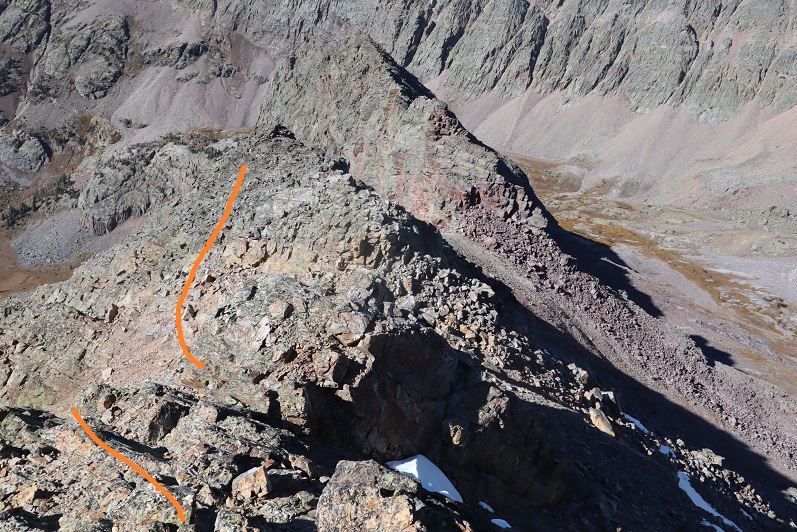
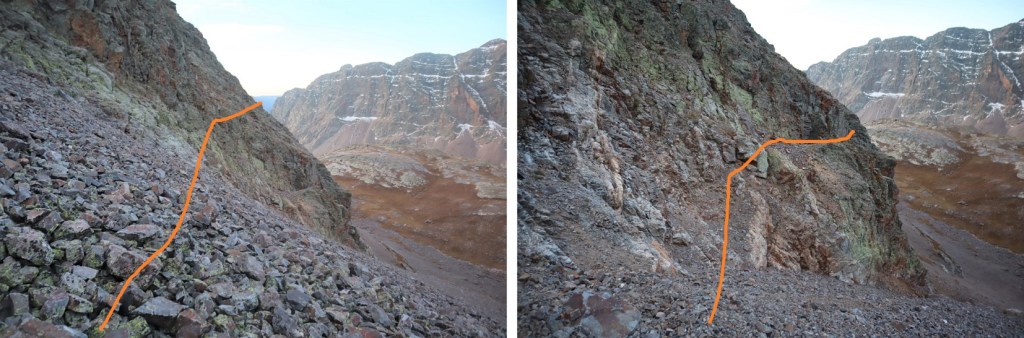
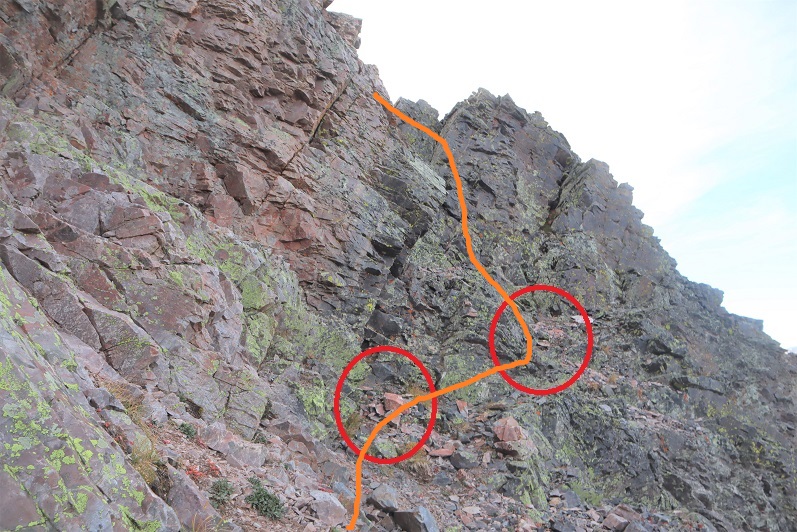
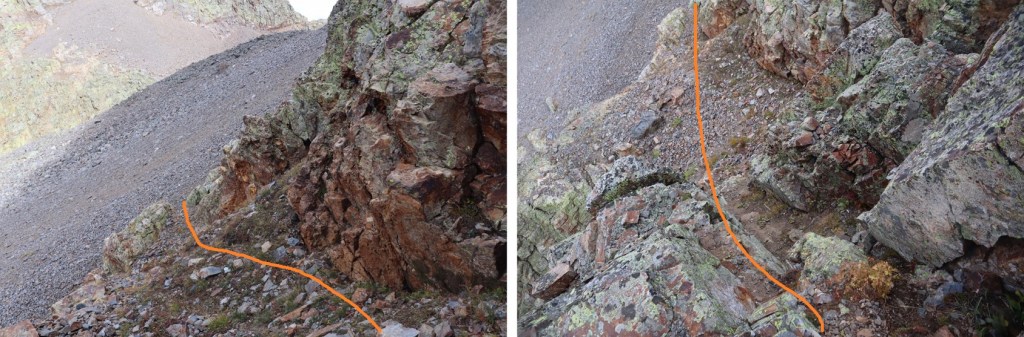
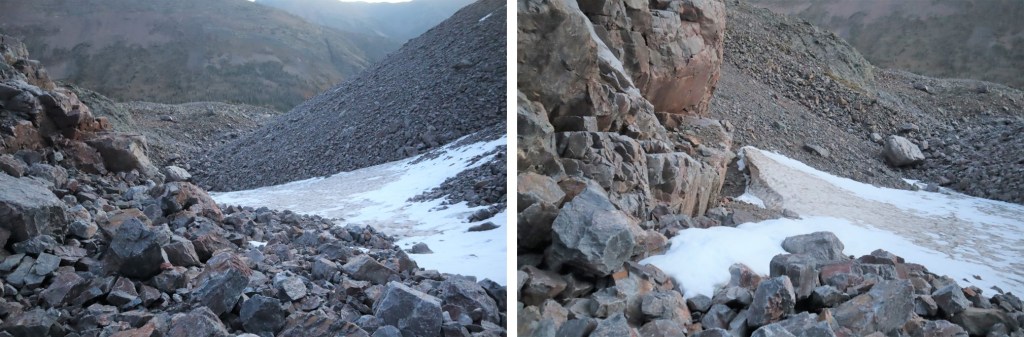
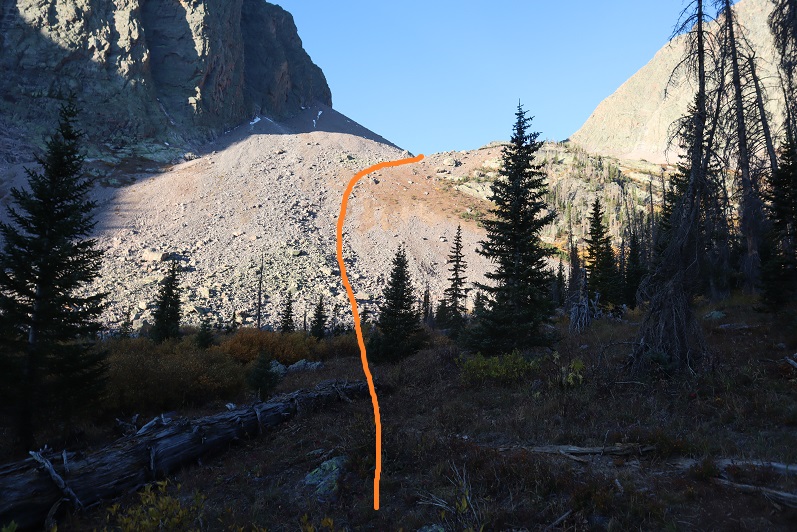
I skirted around the north side of 13164, navigating through a could of ice patches.
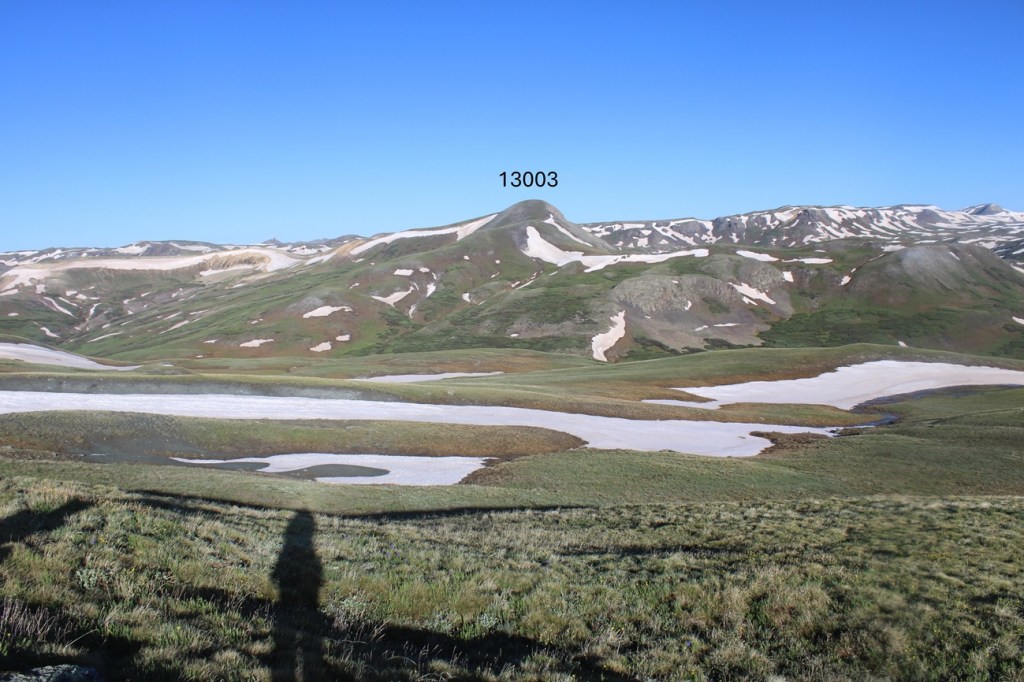
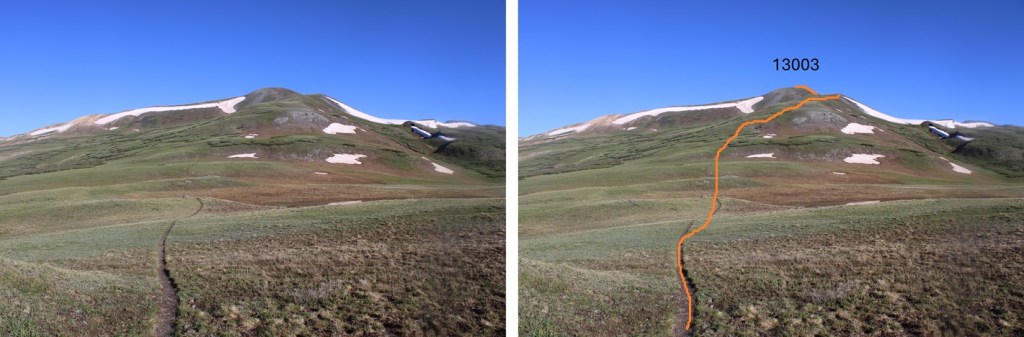
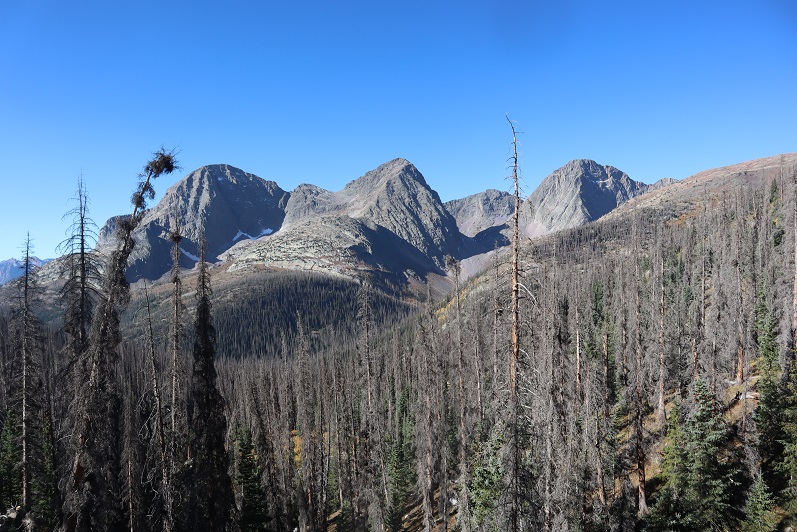
Now on the north side of 13164, I could see 13003 to the west.
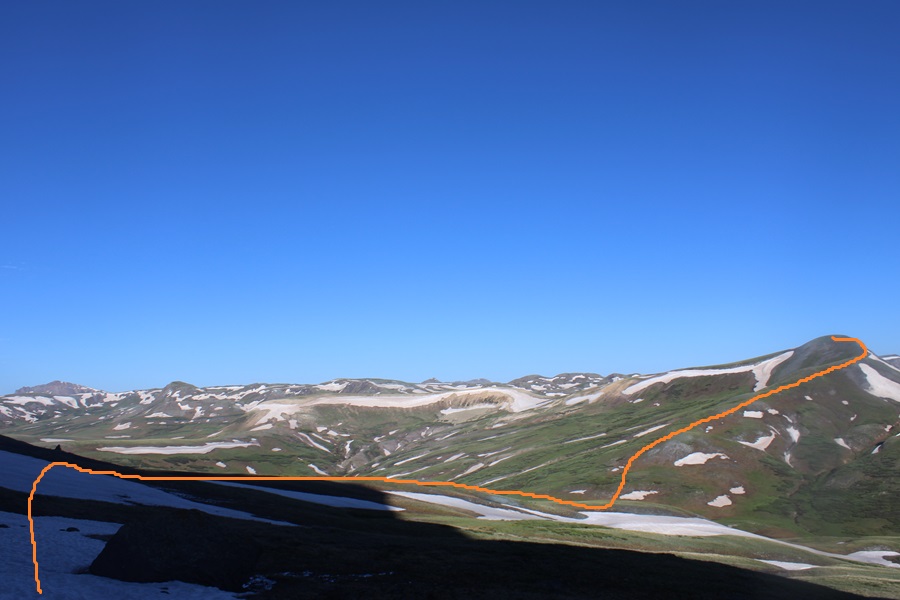
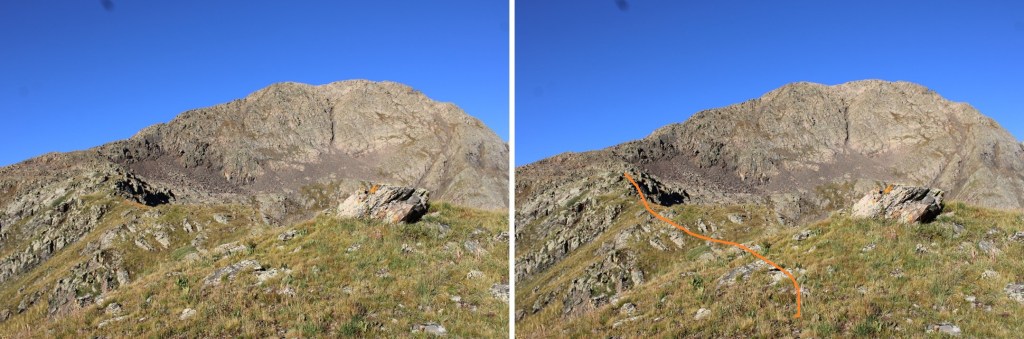
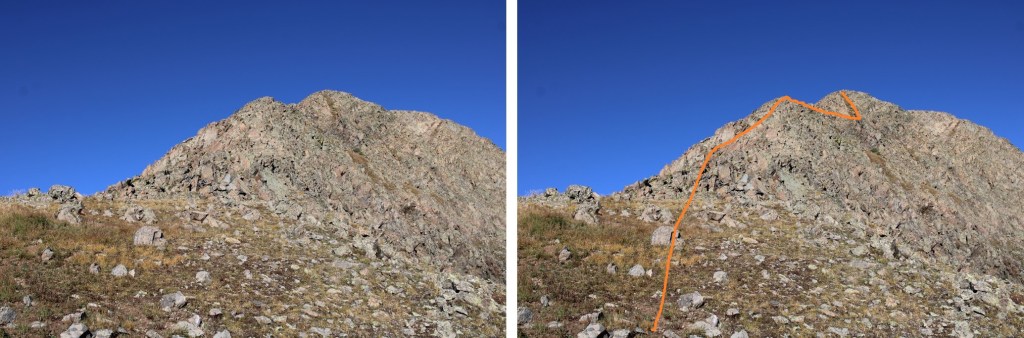
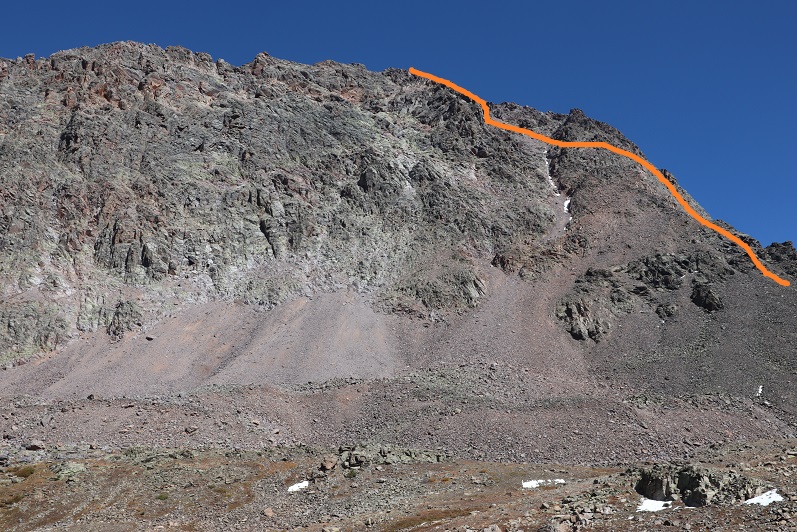
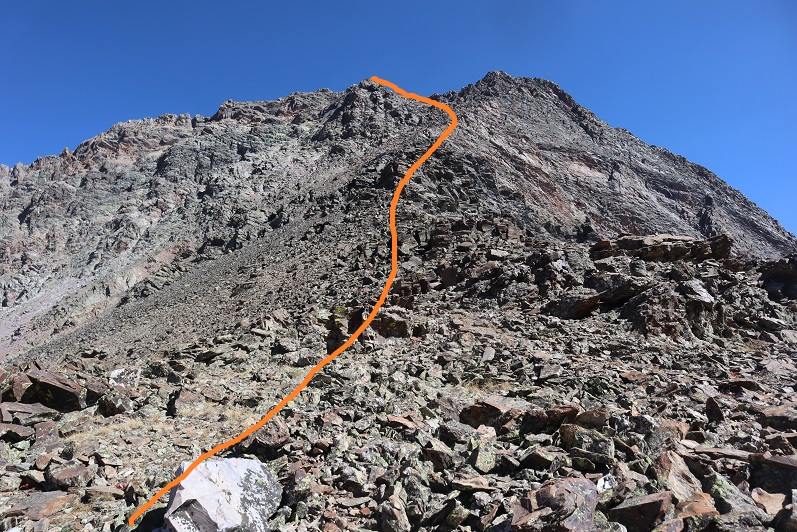
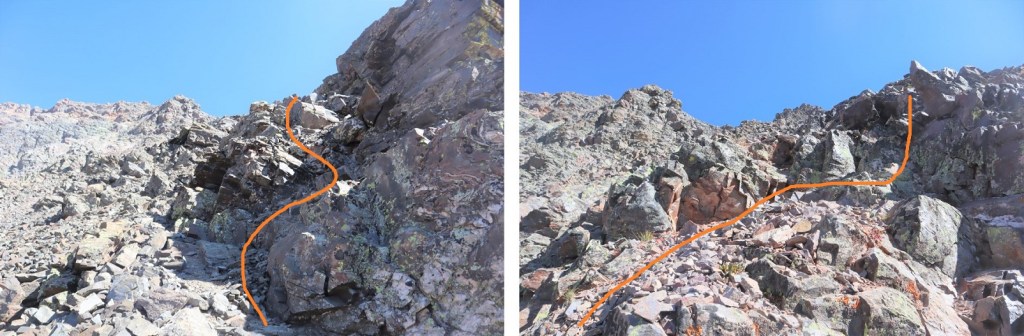
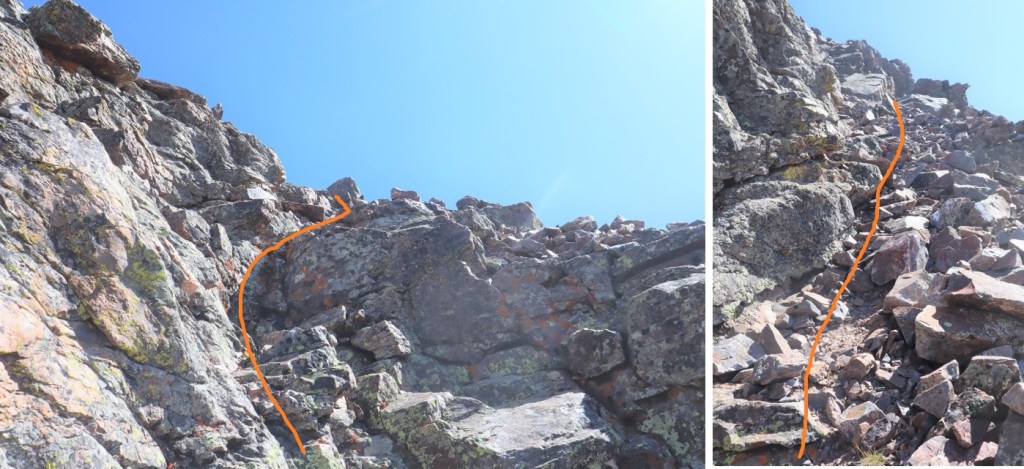
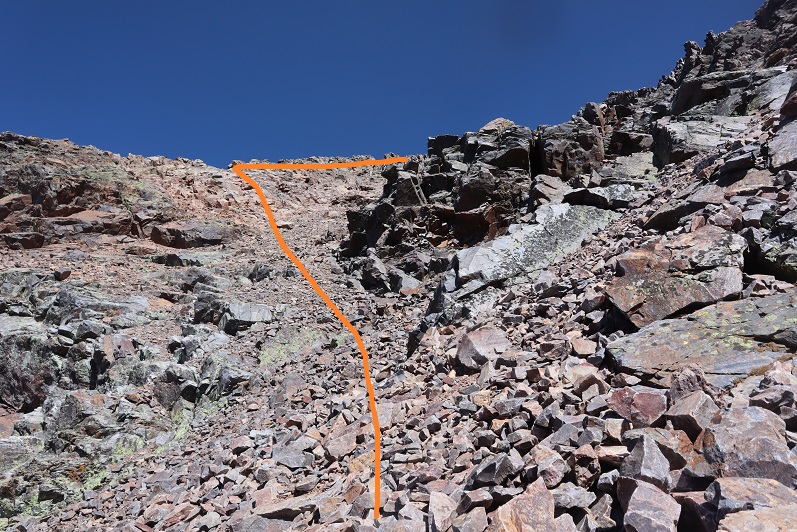
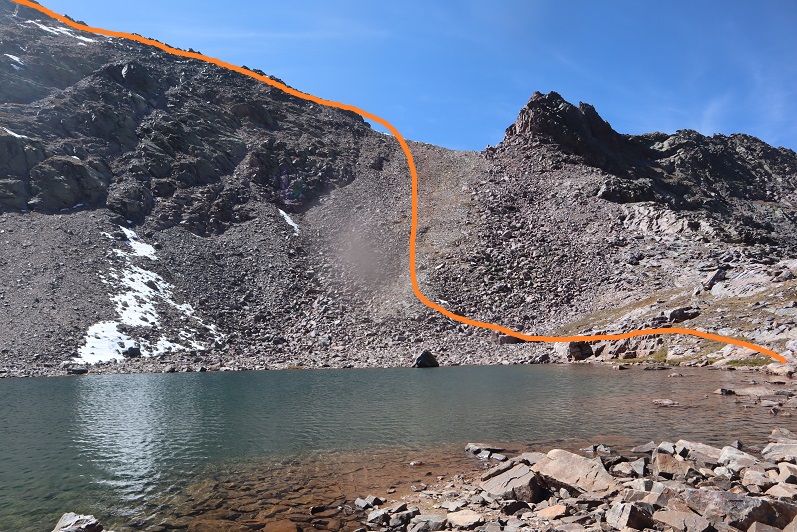
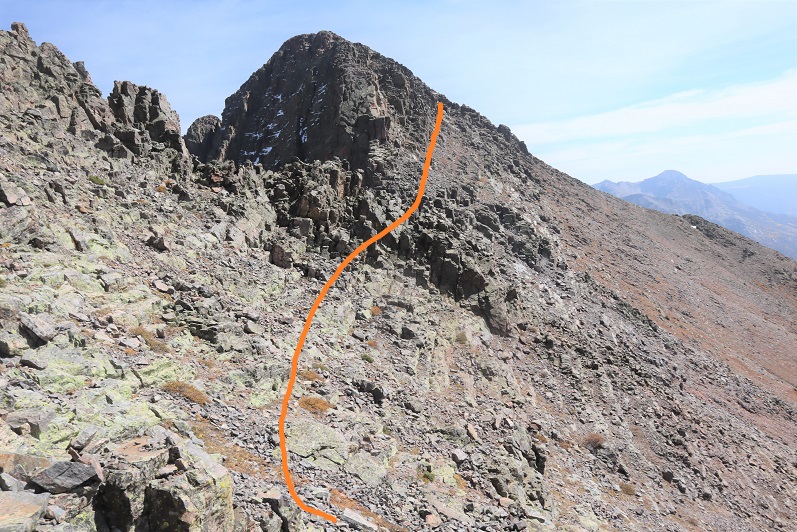
I stayed on the Colorado Trail until I hit the saddle of 13164 and 13003, losing about 500’ of elevation, then left the trail and took the tundra covered ridge to the summit. This is the route I took.
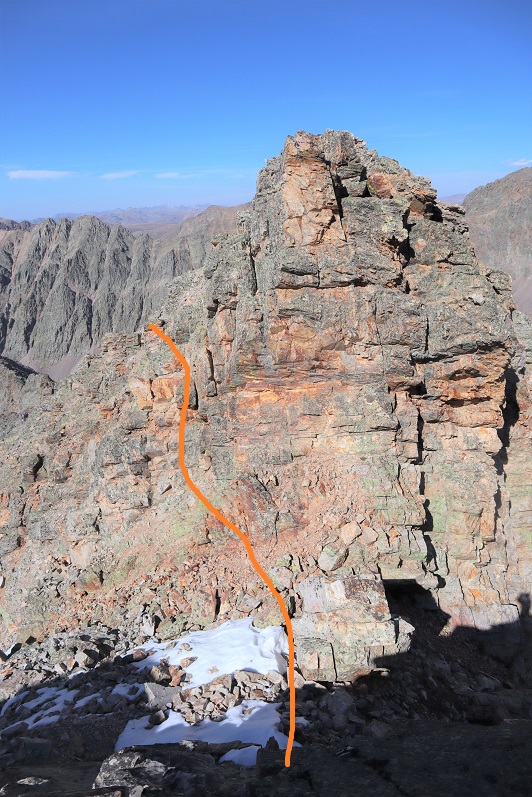
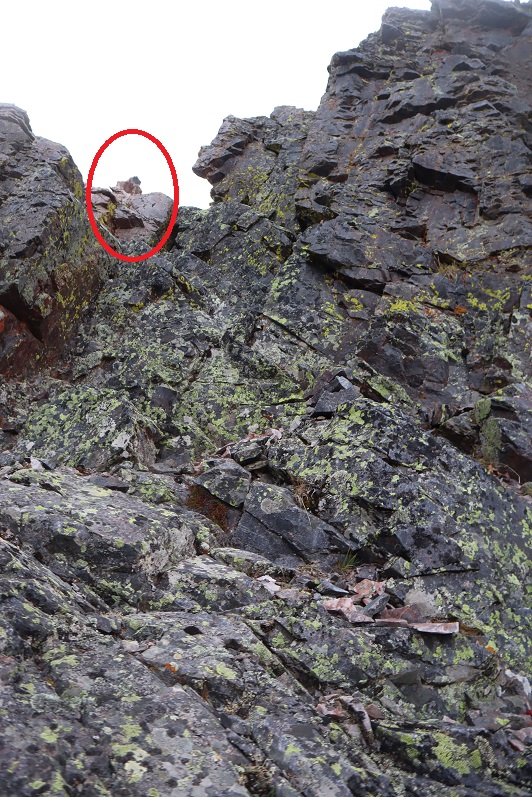
I made my way to the saddle
Then hiked the ridge to the summit
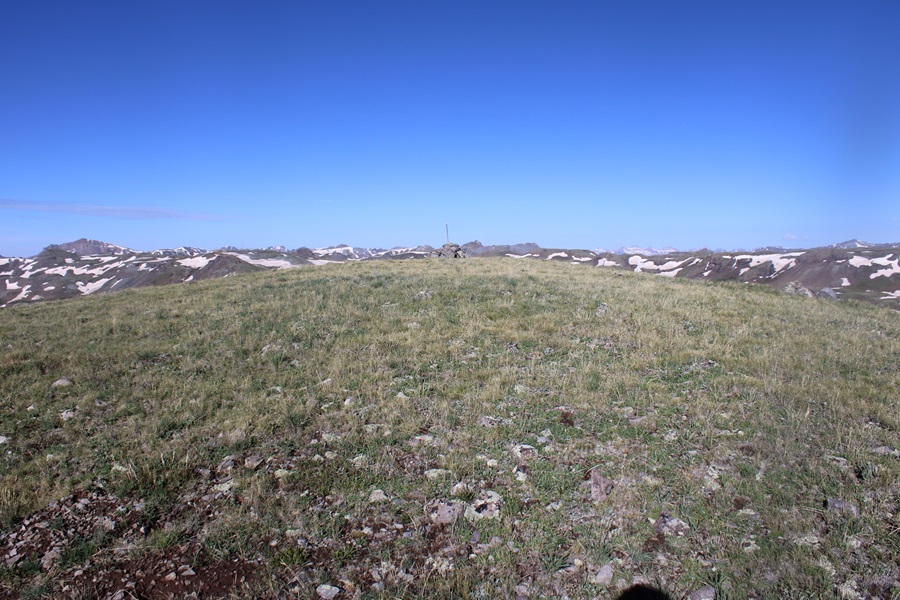
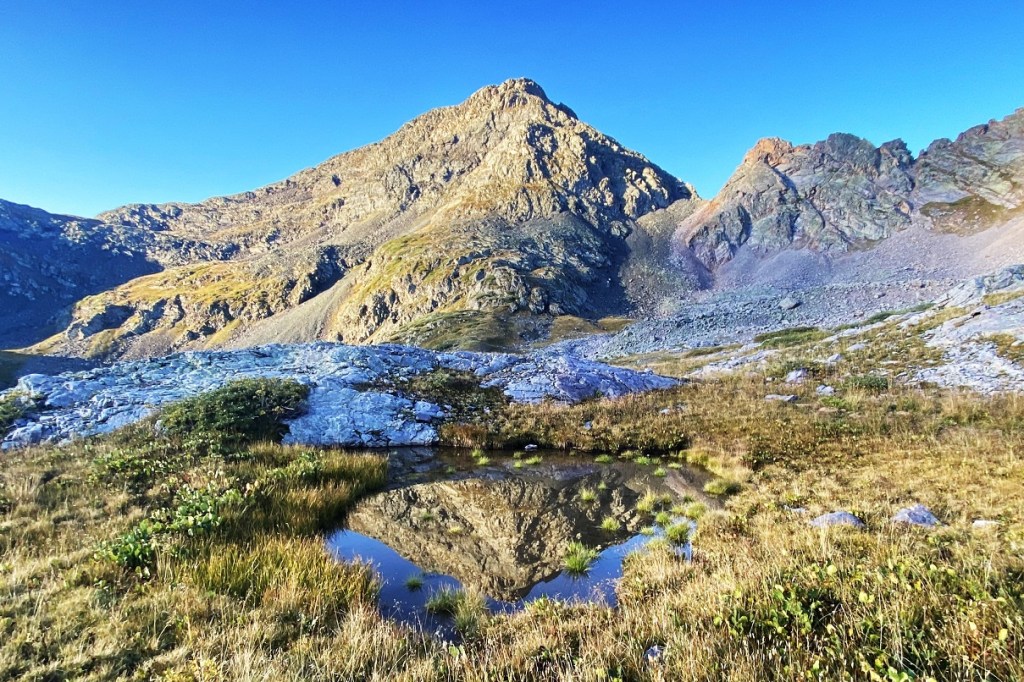
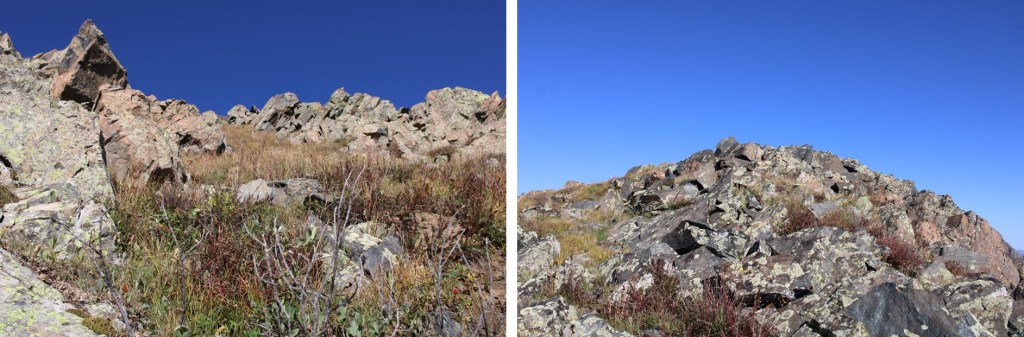
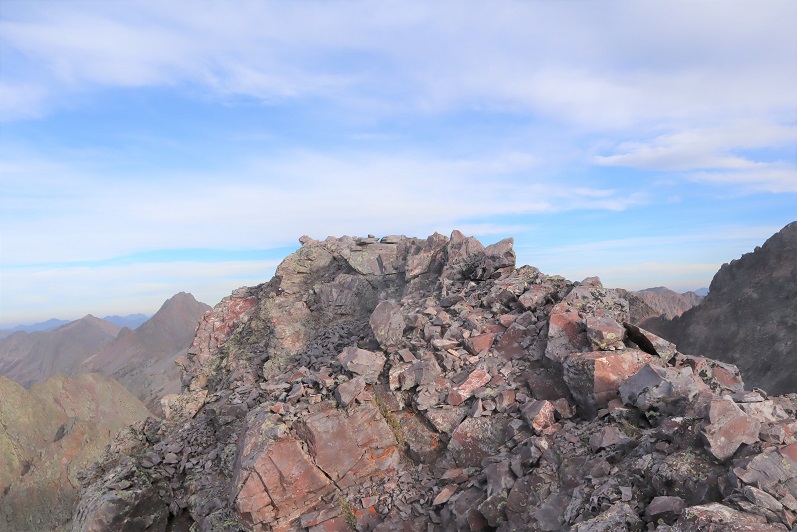
I summited PT 13003 at 8:15am
PT 13003:
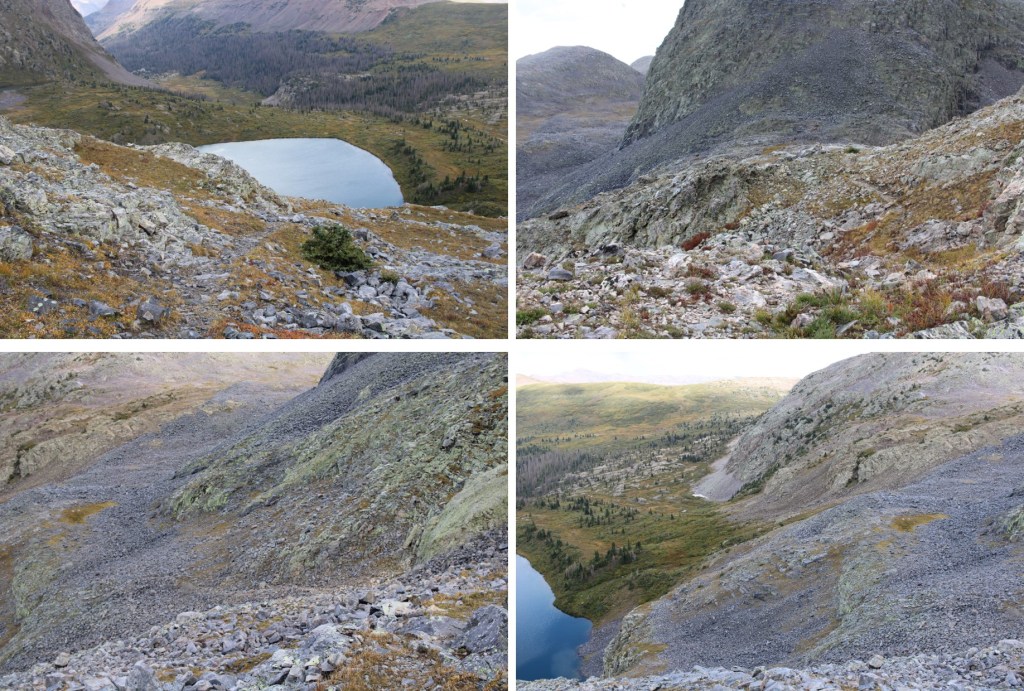
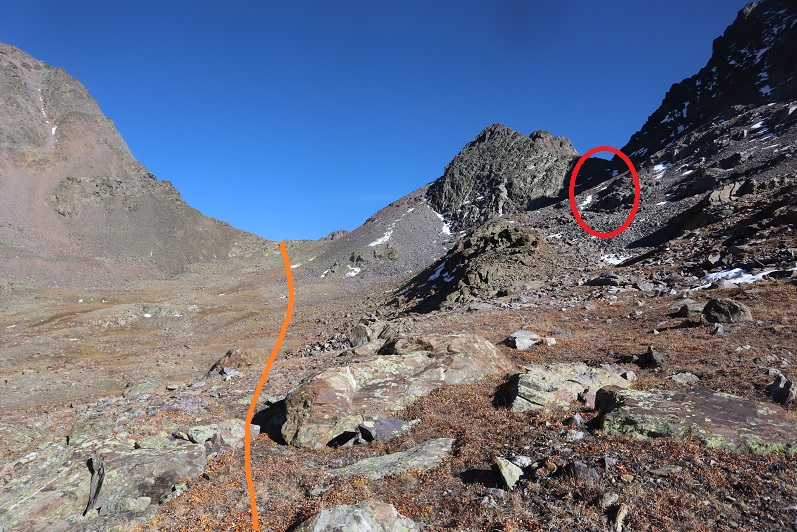
This was an out and back hike for me, so I turned around and retraced my steps. Here’s my route back down the saddle, skirting around the left side of PT 13164, following the Colorado Trail.
I then continued following the trail as it wound back to the Cataract Gulch Trail
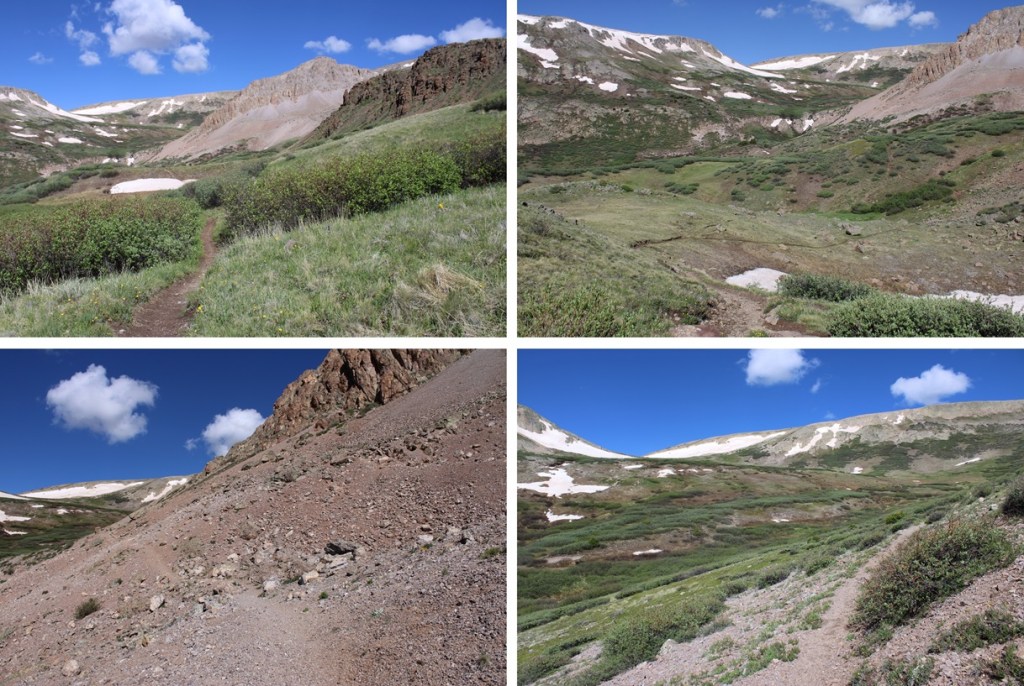
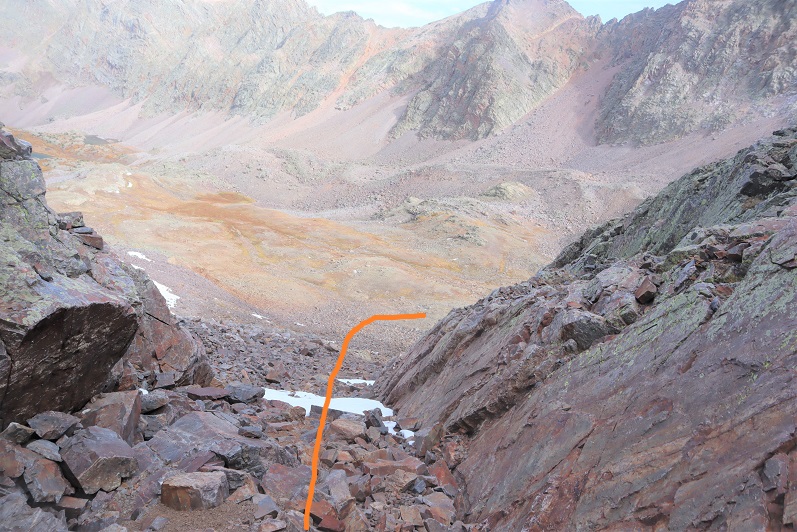
Past the lakes and through the upper basin, I kept following the trail, aiming for Sunshine Peak to the north.
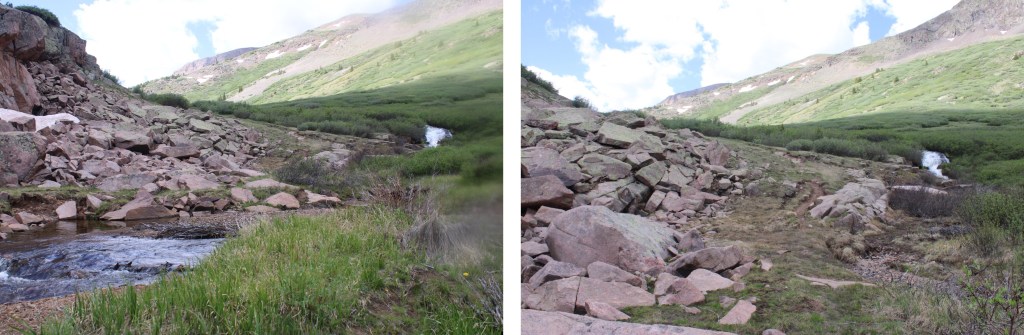
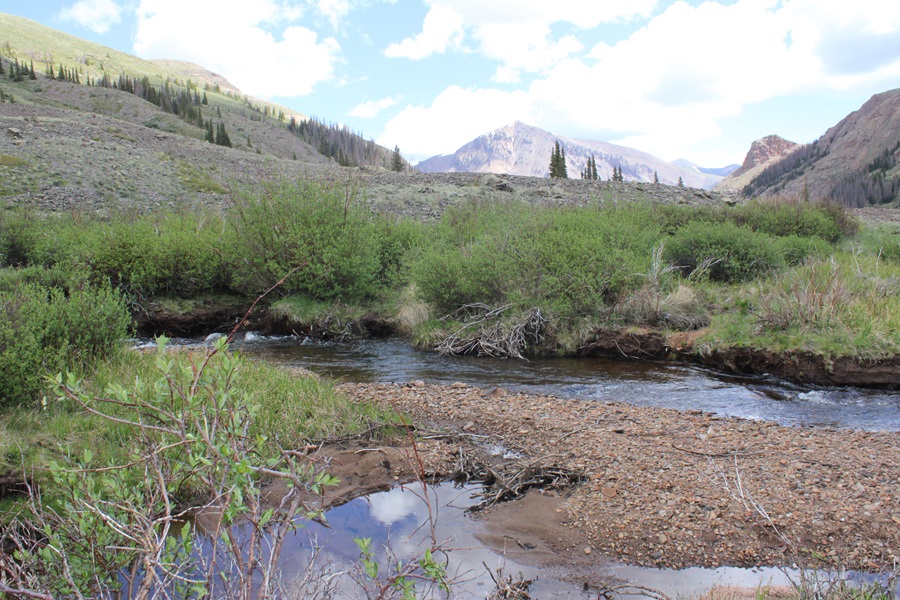
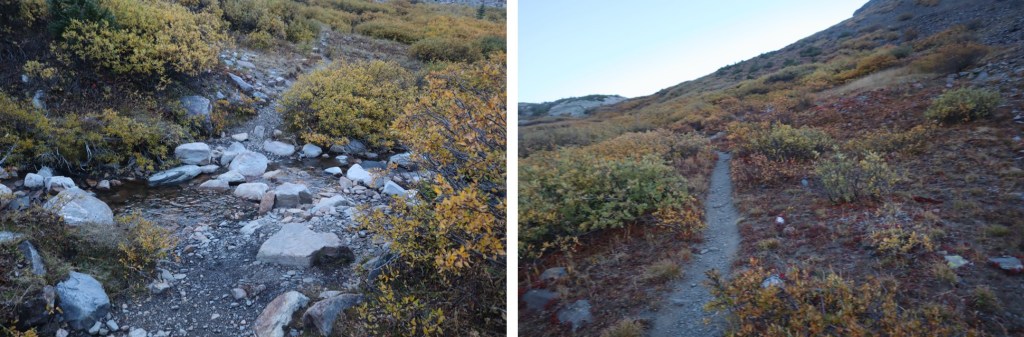
I crossed the creek
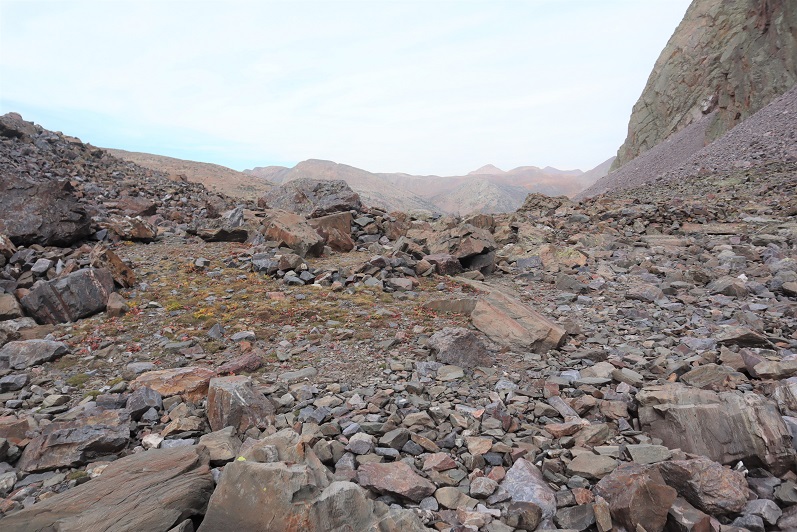
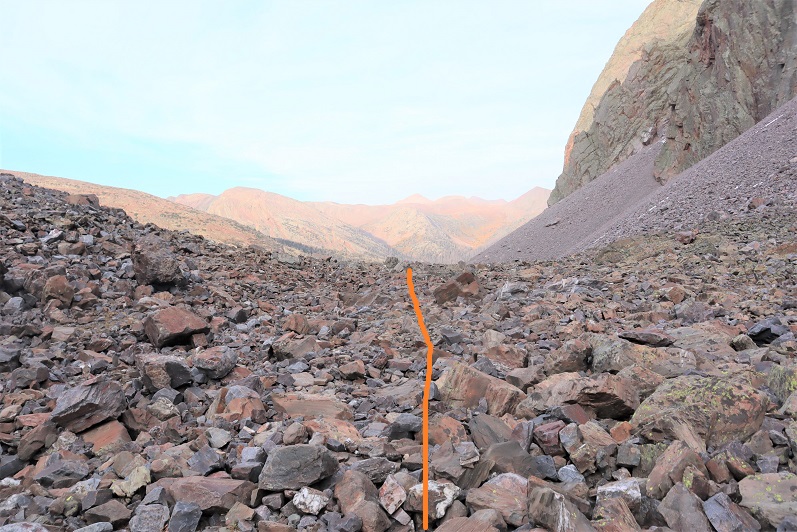
Then descended through the rocky basin
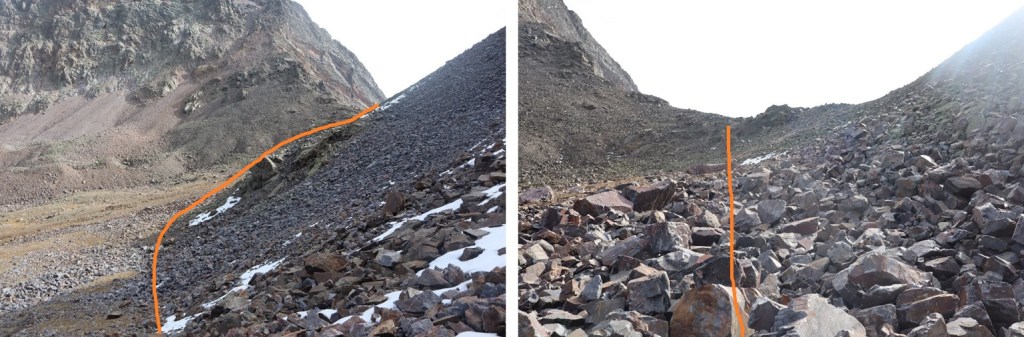
I crossed the creek twice more, and then followed the trail back down around the waterfall and back to the trailhead.
I made it back to the trailhead at 12pm, making this a 17.1 mile hike with 4750’ of elevation gain in 8.5 hours. Note: My Strava glitched about 2 miles into this hike, so I drew in my route for this peak on the topo map. This was easy because most of the route was on a trail, so it auto populated. My phone and watch gave me 19.1 miles for the hike, but I got 17.1 miles when I drew the map in CalTopo.
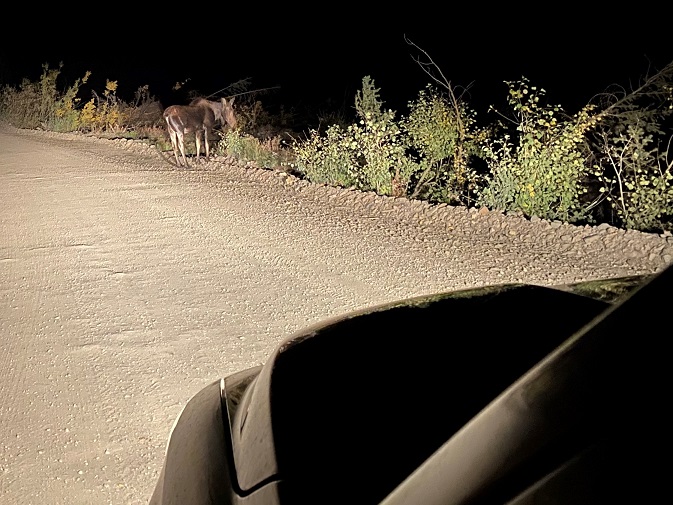
Also, every time I’ve been to Cataract Gulch I’ve seen moose. Today was no exception.
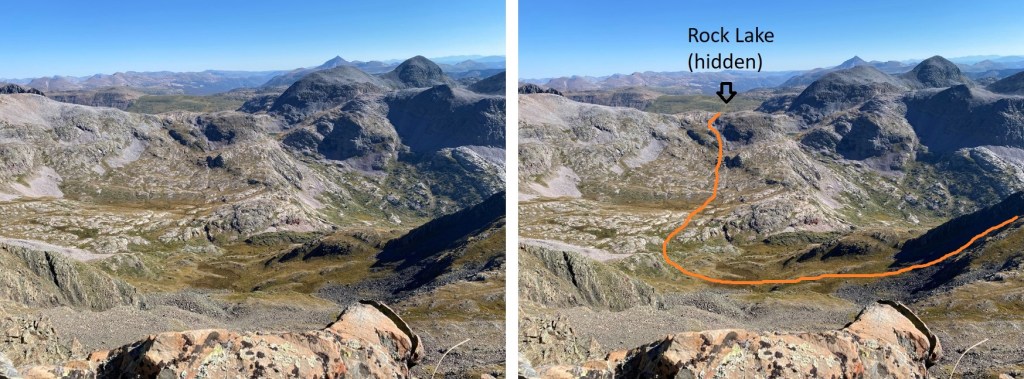
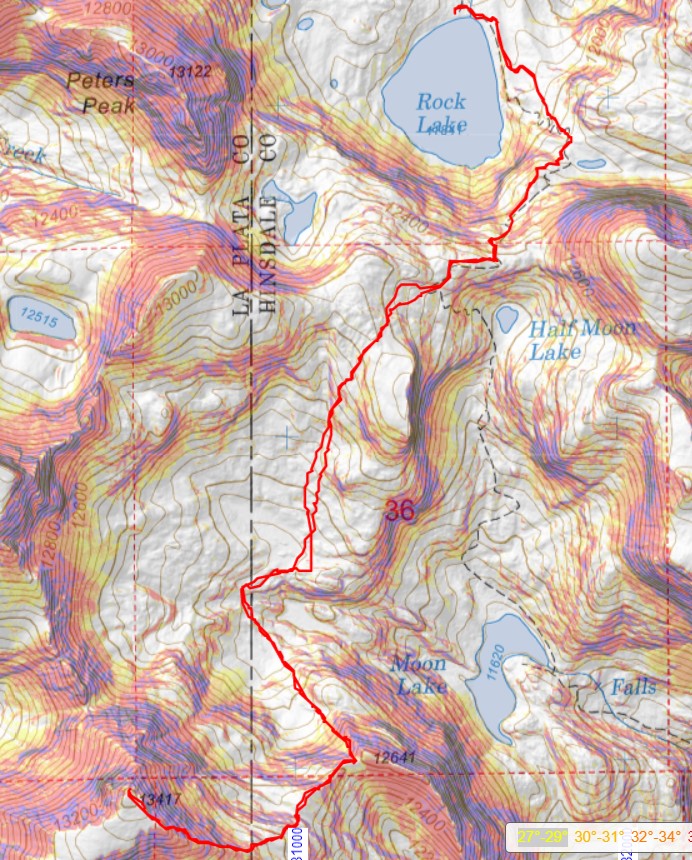
This trip report starts at Rock Lake. For instructions on the approach to Rock Lake, as well as the drive to Beartown from Silverton, click here.
Since I was already at Rock Lake, at around 11850’, I made it a late start and was on the trail at 6am. I was in the camping area directly in front of the lake, and from there I headed south towards the pass.
There is a trail that picks up on the east side of the lake, that will take you all the way to the pass on a class 1 trail
It’s rocky, but there is a well-defined trail here with cairns
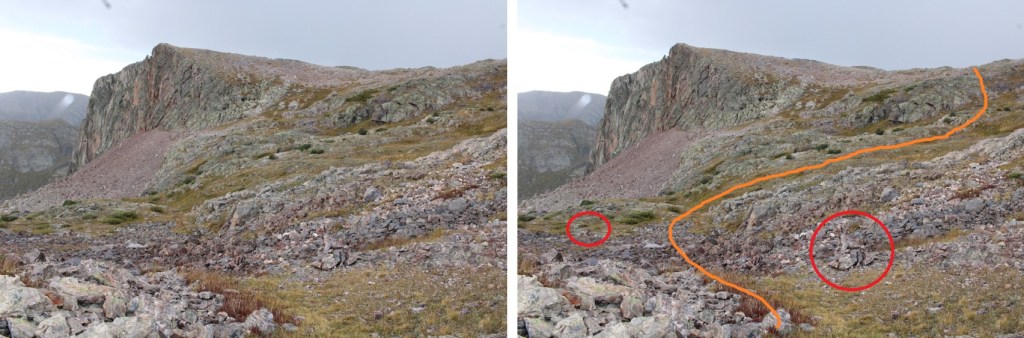
At the top of the pass I headed southwest, following the cairns as they descended a bit. The trail goes on to Half Moon Lake, but I didn’t want to go there, so after descending down a small gully I changed directions, and gained the ridge to the west.
I spent a lot of time putting cairns in this area to help with navigation, but as long as you gain the ridge, the next part of the route will be obvious.
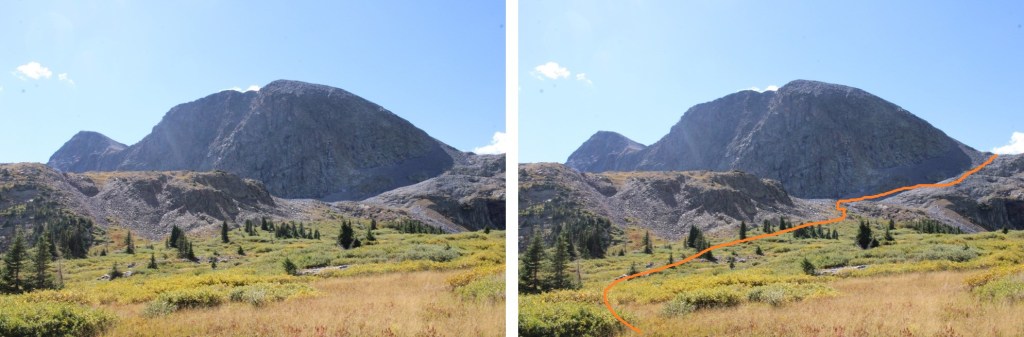
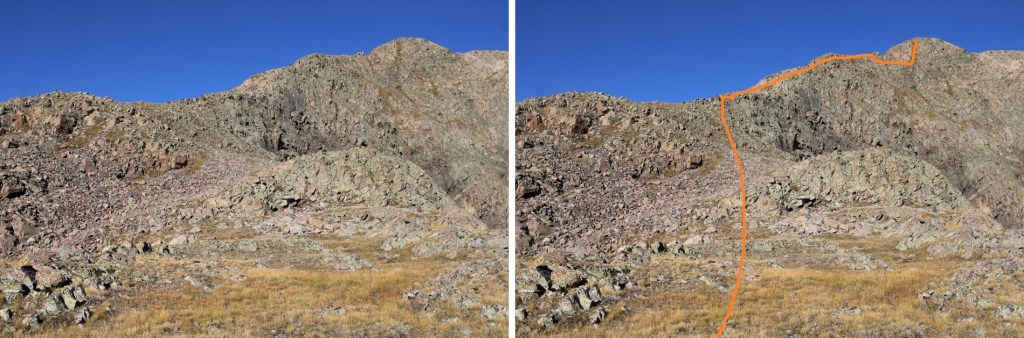
From the top of the ridge, this was my route up to the ridge of Mt Soso.
It looks straightforward, but I ended up losing a lot more elevation than I wanted to, mainly because there’s a gorge that you can’t see from the pass. I initially tried to go straight over the large boulders to the left, but it cliffed out. You’ll need to stay more to the west. I lost almost 600’ of elevation making my way down into the basin.
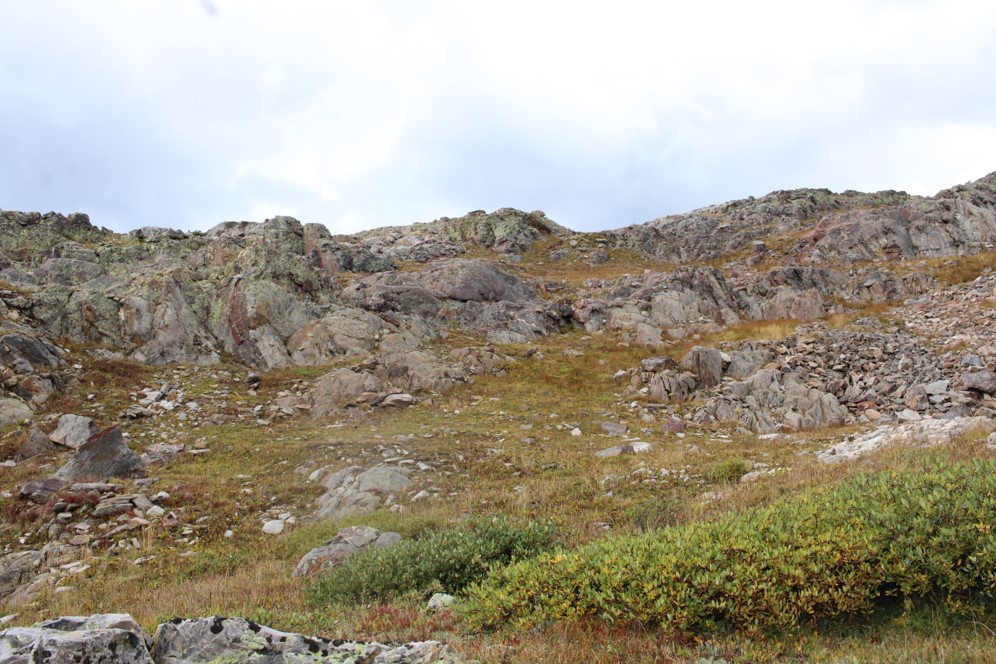
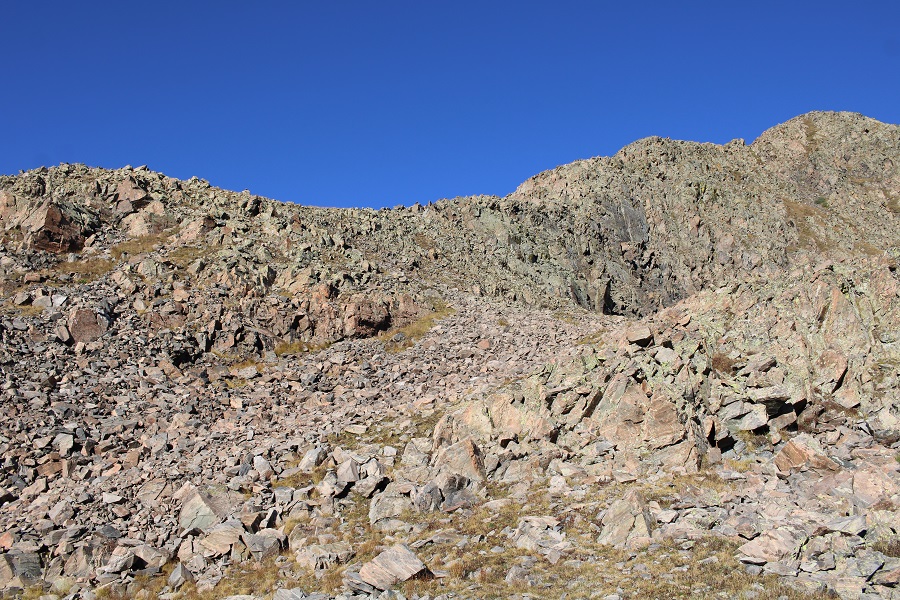
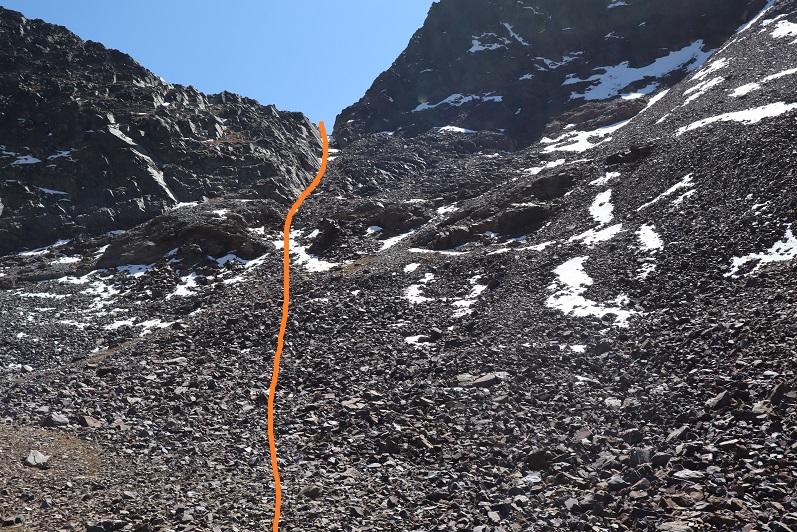
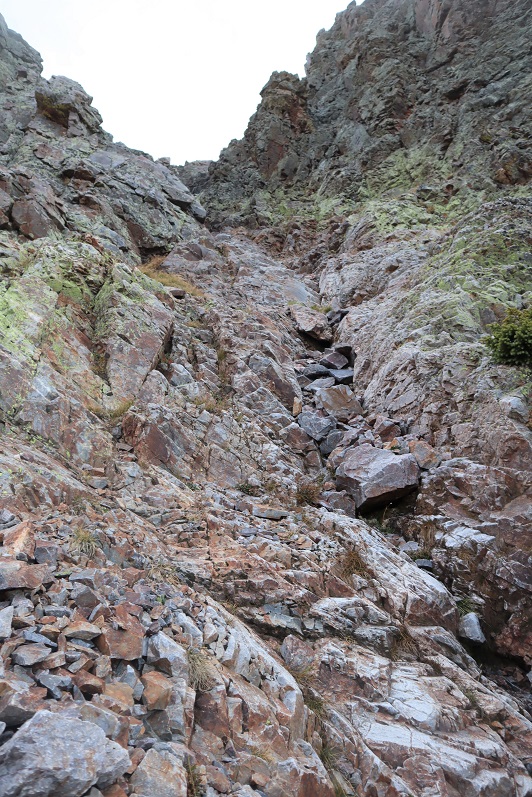
This is all class 2, and easy to navigate. Here’s a picture of the gully that will lead you to the ridge. This is a class 2 gully, and you’ll find a game trail if you stick to climbers left.
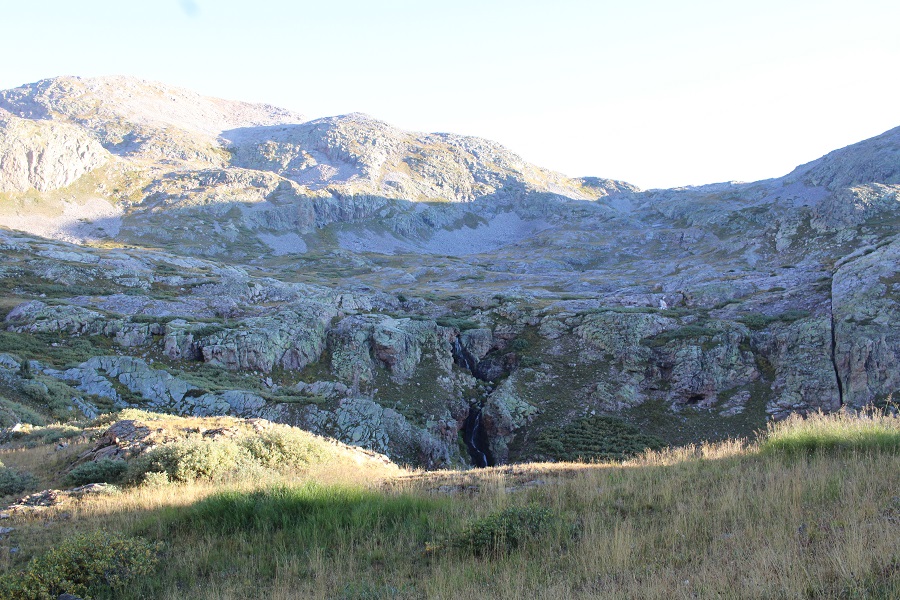
From the top of the gully, looking back on the route I took there, I had a better view of the gorge I’d been trying to avoid. There was a beautiful waterfall I hadn’t been able to see from the other side.
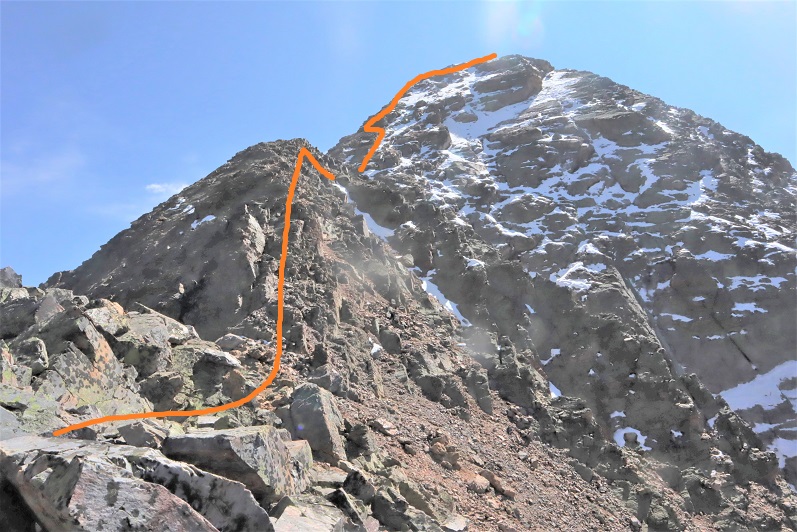
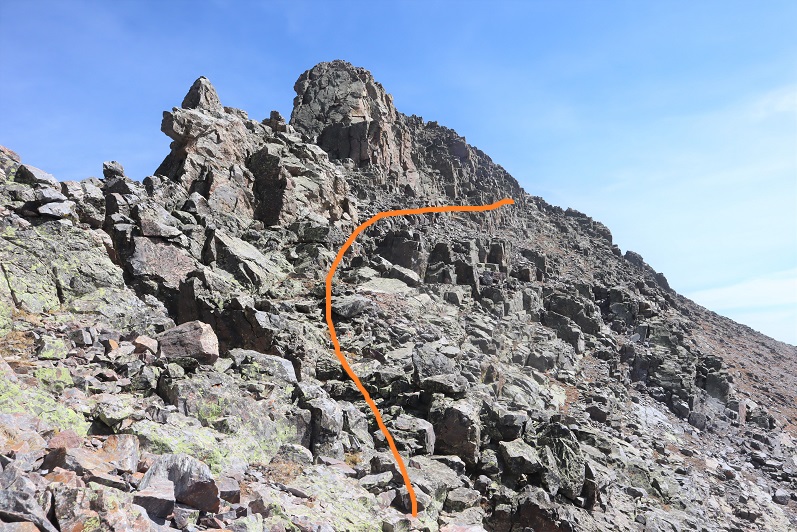
Once on the ridge, I turned right and followed it southwest.
After about a quarter mile of class 2 terrain the ridge became class 3 for a bit. I spent a lot of time putting together cairns for the rest of the route. This is the route I took
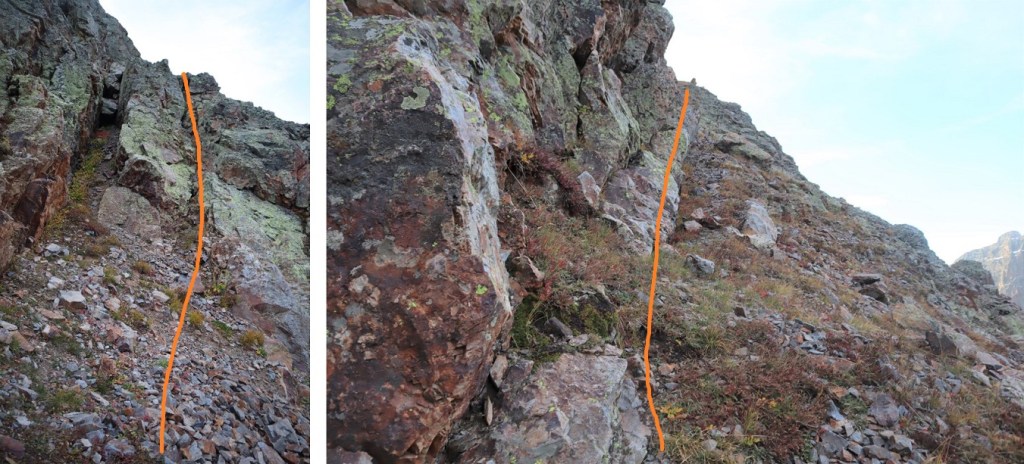
Here are some step-by-step pictures. Most of this is class 2, with some easy class 3 thrown in
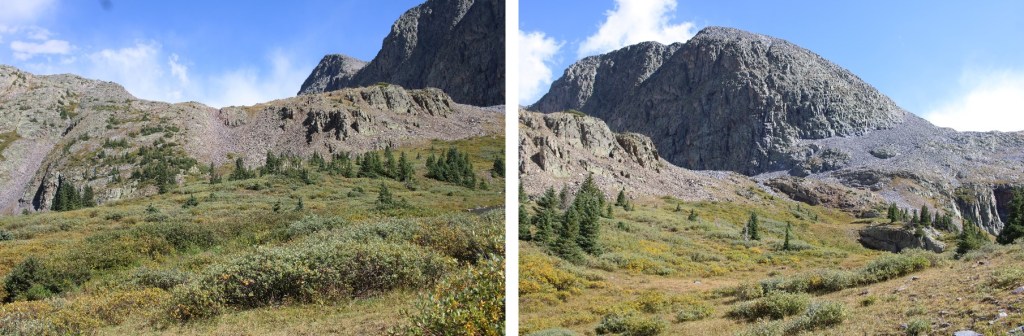
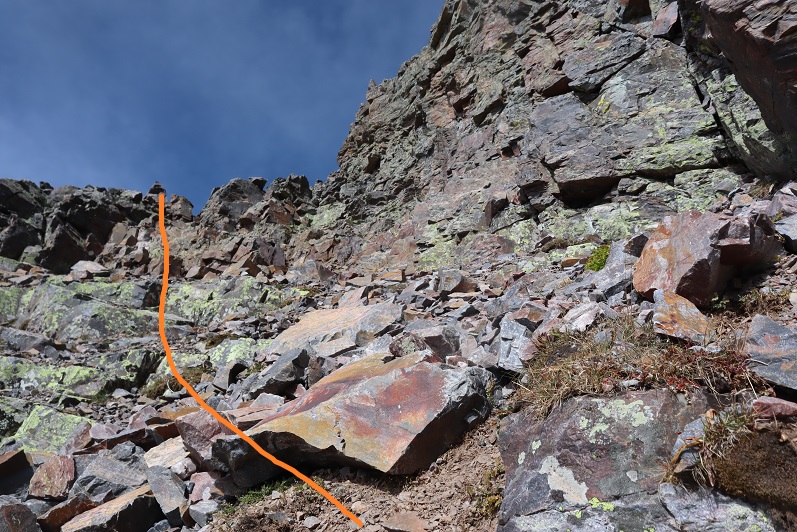
Now is a good time to get a visual on the rest of your route. The upper ridge is sustained class 3, but I dipped down a bit and took the grassy gully to the summit
Here’s a better look at the ridge
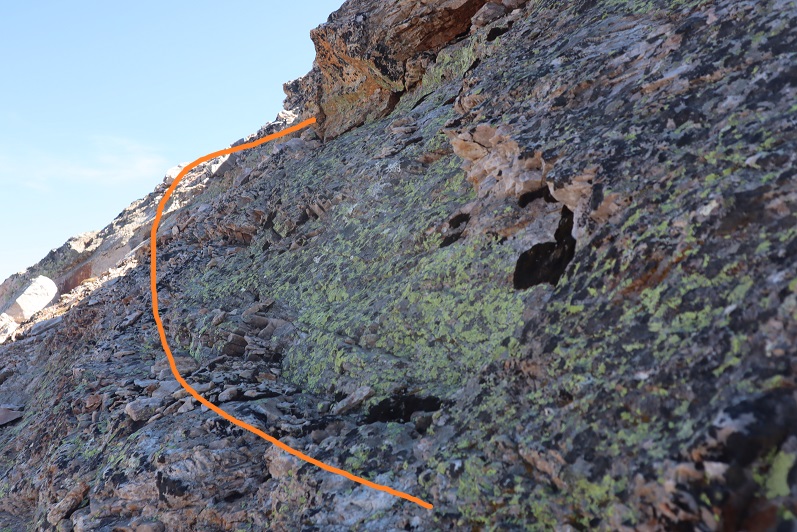
And some close-up pictures of the class 3 scramble. I was able to stay directly on the top of the ridge for this, until I came to just below the grassy area. If you’ve made it this far you can probably just go straight up and over the ridge, but I felt safer dropping down and taking the grassy gully up. I put a ton of cairns in the area to help guide the way.
Here’s where I dropped down about 20 feet
And then went up the grassy gully (class 2+)
Topping out of the grassy gully
And then it was a quick walk north to the summit
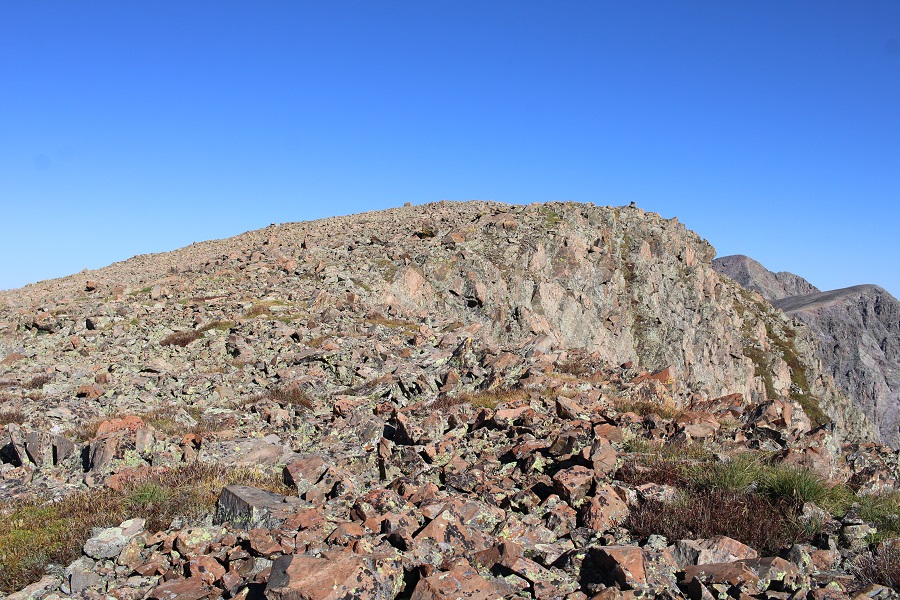
I summited Mt Soso at 9am
Mt Soso:
From the summit I could see my hike into the basin, and the cliff band I’d needed to avoid
I stayed on the summit longer than I normally would, because it was such a nice day. Then I re-traced my steps back to Rock Lake, first by heading south to the ridge
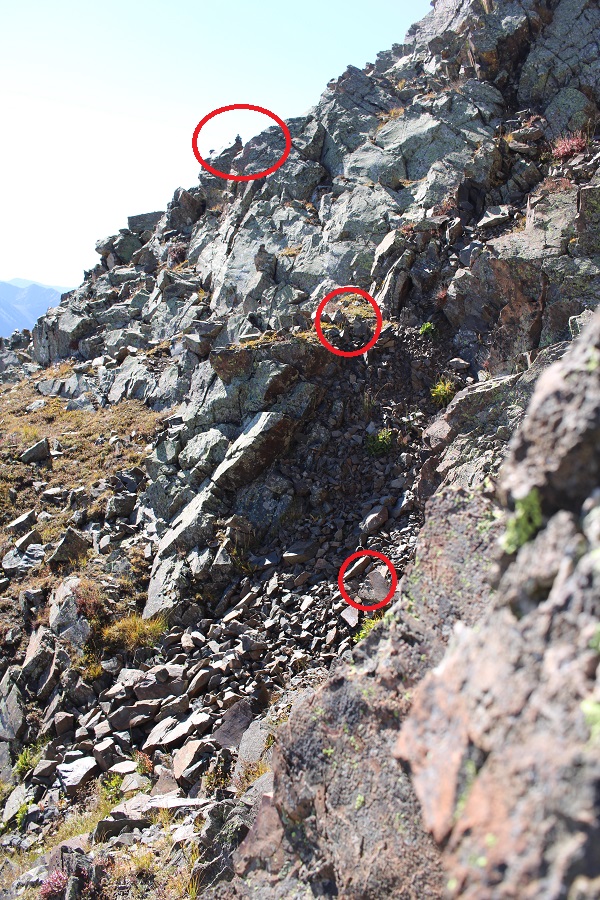
And then taking the grassy gully down. There’s an obvious willow bush in the path. Turn right and head to the ridge BEFORE you make it to this lonely bush.
Then following the cairns back up to the ridge (circled in red)
Here’s the overall route down the ridge, back to the access gully that led up the ridge
And some step-by-step pictures
Then back down the gully, into the basin, avoiding the cliffs and waterfall
Then back up to the pass
From the top the view can get a little confusing, because there are a lot of rocks. Here’s the route:
You’re aiming for this gully, which will have cairns that will lead you back down to Rock Lake
There is a trail here that will lead you back to the lake
Notice there are a lot of campsites in this valley area as well
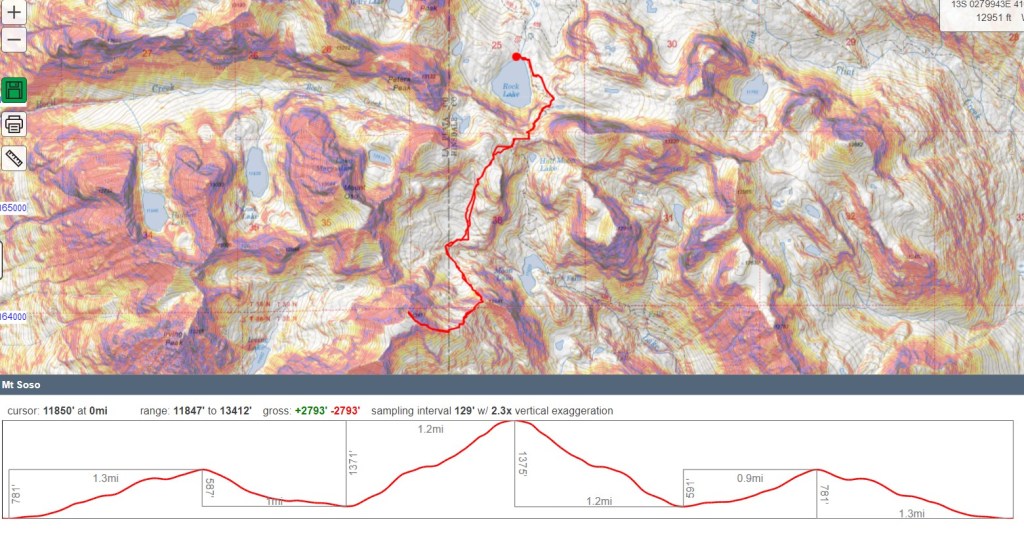
I made it back to Rock Lake at 11:45am, making this a 7.04 mile hike with 2793’ of elevation gain in 5 hours, 45 minutes.
I’ve put off these peaks because I was a bit anxious about the drive in from Silverton, but the weather was perfect and they’re on my list, so off I went. After a Girl Scout meeting where we sewed masks (I have a girl working on her Gold Award who did an awesome job leading the meeting), I drove 8 hours to the Hunchback Pass trailhead. Along the way I saw a moose. And let me tell you, this is why they don’t call it “moose in the headlights”: they really don’t care. I sat there for a bit watching her, and then just drove by. She munched on willows as I passed.
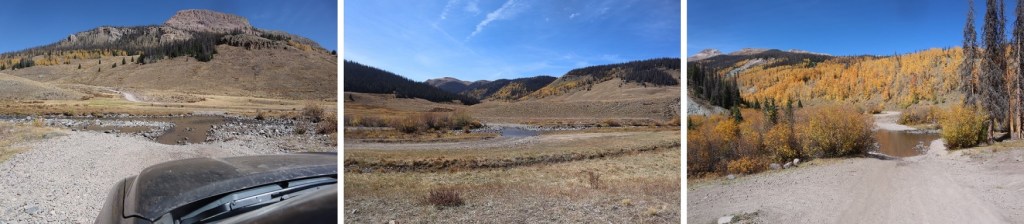
The drive in on the dirt road was underwhelming. I have no idea what I’d been worried about? It took me an hour and a half, and was actually quite pleasant. These pictures are from the way out, but it was just as easy to drive both ways. I never had difficulty passing others, and 4WD was only needed once or twice. This is actually one of the better 4WD roads I’ve done this year, and if weather permits, I’ll be back again next week. Here are some pictures from the drive in
And the Rio Grande river crossings (easy in late September)
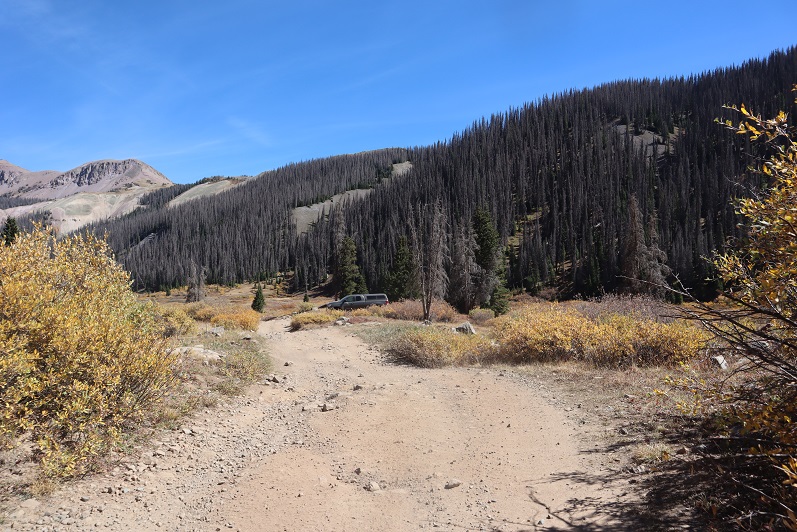
I found a place to park much sooner than I needed to. I’m not sure why I stopped here except it was dark and I was tired and it was a good spot, but I could have continued driving another mile to the trailhead and been fine. I parked, slept for half an hour (I’d been up for 24+ hours, and needed the rest) and was on my way at 5:30am.
Since I’d parked along the road I followed the 4WD road for 1.3 miles before turning left onto Trail 813. There was room for 2 vehicles to park at the trailhead. There’s a trail register here, but nothing official.
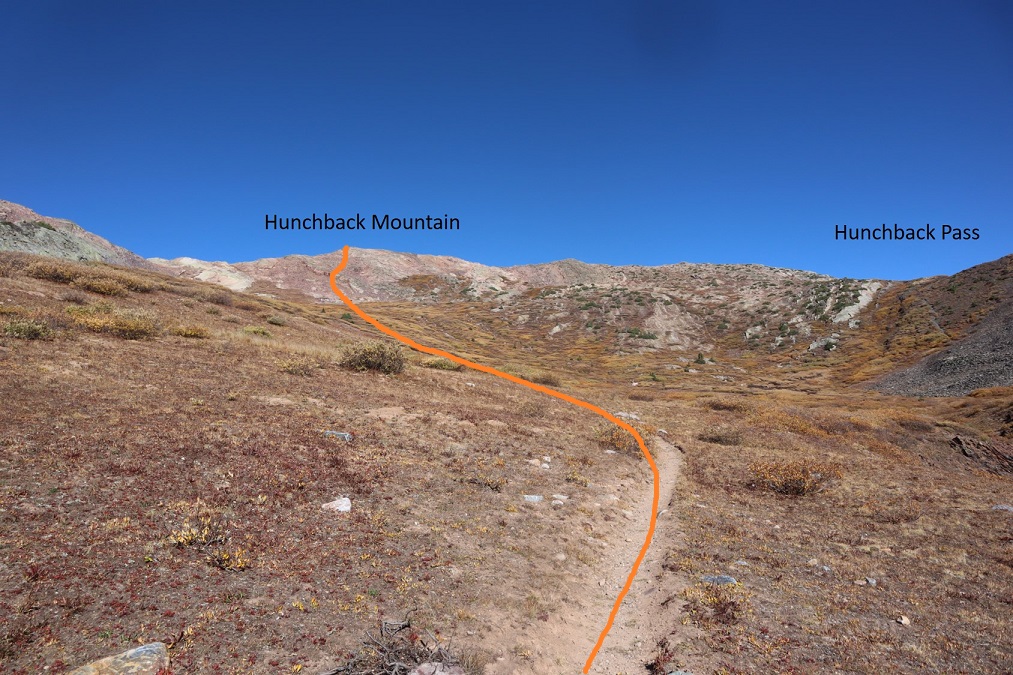
I followed the class 1 trail as it curved up and over and then down hunchback pass. As I was hiking the sun rose, and I got a good look at Hunchback Mountain. I didn’t have a topo for it, but it looked doable. I’d file that one away and maybe attempt it on the way out.
From the top of Hunchback Pass I hiked for 3.4 miles and lost almost 2000’ of elevation as I followed the class 1 trail down the mountain, crossing small creeks and navigating through willows.
Stay straight at this sign/junction
I missed the initial turnoff and had to do some route finding (because there is no official turnoff). However, after hiking for 3.4 miles there are some logs on the right side of the trail, split in half, and a waterfall. There are waterfalls all along this trail, so don’t just look for a waterfall, but look for the split logs. Leave the trail here and head west.
From here you’ll quickly come to an easy creek to cross and a waterfall. This is Nebo Creek. You can camp here, and it’s worth spending a little time enjoying the area.
There is no clear trail here, but there is a bit of a game trail. Several in fact. They all go to the same place, so follow stormy creek by heading west, stay north of the creek for better terrain. Here are some pictures.
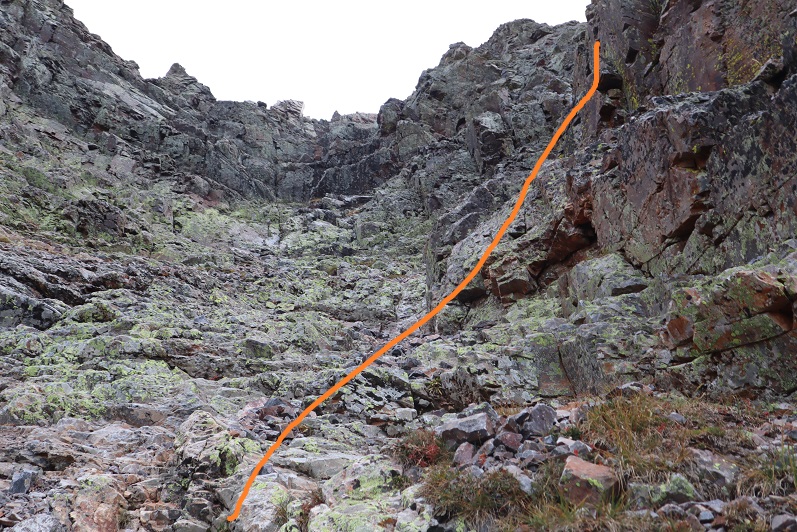
I headed west for just under 2 miles. I believe the standard way to enter the basin as it leads to Lake Silex is to use the obvious scree/rock filled gully (dotted line). I didn’t do this, and I’m glad I didn’t (I did take it down and was disappointed, as it seemed more trouble than the way I took up). Instead, I went further west, found a different, smaller gully by the rock/grass/willow filled slopes, and ascended that way. Here’s an overview
And step by step
I was able to follow game trails the entire way, and even saw some cairns in areas. At 11500’ I turned left and headed south, then southwest up the side of the mountain, aiming for this narrow gully.
Here’s looking up into the gully, and back down from the top. The rocks here were solid and it was an easy climb
From the top of the gully I still had a ways to go. I headed south, and then west, curving high along the side of the mountain. I wasn’t headed to Lake Silex today, but instead to the pass, so staying high was helpful.
After rounding Lake Silex I headed up the rocky gully to the pass at 12800’
It took me 10 miles to make it to the pass. I took off my gear and took a break. I ate a packet of tuna (I’d forgotten to eat breakfast) and decided to leave my large pack here and just take some water and a first aid kit in my small pack for the rest of the day. Before I left, I filled my water filter up with snow and laid it out in the sun, hoping it would melt so I could filter it later.
First up: Storm King Peak. Here’s a view of the overall route from further down the pass below later in the day.
And a view from the pass
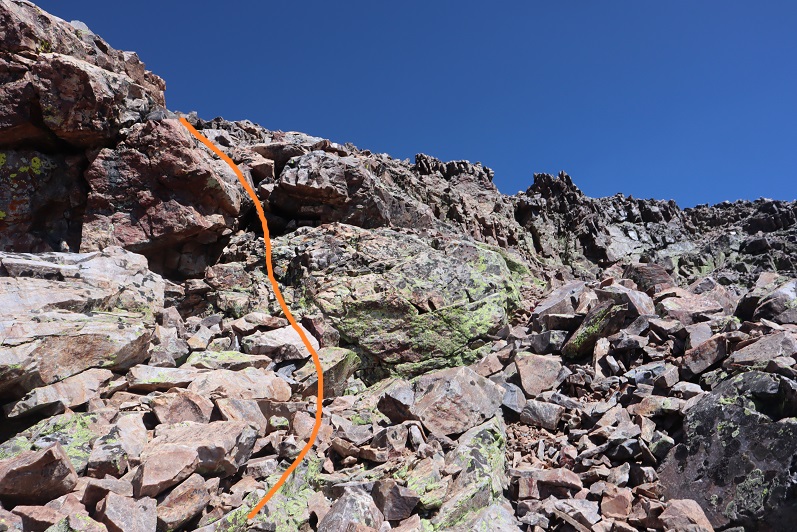
I did some scrambling, following the ridge north east. There really is no established route here, just pick your line. It shouldn’t be harder than class 3
At 13430’ there’ll be a small dip, and an obvious place to cross the gully
After crossing the gully, I headed north along the ridge. The peak is just to the left
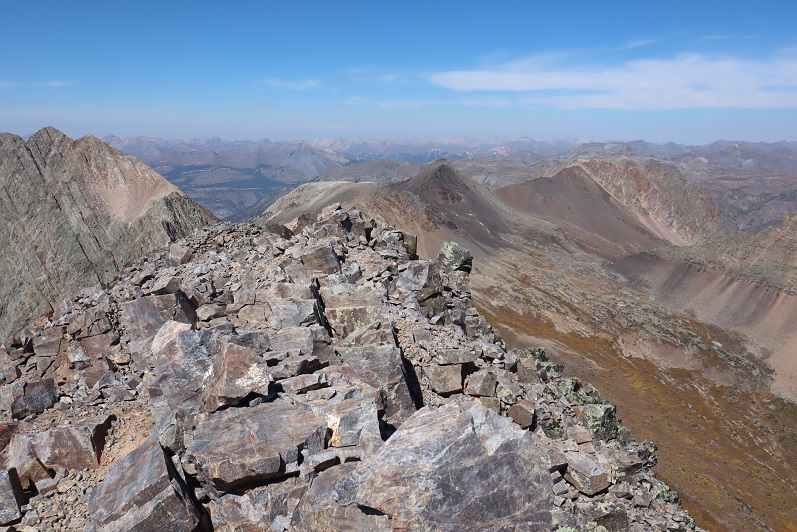
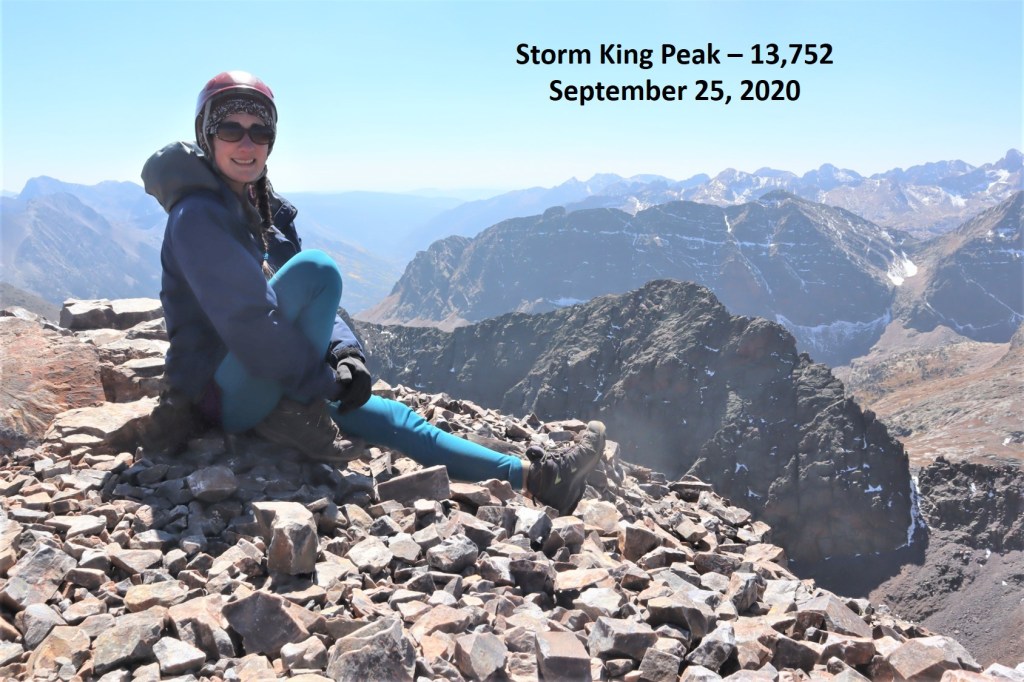
I summited Storm King Peak at 12:25am
Storm King Peak:
Here’s the route back down to the pass
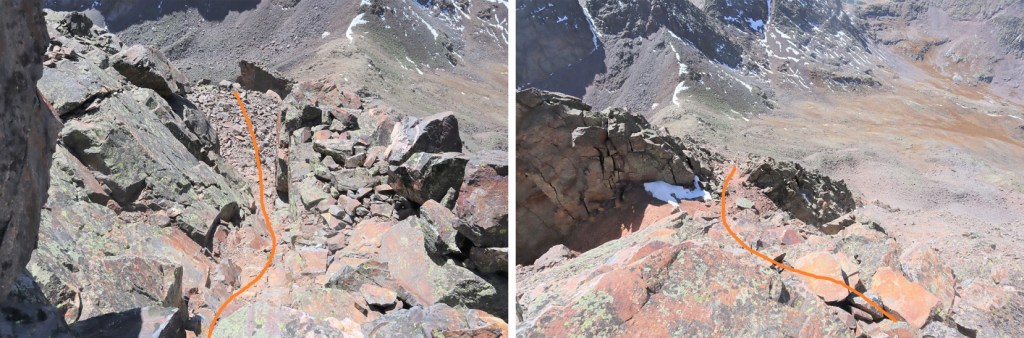
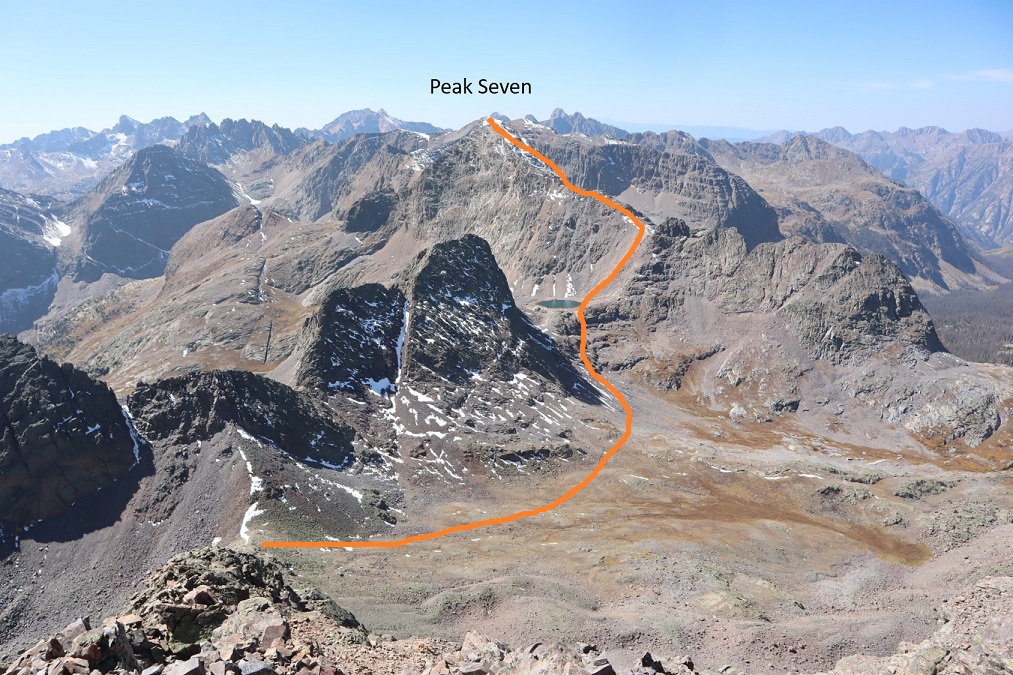
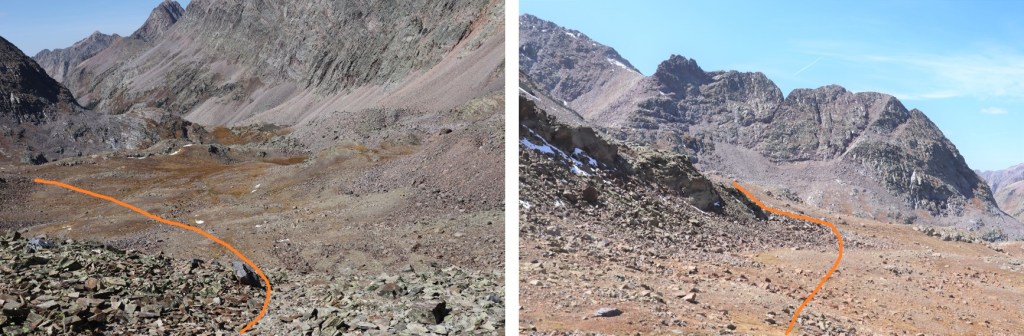
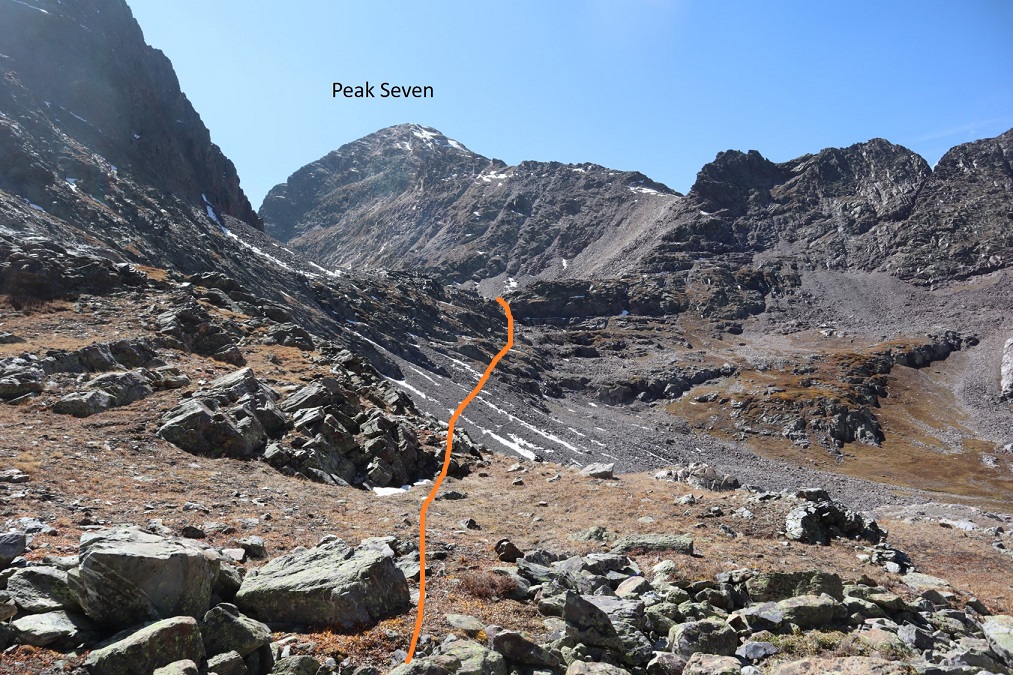
From the pass my next objective was Peak Seven. I headed west, losing about 300’ as I descended into the basin, and then headed back up towards Peak Seven. Here’s an overall look at the route
This was pretty straightforward. Here are some step by step photos. First, I entered the basin and then rounded the side of Peak 8
There were a few game trails here. I stuck high, and then aimed for a gully that would bring me to the pond underneath Peak Seven
From the pond I turned right and headed west up the gully
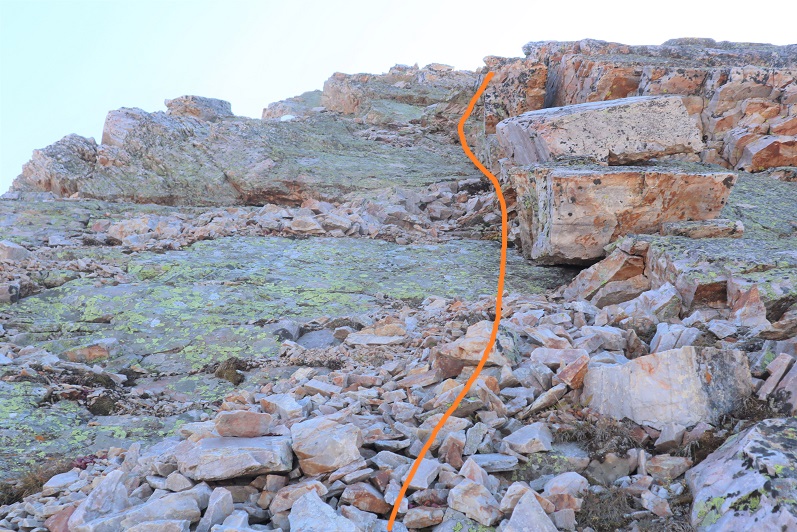
Once I’d gained the ridge I headed south. There was some scrambling here, and due to the fact there was snow on the normal route I had to get a bit creative. Instead of going up the face I stuck to the left and avoided the snow, and had some fun class 3/exposed scrambling instead. Here’s the basic route
There was a nice, airy game trail that led me to some rock slabs, which I used to ascend
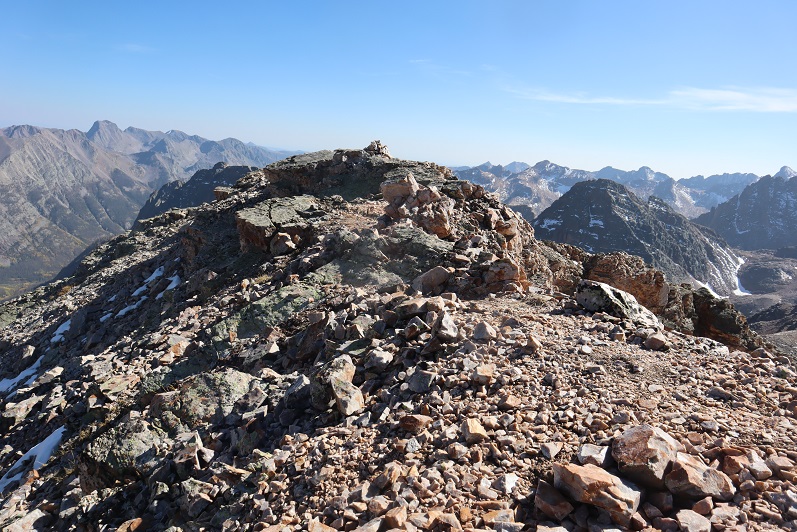
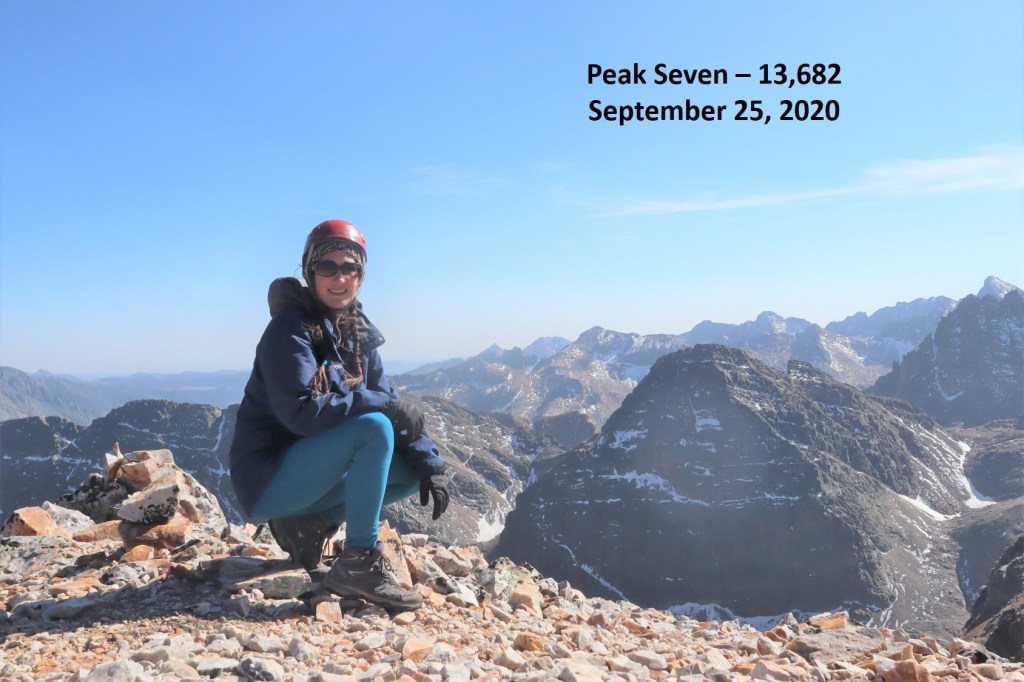
I summited Peak Seven at 3:10pm
Peak Seven:
Heading down Peak Seven was just as fun as heading up. Here’s the way back to the saddle
From the saddle I hiked back down to the lake, and made my way over to the south side of Peak 8, intent on attempting Peak 9 today as well.
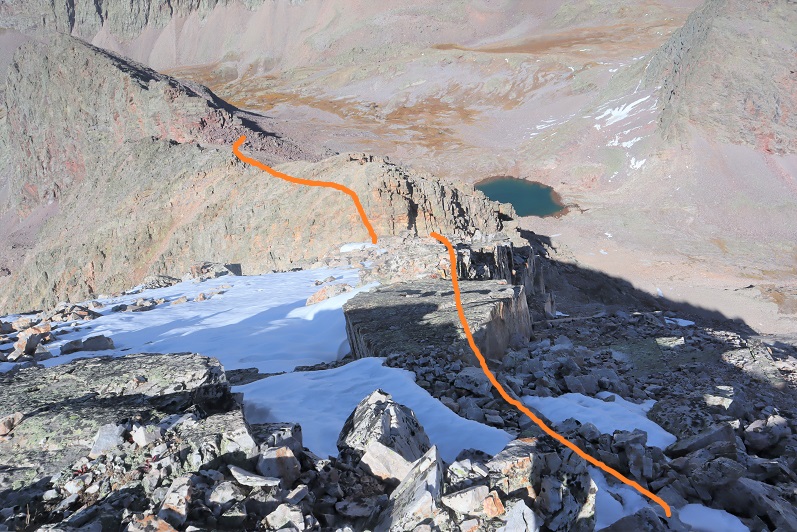
However, as I rounded the corner to Peak 8 I noticed the sun was already starting to set behind Peak Seven. It’s fall, and the days are short. Looking at the hike ahead, I knew I wouldn’t be back to my gear before dark. I have Raynaud’s, and I need to be bundled up and in bed as the sun goes down. I sighed and retraced my steps back to where I’d left my gear at the pass. Once I got there, I’d do some thinking. Here’s the route from the top of the gully of Peak Seven back to the pass.
As I made my way back to the pass I noticed a gully in between Peak Eight and Peak Nine. It looked like it went.
I filed that away and kept hiking to my gear
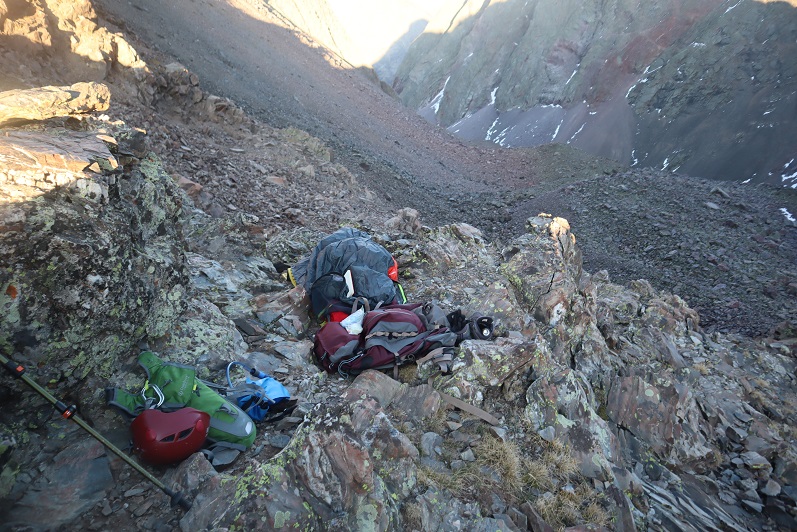
As I hiked, I strategized. I could hike back down to the lake to set up camp, but right now I was really upset about not getting in Peak Nine today as well. The approach was a lot for one peak, and I really didn’t want to drive/hike in all this way in the future just for Peak Nine at a future date. Maybe I could get it tomorrow morning? I got out my topo map and the route I’d passed on my way to/from Peak Seven indeed looked like it went, but I was a little worried about the snow. Luckily, I’d packed spikes. I decided to sleep on the pass tonight (at 12,830’) and attempt Peak Nine first thing tomorrow.
I made it back to the pass and looked for a place to spend the night. I didn’t have many options, and all of them were rocky. And windy. Time to set up camp. Check out my bivy for the night. Side note: it’s hard to dry out your feet when it’s windy and cold. I ended up putting dry socks on and wearing my sandals.
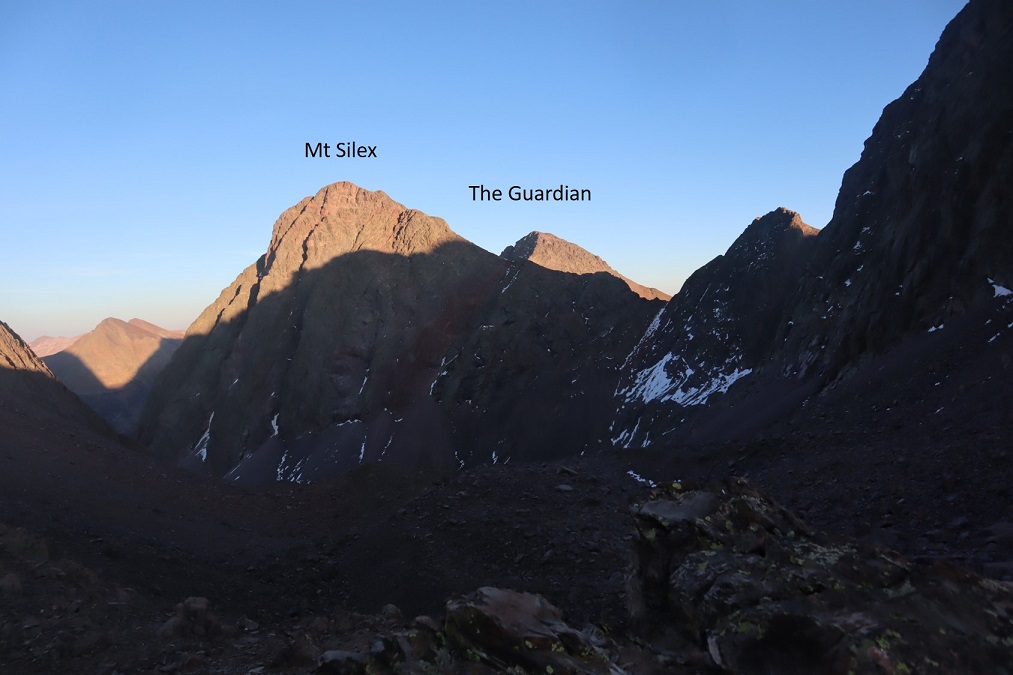
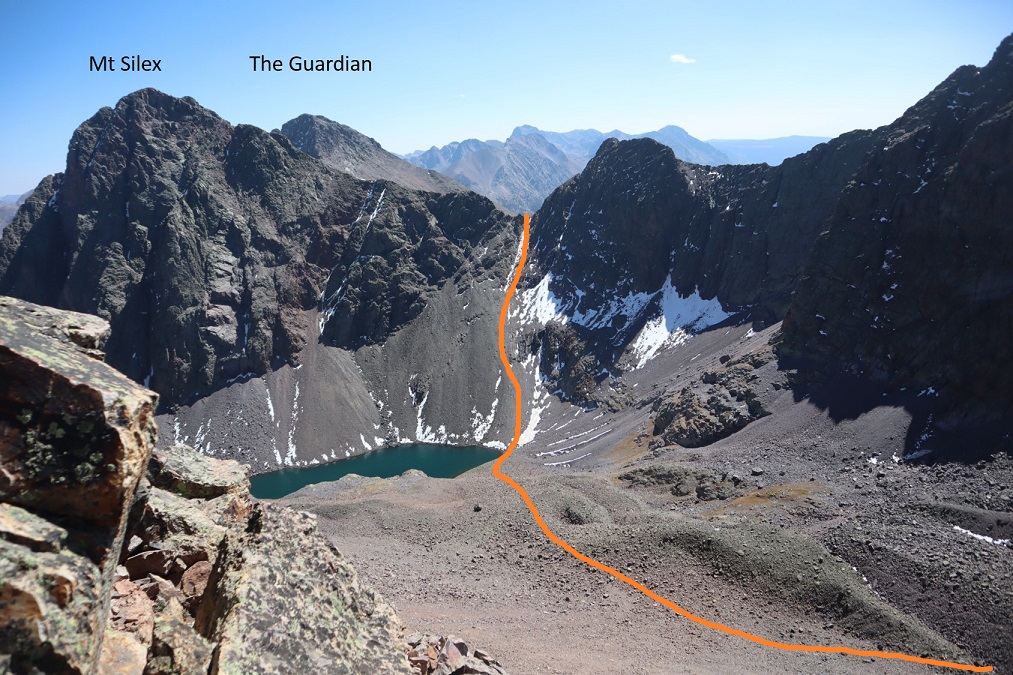
As the sun started to set I filtered some water (glad I’d thought to melt snow now that I wasn’t camping at the lake), jotted down some notes, and had dinner (a handful of peanuts and 4 or 5 slices of dried mangoes: eating while hiking makes me nauseous, so I probably only get in 500 calories in an entire backpacking weekend). Oh, and a couple shots of whiskey. That adds calories. I set up all my gear so in the morning all I’d need to do was put away my sleeping bag and bivy (important when you have no function of your fingers, which I won’t in the morning cold), watched the sun set, and poured over topo maps for two other of tomorrow’s peaks: Mt Silex and The Guardian
Anyone else think it looks like The Guardian is wearing a mask?
I set my alarm, bundled myself up in all my clothes, gloves, hat, etc. and went to bed. It was a windy night but my bivy did its job. I woke up at 5:30am and it was still pitch-black outside. I watched a few shooting stars and re-set my alarm, knowing getting outside of my bivy with this wind/cold would be a bad idea. By 6:30am it was just starting to get light. I enjoyed the sunrise tucked inside my layers, and then as quickly as possible put away my bivy and sleeping bag and bundled my gear together. I was going to attempt Peak Nine with just my daypack today as well (which I’d pre-packed last night), so I left my large pack on the pass and started out.
Day 2: Peak Nine, Mt Silex, The Guardian
I started off the same way I’d headed towards Peak Seven yesterday, heading down the pass, but when I saw the access gully for Peak Nine I turned left (south) and up
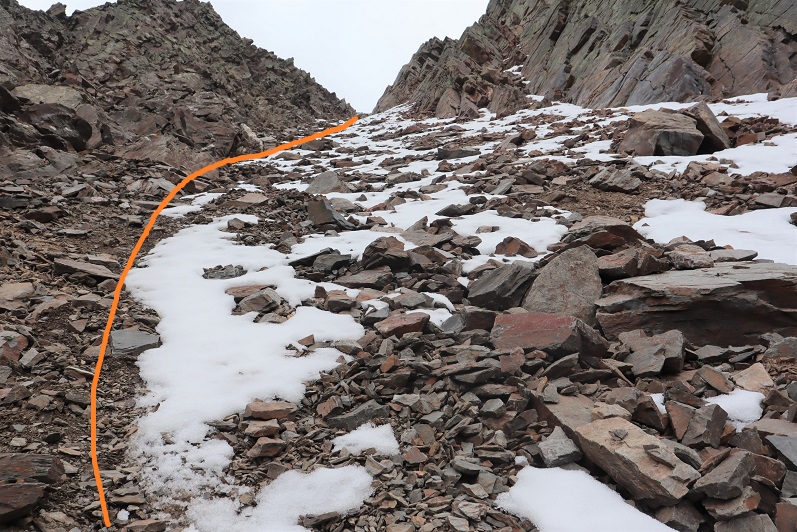
I’d been a bit worried about the snow, but it wasn’t a nuisance. Most of the gully was dry. I didn’t need to put on traction to kick in steps in the snow, and it didn’t cause me to slip. There was only about 20 feet or so to deal with.
I was excited when I made it to the top of the gully to find I was in the perfect spot to continue the hike. I stayed high and aimed for the ridge. Note: Here it became very windy. The wind didn’t stop all day.
At the end of the ridge an obvious cairn trail picks up.
It will lead you up a class 3-4 chimney and then around the mountainside.
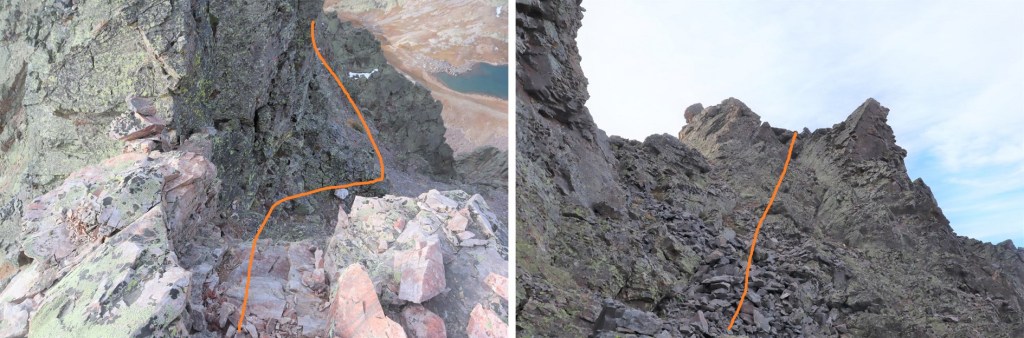
You have the option of taking the gully or the ridge. I took the gully up, the ridge down. The gully takes some route finding and I found it to be class 4. The ridge is easily and highly cairned. Here’s the entrance to the gully. I don’t think there’s a way to cliff out, but there are tons of options to ascend. Just keep heading northeast
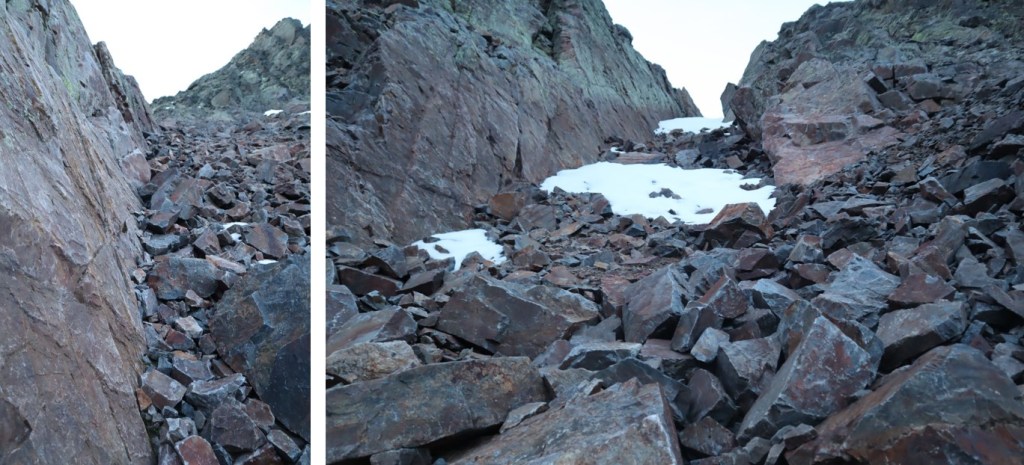
Here are some photos from inside the gully
If you keep heading northeast you’ll hit a wall. There will be cairns in the northeast corner of the top of the gully that lead you both to the exit route back down the ridge, and to the summit.
These cairns will take you to the ridge, which if you follow northwest will take you to the summit
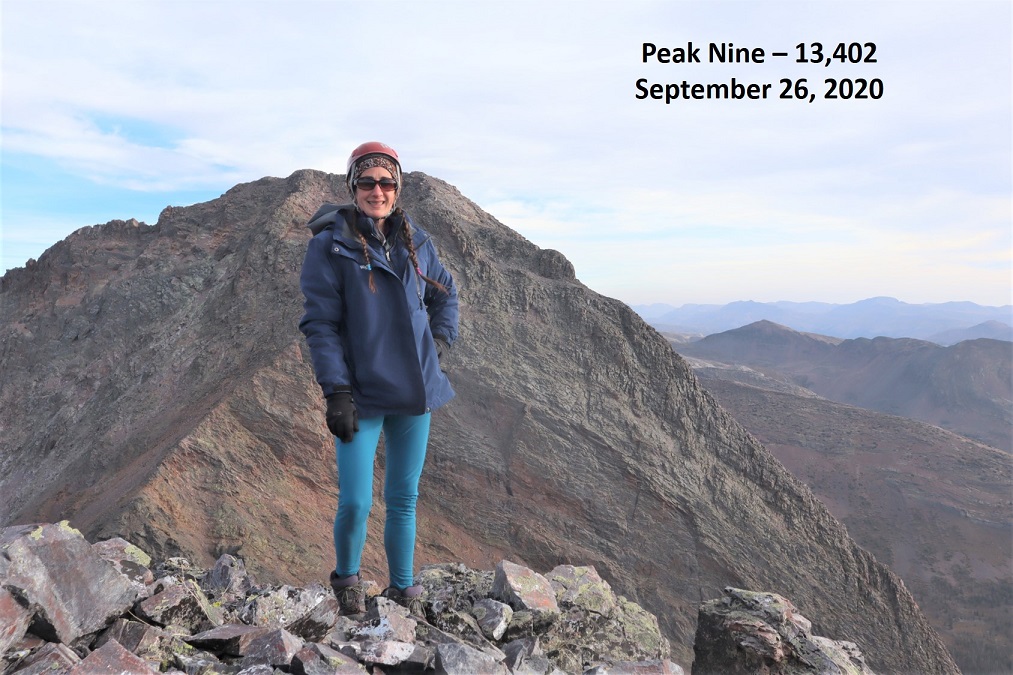
I summited Peak 9 at 8:25am
Peak Nine:
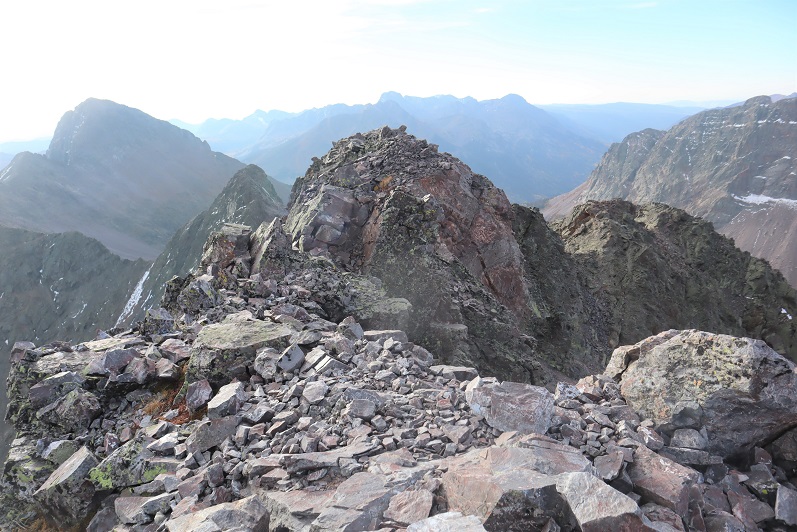
Here’s looking down the gully from the summit. Here you can see you can pick your route but need to head to the northeast corner to gain the ridge
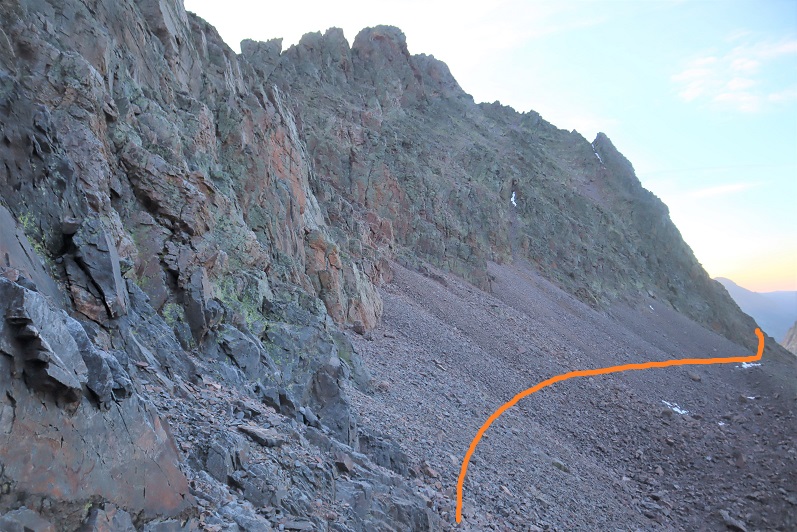
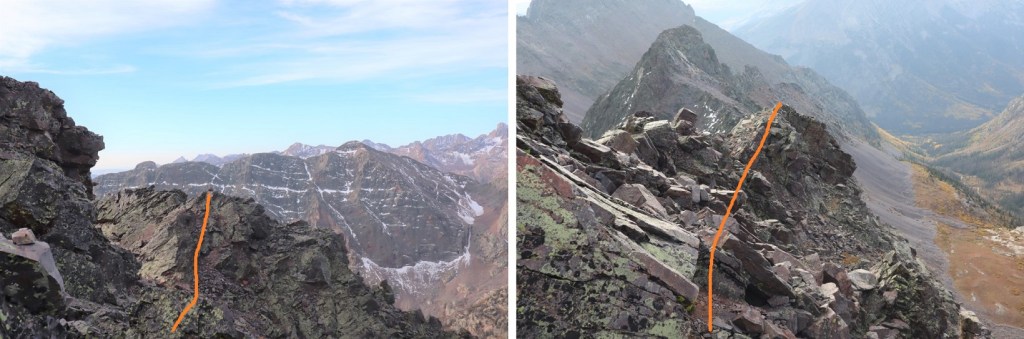
I’m not gonna lie, I didn’t want to head back down the gully. I’d known there was a ridge route when I’d ascended, which kept me going up, but the class 4 moves were bordering on class 5, and I felt safer taking the ridge down. Here are some pictures of the very well cairned route down the ridge. I followed the ridge southeast the way I’d come, dipped down a bit, then found the cairns that led me back up to the ridge
I then followed the ridge
Dipping down to the left once, then staying to the right for the rest of the ridge
The ridge led me to a short gully. I took it southwest
And this brought me back to the trail I’d hiked in on.
I followed it back to the chimney, climbed down
And aimed for the gully I’d hiked in through
I used my kicked in steps from this morning to descend, then made my way back to the pass and my gear.
I sat at the pass and had a packet of tuna and looked at the time. It was still early, so I figured I had plenty of time to hike Mt Silex and The Guardian today as well. I gathered my large pack and set off for Lake Silex below. I was a bit worried about the access gully (circled in red). The snow looked to be covering the entire last part of the route, and I wasn’t sure I’d be able to get up the gully.
I dropped my large pack at the lake. It was now 11am, so the sun wouldn’t be my friend as I ascended the gully: it would be shining in my eyes the entire time. Here’s an overview of the route I took from the pass, down to the lake, and up the gully
When I got to the gully the snow wasn’t as bad as it had looked from down below. I was able to avoid most of it by sticking to the left
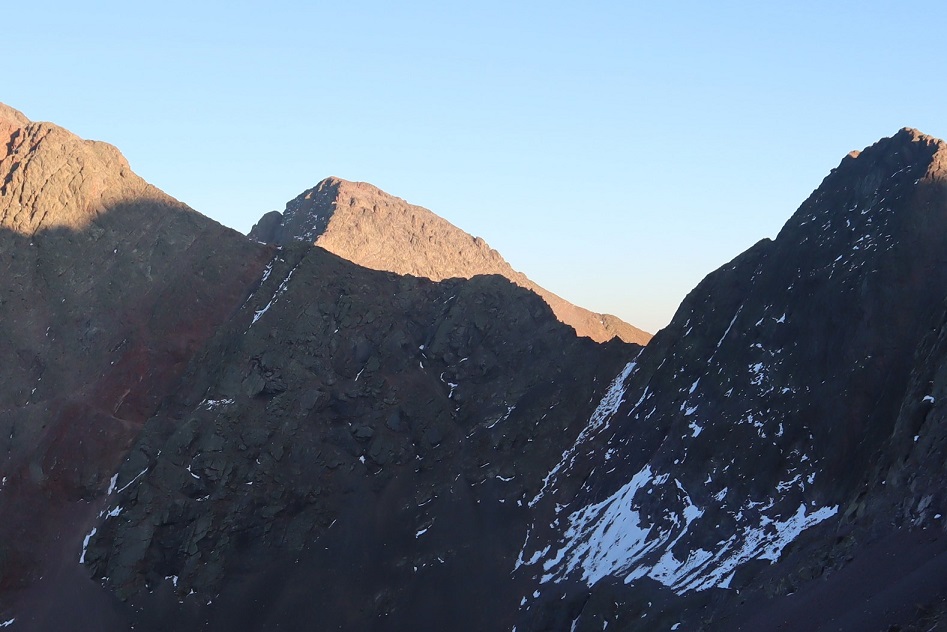
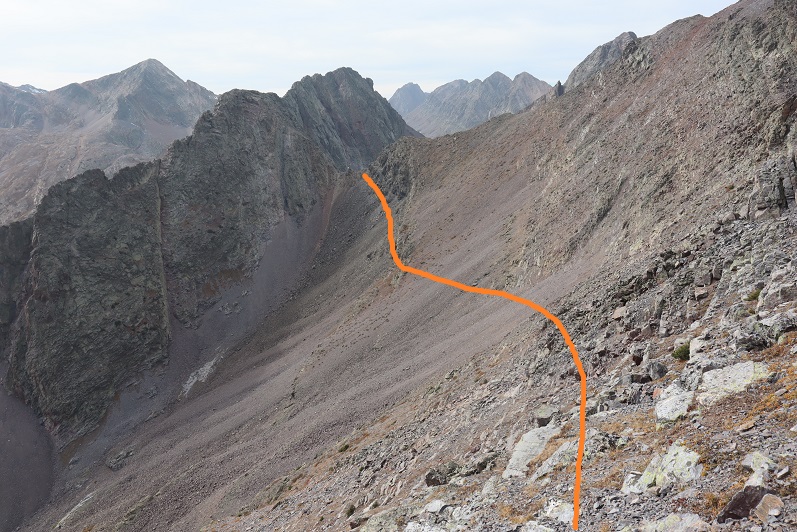
Here’s an overview of the route I took to summit both Mt Silex and The Guardian and back from the top of the gully
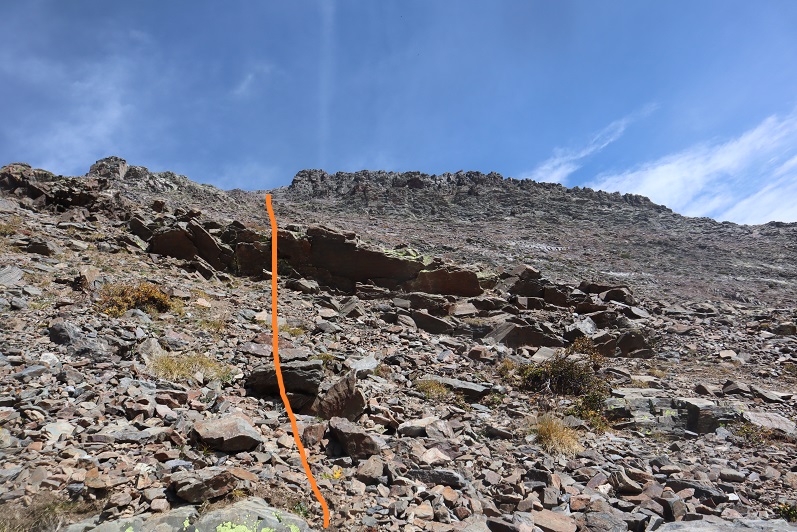
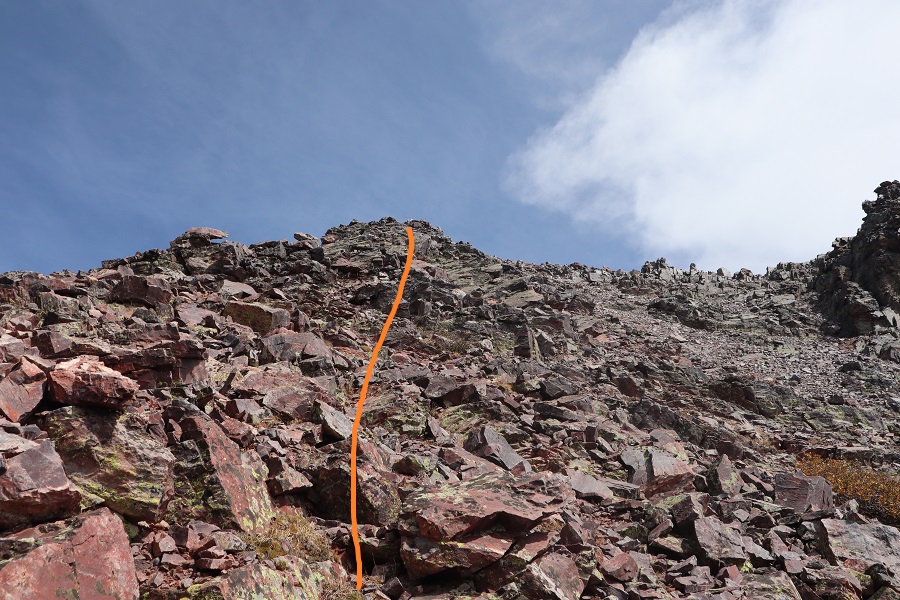
I started out kind of low, but my advice is to gain the ridge as soon as you can and follow it to the summit. I took more of the gully route, which made things more difficult than they needed to be. Here’s my route
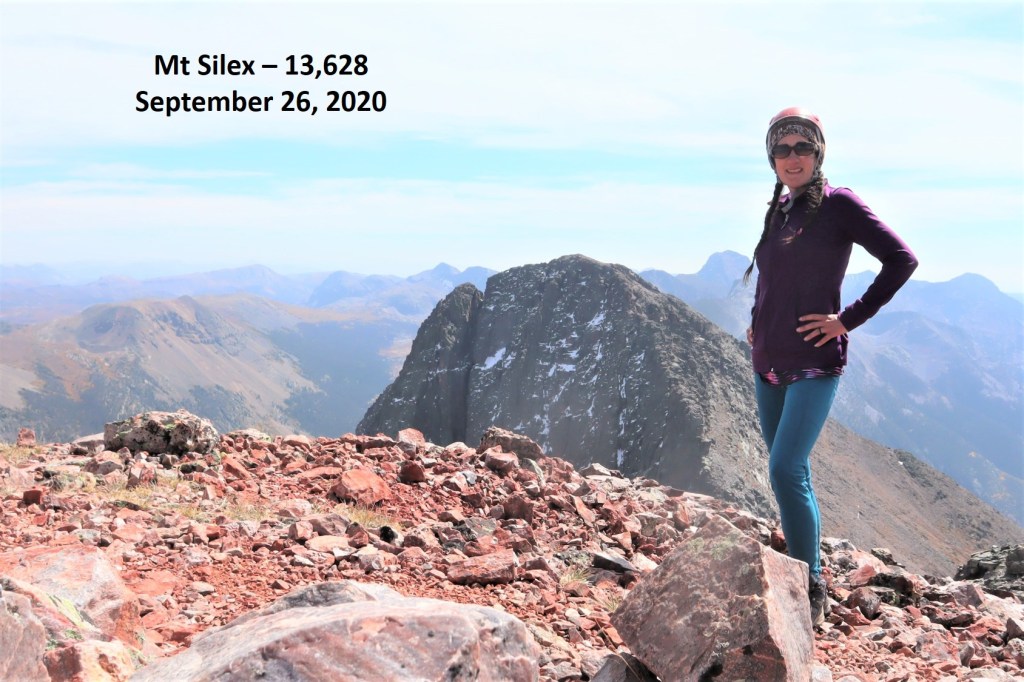
I summited Mt Silex at 12:55pm
Mt Silex:
Here’s a look back down the ridge I’d just hiked up
Now to head over to The Guardian. I went back down the gully, and hugged the side of the mountain
Then I stayed high and worked my way southeast
Here’s step by step.
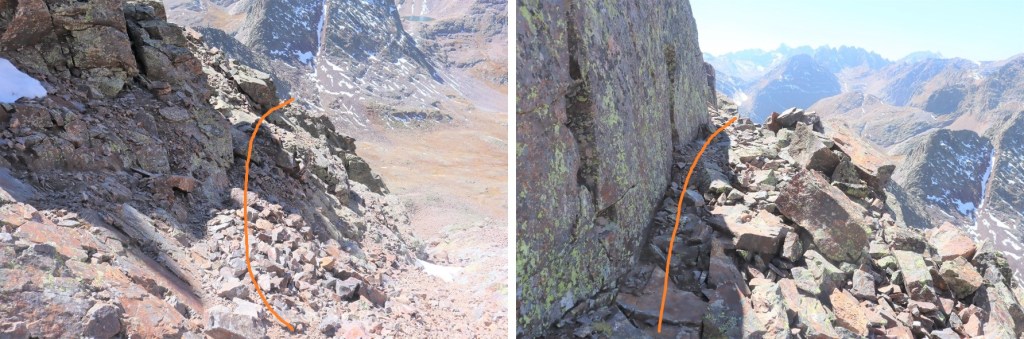
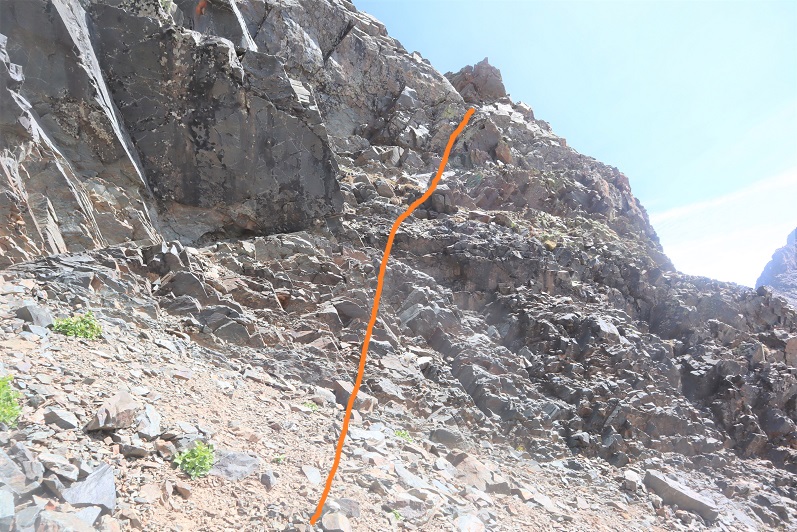
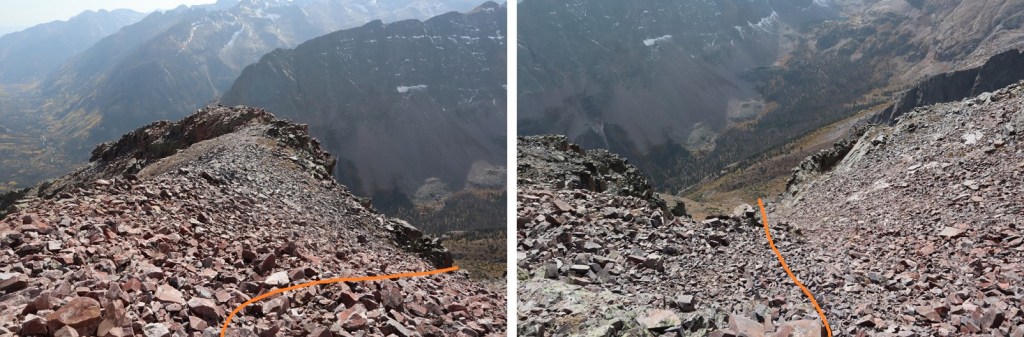
At around 13400’ I came to a gully, turned and headed northeast to the summit. The climbing here was class 4, and seemed to get sketchier as I went.
At the top of the gully was a well-cairned summit ridge
Here’s a look back down the gully
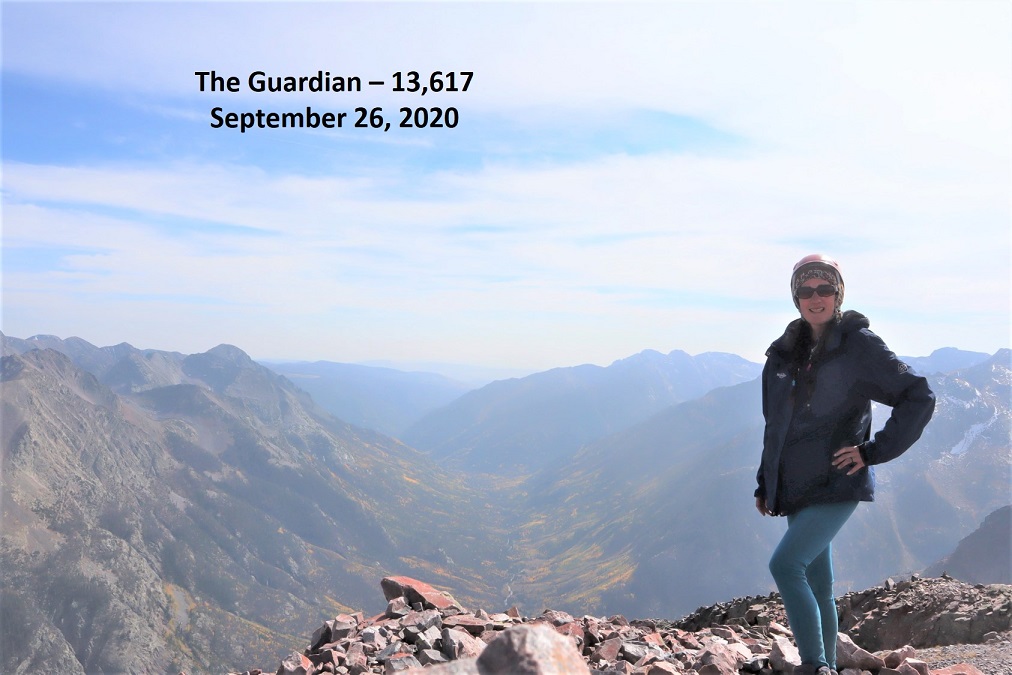
I summited The Guardian at 2:55pm. The views were a bit hazy due to the smoke from the fires
The Guardian:
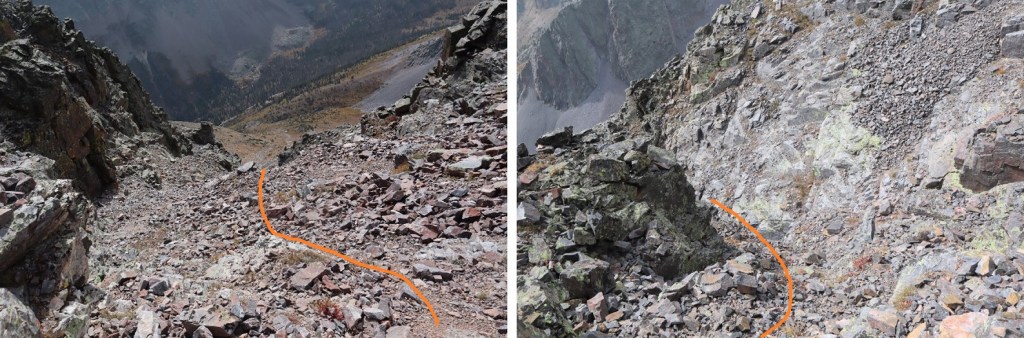
As I’d summited, I noticed an easier gully I could have accessed to summit if I’d hiked just a little further southeast. I decided to take that gully down. It’s scree filled and I scree surfed down. This is class 2.
At the bottom of the gully I turned right
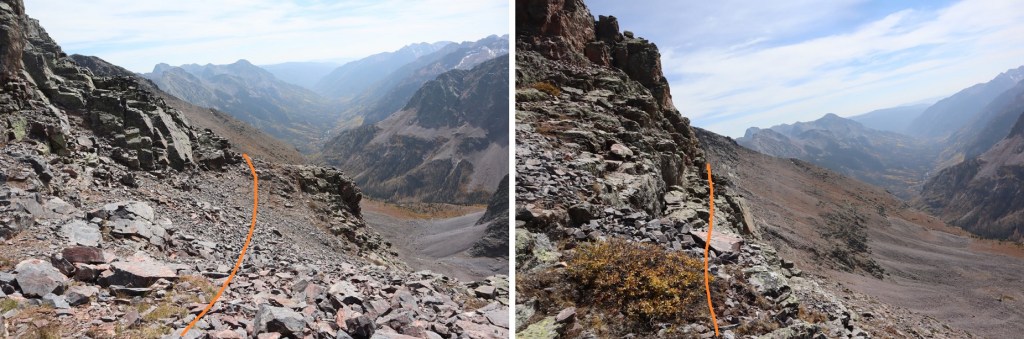
I had a great view of my route back to the gully that leads back to Lake Silex. It’s important to stay high here, as it does cliff out a little below. Here’s my route
Here’s a look back at the route down from The Guardian, staying high to avoid the cliff bands
Back at the top of the gully here’s looking at my route back to Lake Silex. I hiked down to the lake, gathered my gear, and went around the north side of the lake, looking for a spot to spend the night.
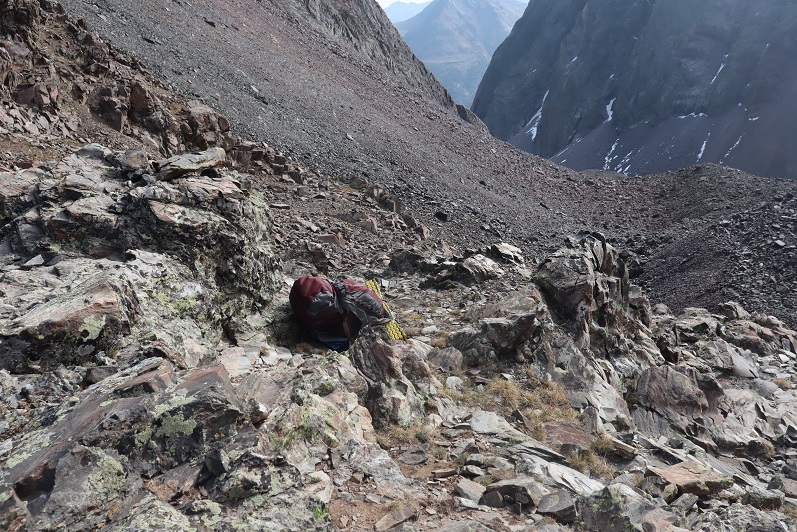
At the northeast side of the lake I found a set of 3 windbreaks and picked the most well-constructed one to spend the night.
I set up my gear inside a windbreak built in-between two large boulders. It was well made, but the wind was so intense the barrier wasn’t doing much to keep out the wind.
I filtered some water from the lake, ate dinner (my last packet of tuna, a handful of peanuts, and a few shots of whiskey) and made it an early night.
The wind howled all night long. It was intense, but my bivy once again did its job.
Day 3: Descent, Hunchback Mountain, Hunchback Pass
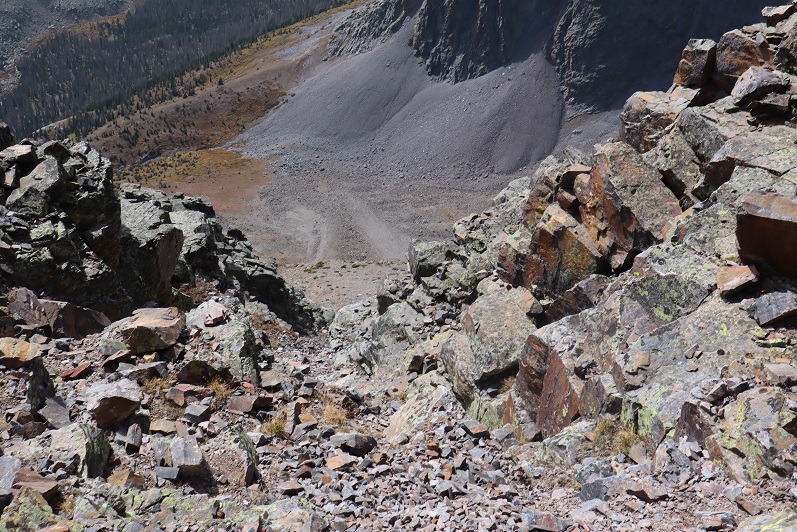
I woke up the next morning, gathered my gear, and was off at 7am. I followed the gully northeast towards Stormy Gulch.
There was still some snow left in this gully from last winter.
I made my way down the scree and back Stormy Gulch
I much preferred the way I hiked in rather than this scree hike out. Here’s looking back on the scree slope
I picked back up the faint trail and followed it east
The waterfall seemed a good place to stop for a bit. I sat on a log and relaxed for a few minutes before the long hike back up to Hunchback Pass. Once again, this would be a great camping spot.
I crossed Nebo Creek and quickly found the trail.
I followed the trail north past treeline, keeping a steady pace as I still had one more peak to climb and didn’t want to get too tired too quickly. I filtered water one last time and took frequent breaks just because I could.
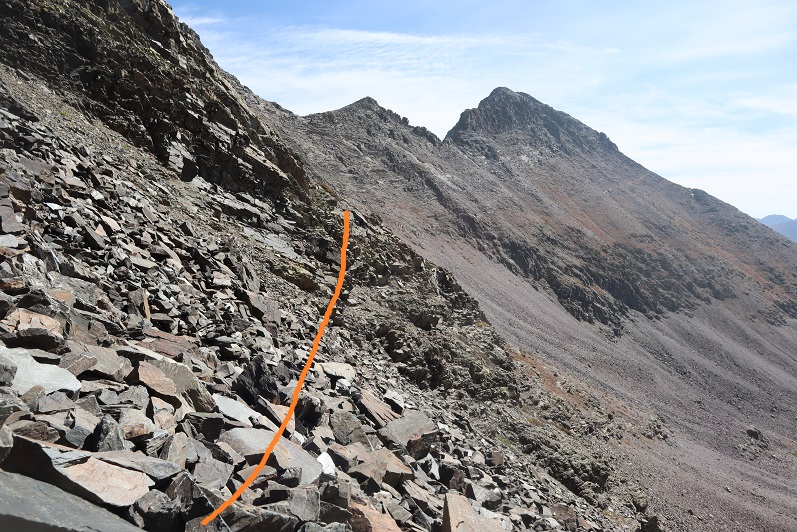
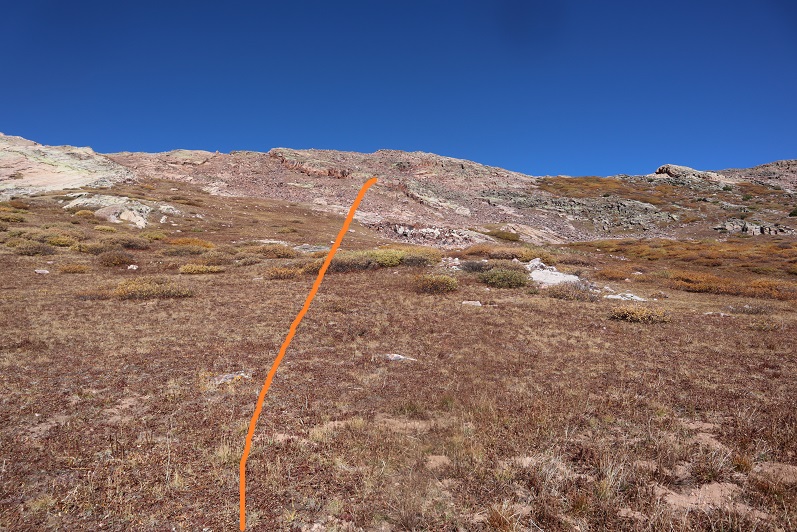
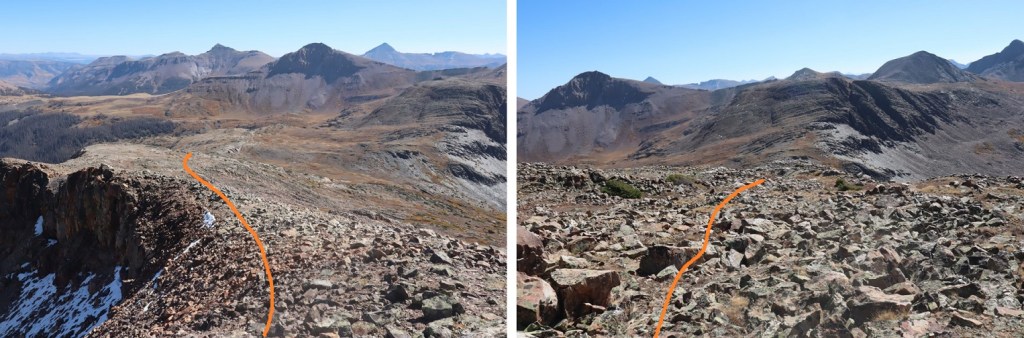
Once above treeline I had a great view of Hunchback Mountain. Here’s the overall route I took to the summit
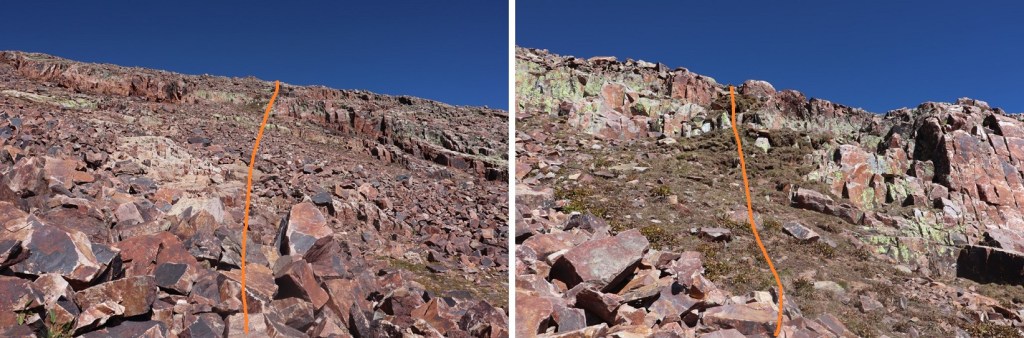
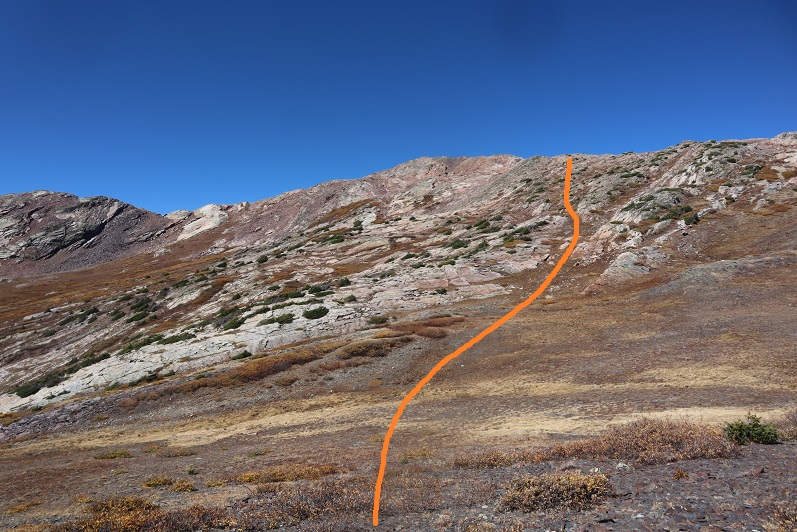
And step by step, all class 2. Sometime during this part of the hike I lost one of my gloves. It was really windy, and I suspect it was blown out of my pocket. Time for a new pair of gloves. I left the trail and aimed for a small grassy area near a band of rocks
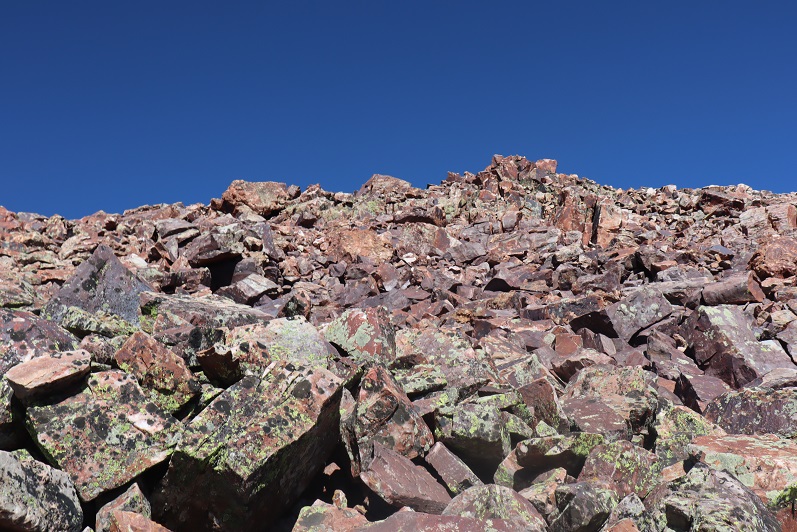
After the grassy area the terrain became rocky. I aimed northwest (note, this is a false summit)
Here’s a view of the summit of Hunchback Mountain
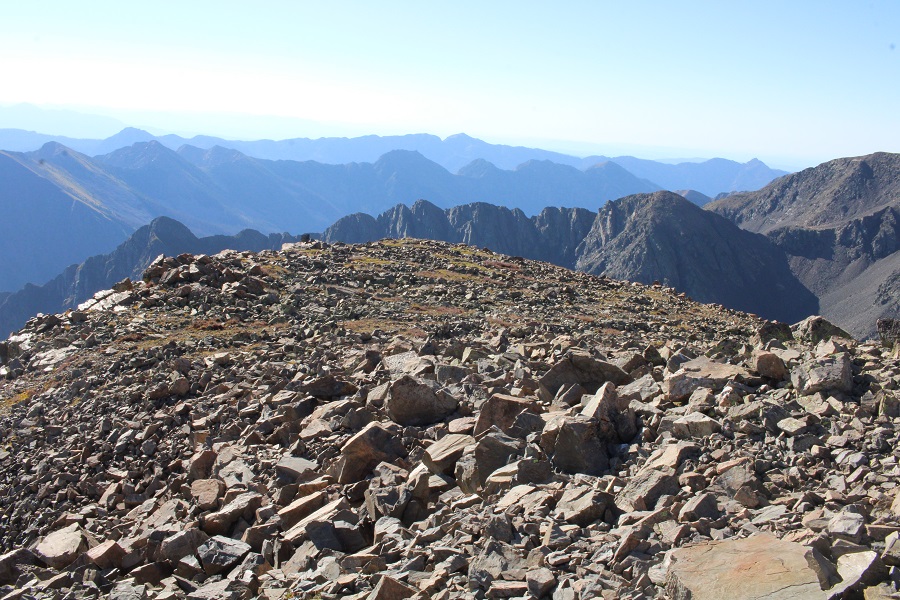
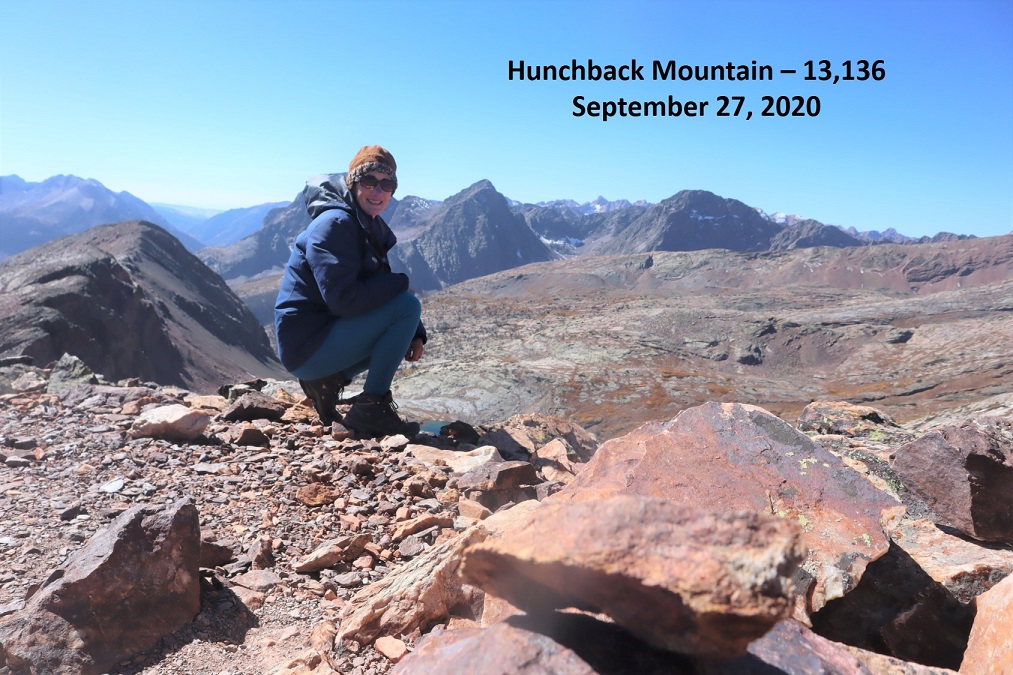
I summited Hunchback Mountain at 11:15am
Hunchback Mountain:
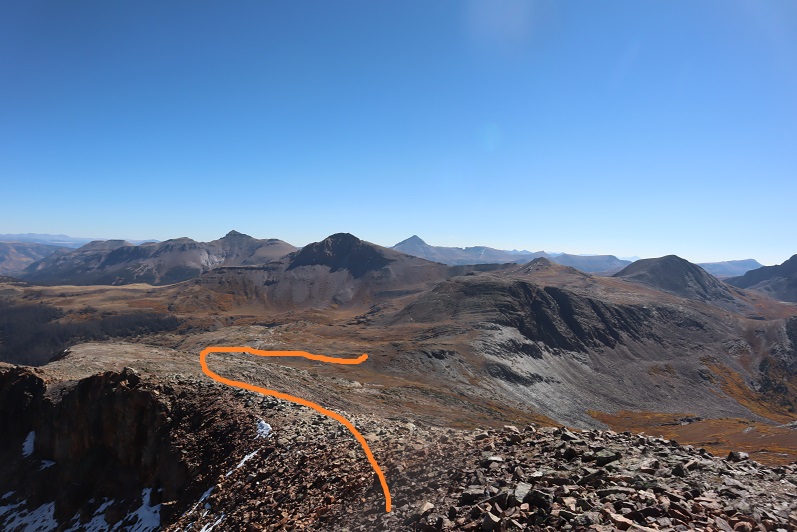
I spent some time on the summit, getting a good look at some 13ers I wanted to attempt next weekend if the weather held out. I figured out which route I wanted to take next week, and then it was time to head towards Hunchback Pass. I just followed the ridge east until I reached a tundra/willow filled gully, then followed the gully back to the trail.
Here’s looking back on my descent
Back on the trail it was an easy hike back down to my truck
I made it back to my truck at 1pm. This was a 3 day hike, with 39.49 miles and 11981’ of elevation gain according to CalTopo, 28.9 miles and 19042’ of elevation gain according to Strava. I’m not sure why the big gap in elevation gain/mileage, but to remain consistent I always use CalTopo data.
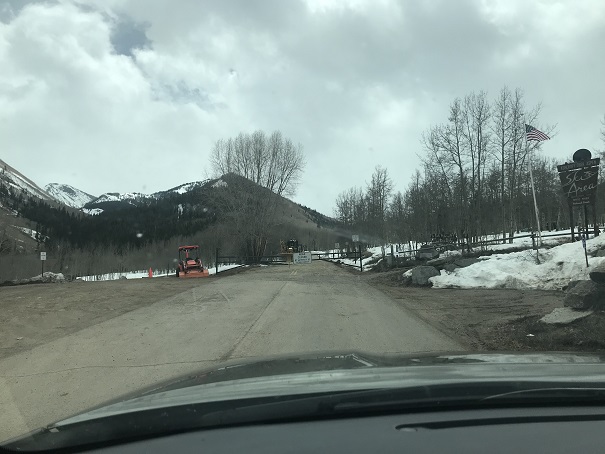
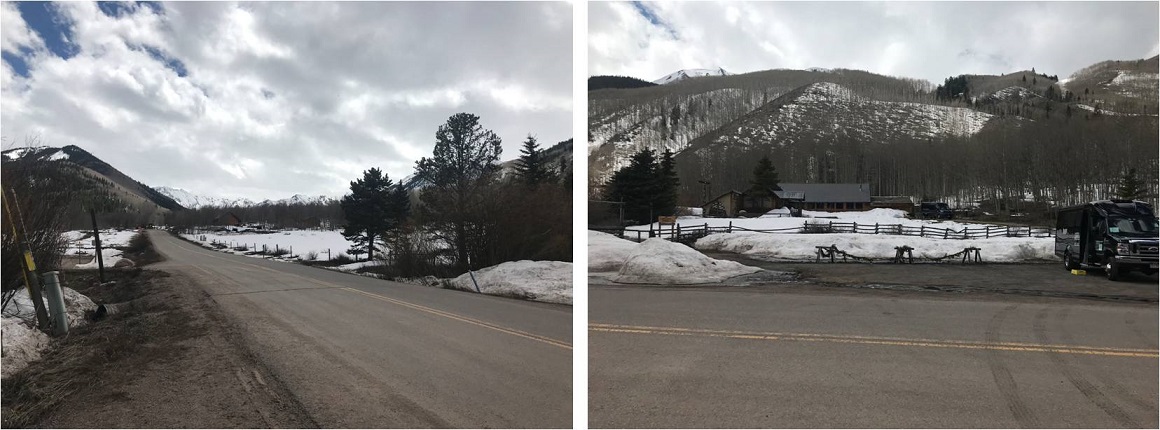
After climbing Lackawanna yesterday I drove 4 hours to Ashcroft and arrived at 1pm. The winter closure started here.
My intent was to spend the night, wake up early and attempt Cathedral Peak in the morning. There were tons of vehicles in the lot when I arrived, and groups getting ready to leave for the day.
This is a popular trailhead as a starting spot for many winter activities (mainly skiing and snowshoeing, not necessarily mountain climbing). I asked about conditions and was told the snow was firm in the morning and soft in the afternoon (lol!). I saw some snowshoers with a guide ready to go out for a short trek (dressed in jeans) and several groups on hut expeditions.
The bathroom was open but dirty, so I got out my Clorox disinfecting wipes and quickly cleaned it so I could feel better about using it over the next few days.
It was still early but I decided to make some Mountain House Stroganoff for dinner and go over my notes for tomorrow. There wasn’t any recent information on this peak, and in fact not much information at all, so I wanted to be prepared. I checked the weather report I’d saved on my phone and calculated start times. I wanted to be on the trail no later than 2:30am so I could potentially make it to the Lake by 5am, with a summit between 5-7am to avoid the warming of the snow and avy conditions.
As I was sitting there, all I could think of was how beautiful the mountains were, and how perfect the weather was right now. It was probably spectacular here in the fall. Even though I’d hiked a centennial already today I wanted to be out there hiking again. I gave it some serious thought but in the end knew the snow at this time of day would be too soft, so it wouldn’t be worth the attempt anyway.
The sun was already warming up my truck and I began to feel sleepy. By 3pm I’d decided to try and get some sleep because I was waking up super early to hike tomorrow and needed my rest after this morning’s climb. At 5pm I was woken up by an intense thunderstorm but was able to fall back asleep.
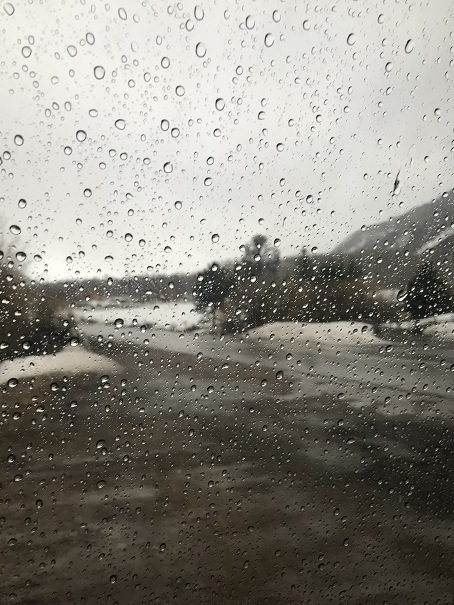
My alarm went off at 1:30am and I woke up to 3 inches of snow outside but check this out: I was warm!
I’ve never been warm sleeping at a trailhead, but for some reason I was this morning, even though it had obviously snowed. I didn’t want to get up but I also knew I didn’t have a large window of opportunity for this climb, so I had to get going. I was on the trail by 2am, following Castle Creek Road. After a little over a mile I saw a gate and a sign indicating I was to take this trail
I exited the road, climbed over a 5 foot tall ice wall and landed face first in the snow. Boy, was I glad no one was here to see me do that! How embarrassing! I picked myself up and in the 3-4 feet of snow (in the dark) struggled to get on my snowshoes. This was going to be an interesting hike!
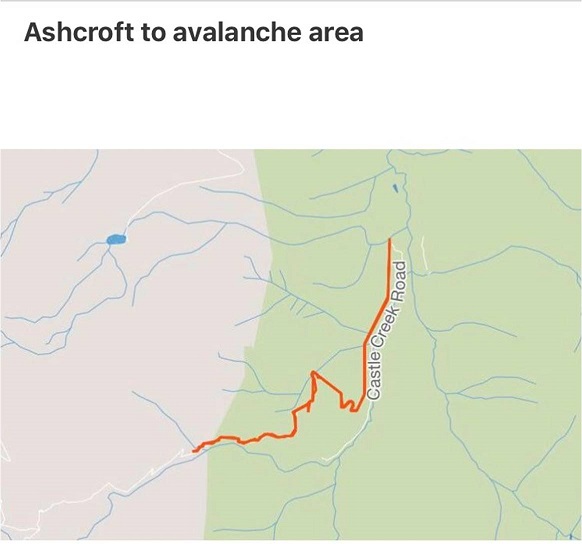
For the next mile and a half I postholed up to my knees in the snow, doing my best to route find a class 1 trail that hadn’t been hiked in quite a while, buried under several feet of snow. I came to an avalanche area. After a few minutes I found my way around it, but quickly came to another one… or maybe it was a continuation of the first? I’m not sure, but this avalanche was very recent and in the dark I couldn’t find a way around it. This was a 15-20 foot wall of compacted snow with tree trunks and branches sticking out from every angle.
I had 2 options: Wait for daylight to see if I could find a passable route, or cut my losses, head back to my truck and drive to the next trailhead. I knew if I waited until daylight I wouldn’t have enough time to complete or even attempt the climb past the lake, so I decided to just head back. That postholing had sure worn me out! I was incredibly tired, but it was probably due a little bit to yesterday’s elevation gain/climb as well.
I hiked back to my truck as the moon rose over the mountains and in and out of the clouds. I no longer needed my flashlight and wondered to myself if the moonlight would have made a difference in my navigating the avalanche? It was 5am when I made it back to my truck. I stowed my gear and hopped in, intent on driving to the next trailhead for the peak I’d intended to hike tomorrow. For reference, here’s where I encountered the avalanche
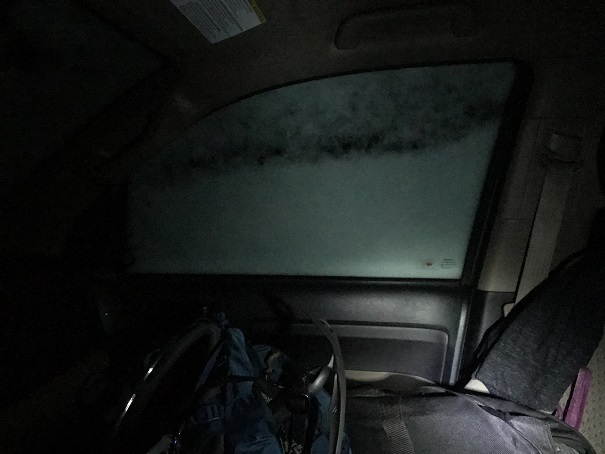
My truck wouldn’t start. Drat! I got out, cleaned 3 inches of snow/ice off the hood of the vehicle and popped the hood. After fiddling around with the battery for a bit I was able to get the truck started and I was off. This had certainly been an interesting morning!
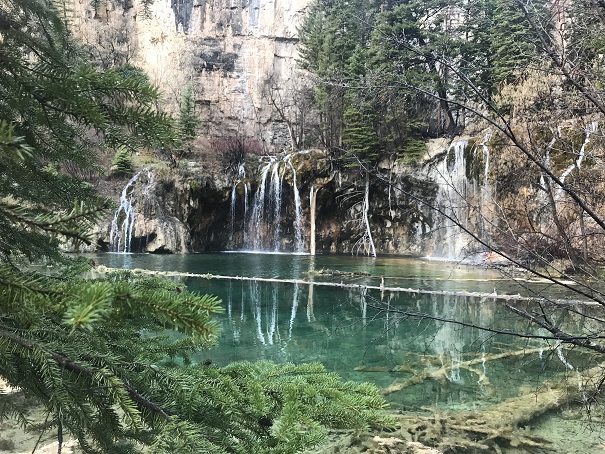
As I was driving to the next trailhead I saw a sign for Hanging Lake. This hike has been on my bucket list for years now, but it’s so short and so far away it hasn’t seemed worth the drive. Well, today I was right here, the new reservation system begins next week and I’ll most likely not go if I have to reserve a spot. It seemed my day was already shot and I wanted to turn it around, so I took the exit for Hanging Lake.
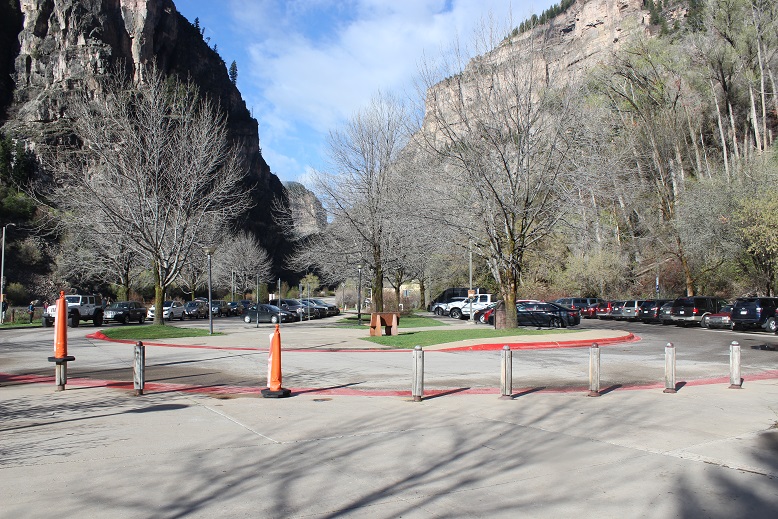
I arrived to a half full parking lot at 7am. (I’ll apologize here: My camera was fogged up due to the change in conditions from snow to warm, so the pictures came out a little hazy).
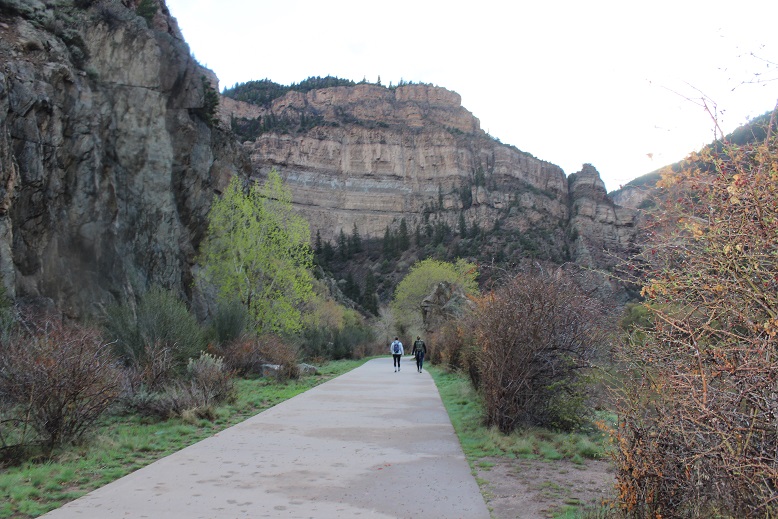
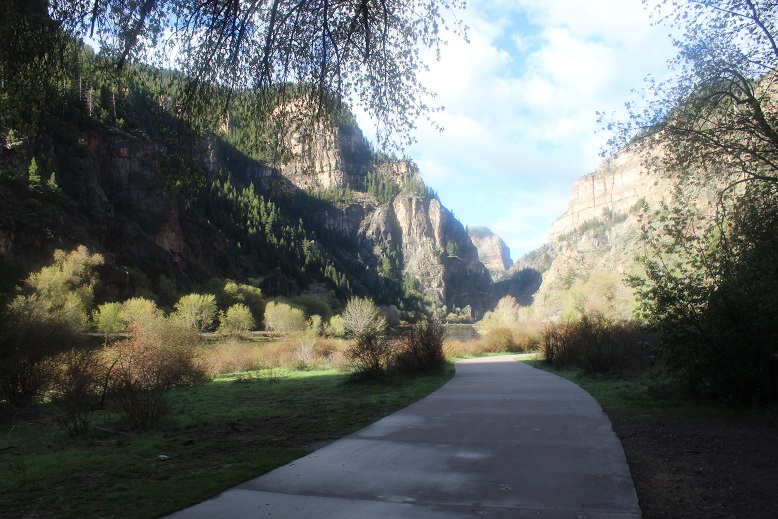
The trail is well marked and easy to follow. I walked along the river on a well kept paved trail for about half a mile
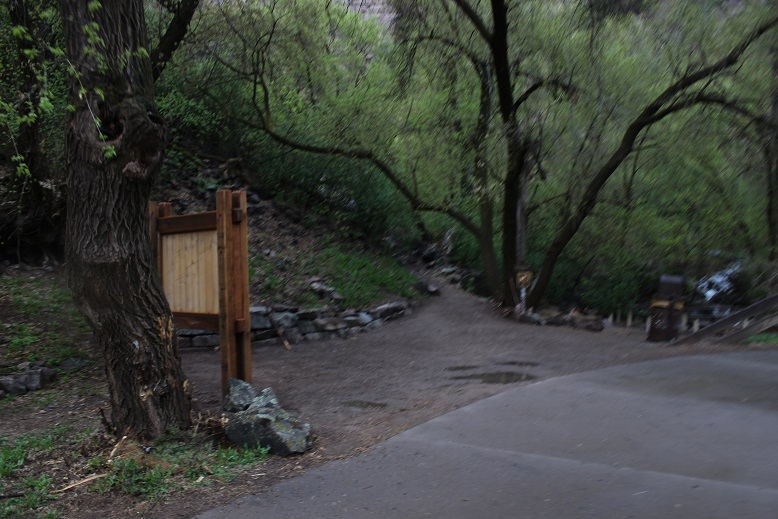
And at the official trailhead turned left
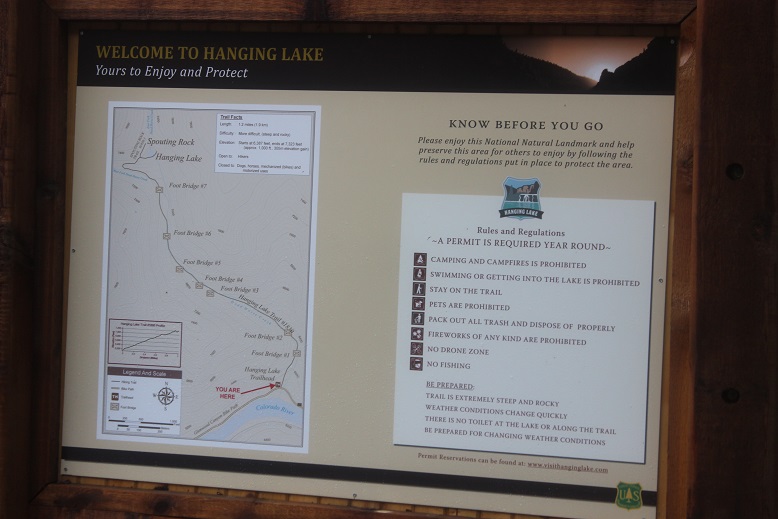
There’s a sign with some rules and information
As you can see from the sign, there are 7 bridges to cross. This hike can be summed up in a few simple pictures:
Bridges:
Stairs:
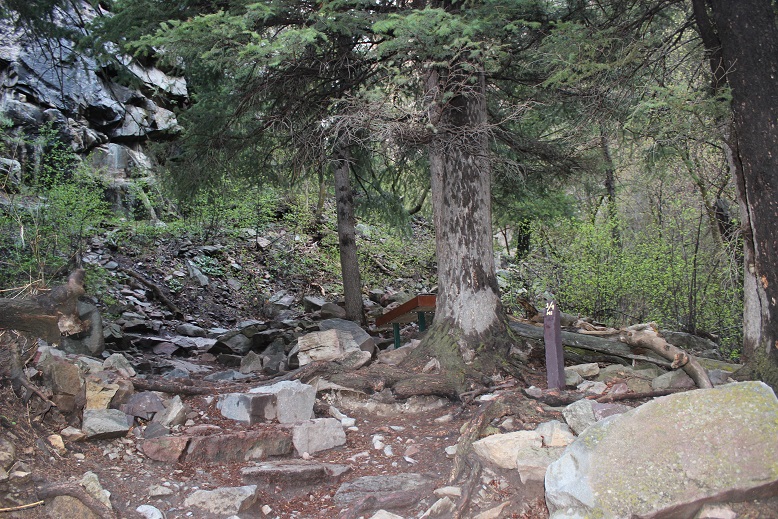
And signs every ¼ mile or so letting you know how far you’ve gone:
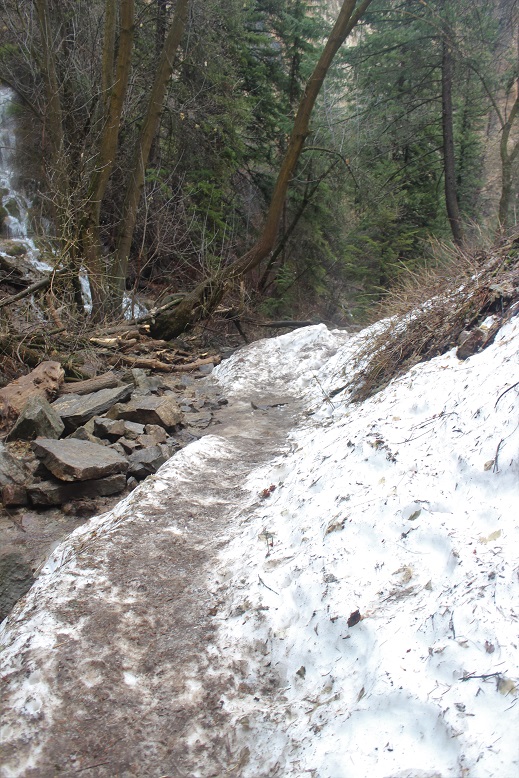
There were a few short sections of snow/ice, but traction would have been overkill
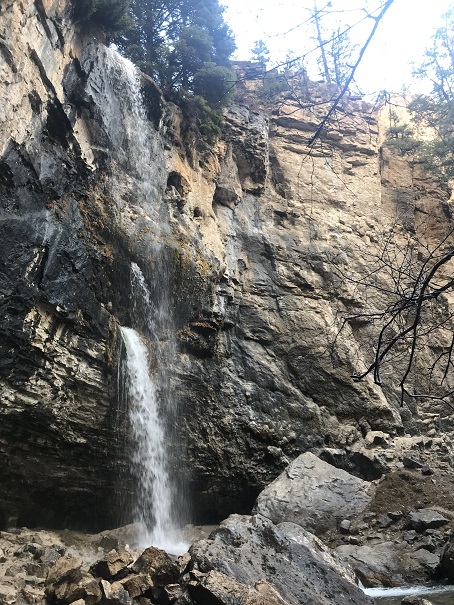
There were also a few waterfalls along the way
And signs of a recent avalanche
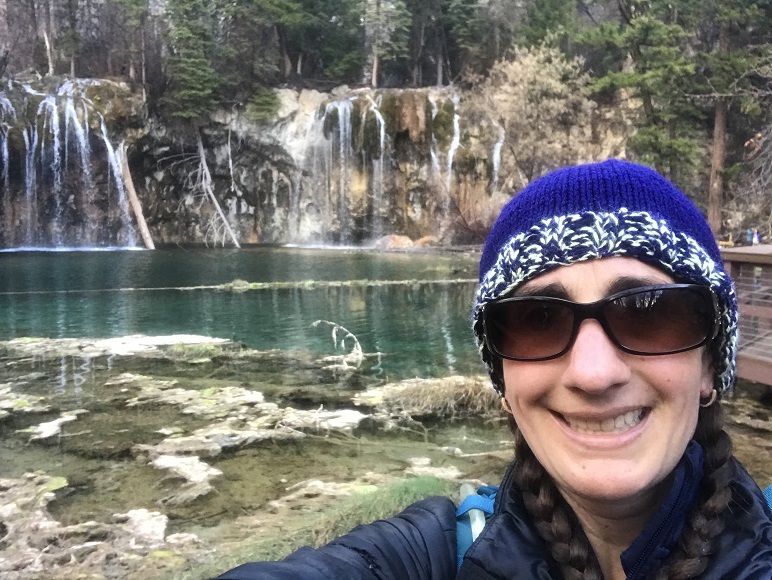
After a mile of hiking up 1000’ or so in elevation I came to a steep set of winding stairs and arrived at Hanging Lake.
And a few pictures of the lake itself (it has fish!!!)
I saw a sign on my way in for Spouting Rock and decided to see what that was all about. It was a 2 minute walk up more steps to an area just above Hanging Lake.
Spouting Rock is a waterfall.
The hike back down was very quick. The only drawback was navigating through all the people on the trail! This is a very popular hike, and on a Saturday morning the last weekend before the reservation system started quite busy, even for 8am.
I made it back down to the river and followed the sidewalk back to the parking lot
There’s a nice bathroom there
And the parking lot was full!
I made it back to my truck a little before 8:30am, making this a 3.5 mile hike in 1.5 hours.
Eagles Peak is a trail accessed through the Air Force Academy. It’s a 3.6 mile up and back trial that has an elevation gain of 2100 feet in 1.3 miles. As I was driving in I got to take a detour through the USAFA housing development (they’re working on the roads) and I saw a turkey this time in the same place I saw one last time. He gobbled at me as I took this picture.
The trail begins at the visitors center. I parked my truck in the lot, crossed the street, and followed the service road past some power lines to the trailhead. I want to note the beginning of the service road stated “authorized vehicles only” and when I got to the trailhead there were two unauthorized vehicles parked. Well, I’m assuming the Accord and Subaru weren’t authorized. Oh well, I got an extra half mile out of my hike and they didn’t, and it let me know there were at least 2 other groups of hikers on the trial. I passed them both coming down as I was going up relatively early in the trial. One was a man in his 50s, the other looked like a cadet with her two dogs.
Here’s a picture of the trail. It looks deceptively short and easy, but look at that elevation gain!
Oh, and the trail also looks easy to follow in this map. What it doesn’t show is how it follows a waterfall for most of the way, so when you’re looking at the trail thinking “There’s NO WAY the trial goes up that waterfall, it must follow this worn path to the left”, you’d be wrong. I was. Right where the ‘17’ is on this trial I ended up hiking up that ridge, only to notice my mistake once I got to the top and it was a dead end at a rock face. I had to retrace my steps and hike up the waterfall I didn’t think was a trail…
This hike is a steady uphill/up rock climb all the way to the top, except for a small meadow just before the final climb.
And what a climb it is! Like most trails in the area, it’s not well marked and hard to follow, but at least someone spray painted these blue dots that indicate what general direction you should follow.
As always, the view from the to was amazing! I love looking west towards Pikes Peak.
I was actually able to find the summit marker this time, which is an anomaly. Most summits don’t have them in the area at this elevation.
The hike back down was uneventful, if a bit slippery. Granite is really slippery when wet (remember the waterfall) and also when it’s crumbled up into pebbles. It is trickier hiking down in many areas than hiking up because it’s easier to slip and fall. Gravity isn’t on your side.
In any event, I made it down safely, hopped into my truck, and floored it to work, as I had several texts asking me for help (my team is in Brussels this week and I’ve been working odd hours while they’re overseas).