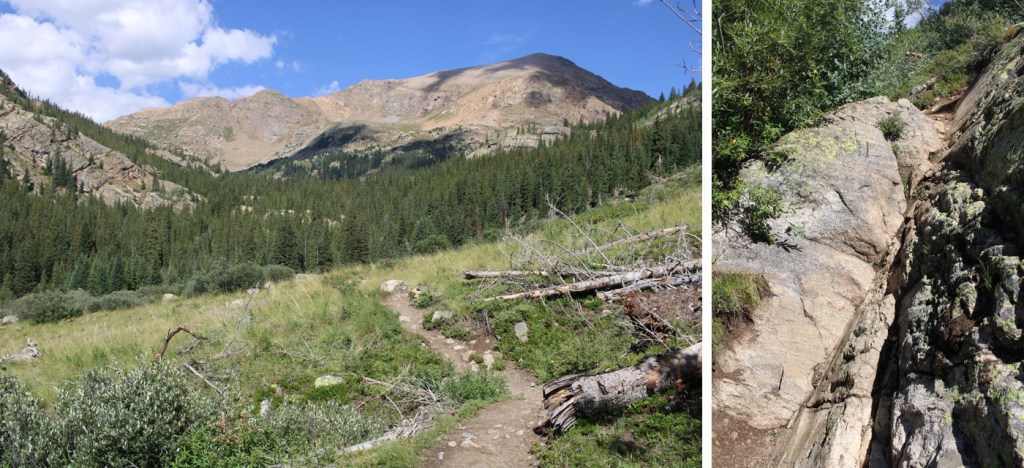
I really wish I would have linked up this peak with PT 13164 when I did it in 2019, but then it wasn’t a known ranked 13er. In any event, today was a long day, so I was getting an early start so I could drive back home for work the next morning.
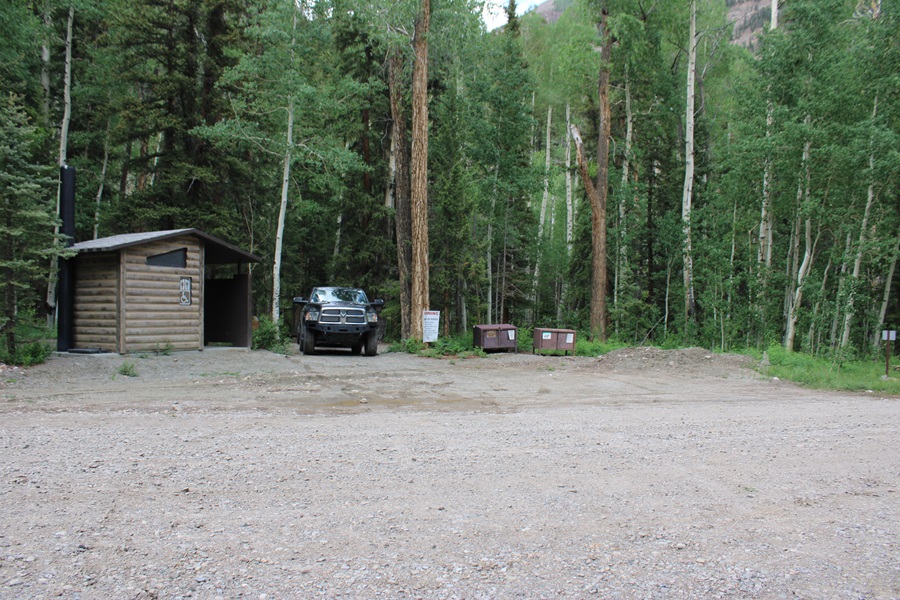
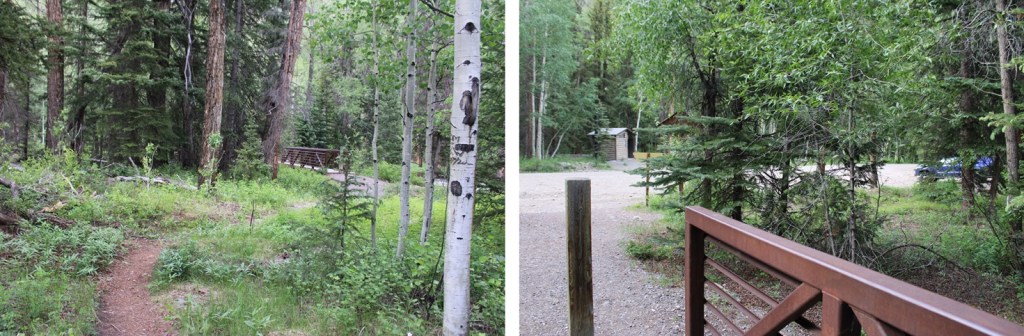
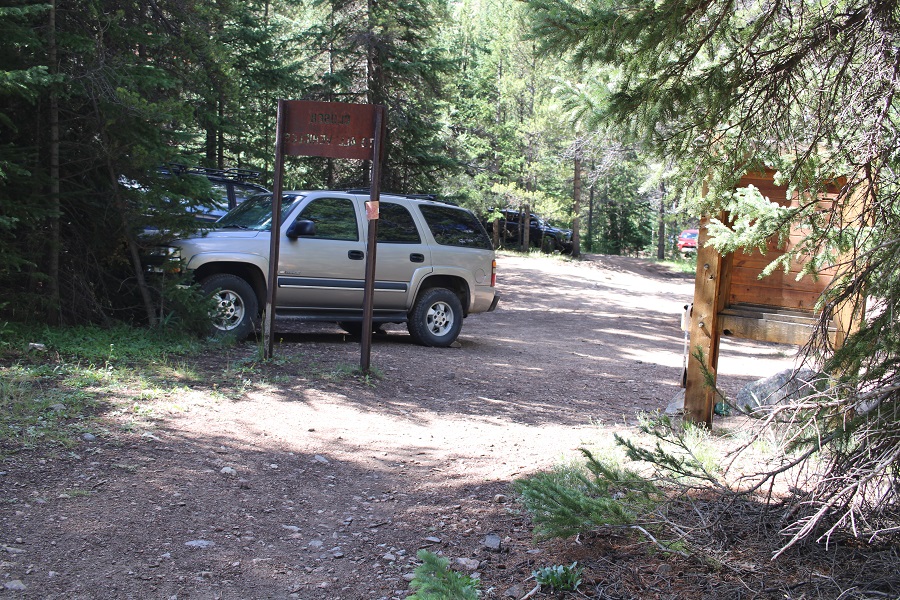
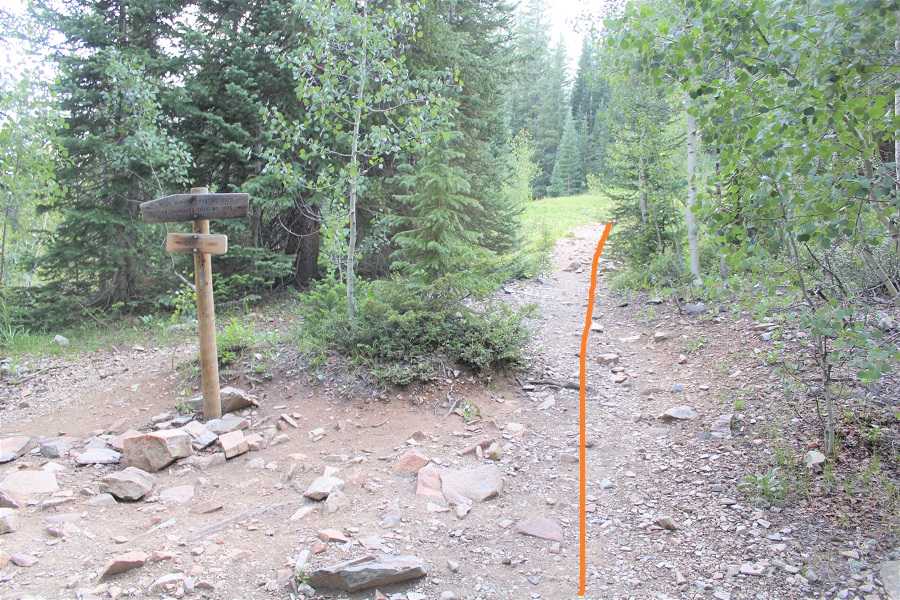
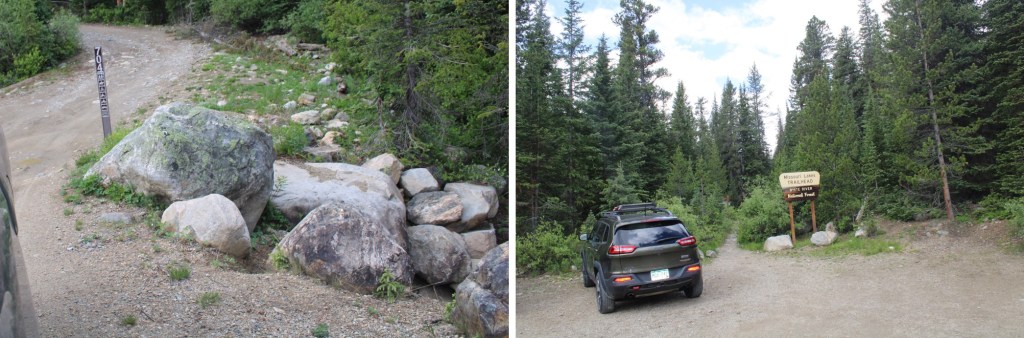
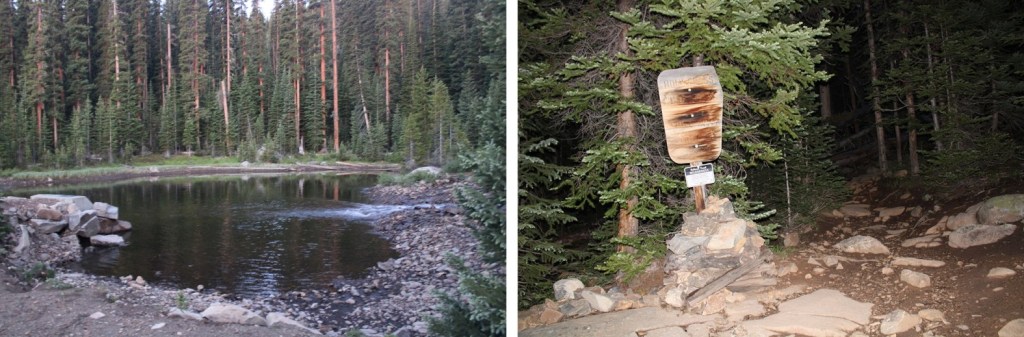
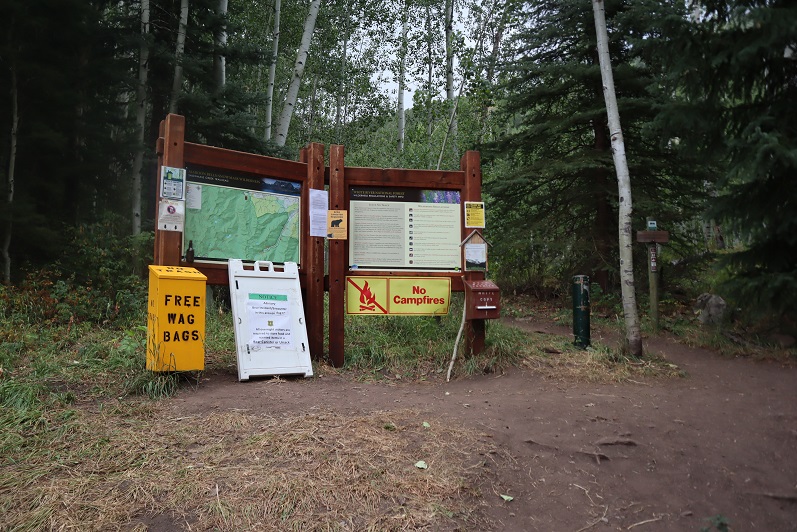
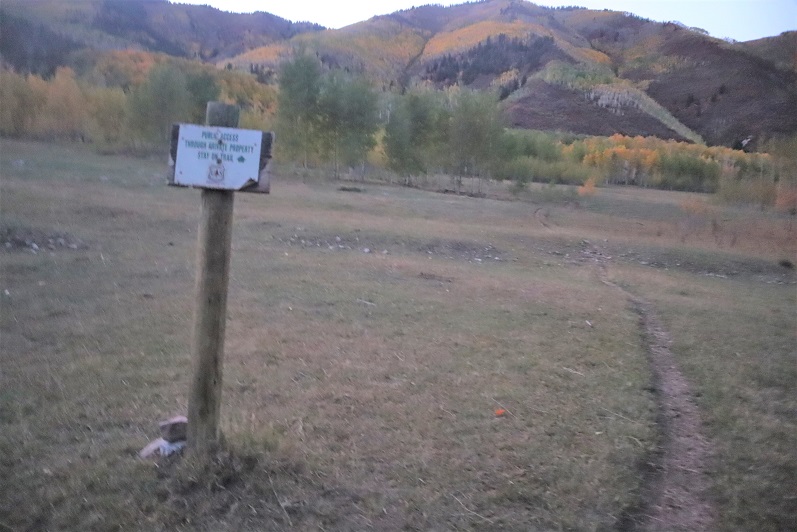
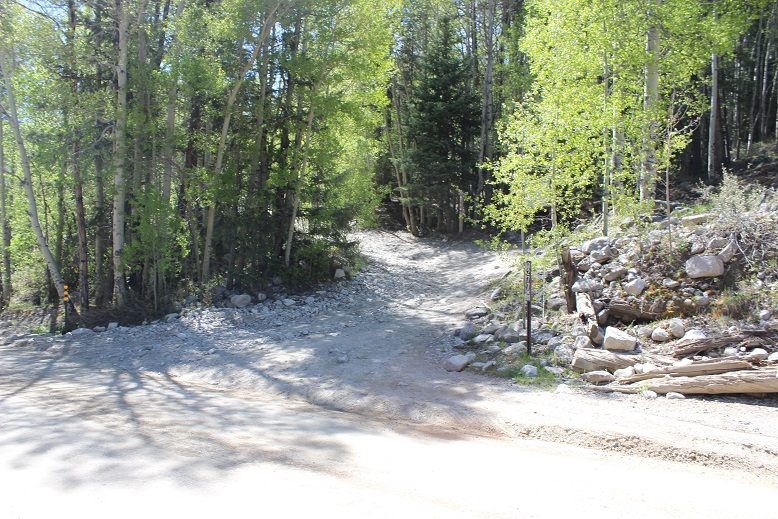
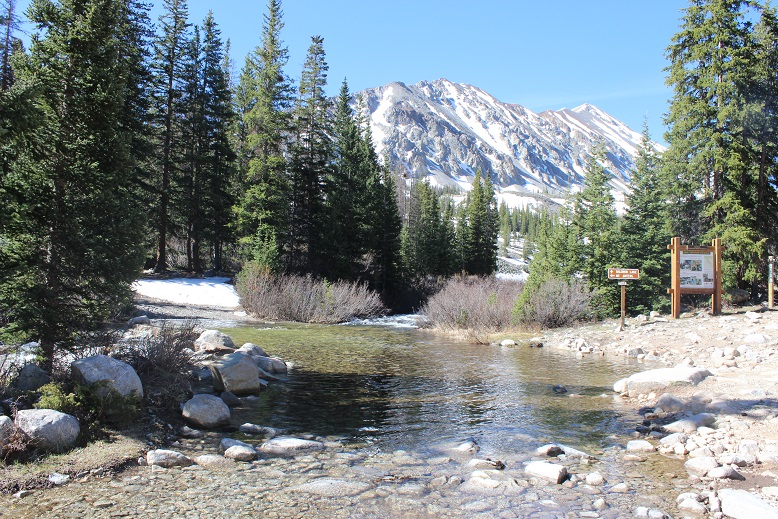
I parked at the Cataract Gulch Trailhead and was on the trail at 3:30am. The trailhead has several parking spaces, dispersed campsites, and bathrooms.
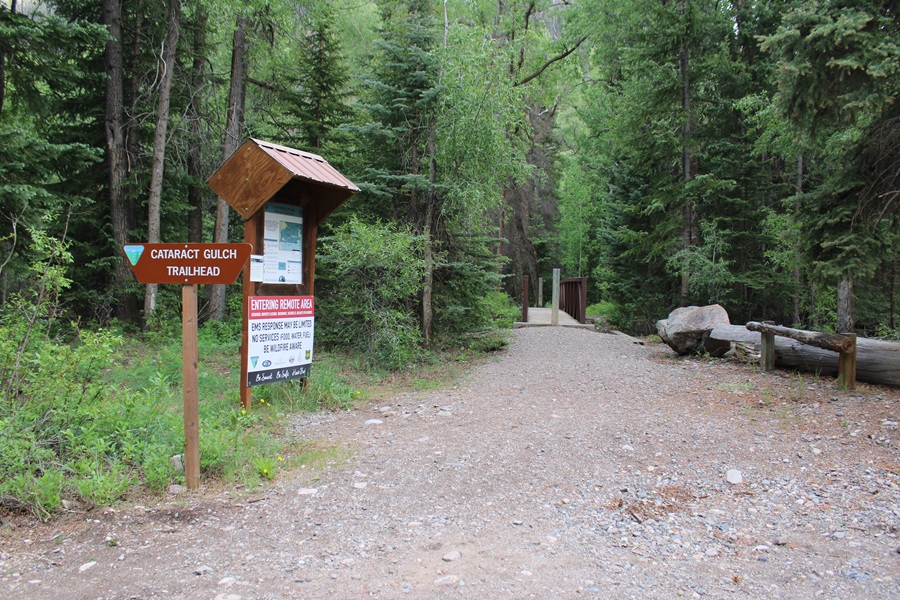
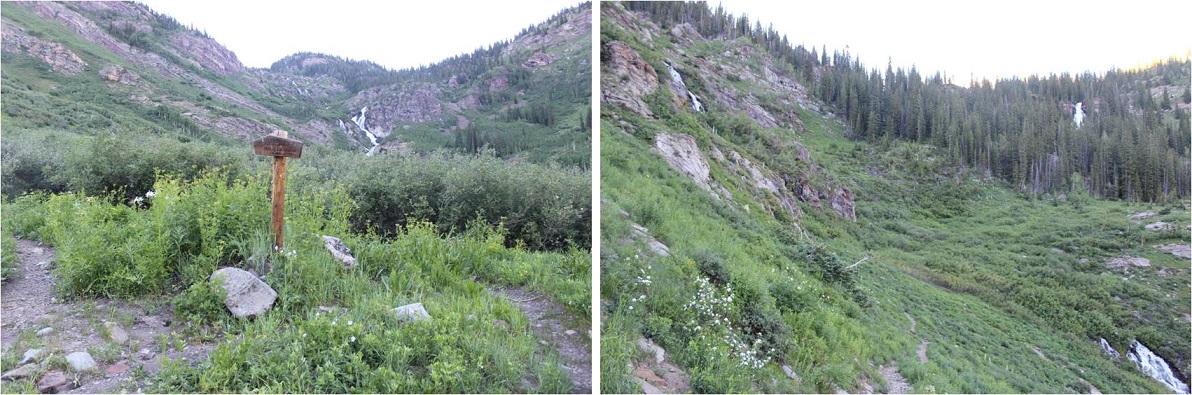
The trailhead is clearly marked, and easy to find.
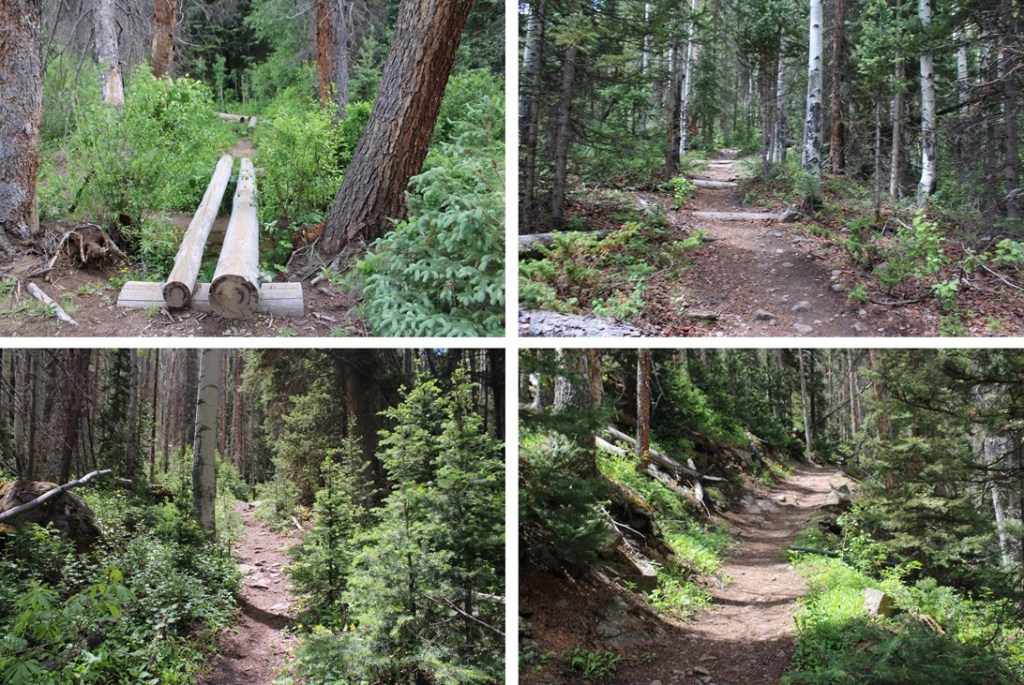
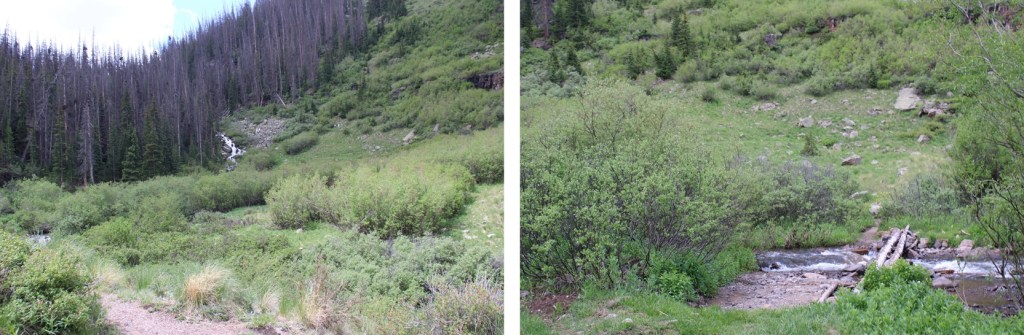
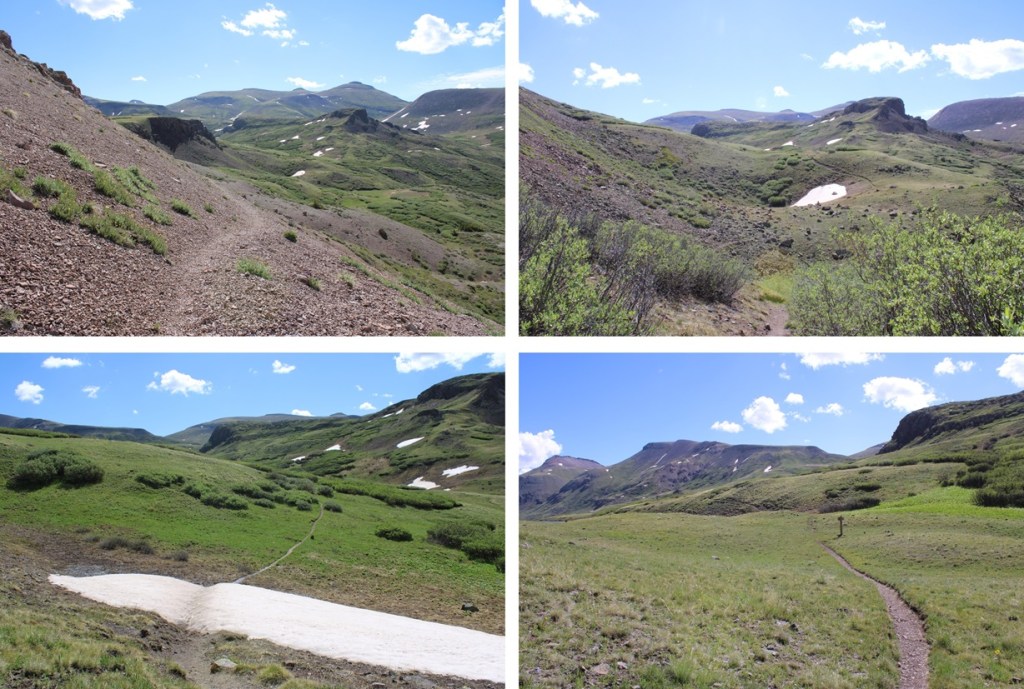
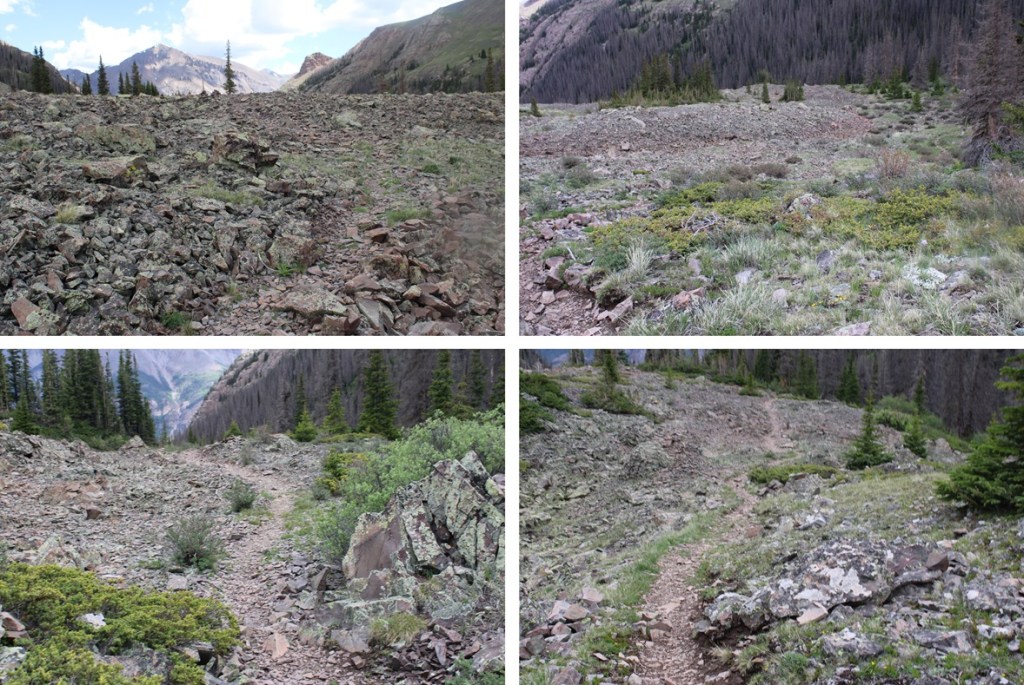
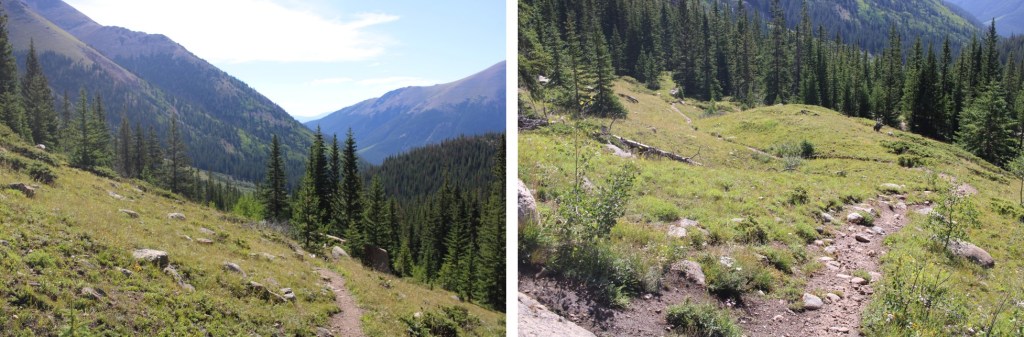
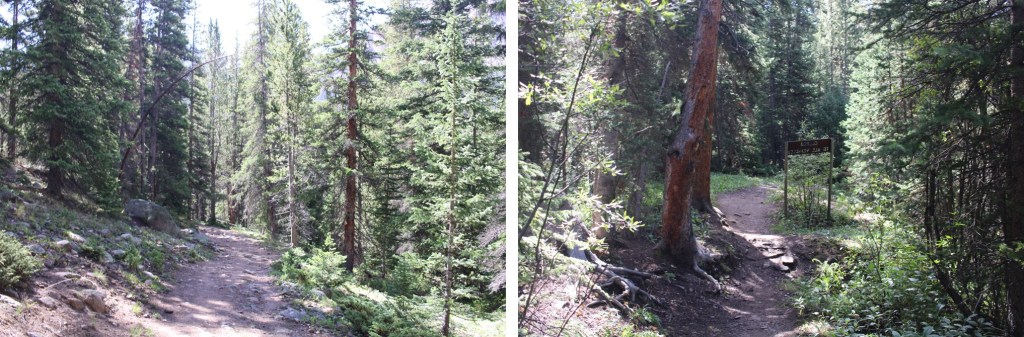
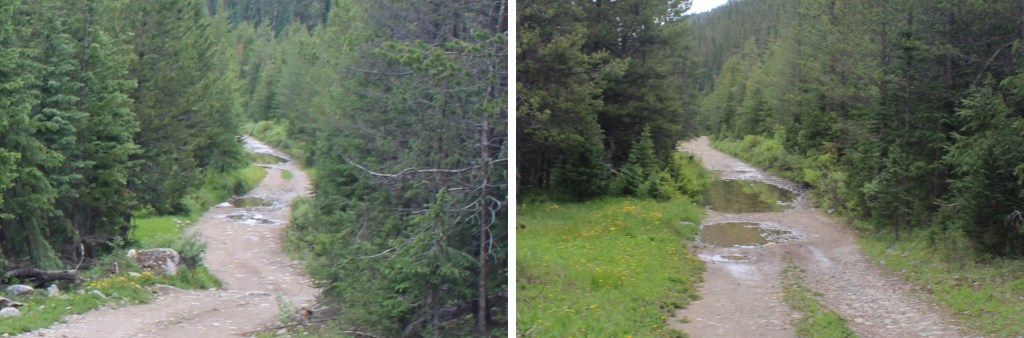
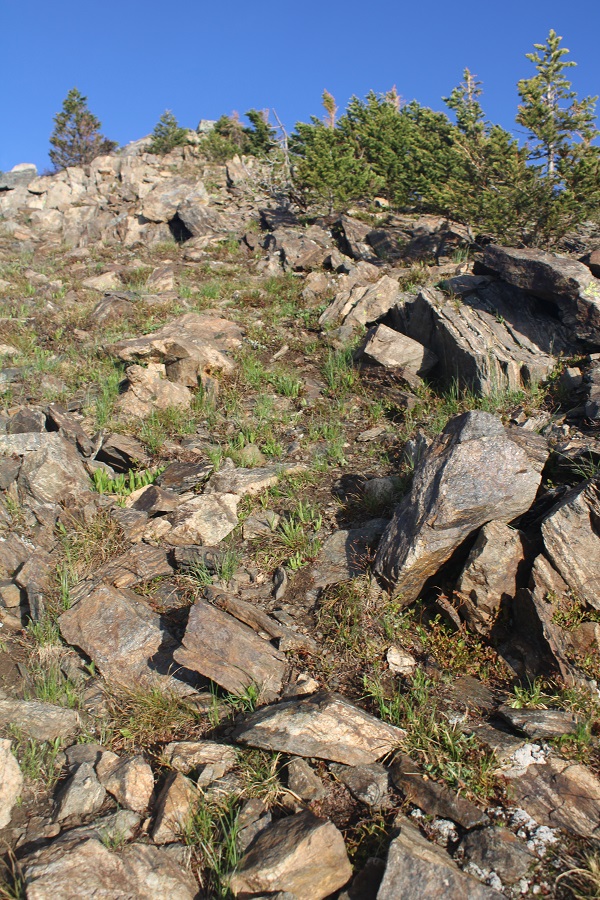
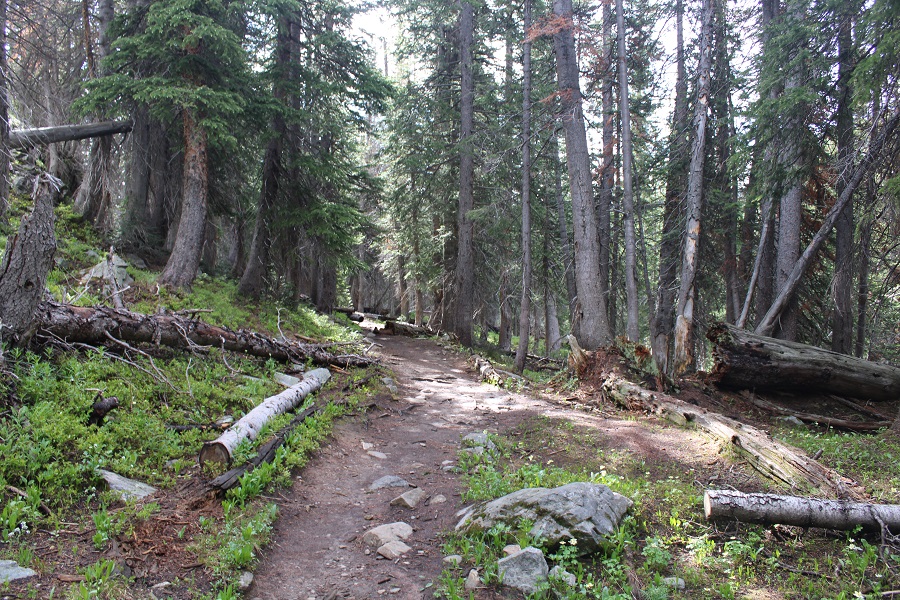
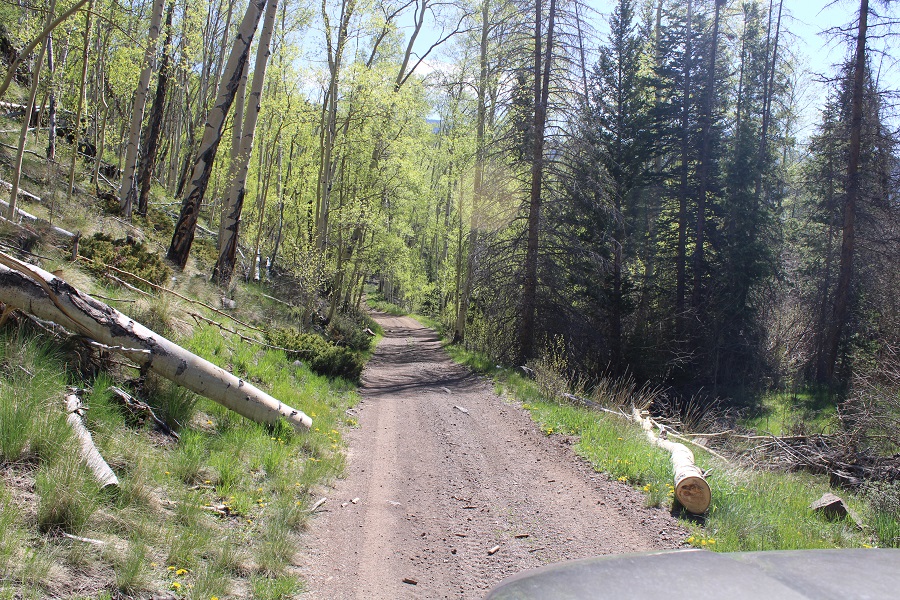
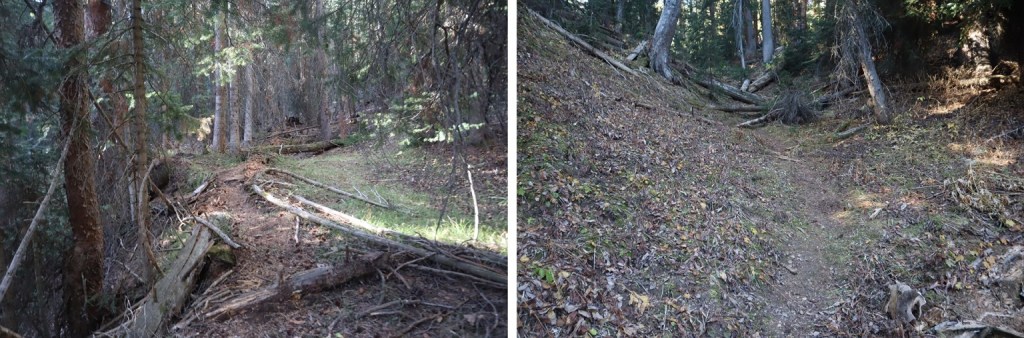
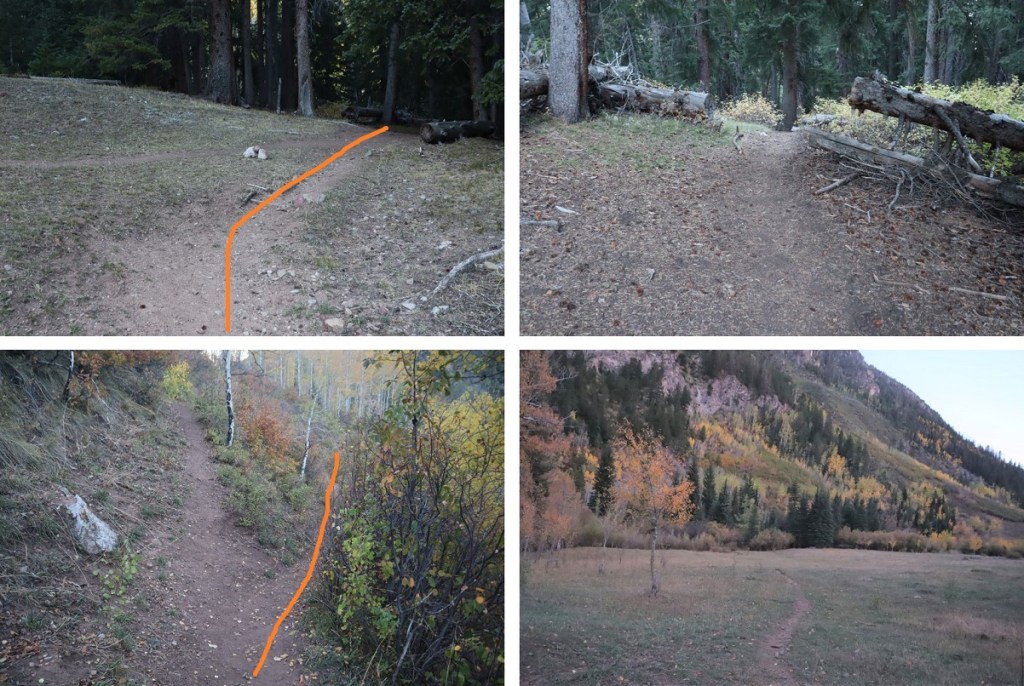
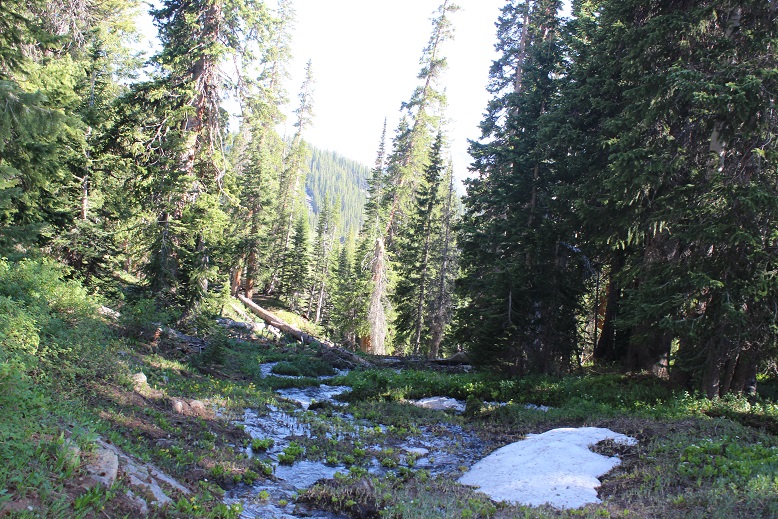
I followed the class 1 Cataract Gulch Trail south, towards Cataract Gulch.
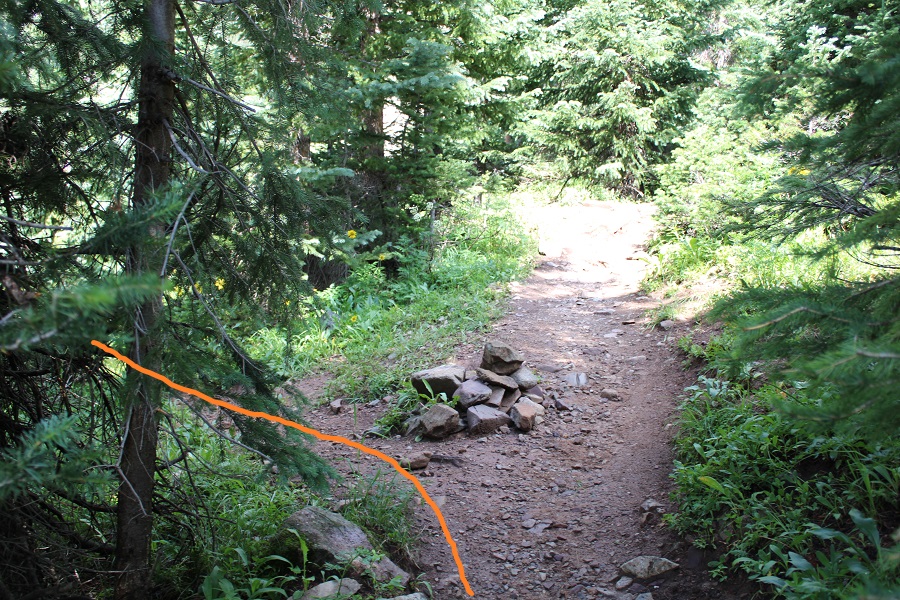
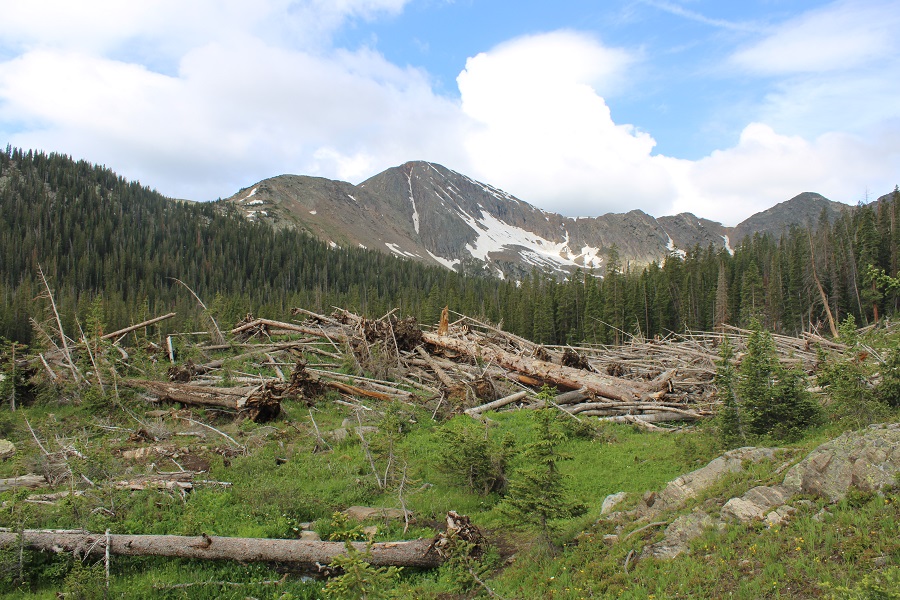
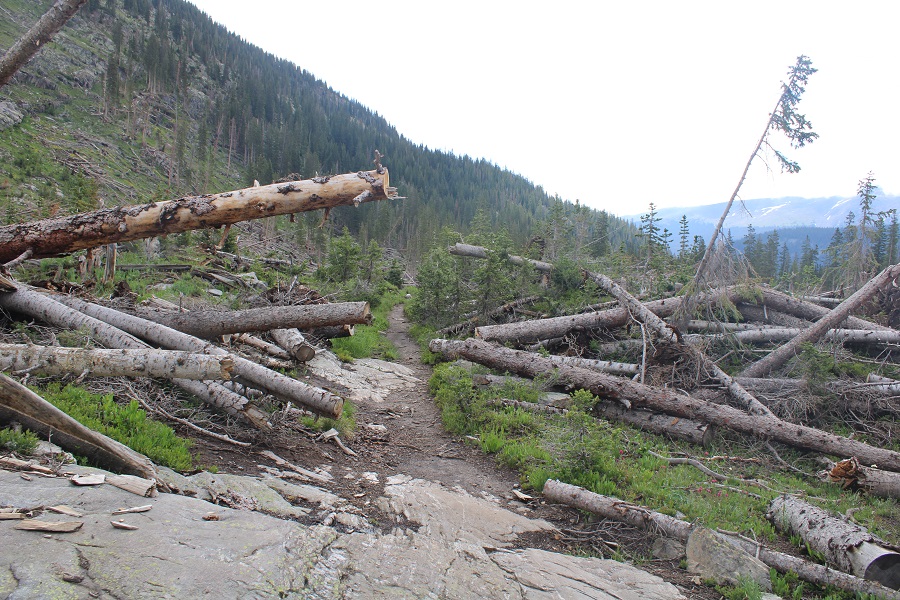
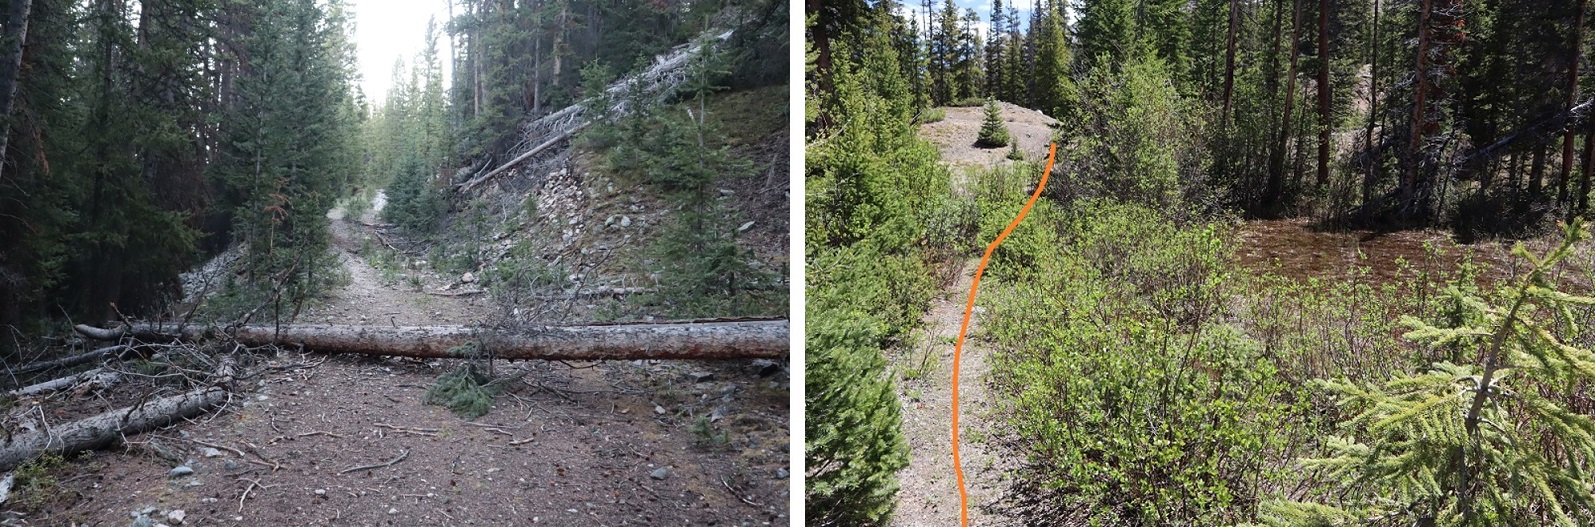
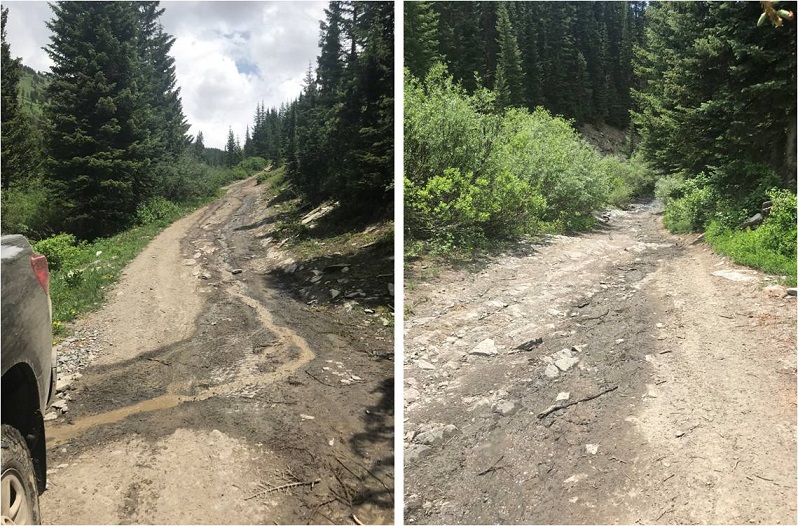
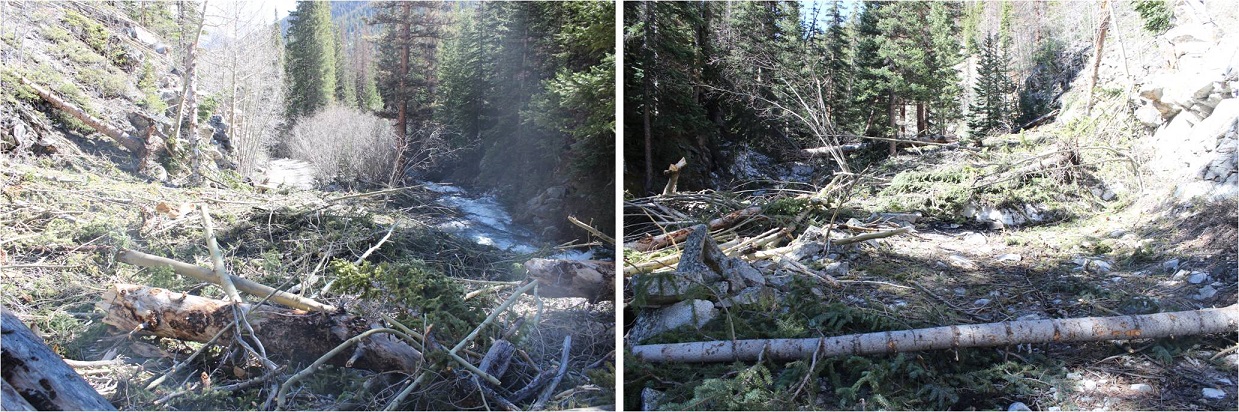
There were several downed trees on the trail, but it was easy to navigate.
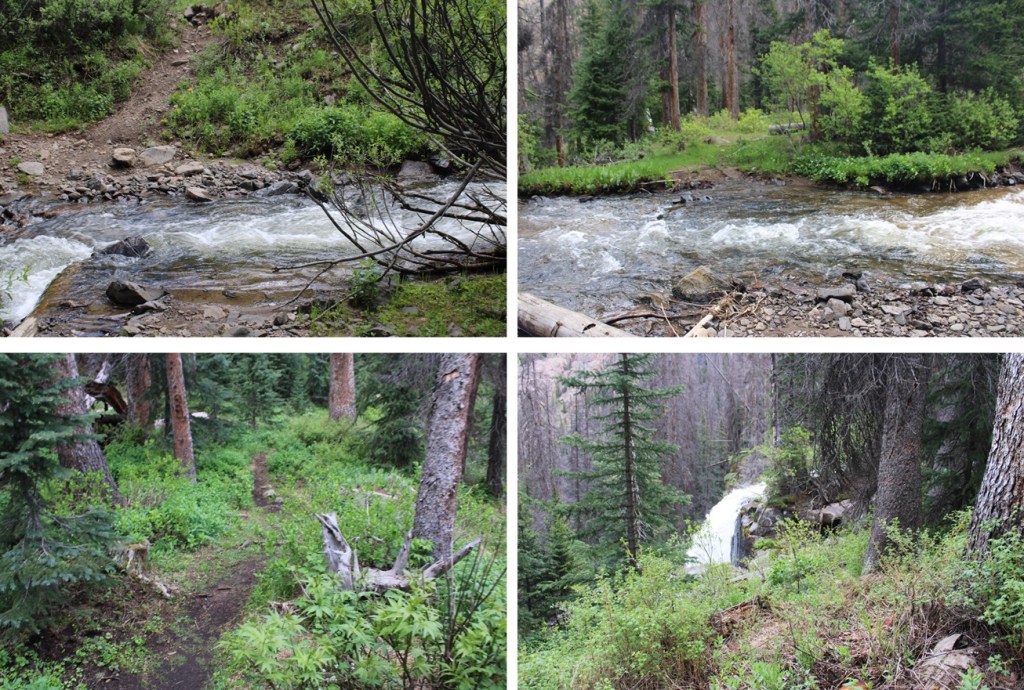
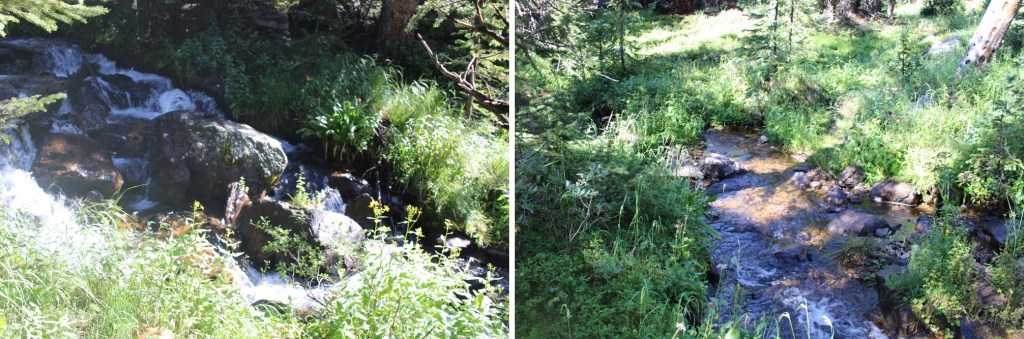
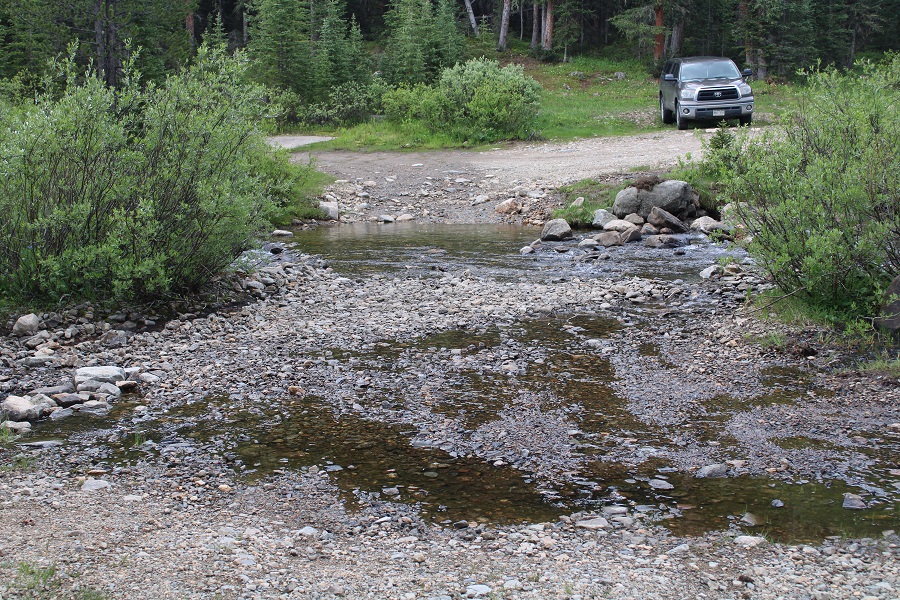
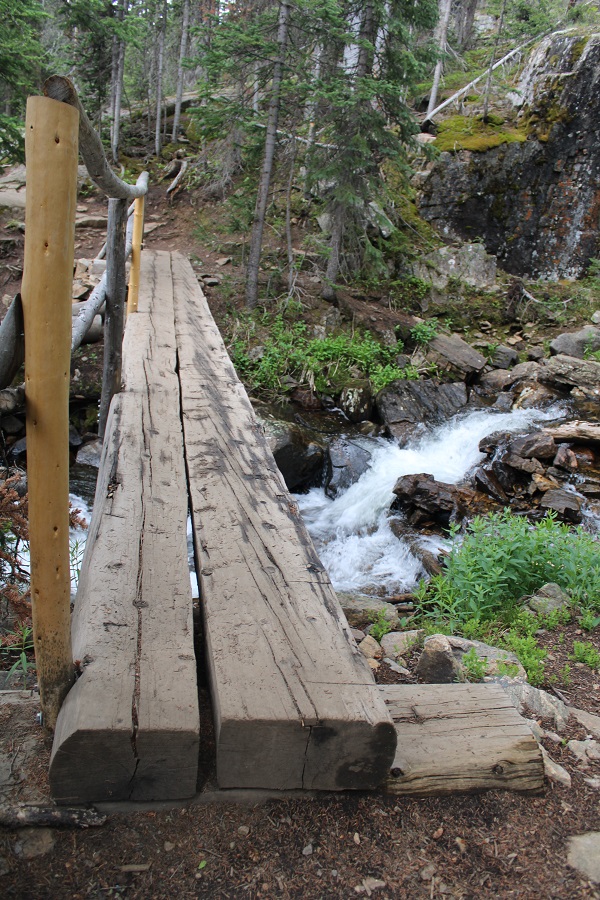
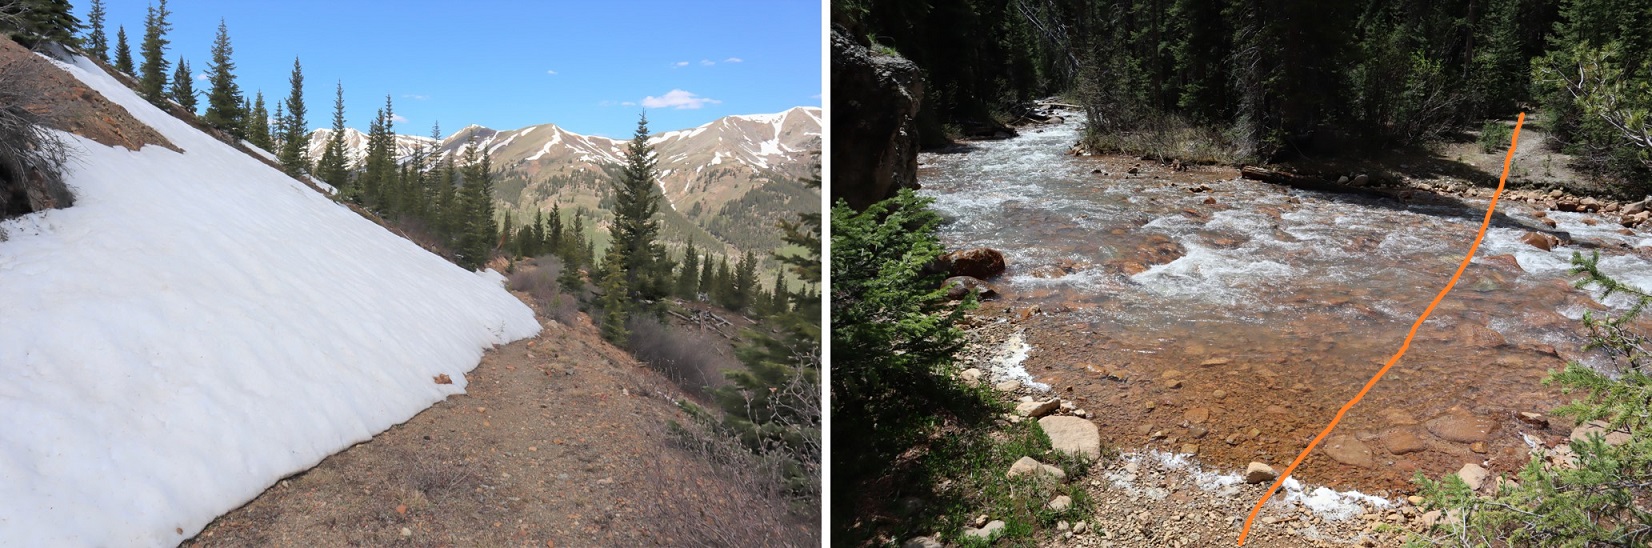
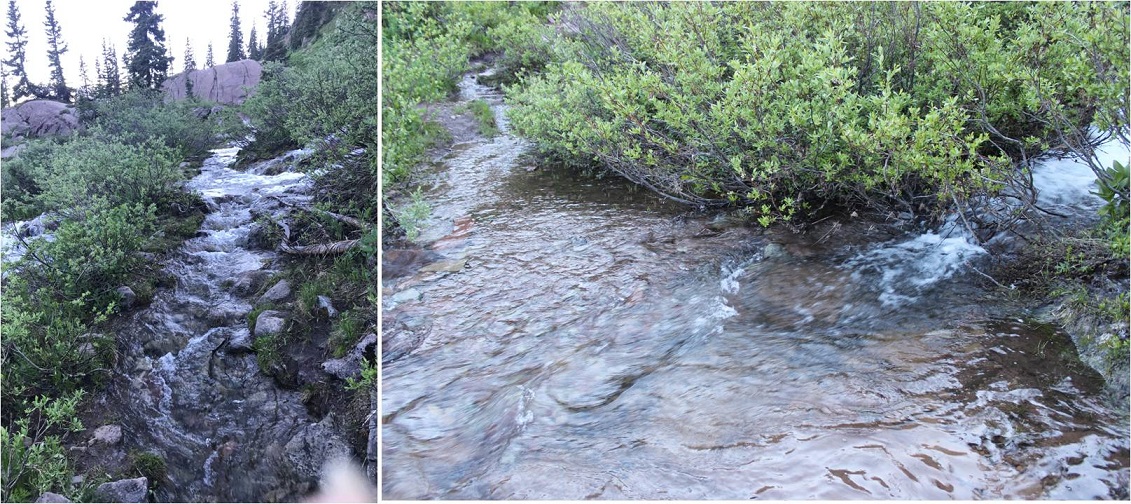
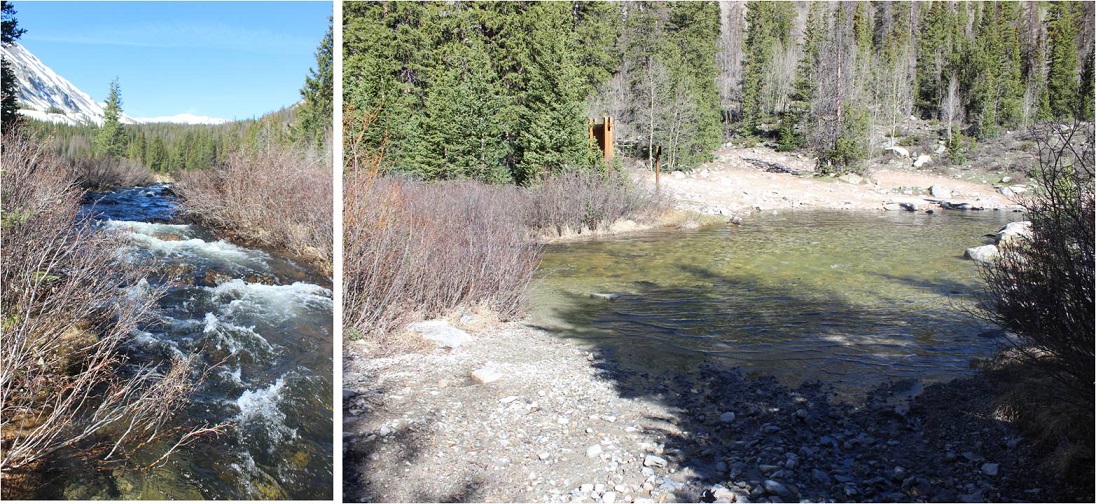
Just before reaching the waterfall about 2.5 miles up the trail, I crossed the creek on a couple of logs.
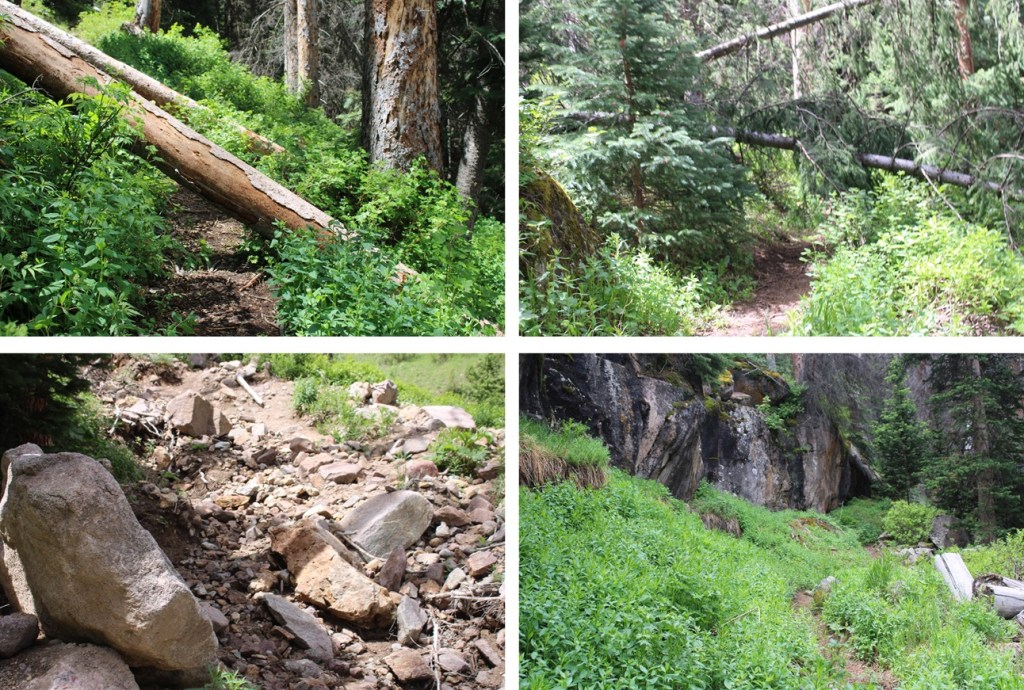
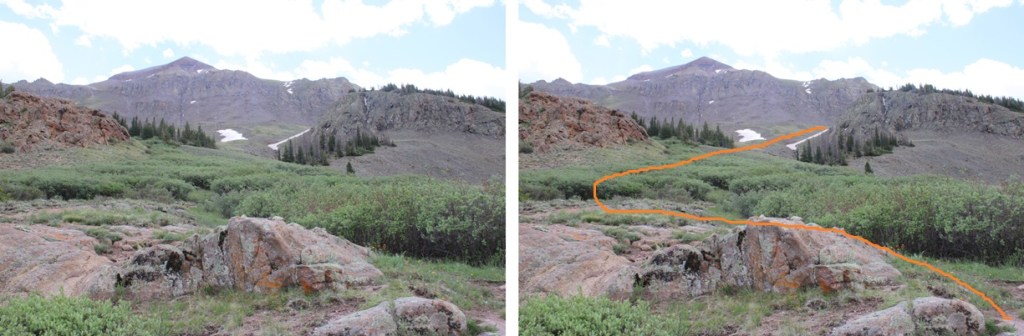
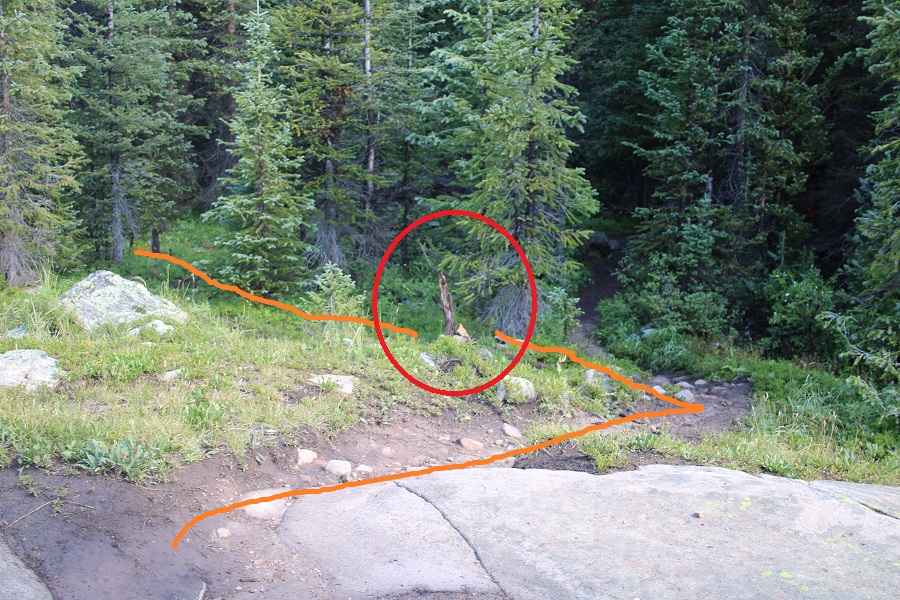
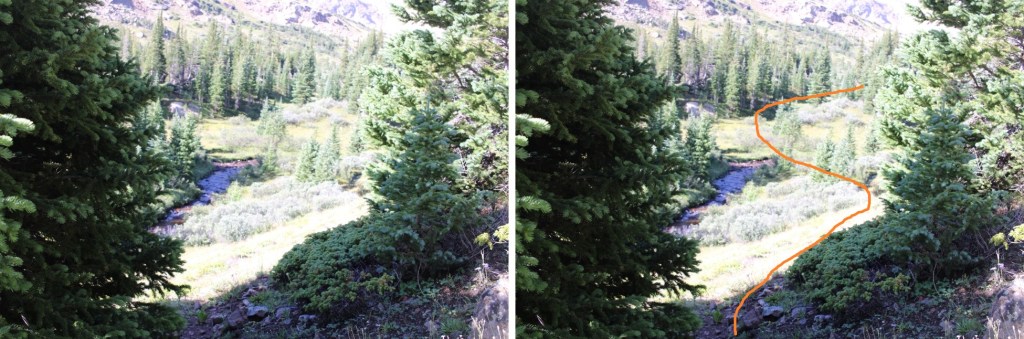
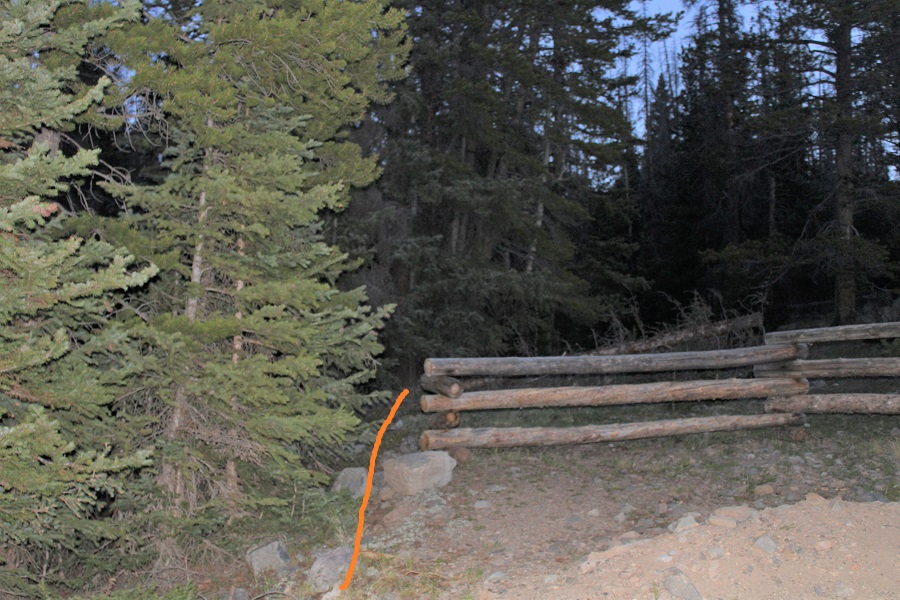
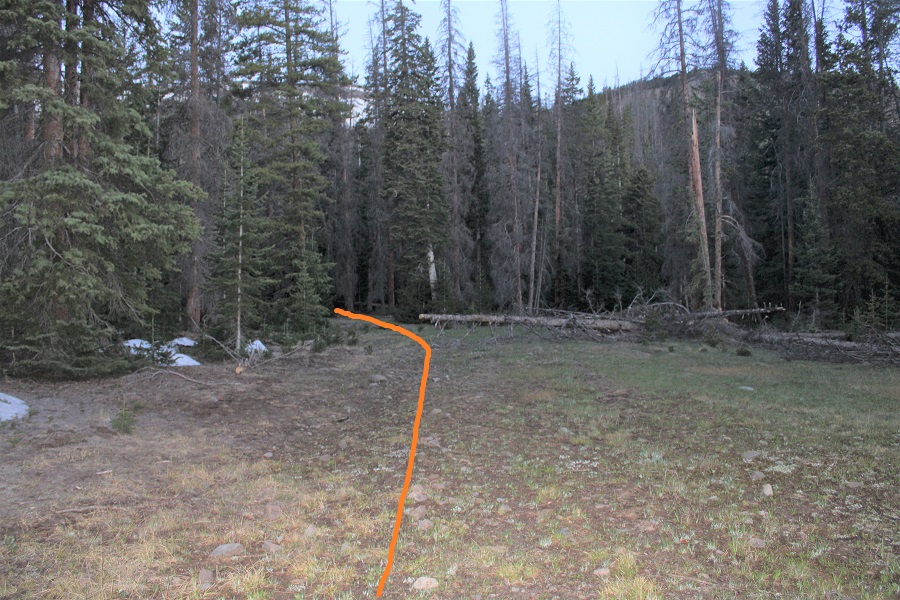
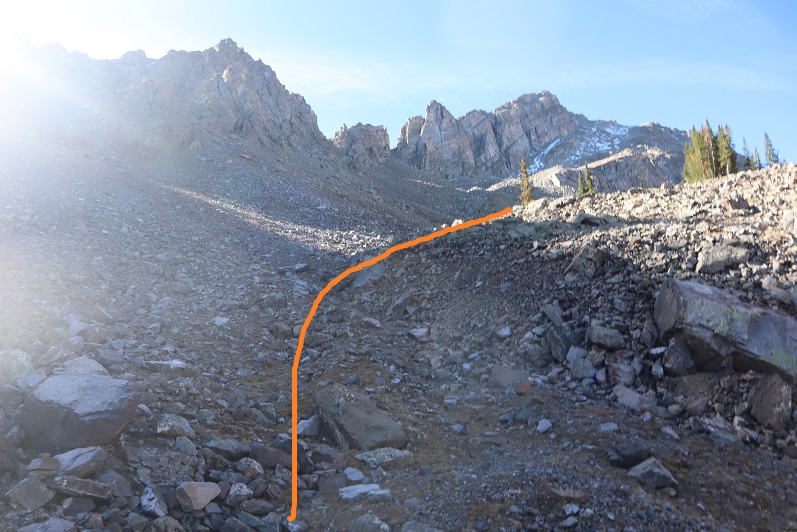
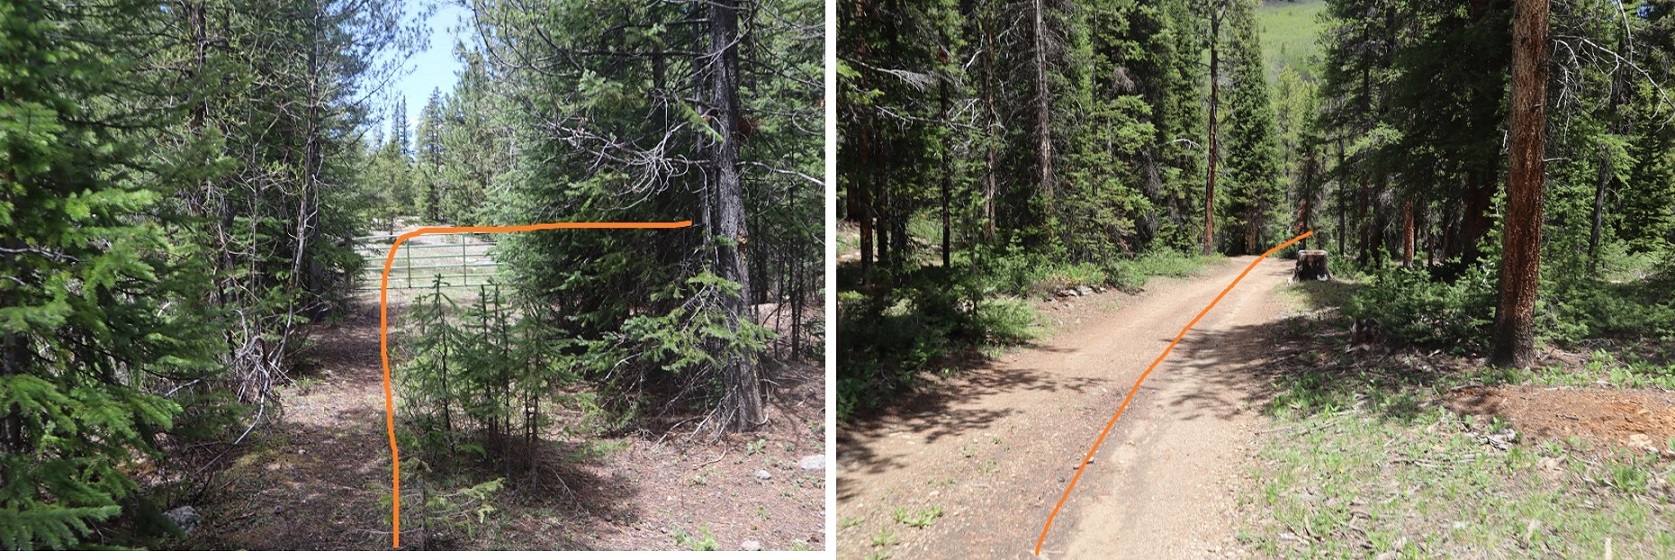
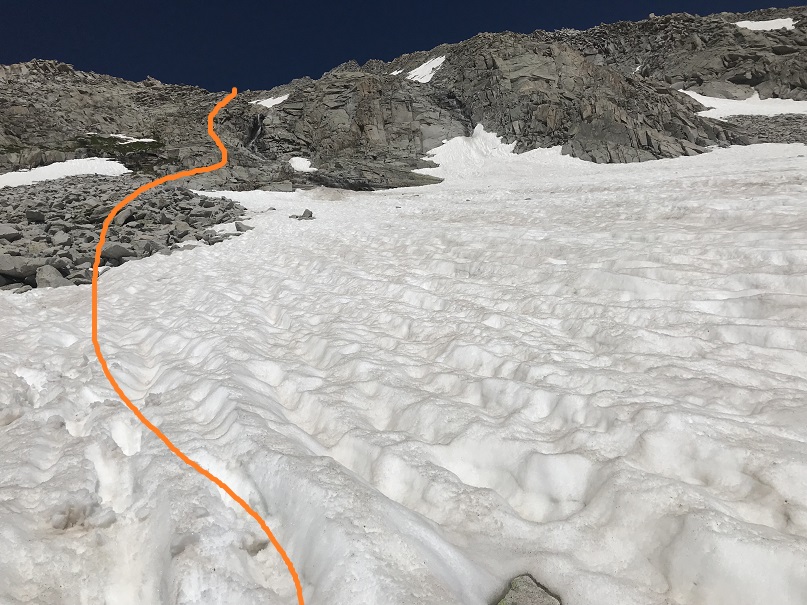
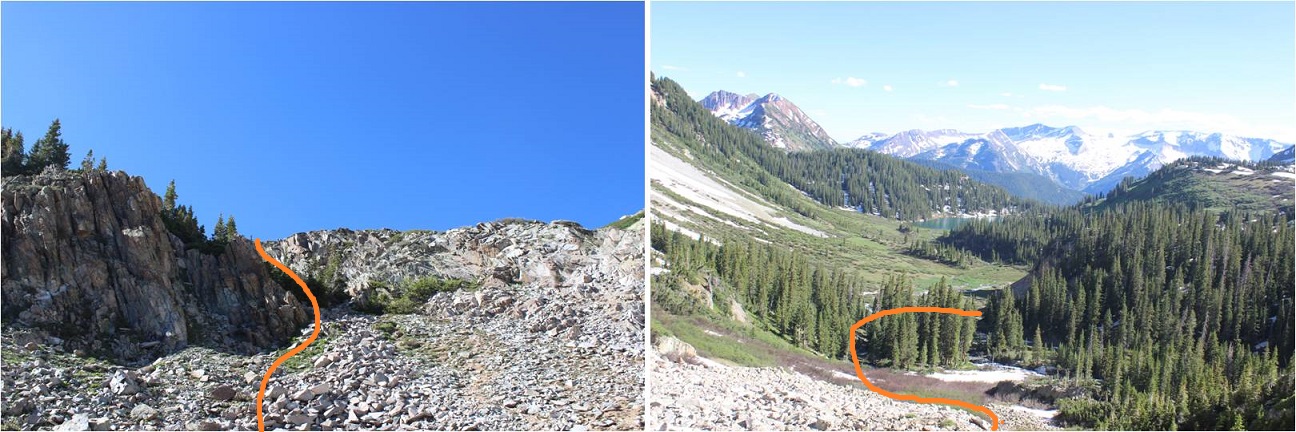
This is where many people get lost. I headed up the slope, and there was a large tree blocking the path. I went left, navigated willows and some boulders, then regained the trail.
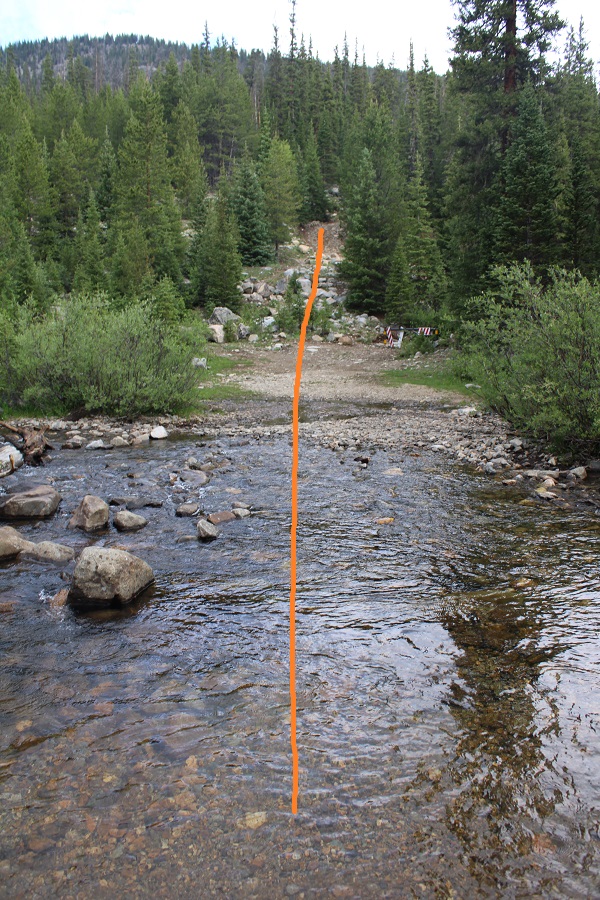
I could now see the waterfall clearly. A lot of people continue straight here, towards the waterfall, following the social trails. Instead, look for a trail to the right that goes up and behind the waterfall.
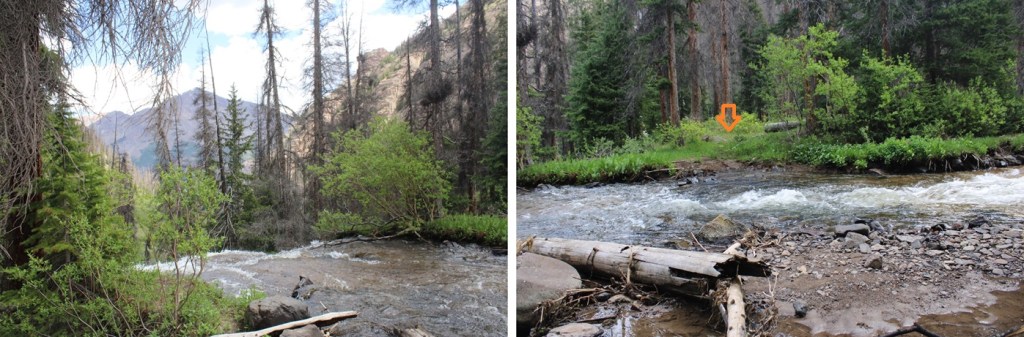
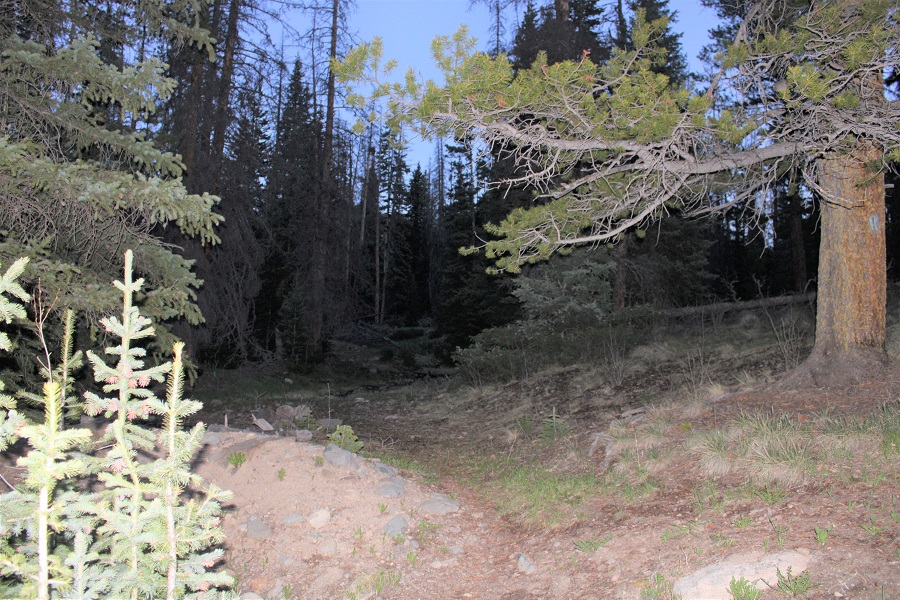
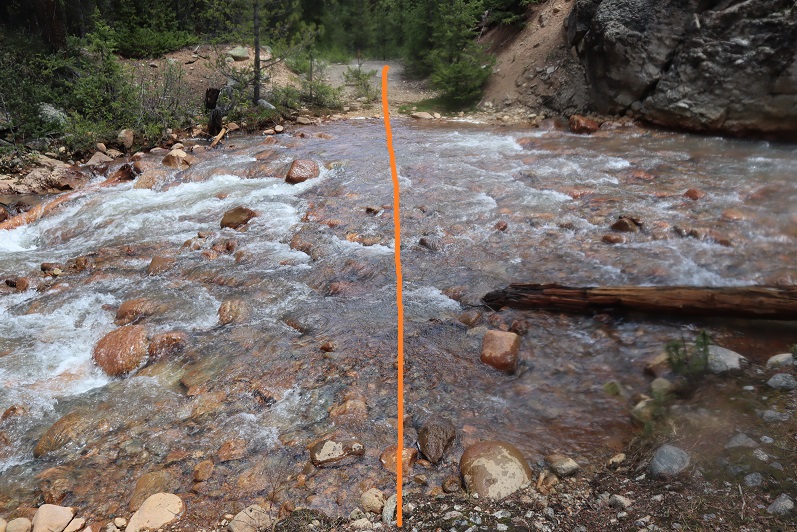
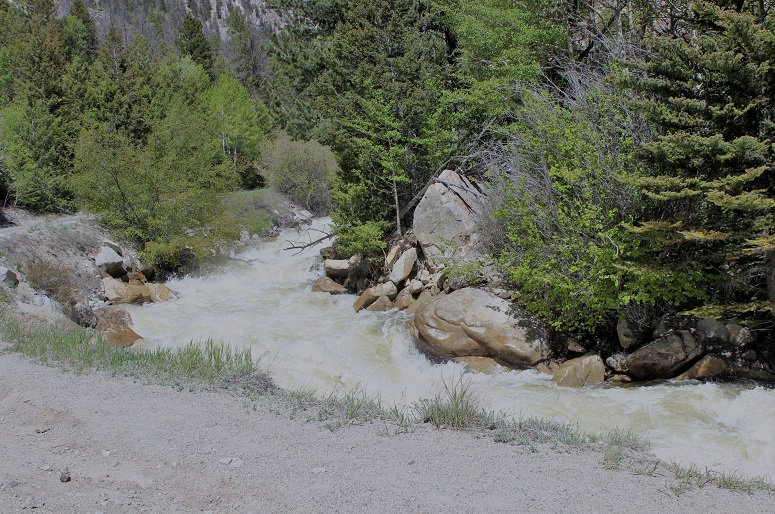
Next, to cross the creek. I crossed directly above the waterfall. Probably about 10 feet from where it drops off. At night I knew where to cross because there are little reflecting circles on the trees across from the water that glow when you shine your flashlight across them. The water was running high today, and I didn’t want to go over the edge, so I crossed carefully. The water was up just past my knees.
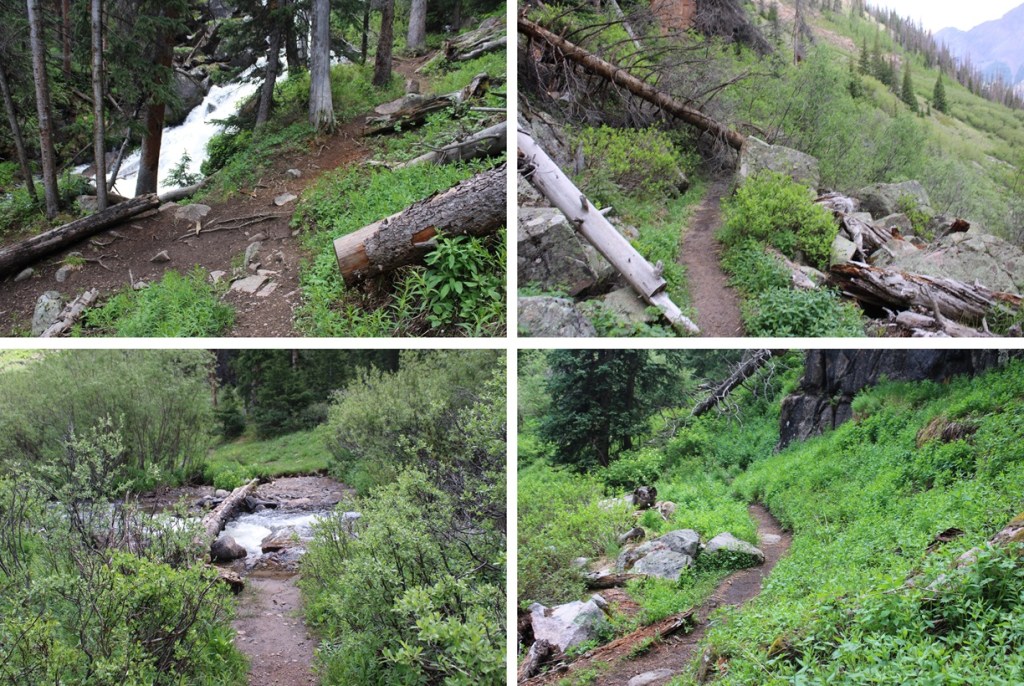
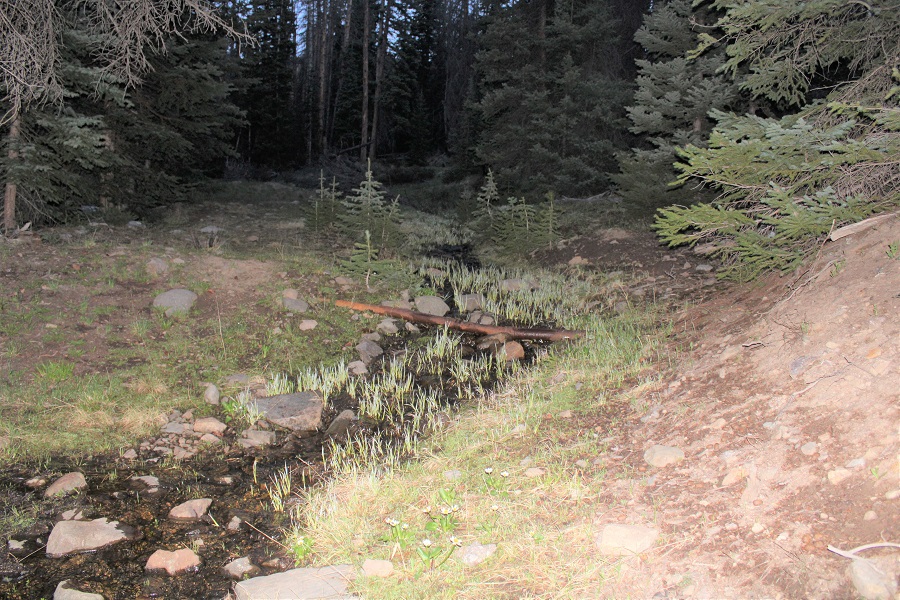
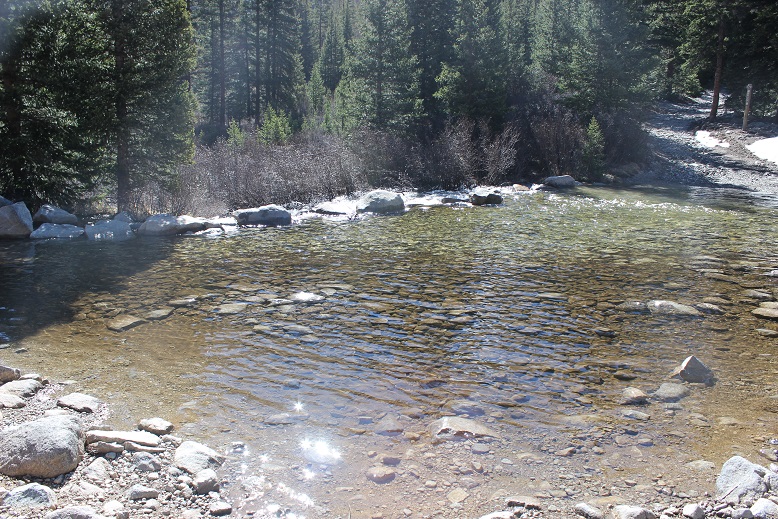
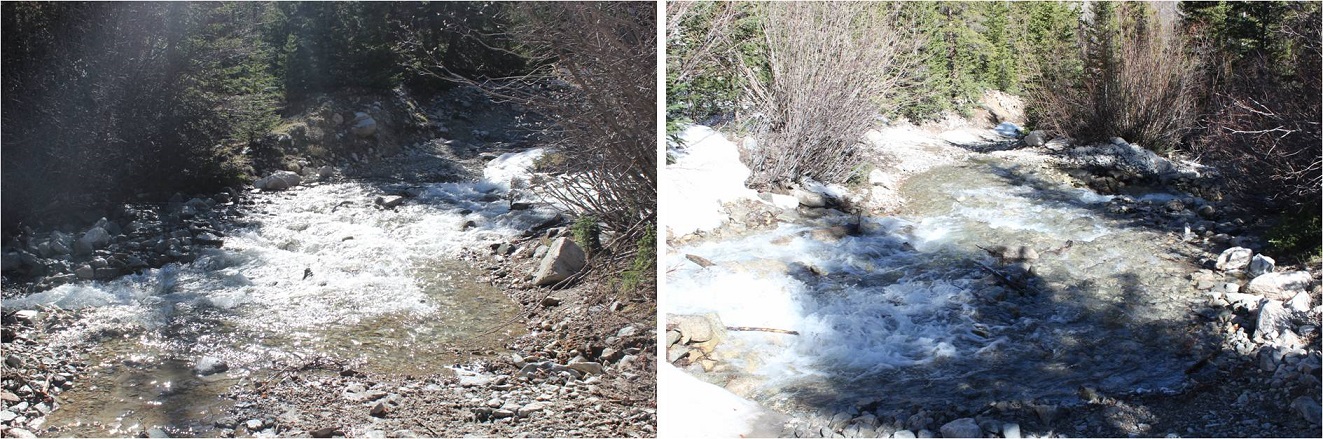
I picked up the trail on the other side, and quickly came to a second creek crossing.
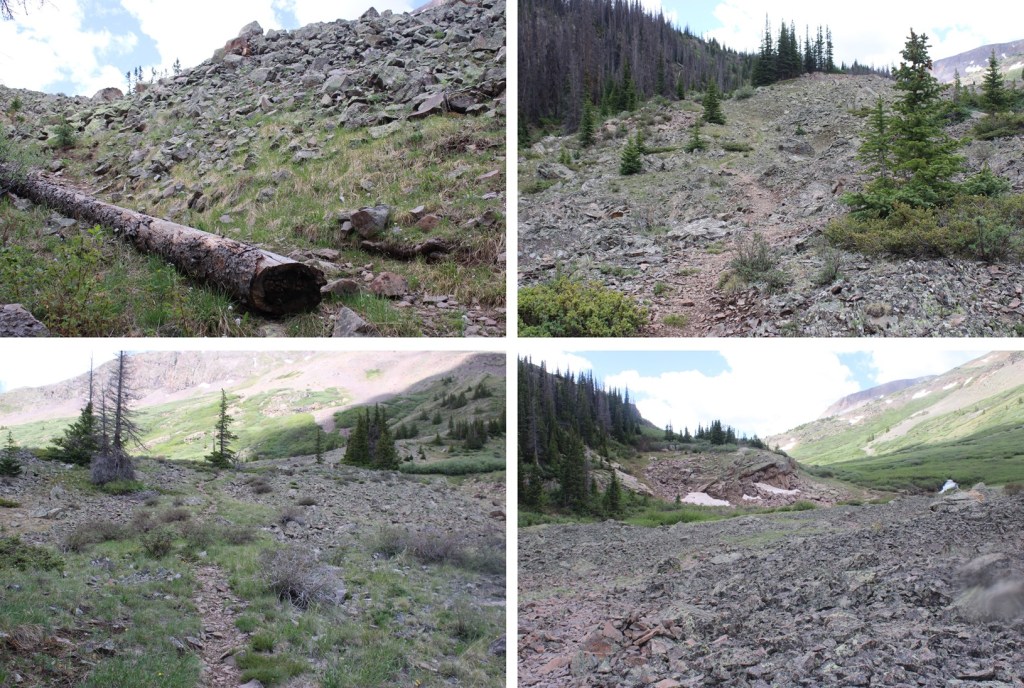
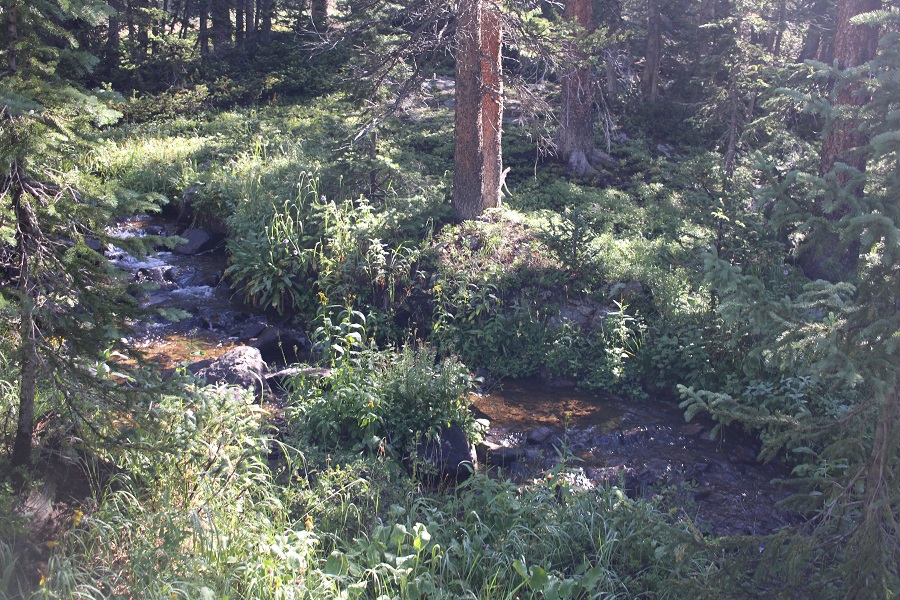
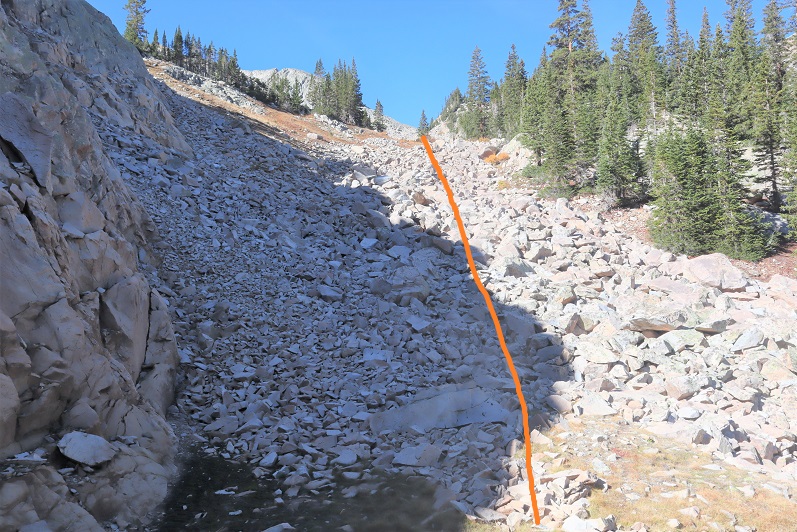
I picked up the trail again on the other side, and ascended through a cairned, rocky area.
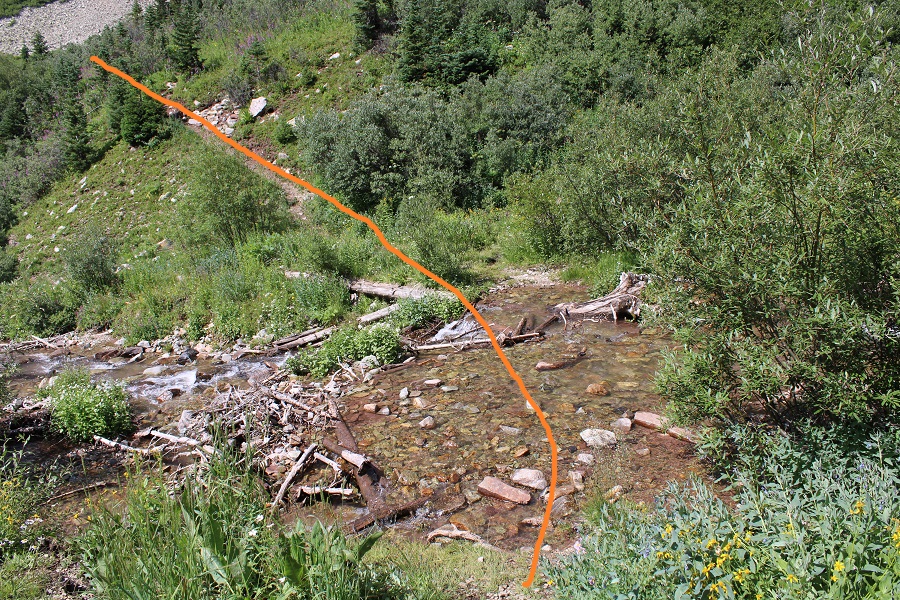
This led me to my final creek crossing of the morning.
I crossed the creek one more time, and picked up the trail on the other side. It led me up and around to the left, behind boulders and through a small canyon.
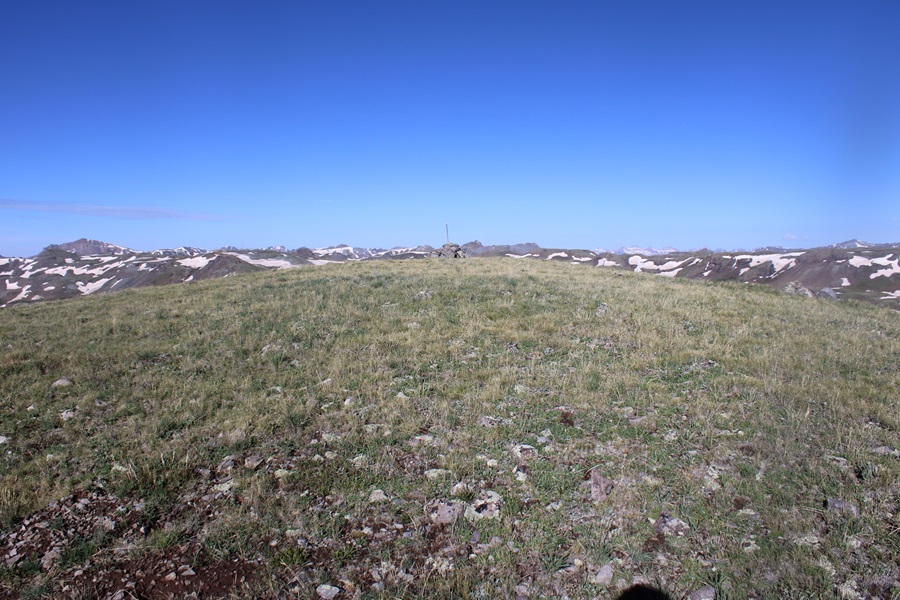
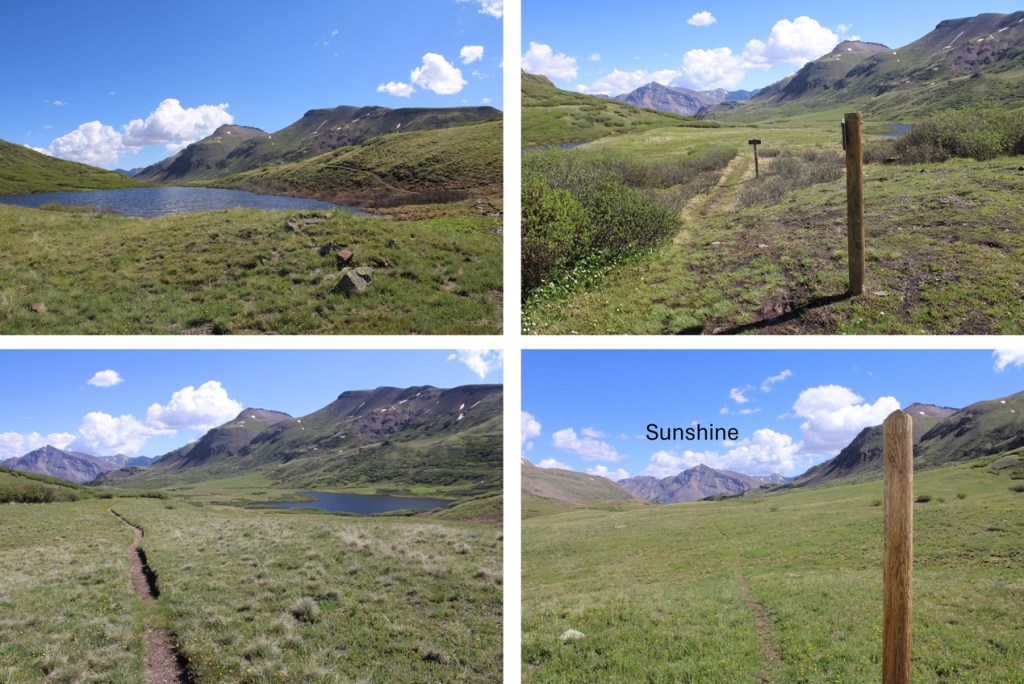
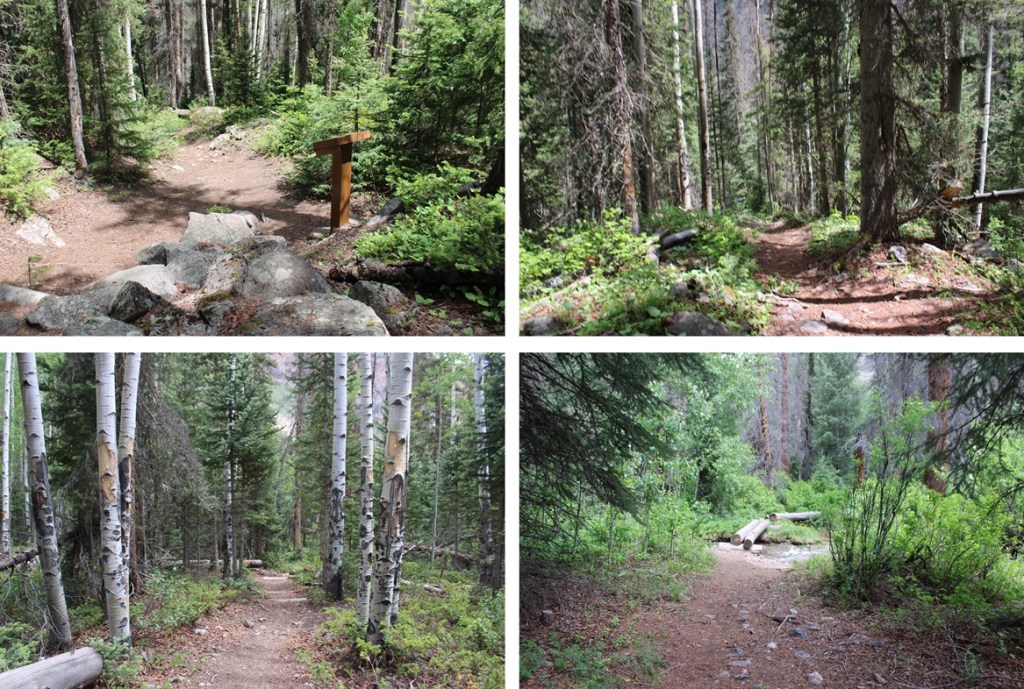
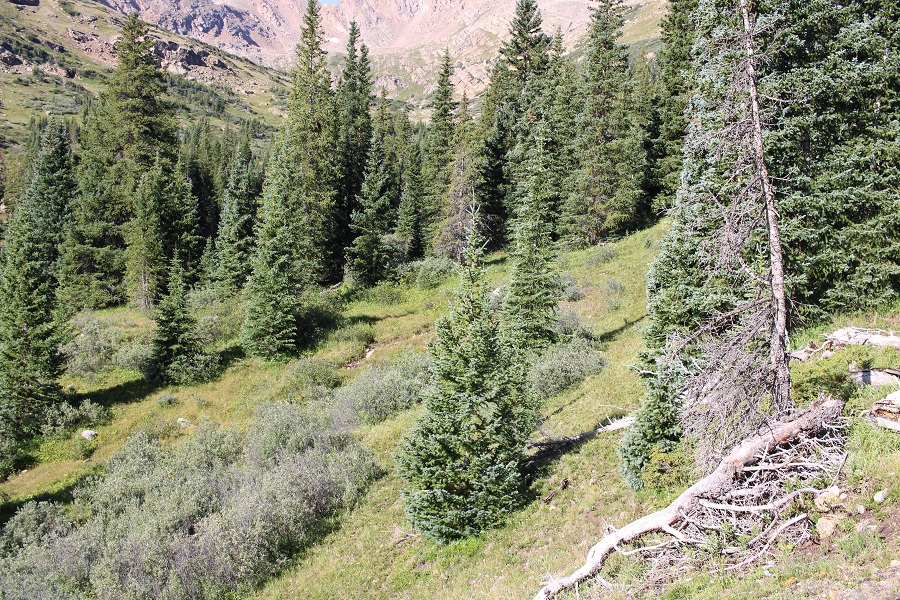
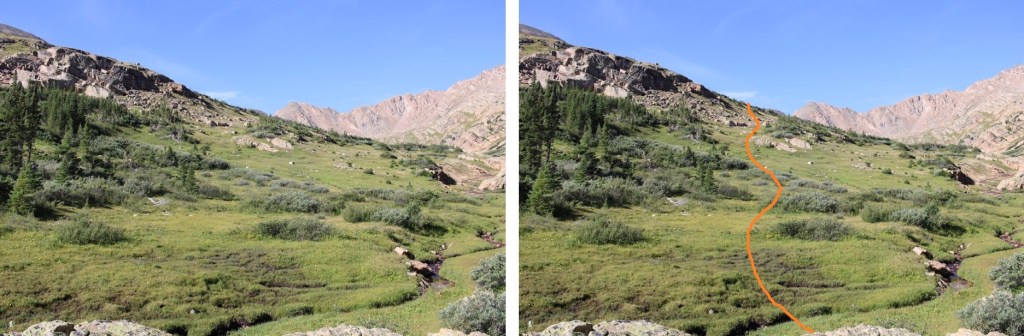
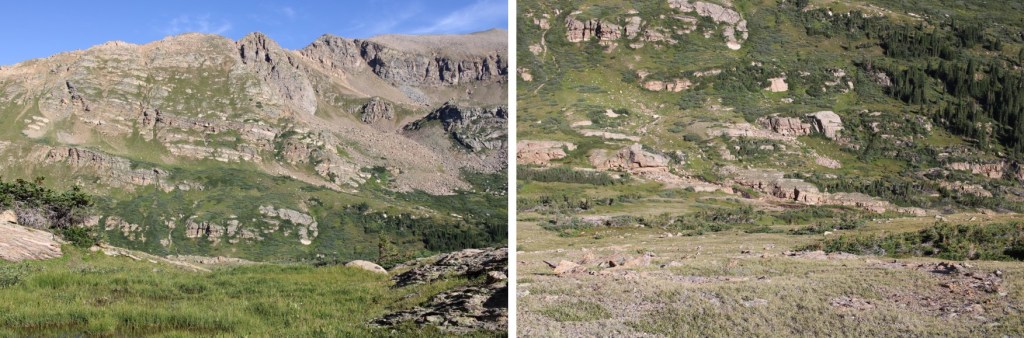
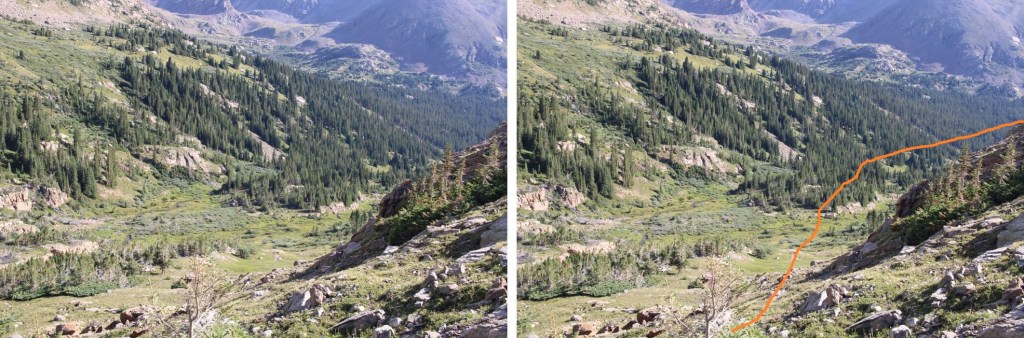
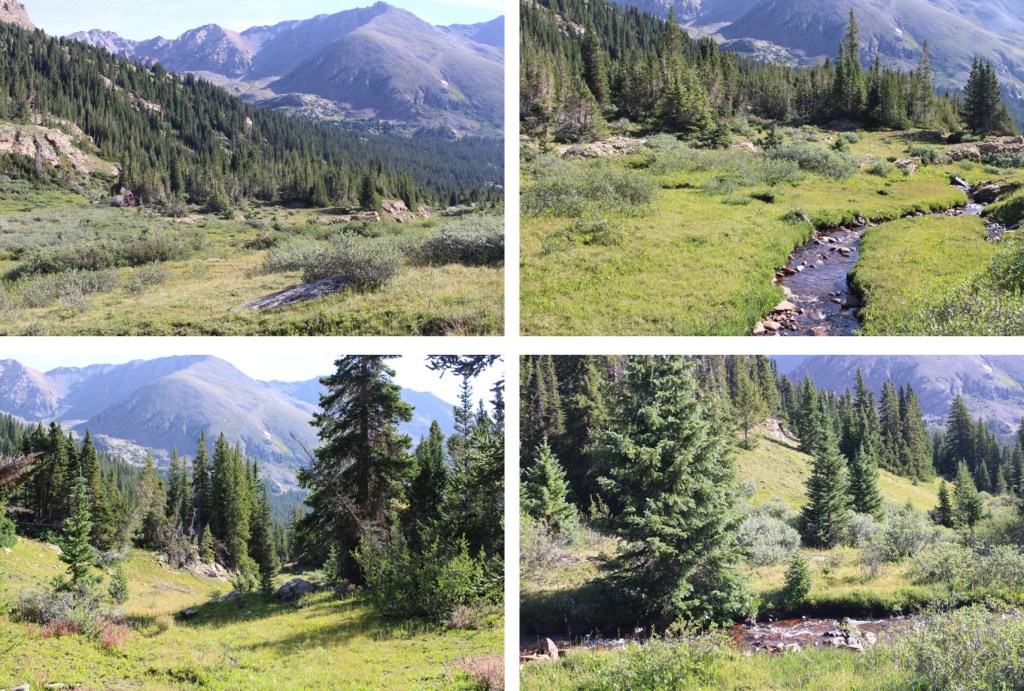
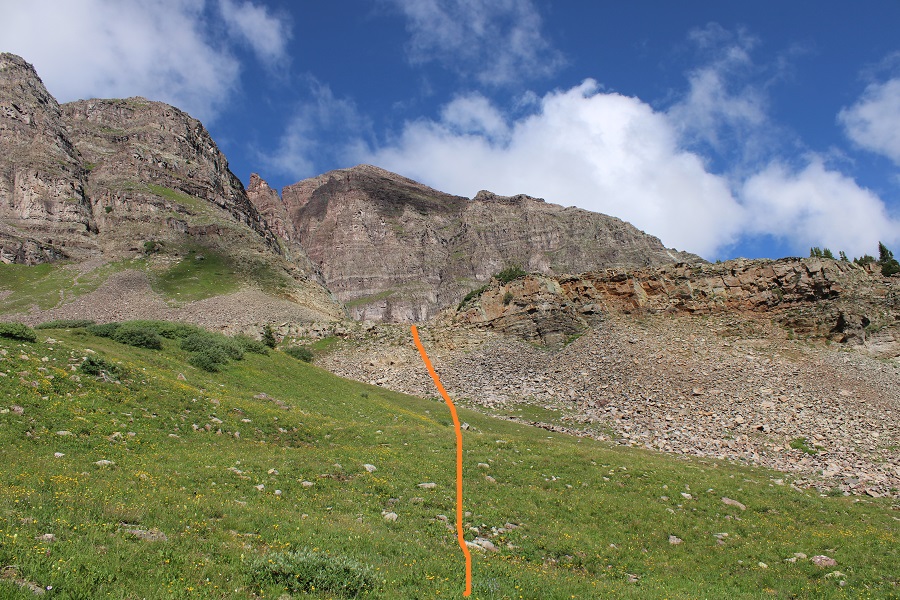
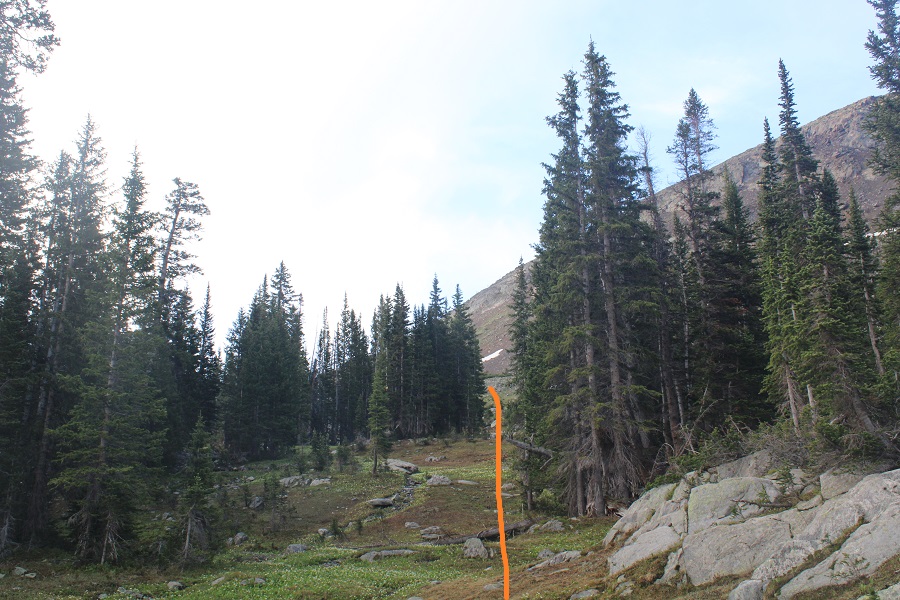
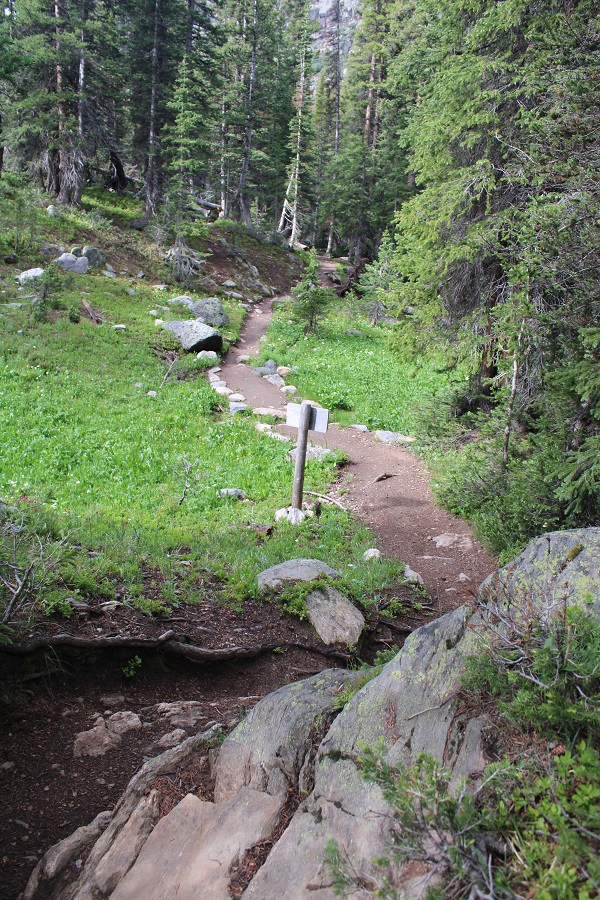
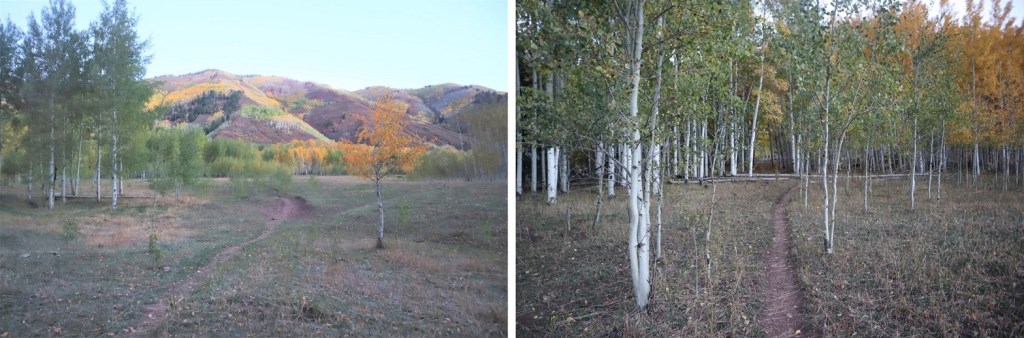
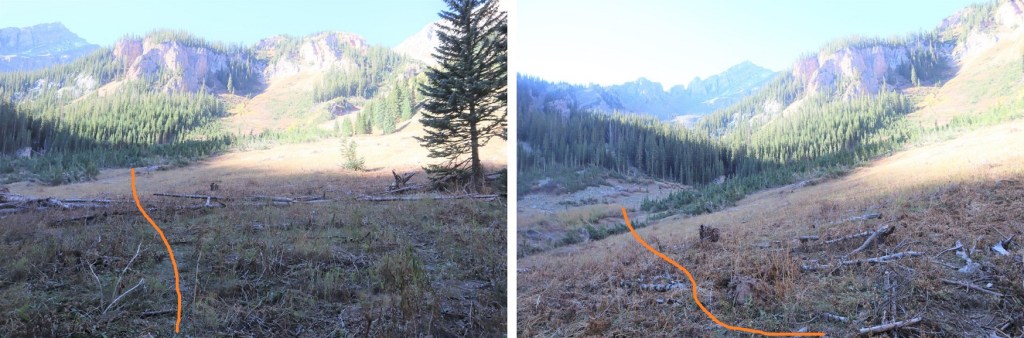
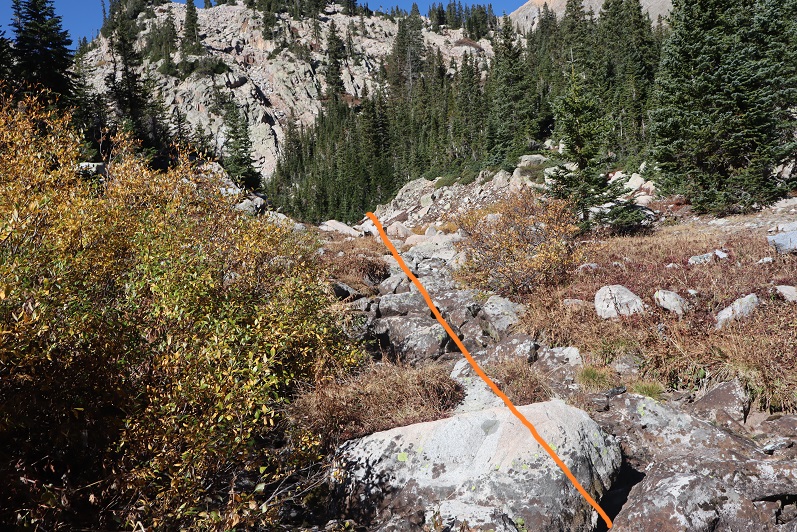
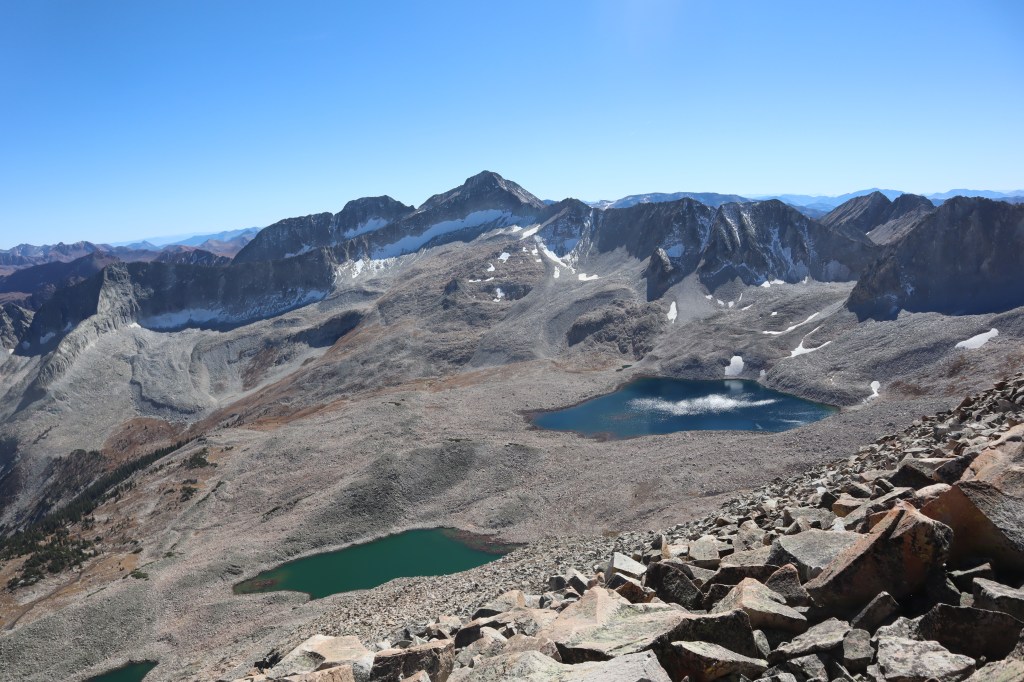
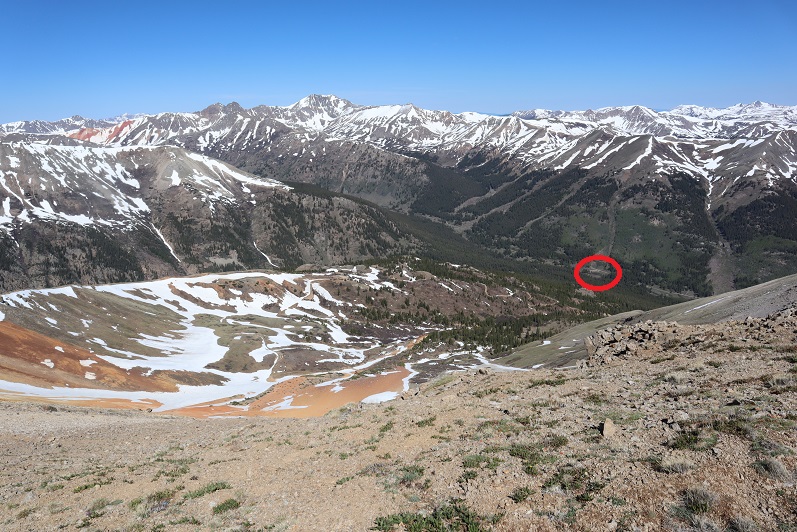
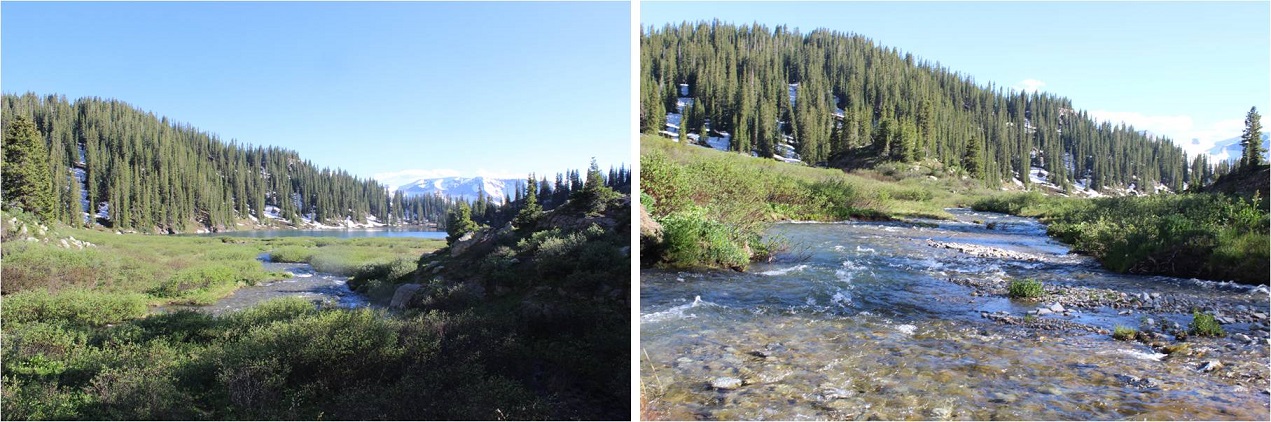
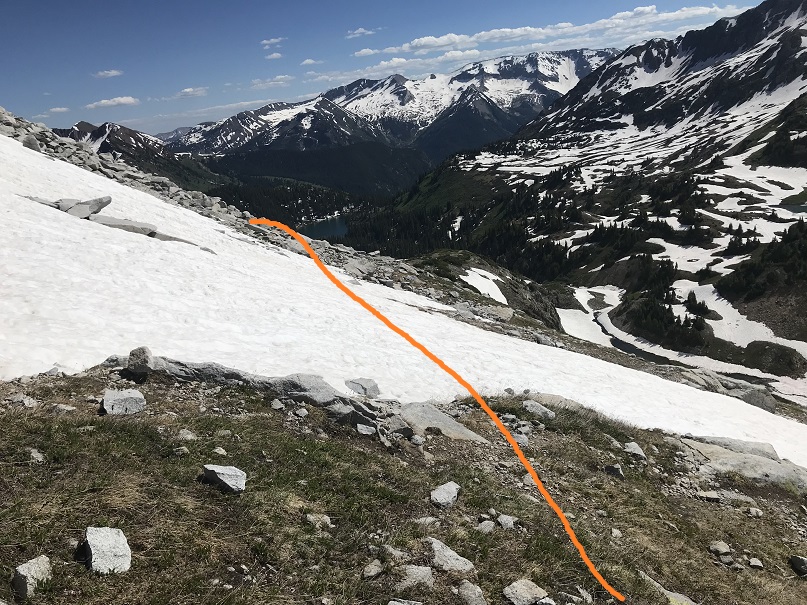
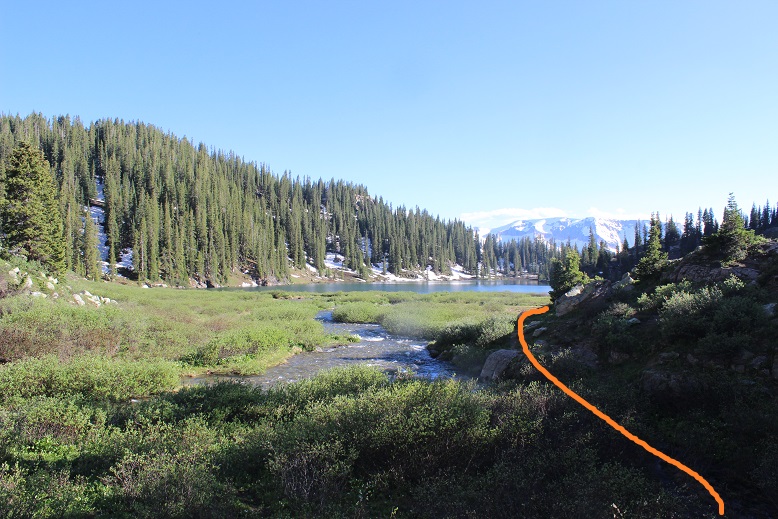
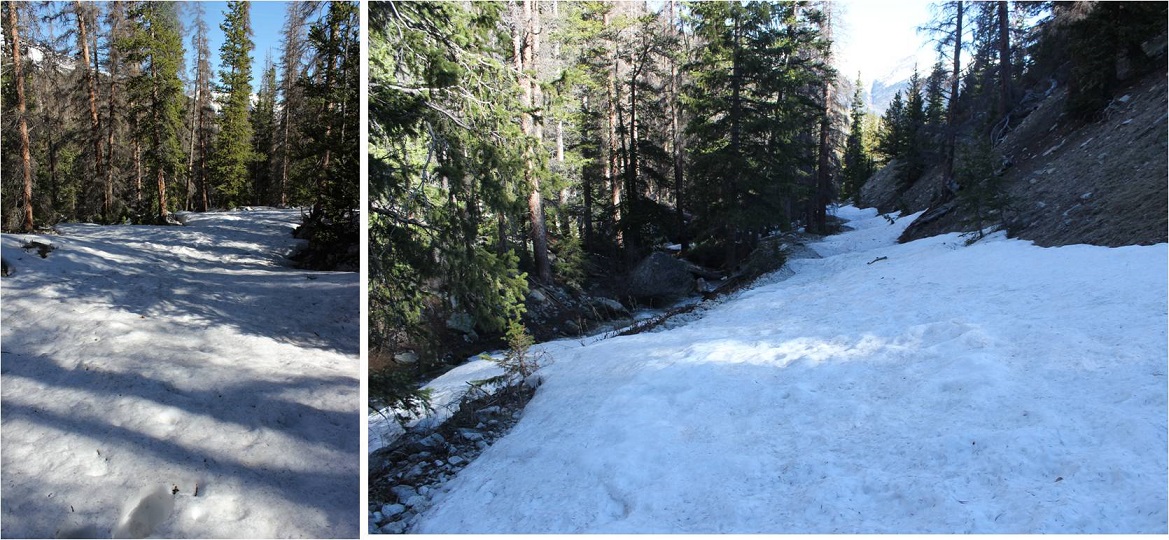
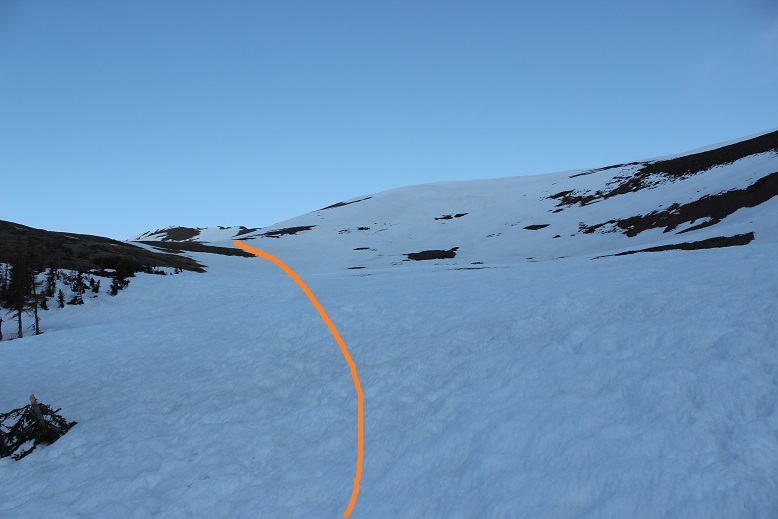
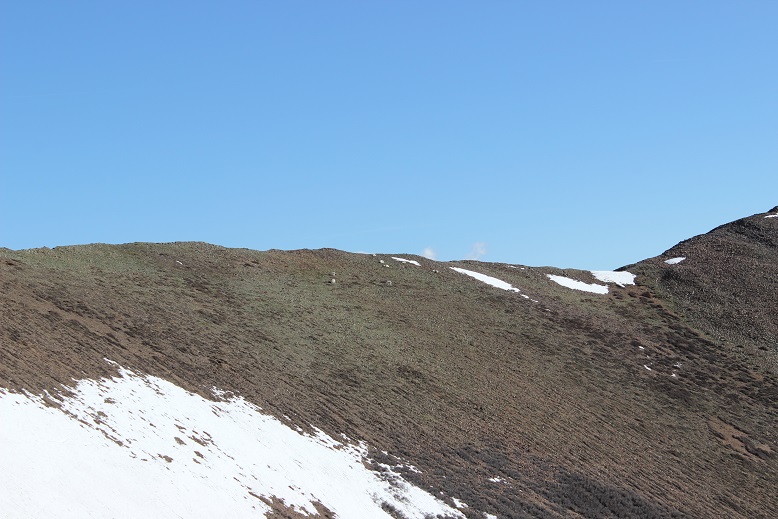
I was now headed south towards Cataract Lake. There’s a pretty good trail here, but every once in a while it gets overgrown. The trail slopes slightly downward as it goes across the tundra and through the willows. There are posts to help guide you if you lose the trail. I was headed here:
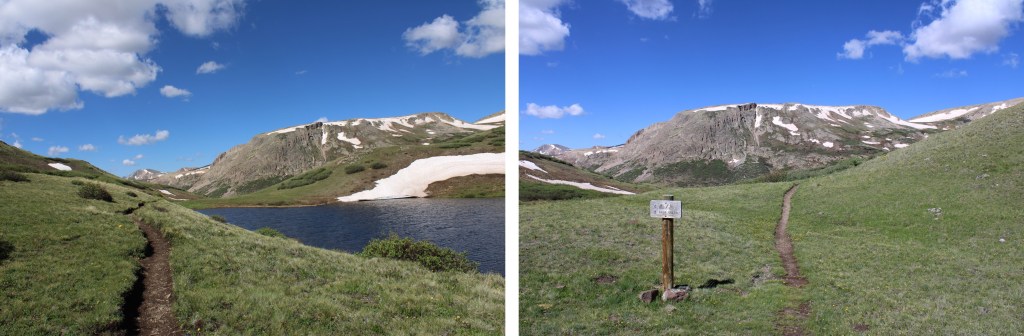
I passed Cataract Lake to my left, and a small lake to my right. Here the trail picked up with the Colorado Trail, and I followed it right, west, towards Cuba Gulch.
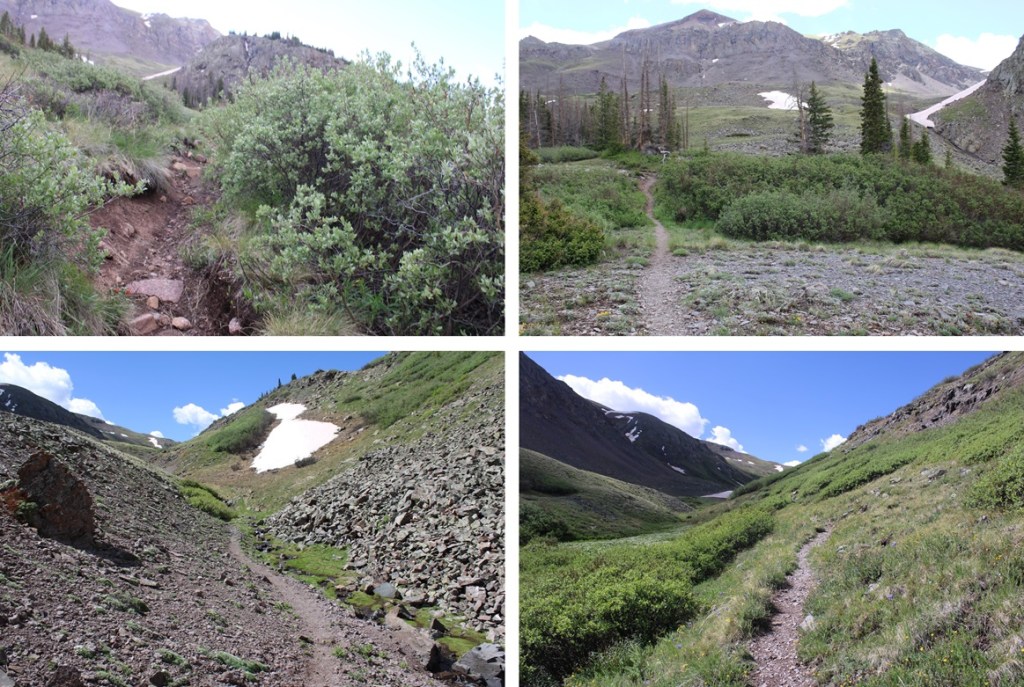
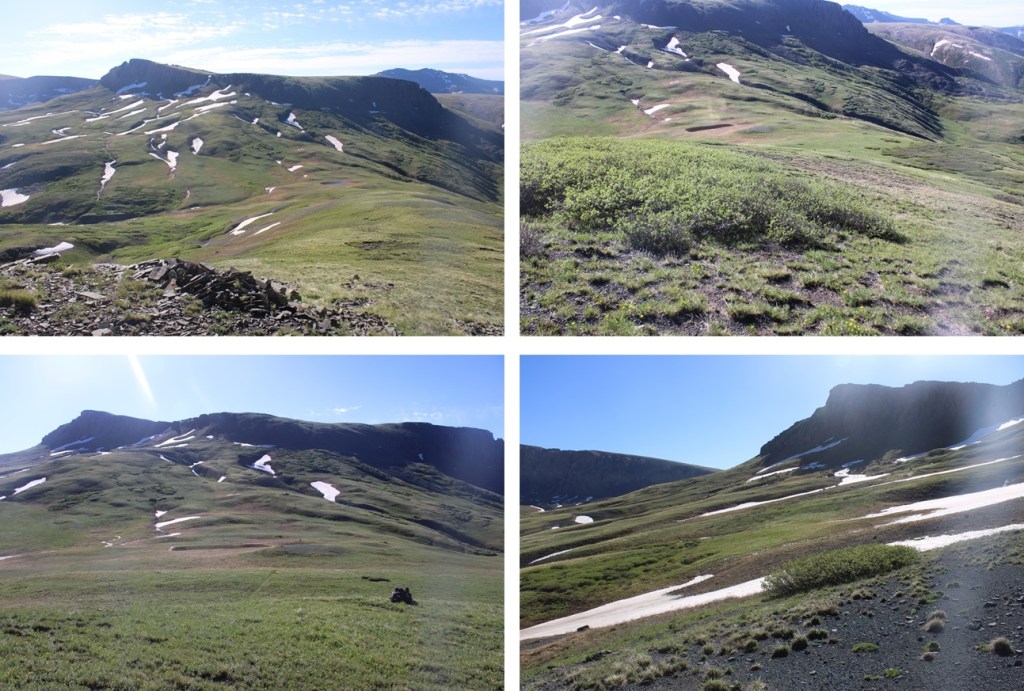
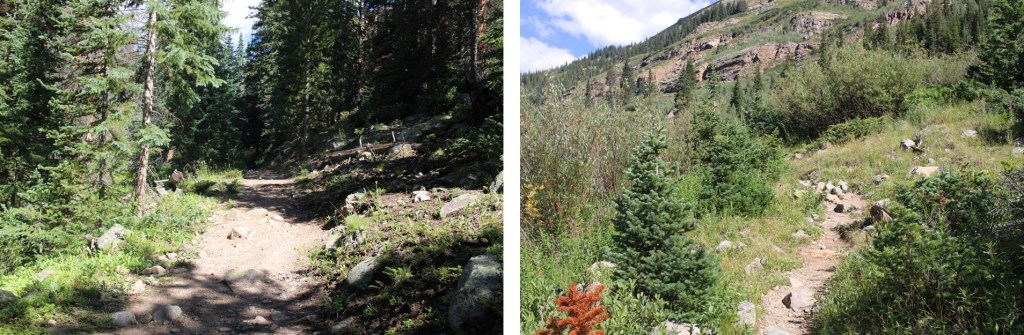
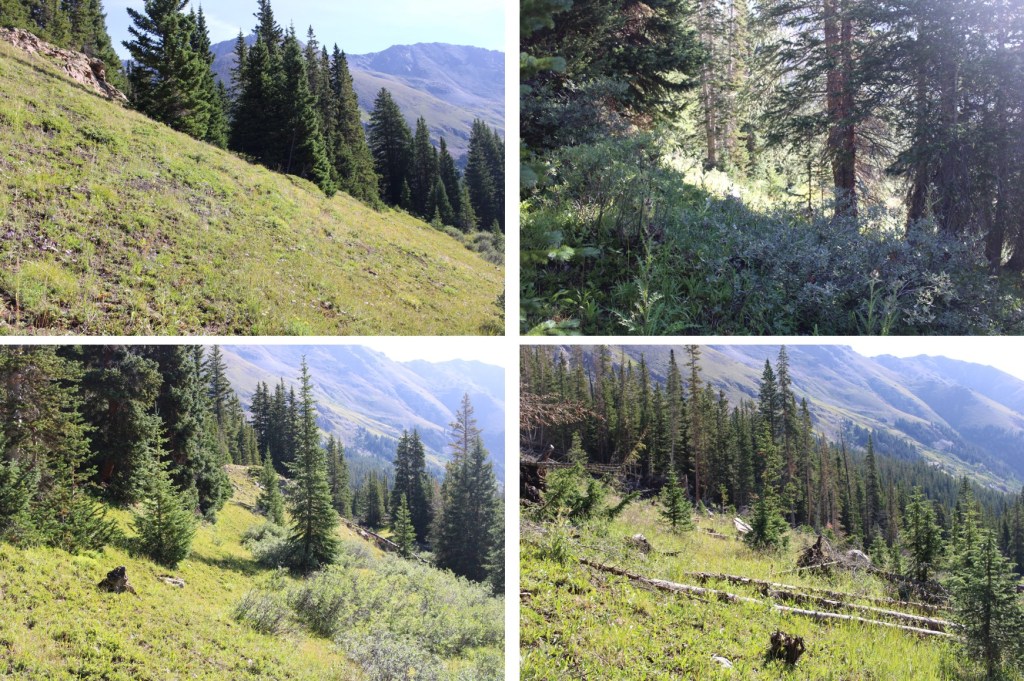
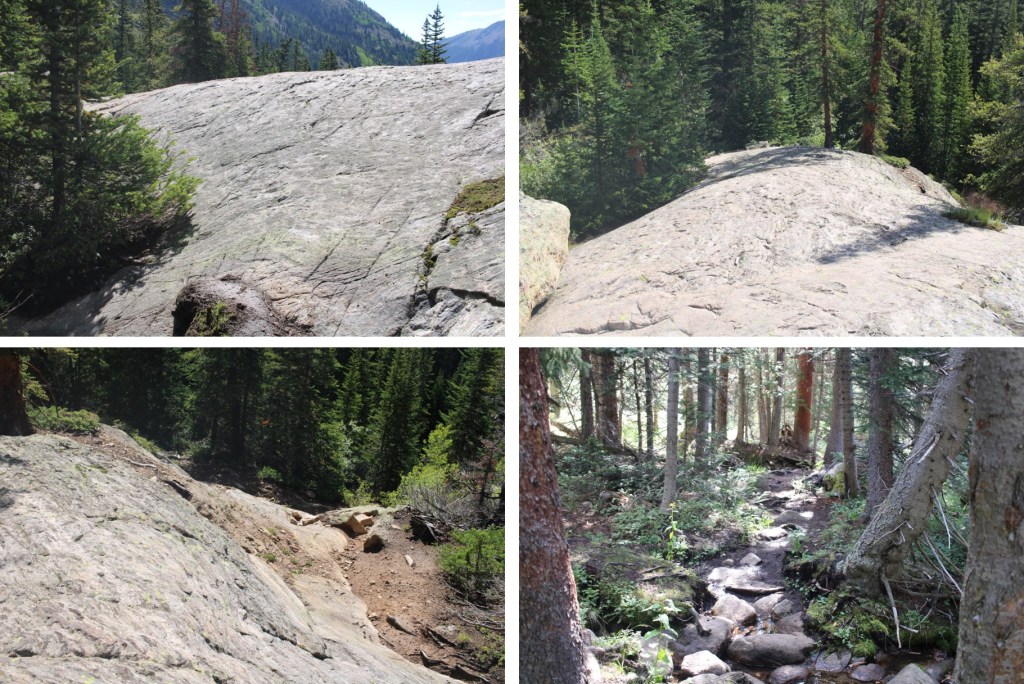
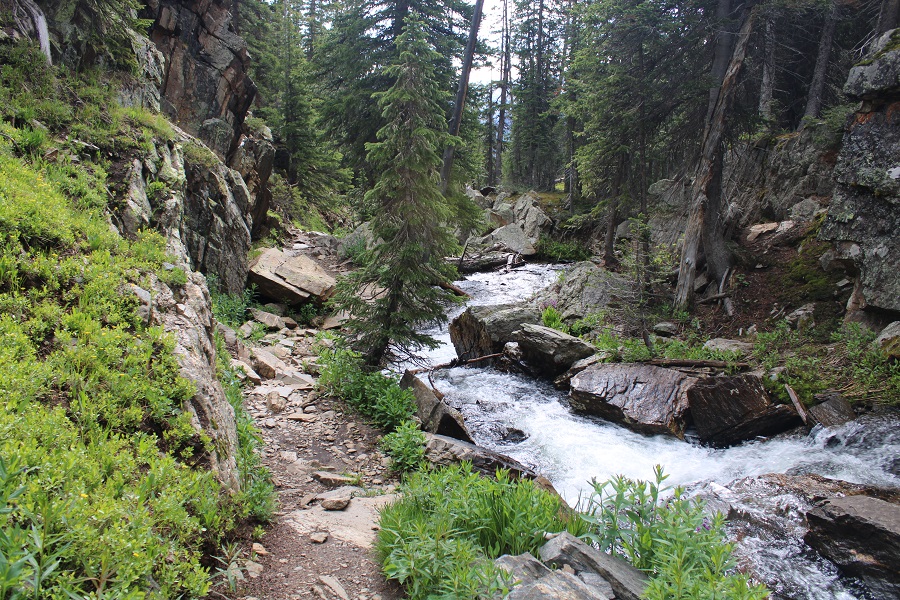
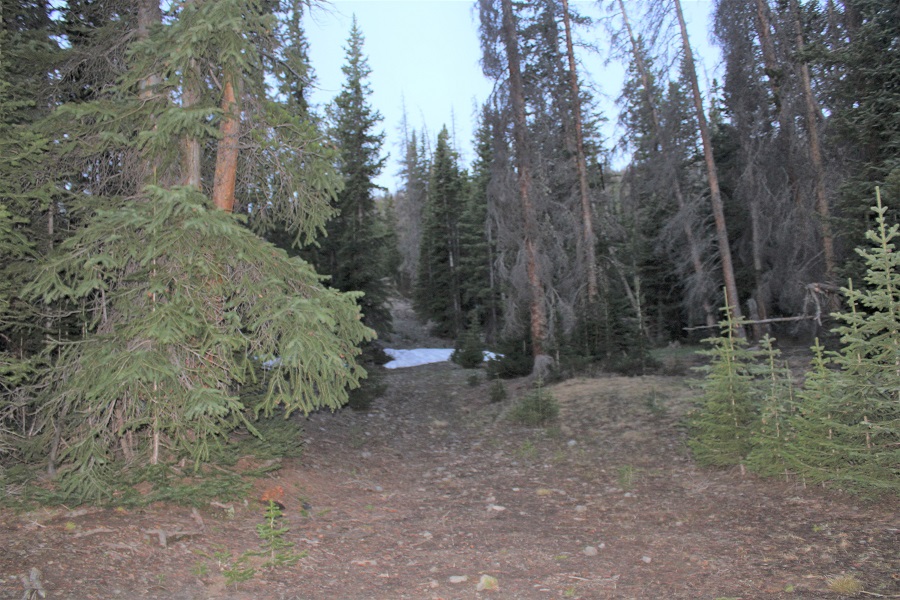
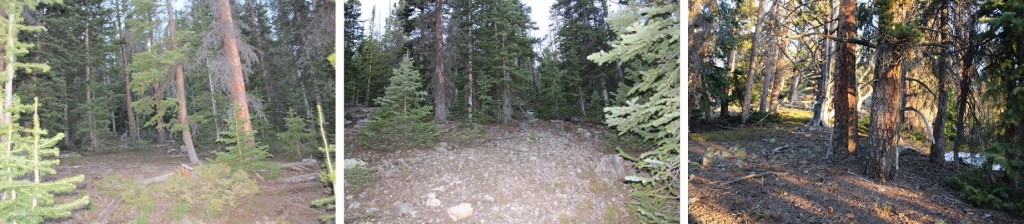
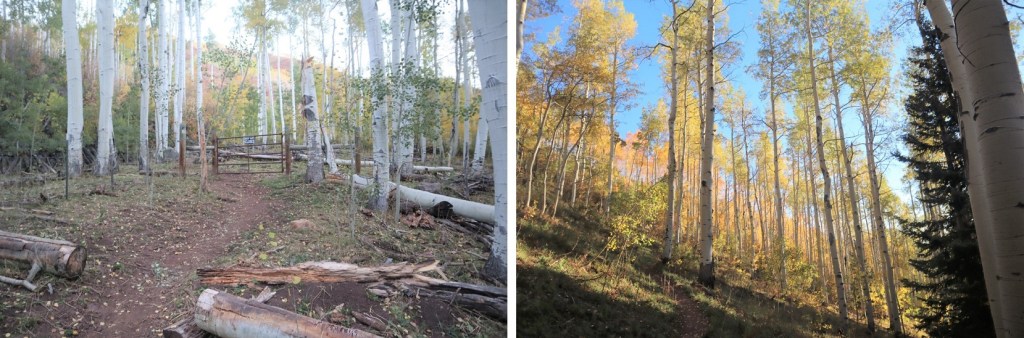
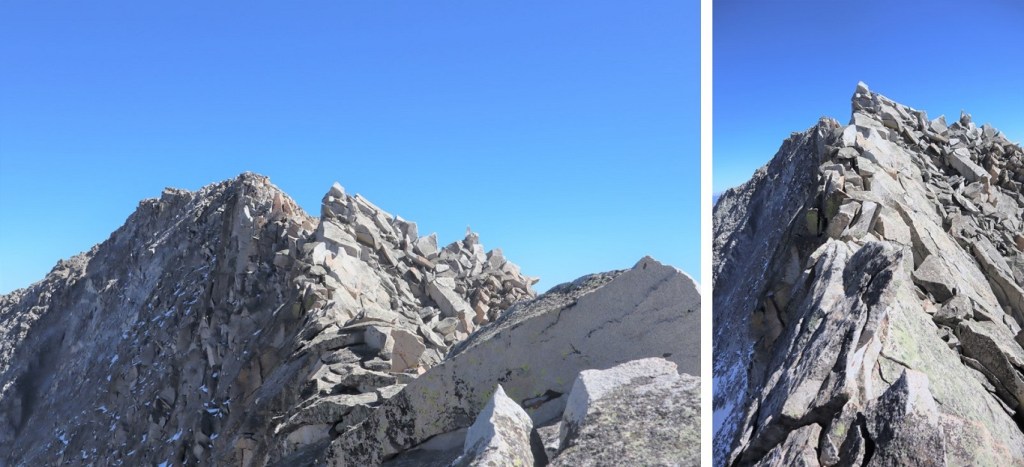
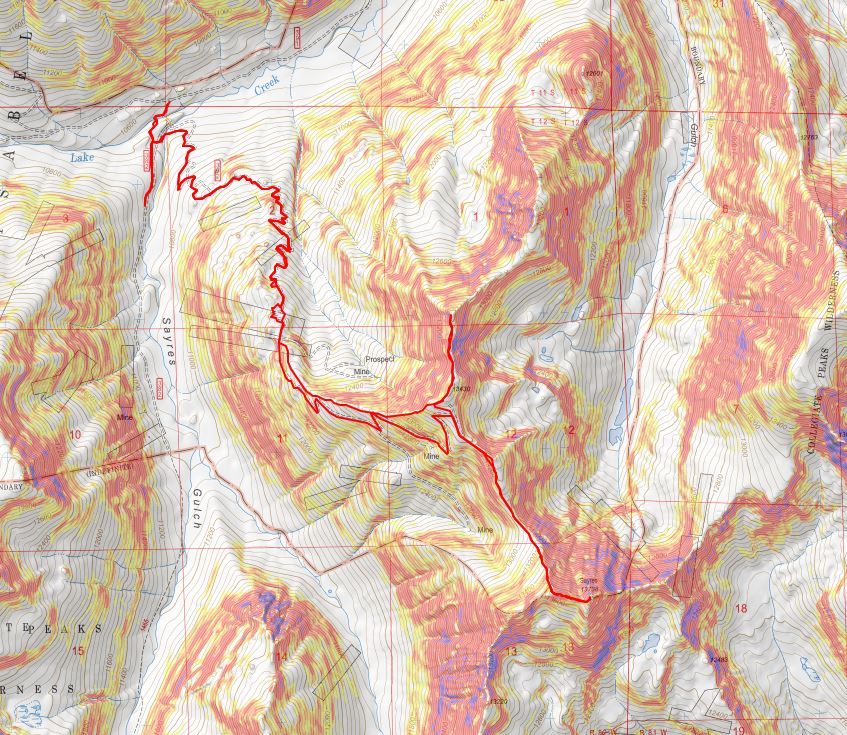
I stayed on the Colorado Trail (East Fork Middle Pole Trail) for most of the rest of the hike. Here are some pictures of the trail.
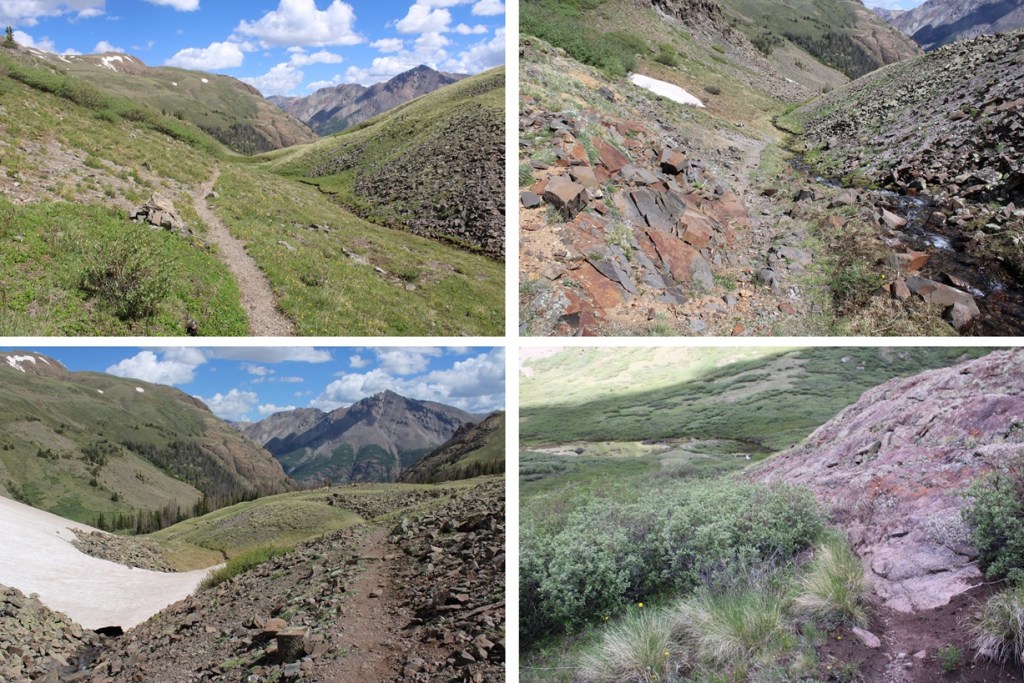
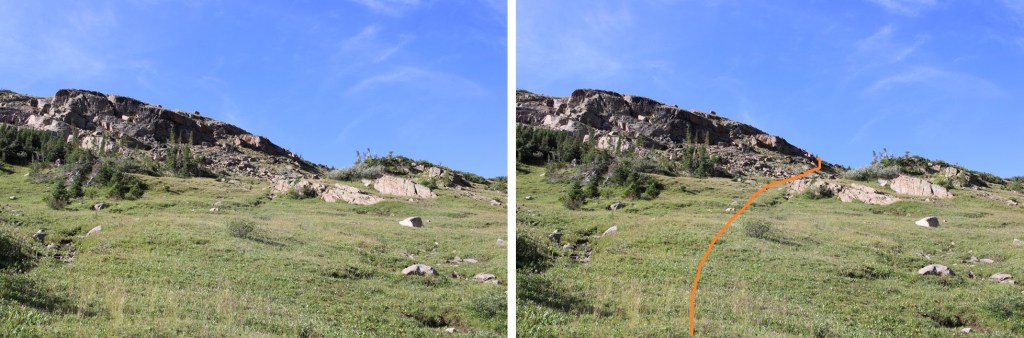
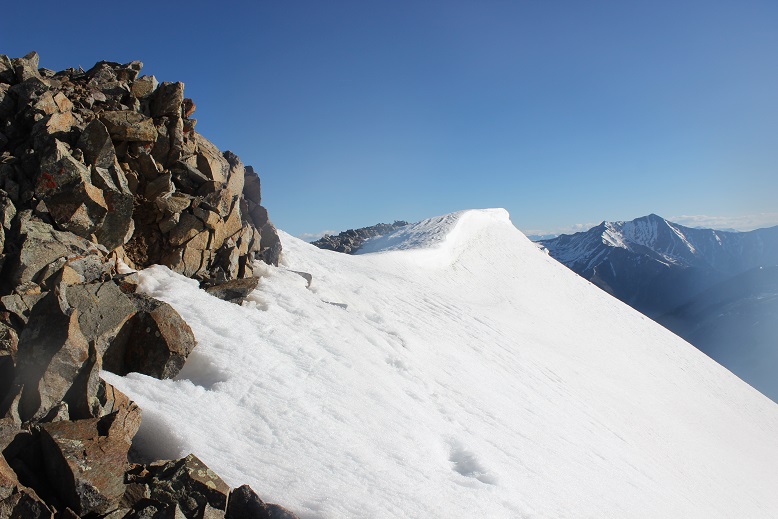
The trail meanders it’s way to a saddle:
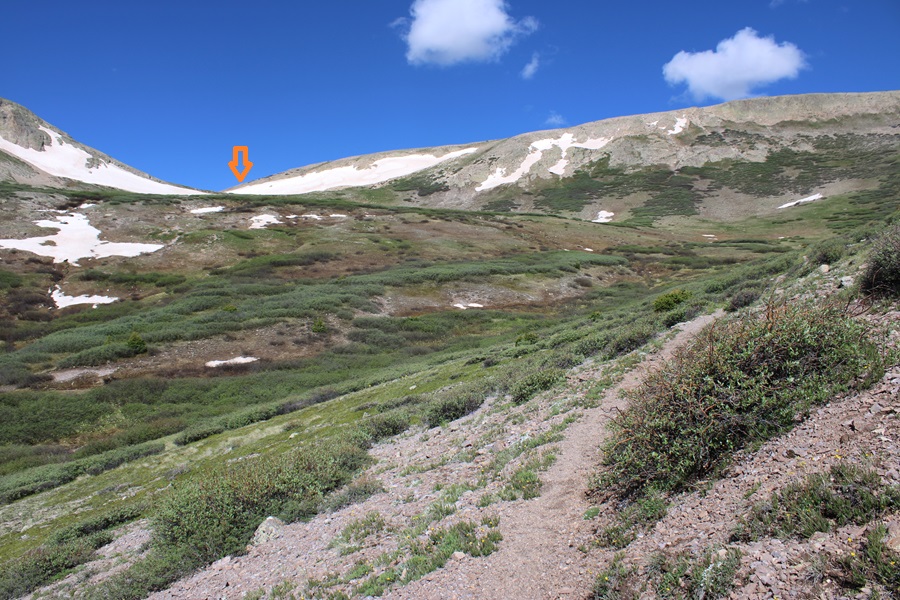
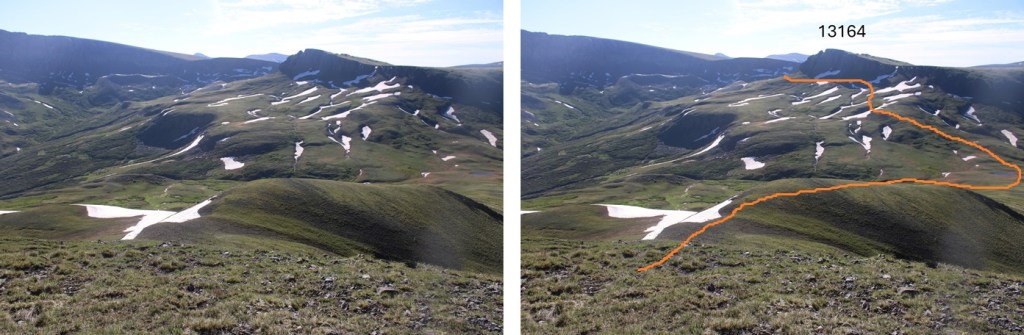
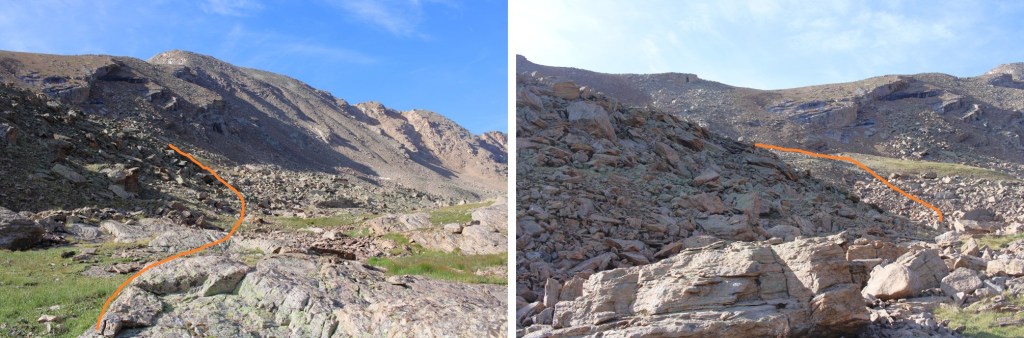
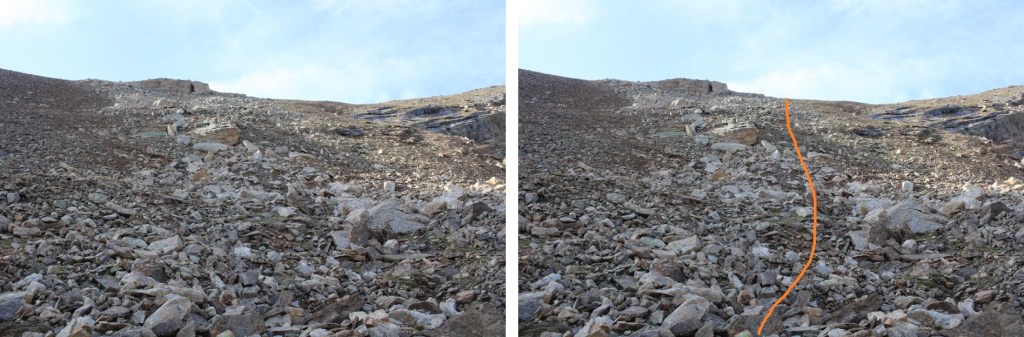
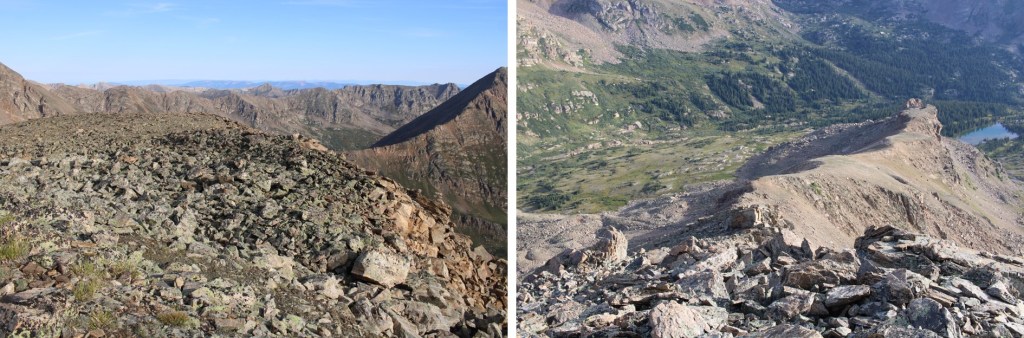
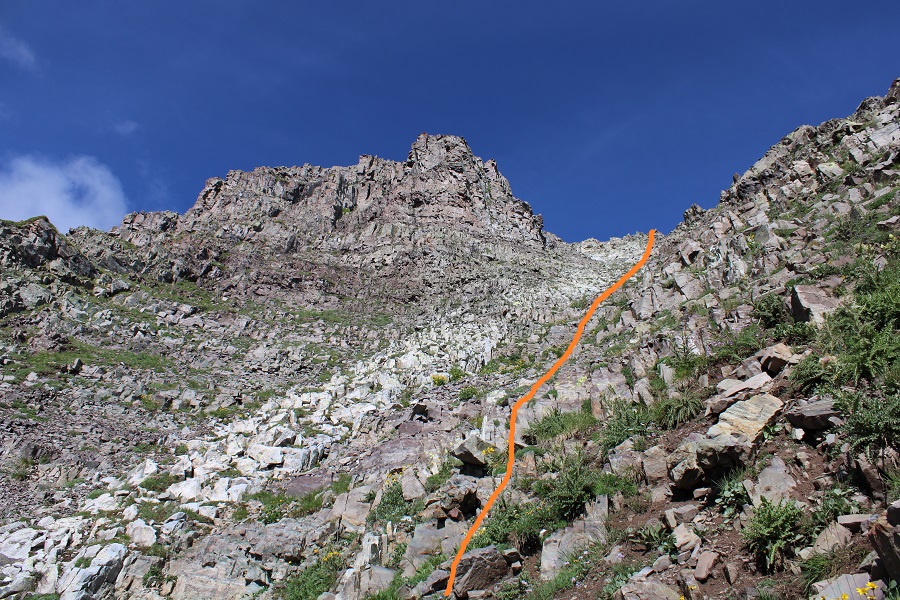
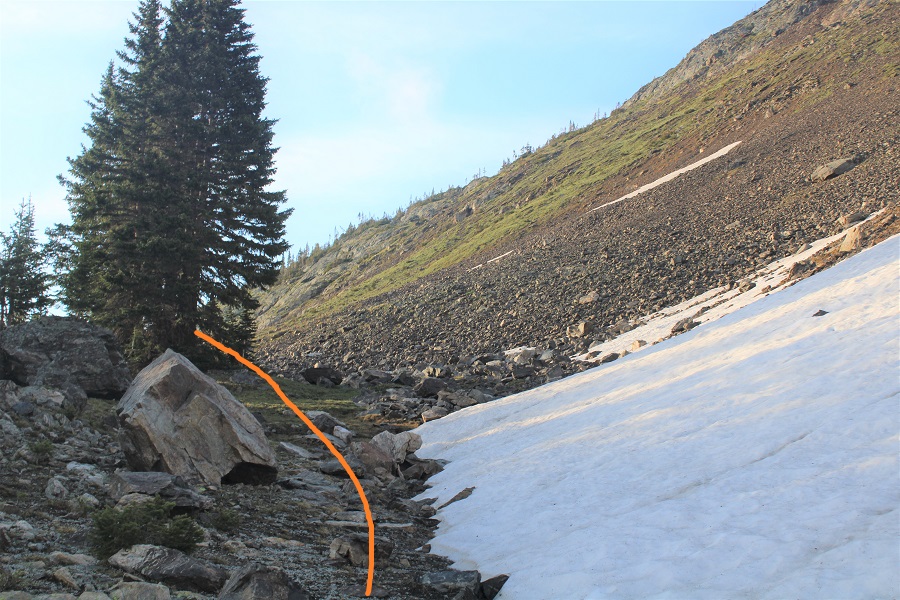
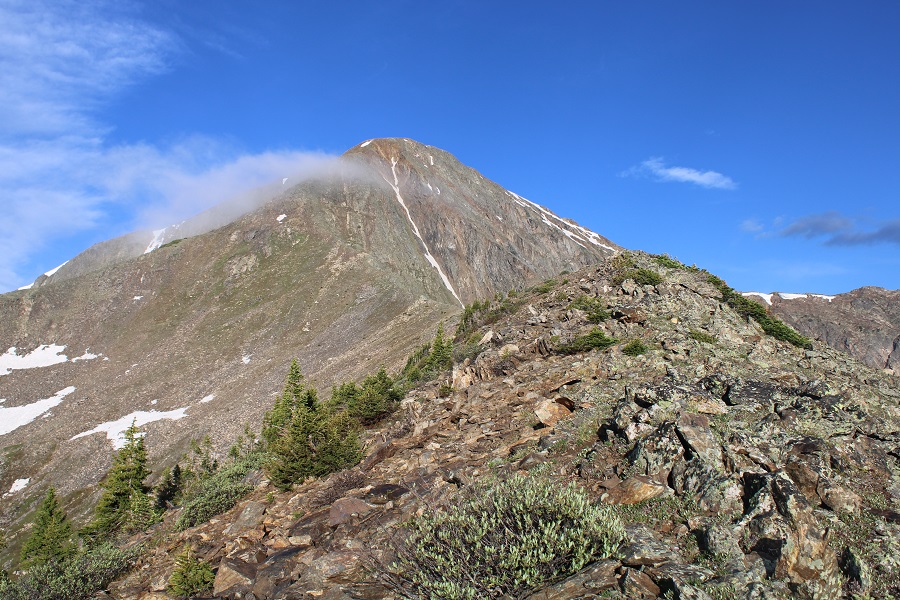
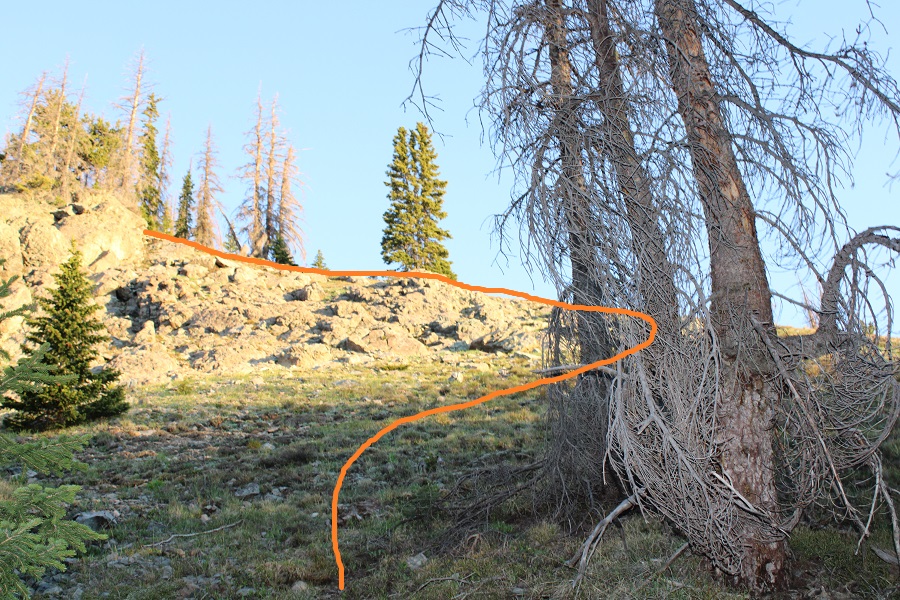
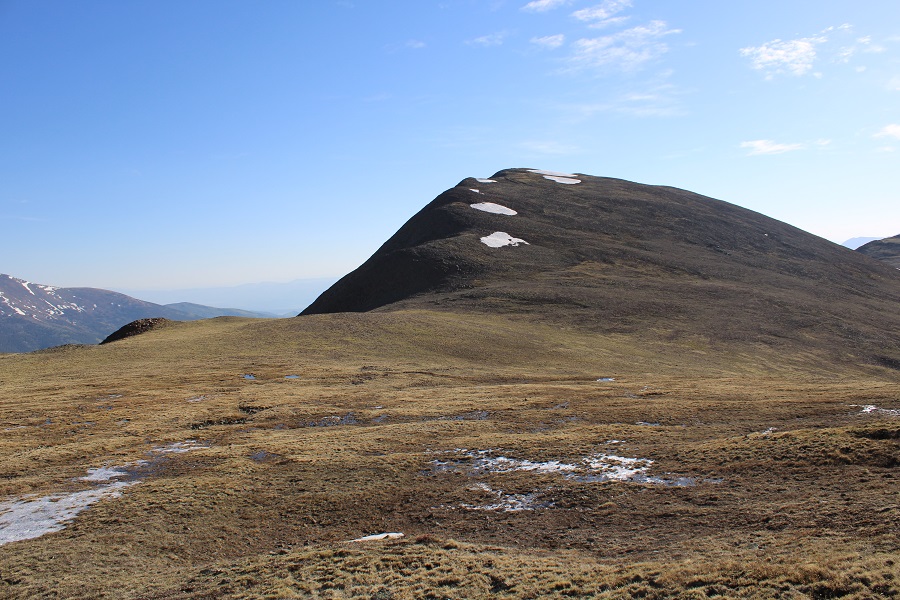
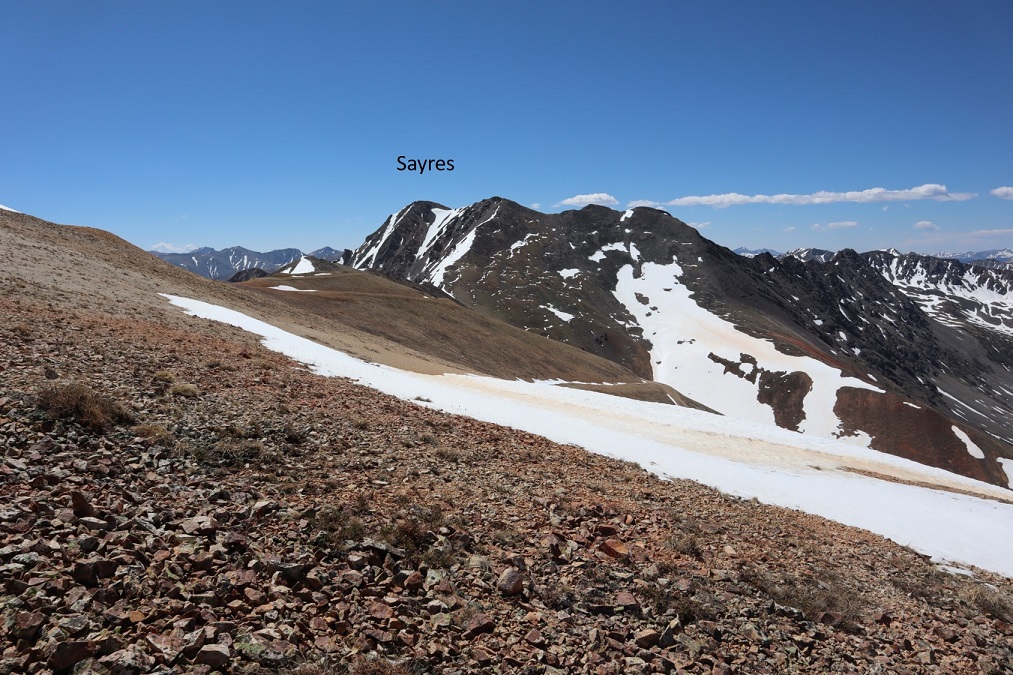
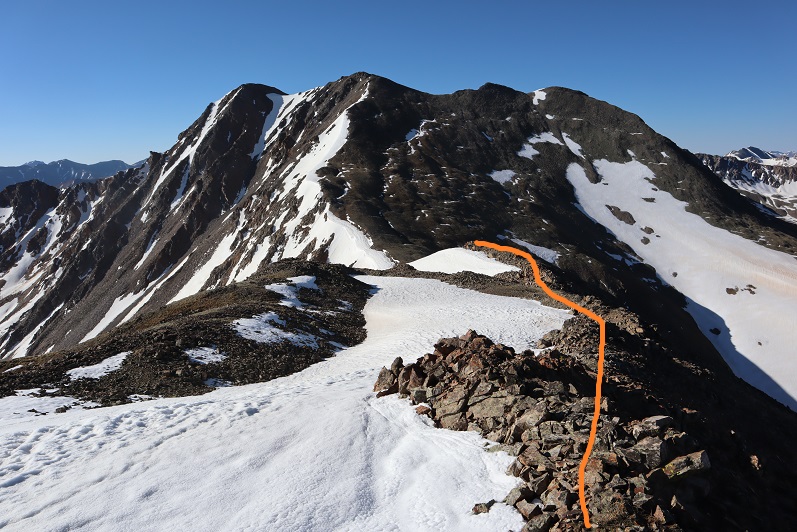
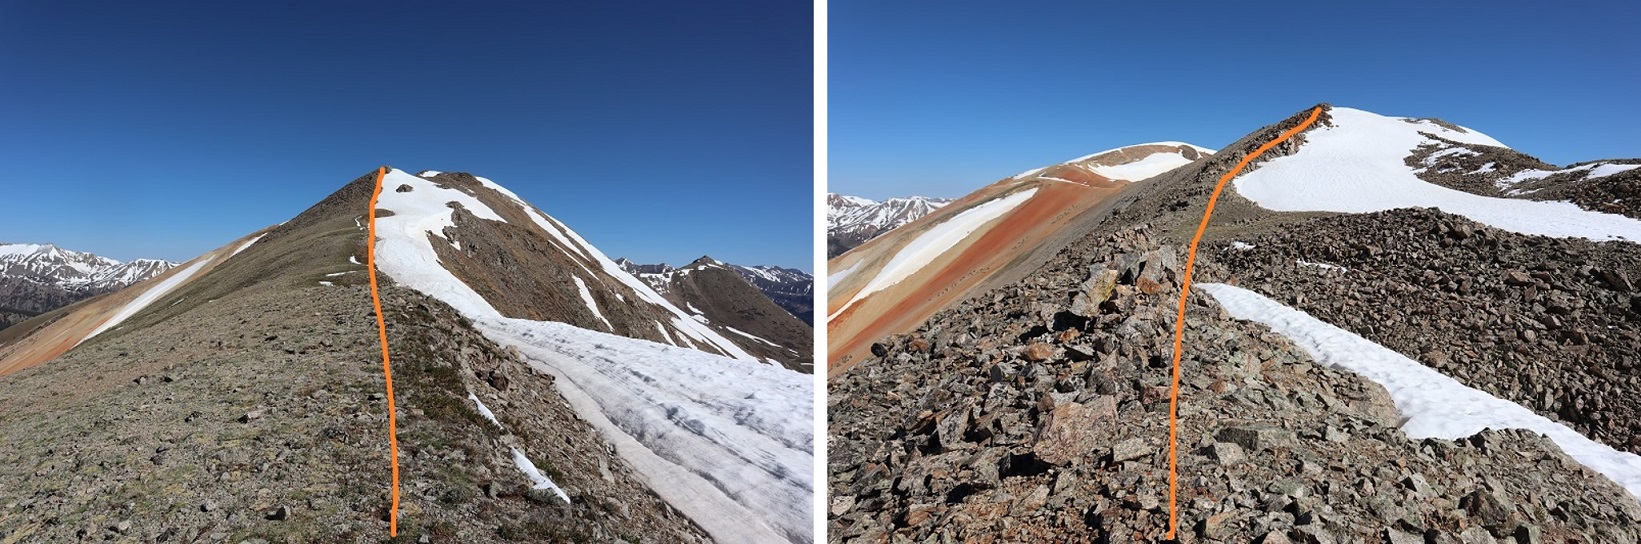
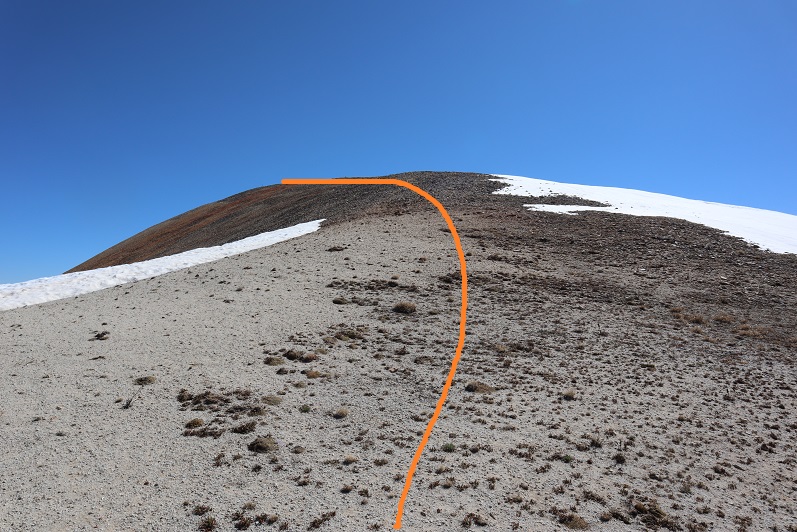
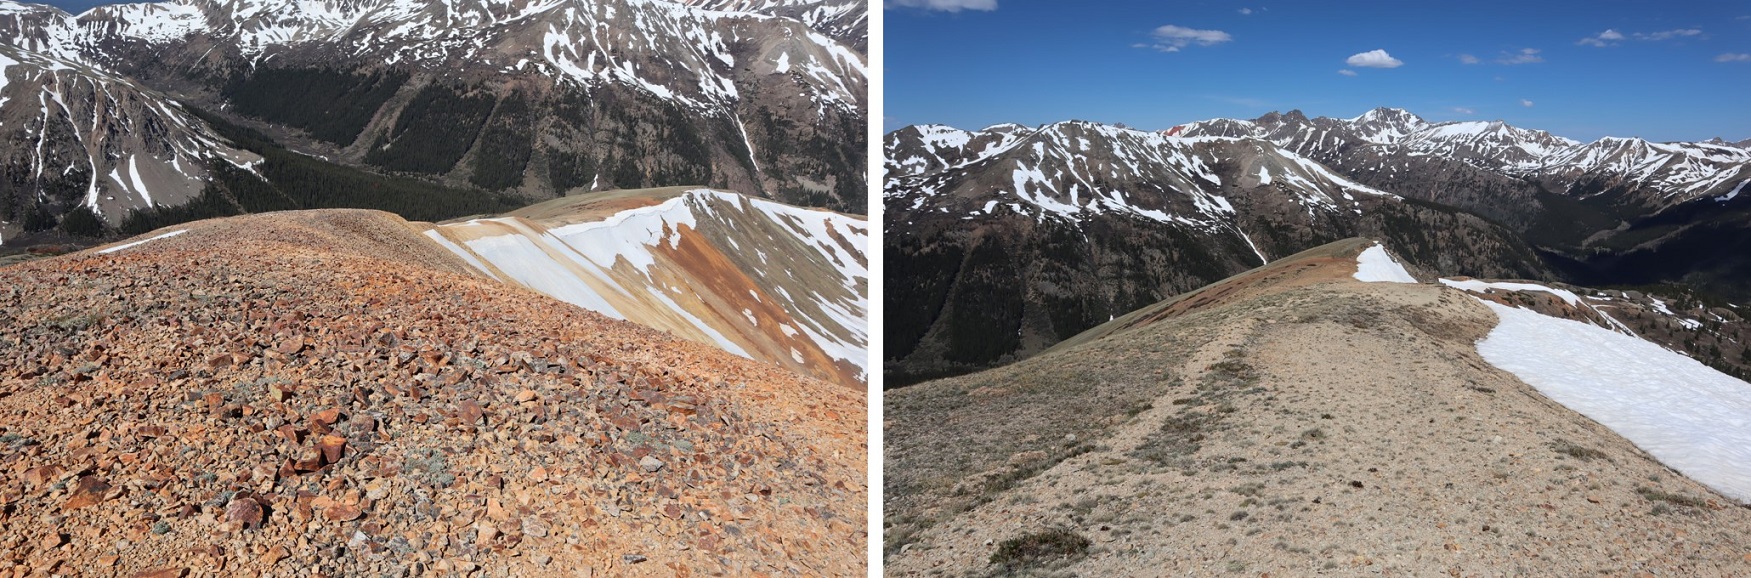
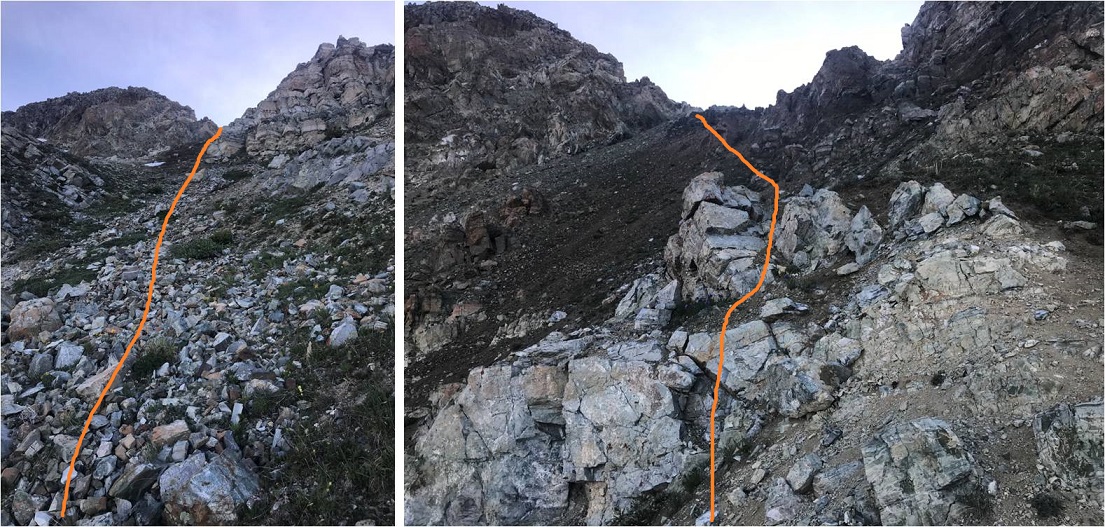
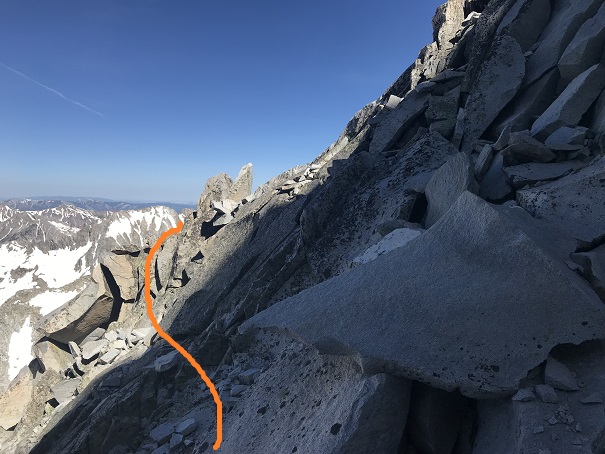
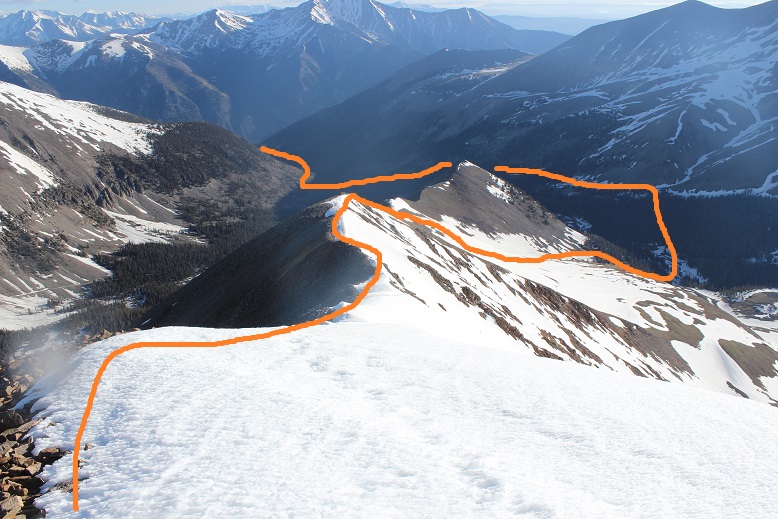
I skirted around the north side of 13164, navigating through a could of ice patches.
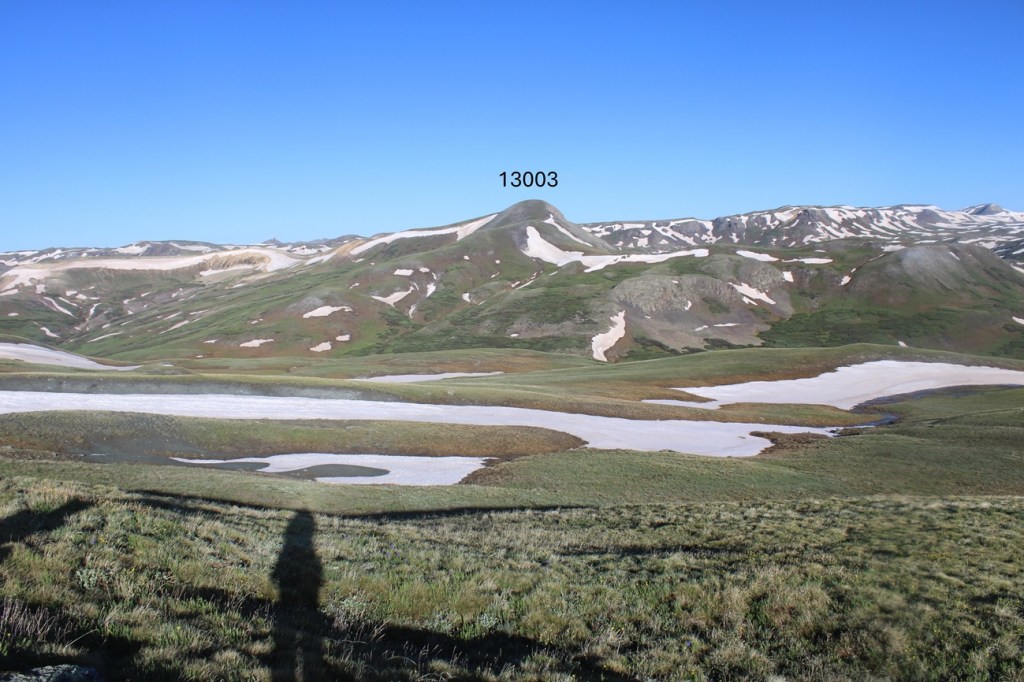
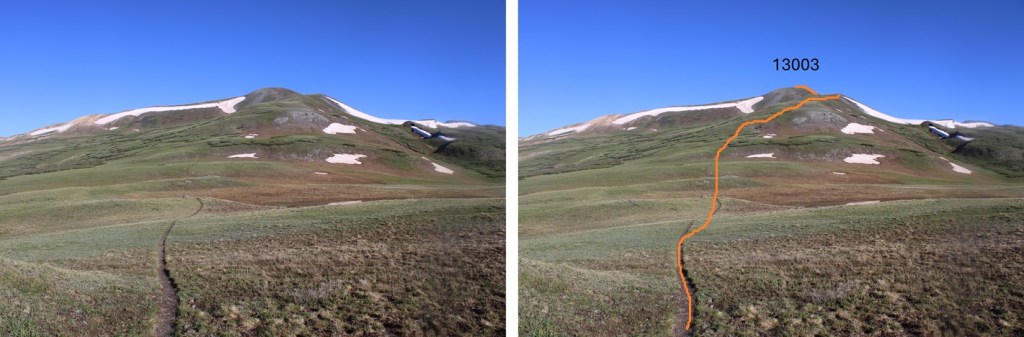
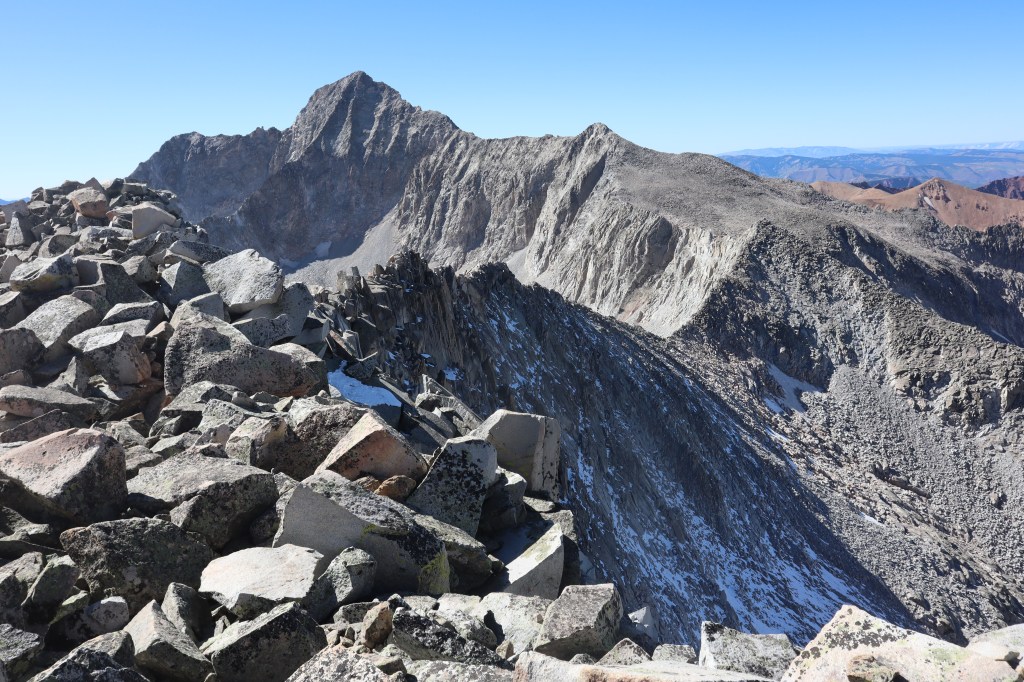
Now on the north side of 13164, I could see 13003 to the west.
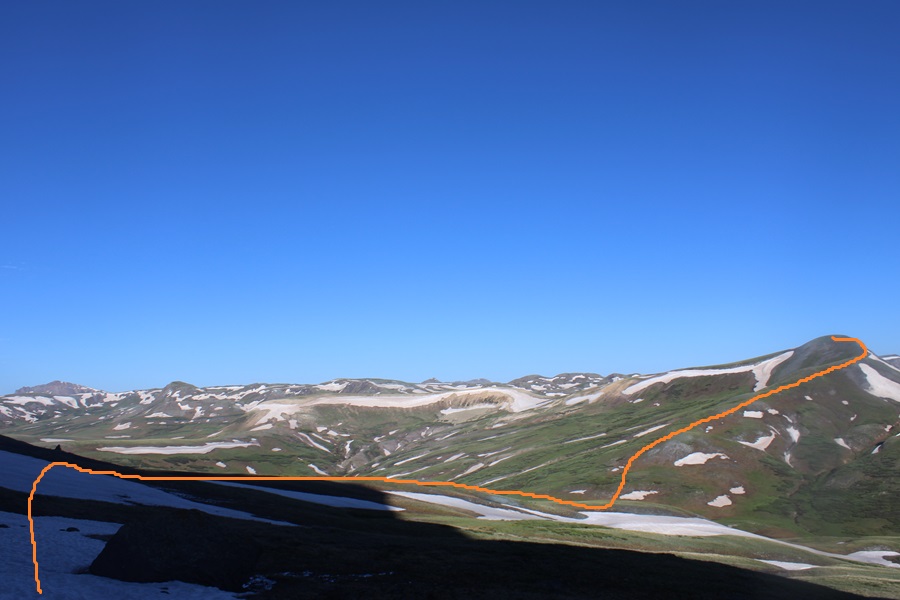
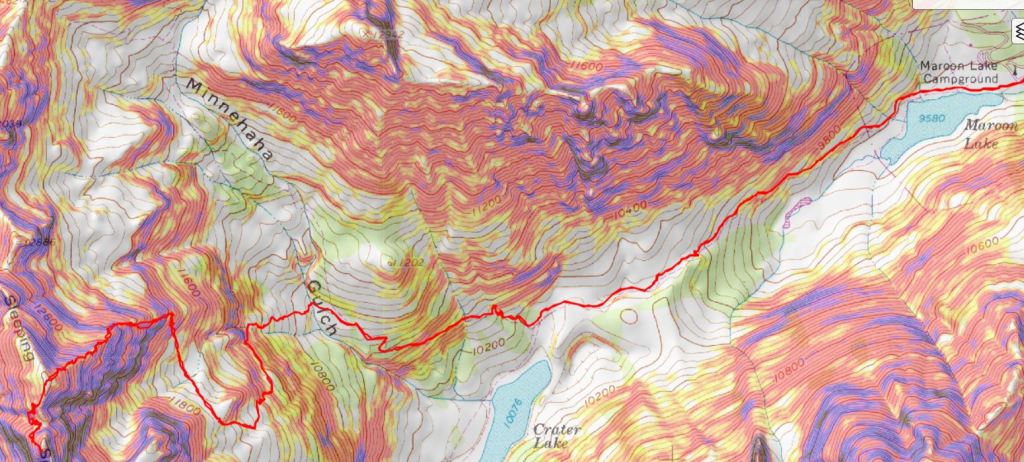
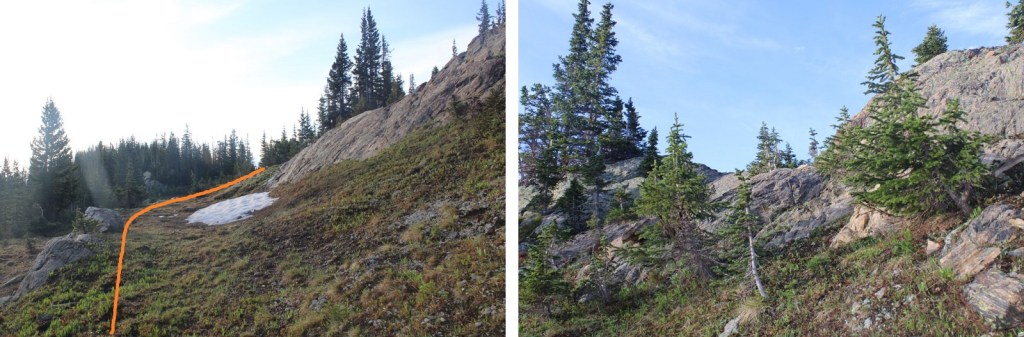
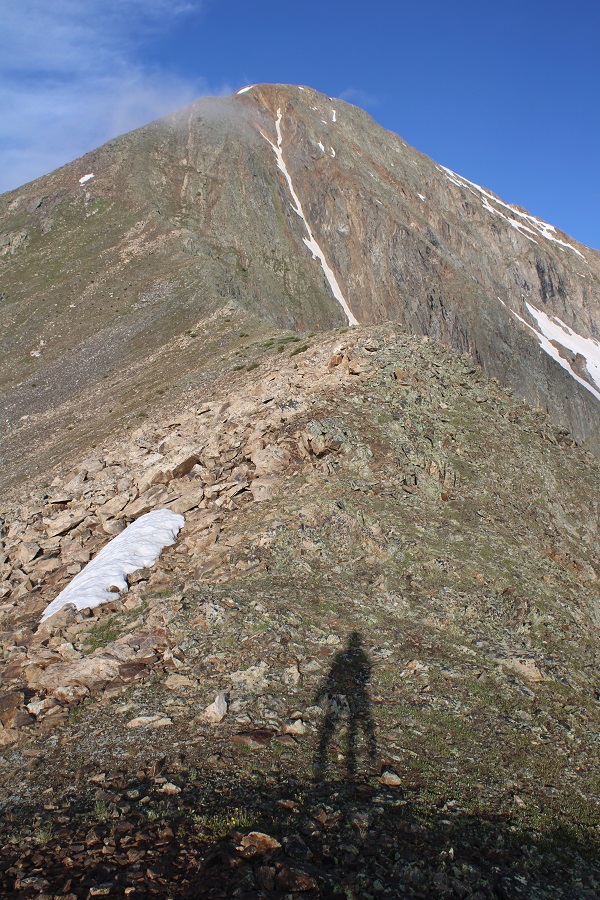
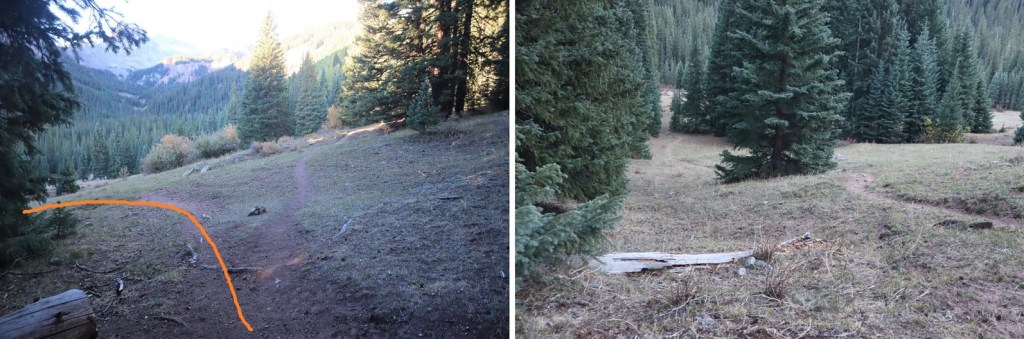
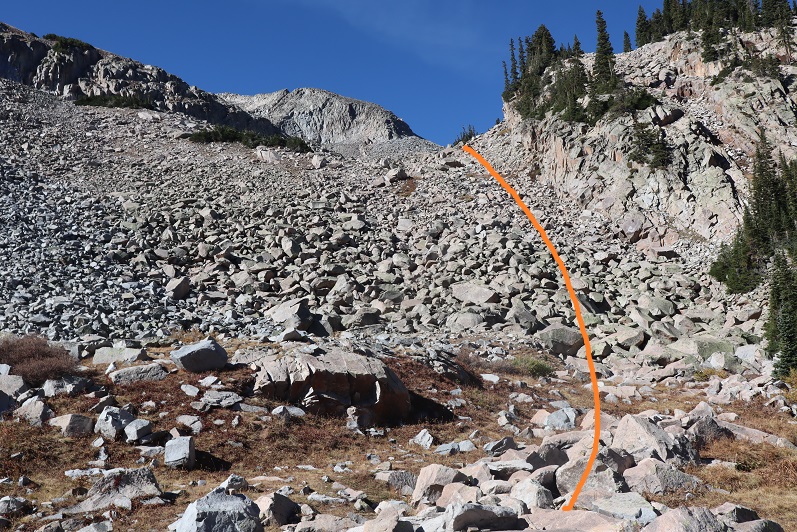
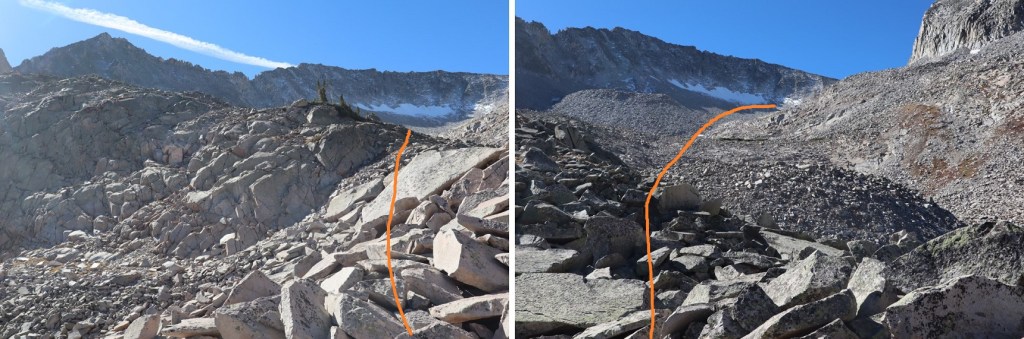
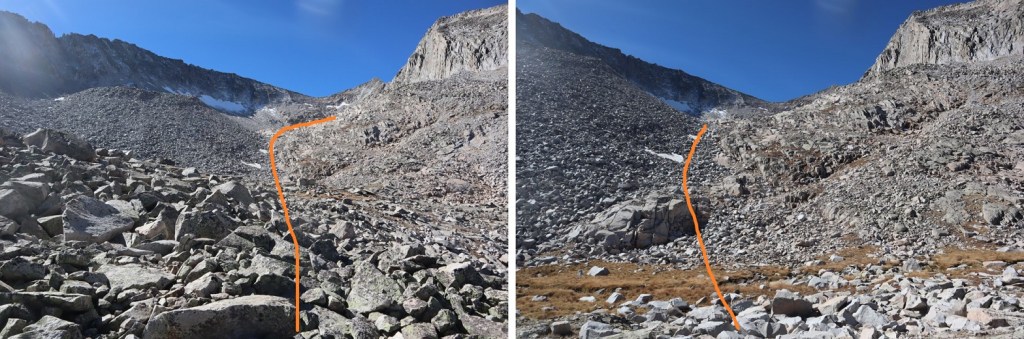
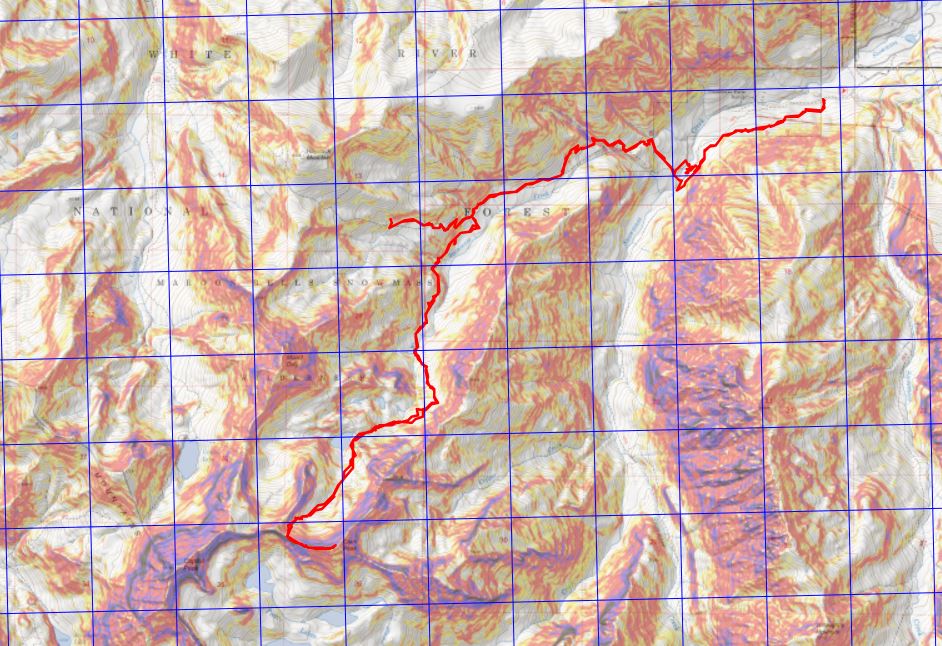
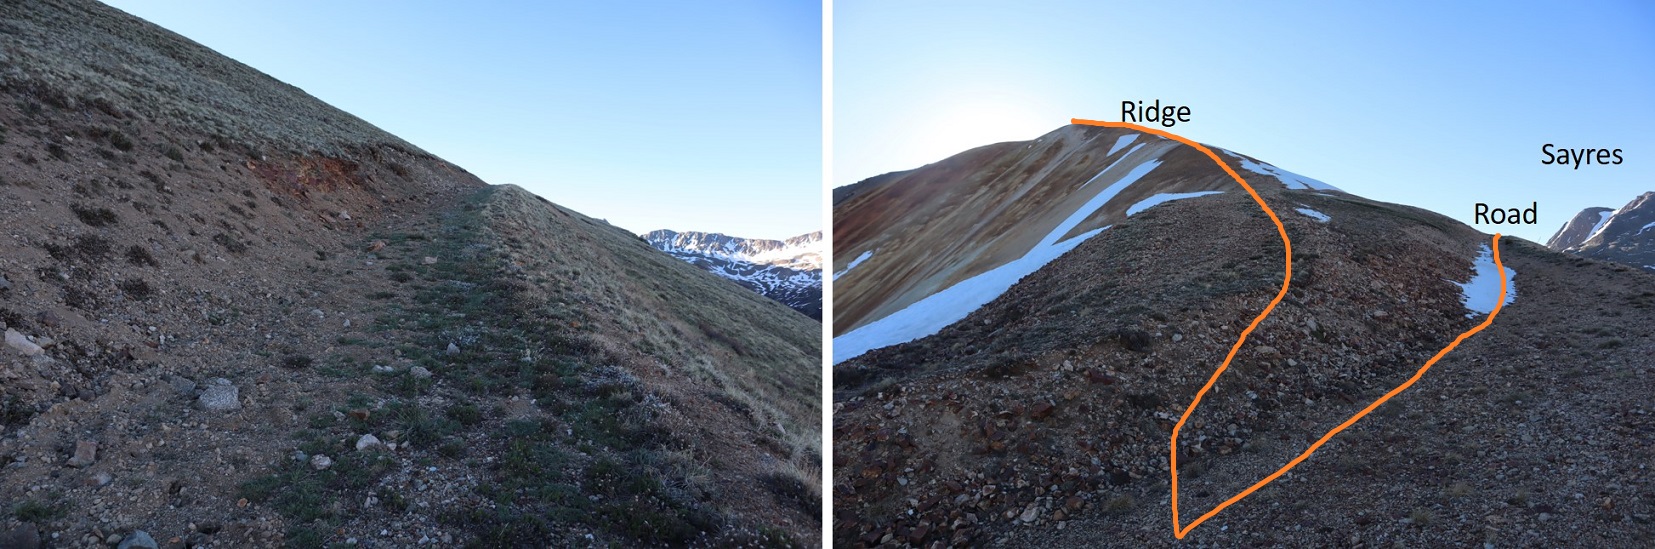
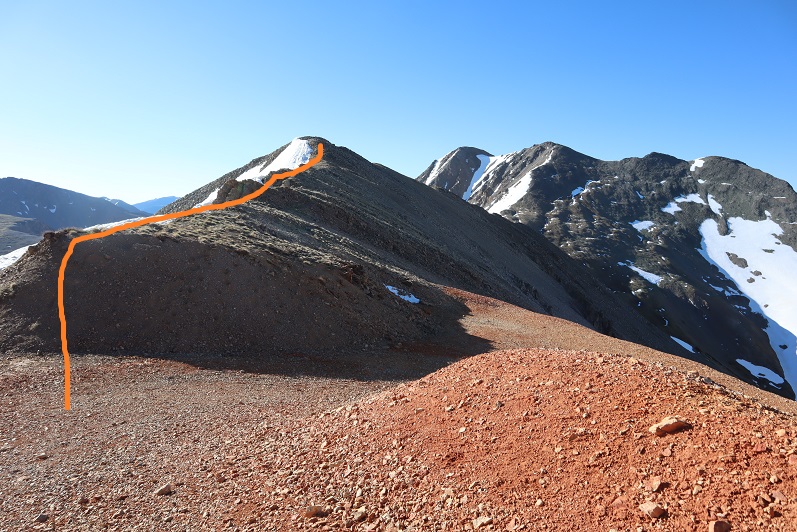
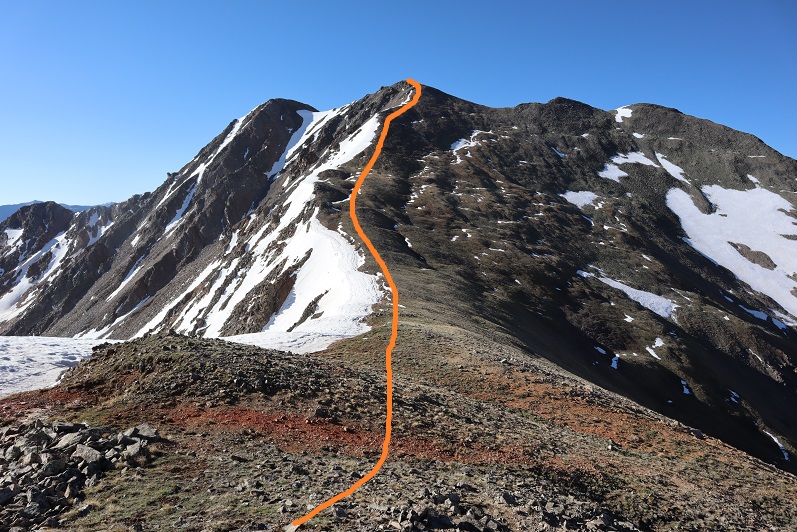
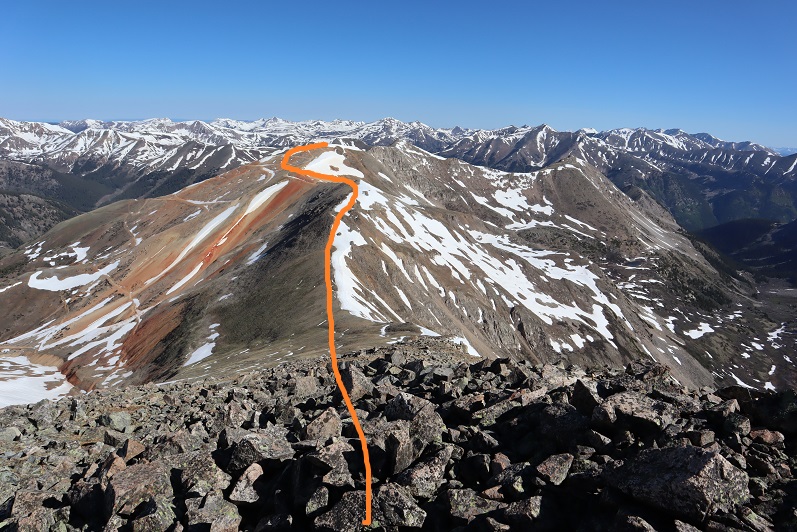
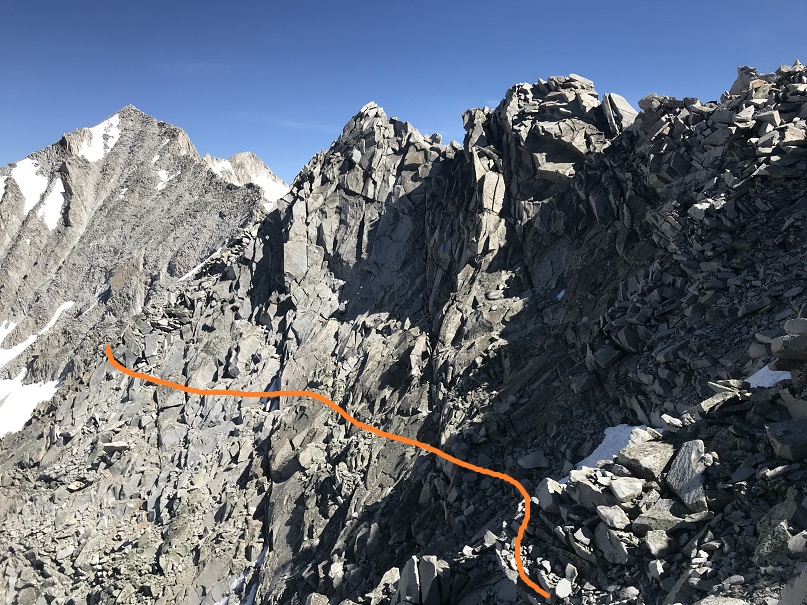
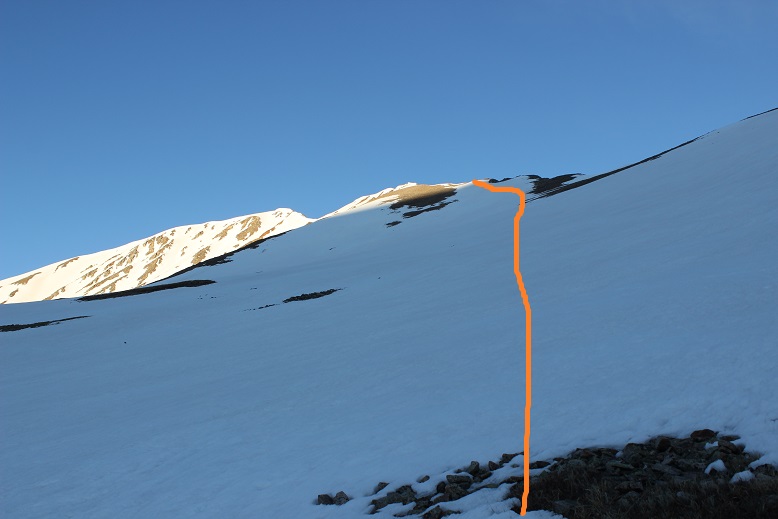
I stayed on the Colorado Trail until I hit the saddle of 13164 and 13003, losing about 500’ of elevation, then left the trail and took the tundra covered ridge to the summit. This is the route I took.
I made my way to the saddle
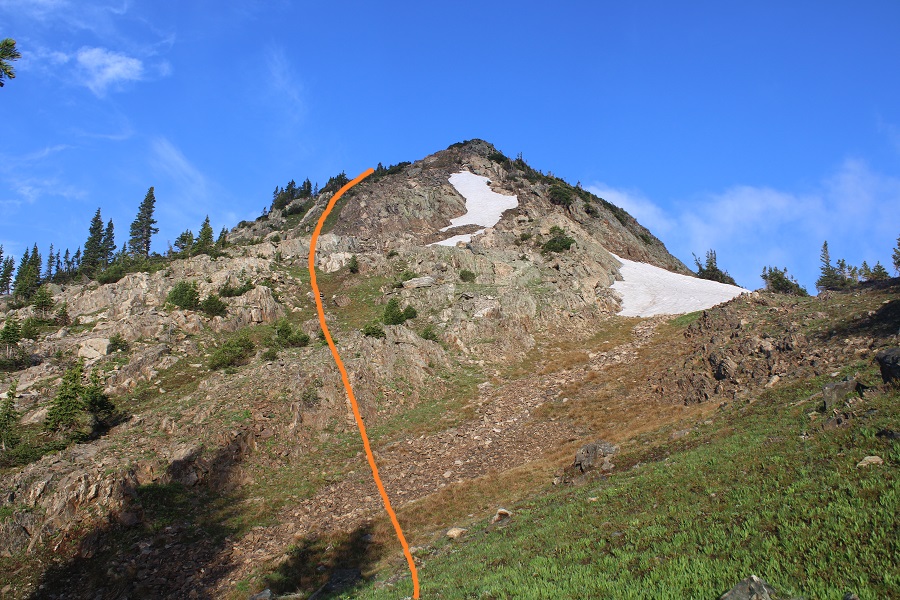
Then hiked the ridge to the summit
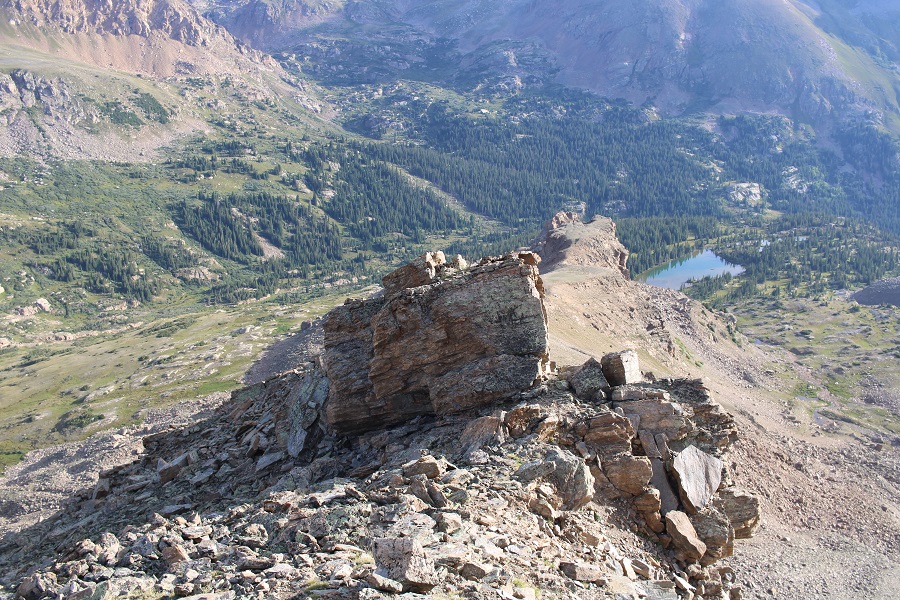
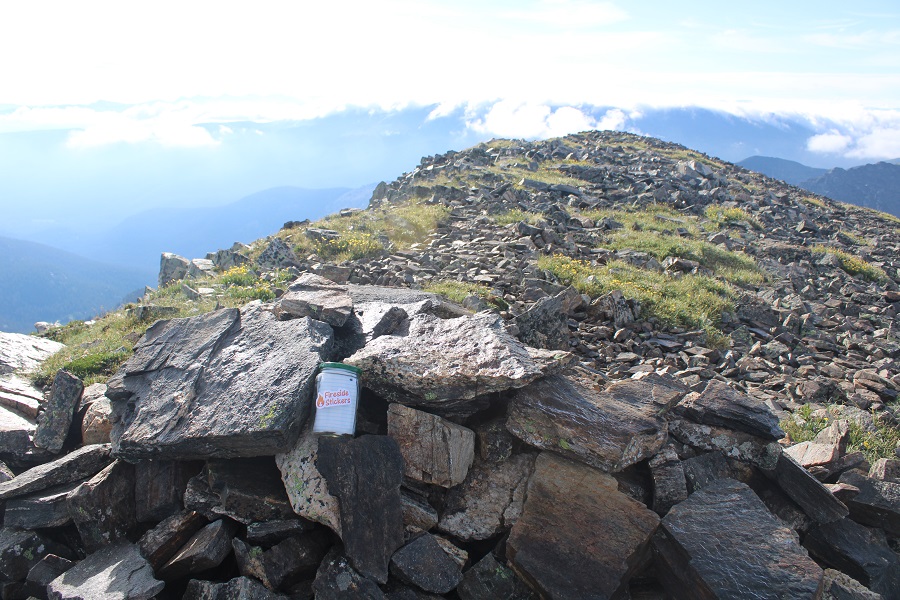
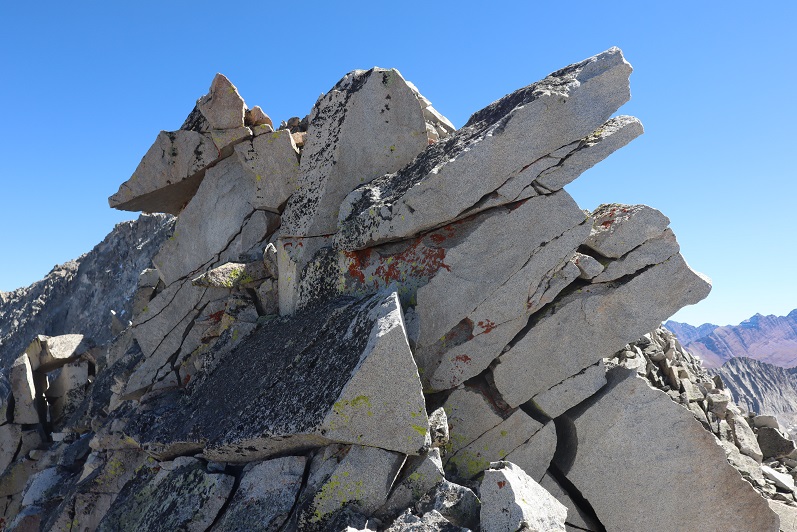
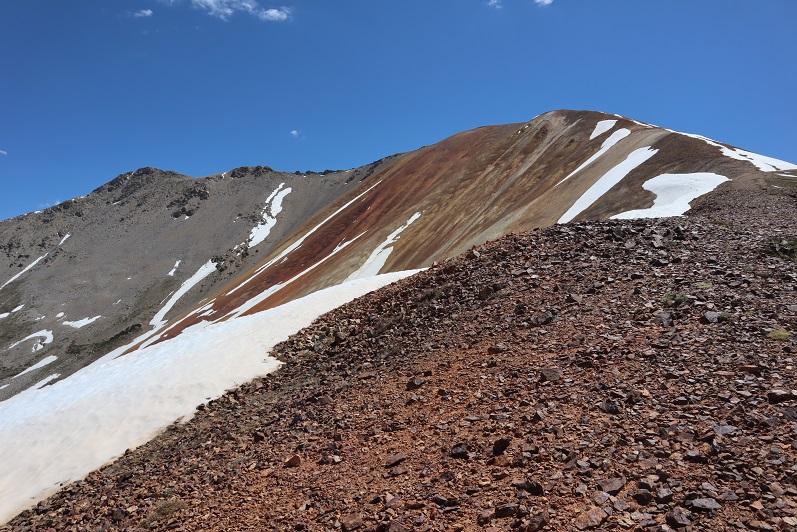
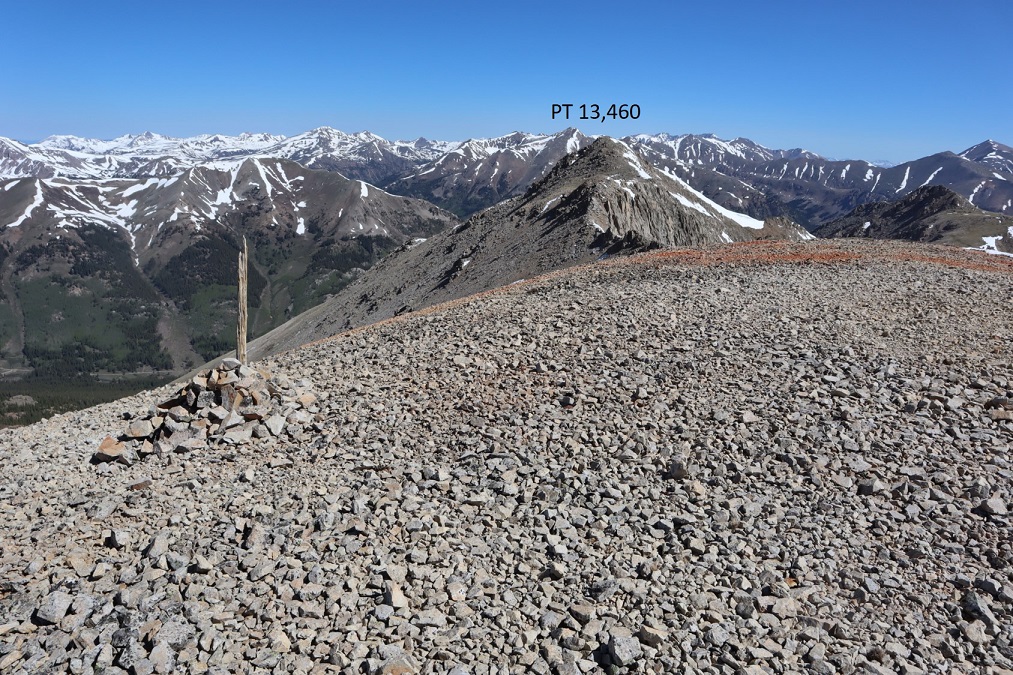
I summited PT 13003 at 8:15am
PT 13003:
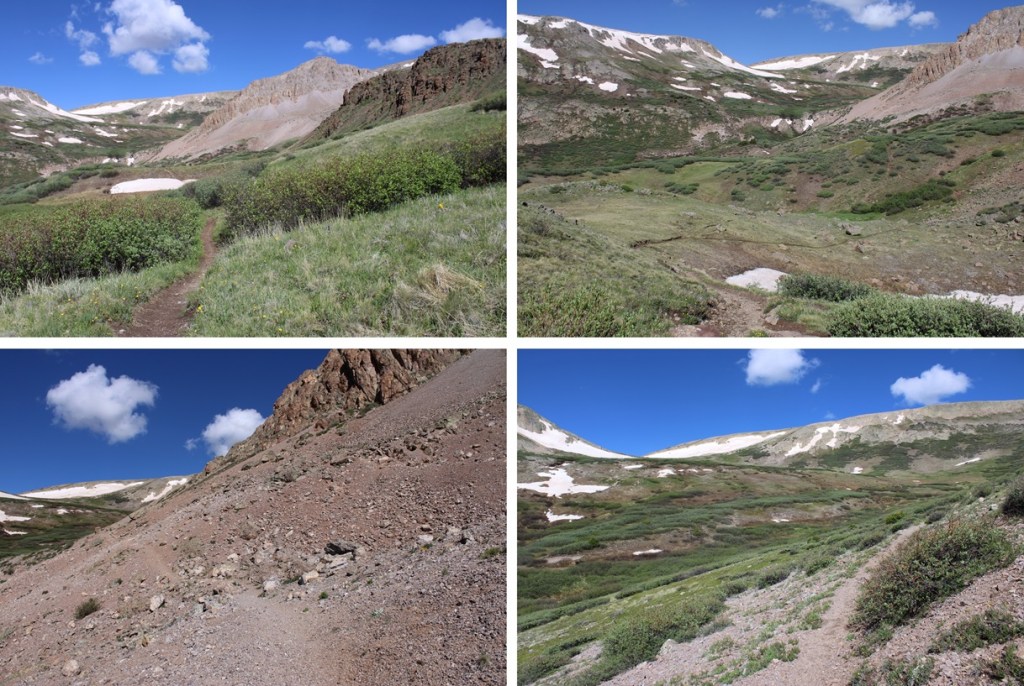
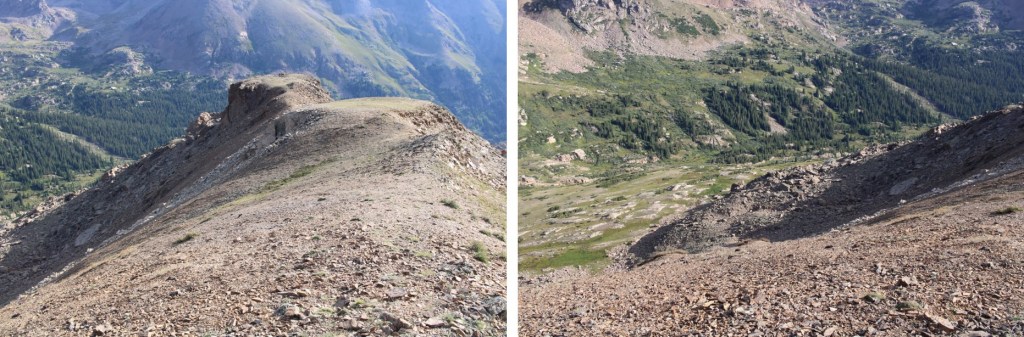
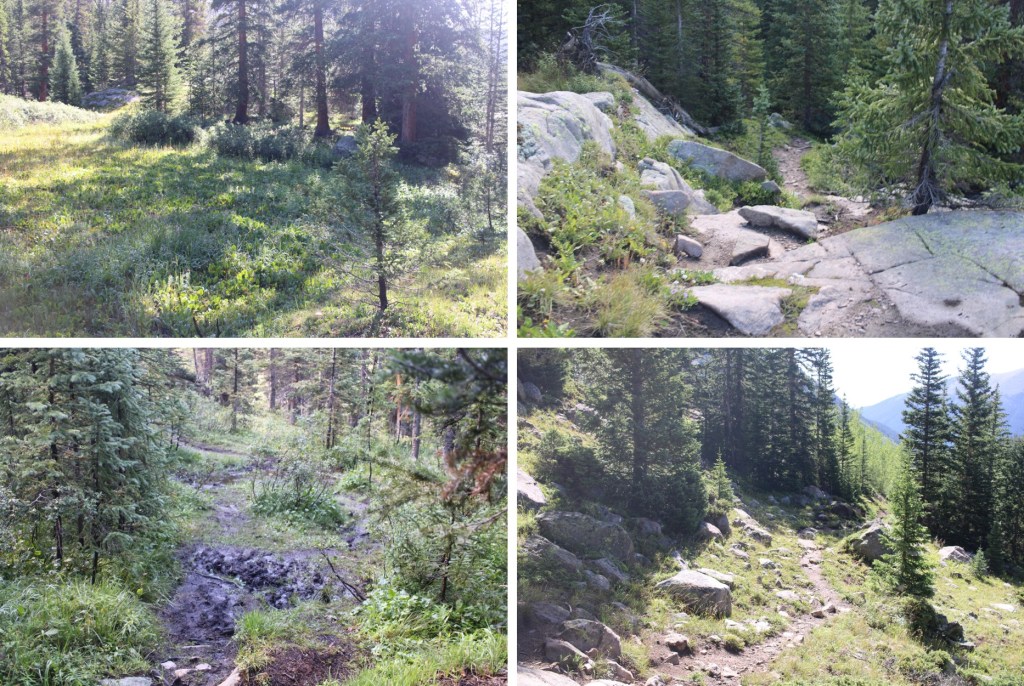
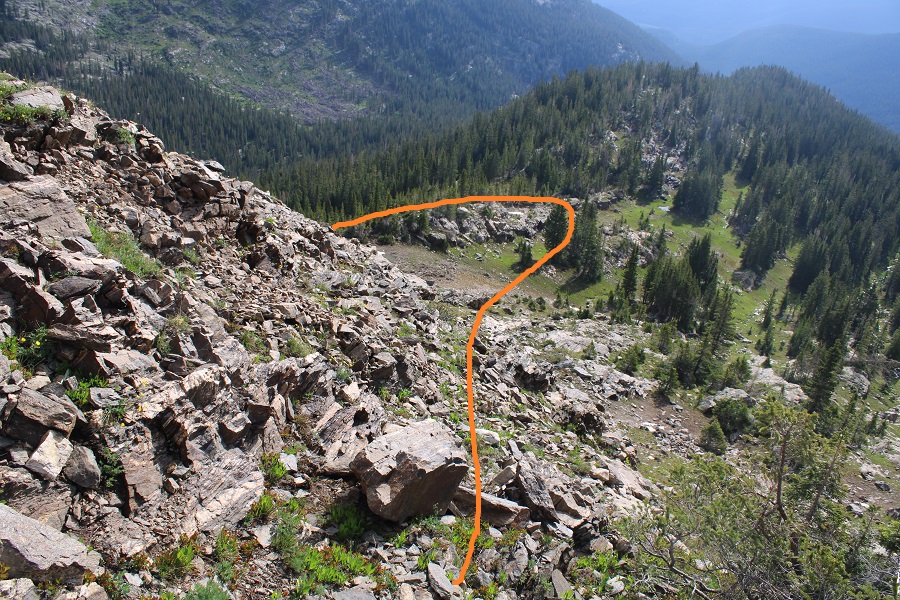
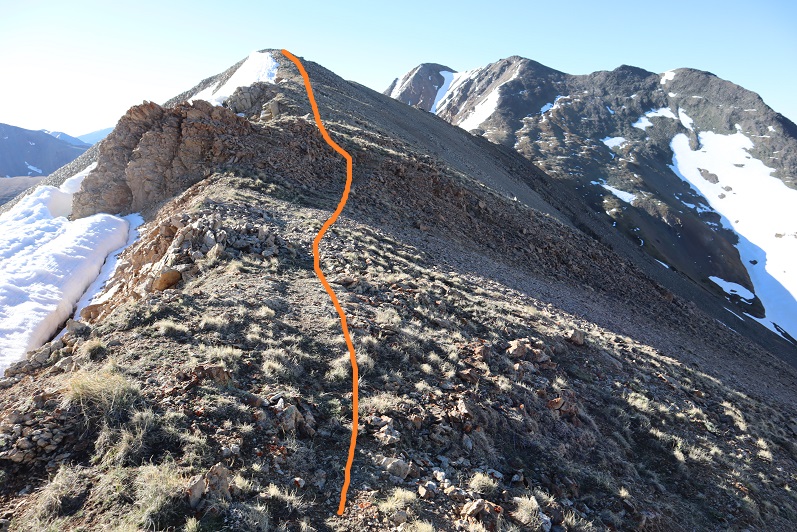
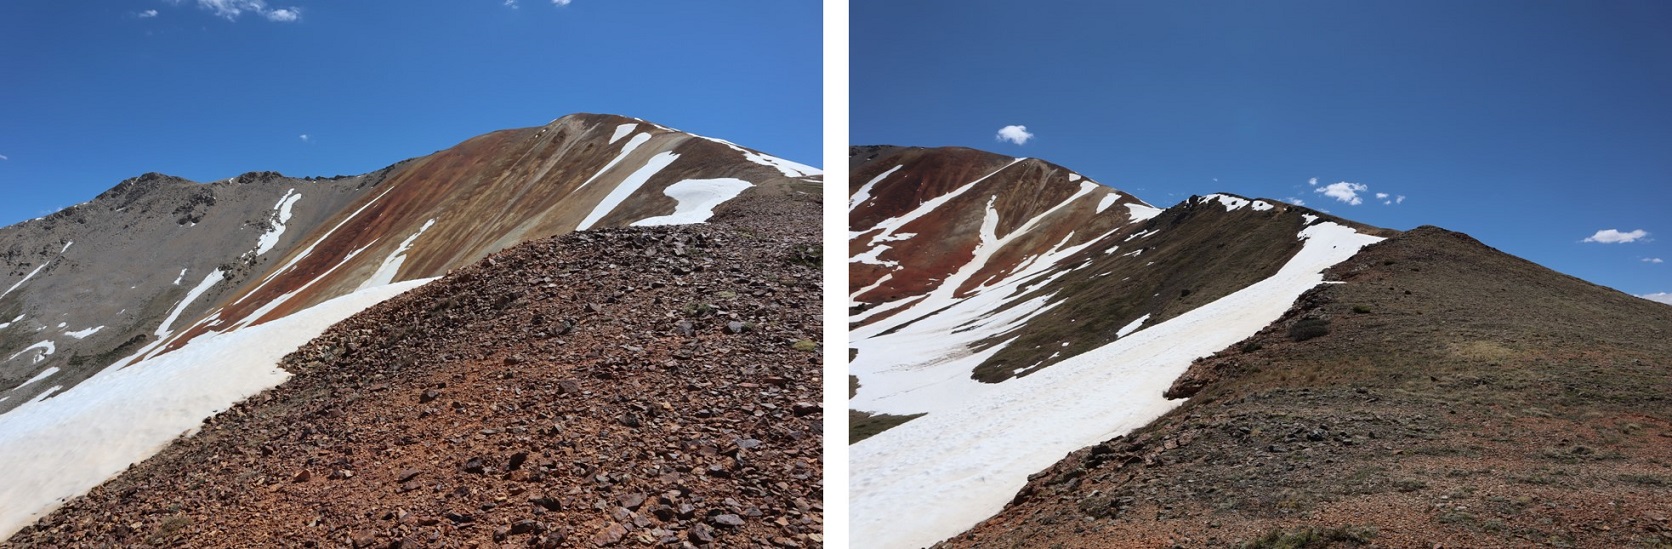
This was an out and back hike for me, so I turned around and retraced my steps. Here’s my route back down the saddle, skirting around the left side of PT 13164, following the Colorado Trail.
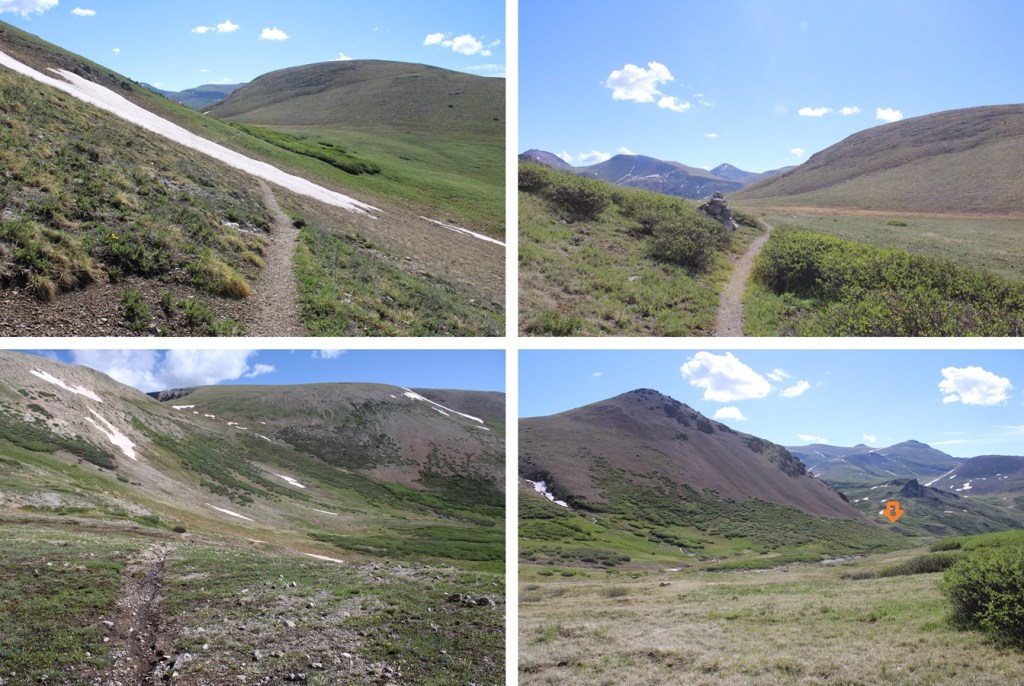
I then continued following the trail as it wound back to the Cataract Gulch Trail
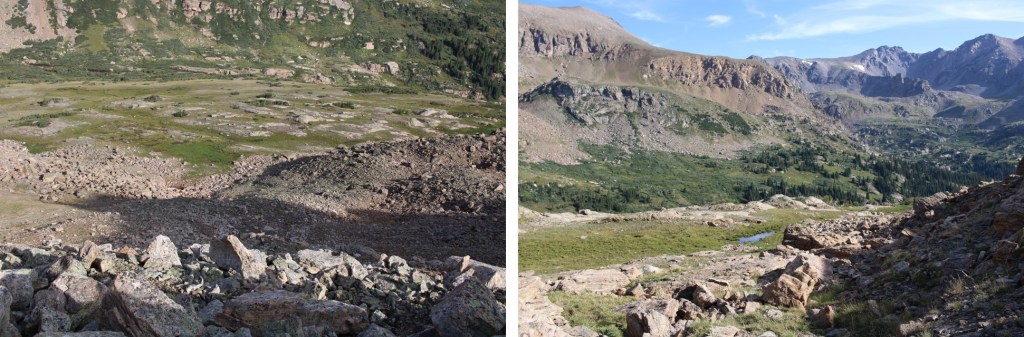
Past the lakes and through the upper basin, I kept following the trail, aiming for Sunshine Peak to the north.
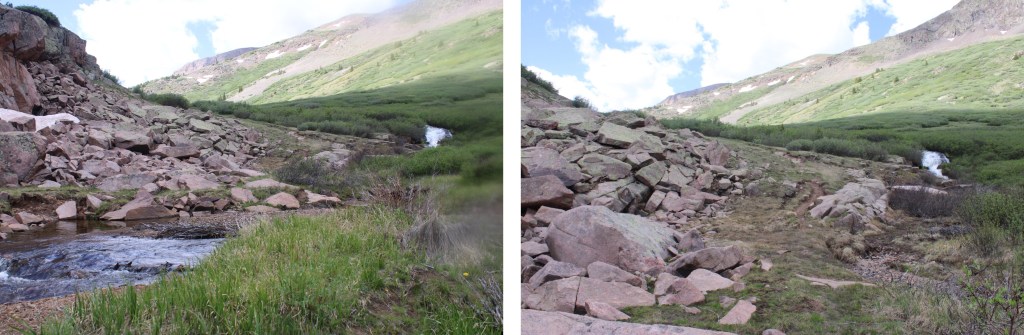
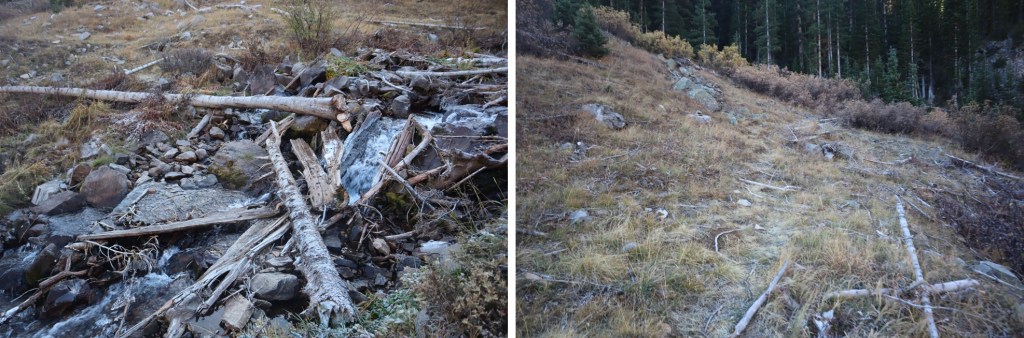
I crossed the creek
Then descended through the rocky basin
I crossed the creek twice more, and then followed the trail back down around the waterfall and back to the trailhead.
I made it back to the trailhead at 12pm, making this a 17.1 mile hike with 4750’ of elevation gain in 8.5 hours. Note: My Strava glitched about 2 miles into this hike, so I drew in my route for this peak on the topo map. This was easy because most of the route was on a trail, so it auto populated. My phone and watch gave me 19.1 miles for the hike, but I got 17.1 miles when I drew the map in CalTopo.
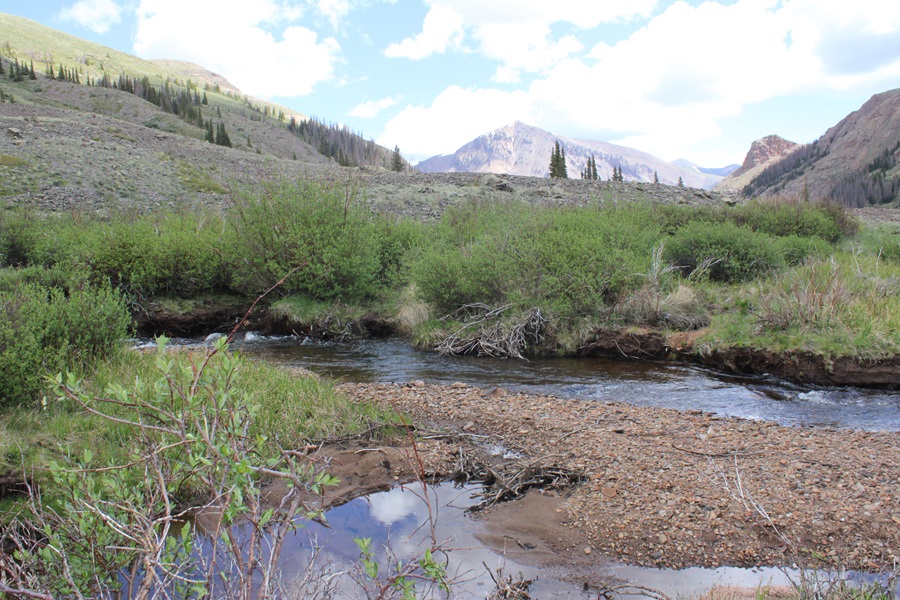
Also, every time I’ve been to Cataract Gulch I’ve seen moose. Today was no exception.
I arrived at the North Halfmoon Creek Trailhead to find it almost full at 3:30am, with several vehicles parked just below the final ‘difficult’ section. Pro tip: If your vehicle cannot make it all the way to the trailhead, do NOT park it just below the difficult section, as it’s narrow and I barely avoided hitting several vehicles on the way down later in the day. I was driving a Tacoma; I can only imagine the difficulty a larger vehicle would have passing poorly parked cars in this area. If your car can’t make it, do us all a favor and park in the 2WD parking area. The upper 4WD parking area was full of 4Runners, Suburbans, and trucks.
I was on the trail at 4am. The sky was clear and I could see stars, but apparently it had rained the night before, and I was quickly soaked.
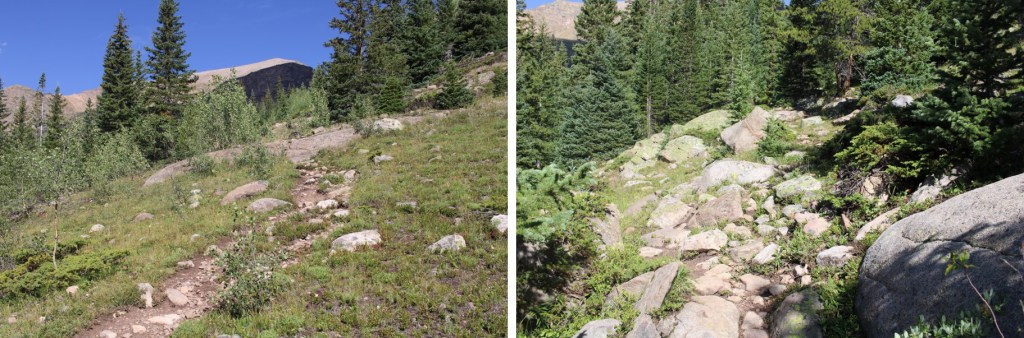
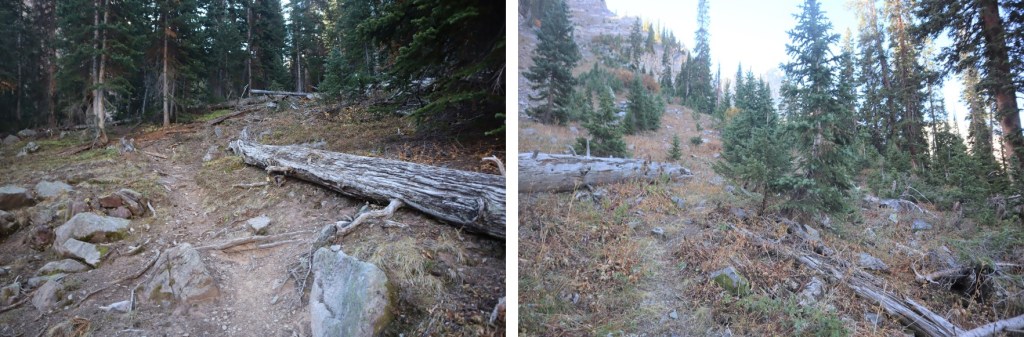
The trail was an easy to follow, class 1 trail
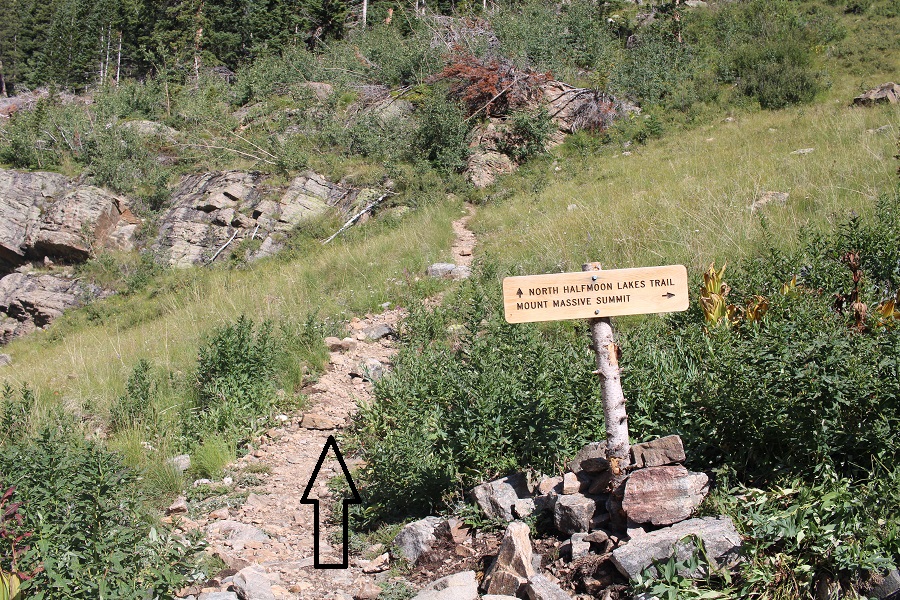
At the junction, I continued straight on North Halfmoon Lakes Trail
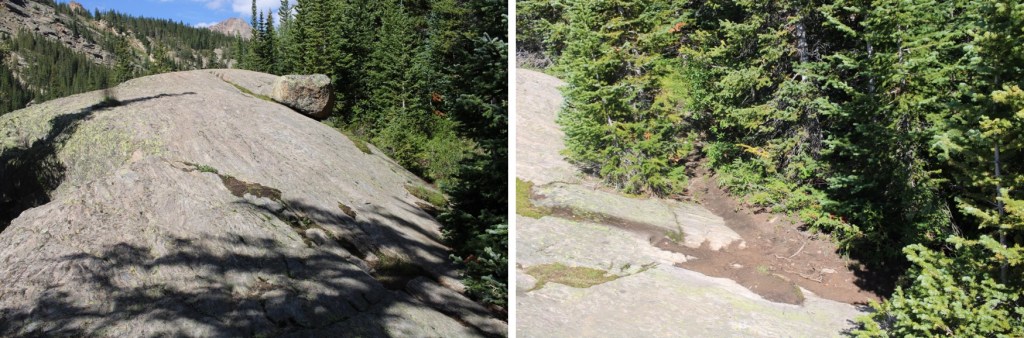
This was still a class 1 trail, with some fun boulders thrown in. These were easy to navigate, with cairns to guide the way.
After hiking for 2 miles, I came to an unmarked junction and left the North Halfmoon Lakes Trail and followed a social trail to a stream.
There were several small streams to cross, and no established trail. I continued heading southwest, staying above North Halfmoon Creek, doing my best to avoid the boulders. This was all done below treeline, so pictures don’t help much. I stayed level at around 11600’
I came to an avalanche area, crossed it, and continued staying at 11600’
Eventually I could see North Halfmoon Creek, and an easy place to cross. I crossed the creek, and headed southwest.
There was a drainage that was easy to follow
I crossed the creek again (once again, easy) and continued heading southwest
At 11900’ I turned and headed south, up this hill
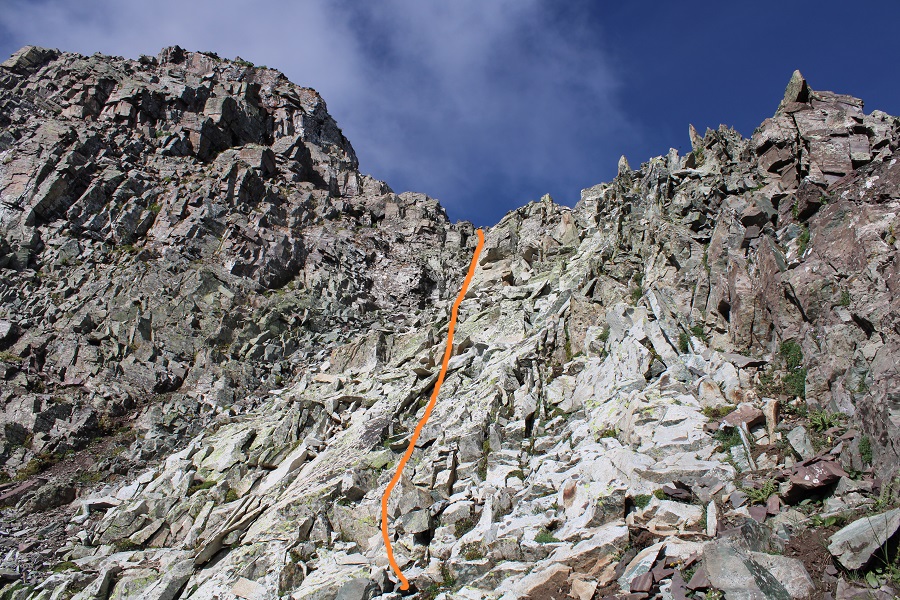
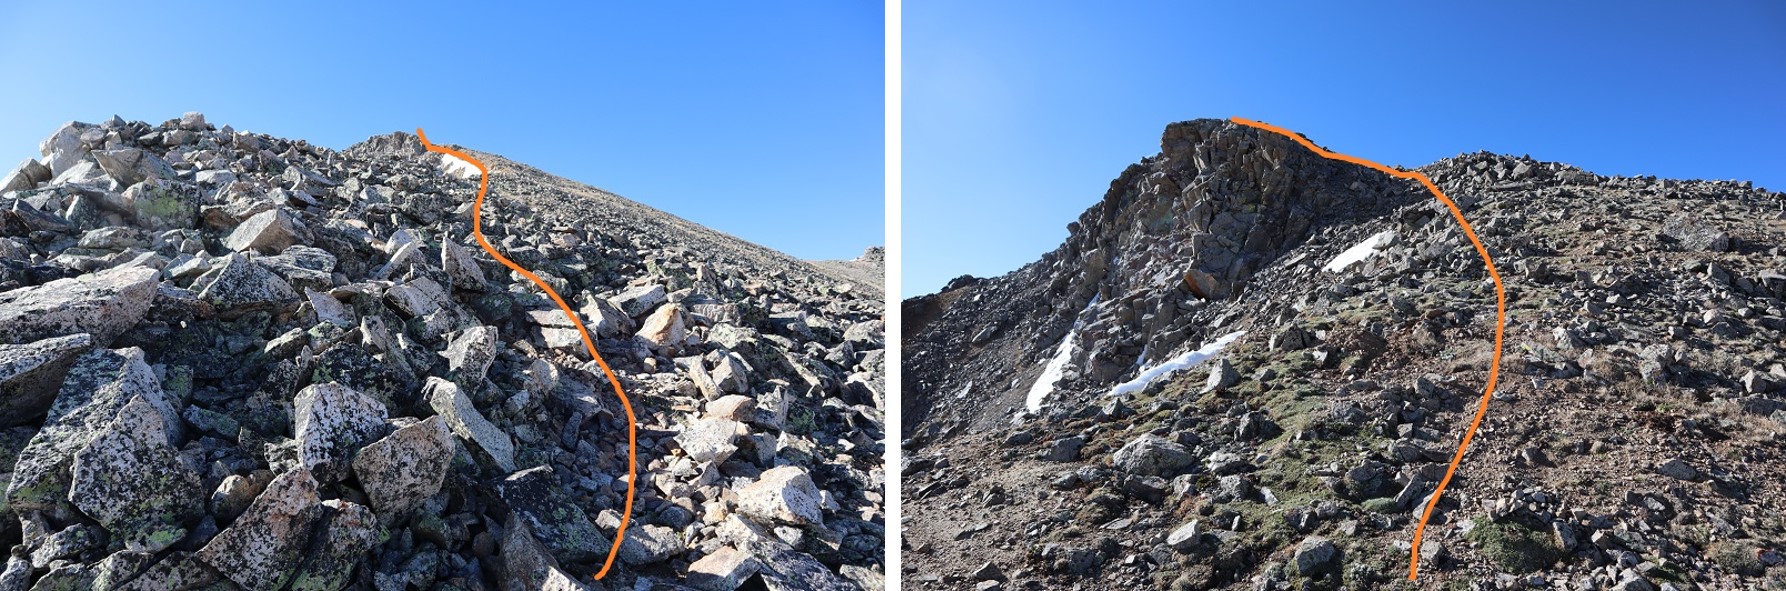
This led me to the upper basin. Here’s my route to the ridge. This is choose your own adventure. I tried to keep it between the rocks and the scree. I took the rocks up, the scree down.
Here are some close-up pictures of the route to the ridge
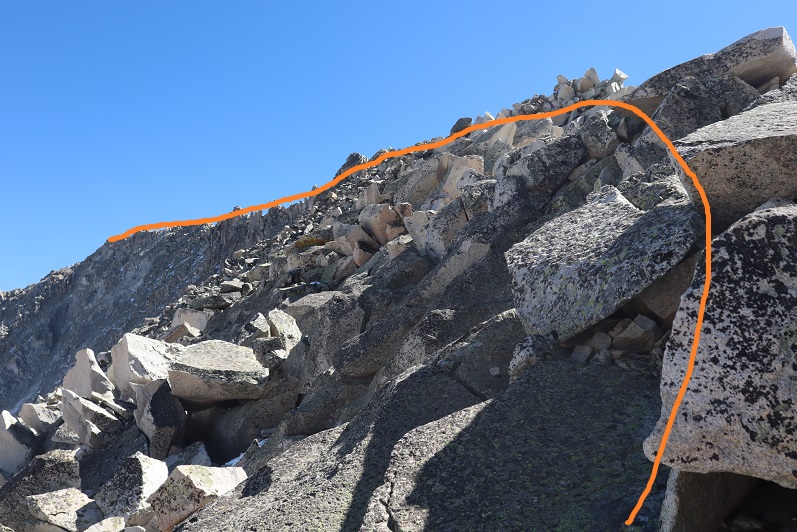
Once on the ridge, I turned right and followed it southwest
This was all class 2. There was a short class 4 section, but it could be easily avoided by dropping down to the right a little bit, then regaining the ridge
Here’s looking back at that rock you’re trying to avoid
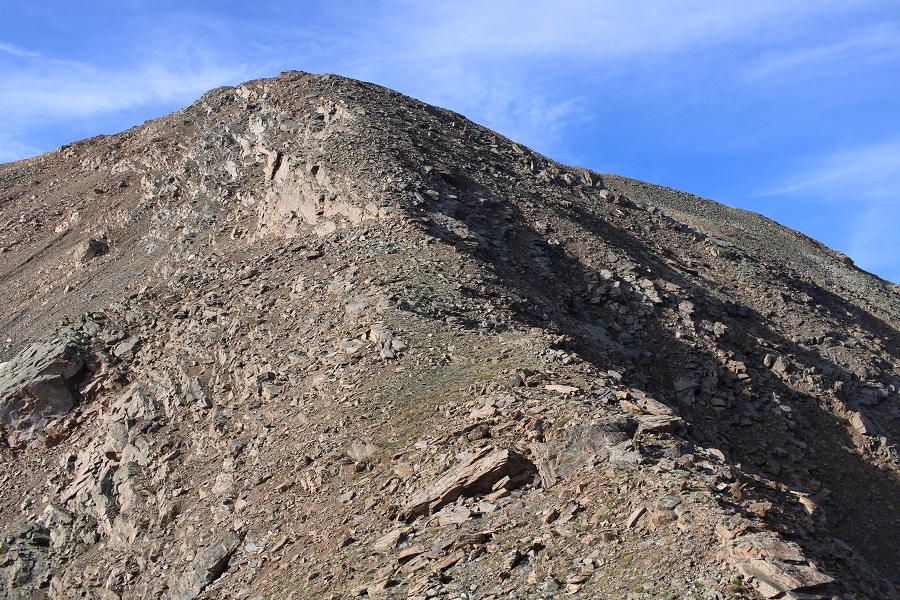
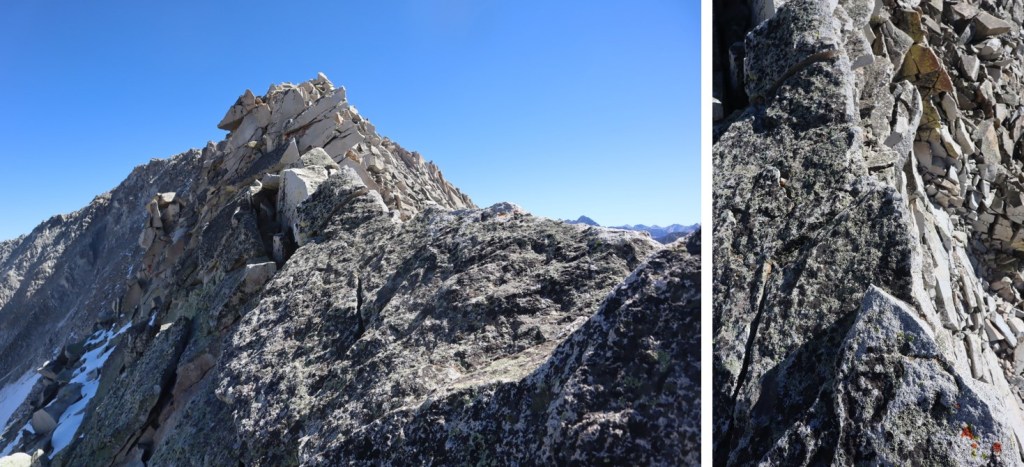
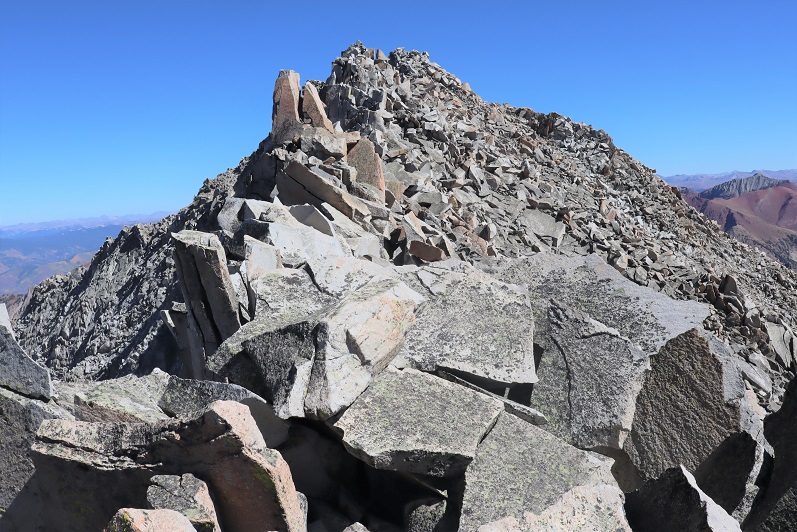
Now it was an easy, class 2 ridge hike to the summit
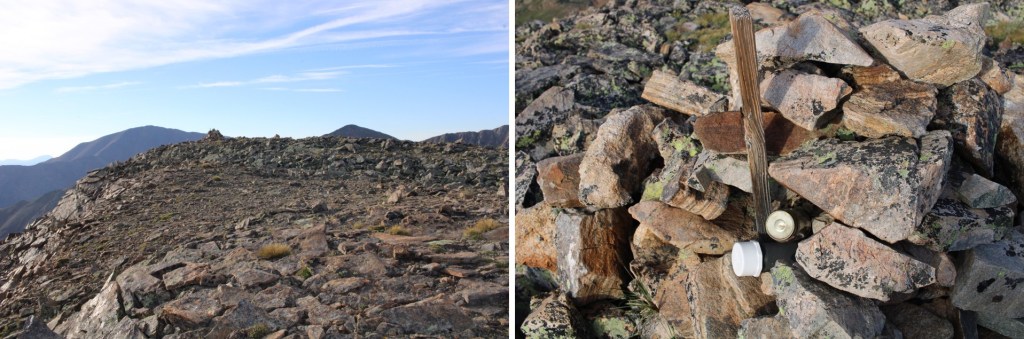
There were 2 summit registers at the summit. A plastic tube with I (surprise!) wasn’t able to open, and a glass jar with a register I signed.
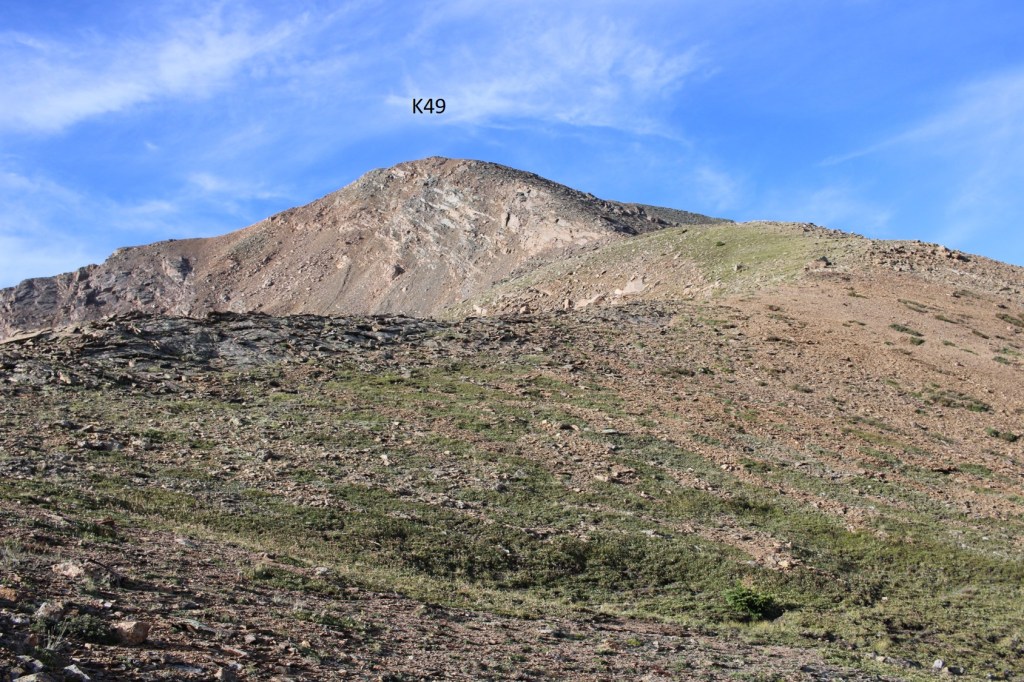
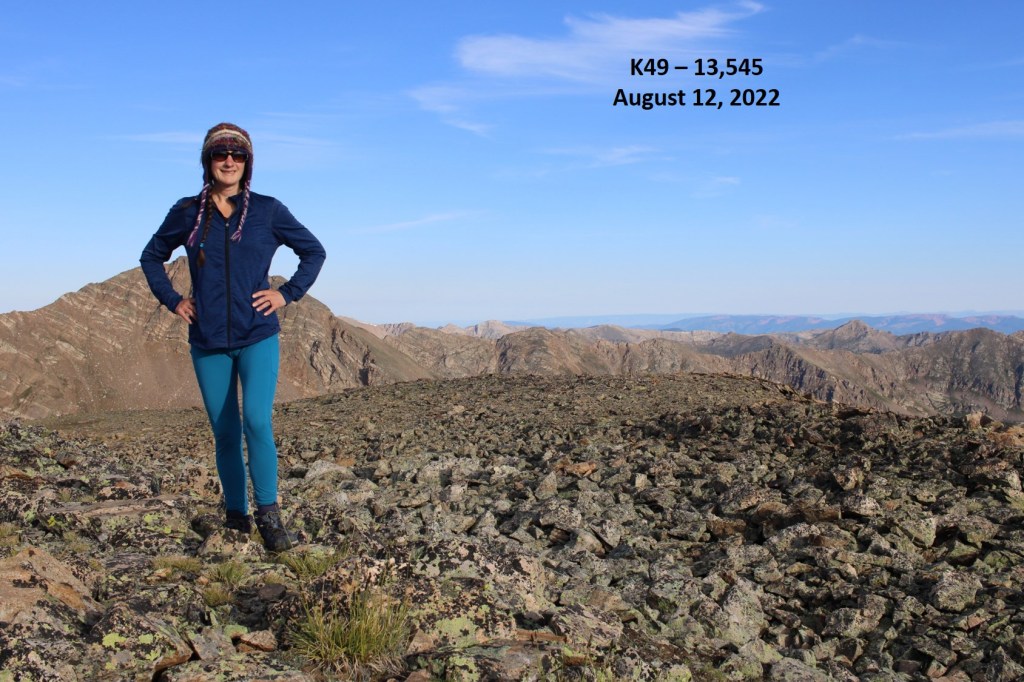
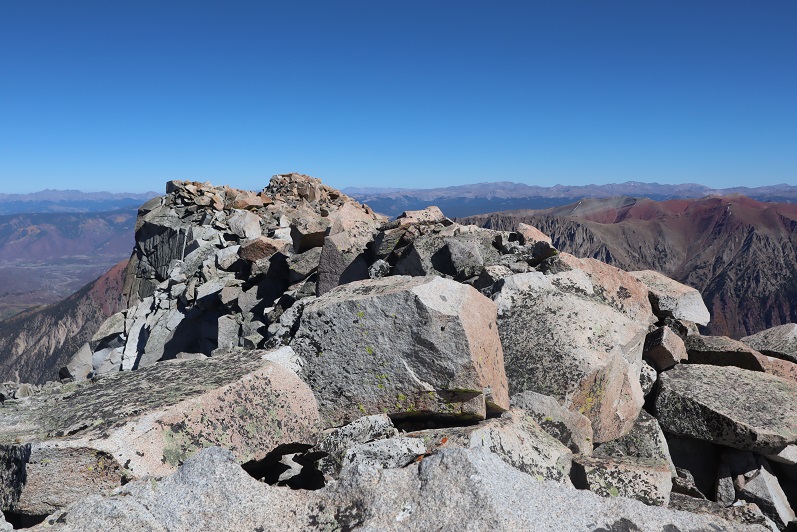
I summited K49 at 7:45am
K49:
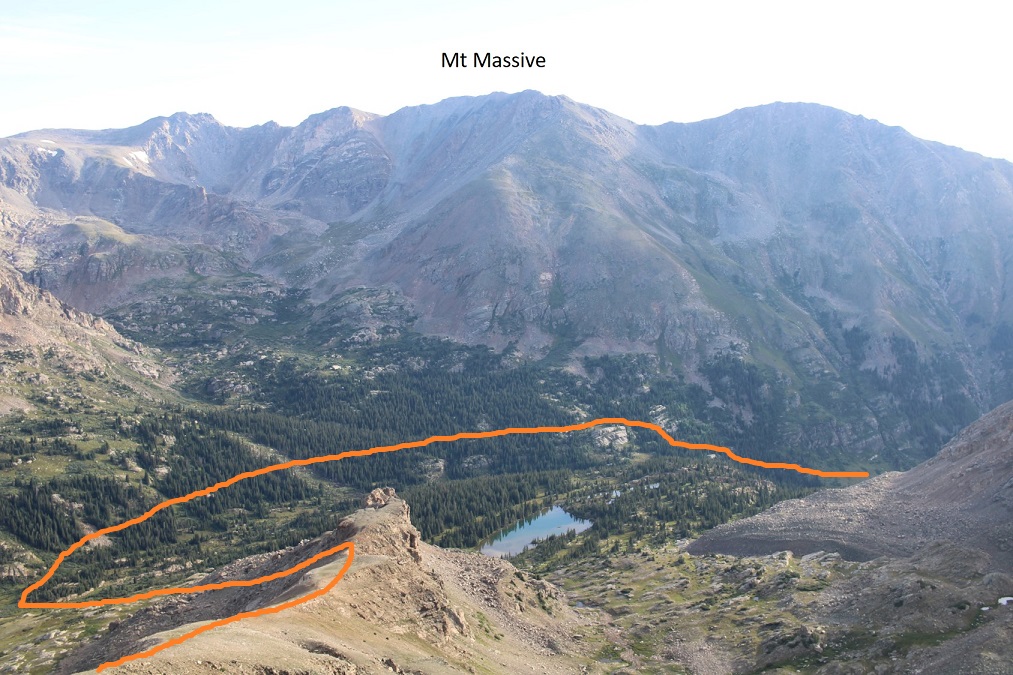
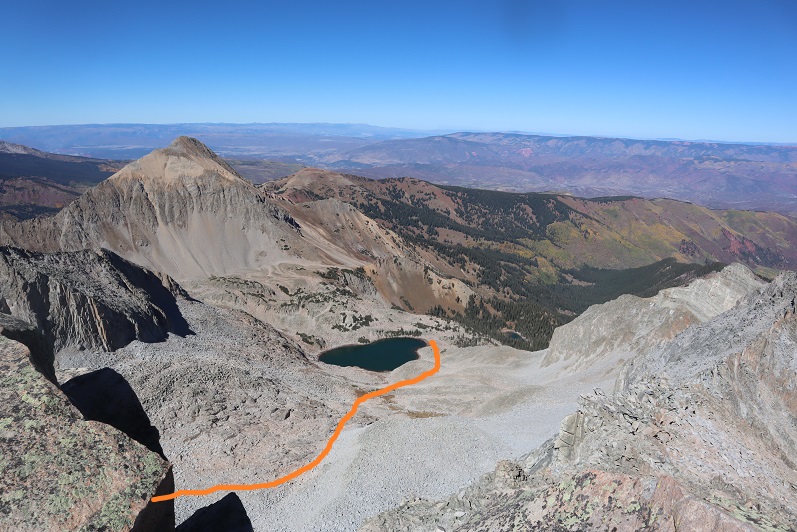
From the summit, here’s a view of Mt Massive, and my route in/out. Now is a good time to get a view of your exit route, and the avalanche run-out you’re aiming for on your way back
I turned and re-traced my steps back down the ridge
Then back down the scree towards the basin and North Halfmoon Creek
Here’s my route across the creek and staying at 11600’ until I met back up with the trail
After passing the avalanche debris I was quickly able to hook back up with the trail
And follow it back to the trailhead
I made it back to my truck at 10:30am, making this a 9.81 mile hike with 3162’ of elevation gain in 6.5 hours.
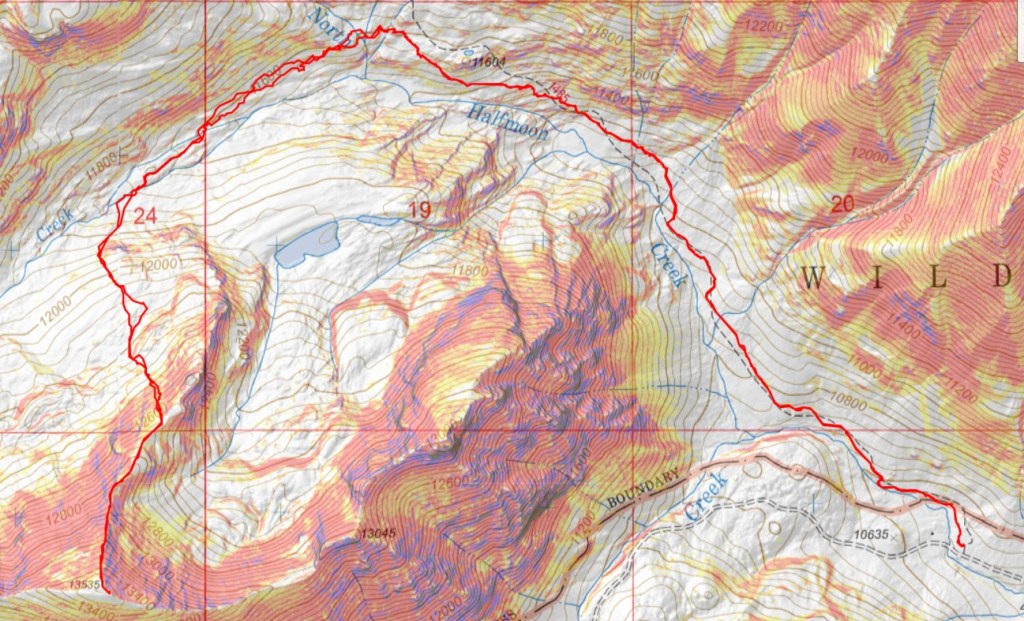
This was actually my second attempt on Sleeping Sexton: I was here last week but got turned around at the false summit due to getting ‘buzzed’. I figured it was for the best however, because I had done some serious route finding that morning and now I could provide a clear and useful GPX file for the route, instead of one with a lot of attempts that didn’t lead anywhere.
I made it to the Maroon Bells welcome station, and this time the attendant recognized me. We chatted for a bit, as he was interested in some of the summits I was doing. Then he referred me to talk with someone at their offices in town, and we’re basically best friends now.
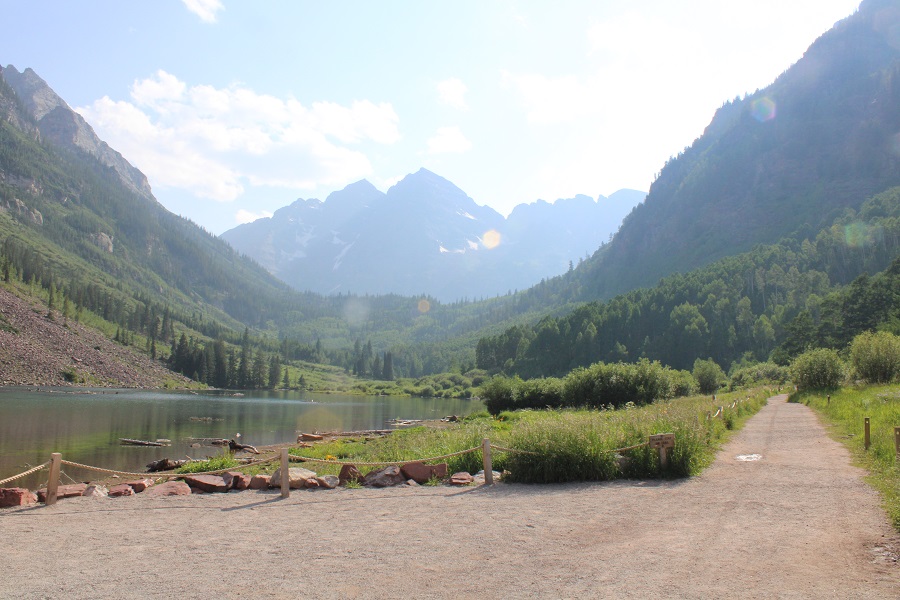
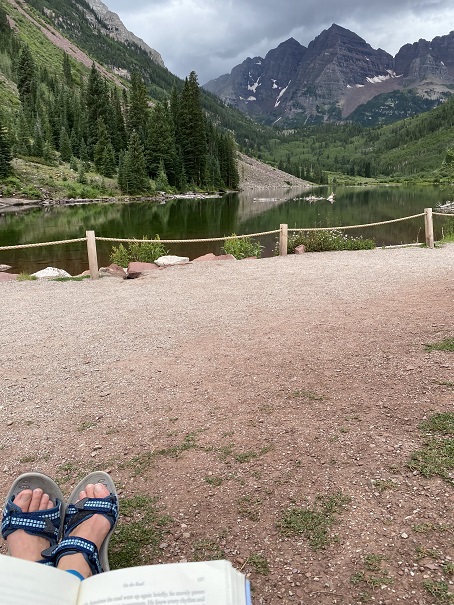
It was raining when I arrived, but people were walking around Maroon Lake anyway.
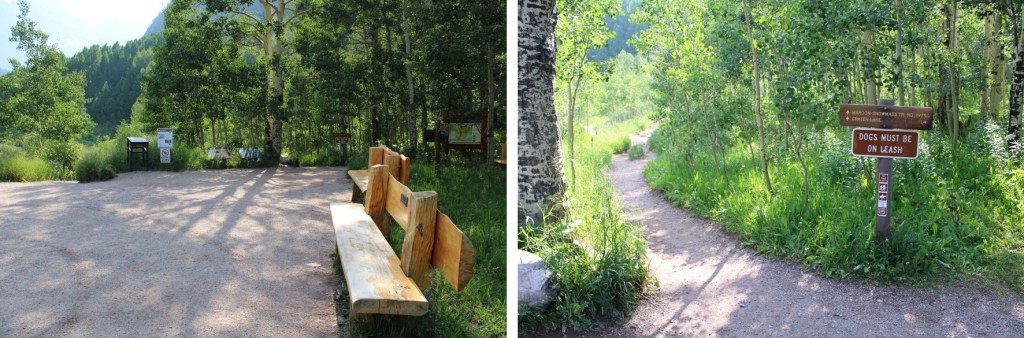
I was on the trail at 2:15am.
From the parking area, here’s an overview of the route above treeline to the false summit
The trail starts by skirting Maroon Lake, then taking the Crater Lake trail southwest.
There was a full moon out, so I didn’t need my flashlight.
At the junction for Crater Lake I continued following trail 1975 northwest. This is the trail you take if you’re doing the Northeast route for North Maroon Peak. There are camping spots just before the next junction.
The trail continues to be a well defined, class 1 trail. At about 10775’ there’s another junction. If you’ve hiked North Maroon Peak before, you’ll recognize this trail. I turned left here and crossed the creek, following the North Maroon Peak Trail (still class 1)
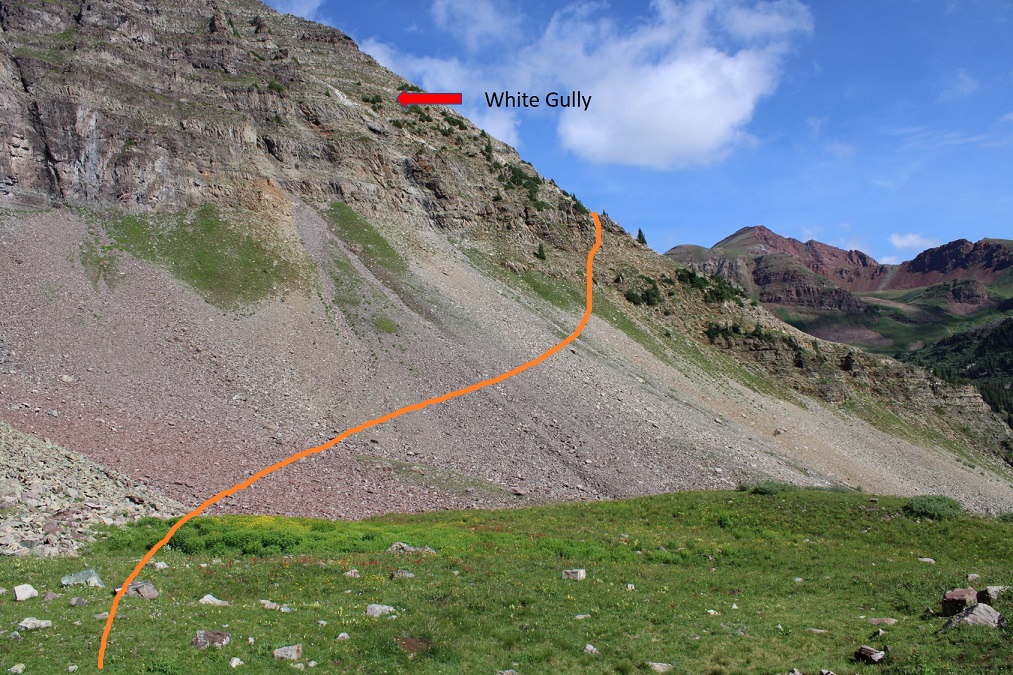
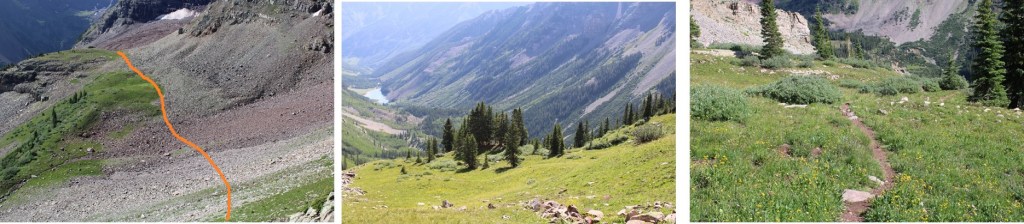
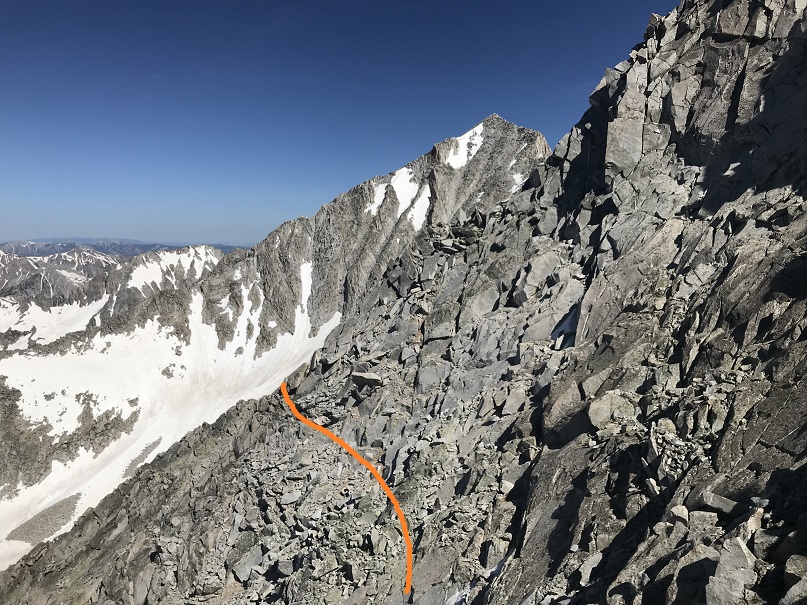
Here’s an overview of the trek to the false summit (or ‘the crown’) from the creek crossing. I followed the North Maroon Peak’s Northeast Ridge Route until I made it to tundra, at about 11,600’. I then left the trail and headed northwest, behind this outcropping, to the base of the white gully. I then trekked up the ridge and followed the white gully until it ended. Here’s a basic overview.
Here are some step by step photos of the way I accessed the white gully: I followed the North Maroon Trail to treeline
At 11,600’ I left the North Maroon Trail and headed northwest
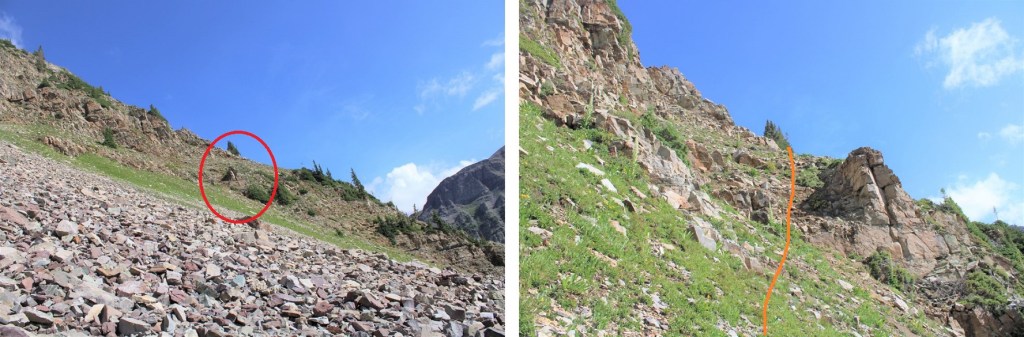
Here you can see the base of the white gully. I didn’t want to climb straight up the gully, as it was very steep. Instead, I accessed the ridge, and followed the ridge to the white gully. (I did this after spending a lot of time last week trying to see if the smaller gullies ‘went’ to access the white gully, and turned back every time because I didn’t have rope. I believe it’s much easier to access the ridge first and then head up).
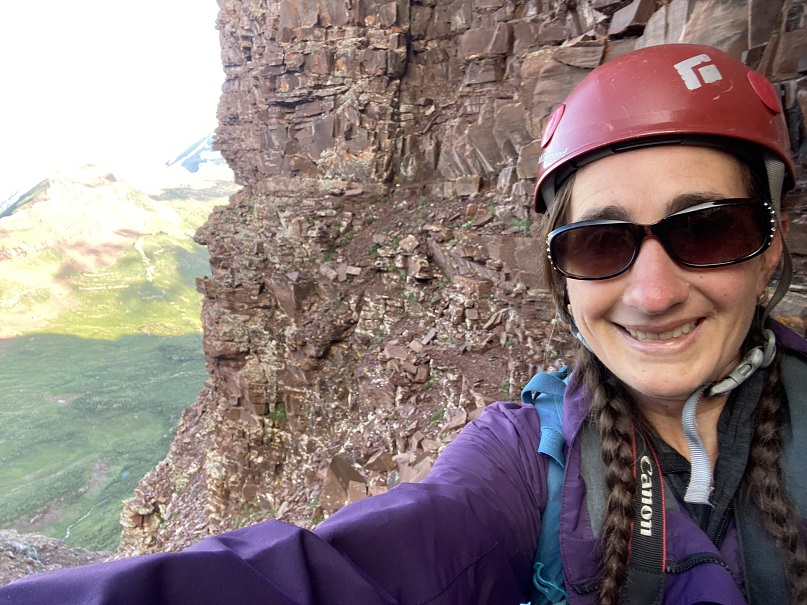
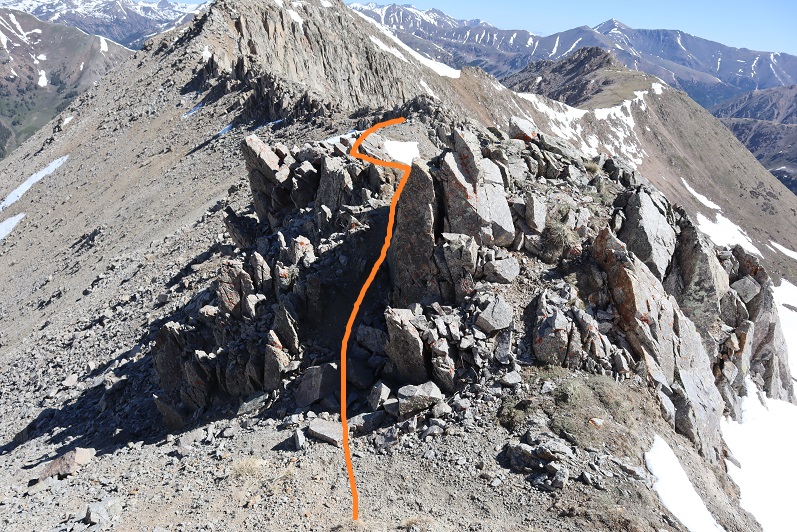
Here’s exactly where I entered and exited the ridge. I found this to be class 2 and direct access. Now’s a great time to put on your helmet if you haven’t already done so.
Once on the ridge I followed it west, staying in-between the ridge and the white gully (to the right of the gully, but left of the ridge). If you look for them, you’ll find game trails here (you may have to duck under some branches to use them though).
Once near the white gully, I found the terrain to the right to be more stable than the white gully itself, especially on my way down.
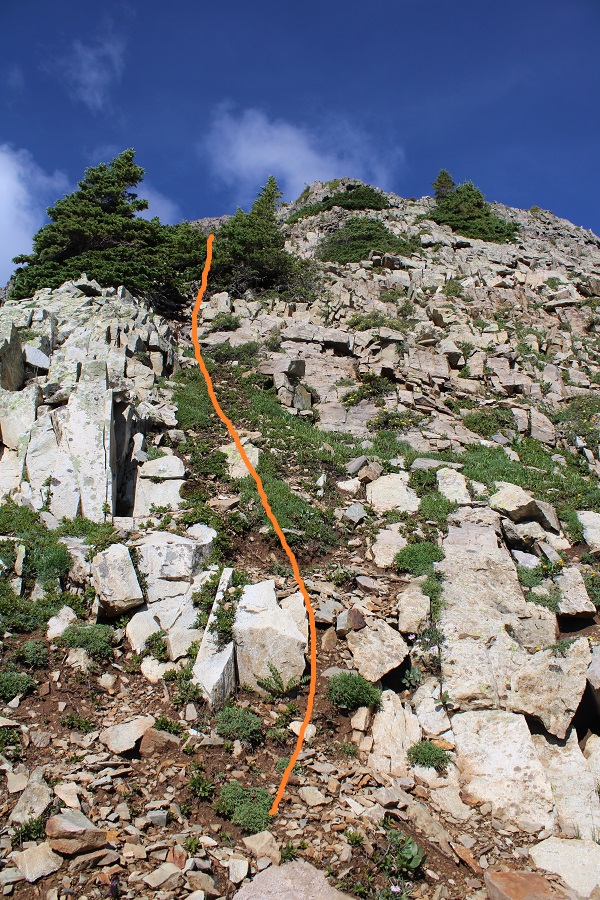
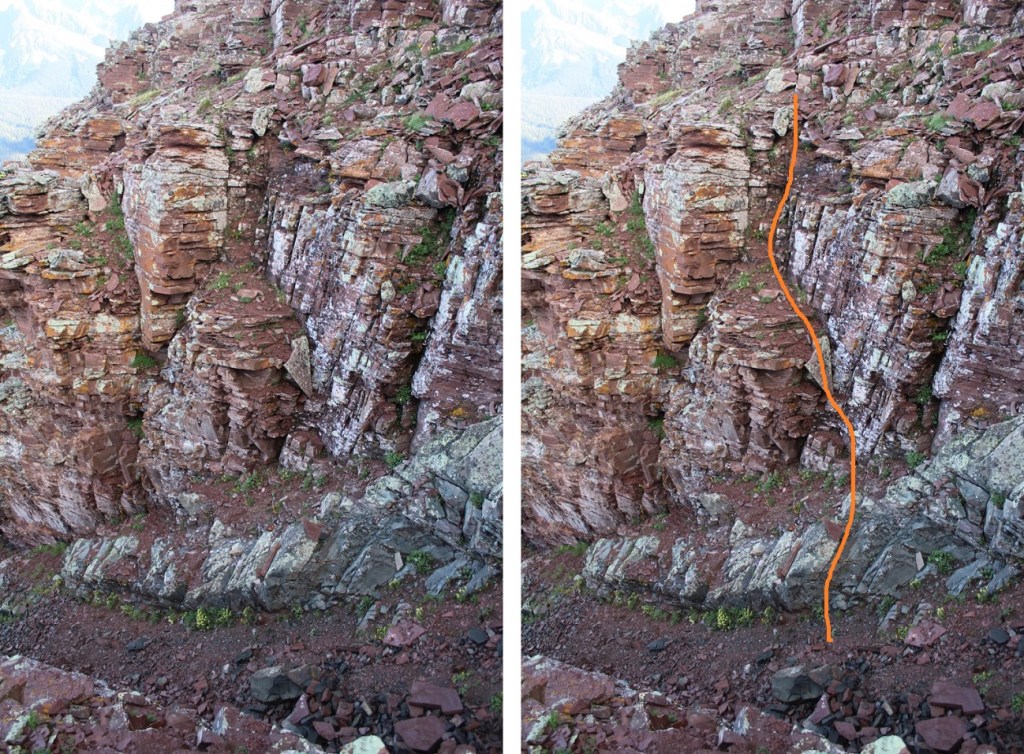
Topping out of the white gully felt class 3
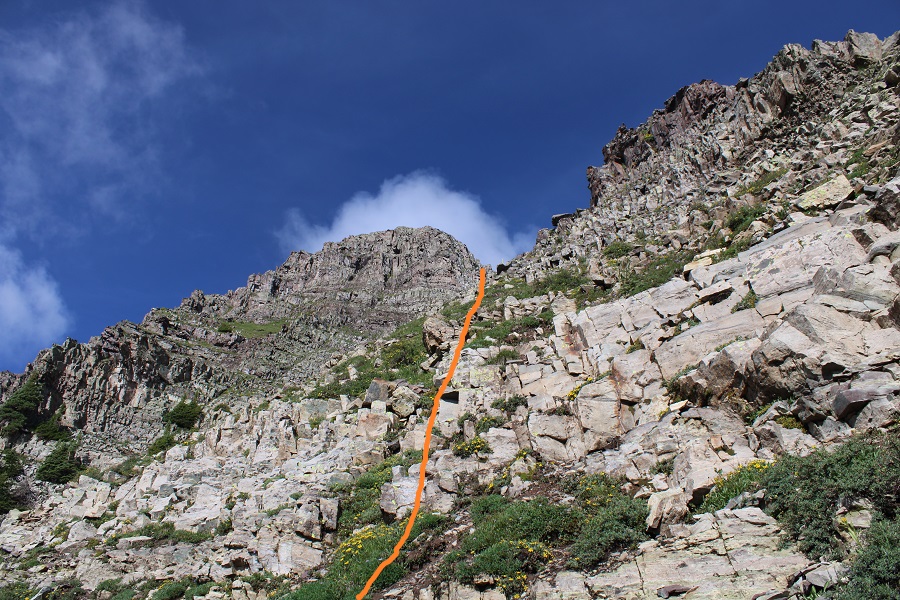
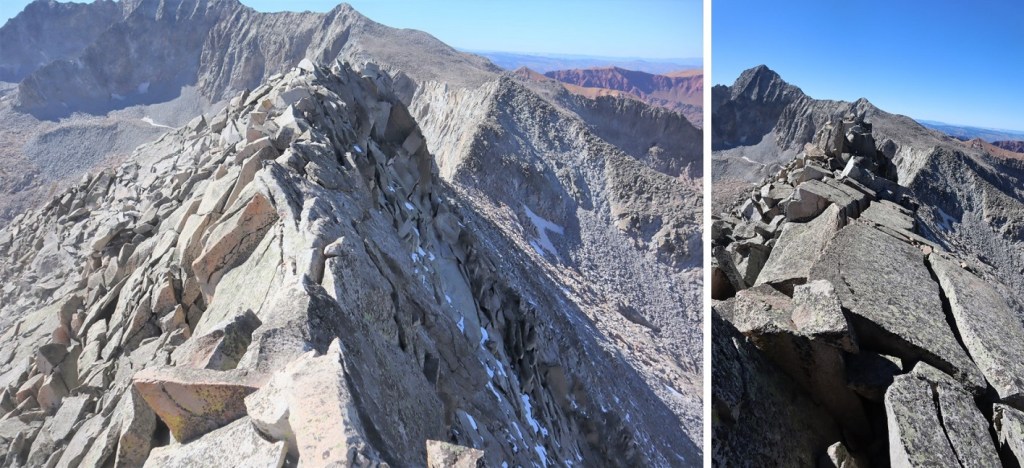
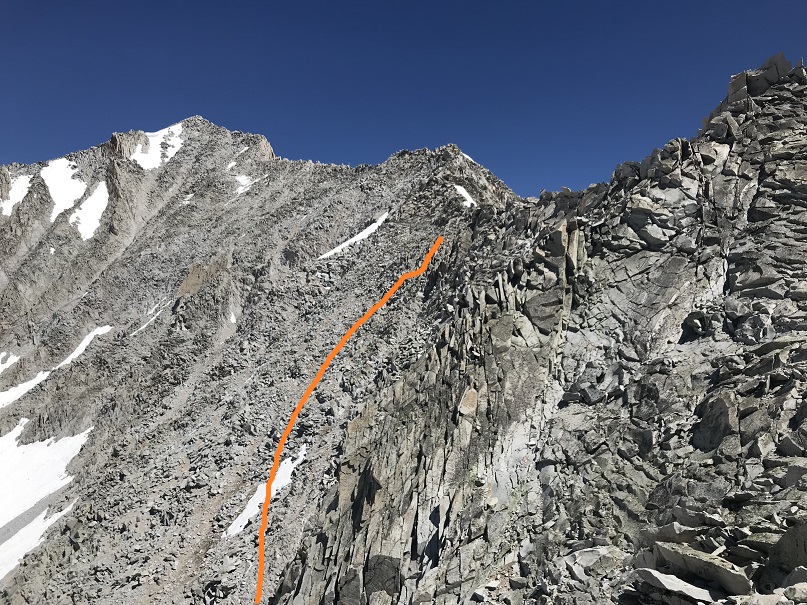
From here it became ‘choose your own adventure’ as I followed the ridge southwest. I started out rounding the ridge’s north side, and then went back and forth between north and south sides of the ridge a few times. There are cairns here, and nothing is more difficult than class 4. In fact, if you’re extra careful/spend a lot of time route finding, you can probably keep this at mostly class 3. Here’s the route I took:
From the top of the white gully I rounded the corner and made my way back to the ridge. It had rained the night before, so I had to be extra careful with every foot placement (wet = slippery)
Once back on the ridge I followed it for a ways
Before hitting a bit of a shelf and crossing over to the south side of the ridge
I followed the ridge to the false summit / ‘the crown’
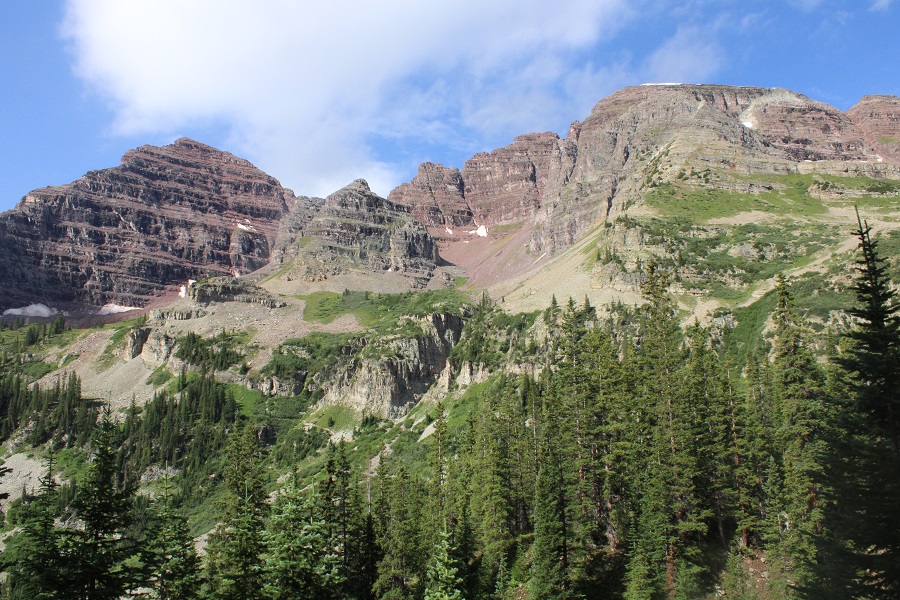
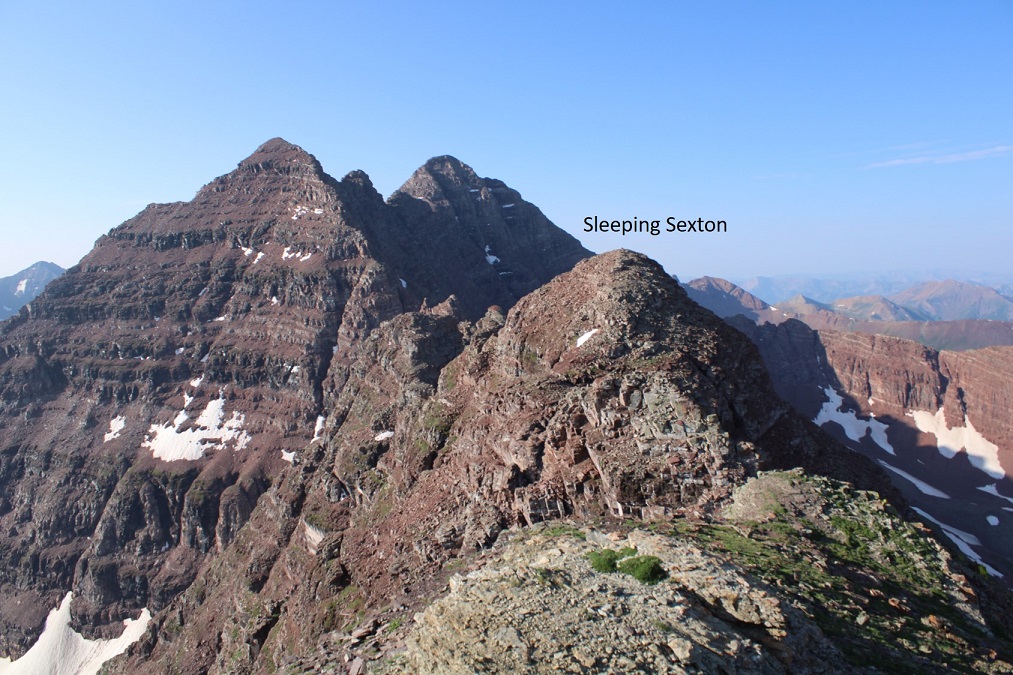
From the false summit you can see the true summit of Sleeping Sexton
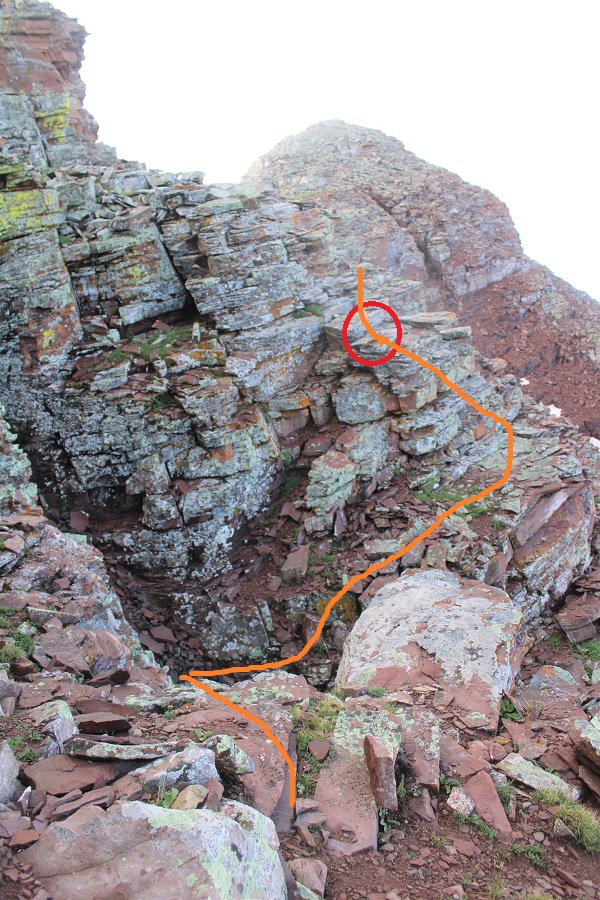
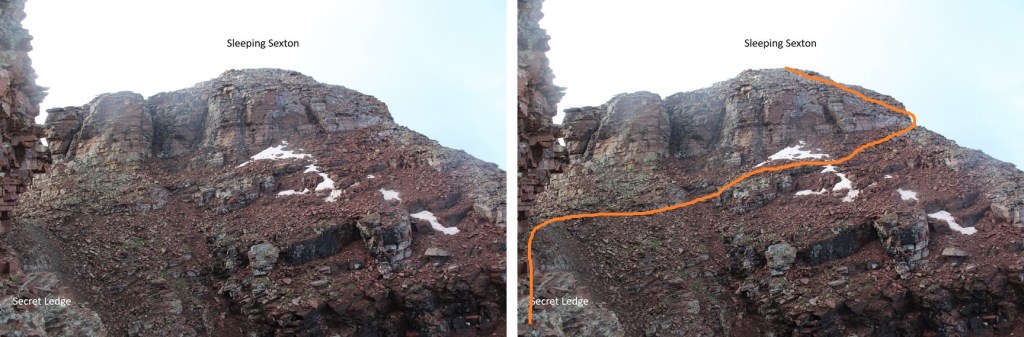
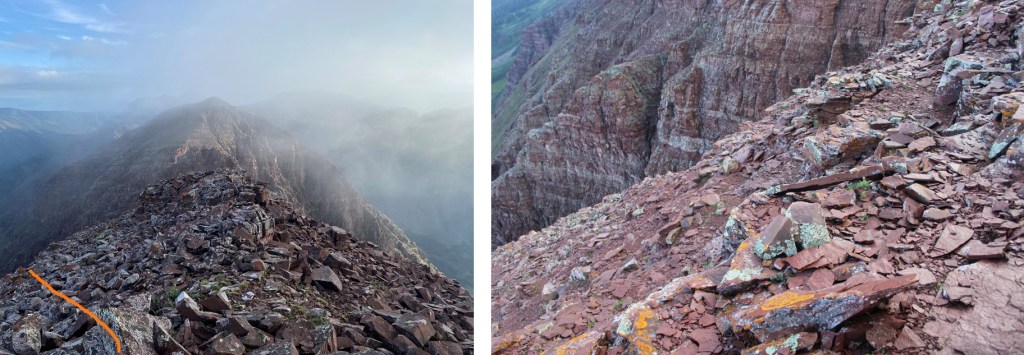
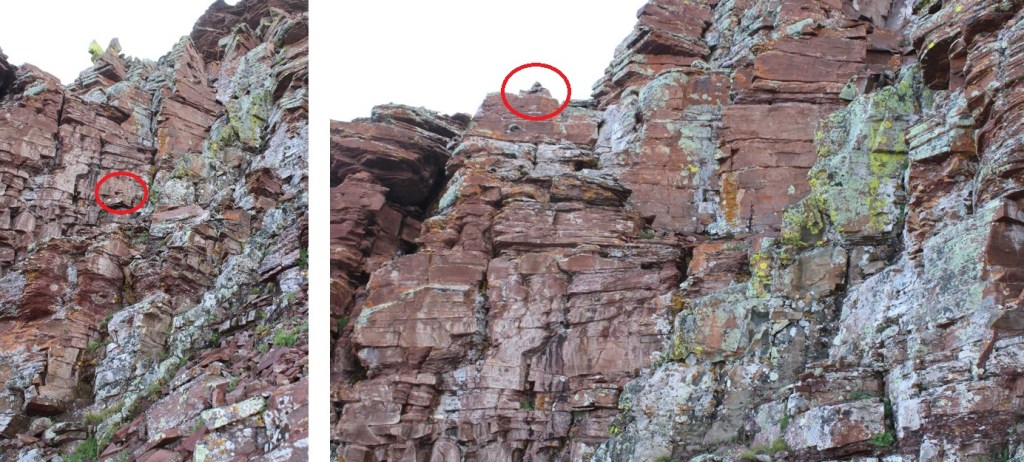
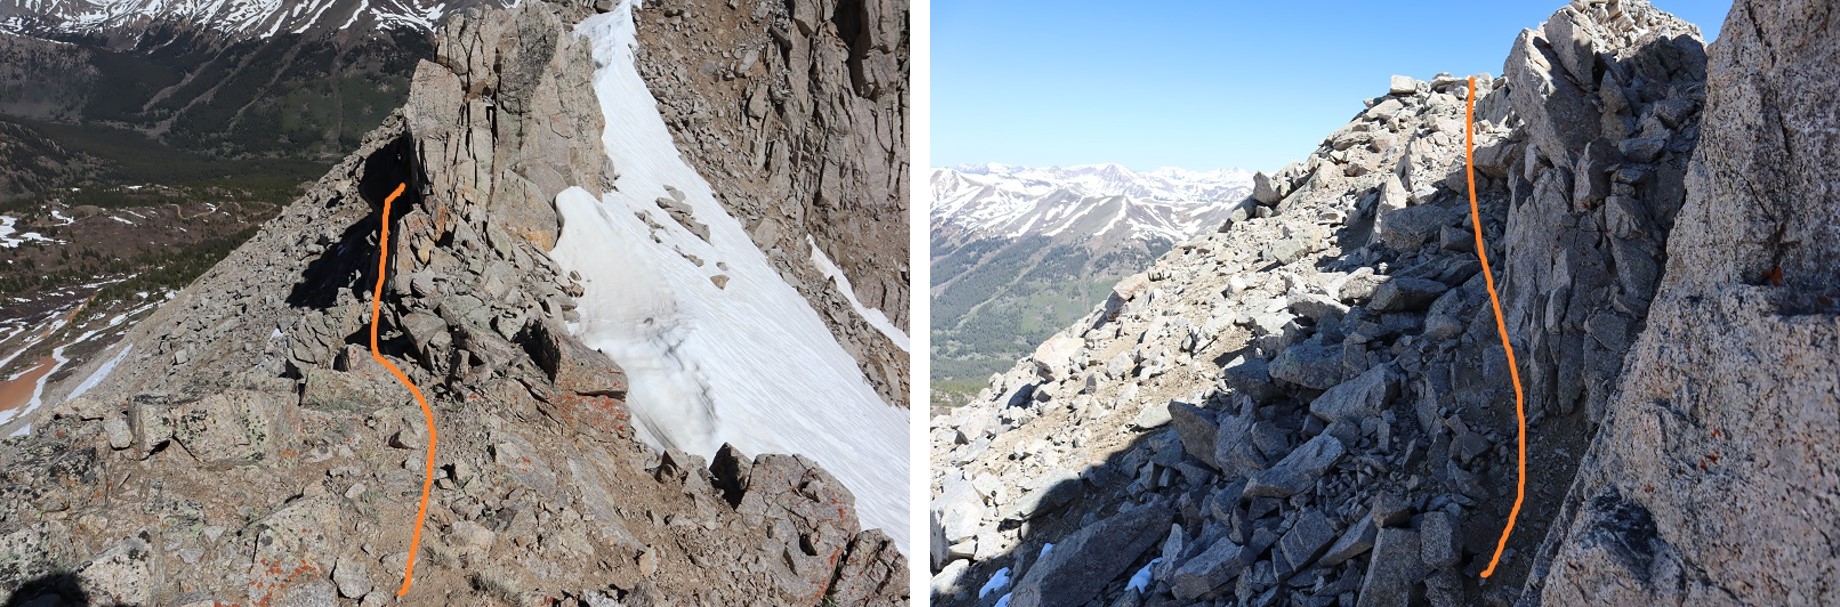
And now, the fun route finding begins! I descended the false summit 125’ and crossed a gully. There were cairns here to help in the crossing (circled in red). These are steep and go at class 3/4
After crossing the first gully I descended once again, another 160’
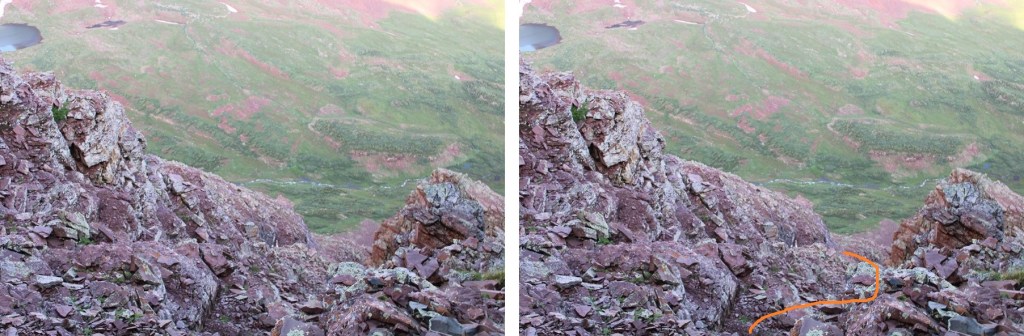
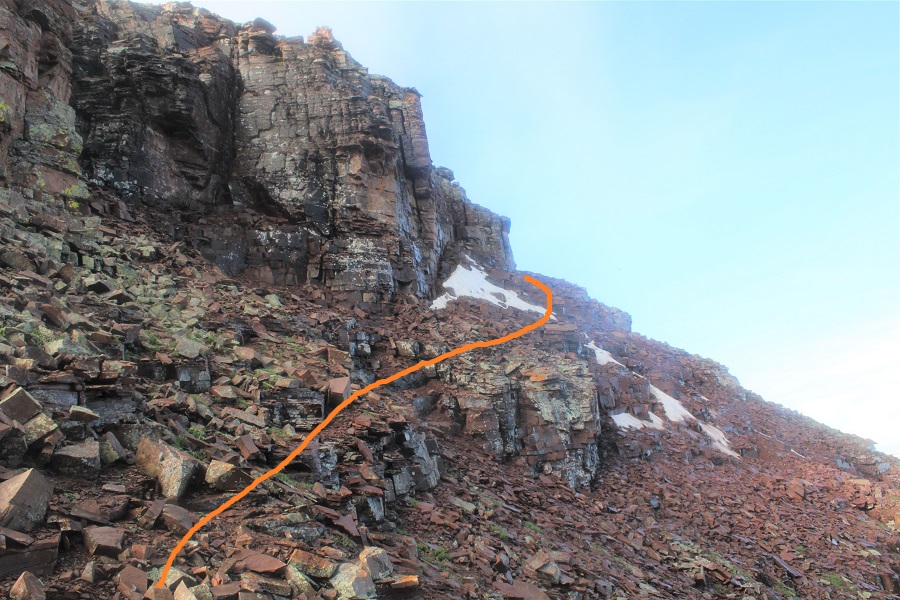
I was now at 13,130’, and parallel with the saddle between Sleeping Sexton and the false summit. I followed the contour of the mountain to the ‘secret ledge’. Here’s what that looks like heading in
I crossed the ledge to the ‘saddle’, then skirted the side of the mountain and headed up to the summit
The ledge is not as bad as it looks. There’s a cairn here (circled in red) DO NOT DESCEND HERE. Instead, use it as a reference point and stay level with it (especially on your way back) and continue following the ledge. If you do this, it stays class 2 to the saddle.
From there it was an easy trek to the summit, first skirting the mountainside
And then ascending the ridge
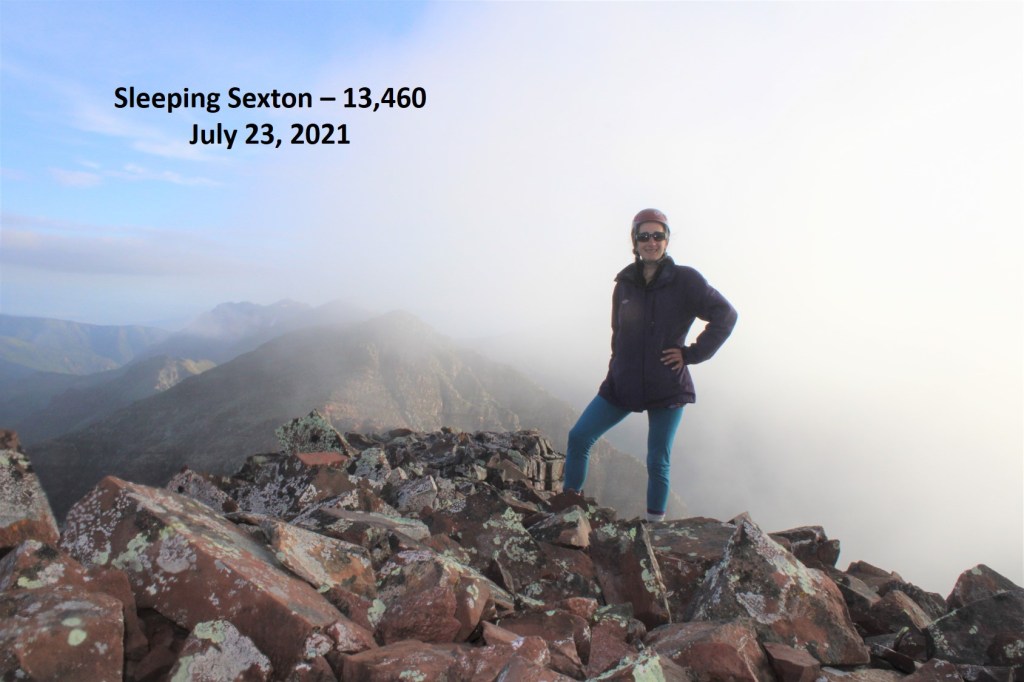
I summited Sleeping Sexton at 6:45am, just as the weather started rolling in
Sleeping Sexton:
Since the weather wasn’t cooperating I didn’t stay long. I turned and headed back the way I’d hiked in. Here’s looking back at the false summit / ‘the crown’
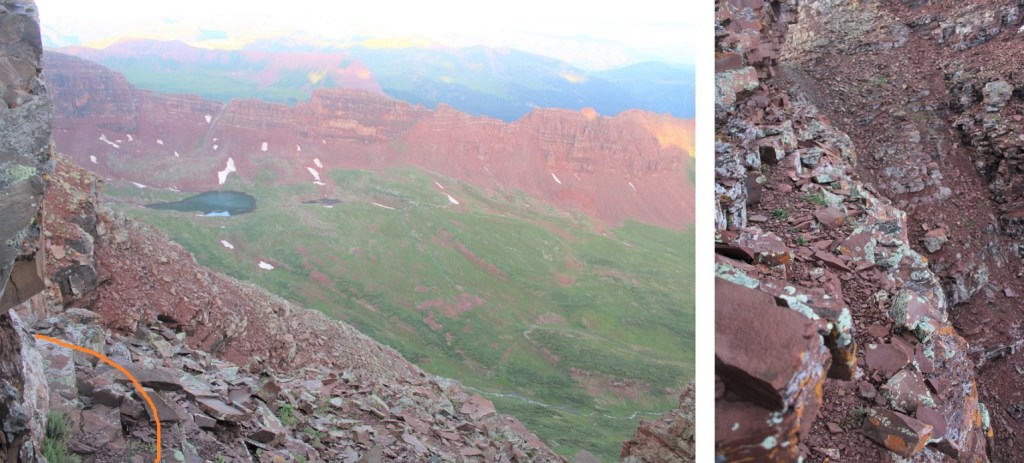
And a view making it back to the ledge
Here are some more images of that ledge, looking back. Remember to look for the cairn, and stay level with it.
For reference, here’s the size of the route. The route can clearly be seen over my shoulder (to the left)
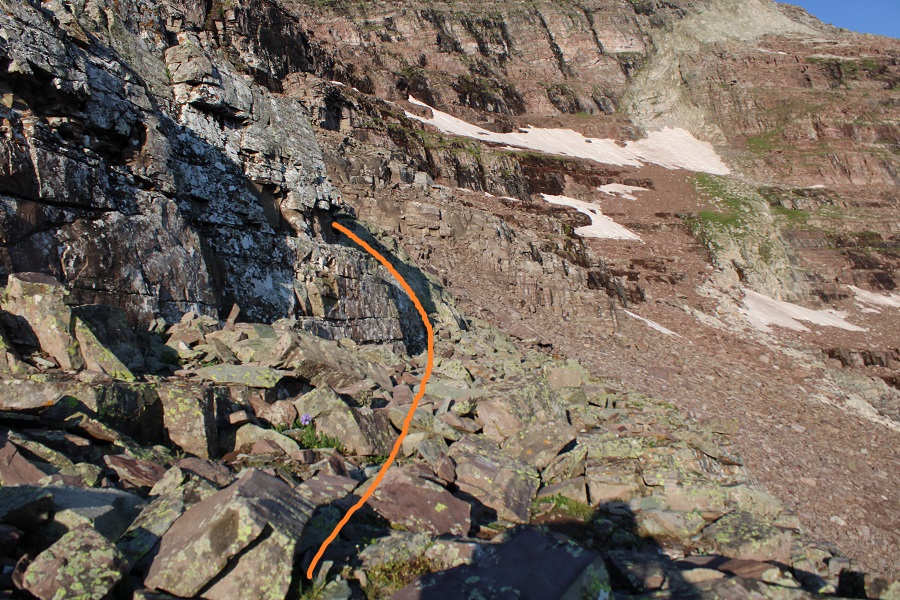
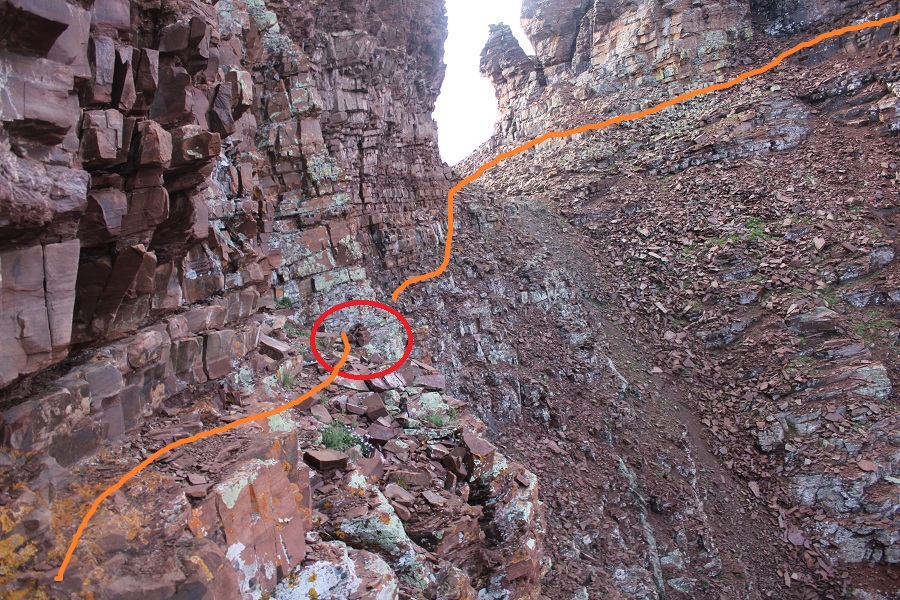
I rounded the corner, and ascended the gully, aiming for the cairns
Crossed the next gully
And gained the ridge to the false summit / ‘the crown’
I actually stayed here for a bit because I had cell service. I let my family know I was ok, and downloaded the weather forecast for the next day. However, eventually the clouds told me to get going.
Clouds rolling in:
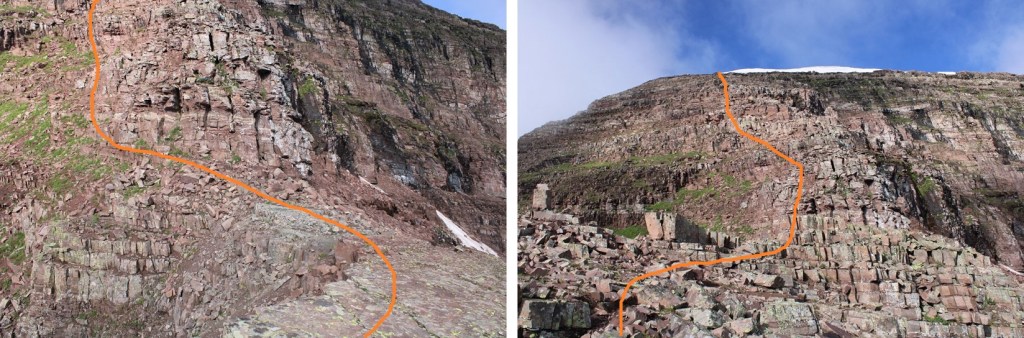
Here are some pictures of my way back to the white gully
Back down the white gully to the ridge
And from the ridge back to the trail
Once back on the trail it was an easy, class 1 hike back to the parking area.
I made it back to my truck at 11:30am, making this a 12.7 mile hike with 5156’ of elevation gain in 9 hours, 15 minutes.
It was still early in the day, so I ate lunch by Maroon Lake, read for a bit, looked at topo maps for tomorrow, and jotted down notes in my journal before making it an early night. Oh, I forgot to mention the goats: They were the same two goats I saw last week, and if for no other reason than them, wear your helmet until you make it back onto the class 1 trail: They were kicking rocks down the gullies the entire time I was there.
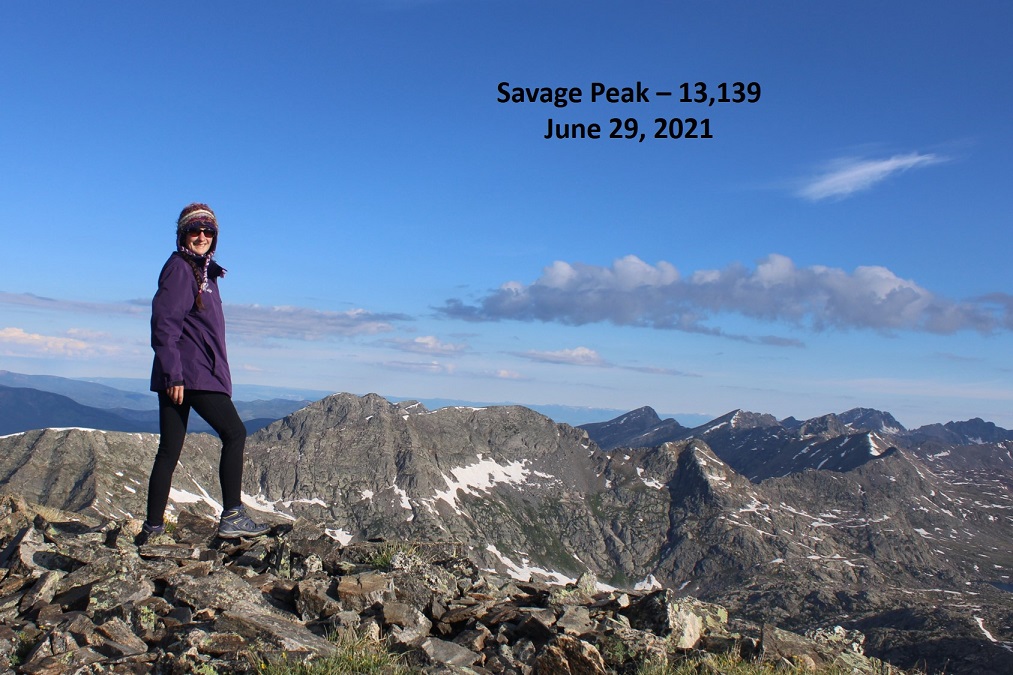
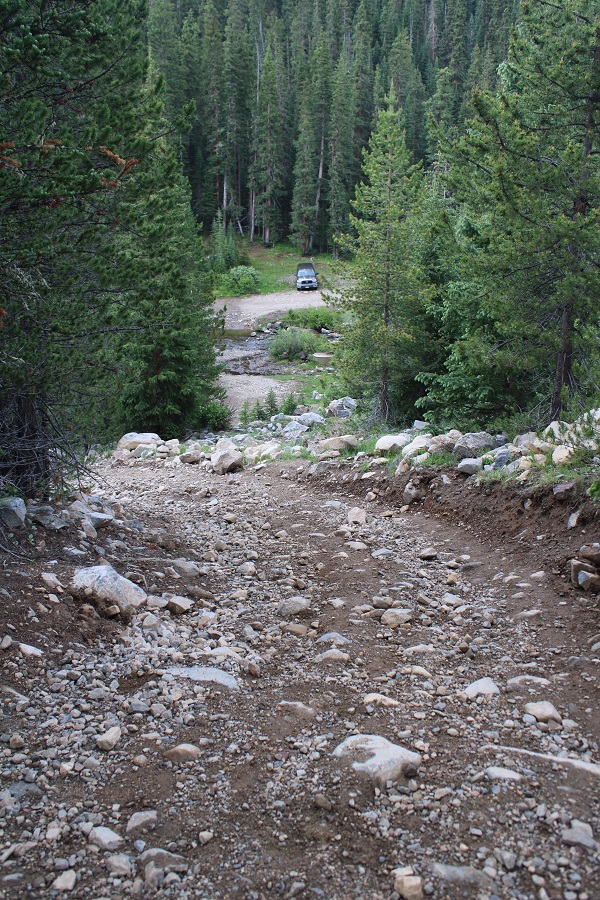
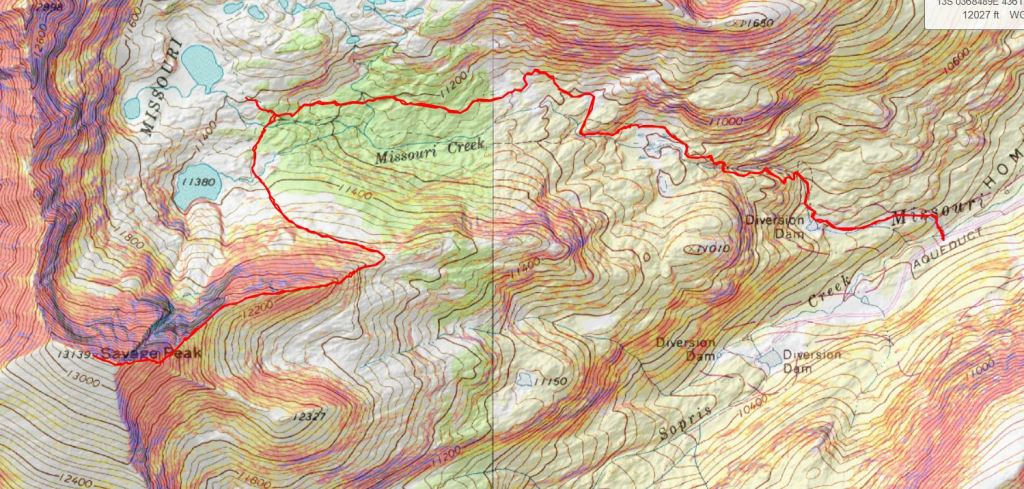
The storms this week have put a damper on my hiking plans. Most of the peaks on my immediate goal list are too long to complete before the storms hit, so when I saw the weather was good near Savage Peak I jumped on the chance to get in a quick weekday summit. I drove past the Missouri Lakes trailhead and drove the 4WD road to the stream crossing. I didn’t need to put my truck into 4WD (which was good, because it’s still not working). There were some large puddles to splash through on the way in.
I parked at the stream crossing, and wore my sandals to cross the river and start the trail
The road curves around a bit, but you can just go straight up the hillside and pick up the road from there. The stream was only a couple of inches deep. You could drive across it, but it only saves you about 100 feet of hiking, so it’s not really worth it.
I followed the road for about half a mile to the diversion dam, where the road ended and the Missouri Lakes trail began.
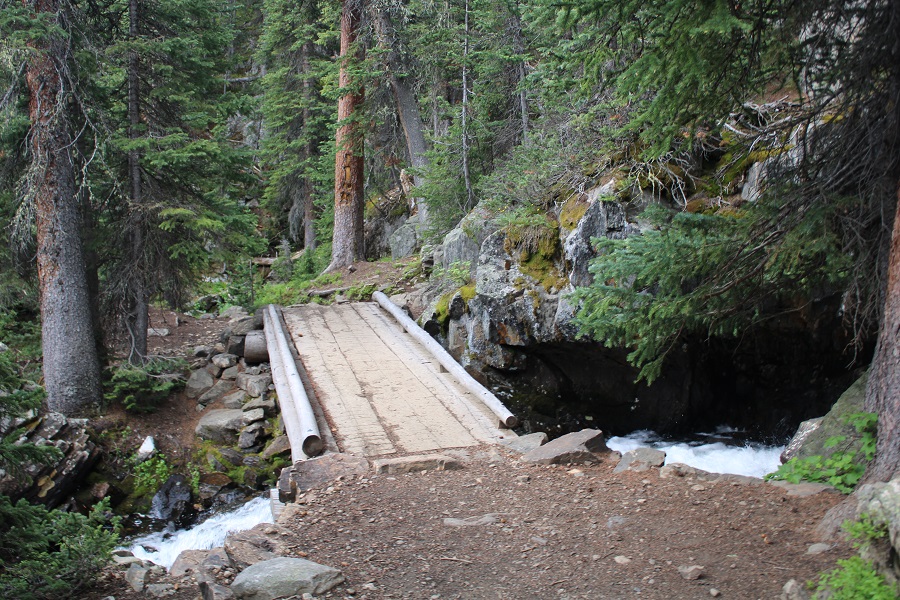
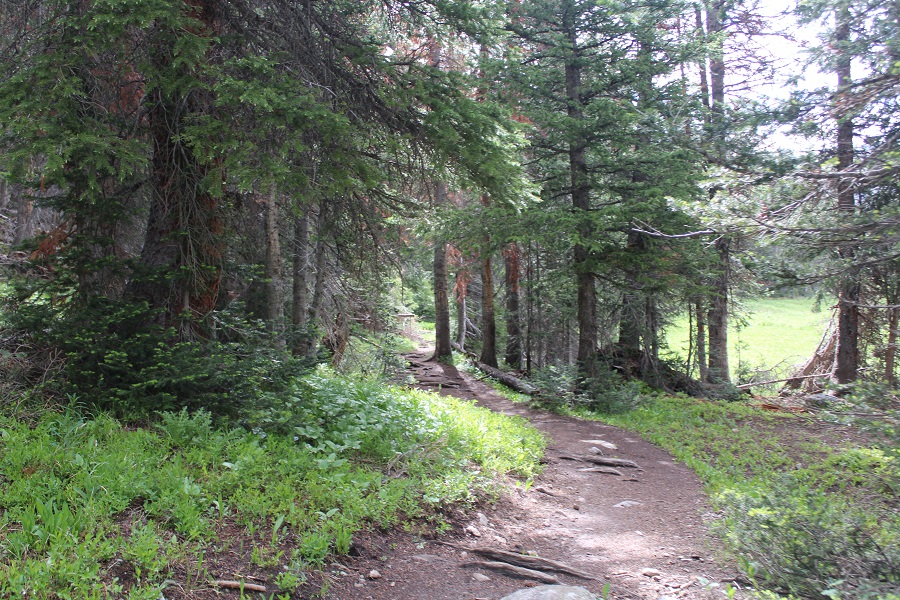
This was a class 1 trail that followed Missouri Creek. I loved how easy it was to follow up and into the basin, crossing the creek several times on sturdy bridges.
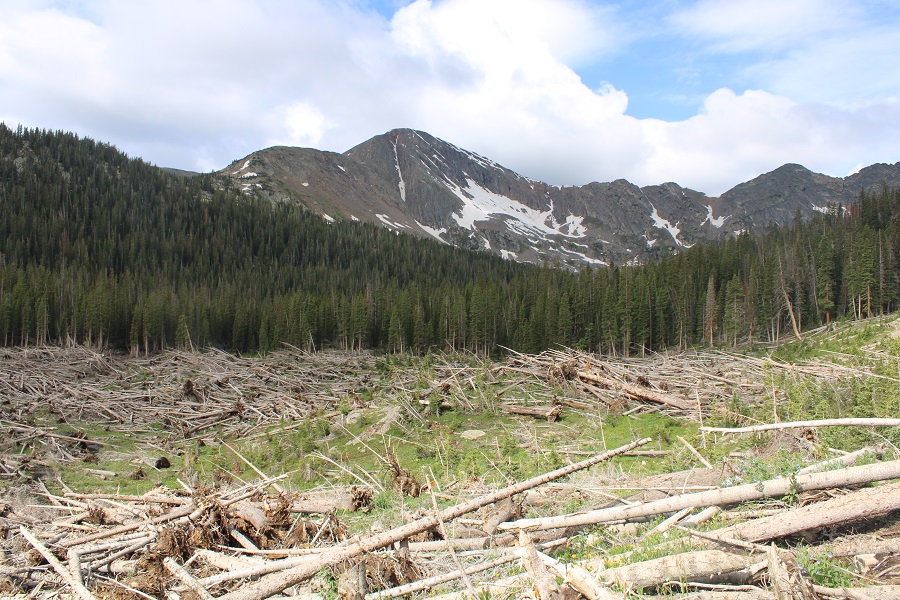
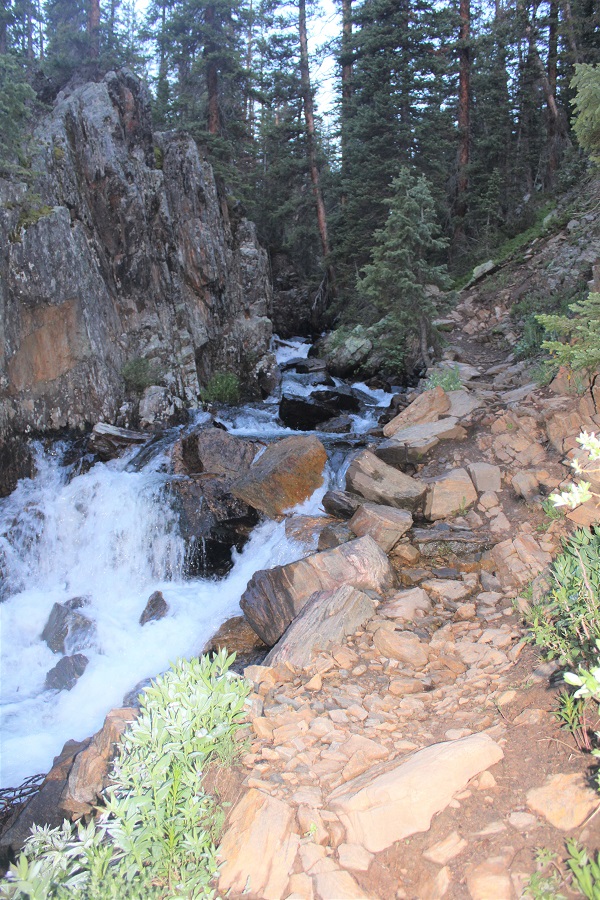
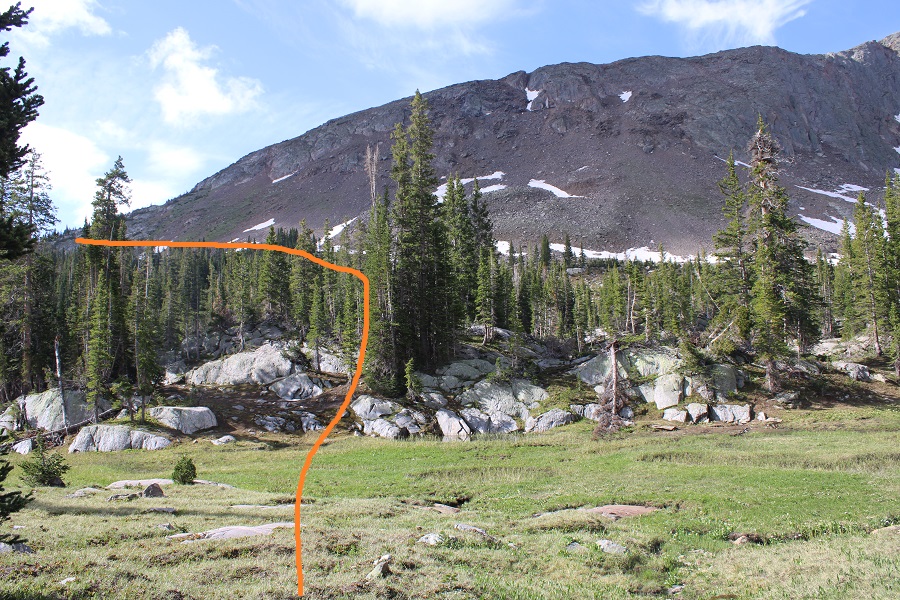
I followed the trail west. At about 11,000’ I came upon avalanche debris. The trail was well maintained and easy to follow through the debris.
This is also a good place to get a visual of the route. This is where you’ll be aiming.
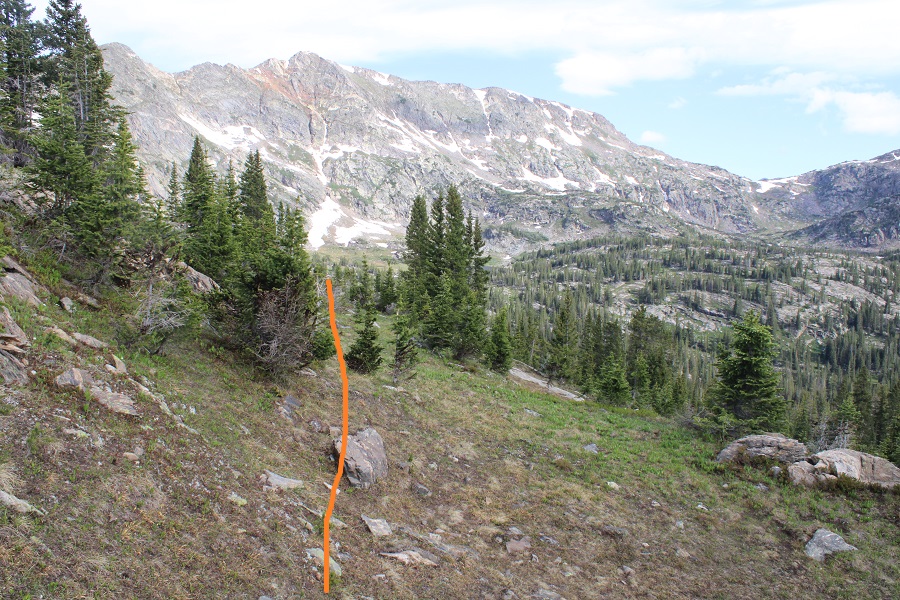
I continued following the well defined trail to 11330’, then left the trail to head south towards the ridge, aiming for a rocky ramp that hugged the side of the mountain.
Once on the ramp, I followed it east to the base of the ridge.
At the base of the ridge I turned right, and followed the ridge west
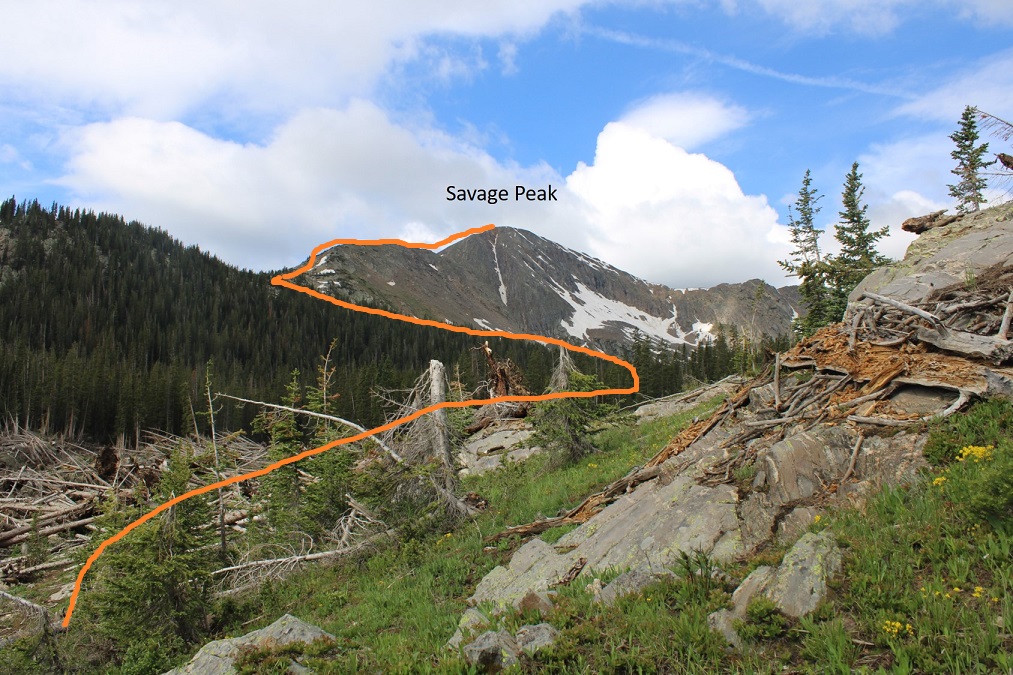
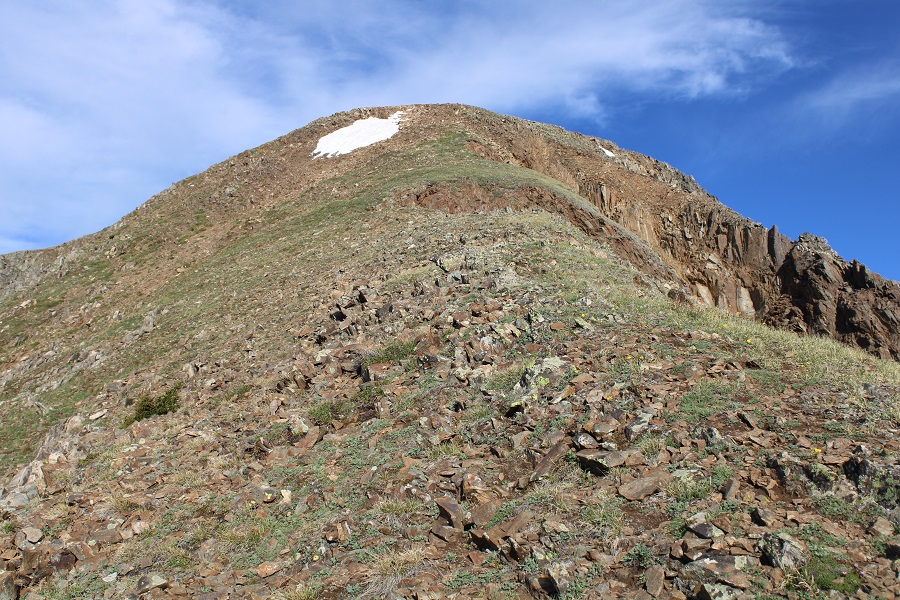
Here’s the first good view of Savage Peak
This is a simple, class 2 ridge hike to the summit.
There is a small false summit just before the true summit
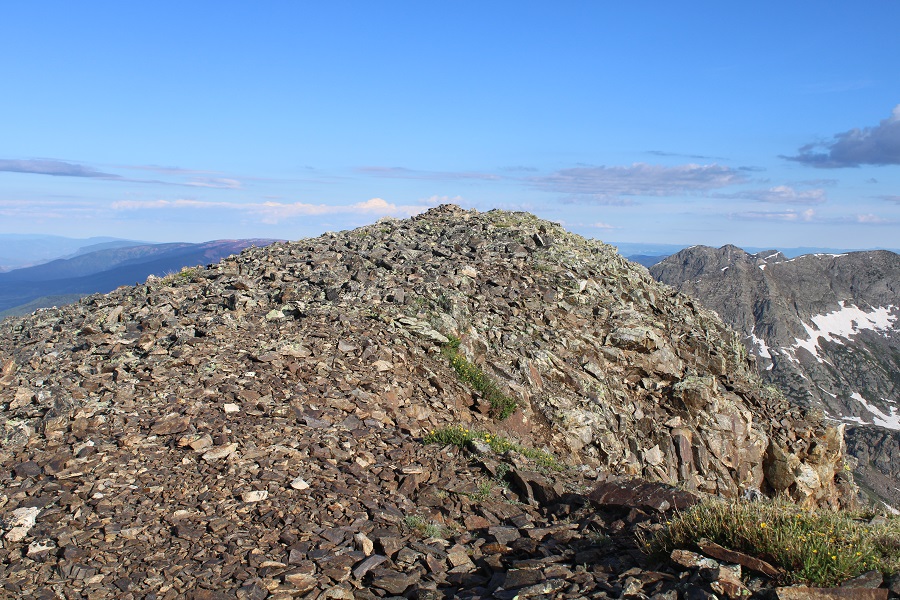
I summited Savage Peak at 7:40am
Savage Peak:
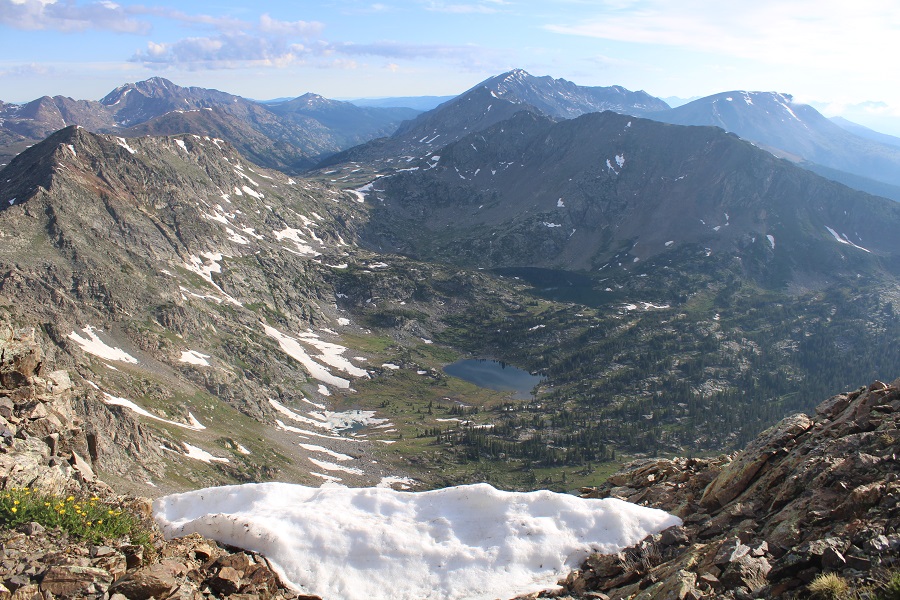
There were some great views of Missouri Lakes
I left a summit register and headed back the way I’d come
Here’s a look down the ridge
Here’s how I exited the ridge
And headed back into the basin
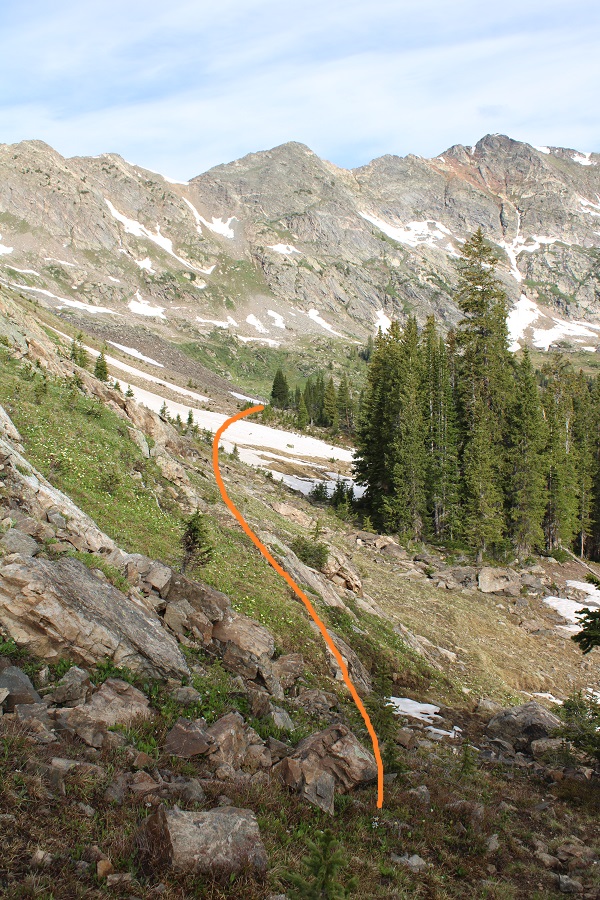
Back in the basin I headed northeast until I linked back up with the Missouri Lakes Trail.
And followed the trail back through the landslide area and across the bridges
Once back on the 4WD road I followed it back down to the stream, and my truck on the other side.
I made it back to my truck at 10am, making this a 9.24 mile hike with 3314’ of elevation gain in 5 hours, just as the storms were rolling in.
Now, off to visit some Hot Springs and get that back window fixed.
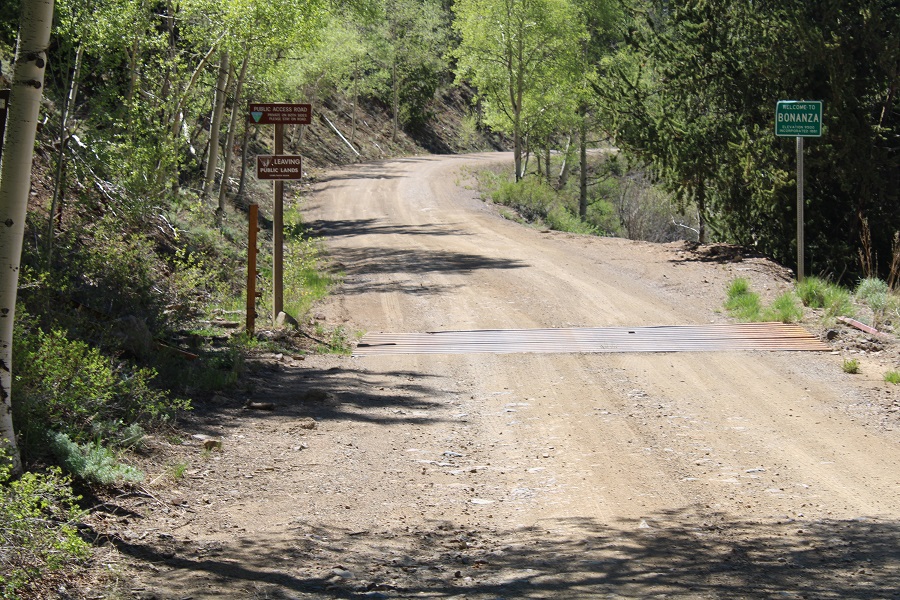
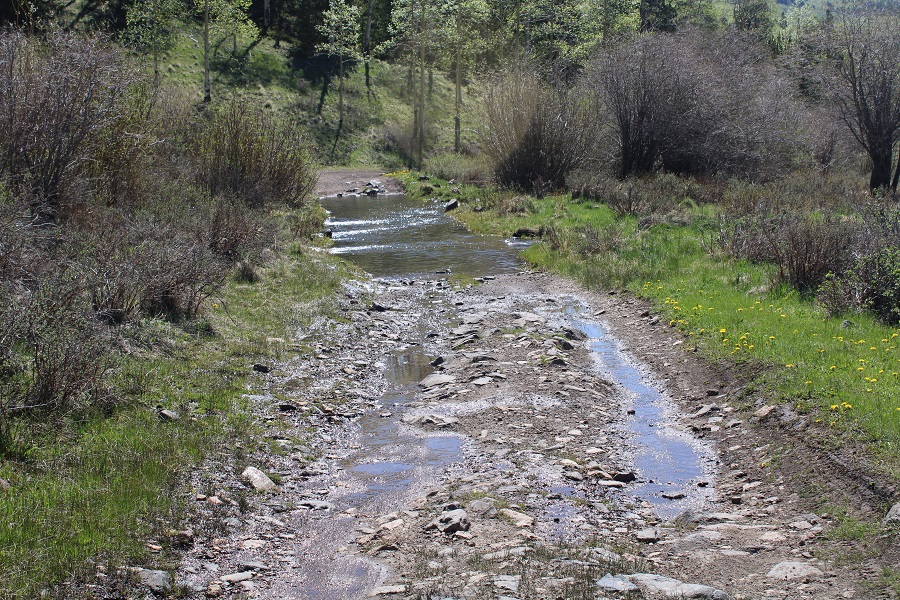
Boy, was that drive in fun! I took LL56 to Bonanza, and then the 862 4WD road. The road was clear to Bonanza, and then the fun began. Notes about 862: It’s narrow, making passing difficult. It’s easy 4WD: In fact, I didn’t put my truck into 4WD (because I couldn’t), but having decent ground clearance was nice. The creek crossing looked more difficult than it was. I’d say the water was 8-10 inches deep.
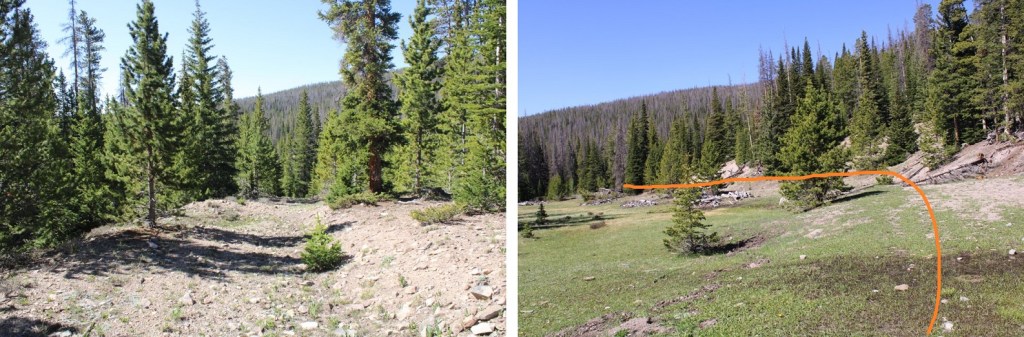
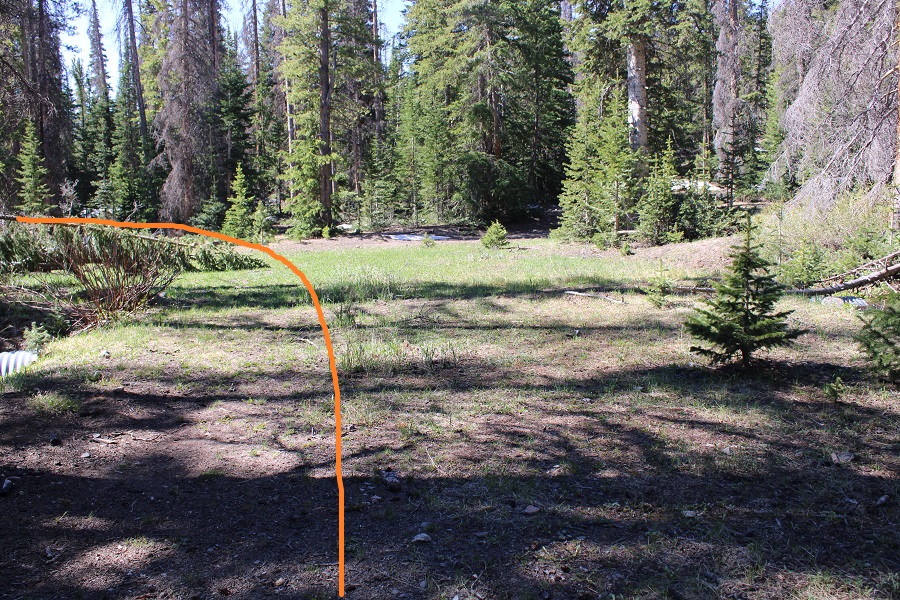
I parked at the junction of 862 and 8622D. There’s a fence blocking off the road here, next to Kerber Creek.
The trail starts just behind the fence, and follows an old 4WD road and Kerber Creek for .3 miles
At this point the road comes to a ‘T’, and since I made this a loop, I ended up coming back to this spot on my way down. Now however, I turned left, and continued to follow the road south.
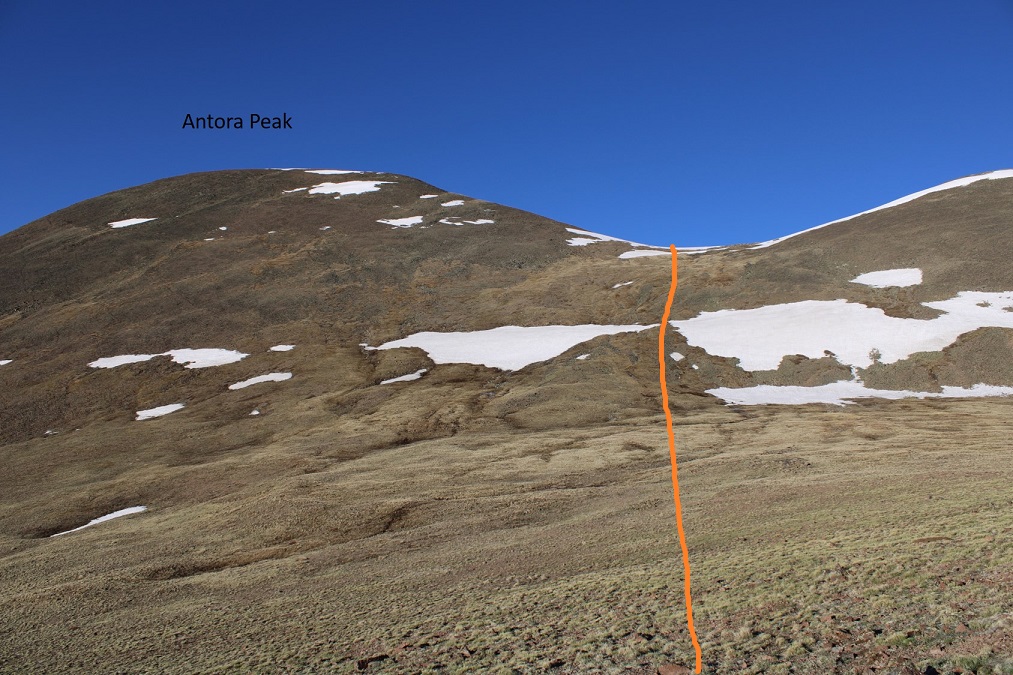
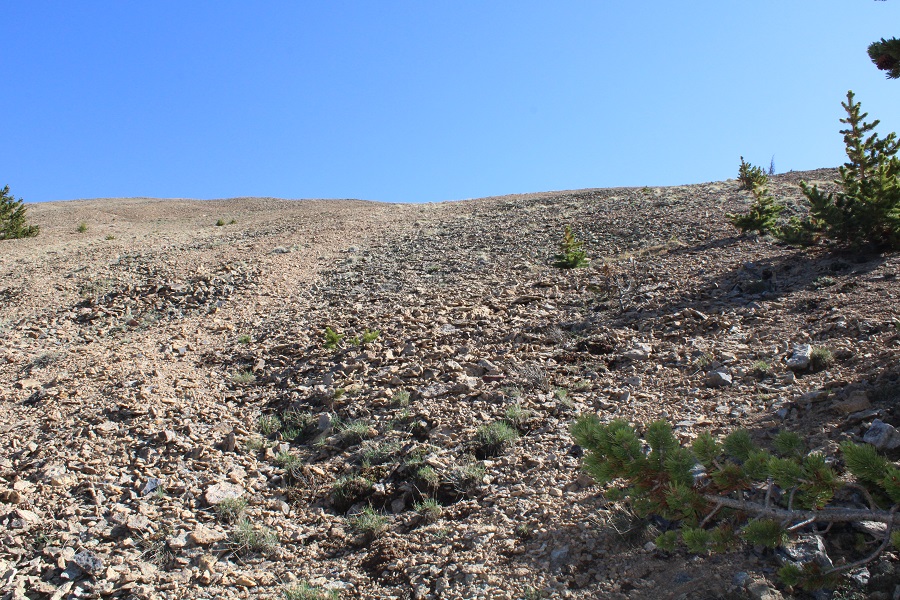
I stayed on this road for another .3 miles, and then left the road to head west and bushwhack up to the ridge. As far as bushwhacking goes, it wasn’t too bad: Not a lot of downed trees, so heading west and staying west was easy.
At treeline, there’s a rock outcropping to skirt to the right
And then I followed the ridge northwest.
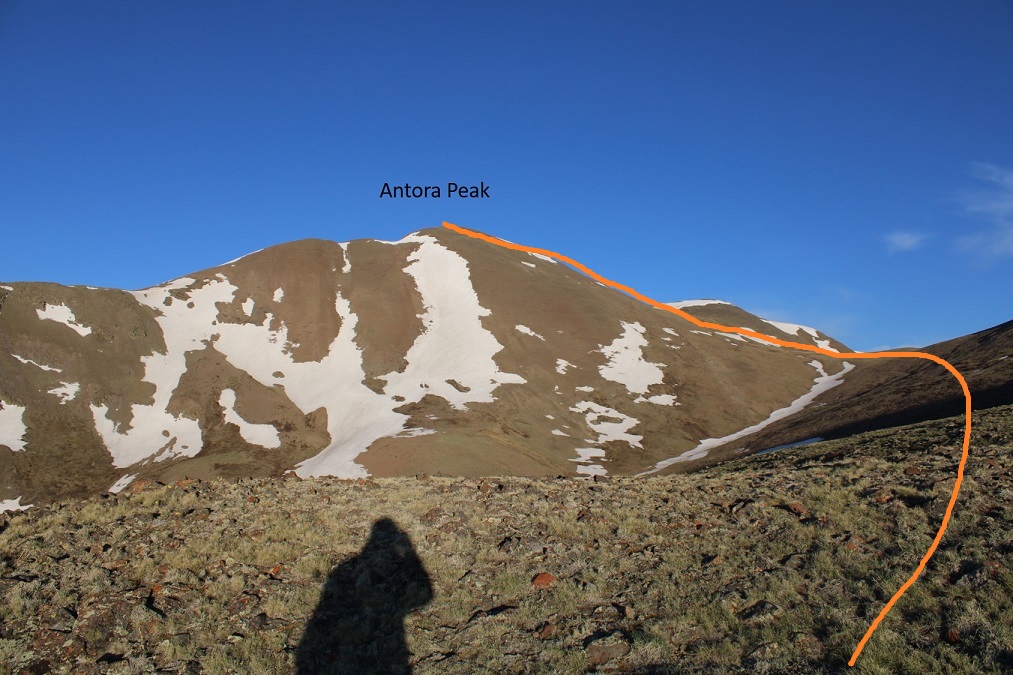
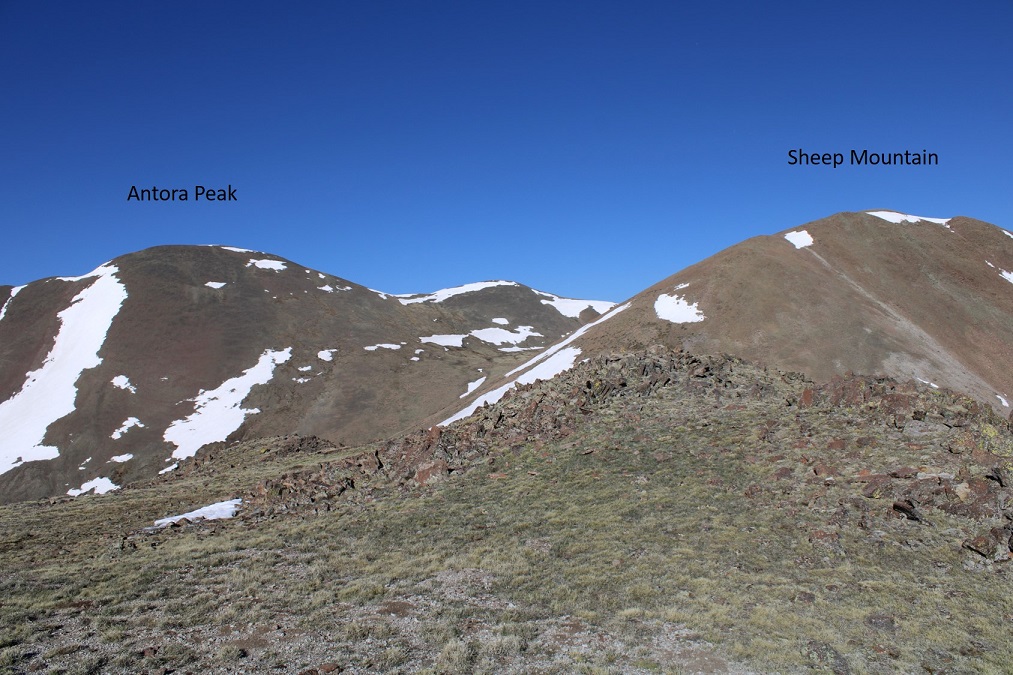
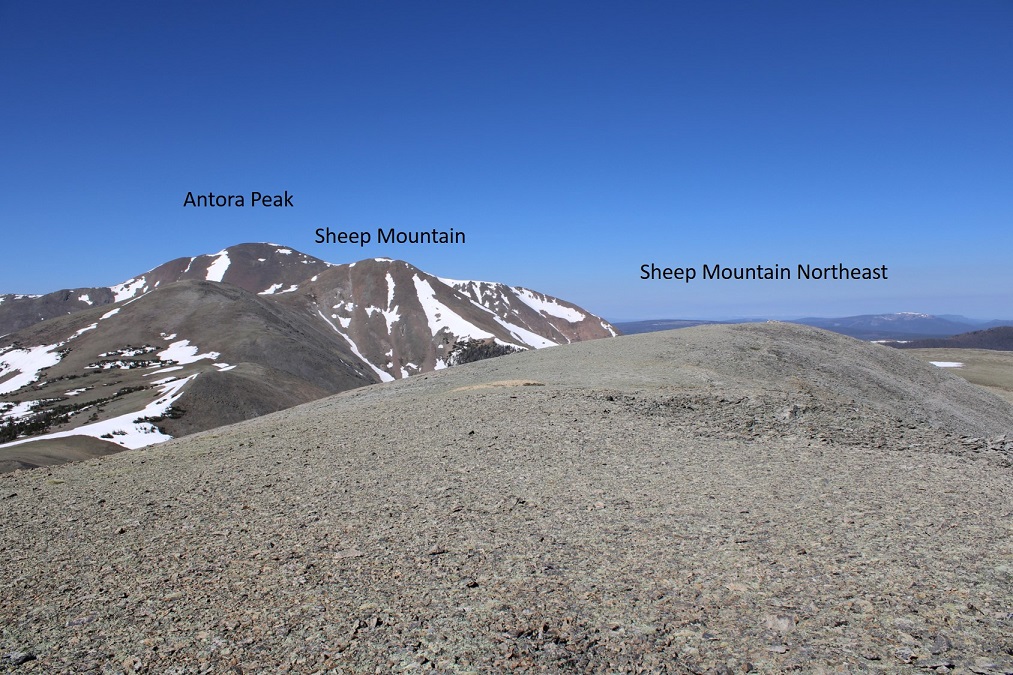
Once on the ridge I could see Antora Peak to my left
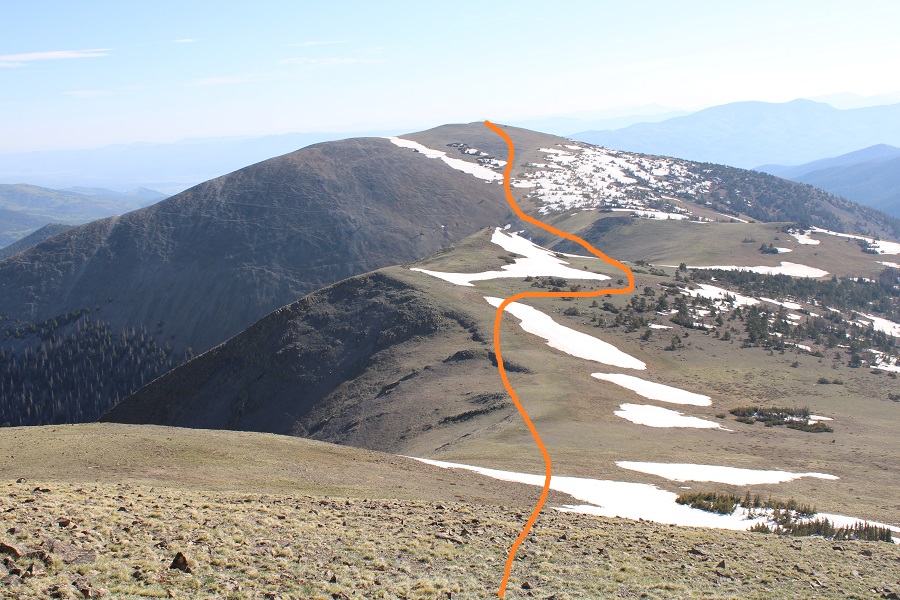
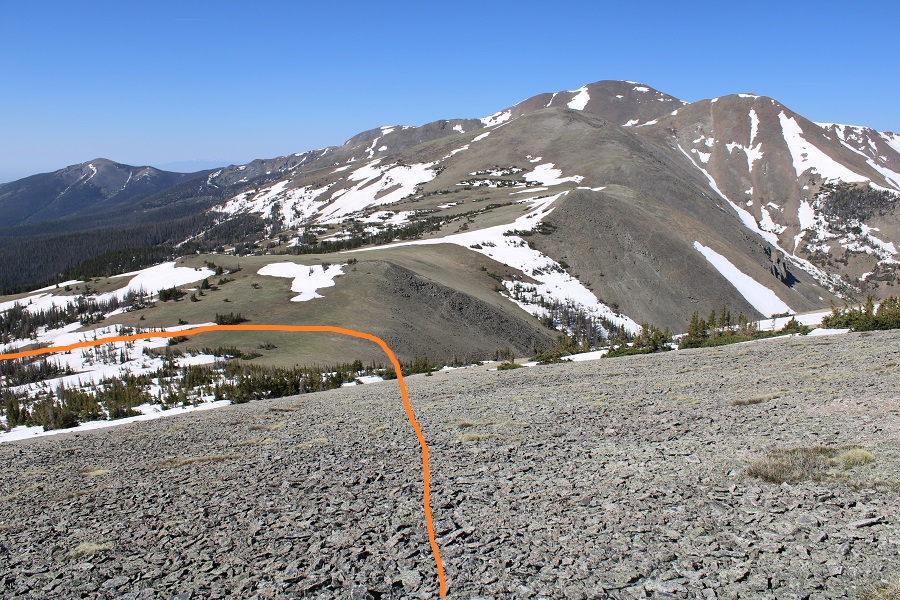
Here’s an overview of the rest of the route to the Antora Saddle.
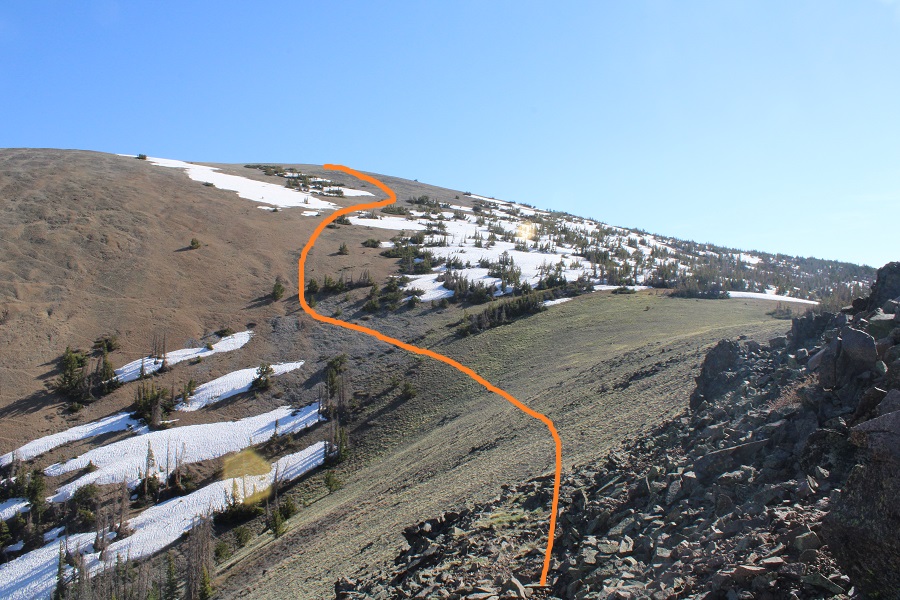
And some step by step pictures. There is no need to ascend Sheep Mountain at this point, but instead skirt it to the left, staying parallel with the saddle.
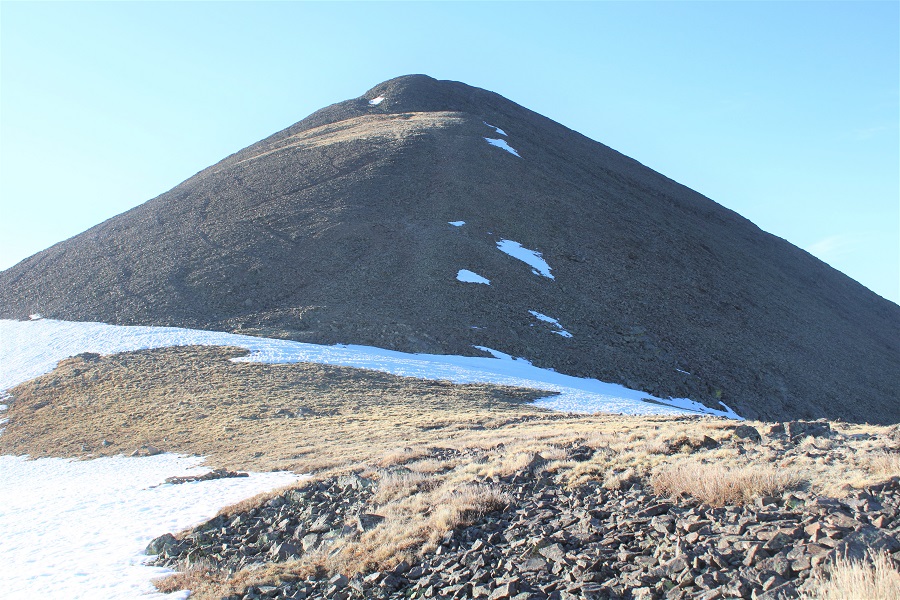
Once on the ridge I turned left and followed it southeast to the summit. There were a bunch of game trails here, but I just went straight up the ridge.
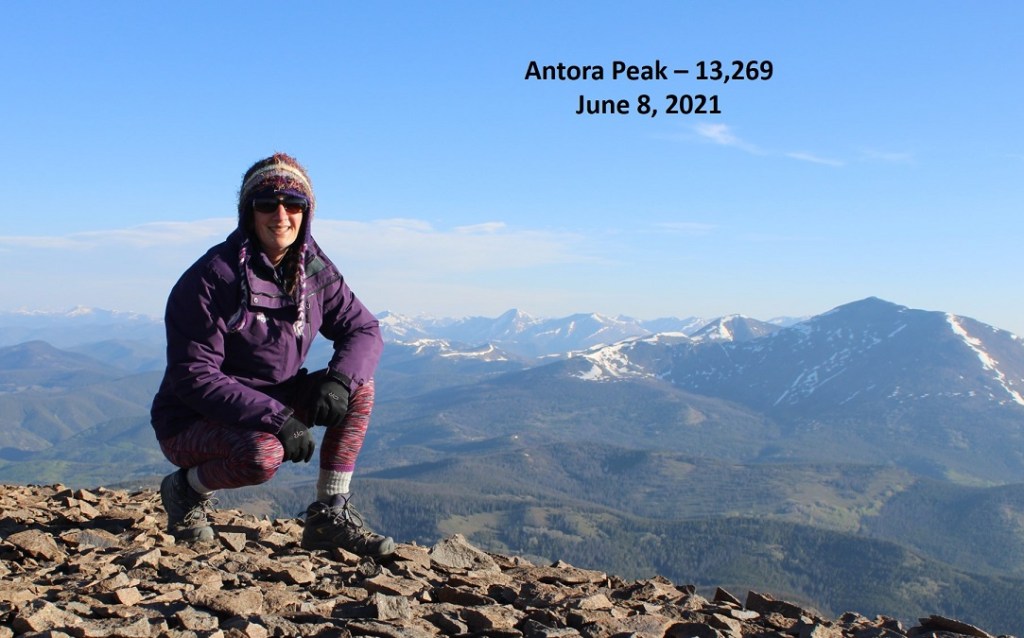
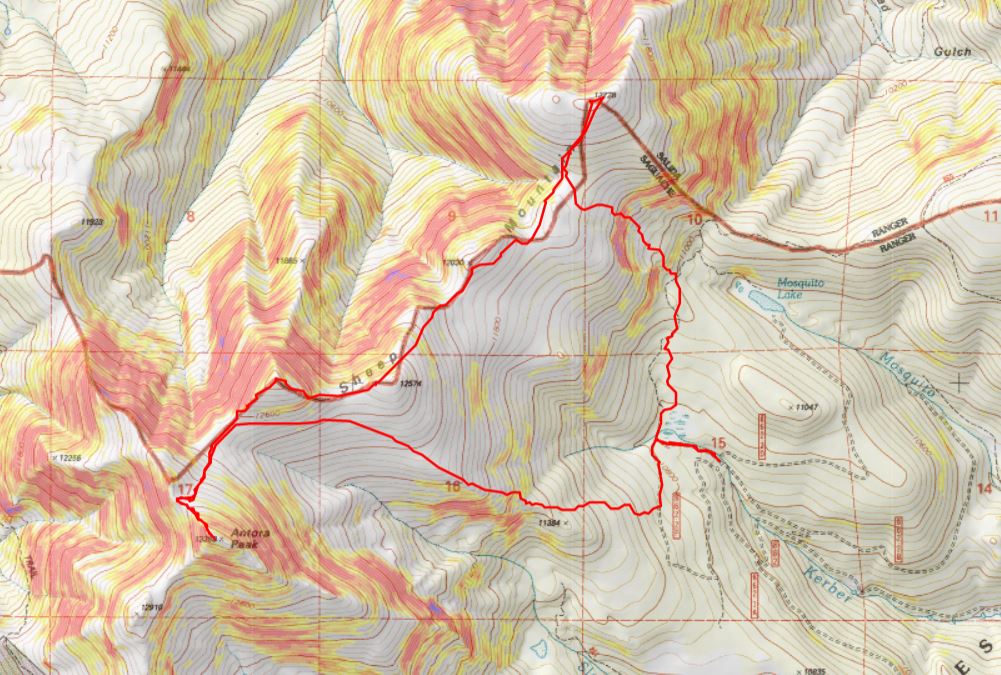
I summited Antora Peak at 7:15am
Not sure why I called it Sheep Mountain in the video: Probably because that was what I was viewing and it was in my head. Oh well, this video is actually the view from Antora Peak.
Antora Peak:
There are fires in the area, so it was a hazy day. I was making this a loop, with Sheep Mountain and Sheep Mountain Northeast.
I headed back towards the Antora/Sheep saddle
And then crossed the tundra and headed up Sheep Mountain. I was glad it was still early and the water still (mostly) frozen on the tundra, otherwise this would have been a sloggy mess
There’s a game trail that goes up the side of Sheep Mountain. It can be hard to see initially, but it’s useful in getting through the initial mound of loose rocks.
Then it was up and over the ridge
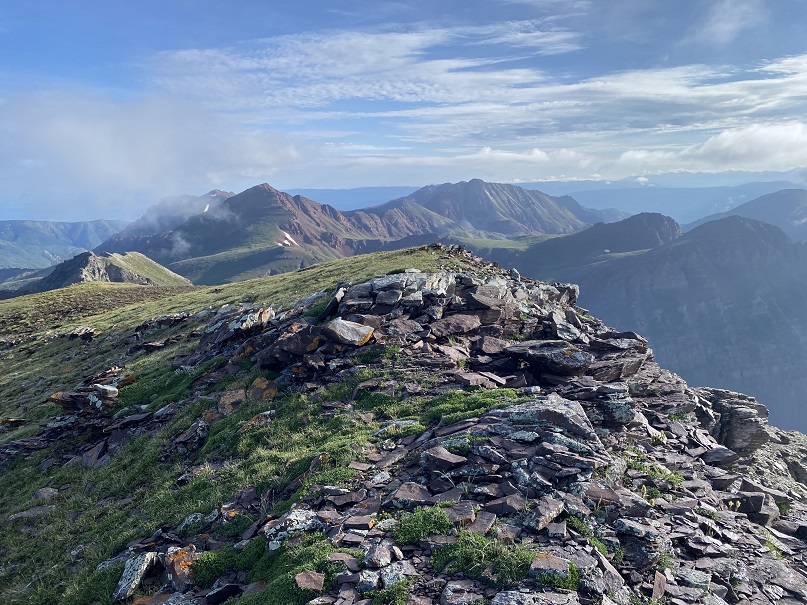
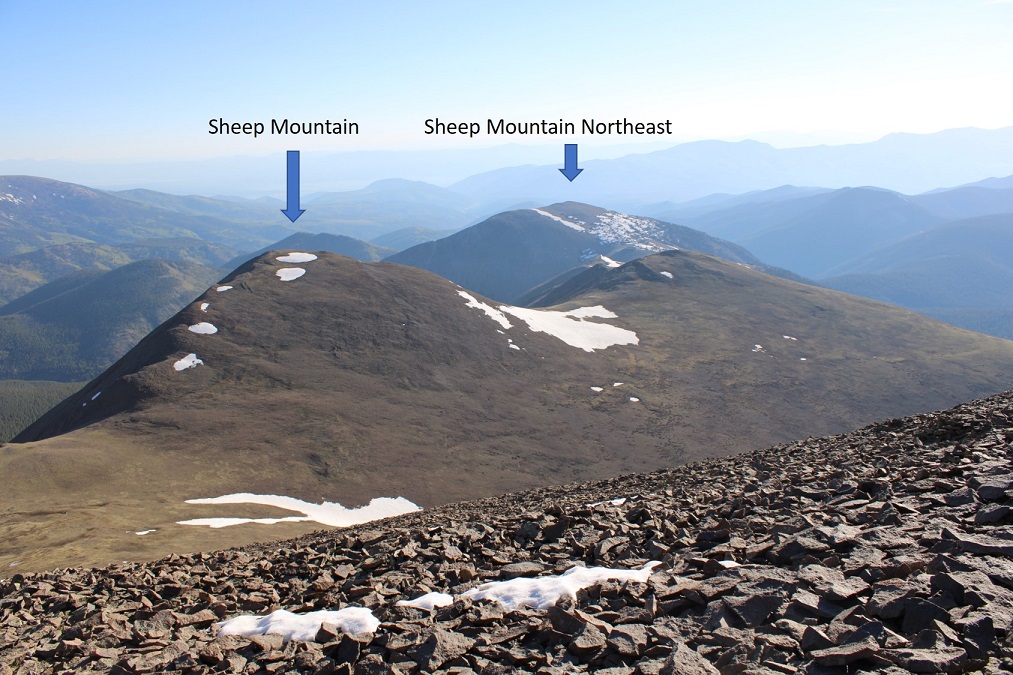
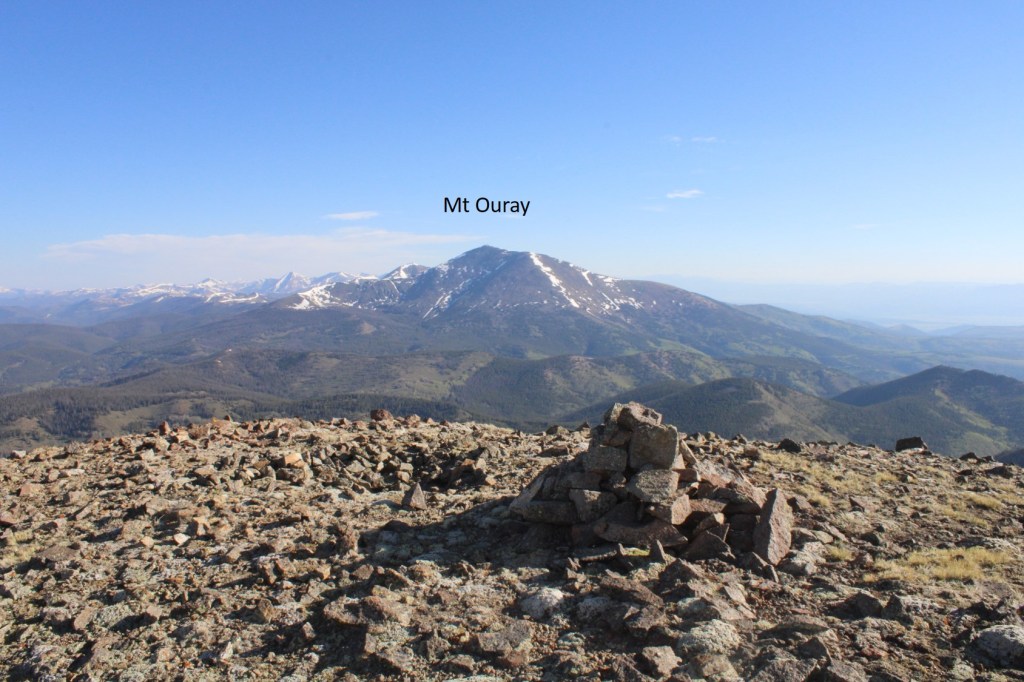
The summit had a great view of Mt Ouray to the north
Sheep Mountain:
Now to head over to Sheep Mountain Northeast
I hiked northeast, following the ridge
Here’s a look back at Antora Peak and Sheep Mountain
I was able to avoid most of the snow on the ridge towards Sheep Mountain Northeast.
Just before the final ascent I skirted the mountain to the left, following game trails
And then continued northeast to the summit
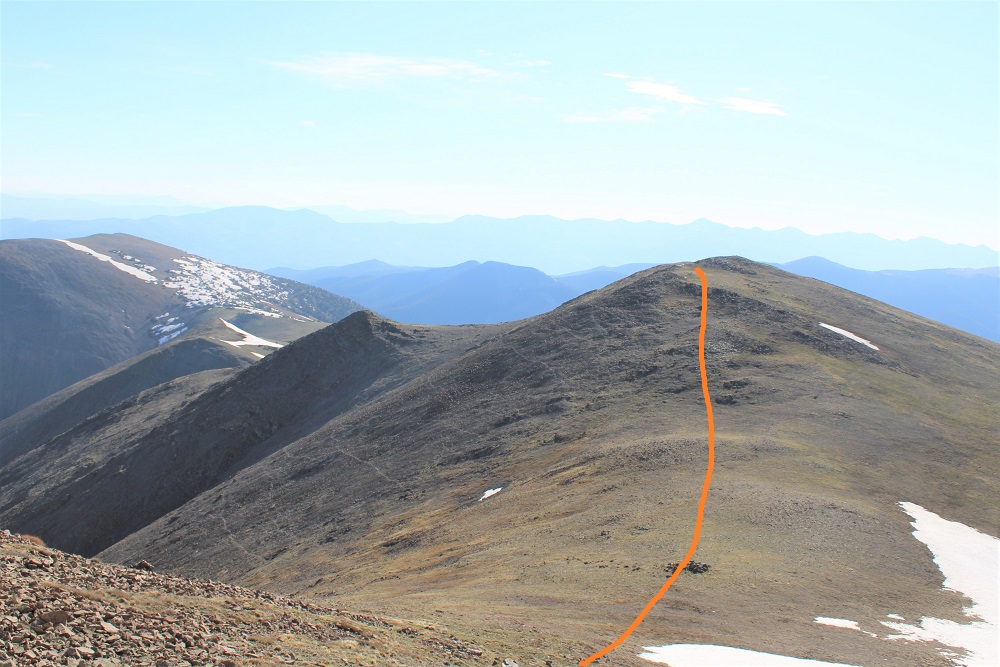
I walked all over the summit, trying to find the highpoint. It looks like it’s further east than it really is (the first cairn you come to is the actual summit). Here’s looking back at the route
To make this a loop, I hiked a third of a mile southwest, then cut across the tundra, heading east
This led me to a gully. From here I could see Mosquito Lake. I didn’t want to go to the lake, I wanted to find the trail that led back to the 4WD road. Here’s the basic route:
I followed the gully down, crossed some small runoff streams, and kept heading south, looking for a trail.
I actually found a trail, but kept losing and finding it again. It hasn’t been used frequently in years, and there are a lot of game trails here. I’m pretty sure it’s a ranching area as well. At one time it looked like the trails were maintained: they may even have been roads, but now they’re a mess. I knew I was on the right track however, because I kept seeing tree stumps from sawed trees.
Continuing south, I eventually made it to the old road
This road led me back to the junction from earlier this morning. I turned left onto 862 (no signage) and hiked the short distance back to my truck. This area is full of nice irrigation channels.
I made it back to my truck at 10am, making this an 8.53 mile hike with 3562’ of elevation gain in 4.5 hours.
Now to drive out in the daylight. Luckily, it was a Tuesday and I didn’t expect to encounter any other vehicles on the road. I didn’t. The Bonanza Mine was pretty cool.
This was my second attempt of Clark Peak. On the first attempt I’d been unaware there was a creek crossing, and the creek looked too high for me to safely cross in the dark. A storm was coming in later in the day, so waiting for daylight hadn’t been an option. I’d turned around and done another peak instead. This time I was prepared (or so I thought) for the creek crossing. Also, please don’t make the same mistake I did crossing the creek…
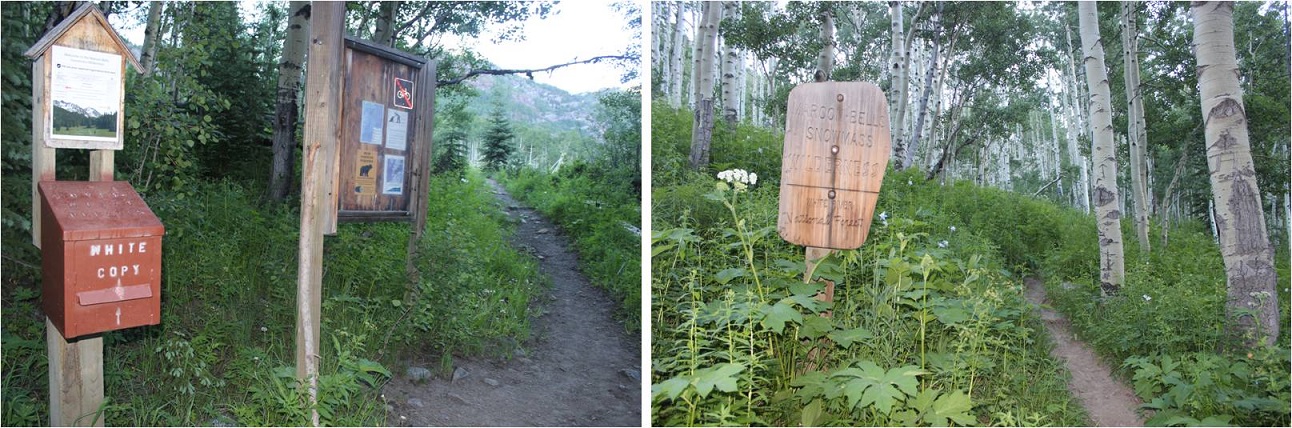
I drove to the trailhead the night before and got a few hours sleep before staring on the trail at 5:45am. The trailhead has space for about 20 vehicles, and good signage
I started off following the Maroon Snowmass Trail south, and then southwest. I went through two unlocked gates
And shortly after the second gate there’s an unmarked side trail that leads down to cross Snowmass Creek. However, after my last failed attempt I’d done more research, and was told I’d gone too far last time and to look for an easier crossing earlier. So I did. I ended up crossing the creek and then running into Beaver Ponds about 20 yards long. I was able to gingerly cross them, stepping through a thin layer of ice while doing so. I picked up a faint trail on the other side, which brought me to the actual trail, where I noticed last time I’d indeed been in the correct area. Hmph. So I’d done all that wading in cold water for nothing. Here is where you should cross:
Doing so will bring you to the West Snowmass Creek Trail. A well-defined, class 1 trail.
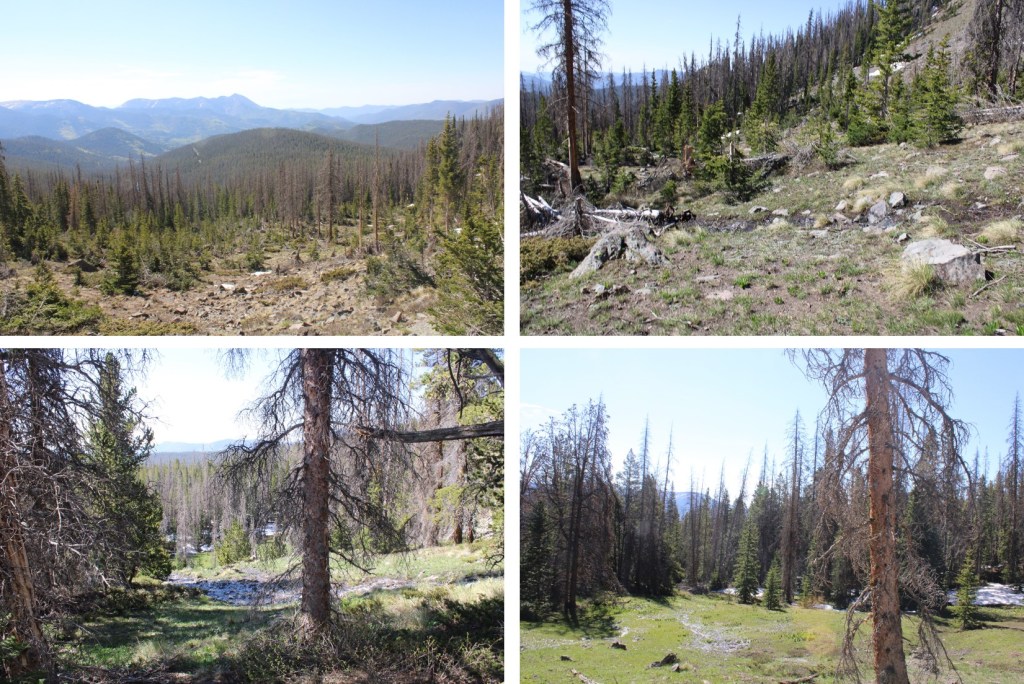
The trees were absolutely beautiful! It was still early morning, so these pictures aren’t the greatest, but the trees had me daydreaming.
This is where I made my second mistake of the morning: I missed the cutoff. The cutoff comes after hiking for just over 4.5 miles. It’s an obvious junction you can see if you’re not looking up at the trees. And cows (there were cows in the meadow). I ended up hiking quite a ways past this junction, just following the trail. It wasn’t until I realized I was switchbacking and I wasn’t supposed to be that I noticed my mistake. This mistake cost me well over a mile and added about 1000’ of elevation to the hike. Here’s where you turn left
After hiking a few dozen yards south the trail abruptly ends. When it ends, turn right and head west towards the hillside. A trail will pick on the hillside.
Here’s where I made my third (and final) mistake of the morning: When you see the path split in two, take the higher one (the lower one is a cow trail that leads you through gooey mud then ends).
From this point on the trail becomes faint. At times I questioned whether I was on an actual trail at all. It will parallel West Snowmass Creek, and stay high. Here are some photos:
I came to a clearing and headed southeast, crossed West Snowmass Creek, and once again picked up a trail.
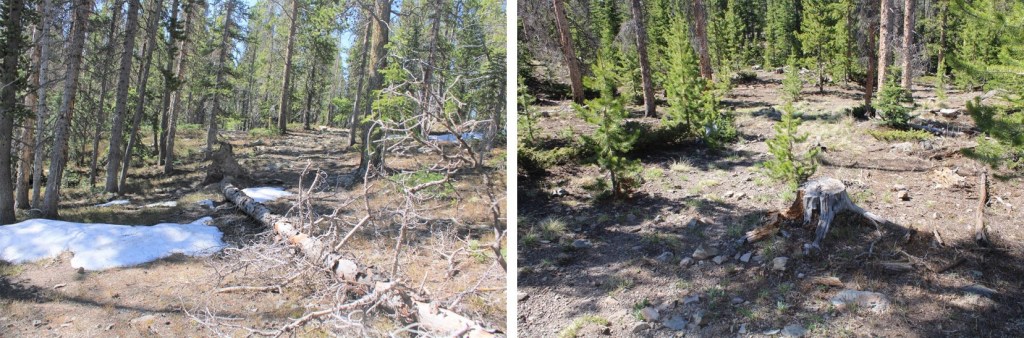
I took this trail to treeline, where it ended. I put pink surveyor’s tape on a tree so I’d know where the trail picked up on my way back.
From here the rest of the hike was full of rocks and boulders. I headed southwest
I lost a little bit of elevation before gaining it again
Rock-hopped up this drainage
Followed the creek for a bit until it ended
Ascended another drainage and at the top turned left to skirt Moon Lake
This basin never seems to end! I just kept heading southwest
At the end of the basin it was time to gain the ridge. I stayed right of the drainage.
This was mostly class 2, but towards the end became class 3 to avoid the snow
Once I gained the ridge I turned left and followed it to the summit.
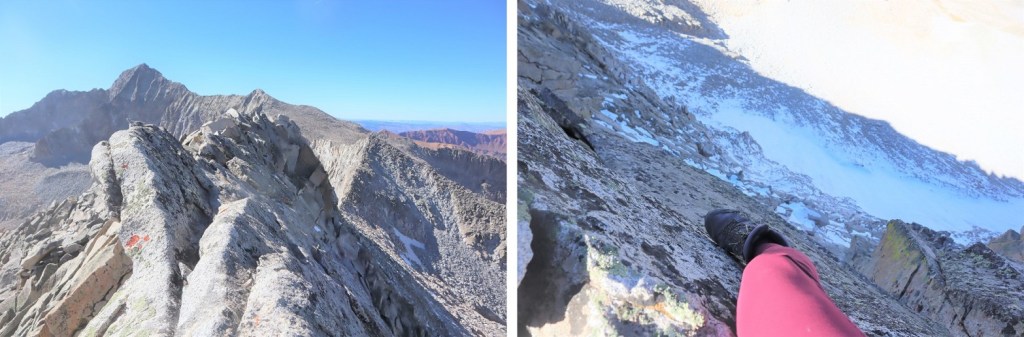
Ha! That’s an oversimplification. I did indeed follow the ridge. The ridge proper goes all the way to the summit. However, it’s a fun scramble to get there, with a lot of exposure, and more than one knife edge. If you did Capitol Peak and it left you wanting more, this is the peak for you! Here are some highlights:
I summited Clark Peak at 2:25pm
Clark Peak:
There were some great views of Snowmass and Capitol Peak, and check out the ridge looking back!
Here’s looking back on the way in through the basin and around Moon Lake
Here are some pictures of the ridge on the way back. I had fun with the exposure here
At the saddle I turned right and headed back through the basin
Skirting Moon Lake to the east and back to the trees
Next profile pic?
Once at treeline I picked up the trail again. After crossing West Snowmass Creek I headed for the trees. The trail picks up again in-between these two trees
Here are some pictures of the trail back down. As I was hiking, I heard a faint bugle. It didn’t sound like a normal elk call: it sounded close but faint. Usually when I hear an elk bugling it resonates, it’s crisp, and I can hear it from far away. This didn’t seem loud enough for being so close. As I reached the meadow I noticed a hunter sitting beneath a tree. I raised my hand to silently say hi, he did the same, and I continued back to the trail.
I kept picking up my pace. Due to this morning’s route finding errors this hike was taking me much longer than I’d anticipated. It was quickly getting dark, and I wanted to get back to cell service so I could call my daughter and tell her I was ok, just running late. I ended up using a flashlight for the last two miles of the hike. Here are some pictures from the rest of the way back to the creek.
I crossed the creek and took Maroon Snowmass Trail back to the trailhead
I made it back to my truck at 8pm, making this a 25.26 mile hike with 6619’ of elevation gain in just over 14 hours.
I drove to the La Plata Gulch Traihead and then took 391 for a little over 2.5 miles to a junction with 382, 391, and 392, where I parked my truck. This is an easy 4WD road in, with a few water holes to navigate.
I parked at what looked to be an avalanche runout area.
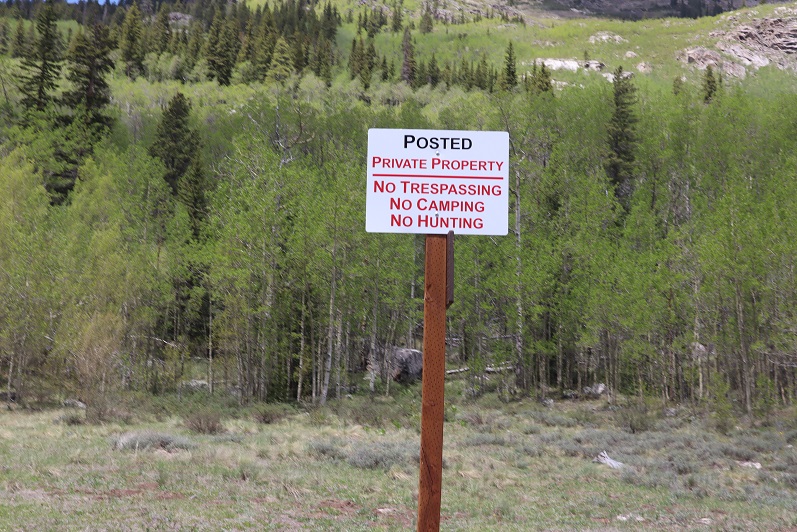
Initially I’d intended to make this a loop and incorporate Unnamed 13,300F and PT 12,601, but the area that I’d exit the hike as a loop with had a lot of “no trespassing” signs, so I decided early on just to make this a 2 peak hike.
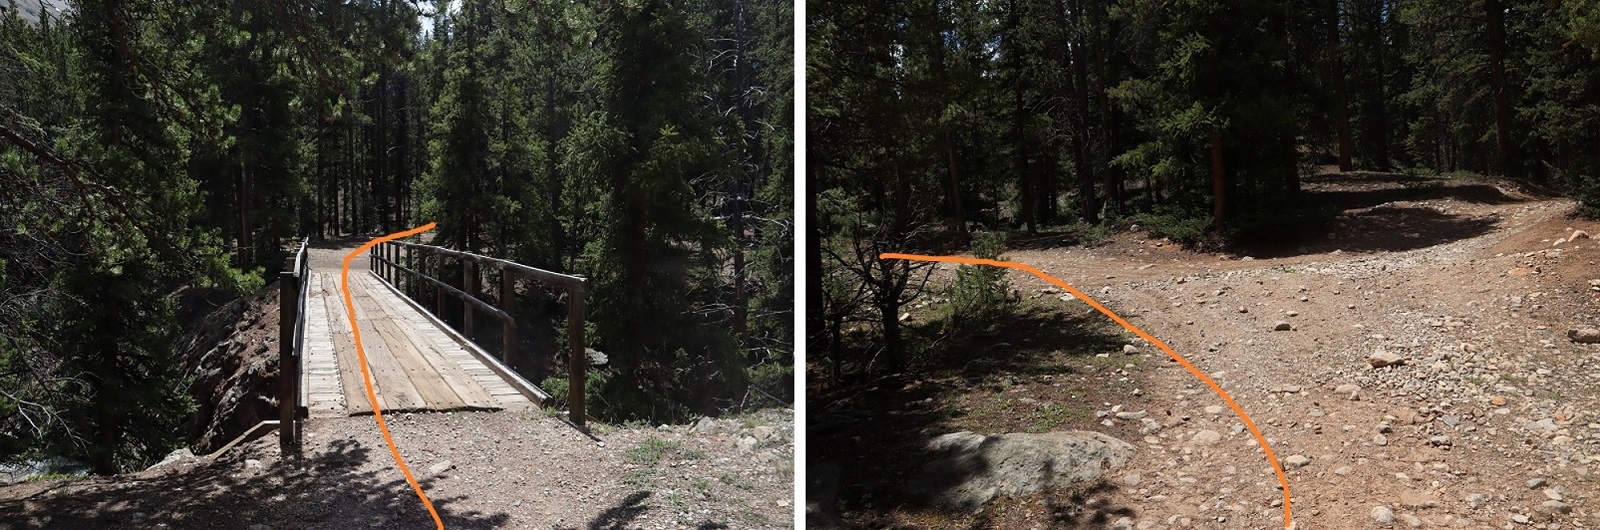
At 5am I gathered my gear and headed southwest, following 392, passing some dispersed campsites and wiki-ups.
I crossed a bridge and turned right, following 392. There are more dispersed campsites here. The dispersed campsites make it a little difficult to follow/see the road.
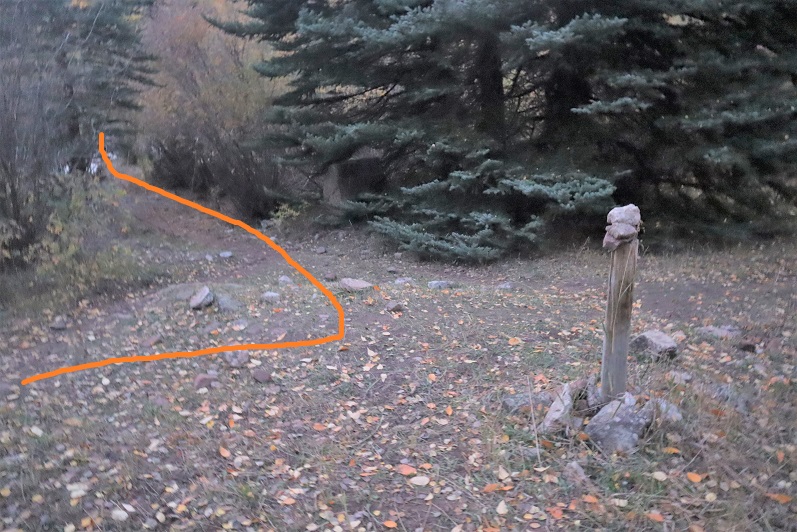
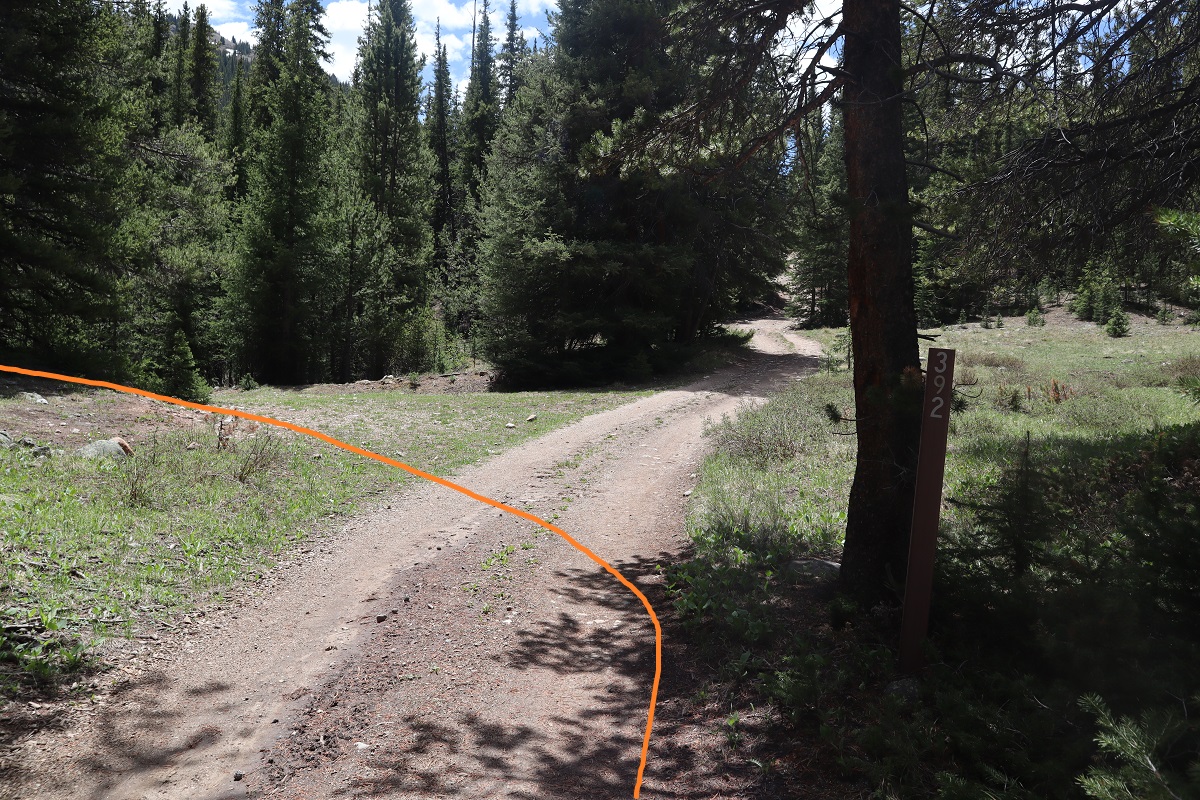
In the dark I ended up going too far south on 382, missing the obvious 392 sign, and the not so obvious road. Turn left at this sign, even though there’s no road.
And pass through a gate, now following the 392 4WD road.
Almost immediately I came to a creek crossing that required me to take off my shoes and get out my sandals. The creek was cold (especially at 5am) but the water only went up to my knees in the deepest of places.
Shoes back on, I followed the 4WD road. “4WD Road” is a bit of a misnomer. This was probably a road decades ago, but it has gone into disrepair and hasn’t been used for quite a while. It’s easy to follow, but overgrown in many areas with willows, aspens, and even 10+ foot pine trees.
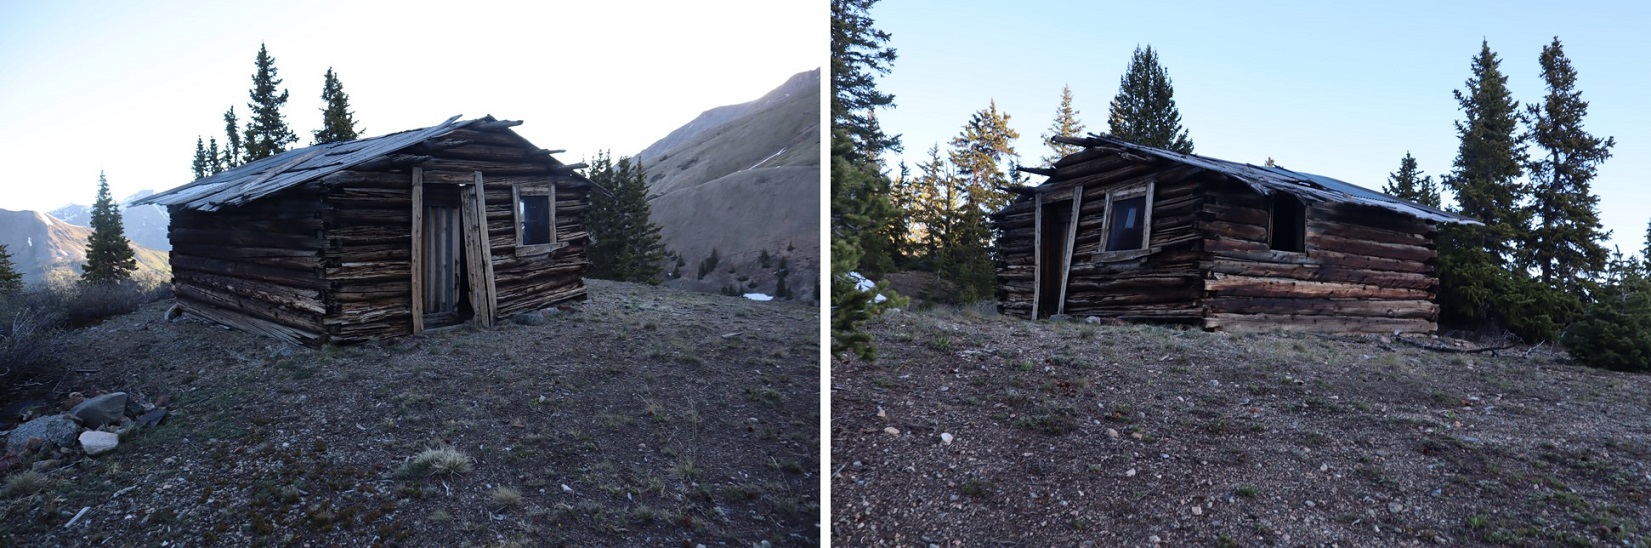
At 11,950’ I came to a small cabin with a great view.
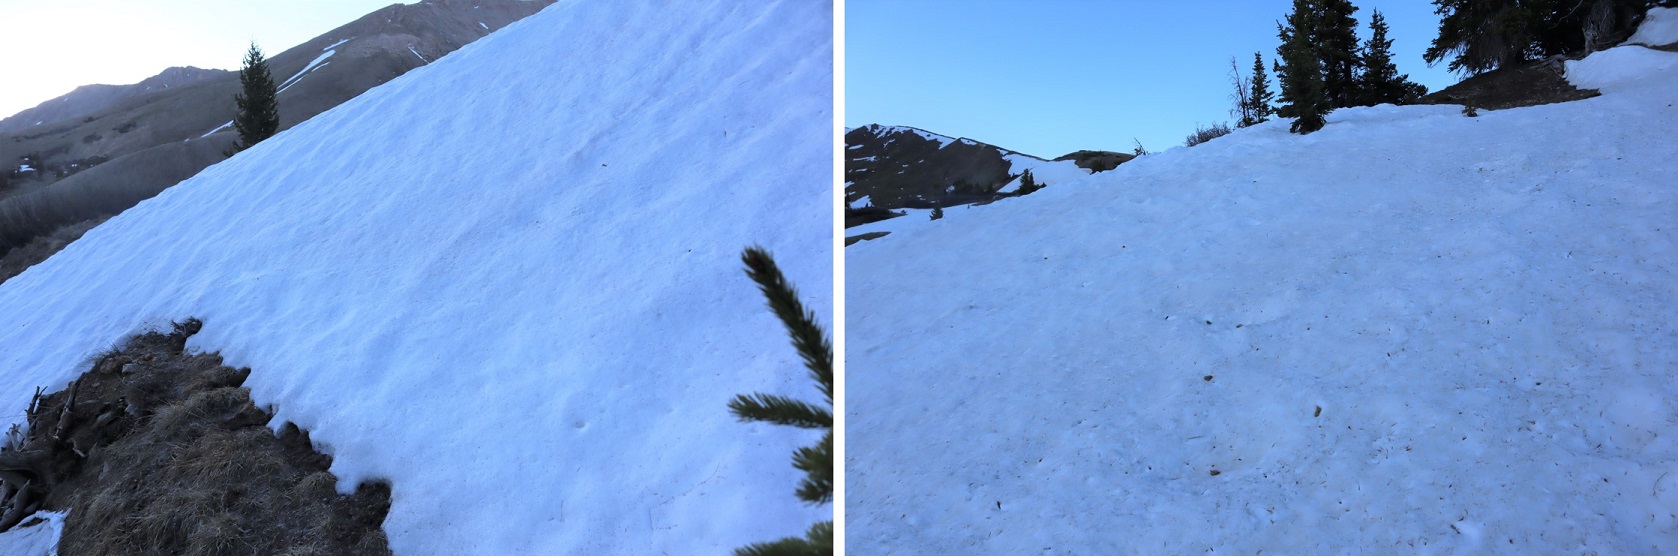
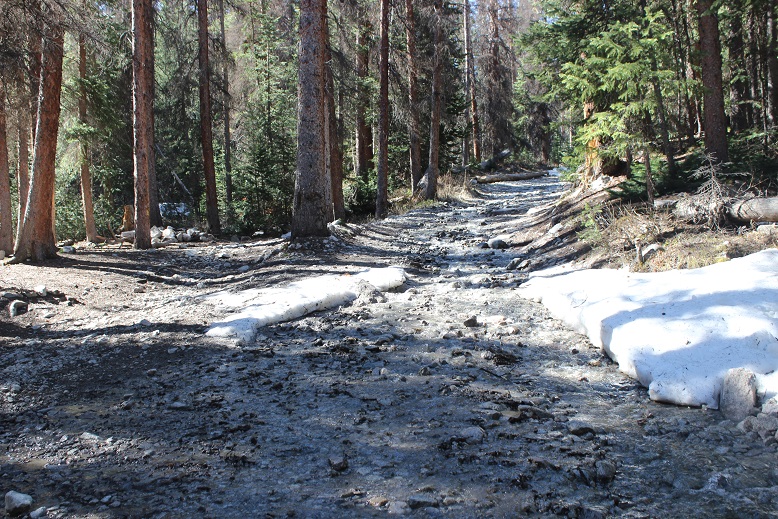
I peered inside: someone had left a peanut bottle full of trail mix (peanuts and M&M’s?) on a shelf. It was dark and cold inside and I’ve seen horror movies so I didn’t take the bait. I turned around and considered my options. Here the road still had some snow/ice covering it, but early in the morning I could walk across it when necessary without traction. On the way back I was able to see dry spots to navigate down and avoided the snow.
My options were to either take the road or follow the ridge. I decided to take the road up and follow the ridge back down. I wasn’t disappointed. I also placed a cairn here to show where you leave the trail to follow the ridge (even though it should be obvious).
The road really didn’t have much snow on it after I passed this point and was quite easy to follow all the way to the saddle. Several times I intersected with the ridge route as I followed the road.
From the ridge you can see the road, and the path you take to get to Sayres Benchmark
I was really glad I decided to take the road up. Not because it was easier than the ridge, but because it was here I saw some elk. My favorite were the calves, suckling breakfast until they noticed me and their mamas decided it was time for them to leave.
Elk:
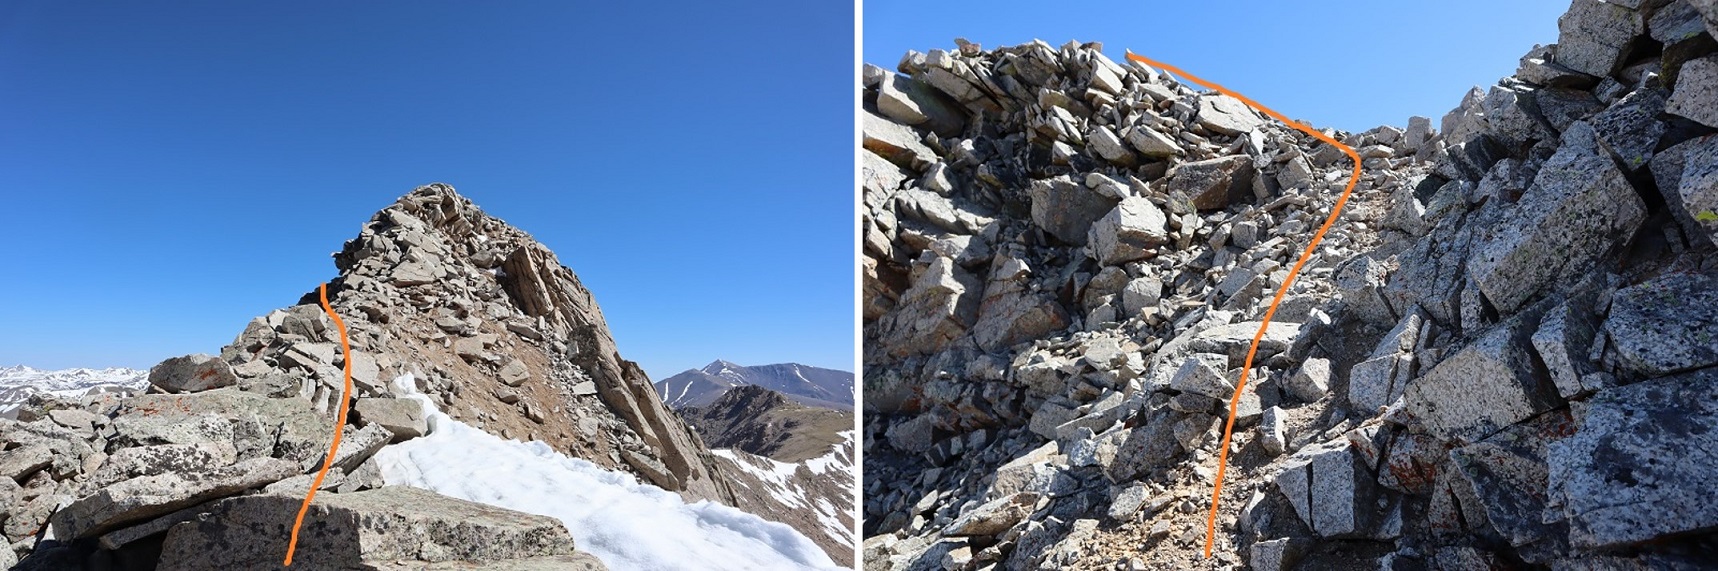
Following the road to 13275 feel of elevation I then turned right (south) and followed the ridge, losing 300 or so feet of elevation as I made my way to the saddle. I decided to just follow the ridge, even though it meant going up and down in elevation a few times. (This is all class 2)
There was still some snow on the ridge. I made the 50/50 decision to stick to the right of the ridge and wasn’t disappointed, as later I could see the ridge to the left was impassable due to snow.
I stuck to the right of the snow
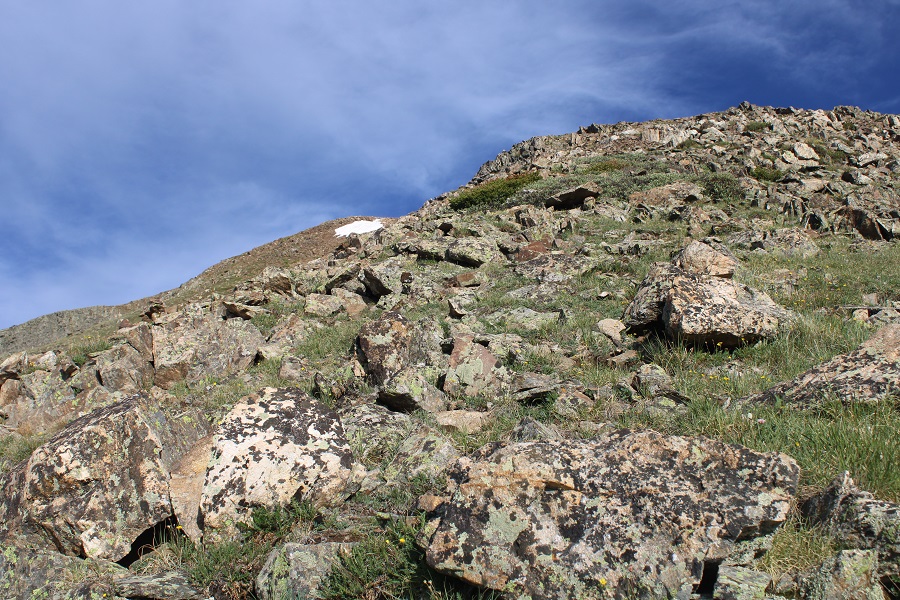
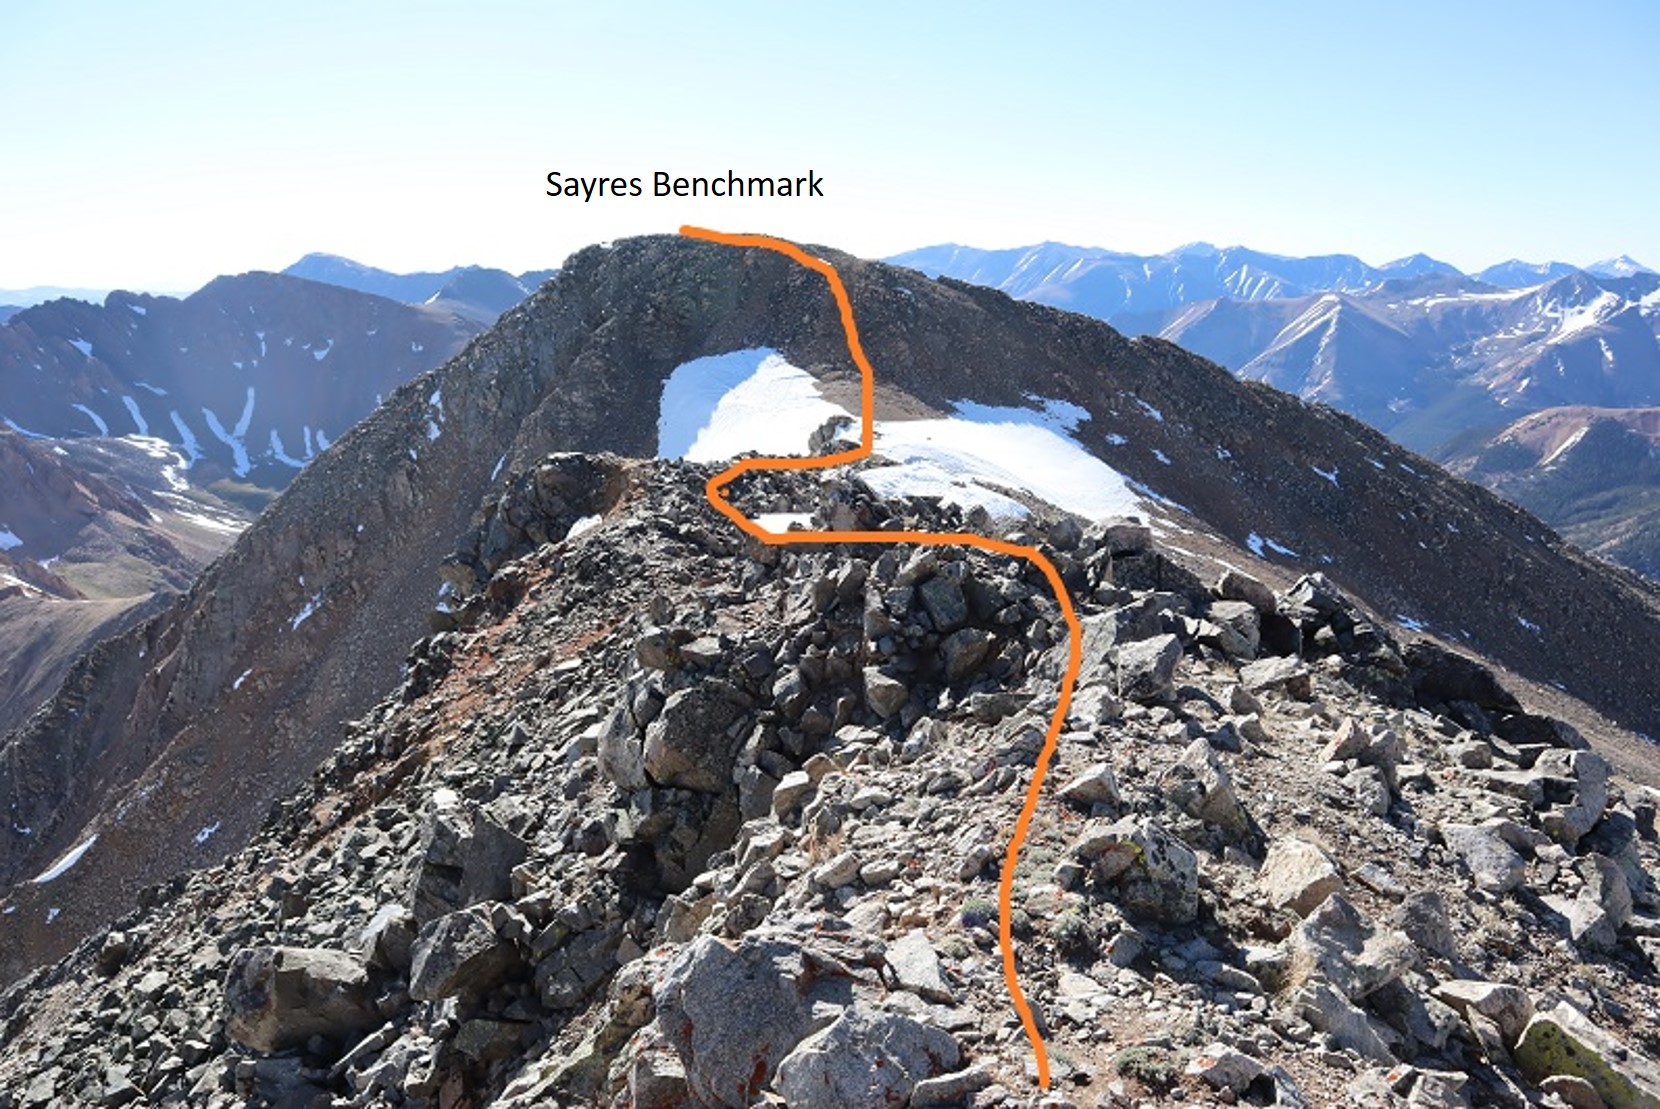
Towards the top the tundra gave way to rocks
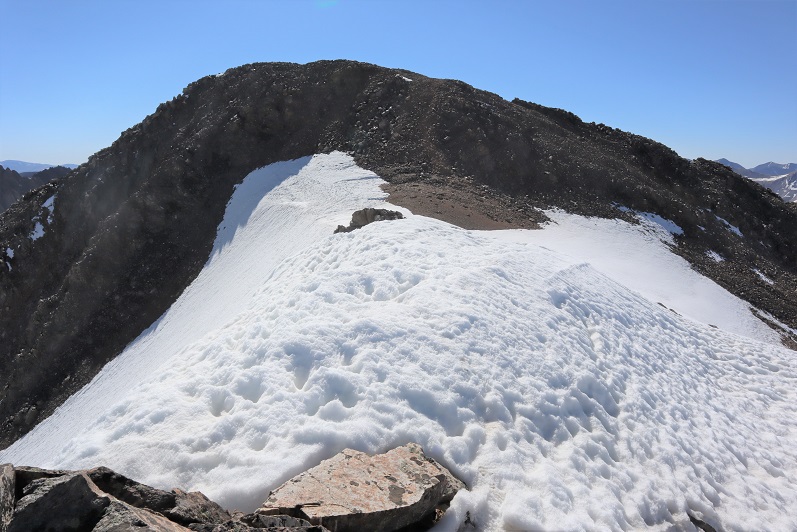
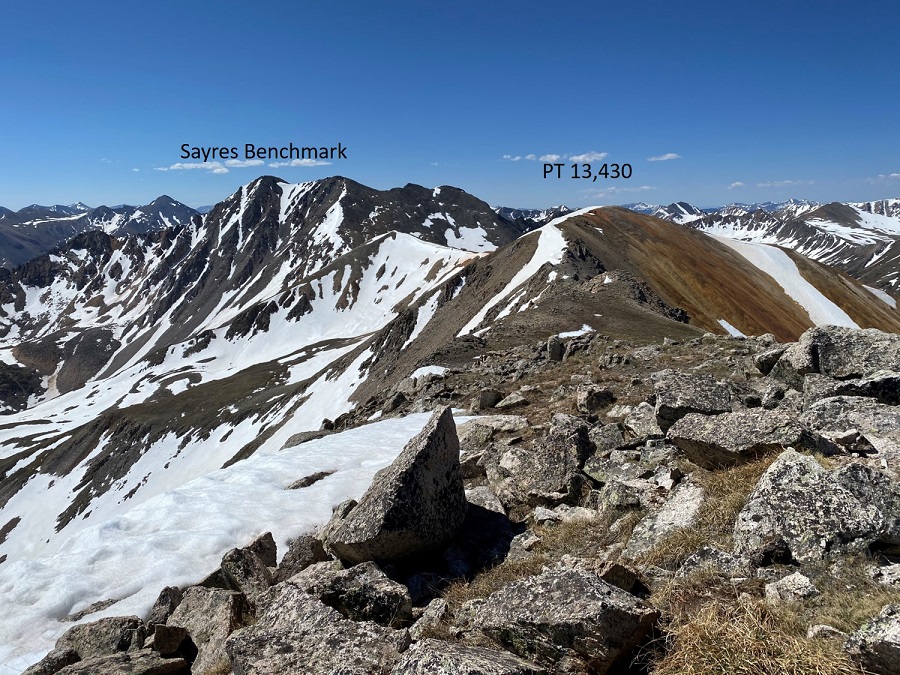
The top of this is unfortunately not the summit of Sayres Benchmark, even if it looks like it is from far away. Nope, when you get to the top of the ridge turn left (northeast) and hike to another small saddle and then up to the summit of Sayres.
There was more snow here than I would have liked, but it was firm this early in the morning. I decided against putting on spikes or crampons and just hiked across.
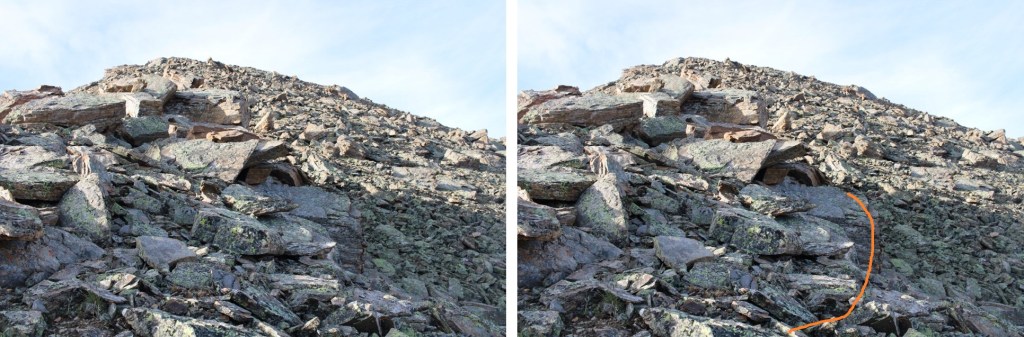
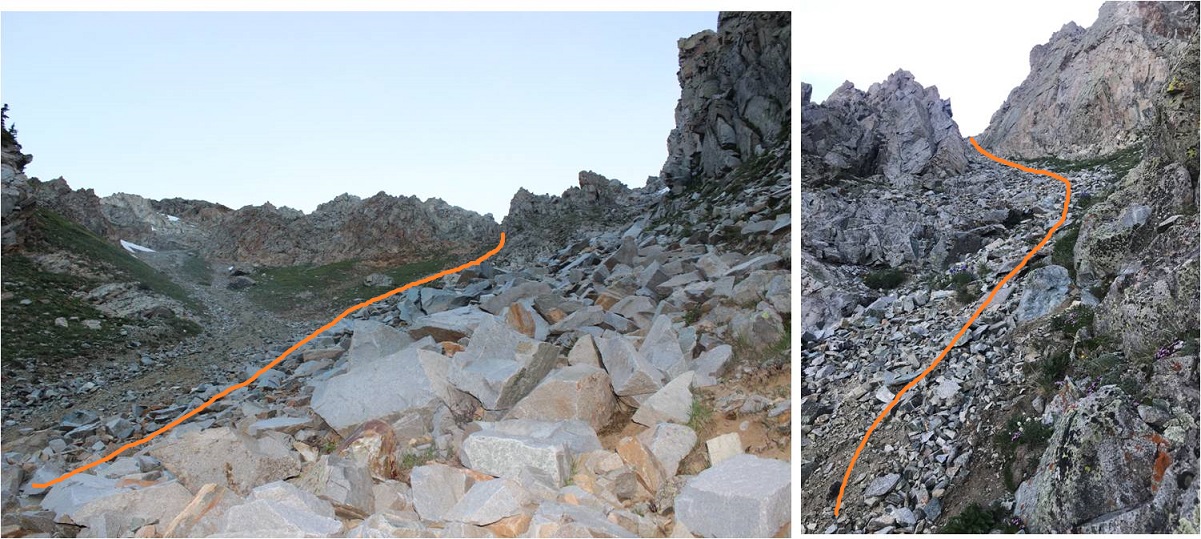
After this small saddle I picked one of the many dirt filled gullies and climbed to the top
I summited at 8:40am.
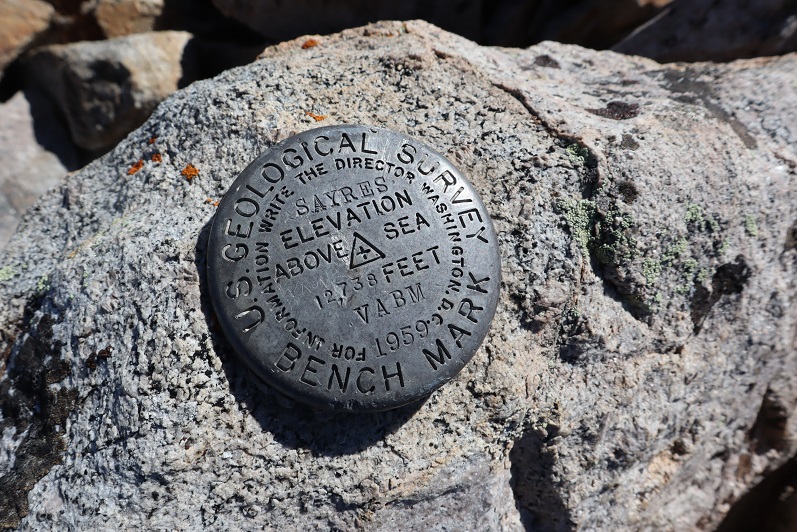
Summit of Sayres:
There was a benchmark that I’m pretty sure is off by 1000’ or so…
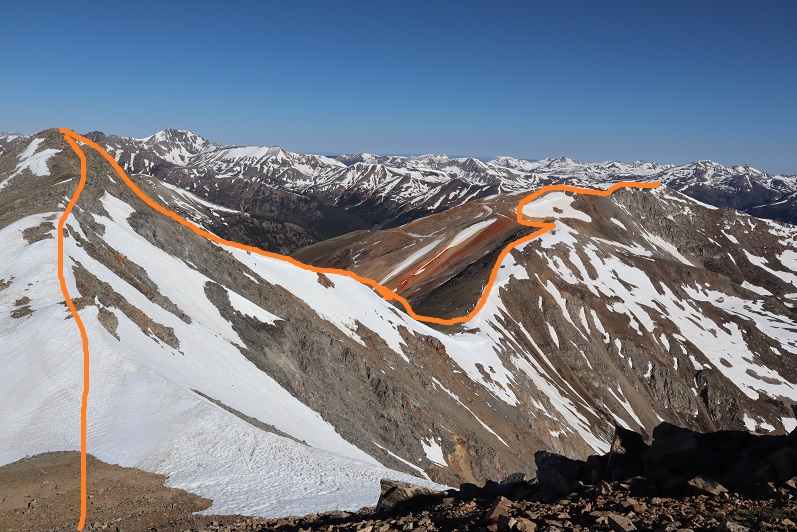
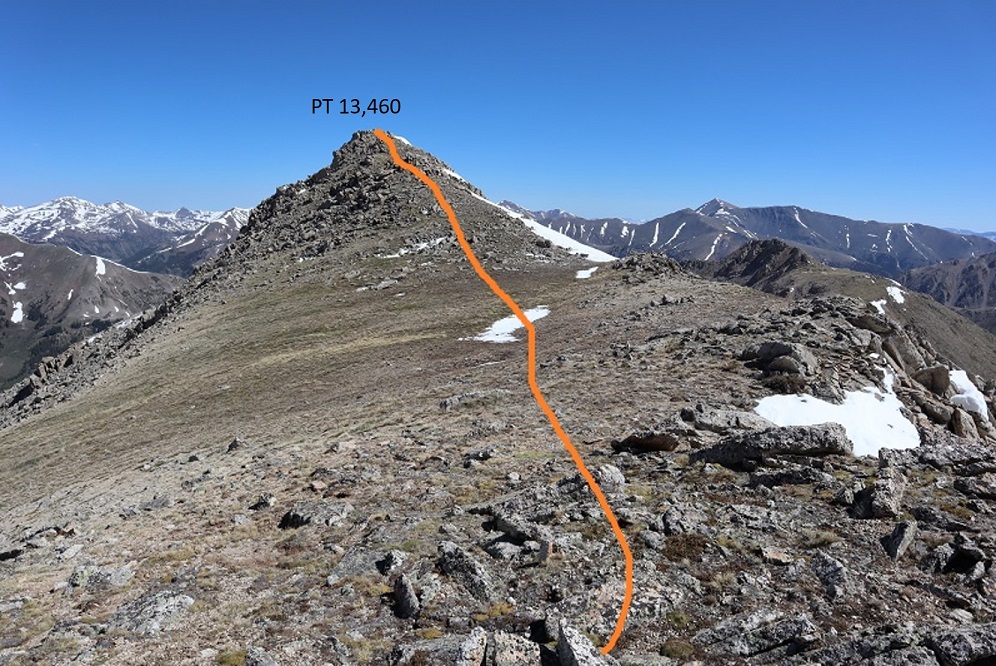
There was a summit register, but as always, I didn’t open it. Time to head back the way I came. I turned back and headed towards the small saddle, retracing my steps. Here’s an overview of the route to PT 13460
I was glad the snow was still firm enough not to need traction. Today there was minimal exposure as well.
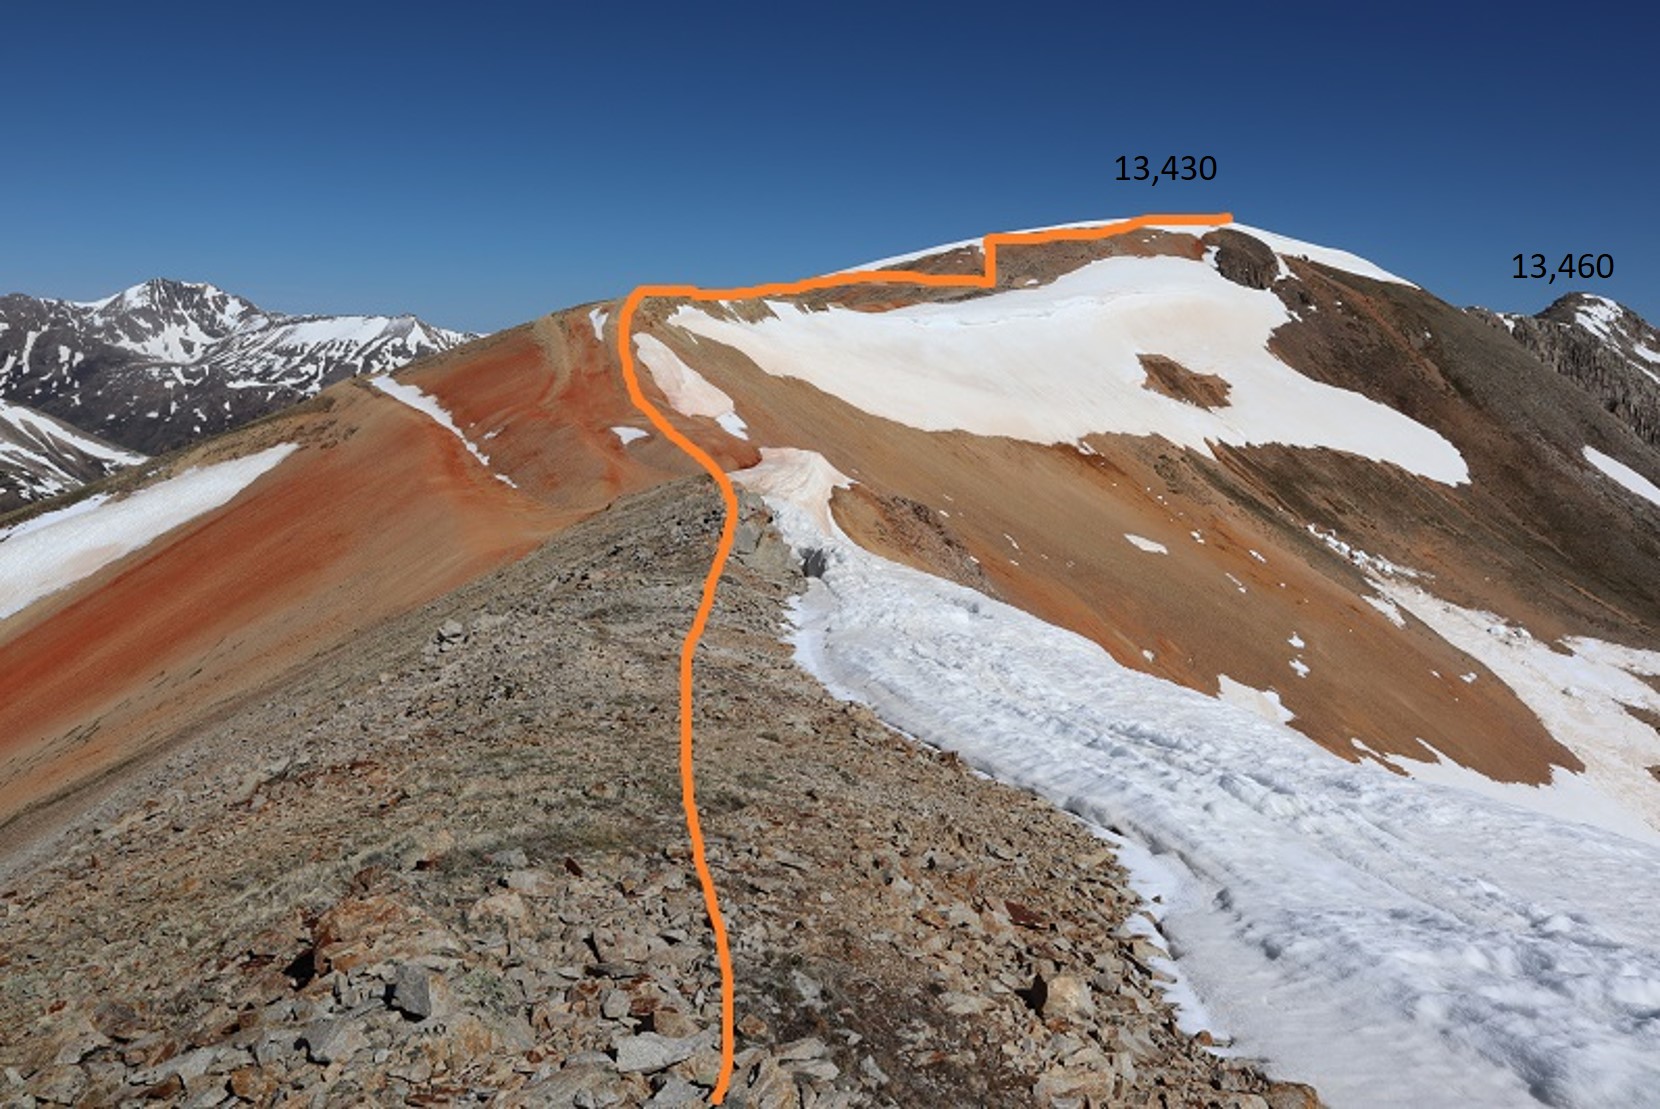
Here’s an overview of the route back to PT 13,430 (not considered ranked or unranked)
Notice the snow? It’s good here to stick to the left (west side)
Here’s a visual of the route to the top of PT 13,430
I took the road to the ridge, turned right (northeast) and once I was on the ridge the ground turned sandy for a bit, but mostly it was crushed rock.
Here’s a view of PT 13,460 from PT 13,430
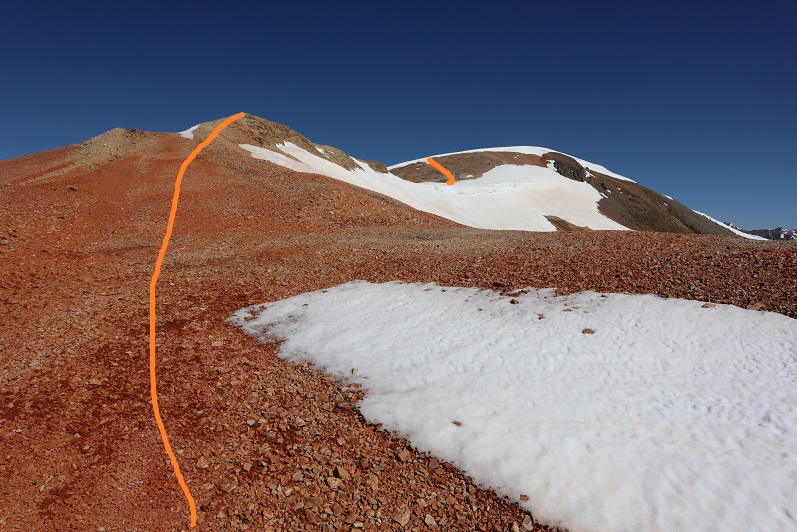
Here’s the route I took to get to PT 13,430. I tried to stick to the ridge, but when that wasn’t possible I dipped to the left. This is all class 2, maybe easy 2D (if that can be a thing?)
Here you dip down to the left and climb back up through a short gully
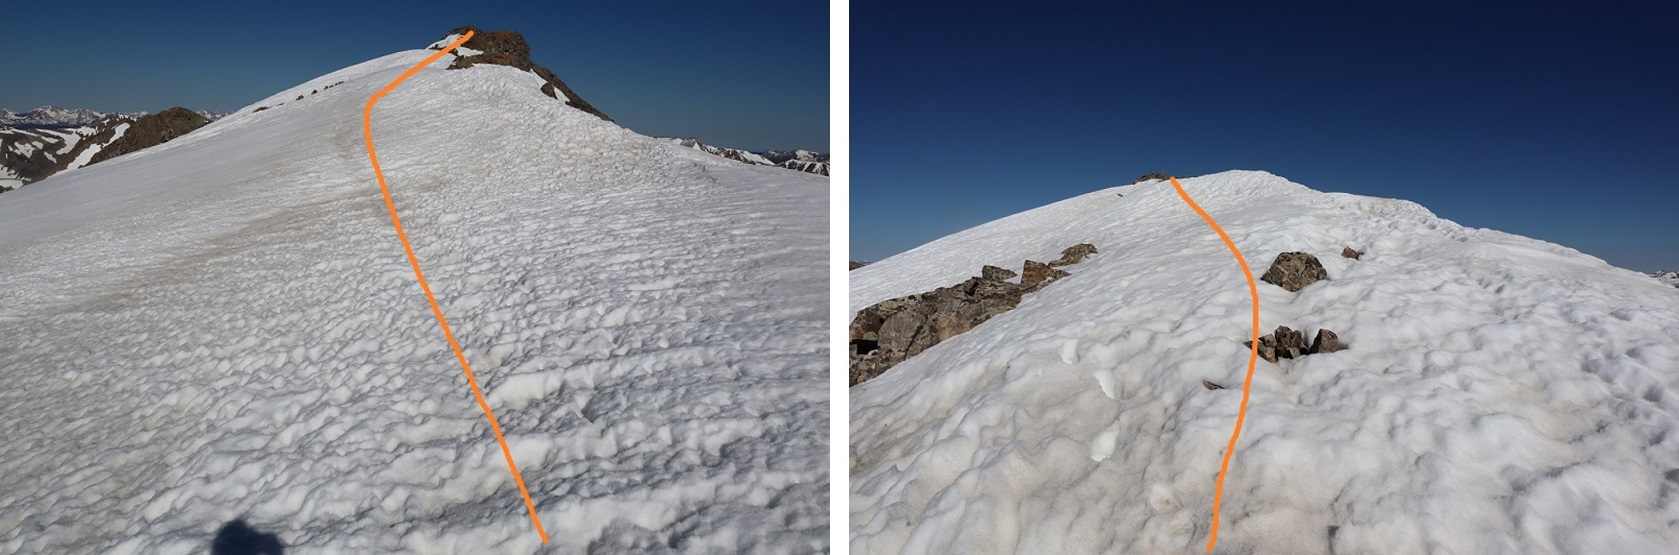
The final trek to 13,460
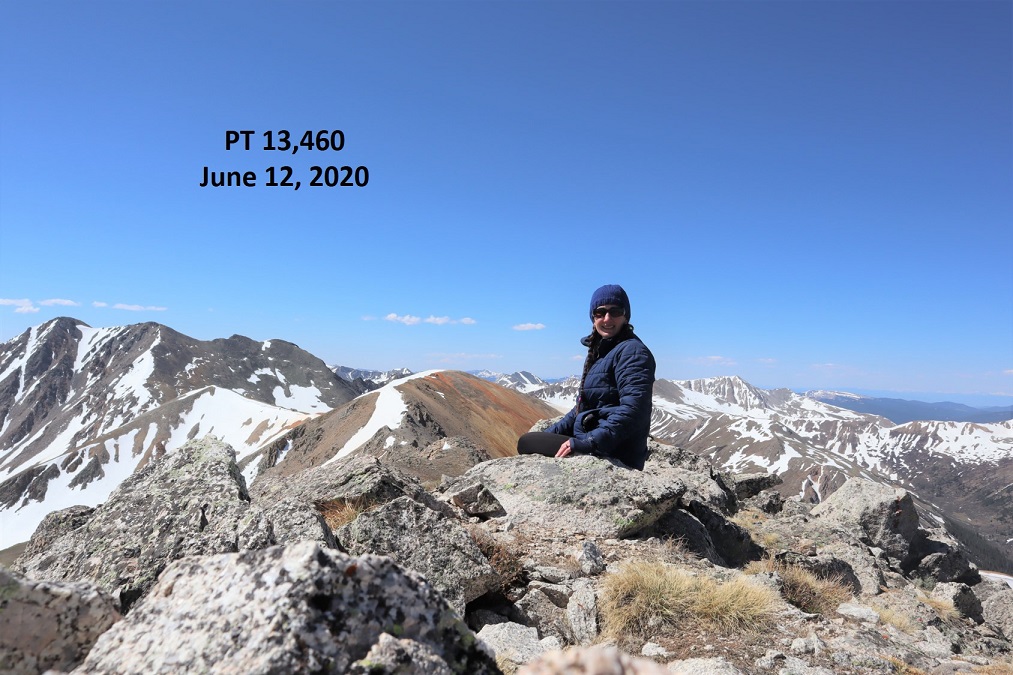
I summited PT 13,460 at 10:20am. There was as a summit register here.
Summit of 13,460:
Here’s looking back at today’s peaks
I made my way back to PT 13,430, retracing my steps. Here’s an overview of the route back down from the ridge before PT 13,460. You can clearly see the road at the end of the ridge. I circled where my truck is parked.
The ridge started out as rubble and turned to tundra before making it back to the road
Here’s looking back at the ridge. While hiking the ridge I ran into another hiker! I hadn’t expected to see anyone at all today, and as we passed I was thrilled to see she was another female solo hiker. It’s nice to see other women out rocking the mountains. We talked for a bit. I was probably a bit clipped because I had other plans for today and wanted to keep moving, but she did too so after chatting about the weekend weather around the state and other peaks for this weekend we were both on our way.
I followed the road back to the creek crossing, through the gate, turned right, and followed the trail back to my truck. I kept my sandals on after the creek crossing, since it was such a short distance and I’d be changing back into them when I was done anyway.
I made it back to my truck at 12:30pm, making this a 12.61 mile hike with 4652’ of elevation gain in 7.5 hours.
Since it was still early, the weather seemed to be holding up, and I wasn’t yet exhausted I decided to drive over to Independence Pass and see if I could hit a few more ranked 13ers today. As I drove out all of those empty dispersed camping spots were full.
After my failed attempt last week I decided to do more research and try Hagerman again today. I learned the upper road to Lead King Basin had an avalanche about 1 mile after the stream crossing (very close to where I’d parked) so I decided to take the lower road from Marble to Crystal instead. I’d heard a lot of conflicting reports on this road, but when I searched it online I found this video, which was very helpful.
The road itself wasn’t that difficult with a 4WD (I wouldn’t attempt in a 2WD), and my Tundra handled it just fine. The only problems I can foresee would be passing other vehicles. Luckily there are a lot of small turnout areas on this road, especially before and after the committing areas. I drove in at night to ensure I wouldn’t need to pass oncoming vehicles, which I knew would be problematic in my big truck, no matter the size of the other vehicle.
Since I drove in when it was dark I wasn’t able to see the Crystal Mill, but I expected to see it on my way out the next day.
I made it to Crystal around 10pm on a Thursday night and all the lights in the ‘city’ were out. As I passed the Crystal Mill I saw a sign saying Lead King Basin was closed, so I dimmed my lights and parked at the east end of town, mentally calculating the extra mileage and what time I needed to start in the morning. Looks like I was getting about 3.5 hours of sleep.
As I was preparing to go to bed (my lights were out) I saw the lights go on in the second story windows of a cabin across the street. The two story 18th century style wood cabin had two tiny windows upstairs, covered in lace curtains. The light from the windows was glowing pale blue, and I saw the silhouette of a woman walking around. She was wearing a long nightgown and her hair was pinned up in a bun. The woman slowly walked around the room, picking up objects and setting them back down. Then the lights went out.
I set my alarm for 2am. When I woke up I crawled from the back seat into my front seat and started putting on my shoes. I didn’t need to turn on any lights because the full moon was shining bright enough to allow me to see. I saw a fox run down the center of the road, and then noticed the lights in the second story window of the house across the street turn on. Once again I saw the silhouette of a woman walking around. She was wearing a long nightgown and her hair was pinned up in a bun. She slowly walked around the room, picking up objects and setting them back down. Then the lights went out.
Whoa. That was spooky. I knew I hadn’t woken her up because I hadn’t made any noise, opened any doors, turned on any lights, etc. I was going to have to investigate that house in the daylight upon my return because that was just… weird. I mean, what are the chances she was up at 10pm and 2am, just like I was? Also, how many women still wear nightgowns to bed?
Ok, so I was on the trail at 2:15am. It was a 2 mile hike to Lead King Basin along a 4WD road that didn’t offer many turnouts, but was indeed open and my truck could have made it just fine to the trailhead. Oh well, I was getting in 4 extra miles today.
The trailhead was about 2 miles from Crystal. I didn’t see any of this in the dark (these signs seriously need reflective elements to them for us who start before daylight).
There’s a nice junction where you turn left to head up and around the north end of Lead King Basin to Geneva Lake
Here the trail was quite overgrown with flowers, plants, and trees. I thought to myself how it felt a little like being in a rainforest, and how much fun the flowered areas would be on my way back (I’m not a fan of flying-stinging insects, so I was being sarcastic). On the positive side: no mosquitoes!
It was in this area I saw my first ever porcupine on the trail. I see them along the side of the road when I’m driving to trailheads quite a bit, and one time I heard one under my truck at the Grizzly Gulch trailhead and had to fend it off in the middle of the night, but this was the first one I’d encountered on the trail.
He was just sitting there, staring at me. So I talked to him to get him to move. He turned around and waddled ahead of me, staying directly in the middle of the trail. I didn’t really want to follow a porcupine to the lake, so I talked a little louder to him. He scurried into the bushes and I immediately realized the error of my ways: now I couldn’t see him and didn’t know where he was. I didn’t want to experience porcupine quills and all that entails, so I nicely talked to the porcupine in a sing-song voice as I passed where I’d last seen him, crossing my fingers I hadn’t made him mad/scared and that he wasn’t sitting in the bushes: poised to shoot.
Mission “pass the porcupine” accomplished I continued on to the lake. The moon was full and bright so I conserved flashlight battery and hiked by the moonlight. Just as I made it to the lake I heard a faint barking in the distance. I was worried there was a lost dog out there somewhere (hey, it’s happened) but as I rounded the bend to the lake the barking got louder, and then I saw a flashlight turn on. The owner was pointing the flashlight in the direction opposite of me, and the dog was starting to bark really loud. I yelled up at them “It’s just a hiker!” I received no response, but the dog stopped barking and the flashlight turned off. It was about 4:45am. I immediately felt more secure hiking in the dark: I was pretty sure there wasn’t another animal in the area, as that dog would have been alerted to it.
Just north of the lake the trail continues north and then there’s a stream crossing. There were tons of areas to cross here, and all required taking off my shoes. At times the water was knee deep (I’m 5’4”), but mostly it was just high on my shins. Also, it was cold. When I was done my water shoes were quite muddy so I left them on a rock to dry and to pick up later.
This is where my trip report diverges from some of the more popular field guides. I took the 1st west side gully to the southwest ridge.
I crossed the creek and headed north for about 100 yards, looking for a gully to my right (west gully). I’d seen pictures of the access gullies on the east that were still full of snow, so by taking the west side I was hoping to avoid any snow filled gullies. I wasn’t disappointed. Here’s the gully I took:
This gully was steep and loose. I did not feel comfortable sticking to the scree in the middle, so I stuck to the right side where the rocks were larger.
My goal was to gain the ridge as quickly as possible, aiming for this small saddle
Here’s looking back on the route
From the small saddle you can see Hagerman Peak
I turned left (north) and faced a class 3 section and headed up and over the ridge.
At the top of this point I could see the rest of the route before me
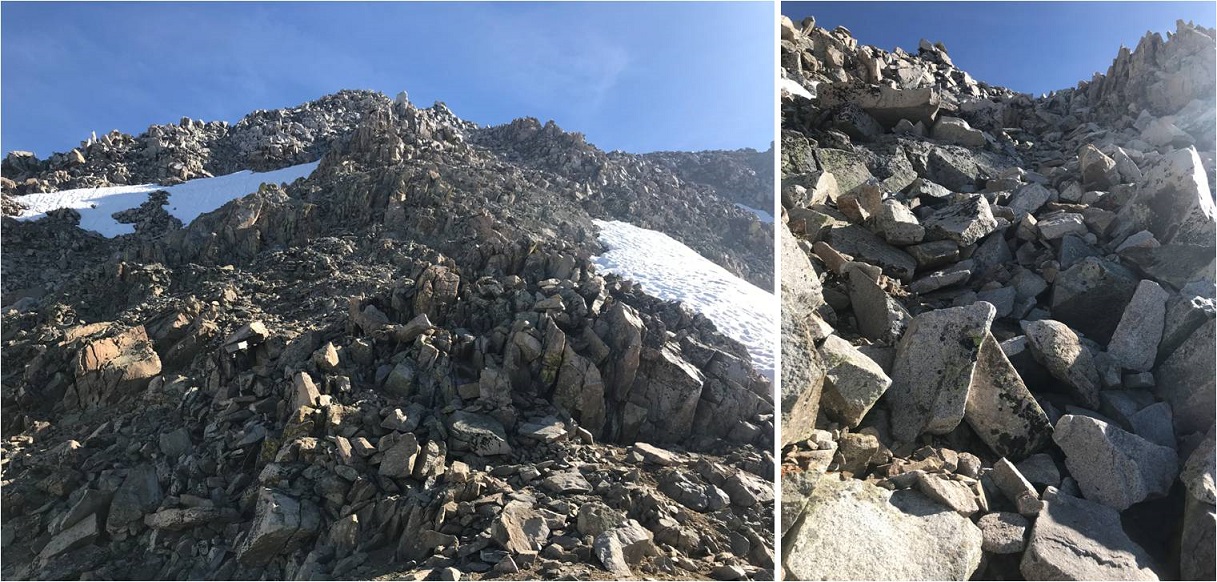
It’s important to note if you’re attempting this ridge to start early and make sure you have a large weather window. This ridge is very committing. I went at it slowly and carefully. The rocks here crumble: I’d find a hand hold, grip, and the rock would crumble in my hands. I had to make sure to test out each hold several times before using it to secure myself. Luckily, the ridge was snow free.
This is definitely a ridge you take by… sticking to the ridge. I was able to go directly up and over most areas, dipping to the left or right just a couple of times. As I ascended the rocks stopped crumbling and started tipping a bit (nothing fell, but not much was stable). Here’s the final push to the summit.
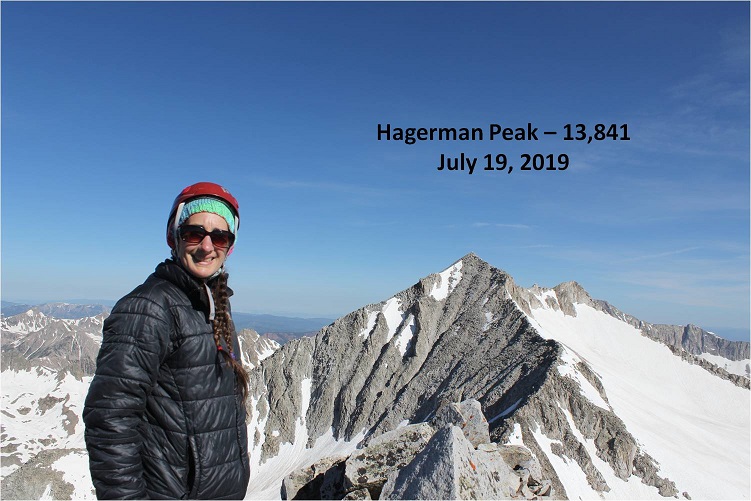
I made it to the summit at 9:10am
Hagerman:
I started the ridge at 7:15am and ended at 9:10am, making this a 2 hour ridge to cross. Here’s looking back at the route
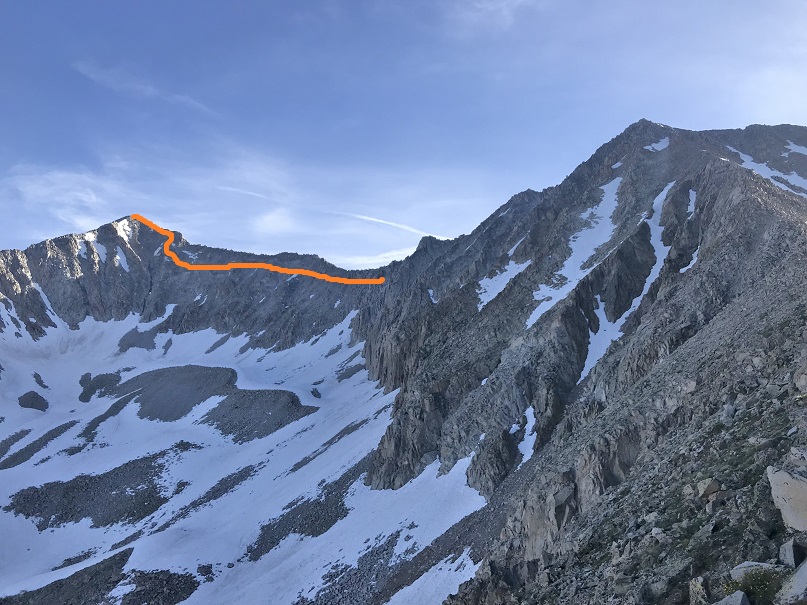
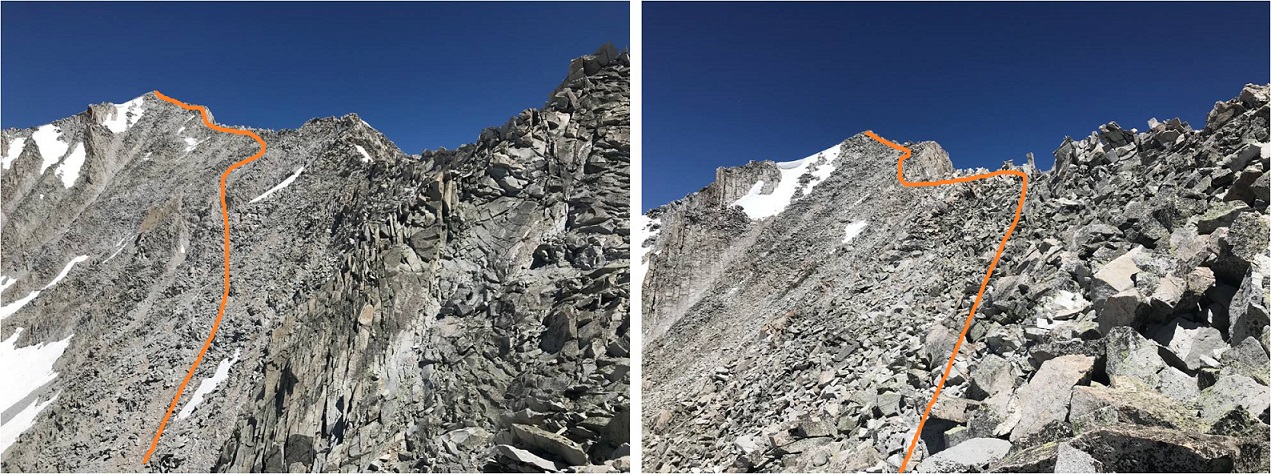
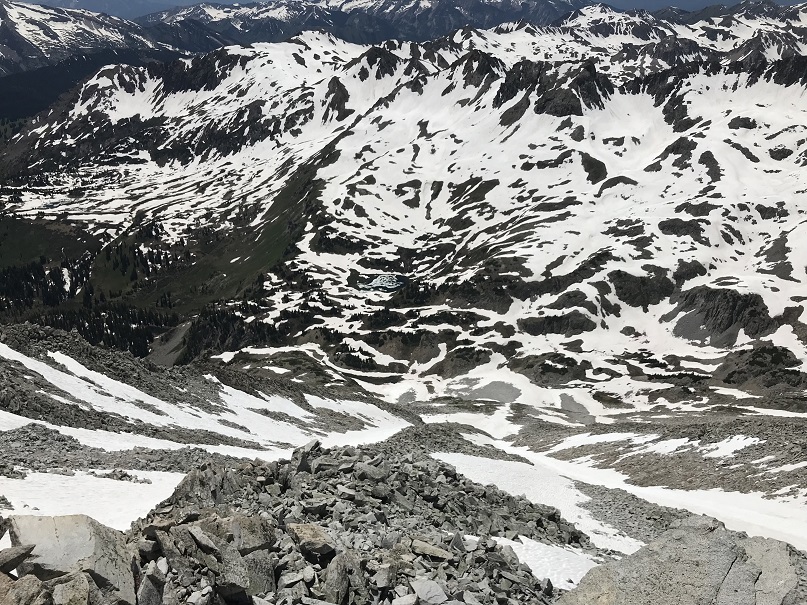
The day was absolutely beautiful and it was still early morning so I considered traversing over to nearby 14er Snowmass Mountain. I’d done a lot of research and came up pretty empty with details, but I knew it could be done. I spent quite a bit of time looking around at possible paths before deciding if I was going to attempt traversing or not. I looked at Snowmass Mountain’s east side: nope, that was a no go. Tons of snow and no way I could see to begin from the summit. Next I looked to the left (west). A lot less snow but the shadows weren’t helping much.
I stopped and did a lot of thinking here. I knew the traverse was possible. The rock looked loose, but I could also see goat trails (or maybe those were gullies…). I was confident I could find traction in the dirt. I mentally calculated how much time I had, the weather, and looked for exit strategies in case I got to a place where I couldn’t continue. I decided both time and weather were in my favor today so I decided to go for it.
Note: This may not be the safest way to traverse from Hagerman to 14er Snowmass Mountain. For me and my abilities, it was the safest way on this particular day.
The first move committed me to the traverse: I down climbed about 50 feet of… this. I’m not sure I could have climbed back up this wall. (Ok, I could have or I wouldn’t have climbed down, but it would have been a lot of work).
I turned and looked towards Snowmass Mountain. This is what I saw. So I headed northeast and rounded the corner.
I was taking this one section at a time, focusing on what was directly in front of me but glancing up at the rest of the route every so often to make sure I was on course. I found myself trying to stick to the ridge, but that is not the way to do this traverse: you need to drop down much lower than you want to. Every time I tried to regain elevation I was forced to head back down.
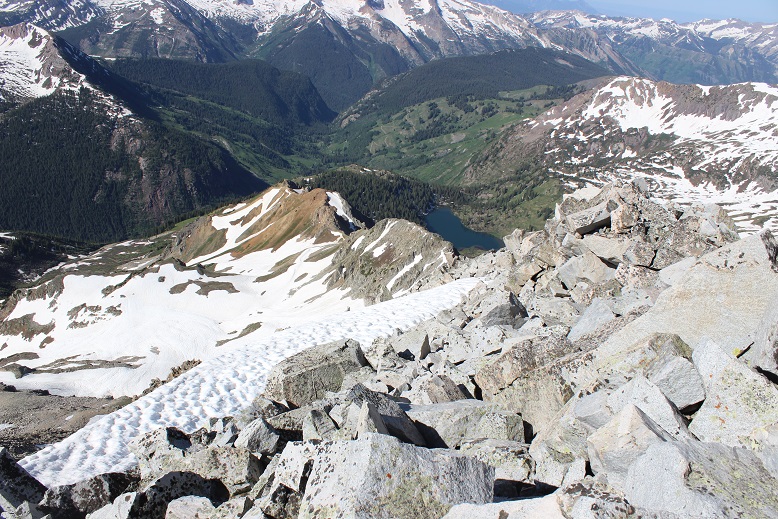
My advice is to descend lower than the saddle, and then take the scree line up to where the trail connects with the east route. The best terrain was consistently 100-200 feet below the ridge.
Once you connect with the ridge where the east route links up you can easily follow the cairns to the summit.
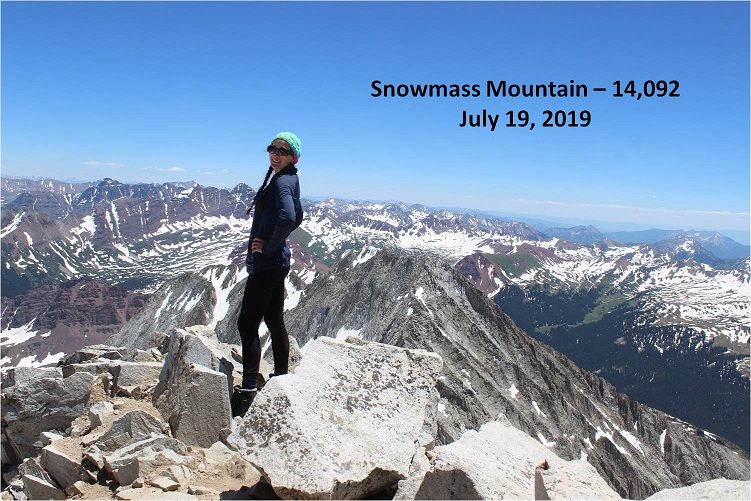
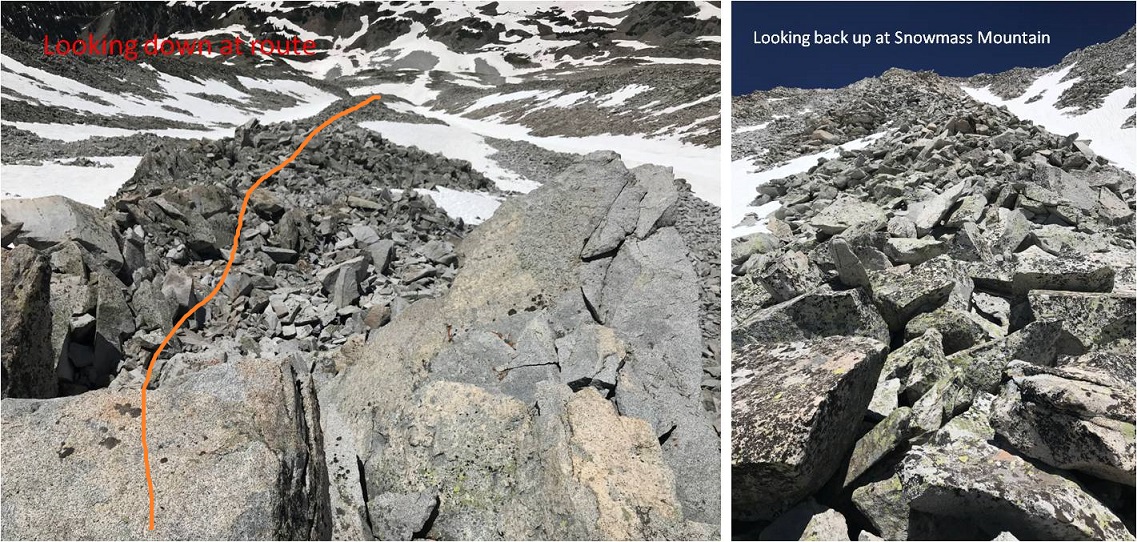
This was a very slow climb. Everything was loose and what wasn’t loose was scree. I took extra time to be careful with each and every step, and kept the entire route in view as often as possible. I most likely made this take longer than necessary, but I stayed safe. I made it to the summit of Snowmass Mountain at 12:50pm, making this a traverse that took over 3.5 hours to complete. Here’s looking back at the route
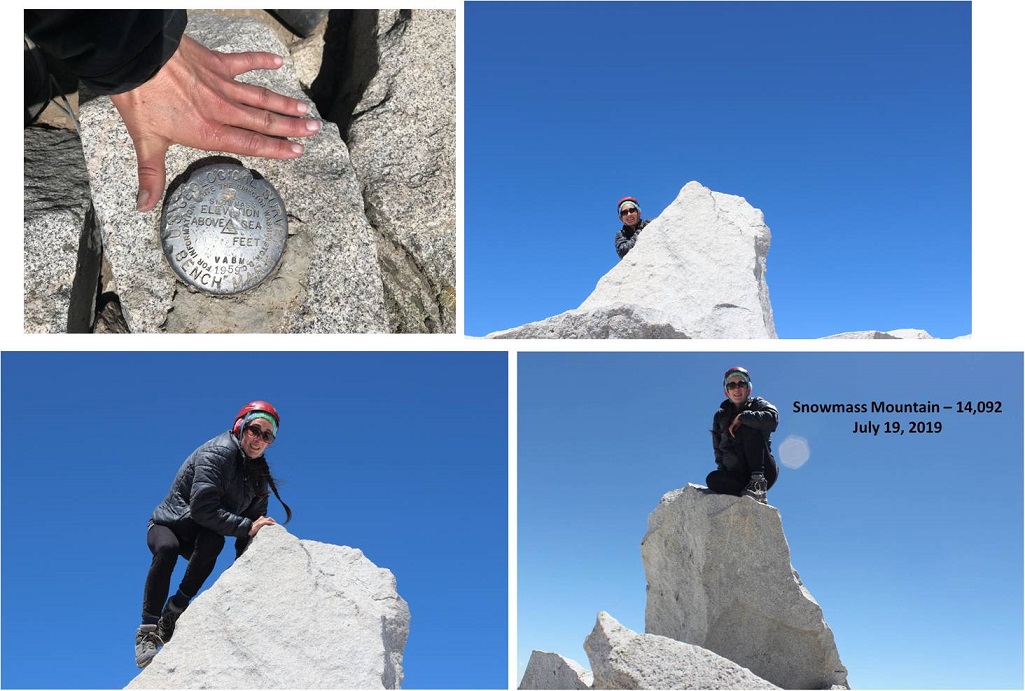
Summit photo
Summit Video
I spent a lot of time on this bluebird day taking pictures. It’s harder than you think to set an automatic timer and then scramble up to the summit block. It took a few tries… and the ones that actually turned out were fuzzy, so I gave up.
After spending much more time on the summit than necessary I needed to make the decision of how I was going to head back down. I’d been hoping, similar to the west side of Hagerman, that the west side of Snowmass Mountain would be free from snow. No such luck. There was still snow in the gullies.
I did not want to do the traverse back to Hagerman because that and another 3 hour traverse would have been exhausting. I could tell the gullies on the west side of Snowmass Mountain ended/cliffed out in a waterfall area, but I could also see bare rock I could traverse either north or south to connect up where I needed to be. I decided to head down Snowmass Mountain’s west side, but for safety I would slightly alter the traditional route. It was too late in the day to safely take the gullies, so I was going to take the rock rib that wasn’t a rib but a bunch of loose rock that bulged from the mountainside. Here’s the route I took
Do not let these photos fool you: this is where I encountered the loosest rock of the day. These rocks are the size of refrigerators and tables. Every 3rd rock would tip, and I would think to myself: “That’s a lot of rock to tip!” Luckily not one rock actually tipped/fell/tumbled/caused a rock slide.
This was a very slow process but eventually I made it to the waterfall area. My feet were starting to hurt at this point from all the rock work.
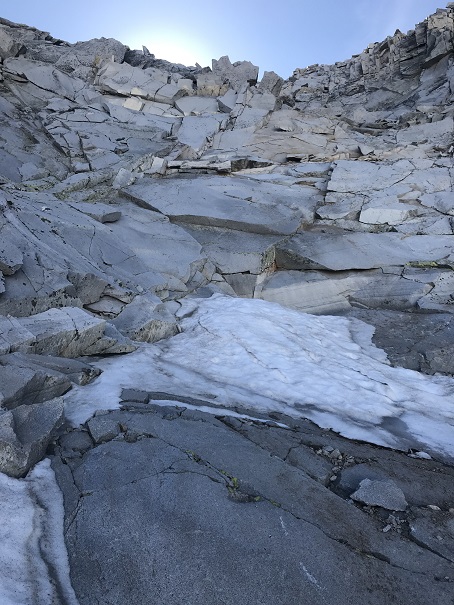
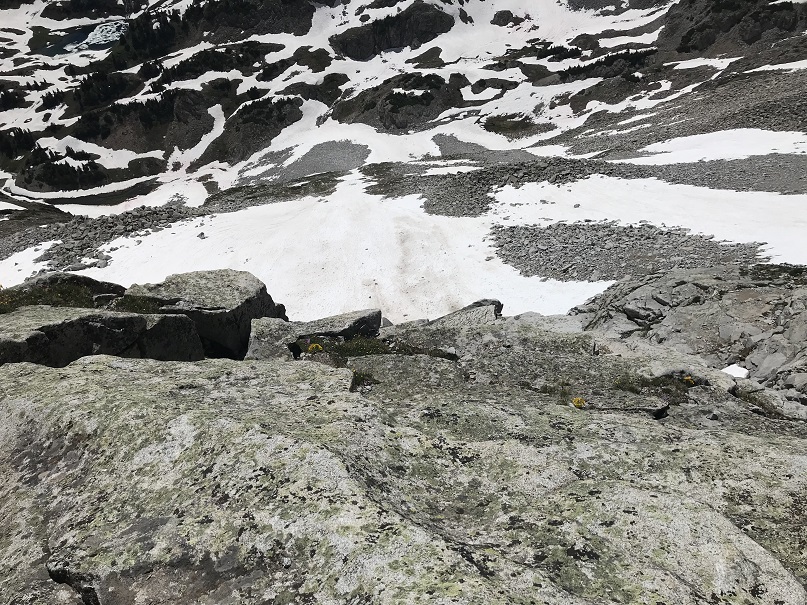
The snow ended just at the waterfall and surprisingly I crossed the waterfall pretty easily here and headed down. I made it down to this area at 3:30pm.
The snow started up again after the waterfalls
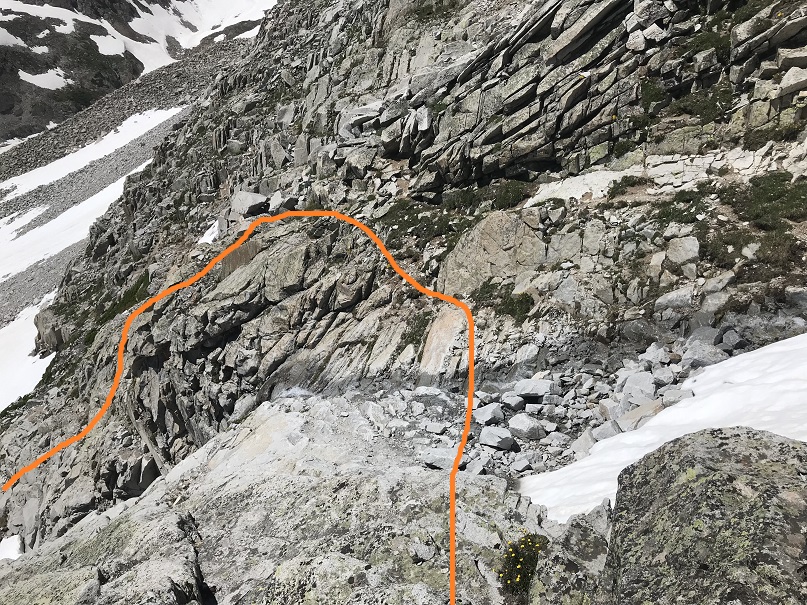
From here I looked down at the basin, and unfortunately there was a lot of snow covering the trail I was supposed to take back to Geneva Lake. That snow was going to be several feet of mush at this time of day so I decided to traverse south along the mountainside, looking for a safer route down.
I made it here and unfortunately cliffed out yet again… but I could see where I needed to be: That goat trail should get me down.
After searching around for a bit I was able to find a way off this spot by circling the area to the north and down the small cliff
From here I followed the goat trail that went down a forested gully and came out ready to exit and head towards Geneva Lake.
The area through the trees to the stream crossing was wet.
At the stream crossing I reconnected with my water shoes. They were now dry but had been scattered and were now no longer sitting on the rock together but in the grass a few feet apart. I changed out of my shoes into my water shoes and crossed the creek
I’m ashamed to say the creek ate my water shoes. Seriously. The banks were quite muddy and during the last two steps my water shoes got sucked off my feet and into the muck. I spent 20 minutes trying to dig them out with my ice axe, but no dice. I couldn’t find them. They were buried in the banks of the stream. Ugh. From here I sat and put on my shoes and new, dry socks. I looked back at the route I’d taken to Hagerman.
My feet were hurting, and I still had 4 miles to go. Time to hit the trail. I skirted the lake and headed back towards Lead King Basin.
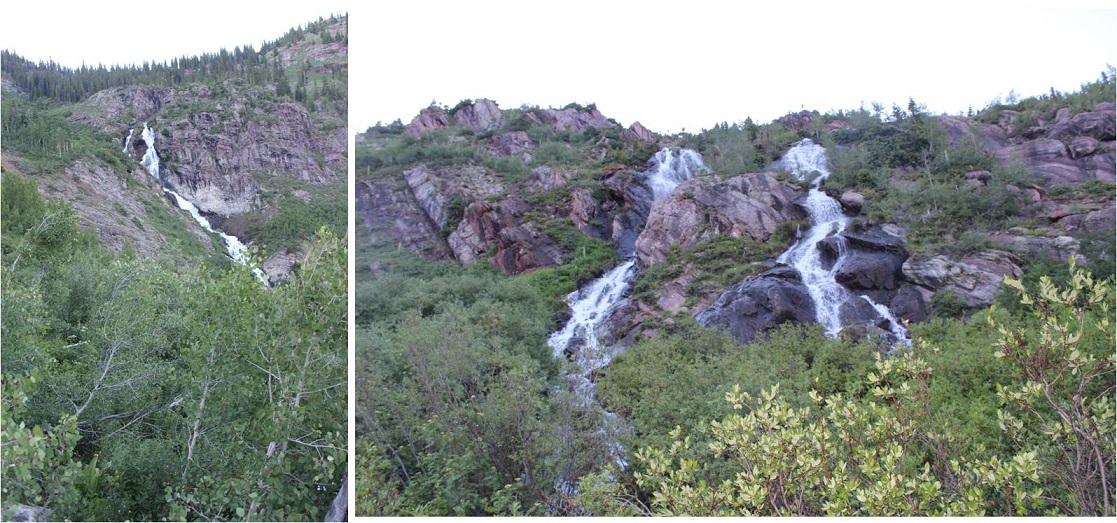
One great part of this hike was being able to see the waterfalls. And, since it was so late in the day: no bees!
At the base of the waterfalls the trail was running with quite a bit of water.
In the daylight I could see the upper 4WD trail to Lead King Basin
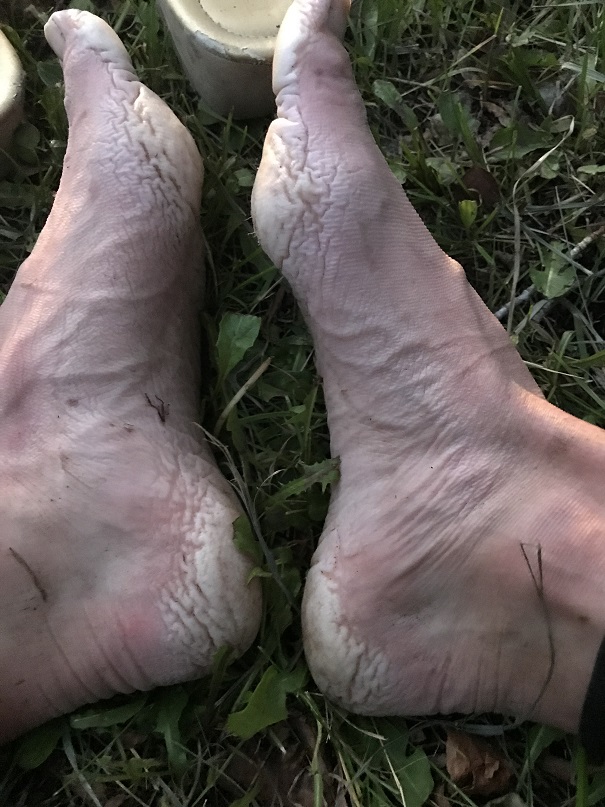
This is where my feet really started burning. I was surprised, since I’ve done more challenging hikes with greater mileage/elevation gain than this one, yet my feet were very sore. I made it past the Lead King Basin trailhead as the sun set and each step I took hurt more than the last. I wanted to cry. I’ve never felt foot pain like this. Also, I’d been hoping to stop in Carbondale tonight to get Subway for dinner, but it looked like I wasn’t going to make it back in time for that to happen.
It seemed as if it were taking forever to reach Crystal. I eventually came across a sign that said “Private Property next 2.5 miles” and mentally freaked out for a second. There was NO WAY it was 2.5 miles to Crystal! Not only could I physically not make it 2.5 more miles (My feet! My feet!!!) but I was pretty sure it had been 2 miles to the upper trailhead. Had I been wrong and it’d been 4? Ugh, I needed rest and I needed calories because my mind was playing tricks on me. Luckily it was only half a mile past that sign to the town of Crystal. I finished this hike at 8:45pm, making this a 15.5 mile hike/climb with 6211’ in elevation gain in 18.5 hours.
Read on for gross feet pictures and segue into the next hike…
I limped to my truck and sat down by a small access creek about 1 foot wide on the side of the road. I took off my shoes and gasped: Yuck! My feet had never looked like that before! The heels and pads were completely swollen and red/gray, and very painful to the touch (no blisters though).
I decided to wash them off in the water. I placed them both in at the same time and immediately felt relief, and then 2 seconds later started screaming because they started burning as if I’d placed them into a pot of boiling water. My feet turned bright red and were rendered useless. Seriously.
I couldn’t walk the 5 feet to my truck so I sat there for half an hour in the wet creek bank and thought about what I was going to do. I was supposed to drive to the next trailhead for my hike tomorrow, but doing the math if I left now I would get there and only have 1 hour to sleep before starting again. This hike had taken much longer than anticipated. I’d only had 3 hours of sleep last night so it was a bad idea to try to drive and then hike at this point. Also… my feet. I wasn’t sure they’d function tomorrow. They needed time to dry out. But long distance runners/thru hikers have this stuff happen, right? They just tape them up and hike/run anyway. I decided I was really, really tired and should sleep before attempting anything. I’d adjust my schedule as needed.
I had pain killers but decided not to take them: I wanted to be sure of an accurate pain level when I woke up so I could plan my day accordingly. Unfortunately, I never really made it to bed. I crawled into the cab of my truck, thankful I hadn’t rolled up my sleeping bag this morning. I tried to nap but even though I was exhausted I couldn’t get myself to fall asleep. After 2 hours I gave up and decided to drive home, with the added bonus of doing so in the dark late at night so I most likely wouldn’t need to pass anyone on the shelf road out. My feet had dried out a bit and were raw but less sore. They still overreacted every time I tried to use them. My right foot was healthier than my left; I couldn’t press down on the pedal very hard, so I drove slowly, but I made it.
Oh, and since I’d returned in the dark I never got to see the Crystal Mill, or get a good look at that old house with the lady in the windows…
I really did’t want to write this one up because I made some amateur mistakes, but I also learned something, so here it goes…
My goal today had been 13er Centennial Hagerman Peak. I drove from the Cathedral Lake Trailhead and set my GPS to Geneva Lake, where the trailhead was supposed to begin. Just after the small town of Marble (which had tons of marble statues on front lawns) the road became rough and honestly quite fun in my 4WD Tundra. The dirt road was narrow, and I had to pull over a few times to let OHVs by, but all in all I was having a great time.
I came to a stream crossing and looked at my navigation. I was 5.5 miles from the trailhead. Not bad. Even if I decided to stay where I was and camp for the night I could still do the hike in under 20 miles. Totally doable. It’s important to note at this point I had no signal, so I was just going off this picture of my location (which rotated as I drove).
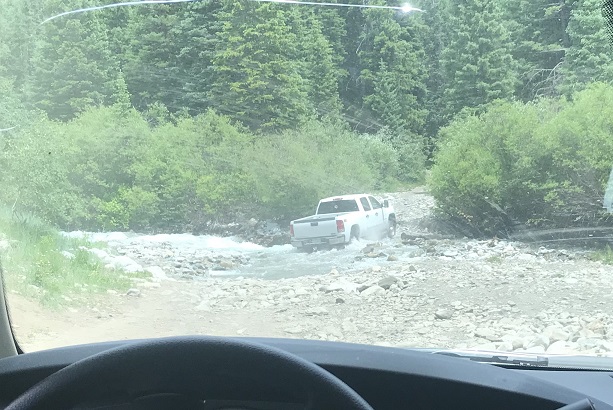
As I sat in my truck eating dinner (I’d found a Subway on the drive in) I watched several vehicles attempt to cross the creek.
The water was just to the top of most of their wheels. The OHVs were lower to the ground and thus their occupants got soaked. The vehicles did just fine crossing though. I watched a GMC truck get stuck, but after some back and forth action it was able to get unstuck. Then I saw an F150 cruise across the stream and thought “My truck can do anything those trucks can do and more” so I put it in drive and crossed the stream, no problem.
About a mile and a half up the road began to get rough. I’m talking closed upper south colony lakes trailhead rough (the part you can no longer drive on). My truck was handling just fine, but huge boulders and water were increasing on the trail and there weren’t many (any) places to turn around, so I used a switchback to reverse my course and ended up parking back at 9960’. I was pleased with this spot, as I was now 4.2 miles from the trailhead.
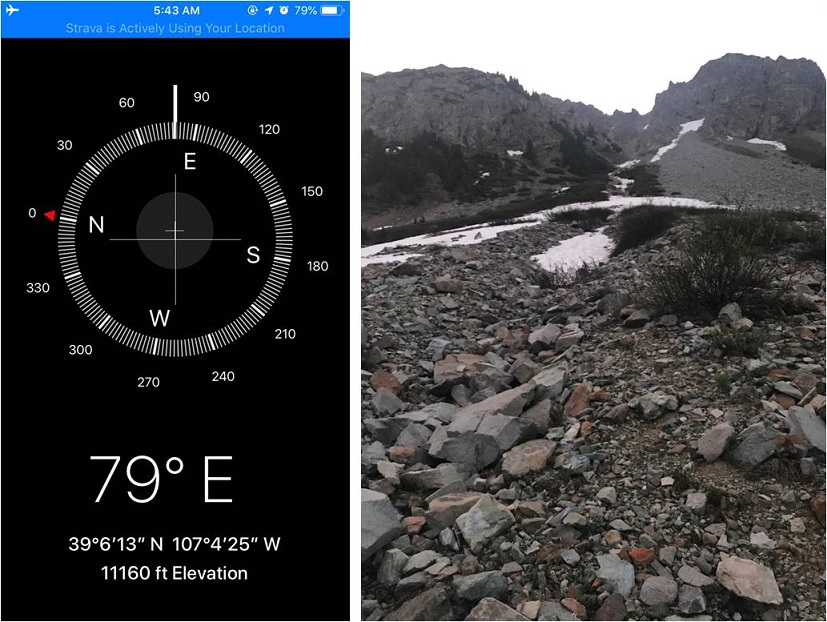
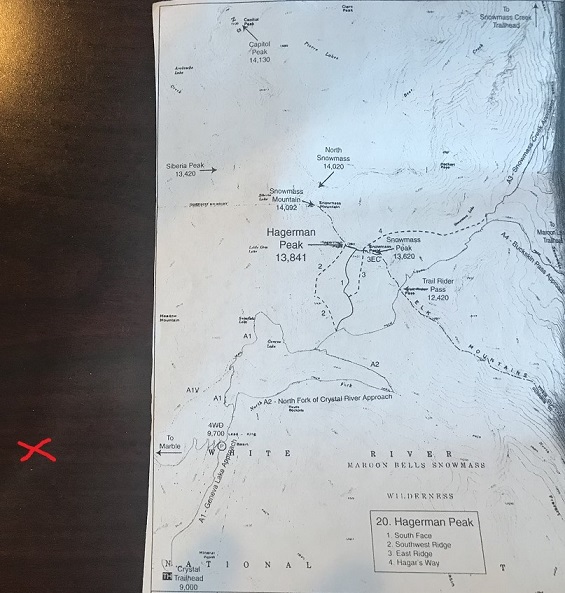
I got out my topo and did my best to guestimate where I was on the map. Unfortunately I was pretty sure I was currently “off map” at this point, but figured I was about here (red x). I realized later I was indeed correct in my assumed location.
Had I had a better topo or cell service I would have realized my mistake instantly, but going off of what I had I was sure of my current location (and actually, I was). I just needed to follow the 4WD road to the trailhead and I could pick it up from there. I had several great topo maps that started at the trailhead, as well as a pre-loaded GPX file. I spent the next 15 minutes or so going over the route again, and calculating how much elevation gain I’d add from starting from my current location. It looked like an extra 700’ each way, so no more than 1500’in total. I was willing to live with that.
I made it an early night and woke up at 10:30pm to start my adventure. I was on the road by 10:50pm. It started out easily enough: I just followed the 4WD road. I didn’t think to take out my map (etc) because I was just following the road. After about a mile the snow started, and it was obvious no vehicle had been in this area yet this year. Hmmm. That was curious: I saw a conditions report from last week stating it was snow free to the lake. I should have stopped and reassessed here, but if I had I wouldn’t be telling this story. Also, some people lie on conditions reports (it’s happened before).
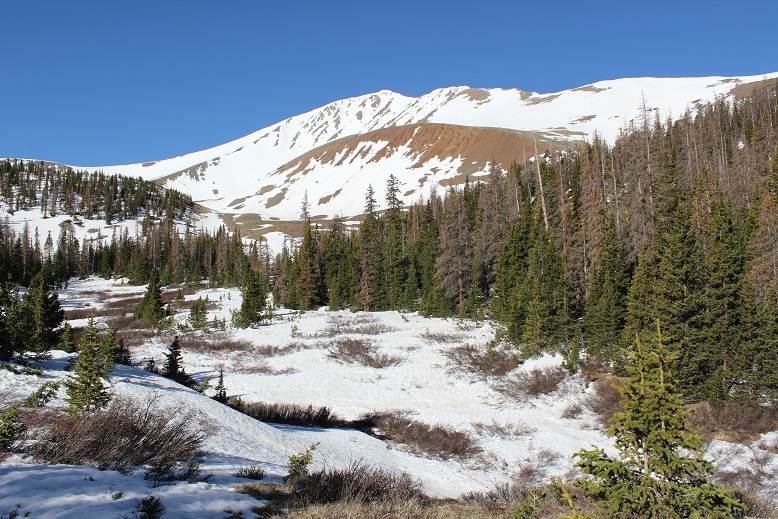
I continued on and thought to myself “Wow! This sure does feel like more than 700’ in elevation gain! I must still be sore from yesterday.” There was a full moon out but it was obscured by the trees. I kept following the road through increasing snow until the road just stopped. That was curious. It just ended and there was no trail to hook up with it. There was supposed to be an obvious trailhead… and I’d never decreased in elevation.
I took out my phone and looked at the picture I had of where I was going, and then looked at my tracks so far. It sure seemed I was going in the right direction. At least my tracks looked similar to the route description. The trail must hook up here somewhere close. I got out my GPS track and yes, it looked like I just had to head in that direction and I’d make it. The problem was ‘that direction’ led me over a cliff.
I kept scouting around and found what looked like fresh tracks. Awesome! Someone had been here after all. I walked over to them and noticed the tracks were from a mama bear and cub, and yes indeed they looked fresh. That did it. I was turning back and heading back to my truck. I did not feel confident continuing in the direction I was going, and I was sure something was wrong with my navigation (I just wasn’t sure what I’d done wrong).
I followed my tracks back to my truck and made it back a little before 1:30am. Drat. It was too late to drive somewhere else and start another hike. The day was shot. What really stinks is I lost an entire day of potential hiking. I decided to drive back home and figure out where I went wrong. On the positive side I was the only one on the 4WD road at 1:30am, so I didn’t need to move over for any passing vehicles.
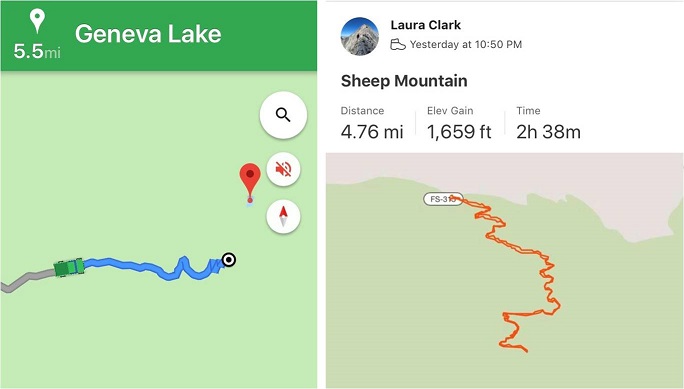
OK, so here’s what I’d done wrong: I followed the orange line, when I was supposed to follow the red line. Note: the orange trail hadn’t been on my map, so I didn’t even know it had been an option. I just figured I was following the same 4WD road.
But if you look at my tracks, they do look pretty similar when you rotate them (which was what was happening as I was hiking)
On the positive side, I ended up unknowingly summiting Sheep Mountain, a ranked 11er, so there’s that. Also, I got in 1659’ in elevation gain (see, I knew I’d gained more than 700’). So, lesson learned. Have topo maps that cover the approach in, even when it’s on a road. I’m going to have to attempt this one again… luckily it’s only a 5 hour drive.
Today became a ‘Surprise! You’re free to hike!’ day at the last minute, which I quickly took advantage of because I was unable to get out last weekend. Luckily the weather cooperated as well. The 2WD road in to the Baldwin Gulch Trailhead was completely clear and dry all the way to the lower 2WD trailhead.
In the dark I could hear and kind of see Chalk Creek. It sounded like it was raging and looked dangerously close to reaching its banks in some areas. I seriously wondered if it would start to overflow later in the day. I’ve driven up the 4WD #277 road before, and even if it was open I didn’t much want to drive it again, so I parked along the side of the road (in the dark not seeing the lot just before the trailhead) and got my gear ready.
I was on the trail just after 3am.
The #277 Baldwin 4WD road was worse than I remember it from 2017 and I was immediately glad I’d chosen to park at the 2WD area. The road was in full spring conditions, with a river of water running directly down the road.
After following the road for about 2 miles I came across avalanche debris blocking the way. It wasn’t too difficult to navigate around, even in the dark, but it looks like it’s going to be there for a while and vehicles can’t cross the area.
If you do decide to drive up the 4WD road there are 2 camping spots with parking for 1 car each before you get to the avy debris. The last spot is located at 10,530’. It’s also the last place to turn around before the debris. I’d just recommend parking at the bottom and hiking in though, as it’s an easy hike.
After the avy debris the water on the road really picked up. It seemed the creek was overflowing its banks here and I easily crossed through a couple inches of water for hundreds of feet
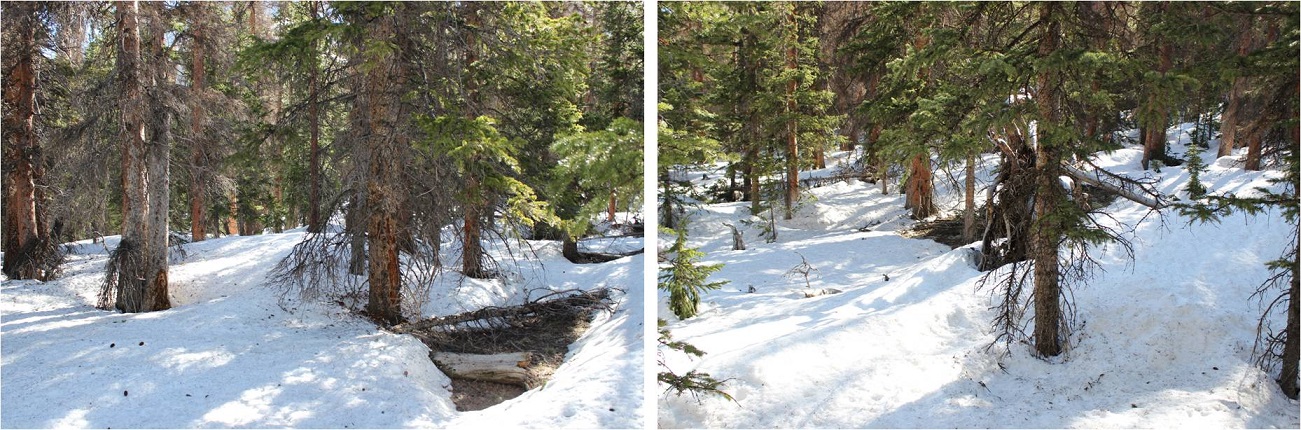
There was also evidence of moose in the area along the trail, but it didn’t look too recent. I made it to the first Baldwin Creek crossing while it was still dark. I couldn’t see how deep the creek was, but my plan had initially been to rock hop across the creek on the boulders to the left. I got about halfway across and had second thoughts: the rocks were slippery and some were under quickly flowing water. I was going to have to jump to make the last few and would most likely end up in the creek in the process. So I backtracked and thought about what to do.
I don’t feel safe crossing streams barefoot, and I hadn’t brought extra shoes/sandals/socks, so if I was going to ford the creek I was going to have to complete the rest of the hike in wet shoes with soggy socks. This did not sound appealing, and I knew soggy socks would turn into ice socks when I got further up in elevation. I gave my summit a 50% chance of happening if I forded the creek but knew if I stopped now that number dropped to 0%. I decided to go for it. In the dark I studied the water and looked for the safest area to cross. This ended up being close to the mouth of the creek. I put my electronics in my pack, adjusted my trekking pole, and took a step in the water. Woot! My foot stayed dry! The rocks were not as slippery as I’d imagined, but I was still careful and gingerly crossed the stream. I took three more steps before my hiking shoes slowly started filling up with water.
I made it to the other side of the creek without incident. The only casualty was my wet feet. I kept hearing squish-squish with each step I took. This was not going to be enjoyable. Oh well, on I went.
It wasn’t long before I came to the second creek crossing, and since my feet were already wet I didn’t hesitate and just walked through this one as well.
This is where the snow started. Since it was still early morning it was consolidated and I was able to walk on top of the snow. As I continued up the trail I encountered more and more snow.
About a mile after the first Baldwin Creek crossing I turned right and entered the trees, aiming for where I mentally knew the willows area should be. I immediately sank up to my waist in snow, but I’m stubborn, so I had to sink about 10 more times in the next 10 more steps to break down and put on my snowshoes. From then on out I didn’t posthole (much). Oh, and my wet toes were beginning to freeze inside my wet socks.
I didn’t feel like I walked very far before I was in a clearing and could see the willows and the rest of the path before me. The sun was also starting to rise, which was nice. Here’s the route I took, staying out of the trees and going straight up the gully
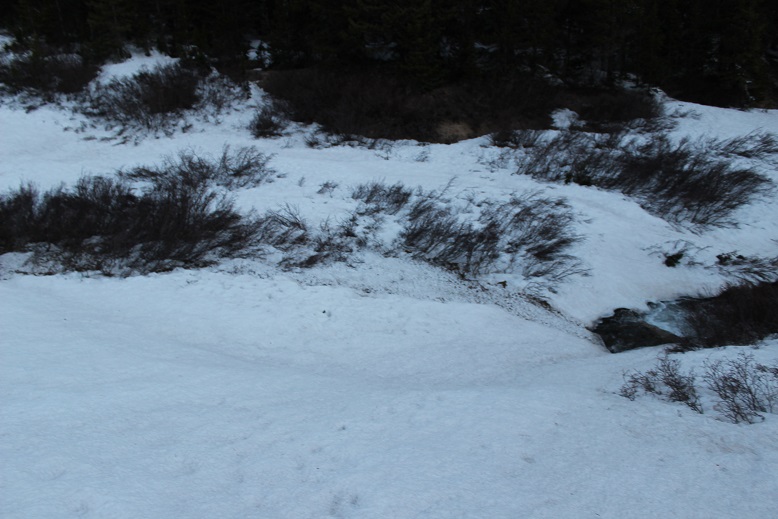
Luckily there was a small snow bridge over the creek in this area, so I didn’t need to get my feet wet again. I could hear the water rushing underneath, and asked myself if the snow bridge would still hold me this afternoon on my way back?
After crossing the stream I navigated around the trees, sticking to the left (southwest). As it rounded I turned west and followed the gully on consolidated snow.
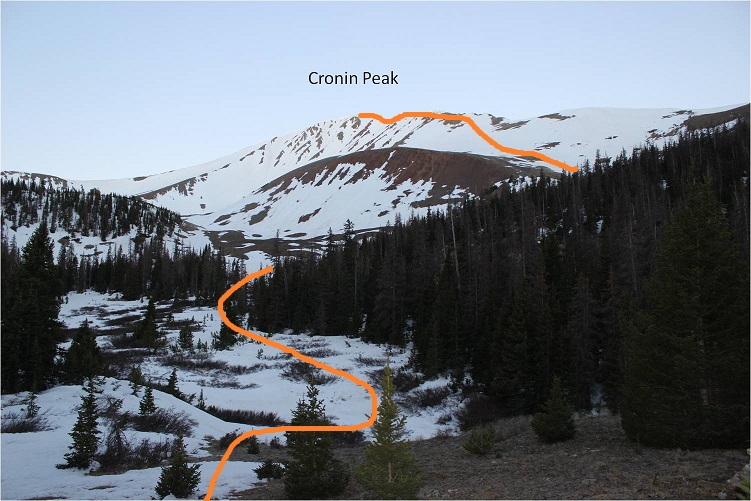
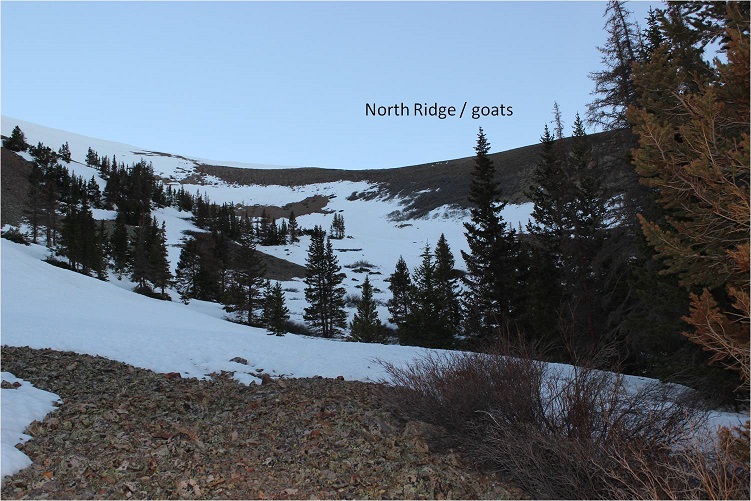
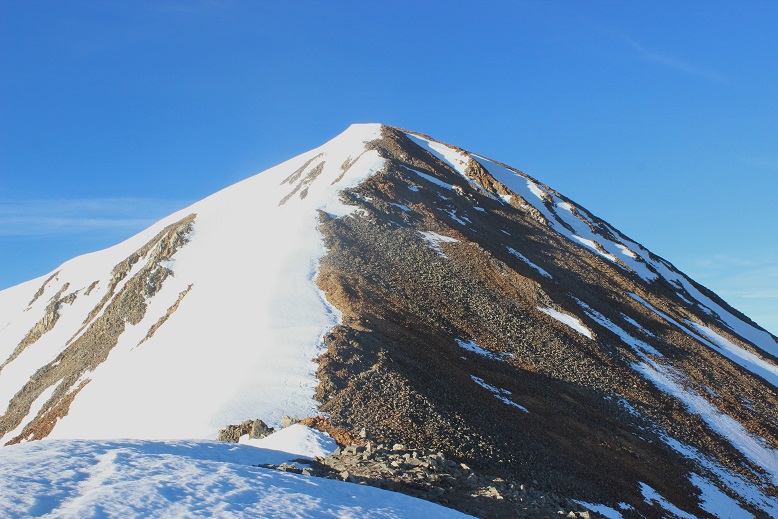
There are a few options from this point to gain the ridge and summit Cronin. One is to take the north ridge, but the scree here didn’t look appealing. Also, there were goats enjoying their breakfast and I didn’t want to disturb them (but it was mainly the scree that made the decision for me).
So I continued following the gully up and to the left (west)
I still had options for gaining the ridge, and decided the safest option was to kind of parallel the ridge as I gained elevation. Here’s the path I took to gain the ridge
My socks were now frozen. I could feel the ice between my toes, but surprisingly they weren’t cold. I decided not to question it and kept going. Gaining the ridge wasn’t difficult, but the snow was starting to soften up.
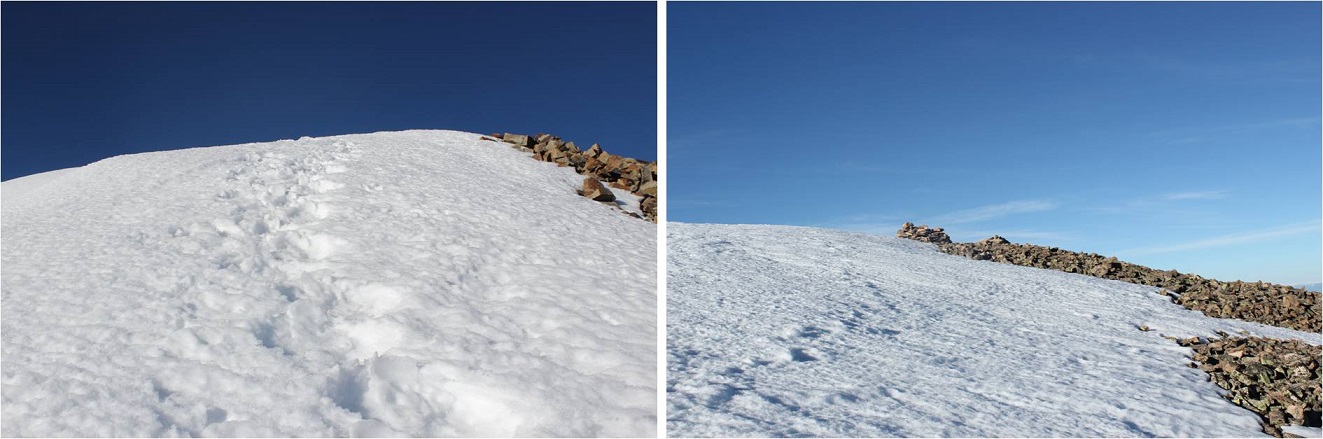
I gained the ridge close to the false summit, and could see the rest of the trail in front of me. There was just enough snow to walk on and goat tracks to follow.
From the false summit there’s a little bit of a downclimb and I’d been told it included some tricky footwork, but the snow obscured any difficulties. I postholed here once or twice up to my waist, even with snowshoes on.
The ridge was one long but squatty cornice. I stayed to the right on the snow and walked where the snow met the dirt.
On the final push to the summit the snow got increasingly softer but was still navigable.
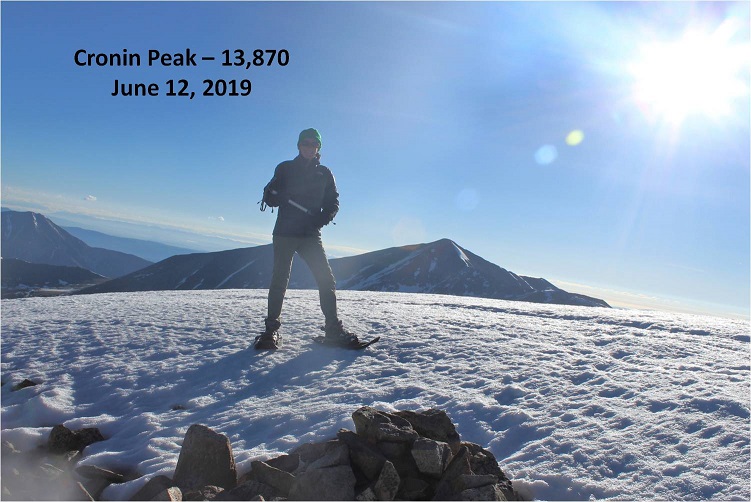
I summited at 7am, and set up my camera with my new gorillapod (which isn’t at all what I’d expected: poor quality but gets the job done).
(For some reason I said Casco, but I was on Cronin. Whoops! Oh well… my fingers were too frozen to try a second time.)
Check out Antero
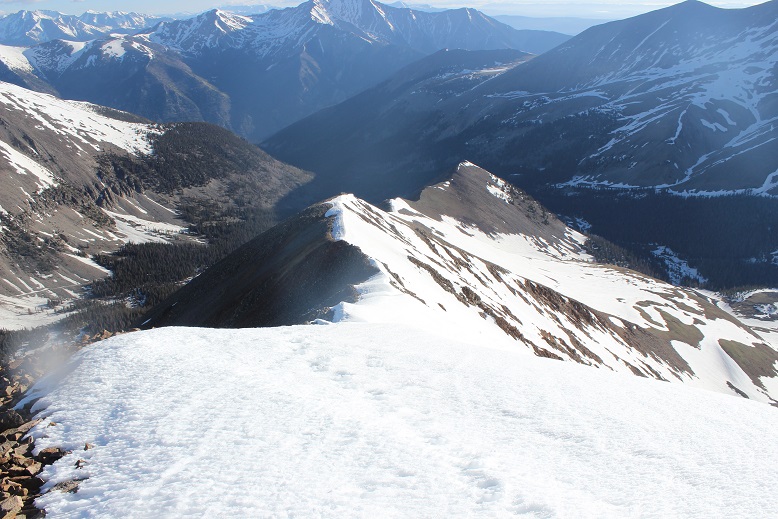
It was windy and my feet were now solid blocks of ice, so I didn’t stay long on the summit. I turned to look back at the way I’d come
Here’s the route I took back
The snow was warming up quickly so I got out my ice axe. It helped me through some quick sketchy sections
The most difficult part of the day was just beginning. This snow section here below the ridge was rapidly warming and became slippery. I had to walk slowly to prevent slipping, yet wanted to make it down before the sun warmed up the snow even more. I couldn’t believe how soft the snow was for 7:30am!
I made it to the top of the gully area, said hi to the goats, and breathed a sigh of relief: I hadn’t slipped once!
Here’s a look back at the route
And a look down the gully
I made it back to the willows, following the tracks I’d made on the way in. My feet had finally defrosted and I was squishing again. From here I decided while I was hiking through the trees I would aim for the ridge directly in front of me
I made my way to the snow bridge and looked back at the mountain. Cronin looks better in daylight!
The snow bridge still held my weight
Once in the trees I walked northeast until I made it back to the road. I’d overshot my entry point by a few yards, but was pleased with my navigation skills. My toes had almost dried by the time I made it to the first creek crossing. Both creek crossings were much easier in the light of day, and with the added bonus of previous experience I just walked across them both. I followed the road back to my truck, taking pictures in the daylight of the fun I’d had in the morning, my feet squishing the entire way. I made it back to my truck at 10am, making this an 11.5 mile hike with 4510’ in elevation gain in 7 hours.
Chalk Creek hadn’t overflowed its banks, but it was raging! Here’s a picture from further down the road