Mountain Boy Peak – 13,198 & Igloo Peak – 13060

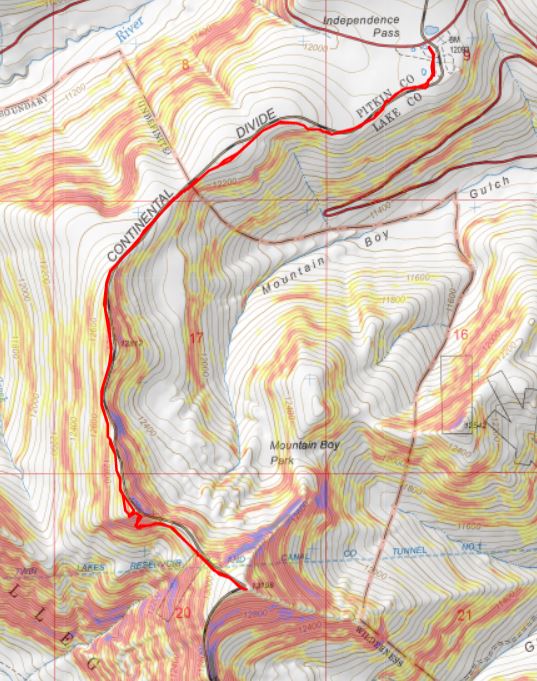
RT Length: 6.78 miles

Elevation Gain: 2151’

I wanted to get in one last peak before Interdependence Pass closes for the year.  I was supposed to hike this peak o Tuesday, but weather was coming in, so I changed my plans and hiked it Monday morning instead. 

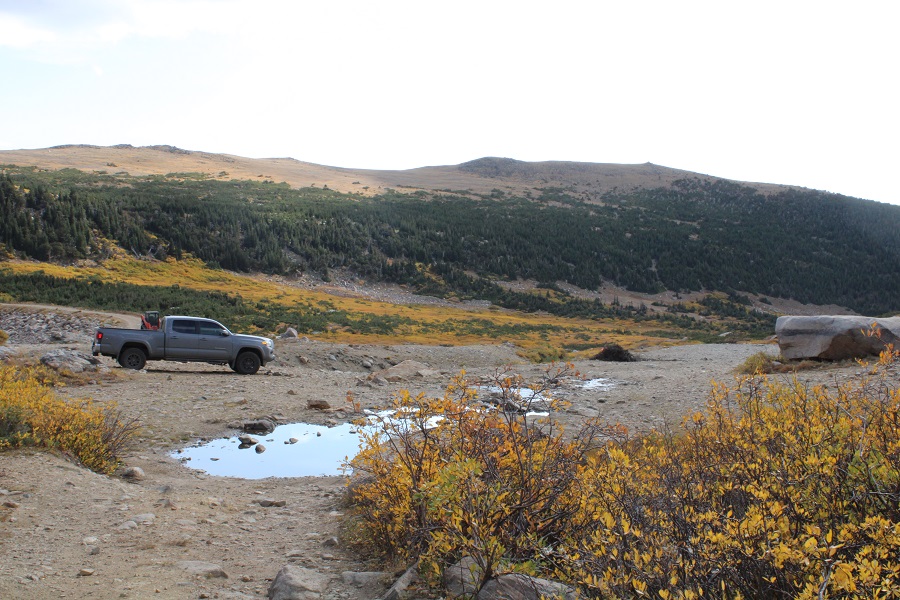
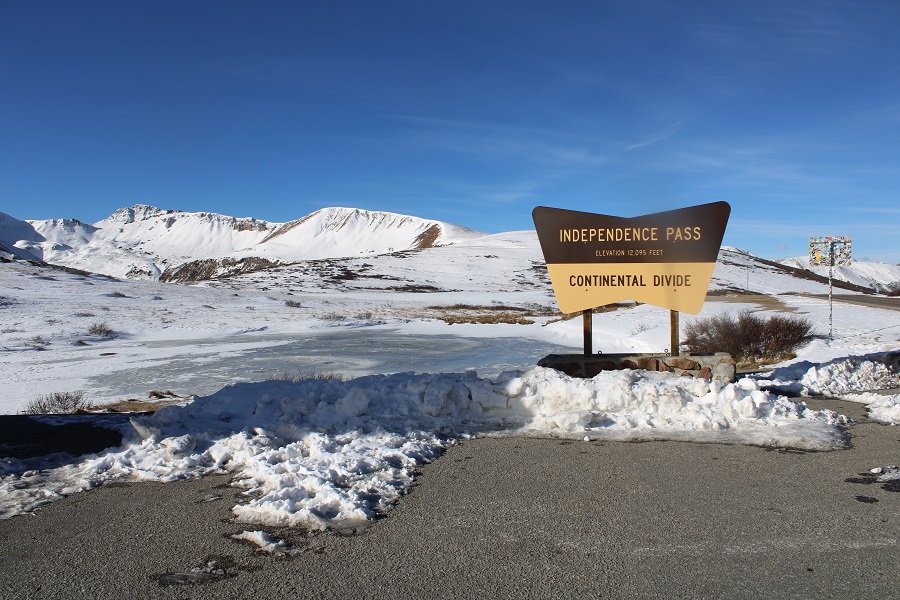
I made it to Independence Pass and was on the trail by 5:30am.  Side note:  I was here October 25th, and the bathrooms were closed for the winter.

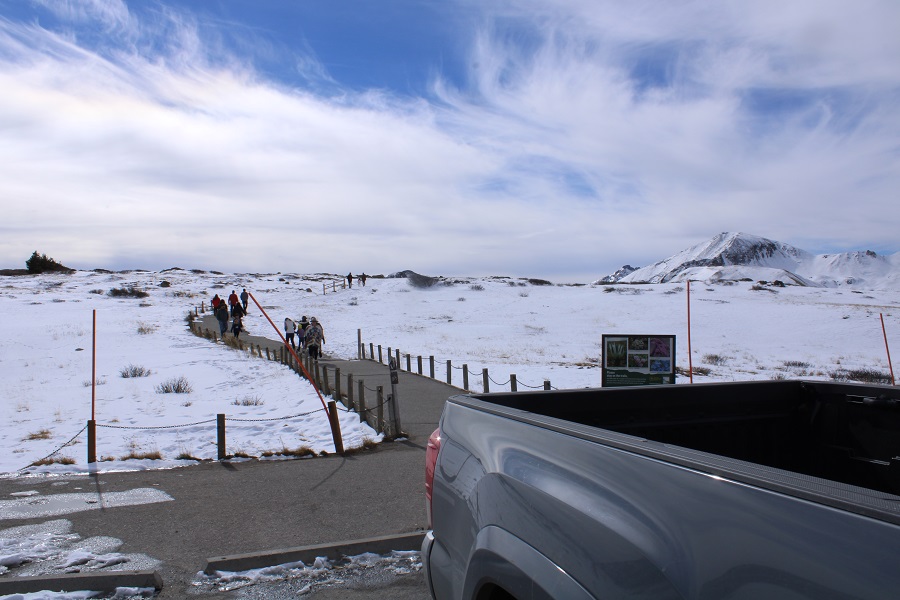
Obviously, mine was the only vehicle in the parking lot that early in the morning. The trail is obvious, and starts by heading south on a paved trail.

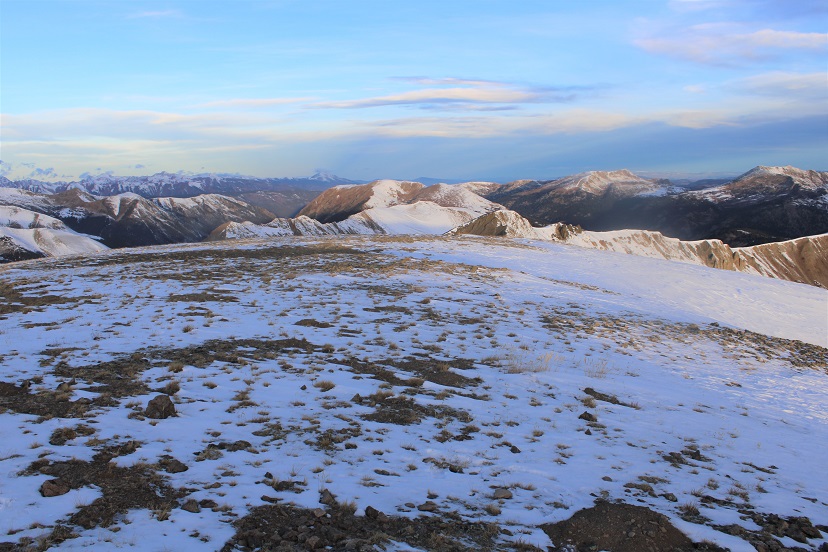
I’ve never been in this area in summer conditions, so I’m not really sure when the trail becomes a trail and no longer paved, but I know I was off pavement pretty quickly, heading west.  This morning, before making it to Igloo Peak, snowshoes were needed some of the time, overkill most of the time.

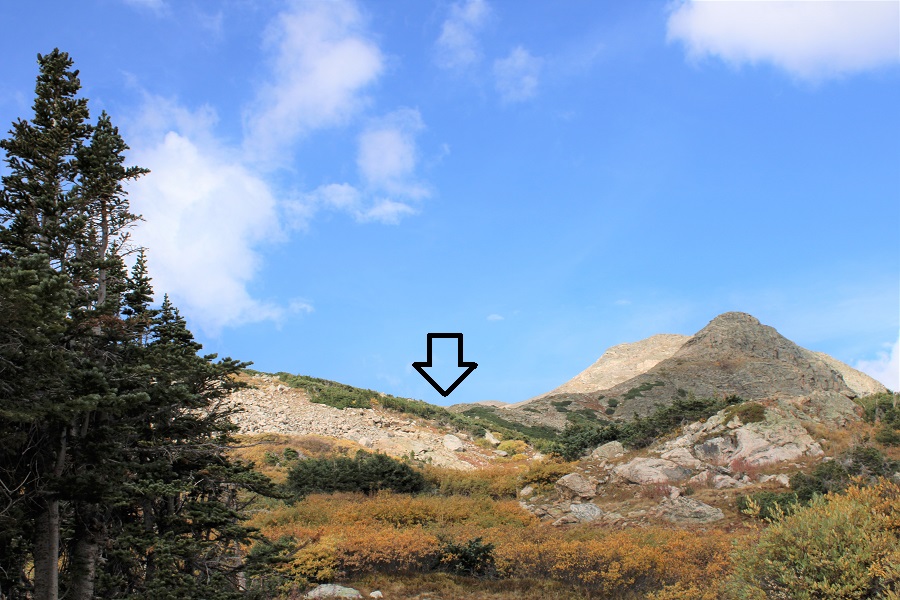
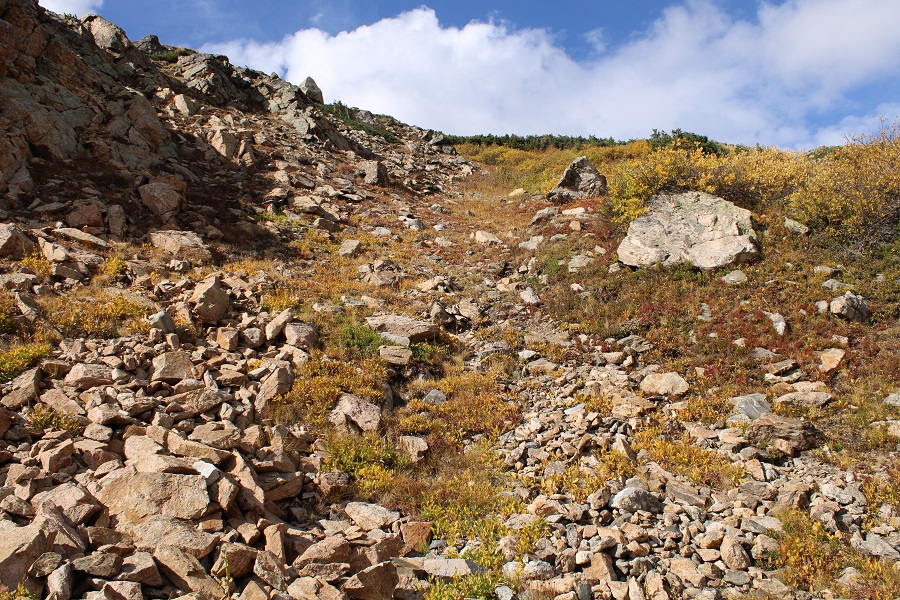
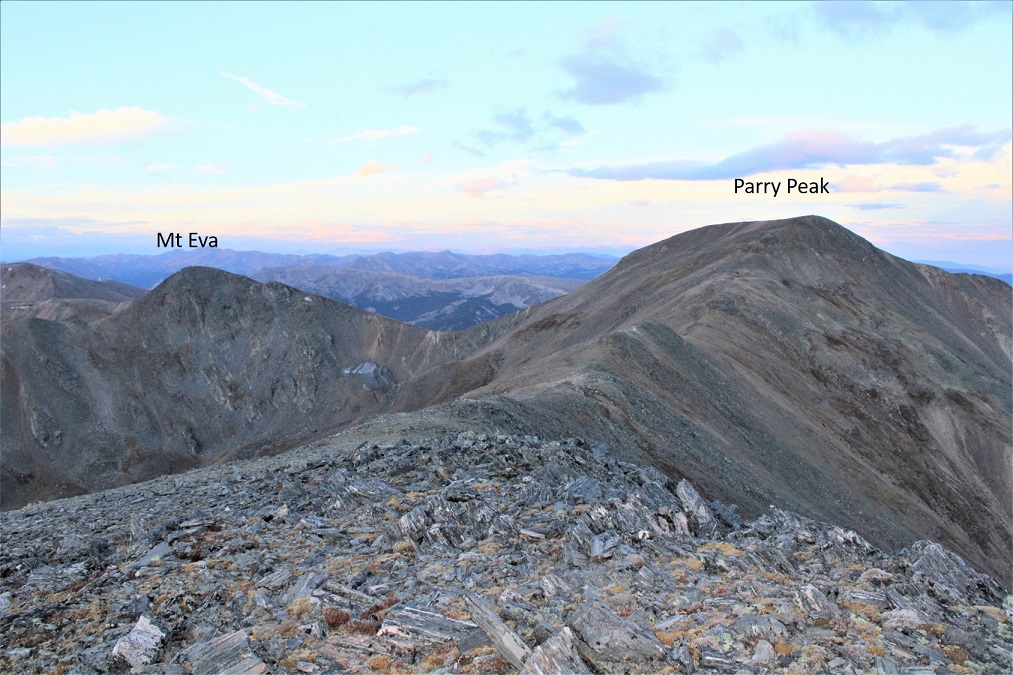
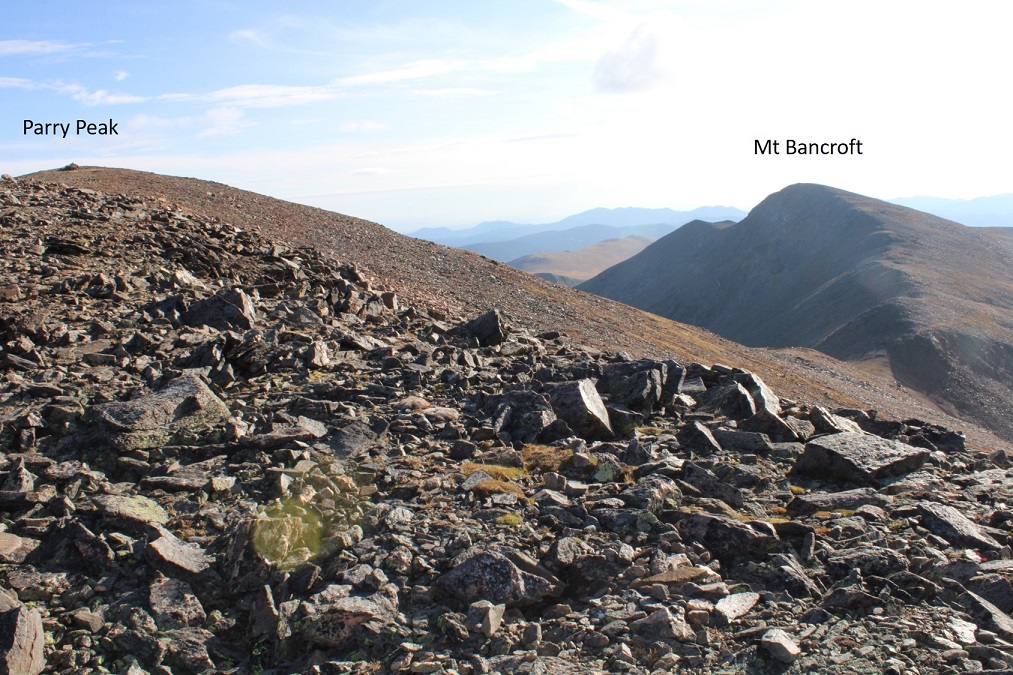
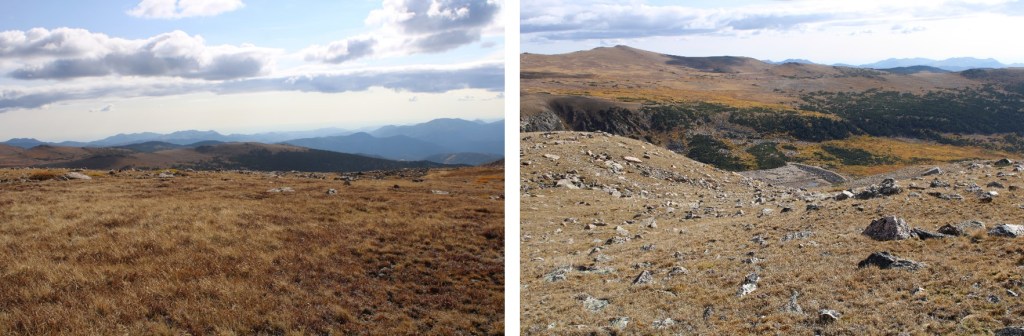
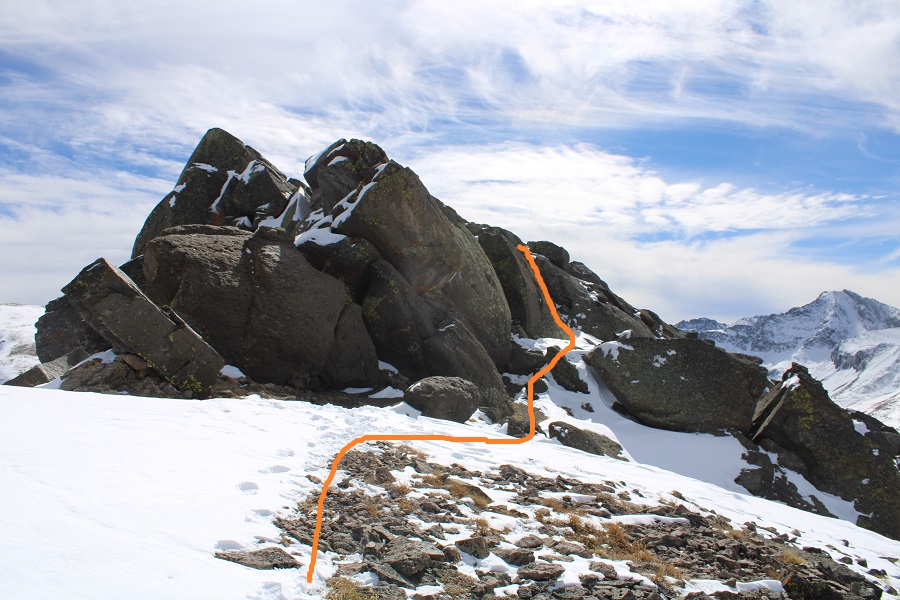
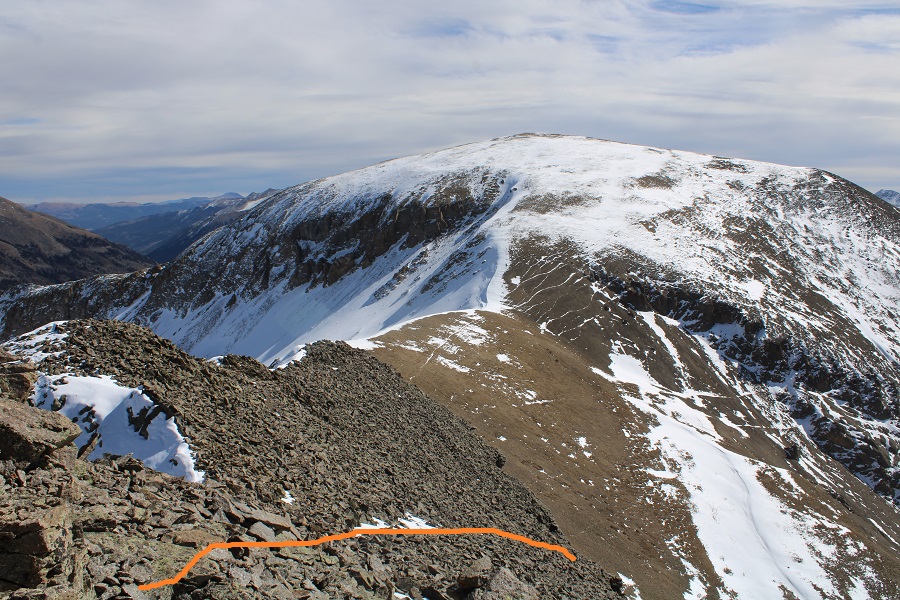
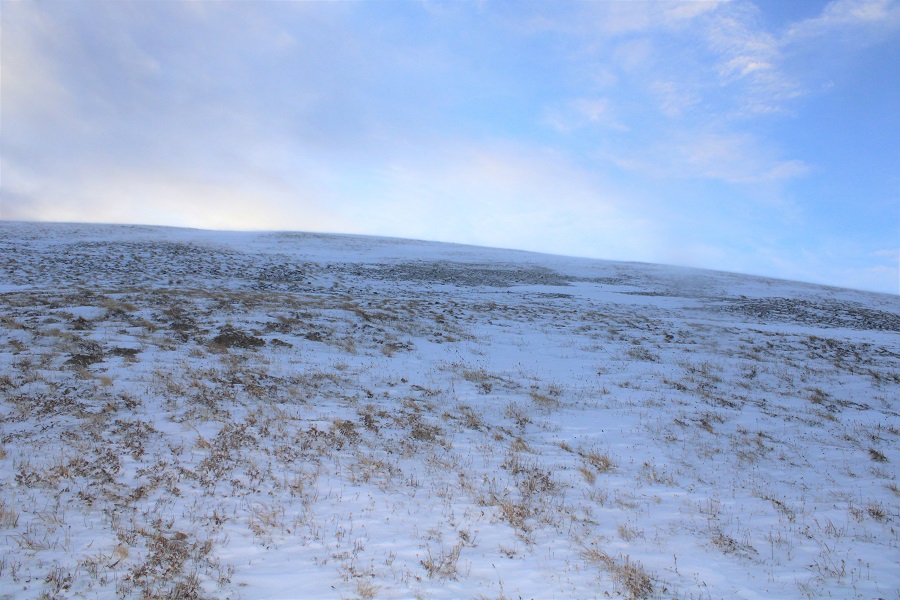
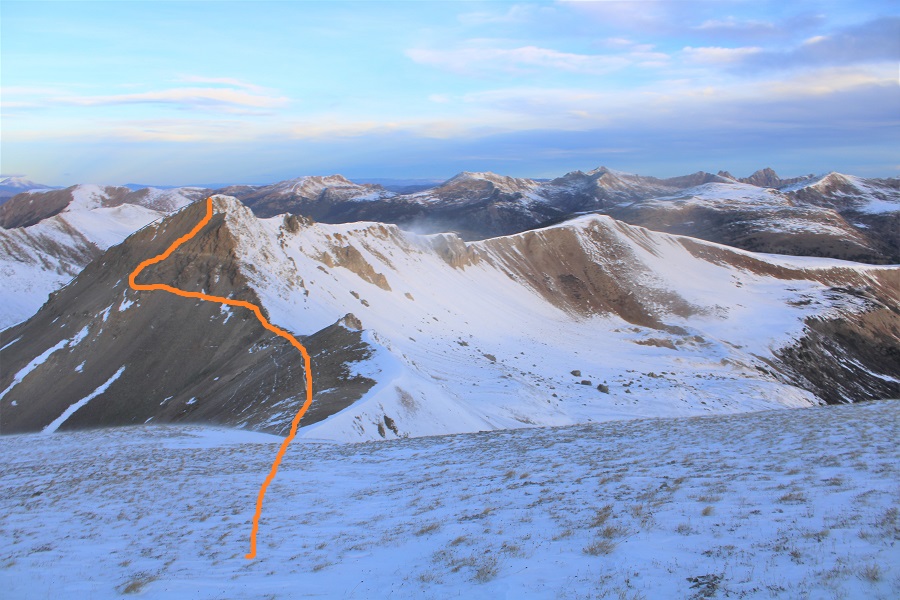
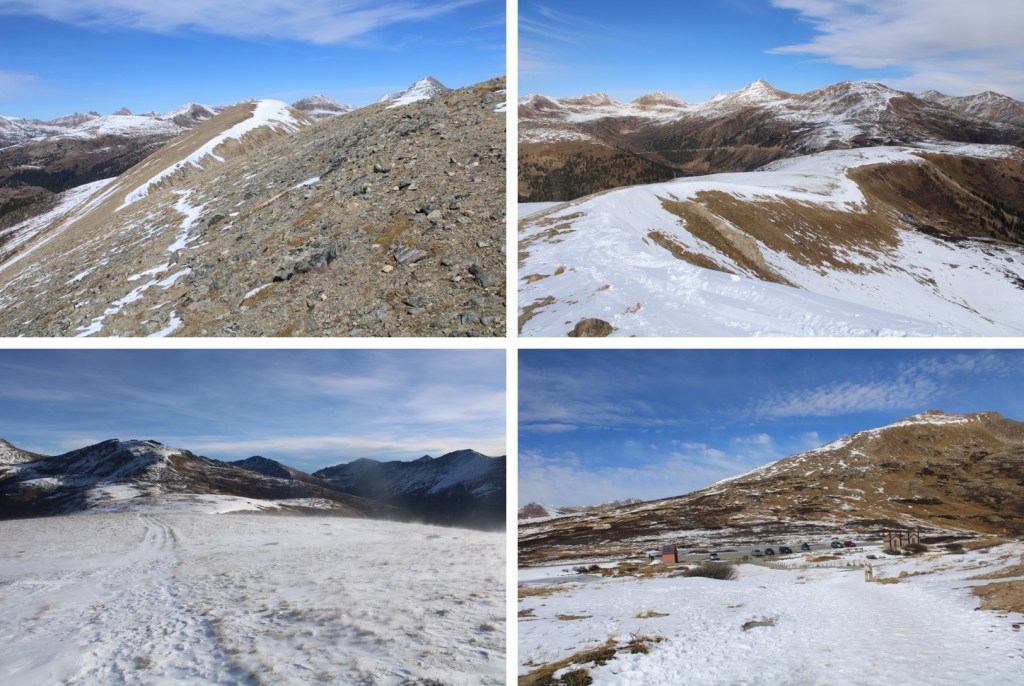
Here’s an overall view of the route to the ridge

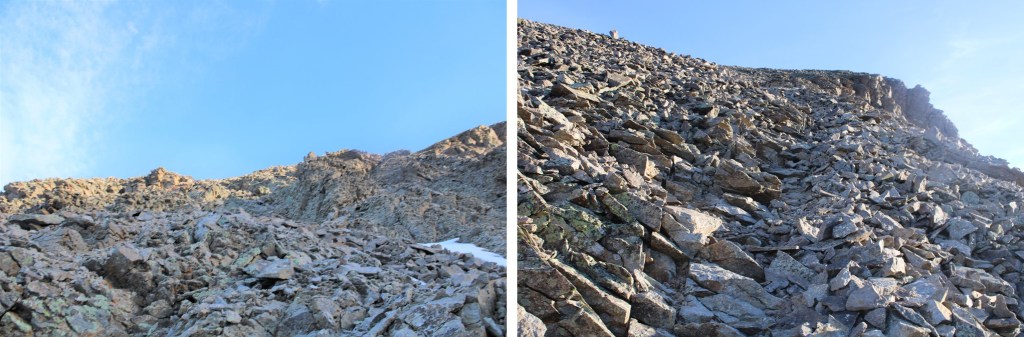
I headed towards the ridge, following an obvious route, which I am sure is class 1 in the summer.

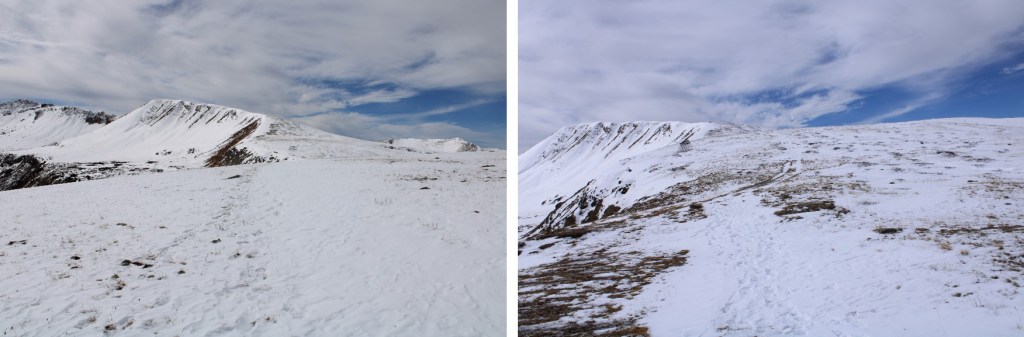
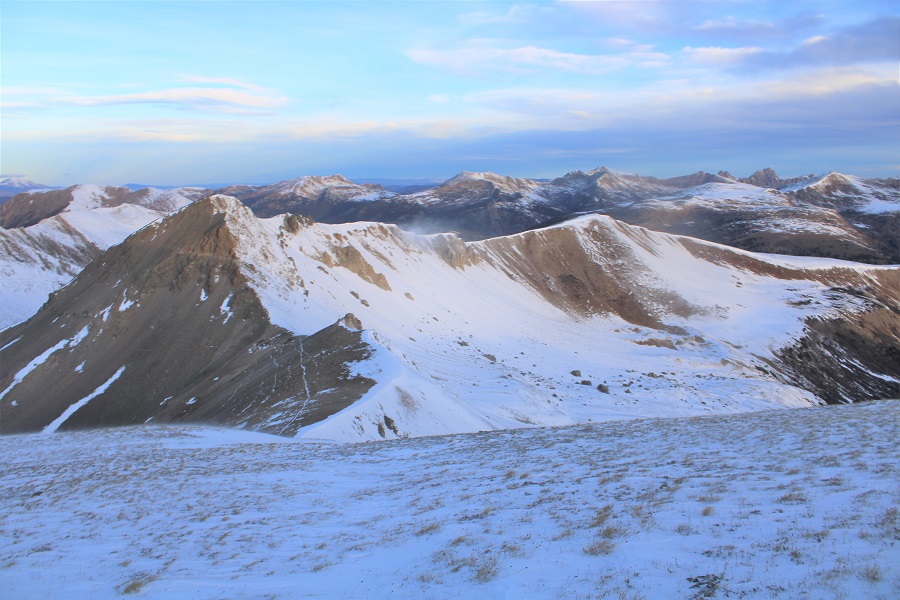
As you can see from the pictures… obvious route.  If it’s not obvious when you’re here, follow the contour of the ridge.  It’s all tundra.

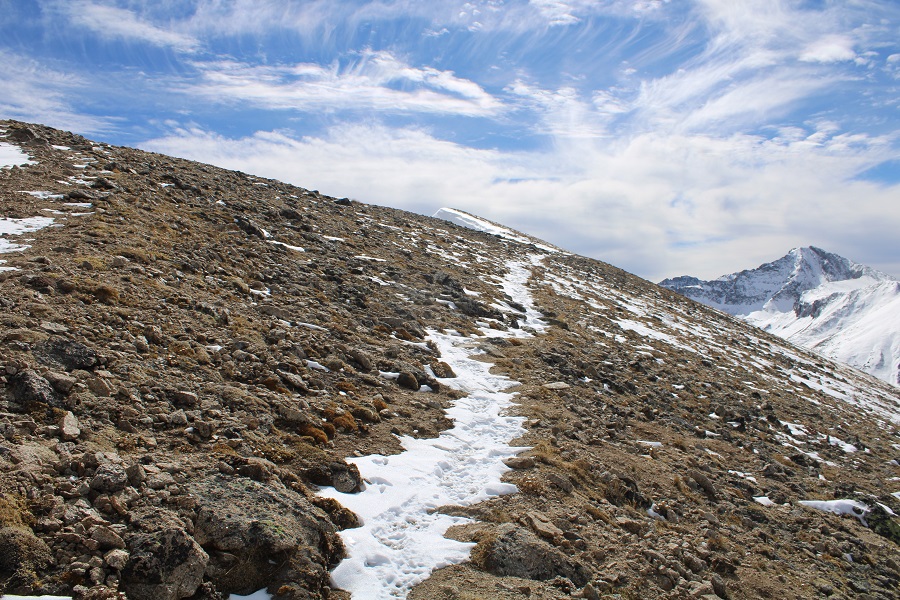
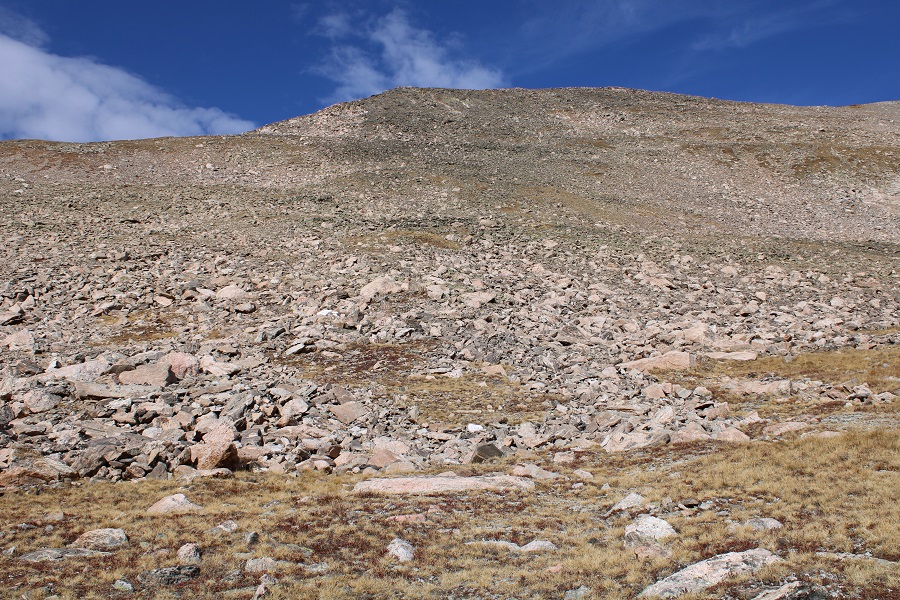
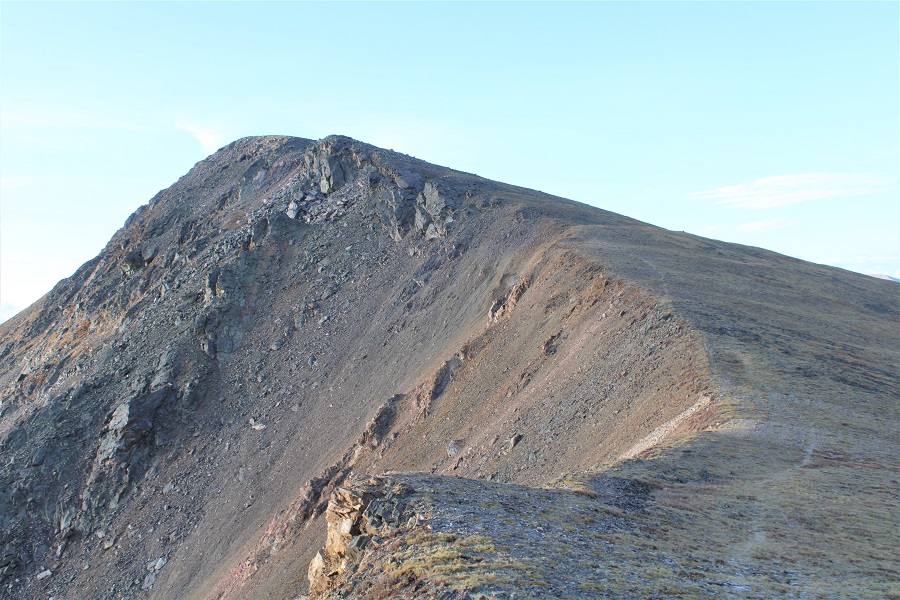
The route becomes briefly class 2 here

This is very easy to navigate

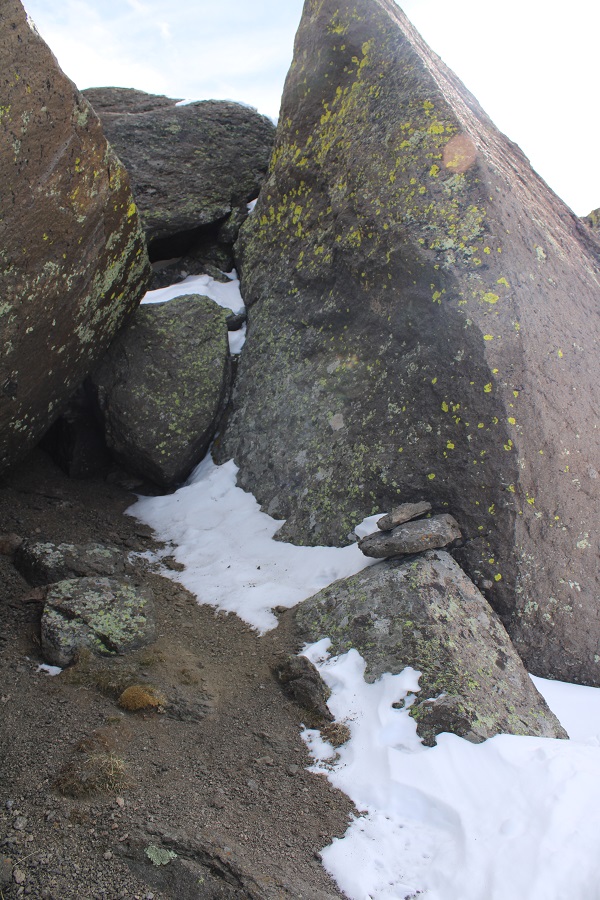
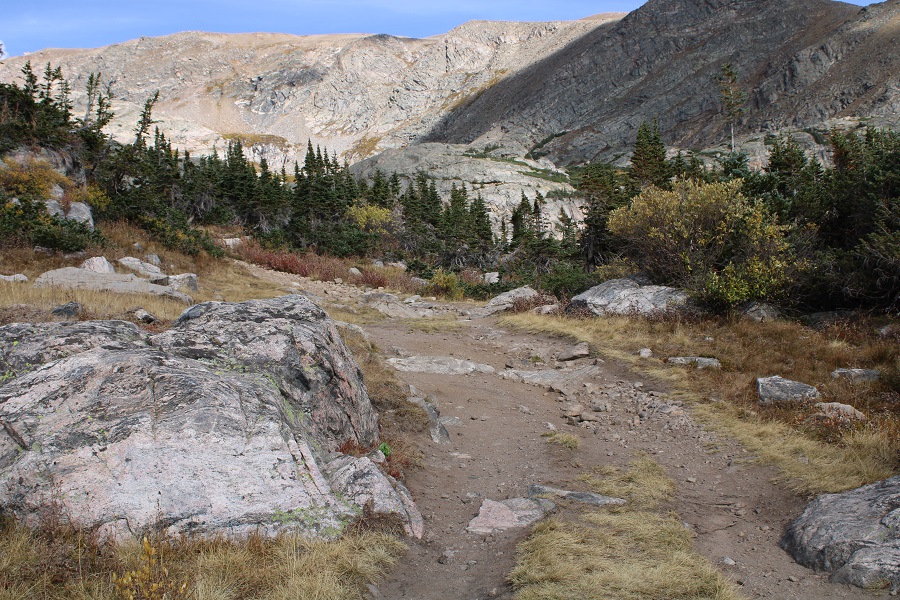
And then it’s back on a class 1 trail again

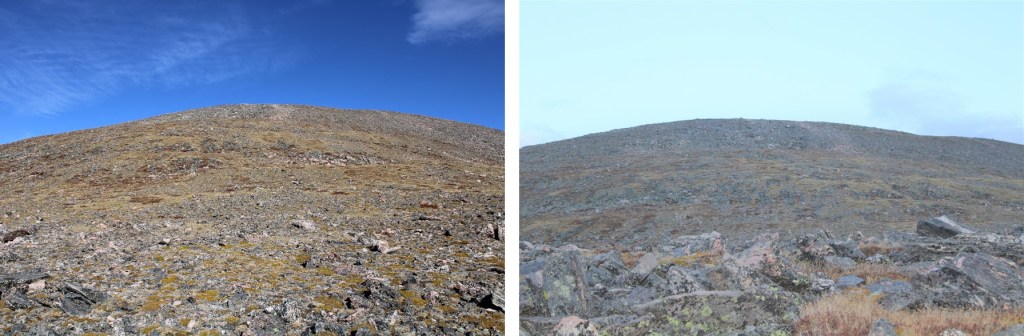
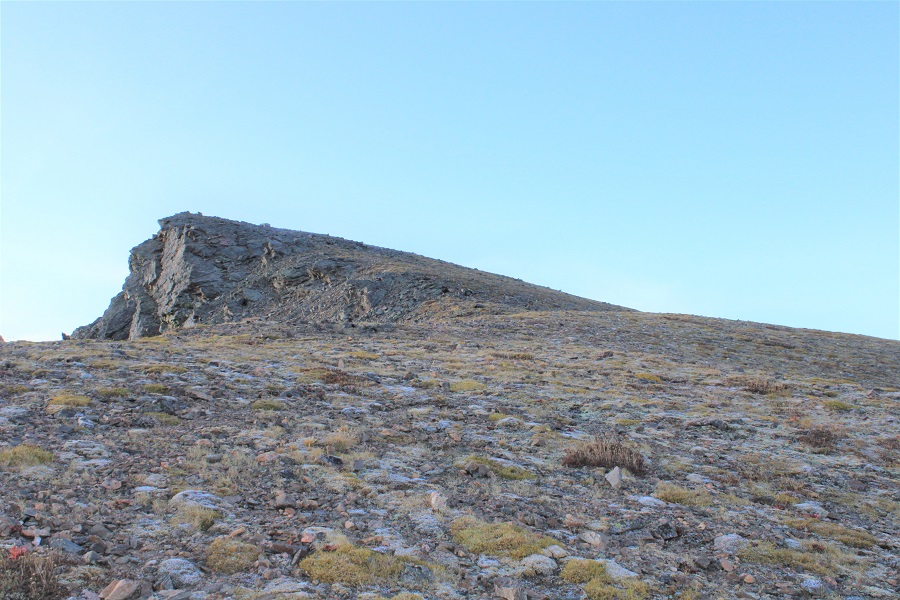
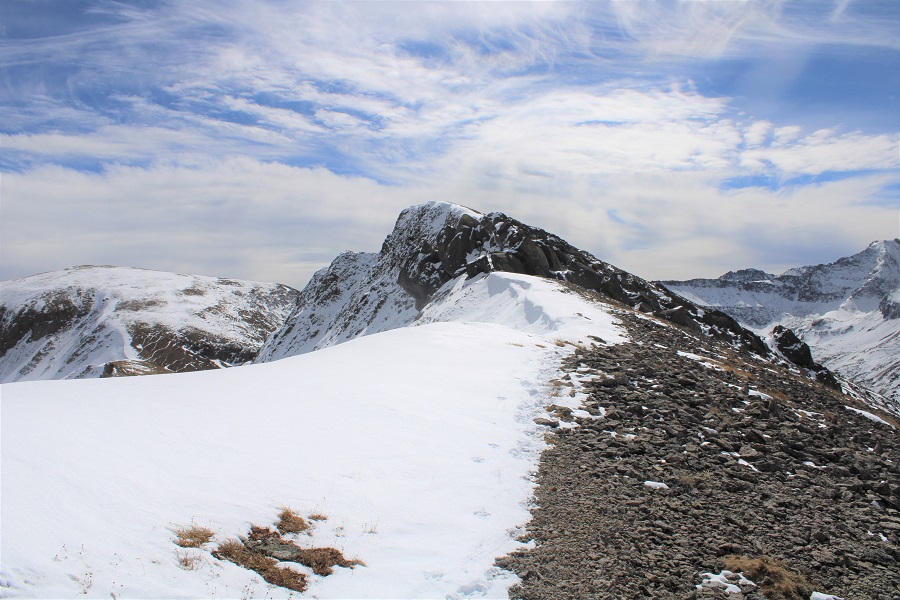
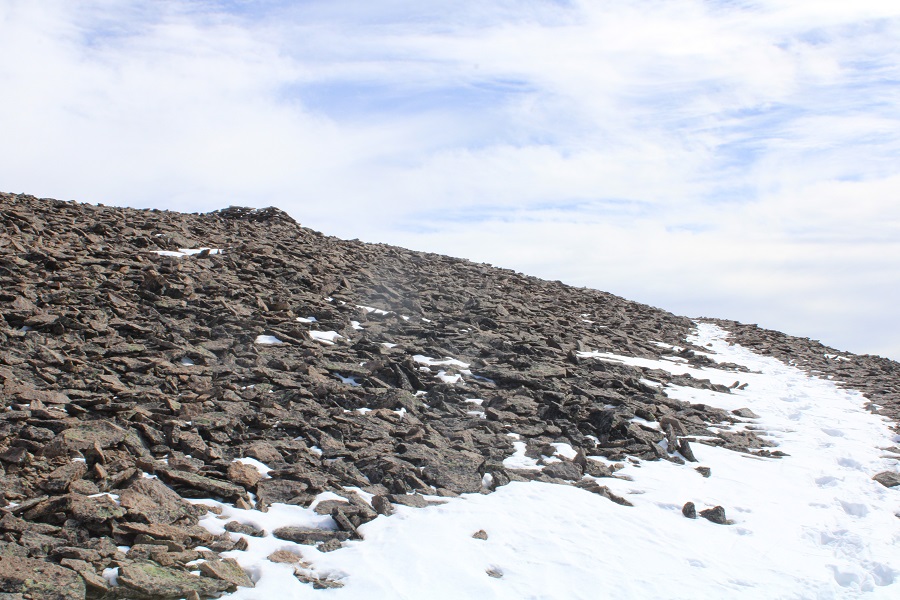
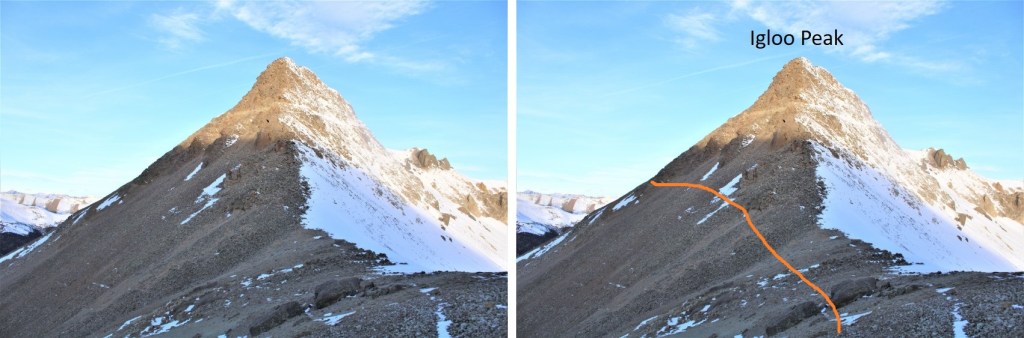
If you stay on the trail, the summit will be obvious

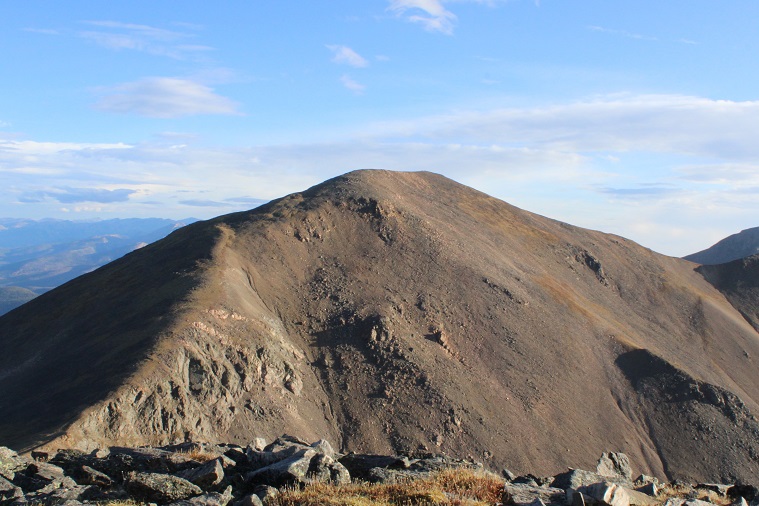
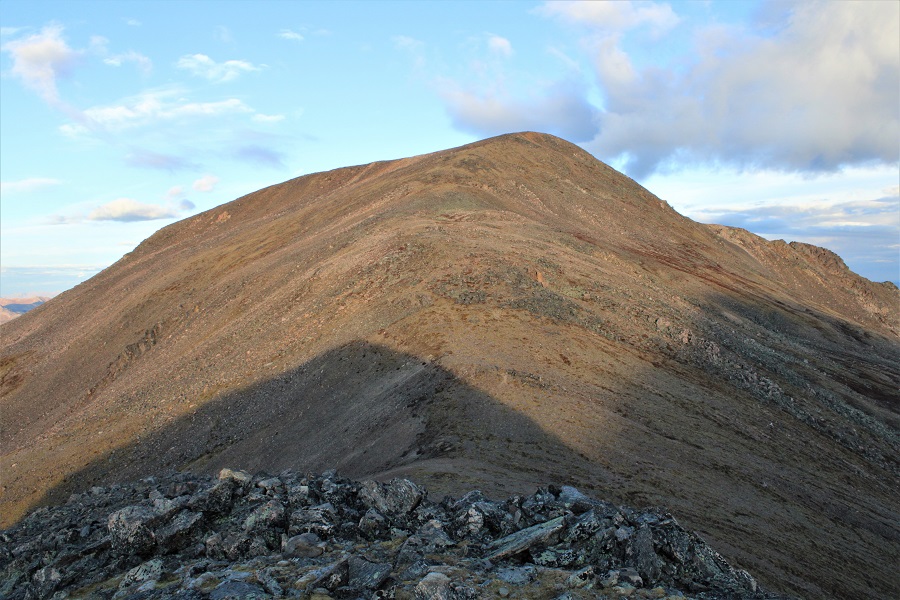
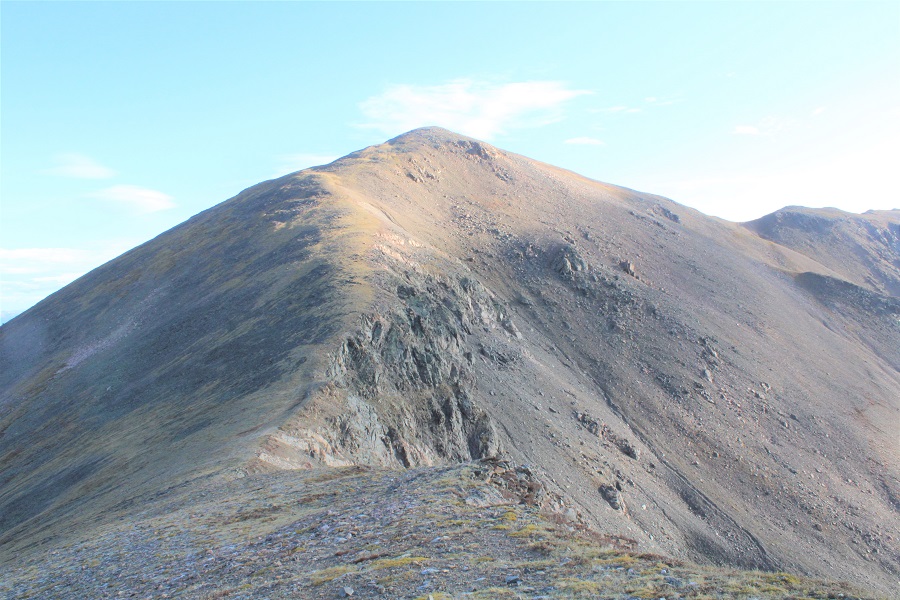
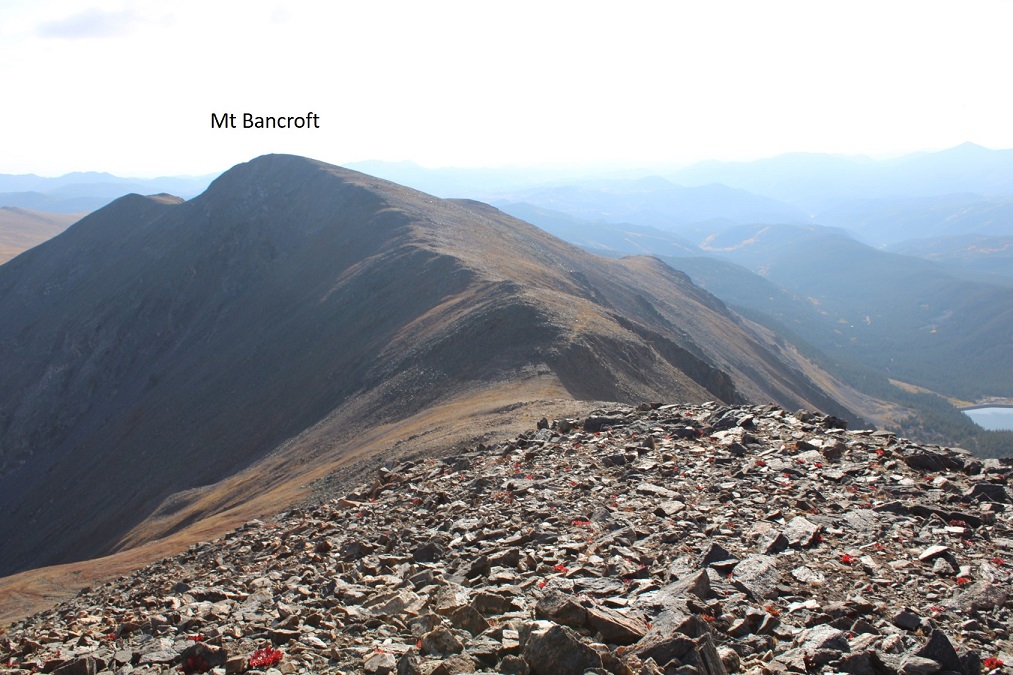
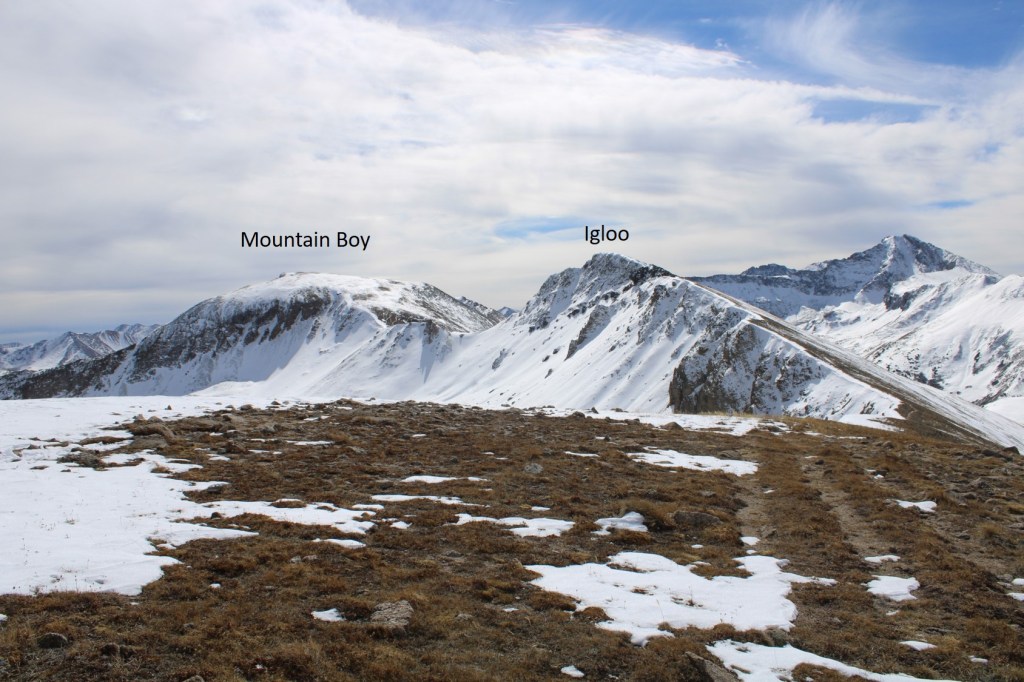
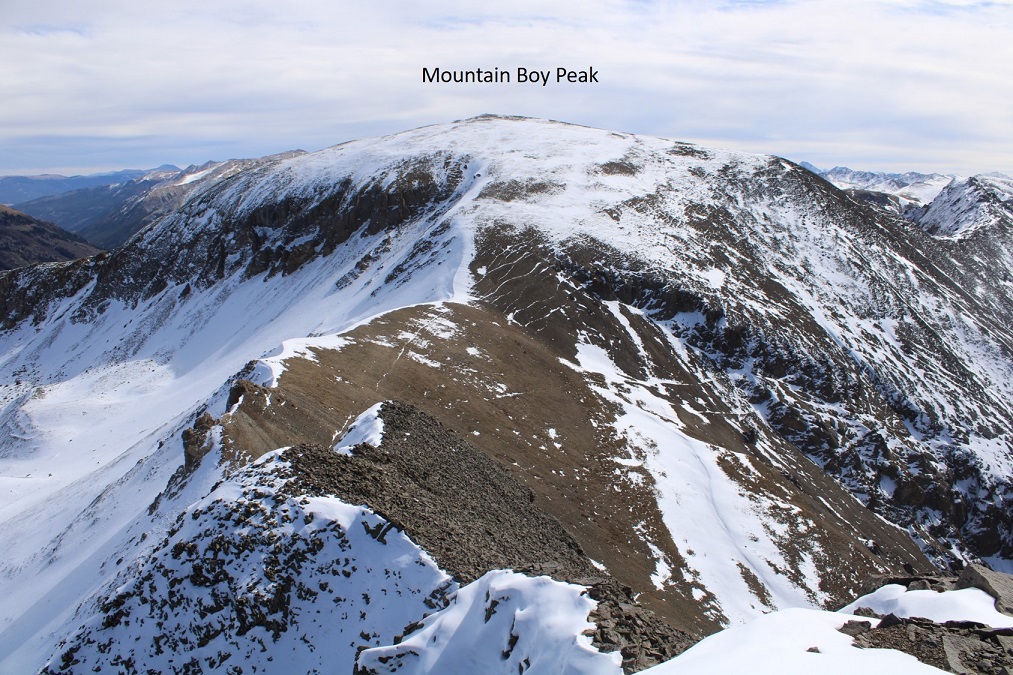
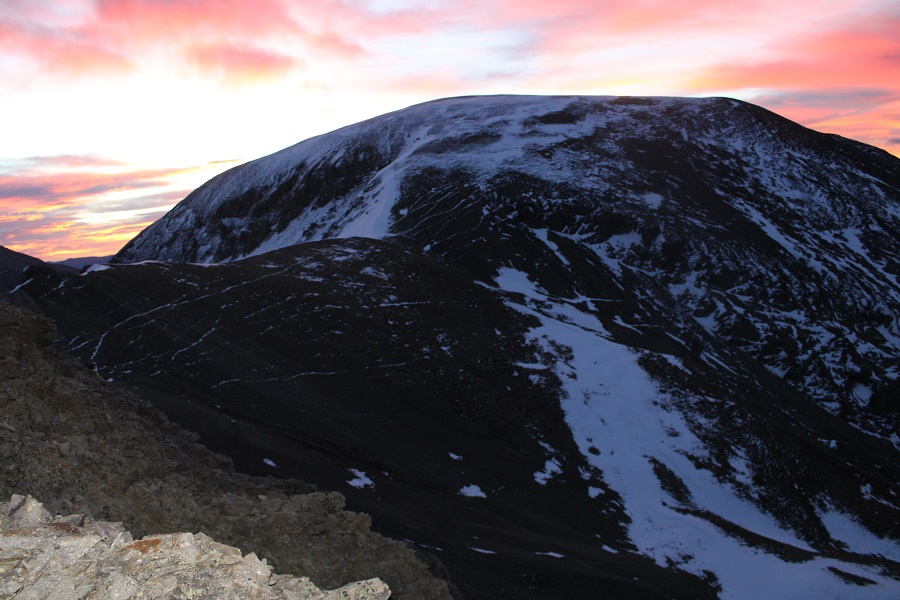
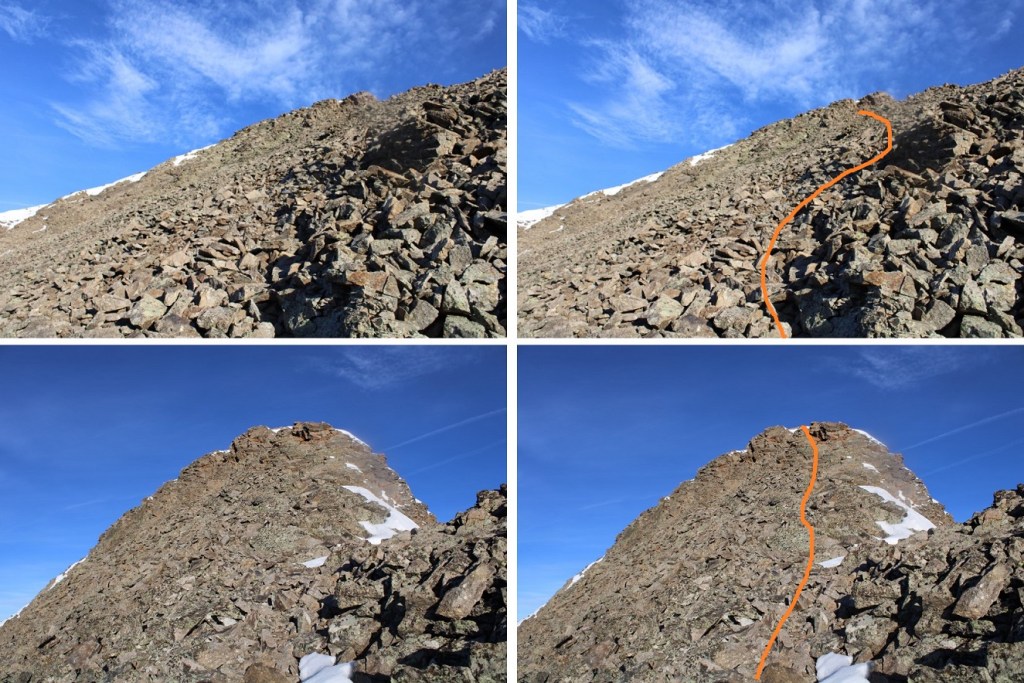
Here’s Mountain Boy from Igloo

From the summit of Igloo Peak, the trail towards Mountain Boy immediately gets fun.  It’s class 2 from here on out, with one brief class 3 move (or two… it’s a chimney).  Now is a good time to put on your microspikes.  I continued southeast, heading down this briefly class 3 chimney

The rock will be loose until you make it to the saddle. 

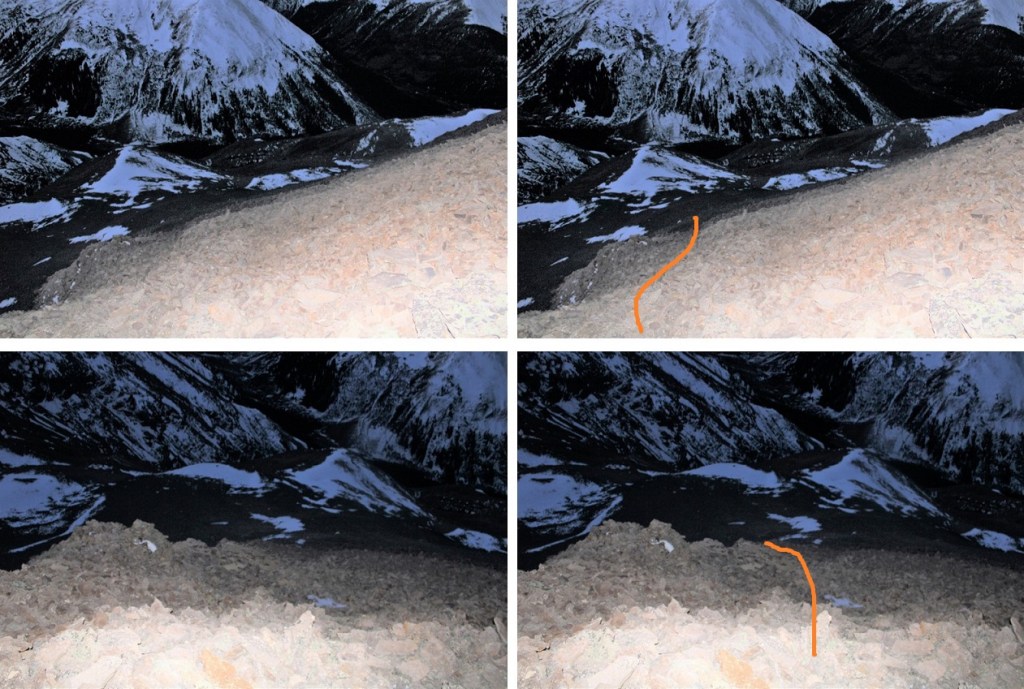
In order to get to the saddle, I headed straight south, down these scree/loose-rock filled gullies

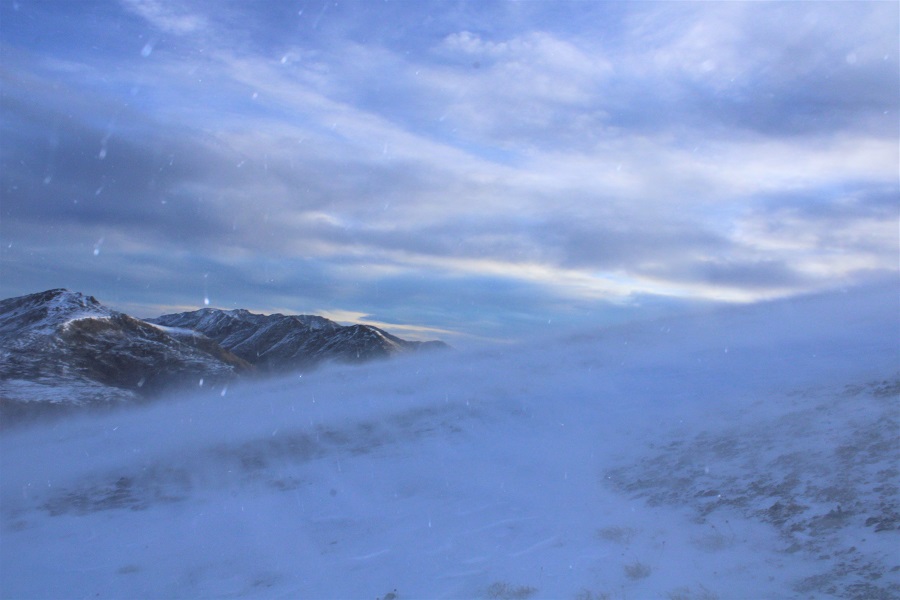
The sun was just starting to rise at this point.  Alpine sunrises are the best!

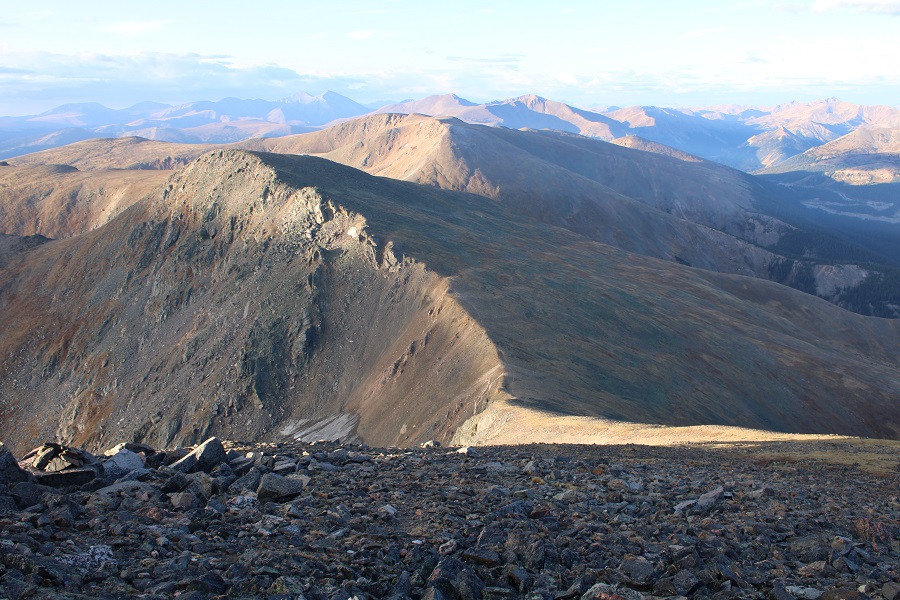
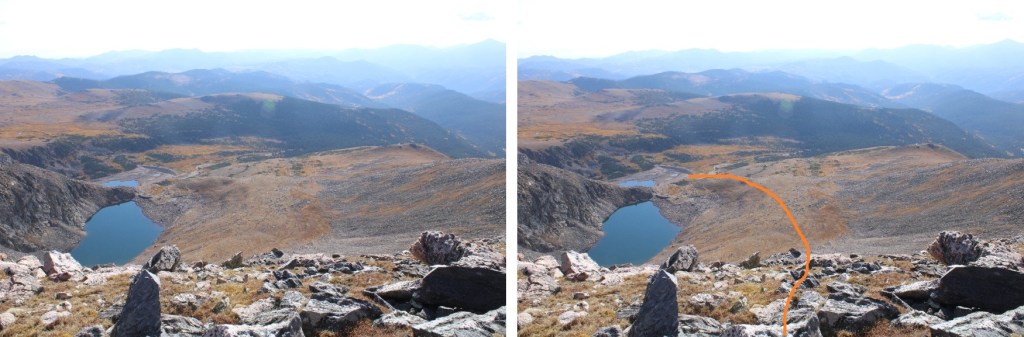
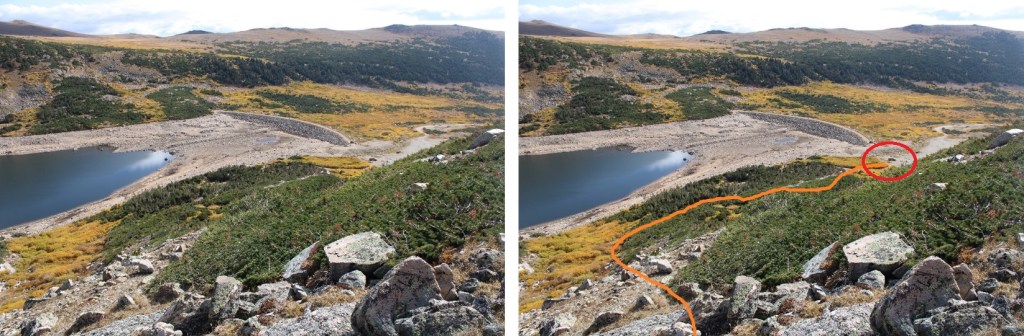
Since the sun was still rising, my view wasn’t that great.  Here’s what I saw as I was descending, following the contour of the drainages.  This is choose your own adventure, but it’ll be obvious when the drainages end.  Don’t descend too early.

It’ll also be obvious when it’s time to head towards the saddle.  There seem to be several social/game trails here.  I chose to stay high, about level with the saddle, and didn’t regret it.

Once at the saddle, there were still a ton of social/game trails.  I chose the one closest to the ridge.  From the saddle, it was an easy hike to the summit of Mountain Boy Peak on scree/tundra

Easy, except for today’s wind!!!  It was relentless, and difficult to catch I pictures/on video at its worst.  This doesn’t begin to describe the gusts

Wind on Mountain Boy: 

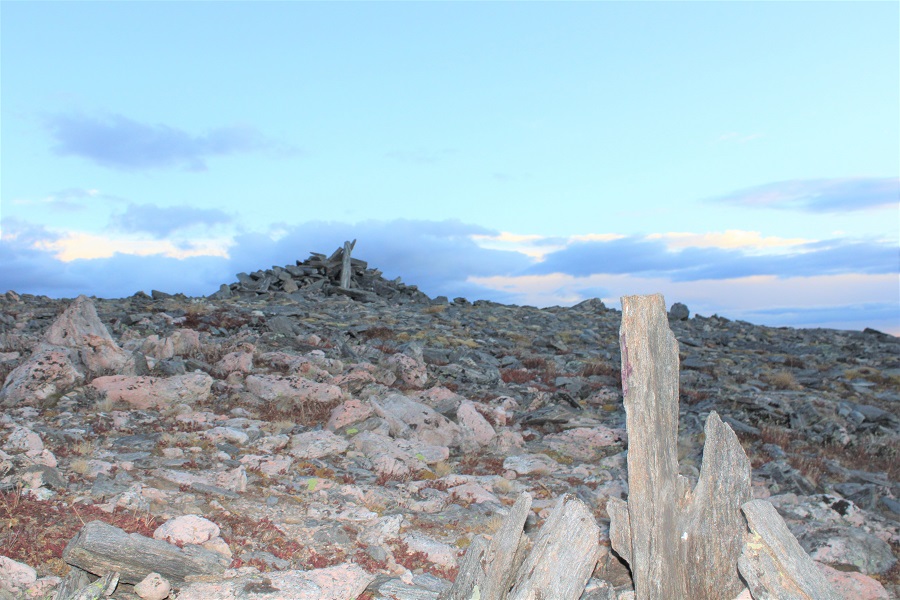
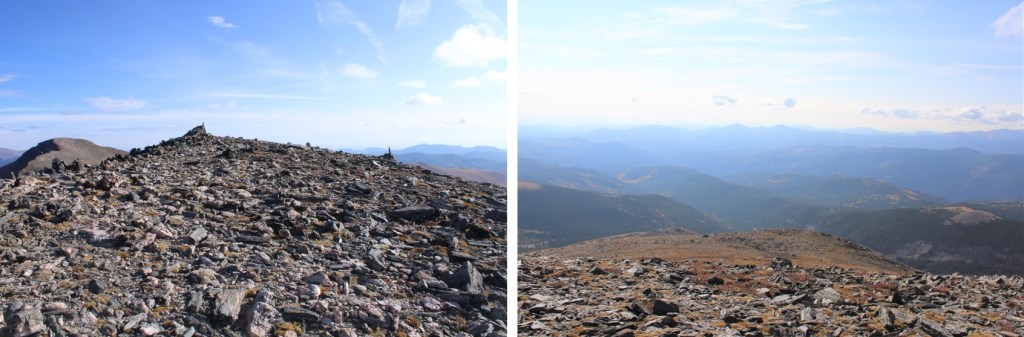
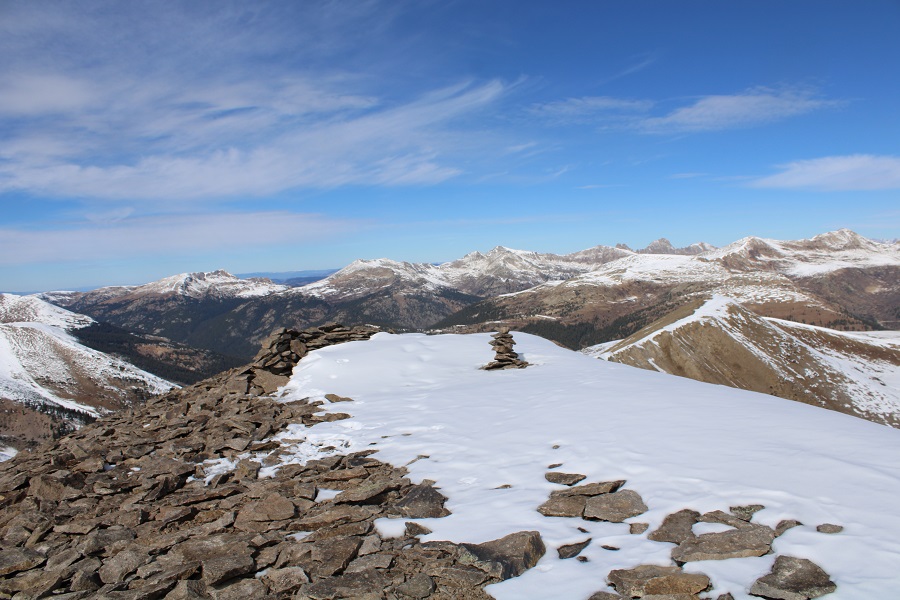
The summit is obvious, marked by a cairn

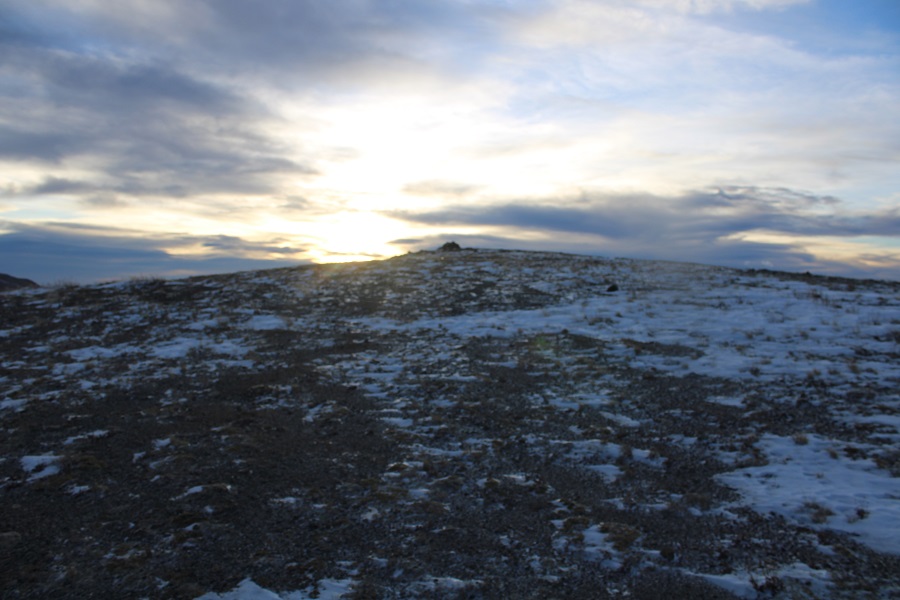
I summited Mountain Boy Peak at 7:45am.
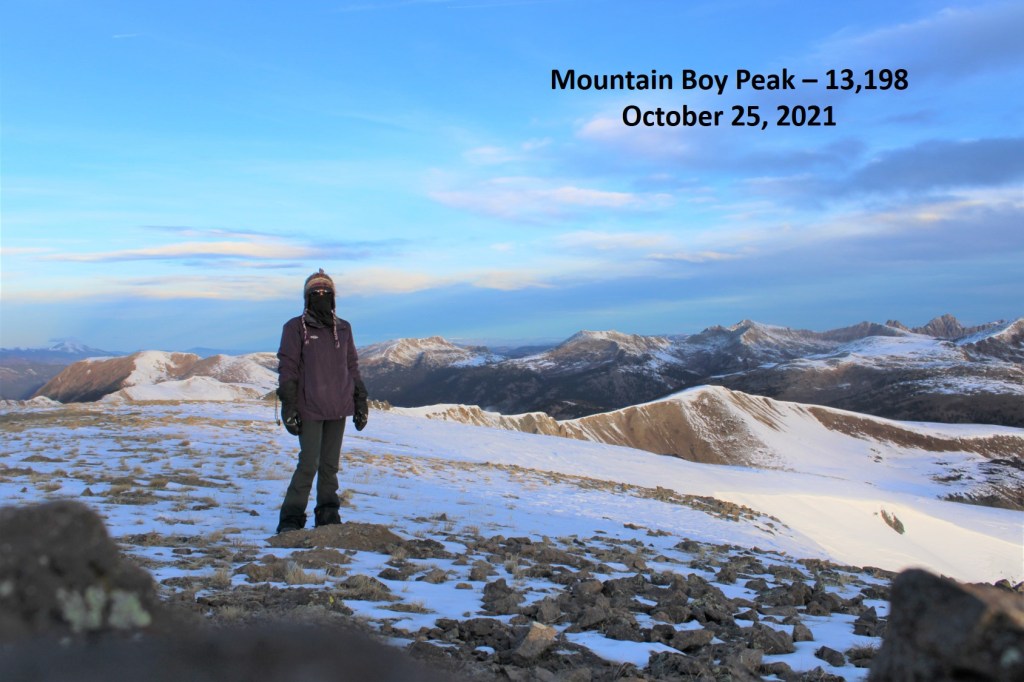
Mountain Boy Peak:

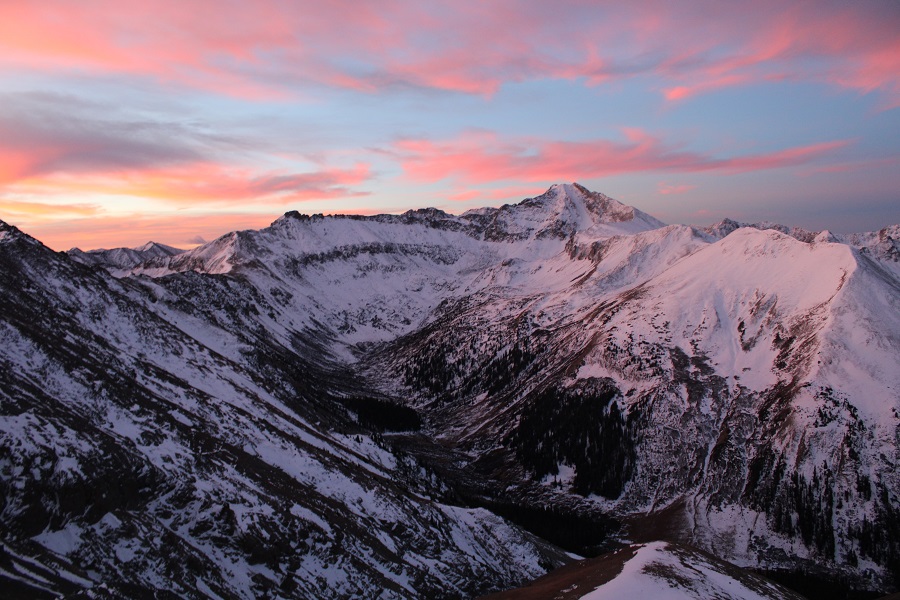
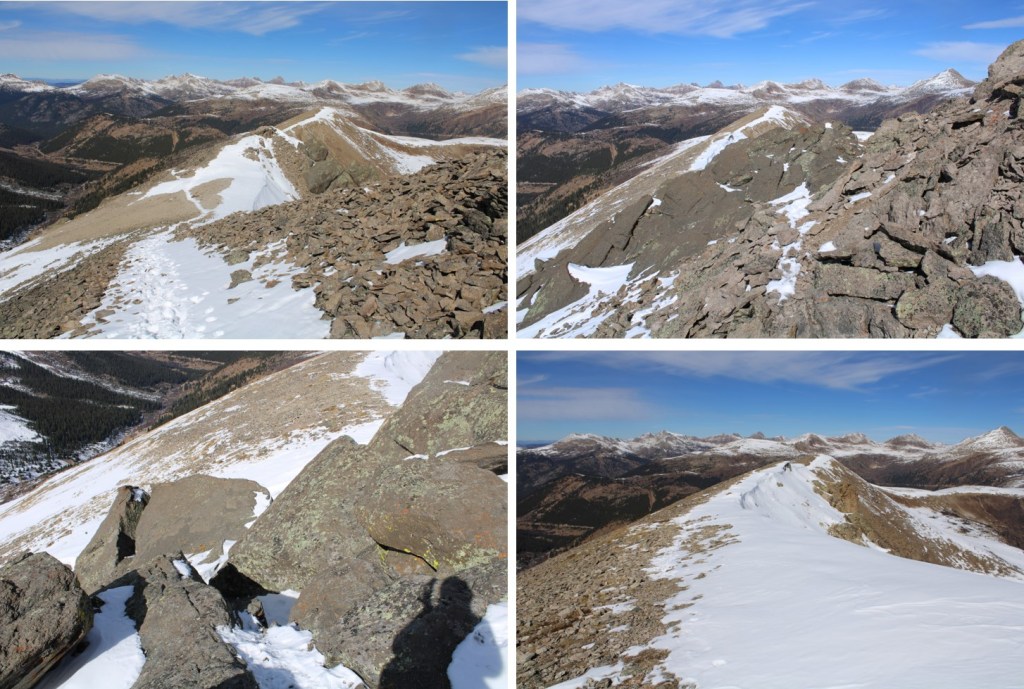
The views of Grizzly Peak were stunning!

I turned and retraced my steps back to the Mountain Boy/Igloo saddle

Here’s the route I took back to Igloo, which is the same route I took down.  Microspikes are helpful here, as it’s kitty litter in some areas.

Here are some close-up pictures of the route back up to Igloo

And back up those scree/rock gullies

And up that quick chimney to the peak

I re-summited Igloo Peak at 8:25am

Igloo Peak:

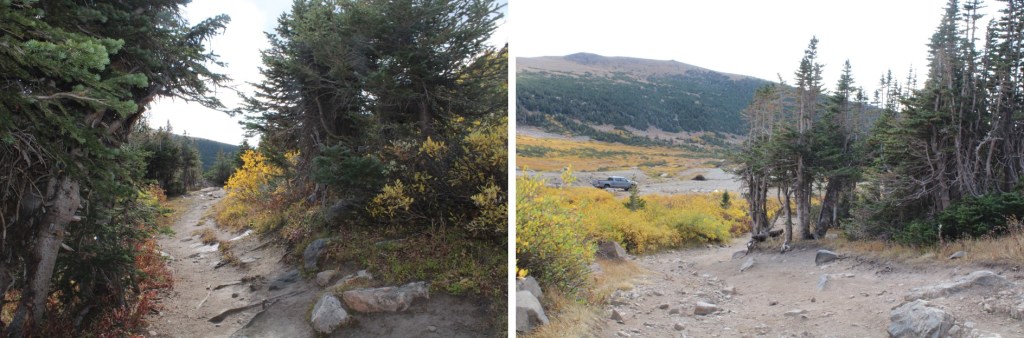
The trek was easy back to the trailhead in the daylight

I made it back to my truck at 9:15am, making this a 6.78 mile hike with 2151’ in elevation gain in 3 hours, 45 minutes

Side note:  I didn’t have my microspikes.  Well, I did, but they fell out of my pack when I took off my snowshoes, and I didn’t realize this until they were needed.  So, when I went to find my microspikes, just before the kitty litter area on the south side of Igloo Peak, they weren’t in my pack.  But I really could have used them!  Especially on the snowy ascent/decent of Mountain Boy Peak. The kitty litter areas were so much more difficult than they needed to be without spikes as well.  I cursed myself the entire time, thinking I’d lost them for good and vowing to buy new ones on my way home as soon as I got cell service.  The reason my track shows movement near Igloo Peak is because, on my way back I realized when I must have lost them and went looking for them.  I found my microspikes, along with a whiskey flask I hadn’t realized I’d lost, just before the summit of Igloo Peak.  From now on, they’re going INSIDE my pack, not in the cup holder of my backpack (I know, I know, not the best decision).

Mt Bancroft – 13,262, Parry Peak – 13,391, and Mt Eva – 13,130

RT Length:  7.29miles

Elevation Gain: 3921’

I got lost in the dark on the drive up to Loch Lomand and accidentally took an intense 4WD road.  Let’s just say, if you’re on a 4WD road that requires serious 4WD skills, you’re on the wrong road.  I made it to Loch Lomand, passing several great dispersed camping sides along the way, parked, and was on the trail at 5:45am. 

It was still dark when I started out, and I didn’t take the most efficient route, but your main goal is to get to the upper basin, near Lake Caroline. I did this by following a trail around the Loch, and then heading west, up a gully.  You’re aiming to get here, by avoiding as many willows as possible.

I started by following this trail

And then headed up a gully

Eventually the willows ran out, and I was on rocky tundra.  I followed this tundra west

Once un the upper basin, I kept Lake Caroline to my right and gained the ridge.  This can be done any number of ways, Here’s my route:

It was rocky here, but all class 2

Once on the ridge, I could see the summit cairns to the northwest, and aimed for the summit of Mt Bancroft.

I summited unranked Mt Bancroft at 7am.  There were two large cairns at the summit.

Mt Bancroft:

From Mt Bancroft I turned and looked west.  It was a simple ridge hike to both Parry Peak and Mt Eva.

I followed the ridge west towards Parry Peak. Here the wind picked up, and didn’t stop for the rest of the hike.  There were faint trails here

I summited Parry Peak at 7:30am

Parry Peak:

It was WINDY!  Much windier than the forecasted 5-10mph.  I was glad I’d packed my winter gloves.  As I recall, the last time I was on this ridge it was super windy as well.  The wind made the nice day quite cold. There was a storm coming in, so I kept going, turning and following the ridge southwest towards Mt Eva. There are faint trails here too.

This was another simple ridge hike, that got a bit rockier at the end.

I summited Mt Eva at 8am

Mt Eva:

Today felt really laidback:  it was easy to cruise along the ridgeline, without any major obstacles keeping me from slowing down. Here’s looking back at Parry Peak and Mt Bancroft from Mt Eva

There was a downed communications tower near the summit of Mt Eva.  I’m guessing wind was involved.

And now to head back to Parry Peak. 

I re-summited Parry Peak, and then headed back to Mt Bancroft.  I decided to actually summit these peaks again, as it felt like a really easy day and I welcomed the extra elevation gain.

Mt Bancroft from Parry Peak

I re-summited Mt Bancroft, and then followed the ridge southeast

Here’s my overall route out of the basin, keeping Lake Caroline to my left this time

I just kept aiming east, for Loch Lomand

It was much easier in the light of day to navigate my way

I made my way east to the trail, then followed the trail southeast to my truck

I made it back to my truck at 10:15am, making this a 7.29 mile hike with 3921’ of elevation gain in 4.5 hours.  I was surprised at how quick todays hike seemed to be. As I looked behind me, huge storm clouds were starting to form:  it’s going to snow!

Mt Rosa – 11,499′

1 Mt Rosa

RT Length:  12 miles

Elevation Gain:  4000’

I woke up late this morning.  My first alarm didn’t go off (the one set for 5 am so I could do yoga before my hike) but my second one did (the one set at 6:50am to wake up the kids).  I jumped out of bed, scrambled to get ready, and was out the door in about 10 minutes, sans yoga for the morning.

I made it to the North Cheyenne Canyon Trailhead just before 8am.  I met Dave there, and we started hiking around 8am, following Gold Camp Road until it intersected with the 624 St Mary’s Falls Trail.  The trail was clear of mud and snow, and followed an ice filled creek filled with small trout (4-5 inches long).

There were several metal signs along the way which indicated the correct direction to hike, but as with most metal signs, the mileage was way off.

2 Signs

We went right at the cutoff for St Mary’s Falls and continued up the 624 and over a frozen creek.  It looked slippery, but wasn’t dangerous enough to use spikes.

2-2

The trail winds up a ways, and eventually comes to a place where it looks like it ends, but it doesn’t.  Just pass through the gateway and continue a few yards to come to service road 381.  Take the road right (North) for another few yards and you’ll see cairns to the left that indicate the 672 or Nelsons Trail (Left/West).

3 Trail Directions

Unfortunately, the 672 trail marker is difficult to find, and not on the road.  It’s about 3 yards up from the road on the trail, hidden under a tree.  The cairns make this an easy trail to find however.

4 IMG_8567

At this point the trail became steeper, so Dave and I separated for a bit.  As I was hiking I saw this cool heart shaped rock right in the middle of the trail.

5

And I could see the fire burning on Ft. Carson

6 Fire 2

This part of the hike just flew by!  It was steep, but not too steep.

7 IMG_8568

I love to hike inclines fast, and made it pretty quickly up to the top to enjoy the view of Almagre and Pikes Peak.  And to sit for a while and have lunch.

8 IMG_8574

The view was amazing, but it was incredibly windy!!!

From my lunch spot I could see the rest of our hike.  That’s Mt. Rosa…

9 View of Mt Rosa

After about 20 minutes or so I was beginning to get really cold from sitting in one spot.  My sweat had turned to ice and I was losing feeling in my fingers, so I got up and hiked a bit more to the 672/673 junction.  The sign for the 673 had blown down, but still indicated which way to go.

10 673

I stood behind some trees, using them as a wind break, and waited for my hiking buddy.  When he arrived we continued on the 673.  We passed a very windy saddle, and then had 500 feet of elevation left to go before reaching the summit of Mt. Rosa. From almost the beginning of this part of the trail it was entirely covered in snow.  It wasn’t enough snow/ice to put on microspikes, and we weren’t postholing too often, so our hiking boots did the trick.  There was a pretty good trench indicating the way up.

11 Snow On Trail

The wind increased and I got colder and colder, but instead of my hiking too far ahead we stayed closer together for this last part of the hike.

Summit photo of Dave and I!

12 IMG_4953

The views from the summit were amazing!  We could see Almagre, Pikes Peak, Ft. Carson, the Penrose-Rosemont Reservoir, and a bunch of Mountain Ranges:  The Wet Mountains, Spanish Peaks, Sangre de Cristos and Sawatch.


We didn’t stay long at the summit because that wind was INTENSE and cold!  When we finally made it back to the Nelsons Trail area I began to thaw out a little.  I could talk again and my fingers were burning, which meant the blood was rushing back into them.  Dave was unfairly quite warm and tried to help warm up my hands.  When we reached the frozen creek it had thawed out a little, giving us some traction as we crossed.

About halfway down towards St. Mary’s Falls I could take off my beanie and gloves, and the final part of the hike was pleasantly warm.  It had just been cold near/above treeline because of the wind.

We made it back around 2:30pm, making the 12 mile, 4000’ in elevation gain trek in 6.5 hours.

Here’s our out and back route:

15