Mt Jackson – 13,675 & PT 13433

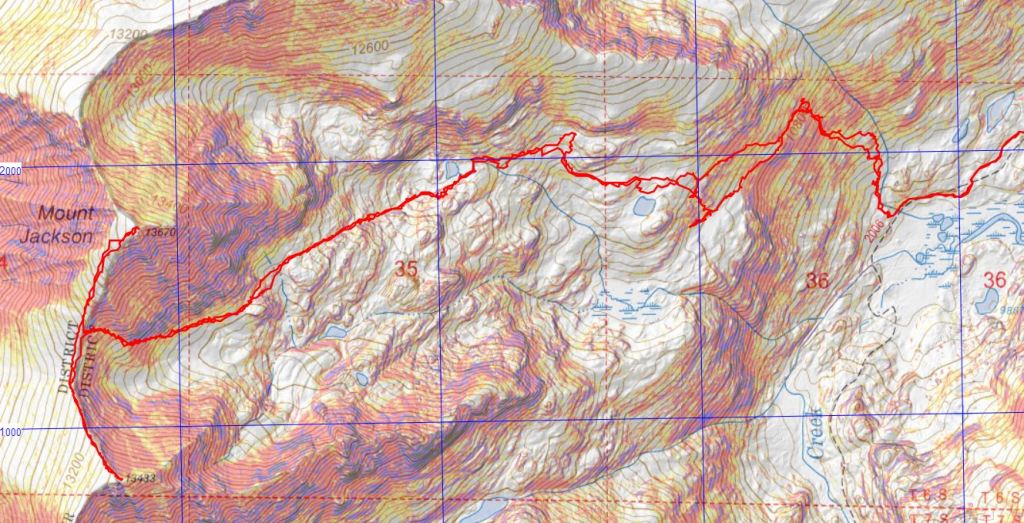
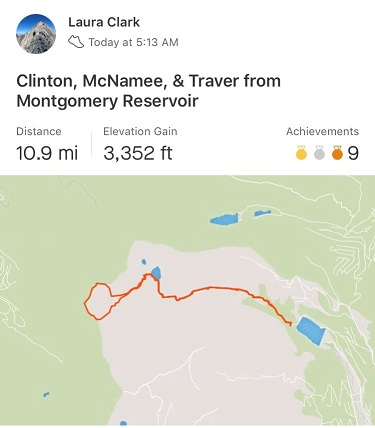
RT Length:  28.33 Miles

Elevation Gain: 6674’

I’m not entirely sure why I chose this approach, but I wouldn’t recommend it; the route finding below treeline is arduous.  In any event, if you still want to do this hike, this is how I climbed Mt Jackson and 13433. 

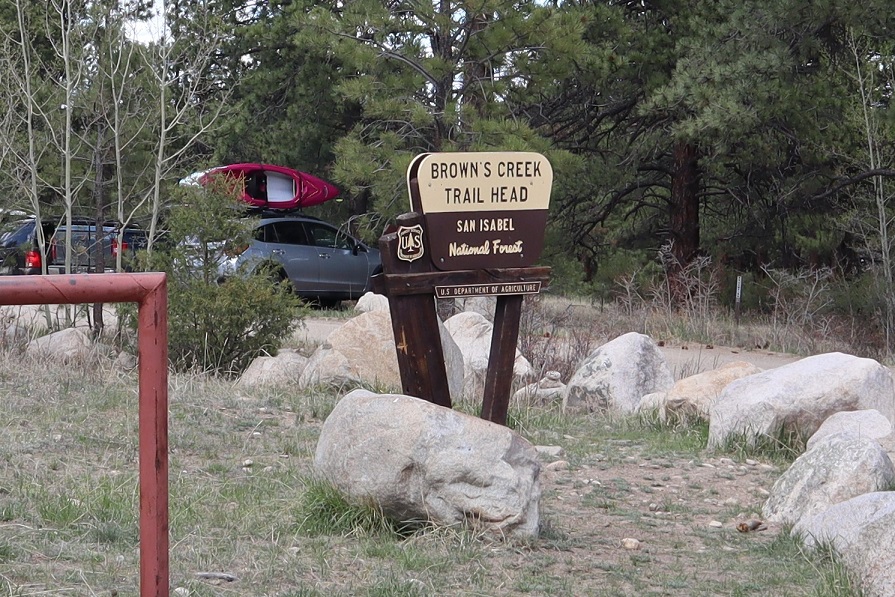
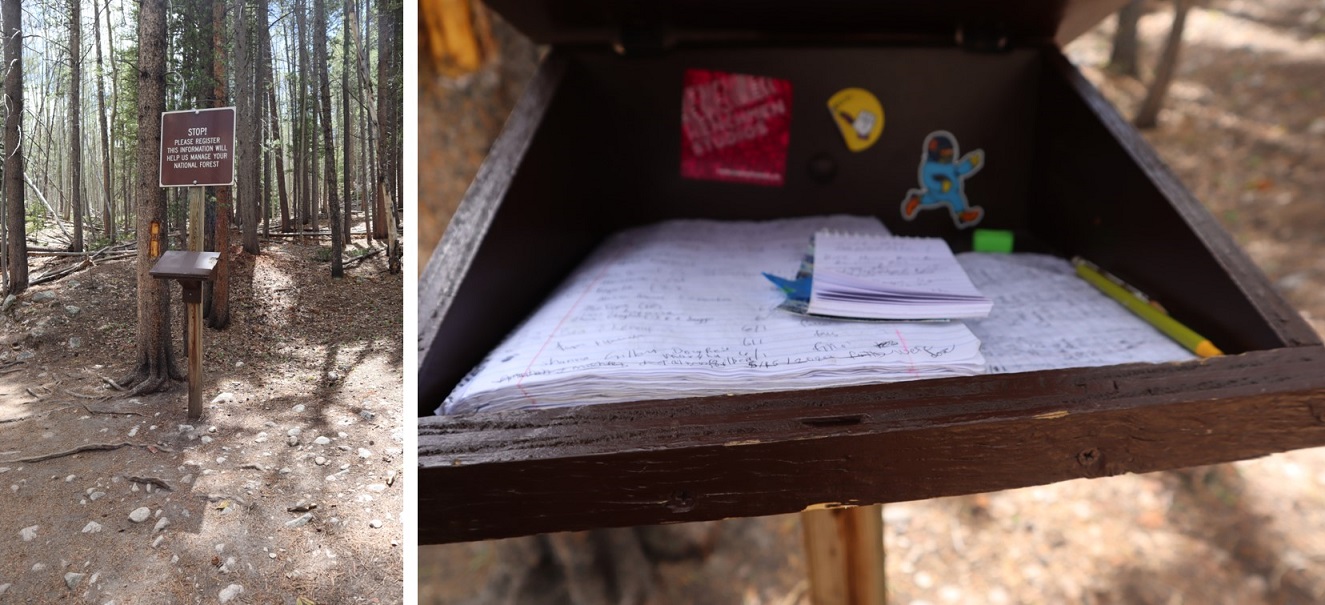
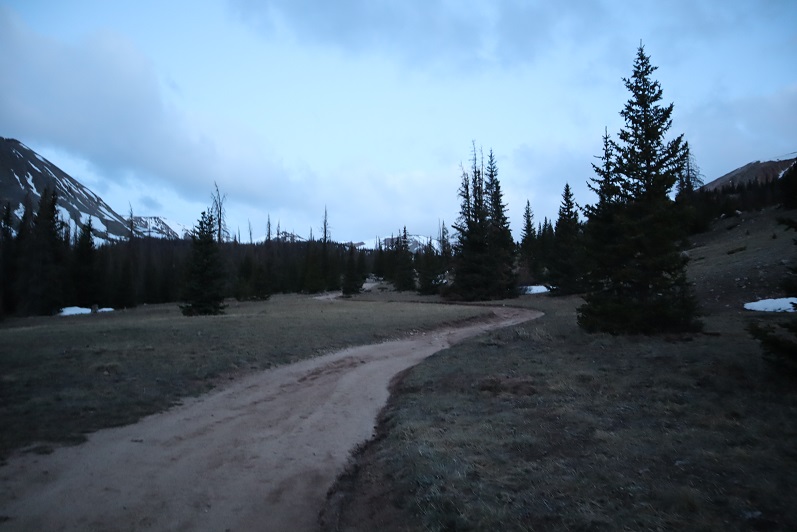
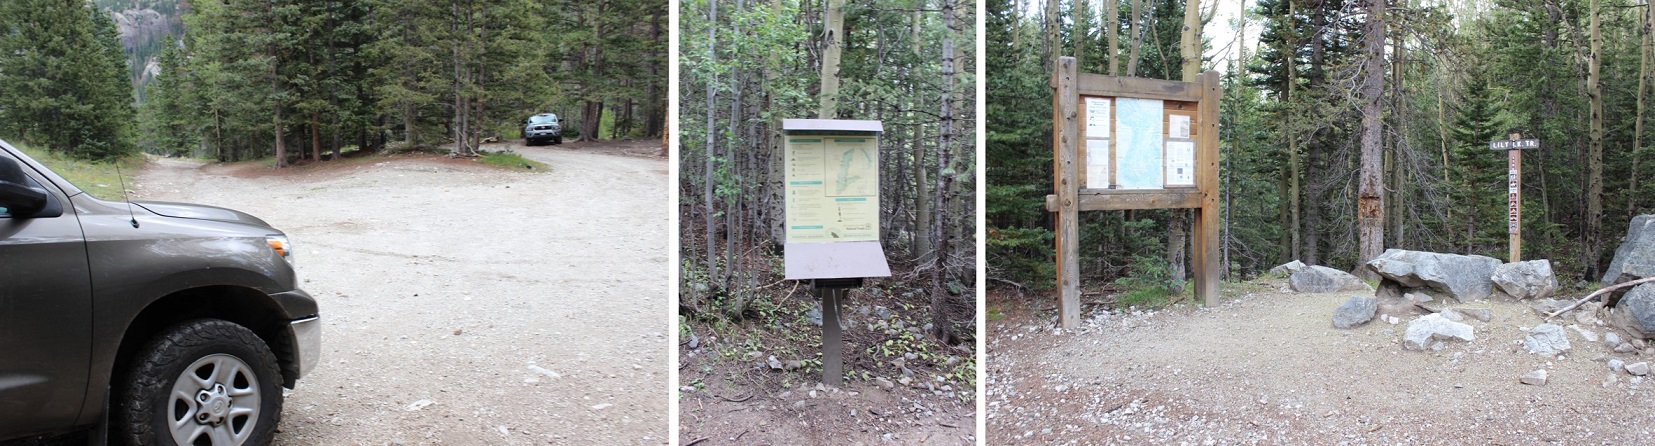
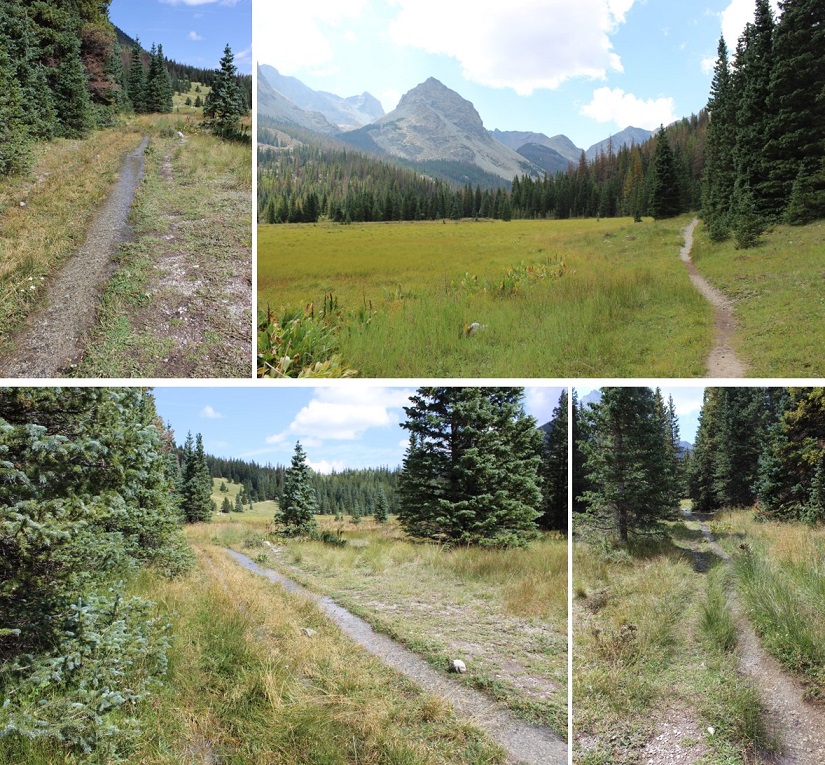
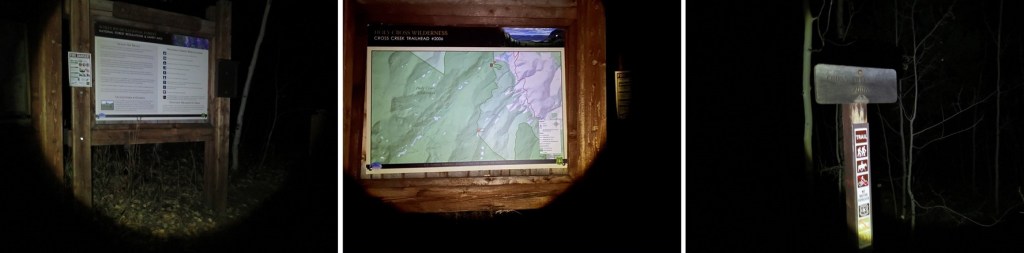
I arrived at the Cross Creek Trailhead and was the only vehicle in the lot.  It’s a poorly designed lot that doesn’t offer much room but can fit 5-6 cars if everyone parks nicely.  It looks more like a horse corral than a parking lot, and there’s not a lot of room to turn a vehicle around.  There is parking across the way as well.  I arrived and left in the dark, so unfortunately, no pictures of the trailhead.  I was on the trail at 3:45am.  Cross Creek trail starts behind obvious signage at the west end of the parking area.

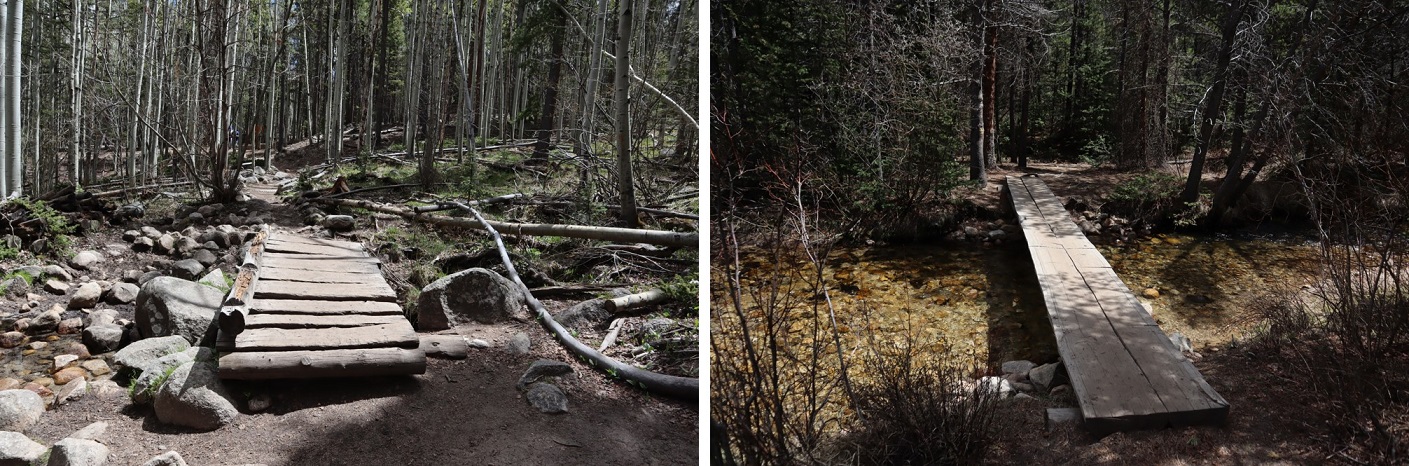
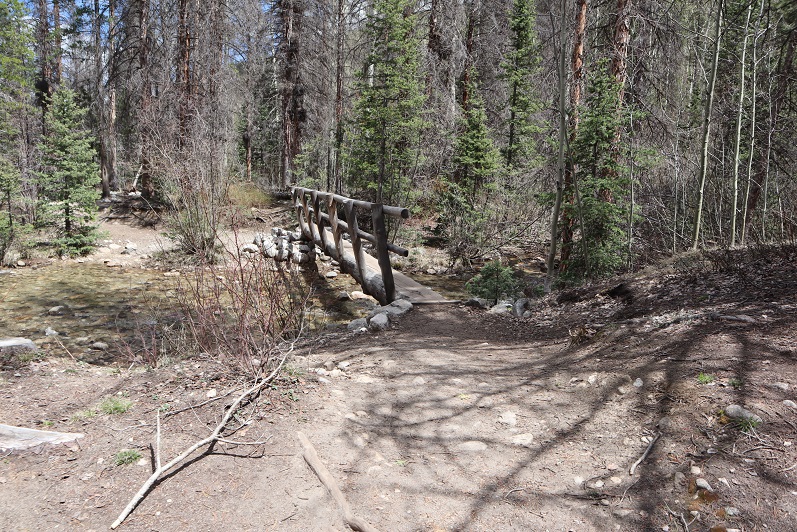
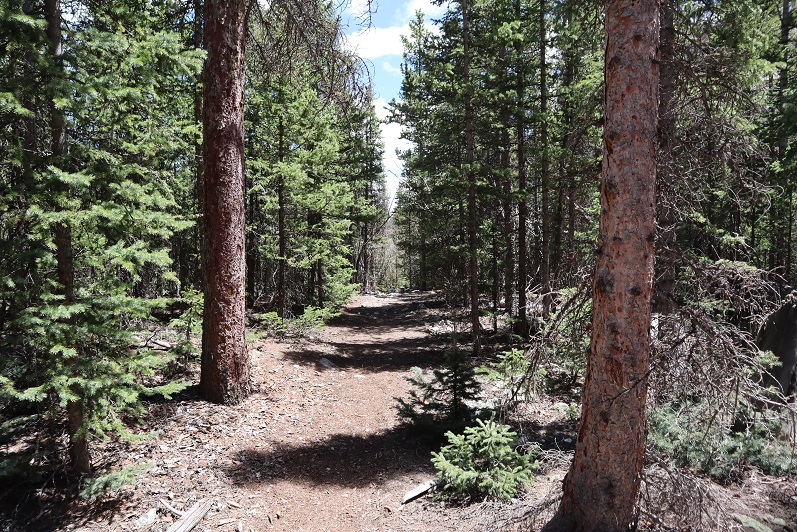
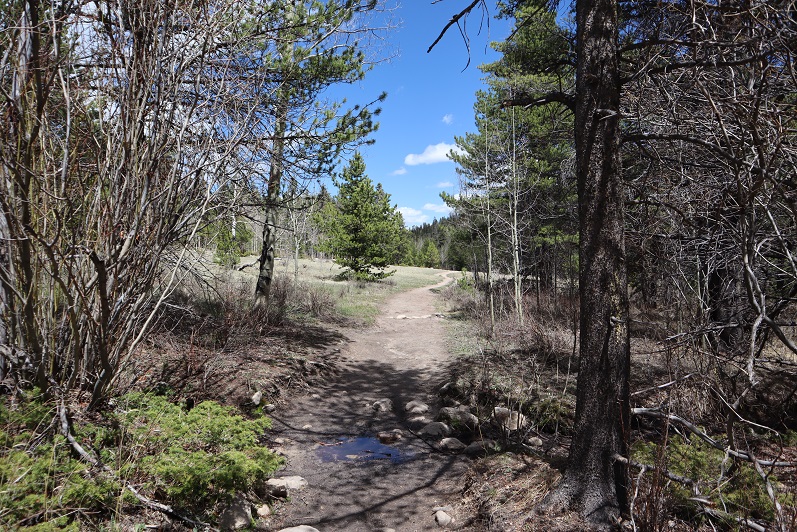
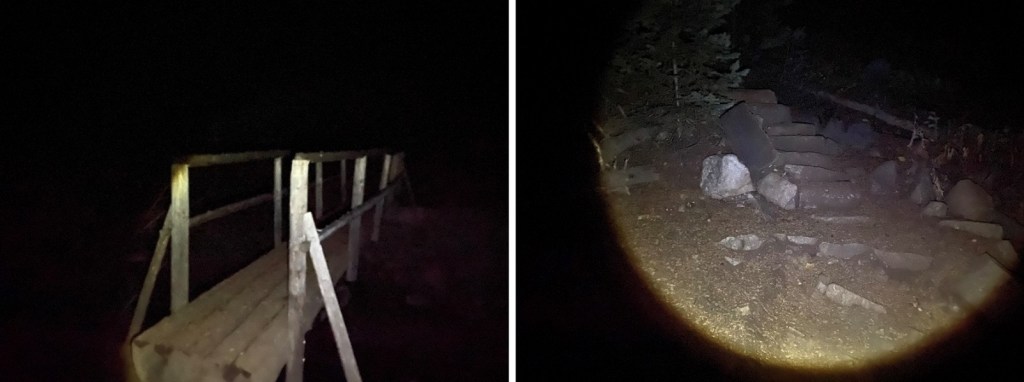
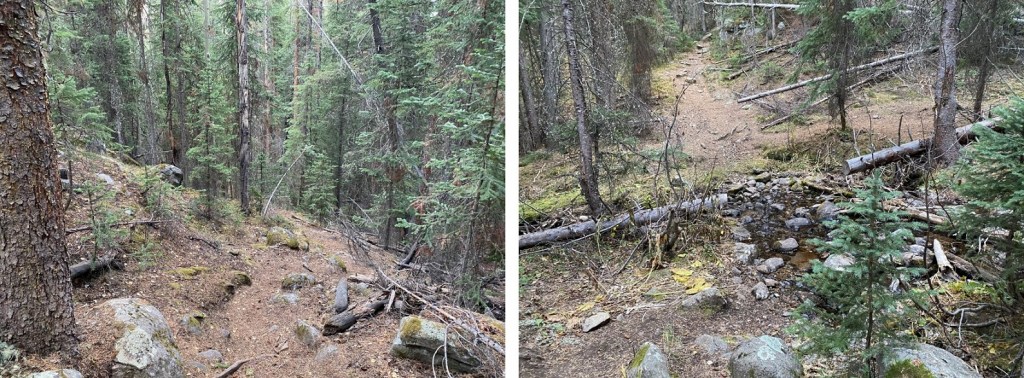
This is an easy to follow class 1 trail.  There’s a new bridge to cross over Cross Creek, and some nice stairs to ascend. 

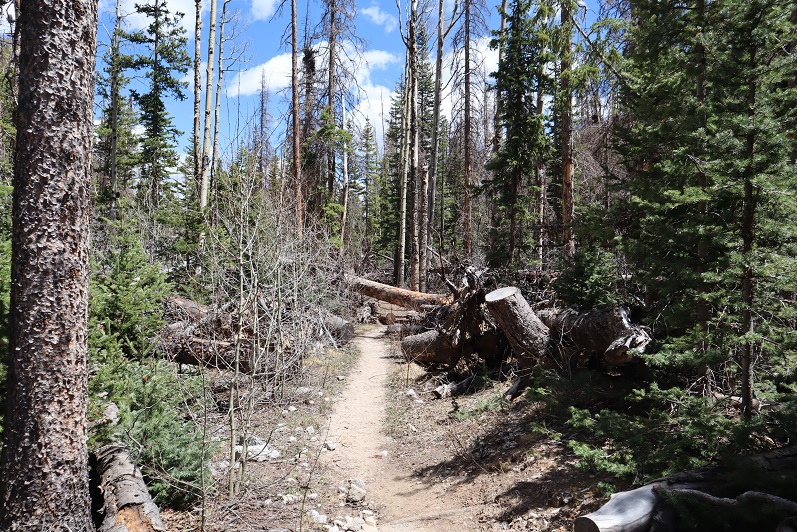
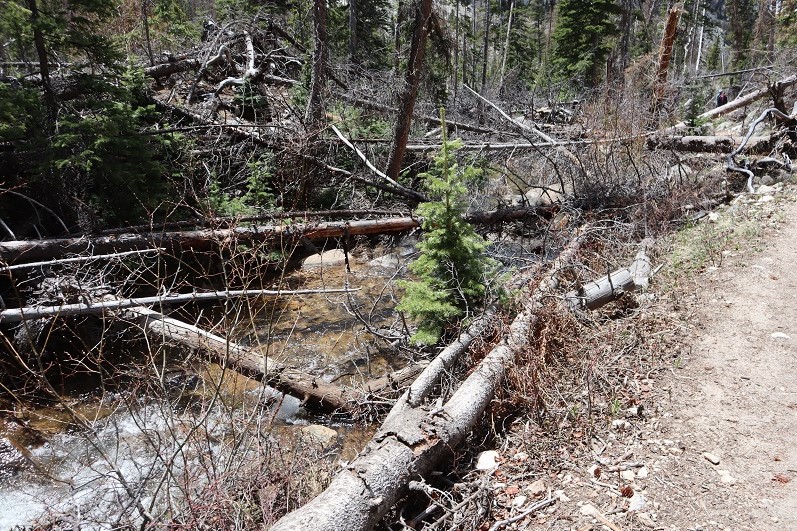
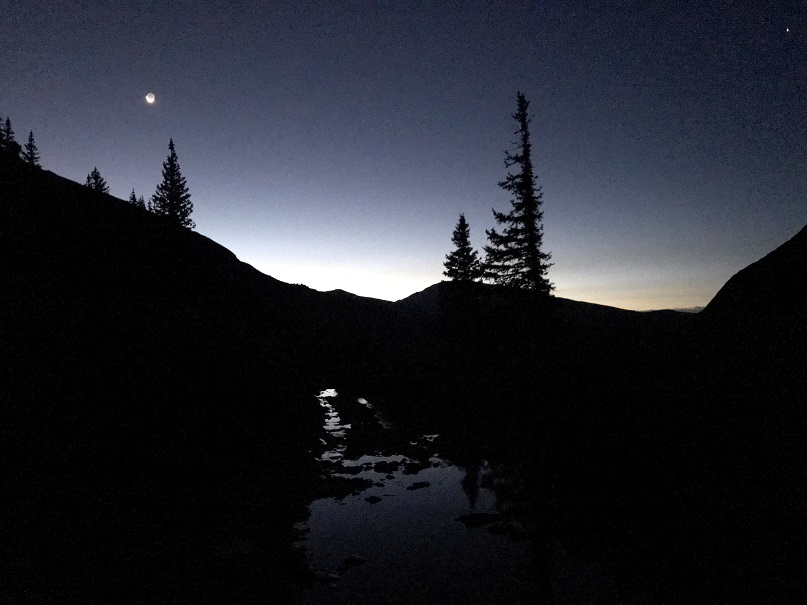
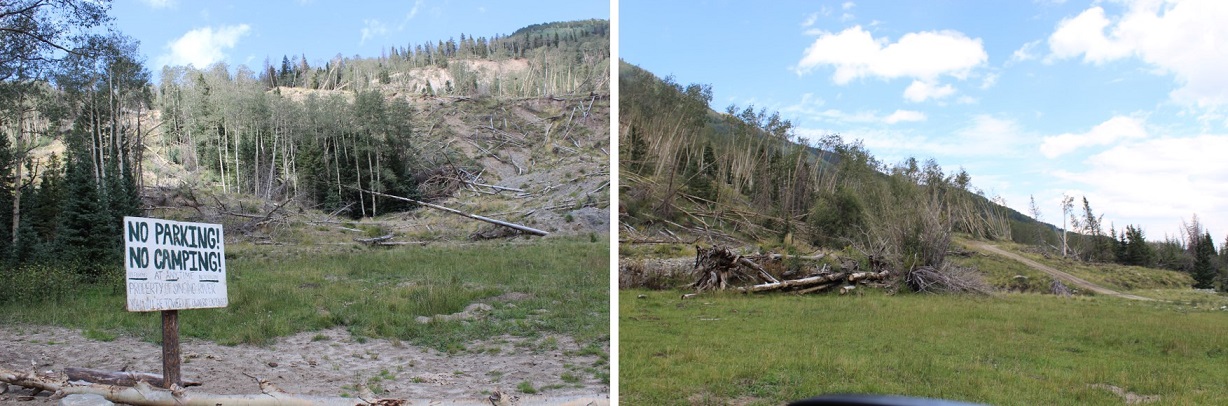
After hiking for 3 miles I came across some avalanche debris on the trail.  As I was navigating at night I stepped over a log, and instead of hitting solid ground my right foot sank in watery mud up to my thigh. 

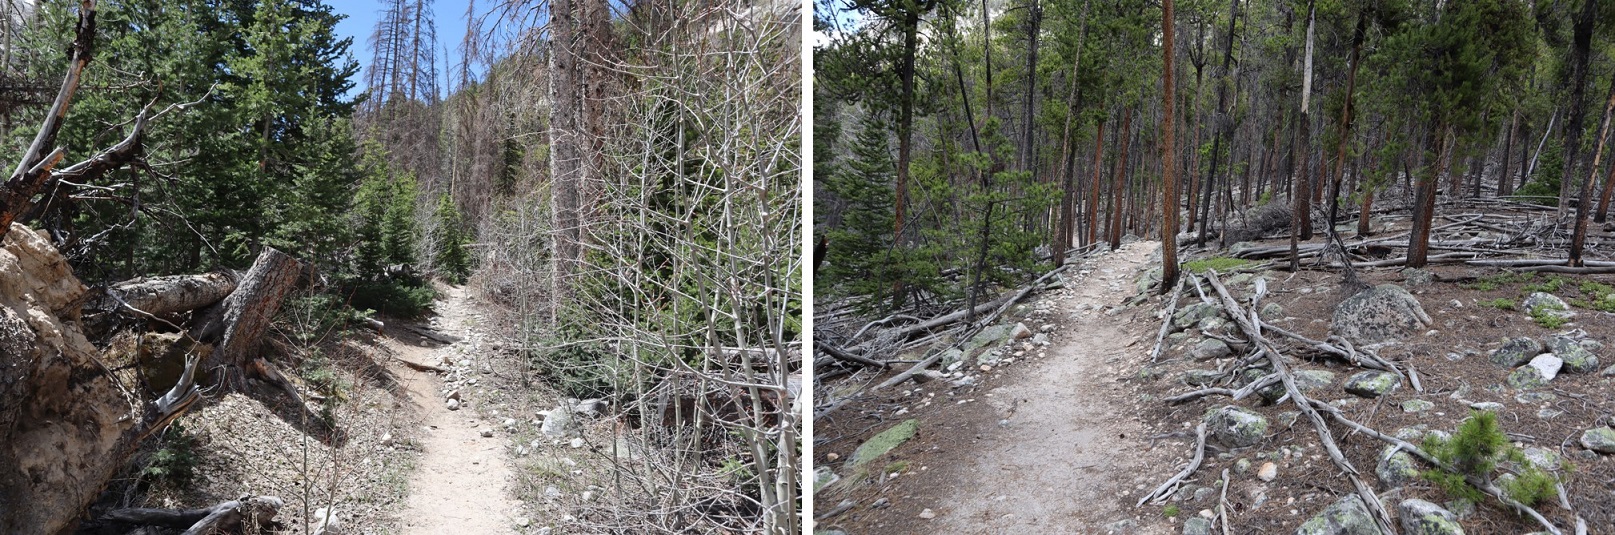
I quickly extricated myself and did a quick assessment.  My shoe and pants were soaking wet, cold, and covered in a layer of mud.  It was only around 5am, 30 degrees outside, and I had a serious decision to make.  Did I turn around now or continue hiking?  I was worried I’d eventually have a Raynaud’s attack, especially if I didn’t dry out before making it to treeline (where it would be windy:  I could already hear trees snapping all around me in the dark).  I cursed myself for not bringing at least an extra pair of socks.  In the end I decided the only way to dry off would be to keep moving, and I could do that either by heading back or forwards, so I continued on.  I followed this class 1 trail for a total of about 8.5 miles as it paralleled Cross Creek, staying straight at the Grouse Mountain Trail Junction (but noting where it was in case I wanted to make this a loop).

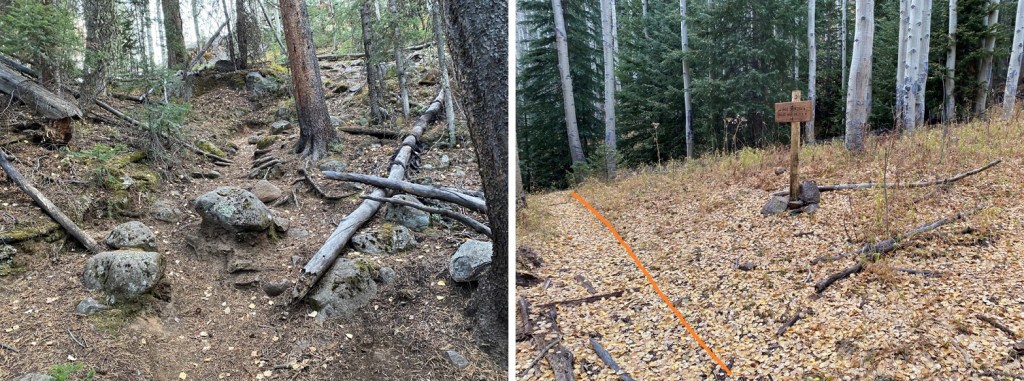
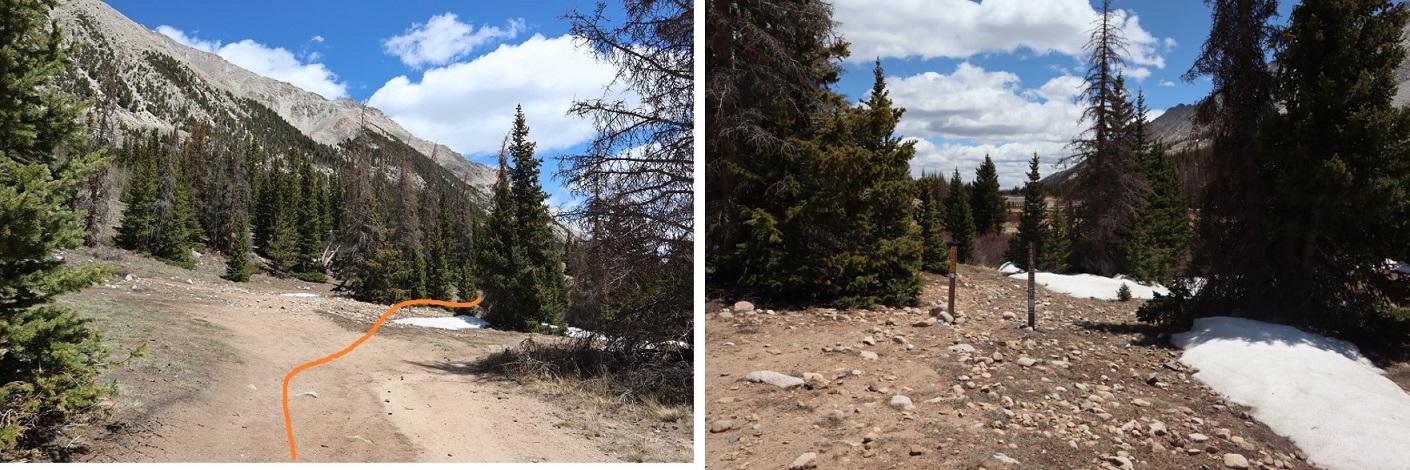
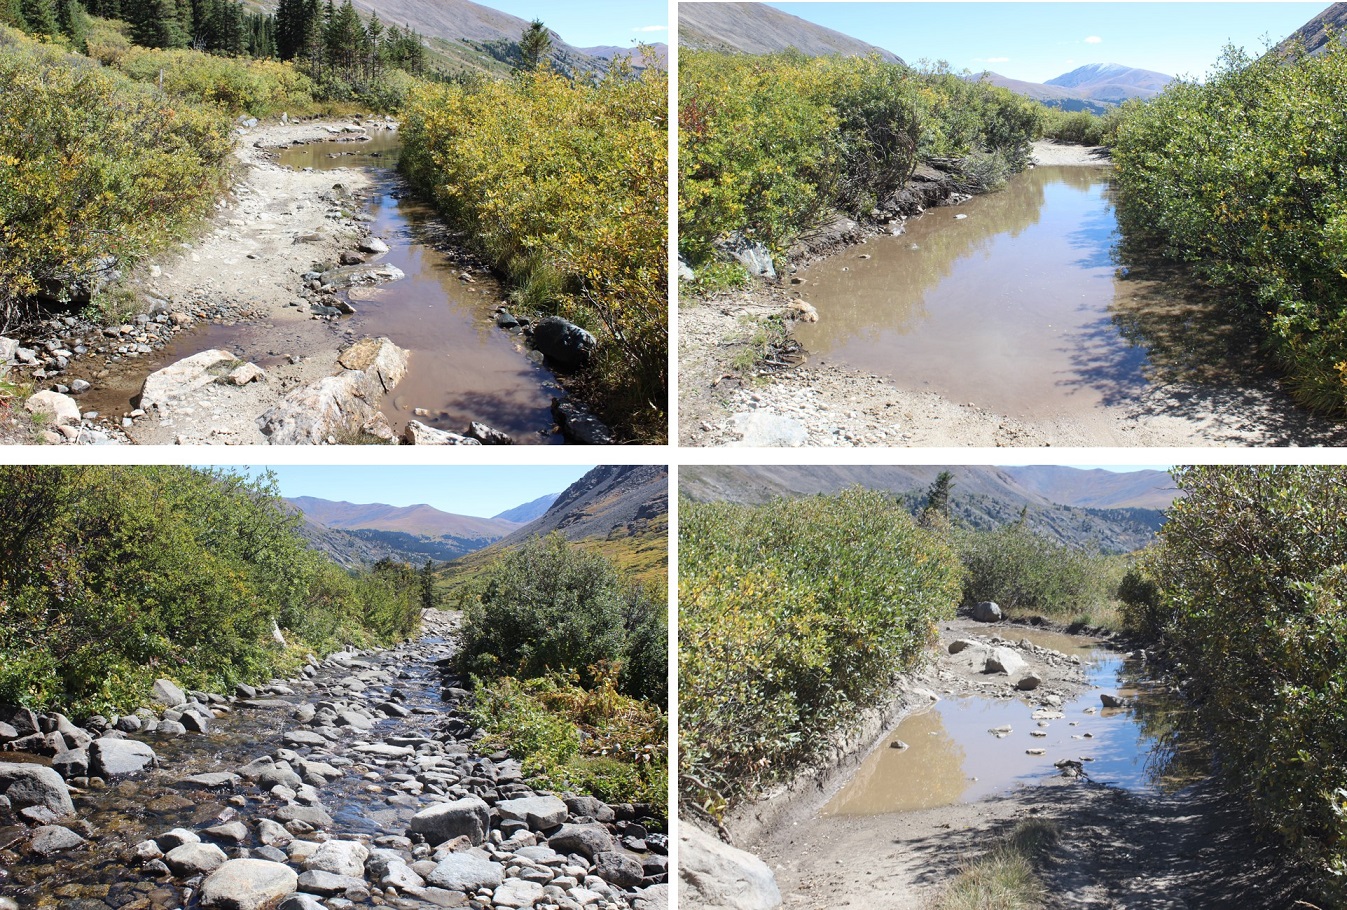
After hiking for 8.5 miles I crossed a stream and the real route finding began

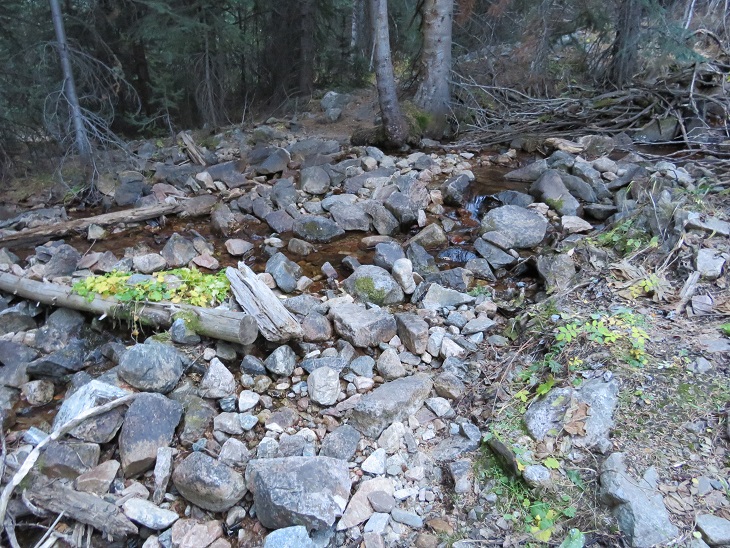
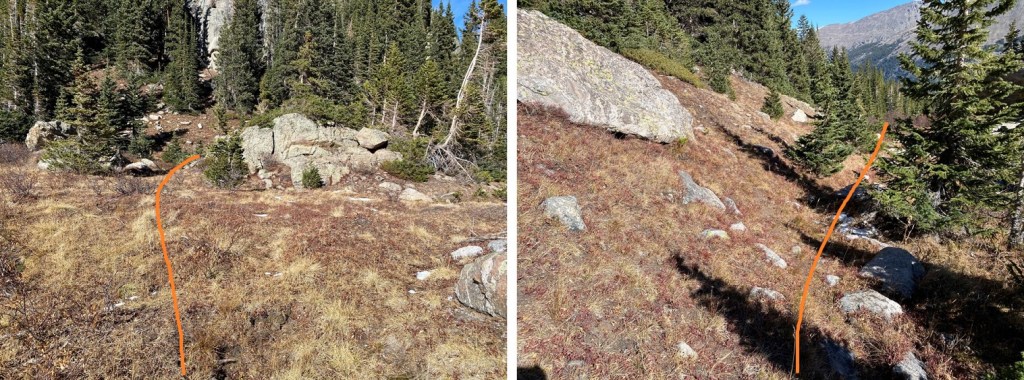
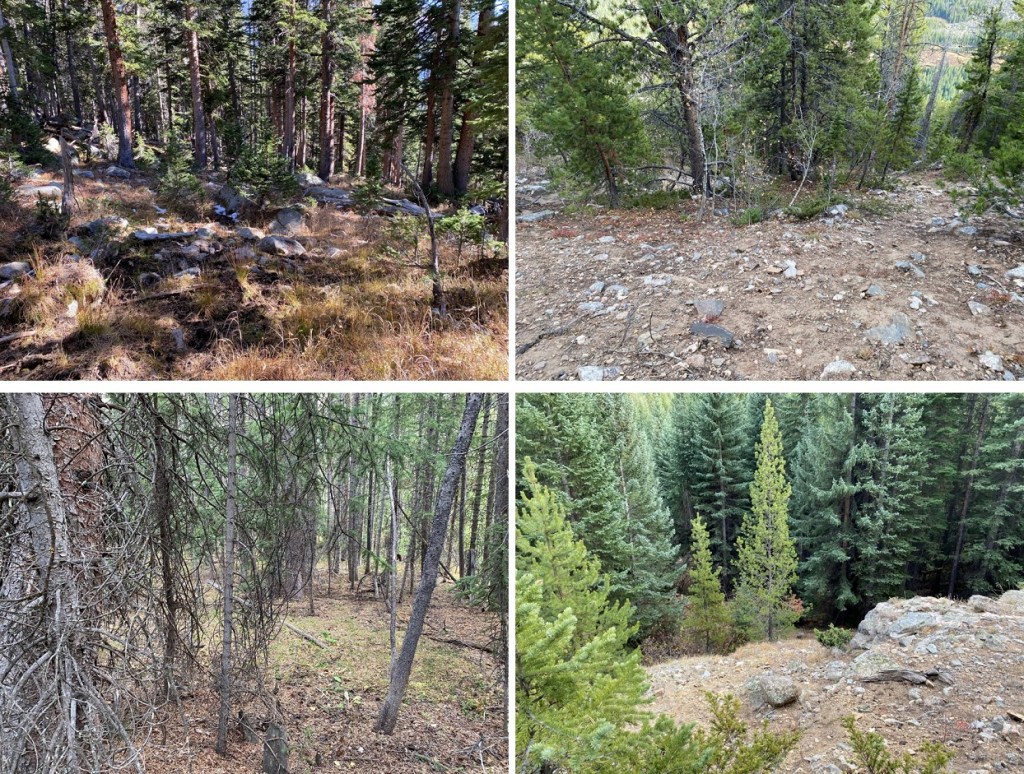
After crossing the stream, I turned right and headed straight up the mountainside, passing a small pond to my left.  There is no trail here, and the bushwhacking is intense.  I passed several sets of bear tracks while route finding here.

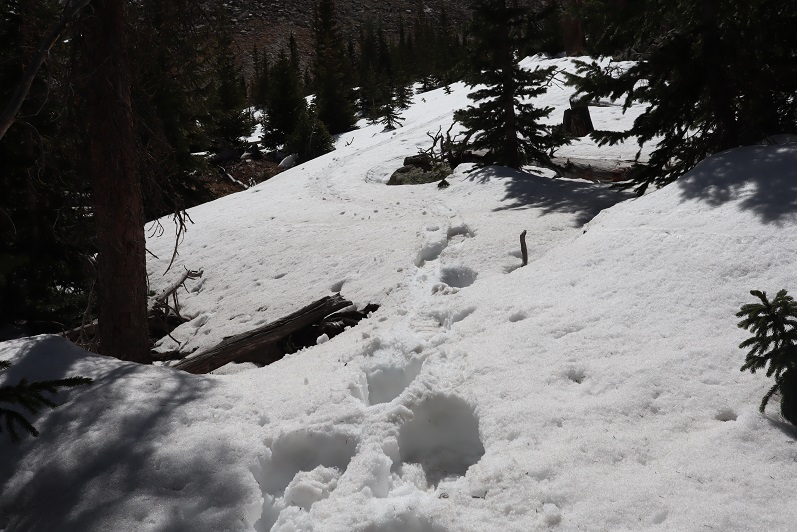
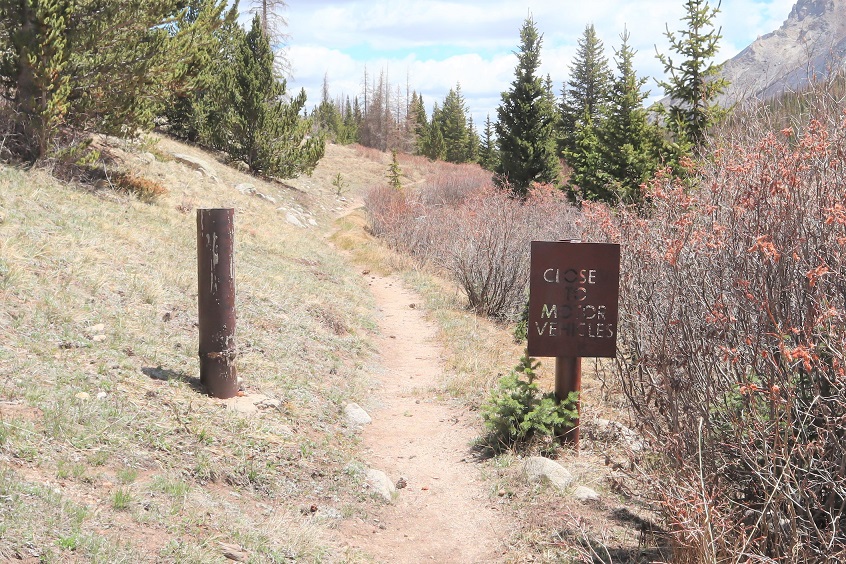
I’d gained 800’ of elevation in 1 mile heading northwest when I came upon a trail!  Woot!  This was a pleasant surprise.  It looked like a game trail, but every now and then I’d see a cairn. 

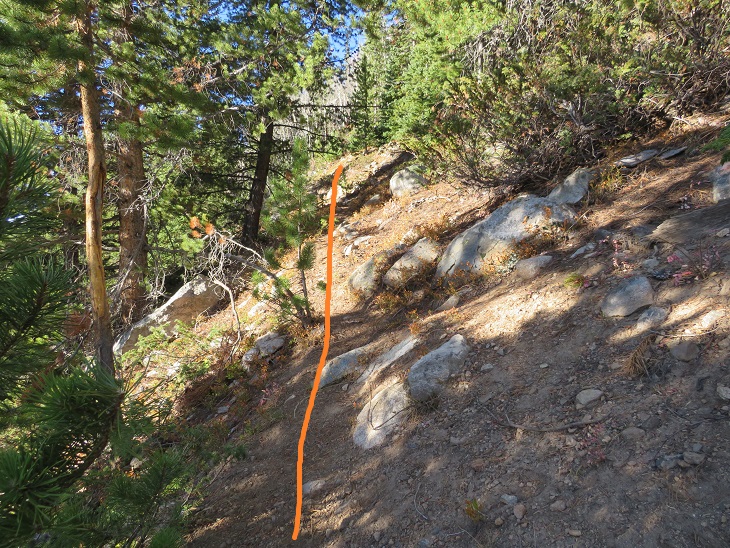
I followed this trail southwest for just over half a mile, until it suddenly ended. 

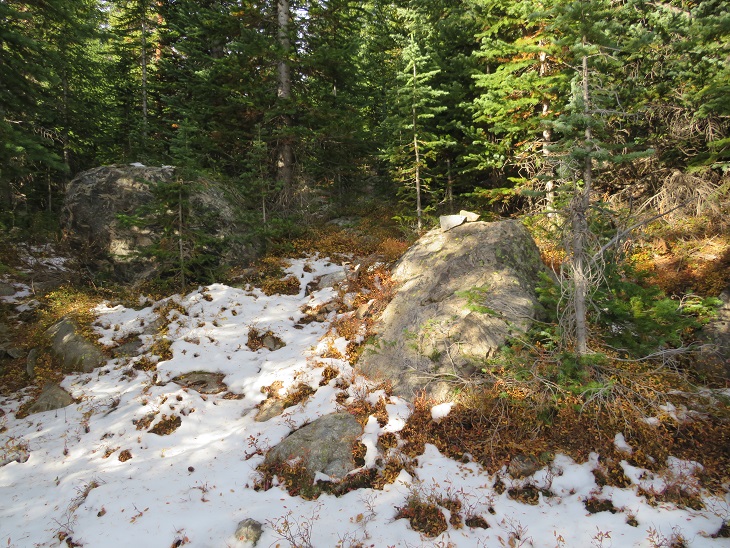
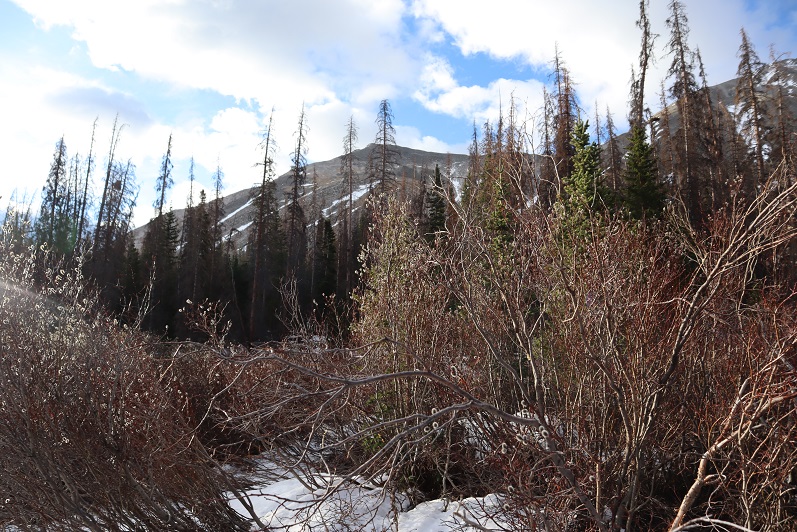
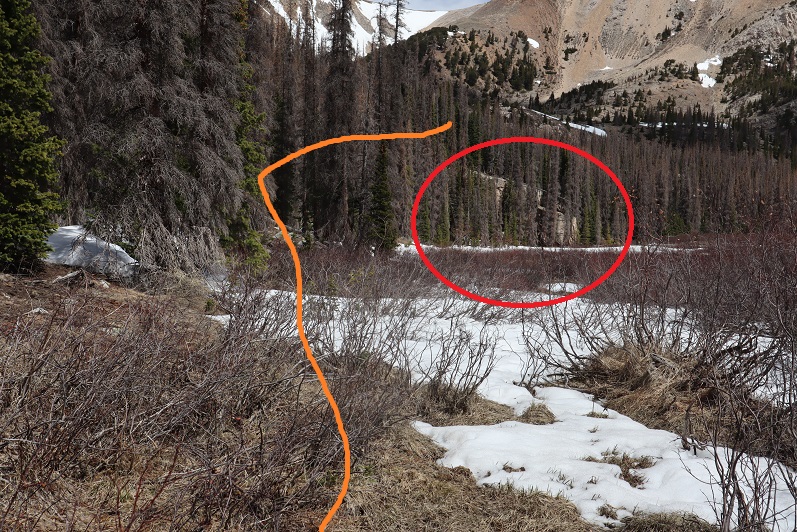
There was a cairn here, but it didn’t seem to lead anywhere.  I went about 20 yards in every pertinent direction and couldn’t locate a trail. The snow on the ground wasn’t helping.  I got out my map and realized I’d gone too far south, so I turned right and headed north up this drainage. 

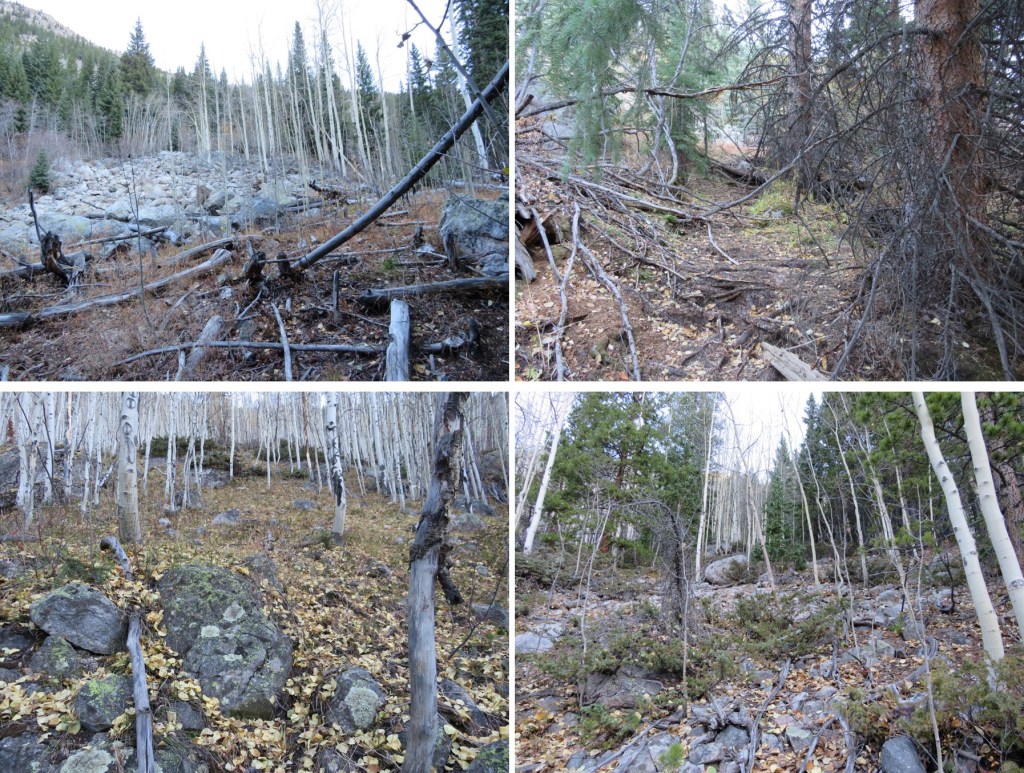
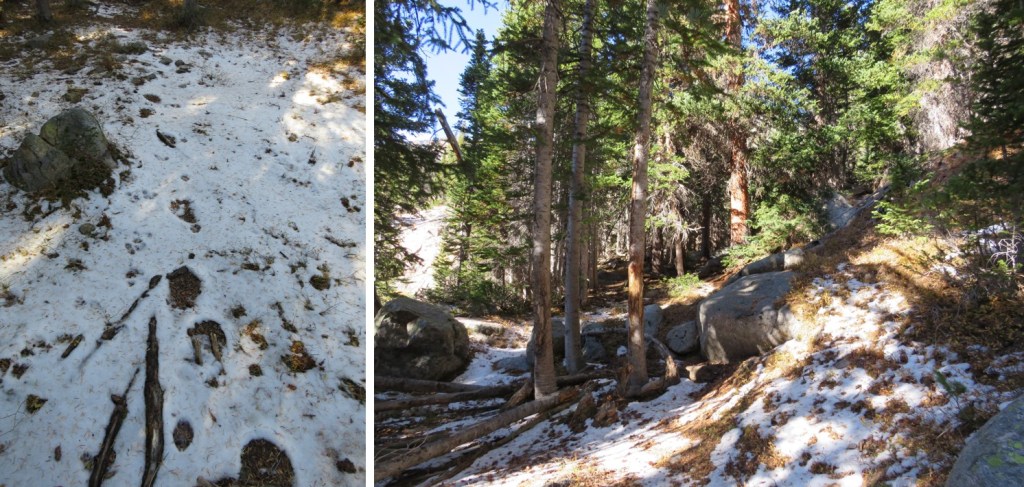
At the top of the drainage I headed west.  You can see how much fun route finding was here as well.  I kept wishing for treeline so I’d have a visual of my route. On a positive note, my shoes and pants had dried out, so while I was still dirty, at least I was dry.

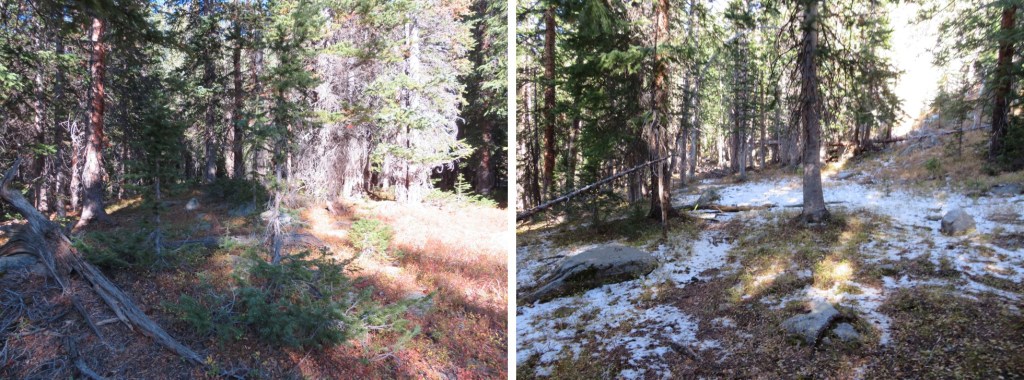
I also passed more bear tracks here.  These tracks had a different gait than the ones I’d encountered before, so I figured there were multiple bears in the area.

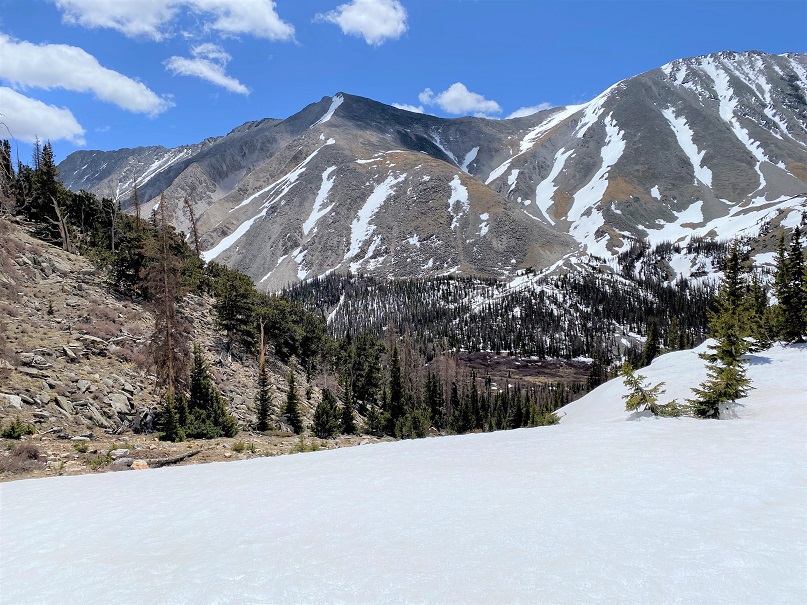
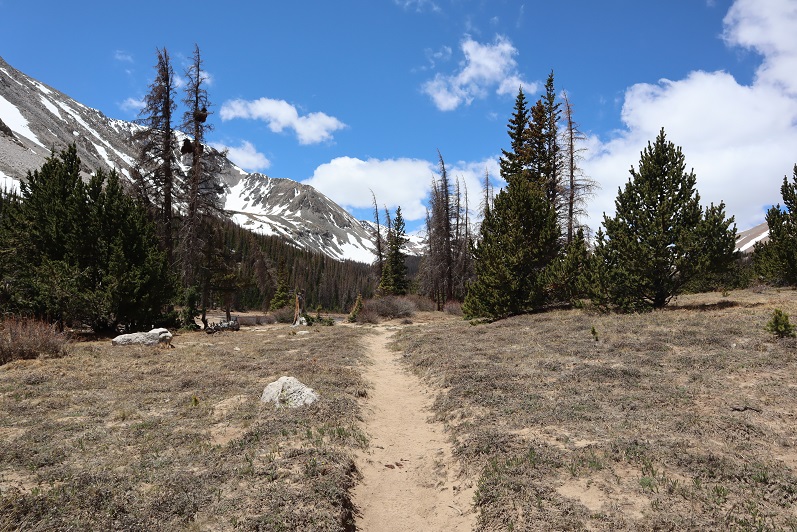
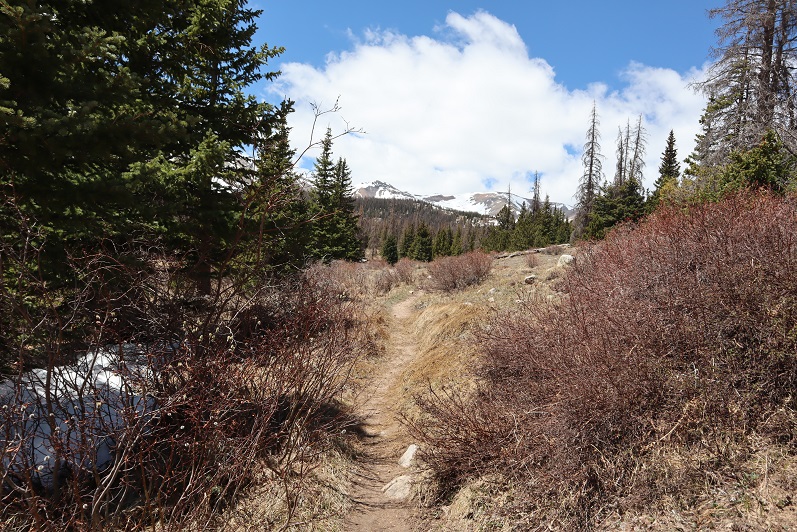
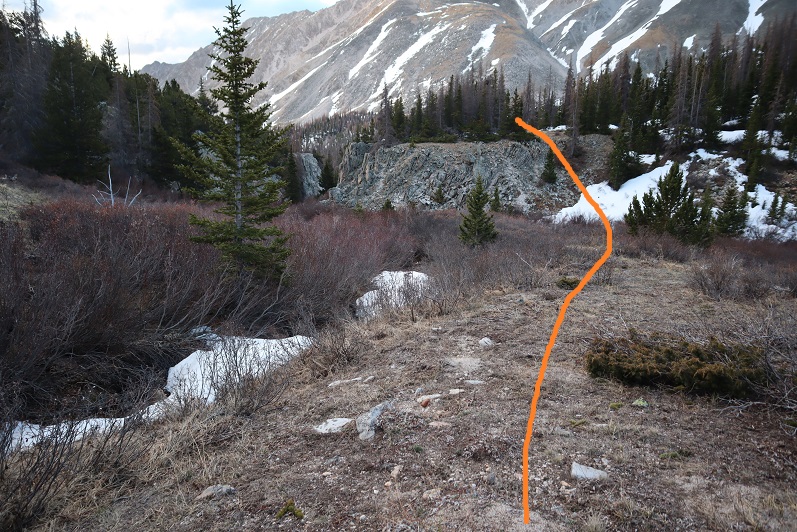
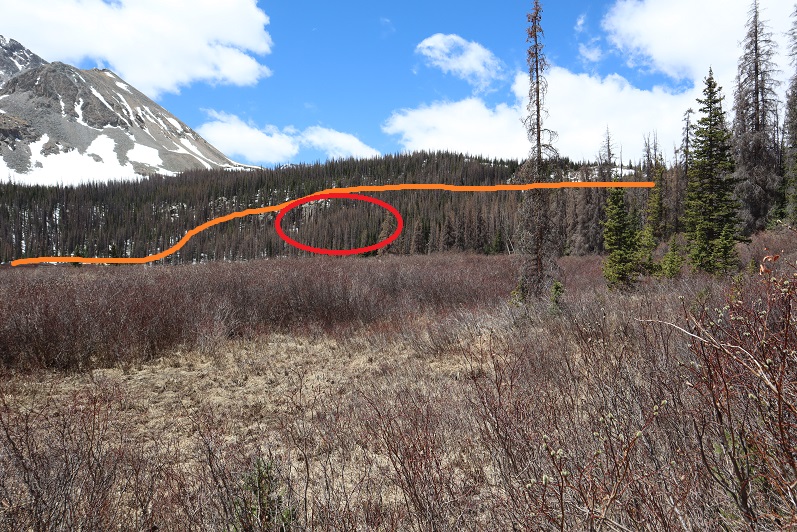
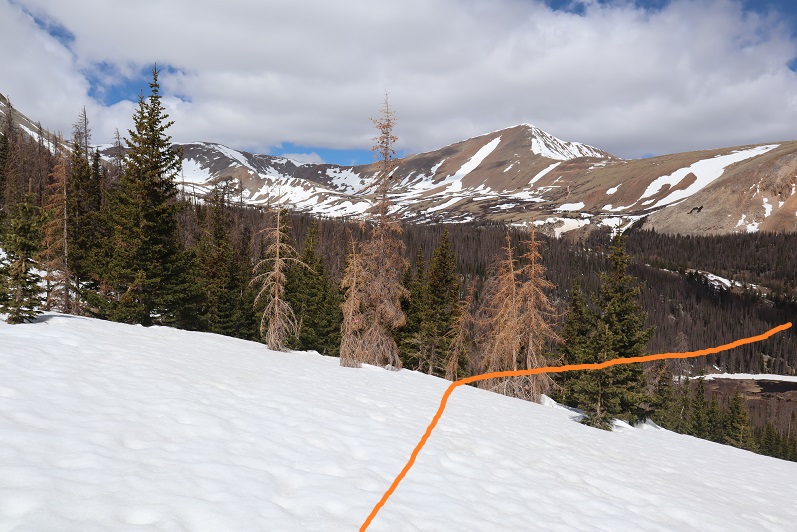
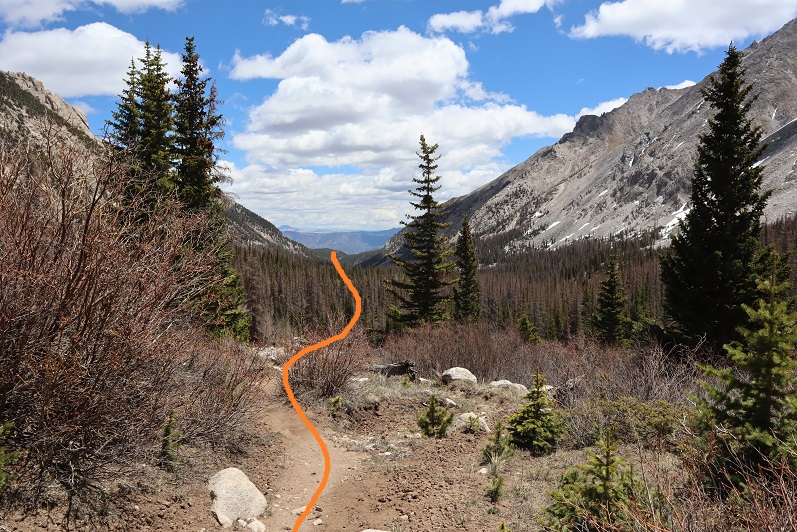
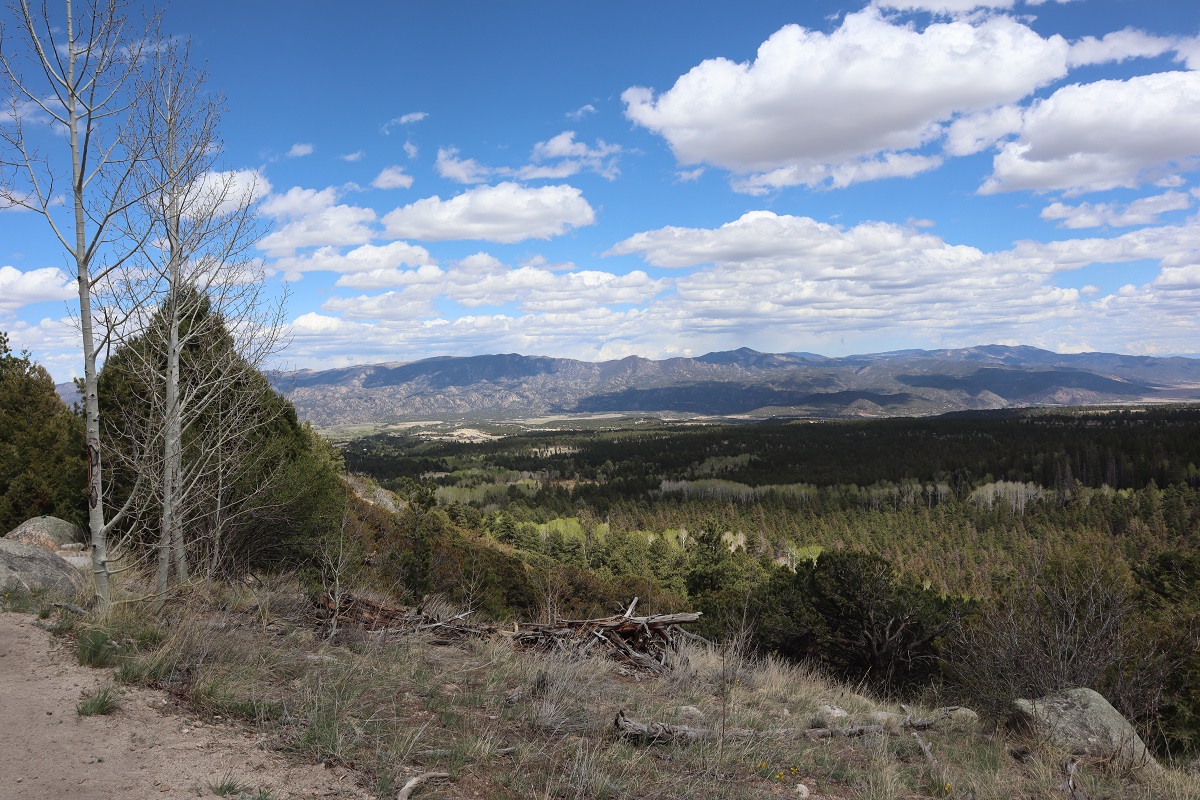
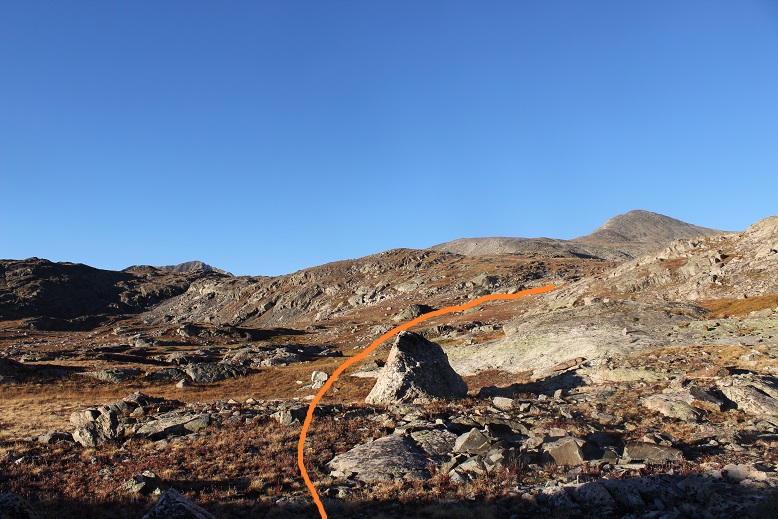
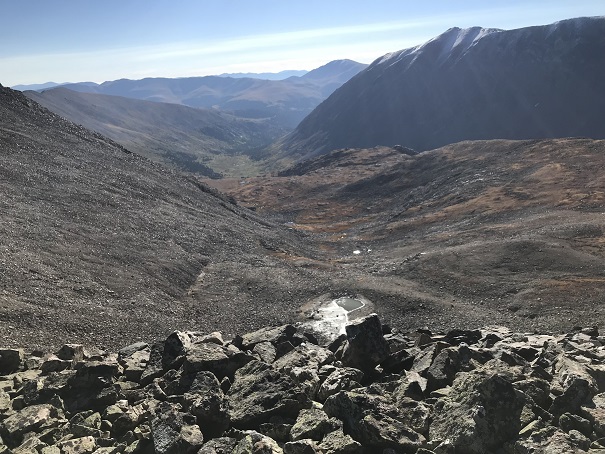
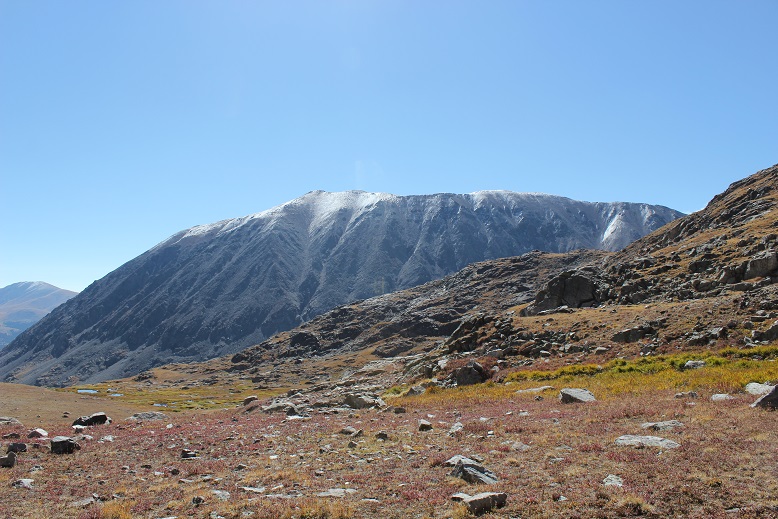
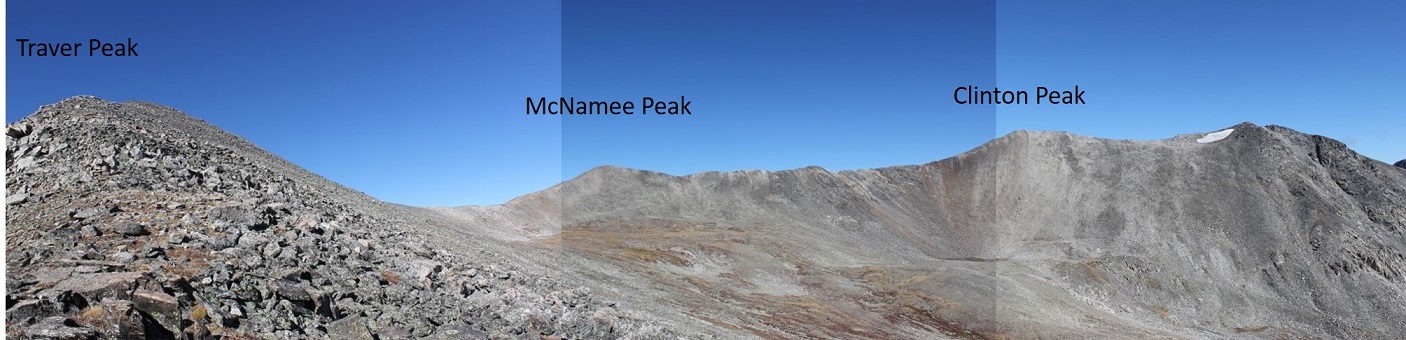
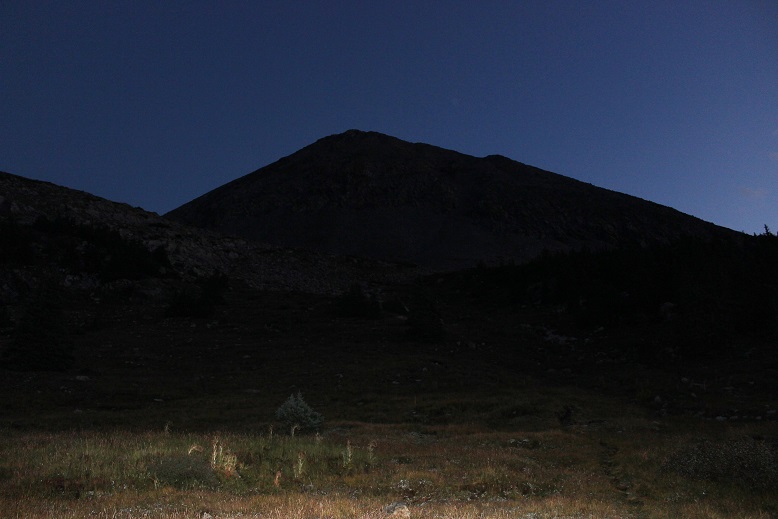
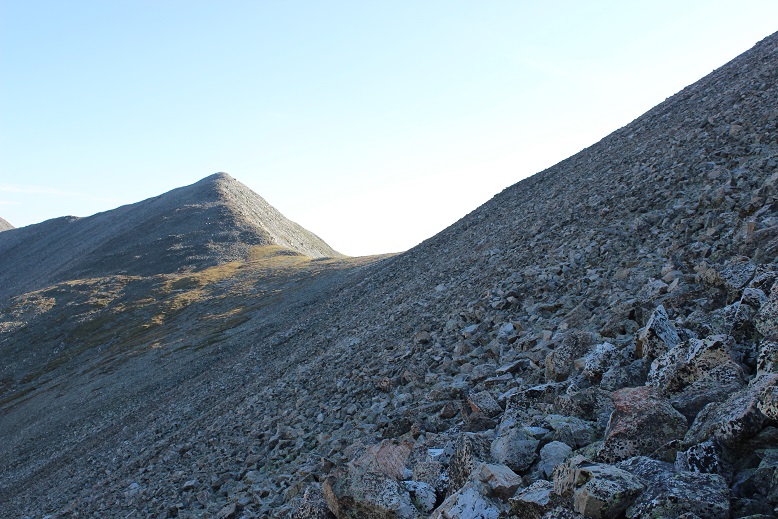
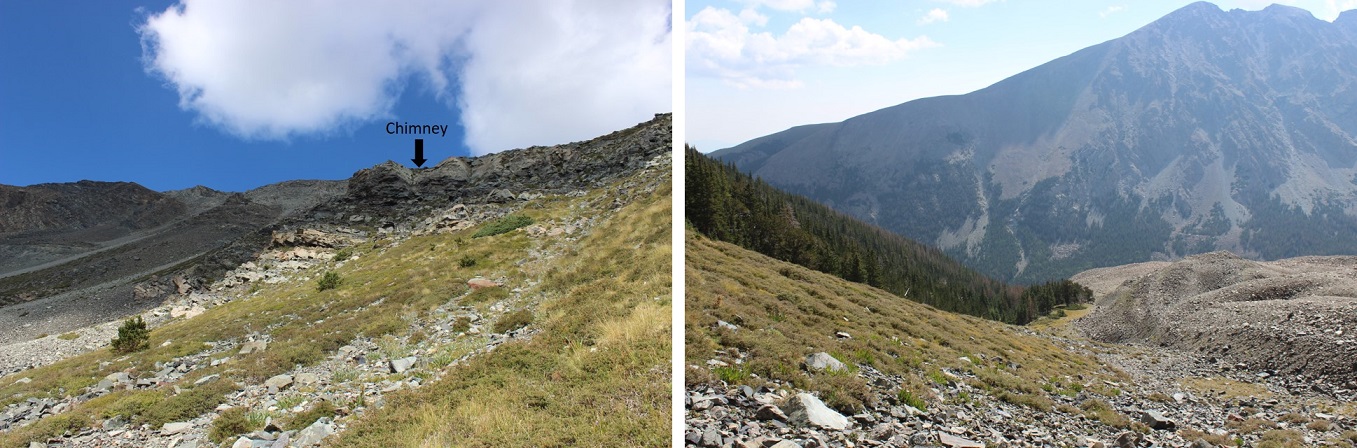
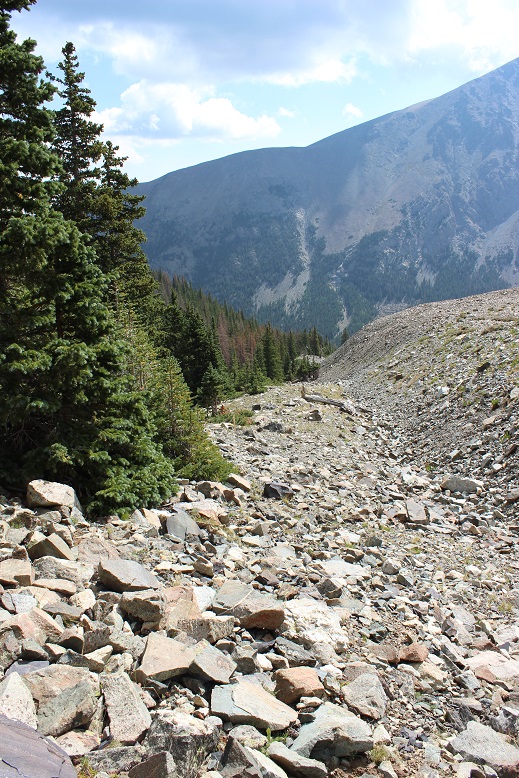
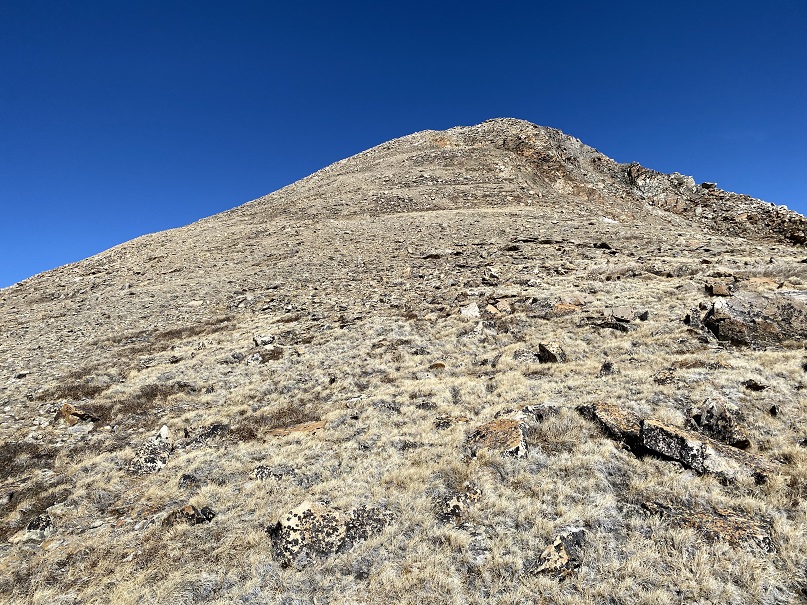
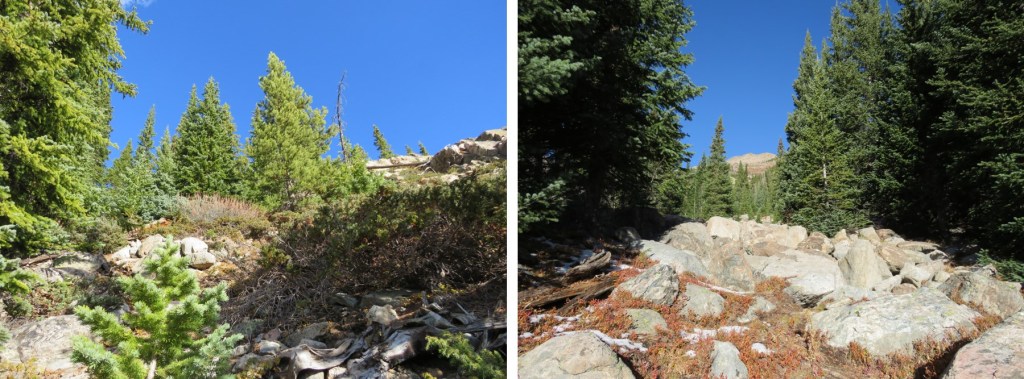
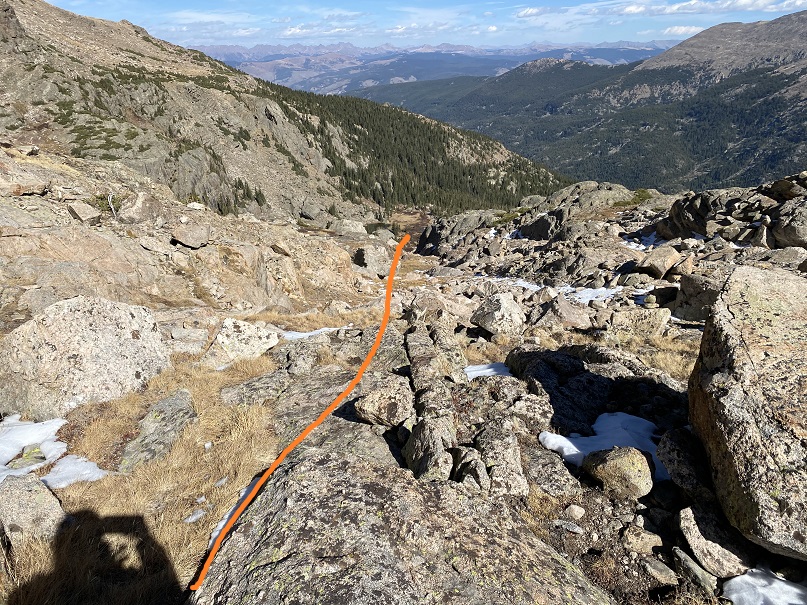
Hiking west eventually led me to a marshy area, and here I was finally able to get a good view of where I was headed

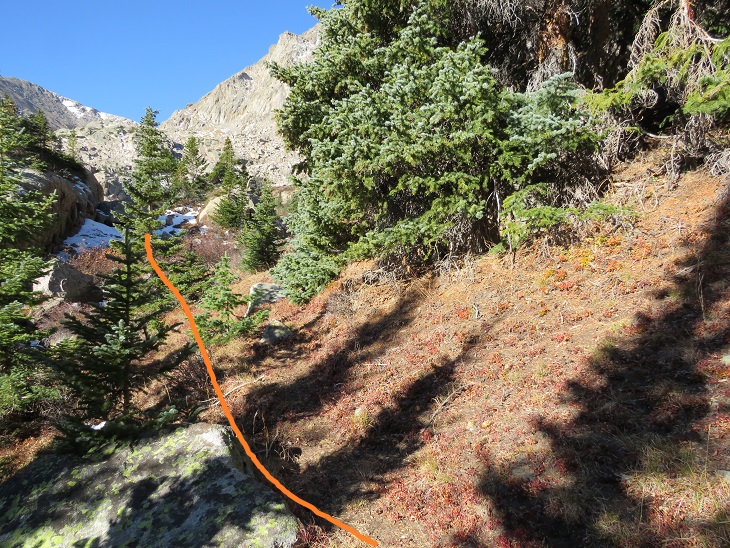
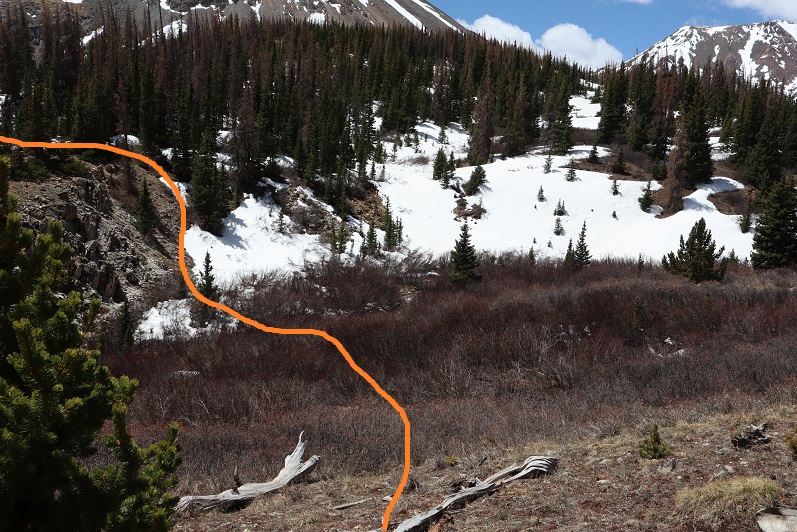
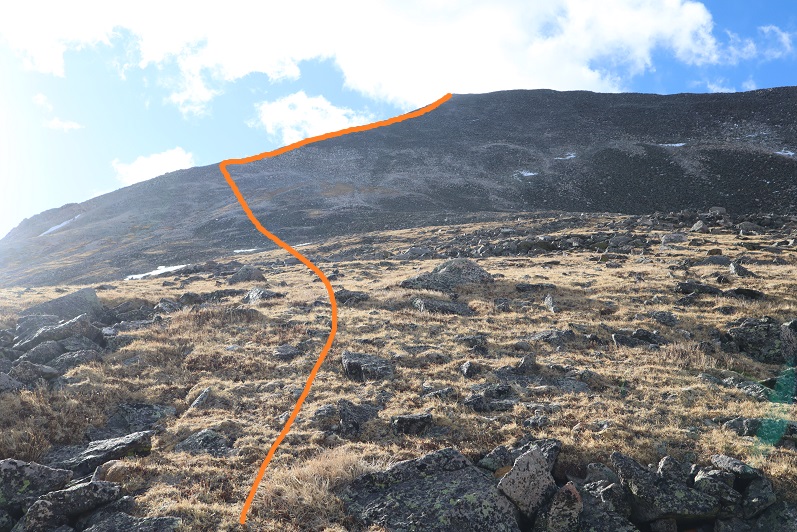
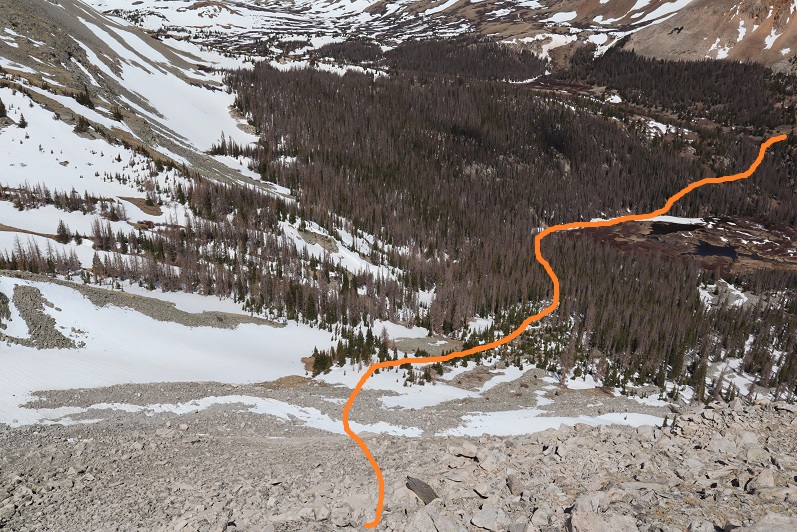
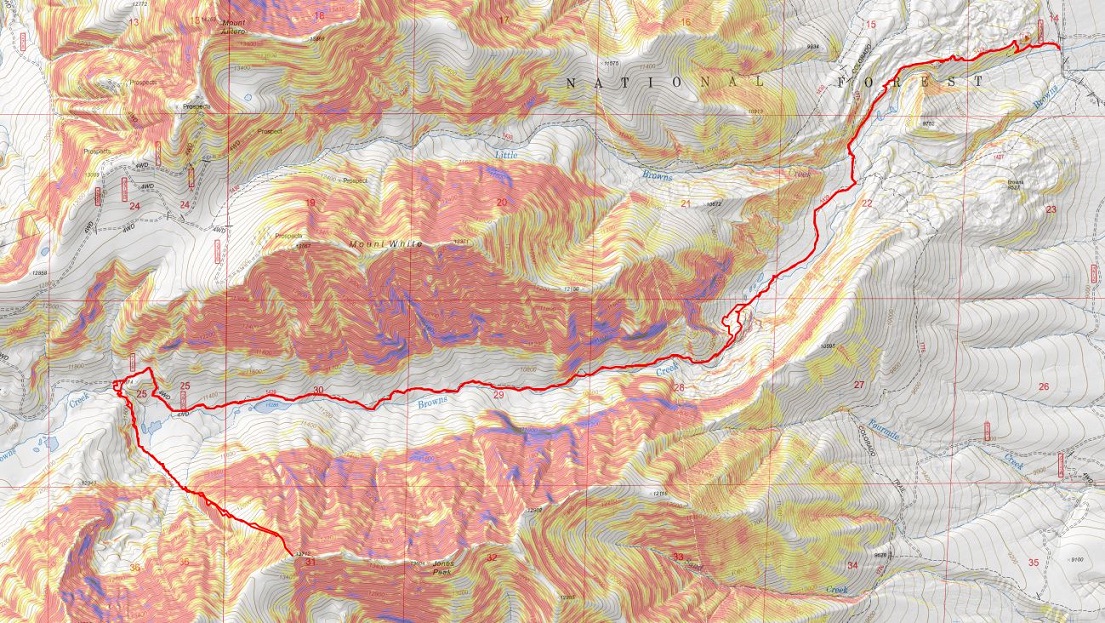
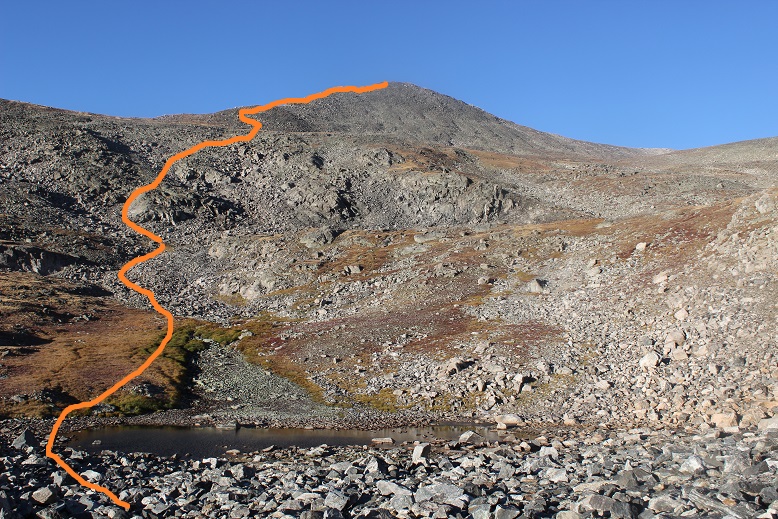
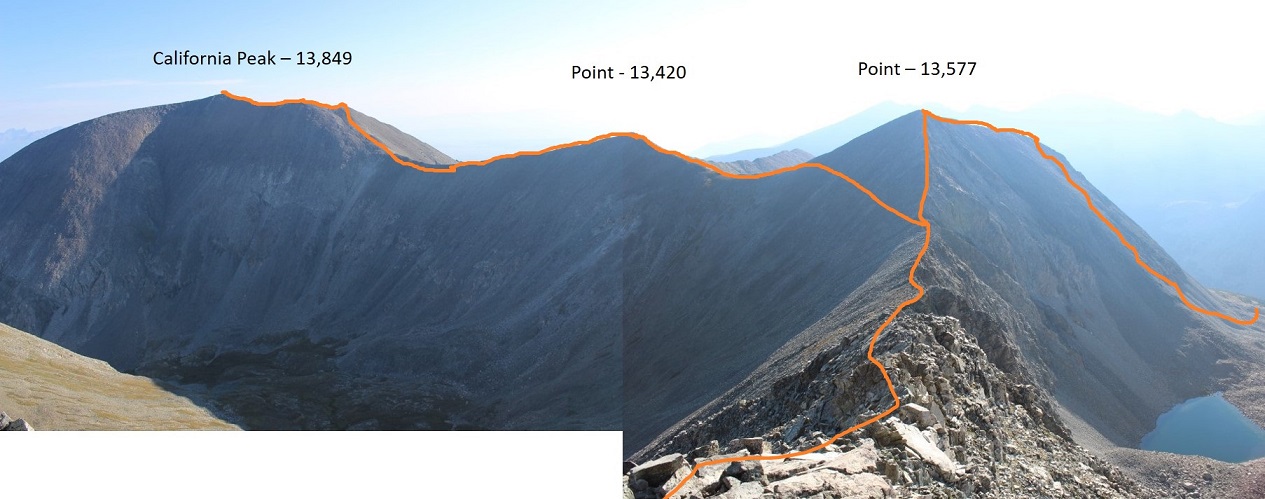
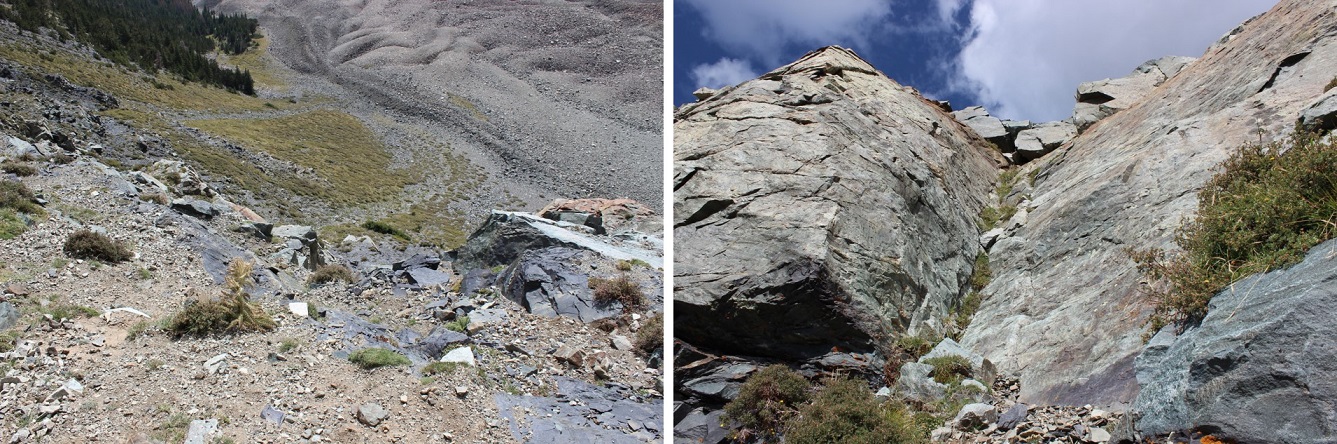
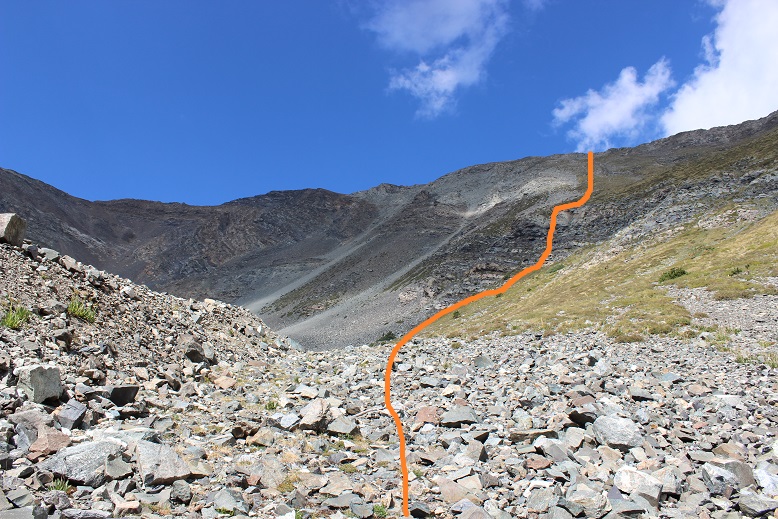
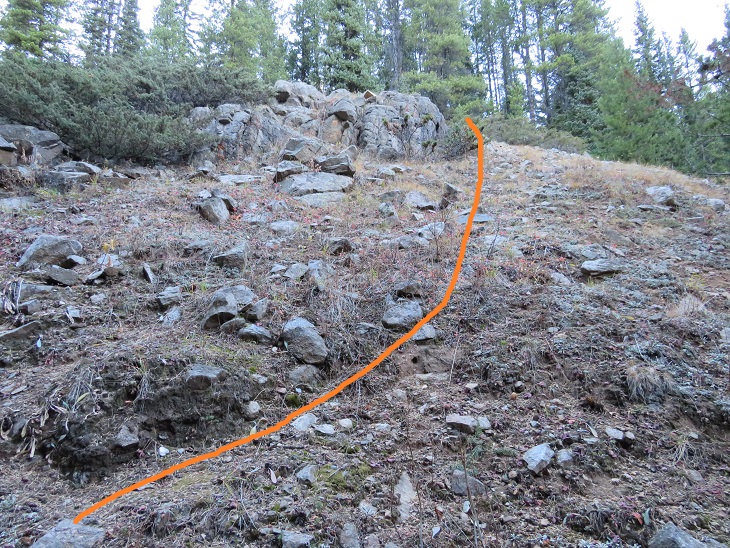
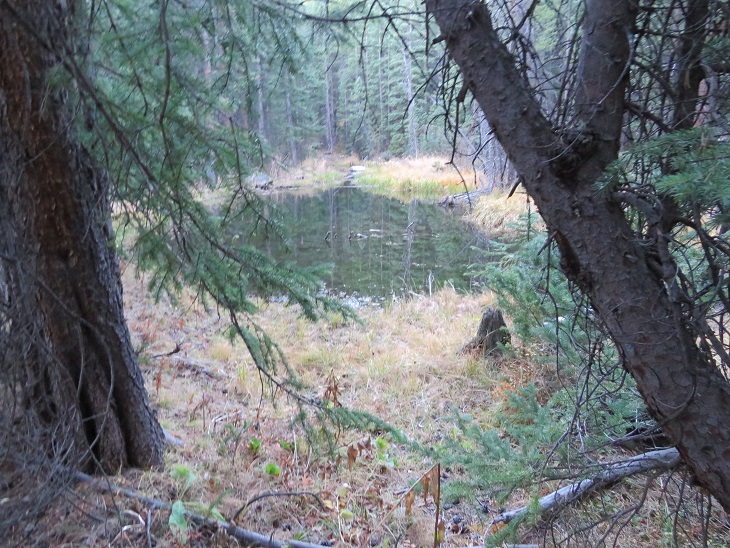
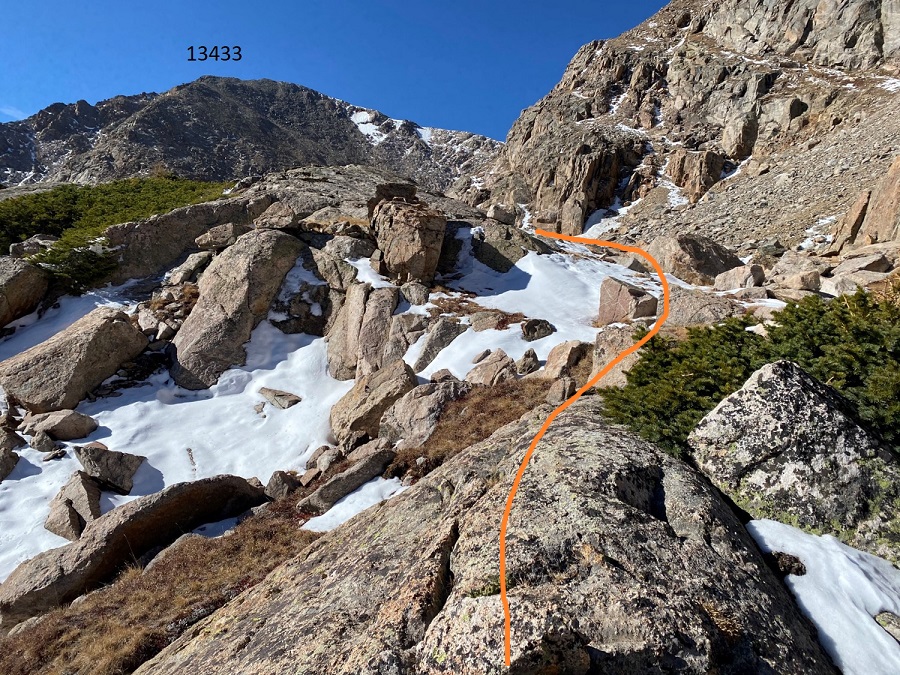
I skirted the marshy area to the south and then headed southwest.  It’s important to head up over the rocky area and not stay low because going low will lead you to a large rock wall bordering a pond with no way to cross.  Here’s an overall view of the route

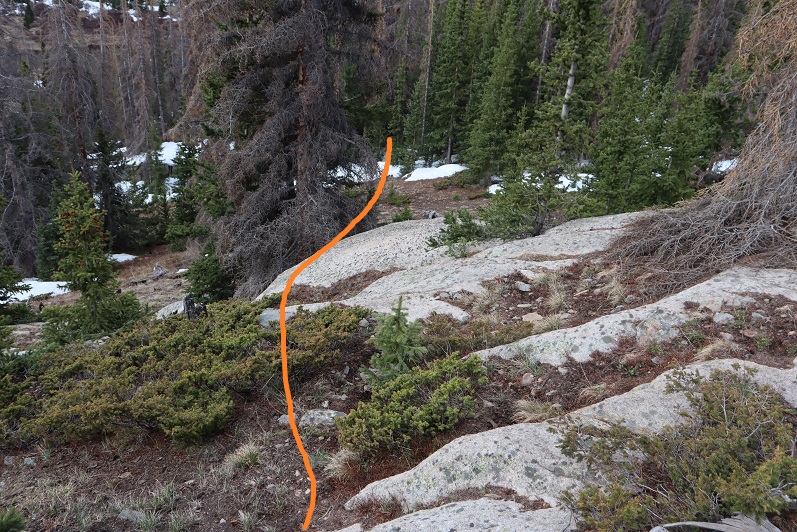
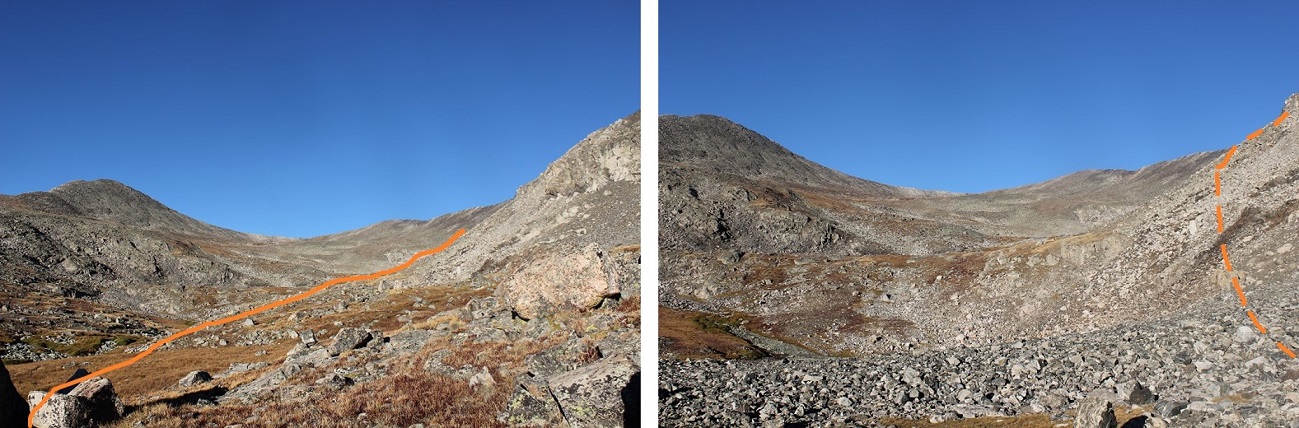
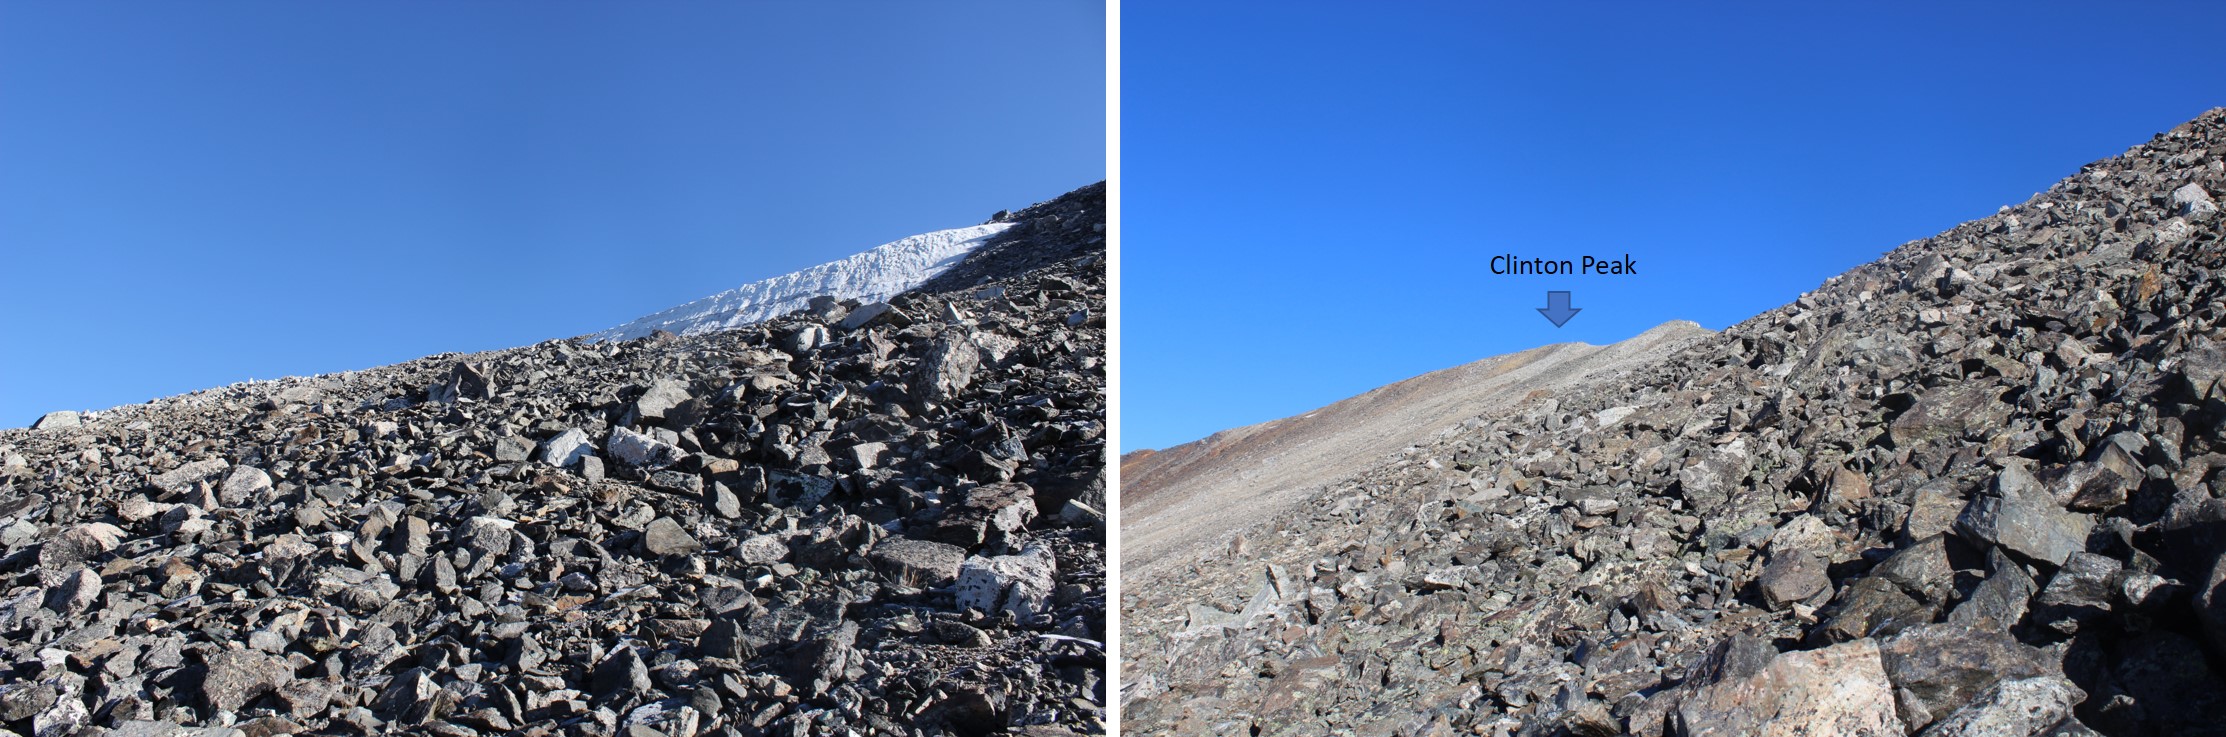
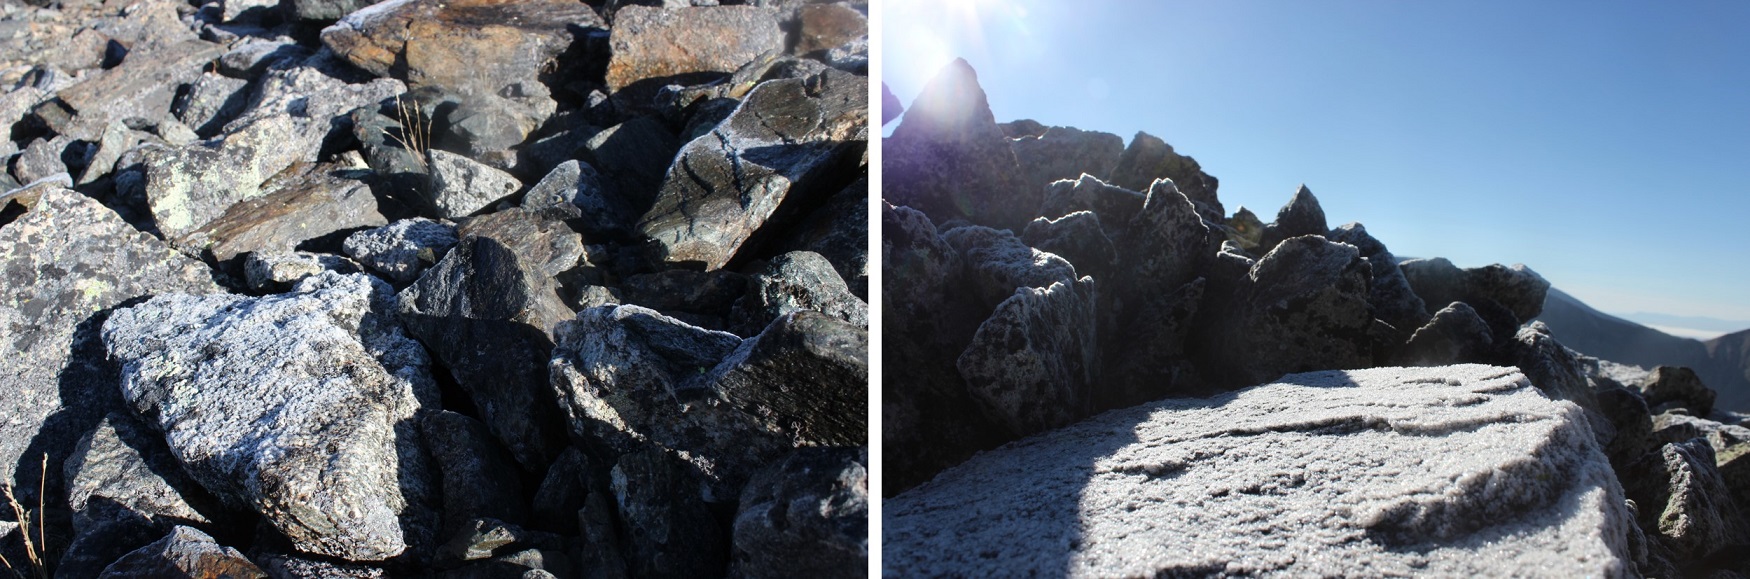
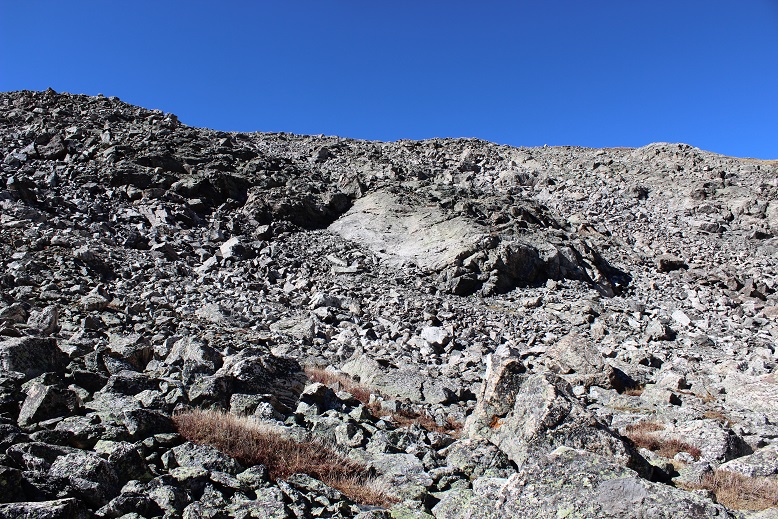
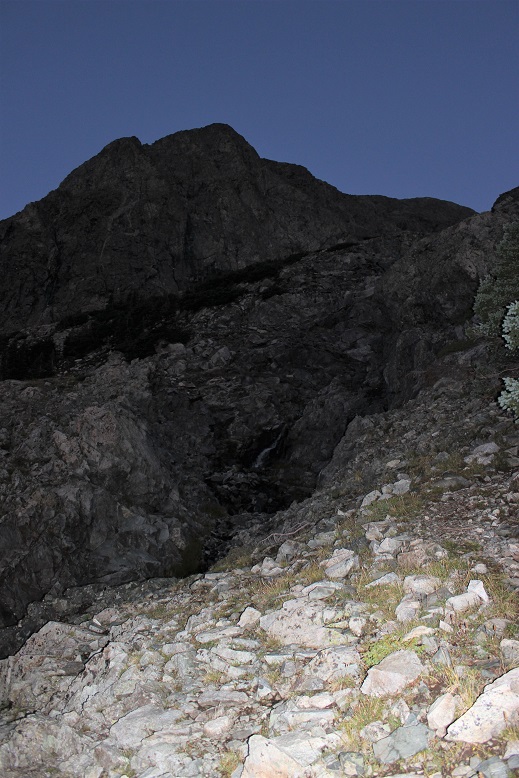
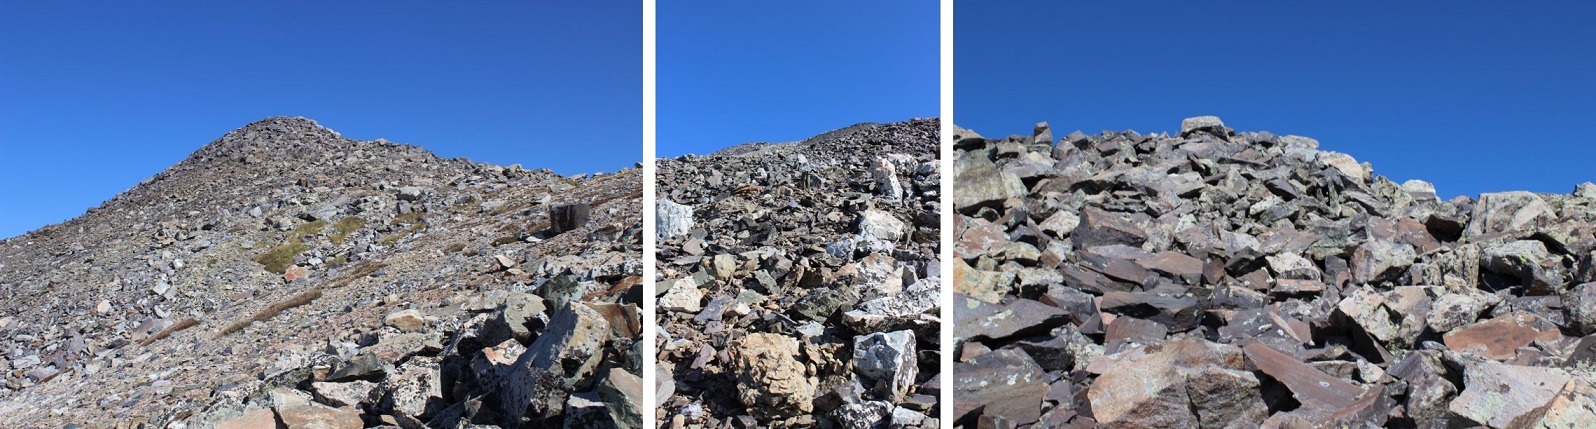
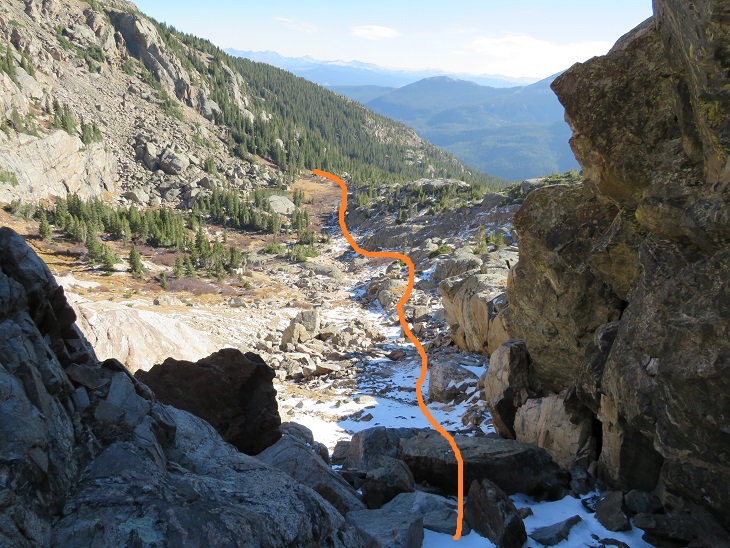
And step by step up the (first) gully

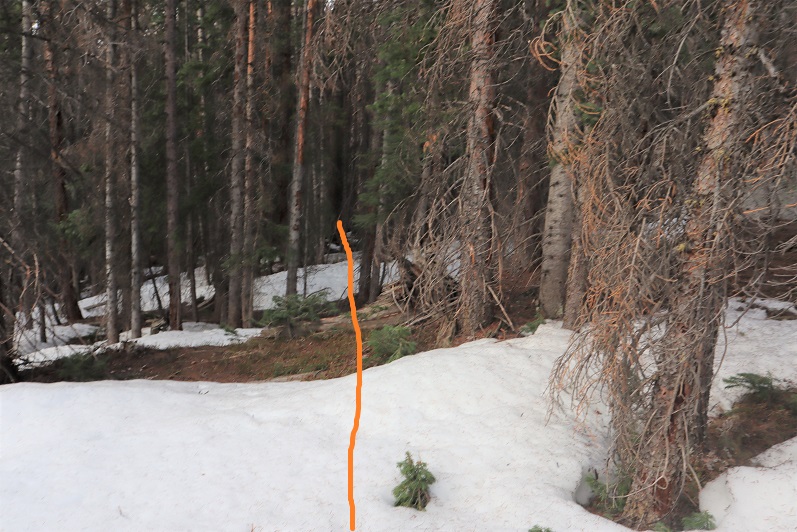
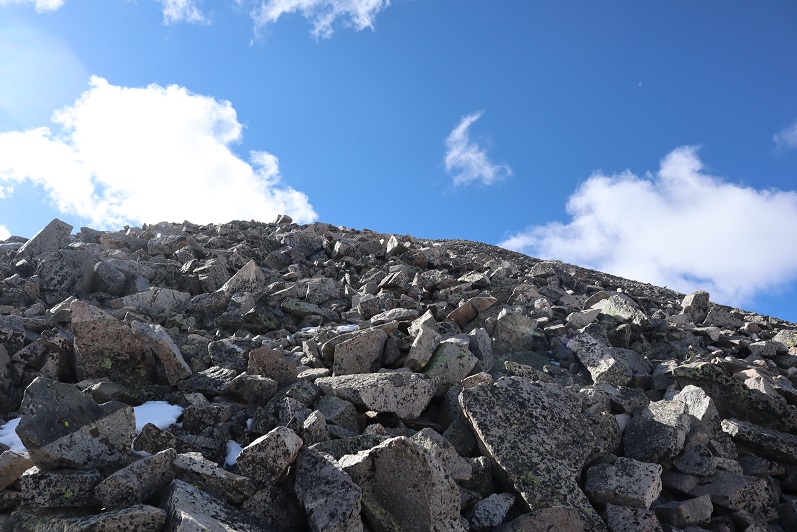
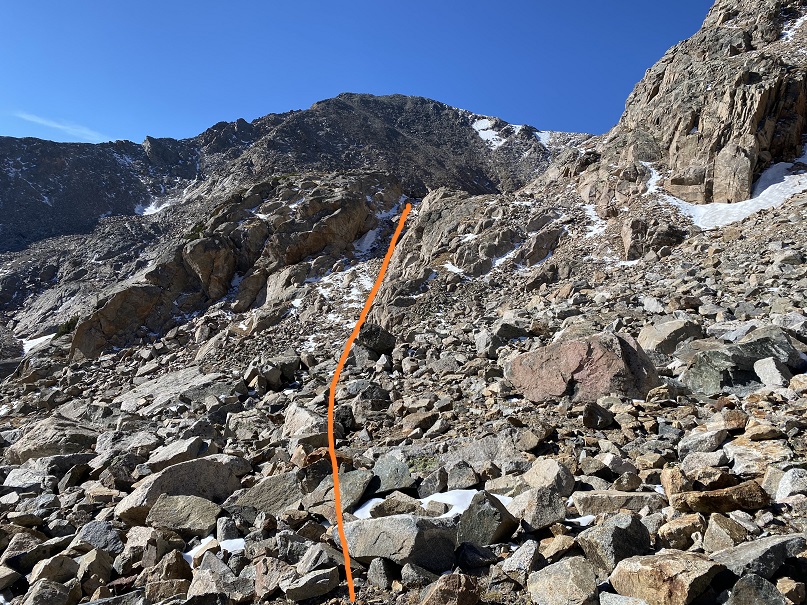
And second and third gullies.  This was really just one long gully that leveled out at times and started again.  The snow was bothersome because it was sugary and every once in a while, I’d posthole. It did make me roll my eyes at being worried my feet would be wet from the swampy water:  the snow had made sure of it. 

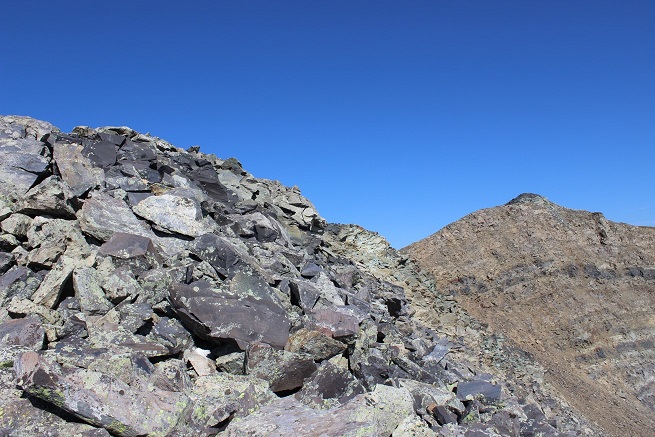
At the top of this long gully I continued southwest

Until I hit another (you guessed it) gully.  It was here the battery in my camera died and I had to switch to using my cellphone (I’m still figuring out my new camera, and the battery seemed to die rather quickly).

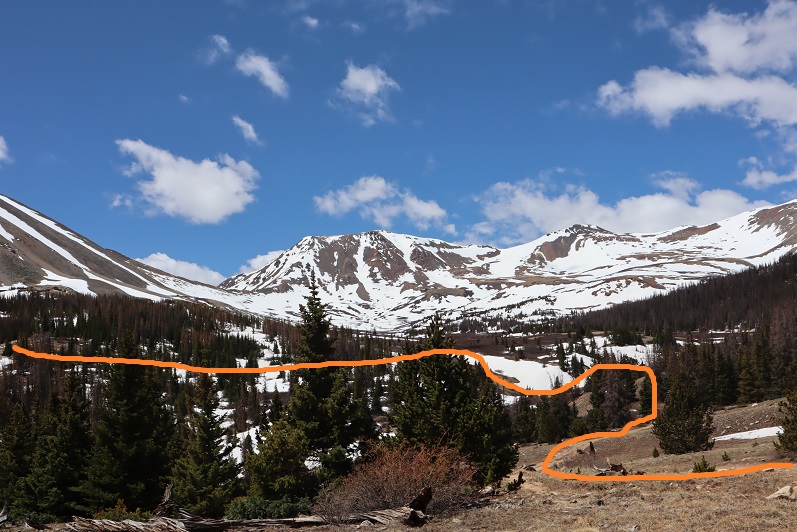
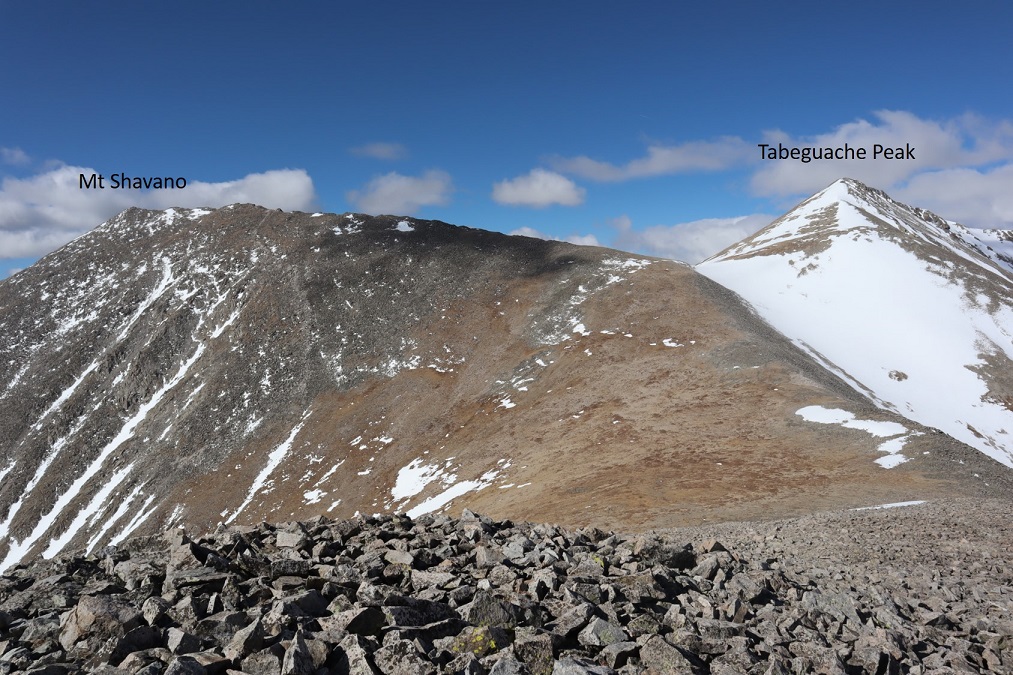
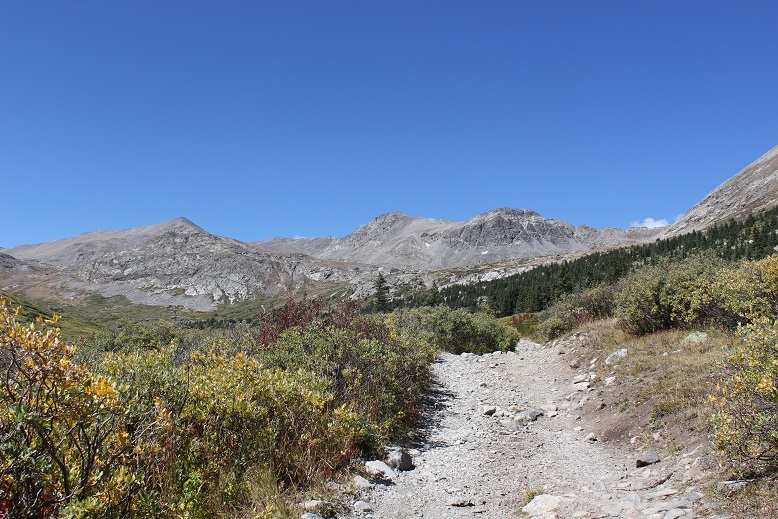
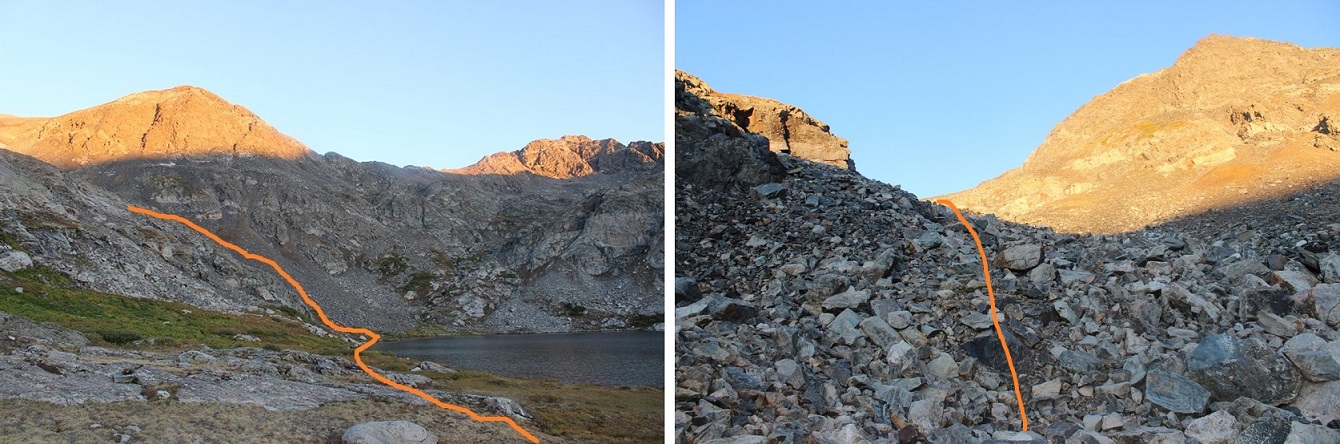
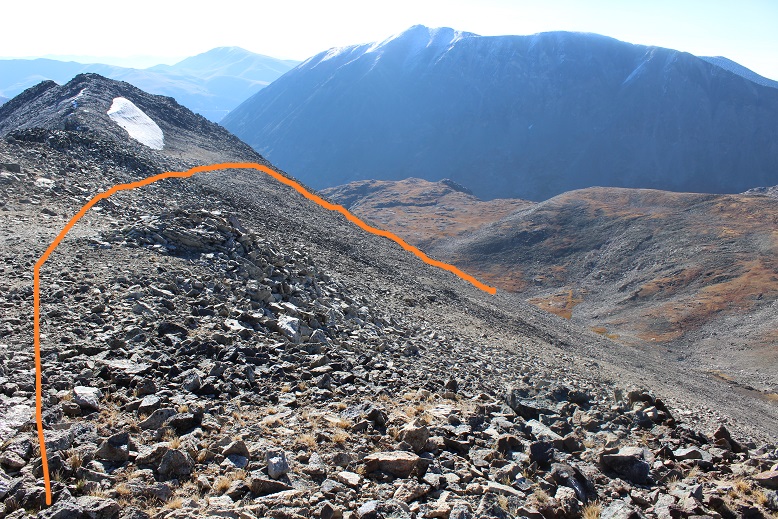
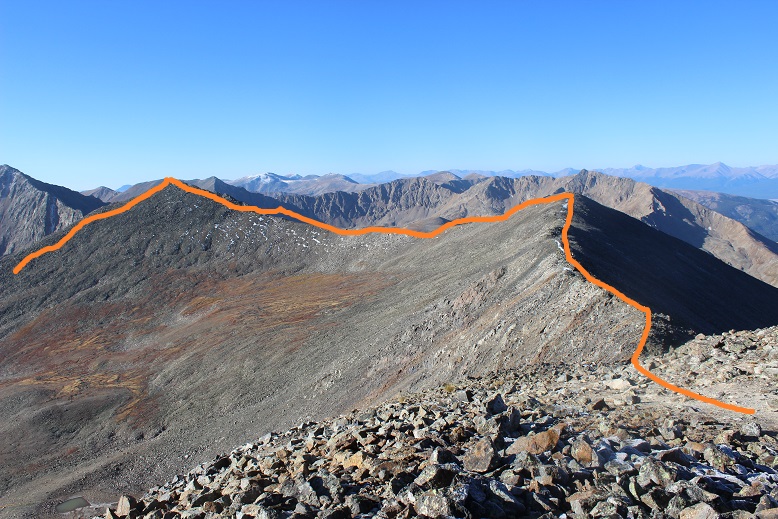
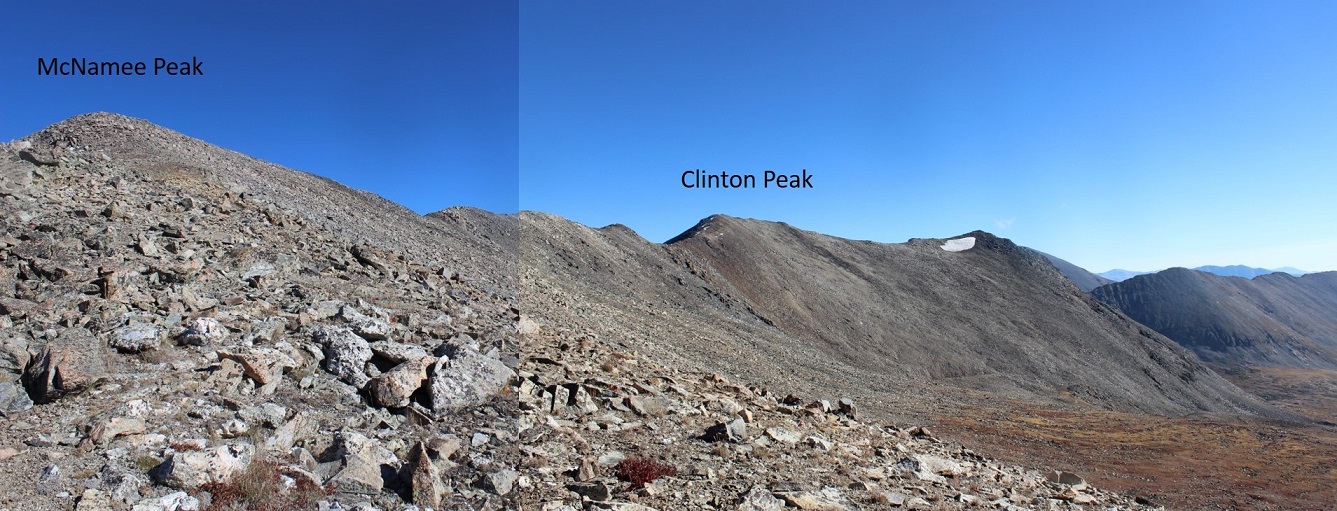
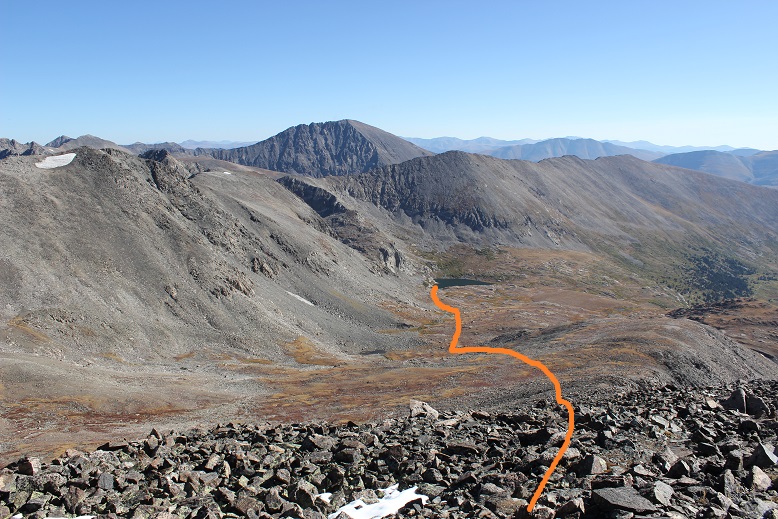
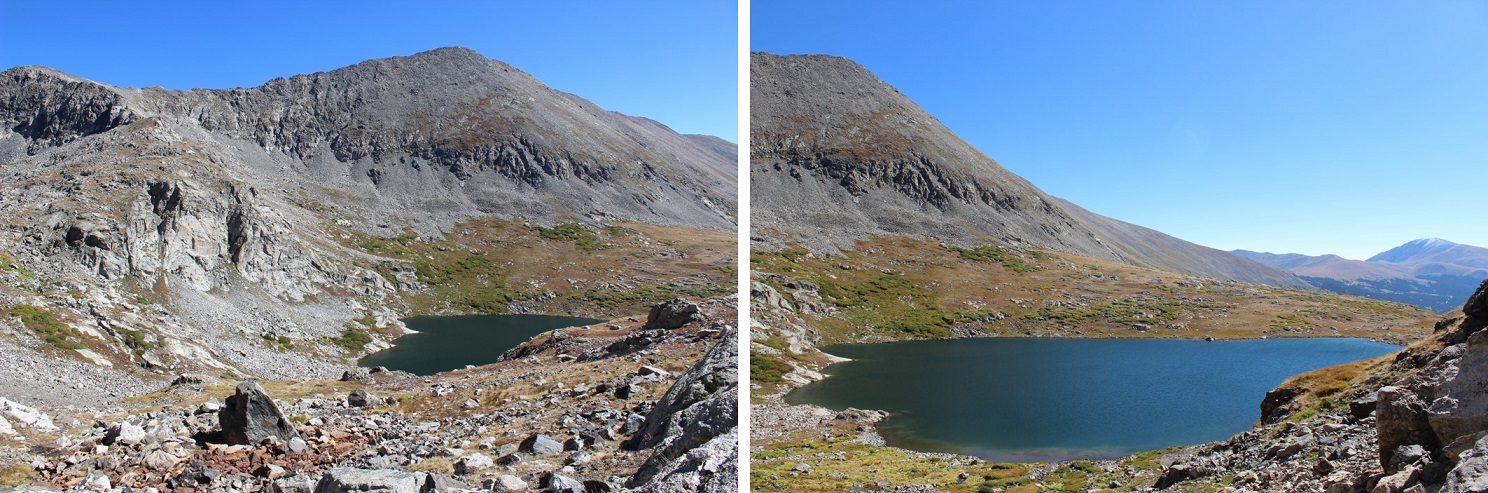
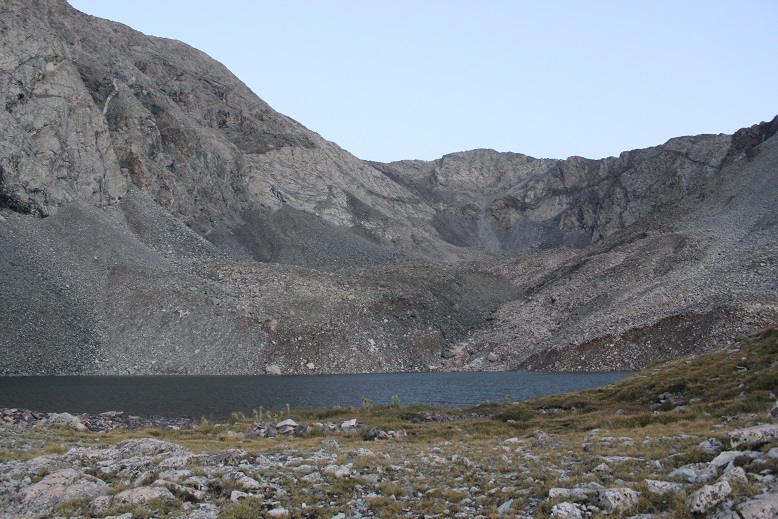
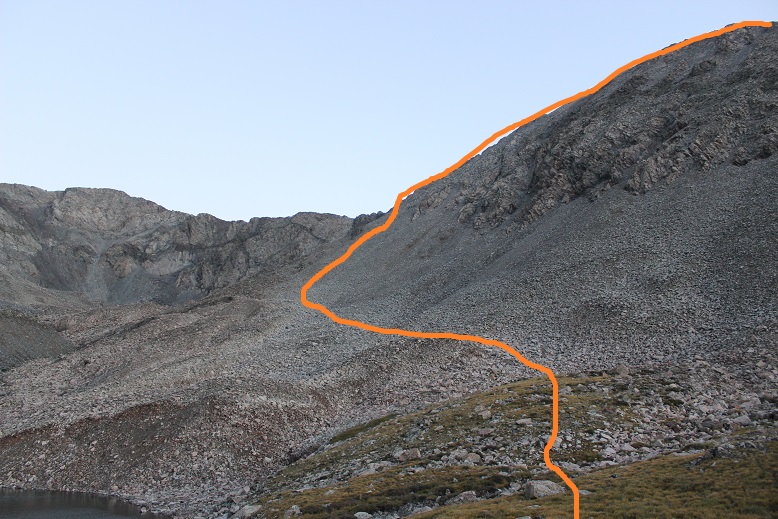
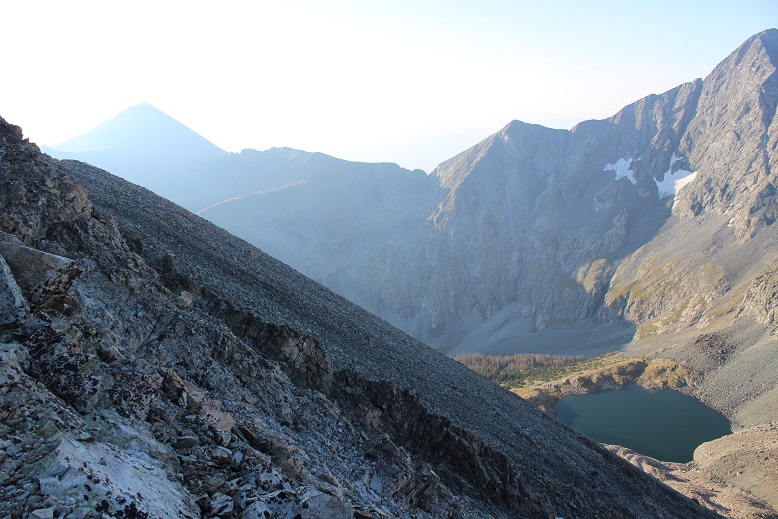
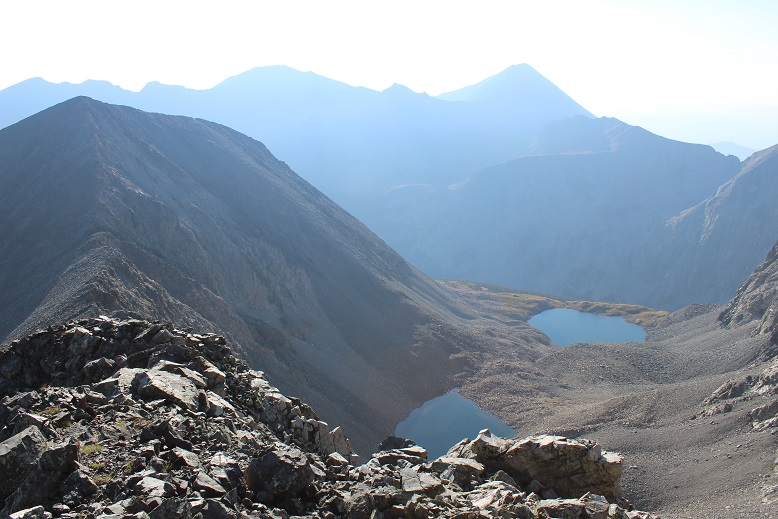
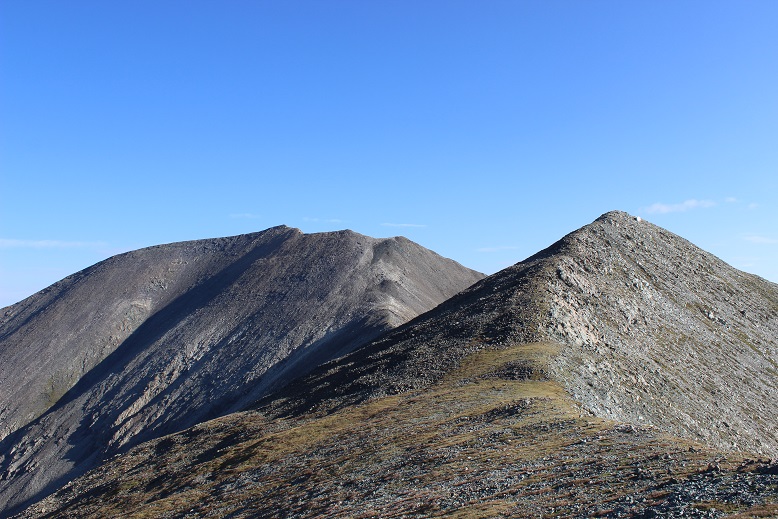
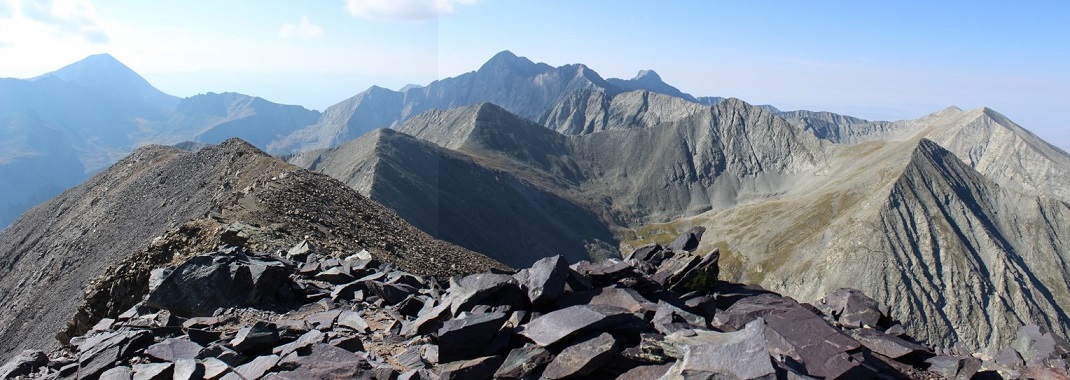
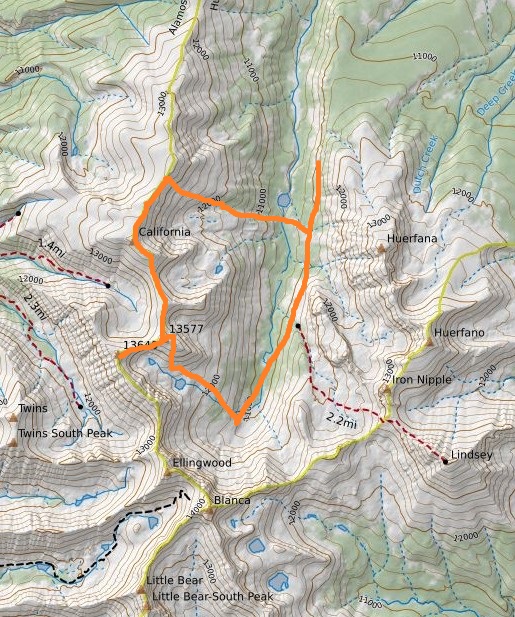
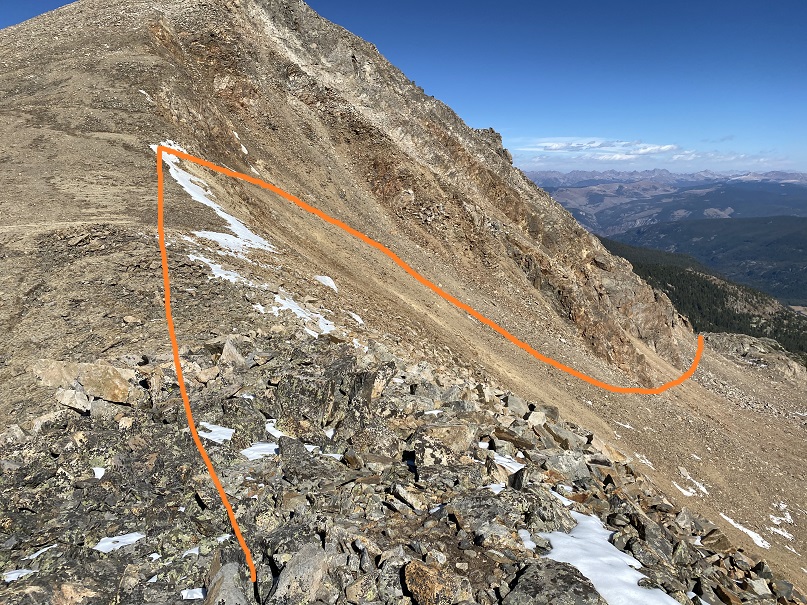
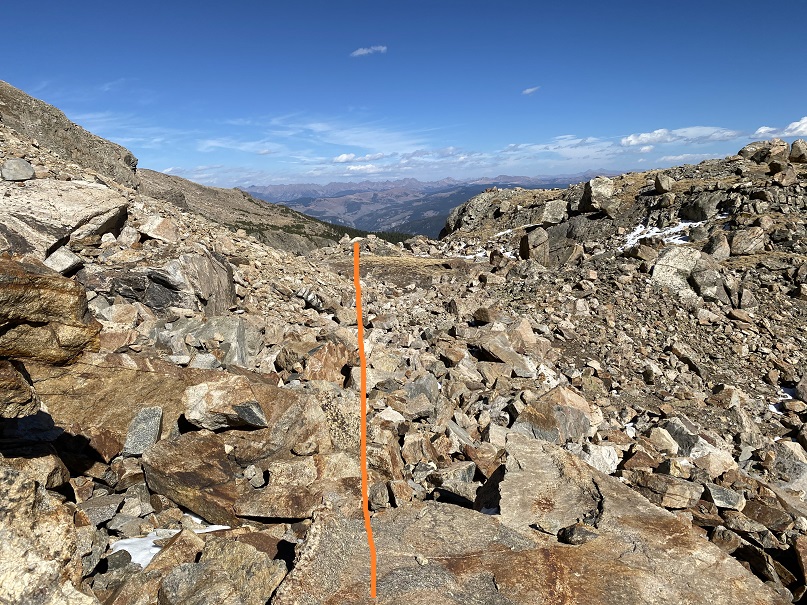
Here I got my first good look at the upper basin.  There are several routes I could have taken from here.  I’d heard there was a path up the north side of 13433, but I wanted to gain the saddle between UN 13433 and Mt Jackson.  I figured my best shot for today would be to stay high and hugging the south side of Mt Jackson.  Here’s my overall route

And step by step. 

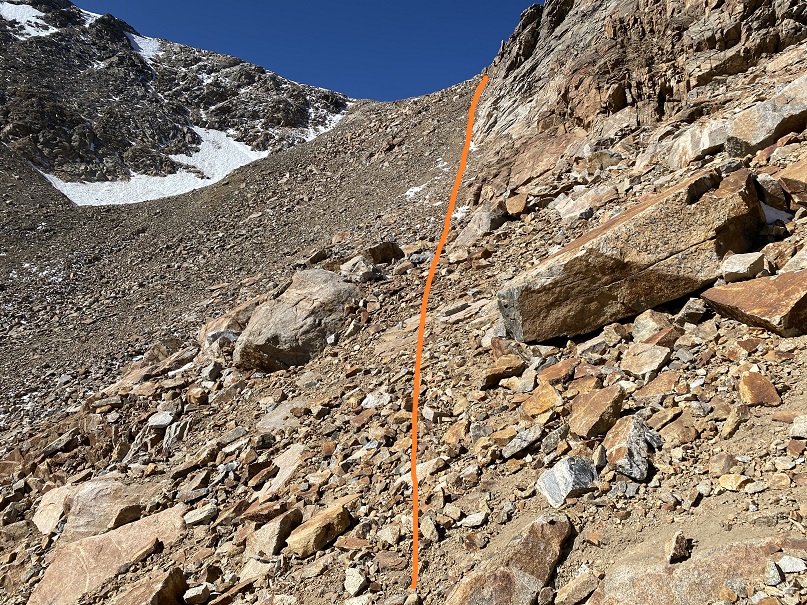
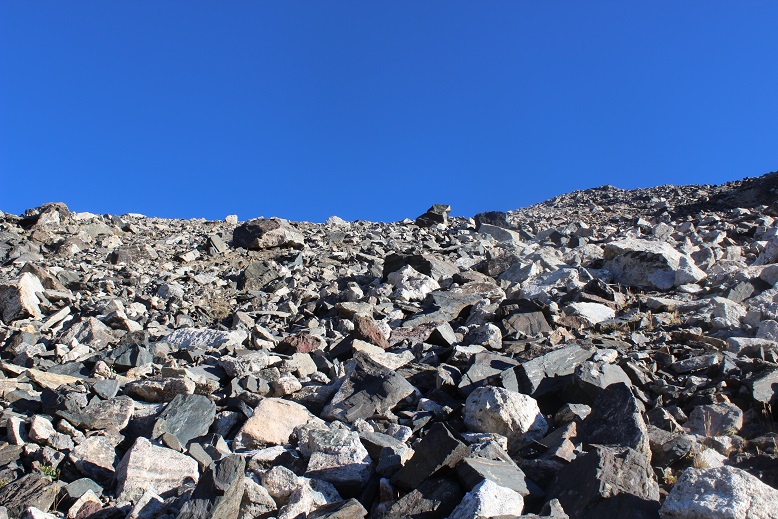
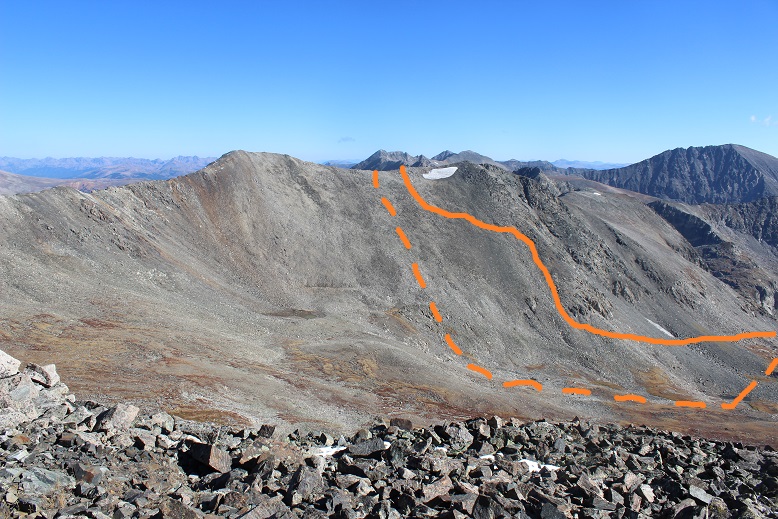
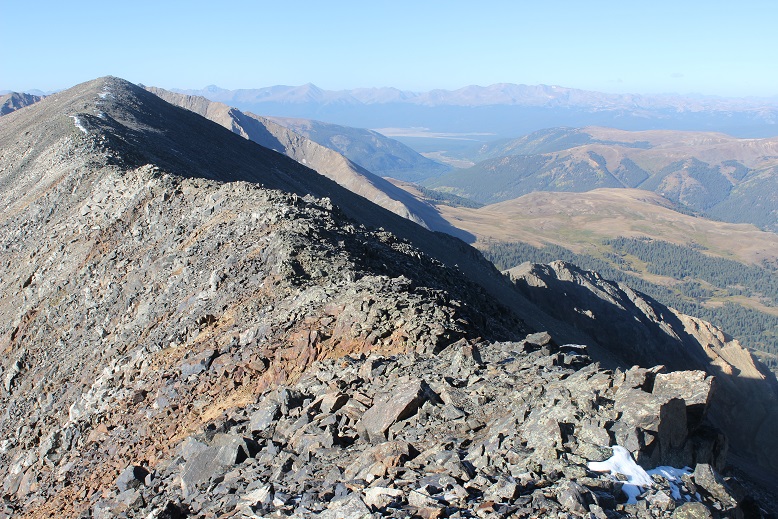
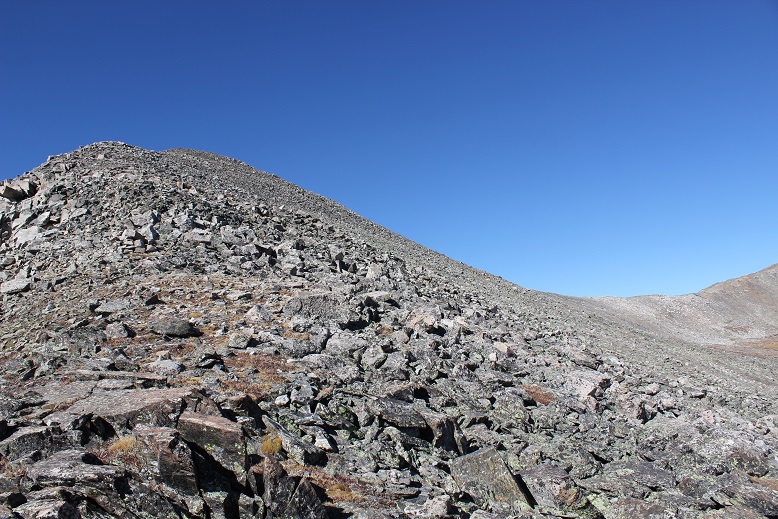
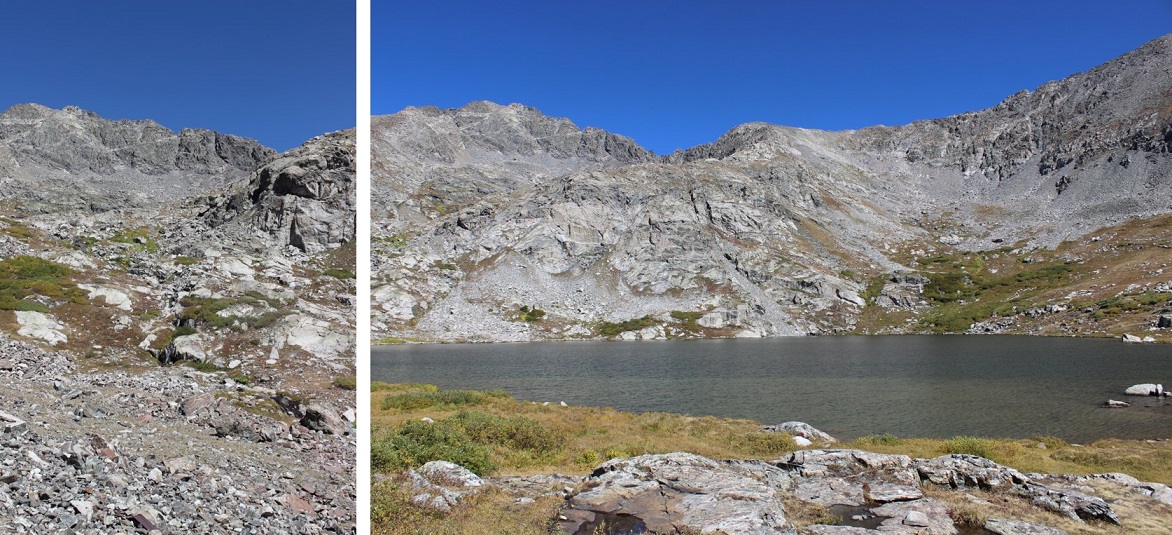
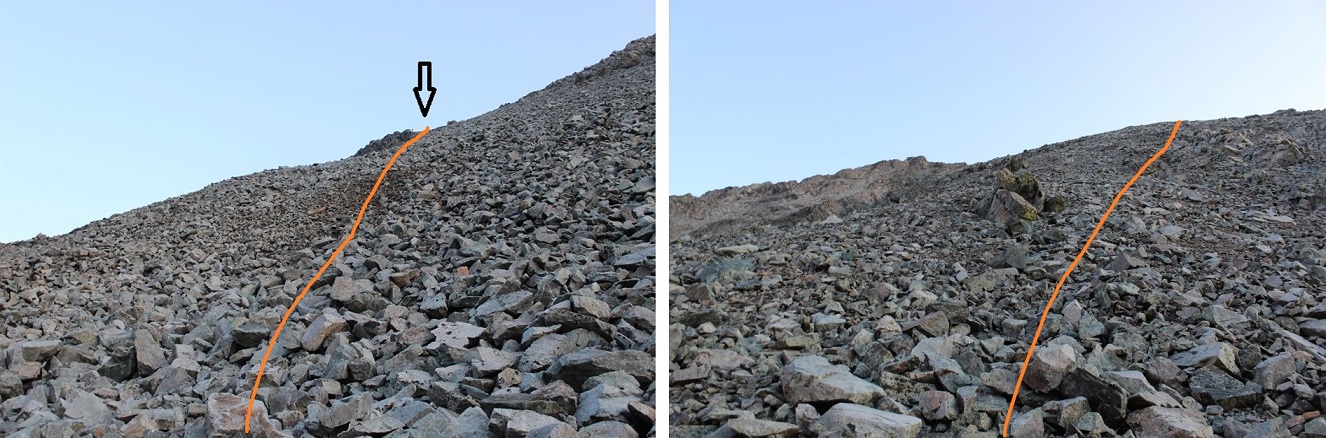
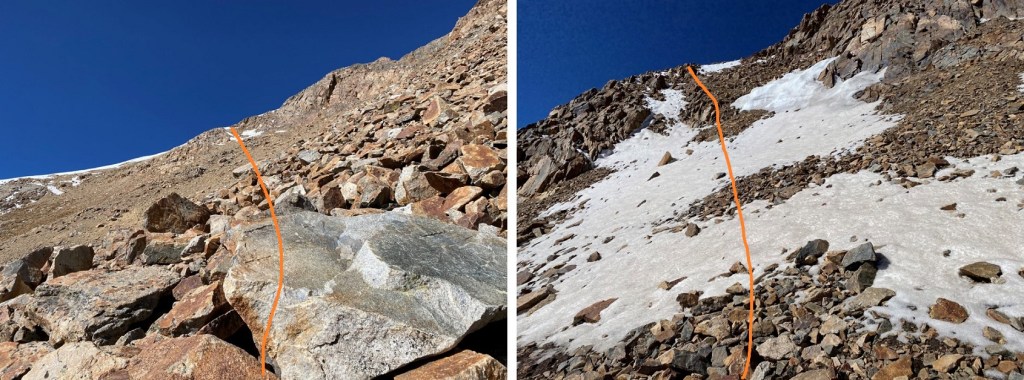
The ground here was surprisingly stable, I just had to watch out for rolling rocks every now and then

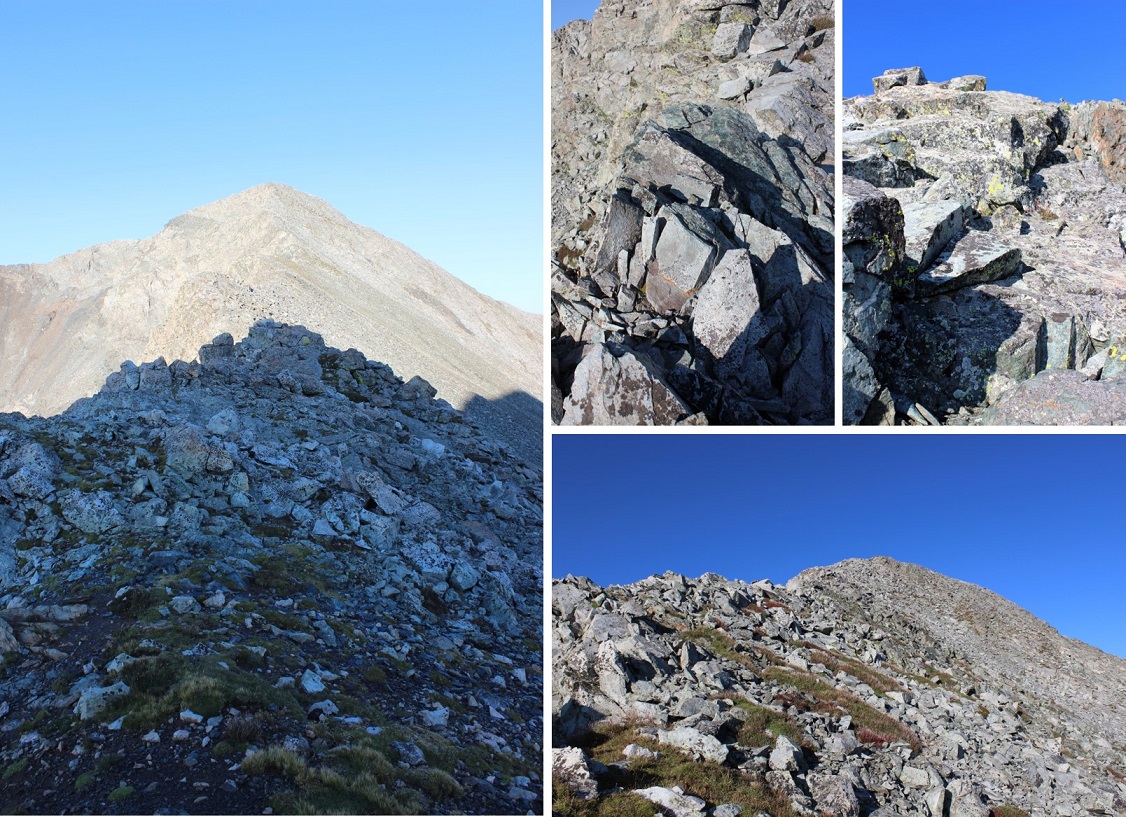
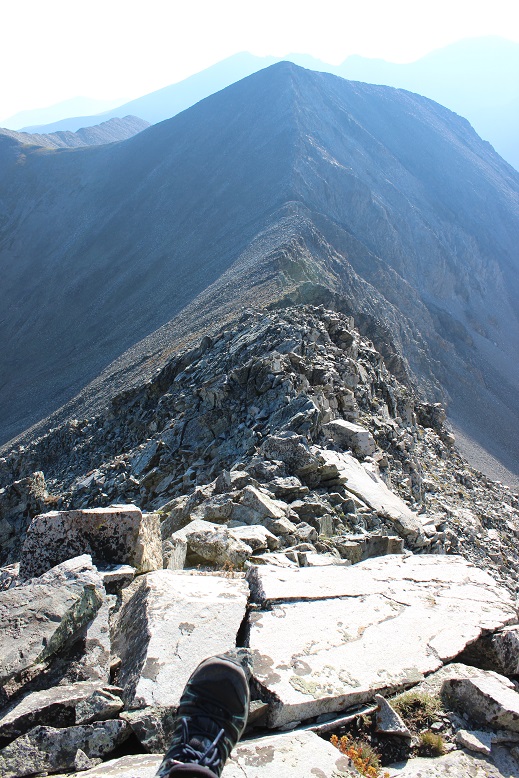
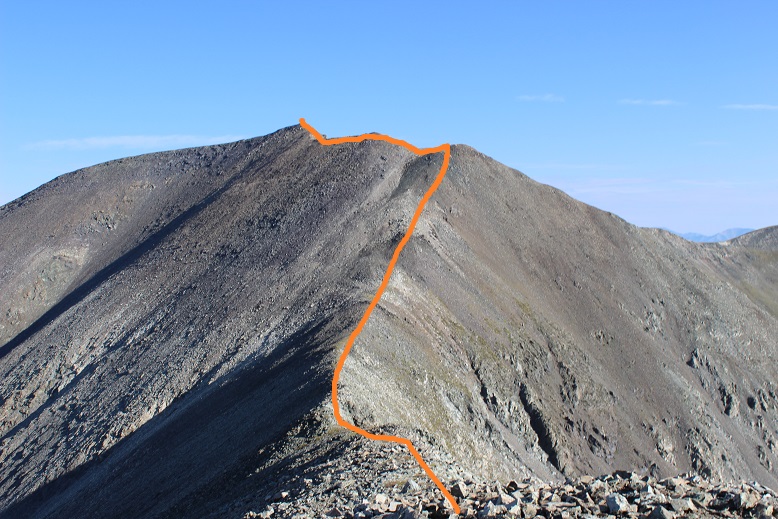
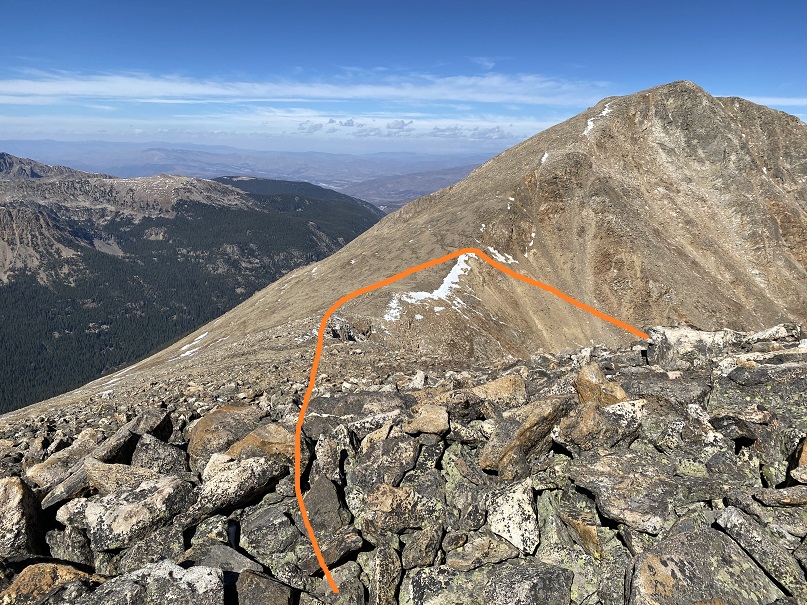
Here’s how I gained the saddle

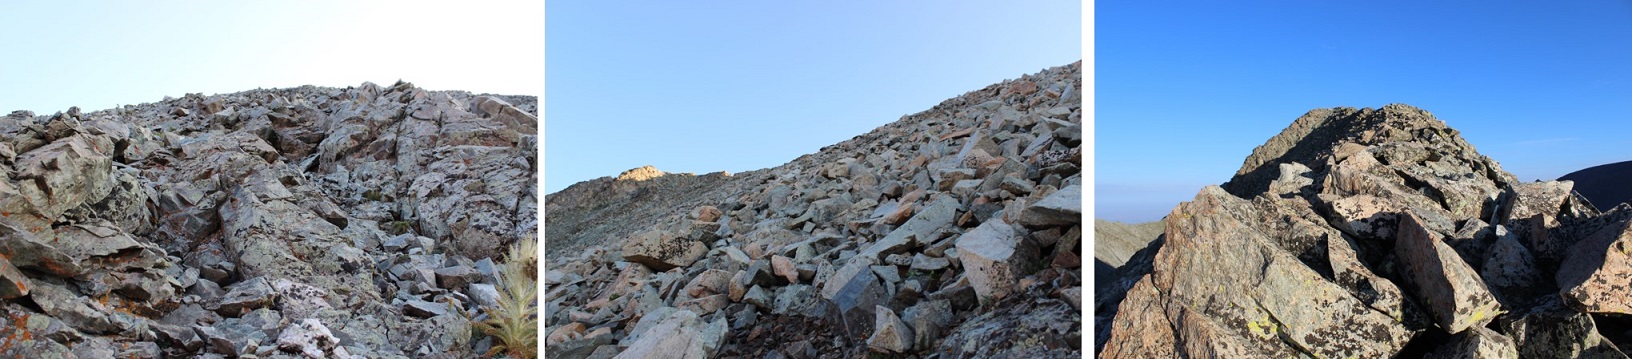
Up until this point I wasn’t sure which peak I was going to climb first.  I had the possibility of making this a loop (coming back down via the Grouse Mountain trail), but once I got to the ridge I was able to feel the wind I’d been hearing all morning.  Winds were predicted at 20-25mph, sustained, with 45mph gusts.  They were at least that.  And brutally cold.  I wasn’t sure I was going to be able to make one mountain today, let alone three.  I got out my balaclava and heavy-duty winter gloves, turned right, and headed north to the summit of Mt Jackson.  This was a fairly easy ridge hike.

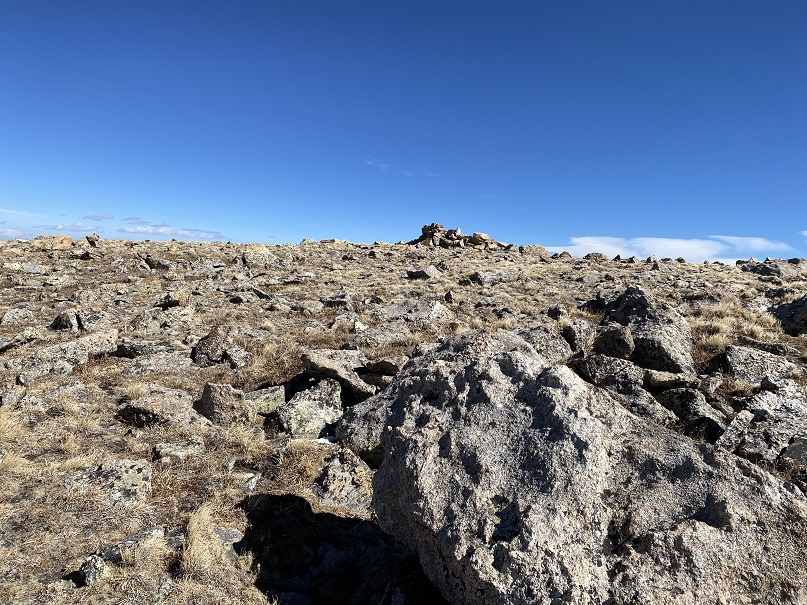
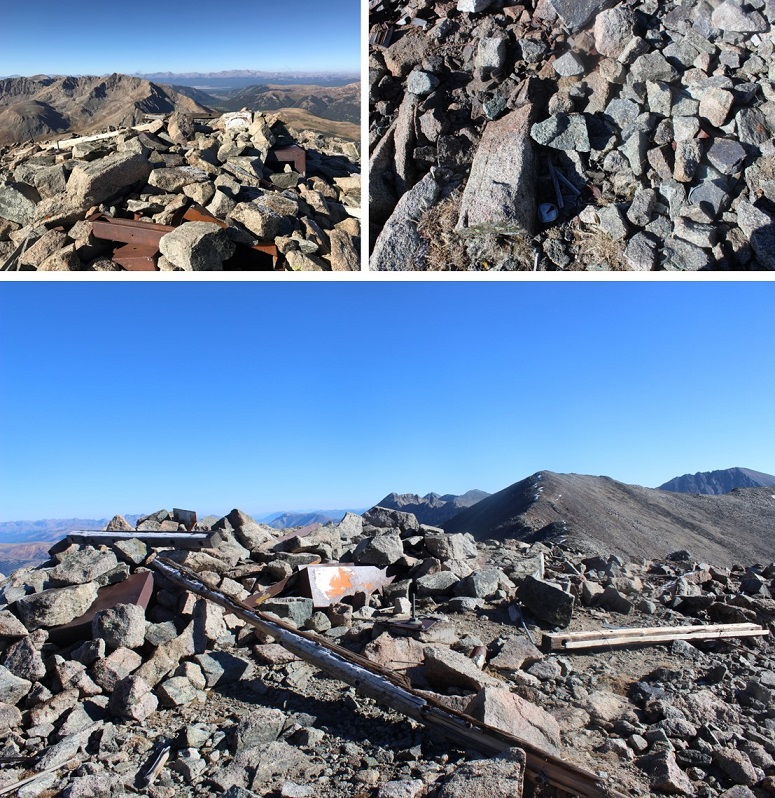
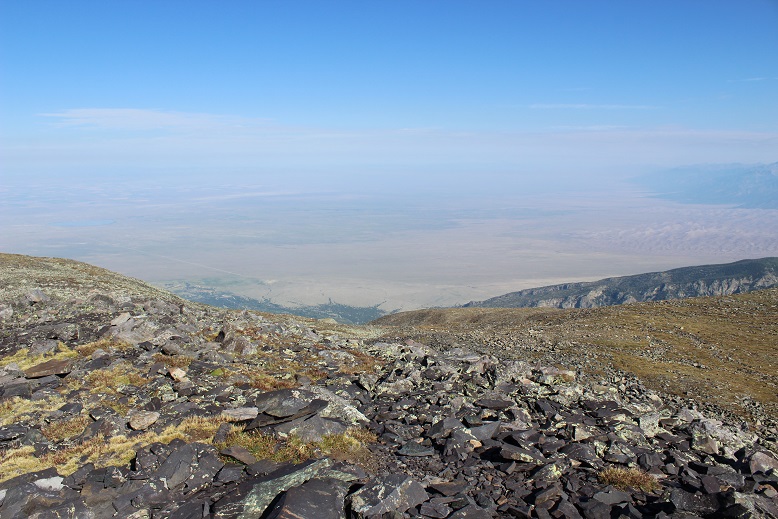
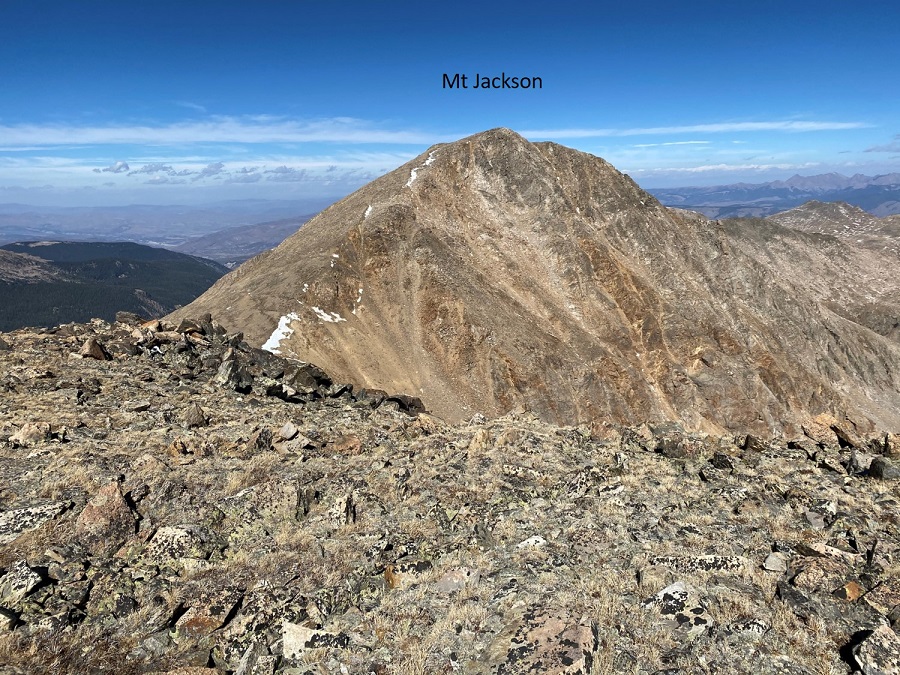
I summited Mt Jackson at noon.  The summit was relatively flat.
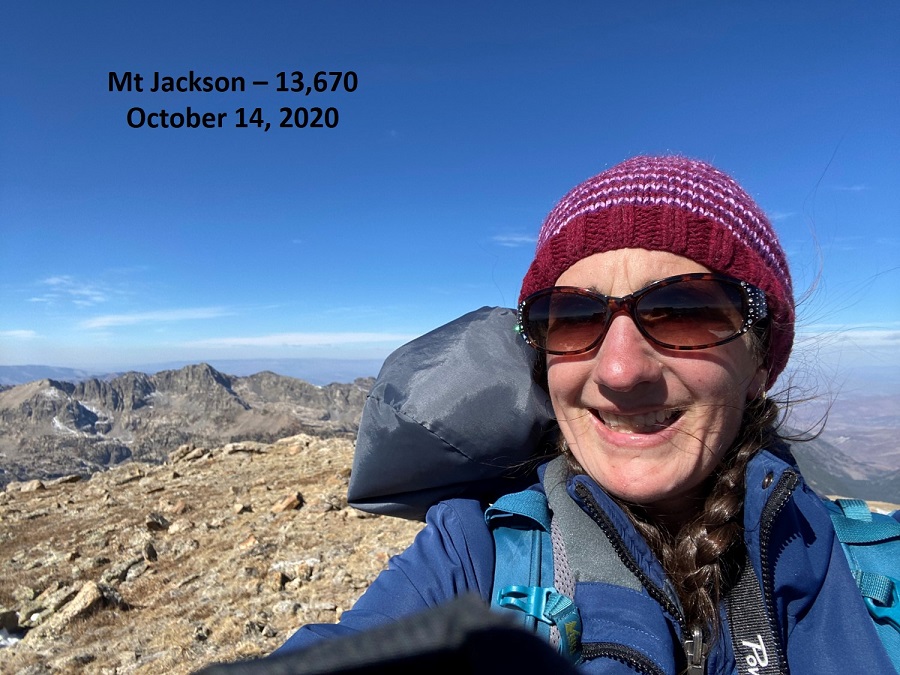
Mt Jackson: 

The wind was blowing so hard all the straps on my gear were slapping me in the face and several times I had snot fly into my sunglasses.  Ah, to be a mountaineer!  I turned and headed back the way I came, bracing myself against the wind as I made my way towards the Mt Jackson/13433 saddle.

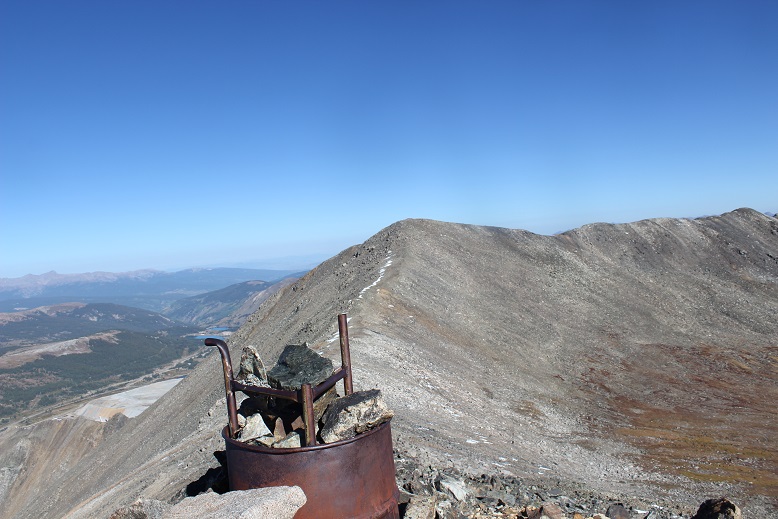
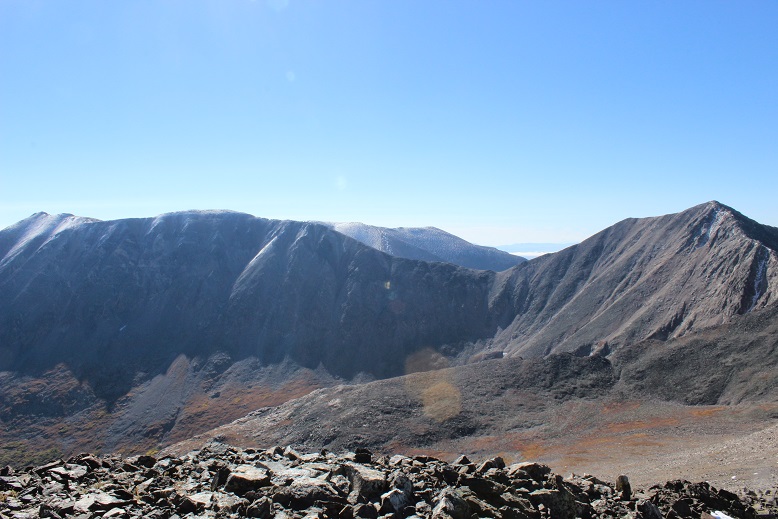
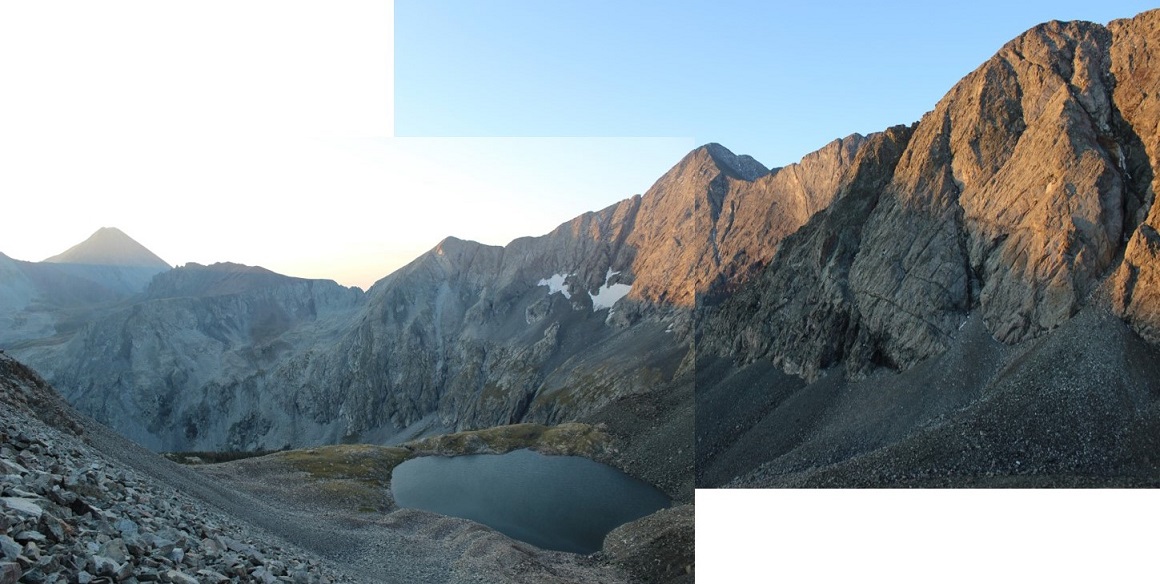
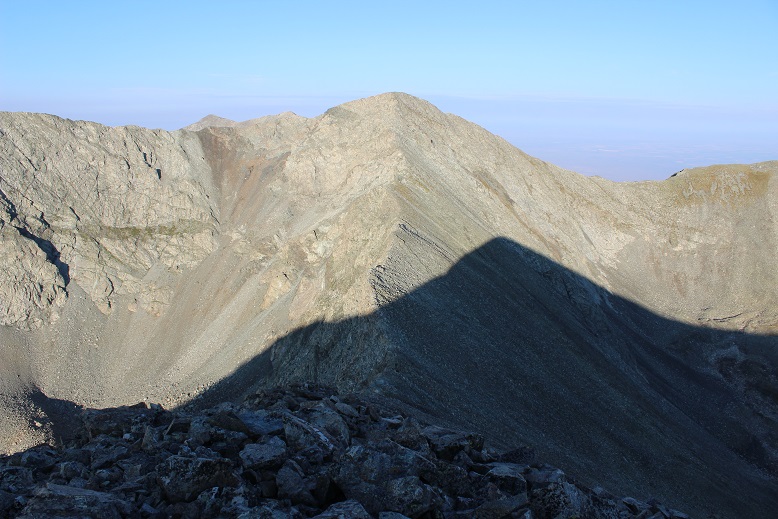
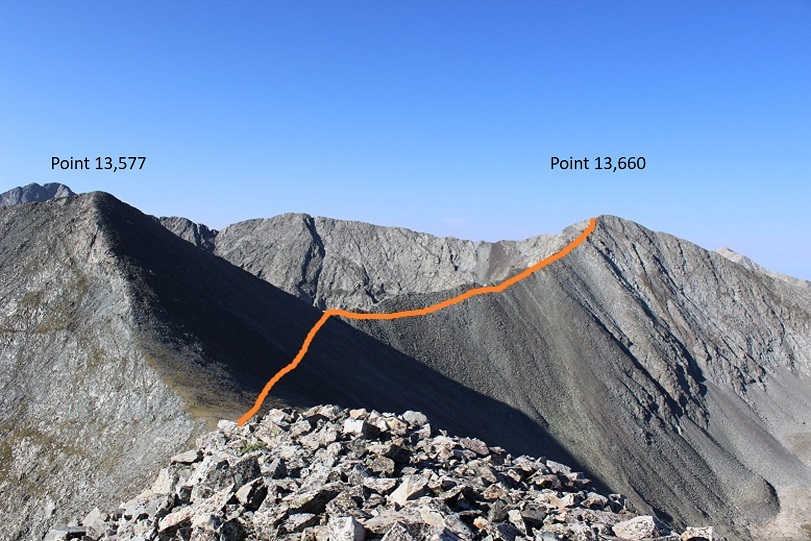
From the saddle here’s looking back at Mt Jackson and up at 13433

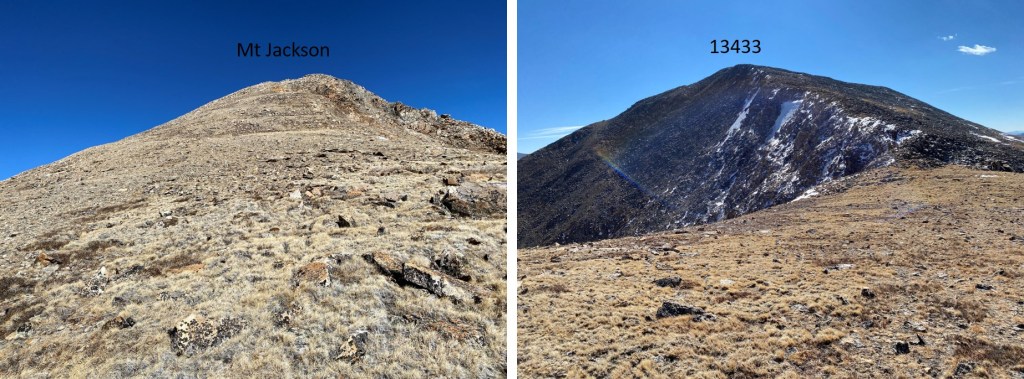
It was a short and simple ridge hike to the summit of 13433.  I summited at 1pm.

UN 13433: 

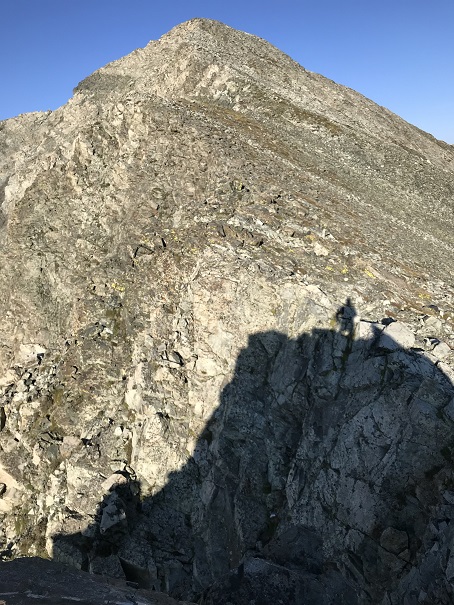
Here’s a view of Mt Jackson from 13433

At this point I couldn’t feel my fingers, so I quickly retraced my steps back to the saddle.  The wind refused to let up, and was blowing loudly long after I left the ridge.  I saw two crows playing with the currents above the saddle.

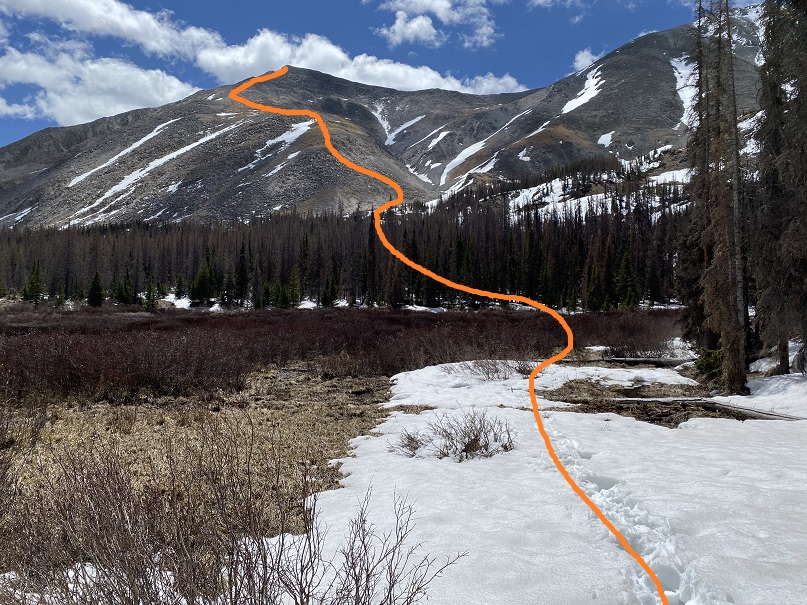
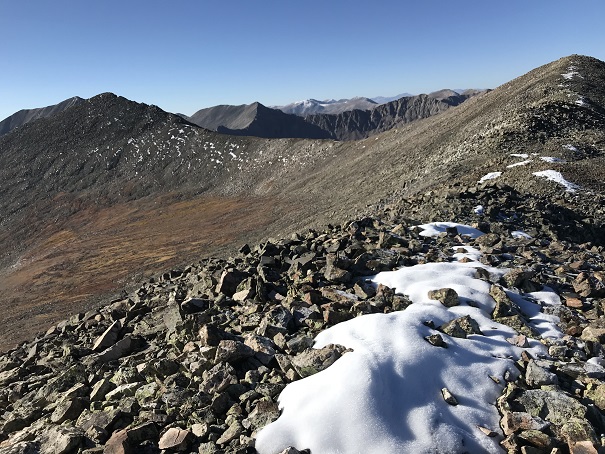
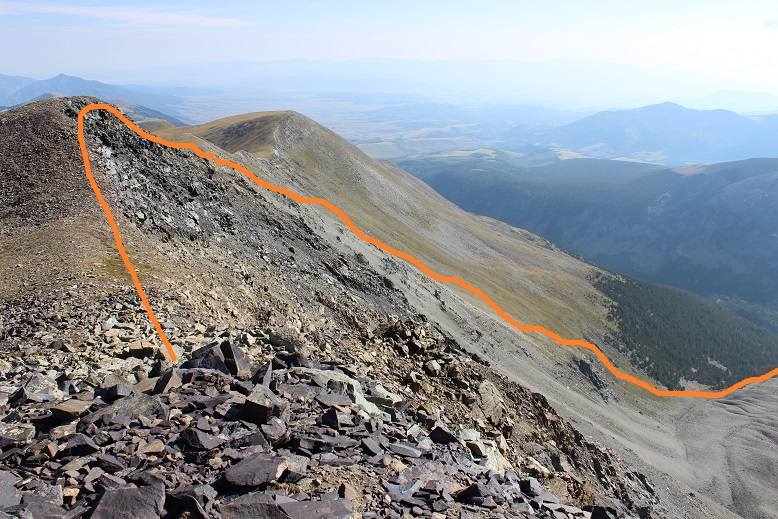
Here’s my route back down into the basin

And down the gullies

Here’s how I ascended the rock to avoid the pond to my left

And headed back out of the marshy area

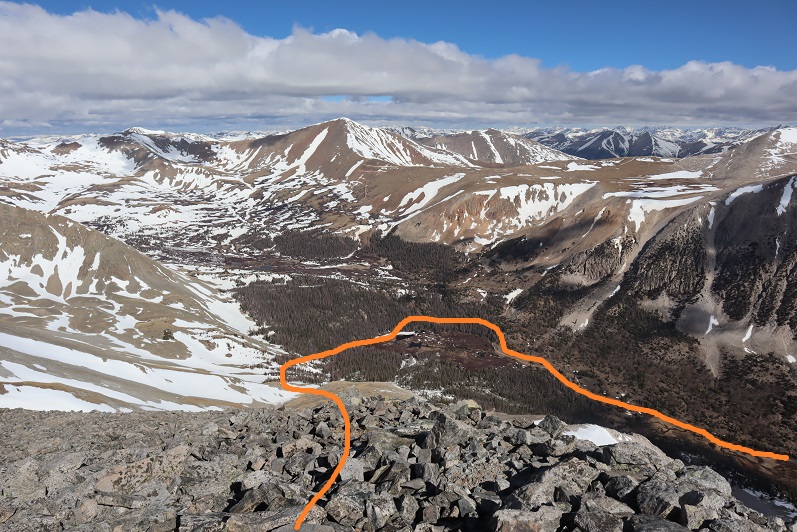
Let the route finding begin again.  I tried to re-trace my steps, but it just wasn’t happening.  I kept looking for my original route in, but finally realized that wasn’t going to happen.   I knew Cross Creek Trail was below me, and as long as I headed down and east I’d eventually run into it.  So I headed east. 

After wandering down and east and down and east I connected up with Cross Creek Trail and followed it back to the trailhead.  I heard trees snapping in the wind the entire hike back.  They’d make a loud, booming sound I initially thought was rockfall, except there were no reverberations from rockslides, just a loud crack and boom! 

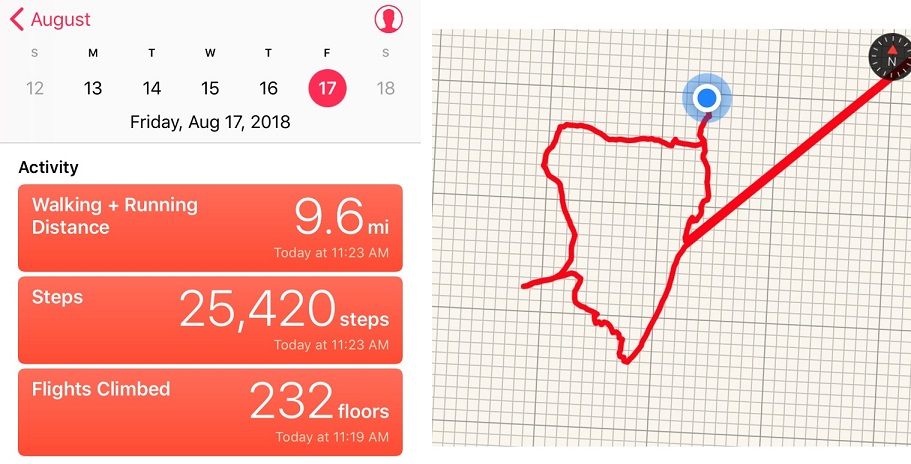
I got back to my truck at 8pm, making this a 28.33 mile hike with 6674’ of elevation gain in 16 hours, 15 minutes. 

PT 13,712

1

RT Length: 18.69 miles

Elevation Gain: 5360’

I only woke up one time during the night, and that was just to put on my thermal top and hide under another layer of covers. When my alarm went off at 1:30am I started my coffee and decided it was too early to get out of my warm truck-bed, so I re-set my alarm and didn’t get up until 2:15am. I was on the trail by 2:30am.

The road to Browns Creek Trailhead is an easy 2WD dirt road.

2

The trailhead had plenty of parking and restrooms (which are currently closed due to Covid-19: they had signs asking us to “recreate responsibly”). The trail starts at the north end of the parking lot, and follows trail 1429 west

3

I passed through an unlocked gate

4

After hiking for 1.5 miles I came to a junction and continued west on trail 1429

5

Shortly after the junction there was a hiking register with a spiral notebook inside that had every single page full. On my way back someone had left a small 3 x 5 notepad for people to write on inside. This must be a popular trail.  Here is also where I realized I’d left my creek crossing sandals in my truck. I hoped that didn’t come back to haunt me…

6

I crossed Browns Creek several times, always on a good footbridge

7

At 2.9 miles I crossed the last bridge and continued hiking along the class 1, well defined trail. Route finding was minimal.

8

9

10

The trail parallels Browns Creek, which was difficult to see because of all the trees covering the water. It looks like there was a wildfire in the area some years ago, and the land is still recovering. The trail was mostly clear of trees however.

11

I was hiking this portion in the dark, and at one point I heard a rather loud twig snap off to my right. I did the only logical thing and used my trekking pole to make as much noise as I could, banging it loudly on every rock and tree I came across, and stopping every few yards for a while to turn around and scan the area with my flashlight. I never saw anything, but on my return noticed I’d been in an area with a lot of downed trees, as well as boulders that would make a great den for a large animal. Curiously, I also heard a loud noise in the daylight crossing the same area on my way back, but didn’t see anything.

After hiking for about 3 hours in the dark the sun finally started to rise.  My reward was hearing the birds wake up and wish each other a good morning. What’s even better is my presence didn’t seem to bother them

Birds:

After hiking for 6 miles I came to a small boulder field

12

On the other side of this boulder field is Browns Lake

13

This area is marshy and has a lot of willows. Unfortunately, I didn’t see any wildlife or signs of wildlife (besides the birds). I continued west along the trail

14

Until it turned into a 4WD dirt road

15

I followed the road for .6 of a mile before coming to a creek. This is where the route finding became tricky. I needed to leave the road and traverse the east side of the mountain and make my way towards the marsh area, cross the willows, and then enter back into the trees and find my way to treeline.

Yesterday while on the summit of Mount White I visually tried to get a good view of the route I wanted to take. This 1 mile section included lots of route finding. I’ll do my best to give you pictures so it’ll be easier for you (as you can see from my topo below, I had to do some route finding and backtrack a few times myself to figure out the correct path).

Here’s an overview:

I left the 4WD road after hiking a total of 7.5 miles (I was at 11600’). I hiked south to cross the creek. It is important you cross here because there’s a small gorge you want to avoid to the left (east)

16

17

There is no trail here, and yes, the willows suck.

18

Once you’ve crossed the stream, make your way up the banks to the top and then skirt the mountainside to the left

19

To the left is the small gorge you’re trying to avoid.

20

From here you don’t need to hike along the ridge because you’re really aiming for the marsh. The reason you’re hiking towards the center of the hillside and not the top or bottom is to avoid the gorge and some rock outcroppings closer to the marsh on your way in. There’s no need to hike all the way to the top because you’ll be heading back down anyway. Here is where the route finding got fun, and I needed to strap on my snowshoes. Here are a few visuals:

You’ll want to avoid the rocks to the left and head into the trees (no trail)

21

22

To avoid the large rocks (circled in red)

23

24

After avoiding the rocks you want to make your way down to the willows, skirt the willows, and re-enter the trees, making your way towards the gully. Here’s an overview of the entire route

25

This was harder than it looked, as the marsh was more like a bog, the willows were dense, and once back in the trees the snow and downed trees were cumbersome to say the least. I was very grateful I’d lugged my snowshoes this far. They were only needed for this one mile section, but I wouldn’t have been able to summit without them.

26

27

Once above treeline the route was much more obvious. I crossed a small runout/gully and began ascending the loose, rocky, scree filled slope. There are a few cairns here, none of them seem to follow the same path and all seemed arbitrary. Just head up. It looks like the rocks shift often, so pick your line carefully. Microspikes are helpful on the scree.

28

The scree eventually gave way to some tundra (I was aiming for the ridge: yes, that summit is 13,712, so no false summits today!!!)

29

And then more loose rocks (bowling ball and microwave size, none of which were stable)

30

31

I summited at 9:10am. I’m not fond of this picture, but it’s what I’ve got

32

13712 Summit:

It was very, very windy on the summit. I was surprised to see just how close I was to Shavano and Tabeguache and noticed two climbers making their final ascent up the snow on Tabeguache.

33

I didn’t plan on summiting either of those peaks today however: The snow had been soft enough on my way in, and I needed to make it back down before it became any softer.

34

All along the ridge I looked for a safer way back down than the way I’d come up, but couldn’t seem to figure a better way: the marshy area was full of either snow, ice, or deep water I didn’t want to cross, so I did my best to retrace my steps back down. The snow made the mile a slog.

35

36

37

38

Here’s that boulder you’re trying to avoid on your way back

39

I made my way back to the creek, crossed it and headed back to the 4WD road, happy to be done with snowshoes for the day. While crossing the creek I’d accidentally stepped in it (both feet ended up getting wet when I lost balance because I was too hard-headed to take off my snowshoes first) and now my hiking shoes were soaking wet. Should be a fun 7.5 mile hike back to the trailhead! Here are some photos of the way back:

40

(also, whoever made this sign forgot the letter ‘d’: there’s obviously space for it, and upon closer inspection there was never a letter there to begin with)

41

42

43

44

45

As I passed Browns Lake and made my way closer and closer to the trailhead there were more and more people on the trail, and everyone seemed to have a dog (or two or three) and I even saw people riding horses. Indeed, this is a popular trail. On a positive note, I didn’t see dog-waste bags lining the trail. I did see someone fishing in the creek in an area made for horse crossing.

I made it back to my truck at 2:45pm, making this an 18.69 mile hike with 5360’ of elevation gain in 12 hours, 15 minutes.

Here’s a topo map of my route

46

Clinton Peak 13,866 – McNamee Peak 13784 – Traver Peak 13,856

1

RT Length: 10.9 miles

Elevation Gain: 3352’

I didn’t want to get up when my alarm went off at 2am.  I really didn’t.  I rarely ever want to get up when my alarm rings, but today I was extra tired.  I really wanted that extra sleep.  I reminded myself while it’s typically difficult waking up early for a hike, I always thank myself for it later.  So I dawdled and took extra time getting ready, trying to wake myself up.  It was supposed to snow last night and there was as 40% chance of snow today, so I dressed in triple layers of pants and double jackets (necessary for me, not for most people).  I also had 3 different pairs of gloves.

I drove to the trailhead and actually stopped at a gas station for 20 minutes to sleep for a bit before continuing on:  I was more tired than I thought!  I felt great after that quick cat nap though.

I finally made it to the trailhead at 5am and was ready to go by 5:15am.  Already I could tell this was going to be a much different adventure than when I was here last March and the area was covered in feet of snow (https://wildwandererlmc.wordpress.com/2018/03/31/wheeler-lake-12168/).  I’d had to turn back at the lake on that trip, but I’d learned a lot!  Today the gate was open all the way to the mill, and there wasn’t any snow to be seen anywhere (in the dark that is).  The road in is a 2WD dirt road all the way to the mill

2

There’s plenty of parking all along the way.  I chose to park by the mill (the ‘lot’ there holds about 7 vehicles).

3

Here are some pictures of the Magnolia Mill, which I swear is going to collapse any minute…

4

Don’t go past the mill unless you have a heavily modified 4×4 vehicle.  You will get stuck.  Here are some pictures of the 4×4 road in

5

And one of a truck getting stuck on my way out

6

You can follow the 4×4 road all the way to Wheeler Lake:  it’s about 3 miles.  Wow!  Was this a different experience than the snow-covered road I’d encountered back in March!  Back then I wasn’t even aware there was a road… I kept looking for trails.  It was obvious from my hike today I’d been way off route earlier this year.  Way off.  And the road had to be under a good 5 feet of snow at the time because these willows which were taller than me now were only about 6 inches high last time I was here.  I’d gone in circles in the blowing snow trying to route find my way to the lake (and back).  Today was a breeze!

I kept thinking to myself: those rocks are going to be a bugger to hike over on the way back down (they were).

7

What a difference the season makes!  One bad part about no snow?  The road was pretty much a river most of the way.   Most of the areas of road covered in water had side trails going through the willows so you didn’t need to walk directly through the mud puddles, which I’m sure added to my route confusion in the snow as well.

8

Oh, but it was still early morning and I was hiking through all of this at night…

9

It’s about a 3 mile hike from the Mill to Wheeler Lake.  I made it to the lake just as the sun began to rise (and thought back on how difficult this trudge had been in snowshoes:  there were actual spots that had had exposure with all the snow and I’d been fearful I’d slip and slide down the mountain.  Not so today.)

10

This is where the route ends and the creativity begins.  Hike around the lake to the left about ¾ of the way around.  You’ll notice an unmarked path left and up a drainage.  (There’s no trail, make your own)

11

I turned back to watch the sunrise and take a Colorado Flag picture of the lake…

12

There are a lot of mines in the area.  I counted at least 6

13

When you get to the top of the drainage you’ll find yourself in a small basin.

14

I tried to stay higher up to the right, and this ended up being a mistake:  Stick to the middle, go up the area with small ponds and waterfalls, and head west.

15

I was trying not to lose my elevation gain, but all I ended up doing was complicating things with lots of rocks, slowing me down.

16

So my route had steeper elevation, lots of loose rocks and scree, and was thus very slow going.  I rounded the corner and kept heading northwest.  Finally I was able to see the summit!  If you’re hiking this too you can breathe a sigh of relief now:  the worst of the hike is over (yes, even if you’re doing all 3 summits)

17

As I rounded the slope the rocks became slippery:  everything in the shadows (west) had a thin layer of frost covering it (slippery!)

18

I gained the ridge and followed it to the summit of Clinton Peak.

19

I turned back and looked at the way I’d come:  that had been a steep climb!

20

From Traver Peak, here’s a view of the route I took (solid line) versus the one I should have taken (dotted line)

21My Route versus actual route

I summited at 8:30am.  Here’s proof I summited

22 Clinton Peak 13857

VIDEO:

There were a lot of active mines in the area west of the peak and below as well

23

The rest of the route before me was very straightforward.  It was class 2 ‘climbing’, following the ridge.

24

There were a few large rocks to contend with, but nothing class 3, and all avoidable if you went down the ridge a bit (go left (east) to avoid frost).

25

There were also small bits of snow, but nothing that got in the way or wasn’t easily avoidable

26

I couldn’t help but think as I reached the saddle of Clinton/McNamee how much easier this hike would have been to just continue straight all the way through the basin up to this saddle.  It would have added maybe a mile to the hike (maybe) but also made the elevation gain so much simpler to deal with!  I’m sure it would have cut my time down at least an hour.

27

The path to McNamee was about half a mile and easy to follow.  I summited at 9am

VIDEO

There was a lot of mining trash on this summit!

28

Here’s the rest of the route to Traver Peak

29

Here’s a picture from the McNamee/Traver saddle looking back on the route so far

30

Summiting Traver was just a little more difficult than McNamee, but as long as I stuck to the ridge I was just fine (class 2).  There were a couple of places I intentionally made it a class 3 climb, but they were completely unnecessary.

31

There was also a metal trash can full of rocks on the ridge?

32

I summited at 9:30am

VIDEO

There had been a light dusting on DeCaLiBron the night before

33

Ok, now it was time to head down.  I turned east and looked at my route before me.  All I had to do was follow the ridge down and head for Wheeler Lake.  It was quite simple really

34

About ¼ of the way down the ridge I found this survey marker

35

And halfway down the ridge I saw a large cairn.  Or at least that’s what I thought it was until I saw the stone with writing and a date.  I couldn’t make out the writing, but the year is clearly 1881.  When I got home I looked it up online, and couldn’t find any information about a possible grave/death/etc.  It looks like a cairn grave to me (think Oatman family?).  Thoughts?

36

The ridge was easy to follow with medium sized, mostly stable rocks.  I couldn’t help but think how much easier it would have been to have done this hike in reverse, instead coming up the east ridge of Traver and down Clinton.  My advice to anyone doing this hike:  HIKE IT IN REVERSE.  Or go up the McNamee/Clinton saddle, over to Clinton, and then back to McNamee and Traver.  That trek up Clinton’s south slope is a bugger! And from what I experienced on the easy way down Traver, totally avoidable and unnecessary.

37

In any event, the cairn is clearly visible from a ways away.  It’s a good marker to look for (especially if you’re hiking this in reverse).  When I made it to the cairn I headed down the basin, over large rocks and some grassy areas.  Before the bottom of the basin I was greeted with some large boulders.  I didn’t have to climb down them… but I did.

38

Here’s the route I took.  I obviously could have avoided the boulders by sticking to the north.  (Note, this is NOT Wheeler Lake, but a small pond in the middle basin).

39

All morning and afternoon the weather had been perfect!  The skies were clear and I’d way overdressed (no worries, this is better than the alternative).  The basin was beautiful, and I got to thinking:  Life for me has been extremely difficult in the past and I’ve been through some dreadful things no one should ever have to go through, but today, life is good.  I mean really, really good!  I’m the happiest I’ve been in years, my kids are all amazing and doing amazing things with their lives, I get to hike every Friday, I paid off my truck this month (woohoo!  This means I’m debt free!), and I’ve now completed 28 13ers (think I can hit 30 by my birthday on the 18th?).  I was in a great mood, and so glad I decided to go hiking today! (See?  I told myself so!)

Here’s where the hike became beautiful.  As I was exiting the basin and aiming towards Wheeler Lake I was able to notice all the fall colors.  Here’s a look at the North side of Lincoln (14er)

40

And a look back down on Wheeler Lake

41

I passed by the waterfall and skirted the lake

42

Here is where I met back up with the road again.  The 3 miles out would have been easier and much faster without all those rocks in the road, but at least route finding was easy!

43

I made it back to my truck around 12:15pm, making this a 10.9 mile hike with 3300’ in elevation gain in 7 hours with lots of summit time.

44

The fall colors are starting to change early this year.  The drive through Alma was unexpectedly beautiful!

45

Here’s another look at the peaks

46

Oh, and I’m still working on the GPX thing.  Here’s the link to STRAVA: https://www.strava.com/activities/1825871164

California Peak – 13,854, PT 13,577, PT 13,656, PT 13,420


RT Length: 9.6 miles

Elevation Gain: 4000’

The weather changed my plans at the last minute, so the hike I’d intended to take in the Sawatch range didn’t happen today.  I’m on a time crunch when it comes to my Friday hikes for the next few weeks, so I needed a hike I could complete and still be home in the early afternoon.  After a quick weather search, California Peak looked promising.  Plus, it has a bunch of other 13ers close to it so I could make the hike longer if I wanted… I just needed to back to my truck before noon.

I made it to the trailhead at 4am without passing a single vehicle on the 69.  Oh, and that forest road 580 in seems to take forever!!!  I’m always surprised this is labeled as a rough 2WD road.  There are several spots I’d love to have 4WD well before the 2WD parking lot (which you aren’t allowed to park at BTW).  This is my third time on this road, and the third time with lots of mud puddles…

2 TH 4WD

4WD Road:

I mean, you could probably do it in a 2WD if you have high clearance and you’re a great driver, but why chance it?  And that last hill before the 2WD parking lot?  4WD is totally necessary!  Most people want to park in the avalanche area, but these signs tell you it’s not advised:

3 Avalanche Area

The 4WD parking lot has enough room for about 10 vehicles.  There were 2 others there when I arrived (and 3 when I left).  I got out my gear and turned on my new tracking app.  I’m not a fan of GPX routes, but think it’d be careless not to have one in case it’s needed.  There isn’t a GPX file for the trail I wanted to take, so I decided to try and make one.  I’ve never done that kind of thing before, but I figured maybe I could make one and help someone out since a lot of this hike is off trail.  I started the track, signed the trail register, and was on the trail at 4:15am.

4 TH and register

The trail was wet.  The sky was clear and I could see the stars, but it had obviously rained (hard) during the night.  The trail was pretty much a small river, and all the grass and plants lining the trail were wet, making my pants wet when I brushed them as I walked by (I should have worn my hiking pants instead of my yoga pants).  I accidentally stepped in the water a few times and was glad I had my waterproof Salomon’s on (so only my socks got wet above my shoes, but my feet remained dry).

5

Even though it was a clear night water was raining from the sky too: as I passed trees startled birds flew out of the trees, causing water droplets to rain down on me from above.  Since the ground was wet I looked for animal tracks and didn’t see any, so I didn’t expect to see any large wildlife before sunrise.  I did hear a rather large animal dash through the creek to the left of me, but it was obviously running away from me.  I’m guessing it was a deer.  I did see a cool mushroom on the side of the trail too

6

I missed the first junction that’s supposed to be a mile in, letting me know to turn right, but I’ve missed it every time I’ve taken this trail, so either the signs missing or I take the wrong path, which is a possibility.  The trail follows the Huerfano creek but since it overflows onto trails there are several side trails.  This is also a heavily used snow shoeing area, so there are tons of paths in and out of the trees.  The good news is I saw the second sign and turned right, heading up the hill towards Lily Lake. I was hiking a bit too fast (I wanted to be at the lake around sunrise so I could see the lake) so I slowed down a bit.  Just before the lake there was a small waterfall

7

I passed it to the right, and headed up a hill

8

And came to Lily Lake

9

The wind immediately picked up and the temperature dropped.  This is also where the trail ended.  I’d read this was the “crux” of the route, and I’d agree.  There is no path through the amphitheater.  The goal is to avoid the loose rock and navigate your way up the mountainside to the right.  The trouble is none of the rock is stable.  It’s all terribly loose and when one rock falls it creates a rockslide.  Think avalanche with rocks.  This is rated as a class 2, but I found myself wishing for my helmet.  I’d consider it absolutely necessary if I was hiking with someone else.  Also, don’t follow anyone else’s GPX route up this mountain.  The rocks slide and change quickly, so a route that’s safe today might not be tomorrow (and most likely won’t be next year).  You need to use your best judgement and pick your own line.  It’s steeper than it looks.  Here’s the route I took:

10

I aimed for the large, stable rock, and once I made it there, passed it to the right, where I was met with larger (unstable) rocks.

11-1

I turned around and could see evidence it had snowed a bit last night as well as rained

12

From here I gained the ridge and followed it left to the summit of Unnamed Point 13,577, arriving at 7am.

13

I turned around to look at the way I’d come up:  steep and full of loose rocks.

14

Point 13,577 is a ranked 13er.  Here’s my summit selfie to prove I summited:

15 Point 13577

And a video:

I turned and looked west at Unnamed Point 13,660.  This is a bicentennial, and I’d promised myself if I had time I’d do my best to summit this peak as well since I couldn’t find another route for this one (hey, I was here, I might as well make the most of it, right?)

16

I mentally calculated my time (I was right on time… that crux had taken a lot longer that=n I’d anticipated) and decided to go for it.  If it took me too long I could always come back for California Peak another day, satisfied I’d completed 2 ranked 13ers today.

And so I headed towards the ridge.  It was a fairly simple hike until I reached the saddle.  From here it got a little more sketchy, but nothing over a difficult class 2.  Once again I wished I’d brought my helmet.  The rock wasn’t sticky at all.  In fact, my (really good) hiking boots were slipping and couldn’t gain traction.  There were also a few steep spots and areas of exposure.  I was able to navigate the entire way by sticking to the ridge, but if necessary stick to the right.

17

OK, this was actually a lot of fun!  The past couple of 13ers I’ve done have been pretty easy, with no real route finding or scrambling involved.  This ridge included plenty of careful scrambling.

18 Shadow Selfie

I made it to the summit at 7:50am and turned back to look at the route and Lily Lake (not sure what the other lake is named, or if Lily Lake is just missing some of its water).

18

Here’s a summit selfie as proof I summited

19

And a video:

The last hundred yards or so of that had been worth it and so much fun!!!

20

From Unnamed Point 13,660 I could clearly see the route I’d taken and the route I had left.  Due to time I didn’t feel it was necessary to re-summit Point 13,577 so I skirted it to the left and aimed for the saddle between it and Point 13,420.

21

Once again, there is no trail for this hike, so I had to carefully navigate my way across the rocks.

22

From this saddle it was a quick hike to the top of Unnamed (and unranked) Point 13,420.

23

I summited at 8:40am to some of the best views I’ve had the pleasure of having all to myself!  I could see small lakes in every direction, Huerfano Peak, Mt Lindsey, Blanca, and Ellingwood.  Wow!

Video :

Here’s a look back at the route I took from PT 13,550

24

OK, time to head up California.  This ridge was easy to follow, with no obstacles to face and stickier rock than Point 13,660.  Here’s the route I took:

25

The rock was much larger and more stable than before

26

There was a false summit, but it wasn’t anything too difficult.  Here you can see California Peak (to the right) from the false summit

27

The false summit is also a great place to stop and visualize your path down from California Peak if you are choosing to do the loop (which I highly recommend… that rock up to PT 13,577 is dangerous enough heading up, down it would be treacherous).   I’ll discuss this more later, but either take a picture here or get a good look so you know how you’ll approach your descent. You want to aim for where the trees and drainage meet.

28

The summit of California Peak was curiously flatter than I’d anticipated

29

I summited at 9:15am to more awesome and amazing views!!!

30 California Peak 13849

Video:

Check out that ridgeline!

30

OK, your goal is to hike north up and around the horseshoe shape, locate a cairn, and head down (right/east) into the basin.  Look for a cairn. You don’t want to descend too soon because it will be full of dangerous rocks.

32

Standing behind the cairn looking down into the basin you can see where you want to aim:  Just where the trees and rocks come together.  From there you follow the drainage until you make it to Huerfano creek (and the obvious trail) Here’s a view from the false summit of the path you want to take.

33

From the top (where the cairn is) your best bet is to descend and angle a bit left to avoid the loose rocks and scree you’ll immediately encounter.  Try to stay on the grassy area, but aim for the left of this bump:

34

Once you make it to the bump you have several options ranging from class 2-4 to navigate your way down to the drainage.  Just stay left and head down.  I chose to climb down the wide chimney, but you have other (class 2) options as well.

35

Here’s a picture looking back at the terrain and what still lies ahead of you

36

In case you’re absolutely crazy and want to do this hike in reverse, here’s how I came down the mountain.  Note:  if you want to do this in reverse stay to the right (where there’s grass) and avoid the loose rock sections to the left.

37

This is where the route gets tricky because you’re going to enter the treeline and terrain filled with rocks, slippery wet grass/plants, creeks, and pine needles (deceptively slippery as well).  I followed the drainage

38

Until I came to this

39

Once again, your goal is to head towards the creek.  I did so and quickly the terrain looked like this:

40

This was actually much more difficult to navigate and took much, much longer than I’d anticipated, but as long as I kept heading east down towards the bottom of the basin I knew I was on the right track.  There were dozens of game trails heading every which way, and a few snow shoe trails as well.  It wasn’t lost on me if I were to get hurt in this area it would be extremely difficult for anyone to know where I was or to be able to find me (even though I’d let people know I was doing the loop).  The area was thick with trees and bushes, most of which got caught in my hair.   When I finally made it back and found the trail I did a fist bump!  That was awesome, and the most difficult route finding (in the daylight) I’ve done to date.  Yes, it was technically easy, but I was super proud of myself!

When I made it to the trail (which was still filled with water BTW) I turned left (north) and headed back towards the trailhead.

I made it to my truck at 11:15am, 45 minutes earlier than needed to remain on schedule to drive back home and pick up my daughter from school.  That made this a 9.6 mile hike/climb in 7 hours.  I quickly got out my phone and checked my route.  Now, this is the very first time I’ve ever tried to track my route, but I’m pretty sure I didn’t teleport 30 miles away for a few minutes and come back right where I’d been on the trail.  Hmmmm.  Either something was wrong with the app or I needed more practice with this (probably both).  Oh well, that’s what I get for using a free app. So no GPX file this time, but maybe in the future?

41

In any event, here’s the route I took on a topo map

42

This was a fantastic trip!  Once again I didn’t see anyone else all day, the views and weather were amazing, and I was able to practice my route finding in an area I was familiar with and didn’t think I could get lost.  I loved being able to tag a bunch of 13ers and I felt I learned a lot today.  13ers are amazing!