13033

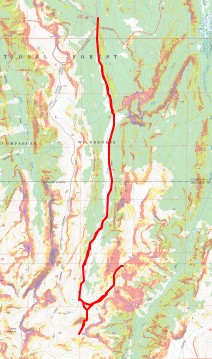
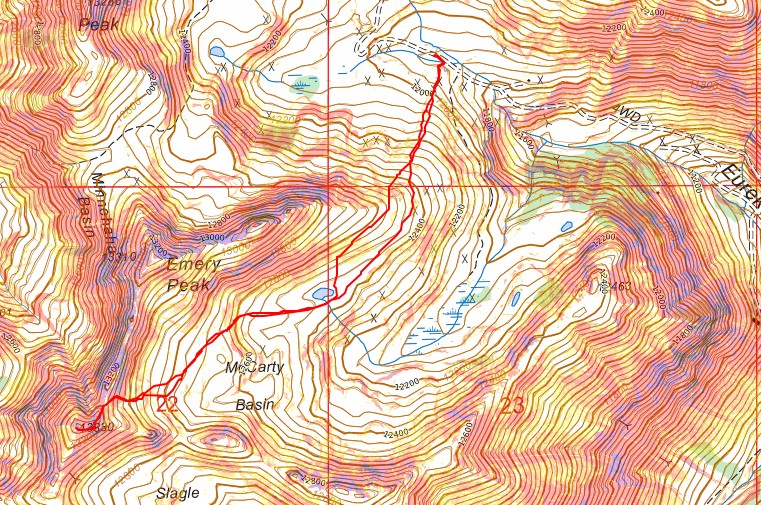
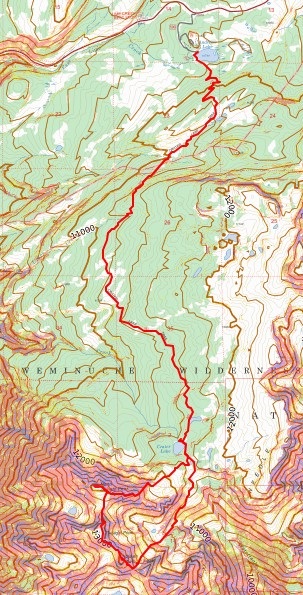
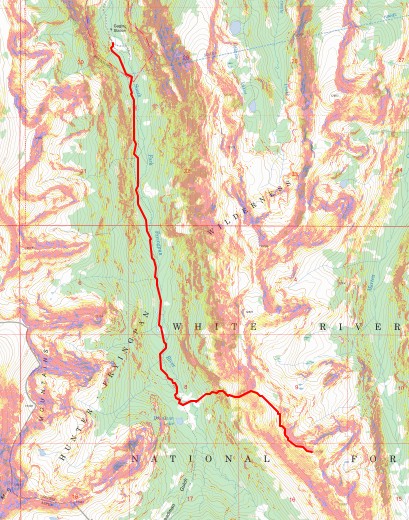
RT Length: 12.14 miles

Elevation Gain: 3207’

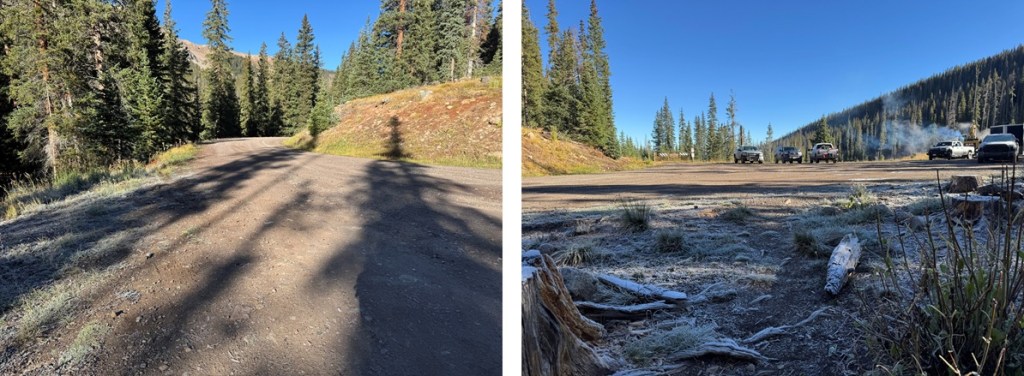
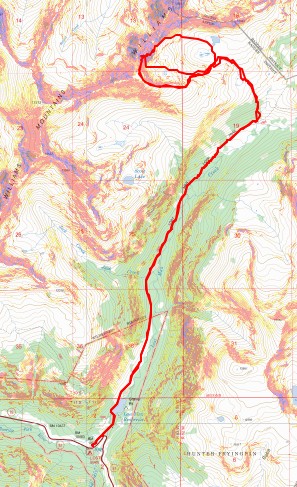
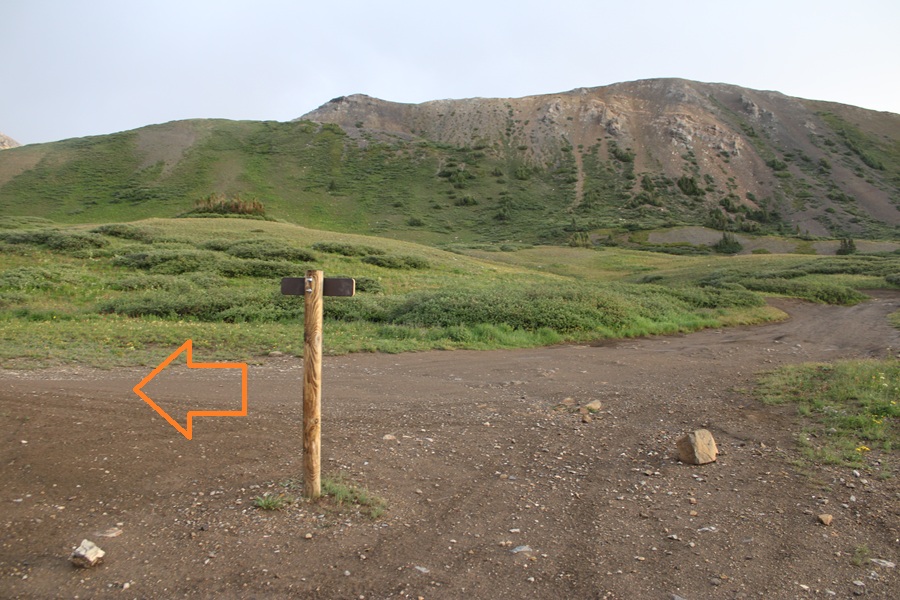
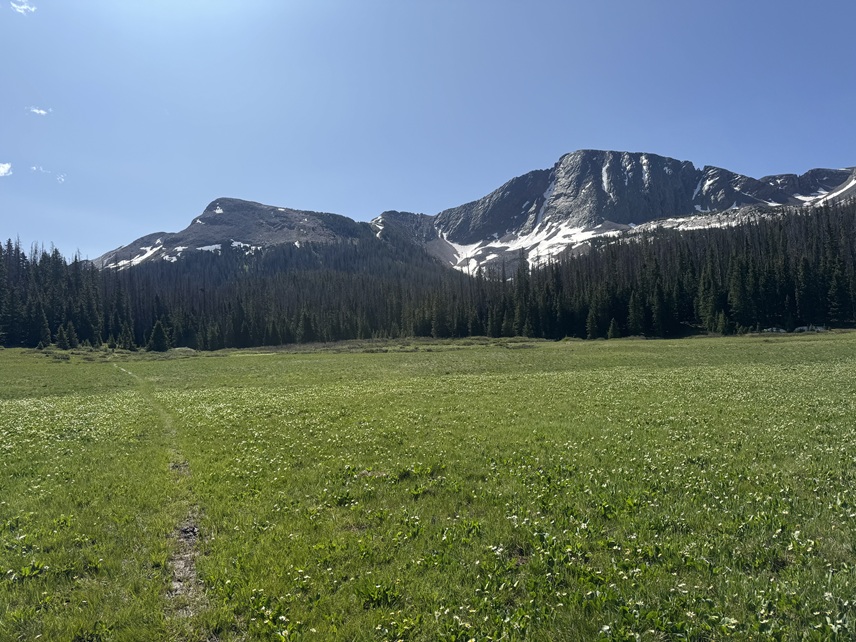
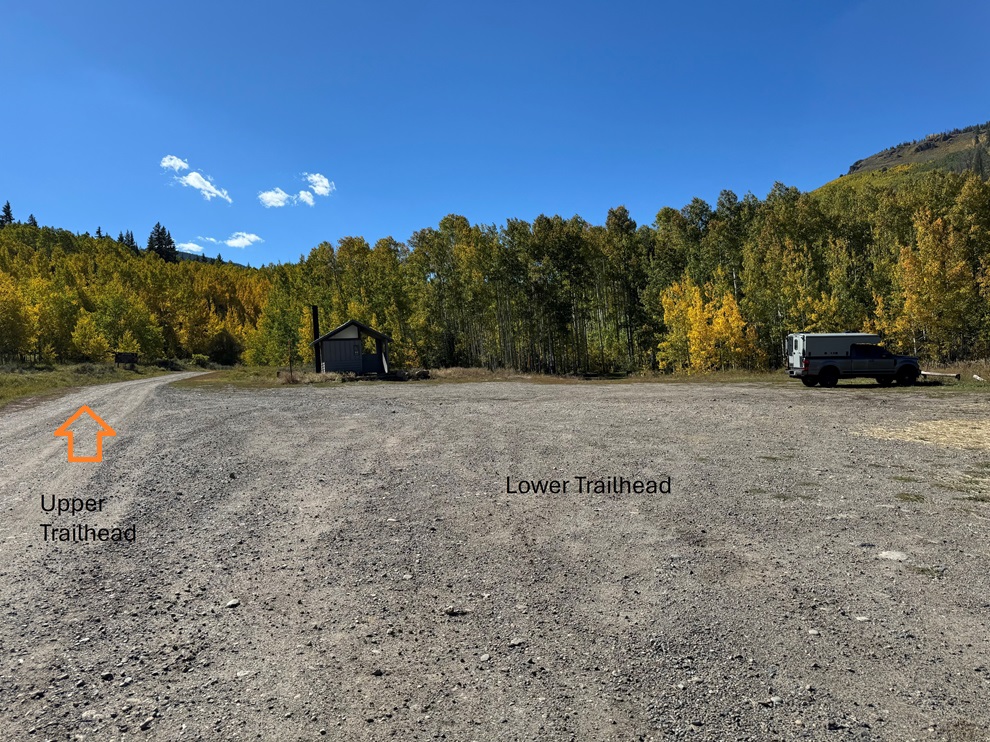
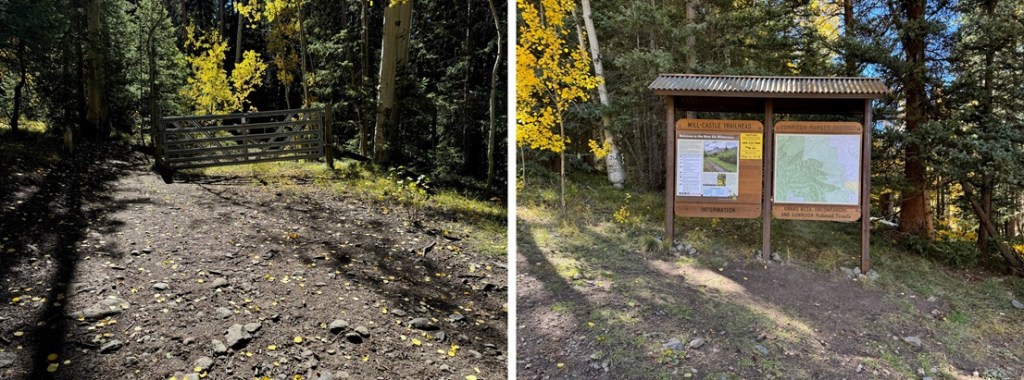
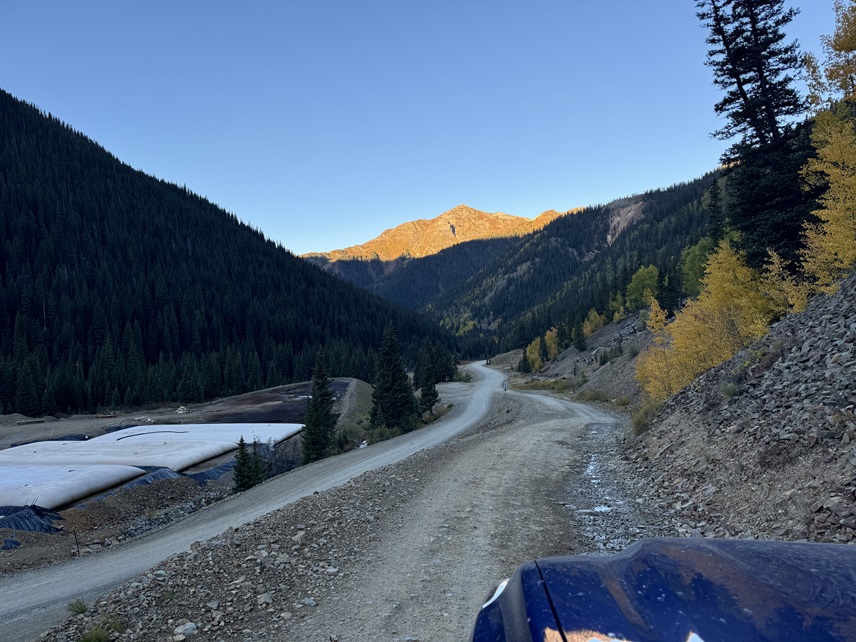
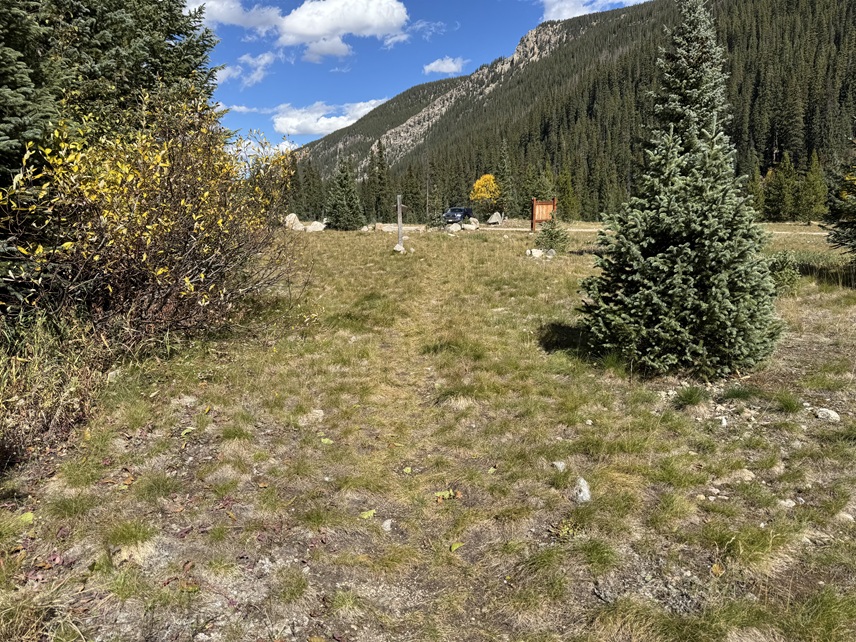
Maps call this trail 1940, but the sign at the trailhead said Fork Fryingpan Trail 1924.  From Norrie Colony I took 2WD dirt road 504 for 10 miles until it ended.  There is one place to turn left about halfway through the drive to stay on 504 but that was the only turn I took.  The left turn is where there’s a sign saying “Hunters Beware: Moose in area, be sure of your shot”.  At the trailhead there were several dispersed campsites and lots of places to park. This is a lightly trafficked and remote but easy to drive to trailhead.   I didn’t see any other vehicles there.  I did see several very large marmots I mistook initially for bear cubs.  Be sure to marmot-proof your vehicle. 

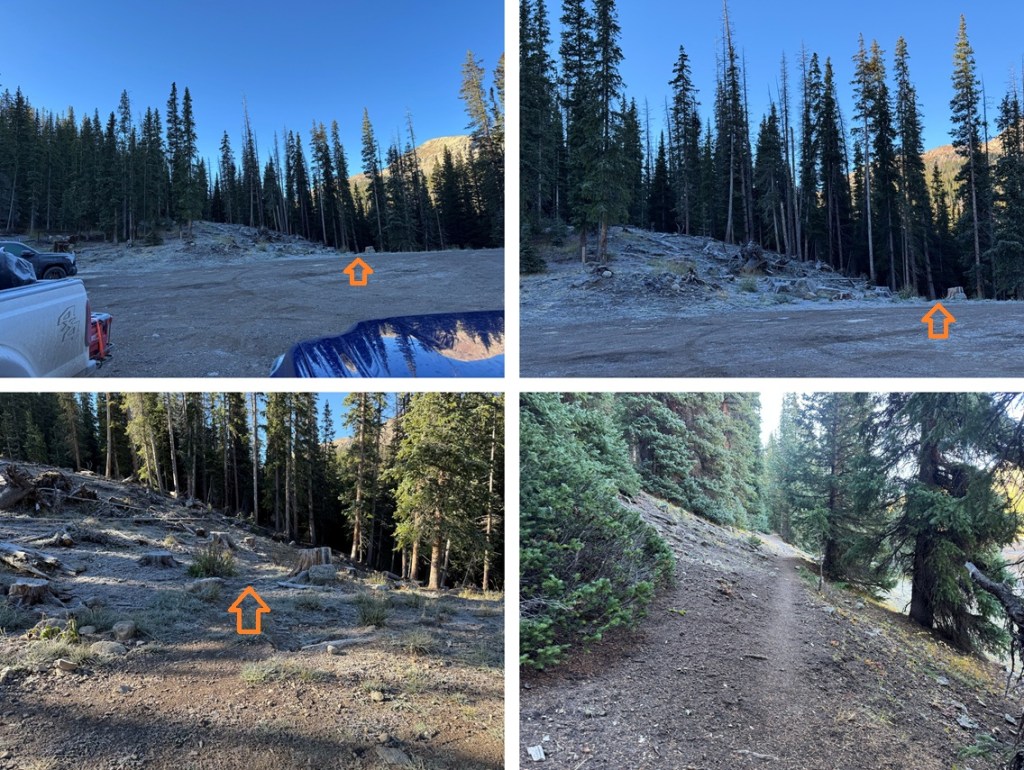
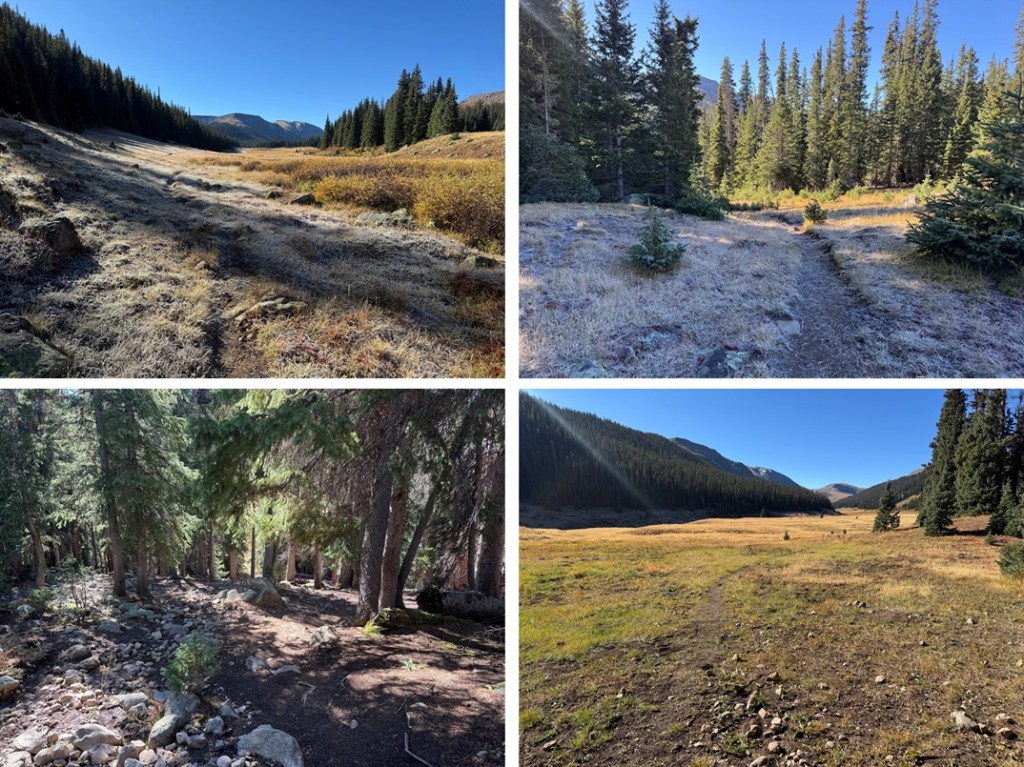
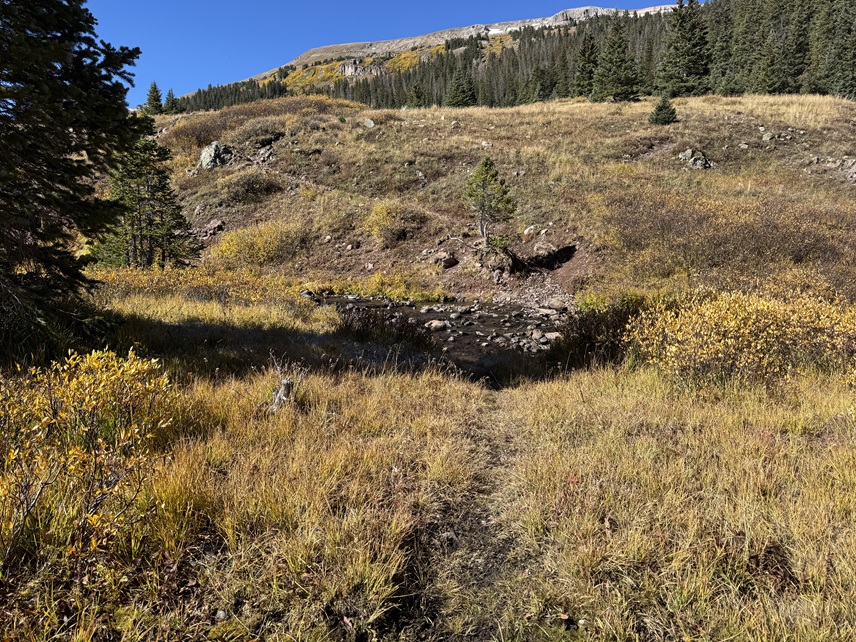
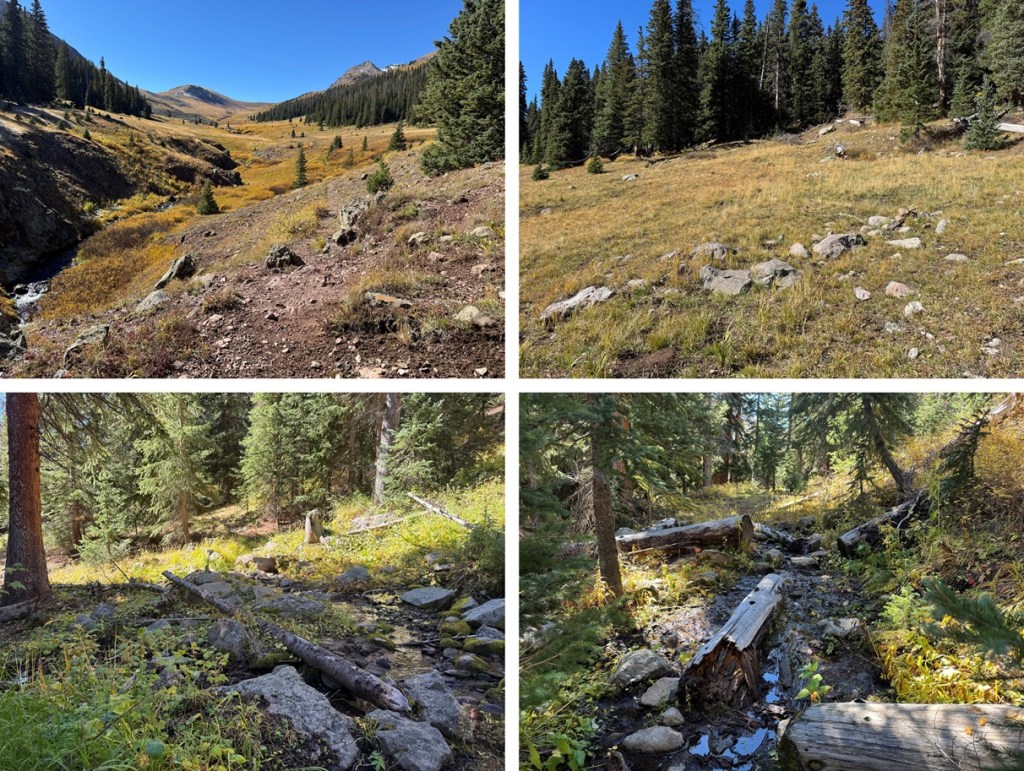
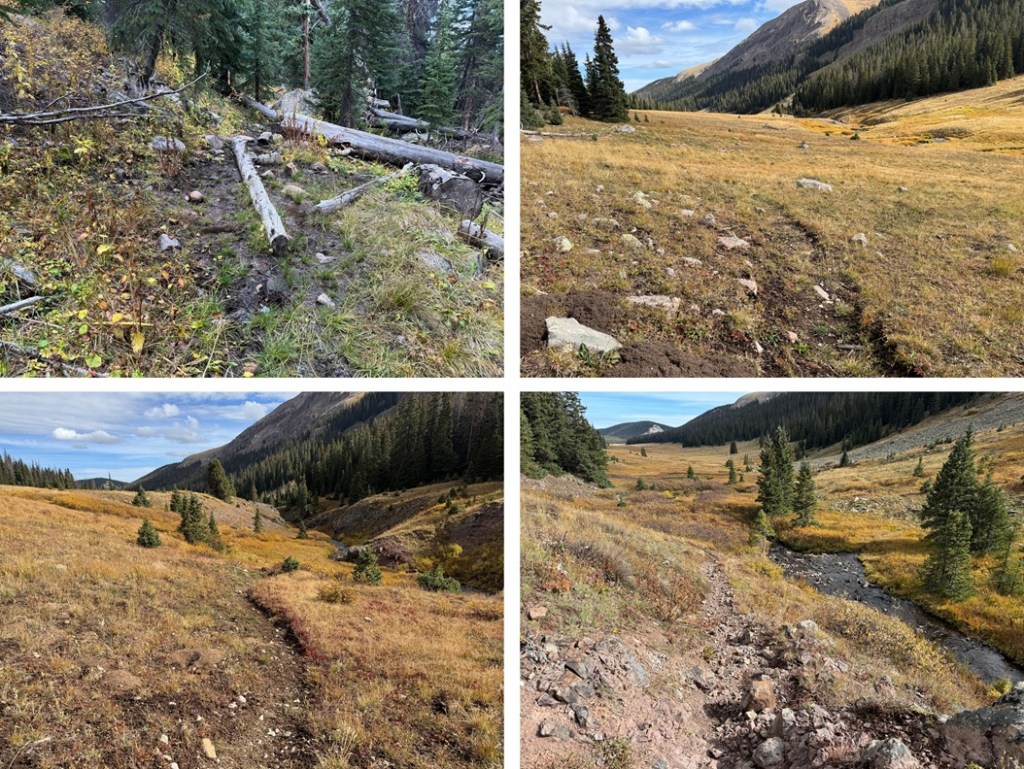
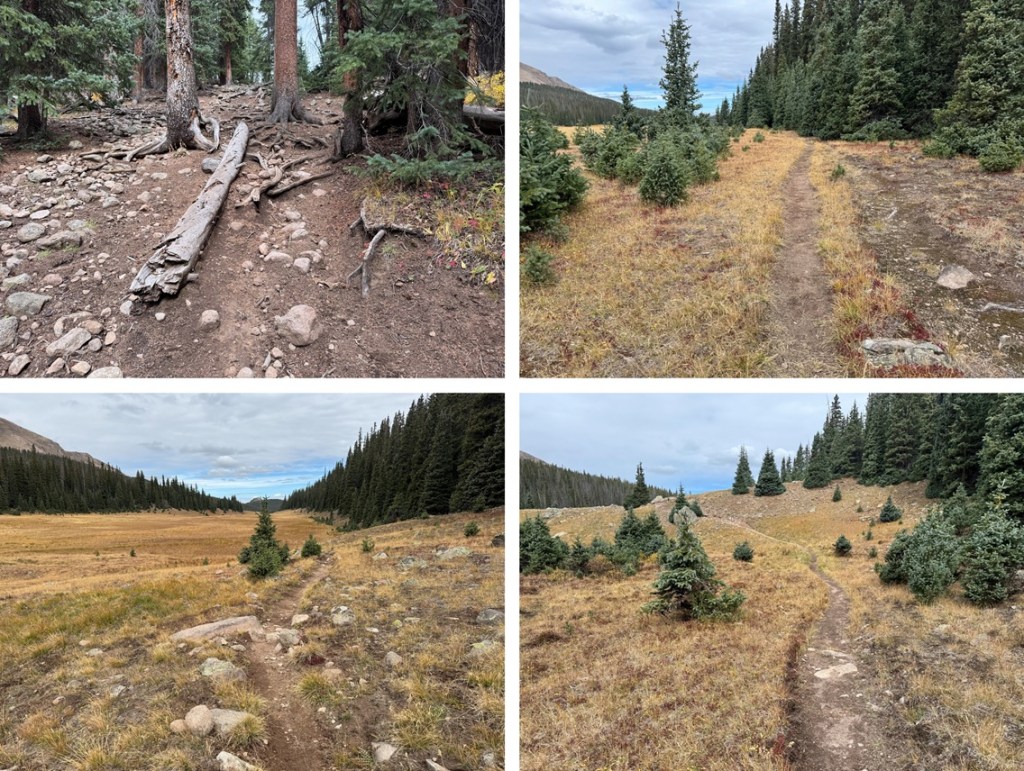
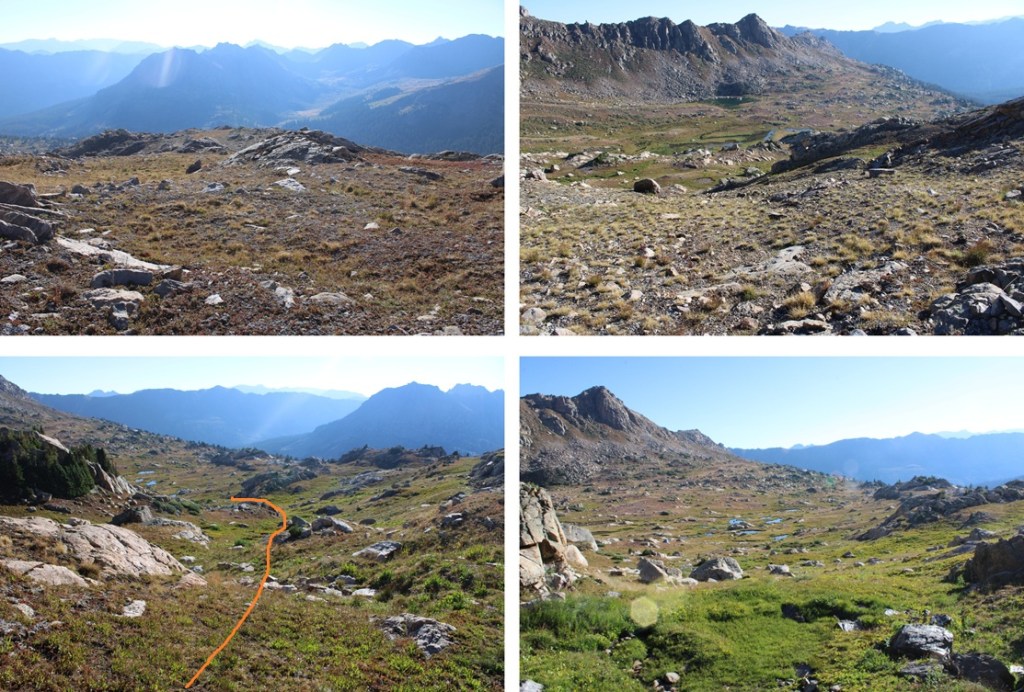
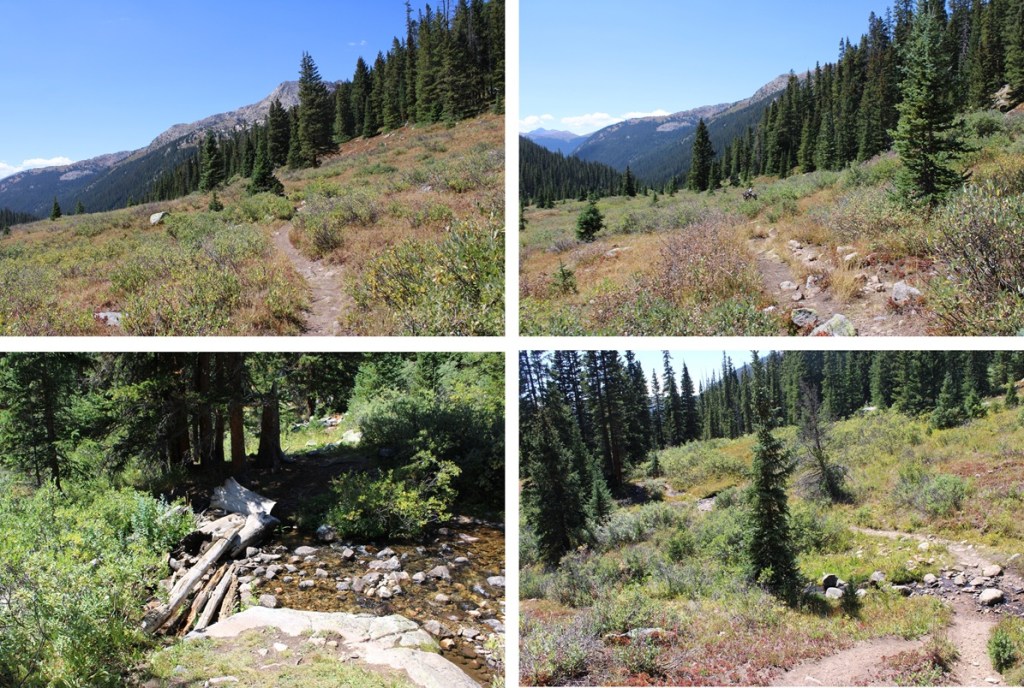
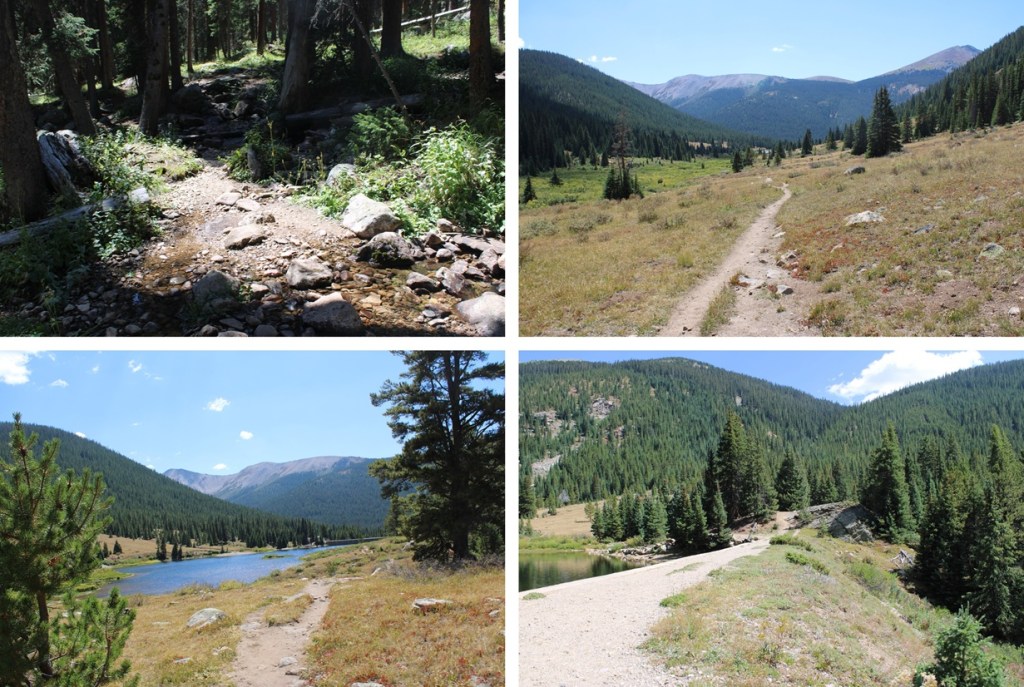
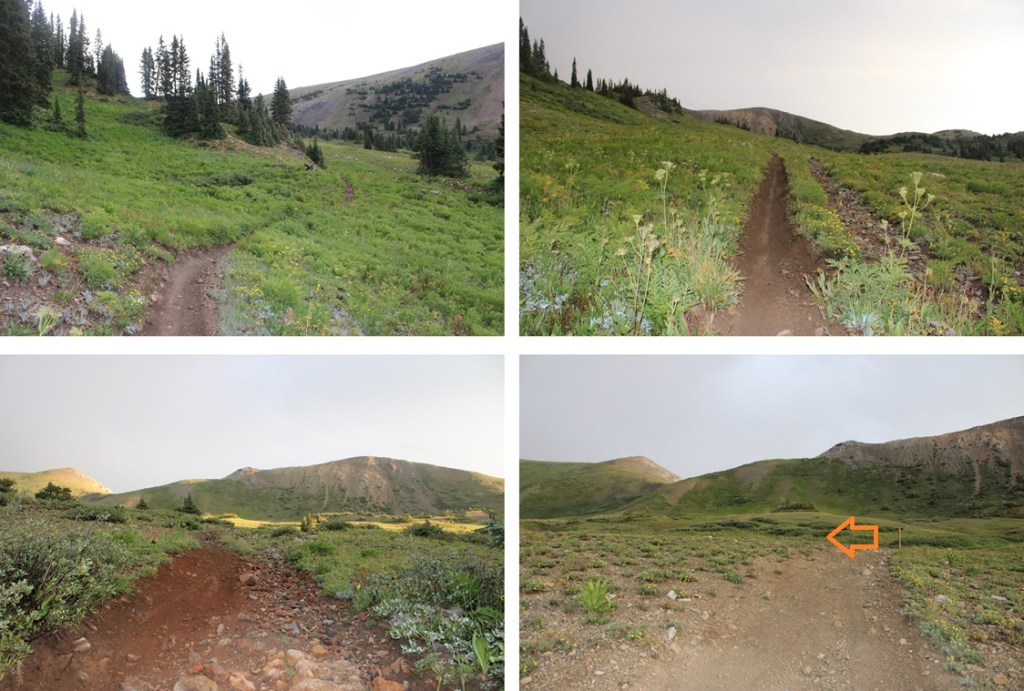
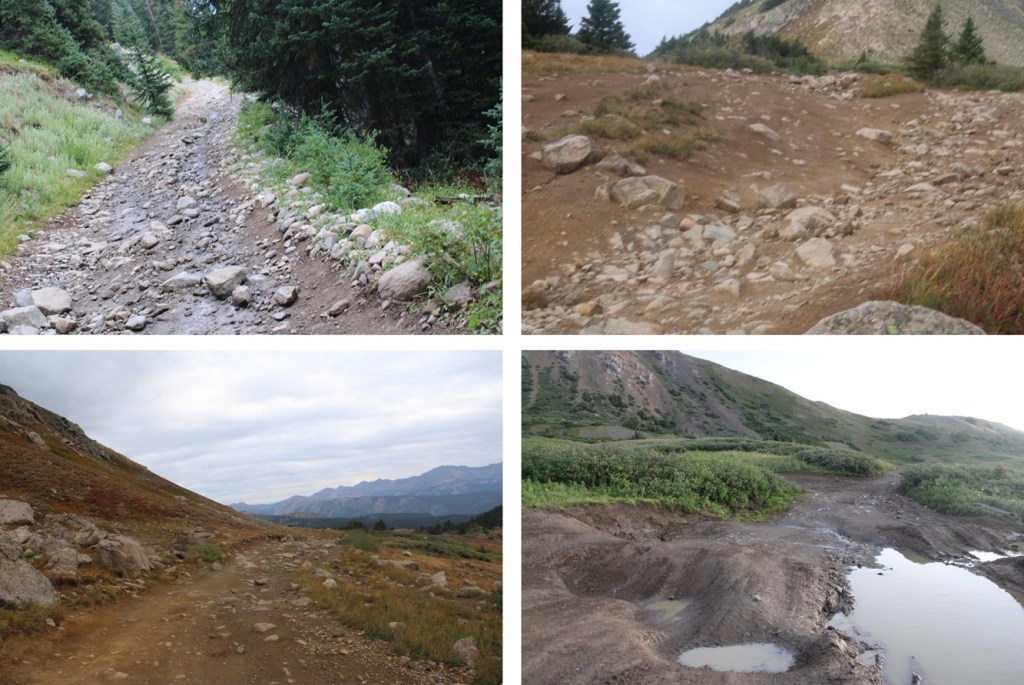
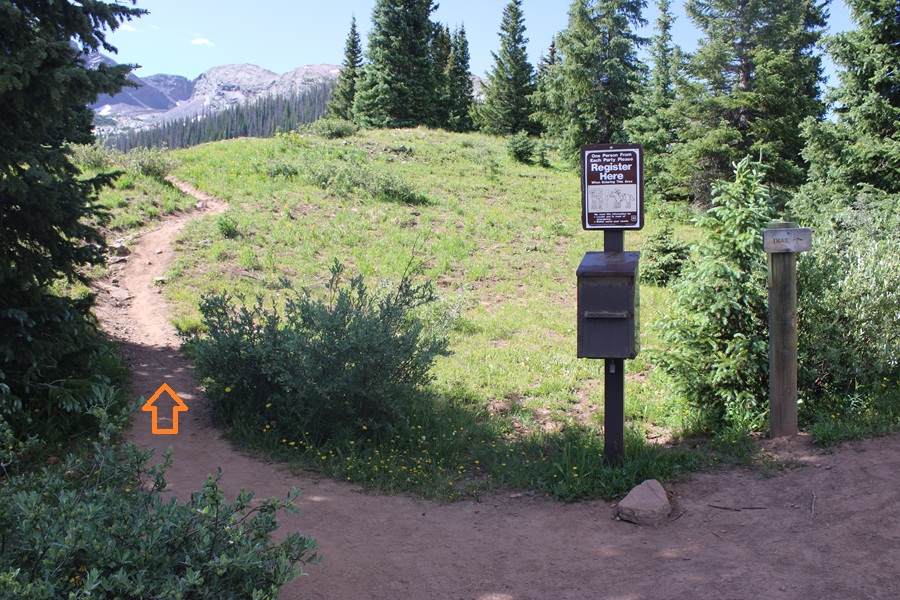
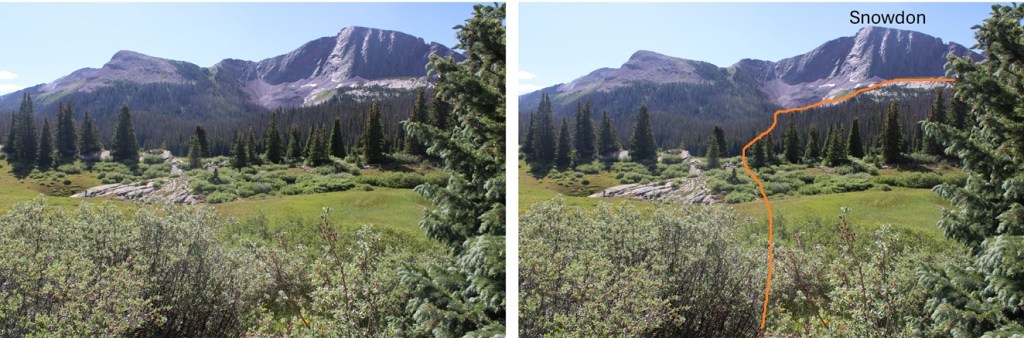
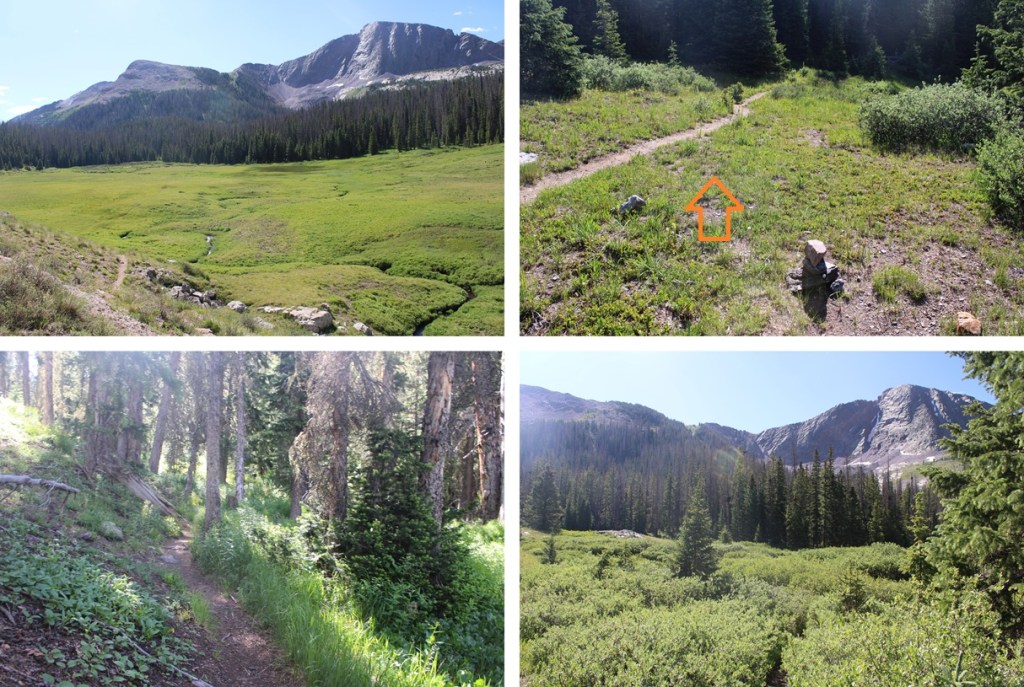
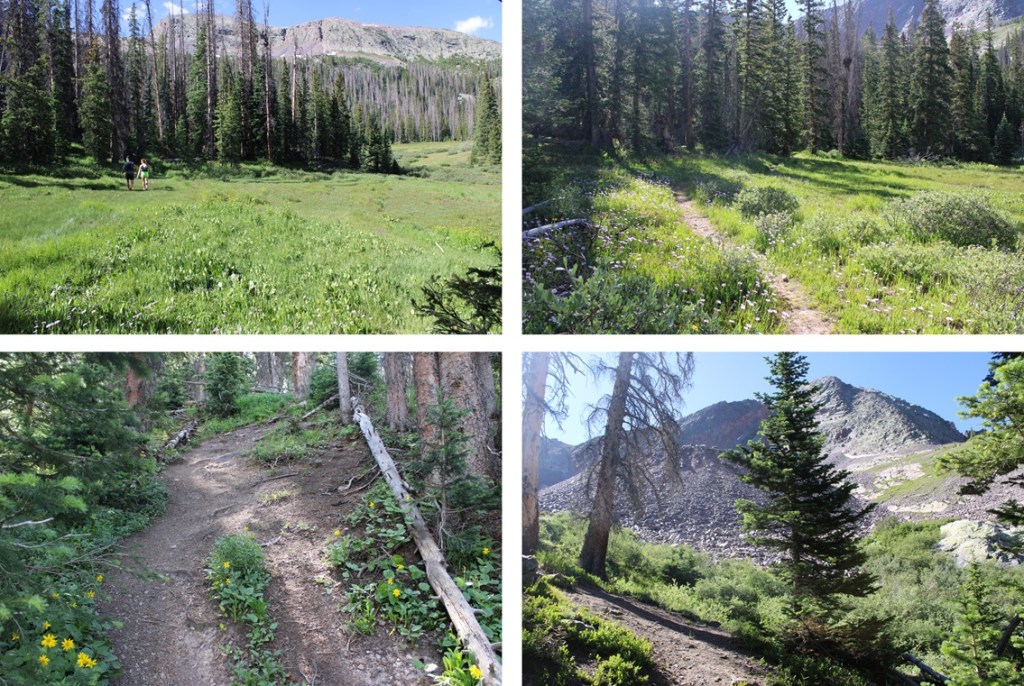
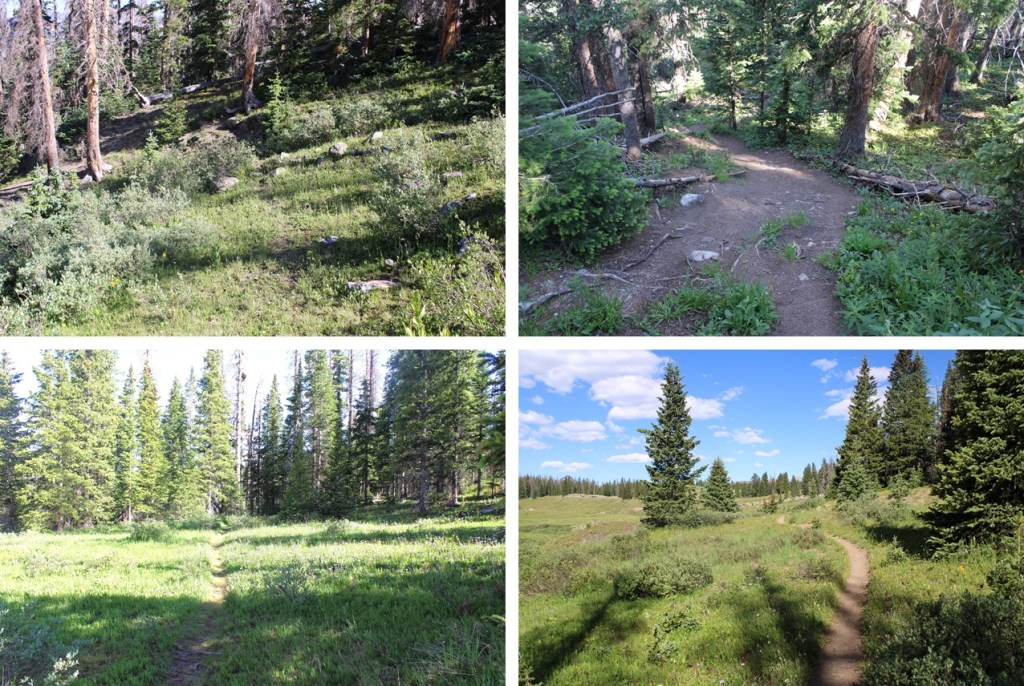
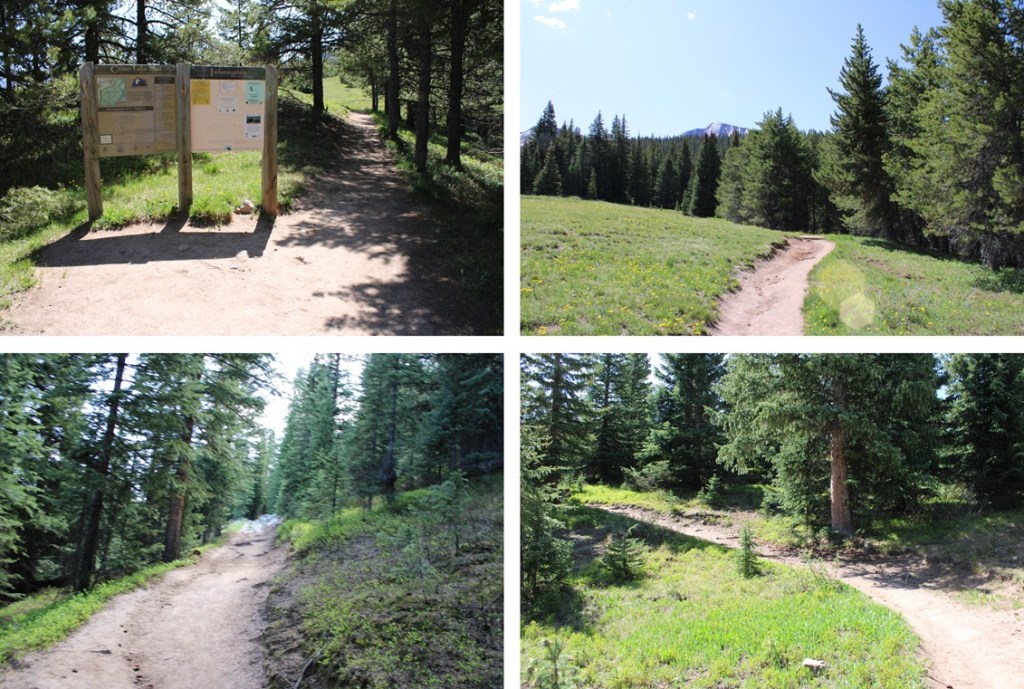
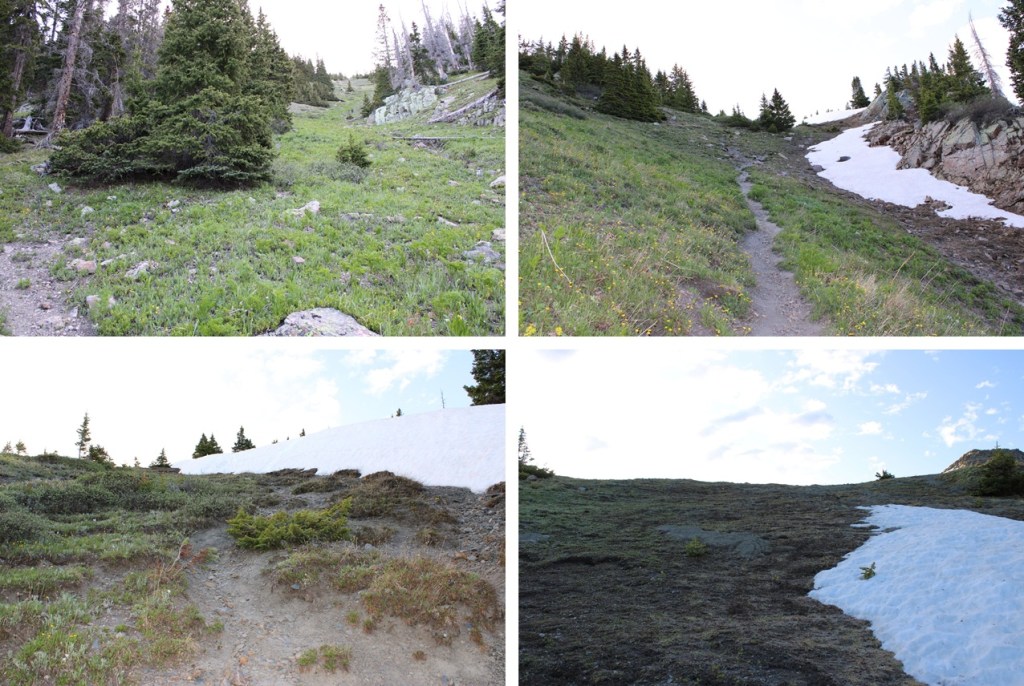
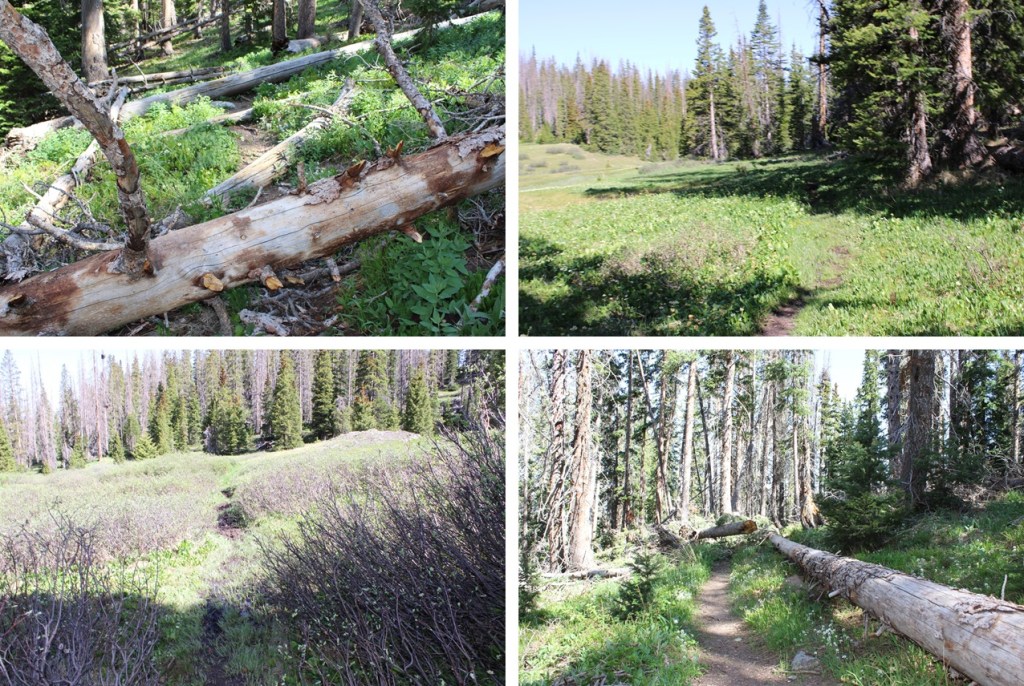
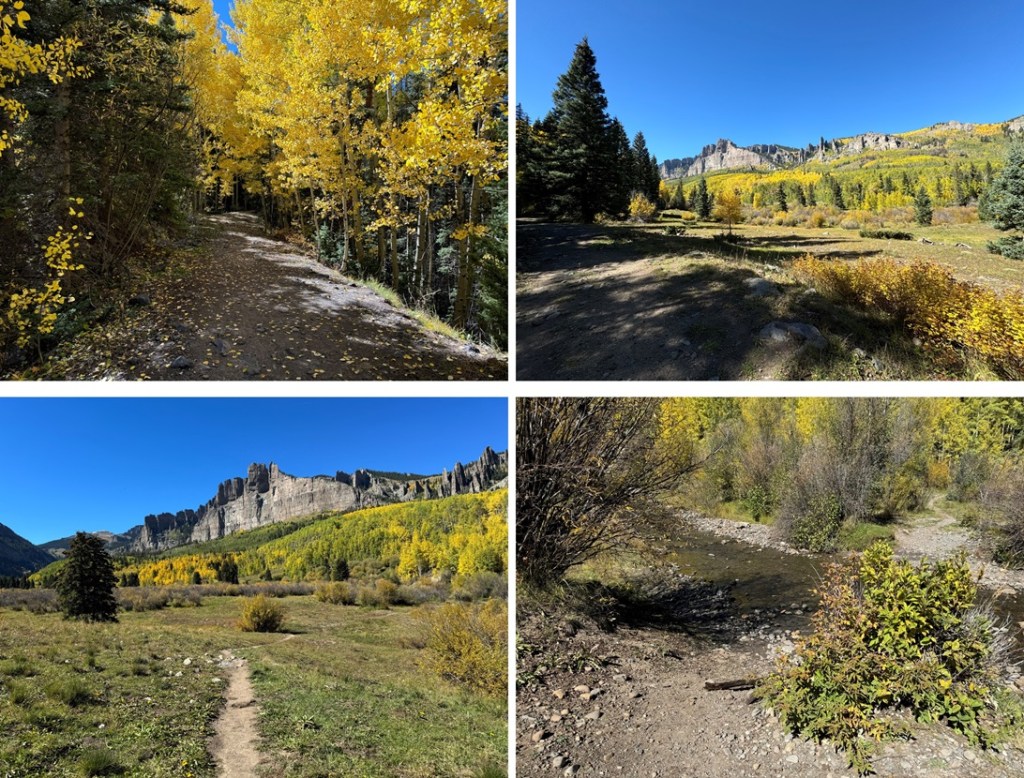
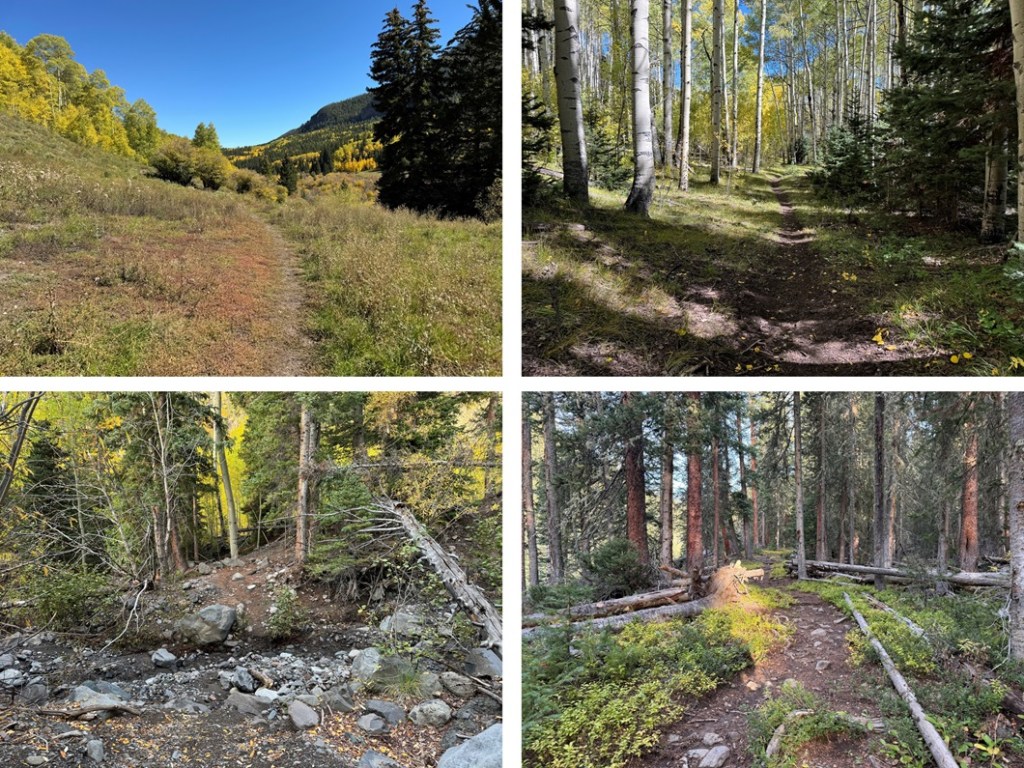
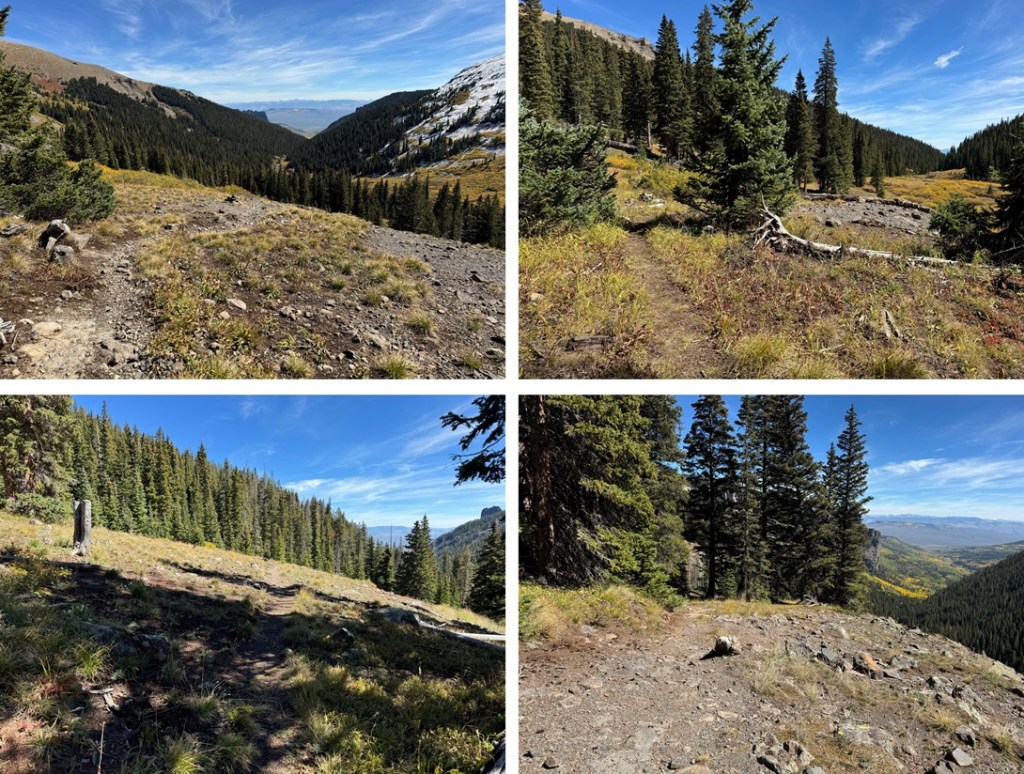
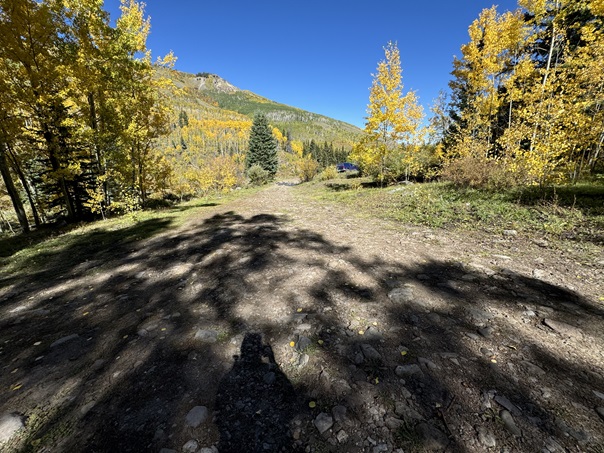
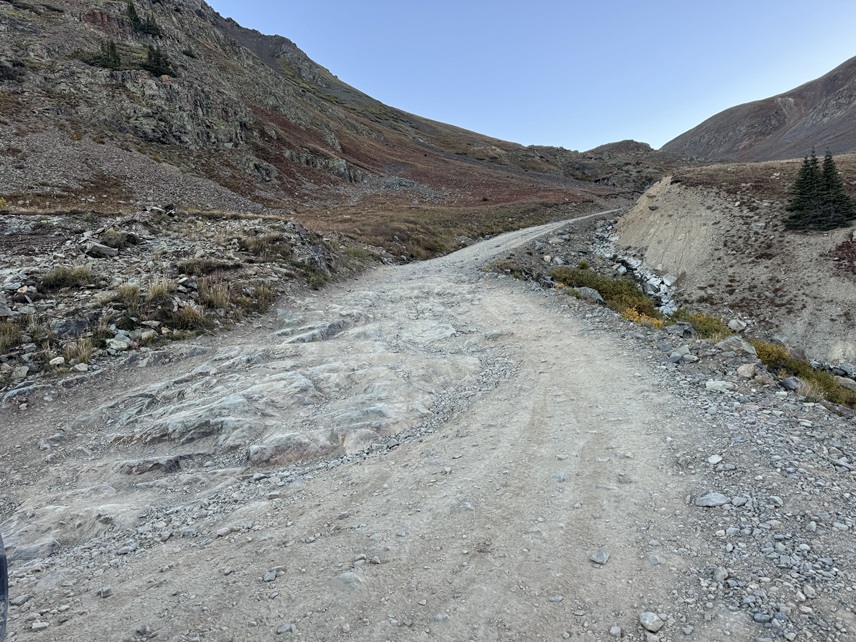
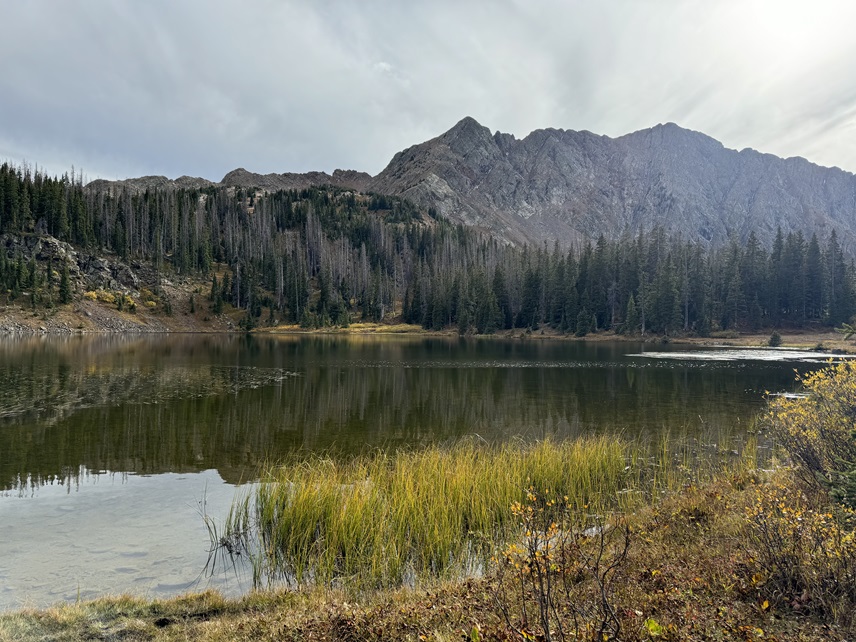
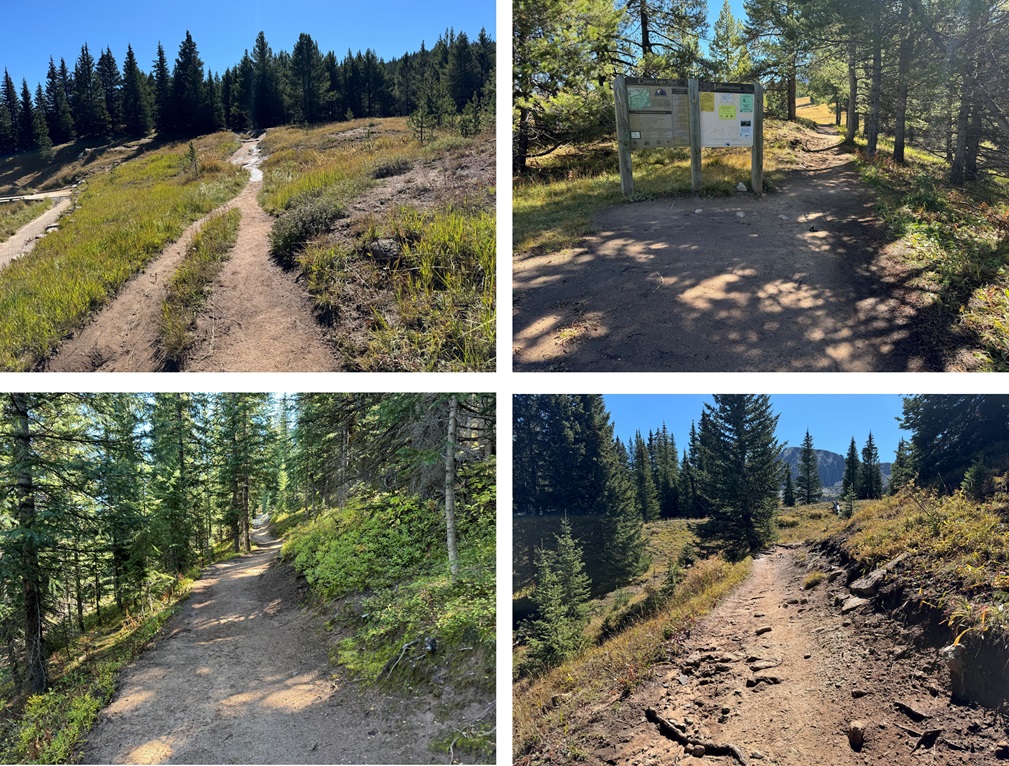
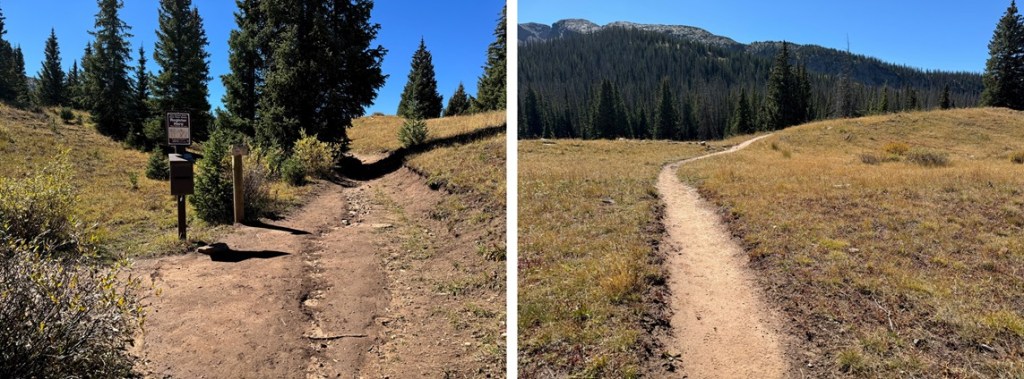
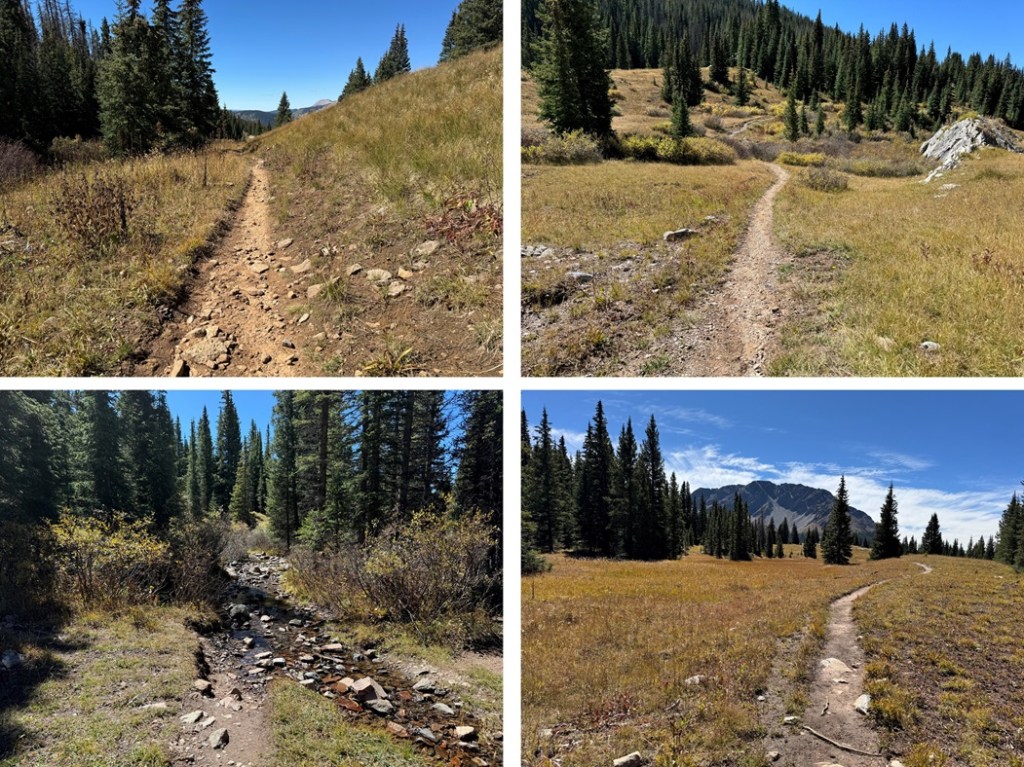
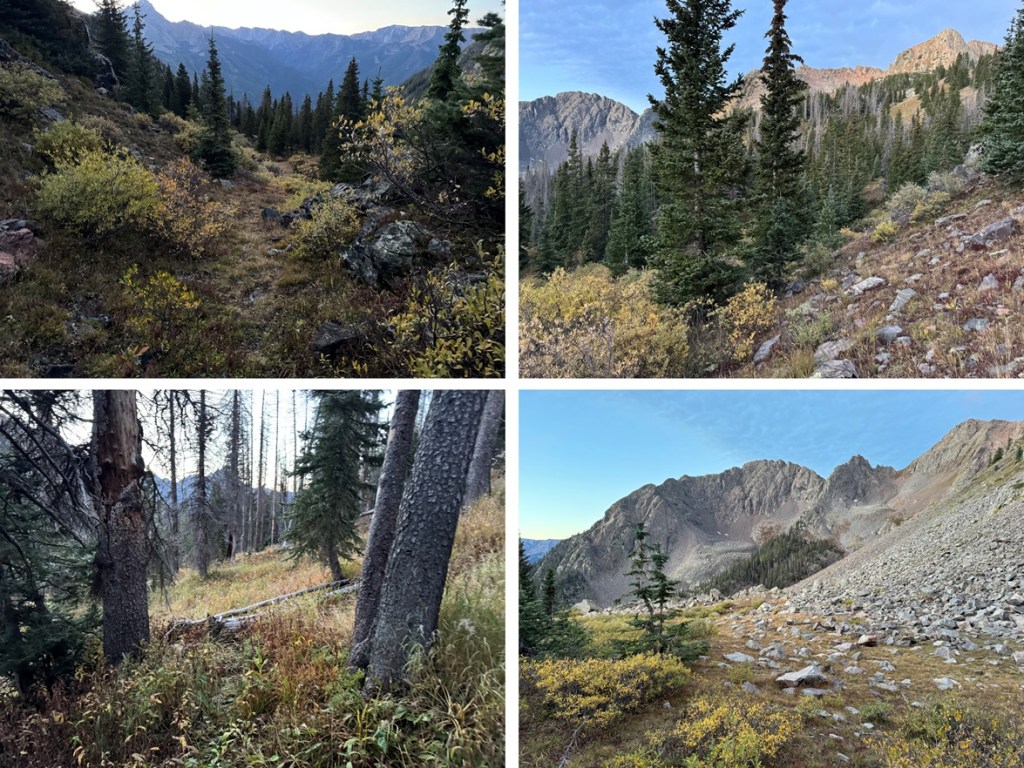
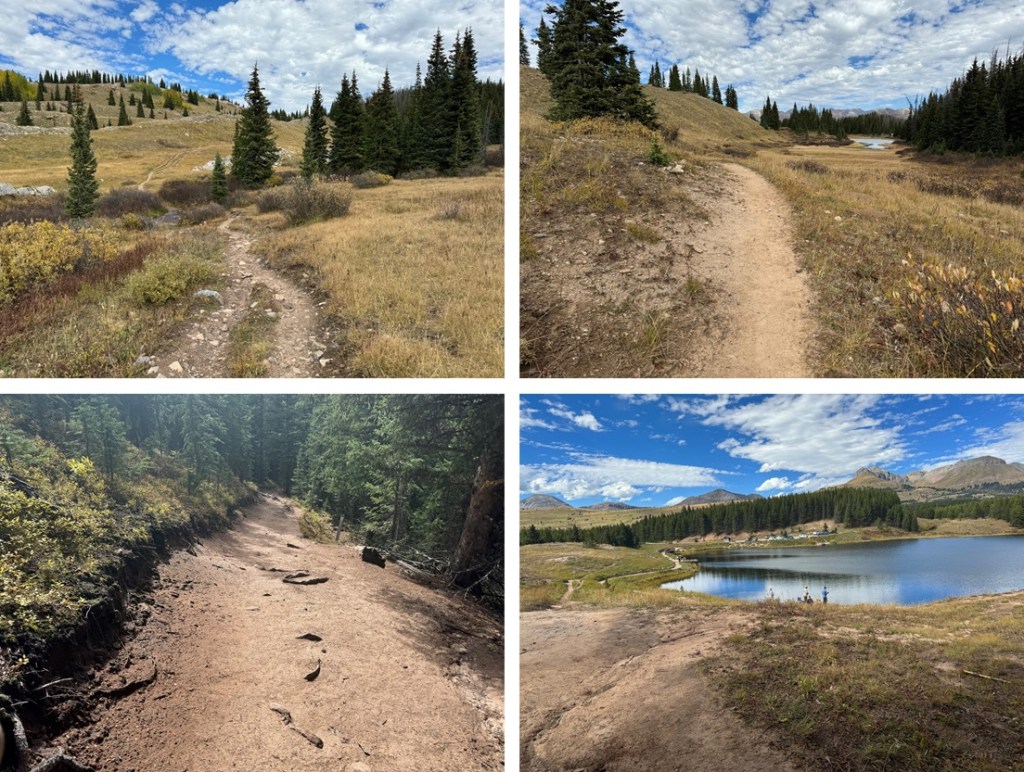
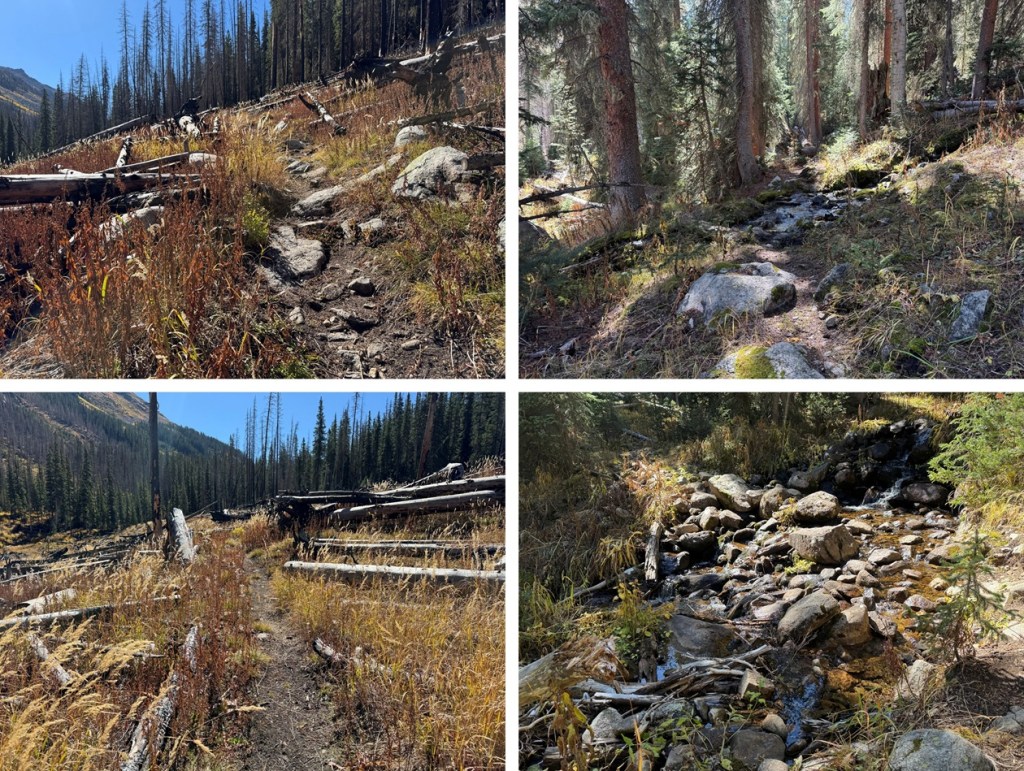
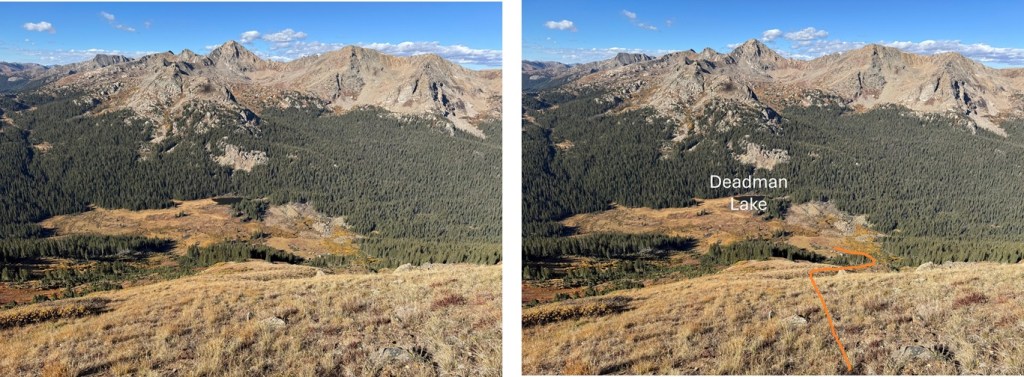
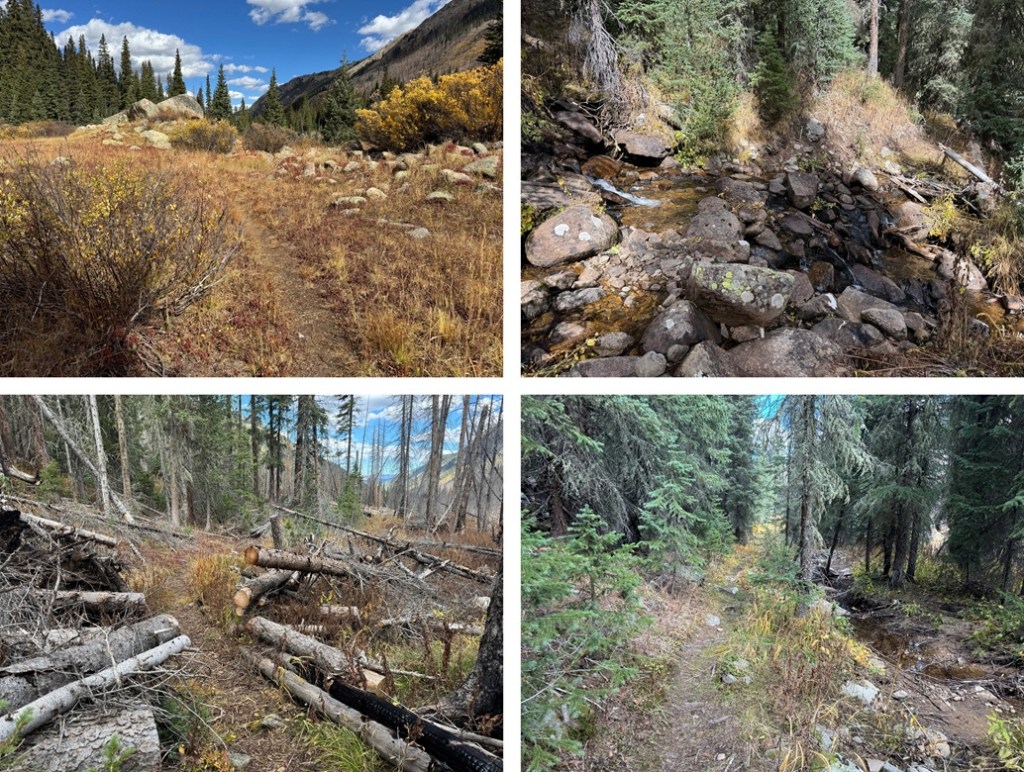
The trail starts at the south end of the parking area.  This is a class 1 trail I followed for 4 miles.  It parallels the South Fork Fryingpan River.  If you get to Deadman Lake you’ve gone too far.  There were several small stream crossings and lots of evidence of moose (but I didn’t see a moose).  This area has also seen avalanches and a fire in recent years, but the trail is well maintained and easy to follow with no junctions. Oh, and SO MANY SPIDERWEBS!  It was obvious no one had hiked this trail in a while.  My tracks were the only ones (besides moose) going in and coming out. 

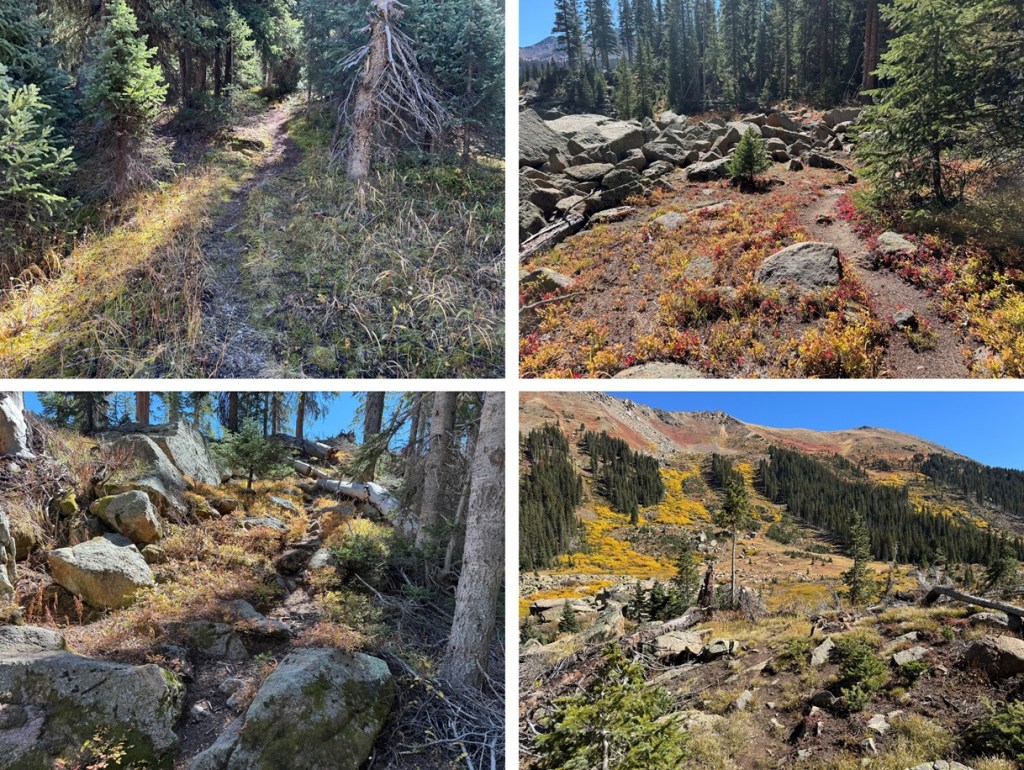
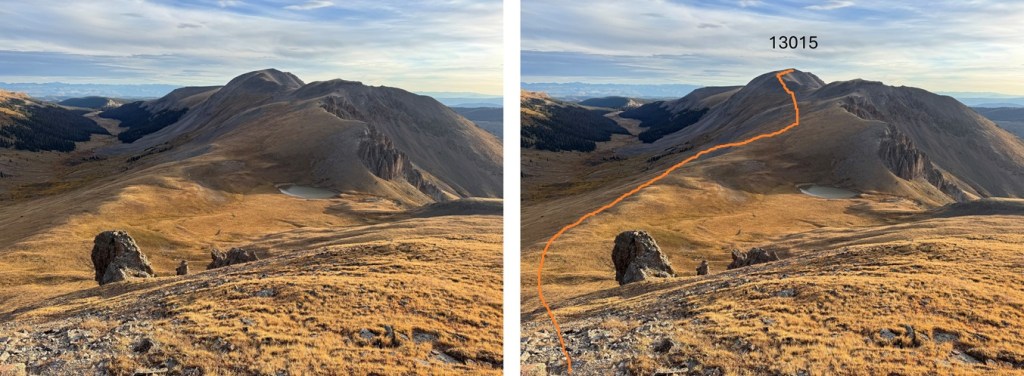
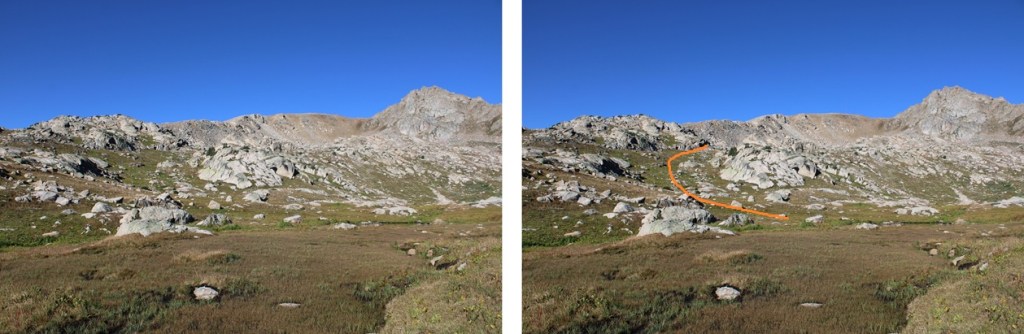
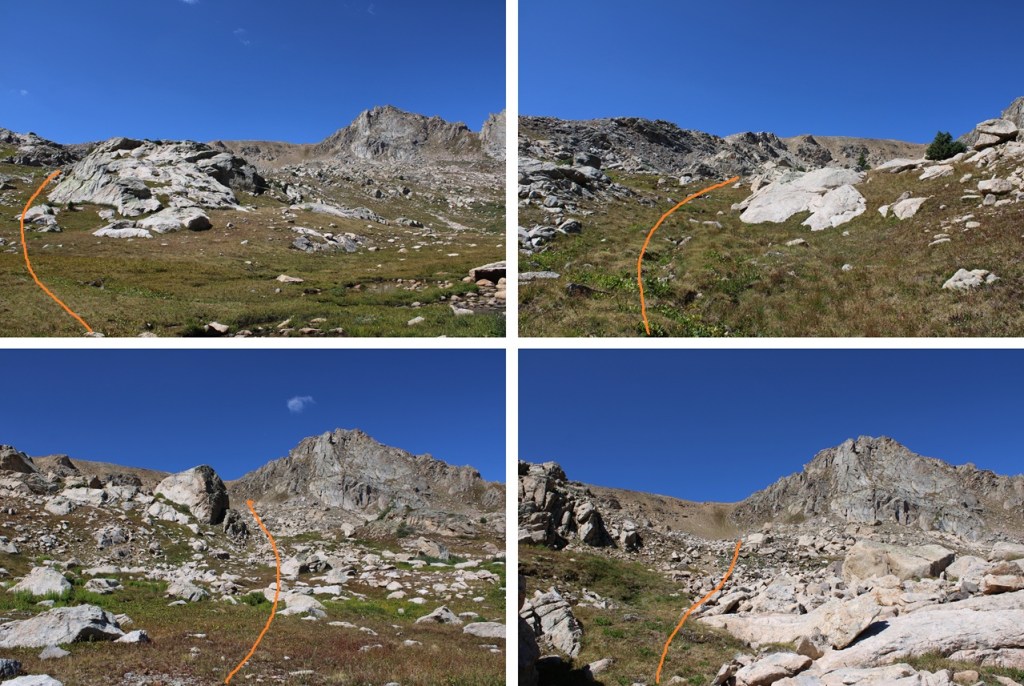
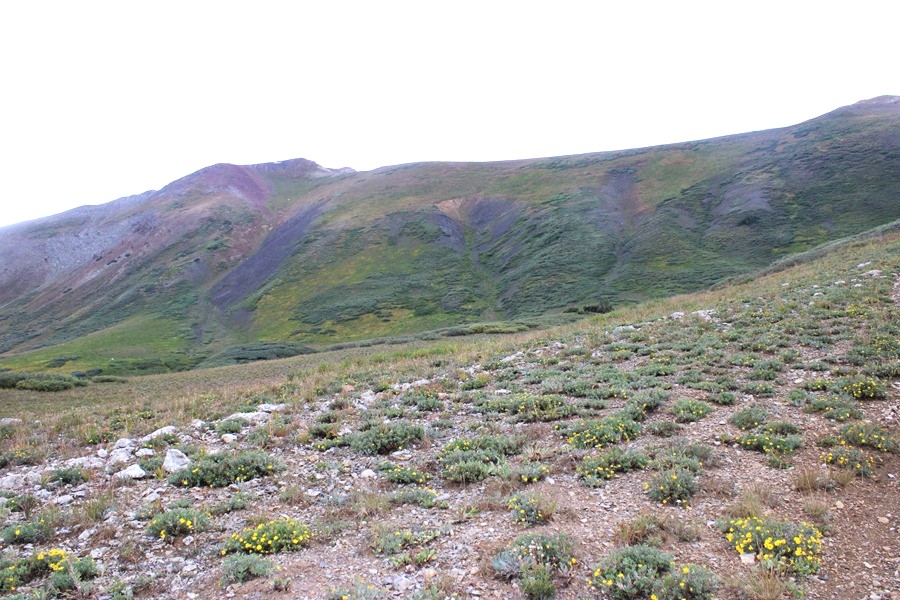
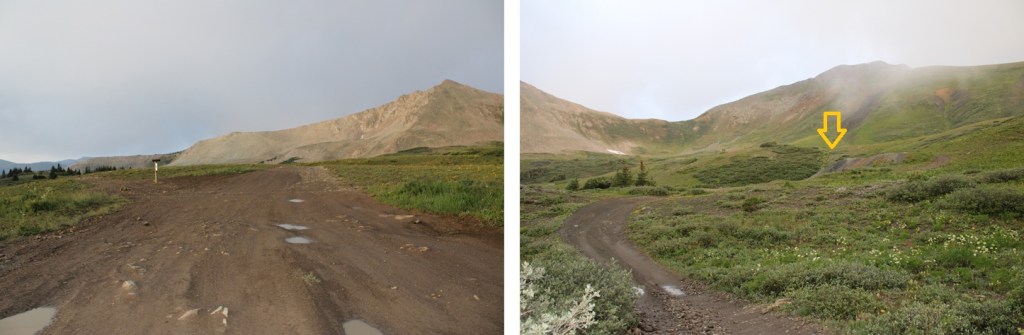
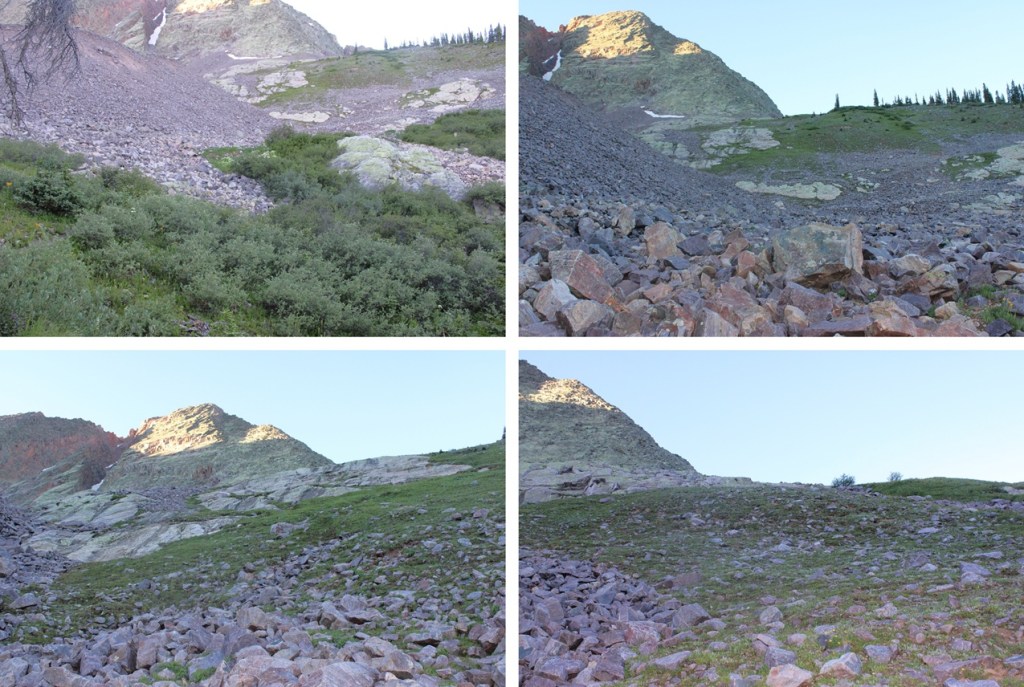
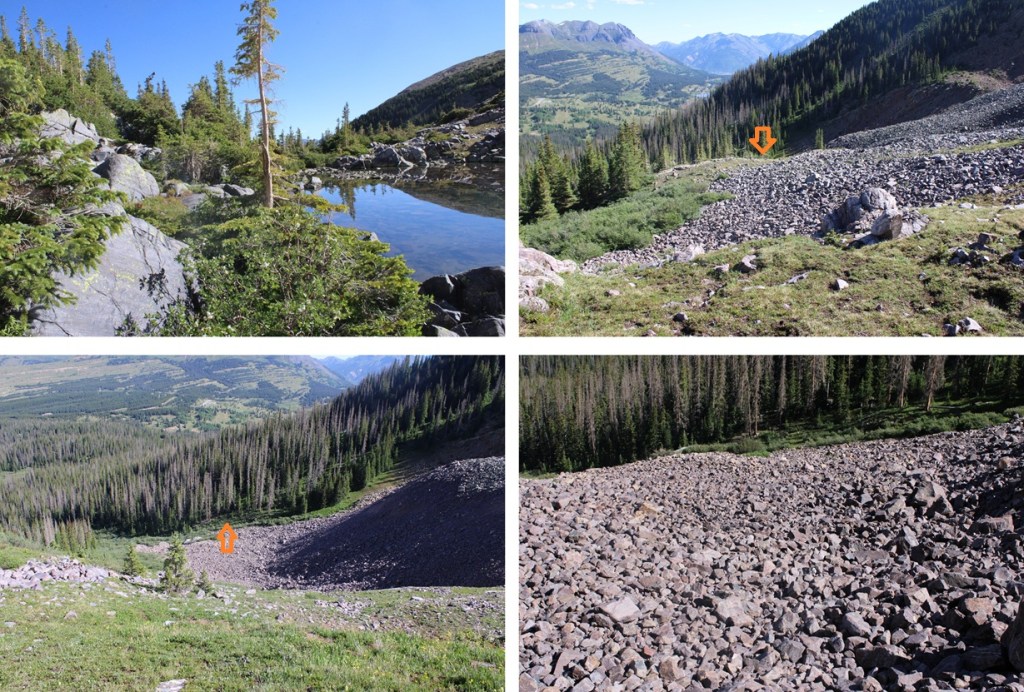
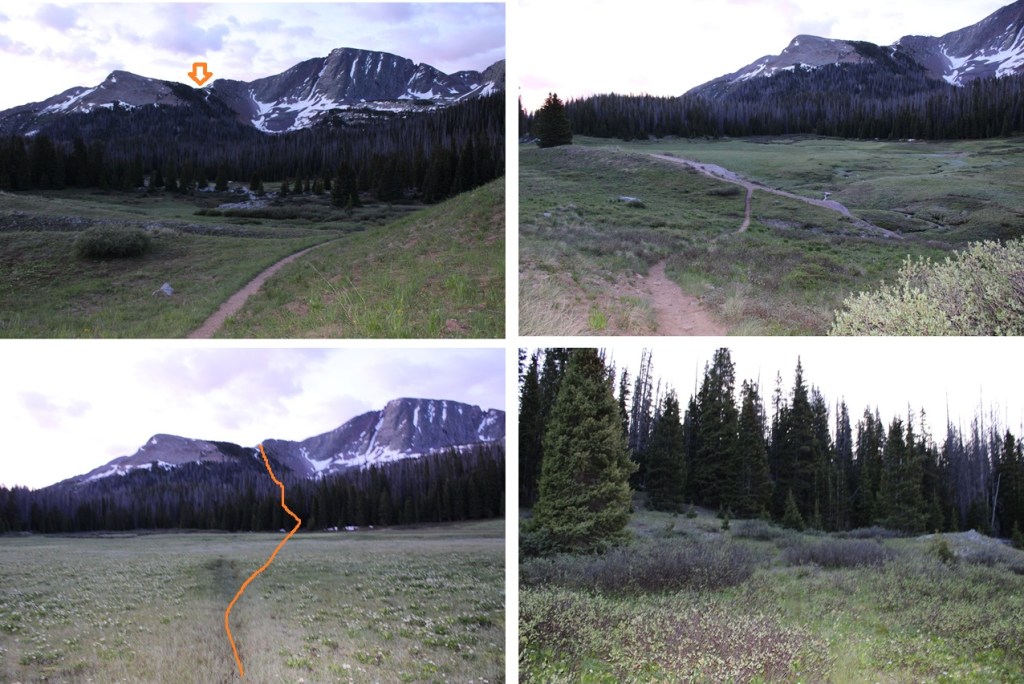
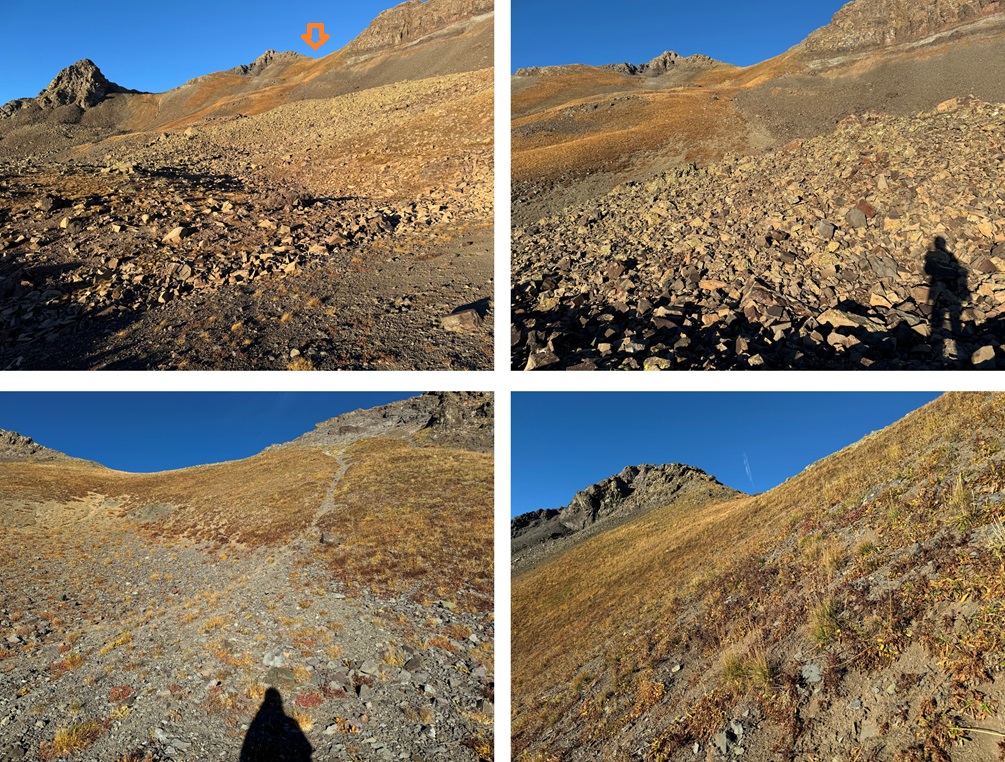
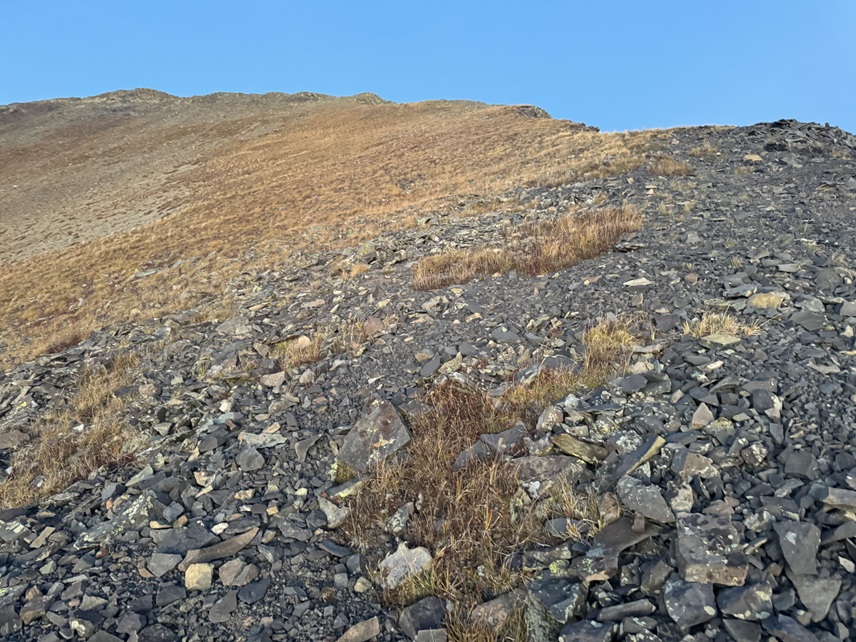
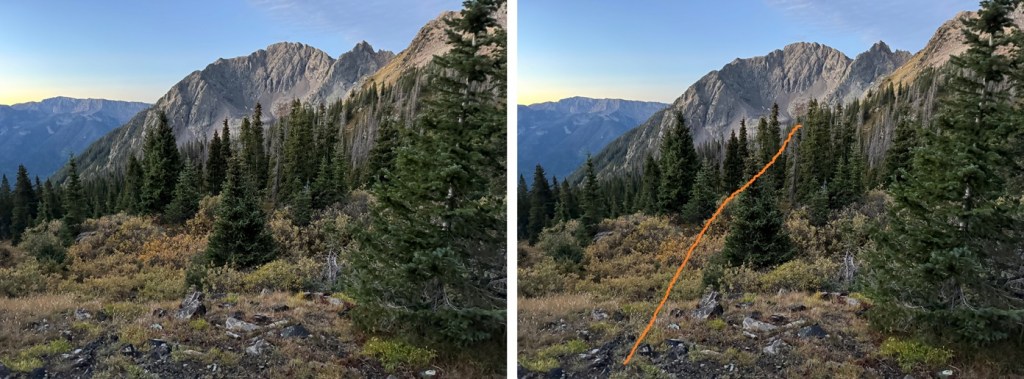
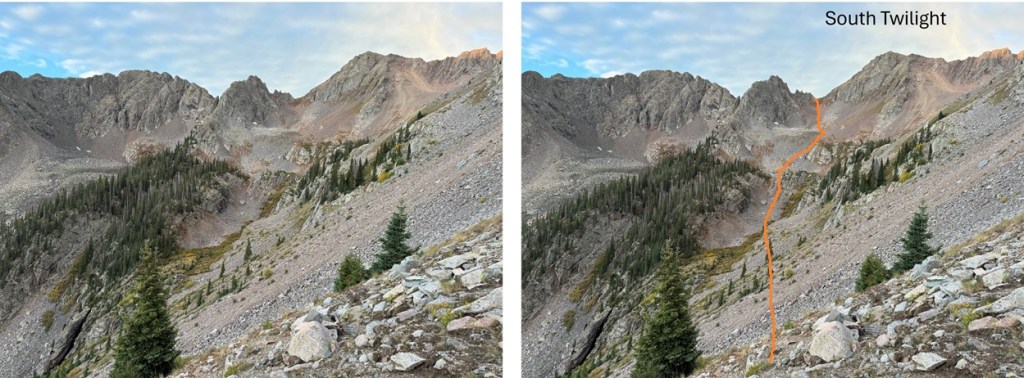
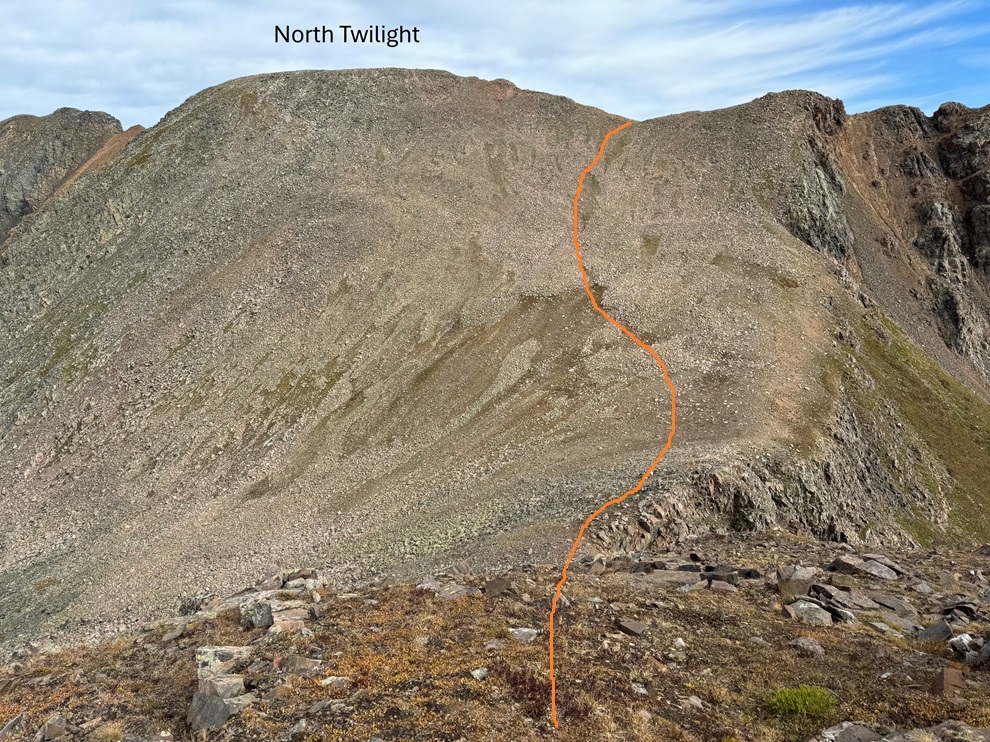
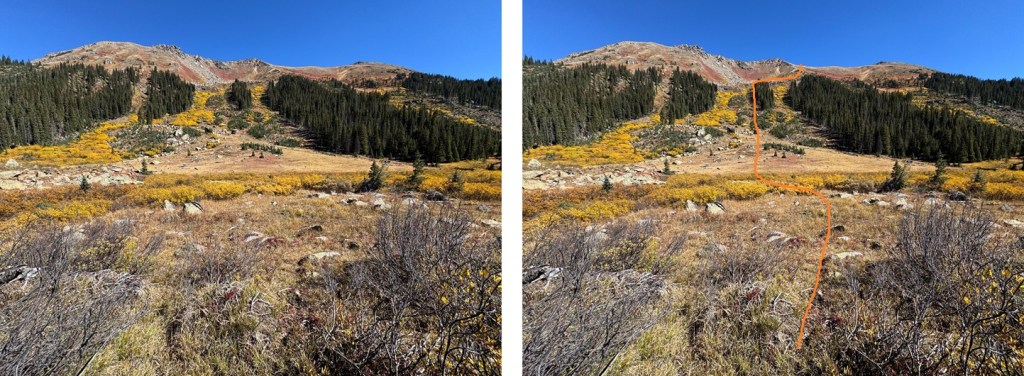
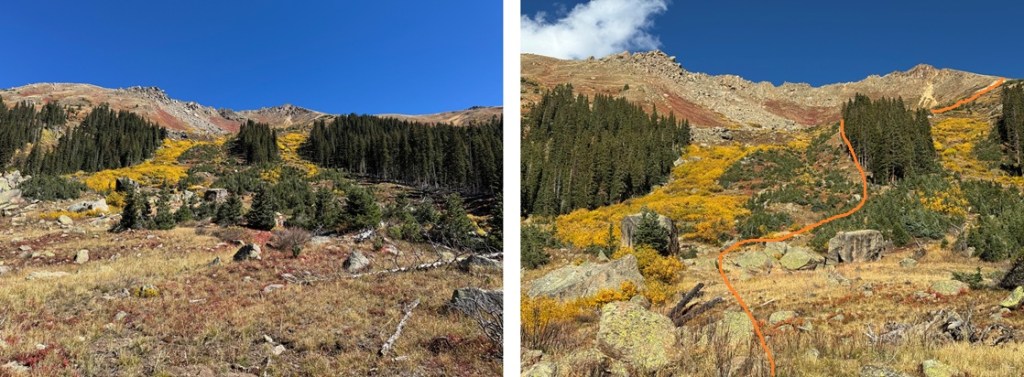
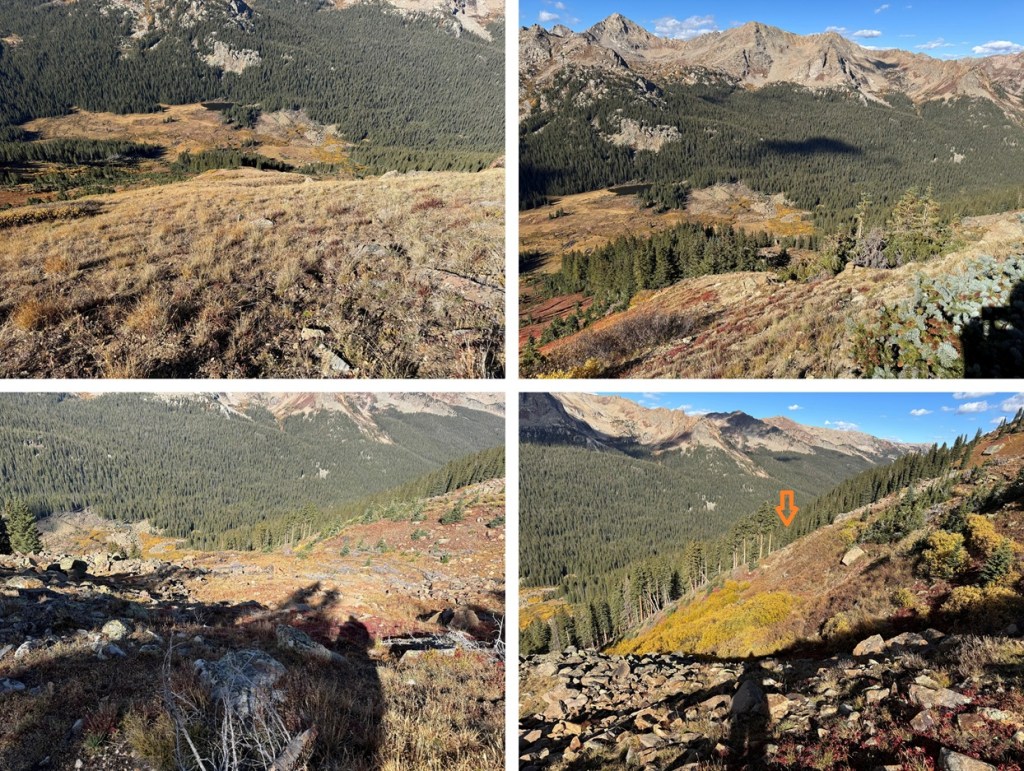
After hiking for 4 miles and at 10930’ of elevation I left the trail and headed east towards an obvious avalanche slide.  There are a lot of slides in the area, so look for the one around 4 miles.  I was making this an overnight to just enjoy the trek, so I planned to set up my tent at the base of this slide, but if you’re making this a day hike here’s the route I took up to the ridge

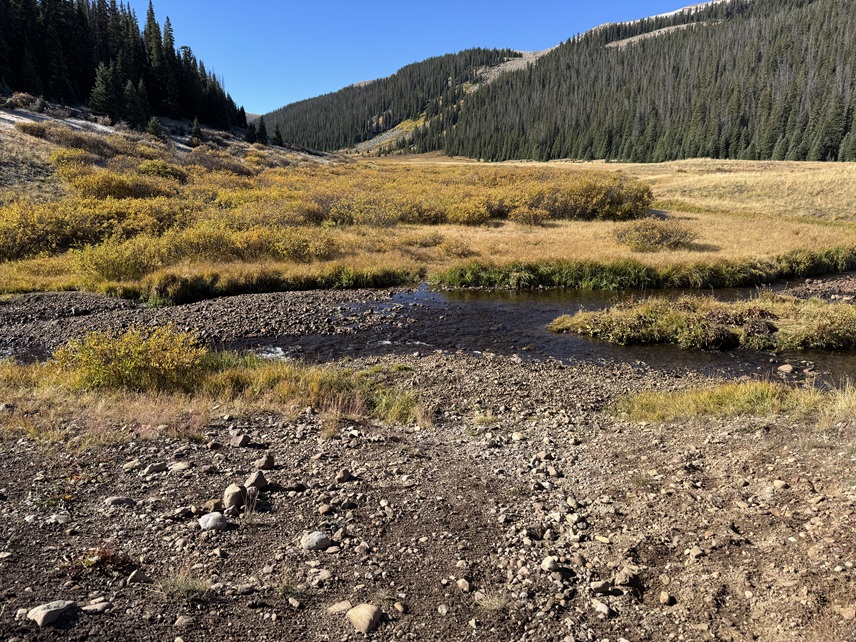
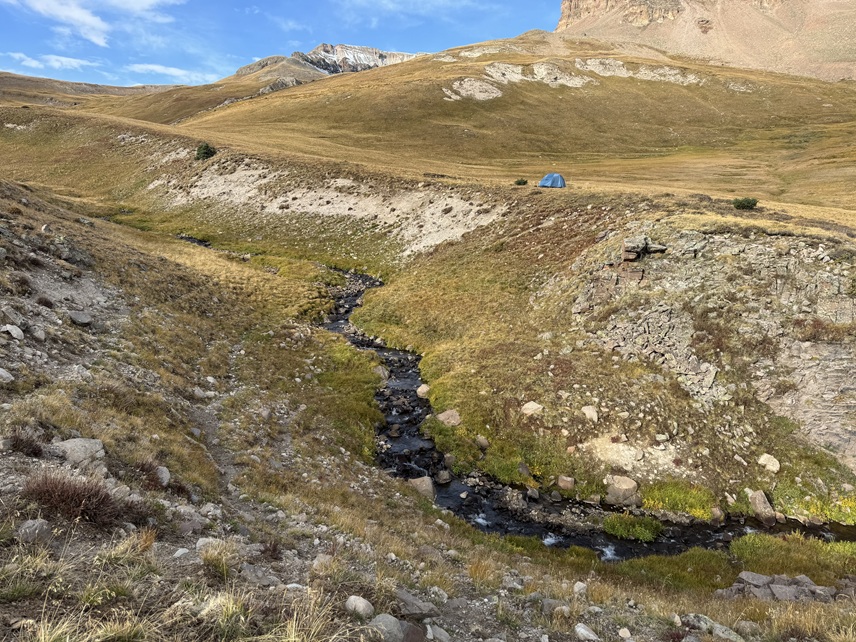
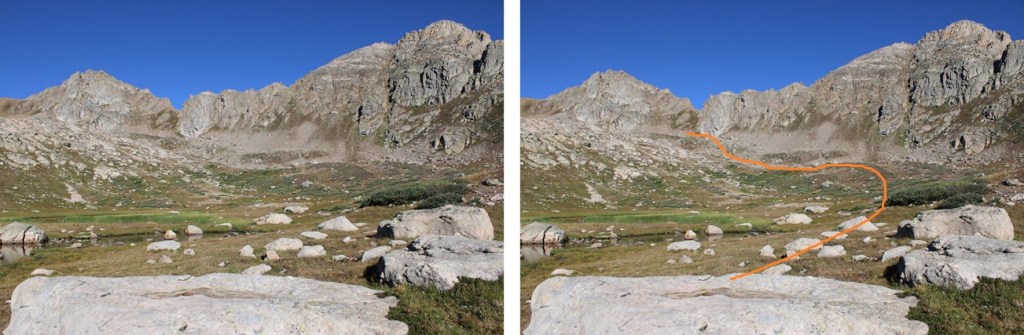
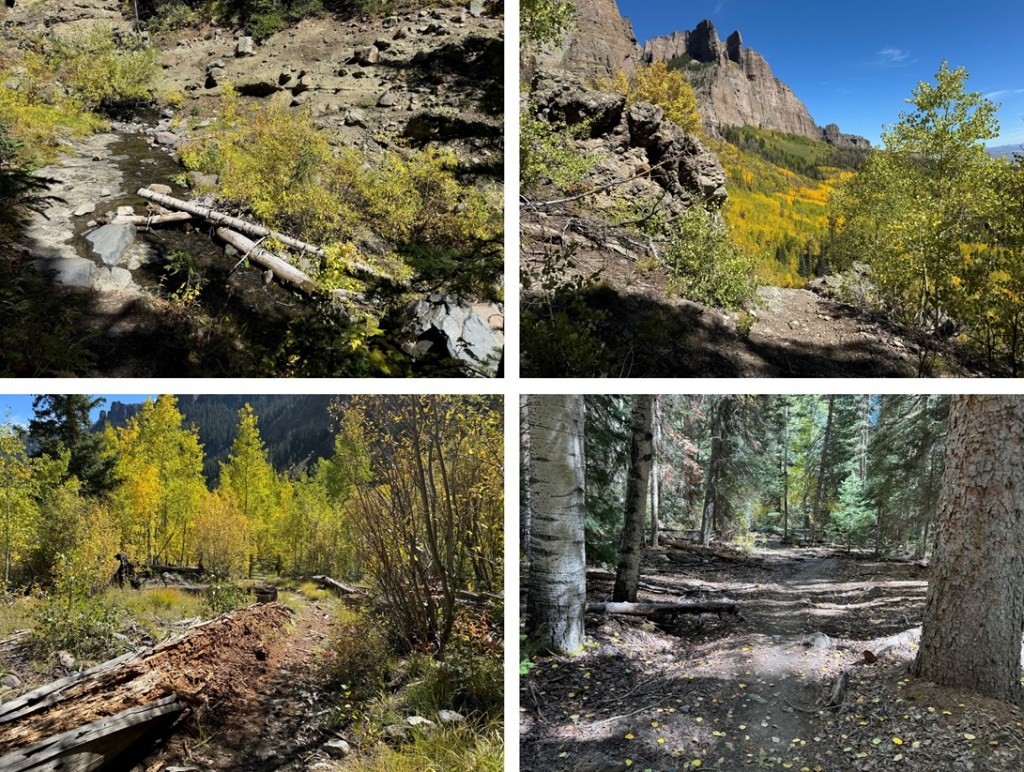
To get to my campsite (and to make it to the ridge) I had to cross the river.  Luckily, I was able to rock hop across it, but earlier in the year it was several feet deep and I decided to turn back and wait for the water levels to lower because I didn’t have the correct gear to cross the river at that time.  There’s a game trail that goes through the willows that will lead you to the river crossing area. I easily crossed the river and set up camp in the grassy area below the slide.

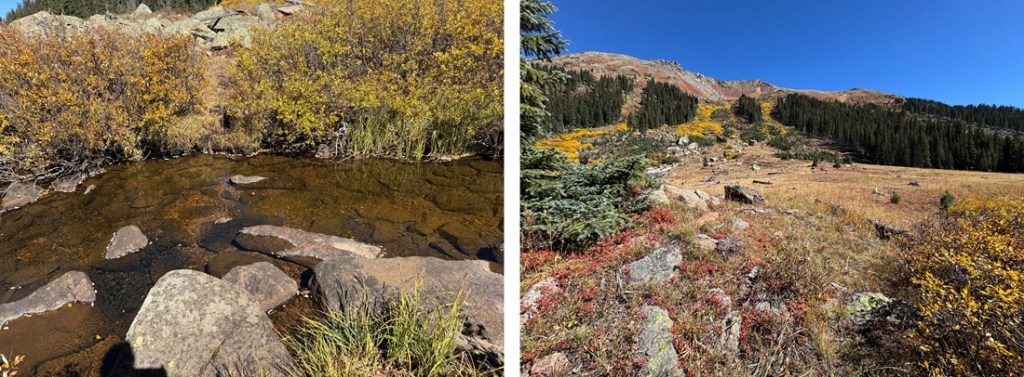
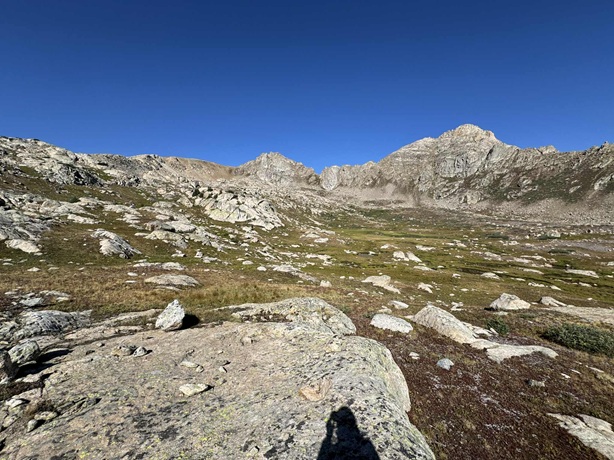
It took me 2 hours of hiking to get to this spot.  I set up camp and enjoyed the rest of my afternoon.  Surprisingly, the only wildlife I saw were camp robbers and raptors.  While there was evidence of elk, deer, moose, etc. I didn’t see any.  There were fish in the river however, and I spent some time watching them swim with the stream.  I also enjoyed my views of the Williams group I’d summited earlier this summer.  It’s cool seeing mountains from different angles. I went to bed early expecting a cold night.  Pro tip: when the temperature is expected to be below 30 degrees I usually double up my sleeping gear.  I set up my bivy inside of my tent to stay extra warm.  My bivy is very light and small so it doesn’t take up too much space in my pack.  It’s worth it for the extra warmth. 

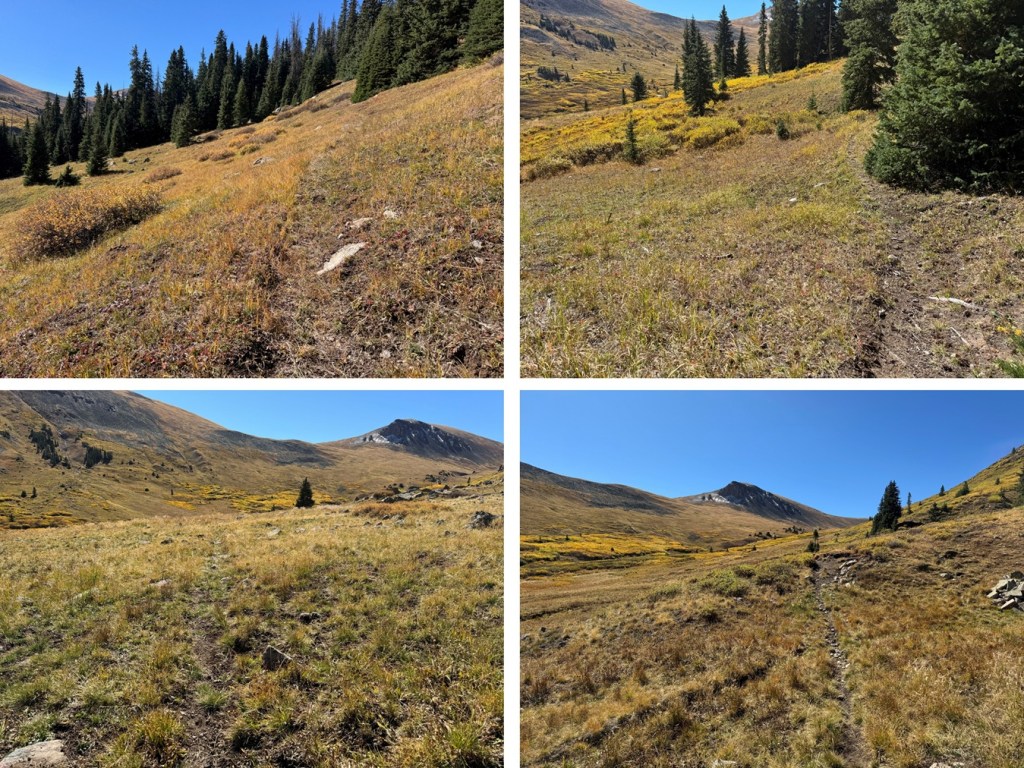
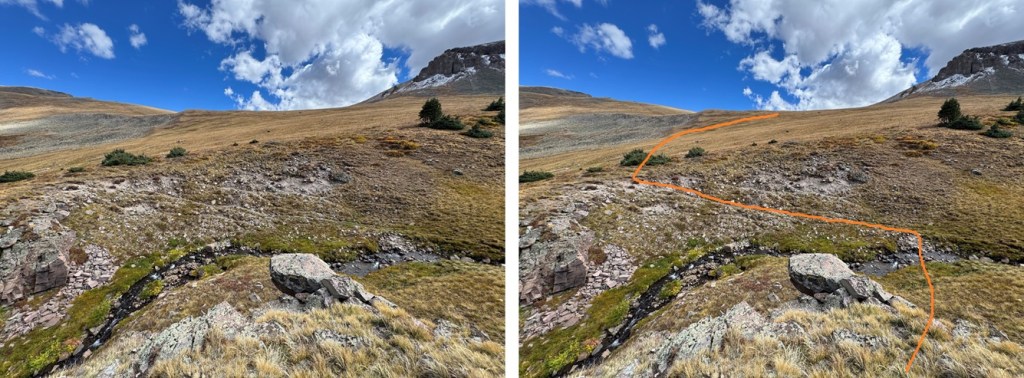
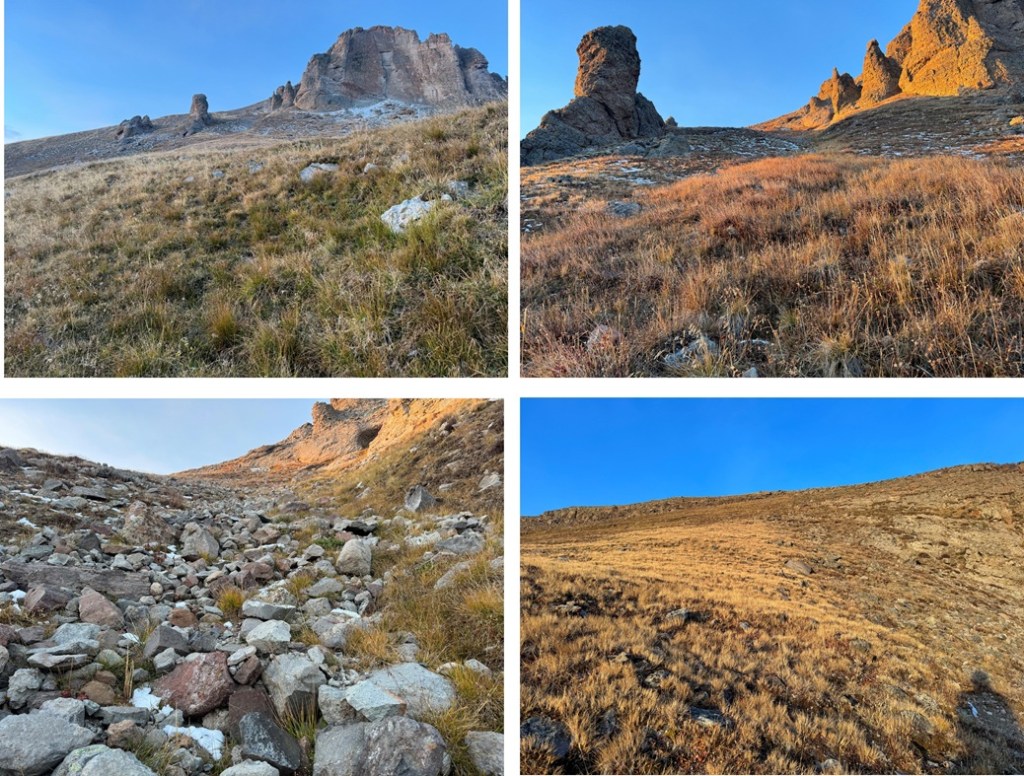
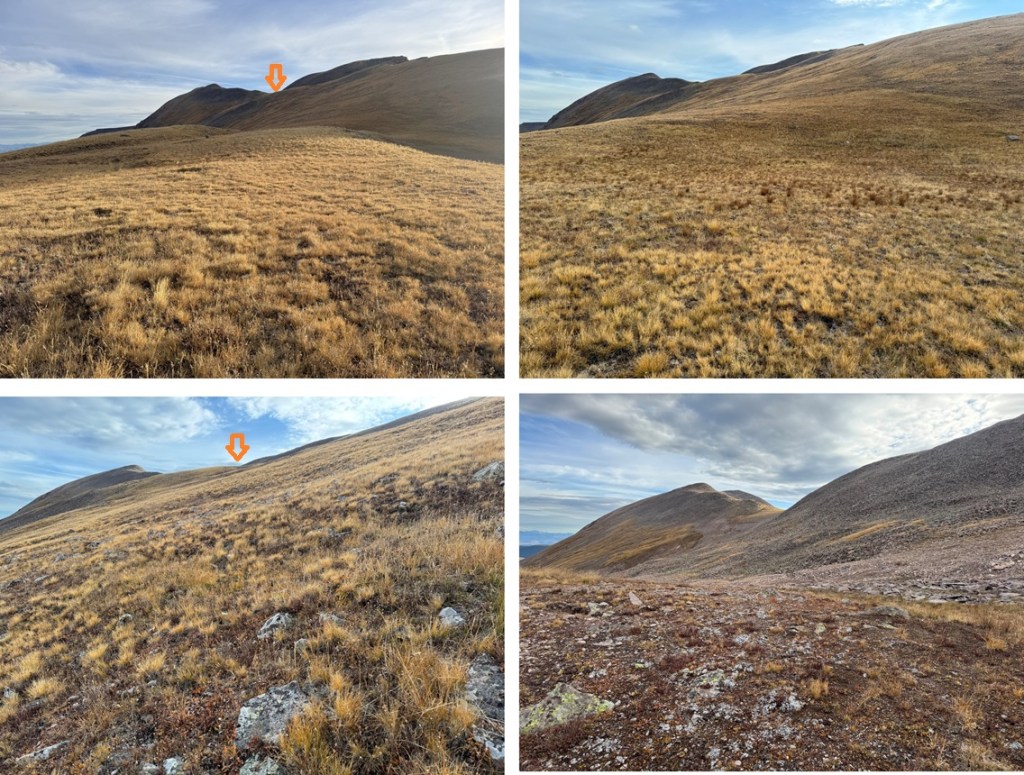
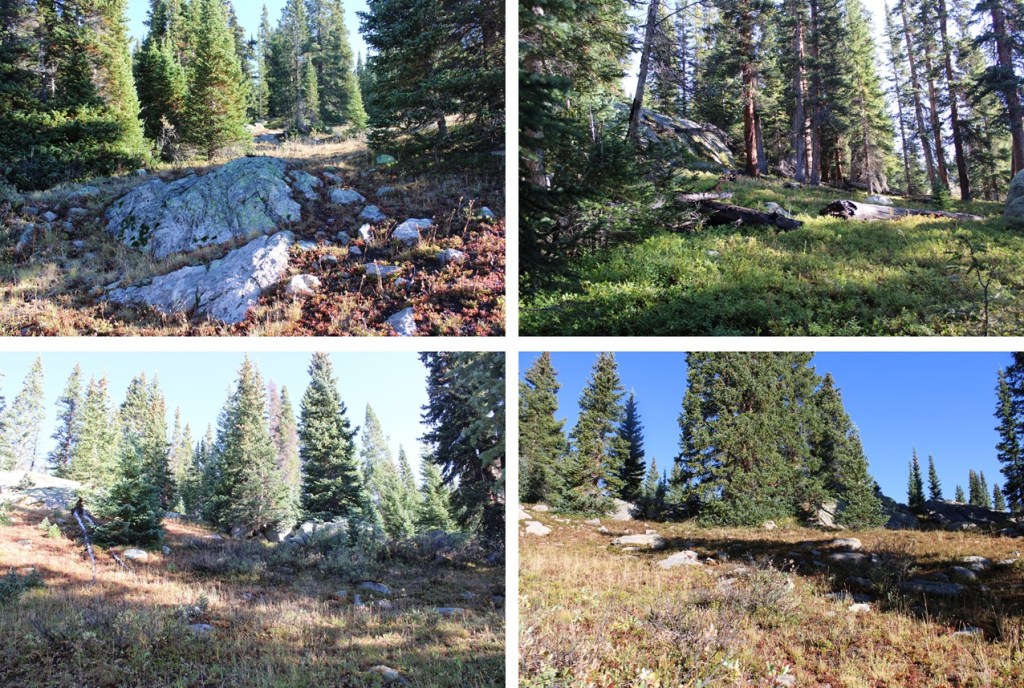
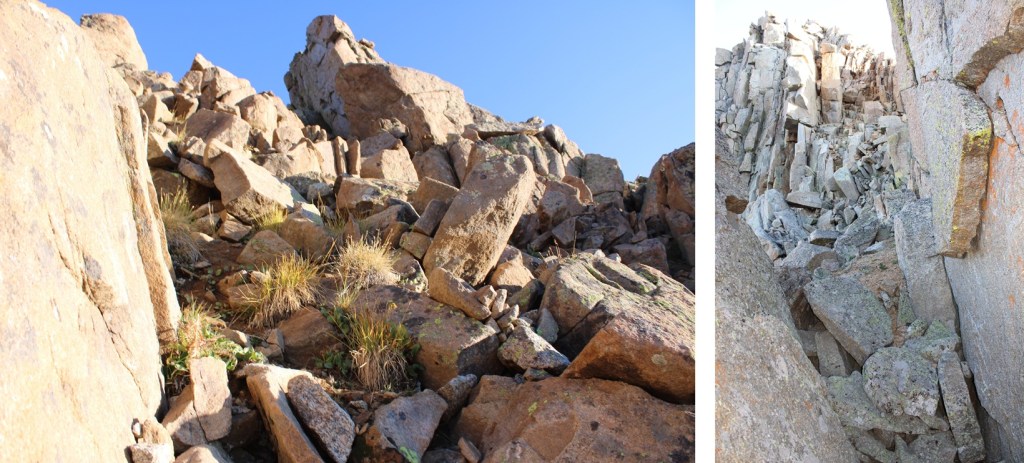
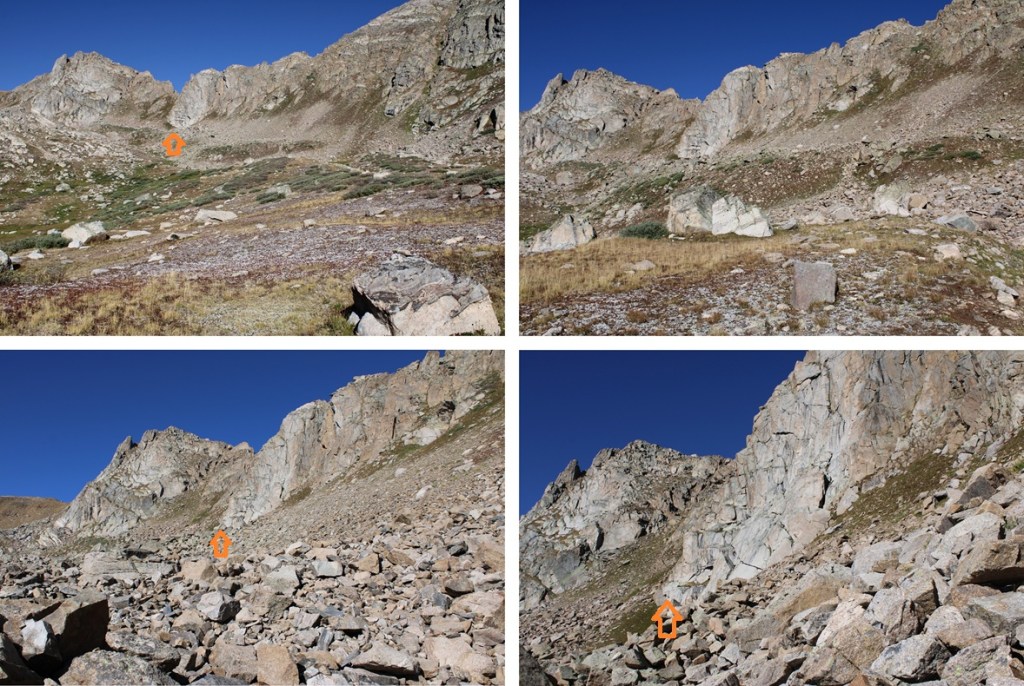
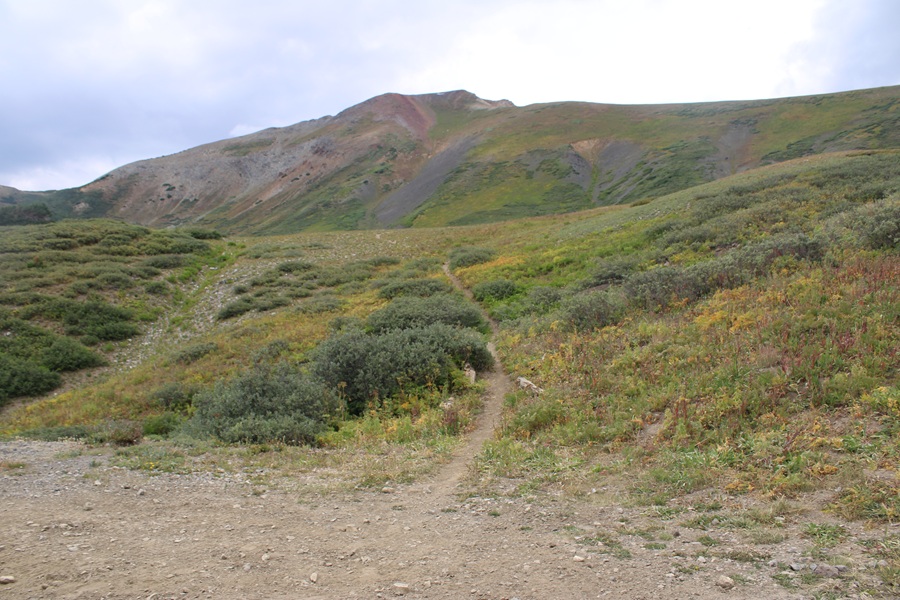
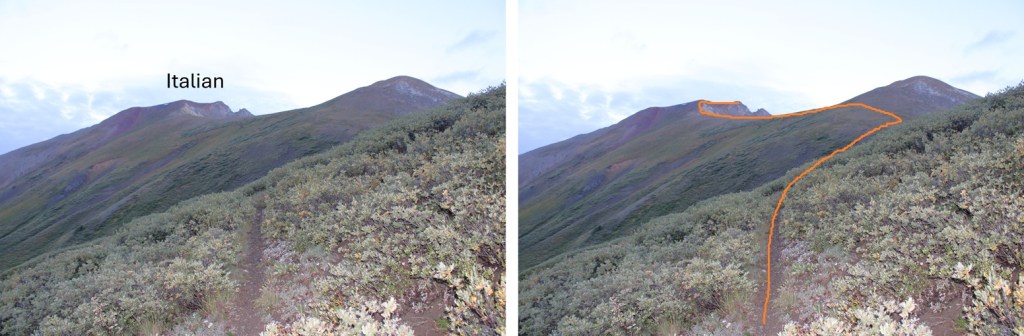
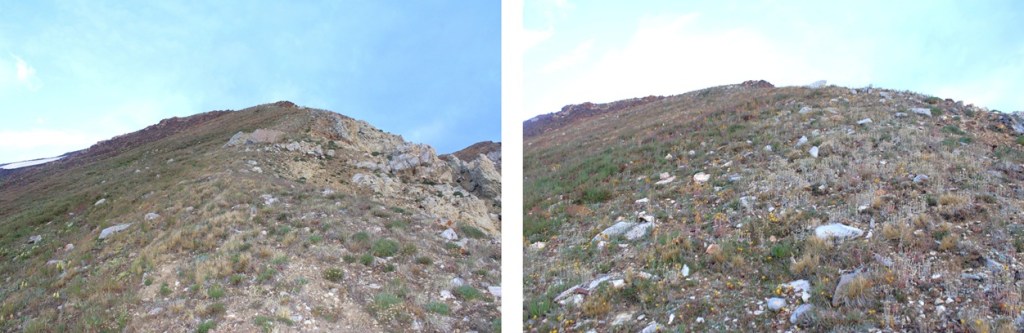
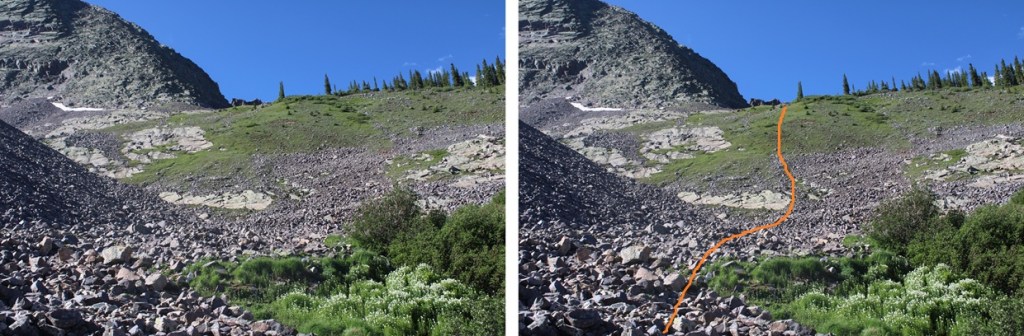
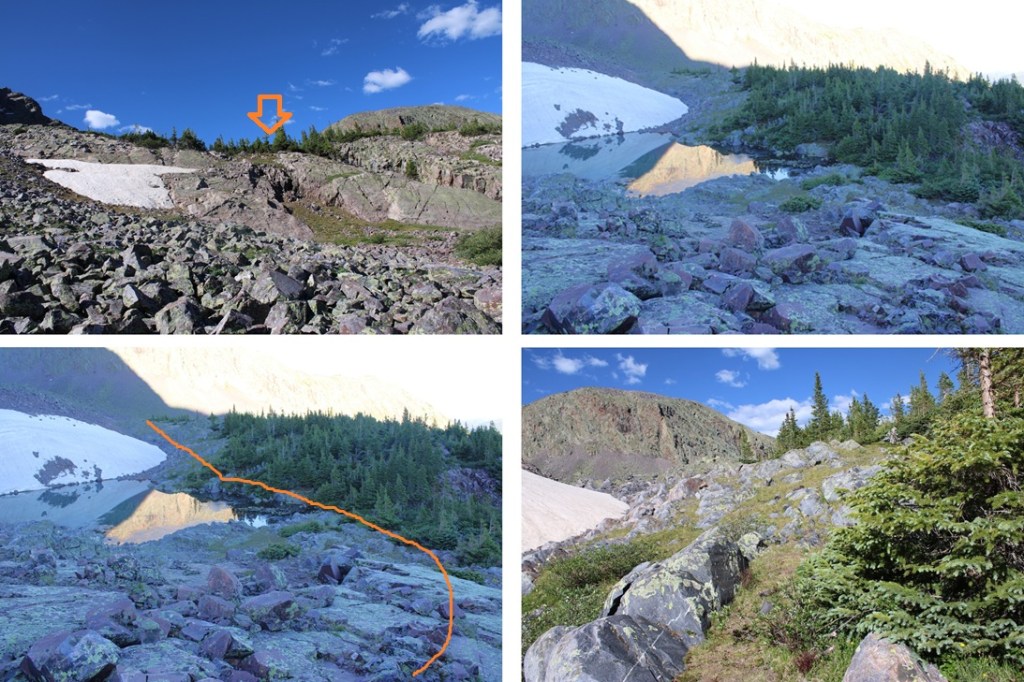
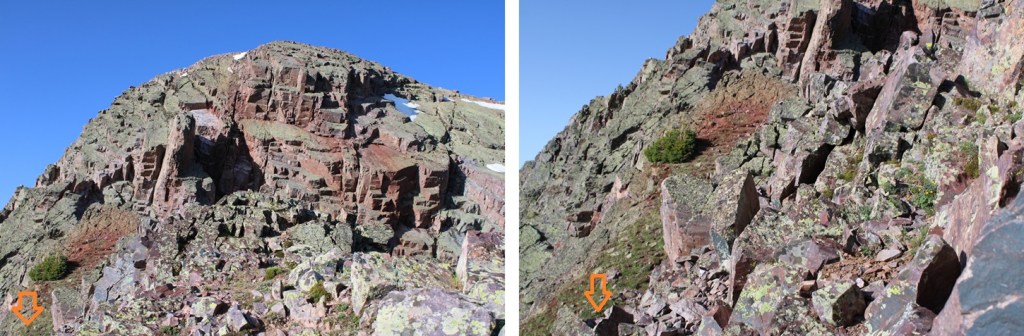
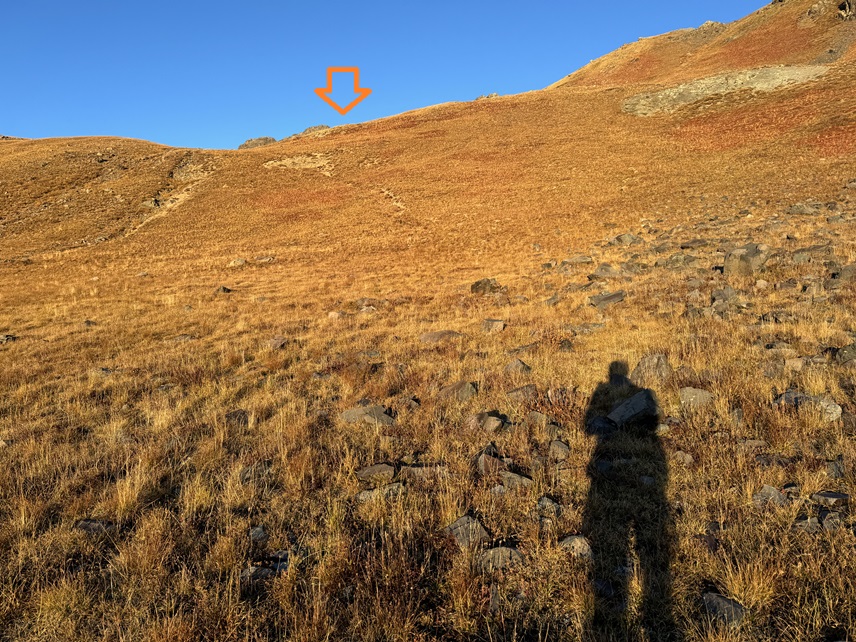
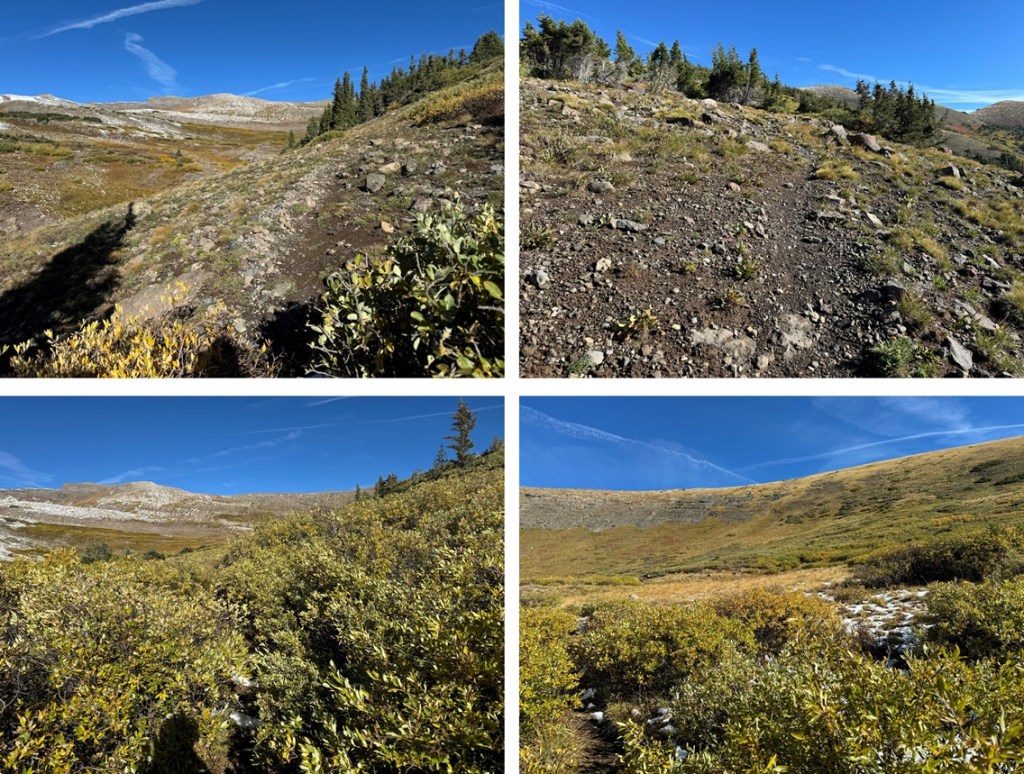
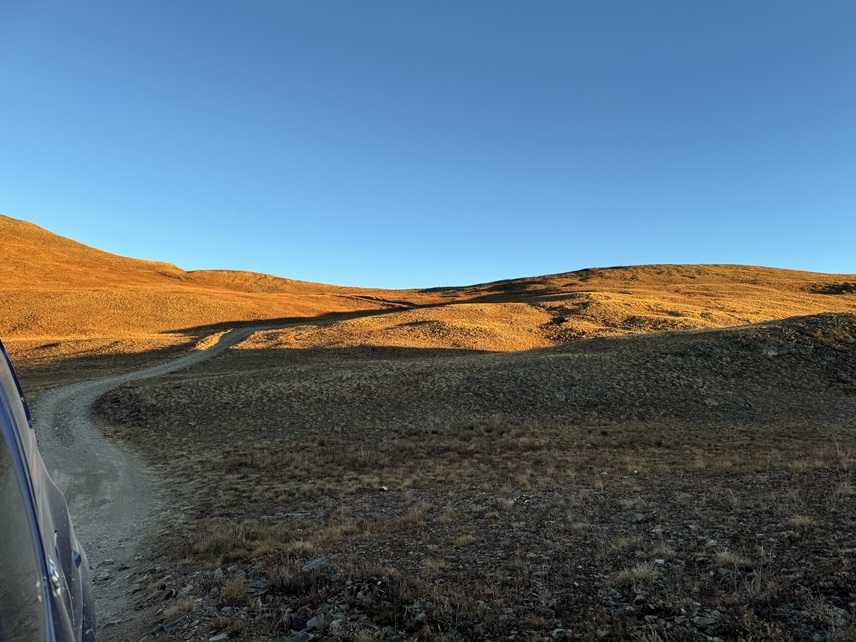
The next morning I was up and on the trail at 7:15am.  I found the best way to avoid the willows in the slide area was to stick close to the trees.  At the top of the trees I veered right on a game trail and took a tundra grassy hike to the ridge.

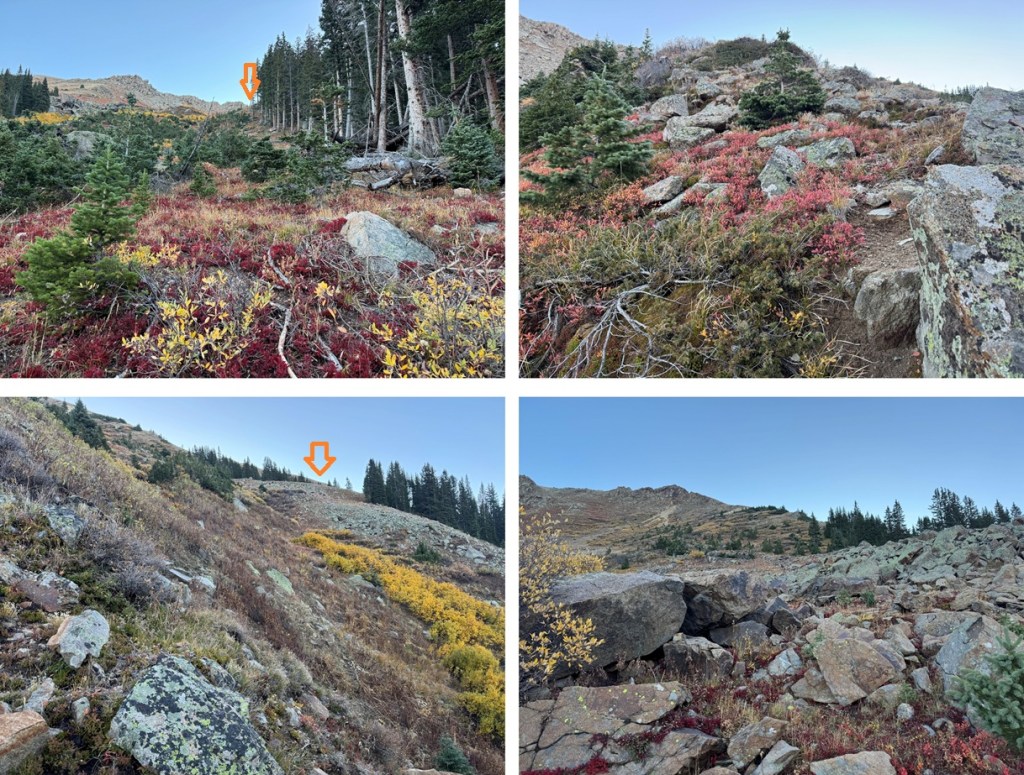
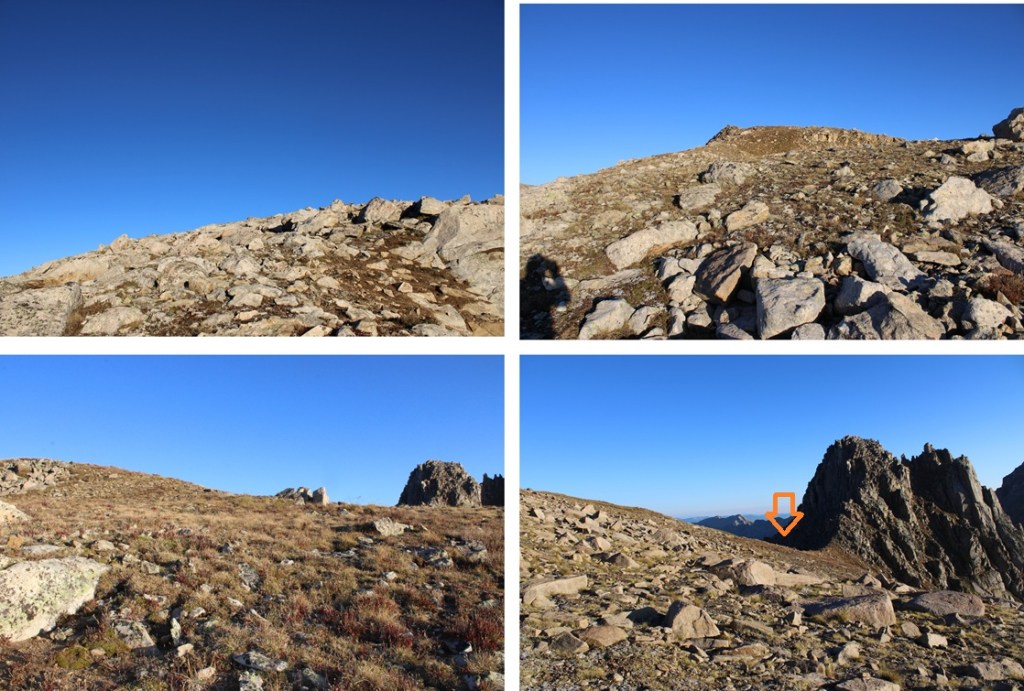
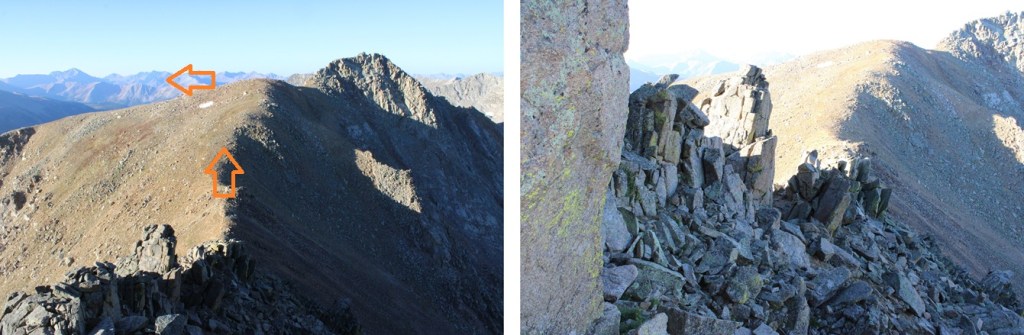
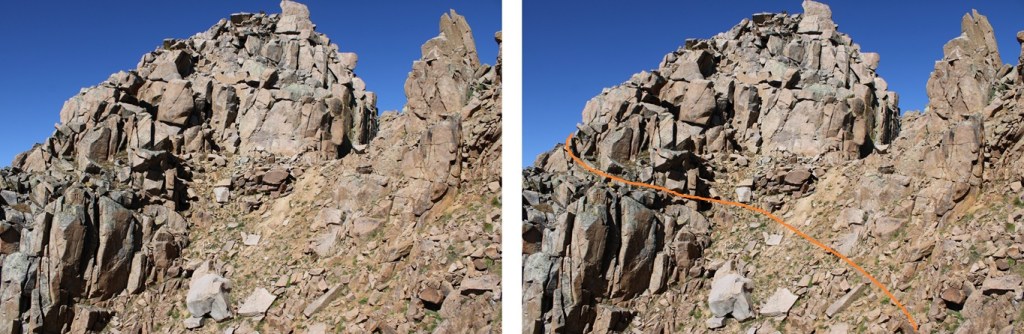
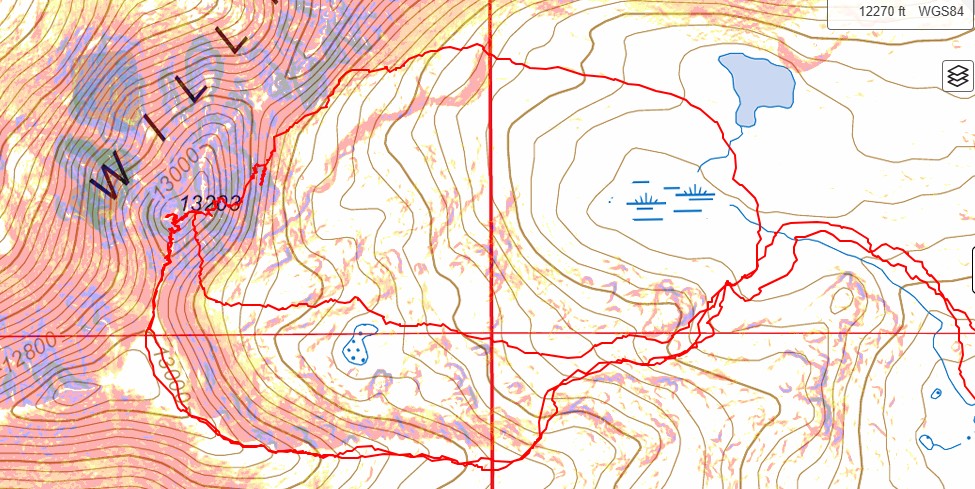
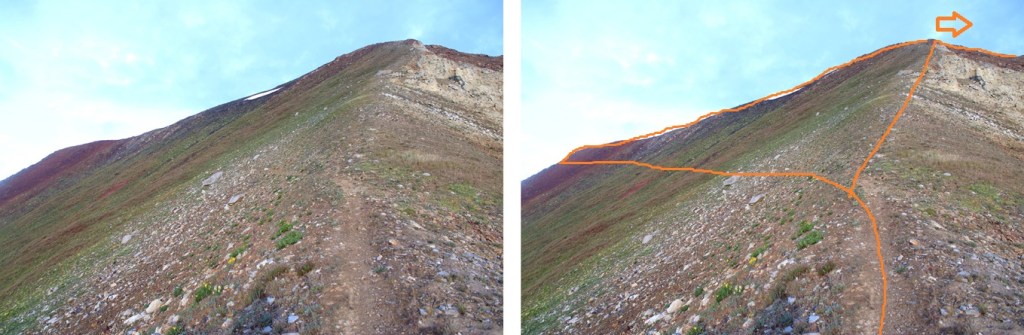
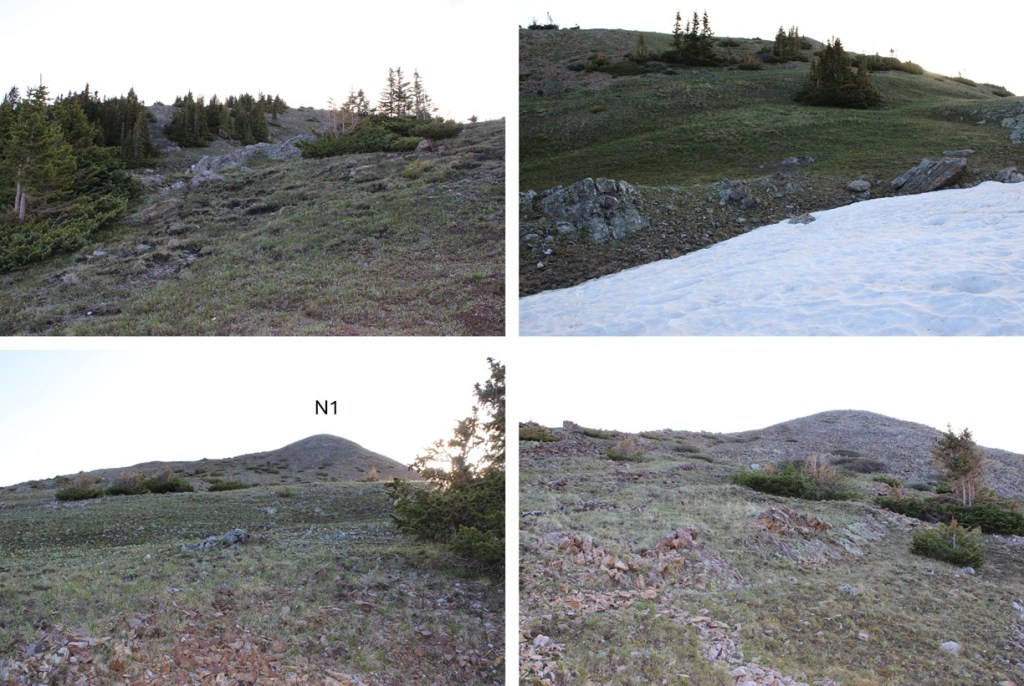
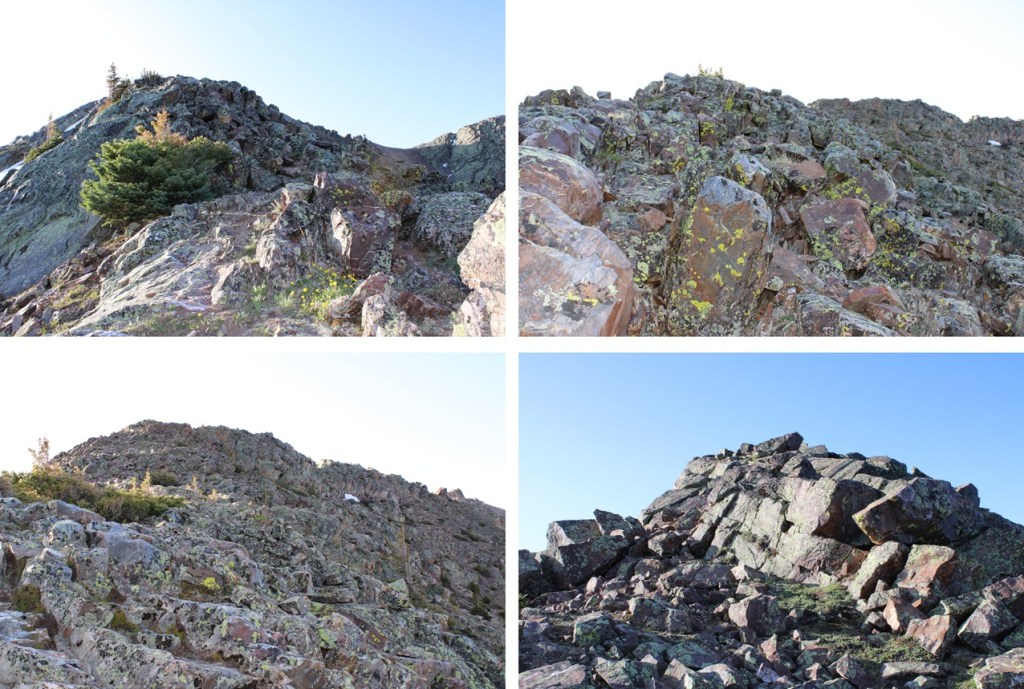
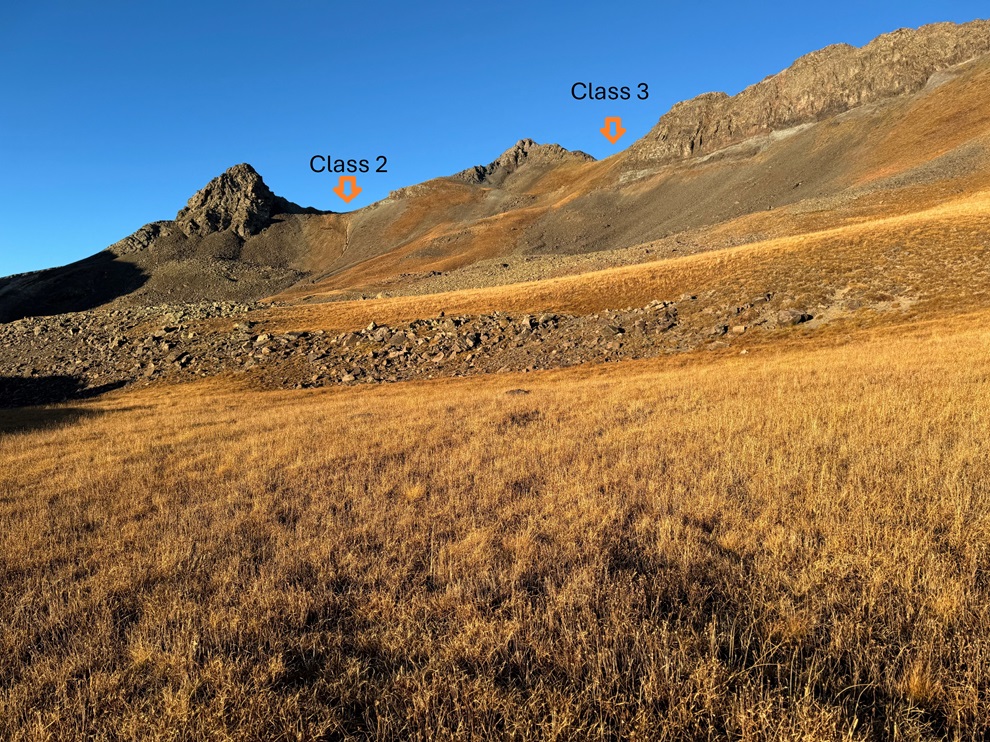
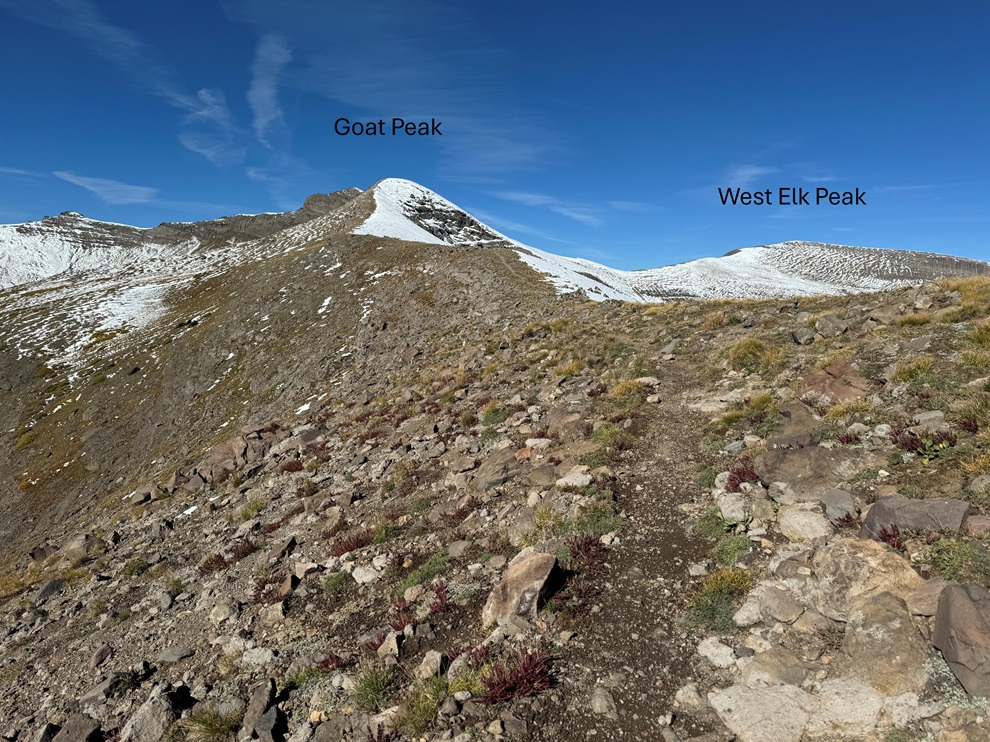
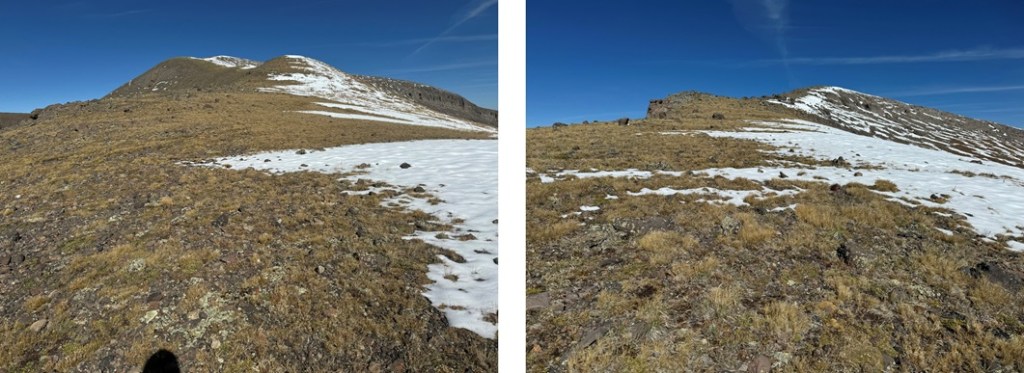
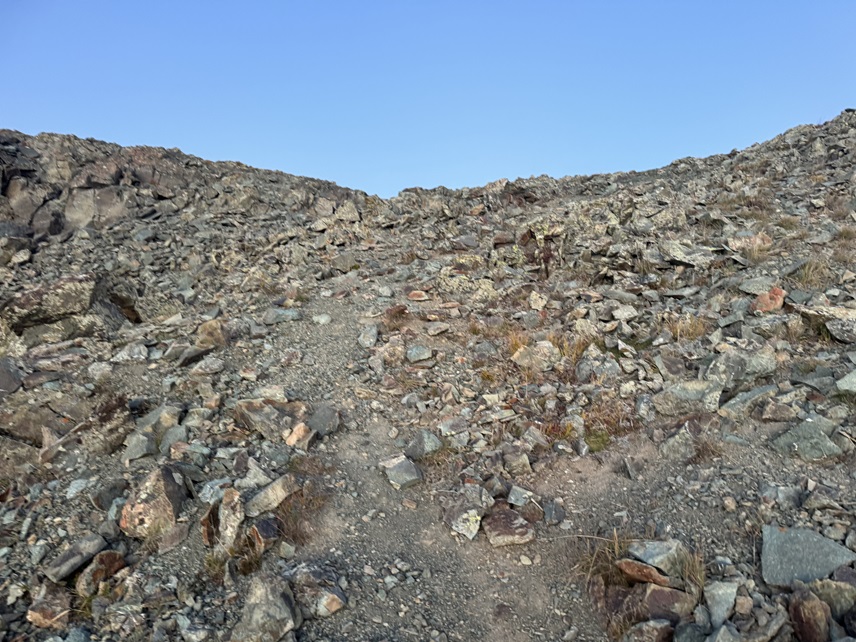
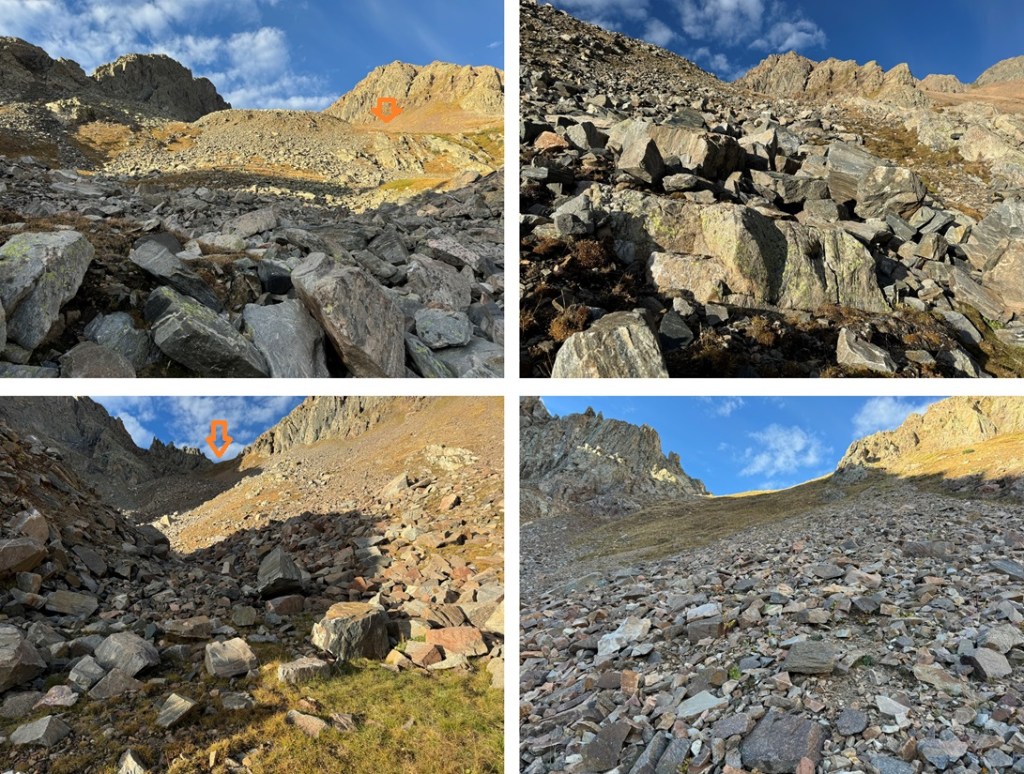
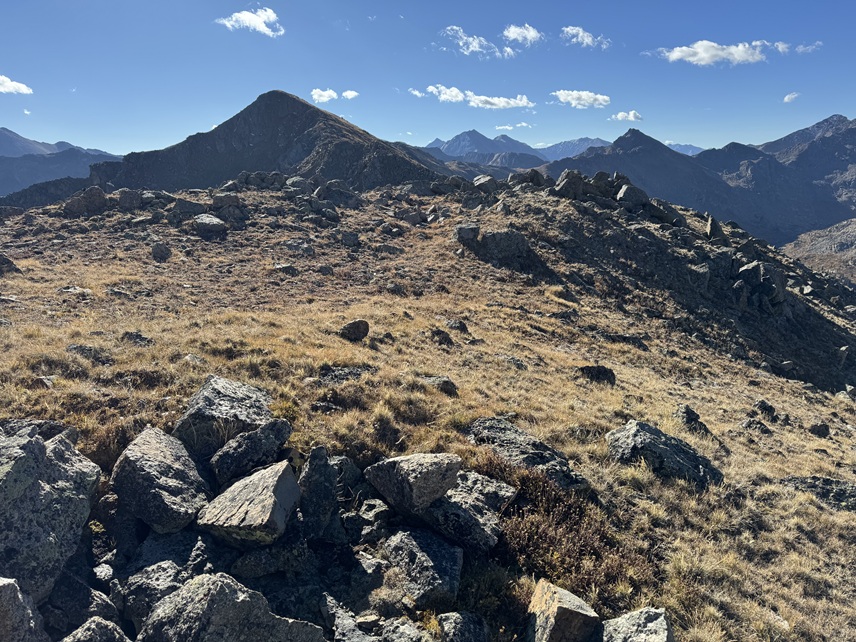
At the top of the ridge I turned right and started following the ridge southeast, still on tundra.  This can all be kept class 2, but there is a false summit.  I followed the ridge to the false summit and saw a pair of mountain goats.

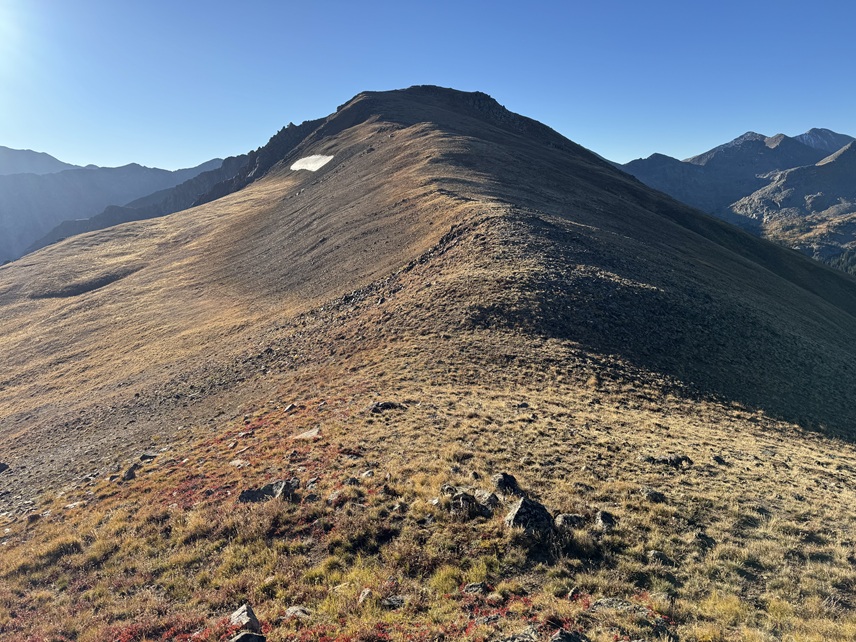
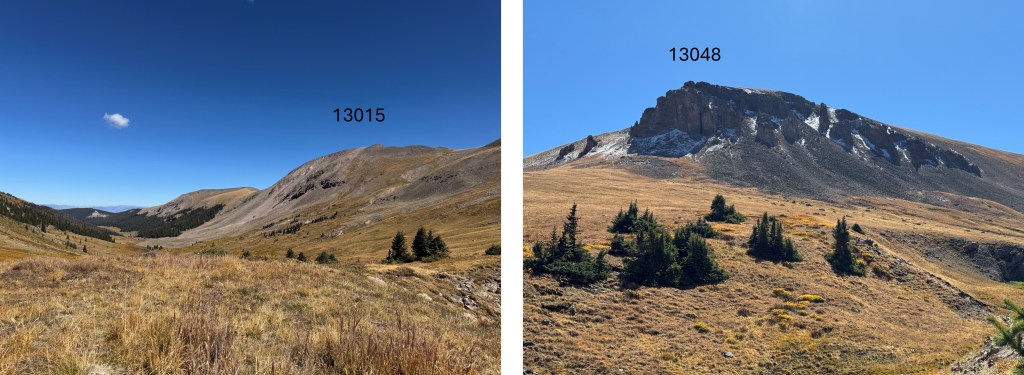
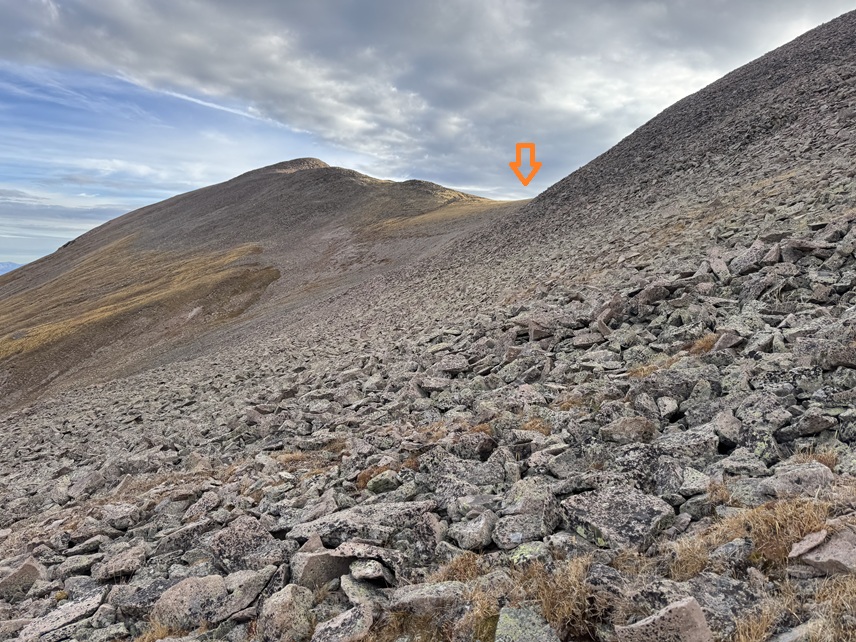
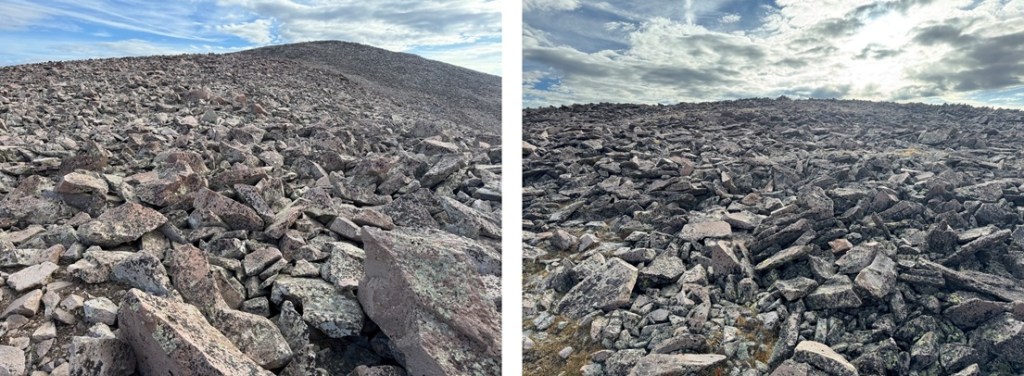
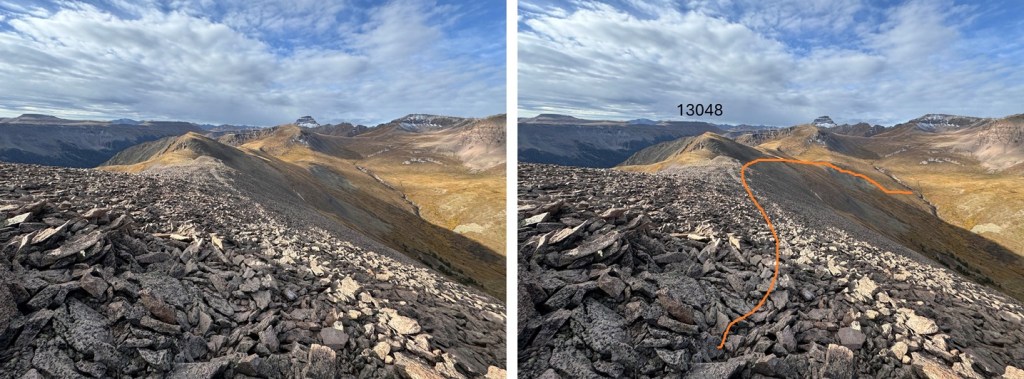
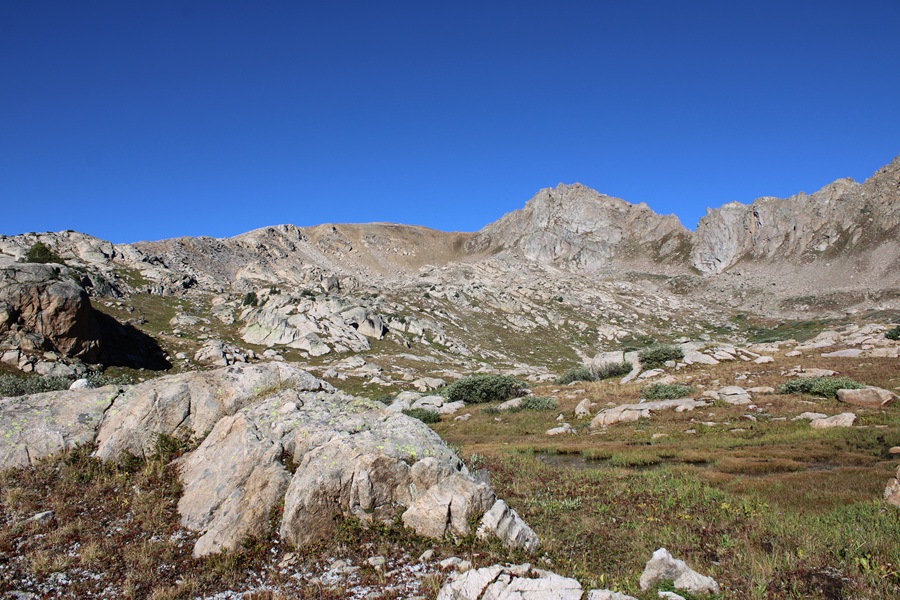
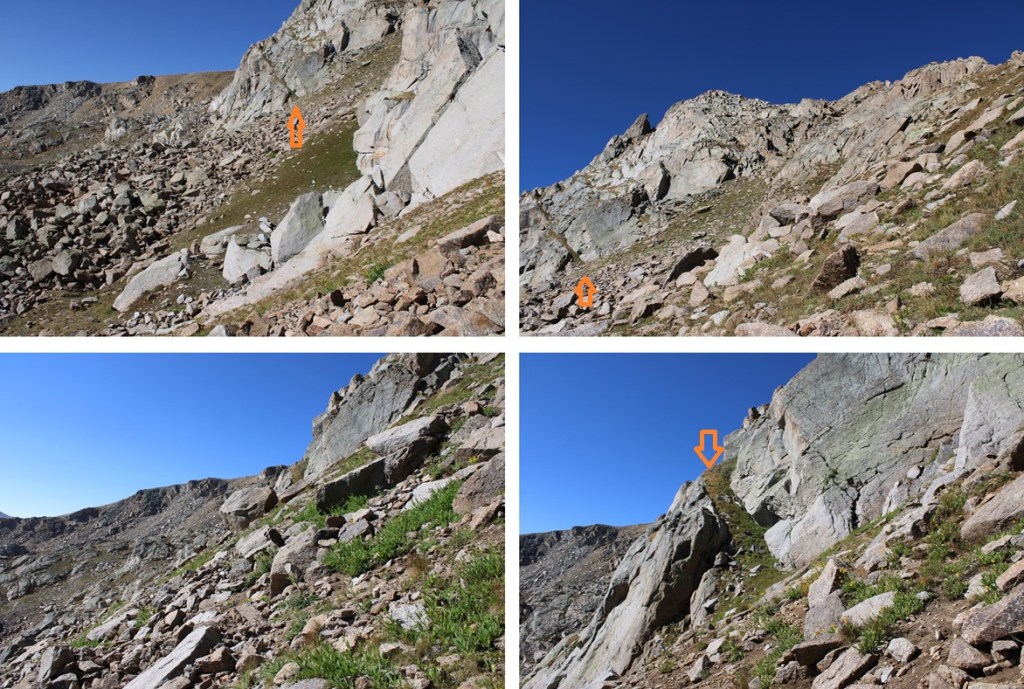
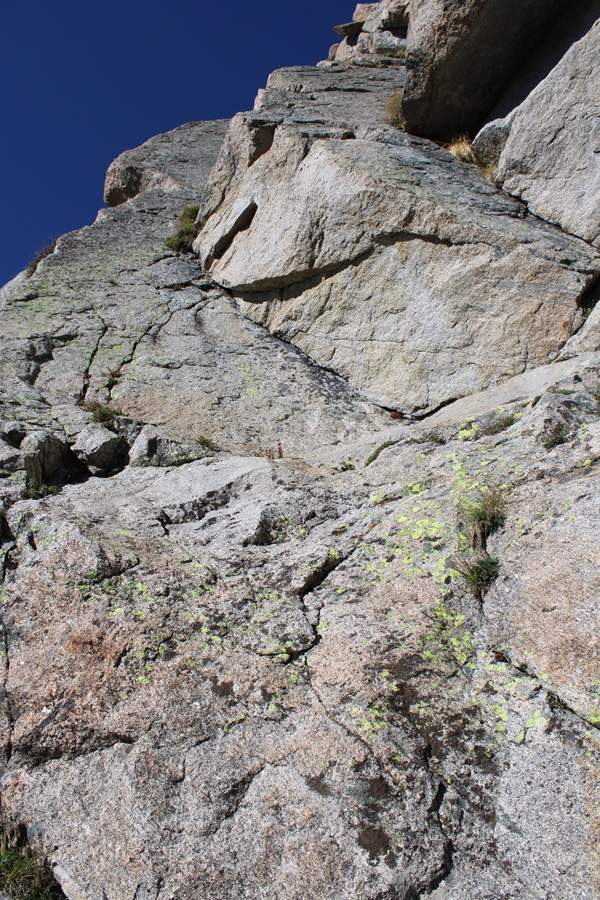
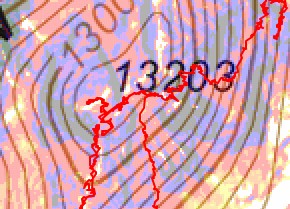
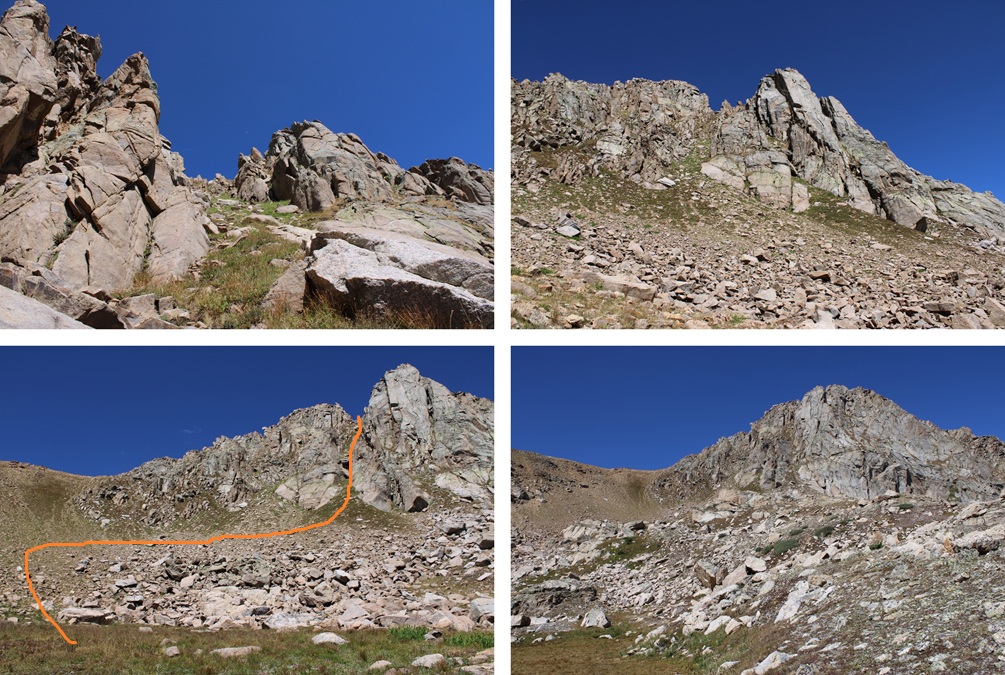
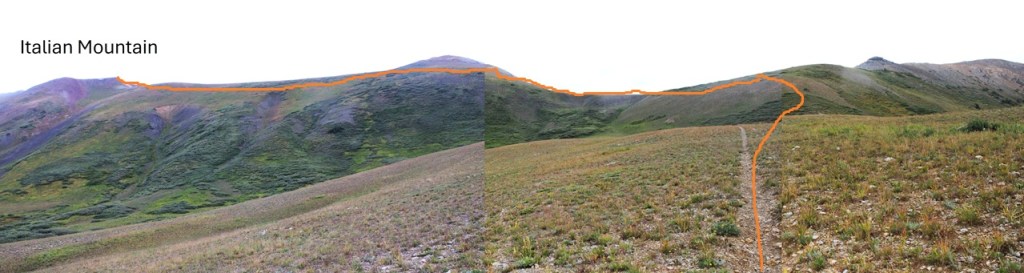
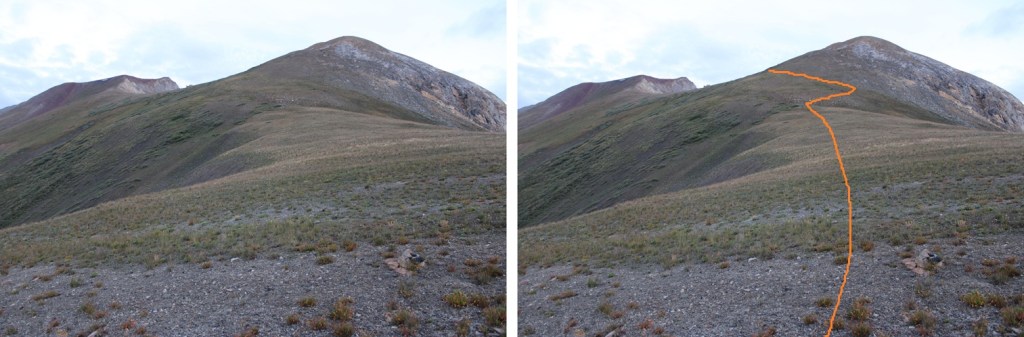
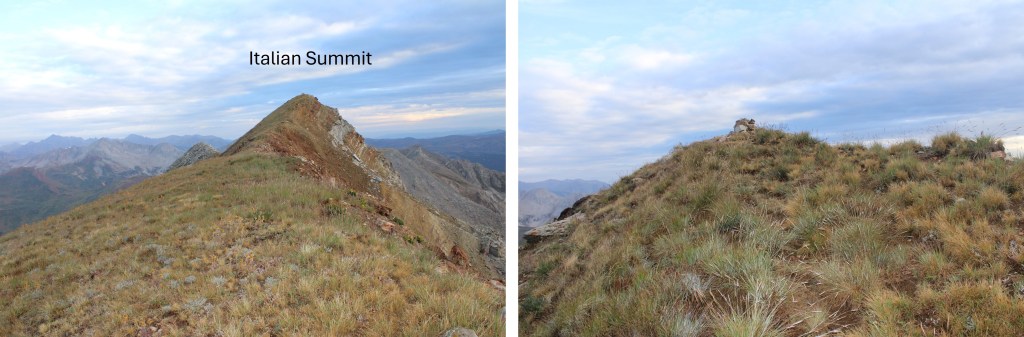
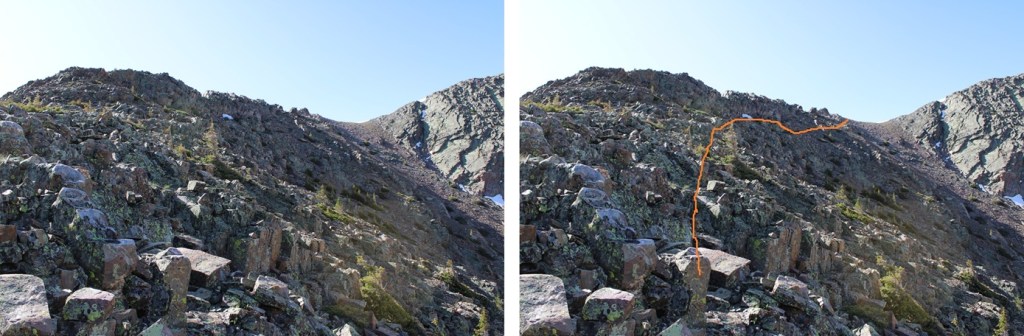
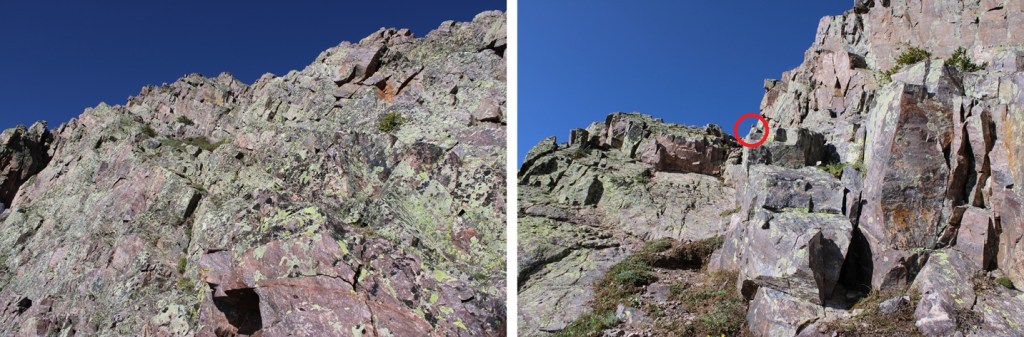
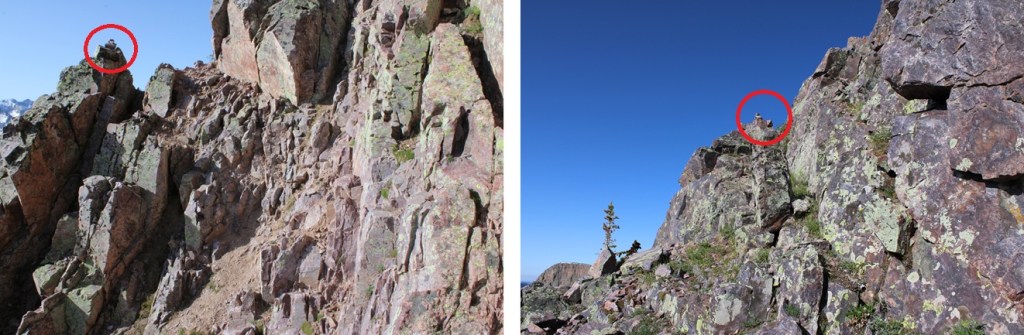
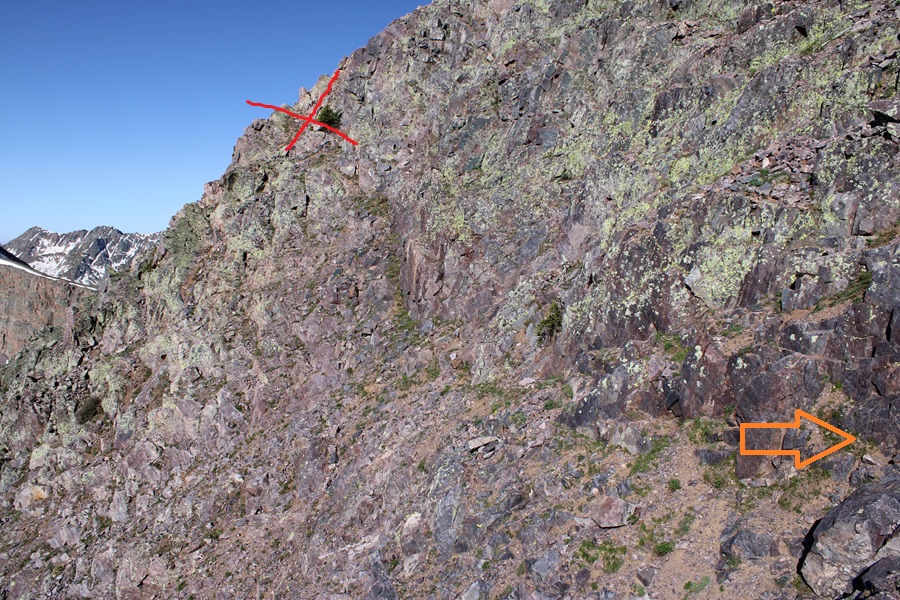
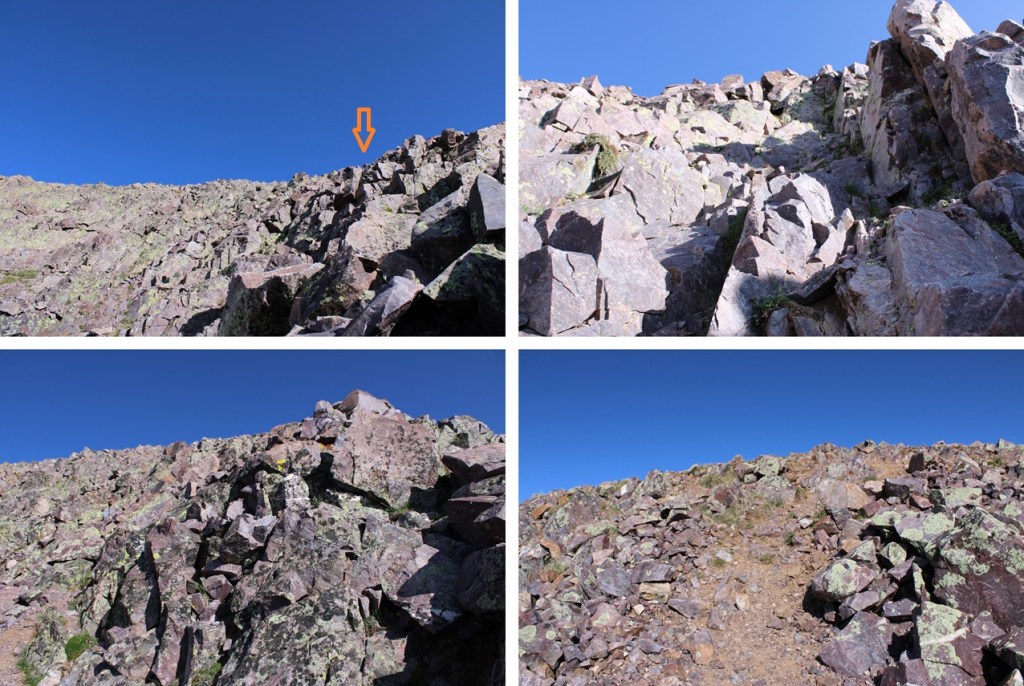
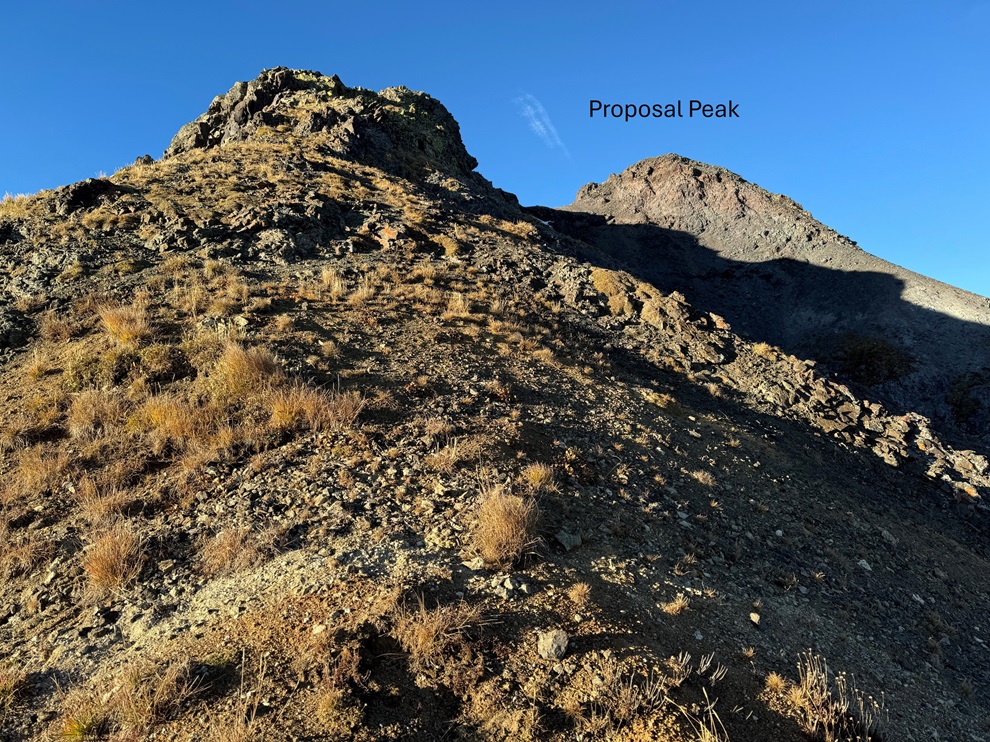
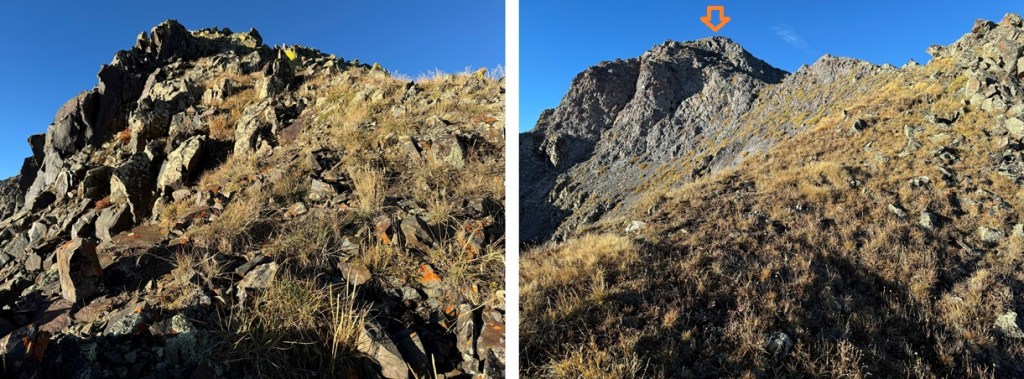
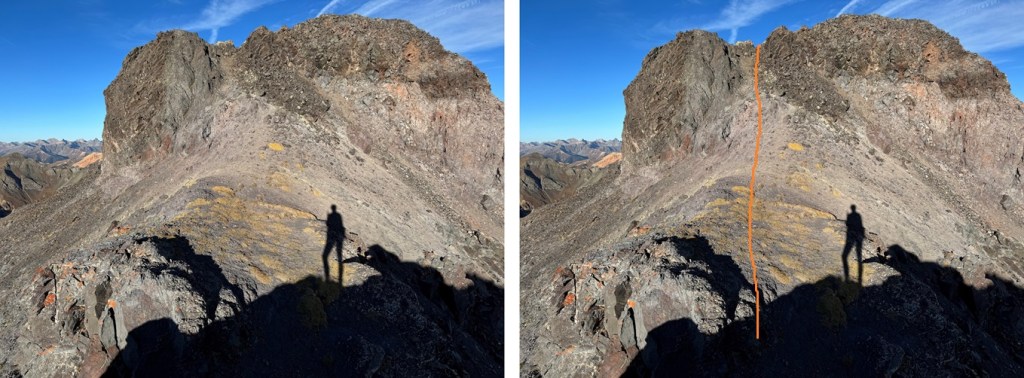
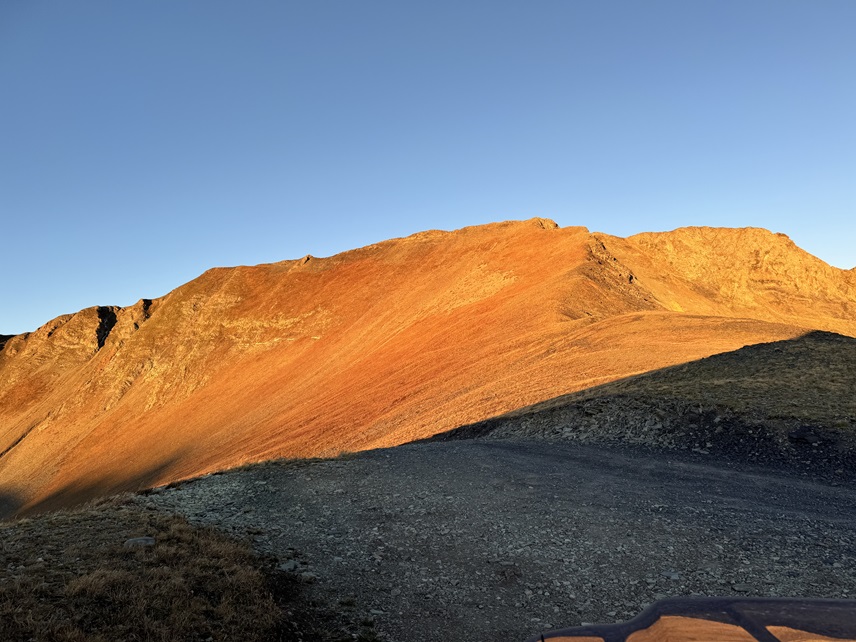
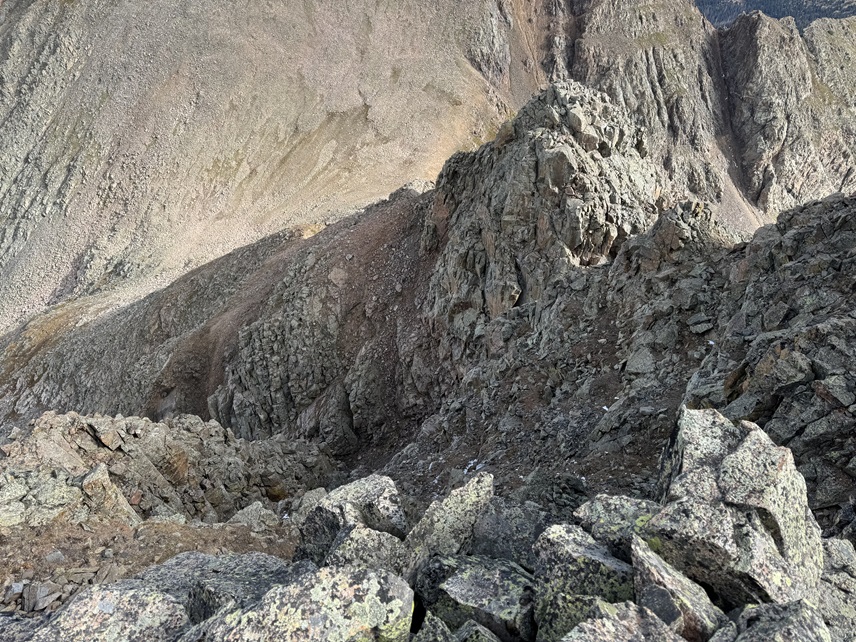
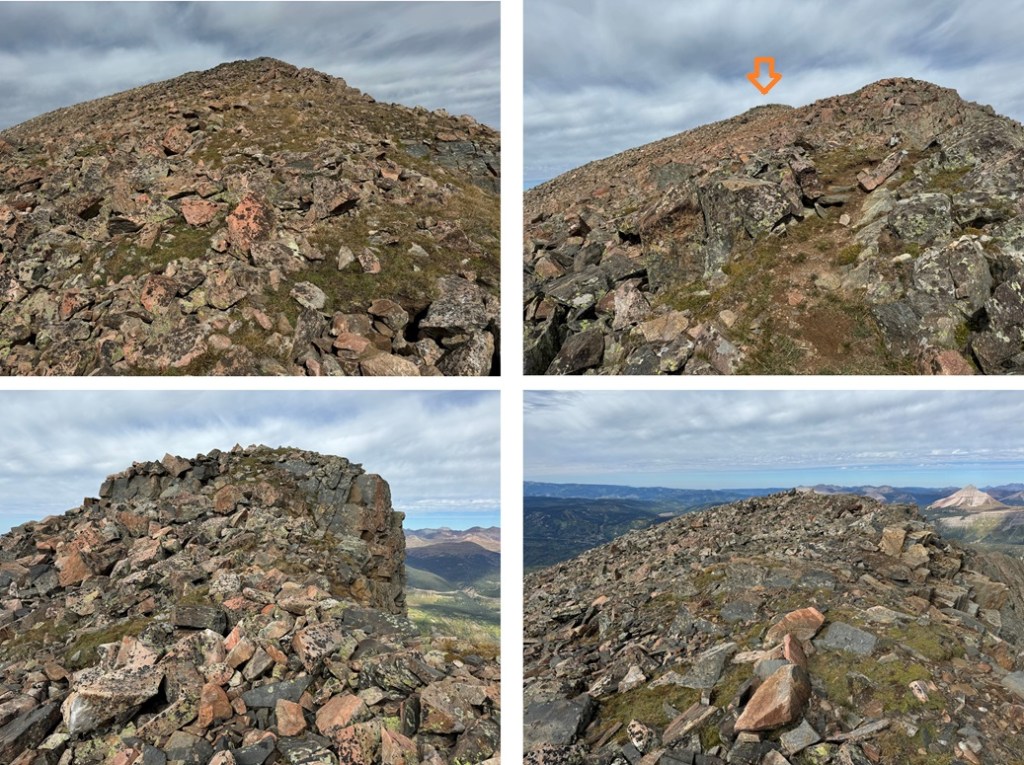
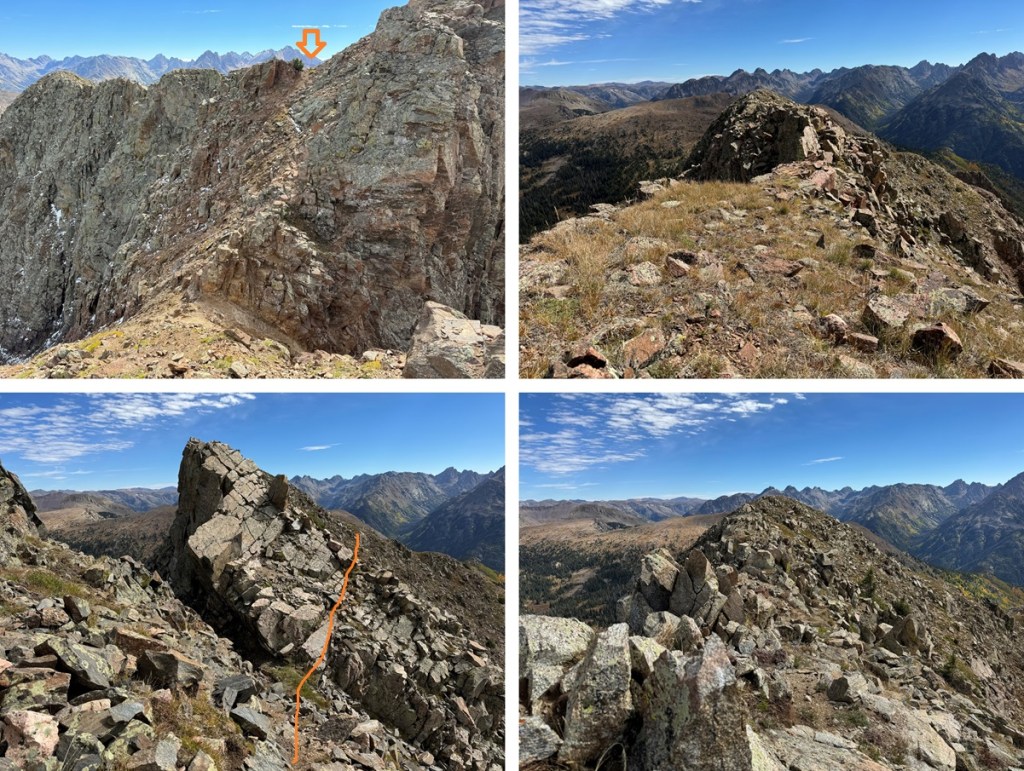
From the false summit I could see the true summit of 13033.  The terrain becomes a little rockier, but it can still be kept class 2 by sticking to the ridge or dipping down a couple of feet to the right to stay on the tundra.  The route is obvious.  Even rock-hopping along the ridge this can be kept class 2.

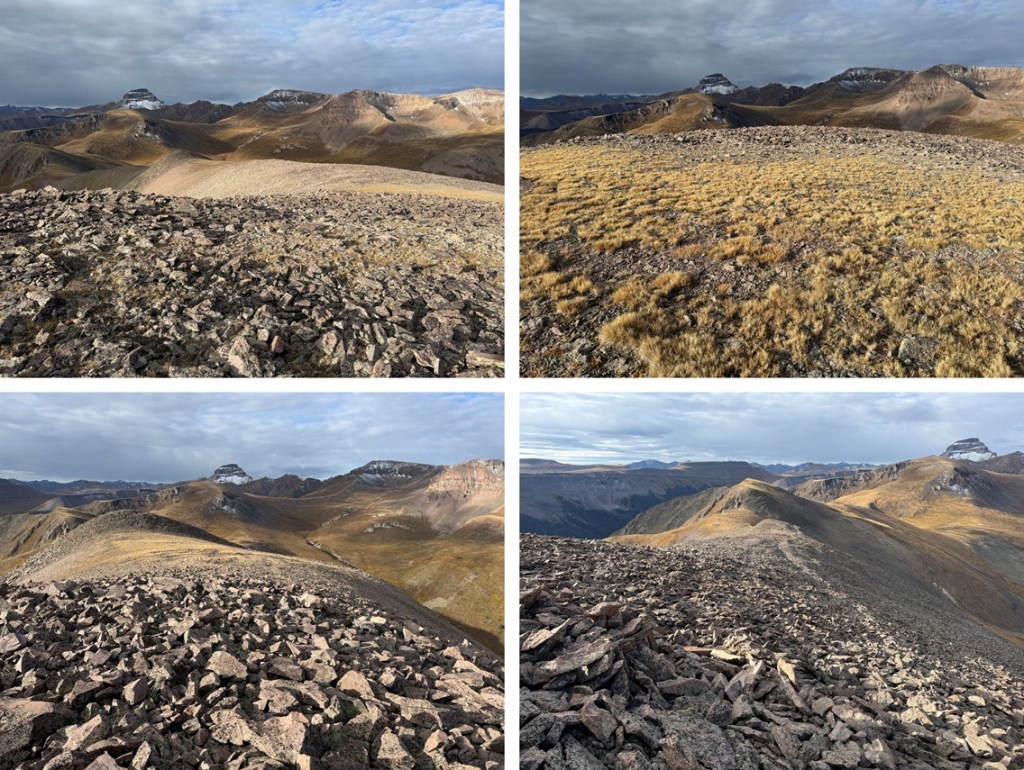
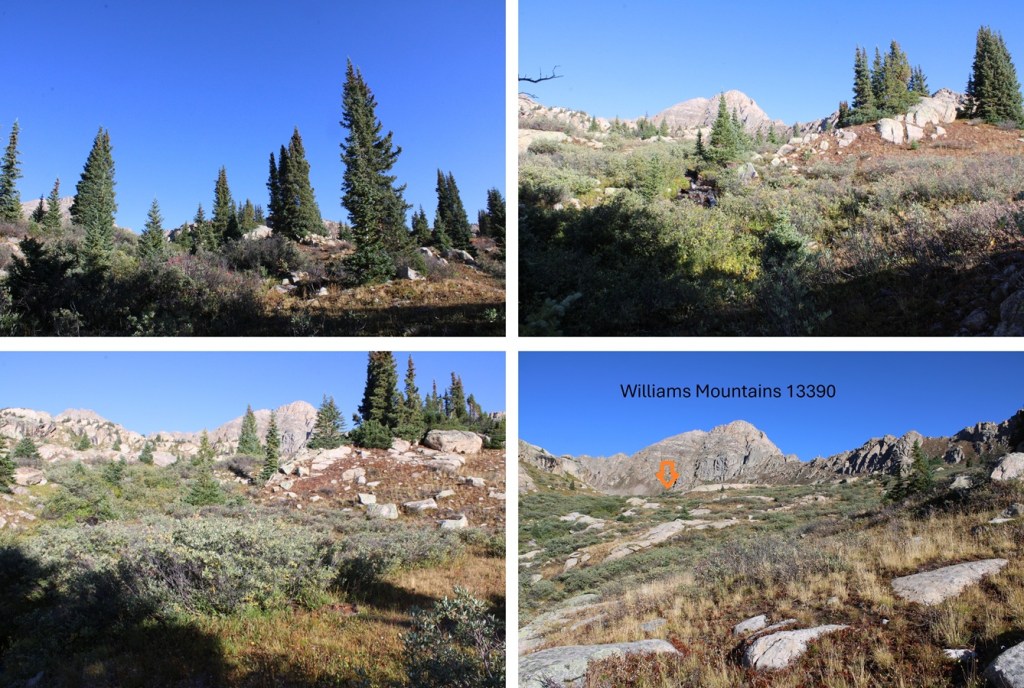
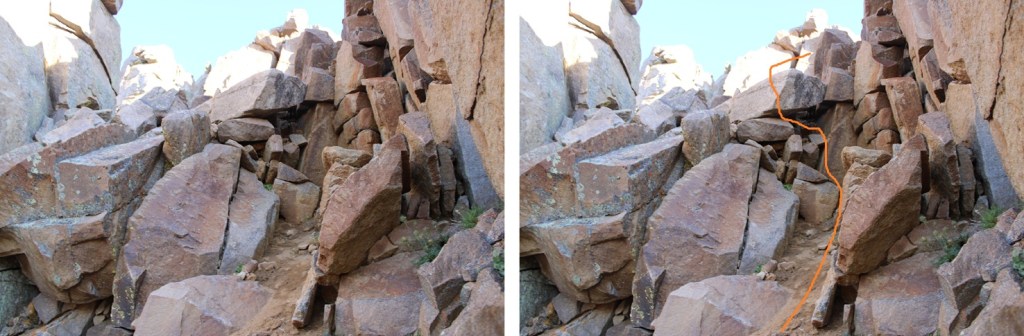
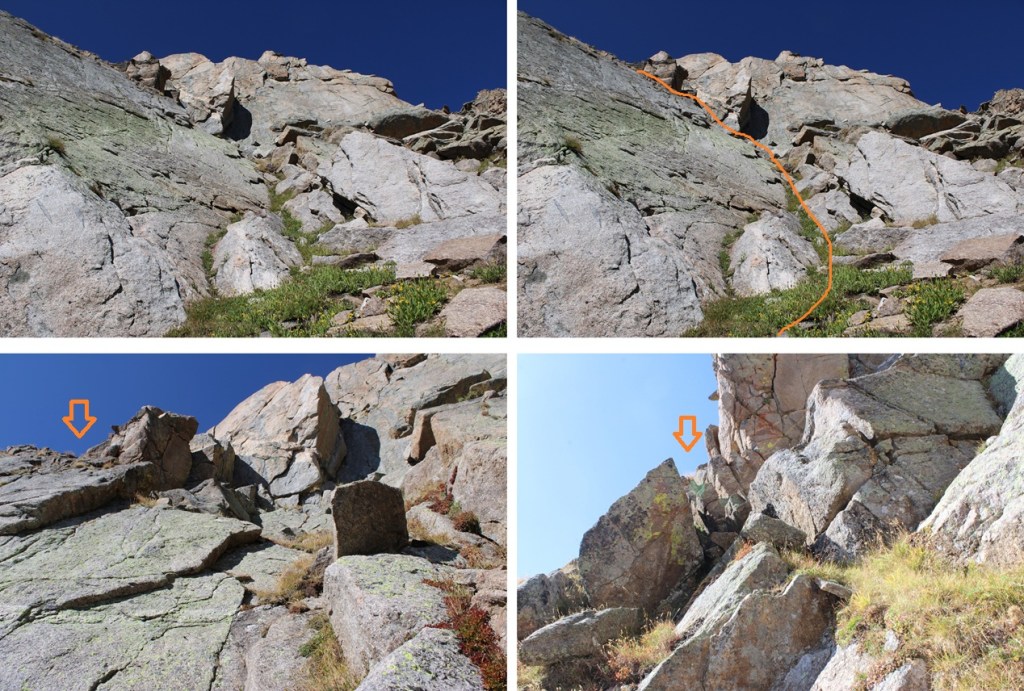
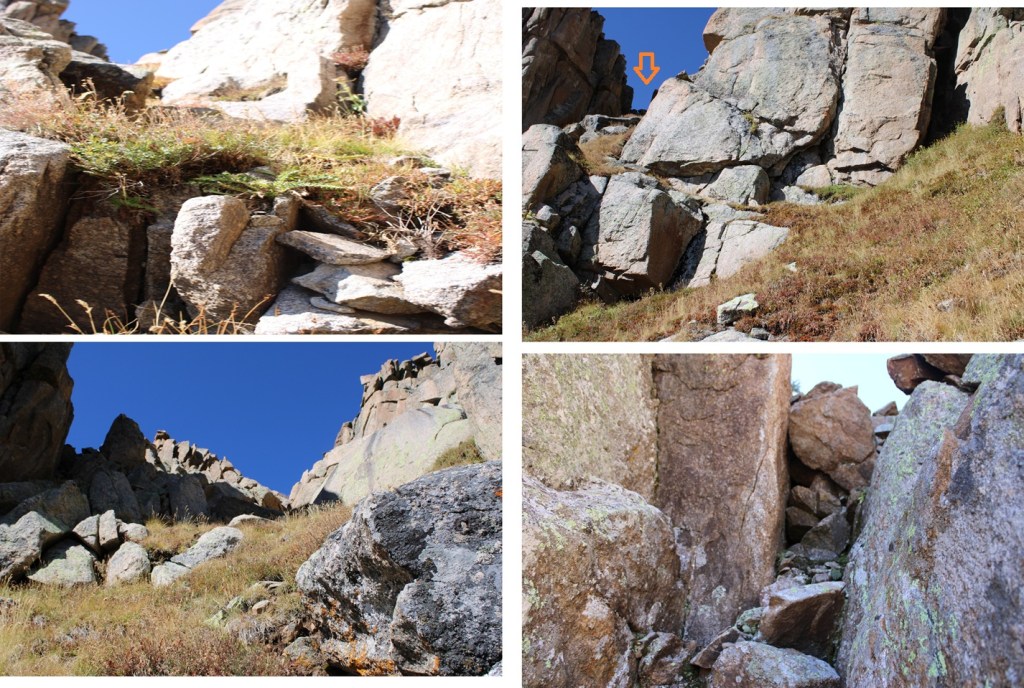
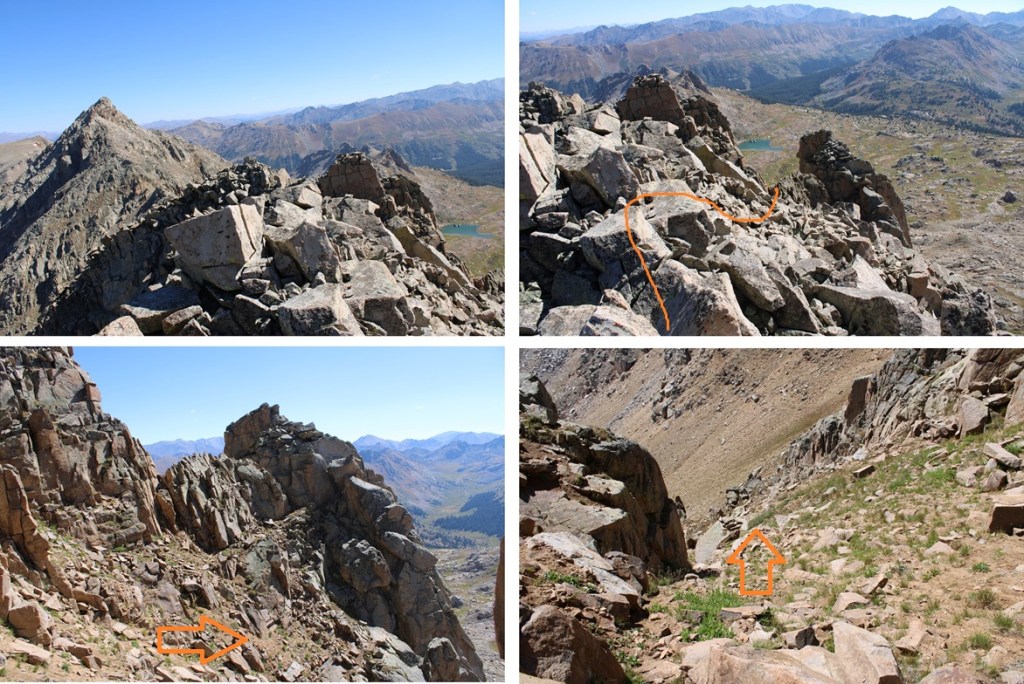
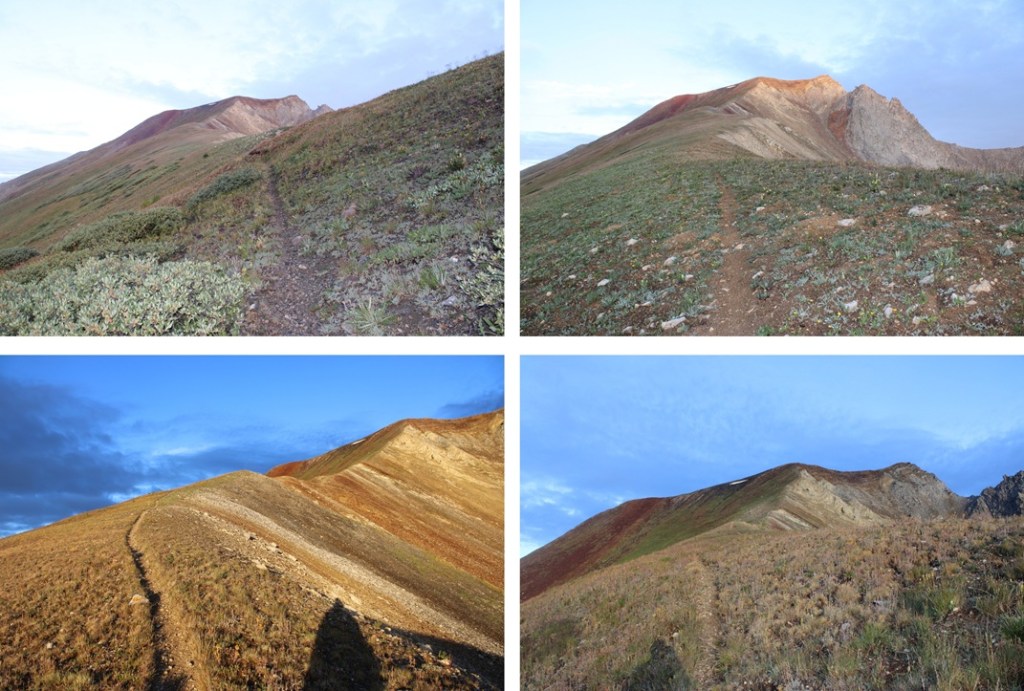
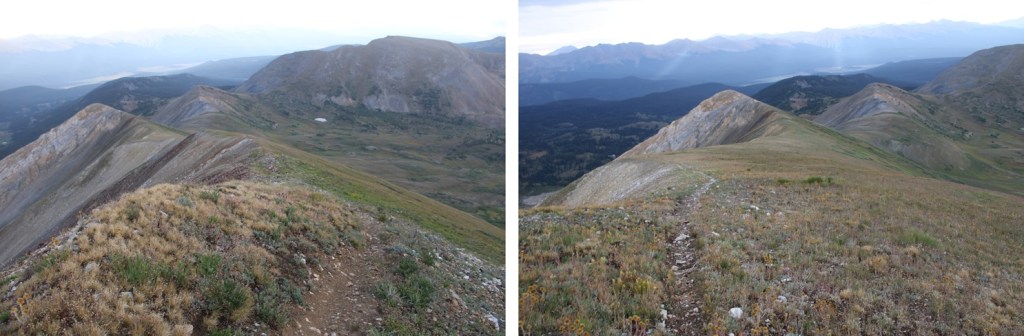
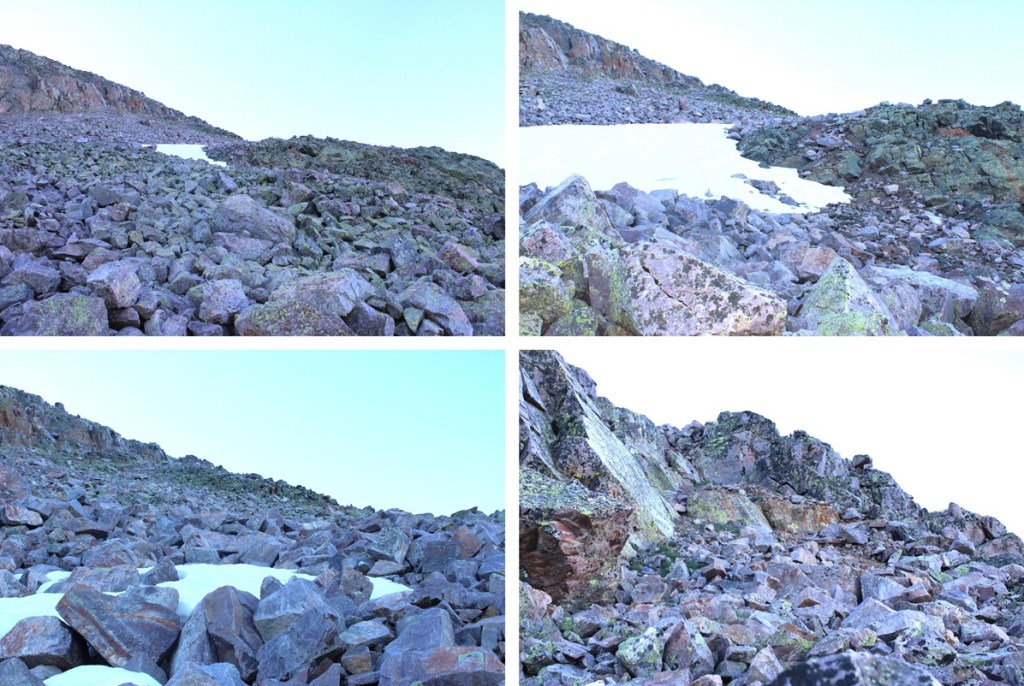
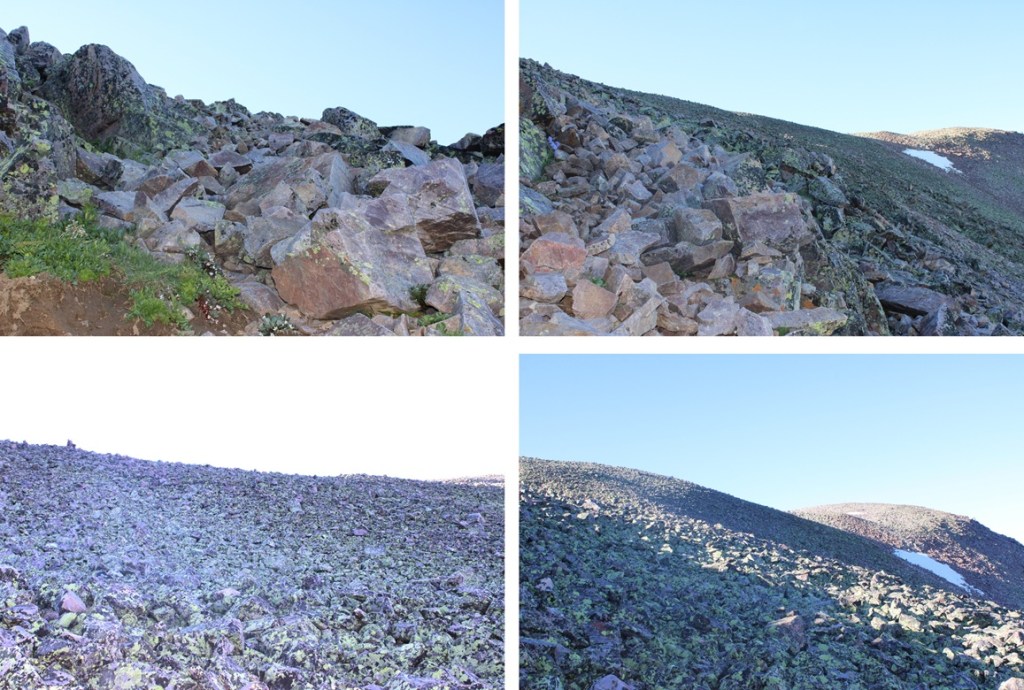
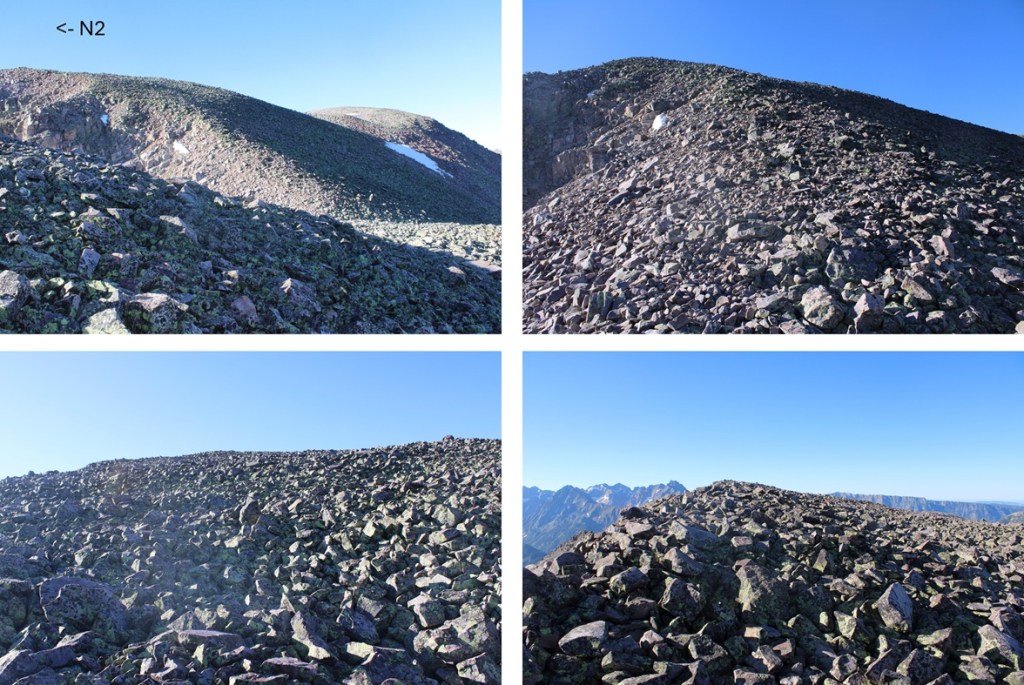
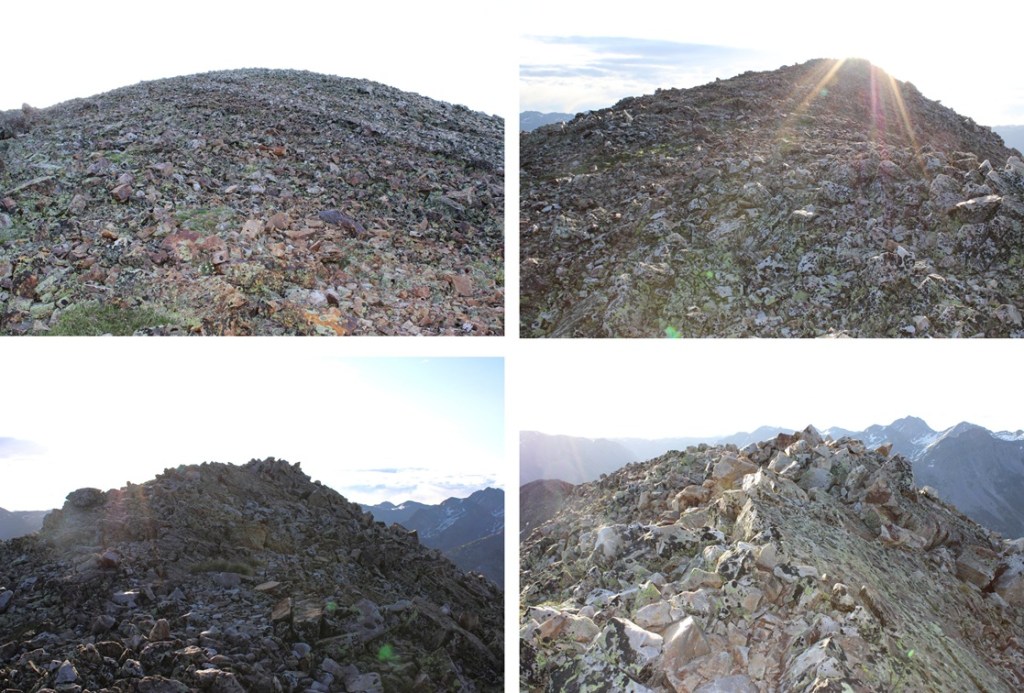
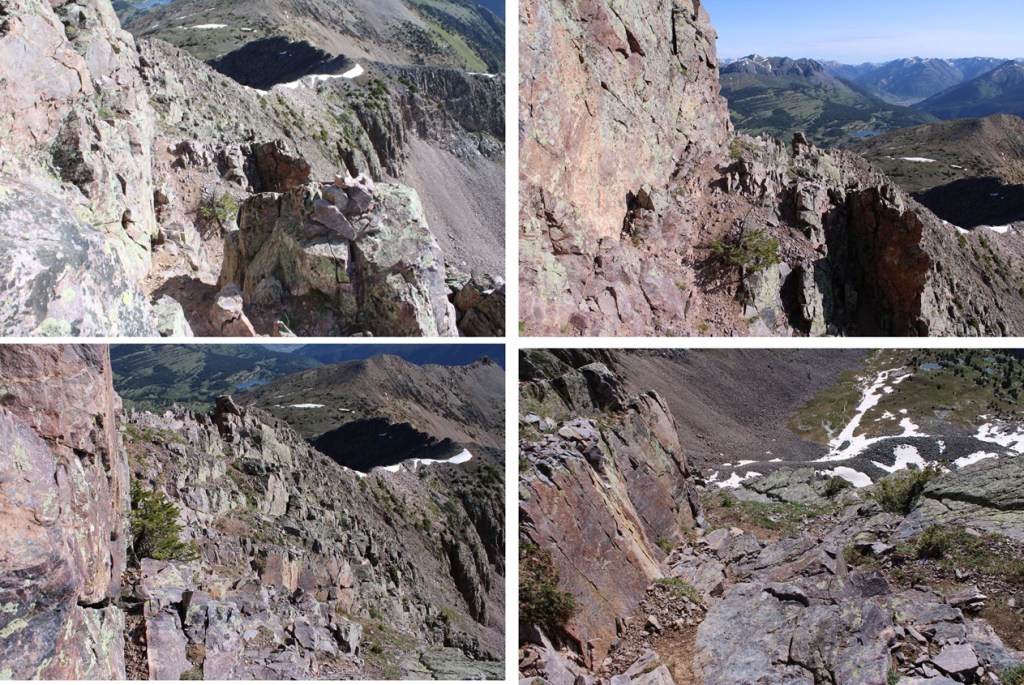
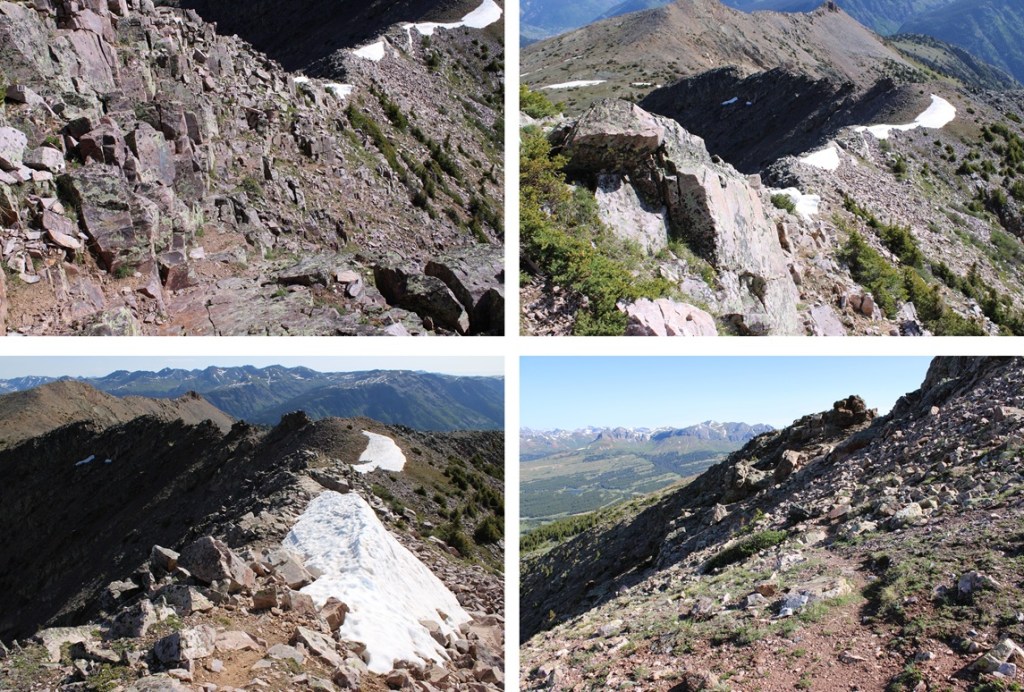
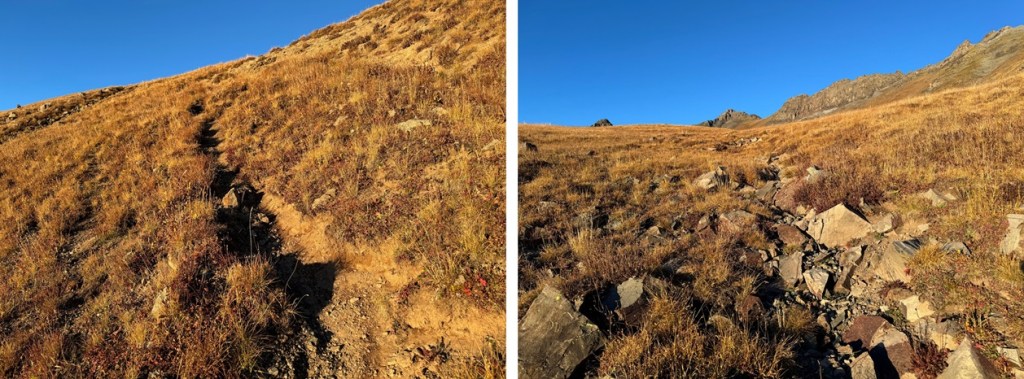
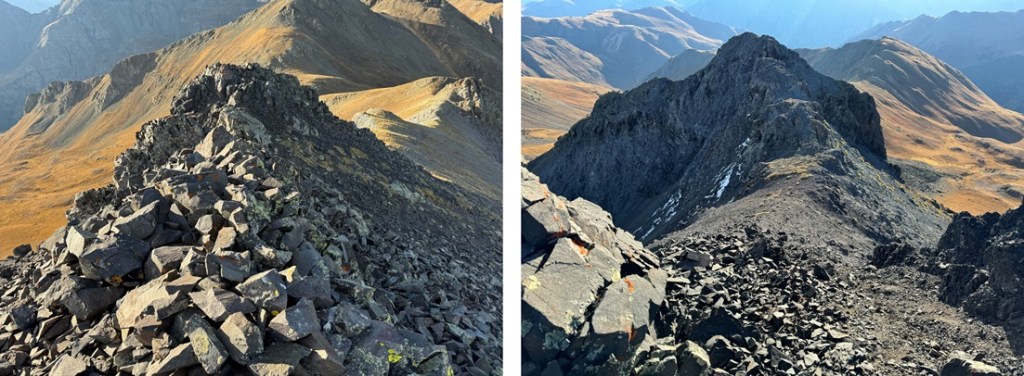
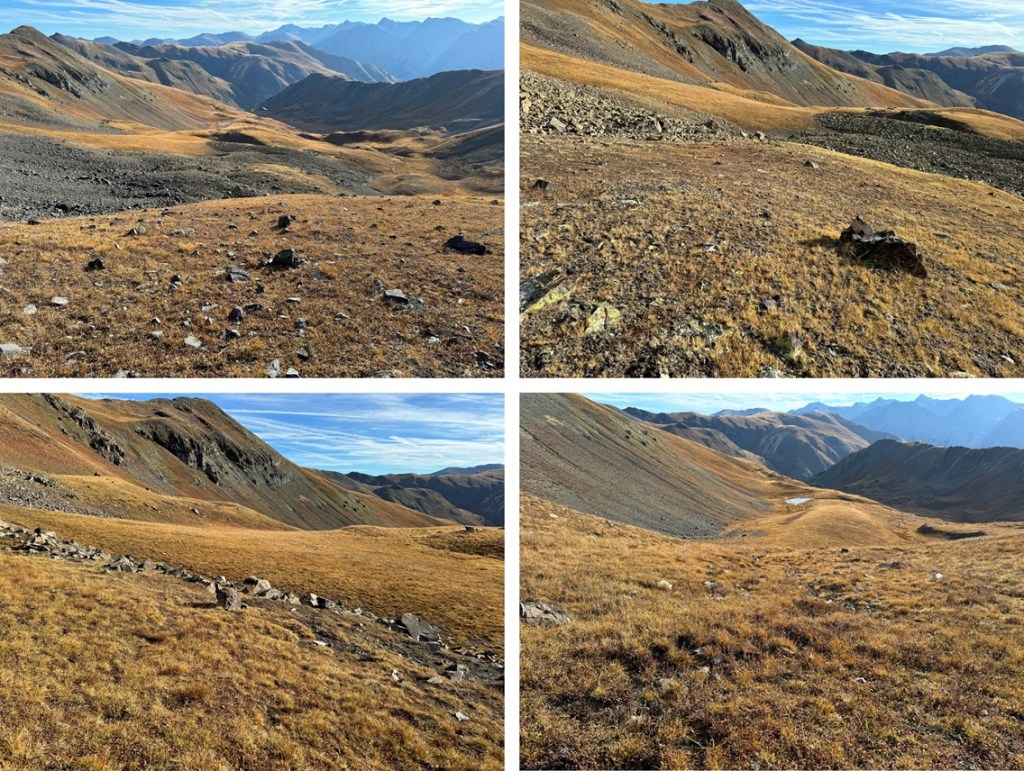
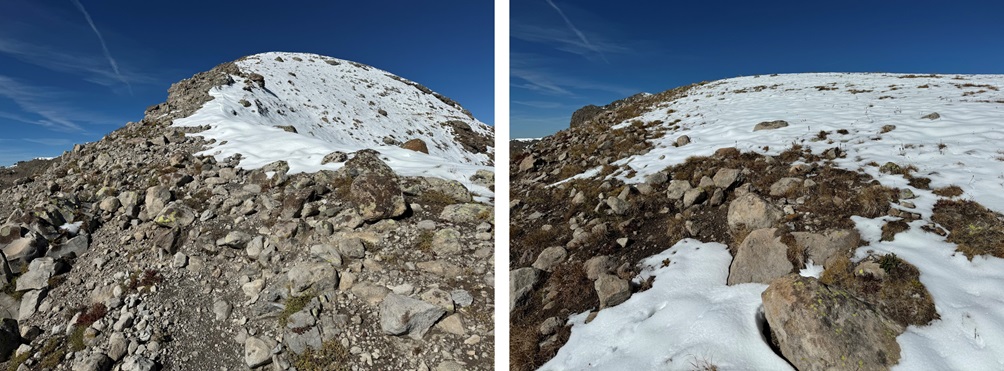
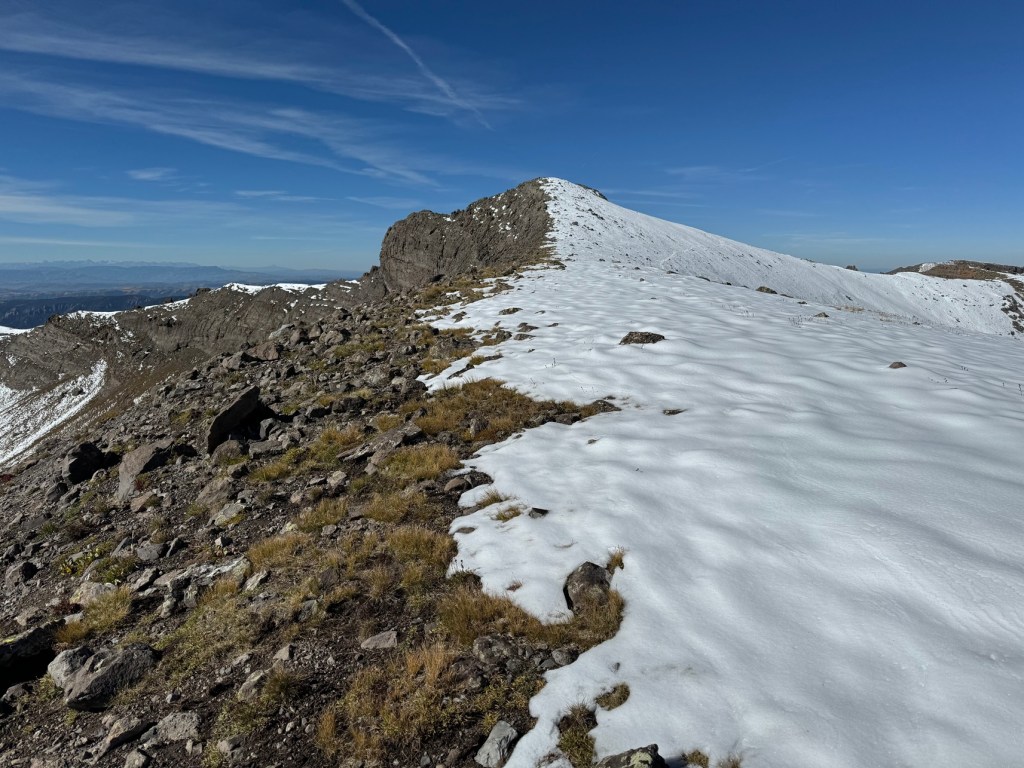
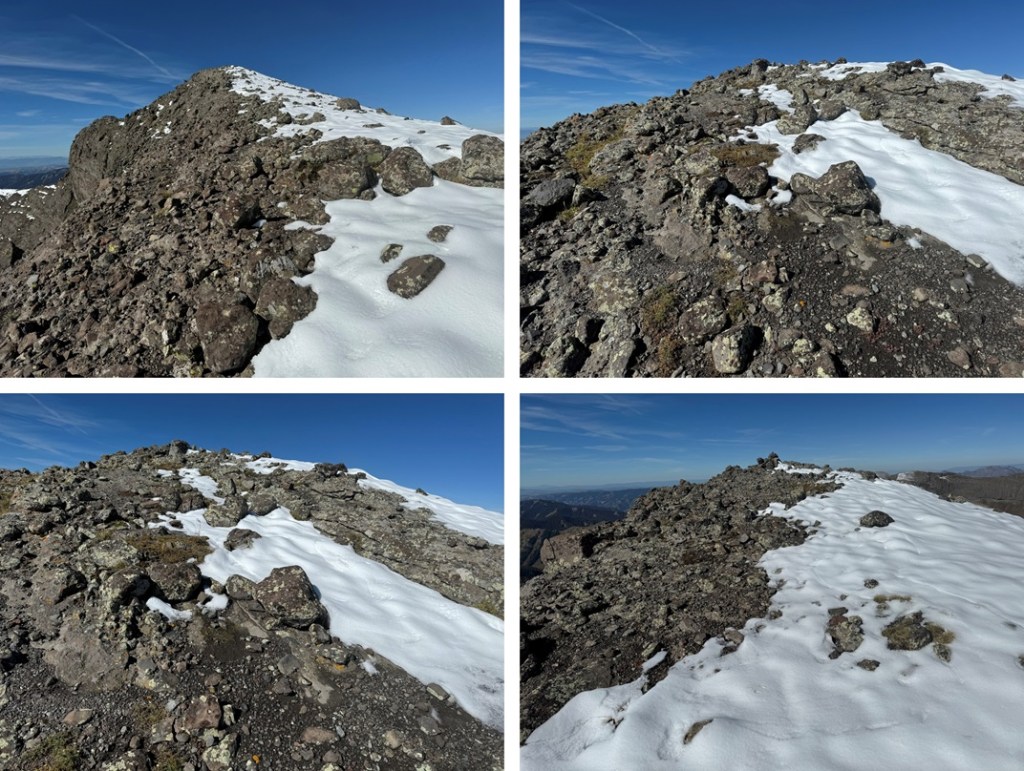
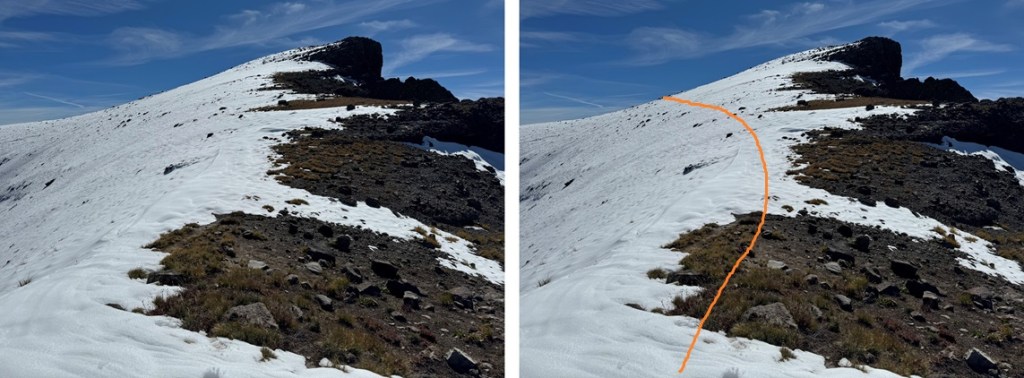
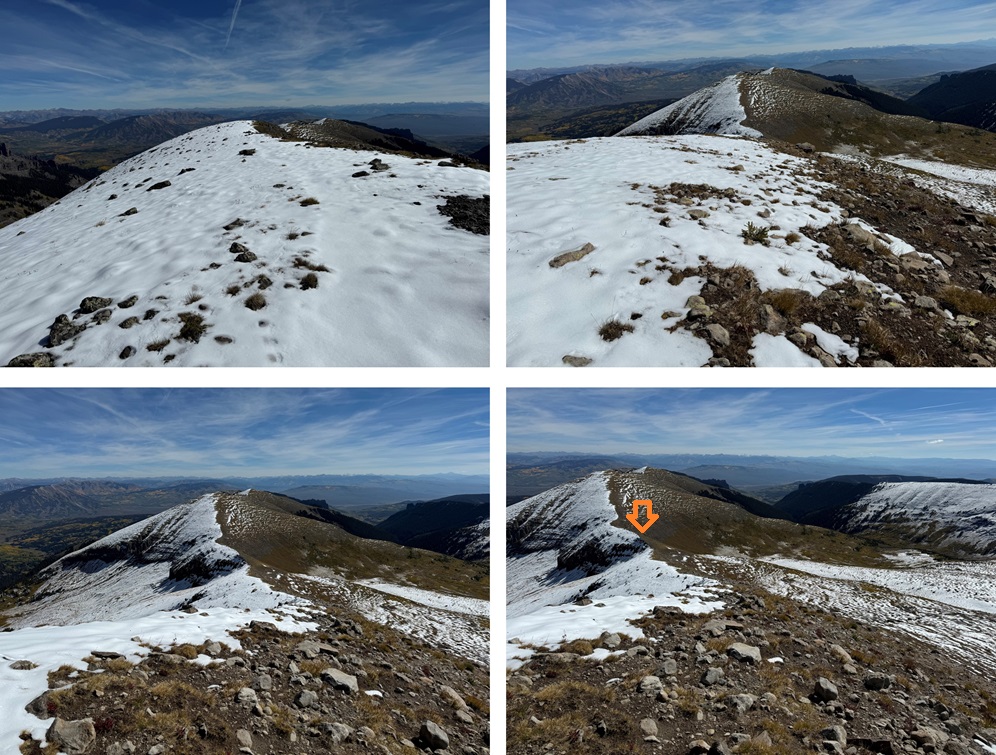
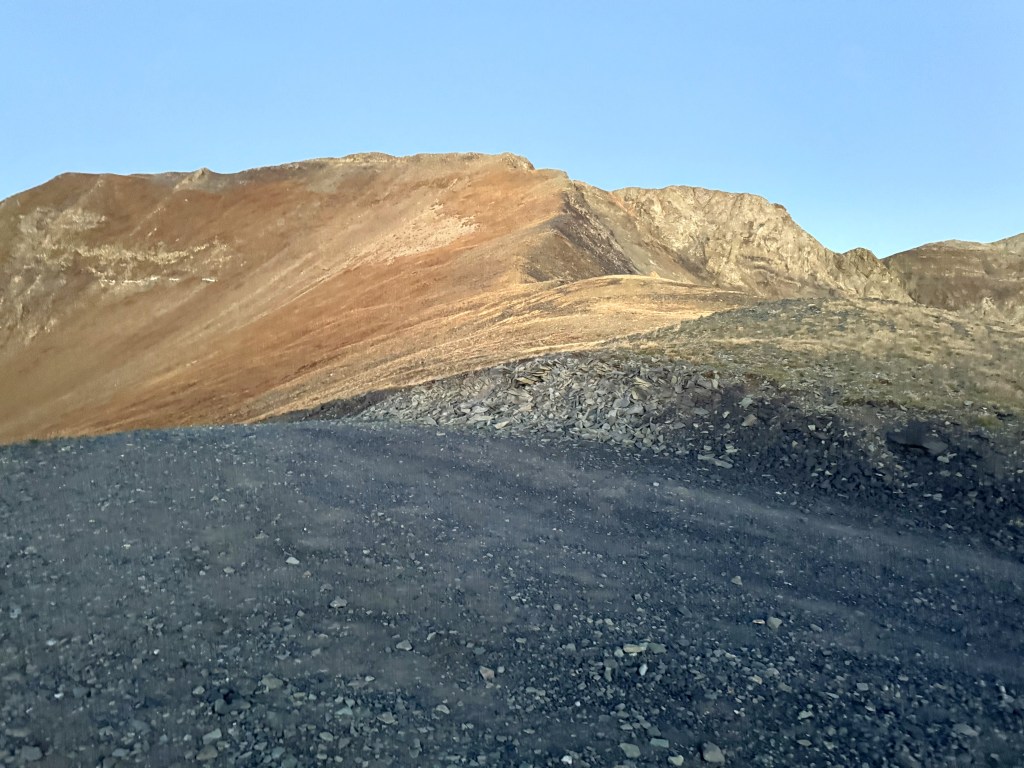
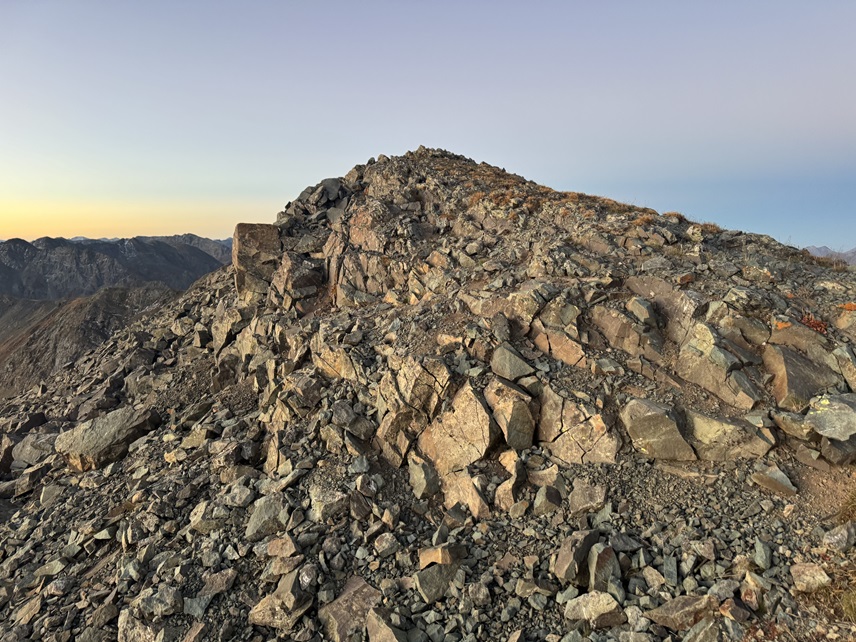
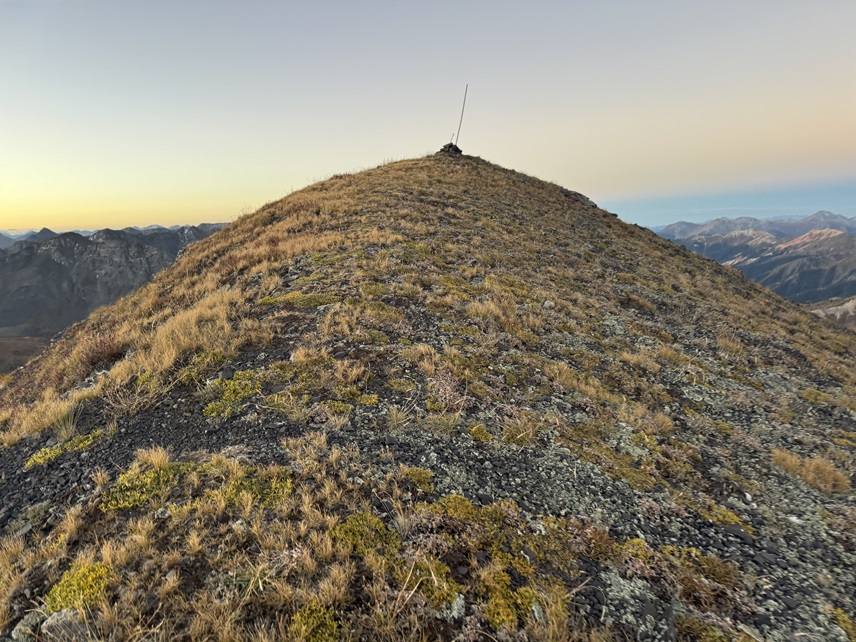
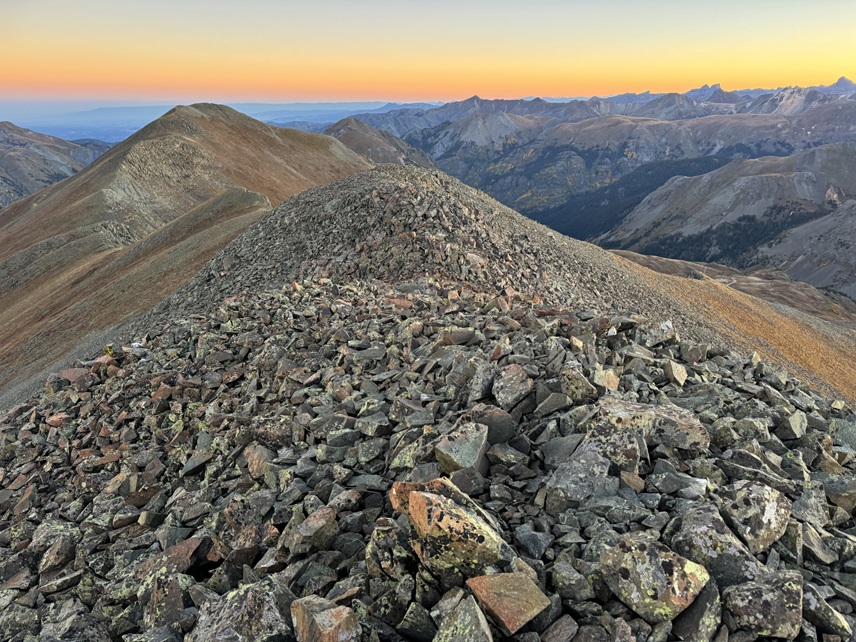
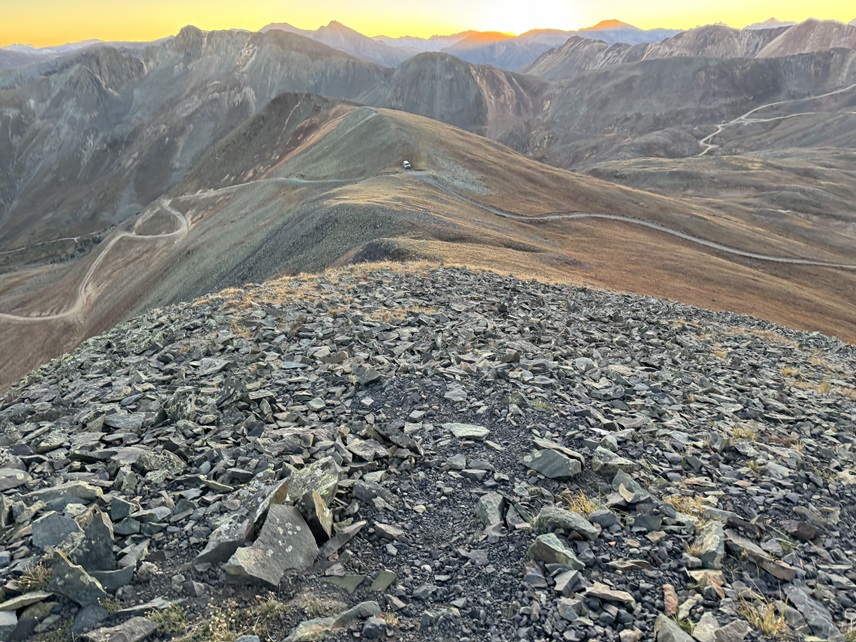
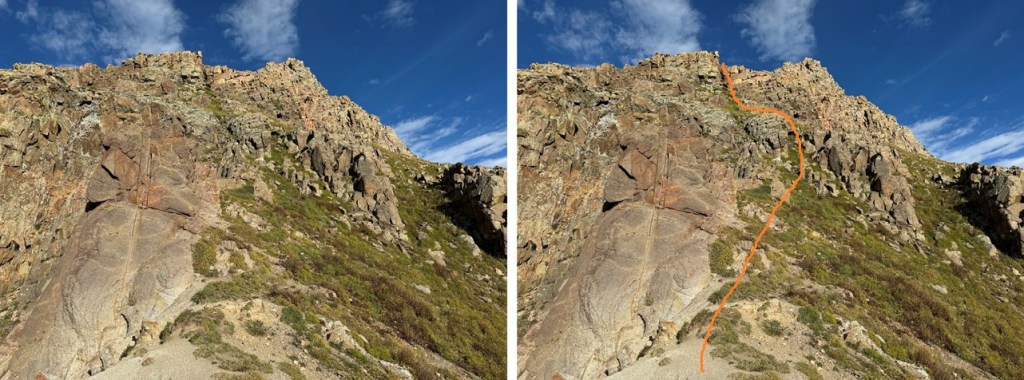
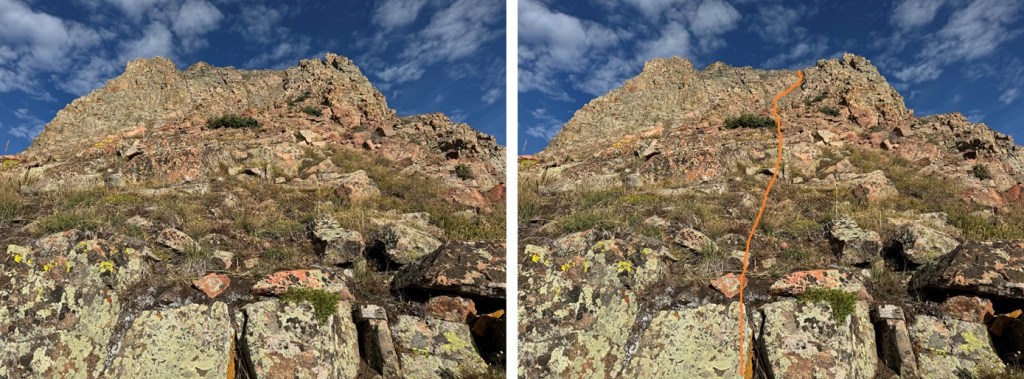
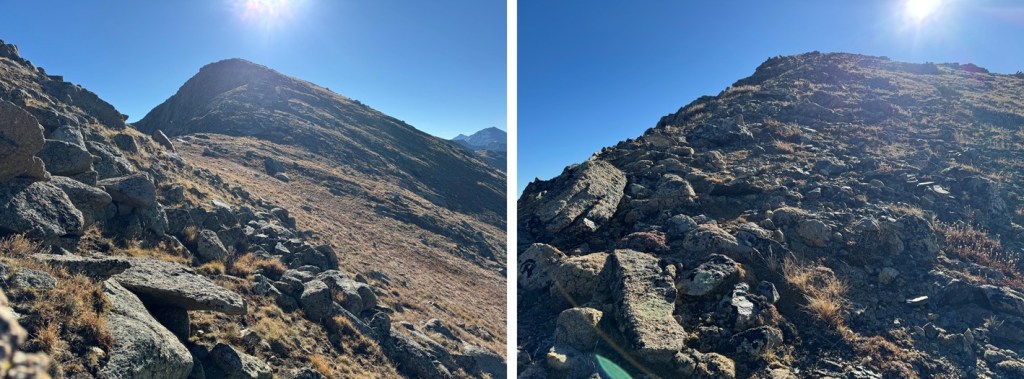
Here are some pictures of the ridge to the summit:

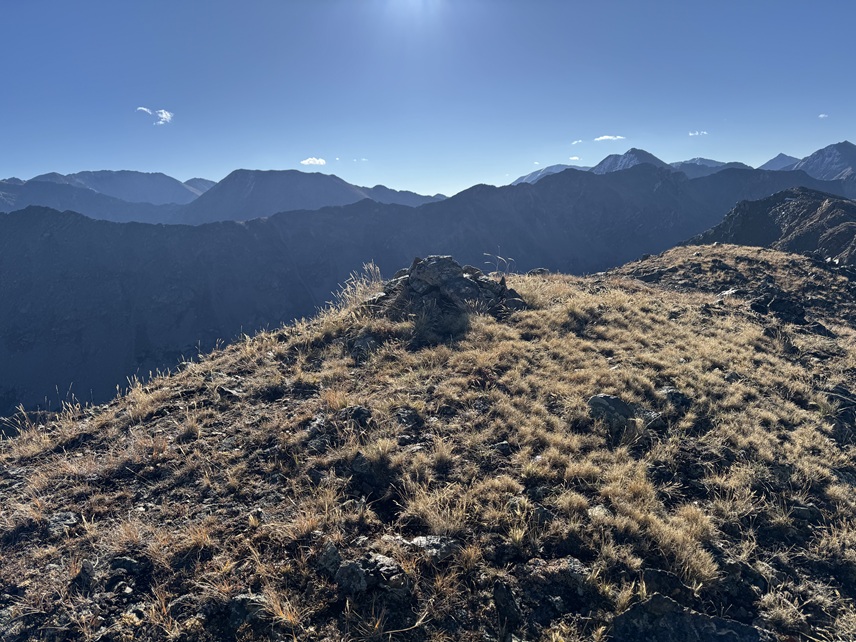
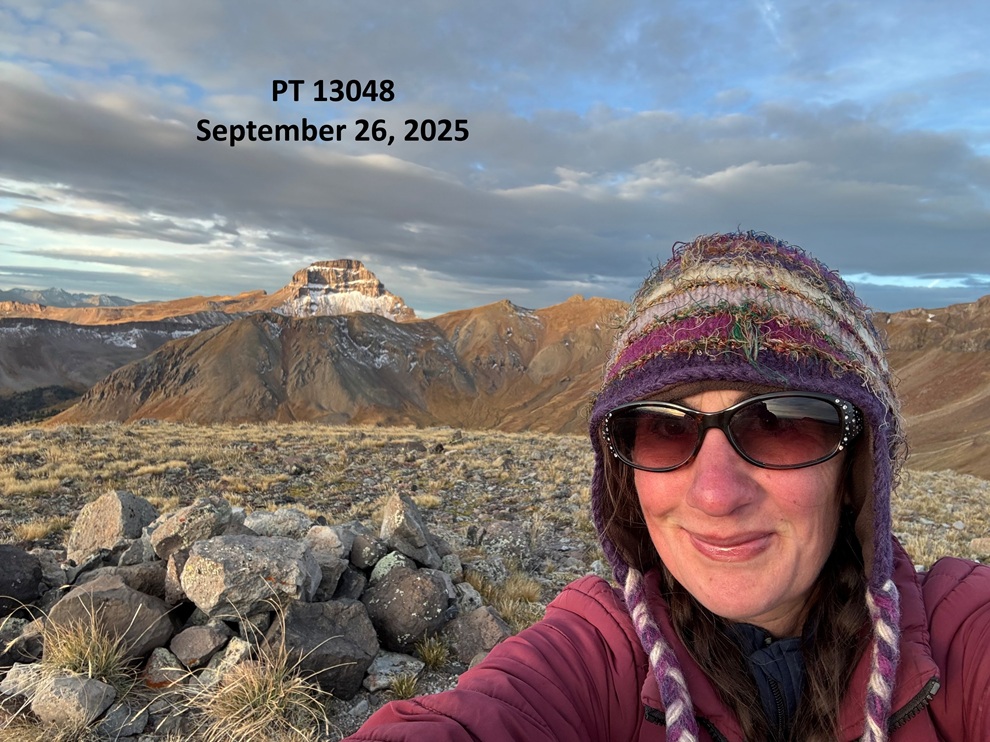
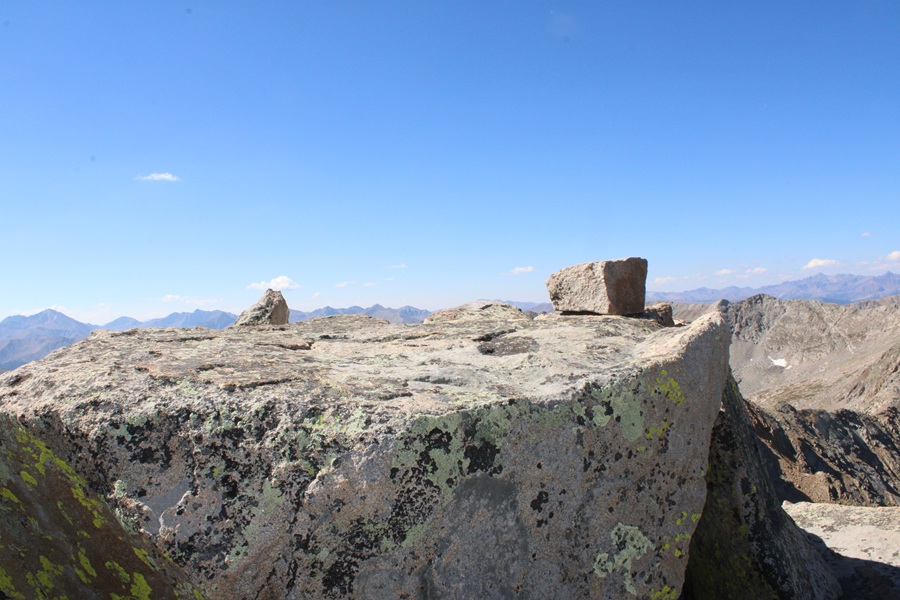
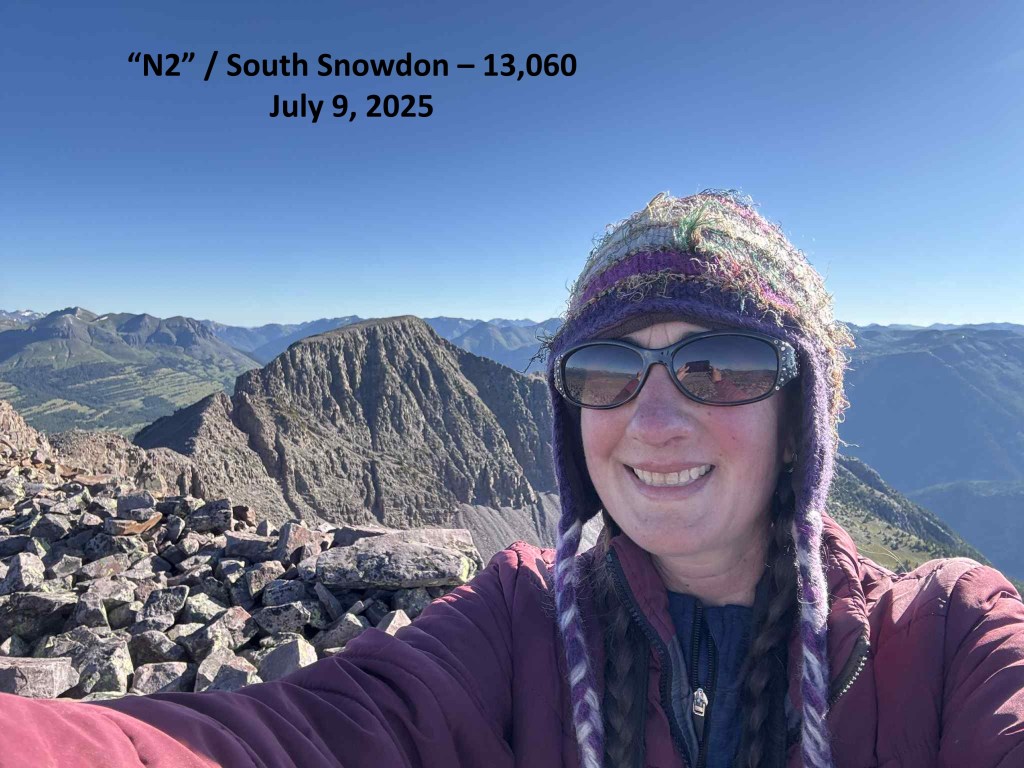
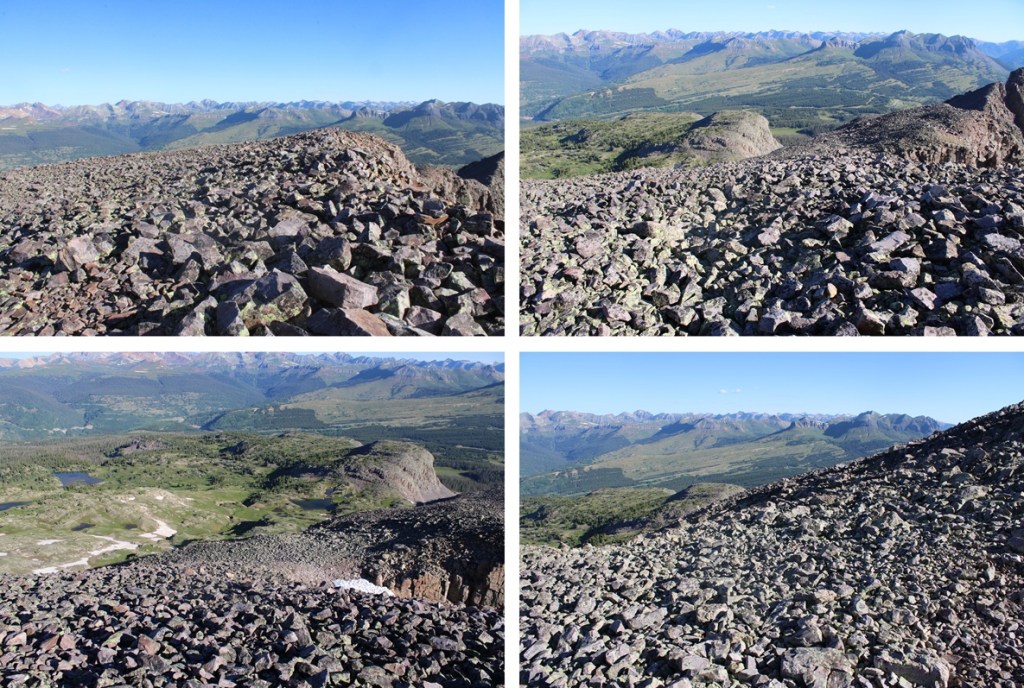
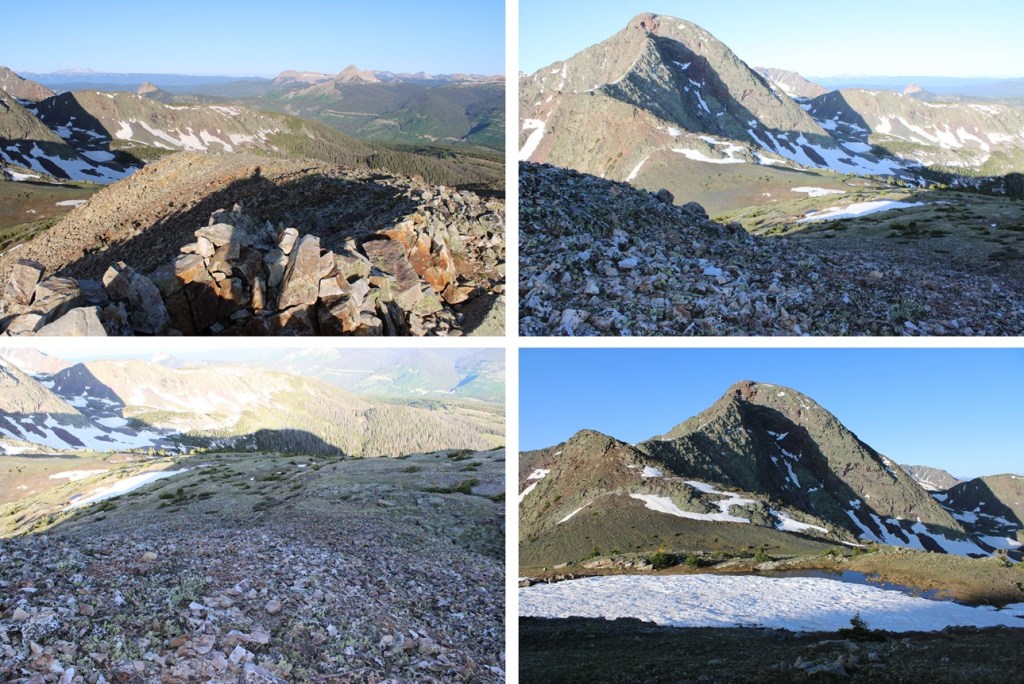
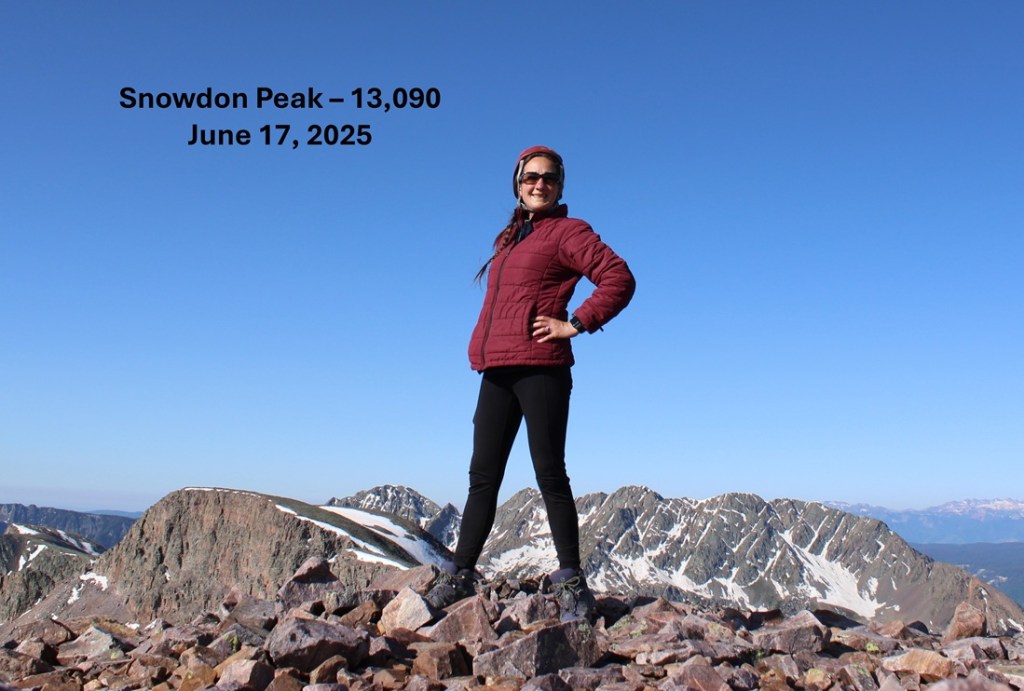
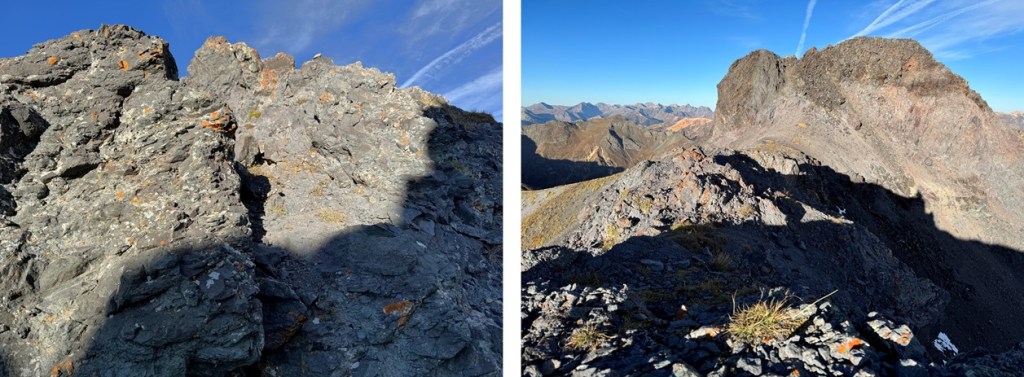
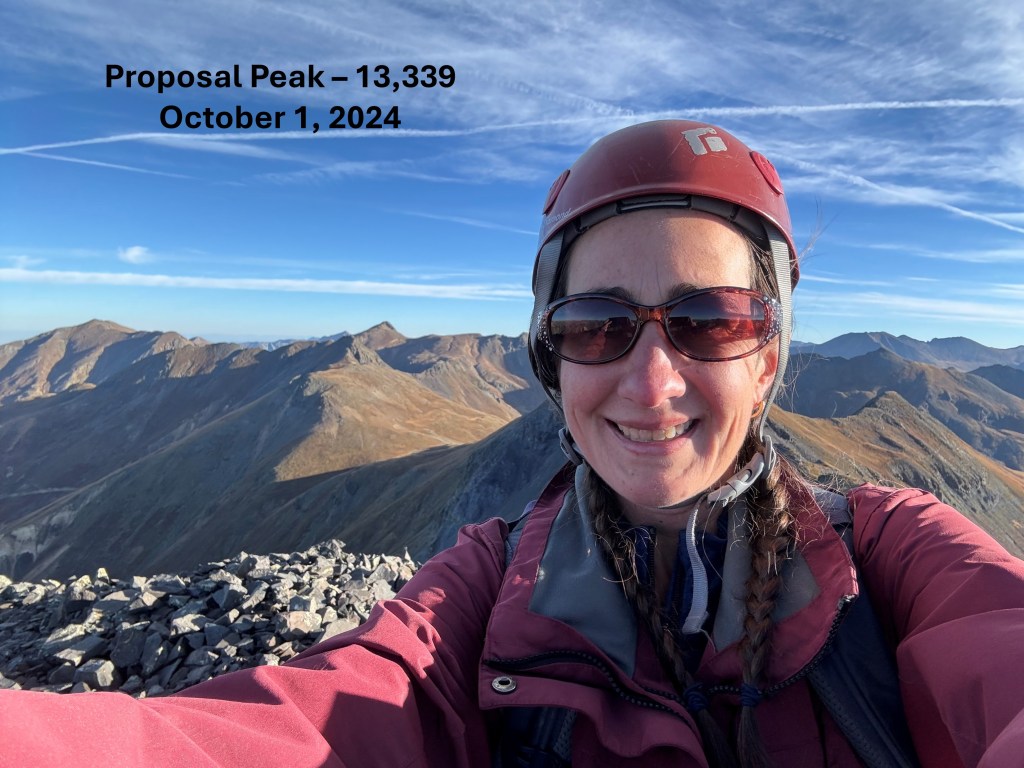
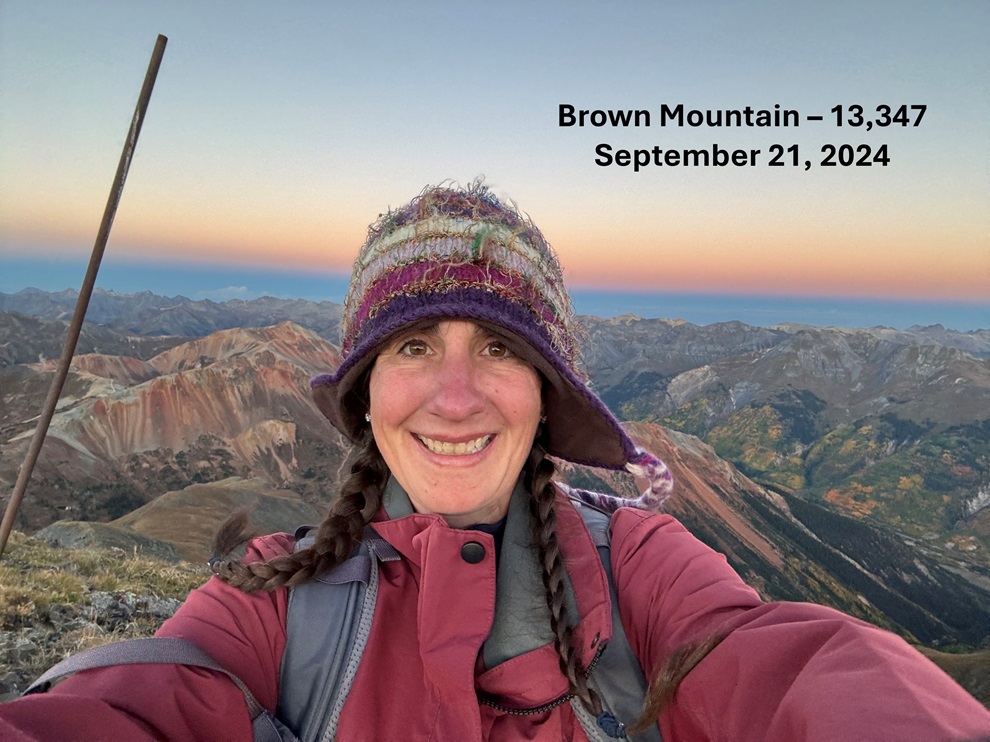
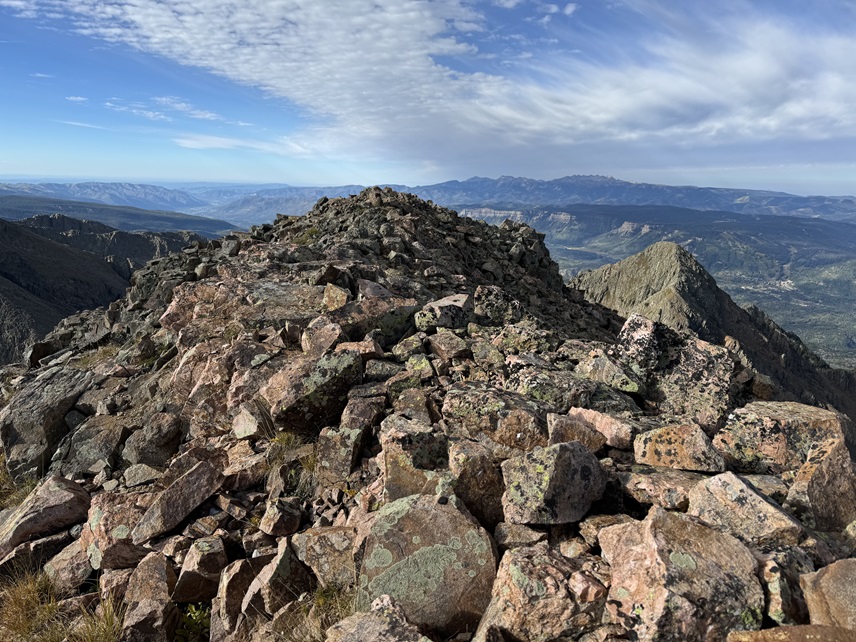
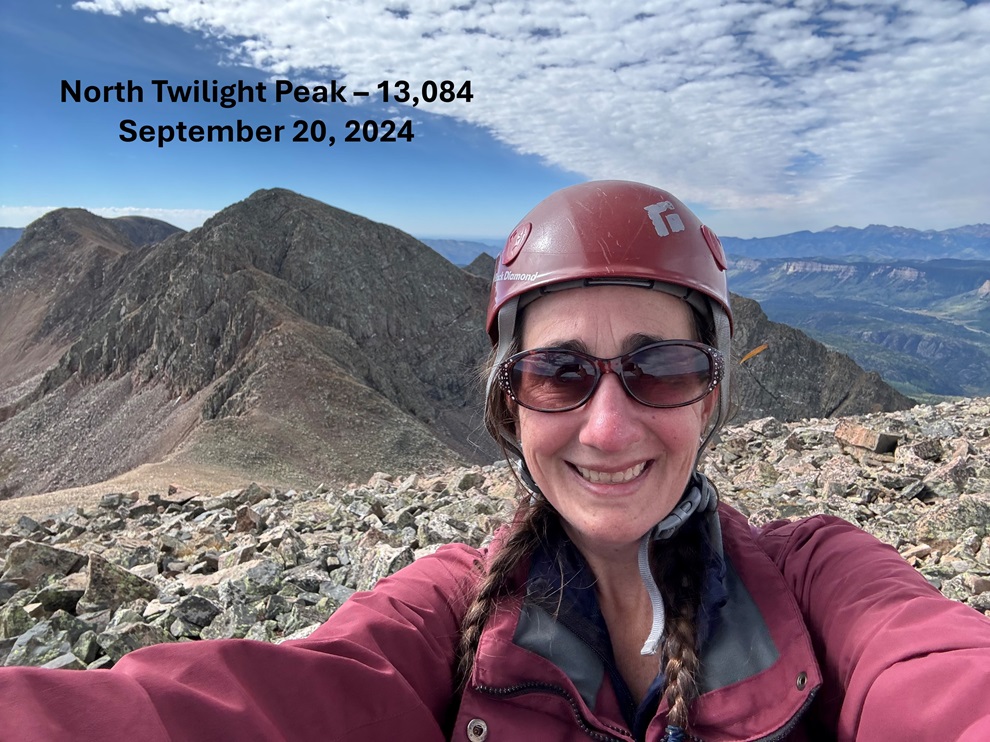
I summited PT 13033 at 9am
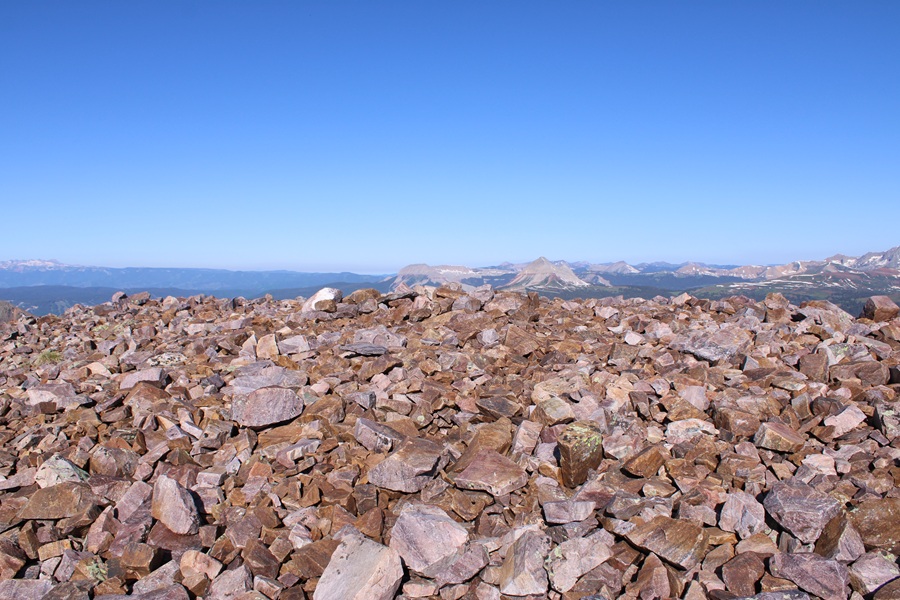
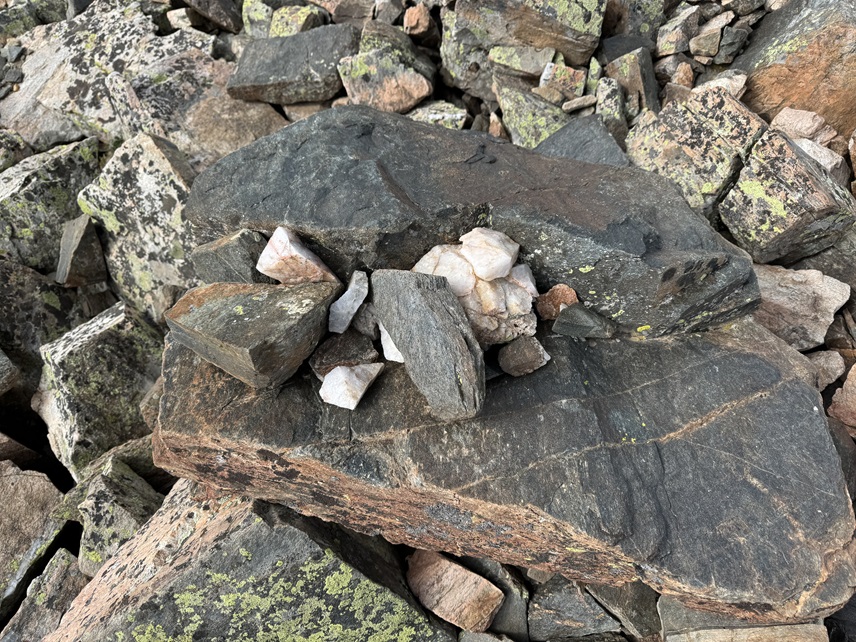
PT 13033:

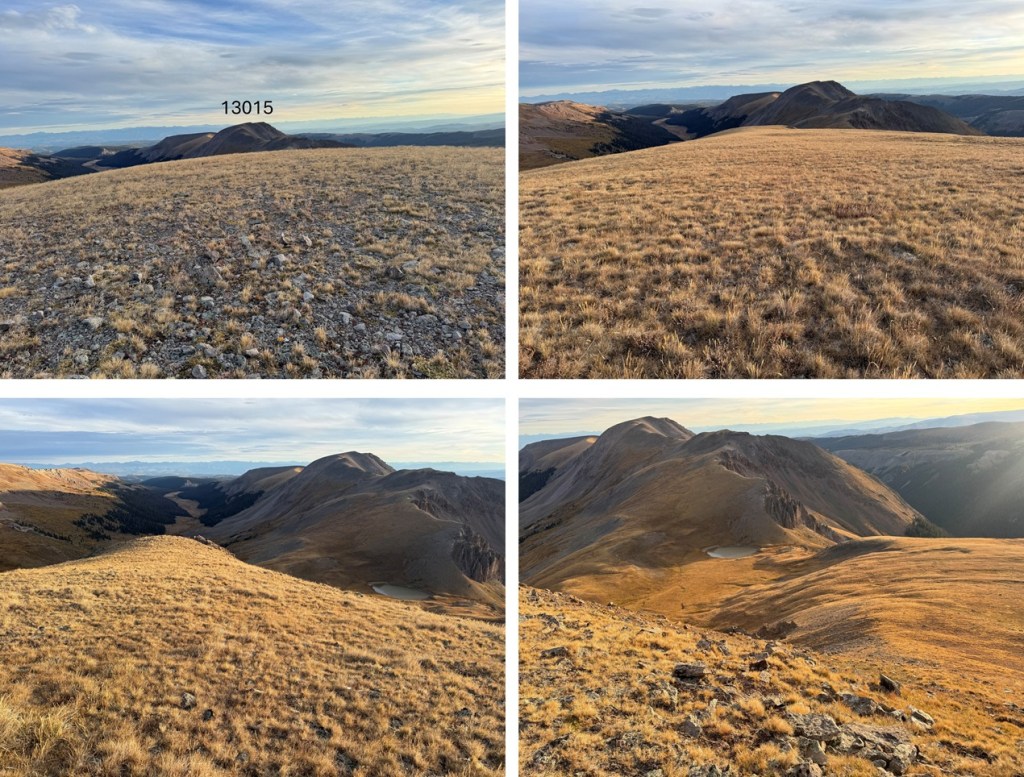
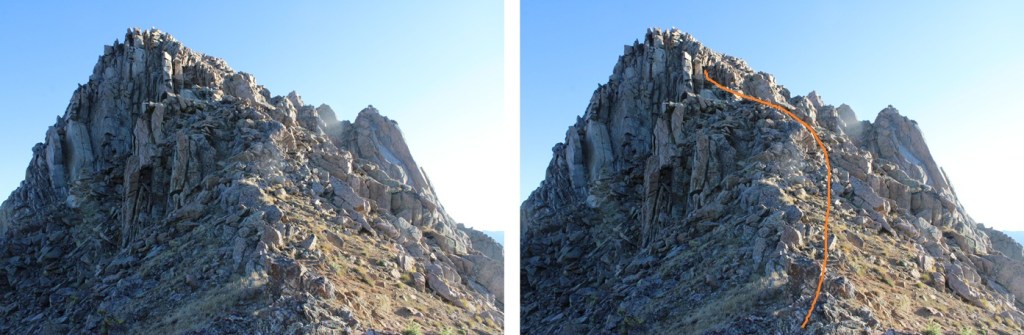
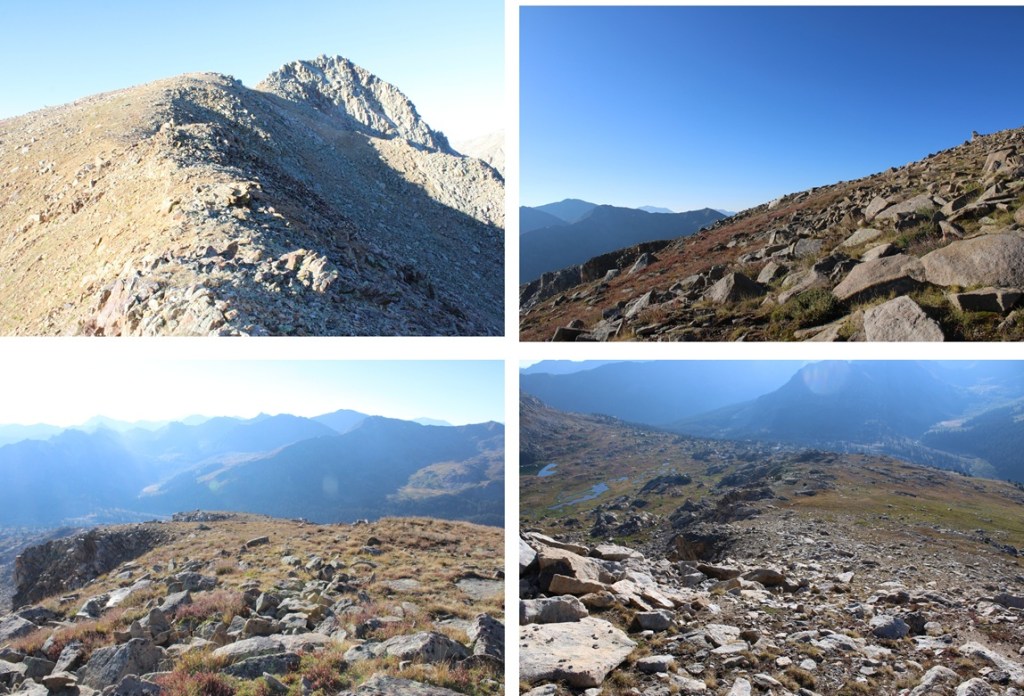
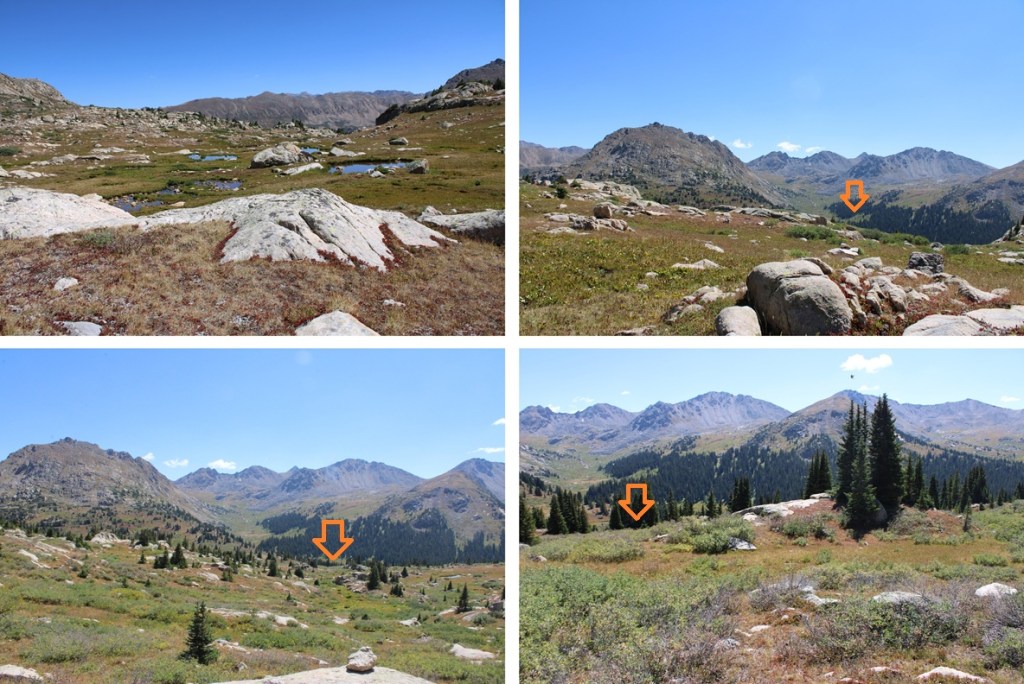
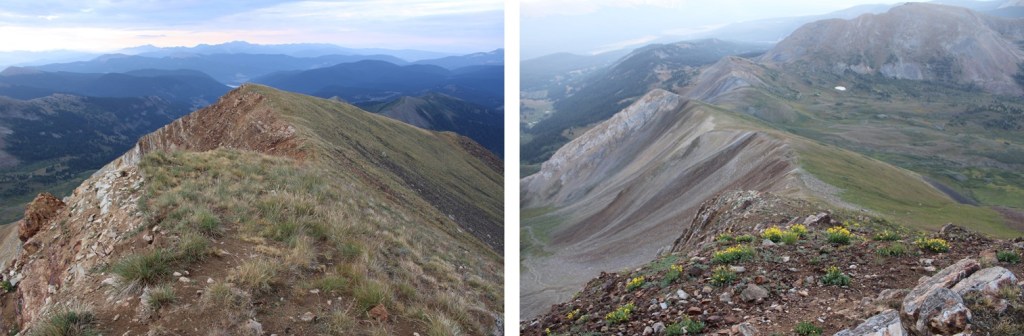
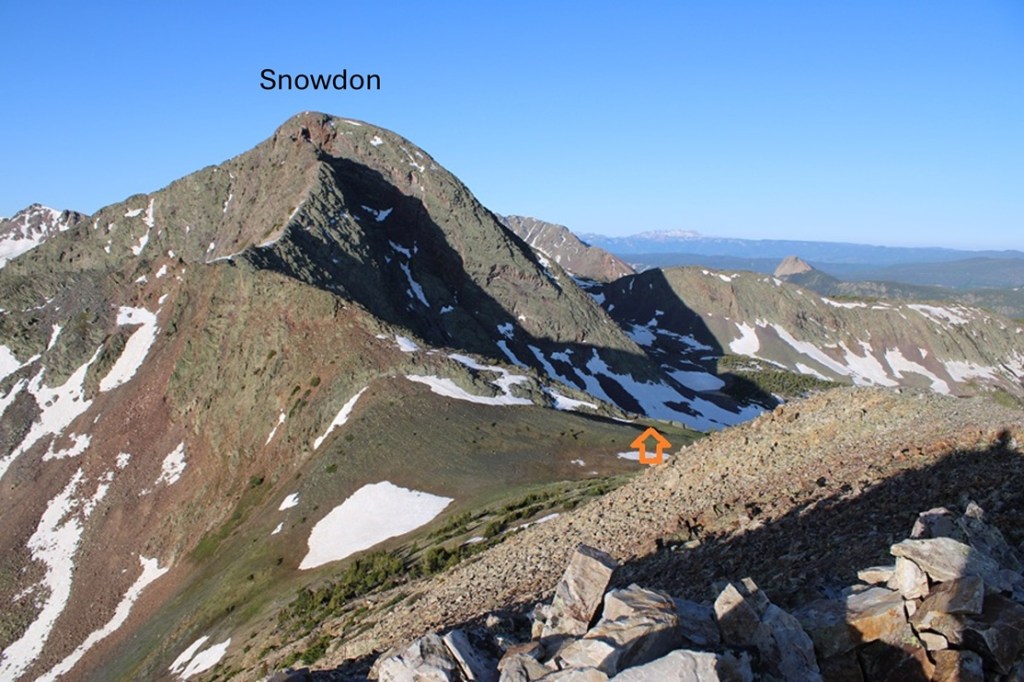
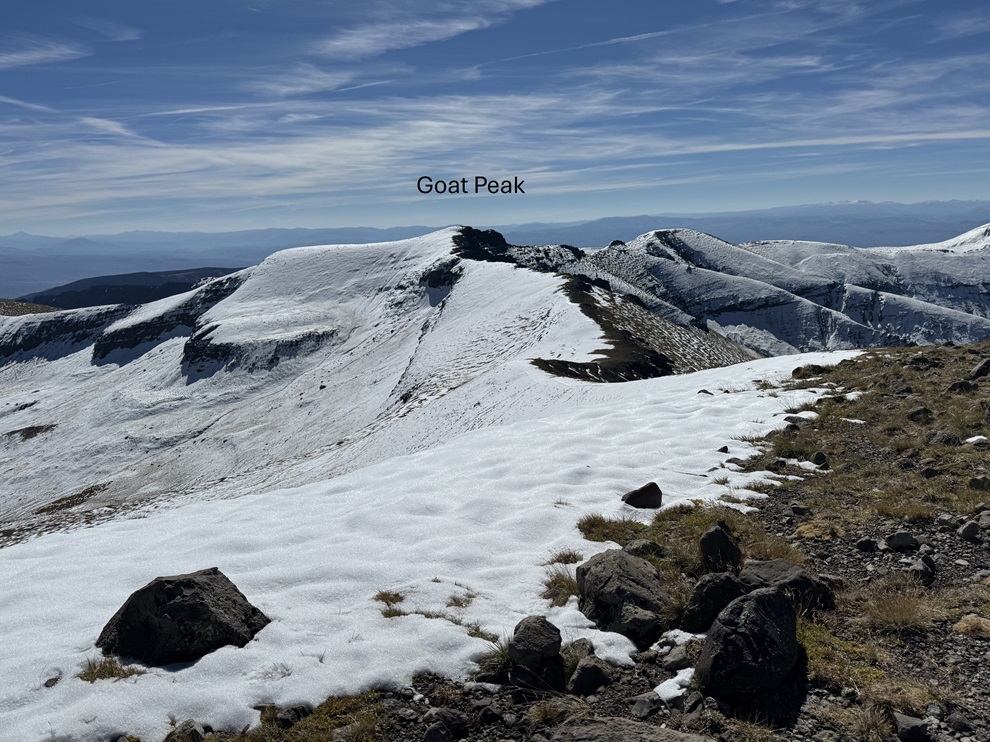
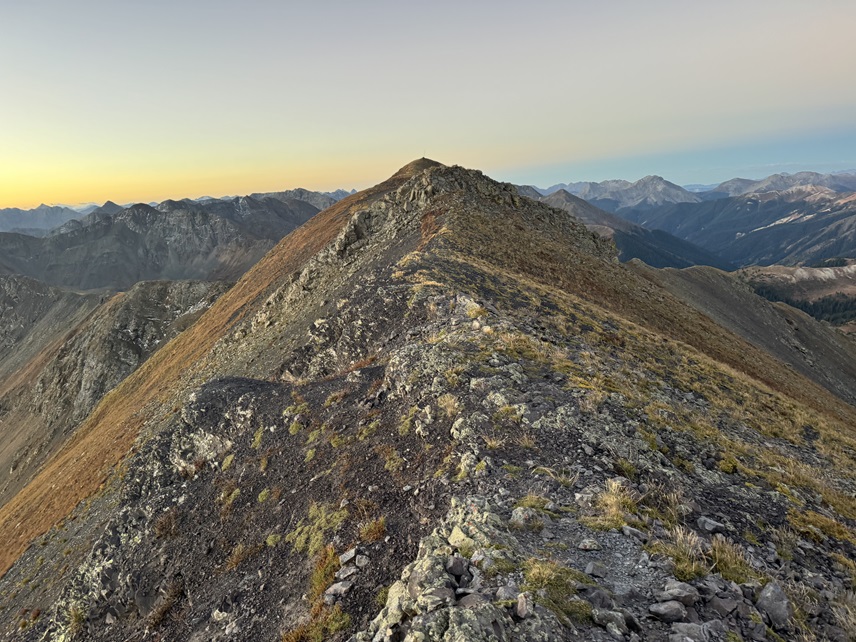
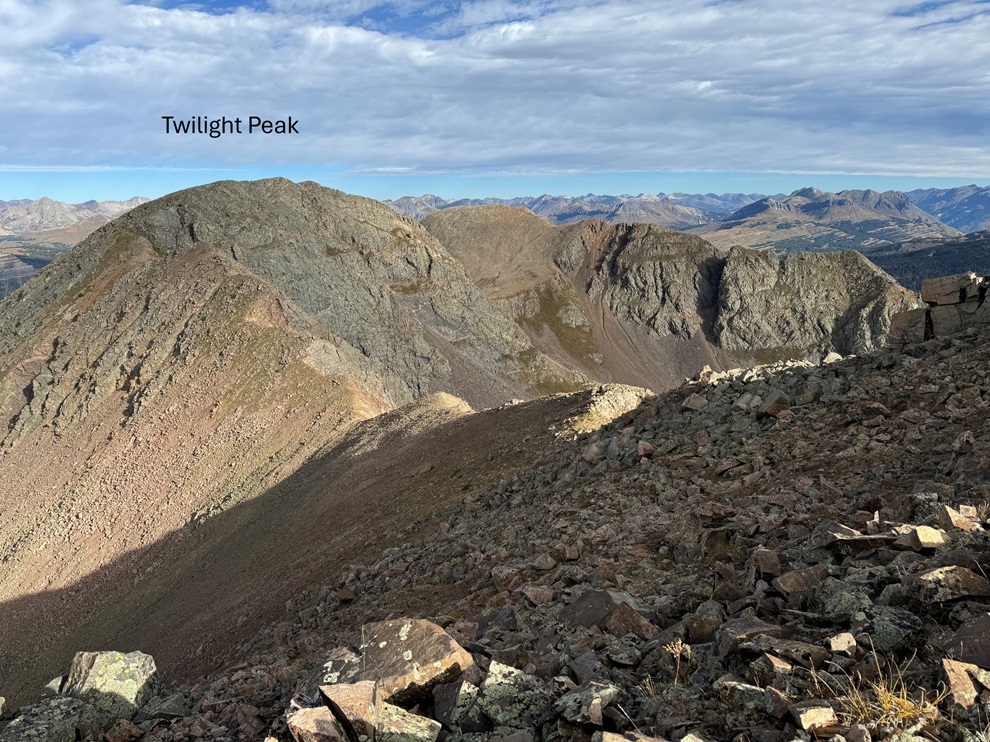
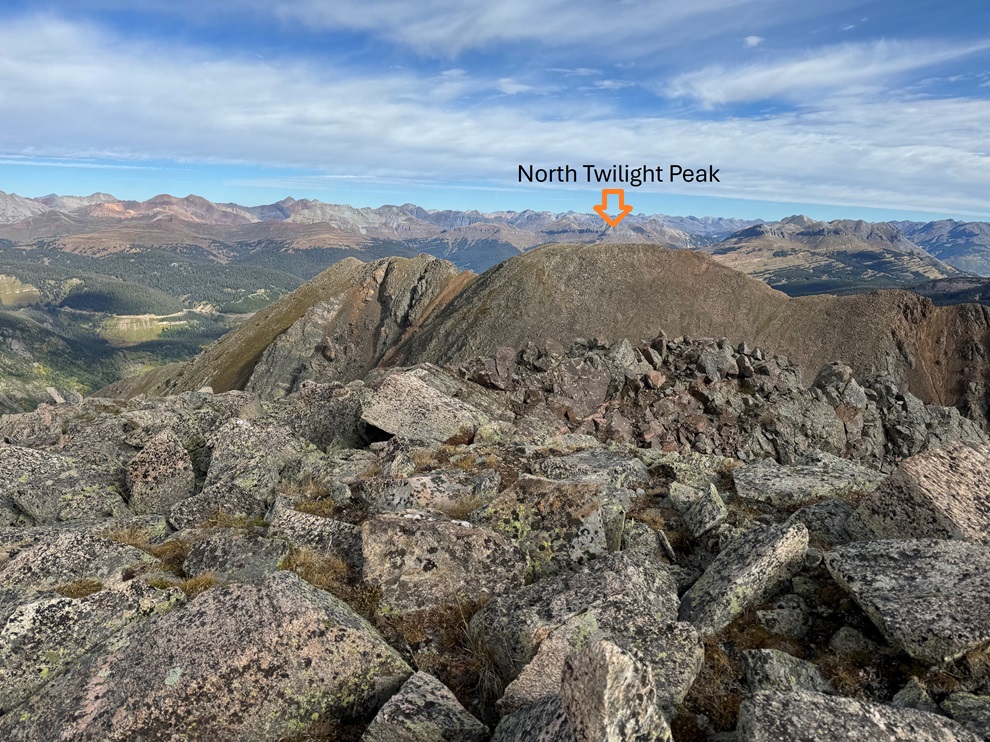
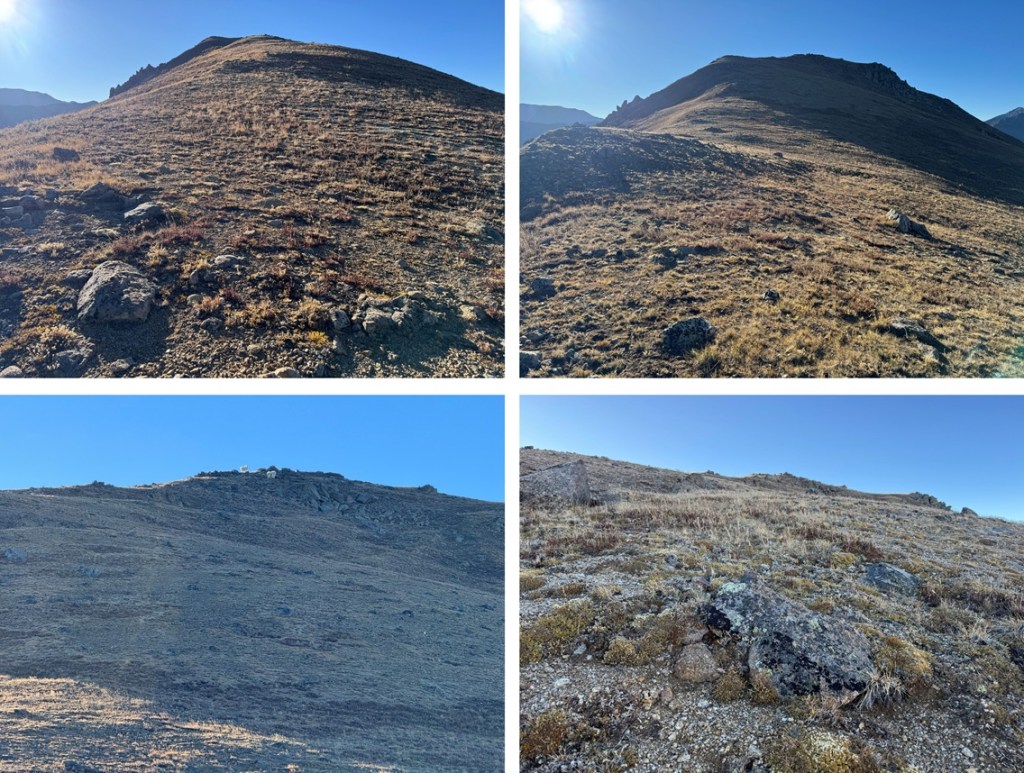
From the summit looking north I could see PT 13014. 

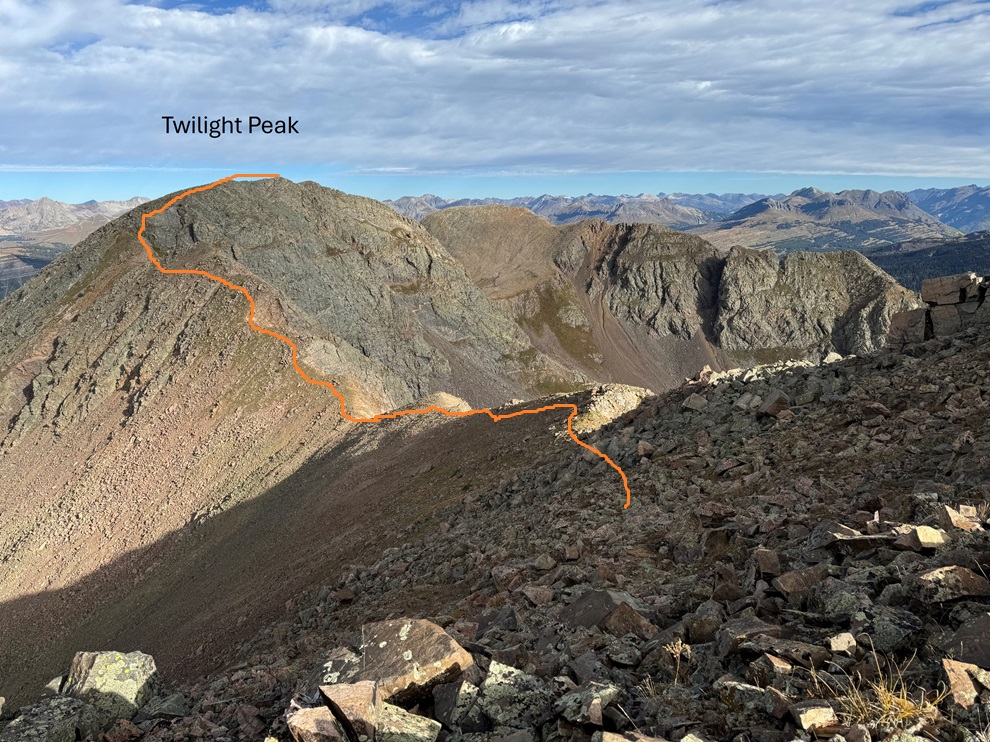
It was my intention to summit 13014 today as well by following the ridge.  However, I took my phone off of airplane mode and my cousin chat group immediately started blowing up with messages I had missed from the past 2 days.  I must have had 200 messages (I have a lot of cousins) and apparently my Grandpa (who’s 97) was in the hospital.  I tried to make phone calls and message back but didn’t have enough cell service to do so.  I made the decision to cut this hike short so I could make sure my Grandpa (and my mom, who isn’t quite ready to lose her father) were ok.  I’ll come back and summit 13014 another way (I already have ideas…).  I turned back and followed the ridge northwest towards the saddle.

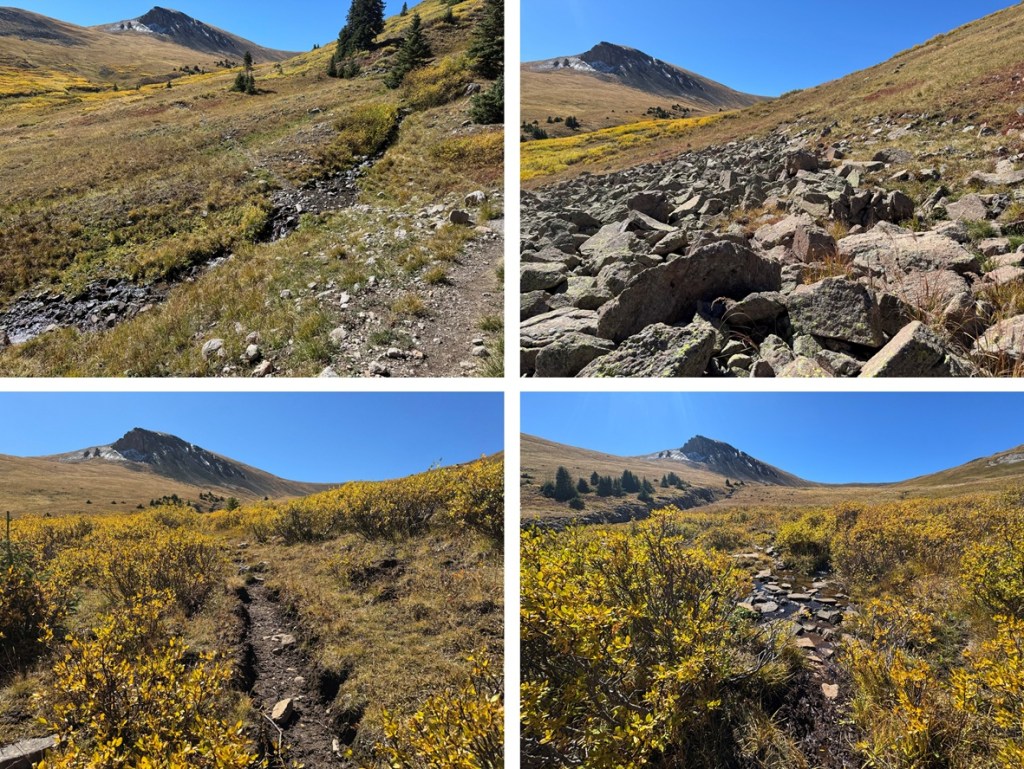
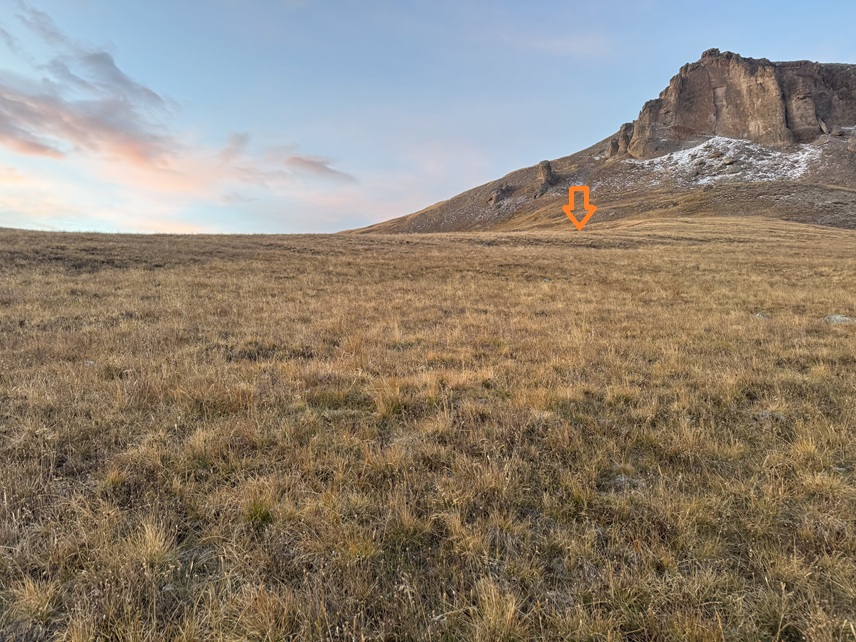
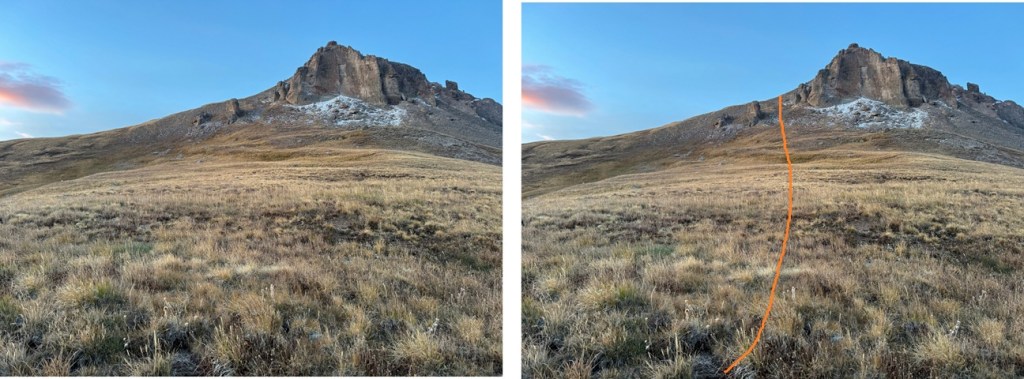
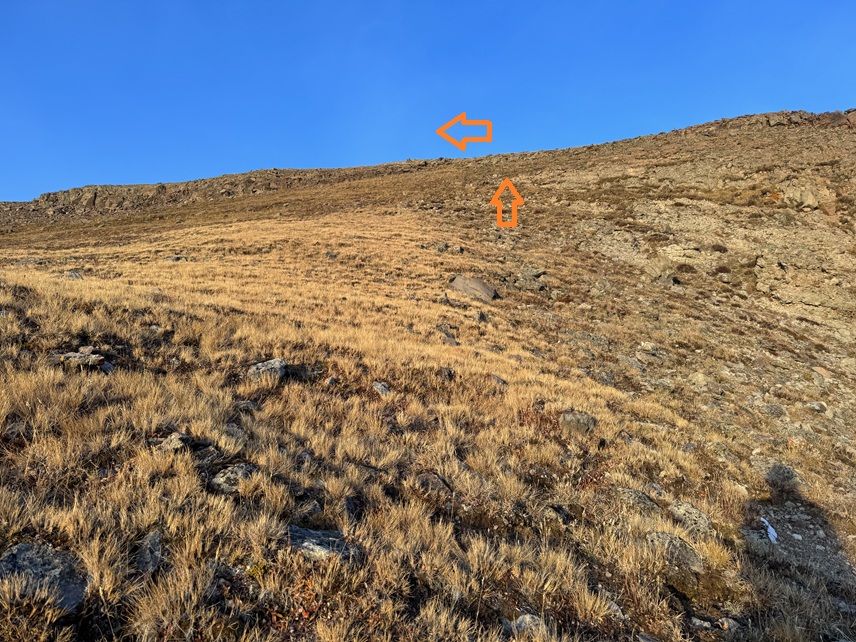
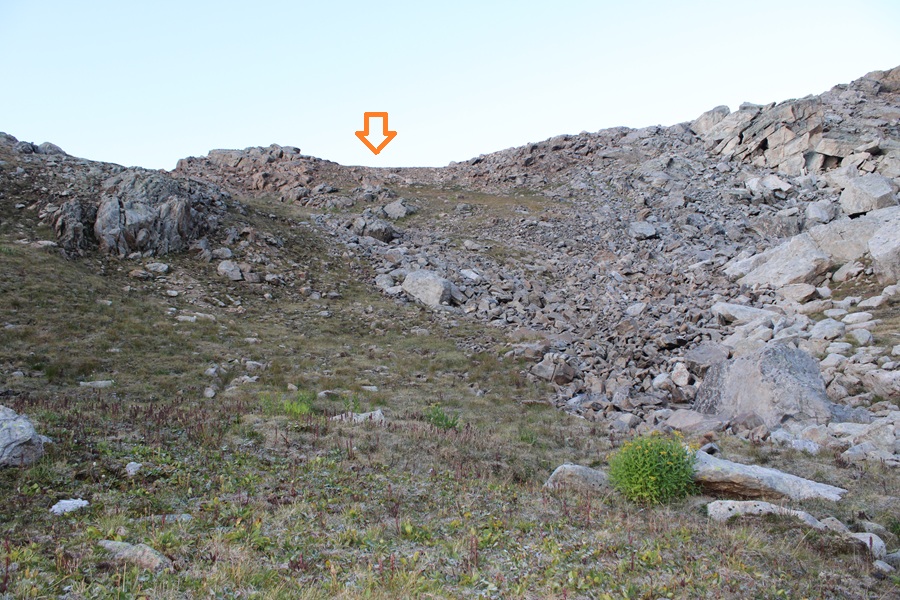
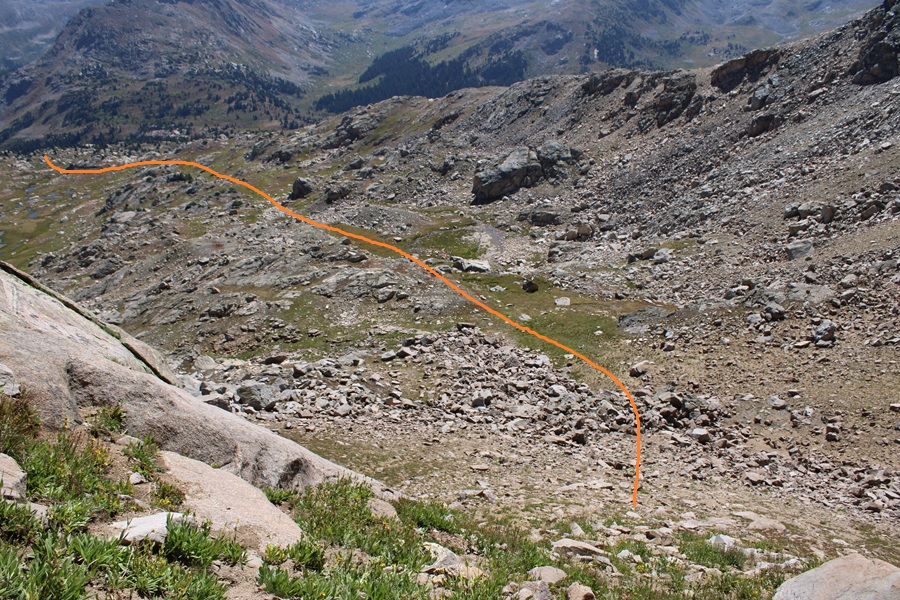
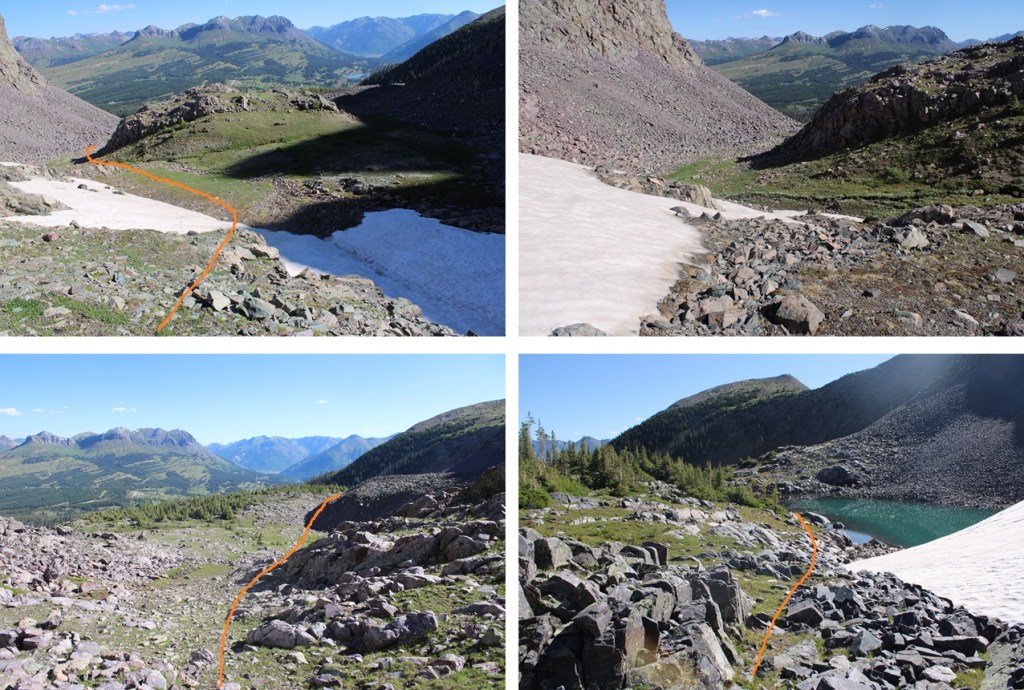
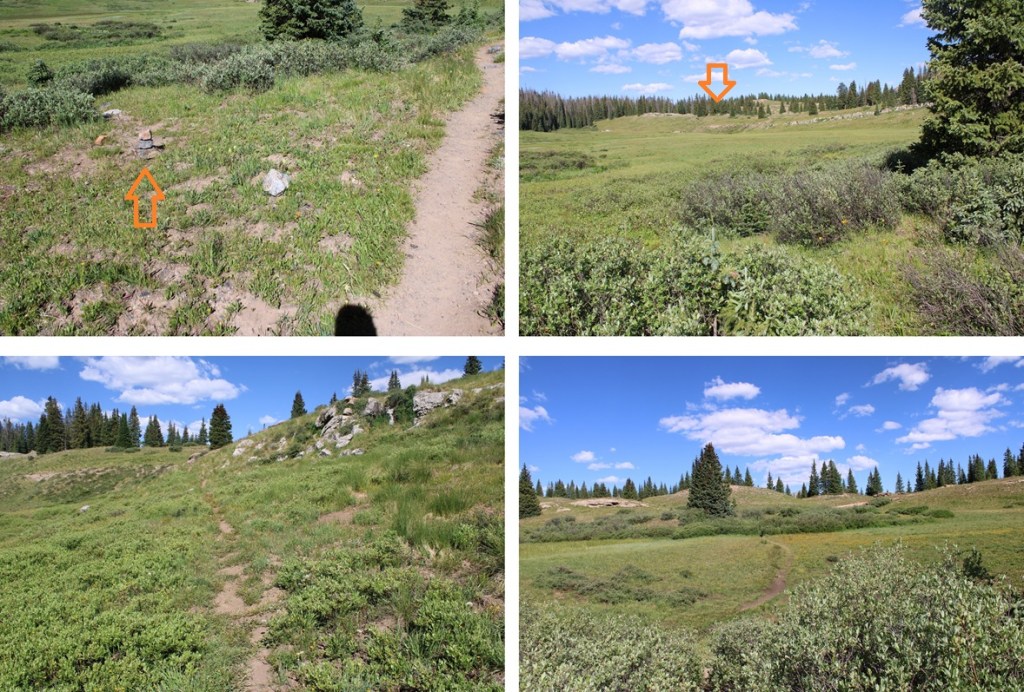
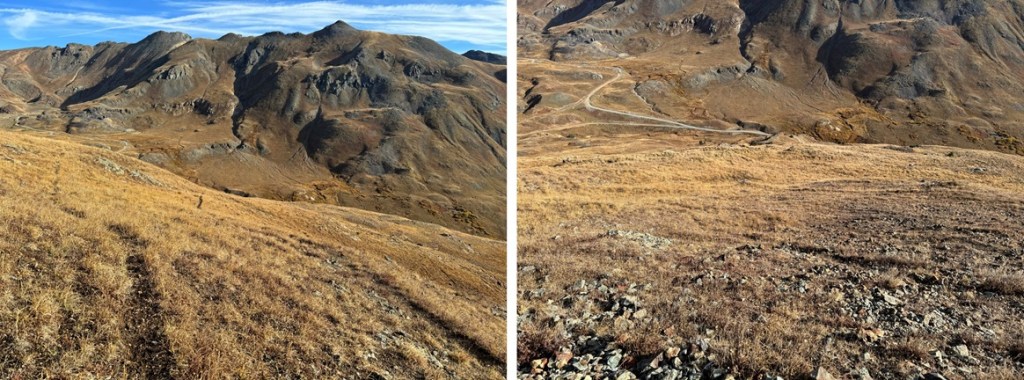
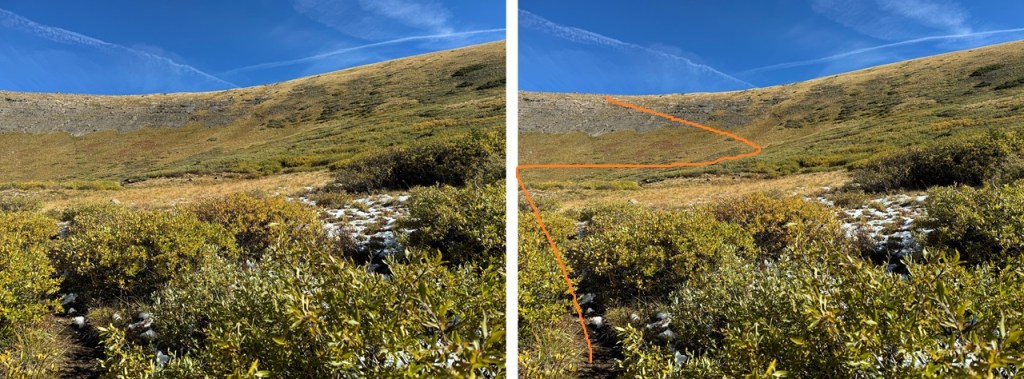
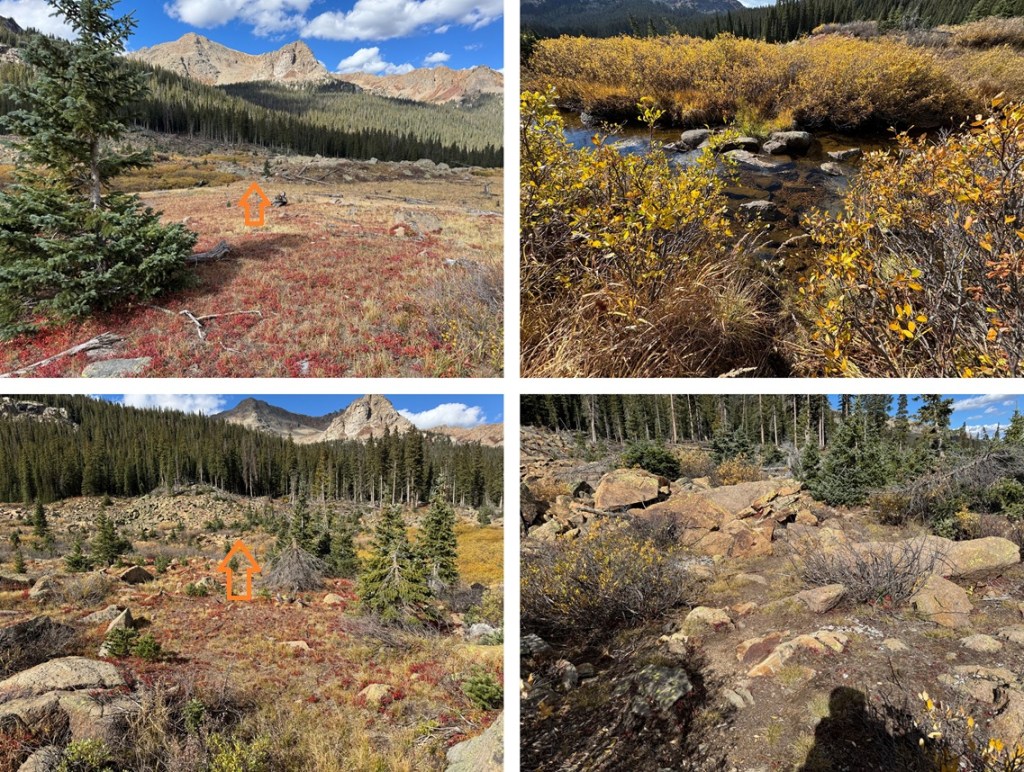
Back on the saddle I’d placed a small cairn where I wanted to descend.  There’s also a robust game trail here that’s a good indication of when to descend, just don’t follow it, as it goes in the opposite direction. 

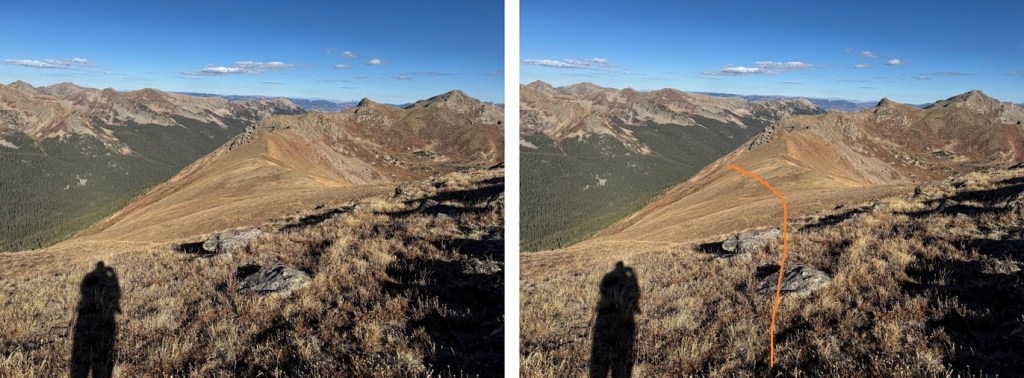
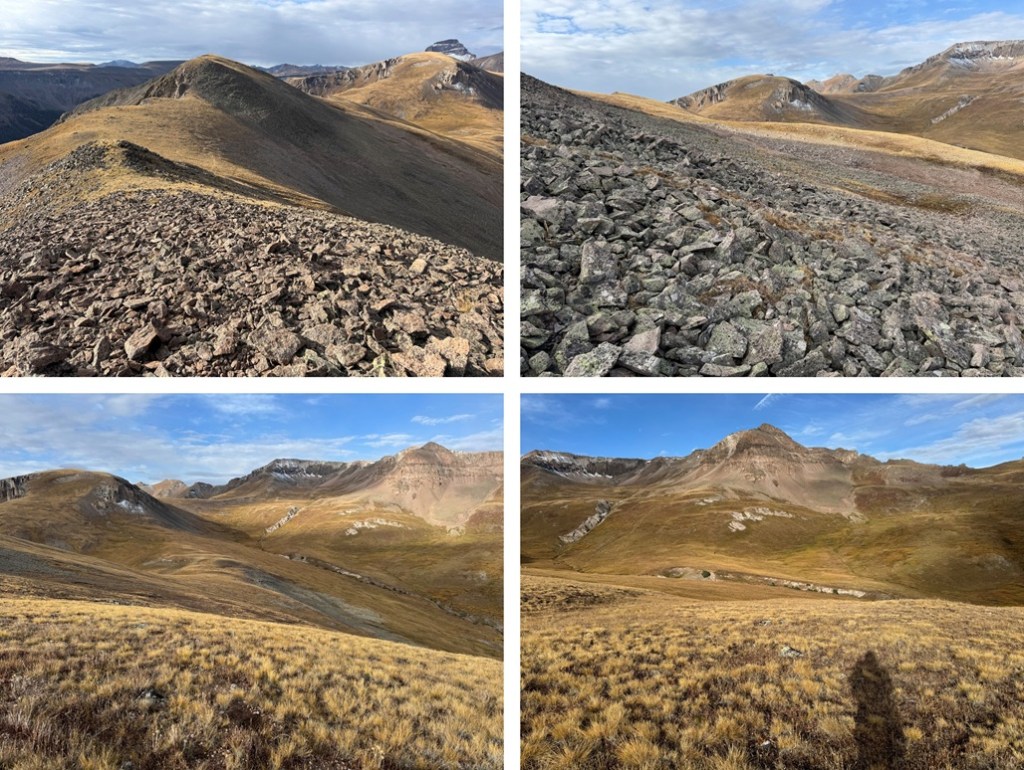
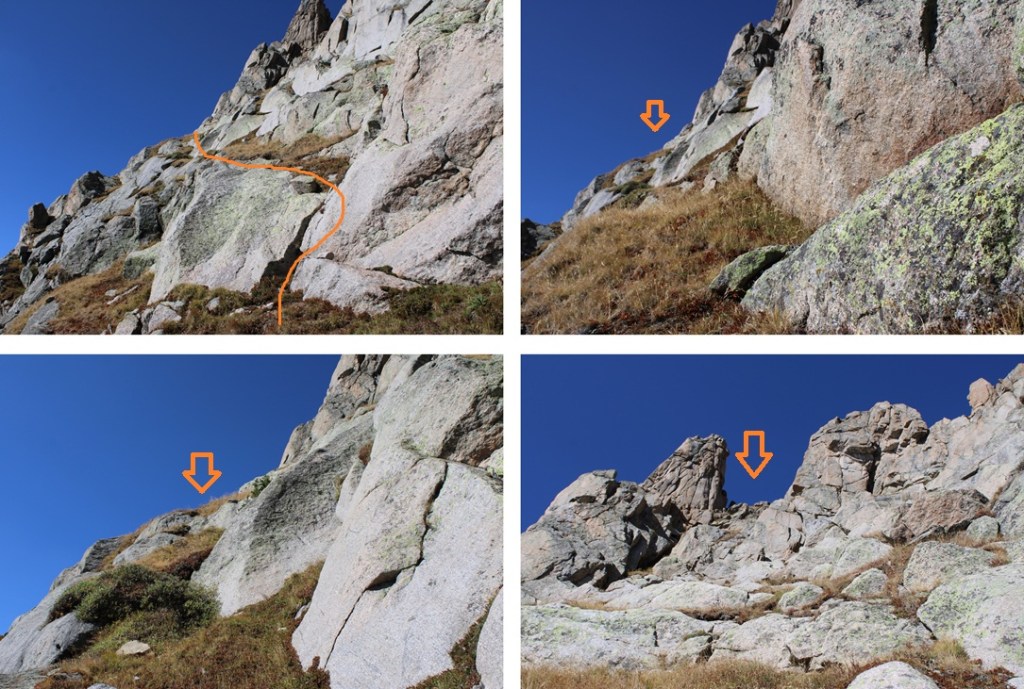
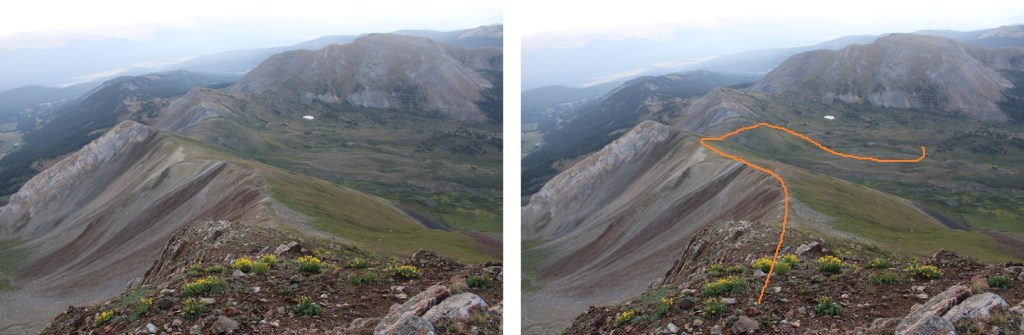
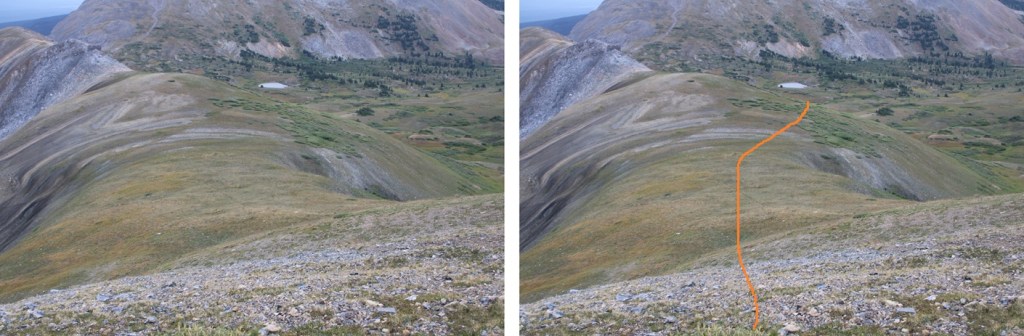
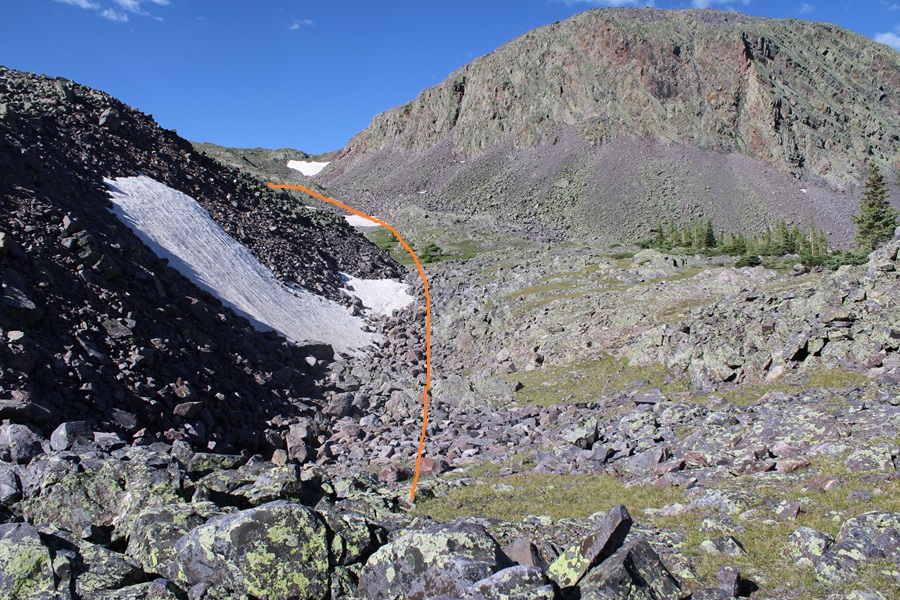
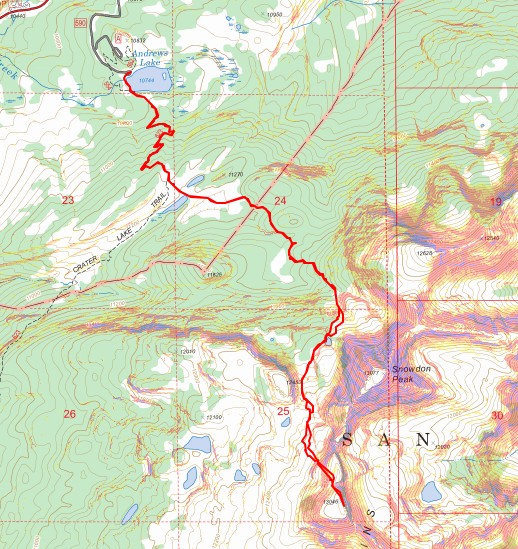
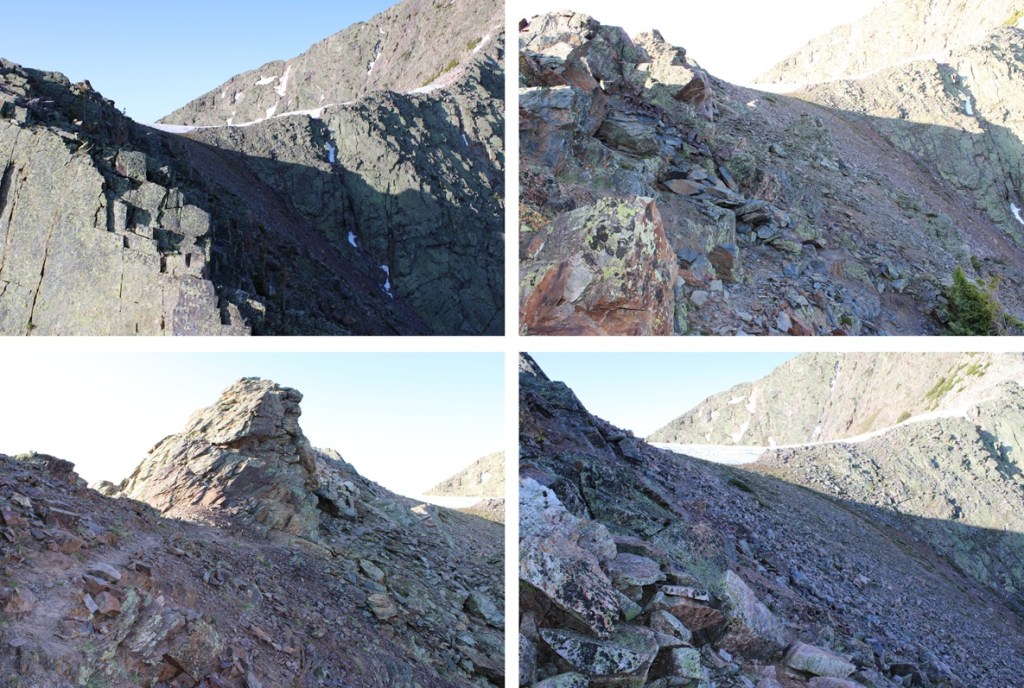
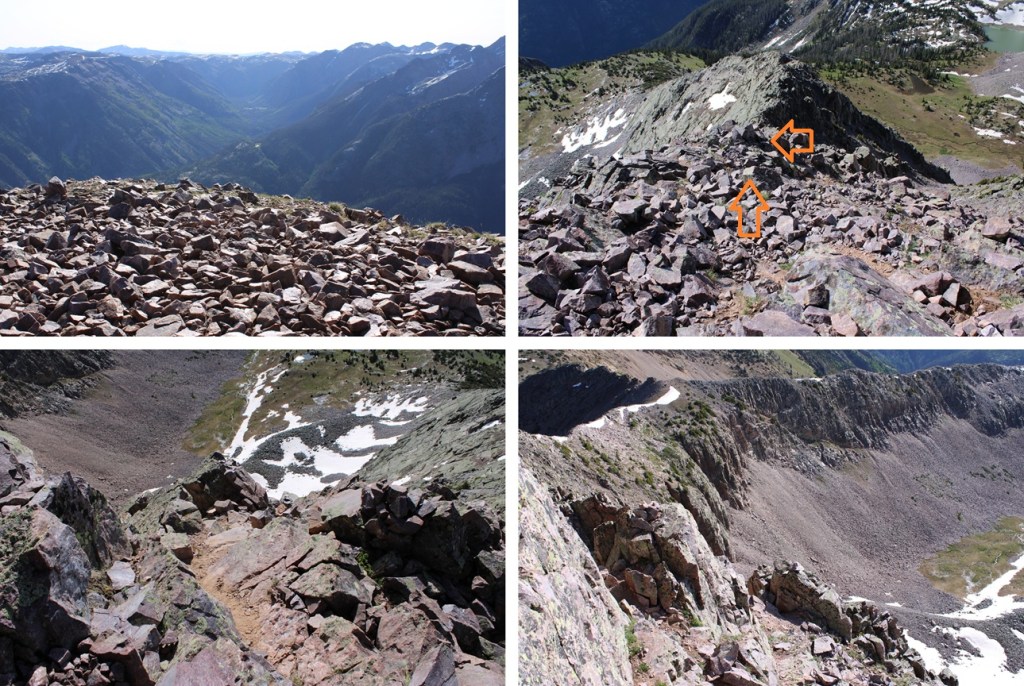
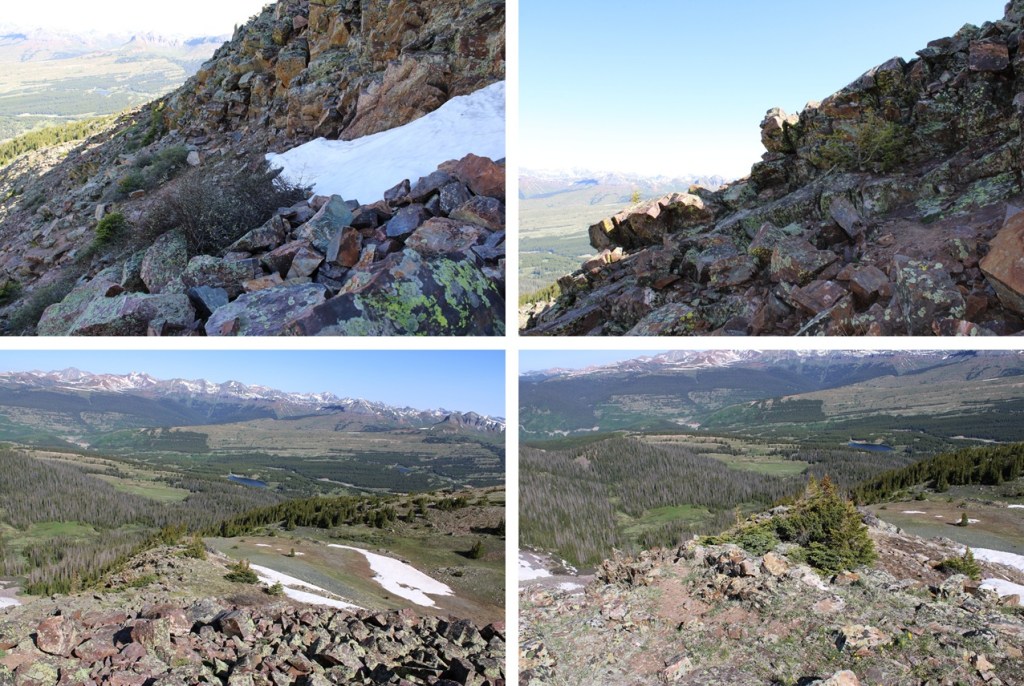
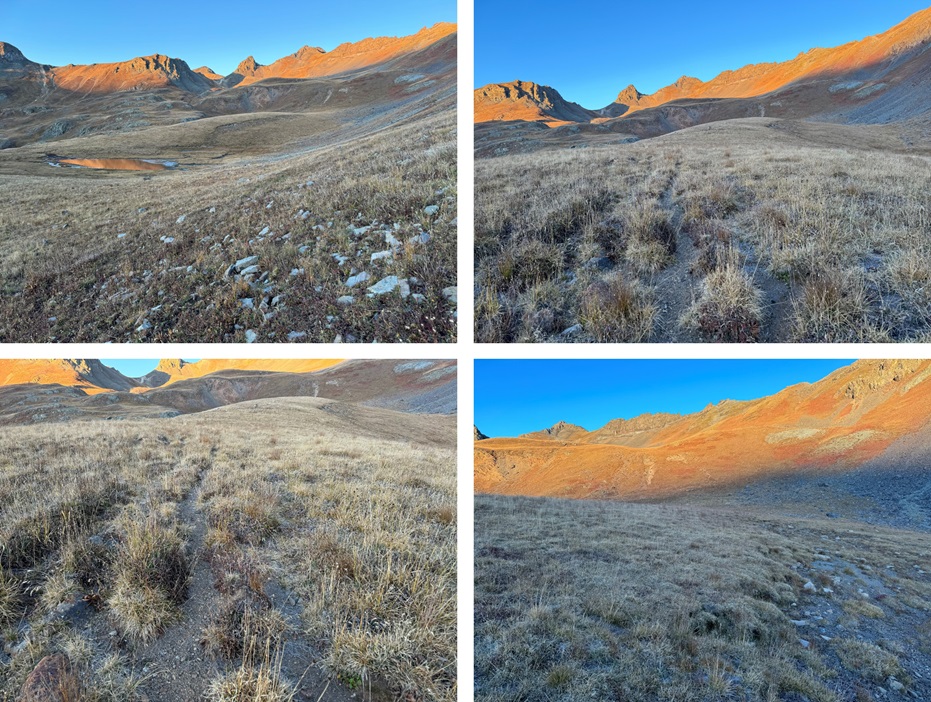
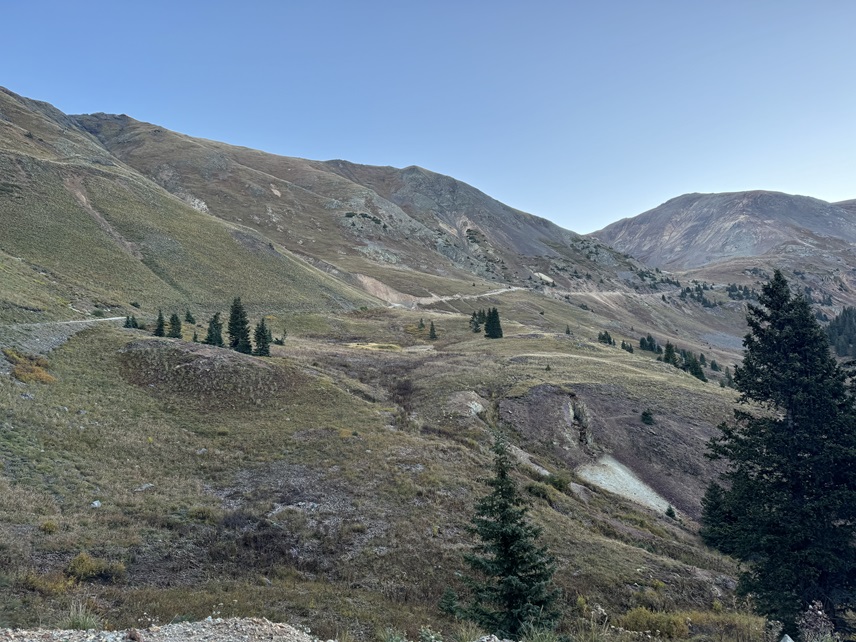
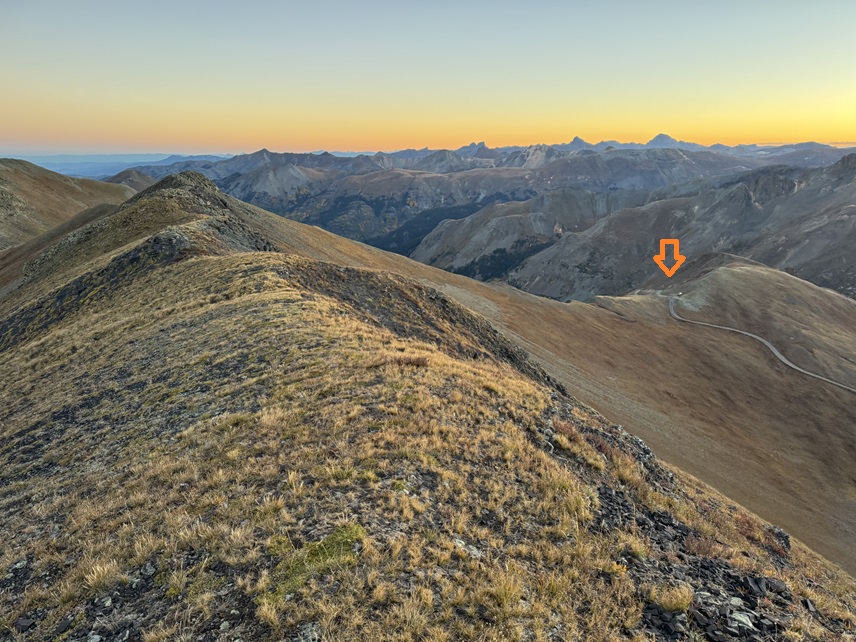
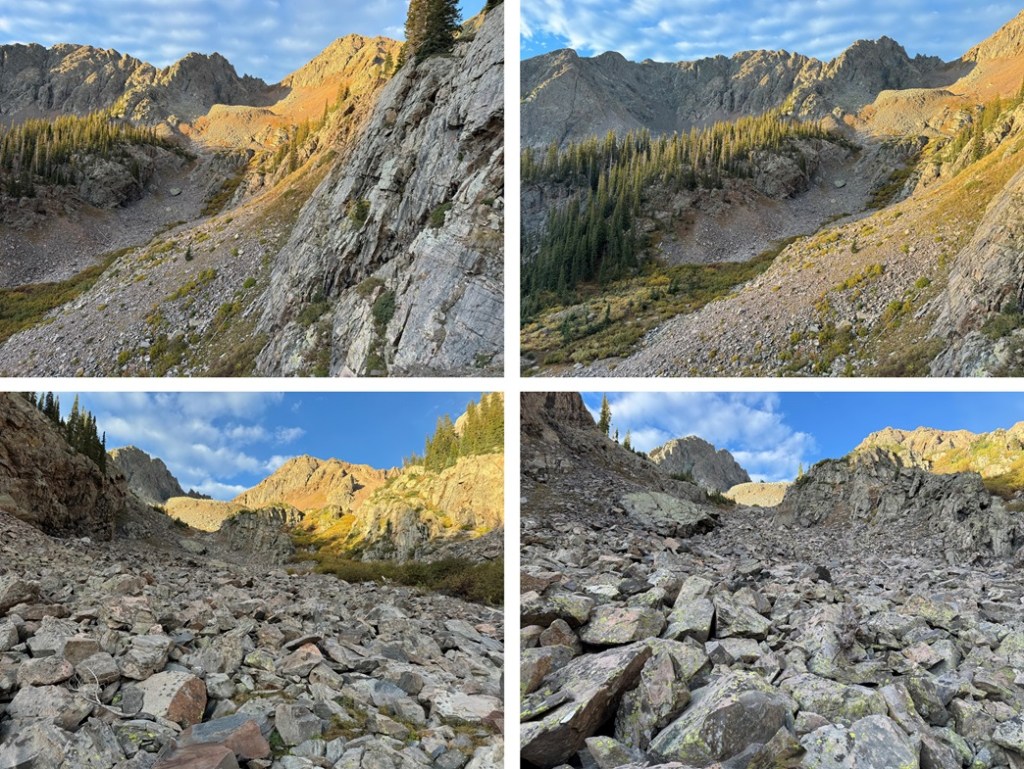
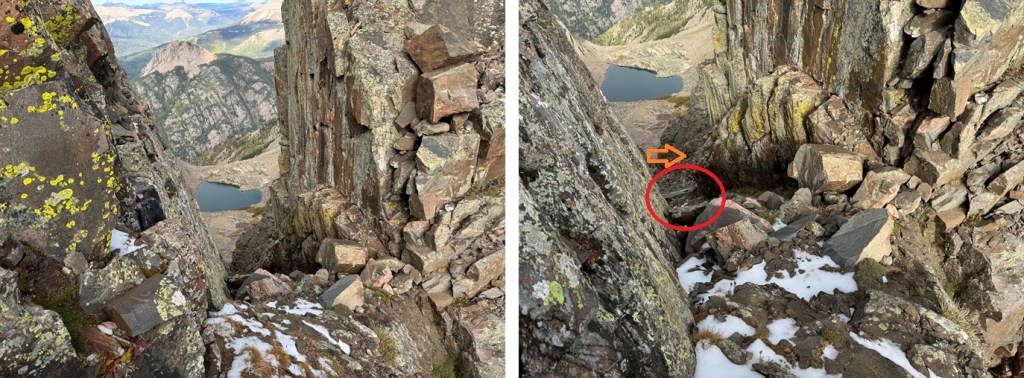
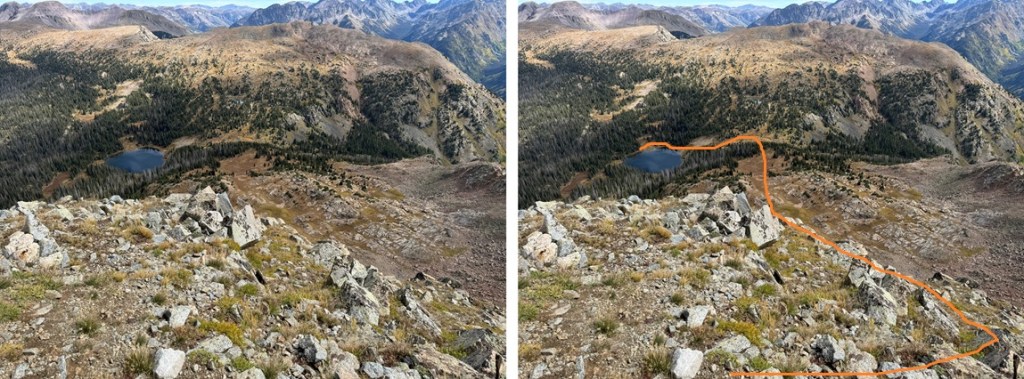
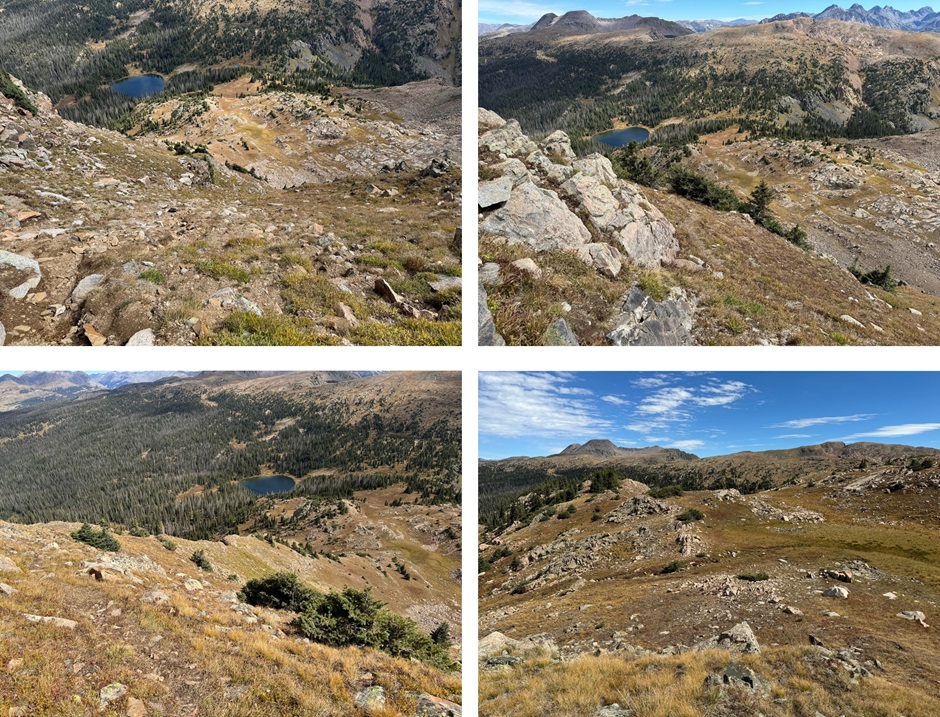
Here’s a view of my route back down the avalanche chute.  Notice Deadman Lake in the distance.  It’s a good visual for the decent.

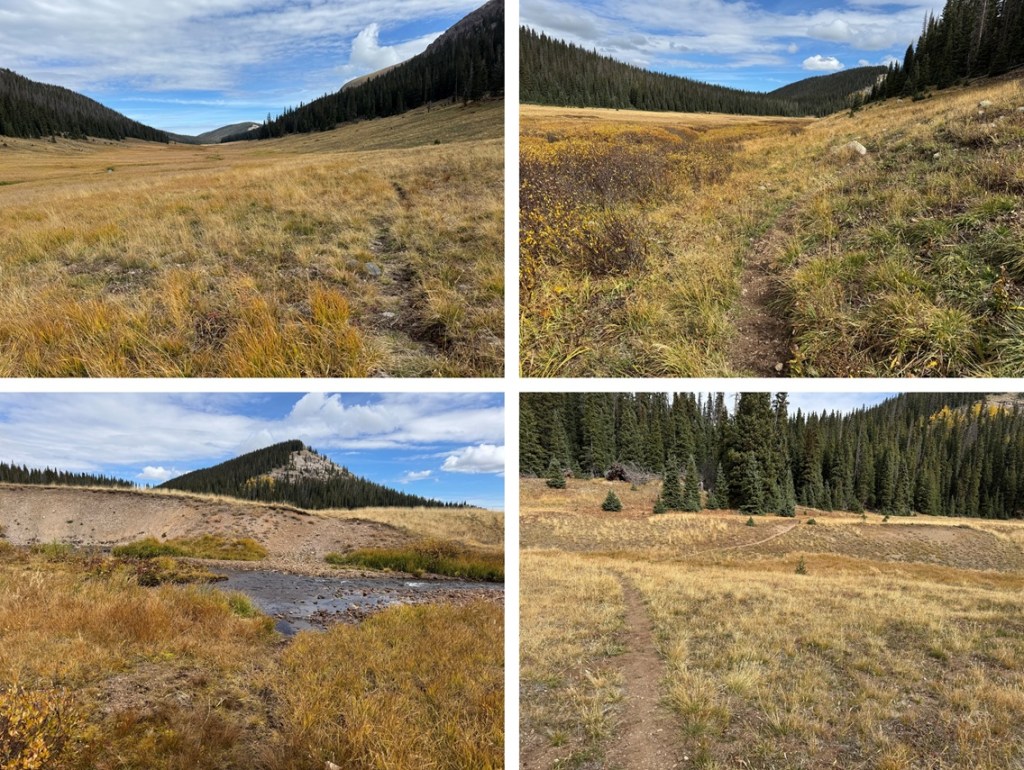
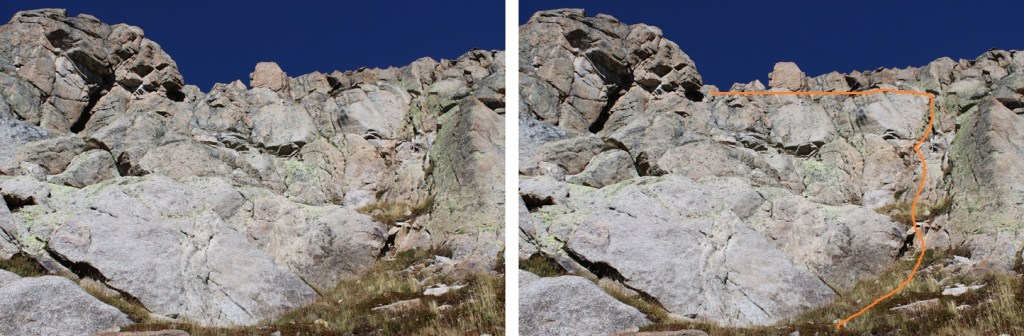
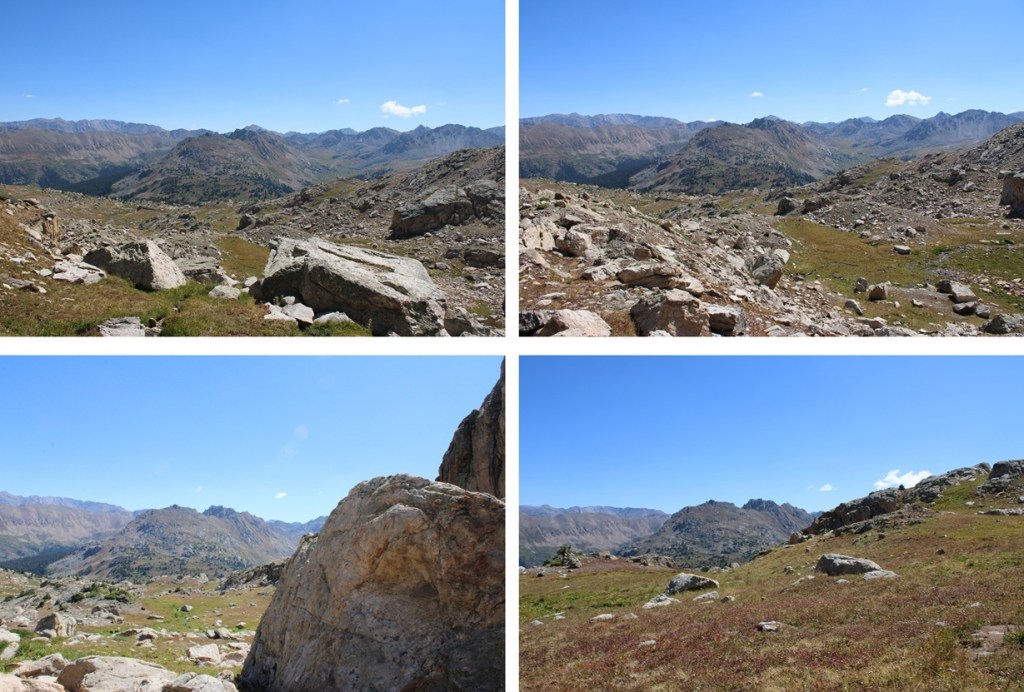
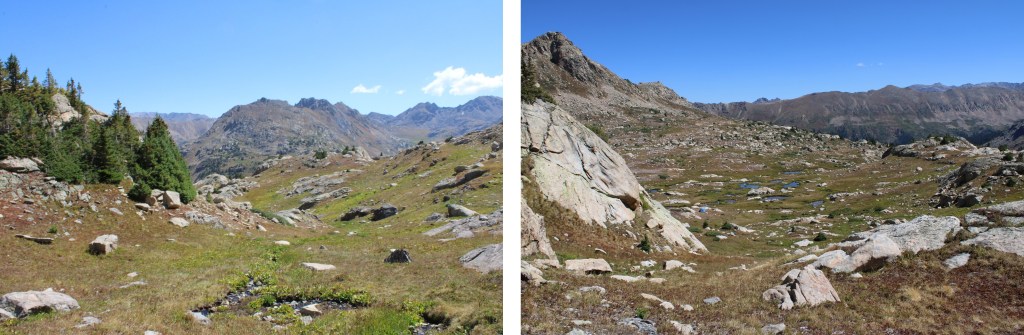
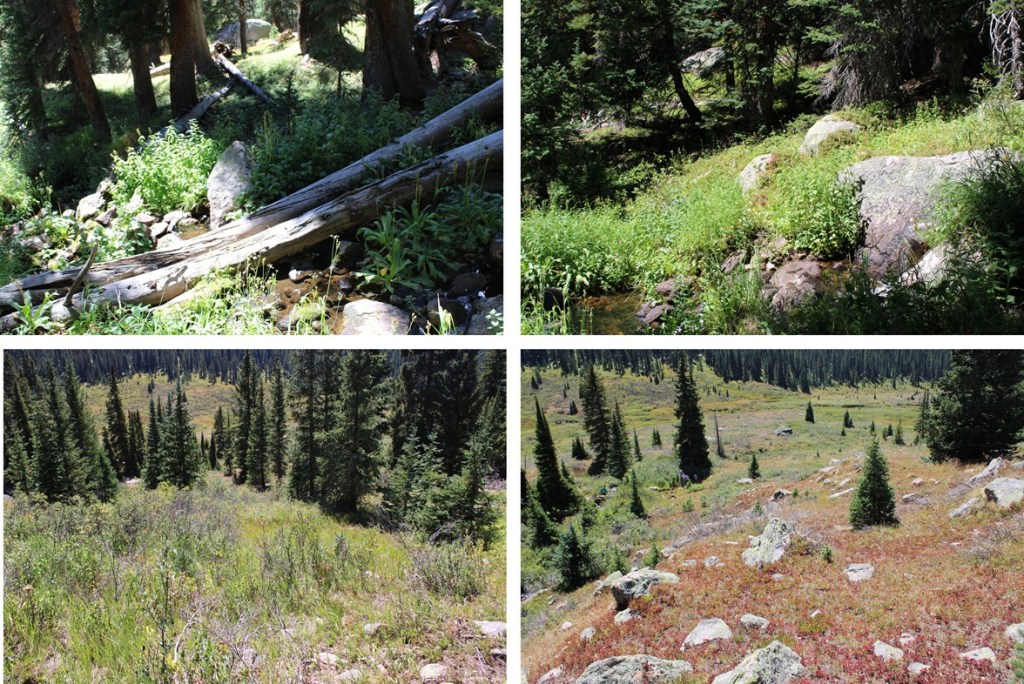
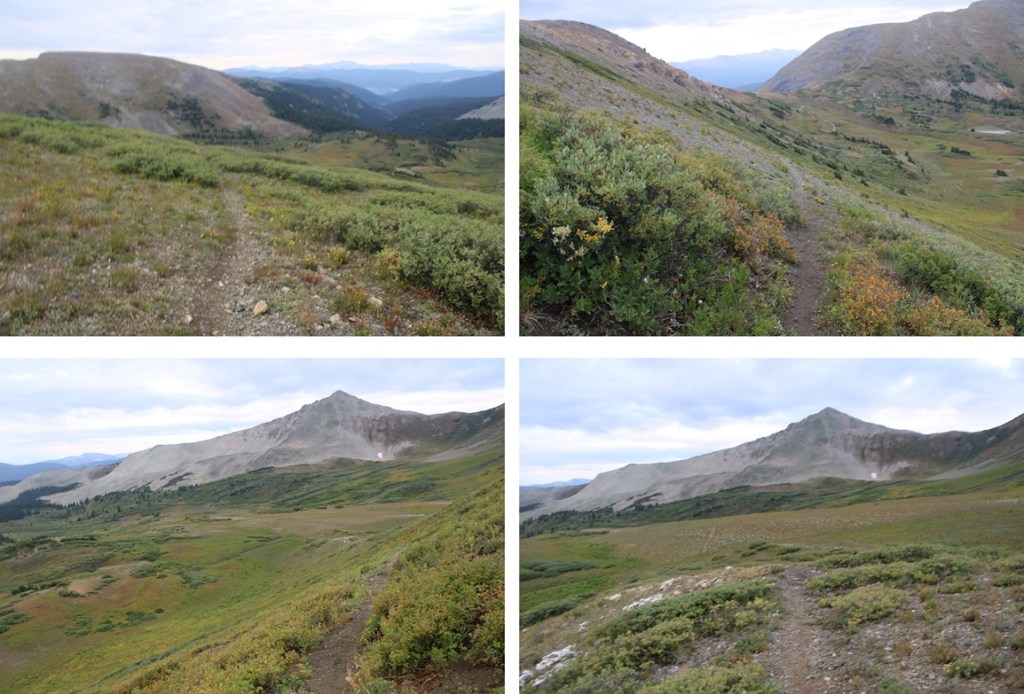
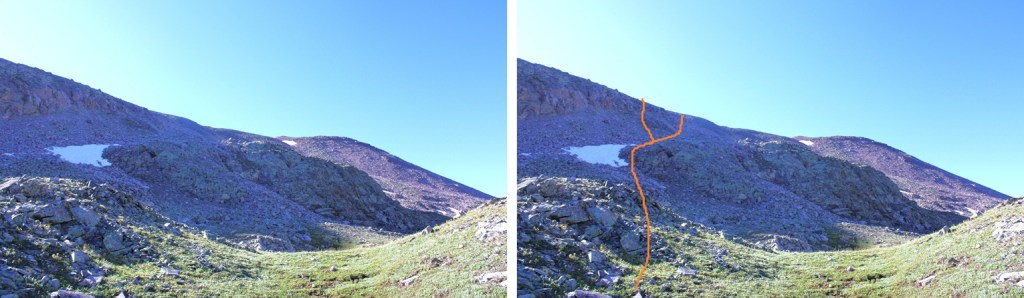
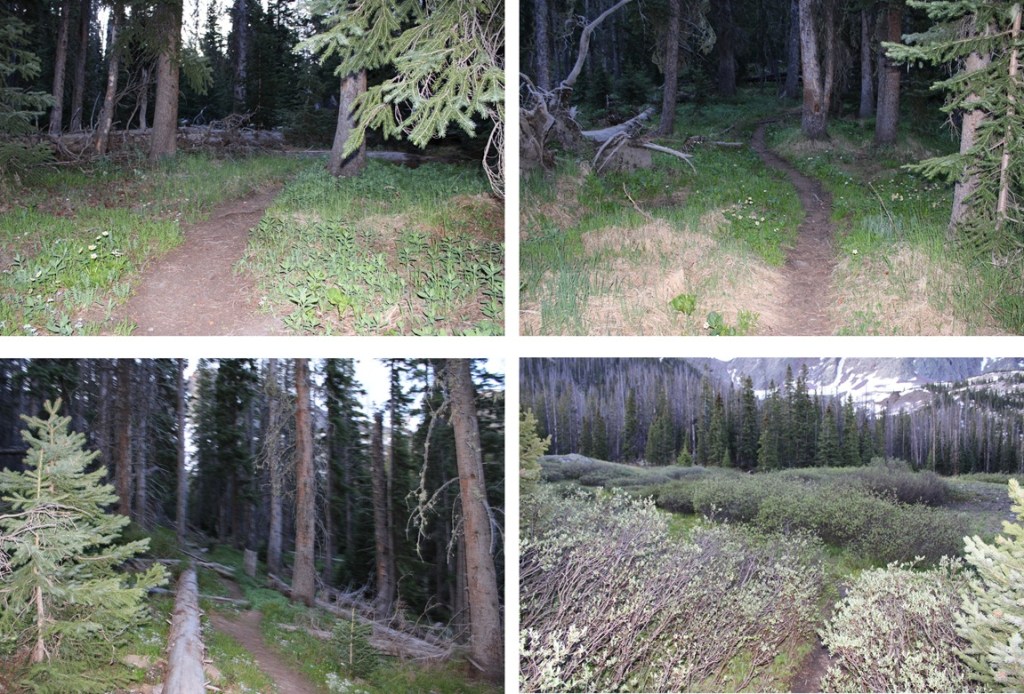
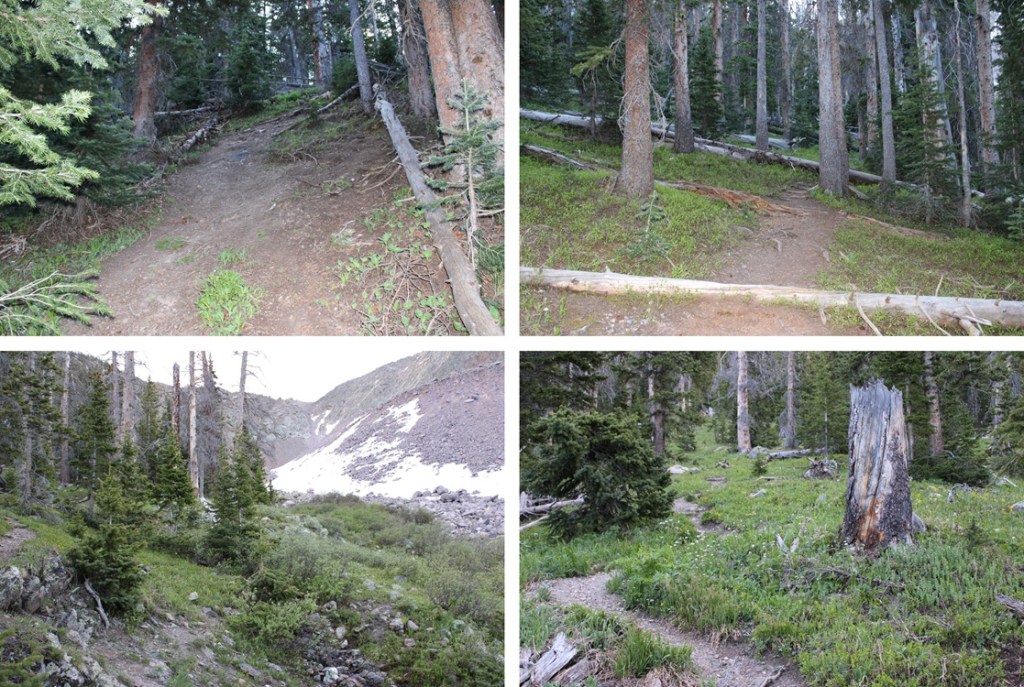
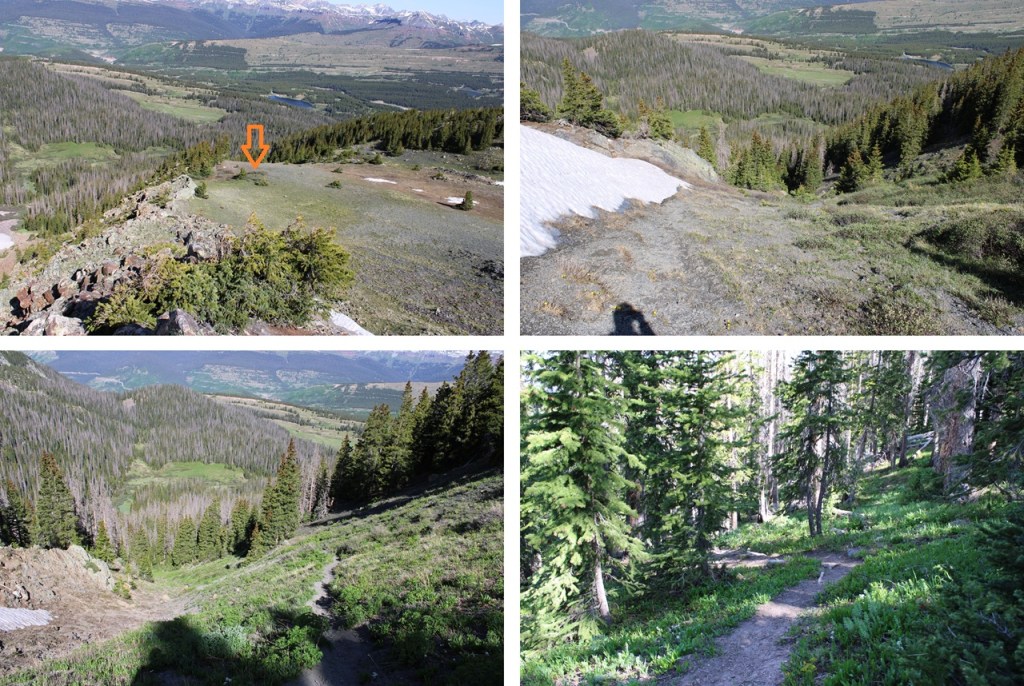
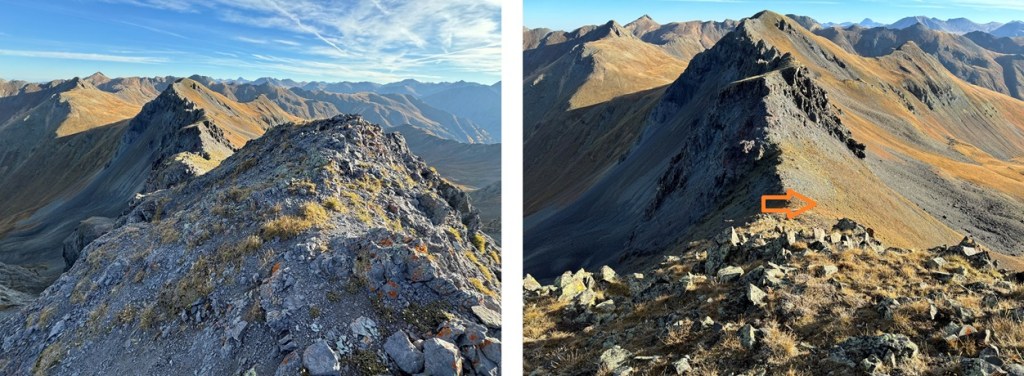
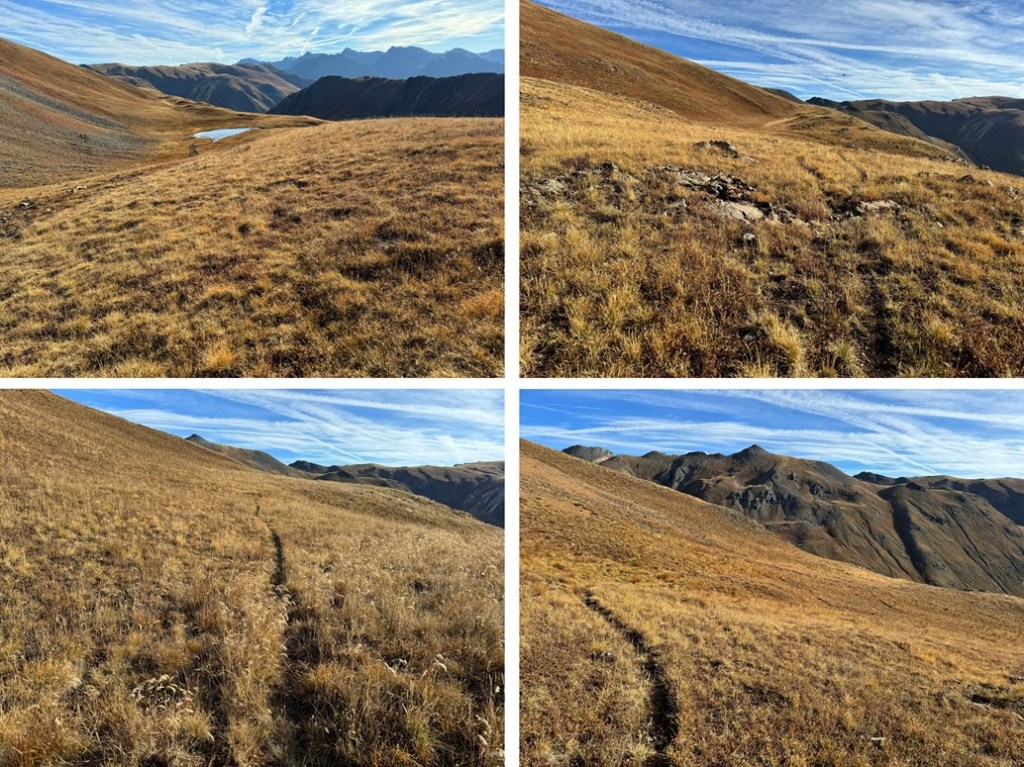
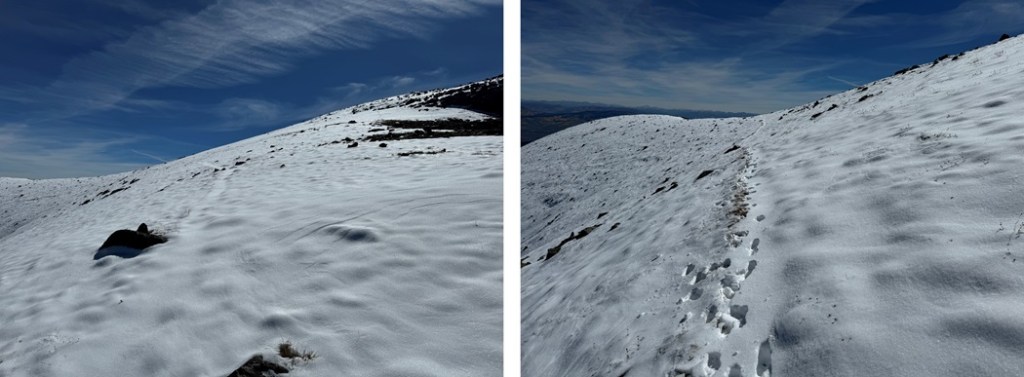
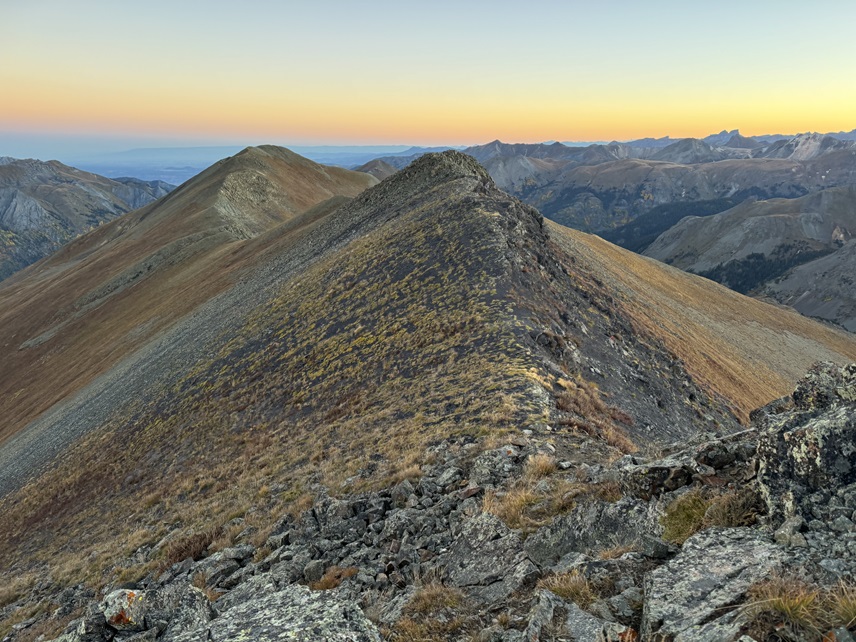
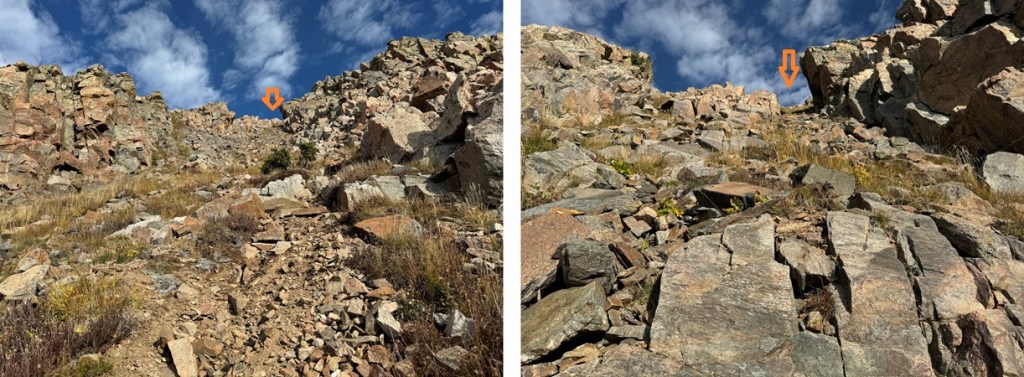
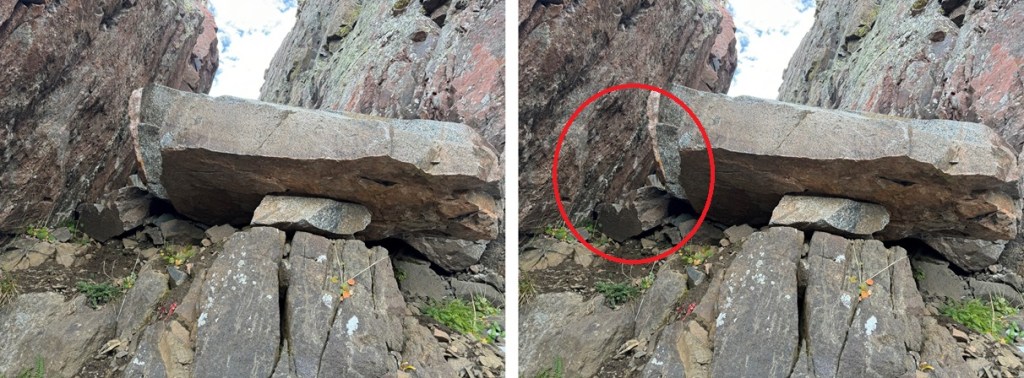
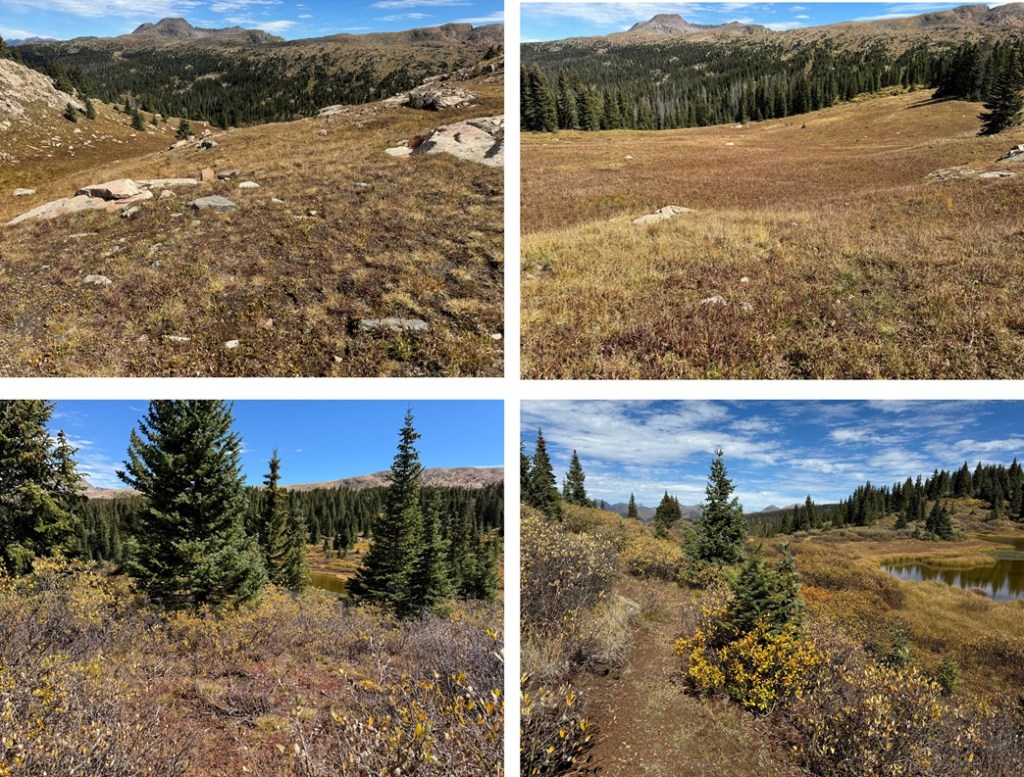
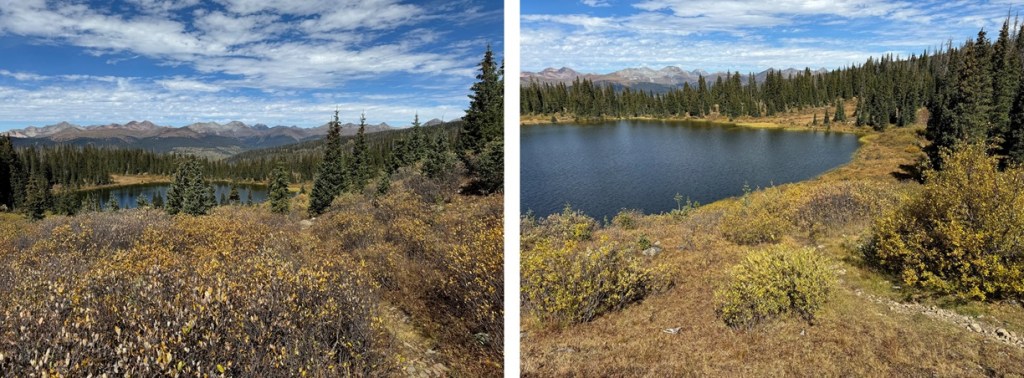
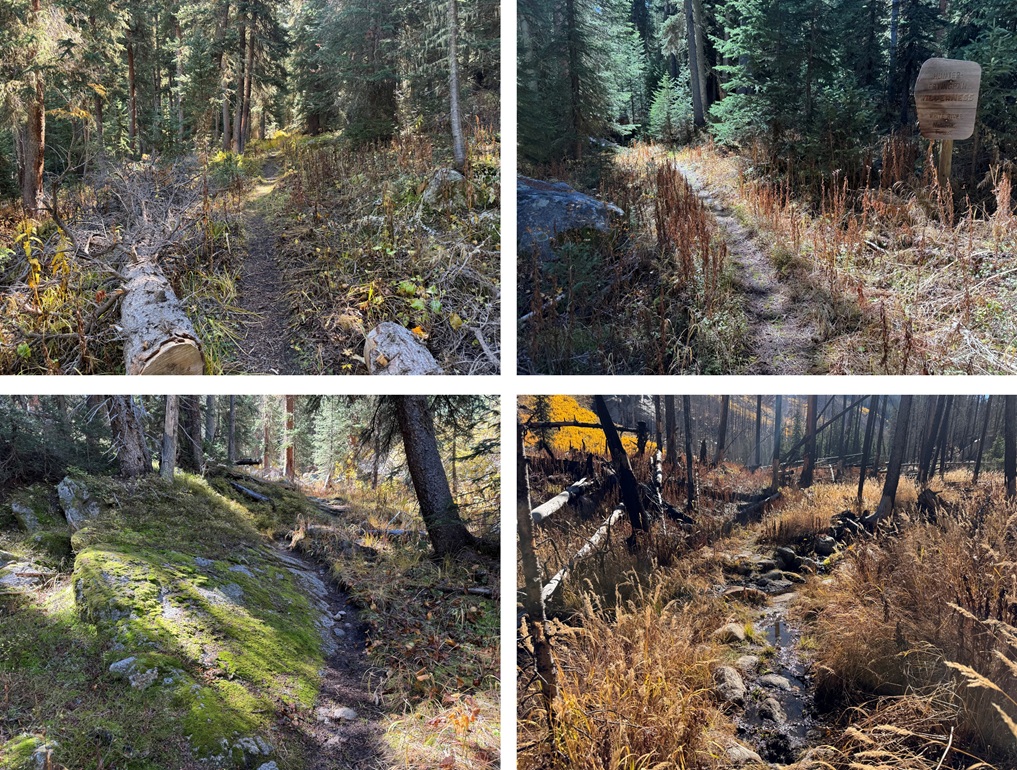
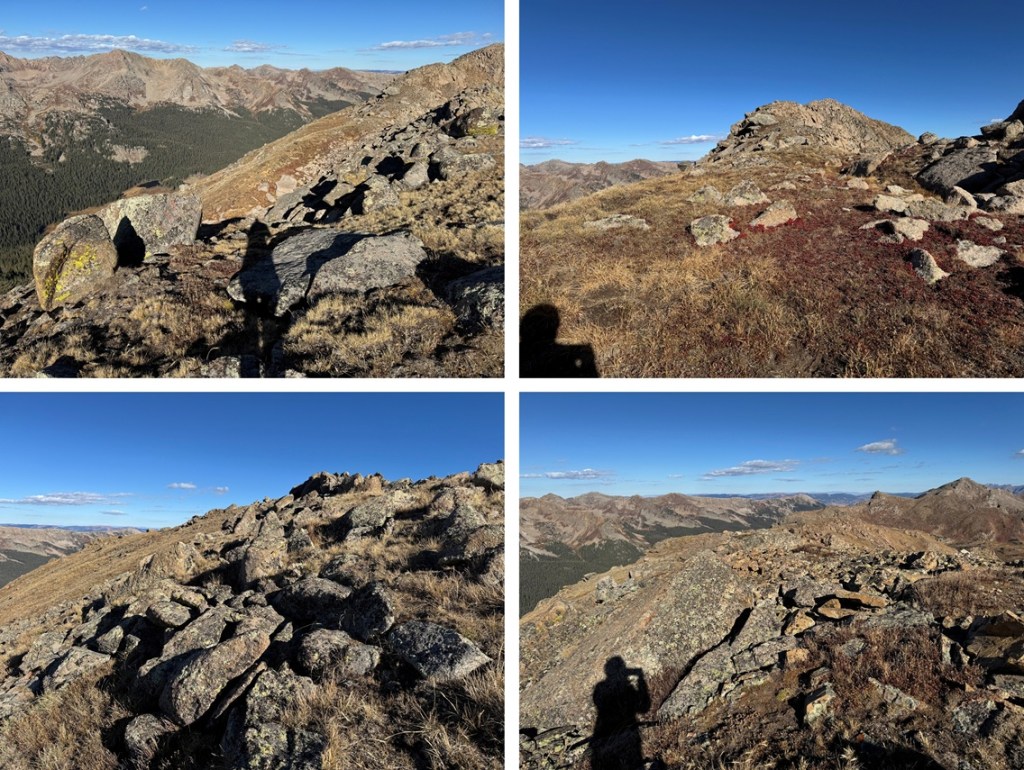
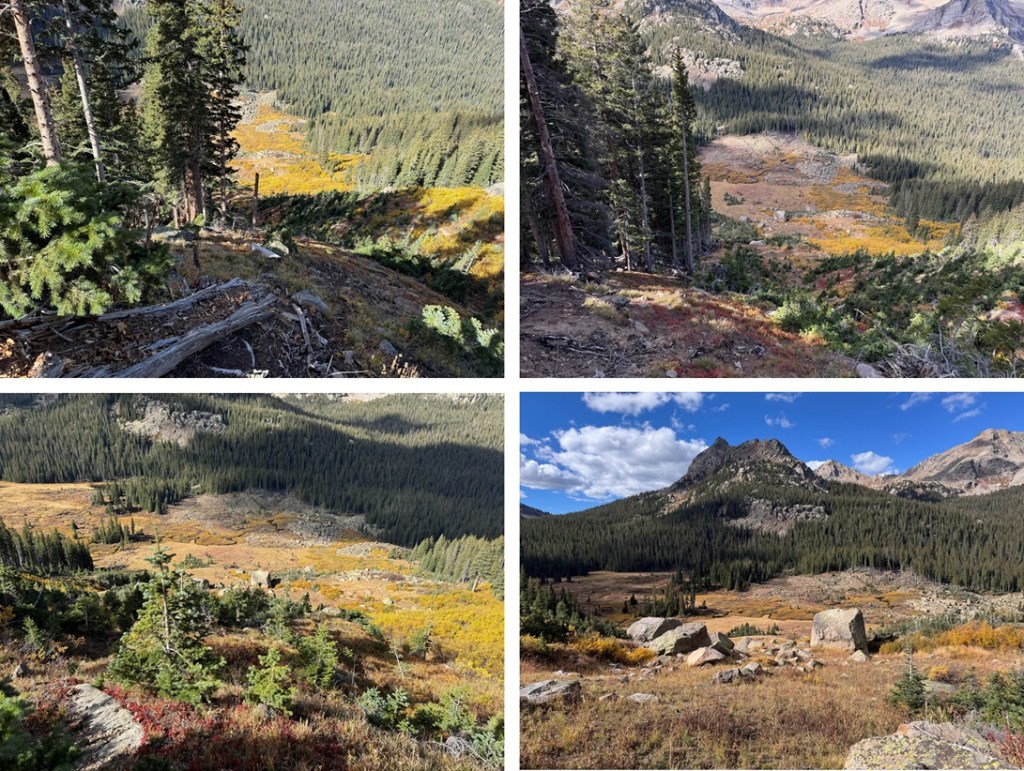
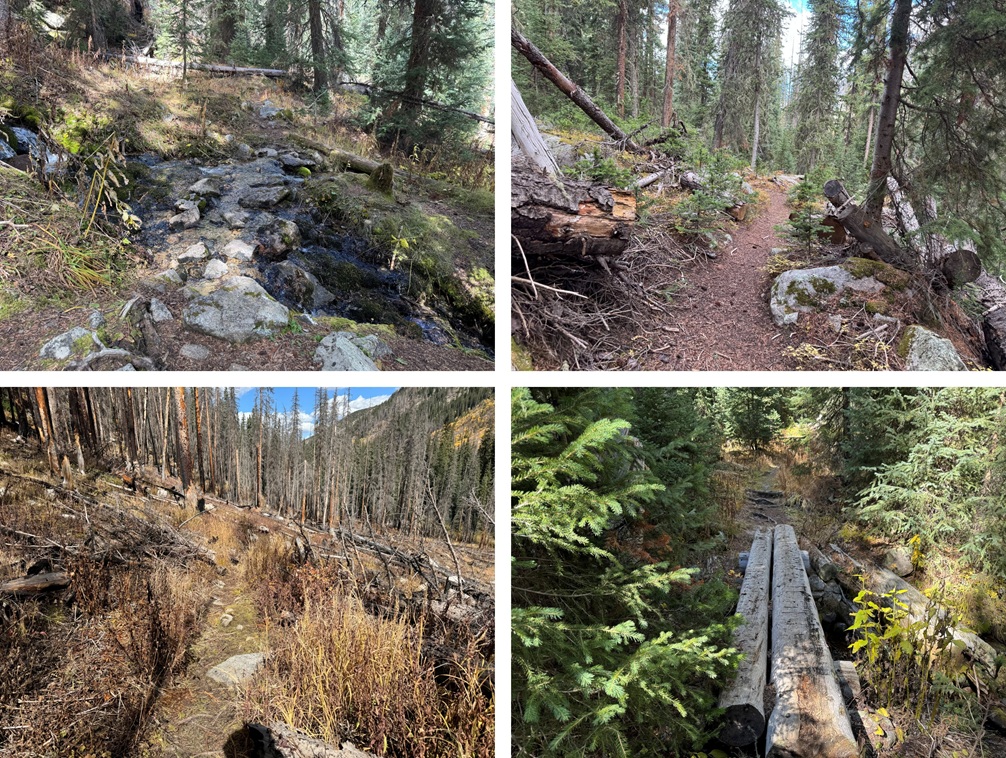
And some pictures of the route back to my campsite

Back at my campsite I quickly packed up my gear and was on my way.  First, I crossed the stream/river and found the trail again.

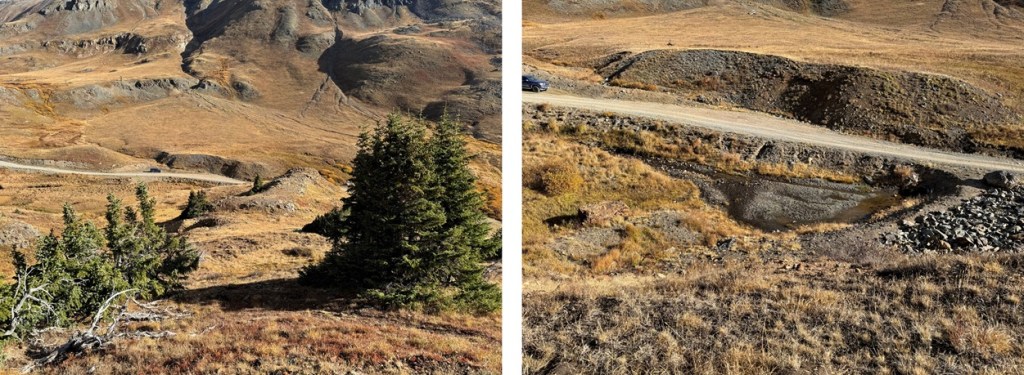
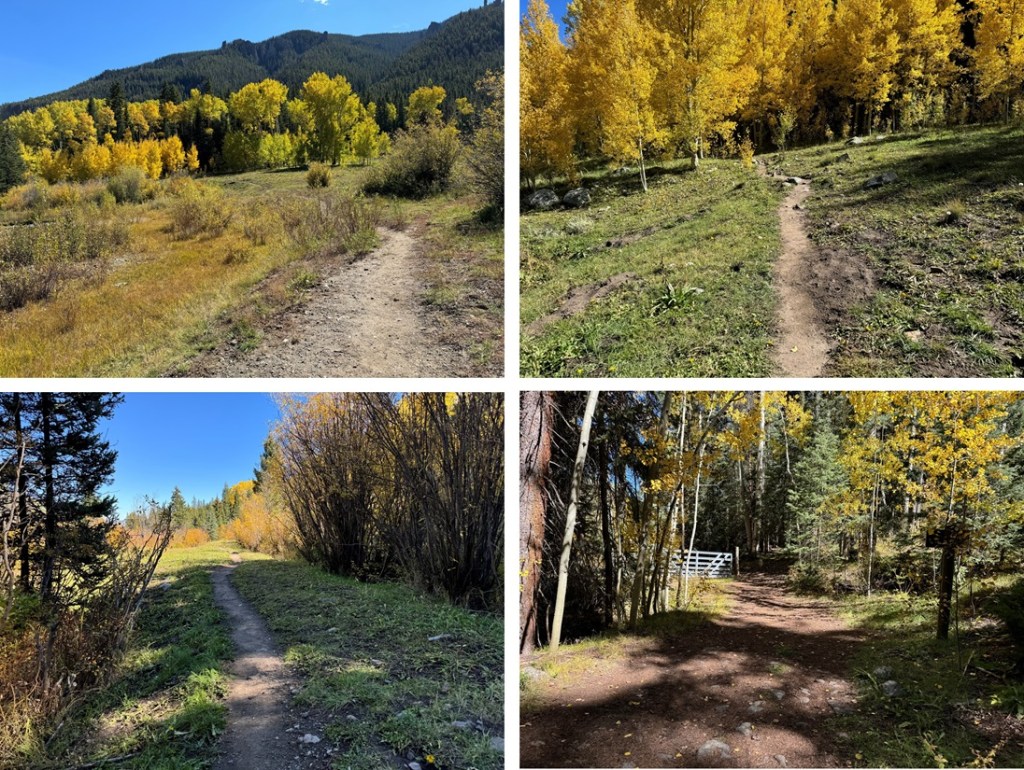
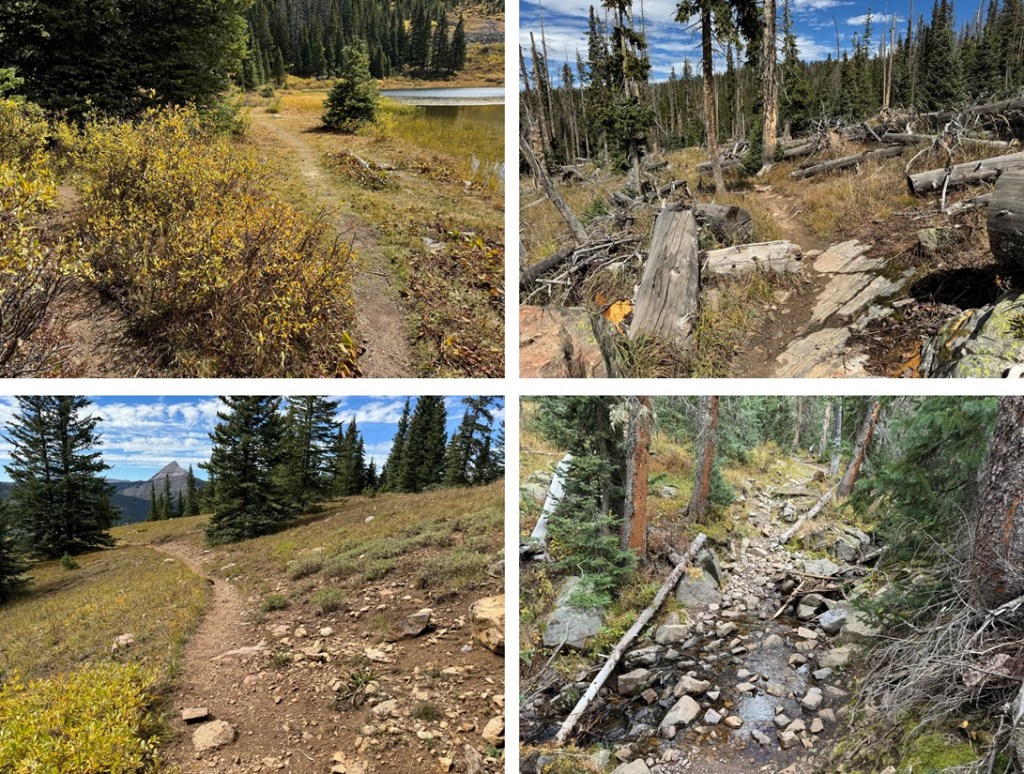
I then followed the trail 4 miles north back to the trailhead.

I made it back to the trailhead at 12:30pm.  This was a 12.14 mile hike with 3207’ of elevation gain.

On to the next trailhead!

13,048 and 13,015

RT Length: 16.36 miles

Elevation Gain: 3188’

This hike starts at Fall Creek Trailhead. However, Google doesn’t seem to know where that is.  To get there first go to the Little Cimarron Trailhead and continue past it for 4.4 miles until the road ends.  It’s a total of over 18 miles on a 2WD dirt road to get to Fall Creek Trailhead.   There’s room for about 10 vehicles to park, and some dispersed campsites along the way and at the trailhead. 

There’s been a fire and a lot of logging in the area, so the beginning of the trail isn’t easy to find.  There isn’t a trailhead marker, etc. but the trail starts at the south end of the parking area. 

Once I found the trail I followed it south.  This trail follows Fall Creek, and on a map is labeled Fall Creek Trail 9231.  For the first few miles the trail is easy to follow.  It goes through a rocky area and through several large meadows following the creek.

Just after descending through the trees I came to a creek crossing. 

From here the trail can be difficult to follow but there are no trail junctions.  It gets marshy and there are many game trails due to the mud and water.  Also, horses have torn up this area.  Be prepared with an extra pair of socks.  From here I stayed on the left side of the creek until an obvious crossing point.

I crossed the stream and the trail brought me into the trees to avoid the willows below.  This is where the elevation gain begins.  There are some downed trees in this area but overall it was much easier to follow than heading through the marsh.  But don’t change your socks yet: it’s going to get muddy through the willows up ahead.

After hiking for 6 miles, and at 12050’ of elevation I found my campsite for the night.  It’s important to note this spot even if you don’t plan on making this an overnight, as this is where you’ll cross the creek again. 

It took me just under 3 hours from the trailhead to my campsite.  I set up camp and enjoyed the rest of my afternoon.  I saw two different herds of elk, lots of raptors, and had amazing views of the peaks nearby.  I could see PT 13015 to the northeast, and PT 13048 to the south.  It was my goal to just enjoy the solitude.

It was a long night, but that was just because I could hear the elk bugling and calling to each other.  I’m also pretty sure I heard a cow moose at one point.  This was why I’d made this trek an overnight: to enjoy the wildlife and fall scenery.  It was worth it.  I was the only one in the basin the entire time I was there.  The next morning I was up and on the trail by 7am.  I crossed the creek on a game trail and headed for the 13015/13048 saddle on tundra. 

Once on the saddle my first objective was 13048.  I turned right and headed up a small gully to the ridge.  This was a class 2 gully and easy to navigate. 

At the top of the gully I turned right to gain the ridge, also on class 2 tundra.

Once I’d gained the ridge I followed it southwest on easy tundra terrain to the summit.

I summited PT 13048 at 7:30am

PT 13048:

I could see PT 13015 to the northeast, so I descended back to the 13015/13048 saddle.

Here’s my overall route to the summit of 13015.  It’s all class 2 on mostly tundra and then rocks at the end.

Back on the saddle I aimed for a low point in the tundra

Then I rock hopped to the saddle.

Once on the ridge I followed it north to the saddle.  There was a game trail here to follow.  There are a few false summits, and the last one has a trail that goes to the left so you don’t need to summit it if you don’t want to. It’s rocky, but all class 2.

I summited PT 13015 at 8:30am

PT 13015:

By this point it was very windy and very cold.  I need to start carrying my balaclava again.  I turned and headed back down towards the saddle.

Here’s the overall route back to my campsite:

I made it back to my campsite at 9am, so I’d summited both peaks in under 2 hours.  I ate breakfast, packed up my gear, and was back on Fall Creek trail heading north by 9:30am.  Here are some pictures of the 6 miles back to Fall Creek Trailhead.

I made it back to the trailhead at 11:50am, making this a 16.36 mile hike with 3188’ of elevation gain.

On to the next trailhead!

PT 13204

RT Length:  Varies depending on route (see below)

Elevation Gain:  Varies depending on route (see below)

This is a three-trip-report peak for me, so my numbers are all splattered together.  I had an idea this peak would take me several attempts to get, so I came prepared and brought my backpacking gear.  I’m going to give you the three reports as they happened.  I found a way to make this a class 4, 3, or 2 peak.  You can choose your route.  Either way, the approach to the place I camped in the upper basin is the same. 

I started at the Lower Lost Man Campground and followed the trail (1996) north past Lost Man Reservoir and up towards South Fork Pass.  This is a class 1 trail I followed for about 4.25 miles.

After about 4.25 miles, at 11430’, and just before the third creek crossing I turned left and followed the creek for about 20 yards before crossing the creek and then following the creek up to an upper basin, heading northeast.  This creek isn’t named, and neither is the basin, but following it will put you just east of 13024.  This is class 2.  It’s less than a mile to make it into the basin once you leave the trail.

This put me into an upper basin.  From this point there are several options to climb 13024. 

I found a camping spot and set up for the night. This area is boggy/marshy, and it’s difficult to find a spot 150’ from water, but I found one underneath a large rock outcropping.  As you can see by the picture below, I found three different routes up/down PT 13024.  The orange route is class 4, the blue route class 2, the pink route class 3 (I didn’t really know this beforehand).  My first attempt the next morning was going to be to the left hand side, as I didn’t yet know if the ridge would go, and had heard it was the easier side (it wasn’t).  I’d been in the area before, and the ridge looked like it went, so in the morning I was going to take the ridge to the summit from the left. 

I set up my tent and had the late afternoon to just chill and relax (a goal of mine while climbing this year).  While I was there a couple of hunters hiked in, scouting the area (hunting season was to start in a couple of days).  I saw them pointing in the distance and getting out their binoculars and looking, then pointing again.  I gave them their space, but half an hour later they started hiking towards me and my tent.  They whistled and said “Just so you know, there’s a bear behind you about 200 feet, behind the rock you’re set up next to.”  I was thrilled with this information, but a bit upset it took them HALF AN HOUR to let me know a bear was behind me.  I got up, got my trekking pole, and spent the next 2 hours looking for the bear.  I never saw it.  I was mentally ok and prepared for the night (bear cannister and all), but still a little upset I never actually got to see the bear.  I did hear cow elk calling to their babies in the night, but no more sighting of that bear.  In the morning I was off at 6:30am to attempt the ridge (orange route).  I started by following the grassy area southwest towards the ridge.

I then found a small gully and gained the ridge on tundra.  This was all easy class 2.

Once on the ridge it was an easy class 2 hike as I followed the ridge west/northwest.

At the top of the ridge I could see 13024 to the right.  I followed the ridge on class 2 terrain to the base of the rocky area.  From here it’s only 1/10th of a mile and less than 200’ of elevation gain to the summit.  It’s mostly class 2 or easy 3, but there was one class 4 move I didn’t feel comfortable attempting without ropes.  Where the orange line ends is where I stopped, about 100’ from the summit.

Here are some pictures of the route to that point.

This was the move that I didn’t feel comfortable attempting without ropes.  It was very similar to the final crux on Jagged after the rockfall, but when I was there I had rope to help me.  The rocks above this problem overhang several feet over what look like easy steps from below, and it’s steep on all sides and all the rocks are loose, making depending on them for support/balance poor judgement.  The picture doesn’t do this area justice, and it wasn’t until I was under the rocks I realized the difficulty.  If I saw this picture, I’d go for it, but when I was there I knew it was too dangerous for me to do solo.  I could see where I needed to place my hands/feet, but I wasn’t tall enough to make the moves.  Rock climbing shoes might have helped, and a rope definitely would have, but I had neither.  I spent about 15 minutes trying to find a way up/around this, and in the end turned around.  I’d just been on an amazing podcast (seriously, you should listen to it just to know the podcaster: it’s called “Going in Blind” and will change the way you think of your own life experiences).  We talked about failed attempts, turnarounds, risk tolerance, etc. and this move was above my risk tolerance for soloing.  How terrible would it have been if I’d just talked about my many, many failed attempts and turnarounds and attempted this and failed because I was overconfident?  I’d look like  a fool.  If I’d been with a friend they could have cheerleader lifted me and I could have pulled them from above but solo I didn’t feel comfortable attempting this move.  I felt there was a 75% chance I could make it up, which just wasn’t good enough, especially when going solo.  However, if you can get over this class 4 move it’s an easy class 3 climb to the summit. 

As I said, I turned around and headed back down to the basin, retracing my steps on easy class 2 terrain.

Back in the basin at my campsite it was only 9am.  I had a quick snack and started out again, this time taking the pink route up to 13204.  I started out by heading northwest up the basin towards the base of a large rock outcropping.  This is choose your own adventure, and all of it is class 2, just make your way towards the large rock outcropping.

From the base of this large rock outcropping I looked for a grassy ramp in the distance to the south/southwest.  It’s small, and the access point for the rest of the climb. 

I hiked up the grassy ramp and came to some willows.  My beta said from here to climb up the rock slab.  This was obviously class 4+ and I once again didn’t feel comfortable climbing up this rock face. 

So I did some scouting around.  BEFORE you see this rock face and before you make it to the willows (which are obvious) there is a nicer class 3 grassy slope.  Take that up and follow it to the left and it will keep you on route but keeps it class 3.  There’s some  exposure, but I felt much safer on this route, and put up some cairns to indicate where you ascend.

From here on out it’s class 3 choose your own adventure up the grassy slopes.  There is exposure here and be extra careful if the foliage is wet (which it was during my trip).  I was aiming for a notch in the mountain, heading west.

Here’s looking from below the notch, and the route I took, class 3

Once over the notch I needed to descend about 20 feet into a gully, then re-ascend to the other side. 

Now I found cairns leading me north and then west to the summit.  From this point on it was difficult class 2, easy class 3 to the summit.  It was choose your own adventure, and the routes were obvious.

The true summit is to the left, with a small rock on top of a large boulder.

I summited 13204 at 10:50am

13204:

Now you might think I’d head back the way I’d summited, but I was curious as to if I could have made it down that class 4 route I’d attempted earlier, so I headed back the way I’d summited, then headed down southwest to try to link up my climb from earlier in the day.  It was all class 2 until I got to the class 4 part, and I was glad I’d turned around. 

Seeing it wasn’t any better from this angle I reascended and found a gully to head down. I could see all the way down to the valley, it looked class 2, so I decided to go for it. I started at 13100’ and descended the entire way down on class 2 terrain just below where I’d dropped down and re-ascended again on the ascent.  The place just before the notch on the return.  That gully goes at class 2.  I could see the access point from the summit.

Here are some pictures looking down the gully.  It splits at least twice, but each option is class 2, so pick the route you like the best.  If I were to do this peak again, I’d take the gully.  Tons of game trails, not a lot of scree, lots of elevation gain but no exposure.  Just keep this as an option as a bail out point, or another way to summit this peak if you’re dividing the peaks and not doing the traverse. 

From the base of the gully I paralleled the ridge I’d hiked that morning, heading west until I’d reached my camping spot.

If you’re heading up from the basin doing this class 2 route, this is how the route would look:

Back in the basin I followed the stream back down, heading Southeast, staying to the left of the stream until I was about 20 yards from the trail, then crossing the stream on an obvious area, and linking up with Lost Man Trail.

Back on Lost Man Trail I turned right and followed it back to the trailhead.

I made it back to my truck at 1pm.  Total stats for this hike vary.

Parking Area to campsite/upper basin: 5.43 miles, 1600’

Campsite to first attempt and back: 2.5 miles, 1000’

Campsite to class 3 summit: 1.3 miles, 1100’

Down summit class 2 route: 1 mile, 1100’ elevation loss

Campsite/upper basin to Parking Area:  5.43 miles

Topo for upper basin:

Route Topo:

On to the next trailhead!

Italian Mountain – 13,385

RT Length (from Stewart Mine):  3.2 miles

Elevation Gain (from Stewart Mine): 1500’

This was my second attempt at Italian Mountain.  Earlier this month (August) I hiked in from Spring Creek Reservoir and got turned around at Stewart Mine due to a summer snowstorm.  Actually, it was the thunder that turned me around.  If you do take the route from Spring Creek Reservoir you take 880 until it becomes a dirt road.  If you have a 2WD vehicle leave it there in the parking/camping area.  If you have a capable 4WD vehicle and competent driver you can take it another mile to the trailhead (at the end of the narrow road).  There is one large campsite just before the trailhead on the left-hand side.  You can then take the Italian Connector Trail to treeline, turn left at the only junction (the one with 4WD road 759), and follow it to Stewart Mine.  It’s about 3.5 miles and 1500’ of elevation gain to Stewart Mine on a class 1 trail that starts with a creek crossing and is very easy to follow.  I don’t have a lot of pictures of this part of the route because I either hiked it in the early morning dark or in whiteout conditions from the snow.  Here are a few pictures of the route to treeline:

When I got to Stewart Mine a dark cloud descended from the ridge of Italian Mountain and within minutes I was in a minor blizzard.  I hunkered down for 15 minutes waiting for it to pass, but when the thunder started I headed back down to treeline.  Half an hour later I realized this summer storm was going to last a while and descended back to the trailhead to try again another time.  It rained/hailed/sleeted/snowed the entire way back to the trailhead.

However, I hadn’t been expecting to see that 4WD road, so it got me thinking… could I drive up it?  The short answer is no.  My Tacoma could not drive this road, but my side by side could.  So I drove the side by side from 742, turned left onto 759.  There are a bunch of campsites along 742 and 759, but at the junction or near it is a great place to leave your 2WD vehicle.  It’s where I left my 4WD Tacoma and started out on the side by side.  From the junction it’s about 10 miles and 2300’ of elevation gain on a difficult 4WD road to Stewart Mine that follows Italian Creek and goes around private property (there are signs directing you on the road where you can legally drive).  My Tacoma could not have made it to the mine.  I’d strongly suggest either hiking in from Spring Creek Reservoir to the mine or taking a truly off road capable vehicle to the mine. Here are some pictures of the road in.  Notice I don’t have many, because I was white-knuckling it the entire way. 

I was on the trail at 6am.  The trail starts directly behind Stewart Mine at 10230’, and is fairly obvious. 

I followed the trail west and then northeast as it gained the ridge.  The trail was very easy to follow the entire way, with no junctions.  Here’s the basic route:

And some pictures of the route to the ridge:

Once on the ridge I followed the trail west.  Here’s the overall route:

There was one time the trail kind of disappeared, but it was easy to see where it picked up along the ridge in the distance.

I continued following the ridge (staying just to the left of the ridge) on this class 1 trail until I made it to 13180’.  Then I made the hike class 2 by leaving the trail and climbing straight up the ridge.  When I hit the top turned right and hiked a short way to the summit.  Alternatly you could follow the trail the entire way to the summit (something I didn’t know until I was on my descent). 

The last 20 yards or so was class 2 terrain, but easy tundra as I headed northwest.

I summited Italian Mountain at 7:10am.  It was a rather gloomy day, but I was glad the weather held out this time.

Italian Mountain:

This was an out and back hike for me, so I headed south, then took the ridge back to the trail. 

Here’s an overall view of my route back down to the mine

Here’s that spot where the trail vanishes for a bit

And then it picks up again and led me right back to the mine

I made it back to my campsite at 8am, making this a 3.2 mile hike with 1500’ of elevation gain in 2 hours.

The black line is my drive in from Spring Creek Reservoir, the purple line is my drive in on 759, and the red line is my hike.

On to the next trailhead!

“N2”- South Snowdon – 13,060

RT Length: 8.15 miles

Elevation Gain: 2416’

I once again started from the Andrews Lake Trailhead.  When the bathrooms are clean this is a really nice trailhead, up close and personal with Andrews Lake.  It’s also quite popular in summer, so get there early (yes, they have plenty of parking and an overflow lot, but it gets busy).

The trail starts by skirting the lake from the parking area and then ascends about 1.2 miles to a junction.

At the trail junction I went left and followed the trail through a meadow and towards the basin below Snowdon Peak. If you’ve done the West Buttress of Snowdon, it’s much of the same route.  Here’s the basic overall route to the upper basin:

And some pictures of the way to the lower basin.  I was lucky enough to see a herd of elk this morning.

At the base of the basin it’s time to leave the trail.  I’d hiked about 2.7 miles to this point.  Here I left the trail and headed southwest into the upper basin.

Heading southwest in the upper basin I came to a small pond and skirted it on a game trail to the west.

After skirting the pond, I came to a bit of a ravine.  I followed it south.  The route is a bit obvious, and the terrain is easy to navigate. You can’t really get lost if you keep heading south.  Access to N2 will eventually be on your left.

When I made it to 12355’ I started heading over towards the ridge. This is class 2 to the ridge and choose your own adventure.  I was trying to avoid the rock outcropping.  Most of the route is full of loose rock and boulders.  I ascended the left route, descended the right route, and both were loose and a bit miserable, but the left route was a little more stable.  Here’s the overall route:

And some pictures of my way to the ridge

Once on the ridge I followed it southeast to the summit.  Once again, very rocky, but all class 2.

I summited N2 at 8am

N2:

This was my only peak for today, so I turned around and headed back the way same way I’d summited. I headed northwest down the ridge

Then back down into the upper basin on a slightly different route.  Lots of loose rocks here.

Once I was done with the rocks I turned right and followed the upper basin north, staying on the grassy areas.

I came to the small pond and skirted it to the left, and then headed down into the lower basin and back to the trail

Then it was a quick 2.7 miles back to the Andrews Lake Trailhead

I made it back to the trailhead at 10:15am, making this an 8.15 mile hike with 2416’ of elevation gain in 4 hours, 45 minutes.

On to the next trailhead!

Snowdon Peak – 13,090 and ‘N1’ – 12,647

RT Length: 8.42 miles

Elevation Gain:  2746’

Yep, it’s been a while.  Those of you who follow me on my socials know what I’ve been up to, and I’ve been busy!  I’m really excited to have a few months off to tackle more peaks (kind of… I still need to travel for work most of August.  WHY is that my busiest climbing month, and my busiest work month???).  Most of the 13ers I have left still need to ‘melt out’ before I can climb them, but when I heard Snowdon was all clear I drove down to Andrews Lake and had to see for myself. 

Andrews Lake has plenty of parking, and even an overflow lot.  However, that didn’t stop it from being full when I arrived.  Also, the bathrooms were dirty (and bring your own toilet paper).  Last time I was here the bathrooms didn’t lock. I was pleased to see they had been fixed.

I started from Andrews Lake at 5:30am, skirting the east side of the lake to the trail.

I followed this class 1 trail for about 1.3 miles to a junction with a trail register.

At the junction/trail register I turned left and followed an unnamed trail east/southeast.

This trail was well defined in the beginning, but in the marshy areas became non-existent and I had to route find a bit.  There were areas with willows, marshes, and trees.  There were a few downed trees along the trail, but nothing too difficult to cross. I was headed towards this gully (there’s a good trail at the base). 

For reference, these are N1 and Snowdon

I followed the gully up a class 1, steep trail for 550’ in elevation.

At the top of the gully the trail ended.  I went left and headed northeast towards the summit of N1.  This was all class 2 and the route was obvious.  It felt “too easy”, almost like it shouldn’t have been ranked.

I summited ‘N1’ at 7am

N1:

Now for Snowdon Peak.  I turned and headed southwest back to the Snowdon/N1 saddle, to the right of the ridge.

Now to head up the ridge.  There are several ways to do this.  On my ascent I stuck to the ridge proper, which went at class 3.  On the way back down I found a faint trail that kept this area at class 2 after climbing about halfway up the ridge.  Here’s a picture of that trail:

And some pictures of the ridge.  I was able to take the ridge proper to the next saddle until I came across the game trail, which was much easier.

If you don’t already have your helmet on now is the time to do so.  There are several routes up this ridge.  I took the ridge proper at class 3 all the way to 12900’ before dipping down and south, then traversing around the east side of the mountain to get to the summit (lots of cairns to help once I dipped down).  However, you don’t need to take the ridge proper to this point.  If you stay to the left of the ridge there are game trails that keep you about 50 feet below the ridge on class 2 terrain most of the way.  Here are the routes:

Here are some pictures of the ridge route I took to 12,900’

On the ridge at 12,900’ I hit a snag, and realized I needed to drop down where I saw this gully.  Directly below it I saw a cairn and headed that way.  Here’s a visual of where you should go when you hit this area.  Head down, not up, and continue around the left side.

From here on out there are cairns to the summit.  If you don’t see a cairn, you’re off route.  I kept heading left, and every time I wanted to ascend it seemed like I had to descend as well, but there were always cairns to help lead the way.  This is class 3.

When I got to 13,010’ I saw this in front of me, and a cairn in the distance.  Don’t head for that cairn.  This is where you just scramble to the top from where you are. 

It’s a short scramble, and soon I was on the relatively flat summit

I summited Snowdon Peak at 8:20am

Snowdon Peak:

Now to head back down.  I took the same route back to the ridge following the cairns as I descended.

And now to follow the ridge back to the saddle.  Here’s a visual of the route I took:

I found my access gully and headed back down to the trail.

I then followed the trail back through the marshes and trees towards Andrews Lake.

Once back on the Crater Lake Trail I followed it back to Andrews Lake.

I made it back to Andrews Lake at 10:30am, making this an 8.42 mile hike with 2747’ of elevation gain. 

And for those of you wondering, my past few months consisted of:  Getting married, buying property, Mexico, Cookie Cupboard for 2 months (I love Girl Scouts!!!), Florida, Washington DC, my son visiting from South Korea, 2 of my kids graduating College in different states during the same week (one of them Valedictorian!), Georgia for a week, South America for a month,  building a ranch from the ground up (empty land, but after a few months of hard work I now have a well, a vineyard, an orchard and the animals have corrals).  Raising yaks and alpacas (all the females are pregnant), a nasty tick bite that left me out of the sun for a month but gave me time to do a  a couple of dozen podcasts, teaching Wilderness First Responder courses and several outdoor survival skill classes to multiple groups.  Oh, and last week we got a puppy, so it’s been a little busy around here!

On to the next trailhead!

Proposal Peak – 13,339

RT Length:  3.4 miles

Elevation Gain: 1652’

I drove up Eureka Gulch Road to 11930’ and parked on the side of the road.  This is a dirt road but can be driven in a high clearance 2WD.  From my parking spot, I could see the route before me. 

On my way in I went right, which ended up giving me needless elevation gain I would lose later.  Instead, head south/southwest and use the route to the left.  Game trails pick up there that will lead you to McCarty Basin. 

I was on the trail at 6:45am.  I started out by heading south/southwest up the tundra

As you can tell, I’d ascended too high and had to lose elevation to head into McCarty Basin.  However, I could now see my route to Proposal Peak

I dropped down into McCarty Basin, and followed the tundra southwest

I came to a game trail, that brought me to the upper basin

I could now see my route to the ridge.  If you want to keep this hike class 2, ascend to the saddle on the left, and skirt around the south side of the peak.  This will include steep scree, but it will remain class 2.  I chose to gain the ridge (the class 3 option).

I was able to follow the tundra all the way to the ridge

Once on the ridge I could see the true summit of Proposal Peak to the southwest. 

I continued following the ridge south. This was all class 2.

Until I came here.  There’s a short difficult class 3 section here.  I would dare to say it borders on class 4 (if you’re short like me).  It was much harder to navigate down than up, and so steep I couldn’t get a good picture of it looking down (I have a better one on the way back).  I turned and faced the mountain and headed down.  Be careful here: the rocks break off, so make sure you have a solid hand hold before committing your weight to a move. The ridge proper goes here at class 3, and it’s a very short section.

Here’s looking up at what I downclimbed:

Now for another short class 3 section, sticking to the ridge proper, before an easy class 2 hike to the summit.

I summited Proposal Peak at 8:15am

Proposal Peak:

Now to head back.  I took much of the same route on my way back down. I followed the ridge to the class 3 section

And then climbed back up the class 3 chimney.  This was much easier to navigate climbing up.

I now followed the ridge northeast, and then descended the gully back down to the basin. 

Here’s a look at my route through McCarty Basin

On the right side of a small pond I found a game trail that would lead me almost all the way back to my truck.

With the road in sight, I followed the tundra north back to my truck

I made it back to my truck at 9am, making this a 3.4 mile hike with 1652’ of elevation gain in 2 hours, 15 minutes.

On to the next trailhead!

Goat Peak – 12,987 and West Elk Peak – 13,040

RT Length: 19.82 miles

Elevation Gain: 4778’

While this trail looks long, it’s actually quite easy.  The elevation gain is gentle, and the views are amazing.  It looked like fall below treeline, and winter above, which was a neat contrast. I parked at the upper Mill Castle Trailhead.  The last mile and a half or so require high clearance, but a 2WD should make it.  If not, there’s a parking area below with vault toilets and plenty of parking.

I was on the trail at 6:30am.  The trailhead is obvious, and as with most of this hike, it starts to the west.

The trail (Mill Castle Trail) starts by going through a gate to what used to be a 4WD road, then changes to a trail.  There aren’t any junctions to this trail, so I followed it west as it paralleled Mill Creek.  There are several creek crossings, as I was hiking up through a drainage, and runnels were entering into the creek from both sides.  It felt as if I was gaining and losing elevation most of the time until I made it to treeline. Every time I’d switchback up a hill, I seemed to head back down for another creek crossing.  It was almost 7 miles to treeline.  On a positive note, the trail was easy to follow, and it was nice hiking in the trees, listening to the birds and squirrels go about their day.

At treeline the trail went through some willows, then west into Mill Basin.

Once in the basin, the trail switchbacked to the right, up to Storm Pass.

Once at Storm Pass, I could see unranked 12er Goat Peak to the west, and West Elk Peak to the northwest.

I followed the ridge west on a class 1 trail towards Goat Peak.  I’m assuming the entire trail to West Elk Peak is class 1, but there was snow on the rest of the route, so I’m not entirely sure.  If anything, it’s easy class 2. The snow was solid in the morning, so the terrain was easy to navigate.  Here are some pictures of the ridge to Goat Peak

This was a bit of a false summit. Here’s the true summit of Goat Peak

I continued following the ridge as it became rocky.  Still class 1 or 2, depending on snow.

From the summit of Goat Peak I followed the ridge northwest to the summit of West Elk Peak on easy terrain.  I did not see any evidence of a trail here, but it could have been covered in snow.

I summited West Elk Peak at 10:45am

West Elk Peak:

West Elk Peak was my main goal for the day, so I turned around and headed back towards Goat Peak

However, on my way back I could see a faint trail under the snow that skirted Goat Peak to the left, so I took that back to the ridge.  I’m not sure if this is an actual trail or a game trail, but it went.

There were some game tracks about half way through skirting the peak, which I followed to the ridge

Once back on the ridge, I followed it east towards Storm Pass

I then picked up the Mill Castle Trail and followed in down the switchbacks, back into Mill Basin

And then all the way back to the trailhead

29

I made it back to my truck at 2:30pm, making this a 19.82 mile hike with 4778’ of elevation gain in 8 hours.

On to the next trailhead!

Brown Mountain – 13,347

RT Length: 1.02 miles

Elevation Gain: 425’

I parked at the Gladstone Mine off 110 outside of Silverton and contemplated my options for the hike the next day.  The weather forecast was calling for rain and snow the next morning but amounts and times were varying.  I don’t like driving up 4WD roads.  It’s not the driving, it’s the oncoming drivers I don’t like.  Most are nice, but a few are jerks and make passing people an experience.  I decided to spend the night in my vehicle at the junction with 110 and 10 outside of the Gladstone Treatment Plant near Gold King Mine and make my final hiking decision the next morning.

I woke up at 4am the next morning to clear skies, but it was cold and windy.  I warmed up in my truck for a bit before starting my hike.  I got about 100 yards into the hike and said “this is too windy for me!”  and hiked back to my truck to warm up.  The wind chill was bitter cold.

The past few weeks had been difficult for me mentally.  I’d done a lot of backpacking and had to turn around on a lot of peaks due to weather.  I homestead (basically, if I don’t raise it, shoot it, or grow it, I don’t eat it), and I have difficulty eating while hiking/backpacking, meaning while I get a lot of protein, I don’t get a lot of fat in my diet. 

Last week my husband got 2 elk, so I took a break from backpacking to help him process the meat.  When he saw me again after being gone for a while he mentioned I’d lost about 10 pounds, and needed to put on more weight.  To put it in perspective, I weighed 105 pounds before and was down to 95 pounds.  At 5’4”, this isn’t a good thing.  I don’t have the fat reserves to keep me warm, which is a major problem with my Raynaud’s.  I tried to bulk up when I was home, but I wasn’t able to gain 10lbs in 2 days. 

Losing weight and having a handful of failed summits that I should have been able to climb (darn weather!) put me in a moody mental state.  So, this morning I was unconsciously looking for any excuse to just go home, and the cold, windy, and potentially snowy weather was giving me that excuse.  I knew the wind was blowing in a storm that would hit full force later that day.  That’s why I chose something easy for today:  I didn’t want to get stuck in a storm.  I sat in my truck for a bit trying to will myself to get out and hike when I decided to just drive up the dirt road to see how bad it would be.  After all, it was now 5am, and I’d most likely be the only one on the road. I headed up 10:

For those of you wondering, the road isn’t that bad.  It’s doable in a high clearance 2WD with a capable driver.  I followed the road 3.68 miles north to an unnamed pass at 12900’ to the east of Lake Como. (For those of you hiking this, it’s 2419’ of elevation gain). This is a bit of a shelf road in areas, but it’s wide and there are plenty of places to pass oncoming vehicles.

There was a parking area at the pass, so I parked and sat in my truck, waiting for the sun to come up.  I could hear the wind howling all around me, shaking my truck back and forth.  I wanted to use the restroom and tried to open my truck door.  The wind immediately slammed it shut.  My mind said: “not today” and I drove halfway back down the road, intending to just head back home.  In the time it took me to get halfway down the road I’d talked myself into driving back to the pass.  After all, it had been dark and I didn’t even have a visual of the peak yet.  The least I could do was get a visual, and then decide.  So, I drove back up to the pass.

I sat there and waited for the sun to rise and the wind to die down.  As soon as I could see the mountain, I realized it would be a very quick and simple summit from this saddle.  I told myself the only reason it was so windy was because I was on the saddle:  As soon as I ascended, the wind would stop.  Surely I could brave the suck for a few minutes?  At 6:35am I left my truck and headed up the ridge. 

This is a very straightforward hike, entirely class 2.  I ascended the tundra to the ridge, turned left, and ascended the shale and then tundra again to the summit.  

Halfway up the ridge I came to a game trail and followed it west.

Once on the ridge, I turned left and followed it south to the summit. It started out as rocky, then turned to tundra.

The summit is marked by an obvious cairn.

I summited Brown Mountain at 6:50am and could not feel my fingers. As you can hear in the video, the wind never let up, but once I got started I kept telling myself I’d be a fool not to finish because the summit was RIGHT THERE, and I’d be in sight of my truck the entire time.  I may be frozen when I made it back to the truck, but at least I could turn the heat on. 

Brown Mountain:

I didn’t stay too long at the summit.  I turned around and headed back the way I’d ascended, my truck below in sight the entire time.

I made it back to my truck at 7:05am, making this a 1.02 mile hike with 425’ of elevation gain in 30 minutes. If you start from Gold King Mine it’s 8.38 miles with 2844′ of elevation gain.

Then I drove back down to Gladstone and Gold King Mine. In any event, long story short, hiking is very mental. Knowing how to talk yourself into a hike is a great asset, especially when you’re not ‘feeling it’, as long as you have a backup plan and don’t put yourself in a dangerous situation. It’s always the right decision to turn around and go back, but sometimes you need to dig deep and push on. I needed an easy win today for my mental state. Once again, easy hike, but it would have been easier to have just given up and gone home.

On to the next trailhead!

South Twilight Peak – 13,105, Twilight Peak – 13,162, North Twilight Peak – 13,084

RT Length (from Andrews Lake): 17.11

Elevation Gain (From Andrews Lake): 4573’

I arrived at the Andrews Lake trailhead and noticed a rather robust coyote sitting along the shoreline, just staring.  He wasn’t bothering anyone, so I let him be.

About 20 minutes later, I heard a woman screaming from not too far away.  The coyote was attacking her Golden Retriever (which was luckily leashed).  I ran over there with my trekking pole to help her out.  The coyote had been stalking them for a bit and wanted the dog as food.  After scaring the coyote away, we chatted for a while, and she told me this wasn’t the first time her and her dog had been stalked by a coyote.  I was surprised the coyote would be so bold as to go after such a big dog.  We quickly became friends, exchanged contact information, and we were both on our way.

I started my hike at the Andrews Lake Trailhead, which is at the west end of the lake.  The trailhead has vault toilets (but women be mindful:  the door lock moves left and right but doesn’t actually lock).  There are about 15 parking spaces here, with an overflow lot on the way in to accommodate more vehicles.

My goal for day 1 was to make it to Crater Lake, since I had a late start, not starting until about noon.  I followed the class 1 trail as it skirted the lake, then switchbacked up to some ponds at 11200’

I then continued following the trail as it wound south to crater lake, rolling up and down in elevation as it went.  Pictures of this trail are difficult to give reference points to, as most of it was below treeline and the views were always the same.  However, there are no junctions or side trails, so just stay on the main trail and it will take you to Crater Lake.  There are several small creek crossings that are easily manageable, and the trails were a bit muddy.

It was 5.5 miles and 1530’ of elevation gain from Andrews Lake to Crater Lake.  It took me 2.5 hours to get there with a full pack.  There are some good campsites up the slope in the trees to the north of the lake (your right when you arrive).  I set up my tent and made it an early night. 

The next morning I was up and on the trail at 7am.  To the left (east) of the lake there’s a trail that will take you through the willows and up to another small pond.

I skirted the small pond on a trail to the left

And then the trail ended, but I could see my route to the southwest.   Here is where I was aiming:

To do this, I went down a grassy gully, then headed southwest, losing about 400’ of elevation total as I rounded the mountain, avoiding the rocky gully below.

I made it through the trees, and the terrain became rocky.  I was headed towards a saddle to the left of South Twilight Peak. 

This is choose your own adventure.  I chose to stay low, heading for the small stream below, then ascend by following the tundra, going to the right of the rock pile (it’s obvious as you get higher), and up the tundra slope. 

Here are some pictures of my way to the saddle:

Once on the saddle I turned right, and scrambled northwest to the summit of South Twilight Peak.  This was mostly class 2.  I just looked for grassy gullies and ascended them, heading northwest, until I came to the top, then walked the short distance southwest to the summit. 

I summited unranked South Twilight Peak at 9:10am

South Twilight Peak:

From South Twilight Peak, Twilight Peak was to the northwest.

It was a class 2 tundra/rock walk to get there that only took me 20 minutes.  This is the route I took, sticking mostly to the ridge.

There was a bit of a false summit.  The summit is to the north.

I summited Twilight Peak at 9:30am.  Sorry, no summit video: I thought I took one, but when I uploaded it, it was only 1 second long, so it wasn’t very helpful. 

From the summit of Twilight Peak, I could see North Twilight Peak to the North.

To get there, I continued following the ridge north.

It was all class 2 until I got here. 

This is where the route finding and class 3 fun began.  If you haven’t already put on your helmet, now is a good time to do so.  I could tell there were a lot of ways to navigate this ridge successfully, but many would end in getting cliffed out.  I chose to go right.  Here’s an overall view of my route out of this fun.  There’s a hidden gully I took to get back to the ridge.

This is class 3, and pretty steep, but if you choose your line carefully and drop down just to the right of the gully, the gully is easy to access.

I passed through the gully, which was a bit sketchy.  These photos don’t do the terrain justice, but the graupel here had turned to ice, and there’s a bit of a waterflow on the rocks, which had also turned to ice.  I put on my microspikes (they’re ALWAYS in my bag), and carefully navigated through the notch and down the gully, being deliberate so as not to slip on the ice.  There’s exposure here, so falling would be detrimental.  At the bottom of the gully was a large boulder.  This can easily be climbed up from the other direction, but heading down the gully I found a very small hole to the right I was able to crawl through (I’m glad I’m small!).  You can also climb over it to the left, but I didn’t like the conditions (ice) on that side.  The boulder is circled.

Here’s looking back up at the boulder at the base of the gully.  I crawled through the hole to the left (circled).  

Once passing around the boulder, I immediately turned right and re-gained the ridge.

The rest of the route to North Twilight was class 2.  I descended to the saddle, then re-ascended to the ridge on a small patch of tundra.  The slope angle was low, so it was an easy trek.

Once on the ridge, I turned left and headed west for the summit.

The only problem?  The summit ridge is rocky but flat, so it’s difficult to tell exactly where the summit is.  I walked the length of the summit, but I’m pretty sure the actual summit is in the middle (not the far west end as indicated on a map).  There aren’t any cairns, but there is a circle of rocks on the middle of the ridge placed on top of another rock that look ‘intentionally’ placed.

I summited North Twilight Peak at 10:40am

North Twilight Peak:

Now to head back to Crater Lake.  I did this by turning around and following the ridge east.  While there are some ups and downs on this ridge, there are game trails that can help keep this a class 2 trek with one or two easy class 3 sections (I’ve labeled the route below).  Here are some pictures of the ridge.

I could now see Crater Lake in the distance.  Here I found a game trail that would lead me most of the way there.  I descended on the tundra, heading northeast, towards the small pond I’d seen early that morning.  There I picked up the trail that headed west back to Crater Lake.  Here’s the overall view of the route:

And some pictures.  First, I found the tundra to the right of me, and descended on the game trail that wound its way back to the ridge.

This trail ended in a meadow, so I headed northeast through the trees towards the small pond.

Once at the pond, I followed the trail back to Crater Lake.

I made it back to Crater Lake at 11:20am.  Once back at Crater Lake I checked the weather (I had cell service for almost this entire hike).  Forecasts for the next day were all over the board (calling from anywhere from half an inch to a foot of snow, starting anywhere from 7am to noon), so I decided to pack it out and come back another day for the other peak I had in the area.  I packed up my tent and followed Crater Lake trail back to Andrews Lake. 

I made it back to Andrews Lake at 2:45pm, making today’s hike 11.61 miles with 3034’ of elevation gain, and the total hike 17.11 miles with 4573’ of elevation gain.

On to the next trailhead!