Hagerman Peak 13,848 & Snowmass Mountain 14,105

1

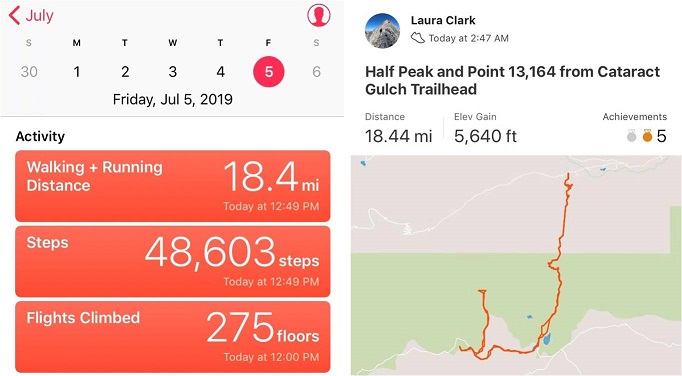
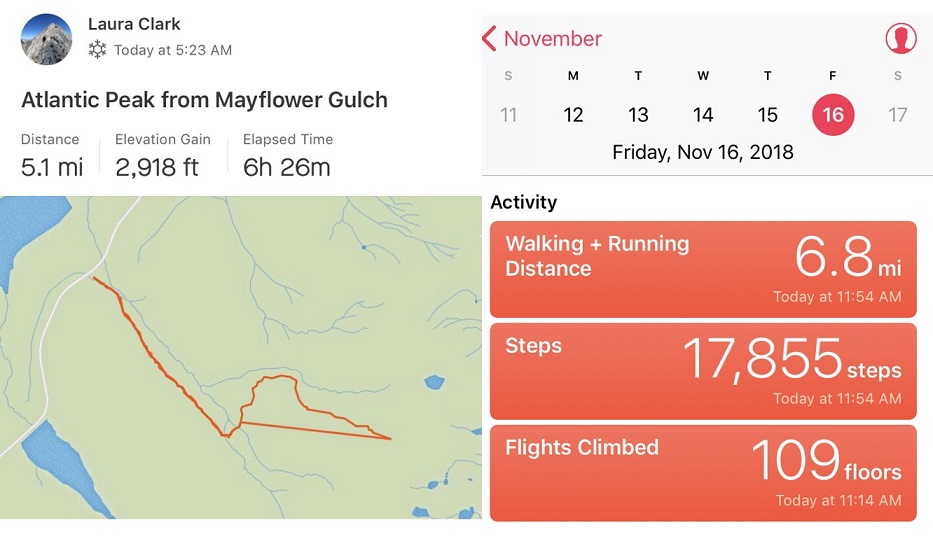
RT Length: 15.5 miles

Elevation Gain: 6211’

After my failed attempt  last week I decided to do more research and try Hagerman again today.  I learned the upper road to Lead King Basin had an avalanche about 1 mile after the stream crossing (very close to where I’d parked) so I decided to take the lower road from Marble to Crystal instead.  I’d heard a lot of conflicting reports on this road, but when I searched it online I found this video, which was very helpful.

Marble to Crystal

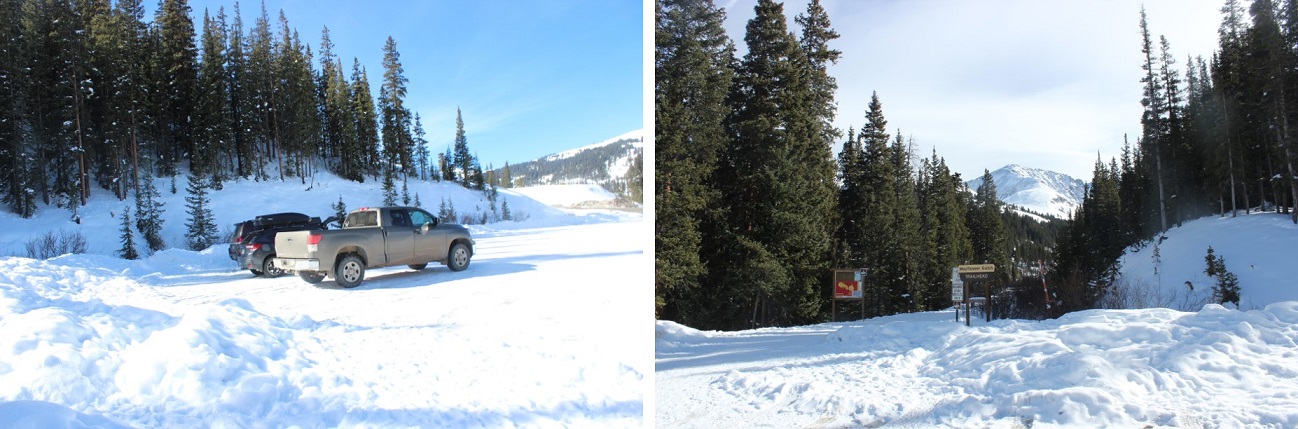
The road itself wasn’t that difficult with a 4WD (I wouldn’t attempt in a 2WD), and my Tundra handled it just fine. The only problems I can foresee would be passing other vehicles.  Luckily there are a lot of small turnout areas on this road, especially before and after the committing areas.  I drove in at night to ensure I wouldn’t need to pass oncoming vehicles, which I knew would be problematic in my big truck, no matter the size of the other vehicle.

Since I drove in when it was dark I wasn’t able to see the Crystal Mill, but I expected to see it on my way out the next day.

I made it to Crystal around 10pm on a Thursday night and all the lights in the ‘city’ were out. As I passed the Crystal Mill I saw a sign saying Lead King Basin was closed, so I dimmed my lights and parked at the east end of town, mentally calculating the extra mileage and what time I needed to start in the morning.  Looks like I was getting about 3.5 hours of sleep.

As I was preparing to go to bed (my lights were out) I saw the lights go on in the second story windows of a cabin across the street. The two story 18th century style wood cabin had two tiny windows upstairs, covered in lace curtains.  The light from the windows was glowing pale blue, and I saw the silhouette of a woman walking around.  She was wearing a long nightgown and her hair was pinned up in a bun.  The woman slowly walked around the room, picking up objects and setting them back down.  Then the lights went out.

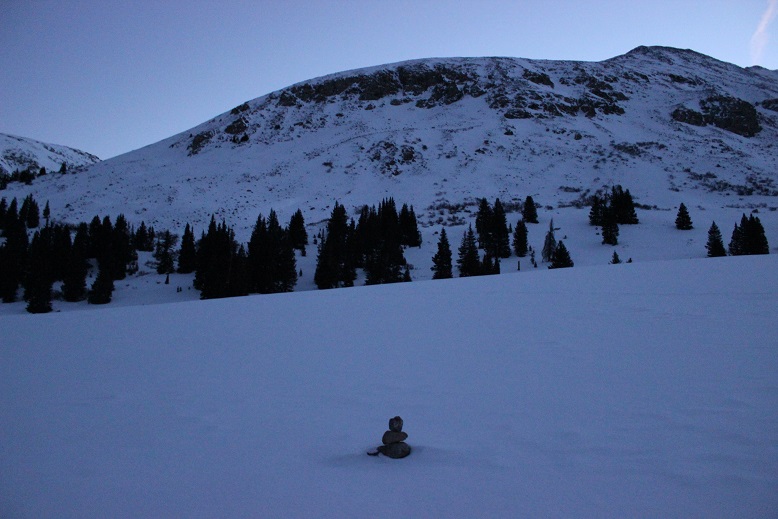
I set my alarm for 2am. When I woke up I crawled from the back seat into my front seat and started putting on my shoes.  I didn’t need to turn on any lights because the full moon was shining bright enough to allow me to see.  I saw a fox run down the center of the road, and then noticed the lights in the second story window of the house across the street turn on.  Once again I saw the silhouette of a woman walking around.  She was wearing a long nightgown and her hair was pinned up in a bun.  She slowly walked around the room, picking up objects and setting them back down.  Then the lights went out.

Whoa. That was spooky.  I knew I hadn’t woken her up because I hadn’t made any noise, opened any doors, turned on any lights, etc.  I was going to have to investigate that house in the daylight upon my return because that was just… weird.  I mean, what are the chances she was up at 10pm and 2am, just like I was?  Also, how many women still wear nightgowns to bed?

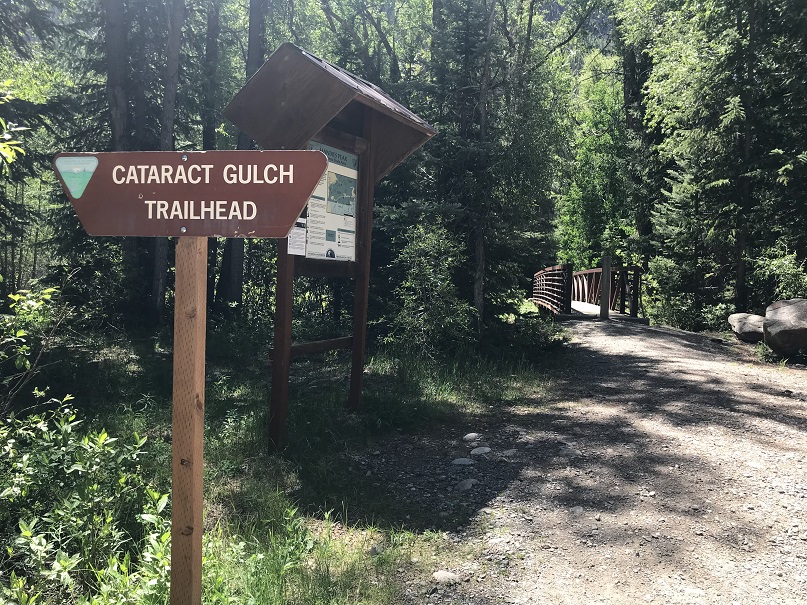
Ok, so I was on the trail at 2:15am. It was a 2 mile hike to Lead King Basin along a 4WD road that didn’t offer many turnouts, but was indeed open and my truck could have made it just fine to the trailhead.  Oh well, I was getting in 4 extra miles today.

2

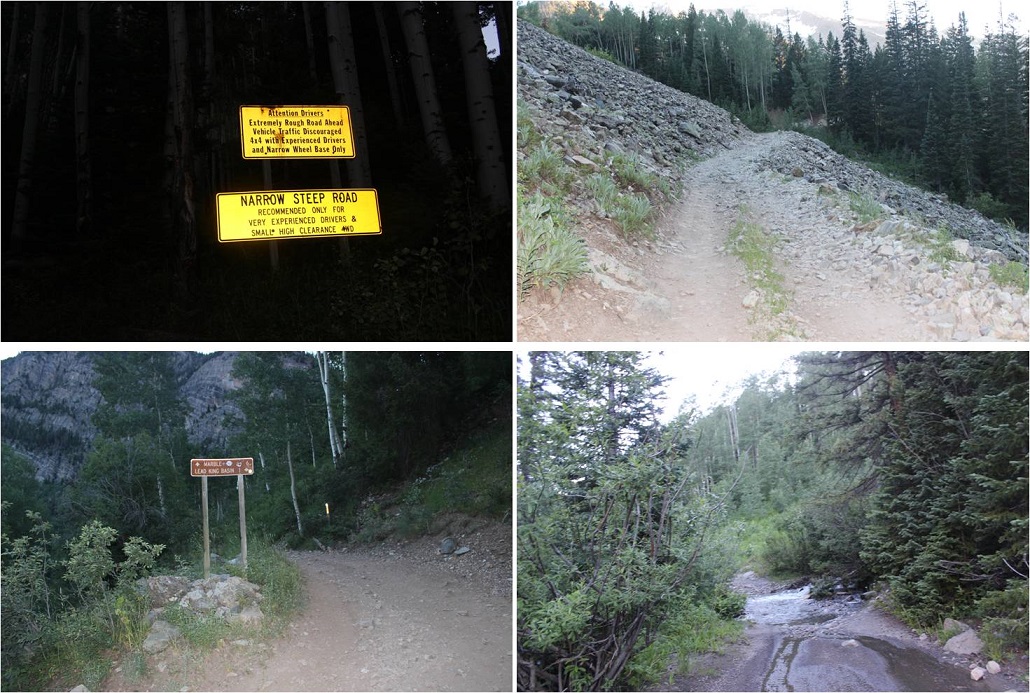
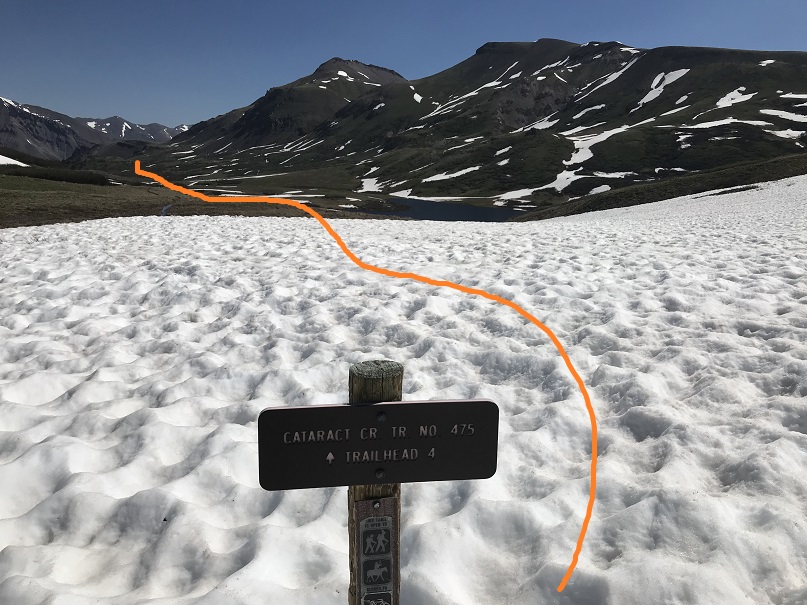
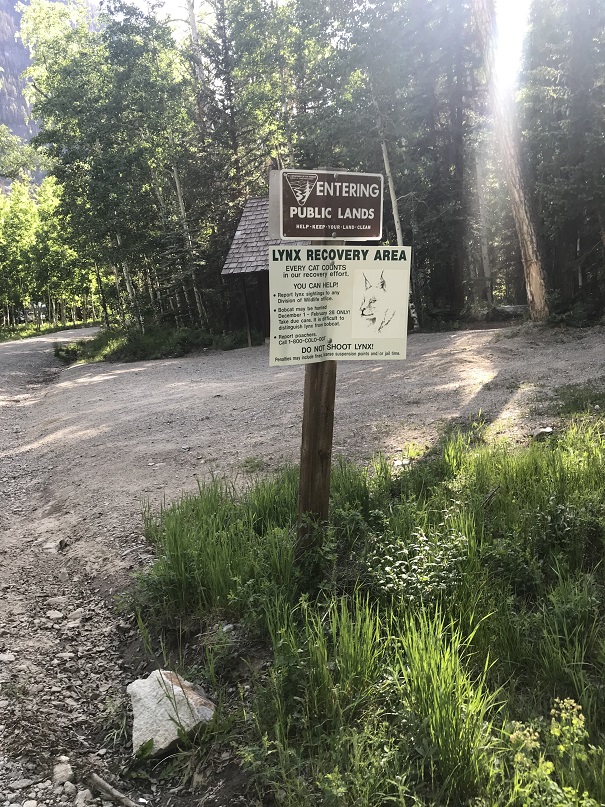
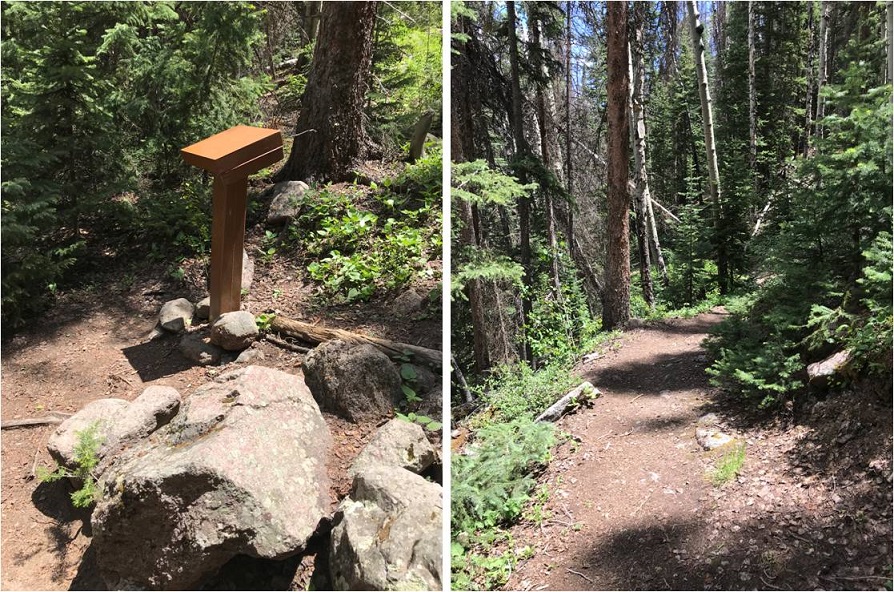
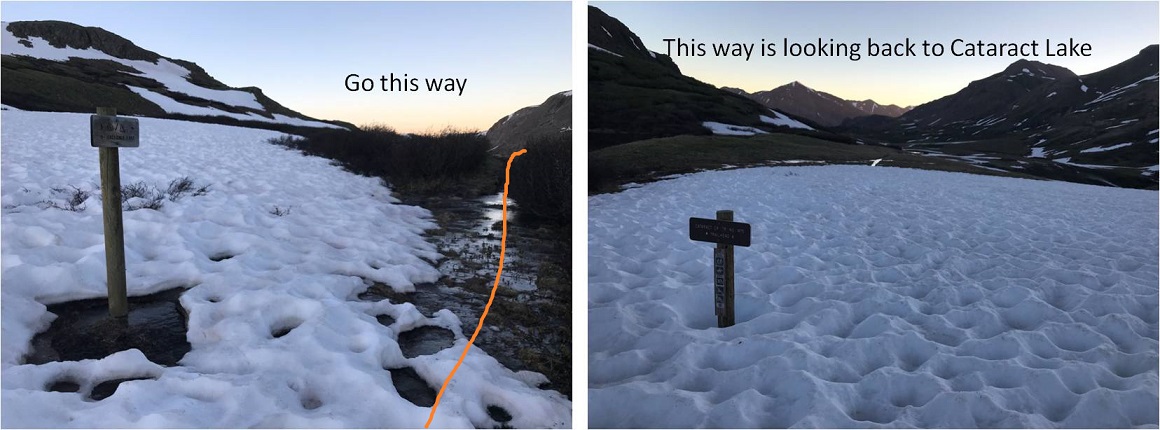
The trailhead was about 2 miles from Crystal. I didn’t see any of this in the dark (these signs seriously need reflective elements to them for us who start before daylight).

3

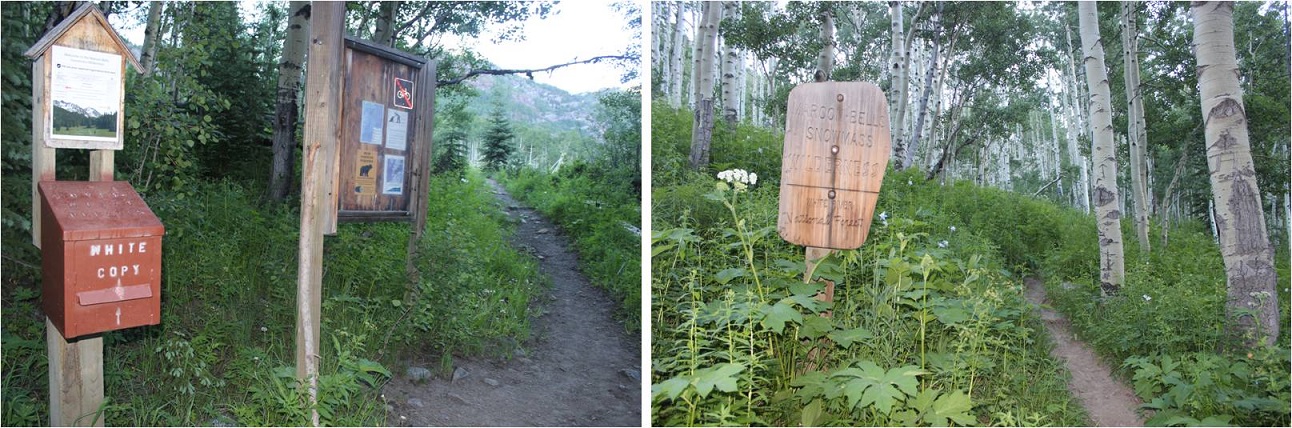
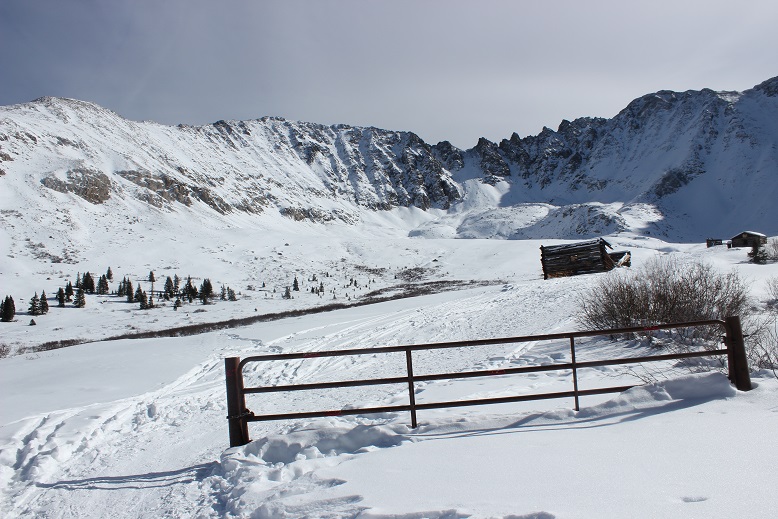
There’s a nice junction where you turn left to head up and around the north end of Lead King Basin to Geneva Lake

4

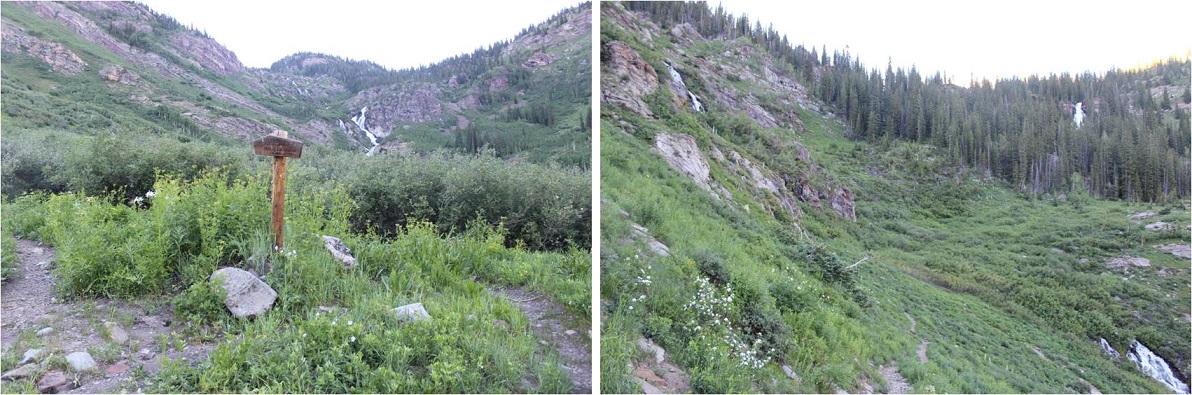
Here the trail was quite overgrown with flowers, plants, and trees. I thought to myself how it felt a little like being in a rainforest, and how much fun the flowered areas would be on my way back (I’m not a fan of flying-stinging insects, so I was being sarcastic).  On the positive side: no mosquitoes!

5

It was in this area I saw my first ever porcupine on the trail. I see them along the side of the road when I’m driving to trailheads quite a bit, and one time I heard one under my truck at the Grizzly Gulch trailhead and had to fend it off in the middle of the night, but this was the first one I’d encountered on the trail.

He was just sitting there, staring at me. So I talked to him to get him to move.  He turned around and waddled ahead of me, staying directly in the middle of the trail.  I didn’t really want to follow a porcupine to the lake, so I talked a little louder to him.  He scurried into the bushes and I immediately realized the error of my ways:  now I couldn’t see him and didn’t know where he was.  I didn’t want to experience porcupine quills and all that entails, so I nicely talked to the porcupine in a sing-song voice as I passed where I’d last seen him, crossing my fingers I hadn’t made him mad/scared and that he wasn’t sitting in the bushes:  poised to shoot.

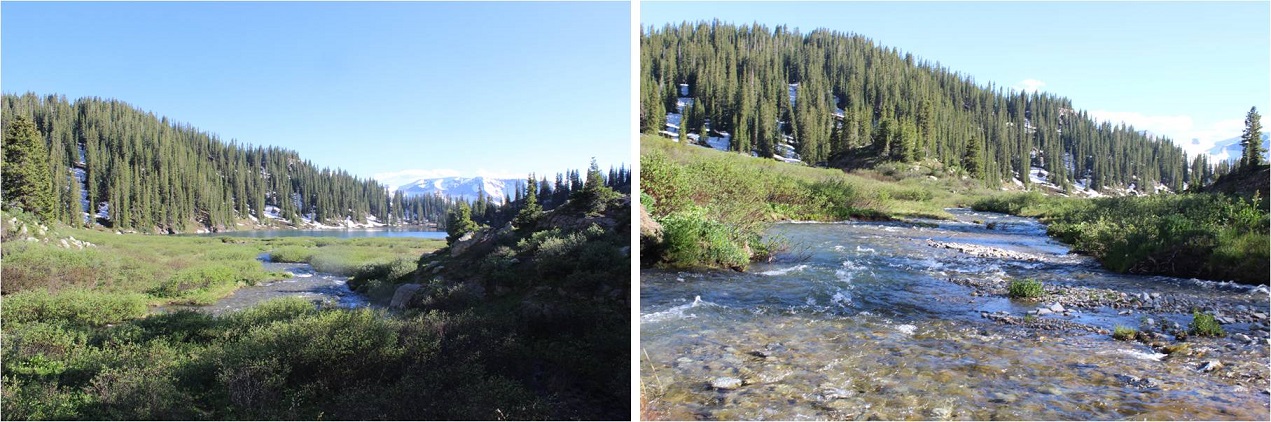
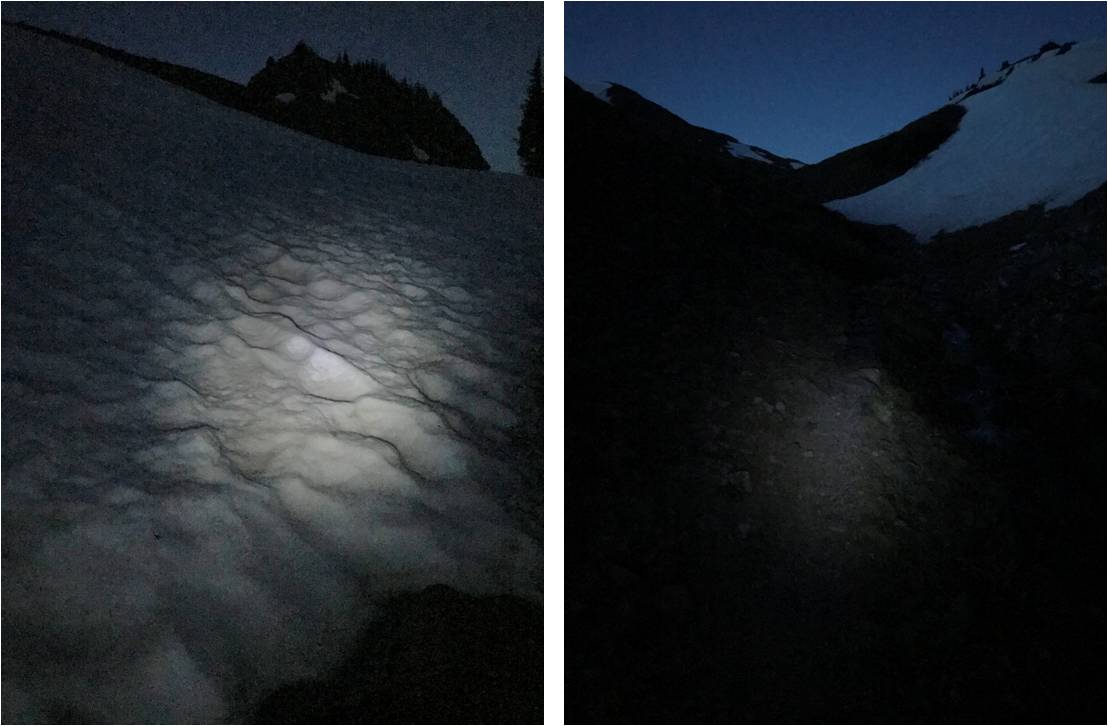
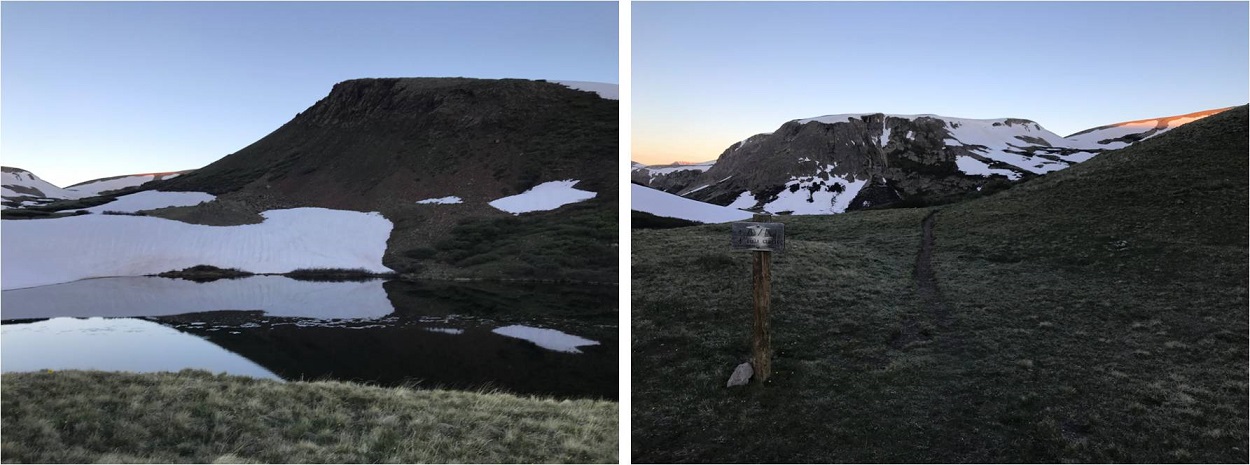
Mission “pass the porcupine” accomplished I continued on to the lake. The moon was full and bright so I conserved flashlight battery and hiked by the moonlight.  Just as I made it to the lake I heard a faint barking in the distance.  I was worried there was a lost dog out there somewhere (hey, it’s happened) but as I rounded the bend to the lake the barking got louder, and then I saw a flashlight turn on.  The owner was pointing the flashlight in the direction opposite of me, and the dog was starting to bark really loud.  I yelled up at them “It’s just a hiker!”  I received no response, but the dog stopped barking and the flashlight turned off.  It was about 4:45am.  I immediately felt more secure hiking in the dark:  I was pretty sure there wasn’t another animal in the area, as that dog would have been alerted to it.

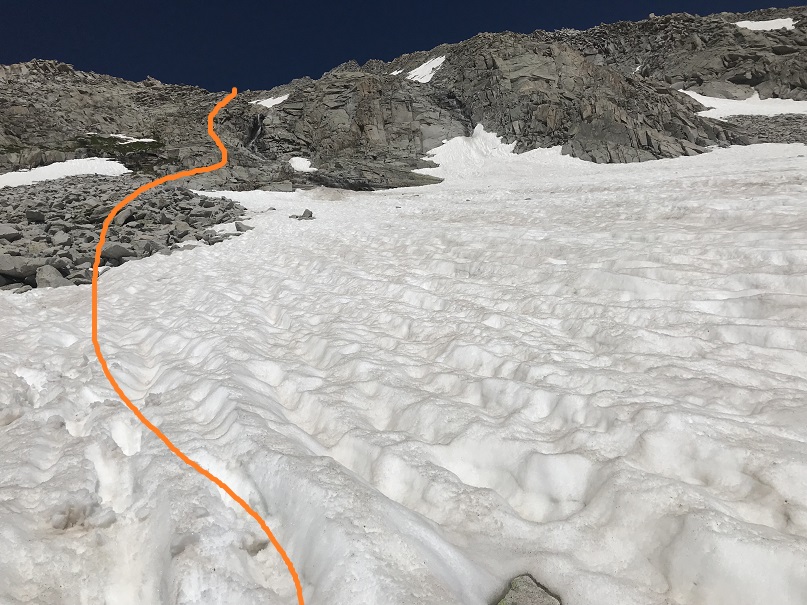
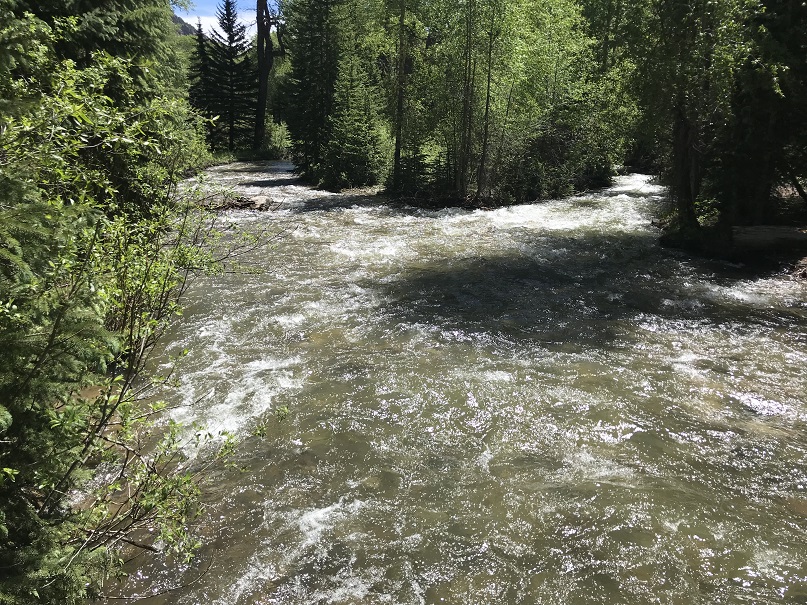
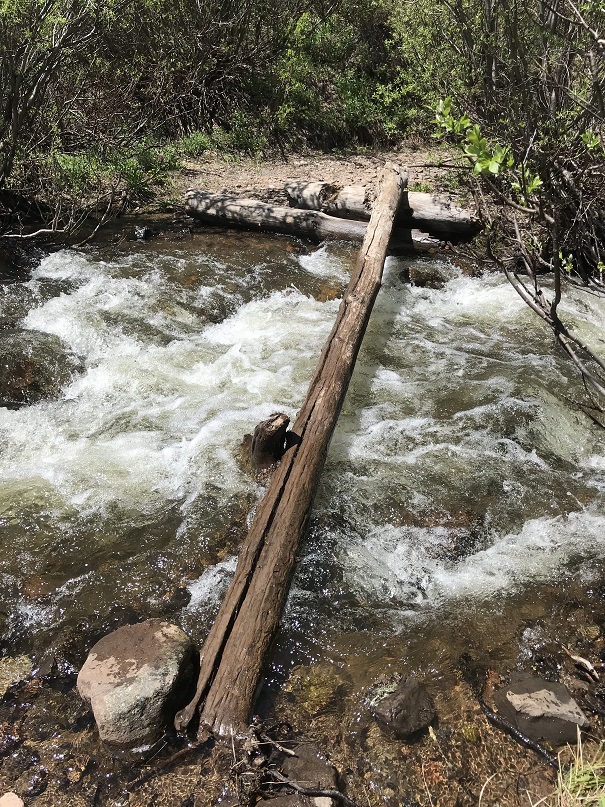
Just north of the lake the trail continues north and then there’s a stream crossing. There were tons of areas to cross here, and all required taking off my shoes.  At times the water was knee deep (I’m 5’4”), but mostly it was just high on my shins. Also, it was cold.  When I was done my water shoes were quite muddy so I left them on a rock to dry and to pick up later.

6

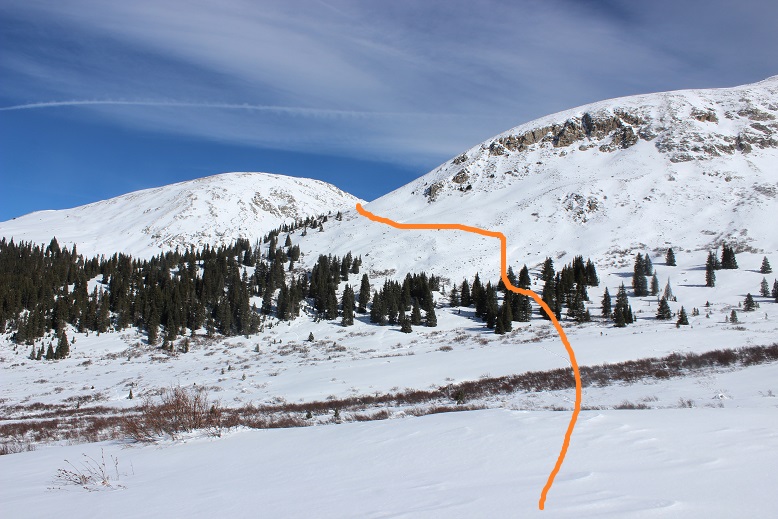
This is where my trip report diverges from some of the more popular field guides. I took the 1st west side gully to the southwest ridge. 

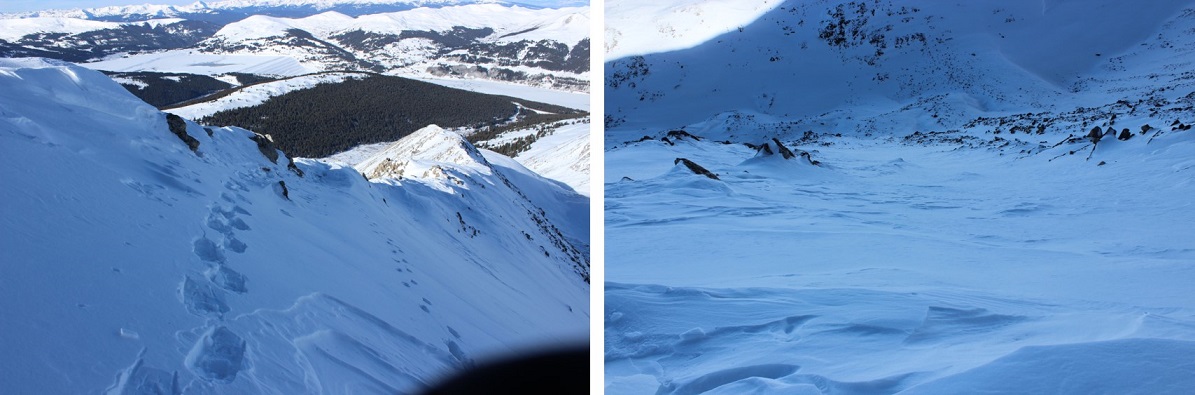
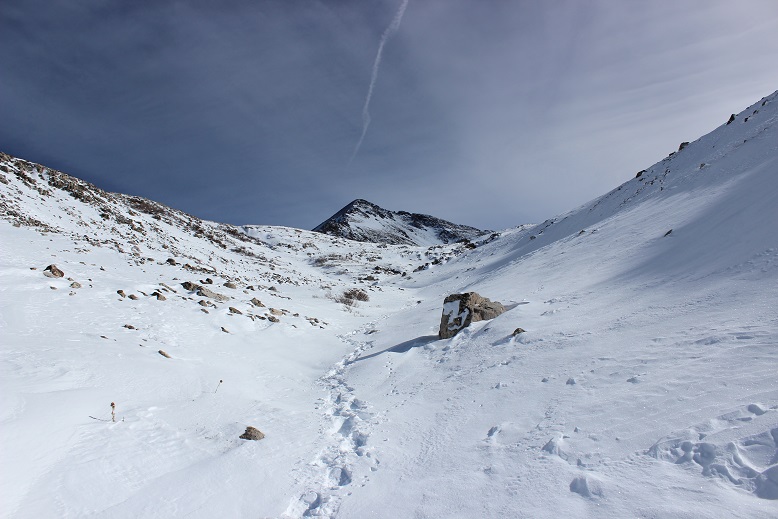
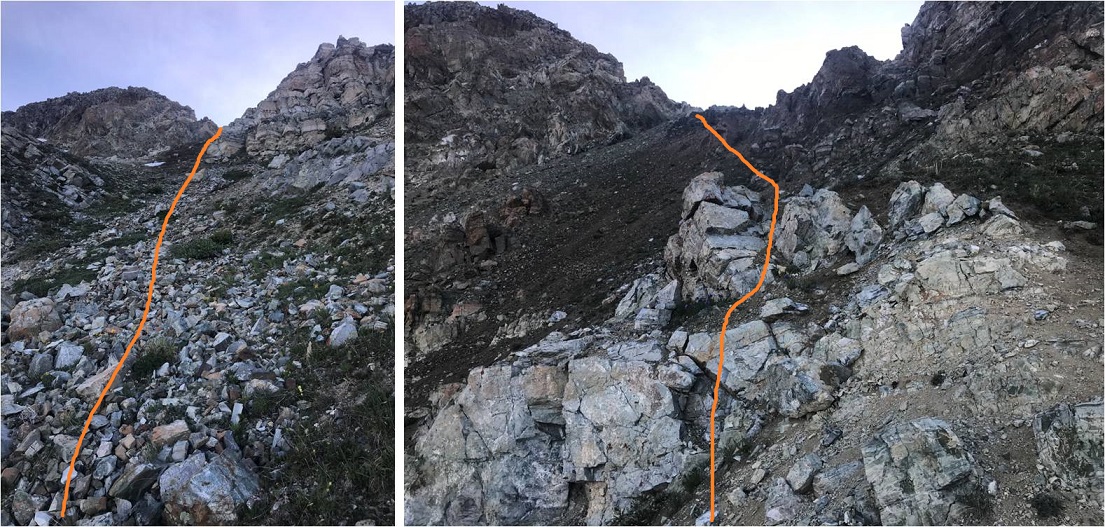
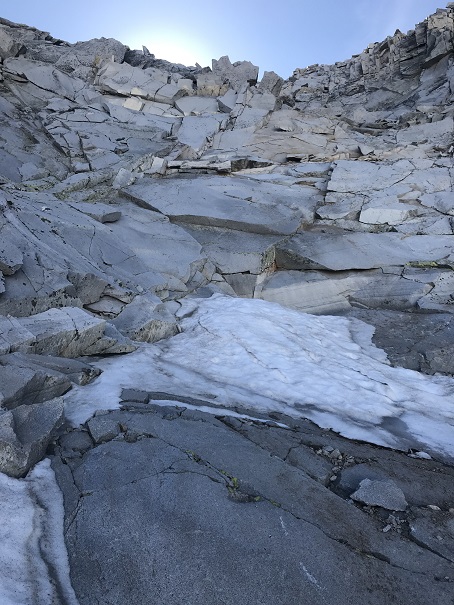
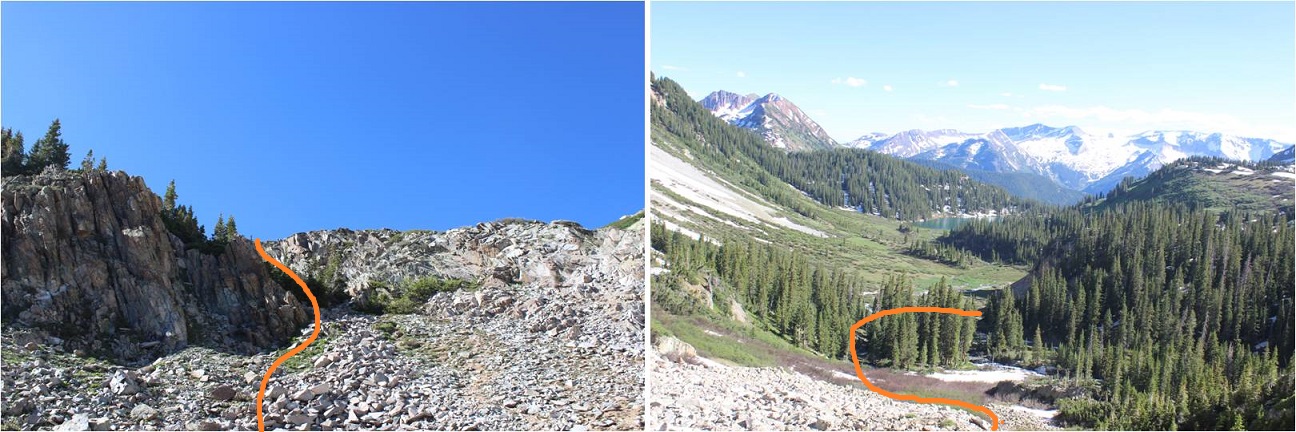
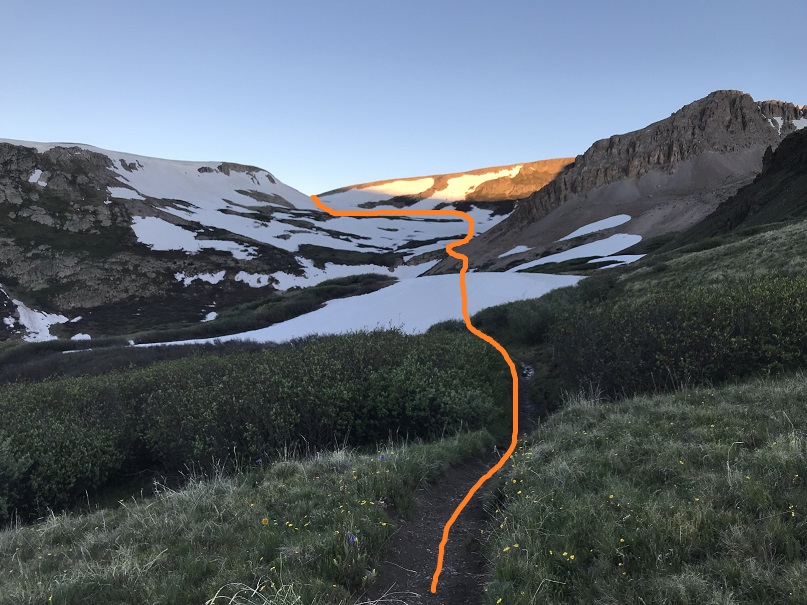
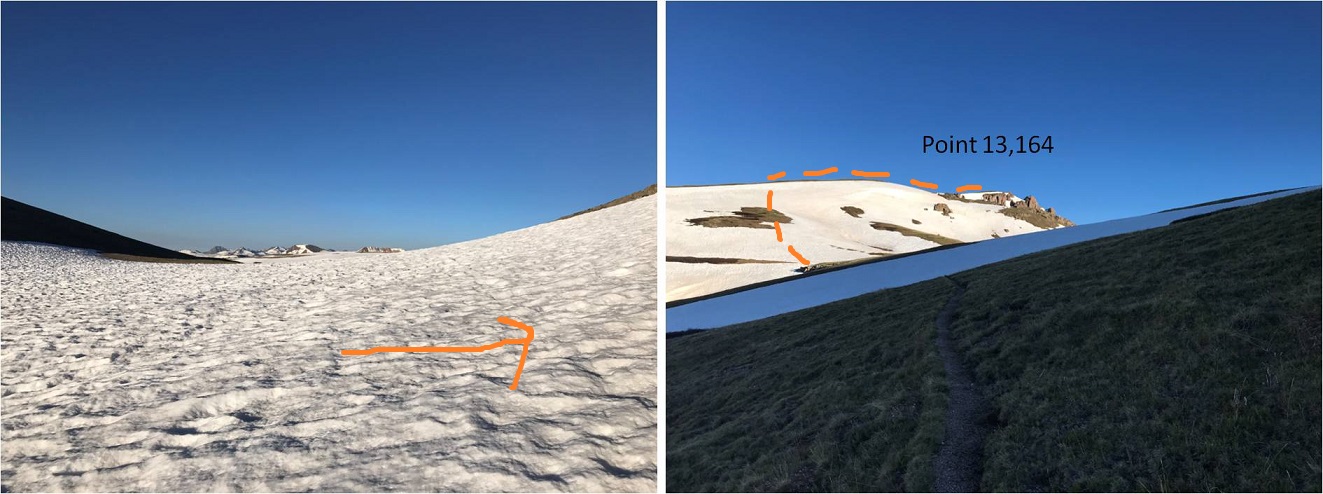
I crossed the creek and headed north for about 100 yards, looking for a gully to my right (west gully). I’d seen pictures of the access gullies on the east that were still full of snow, so by taking the west side I was hoping to avoid any snow filled gullies.  I wasn’t disappointed.  Here’s the gully I took:

7

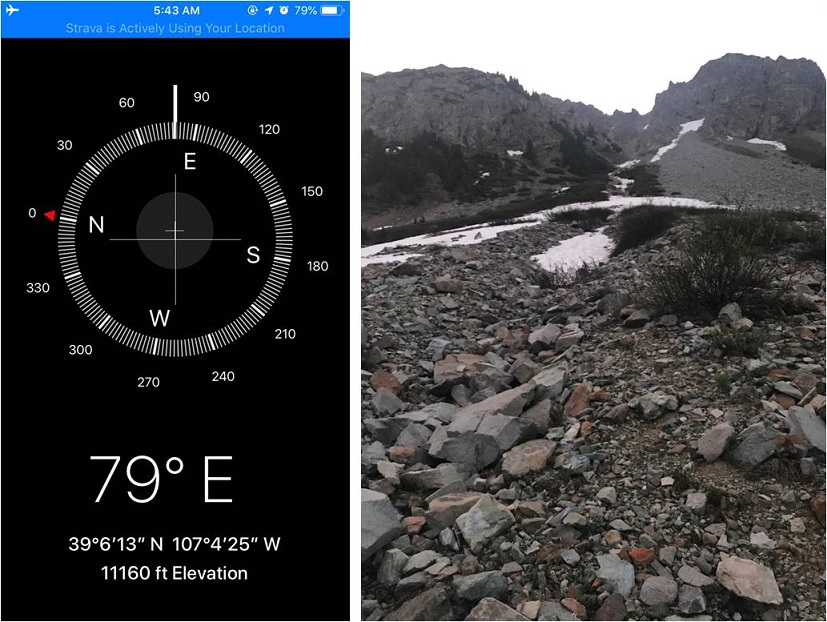
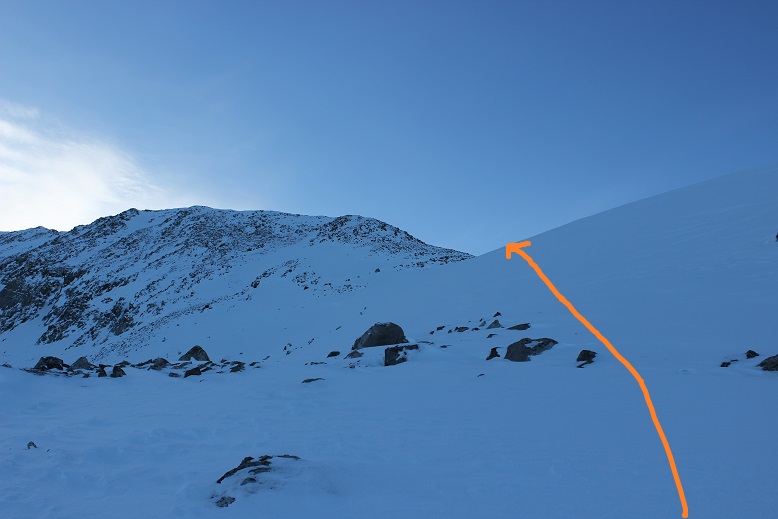
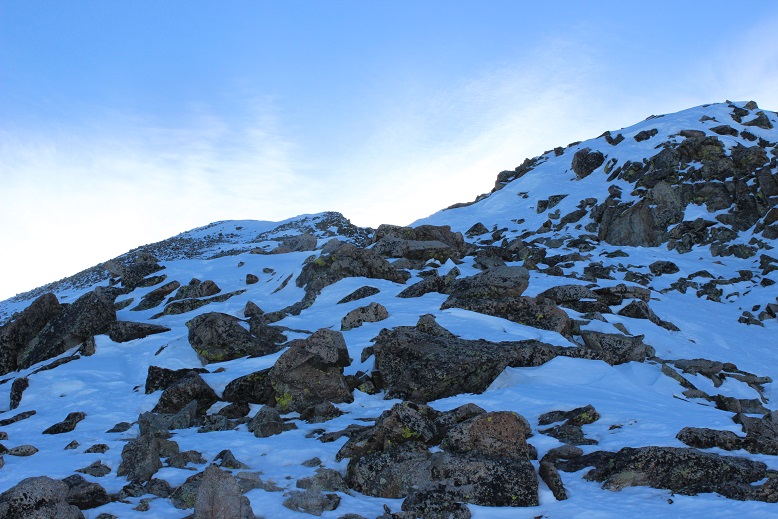
This gully was steep and loose. I did not feel comfortable sticking to the scree in the middle, so I stuck to the right side where the rocks were larger.

8

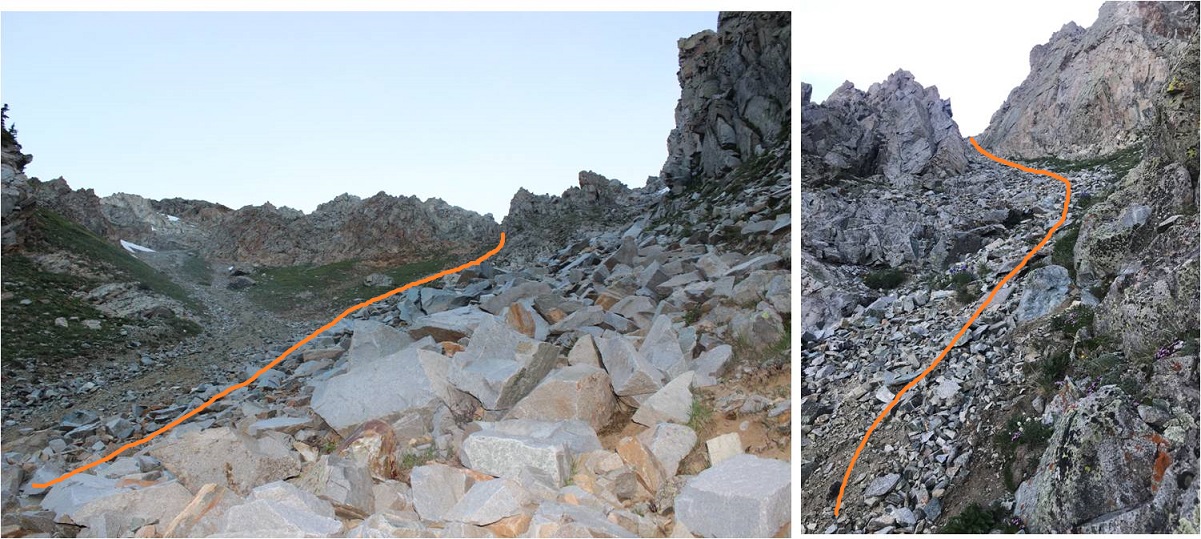
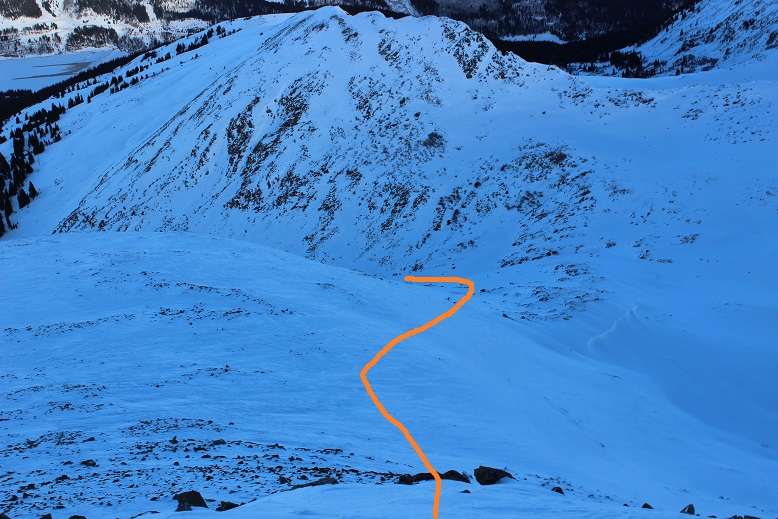
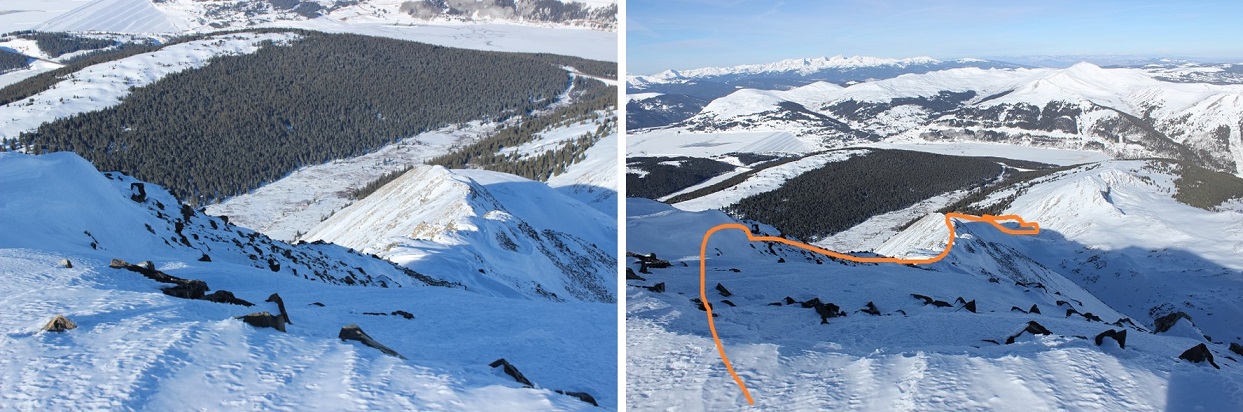
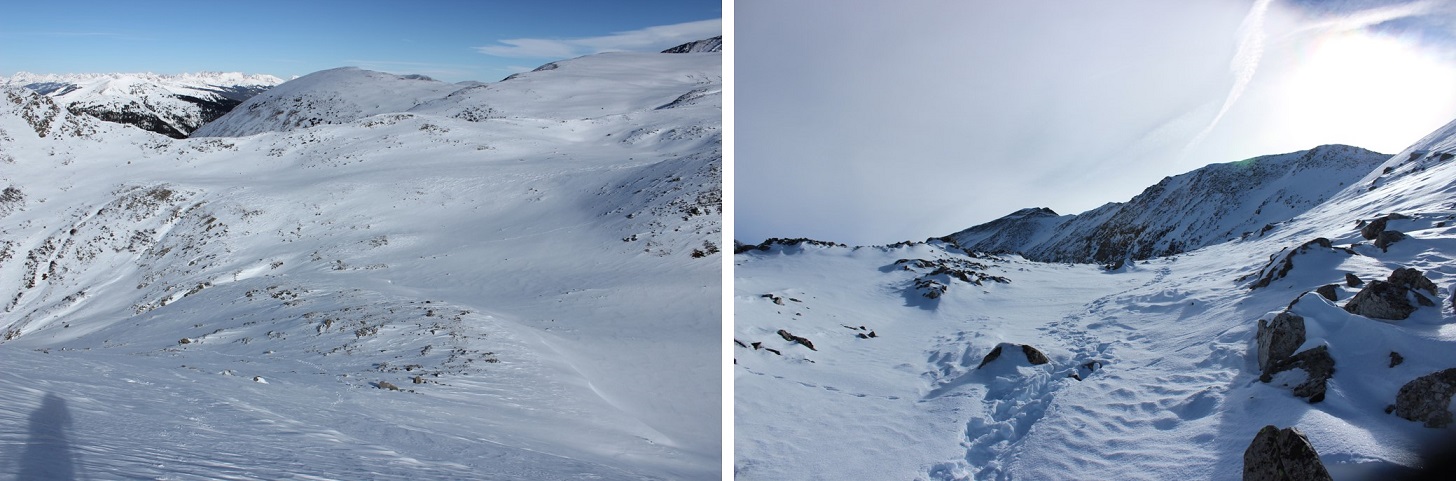
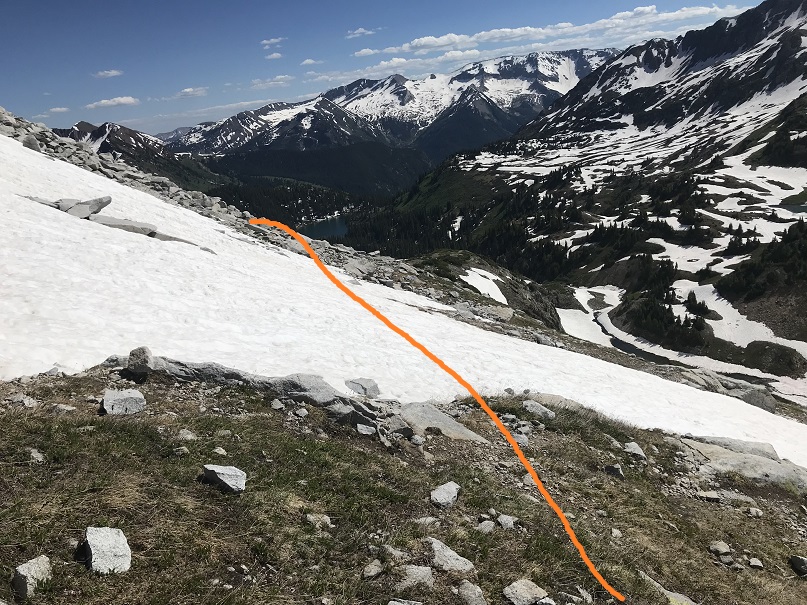
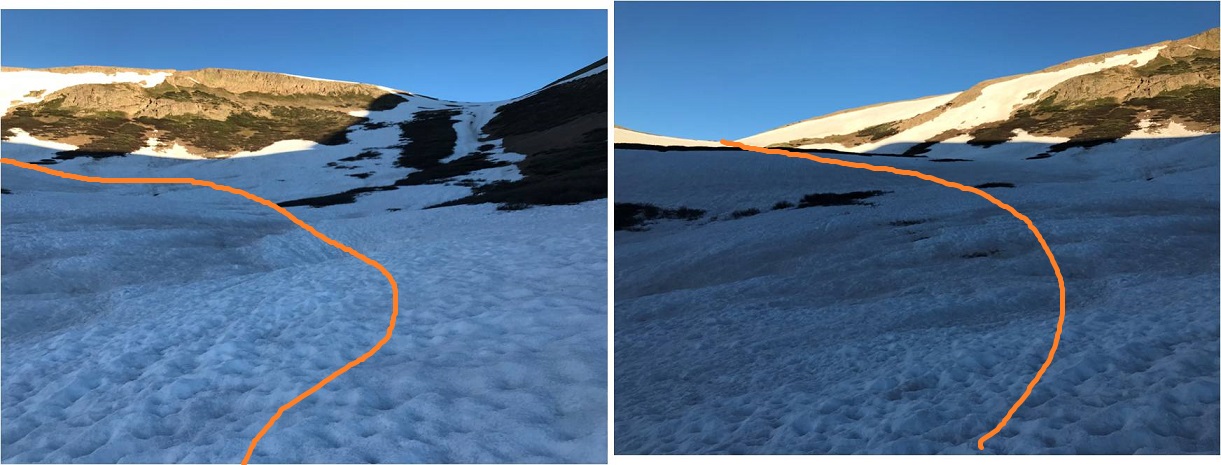
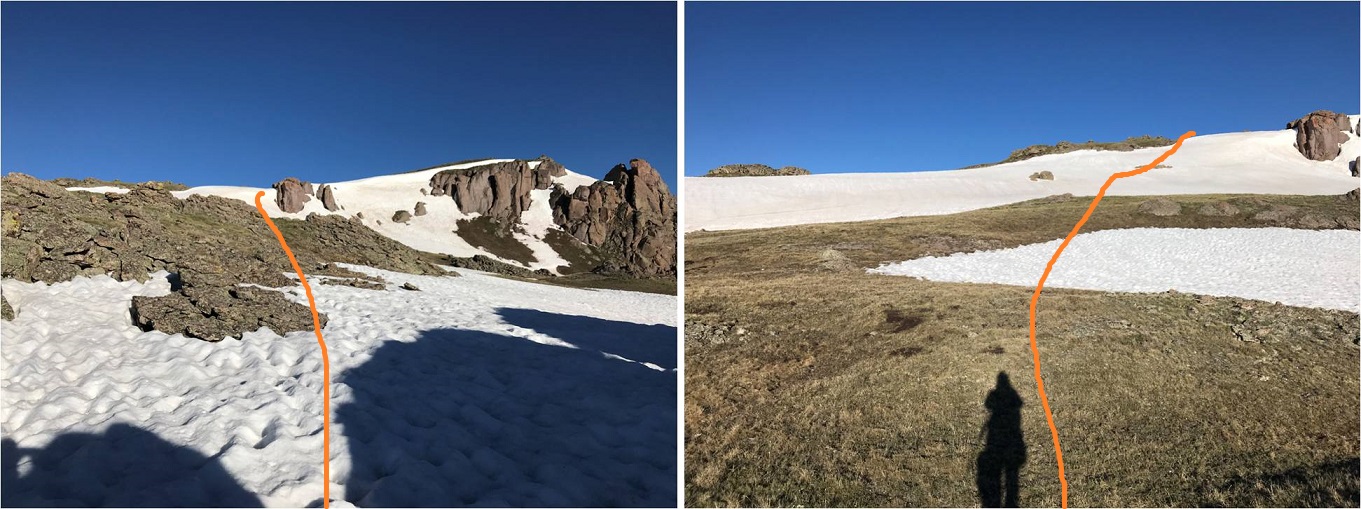
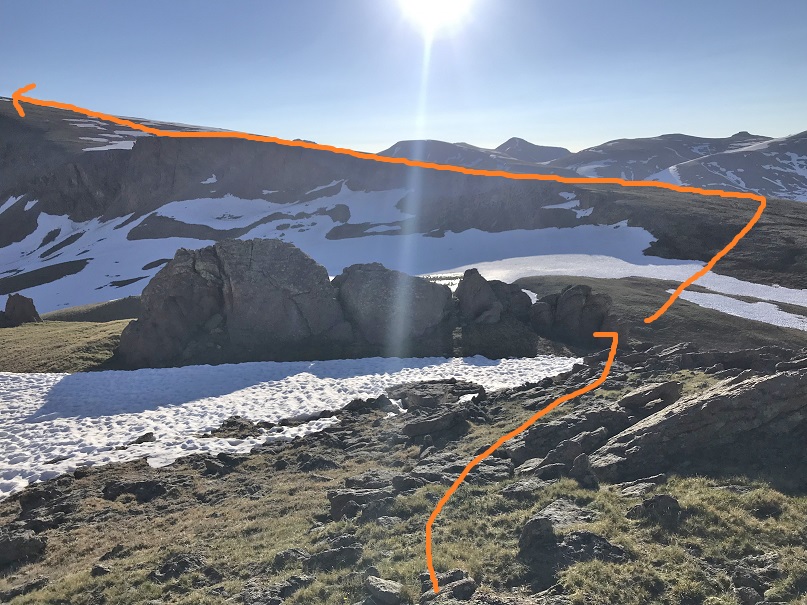
My goal was to gain the ridge as quickly as possible, aiming for this small saddle

9

Here’s looking back on the route

10

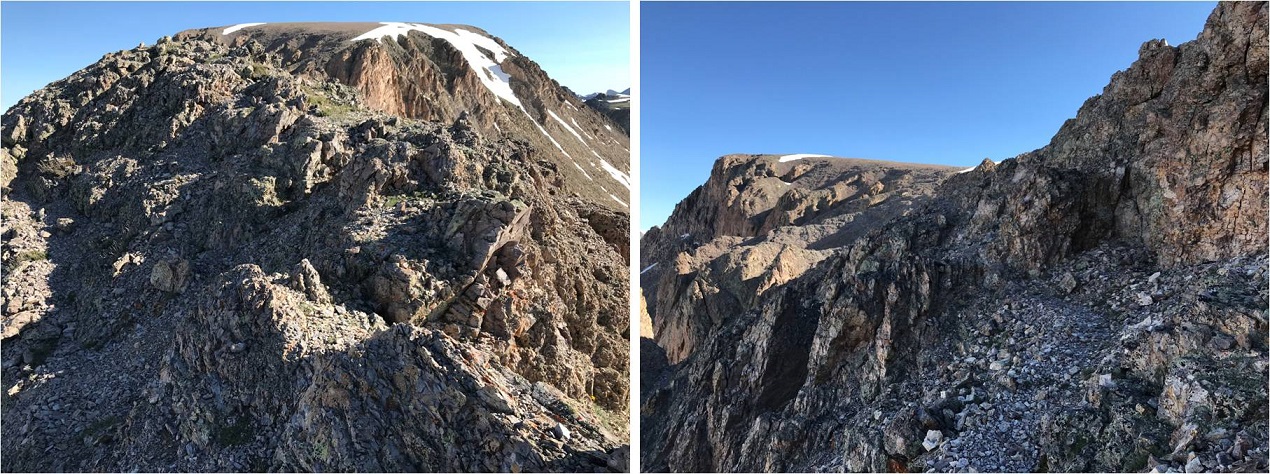
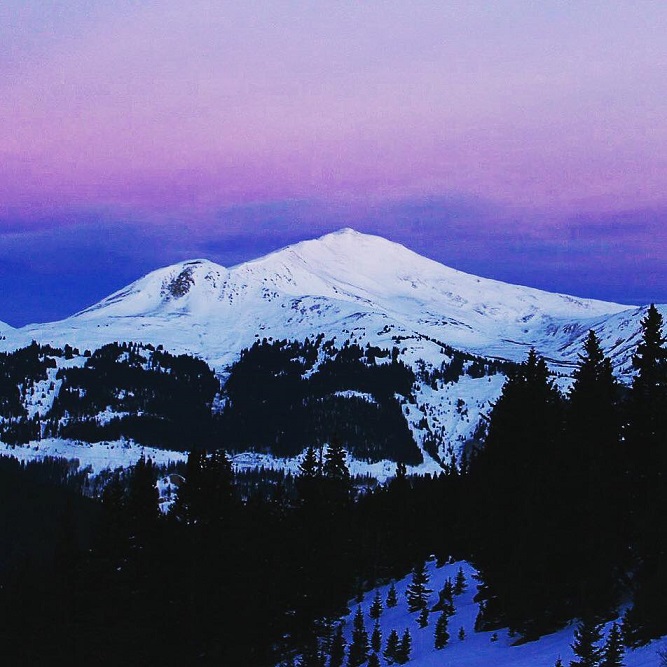
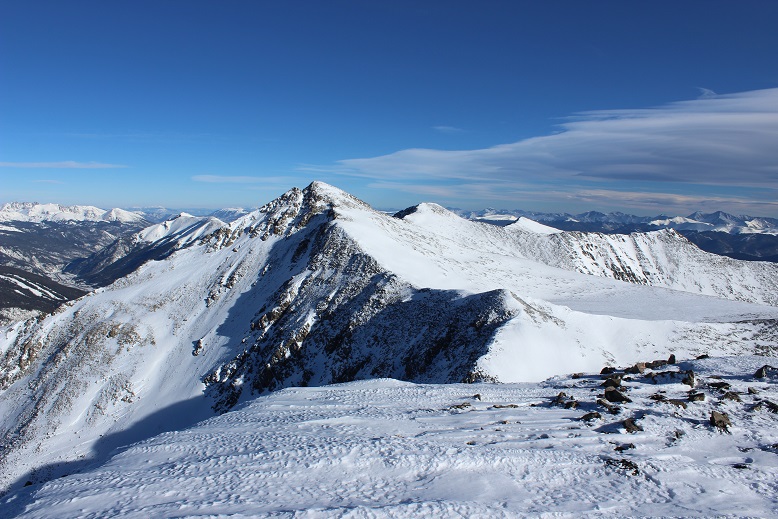
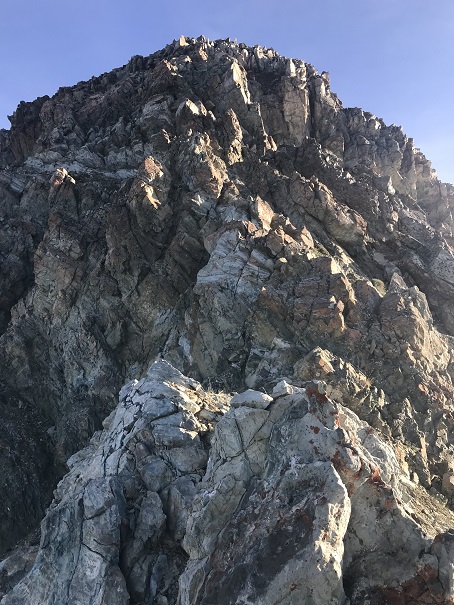
From the small saddle you can see Hagerman Peak

11

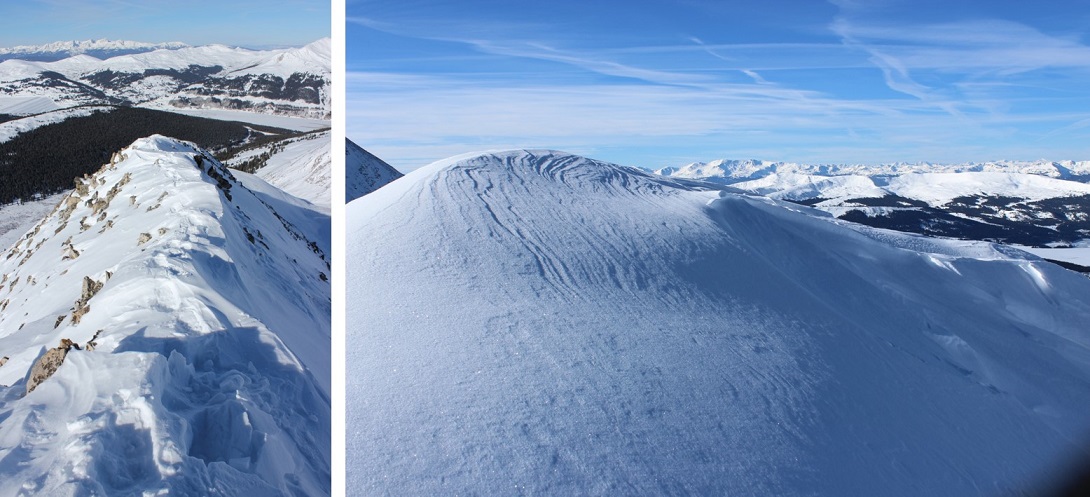
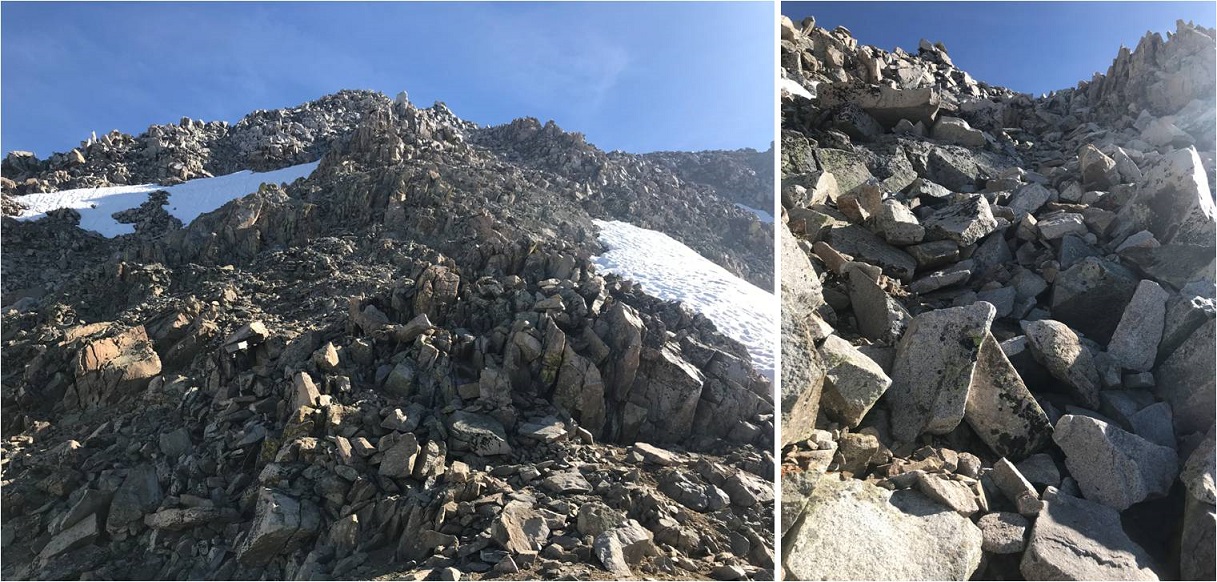
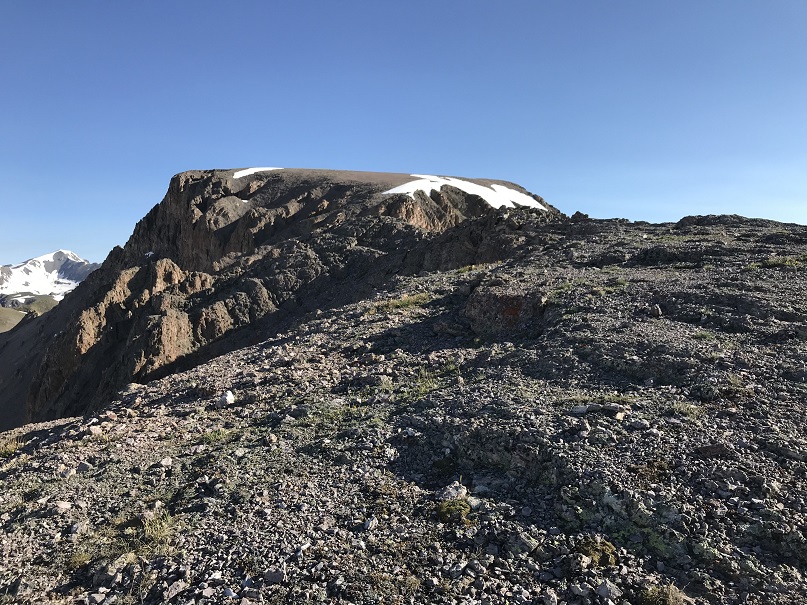
I turned left (north) and faced a class 3 section and headed up and over the ridge.

12

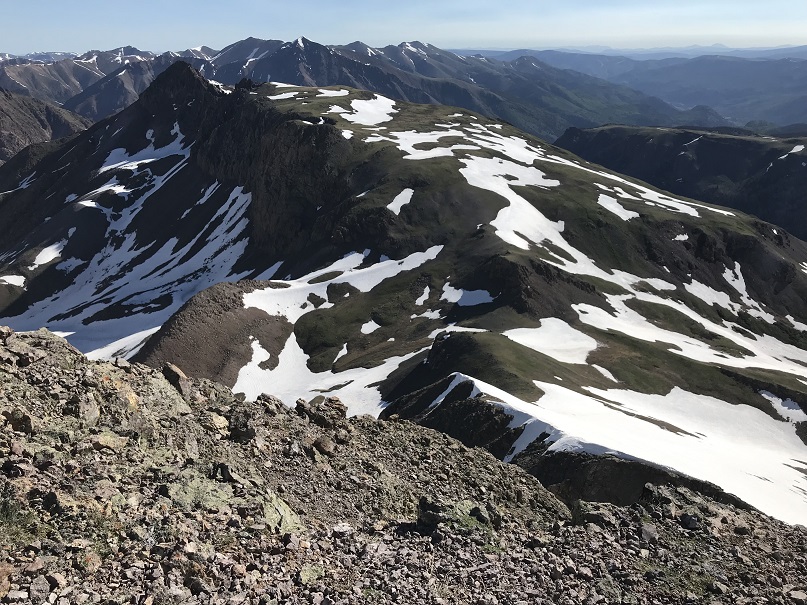
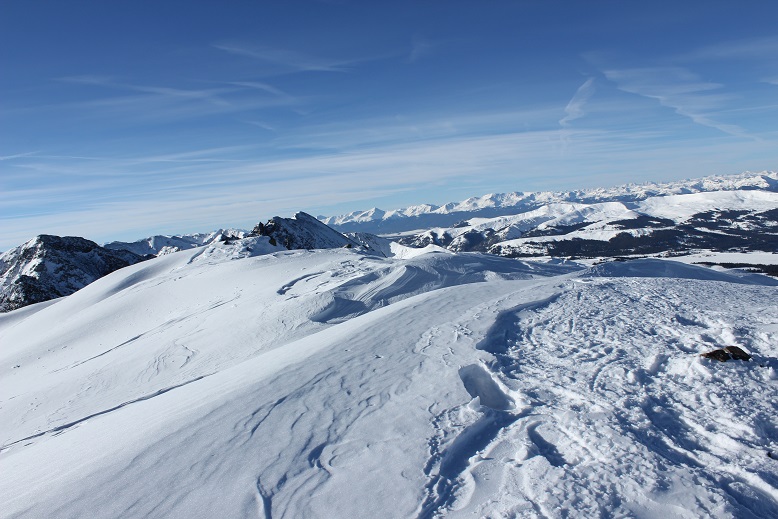
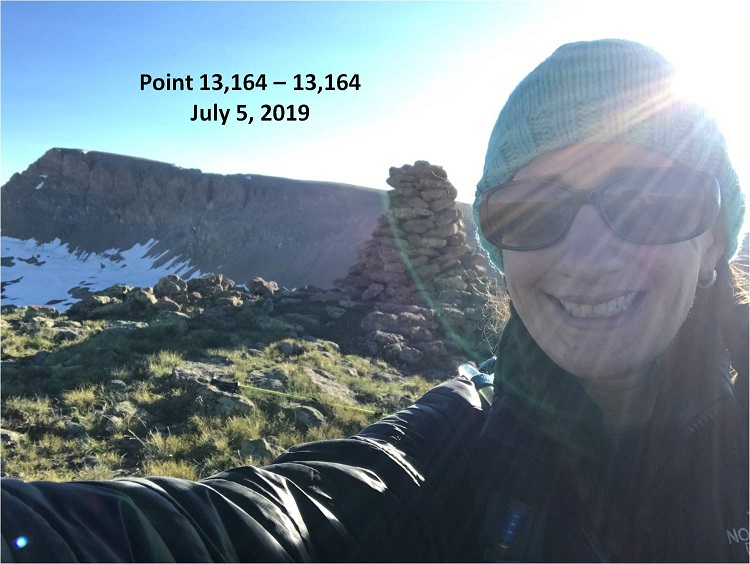
At the top of this point I could see the rest of the route before me

13

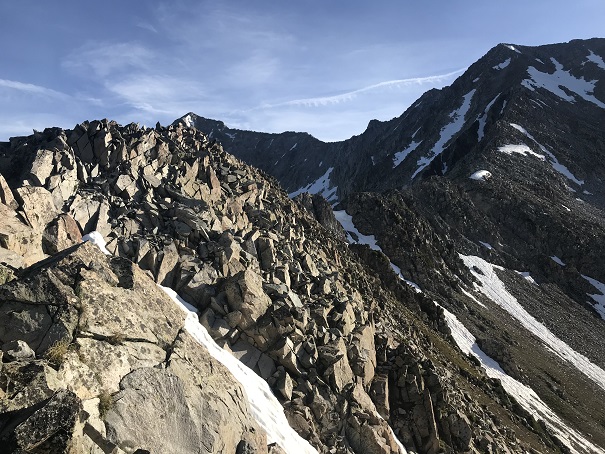
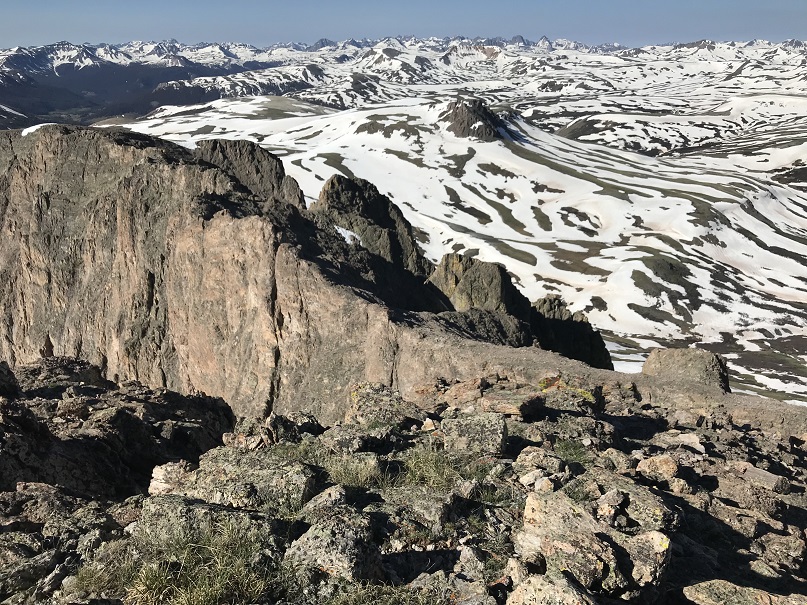
It’s important to note if you’re attempting this ridge to start early and make sure you have a large weather window. This ridge is very committing.  I went at it slowly and carefully.  The rocks here crumble:  I’d find a hand hold, grip, and the rock would crumble in my hands.  I had to make sure to test out each hold several times before using it to secure myself.  Luckily, the ridge was snow free.

14

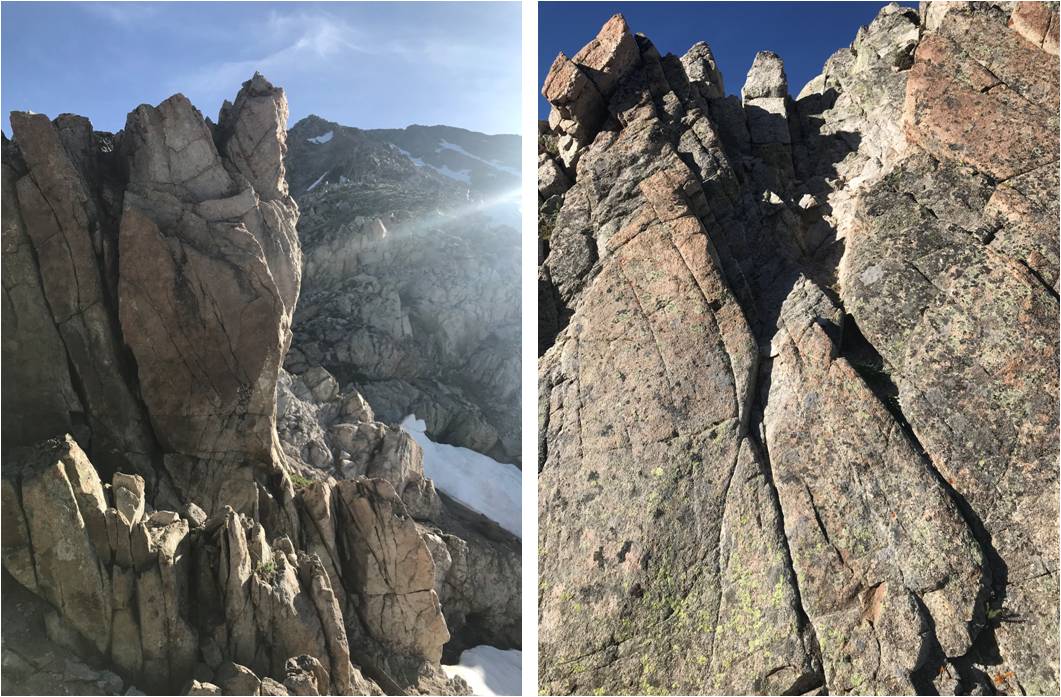
This is definitely a ridge you take by… sticking to the ridge. I was able to go directly up and over most areas, dipping to the left or right just a couple of times.  As I ascended the rocks stopped crumbling and started tipping a bit (nothing fell, but not much was stable).  Here’s the final push to the summit.

15

I made it to the summit at 9:10am
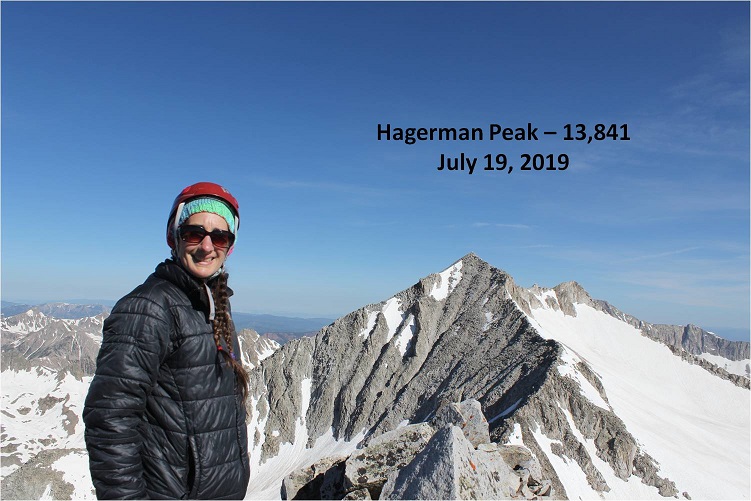
16

Hagerman:

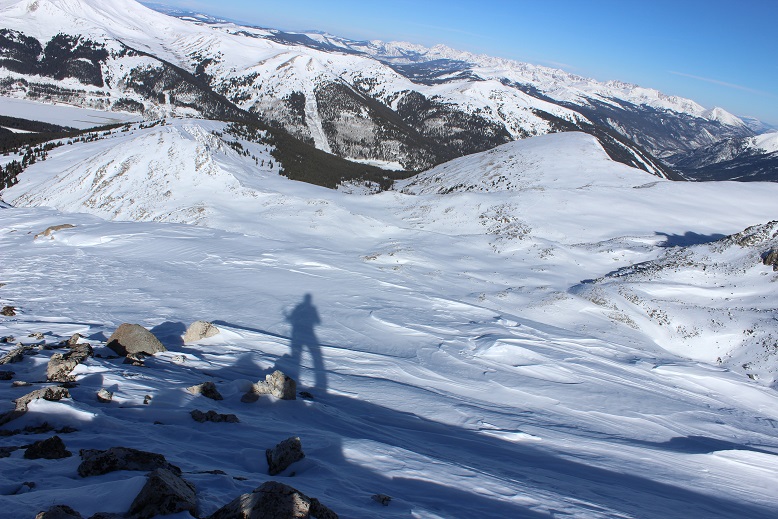
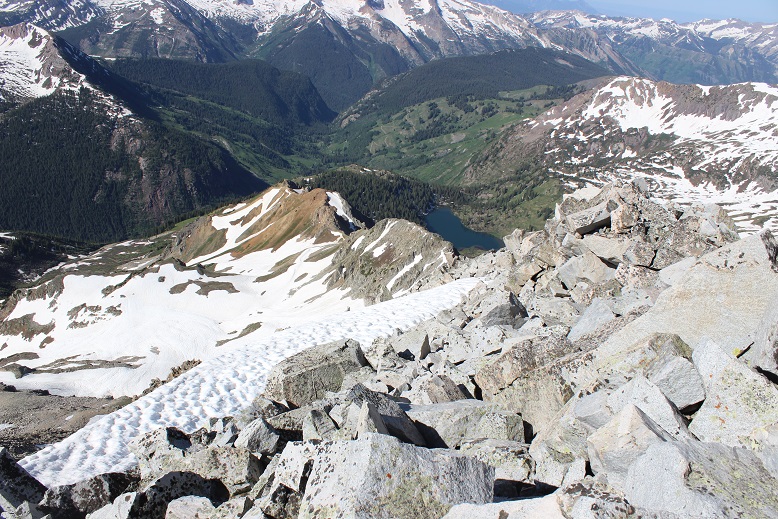
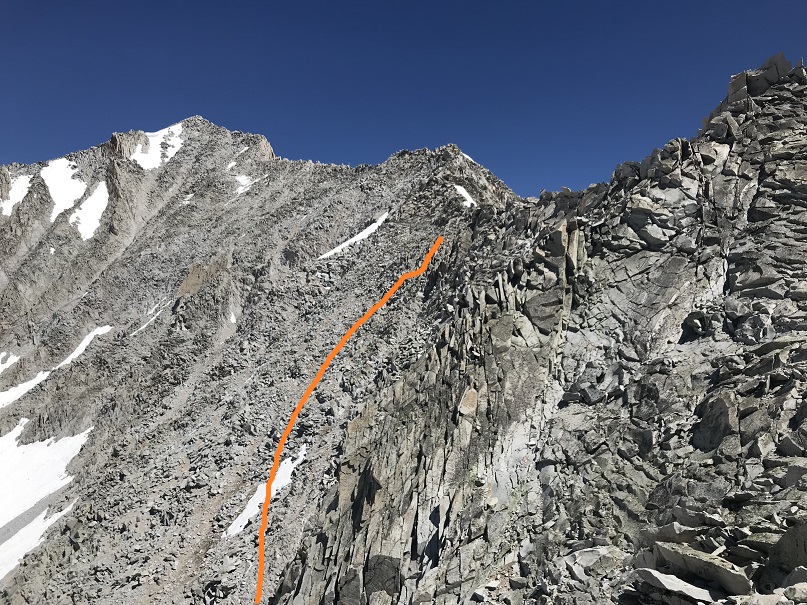
I started the ridge at 7:15am and ended at 9:10am, making this a 2 hour ridge to cross. Here’s looking back at the route

17

The day was absolutely beautiful and it was still early morning so I considered traversing over to nearby 14er Snowmass Mountain. I’d done a lot of research and came up pretty empty with details, but I knew it could be done.  I spent quite a bit of time looking around at possible paths before deciding if I was going to attempt traversing or not.  I looked at Snowmass Mountain’s east side:  nope, that was a no go. Tons of snow and no way I could see to begin from the summit. Next I looked to the left (west).  A lot less snow but the shadows weren’t helping much.

18

I stopped and did a lot of thinking here. I knew the traverse was possible.  The rock looked loose, but I could also see goat trails (or maybe those were gullies…).  I was confident I could find traction in the dirt.  I mentally calculated how much time I had, the weather, and looked for exit strategies in case I got to a place where I couldn’t continue.  I decided both time and weather were in my favor today so I decided to go for it.

Note: This may not be the safest way to traverse from Hagerman to 14er Snowmass Mountain. For me and my abilities, it was the safest way on this particular day.

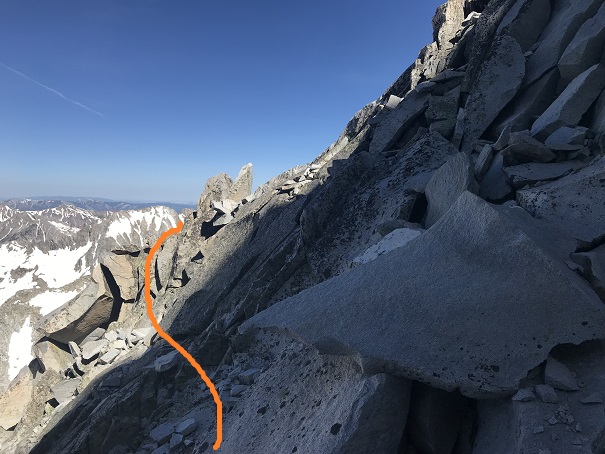
The first move committed me to the traverse: I down climbed about 50 feet of… this.  I’m not sure I could have climbed back up this wall. (Ok, I could have or I wouldn’t have climbed down, but it would have been a lot of work).

19

I turned and looked towards Snowmass Mountain. This is what I saw. So I headed northeast and rounded the corner.

20

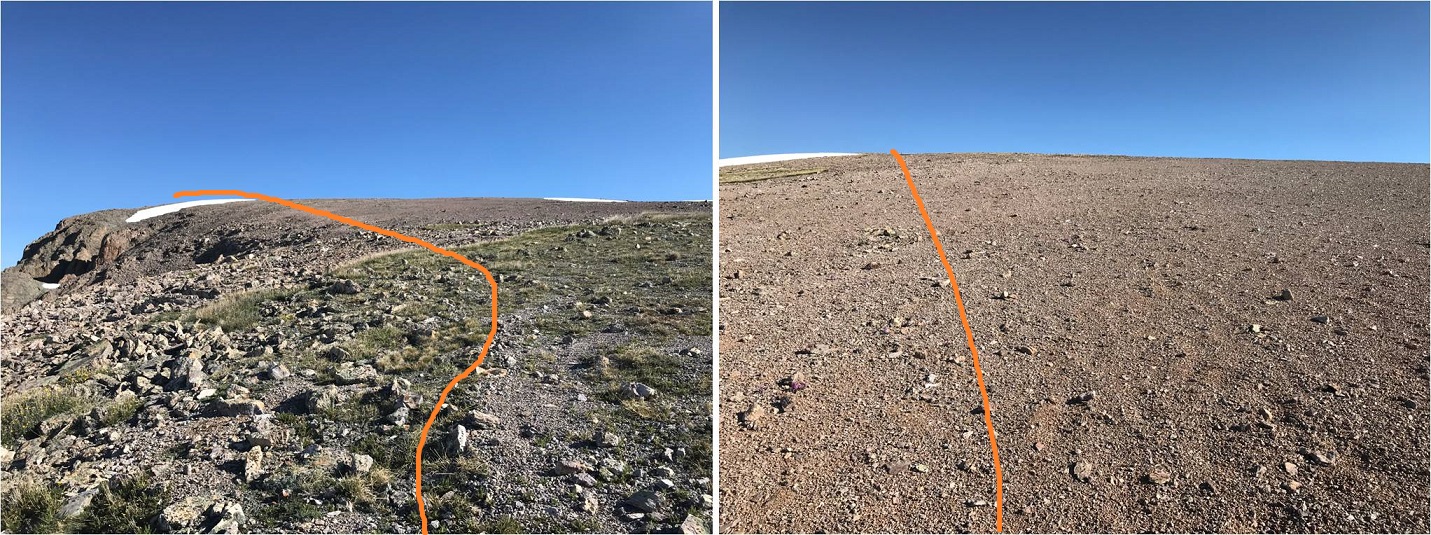
I was taking this one section at a time, focusing on what was directly in front of me but glancing up at the rest of the route every so often to make sure I was on course. I found myself trying to stick to the ridge, but that is not the way to do this traverse:  you need to drop down much lower than you want to.  Every time I tried to regain elevation I was forced to head back down.

21

22

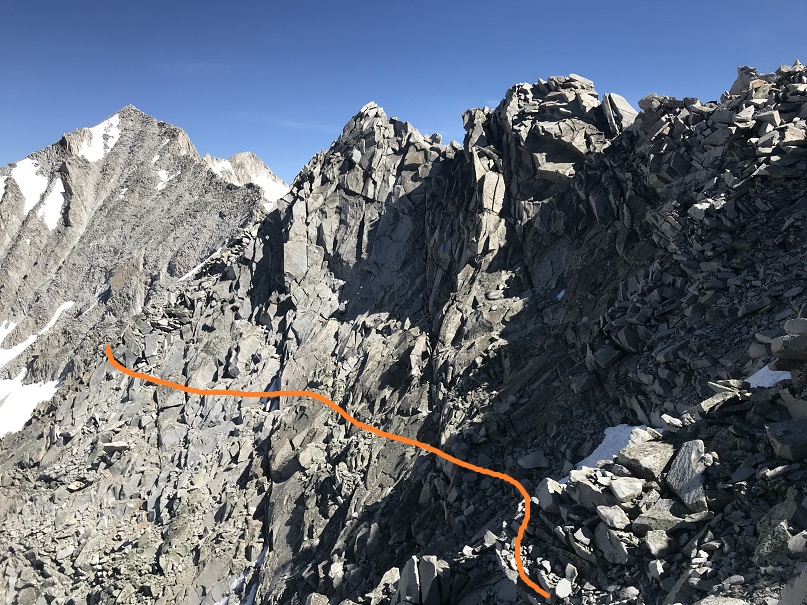
My advice is to descend lower than the saddle, and then take the scree line up to where the trail connects with the east route. The best terrain was consistently 100-200 feet below the ridge.

23

24

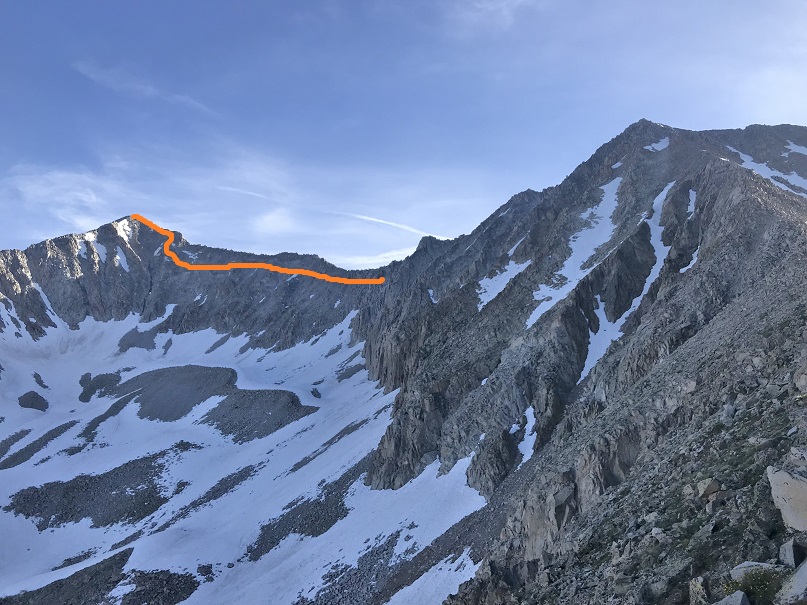
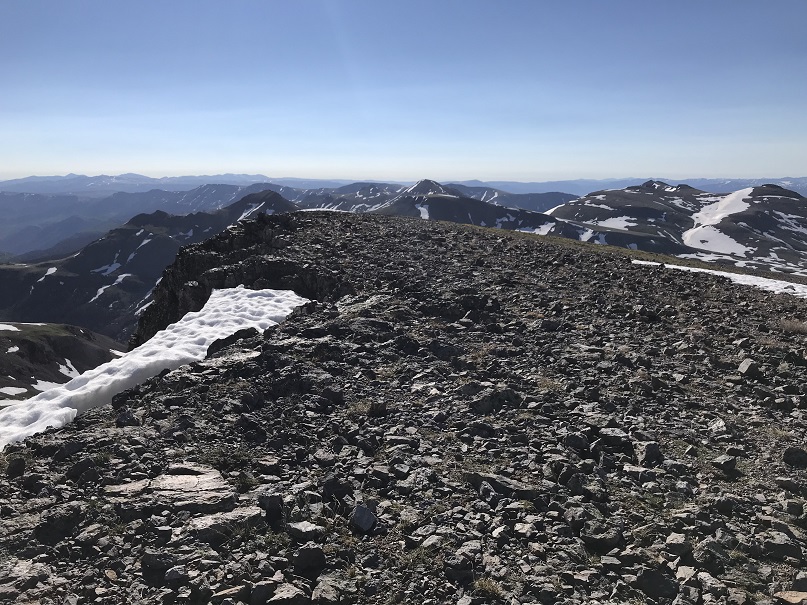
Once you connect with the ridge where the east route links up you can easily follow the cairns to the summit.

25

This was a very slow climb. Everything was loose and what wasn’t loose was scree.  I took extra time to be careful with each and every step, and kept the entire route in view as often as possible.  I most likely made this take longer than necessary, but I stayed safe.  I made it to the summit of Snowmass Mountain at 12:50pm, making this a traverse that took over 3.5 hours to complete.  Here’s looking back at the route
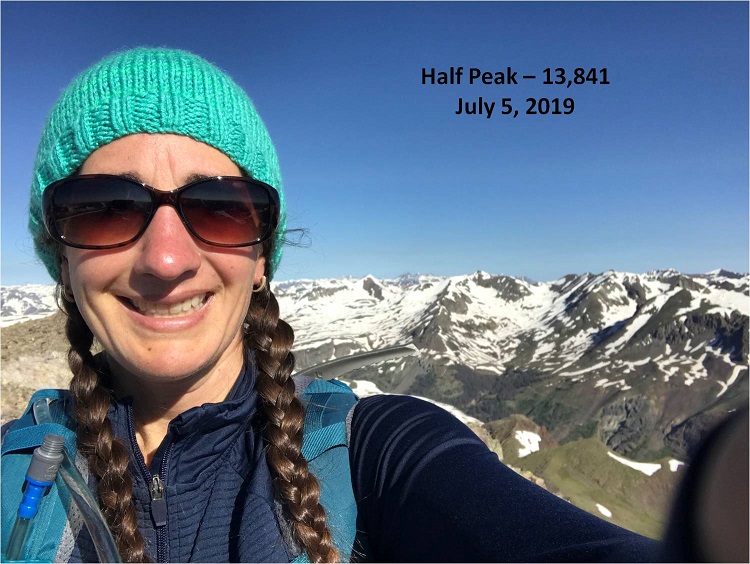
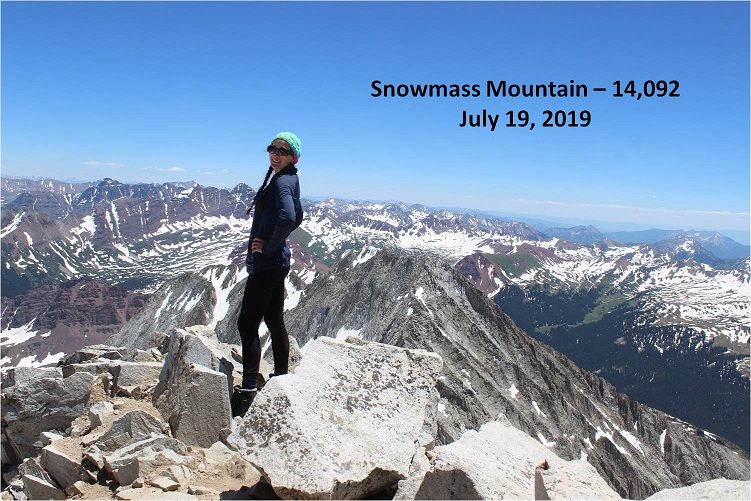
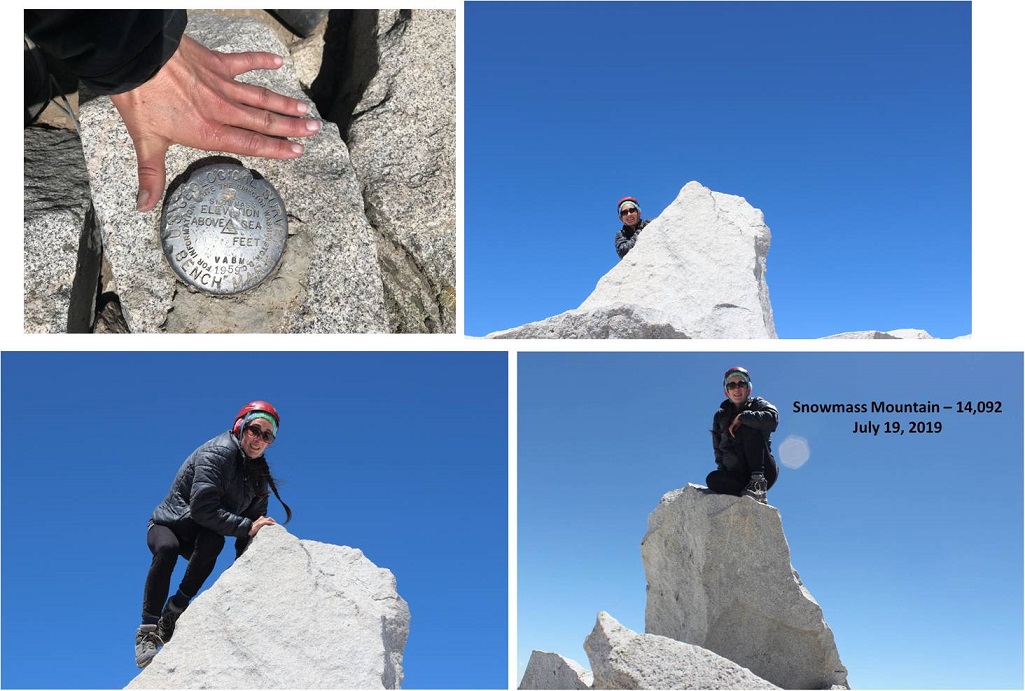
26

Summit photo

27

Summit Video

I spent a lot of time on this bluebird day taking pictures. It’s harder than you think to set an automatic timer and then scramble up to the summit block.  It took a few tries… and the ones that actually turned out were fuzzy, so I gave up.

28

After spending much more time on the summit than necessary I needed to make the decision of how I was going to head back down. I’d been hoping, similar to the west side of Hagerman, that the west side of Snowmass Mountain would be free from snow.  No such luck.  There was still snow in the gullies.

29

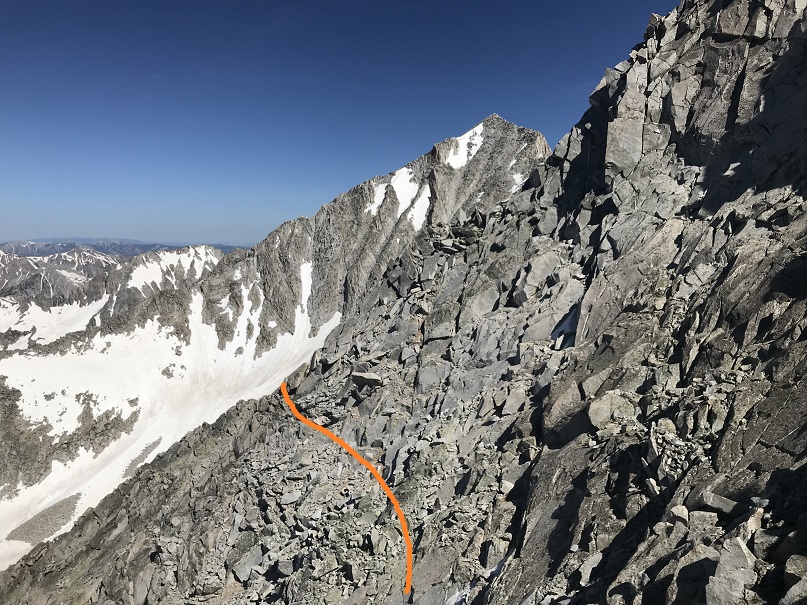
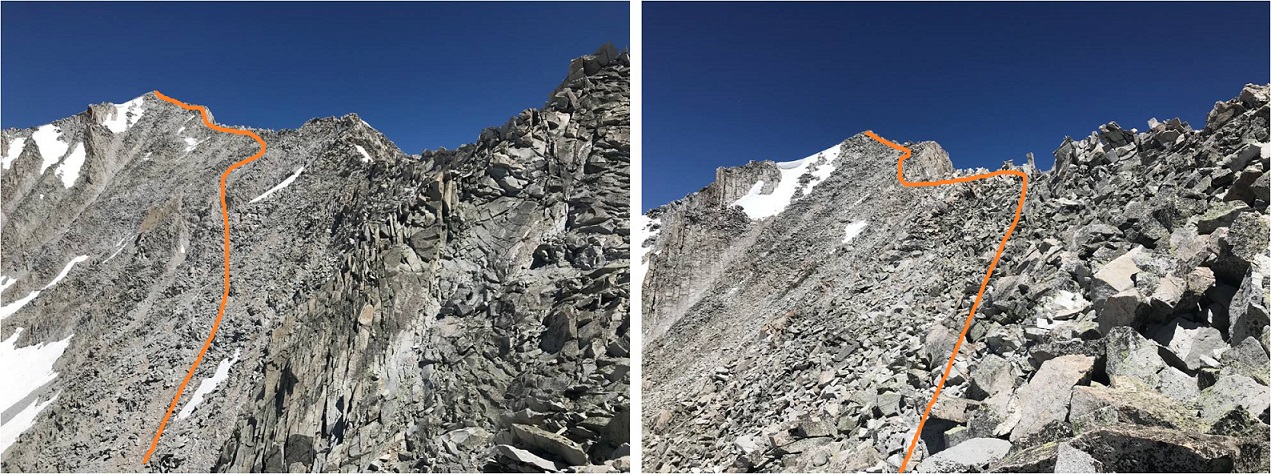
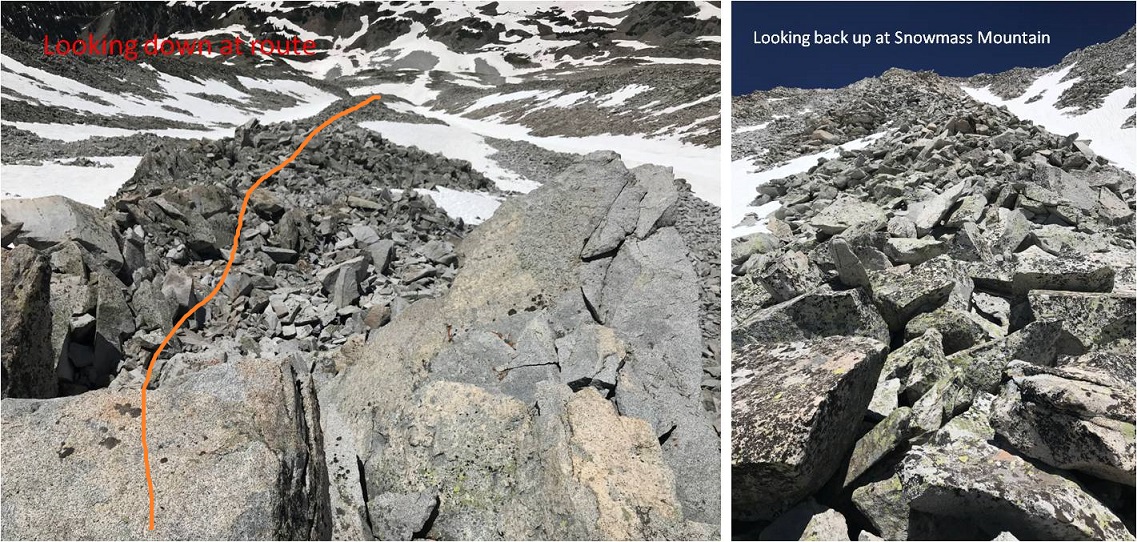
I did not want to do the traverse back to Hagerman because that and another 3 hour traverse would have been exhausting. I could tell the gullies on the west side of Snowmass Mountain ended/cliffed out in a waterfall area, but I could also see bare rock I could traverse either north or south to connect up where I needed to be.  I decided to head down Snowmass Mountain’s west side, but for safety I would slightly alter the traditional route.  It was too late in the day to safely take the gullies, so I was going to take the rock rib that wasn’t a rib but a bunch of loose rock that bulged from the mountainside.  Here’s the route I took

30

Do not let these photos fool you: this is where I encountered the loosest rock of the day.  These rocks are the size of refrigerators and tables.  Every 3rd rock would tip, and I would think to myself:  “That’s a lot of rock to tip!” Luckily not one rock actually tipped/fell/tumbled/caused a rock slide.

31

This was a very slow process but eventually I made it to the waterfall area. My feet were starting to hurt at this point from all the rock work.

32

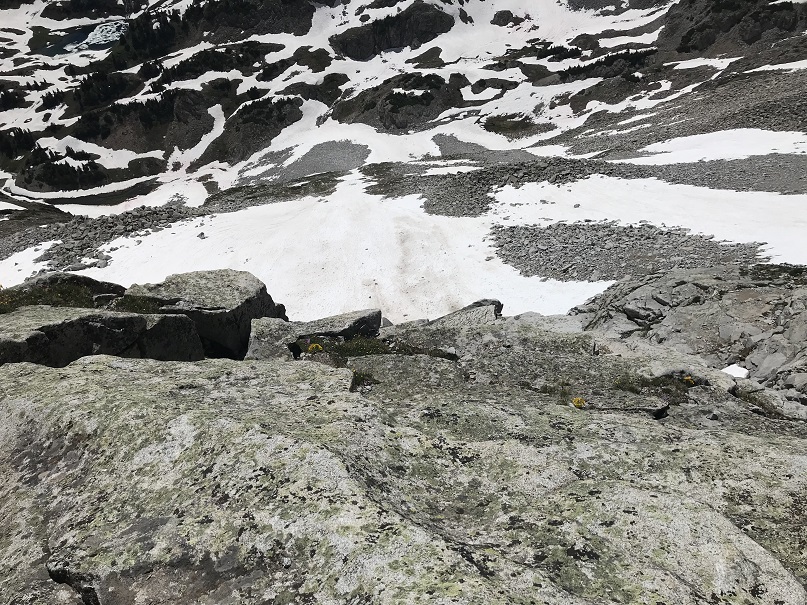
The snow ended just at the waterfall and surprisingly I crossed the waterfall pretty easily here and headed down. I made it down to this area at 3:30pm.

33

The snow started up again after the waterfalls

34

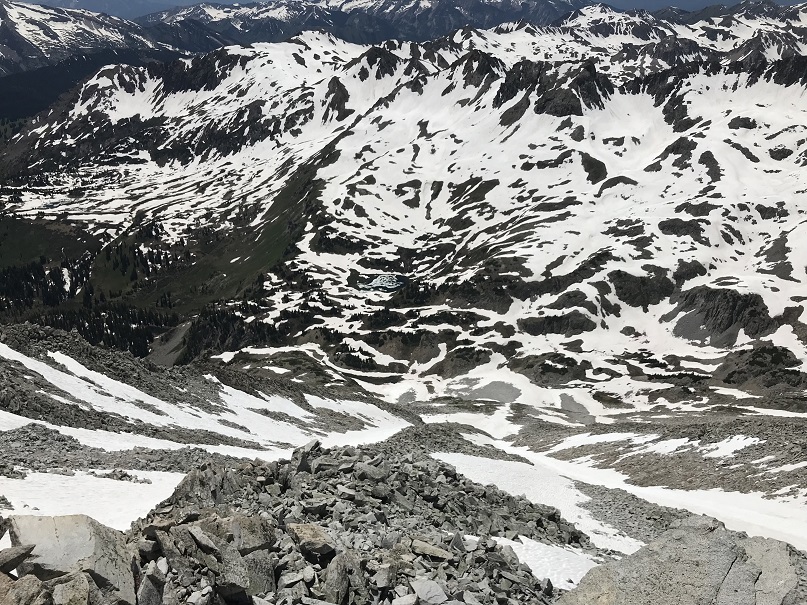
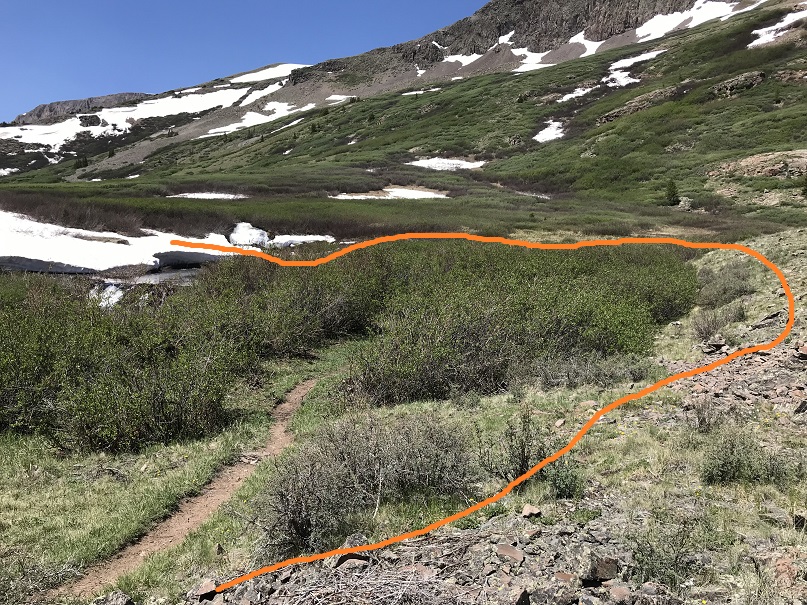
From here I looked down at the basin, and unfortunately there was a lot of snow covering the trail I was supposed to take back to Geneva Lake. That snow was going to be several feet of mush at this time of day so I decided to traverse south along the mountainside, looking for a safer route down.

35

36

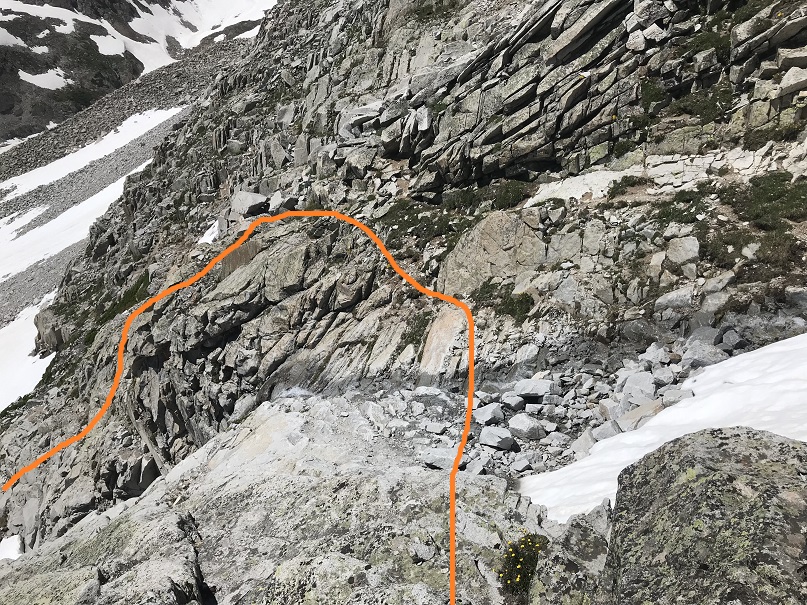
I made it here and unfortunately cliffed out yet again… but I could see where I needed to be:  That goat trail should get me down.

37

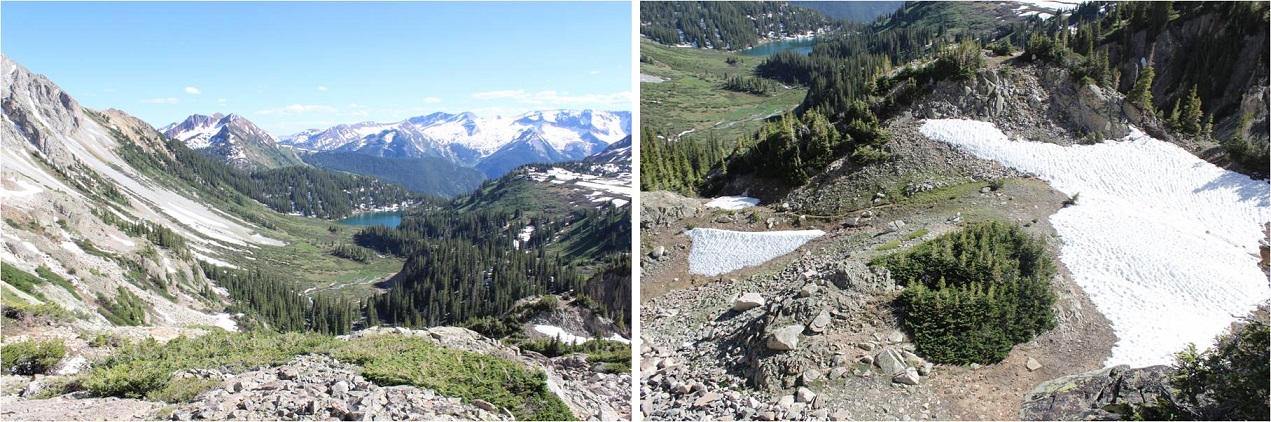
After searching around for a bit I was able to find a way off this spot by circling the area to the north and down the small cliff

38

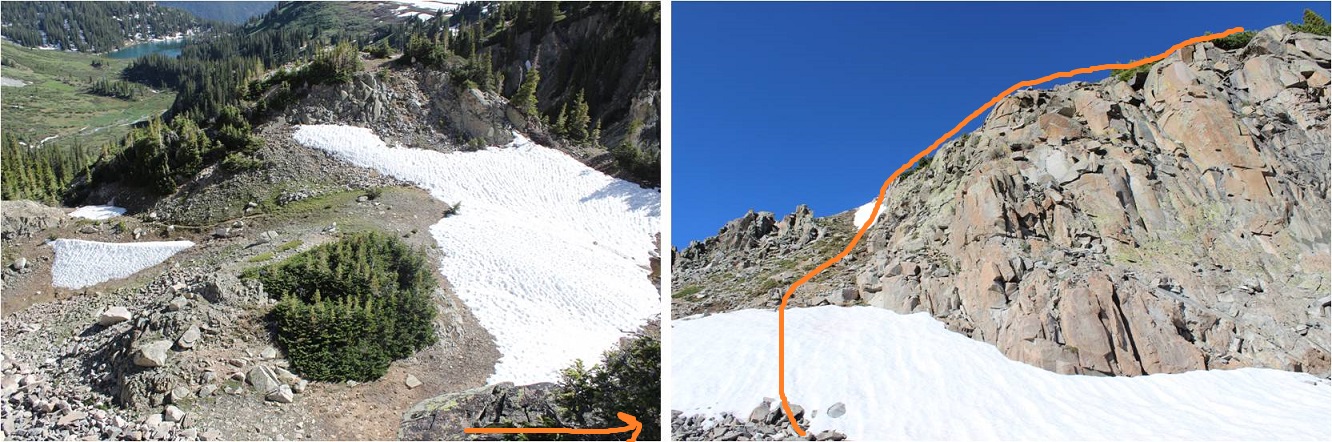
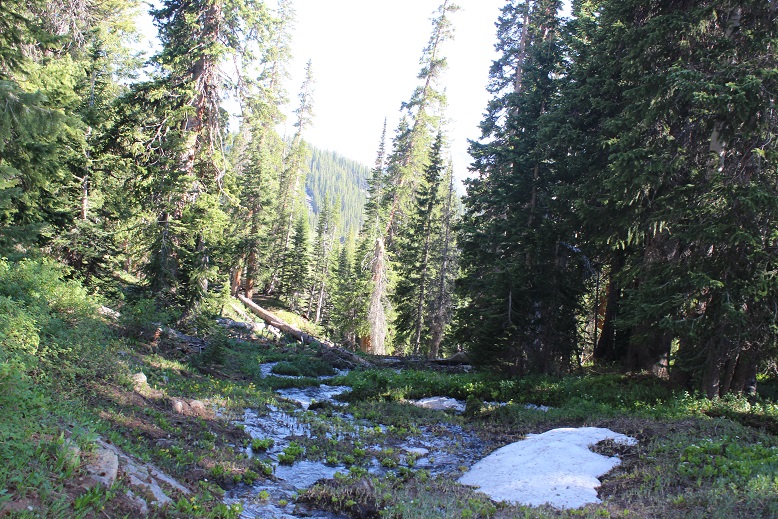
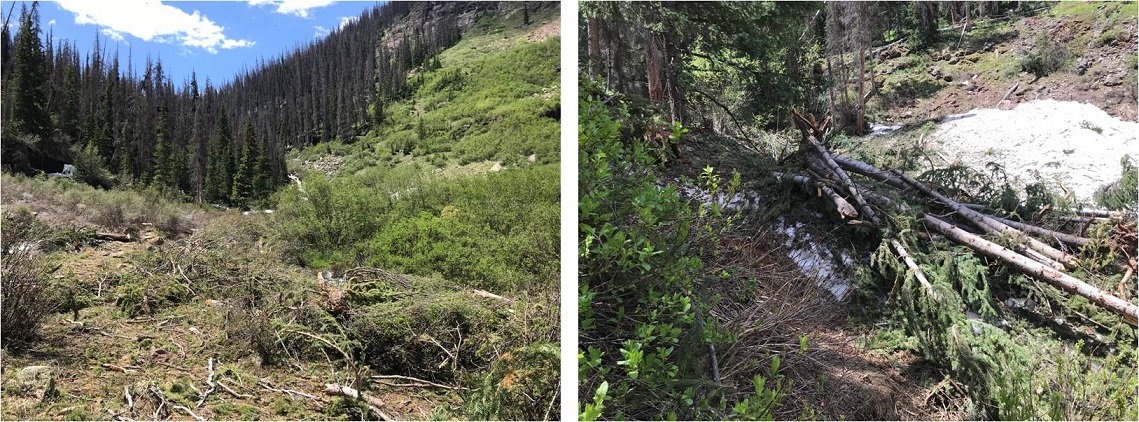
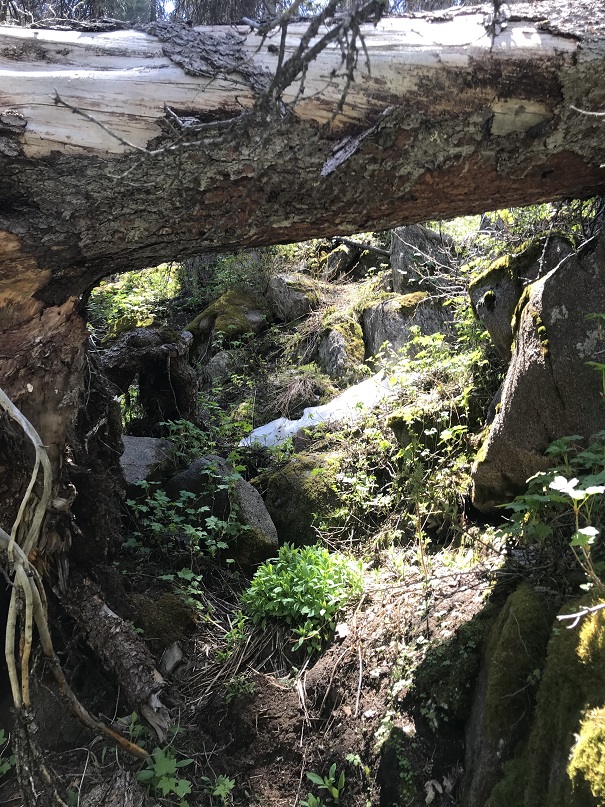
From here I followed the goat trail that went down a forested gully and came out ready to exit and head towards Geneva Lake.

39

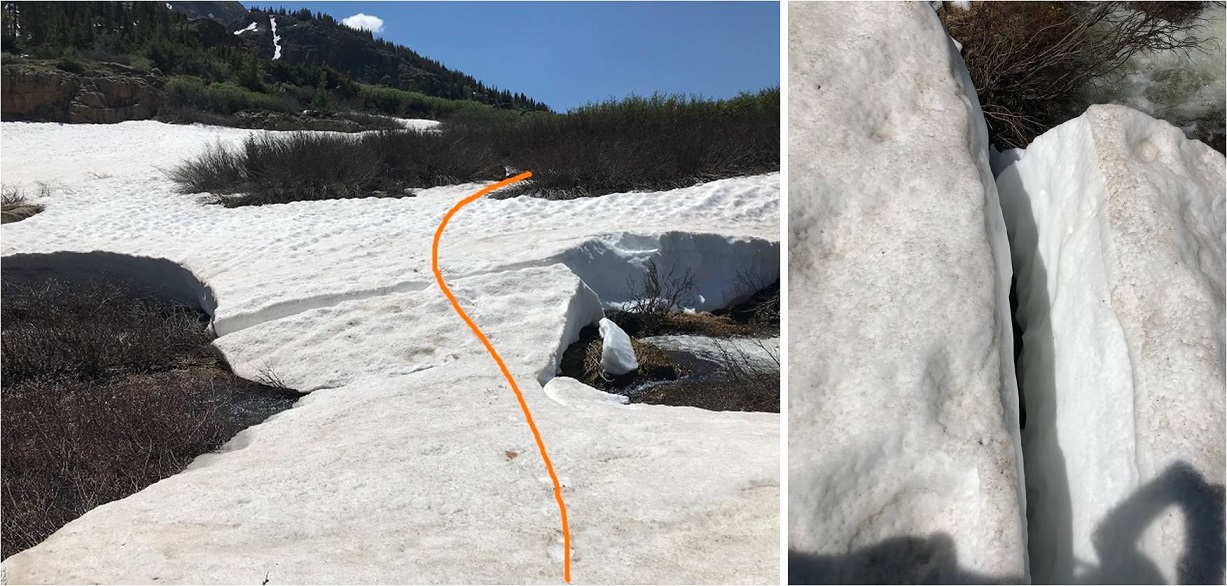
The area through the trees to the stream crossing was wet.

40

At the stream crossing I reconnected with my water shoes. They were now dry but had been scattered and were now no longer sitting on the rock together but in the grass a few feet apart.  I changed out of my shoes into my water shoes and crossed the creek

41

I’m ashamed to say the creek ate my water shoes. Seriously.  The banks were quite muddy and during the last two steps my water shoes got sucked off my feet and into the muck.  I spent 20 minutes trying to dig them out with my ice axe, but no dice.  I couldn’t find them.  They were buried in the banks of the stream.  Ugh.  From here I sat and put on my shoes and new, dry socks.  I looked back at the route I’d taken to Hagerman.

42

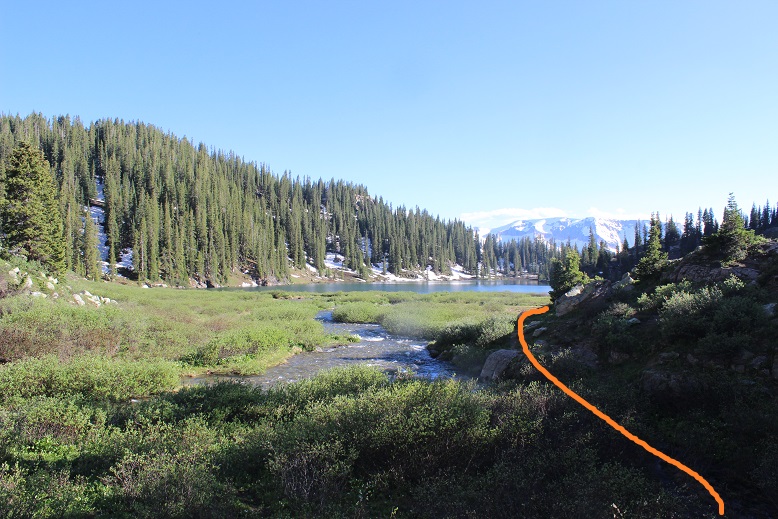
My feet were hurting, and I still had 4 miles to go. Time to hit the trail.  I skirted the lake and headed back towards Lead King Basin.

43

One great part of this hike was being able to see the waterfalls. And, since it was so late in the day: no bees!

44

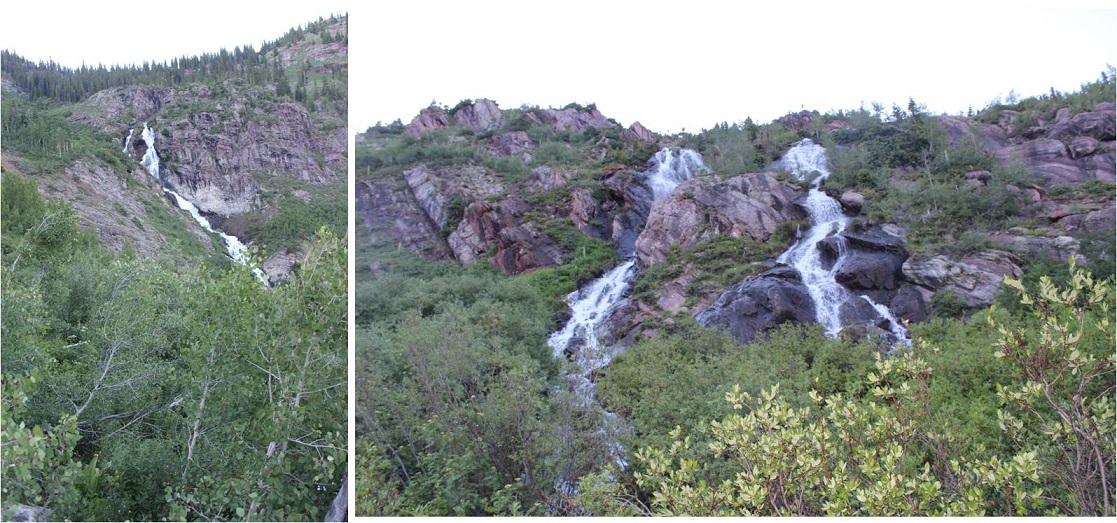
At the base of the waterfalls the trail was running with quite a bit of water.

45

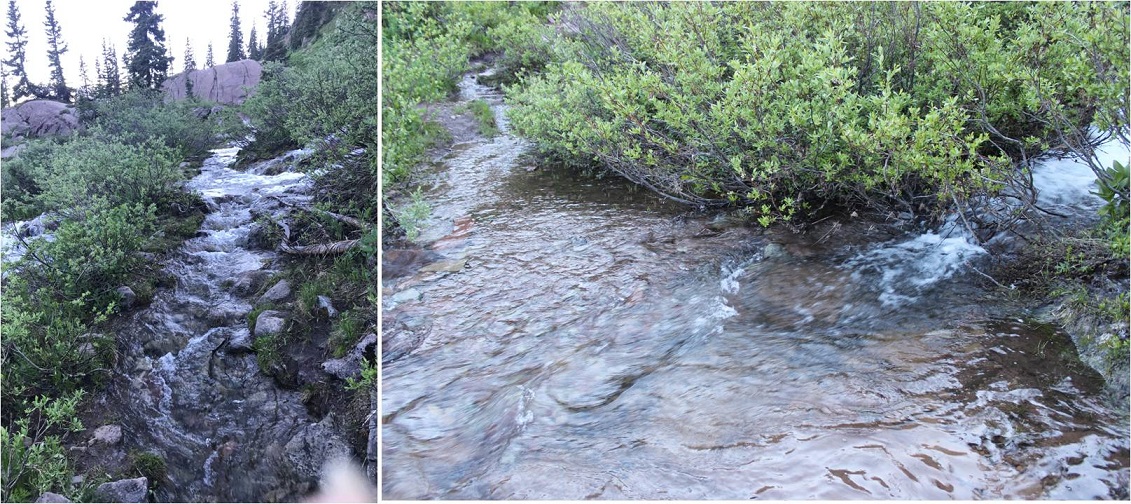
In the daylight I could see the upper 4WD trail to Lead King Basin

46

This is where my feet really started burning. I was surprised, since I’ve done more challenging hikes with greater mileage/elevation gain than this one, yet my feet were very sore.   I made it past the Lead King Basin trailhead as the sun set and each step I took hurt more than the last.  I wanted to cry.  I’ve never felt foot pain like this.  Also, I’d been hoping to stop in Carbondale tonight to get Subway for dinner, but it looked like I wasn’t going to make it back in time for that to happen.

It seemed as if it were taking forever to reach Crystal. I eventually came across a sign that said “Private Property next 2.5 miles” and mentally freaked out for a second.  There was NO WAY it was 2.5 miles to Crystal!  Not only could I physically not make it 2.5 more miles (My feet! My feet!!!) but I was pretty sure it had been 2 miles to the upper trailhead.  Had I been wrong and it’d been 4?  Ugh, I needed rest and I needed calories because my mind was playing tricks on me.  Luckily it was only half a mile past that sign to the town of Crystal.  I finished this hike at 8:45pm, making this a 15.5 mile hike/climb with 6211’ in elevation gain in 18.5 hours.

47

48

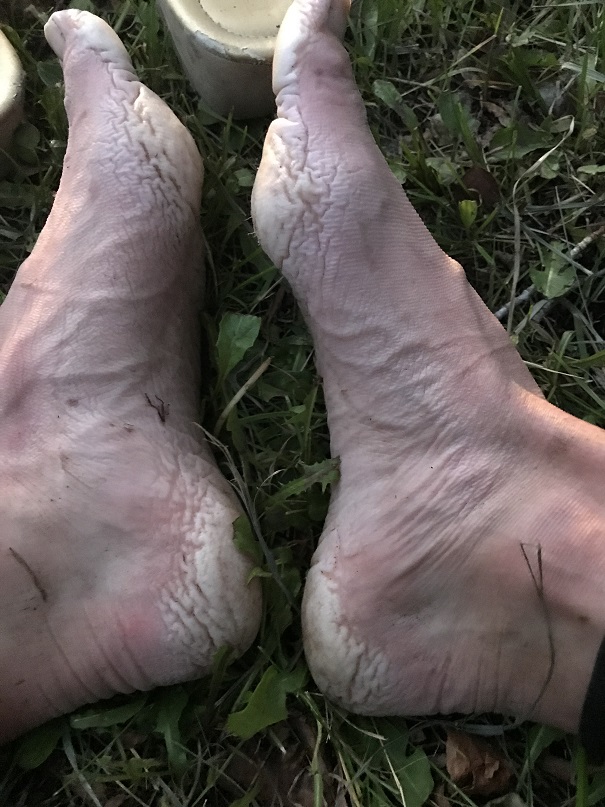
Read on for gross feet pictures and segue into the next hike…

I limped to my truck and sat down by a small access creek about 1 foot wide on the side of the road. I took off my shoes and gasped:  Yuck!  My feet had never looked like that before!  The heels and pads were completely swollen and red/gray, and very painful to the touch (no blisters though).

IMG_5160

I decided to wash them off in the water.  I placed them both in at the same time and immediately felt relief, and then 2 seconds later started screaming because they started burning as if I’d placed them into a pot of boiling water.  My feet turned bright red and were rendered useless.  Seriously.

I couldn’t walk the 5 feet to my truck so I sat there for half an hour in the wet creek bank and thought about what I was going to do. I was supposed to drive to the next trailhead for my hike tomorrow, but doing the math if I left now I would get there and only have 1 hour to sleep before starting again.  This hike had taken much longer than anticipated.  I’d only had 3 hours of sleep last night so it was a bad idea to try to drive and then hike at this point.  Also… my feet.  I wasn’t sure they’d function tomorrow.  They needed time to dry out.  But long distance runners/thru hikers have this stuff happen, right?  They just tape them up and hike/run anyway.  I decided I was really, really tired and should sleep before attempting anything.  I’d adjust my schedule as needed.

I had pain killers but decided not to take them: I wanted to be sure of an accurate pain level when I woke up so I could plan my day accordingly. Unfortunately, I never really made it to bed.  I crawled into the cab of my truck, thankful I hadn’t rolled up my sleeping bag this morning.  I tried to nap but even though I was exhausted I couldn’t get myself to fall asleep.  After 2 hours I gave up and decided to drive home, with the added bonus of doing so in the dark late at night so I most likely wouldn’t need to pass anyone on the shelf road out.  My feet had dried out a bit and were raw but less sore.  They still overreacted every time I tried to use them.  My right foot was healthier than my left; I couldn’t press down on the pedal very hard, so I drove slowly, but I made it.

Oh, and since I’d returned in the dark I never got to see the Crystal Mill, or get a good look at that old house with the lady in the windows…

The Snowmass Mountain Summit Sticker can be bought here

Half Peak – 13,866 & Point 13,164

1

RT Length: 18.5 miles

Elevation Gain: 5640’

I arrived at the Cataract Gulch trailhead the day before, after summiting Point 13,832.  I was pleasantly surprised to find a well stocked and clean bathroom, as well as plenty of open parking space.   Mine was the only vehicle in the lot, despite it being 4th of July weekend.

2

Also, apparently this is a Lynx recovery area, which I found interesting.

3

I’d ended my hike early and desperately needed to catch up on sleep, so I went to sleep around 2:30pm and only woke up twice:  once because it was too hot in my truck (the sun was going down but at exactly the right angle to heat up my vehicle drastically in just a few minutes) and another time I around 10pm. I still had over 4 hours of potential shut eye so I took a melatonin with a shot of whiskey and fell back asleep.  I didn’t wake up again until my alarm went off after 2am, so I consider it a successful night of truck camping (I notoriously sleep terribly at trailheads).

I fished around in my backpack for my flashlight and couldn’t find it.  I was sure I’d placed it in the small pocket the day before, but it was nowhere to be found. Luckily, I always carry a spare as well as extra batteries.  Immediately I remembered why I didn’t like this flashlight:  it was TOO bright.  That sounds like a good thing, but when hiking in the forest in the dark I’d actually rather not see every detail.  This flashlight was too good. I was going to have to replace it when I got home.

On this hike I was armed with a topo map, a compass and some beta from the campers I met last night, as well as a rough route description.  I started on the Cataract Gulch trailhead around 2:45am, crossing Cottonwood Creek on a well built bridge over a swiftly flowing creek

4

5

And then I crossed the creek twice more on well placed log bridges I had to hunt for in the dark because they weren’t on the main trail.  I was seriously worried I’d have to ford this creek multiple times before discovering the log bridges, which were (as usual) easy to spot in the daylight.

6
This trail had a trail register (Woot!  More noise!) and was easy to follow up to the first avalanche area

7

The avalanche area was very small and well packed down

8

I didn’t have any difficulties until I made it to the waterfall area.  There had been a small avalanche and it looked as if the trail wanted me to cross the waterfall.  I took out my topo map and it looked too early to cross yet, which meant I’d have to follow the waterfall up for a ways first.  There was no trail so I bushwhacked in the dark up the mountainside, paralleling the creek.

9

Here’s when I came to the crux of the waterfall. It was still dark out (I’m guessing it was around 3:30am) and the waterfall was raging.  I could feel the spray of water on my face, even though I was standing several feet away.   I went right and left looking for a better way up and encountered very large boulders blocking the route in every direction.  I could tell I just needed to ascend 15 feet or so (maybe less) and I’d be where I needed to be to cross the waterfall.  It took some fancy footwork and a class 4 move, but I was able to work my way up the side of this boulder, up and over to flat terrain.  (Side note, apparently I made this too difficult and there’s an easier way I was unable to find in the dark.  Check out Angry’s conditions report for a class 2 route over the waterfall).

10

There was a camping area directly above the waterfall, and I was able to pick up a trail again.  I was already considering today a success:  the campers I’d talked to the night before hadn’t made it this far.  The trail rounded a corner and brought me to a creek crossing above the waterfall.  I had 2 options here:  either balance my way across the log and potentially fall in the water (I was carrying a full pack) or take off my shoes and wade across.   In the dark I took off my shoes and put on my water shoes (hurray for new gear and dry socks!).  Yes, I’m sure some could have walked across the log, but I decided to use the log for stability and wade across, keeping my feet dry in the long run.

11

The well established trail picks up directly after the creek crossing

12

And brings you to a boulder field

13

Just after the boulder field there’s another creek crossing.  Unfortunately, the creek was running quite high here and I became frustrated trying in the dark to find a passable route.  I noticed some cairns to the right and followed them to what looked like a goat trail through the willows.  This led me to a snow bridge that looked ready to collapse any day now, but it would get me across the roaring creek.

14

Check out the snow bridge.  I was so excited to come across this in the dark.  There weren’t any footprints from here on out, so I crossed my fingers I’d be able to find my way.

15

I didn’t find many pictures of this route, and to be honest route finding was difficult in the dark due to the snow, so I’m going to do my best to post some details.  I followed the well defined (when there wasn’t snow) Cataract Gulch Trail.  Just after the last creek crossing I headed south and rounded a large boulder

16

The (still snow free) trail brought me to a ravine

17

(In case anyone wants to see what the trail looks like at 4am…)

18

Here the snow picked up, covering the trail about 80% of the time.  This was both good and bad:  It was nice to see a trail every once in a while, but it was covered so much it was difficult to follow and became frustrating to someone like me who hikes on established trails when available.  Just head south until you reach Cataract Lake. It feels like you’re hiking forever, but I promise you it’s there.  My tracker showed it at 4.9 miles from the trailhead.

19

Here the birds started waking up.  This is one of my favorite part of early morning hikes!  I also saw a herd of Elk in the meadow.

Video:

Continue past the lake and you’ll come to a trail junction.  Continue heading South

20

You’ll pass a small pond on your right and head towards Cuba Gulch, which is also the East Fork Middle Pole Trail (another well defined trail when there’s no snow).

21

Follow this trail west as it hugs the side of a mountain, unfortunately losing a little bit in elevation in the process.  Here’s the general idea of where you’re headed

22

And some close ups.  There was quite a bit of snow here, obscuring the trail.

23

Here I rounded the small basin and headed to a small saddle

24

This section is steeper than it looks, and snowshoes were helpful.

25

Turn right at the saddle and follow the trail towards Point 13,164.  The dotted line is the suggested route to summit this ranked 13er, but I didn’t like the angle of the snow, so I continued on the trail until I found a better way to summit.

26

This is the route I took to gain the ridge of Point 13,164:  I needed snowshoes and an ice axe here

27

At the top of the ridge I wound my way north to the summit.

28

From there it was an easy walk up a tundra slope to the summit with a rather large cairn and a great view of Half Peak

29
I summited at 7:10am

30

Video:

Also, the San Juan’s still have a lot of snow!!!

31

Ok, back down so I can get started with Half Peak.  Here’s the view of the way I went back down and then gained the ridge to hike up Half Peak.

32

Side note:  If you’re not interested in summiting 13,164 here are the coordinates along the trail you turn east at to gain the ridge of Half Peak

33

This is a long but gentle slope with no defined trail.

34

The crux of this route comes just before the summit at around 13,500’.  There is a narrow ridge to navigate.

35

Ther37e’s a lot of exposure but I agree with Roach’s assessment this can be kept class 2 with careful footwork.  I found the best strategy was to stick to the ridge in most places, dropping down 15 feet or so only when necessary

36

Here’s a picture looking back.  The ridge reminded me of the catwalk along the ridge to Eolus.

37

From here it’s an easy walk to the summit

38

The summit is large and pretty flat

39

I summited at 8:30am

40

Video:

Here’s a look back on the route up the slope

41

I’d initially planned on hiking Quarter Peak (a bicentennial) today as well, but in the morning I’d gotten a look at Half Peak and the decent route off Half and towards Quarter had a lot of snow.  I didn’t feel ready to commit to the descent in this warm weather.  However, looking at Quarter from Half the ridge up to the summit of Quarter looked dry enough to summit without tackling snow

42 (2)

Oh well, time to head back down.  The snow was softening up, and the snow below the saddle required snowshoes once again (more necessary this time).   In this picture you can see a river flowing underneath several feet of snow

43

Here’s a look at the route back from Cataract Lake

44

I was almost back to the river crossing with the snow bridge when I looked over at the basin and saw 3 Bull Moose enjoying lunch together in the willows!  Very cool!

45

Video :


I crossed the snow bridge, following my previous tracks.  Here I started seeing people on the trail.  I warned those with unleashed dogs about the moose up ahead and gave some people advice on how to find the snow bridge so they could hike to the lake.  Actually, the park ranger/mom in me talked to everyone on the way down, but mostly just to see where they were headed.  Today was such a beautiful day to hike!

I crossed the stream above the waterfall, descended the waterfall the same way I’d ascended, and made it back to my truck at 12:45pm, making this an 18.5 mile hike with 5640’ in elevation gain in 10 hours.

46

Here’s a topo map of my route

47

Atlantic Peak 13,856

1

RT Length:

Elevation Gain:

I really wanted to do Atlantic and Pacific together, but until April I have limited time schedules for hiking (I need to be back at my truck by noon to make it home in time to pick up my daughter from school, so it’s hikes under 8 miles until then).  The weather indicated Atlantic Peak would be a good choice for today, so I went for it.  This was only supposed to be a 4-6 mile hike and I wanted to break in my new winter hiking boots.  They were supposed to be lighter and warmer than my Sorrels, but I was skeptical so I wanted to use them on a shorter hike before committing to longer distances.

I arrived at the Mayflower Gulch trailhead at 5:15am to 14* weather, much better than the -5* weather of last week in the San Juans.  I was also pleasantly surprised to find it was right off the road:  no off road driving for me today.  There was one other vehicle (a Subaru) in the lot, and while the gate was open up to Boston Mine I decided to park my truck at the lower lot and hike in.

2

The lower lot was icy!!!  I put on my microspikes in the truck and gathered my gear.  I set out at 5:30am.  It was very peaceful hiking at night.   Silent.  Very silent.  No moon, but the stars were magnificent!  The only sound was the snow falling off tree branches and onto the trail below.  The trail was tightly packed down by other hikers, snowshoers and skiers.

3

A 4WD vehicle could have made the icy drive, but since this hike was so short it didn’t seem worth the extra mile and a half.  I made it to the Boston Mine area before sunrise and put on my snowshoes in the dark.  I was lazy so I kept my microspikes on and just put my snowshoes on over them.  If I needed to take them off it would be a quick transition and maybe I could keep my gloves on the entire time (saving my fingers from the cold).

Oh, btw, this fence is not the height of a normal fence… it’s probably half the height (so the snow looks deeper than it actually is).

4

Snowshoes ended up being a great idea, because while the trail was packed down, as soon as I went off trail I started sinking to my knees, even while wearing my snowshoes.  I looked for a trail across the gulch, but it looked like I was the first since the last snowfall so I broke my own trail.

5

The sun was beginning to rise, and Jacque Peak looked beautiful.

6

The snow was sugary and made snowshoeing difficult.  I’d be fine for a few yards, and then plunge up to my waist.  This was a serious problem in the willows, but I made it across the gulch and was surprised to exit and stumble upon a cairn!  This was an unexpected treat!  I found about 4 cairns on the entire route, always unexpected and sometimes on my way back down.

7

After crossing the gulch I was supposed to follow Mayflower Creek up to Atlantic’s west ridge, but the snow didn’t look stable and it looked really deep, so I stayed higher up on the hillside.  This was great (early elevation gain) but there were times I was seriously worried about avalanche danger.  It wouldn’t have been an intense avalanche, but I could see signs I should take an alternate route back once it warmed up. So I was slow in traversing the slope, but careful and ultimately safe.

8

Here’s the route I took

9

My next task was to hike Atlantic’s lower west ridge.  This ended up being more difficult than anticipated:  the snow here was very consolidated, unlike the sugary snow on the slopes and gullies.  My snowshoes weren’t going to cut it.  I took off one snowshoe and tried it with my microspikes.  They became ice skates.  Hmph.  Ok, I was going to need to get creative.  I put back on my snowshoes and got out my ice axe.  This wouldn’t have been a problem with two ice axes or two ice picks and crampons, but I only had one ice axe and I hadn’t brought my crampons (I thought it was still too early).  So I used my ice axe to drill a hole big enough for my left hand and then struck the snow with the axe and my right hand for support and lifted myself up.  My snowshoes used the holds I’d made for my hands.  This worked very well and I was able to gain the ridge in no time at all.  (Note to self:  It’s time for crampons).

10

11

Here’s a look back on the route

12

From here I was just supposed to follow the trail to the summit, but there wasn’t a trail, and in fact, at about 12,700’ I encountered some of the most difficult terrain of this hike.

13

This is where I wanted to turn back.  I seriously considered it.   The snow was intermittent and what snow there was was sugary and covering loose talus, so I couldn’t get a good grip on it in my snowshoes.  I took them off again  to try it with just spikes and it was even worse!  My microspikes were of no use:  I really needed the stability/flotation of snowshoes.  Even though they weren’t perfect, they were a big help. This area took me much longer to navigate than it should have, but I didn’t quit and I didn’t turn back.  I gained this ridge and was met with this:

14

Wow.  That ridge didn’t look too difficult in normal conditions, but I could already see this would be a challenge due to the unpredictable snow.  Maybe not a challenge for seasoned snow summiters, but I’m still new to this.  There was snow, lots of cornices beginning to form, and a narrow ridge to navigate.  I forged on ahead.

15

Luckily a mountain goat had been here last night and gave me some tracks to consider.  There were times I didn’t feel safe following it’s tracks, but they did give me a good general direction to follow, which was directly on top on the ridge.

16

I’d reach one summit and find another, which was frustrating, but I knew everything I encountered was within my abilities and even a bit challenging.  I came across a few sections that would have been class 2 if there hadn’t been snow, but with the snow (and instability of said snow) I decided it was safer just to go straight over the ridge.  This turned the hike into a class 3 climb, and with snowshoes made me a bit clumsy (but safer than without).

17

This was one of those learning opportunities where I was scared at times but knew I could do it so I kept pushing forward, even though there were many times I wanted to quit and come back in the summer.

Here’s the route I took:

18

The trek wasn’t long, and I wasn’t tired when I reached the summit, but I was cold.  Luckily my phone and camera were working, although my phone cut out halfway though the first video and I had to take another one and then it shut down.  I plugged it into my portable charger and took pictures with my DSLR.   I summited at 9am.

19

VIDEO:

While it was cold it wasn’t windy, so the cold was bearable.  I stayed on the summit much longer than I normally do, taking pictures and marveling at the beauty of the mountains with snow.

20

I considered traversing Pacific Peak as well, but didn’t think I’d be able to do it successfully with my time constraints.  The class 3 route looks doable now though, so I may be back in the next few weeks.

21

Here’s a look back at the route

22

The trek back was easier than the hike in because I just followed my tracks (and didn’t look down).  Looking down would have caused unnecessary anxiety.

23

Those ridges were something else!

24

Of course I took a shadowselfie

25

I decided to follow the creek down because that was what I was supposed to do and I was seriously worried about avalanche danger on the route I’d taken up the mountain.  I’m still learning about avalanches, but know some of the initial signs and what I was seeing wasn’t making me comfortable.  So I took the creek, but this proved difficult as well, as out of nowhere I’d sink up to mu chest in soft snow and then have to work myself out.  This happened many times and was frustrating, but I still felt safer than on the slope above.

26

27

Just before hitting Mayflower gulch my toes started to hurt:  the new snow boots were fine, but the snowshoes and boots combination was cutting off circulation in my toes and trekking downhill was beginning to hurt.  This hadn’t happened in my previous boots, and is something I need to consider.

Also, I lost my phone.  It fell out of my pocket and I had to retrace my steps ¼ of a mile uphill to find it.  That wasn’t fun.  I found it buried in snow (but attached to my bright orange solar charger).  I picked it up and trudged back down the hill and across Mayflower Gulch to Boston Mine.

28

It was a beautiful day!  And warm!  I took off my gloves but had to put them back on again once I made it back to the trail (and shade).  Have I mentioned I love my new gloves!

29

My new winter books are ok, but despite my double tying them and folding them under my laces they still came undone while hiking, which isn’t an option for me since I can’t tie them wearing mittens.  I may try safety pinning them next time.

I made it back to the trailhead at noon and looked at my STRAVA map.  Hmph!  This wasn’t right:  It showed my trek to the summit, but it seems it stopped working there and picked up again where I found my phone in the snow after losing it (please don’t attempt to take that straight line:  it’s not safe!!!).  So while the elevation gain is most likely correct, the trek down and mileage definitely are not.  My iPhone told me I’d hiked 6.8 miles, so I’m going with that for mileage.  The hike was 5.5 hours.

30

Here’s my Relive map (which is also false since it did that straight line thing from the summit to where I lost my phone).

https://www.relive.cc/view/1968357714