PT 13204

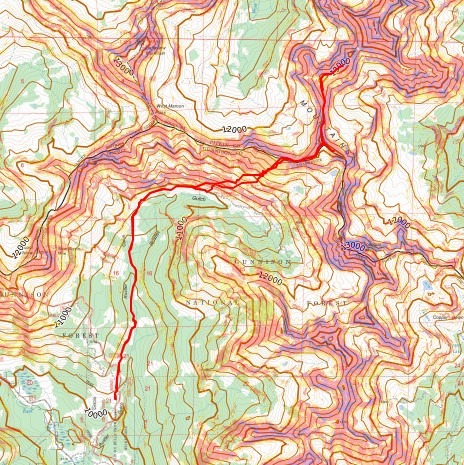
RT Length:  Varies depending on route (see below)

Elevation Gain:  Varies depending on route (see below)

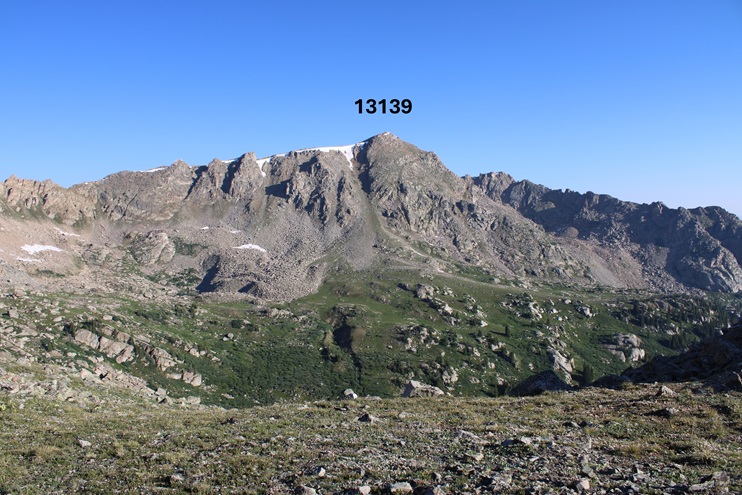
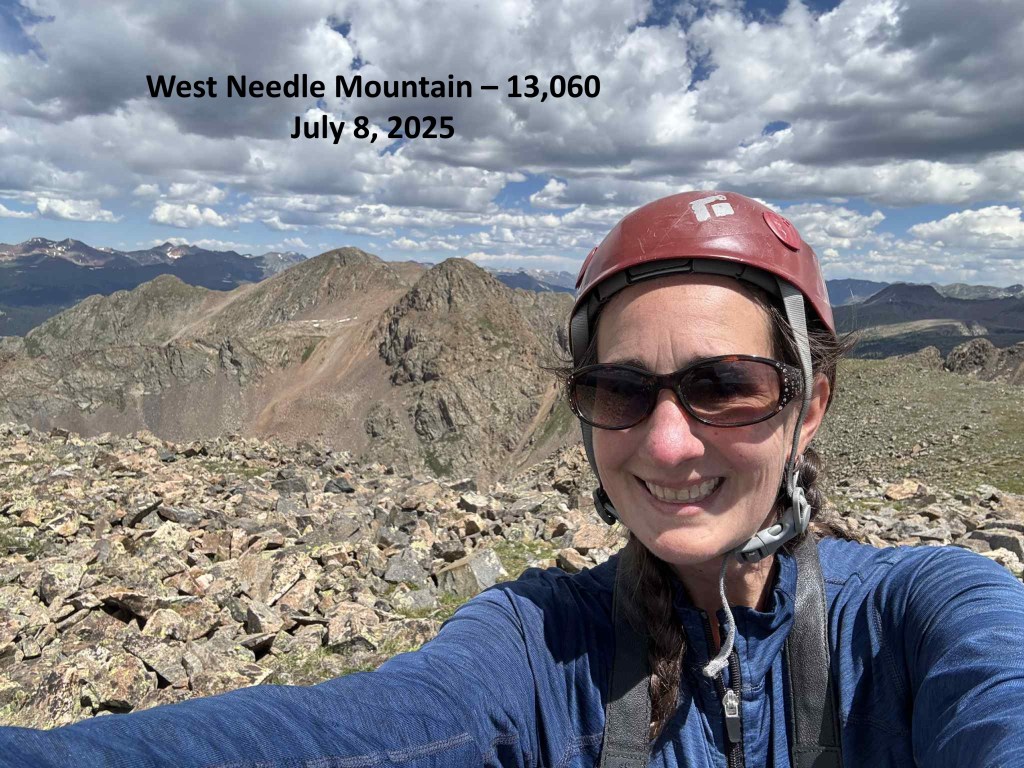
This is a three-trip-report peak for me, so my numbers are all splattered together.  I had an idea this peak would take me several attempts to get, so I came prepared and brought my backpacking gear.  I’m going to give you the three reports as they happened.  I found a way to make this a class 4, 3, or 2 peak.  You can choose your route.  Either way, the approach to the place I camped in the upper basin is the same. 

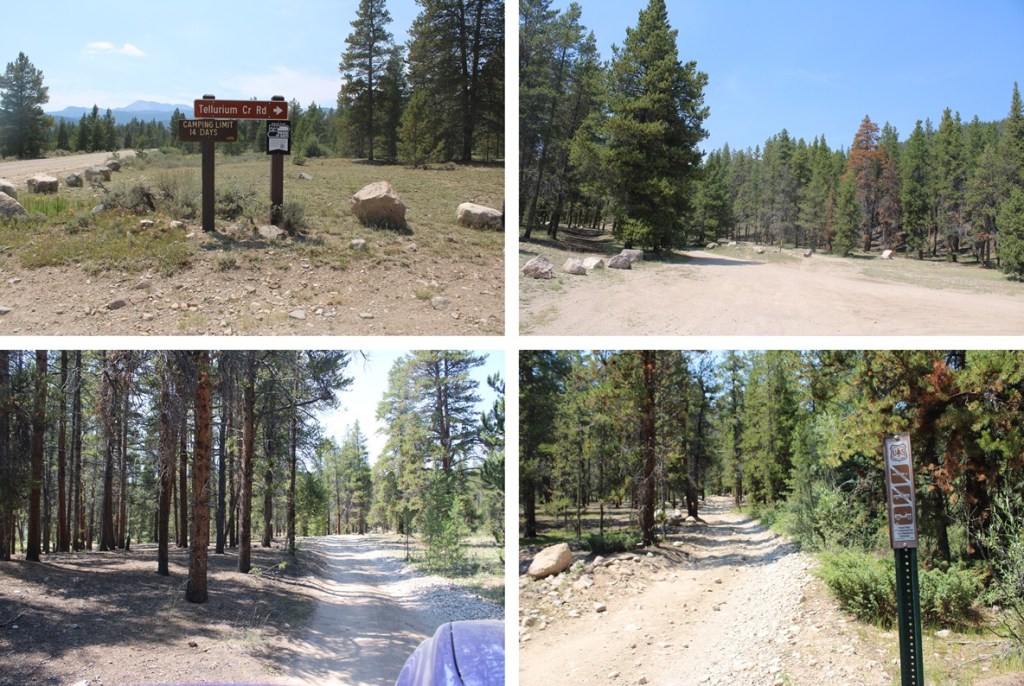
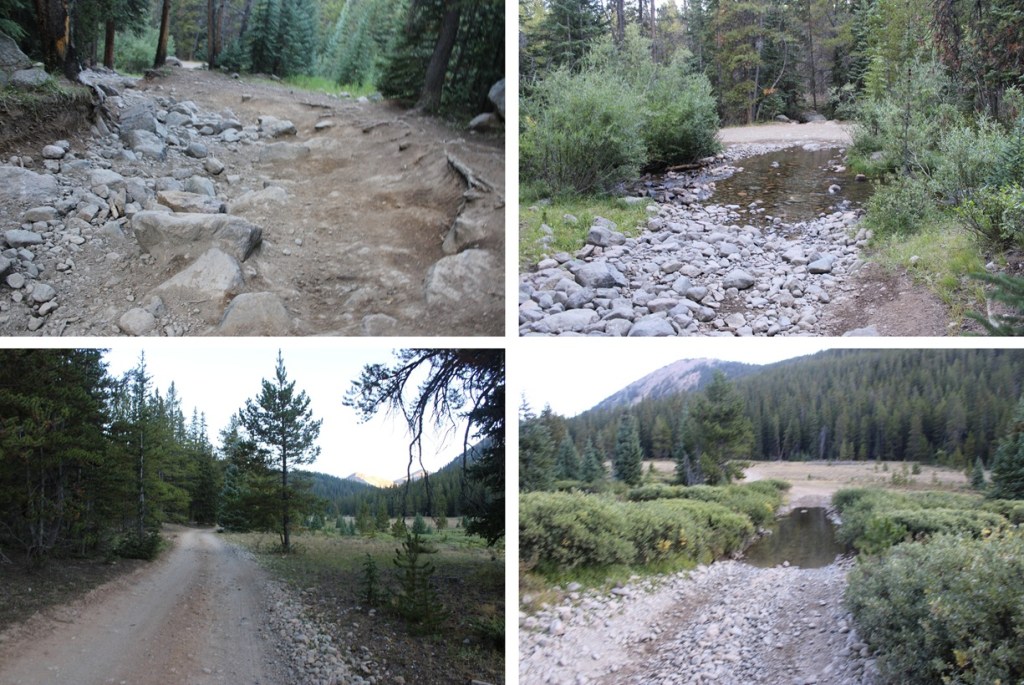
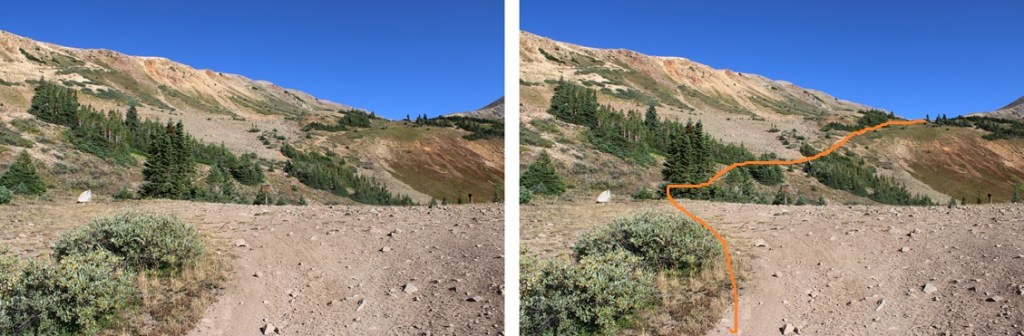
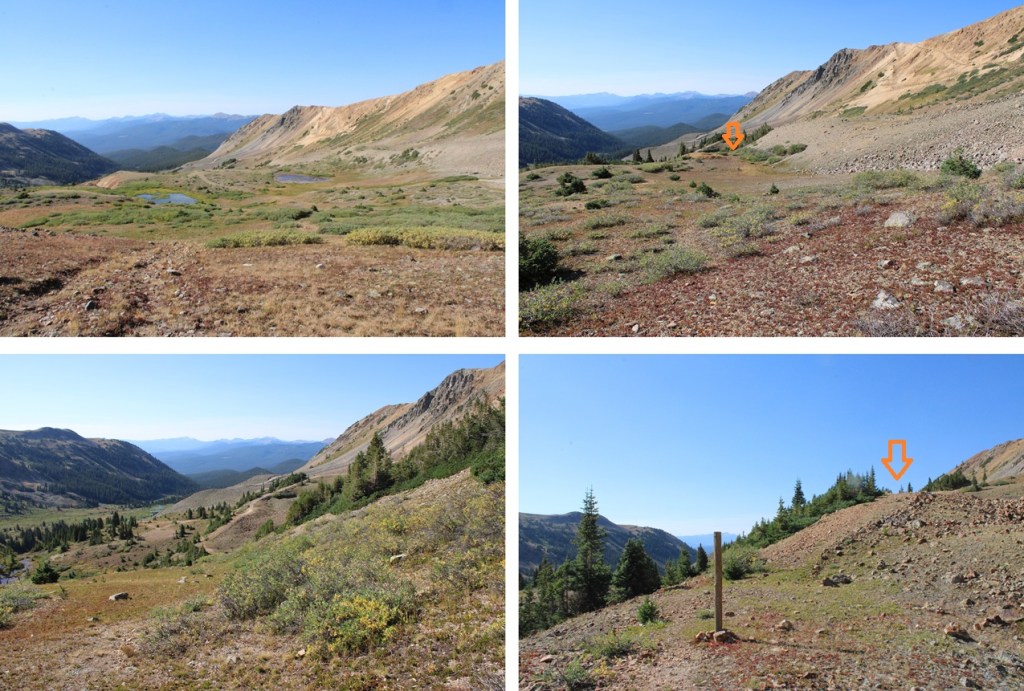
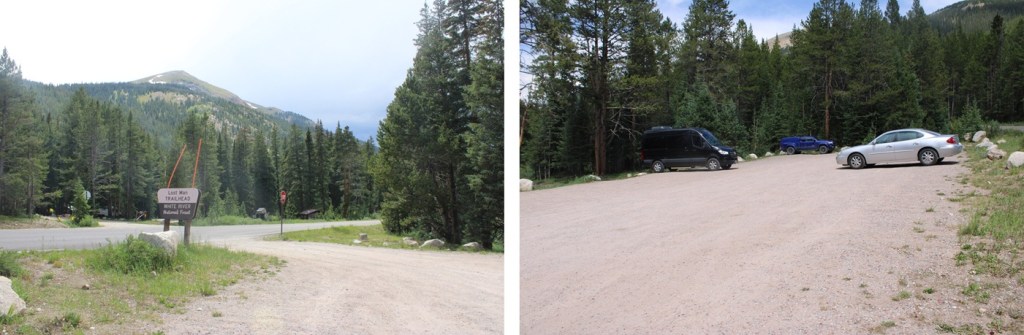
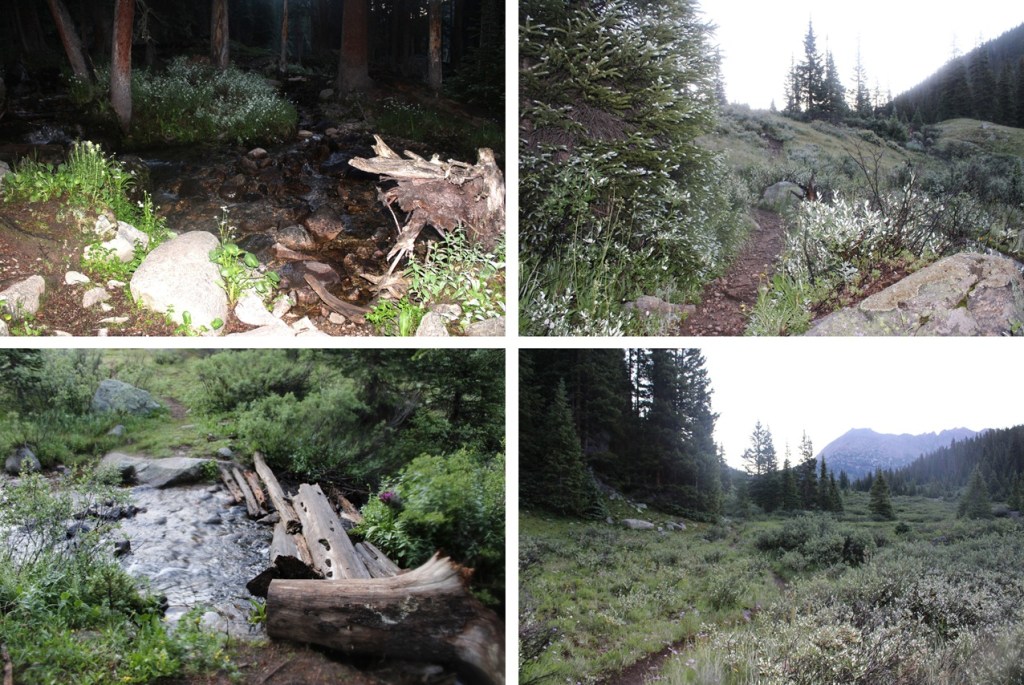
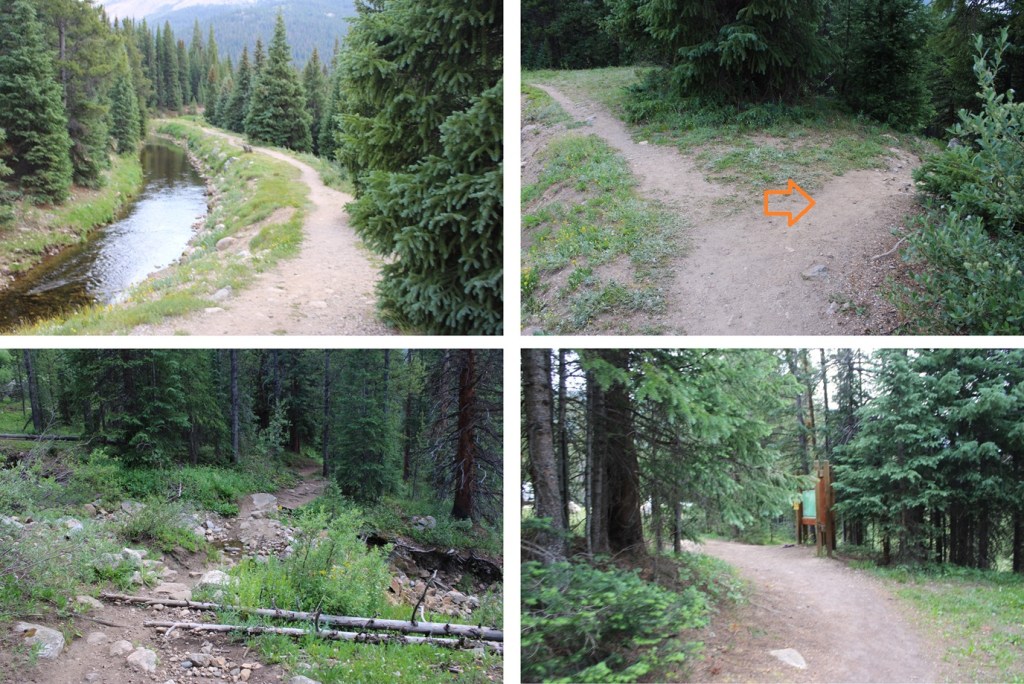
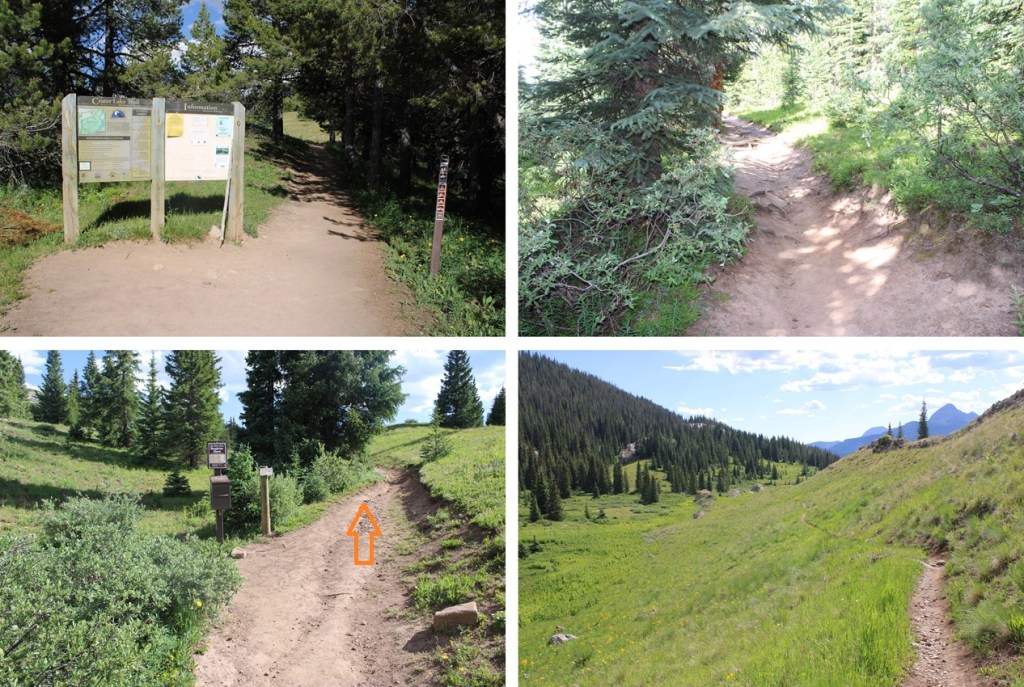
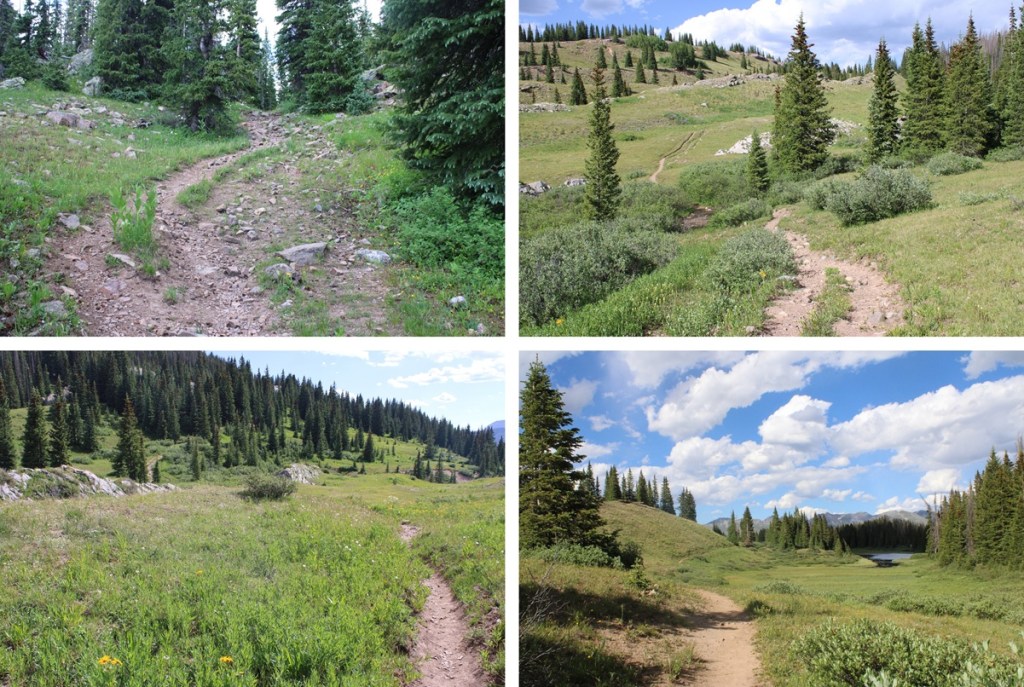
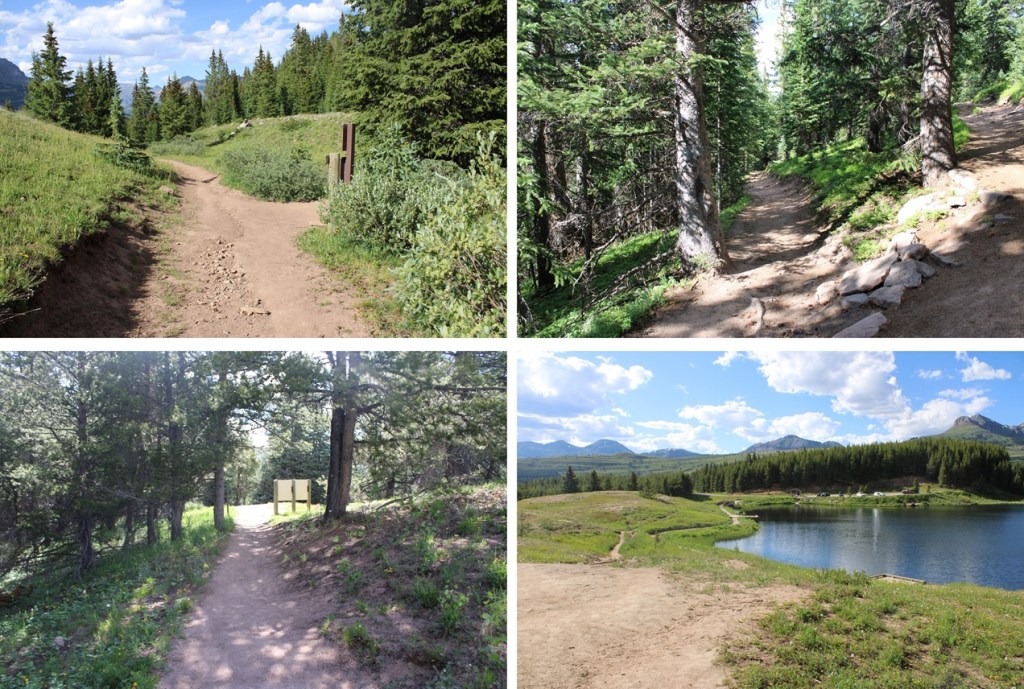
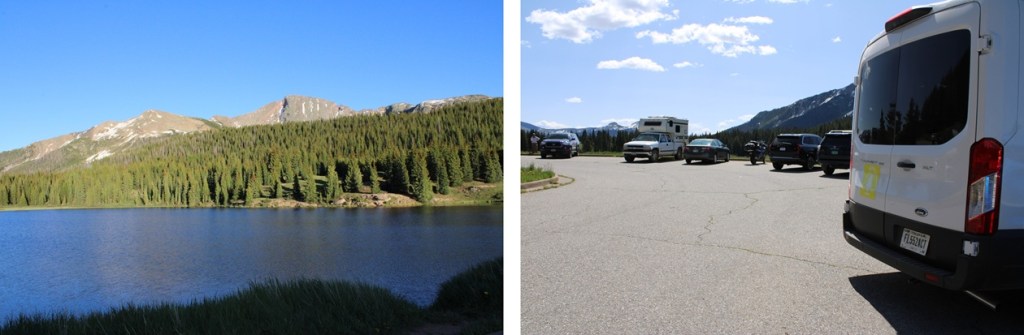
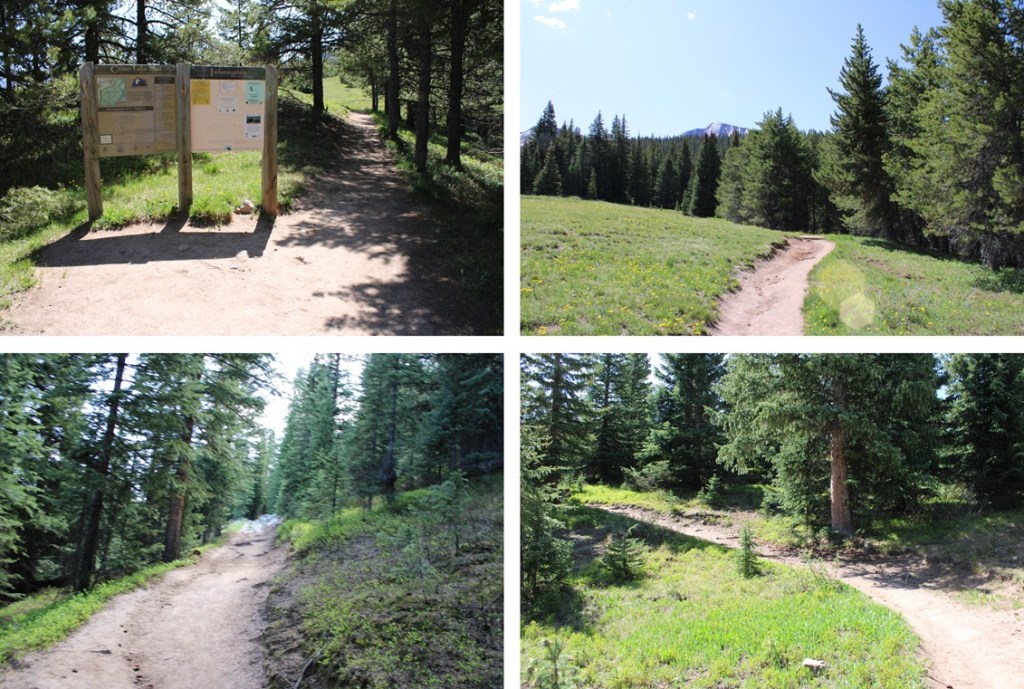
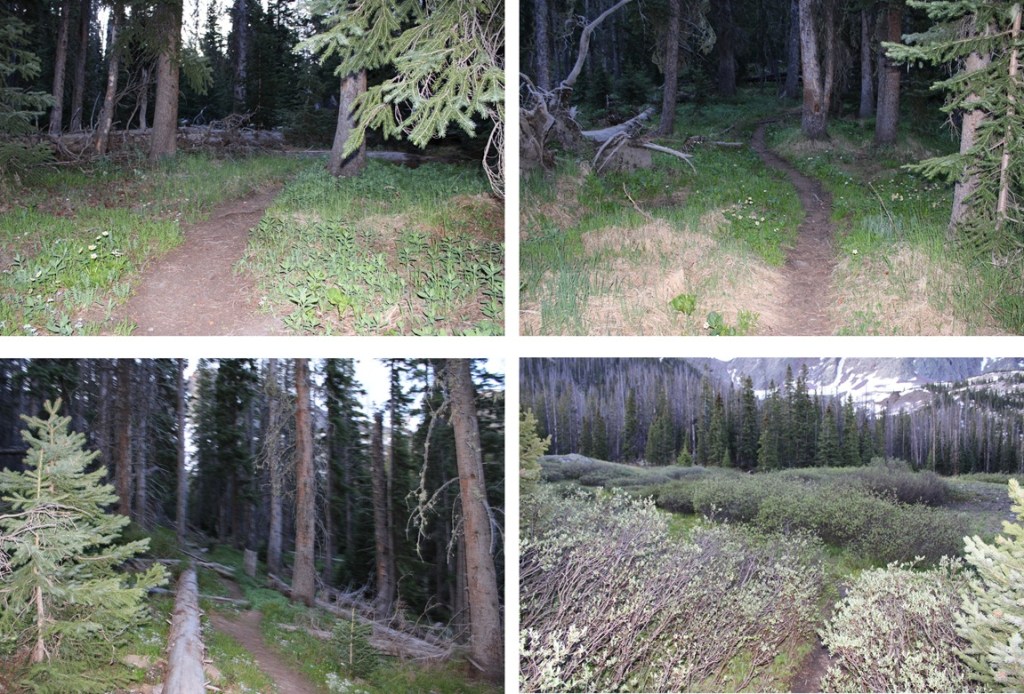
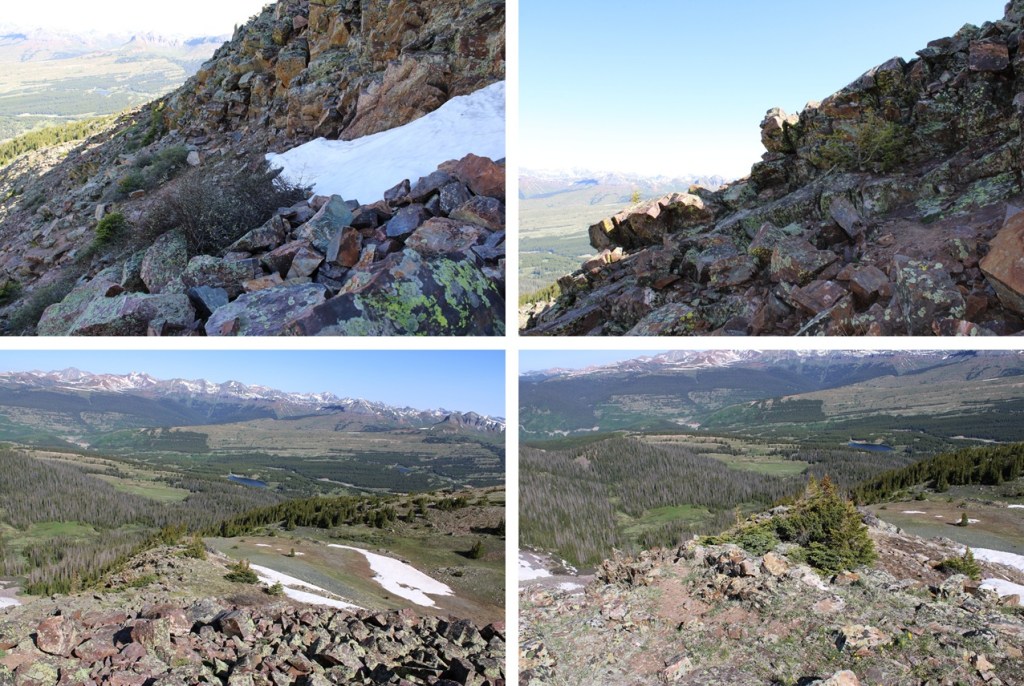
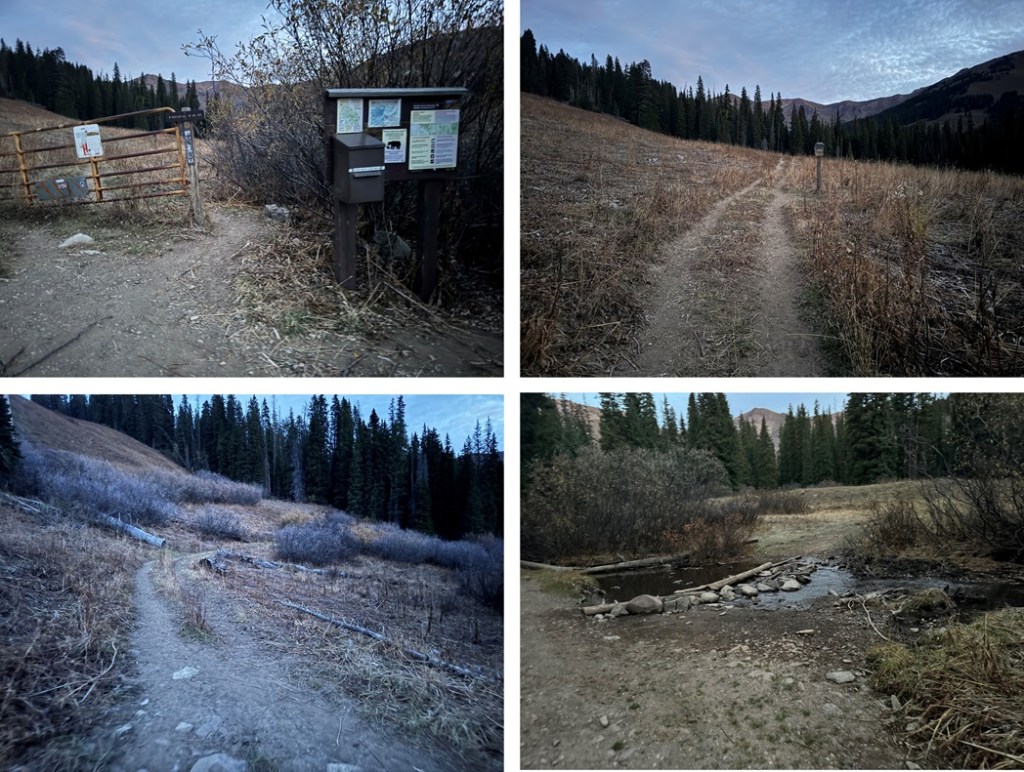
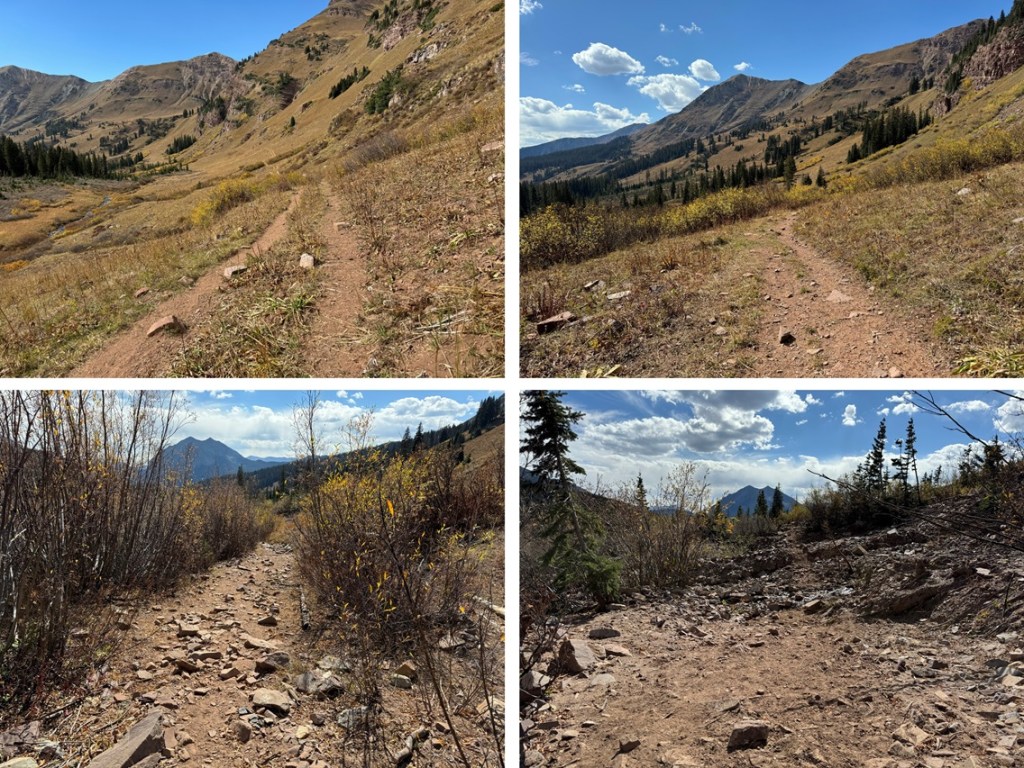
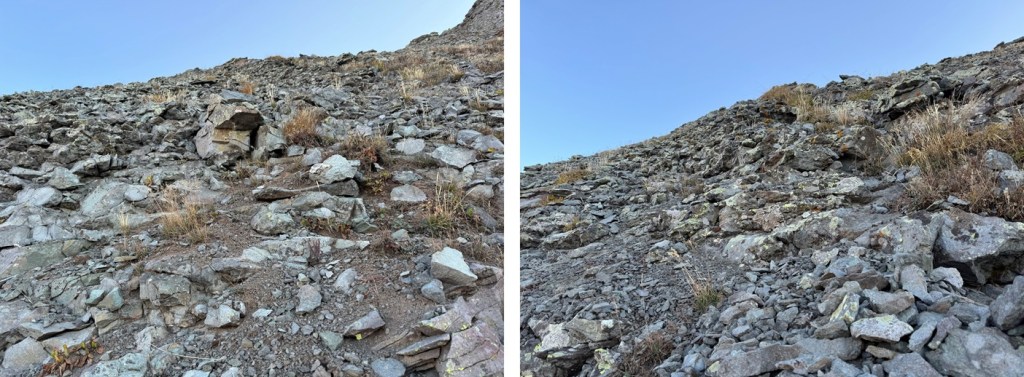
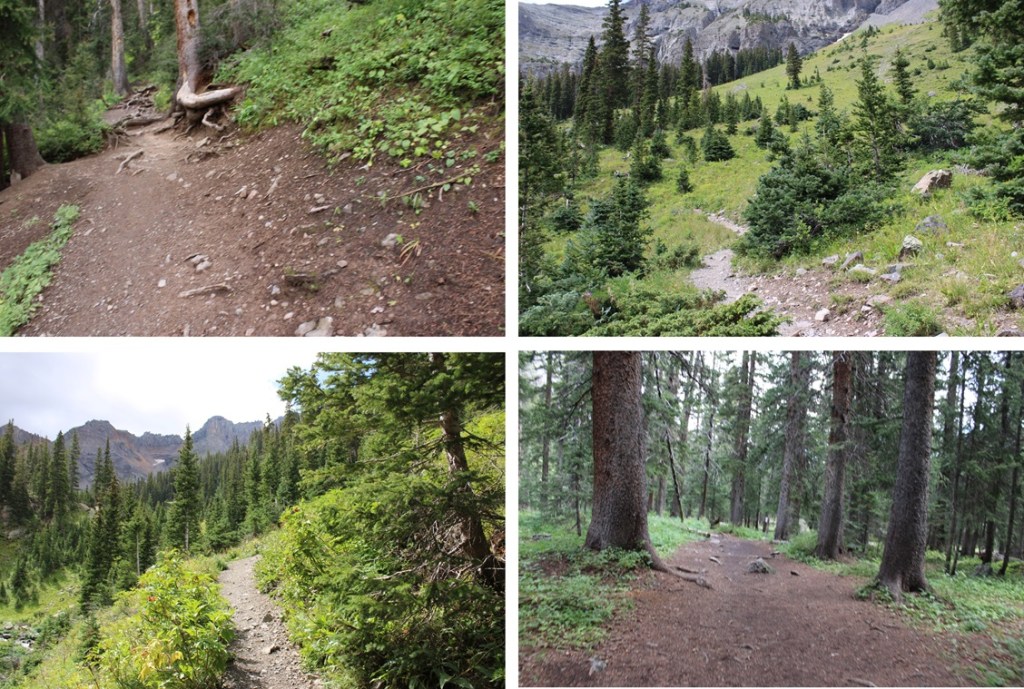
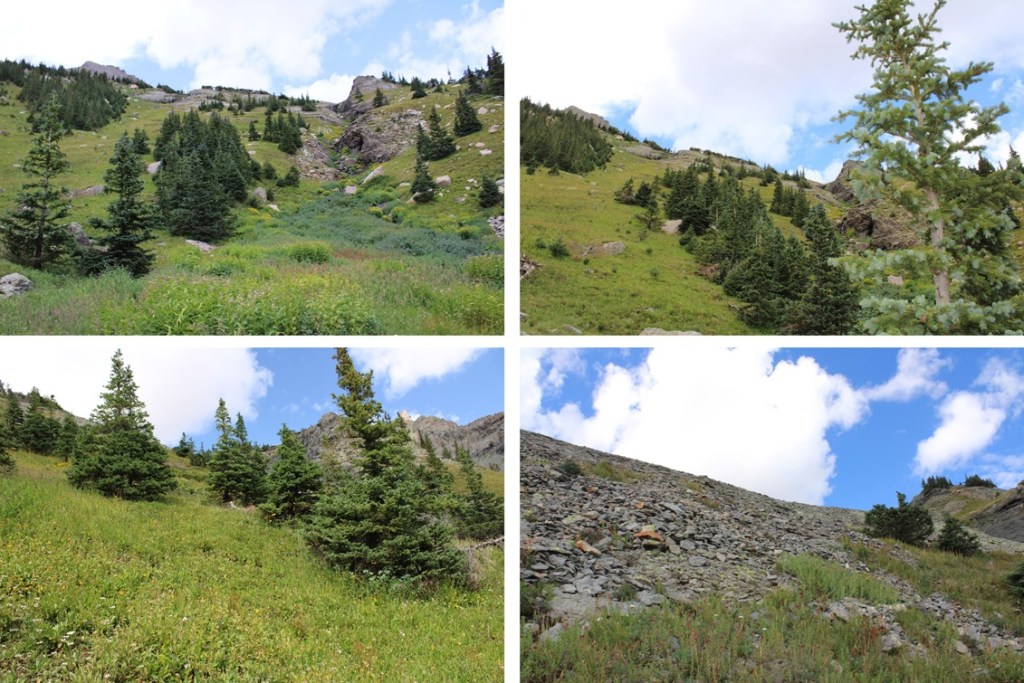
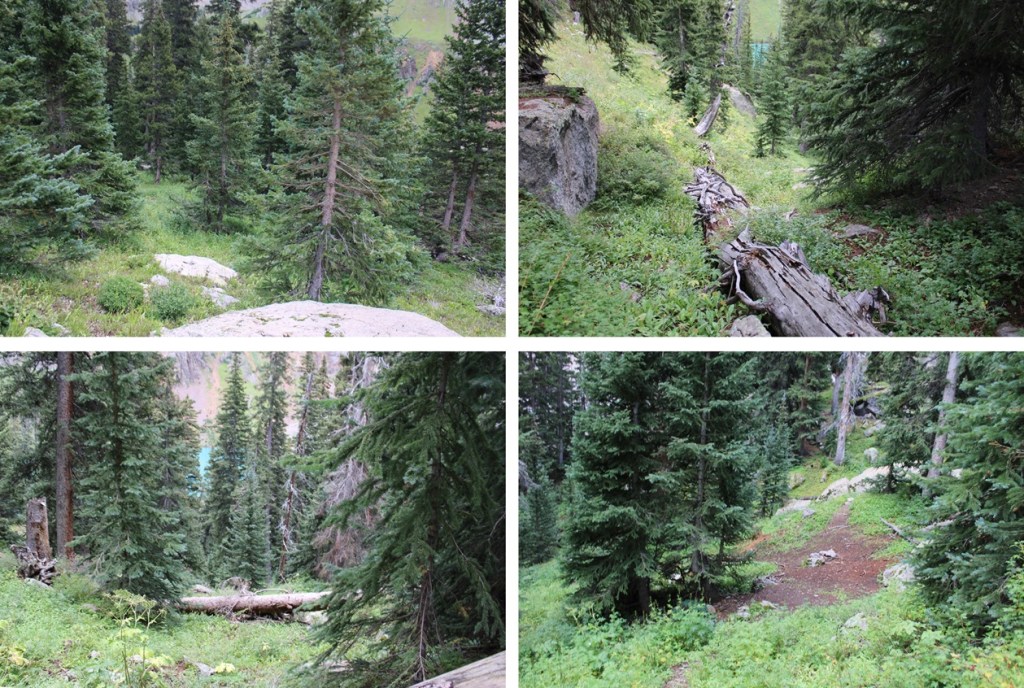
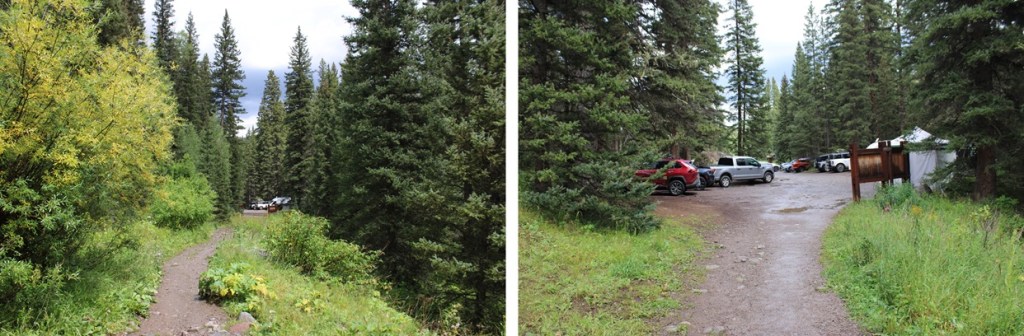
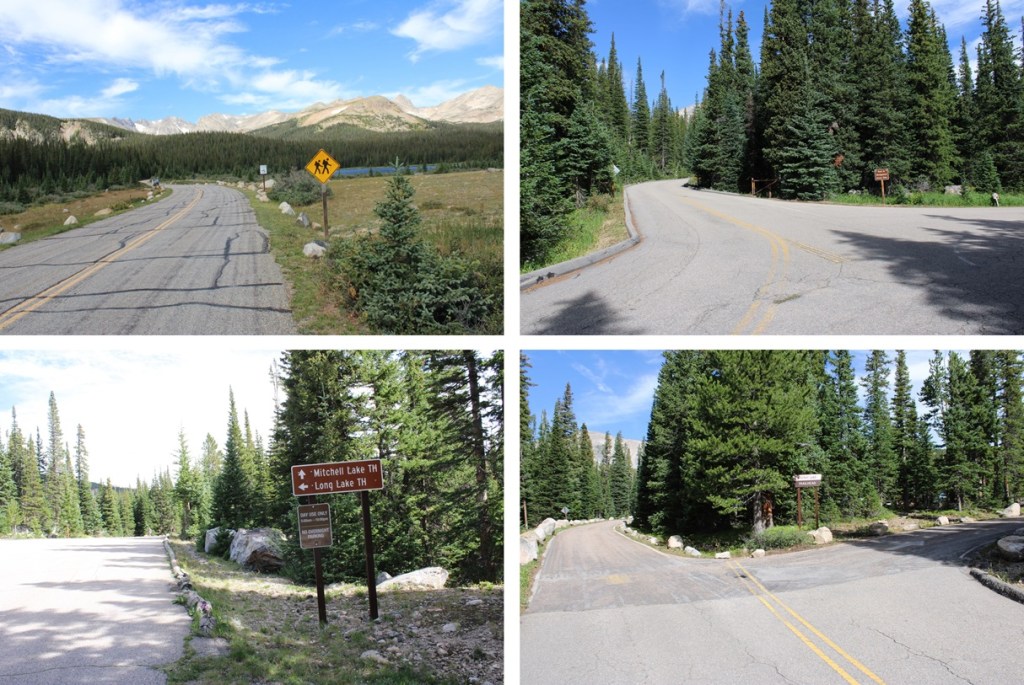
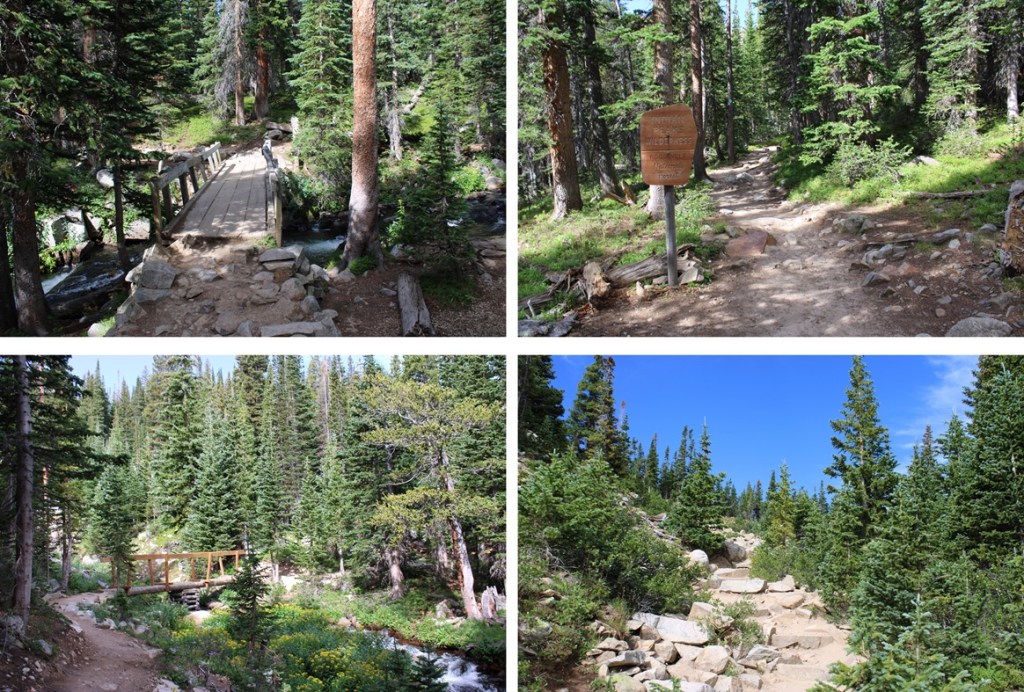
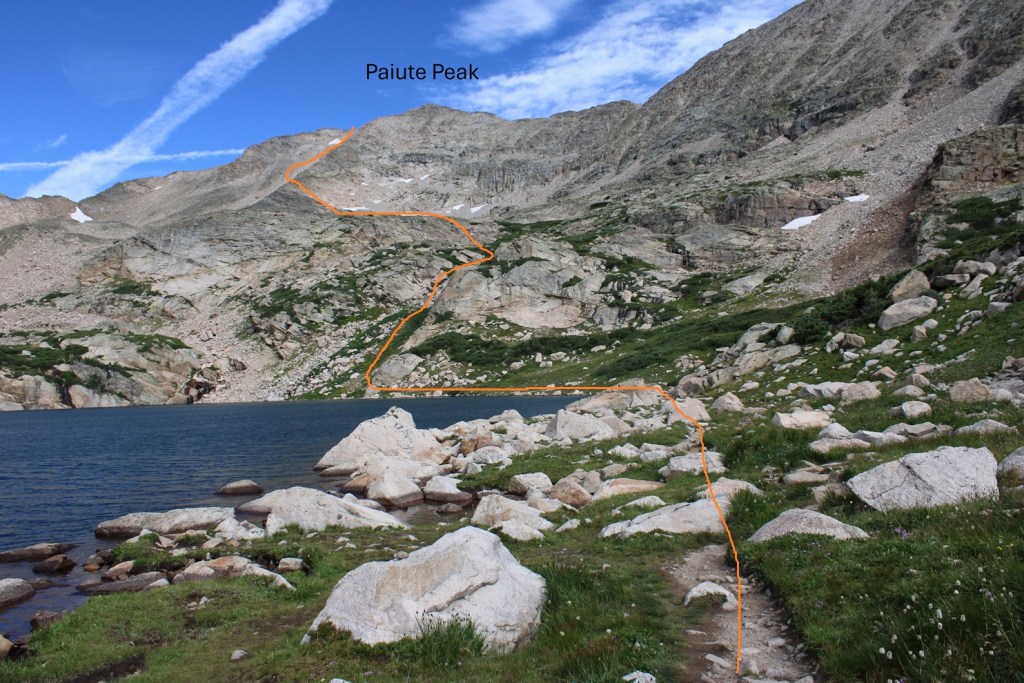
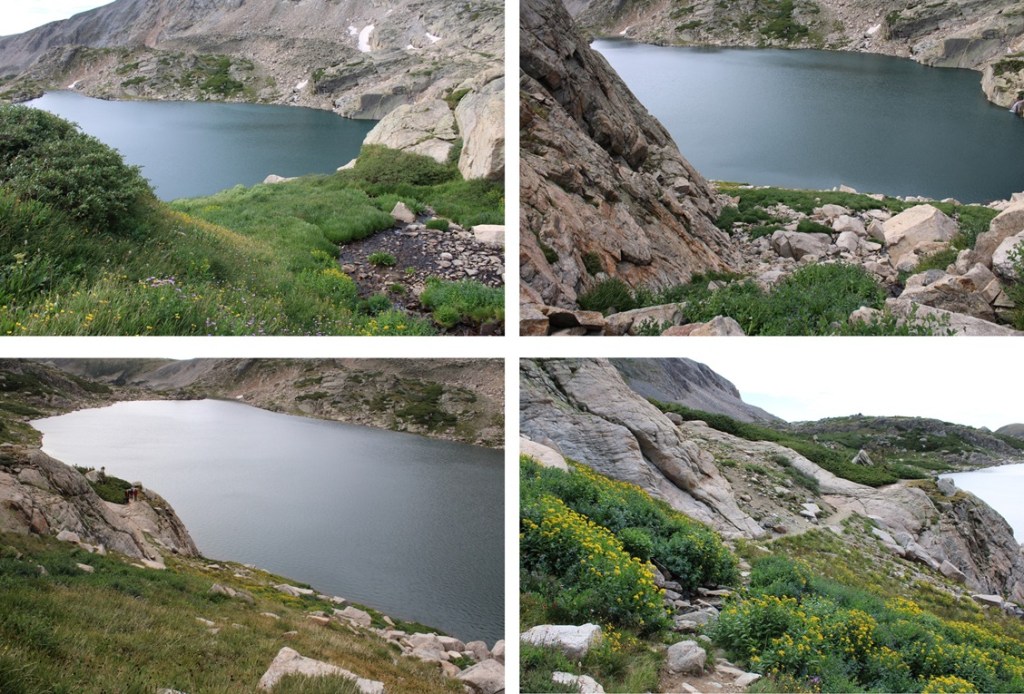
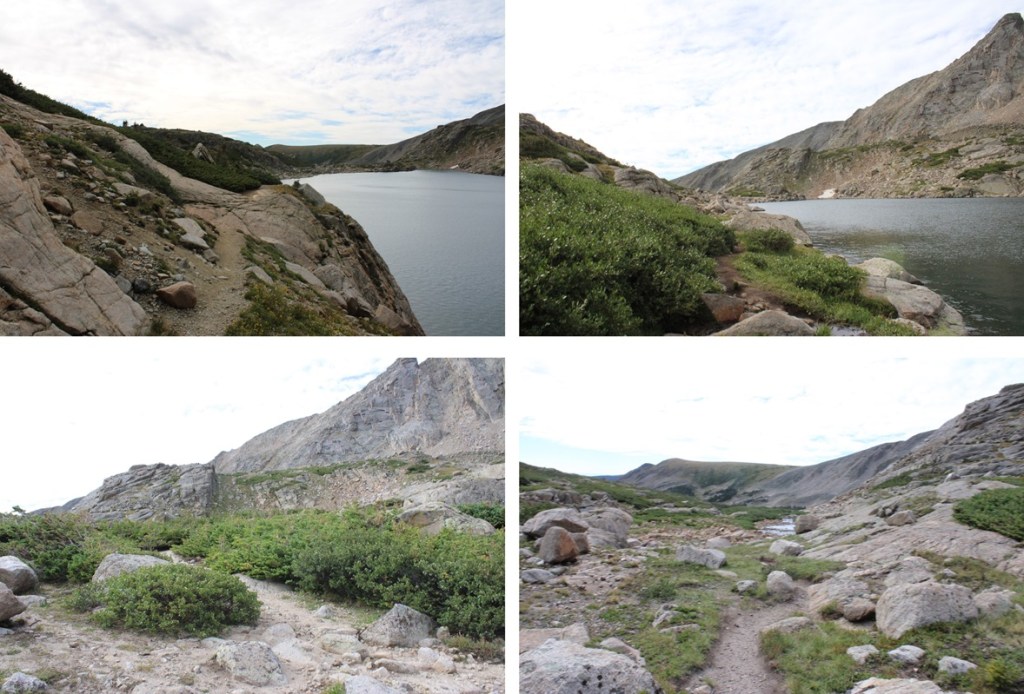
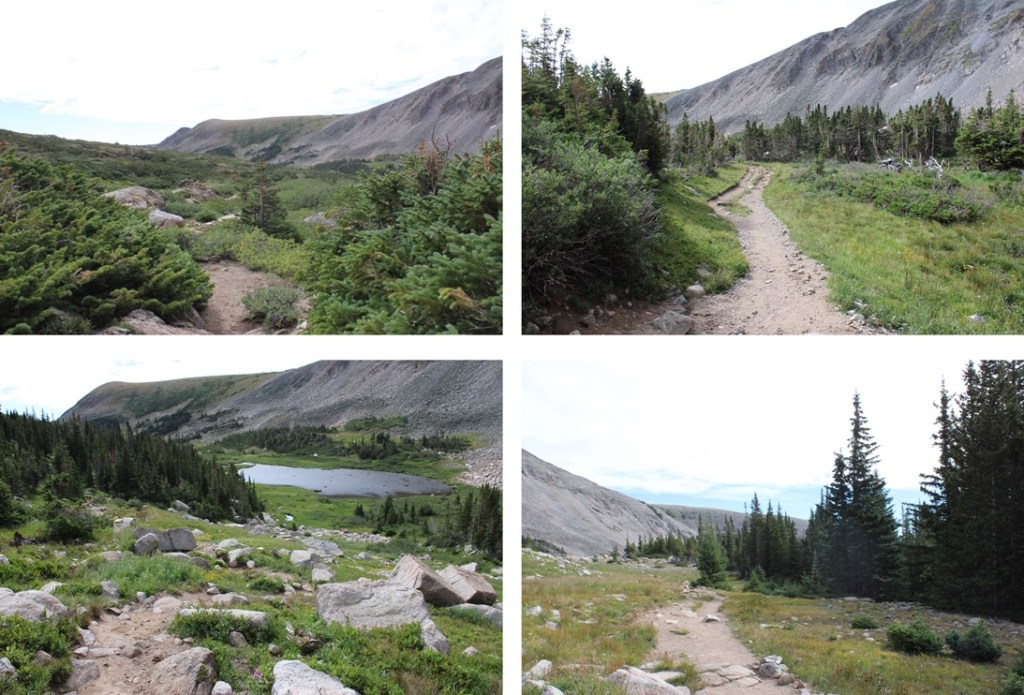
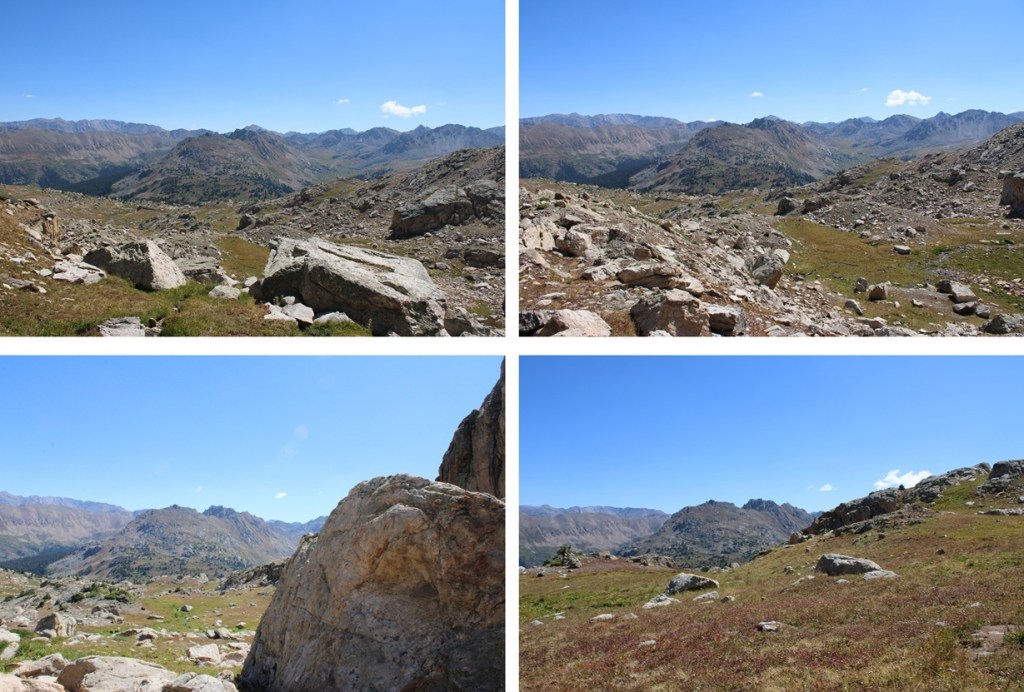
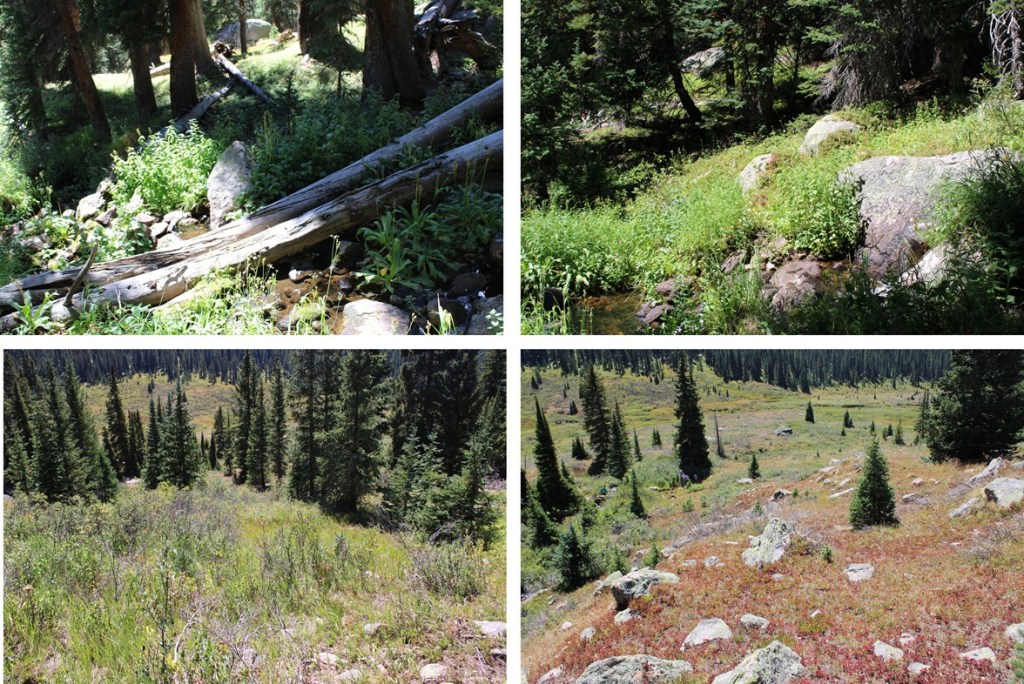
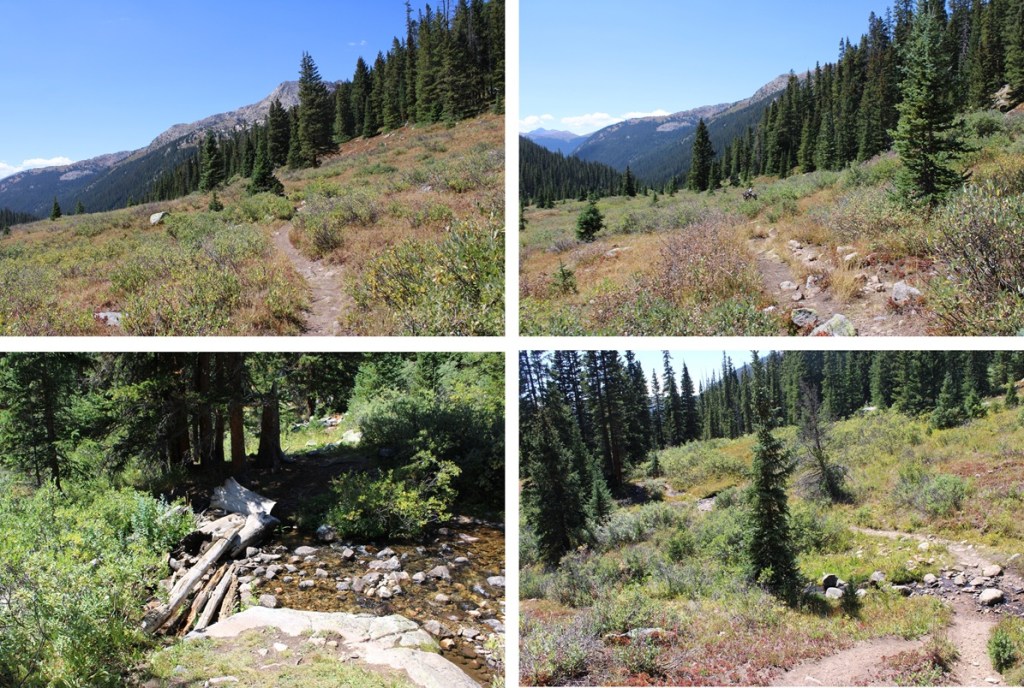
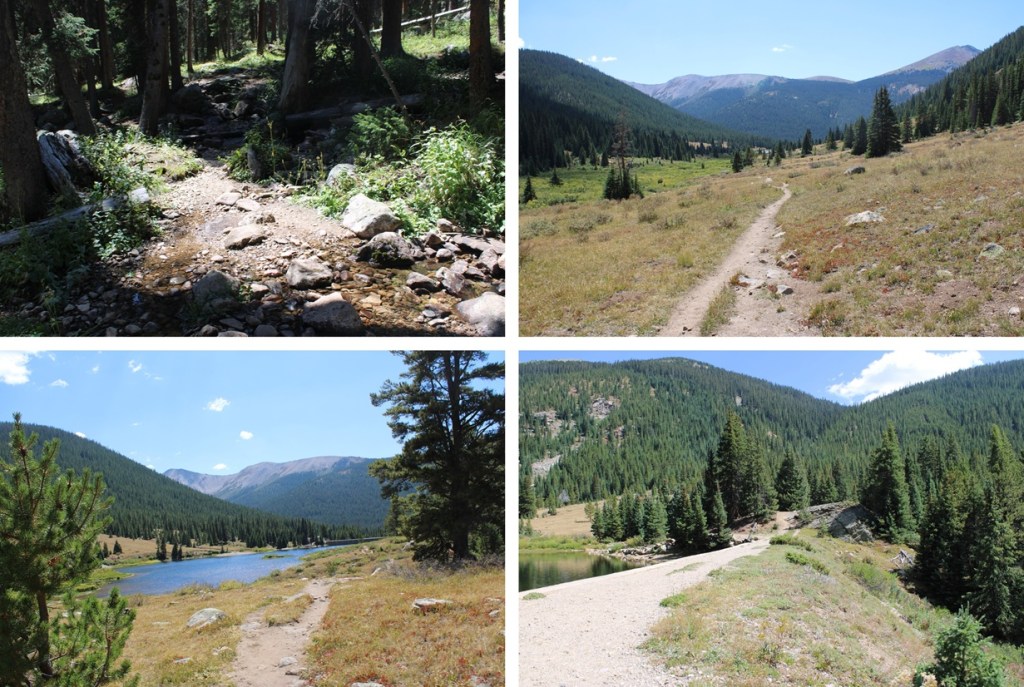
I started at the Lower Lost Man Campground and followed the trail (1996) north past Lost Man Reservoir and up towards South Fork Pass.  This is a class 1 trail I followed for about 4.25 miles.

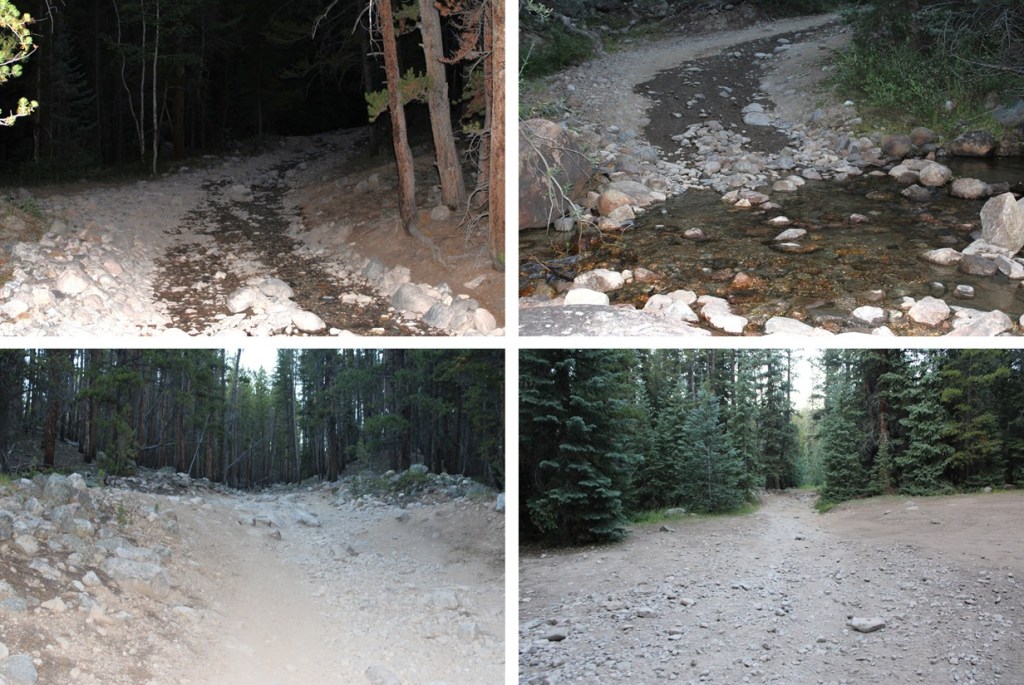
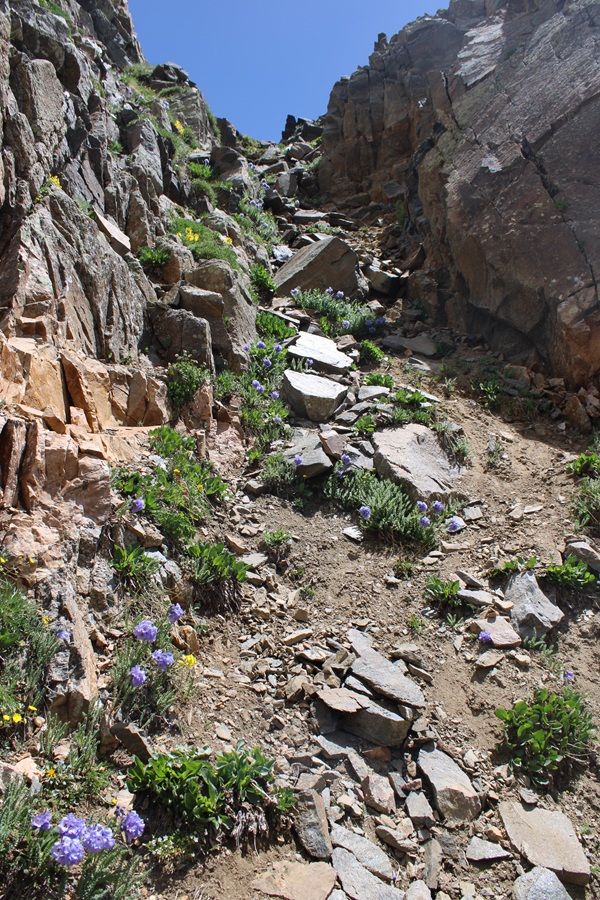
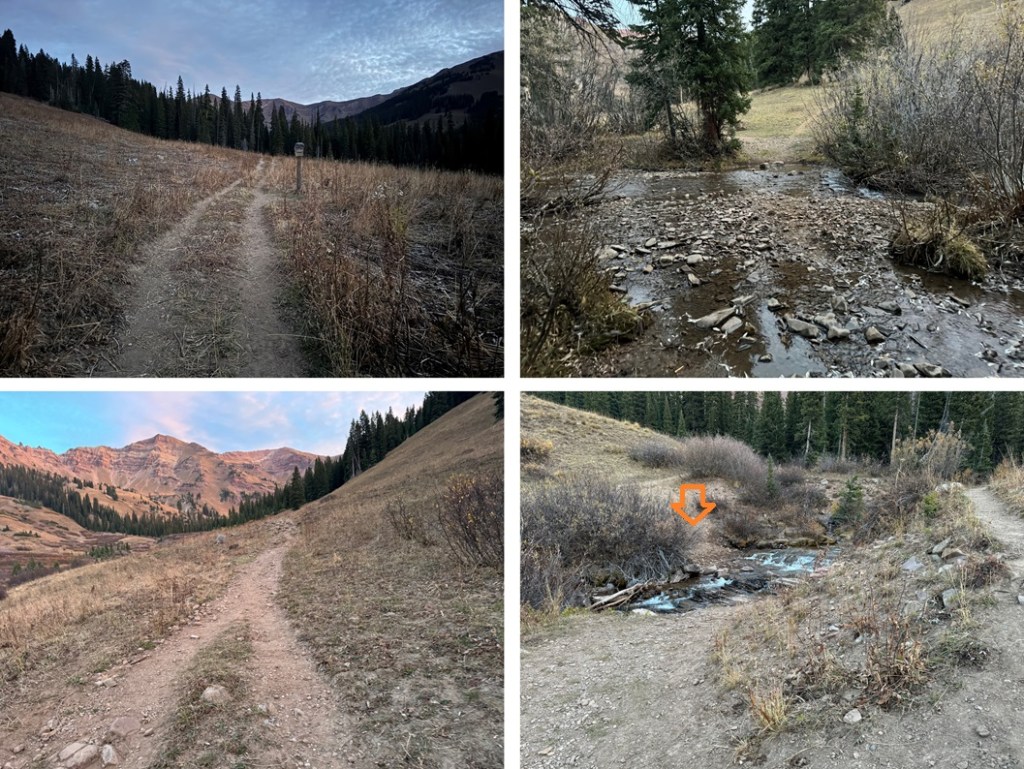
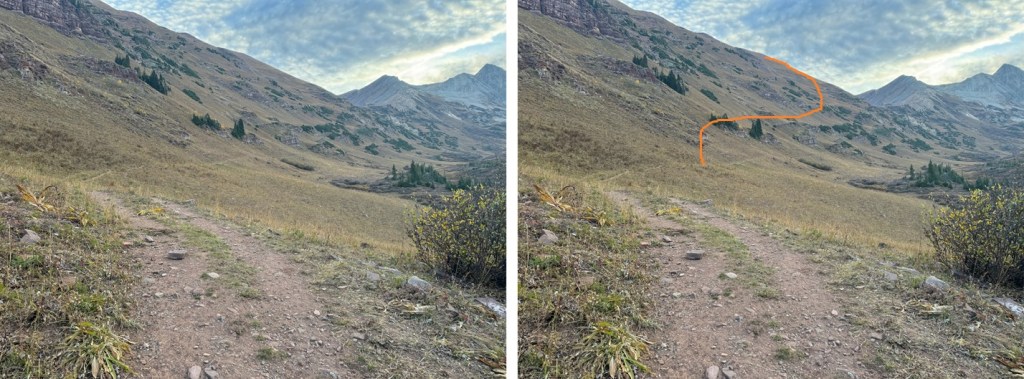
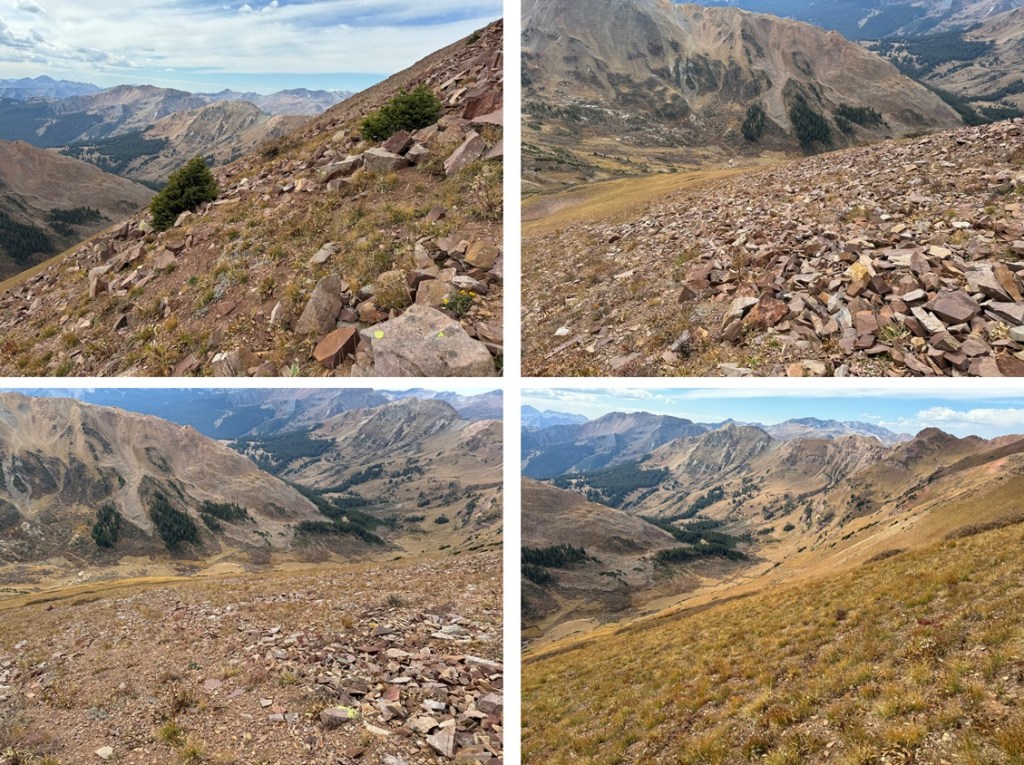
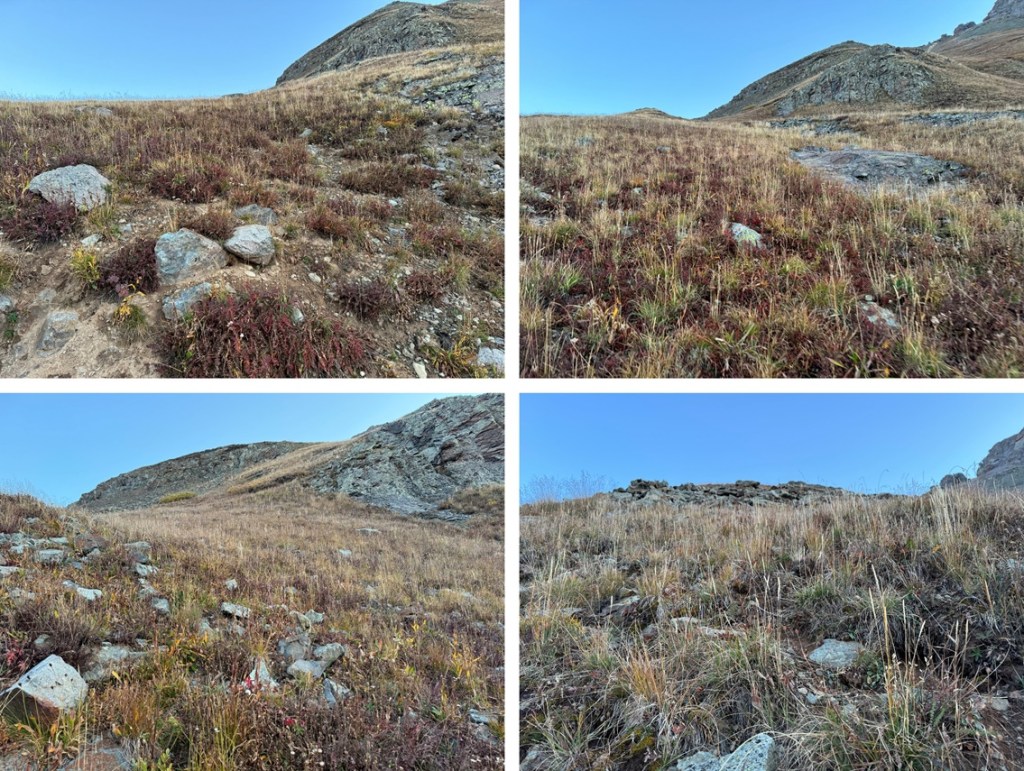
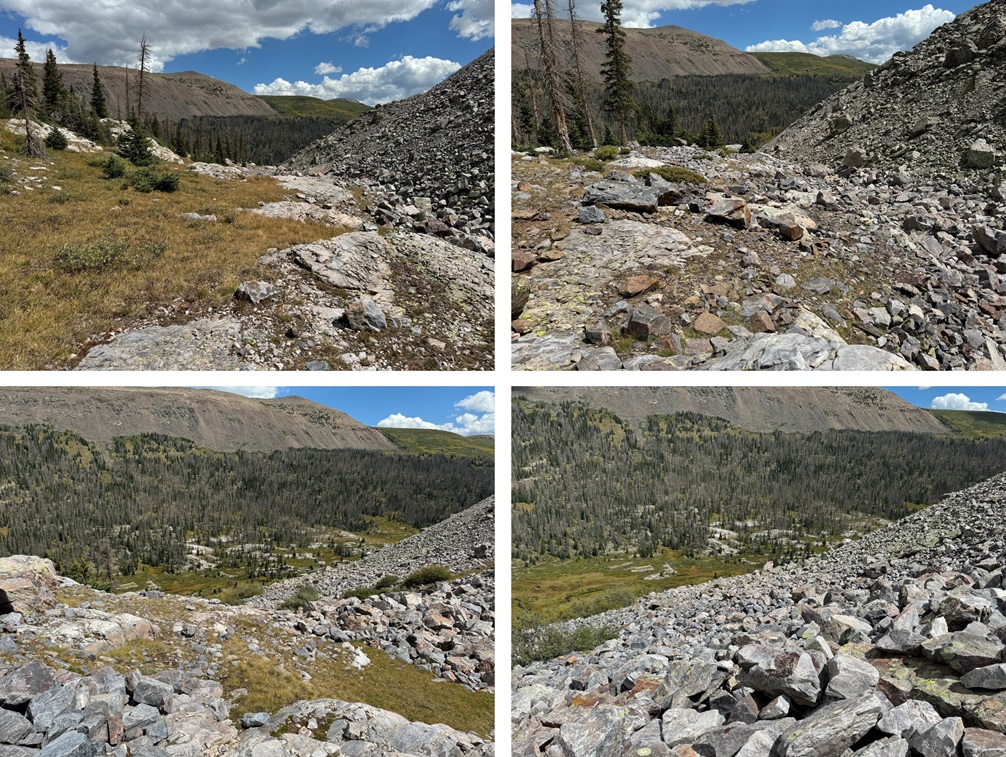
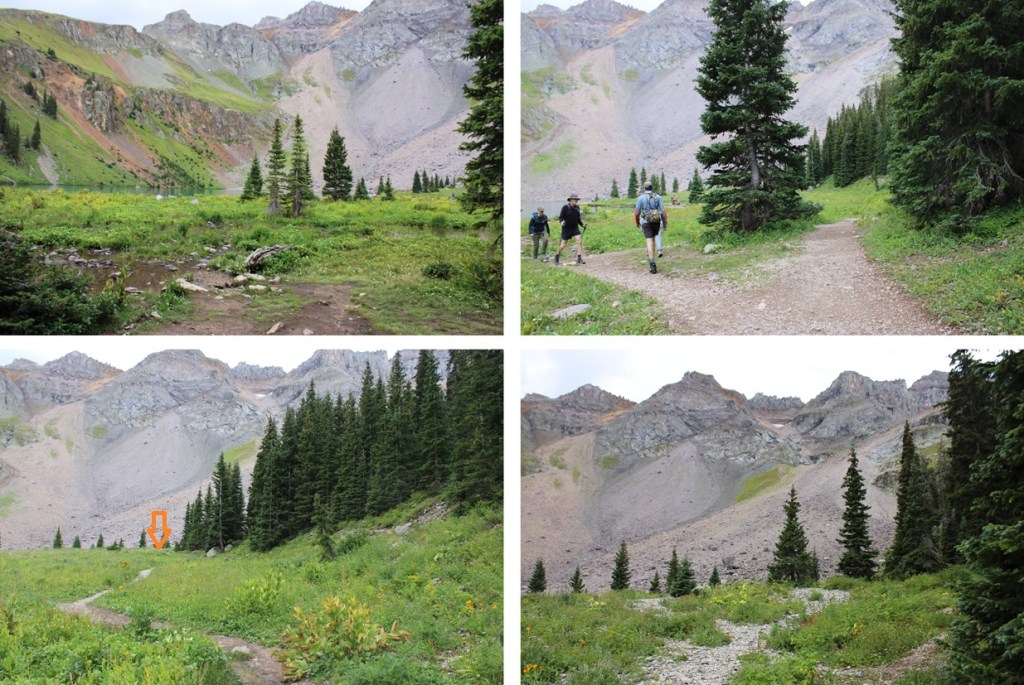
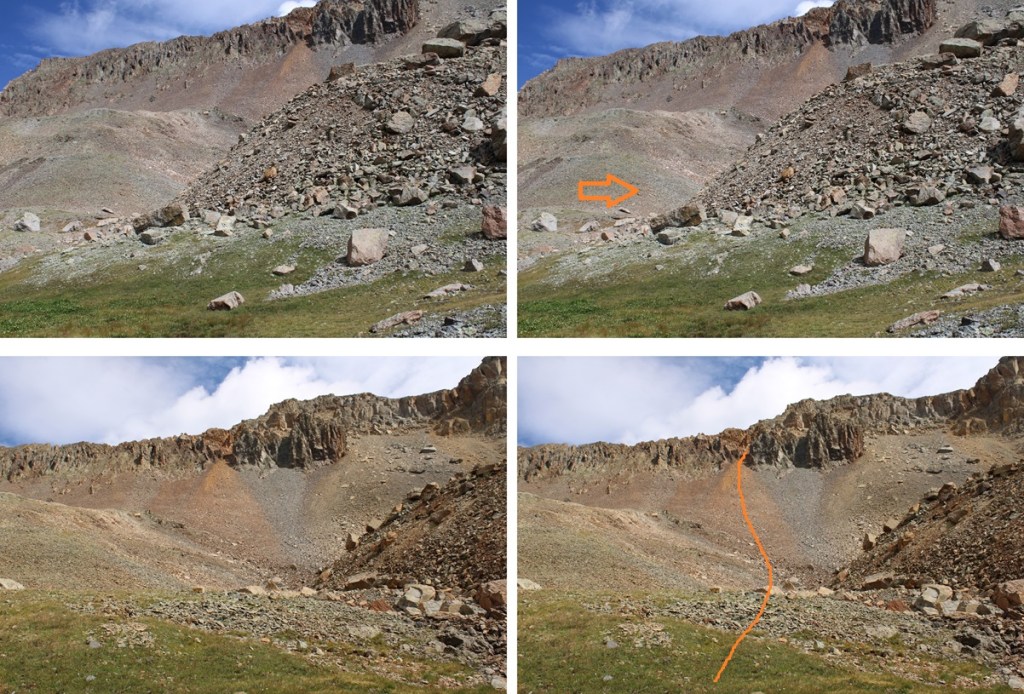
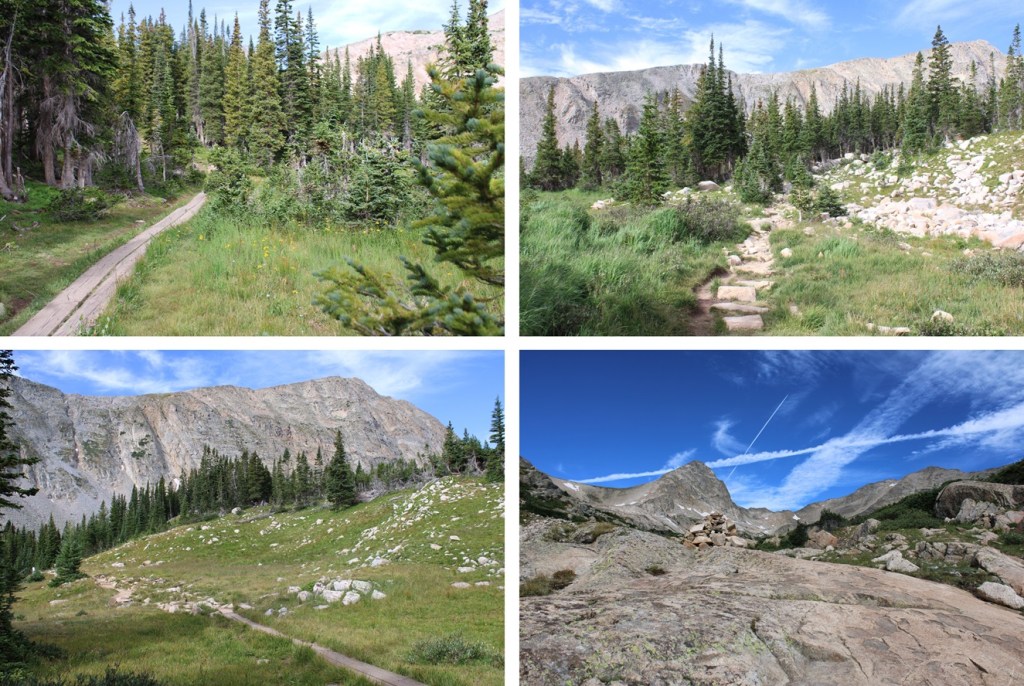
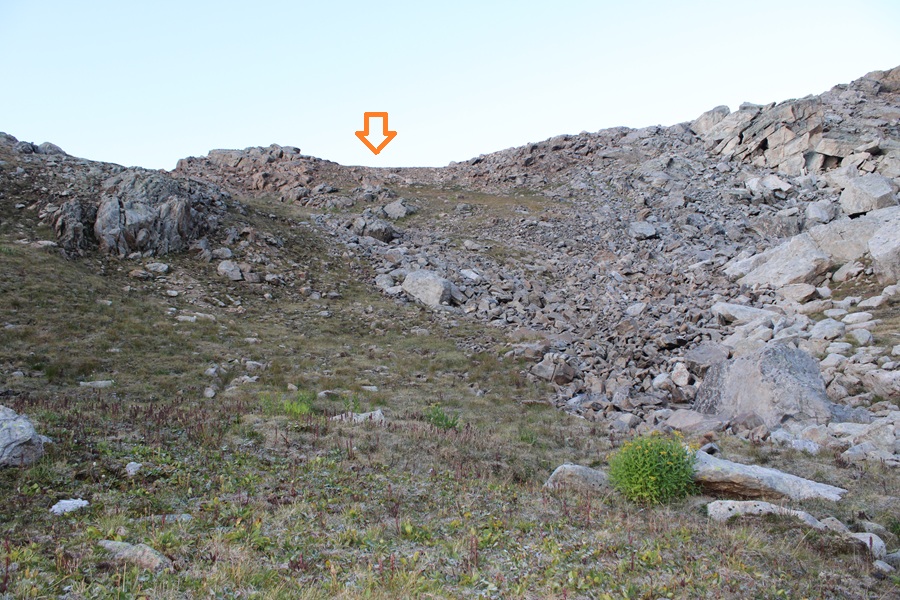
After about 4.25 miles, at 11430’, and just before the third creek crossing I turned left and followed the creek for about 20 yards before crossing the creek and then following the creek up to an upper basin, heading northeast.  This creek isn’t named, and neither is the basin, but following it will put you just east of 13024.  This is class 2.  It’s less than a mile to make it into the basin once you leave the trail.

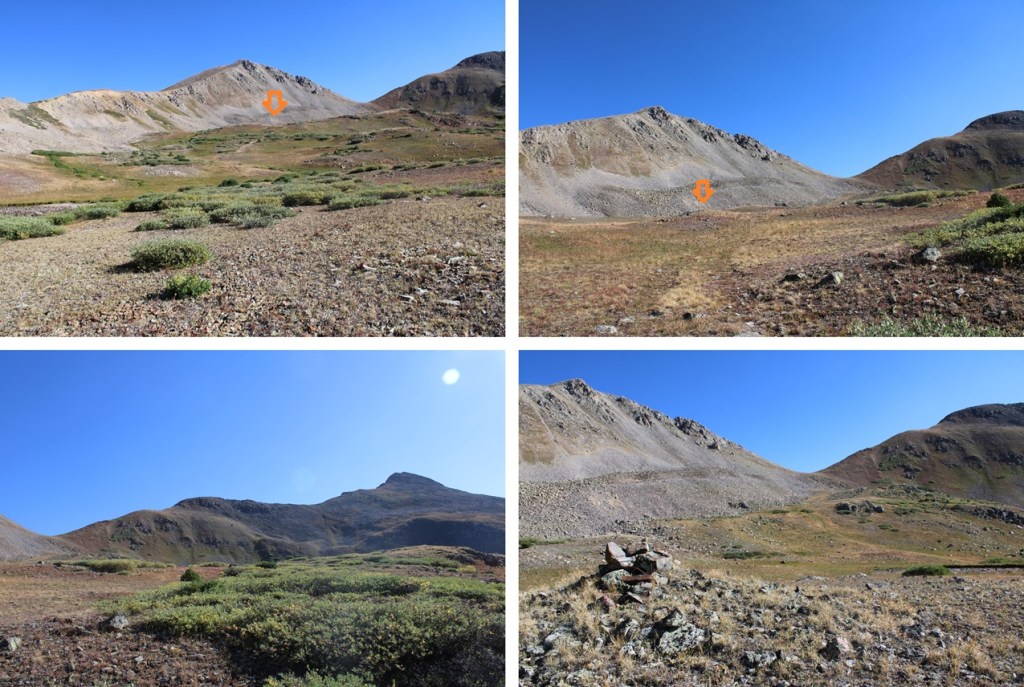
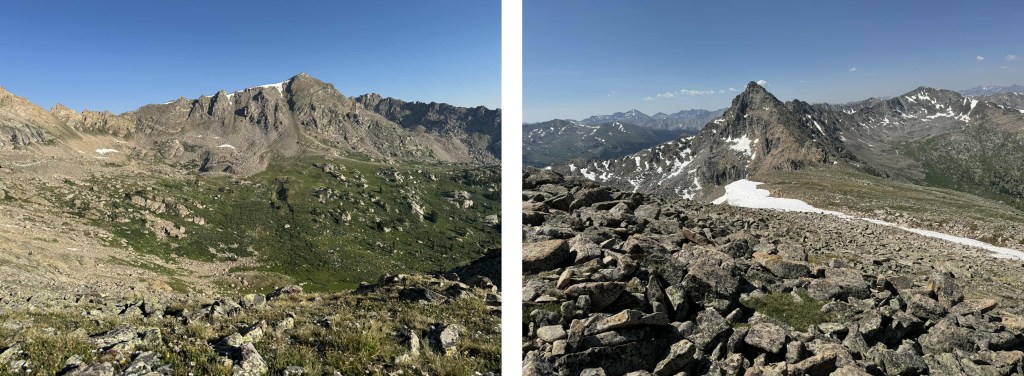
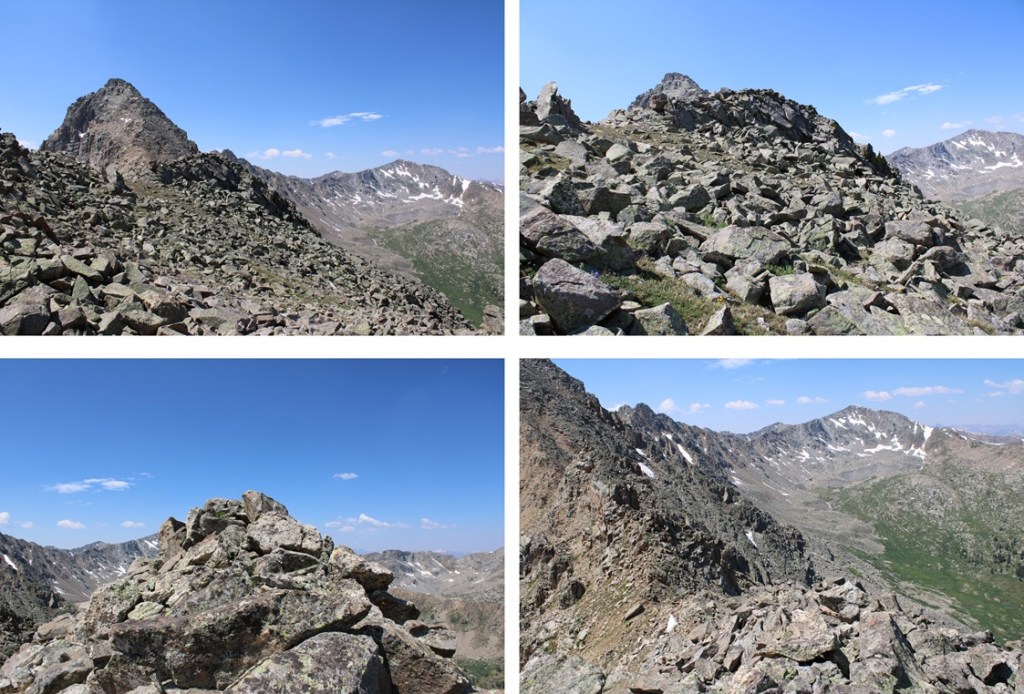
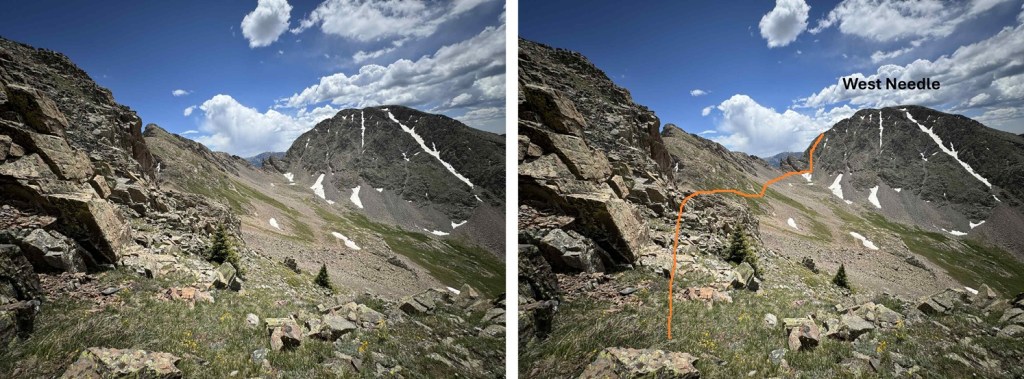
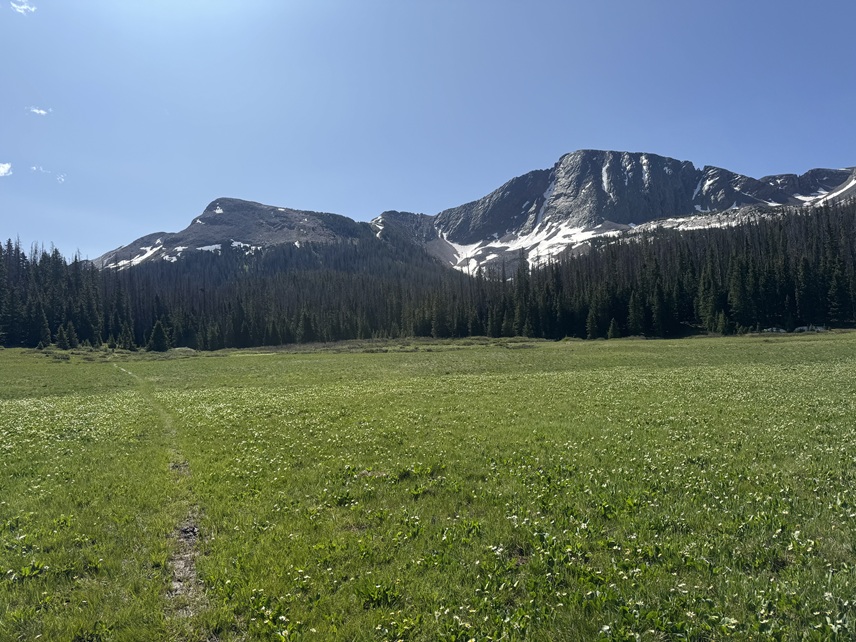
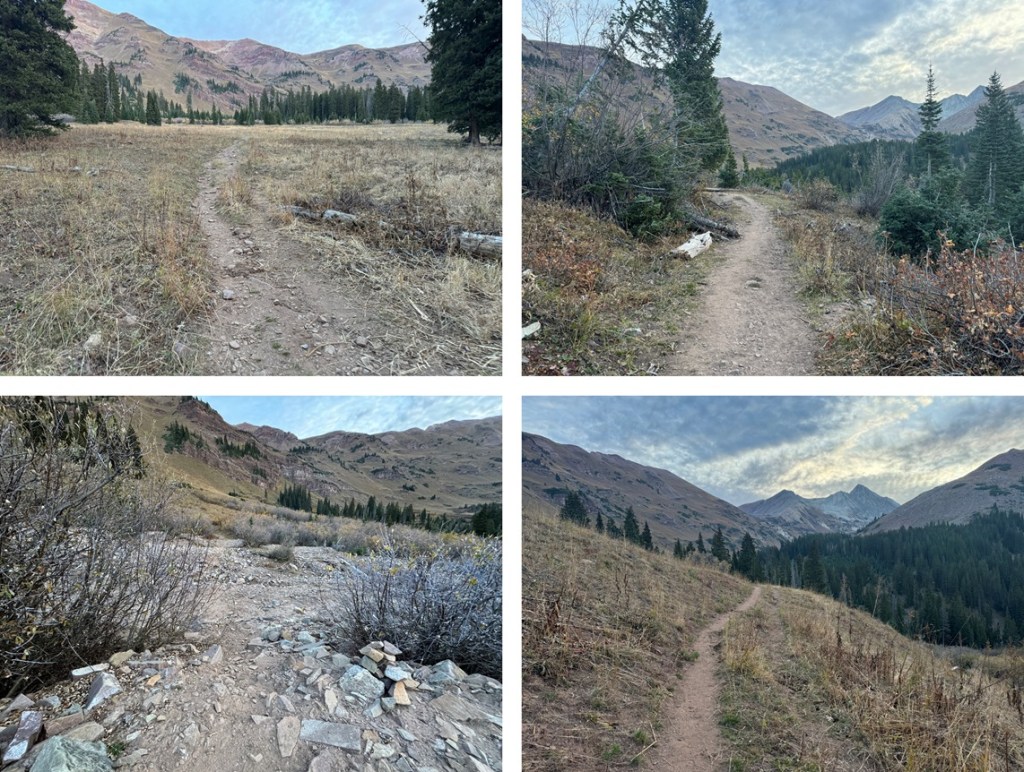
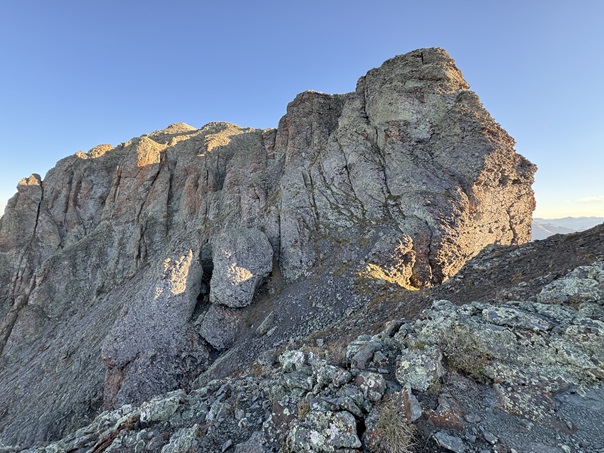
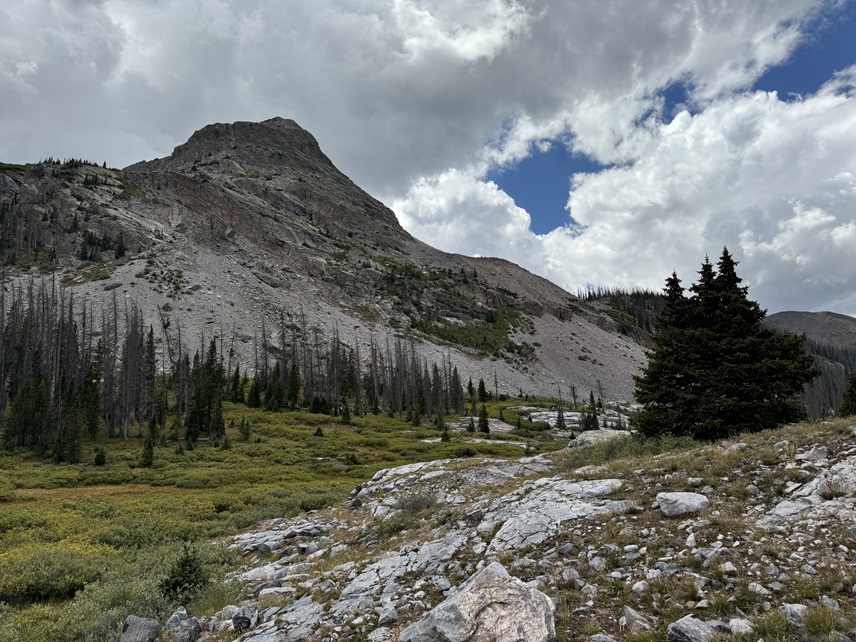
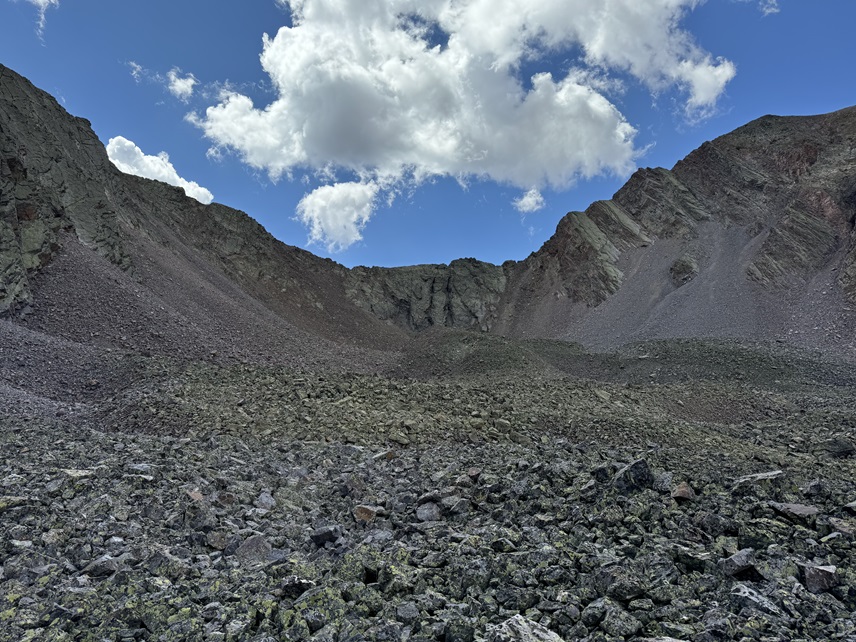
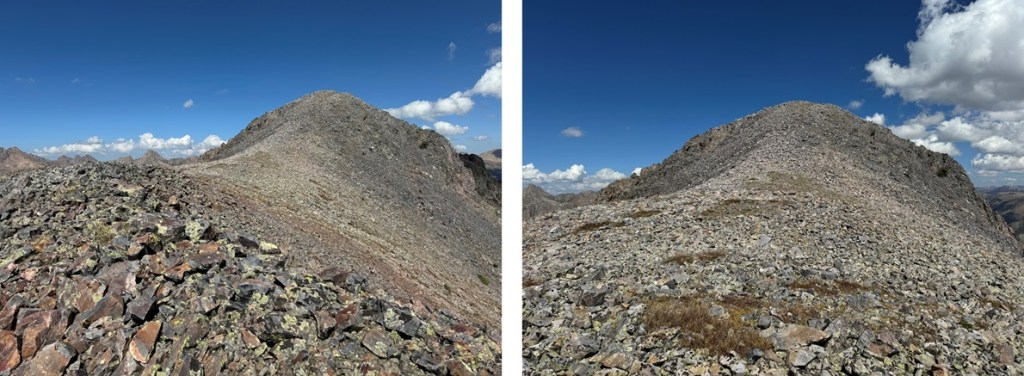
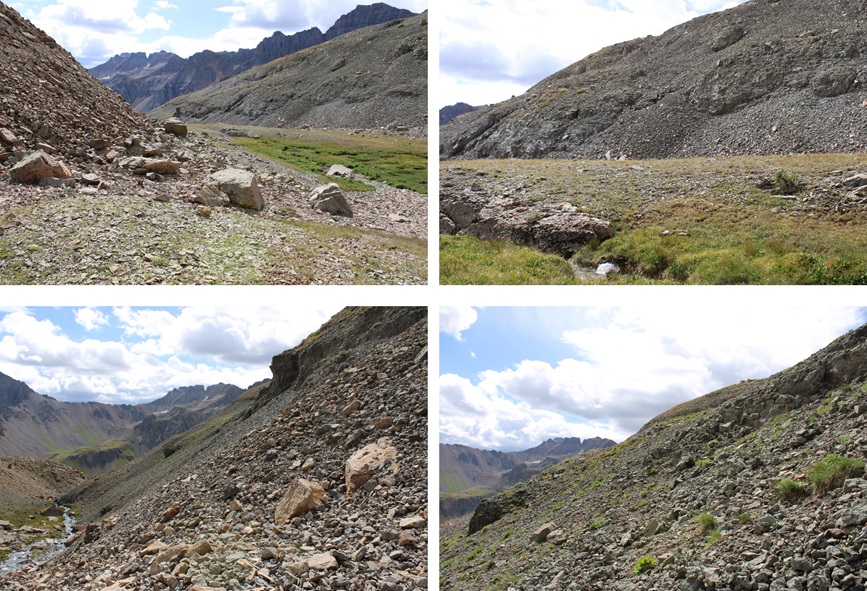
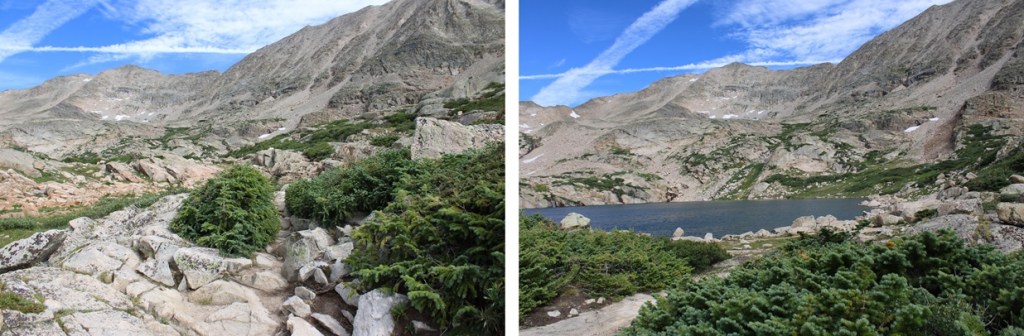
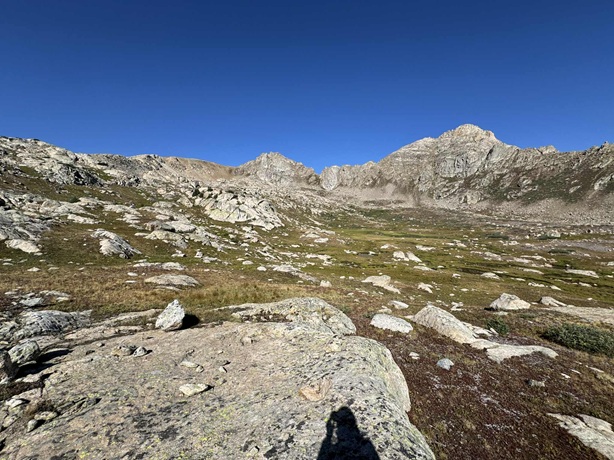
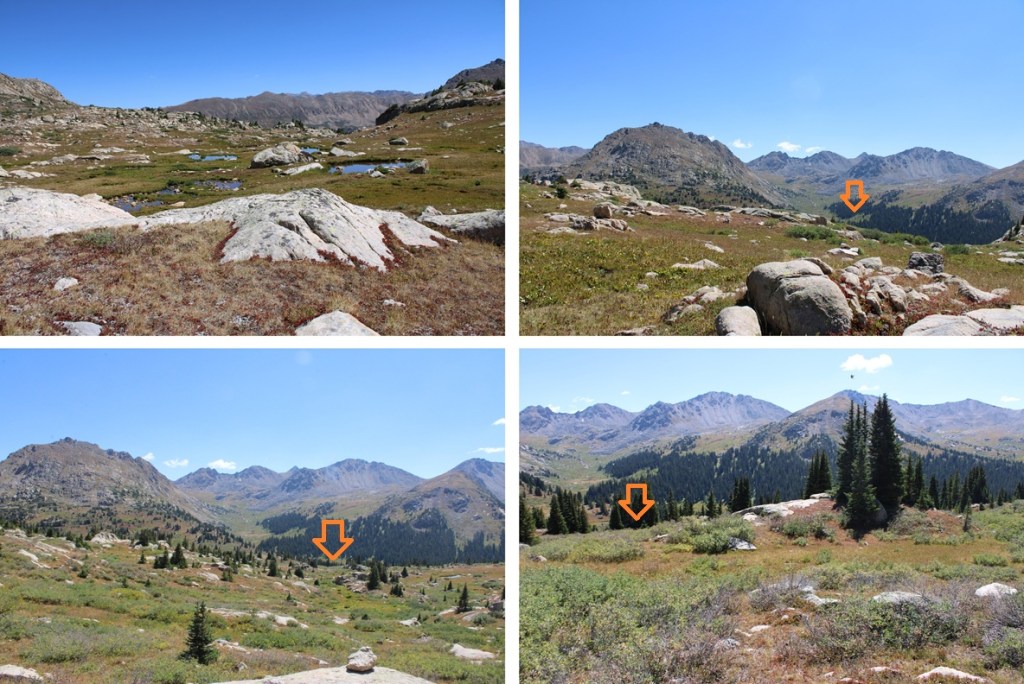
This put me into an upper basin.  From this point there are several options to climb 13024. 

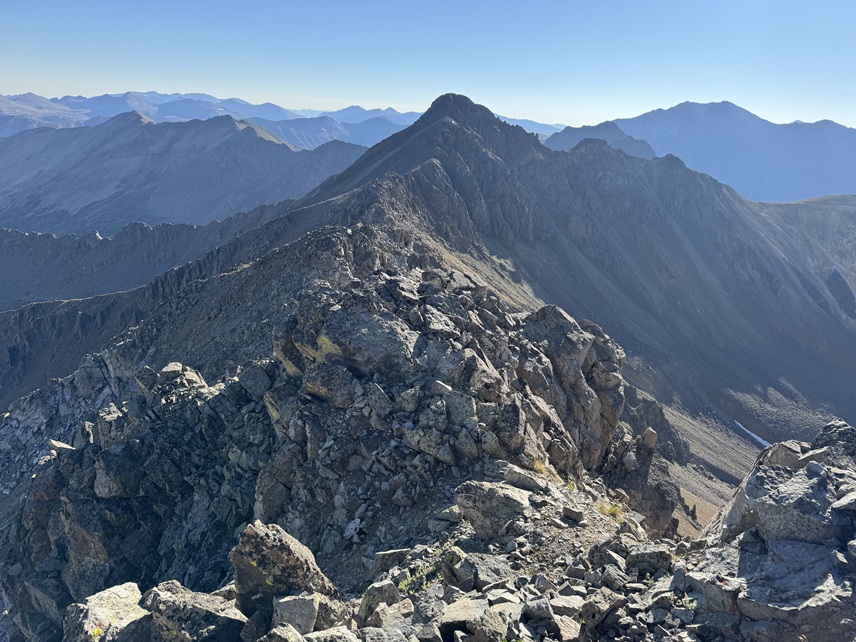
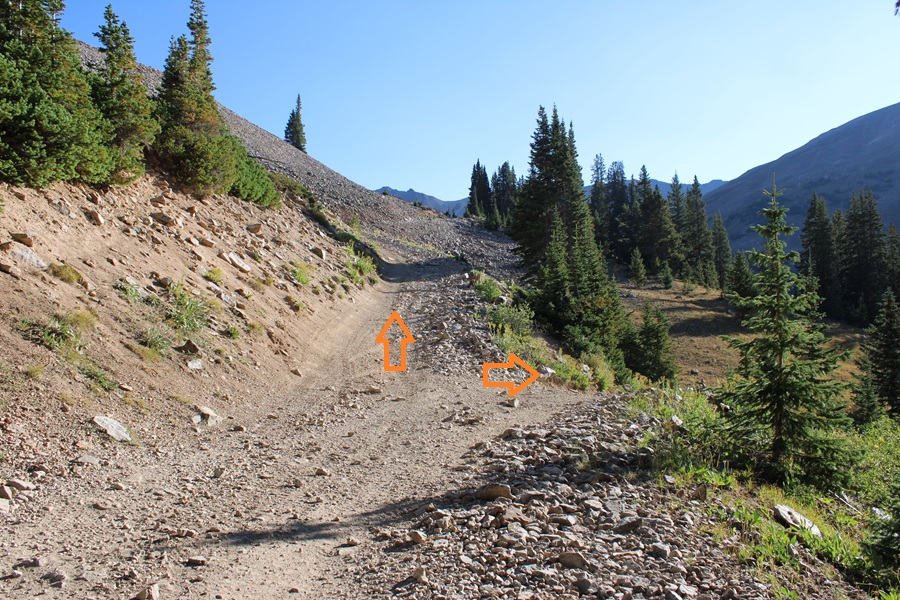
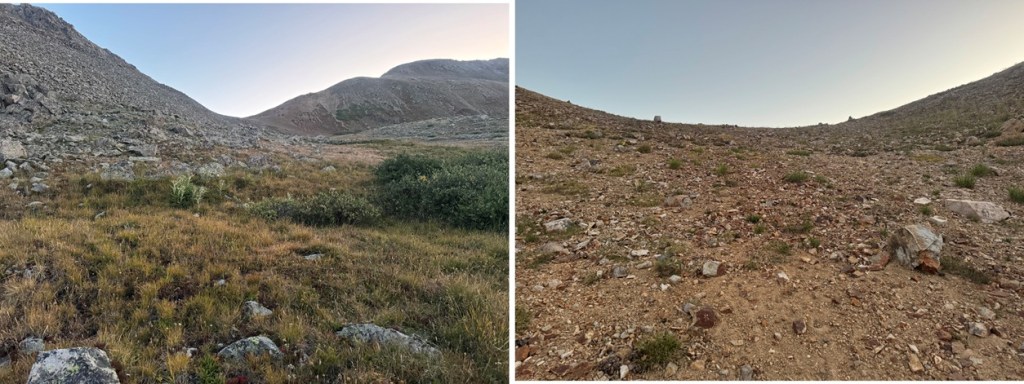
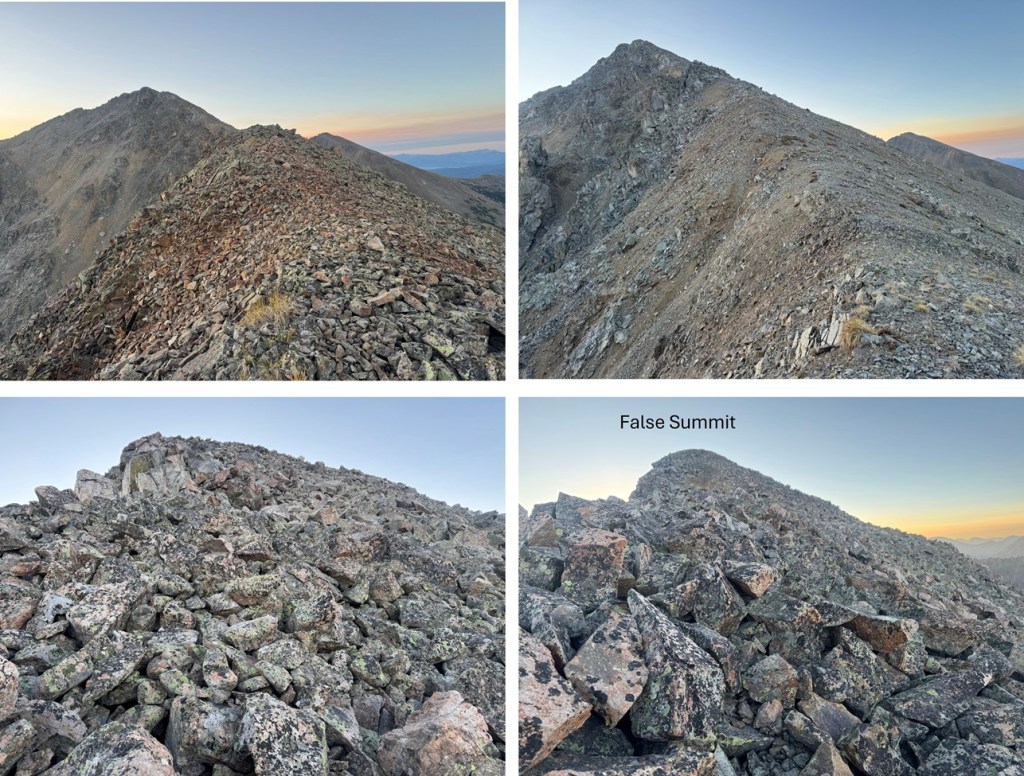
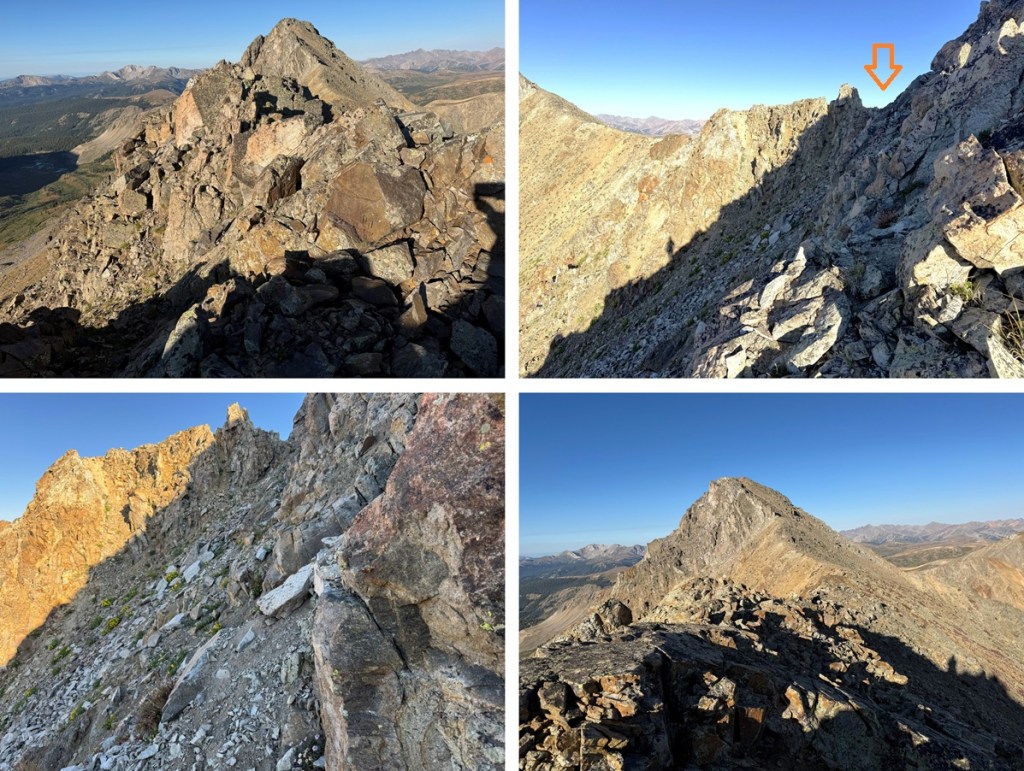
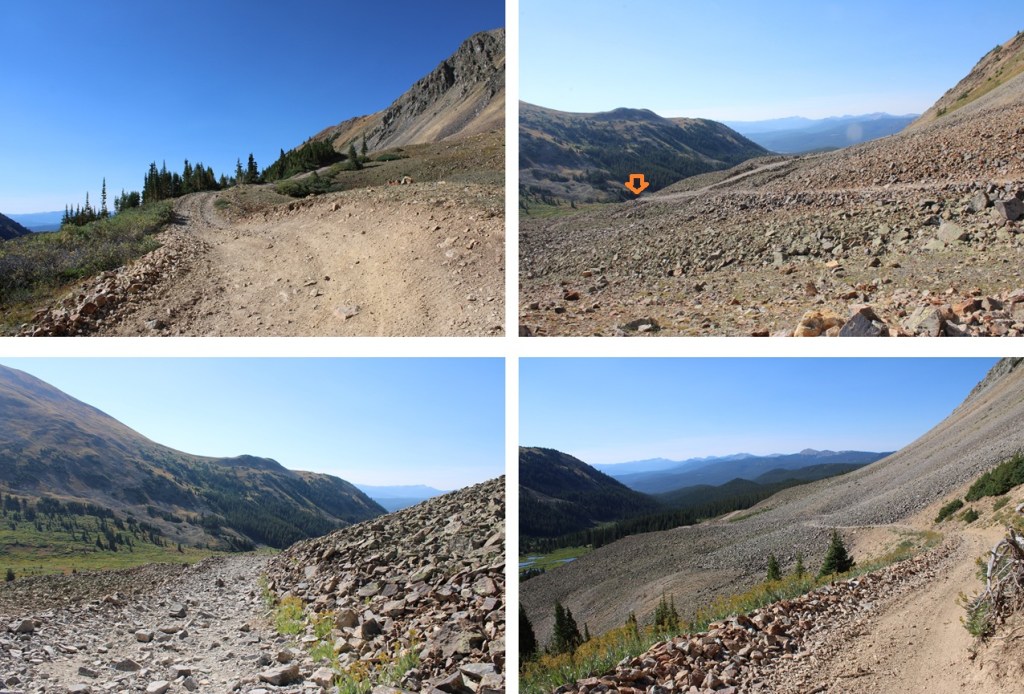
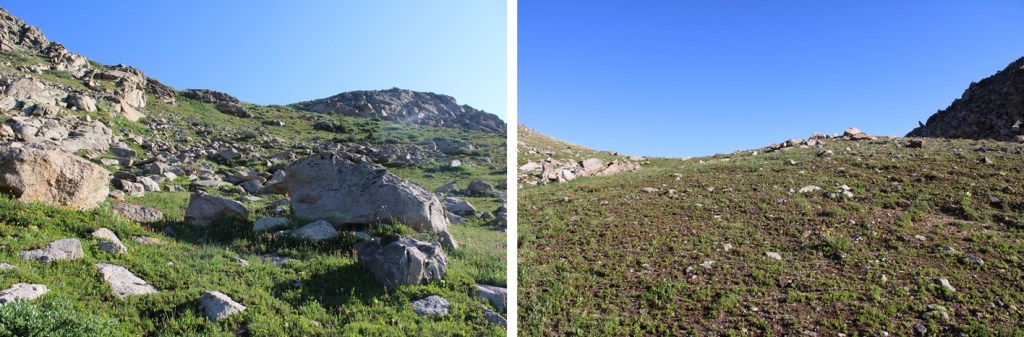
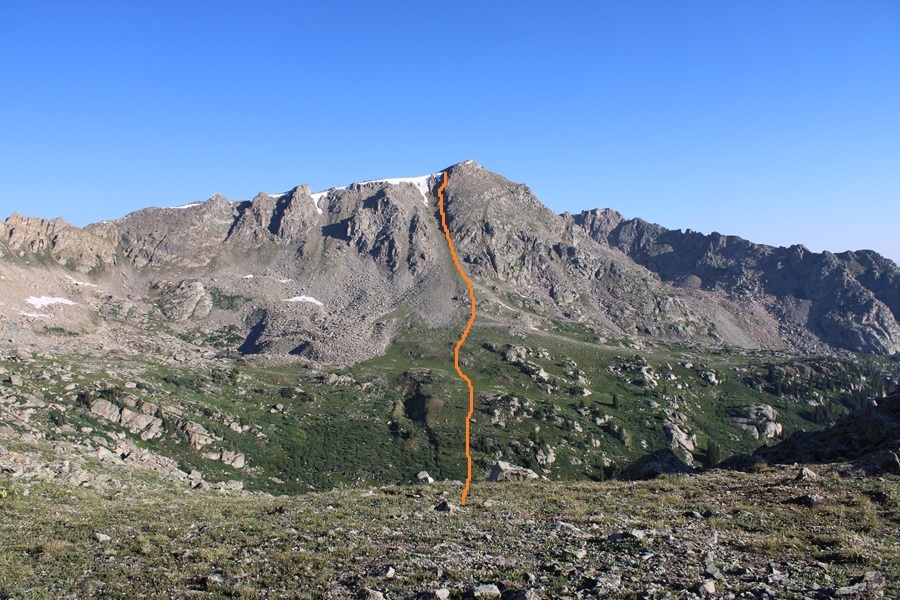
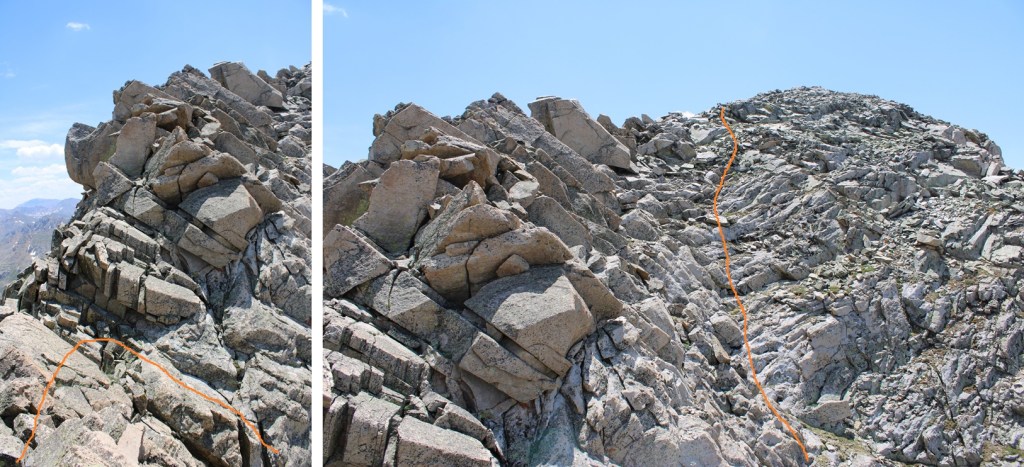
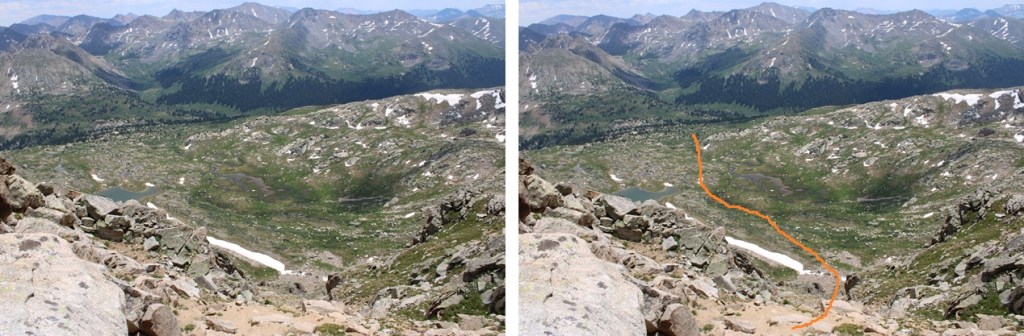
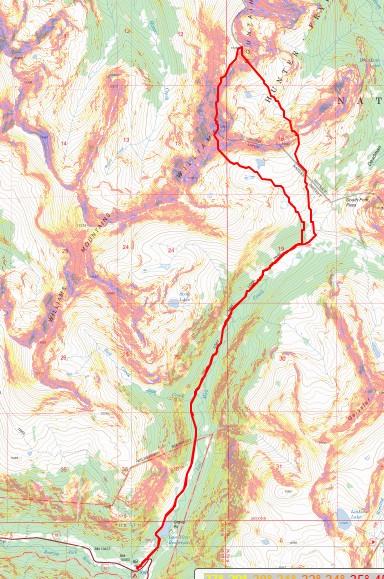
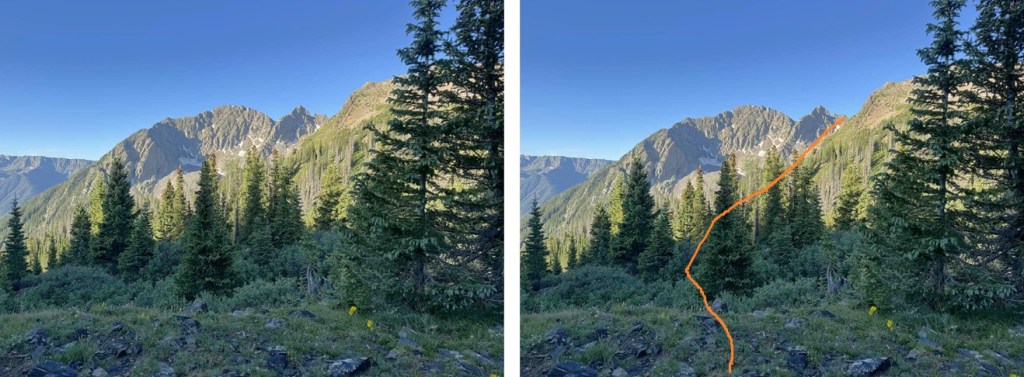
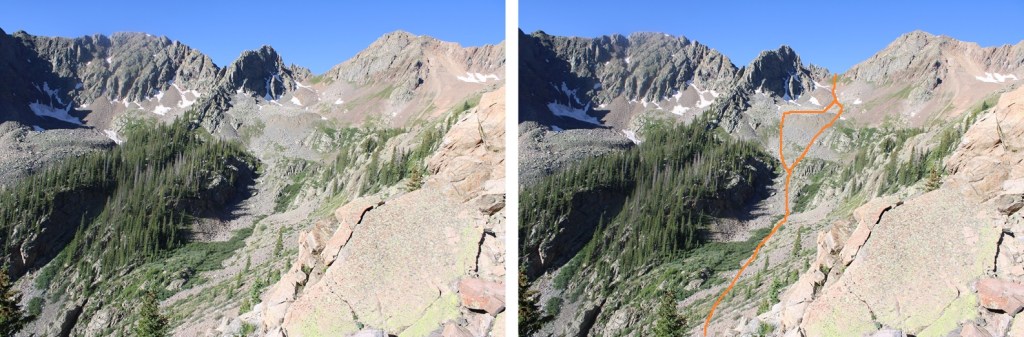
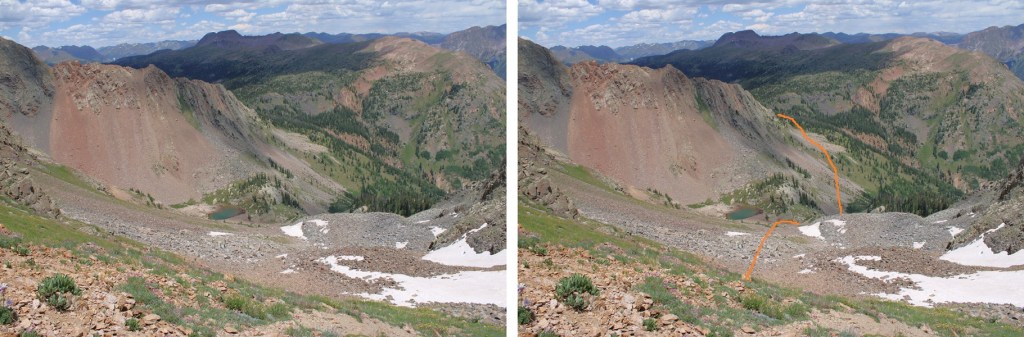
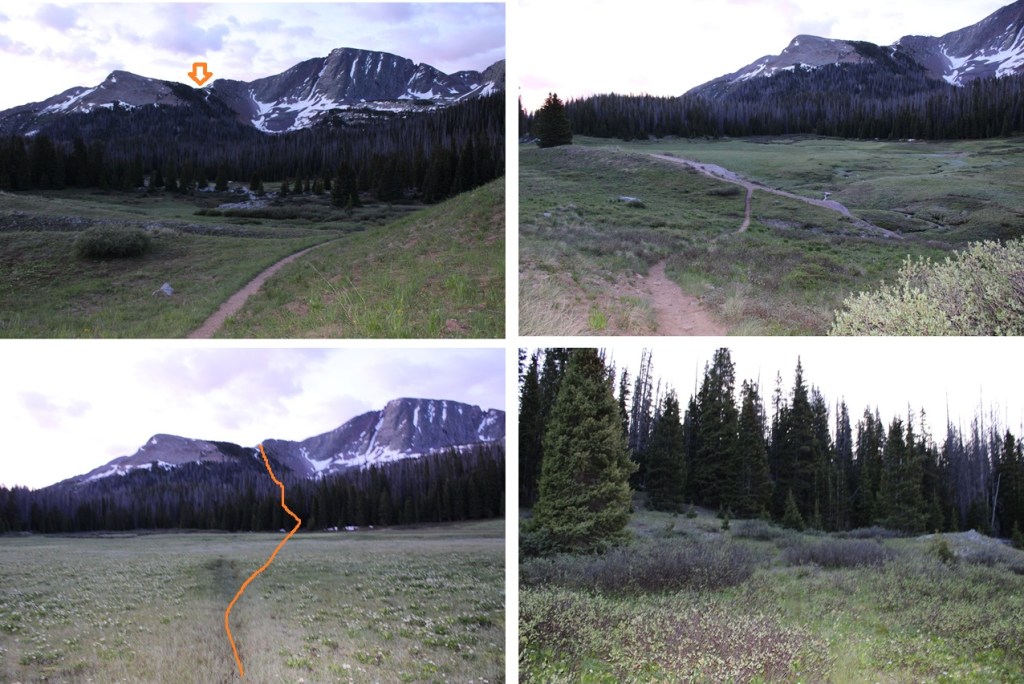
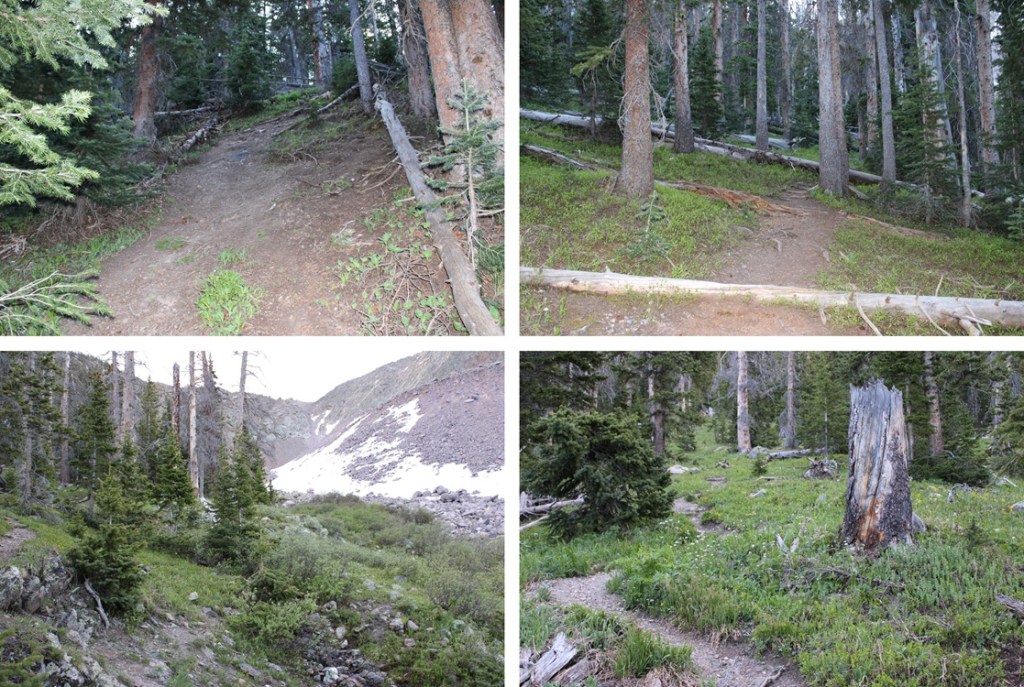
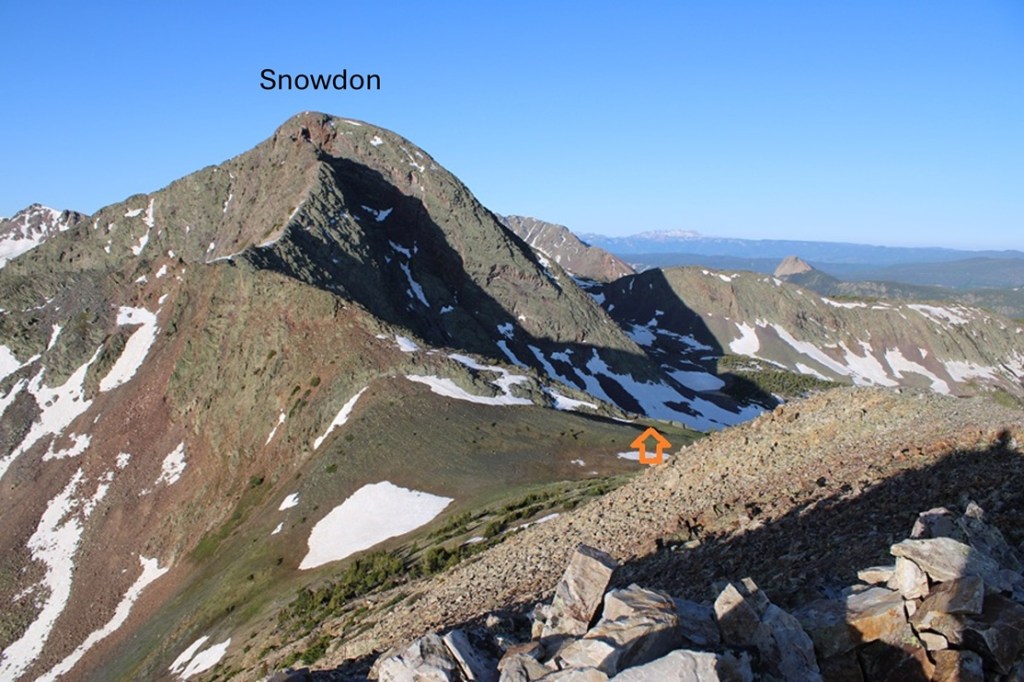
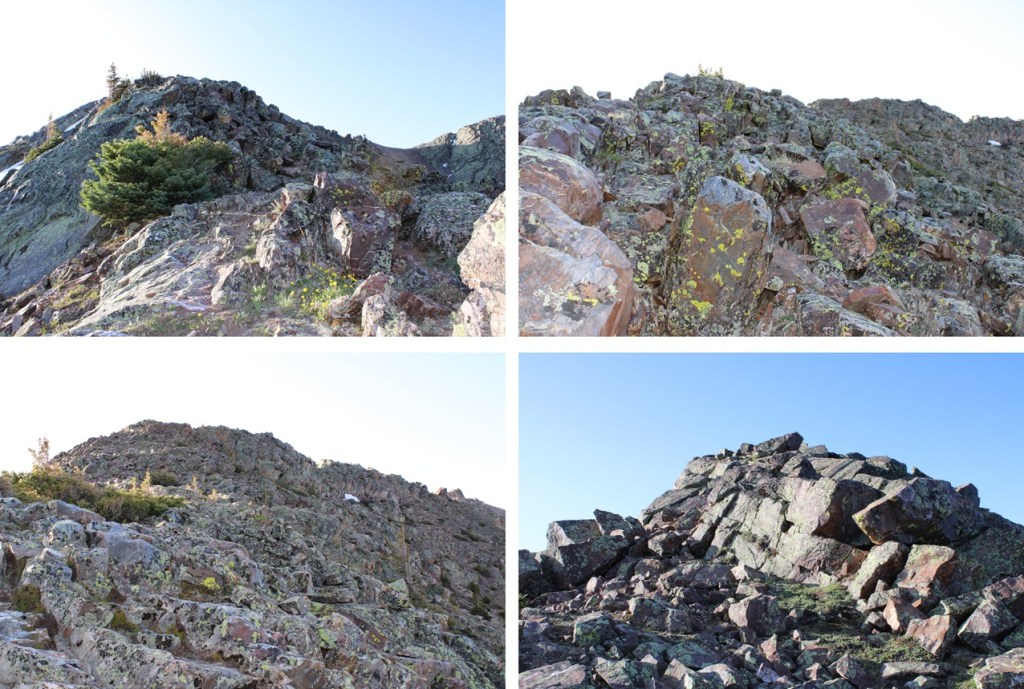
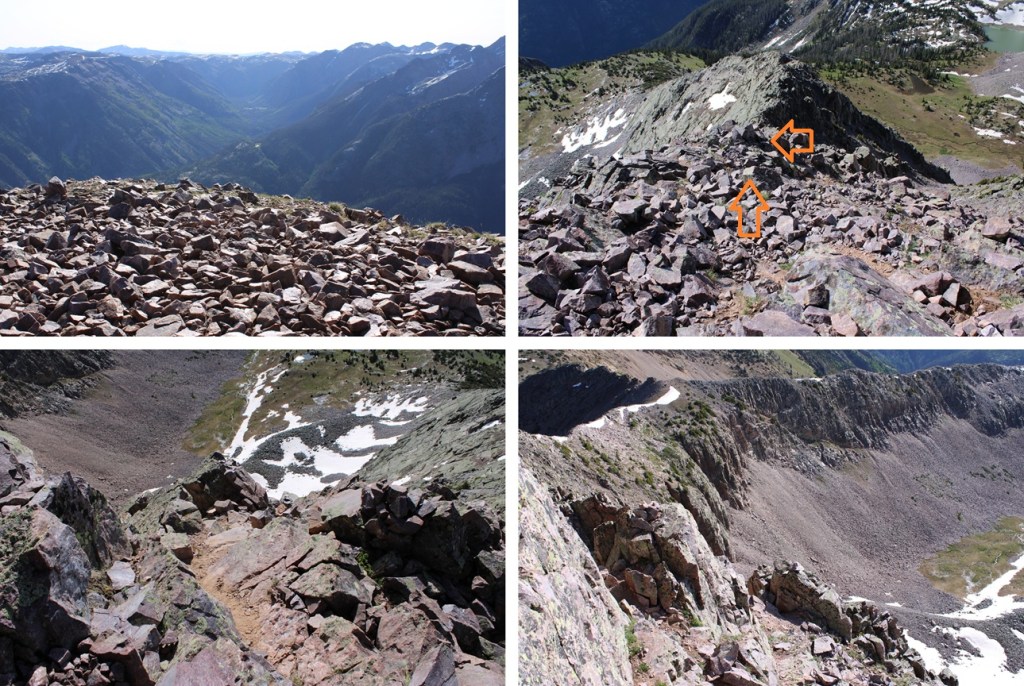
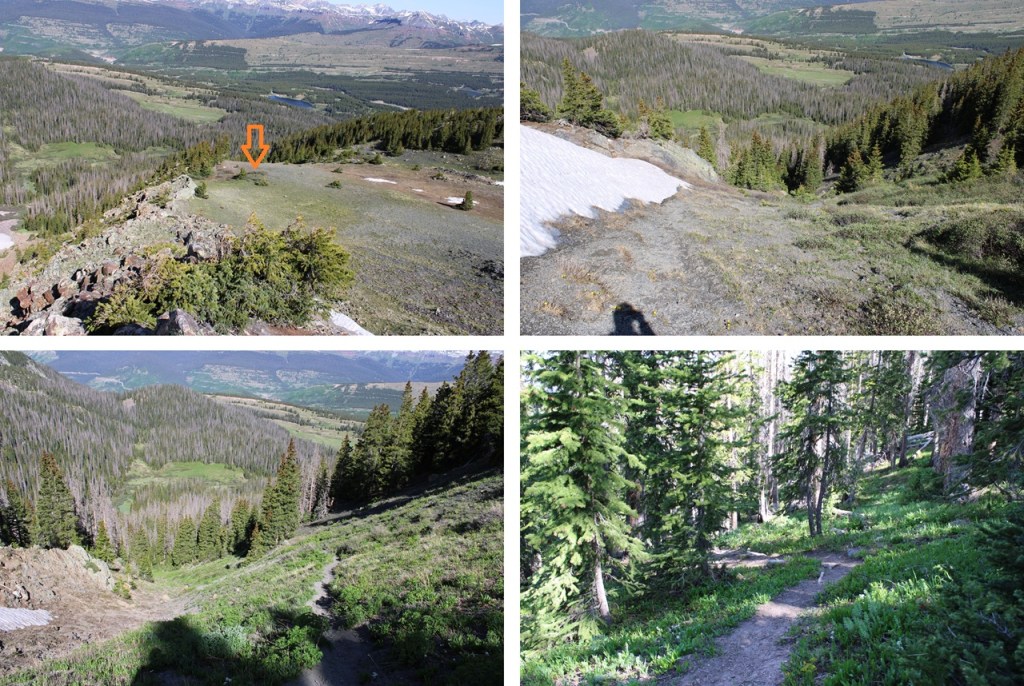
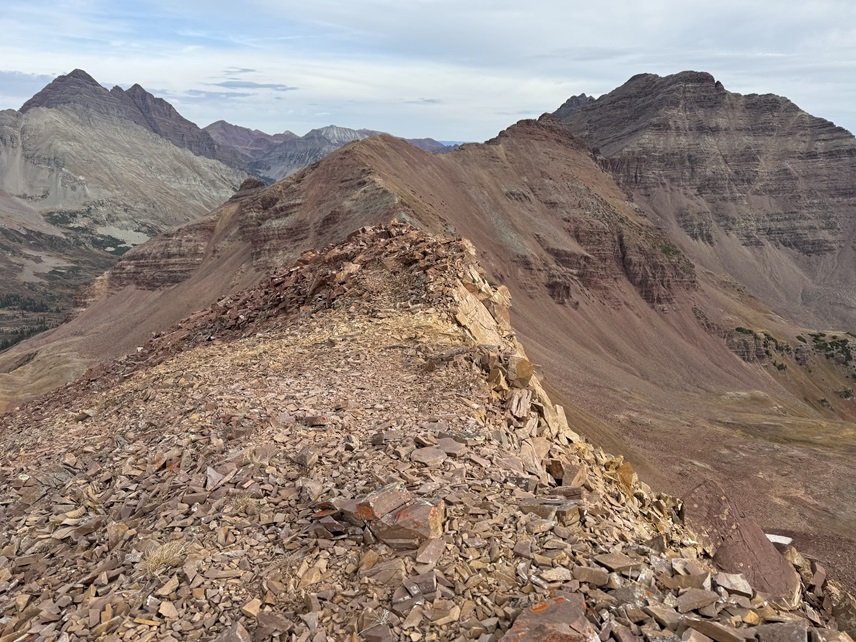
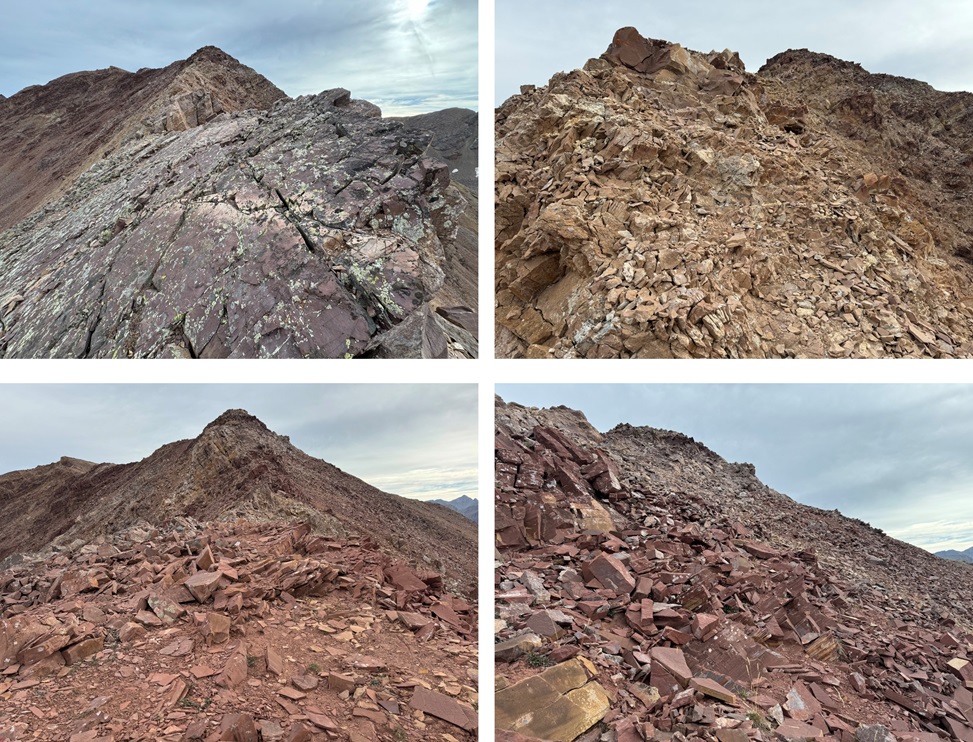
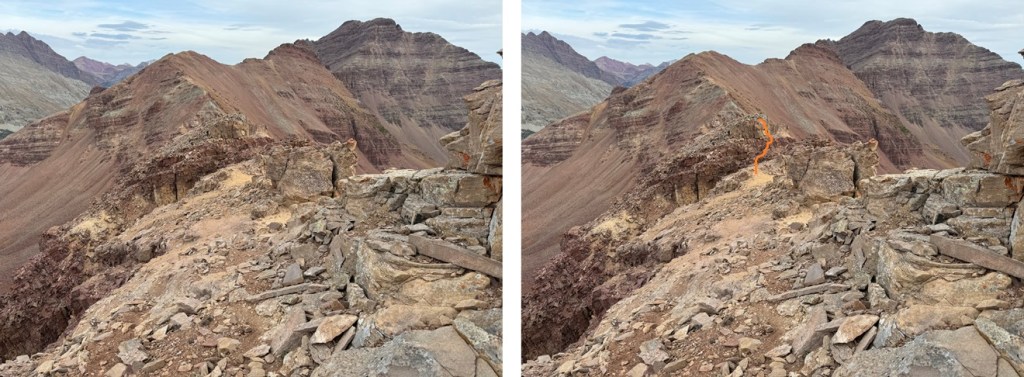
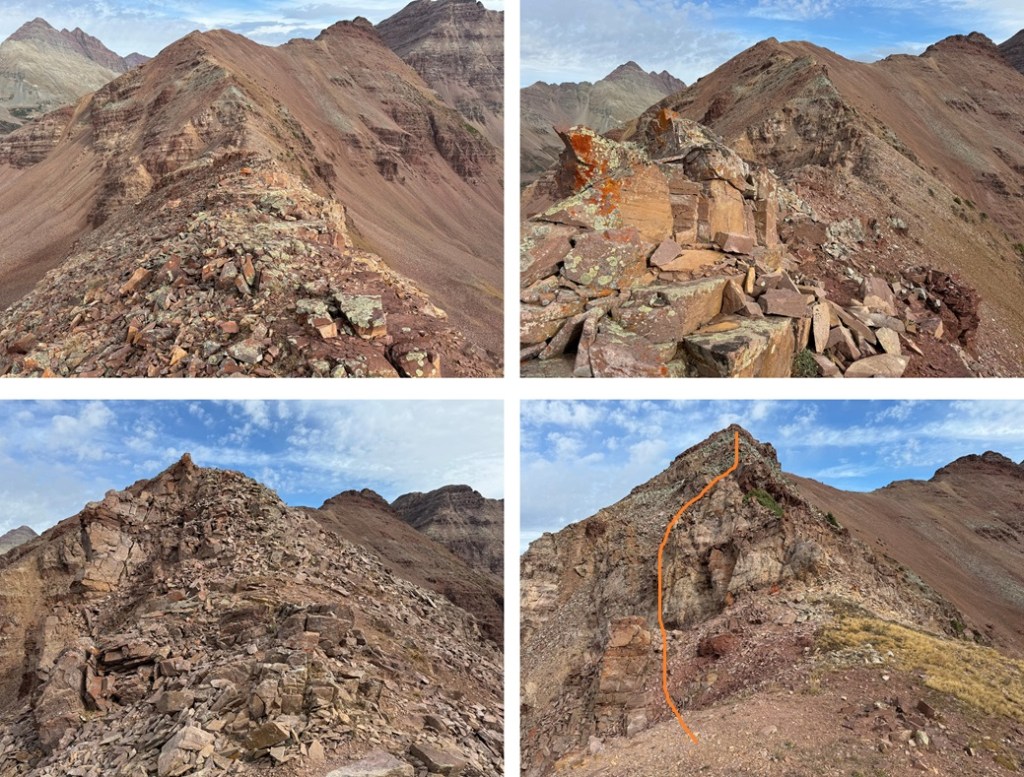
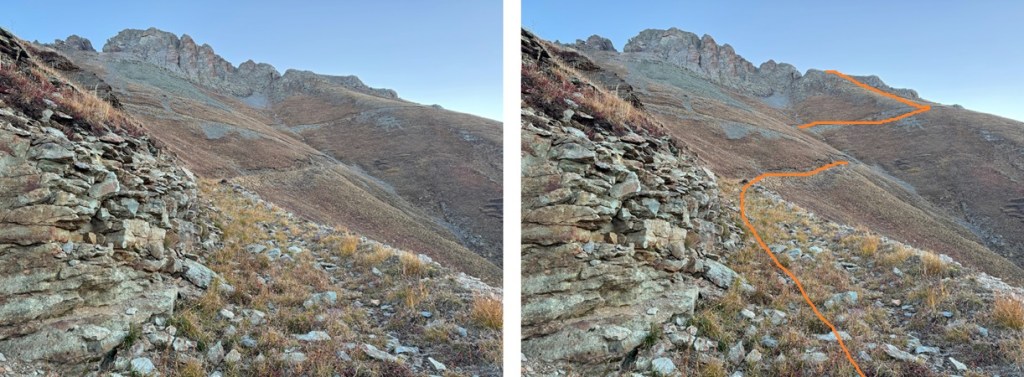
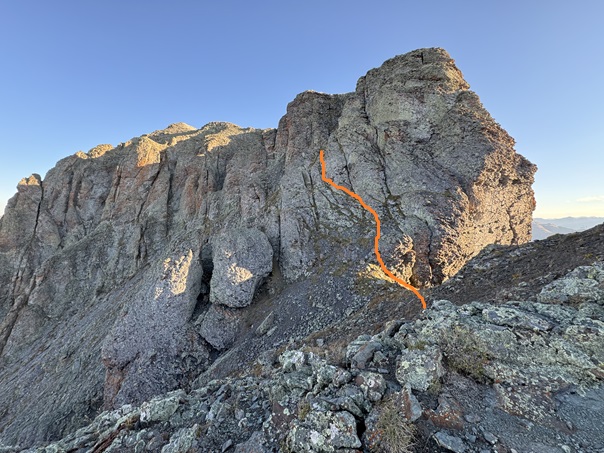
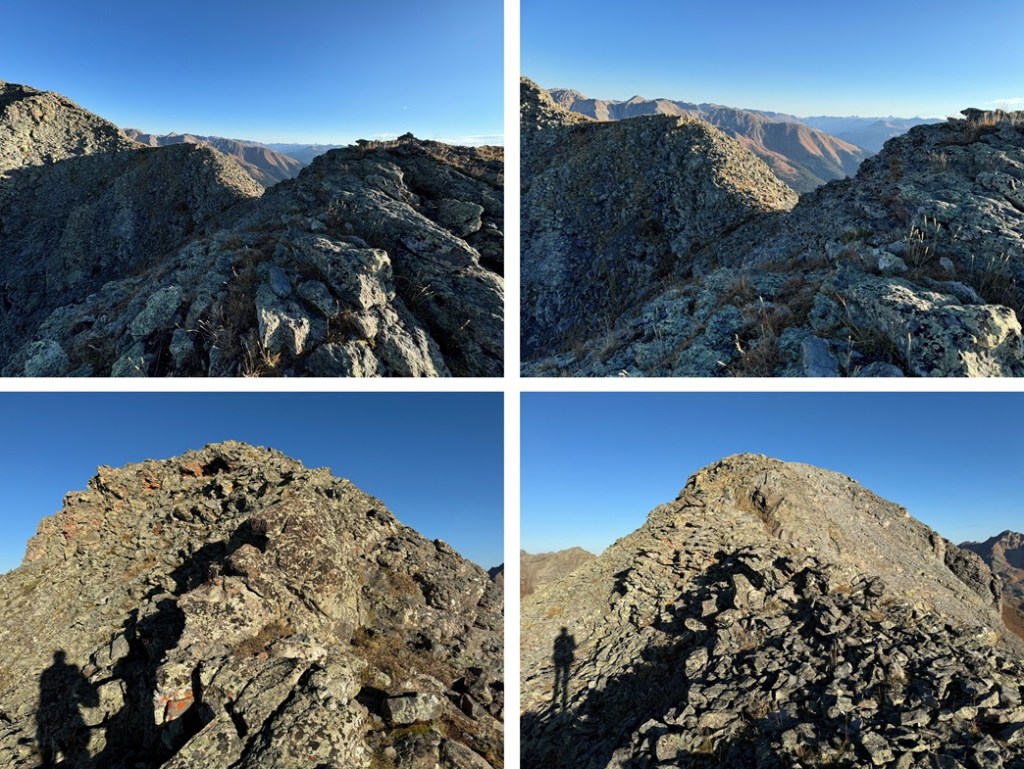
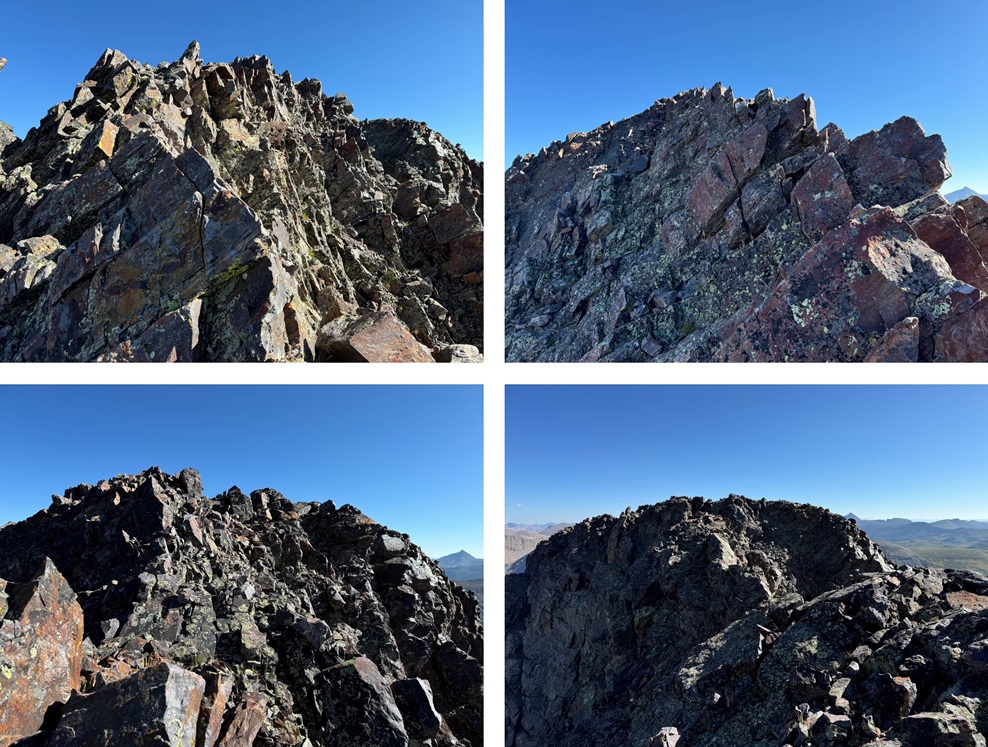
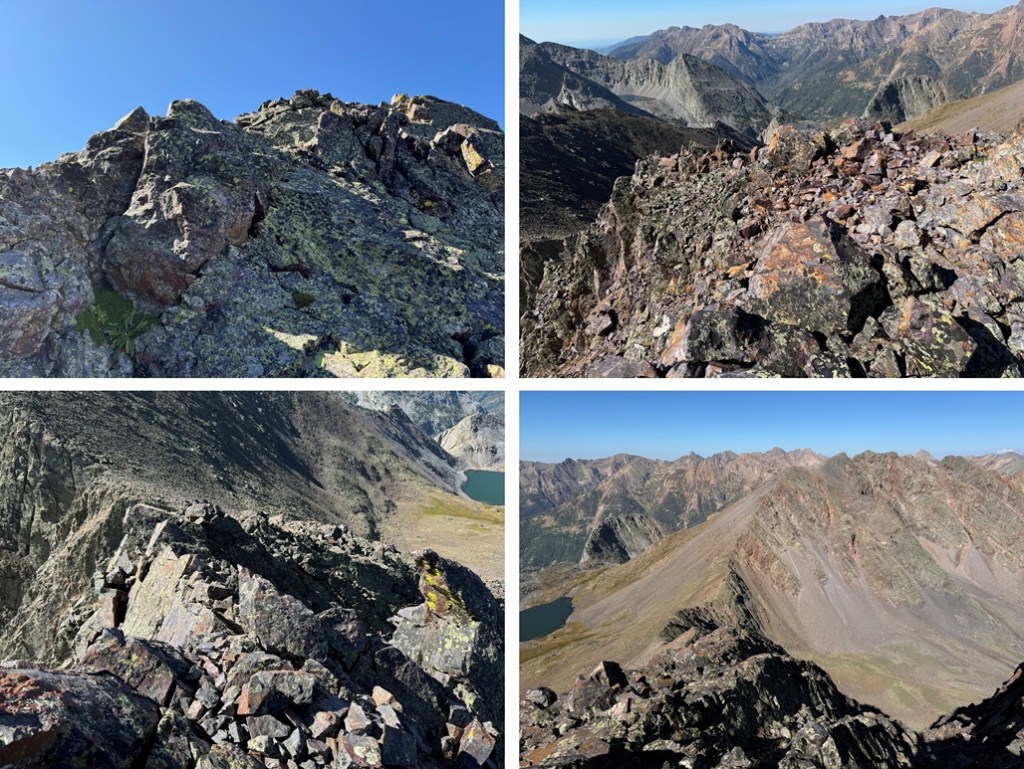
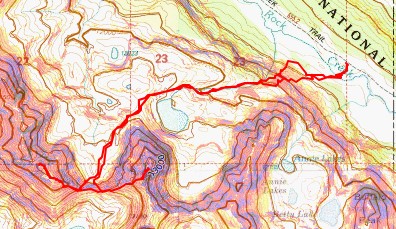
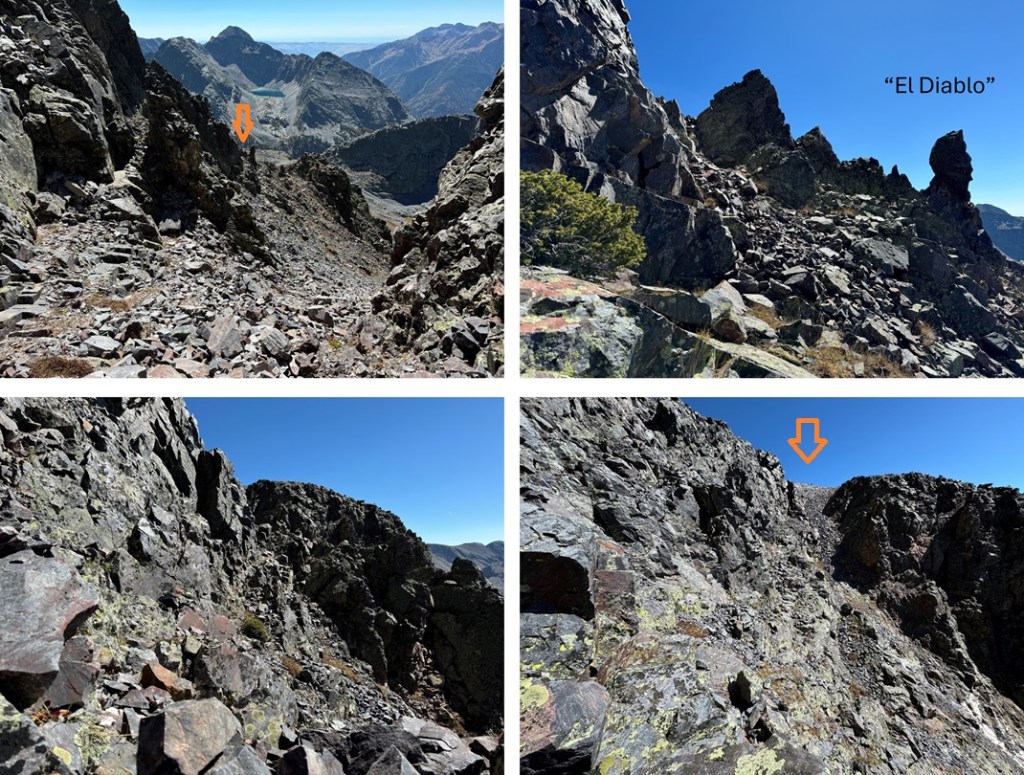
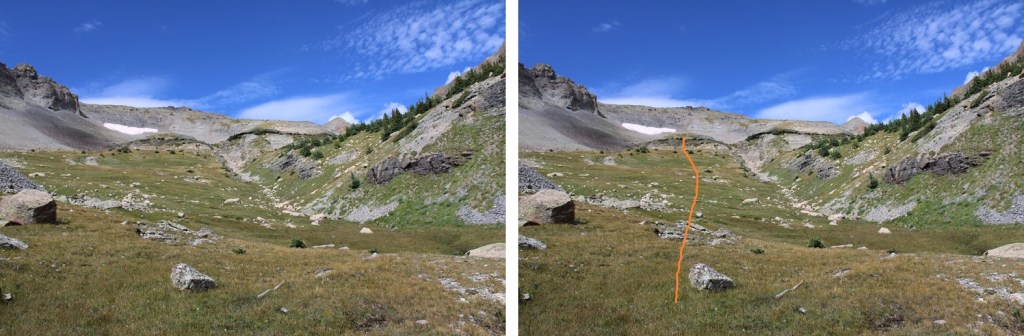
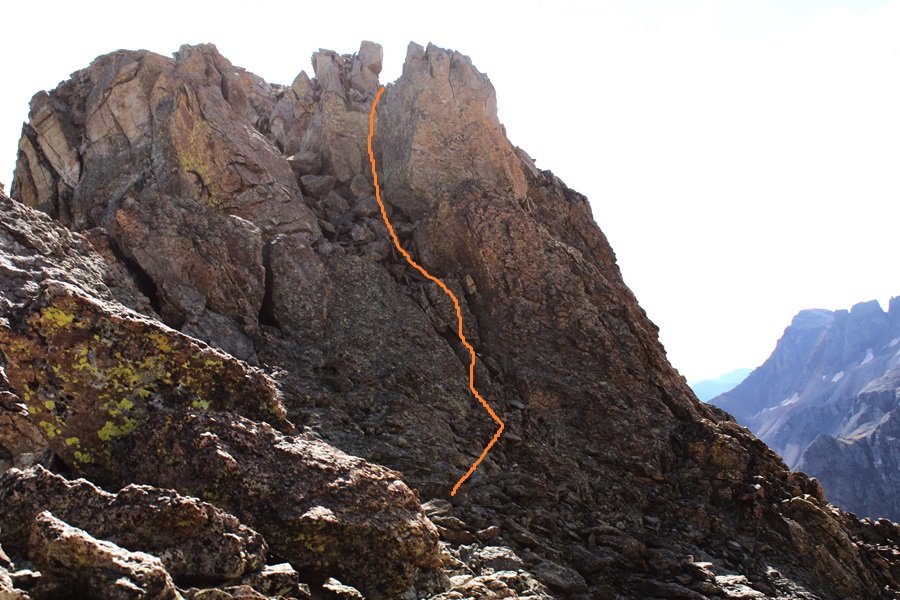
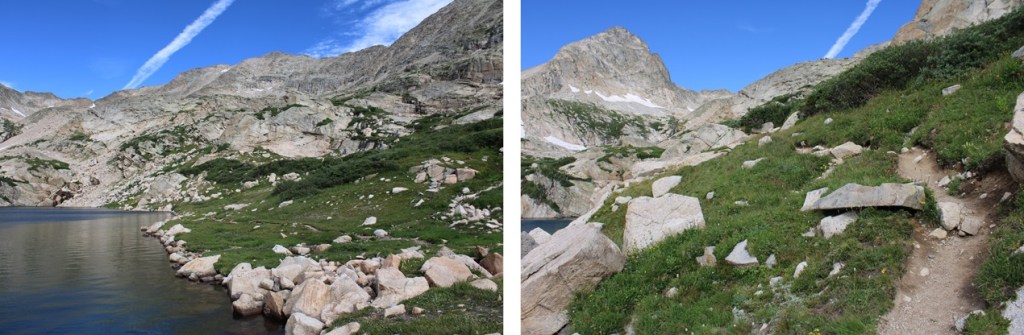
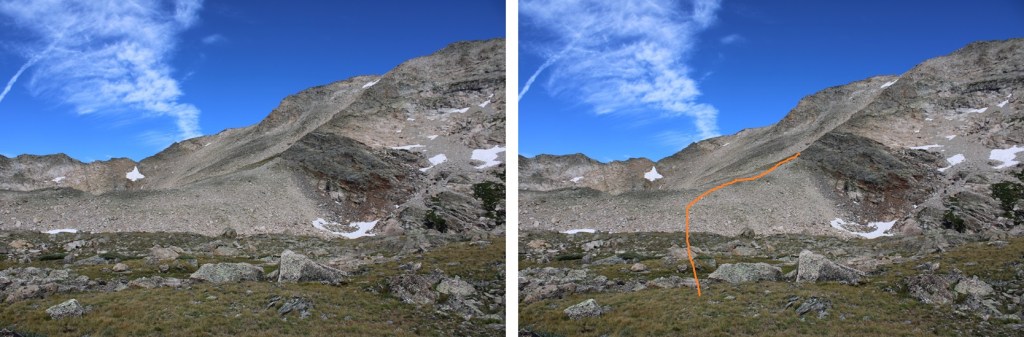
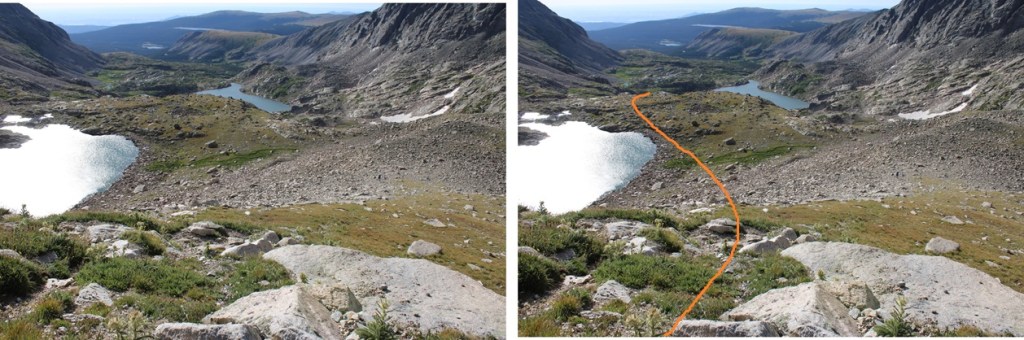
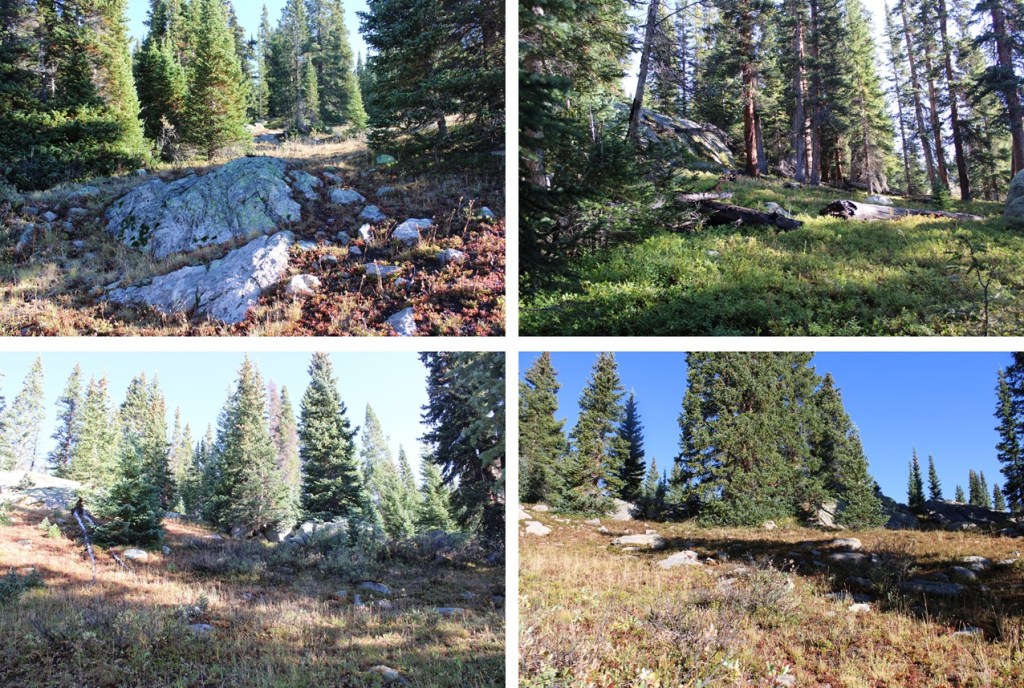
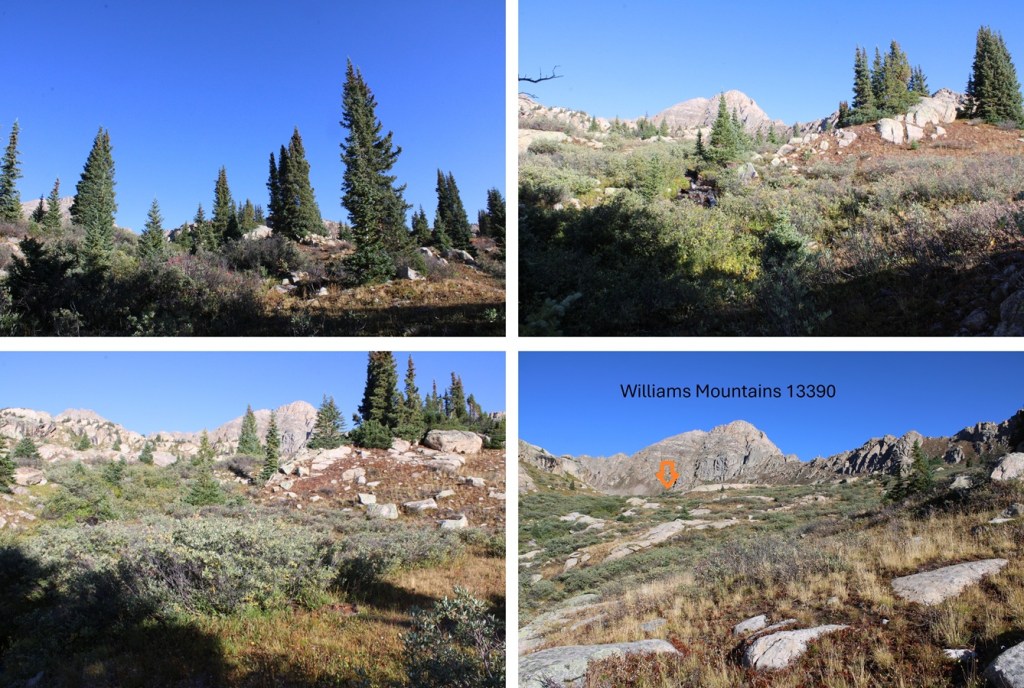
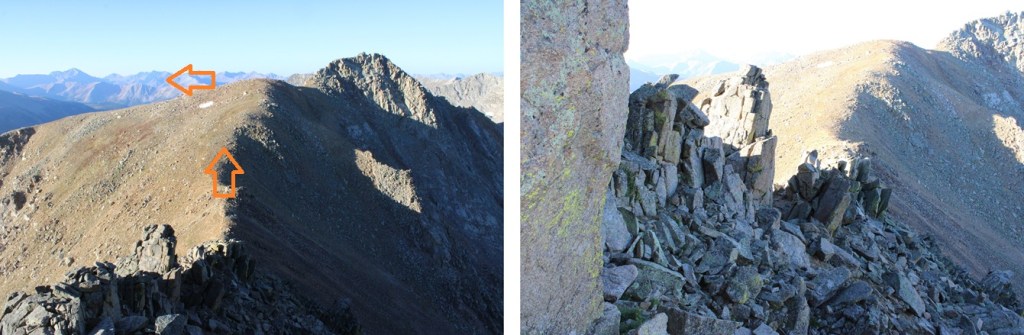
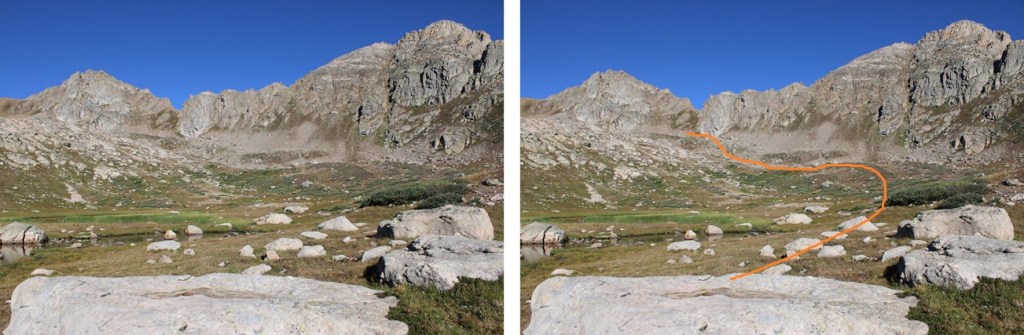
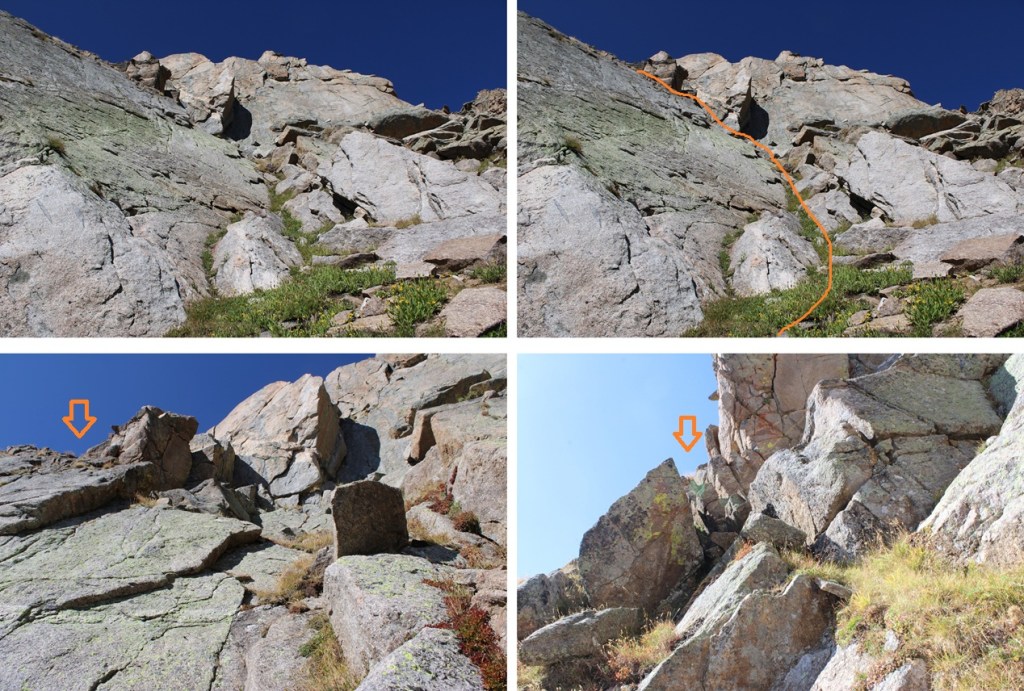
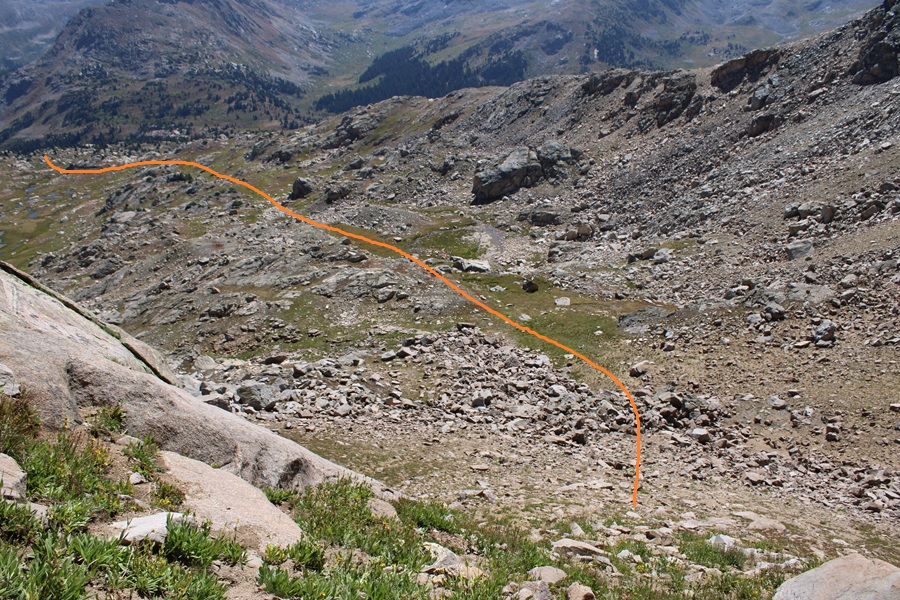
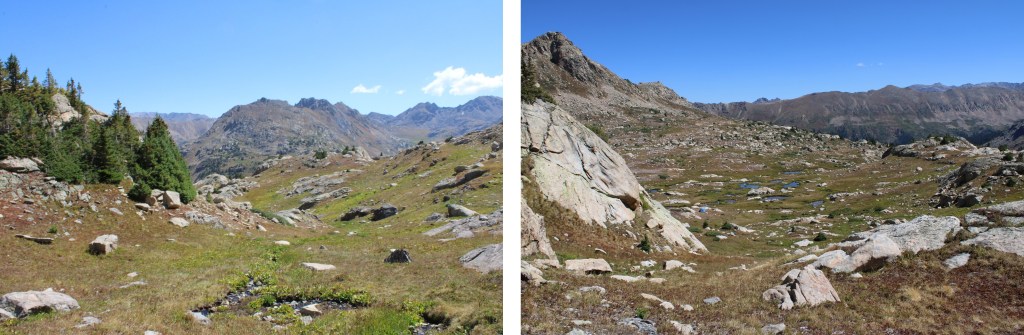
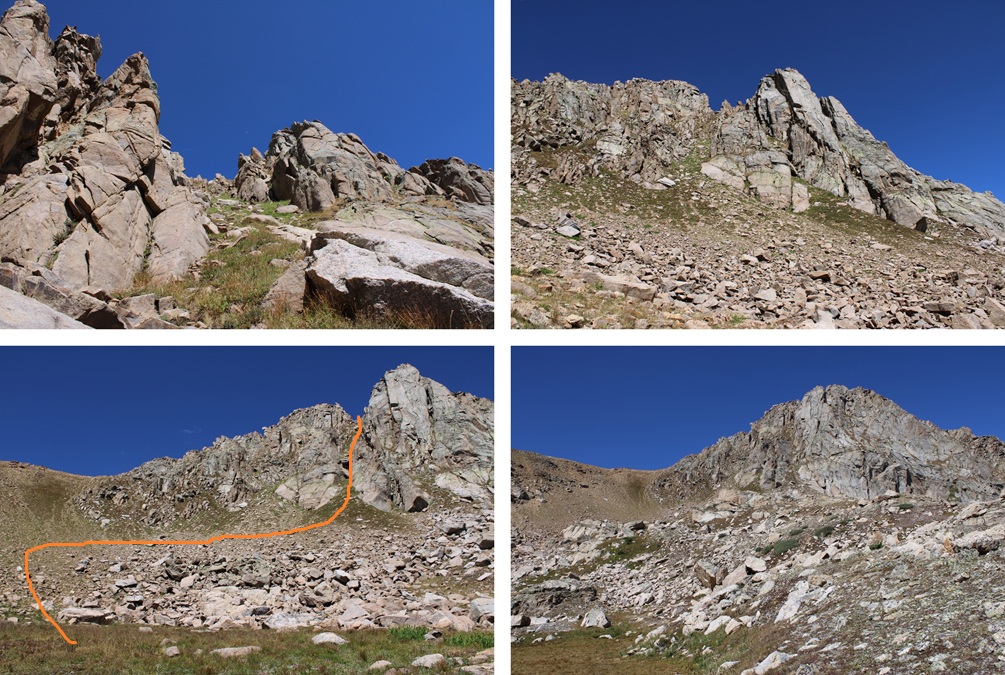
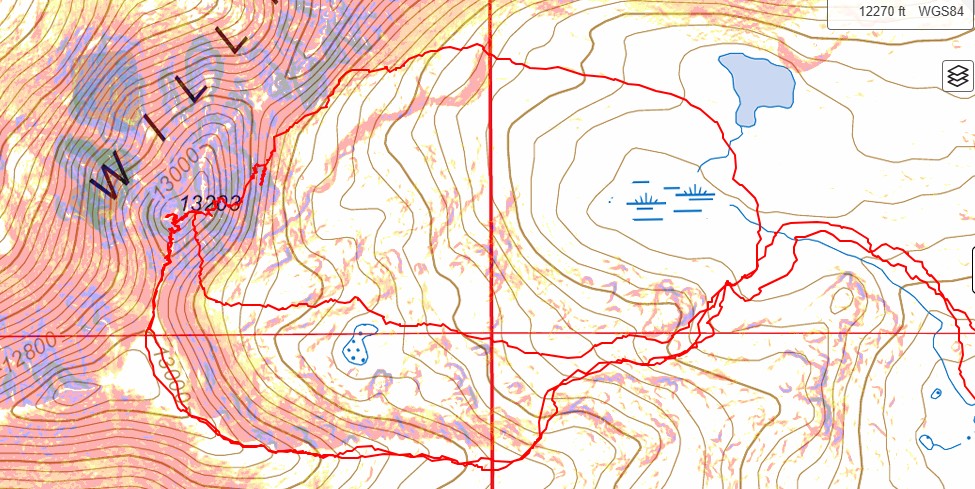
I found a camping spot and set up for the night. This area is boggy/marshy, and it’s difficult to find a spot 150’ from water, but I found one underneath a large rock outcropping.  As you can see by the picture below, I found three different routes up/down PT 13024.  The orange route is class 4, the blue route class 2, the pink route class 3 (I didn’t really know this beforehand).  My first attempt the next morning was going to be to the left hand side, as I didn’t yet know if the ridge would go, and had heard it was the easier side (it wasn’t).  I’d been in the area before, and the ridge looked like it went, so in the morning I was going to take the ridge to the summit from the left. 

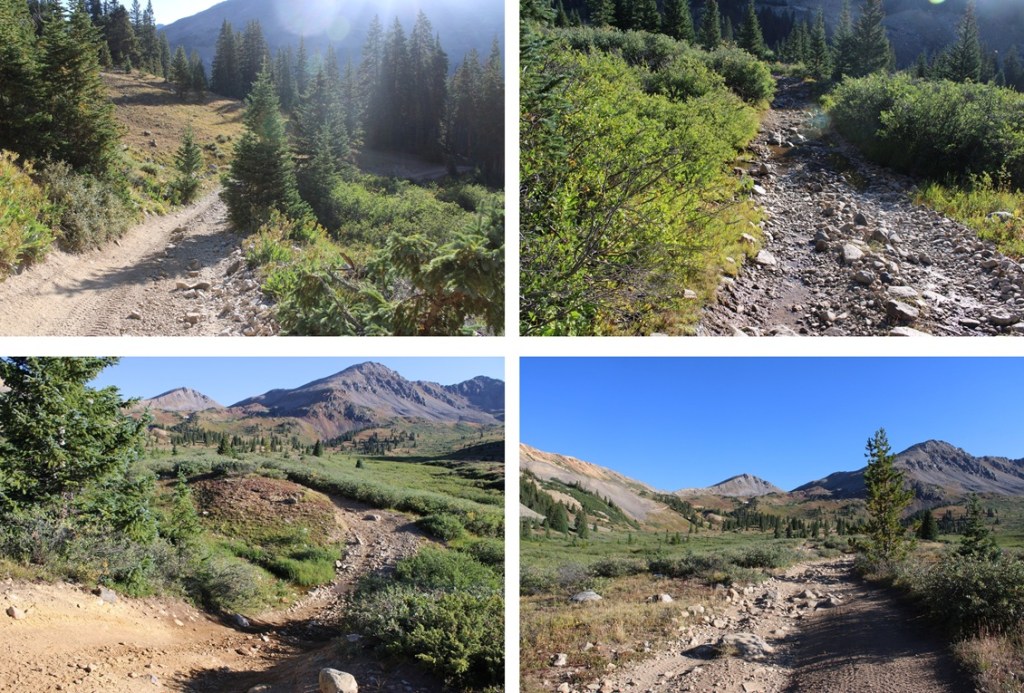
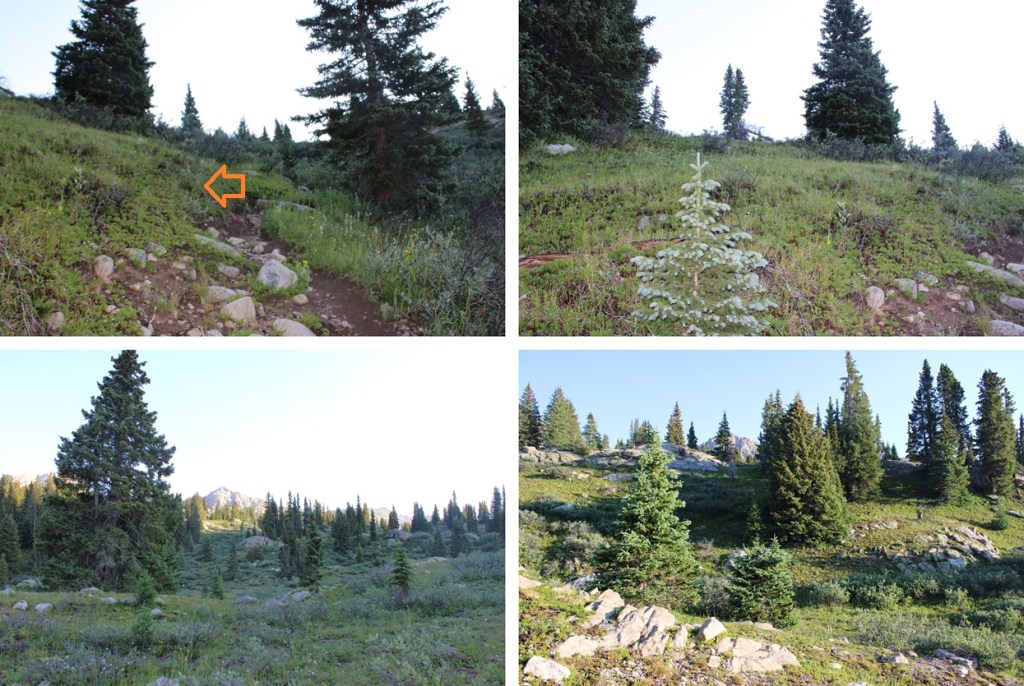
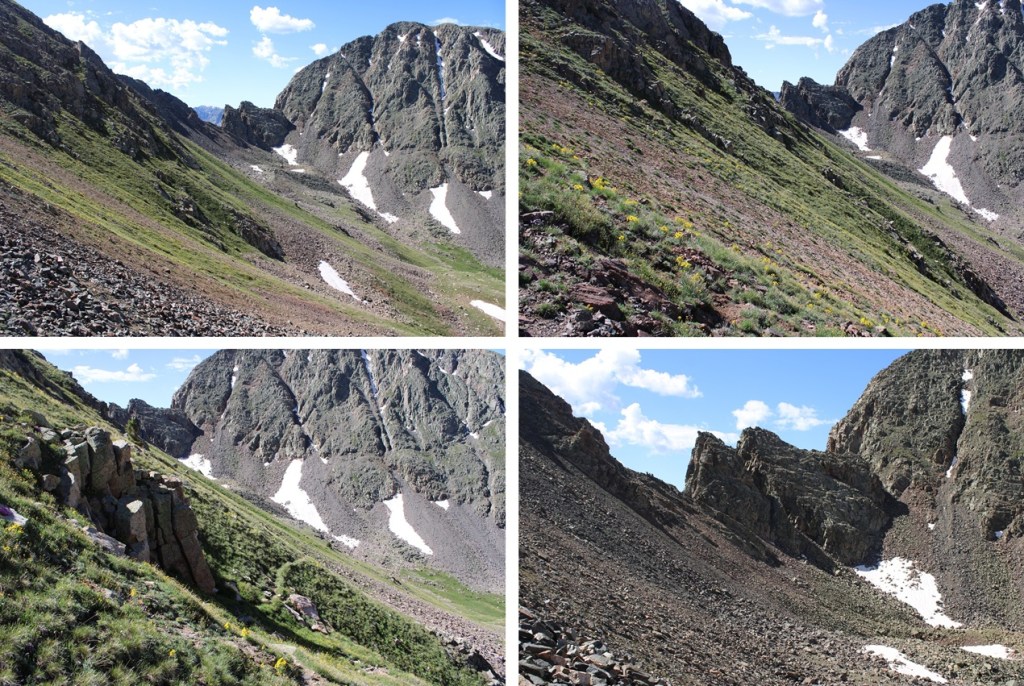
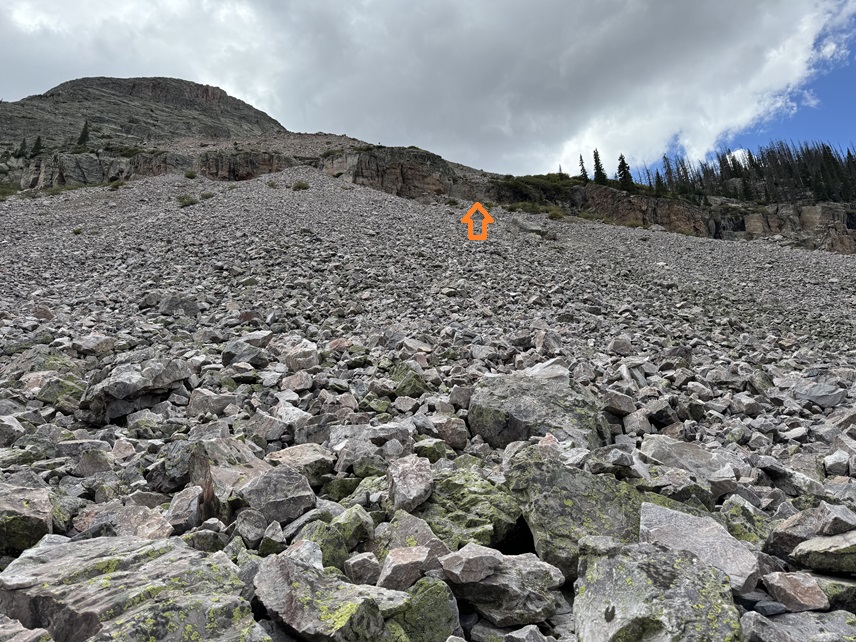
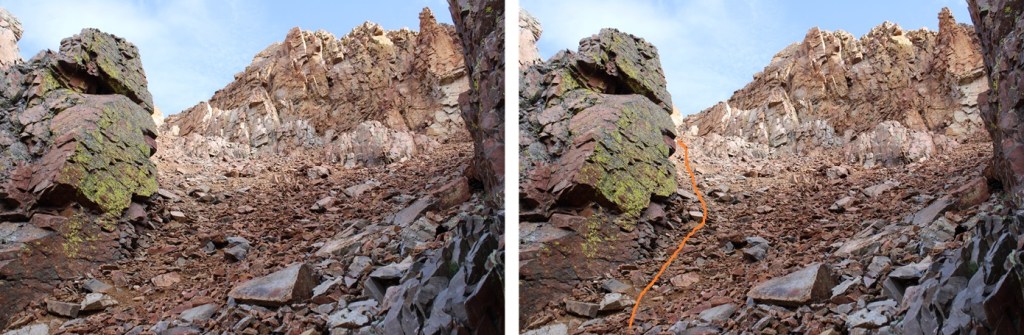
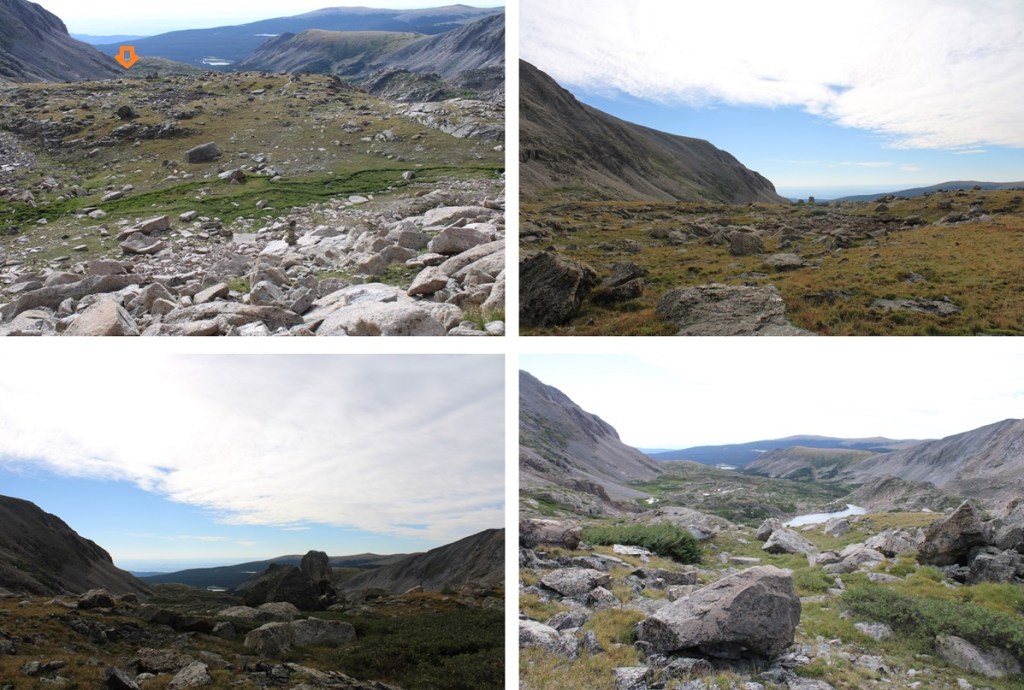
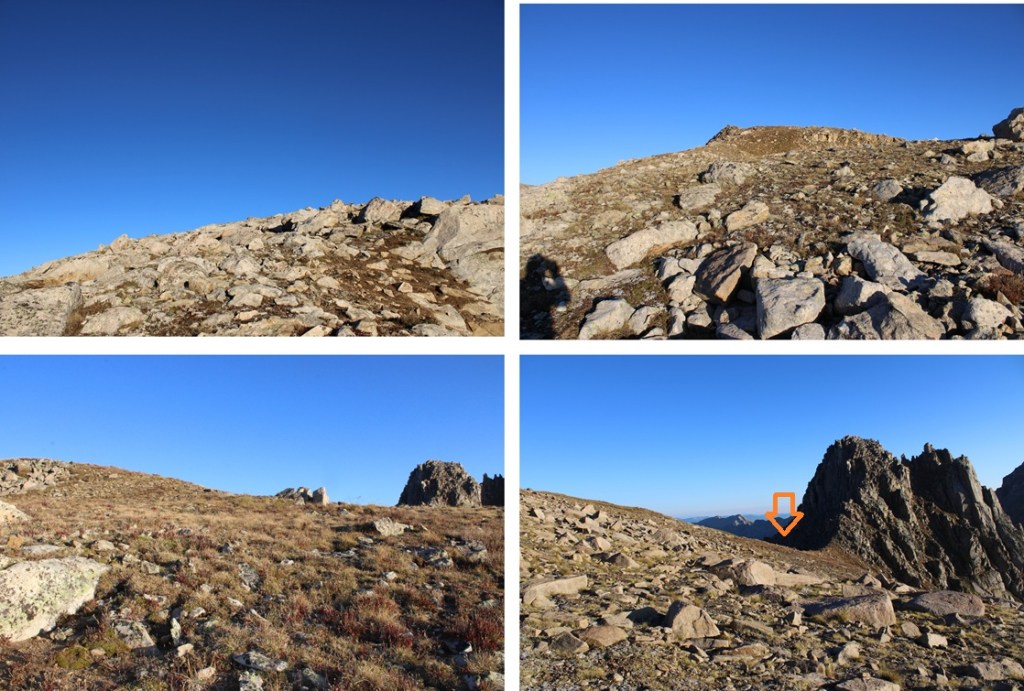
I set up my tent and had the late afternoon to just chill and relax (a goal of mine while climbing this year).  While I was there a couple of hunters hiked in, scouting the area (hunting season was to start in a couple of days).  I saw them pointing in the distance and getting out their binoculars and looking, then pointing again.  I gave them their space, but half an hour later they started hiking towards me and my tent.  They whistled and said “Just so you know, there’s a bear behind you about 200 feet, behind the rock you’re set up next to.”  I was thrilled with this information, but a bit upset it took them HALF AN HOUR to let me know a bear was behind me.  I got up, got my trekking pole, and spent the next 2 hours looking for the bear.  I never saw it.  I was mentally ok and prepared for the night (bear cannister and all), but still a little upset I never actually got to see the bear.  I did hear cow elk calling to their babies in the night, but no more sighting of that bear.  In the morning I was off at 6:30am to attempt the ridge (orange route).  I started by following the grassy area southwest towards the ridge.

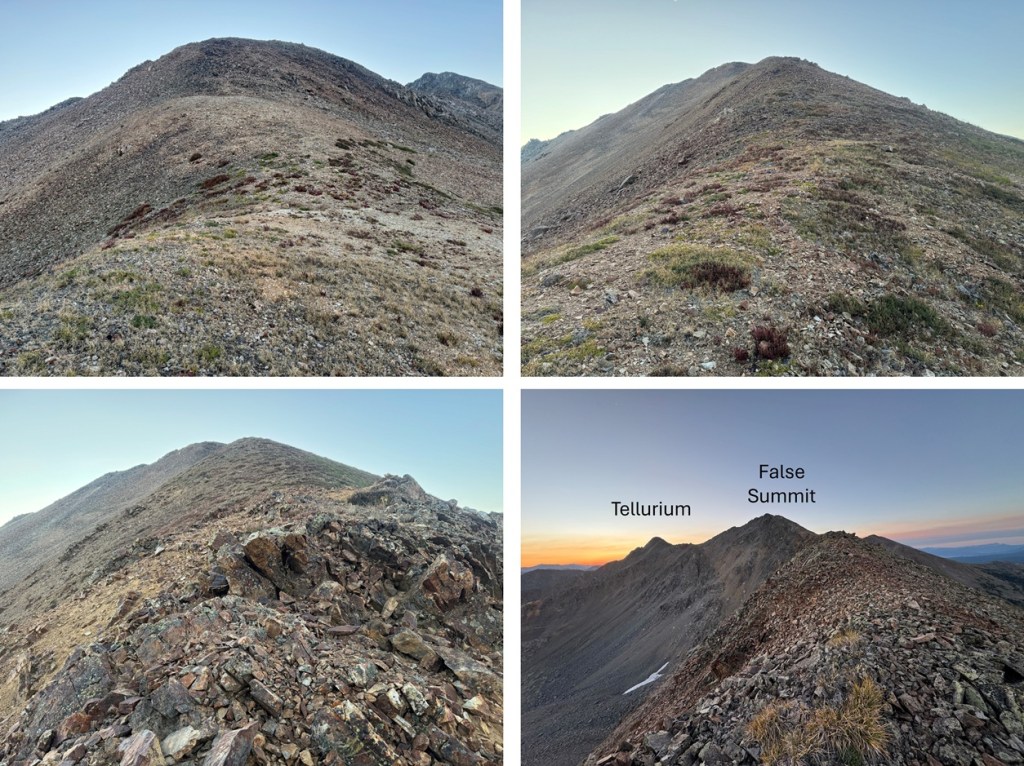
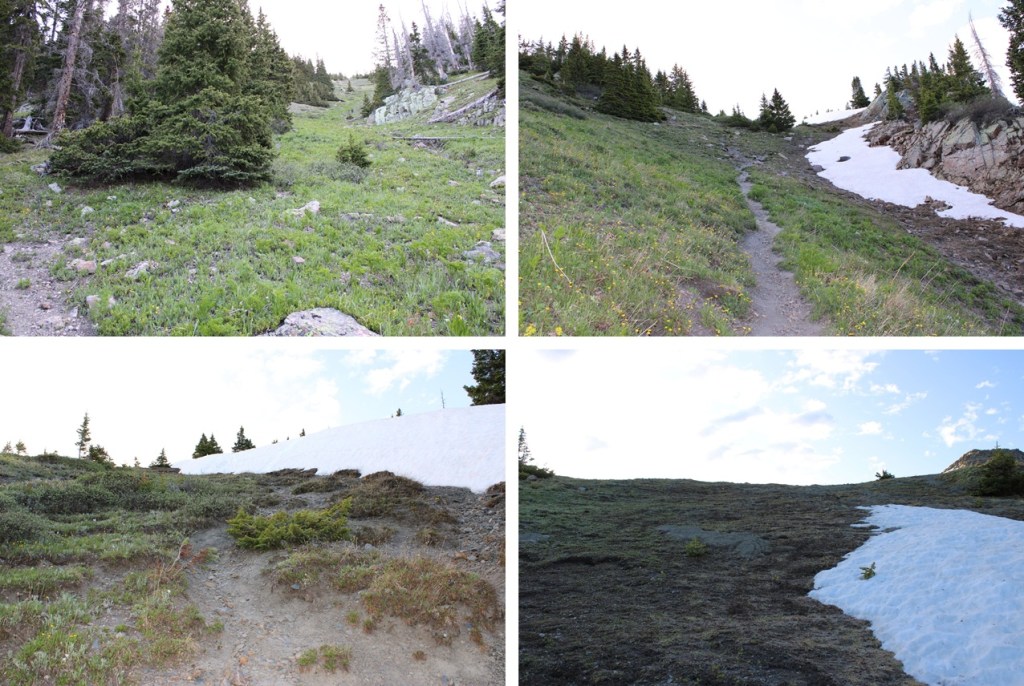
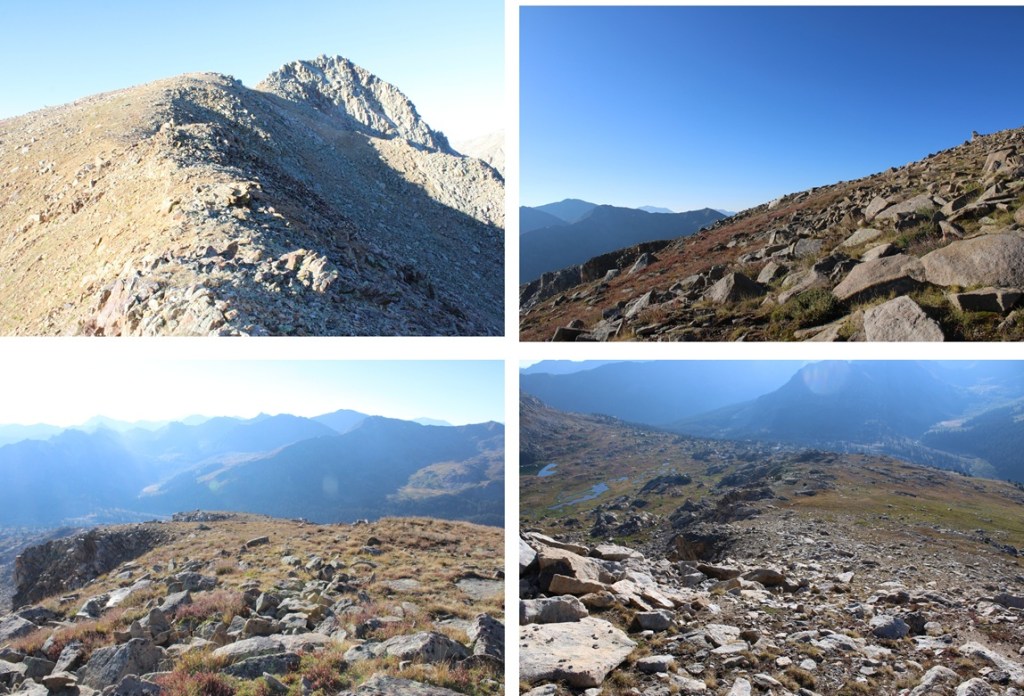
I then found a small gully and gained the ridge on tundra.  This was all easy class 2.

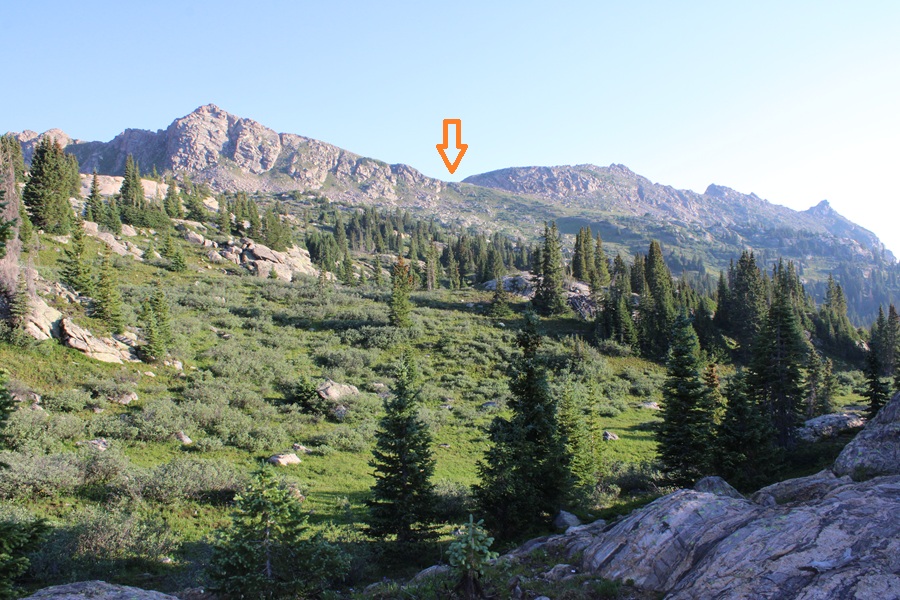
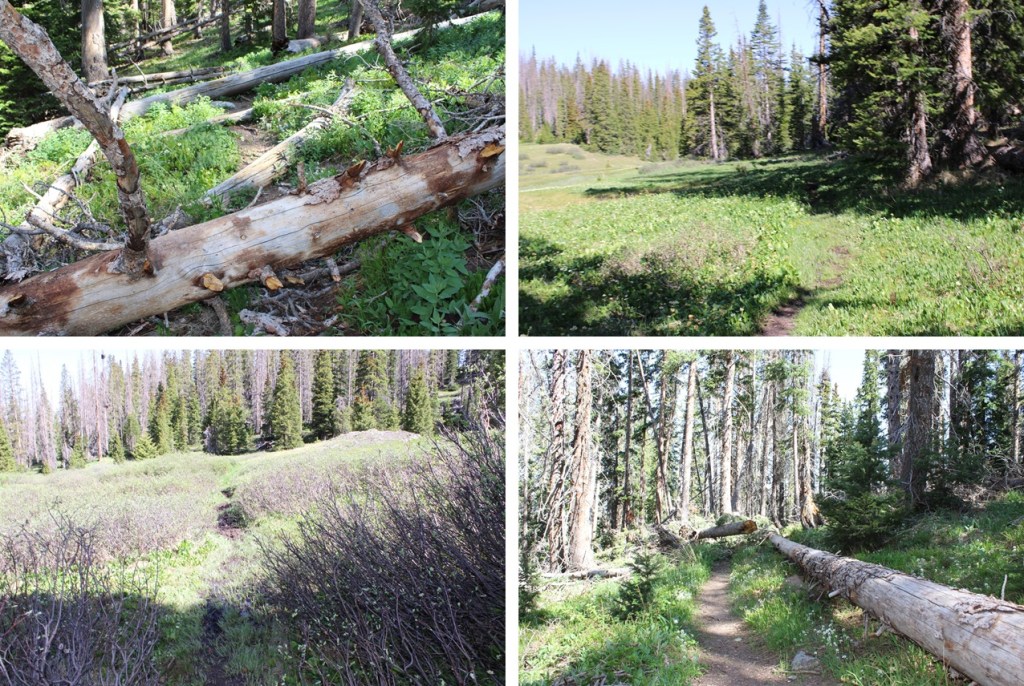
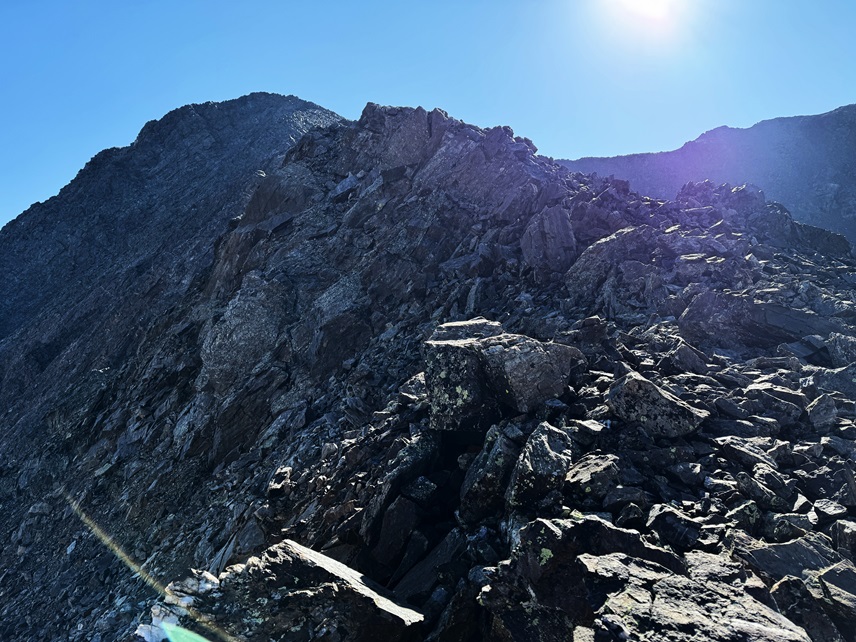
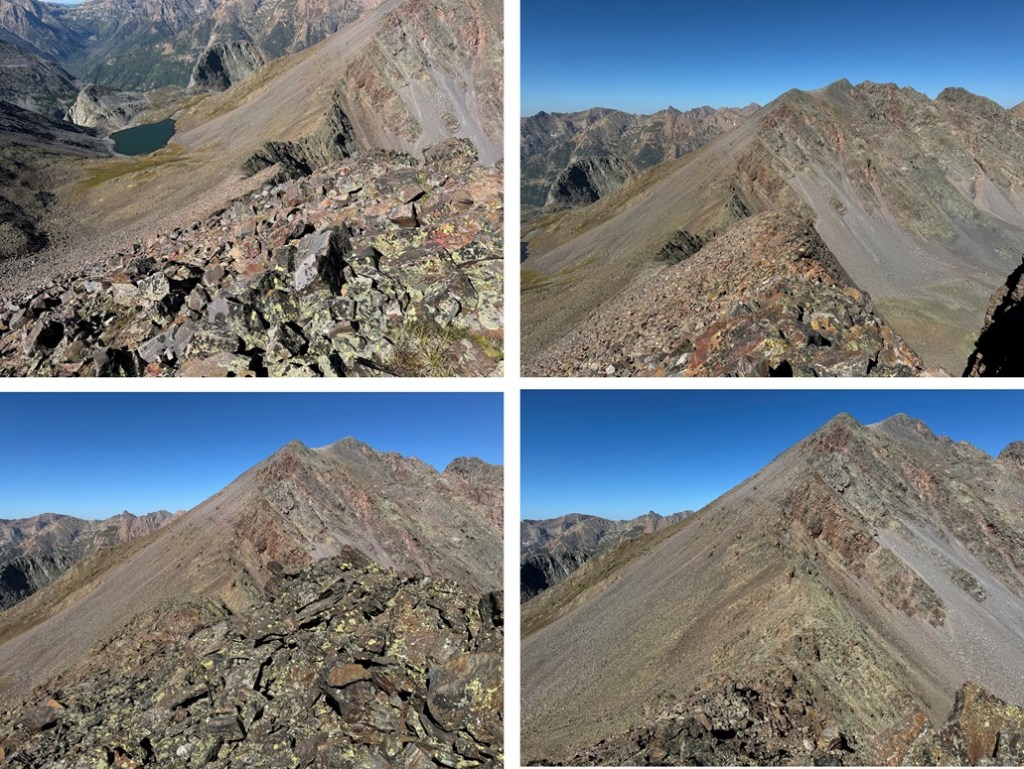
Once on the ridge it was an easy class 2 hike as I followed the ridge west/northwest.

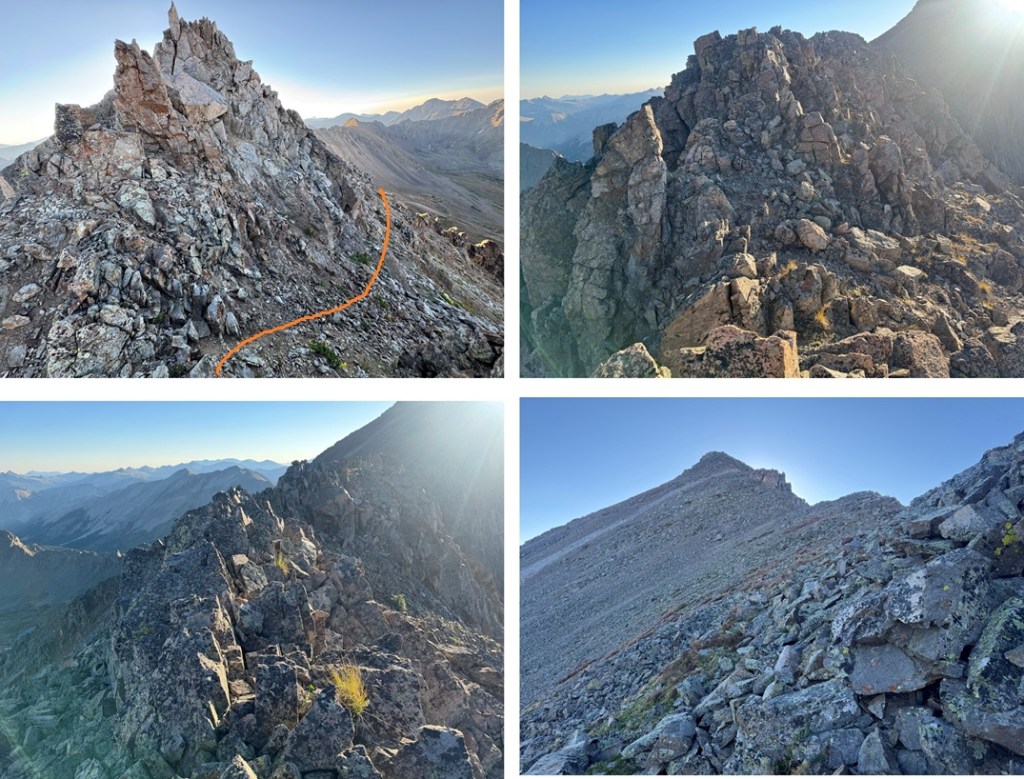
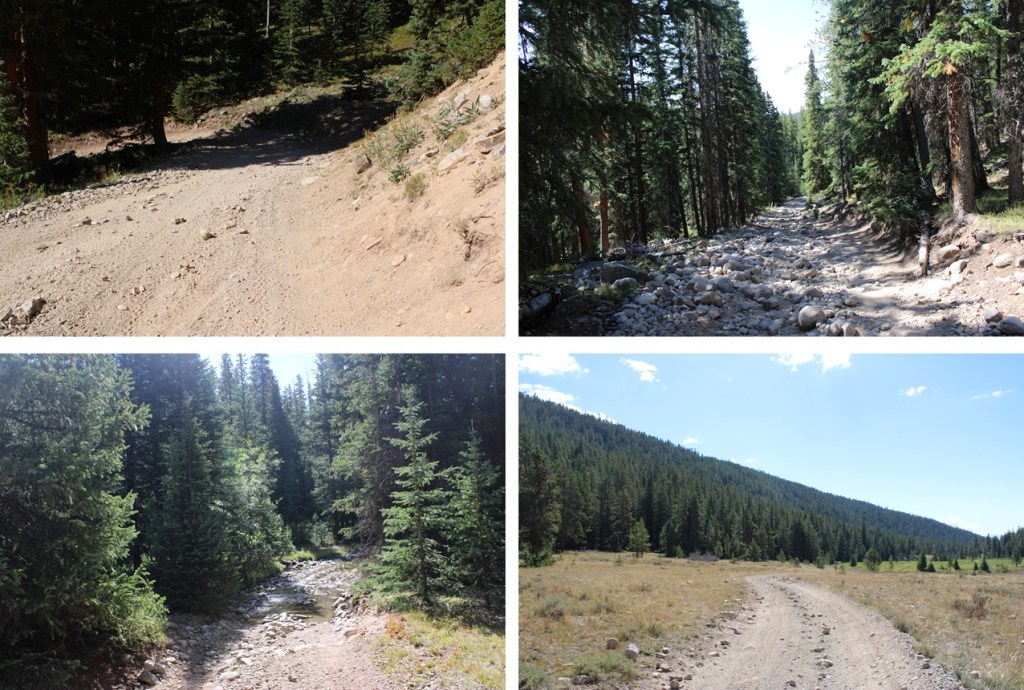
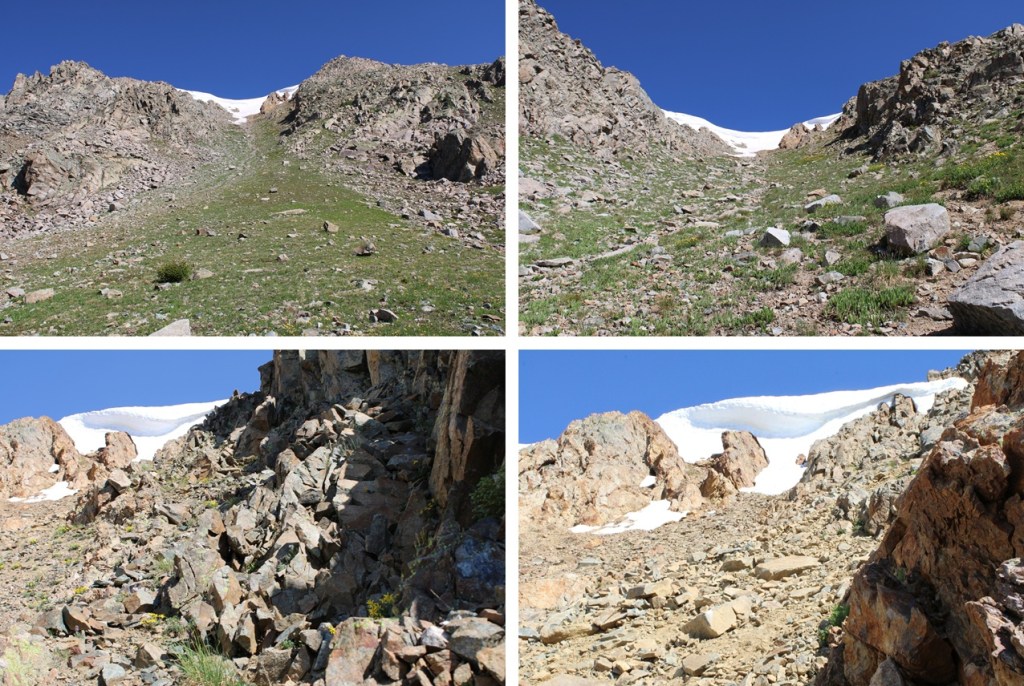
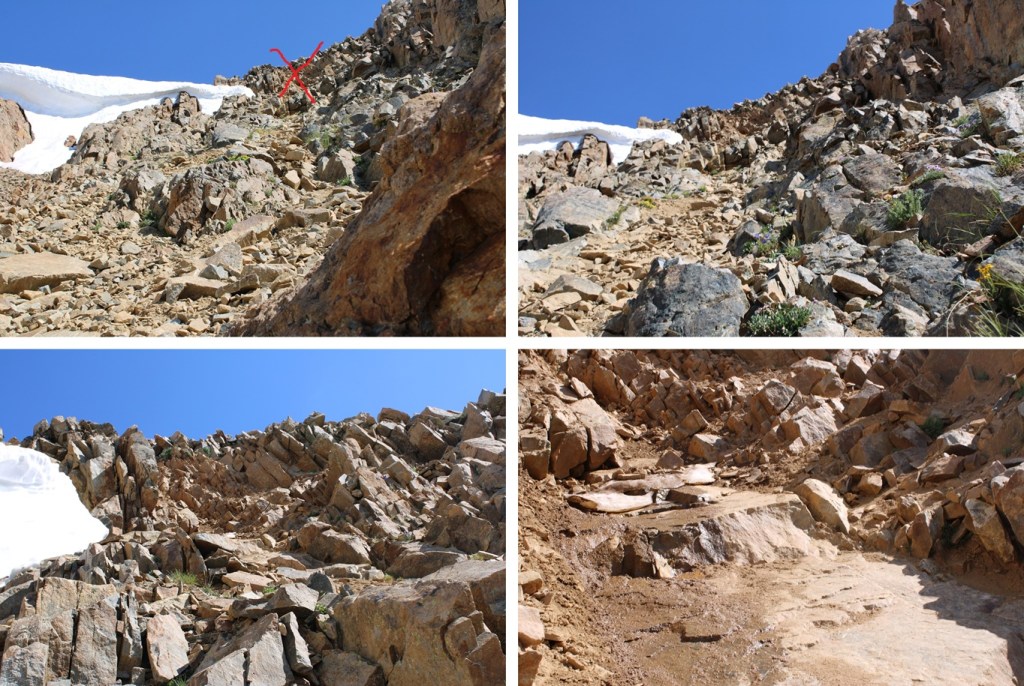
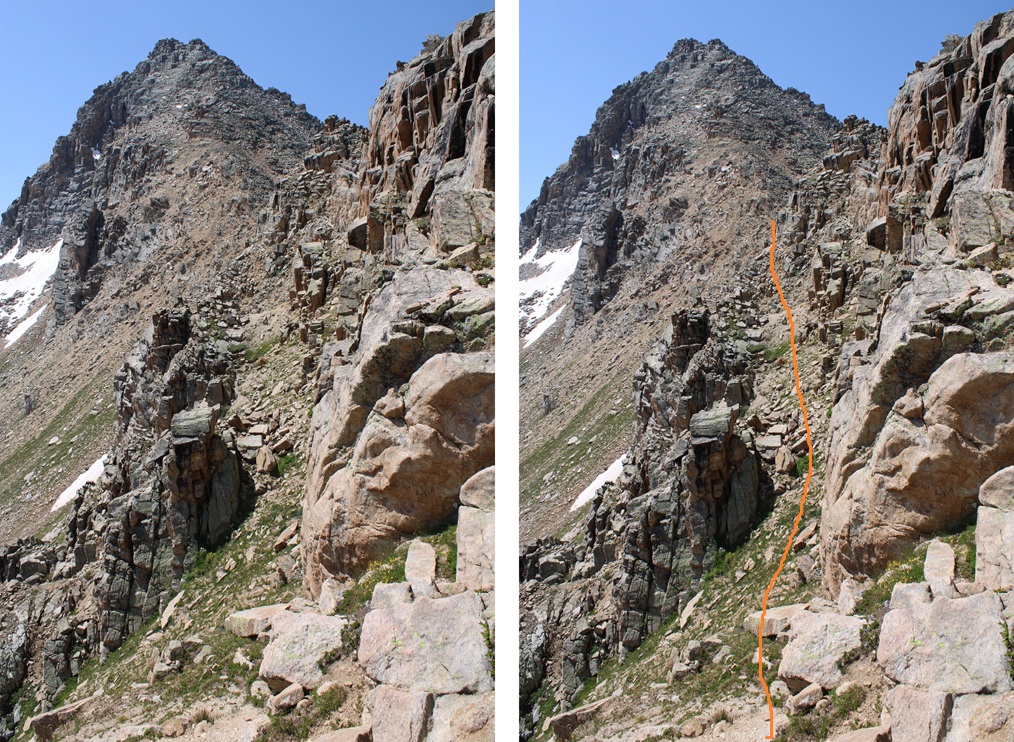
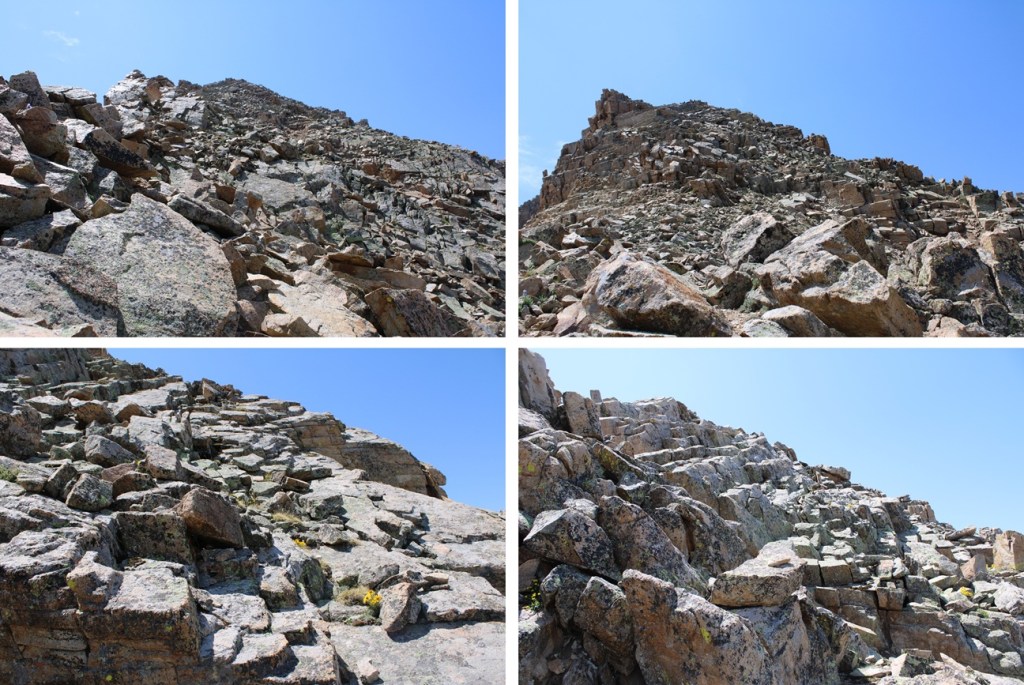
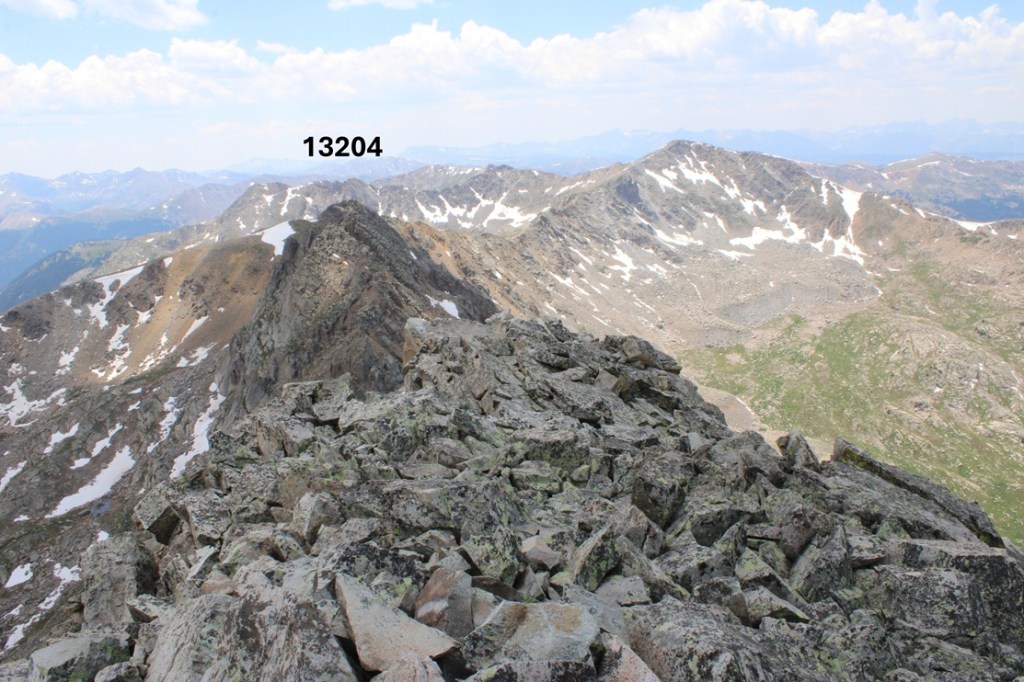
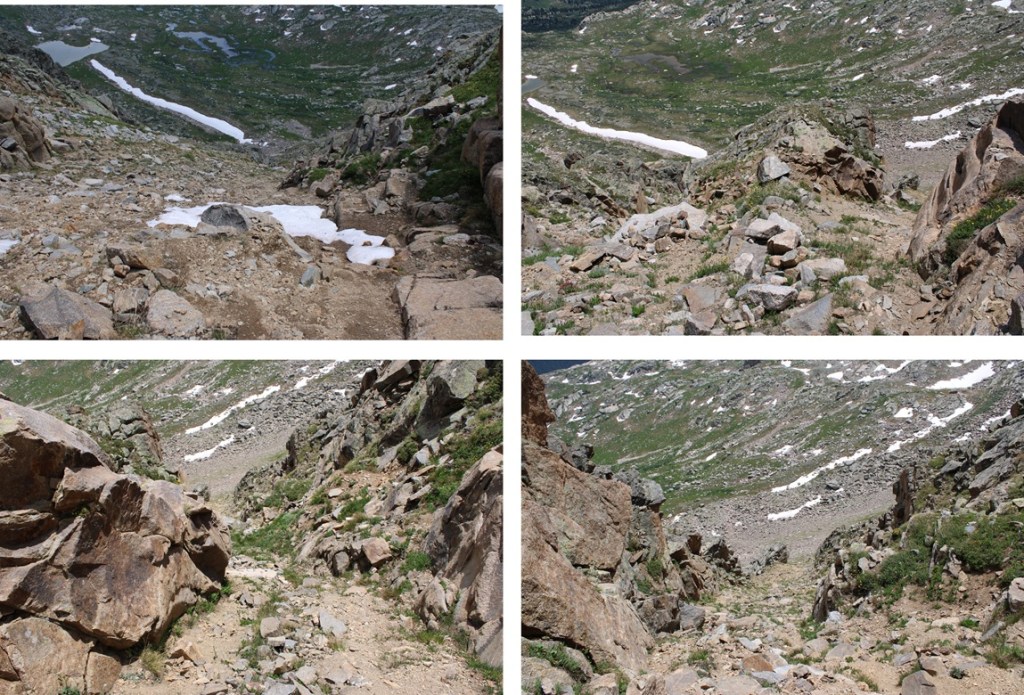
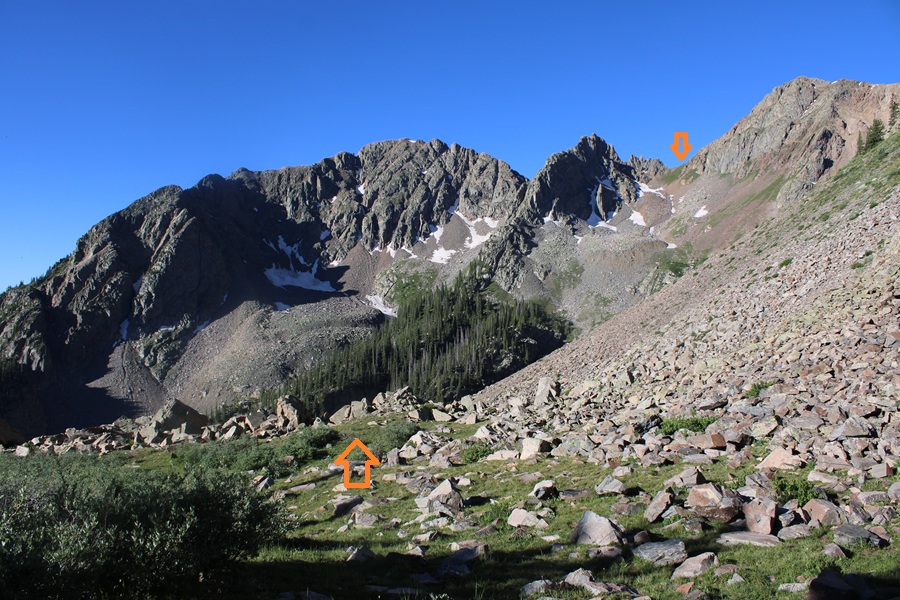
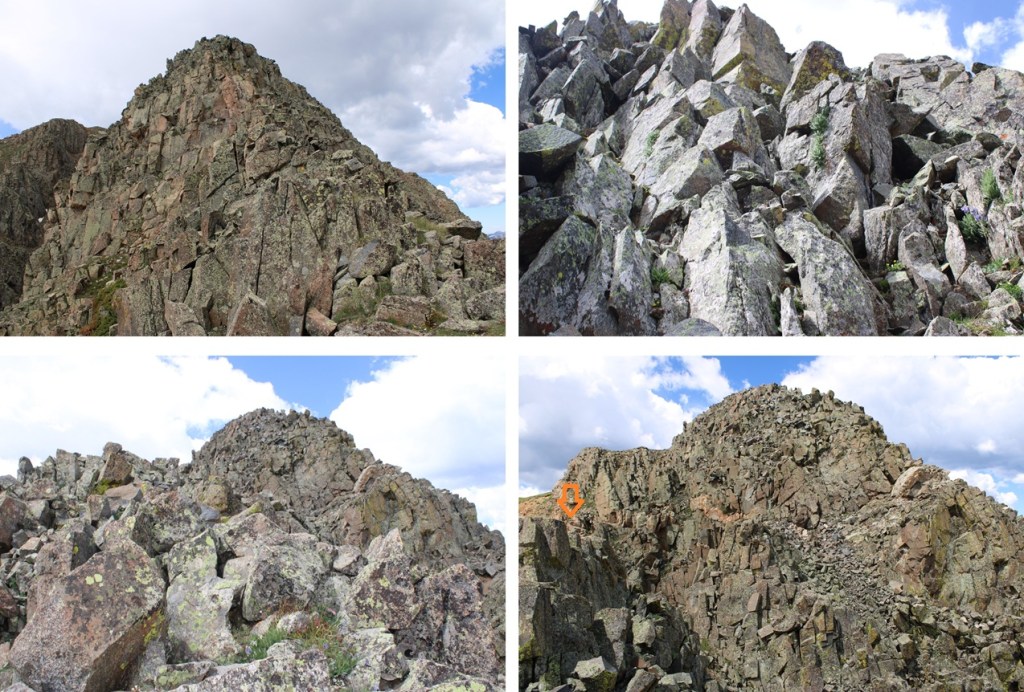
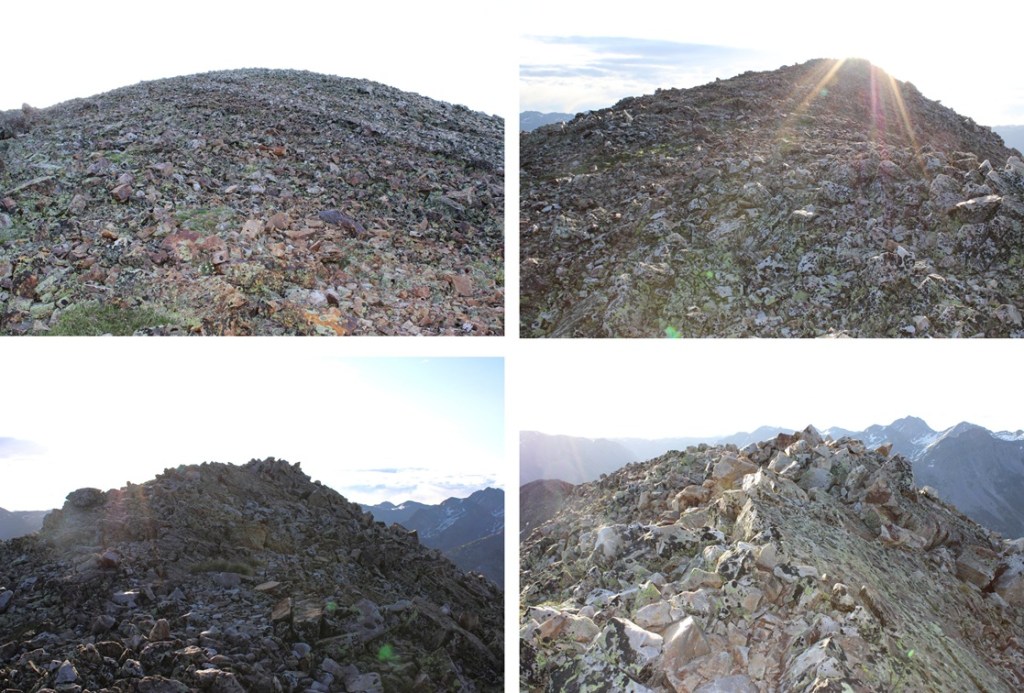
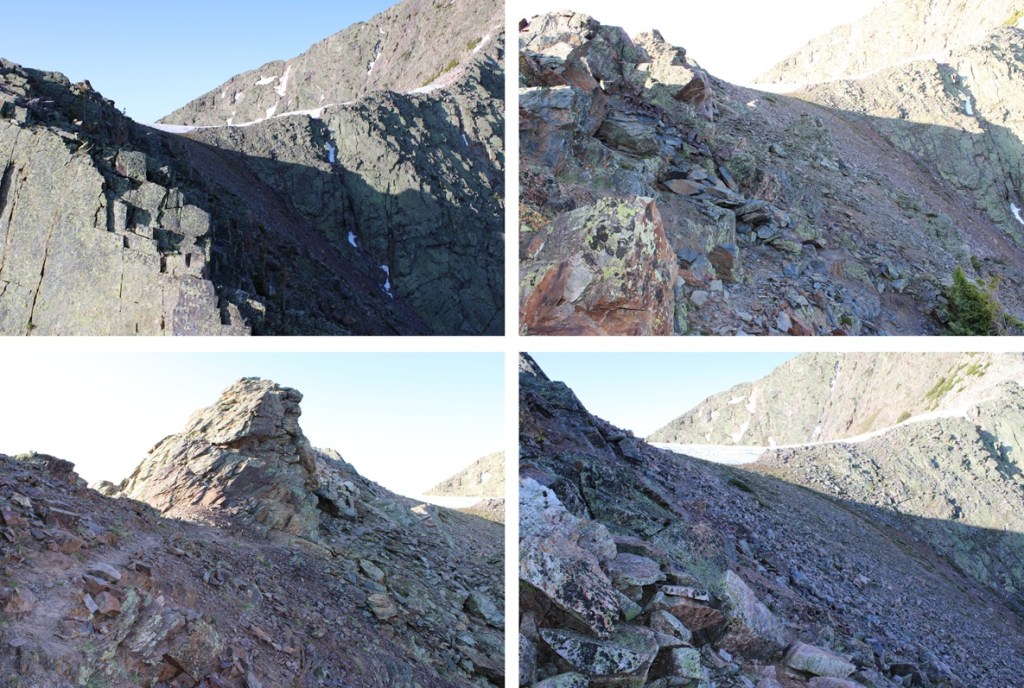
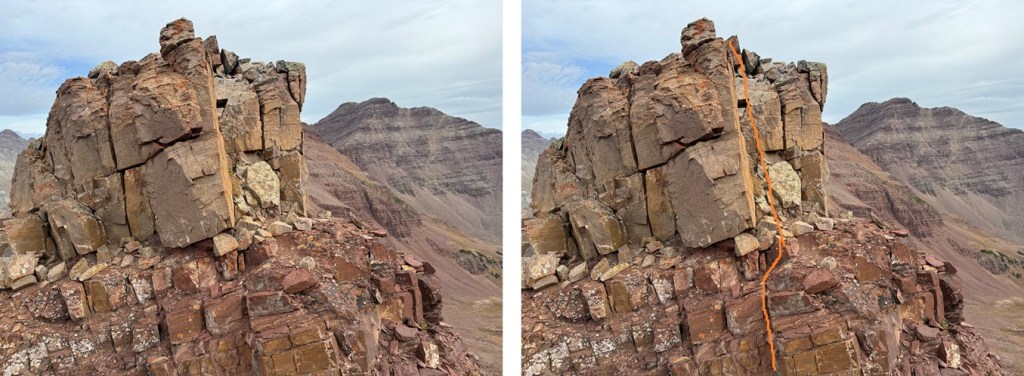
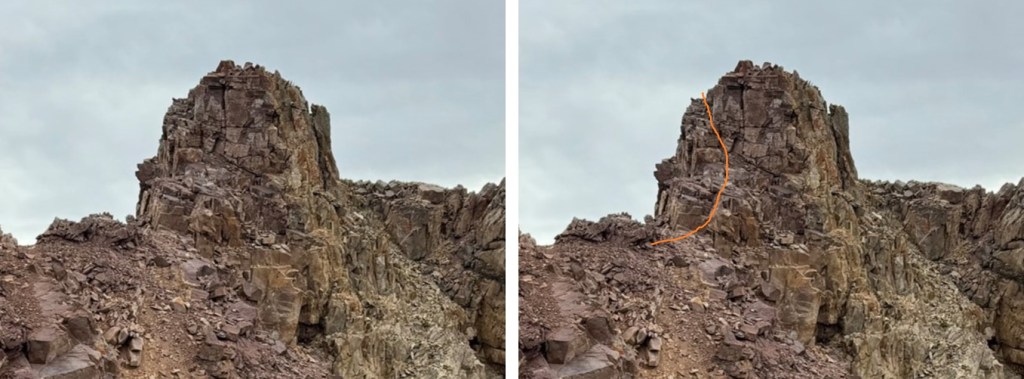
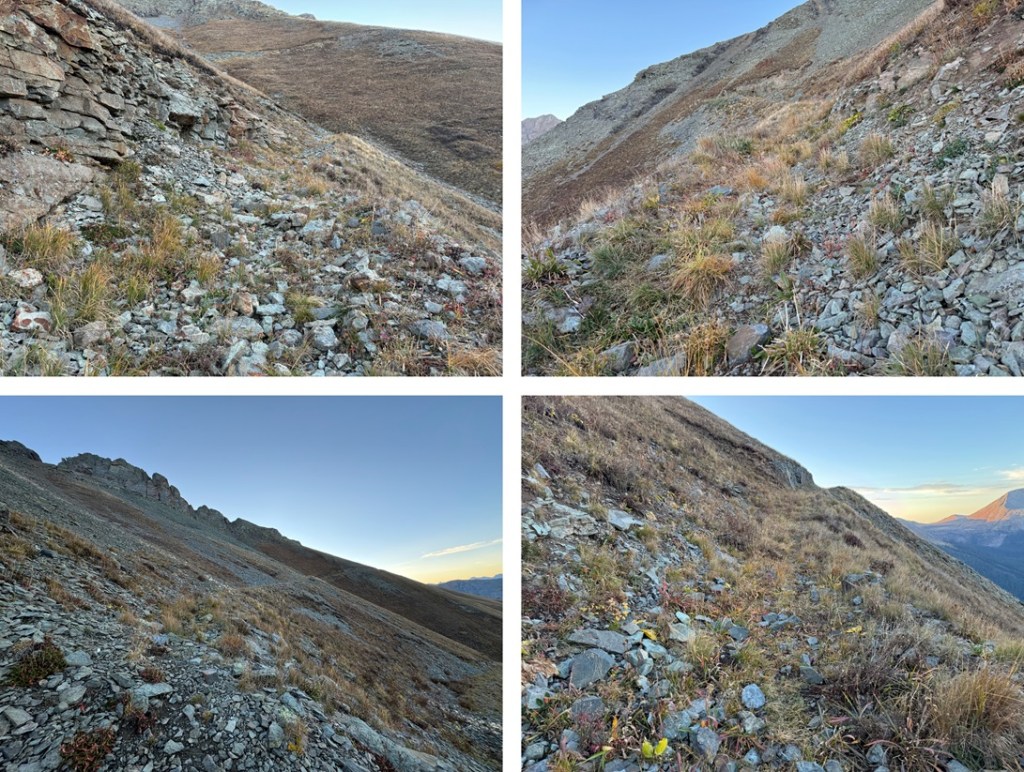
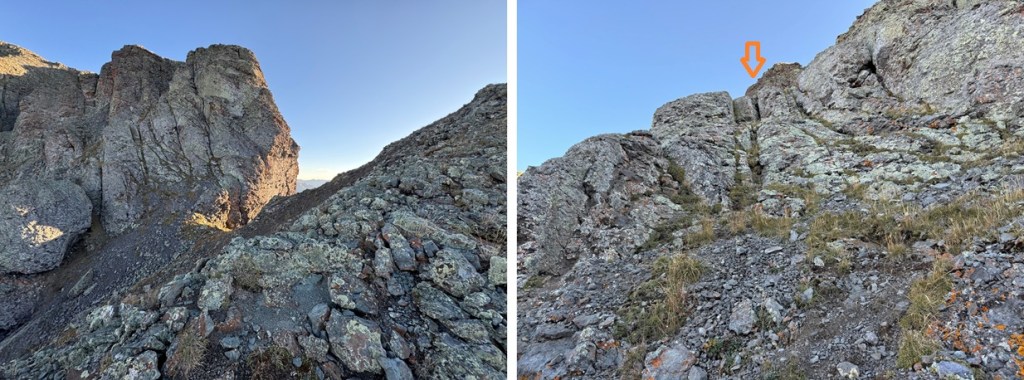
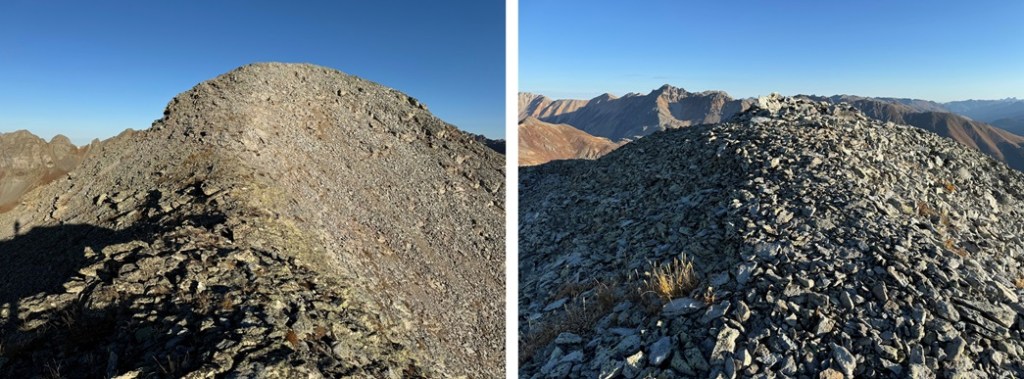
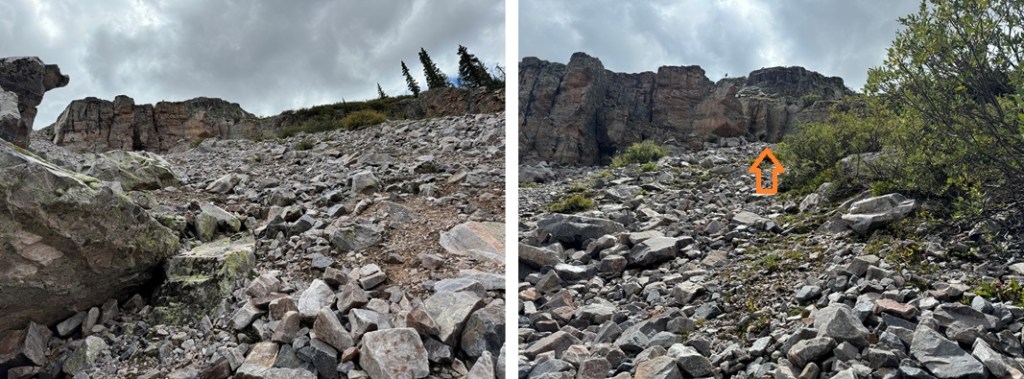
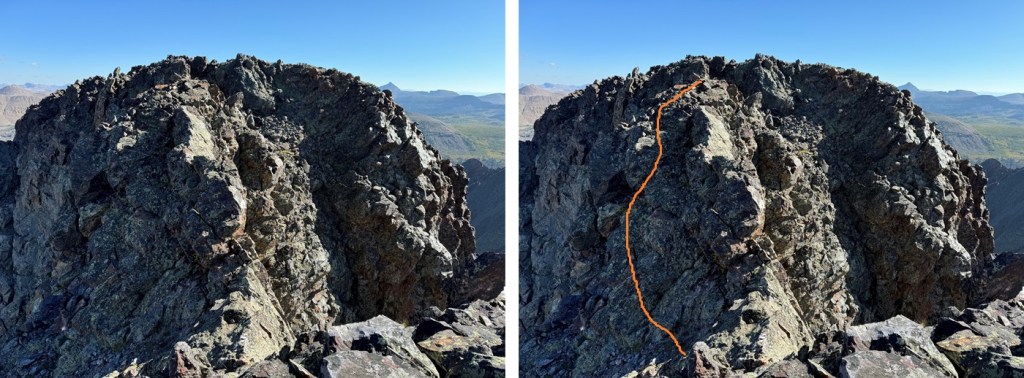
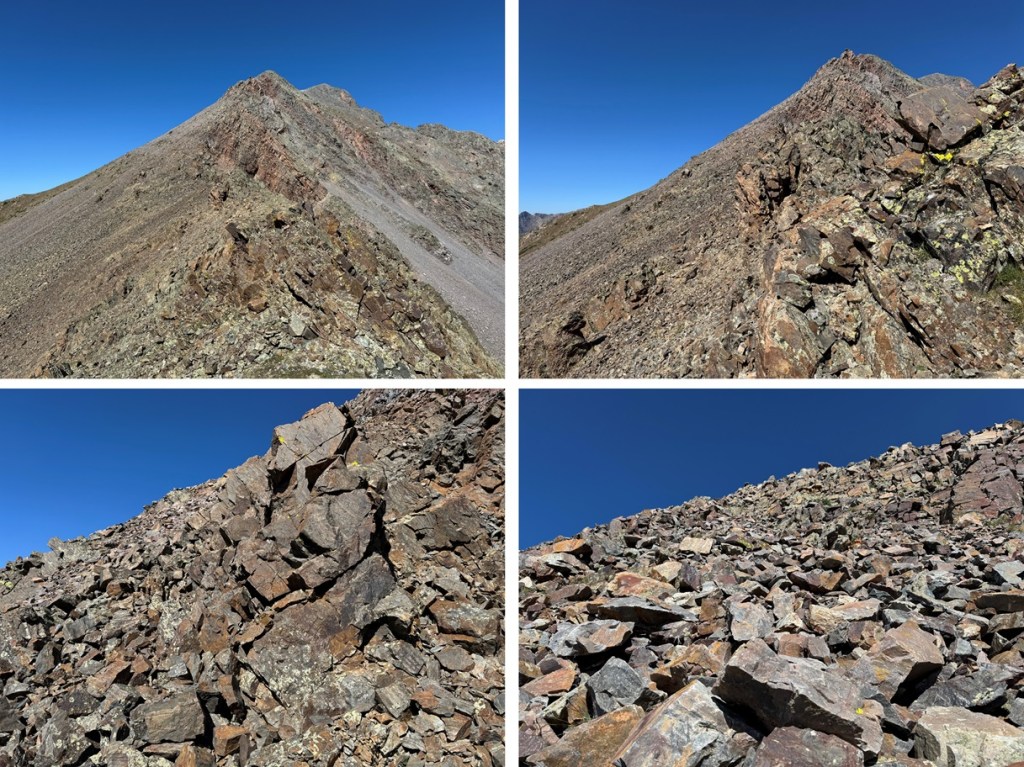
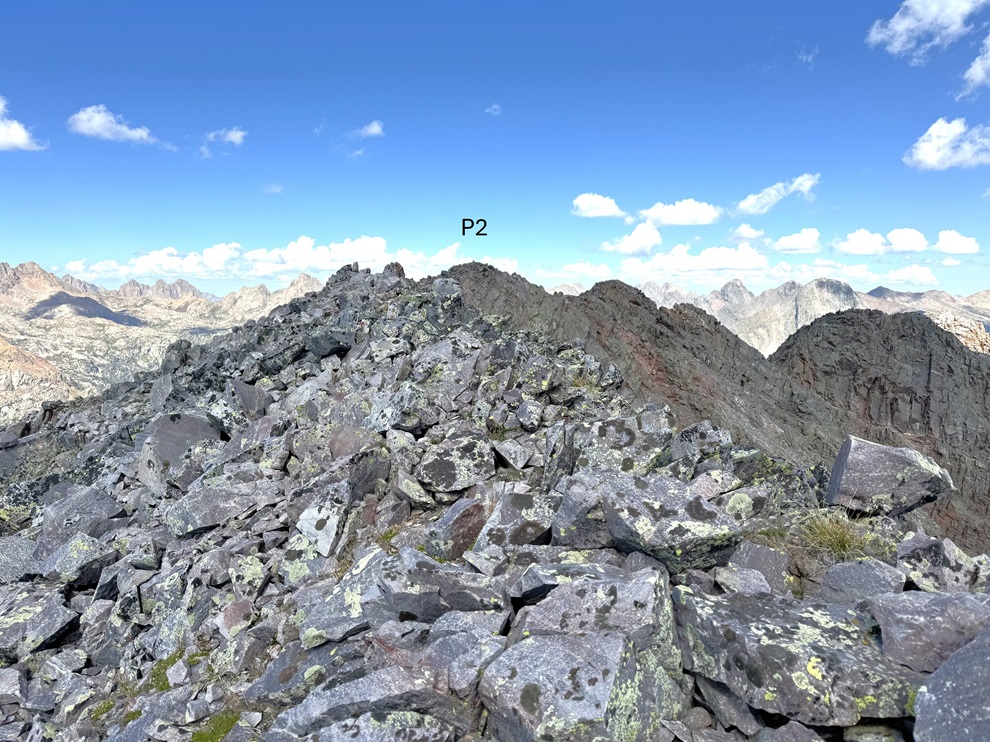
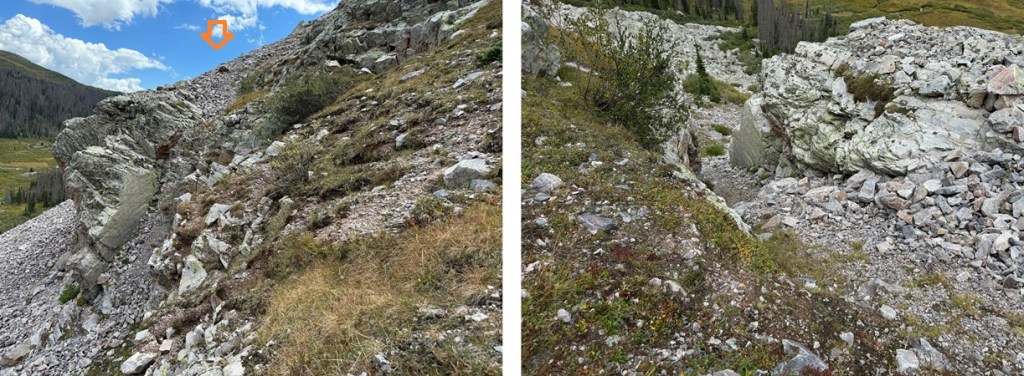
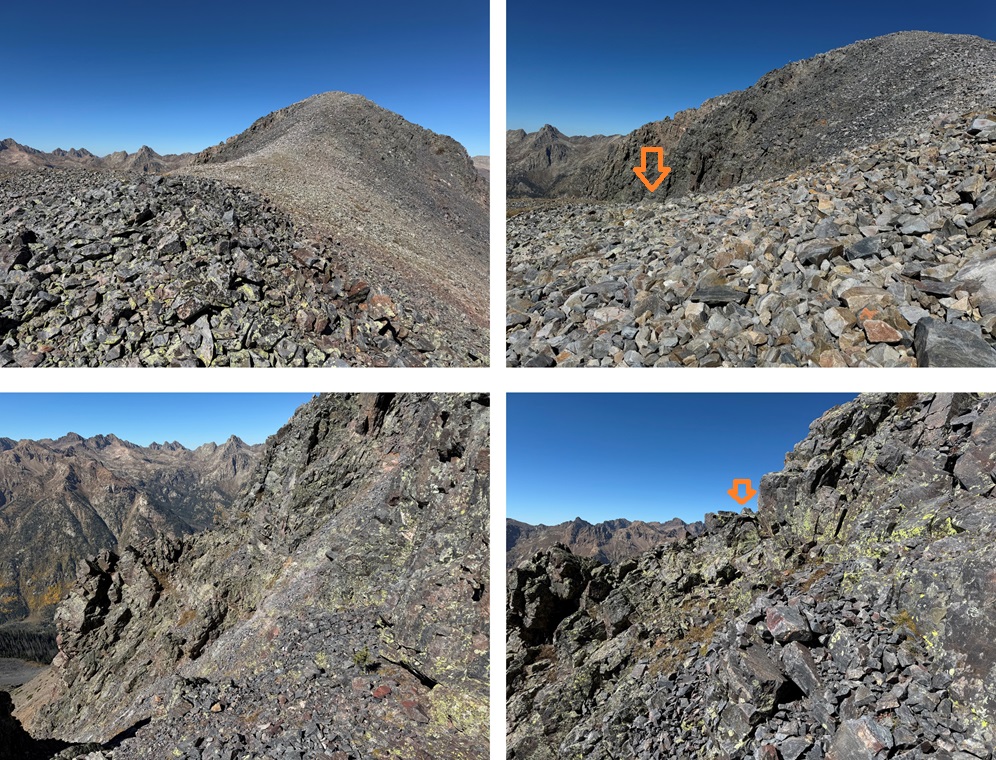
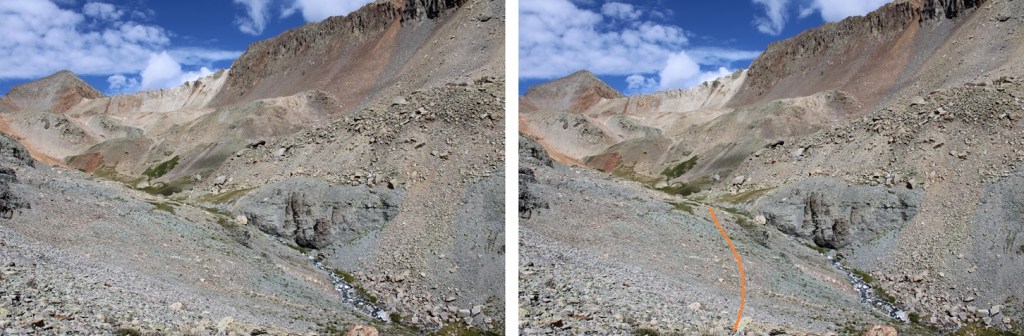
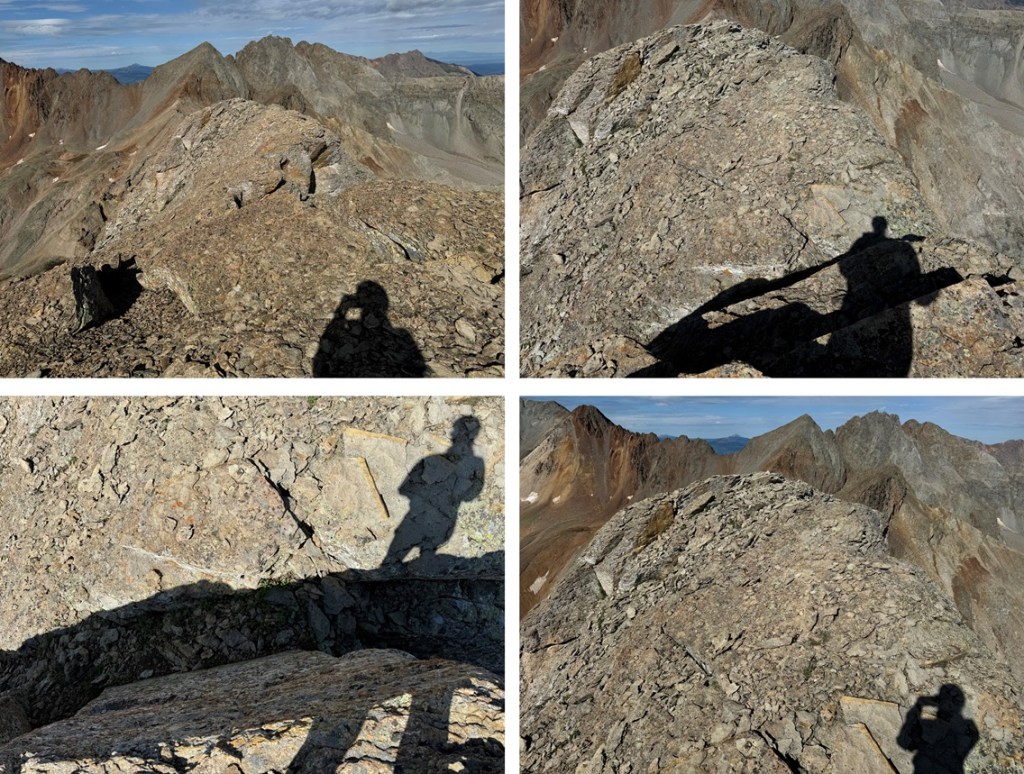
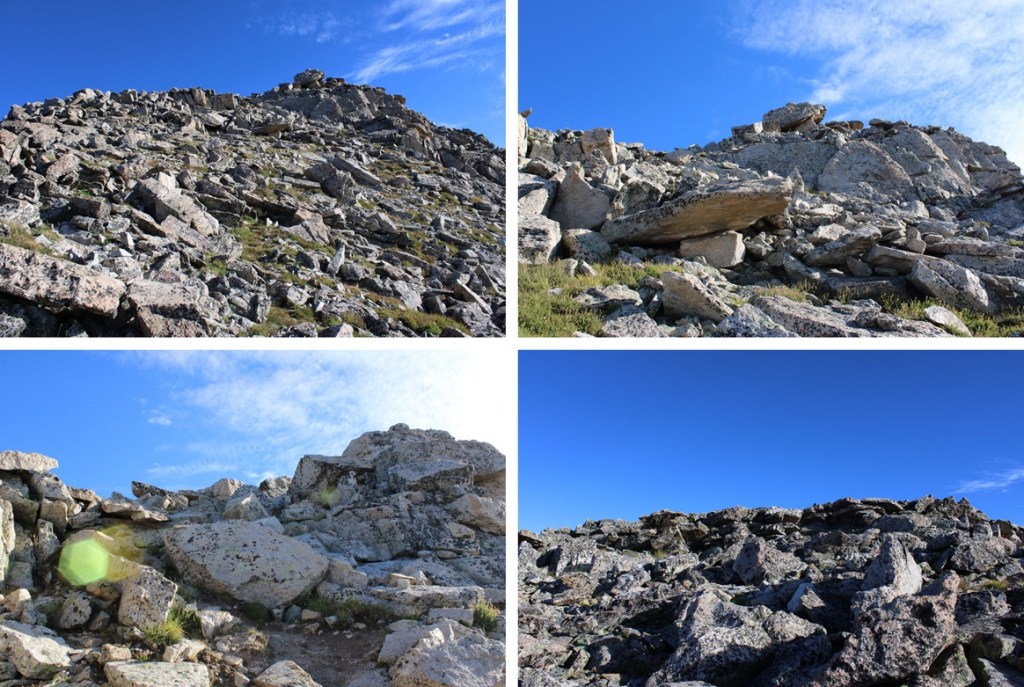
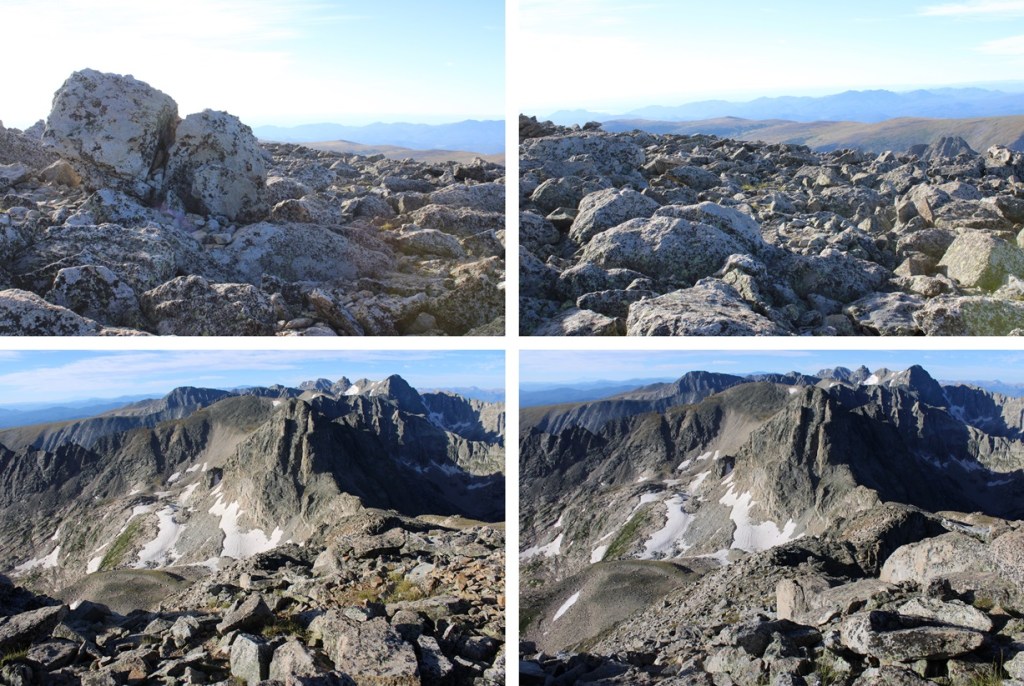
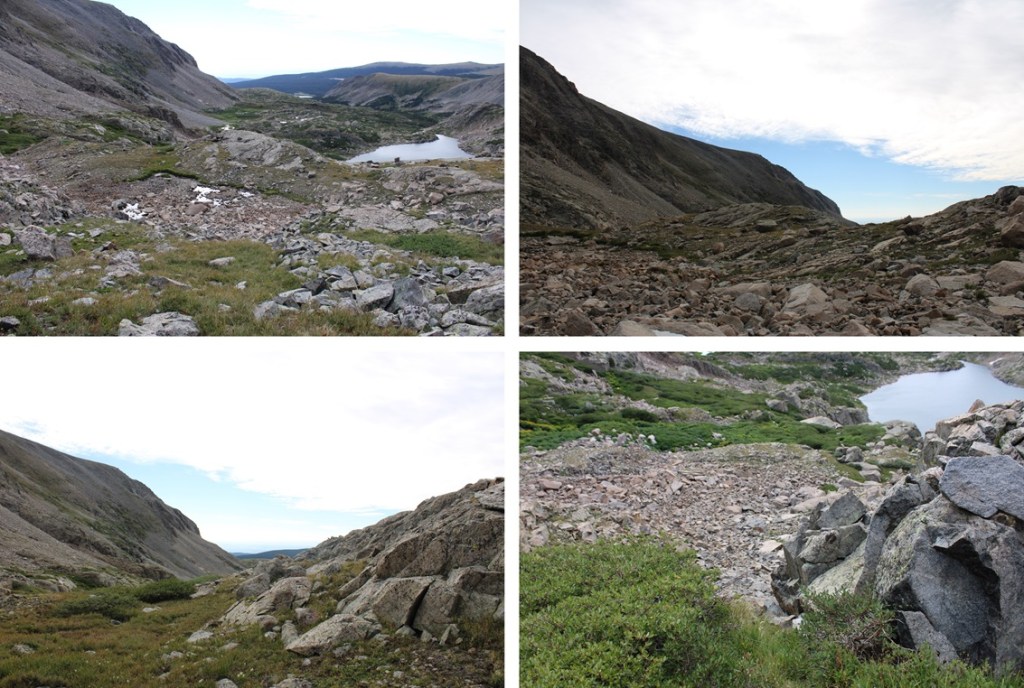
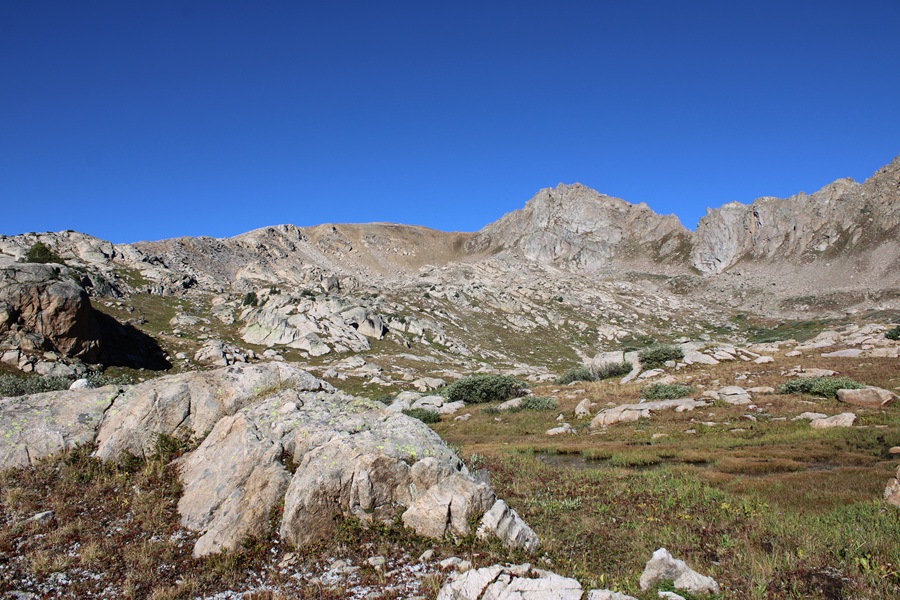
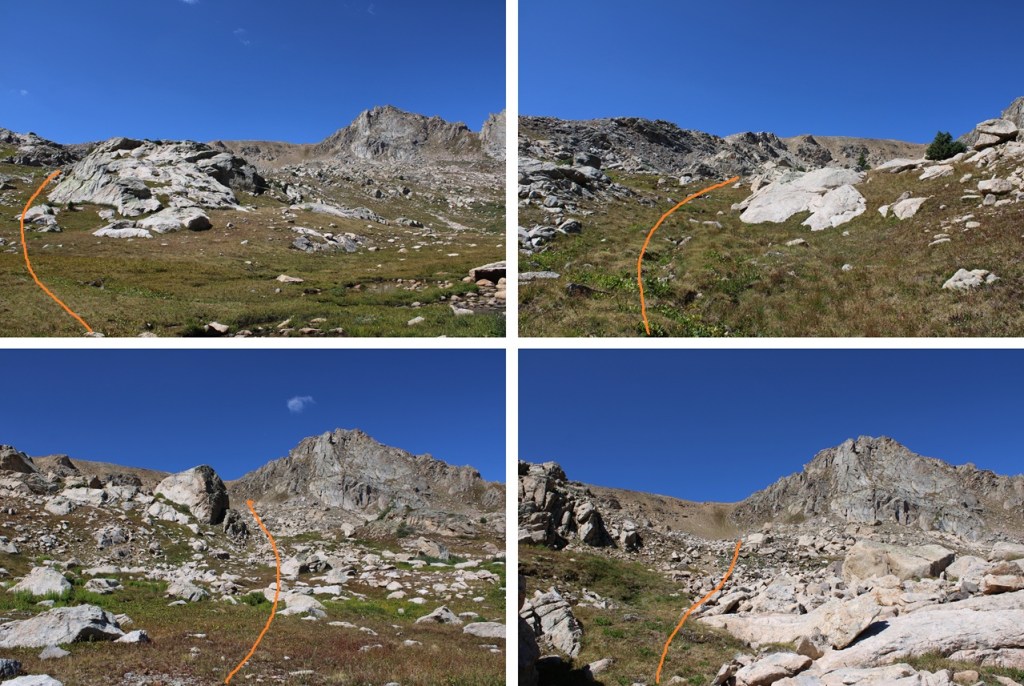
At the top of the ridge I could see 13024 to the right.  I followed the ridge on class 2 terrain to the base of the rocky area.  From here it’s only 1/10th of a mile and less than 200’ of elevation gain to the summit.  It’s mostly class 2 or easy 3, but there was one class 4 move I didn’t feel comfortable attempting without ropes.  Where the orange line ends is where I stopped, about 100’ from the summit.

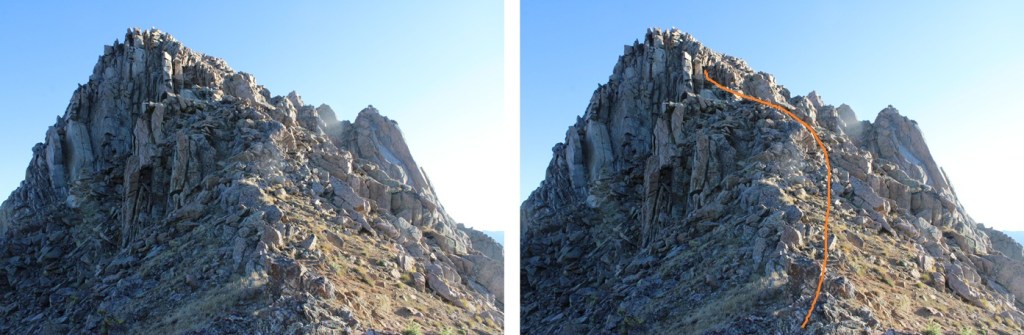
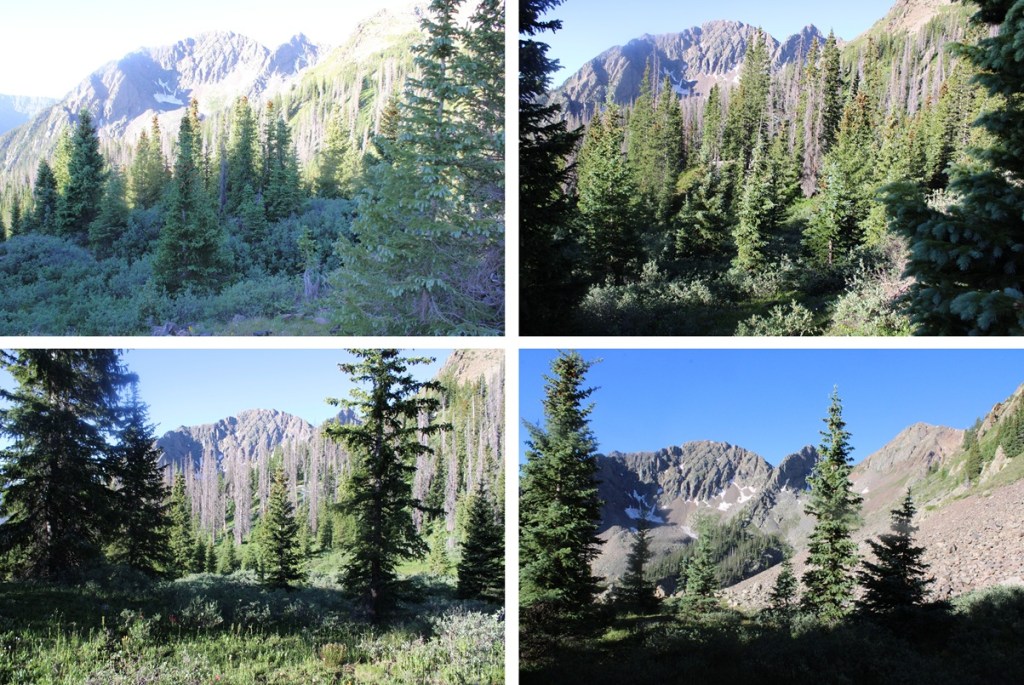
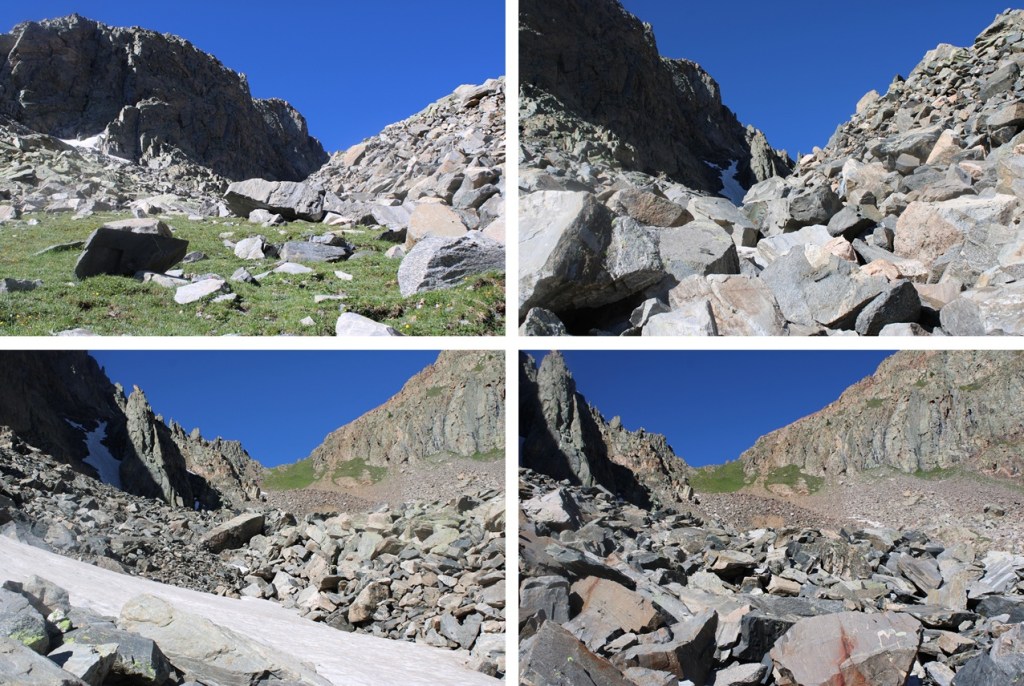
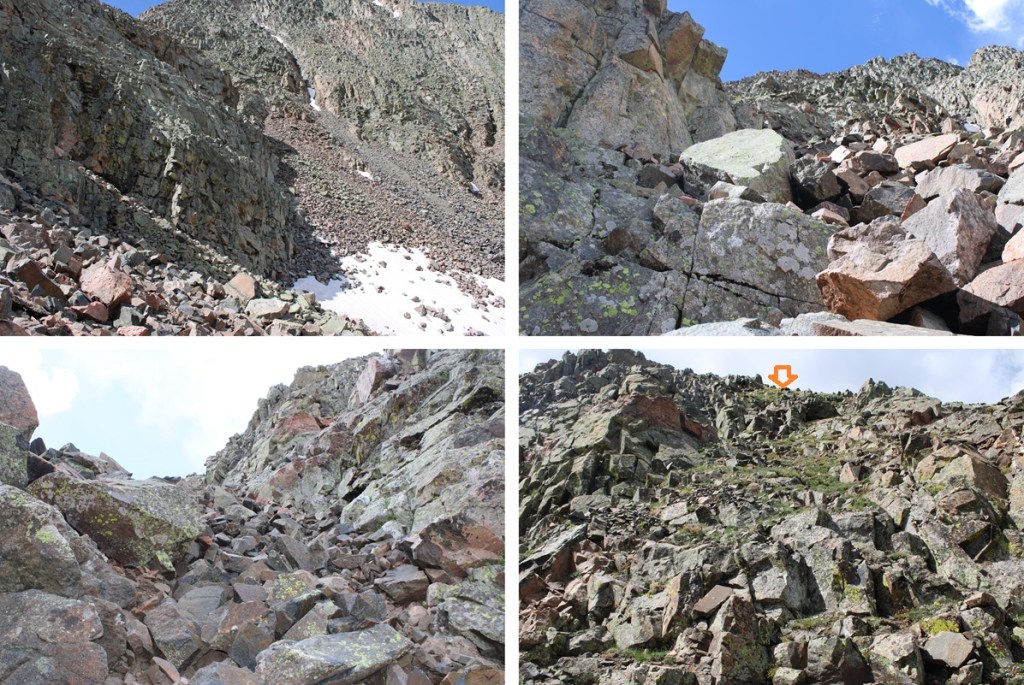
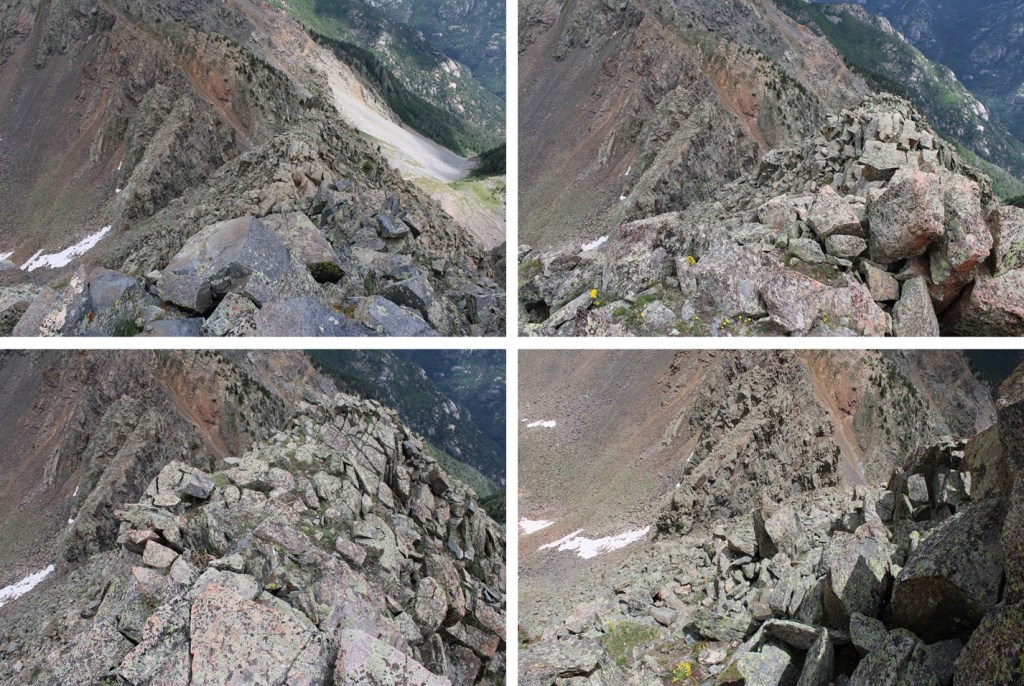
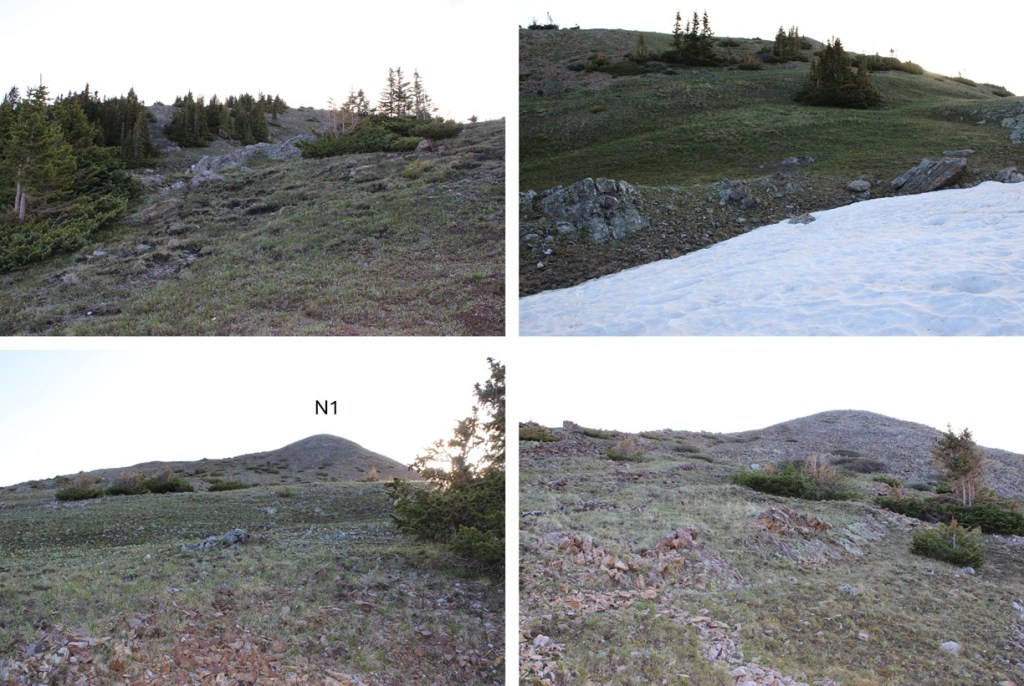
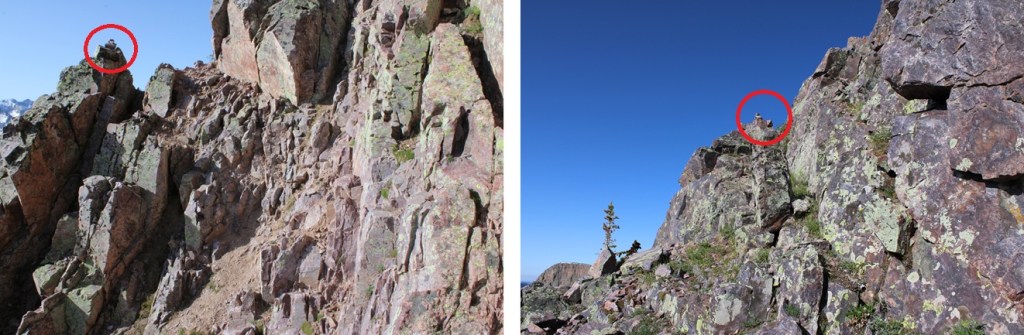
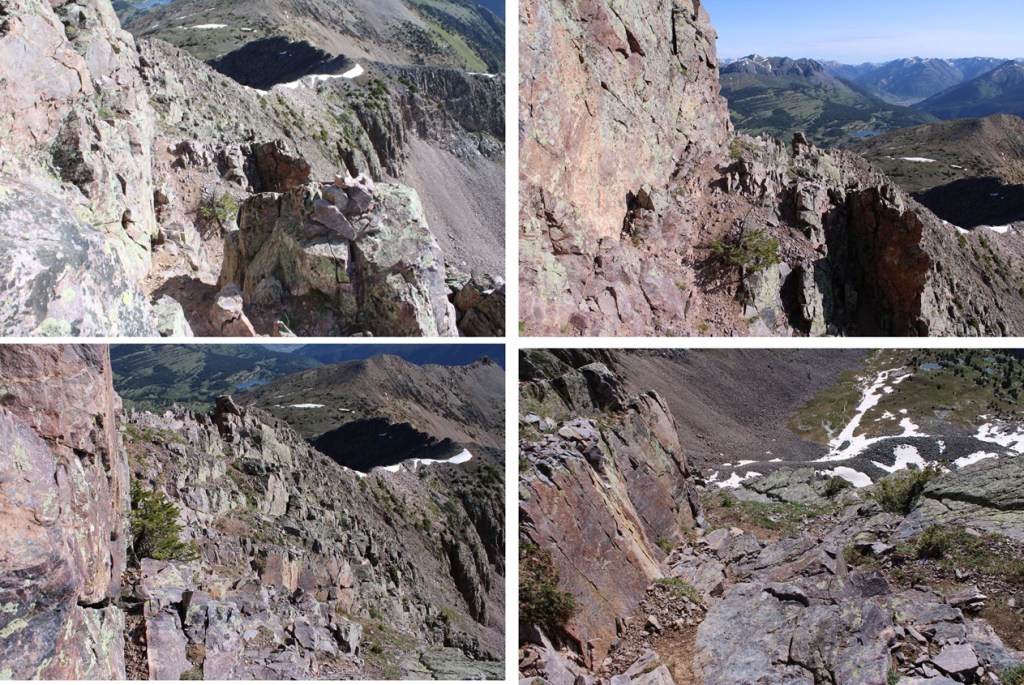
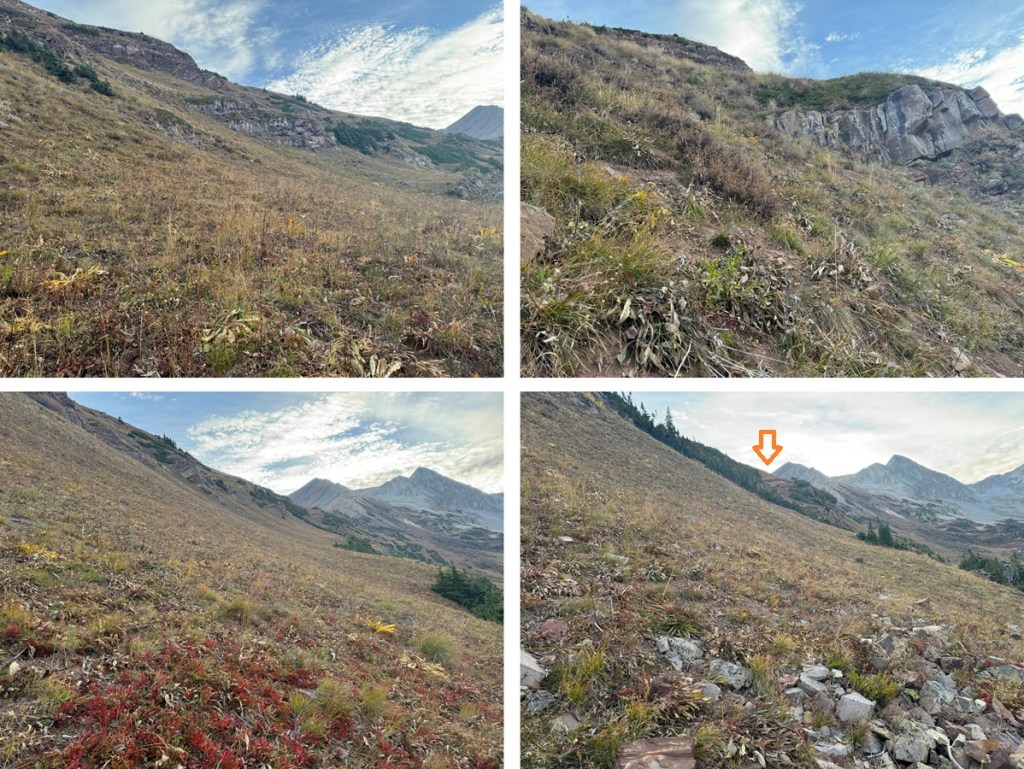
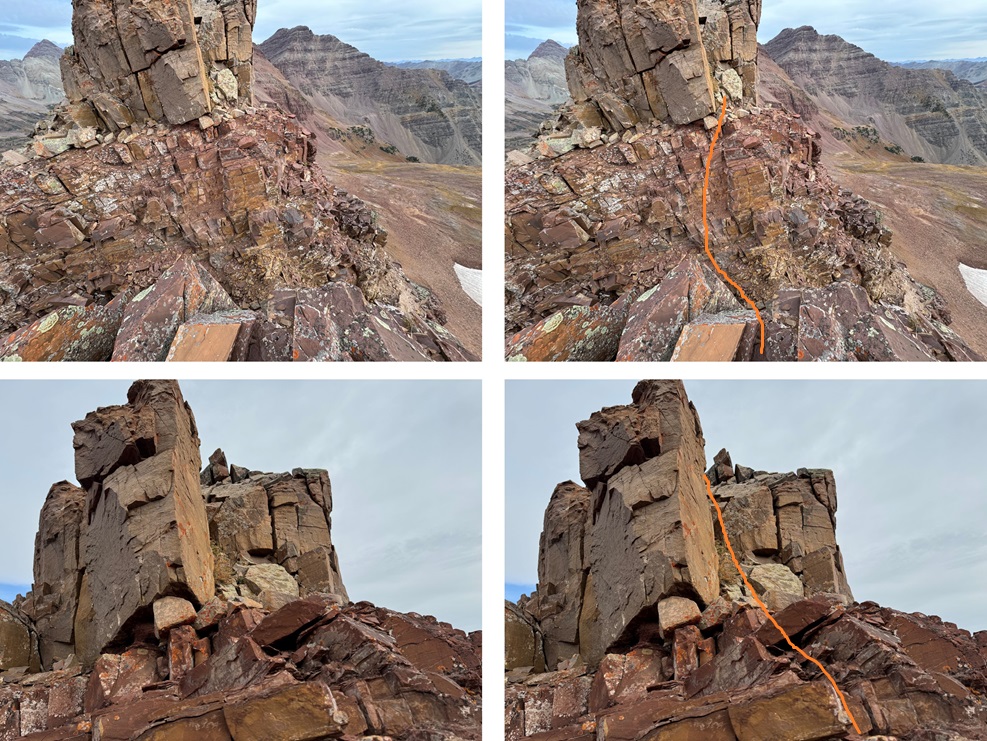
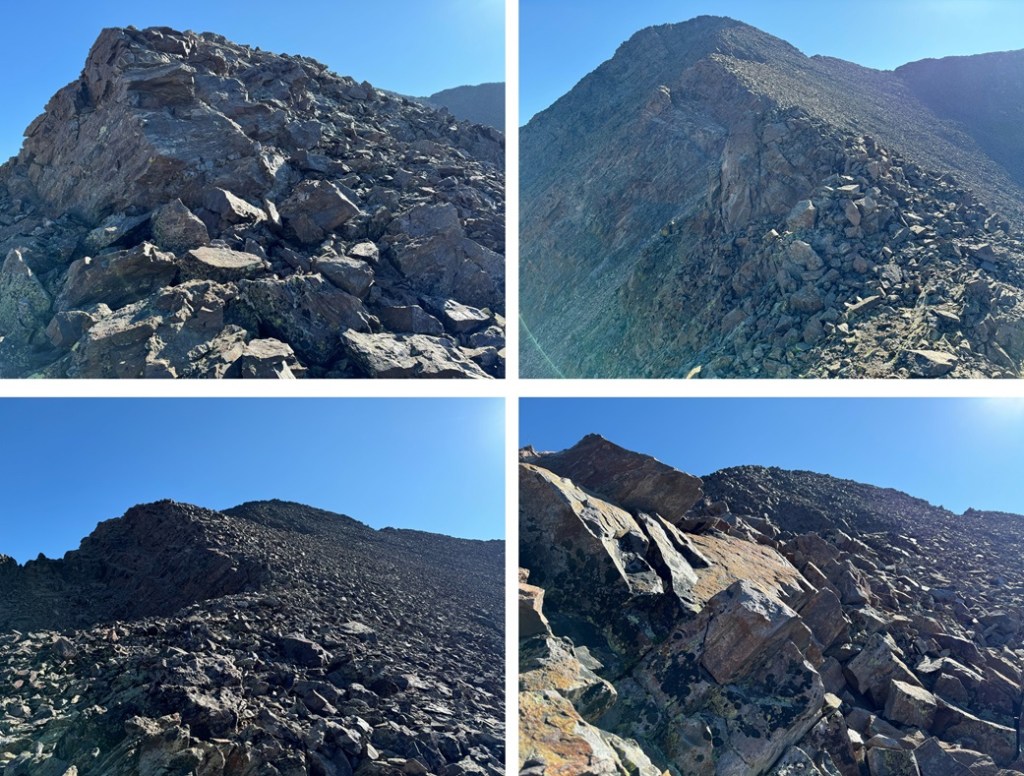
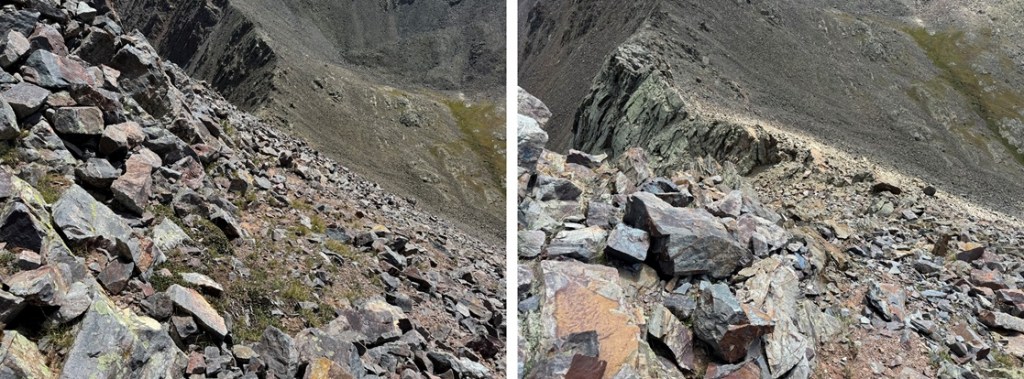
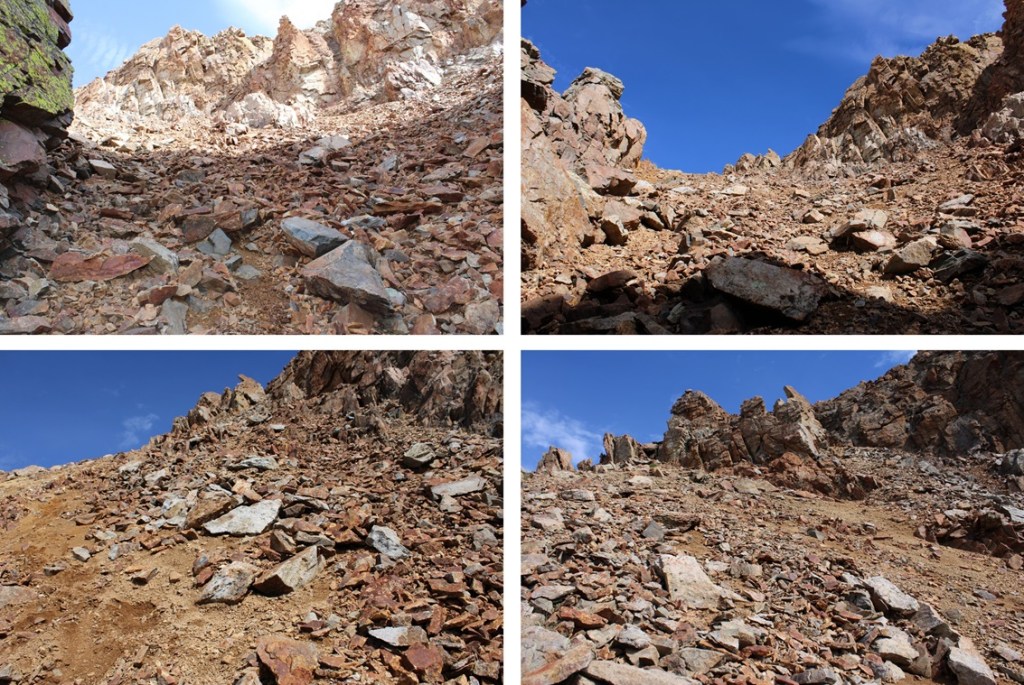
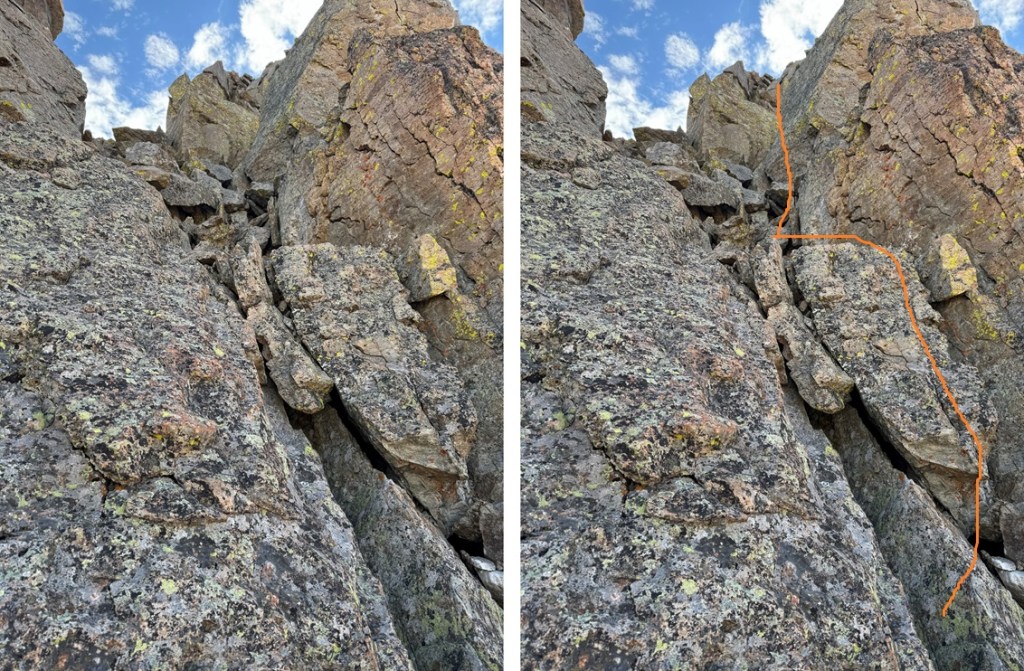
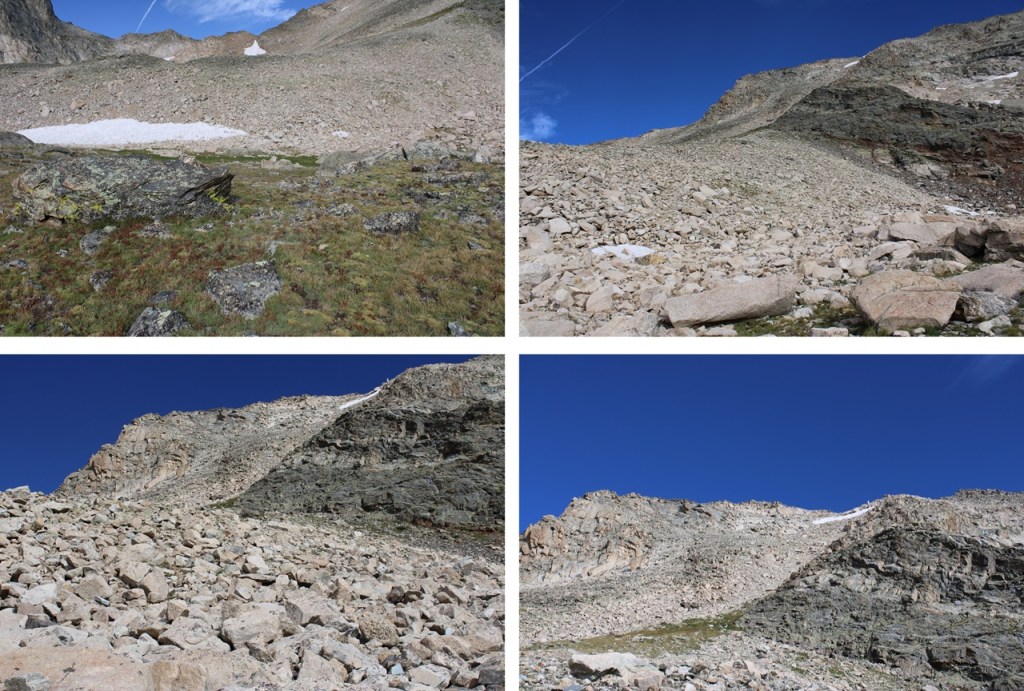
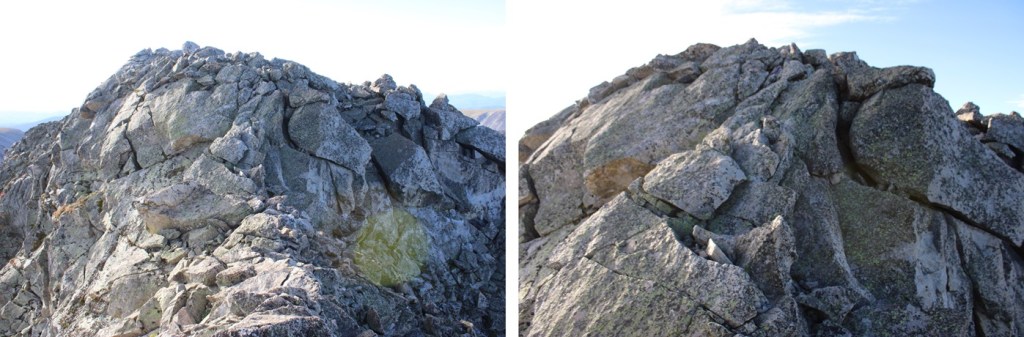
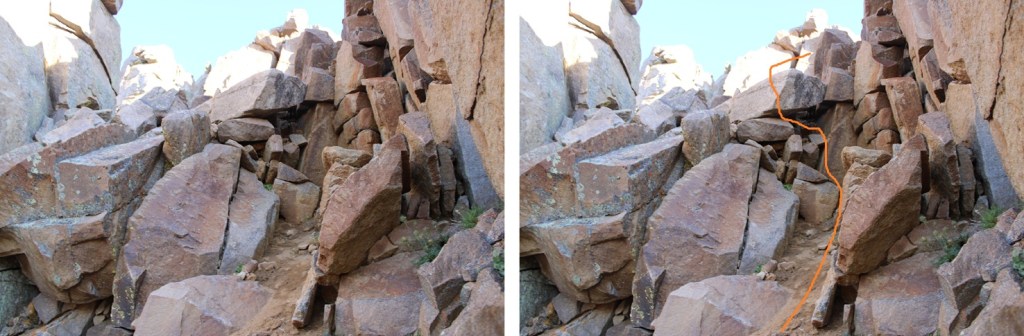
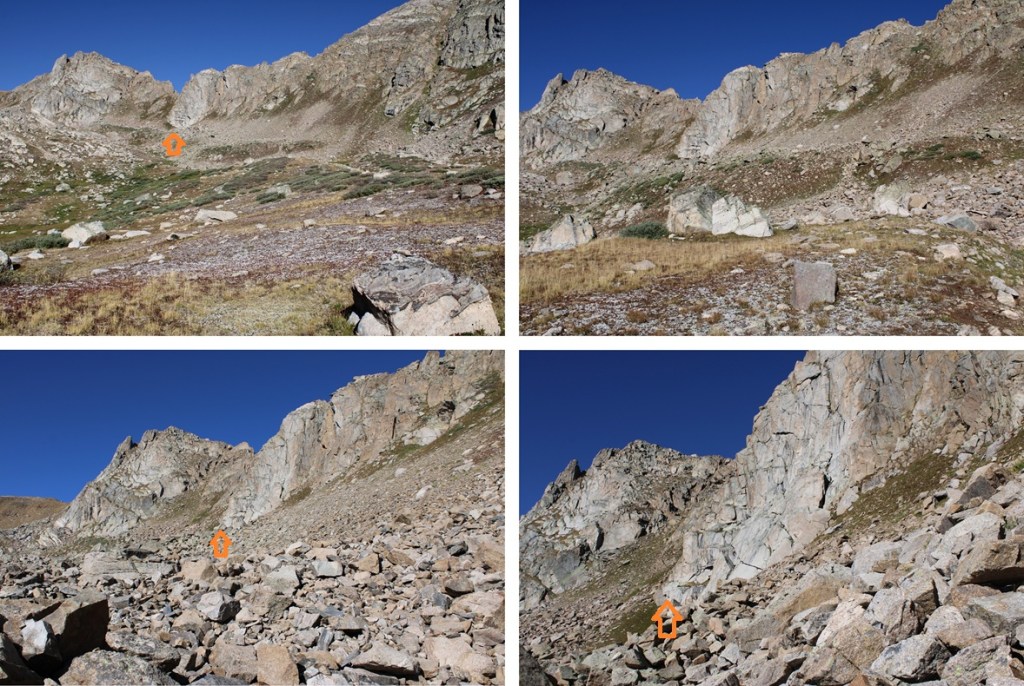
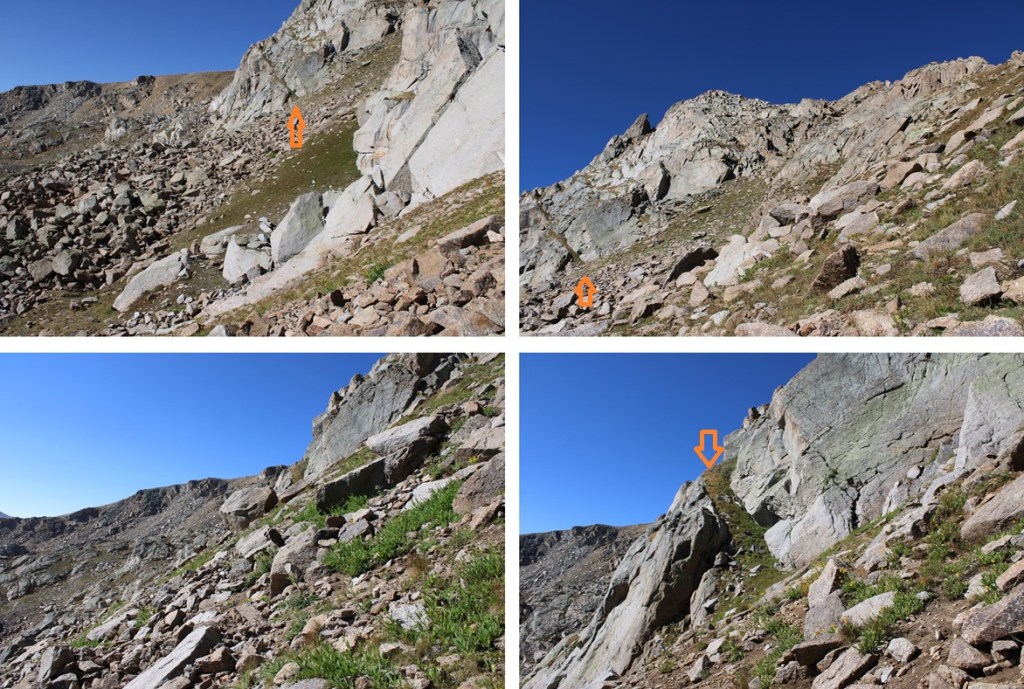
Here are some pictures of the route to that point.

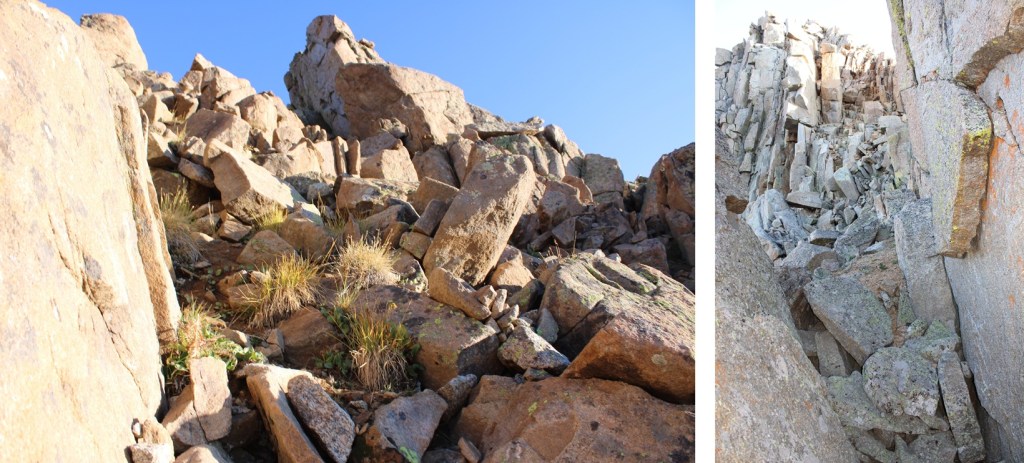
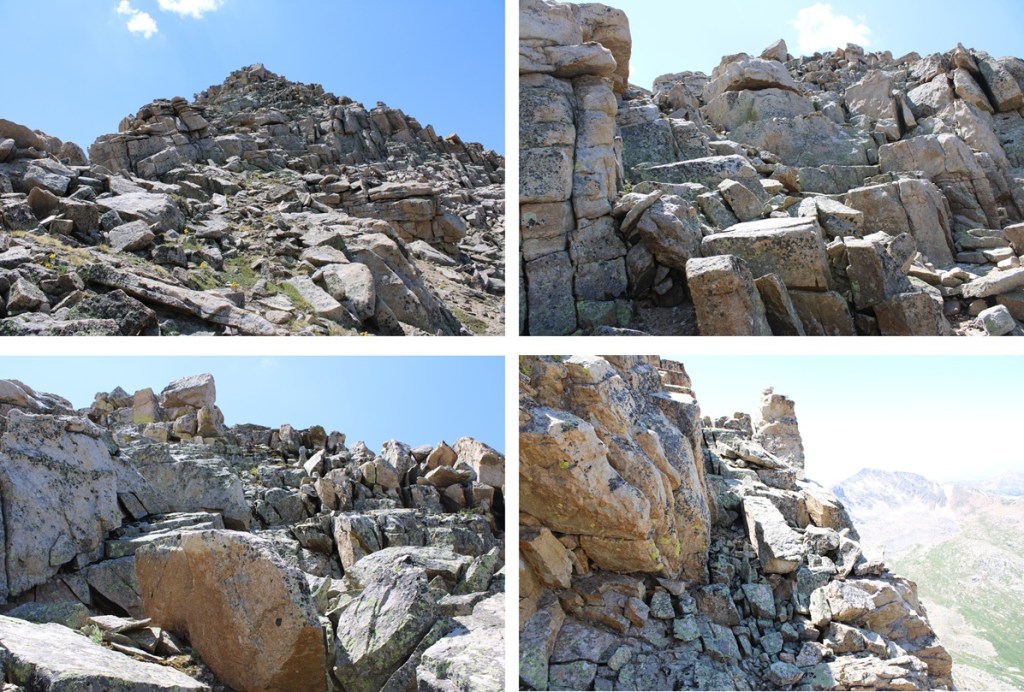
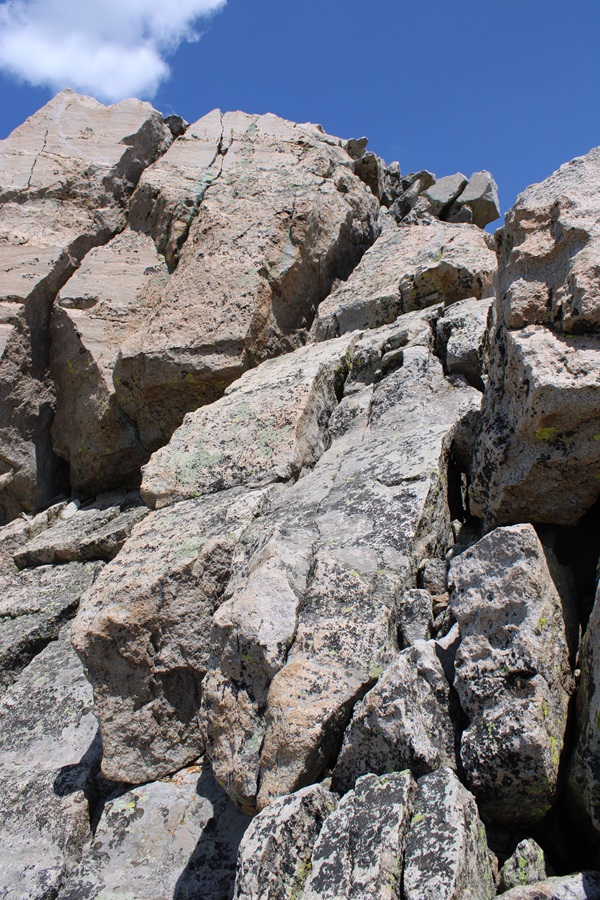
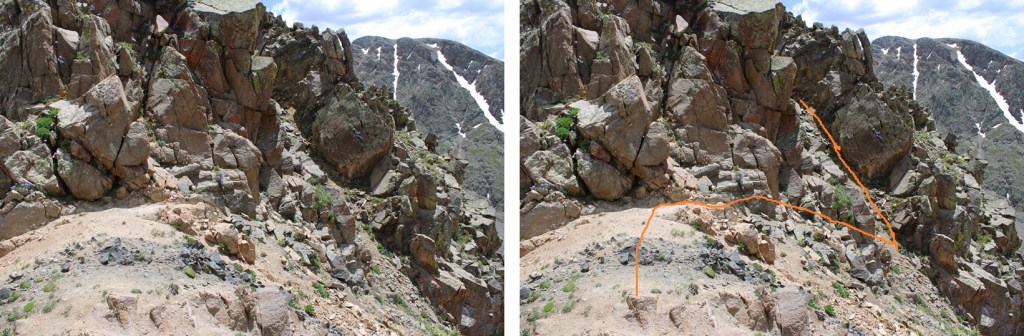
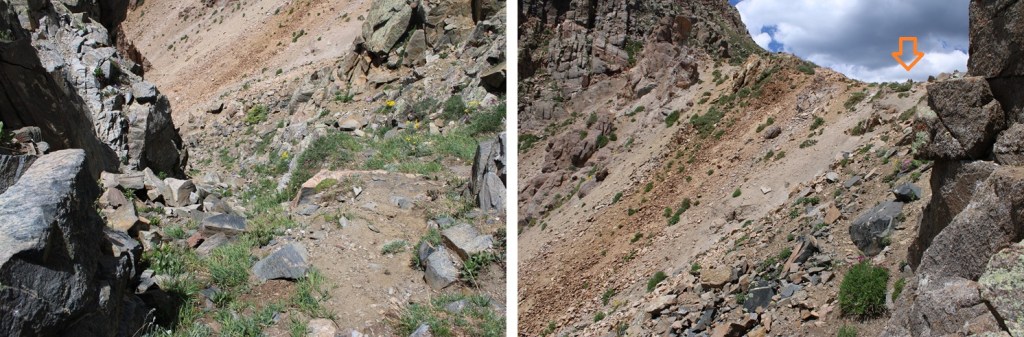
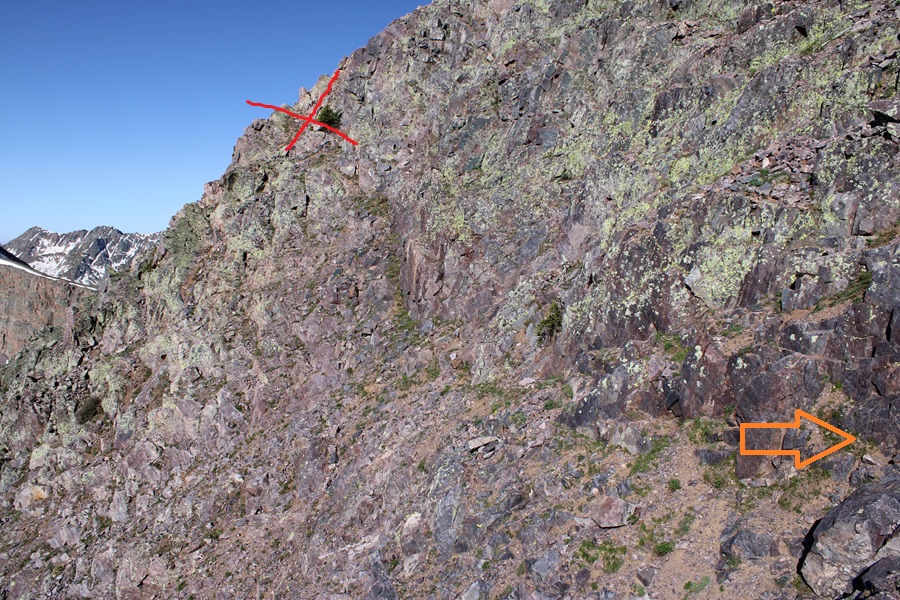
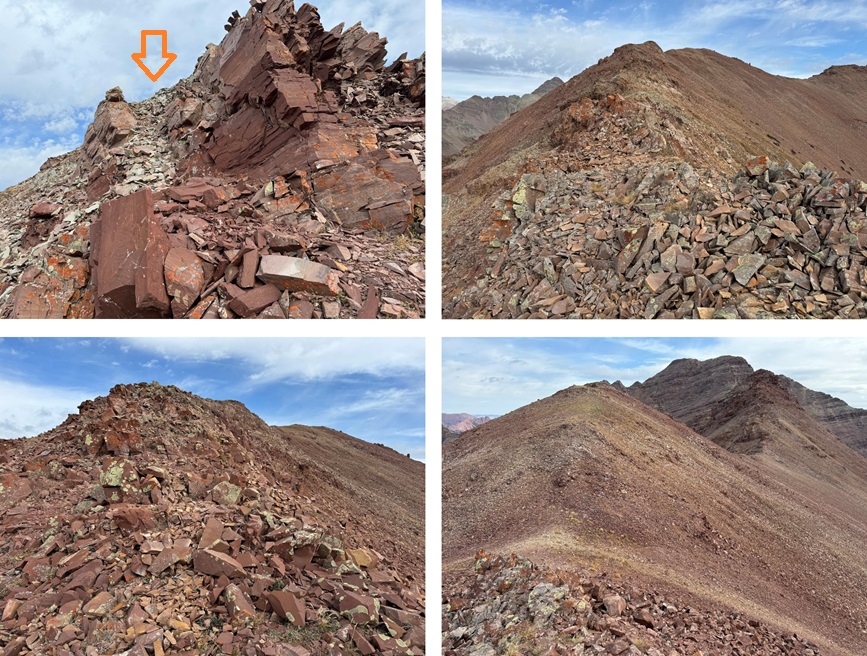
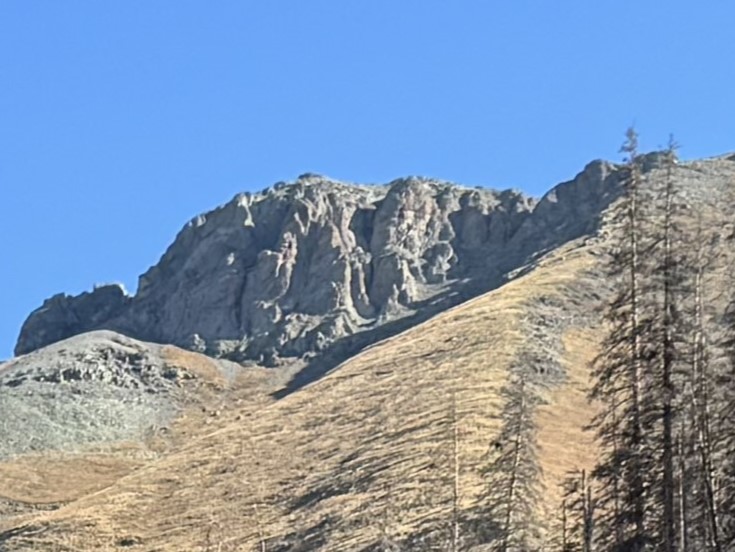
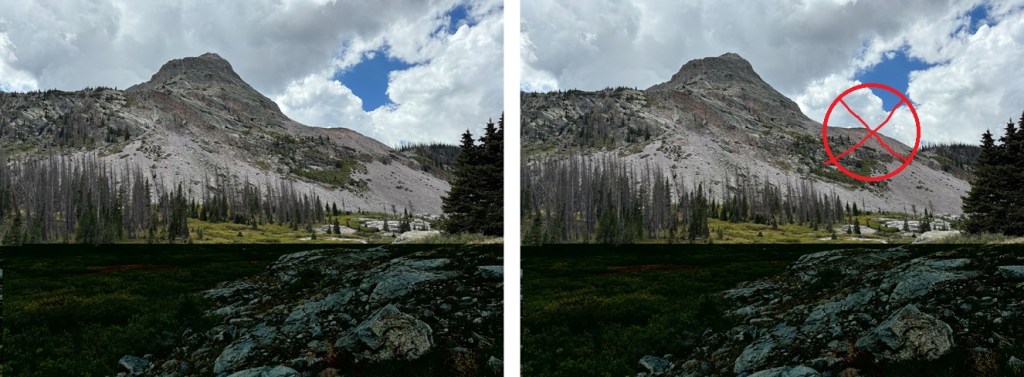
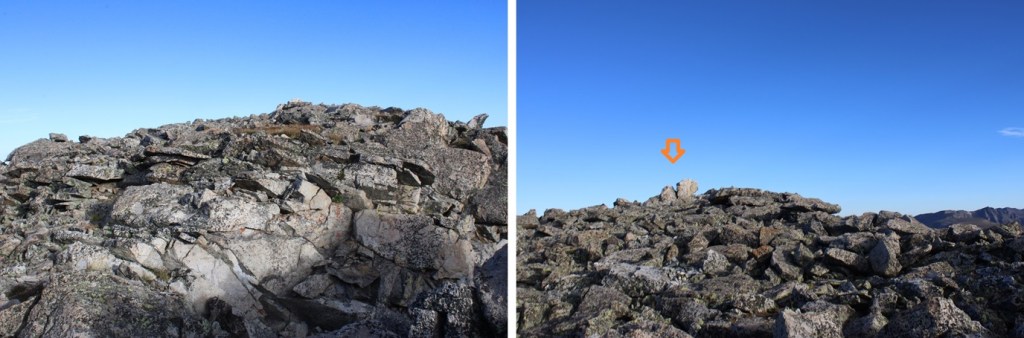
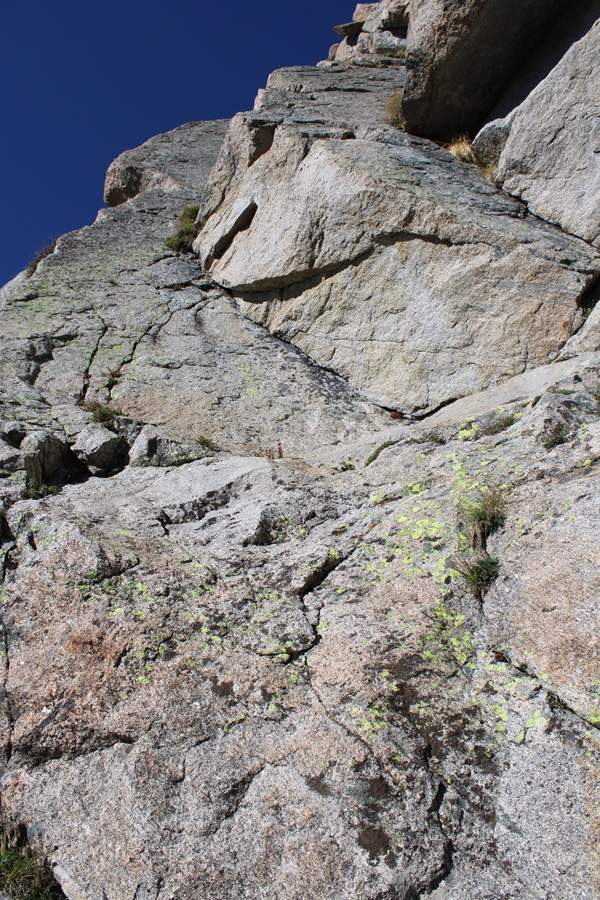
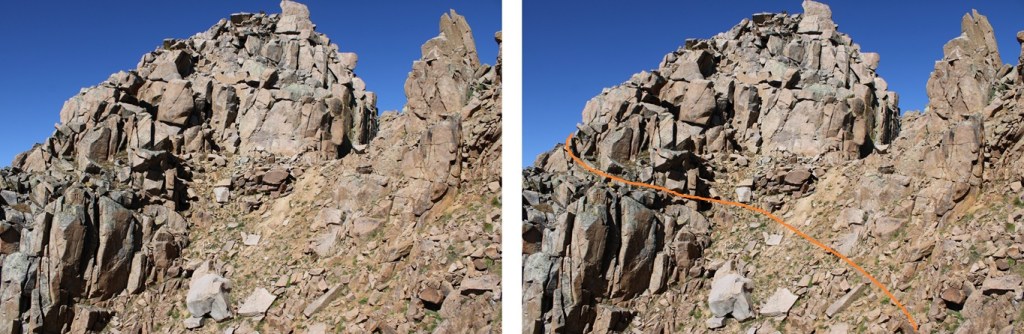
This was the move that I didn’t feel comfortable attempting without ropes.  It was very similar to the final crux on Jagged after the rockfall, but when I was there I had rope to help me.  The rocks above this problem overhang several feet over what look like easy steps from below, and it’s steep on all sides and all the rocks are loose, making depending on them for support/balance poor judgement.  The picture doesn’t do this area justice, and it wasn’t until I was under the rocks I realized the difficulty.  If I saw this picture, I’d go for it, but when I was there I knew it was too dangerous for me to do solo.  I could see where I needed to place my hands/feet, but I wasn’t tall enough to make the moves.  Rock climbing shoes might have helped, and a rope definitely would have, but I had neither.  I spent about 15 minutes trying to find a way up/around this, and in the end turned around.  I’d just been on an amazing podcast (seriously, you should listen to it just to know the podcaster: it’s called “Going in Blind” and will change the way you think of your own life experiences).  We talked about failed attempts, turnarounds, risk tolerance, etc. and this move was above my risk tolerance for soloing.  How terrible would it have been if I’d just talked about my many, many failed attempts and turnarounds and attempted this and failed because I was overconfident?  I’d look like  a fool.  If I’d been with a friend they could have cheerleader lifted me and I could have pulled them from above but solo I didn’t feel comfortable attempting this move.  I felt there was a 75% chance I could make it up, which just wasn’t good enough, especially when going solo.  However, if you can get over this class 4 move it’s an easy class 3 climb to the summit. 

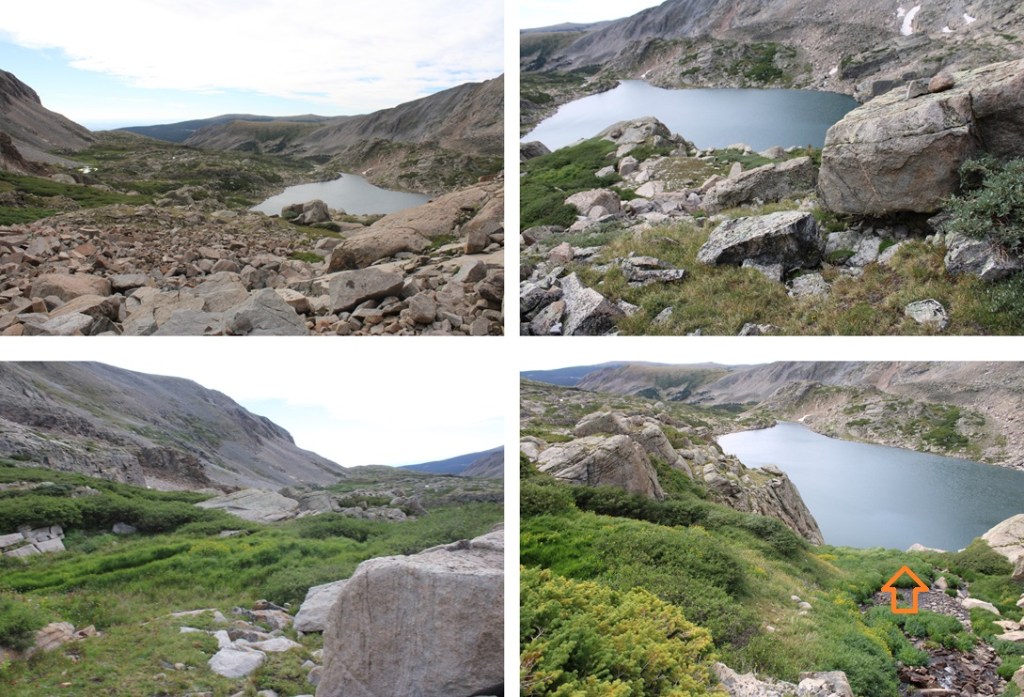
As I said, I turned around and headed back down to the basin, retracing my steps on easy class 2 terrain.

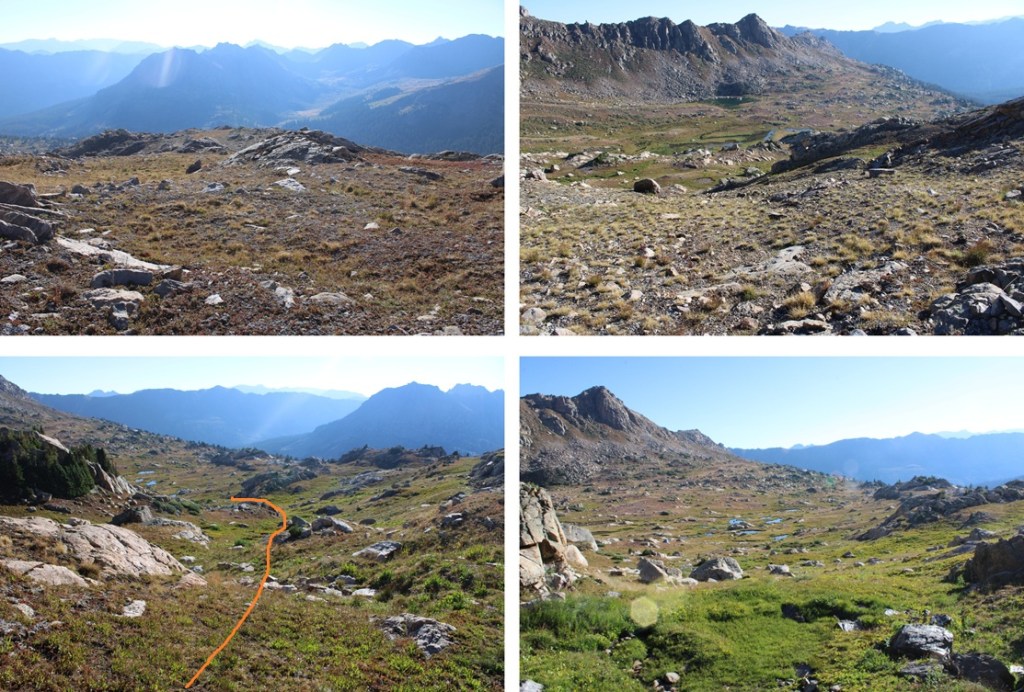
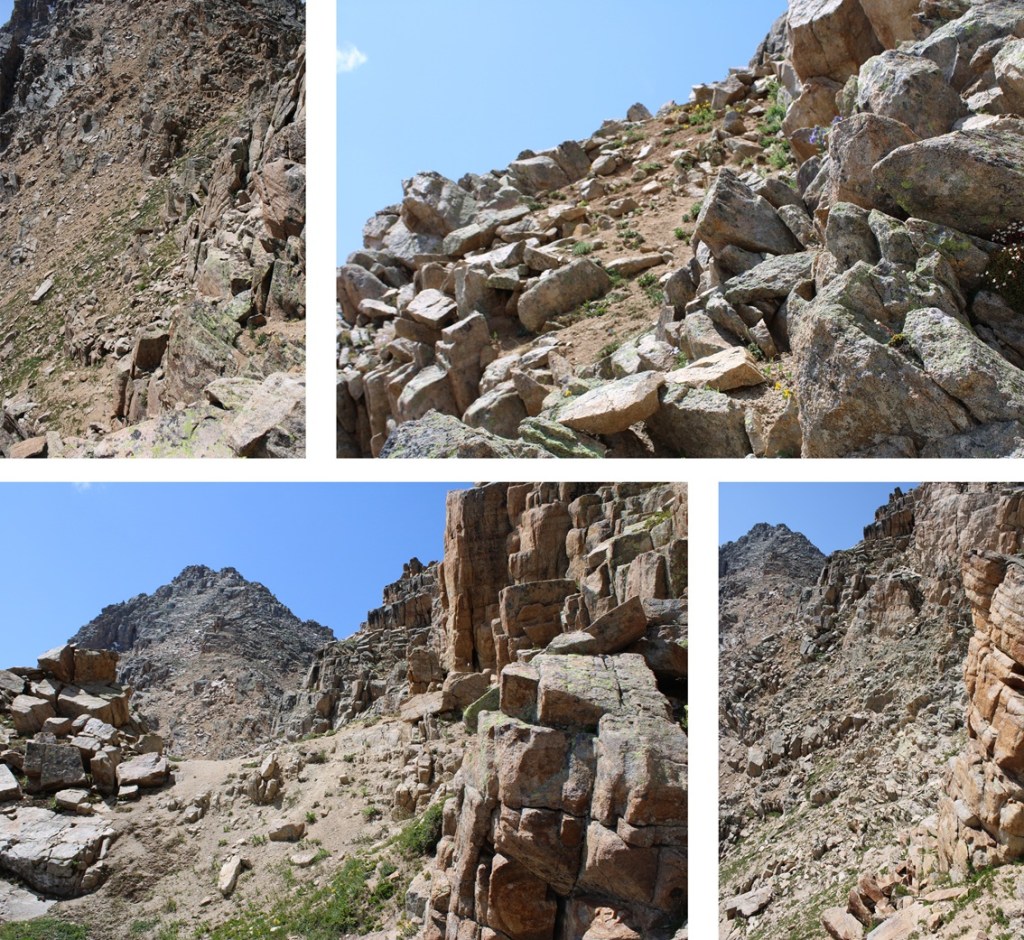
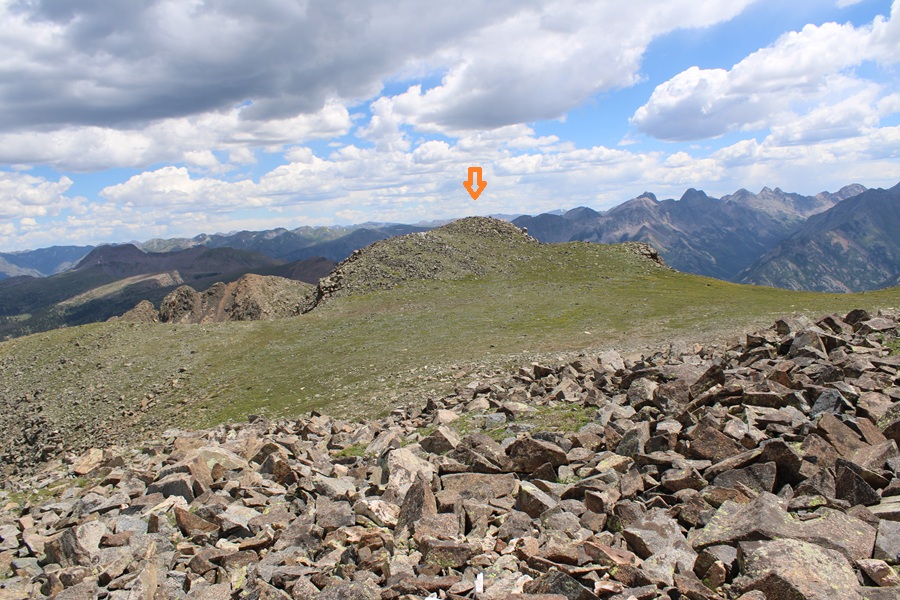
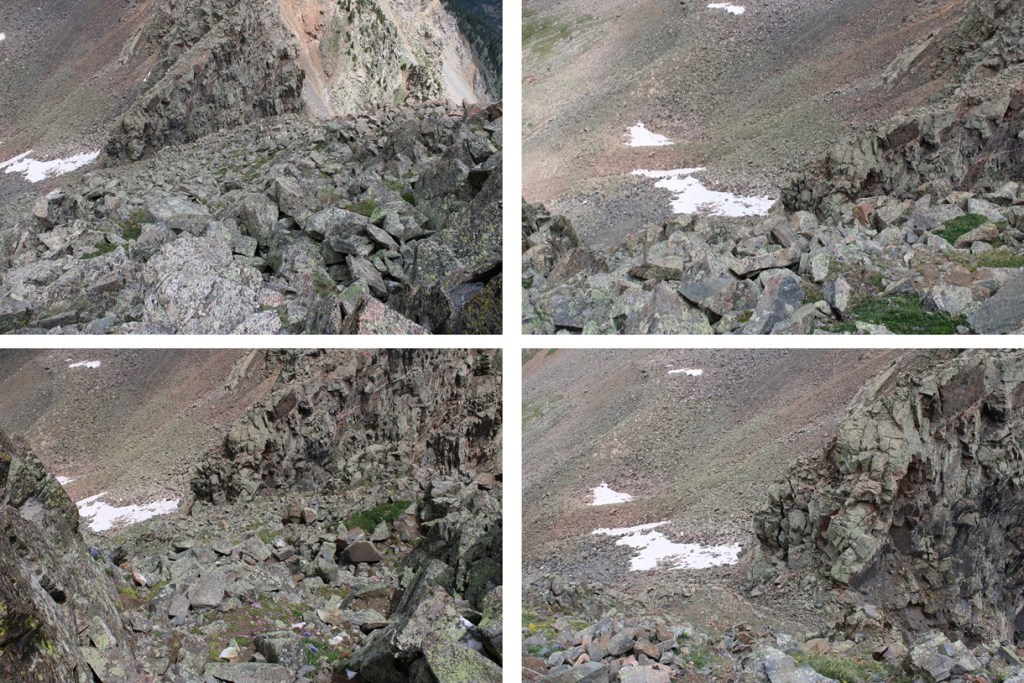
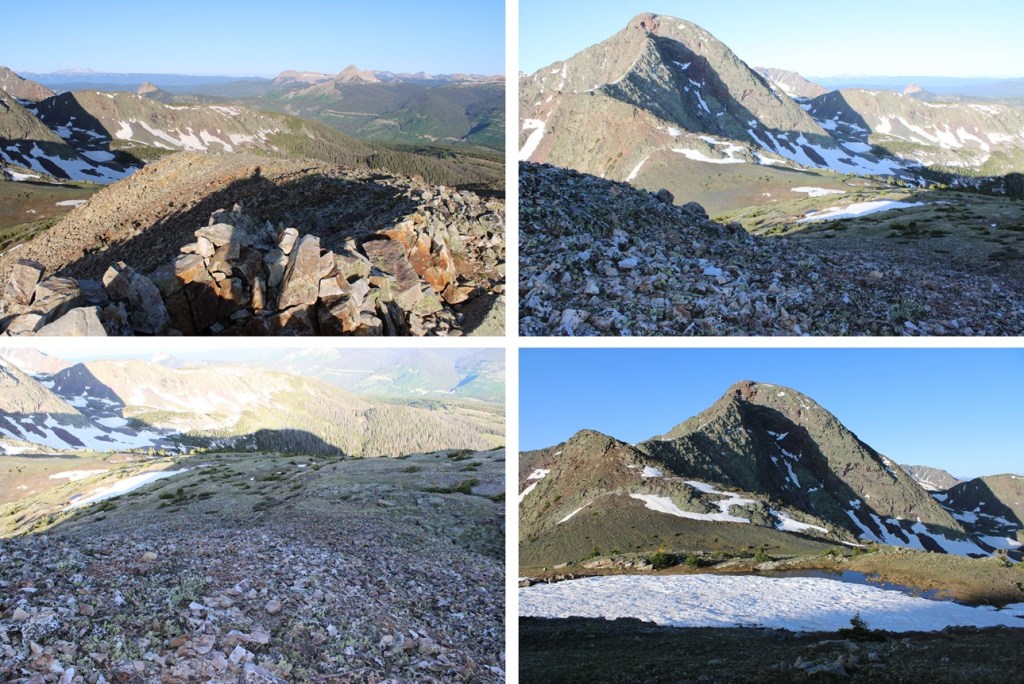
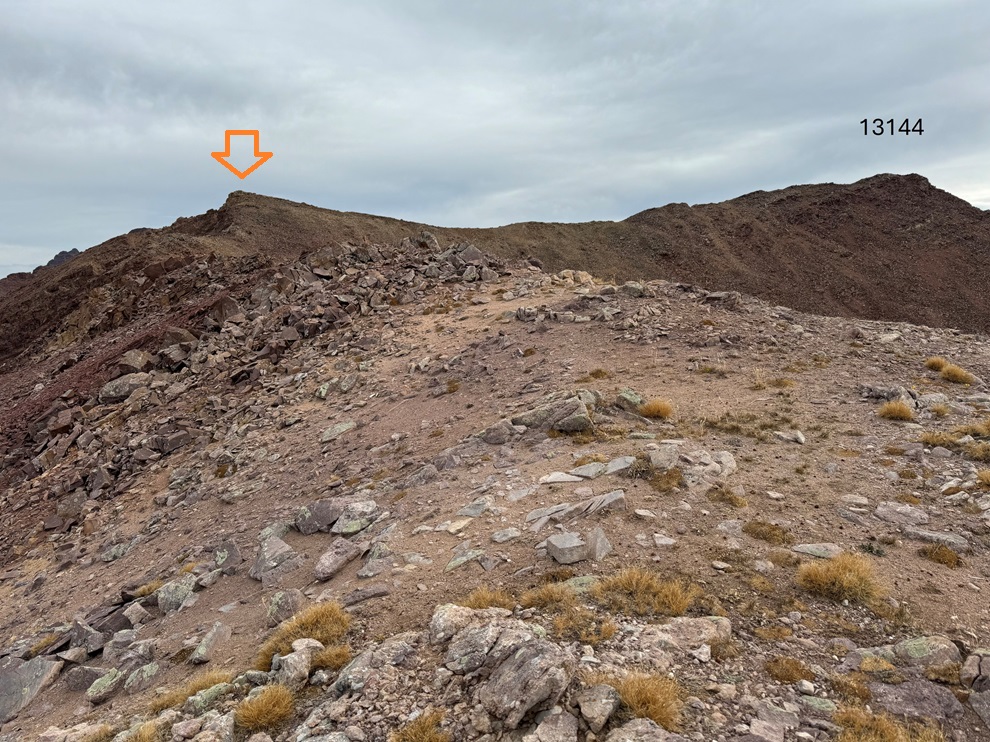
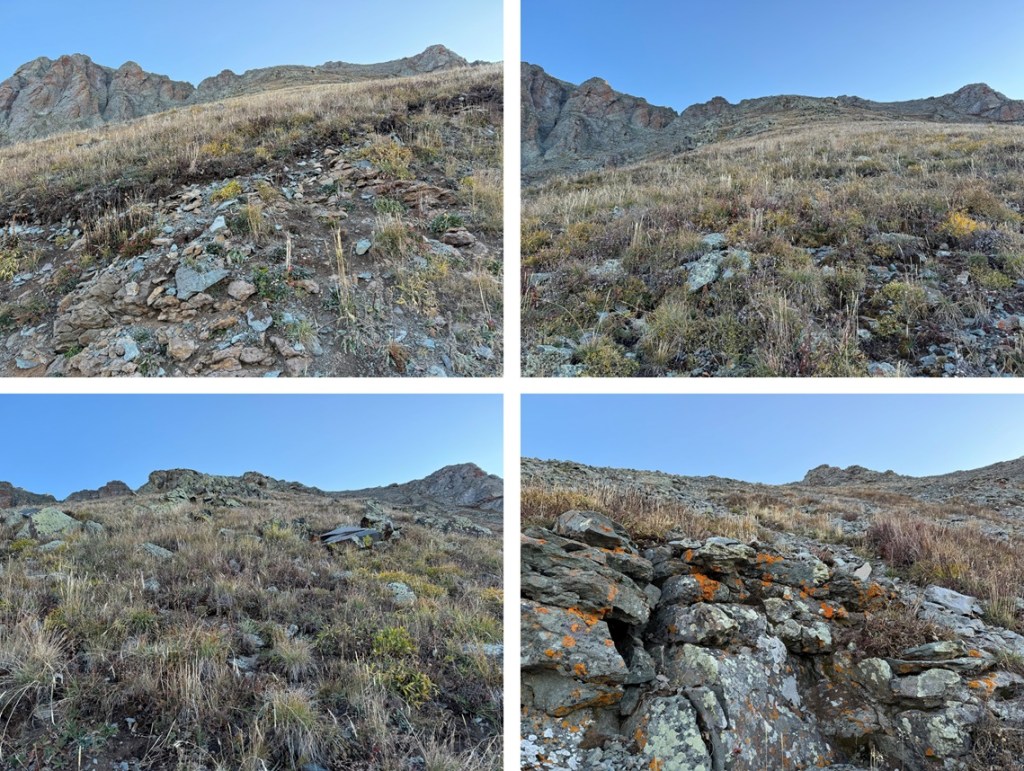
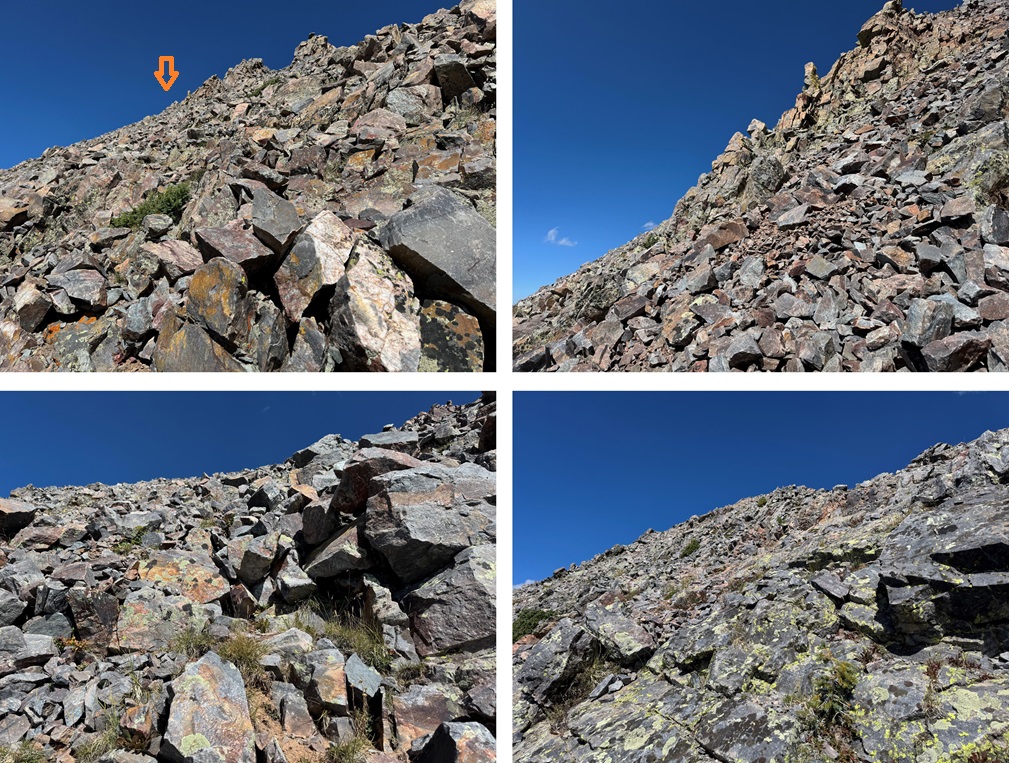
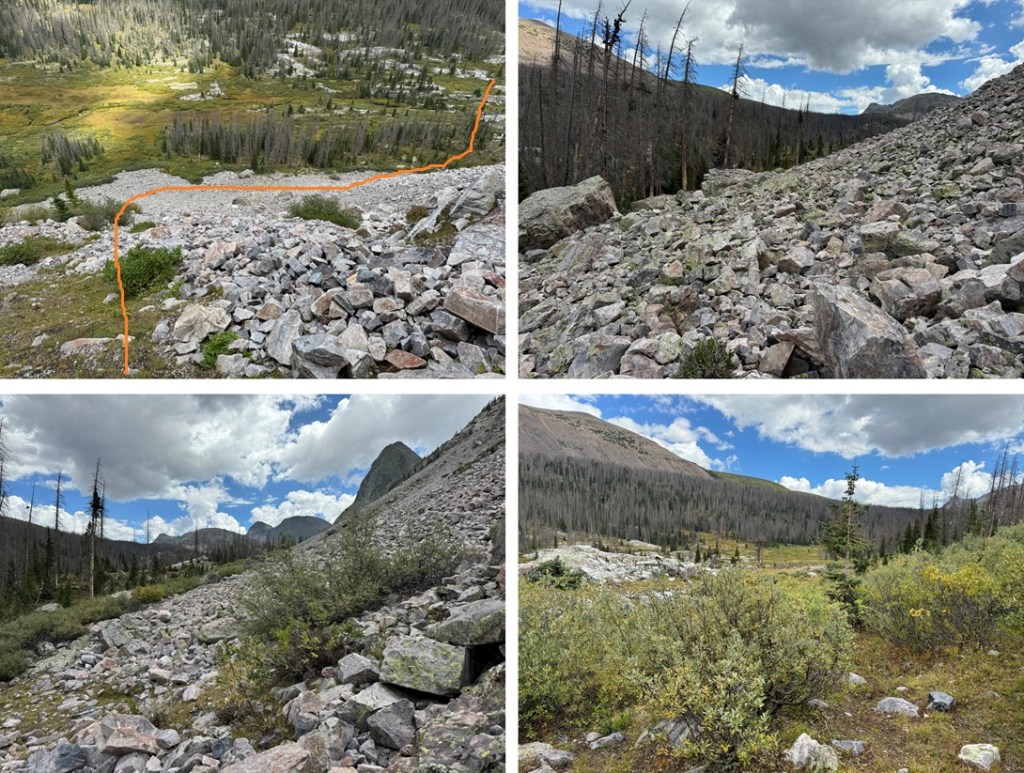
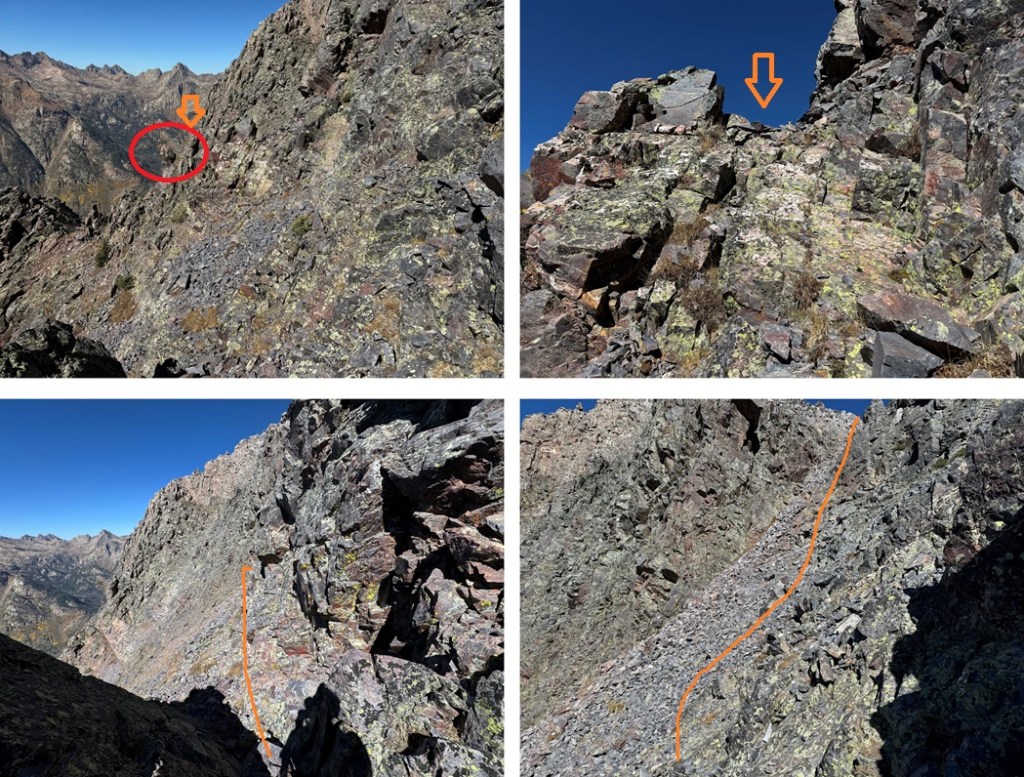
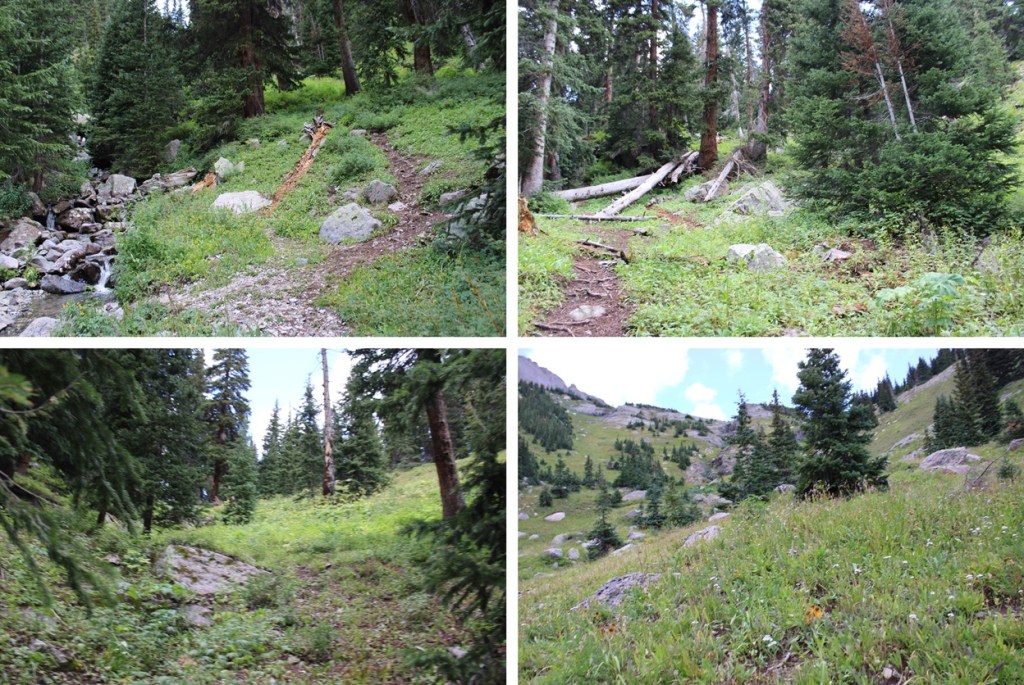
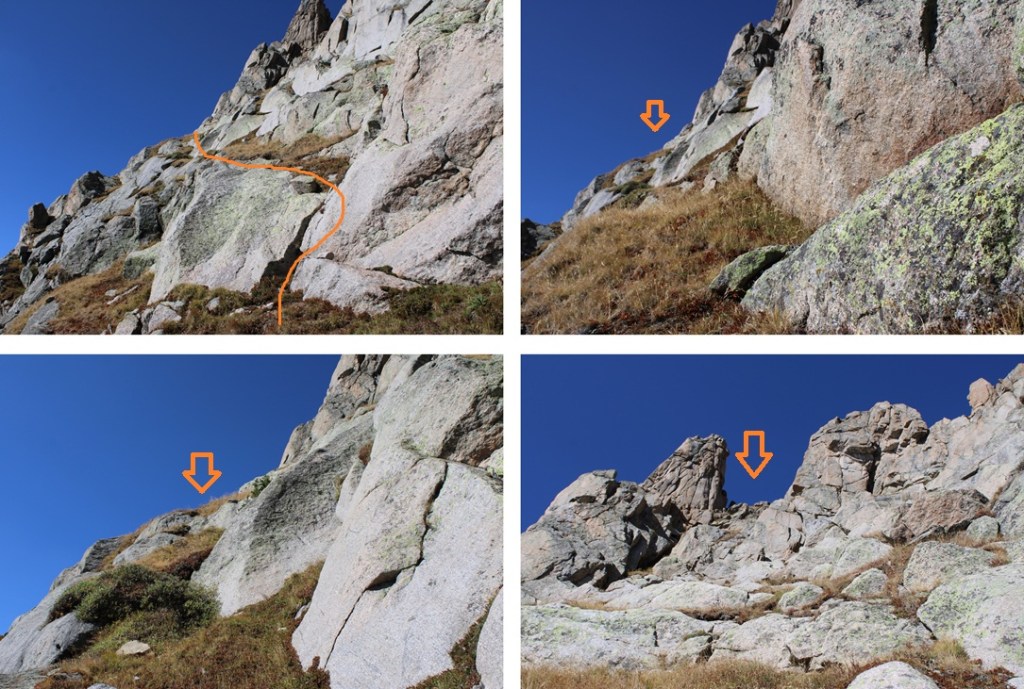
Back in the basin at my campsite it was only 9am.  I had a quick snack and started out again, this time taking the pink route up to 13204.  I started out by heading northwest up the basin towards the base of a large rock outcropping.  This is choose your own adventure, and all of it is class 2, just make your way towards the large rock outcropping.

From the base of this large rock outcropping I looked for a grassy ramp in the distance to the south/southwest.  It’s small, and the access point for the rest of the climb. 

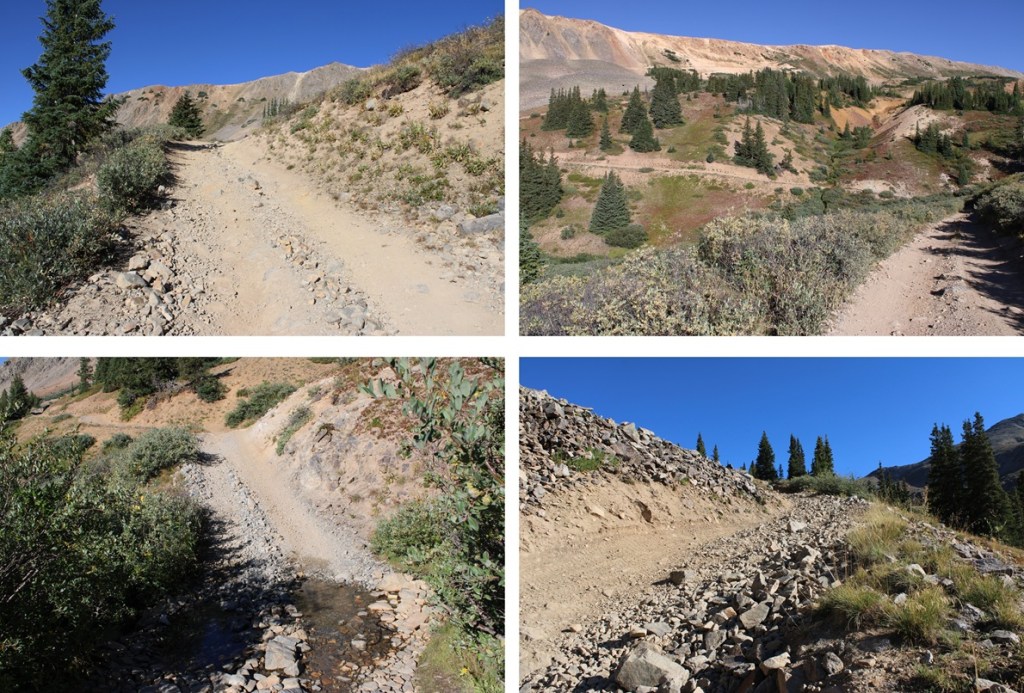
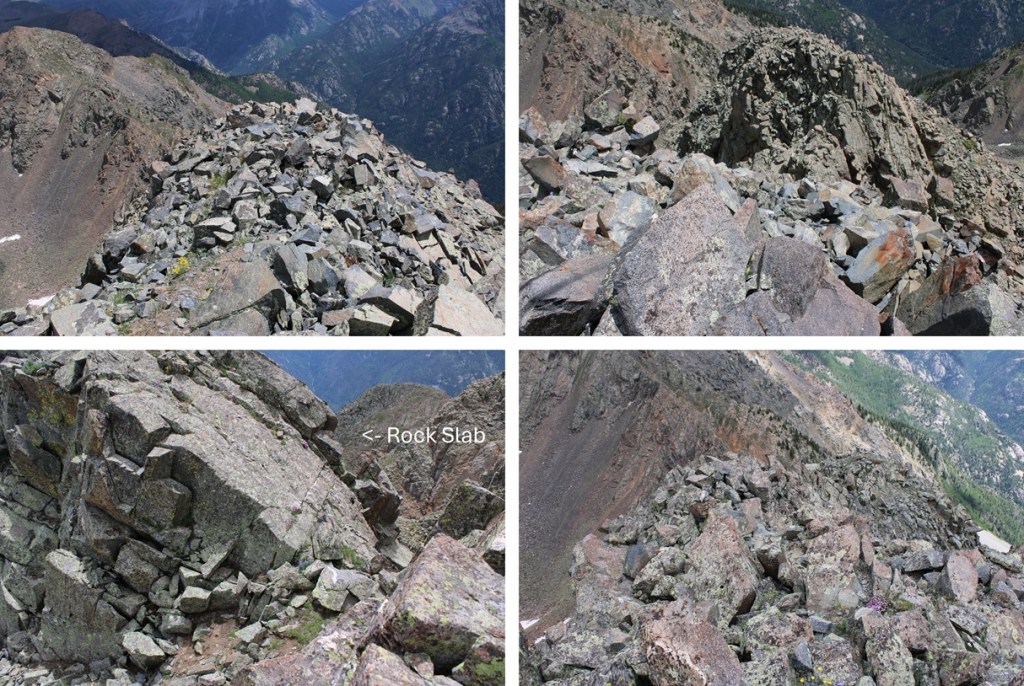
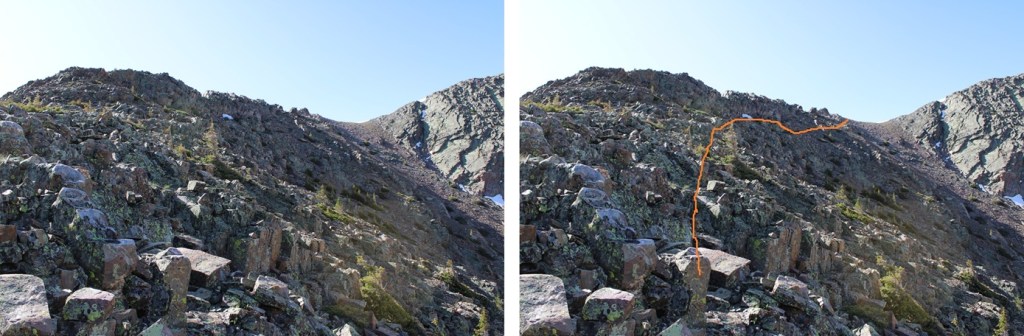
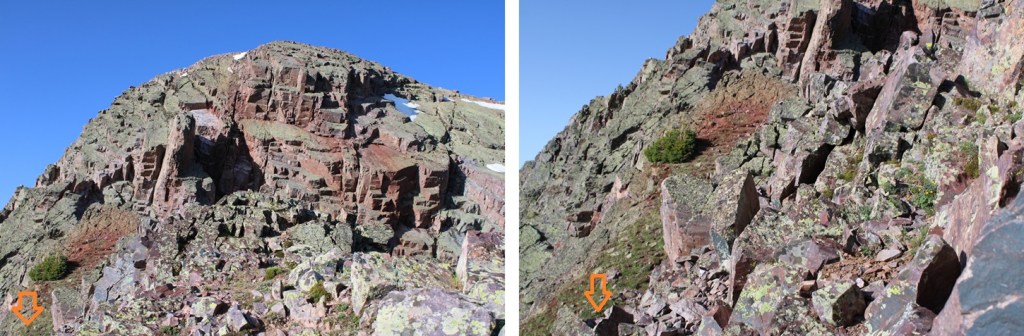
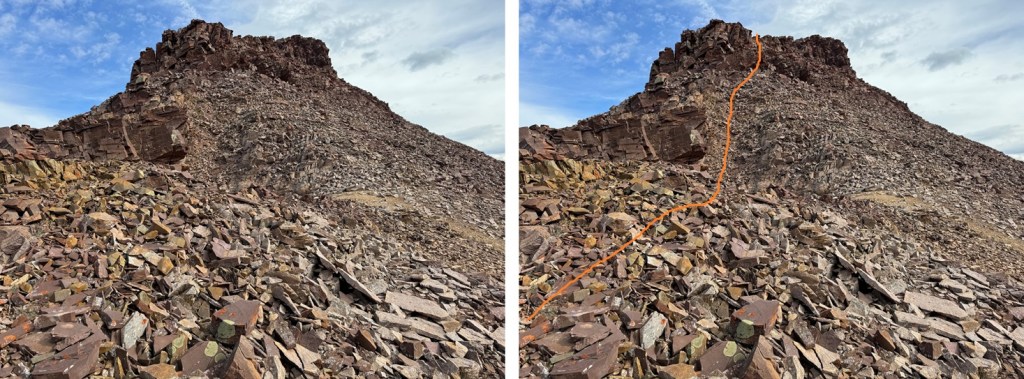
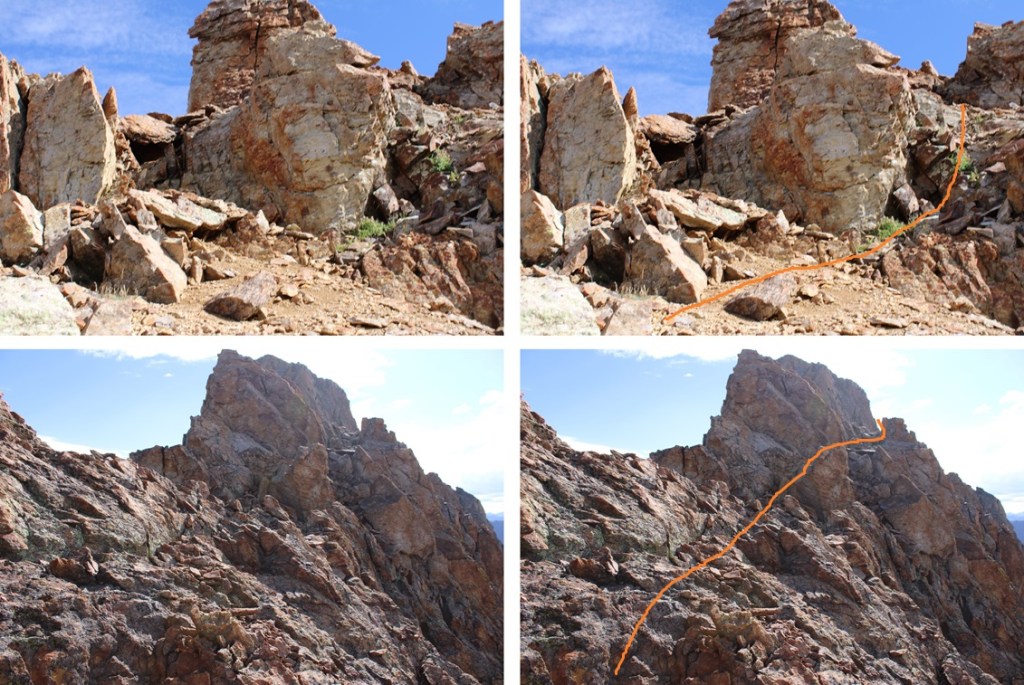
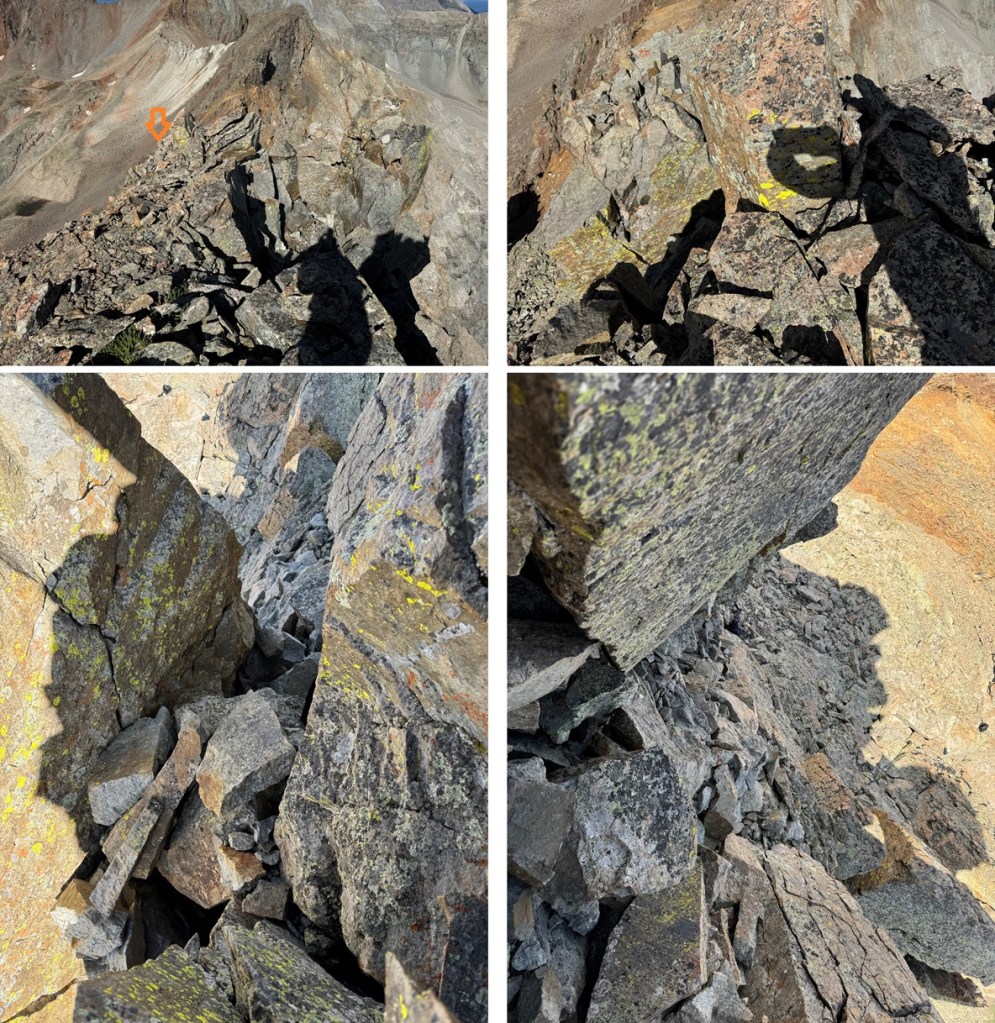
I hiked up the grassy ramp and came to some willows.  My beta said from here to climb up the rock slab.  This was obviously class 4+ and I once again didn’t feel comfortable climbing up this rock face. 

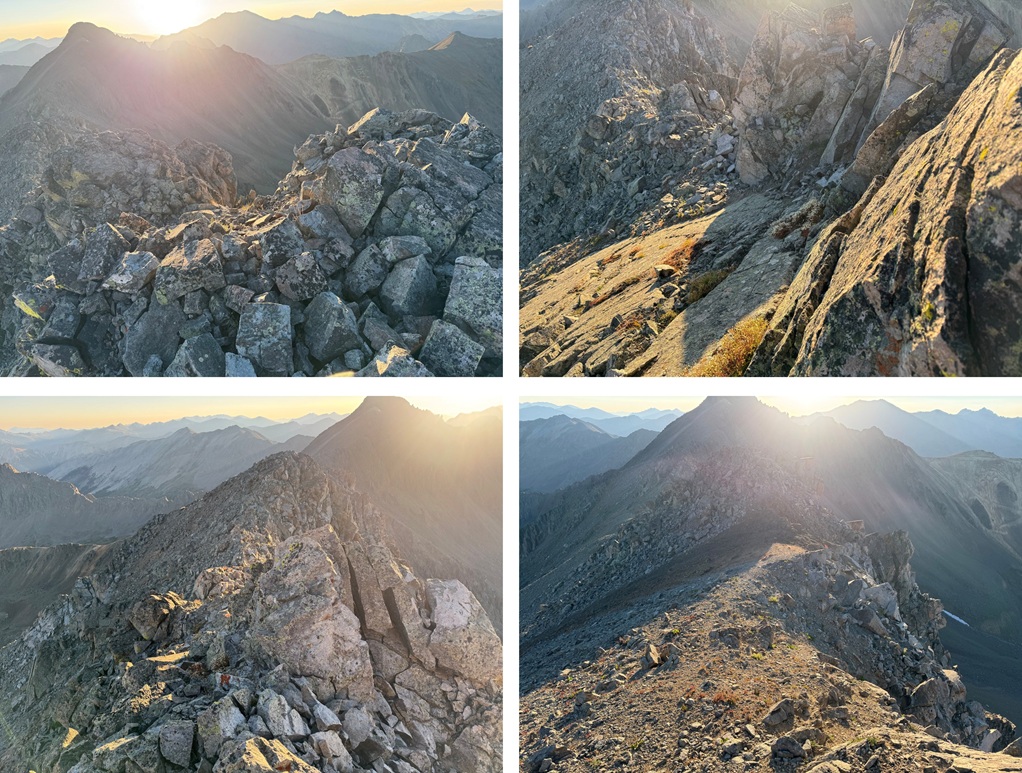
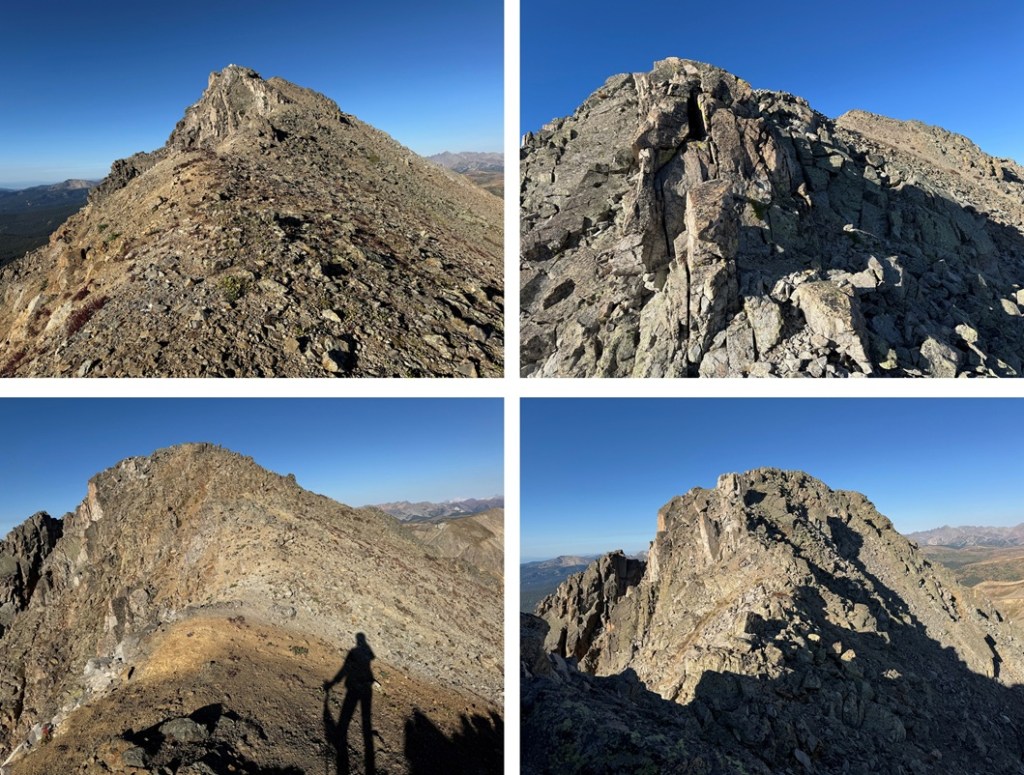
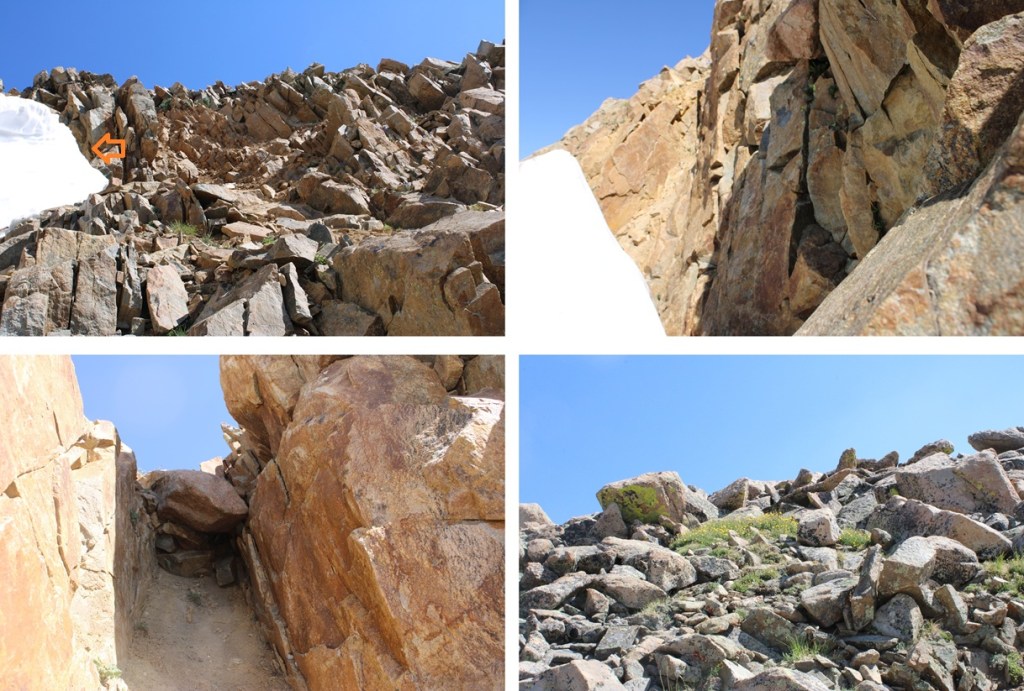
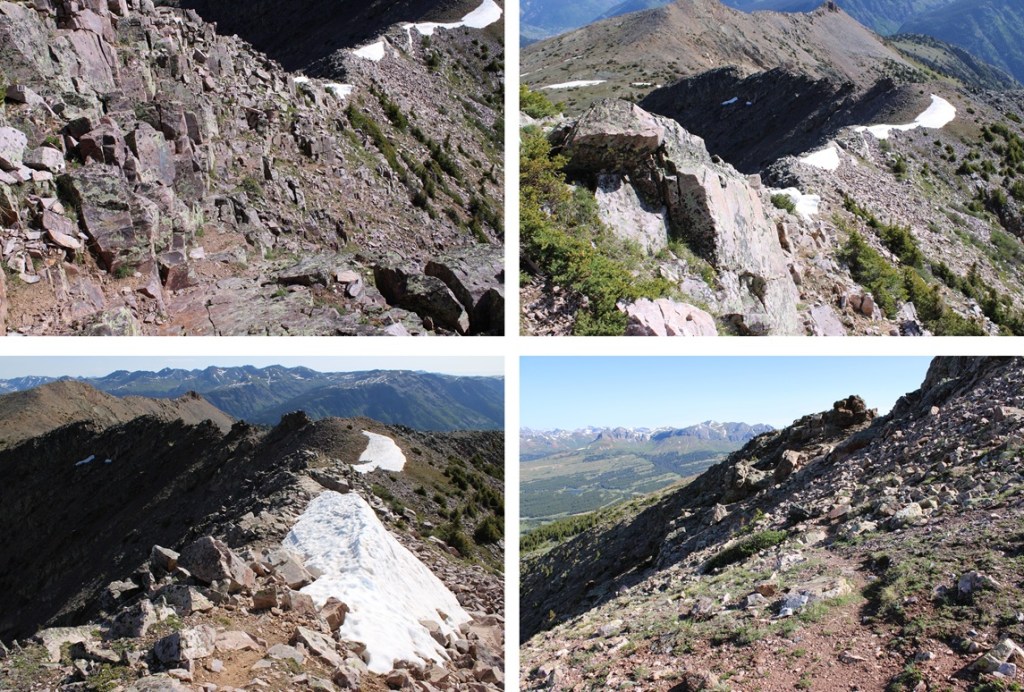
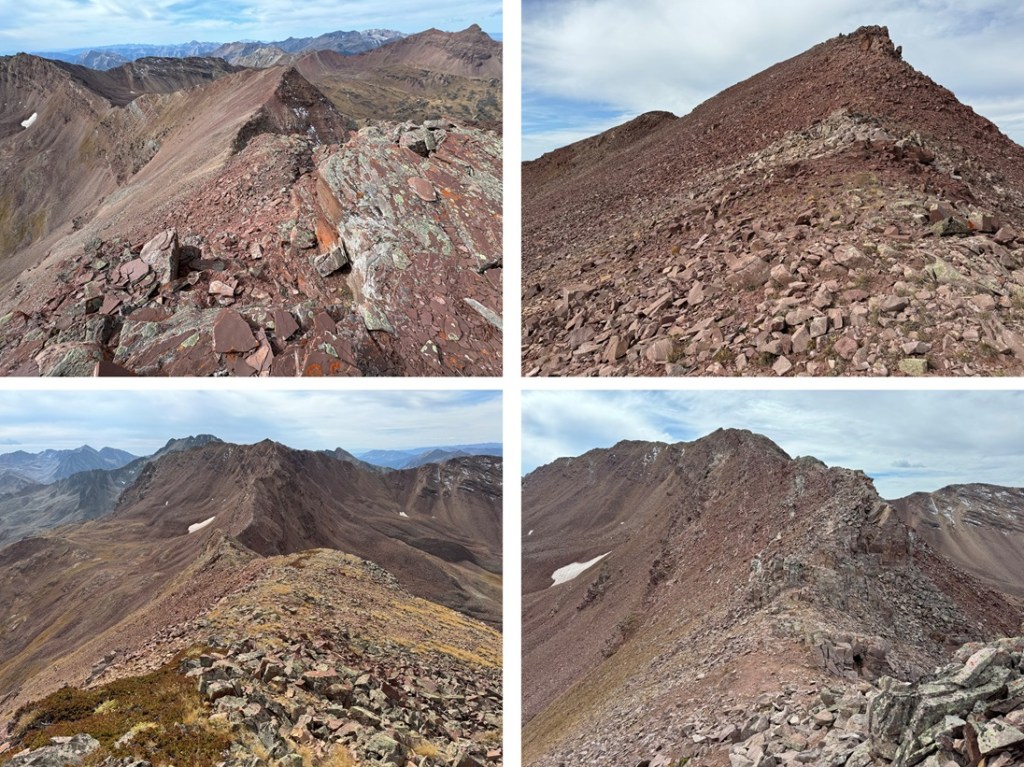
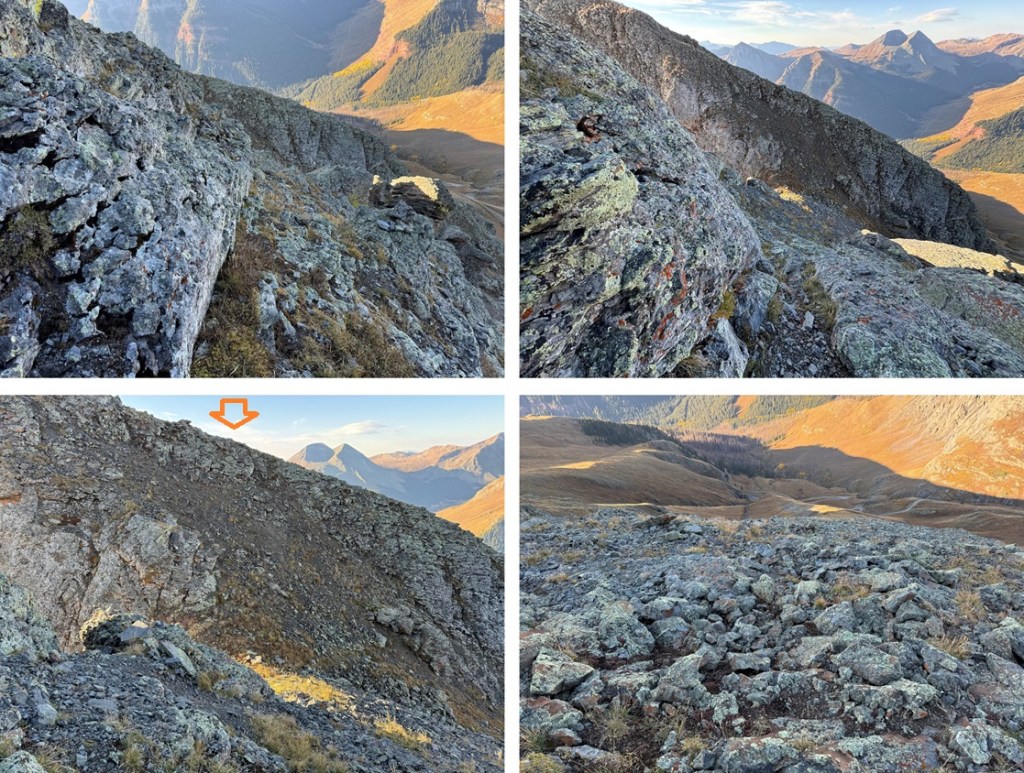
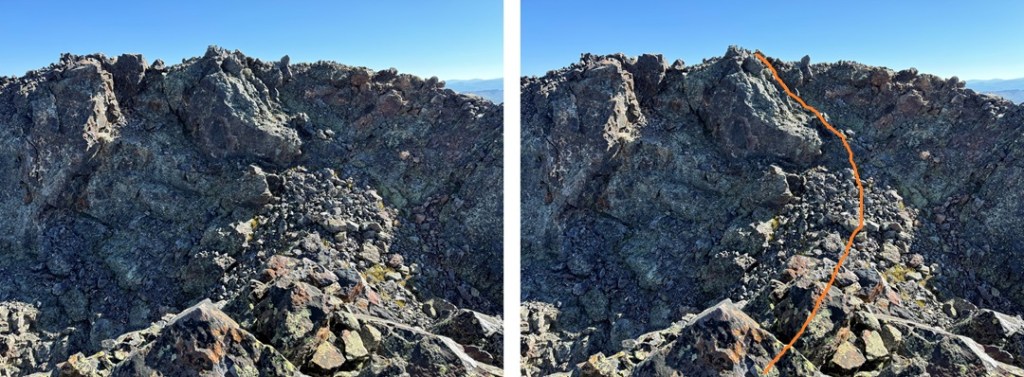
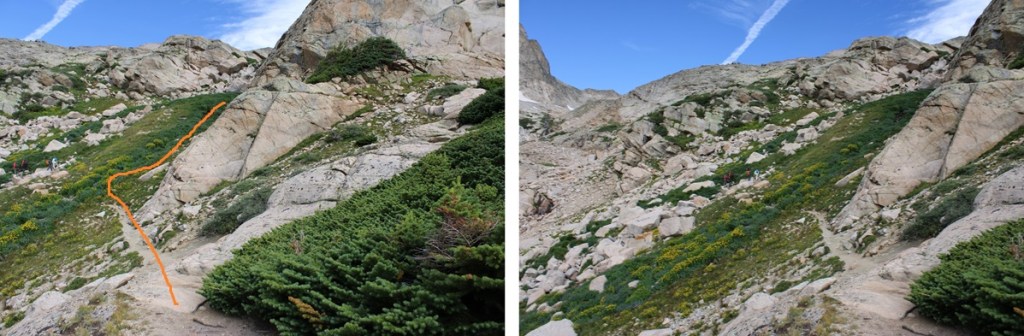
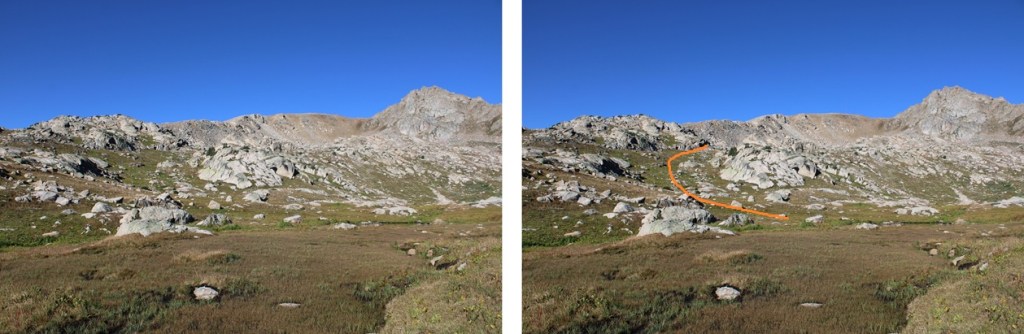
So I did some scouting around.  BEFORE you see this rock face and before you make it to the willows (which are obvious) there is a nicer class 3 grassy slope.  Take that up and follow it to the left and it will keep you on route but keeps it class 3.  There’s some  exposure, but I felt much safer on this route, and put up some cairns to indicate where you ascend.

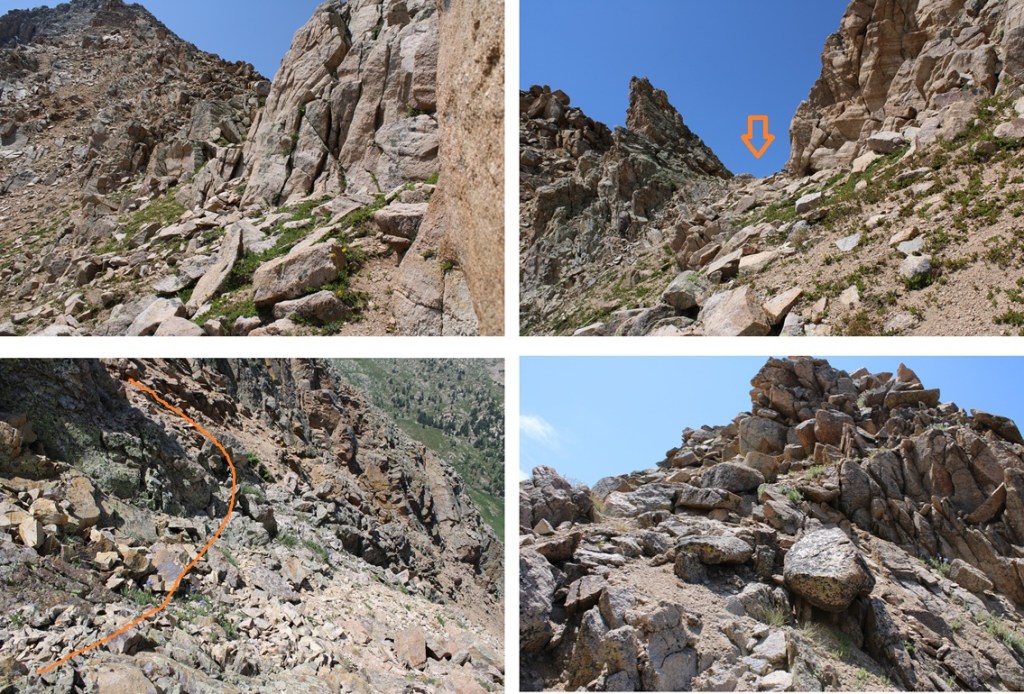
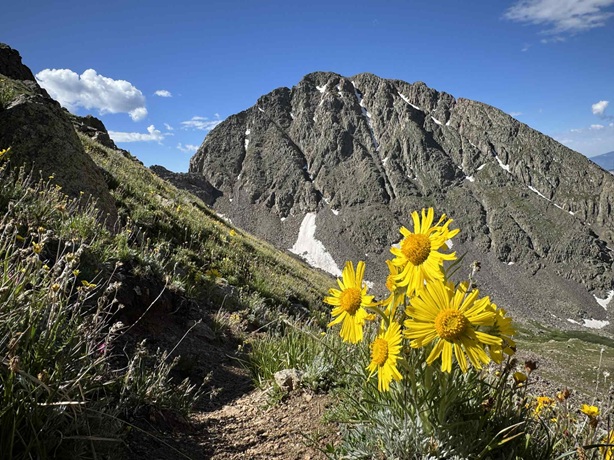
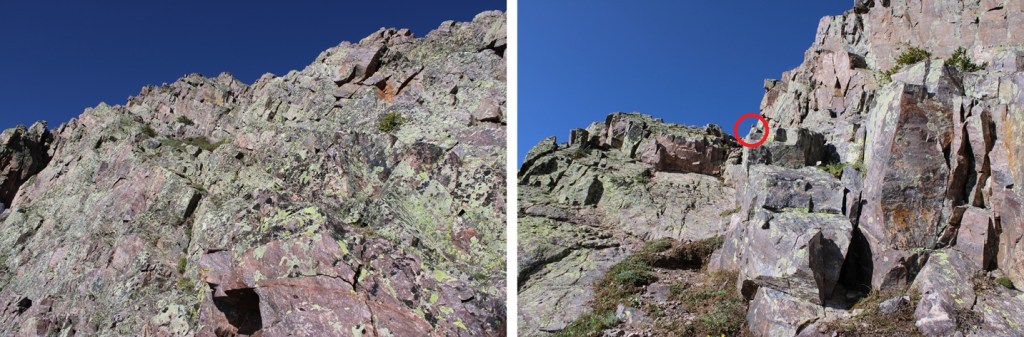
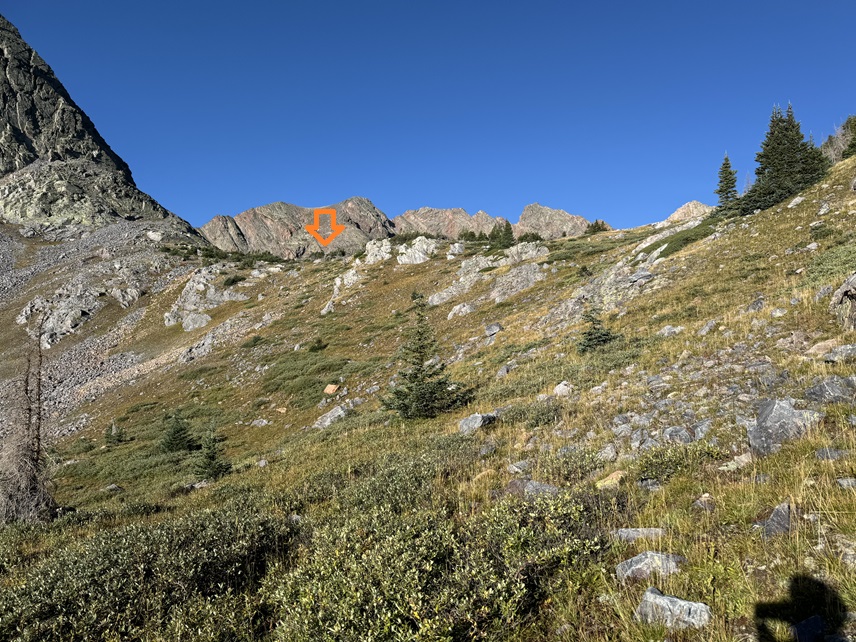
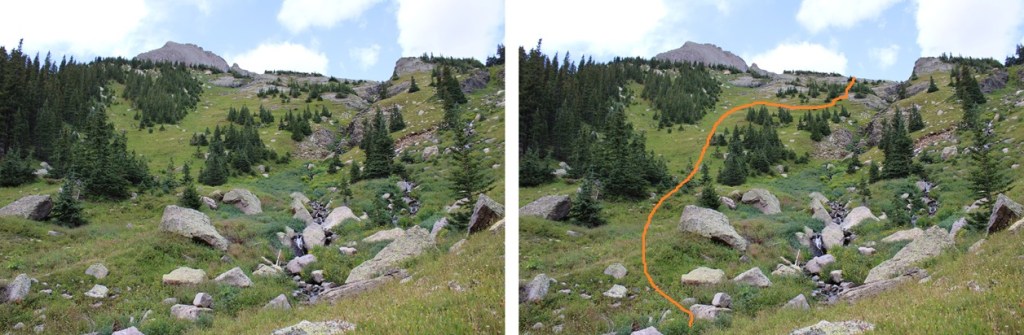
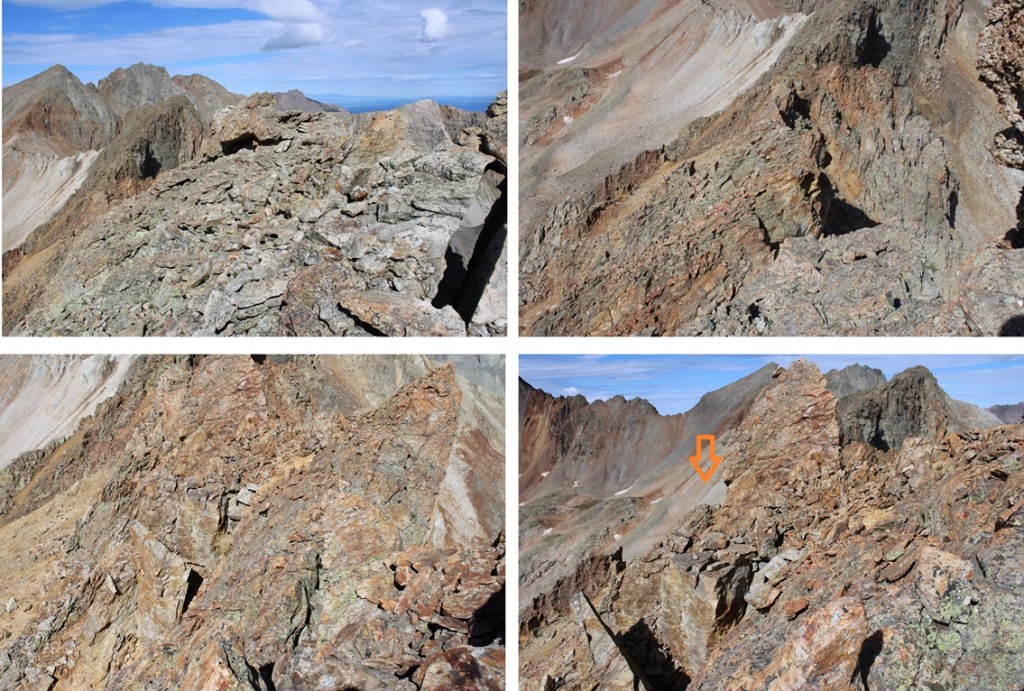
From here on out it’s class 3 choose your own adventure up the grassy slopes.  There is exposure here and be extra careful if the foliage is wet (which it was during my trip).  I was aiming for a notch in the mountain, heading west.

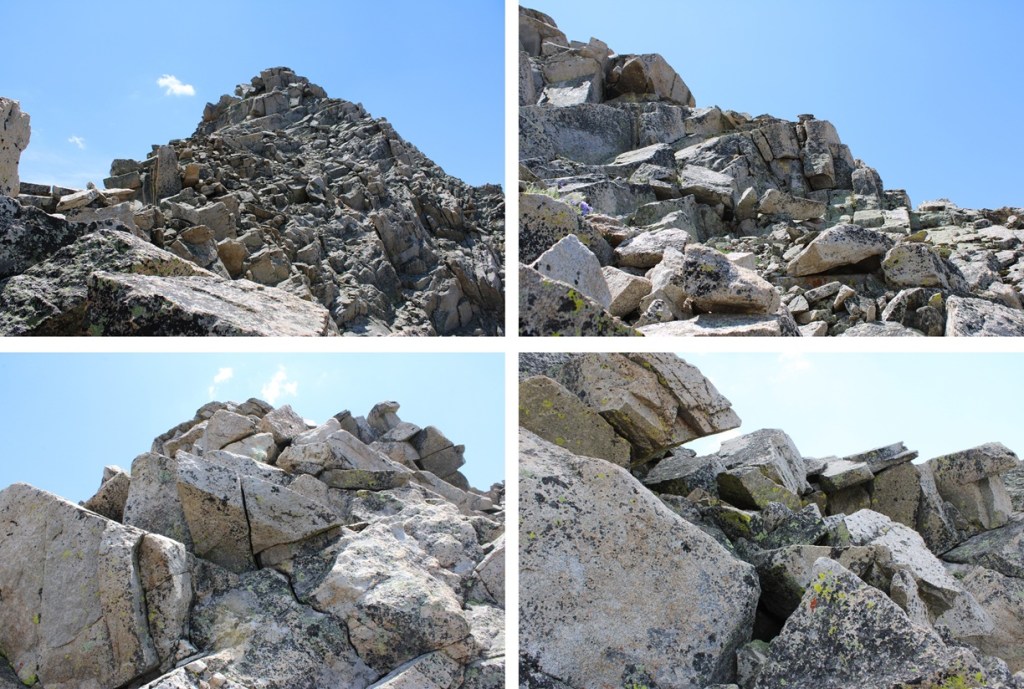
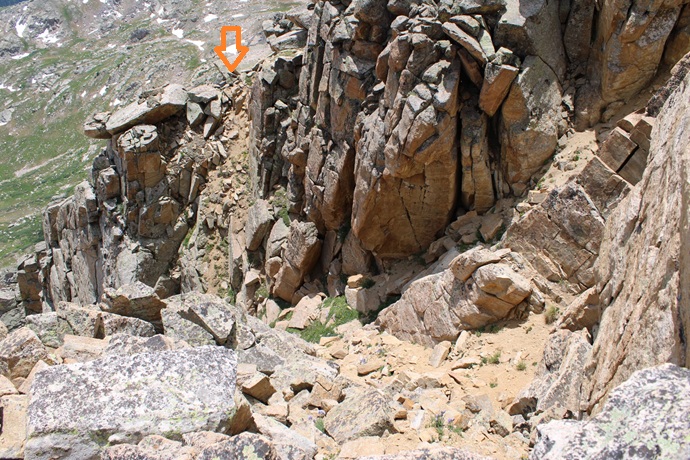
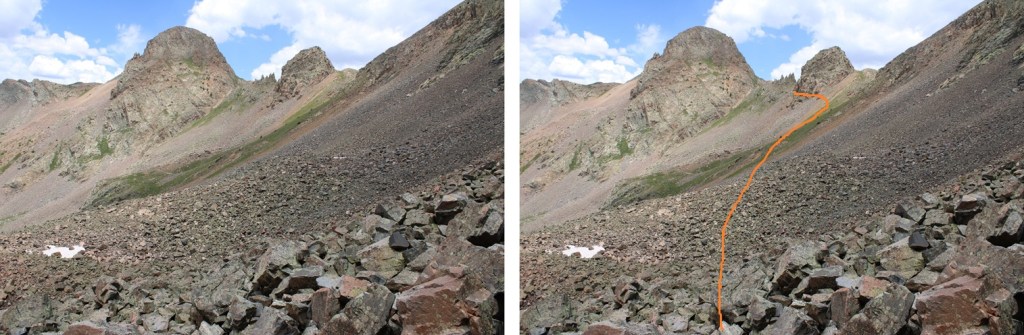
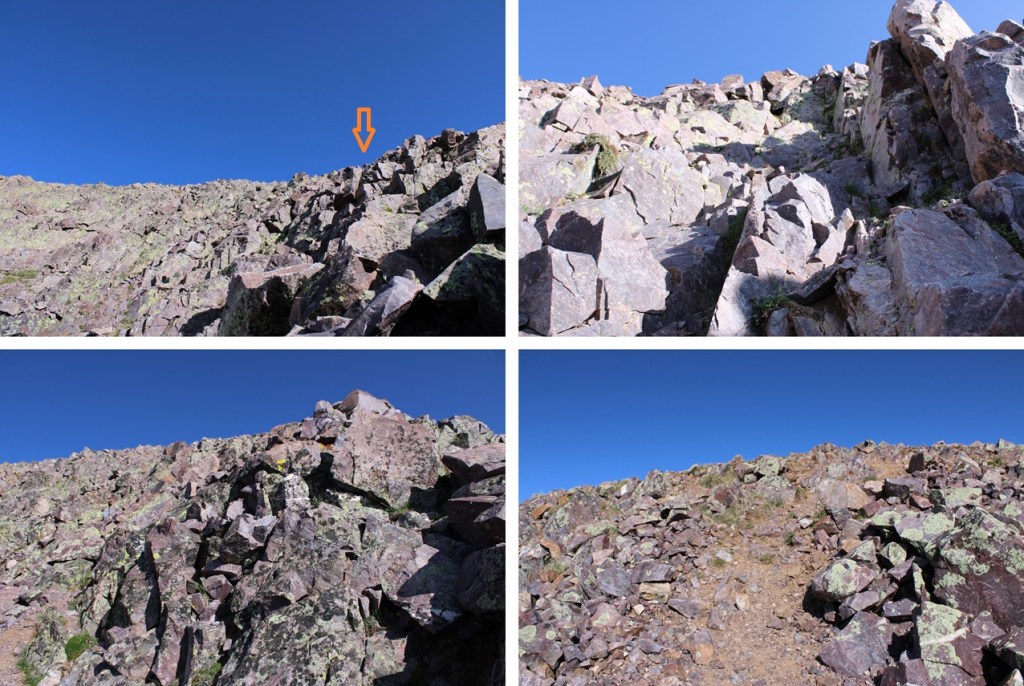
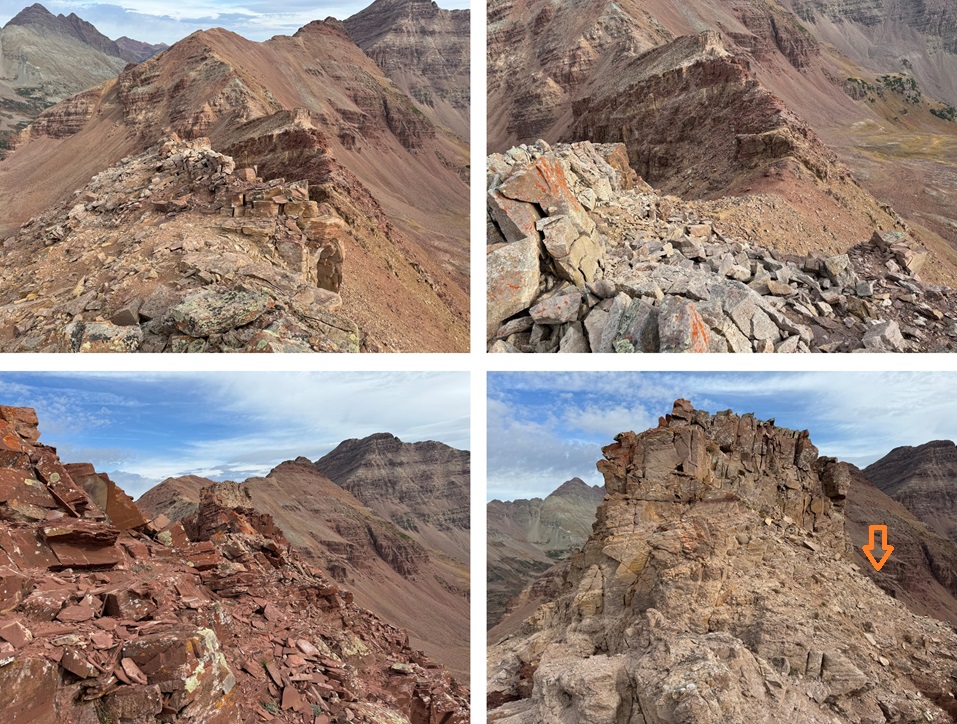
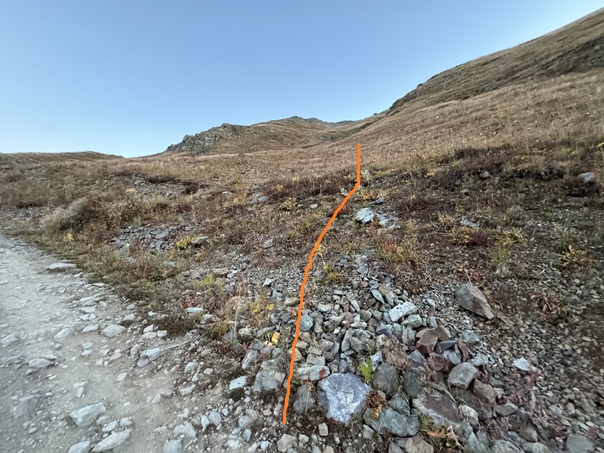
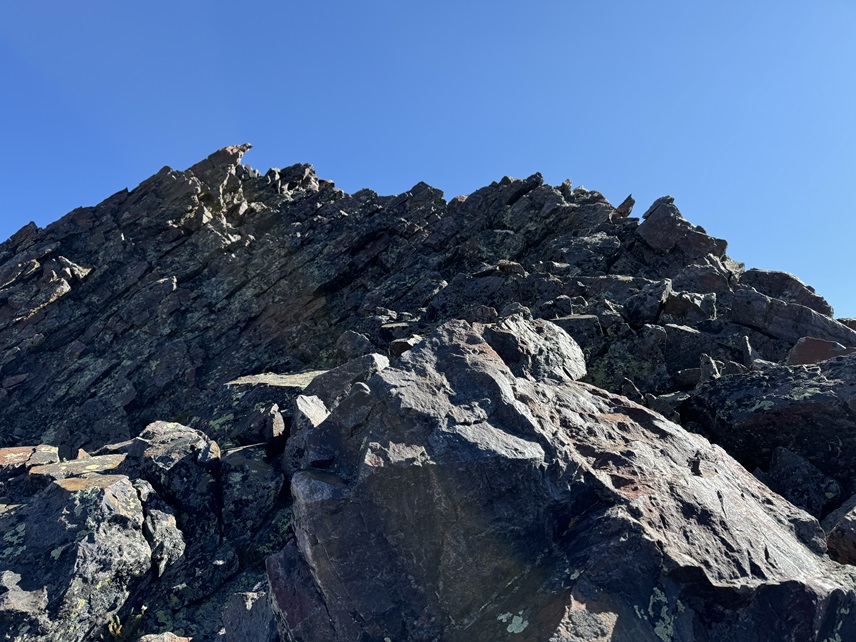
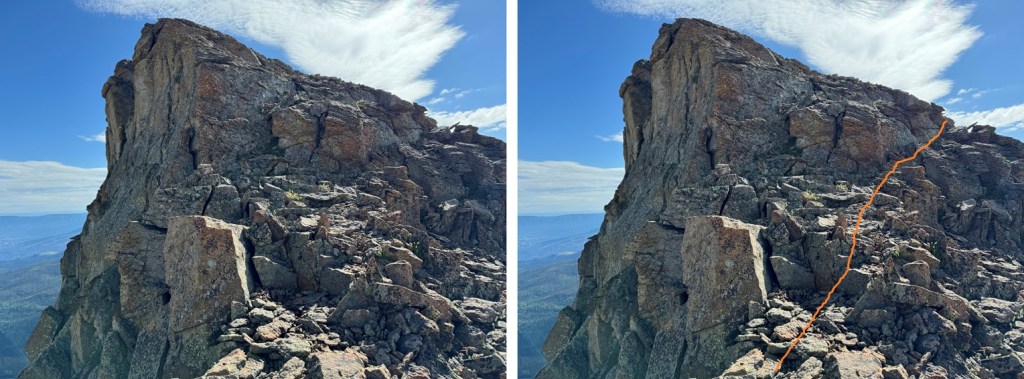
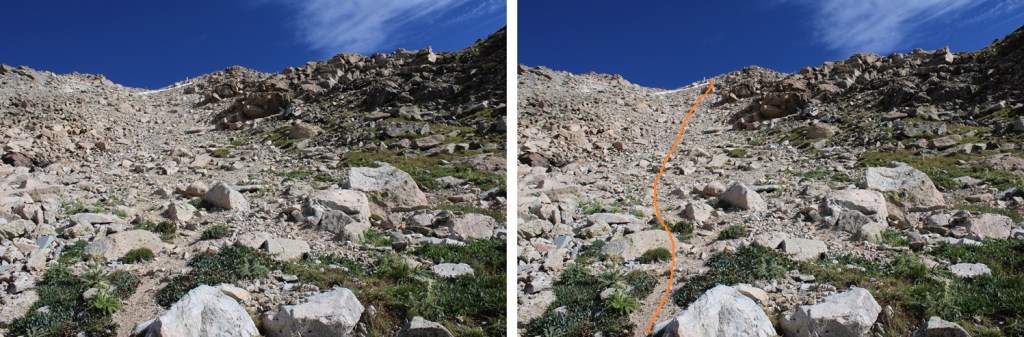
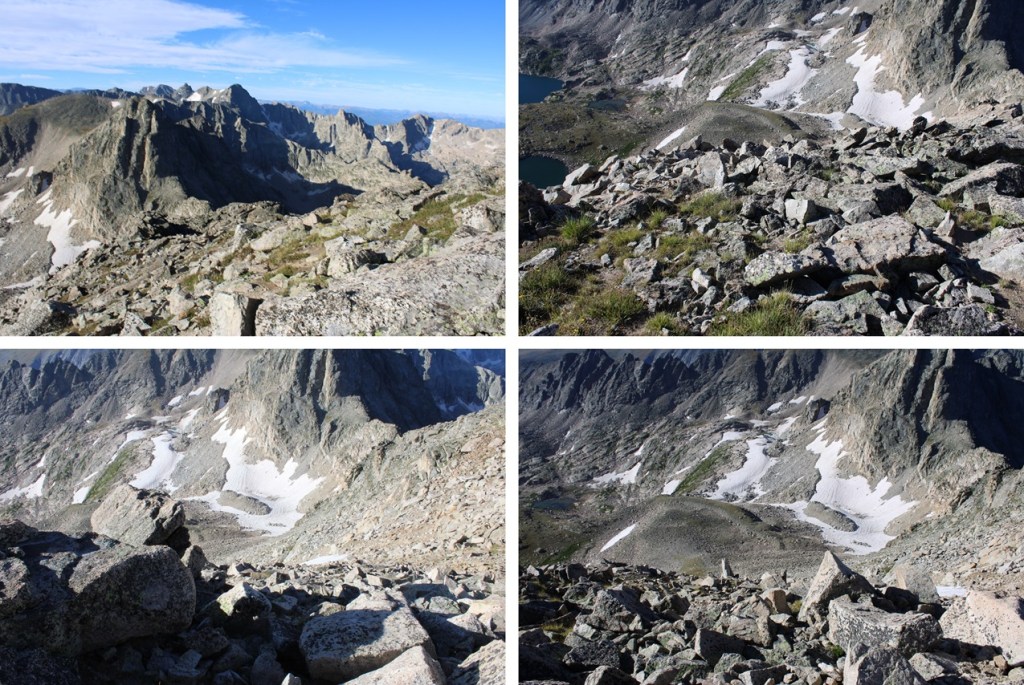
Here’s looking from below the notch, and the route I took, class 3

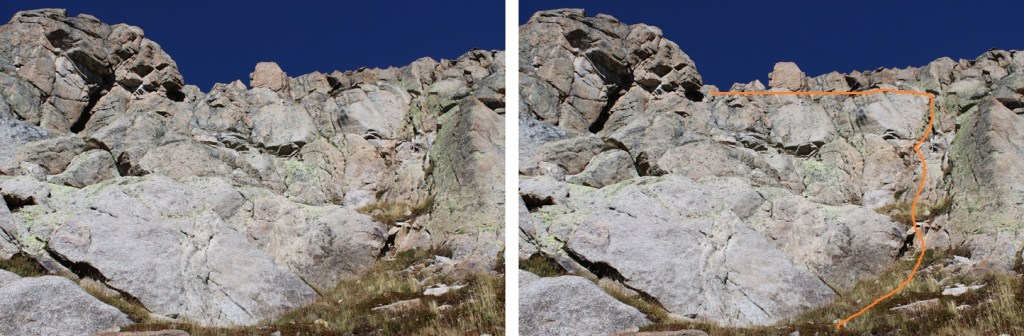
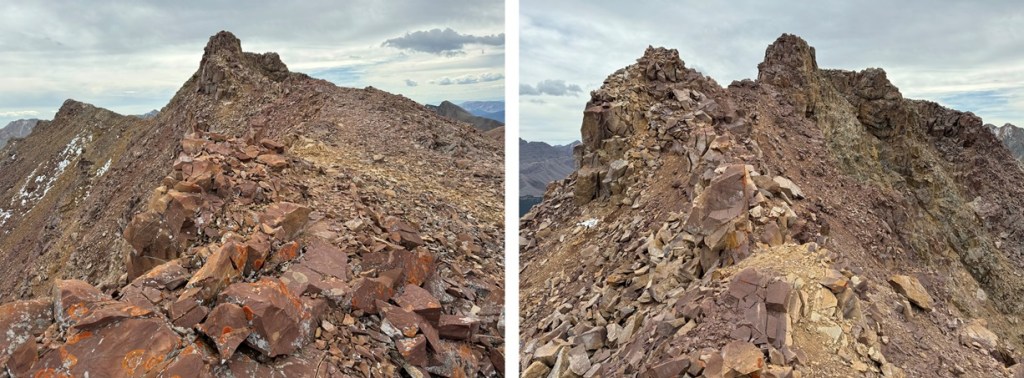
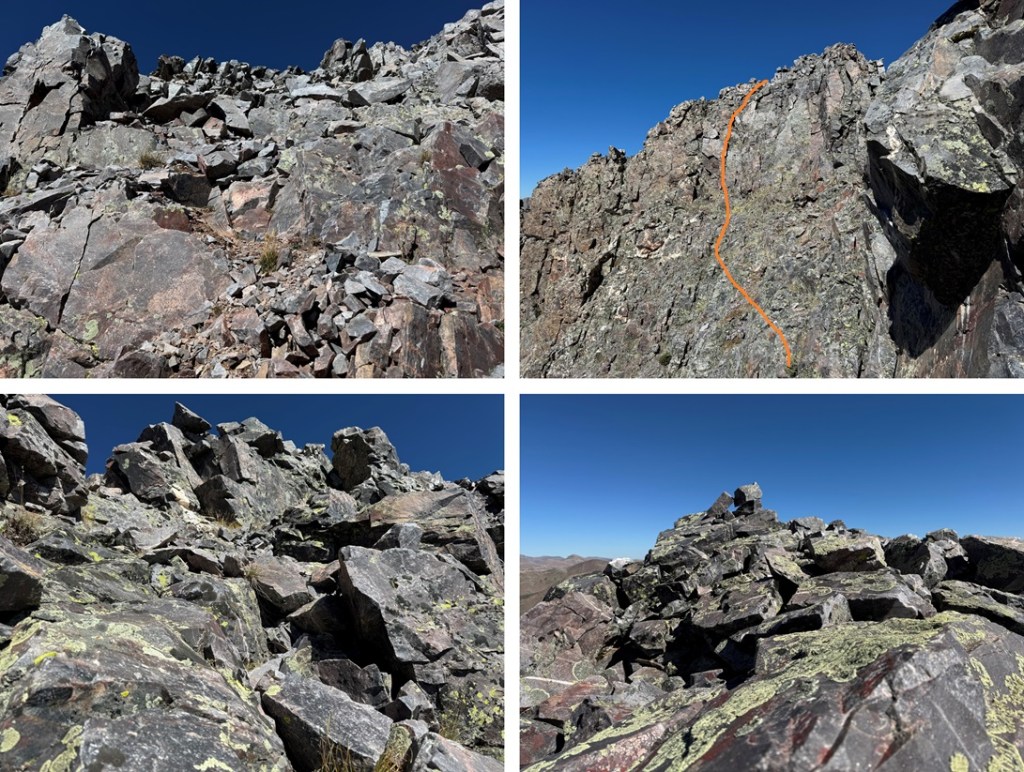
Once over the notch I needed to descend about 20 feet into a gully, then re-ascend to the other side. 

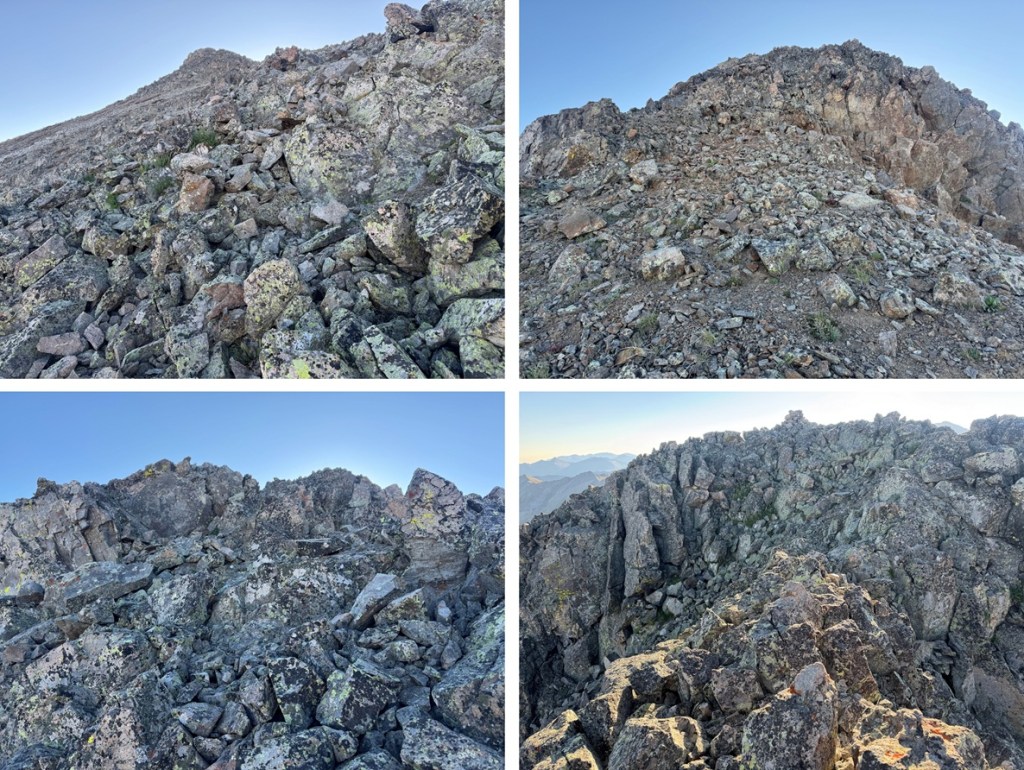
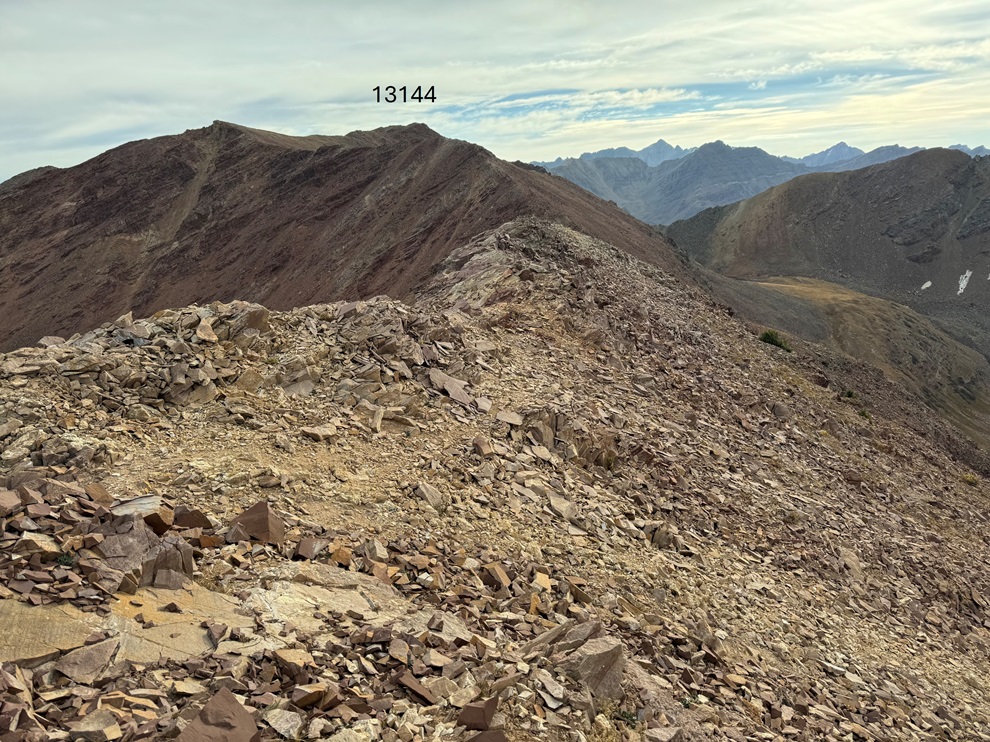
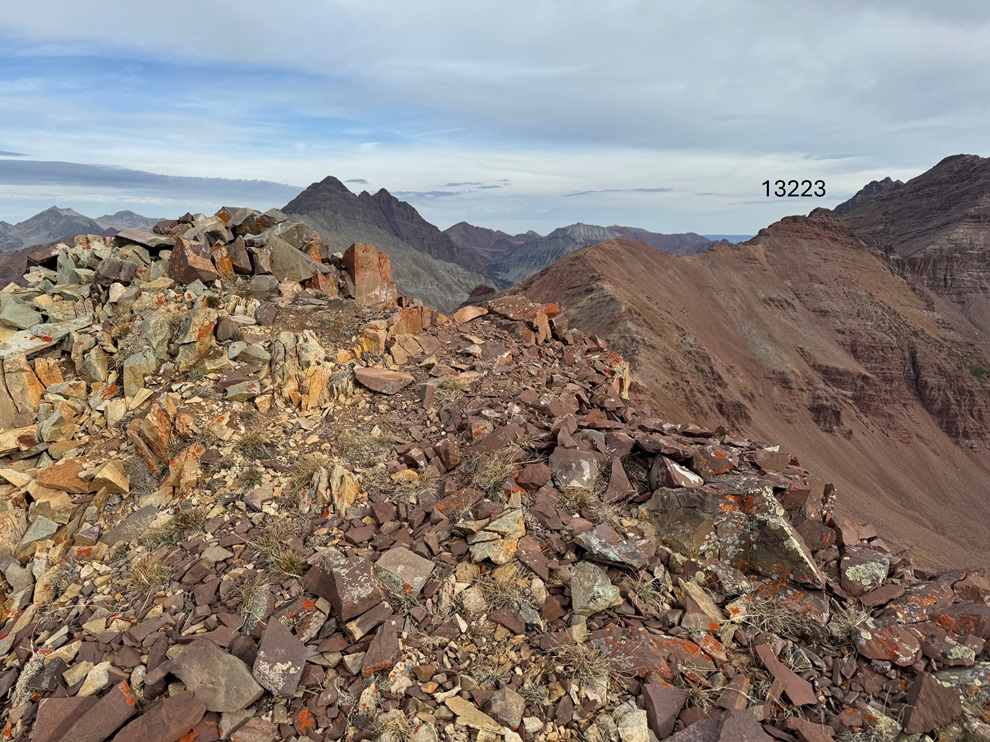
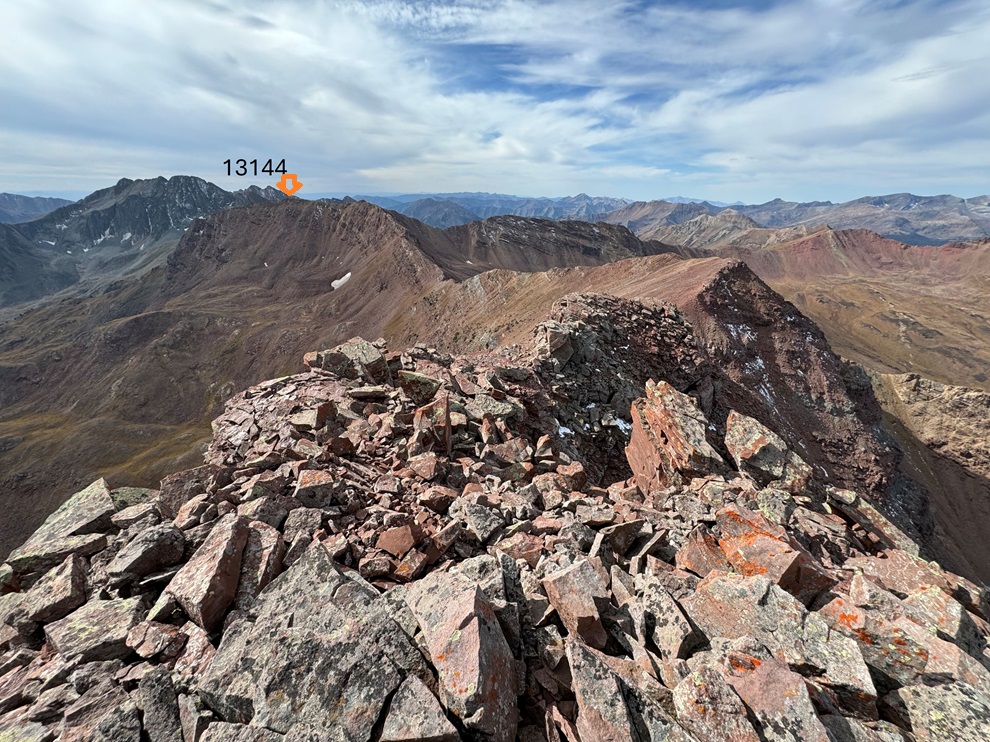
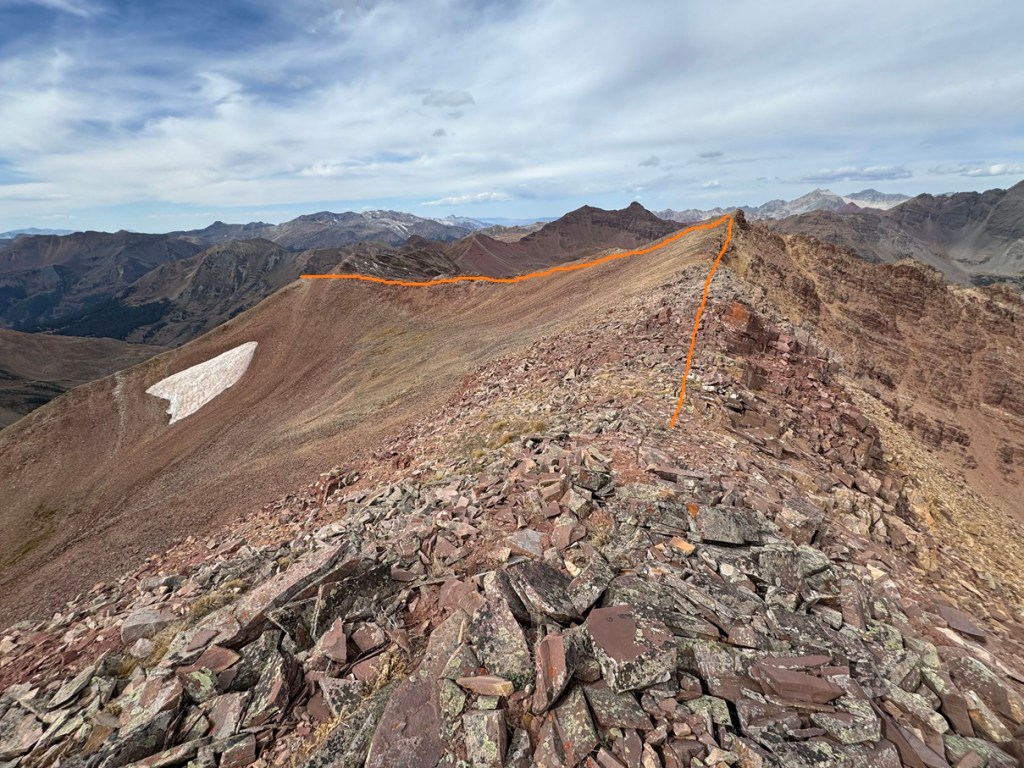
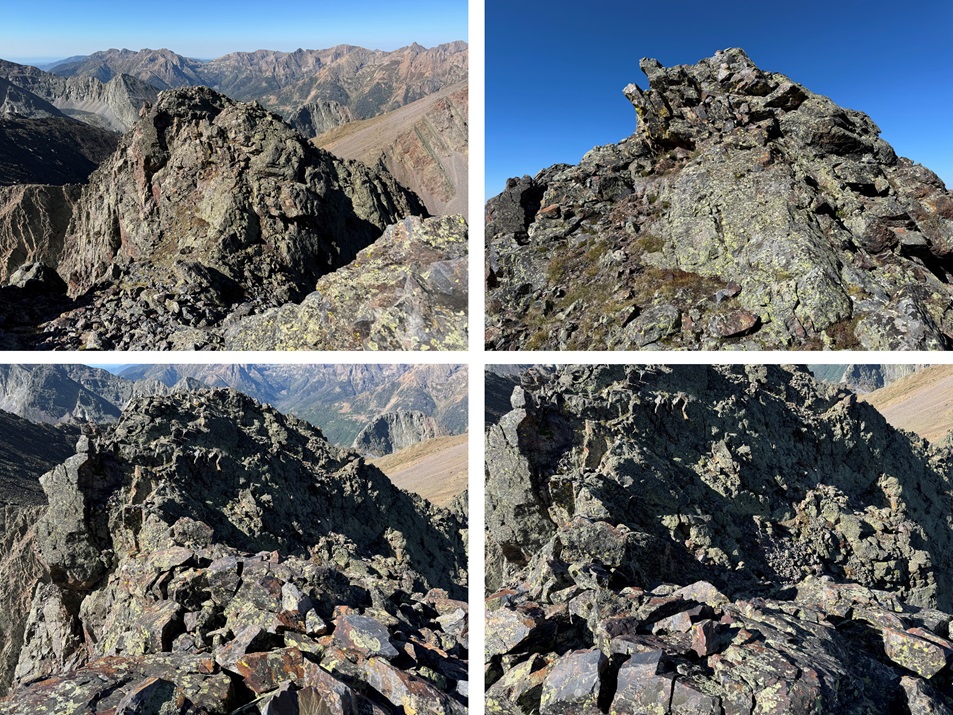
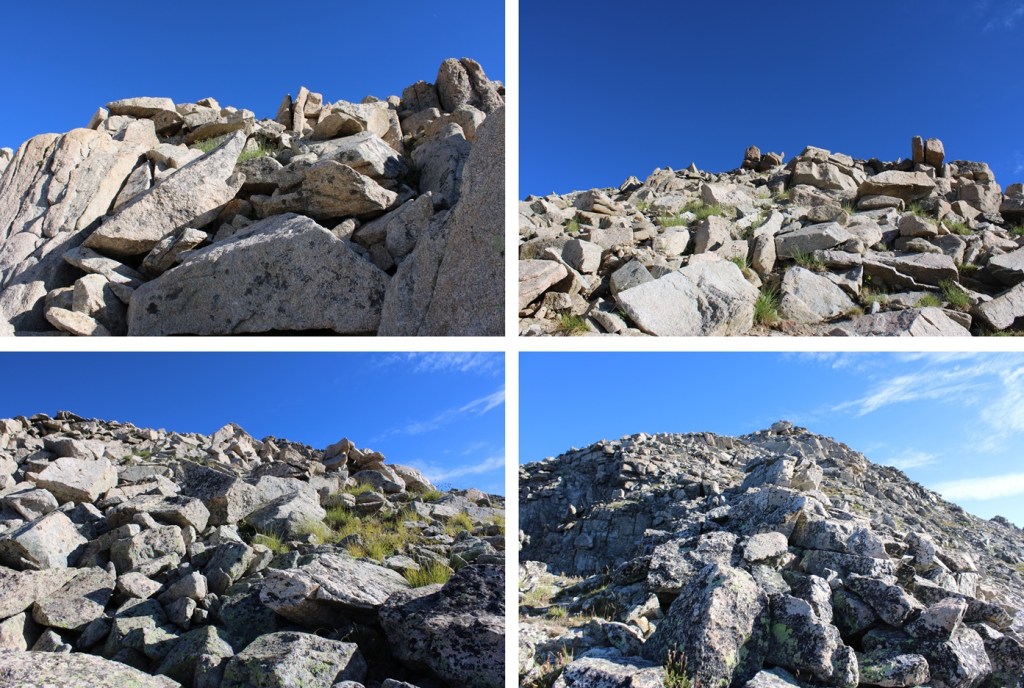
Now I found cairns leading me north and then west to the summit.  From this point on it was difficult class 2, easy class 3 to the summit.  It was choose your own adventure, and the routes were obvious.

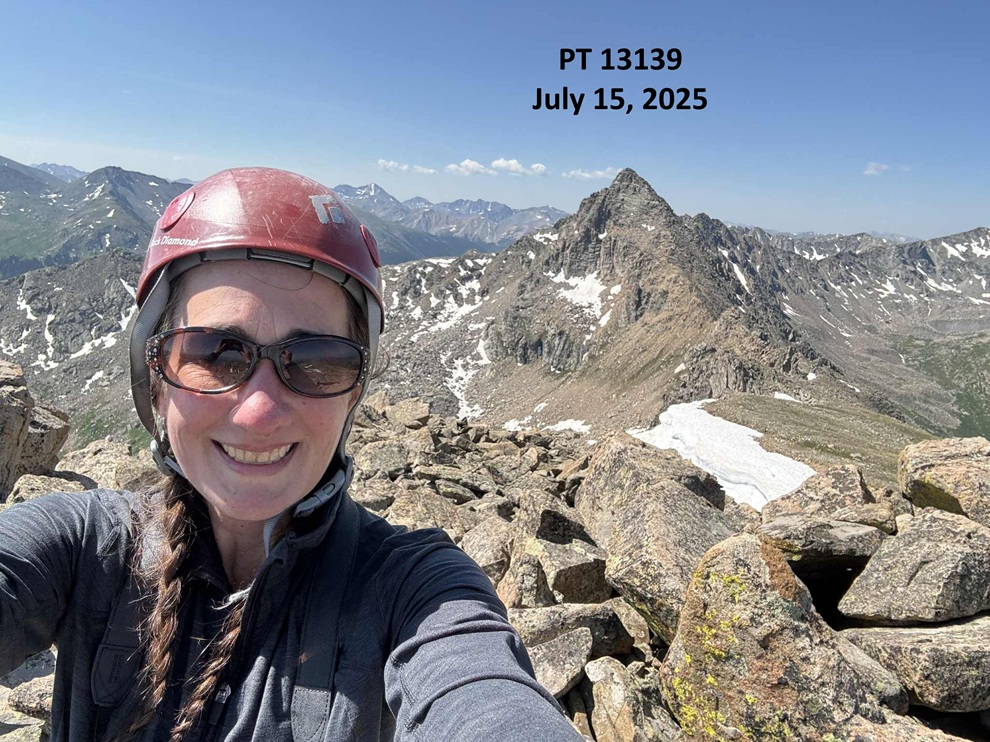
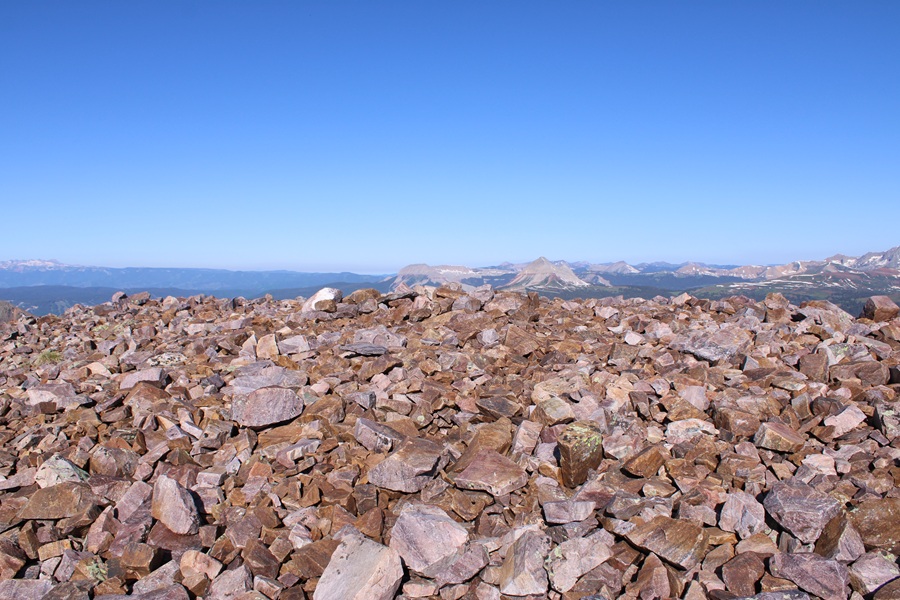
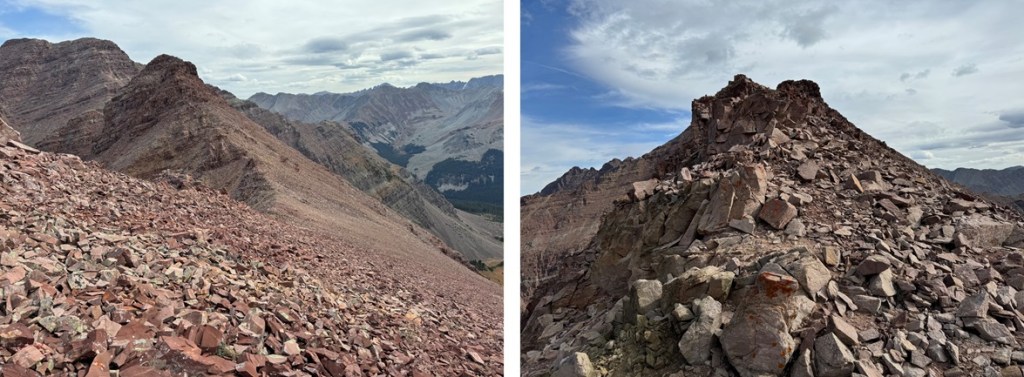
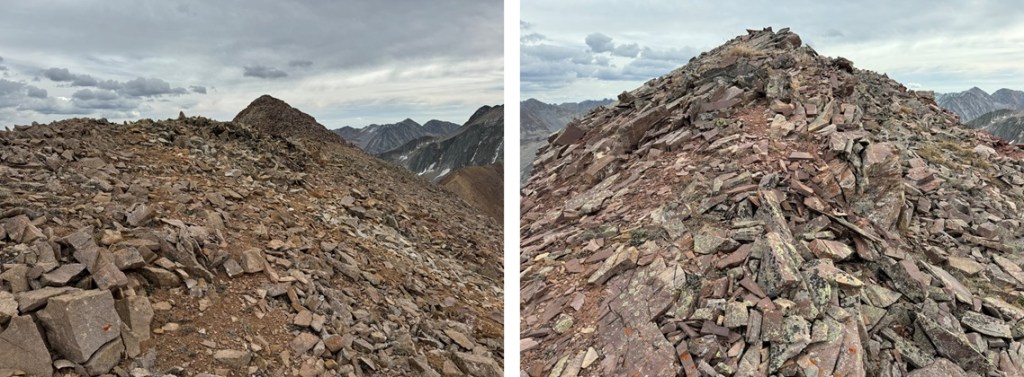
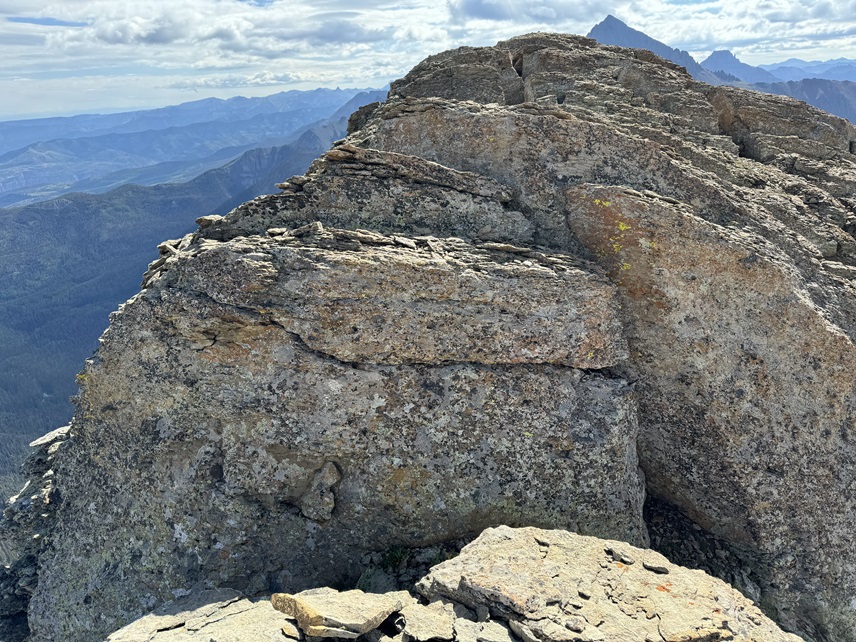
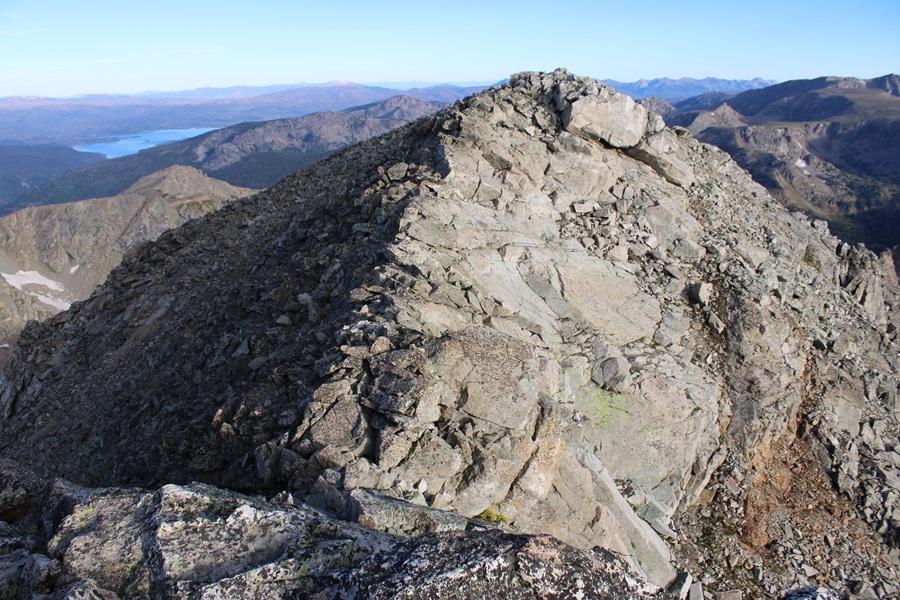
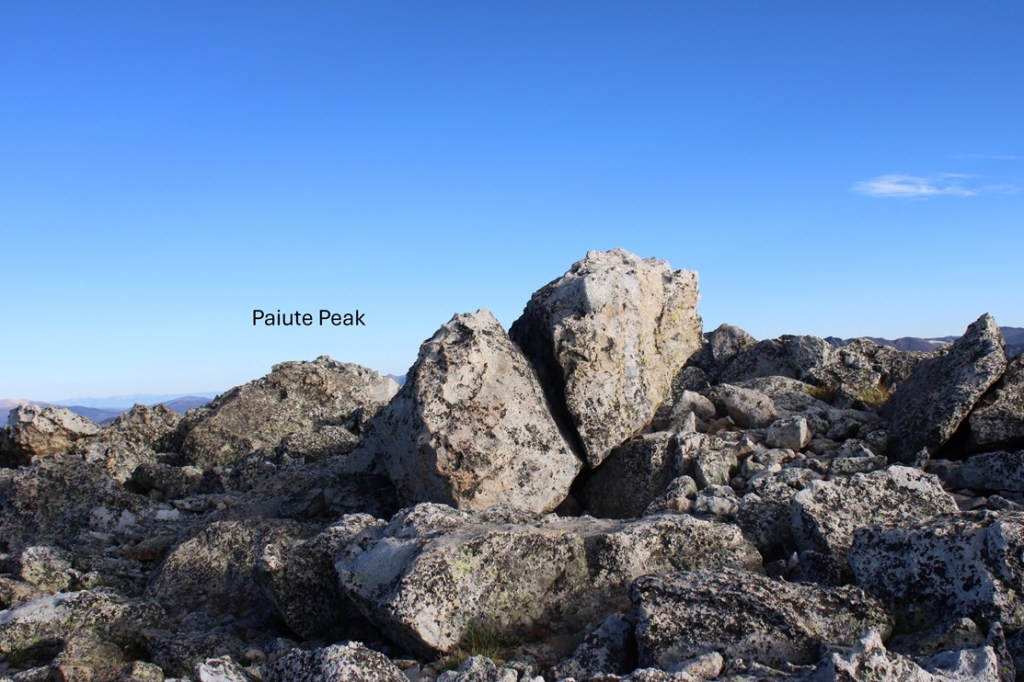
The true summit is to the left, with a small rock on top of a large boulder.

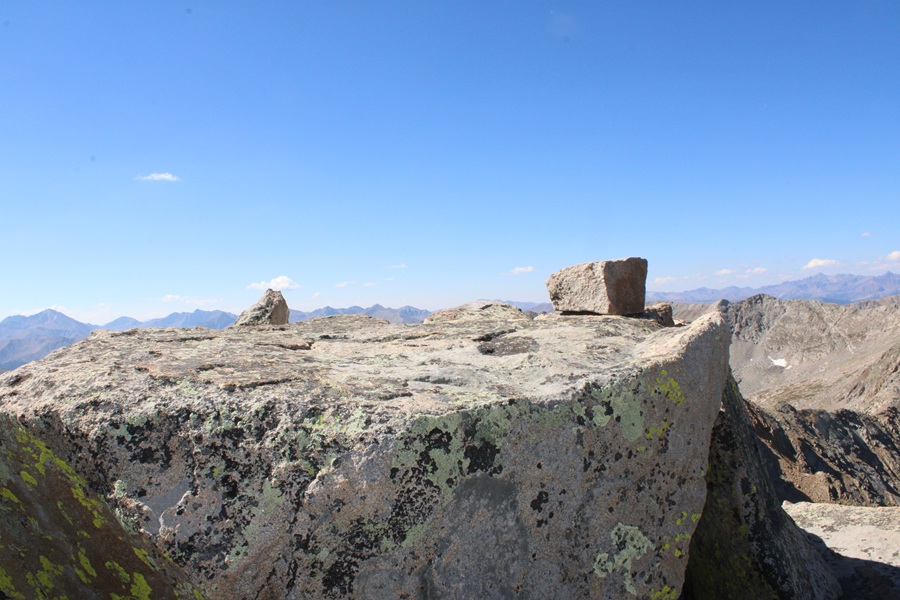
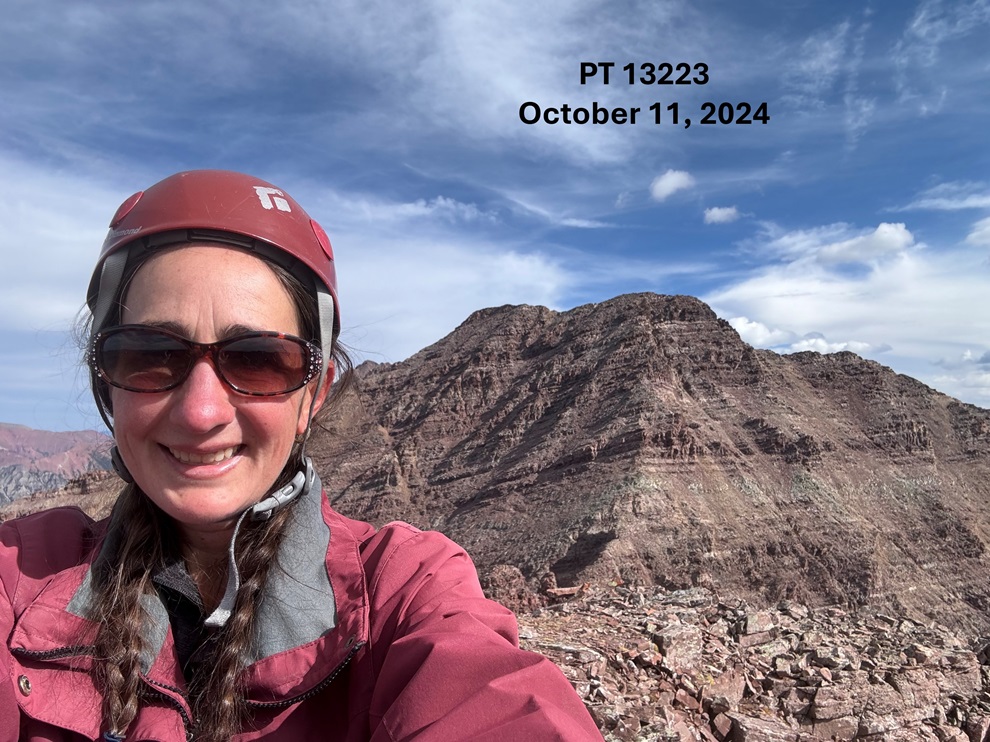
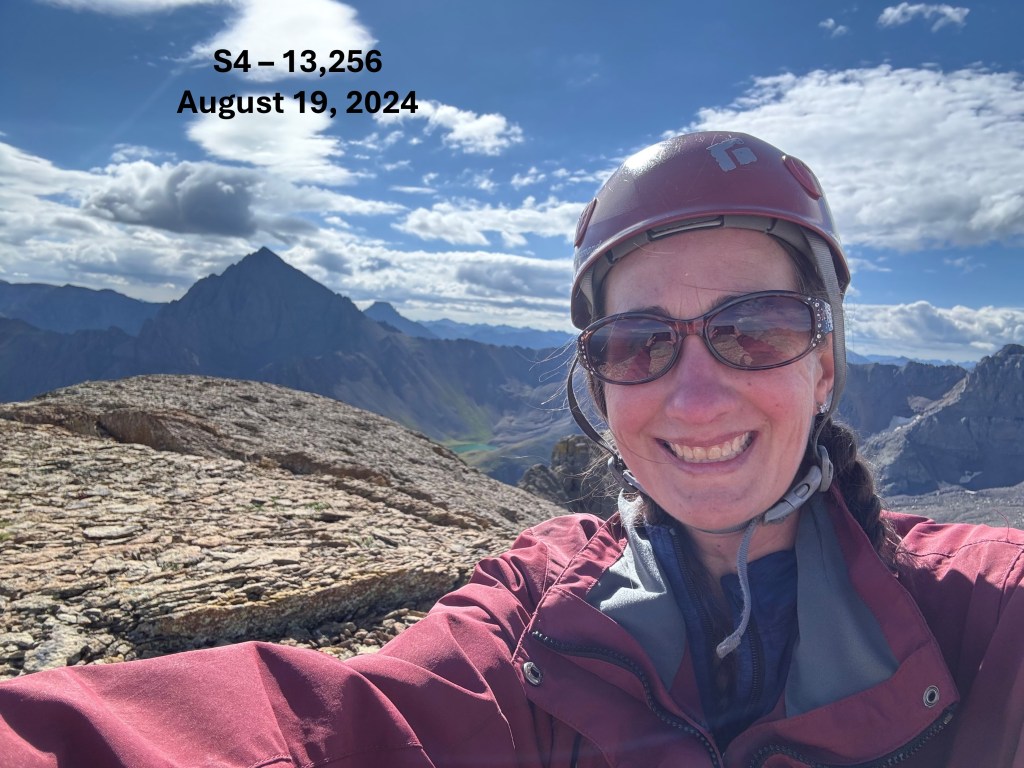
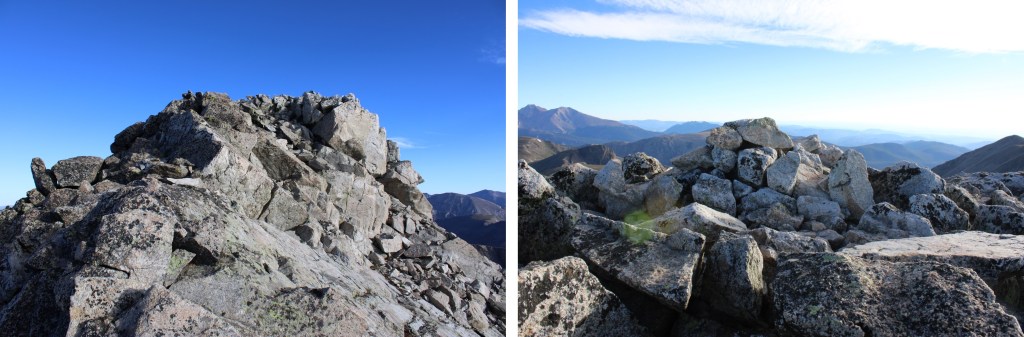
I summited 13204 at 10:50am

13204:

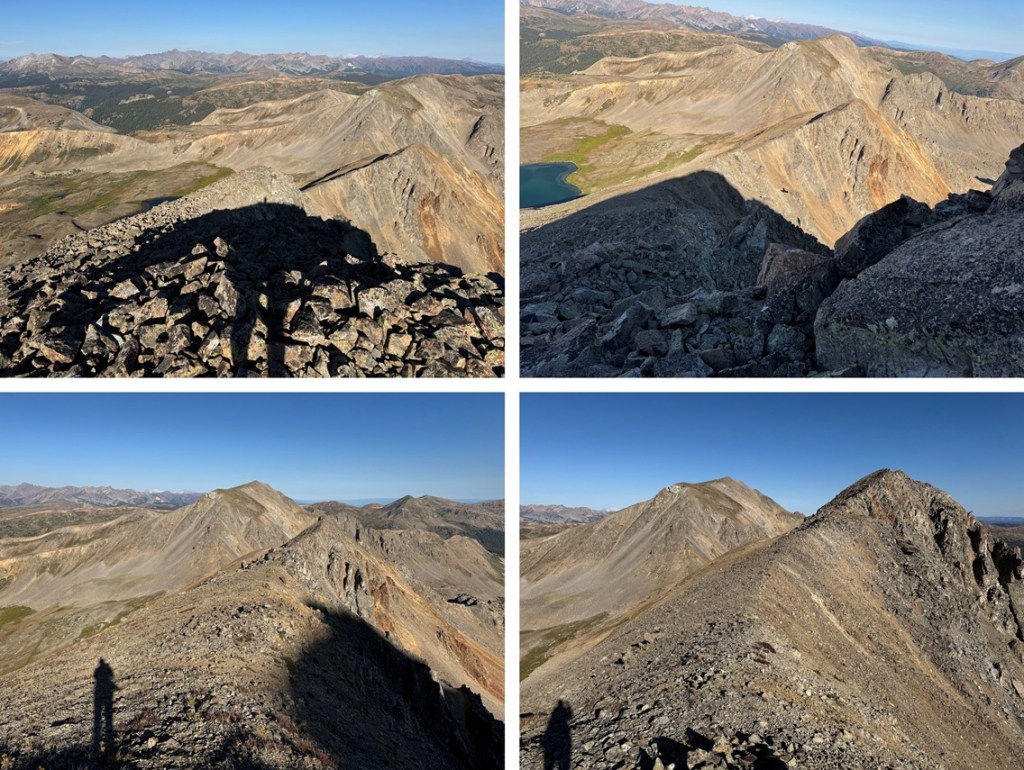
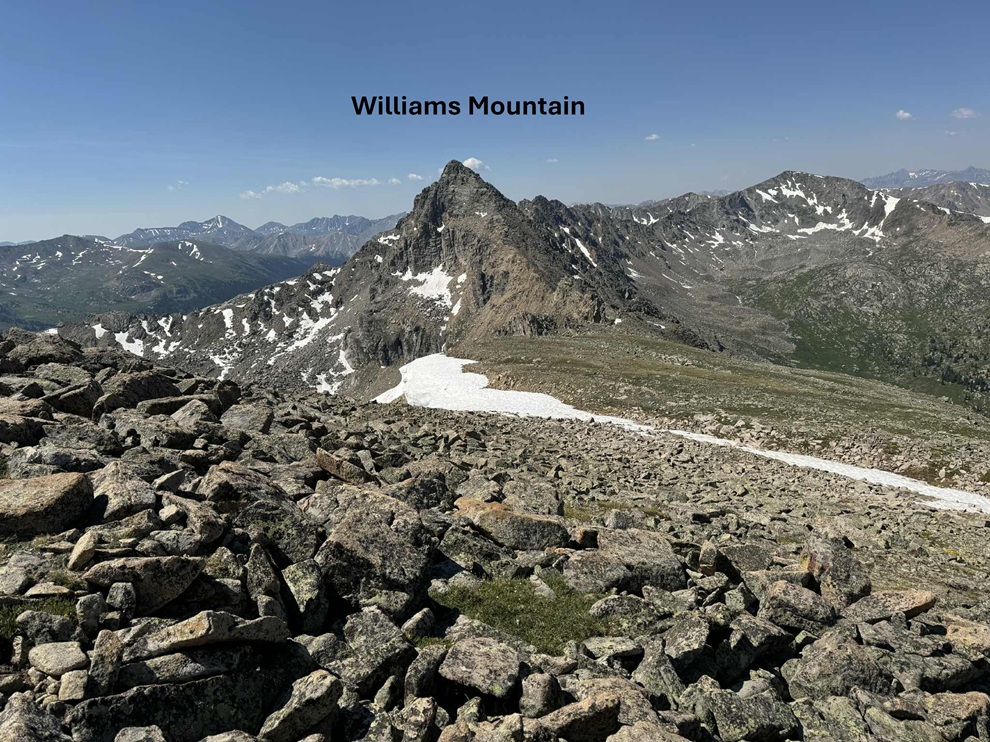
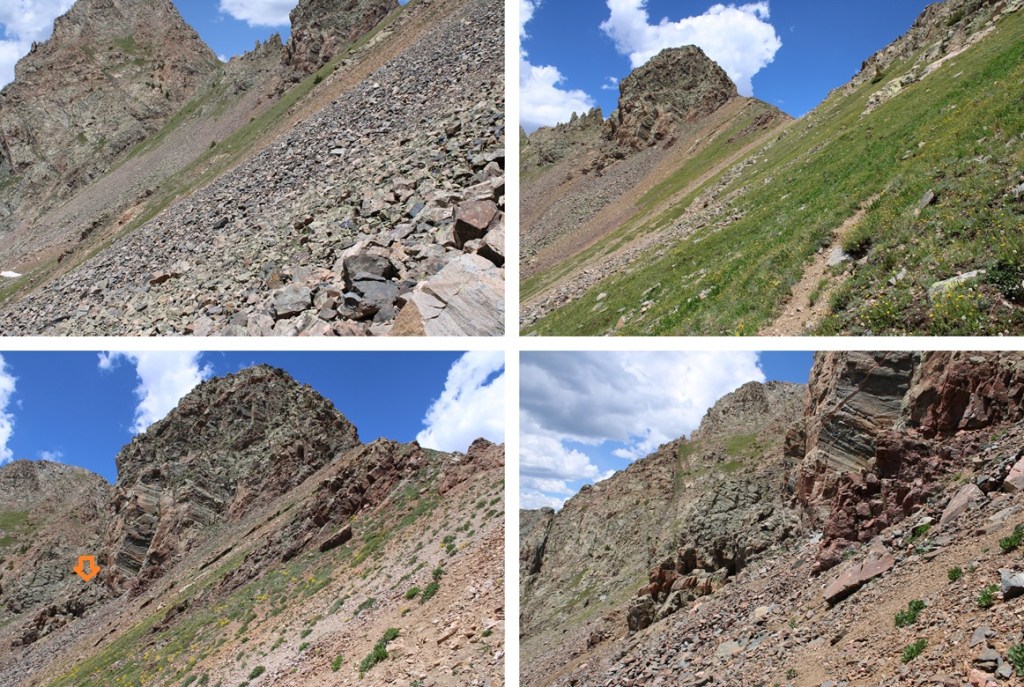
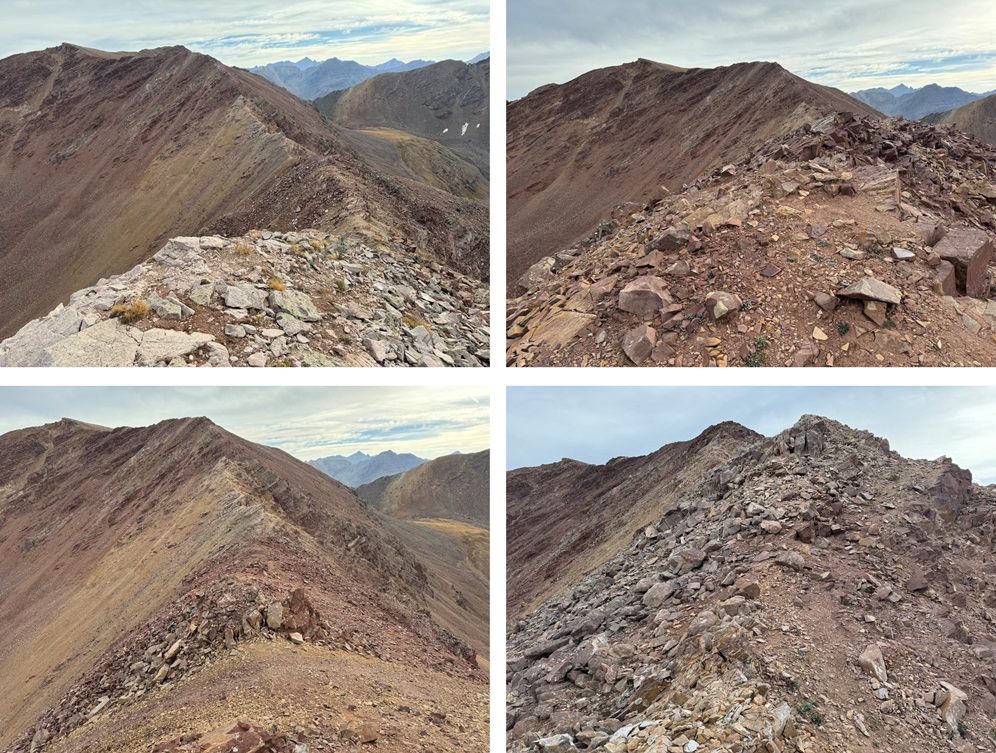
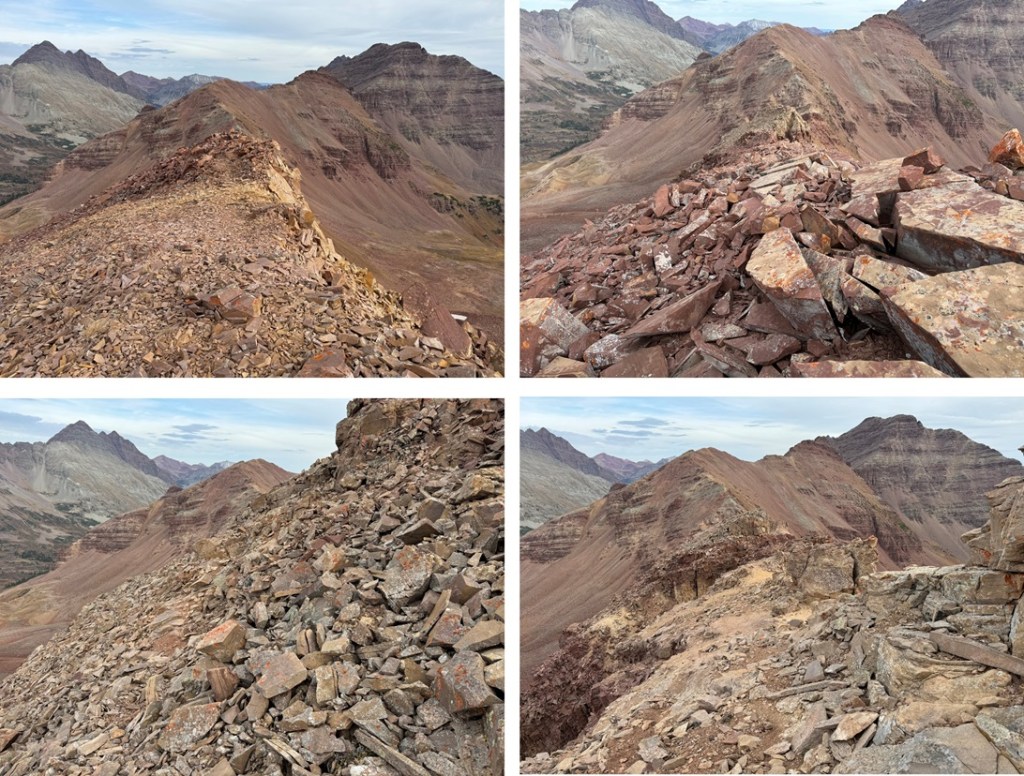
Now you might think I’d head back the way I’d summited, but I was curious as to if I could have made it down that class 4 route I’d attempted earlier, so I headed back the way I’d summited, then headed down southwest to try to link up my climb from earlier in the day.  It was all class 2 until I got to the class 4 part, and I was glad I’d turned around. 

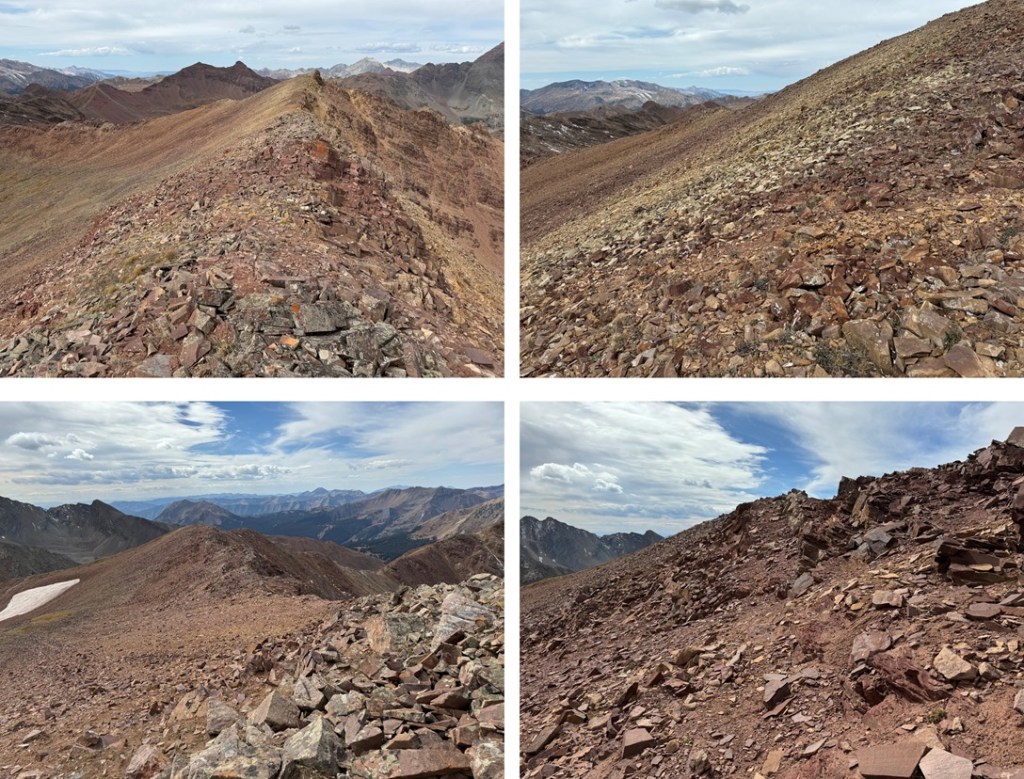
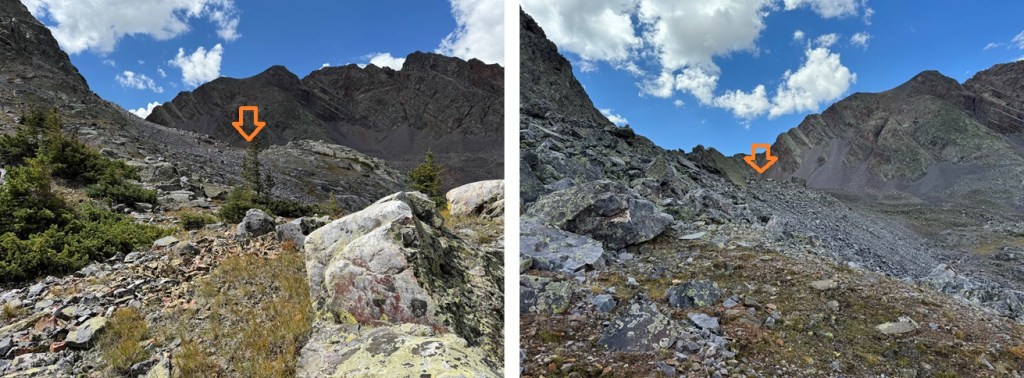
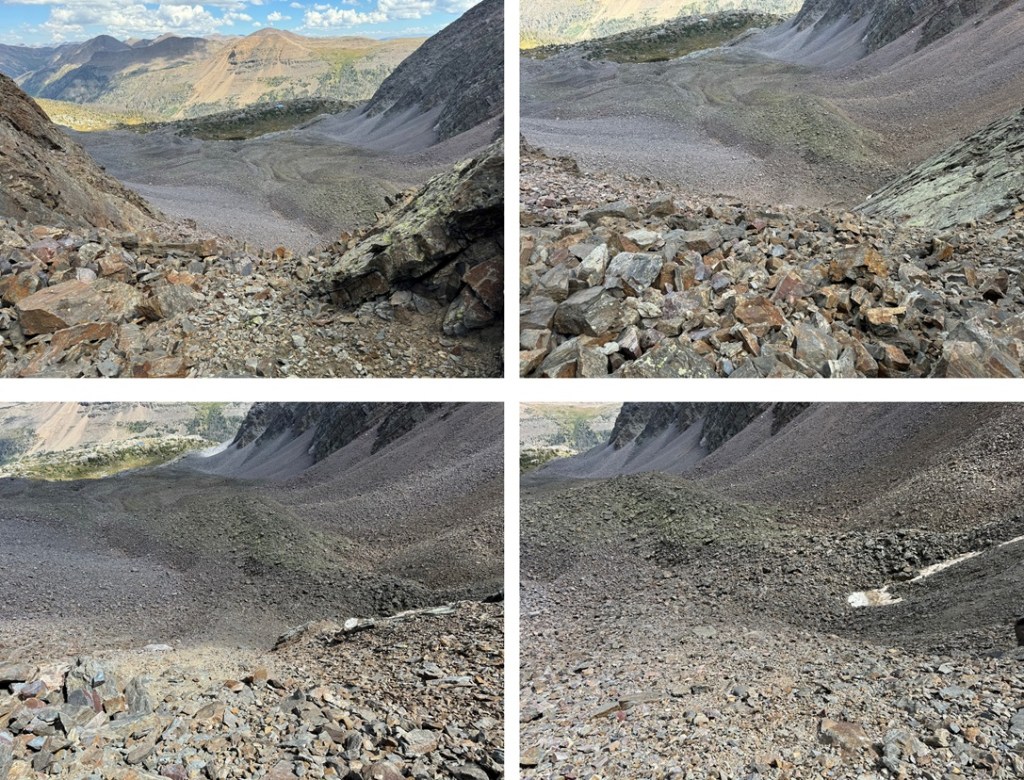
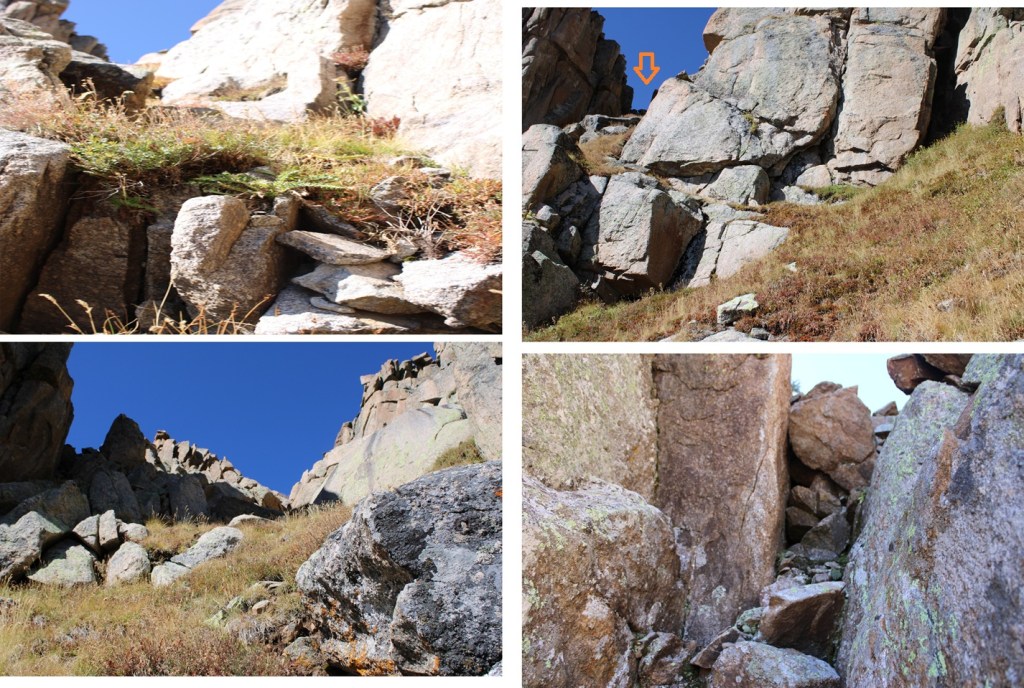
Seeing it wasn’t any better from this angle I reascended and found a gully to head down. I could see all the way down to the valley, it looked class 2, so I decided to go for it. I started at 13100’ and descended the entire way down on class 2 terrain just below where I’d dropped down and re-ascended again on the ascent.  The place just before the notch on the return.  That gully goes at class 2.  I could see the access point from the summit.

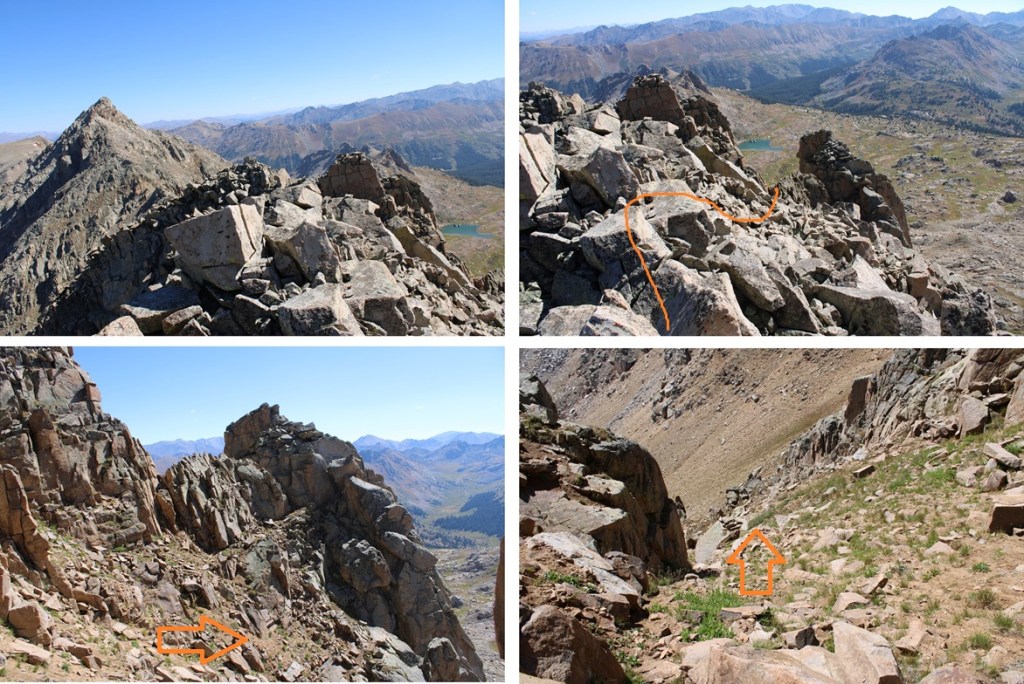
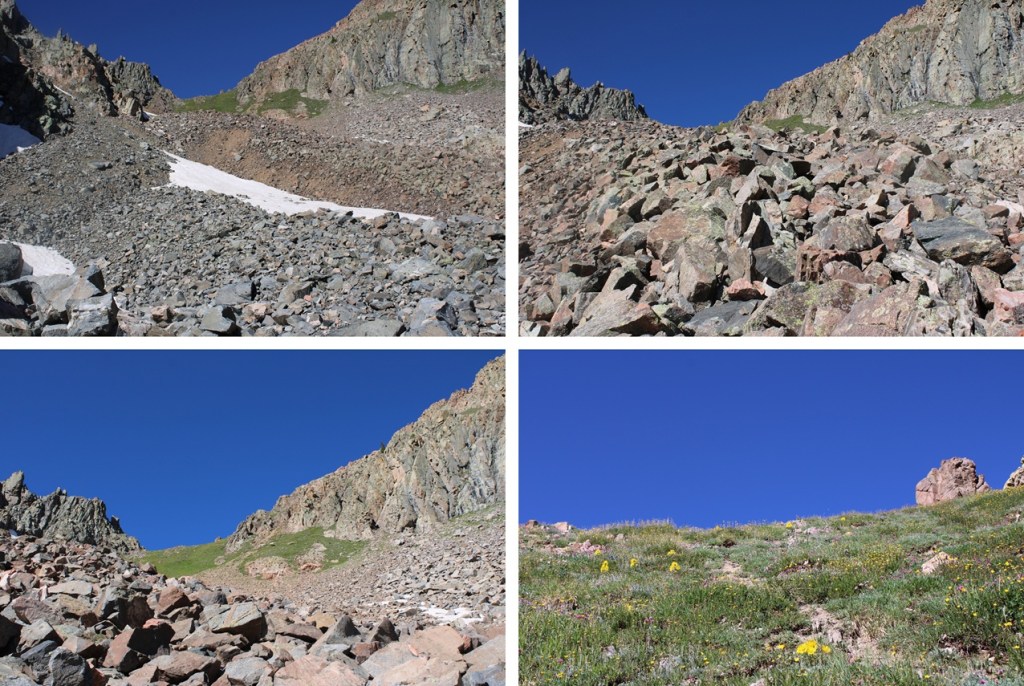
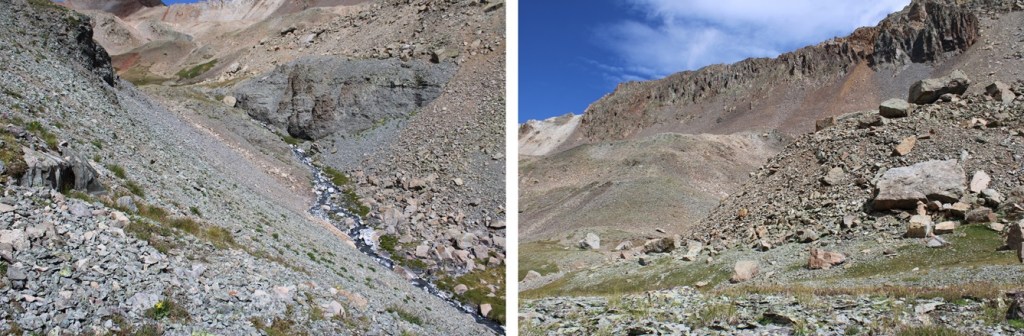
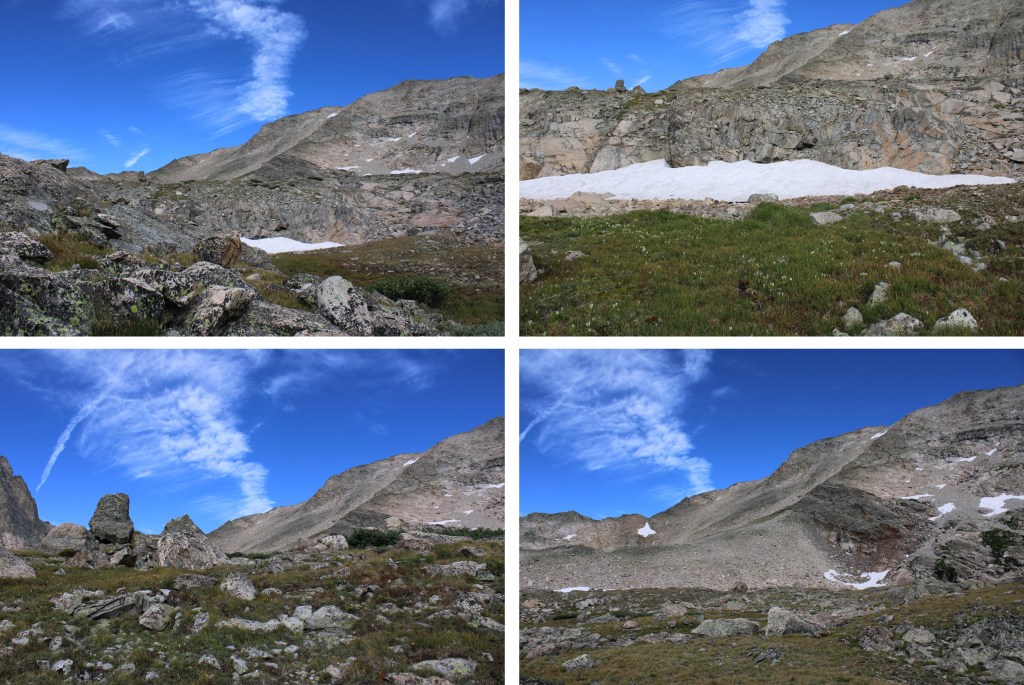
Here are some pictures looking down the gully.  It splits at least twice, but each option is class 2, so pick the route you like the best.  If I were to do this peak again, I’d take the gully.  Tons of game trails, not a lot of scree, lots of elevation gain but no exposure.  Just keep this as an option as a bail out point, or another way to summit this peak if you’re dividing the peaks and not doing the traverse. 

From the base of the gully I paralleled the ridge I’d hiked that morning, heading west until I’d reached my camping spot.

If you’re heading up from the basin doing this class 2 route, this is how the route would look:

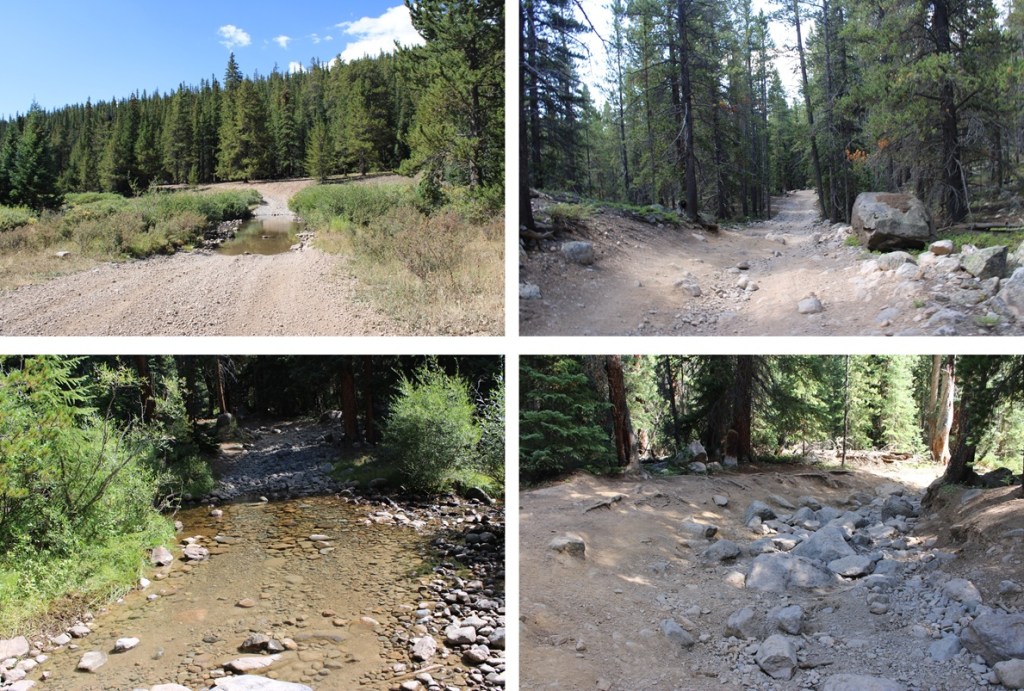
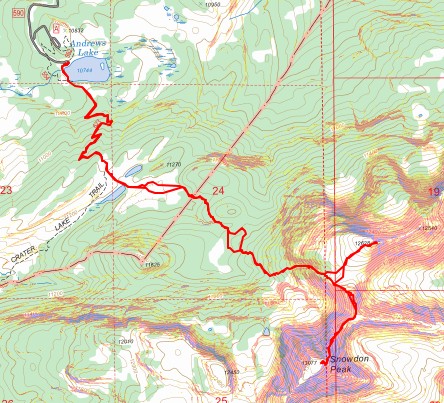
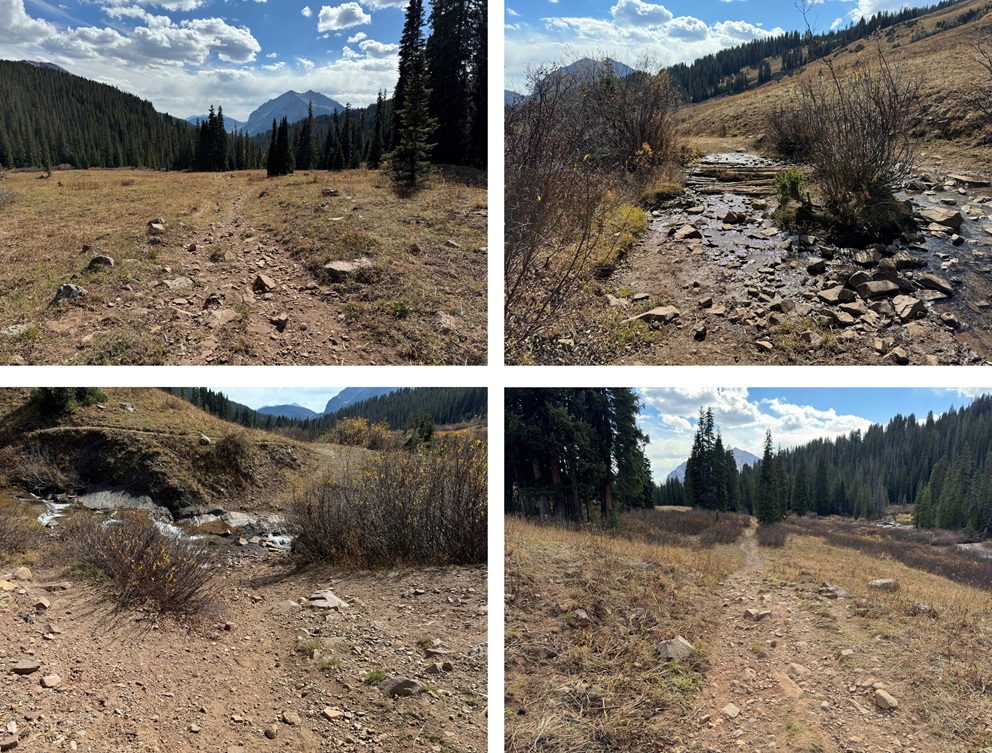
Back in the basin I followed the stream back down, heading Southeast, staying to the left of the stream until I was about 20 yards from the trail, then crossing the stream on an obvious area, and linking up with Lost Man Trail.

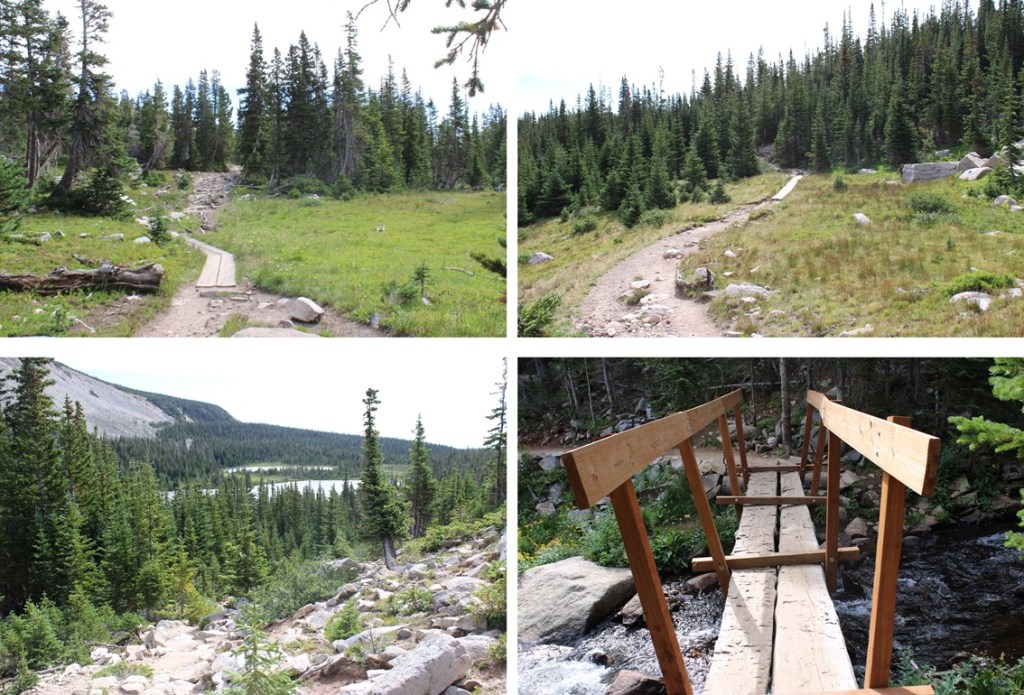
Back on Lost Man Trail I turned right and followed it back to the trailhead.

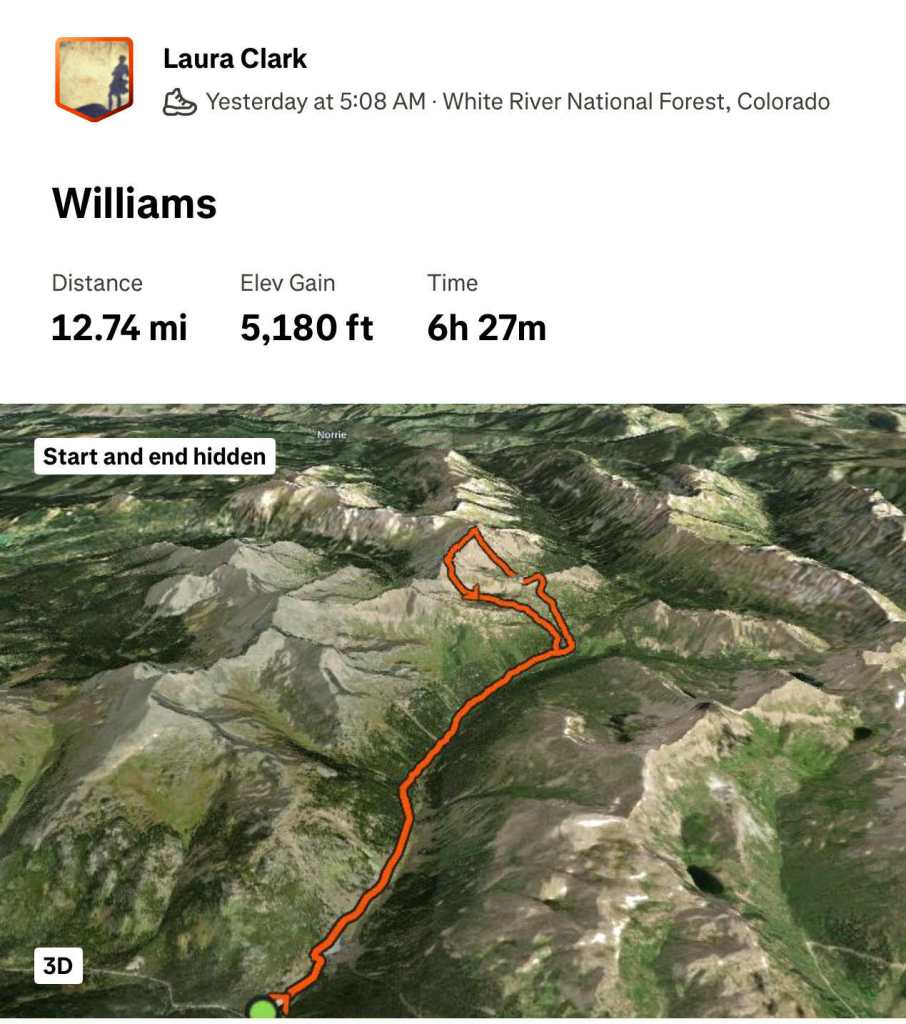
I made it back to my truck at 1pm.  Total stats for this hike vary.

Parking Area to campsite/upper basin: 5.43 miles, 1600’

Campsite to first attempt and back: 2.5 miles, 1000’

Campsite to class 3 summit: 1.3 miles, 1100’

Down summit class 2 route: 1 mile, 1100’ elevation loss

Campsite/upper basin to Parking Area:  5.43 miles

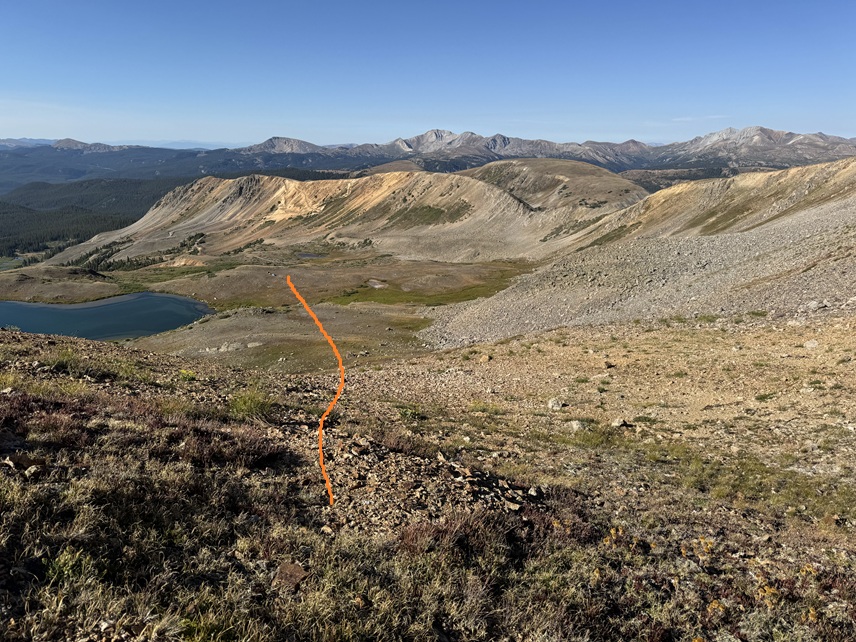
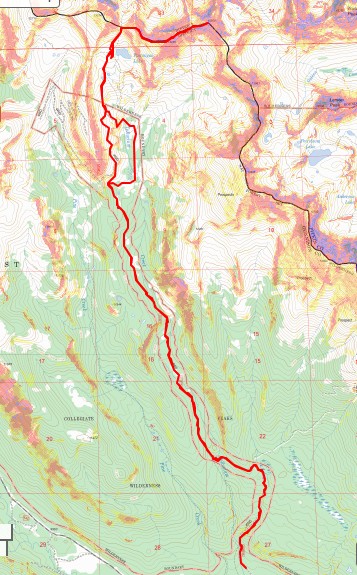
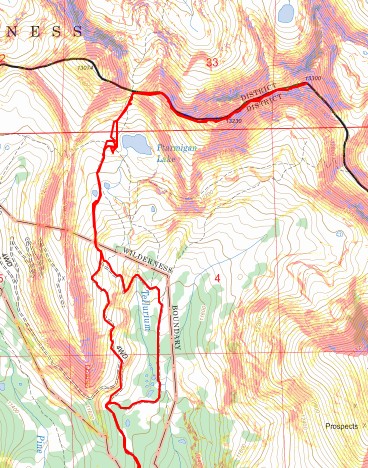
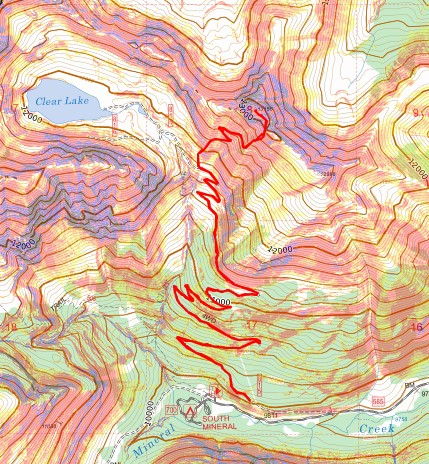
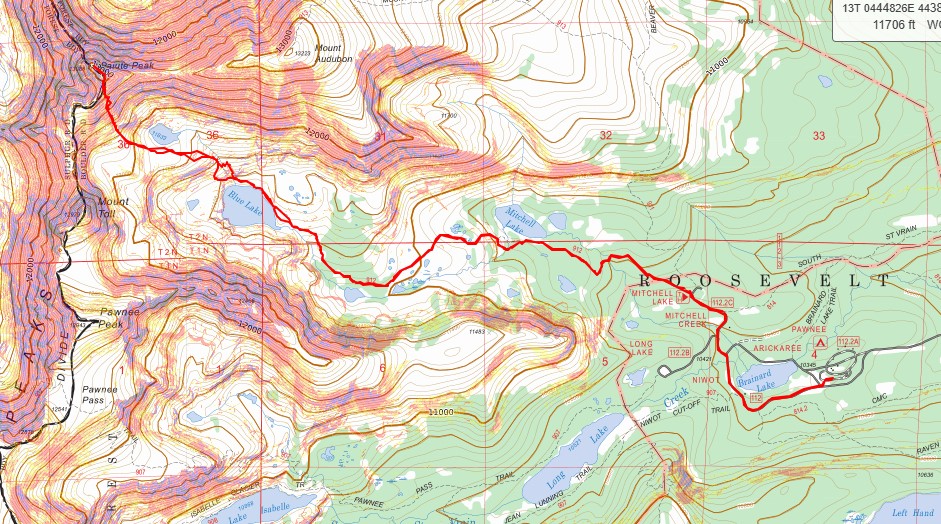
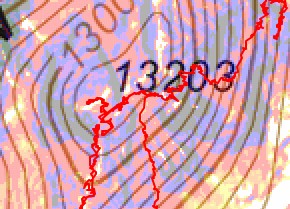
Topo for upper basin:
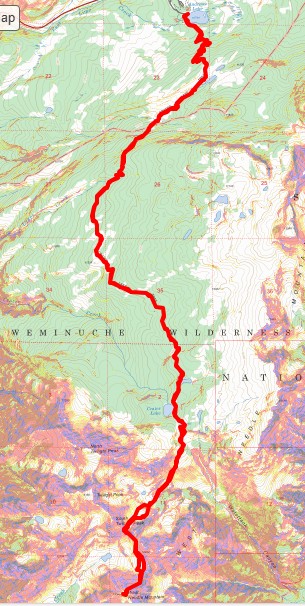
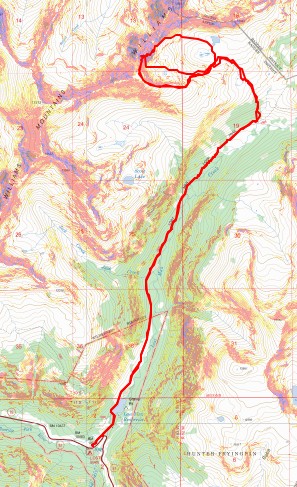
Route Topo:

On to the next trailhead!

Tellurium Peak – 13,311

RT Length: 16.42 miles

Elevation Gain: 4219’

Last time I went to Ptarmigan Lake I did it in my side by side and it took over an hour and a half to drive up.  This time, feeling like I needed to ‘earn’ this hike, I parked in the dispersed camping area and hiked 6 or 7 miles (depending if you trust Strava versus CalTopo) to Ptarmigan Lake. Here’s a picture of the camping area.  There are several large, dispersed campsites at the beginning of the 4WD road.  Vehicles (Tundra, Subaru, Tacoma, 4Runner, etc.) are not allowed on this road, so unless you have a side by side, Razor, etc. you’ll need to hike in. 

It took me 3 hours carrying a full pack to make it to the lake.  The road is easy to follow but very rocky.  Here are some pictures of the road up to 11900’, where the junction is with the trail that takes you to the lake.   There are several stream crossings along the way, but this time of year they were all low enough I could rock hop across. 

At around 11480’ there’s a junction in the road.  You can go either way.  To the right you’ll go through a marshy area, to the left you’ll stay high and see the marshy area.  I went right on the way in and hiked out the other way.  Both were comparable, but the road to the left is a little shorter.

Here are some pictures of the rest of the route up to the parking area.

At 11900’ there’s a parking area and a closed gate.  To the left if the gate is a trail that will take you to some old mines.  The trail stops at the mines, but in the distance you can see where the old road to Ptarmigan Lake used to be.  I aimed for that and hiked up to the lake. 

From here you can go right to Ptarmigan Lake or continue your hike.  I stopped at the lake and set up my tent for the night.  My watch said it was 6 miles to the lake, CalTopo gave me 7 miles and 2650’ of elevation gain.  It took me 3 hours to get to the lake.

From Ptarmigan Lake the next objective is to head northeast to make it to the saddle of West Tellurium/Tellurium.  It’s an easy class 2 hike to get there.

Once on the saddle I turned right, and this became a ridge hike.  I followed the ridge east.  It started out as class 2 and continued to be class 2 until the false summit.  Just before the false summit the terrain became rocky but stayed at class 2.

From the false summit I continued to follow the ridge east.  The terrain became more difficult as I descended about 150’, then reascended up to Tellurium.  I mainly stuck to the ridge, unless it was obvious to drop down to easier terrain.  I felt this was easy class 3, but with a lot of choss/talus and exposure. 

Here are some pictures of the ridge:

The last section of the ridge just before the summit became rocky, but a class 2 rocky

I summited Tellurium Peak at 7:40am

Tellurium Peak:

This was my only peak for today, so I turned around and headed back down/up/down the ridge.  Here are some pictures of my way back over to the false summit.

Then it was back to the West Tellurium/Tellurium saddle.

Then from the saddle I hiked back to my campsite at Ptarmigan Lake

From the lake to the summit and back took me 3 hours total, with a stop on the ridge to make a phone call.  Now to head out.  From the lake I followed the 4WD road back to the trail/mines

Then I followed the road all the way back to the dispersed camping area, taking the upper road this time (both roads make a loop).

I made it back to my truck at 11:45am.  This hike totaled 16.42 miles with 4219’ of elevation gain. Here’s the topo of my entire route

And one closer up

On to the next trailhead!

PT 13139 and Williams Mountain

RT Length: 15.26 miles

Elevation Gain: 3918’

I started from the Lost Man Trailhead at 5am.  This trailhead has capacity for around 35 vehicles, if everyone parks nicely.  The trailhead is obvious.

At the trailhead sign I went right, following the Lost Man Loop Trail.

This is a well-maintained class 1 trail that passed by Lost Man Reservoir and then continued north, paralleling Lost Man Creek.

I followed this trail for about 4 miles.  If you make it to South Fork Pass you’ve gone too far.

At 11550’ of elevation I left the trail and headed north towards an unnamed pass to the right of PT 12683.

For a visual, I was headed here:

When I got to the top of this small pass I had a visual of the route before me to PT 13139. 

I was disheartened.  That cornice looked big.  I sat on that pass for longer than I wanted, contemplating my next move.  It was only July 15, and I’d already had over a dozen failed attempts already this year.  Mostly due to cornices, but also due to wildfires (I evacuated twice) and getting “the knock” twice and being told I can’t park my vehicle at a trailhead overnight (even to leave it to go backpacking: it would be towed).  I remembered hearing (somewhere) that the entire Williams traverse was clear of snow this week, so in my mind I figured it was possible to make it around the cornice.  Needing a ‘win’ I decided to go for it.  Here’s my route, dropping 620’ into the basin on an adequate game trail, staying to the right of the creek and avoiding the willows, and then climbing up the gully.

At the base of the gully I once again stopped to rest and contemplate the ascent.  That cornice looked really big (it was).  But it also looked like I could go around it to the right.  I ascended the gully, trying to stay in the middle but drifting towards the right because the terrain there was more stable.  This gully is steeper than it looks and it took quite a while to ascend. 

The cornice was indeed large.  At the base of it I thought I saw a line to the right that would lead me to the ridge, so I headed that way.  Long story short, it did NOT go.  I got myself into a very scary situation where the rocks and dirt (which was wet) caved out from underneath me and slid down, leaving me standing on a slick rock slab with no traction, and no way to go up or down.  While it looks like it goes, even when standing right beneath it, it does not (at least not safely).  It is much steeper than it looks from below.

I was frustrated, especially since I’d heard someone else had already done the route this year.  There were no footprints to be seen (I didn’t see any at all the entire hike), and no clear line to the ridge.  I was heading back when I took a different look at the cornice, this time from above.  There was about a foot of space behind the cornice I could crawl through (and get wet in the process) that would lead me to the ridge.  I squeezed behind it and was quickly standing on the ridge.

Once on the ridge I turned right and headed northeast to the summit.  The terrain was class 2, and very rocky.

I summited PT 13139 at 10:40am

13139:

Once again I had a chat with myself on the summit.  I am getting closer to finishing the 13ers, and when they’re done for me that’s it.  I’m not going for 12ers, etc. because I’m starting a new phase of my life.  However, I want to enjoy the 13ers for as long as possible.  That’s a long way of saying I’m trying to stretch out my remaining climbs by making them multiple day trips.  I’d planned on doing the Williams group in 3 days, but since if I returned the way I’d summited I’d need to gain over 600’ of elevation anyway, I figured I’d head over to Williams Mountain and summit that one today as well.  So, I turned and headed southwest along the ridge towards Williams Mountain.

The ridge started out calmly, then quickly became rocky.  I stayed to the ridge proper on class 2 and 3 terrain.

Until I came to this point, where I dropped down to the left and followed the scree filled slopes before regaining the ridge.

While it may look flat, there were a lot of ups and downs along the way.

Once on the ridge again I followed it south. There were large boulders to navigate, but the rock was pretty solid.  This is where the ‘fun’ begins.  For the rest of the route to the summit it’s intense class 3, if not class 4.  It’s probably the most difficult class 3 I’ve done to date, bordering on class 4 in areas (I’m short, so a lot of the holds are a stretch).  There are a few cairns in this area, but don’t rely on seeing them. This was an intense, exposed scramble, and more than once I got myself ‘stuck’ in a not so friendly position and had to backtrack (which was also not so friendly).  Be sure of your holds, be sure of your moves, and please have climbing experience before attempting this climb because it only gets more difficult as you ascend.  I stuck a little to the west of the ridge, heading south.

I summited Williams Mountain at 12:55pm

Williams Mountain:

After summiting I kept heading south, towards 13204.

I’d thought the difficult climbing was over, but I was wrong.  Almost immediately I was greeted with a rock slab I’d need to descend. I butt-schooched down this thing.

Here’s looking back up at the rock slab

That was the worst of it though.  I went left and descended and then reascended this little gully

Then I made my way down the ridge to a larger gully and followed it southeast into a basin.  This gully was easily manageable, with game trails to follow.  Towards the middle there were options to go left or right.  Both went, but I took the right side. 

From the top of the gully you can see my route out of the basin.

Here are some gully pictures

At the base of the gully I headed southeast along the basin. 

At the end of the basin I followed the stream that was running pretty strongly all the way back down to Lost Man Loop Trail, staying to the left of the stream the entire time.

Back on Lost Man Loop Trail, I followed it southwest back to the trailhead.

I made it back to my truck at 4pm, making this a 15.26 mile hike with 3918’ of elevation gain, according to CalTopo.  My numbers with Strava were different.

On to the next trailhead!

West Needle Mountain – 13,060

RT Length: 19.1 miles

Elevation Gain: 4853’

I started from the Andrews Lake trailhead at 6am.  On a positive note, the bathrooms were clean this time!  No toilet paper, but the seats were clean (always bring your own TP).  The trail starts by skirting the south side of the lake.

I then took Trail 623/Crater Lake Trail all the way to Crater Lake. This is an easy, class 1 trail that is easy to follow with no major junctions.  I hiked the 5.5 miles to Crater Lake on this trail.

Once at Crater Lake there’s a side trail that goes off to the left.  This trail stops at 11750’ at a small pond.  I took the trail to the pond.

The trail stops at 11750’ and now it’s time to bushwhack.  I lost 400’ of elevation as I headed southwest towards a gully I couldn’t yet see.  Here’s an overview of where I was headed.

Aiming southwest I skirted the hillside until I came to the end of the trees. 

I now had a clear view of my path to the saddle between South Twilight Peak and PT 12932.  I kept descending towards the creekbed and then ascended up 1260’ towards the saddle. 

The route was obvious but not marked. I went to the left on the way up, to the right on the way down, and both were similar. The left side had larger boulders and the right side had more tundra, but both were essentially snow free and clear.

Here are some pictures of the route to the saddle

Now at the saddle I had to descend a bit to traverse towards West Needle Mountain.  I descended about 25 feet to the south and found an access gully on the left that would get me around the rock outcroppings.

I ascended the class 2 gully

From the top of the gully I could see my intended route for West Needle Mountain.  I would initially stay high, just under the rock outcroppings, then pick up a game trail for a while and follow it towards the base of the ridge in the distance, aiming towards just below the two large outcroppings and up a gully.

Here are some pictures of the route to the base of the gully I used.

From here it’s a great time to look at the route before you. This is choose your own adventure, and there seem to be a lot of different possibilities for gaining the ridge.  All class 3.  This is the route I chose, first going up the loose and rocky gully then straight up the class 3 face. 

Once on the ridge it was still choose your own adventure.  I stuck mainly to the ridge itself in class 3 terrain.  There was one ‘sketchy’ move where I had to slide down a 10-15 foot boulder/rock slab and shimmy down.  It wasn’t difficult, but there was exposure.  The entire ridge for me was ‘figure it out as you go’.  I just kept following it up, never cliffed out, and kept heading southwest.

Of course there was a false summit, but luckily the terrain got easier from there.

I summited West Needle Mountain at 11:40am

West Needle Mountain:

This was an out and back hike for me, so I turned around and headed towards the false summit

Then back down the ridge.  Downclimbing seemed much easier than upclimbing on this route.  The route was easier to ‘find’ on the way down.

And then back towards the gully.  It’s easy to know when to start the descent towards the gully as the terrain gets noticeably easier and you have a line of sight as to where you need to descend.

From the base of the gully this is my route back up to the saddle. I’d be ascending about 250’ to get there.

Then it was back down the gully and up towards the saddle

From the saddle I could see my route back towards Crater Lake.  I’d descend back down 1260’, then up 400’.

First to head back down the drainage

Then to head back up towards the pond at 11750’.  To help me navigate I first aimed for this large boulder in the distance, then headed north through the trees.

Once at the pond at 11750’ I found the Crater Lake Trail and took it the 5.5 miles back to Andrews Lake.

I made it back to my truck at 5:30pm, making this a 19.1 mile hike with 4853’ of elevation gain in 11 hours, 30 minutes.  At least according to CalTopo. Strava gave me different numbers.

On to the next trailhead!

Snowdon Peak – 13,090 and ‘N1’ – 12,647

RT Length: 8.42 miles

Elevation Gain:  2746’

Yep, it’s been a while.  Those of you who follow me on my socials know what I’ve been up to, and I’ve been busy!  I’m really excited to have a few months off to tackle more peaks (kind of… I still need to travel for work most of August.  WHY is that my busiest climbing month, and my busiest work month???).  Most of the 13ers I have left still need to ‘melt out’ before I can climb them, but when I heard Snowdon was all clear I drove down to Andrews Lake and had to see for myself. 

Andrews Lake has plenty of parking, and even an overflow lot.  However, that didn’t stop it from being full when I arrived.  Also, the bathrooms were dirty (and bring your own toilet paper).  Last time I was here the bathrooms didn’t lock. I was pleased to see they had been fixed.

I started from Andrews Lake at 5:30am, skirting the east side of the lake to the trail.

I followed this class 1 trail for about 1.3 miles to a junction with a trail register.

At the junction/trail register I turned left and followed an unnamed trail east/southeast.

This trail was well defined in the beginning, but in the marshy areas became non-existent and I had to route find a bit.  There were areas with willows, marshes, and trees.  There were a few downed trees along the trail, but nothing too difficult to cross. I was headed towards this gully (there’s a good trail at the base). 

For reference, these are N1 and Snowdon

I followed the gully up a class 1, steep trail for 550’ in elevation.

At the top of the gully the trail ended.  I went left and headed northeast towards the summit of N1.  This was all class 2 and the route was obvious.  It felt “too easy”, almost like it shouldn’t have been ranked.

I summited ‘N1’ at 7am

N1:

Now for Snowdon Peak.  I turned and headed southwest back to the Snowdon/N1 saddle, to the right of the ridge.

Now to head up the ridge.  There are several ways to do this.  On my ascent I stuck to the ridge proper, which went at class 3.  On the way back down I found a faint trail that kept this area at class 2 after climbing about halfway up the ridge.  Here’s a picture of that trail:

And some pictures of the ridge.  I was able to take the ridge proper to the next saddle until I came across the game trail, which was much easier.

If you don’t already have your helmet on now is the time to do so.  There are several routes up this ridge.  I took the ridge proper at class 3 all the way to 12900’ before dipping down and south, then traversing around the east side of the mountain to get to the summit (lots of cairns to help once I dipped down).  However, you don’t need to take the ridge proper to this point.  If you stay to the left of the ridge there are game trails that keep you about 50 feet below the ridge on class 2 terrain most of the way.  Here are the routes:

Here are some pictures of the ridge route I took to 12,900’

On the ridge at 12,900’ I hit a snag, and realized I needed to drop down where I saw this gully.  Directly below it I saw a cairn and headed that way.  Here’s a visual of where you should go when you hit this area.  Head down, not up, and continue around the left side.

From here on out there are cairns to the summit.  If you don’t see a cairn, you’re off route.  I kept heading left, and every time I wanted to ascend it seemed like I had to descend as well, but there were always cairns to help lead the way.  This is class 3.

When I got to 13,010’ I saw this in front of me, and a cairn in the distance.  Don’t head for that cairn.  This is where you just scramble to the top from where you are. 

It’s a short scramble, and soon I was on the relatively flat summit

I summited Snowdon Peak at 8:20am

Snowdon Peak:

Now to head back down.  I took the same route back to the ridge following the cairns as I descended.

And now to follow the ridge back to the saddle.  Here’s a visual of the route I took:

I found my access gully and headed back down to the trail.

I then followed the trail back through the marshes and trees towards Andrews Lake.

Once back on the Crater Lake Trail I followed it back to Andrews Lake.

I made it back to Andrews Lake at 10:30am, making this an 8.42 mile hike with 2747’ of elevation gain. 

And for those of you wondering, my past few months consisted of:  Getting married, buying property, Mexico, Cookie Cupboard for 2 months (I love Girl Scouts!!!), Florida, Washington DC, my son visiting from South Korea, 2 of my kids graduating College in different states during the same week (one of them Valedictorian!), Georgia for a week, South America for a month,  building a ranch from the ground up (empty land, but after a few months of hard work I now have a well, a vineyard, an orchard and the animals have corrals).  Raising yaks and alpacas (all the females are pregnant), a nasty tick bite that left me out of the sun for a month but gave me time to do a  a couple of dozen podcasts, teaching Wilderness First Responder courses and several outdoor survival skill classes to multiple groups.  Oh, and last week we got a puppy, so it’s been a little busy around here!

On to the next trailhead!

13223 and 13144

RT Length: 11.58 miles

Elevation Gain: 4141’

I started this hike at 6:45am from just below Rustler Gulch Trailhead.  Rustler Gulch Trailhead is located off a 4WD road, and while there is a trailhead, there’s really only enough room for one or two small vehicles to park there.  I tried parking my truck near the gate, and it stuck out halfway into the narrow road, so I backtracked and parked a bit earlier along the road. 

I’ve been to this area in the summer, and while the wildflowers are beautiful, I knew I wanted to do this hike in the fall.  In the summer the entire road to the trailhead is packed with vehicles, there are biting black flies, and I’d be hiking with 2000 other hikers.  Not to mention the flowers: they’re beautiful, but I’d need to navigate my way through them (and the bees) to reach the ridge, which I didn’t want to do. 

I walked a little bit up the road, and then hiked the Rustler Gulch trail for 3 miles.  This trail is easy to follow, starting out in the trees before crossing several streams and entering the gulch.

After hiking for about 3 miles, I could see the route I wanted to take to gain the ridge. 

This was fairly easy to do.  I left the trail, and started heading northeast up the tundra slope, avoiding the rock outcroppings and willows along the way.

As I continued northeast, aiming for the ridge, the terrain got steeper and it changed from tundra to talus. 

Once on top of the ridge I turned right and followed it east.  I could see 13144 in the distance.

There are a lot of ups and downs along the ridges in this hike, gaining and losing and gaining elevation.  This part of the ridge is class 2.  If you find yourself in class 3 territory, you’re making it too difficult.  Look for game trails to the right to avoid any potential class 3.  Here are some pictures of this part of the ridge.

From about halfway along the ridge I could clearly see 13144, but I wasn’t headed there first.  Instead, I was headed here:

I continued following the ridge (now heading northeast) to that point, still in class 2 territory.

I could now see 13223 to the north/northeast.

From this point, the most difficult part of the ridge is class 3.  It’s mainly class 2, with a couple of class 3 climbs thrown in, especially at the beginning of the ridge and the final climb to the summit. This part of the ridge starts out with an airy class 3 move.  I went to the right on a narrow shelf of rocks.  Now is also probably a good time to point out the rock here, like the rest of the Maroon Bells area, is unstable and chossy.  Most rocks will move, so be sure of your holds before continuing.

After the initial airy class 3 around the rock outcropping I was back into class 2 territory for a while

Until I came here.  I came to a point in the ridge that was narrow and had gullies on each side.  While these gullies looked like they went at difficult class 2, they had kitty-litter scree on top of hard sand, steep drop offs, and a lot of exposure.  The best (safest) way to traverse this is to downclimb to the narrow point at the top of both gullies, then climb straight up the rock.  This was the crux of the climb, and had exposure, but it was no more than class 3 (and much easier to downclimb). There are plenty of holds to use, just make sure they’re stable before committing. This is much easier to do than pictures make it look, and indeed, than it looked at the time. 

From here, the rest of the ridge is class 2/difficult class 2.  If it looks more difficult than class 2, look for a game trail to the left or the right of the ridge.

There’s a bump in the ridge, which I went over on my way to Belleview

The last bit to the summit starts out as class 2, then becomes class 3.  I aimed for the depression in the rocks.  This area is filled with broken pieces of rock, but there are sections of scree.  Aim for the sections of scree as you ascend.  Getting over this piece brought me to the final push to the summit. 

Now I could see the final push to the summit. This is class 3, and loose, but easy climbing.  This is the overall route I took:

I summited 13223 at 11am

13223:

Now to head back towards PT 13144. 

I descended back to the ridge, and followed it the way I hiked in.

For brevity, and because I’m assuming you already hiked the ridge on the way in, I’m just going to show a few pictures of the ridge back towards 13144

And the final exit off the ridge

From here, it was a quick class 2 hike southeast to the summit of 13144

I summited 13144 at 12:15pm

13144:

I descended much the same way I ascended initially to the ridge.   I headed northwest along the ridge, and then followed the ridge southwest, back towards Rustler Gulch.

Instead of ascending to the high point on the ridge, this time I descended just below the talus and scree, heading southwest on the grassy slope towards the trail below.

Back on the trail, I followed it west and then south through Rustler Gulch, back to the trailhead. 

I made it back to my truck at 2:45pm, making this an 11.58 mile hike with 4141’ of elevation gain in 8 hours.

On to the next trailhead!

V5 – 13,164

RT Length: 9.05 miles

Elevation Gain: 3128’

I parked a little ways up Clear Lake Road at a dispersed campsite.  The road is 4WD, but I could have driven all the way to Clear Lake.  If you have a 4WD vehicle, this is an easy road to navigate all the way to the end.  There’s just one obstacle:  A boulder taking up half the road about a mile up.  After that, it’s pretty straightforward.  

I was on the trail at 5:30am.  I followed the road for 3.5 miles up to 11820’

At 11820’ I left the trail, and headed northeast up this tundra slope, towards a mining road

When I reached the mining road I followed it west, then east, then west as it switchbacked to  12530’.  Here’s an overview of my route:

At 12530’ I left the mining road and headed northeast up the tundra.  The tundra eventually changed to scree, but this was all class 2.

At the top of the scree I was now on the ridge.  If you don’t already have on your helmet, now is the time to put it on.  This next section is a class 3 gully. 

While not entirely solid, it’s much easier to navigate than it looks. This is the route I took to access the gully:

Here’s a look at the class 3 gully.  It’s easier to navigate than it looks.

At the top of the gully I turned left and hiked the class 2 ridge northwest to the summit

Here are some pictures of the rocky (but class 2) ridge

I summited V5 at 8:10am

V5:

This was an out and back hike for me, so I turned around and headed back down the ridge.

Then it was back down the gully

And back to the scree, which turned to tundra, which took me to the mining road

I followed the mining road back to 12220’

And then hiked down the tundra to the road I could see below.

Once on the road, I hiked it back to my truck.

I made it back to my truck at 10am, making this a 9.05 mile hike with 3128’ of elevation gain in 4.5 hours

On to the next trailhead!

P3 – 13,279 and P2 – 13,288

RT Length:  6.61 miles

Elevation Gain: 2539’

Edited to add:

I came back a month later and was successful in summiting P2.  Details below.

Full disclosure, I did NOT summit P2.  However, I came very close, and thought I’d share the information I have for those who might find it useful. 

I camped at 11330’ of elevation, along the Rock Lake Trail that parallels Rock Creek in the basin just before Rock Lake

The next morning I was on the trail at 6:30am, heading west.  My goal was to gain this ridge, and I did it poorly.  I spent way too much time route finding, so I’m going to try to make this easier for you.  You need to ascend this ridge, but DO NOT do it here.  There is a way to find a weakness and ascend here, which I did, but I was greeted with the steepest, worst scree I’ve ever encountered, where if I’d have fallen, I would have skidded all the way down, over the edge.  It was dangerous, and put me at a too high position and I needed to descend anyway. 

Instead, start out by crossing Rock Creek (I was able to jump across it) and head for the rocky section.

Parallel the rocky section until you come to just before the waterfall.  Then turn left, and head up the scree to what looks like a solid rock wall.  There is a very well-hidden access gully here, that will easily get you where you want to go. 

Climb up this easy gully, and immediately turn right, and head towards a drainage.

When I made it to the drainage, I followed it west as far as it went, until I was on a small ridge parallelling a pond.  There are a few game trails here that will lead you up.  Stay in the drainage, which goes from rocky to grassy as it ascends.

I came to a ridge and turned left.  Here I could see a rocky basin.  I followed the basin southwest, left, until it ended.

From here you can see two gullies.  One leads to P3, the other to P2.  I went up the gully to the left, and came down the gully to the right.  Both are loose and scree filled.  The P2 gully had larger rocks, which would have made it better (for me) to ascend, and the P3 gully had more scree, which would have made it better (for me) to descend.  Alas, I ascended the P3 gully, and descended the P2 gully.

Here are some pictures of the P3 gully.  I ascended on scree, sticking close to the rock band, and headed towards the ridge.

Once on the ridge I turned left, and followed it northeast.  While it looks daunting, this was all class 2 on stable rock, and not so stable rock. 

Until I got to here.  If you haven’t already, now is your time to put on your helmet.  From here the rest of the route is exposed class 3 and class 4 climbing.  I chose to stick to the ridge.  Luckily, the rock here is solid and there are plenty of hand and footholds.

I stuck to the ridge here, so I won’t include direction lines, but I’ll show you a few pictures of this part of the ridge, which I considered class 3

Until I got to here.  I felt this was class 4, and the crux of P3.  This is the route I took, sticking a bit to the left as I felt there were more holds, but I can see how someone with a higher risk tolerance would have gone straight up the middle.

I could now see the summit of P3.  This is the route I took.

I summited P3 at 9:45am

P3:

From the summit of P3, I made my way back to the ridge.

Back on the ridge, I followed it to the P3/P2 saddle

From the saddle, I headed up on talus and scree, following the ridge towards P2, but avoiding the large rock structures to the right.

I then came to a sloping section, with a false summit.  I made my way towards the false summit

From the false summit, I could see the true summit of P2 in the distance.

I followed the ridge, and this is what I saw in front of me

The climbing wasn’t what bothered me here.  It was that long, yellow rock slab.  I’d heard it was maybe 40 feet, but being there in person, it looked double that.  I downclimbed a bit to get a better view, and the view didn’t get any better. Pictures DO NOT do this slab and it’s exposure justice.

At this point I had to make a very difficult decision.  I do a lot of crazy stuff while hiking solo, but it’s always within my abilities, and I try not to take unnecessary risks.  This rock slab was an unnecessary risk, and that’s coming from someone who’s favorite 14er is Capitol because of the knife’s edge.  I did not feel safe downclimbing this slab solo, or even with another person present, although I would have tried it going from the opposite direction if I didn’t need to downclimb it again.  I had about a 75% certainty if I attempted to downclimb this slab, I would fall.  And the exposure wasn’t pretty.

One of the reasons my husband encourages me to hike solo is he knows I don’t take unnecessary risks in the backcountry, and I want to come home safe to him.  I also want to be a Grandma someday, and I can’t do that if I die. 

I knew there was another way to summit by dropping down to the left, so I got out my cell phone and checked the weather.  The 10% chance of rain after 12pm had now become 80% chance of thunderstorms.  I wouldn’t have the time needed to route find my way to the summit of this peak and make it back to my tent in time before the storm came in.

So, I turned around at the final crux to the summit and headed back down.  I did a lot of scouting around while I was up there and know how I want to attempt this peak next time (I’m thinking of dropping down to avoid the edge or coming in from a different angle).  I’ll be back to summit this peak another way.

So, I turned around and headed back towards the P3/P2 saddle.

Just before the saddle I turned left, and took the P2 gully down into the rocky basin.

I then followed the basin back to the drainage, staying mostly to the right of the basin.

When I came to the drainage, I turned right followed it, staying to the left of the pond, back to the ledge, following game trails where I could find them.

Just before making it to the waterfall I headed right, found my access gully, and headed down.

I descended the rocks, then headed back to my campsite.

I made it back to my campsite at 1:30pm, making this a 6.61 mile hike with 2539’ of elevation gain and tons of route finding in 7 hours.

Oh, and that storm?  It dumped about 4 inches of slush, rain, snow, and hail on top of my tent in about 2 hours.  So now, I had another difficult decision to make:  Stay there overnight and wake up at 5am to a tent frozen solid, pack it up, and hike out, or just hike back to Beartown now.  For those of you who know me (and my Raynaud’s), you know what I did.  I packed it up and headed back to Beartown, hiking in the dark to make it back to my truck in time for my work meeting in the morning. It was NOT a fun hike out, as the trails were now covered in slush (I slipped a few times in the granite rock sections) but I stayed (relatively) warm.

From the saddle of P3 and P2, I followed the ridgeline to 13190’, where you can see the false summit. From below the false summit, I went left (east) and found a gully.  I descended this gully, but not all the way.  Instead, I stayed high and traversed these rock outcroppings.  This route is basically class 3 and choose your own adventure.  I stayed high so as not to have to re-gain elevation, and this worked for me.  Here are pictures of the route I took:

See this rock formation here?  While it’s difficult to see from this angle, I’m nicknaming him “El Diablo”, because to me he looks like a lot of things, but also closely resembled my High School Mascot, the Diablo.  Yes, my high school mascot is the devil.  For middle school we were the Banditos (imagine Yosemite Sam as a Mexican, complete with the mustache and beard, bullet harnesses and a gun in each hand).  Alas, after I went there the parents got upset and changed things and now they’re the “Leopards”.  The parents keep trying to change the Diablo mascot as well, but the students won’t let them.  In any event, I digress.  I went to the right of El Diablo on my way in and used him as a spotting point on my way out.  After passing El Diablo I could see a large gully to the right.  I stayed high on class 3 terrain and climbed the gully, which brought me to the base of the rock slab.

From there, I turned left, and it’s a class 3 climb to the summit.  I tried a lot of different routes that others said ‘went’, but I found climbing straight up the face was the easiest way to summit and stayed at easy class 3.  Climbing straight up the face is easier than it looks, with lots of ledges.  From there I was on a small ridge, and it was 10 feet or so of walking northeast to the summit. Here’s the overall route:

And my summit Photo:

P2:

Here are some pictures of the route back:

And the TOPO for P2

On to the next trailhead!

S4 – 13,256

RT Length: 11.57 miles

Elevation Gain: 4082’

There were only two other vehicles in the lot when I parked at the Blue Lakes Trailhead.  It was raining, so I waited for the rain to stop, and was on the trail at 5am.  The trailhead starts at the south end of the parking area, and is clearly marked.

Immediately after the trailhead there’s a junction.  I went right, taking the Blue Lakes Trail.

This was the only junction until I made it to Blue Lakes.  I followed the trail 3.5 miles to Blue Lakes.  About 2.5 miles into the hike it started raining again, and I had to take shelter for a bit under a tree.  However, the trail was class 1, and easy to follow the entire way.

There was an easy creek crossing

And then I continued my way up to Blue Lakes

Once I arrived at Blue Lakes, there were several social trails to campsites.  I stayed on the trail closest to the lake, skirting the west side, towards a creek flowing into Blue Lakes.

At the last campsite before the creek, I followed the drainage on the right side of the creek up to treeline.

Once at treeline, or at least very close in a wide open space, I crossed the creek and headed west up the slope, keeping the creek to my right.

At the top of the slope I continued heading west, staying on the tundra.  You can go right and use the talus, but it’s going to be a LONG day of talus, and I’d rather use the tundra when available. 

At about 12330’, I went right and dropped about 50 feet down to the talus.  There is a game trail here on the talus that will bring you to the upper basin.

Once in the upper basin, there will be an obvious drainage to the right.  I went through the drainage, rock hopped for a bit, and then ascended 600’ of the worst talus ever to a gully.  I put on my helmet and started up.  Here’s the overall route:

As I ascended further up the gully, the talus became looser, but there were also areas of sand mixed with scree.  The rain that morning had turned the sand into a thicker substance, which gave me some much needed traction.  When you enter the gully, stay to the LEFT.  I tried to stay to the right because it looked more stable, but found I was unable to cross over to the left when the time came, because I was now in an hourglass, and traversing it meant rocks above and below me would give way in a rockslide towards the base of the gully, like a funnel (or an hourglass).  After the first few attempts at traversing from up high and sliding several feet before stopping, I downclimbed and re-traced my steps up this part of the gully, sticking to climbers left.  Also, if you’re doing this with other people (in your group or not) stay clear when someone is in the gully, and even if you don’t think anyone is below you on your descent, yell to see if anyone is there. Large rocks will fall as you ascend and descend (there’s nothing you can really do to prevent it). 

Keep heading left, until the scree ends

Once the scree ends, if you haven’t already, now is the time to put on your helmet.  The rest of the summit is class 3 and class 4 on the loosest terrain I’ve ever experienced.  NOTHING is stable.  Trust nothing above, in front of, or below you without attempting holds several times to make sure they are solid.  There is large kitty litter on solid rocks, loose talus, and rock slabs that look stable but are hanging precariously, especially from above. 

From the top of the gully I headed east, to follow the ridge.  Here’s the route I took:

You should now have a good view of the class 4 chimney to the summit.  This is a very loose chimney, and it stops halfway and starts again.  Even the large boulders are loose, so be careful with hand and footholds until you’re sure it won’t move.  I started out by climbing straight up the center, until I came to a “y” where both sides looked perilous.  I decided the right side looked more protected.  The were both loose, sometimes with just large wobbly boulders stacked on top of each other to climb, and sometimes what looked like 10 foot boulders sitting atop rocks the size of a microwave.  Between the two chimneys, there’s probably 40 feet of climbing.  I wouldn’t trust an anchor here:  to many of the boulders are loose.  (There weren’t any anchors set up).

Here’s the overall route I took:

And some closer pictures of the chimney(s)

Chimney 1:

Chimney 2

From the top of the second chimney to the east you can see the route you scramble up to the summit

But wait!  There’s more!  Keep heading east, and climb down and then up this rock slab covered in kitty litter.  It’s not tall, maybe 7 feet, but another fun surprise!

And then it’s a quick walk to the actual summit, on… you guessed it, more talus!

I summited S4 at 9:40am

S4:

And now to head back.  I re-traced my steps to the chimney(s)

Safely down the chimney(s), I made my way back to the top of the gully.

Here are some pictures of the descent down the gully

And the route down into the basin

Once in the rocky basin, I stayed to the right of the creek and descended on the talus to the tundra towards Blue Lakes.

I headed east back to treeline and crossed the creek

Then headed north back towards the Blue Lakes Trail

And followed the trail in the rain all the way back to the trailhead

I made it back to the trailhead at 12:30pm, making this an 11.57 mile hike with 4082’ of elevation gain in 7.5 hours

On to the next trailhead!

Paiute Peak – 13,094

RT Length: 11.32 miles

Elevation Gain: 2781’

I was parked at the Brainard Lakes parking lot.  I already posted about why I was parked there, and not the Mitchell Lakes trailhead, so I’m going to skip that part this time. 

I was on the trail at 4:30 am.  My first order of business was to hike the 1.3 miles to the Mitchell Lake Trailhead. 

From the Mitchell Lake Trailhead, I followed the Blue Lakes Trail west towards Blue Lake. This is a well defined, class 1 trail with no junctions, so I was able to follow the trail the entire way.  From the Mitchell Lake Trailhead, it was around 3 miles to Blue Lake. 

From Blue Lake I had a clear view of Paiute Peak.  Here’s an overview of the rest of my hike

First, I followed the trail around the north side of the lake

When I came to a grassy drainage, I left the trail and followed the drainage north

At around 11580’ I crossed the creek at a small waterfall, and headed northwest.

After crossing the waterfall I kept heading west, aiming for the ridge in the distance.  This was choose your own adventure.  I chose to go up and over the rocky gullies, doing my best to avoid the snow.  This can all easily be kept class 2.

At this point , the lake at 11833’ was to the north of me, on my right.  I kept heading west, to gain this ridge.  There are a couple of cairns here, and parts of a game trail, but the main goal is to head towards the gully.    

And now to head up the gully. I did this by heading north, staying to the right of the snow.   If there isn’t snow when you’re doing this route, you can aim for a rather large vertical rock sticking up straight (you’ll know it when you see it, as it stands out).  This gully had game trails leading to the top, and I’m sure you could take them all the way to the top of the gully.  However, I stayed to the right of the snow and then climbed up the rocky rib.  This was mostly class 2, with a few easy class 3 moves thrown in.

At the top of the rock rib, you’ll see what appears to be the summit of Paiute Peak to the north. It’s actually a false summit, but aim for it.

From here, the true summit is to the northeast.  Head towards two boulders that look like the summit (they’re another false summit)

From those two boulders, the summit of Paiute Peak is visible to the north.

To get there I downclimbed a difficult class 3 section (or easy class 4) with exposure.  This was much more difficult to downclimb than to upclimb.  And it was very windy this day, making this ridge extra spicy.  The route down and then up to the summit are obvious.  There was a cairn at the top, and a summit register.

I summited Paiute Peak at 7:30am

Paiute Peak:

From the summit looking back, it really, really looks like where those two boulders are is higher, but there was a register here, so I’m assuming it’s the true summit.  Now to head back.  This “v” was much easier to upclimb. I used the same route down as I did on my way back up.

I then made my way towards the gully.

I went southeast down the rocky rib

Then descended the gully

At the bottom of the gully I turned left, and made my way back towards Blue Lake

I aimed for the drainage, then followed it south towards Blue Lake and the trail below

Back on the trail, I followed it east back to the Mitchell Lake Trailhead, passing several lakes along the way.

Back at the Mitchell Lake Trailhead, I followed the road back to the Brainard Lake parking area.

I made it back to the Brainard Lakes trailhead at 10:30am, making this an 11.32 mile hike with 2781’ of elevation gain in 6 hours.

On to the next trailhead!