Sleeping Sexton – 13,460

RT Length:  12.7 miles

Elevation Gain:  5156’

This was actually my second attempt on Sleeping Sexton:  I was here last week but got turned around at the false summit due to getting ‘buzzed’.  I figured it was for the best however, because I had done some serious route finding that morning and now I could provide a clear and useful GPX file for the route, instead of one with a lot of attempts that didn’t lead anywhere.

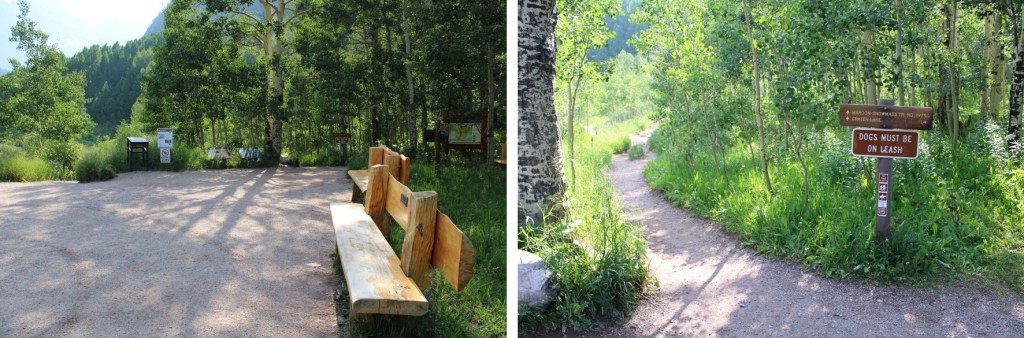
I made it to the Maroon Bells welcome station, and this time the attendant recognized me.  We chatted for a bit, as he was interested in some of the summits I was doing.  Then he referred me to talk with someone at their offices in town, and we’re basically best friends now.

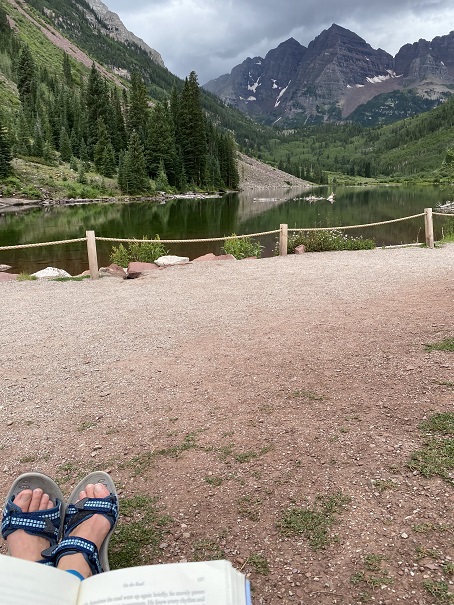
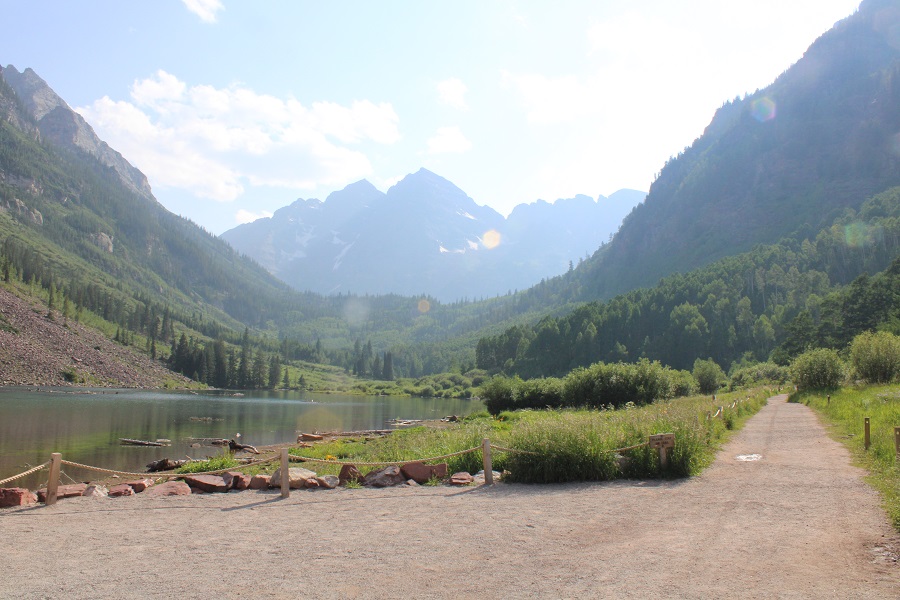
It was raining when I arrived, but people were walking around Maroon Lake anyway. 

I was on the trail at 2:15am. 

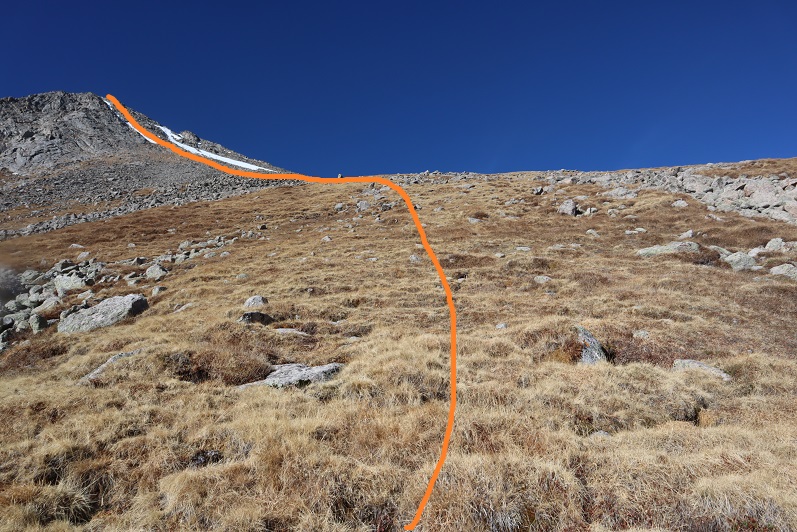
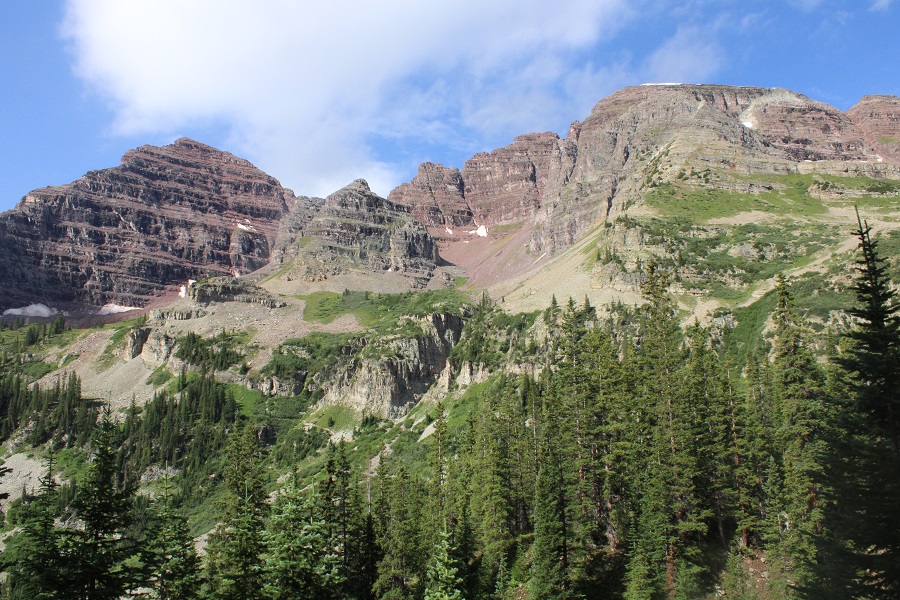
From the parking area, here’s an overview of the route above treeline to the false summit

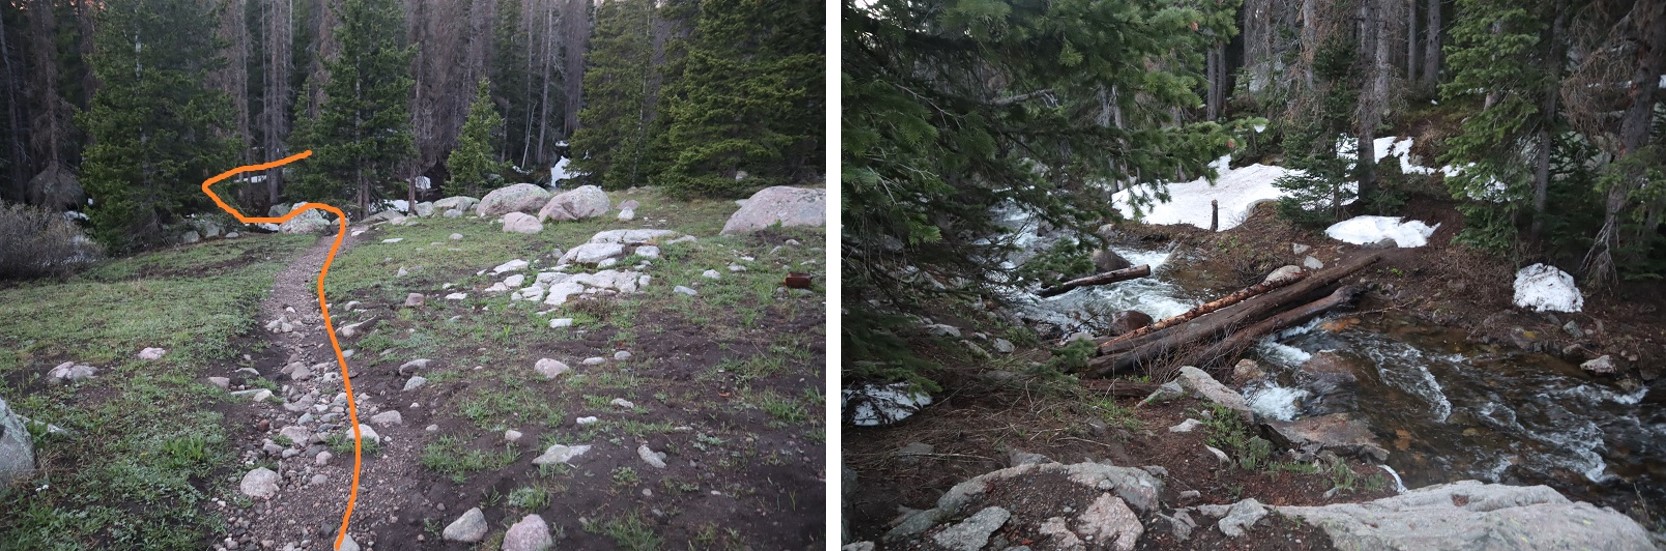
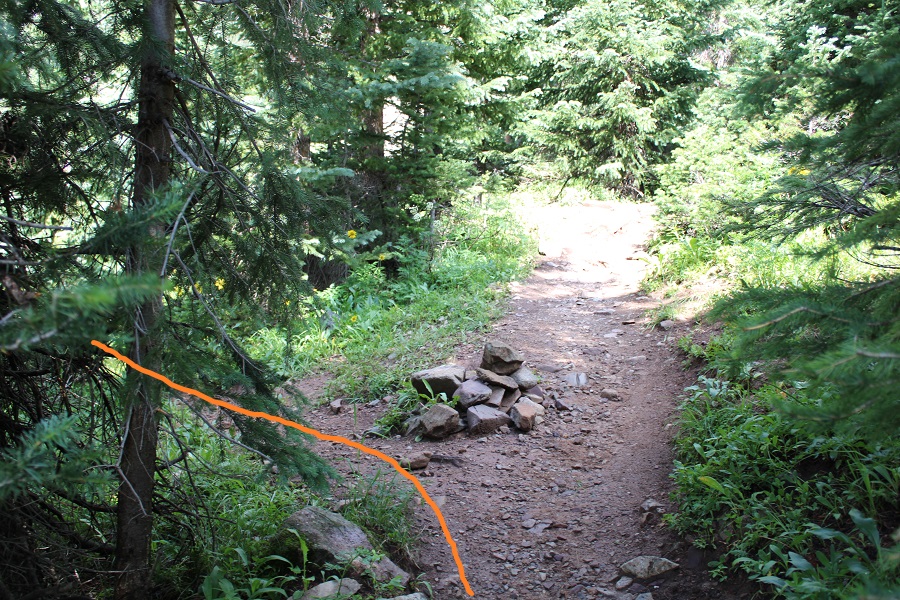
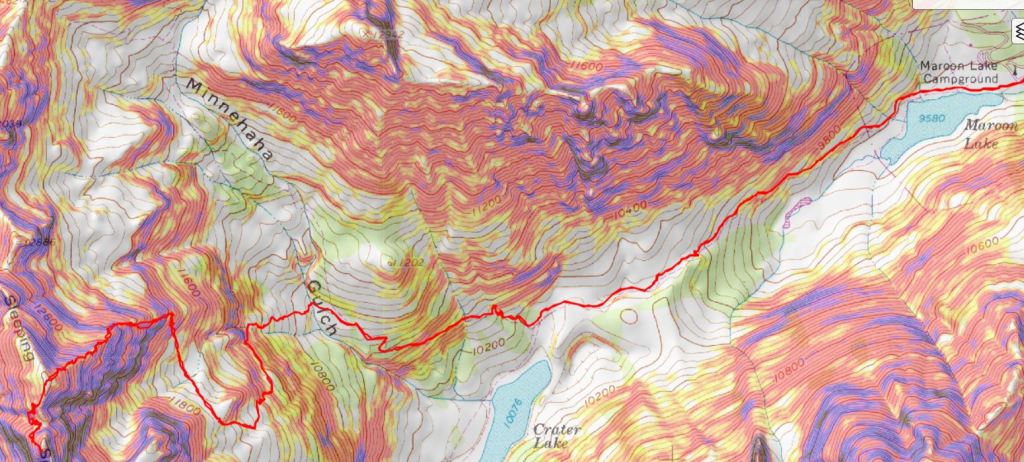
The trail starts by skirting Maroon Lake, then taking the Crater Lake trail southwest.

There was a full moon out, so I didn’t need my flashlight.

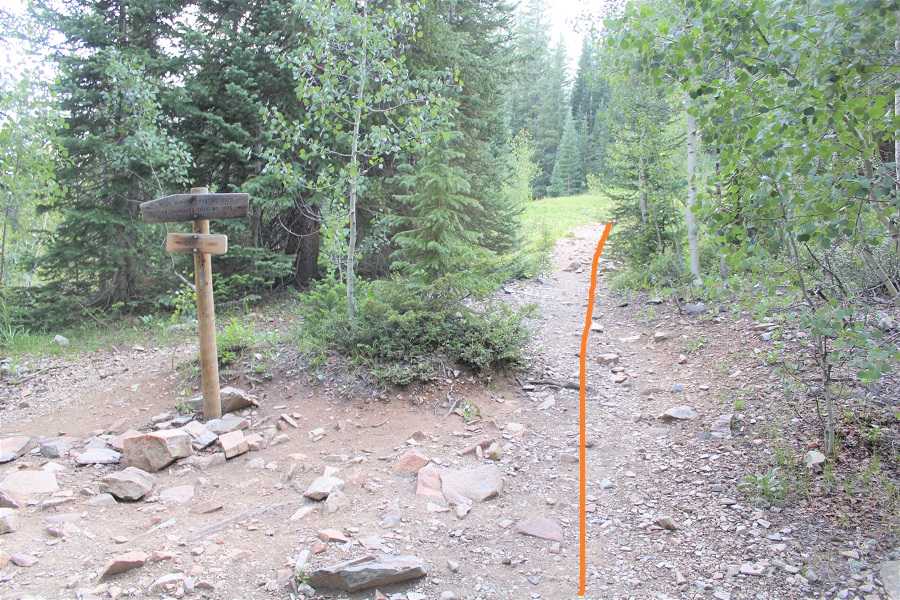
At the junction for Crater Lake I continued following trail 1975 northwest. This is the trail you take if you’re doing the Northeast route for North Maroon Peak.  There are camping spots just before the next junction.

The trail continues to be a well defined, class 1 trail.  At about 10775’ there’s another junction.  If you’ve hiked North Maroon Peak before, you’ll recognize this trail.  I turned left here and crossed the creek, following the North Maroon Peak Trail (still class 1)

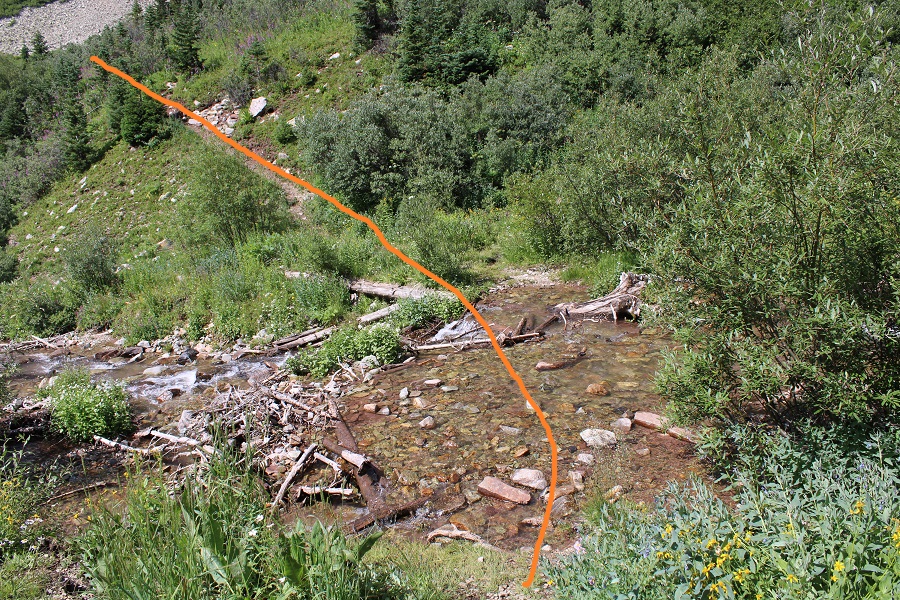
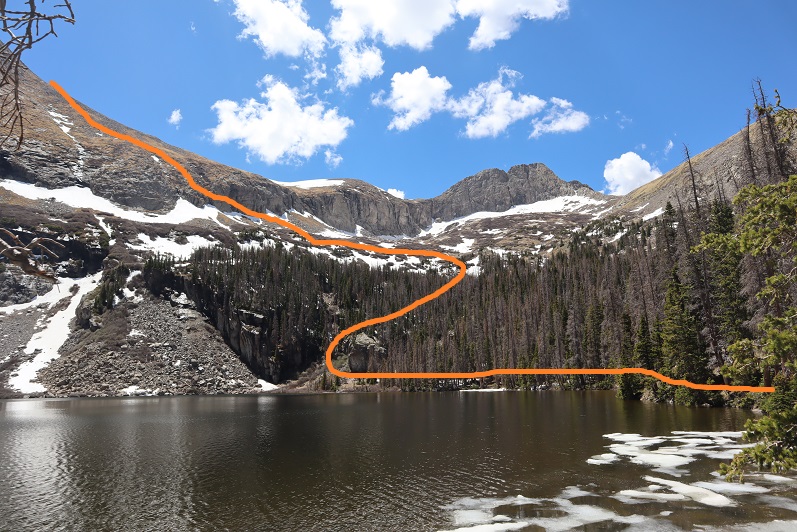
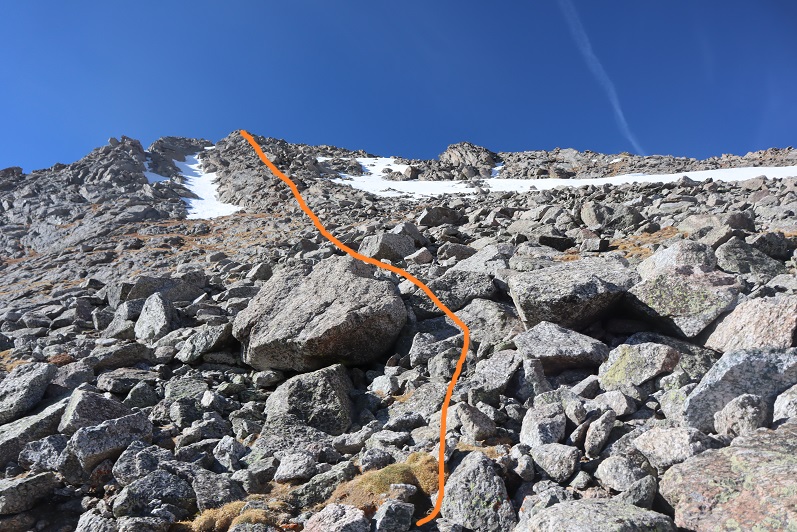
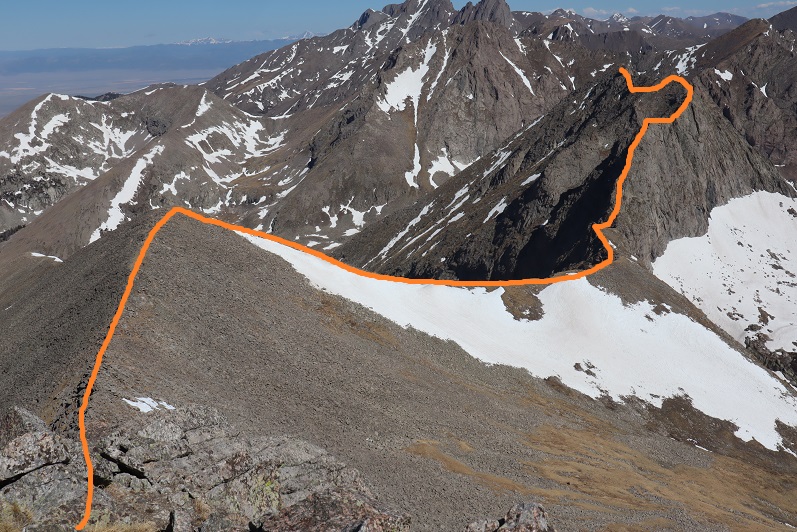
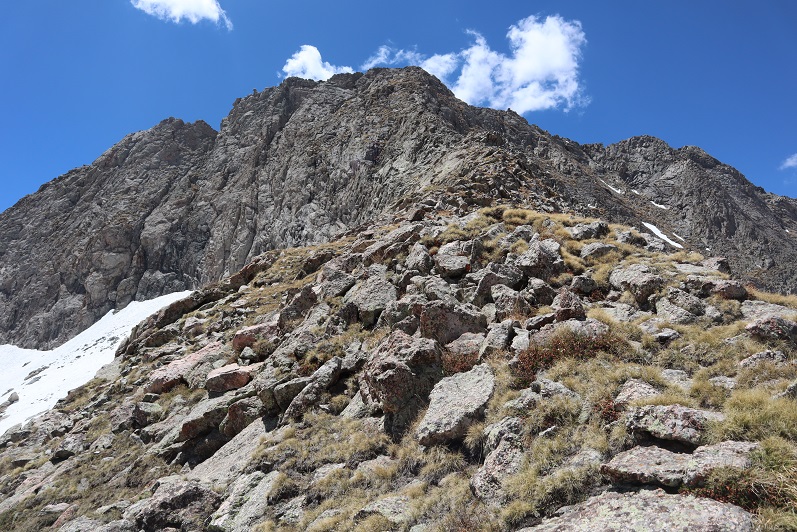
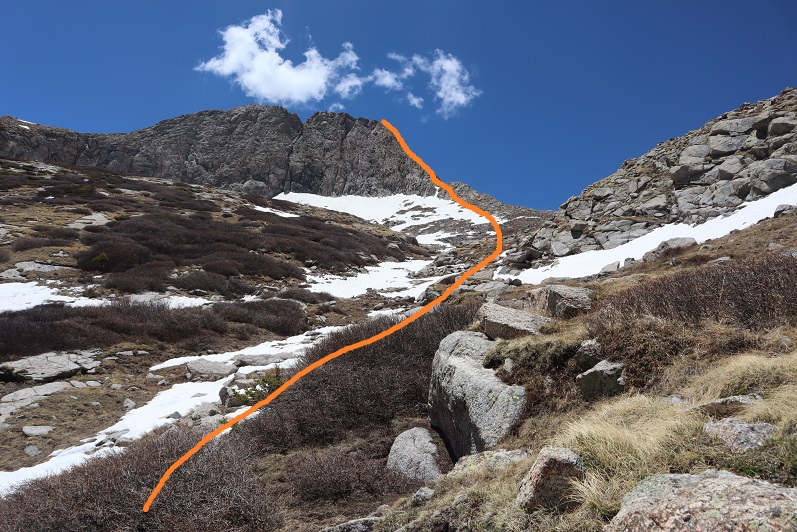
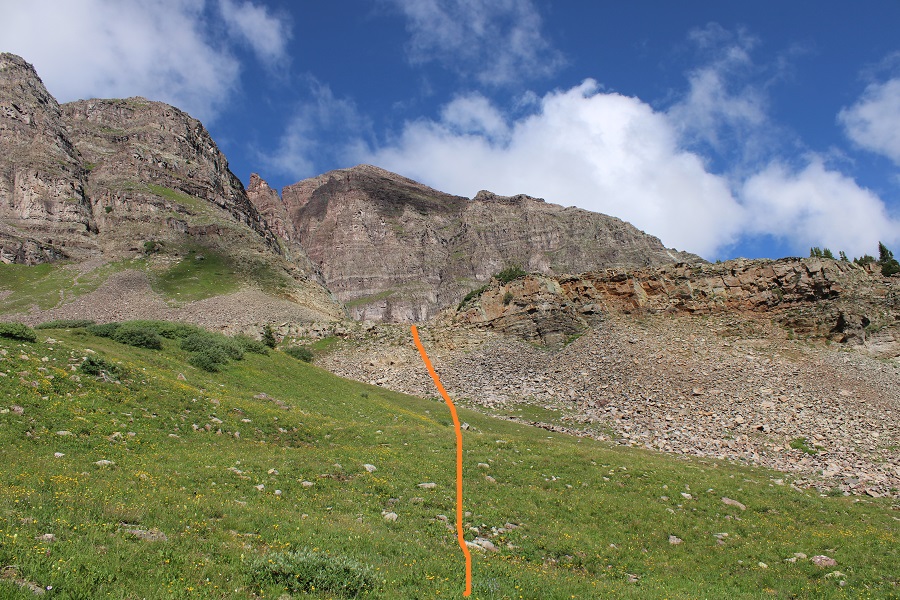
Here’s an overview of the trek to the false summit (or ‘the crown’) from the creek crossing.  I followed the North Maroon Peak’s Northeast Ridge Route until I made it to tundra, at about 11,600’.  I then left the trail and headed northwest, behind this outcropping, to the base of the white gully. I then trekked up the ridge and followed the white gully until it ended. Here’s a basic overview.

Here are some step by step photos of the way I accessed the white gully:  I followed the North Maroon Trail to treeline

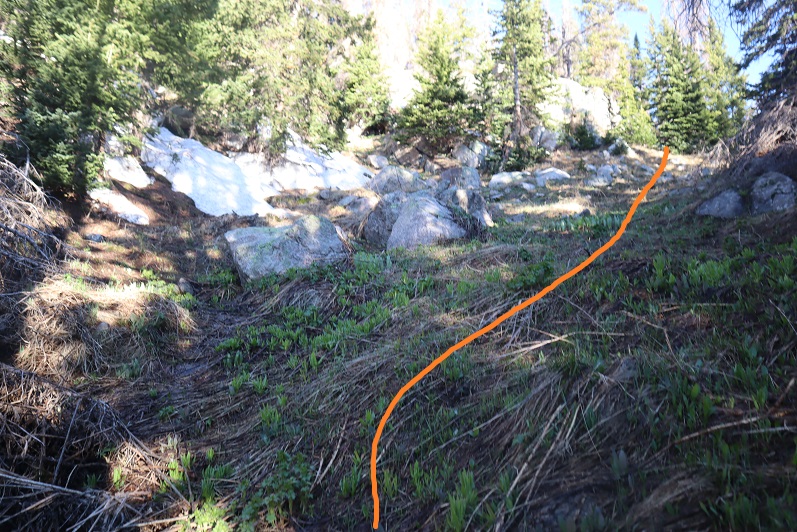
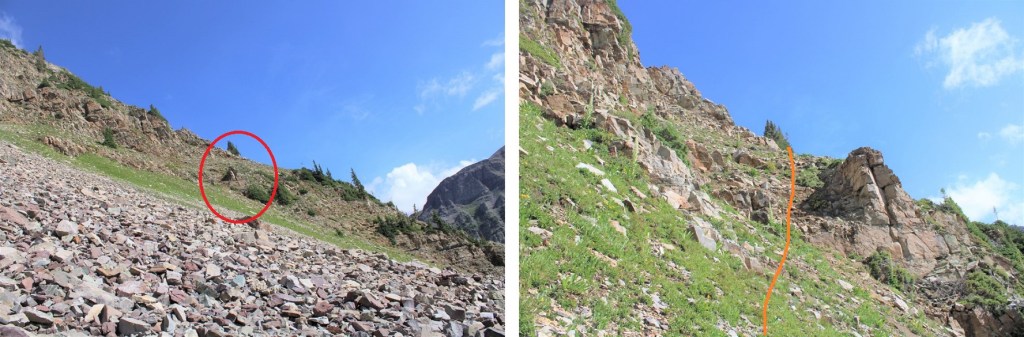
At 11,600’ I left the North Maroon Trail and headed northwest

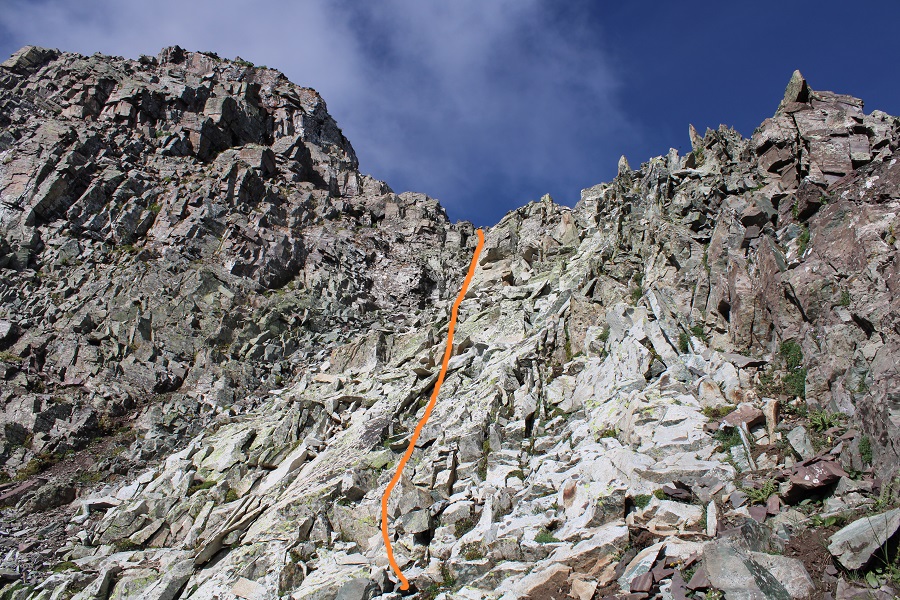
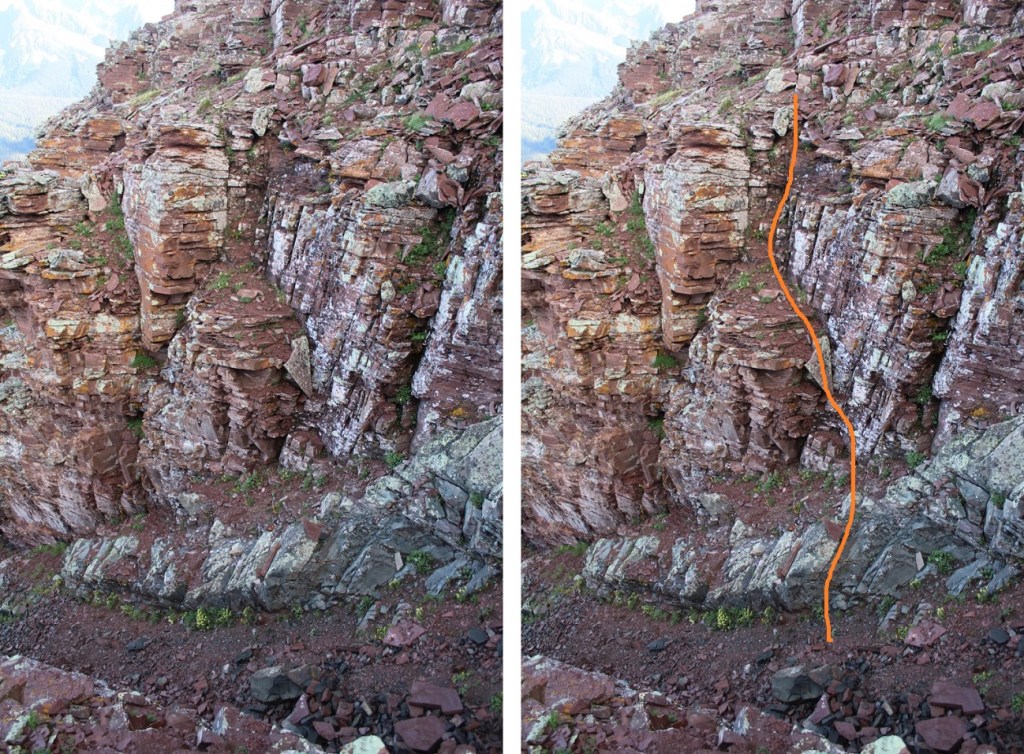
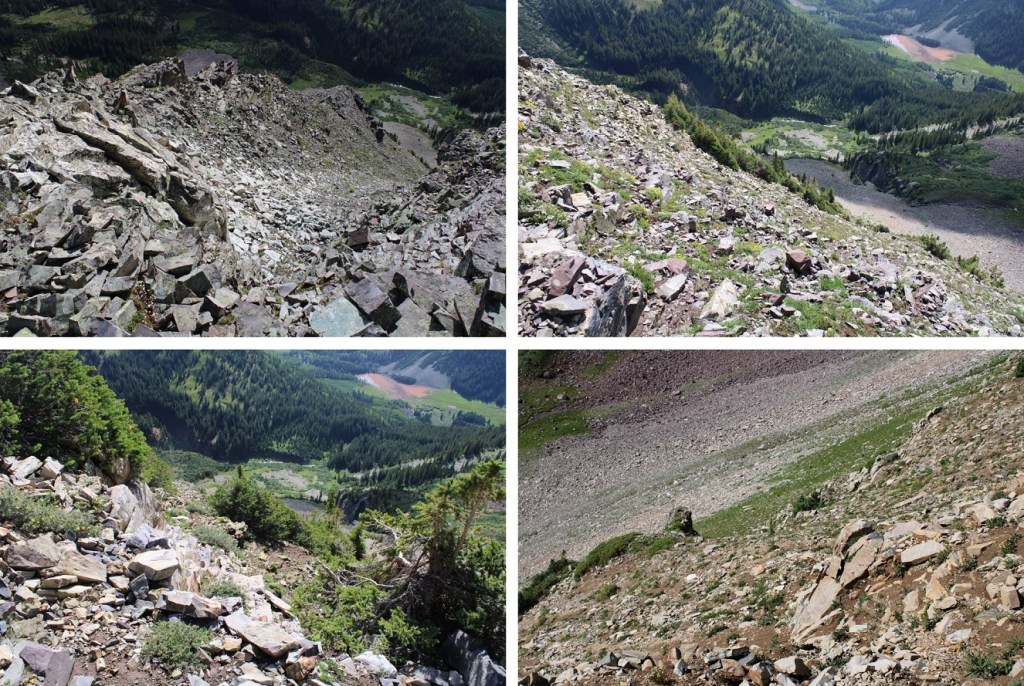
Here you can see the base of the white gully.  I didn’t want to climb straight up the gully, as it was very steep.  Instead, I accessed the ridge, and followed the ridge to the white gully.  (I did this after spending a lot of time last week trying to see if the smaller gullies ‘went’ to access the white gully, and turned back every time because I didn’t have rope.  I believe it’s much easier to access the ridge first and then head up).

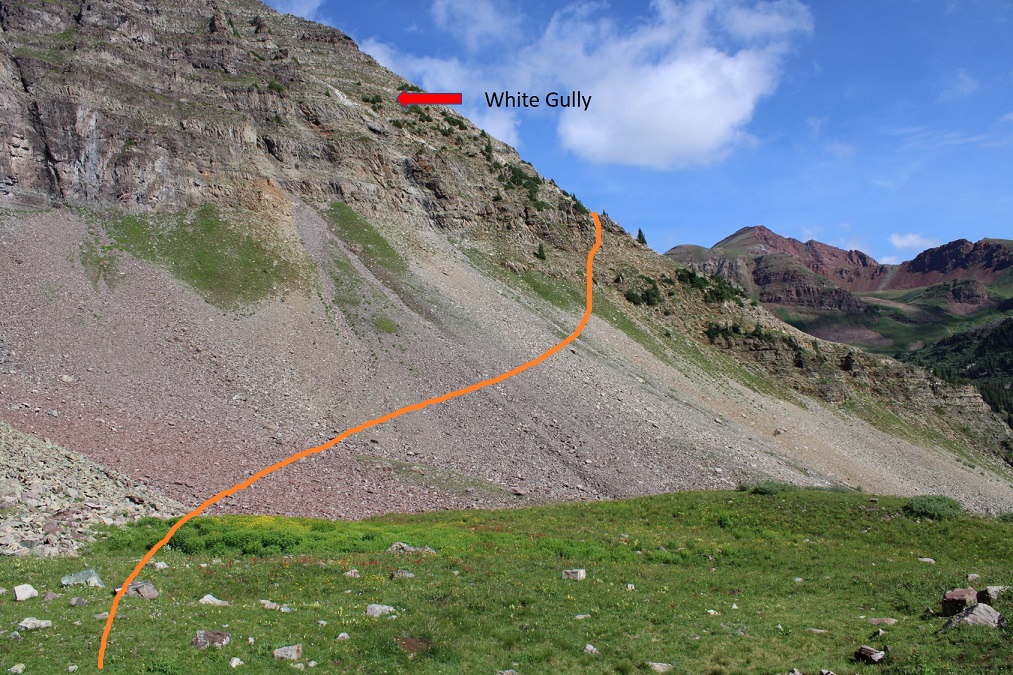
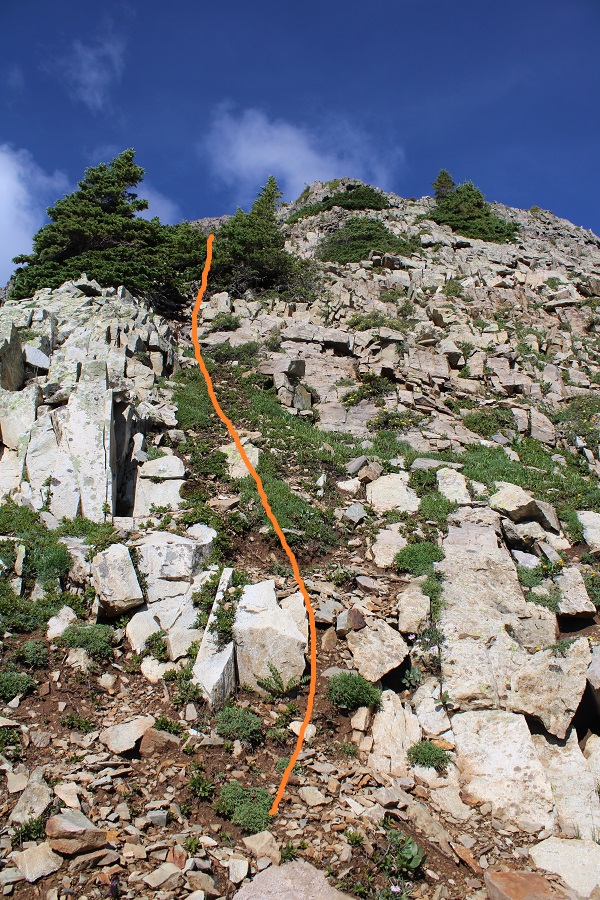
Here’s exactly where I entered and exited the ridge.  I found this to be class 2 and direct access.  Now’s a great time to put on your helmet if you haven’t already done so.

Once on the ridge I followed it west, staying in-between the ridge and the white gully (to the right of the gully, but left of the ridge).  If you look for them, you’ll find game trails here (you may have to duck under some branches to use them though).

Once near the white gully, I found the terrain to the right to be more stable than the white gully itself, especially on my way down.

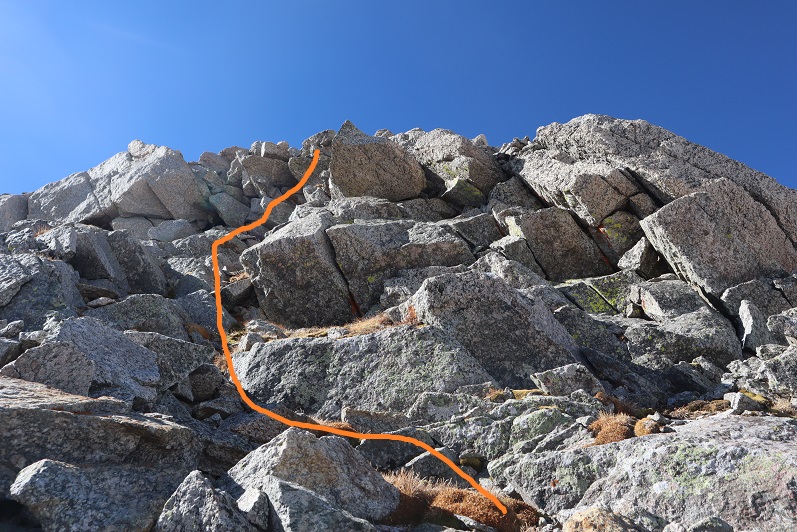
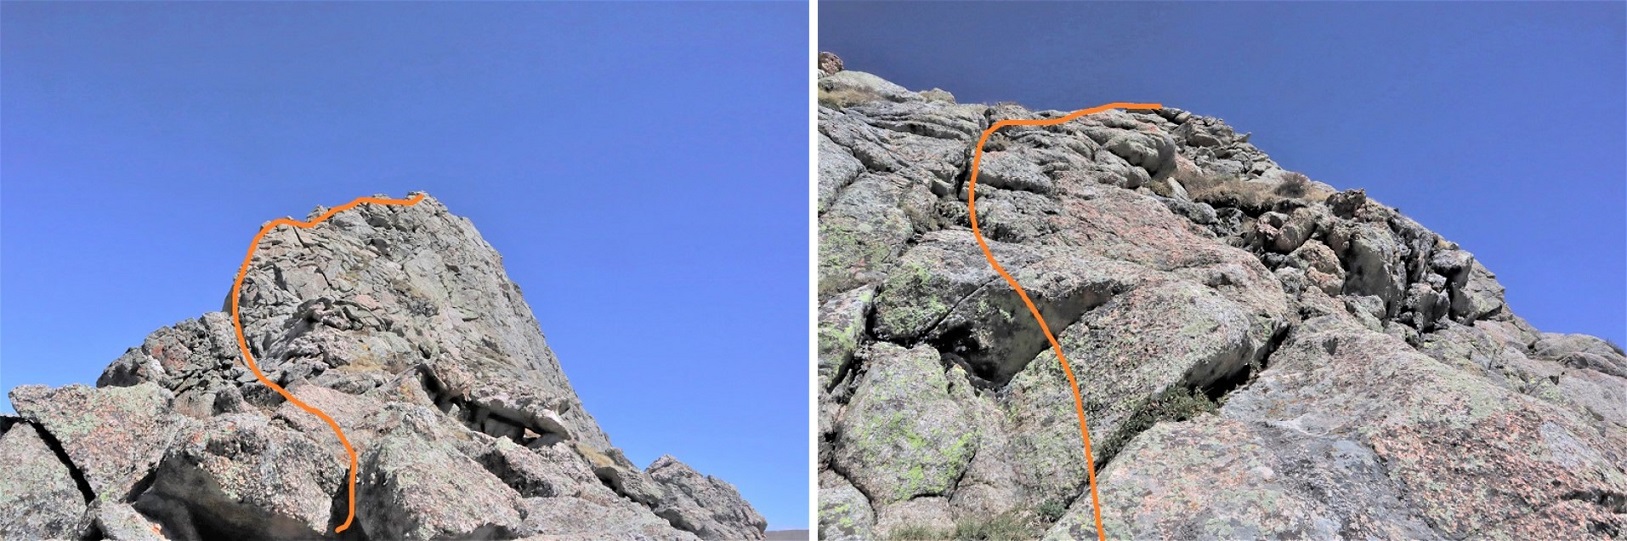
Topping out of the white gully felt class 3

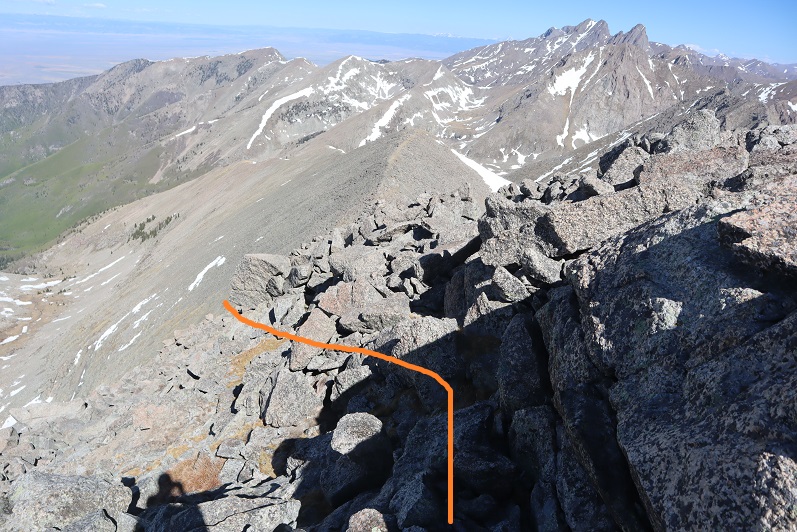
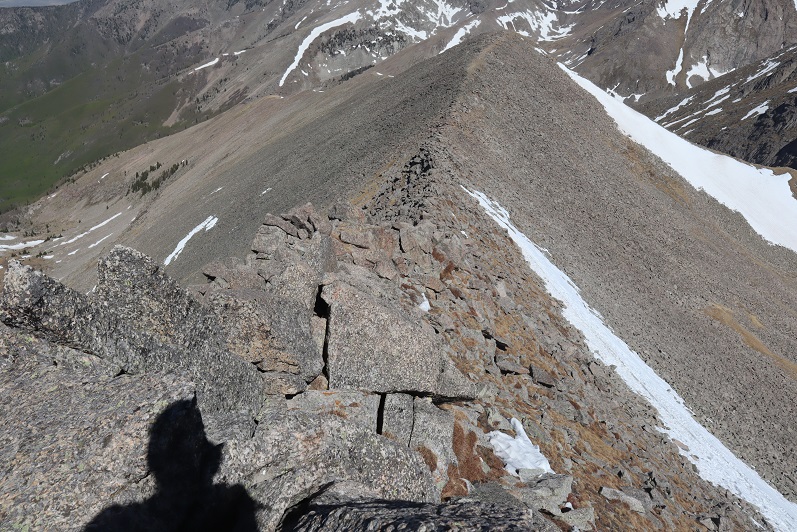
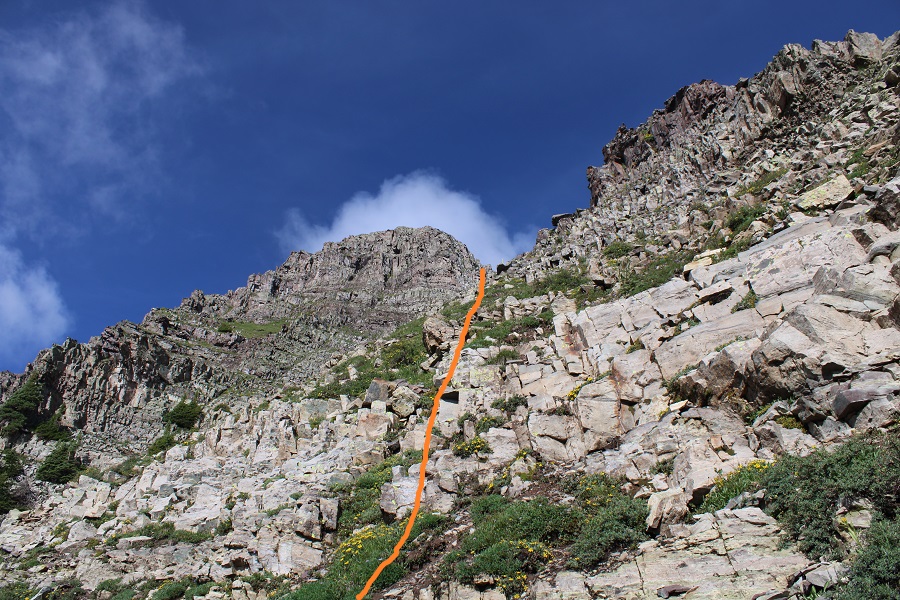
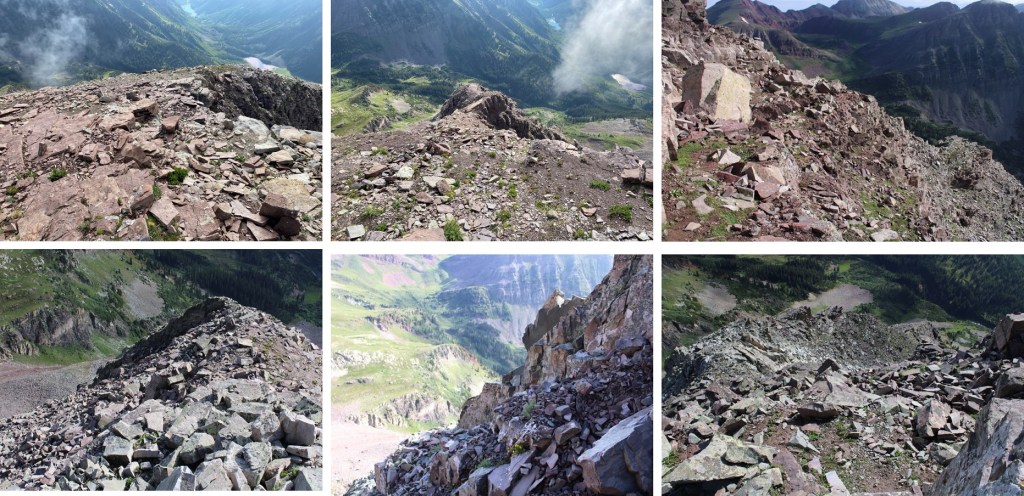
From here it became ‘choose your own adventure’ as I followed the ridge southwest. I started out rounding the ridge’s north side, and then went back and forth between north and south sides of the ridge a few times.  There are cairns here, and nothing is more difficult than class 4.  In fact, if you’re extra careful/spend a lot of time route finding, you can probably keep this at mostly class 3. Here’s the route I took:

From the top of the white gully I rounded the corner and made my way back to the ridge.  It had rained the night before, so I had to be extra careful with every foot placement (wet = slippery)

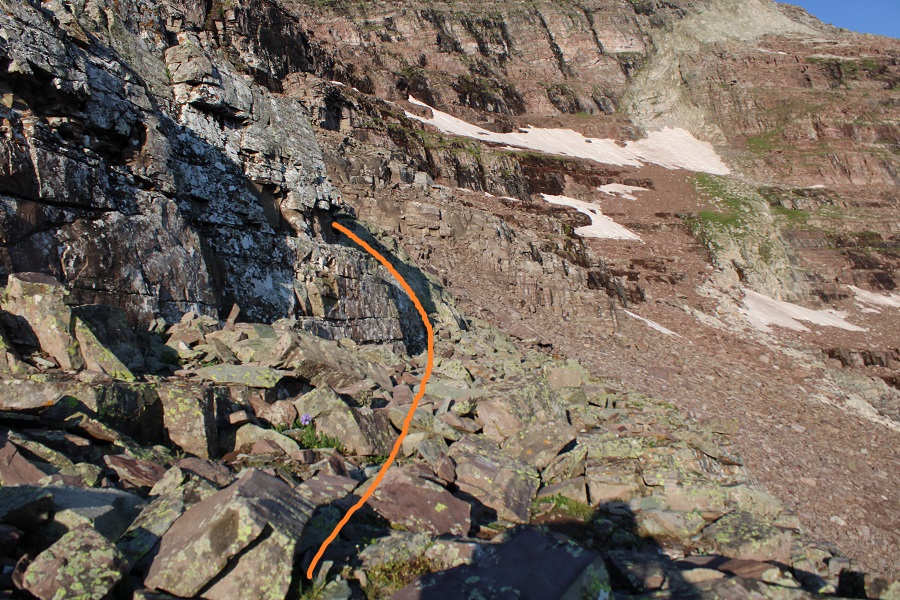
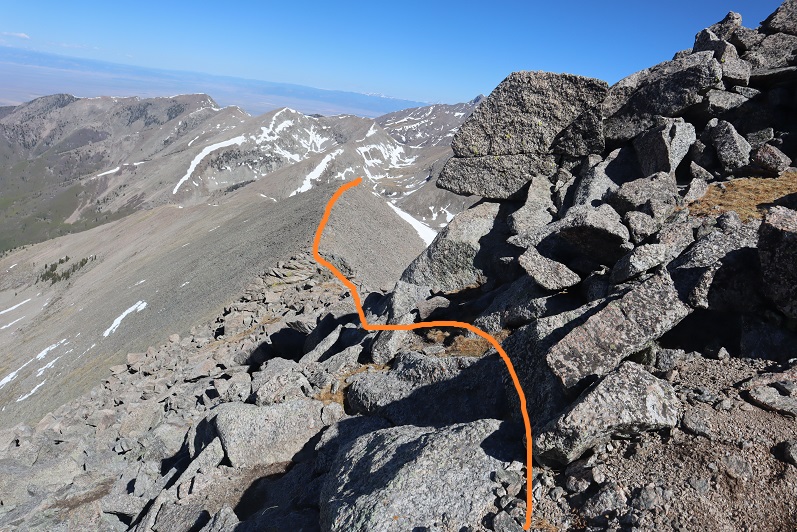
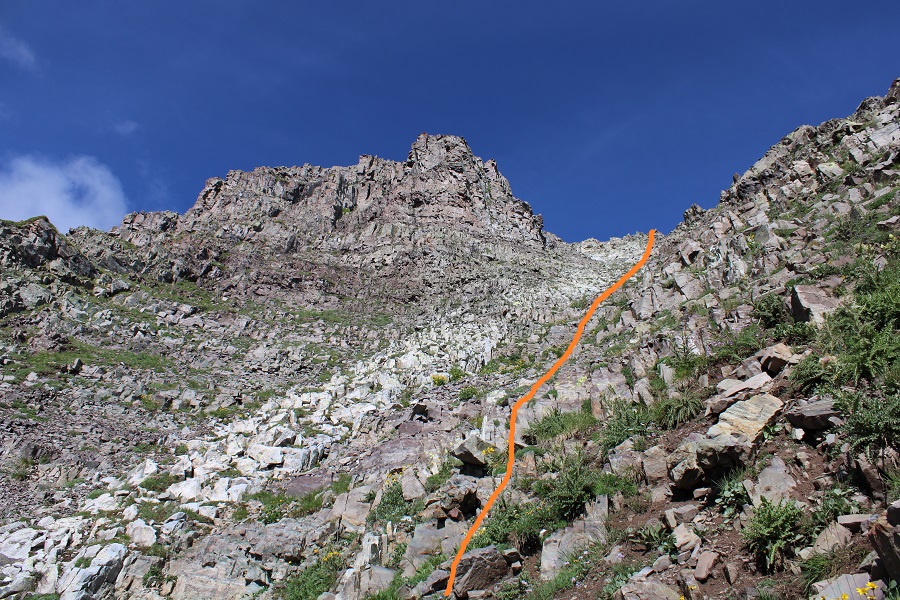
Once back on the ridge I followed it for a ways

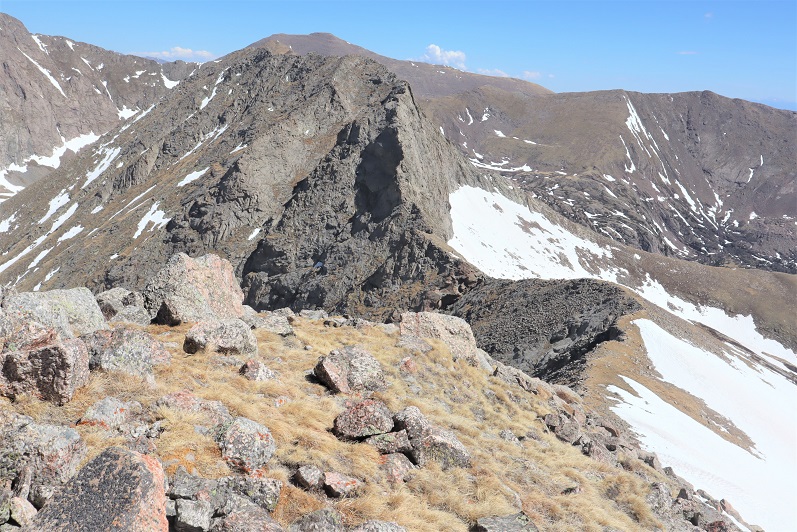
Before hitting a bit of a shelf and crossing over to the south side of the ridge

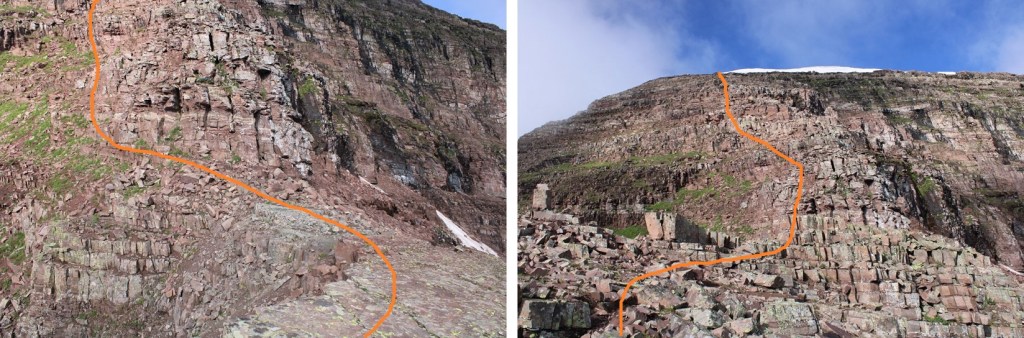
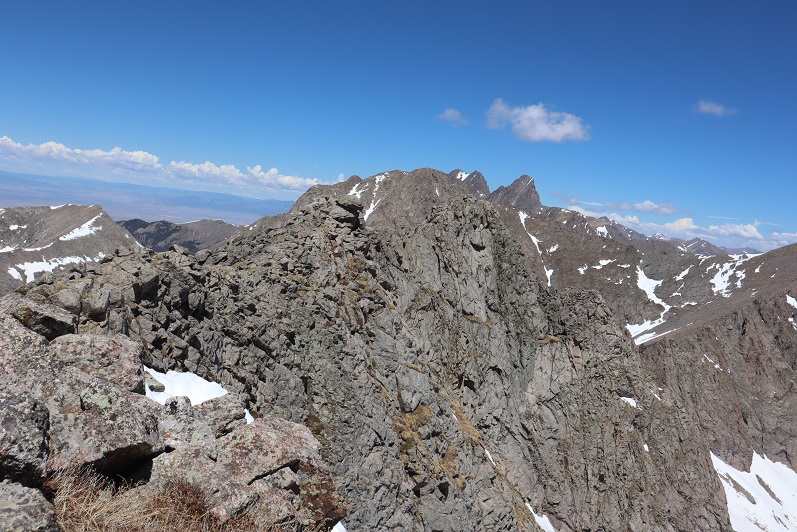
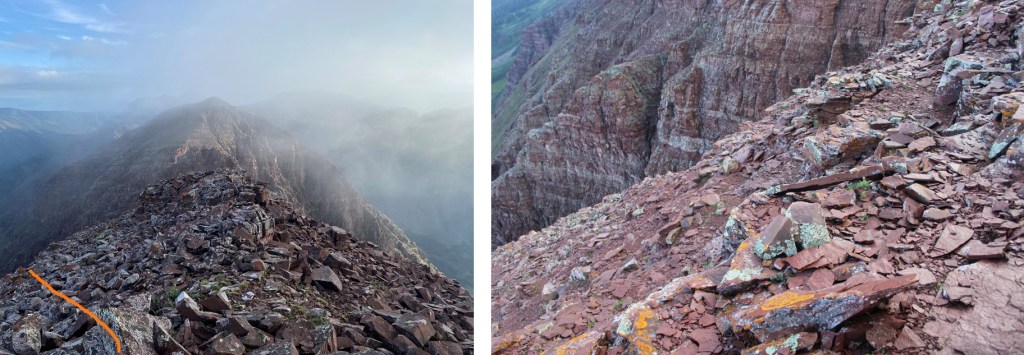
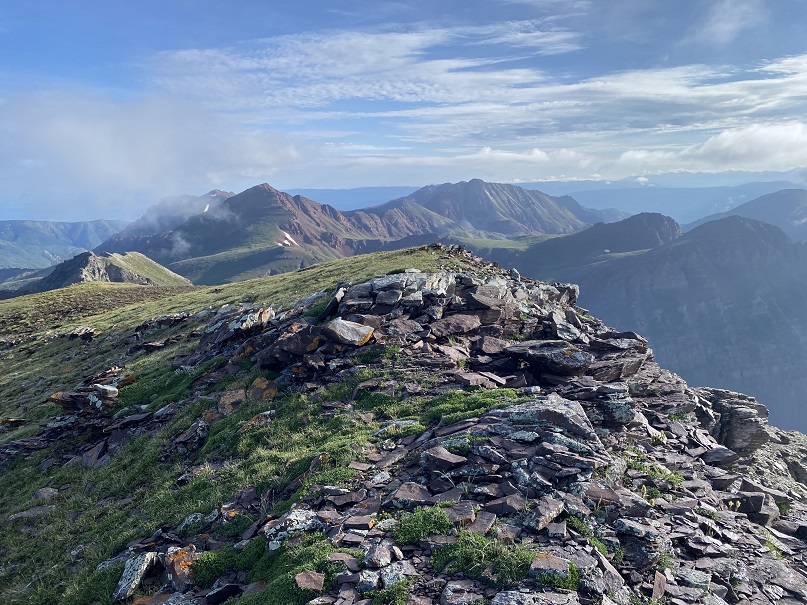
I followed the ridge to the false summit / ‘the crown’

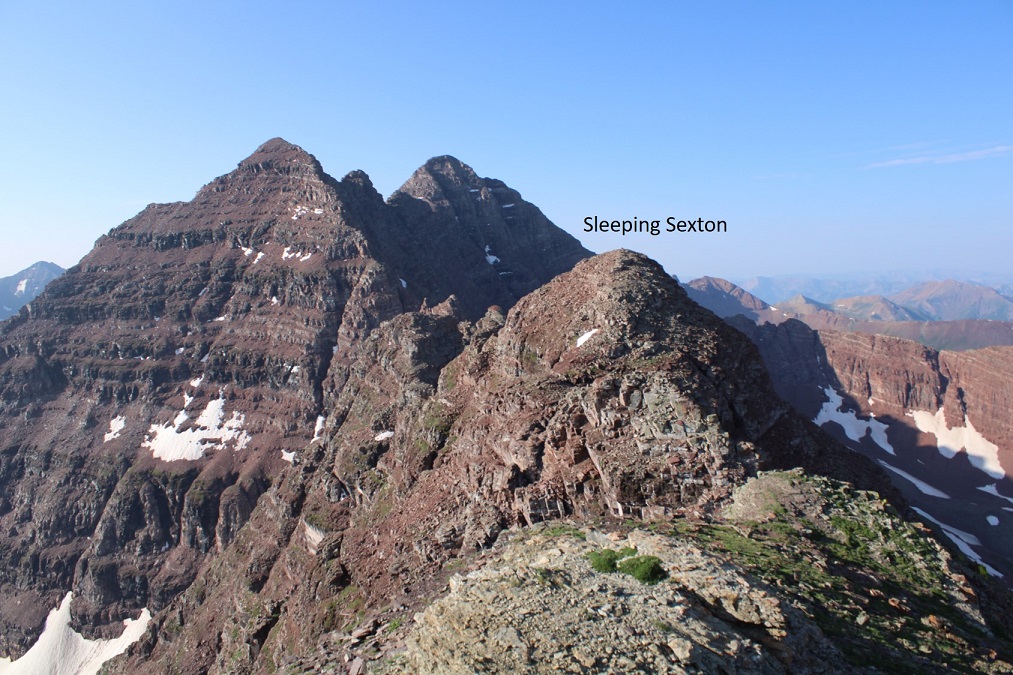
From the false summit you can see the true summit of Sleeping Sexton

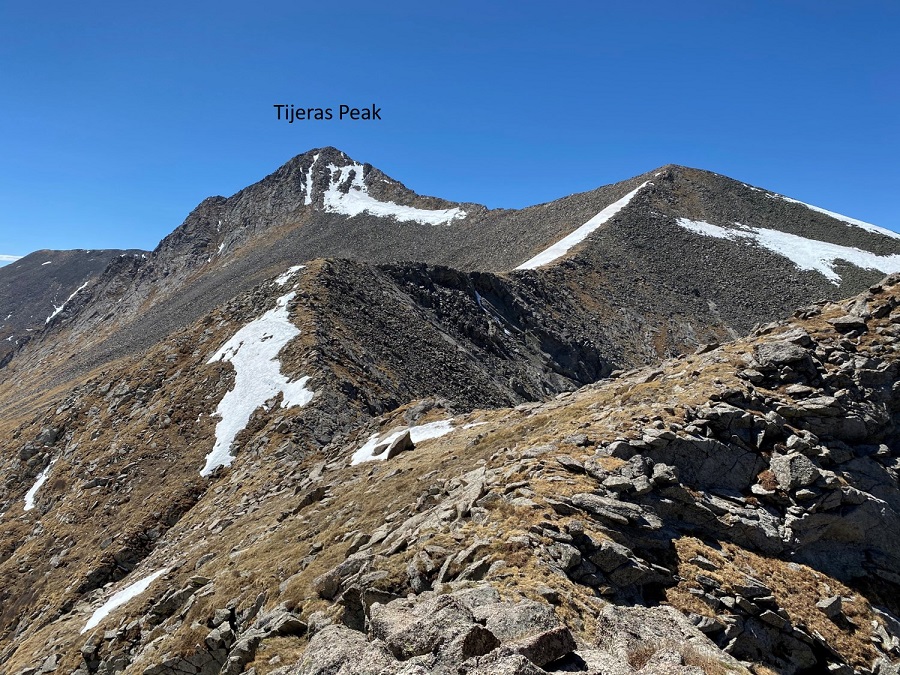
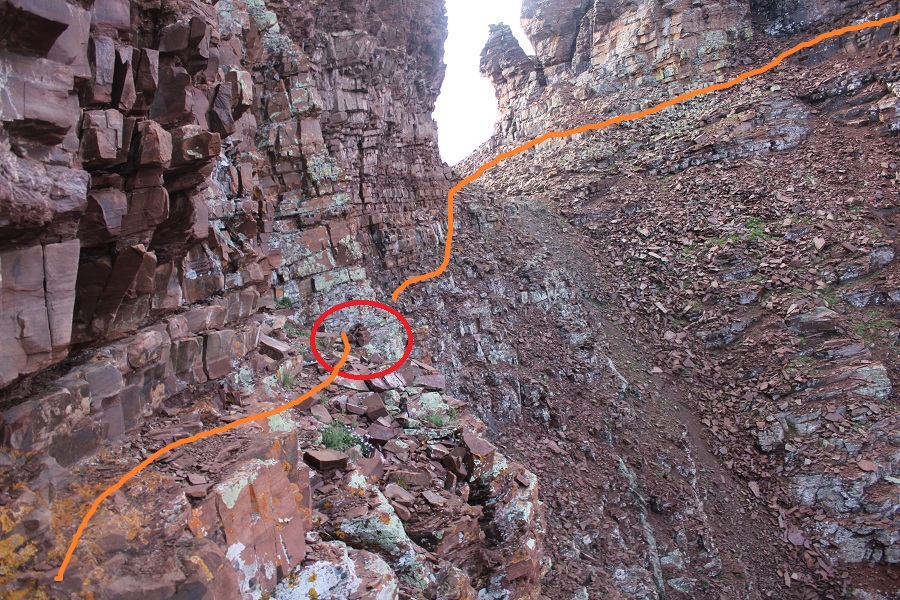
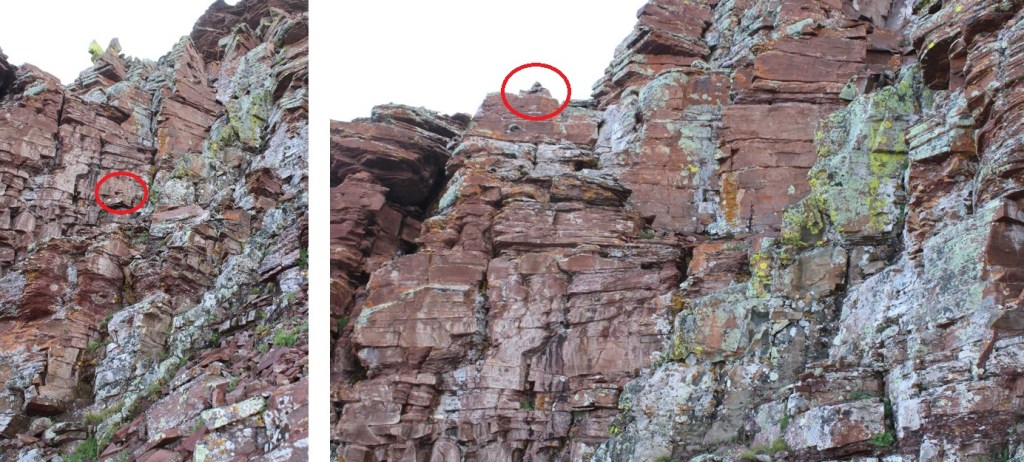
And now, the fun route finding begins!  I descended the false summit 125’ and crossed a gully.  There were cairns here to help in the crossing (circled in red). These are steep and go at class 3/4

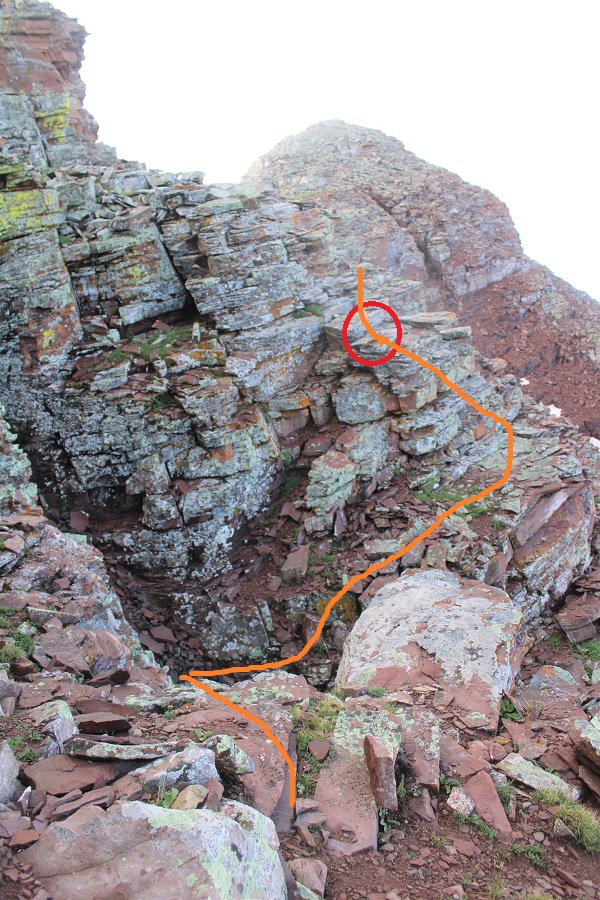
After crossing the first gully I descended once again, another 160’

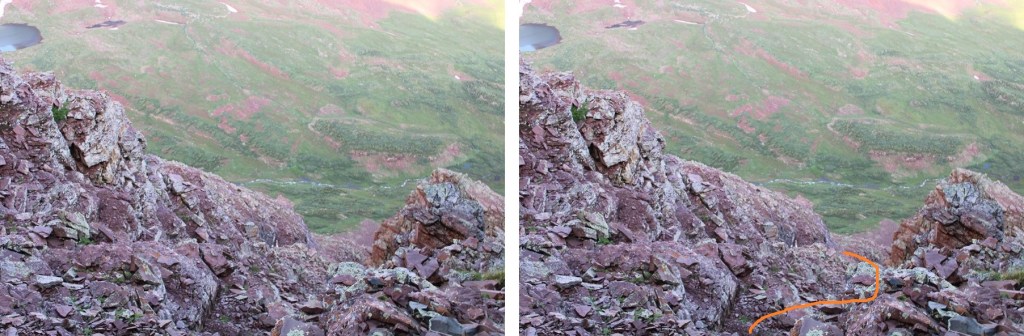
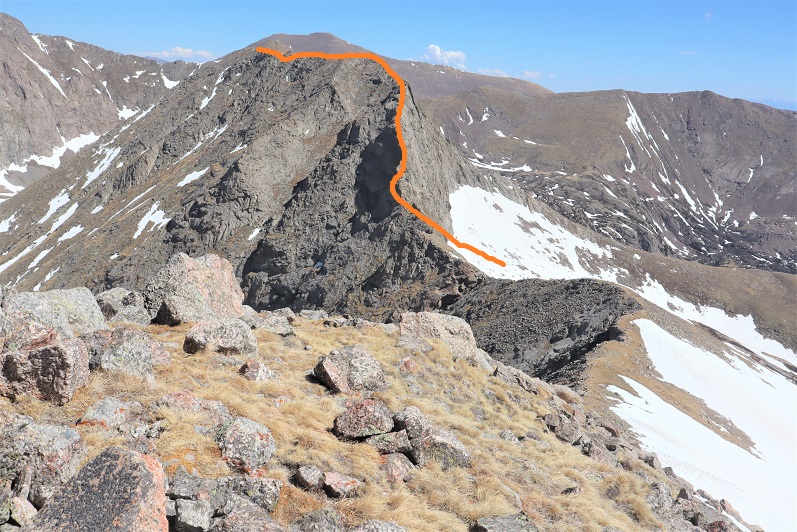
I was now at 13,130’, and parallel with the saddle between Sleeping Sexton and the false summit.  I followed the contour of the mountain to the ‘secret ledge’. Here’s what that looks like heading in

I crossed the ledge to the ‘saddle’, then skirted the side of the mountain and headed up to the summit

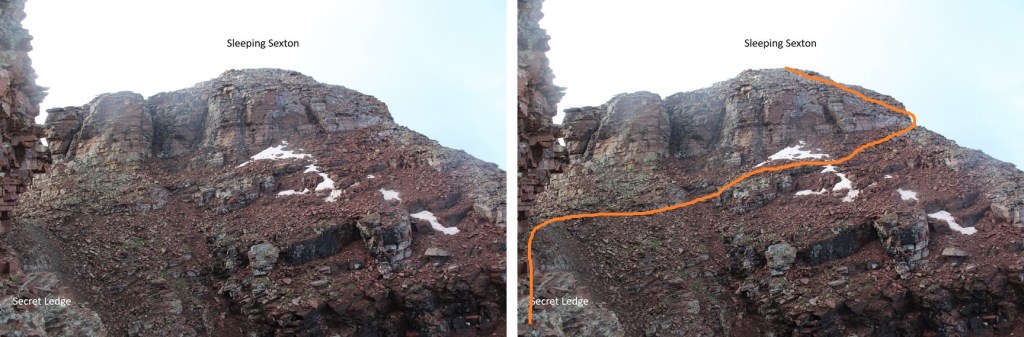
The ledge is not as bad as it looks.  There’s a cairn here (circled in red) DO NOT DESCEND HERE.  Instead, use it as a reference point and stay level with it (especially on your way back) and continue following the ledge. If you do this, it stays class 2 to the saddle.

From there it was an easy trek to the summit, first skirting the mountainside

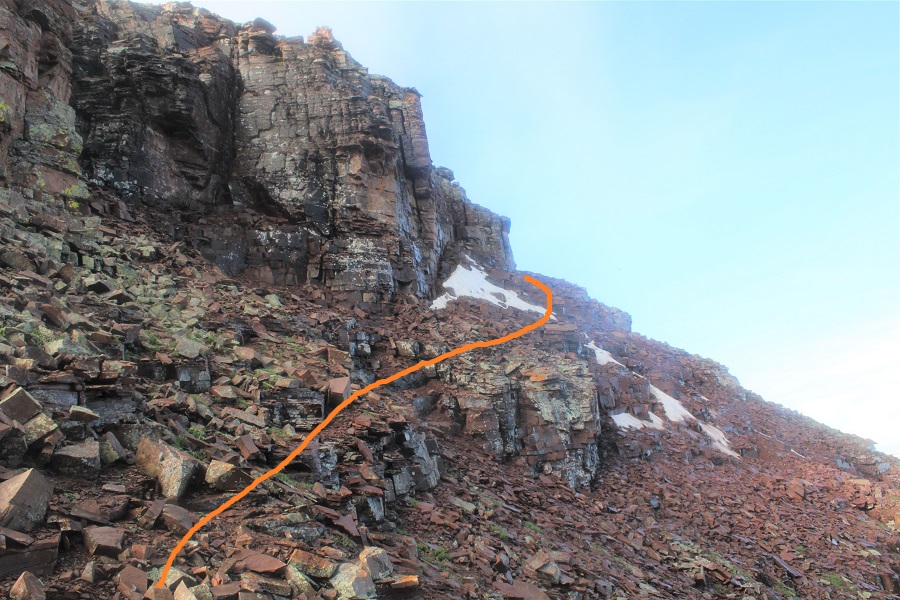
And then ascending the ridge

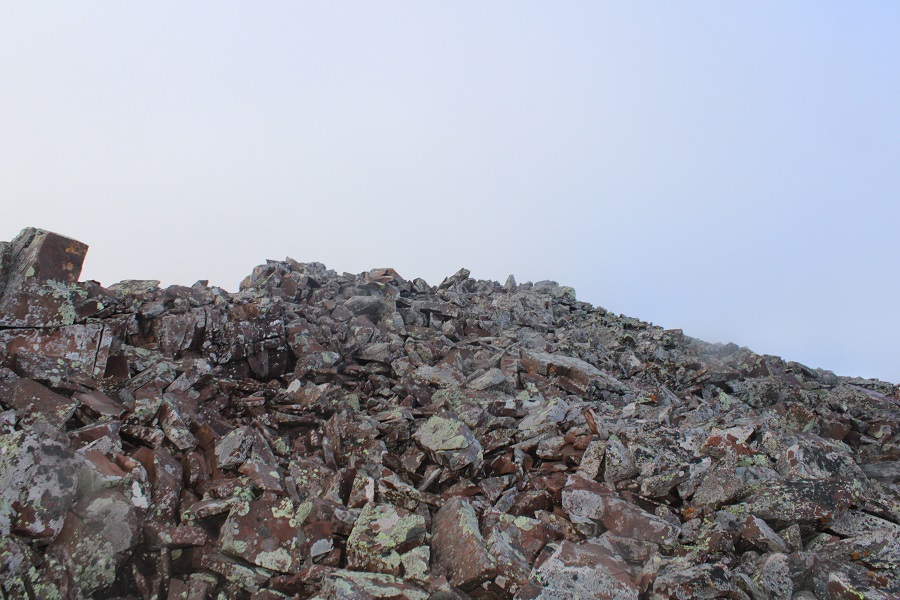
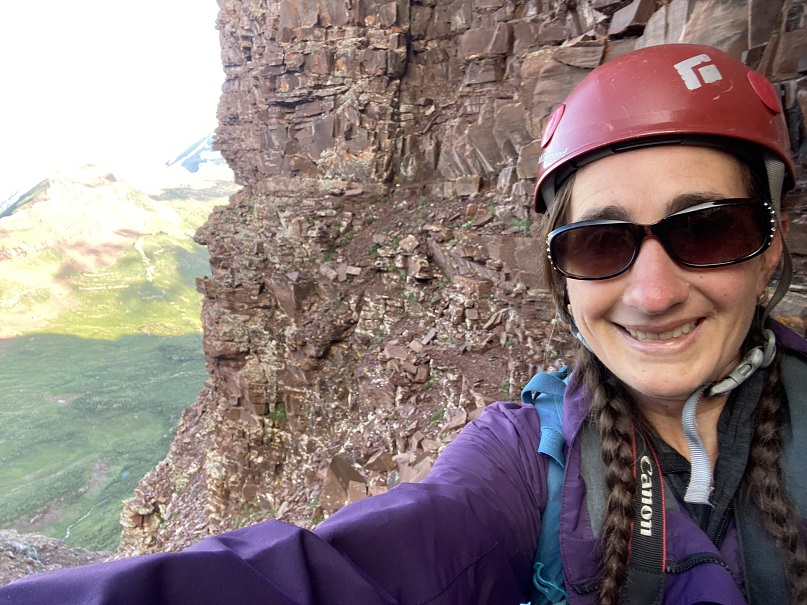
I summited Sleeping Sexton at 6:45am, just as the weather started rolling in
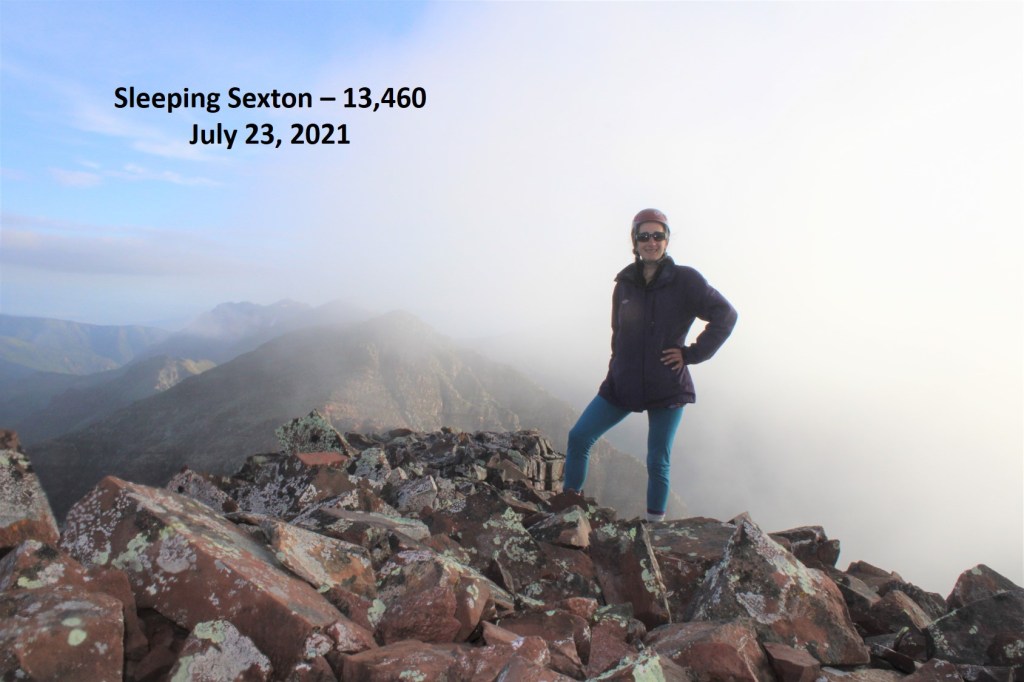
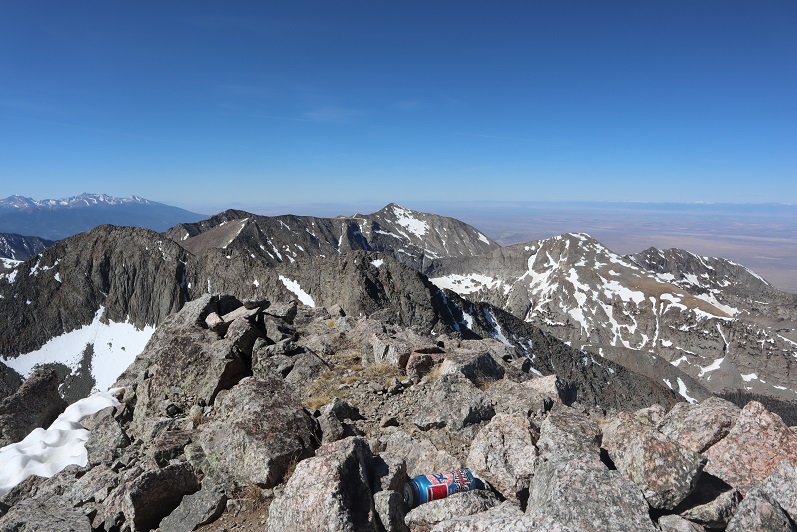
Sleeping Sexton: 

Since the weather wasn’t cooperating I didn’t stay long.  I turned and headed back the way I’d hiked in.  Here’s looking back at the false summit / ‘the crown’

And a view making it back to the ledge

Here are some more images of that ledge, looking back.  Remember to look for the cairn, and stay level with it.

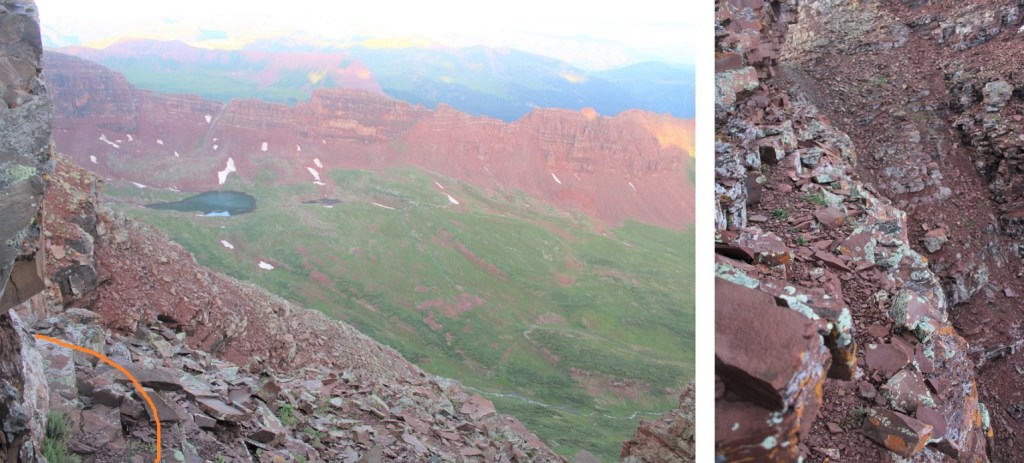
For reference, here’s the size of the route.  The route can clearly be seen over my shoulder (to the left)

I rounded the corner, and ascended the gully, aiming for the cairns

Crossed the next gully

And gained the ridge to the false summit / ‘the crown’

I actually stayed here for a bit because I had cell service.  I let my family know I was ok, and downloaded the weather forecast for the next day.  However, eventually the clouds told me to get going.

Clouds rolling in: 

Here are some pictures of my way back to the white gully

Back down the white gully to the ridge

And from the ridge back to the trail

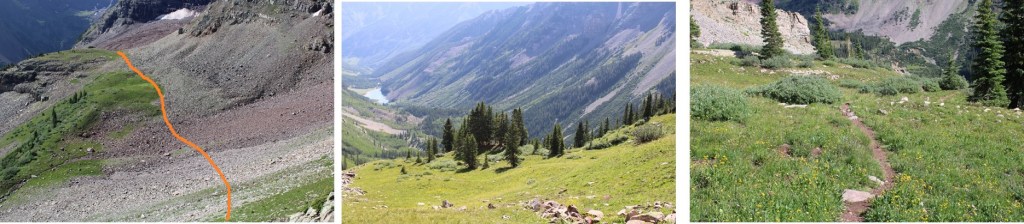
Once back on the trail it was an easy, class 1 hike back to the parking area.

I made it back to my truck at 11:30am, making this a 12.7 mile hike with 5156’ of elevation gain in 9 hours, 15 minutes. 

It was still early in the day, so I ate lunch by Maroon Lake, read for a bit, looked at topo maps for tomorrow, and jotted down notes in my journal before making it an early night.  Oh, I forgot to mention the goats:  They were the same two goats I saw last week, and if for no other reason than them, wear your helmet until you make it back onto the class 1 trail:  They were kicking rocks down the gullies the entire time I was there. 

Tijeras Peak – 13,612 & Music Mountain – 13,365

1

RT Length: 12 miles

Elevation Gain: 4587’

I’d intended to be on the trail by 4am, but the last 2.5 miles of 4WD road past Grape Creek TH to Music Pass TH took longer than I’d anticipated. It is indeed a 4WD road that requires some clearance. It was better than South Colony Lakes though. I brought snowshoes but decided to leave them in the truck. I was the only vehicle in the very large parking area when I left. I put on my helmet and was on my way by 4:30am.

2

The trail starts at the west end of the parking area.

3

The trail is class 1 all the way to the Lower Sand Creek Lake. I came across a (full) trail register quickly

4

And continued on a well-maintained trail west 1.2 miles to Music Pass, where there was another (full) trail register.

5

6

From Music Pass there’s a great view of the entire route:

7

From Music Pass the trail loses 450’ in elevation as it brings you to the valley below.

8

Stay straight at the first junction (2 miles)

9

And turn left at the second (2.3 miles)

10

I quickly crossed Sand Creek on a bridge put together by fallen logs, and continued along the class 1 trail

11

The trail was easy to follow, but, ah, spring conditions. If there wasn’t water on the trail there was snow. More than once I regretted leaving my snowshoes in the truck: It was posthole city at 6am.

12

I swithchbacked up to the lake, where the trail ended (or was covered in too much snow to follow). I made it to the lake after 3.5 miles of hiking. My next objective was to skirt the north side of the lake and ascend the gully to make it into the upper basin. Here’s an overview of the route:

13

Here’s where I began the ascent. Note, that big rock to the left is basically a waterfall. On my way down it was nice letting the water sprinkle over me in the heat.  There is a gully to the right that is an actual waterfall with lots of flowing water. If it were winter or no flowing water it could be an alternate route to the basin.

14

The rock to the right has a huge cave underneath it (big enough for several people to fit inside). It looked perfect for a mountain lion or bear den so I chose to hug the opposite rock more on my return.

15

The gully only goes for about half a mile before you turn left (south) and cross the basin

16

There was a lot of snow here, and it was impossible to avoid it. It was still early morning but there hadn’t been a freeze the night before so the snow was soft. Postholing was terrible and I knew it was only going to get worse so I chose to ascend via the first ramp I saw instead of inspecting the others. As I was postholing I aimed for this rock, which was visible above the willows.

17

I made it to the ramp, a bit displeased to find the snow just kept getting softer. Before making the decision to ascend I made sure I had an exit route. I knew if I ascended here the snow would be too soft to descend, most likely at about the time I reached the top. If I was going to continue I was going to need to make this a loop. I looked over to Music Mountain and the way down, took some pictures for further reference, looked at pictures of the route I’d taken from this morning, and consulted the sky (70% chance of thunderstorms after 4pm today, I so needed to be able to make it down well before then). I saw a viable route to descend via Music with avoidable snow and decided to go for it. Note: you only have two options to ascend and descend this loop, as it cliffs out everywhere else. Before committing know your options.  I strapped on my crampons, got out my ice axe, and went for it.

The snow was soft, so kicking in steps was easy (almost too easy at times and I had to re-make them when the snow turned to mush under my feet).

18

A view from inside, looking up and looking down

19

Eventually the snow ran out and I scrambled on rock/tundra to reach the top of the ledge. Here’s the route from the ledge to the summit

20

Note: This is NOT the only route. You could make this easier by hiking to the saddle and then turning left and hiking up the class 2 (possibly easy 3) ridge. I chose instead to go up the face and get in a little scrambling. As with a lot of scrambling routes, there is no exact route; you need to pick it and choose it carefully. Here’s how I went, once again, sticking to the center as much as possible.

21

22

23

The rocks were surprisingly stable, although there were several areas that looked as if they’d recently experienced a rockslide. I made it to the summit at 9:30am

24

Tijeras Peak:

There was a water bottle summit register at the top, and great views of the surrounding mountains.

25

I turned northwest to head down the ridge of Tijeras towards its saddle with Music Mountain.

26

Here’s the route I took in a nutshell

27

For much of this ridge walk I stuck to the ridge, but there was a time I dipped to the left a little. This is not a simple ridge walk, and did require some scrambling. Nothing that gets your heart going like on the way up Tijeras, but scrambling nonetheless.

28

29

30

Here’s a look back up the ridge of Tijeras

31

Once down on the saddle the walk to the base of the Music Mountain climb was easy.

32

Here’s a look at my route down Tijeras and over to Music

33

Climbing up Music Mountain was the biggest challenge of my day. The entire route was scrambling that took committed attention to each and every move. Luckily the rock was solid and there were many hand/foot holds. Since I climb solo I was extremely careful and tested each hold several times before committing, which made the process slow. Also, I didn’t look down: This ridge was spicy. I began by going straight up the ridge and staying on that ridge through class 3 and 4 sections, only altering one time to use a gully because I felt the ridge was too dangerous (but I’m sure you can make it go all the way because I had no problem downclimbing the entire ridge). Here’s an overview

34

And step by step, straight up and over. It’s more committing than it looks

35

36

37

At the top of the first ridge I saw a lot more scrambling (and what looked like a knife edge from below but really wasn’t) and decided to divert the main ridge by finding a gully to climb instead. This is the area I had no trouble downclimbing.

38

39

And then more ridge work. I’m standing on one of three ‘highpoints’ on Music Mountain, taking a picture of the other two. This was the easiest part of the ridge

40

I couldn’t be sure which point was the actual summit of Music Mountain: There was no summit marker/cairn and all three points seemed to be the same height, so I just made sure to hike to the last one. On my way back I took altimeter measurements of all three. Surprisingly, the point in the middle measured highest, and the first point measured lowest. In any event, I hit all three and took a picture at the furthest point because it offered the best views

41

Music Mountain:

Time to head back. I took Music’s East Ridge down. those grassy ledges and rock faces are steep! Nothing compared to the previous ridges of the day, but they still took careful planning and foot placement. Nothing special to add here except watch out for the gullies and try to stick to the tundra or ridge when possible. Here’s the route I took down

42

And a look back up at the ridge

43

Here are the current options for gaining the ledges on Tijeras. I took the smaller one to the left

44

I made it back down the gully to the lake and followed the trail back to Music Pass

45

46

Re-summiting Music Pass was a bit of a buzz kill after such a long day, but this would still be high on my list of most beautiful places to hike. The mountains were absolutely gorgeous!

47

I made it up to Music Pass and opened the trail register to sign out, but when I did so no less than 10 miller moths flew out at me. I slammed the lid and said ‘no thank you’ and was on my way. There wasn’t really a place to sign out anyway, just a record of who’d been there. I didn’t bother signing out of the second register, not wanting the same experience.

I made it back to my truck at 3:15pm, making this a 12 mile hike with 4587’ of elevation gain in just under 12 hours.

48

Here’s a topo of the route

49

I saw some wild horses on my way out… either that or the horses got out. In any event, we chatted for a bit until it started to rain. It seemed those thunder storms were going to happen today after all!

50