Keller Mountain – 13,080

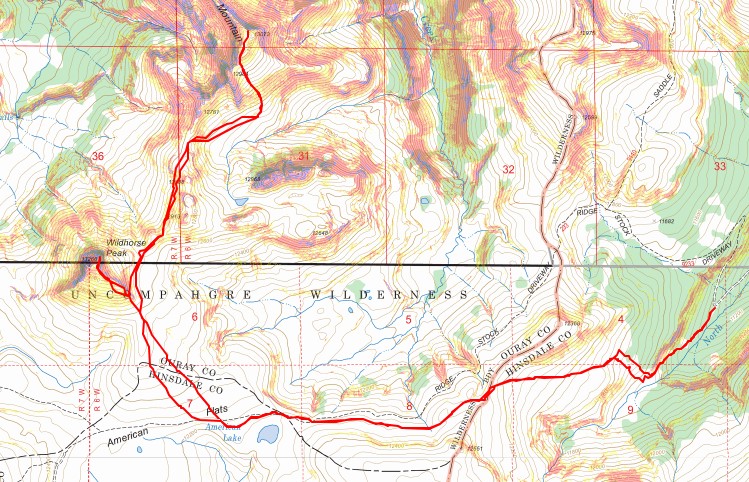
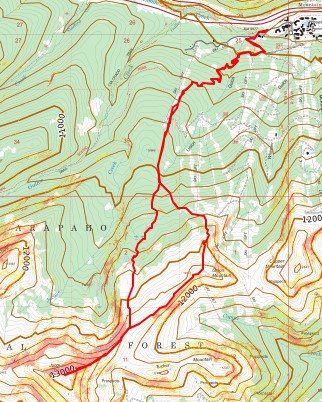
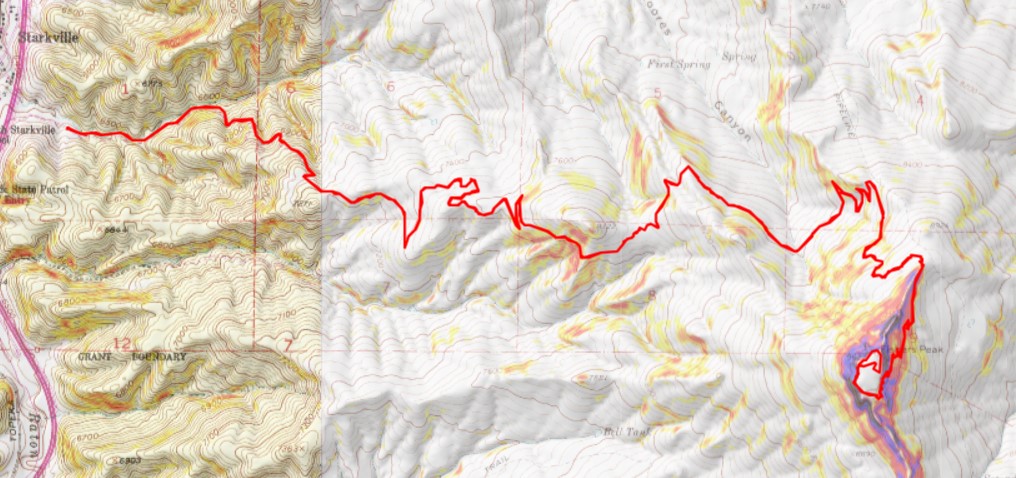
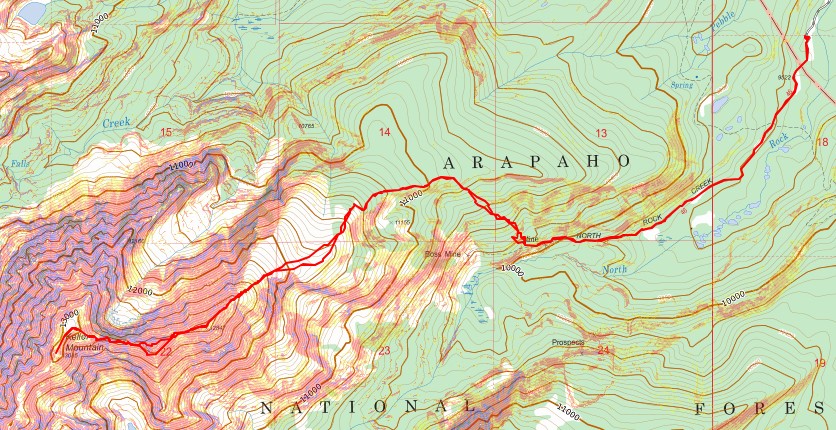
RT Length:  11.89 miles

Elevation Gain:  4086’

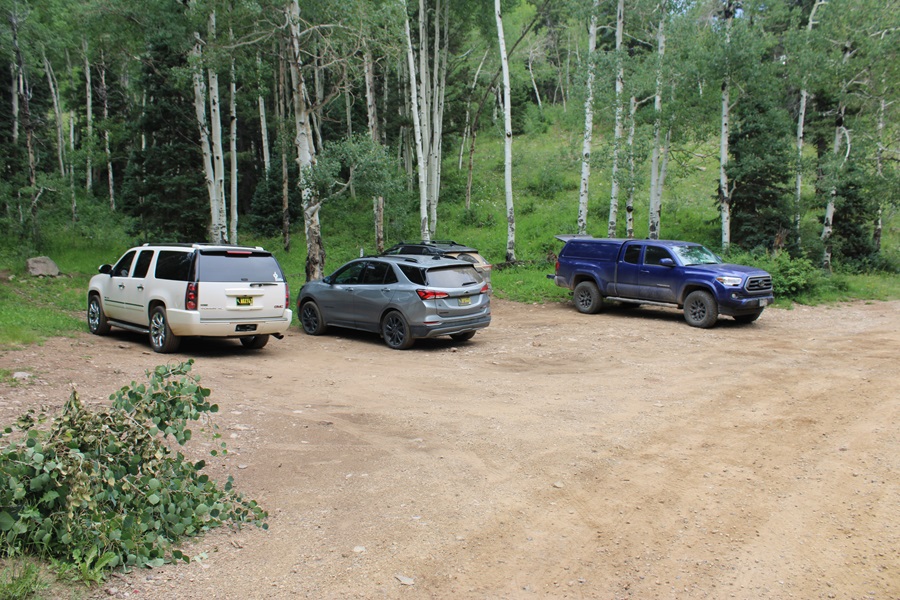
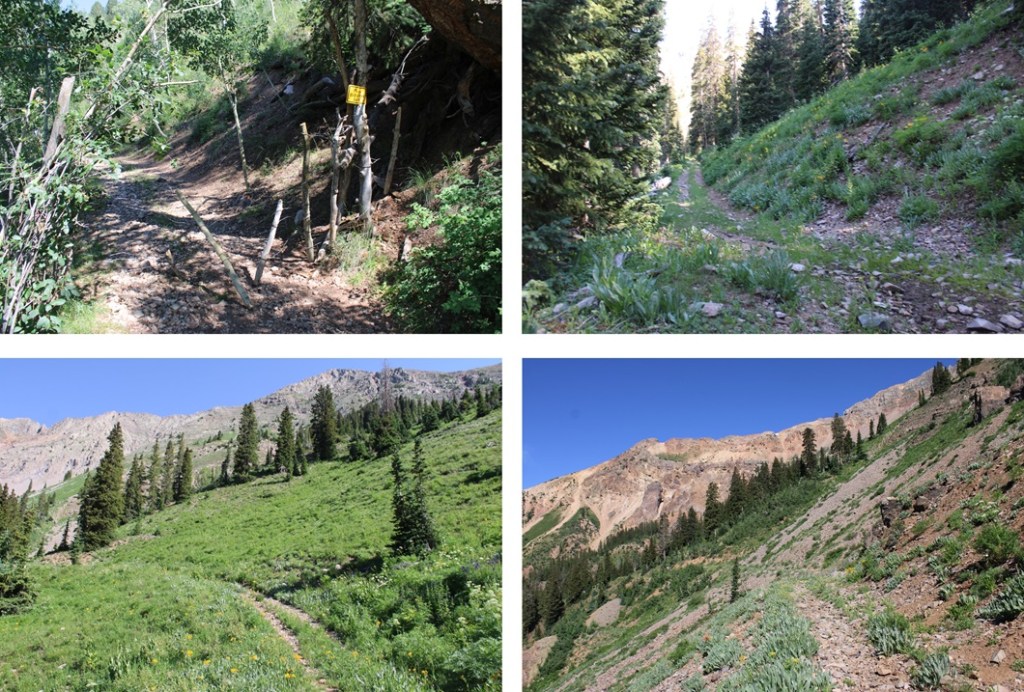
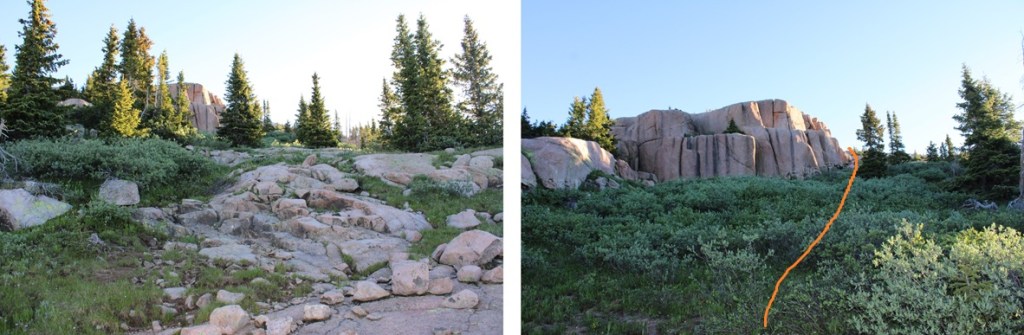
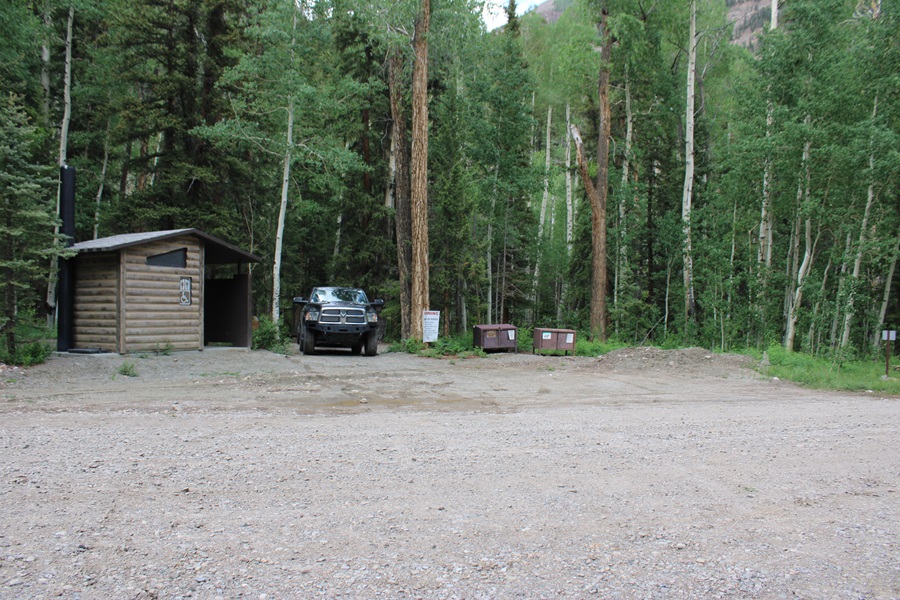
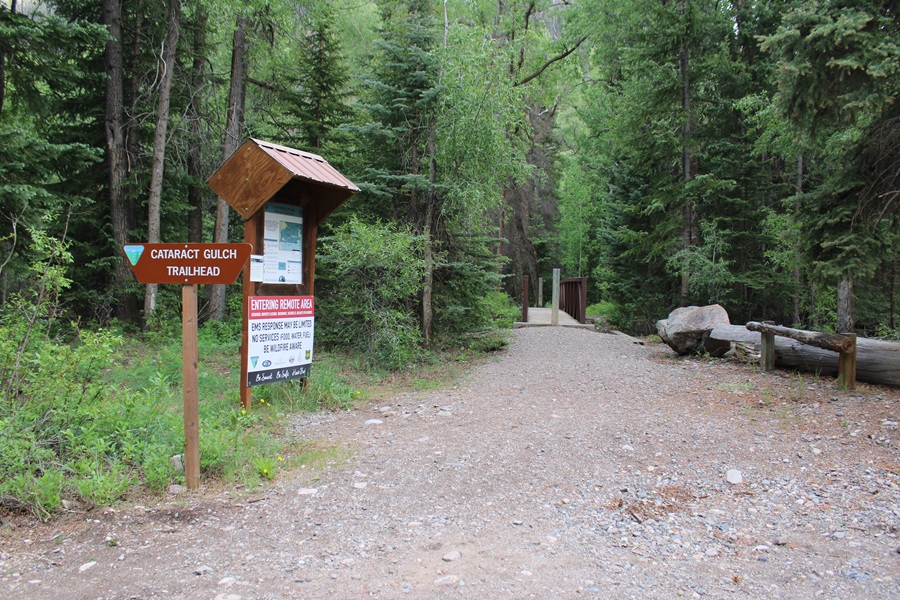
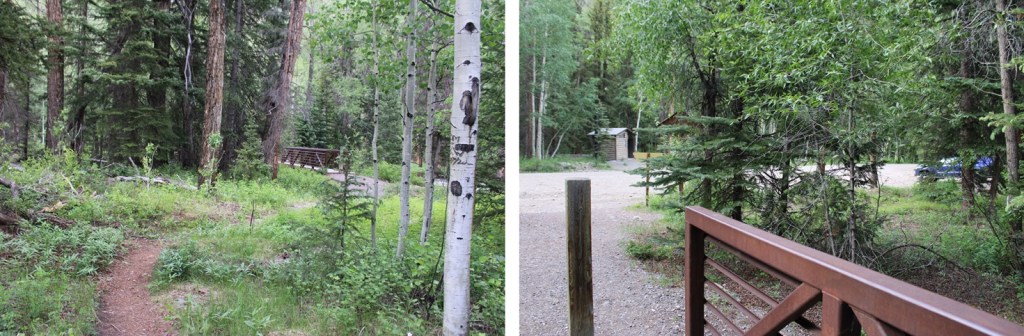
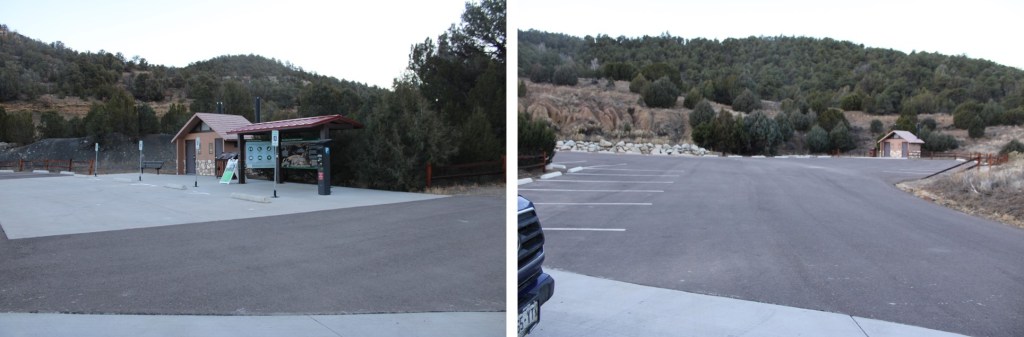
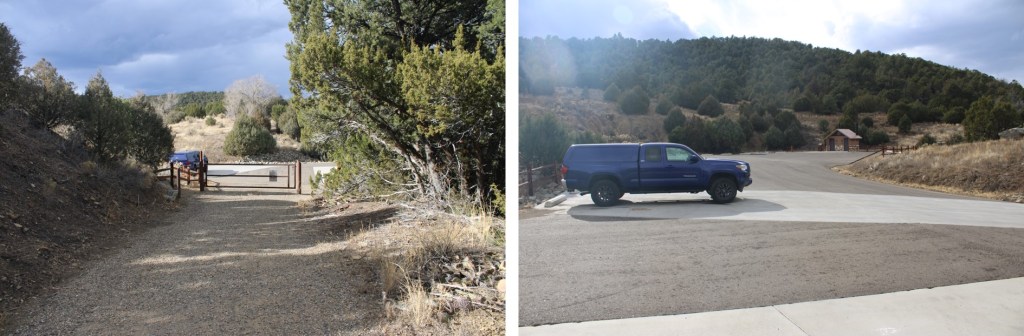
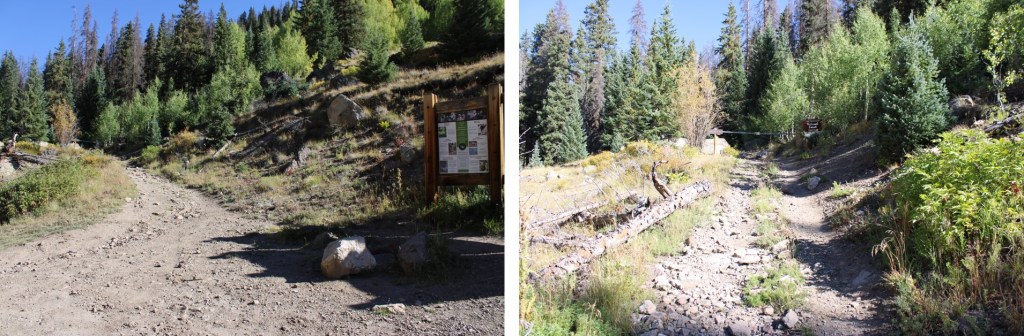
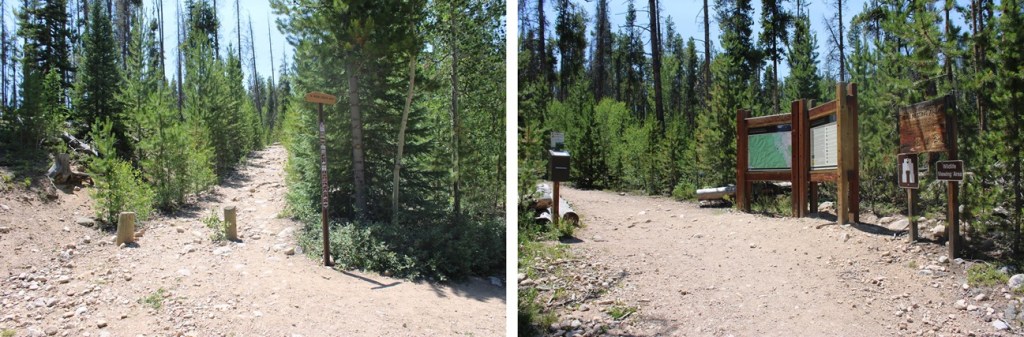
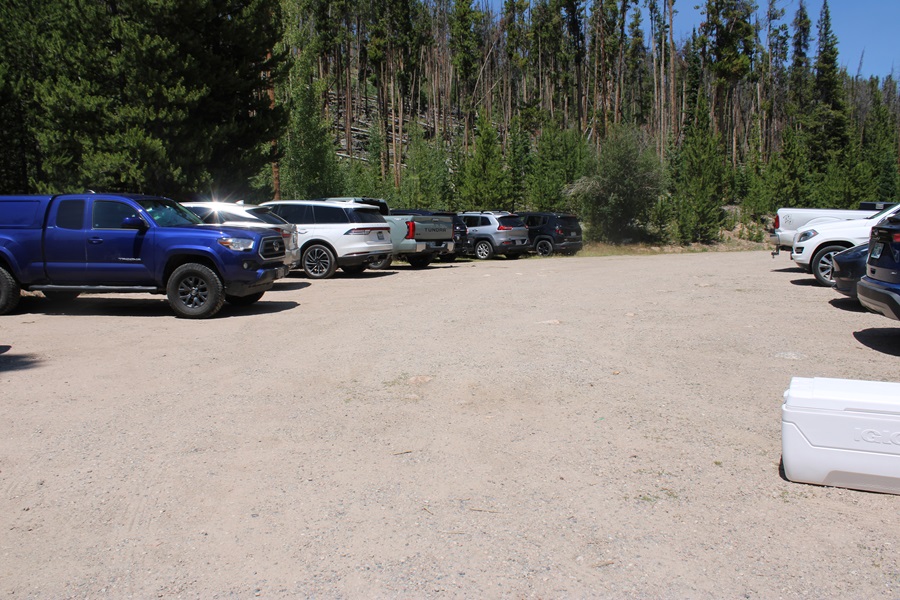
I parked at the Rock Creek Trailhead at 5am, and the parking lot, which holds about 20 vehicles total if everyone parks nice, was already full.  I’m guessing all the vehicles were from weekend backpackers (I arrived on a Sunday morning).  The drive in is mostly 2WD on a dirt road, but you’ll want high clearance for the last quarter mile or so.  I saw someone trying to head down in a Honda Odyssey who was having major issues (although it was probably just the driver, not the vehicle).

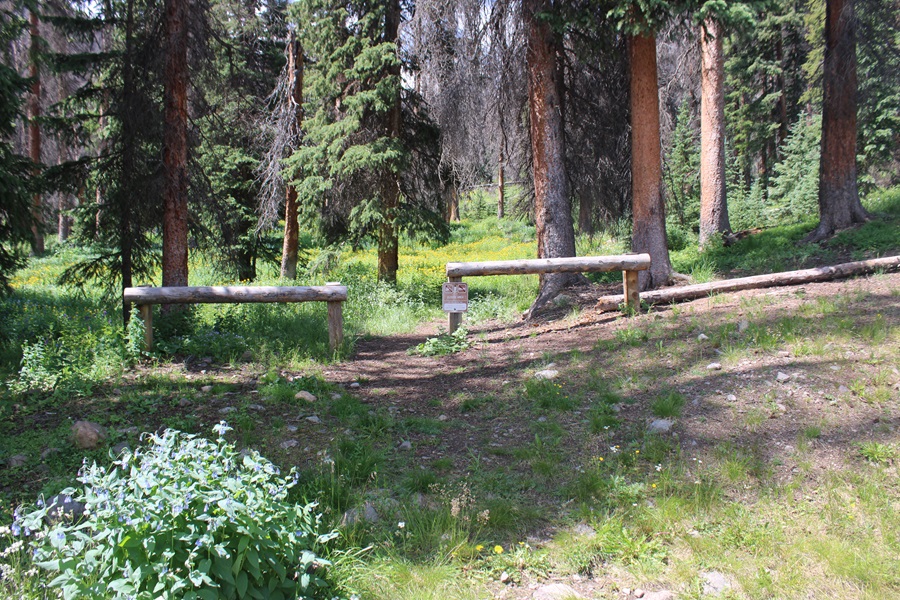
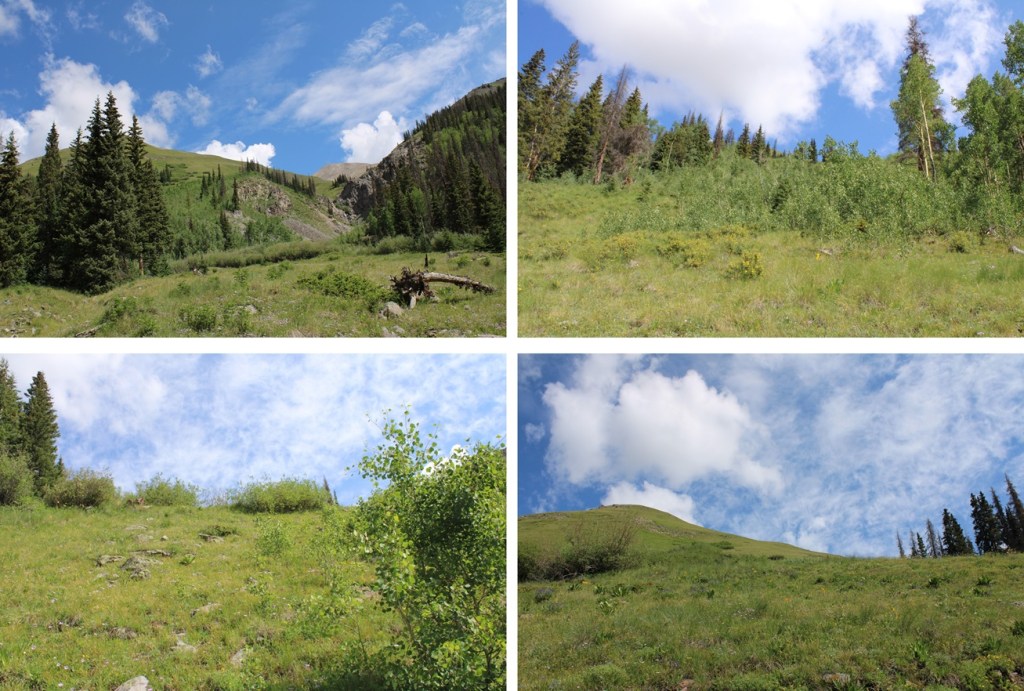
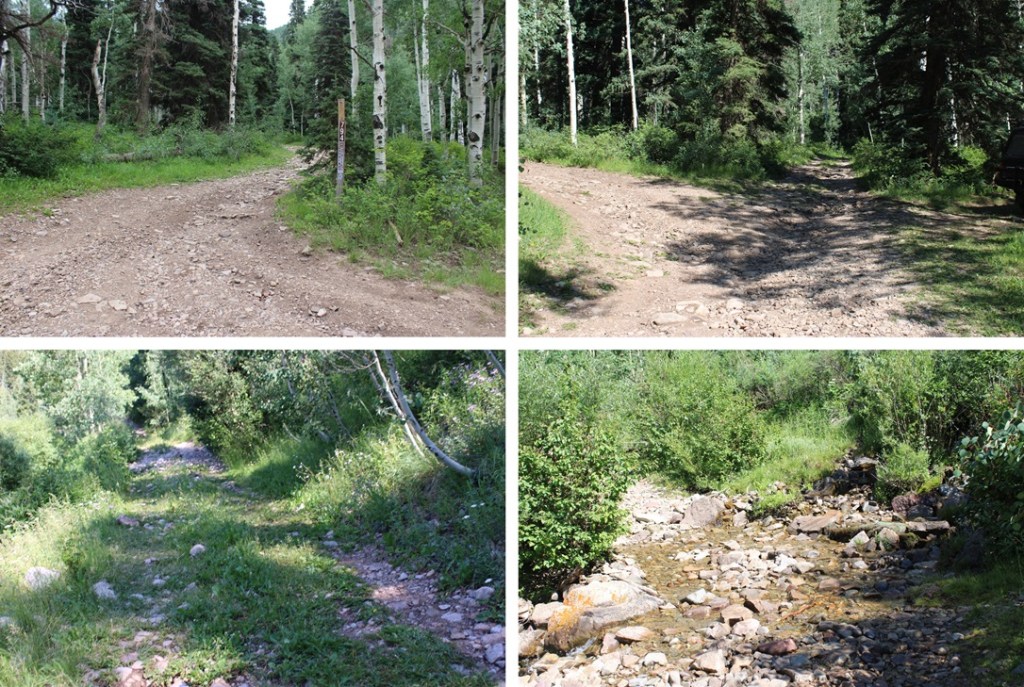
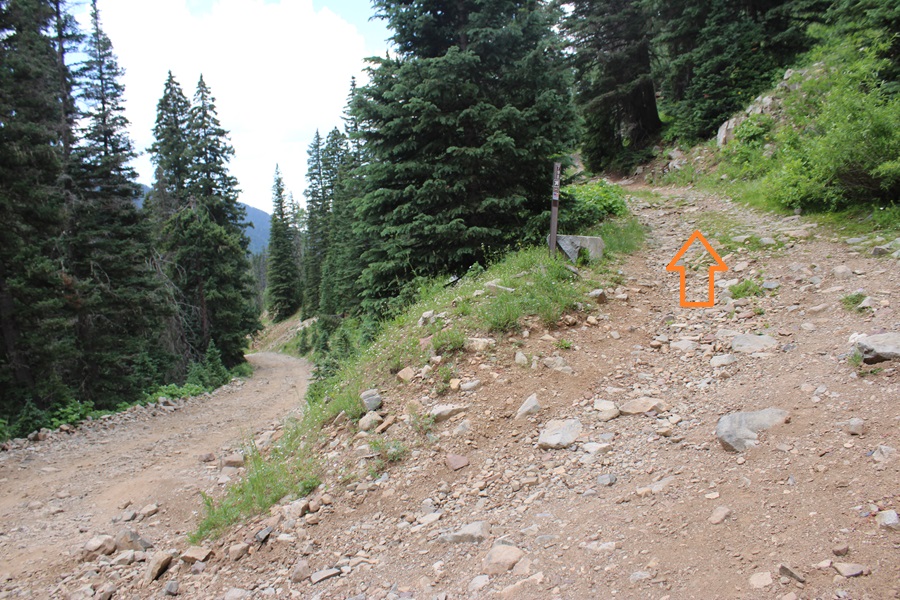
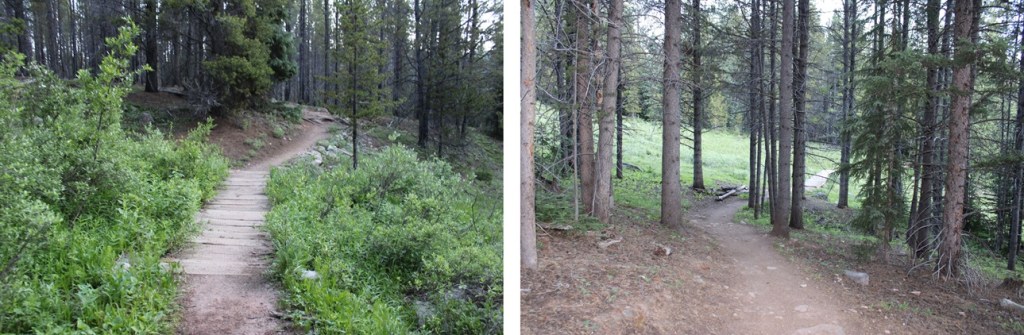
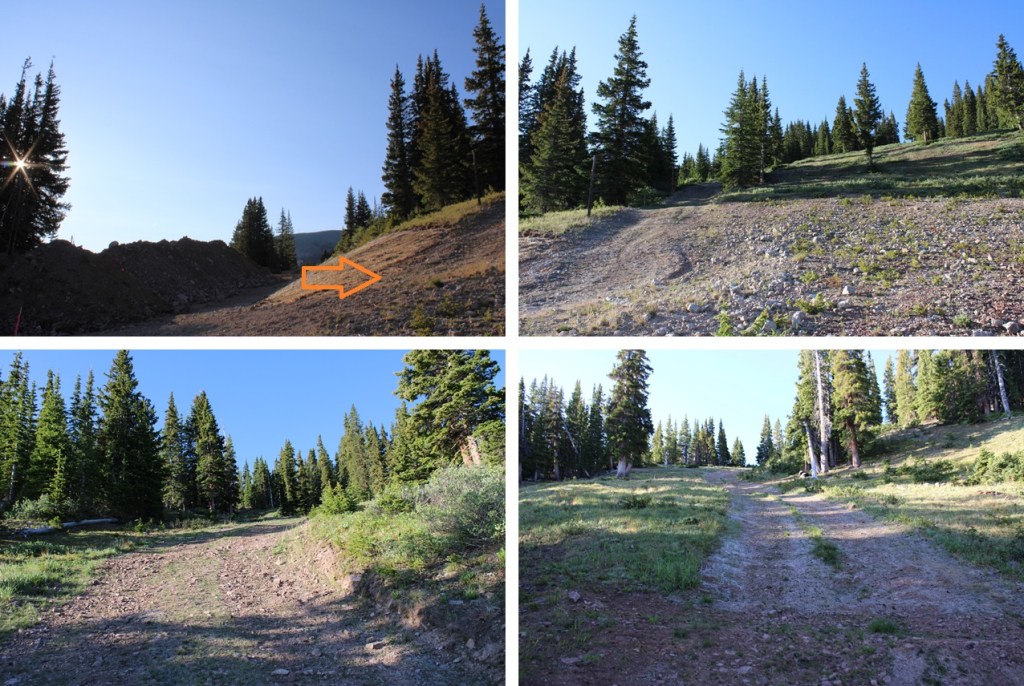
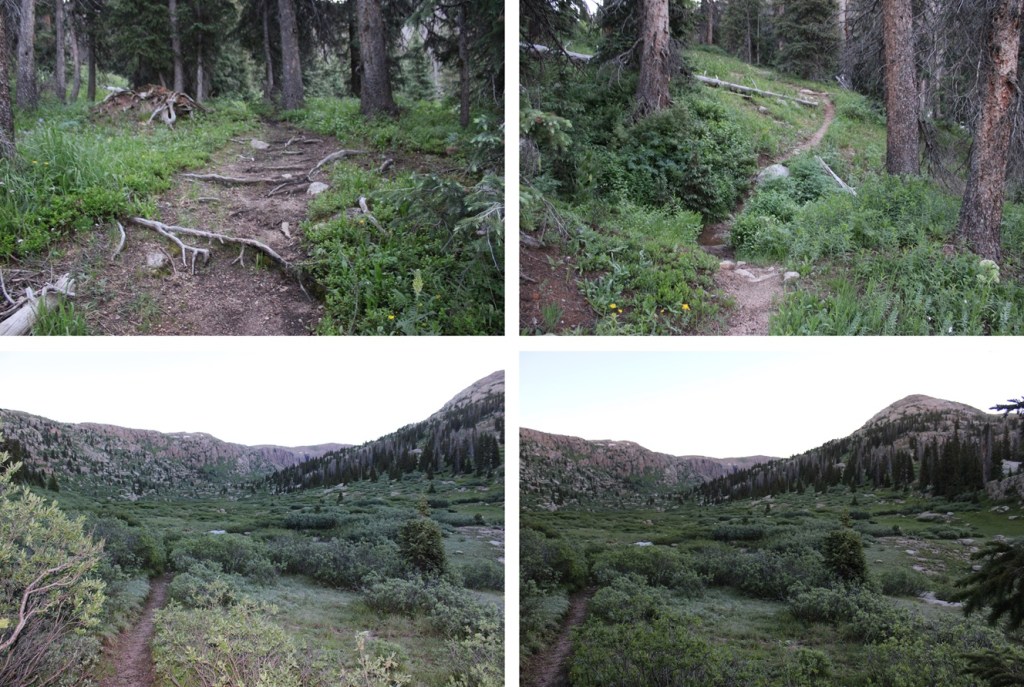
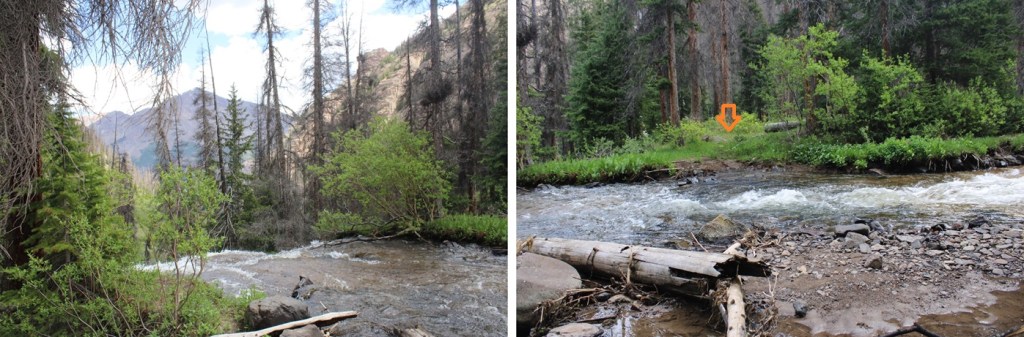
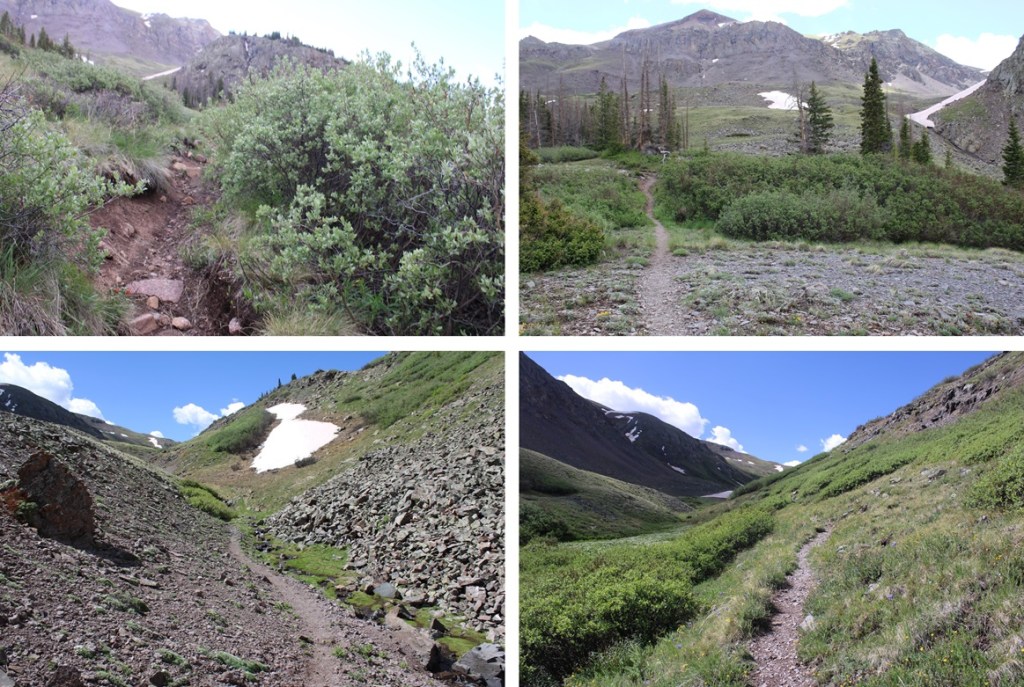
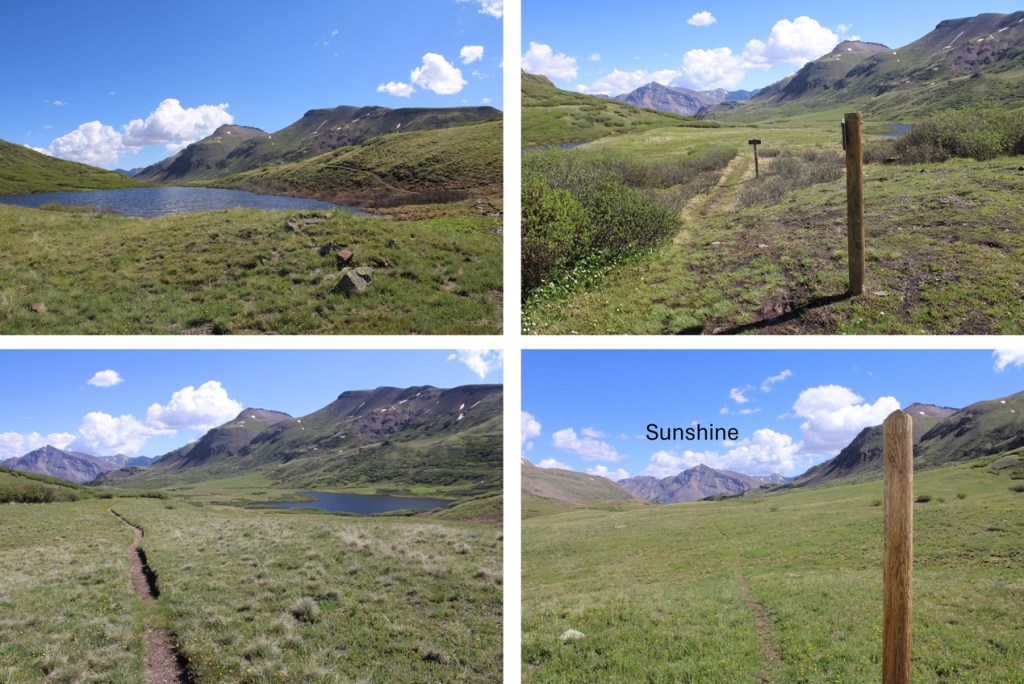
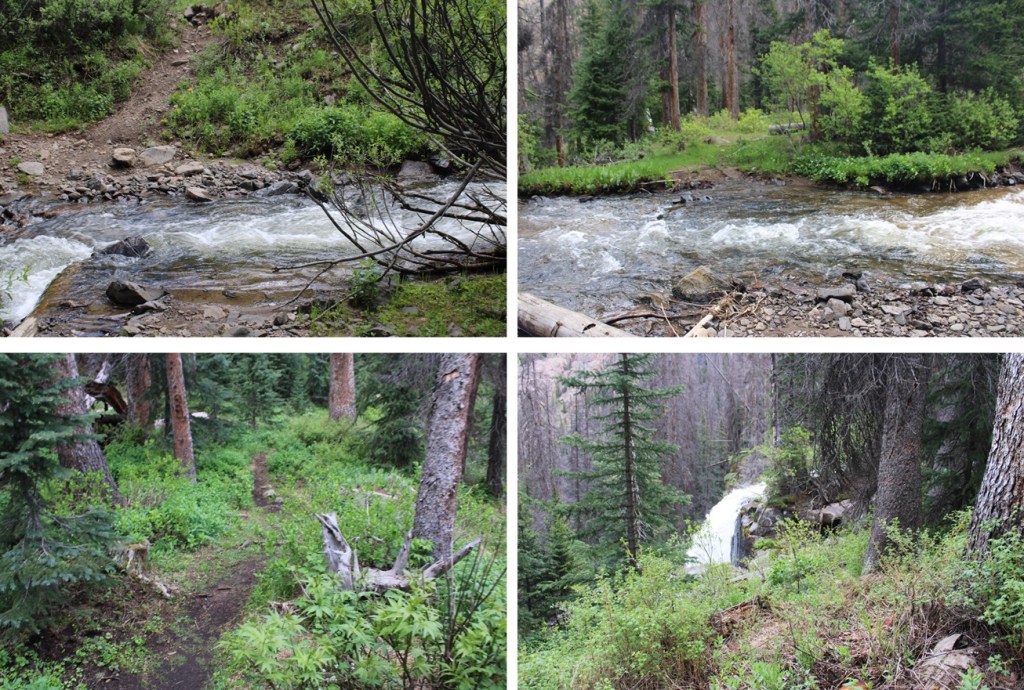
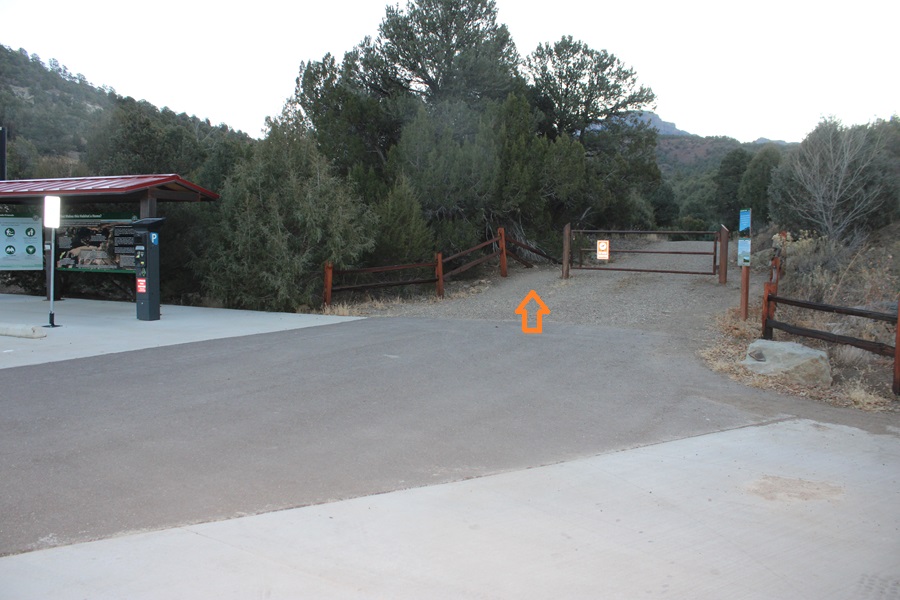
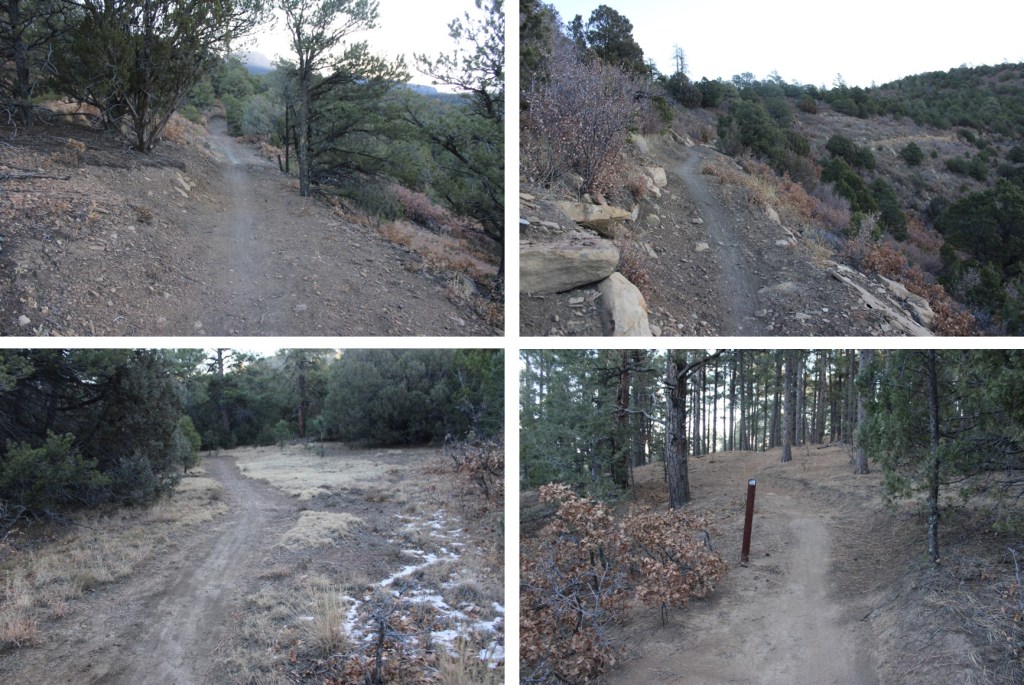
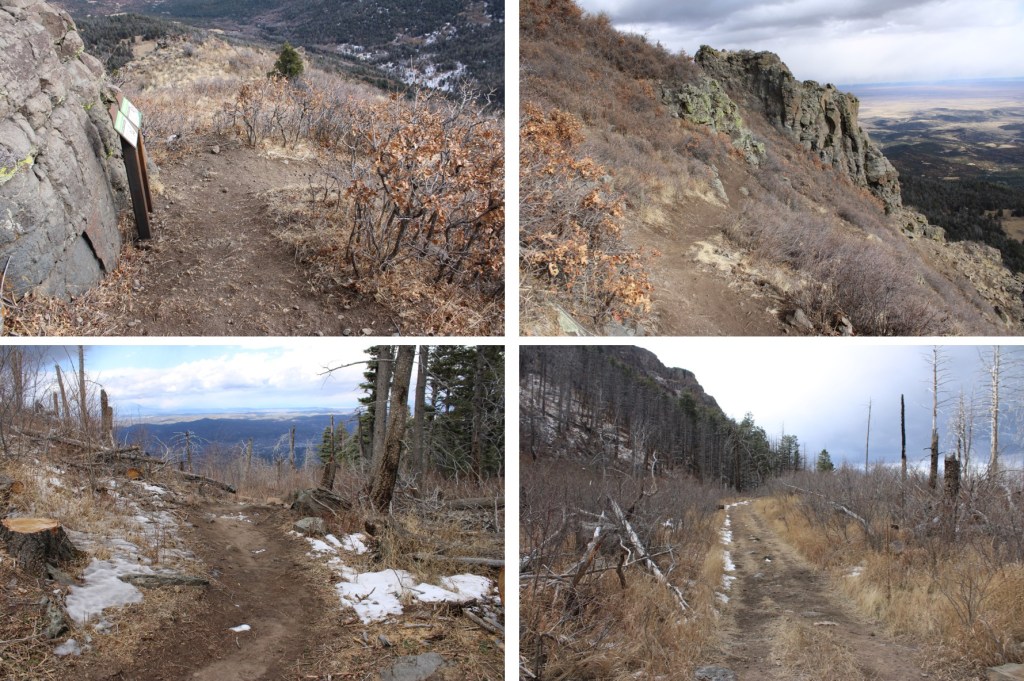
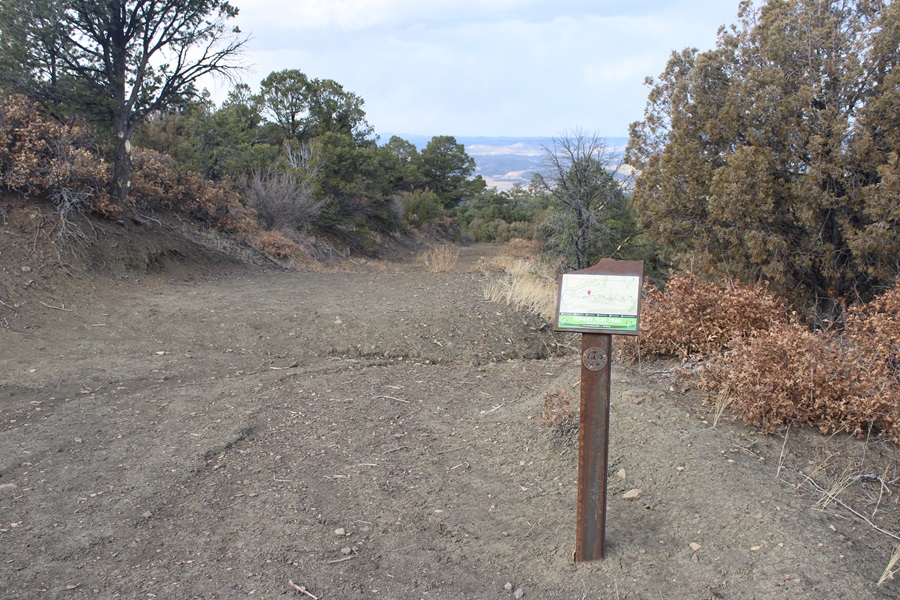
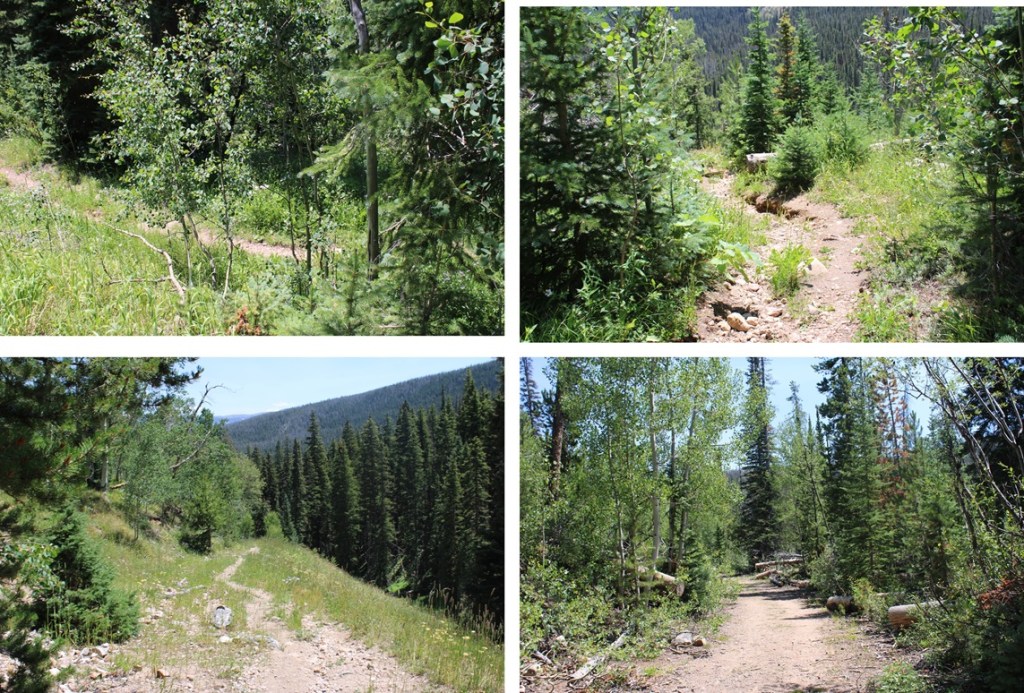
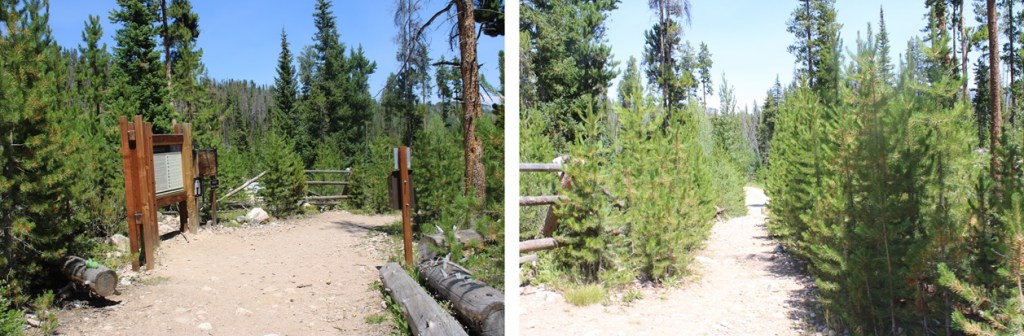
I was on the trail at 5:30am.  The trail starts at the east end of the parking area.

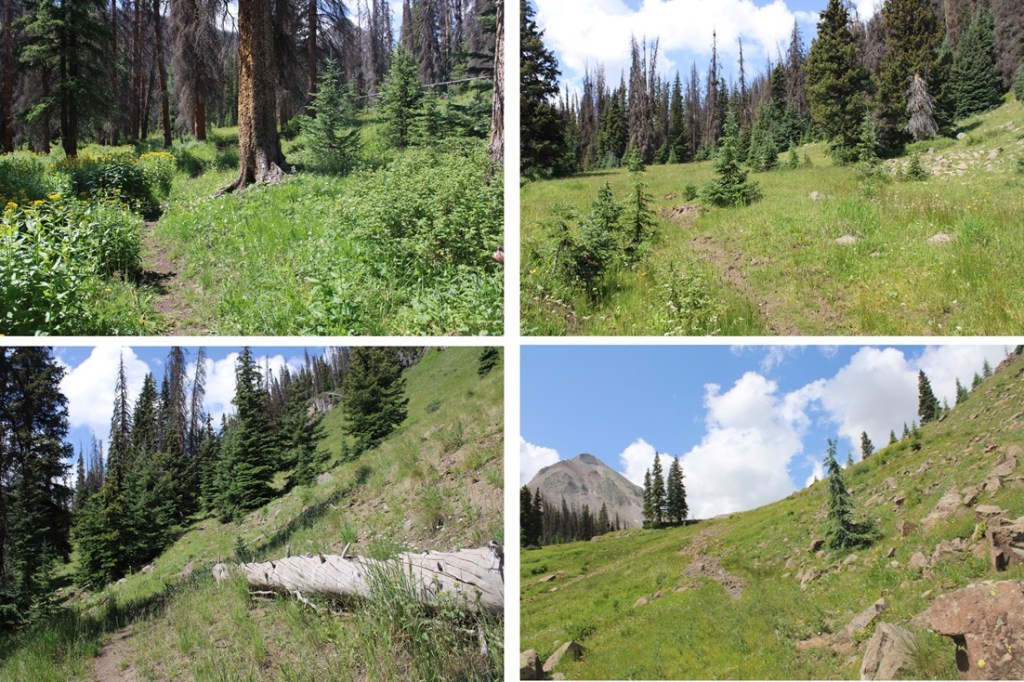
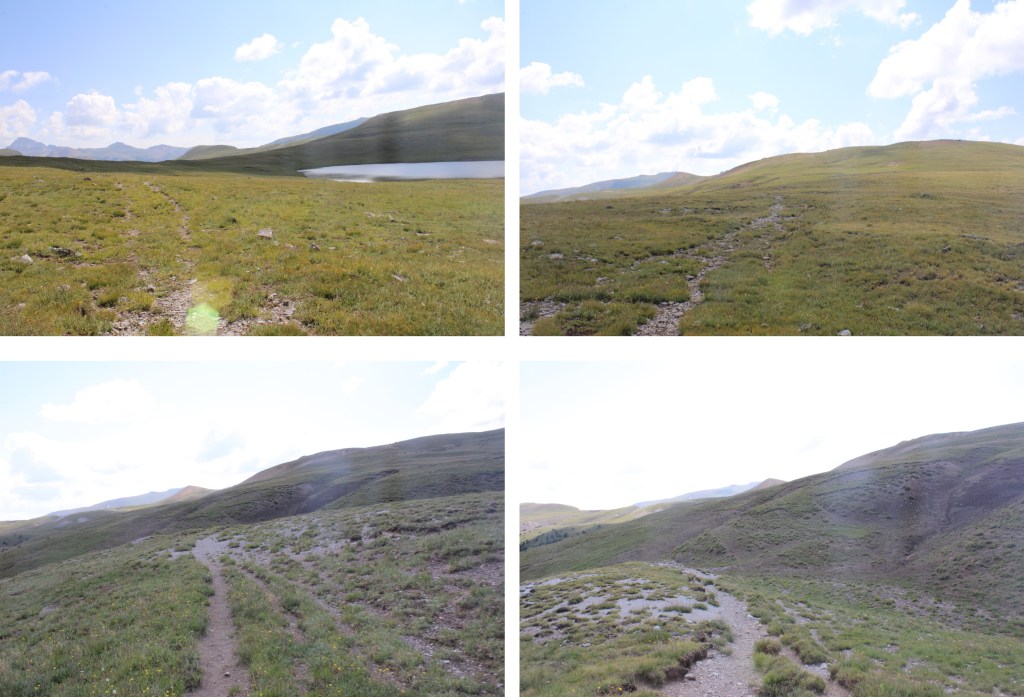
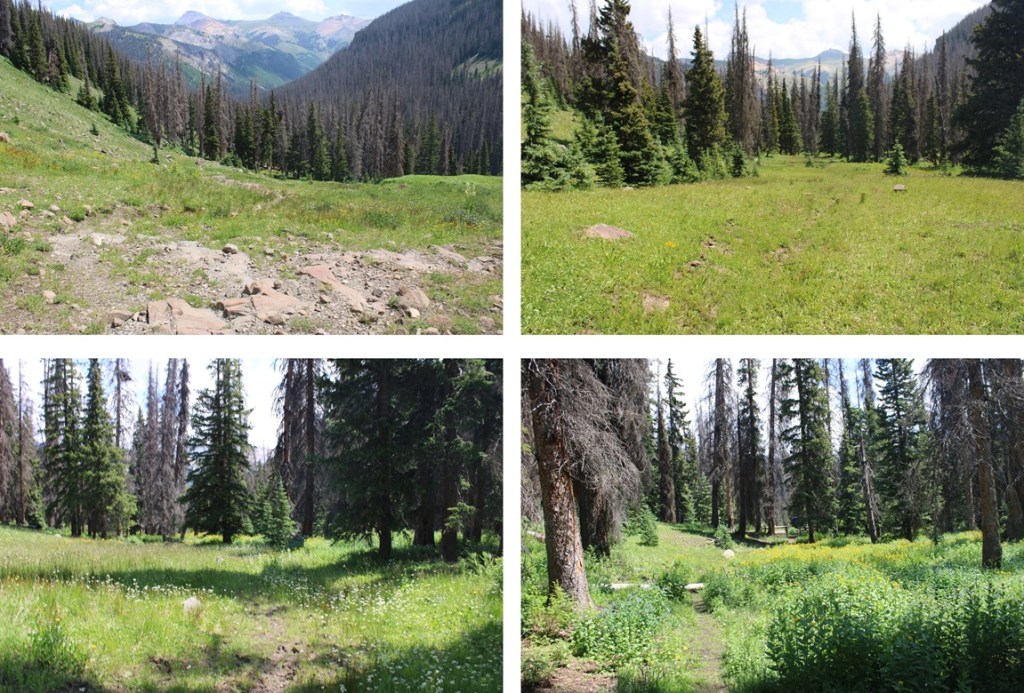
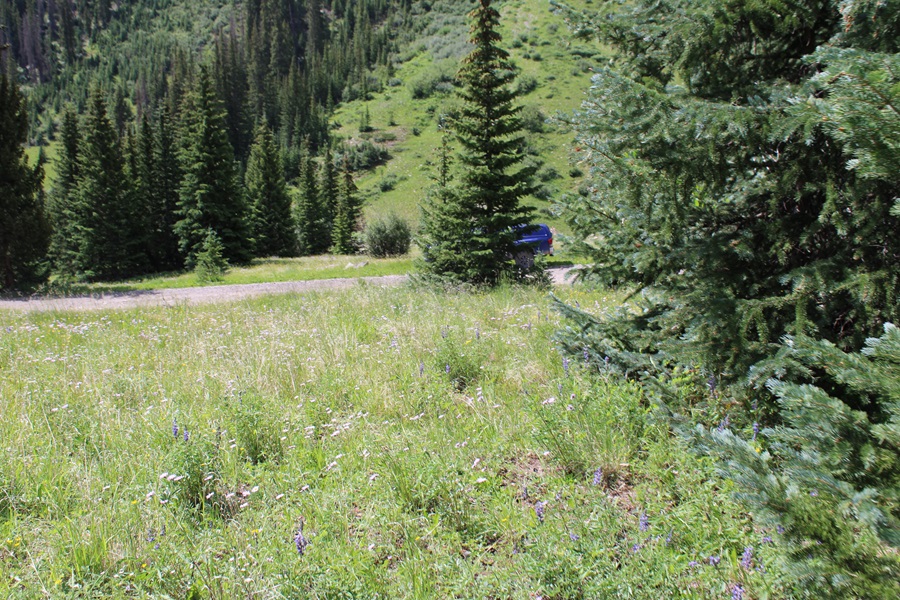
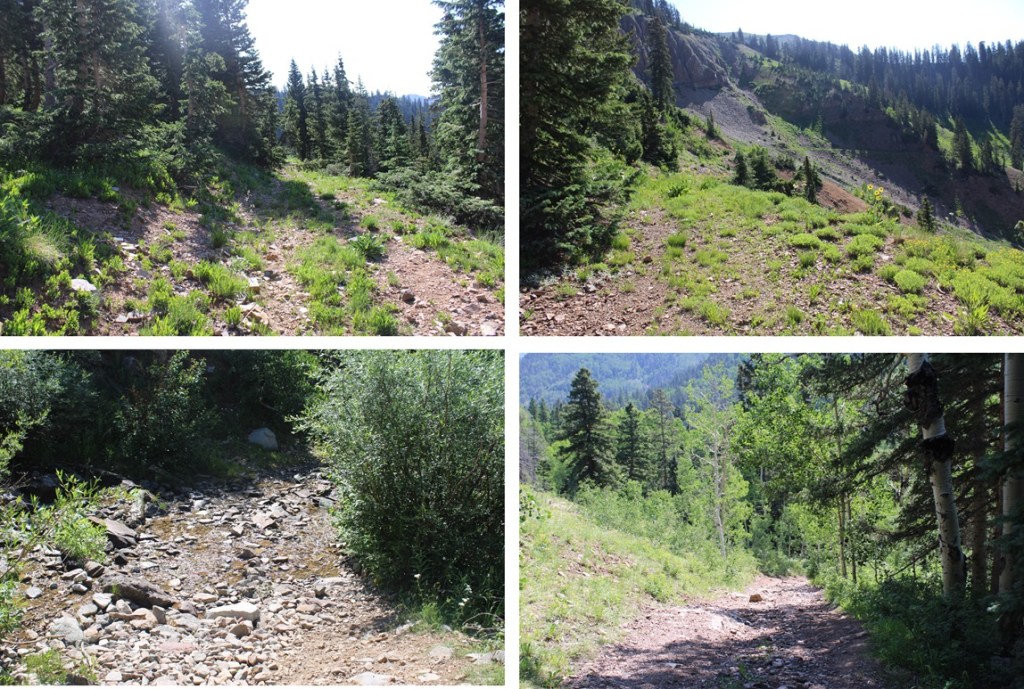
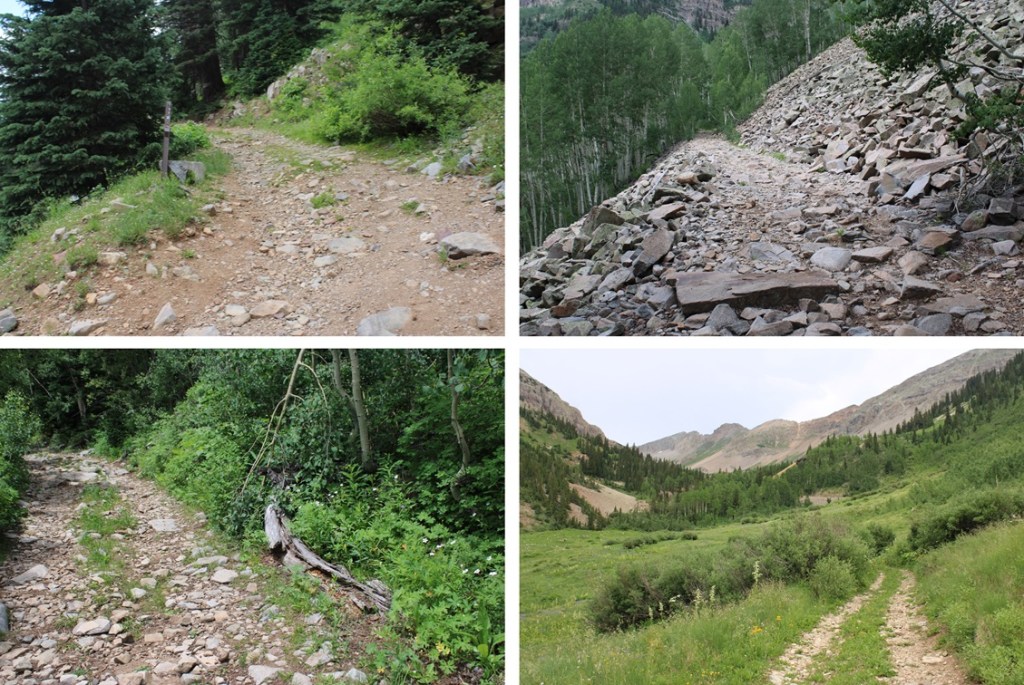
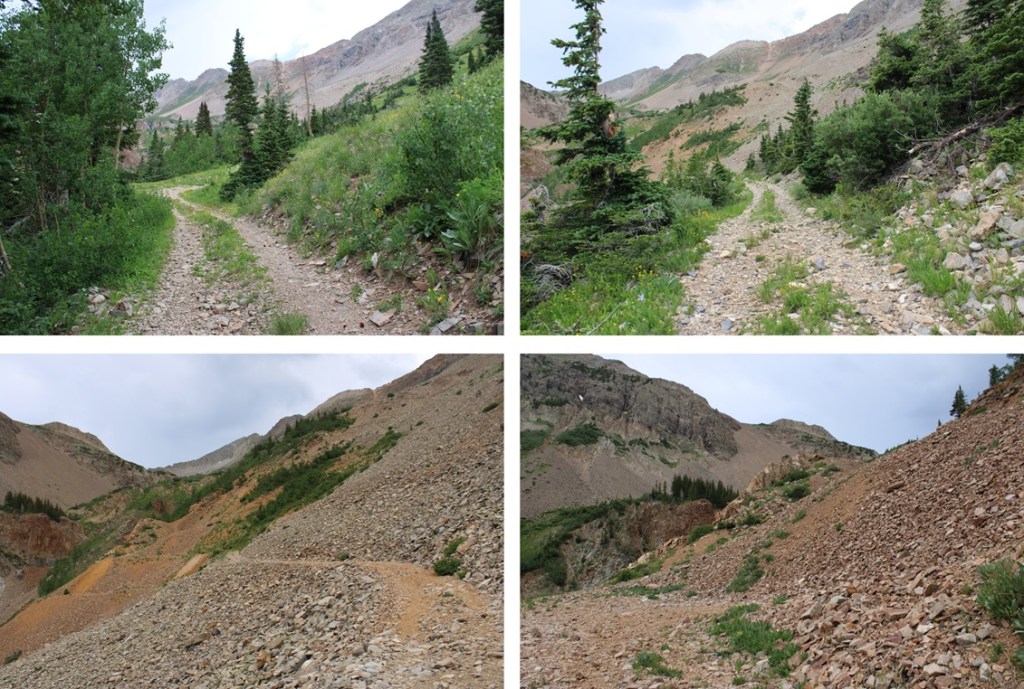
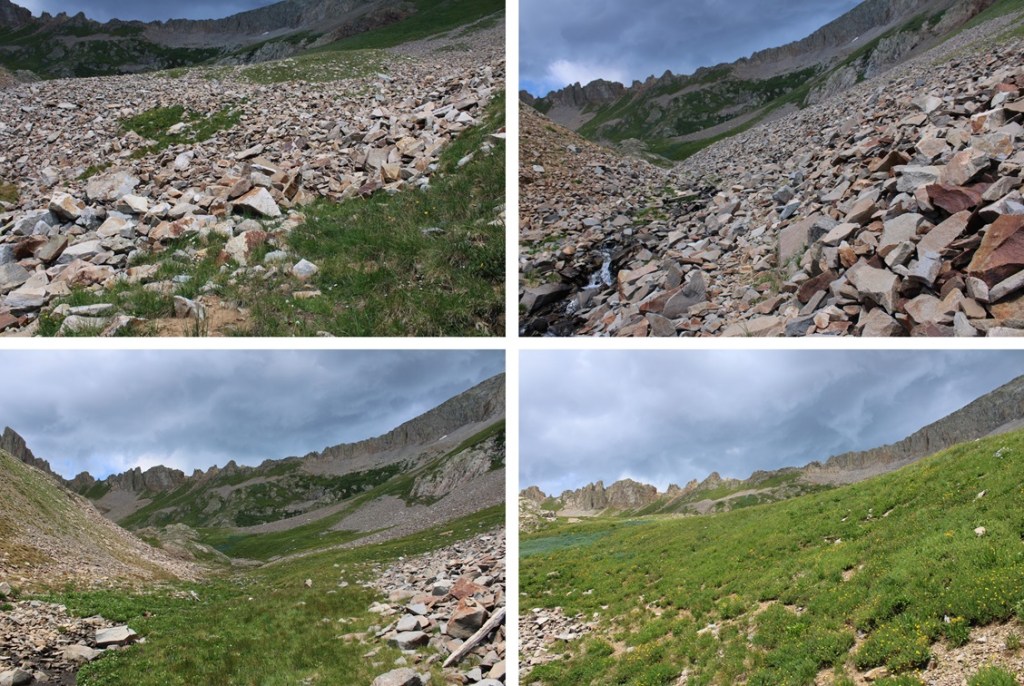
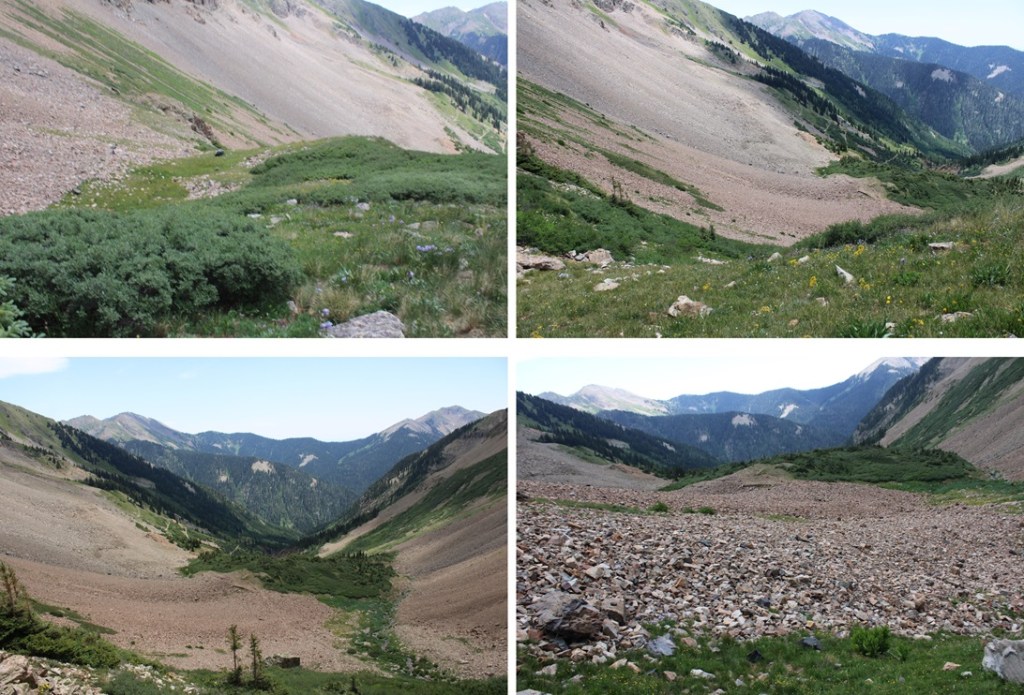
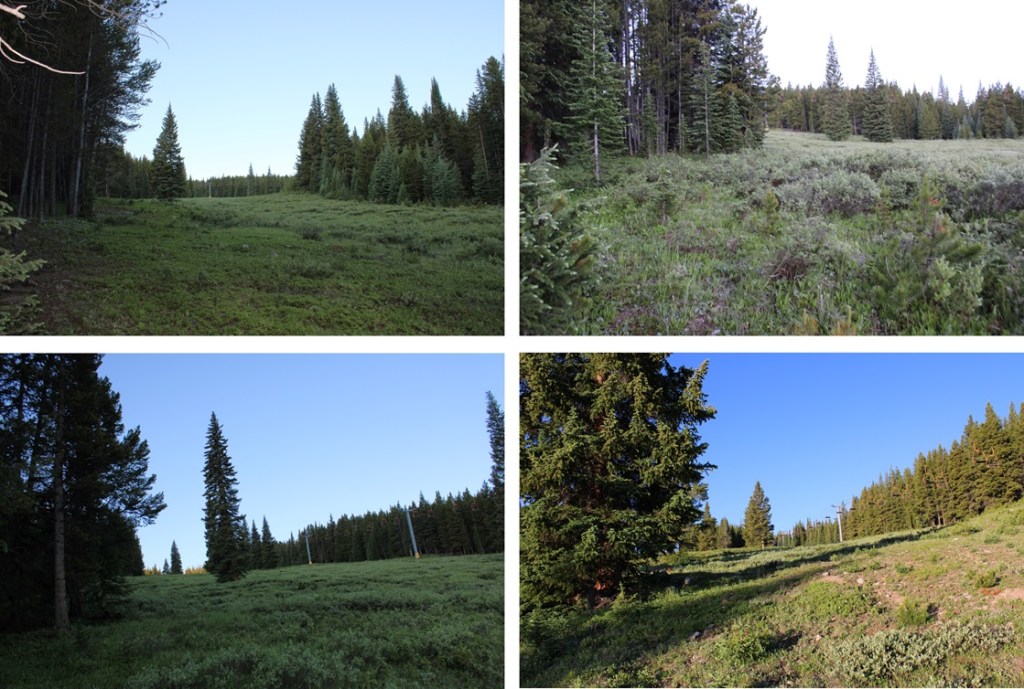
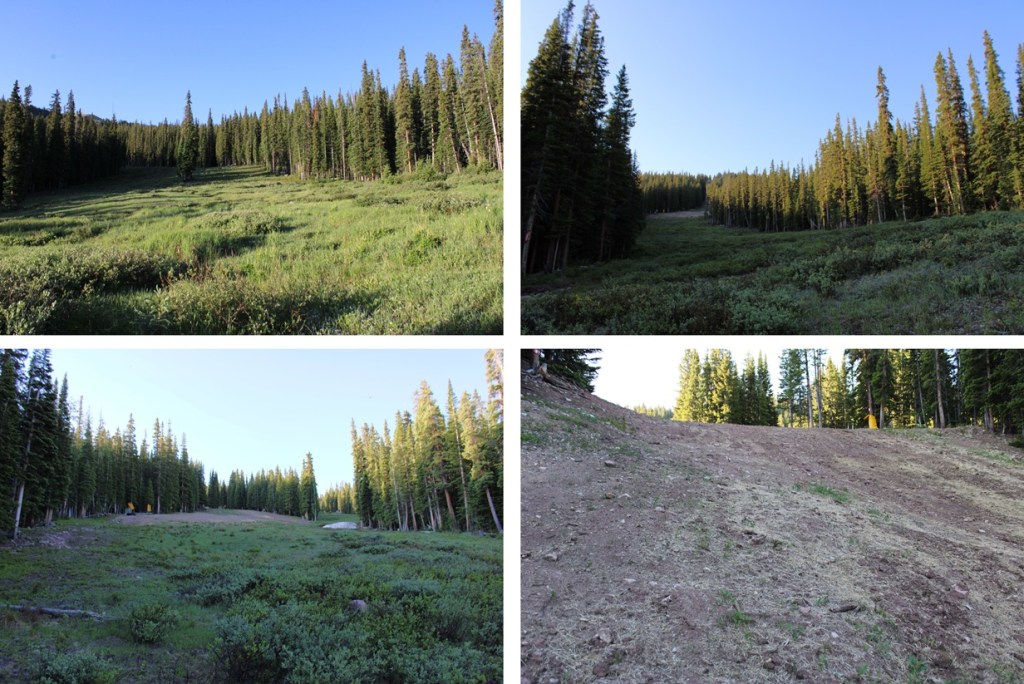
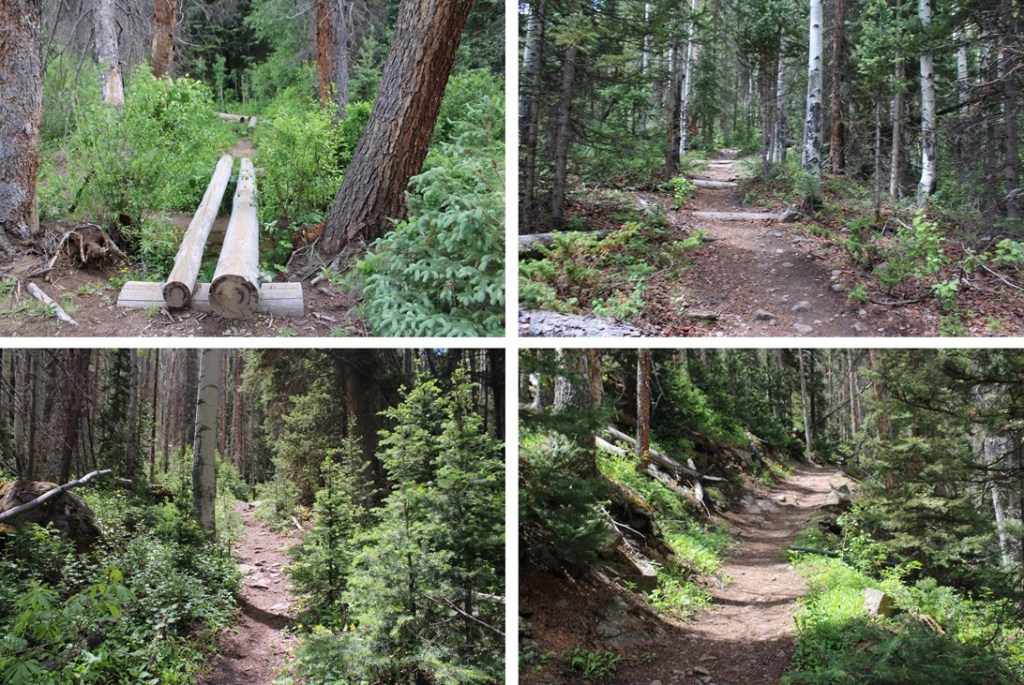
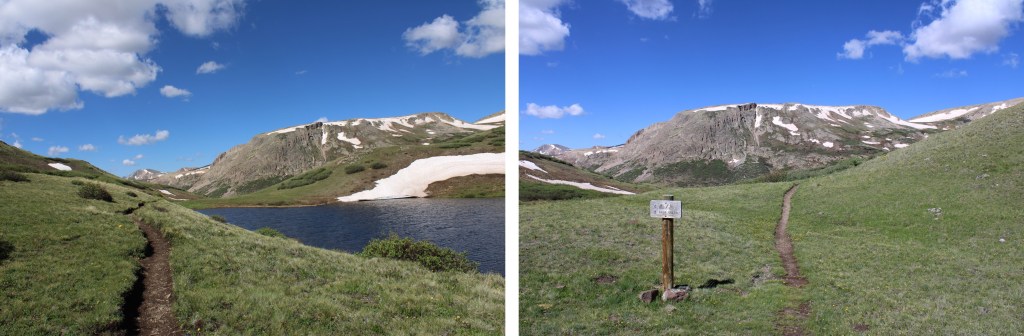
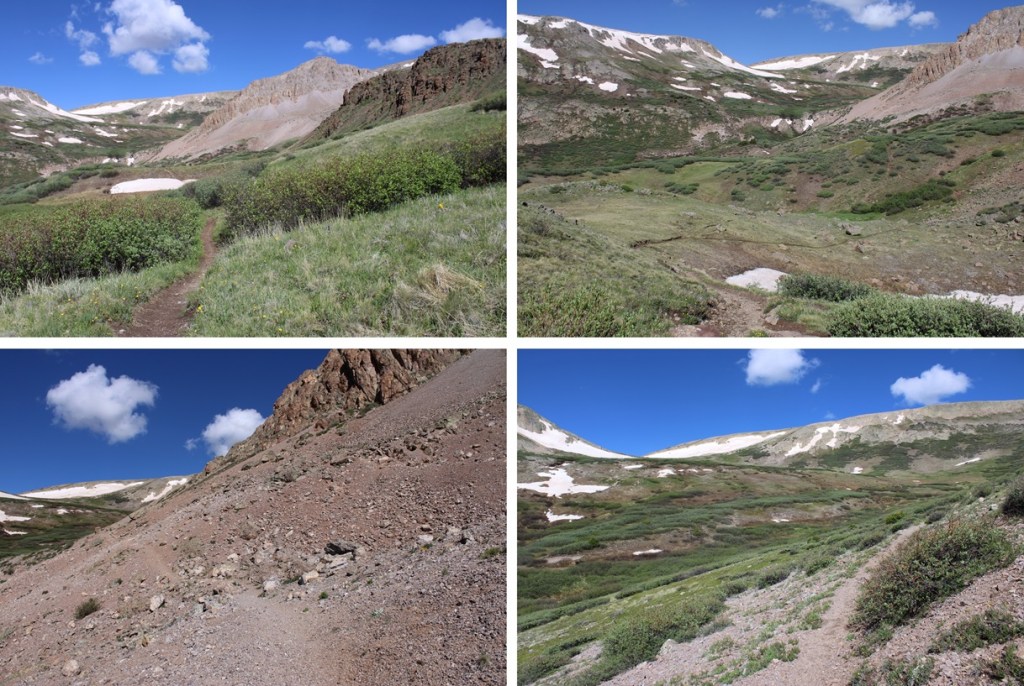
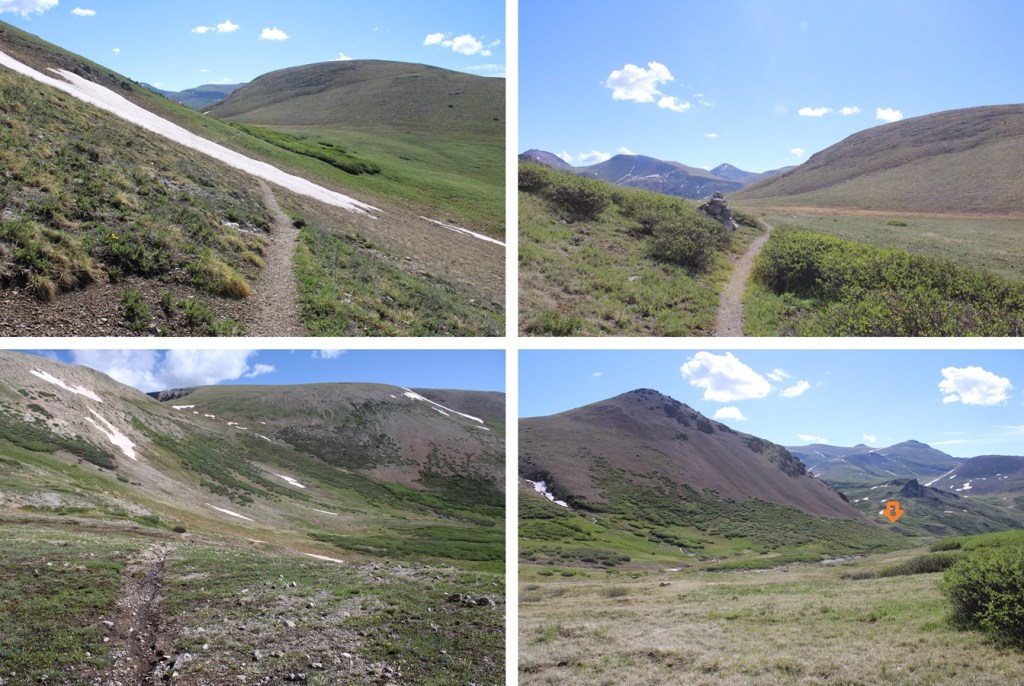
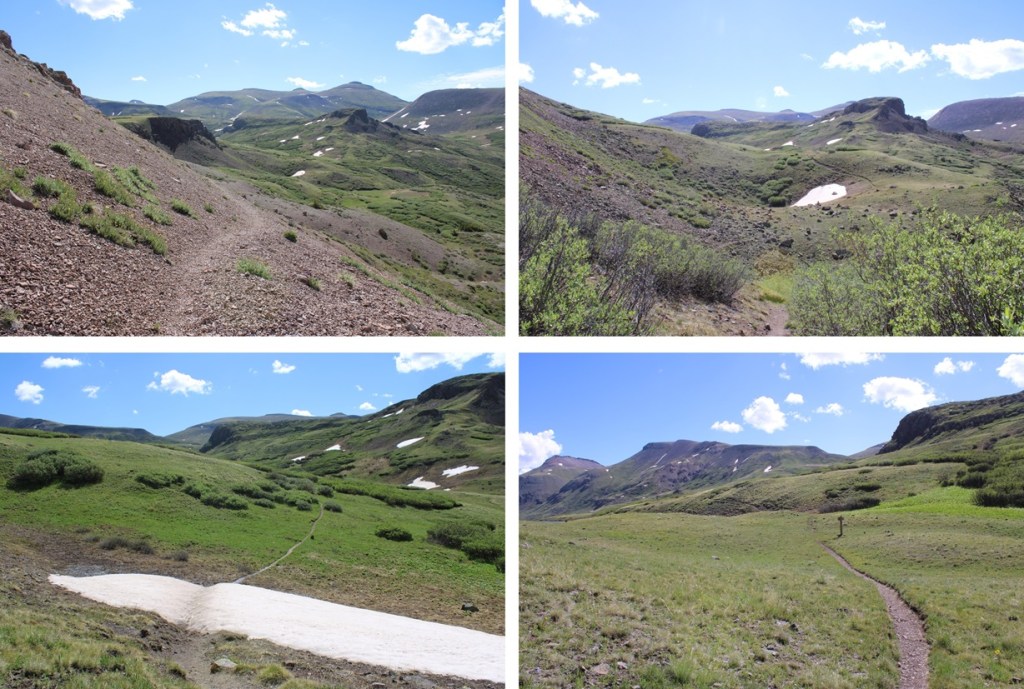
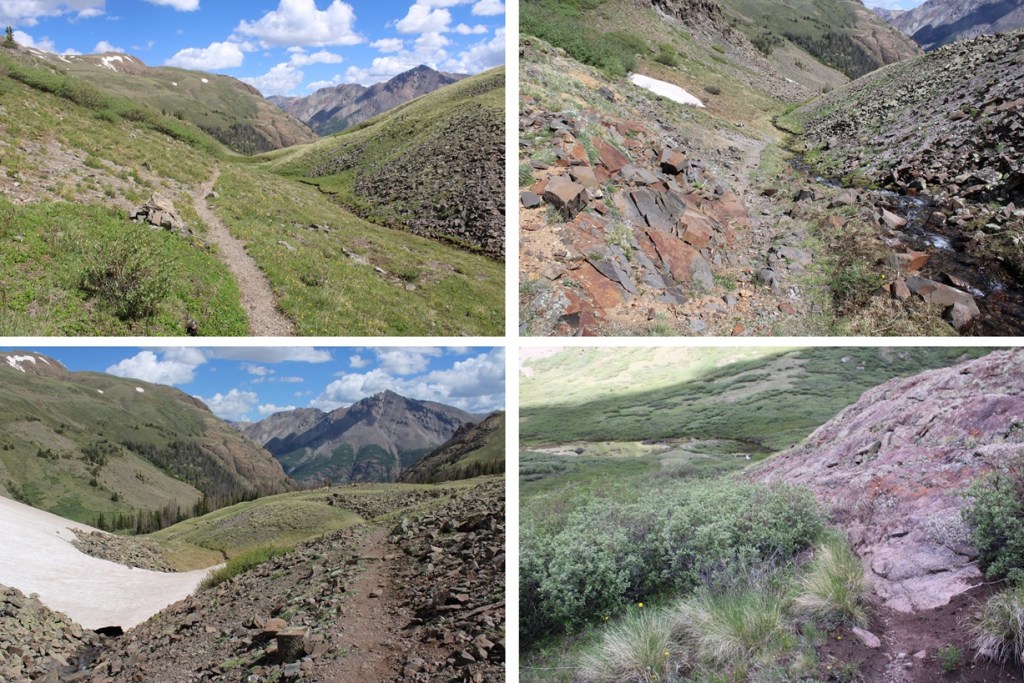
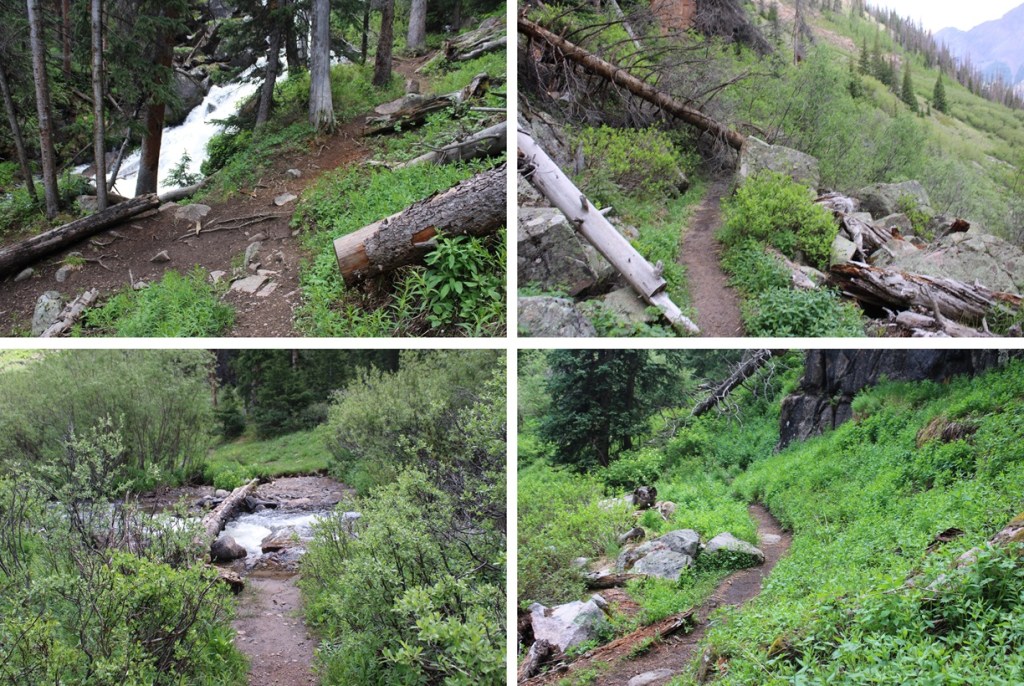
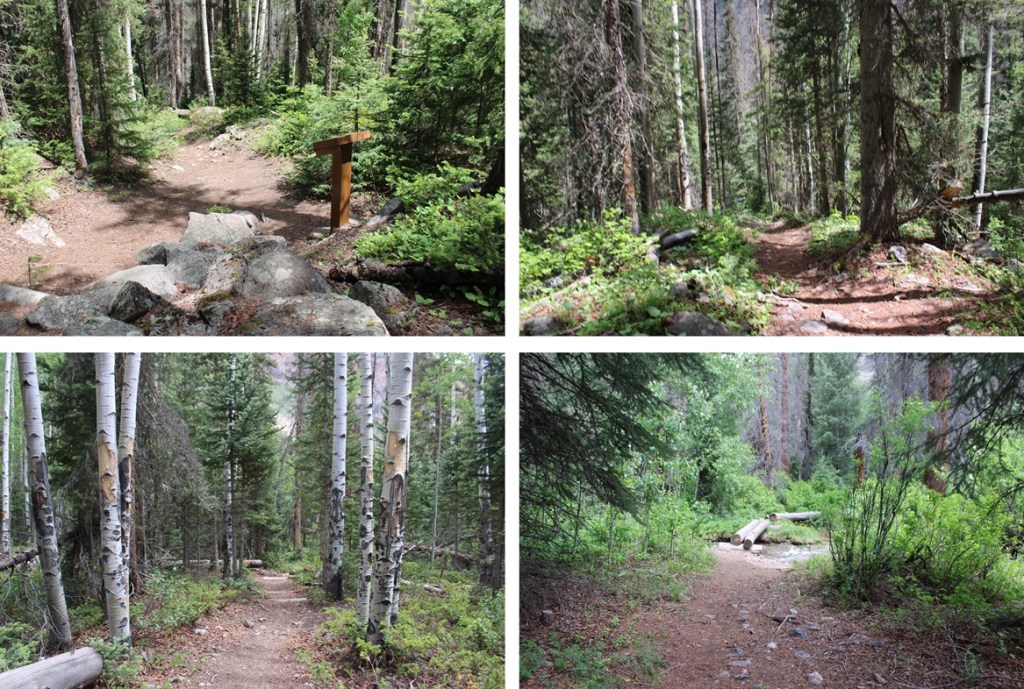
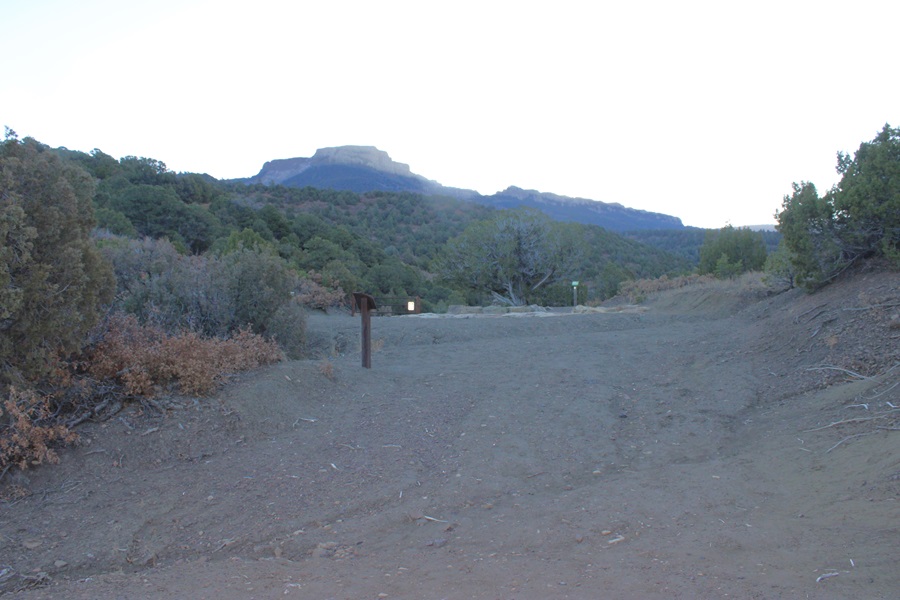
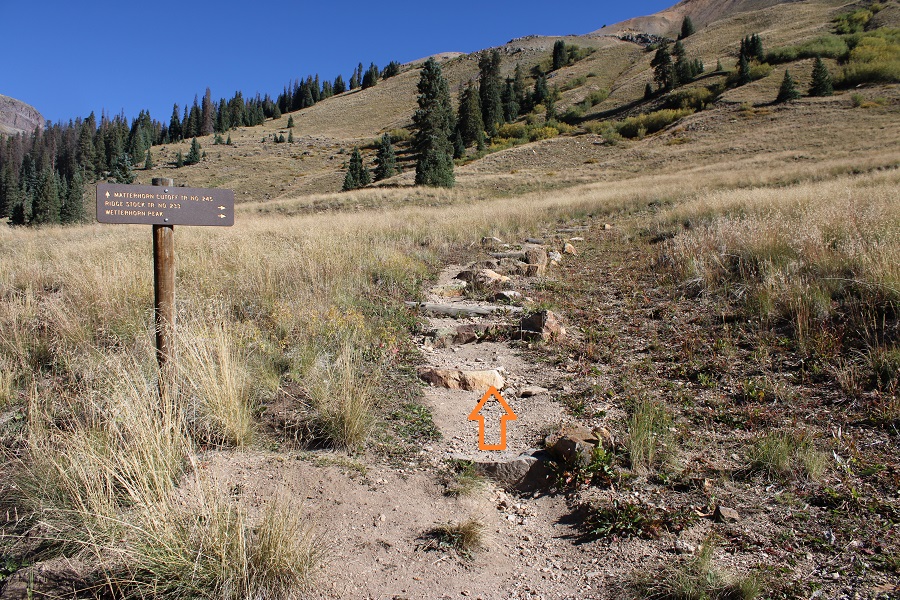
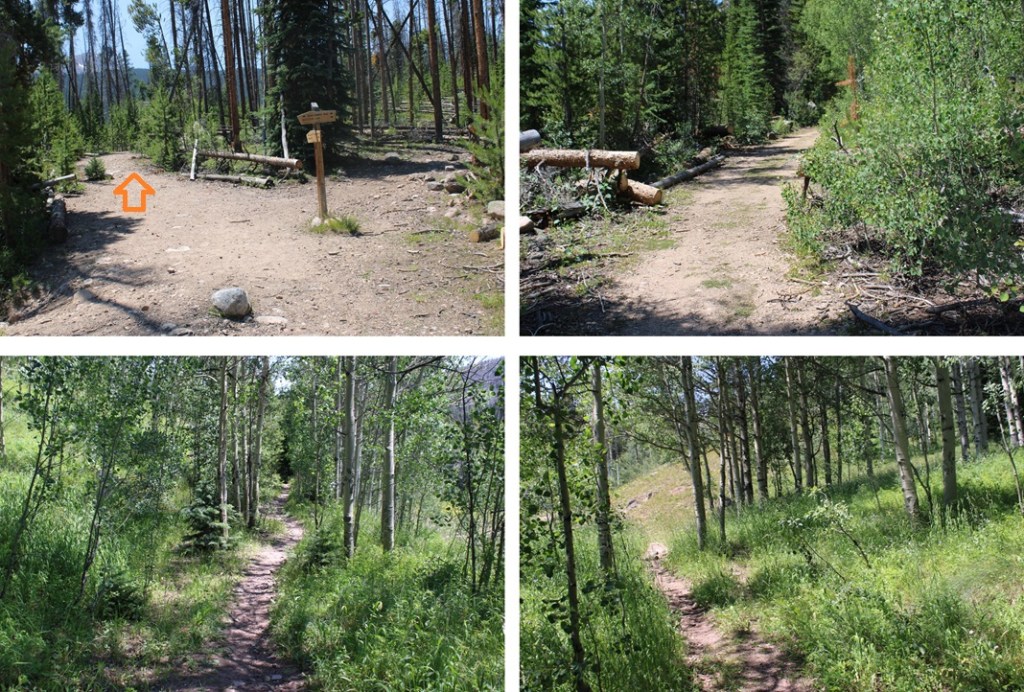
I followed this trail for 2.3 miles, headed west, and staying straight at the first junction to stay on North Rock Creek Trail No. 46.

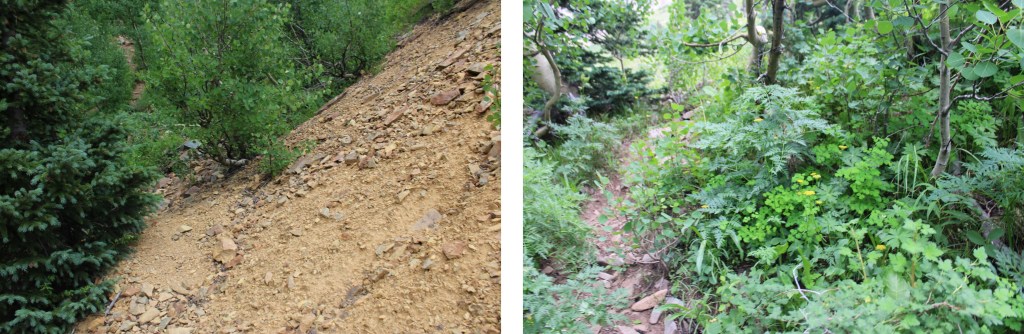
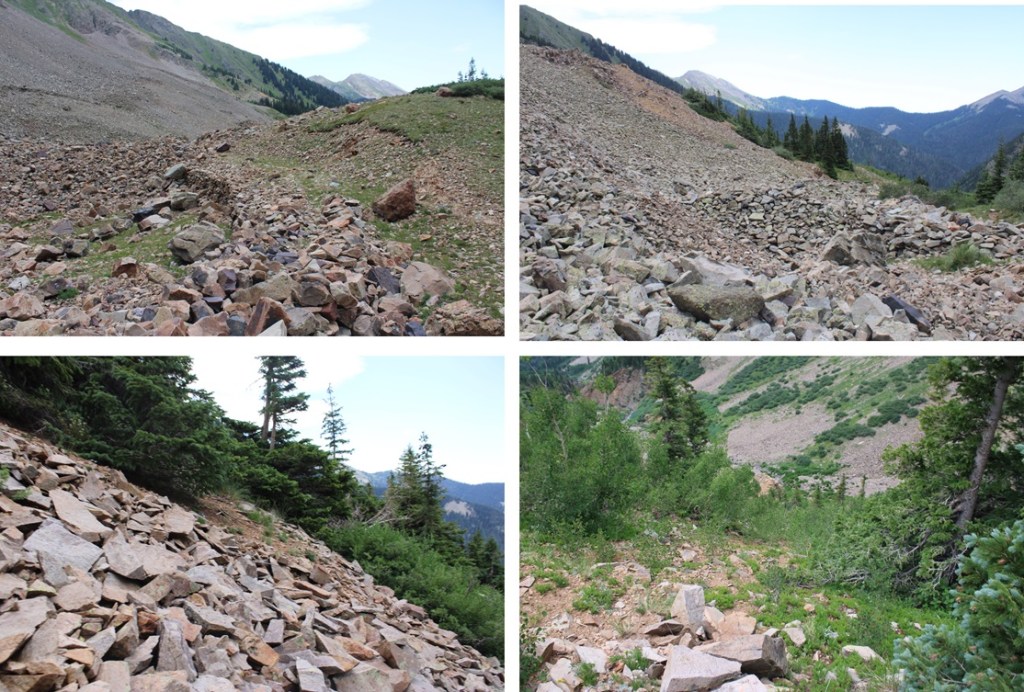
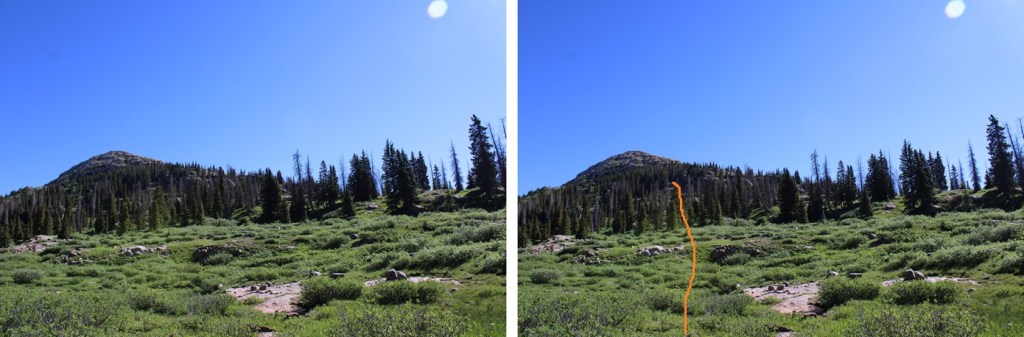
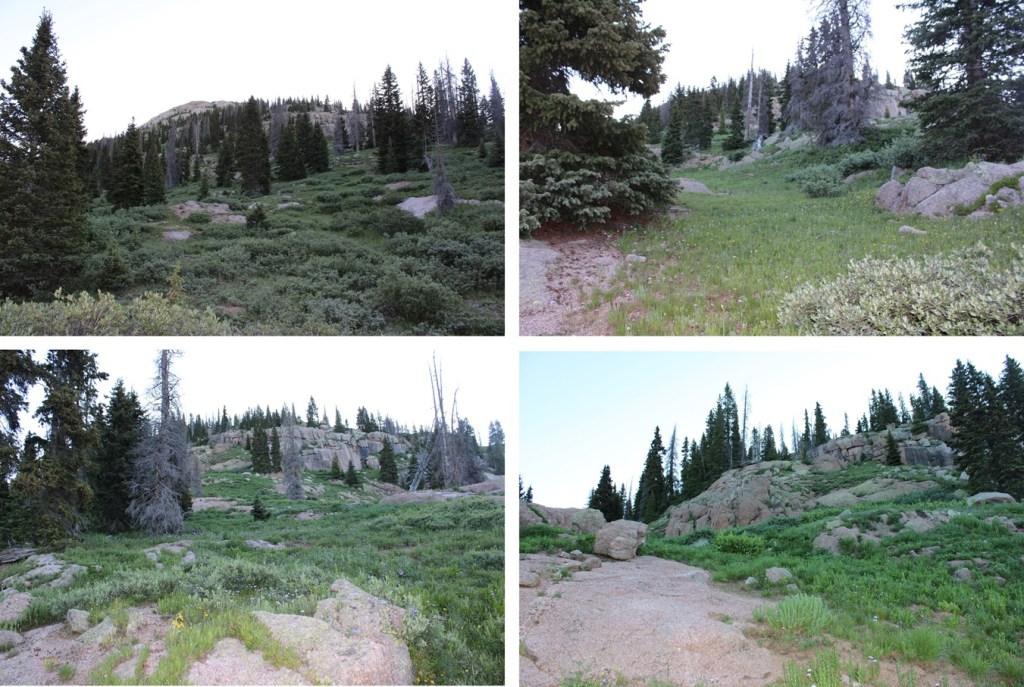
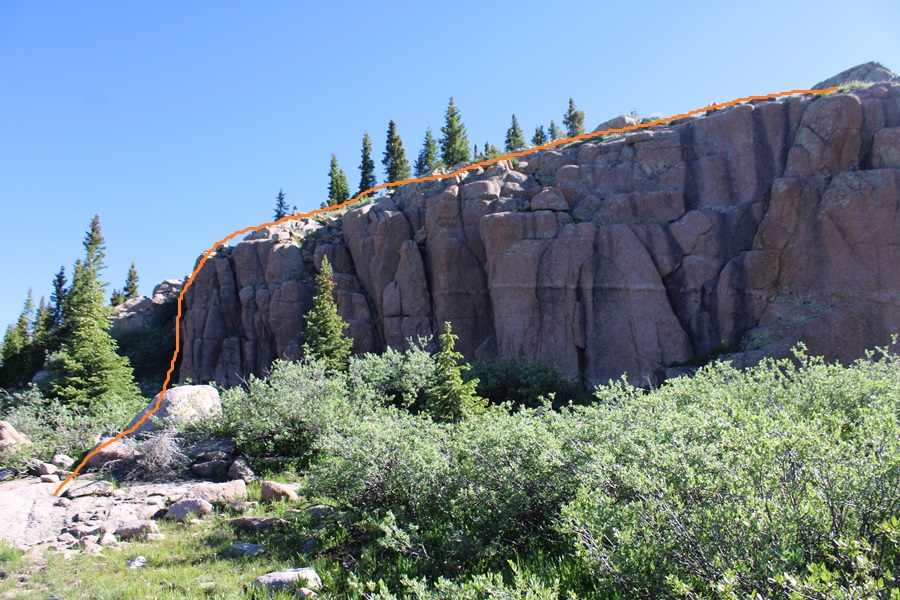
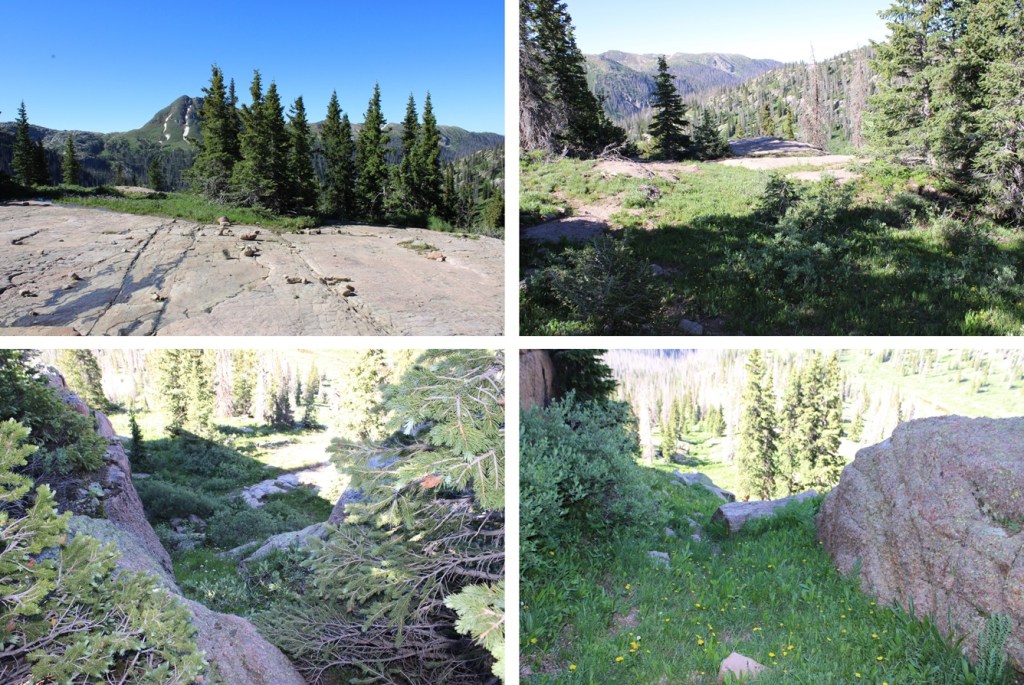
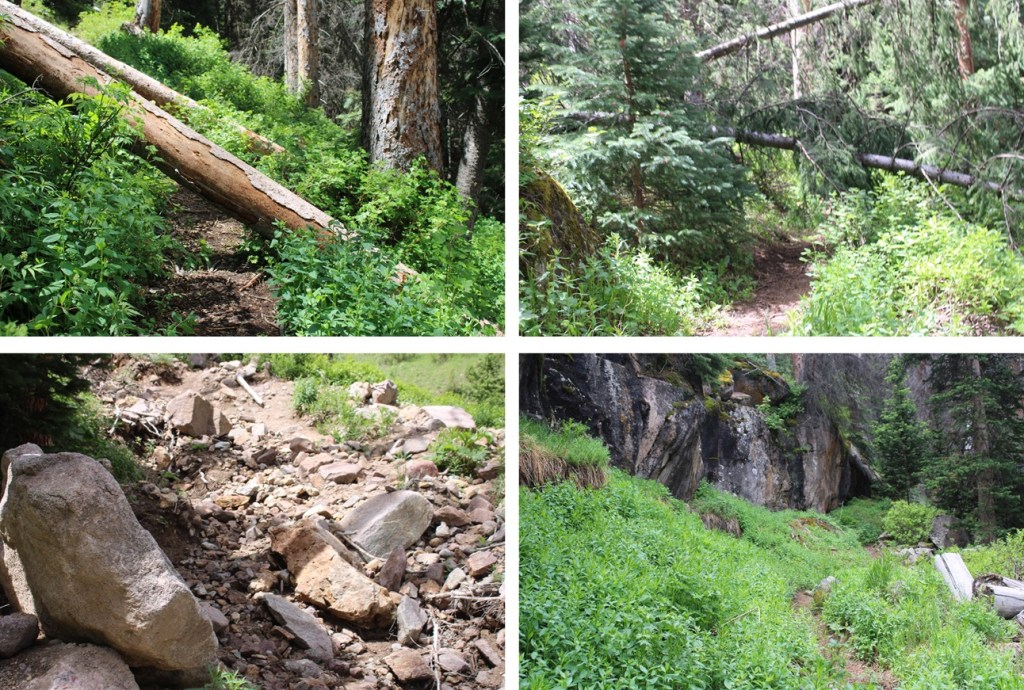
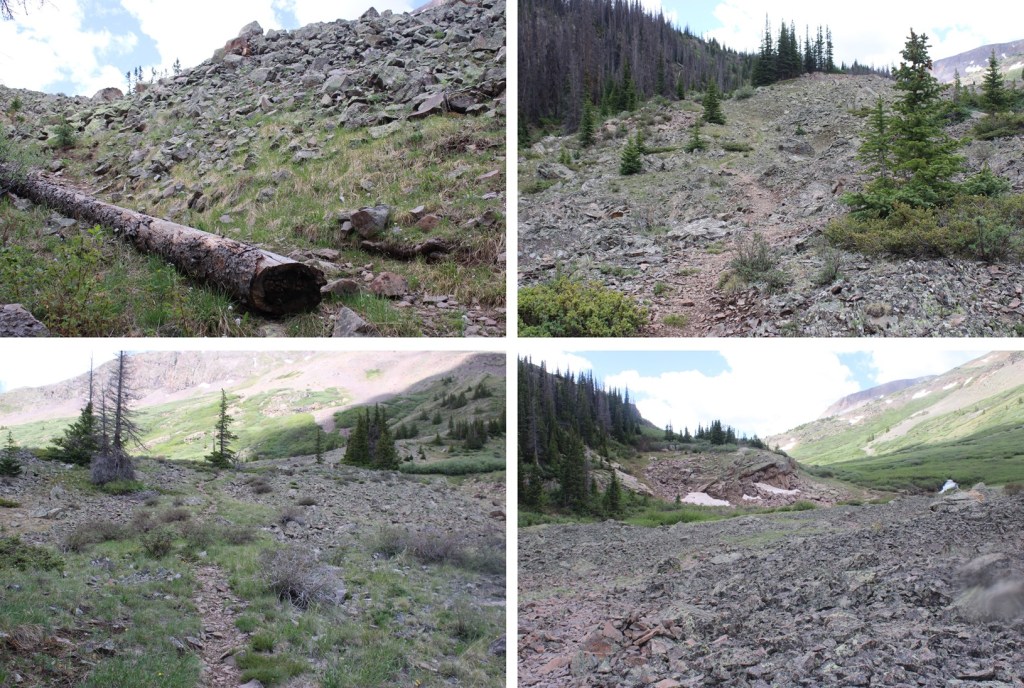
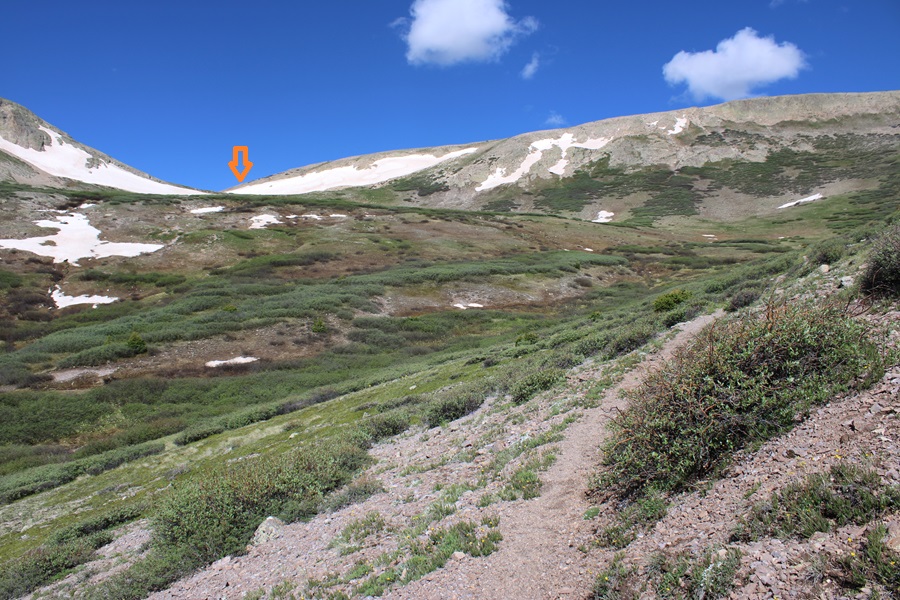
After hiking for over 2 miles on this class 1 trail, I turned right, and started bushwhacking northeast to the ridge.  There were a lot of downed trees in this area, so navigation was an adventure.  I just kept heading northeast, gaining 760’ of elevation in .7 miles as I made my way to 10900’

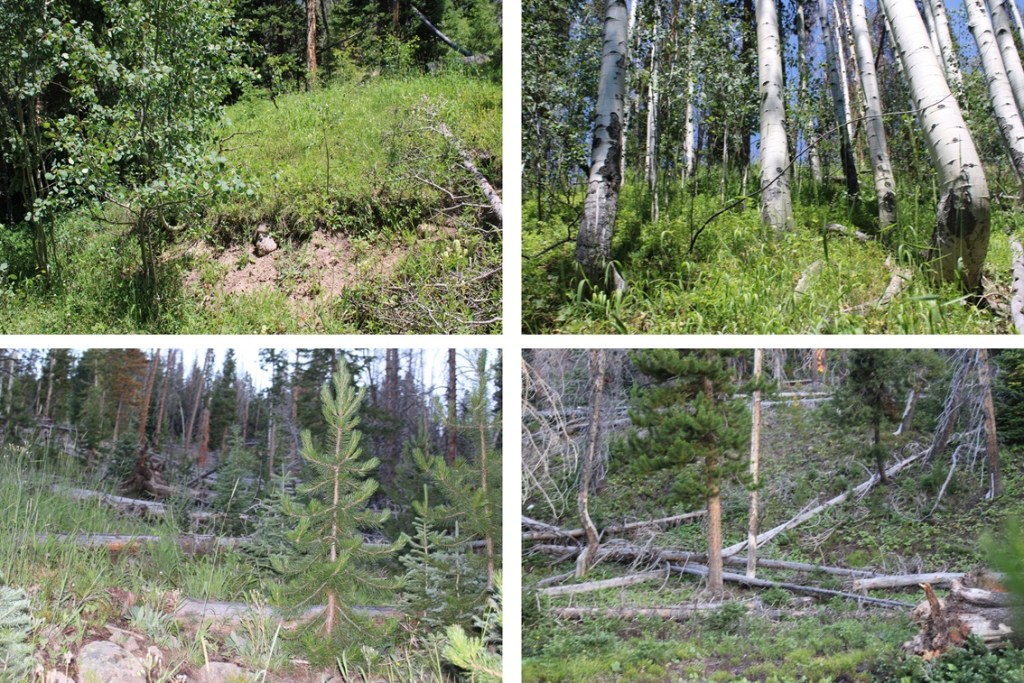
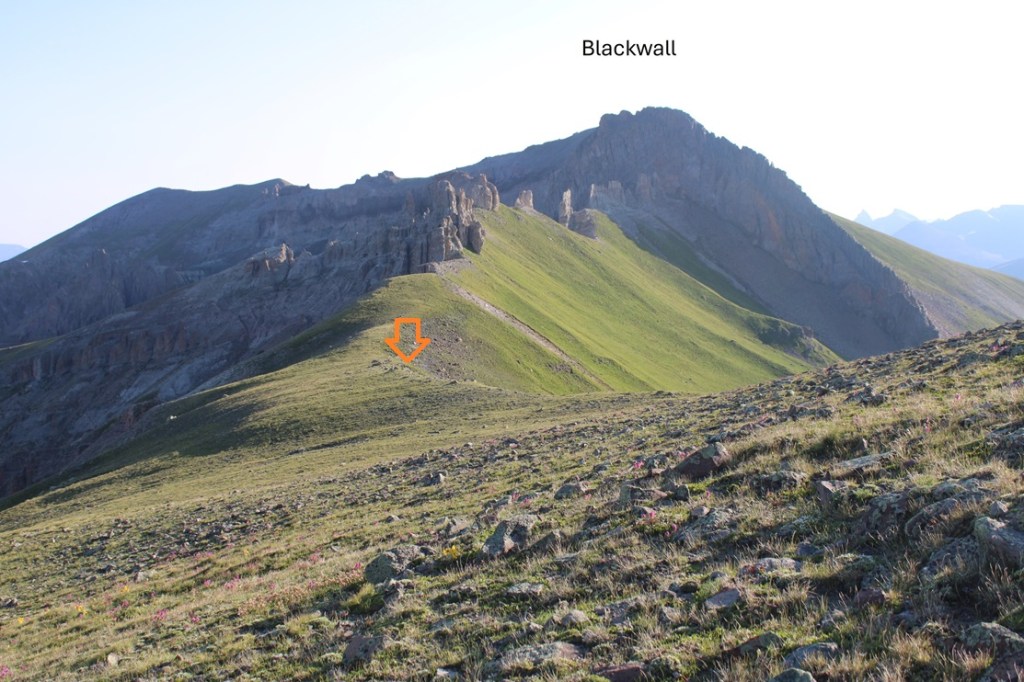
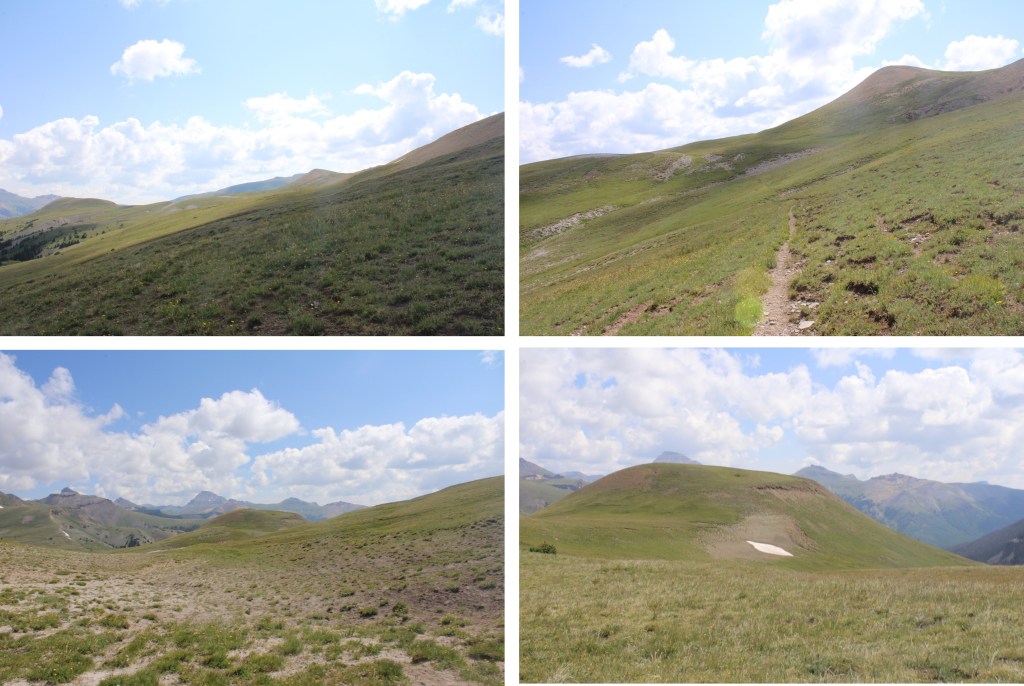
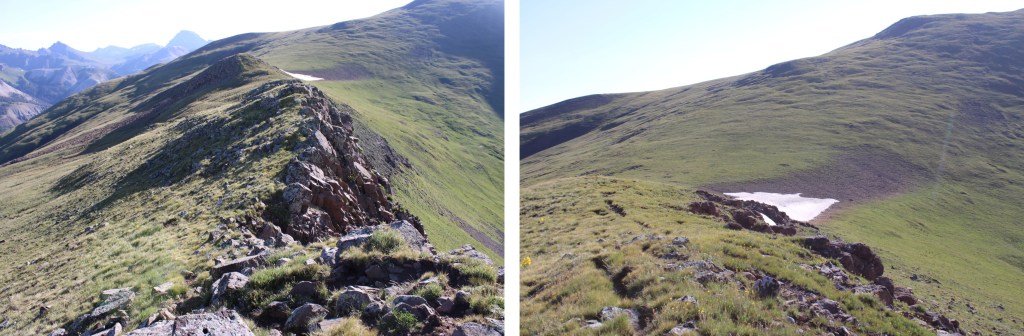
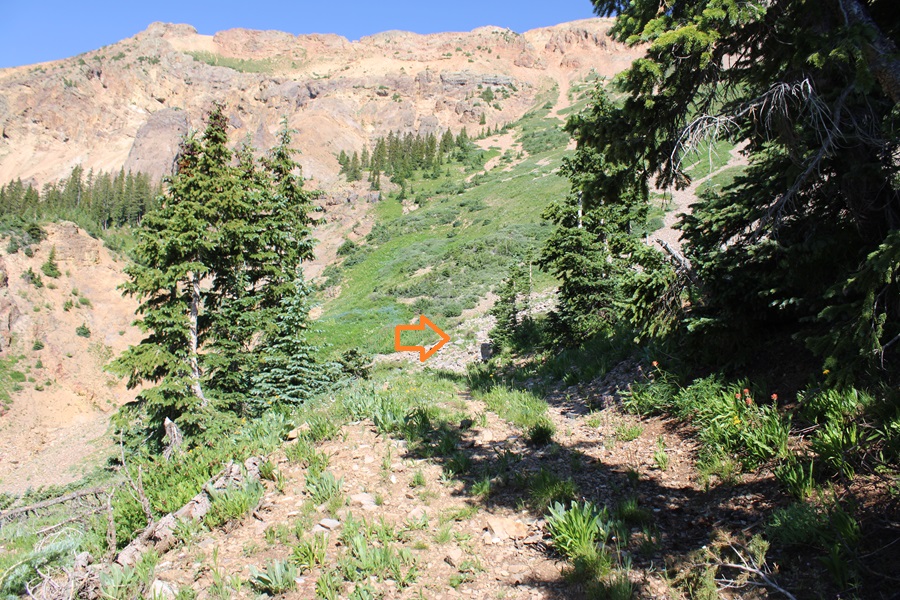
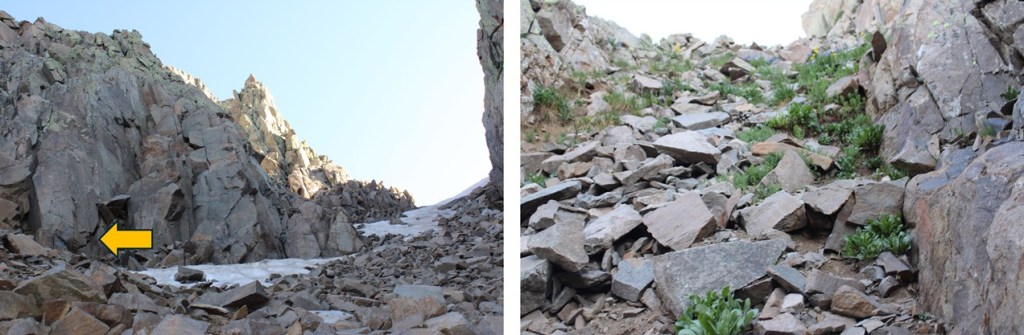
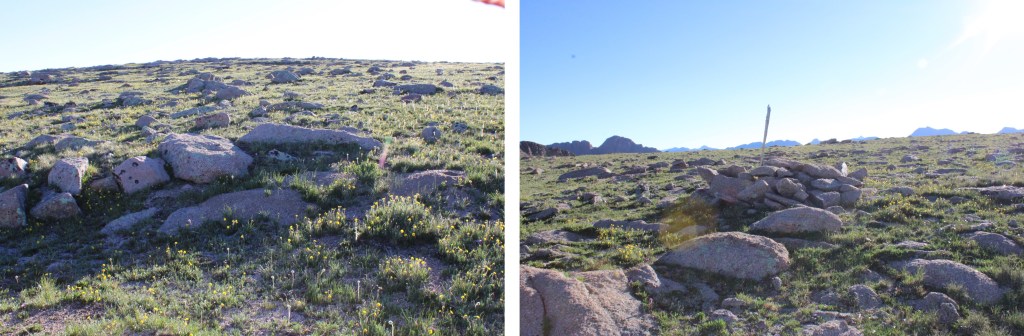
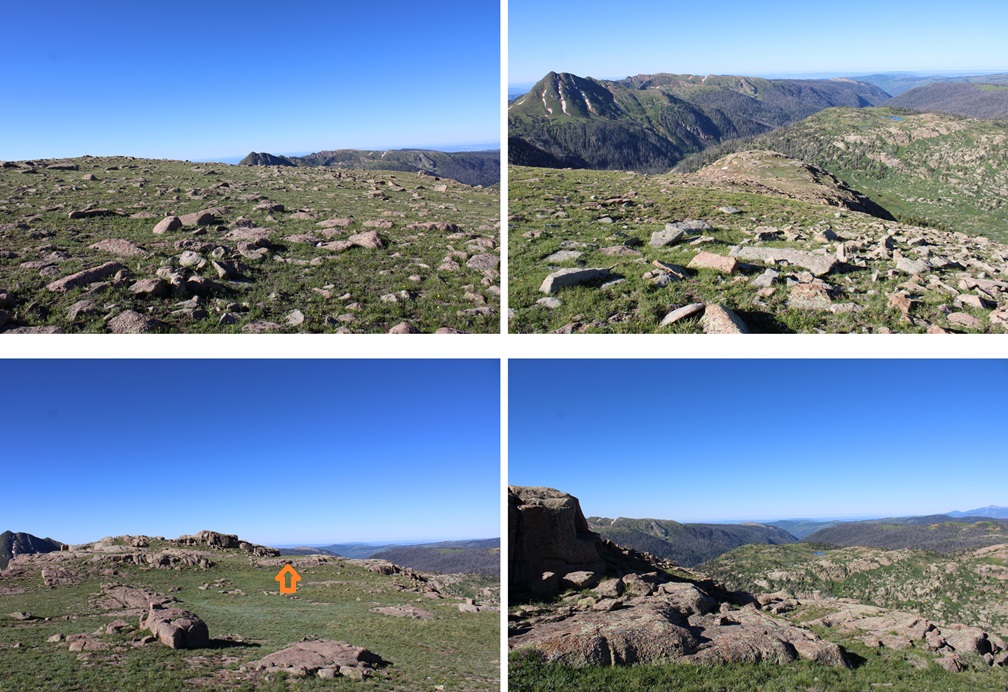
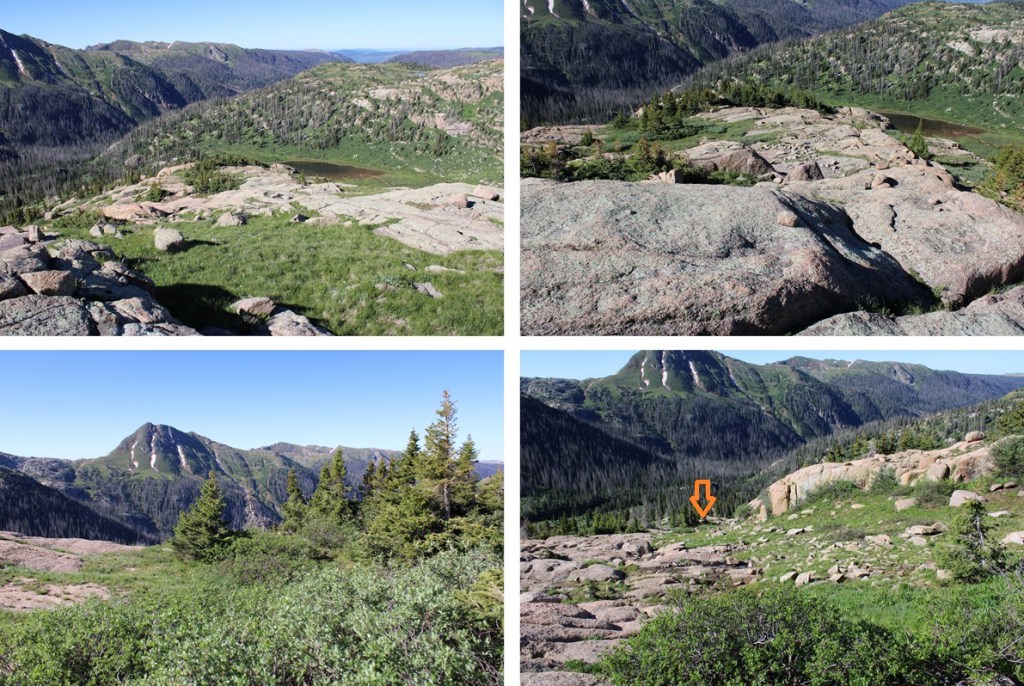
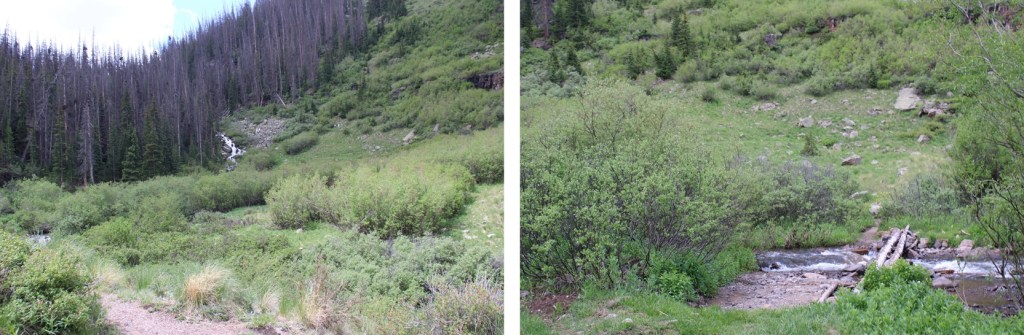
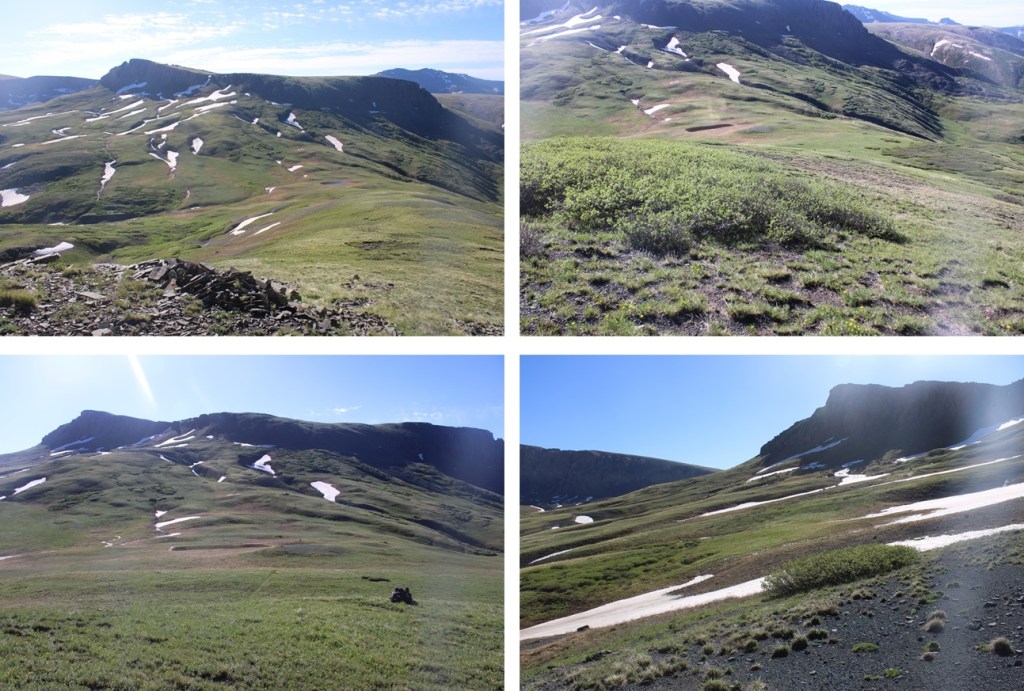
At 10900’ I came across a well-established game trail, and followed it west towards treeline.

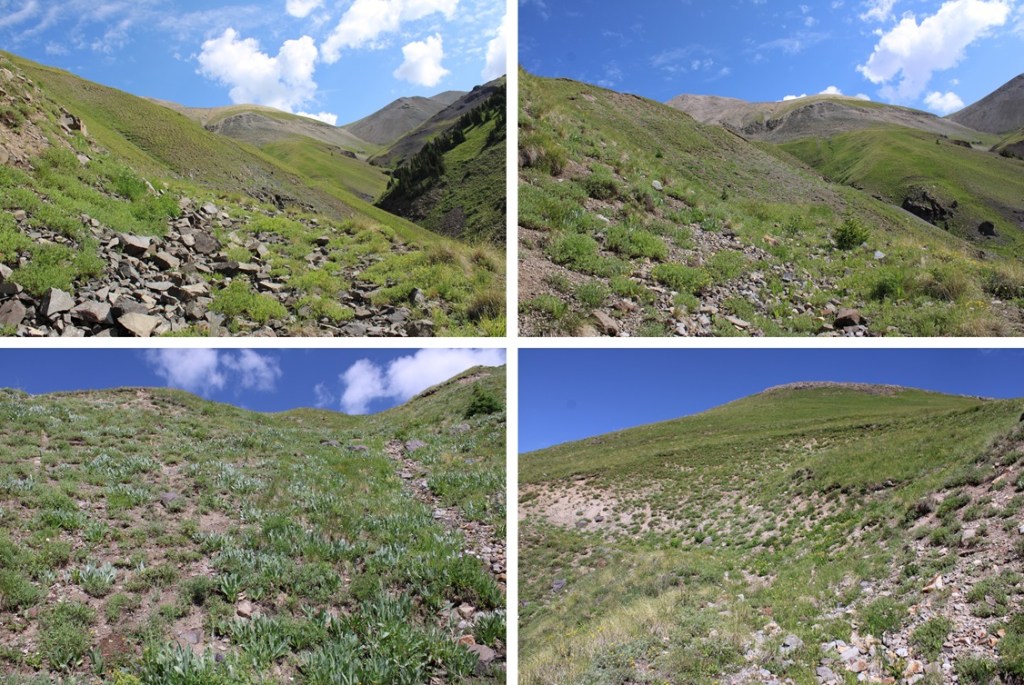
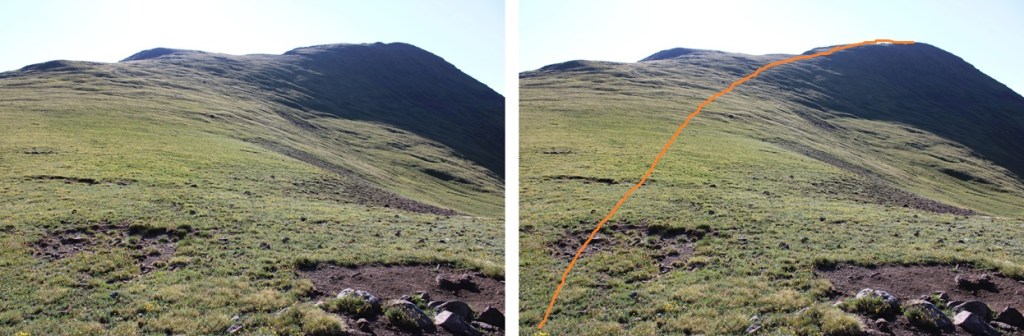
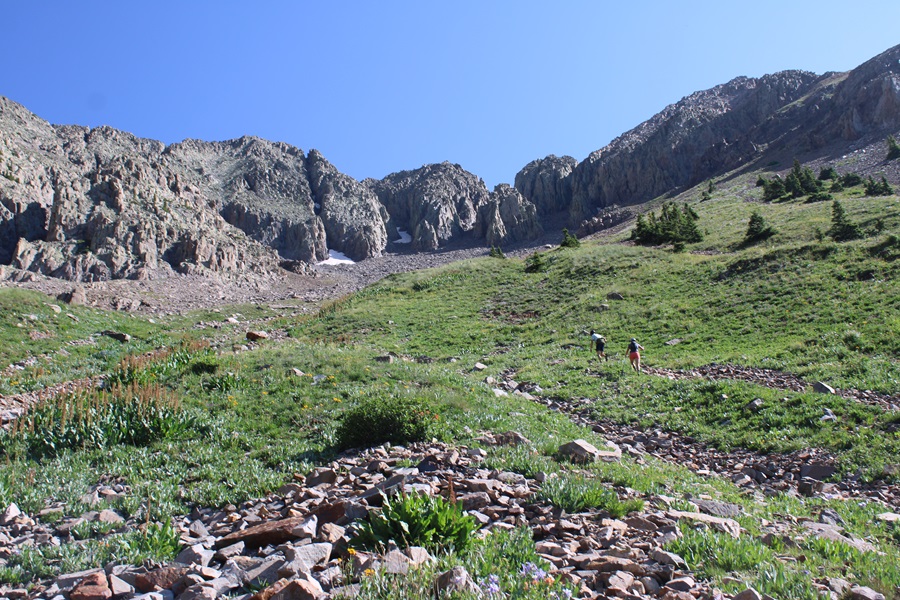
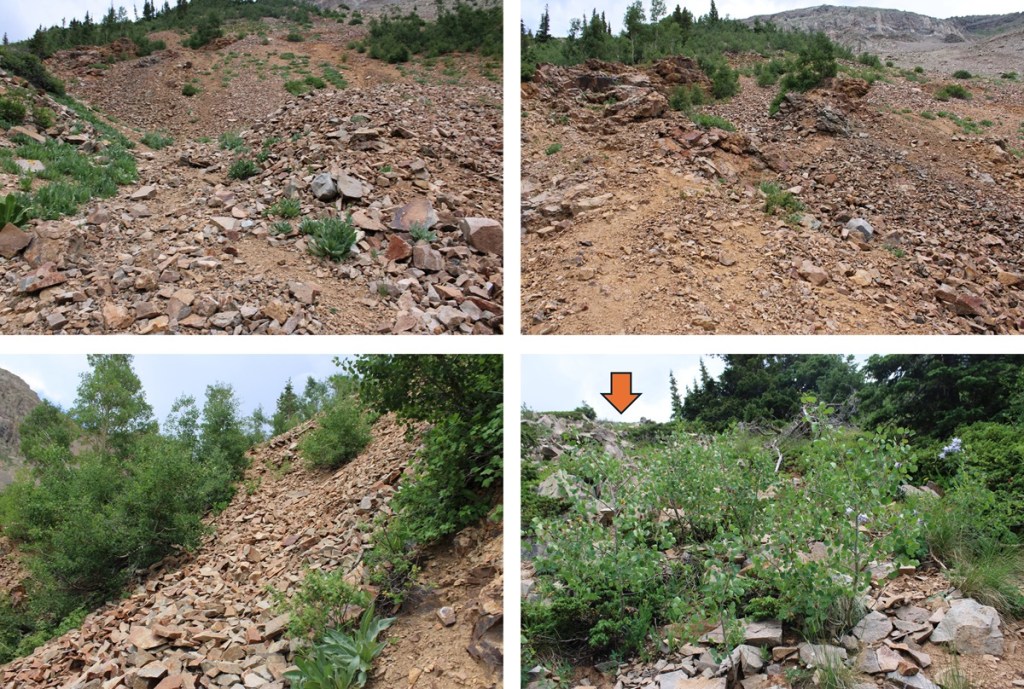
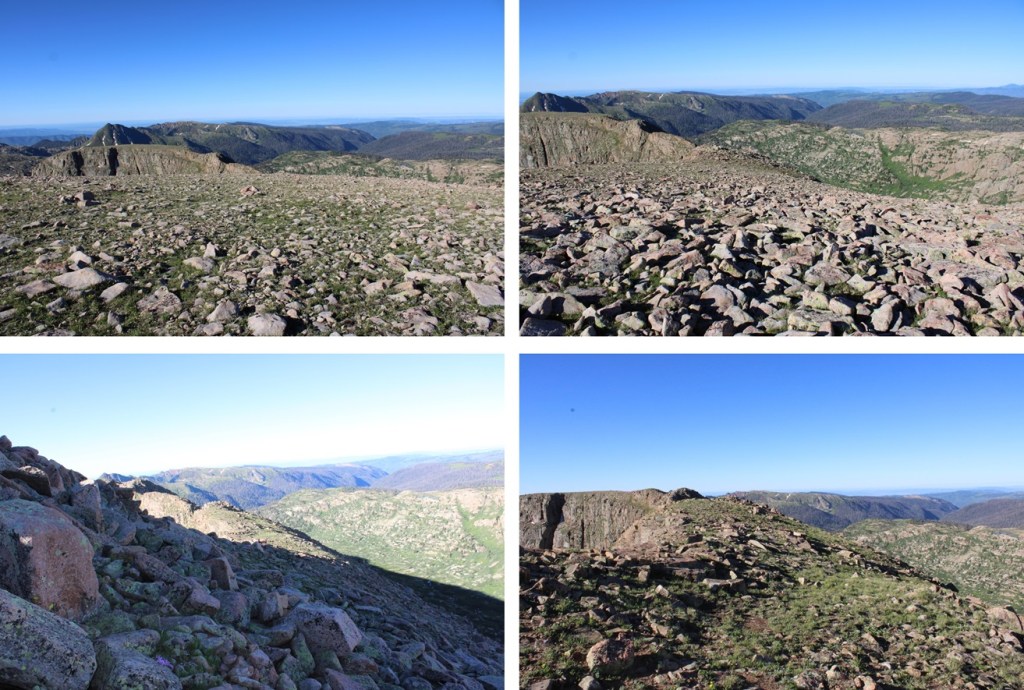
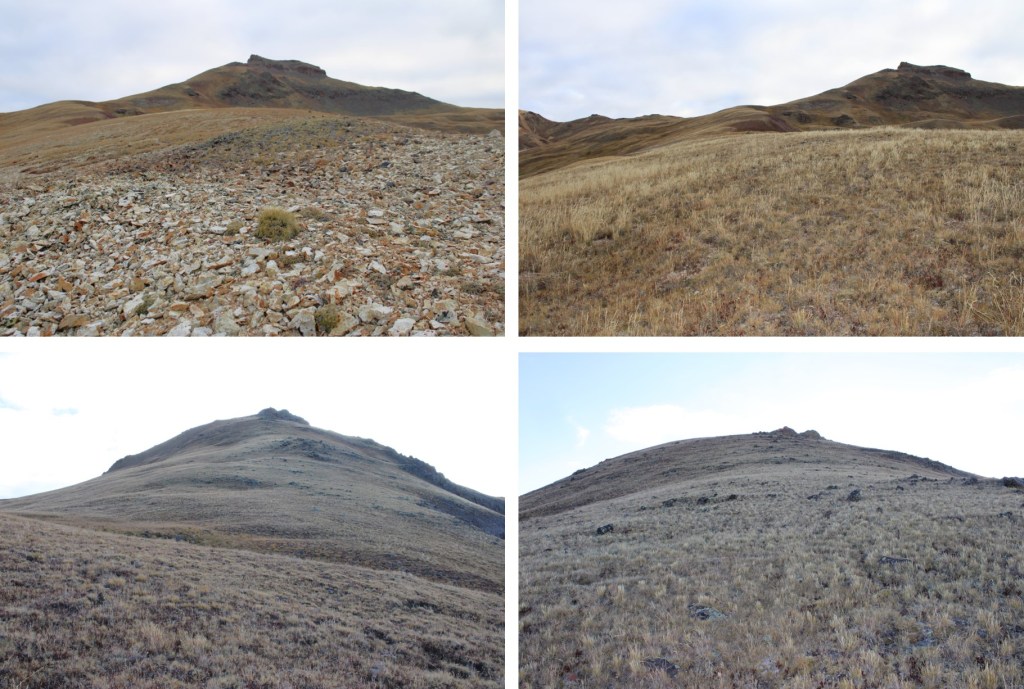
At 11400’ the trail fizzled out, but the route was obvious.  I was headed southwest, following the ridge to treeline.

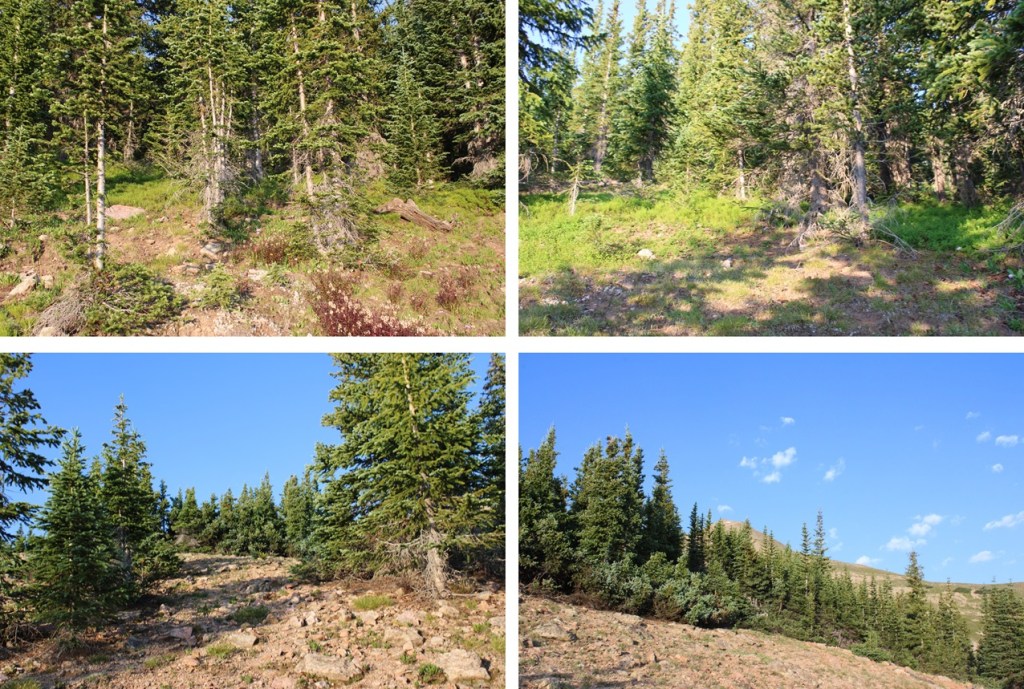
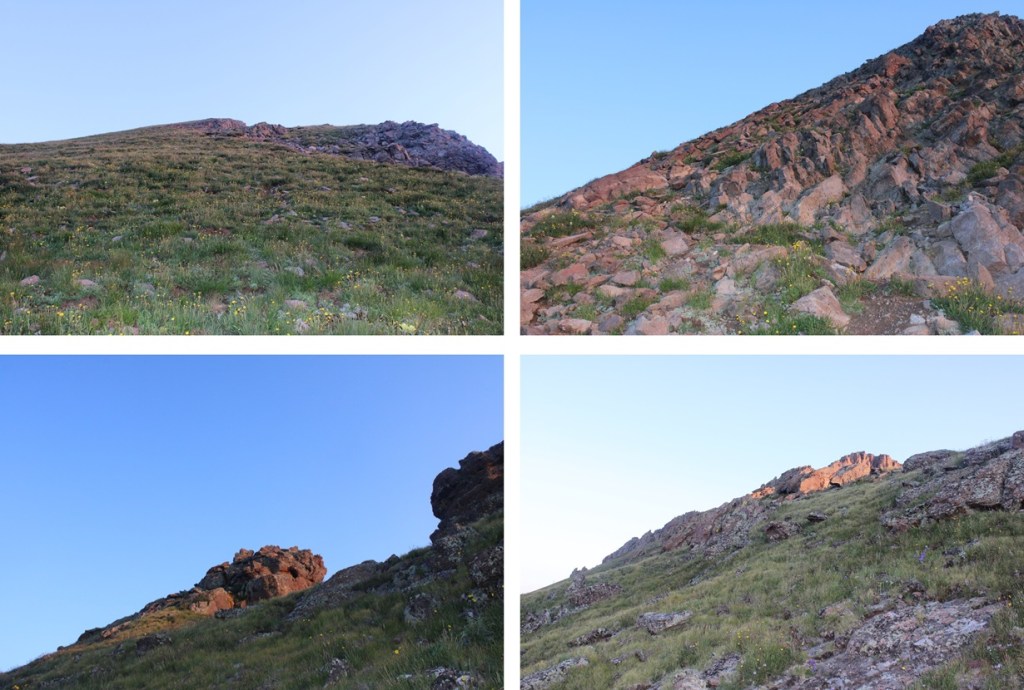
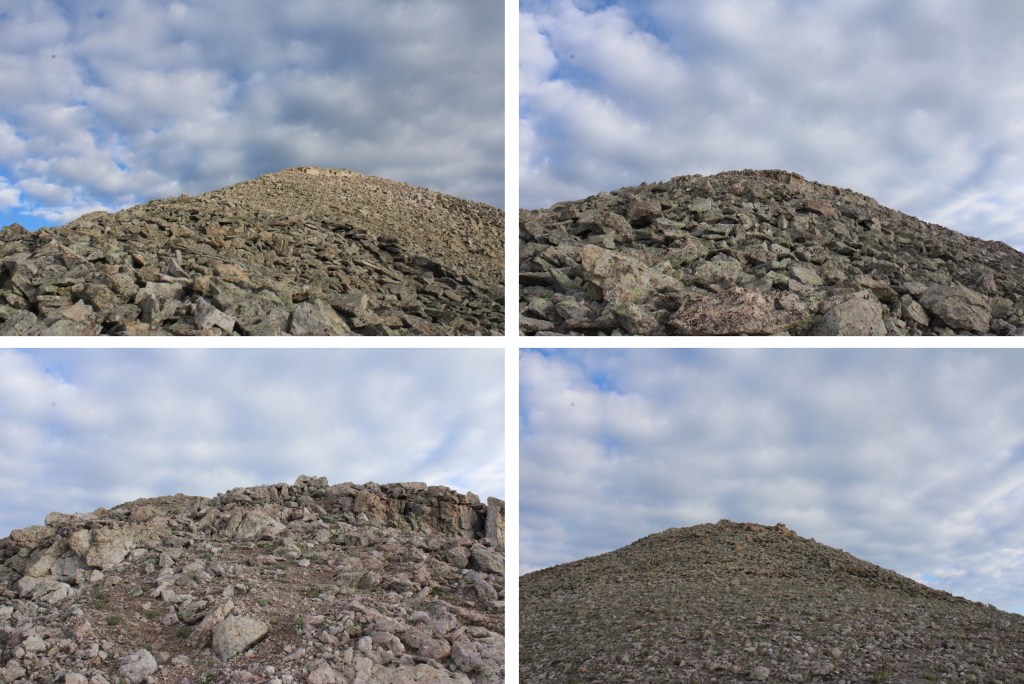
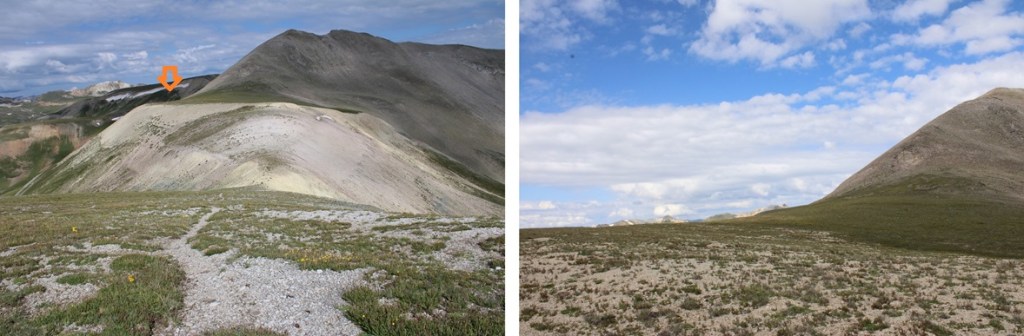
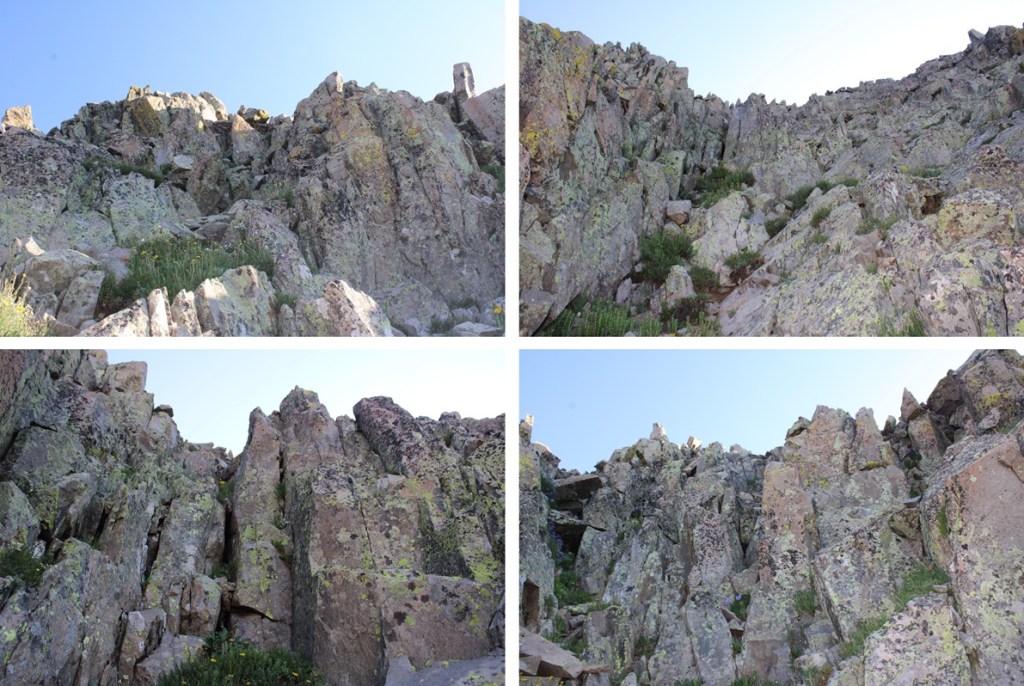
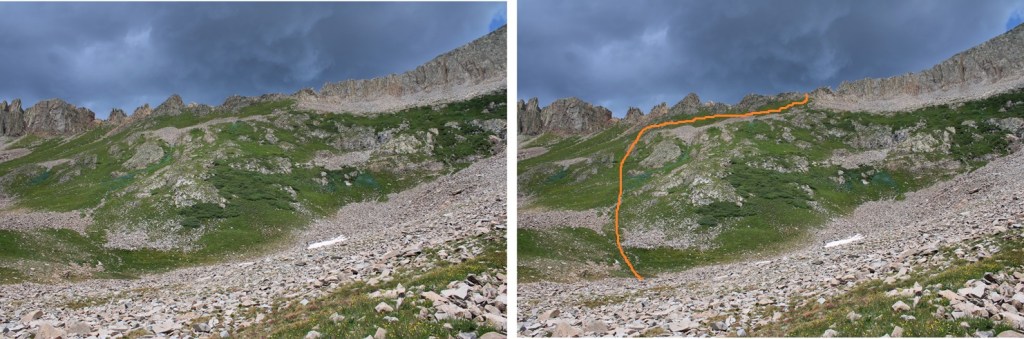
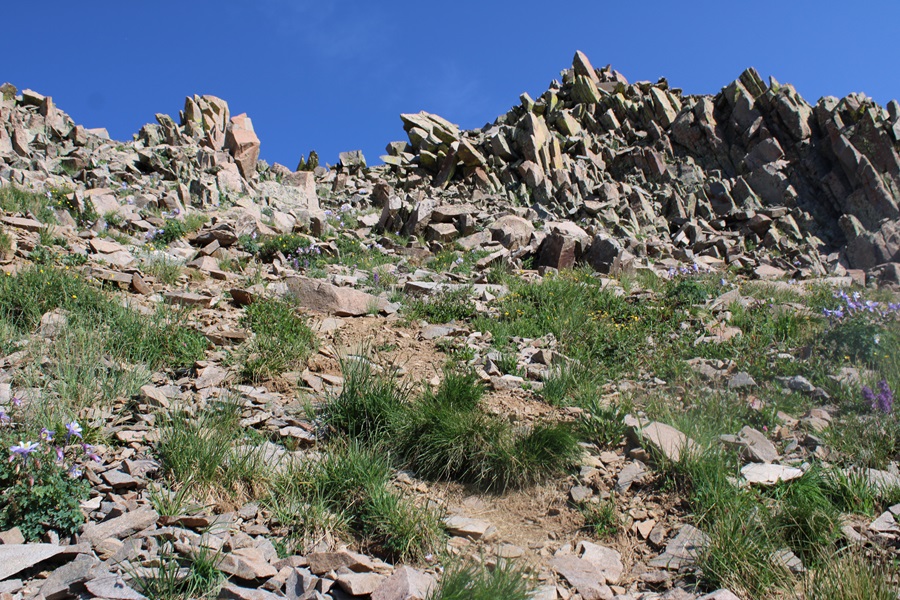
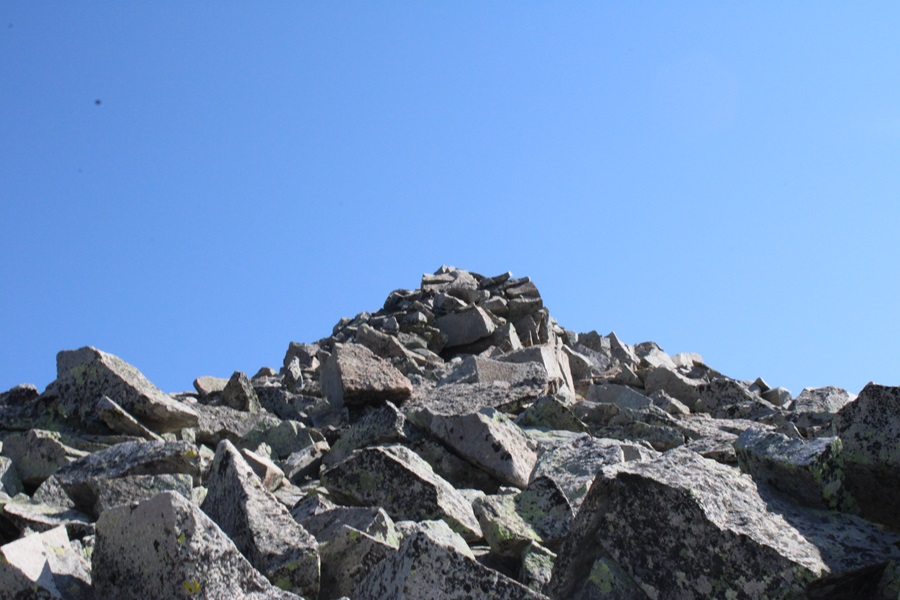
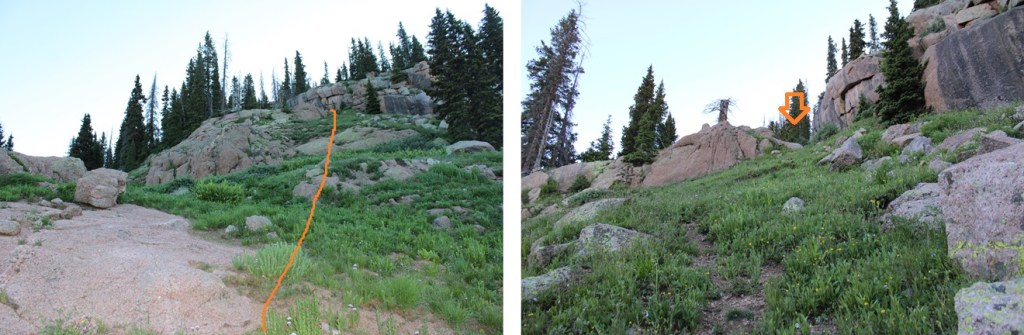
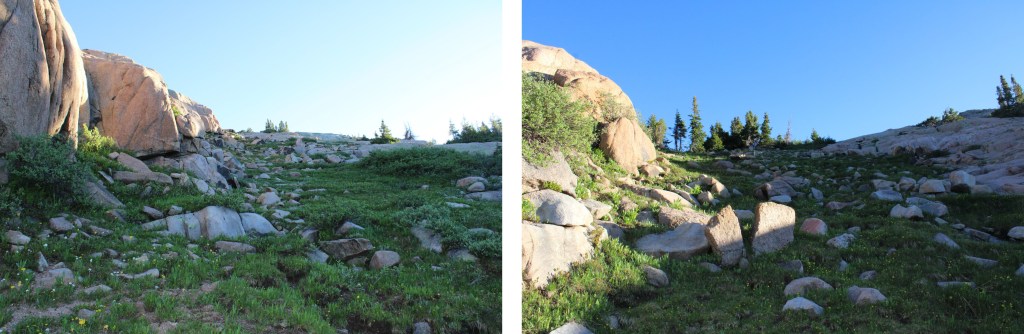
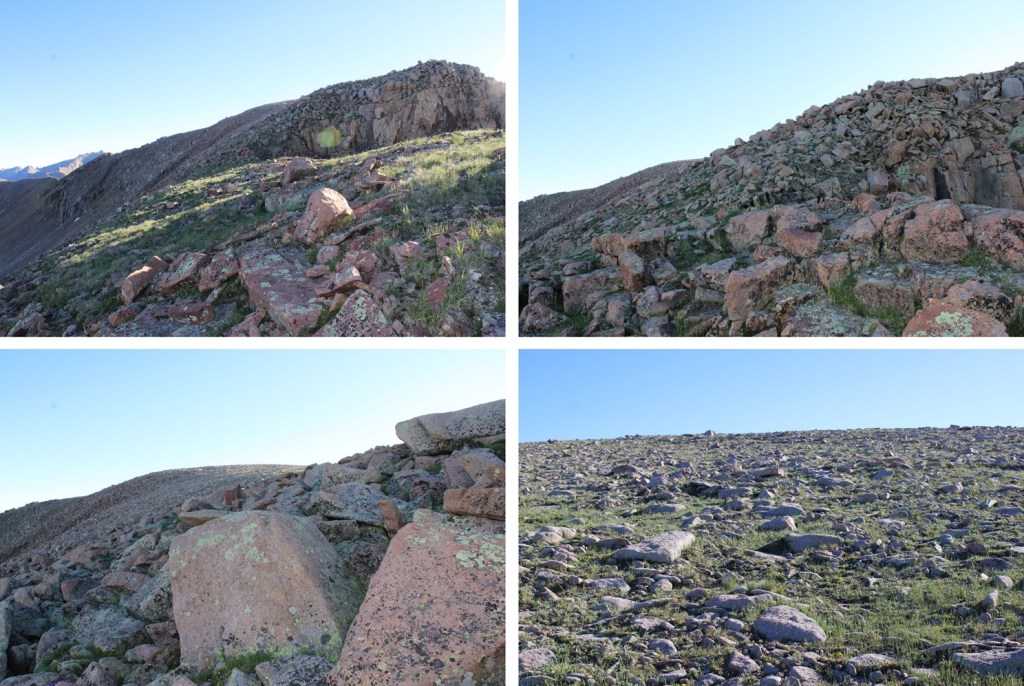
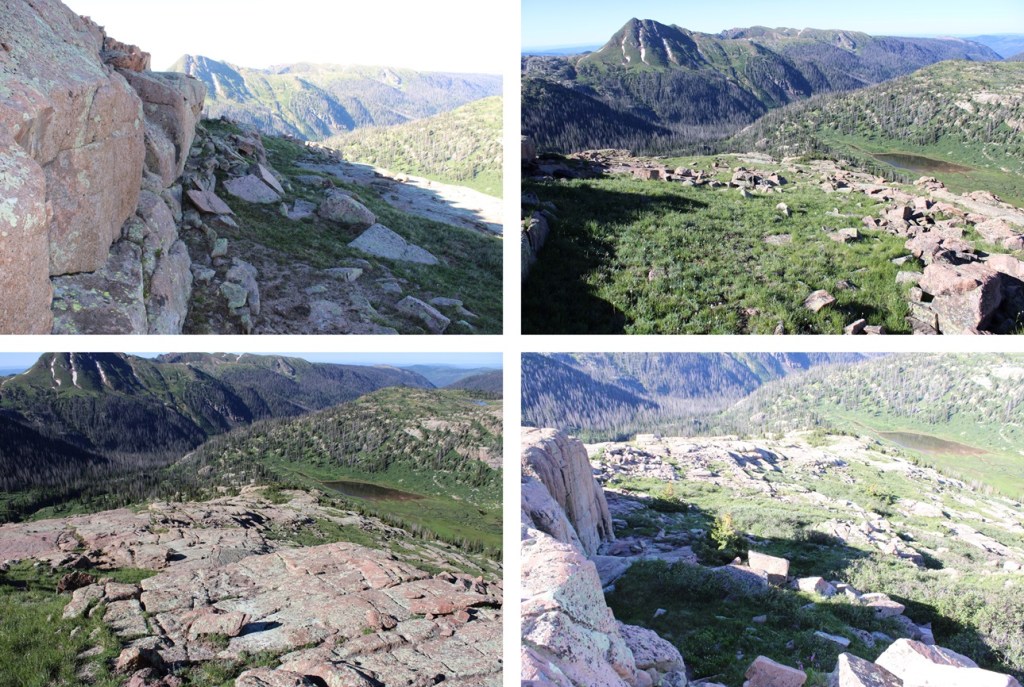
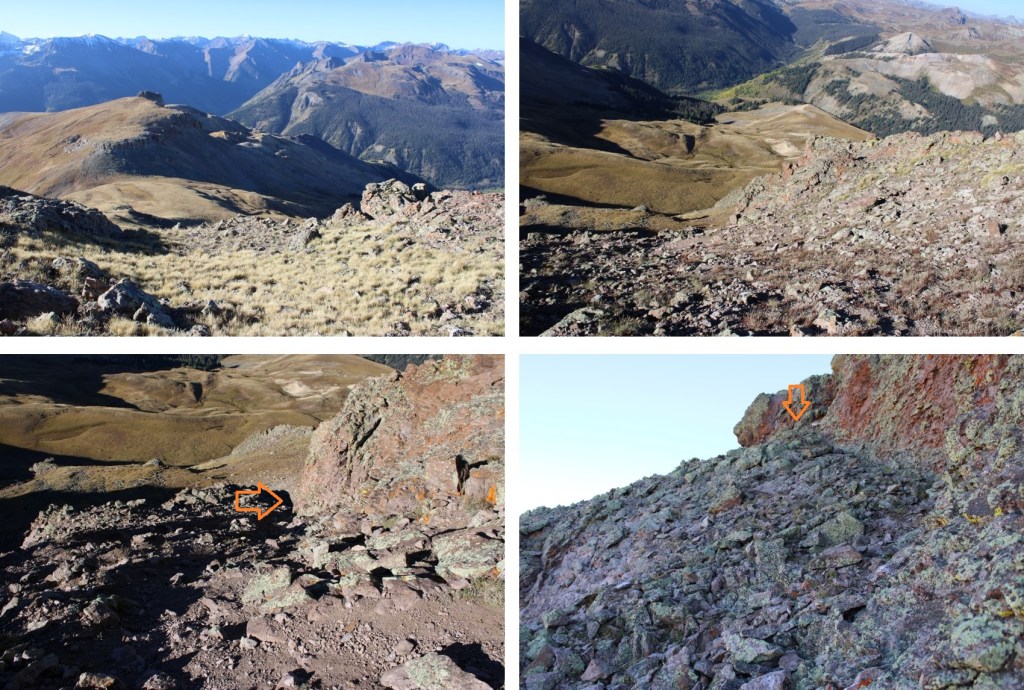
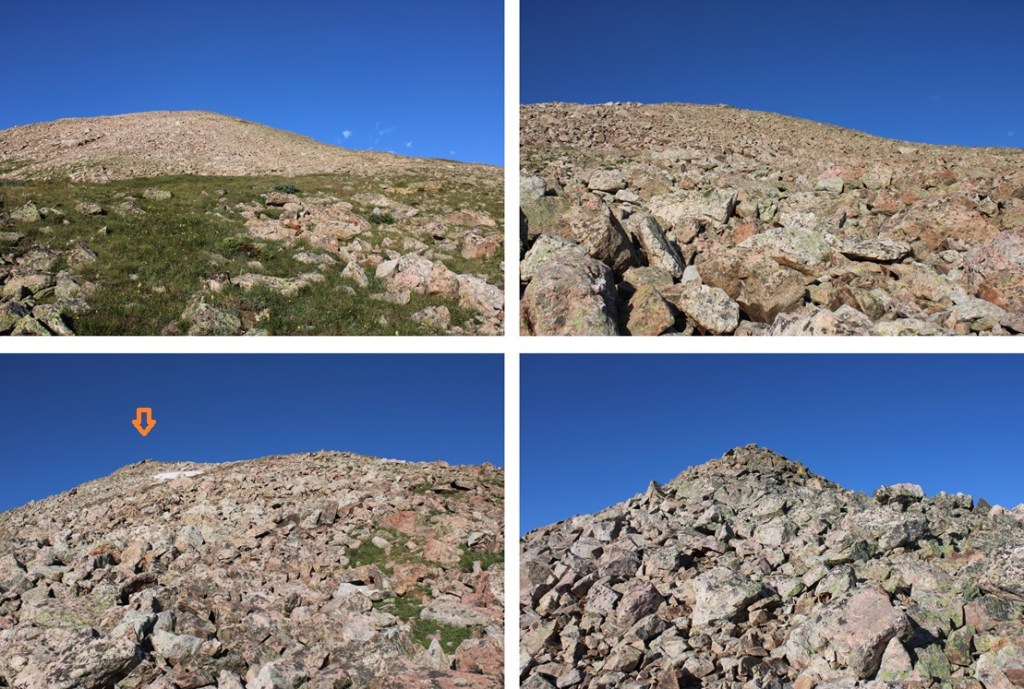
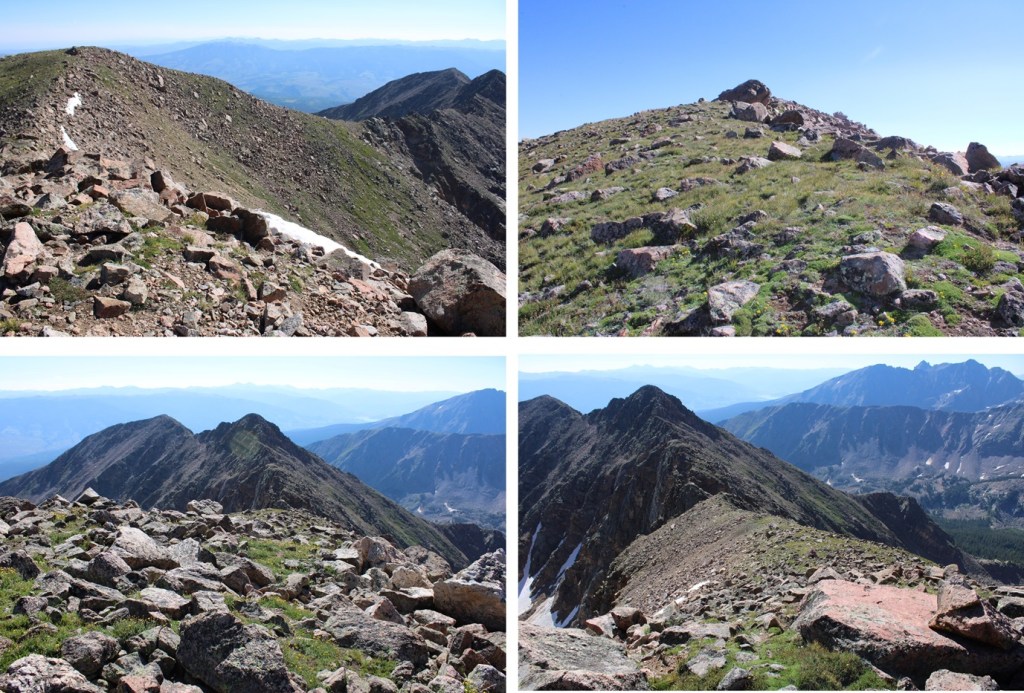
At treeline my next goal was to ascend the tundra and then rocky slope, still headed southwest.  The rocks here were solid, and easy to navigate.  I just kept following the rocky, class 2 ridge.


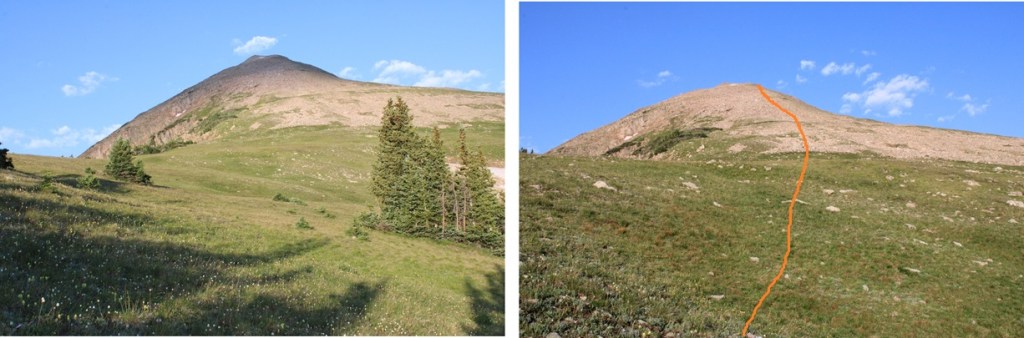
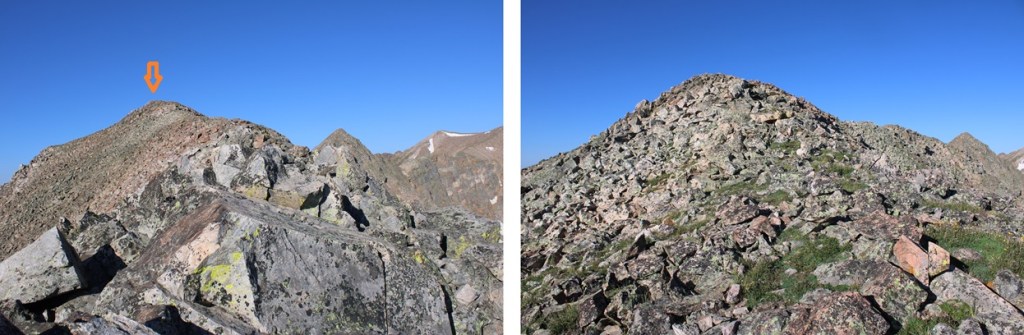
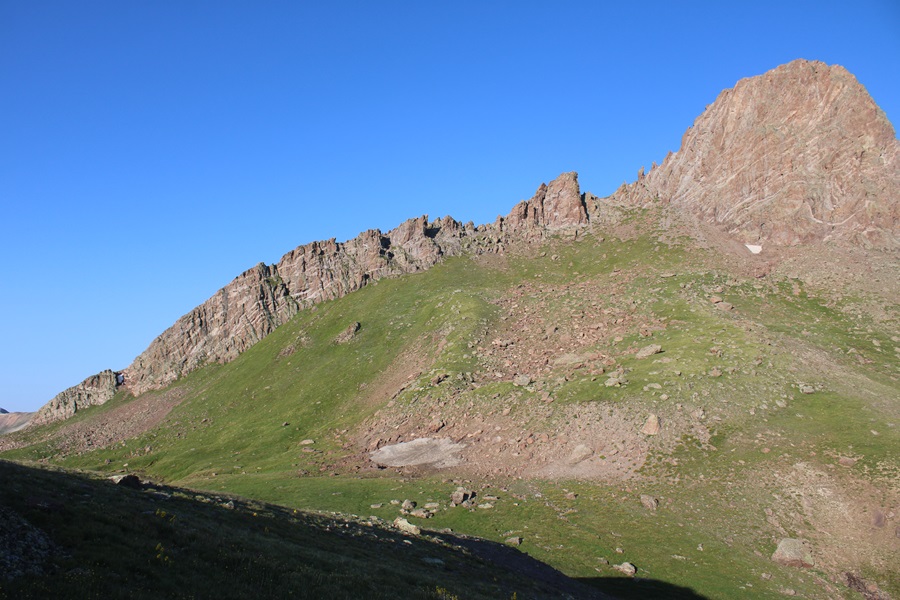
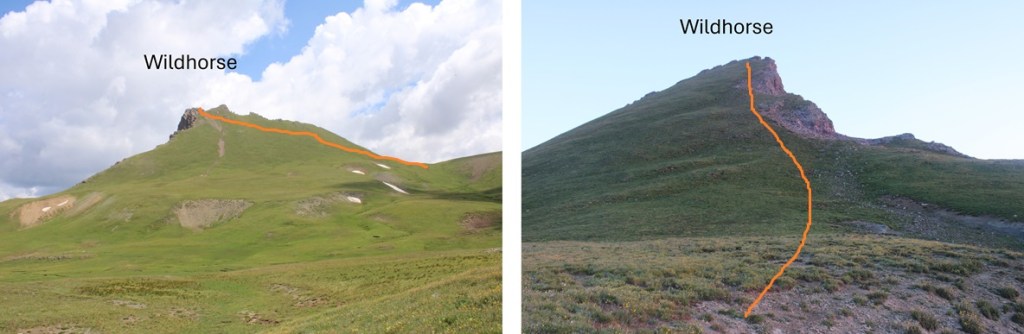
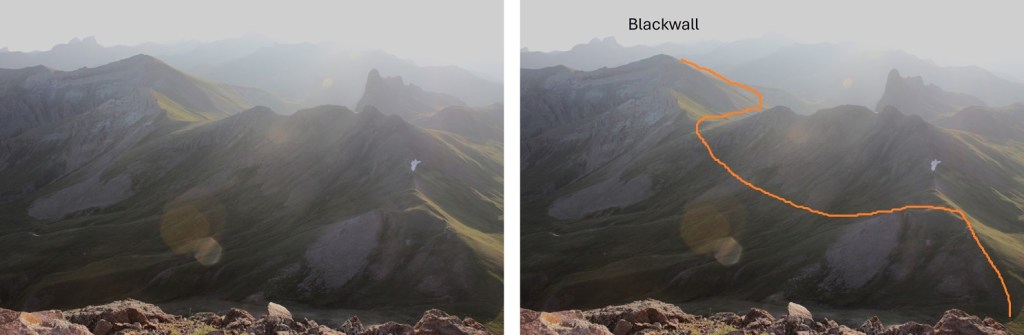
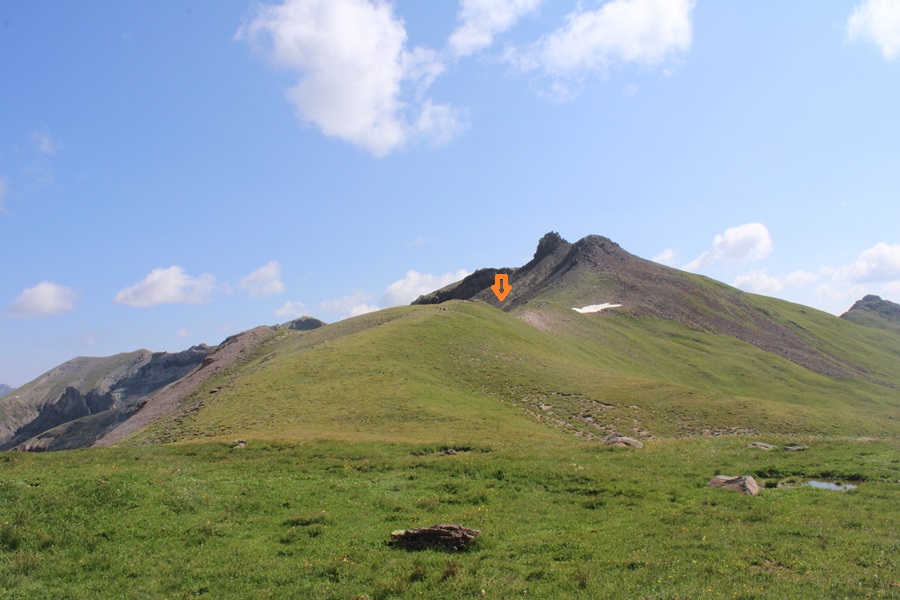
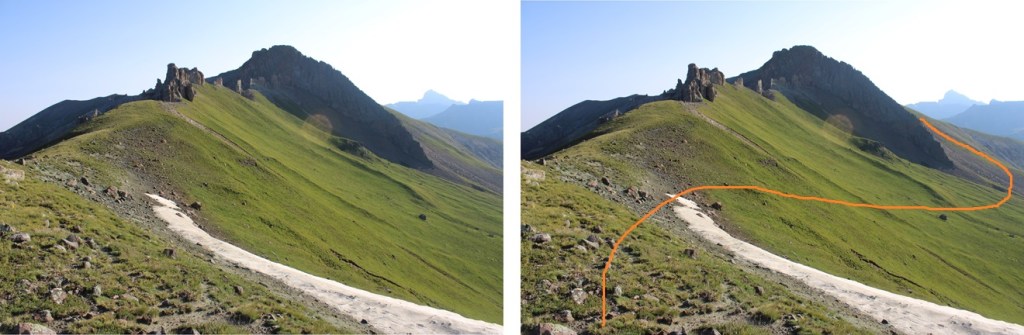
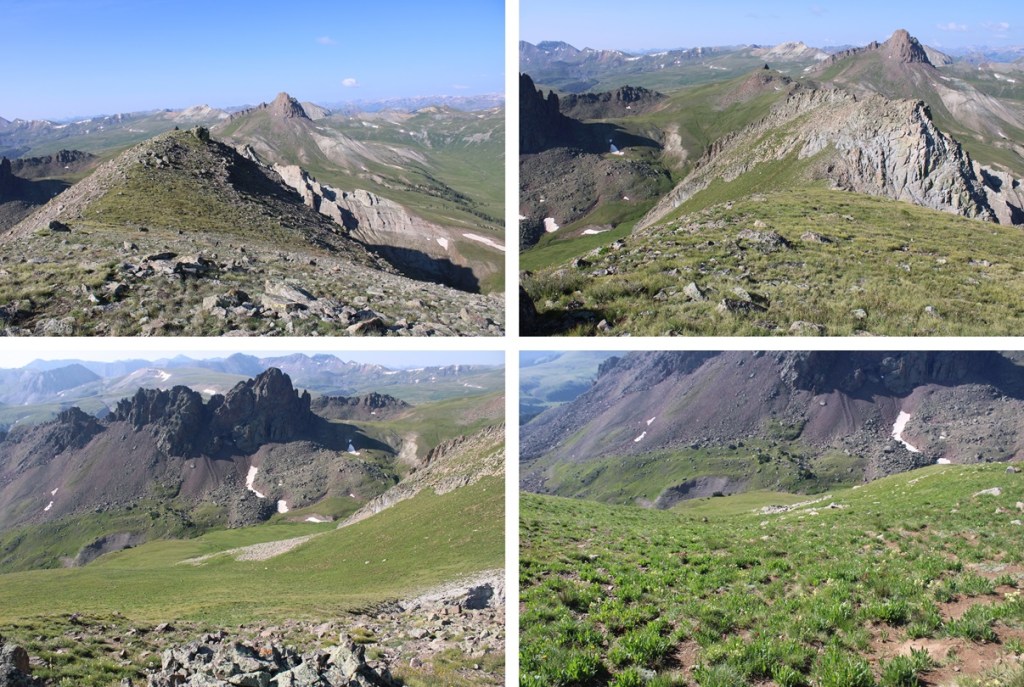
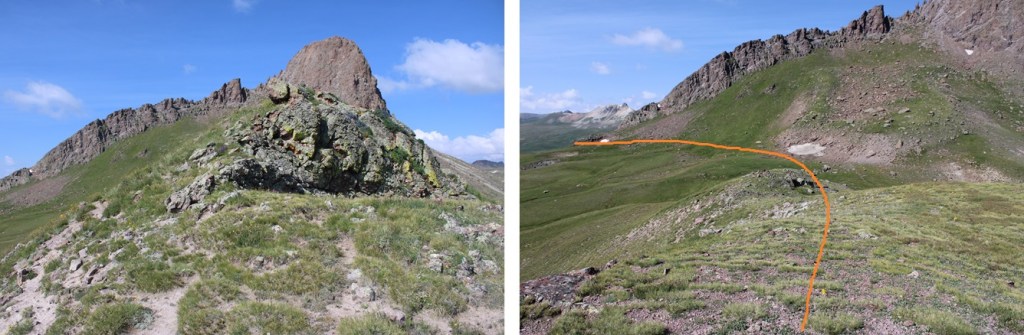
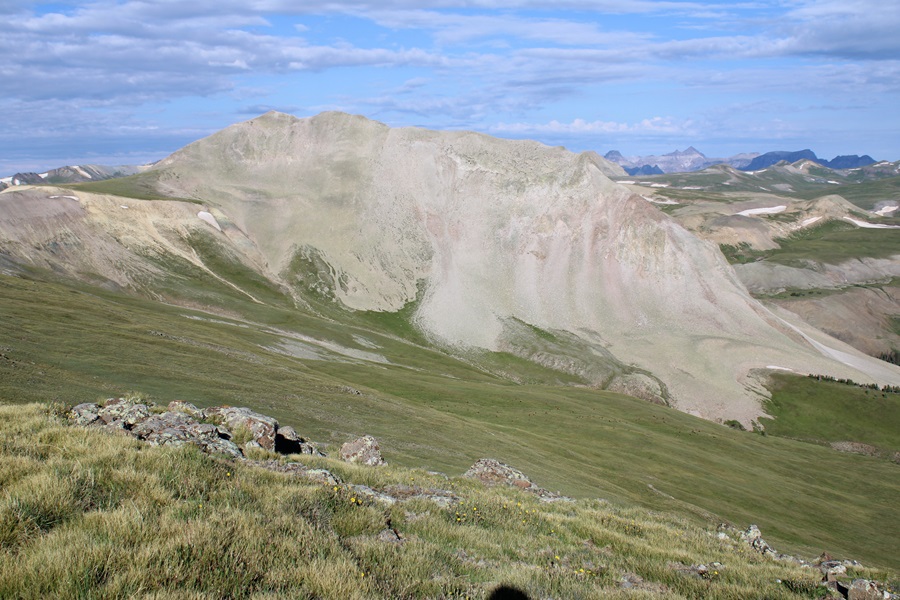
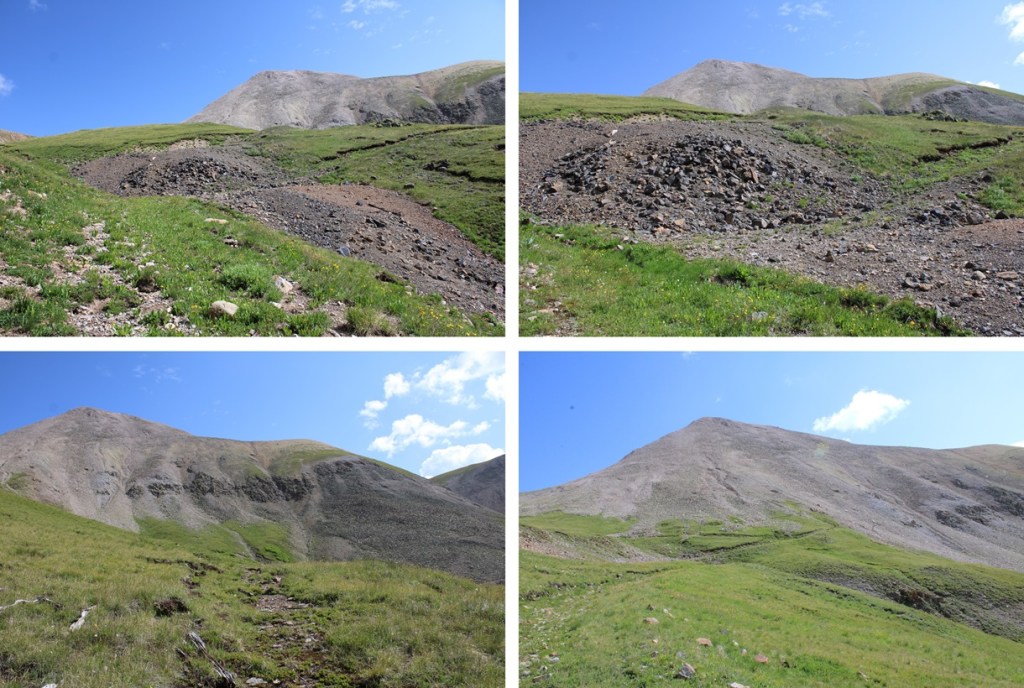
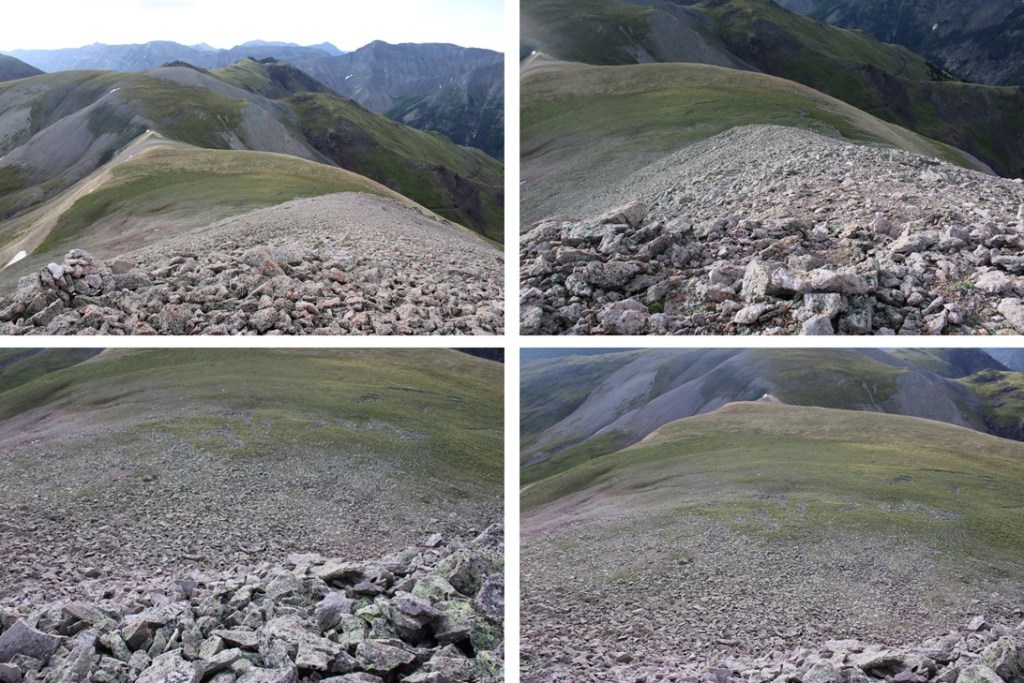
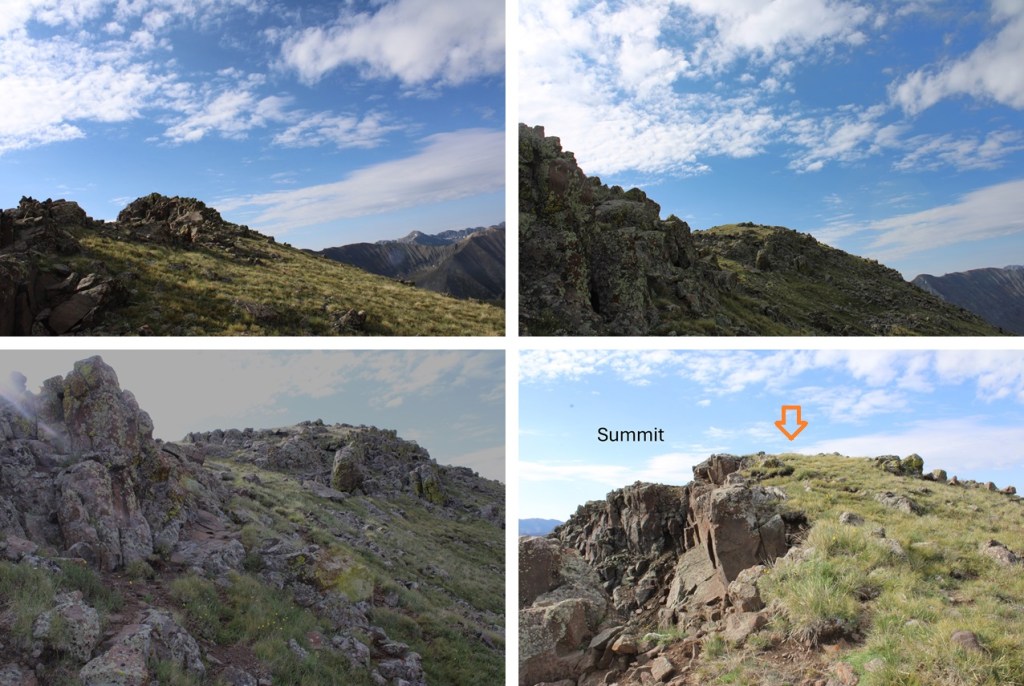
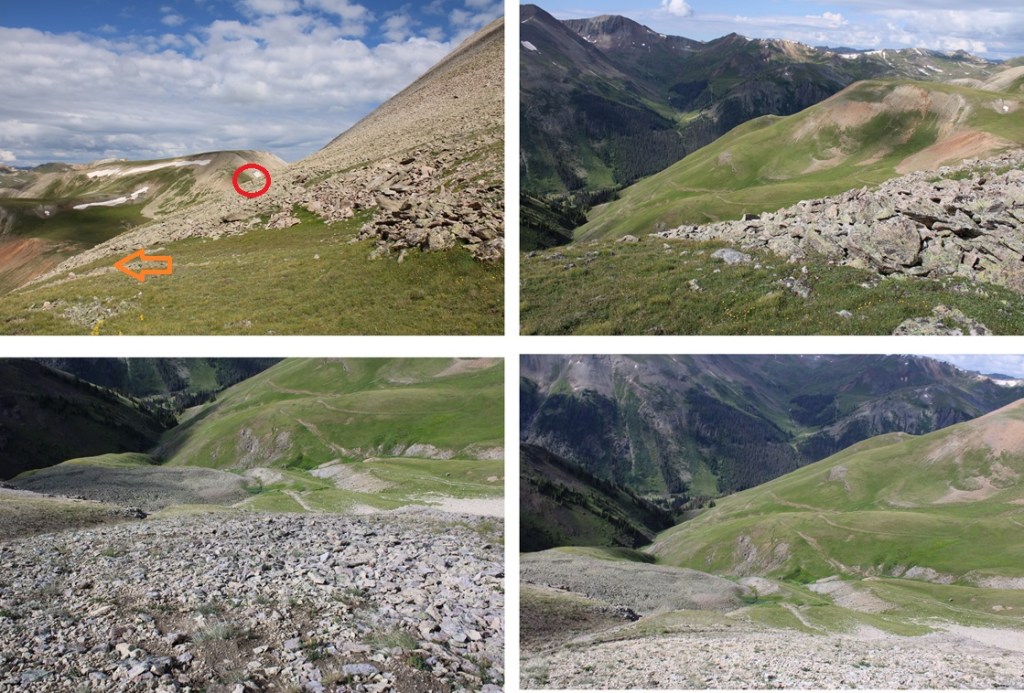
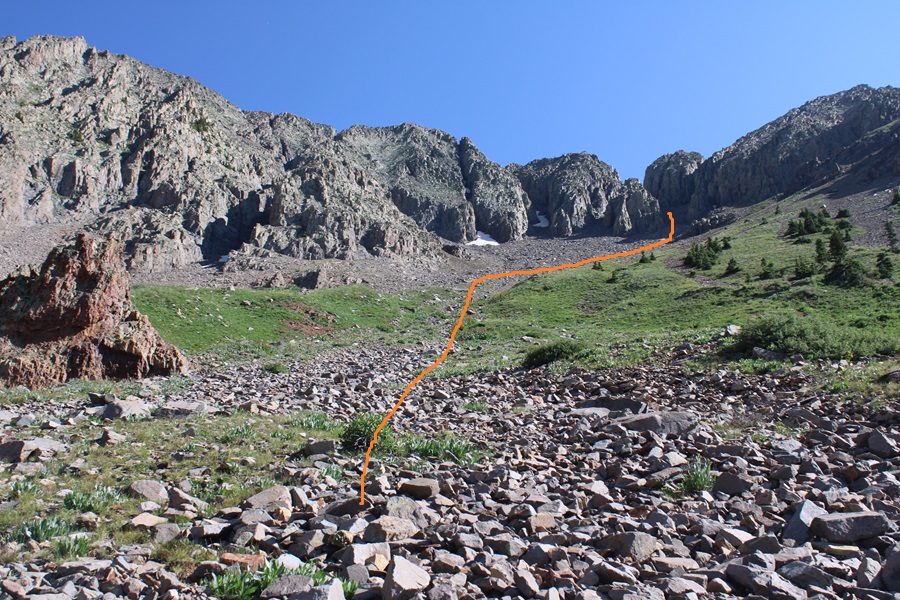
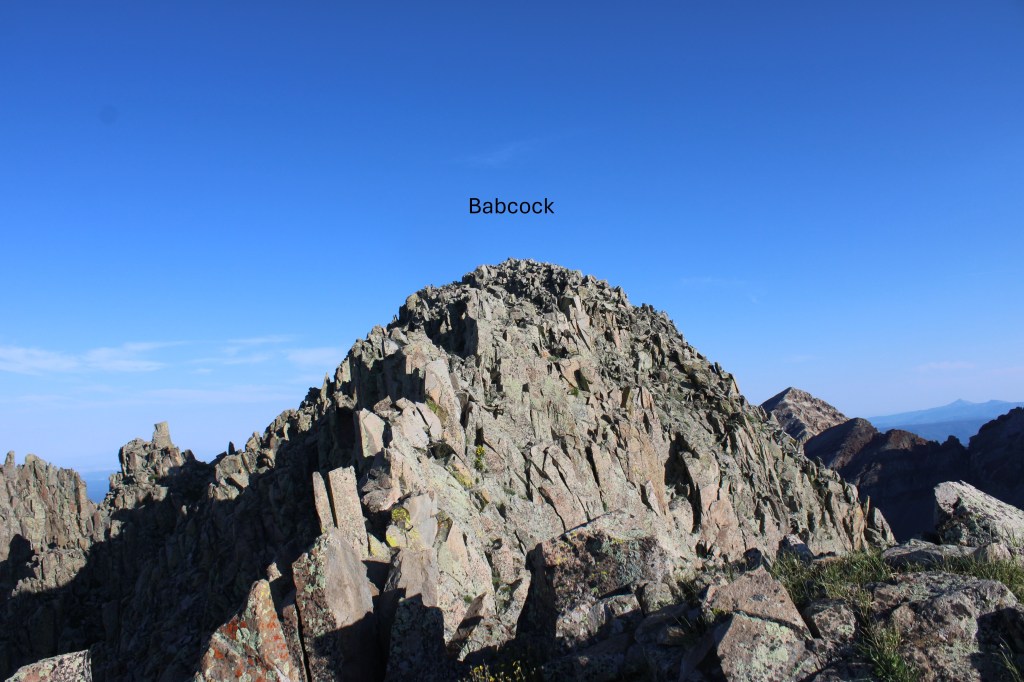
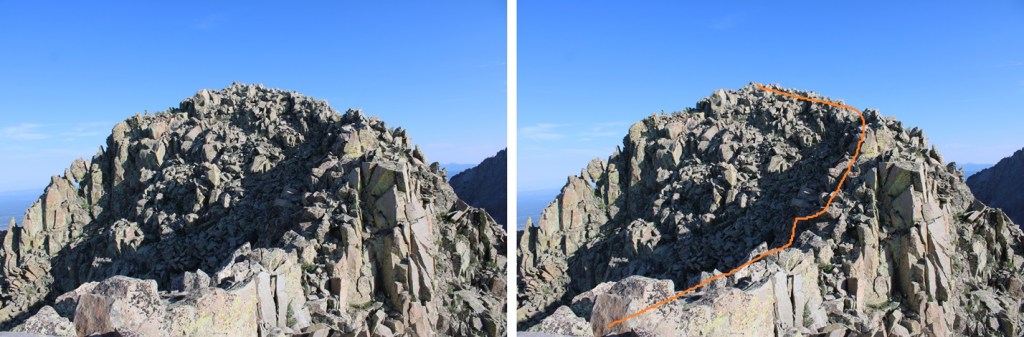
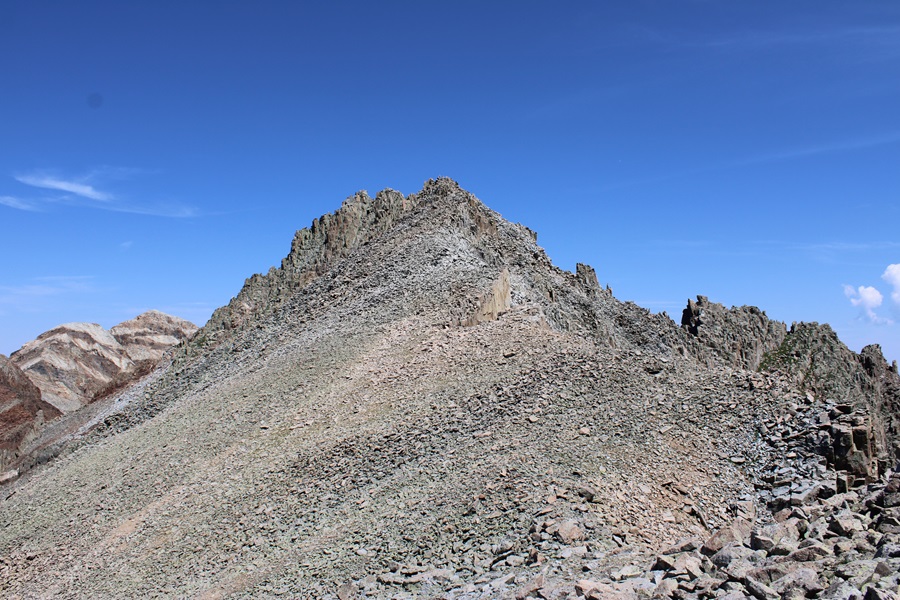
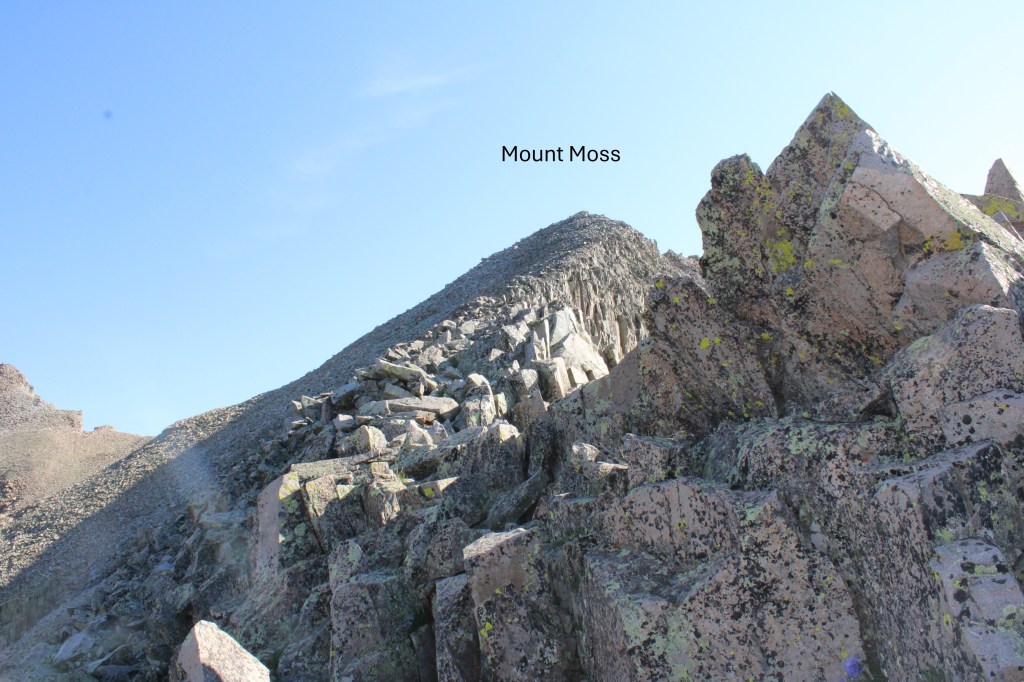
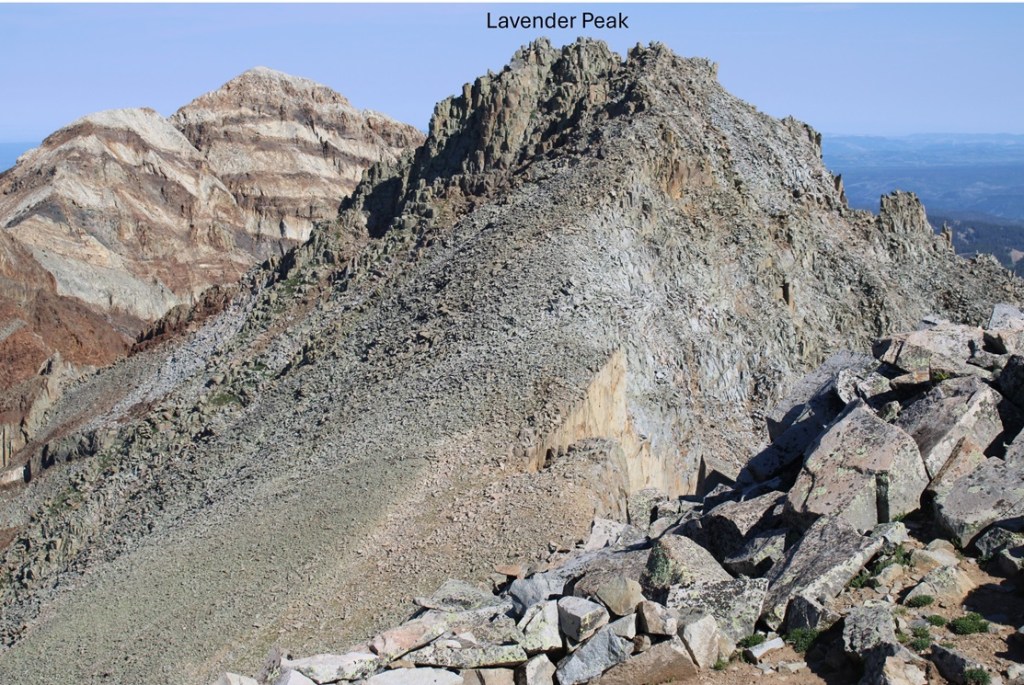
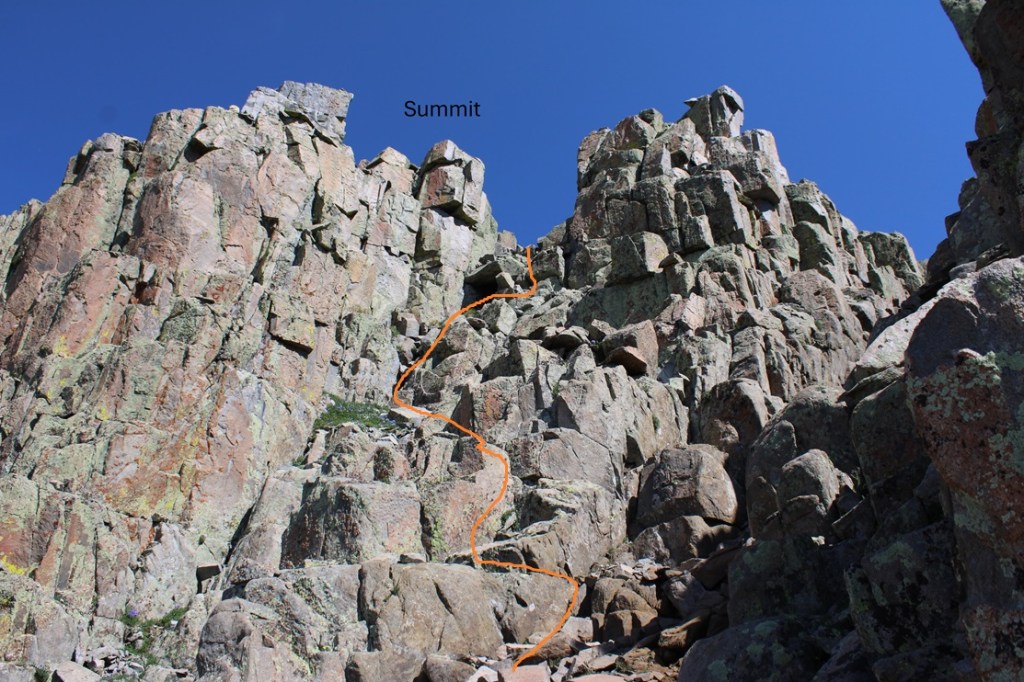
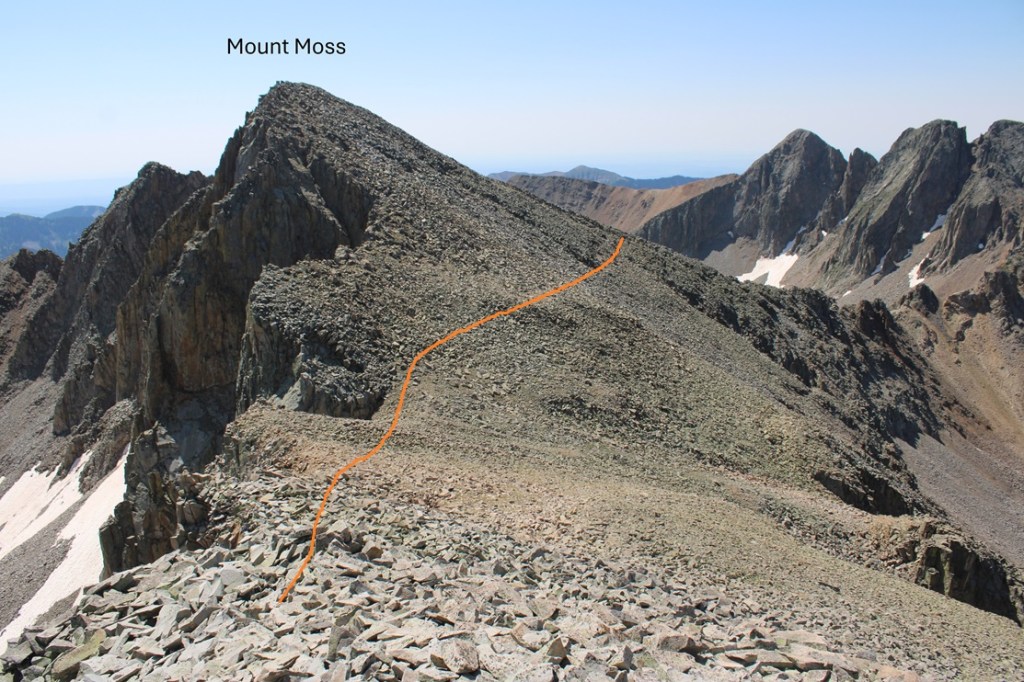
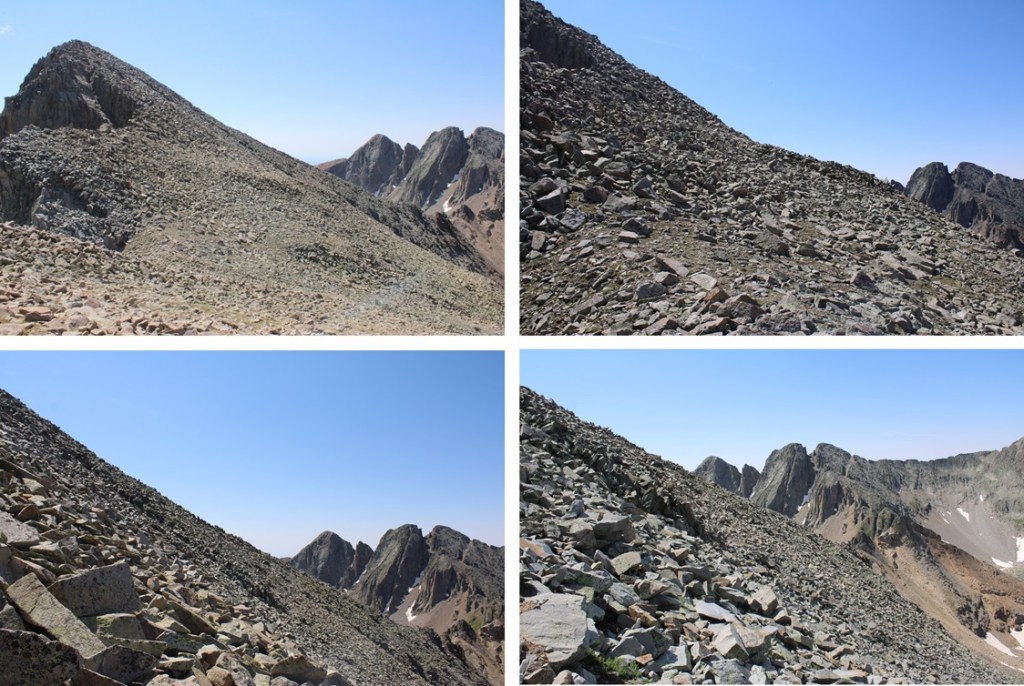
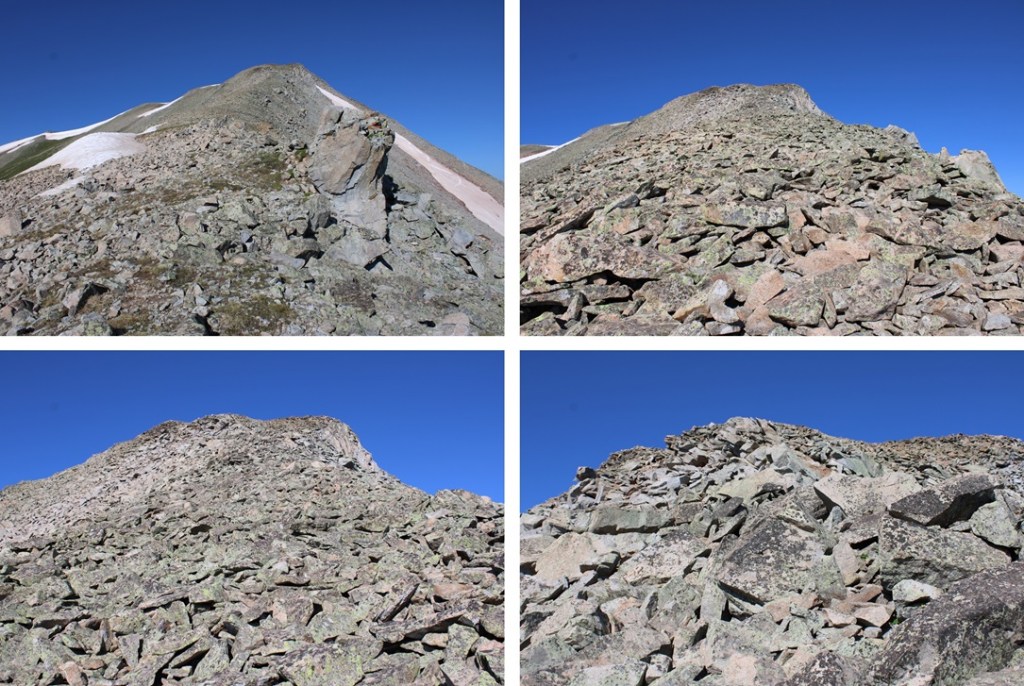
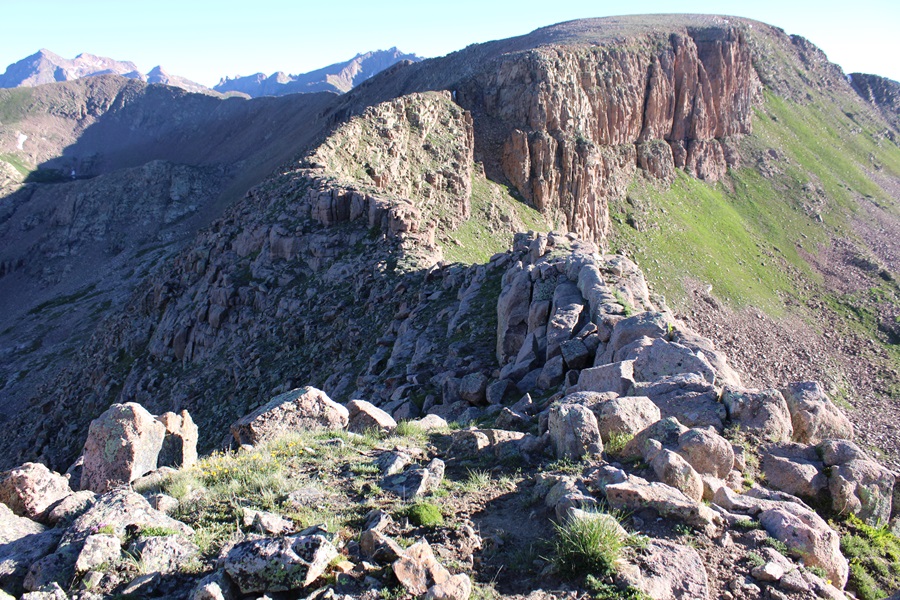
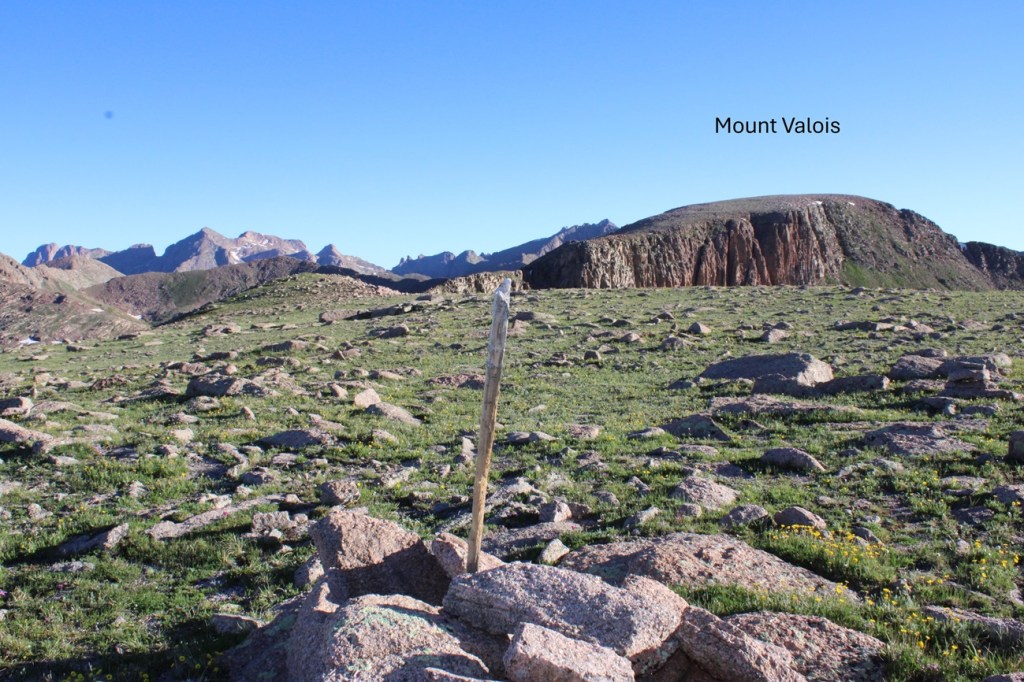
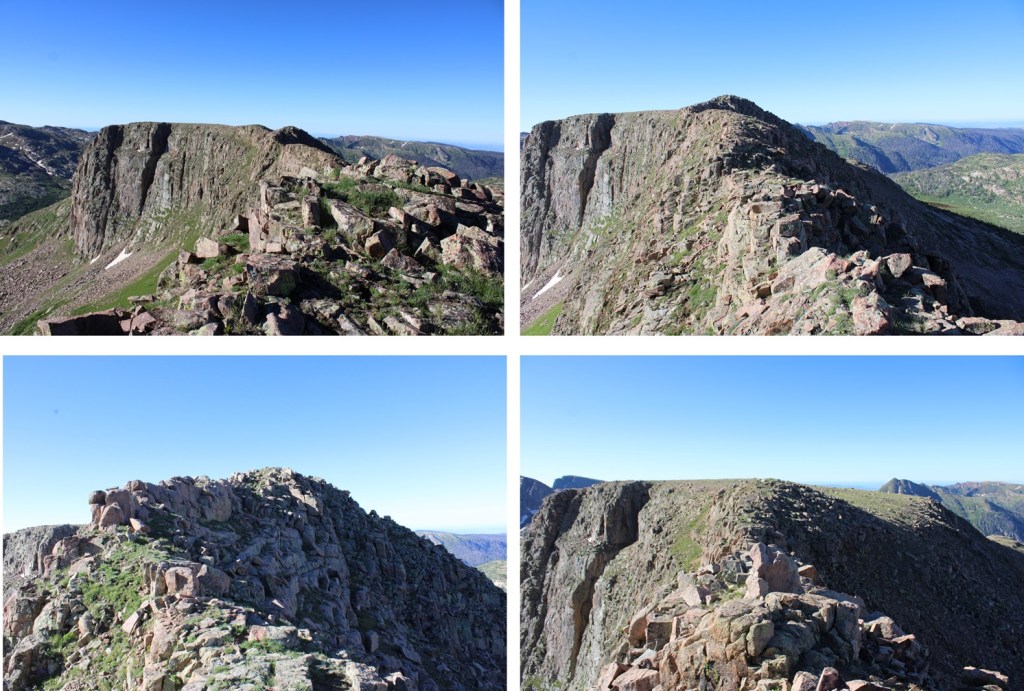
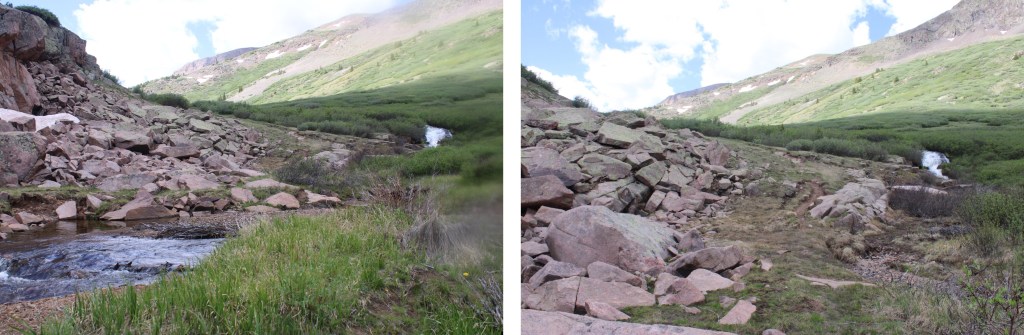
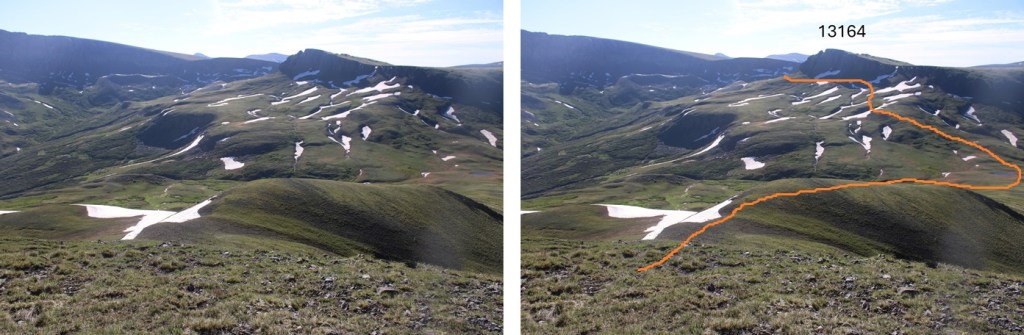
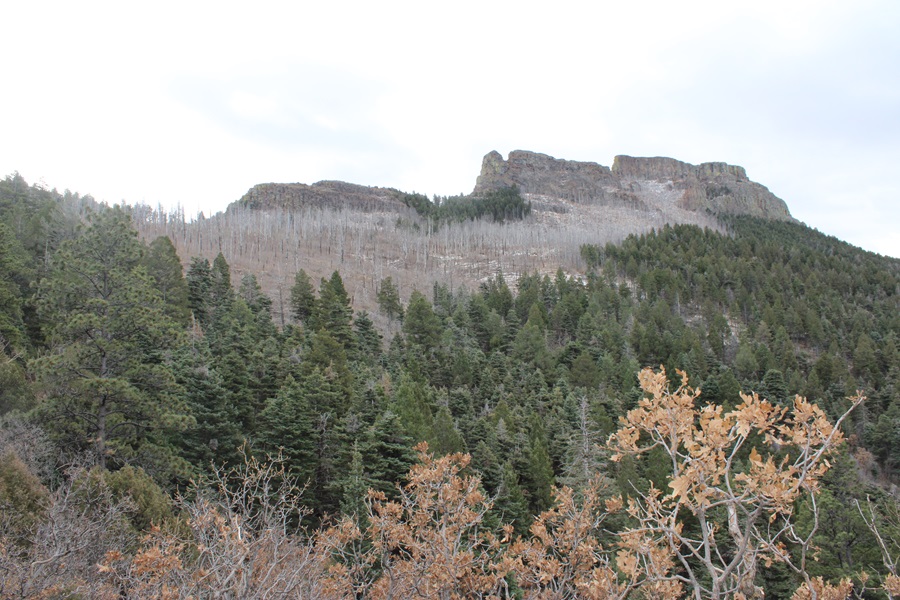
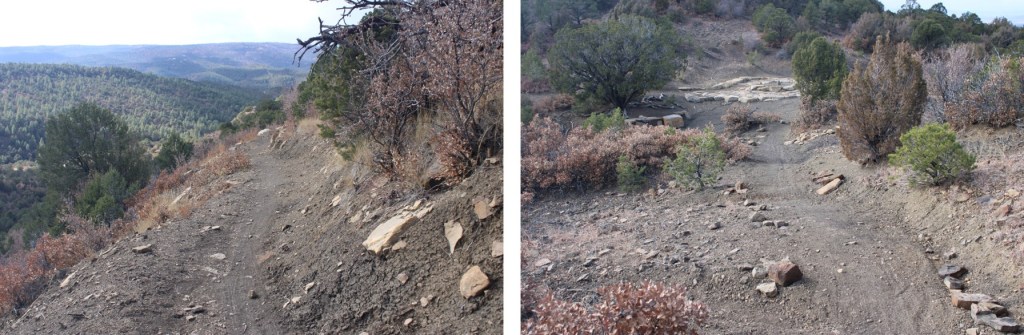
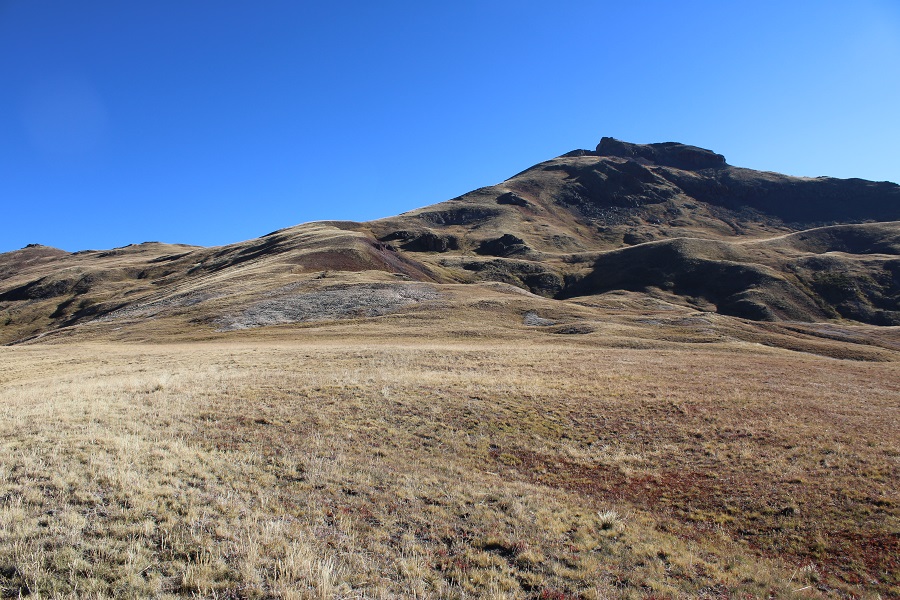
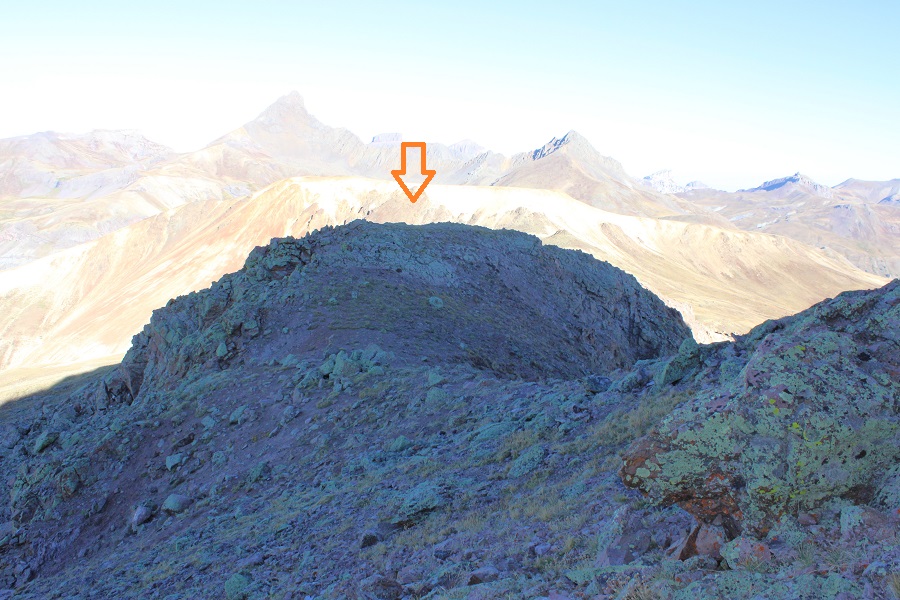
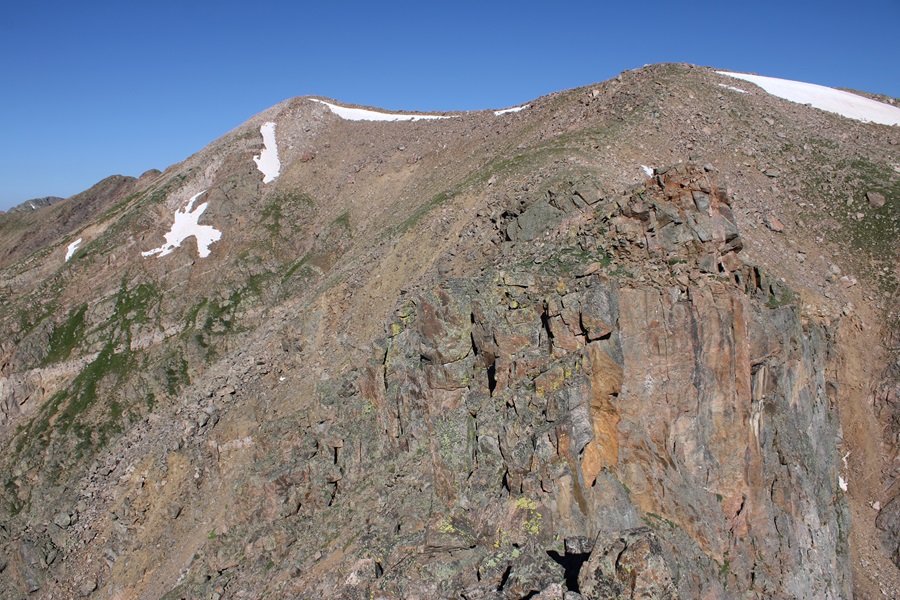
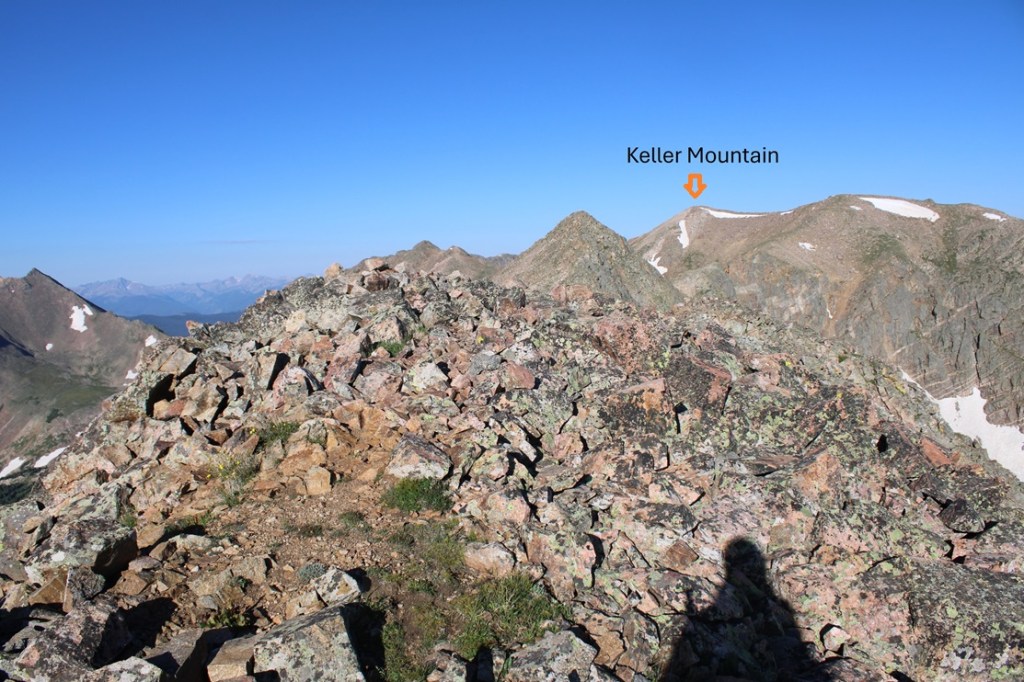
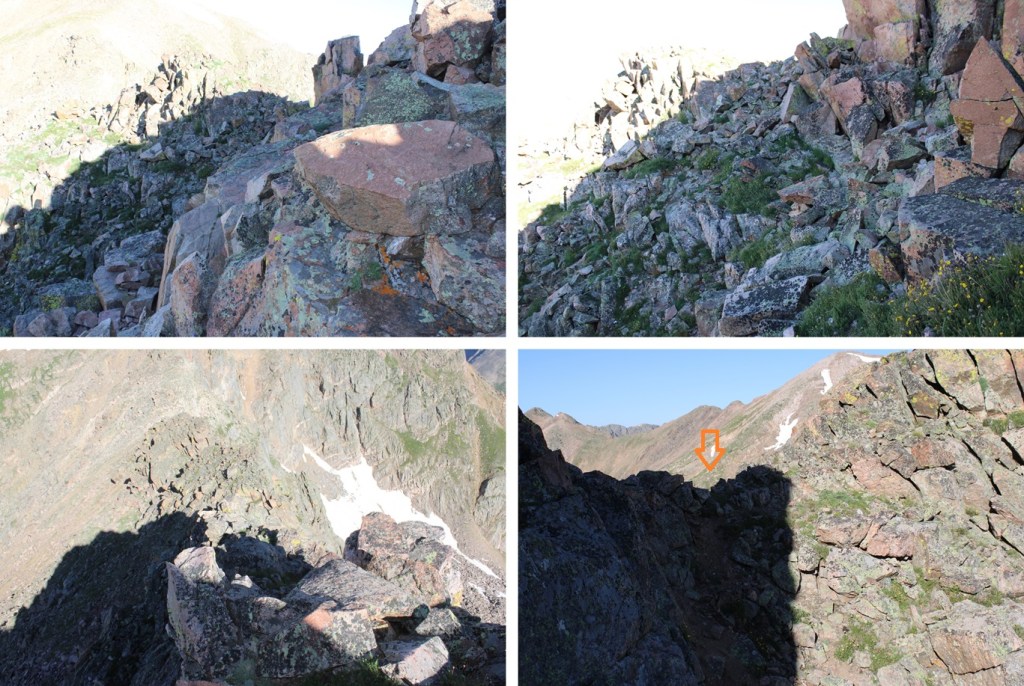
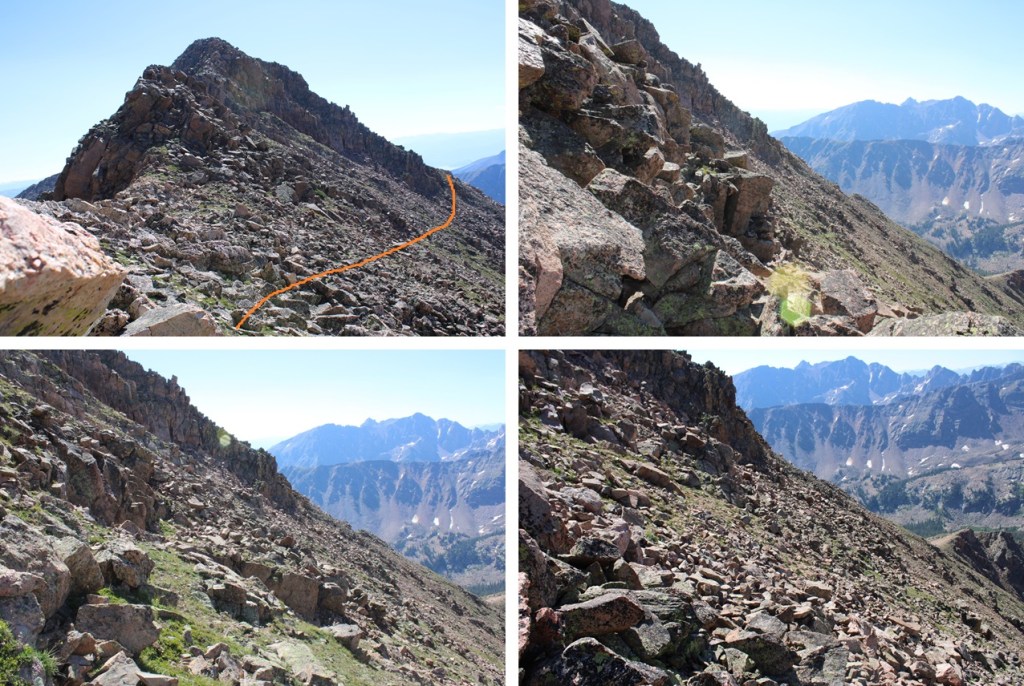
If you get here and think “Wow!  That was almost too easy!” it’s time to strap on your helmet, because you’re only at PT 12847, and the rest of the route is about to get class 3.  Here is the real summit of Keller Mountain, a mile off in the distance and a fun ridge to get there.

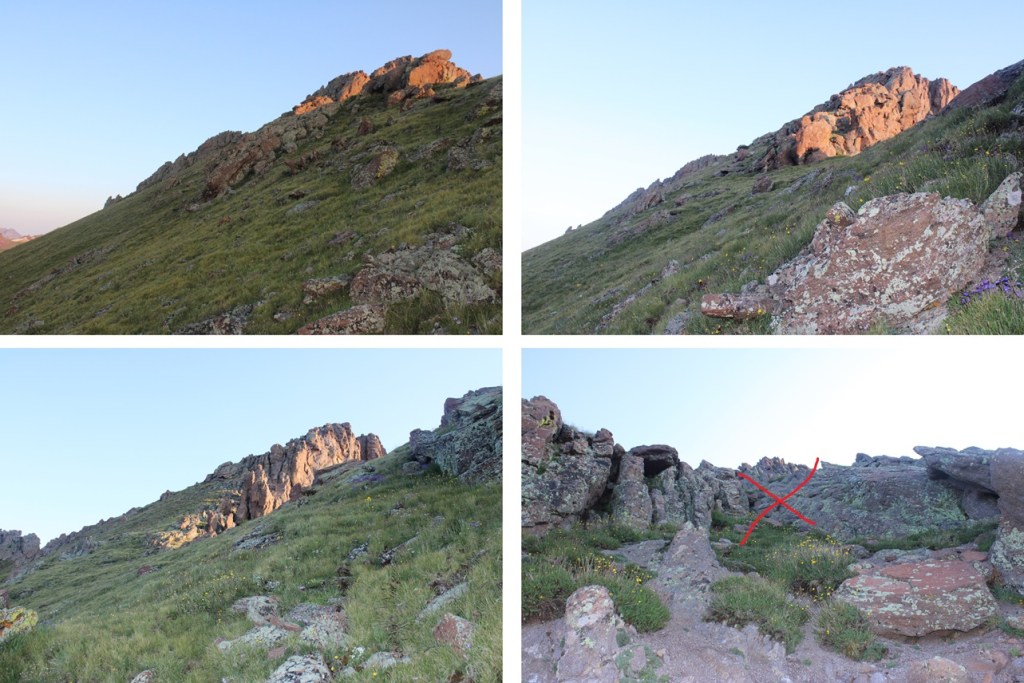
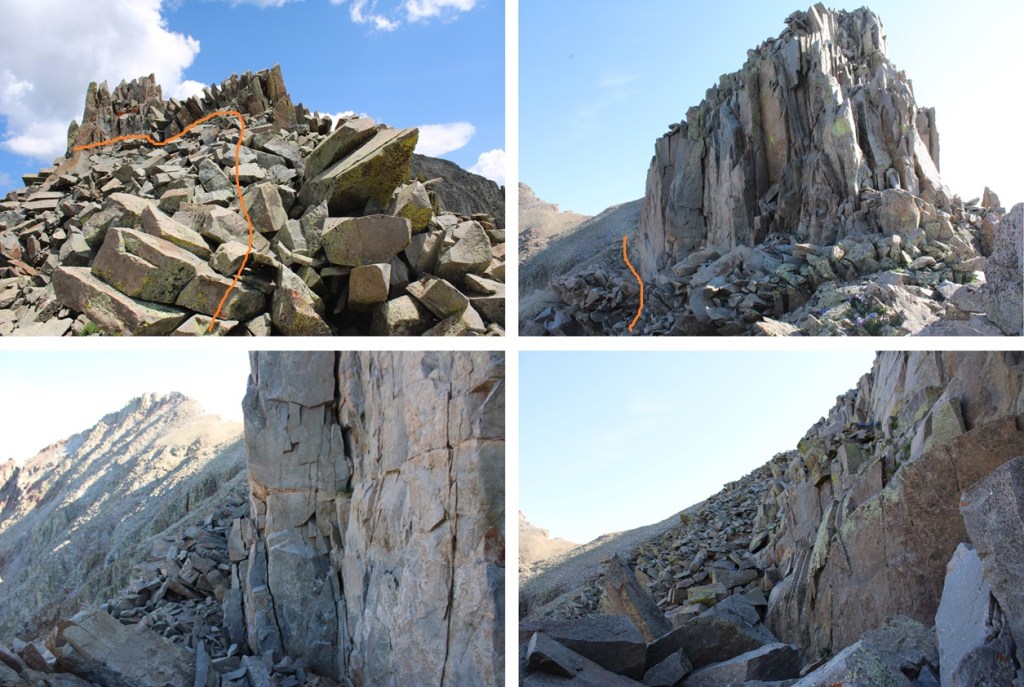
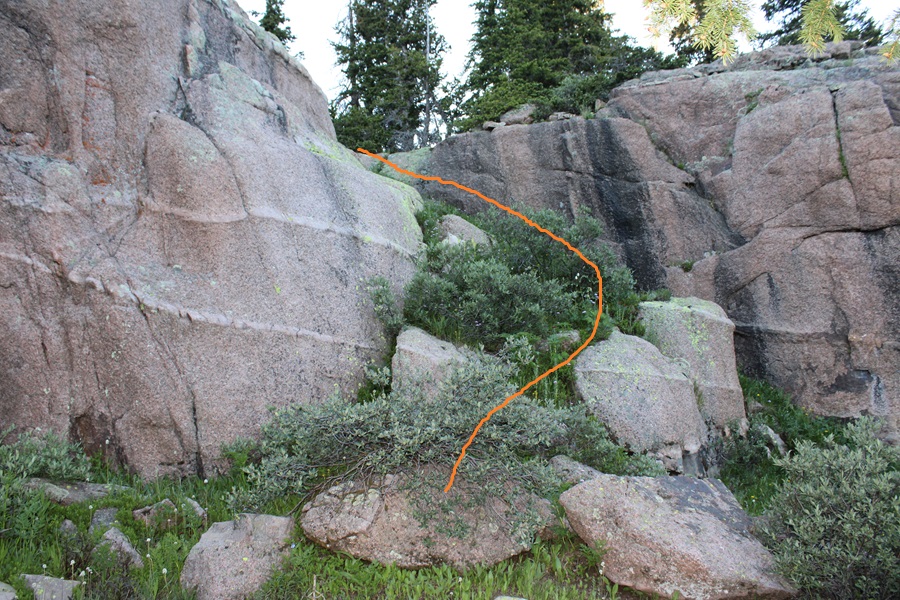
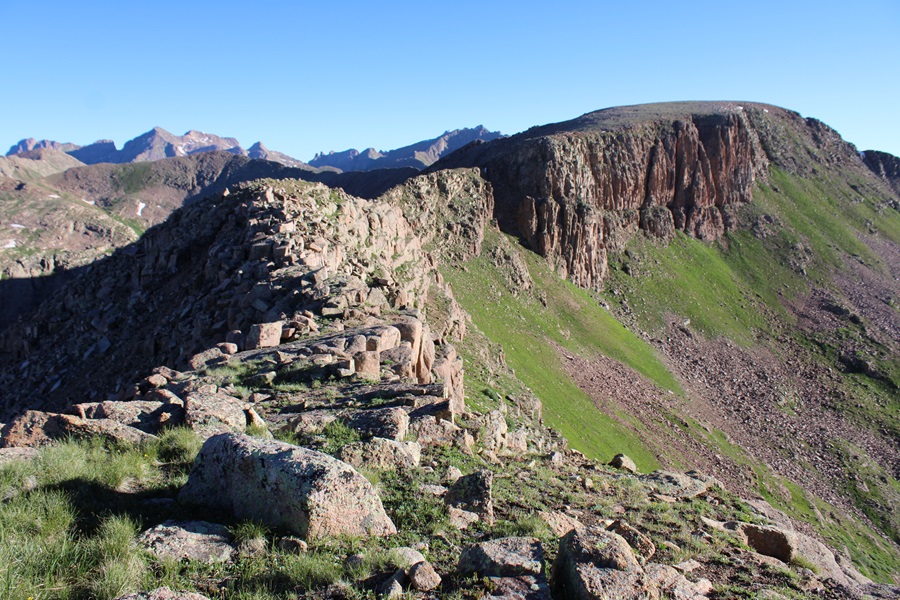
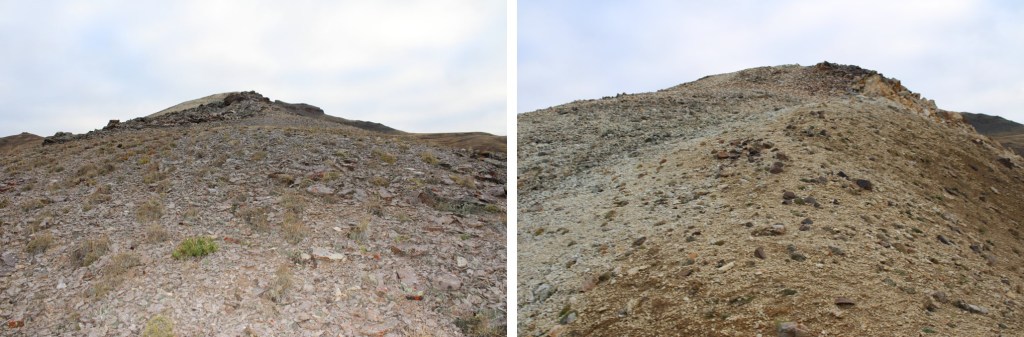
First, I had to get around this point.  Going up is straightforward, and I stuck to the ridge.  Going down, however, was a bit more challenging in the route-finding department. You can go directly up and over this class 3 ridge, or descend to 12750’ and keep this section class 2 by skirting the ridge.

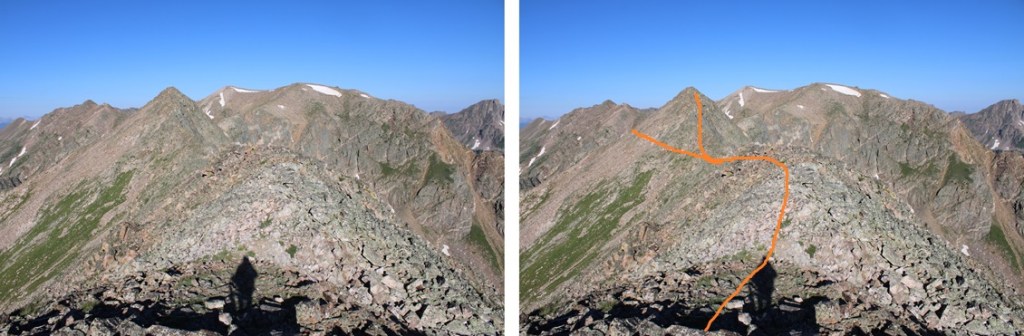
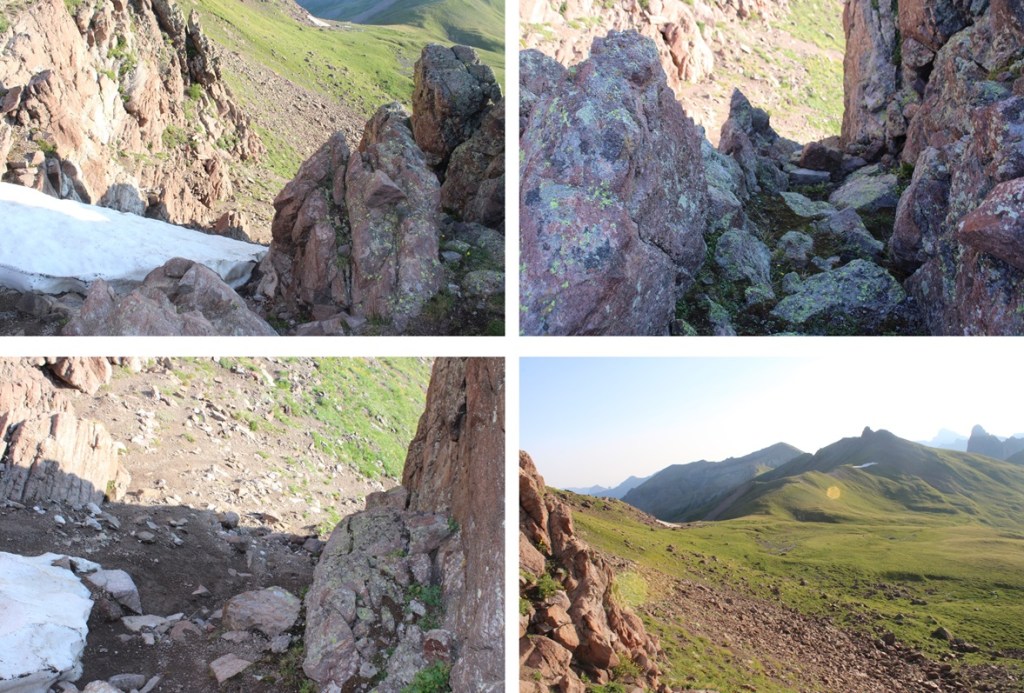
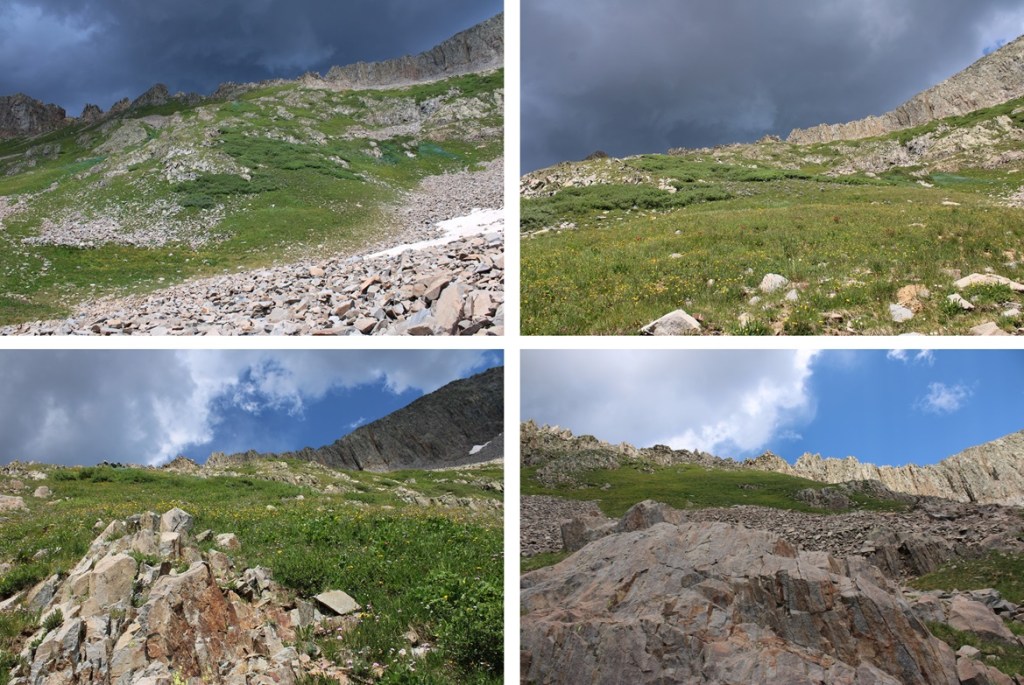
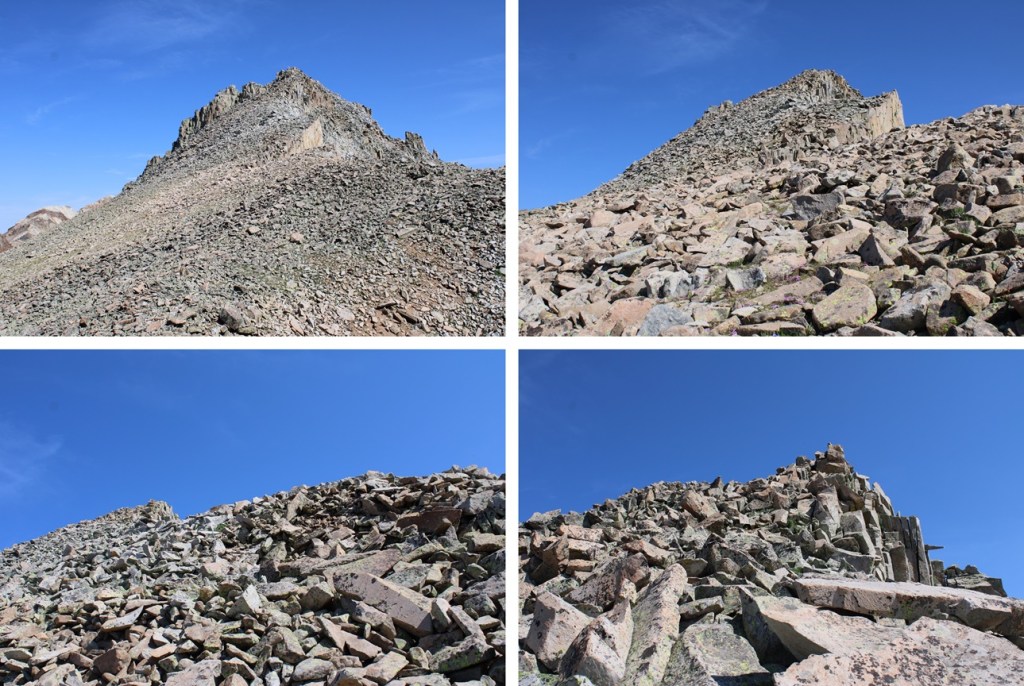
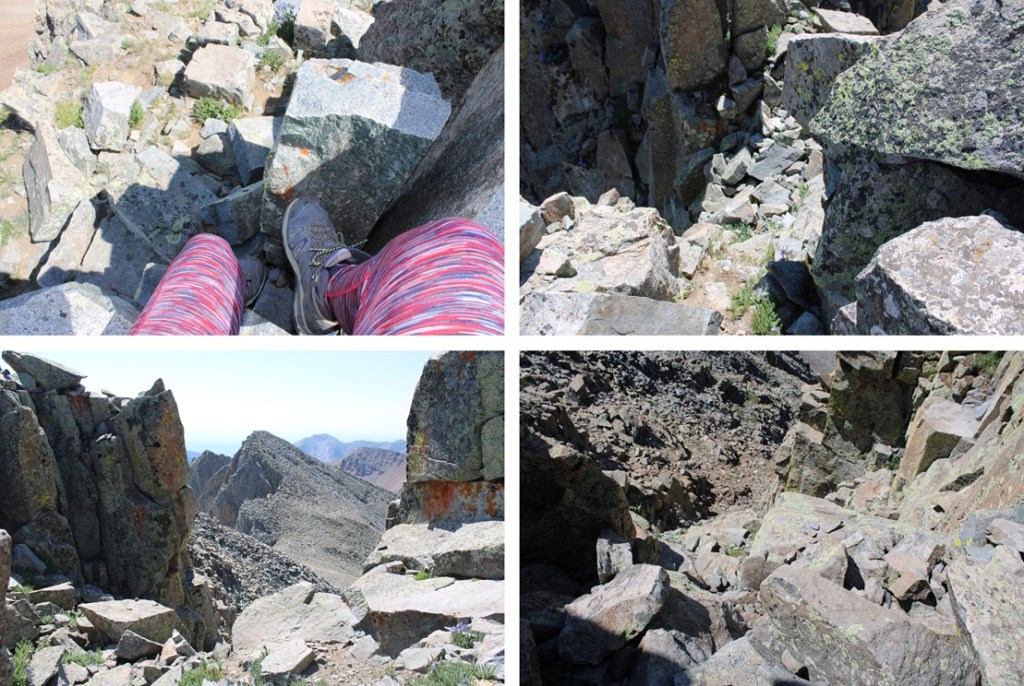
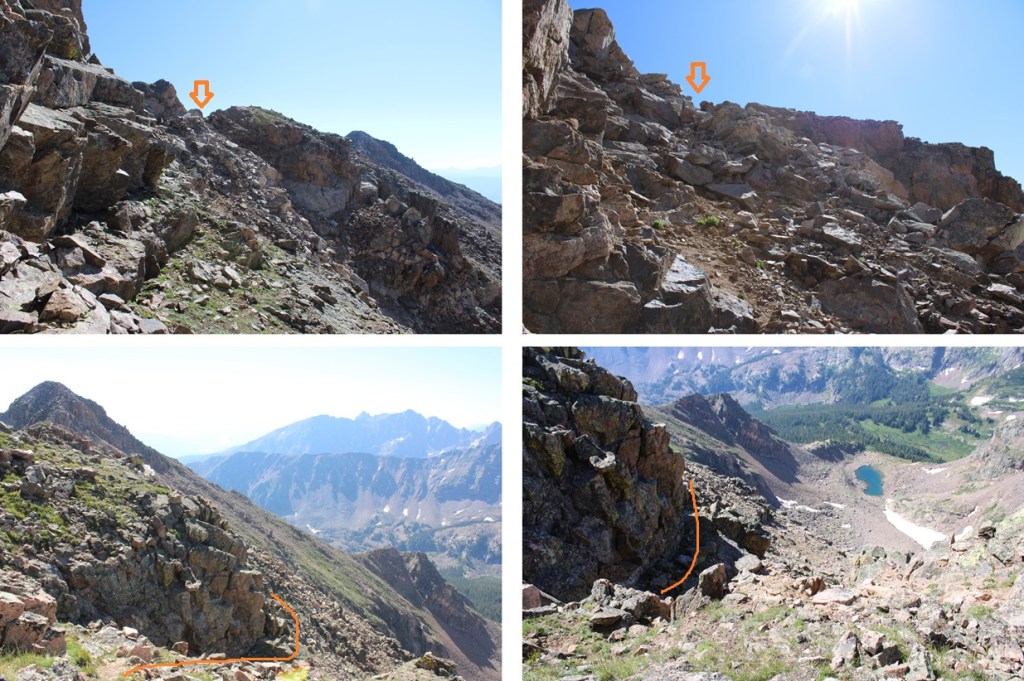
I took the ridge on my ascent, and skirted it on my decent.  Here are some pictures of this ridge. At times I dipped down to the left (never to the right) to ascend on rocky tundra.

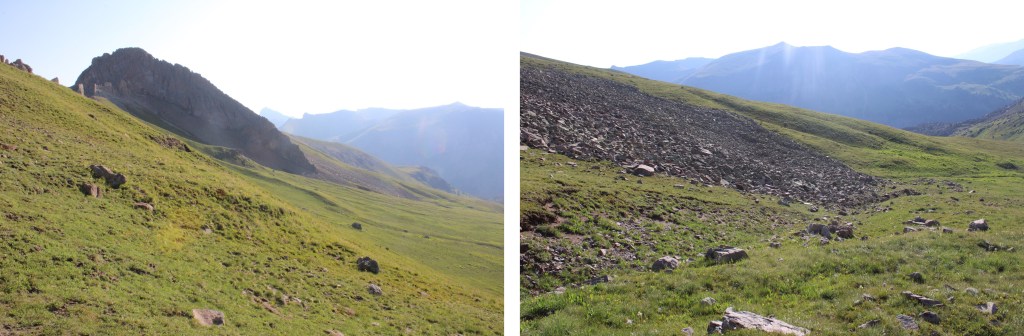
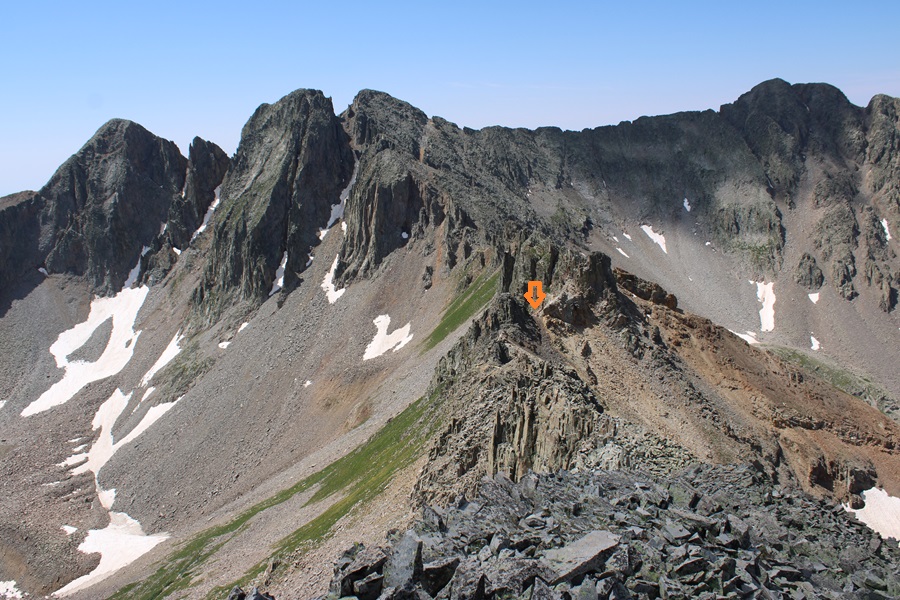
The descent off this ridge was a little more challenging, as there were gullies to navigate that had recent rockfall, and were unstable.  I stuck to the left side of the ridge all but in one obvious spot, where I dipped to the right and re-ascended to this small saddle.

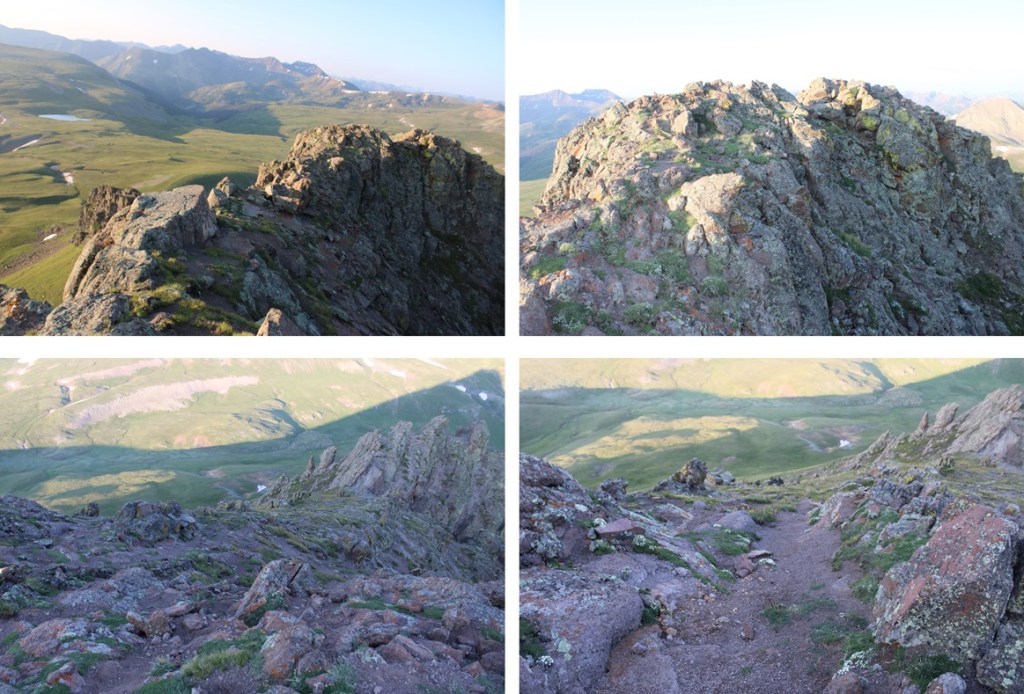
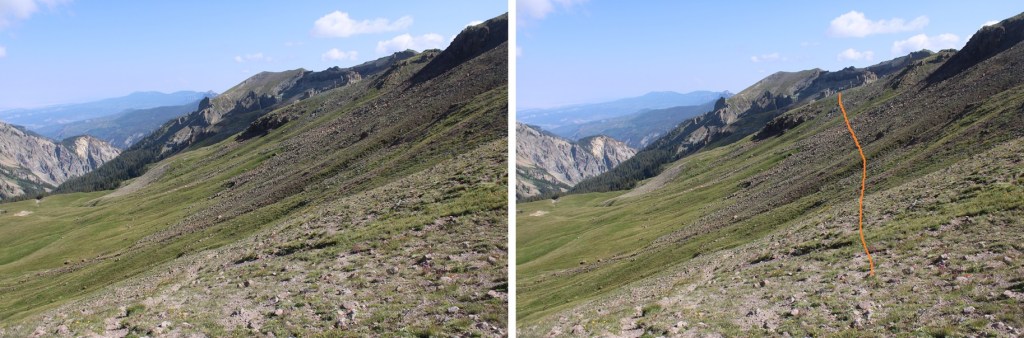
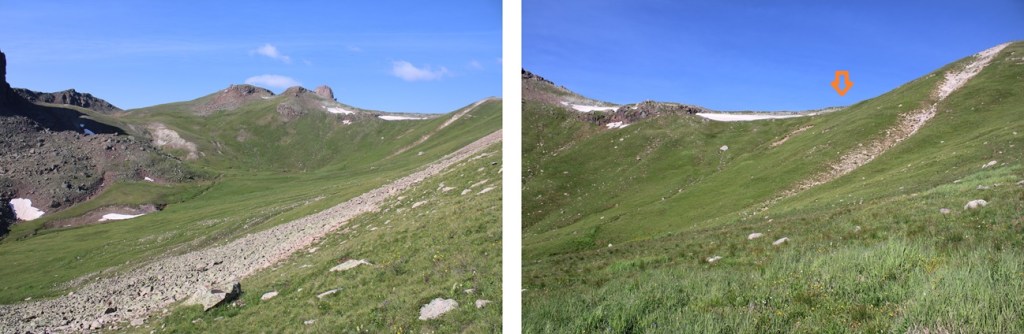
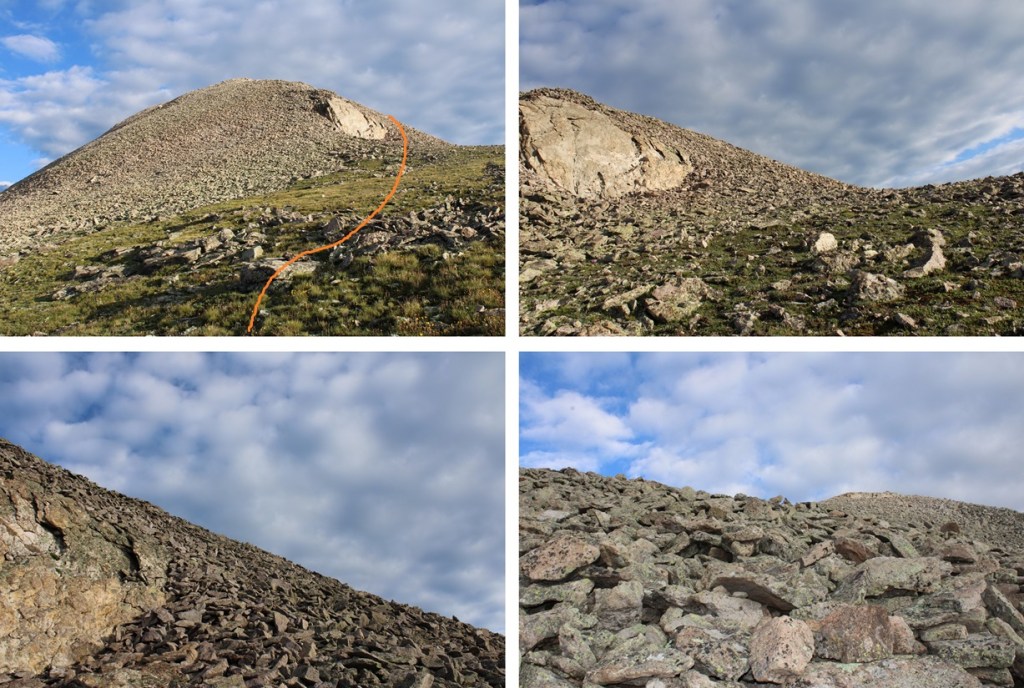
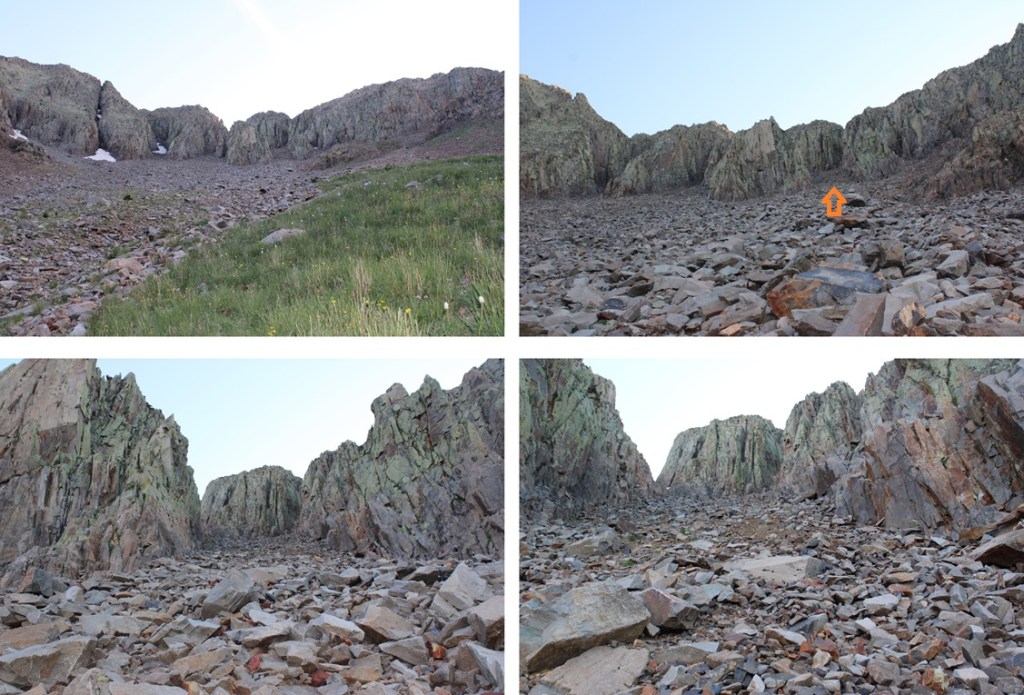
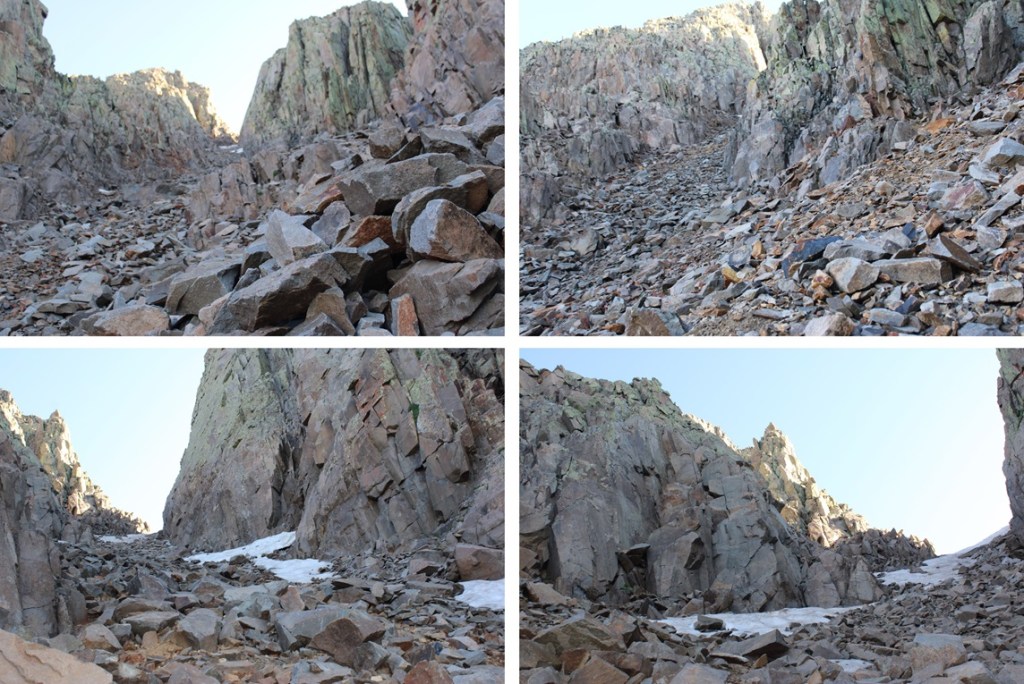
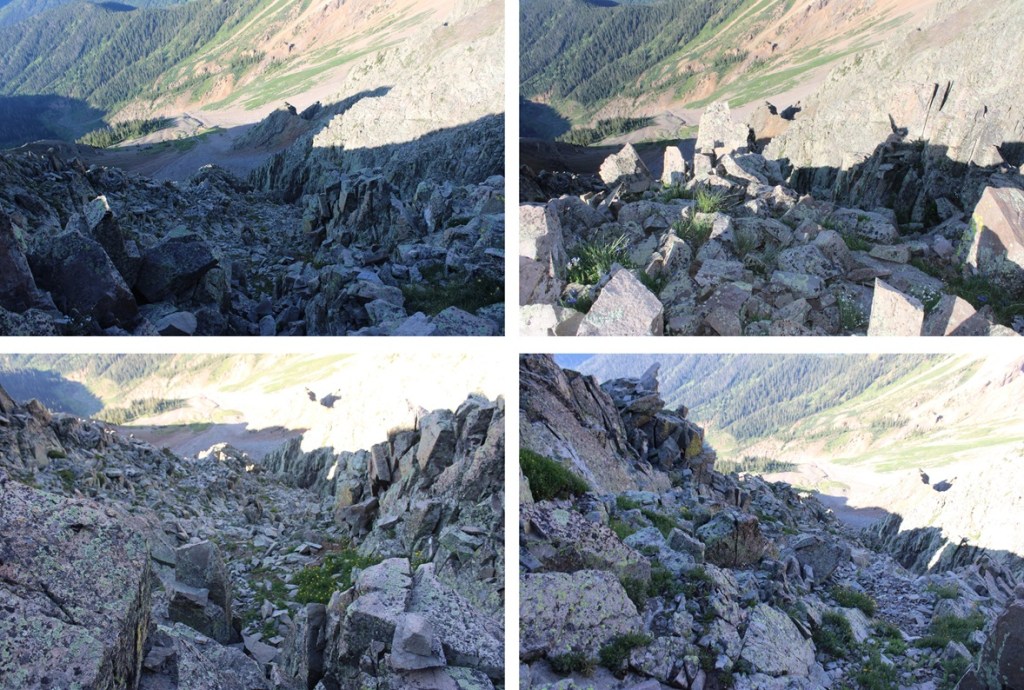
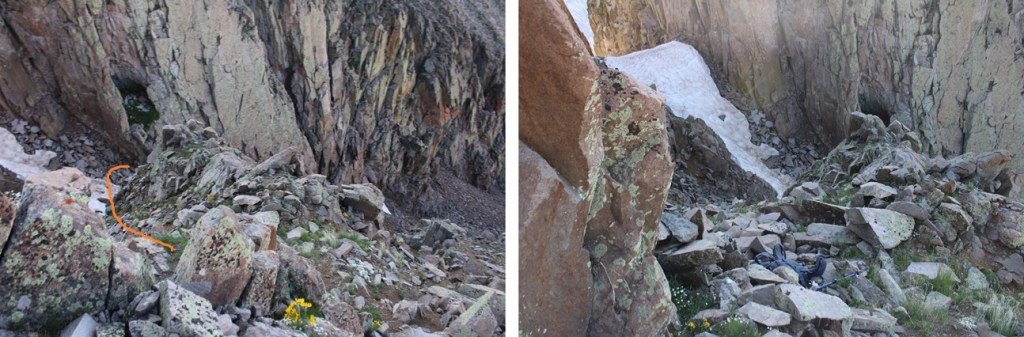
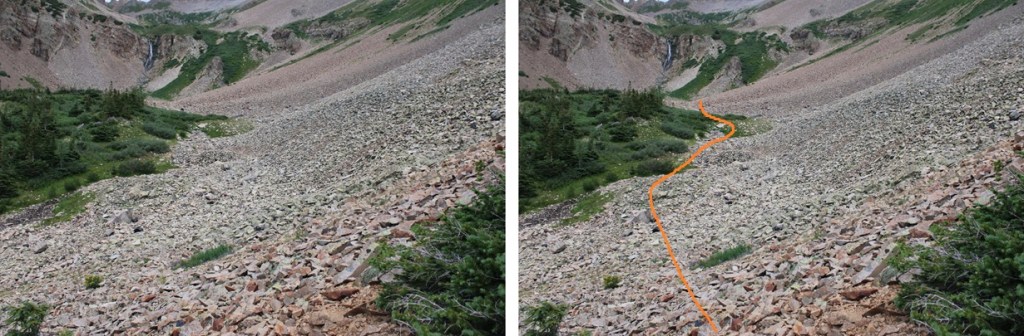
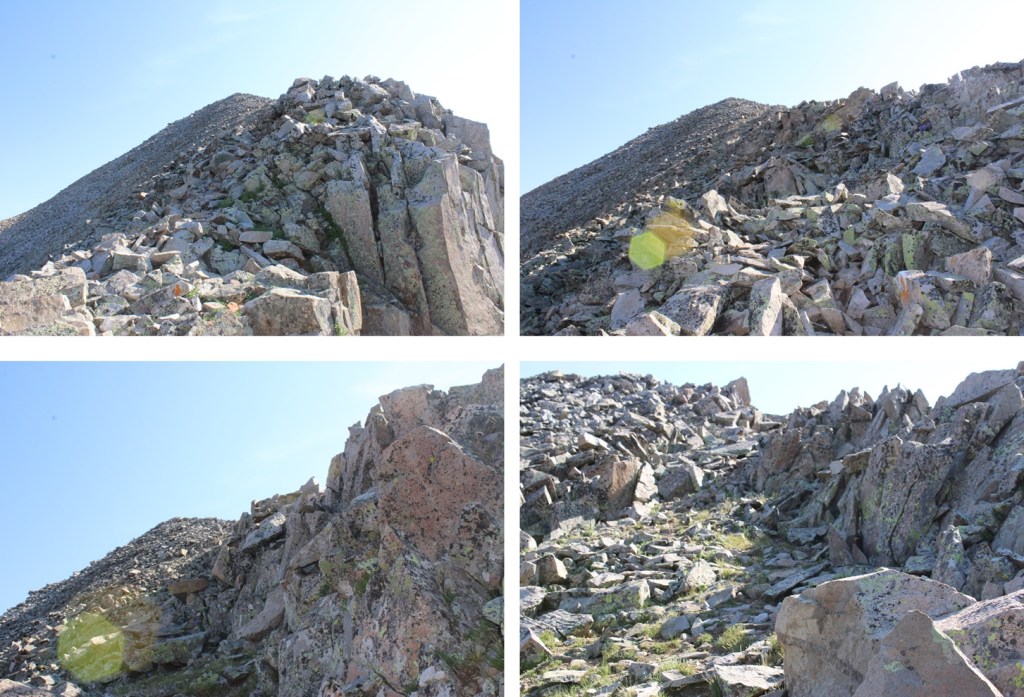
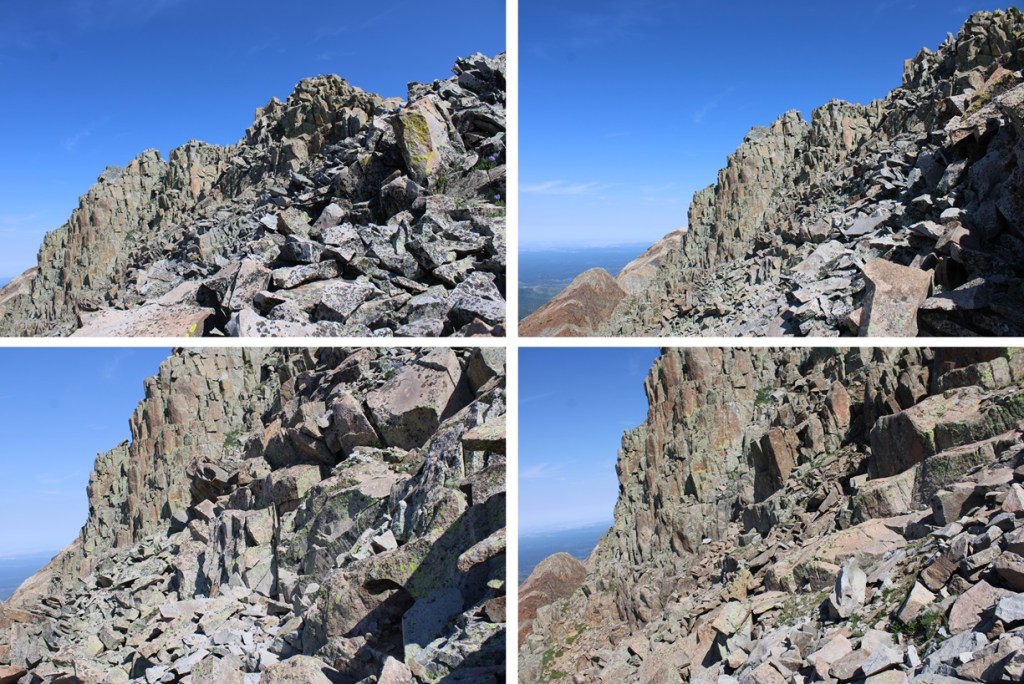
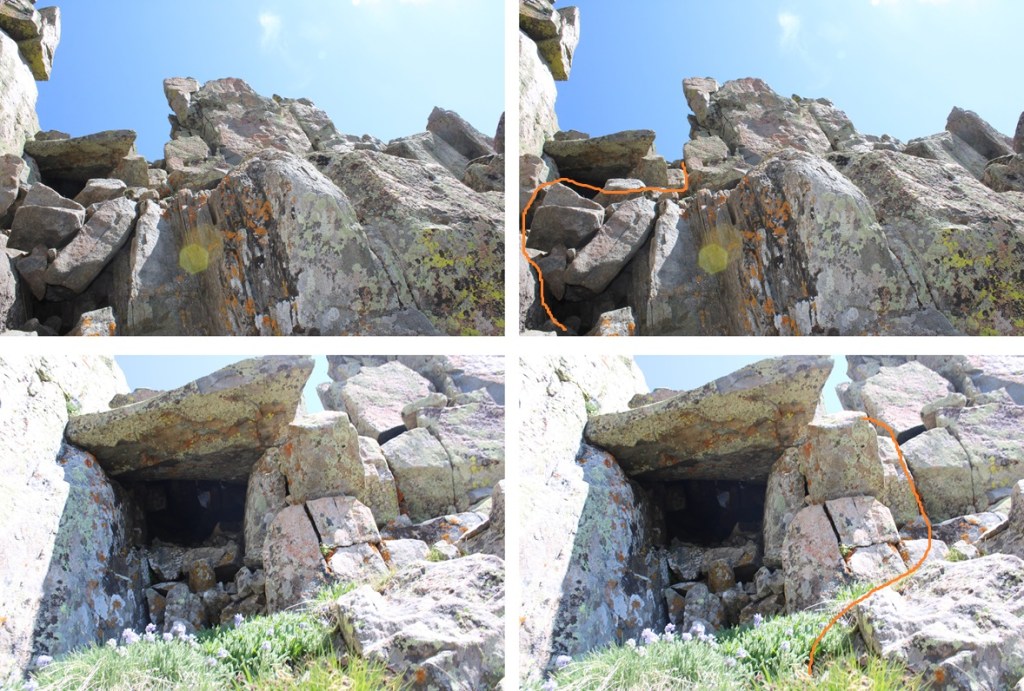
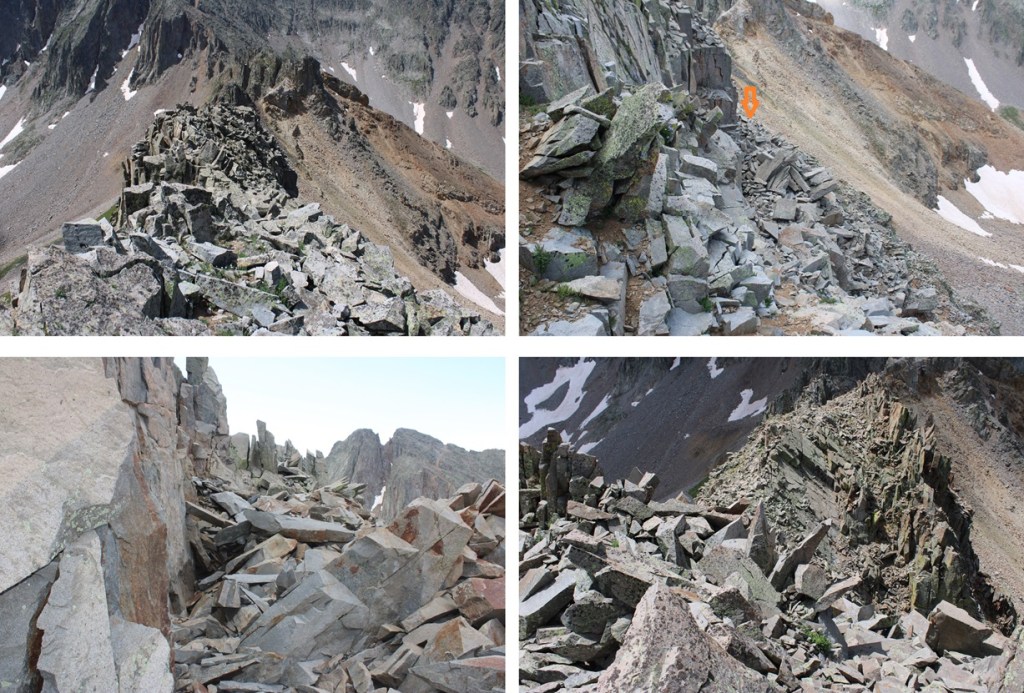
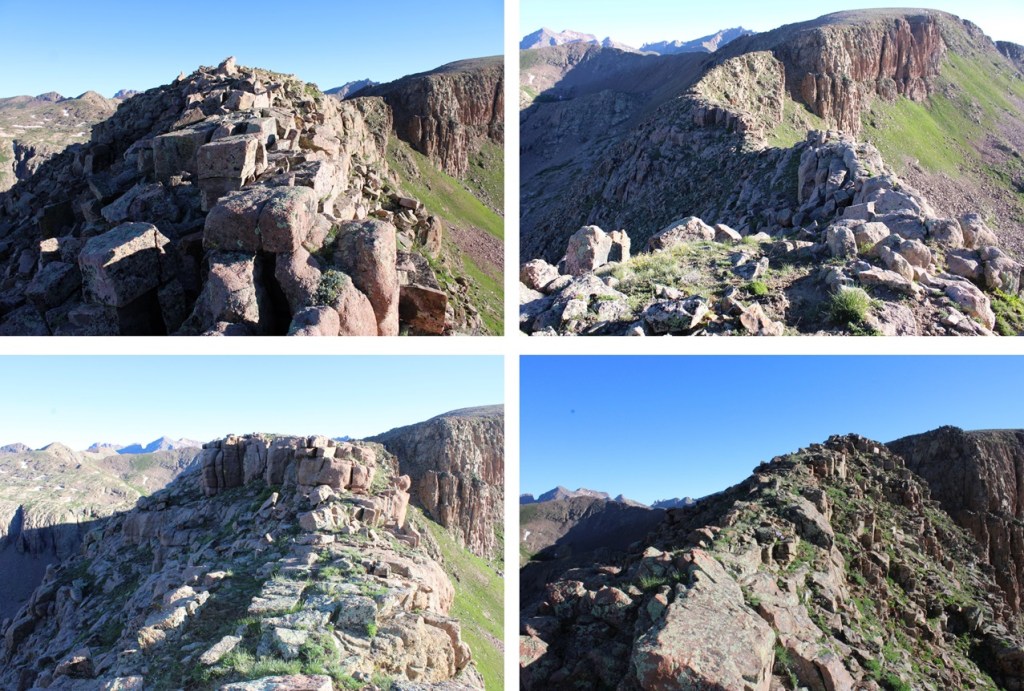
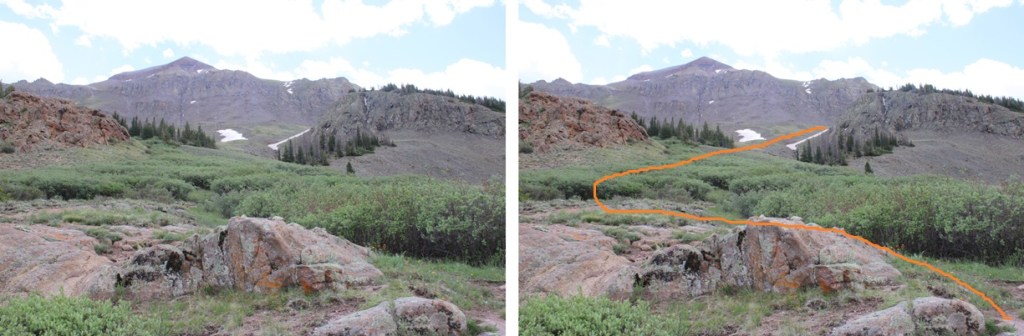
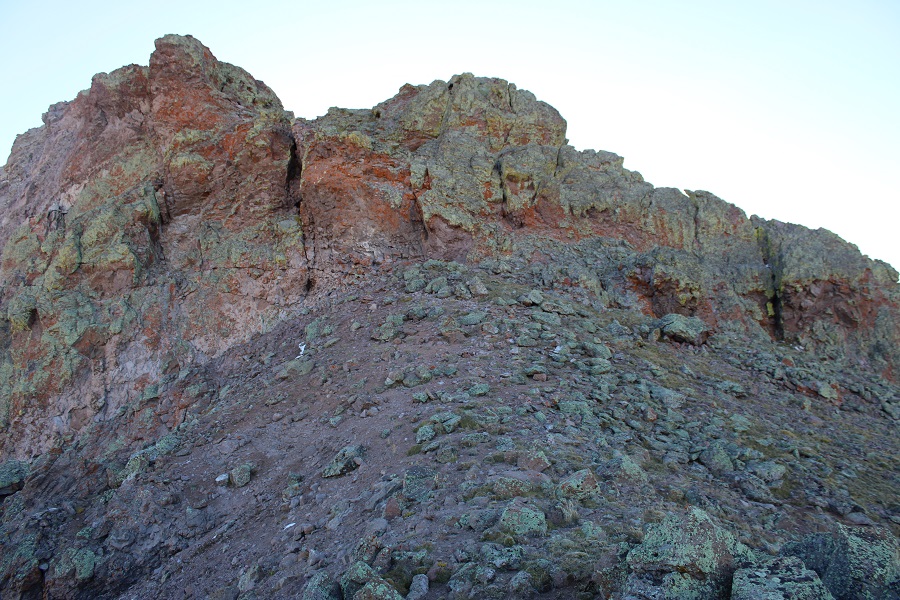
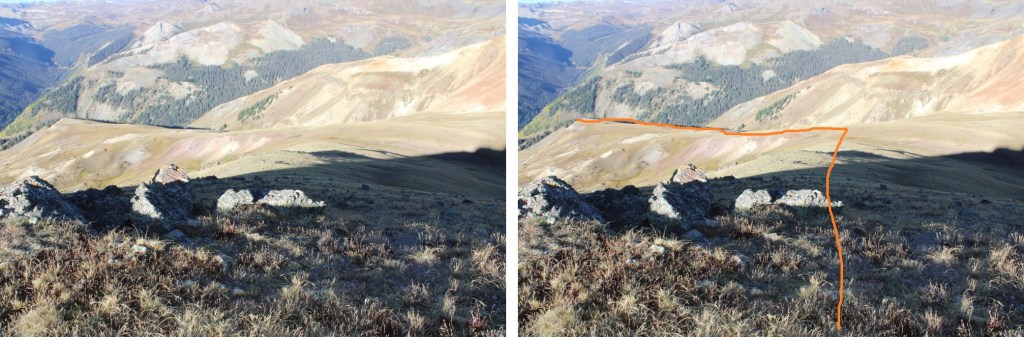
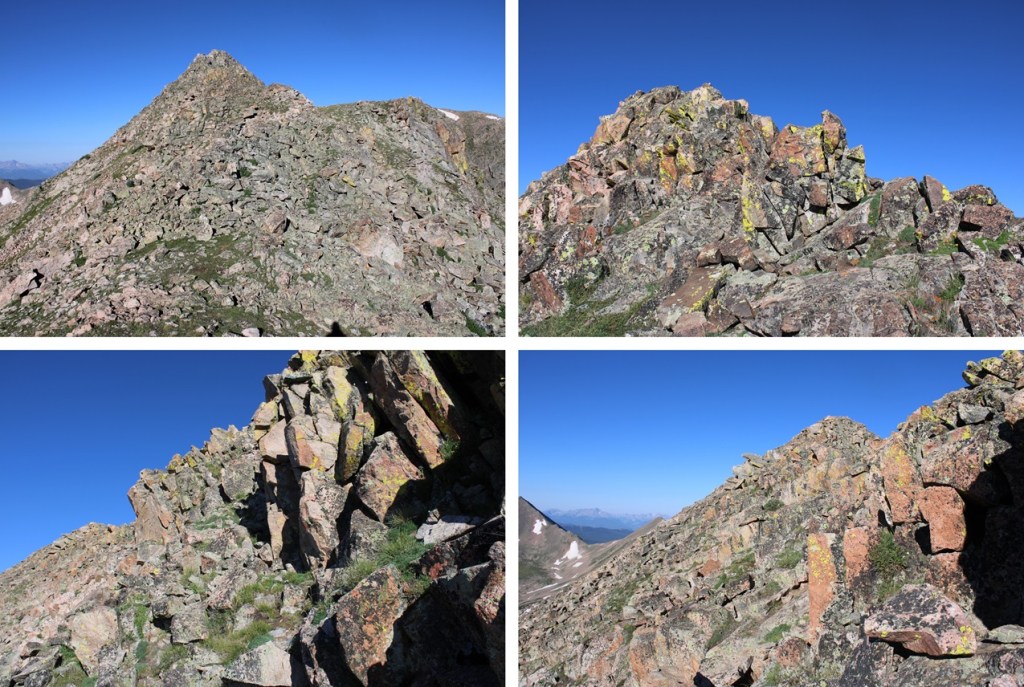
Now the real fun begins.  There are several more gullies to navigate, but luckily here, I found a few cairns.  Once again, I stayed to the left of the ridge.  I kept wanting to head back to the ridge, but found the gullies and large rock outcroppings kept keeping me about 50 feet below the ridge proper, so every time I’d make it to the ridge, another gully or rock outcropping would pop up and I’d have to descend again.  Here are some pictures of my route along the ridge (red circles are cairns).

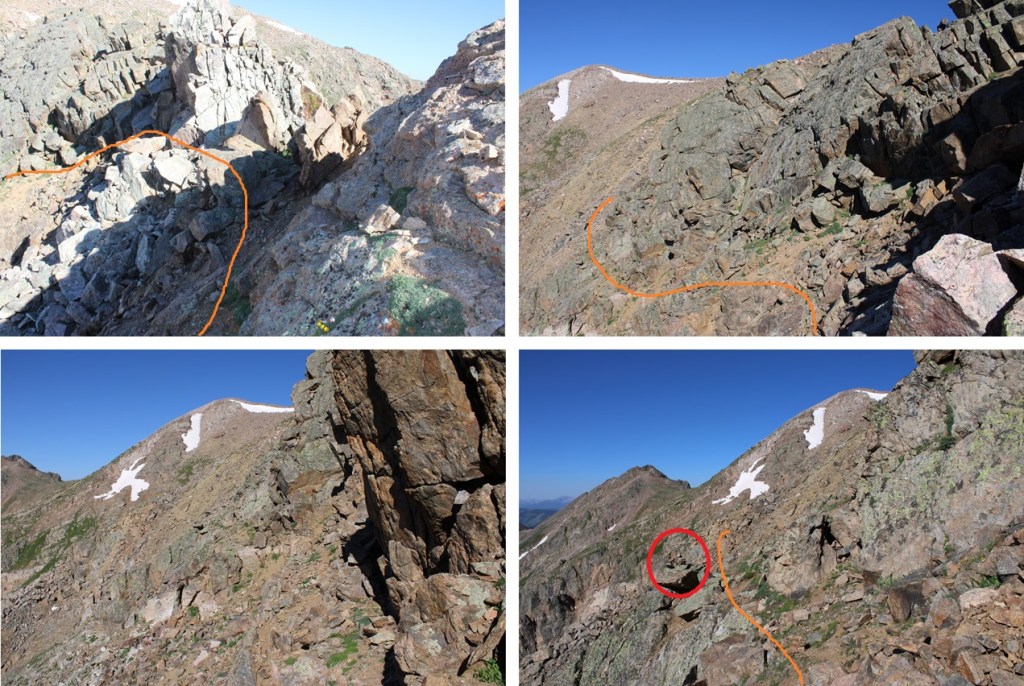
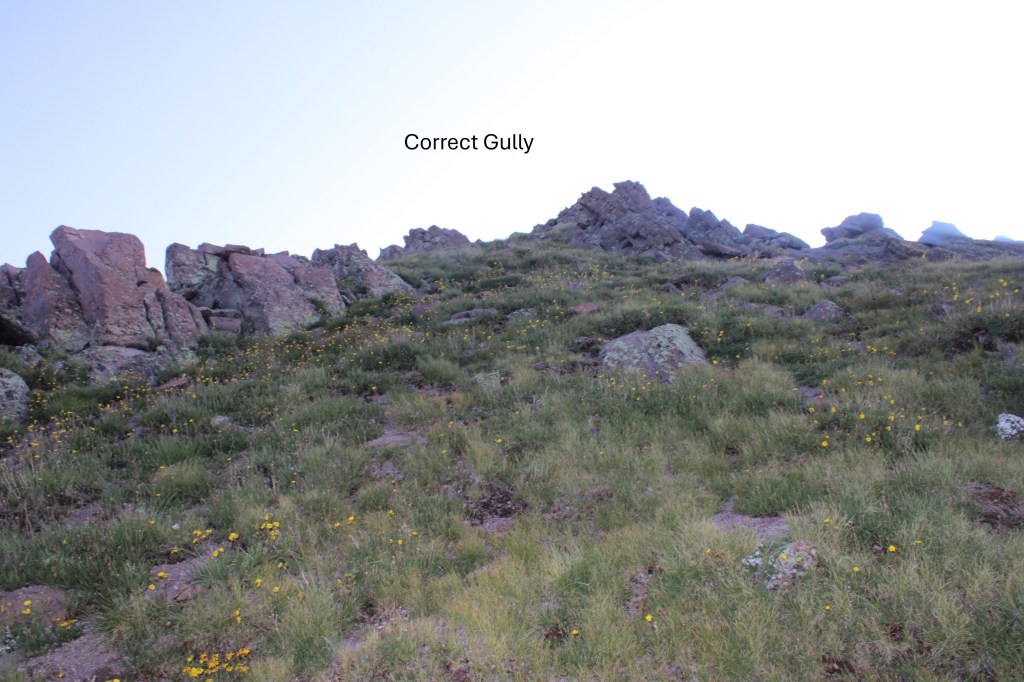
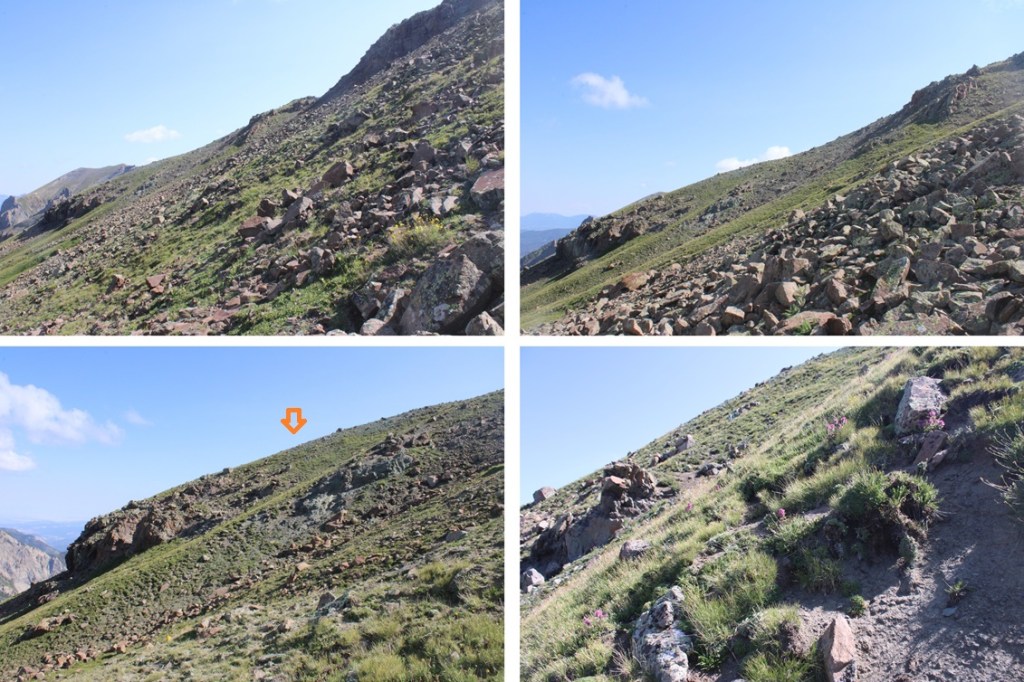
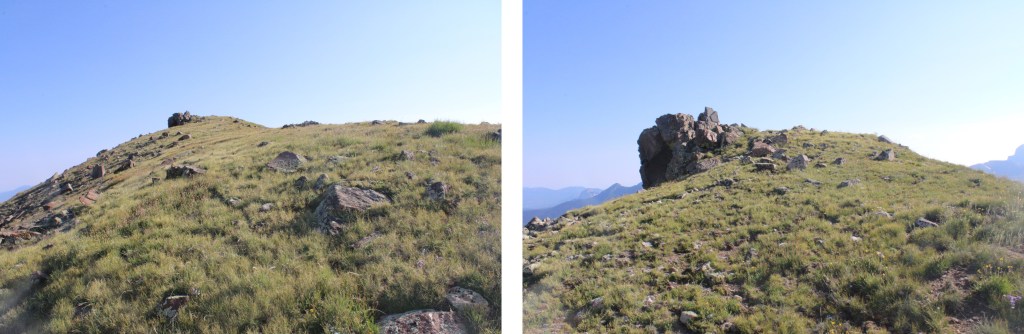
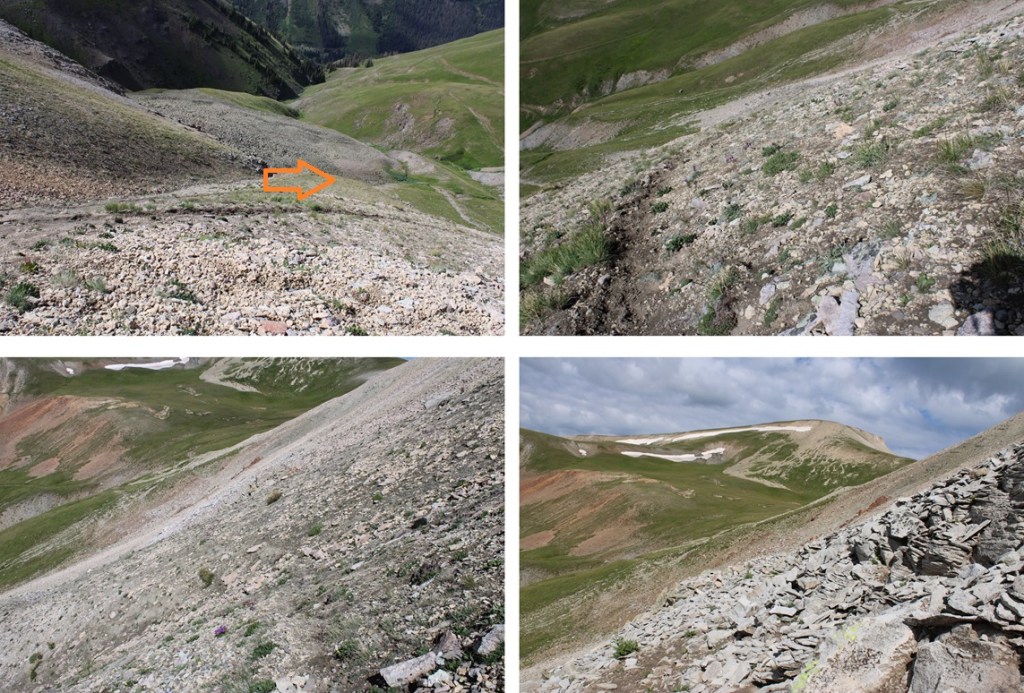
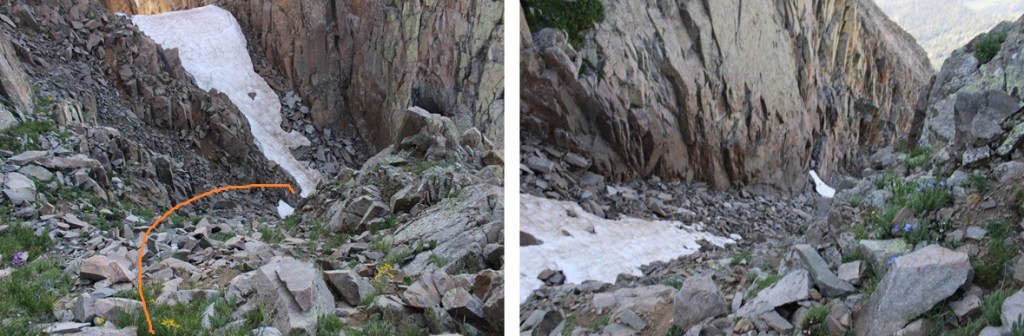
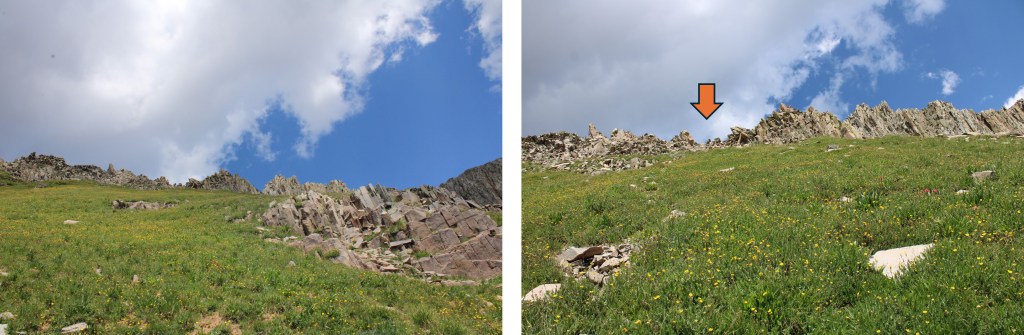
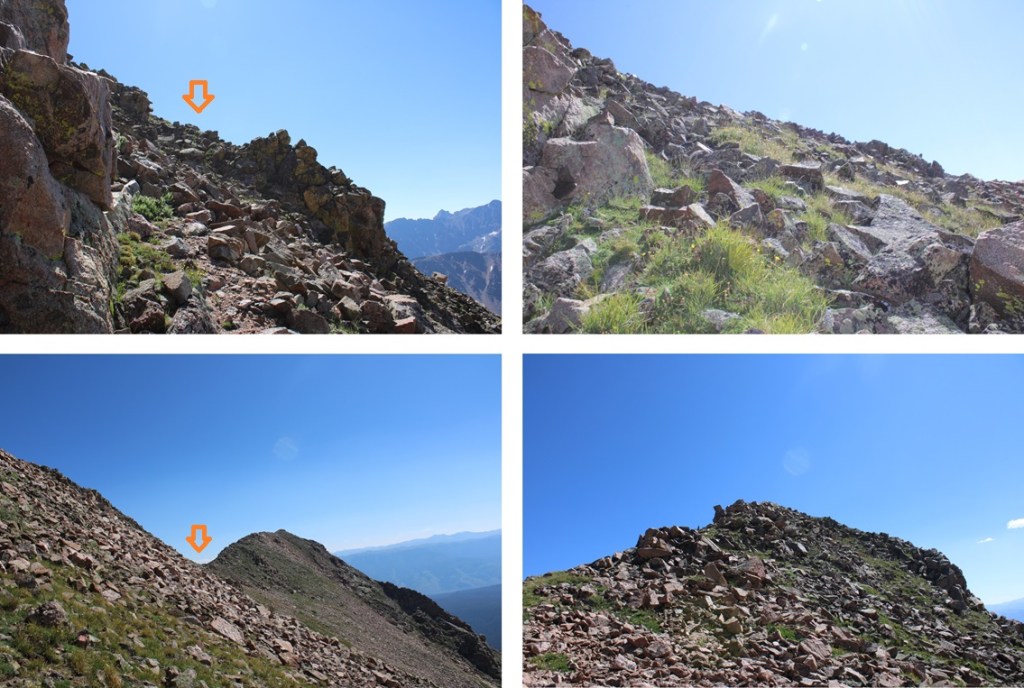
Here’s a picture of the final gully, the only one filled with scree.  You’ll see a cairn off in the distance here on the tundra ahead of you on the hillside, but don’t aim for it (circled in red).  Go around the rock outcropping and ascend the gully instead.  It keeps you from some sketchy stuff below. 

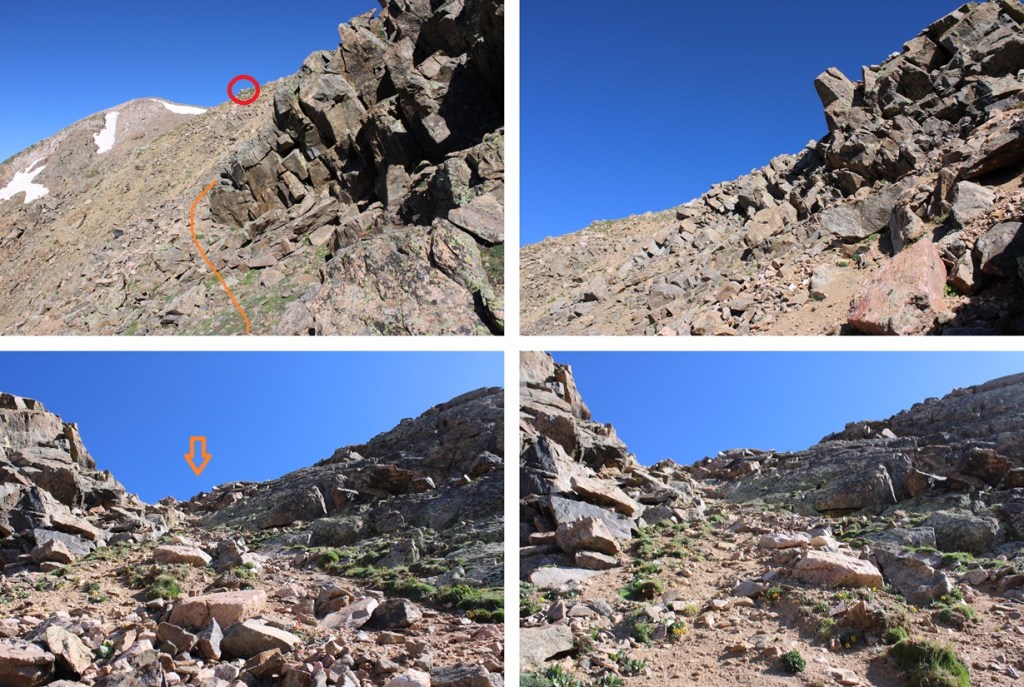
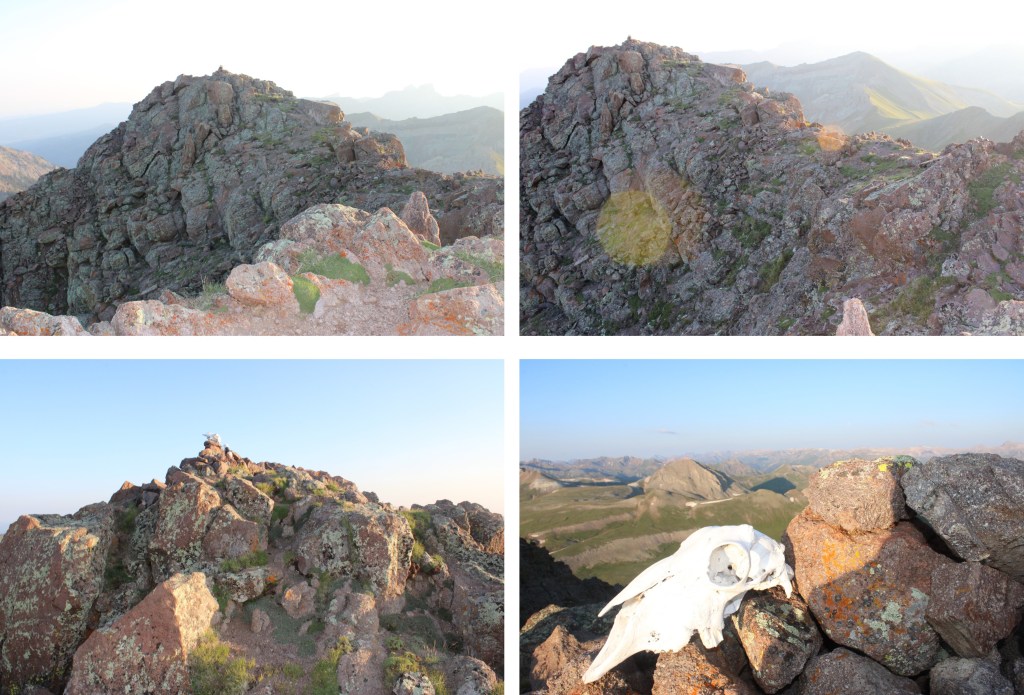
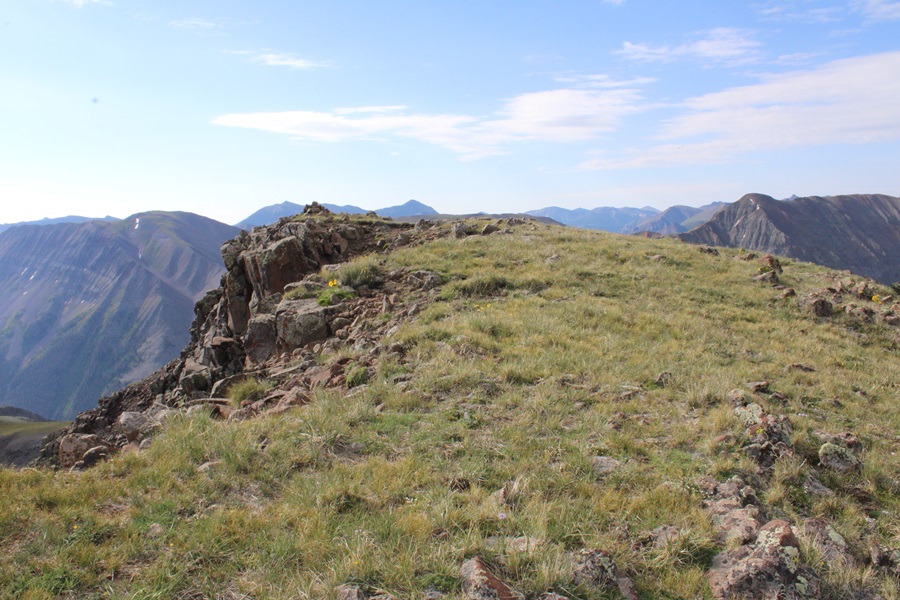
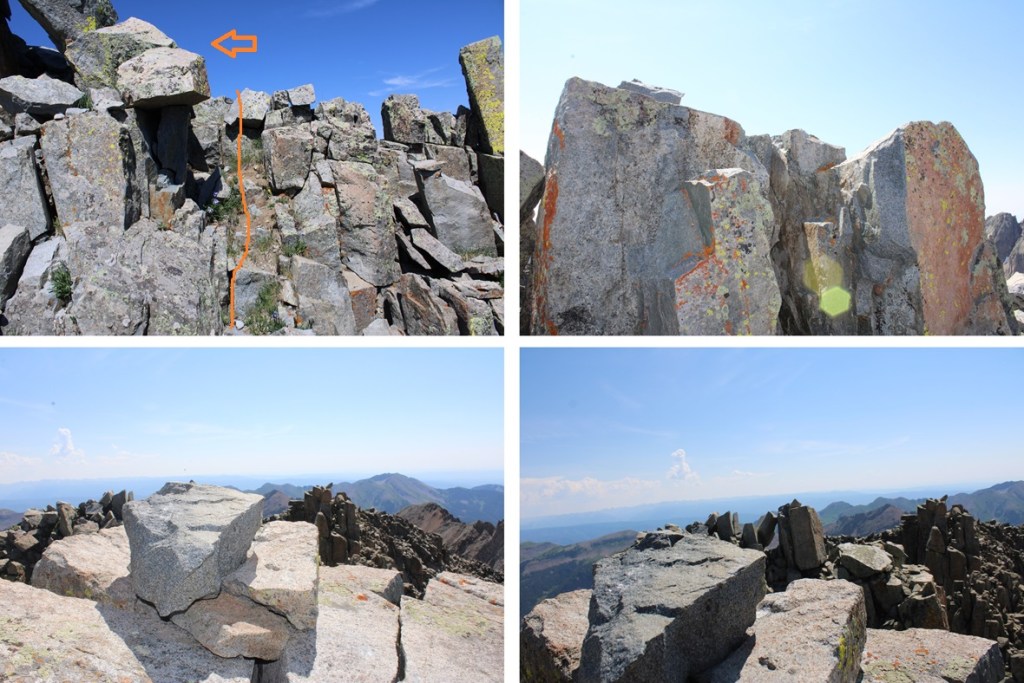
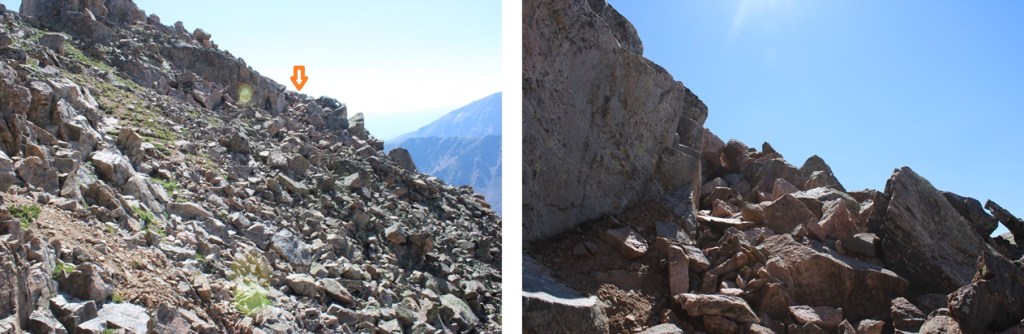
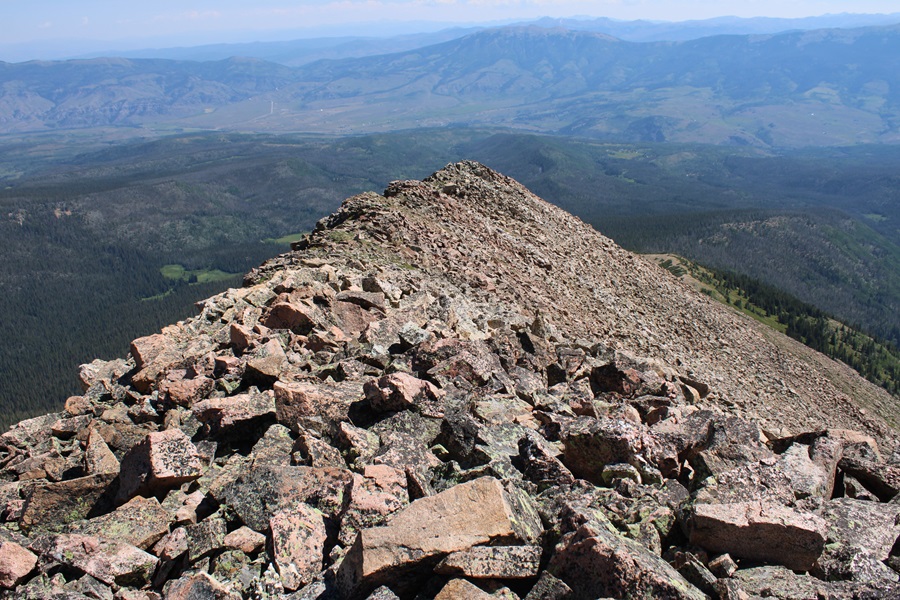
At the top of this last gully I turned left, and followed the ridge west, and then southwest to the summit of Keller Mountain.  This part was all class 2.  There was no summit cairn, but there was a summit register here

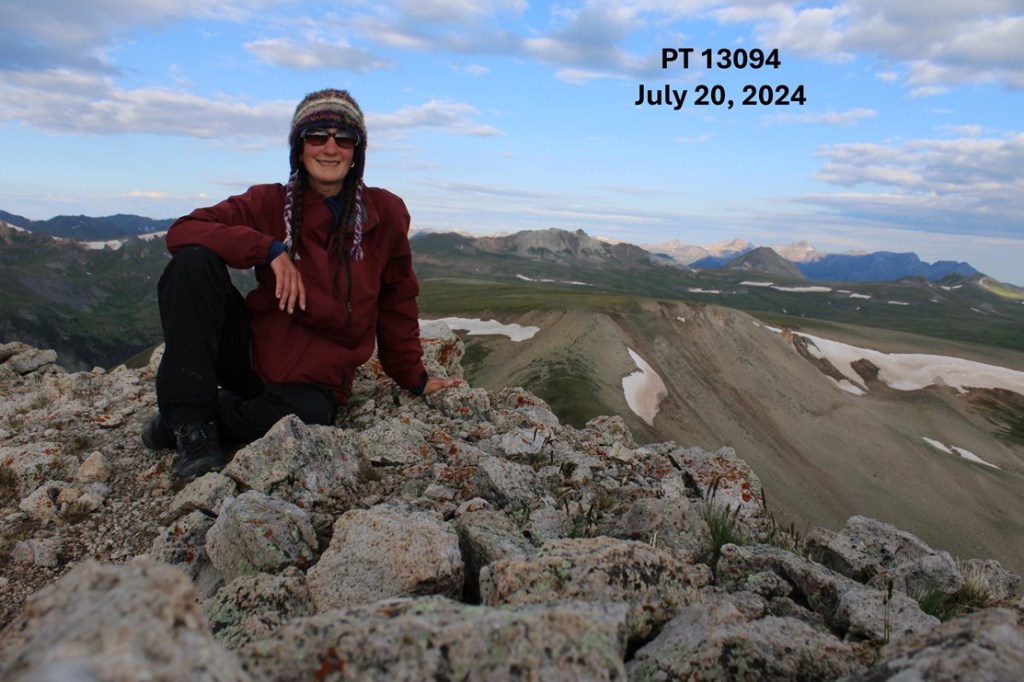
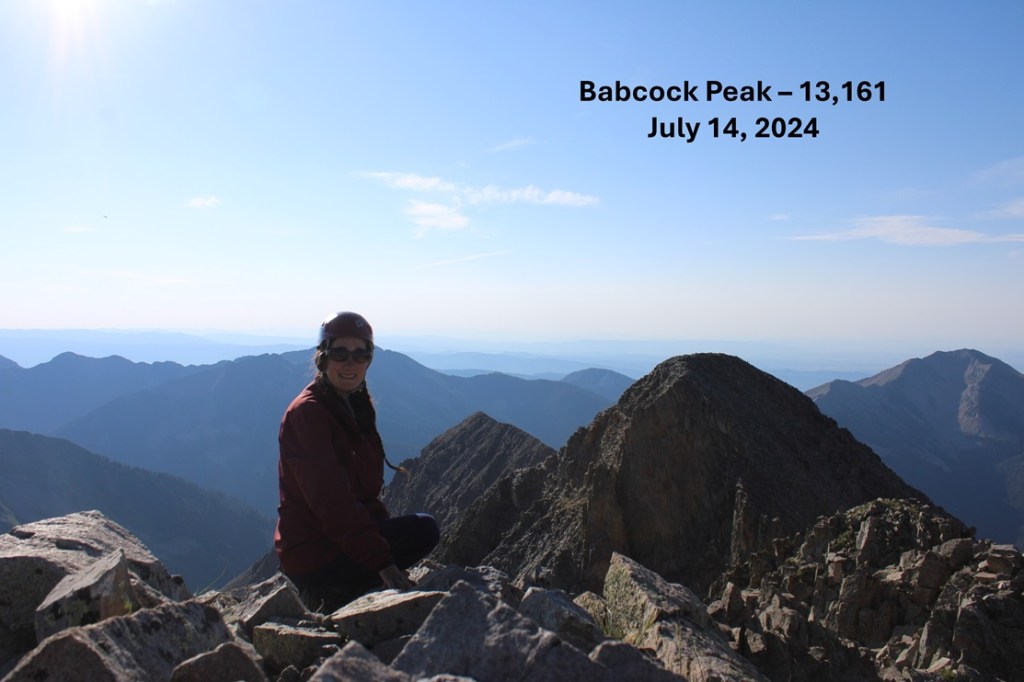
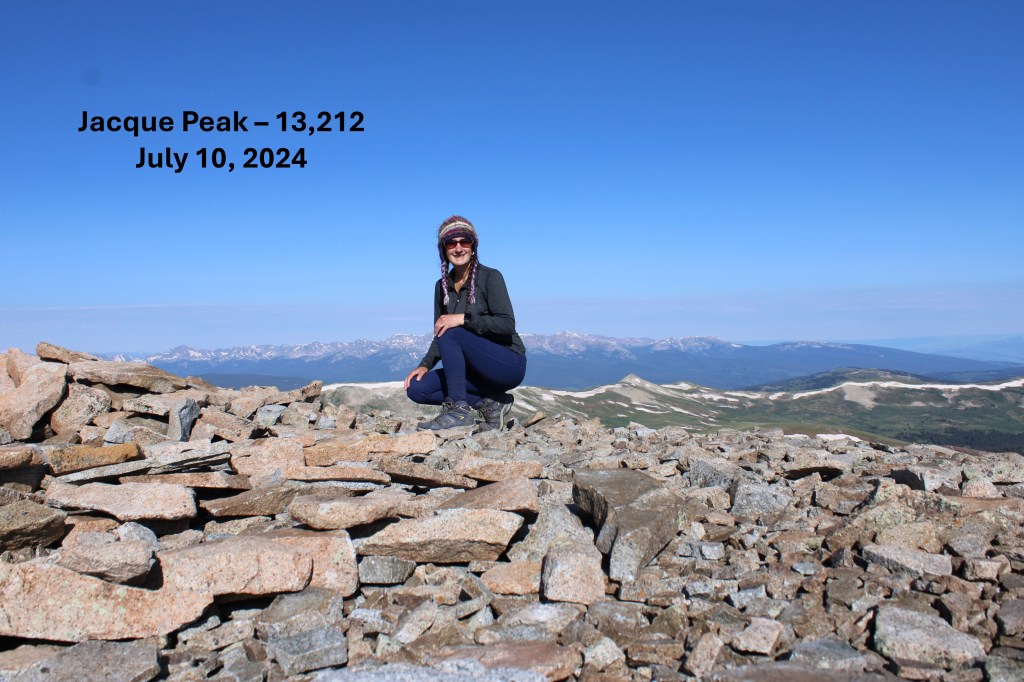
I summited Keller Mountain at 9:15am
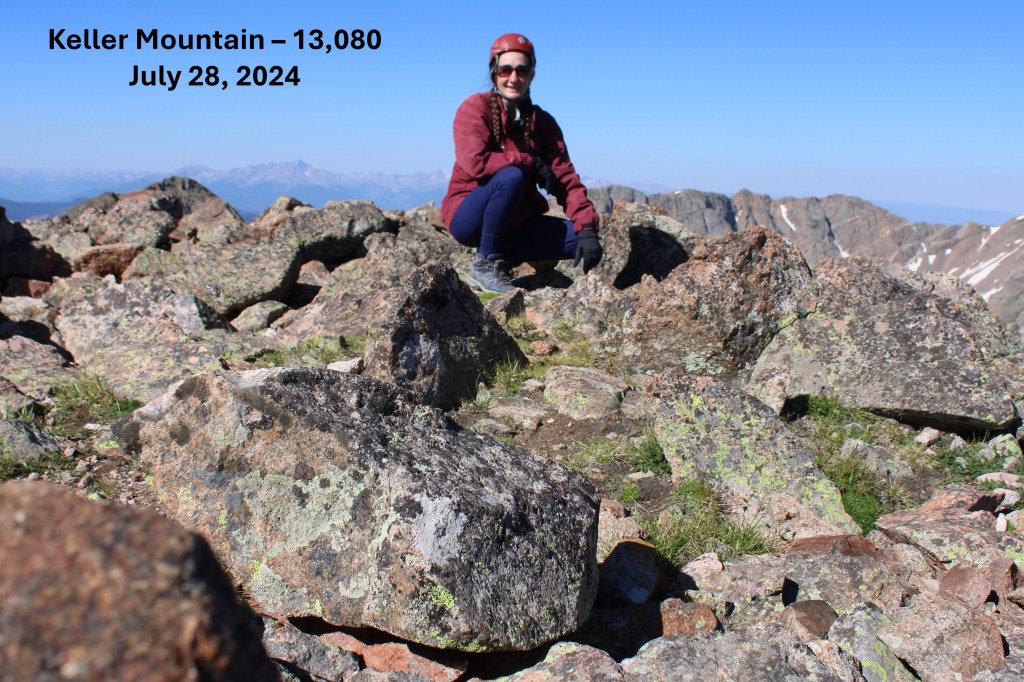
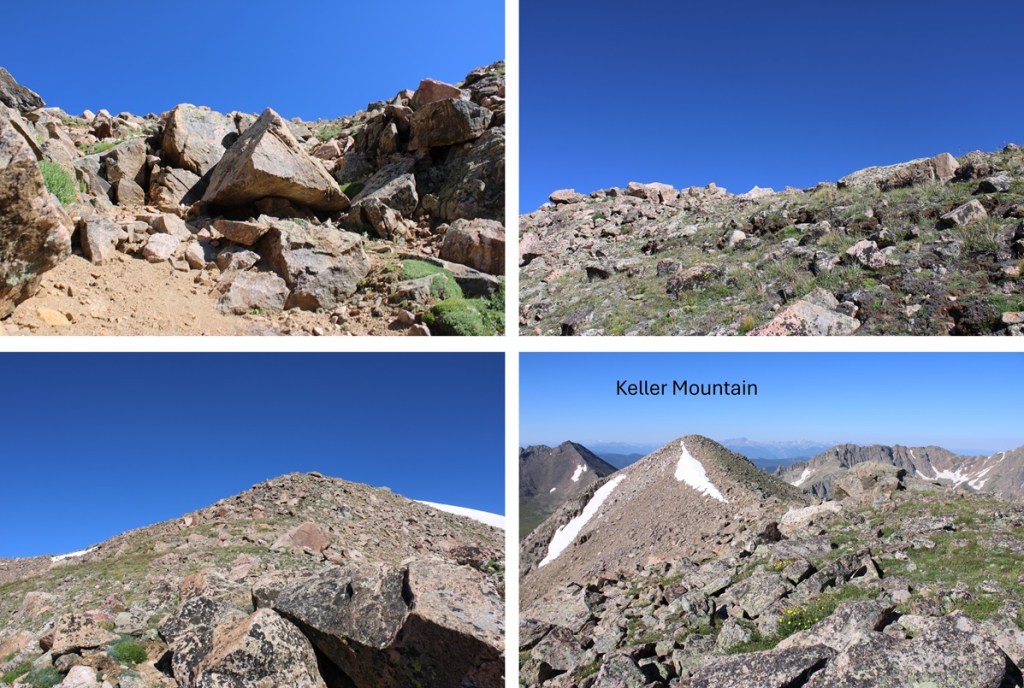
Keller Mountain:

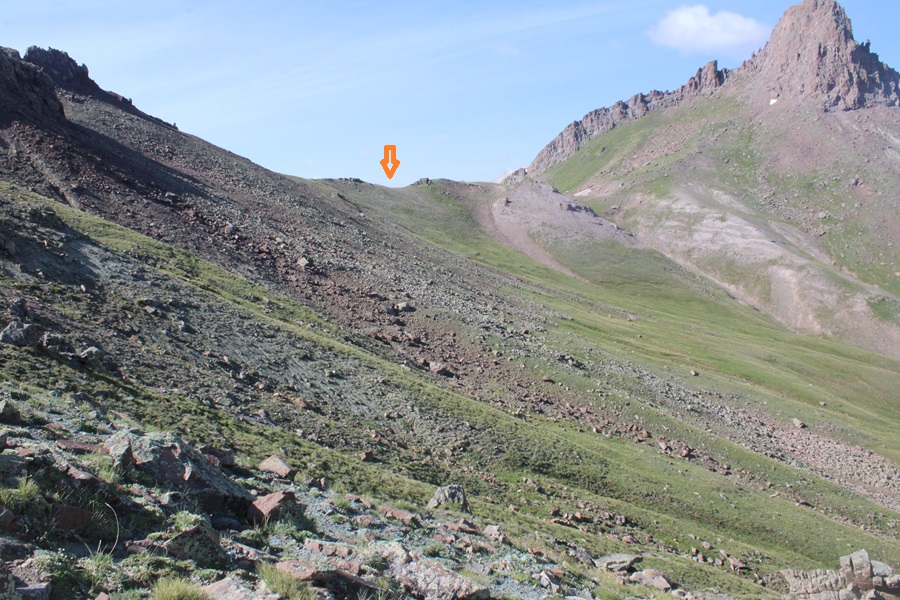
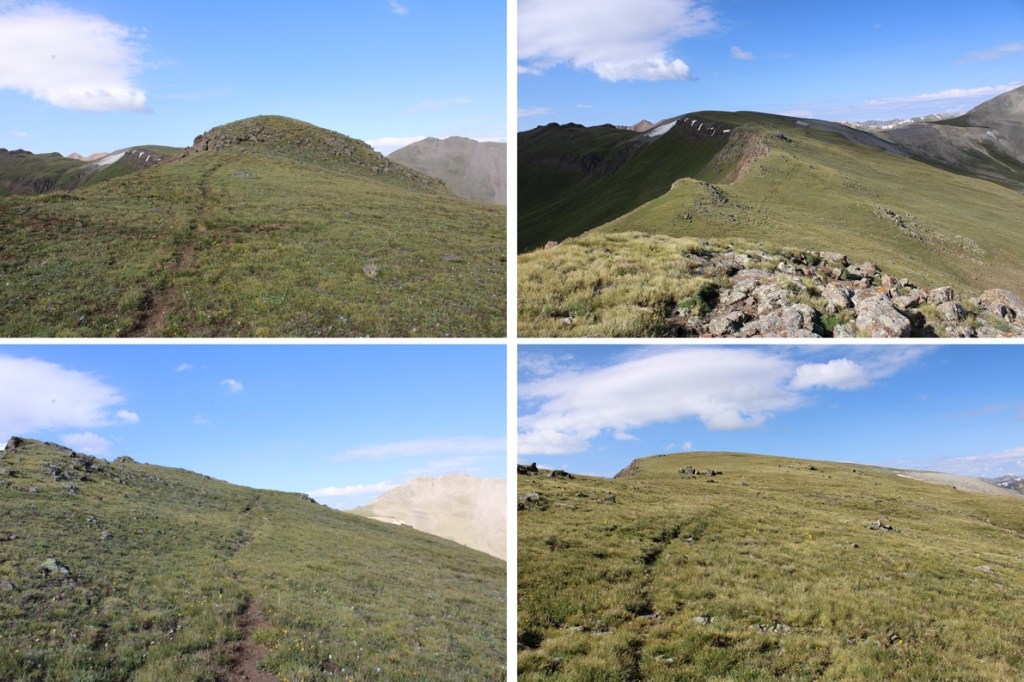
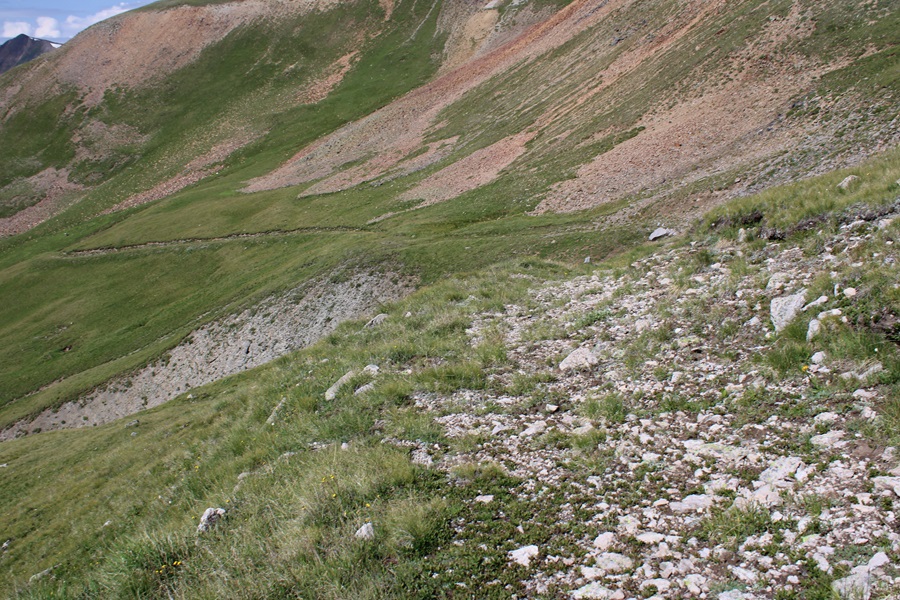
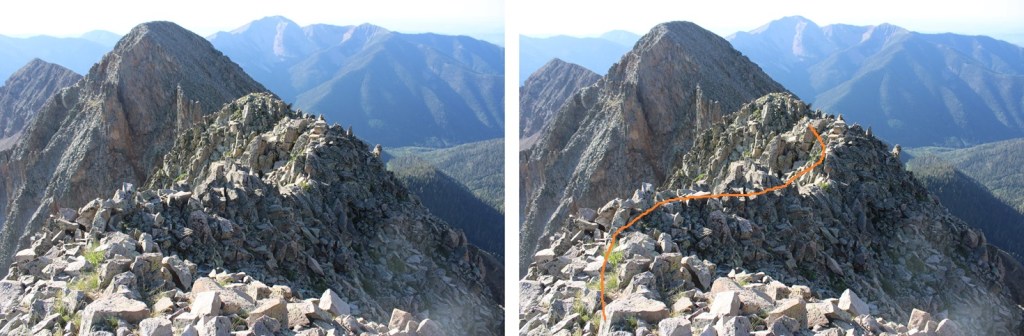
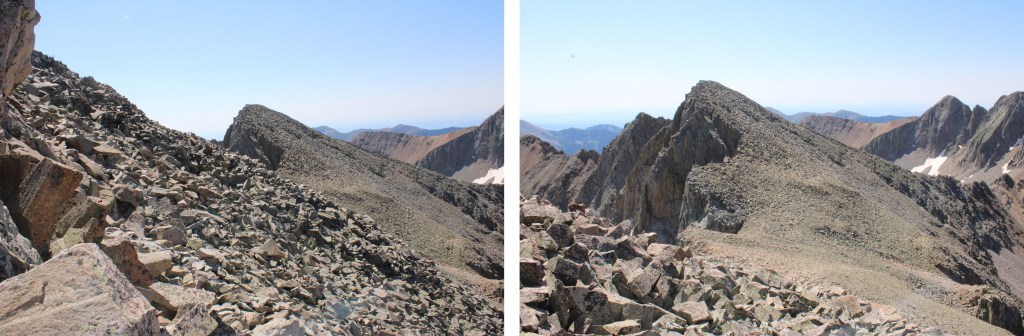
Here’s a look back at that ridge, and the route I took to get to the summit.  Notice how you don’t want to dip too low on the ridge, due to the chasm below.

This was an out and back hike for me, so I headed back to the false summit, and descended the ridge back to the gullies

By now I’d had enough of this fun ridge route finding and decided to stay at 12750’ and skirt this part of the ridge, keeping the rest of the hike class 2.

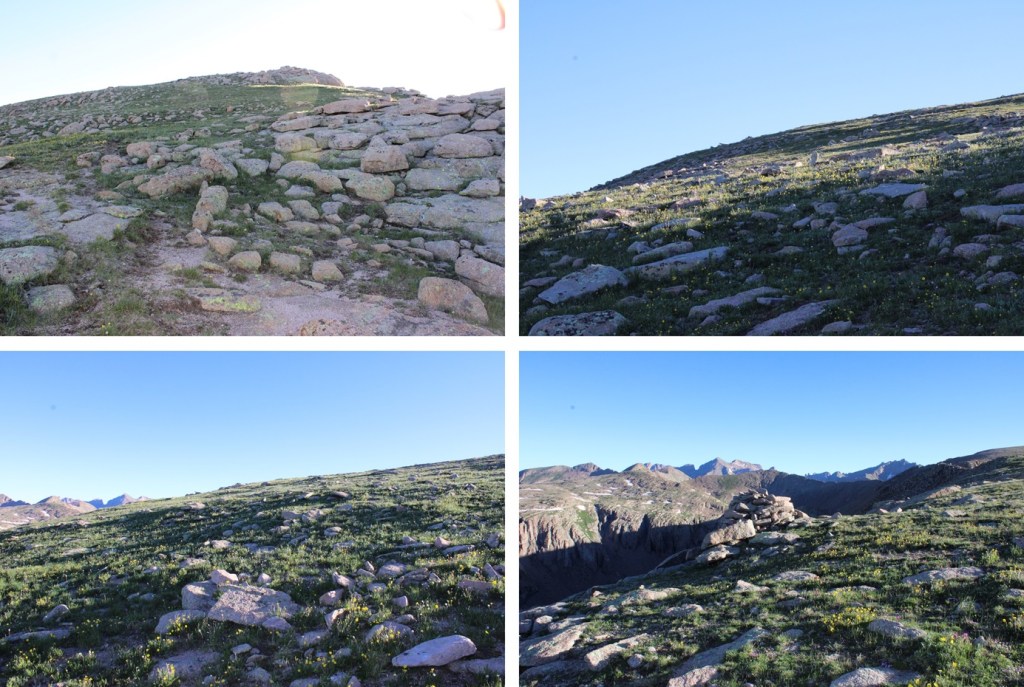
Back on the ridge, I followed it to the top of PT 12847

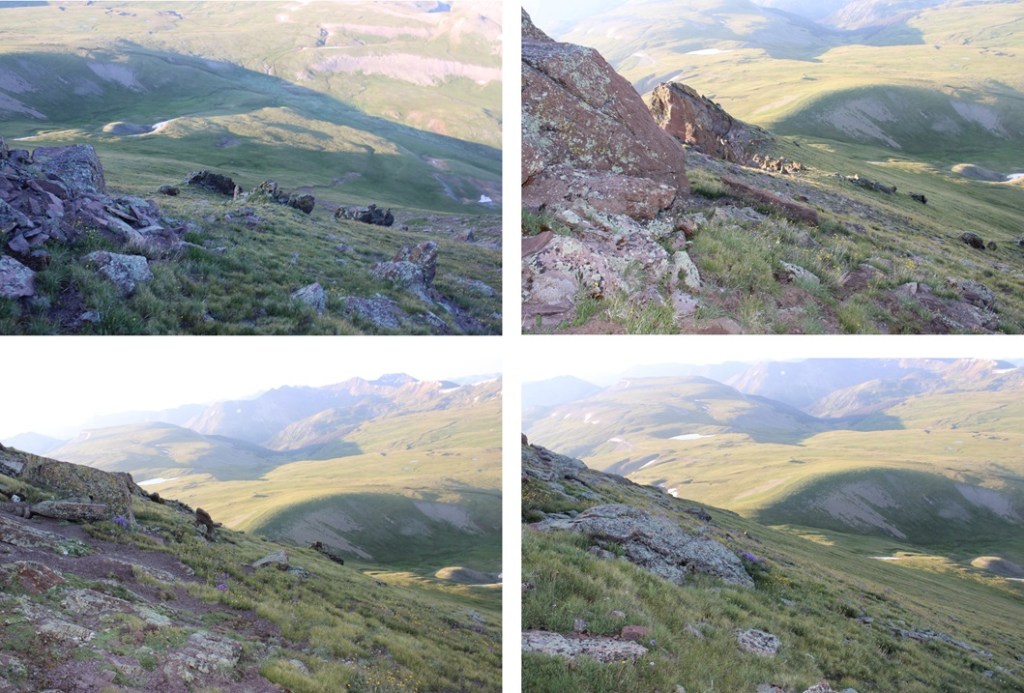
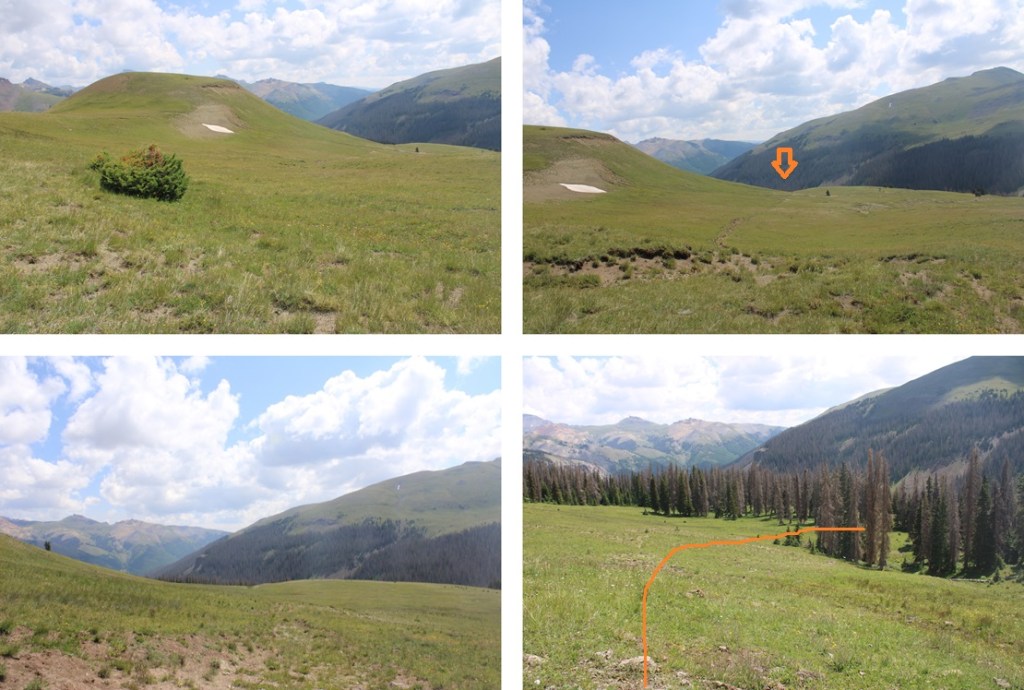
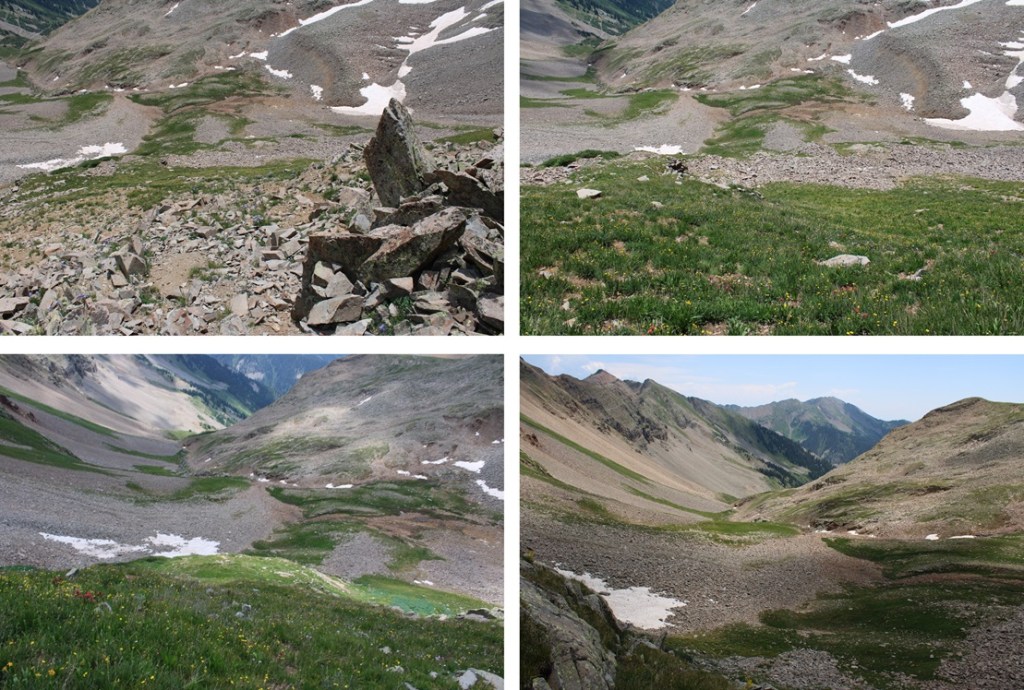
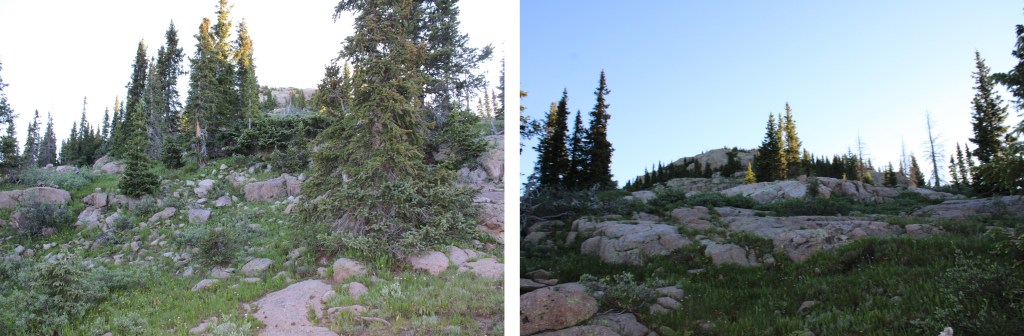
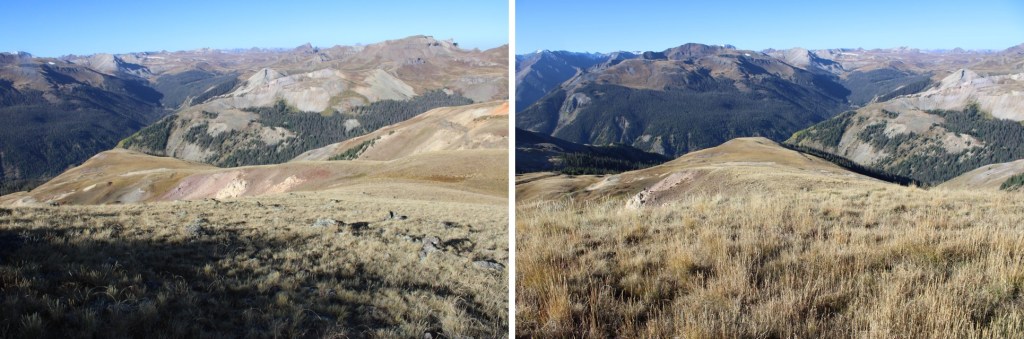
And then back down to treeline

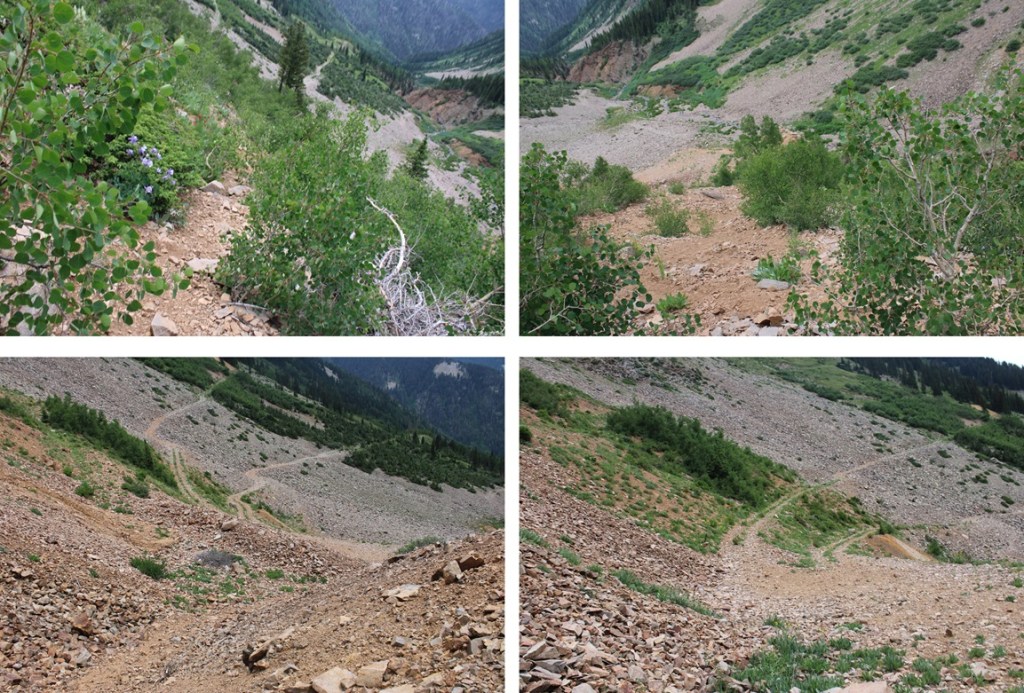
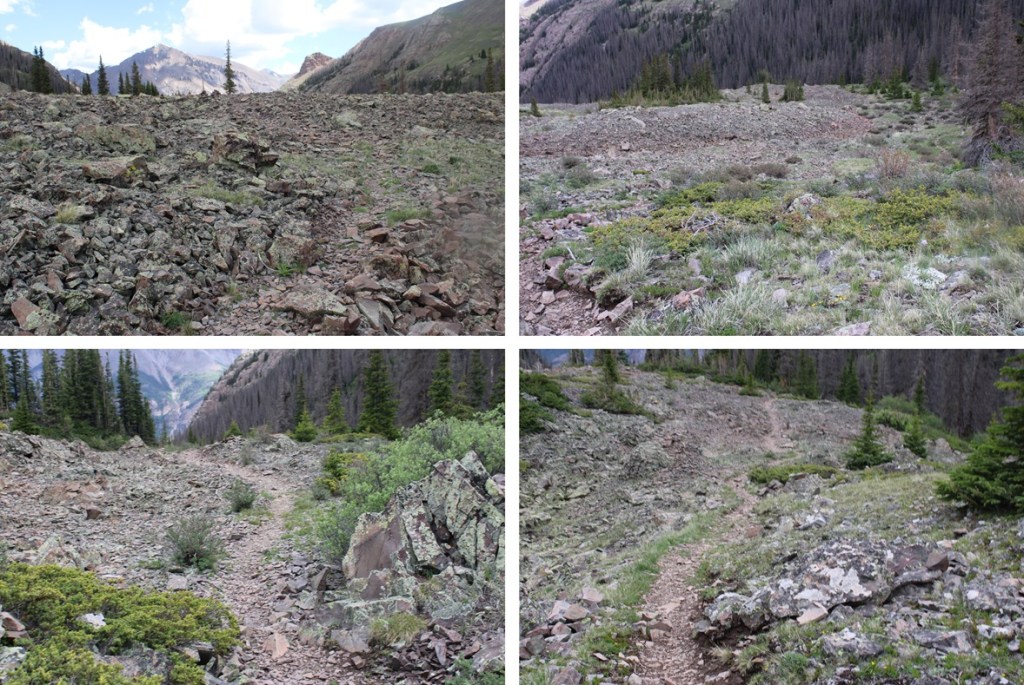
Once at treeline, I followed the ridge northeast until I came back to the game trail, then followed the game trail to 10900’

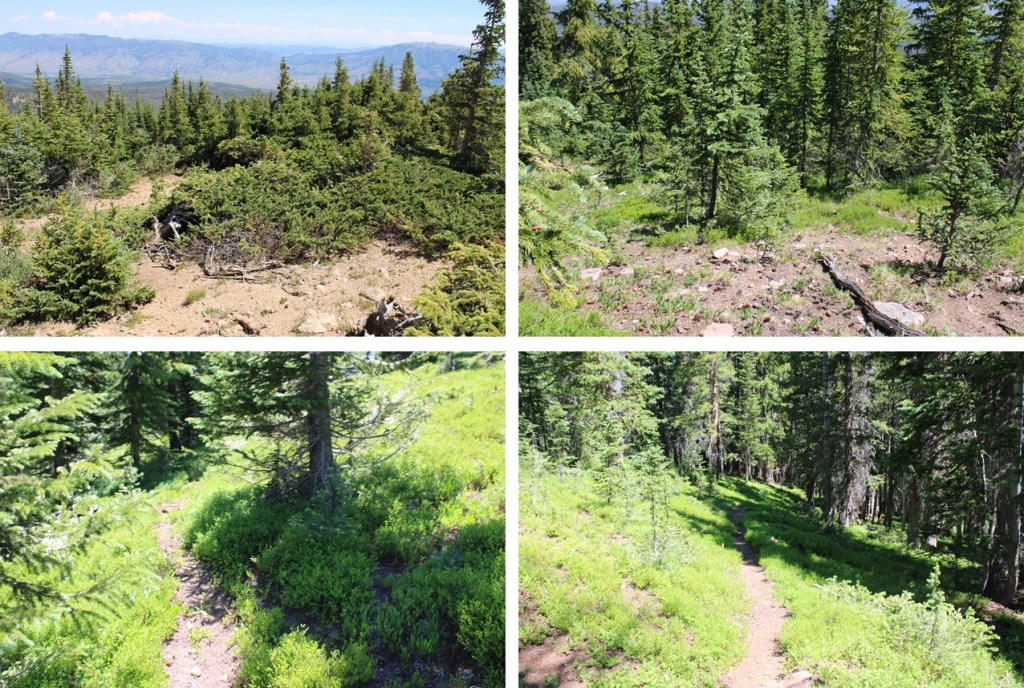
At 10900’ I turned and headed southeast down the hillside, aiming for the North Rock Trail No 46 I knew would be below, bushwhacking through grass taller than I was and tons of downed trees. 

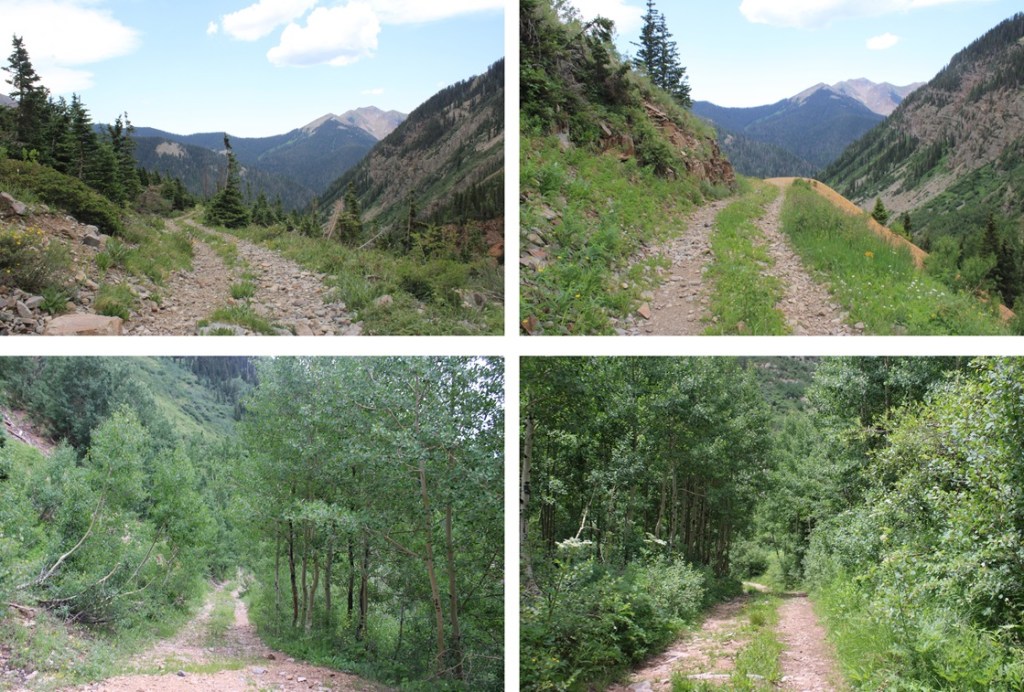
Back on the trail, I turned left and followed it just over 2 miles east/northeast back to the trailhead.

I made it back to the trailhead at 12:30pm, making this an 11.89 mile hike with 4086’ of elevation gain in 7 hours.

On to the next trailhead!

Wildhorse Peak – 13,271 and Blackwall Mountain – 13,077

RT Length:  12.45 miles

Elevation Gain:  3722’

I took CR 20 out of Lake City, turned right at the North Henson road near Capitol City, and parked off 870 at 11200’ at an unnamed trailhead with parking spots for 4 or 5 vehicles.  This is also where the porcupine and marmot and pine marten chewed my wires last week, so make sure your vehicle is rat taped.  Click here if you want to see pictures of the damage done to my vehicle last week.

I was up and on the trail at 4:30am. 

This trail starts out easy to find and easy to follow.  I followed this trail for half a mile, until I made it to a gulch just below treeline

Once here, I turned right and ascended this small ridge.  It doesn’t matter where you ascend, this whole area will get you to the right area.   There are several drainages you can use to ascend.

Once on top of this little ridge I was headed west, through treeline. 

This is a big meadow.  Just keep heading west, towards these two small trees.  The trail here looks like a drainage ditch.  If you see a ditch heading west, follow it.

At the top of this ridge I turned left, and found a game trail that would take me west, towards American Flats.

Here the trail got ‘iffy’, as it turned into a kind of mining road that hasn’t been used in several decades.  I followed it as I passed American Lake to my left.  After hiking for a total of just over 3 miles, and at around 12290’ of elevation, I left the trail to head northwest towards the saddle of Wildhorse Peak. 

There was no trail, but the route was obvious on rolling tundra.  I kept heading for the base of Wildhorse Peak.

Here are a couple of views of my route up to the summit of Wildhorse Peak.  This is a choose your own adventure kind of hike.  I chose to stick to the ridge as much as possible. 

I started out by heading northwest up the tundra.  Most of this hike is on tundra, and it’s all class 2.  If you find yourself in class 3 territory, you’re making it too difficult. 

As you near the top, you’ll come to a couple of gullies.  DO NOT take the rocky one (the first one your come to).  Well, you can, but you’re making the hike more difficult than you need to.

Instead, head a little further northwest along the ridge and ascend on the tundra. 

This will lead you to almost the summit, which is rocky.  The true summit is to the left, on an airy but class 2 catwalk to the summit.  Also, there was a skull on the summit

I summited Wildhorse Peak at 6:45am

Wildhorse Peak:

The early morning light and a dirty camera don’t do this picture justice, but I could see Blackwall Mountain to the northeast.  From above, this was my overall route to get there.

First, to descend back the way I’d come, making my way back towards the saddle. 

When I was almost to the saddle I noticed a gully to my left that still had snow in it, but was easy to downclimb.  I downclimbed this gully (no, not the upper gully, but the lower one), and headed north towards a saddle.

Looking back, you can see the gully I downclimbed.  There is an upper one you can downclimb as well, but when I looked down it, it looked like slick rocks covered in kitty litter, and I didn’t think it was worth the effort.

Next, I was headed here, to this small dip in the ridge

I turned left, and headed north, to the saddle

This is choose your own adventure, but I tried to stay level at 12630’ to re-gain the ridge.  I went to the right of the large rock outcropping

I could see Blackwall ahead of me and walked to the saddle.

Now I turned right, and descended 400’ into the basin

Instead of ascending via the rock rubble, I decided to take a grassy gully instead.  I had to descend a little more than I would have liked, but the easier terrain made up for the loss in elevation. From the bottom of the gully to the summit of Blackwall I gained 791’ of elevation in half a mile.

Just as I was nearing the top of the gully, I saw a bear running around.  Of course, it was running away from me… It was a blonde black bear with dark socks.  Curious coloring for a black bear. 

Bear Video:

The true summit isn’t the large rock formations you’re seeing to your left, but rather just northeast of the grassy gully.  I ascended out of the gully to the right, and saw where I’m sure that bear had been sleeping overnight.  No scat or footprints in the area, but fur on the rocks. 

It was a short tundra walk to the true summit

I summited Blackwall Mountain at 8:45am

Blackwall Mountain:

Those were the only two peaks I planned on summiting today, so I made my way back much the same way I hiked in.  First down the gully

Then over to re-gain 400’ of elevation I’d lost to this saddle.

From the saddle, I headed southwest towards Wildhorse

Then crossed the upper basin, aiming for a game trail I could clearly see in the distance.

I turned right at the ridge, and aimed for the base of Wildhorse

Once there, I aimed southeast and headed towards American Lake, where I knew there was a trail I could pick up that would lead me back to the trailhead.

Back on the trail, I followed it east towards the basin I wanted to descend

When I found my two trees at the top of the ridge I turned right, and descended east into the basin, following the trail/ditch

Then descended southeast down the small ridge, and back to the trail

Then took this trail the short distance (half a mile) back to the trailhead

I made it back to my truck at 11:30am, making this a 12.45 mile hike with 3722’ of elevation gain in 7 hours

On to the next trailhead!

PT 13,094 and Sunshine Mountain – 13,329

RT Length: 8 miles

Elevation Gain: 3171’

I parked at MM 14 off CR 20 in Lake City, just before the turnoff for 22, at 10900’. 

I was up early, but it rained until about 6:15am, so I was on the trail at 6:30am.   As you can see by looking at the topo map,  I didn’t ascend the same way I ascended, mainly because it was terrible.  Down wasn’t great either, but a bit more manageable.  I’m going to describe the route to ascend how I came down.  Note:  There are tons of mining roads in this area, and they don’t all meet up. 

From my parking spot, I needed to be here. 

The best way to do this is climb to the left of the gully, navigating through the aspen trees to treeline.    This is choose your own adventure quest, but it doesn’t last long, and is manageable if you have good route finding skills and can follow game trails. 

It’s important to note I passed 2 different mining roads before I hit the one I was looking for, at about 11600’

I followed this road as it curved around the mountainside north.  The road was overgrown, and lost in places, and intersected with a lot of other roads.  I just kept turning left if there was an option, heading north.

Once in the upper basin, I could clearly see PT 13093.  This is the route I took to get to the ridge. 

I walked the mining road for a while, and then it turned into a game trail.  This is a good game trail I followed east until I came to a sketchy part.  You’ll know it because the dirt turns black.  Here I turned northeast and aimed for the ridge, using fainter game trails.  (On my way down I realized this game trail probably goes all the way to the saddle, but I felt confident in my decision to turn and head for the ridge here. 

I made my way to the ridge

At the ridge, I could see PT 13093 to the northwest

The terrain here was very rocky, and those rocks were loose.  This is how I started my climb, avoiding the rock slab and climbing it to the right

From here, it was a rocky climb northwest along the ridge to the summit.  This was all class 2

I summited PT 13094 at 7:30am

PT 13094:

My next objective was Sunshine Mountain, to the northeast

After the initial downclimb off 13093, this was a simple ridge hike on tundra.  This is the overall route I took:

First, I downclimbed the rocky section

Then headed towards the sunshine/13094 saddle

From there I picked up a solid game trail that led me to the ridge, then down to the saddle.

From the saddle I followed the tundra east 570’ towards the summit. 

There was a short rocky section towards the summit, with tons of game trails to the right to keep it class 2, but honestly, going over the rocks is probably class 2 as well. 

I summited Sunshine Mountain at 8:45am

Sunshine Mountain:

I turned and made my way back down the tundra ridge, and to the saddle

I made my way towards the left side of PT 13094.  Here’s a little hint to help you descend:  There’s a wooden post sticking out of the ground about 20 feet after you should descend.  Use this as a visual for where to start heading down the side of the mountain.

Back on the game trail, I turned right and followed it back to the mining road.

Then I took the mining road back to about 11600’

From here, I could see my truck parked below, and just made my way back to it, bushwhacking the entire way.

I made it back to my truck at 10:30am, making this an 8 mile hike with 3171’ of elevation gain in 4 hours.

On to the next trailhead!

Babcock Peak – 13,161

RT Length: 9.23 miles

Elevation Gain: 3868’

I parked at a turnoff near Boren Creek and124/794 with room for about 5 vehicles if everyone parked nicely.  The drive in is dirt 2WD.   I was on the trail at 4:30am.

I followed 4WD road 794 for over 3 miles as it switchbacked it’s way northeast, following Boren Creek.

After hiking for around 3 miles I made it to treeline.

Here I turned right, and could see Babcock Peak to the north.

Route finding here was pretty easy.  I headed north towards the gully, aiming for the gully to the right.  I gained about 1500’ here to the summit in about a mile.  This gully is very loose, and full of all different sized rocks.  I didn’t stick to one side, but chose whatever route looked best.  Here are some pictures of the gully.  It’s pretty straightforward.

Just before reaching the saddle, I turned left, and ascended this much smaller gully

From here, it’s choose your own adventure to the ridge.  Everything is class 3 climbing, and I’m pretty sure there is no wrong way to get to the ridge, as long as you’re heading north/northwest.  I can’t say the same for heading down, so it’s a good idea to keep looking behind you for reference points for the way back.  Also, pictures were very difficult to put everything into perspective.  Right now you should be at the junction of the left and right gullies.  Take note of where you are, because this is where you’ll want to descend to on your way down, and as you can see by looking ahead of you, the initial climb to the ridge is steep and it can be difficult to know exactly where you are.  Here are some pictures as I made my way up to the ridge.

Once on the ridge, I turned left, and headed northwest towards the summit.  There was only one ‘tricky’ move, and the rest was class 2.

Here’s the tricky move.  Go right here to ascend the ridge.  It feels like difficult class 3 or easy class 4, with some exposure.

Then it was a quick ridge hike to the summit, staying on the ridge proper.

I summited Babcock Peak at 8am

Babcock Peak:

Now to head back down. Here’s a picture of the ridge

And the one tricky section

Now it was time to head back towards the gully.  Visuals are good here.  When heading down, keep moving to your left as you do so, making your way down to where the left and right gully meet up. 

Where the two gullies meet, I turned left and headed down the same gully I’d ascended.

And now, to descend the gully back to the 4WD road

Back on the road, I turned left and followed it southeast back to the trailhead.

I made it back to the trailhead at 10:30am, making this a 9.23 mile hike with 3868’ of elevation gain in 6 hours.

On to the next trailhead!

Mount Moss – 13,194 and Lavender Peak – 13,327

RT Length: 10.58 miles

Elevation Gain: 3604’

Once again, this wasn’t the peak I’d planned for today.  In fact, due to my carelessness with my new truck and forgetting to wrap the wires with rat tape, I had a 2am encounter with varmints and had to abandon a days worth of hiking (where I’d hoped to get in 5 ranked 13ers).  Not to bore you, but if you want to hear the story and see video footage, click here to find out what creature got stuck inside my truck, and the damage they did.  Also, rat tape your wires people.

So, after an 8 hour detour, I found myself at around 9800’, at the base of the Tomahawk Mine, parked off road 124 and 798 near Mancos.  I was up and on the trail at 6am

I followed road 798 for about 1.5 miles northwest.

After about 1.5 miles I came to a junction, and turned left.  You can continue on the road here, as it will eventually get you to the same place, but I wanted to see the Tomahawk Mine.  If you’d like to see the mine, turn left here, and follow the road.

The road will quickly end, but a trail will pick up to the right.  It will take you to Tomahawk Mine.

If you look closely, to the left of the mine is a trail that will lead you north, back to the 4WD road.

I turned left, and followed this road northeast until Little Kate Mine.

At the base of the mine, just as the road switchbacks to the right, I ascended a scree game trail northeast to treeline.  The trail is obvious, and splits and comes together a few times, but I generally headed towards treeline.

At treeline I headed west, towards Tomahawk Basin.  There’s kind of a trail here, but it’s really faint.

Now I needed to ascend into the upper basin.  There are several ways to do this (I went up a different way than I descended), but you basically want to get above the waterfall.  If you take the route I’ve outlined, there will be a faint game trail to the top, but you may need to search a bit to find it. 

I followed the creek as it headed west.  There is a faint game trail, but eventually it goes away.  Just keep heading west. 

Now in Tomahawk Basin, my next goal was to gain the ridge.  This was extremely steep.  I gained 665’ of elevation in .3 miles.  Luckily, the terrain was easy to navigate.  Here’s the route I took.

And some pictures of the hike to gain the ridge, staying mostly on tundra.

Once on the ridge I took a little break and put on my helmet.  There was a short class 3 section and some scrambling to do from here on out.  I headed north, following the ridge and then dipping down to the left.  It should be noted the ridge goes at class 3 most of the way, after the initial drop off to the left and re-gaining the ridge, but to make it easier there are game trails to the left of the ridge that I followed most of the time.   It should also be noted the rocks here are loose, so watch your footing.

I summited Mount Moss at 9:30am

Mount Moss:

From Mount Moss I could see Lavender Peak to the northeast

It’s a really good idea to take a good look at the route you’d like to take now, as when you’re below the summit it can be difficult to figure out where you’re at.  The summit of Lavender is the point furthest west.  This is the route I took to the summit, which was mostly class 3, but included a class 4 chimney.

First, I descended to the Moss/Lavender saddle.  Once again, lots of large, loose rocks.

From the saddle, I ascend the ridge to Lavender to just below the gullies, at around 13125’

Next, I traversed west, looking for the gully I wanted to ascend. 

This is the route I took to ascend the gully.  There’s a difficult 3/easy 4 chimney to ascend, just below a cool looking cave.  Ascend straight up to the cave, to right around the cave, and the summit will be to the left. 

And some pictures up the gully.

Once you get past the cave, the summit is to your left

It’s an easy trek to get there, up a small ramp

I summited Lavender Peak at 10:45am

Lavender Peak:

And now to head back down.  Here are some pictures of my way back down the gully.  I turned and faced the mountain for much of the trek down.

Safely down the gully, I made my way back to the Moss/Lavender saddle

Having no desire to summit Mount Moss again, I decided to traverse below the summit, staying at around 12900’ to get to the ridge

Once on the ridge, I followed it south to my entry point

And then back down into Tomahawk Basin

I made my way back to the scree trail

Then followed it back down to the 4WD road.

I followed the road a little more than 2 miles back down to the trailhead

I made it back to the trailhead at 1:30pm, making this a 10.58 mile hike with 3604’ of elevation gain in 7.5 hours

On to the next trailhead!

Union Mountain – 12,313 and Jacque Peak – 13,212

RT Length:  12.45 miles

Elevation Gain: 3551’

I didn’t summit the way I’d intended.  The place I’d wanted to park and hike had a bunch of “No Parking” signs, and there wasn’t another good place to park for miles, so I turned around and headed to the Copper Mountain Ski Area.  I found a parking spot just under the lifts, and before entering Lewis Ranch, but there was a sign that said “Tow Away Zone from 10pm-6am”, so I waited around until 6am, and hit the trail from Copper Mountain Ski Area.

I’d planned on hiking up the road for as far as I could get, but as I started heading up the road, I noticed several pieces of large equipment being driven up the road ahead of me (think cranes, bulldozers, etc.).  It’s been my experience that when these vehicles are in operation, the operators tend to ‘kindly’ ask you to leave the area (or escort you down).   Being a solo female hiker who’s encountered this type of thing before, I don’t like to get into these types of situations.  Instead, I went with Plan C:  I’d hike the Colorado Trail for as long as I could, then start ascending ski runs.  So, if this isn’t the conventional way to summit Jacque Peak in the summer, please forgive me, as it was my third option. 

I left the parking area at 6am, and headed west toward the ski lifts. 

I walked through this gate, and started following the dirt road as it wound west and then southeast.

I quickly came to the junction for The Colorado Trail.  It’s on the right side of the road, and clearly marked.  I turned right.

I followed The Colorado Trail for just under 2 miles, staying on The Colorado Trail at junctions. 

When I came to the Fairway Ski Run, I left the trail, and headed southwest up the run.  For those of you skiers out there, or anyone with a map of the runs, I took Fairway to Roundabout to Soliloquy to the ridge.  There were nice game trails to the hikers left of the runs that I was able to follow to stay out of the willows.  I just kept following the runs up and southeast.  Here are some pictures of the route:

When I came to 11600’ there was a big dirt pile and a bulldozer moving the dirt. Not wanting to get in their way, I turned right and headed up the ridge, following the road south to the ridge.

Then continued following the ridge south towards Union Mountain, which is just to the west of the last ski lift.

I summited Union Mountain at 7:30am

Union Mountain:

From Union, you can clearly see Jacque Peak looking to the southwest.

As you can imagine, this was a straightforward ridge hike to the summit.  From Union, I gained about 900’ to the summit of Jacque.  There were a few rocky areas in the beginning, then tundra, then more rocks.  All the rocks were loose, so watch your footing, especially as you near the summit.  This was all class 2, with no trails.

Oh, and there’s a false summit

I summited Jacque Peak at 8:40am

Jacque Peak:

I turned and headed back down the ridge. 

But I didn’t descend entirely the same way I ascended.  Instead, about halfway along the ridge between Jacque and Union, I turned left and headed north down the West Ridge Traverse Route.  I took West Ridge Traverse to Soliloquy to Roundabout, then Fairway to The Colorado Trail.  It sounds daunting, and at times the runs get narrow, but I just followed the wooden posts initially, then the Ski Area Boundary signs and little pieces of pink surveyor’s tape heading down and south (there are signs every 30 feet or so), staying on game trails to the right of the runs.  And you don’t need to take the same route I did.  As long as you’re headed down on a ski run, it’ll take you back to the lifts. 

I made it back to The Colorado Trail, turned right, and followed the well marked trail back to the dirt road, then back to my parking spot.  The lifts were running on my way down, carrying visitors/hikers to the top.

I made it back to the trailhead at 10:45am, making this a 12.45 mile hike with 3551’ of elevation gain in 4 hours, 45 minutes.

On to the next trailhead!

Mount Valois – 13,173

RT Length from City Reservoir: 6.75 miles

Elevation Gain from City Reservoir: 2310’

RT Length from Endlich Mesa Trailhead: 21.45 miles

Elevation Gain from Endlich Mesa Trailhead: 5078’

The approach to City Reservoir is a total of 7.35 miles and 1220’ of elevation gain (but also over 1500’ of elevation loss) from Endlich Mesa Trailhead and City Reservoir.  You can view the approach to the saddle here

I awoke from my campsite at City Reservoir and was on the trail at 7am.  I followed the Endlich Mesa Trail towards Lake Marie.

When I reached the south end of the lake, where a stream flows out, I crossed the stream

After crossing the stream I headed northeast towards the ridge and the rocky outcropping.  The ridge actually has a lot of route finding, so I’ll do my best to explain how to navigate it.  This is all class 2, with route finding below treeline.

At the first rock outcropping, head for the tree that’s cut in half at the top of the rocks

Next, ascend this small gully

And continue heading northeast

You will eventually come to this wall.  If you navigate around to the left, you’ll find a grassy ramp to ascend.  Ascend, then walk back towards the wall to navigate around the rocks. 

After going east around the large rock face, again head northeast along the ridge.  You’ll encounter another large rock face.  This time, go right, and ascend a grassy gully.

Now you should be looking at the rocky ridge, but at least you’re above treeline. I pretty much stayed to the center of the ridge, and kept heading northeast, following the ridge.  If you have an option to go left on grassy slopes, do that. 

From here on out, this is a straightforward hike.  I climbed northeast up this class 2 ridge to a rather large cairn.

From there I headed east towards this large cairn, but I could have just kept heading northeast along the ridge.

From this second large cairn I followed the ridge towards Mount Valois.  It may look daunting, but it’s all class 2.  The ridge goes, but if it feels sketchy there’s a way to drop down to the left and use game trails. 

Here are some pictures of the ridge. 

Then it’s an easy rocky tundra walk to the summit

I summited Mount Valois at 7:45am

Mount Valois:

Now to head back to City Reservoir.  I retraced my steps back down to the ridge

Then across the ridge

Here are some pictures of the route back down to Lake Marie

Back down the gully

And across the rocky ledge

Then southwest towards Lake Marie

I crossed the stream, and headed south on the Endlich Mesa Trail back to City Reservoir.

I made it back to City Reservoir at 9:30am, making this a 6.5 mile hike with 2310’ of elevation gain from City Reservoir in 3.5 hours. 

On to the next trailhead!

PT 13003

RT Length:  17.1 miles

Elevation Gain: 4750’

I really wish I would have linked up this peak with PT 13164 when I did it in 2019, but then it wasn’t a known ranked 13er.  In any event, today was a long day, so I was getting an early start so I could drive back home for work the next morning.

I parked at the Cataract Gulch Trailhead and was on the trail at 3:30am.  The trailhead has several parking spaces, dispersed campsites, and bathrooms.

The trailhead is clearly marked, and easy to find. 

I followed the class 1 Cataract Gulch Trail south, towards Cataract Gulch. 

There were several downed trees on the trail, but it was easy to navigate.

Just before reaching the waterfall about 2.5 miles up the trail, I crossed the creek on a couple of logs.

This is where many people get lost.  I headed up the slope, and there was a large tree blocking the path.  I went left, navigated willows and some boulders, then regained the trail.

I could now see the waterfall clearly.  A lot of people continue straight here, towards the waterfall, following the social trails.  Instead, look for a trail to the right that goes up and behind the waterfall.

Next, to cross the creek.  I crossed directly above the waterfall.  Probably about 10 feet from where it drops off.   At night I knew where to cross because there are little reflecting circles on the trees across from the water that glow when you shine your flashlight across them.  The water was running high today, and I didn’t want to go over the edge, so I crossed carefully.  The water was up just past my knees. 

I picked up the trail on the other side, and quickly came to a second creek crossing. 

I picked up the trail again on the other side, and ascended through a cairned, rocky area. 

This led me to my final creek crossing of the morning. 

I crossed the creek one more time, and picked up the trail on the other side.  It led me up and around to the left, behind boulders and through a small canyon.

I was now headed south towards Cataract Lake.  There’s a pretty good trail here, but every once in a while it gets overgrown.  The trail slopes slightly downward as it goes across the tundra and through the willows. There are posts to help guide you if you lose the trail. I was headed here:

I passed Cataract Lake to my left, and a small lake to my right.  Here the trail picked up with the Colorado Trail, and I followed it right, west, towards Cuba Gulch.

I stayed on the Colorado Trail (East Fork Middle Pole Trail) for most of the rest of the hike.  Here are some pictures of the trail.

The trail meanders it’s way to a saddle:

I skirted around the north side of 13164, navigating through a could of ice patches. 

Now on the north side of 13164, I could see 13003 to the west. 

I stayed on the Colorado Trail until I hit the saddle of 13164 and 13003, losing about 500’ of elevation, then left the trail and took the tundra covered ridge to the summit.  This is the route I took.

I made my way to the saddle

Then hiked the ridge to the summit

I summited PT 13003 at 8:15am

PT 13003:

This was an out and back hike for me, so I turned around and retraced my steps.  Here’s my route back down the saddle, skirting around the left side of PT 13164, following the Colorado Trail.

I then continued following the trail as it wound back to the Cataract Gulch Trail

Past the lakes and through the upper basin, I kept following the trail, aiming for Sunshine Peak to the north.

I crossed the creek

Then descended through the rocky basin

I crossed the creek twice more, and then followed the trail back down around the waterfall and back to the trailhead.

I made it back to the trailhead at 12pm, making this a 17.1 mile hike with 4750’ of elevation gain in 8.5 hours.  Note:  My Strava glitched about 2 miles into this hike, so I drew in my route for this peak on the topo map.  This was easy because most of the route was on a trail, so it auto populated.  My phone and watch gave me 19.1 miles for the hike, but I got 17.1 miles when I drew the map in CalTopo. 

Also, every time I’ve been to Cataract Gulch I’ve seen moose. Today was no exception.

On to the next trailhead!

Fishers Peak – 9,637’

RT Length:  15.3 miles

Elevation Gain: 3588’

This peak has been on my bucket list for a while, but it was located on private property.  Recently this property became a Colorado State Park (currently you need the Colorado State Parks Pass or to pay the $10 to park at the kiosk), and I was able to legally climb the peak.  The park is open sunrise to sunset, so I didn’t get my usual pre-dawn start.  There is plenty of parking at the trailhead, along with vault toilets and trailhead signs.

I parked at Fishers Peak Trailhead (the only trailhead in the park) and was on my way at 7am.  The trailhead is obvious, at the east end of the parking area.

There were a limited number of trail maps at the trailhead, and I snagged one.  If there isn’t one there, here’s a copy.  I can tell you this isn’t the best map, and the signs can be confusing, but you basically want to take trail 1 to trail 2 to trail 3, then 4, 5, and 6.  This may sound obvious, but trail 8 and 10 and 9 all lead to trail 2 as well (they just meander a bit). 

Trail 1: Navy Blue on Map, Challenge Hill Section

Trail 2: Dark Magenta on map (as opposed to light Magenta), Osita Ridge Section

Trail 3: Blue on map (as opposed to Navy Blue or light blue), Shady Forest Section

Trail 4: Green on map, Stone Guard Section

Trail 5: Light blue on map (Peak Approach Section)

Trail 6: Brown on map (Summit Loop Section)

I followed the Challenge Hill section for a short while (maybe 100 yards) before coming to a junction with several other trails.  I could see Fishers Peak from the parking area.

At the junction I stayed on the Challenge Hill Section, which is the wide path that goes straight (yes, this can be confusing, stay on the road).

The road quickly begins to gain in elevation.  I gained 770’ of elevation in just under 1.5 miles.

After hiking for about 1.3 miles, I came to another junction.  If you accidentally took trail 10 or 8 or 9, you’ll end up here as well.

I continued east, taking the Osita Ridge Section

Now the trail became more of a bike trail than a hiking trail.  It meandered around mountainsides instead of over them, and had a lot of small ups and downs, which I’m assuming make biking up hill easier?  I can see problems in the spring with rain and runoff collecting in pools on this trail, but for now it was just mildly annoying. 

After hiking for 3.85 miles I came to a junction, which congratulated me for making it halfway.  I like how the sign asks the hiker if they are truly prepared for the second half of the hike.

At this junction I turned right, and followed the Shady Forest Section.  If you go left, you can hike .4  miles up to Osita Point.

About 2 miles of hiking brought me to a gate.  The sign says this portion of the trail is closed March 15-July 31 for Raptor breeding season.  So if you’re going to do the peak, don’t plan on coming during that time.  This is also a good place to leave your bike if you rode one, as the trail becomes much more rocky and there are stairs involved. 

I was now in the Stone Guard Section, and followed the class 1 trail south as it gained the ridge.

There are a couple of gates here, but the trail doesn’t intersect them, and the path is obvious

I came upon some stairs, which is the beginning of the ‘hard’ part of this climb.  This is a fairly new trail, but the workmanship in the stair and narrow areas doesn’t look like it will last long.  I can see it eroding in a year or two, or even after this winter/spring season.  Although this is a class 1 trail, care should be taken not to dislodge a rock or slip off the side of the trail.

When you see these signs, you’re almost to the summit. There’s a little bit of scrambling here, but only for about 20 feet or so. 

The trail here is not obvious, but you’re trying to ascend these rocks.

At the top of the rocks I was surprised to be greeted by a mesa.  There is a well-established trail here, that goes around the mesa.  You can go either left or right.  I went left.  This is the Summit Loop section of the trail.

The actual summit can be difficult to discern, as there are multiple large cairns that look like the summit.  It you go left as I did, the summit will be the first large cairn you come to.  Because I wasn’t sure at the time, I went all over the mesa to make sure this was indeed the true summit.

I summited Fishers Peak at 10:15am.  This video is from the middle of the mesa.

Fishers Peak:

Now to head back down.  I simply re-traced my steps back the way I came

Back down the rocky area

Then I followed the trail backwards, taking sections 5-4-3-2-1

It wasn’t supposed to start snowing for another two hours, but mountains have a way of making their own weather.  It started graupeling pretty heavily.

Graupel:

I continued on through the graupel, following the well established trail

At the junction of trail 1,2,9 & 10 I followed trail 1, the Challenge Hill Section (the one that’s a dirt road), back to the trailhead.  You can take any of the routes, the others will just be longer.

When I got back to the trailhead, my truck was still the only vehicle in the lot, leading me to believe not many people know the park is open

I made it back to my truck at 12:45pm, making this a 15.3 mile hike with 3588’ of elevation gain in 5 hours, 45 minutes

On to the next trailhead!

Broken Hill – 13,254

RT Length: 8.22 miles

Elevation Gain: 2924’

I parked near the lower Matterhorn Creek Trailhead at a nice dispersed camping spot, and was on the trail at 6am the next morning.  The trail is an obvious 4WD road, and if your vehicle has made it this far, it will make it to the upper trailhead.

I followed the dirt road alongside Matterhorn Creek to the upper trailhead.  There are several dispersed campsites near the upper trailhead as well.

Once at the upper trailhead I continued following the dirt road north

The dirt road is closed at this point, and becomes more of a trail.

I came to a well marked junction and turned right. 

From this junction, to the right you can see the ‘road’ you want to take.  It’s grown over, and doesn’t look much like a road, but it’s Ridge Stock Trail 233.  This is where you’re headed.

I followed this road all the way to just before treeline.  It was difficult to follow at times because it was so grown over and there were quite a few downed trees blocking the trail.   The higher up I got, the more difficult the road became to follow, as it looks like elk live permanently in the area.  The game trails parallel and cross the road, making route finding interesting.

At around 12000’, the road curves around the mountain and I left the road to head northeast along the ridge. I quickly came to treeline.

From treeline, this became a class 2 ridge hike. I followed the ridge northeast.

Here’s the route I took to get to the summit of Broken Hill

This is a ridge hike on tundra all the way to the base of Broken Hill

There’s a summit block at the end of the tundra. 

My first thought was to go up one of the class 4 chimneys, but I felt there must be a better way.  I scouted around, and found if I headed to the right and around the corner, I could keep this a class 2 hike to the summit.  I aimed for here:

I skirted the mountainside, then headed north on class 2 terrain to the summit

I summited Broken Hill at 8:25am

Broken Hill:

This was an out and back hike for me, so I returned the way I came, down the slope and around the rocks, back to the ridge

Then it was back down the ridge to treeline

At treeline I continued heading southwest until I came back to the ‘road’

Then I followed the road back to the trail

And took the trail back to the trailhead

I made it back to my truck at 10am, making this an 8.22 mile hike with 2924’ of elevation gain in 4 hours.

On to the next trailhead!