Irving Peak – 13,218 and North Irving – 13,017

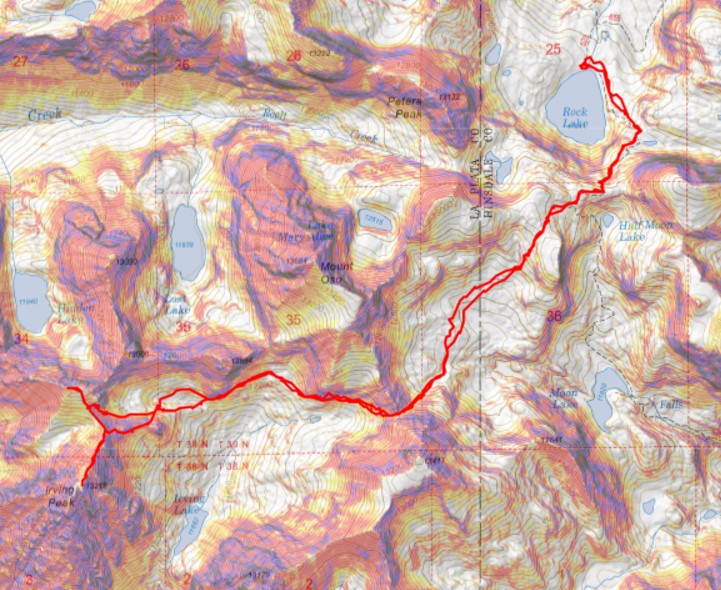
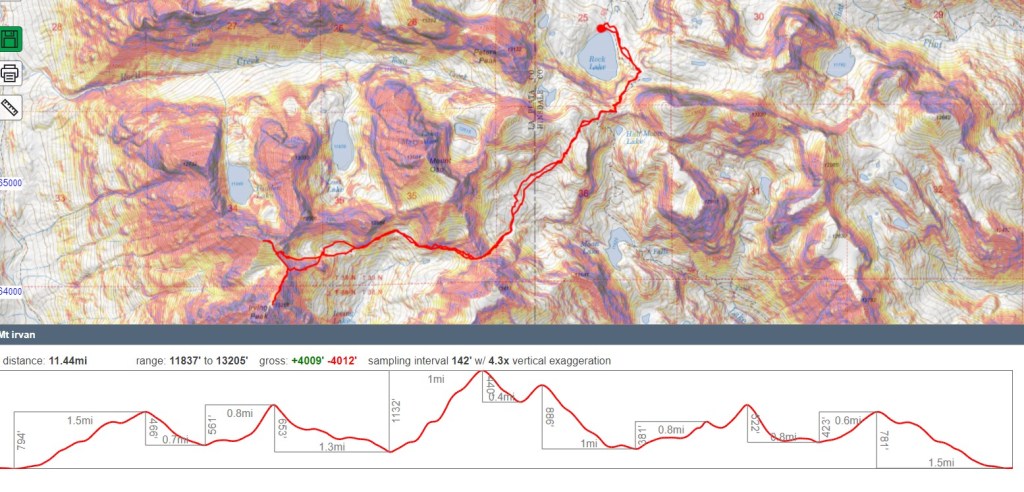
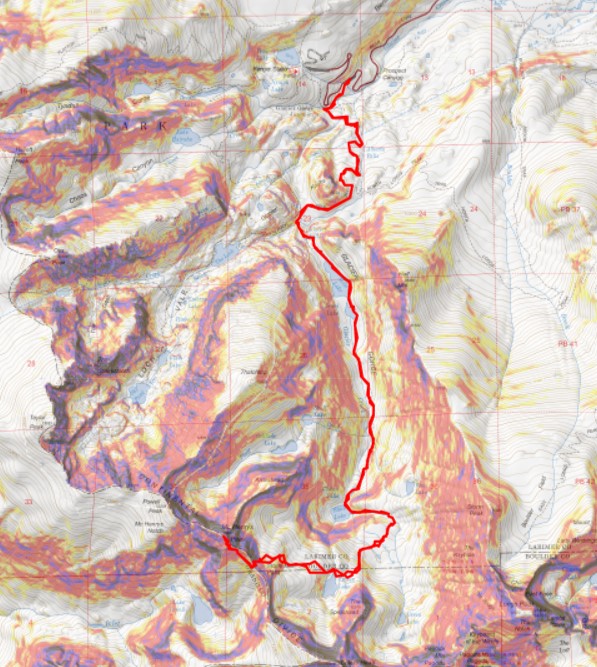
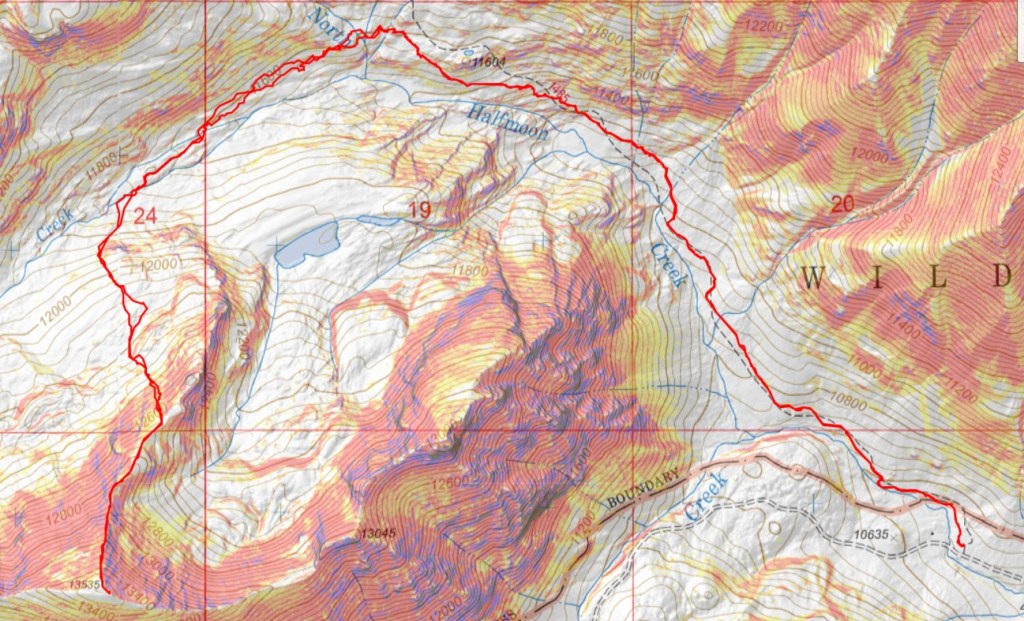
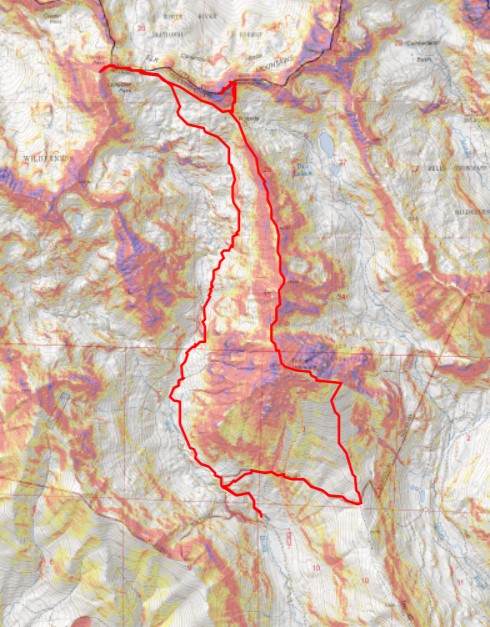
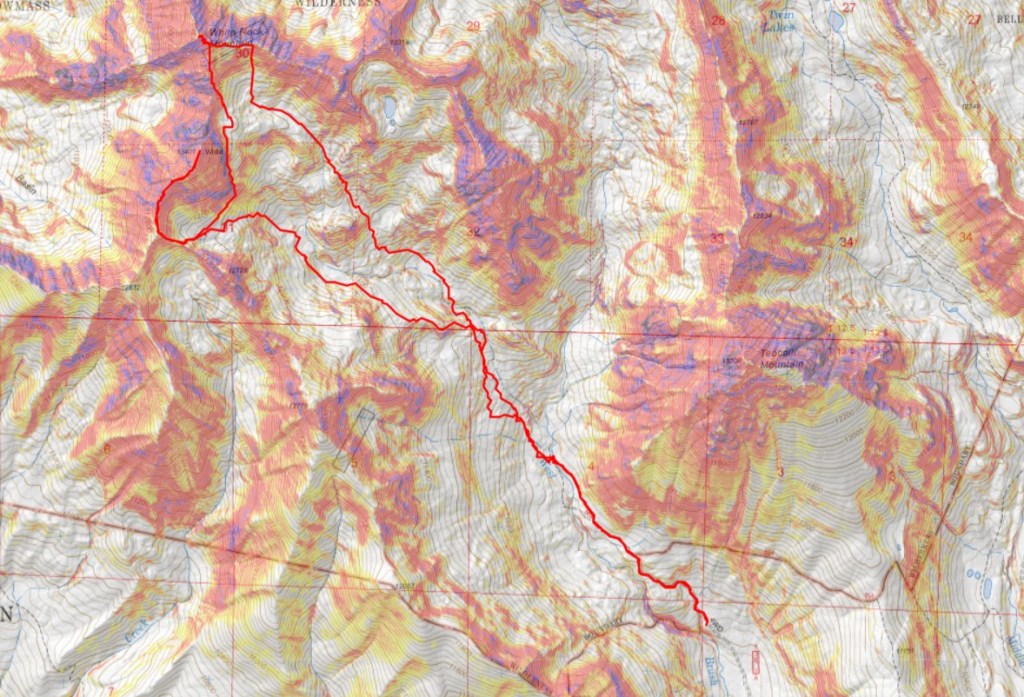
RT Length (from Rock Lake): 11.44 miles

Elevation Gain (from Rock Lake): 4009’

This trip report starts at Rock Lake.  For instructions on the approach to Rock Lake, as well as the drive to Beartown from Silverton, click here.

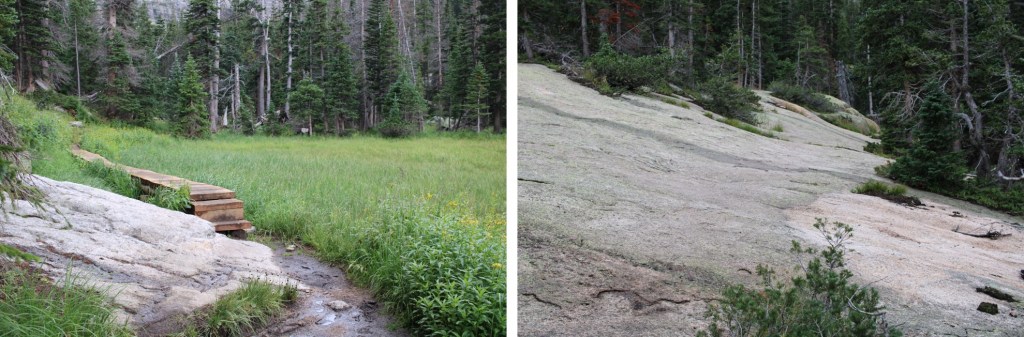
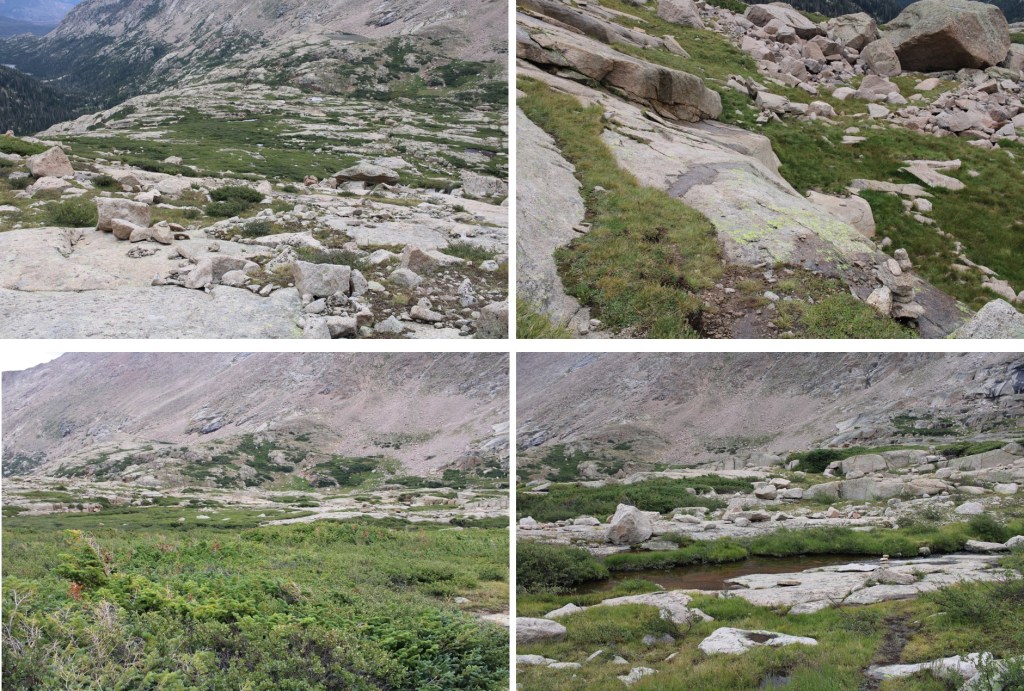
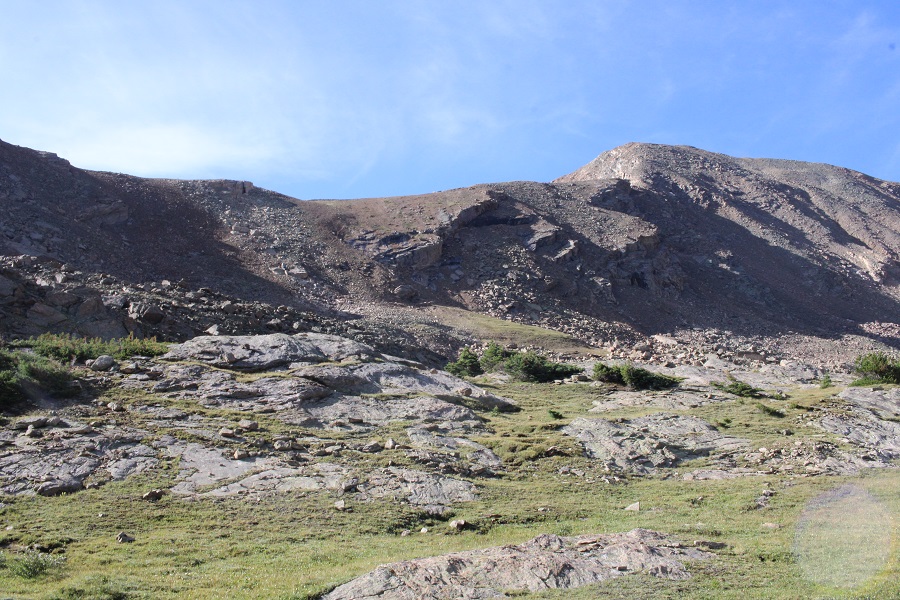
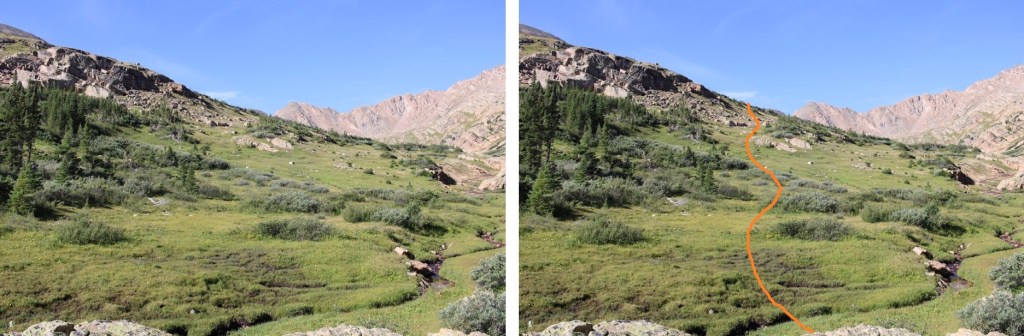
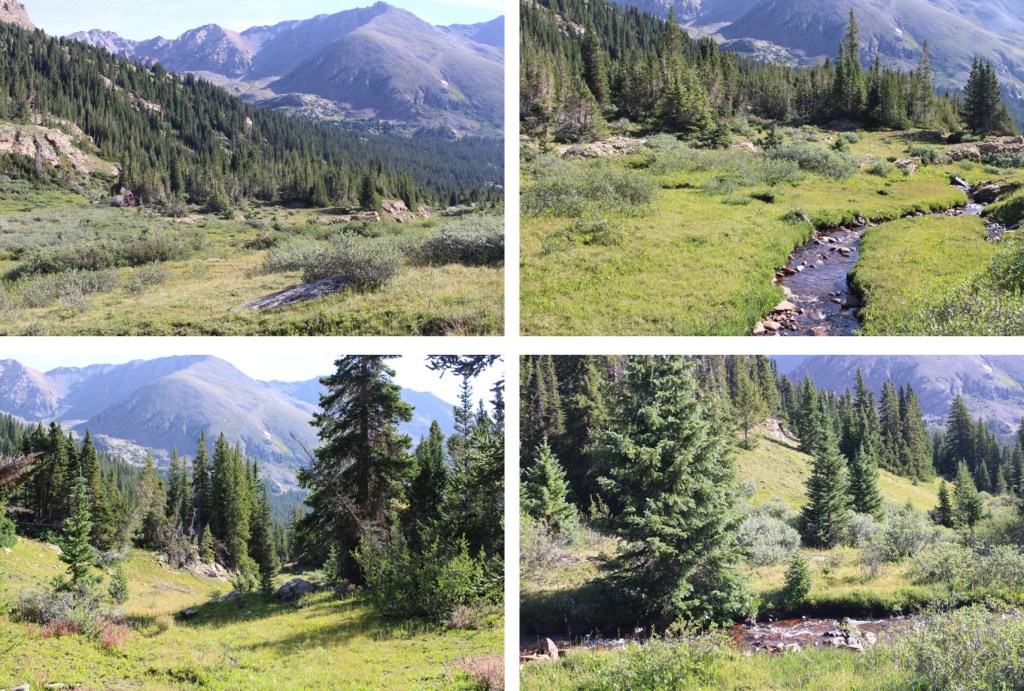
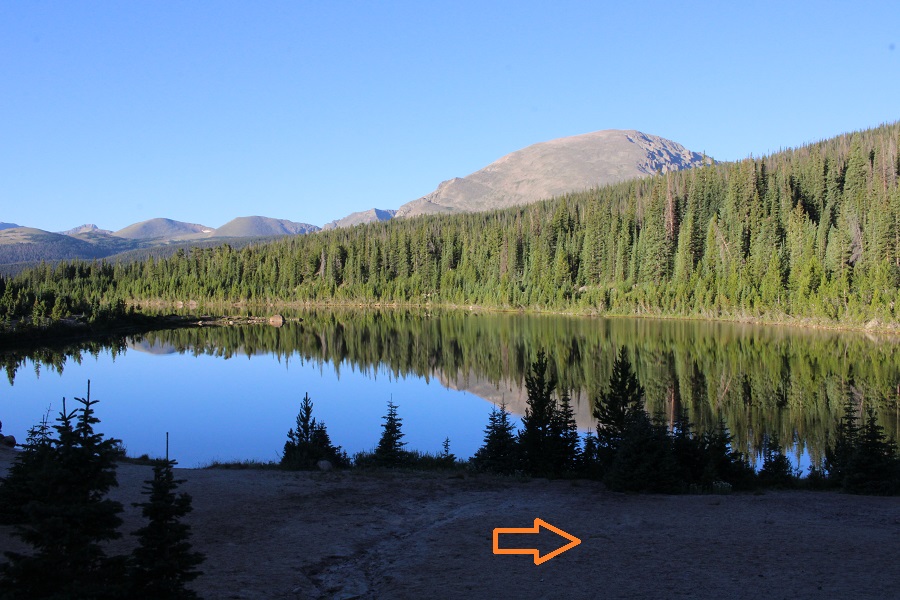
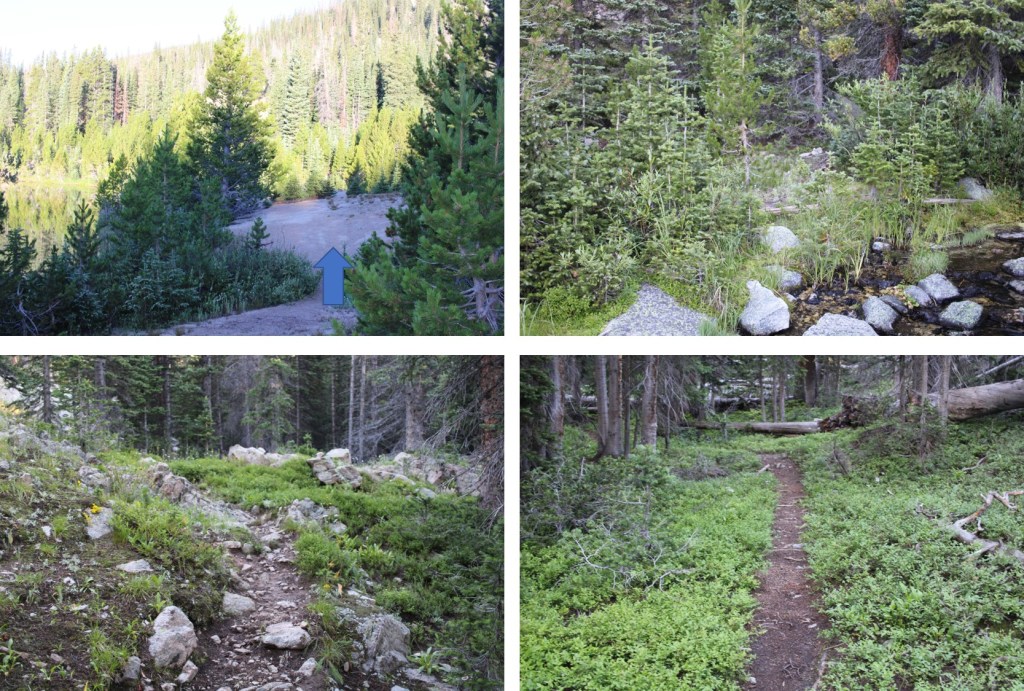
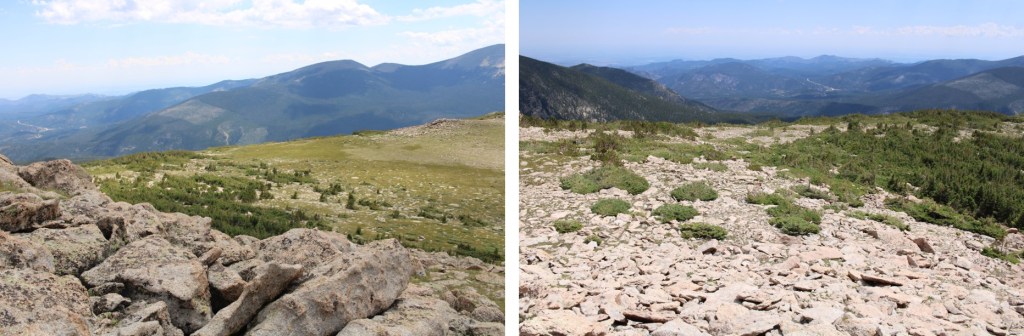
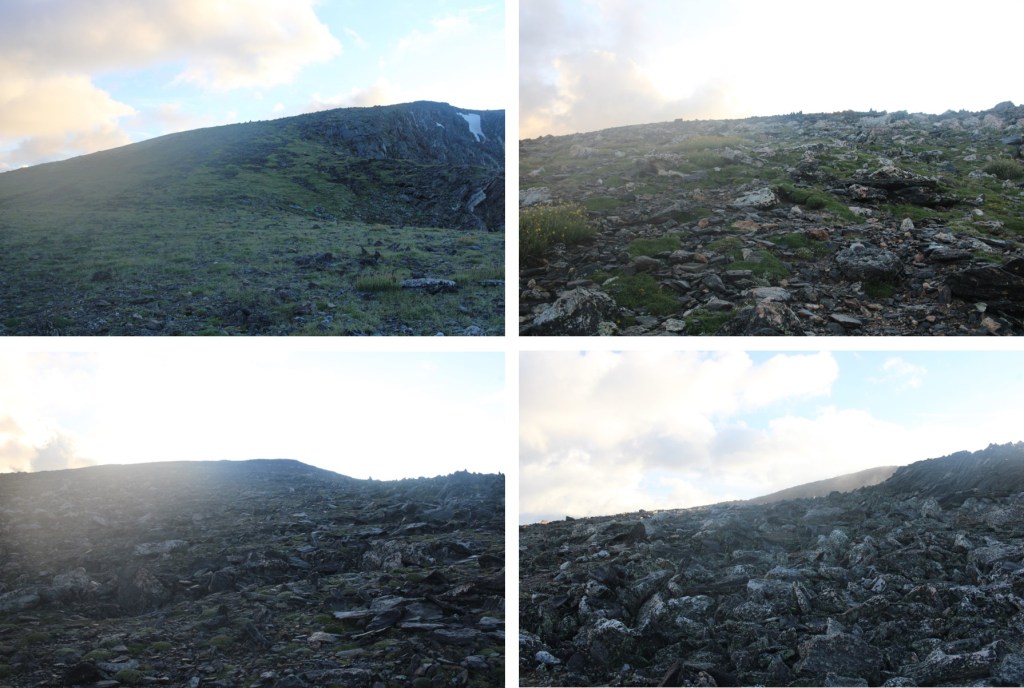
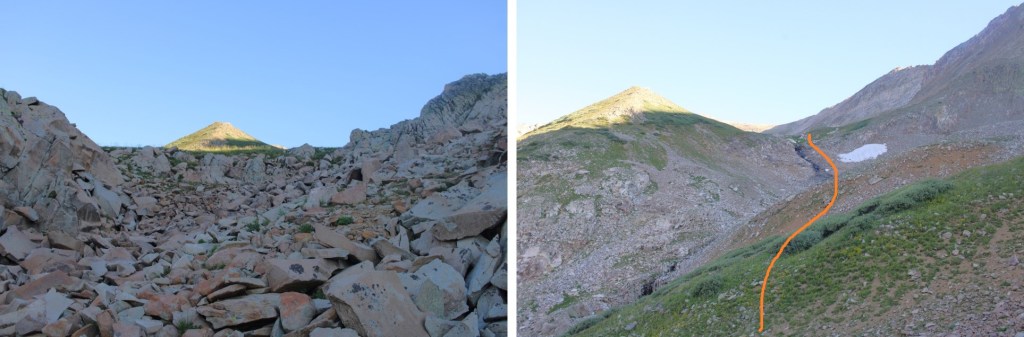
Since I was already at Rock Lake, at around 11850’, I made it a late start and was on the trail at 6am.  I was in the camping area directly in front of the lake, and from there I headed south towards the pass.

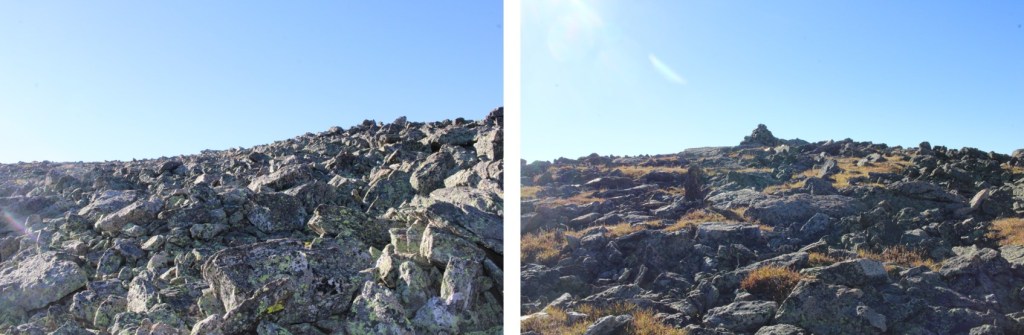
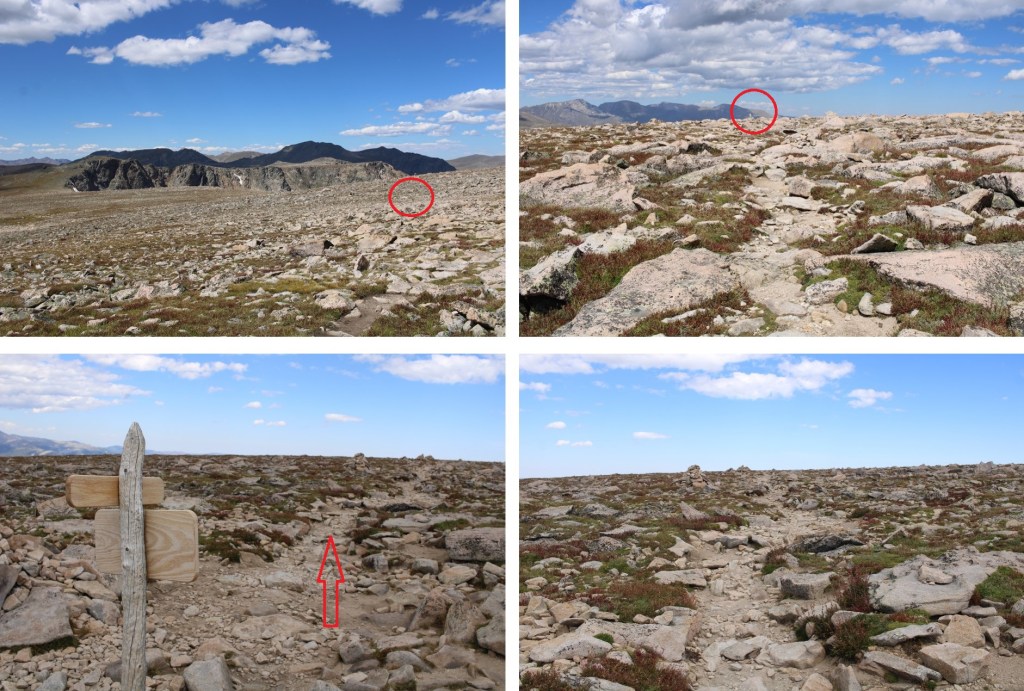
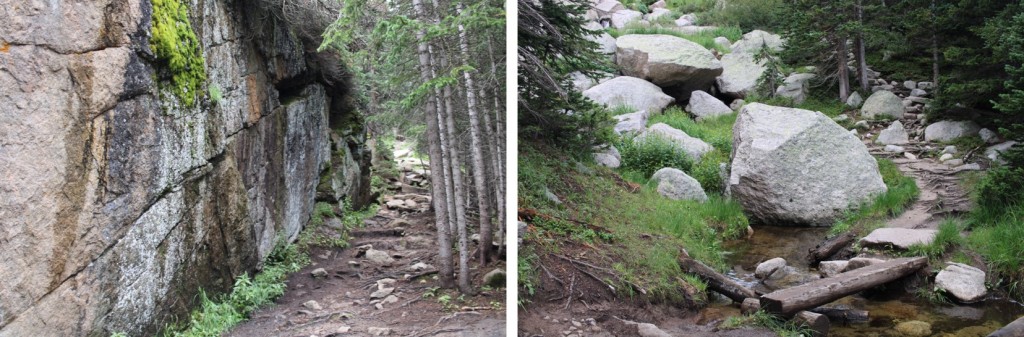
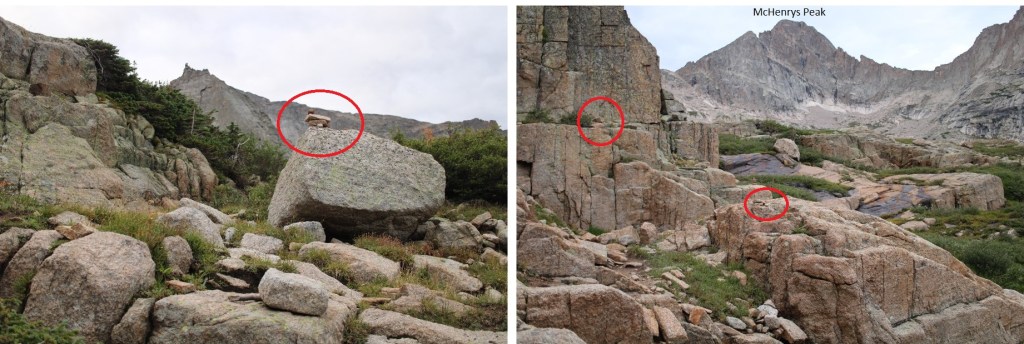
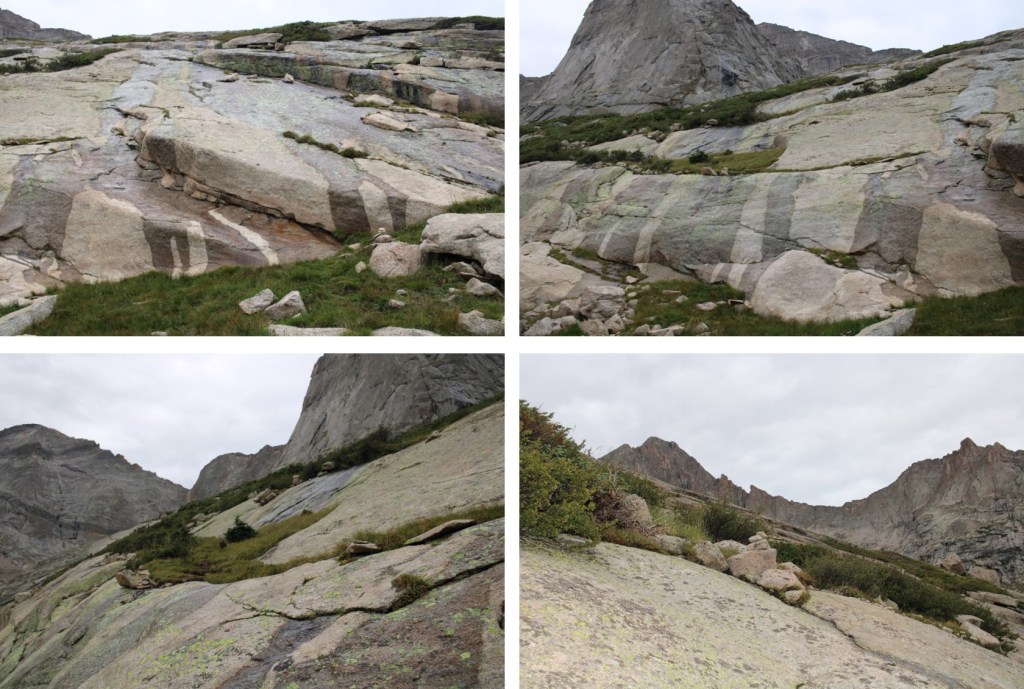
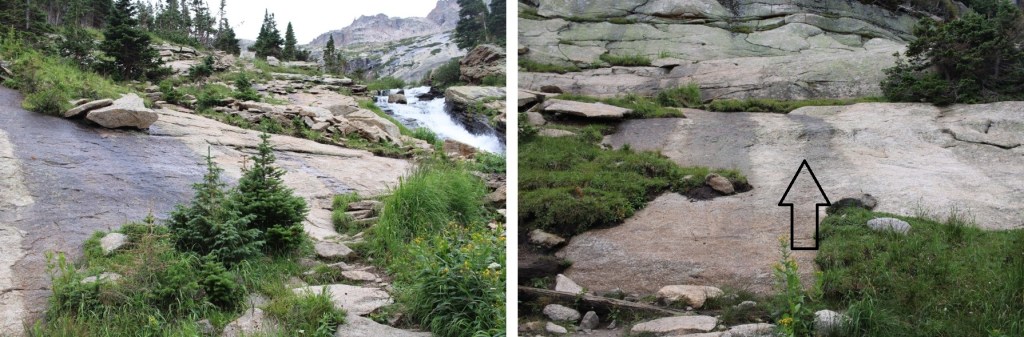
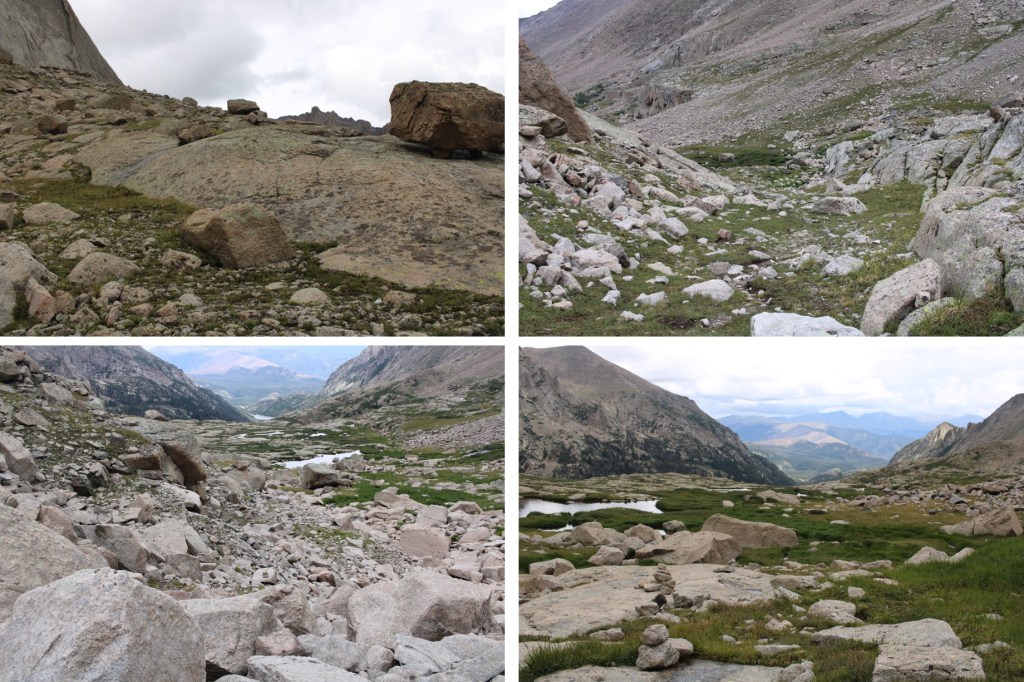
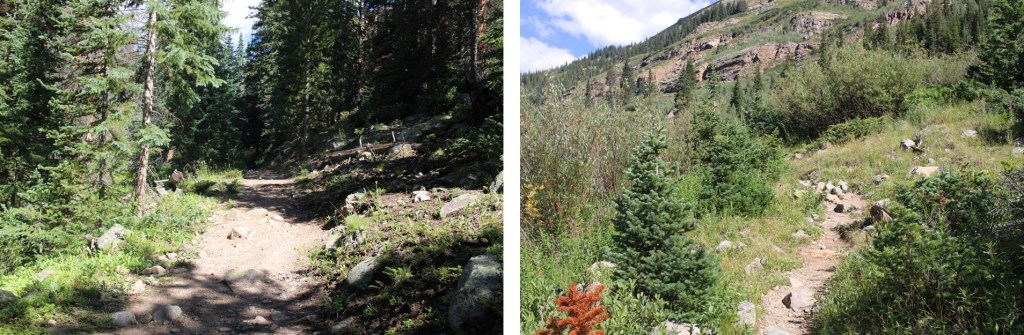
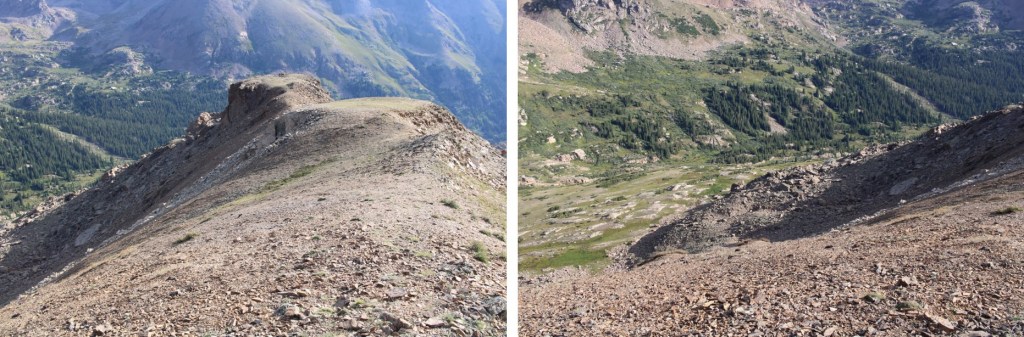
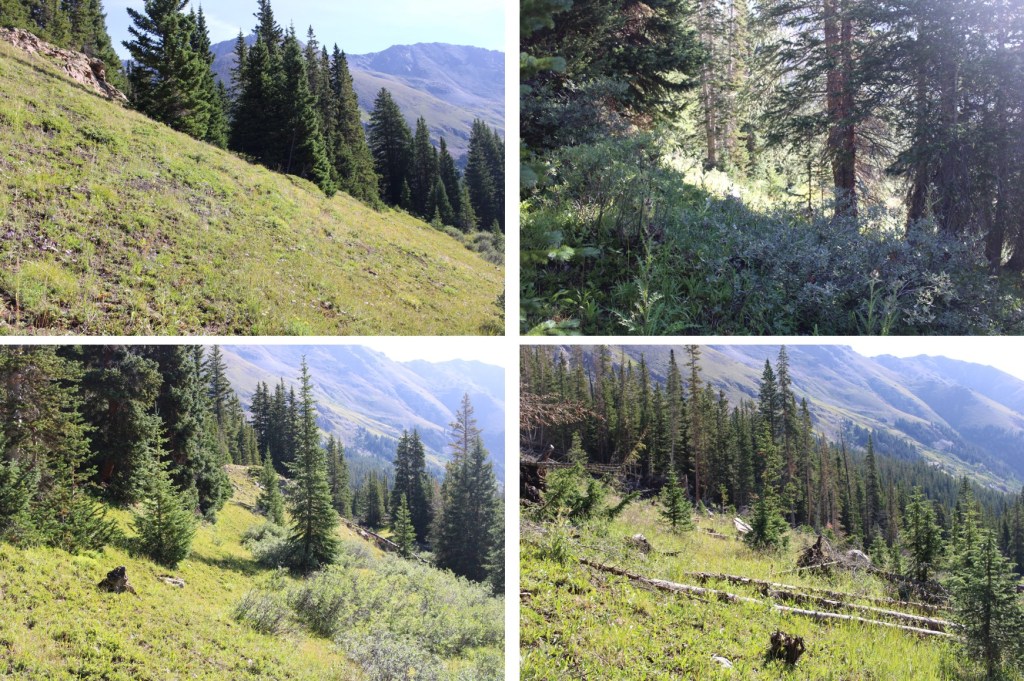
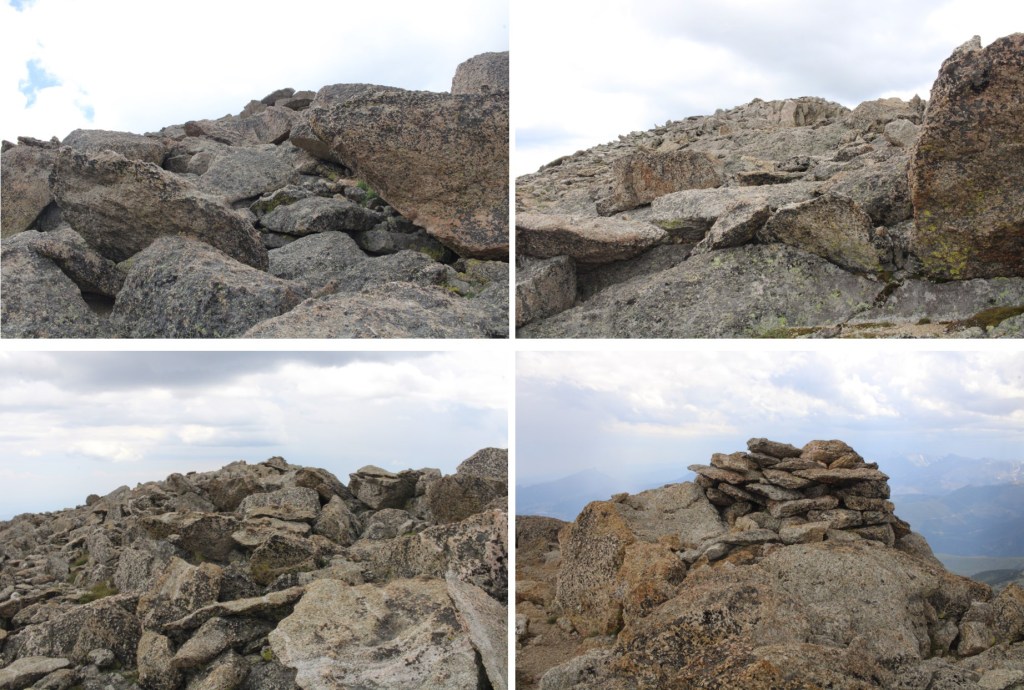
There is a trail that picks up on the east side of the lake, that will take you all the way to the pass on a class 1 trail

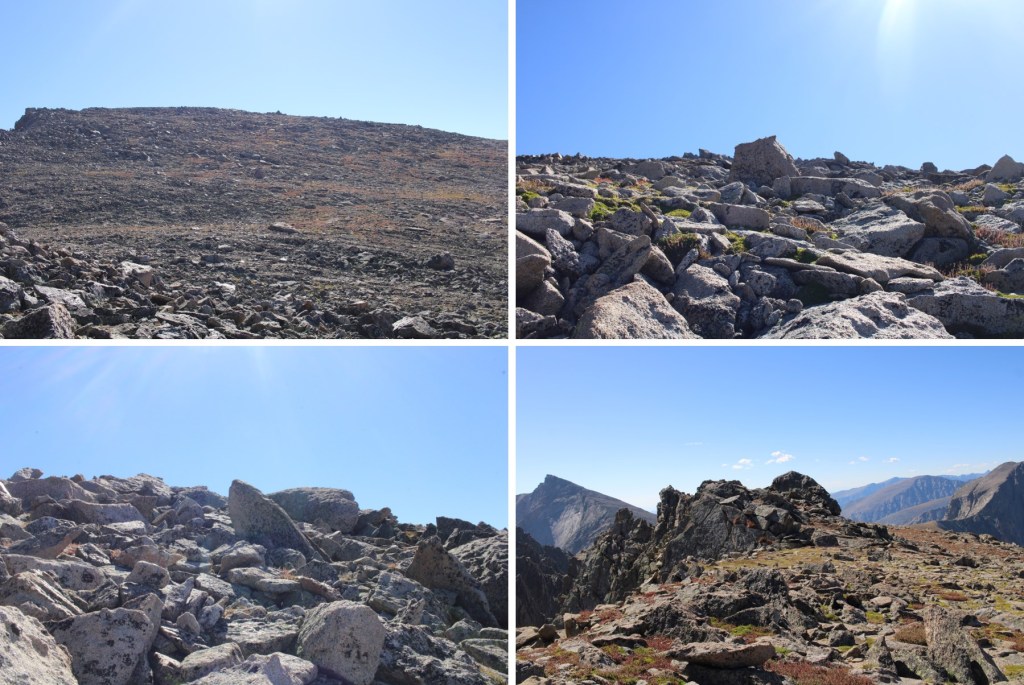
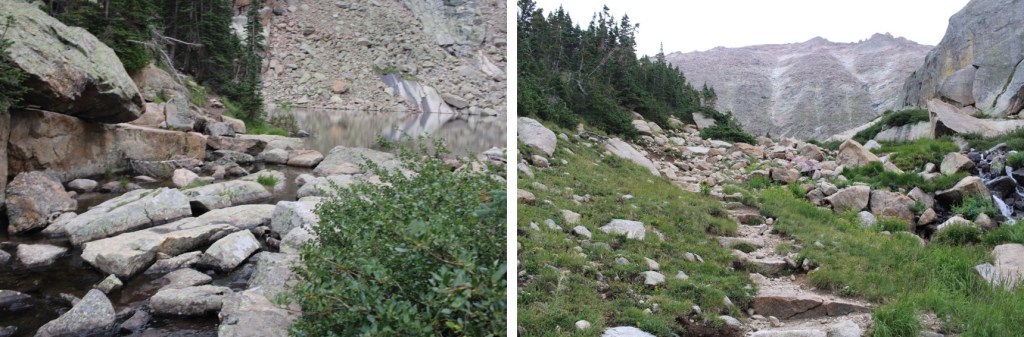
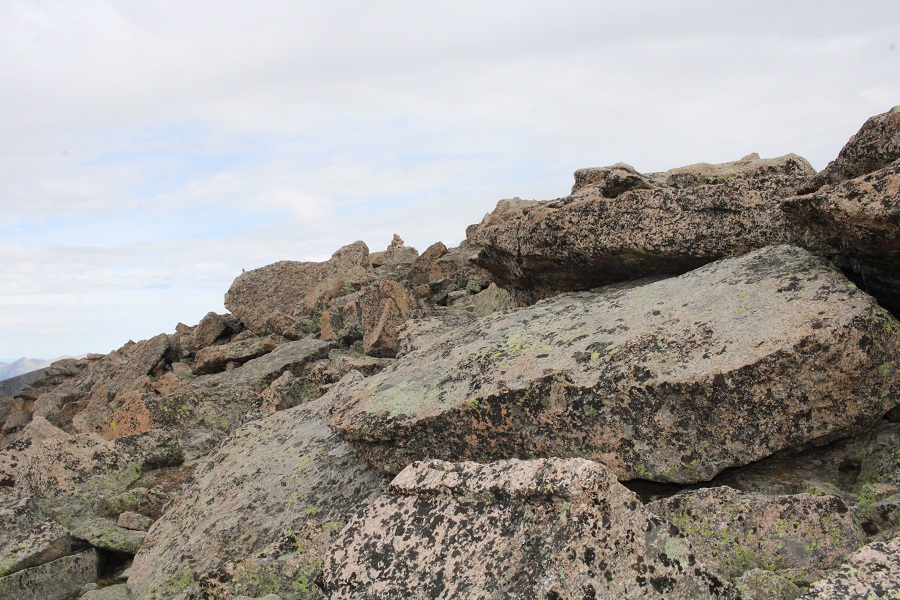
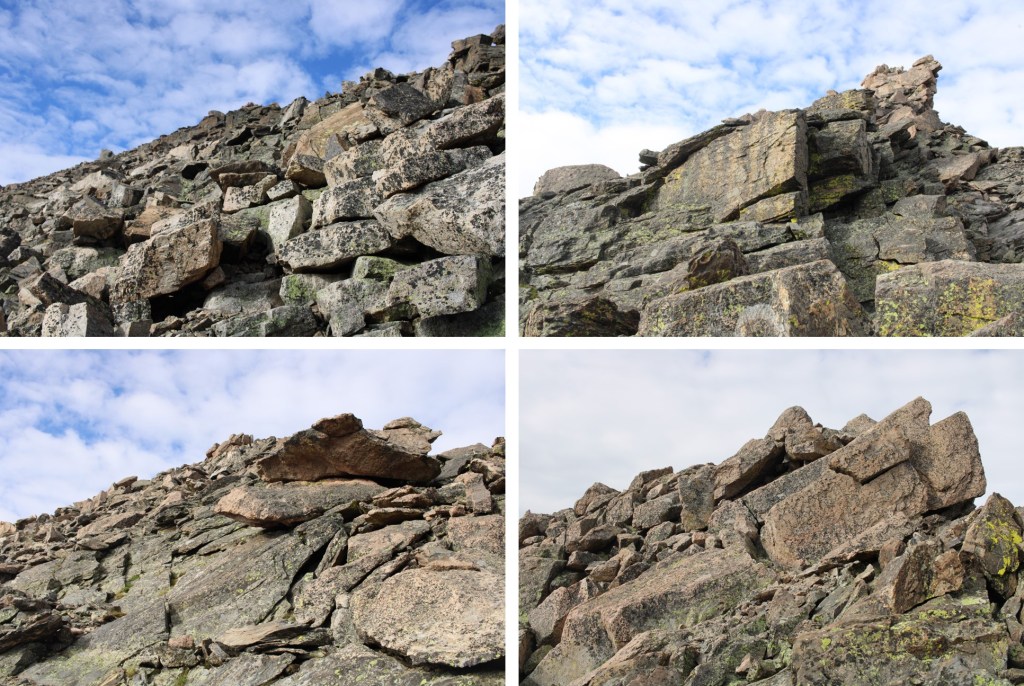
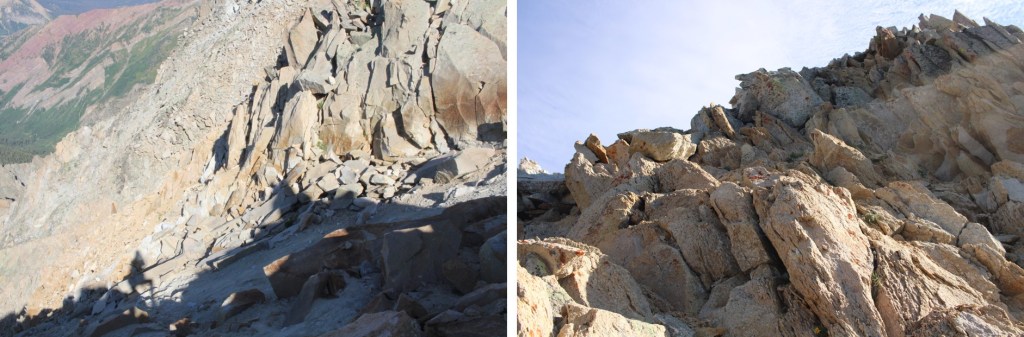
It’s rocky, but there is a well-defined trail here with cairns

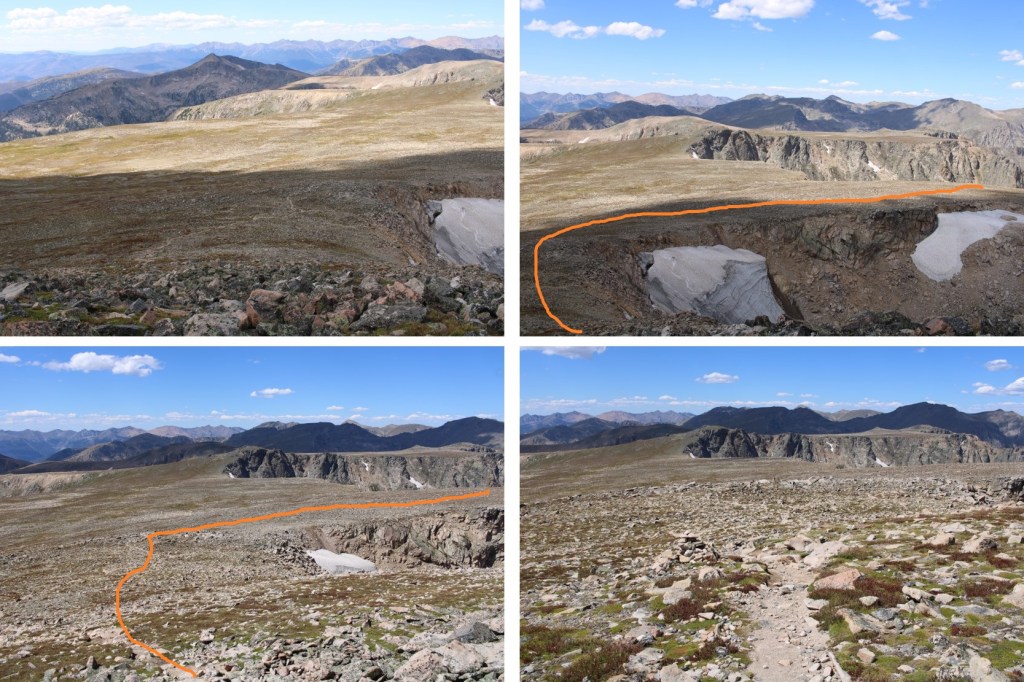
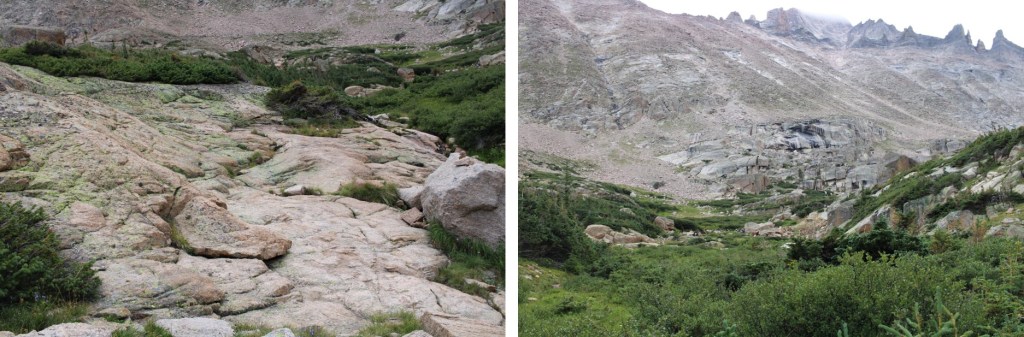
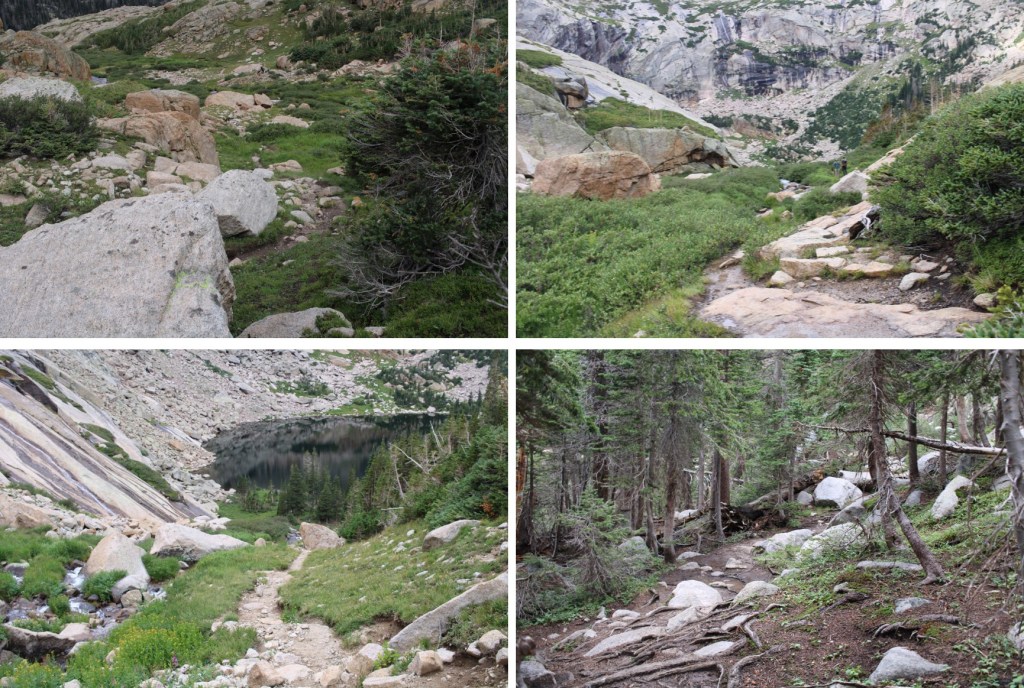
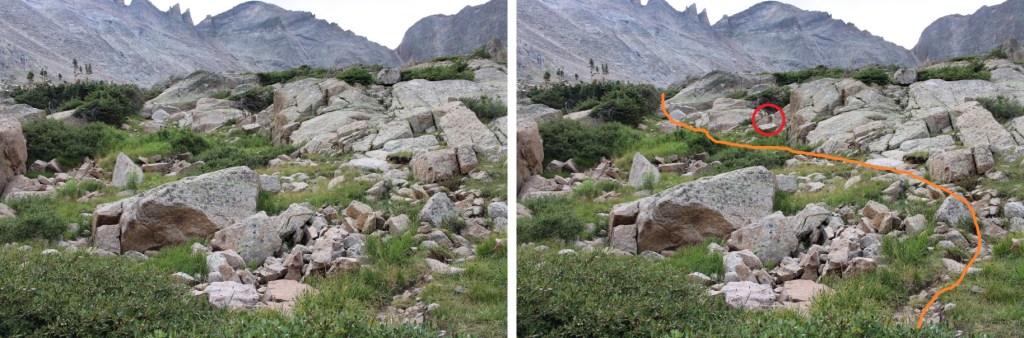
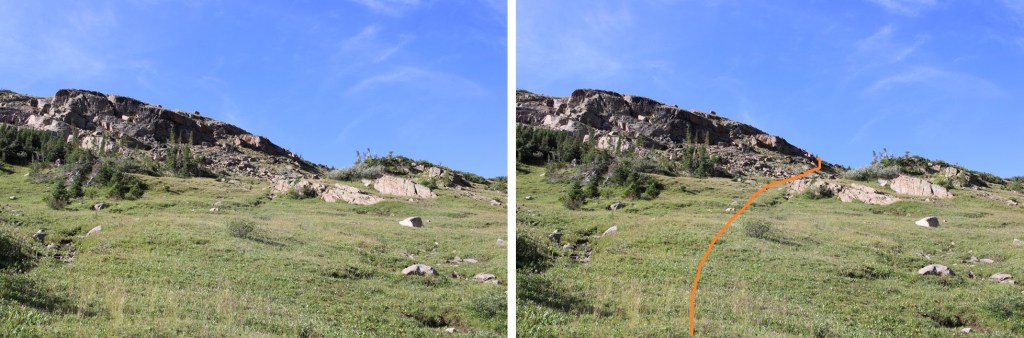
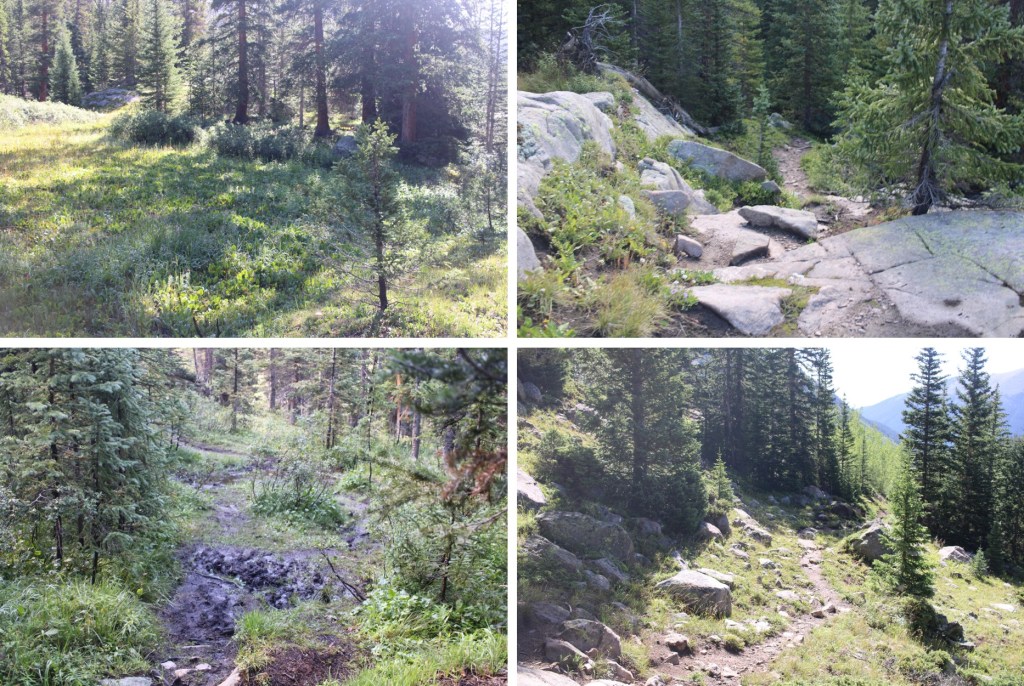
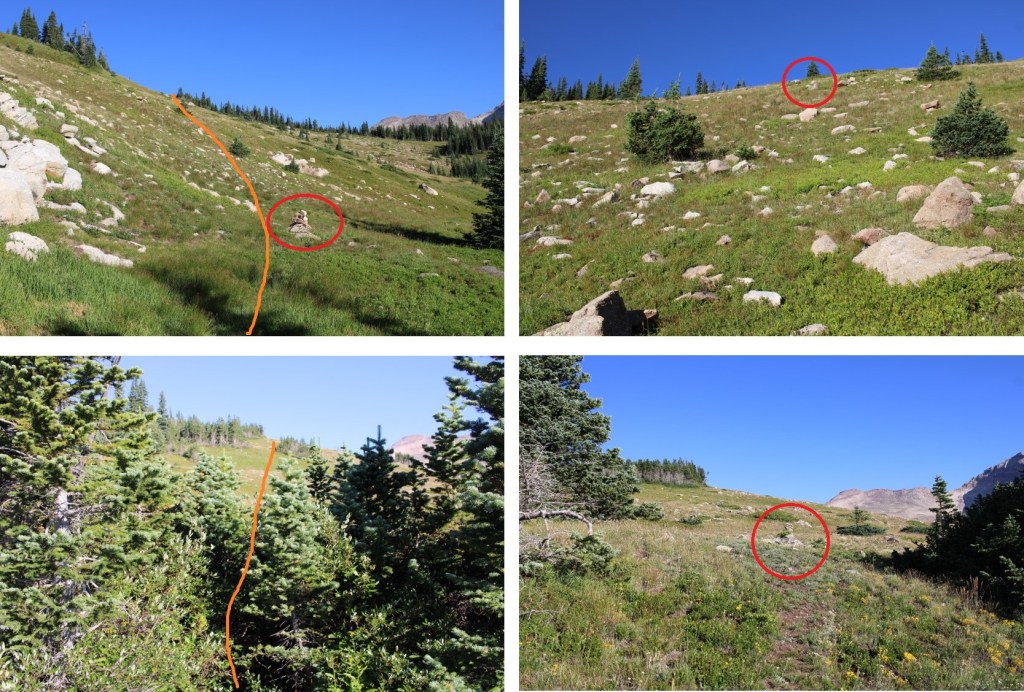
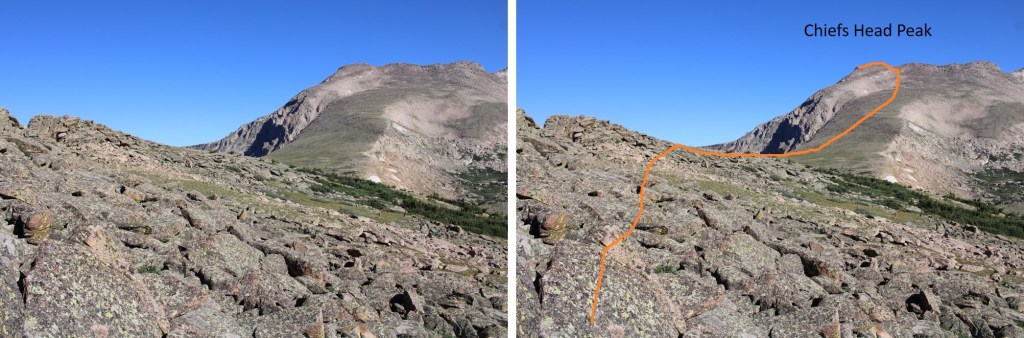
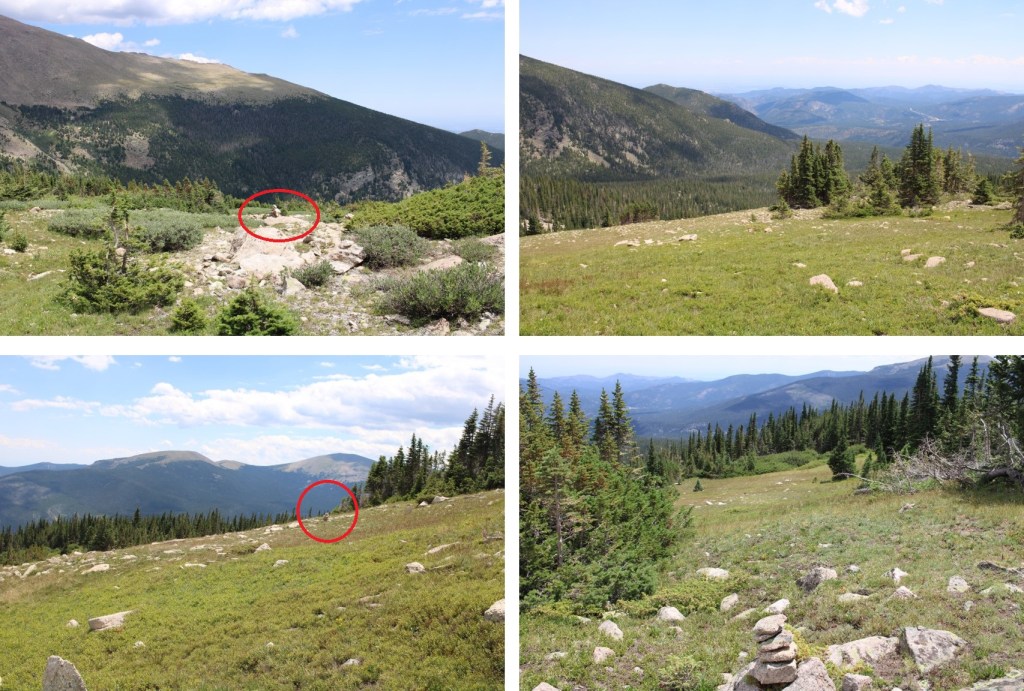
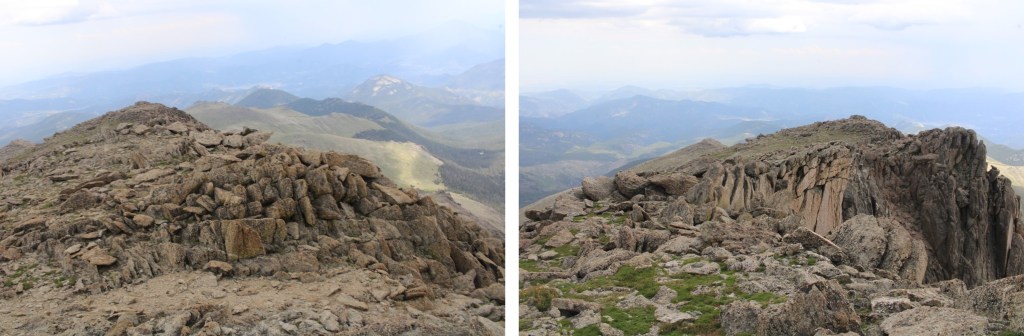
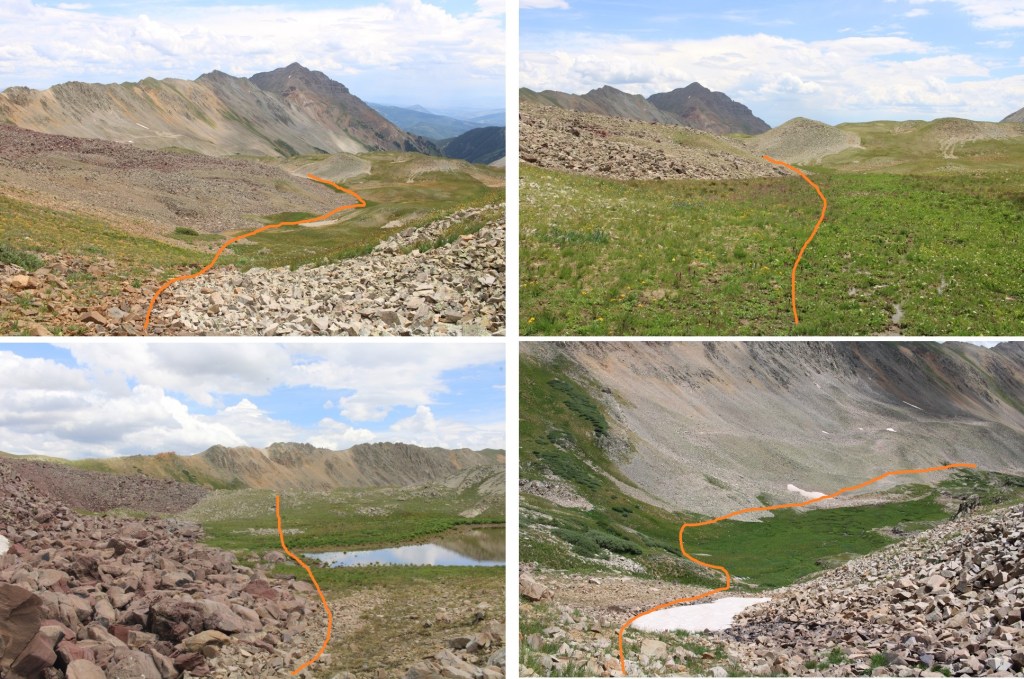
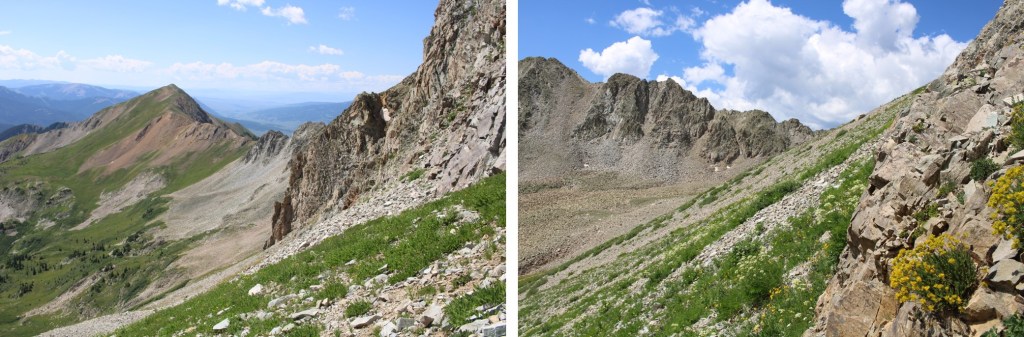
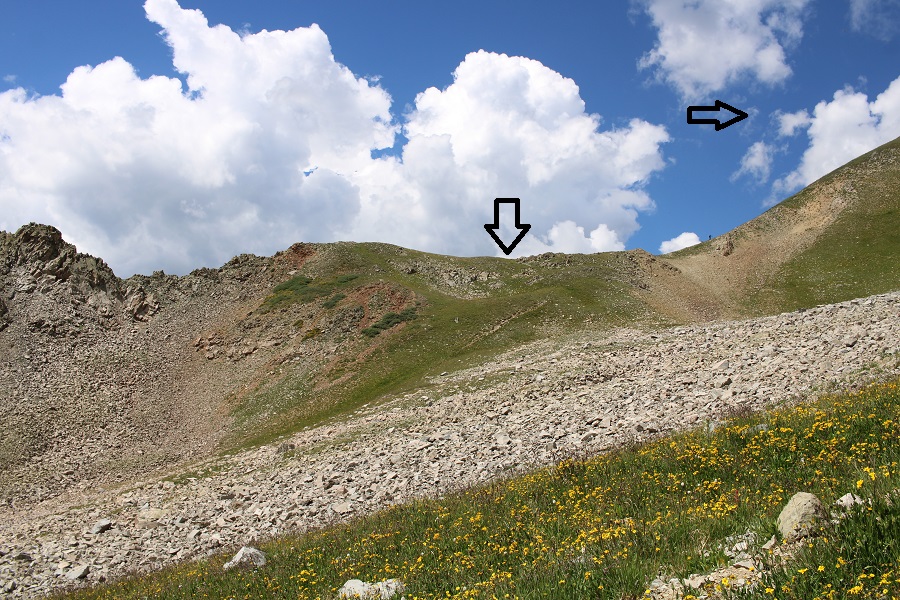
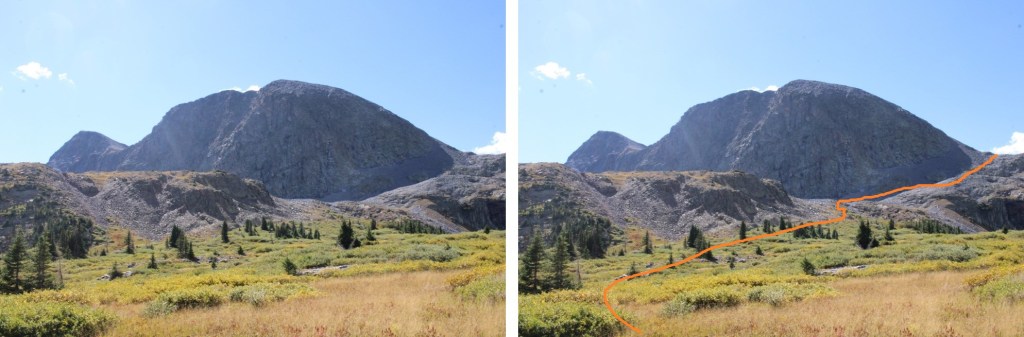
At the top of the pass I headed southwest, following the cairns as they descended a bit. The trail goes on to Half Moon Lake, but I didn’t want to go there, so after descending down a small gully I changed directions, and gained the ridge to the west.

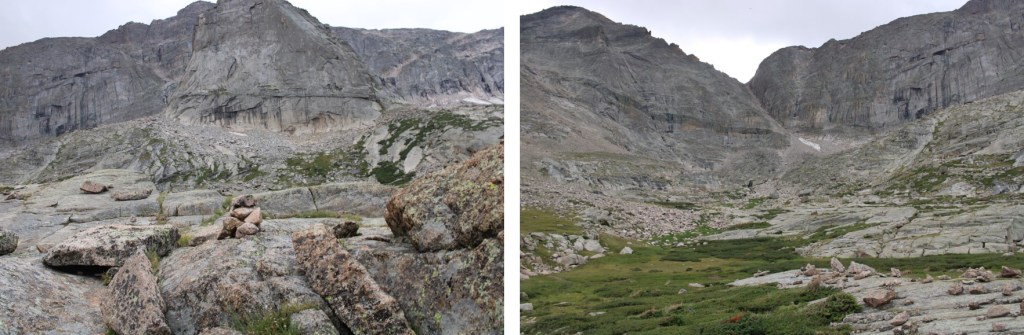
I spent a lot of time putting cairns in this area to help with navigation, but as long as you gain the ridge, the next part of the route will be obvious.

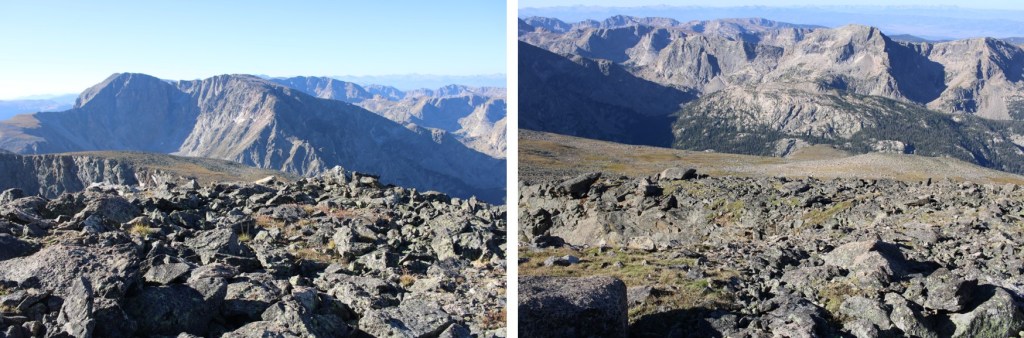
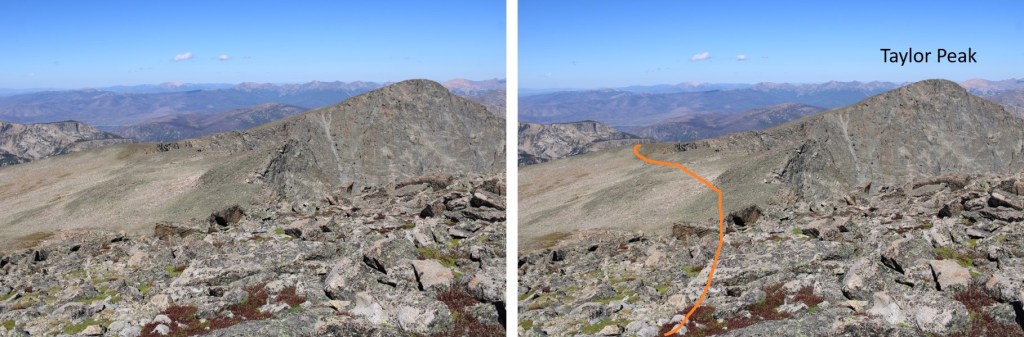
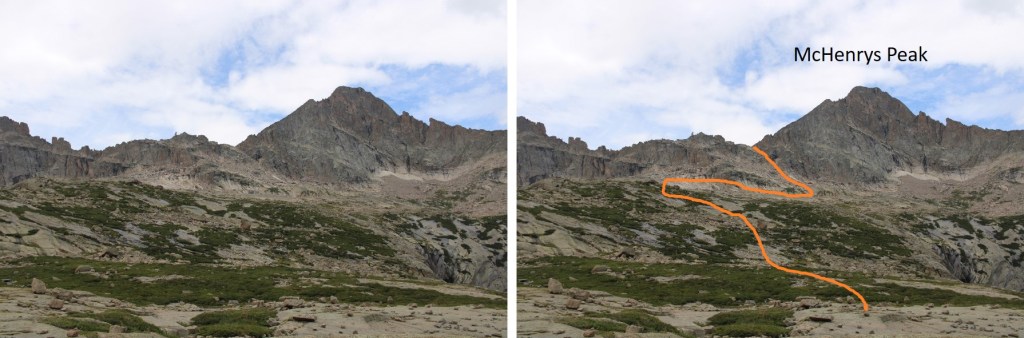
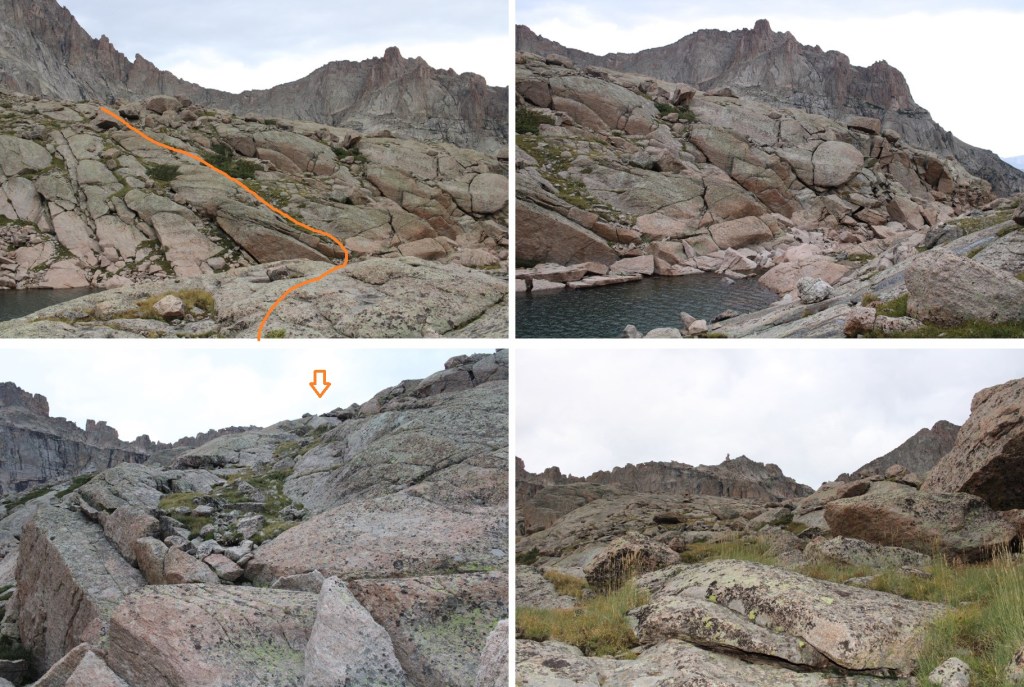
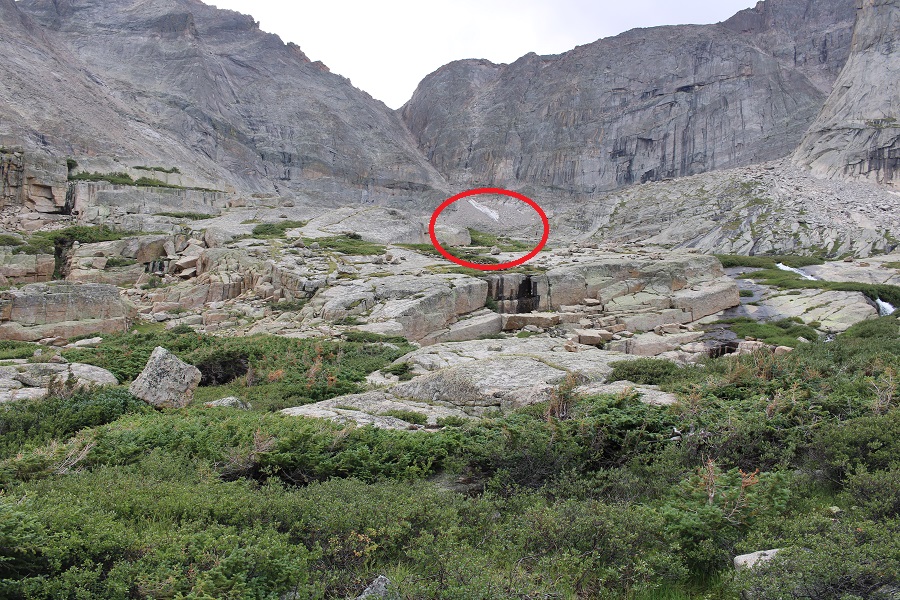
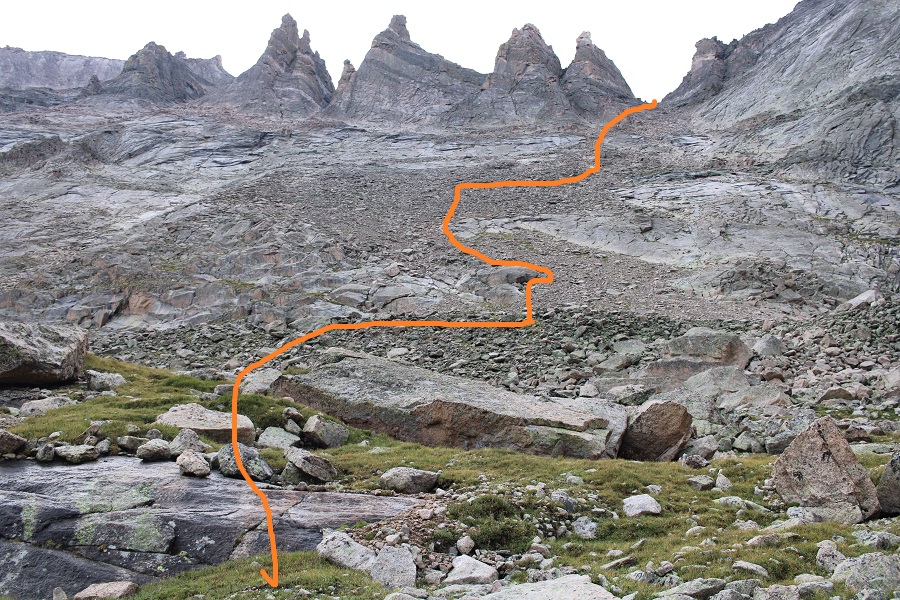
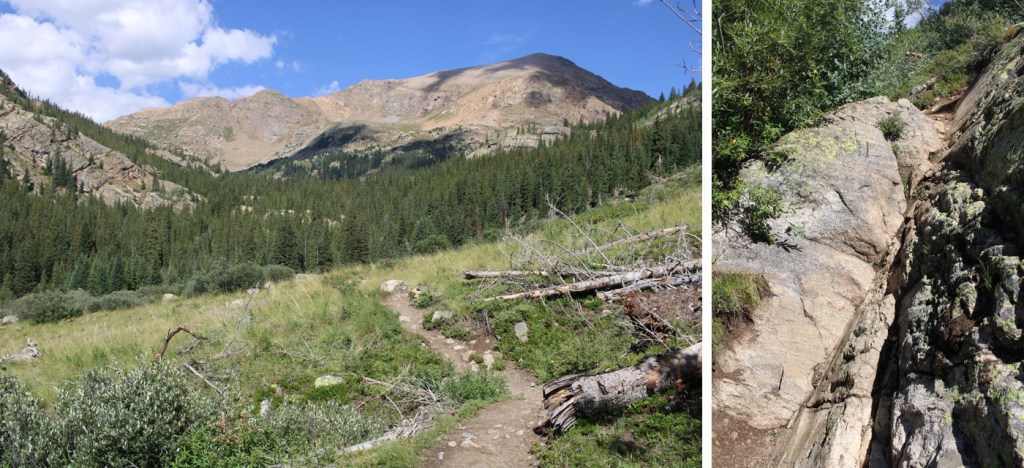
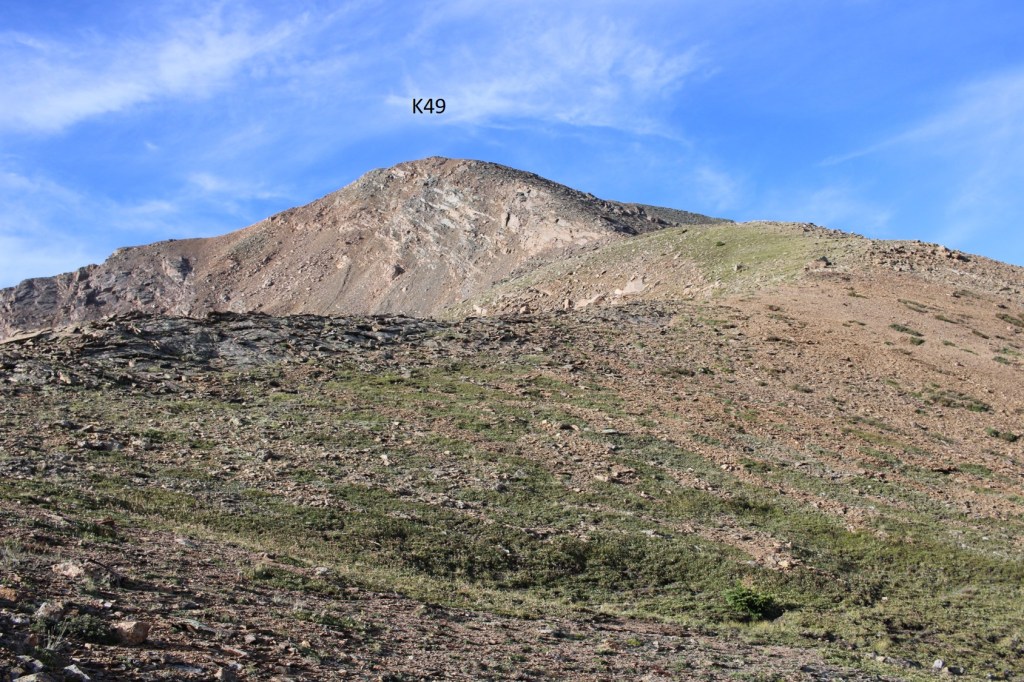
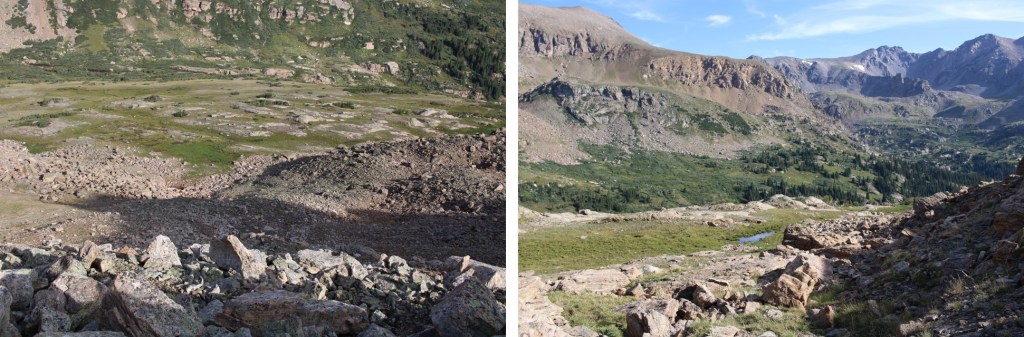
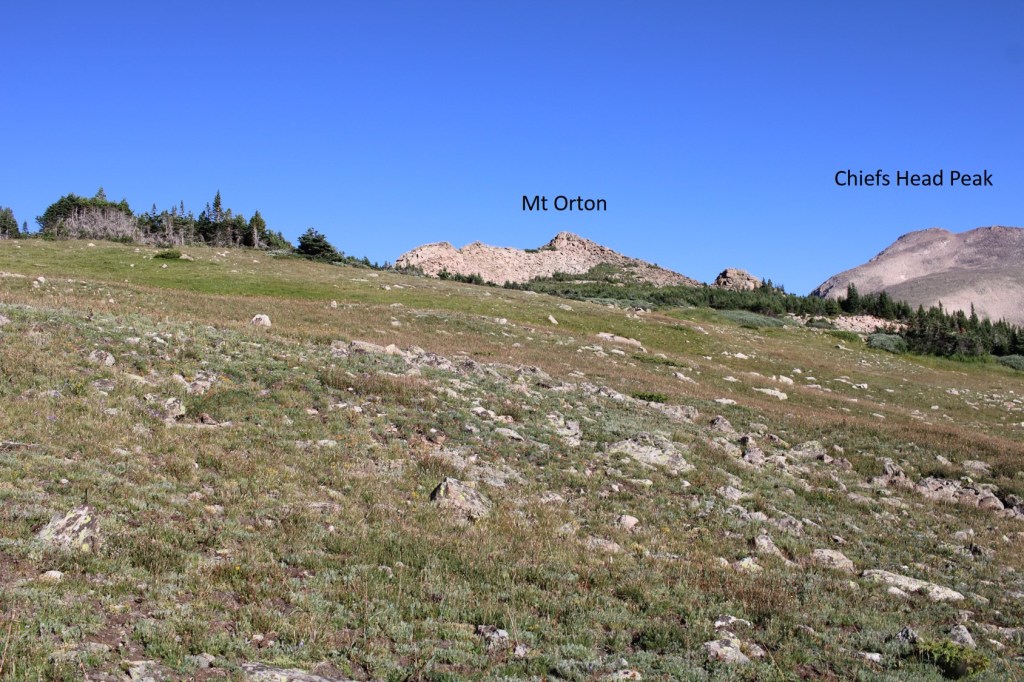
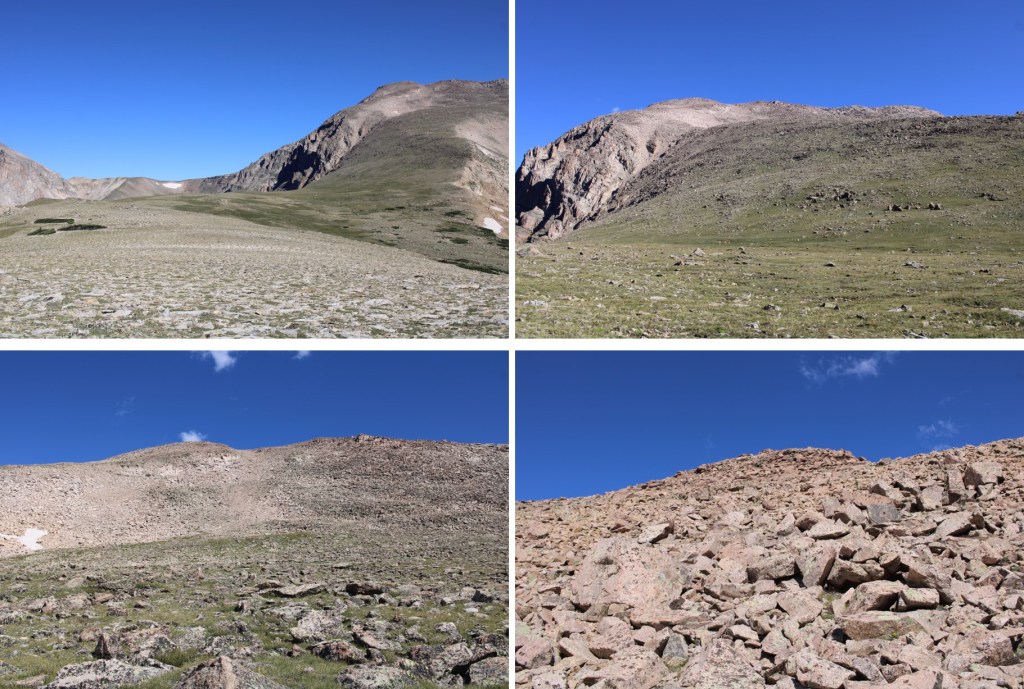
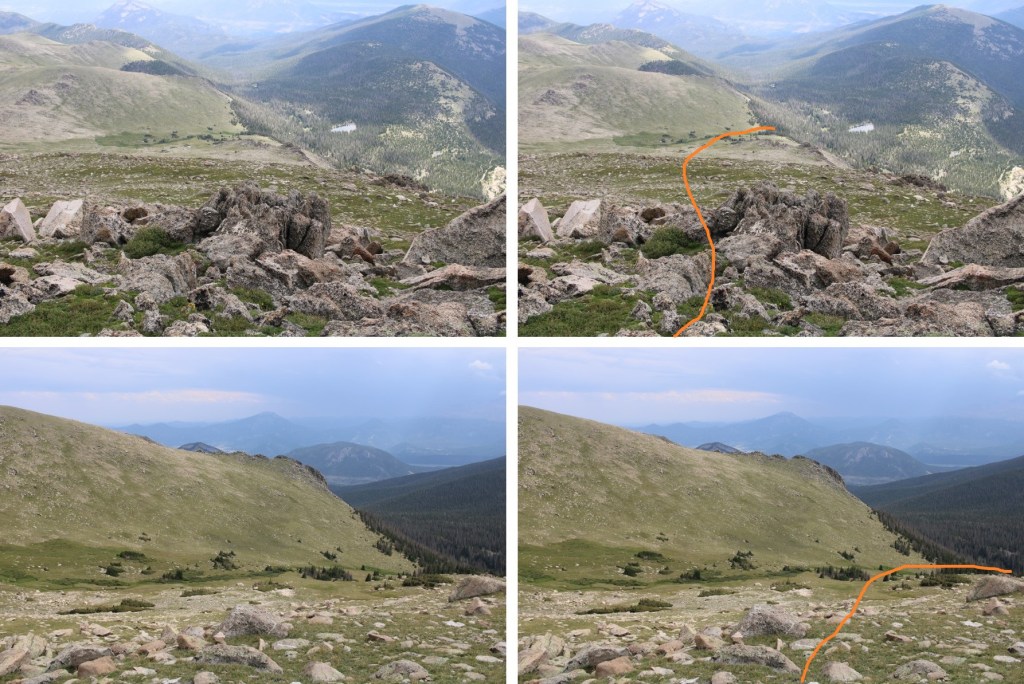
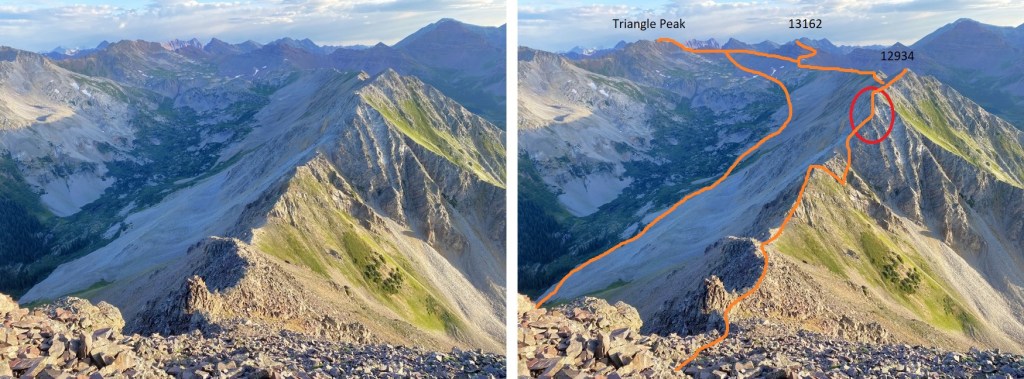
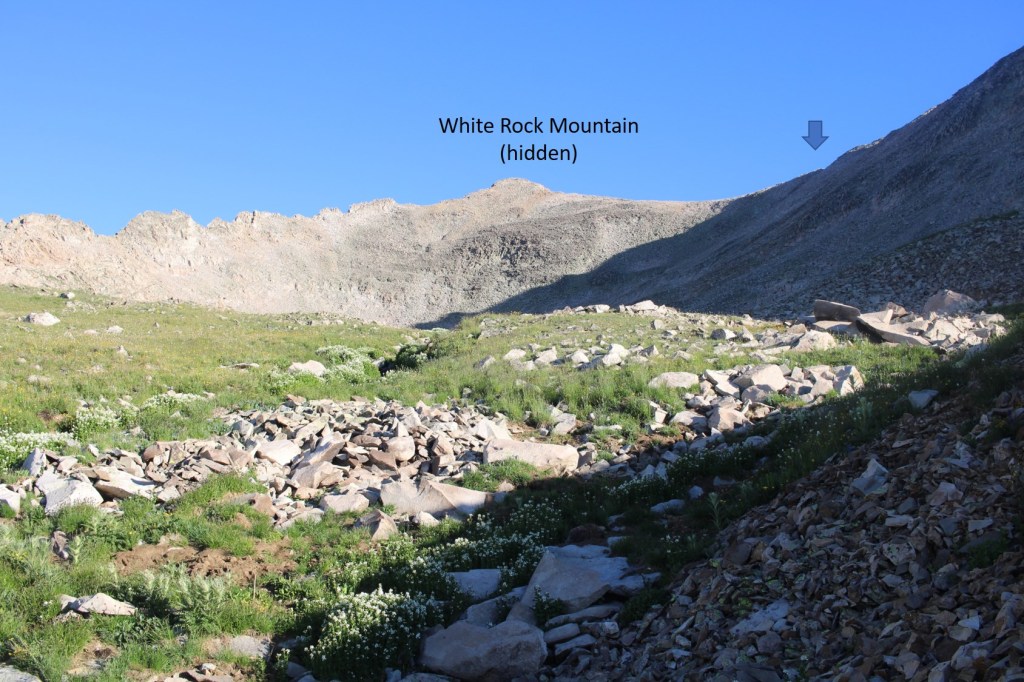
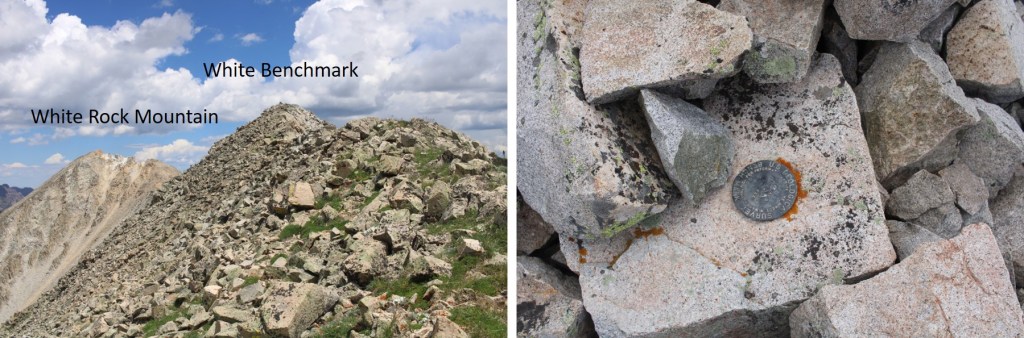
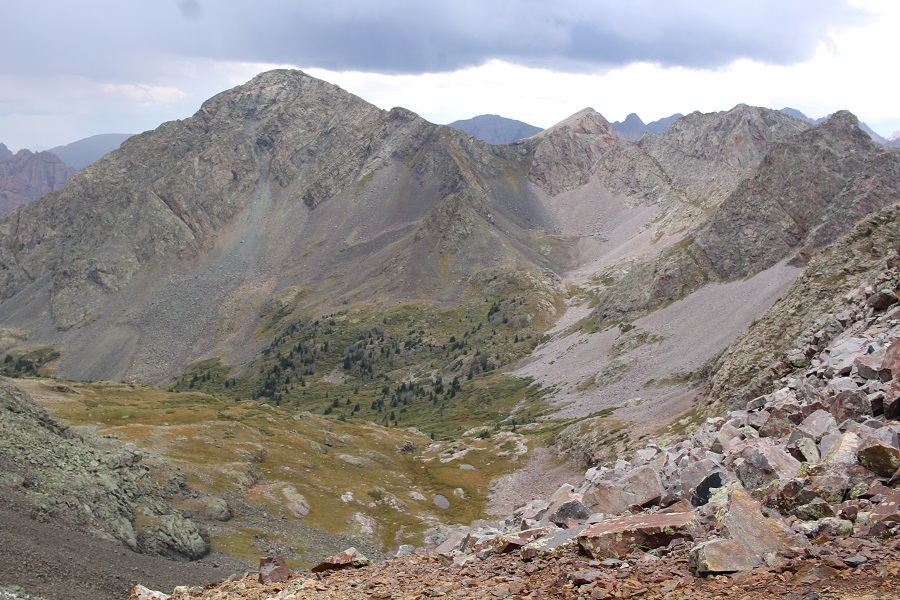
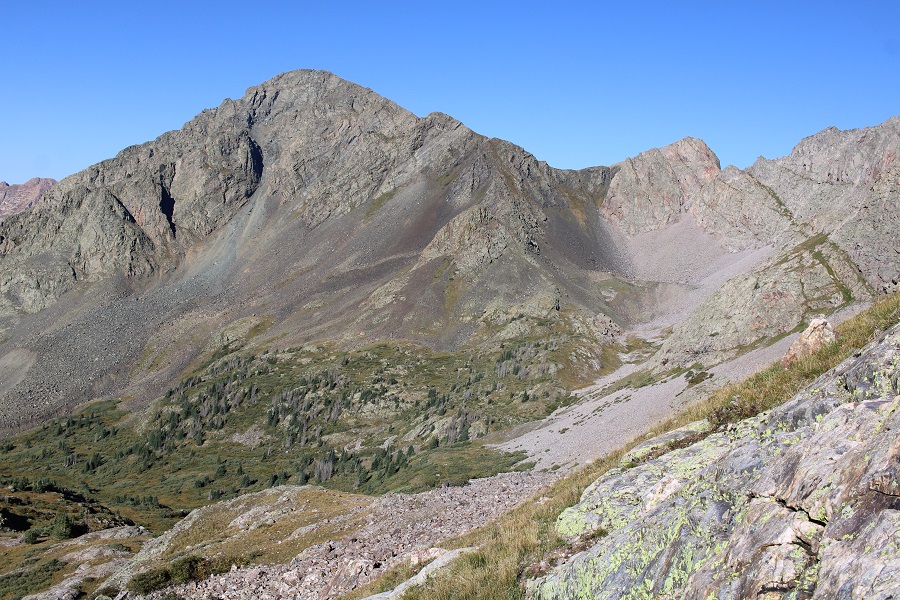
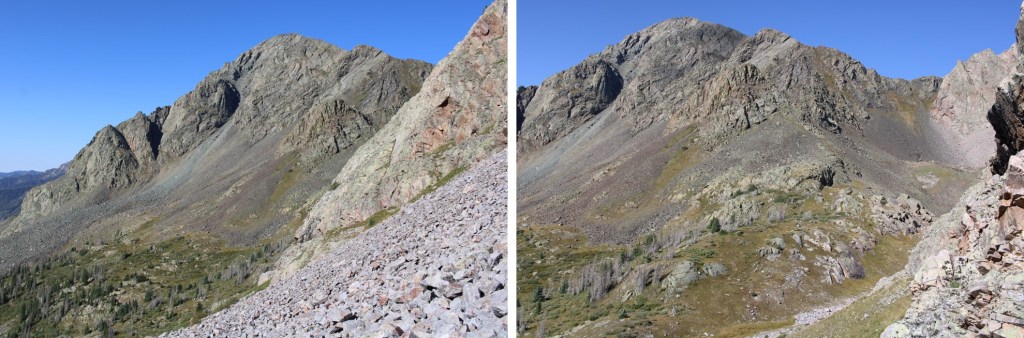
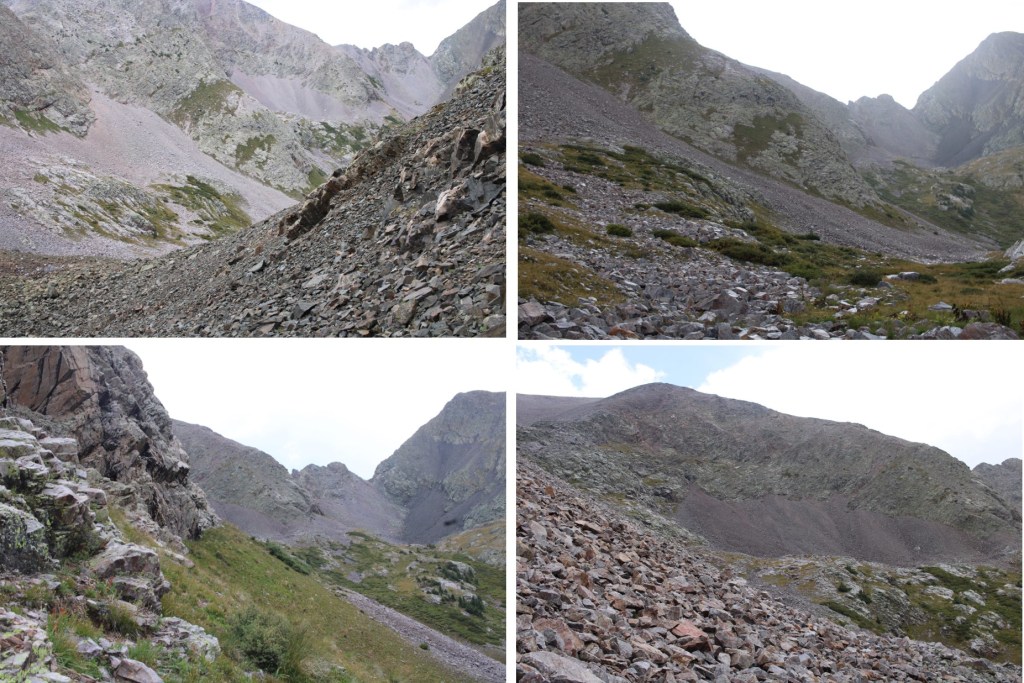
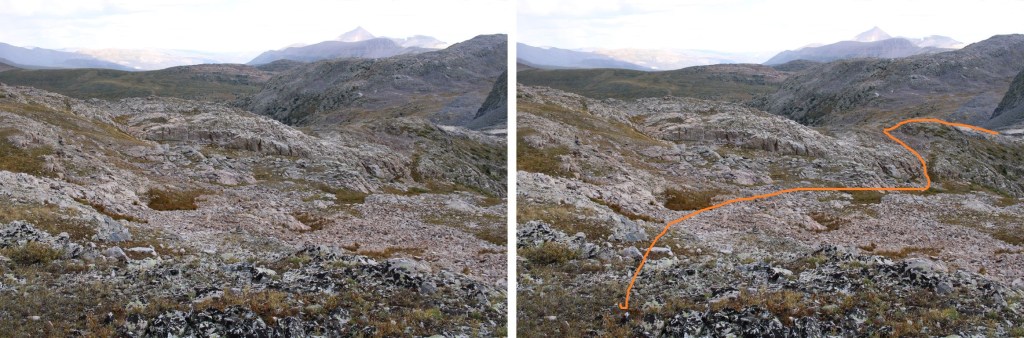
From the top of the ridge, I could see Mt Soso, and the gully I would need to climb to access the next basin, where Irving and North Irving were. 

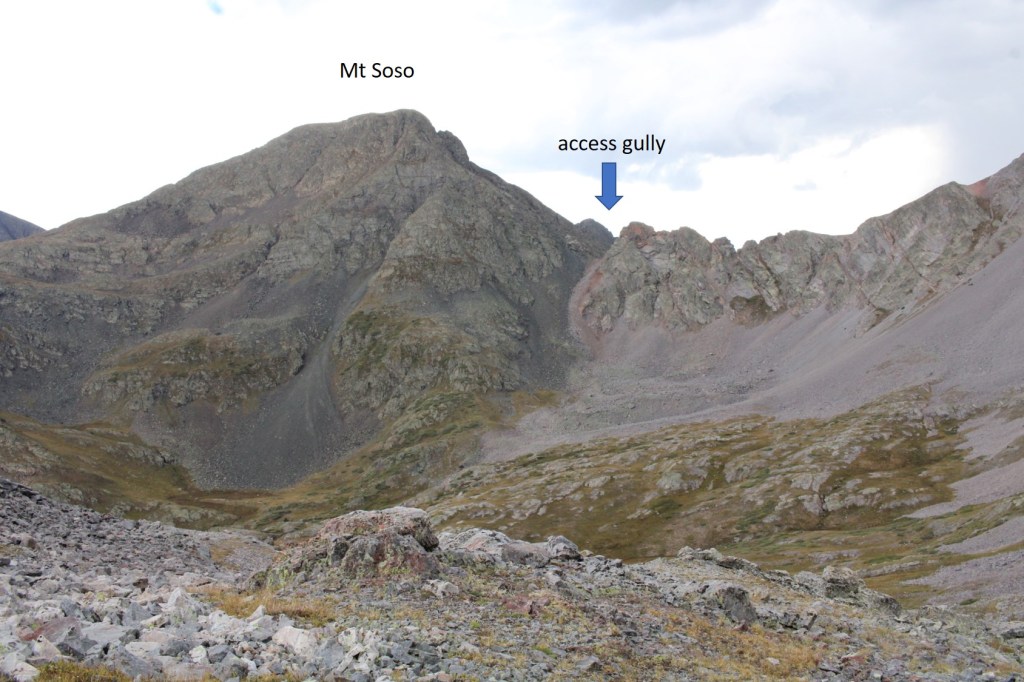
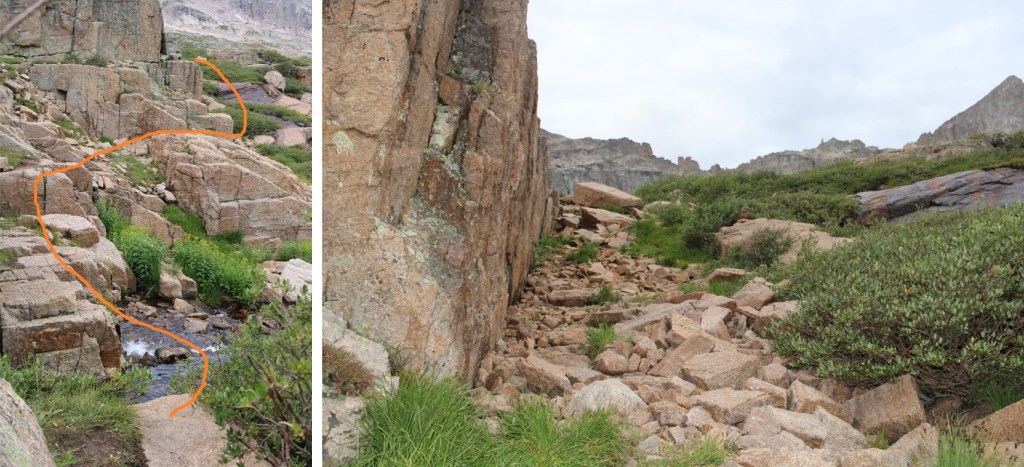
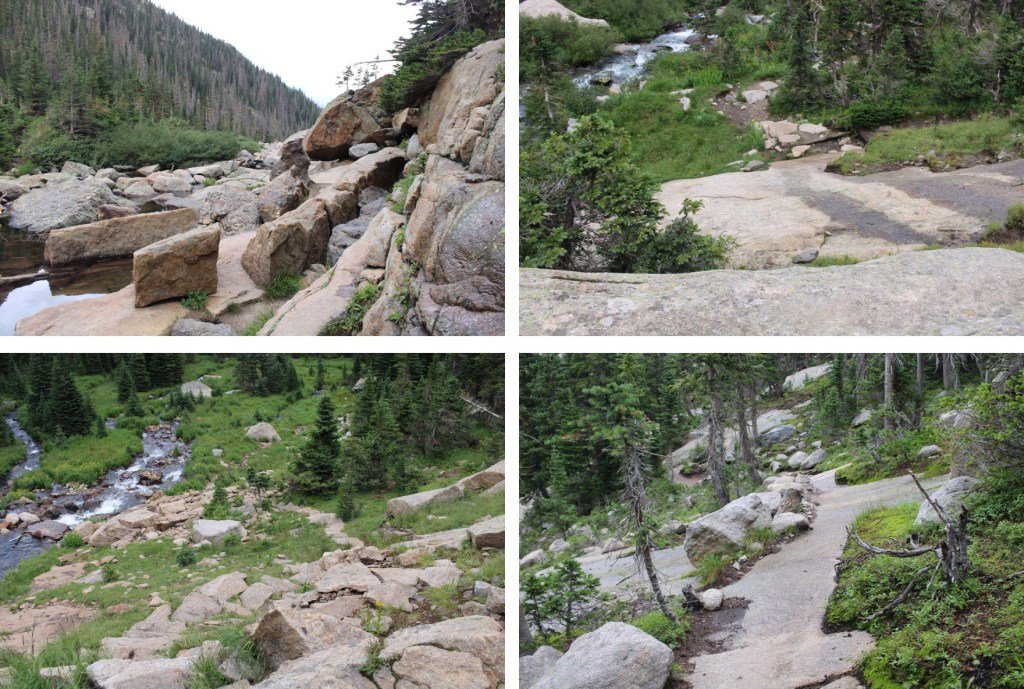
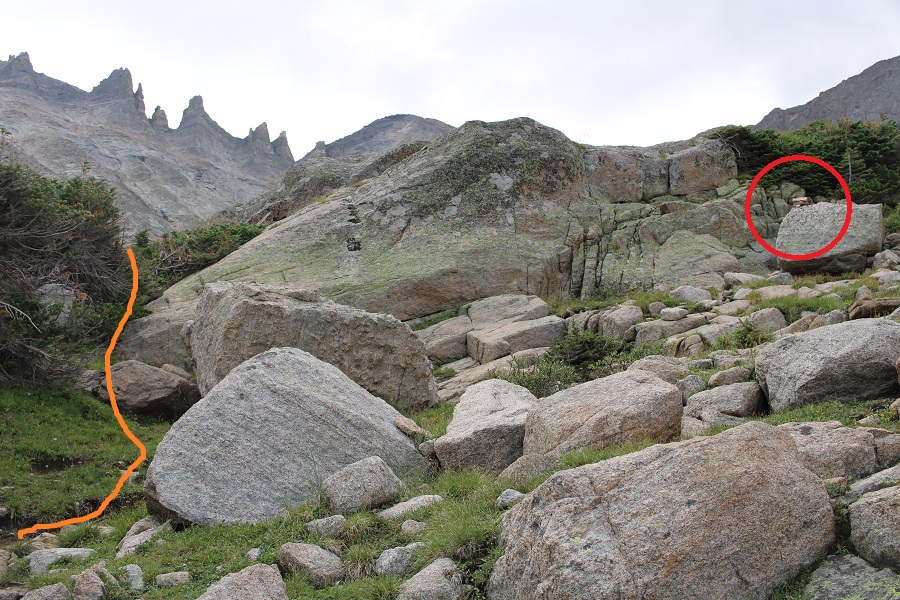
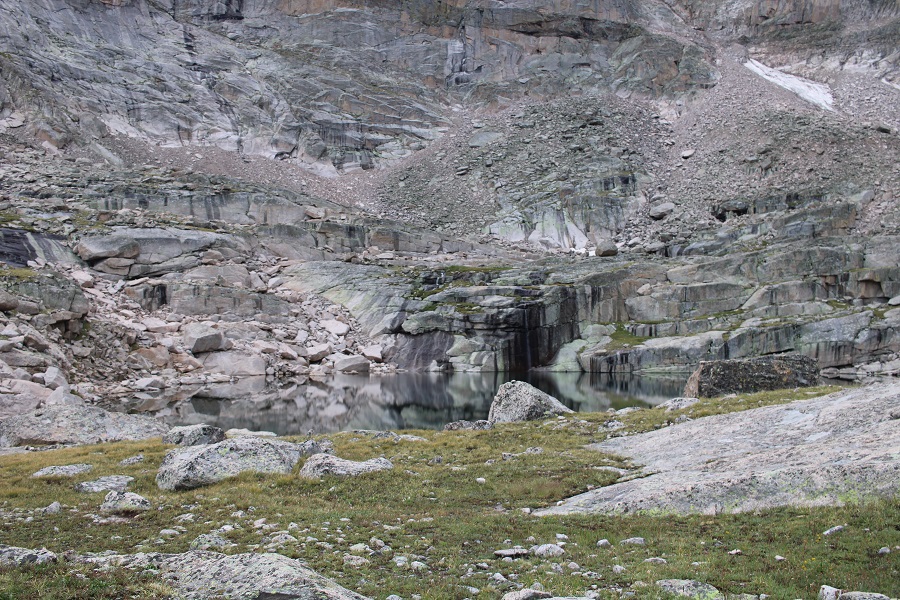
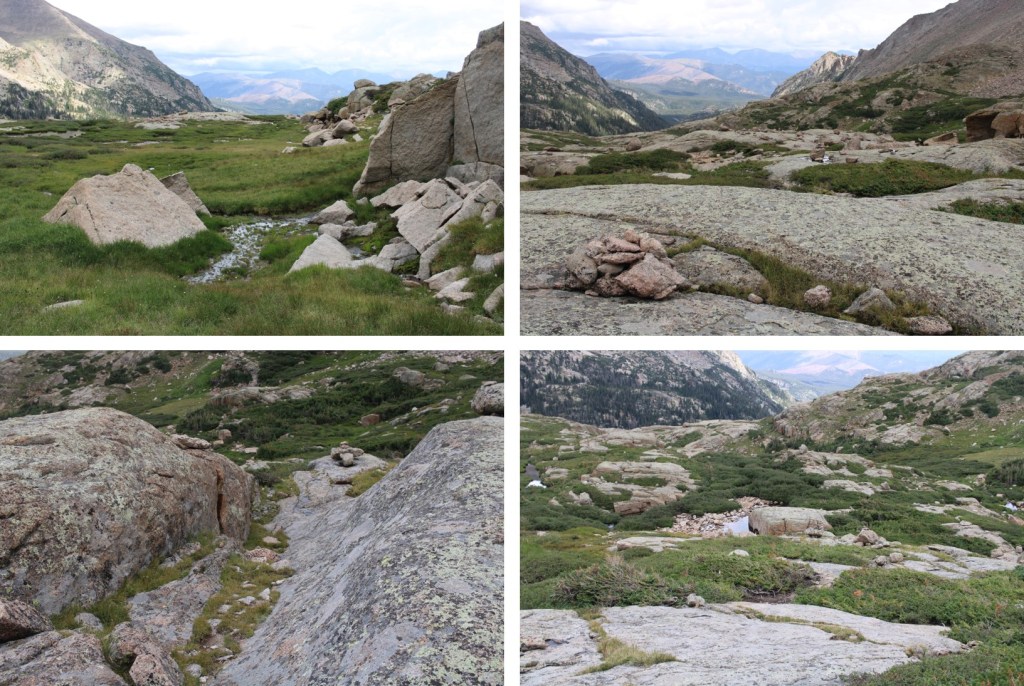
This is the route I took to get to the gully.  There are a lot of small ponds in this area, and marshy areas.  I found I could skirt the water to the north, and then easily access the gully

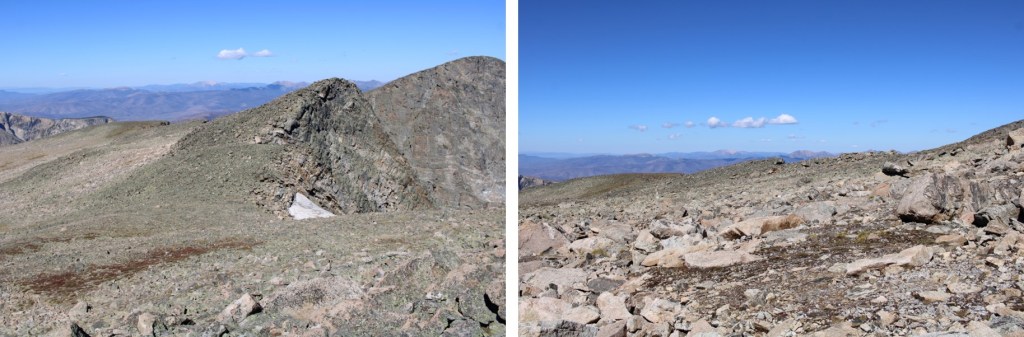
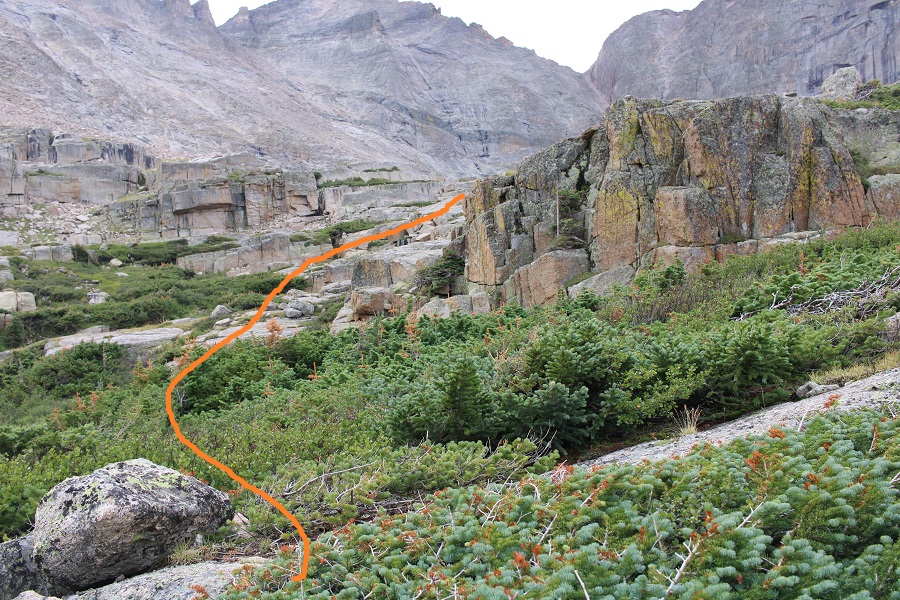
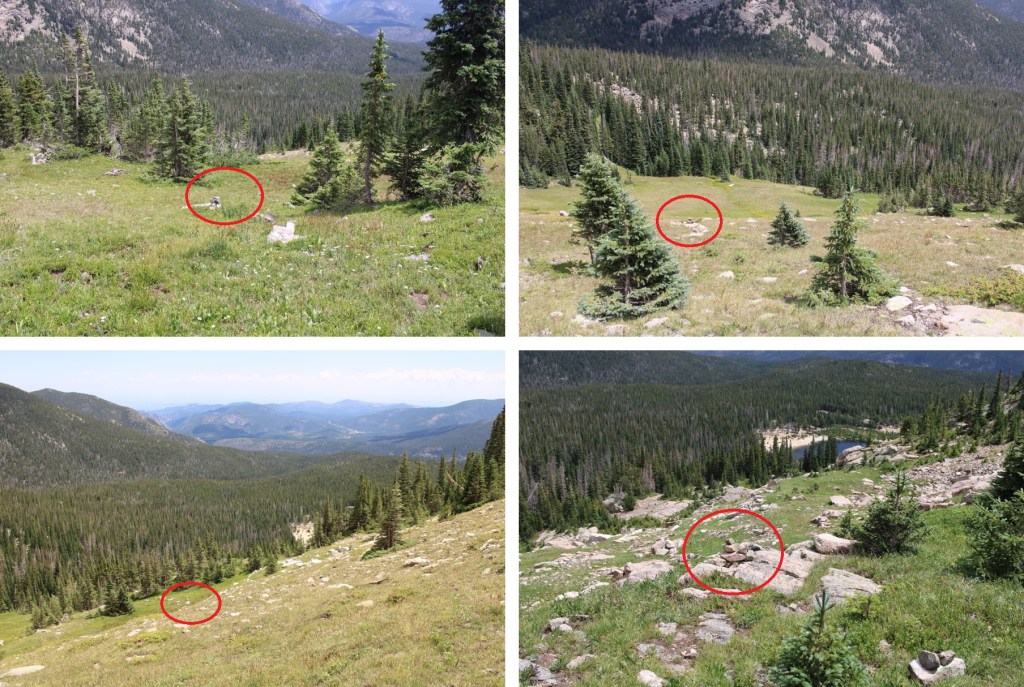
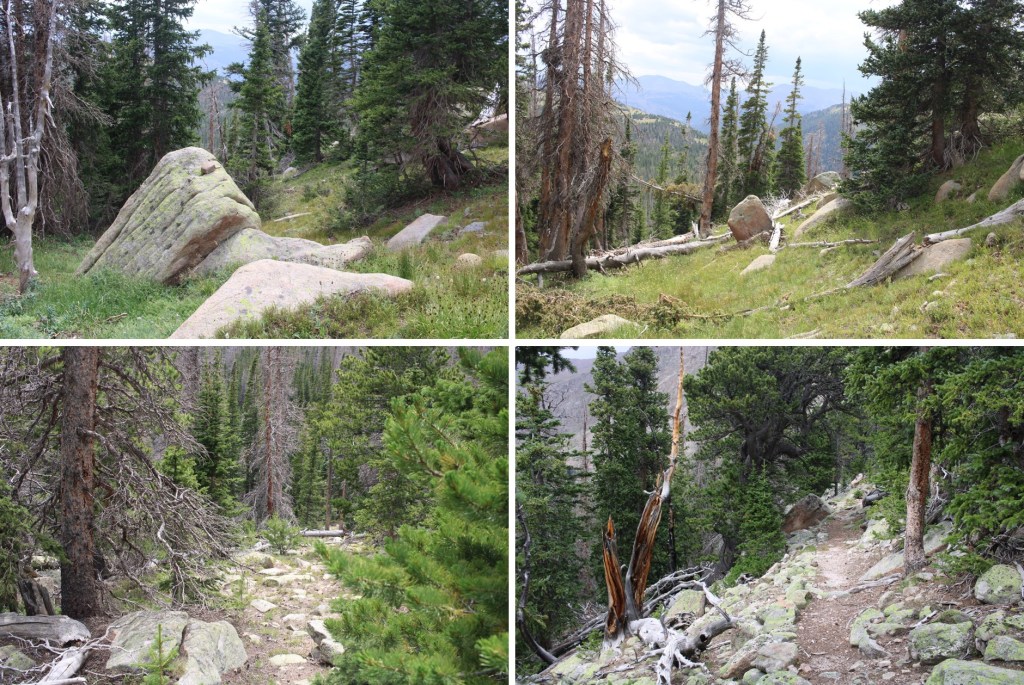
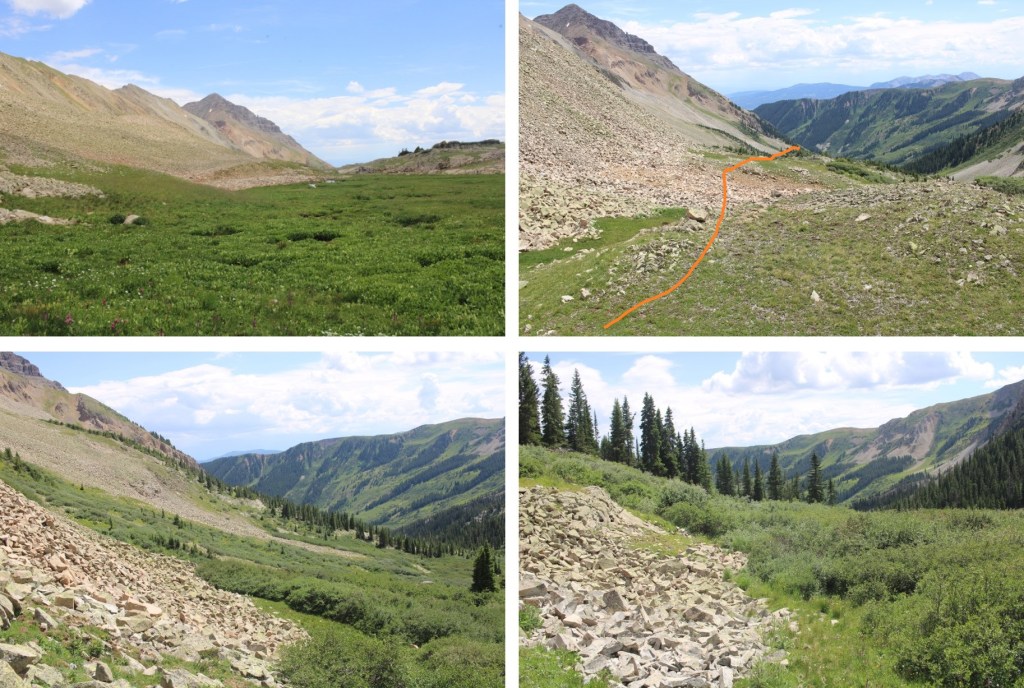
I first had to descend 450’ into the basin (I stayed high, as you can descend much further if you take a different/lower route), and then re-ascended 560’ up the gully.

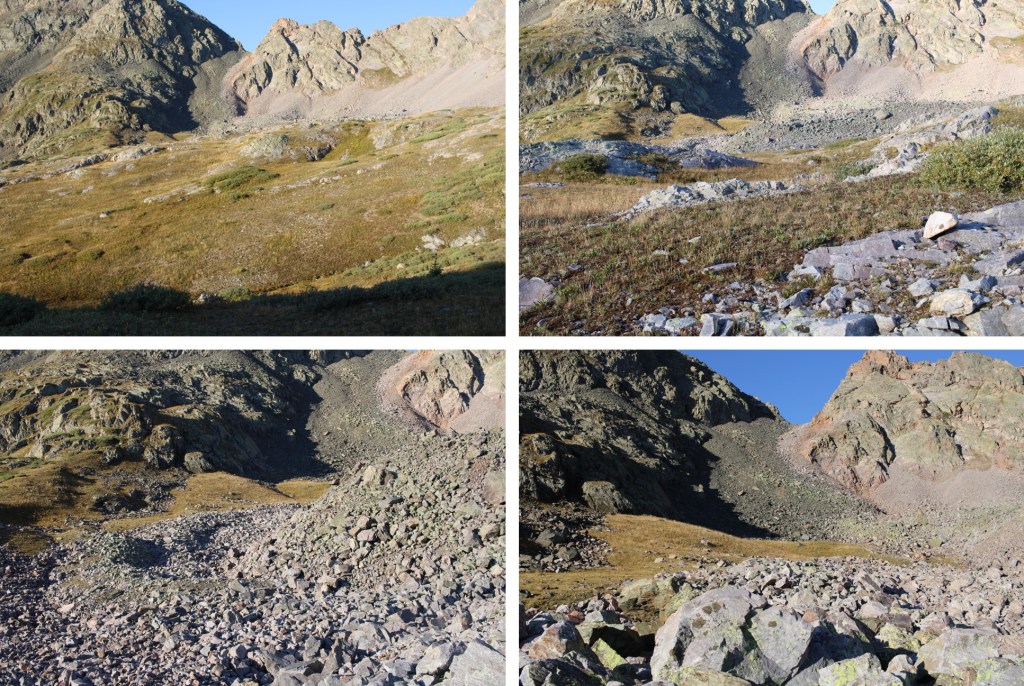
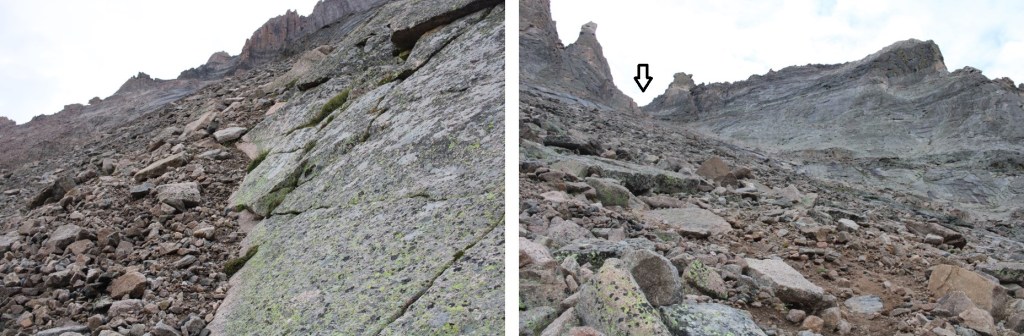
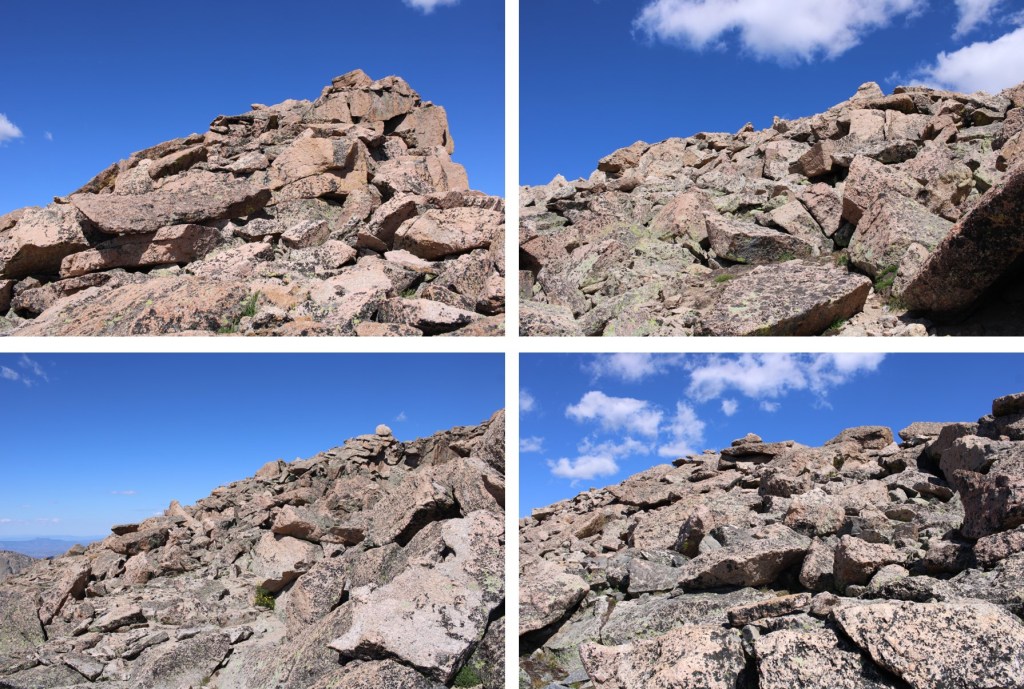
The gully really wasn’t that bad to ascend

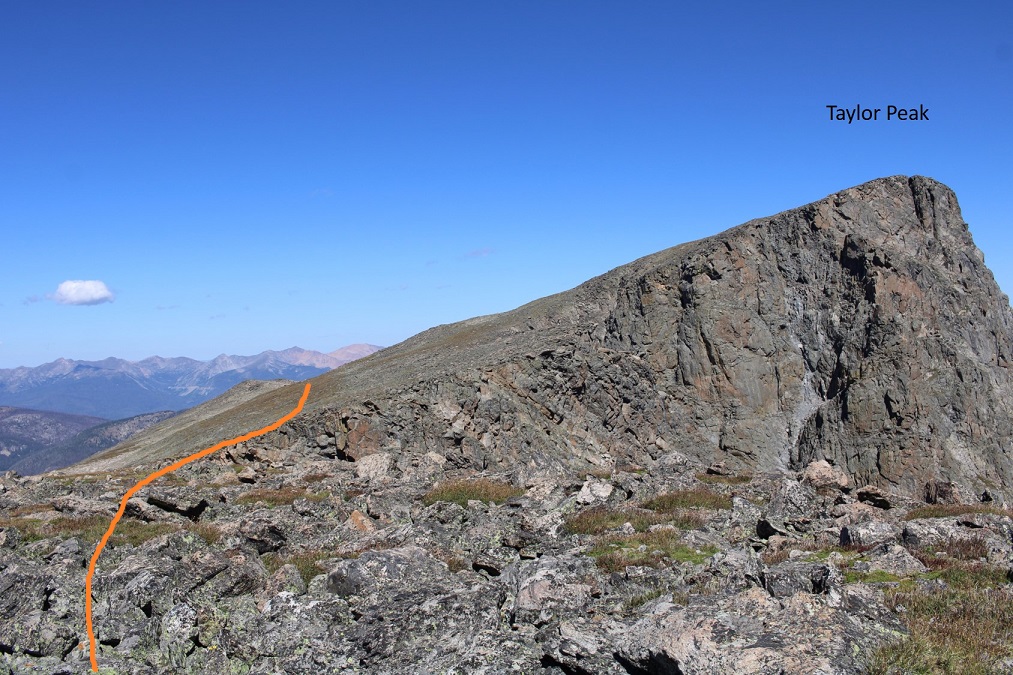
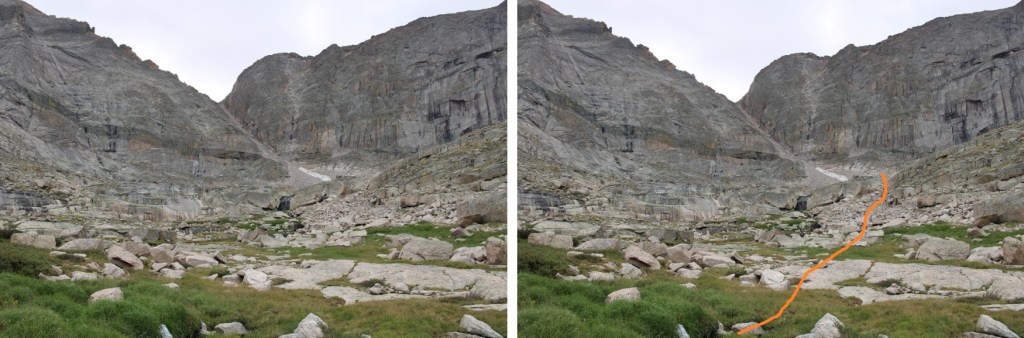
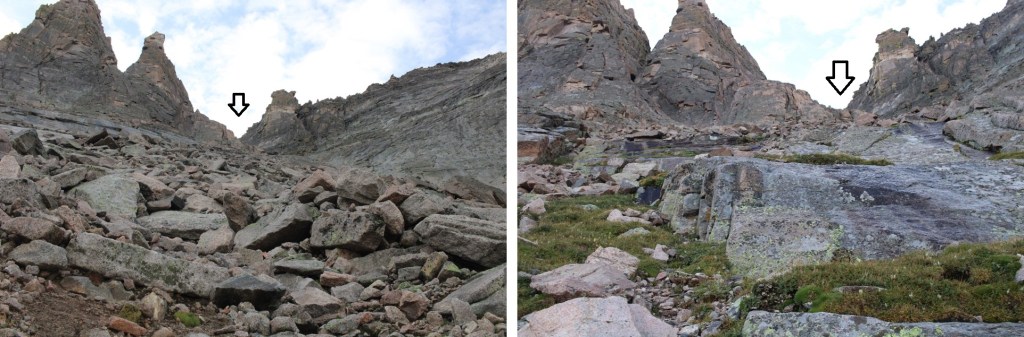
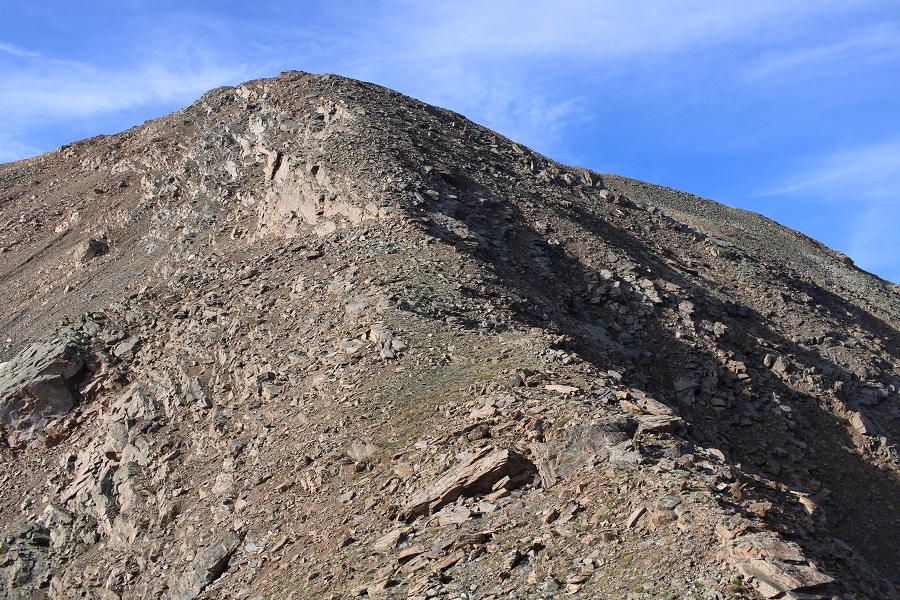
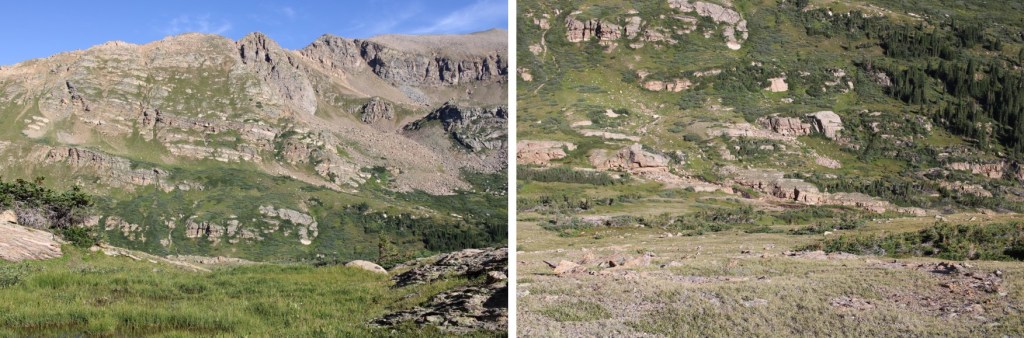
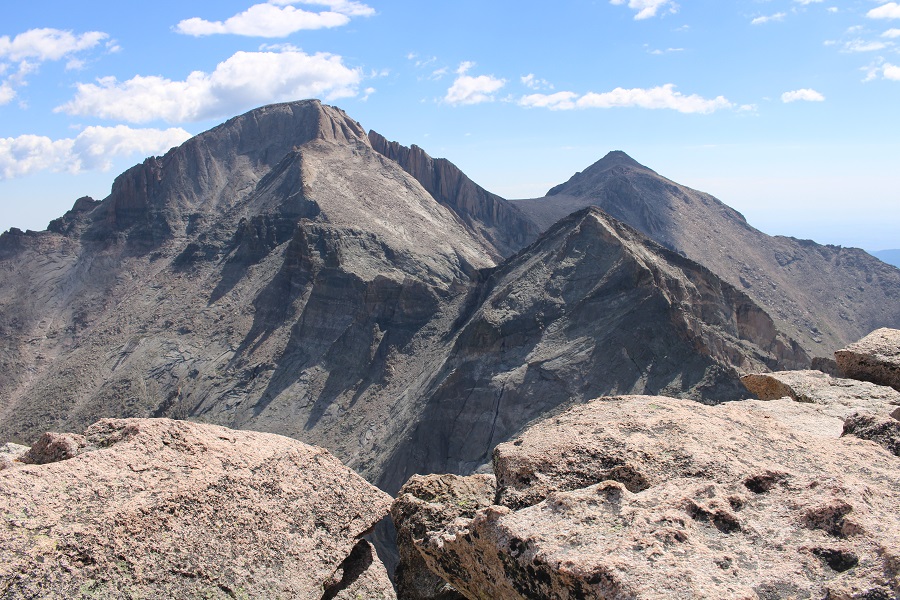
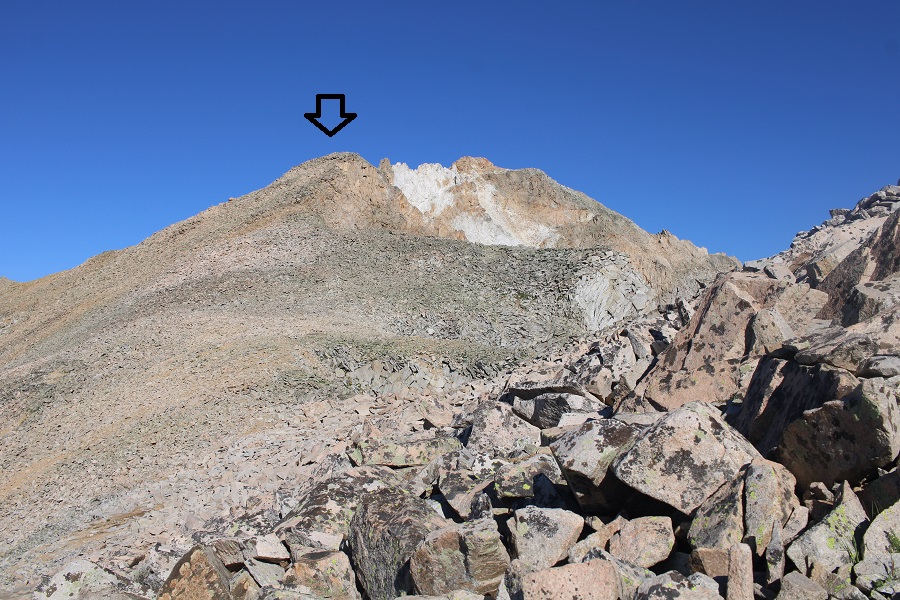
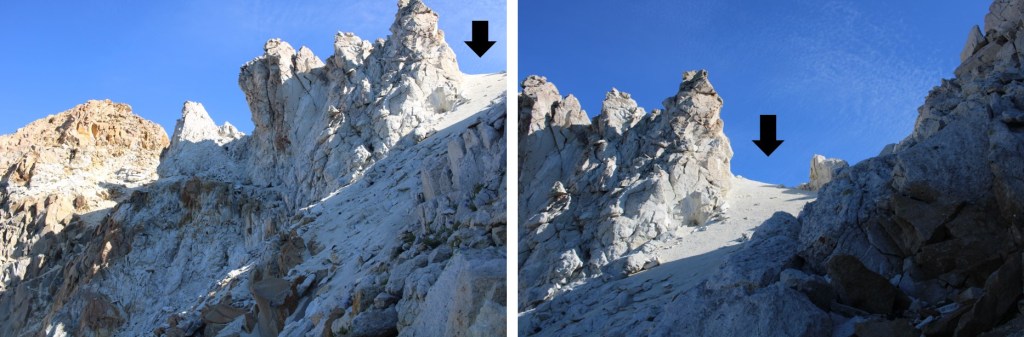
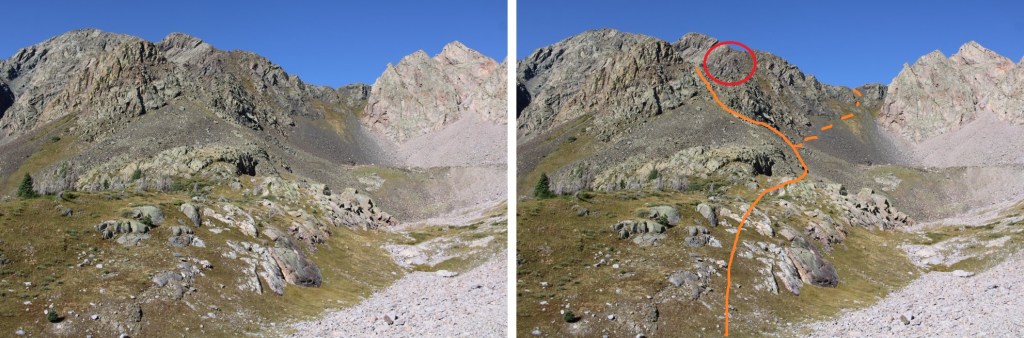
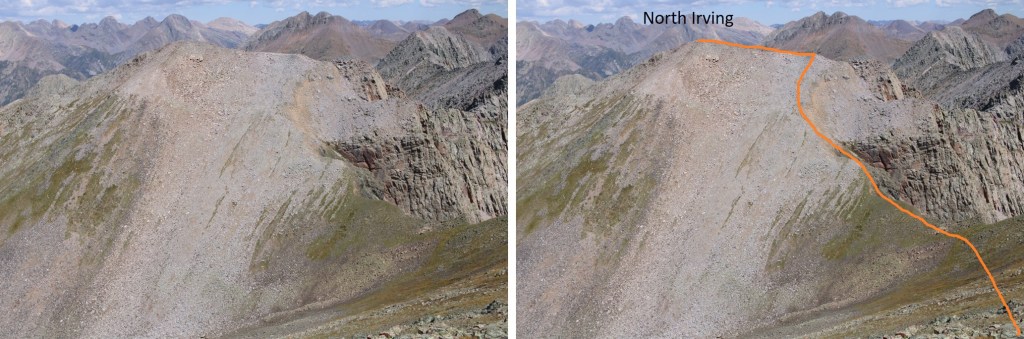
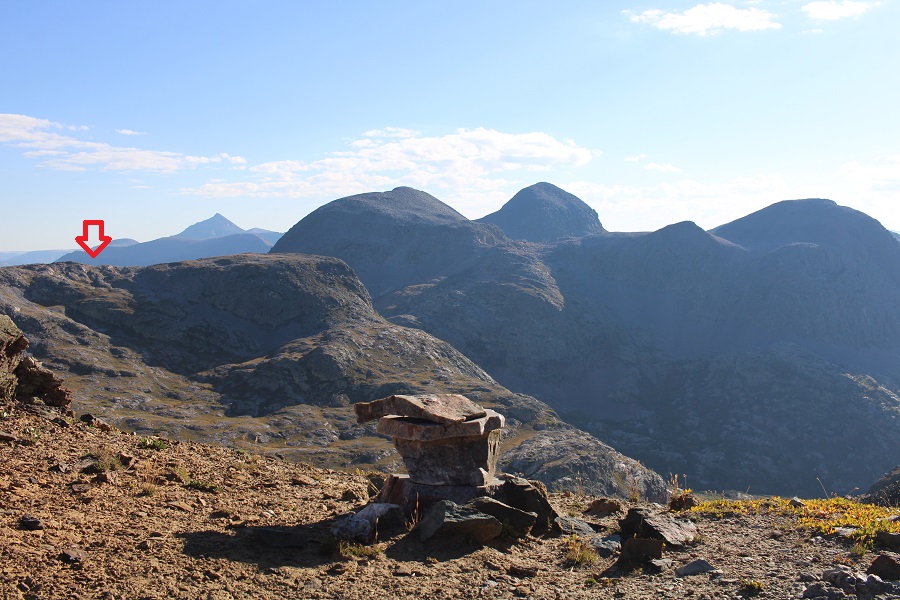
At the top of the gully, I could see Irving Peak and North Irving.

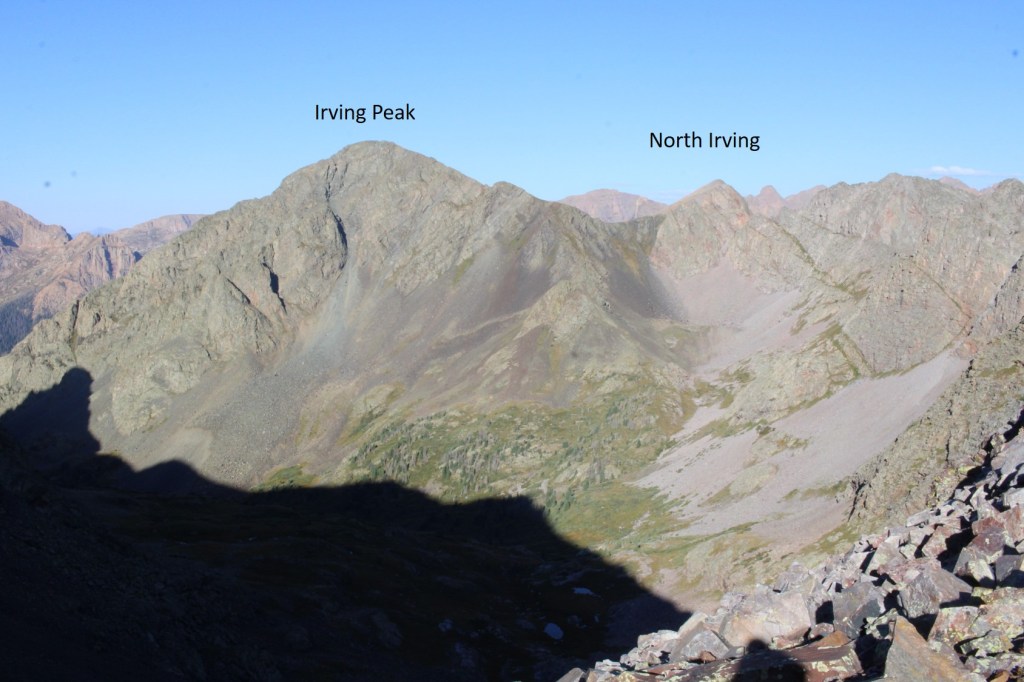
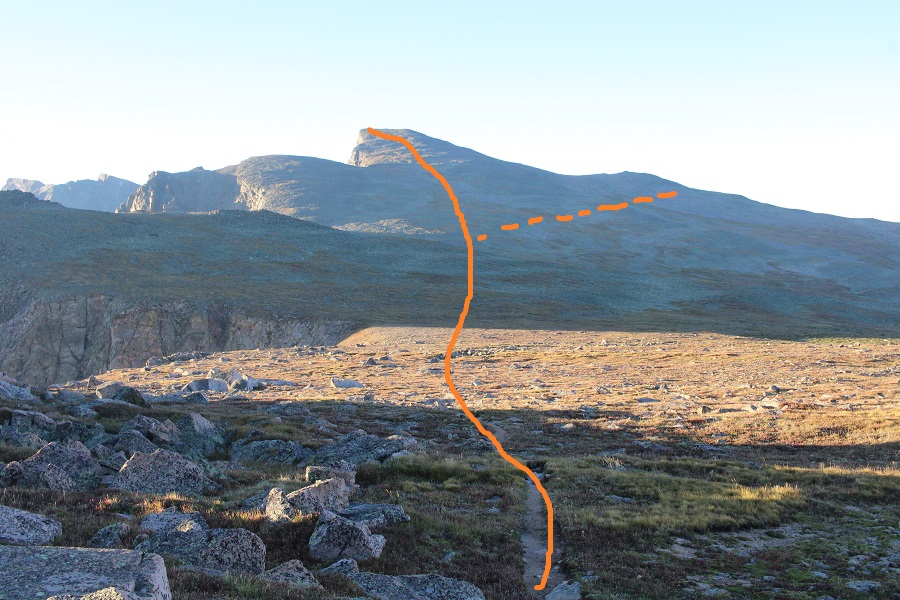
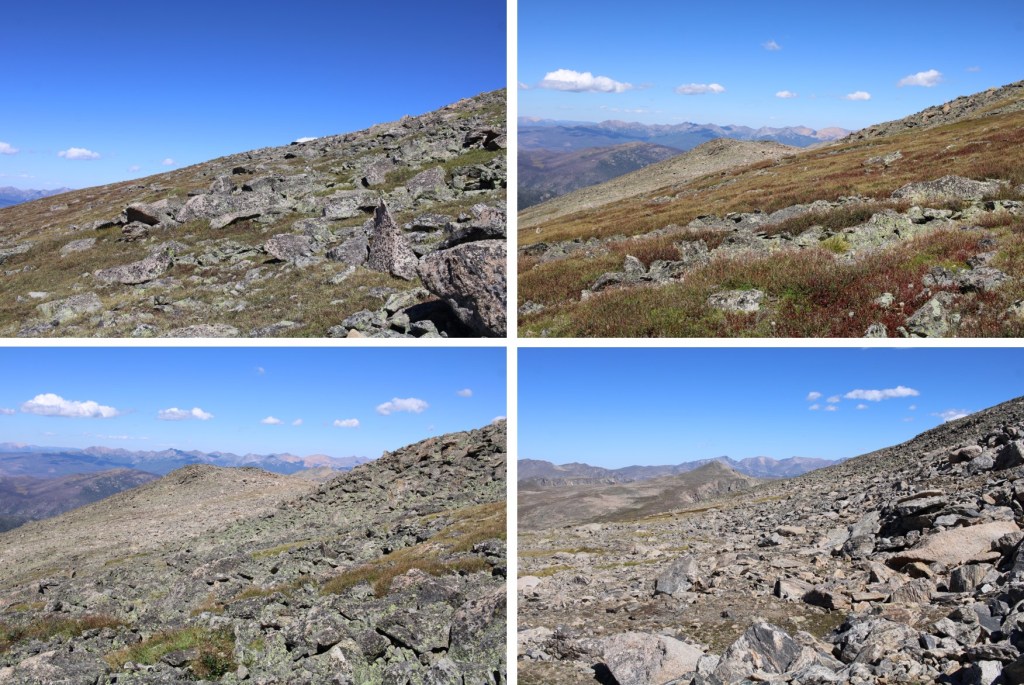
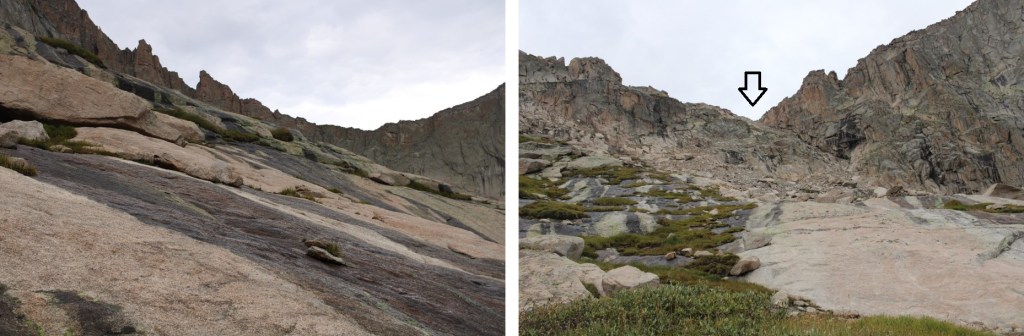
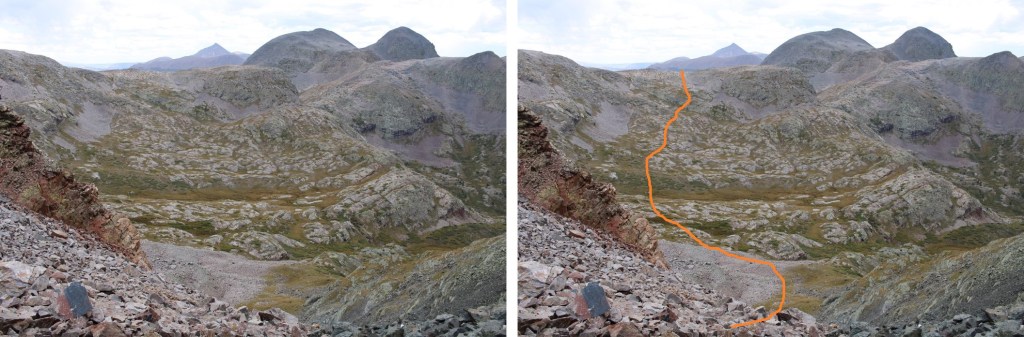
I had a clear visual of how I wanted to ascend, and descend to get there.  This is the overall route I took.  I stayed high, losing about 650’ of elevation, and paralleled the mountainside at around 12300’ to get to the base of Irving Peak.  The dotted line is my descent route off North Irving (more details later).

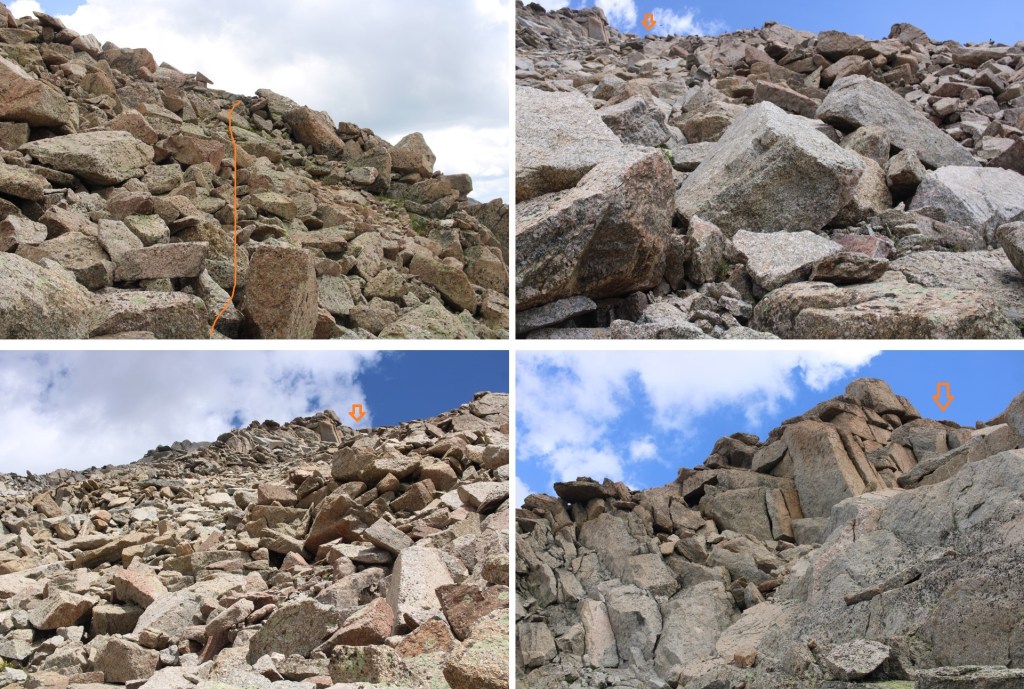
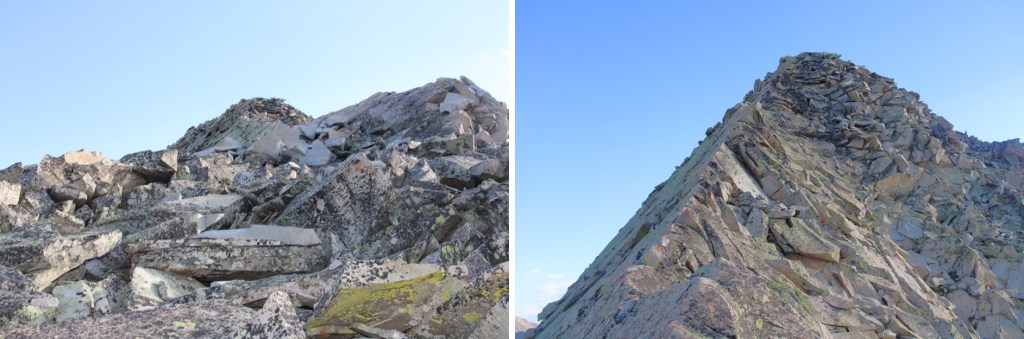
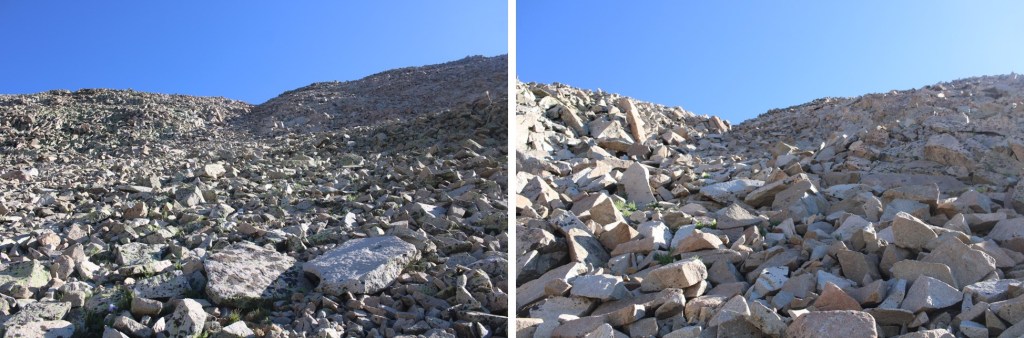
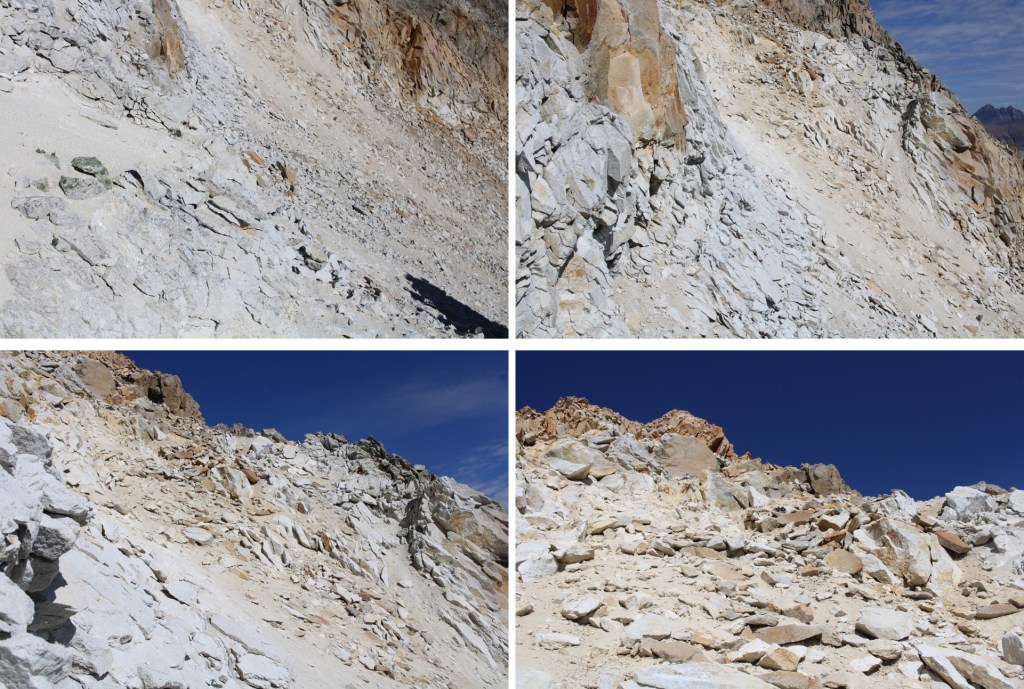
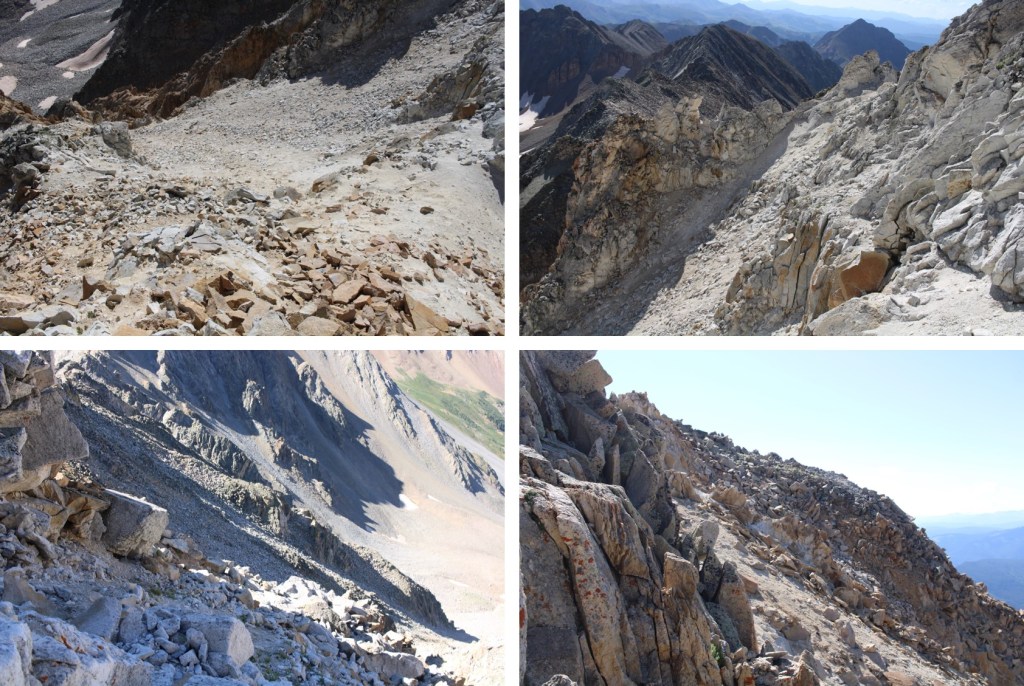
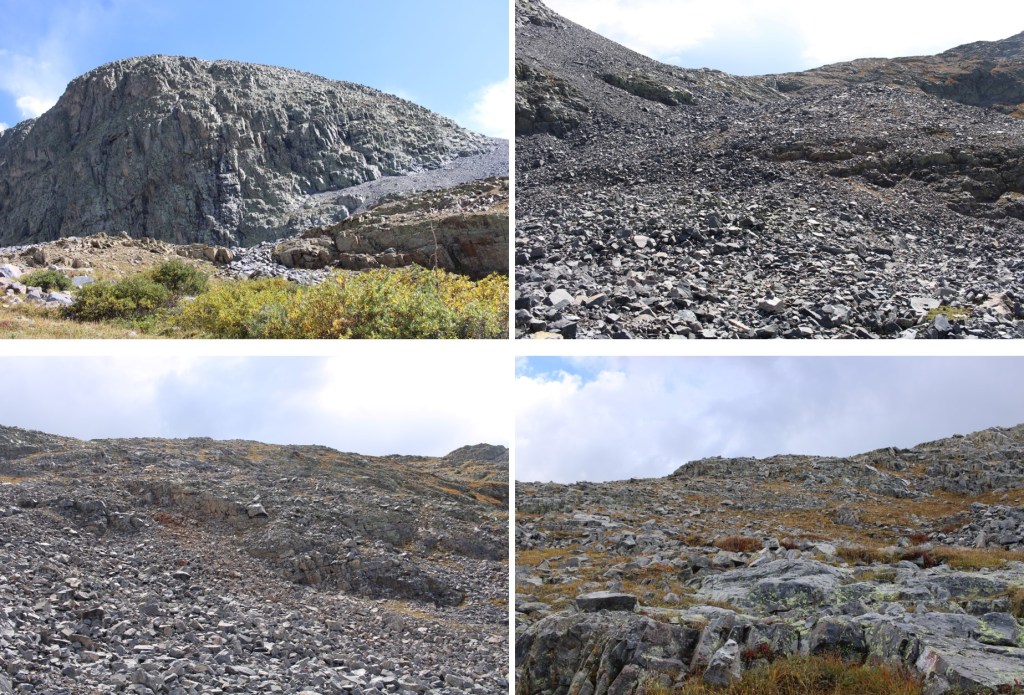
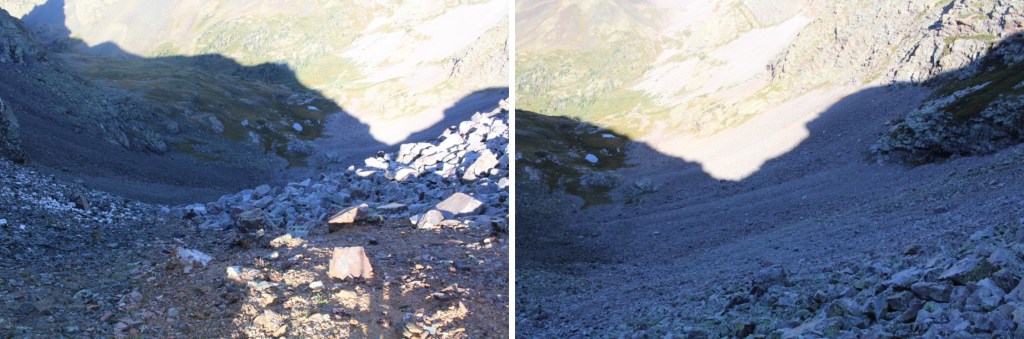
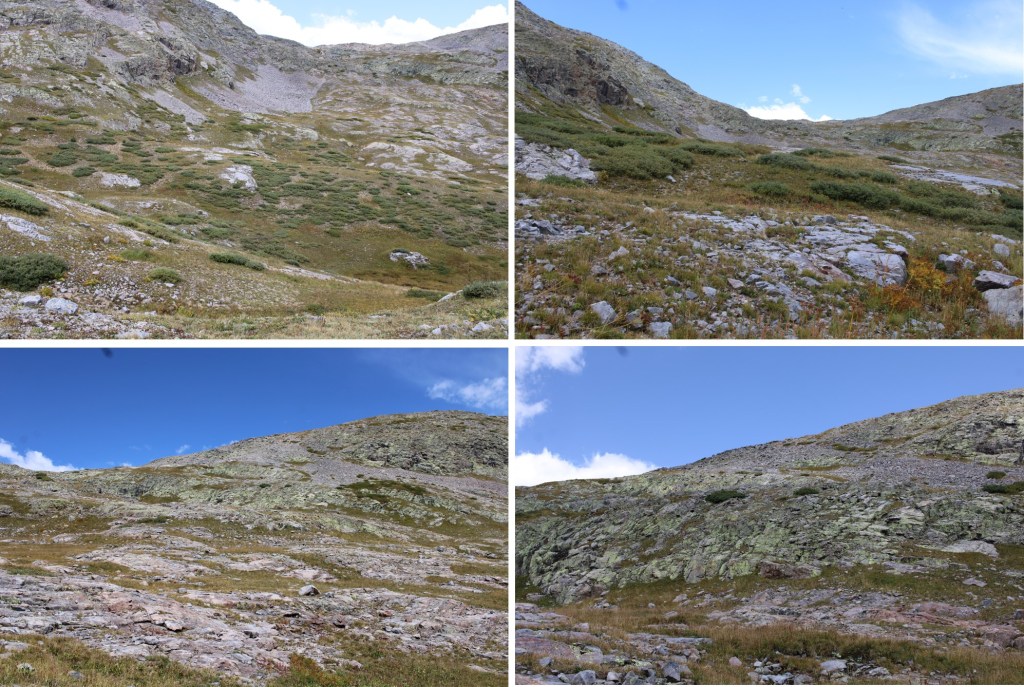
Here are some close up pictures of the route

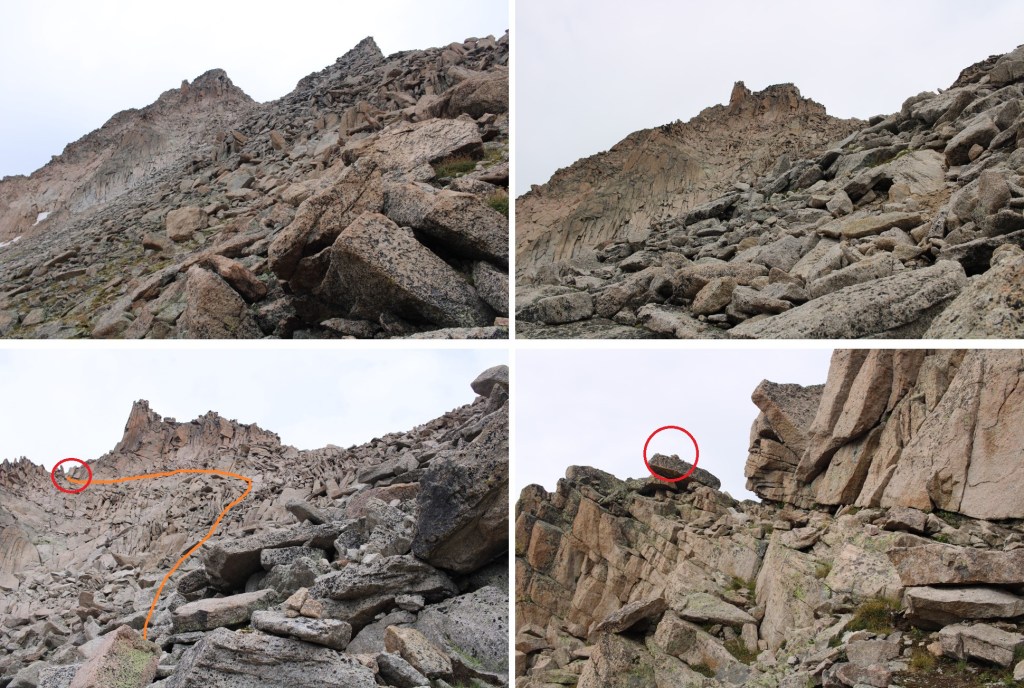
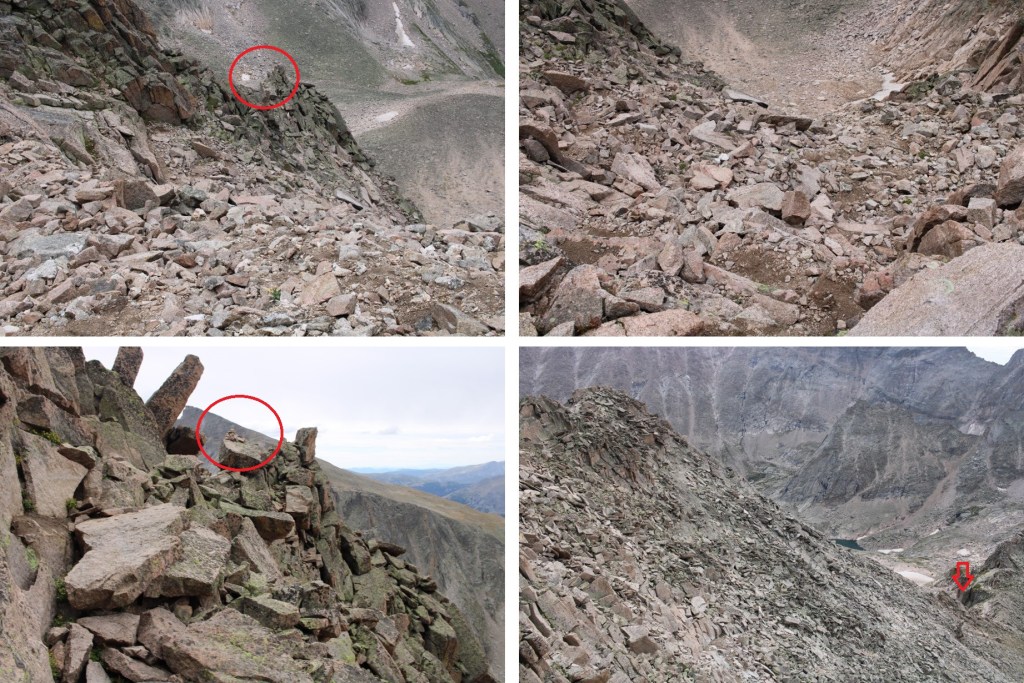
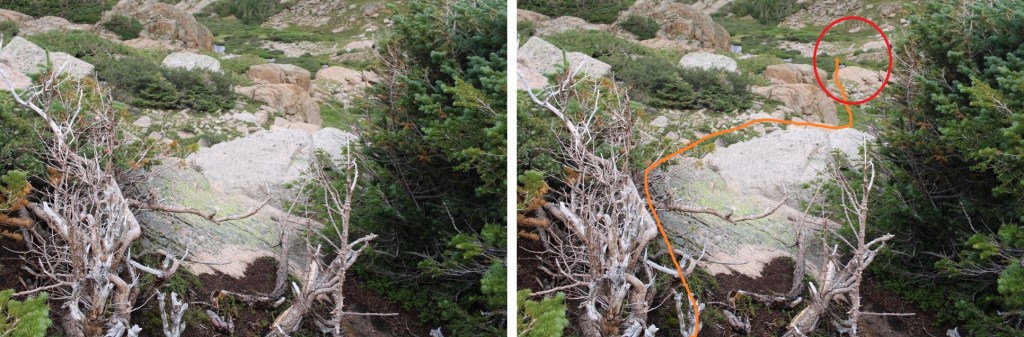
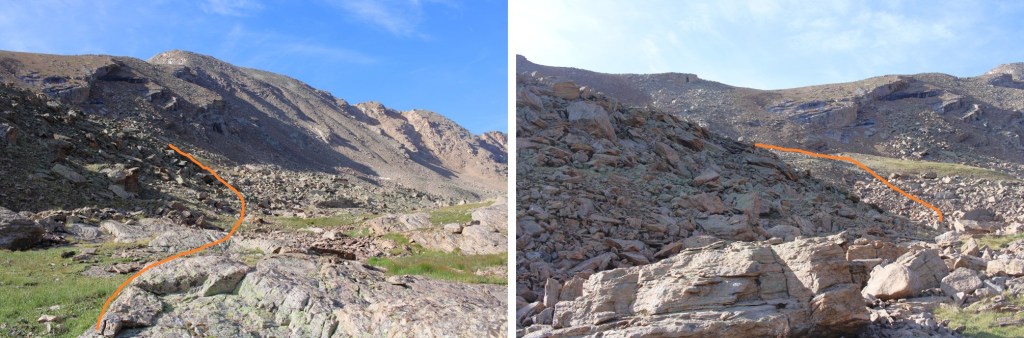
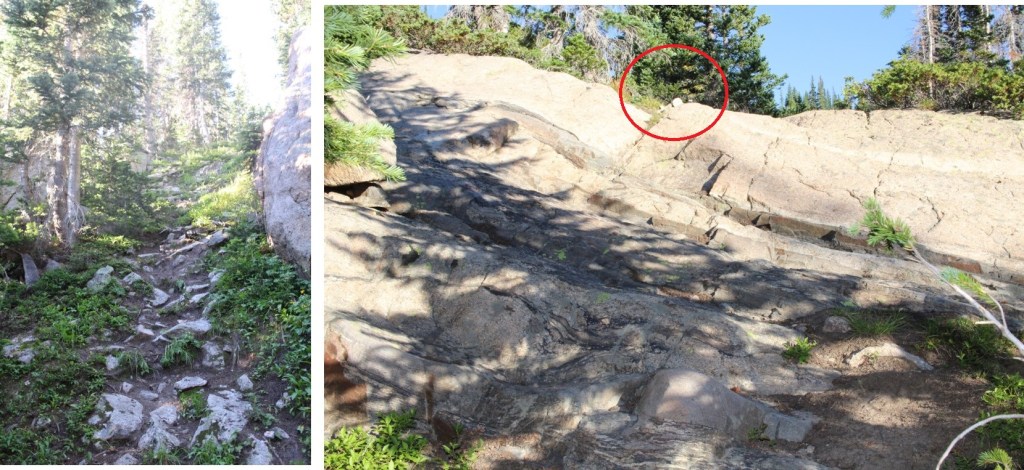
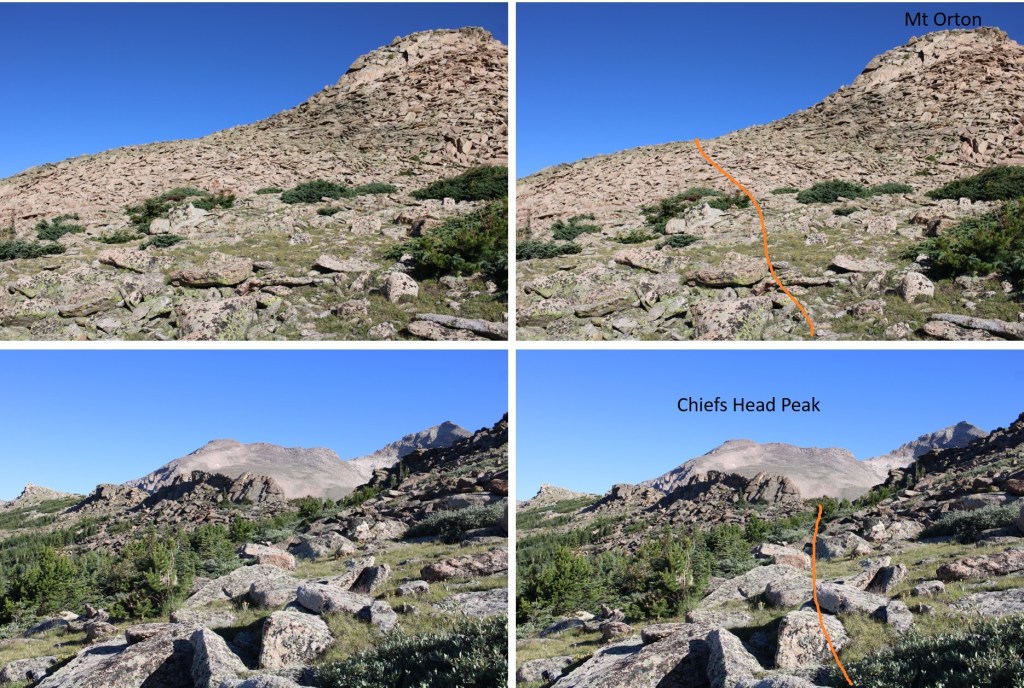
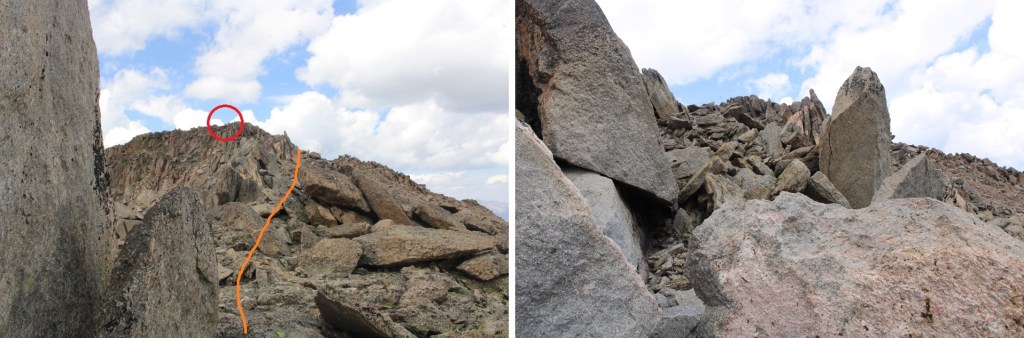
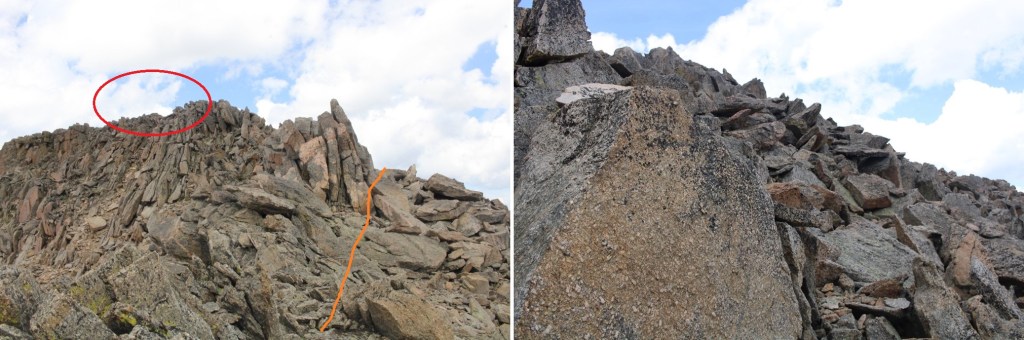
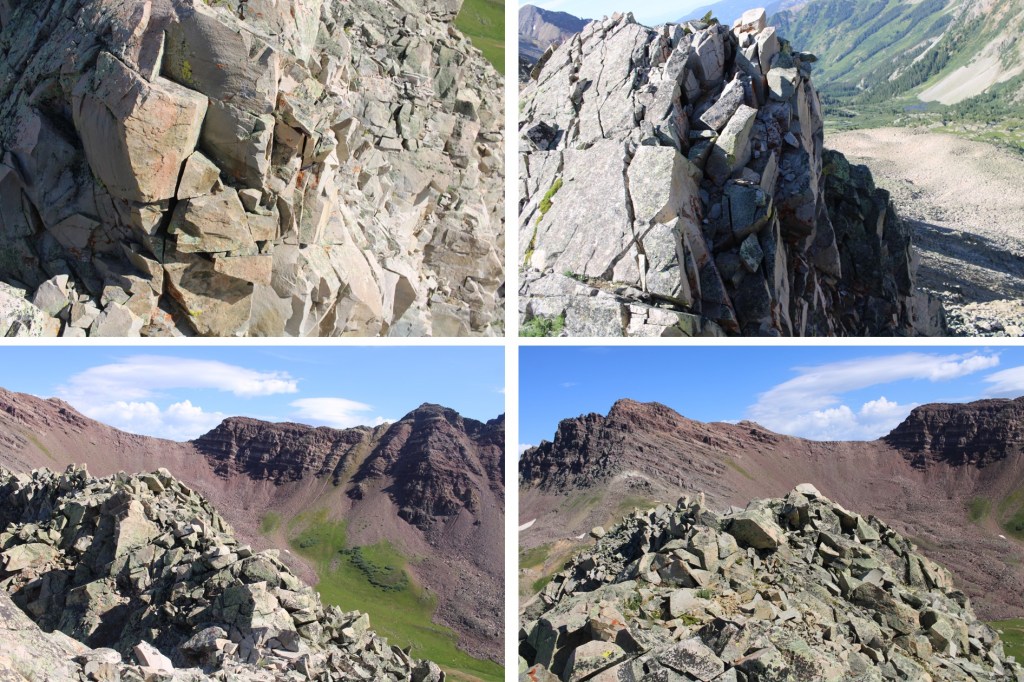
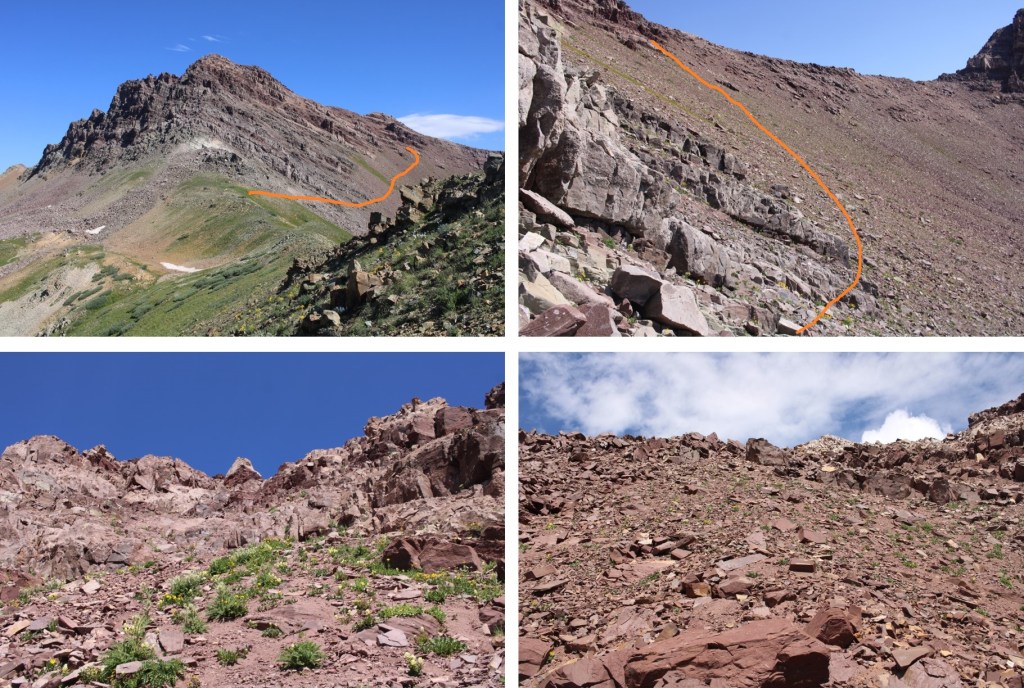
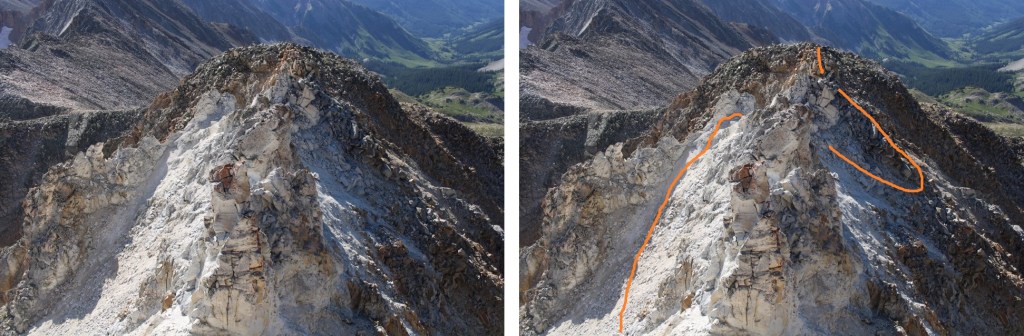
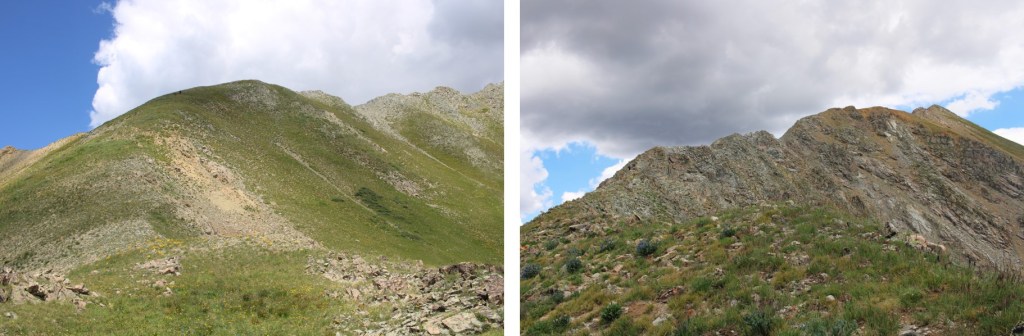
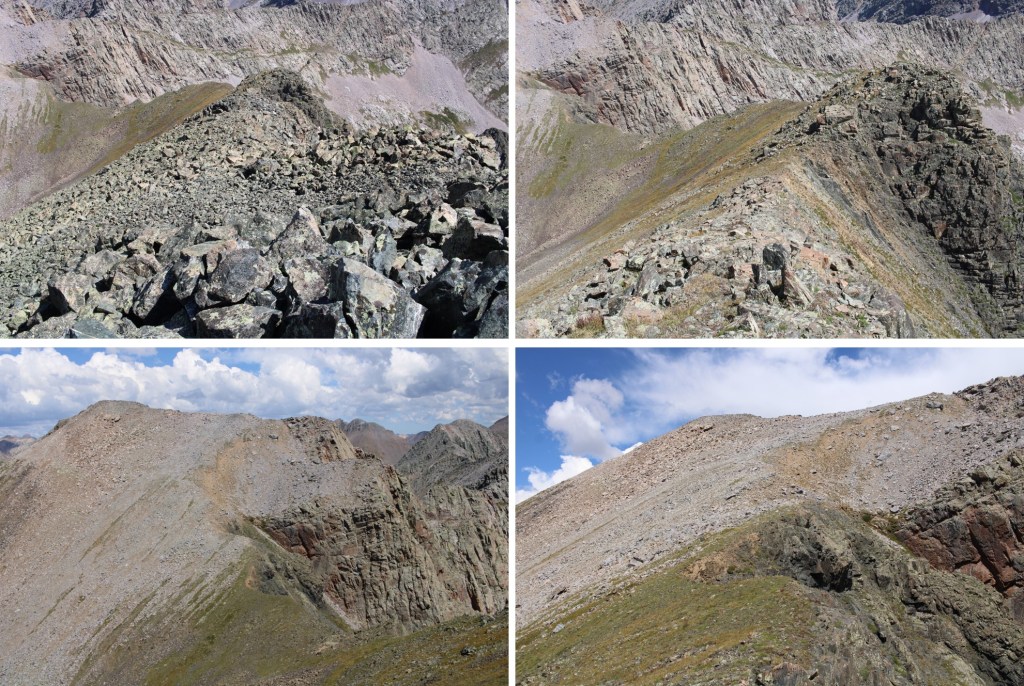
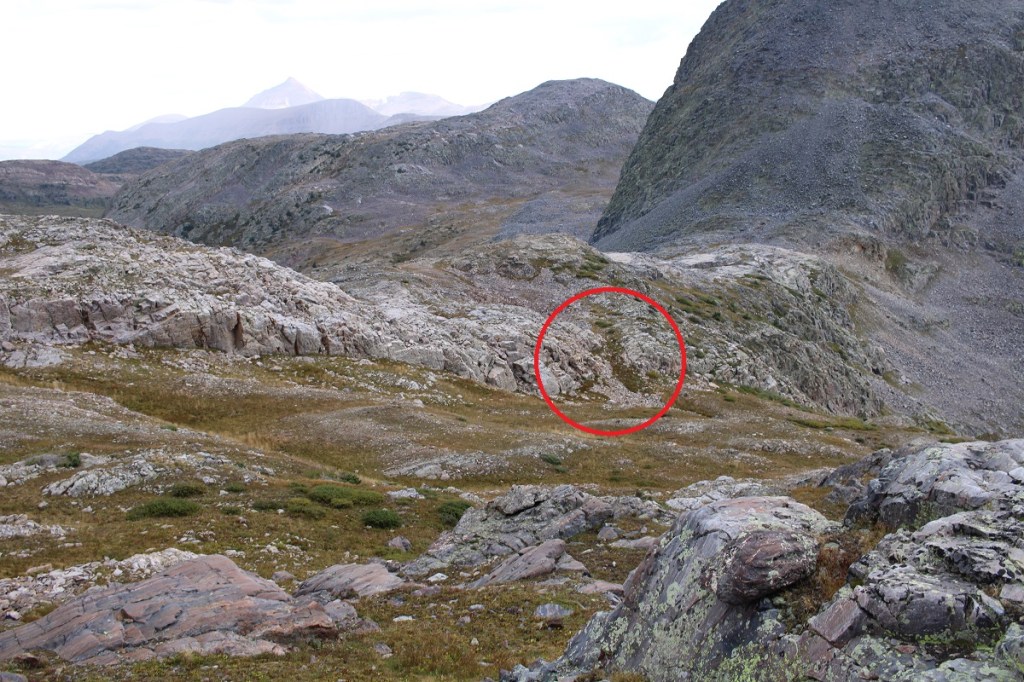
When I made it to the bottom of Irving Peak, I had a few options.  I decided to head up the gully to the left, but this meant I’d need to descend about 50 feet on the other side and then regain the ridge.  Now is also a good time to note my decent route from North Irving.  If I were to do this again, I’d choose the same route.  The gully I took down would not have been fun to upclimb. The area circled in red is what I was trying to avoid, as it didn’t look like it ‘went’.

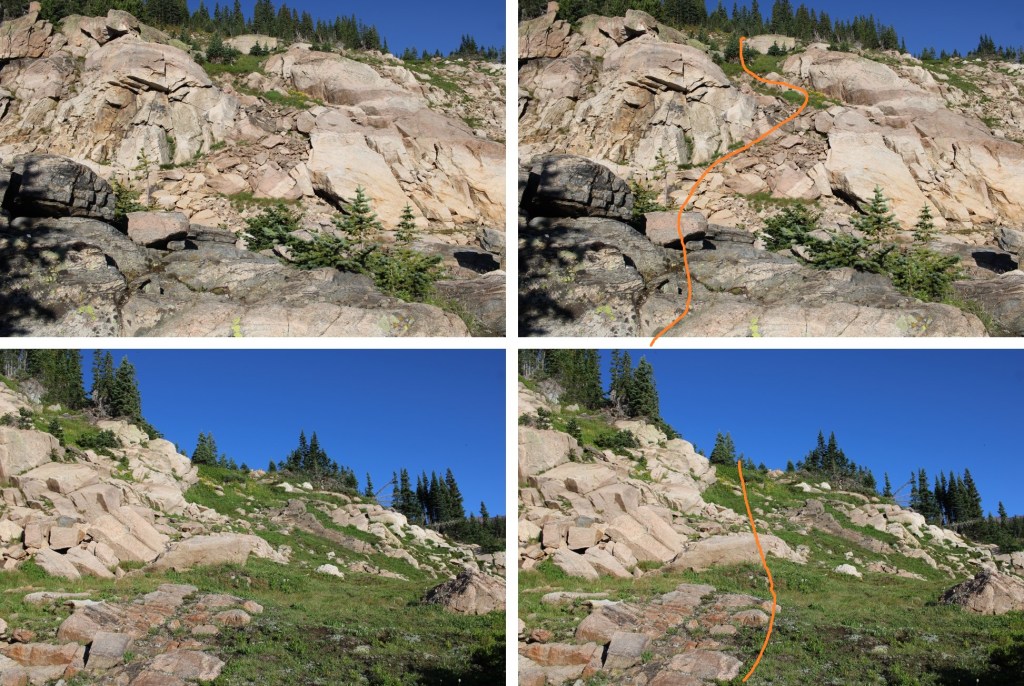
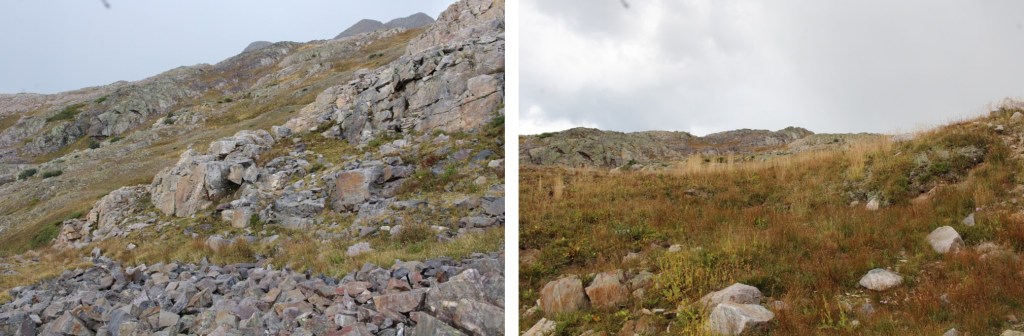
Here are some pictures of my route up to the ridge (all class 2+)

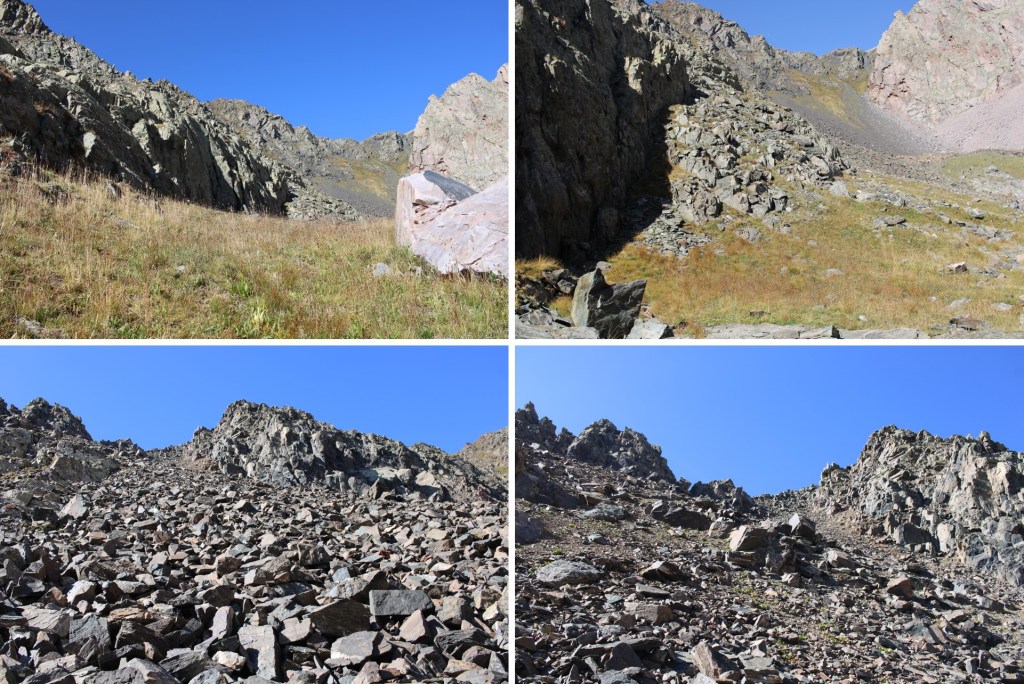
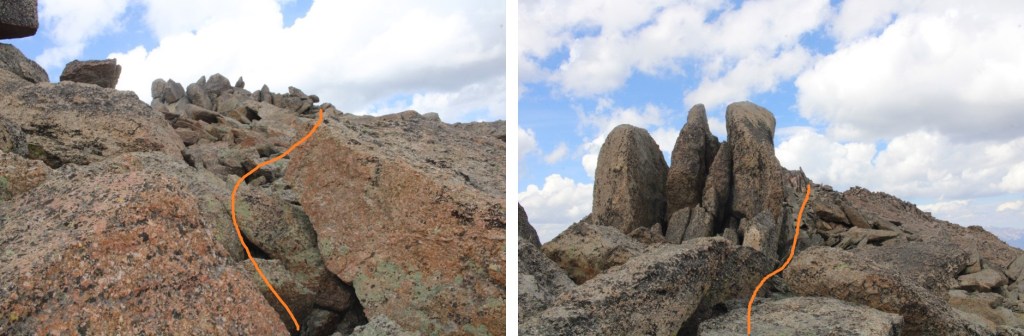
And once on the ridge, the area I dropped down to avoid, and then regain the ridge

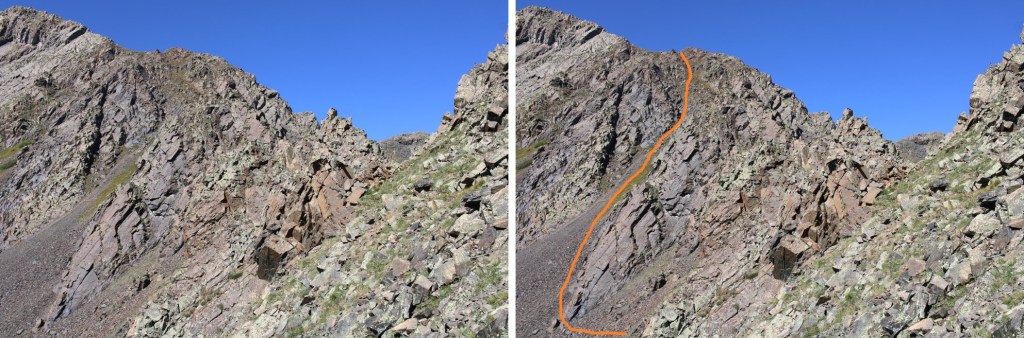
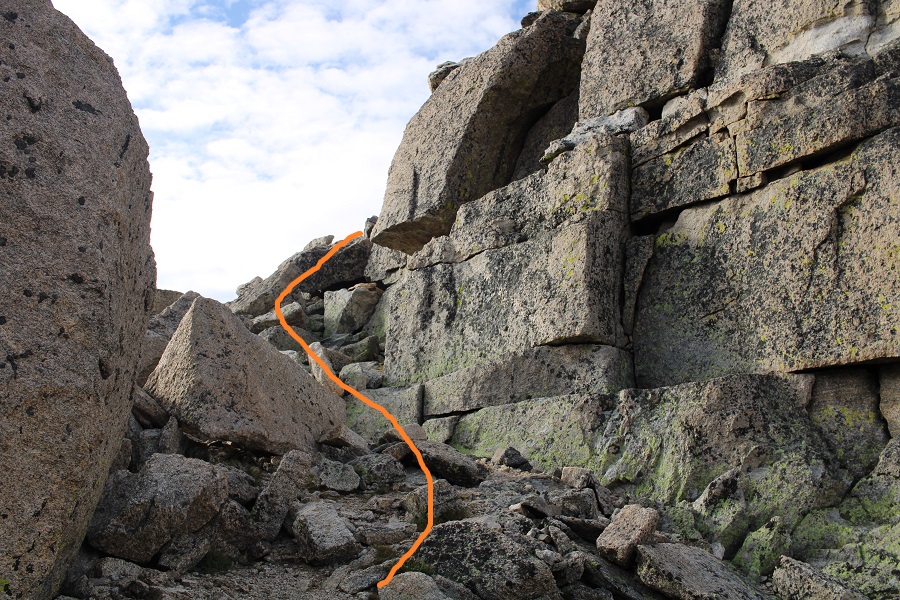
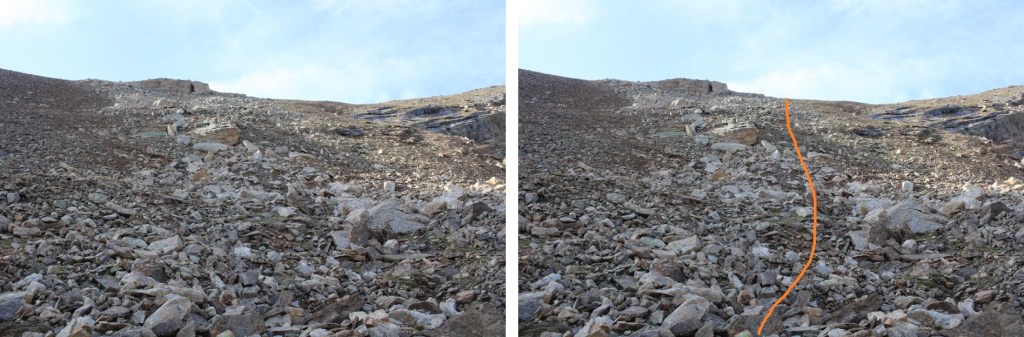
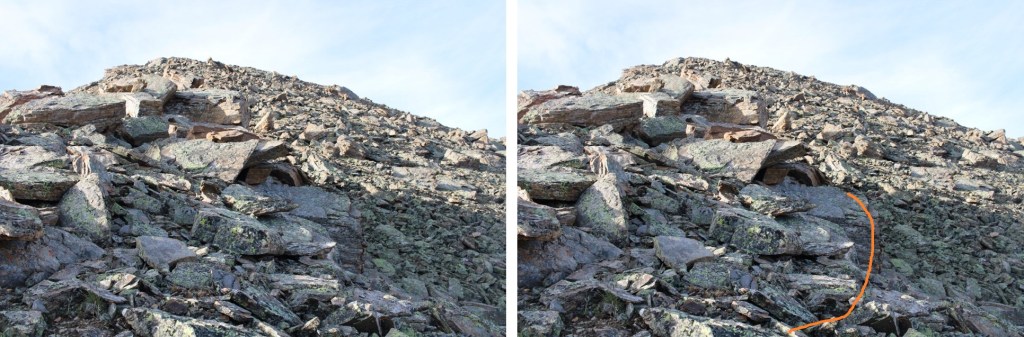
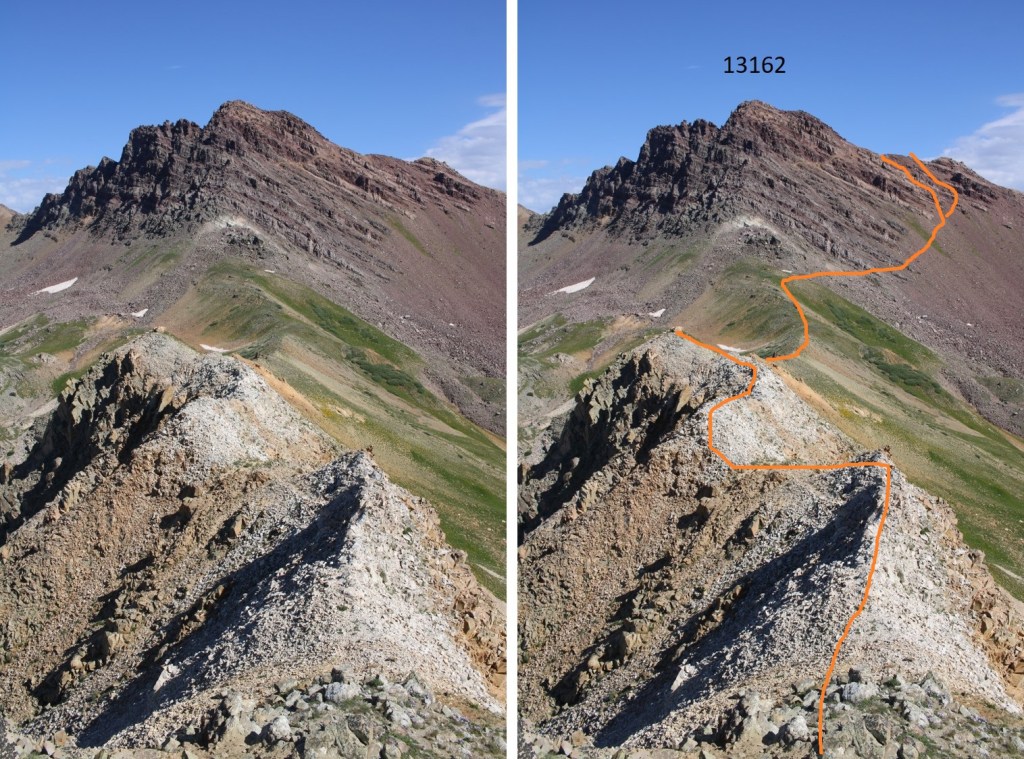
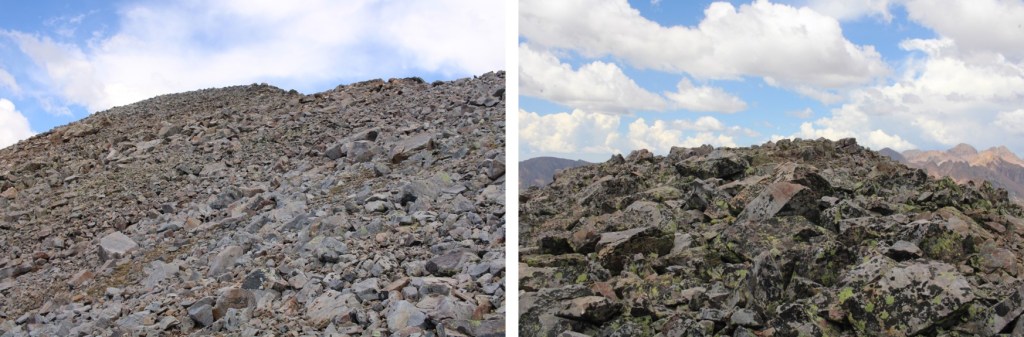
Some step by step pictures avoiding the rocks and accessing the gully

The gully was at worst class 3

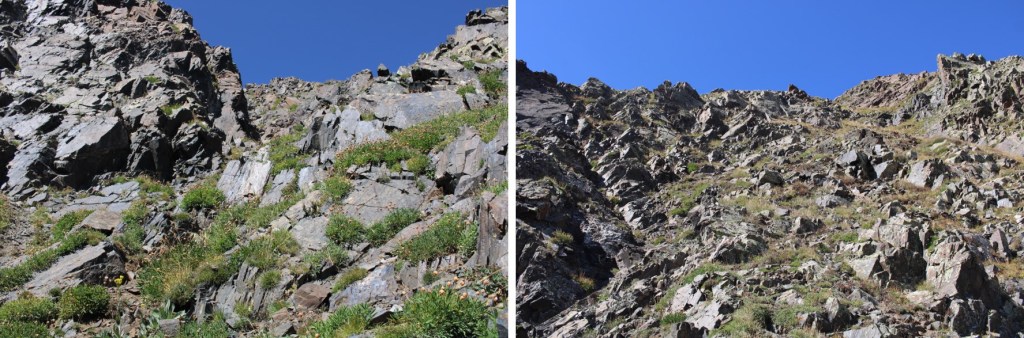
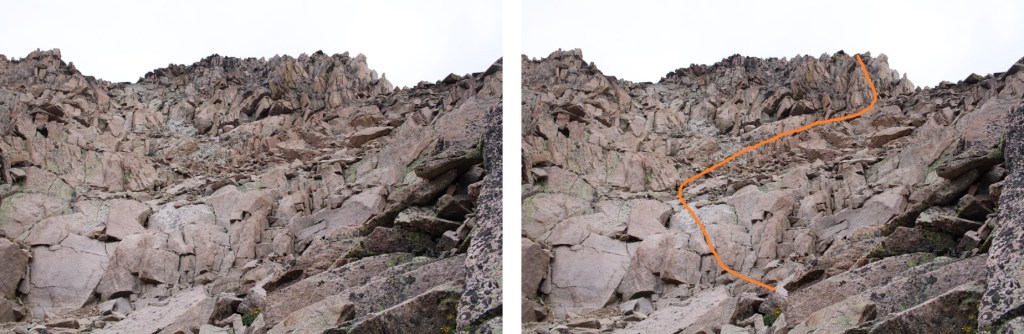
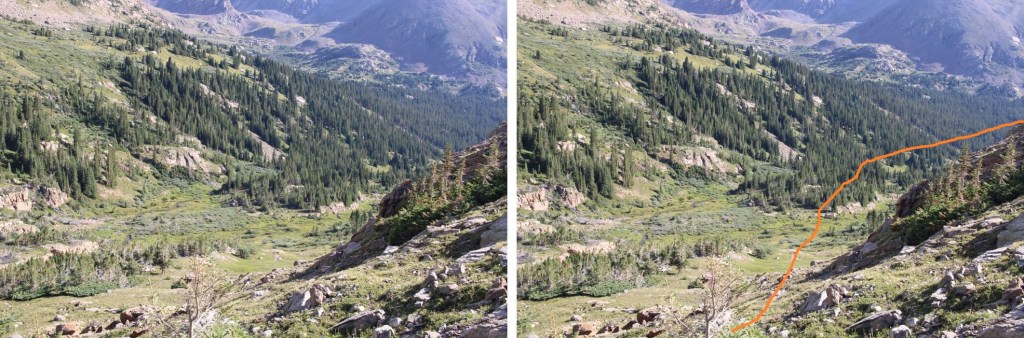
At the top of the gully, here’s looking back on my route from the pass

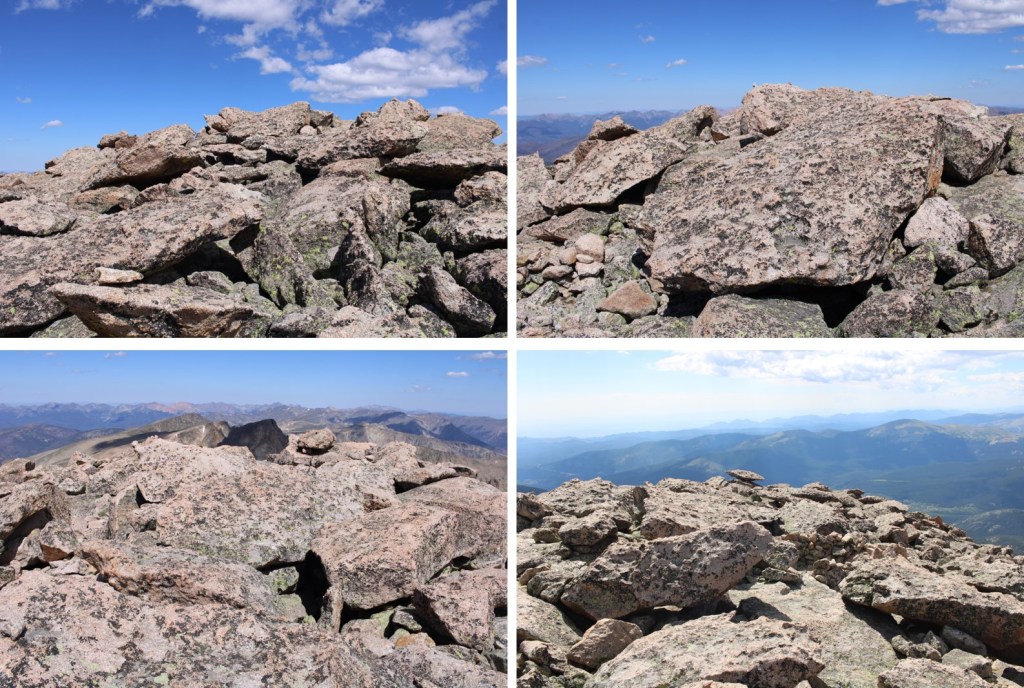
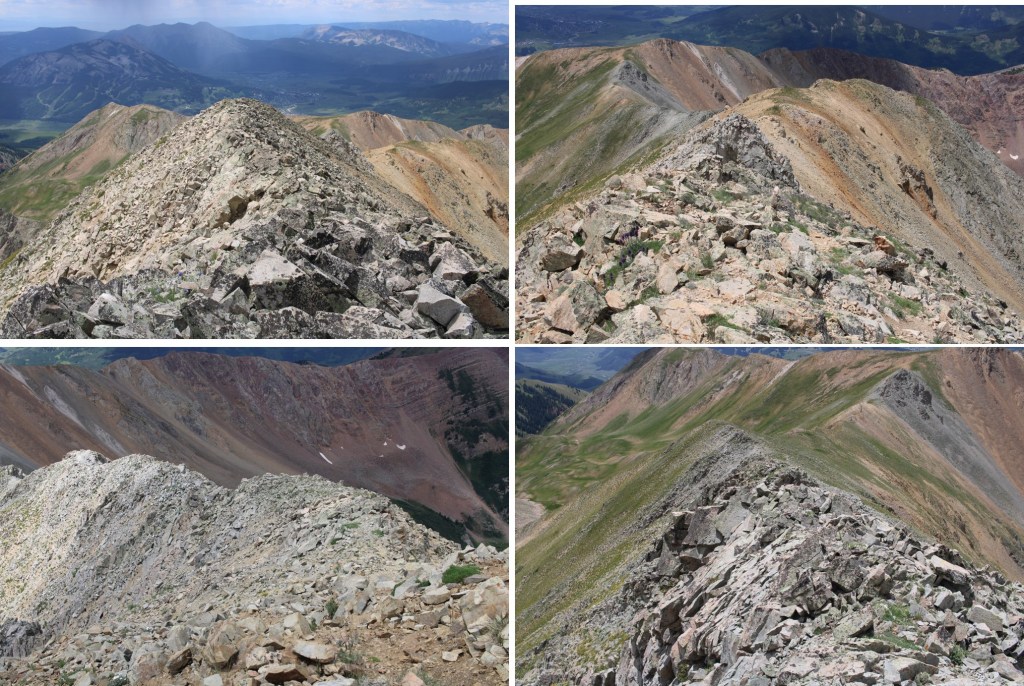
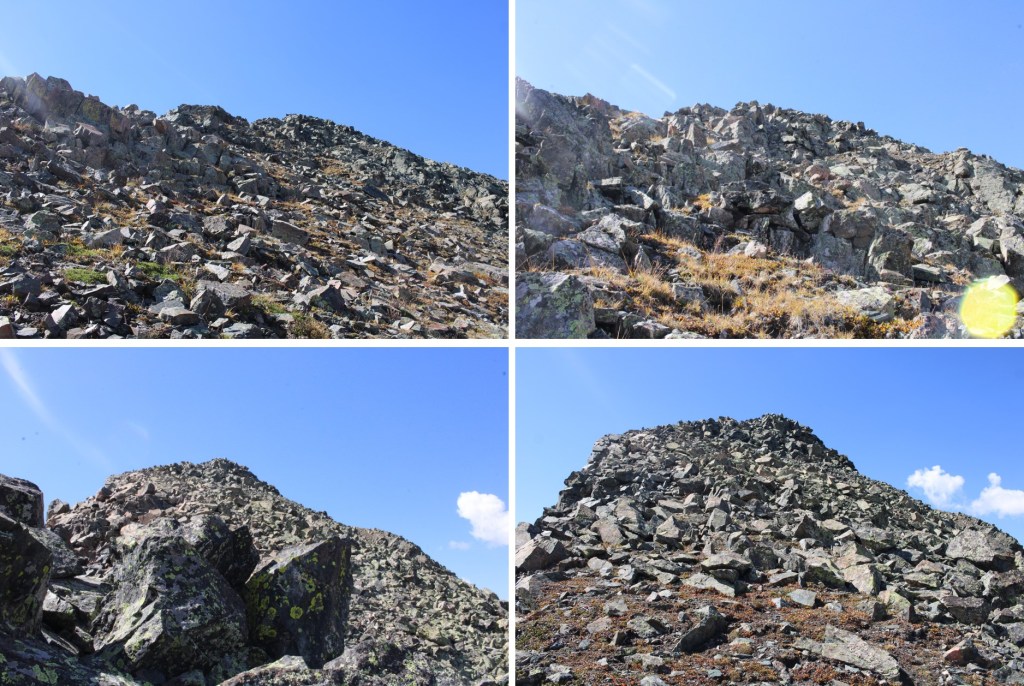
I turned left, and followed the rocky ridge southwest to the summit of Irving Peak.  This was a class 2 scramble

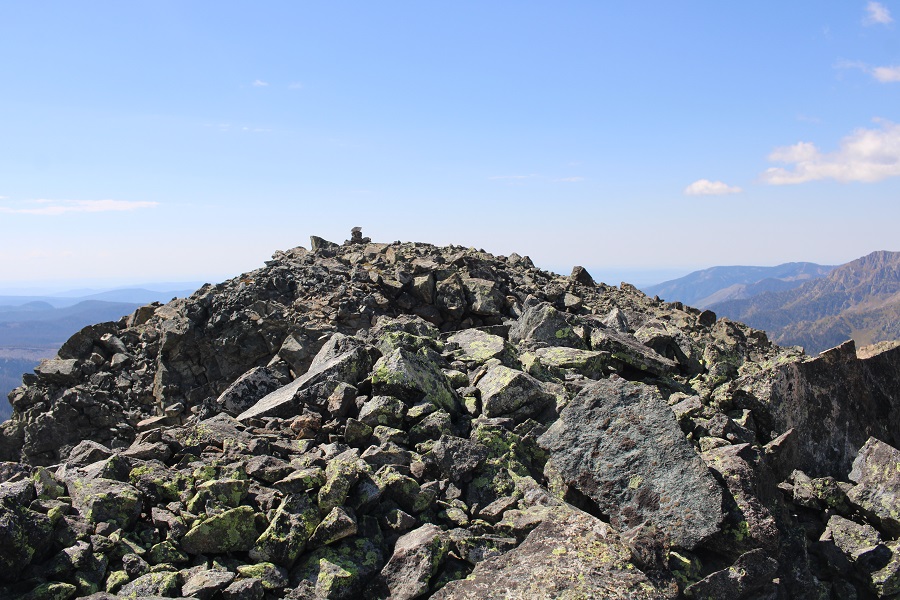
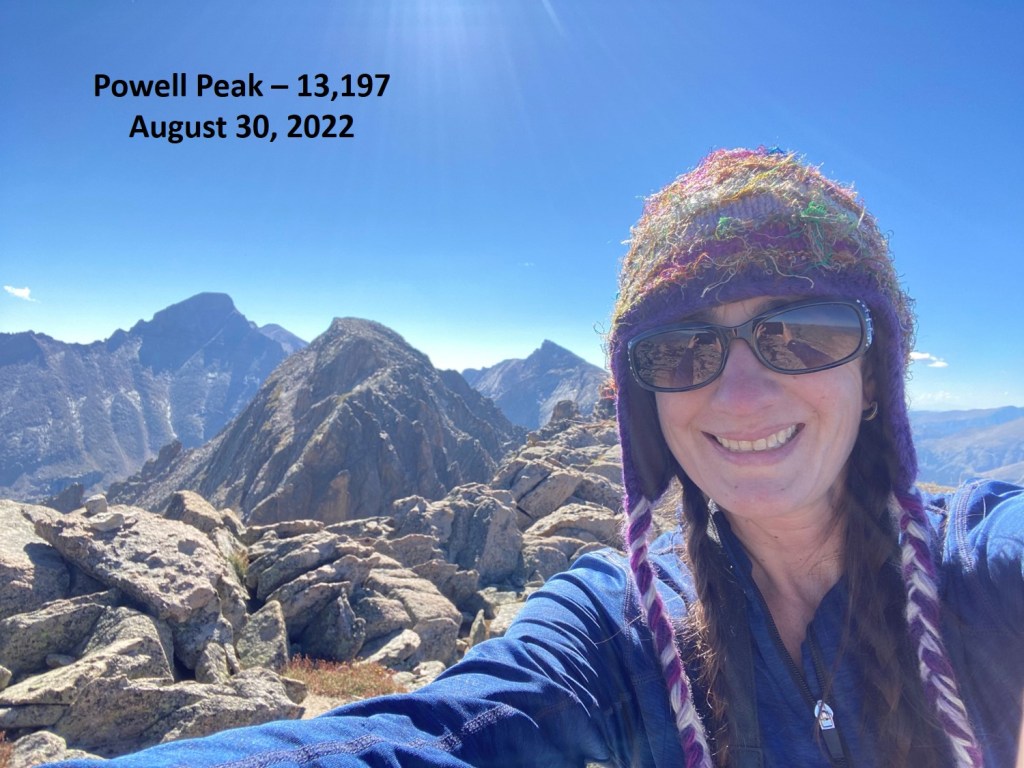
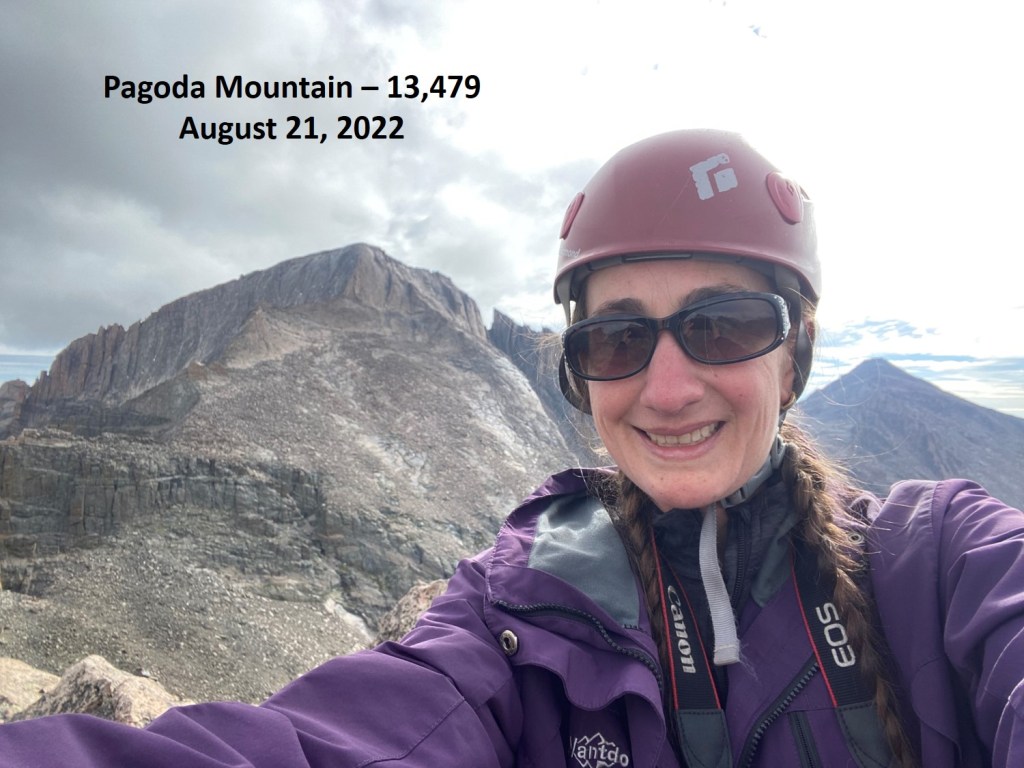
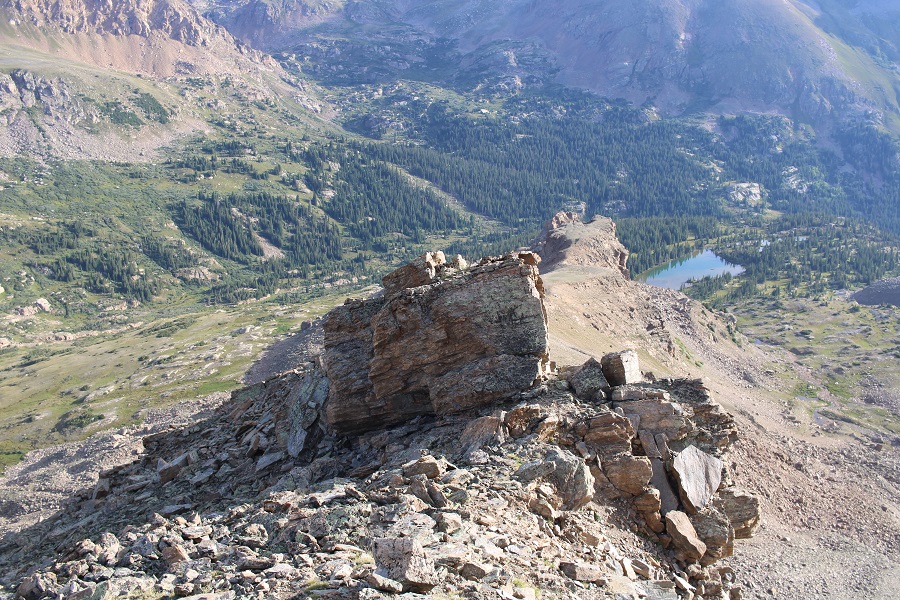
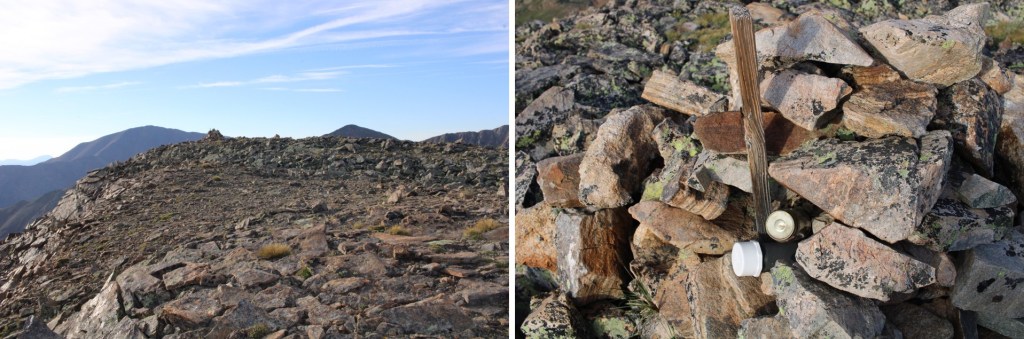
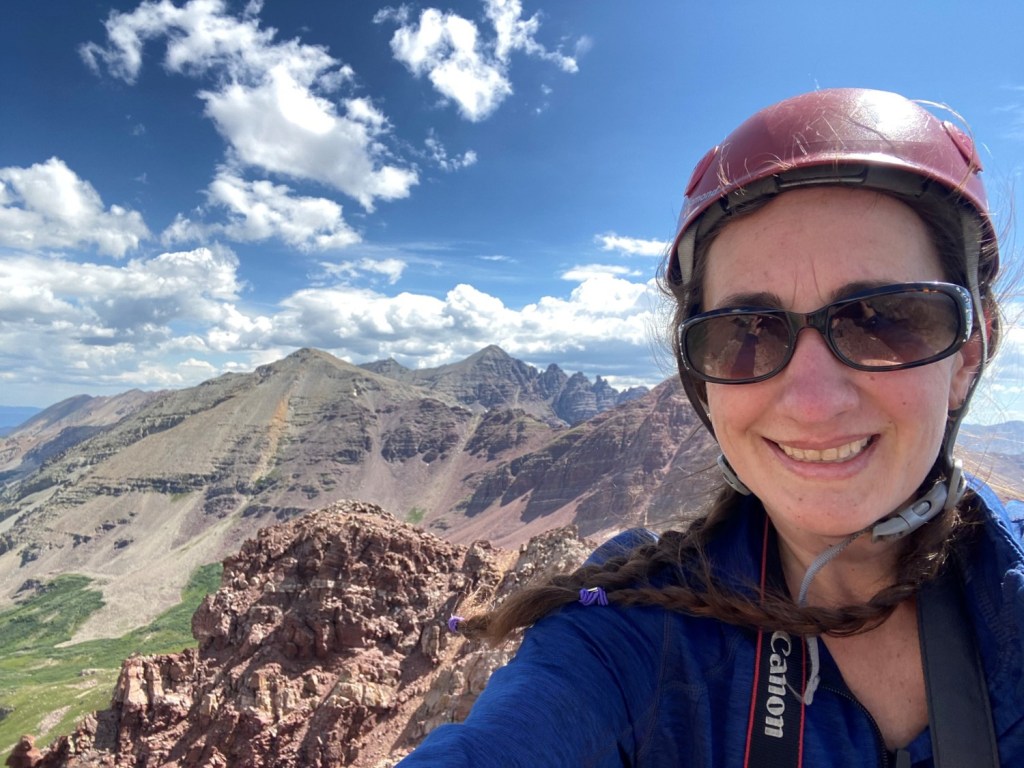
I summited Irving Peak at 11:15am

Irving Peak:

Now to head over to North Irving.  This was a class 2 hike northeast down to the saddle, then 240’ of elevation gain as I followed the ridge northwest

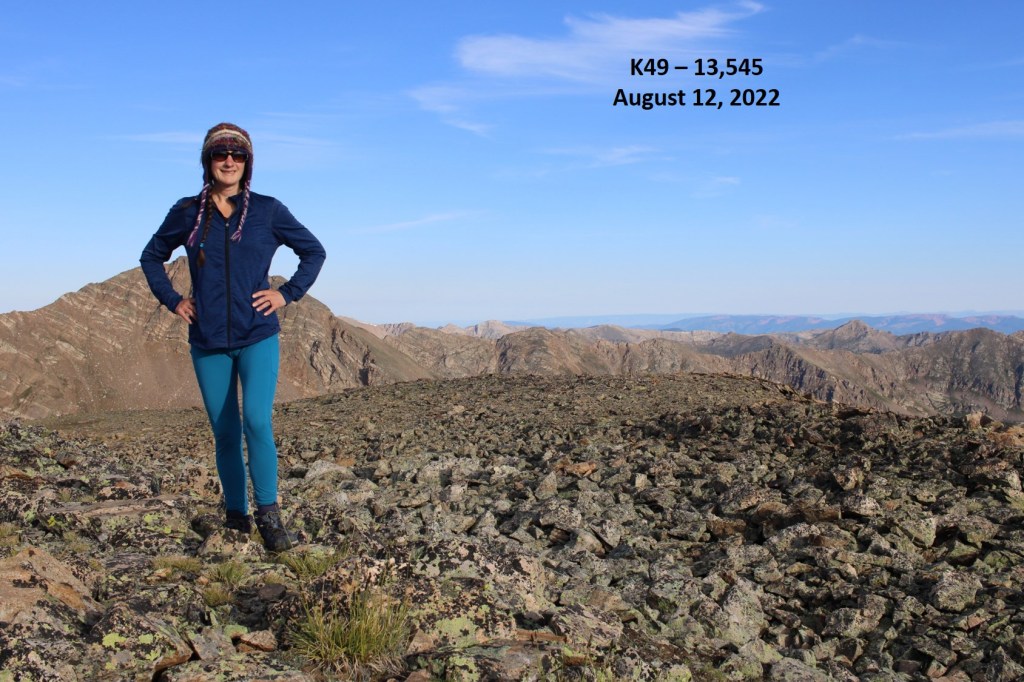
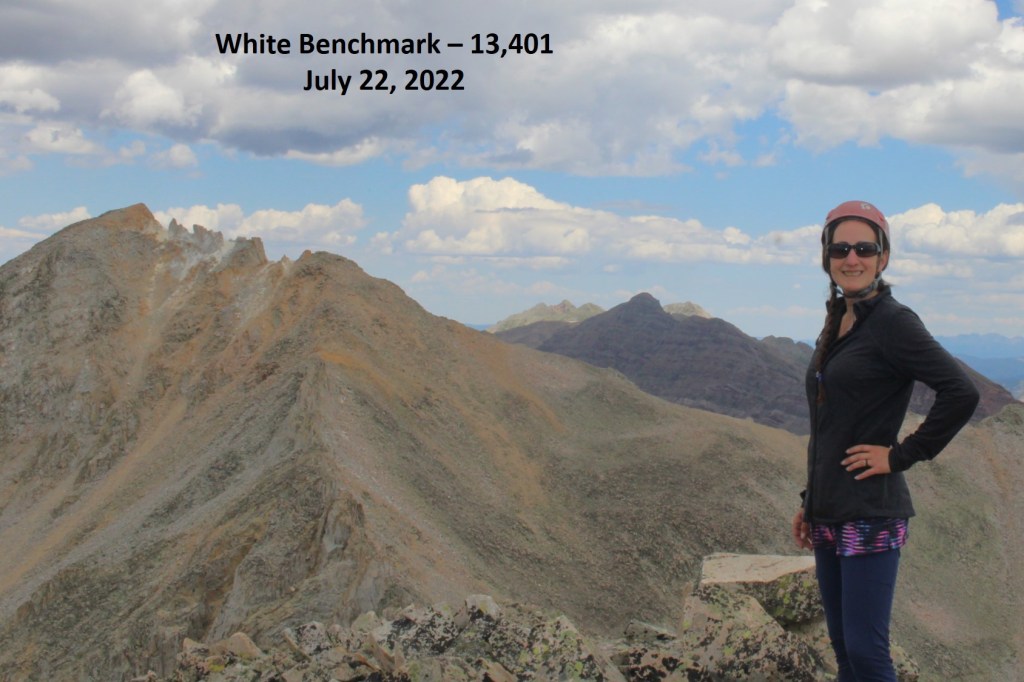
I summited North Irving at 12pm

North Irving:

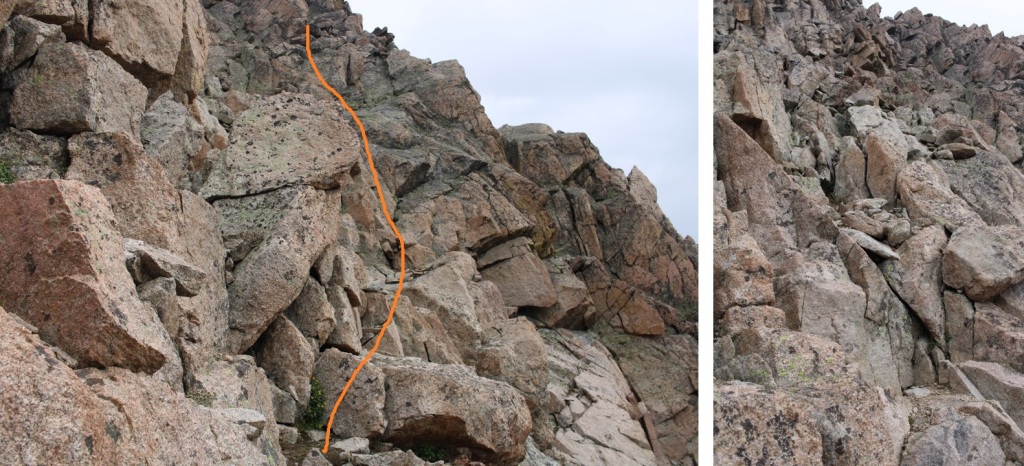
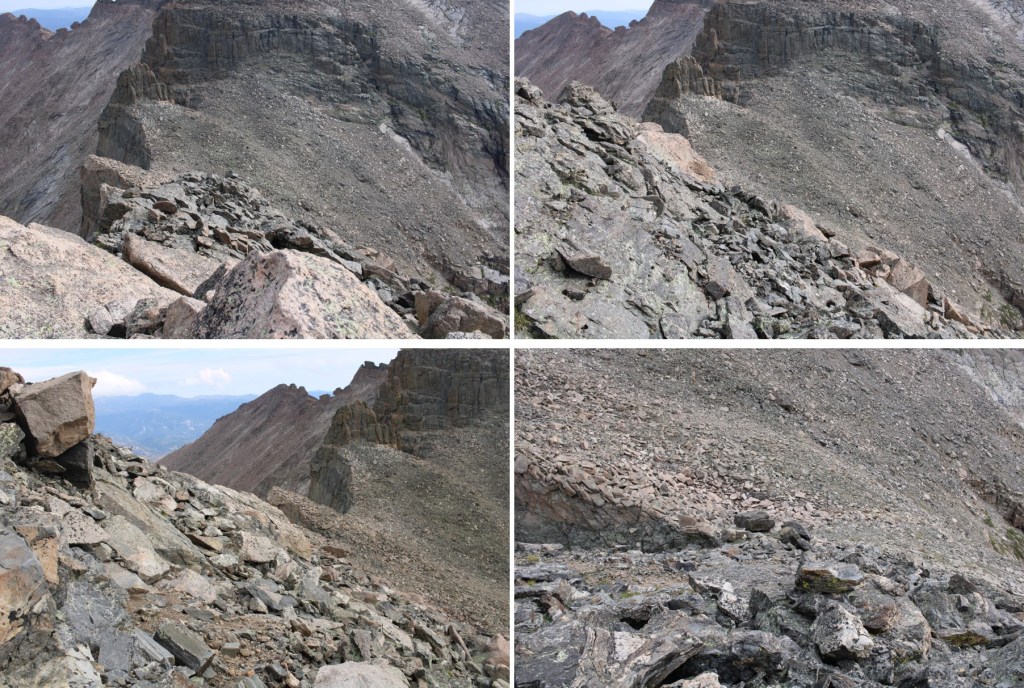
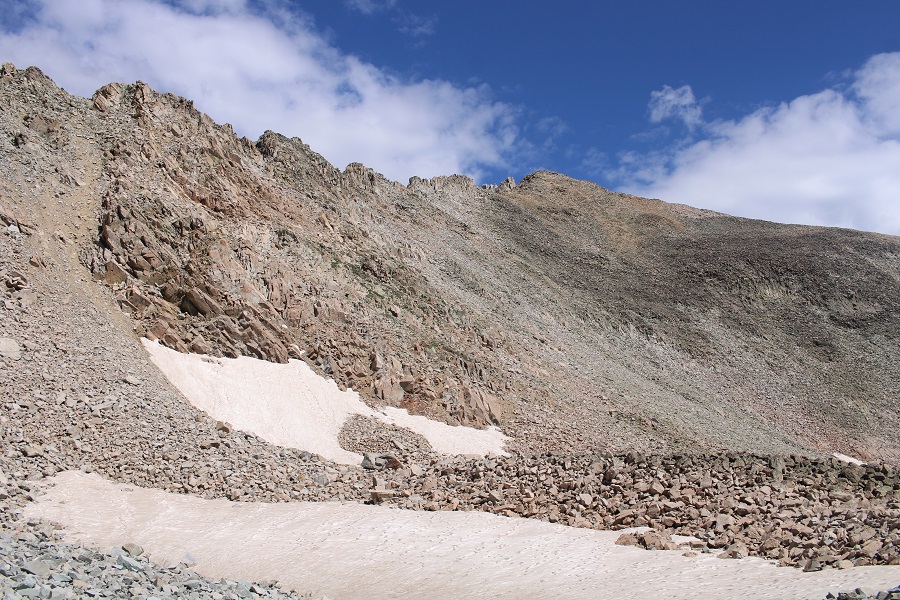
There was a storm coming in, so I quickly made my way back down towards the Irving/North Irving saddle. 

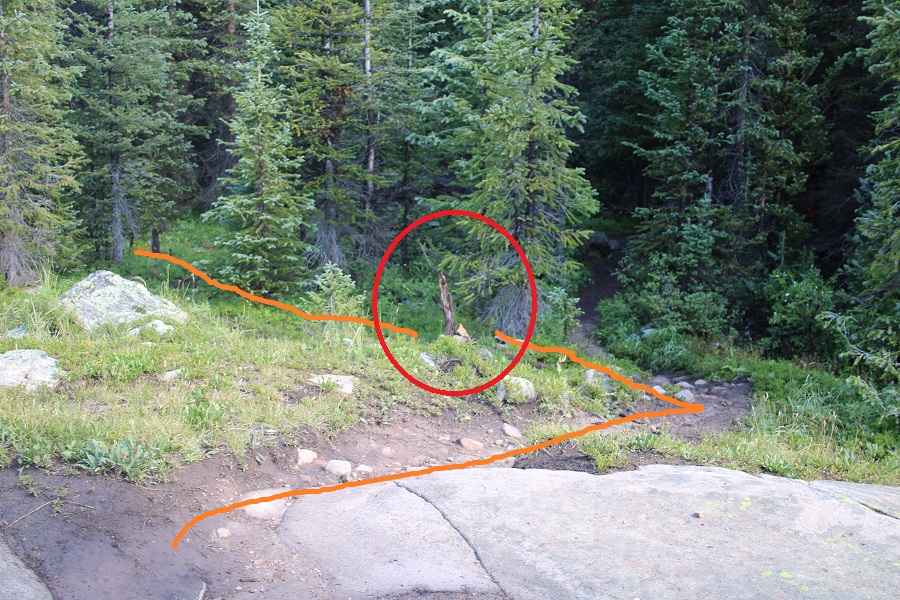
There are several gullies you can take down.  I took the second one, circled here in red.  I do not regret my choice.

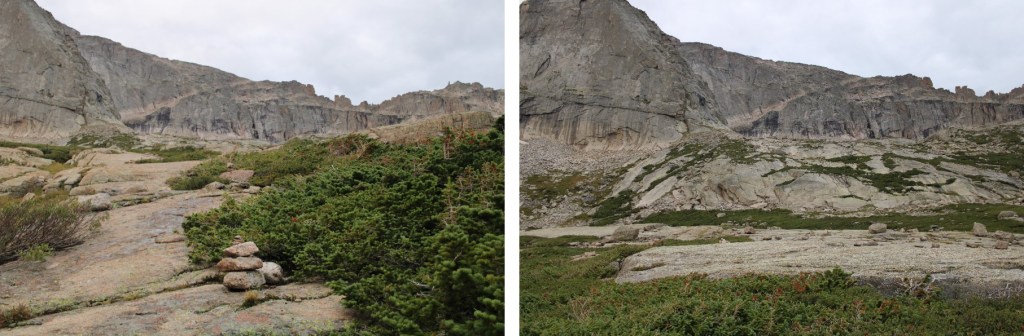
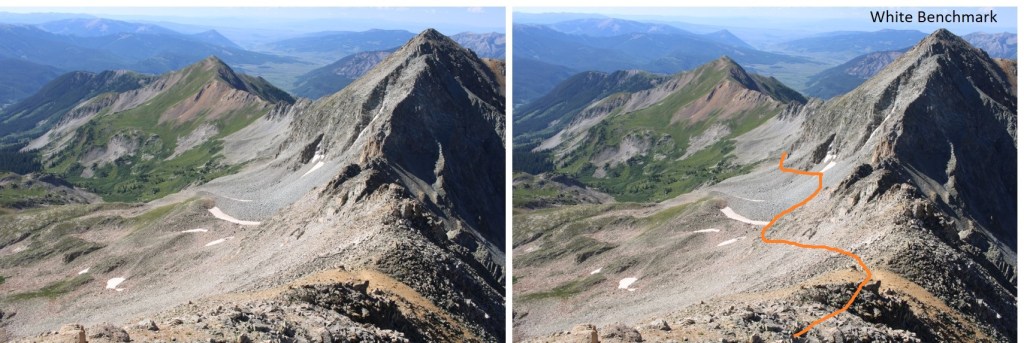
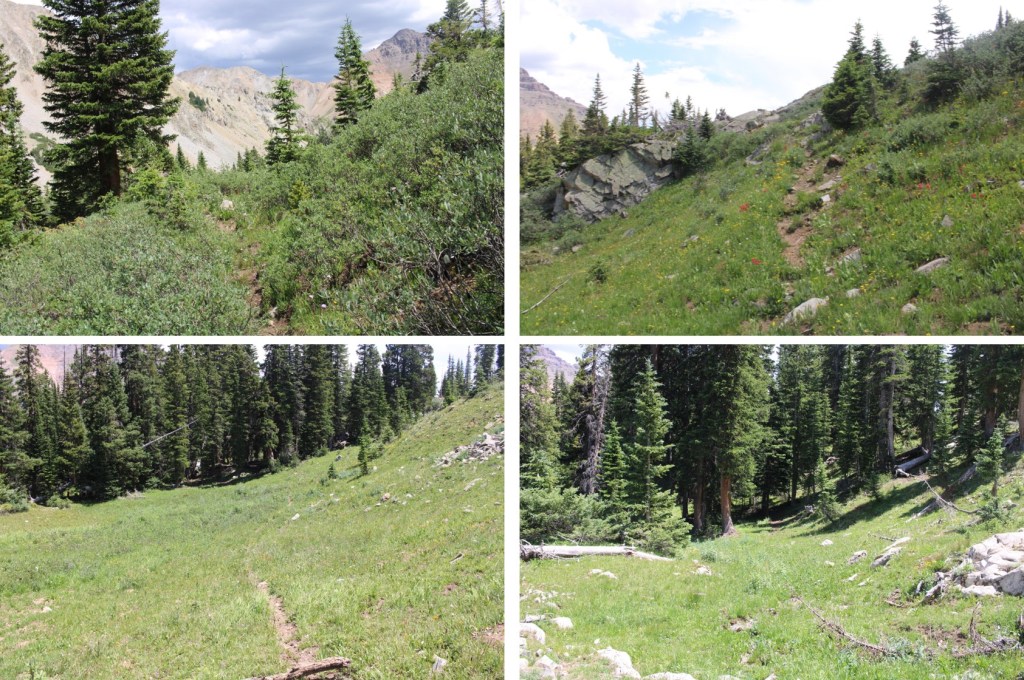
Once out of the gully, I retraced my steps back the way I’d come, to the Oso/Soso saddle

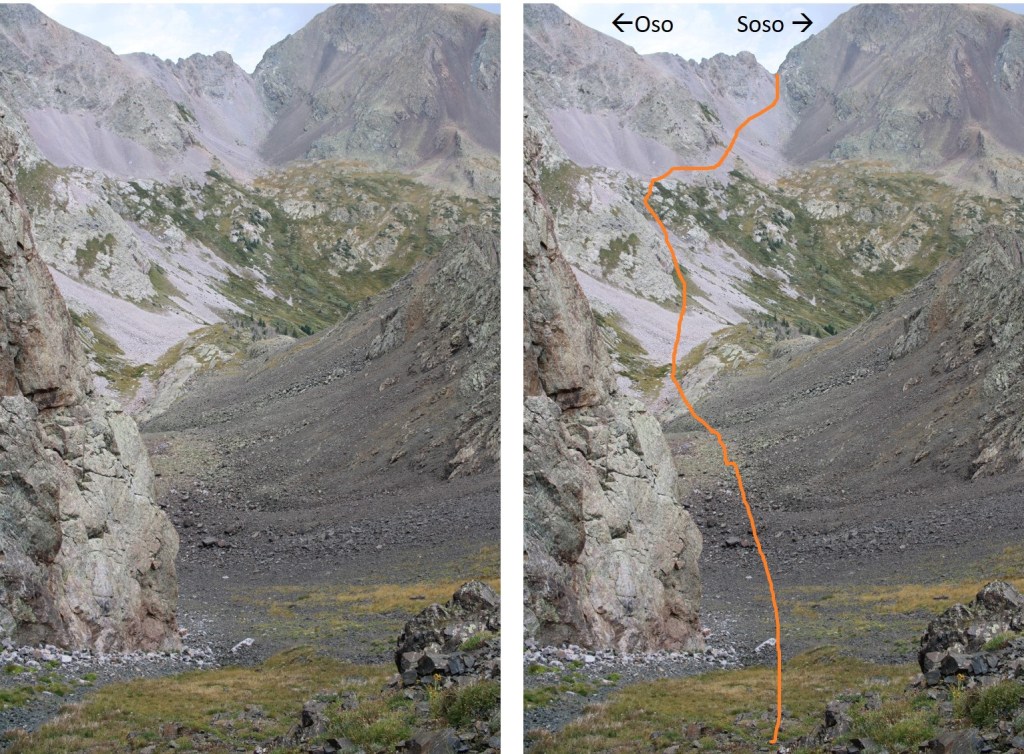
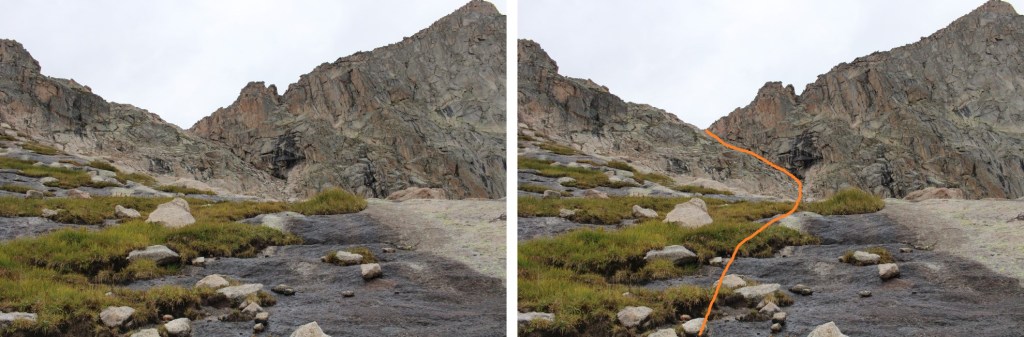
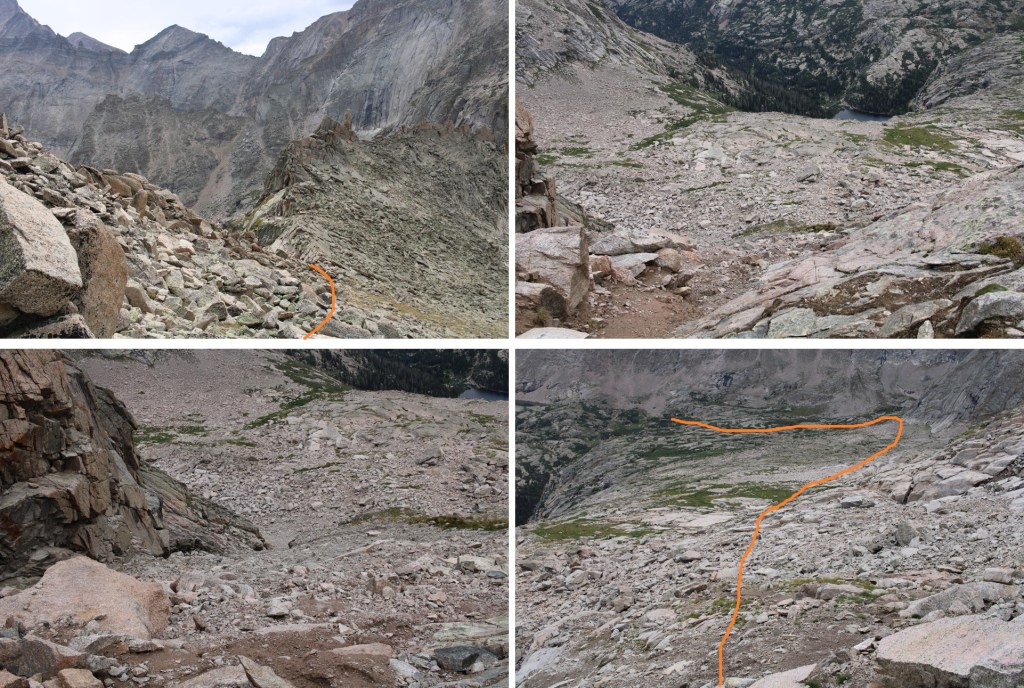
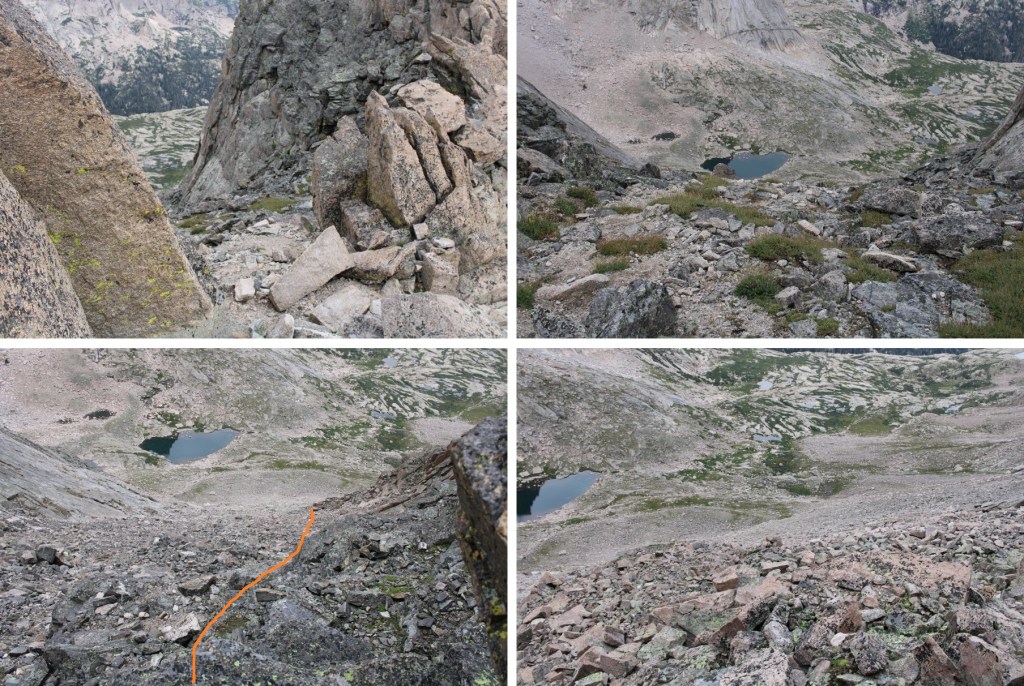
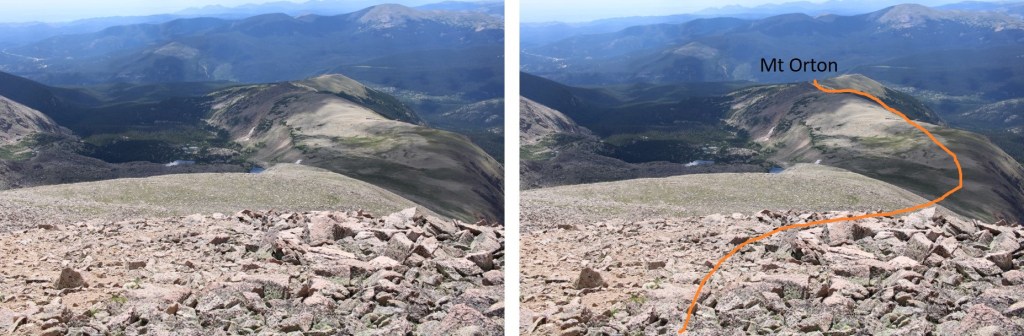
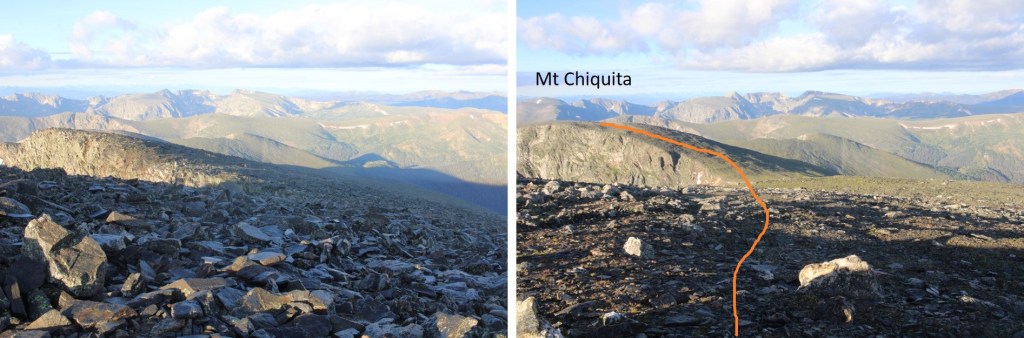
From the Oso/Soso saddle I aimed for the ridge to the northeast, losing and then regaining elevation.

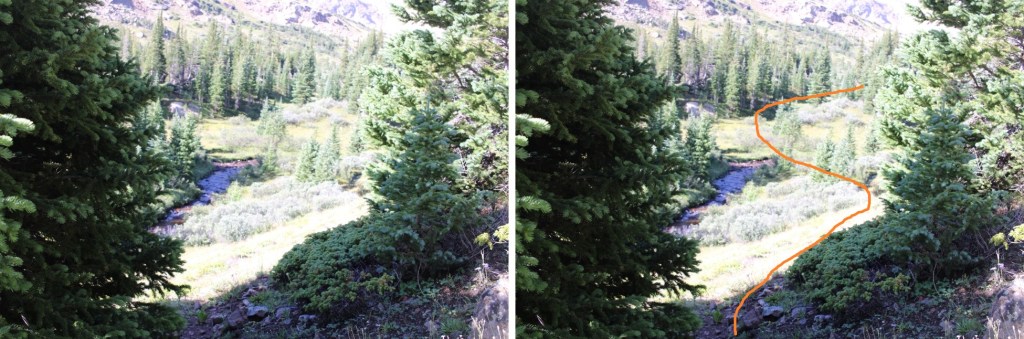
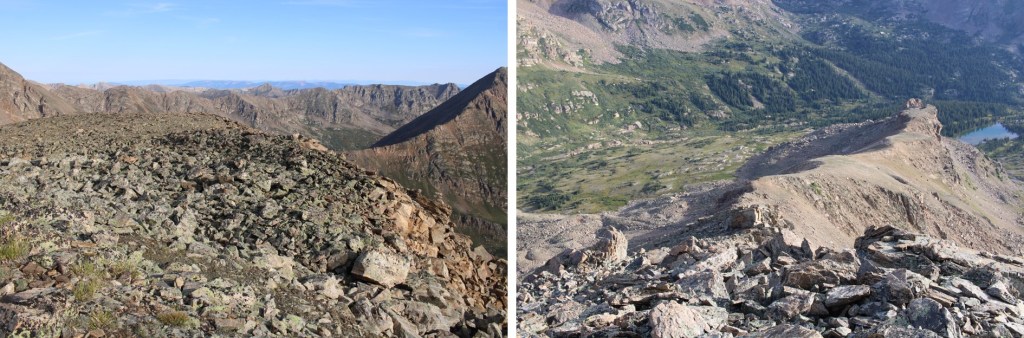
From the top the view can get a little confusing, because there are a lot of rocks.  Here’s the route:

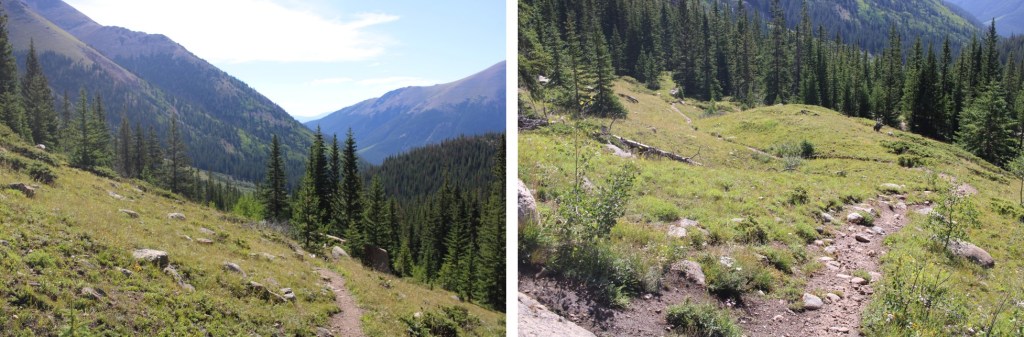
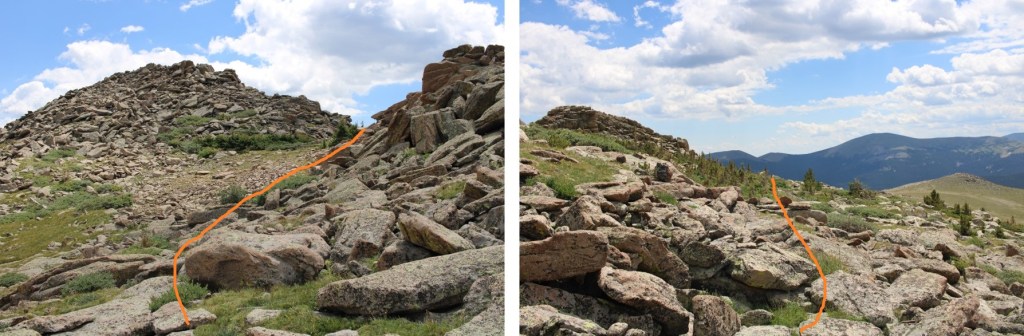
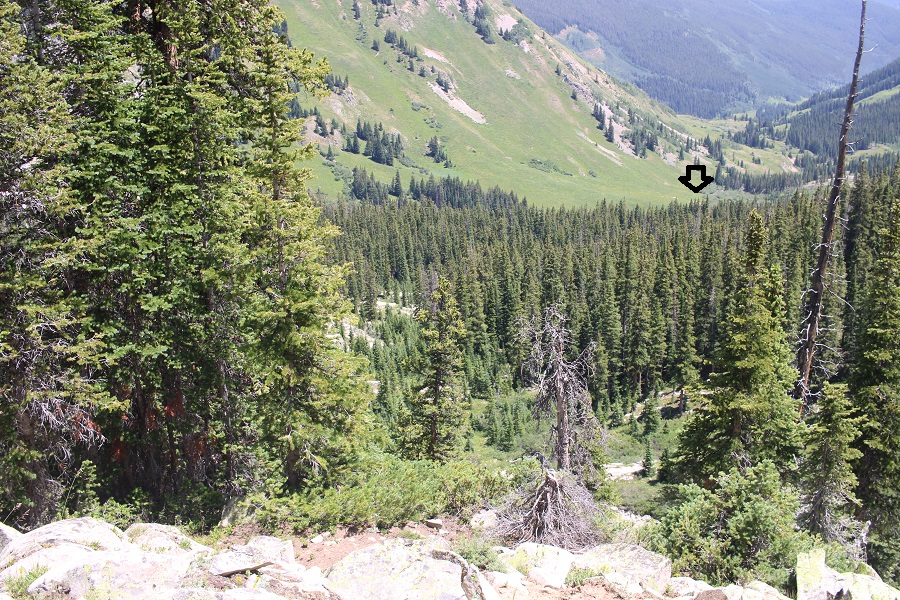
You’re aiming for this gully, which will have cairns that will lead you back down to Rock Lake

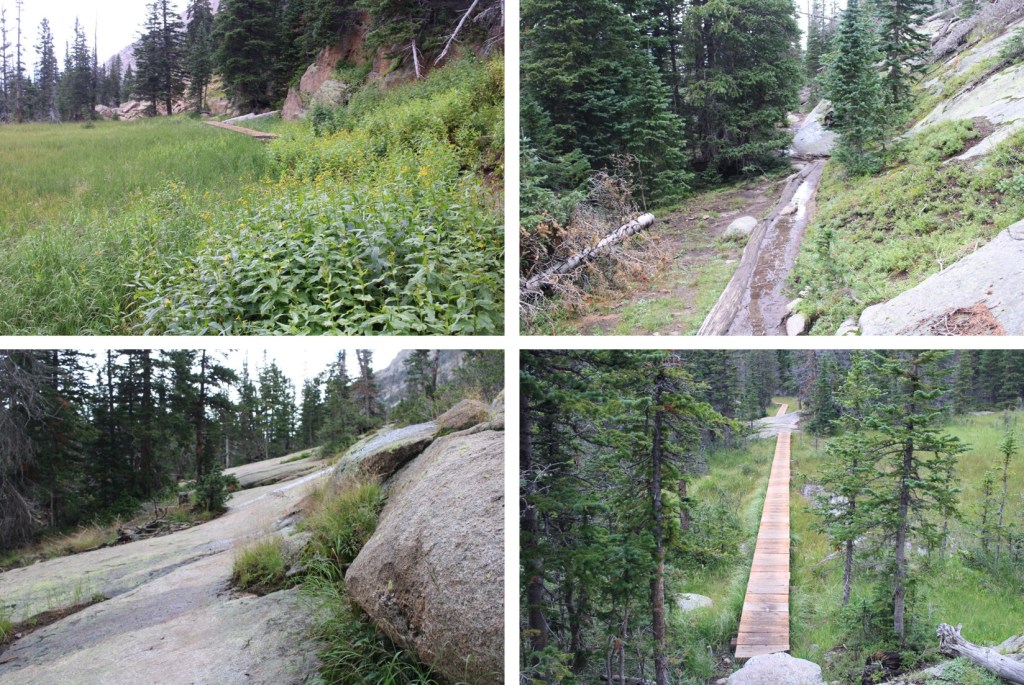
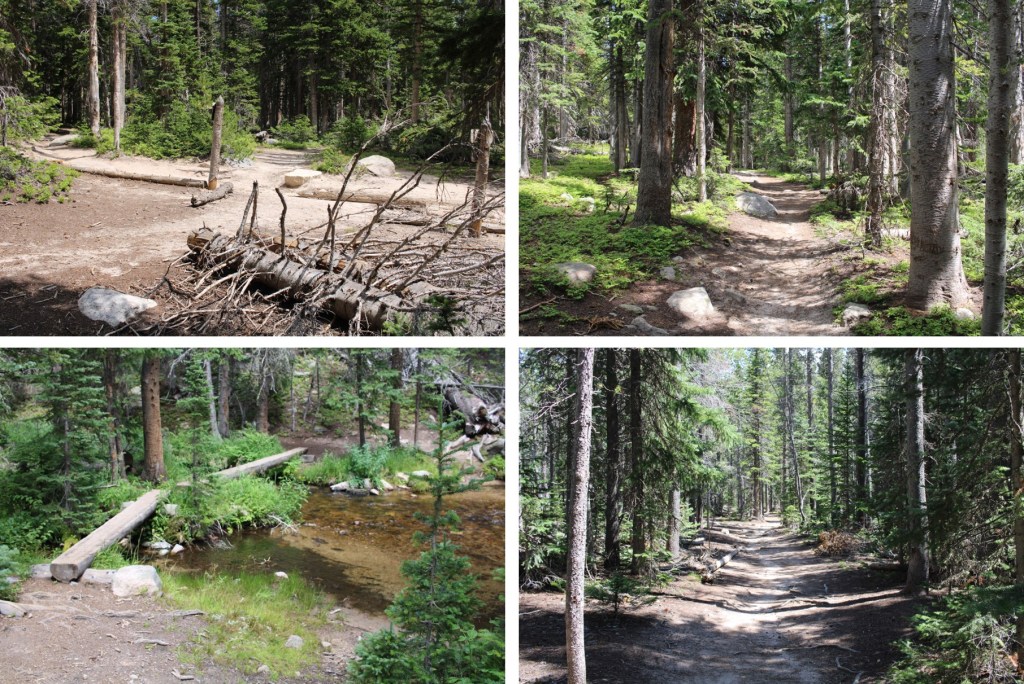
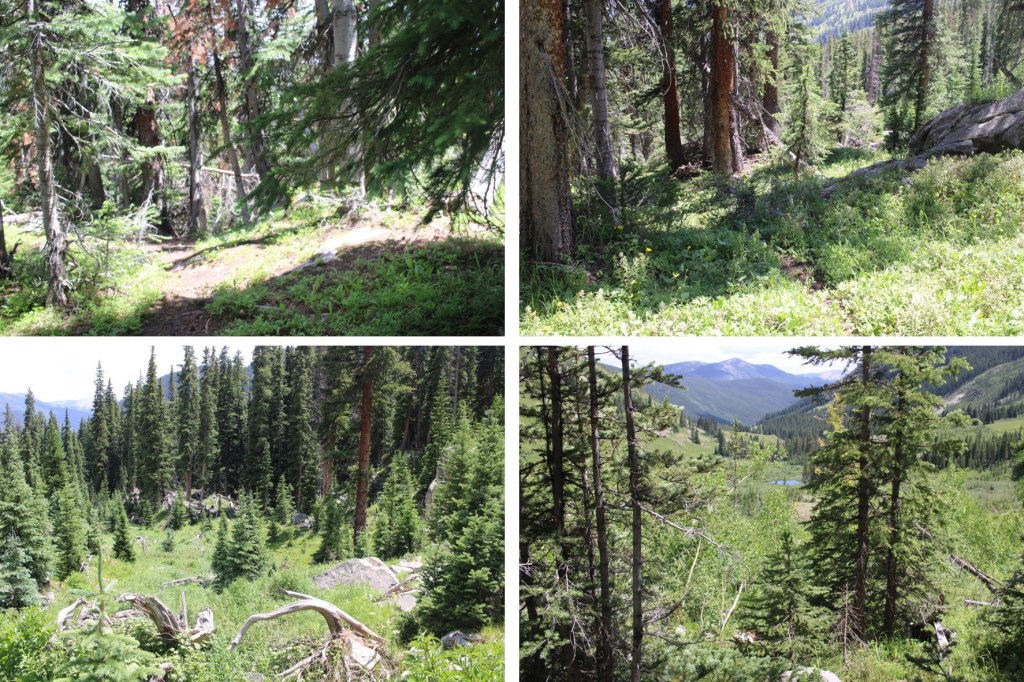
There is a trail here that will lead you back to the lake

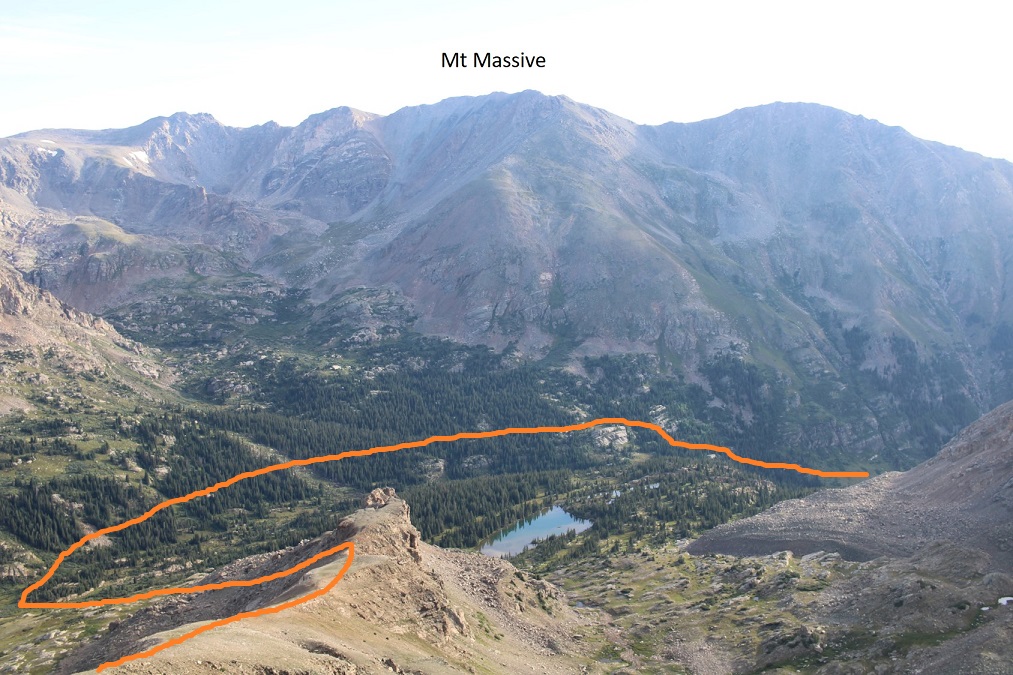
Notice there are a lot of campsites in this valley area as well

I made it back to Rock Lake at 3:30pm, making this an 11.44 mile hike with 4009’ of elevation gain in 9 hours.

Taylor Peak – 13,157, Powell Peak – 13,197, Otis Peak – 12,481, Hallett Peak – 12,723 & Flattop Mountain – 12,330

RT Length:  19.75 miles

Elevation Gain: 5983’

I started from the Flattop Mountain Trail inside Rocky Mountain National Park, at the Bear Lake parking area,  at 4am.  I’ve been to this trailhead a few times, and it fills up before 6am, so plan on getting there early to secure a spot. 

There is great signage in this area, leading you to the trailhead

I followed the class 1, well-marked trail for 5 miles up to Flattop Mountain, gaining almost 3000’ of elevation in the process

As soon as I hit treeline the sun began to rise, and I saw a small herd of elk, led by one male bull.  He bugled to me, and the ptarmigans began to chirp .

Elk Bugling:

Ptarmigans waking up:

I continued following the class 1 trail to Flattop Mountain (which is really just a plateau).

At the top of the plateau is a sign.  At this sign I turned left, following the cairns.  Note:  there isn’t a sign indicating there is a trail to the left, but there will be dozens of rather large cairns to follow towards Hallett Peak

While you could certainly summit Hallett Peak first, my main goal were some 13ers further ahead, so I skirted Hallett Peak to the right, staying at about 12360’, which kept me on rocky tundra.

As I headed southwest, staying on the rocky tundra, I could see both Otis Peak and Taylor Peak.  It was my objective to summit Taylor Peak next, which meant I’d need to lose about 400’ of elevation to the Otis/Taylor Saddle (also where top of Andrews Glacier/Andrews Pass is located)

Here’s my route up to Taylor Peak from the Otis/Taylor Saddle. Note, my route up is solid, my route back down (after summiting Powell) is dotted.  I would recommend these routes in the same order I completed them.  The entire day consisted of class 2 terrain for all the peaks I summited.

Here are some close-up pictures of the terrain to the summit of Taylor Peak


I summited Taylor Peak at 8:30am

Taylor Peak:

From Taylor Peak I could see Powell Peak to the southeast. 

To get there, I’d need to contour southwest down the south side of Taylor, and then follow the ridge towards Powell Peak.  The route is obvious, and easily kept class 2.

Here’s the route from the Taylor/Powell Saddle

And some close-up pictures of the route

I aimed for the highpoint, a large rock on the ridge

Here are some closer pictures of the route to the summit

Powell Summit rock, easily scaled from the left

To be honest, I’m not sure where the true summit lies.  When I got to the large rock outcropping I saw what looked like a cairn a short distance away, further southeast, but when I went further southeast to that point, the rock looked higher.  When I got home my track showed the rock was the highpoint, but there wasn’t anything indicating it was (no cairn/summit register/etc.)  A point further northwest looked high too, so I made sure to walk over there, but my photos are from the rock outcropping.

I summited Powell Peak at 10:15am

Powell Peak:

https://youtu.be/0oxEIaN_wYg

I then retraced my steps back to the Taylor/Powell Saddle

But instead of re-summiting Taylor Peak, I skirted the summit to the left, staying at around 12750’

This was all class 2, but required a bit of rock hopping

As I continued to round Taylor Peak, Otis Peak came into view.  The path towards the summit was obvious

I made my way down to Andrews Pass, and then up towards Otis Peak

I summited Otis Peak at 12:45pm

Otis Peak:

I could see Hallett Peak to the northwest, and descended to the Otis/Hallett saddle

And then headed northeast up to the summit of Hallett Peak

I summited Hallett Peak at 1:45pm

Hallett Peak:

Now to head back to the trail.  This was all class 2, and there were cairns to guide the way.  Be careful not to aim for the obvious trail in the distance, as it will not lead you back to the trailhead.  This is the route you should take.   If you look carefully, you can see the sign you’re aiming for from earlier in the morning

At the junction I turned right, and followed the class 1 trail back to the trailhead

I made it back to my truck at 4pm, making this a 19.75 mile hike with 5983’ of elevation gain in 12 hours.

On the way out, I was stopped by another herd of elk, walking along the road.

On to the next trailhead!

McHenrys Peak – 13,330

RT Length:  17.46 miles

Elevation Gain:  4442’

I started from the Glacier Gorge trailhead in Rocky Mountain National Park at 3:30am.  There were already several parties in the parking lot (probably 10 vehicles), but didn’t see another person on my route all day.   This is also a bus stop for access to Glacier Gorge (and lots of other hikes).  All this means is that it was overly crowded the last 2 miles of the hike on my way down.  Passing people became impossible, and more of a stroll as I hiked out with hundreds of other hikers. 

I followed the class 1 trail, staying on the Mills Lake trail.  There were wonderful signs that made getting lost difficult. 

I passed Alberta Falls at 1.15 miles, and continued following the trail to Mills Lake

After hiking for 3.35 miles I passed Mills Lake, and at 3.85 miles I passed Jewel Lake.  Side note:  there’s great fishing here.  Lots of hungry trout, eager to feast on any worm you drop in.  The larger trout are in the stream above Jewel Lake, and in Mills Lake.

I continued following the class 1 trail all the way to Black Lake (6 miles in).  This part of the trail had a lot of wood foot bridges, and rock slabs to cross.  All class 1, but the rock slabs were tricky to navigate in the dark.

I made it to Black Lake, and continued on the class 1 trail, up a waterfall, and across more rock slabs.

Here the trail kind of fizzled out, but I continued following cairns as I crossed a small creek, and headed southwest towards McHenrys Peak. There are a ton of cairns in this area (circled in red). 

Here’s the overall route to Frozen Lake (not pictured) and up Stone Man Pass.  There are plenty of cairns to guide you, but for the rest of the hike be careful:  there are a lot of granite slabs that are quite steep to navigate (all class 2), and slippery where wet.

Here are some close up pictures to Frozen Lake

I easily rock hopped and crossed the lake on its north side, and continued heading west towards Stone Man Pass

There are still tons of cairns in this area, but choose your route based on the best conditions.  The rocks are very slippery where they are wet.  I was aiming for the gully below Stone Man Pass.

I didn’t think the gully was that bad.  I stayed right on my way up, but took the other side down.  I’d recommend climbing up the left side of the gully, as it was more stable, but both were fine.  Here are some pictures of the gully

Once at the top of the gully, I turned right and headed northwest towards McHenrys Peak.  Everything you can see here is class 2, and there are cairns to guide your way.

I rounded the mountain, and was now on the west side of the peak.  Here is got a bit trickier.  There were still cairns to follow.  I headed up a rock slab, and rock filled gully.  This was easy class 3

Here’s the overall route of the rest of the climb.  I felt this was difficult class 3, with some exposure. 

There was a chimney to head up, and then a short but intense scramble to the summit

I summited McHenrys Peak at 9:50am

McHenrys Peak:

The summit looked like it could have several actual summits, so despite the large cairn and summit register, I made sure to walk all around the summit to make sure I’d actually summited.

Now to head back down. The trickiest part was descending the initial section, and finding my way back around the side of the mountain.  Once I was there, it was easy to find my way to Stone Man Pass, and then back down to Frozen Lake.

And then I followed the cairns northeast, back towards the trail that would lead me to Black Lake

Then followed the trail all the way back to the trailhead. 

I made it back to my truck at 2:30pm, making this a 17.46 mile hike with 4442’ of elevation gain, as per CalTopo.  Strava told me it was a 15.02 mile hike with 6573’ of elevation gain.  I tend to go with CalTopo when I write, for consistency purposes, especially since Strava tends to grossly exaggerate elevation gain. 

Also, there were a few elk along the trail who didn’t seem bothered by my presence… they wouldn’t even look up from whatever they were eating to acknowledge me.

On to the next trailhead!

Pagoda Mountain – 13,488

RT Length:  17.74 miles

Elevation Gain:  4544’

I started from the Glacier Gorge trailhead in Rocky Mountain National Park at 3:30am.  There were already several parties in the parking lot (probably 10 vehicles), but didn’t see another person on my route all day.   This is also a bus stop for access to Glacier Gulch (and lots of other hikes).  All this means is that it was overly crowded the last 2 miles of the hike on my way down.  Passing people became impossible, and more of a stroll as I hiked out with hundreds of other hikers. 

I followed the class 1 trail, staying on the Mills Lake trail.  There were wonderful signs that made getting lost difficult. 

I passed Alberta Falls at 1.15 miles, and continued following the trail to Mills Lake

After hiking for 3.35 miles I passed Mills Lake, and at 3.85 miles I passed Jewel Lake.  Side note:  there’s great fishing here.  Lots of hungry trout, eager to feast on any worm you drop in.  The larger trout are in the stream above Jewel Lake, and in Mills Lake.

I continued following the class 1 trail all the way to Black Lake (6 miles in).  This part of the trail had a lot of wood foot bridges, and rock slabs to cross.  All class 1, but the rock slabs were tricky to navigate in the dark.

I made it to Black Lake, and continued on the class 1 trail, up a waterfall, and across more rock slabs.

This is where my report may differ from others.  I took a different route in than I did out at this point, and liked my route out better.  It was easier to follow, and there were less willows/shrubs involved.  Here’s the overall picture of what I did.  There is a cairn circled in red, indicating the route to McHenry’s Peak.  Don’t take that route, but leave the trail and head behind the bush.  You will then easily see cairns that will guide you through the upper basin.

Once again, there is no established trail to Green Lake, but there are some tramped game trails (all covered in grass, not much dirt to be seen) and lots of cairns.  This is also choose your own adventure.  You’re aiming south, towards the mountains (circled in red).  There are several small streams to cross in this area, all easily hop-able.


I navigated a bit to the right of the waterfall to get to Green Lake (cairns here too)

Once at Green Lake, I turned left and headed southeast.  Here’s my overall route on scree, navigating around large boulders and rock slabs to keep this all class 2.

Here are some close-up pictures of my route up the gully, to the saddle

Once at the saddle, I turned right and headed up the ridge.  I went directly up the ridge on the way up, which was class 3.  I kept it class 2 on the way down by staying more to the left of the ridge. 

Here are some pictures of the ridge.

I summited Pagoda Mountain at 9am. There was a plastic tube at the summit as a register, lacking a lid, but with a ziplock bag inside.  I didn’t bother opening it.

Pagoda Mountain:

I had a great view of the Longs Peak keyhole route

Now to re-trace my steps back to the saddle, before the storm hit

And back down the scree to Green Lake

Once back at Green Lake, I turned right and followed the cairns north out of the basin

This time I went behind the rocks and picked up the old trail, circled in red

Then followed the trail all the way back to the trailhead.  It started raining just as soon as I made it to treeline, accompanied by a flash of lightning, a loud boom, and a wide rumbling all around me.

I made it back to my truck at 1:30pm, making this a 17.74 mile hike with 4544’ of elevation gain in 10 hours. 

On to the next trailhead!

K49 – 13,535

RT Length: 9.81 miles

Elevation Gain: 3162’

I arrived at the North Halfmoon Creek Trailhead to find it almost full at 3:30am, with several vehicles parked just below the final ‘difficult’ section. Pro tip:  If your vehicle cannot make it all the way to the trailhead, do NOT park it just below the difficult section, as it’s narrow and I barely avoided hitting several vehicles on the way down later in the day.  I was driving a Tacoma; I can only imagine the difficulty a larger vehicle would have passing poorly parked cars in this area.  If your car can’t make it, do us all a favor and park in the 2WD parking area.  The upper 4WD parking area was full of 4Runners, Suburbans, and trucks.

I was on the trail at 4am.  The sky was clear and I could see stars, but apparently it had rained the night before, and I was quickly soaked. 

The trail was an easy to follow, class 1 trail

At the junction, I continued straight on North Halfmoon Lakes Trail

This was still a class 1 trail, with some fun boulders thrown in.  These were easy to navigate, with cairns to guide the way.

After hiking for 2 miles, I came to an unmarked junction and left the North Halfmoon Lakes Trail and followed a social trail to a stream.

There were several small streams to cross, and no established trail.  I continued heading southwest, staying above North Halfmoon Creek, doing my best to avoid the boulders.  This was all done below treeline, so pictures don’t help much.  I stayed level at around 11600’

I came to an avalanche area, crossed it, and continued staying at 11600’

Eventually I could see North Halfmoon Creek, and an easy place to cross.  I crossed the creek, and headed southwest.

There was a drainage that was easy to follow

I crossed the creek again (once again, easy) and continued heading southwest

At 11900’ I turned and headed south, up this hill

This led me to the upper basin.  Here’s my route to the ridge.  This is choose your own adventure.  I tried to keep it between the rocks and the scree.  I took the rocks up, the scree down.

Here are some close-up pictures of the route to the ridge

Once on the ridge, I turned right and followed it southwest

This was all class 2. There was a short class 4 section, but it could be easily avoided by dropping down to the right a little bit, then regaining the ridge

Here’s looking back at that rock you’re trying to avoid

Now it was an easy, class 2 ridge hike to the summit

There were 2 summit registers at the summit.  A plastic tube with I (surprise!) wasn’t able to open, and a glass jar with a register I signed.

I summited K49 at 7:45am

K49:

From the summit, here’s a view of Mt Massive, and my route in/out.  Now is a good time to get a view of your exit route, and the avalanche run-out you’re aiming for on your way back

I turned and re-traced my steps back down the ridge

Then back down the scree towards the basin and North Halfmoon Creek

Here’s my route across the creek and staying at 11600’ until I met back up with the trail

After passing the avalanche debris I was quickly able to hook back up with the trail

And follow it back to the trailhead

I made it back to my truck at 10:30am, making this a 9.81 mile hike with 3162’ of elevation gain in 6.5 hours.

On to the next trailhead!

Chiefs Head Peak – 13,577

RT Length:  18.17 miles

Elevation Gain:  5476’

I parked at the Sandbeach Lake Trailhead at Rocky Mountain National Park, and was on the trail at 4:30am.

The Sandbeach Lake Trail was a class 1 trail I took all the way to Sandbeach Lake.  There were 2 creek crossings, but they had footbridges across.

It was 5 miles to Sandbeach Lake. Once at the lake, the fastest way to skirt the lake and find a trail is to go right here

But I wanted to see the lake, so I did, and then followed the lake past a small stream, and caught up with the trail there.  

After crossing the creek, I followed the trail northeast to treeline.  When the trail ended, there were plenty of cairns to guide the way (circled in red).

Once at treeline, I kept aiming for Mt Orton (unranked). There were cairns to mark the way until I was in front of Mt Orton

I then skirted Mt Orton to the left, and went through a very small saddle

I could now see an easy path to Chief Head’s ridge.  Here’s the route I took

And some close-up pictures

Once on the ridge, I followed it .3 miles to the summit, on rocky terrain.  I was able to keep it all class 2 by staying to the left.

There wasn’t a summit register, or a cairn, or a marker, so I just walked all over the rocky summit.

I summited Chiefs Head Peak at 11am

Chiefs Head Peak:

From the summit I had an amazing view of Pagoda, Longs, and Meeker

This was an out and back hike, so I turned and retraced my steps back down the mountain, around Mt Orton, and to Sandbeach Lake

The cairns picked up again, and I could now see Sandbeach Lake, so route finding was easy until I hit the trail.

Back at the lake, I picked up the Sandbeach Lake Trail, and took this class 1 trail all the way back to the trailhead.

I made it back to my truck at 3:15pm, making this an 18.17 mile hike with 5476’ of elevation gain in 10 hours 45 minutes.

On to the next trailhead!

Mt Chiquita – 13,054, Ypsilon Mountain – 13,513, Mt Chapin – 12,454

RT Length:  10.2 miles

Elevation Gain:  3555’

I parked my truck at the Chapin Pass trailhead and was on the trail at 4am. 

The trail starts out heading directly up to the pass. 

After hiking for .25 miles I came to an obvious junction and turned right, heading towards Chapin, Chiquita, and Ypsilon summits

The trail was very easy to follow.  I followed it east and rounded the north side of Mt Chapin (saving it for later).

The trail changed from Class 1 to Class 2 as I made my way up to the top of Chiquita, heading northeast. 

I made it to the summit just as the sun was starting to rise

 I summited Mt Chiquita at 6am

Mt Chiquita:

From the summit of Mt Chiquita I could see the summit of Ypsilon Mountain to the north. 

It was an easy ridge walk to get there, with a small false summit along the way. I just followed the ridge down 270’, and then up 722’ to the summit of Ypsilon.

I summited Ypsilon Mountain at 7am

Mt Ypsilon:

This was going to be an out and back for me, so I retraced my steps back to Chiquita, losing 722’ of elevation, and then gaining 270’

Back at the summit of Mt Chiquita I continued following the ridge southwest, back to the trail.  There is a trail to the summit of Mt Chapin from there.

Here are some close up pictures of the class 1 trail

I summited Mt Chapin at 8:30am

Mt Chapin:

I turned and retraced my seps back to the trail below

Once back at the junction with the main trail, I turned left and followed it west to Chapin Pass

I even saw a few bull elk lounging along the way

Back at Chapin Pass, I turned left, and followed it back to the parking area, which was now overflowing with dozens more vehicles than could fit in the area.  If you want to do this hike, get there early.

I made it back to my truck at 9:15am, making this a 10.2 mile hike with 3555’ of elevation gain in 5 hours, 15 minutes.

On to the next trailhead!

Fairchild Mountain – 13,509 – Hagues Peak – 13,56 – Mummy Mountain – 13,420

RT Length:  24.7 miles

Elevation Gain:  6931’

I made it to the Lawn Lake trailhead exhausted.  It’s been a fun month, but not one in which I’ve gotten much sleep.  I was on the trail at 4:30am. 

I followed the class 1, Lawn Lake Trail, for 5.7 miles

After hiking for 5.7 miles I came to a junction with the Black Canyon Trail, and took the Black Canyon Trail past Lawn Lake, and all the way to the Fairchild/Hagues Saddle.

Just after passing the lake I came across 3 bull moose enjoying breakfast. I took a few pictures and gave them their space

Bull Moose at Lawn Lake:

I continued following the class 1 trail up to the saddle

I crossed a small stream.  You can clearly see the trail on the other side.  The trail became faint in areas, but there were cairns and the trail became easier to see near the saddle. 

Just before making it to the saddle, I turned left and this is the route I took to the summit of Fairchild, following the ridge southwest

Here are some close up pictures.  Note, the boulders become very large near the top.  They’re all stable, but larger than vehicles.  My hiking shoes gripped the rocks nicely, but they would be treacherous if they’d been wet.

I summited Fairchild Mountain at 9:45am

Fairchild Mountain:

There was a plastic tube summit register I couldn’t open, and a rock wind break at the summit. 

From Fairchild, I looked back at the saddle and could see Hagues Peak, and my route.  Now is a good time to get a visual of the way you want to summit, as it’s difficult to see from the saddle/below.  This is the route I took, which kept it low class 3, but mostly class 2.

I made my way back to the Hagues/Fairchild saddle

And then followed the ridge until I made it to 12700’. 

I then headed northeast towards the ridge, staying on class 2 terrain.  Here are some close ups of my route

Also, there were more moths than I’d ever seen this far above treeline, and dozens of crows taking advantage of the situation

I gained access to the ridge with a few easy class 3 maneuvers.

One on the ridge, I turned left and followed it through more easy class 3 terrain west to the summit.  If there’s an option, always go right around the boulders.

The summit is circled in red

It’s just a little further southwest past the tower

I summited Hagues Peak at 12:25pm

Hauges Peak:

There were several benchmarks/elevation markers, and another summit tube (full of various loose pieces of paper, so I didn’t bother signing one).

Next on the agenda for the day was Mummy Mountain. I turned and headed back down the ridge the way I’d summited, and then crossed PT 13302, and headed up Mummy Mountain.  Here’s my overall route

And some step by step pictures

The terrain became rocky near the top, but this all remained class 2

I summited Mummy Mountain at 2pm

Mummy Mountain:

The weather had held out so far, but on the summit of Mummy Mountain I heard my first clap of thunder in the distance, and wanted to get back down to treeline as soon as possible.  I followed the ridge southeast on class 2 terrain.

I aimed for the drainage, and followed it until I made it back to the Black Canyon Trail

I followed the Black Canyon Trail North until the junction with the Lawn Lake Trail

There I took the Lawn Lake Trail back to the trailhead.  It rained the entire way.  Not the fun, misty rain, but buckets of large water droplets.  The sky thundered all around, after large flashes of lightning. 

I made it back to my truck at 5:30pm, making this a 24.7 mile hike with 6931’ of elevation gain in 13 hours.

On to the next trailhead!

Teocalli Mountain – 13,208, PT 12934, PT 13162, Triangle Peak – 13,380

RT Length:  16.72 miles

Elevation Gain: 5244’

The drive in to the Teocalli Trailhead was sketchy.  My stock Tacoma made it, but the last 2 miles were brutal, and the last quarter of a mile I kept going because I had to and couldn’t turn around if I’d tried.  The drive made for a great incentive not to need to come back to this area. 

I parked at the trailhead.  There were a ton of flies and mosquitoes out.  The flies looked like normal flies, but when they bit me, I got welts.  The next day they looked like burns.  Bring bug spray.

I was up and on the trail at 4:15 am.  The trail was class 1, but overgrown with plants, so at times it was hard to see.  I followed Teocalli Trail NO 554 for .65 miles

After hiking for .65 miles, I came to a junction.  Here I turned right, and continued following the trail east to the next junction.  This was a class 1 trail. 

The next junction was 1.5 miles away, and clearly marked.  Here I turned left, and followed the class 1 trail north

At 12420’ the class 1 trail ended, and became a class 2 trail. 

I headed west, to the summit of Teocalli Peak.  Route finding was easy, and I even found a few cairns along the way.

I summited Teocalli Mountain at 6:25am.

Teocalli Mountain:

There was a military box chained to a rock as a summit register, but it was open and empty, so I left a new one, and continued north.  If you’re going to do the loop as I did, note you need to be very comfortable with class 4 climbing and exposure, as well as bushwhacking through trees/brush/willows.  There is a knife edge that puts the one on Capitol to shame (circled in red below), and several class 4 chimneys. If you’re not comfortable with this type of scrambling/climbing/hiking, turn back now.  If you are, it’s time to put on your helmet and get ready for some type 2 fun!

Here’s an overall view of the route.  I spent a lot of time looking at my exit route down the basin, as I wasn’t sure if it would go.  I memorized the terrain in my mind for later in the day. 

I followed the ridge north, as I descended to the Teocalli/PT 12934 saddle.  This was full of loose rock.  I put on my microspikes and navigated down the class 2+ terrain to the saddle.

The first obstacle from the saddle is getting around these rocks.  I went right, and up a grass filled gully that turned into a rock filled gully

Then the terrain became rocky, and the class 3 climbing began.  I took this route up the rocks initially

And then went straight up the knife edge.  Do not go to the left or right, as the rocks are all loose.  The best way to climb this is to stick to the ridge.

Then it was a rocky, class 2 hike to the summit of PT 12934

I summited PT 12934 at 8:15am

PT 12934:

From 12934 it looked like an easy ridge hike to the base of PT 13162, but I was wrong. There is class 3 scrambling and class 4 chimneys to contend with.  There are too many moves to picture, so I’ll surmise the ridge by saying if you have to dip down, go right, but the ridge mostly goes.  Here are some pictures of the fun parts.

From the 12934/13162 saddle, this is the route to the ridge.  It’s all class 2.  There are actually 2 gullies that ‘go’.  I took one up, the other down, and they both felt about the same difficulty wise (difficult class 2). 

Here’s looking back at that ridge

Here are some step-by-step pictures to PT 13162.  Microspikes were very useful ascending and descending the gullies

Now on the ridge, I followed it southwest to the summit.  There was some low class 3 scrambling here.  This is the route I took

I summited PT 13162 at 11am

PT 13162:

From the summit I once again got a good look at my decent route down the basin.  I took a mental picture of it for later

I retraced my steps back to the 13162/12934 saddle.  Once again, both gullies ‘go’, so pick your favorite

Back at the saddle, it was time to head northwest towards the PT 13162/Triangle Peak saddle.  I stayed at about 12600’ of elevation the entire time

I also found a cool fossil.  I have really good luck finding fossils around 12500’/12700’

Here are some photos of my way to the Triangle/13162 saddle

Once there, it as mostly an easy ridge walk to the summit

Except for the last bit, which was class 3.  I did not take the scree filled/steep gully, but instead chose the class 3 scrambling route to the left

I summited Triangle Peak at 1:20pm

Triangle Peak:

I’d thought about summiting a few more peaks in the area, but as you can tell from the picture above, the weather was moving in, and I wanted to get back below treeline. Here’s the route I took out of the basin.  Basically I made my way to where the maroon rocks met the tundra, and followed the rocks out of the basin. The dotted line is my route from 13162 to the saddle of Triangle Peak

Here are some pictures of my route into the basin

And from the basin back to the trailhead. I stayed left the entire time, keeping the creek to my right.  The creek does flow through terrain too difficult to cross, so don’t follow too closely or you will cliff out. There are no established trails here, but every once in a while, mainly when I was in the trees, I was able to find a game trail to follow. Just keep heading south.

I came to the flower field I knew would eventually lead me to the trail, as I’d been in the area the day before. 

I made it back to my truck at 5pm, making this a 16.72 mile hike/climb with 5244’ of elevation gain in 13 hours.

On to the next trailhead!

White Rock Mountain – 13,540 and White Benchmark – 13,401

RT Length: 11.04 miles

Elevation Gain: 4470’

The drive in to the Teocalli Trailhead was sketchy.  My stock Tacoma made it, but the last 2 miles were brutal, and the last quarter of a mile I kept going because I had to and couldn’t turn around if I’d tried.  The drive made for a great incentive not to need to come back to this area. 

I parked at the trailhead.  There were a ton of flies and mosquitoes out.  The flies looked like normal flies, but when they bit me, I got welts.  The next day they looked like burns.  Bring bug spray.

I was up and on the trail at 4:15 am.  The trail was class 1, but overgrown with plants, so at times it was hard to see.  I followed Teocalli Trail NO 554 for .65 miles

After hiking for .65 miles, I came to a junction.  Here I left the main trail, and took a side trail.  I swear it’s there!  It’s just covered in vegetation.

Now is a good time to get a look at the overall route northwest.  Once in the trees, it’s difficult to know where you’re going until you make it into the basin

I followed a slight trail until I crossed the creek (creek crossing shoes needed) and then there was no more established trail (but a lot of game trails) I followed the drainage northwest to treeline.  Also, here I saw fresh bear scat (still wet) so be aware there may be a bear in the area.

Once at 11570’, I rounded the side of this hill, and headed up

I ascended a small gully to the upper basin

Here are some closer pictures of my ascent into the upper basin

Now’s a good time to look west.  This is the route I took down from White Mountain to White Benchmark.  I stayed just under the cliffs.  You’ll use this information later

Now in the upper basin here’s my route to the ridge.  This is choose your own adventure, and I’m pretty sure you could pick any line and it would go. The arrow shows where I ascended the ridge, via a small gully.

Now on the ridge, I followed it northwest.  Making it to the arrow was all class 2.

Once there, I had to drop a bit in elevation to get around the rocks. I put on my microspikes and went for it

Making it back to the ridge felt like class 3

Once around this obstacle, I now had to go around the white rock.  I did this by heading back to the ridge, and then dropping down onto the other side.

To summit White Mountain, I had to once again dip down, then re-ascend to the ridge.  Microspikes were extremely helpful here.  This is the route I took. Once I left the white dirt and made it to the brown rock, this became a class 3 scramble on questionable rock.  It looks like the terrain shifts constantly, so be careful picking your route

And some step-by-step pictures to the summit

I summited White Rock Mountain at 9:30am.  No summit photo: With all the excitement of a functional summit register that I could actually open and sign, I forgot.  This is also how I knew the sand shifts frequently:  There were signatures from just a few days before, but I didn’t see on shoe track the entire hike, and I was leaving prints everywhere.  

White Rock Mountain:

I retraced my steps back to the ridge

From the ridge I could see White Benchmark.  I decided to stay high, just under the cliff bands

The rocks were relatively stable, but it was slow going

Here’s looking back at my decent route off White Mountain

I kept rounding the ridge to the south, and eventually could see the 12728/White Benchmark Saddle, and a trail!

Once on the saddle, I followed it north.  It started out as easy tundra

But eventually switched to rock.  I still had on my helmet.  The route is fairly obvious.  You can stick to the ridge the entire time, keeping it at class 3.  If you opt to dip down to the left or right you might be able to keep it difficult class 2/easy class 3.

I summited White Benchmark at 12:30pm

White Benchmark:

I made my way back to the 12728/White Benchmark Saddle

Once there, I picked up the faint game trail.  This trail has the potential to lead you all the way into the trees and beyond, if you don’t lose it.  It avoids the willows below, and becomes quite robust at times. 

Once in the trees, route finding becomes more difficult. There are many game trails in the area. Pick one and follow it southeast until it runs out, then pick another one and continue following it southeast.  Repeat.  Keep the creek/drainage to your left (east).

Once you exit the trees, aim for the small pond below, and then re-cross the creek and pick up the trail you walked in on

The parking area is circled in red

I made it back to my truck at 3:15pm, making this a 11.04 mile hike with 4470’ of elevation gain in 11 hours.

On to the next trailhead!