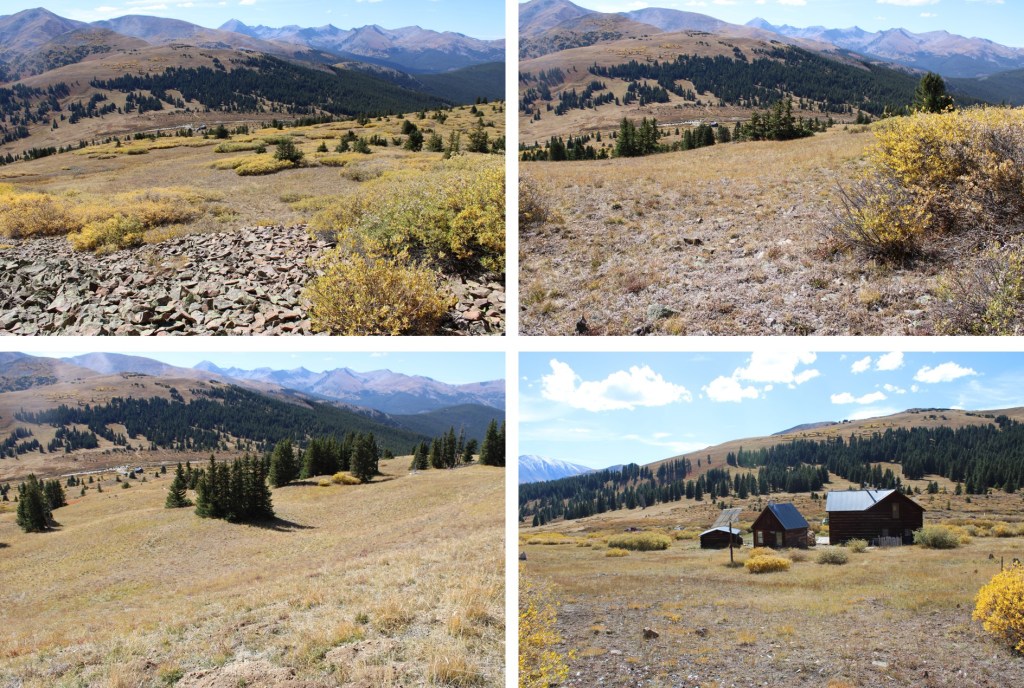
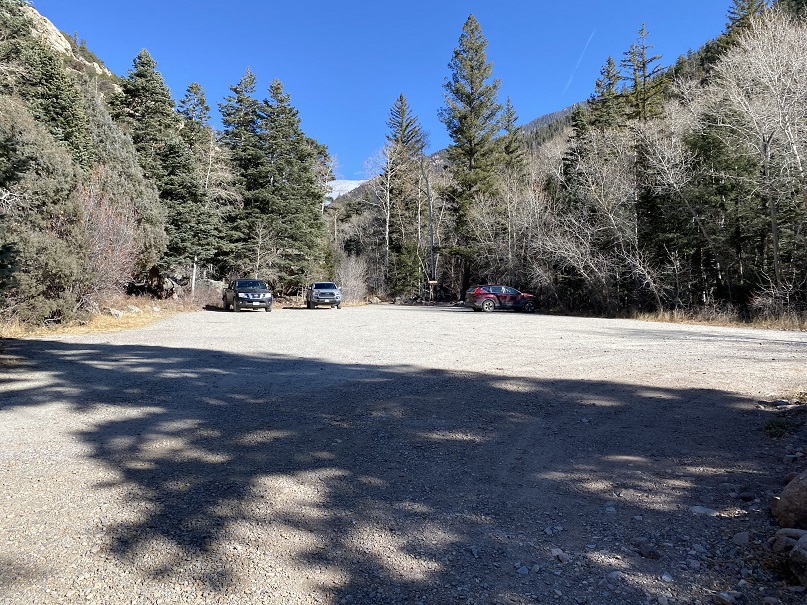
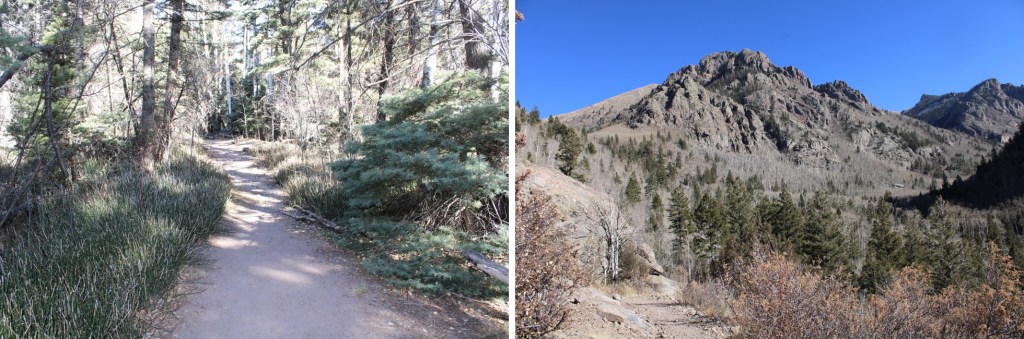
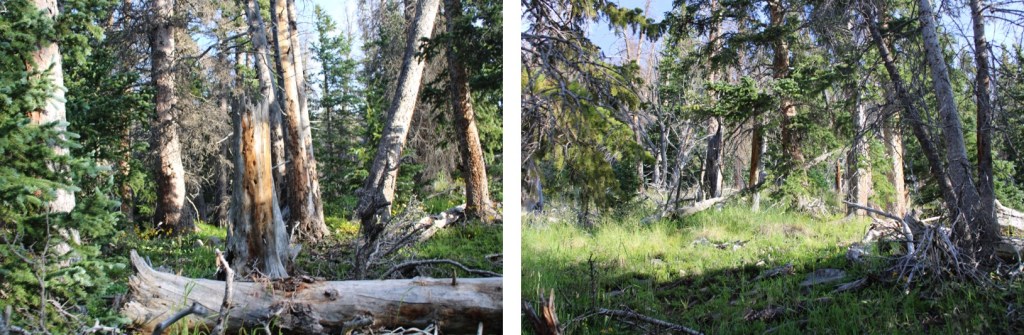
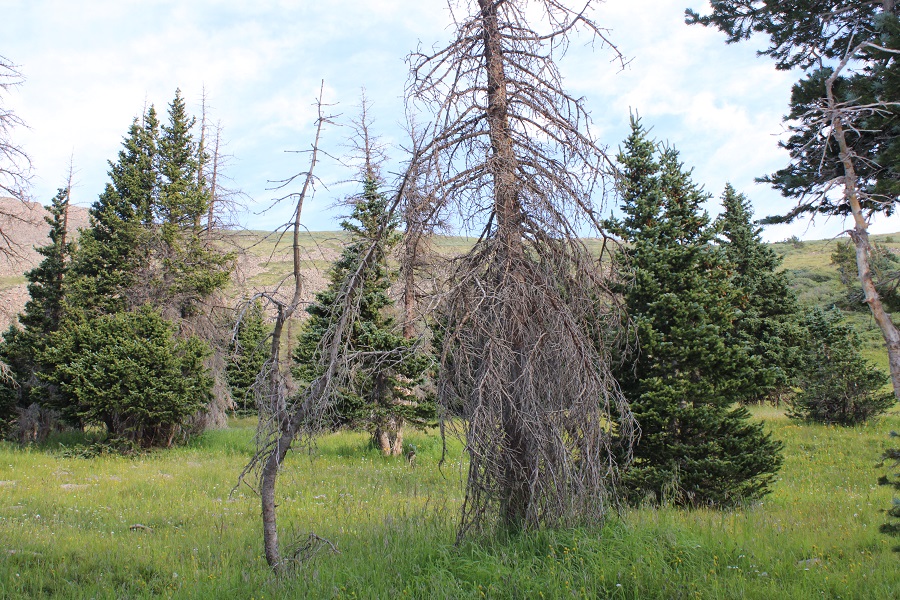
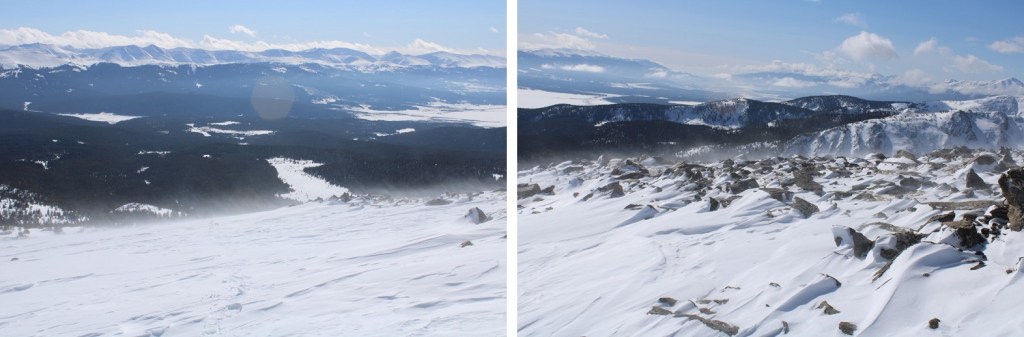
I was meeting some ladies in Breckenridge for a weekend getaway, and to take them up their first 14er. Boreas Pass was along the way, so I decided to make a quick stop to summit Boreas Mountain. I drove up Boreas Pass, and parked at about 11500’. Boreas Pass road is a 2WD dirt road, and easy to navigate.
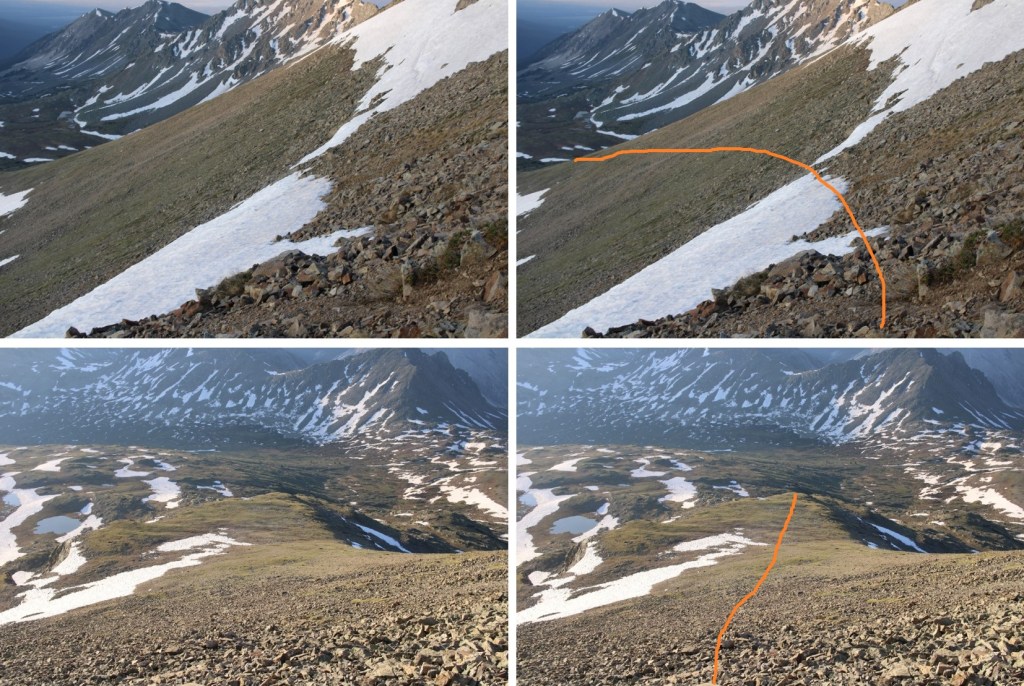
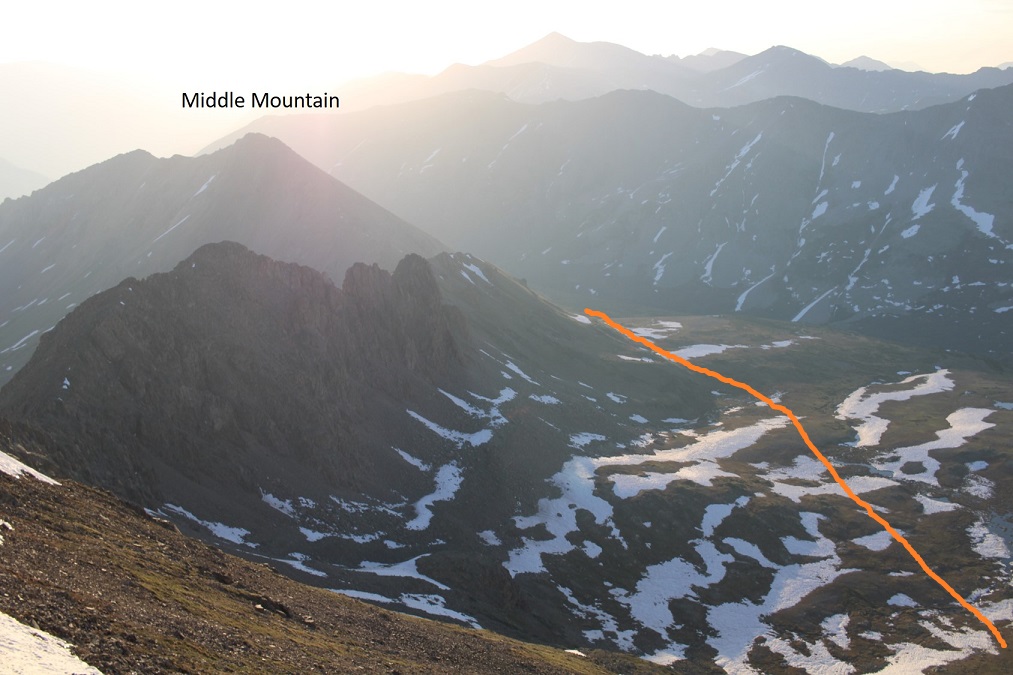
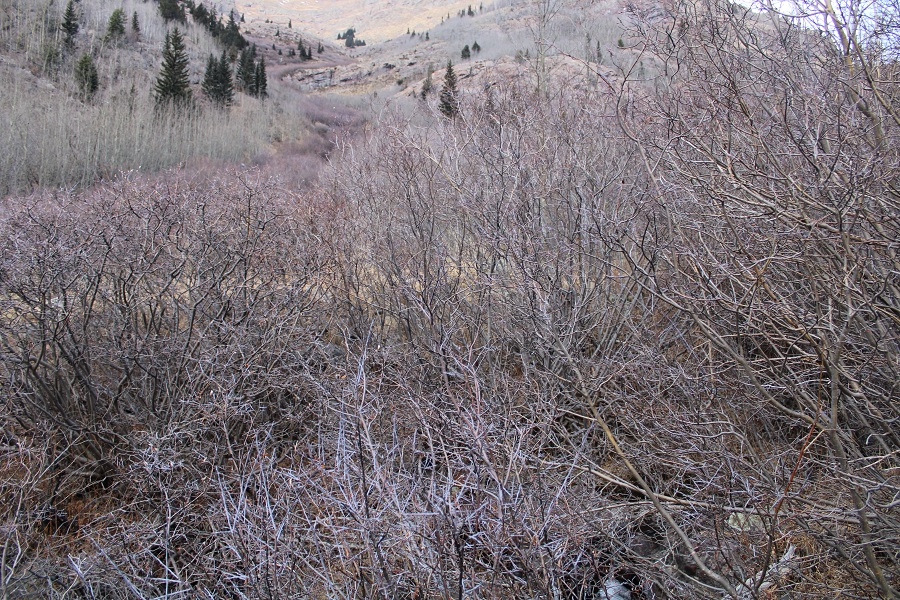
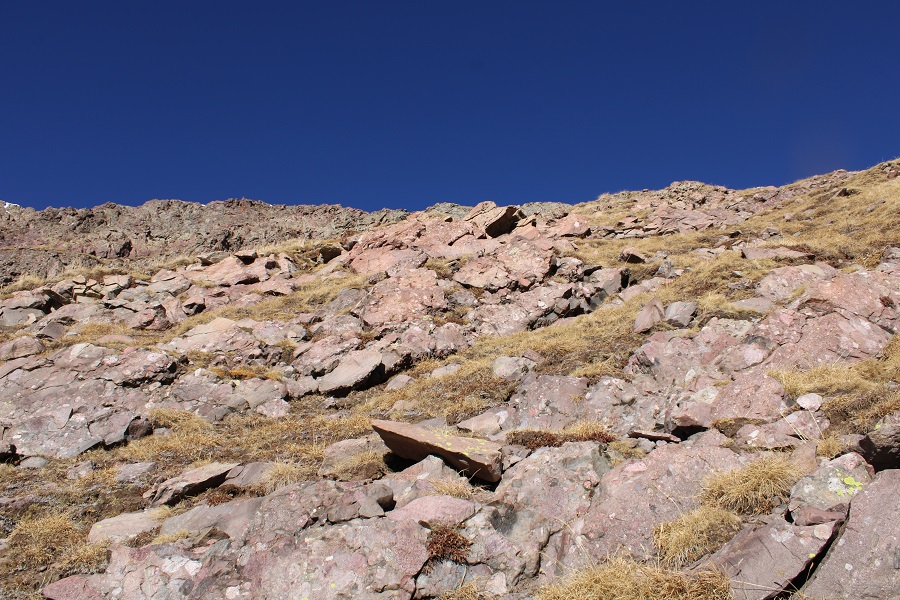
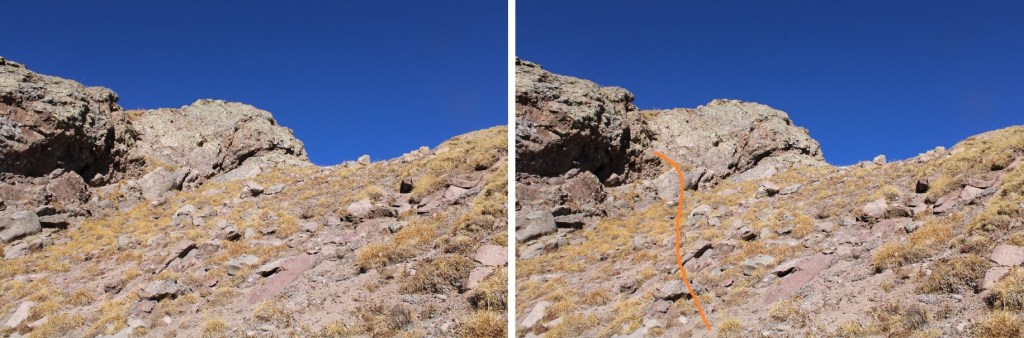
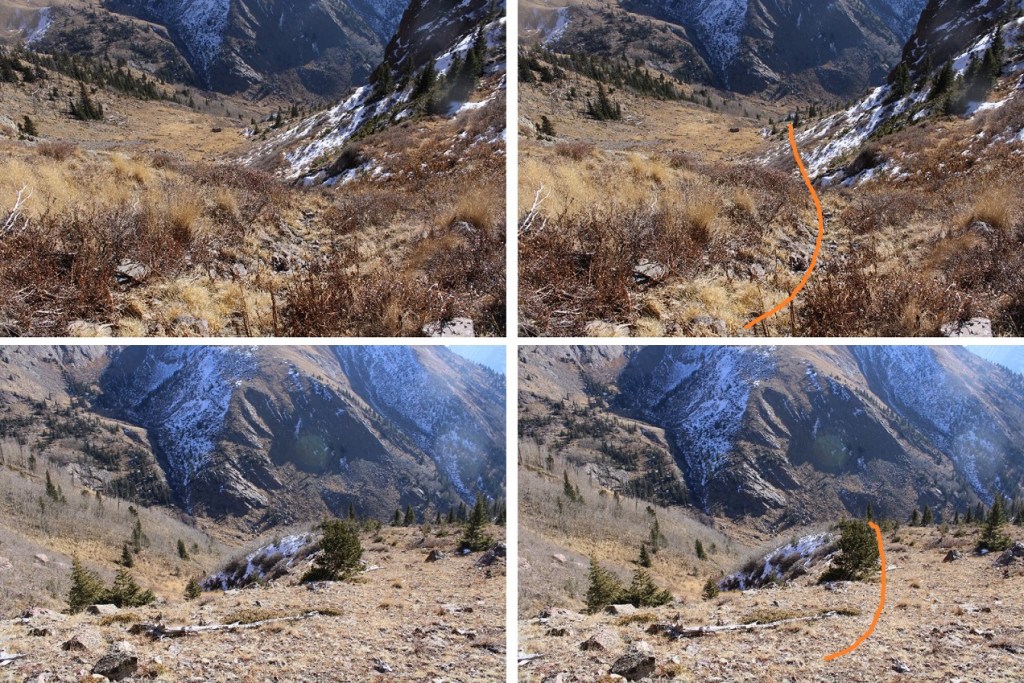
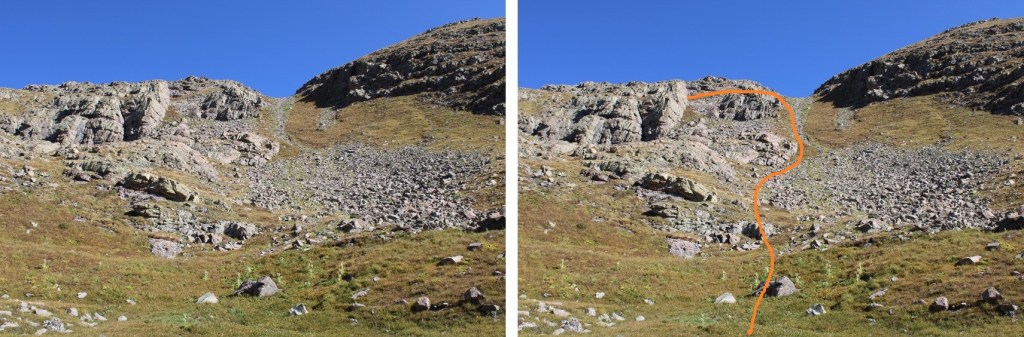
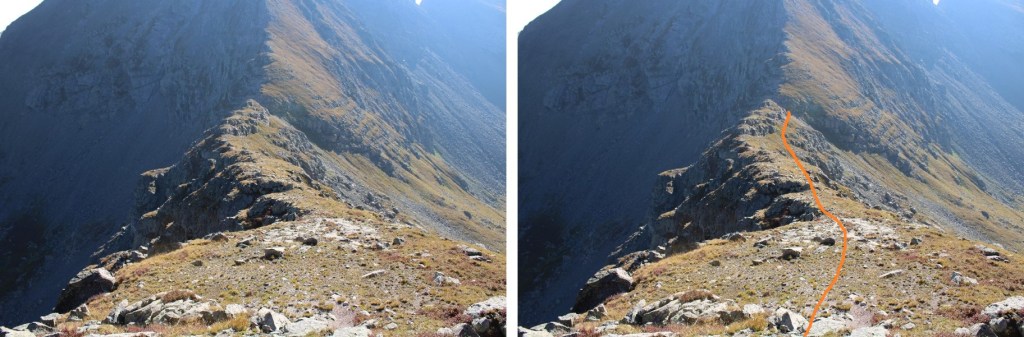
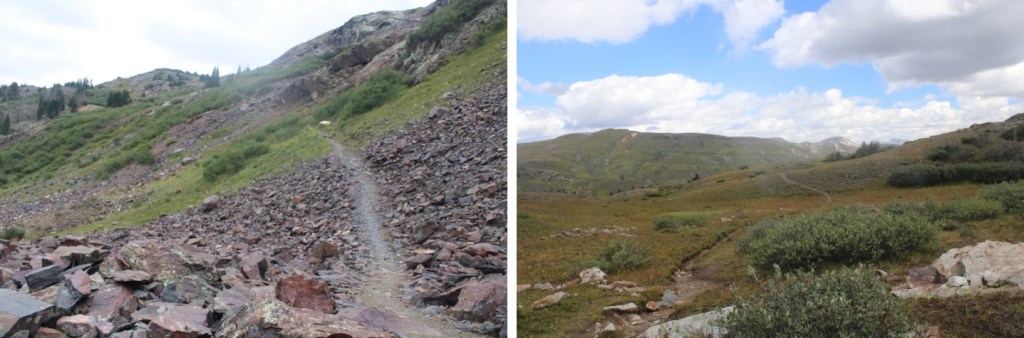
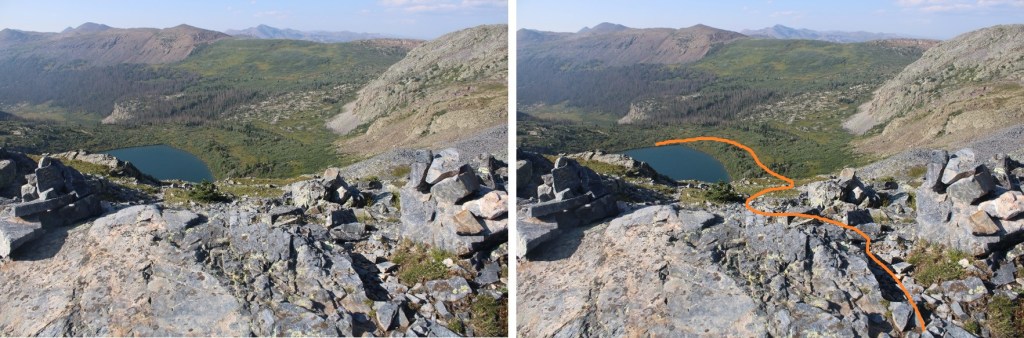
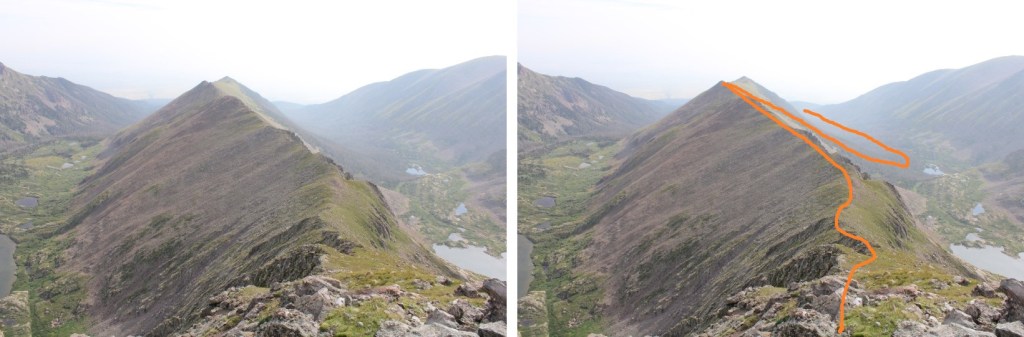
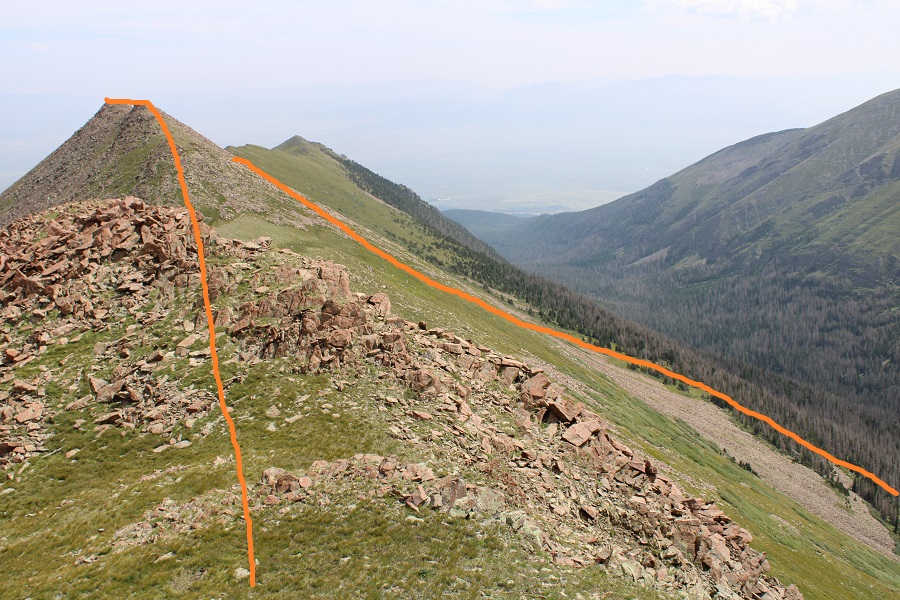
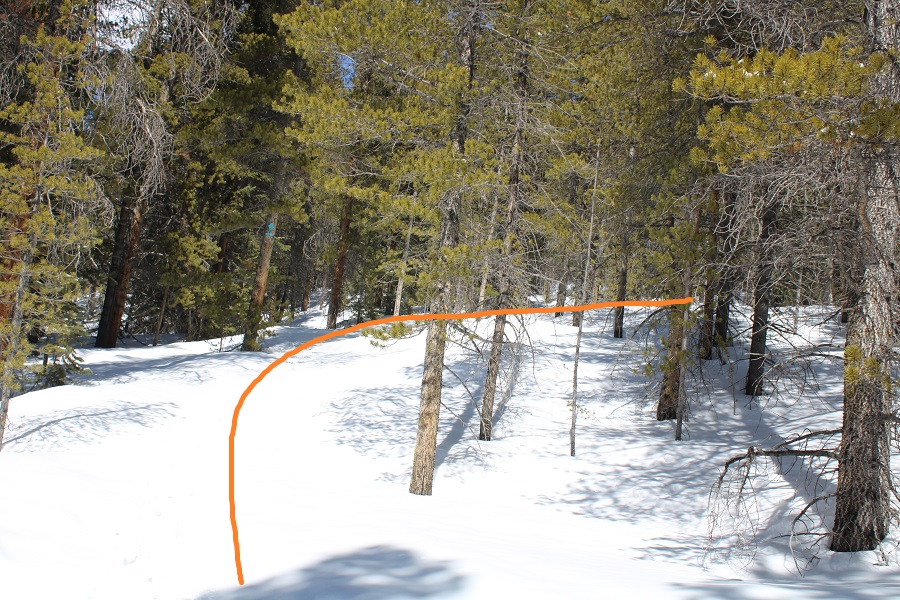
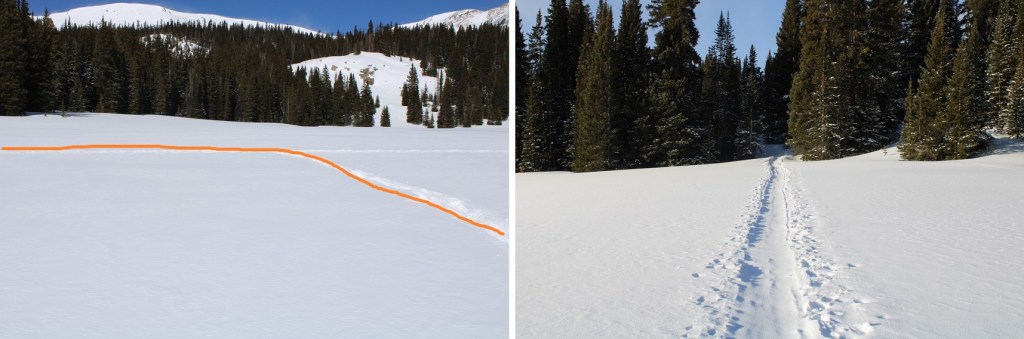
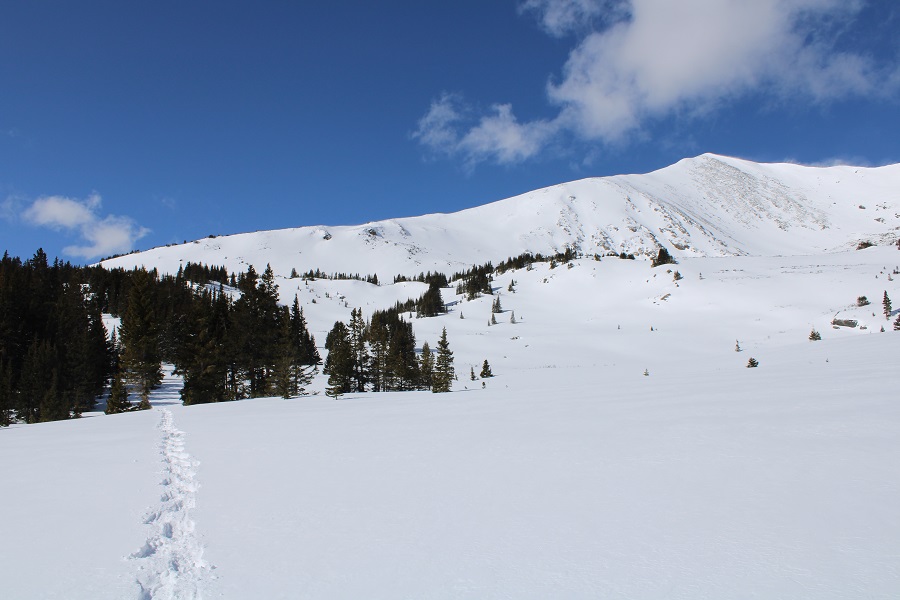
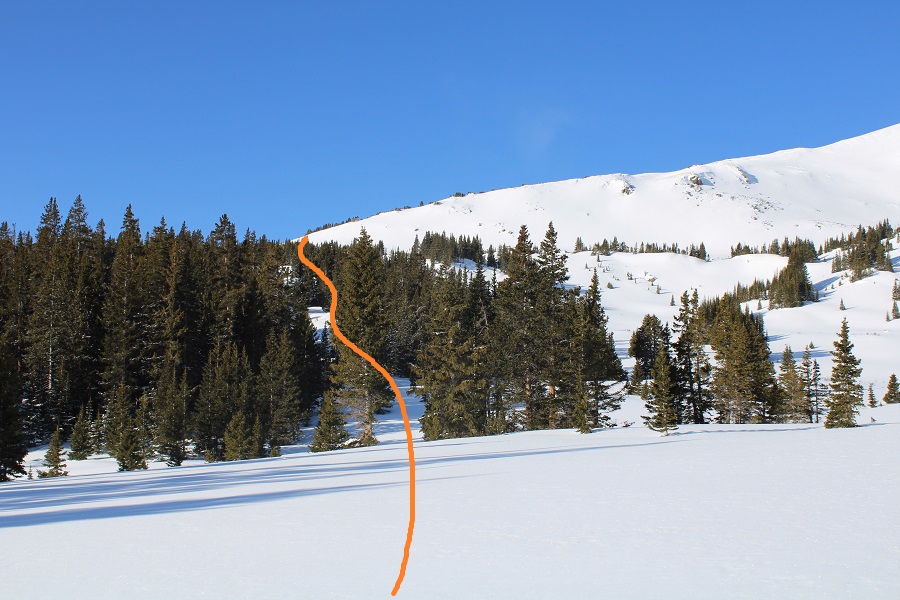
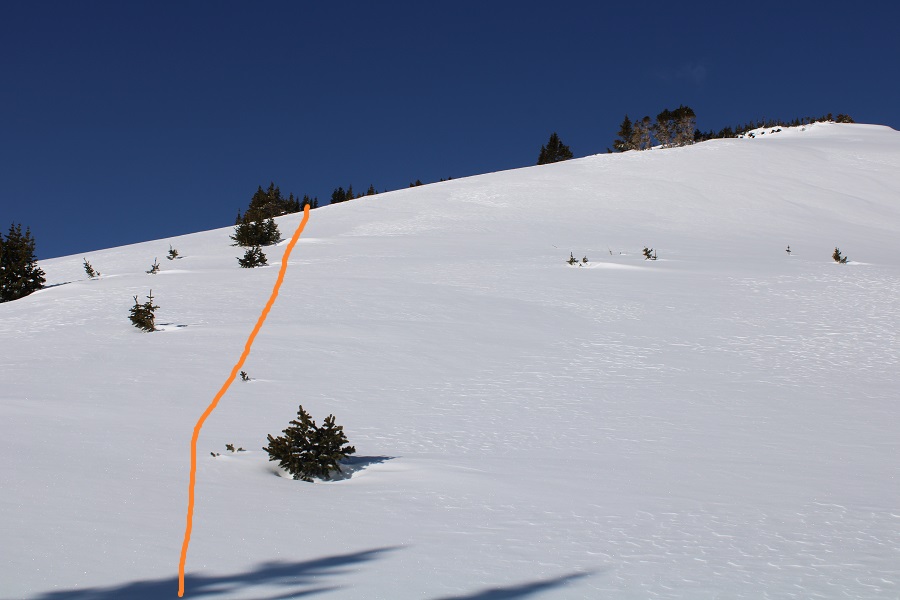
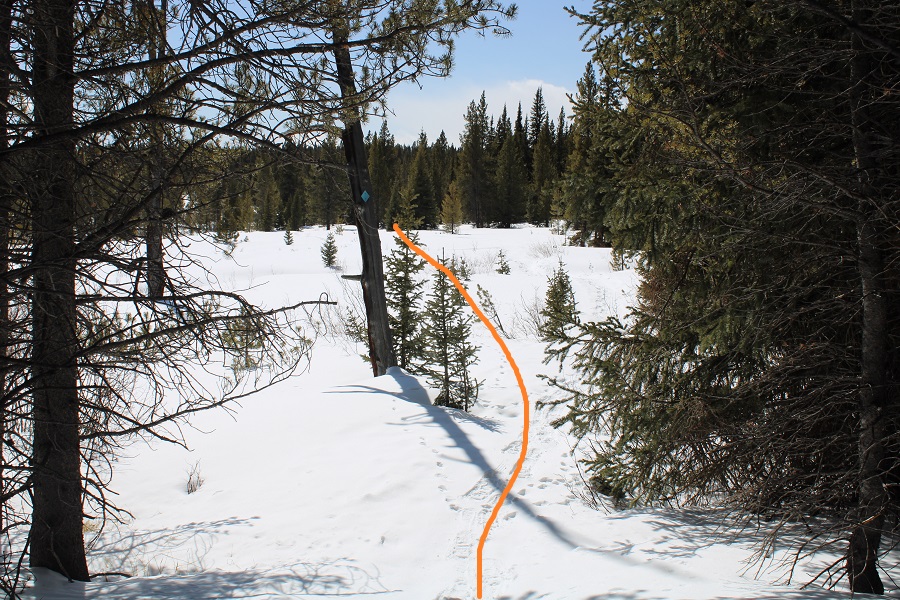
I started by heading east, up the slope to the ridge.
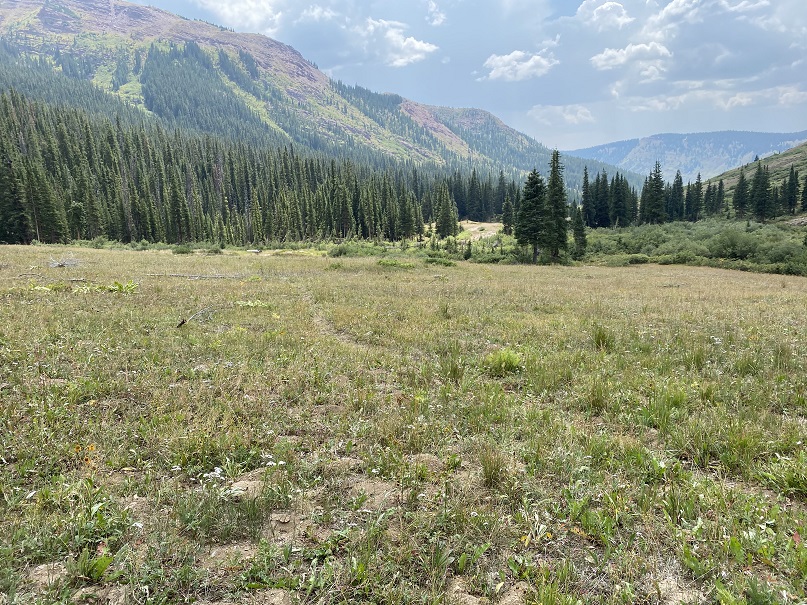
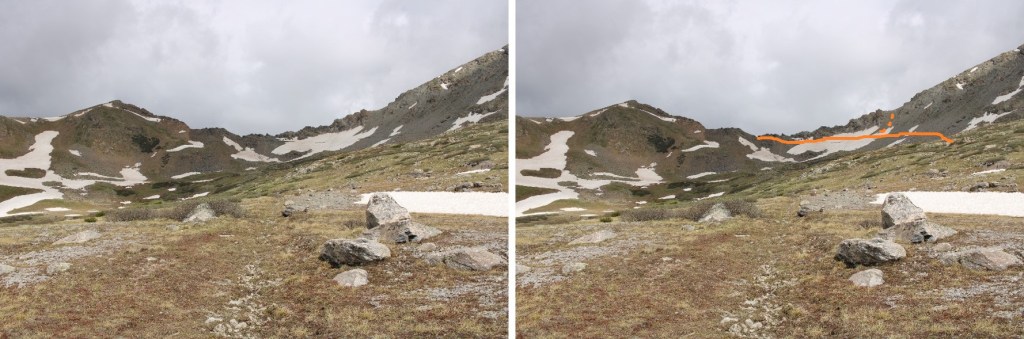
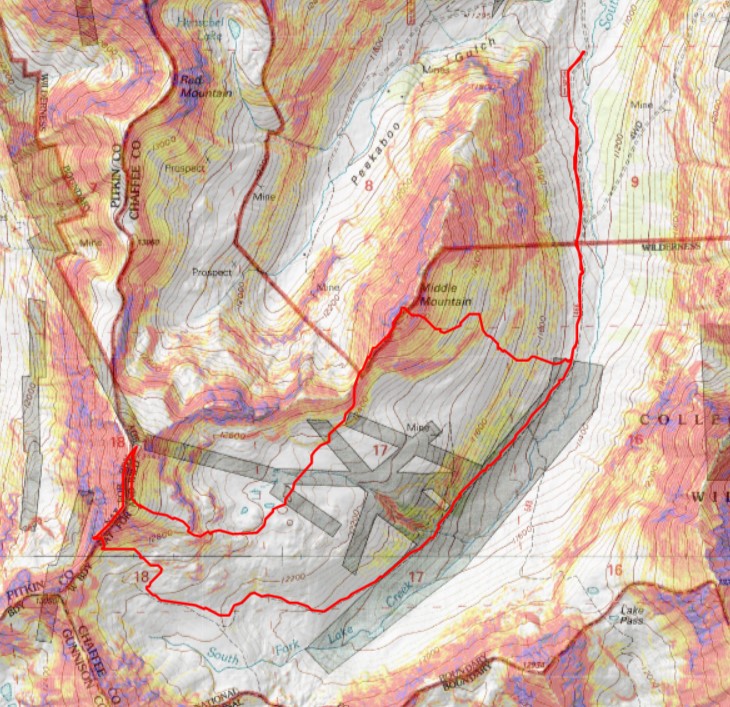
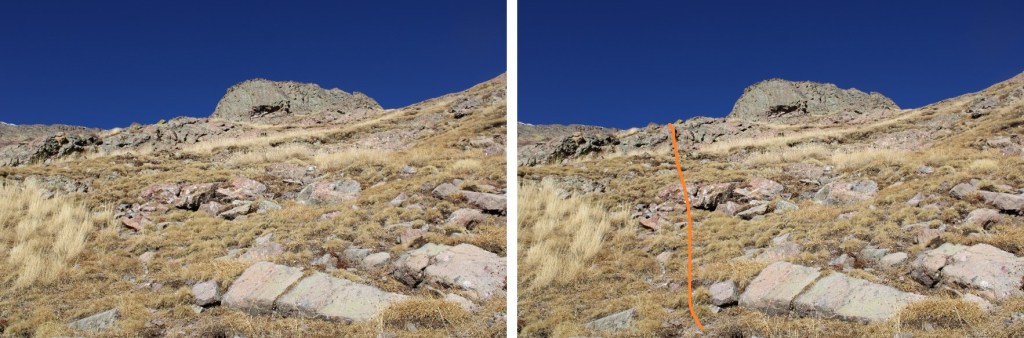
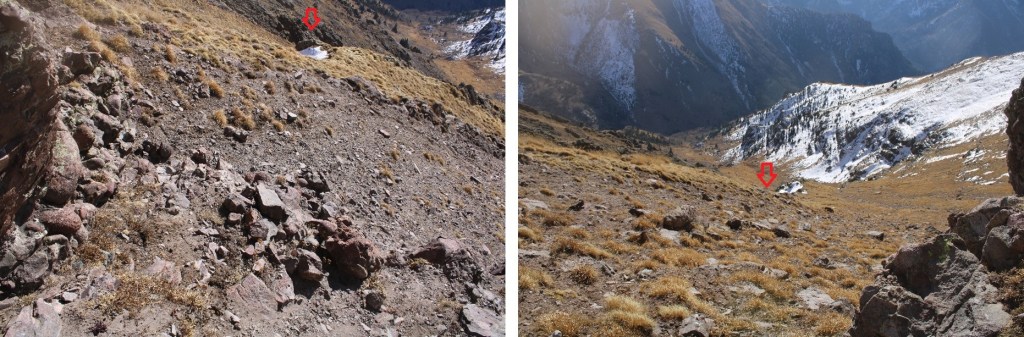
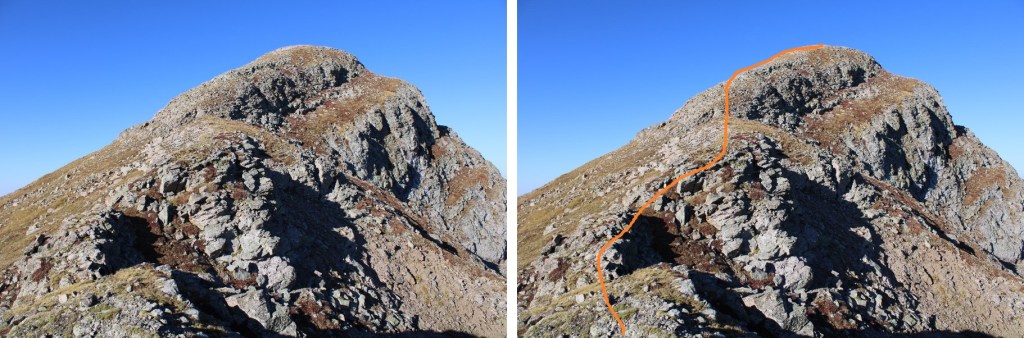
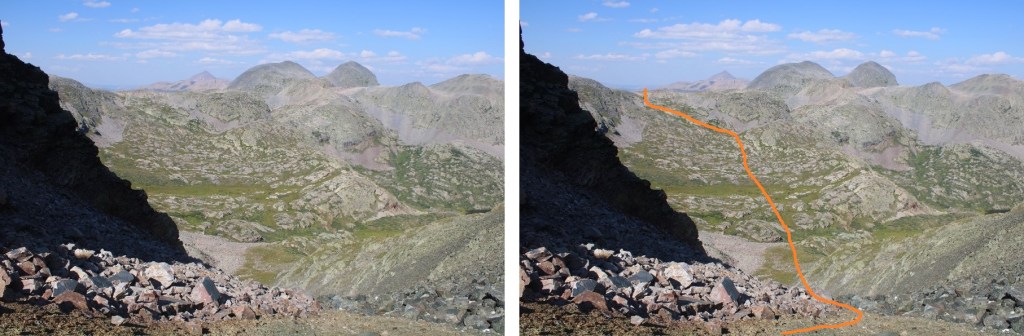
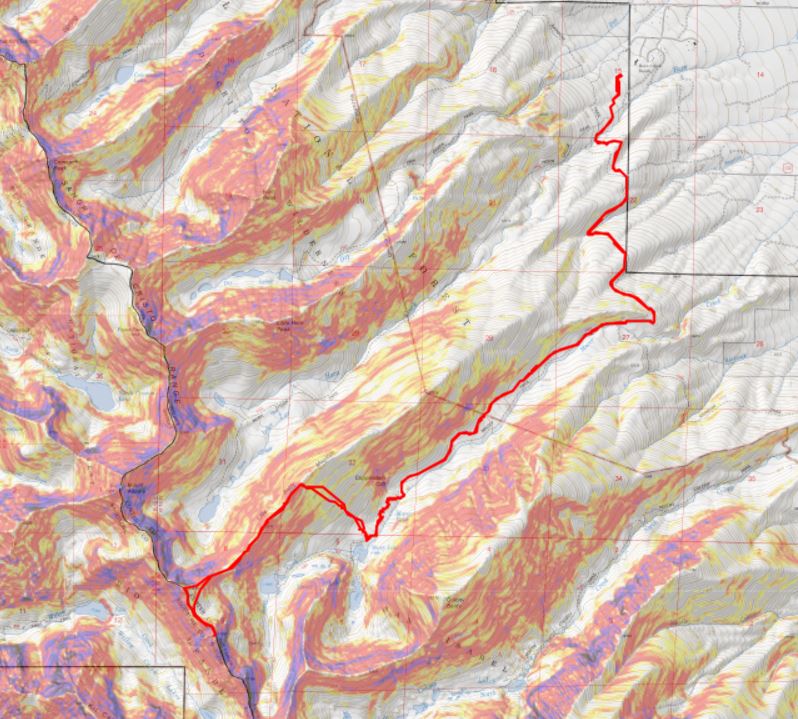
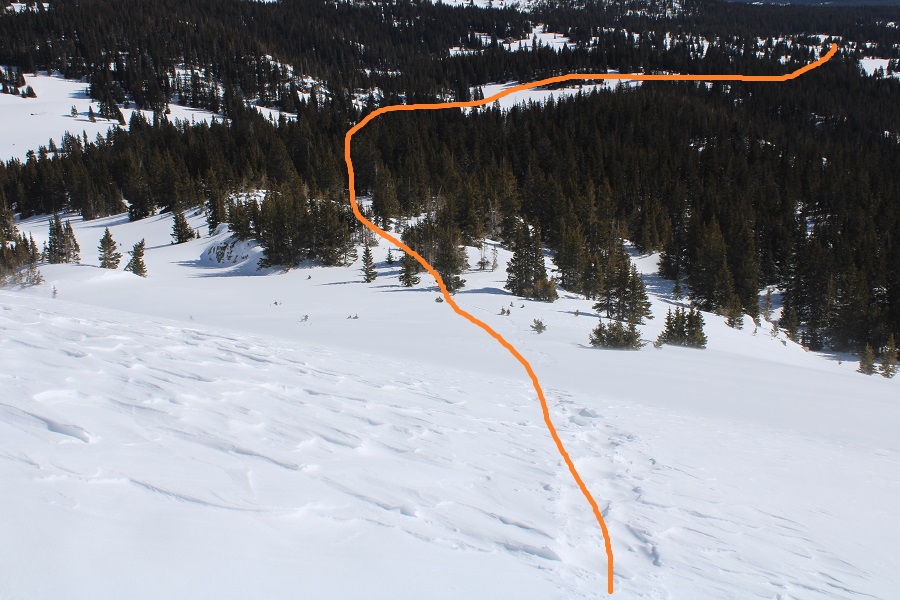
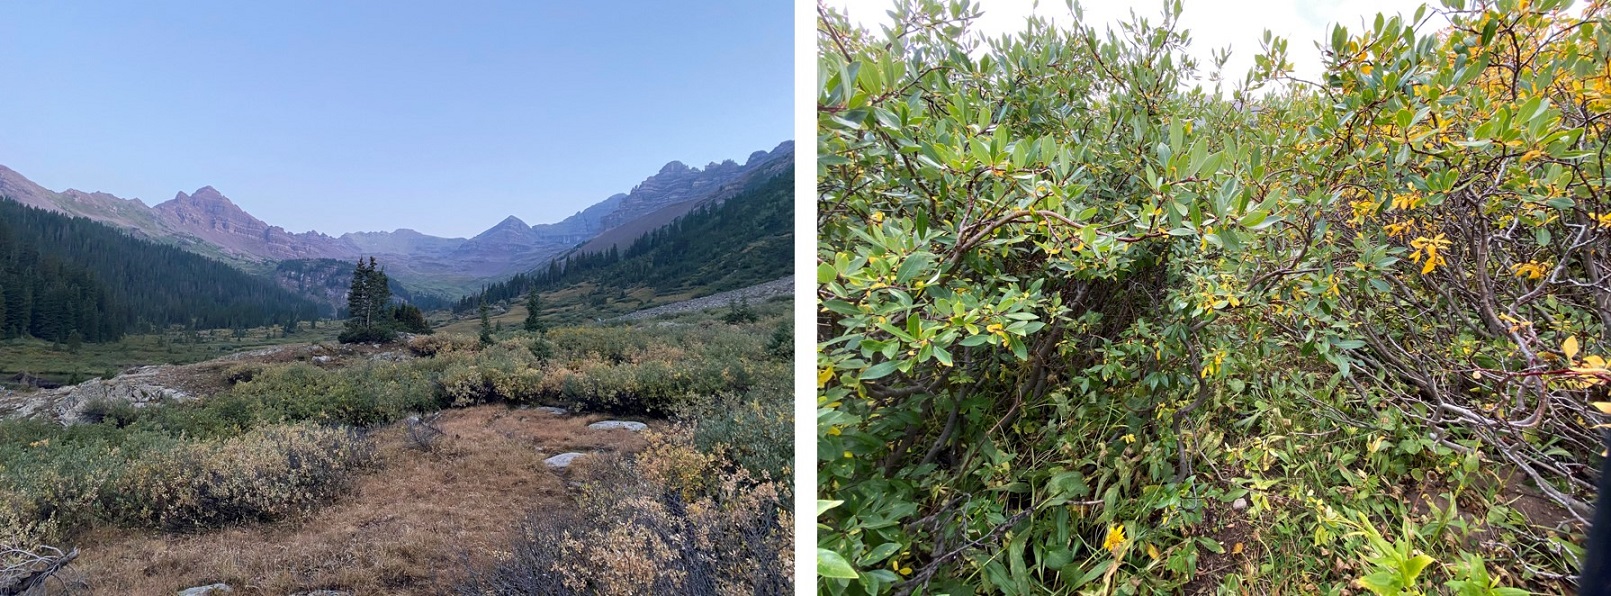
Here’s the overall route I took, staying just to the right of the willows.
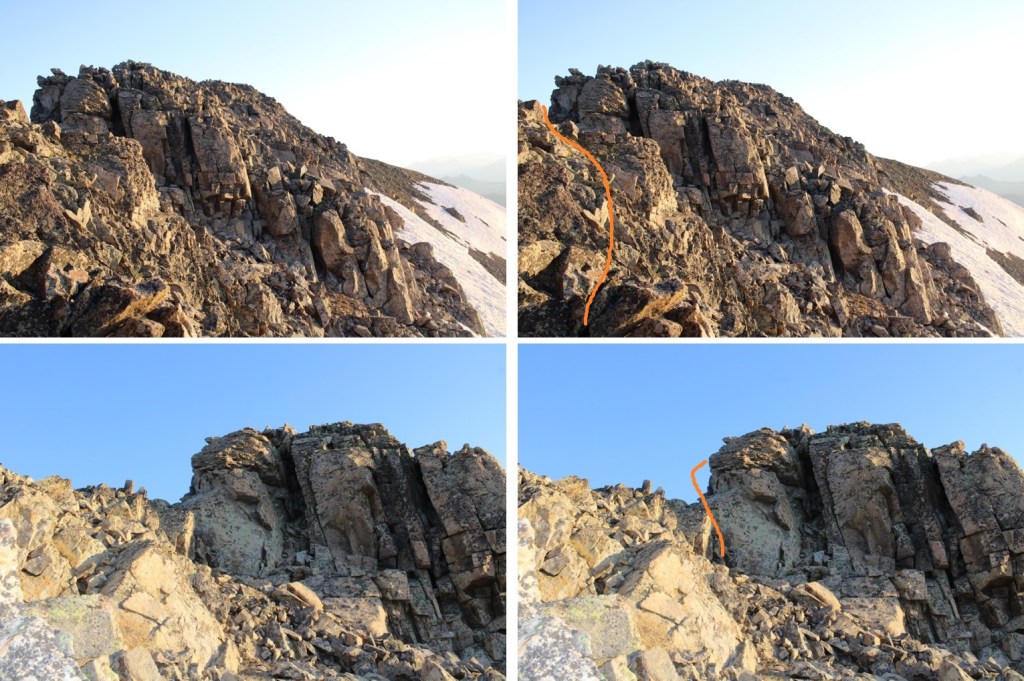
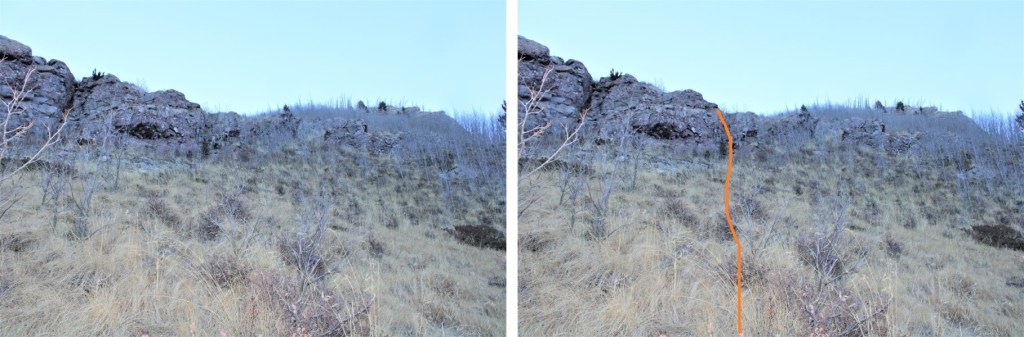
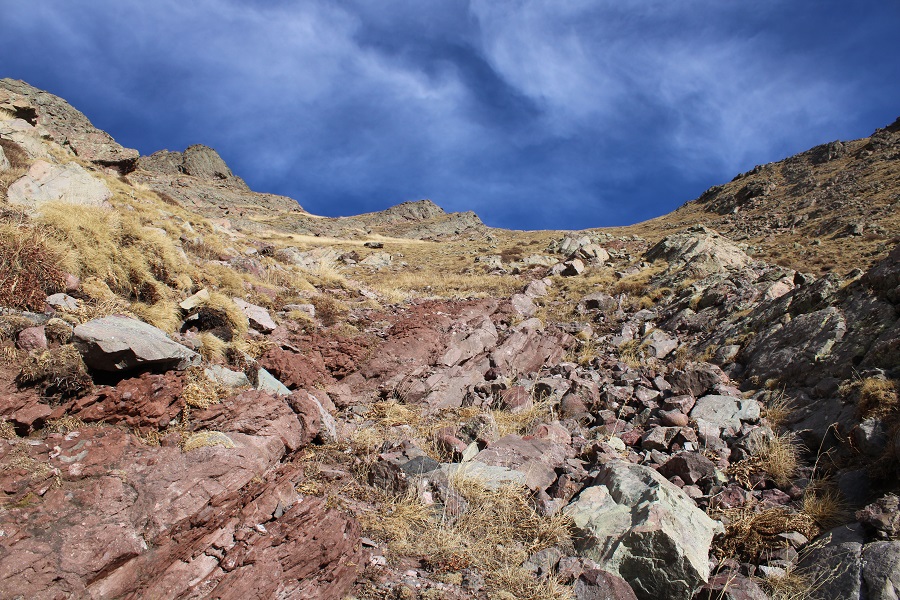
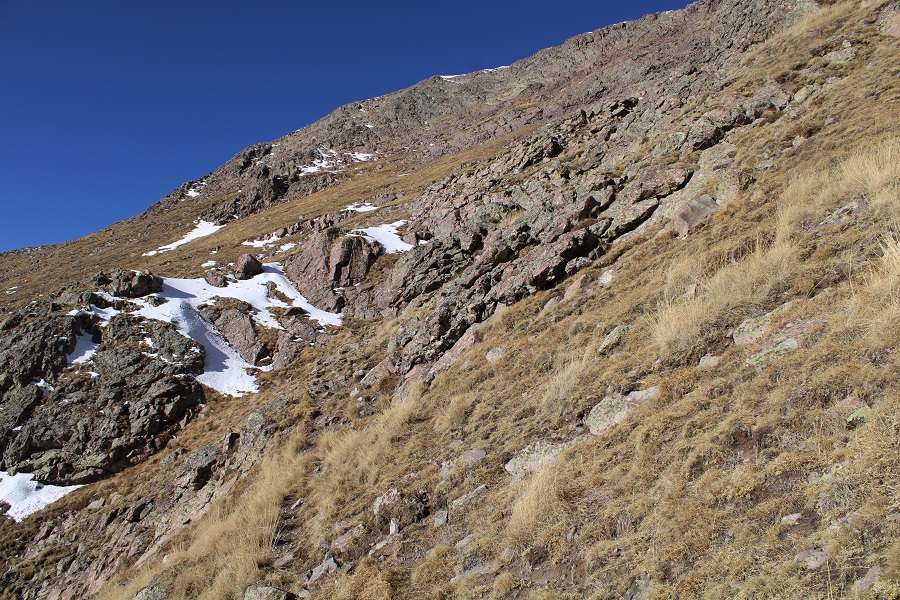
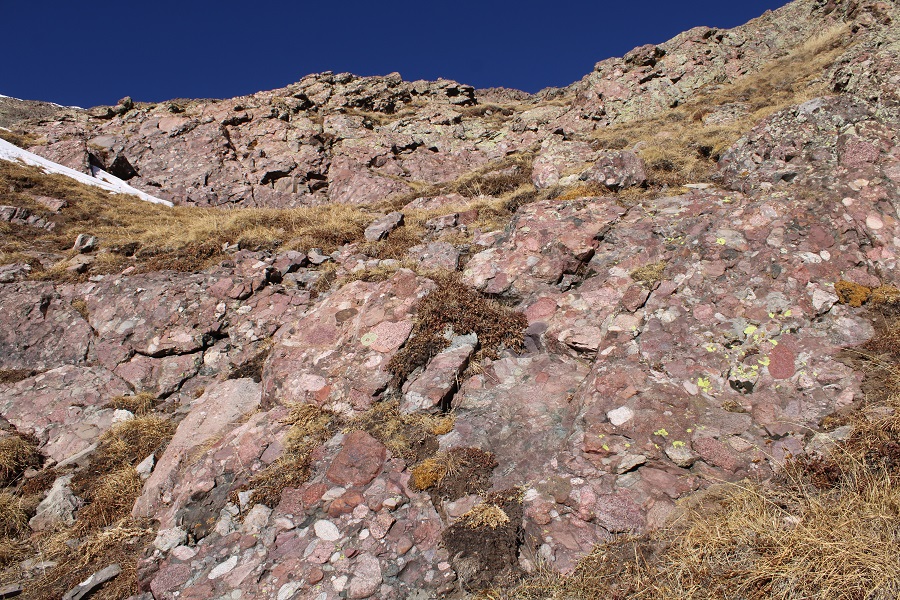
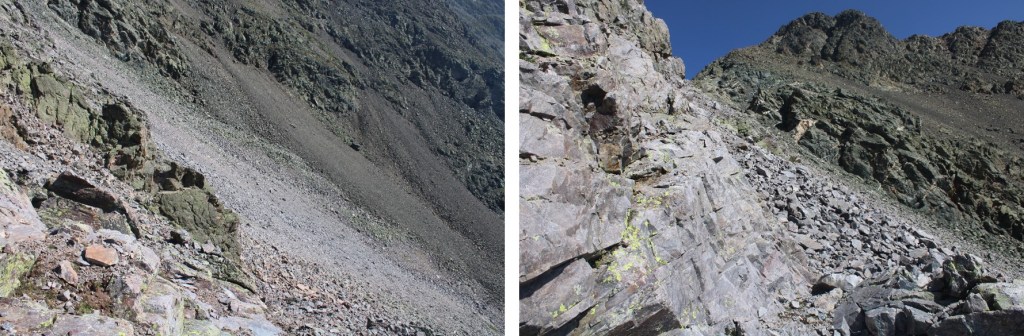
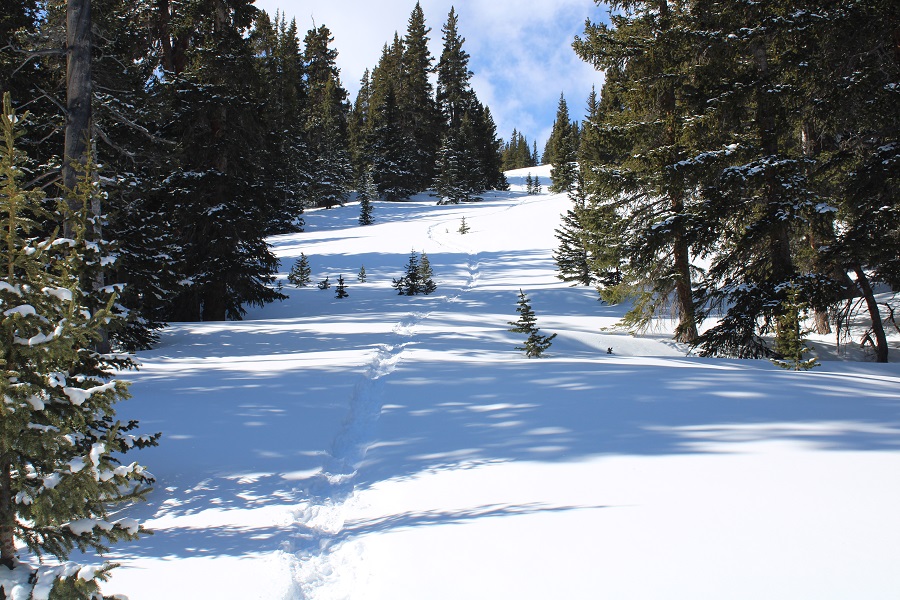
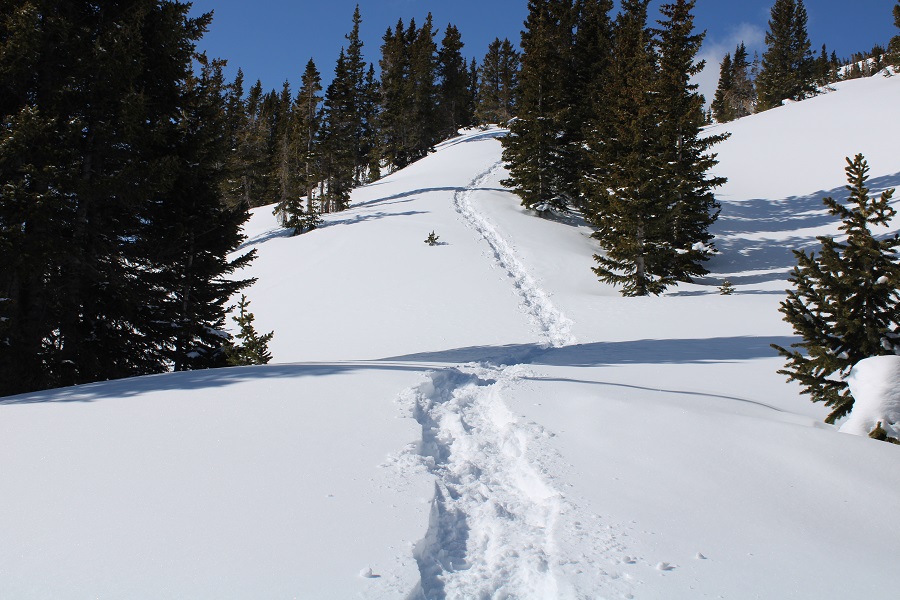
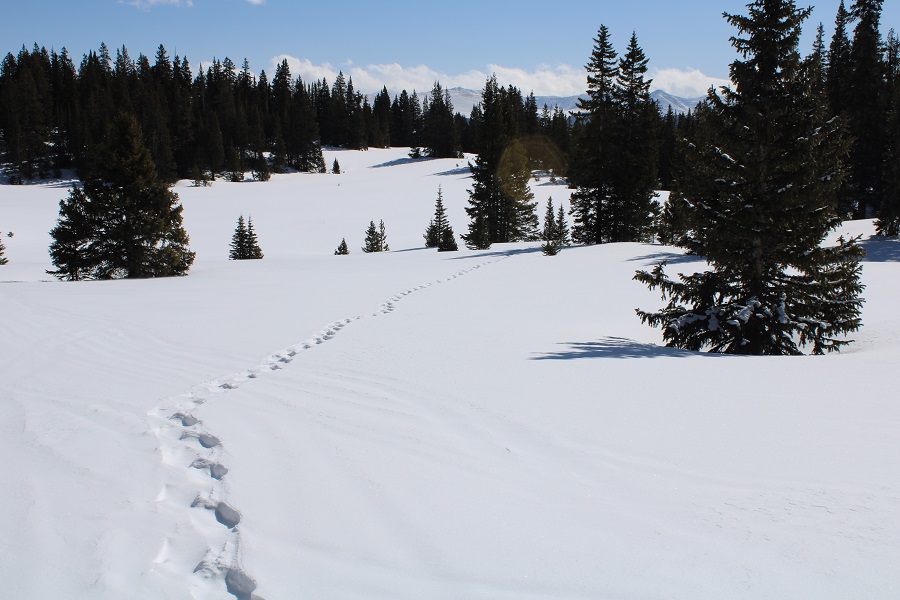
And some step-by-step pictures of the route to the ridge. There was some talus to deal with, but this entire hike is class 2.
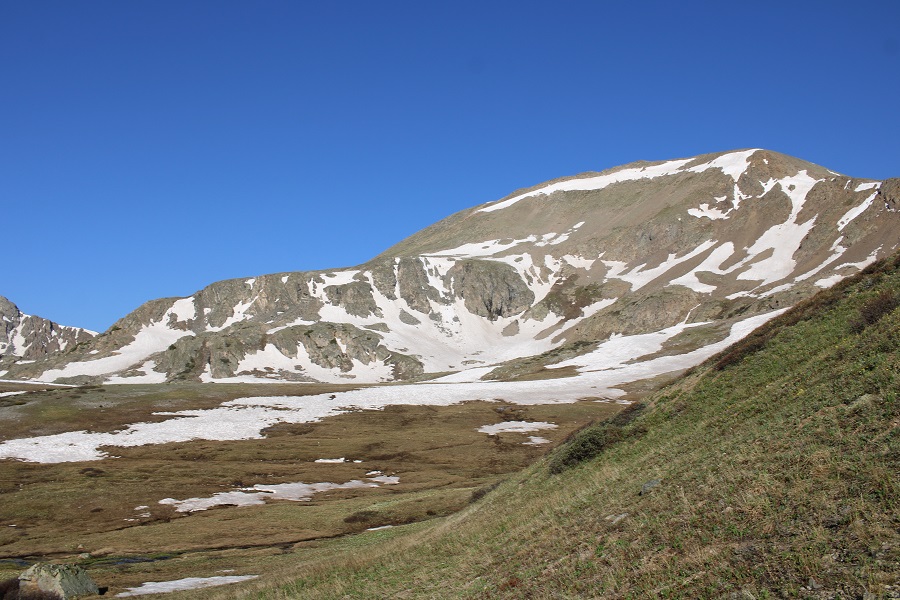
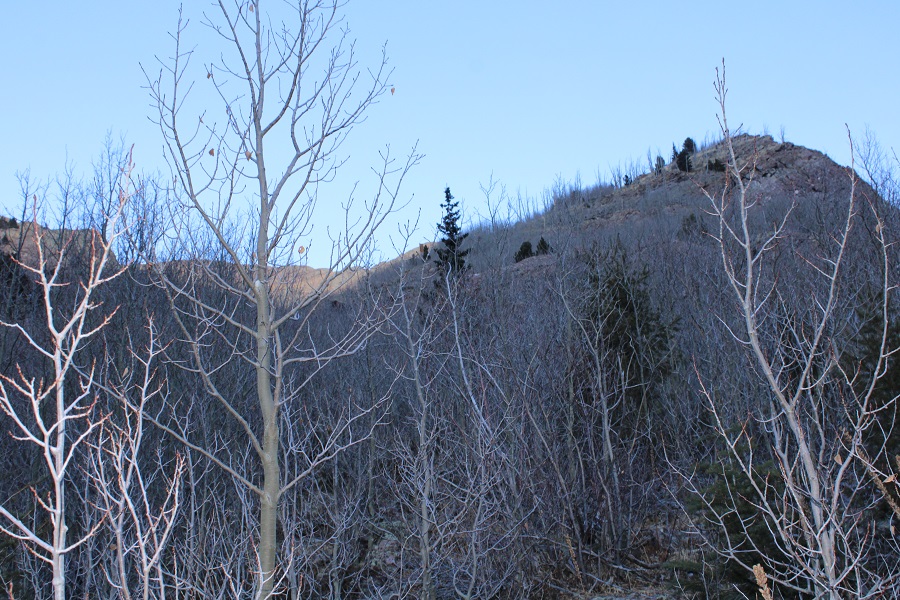
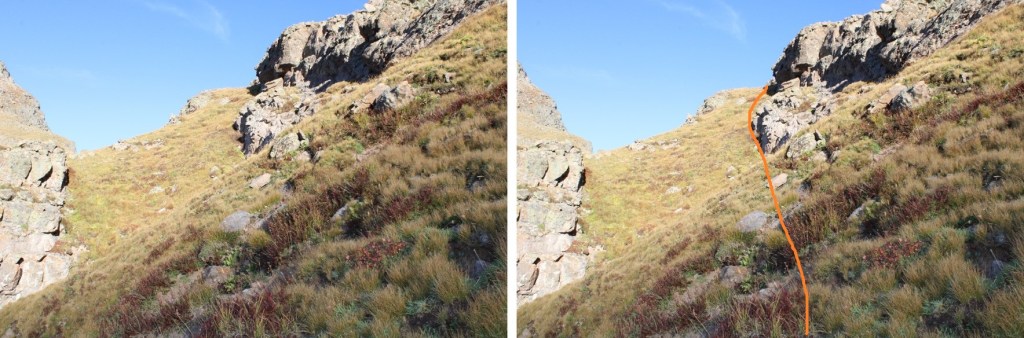
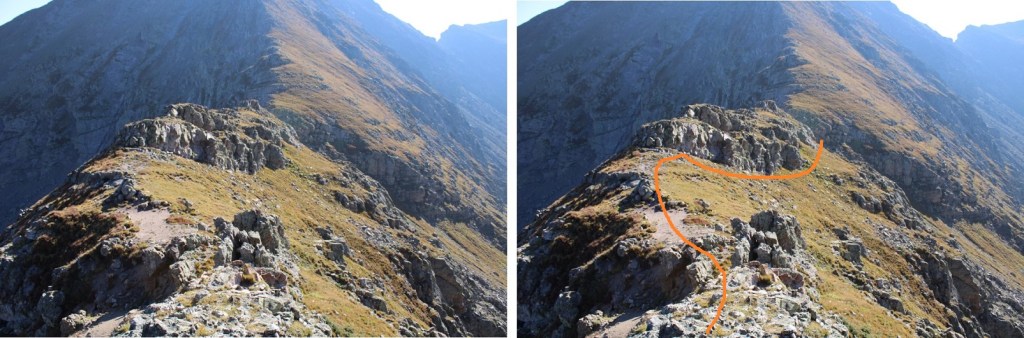
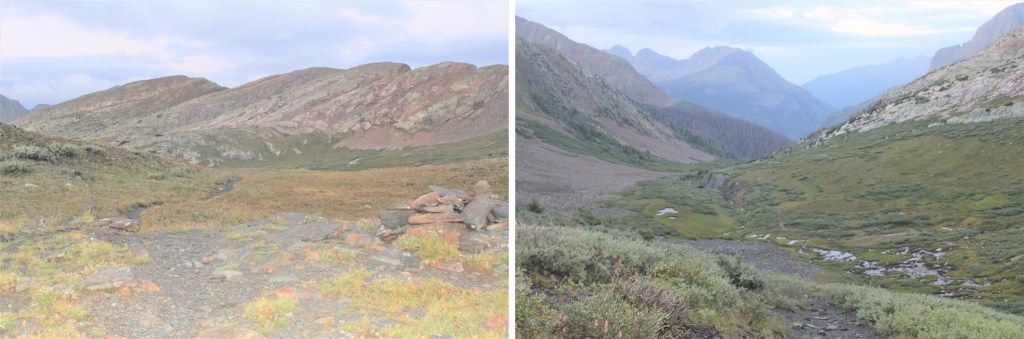
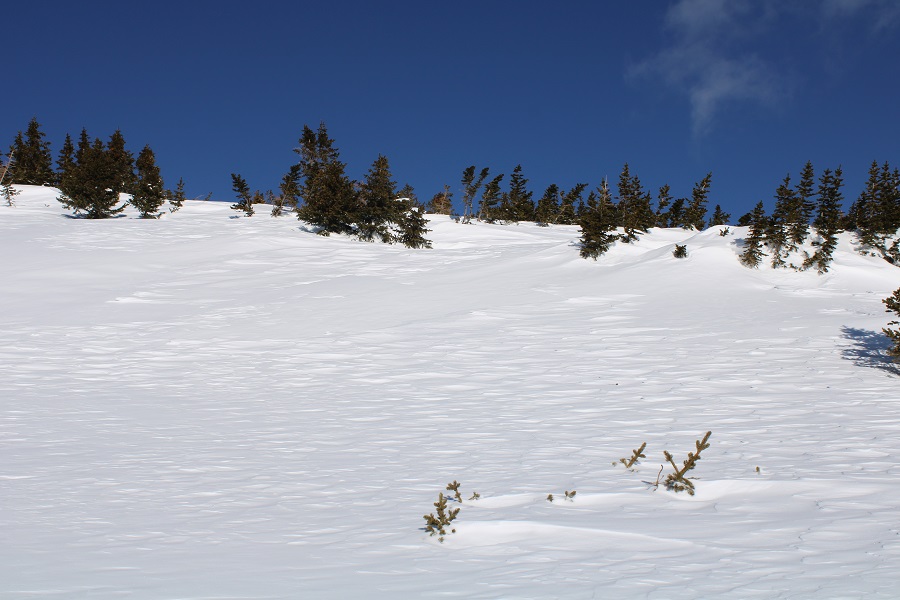
Once on the ridge, I travelled to this point
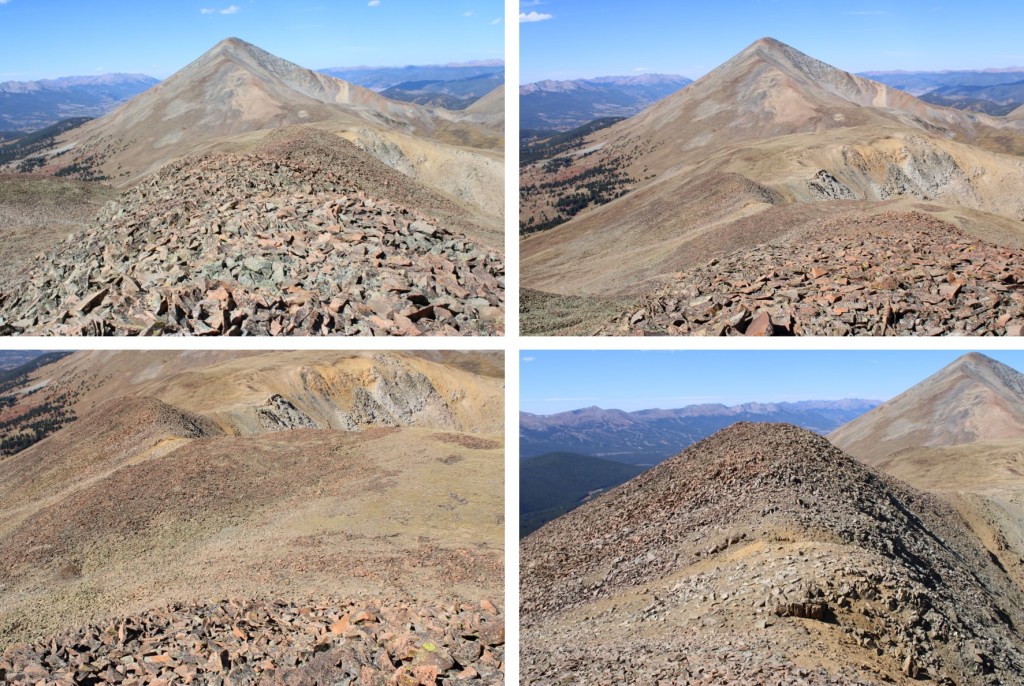
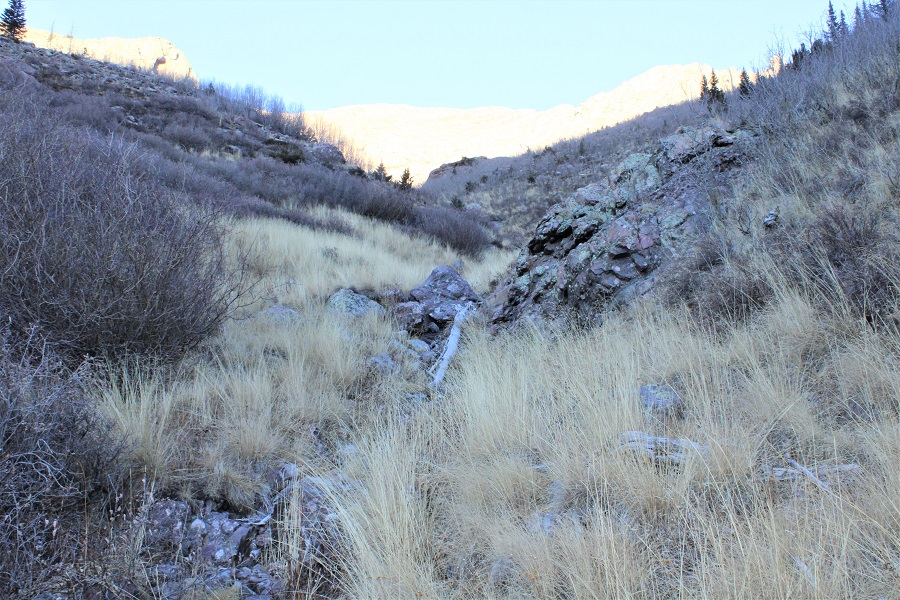
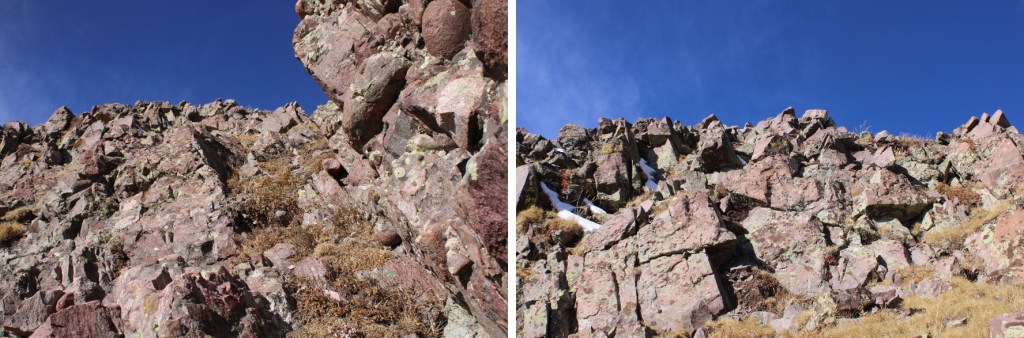
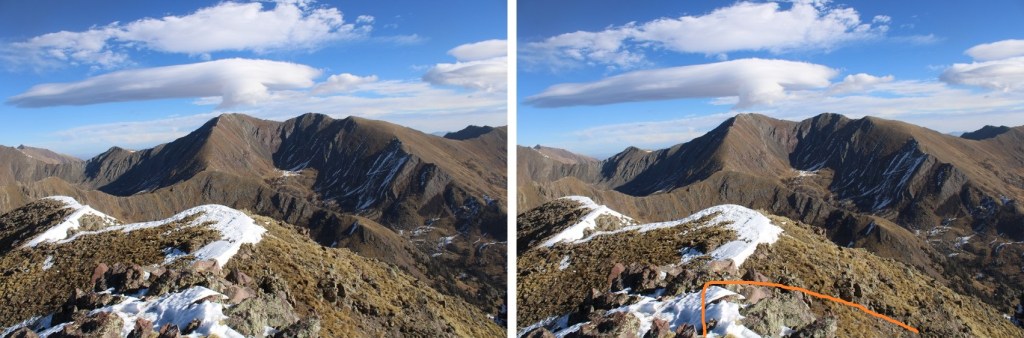
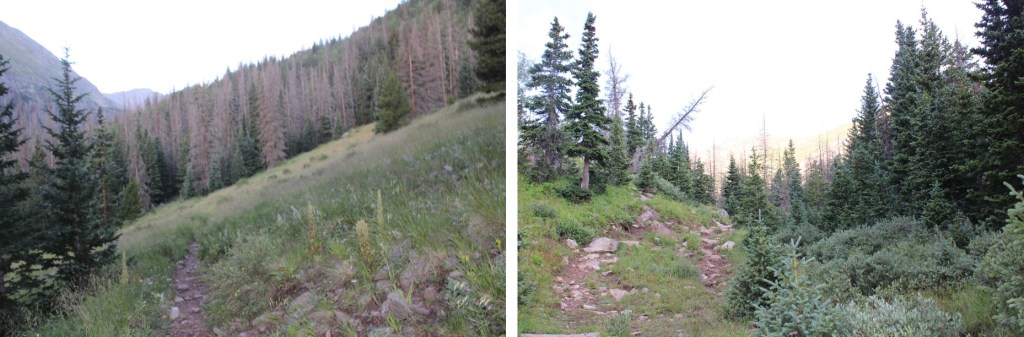
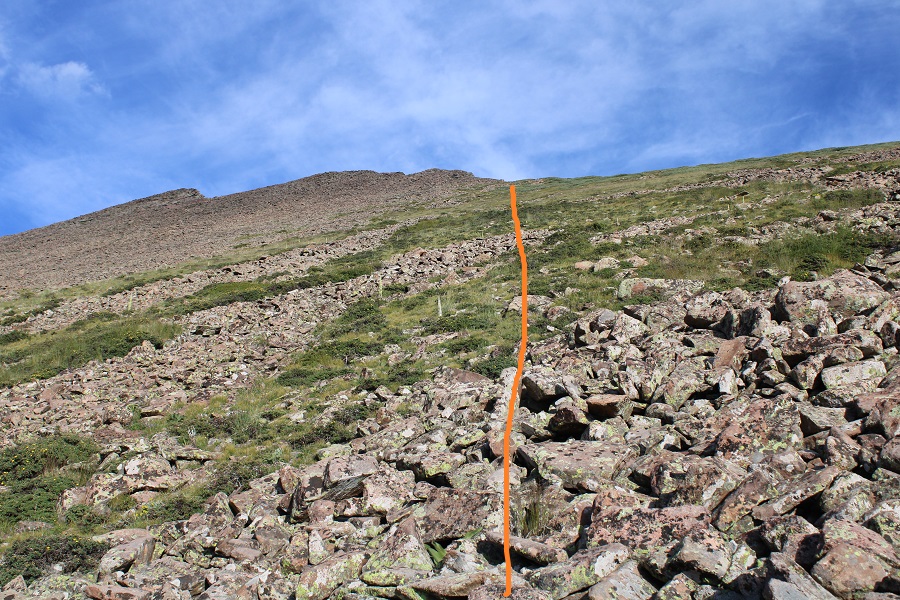
Now it was a ridge hike on loose rock, heading south. There were game trails to follow, which made route finding easy.
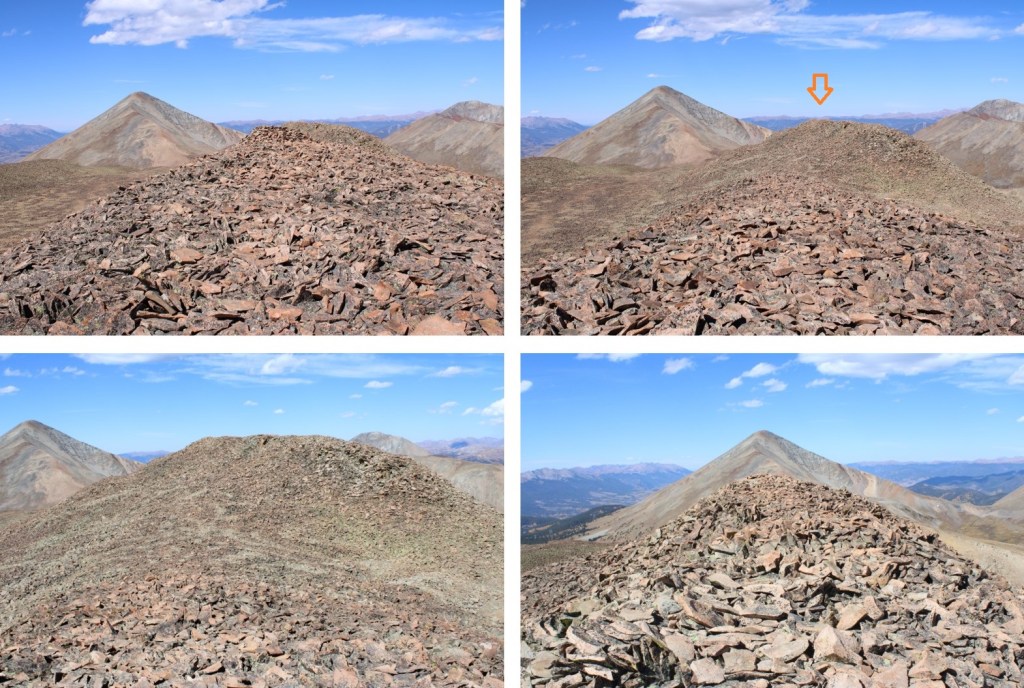
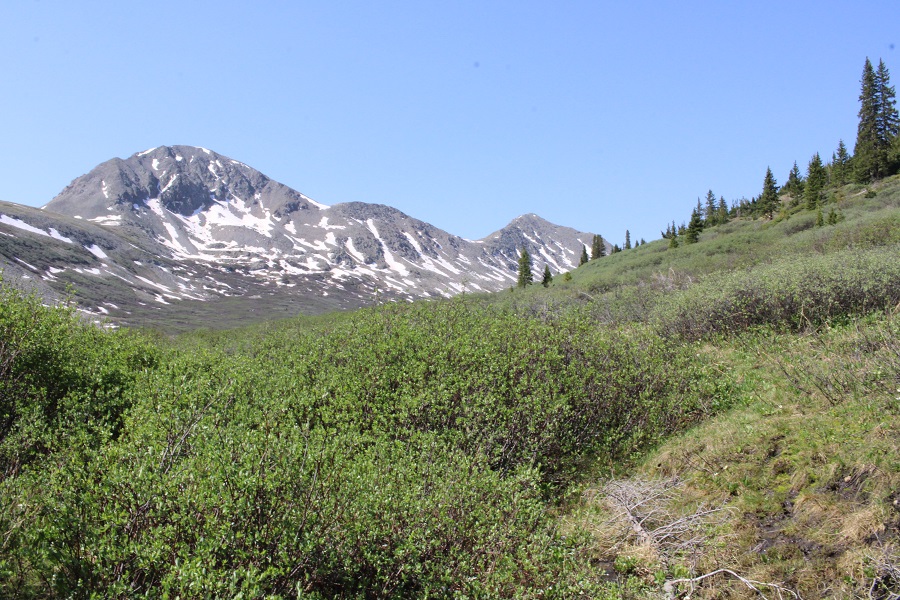
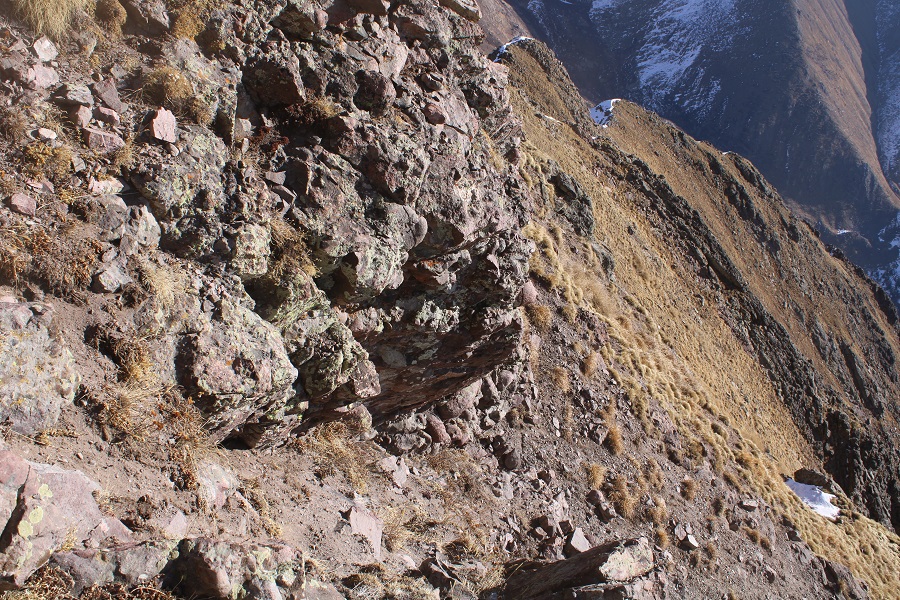
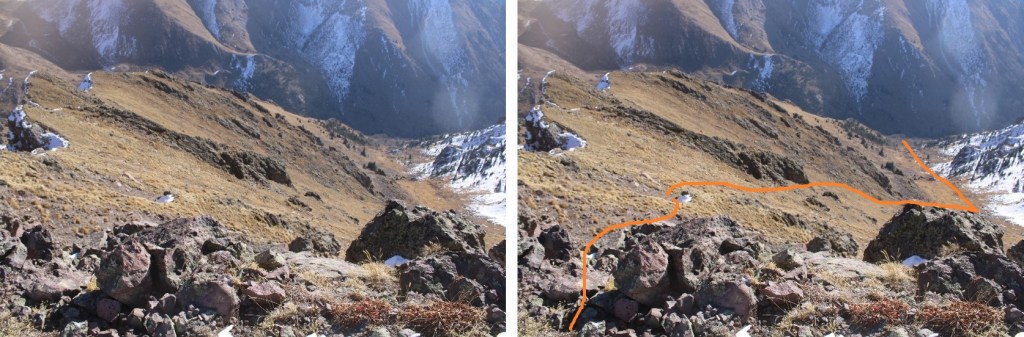
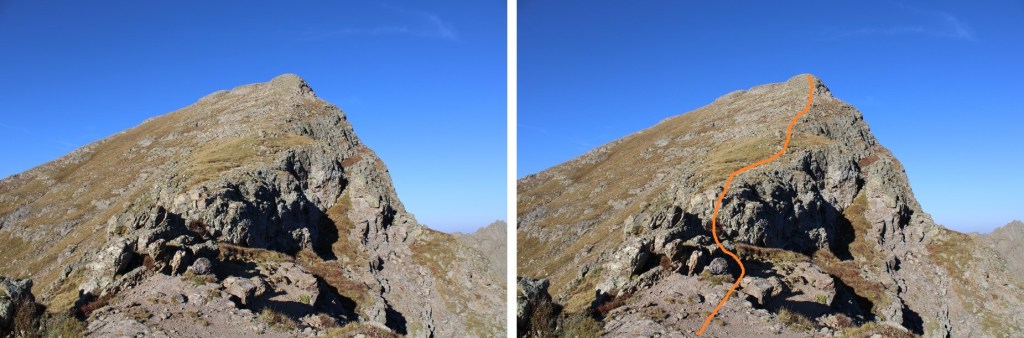
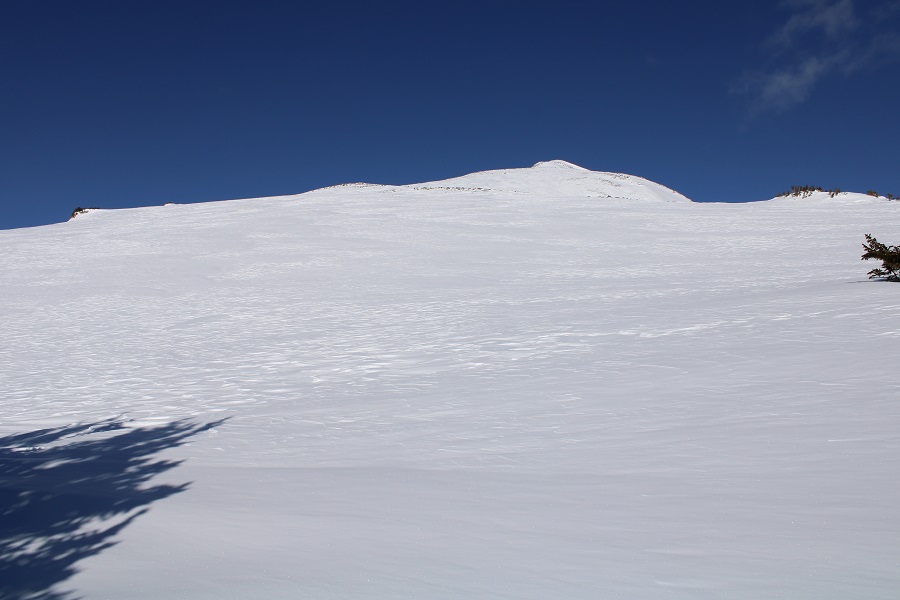
I continued following the ridge south. This part is choose your own adventure as well, as long as you keep heading south you’ll eventually see the summit (currently hidden). There were cairns here, so I followed the cairns
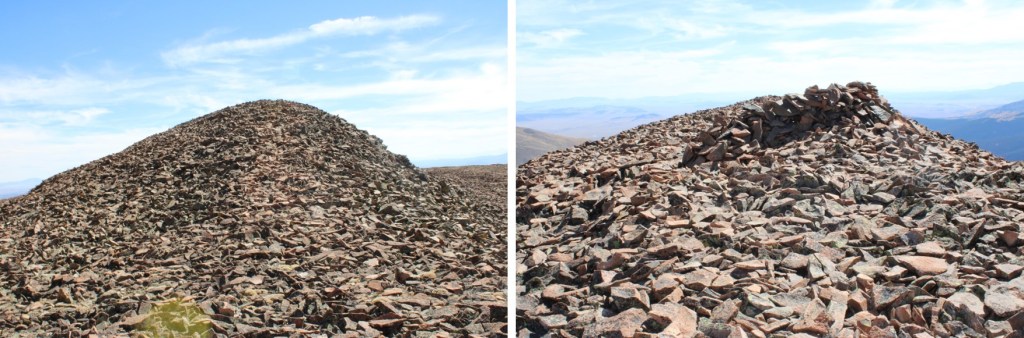
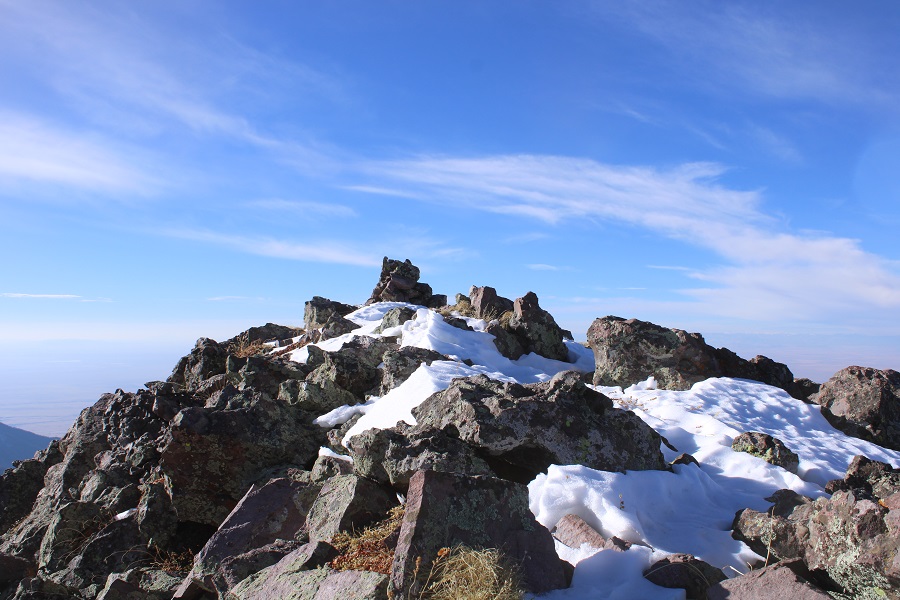
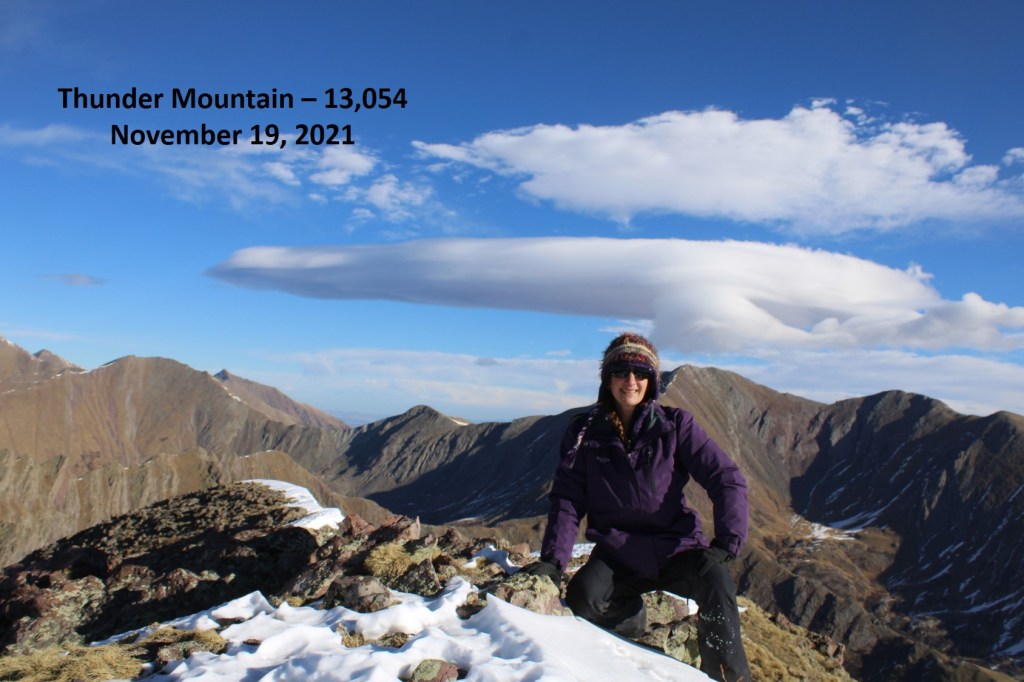
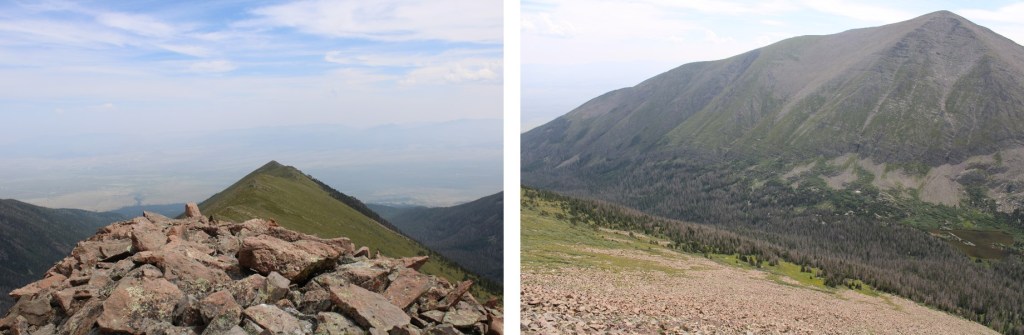
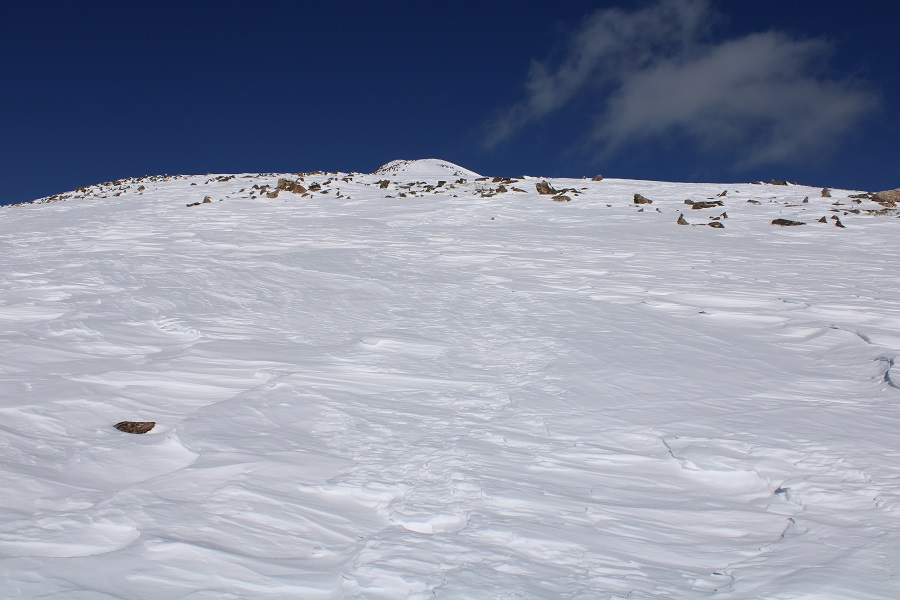
The true summit was difficult to ascertain, as many points looked like the highpoint. When I used my altimeter, the furthest point south was the highpoint, with a wind break at the top (and a summit register).
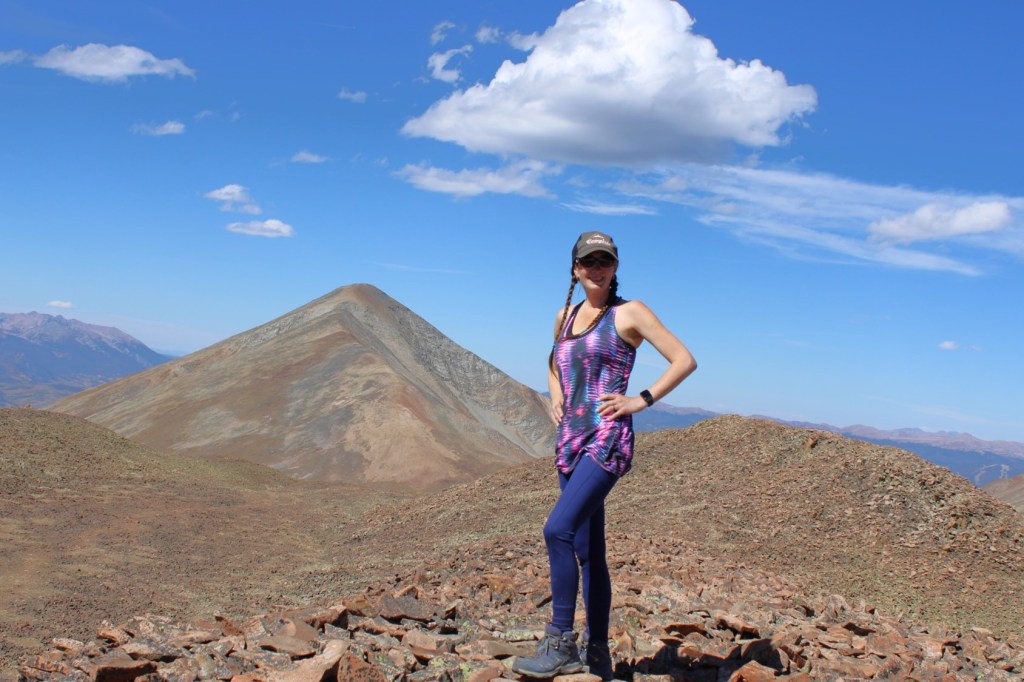
I summited Boreas Mountain at 1:50pm
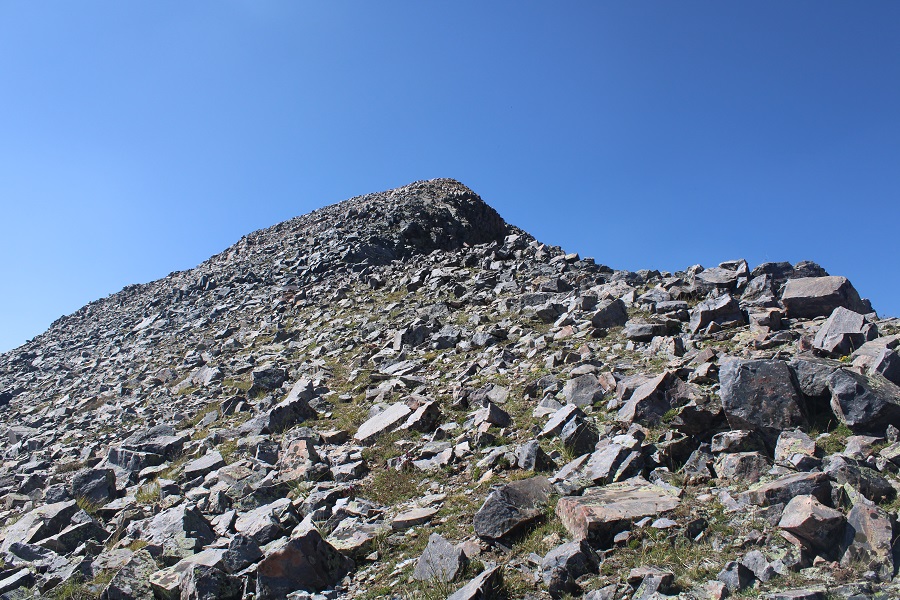
Boreas Mountain:
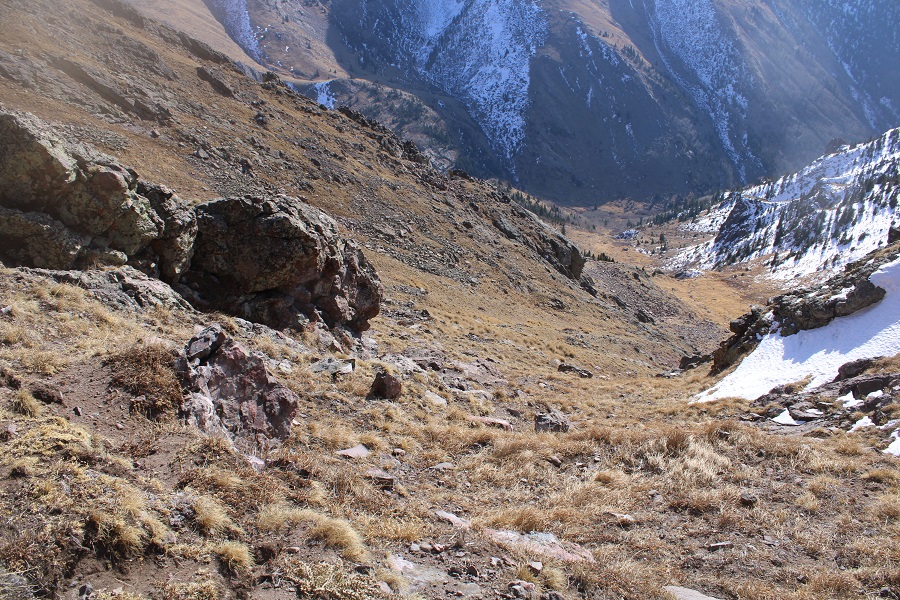
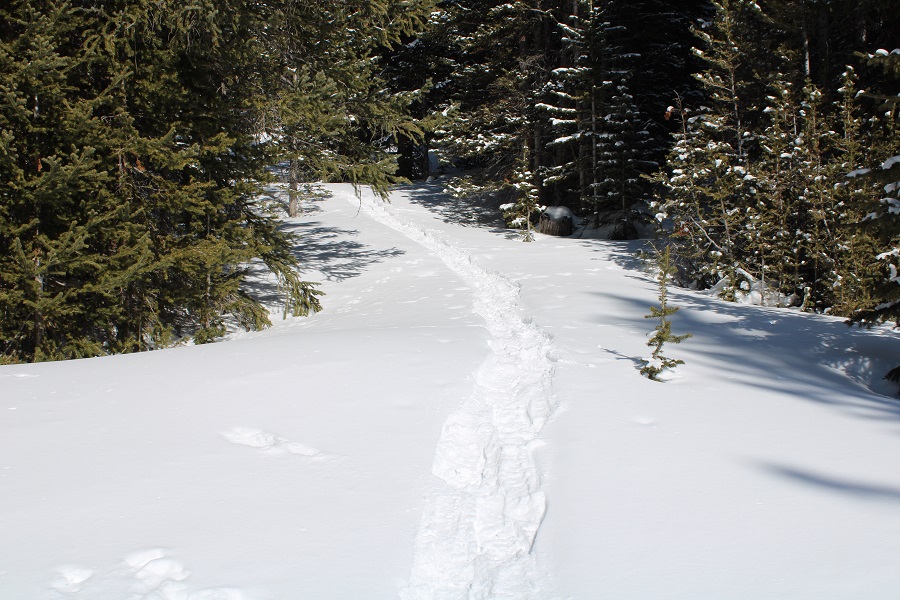
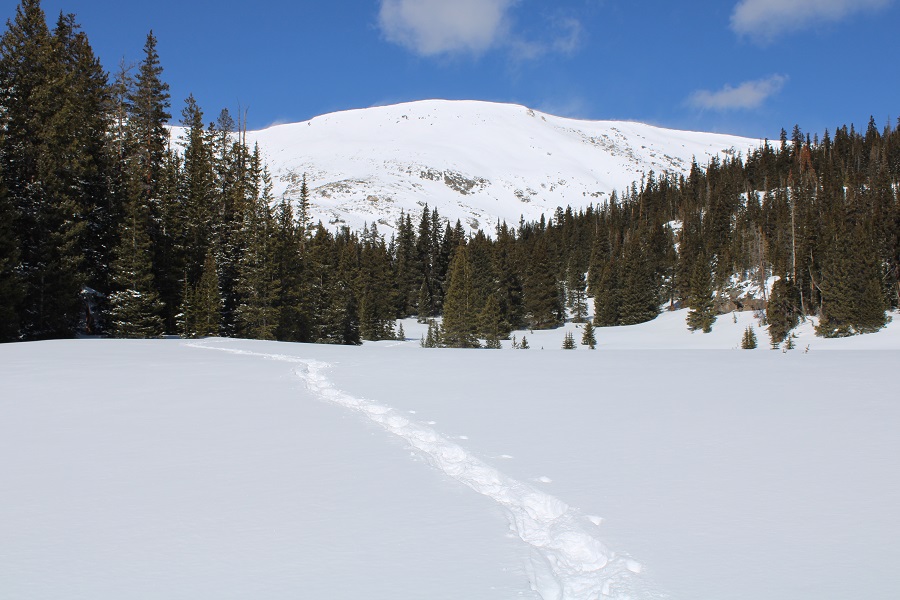
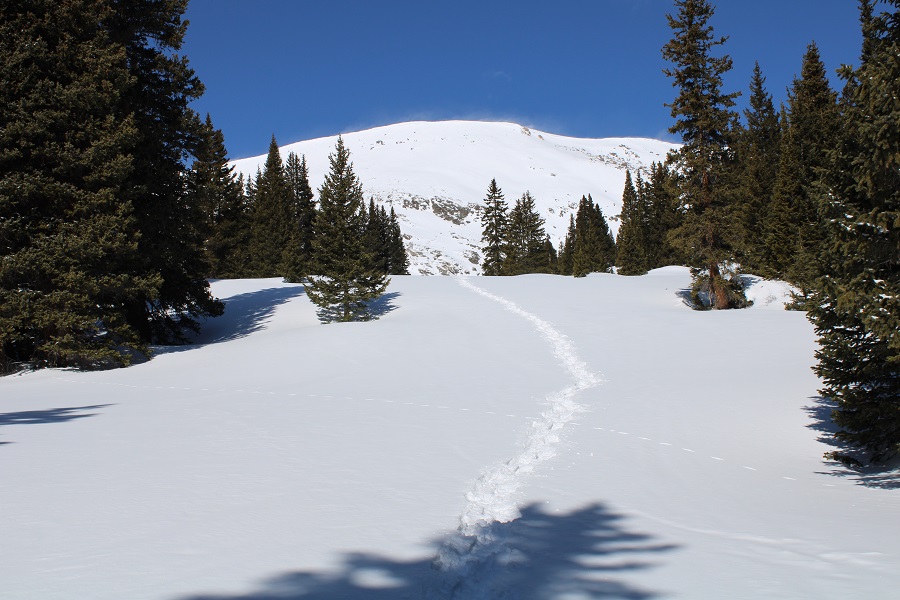
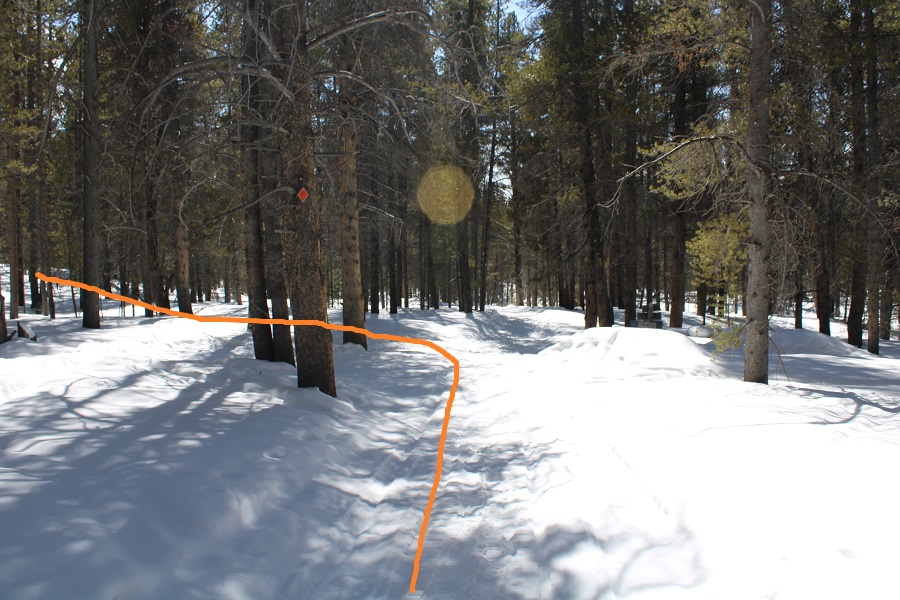
I took the same route to descend as I did to ascend, and re-traced my steps
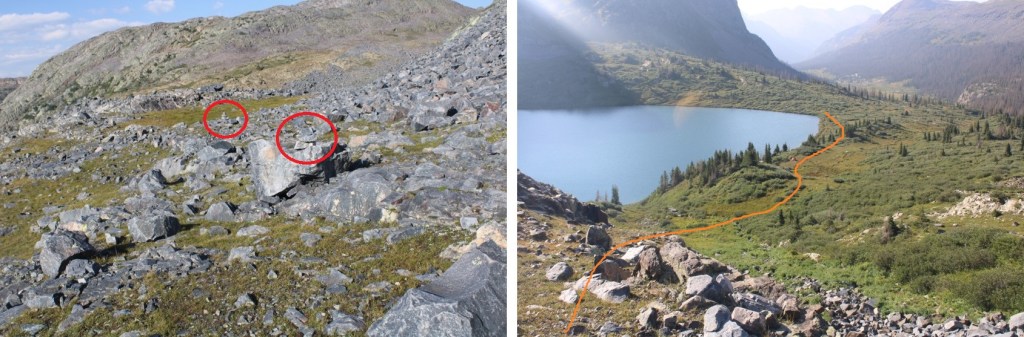
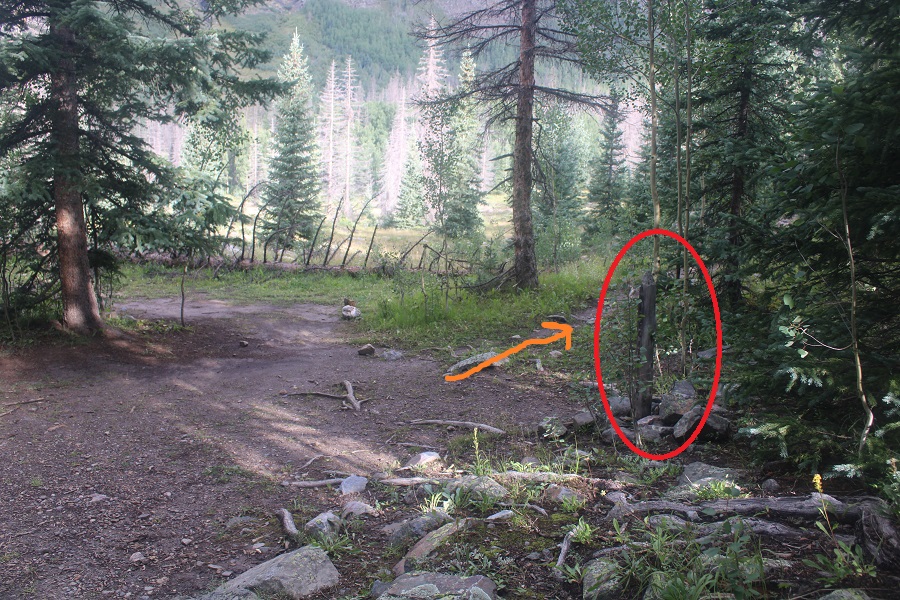
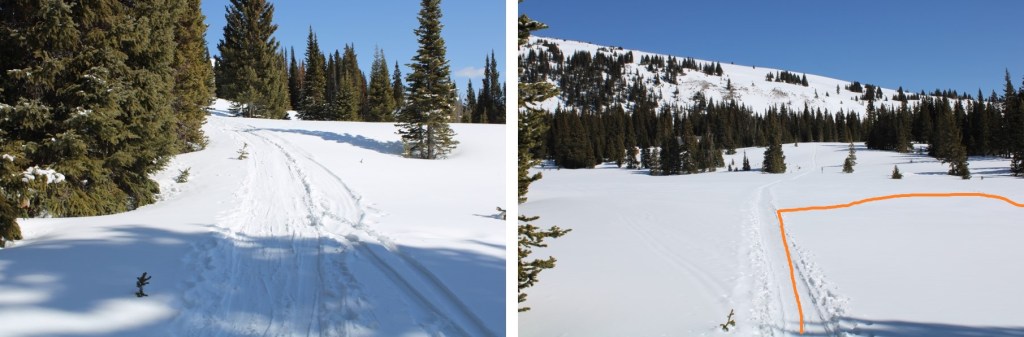
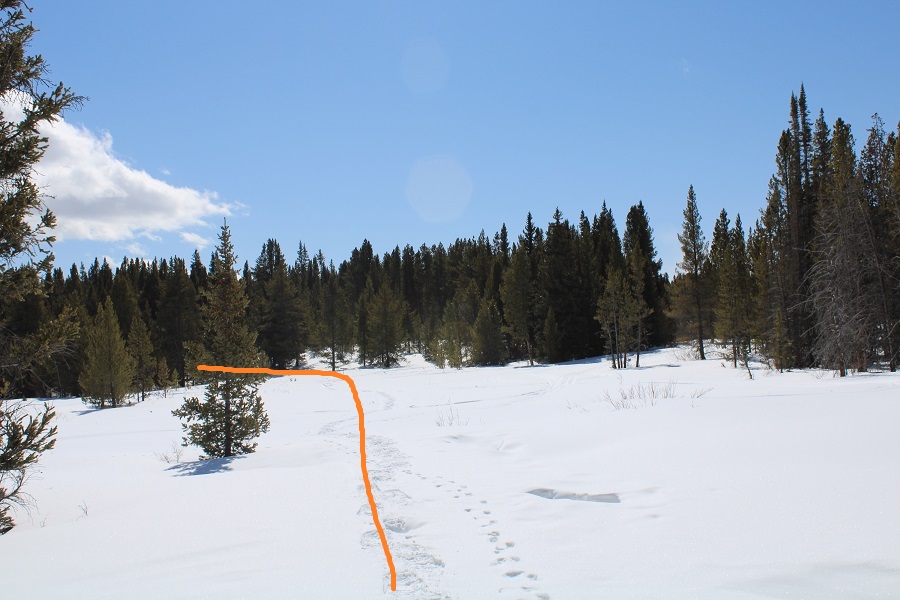
Then I headed back down the slope, once again using the willows as my guide, this time keeping them to the right of me.
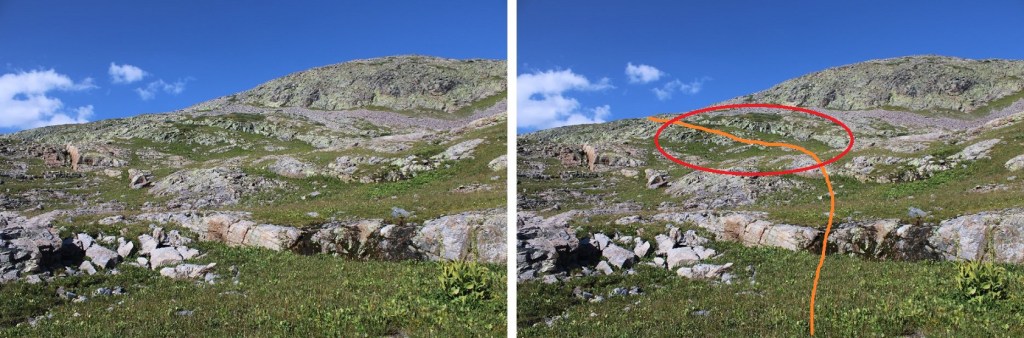
There’s a cairn at the base of the slope that I aimed for (circled in red)
I made it back to the trailhead at 2:45pm, making this a 3.39 mile hike with 1575’ of elevation gain in 2 hours.
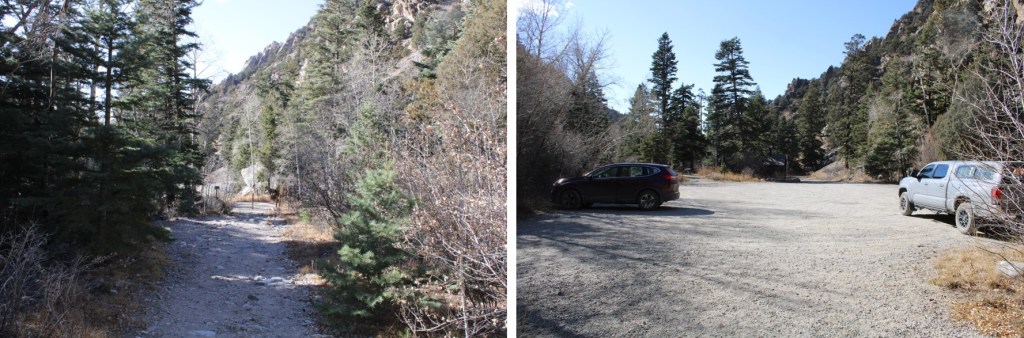
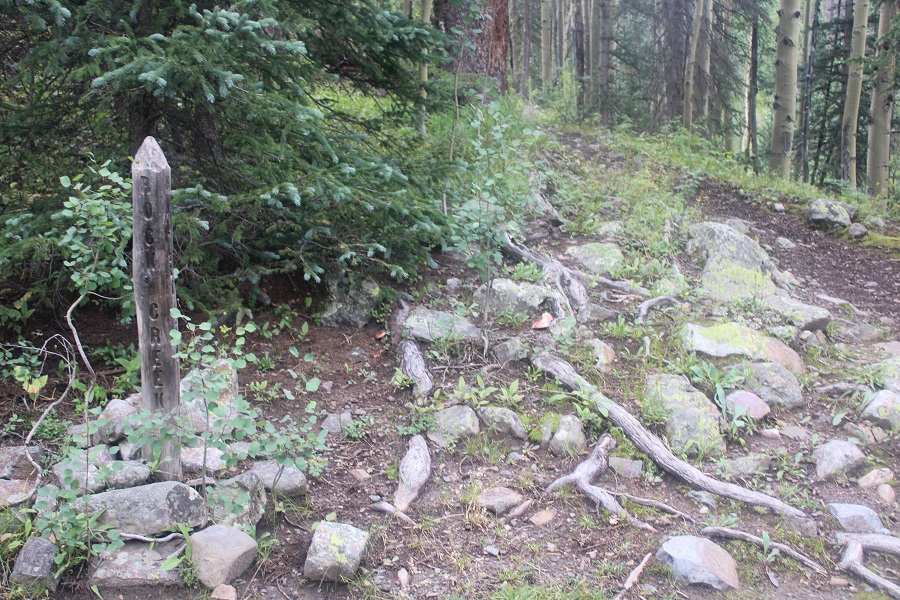
Trailhead: Just before South Fork Lake Creek, where 391 and Trail 1466 meet.
I drove in the night before, so I could start early the next morning. The only problem? I wasn’t able to drive all the way to the trailhead. There was a small ice flow that still hadn’t melted, and it’s the middle of June! It wasn’t very big, but so far no one has been able to cross it.
It wasn’t a big deal, but I did have to back up for half a mile before I could find a place to turn around, which happened to be at a nice campsite at 11,000’, so I parked there for the night.
I woke up at 1am, 1:30am, and 2am to something moving around underneath my truck. It sounded about the size of a squirrel, and made sleeping difficult, so eventually I got up and sat in the front seat of my truck, ate breakfast (vanilla Breakfast Essentials shaken with a sleeve of Folgers instant coffee crystals), and was on my way at 3:30am. I could smell the Arizona and New Mexico fires as I hiked. I followed ROAD 391 for .8 miles to the proper trailhead.
The entrance to the trail is to the left of the gate
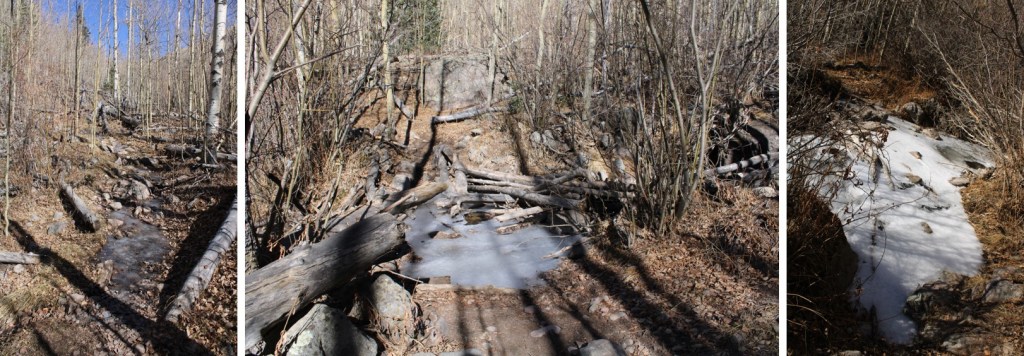
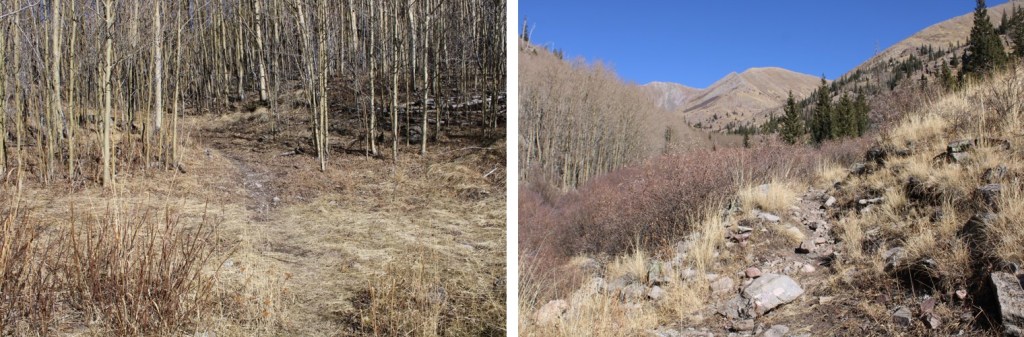
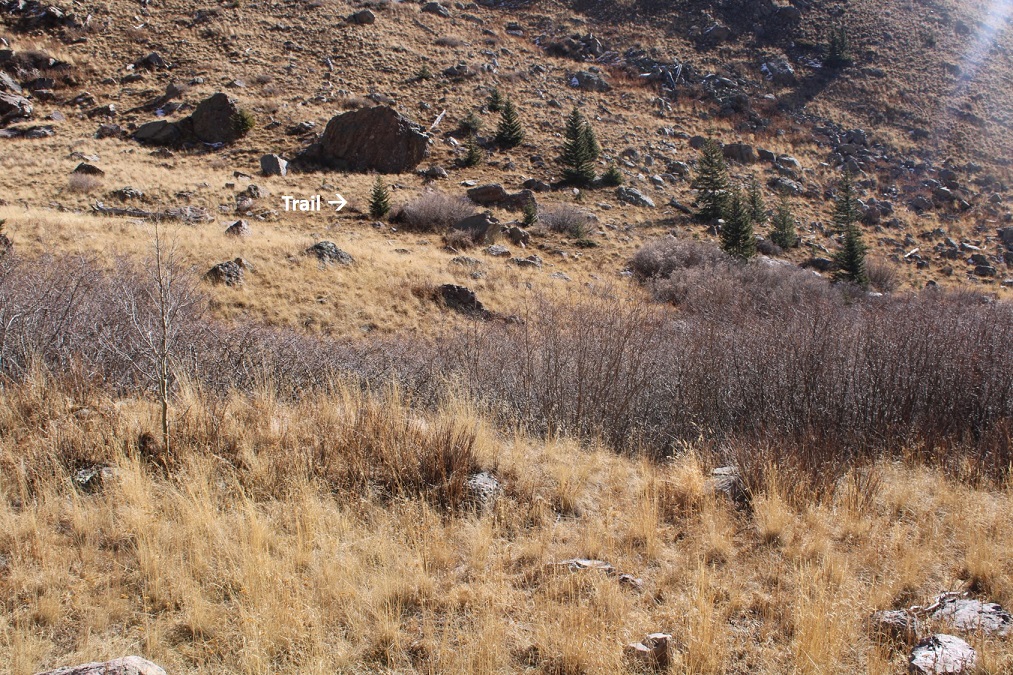
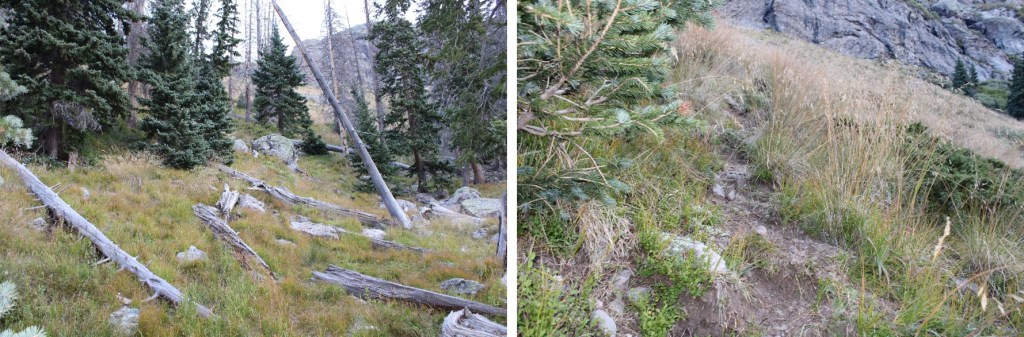
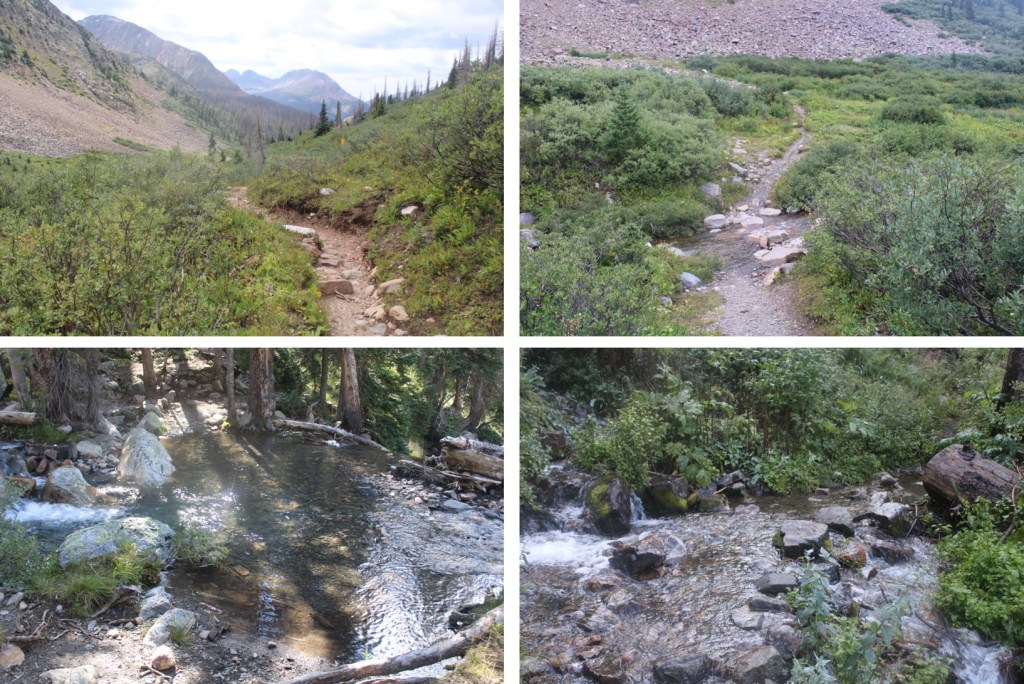
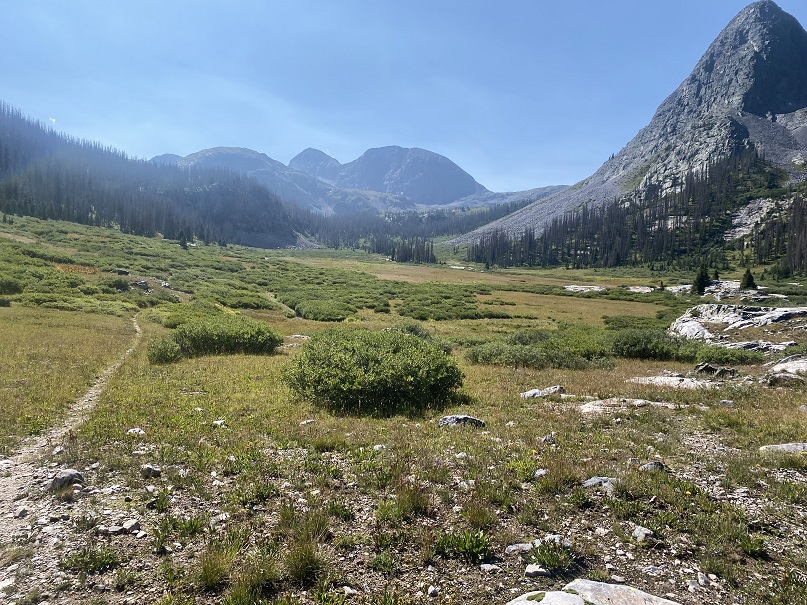
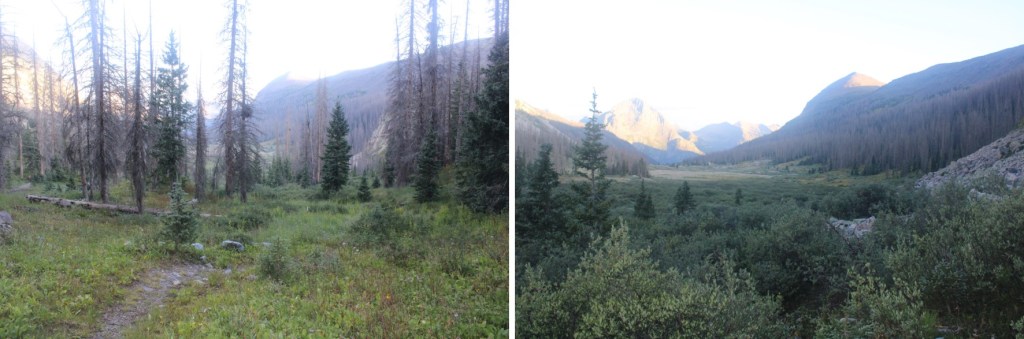
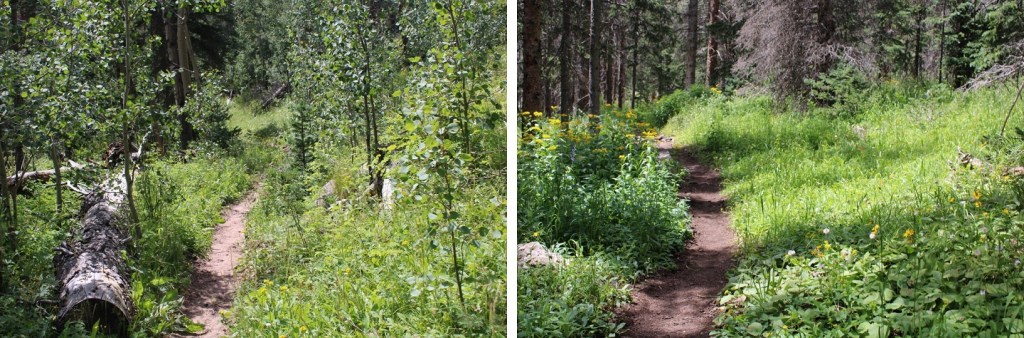
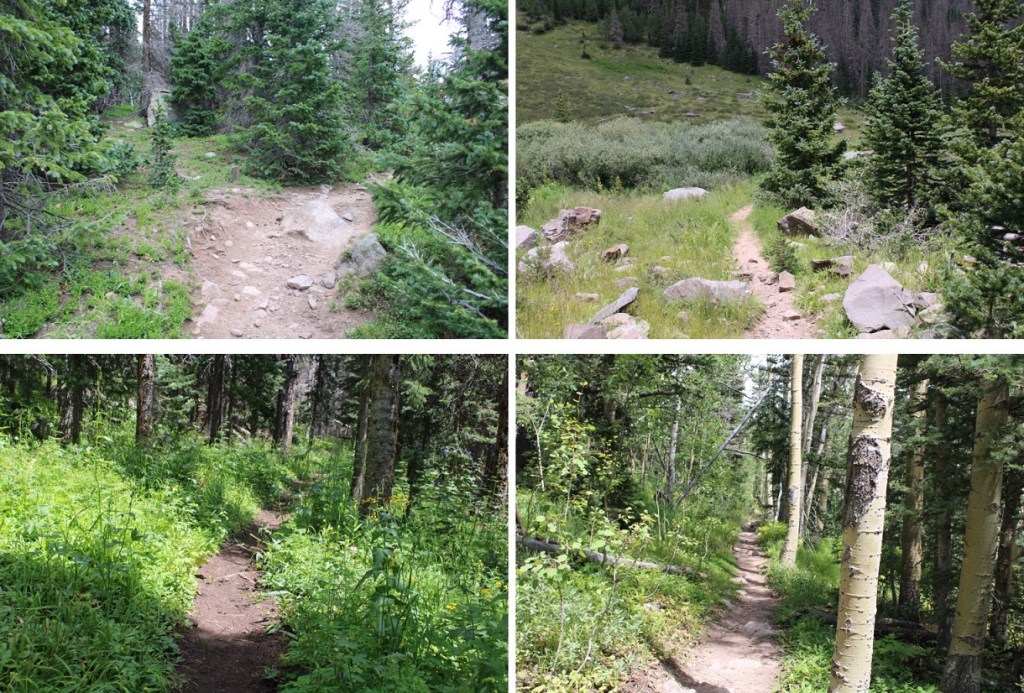
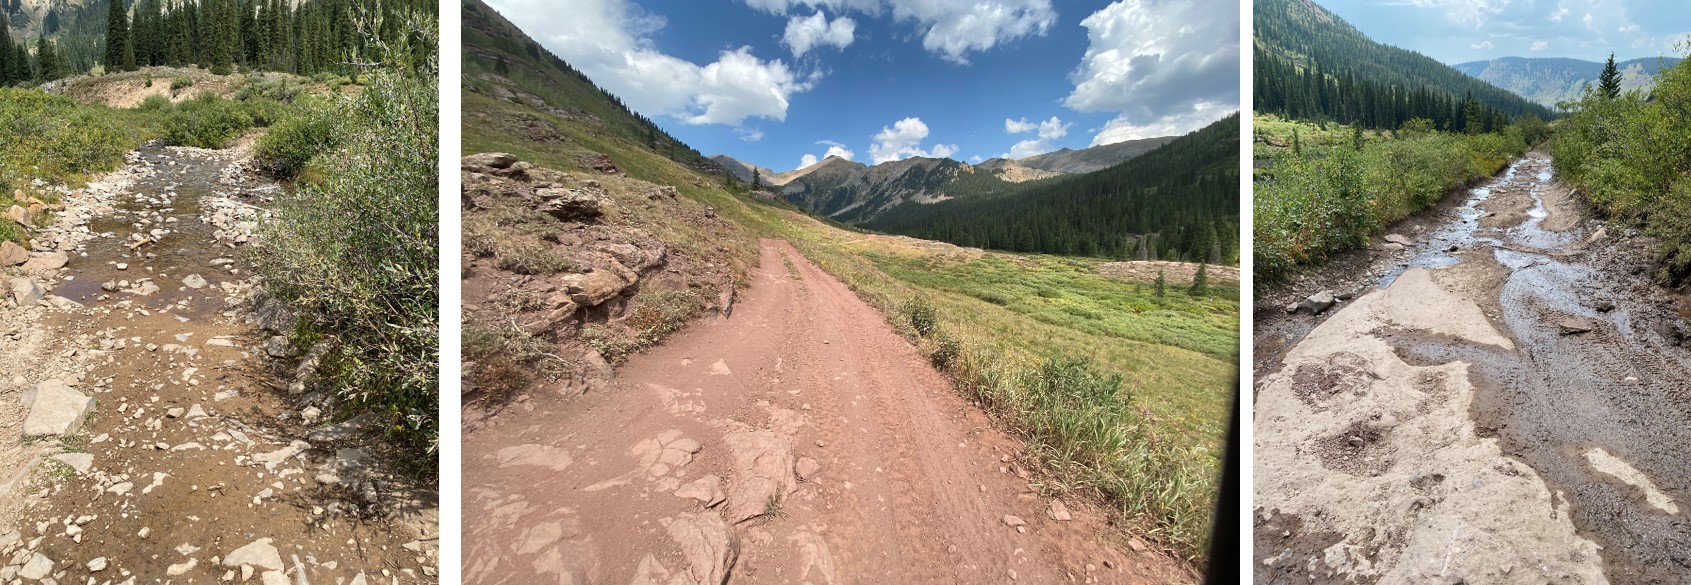
I followed the trail until it ended in the upper basin. This is a class 1 trail, but it goes through willows and since it’s currently spring conditions, there was an excess of water running in the middle of the trail. With no way to avoid it, my feet became wet and muddy early on in the hike.
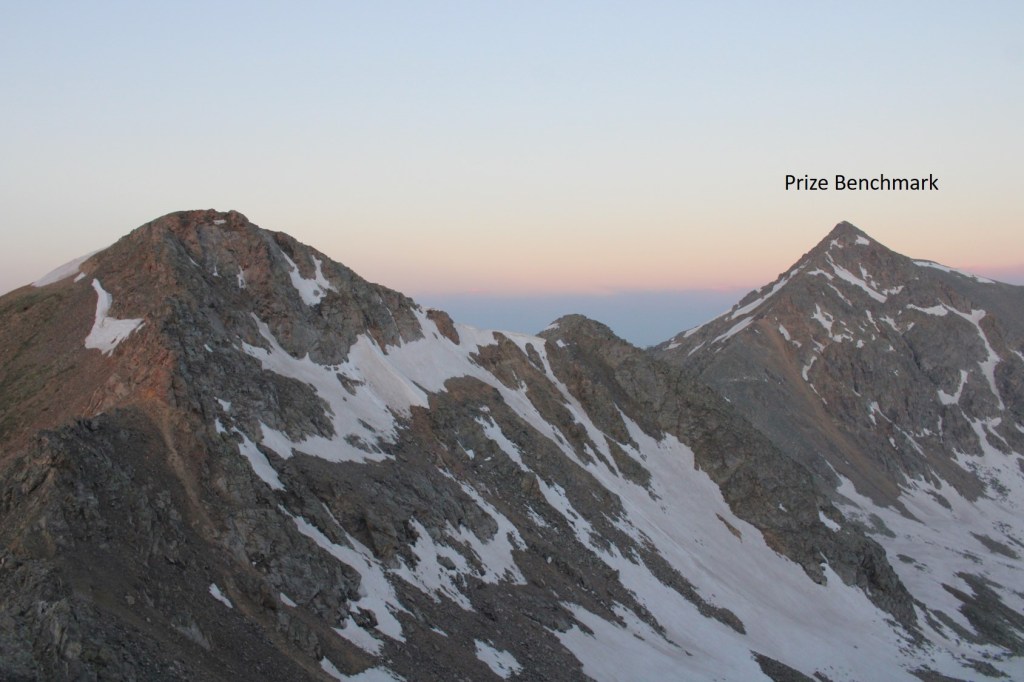
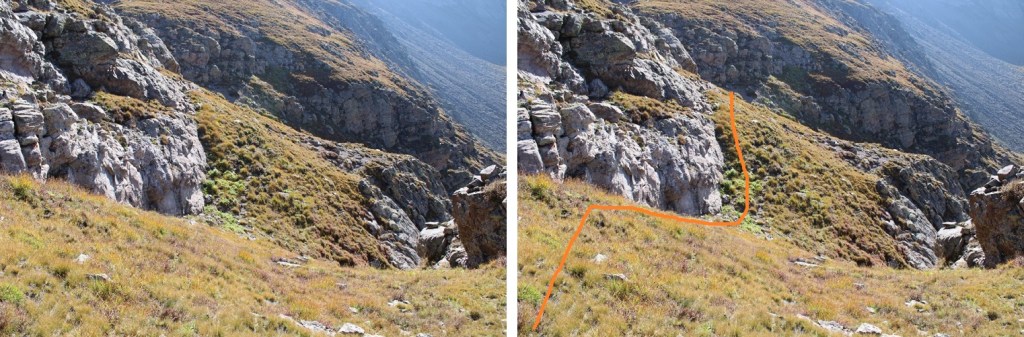
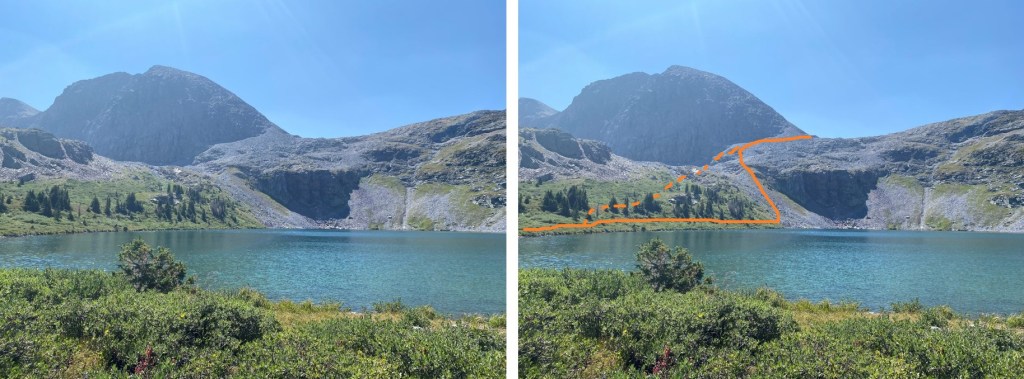
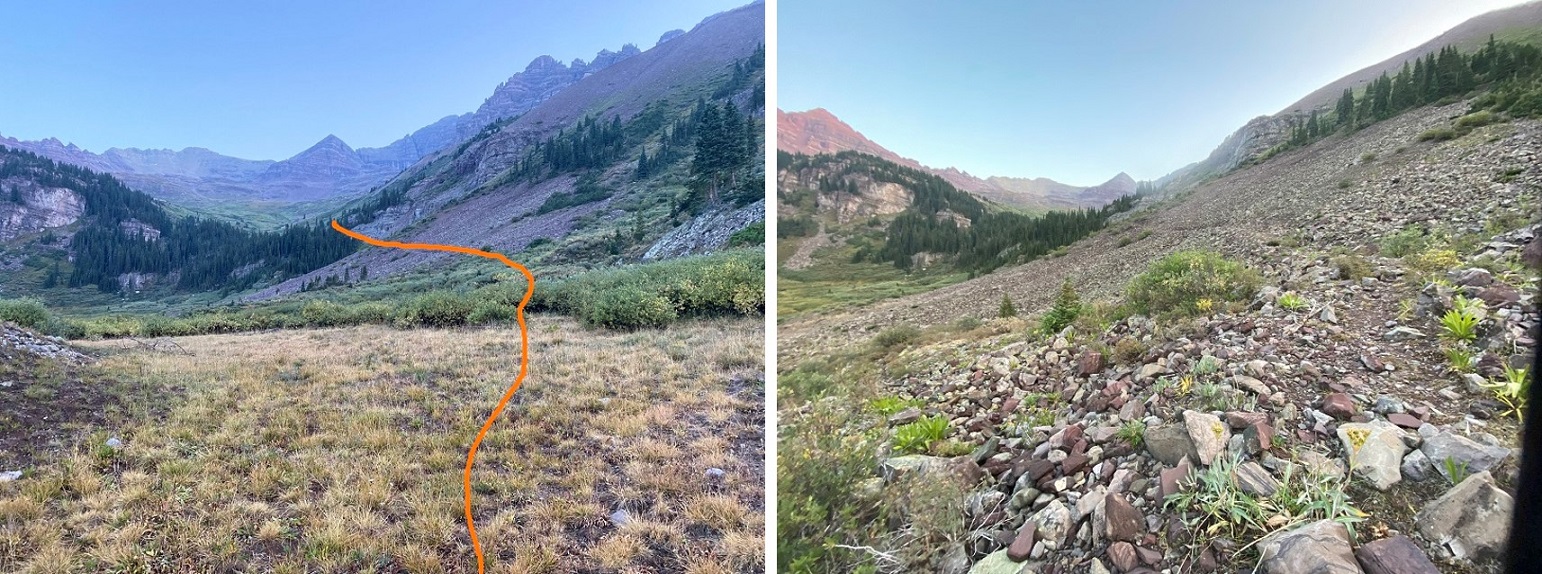
When I made it to the upper basin, my intent has been to take the trail to the saddle, and summit Prize Benchmark first. The intended route is the solid route, the route I took is the dotted line. Note: the solid route wouldn’t work, because it was too chossy on the other side to utilize.
I put on my microspikes and started crossing the ice. I got about halfway across and felt out of my comfort zone: The ice was too slippery, and I didn’t have an ice axe. Instead, I turned and headed northeast towards a different part of the saddle
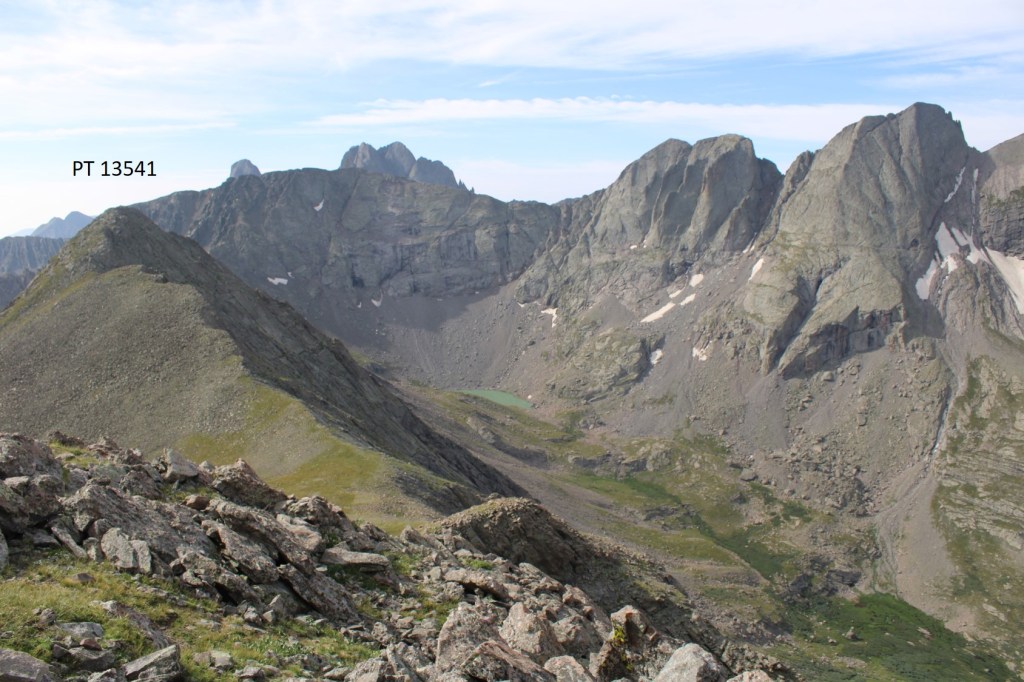
Now at the saddle, I turned and looked over at Prize Benchmark, but the route the rest of the way across the saddle looked sketchy. It was loose, with spires and talus.
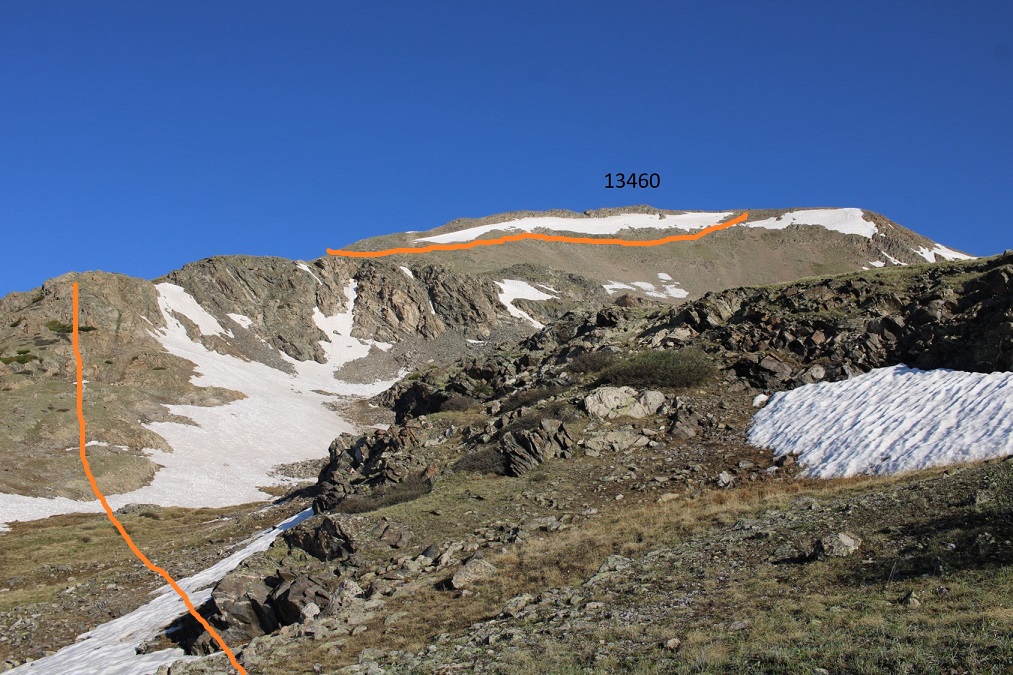
I got out my map, considered my options (did I want to backtrack?) and decided to change my plans for the weekend and head over towards PT 13460. I headed east along the ridge.
This was all easy class 3 or below, with a few scree gullies and rocks. The route was obvious, but there were a few false summits
The summit was obvious, with a summit register clearly visible
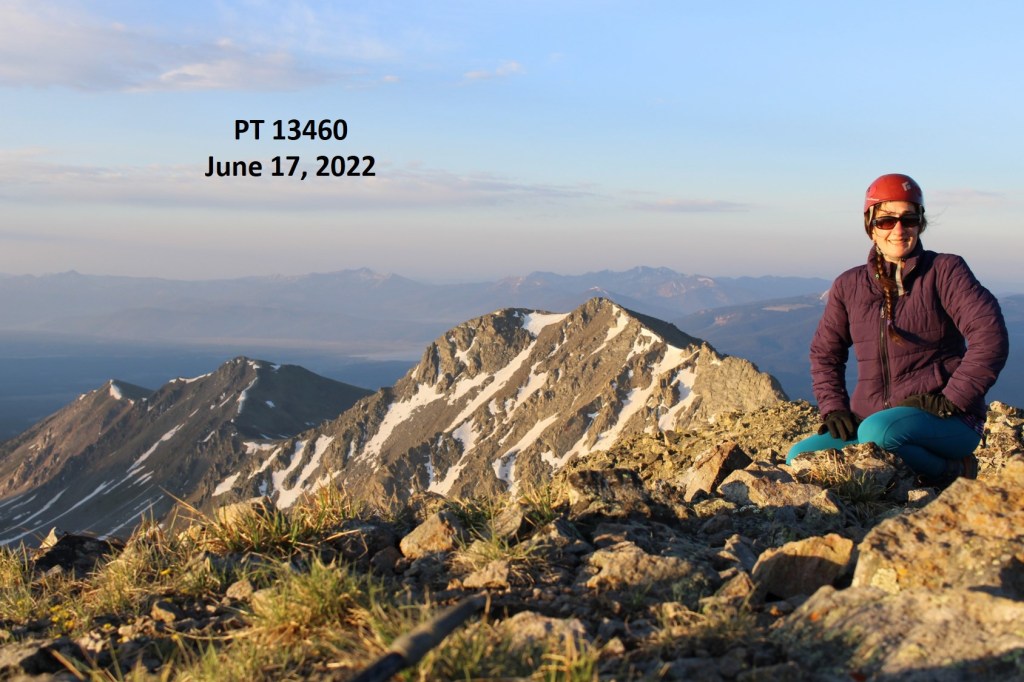
I summited PT 13460 at 6:10am
PT 13460:
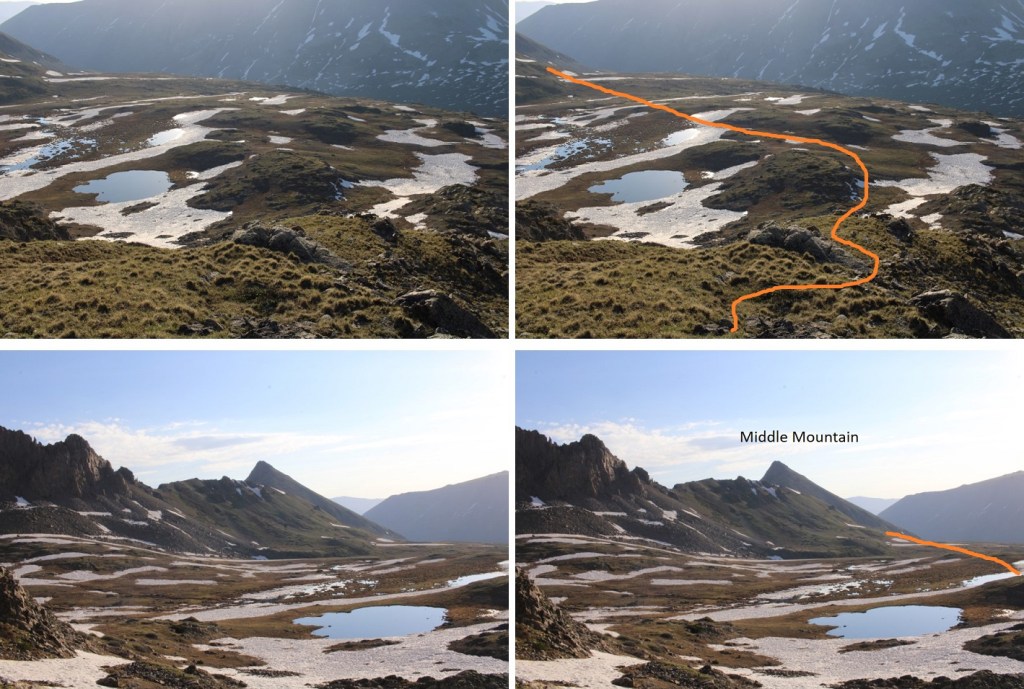
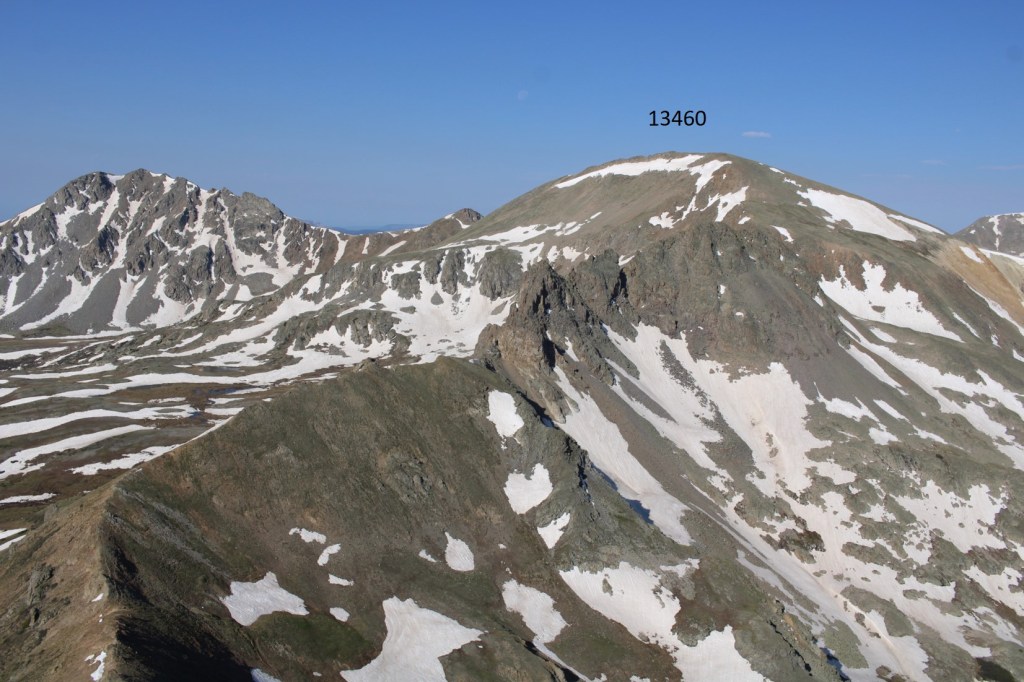
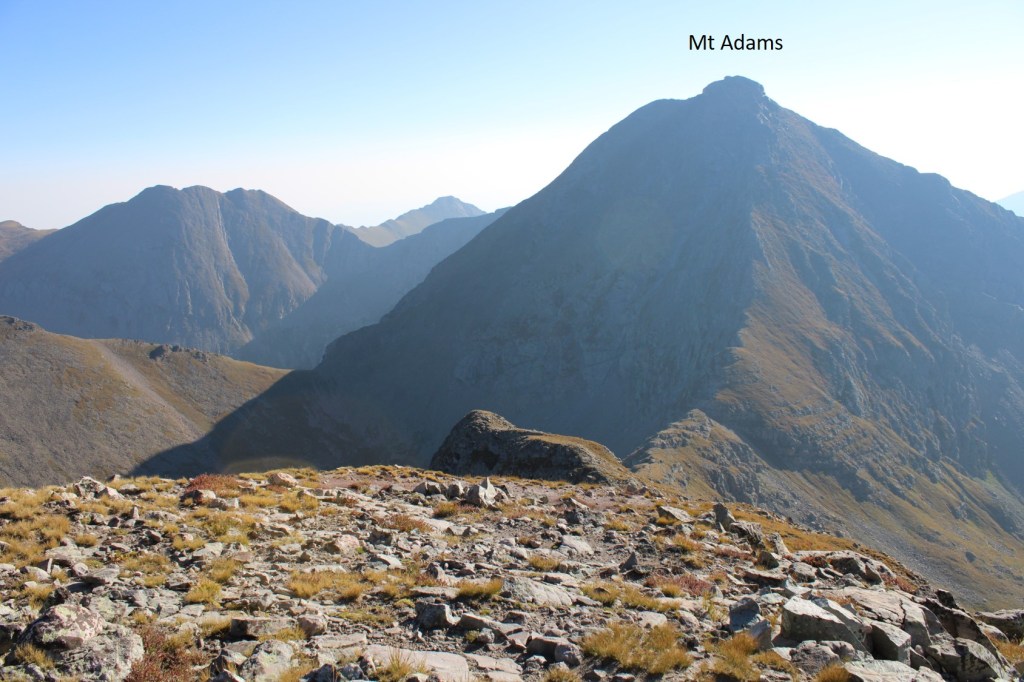
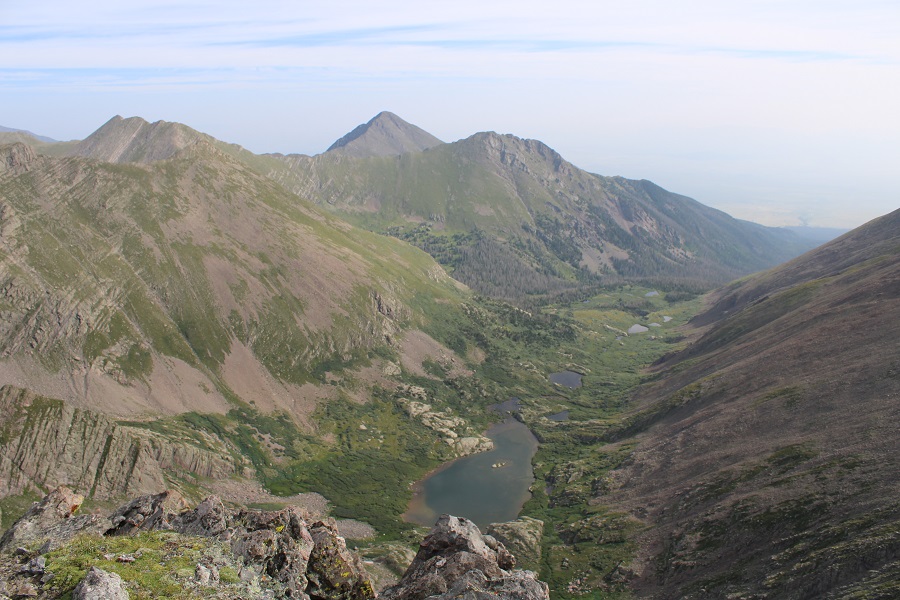
From the summit I could see my next intended summit, Middle Mountain, to the southeast. Sorry for the bad picture… the smoke from the fires created a haze that was hard to photograph through.
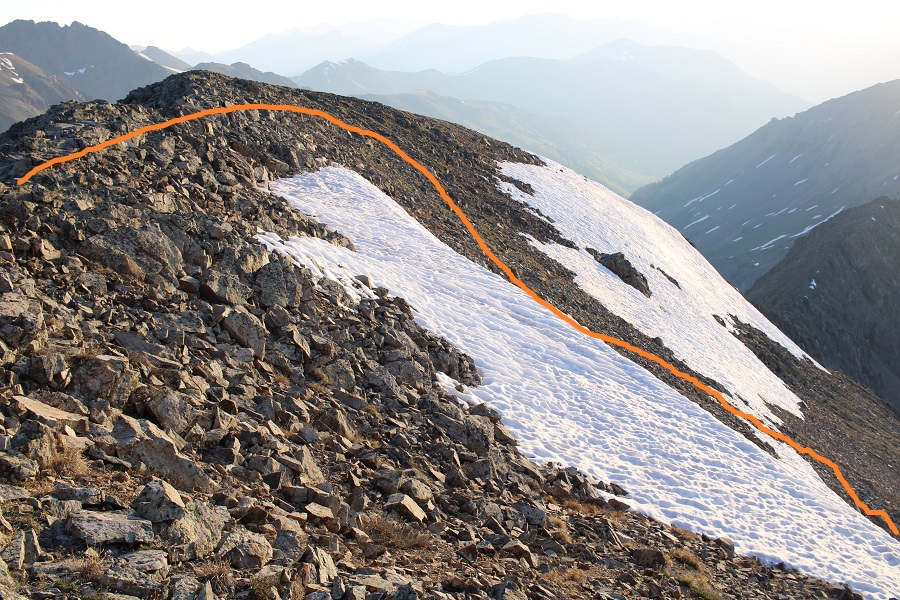
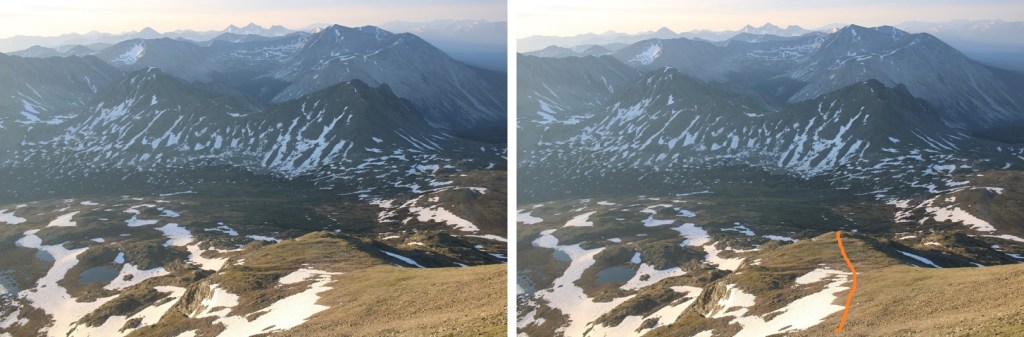
I didn’t have a good view on my way in of the snow conditions, so I walked southeast for a bit along the ridgeline to gauge the best descent route.
The conditions looked sketchy: All I could see from above were drop offs and snow, so I got creative and headed down into the basin, avoiding cliffs and snow. I found out I had cell service, and ssat for 30 minutes on the mountain, checking weather forecasts. Here’s my route:
I came to some tundra gullies, and was able to navigate down them without a problem.
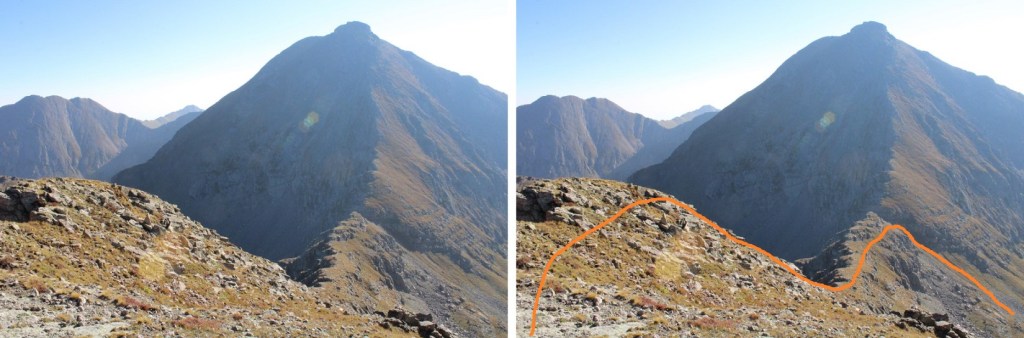
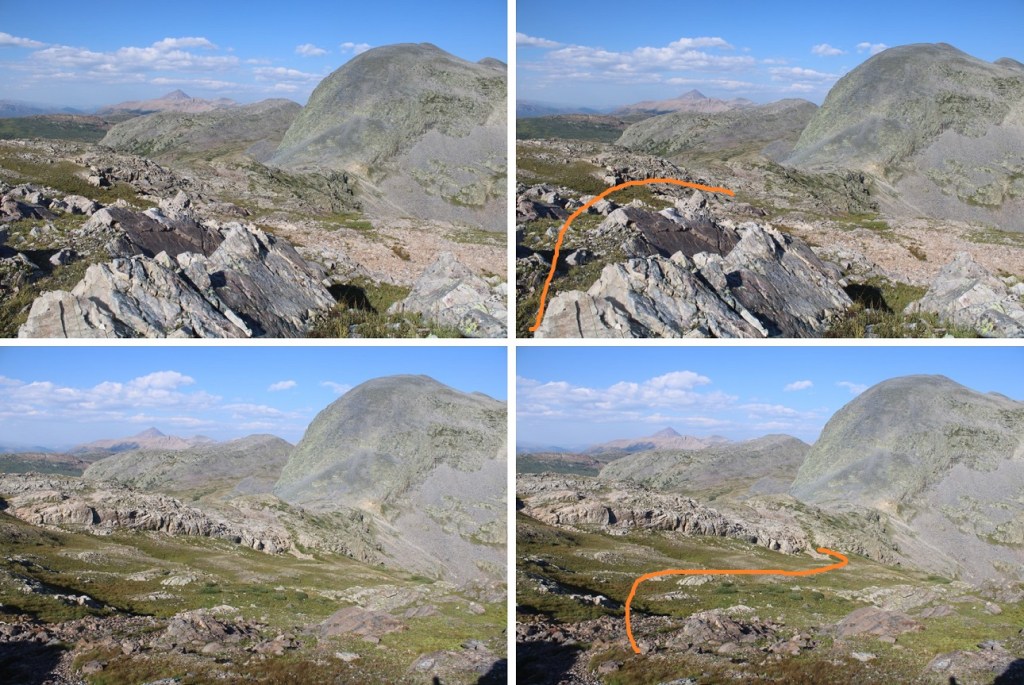
Here’s my route into the basin
And through the basin to Middle Mountain. You can see the ridge to the left I was trying to avoid
Here’s a look back on the route down into the basin
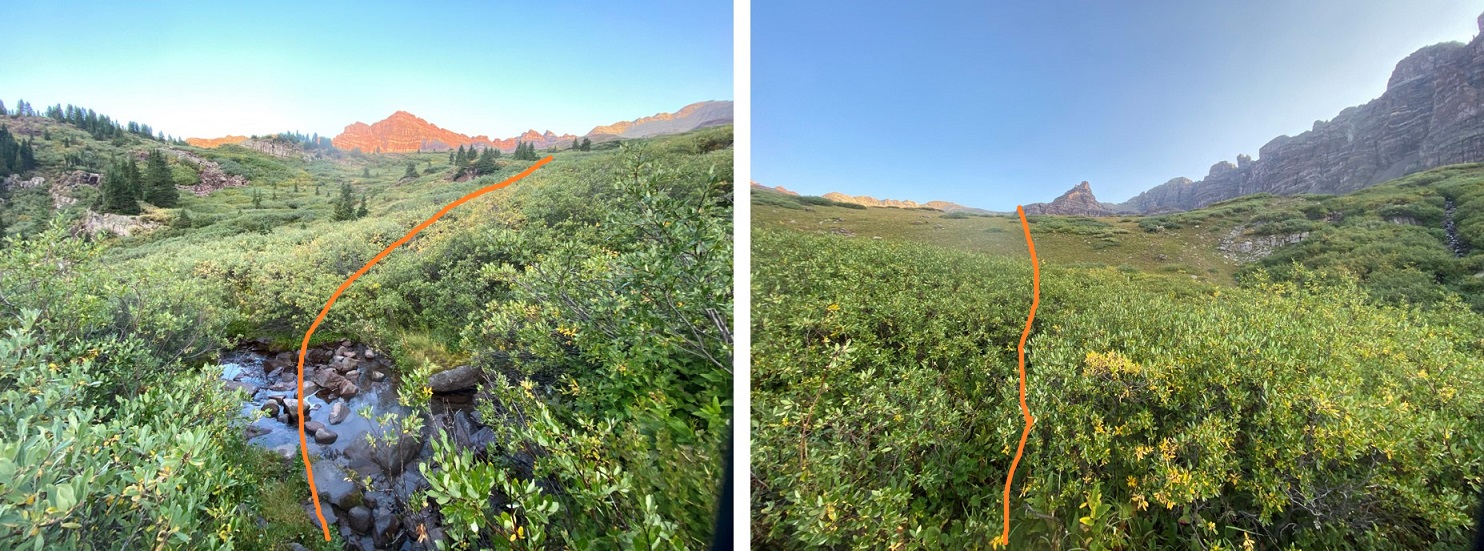
The upper basin was still melting out, and very… squishy. Once again, my socks and shoes got wet. I slogged my way southeast towards the saddle
Here are the last few bits before the saddle. I was trying to avoid a large boulder and the willows
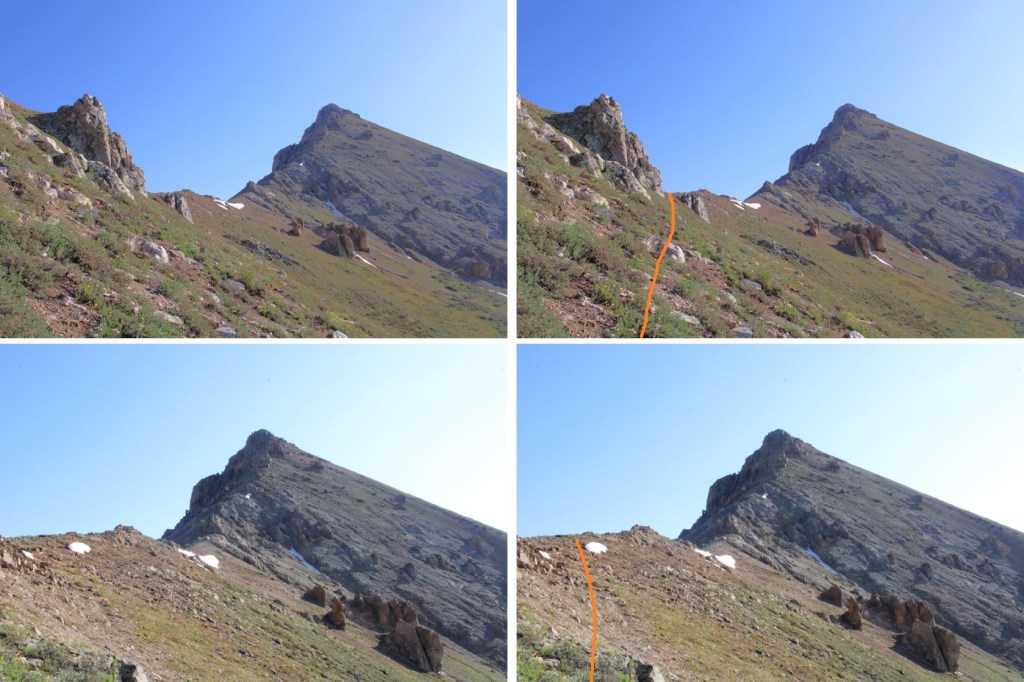
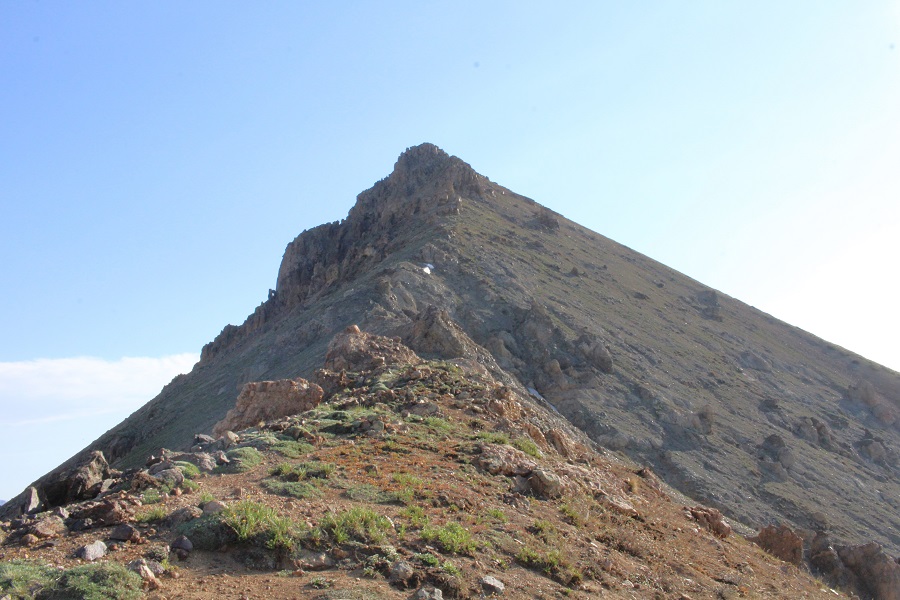
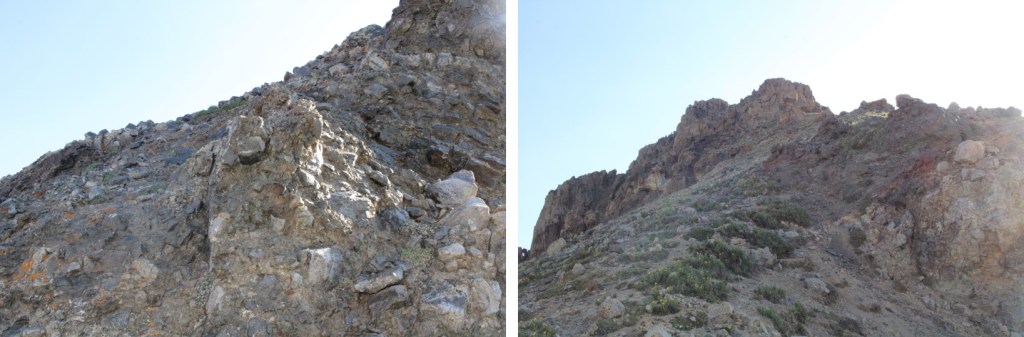
Middle Mountain was also easy class 3, with several false summits.
I went right here
Left here
And then right again
Now it was some easy scrambling over false summits to the true summit. I always stayed right (south)
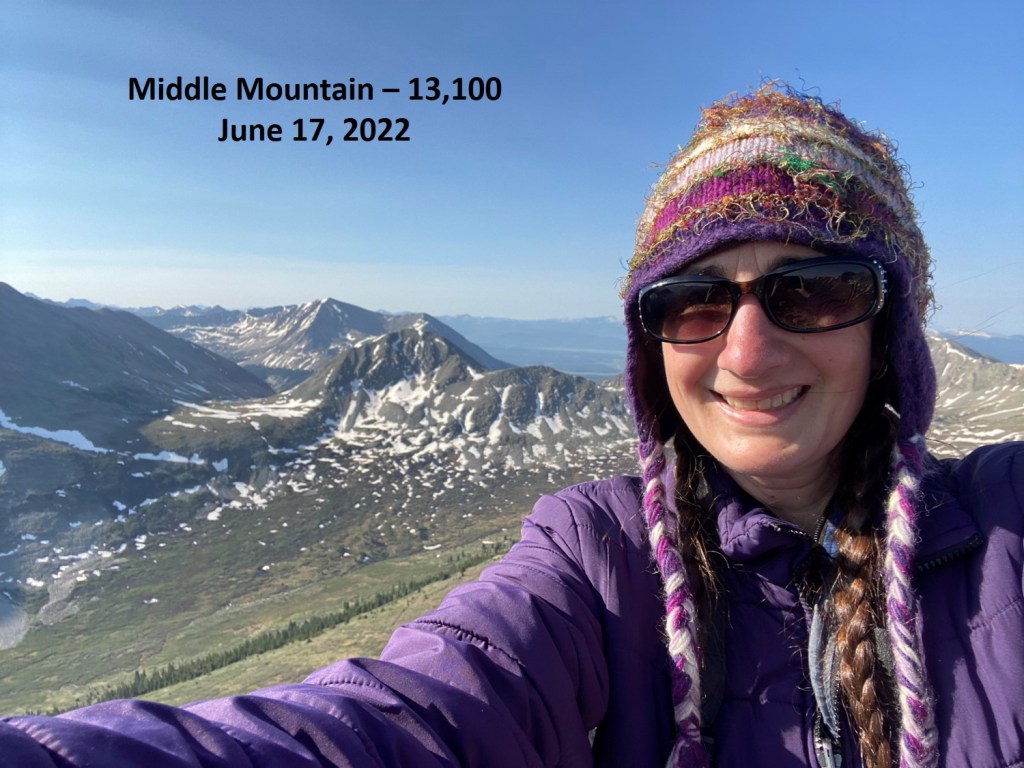
I summited Middle Mountain at 8:25am
Middle Mountain:
Here’s looking back at 13460
Now to head back to the trail. This was easy, and choose your own adventure. I just looked and headed south, doing my best to avoid the willows (etc.).
From the lower basin, here’s looking at the route I took down from Middle Mountain
Now back on the trail, I followed it back to my truck
I made it back to my truck at 10:15am, making this a 9.37 mile hike with 3246’ of elevation gain in 6 hours, 45 min.
The moon was full, which makes hiking in the dark so much more enjoyable. The trailhead is located at the northeast end of the North Crestone Campground. I was surprised to find tent campers in some of the spots on this 20-degree morning. There were no other vehicles I the lot when I arrived. I was surprised to find the bathroom still open, and well stocked.
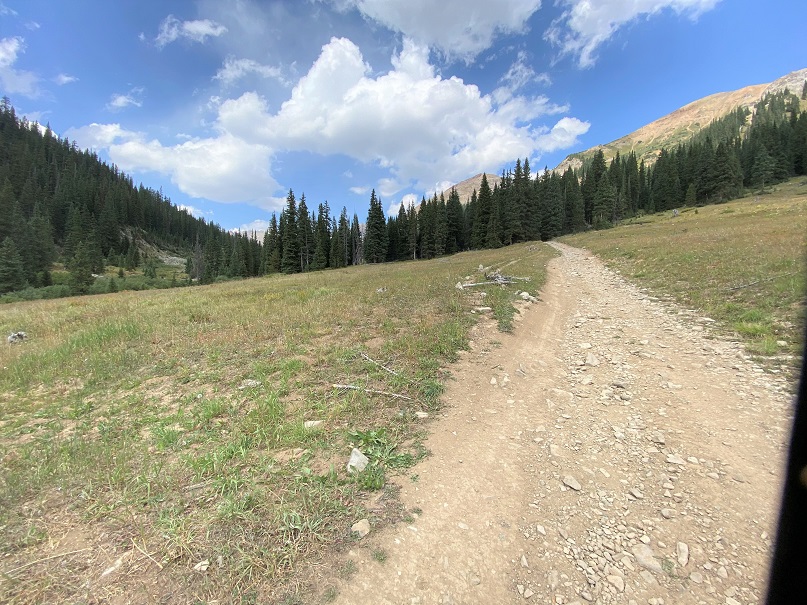
I was on the trail at 5am. The trail is obvious.
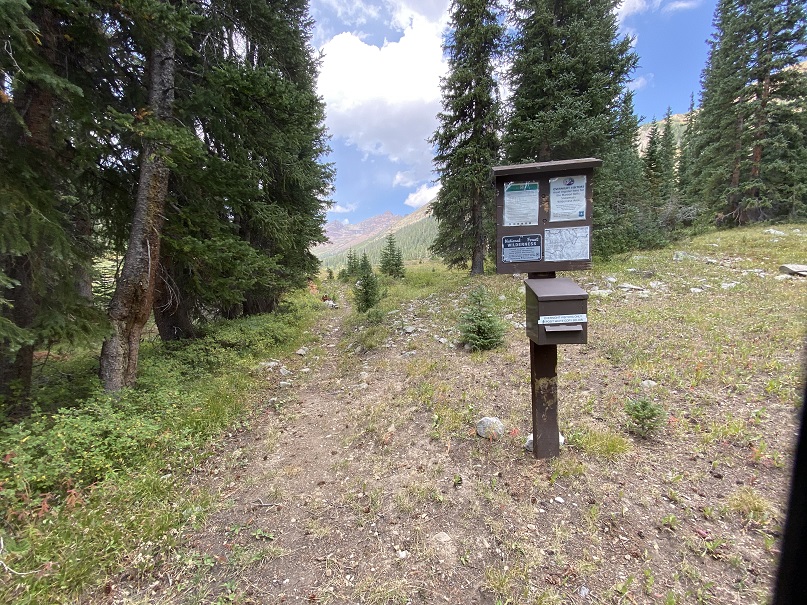
I signed the register (the first person to do so in about a week) and followed the North Crestone Trail northeast. This is a class 1, easy to follow trail
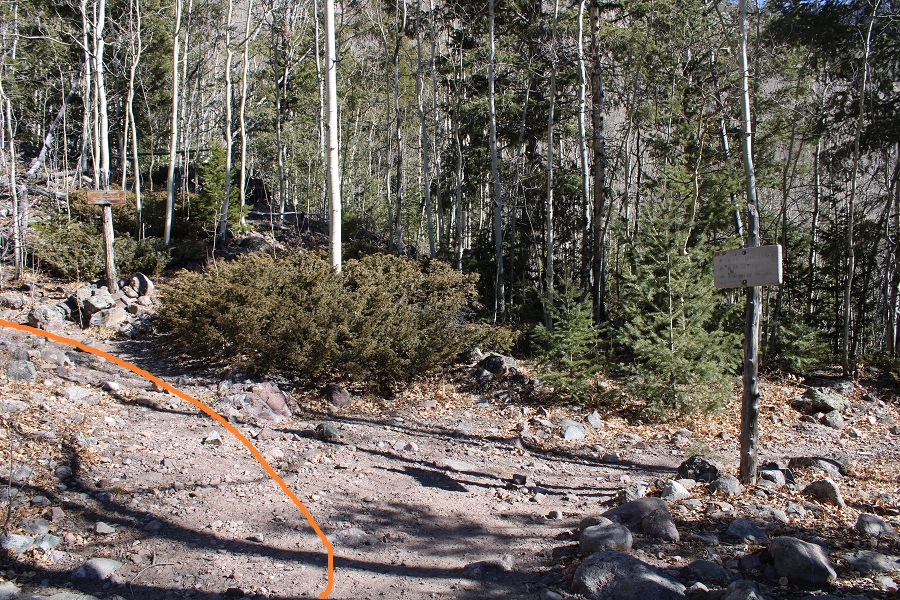
After hiking for 2.8 miles, I came to the junction for the North Crestone Trail, Comanche Trail, and North Fork Crestone Trail. I basically made 2 left turns, and began following the North Fork Crestone Trail
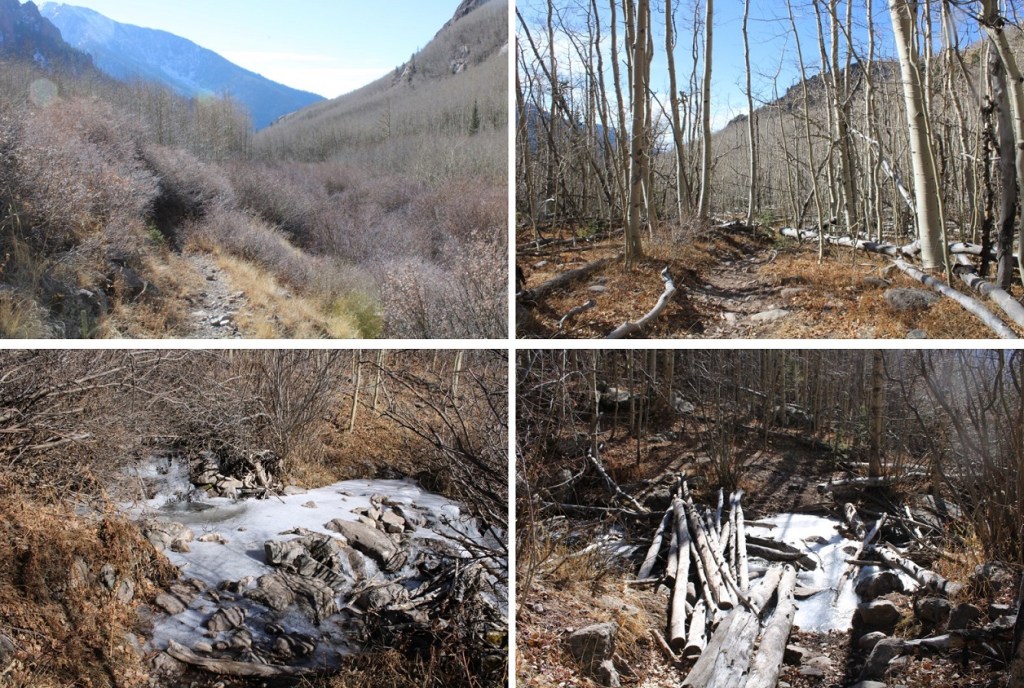
This trail was also easy to follow, as it switchbacked and headed north
There were some frozen stream crossings
There were also a lot of downed aspens from previous avalanches (but a clear trail) and willows
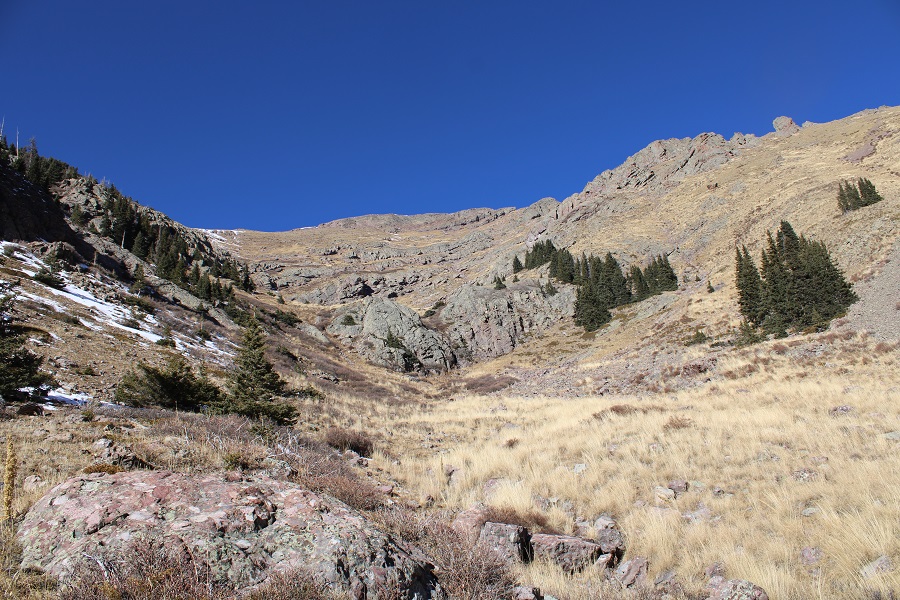
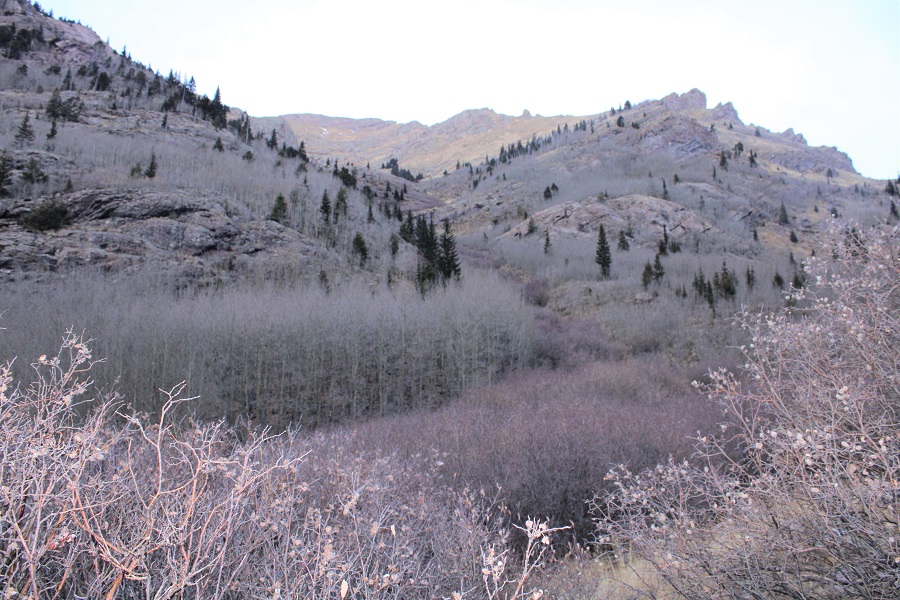
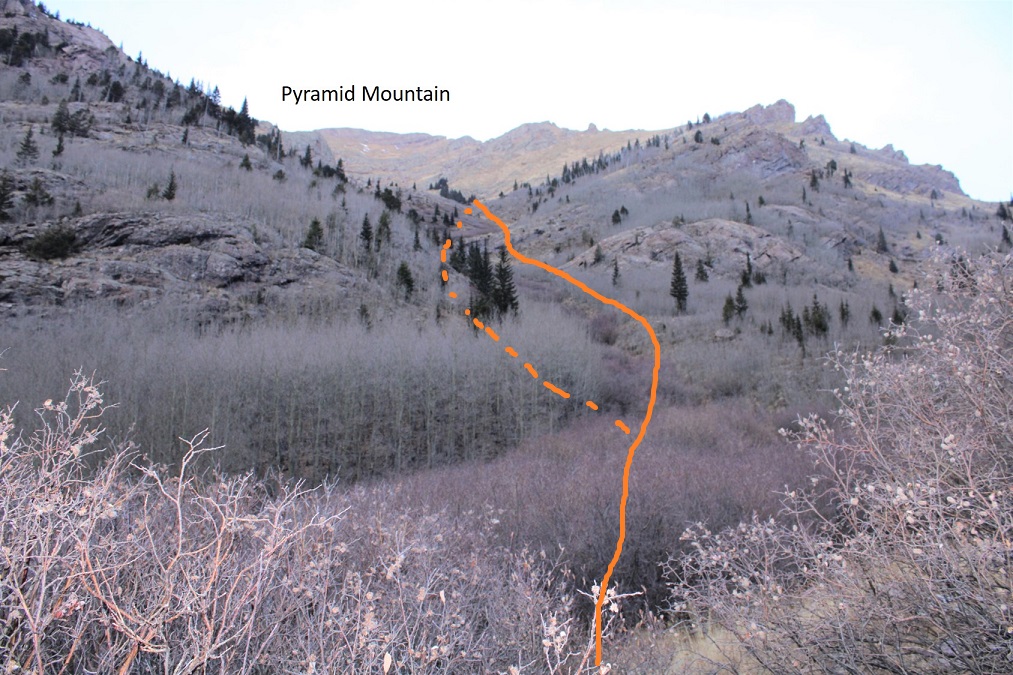
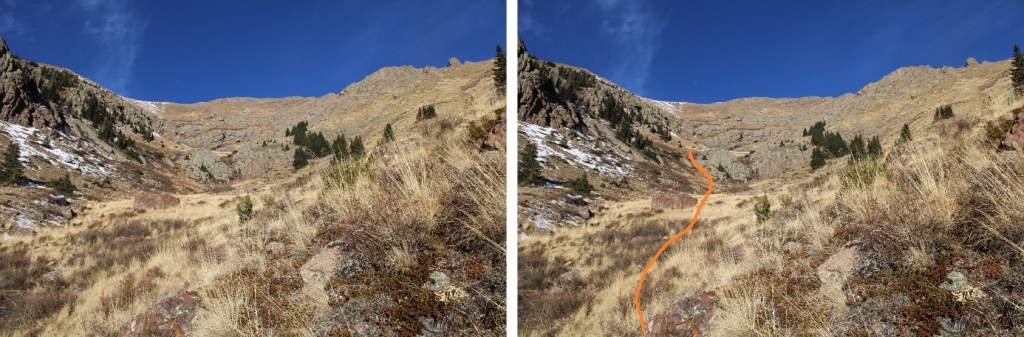
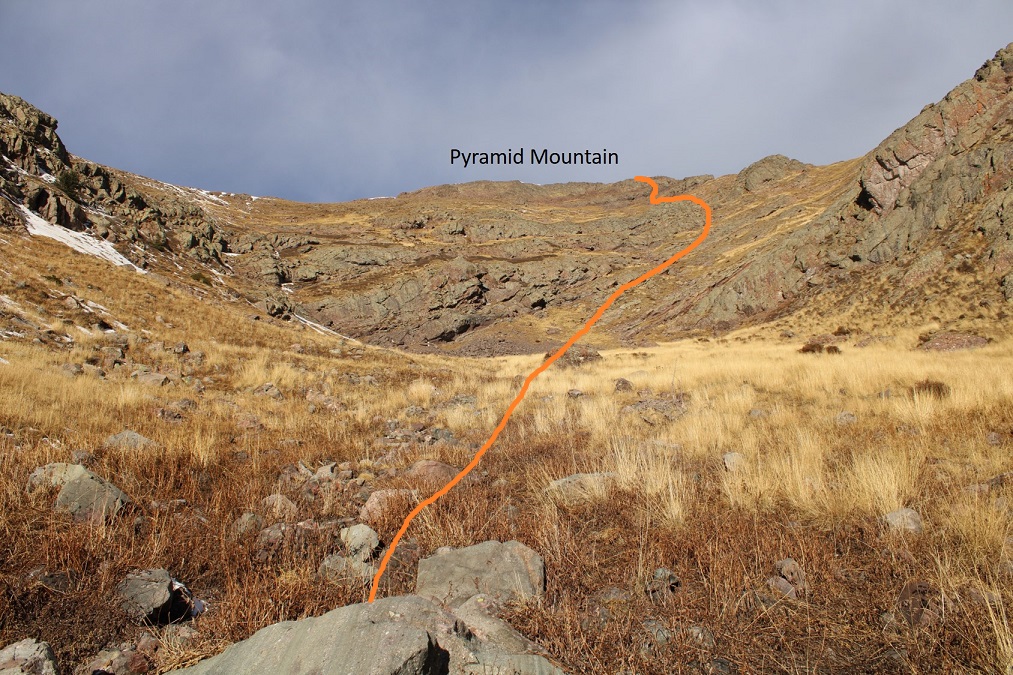
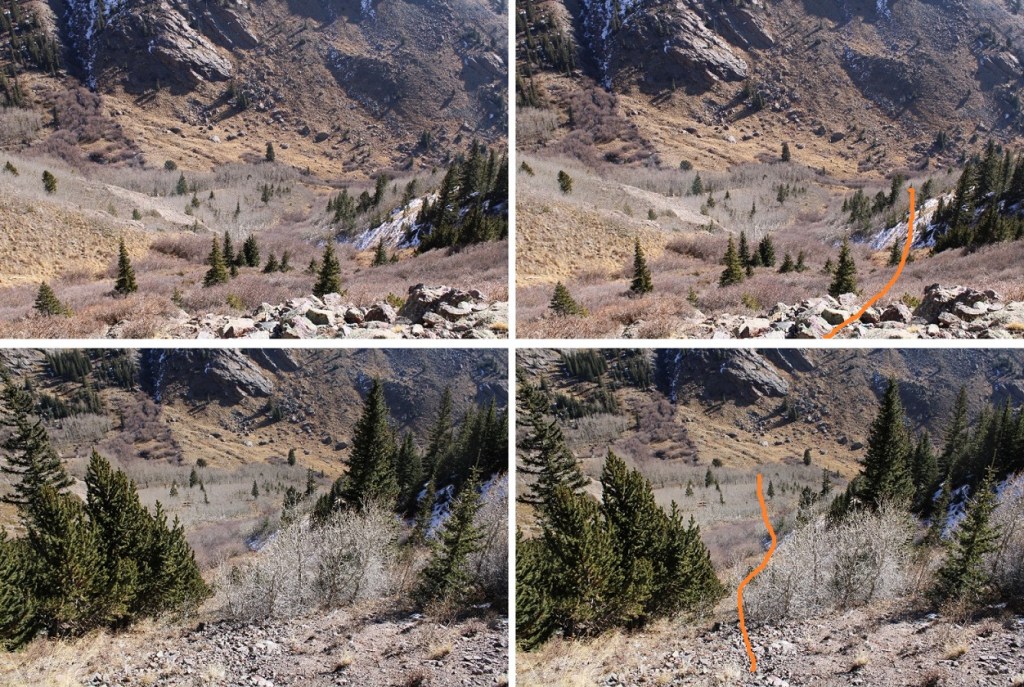
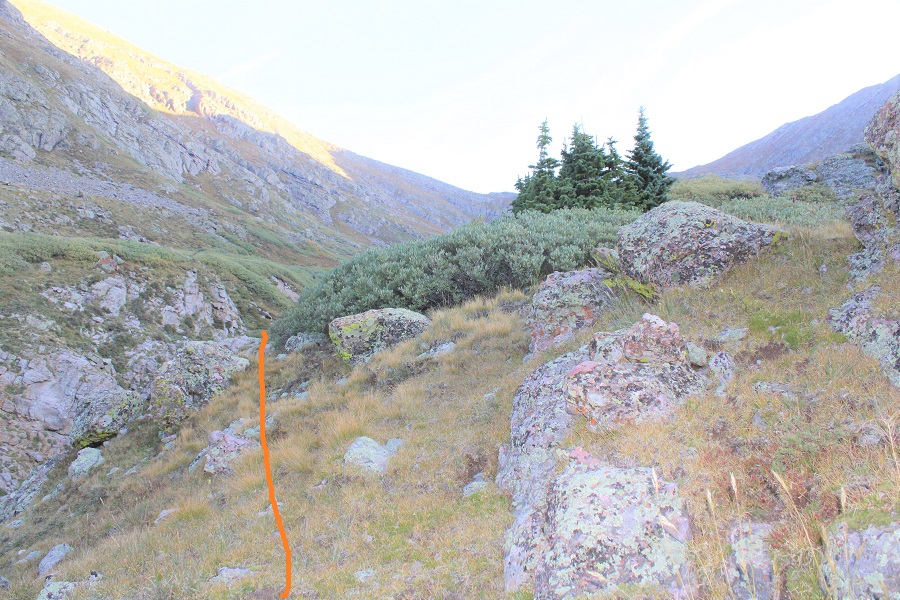
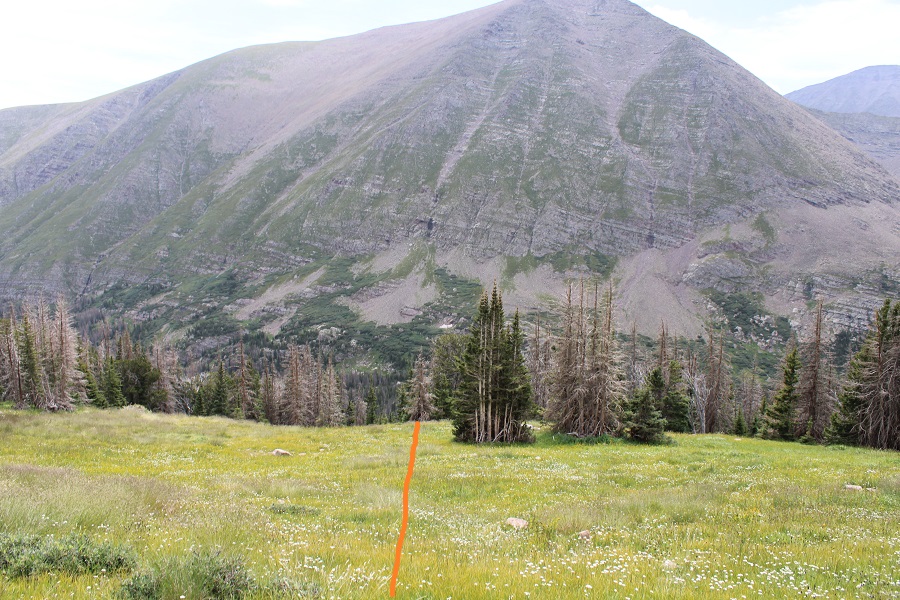
After hiking for a total of 4.25 miles and at 10750’ I looked left and saw a drainage. This is the east side of Pyramid Mountain.
The idea here is to follow the drainage northwest. This is harder than it sounds. I ascended via the right, only to encounter some class 3 climbing and avalanche debris from aspens. I descended via the left, in the snow with even denser aspens. If I had to do this again, I’d probably stick to the route on the left, because, while there were more aspens, they were easier to navigate and much shorter than the ones on the right. In any event, it’s choose-your-own adventure. Following the drainage directly isn’t an option for the first 100 yards or so, due to the dense willows (but after that I’d recommend following the drainage proper, rock hopping). Either way, you will come out of this part of the trek covered in aspen dust. I can’t imagine attempting this when the trees and willows have leaves.
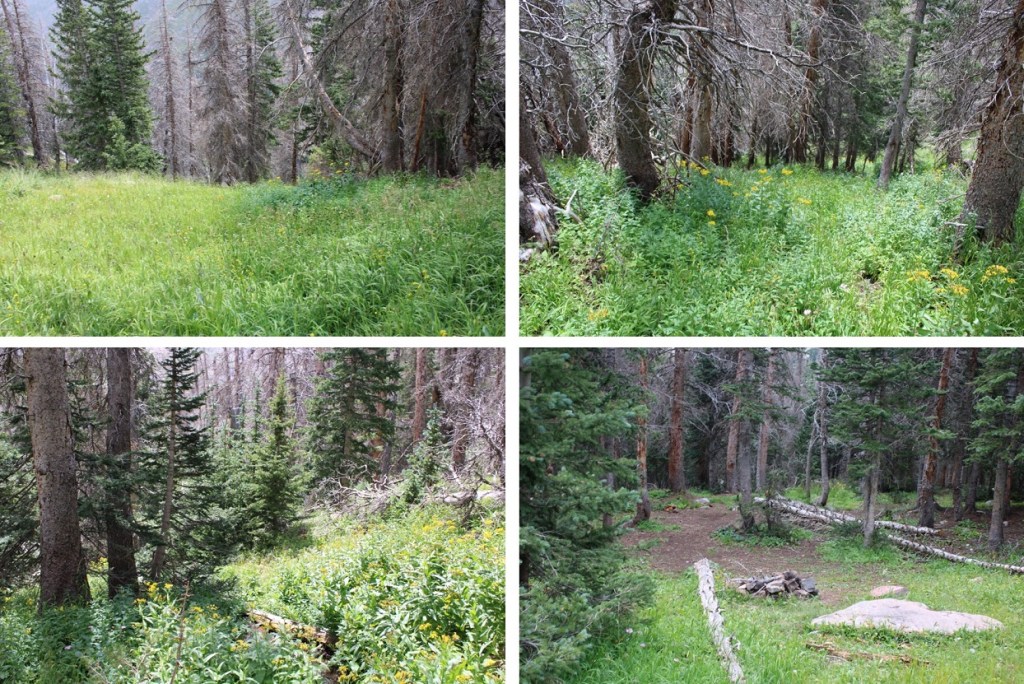
Here are some closer pictures of my ascent route. First, I crossed the stream. It was covered in willows, so pictures don’t do much, but trust me, there is a stream here. Just float over it on the willow branches…
Next, I found an obvious game trail through the next set of willows
Directly after this game trail is another game trail to the left that crosses the drainage/a small stream (picture of this to come later). This is how I came down. But for now, I stayed to the right of the willows, trying to straddle the willows and the aspens (it didn’t work).
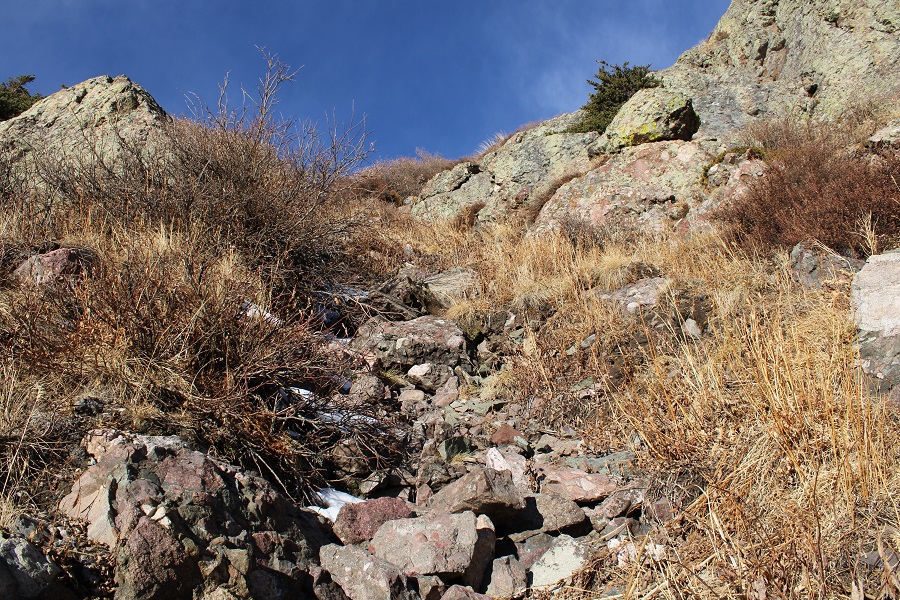
Staying to the right of the drainage brought me to a rocky area I needed to ascend. This could be considered easy class 3
Once over this rock outcropping, I was easily able to follow the drainage northwest, as I was now above treeline
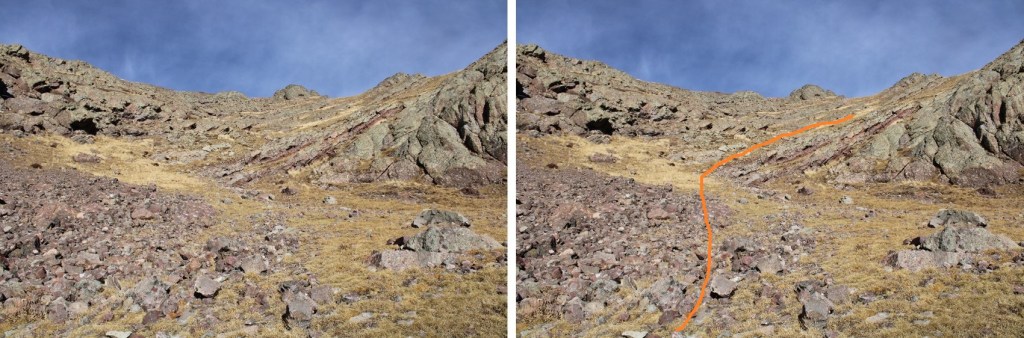
I took the ramp to the left, which is steeper than it looks. Here I encountered a few stubborn willows, but was able to keep this class 2
Now I could see the rest of the route. There are a few ways to ascend to the summit. Once again, this is choose your own adventure. It looks more intimidating than it is. I was able to keep this all class 2, with one easy class 3 move (which would have been class 2 without snow).
Here’s my overall route to the summit
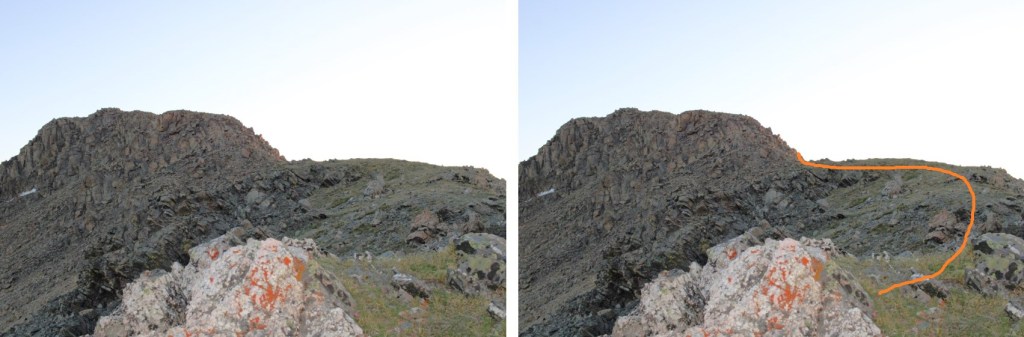
Let’s go step by step. I made my way towards the rock outcropping. Here there are two prominent, red ribs of rock. Both go. I chose a different one on the way up than I did on the way down. Follow them north and they will quickly lead to tundra
At the top of these ribs, resist the urge to head to the ridge (it doesn’t go, yet). Instead, aim for just below this prominent rock
Heading this way will take you to a game trail. I followed it west a few yards, and then took a gully towards the ridge, avoiding the large rock.
When I did this there was snow. Snow helps to make for a nice visual. Just before making it to the snow, I turned right. There was a faint trail here, heading northwest.
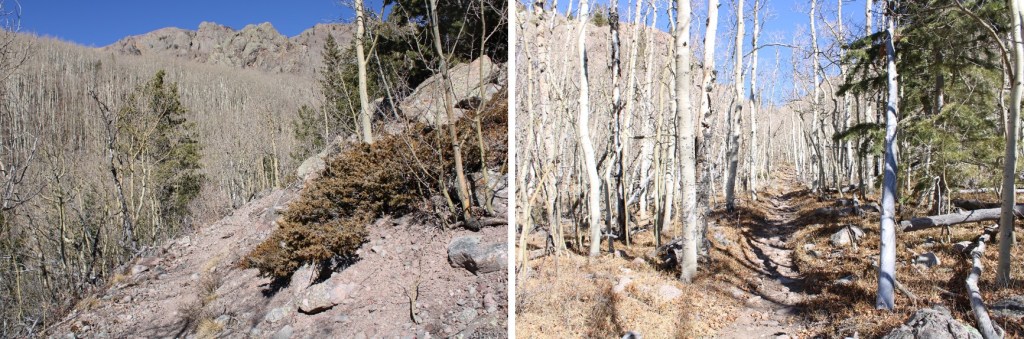
I was making my way northwest, towards the ridge, on tundra and Crestone conglomerate rock (side note, had I gone to the next gully further, this would all have been tundra).
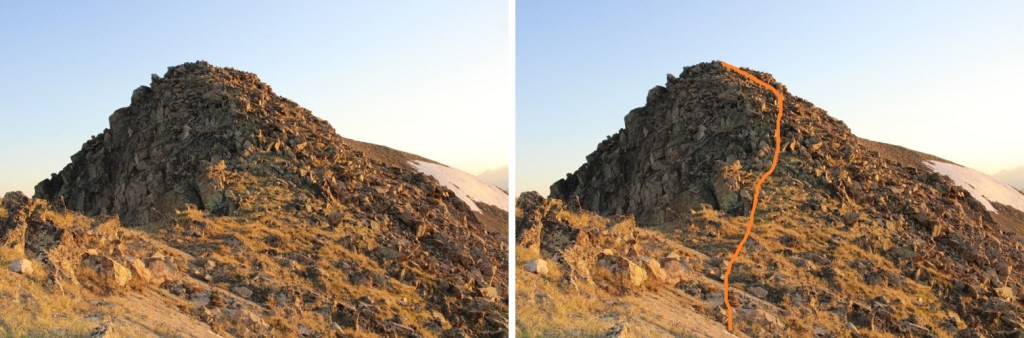
I hit another large rock just before the ridge. There’s an access gully here that’s most likely class 2 in summer, but with snow felt easy class 3. I climbed this gully
From here, it was an easy scramble up the ridge to the summit. The pictures make this look tougher than it was.
I summited Pyramid Mountain at 9:15am
Pyramid Mountain:
There was a summit register, which I actually signed because it was warm outside. Then I was on my way back down.
Here’s an overview of the exit, back to the drainage
I made it back to the game trail, followed it for a few yards, and then descended south
This time I took the opposite side of the drainage down. I’d recommend taking this route up (it won’t be ‘fun’, but it will be slightly better than the other side)
Yes, there are a lot of aspens, but they’re small-er than those on the other side. I made it to the willows and crossed the creek at what felt like a game trail, but had an access log across it, so maybe it’s intentional?
Now for the final creek crossing, willow wrestling, and back to the trail
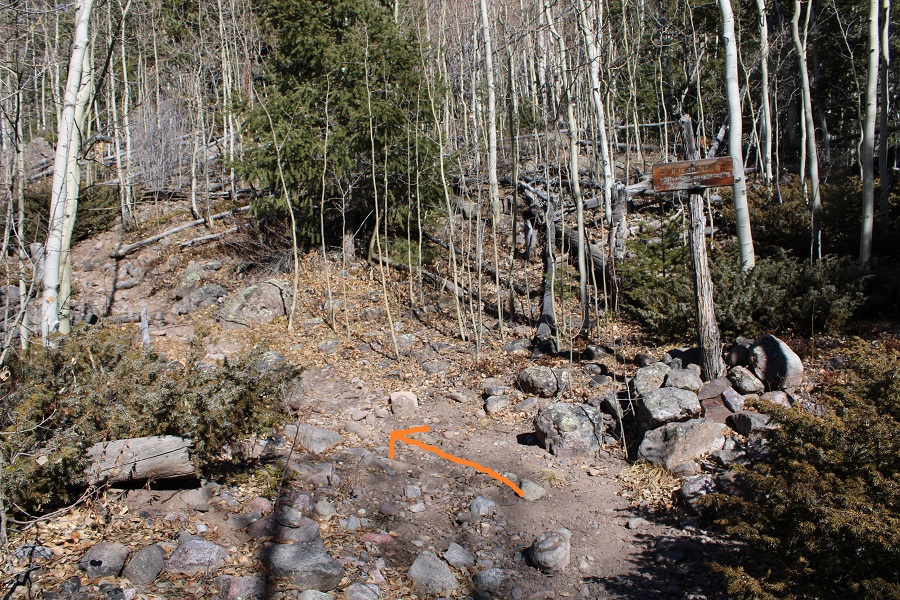
I hiked over several (frozen) creek crossings, back to the junction with the North Crestone Trail, Comanche Trail, and North Fork Crestone Trail
I turned right twice this time, and hiked back to the trailhead, following North Crestone Trail
I made it back to my truck at 12:15pm, making this a 11.27 mile hike with 4639’ of elevation gain in 7 hours, 15 minutes.
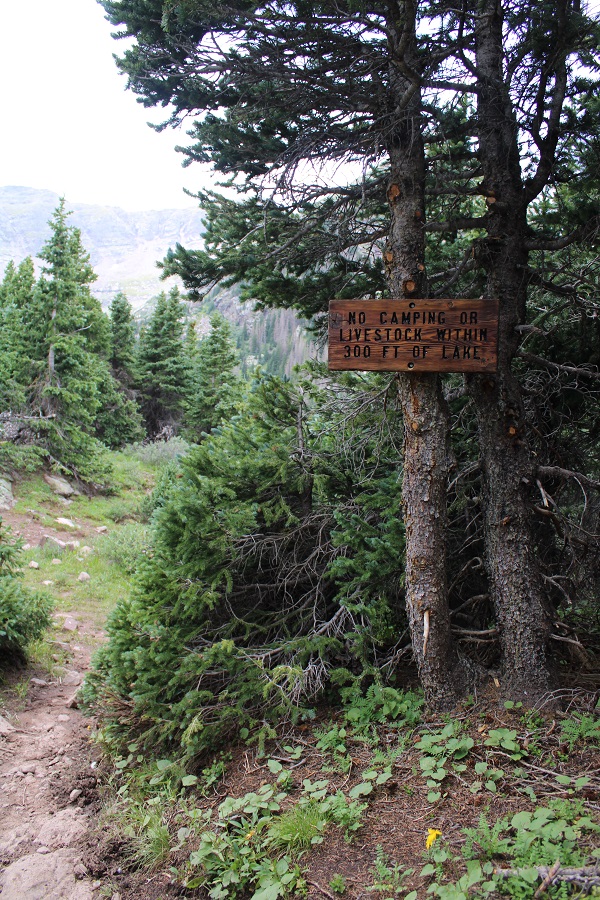
I’ve taken the Willow Lake trail several times, and I’m guessing if you’re doing this peak you have too, so I’m going to start this report from the camping area just before Willow Lake. If you’d like detailed instructions on the approach, click here
I would also like to recommend pairing this up with other peaks in the area: PT 13153, Mt Adams, PT 13580, etc. This felt like a really easy day.
I was on the trail at 4:30am, surprised at how easy the approach was this time. I attribute it to taking the week off from hiking to visit my son in Alaska, and in doing so, consuming about 10 times more calories than I normally would, thus giving me an excess of energy.
There are several spots to camp just before making it to Willow Lake, including one very large area at 11500’. There are still plenty of areas to hang bear bags already set up (for public use). I continued to hike west. My tracker told me I’d hiked 5.3 miles to this point.
I followed the sign left that took me on the trail for Challenger/Kit Carson
About 10 yards after this sign I left the trail and headed north up the hillside. There are cairns here, but they may be difficult to see in the tall grass.
There are game trails here. I saw tons of deer and bighorn sheep the last time I was here, and this time I saw a few deer. Find a game trail and follow it north, keeping the creek to your left and rock outcropping to your right.
At the top of this hill there are cairns indicating you should go right, but if you do so, you’ll be going through a lot of willows. Instead, parallel the creek, staying to the right of the creek, and you can follow a game trail to the end of the basin, staying out of the willows, or at least keeping them to the easy ones that just reach your knees. Just keep heading north.
You’re aiming for this gully
Here are some step-by-step photos (just keep heading north, this is class 2 terrain on tundra). First, stay to the right of the creek, and to the left of the willows
Then, continue north towards the gully. I was easily able to cross a creek and avoid the willows. I kept to the left of the willows and right of the creek the entire time.
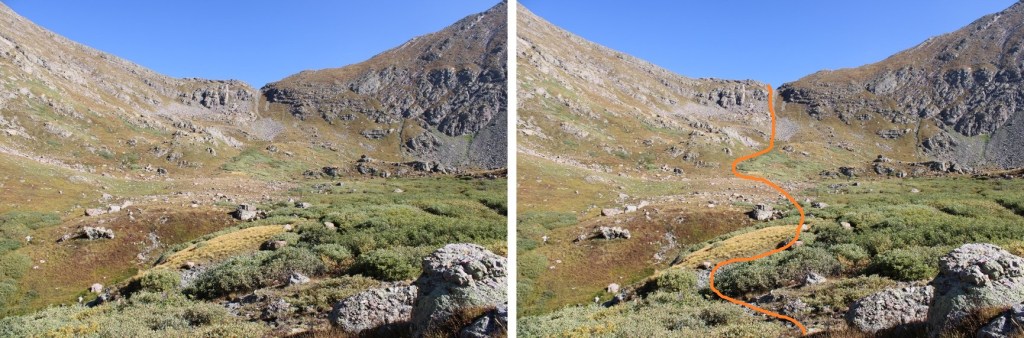
Next, I ascended the gully. This was easy as far as gullies are concerned. I was able to stay mostly on grassy areas. Note, you do NOT need to ascend all the way to the top of the gully. About 15 feet before topping out, take the grassy ramp to the left, staying below the rock outcropping of the ridge.
This grassy area is easy to follow. I just stuck below the rock. Here’s an overview of the route to the summit.
And step by step, first, following the ridge west
After the rocky ledge, I stayed on the ridge all the way to the summit. Once again, all class 2, and you can stick to the ridge.
Yes, this stays at class 2 (it looks harder than it is)
There’s a small false summit, and then it’s an easy trek to the peak
I summited PT 13546 at 8:30am
PT 13546:
It was a hazy day. There was a summit register, but it was one of those pipe ones, so the paper inside was wet. It was also completely full of signatures, so I left the paper in the tube and added another one. There was a nice view of the Crestones; I just wish it was a little less hazy today.
I turned and headed back the way I came in, aiming for the Adams/13546 saddle. If you look closely, you can see a route to Mt Adams. I still had to get to work today, so I didn’t have time for Mt Adams (or PT 13153). Both look straightforward though from the saddle.
Here’s how I exited the ridge
Once back on the saddle, I headed south out of the basin
At the south end of the basin, I turned and followed the grassy ridge down (make sure you’re on the grass, not in the trees: there will be game trails here)
From the grassy area, the trail is easily visible. I made it to the trail, and followed it west, back to the trailhead.
I made it back to my truck at 11:30am, making this a 14.15 mile hike with 5337’ of elevation gain in 7 hours. While it was hazy today, it felt like a perfect day to be out!
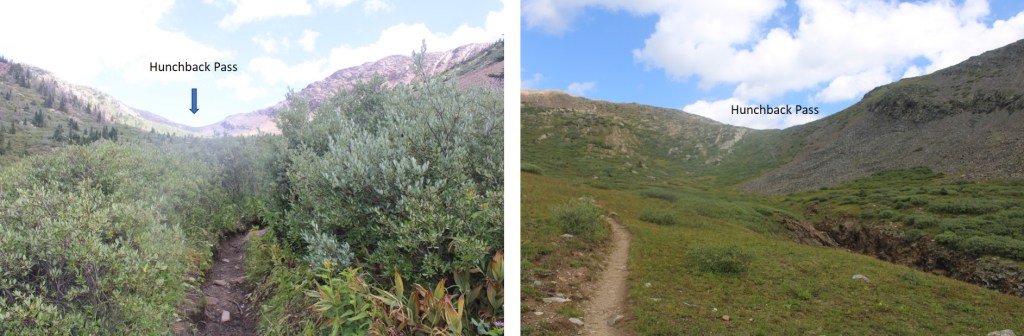
This trip changed so many times before it even began. I have an actual job, with responsibilities, meetings, etc. I drove down to Durango Wednesday night, slept in the cab of my truck at a Walmart (the topper is still on order), got “the knock” at 10:30pm, moved, then woke up and worked/had meetings in my truck the next day. Then I drove to Hunchback Pass through Silverton (my favorite way to get to Hunchback pass). It started raining as soon as I hit the dirt road, and didn’t stop. There was a 60% chance of rain today, but I was still hoping to find a window and hike either 5 or 10 miles to a camping spot (depending on when it got dark, weather, etc.).
The road over Stony Pass was sketchy in the rain. Miles did great, but there were a few times I was worried the mud was too deep to get through. I was a bit worried about the river crossings too, but Miles once again had no trouble.
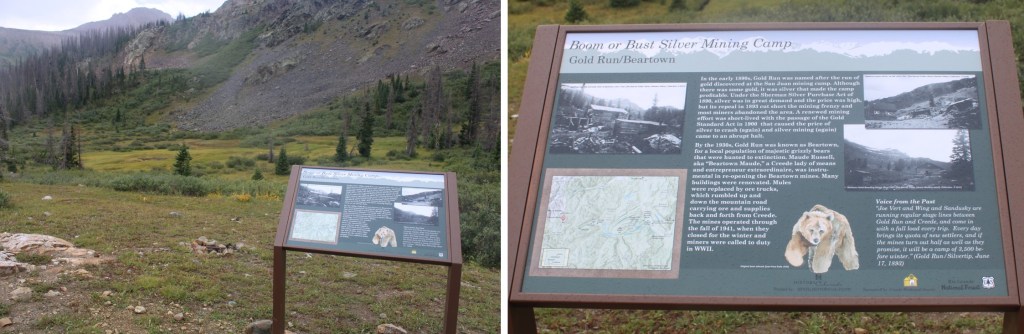
I’ve been to this area 3 or 4 times, and know the perfect place to park: It’s a pullout at 11230’, just before you hit the trees (again), and before getting to Beartown. My truck can make it further, but from past experience I know it’s going to get Colorado pinstripes from the willows and I have the opportunity to scrape the frame a couple of times as well. I love my truck, so I parked here, about 1.3 miles from the trailhead, in a flat spot with a campfire ring at 11235’.
I parked and waited for the rain to stop. The rain turned to graupel, then rain again, then hail. I could see the clouds coming over Hunchback Pass, and they weren’t getting any prettier. Wave after wave of new sets of clouds kept cycling in. After waiting for a few hours, I decided to just get some sleep. I know many of you would start out in the rain, but with my Raynaud’s I can’t risk it: If I get wet/cold that’s it for me, as I cannot warm up. I woke up every hour to check on the weather. The rain didn’t stop/clouds didn’t clear until 4:30am. That was a 15 hour rain delay that was seriously messing with my summiting plans.
I put on my rain gear to ward off water on the trail dripping from plants, and was on the trail before 5am.
Day 1 went like this:
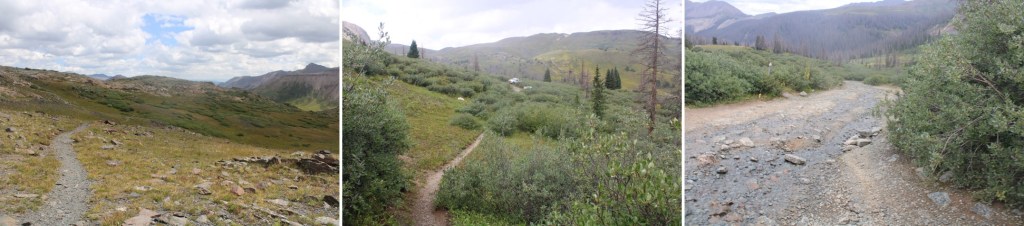
Gained 1275’ over 2.8 miles (to Hunchback Pass)
Lost 2350’ over 5 miles (to Rock Creek Junction)
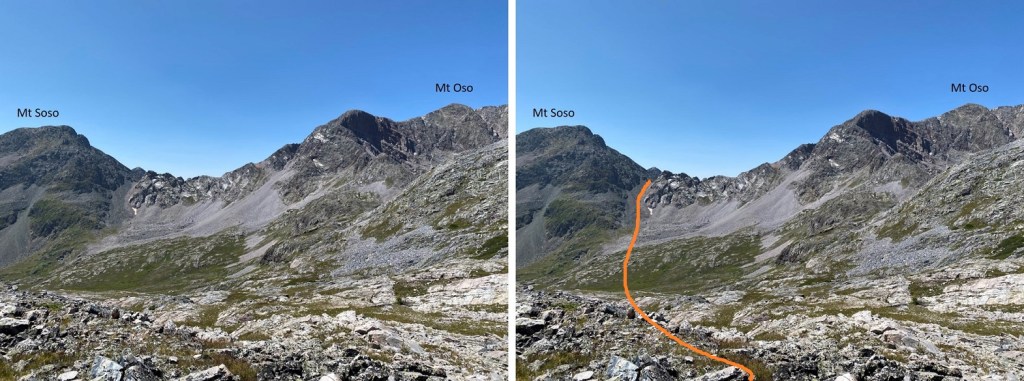
Gained 2503’ over 6.4 miles (to pass over Rock Lake)
Lost 500’ over .5 miles (From pass across basin)
Gained 1150’ over 1 mile (from basin to Oso/Soso saddle/to Oso Summit)
Woot! Summit!
Lost 1150’ over 1 mile (back to basin)
Gained 500’ over .5 miles (back to saddle)
Made it back to Rock Lake (losing about 600’ more)
Ok, so, let’s start from the beginning: From my parking space at 11235’, it was an easy hike to the trailhead, passing through Beartown. There were two other 4WD vehicles parked here, a 4Runner and a Tacoma like mine, unmodified, so you know it’s doable (choose wisely).
Once at the trailhead (813) I followed the Vallecito Trail up to Hunchback Pass
And then I headed south through the basin, following the trail down for 5 miles as it lost 2350’ in elevation
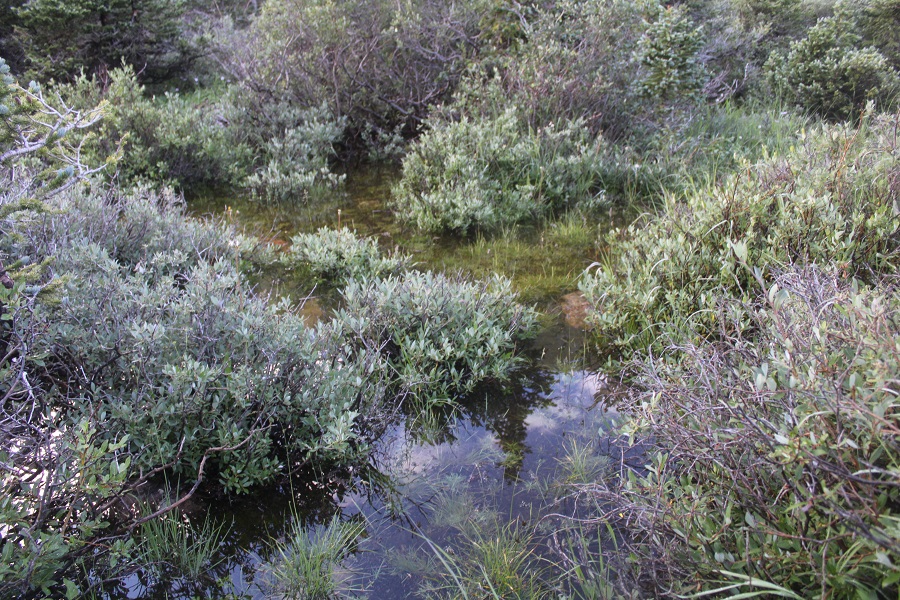
There were willows here, and I was glad to have on my rain pants. There were a few stream crossings, all easily crossable.
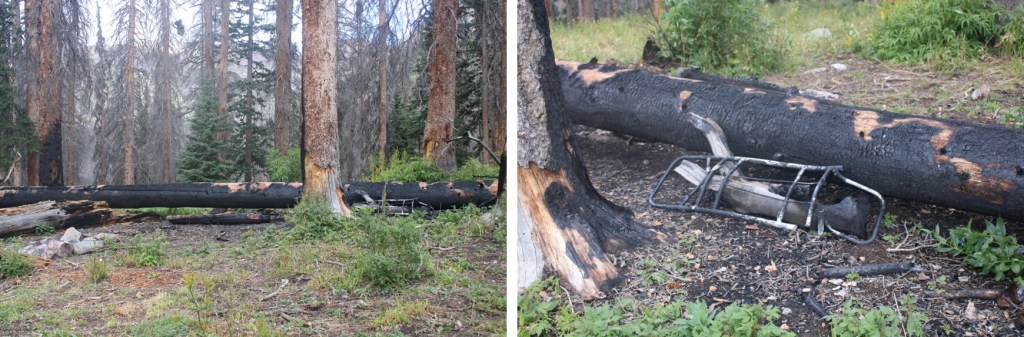
I saw evidence of someone’s fire getting out of control: looks like they lost their pack in the process. I wonder how they put it out? In case you’re wondering, yes, the ground was cold and the fire was out (I’m sure the 15 hours of rain last night had helped).
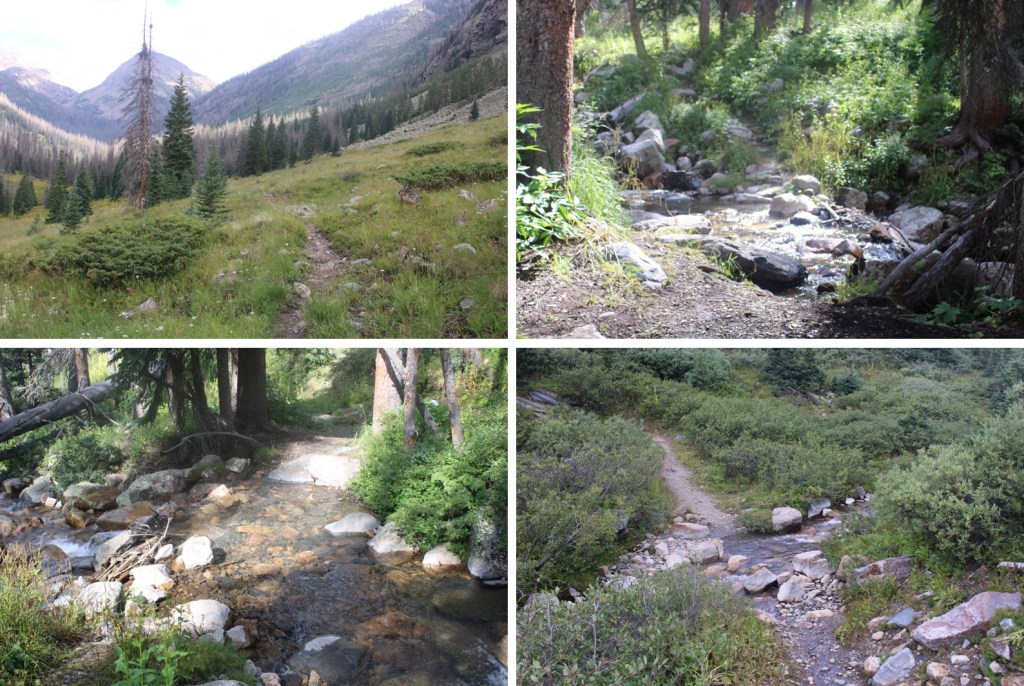
After hiking for a total of 7.8 miles (from where I parked) I made it to the Rock Creek Junction, and followed that trail southeast for another 5 miles up to Rock Lake. This trail was also class 1, and easy to follow.
Just before making it to Rock Lake I passed through a basin
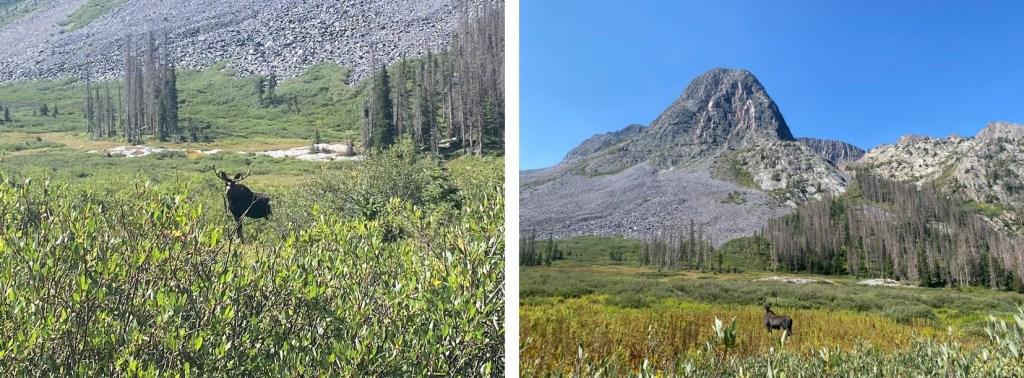
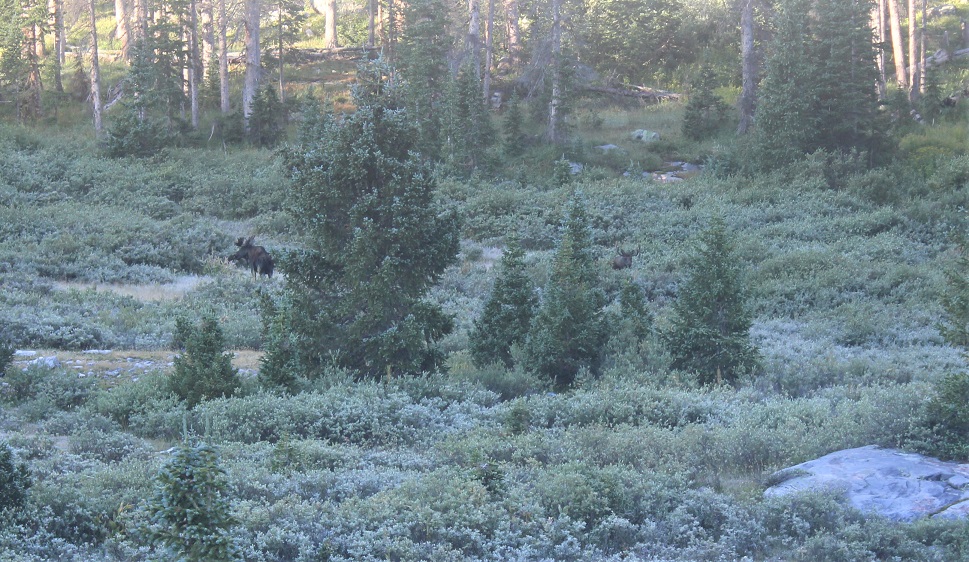
In this basin was a bull moose. I didn’t worry too much about him, because he was hundreds of yards away from me, on the opposite side of the basin. I continued on the trail, but once he noticed me, he raced towards me and stopped a few yards away. He charged me (it was a bluff). I knew not to make eye contact with him, which was what he wanted. I could actually feel him willing me to look at him. I kept my head straight and walked the trail with a purpose, ignoring him. He continued snorting and pawing at the ground and shifting his head from side to side. Then he paralleled me for about 50 yards, walking about 5 yards to the west of me. When he was done, he trotted away and took in a view of the mountains.
As he trotted away I breathed a sigh of relief, and continued on the trail, exiting the basin and making my way to Rock Lake.
I arrived at the lake at 11am and decided to set up my campsite for the night. I didn’t see anyone else here.
It was still early in the day, so after a quick snack I left my heavier gear and just brought the essentials: I planned to summit Mt Oso today. To do that, I skirted Rock Lake to the east and ascended the rocks
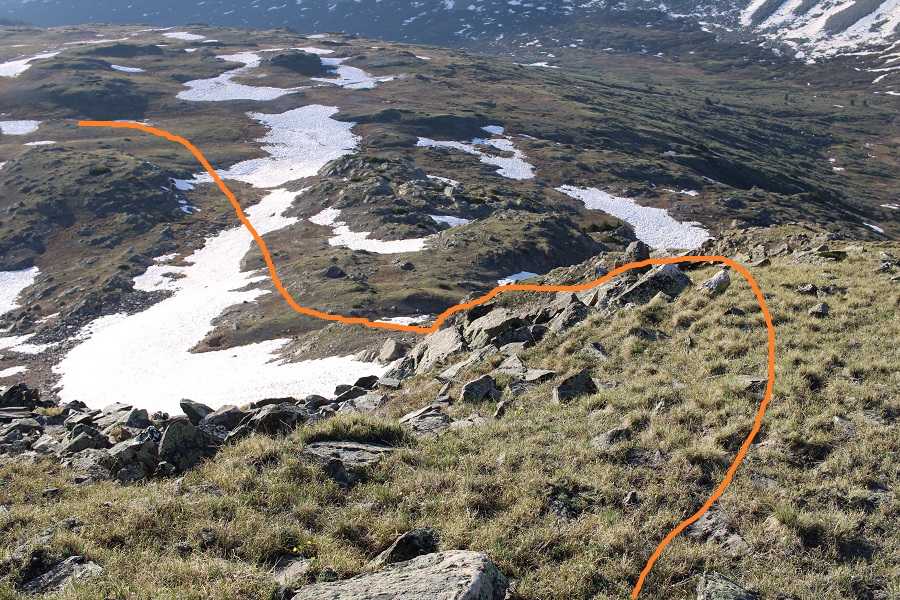
As I made it to the rocky area, I came across a cairned trail, and followed that trail southwest. Note, I took the solid line up, the dotted line down. The dotted line was easier, but both ‘went’. You can’t tell from below, but there’s a grassy area by the dotted line that helped me avoid the willows (pictures on my way down).
Here’s the cairned route, with the ‘exit cairns’ circled in red
Here’s where I left the trail. If you continue following the cairns, you’ll go down to Half Moon Lake. I was headed towards Mt Oso, so I left the cairns and continued heading up (west).
Time for more elevation loss, and gain. I was headed for the Mt Soso/Mt Oso saddle. This required me to lose 500’ through this basin, and then ascend the gully.
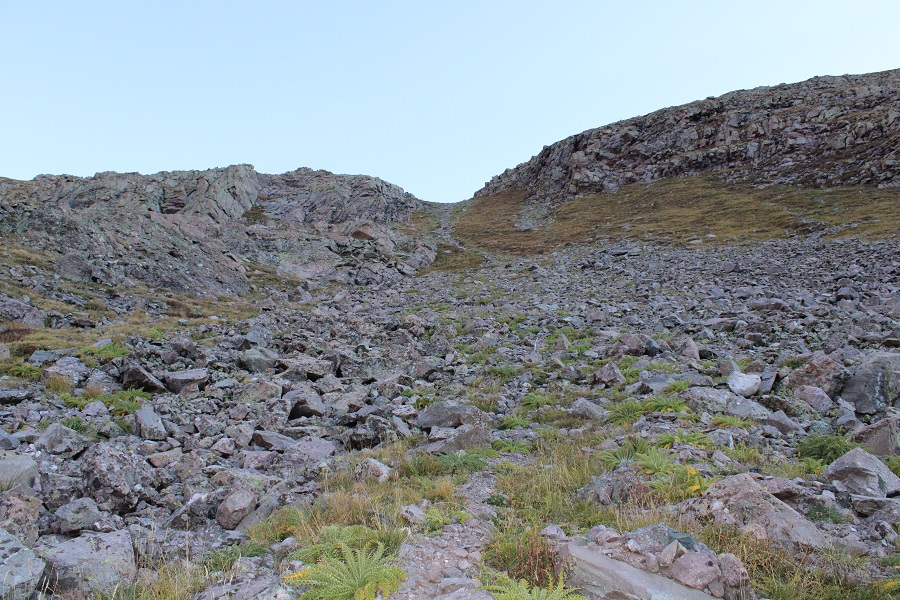
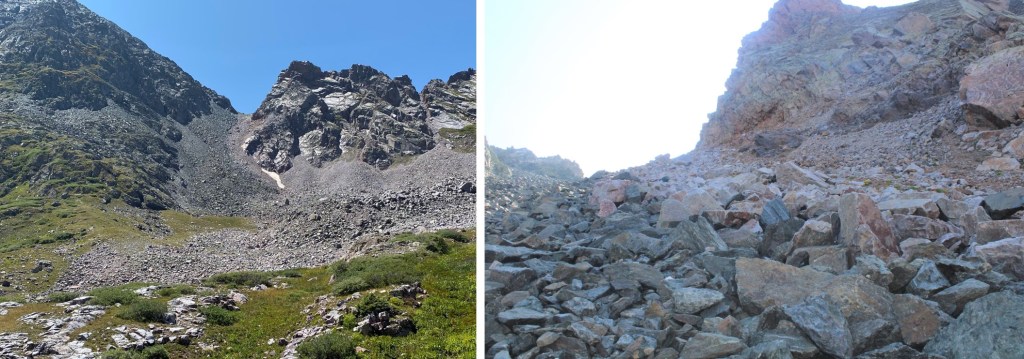
The basin was easy to cross. There were small streams and some willows to navigate, but the route was obvious (and choose your own adventure: just keep heading towards the gully/saddle). The gully was a mix of large, loose boulders, smaller loose rocks, and scree.
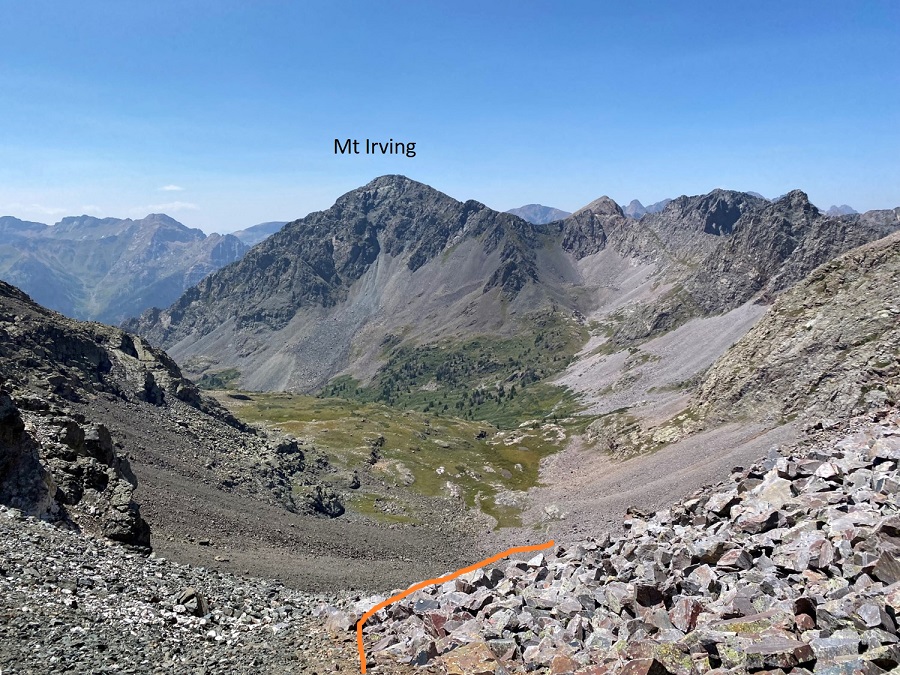
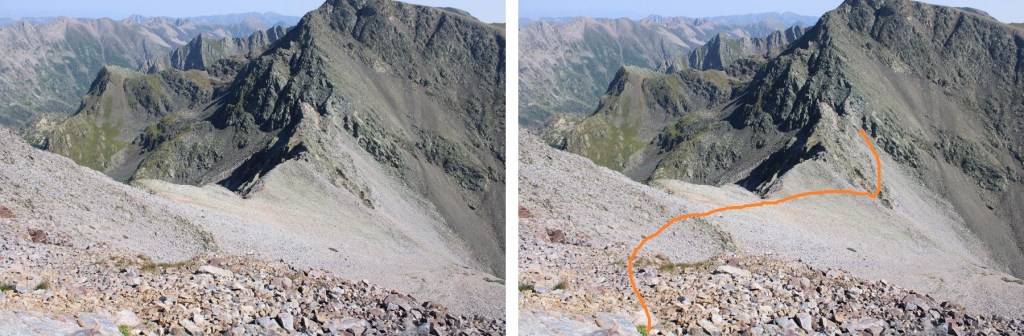
Once at the top of the gully/saddle, it was once again time to lose elevation. Being here also gave me a great view of Mt Irving. I descended the gully to the northwest, staying on the scree at the base of the rock outcroppings, rounding them, and losing 175’ in elevation.
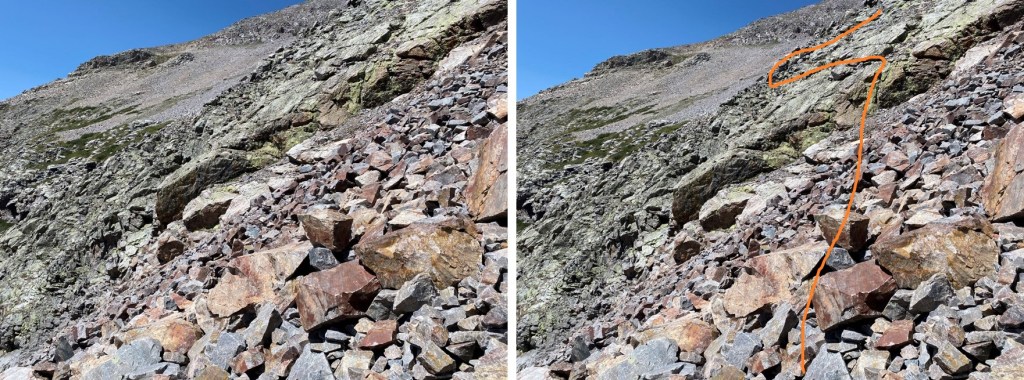
Stay low here. You’re going to want to stay high, but you’re aiming for a green rock band to cross. It’s lower than you’d like it to be (around 12600’)
There’s a little bit of scrambling to get over the rock band. I was able to keep it as easy class 3 by taking this route
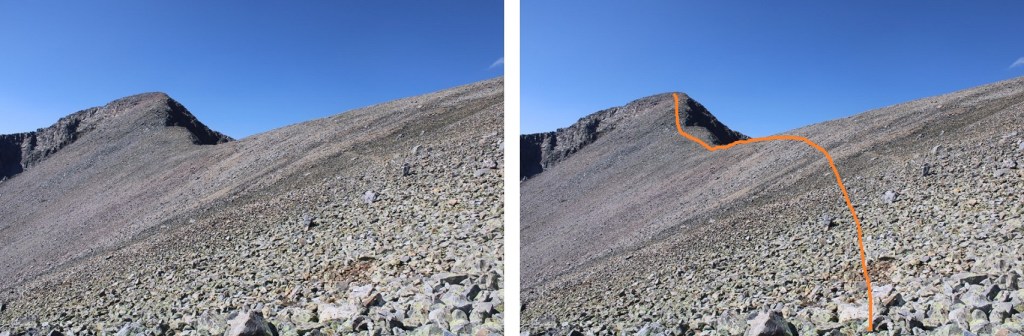
Once across the green rock outcropping, it was time to gain the ridge. I turned and headed north. The rocks here were large and loose, with some scree mixed in.
I went low just before ascending the ridge, following a scree/game trail
And then followed the ridge to the summit
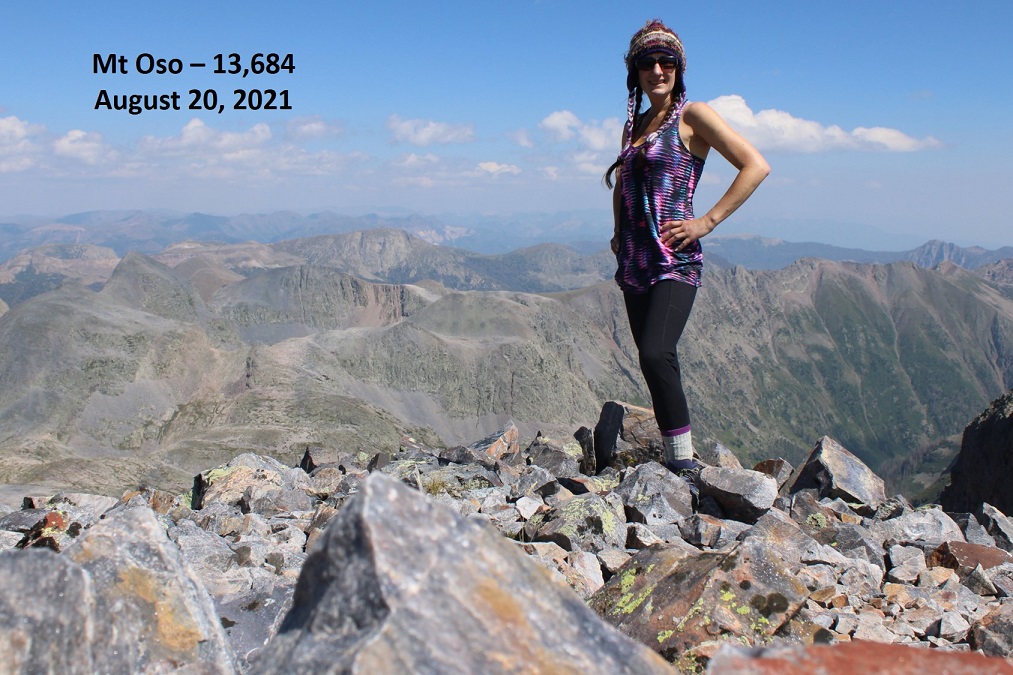
Summit of Mt Oso
Mt Oso:
There was a large, military grade summit register, with a moving dedication inside, as well as some ceramic bowls (I’m sure that’s not what they actually are, ad that they have a purpose?).
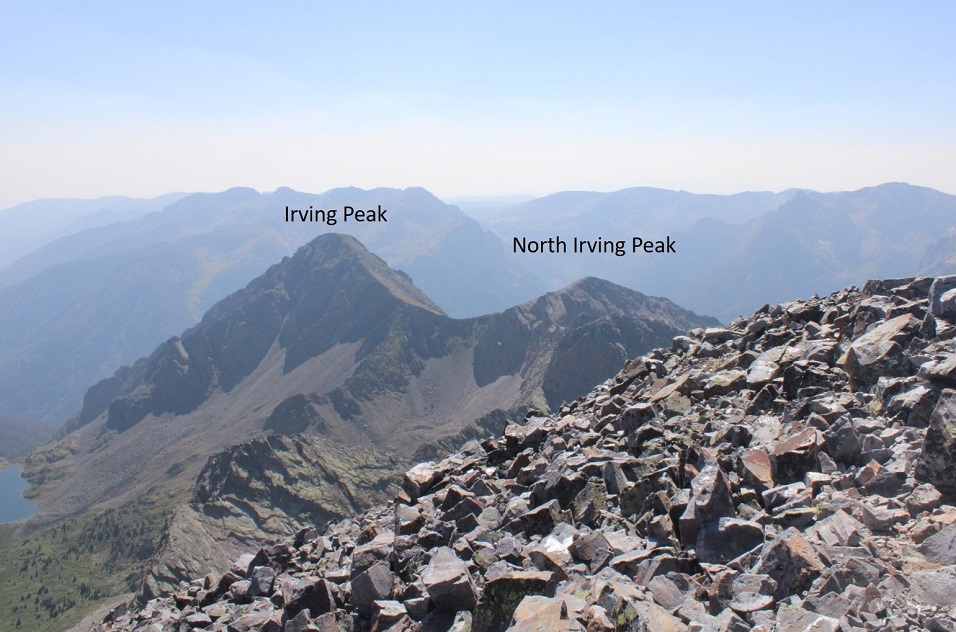
I looked over at Irving and North Irving. I did the math in my head, and there was no way I had time to loose the 1500’ of elevation, then regain 1300’ to summit Irving, plus hike back with all those ups and downs to Rock Lake before sunset. It’s important I’m in my sleeping bag before the sun goes down, which limits my hiking time. Oh well, just one peak for this trip.
So, I turned and headed back towards the Oso/Soso saddle
Back at the saddle I retraced my steps down the gully, back across the basin, and up to the next ridge, finding a grassy bank to ascend
The route looks much different heading back, so be sure to study it on the way in. Stay just below this cliff band
And now to head back down to the trail
You know you’re back on trail when you see cairns
Back down to Rock Lake. Here’s an overall view of the route I took down, and check it out: another camper! I walked by his tent, and apologized for doing so, but told him he was camped in the only area without willows…
There are lots of cairns here to guide you back down.
I made it back to my campsite as the wind started picking up. I was glad I’d made the decision to head back. I jotted down some notes, and looked at my tracker: I’d done 18 miles today, with almost 7500’ of elevation. I sat in my tent for a while, glad I’d decided to bring a tent, listening to the wind howl outside. I eventually fell asleep, and woke up to frost inside my tent. Lovely. I quicky broke camp and headed back down into the basin. Everything was covered in a thinl layer of frost.
Oh, did I mention the trails were mucky? It was from all of that rain yesterday. The entire way in, and out, I was walking on water/mud/avoiding puddles, glad I was wearing new hiking boots that were still waterproof.
On my way out of the basin I decided not to take any chances, and wore my helmet. Towards the end of the basin I spotted the moose again. This time he had a friend, and didn’t seem to care I was there. I’ve seen over 20 moose in Colorado while hiking, and this was the first aggressive one I’ve come across. It’s interesting today he had no interest in me, while yesterday he was overly intrigued/agitated I was there.
I followed the Rock Creek Trail back down to the Vallecito Trail
Then took the Vallecito Trail back up to Hunchback Pass
And then back to the trailhead, the road, and my truck
When I made it back to my truck, my tracker told me I’d hiked 33.61 miles with 9833’ of elevation gain.
Now, for the hour and a half drive back to Silverton! Oh, also, side note: If you’re driving these back roads, make sure you know where you’re going! It’s easy to get lost back here. I met a man in a jeep as I was hiking back to my truck who was totally turned around. He wanted to know how much further down the 4WD road to the ‘real’ road. I had to tell him he wasn’t going in the right direction (this road is a dead end) and that Silverton was many, many miles away. An easy way to not get lost out there without cell service is to load your track onto CalTopo, then add a line and trace the roads you wish to take, then use that track your drive.
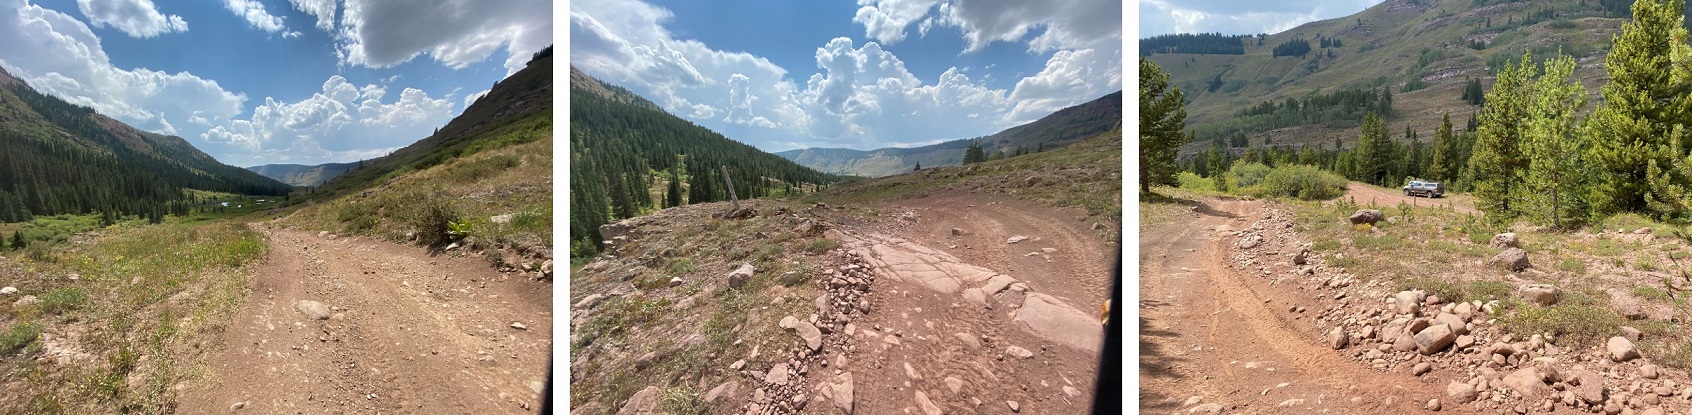
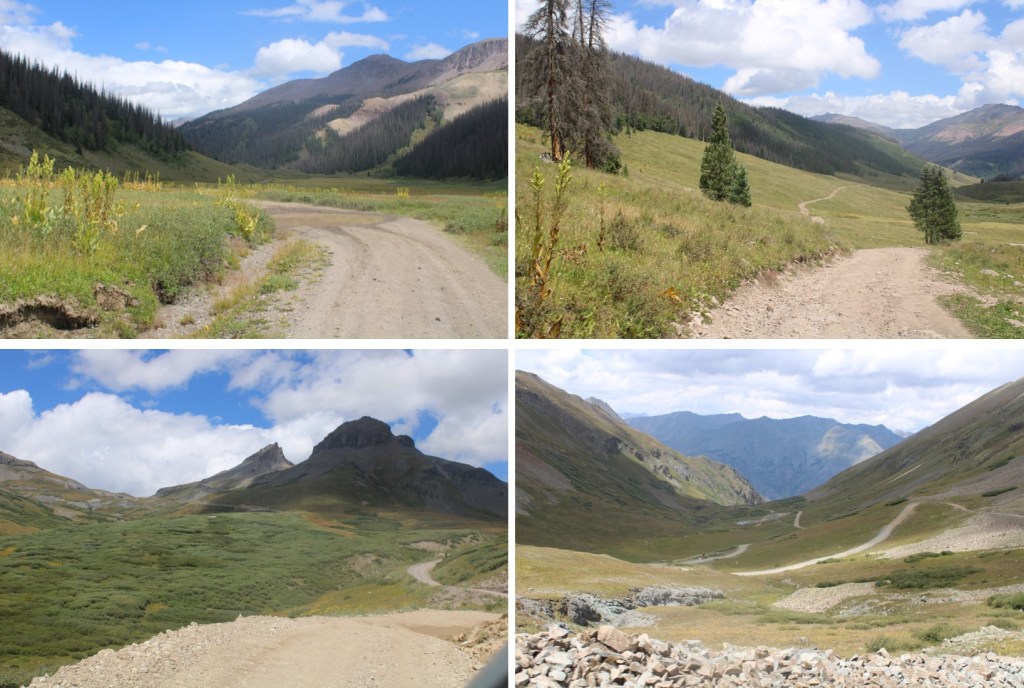
Just for fun, here are some pictures of the road out…
I was here last week and summited PT 13541 via Horn Lakes Trail, and to put it nicely, it was awful! Once the trail ended at the creek crossing (Dry creek, which was flowing fast), I was met with hundreds of feet of 8-foot-tall willows to navigate, standing in about 18 inches of standing water.
There was no way I could recommend that route, so I went about trying to figure out another one. While this route is a bit longer, bonus: no willows in water!!!
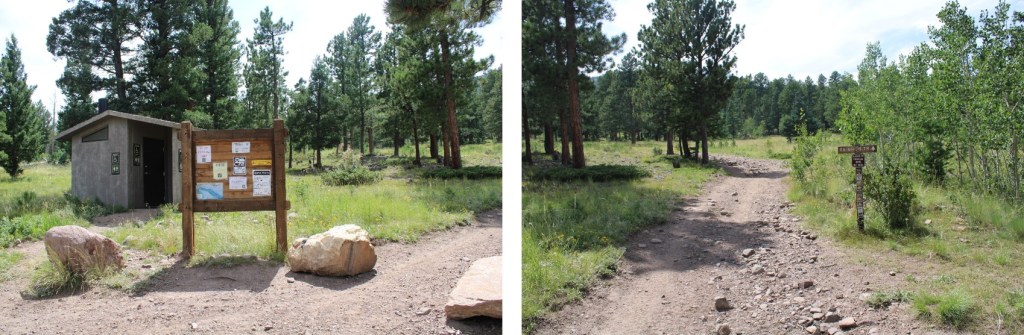
I parked at the Horn Creek Trailhead and was on the trail at 4:30am. The trailhead was full of vehicles (last week I was the only vehicle in the lot). The trail starts at the west end of the parking area, which holds about 20 vehicles. There are information maps here and a clean restroom. Dispersed camping is allowed for 14 days, and there are horse corrals.
I followed the Rainbow Trail for just under half a mile to this junction, then turned left and continued following Rainbow Trail / Macey Trail.
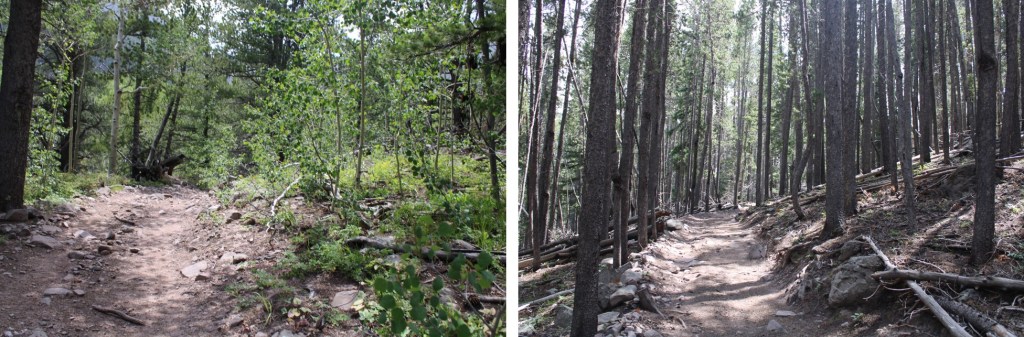
This trail is very well defined: it’s used for OHVs. I followed the trail as it hugged the side of the mountain, heading south
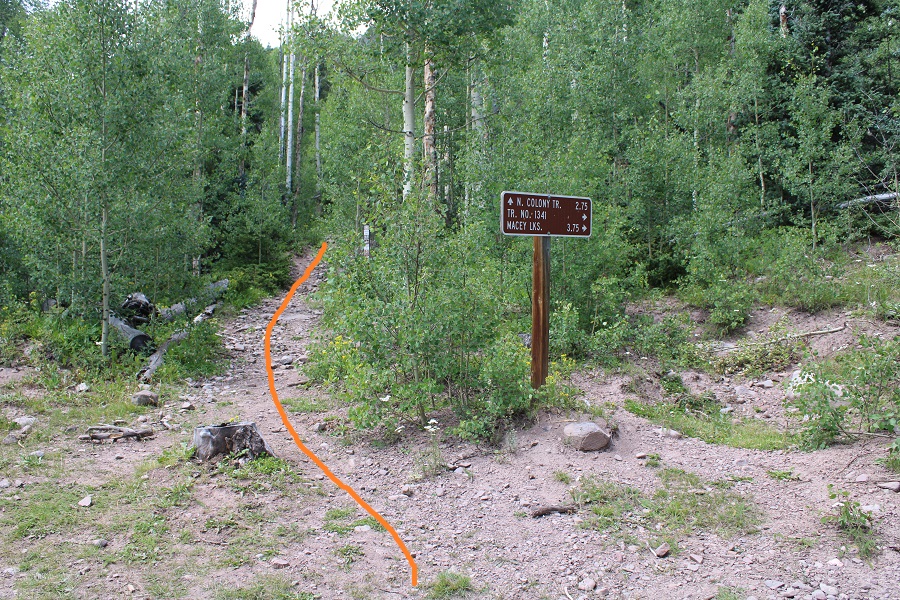
After hiking for a total of 3.3 miles I came to another junction, and took the Macey Trail west. This trail is a little more narrow, but still class 1.
There’s a trail register a ways after the junction. I signed it and continued on.
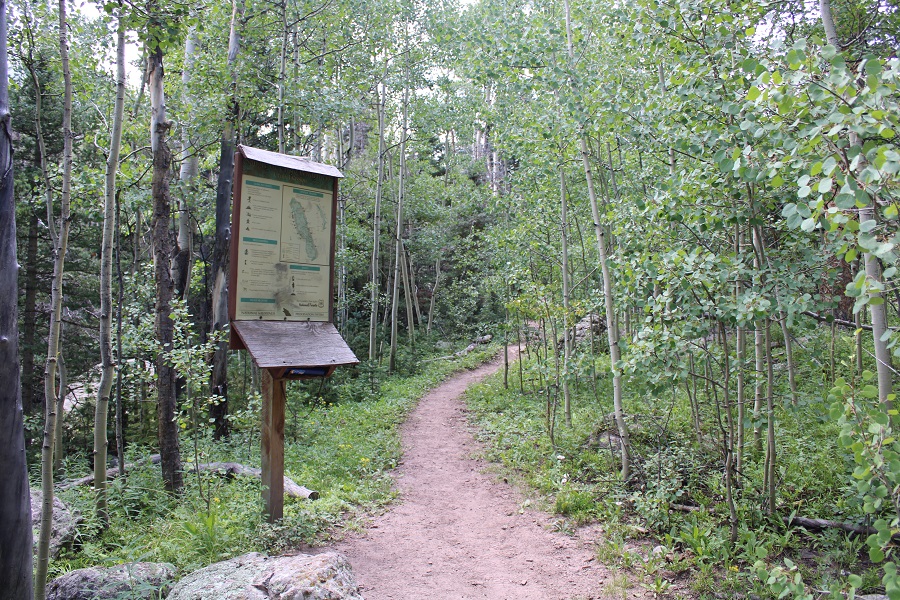
Just after Macey Falls, and just before making it to the first Macey Lake, I left the trail and headed northwest. I’d hiked 6.5 miles total to this point. I’m guessing this is a camping area, because I left the trail at this marker (seen on the right side of the trail).
If you see this sign, you’ve gone a couple of yards too far.
I bushwhacked northeast to treeline, about half a mile. This wasn’t too bad: there were downed trees, but not too many. I was mostly pushing my way through thigh-high flowers and grasses. I started out by skirting a small pond to the right.
And then hiking up through grasses, flowers, and trees. The elevation gain was moderate and I never came across a large obstacle (cliff, water, drainage, huge boulder, etc.)
After about half a mile I was at treeline, and could clearly see the ridge
I made my way to the ridge, staying mostly on tundra and rocks. The willows are small and completely avoidable.
Once on the ridge I turned left, and followed it southwest
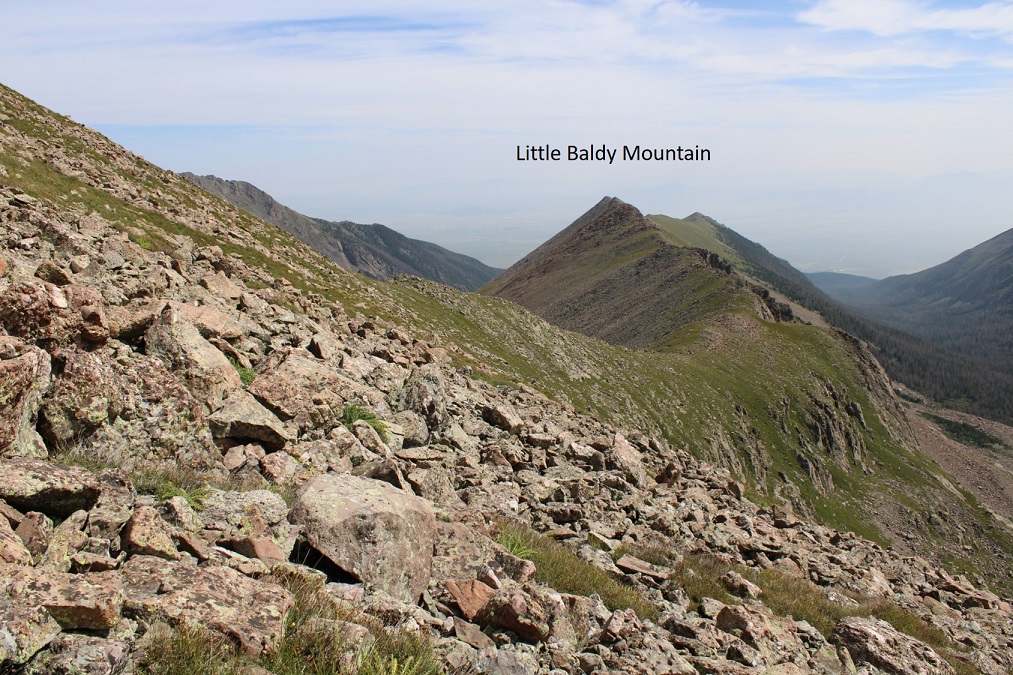
The ridge has a lot of ups and downs. I crossed over two small bumps (kind of like ears), then lost 150’ of elevation and gained it again to the true summit of Little Baldy Mountain. This is the best way to describe where Little Baldy Mountain is (an unranked 12er). There is a cairn on the first hump, but it’s the second cairn you’re looking for (if it really even matters? It is unranked. Just follow the ridge and you’ll hit it).
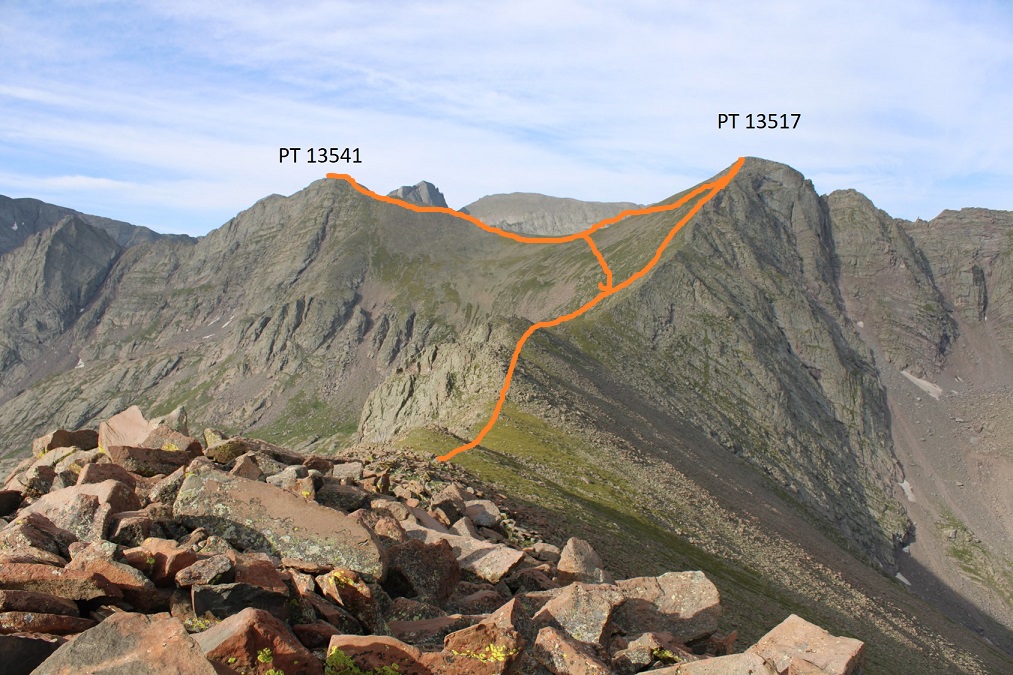
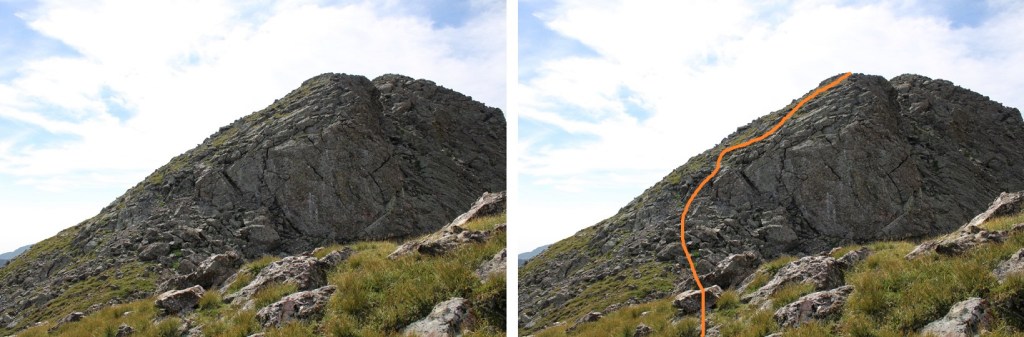
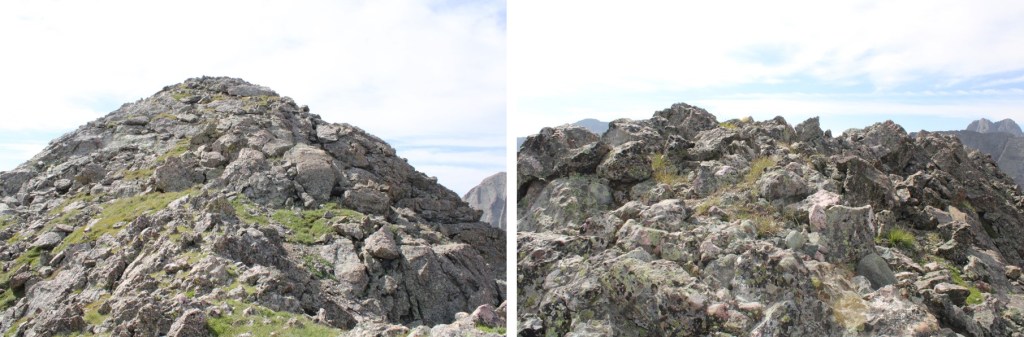
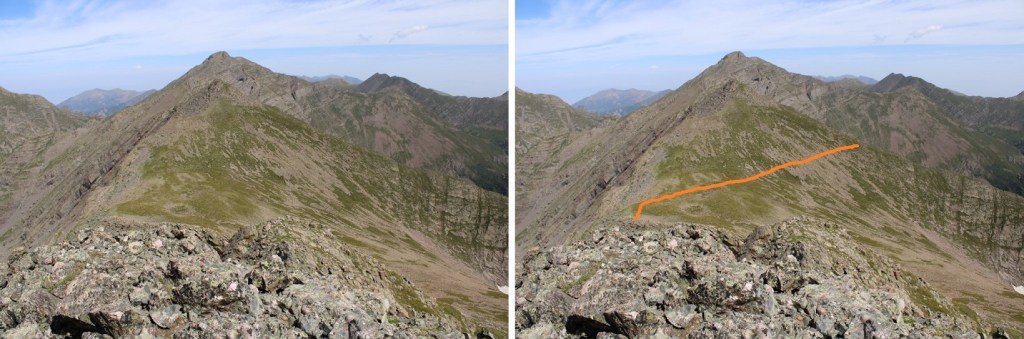
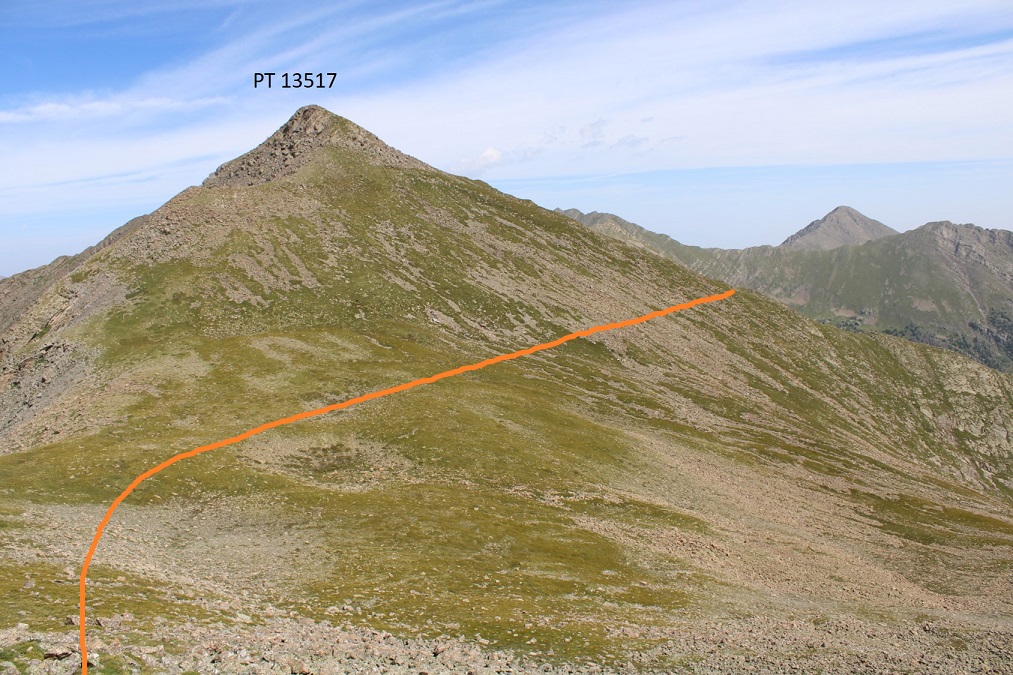
The ridge is a bit rocky, with some tundra thrown in, and all class 2. Here you can see the route to PT 13517 and 13541
Here’s an overview of the route I took. I summited PT 13517 first, then took the ridge to PT 13541, and then went saddle to saddle.
Here are some step by step photos. First, the ridge to PT 13517
The ridge was mostly tundra, but became rocky at the end. All of the rock above treeline feels like Crestone rock: conglomerate with lots of hand holds. The only difference is these are rocks, and not slabs. This stays class 2
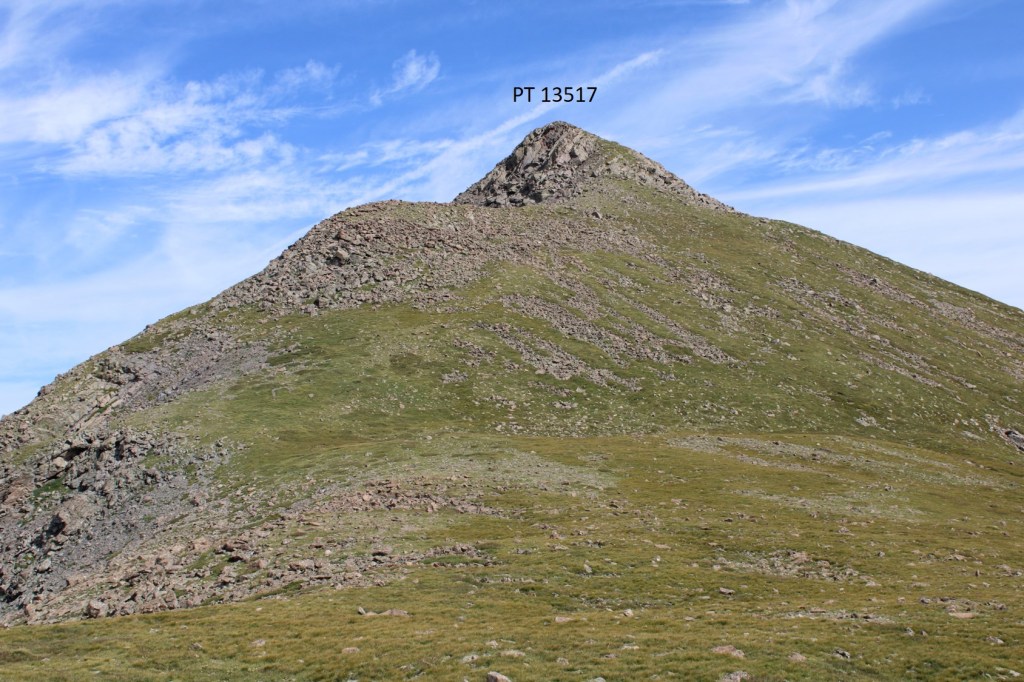
I summited PT 13517 (unranked) at 9:15am
PT 13517:
Here’s looking back at the ridge and the route in
Here’s looking back at the Horn Creek approach: Look at all that water and willows!!!
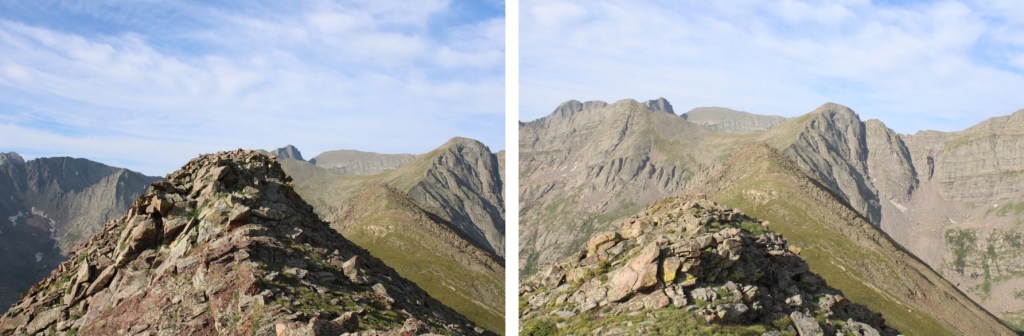
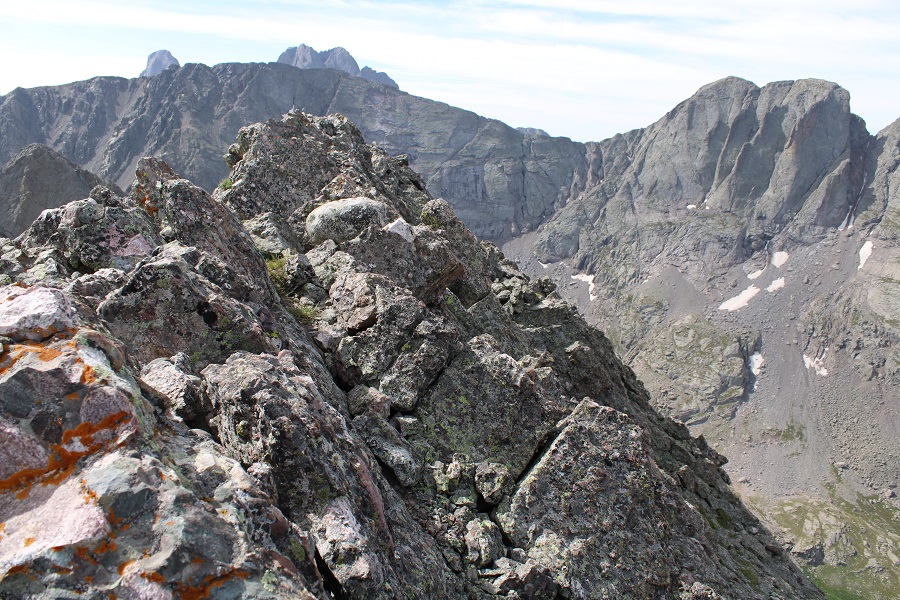
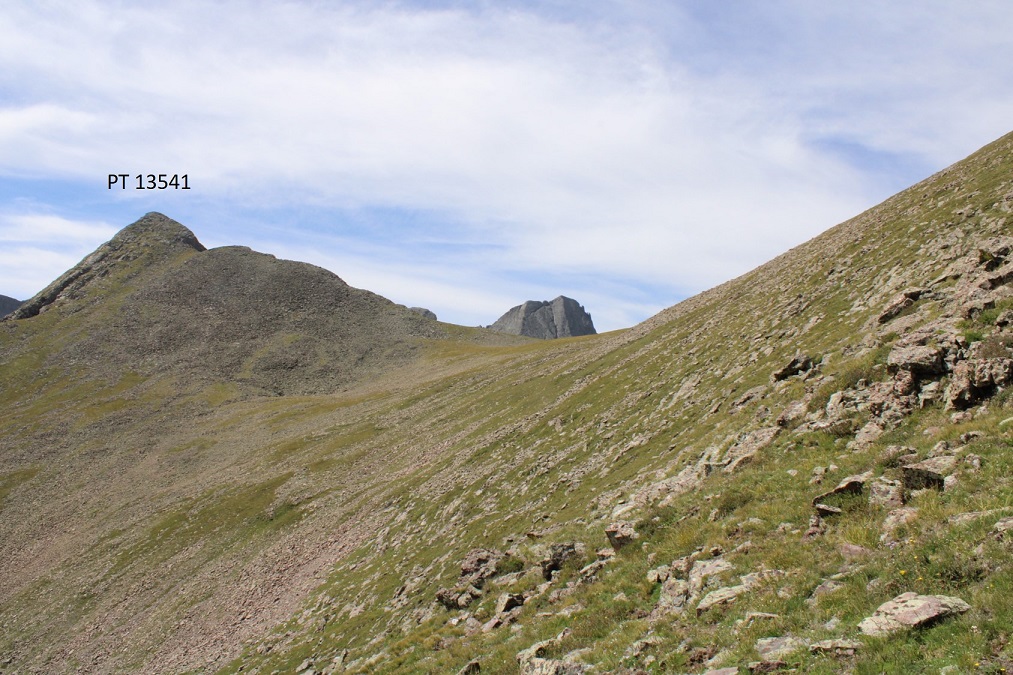
Now to head over to the ranked peak of the day: PT 13541. Check out those Crestones!
The trek over to 13541 was straightforward, and a simple ridge hike until the last bit or so (circled in red)
I hiked down to the saddle and enjoyed the views for a bit. Doesn’t Kit Carson Peak look like a cooked (or uncooked) turkey from this angle?
From the saddle, here’s looking up at 13517
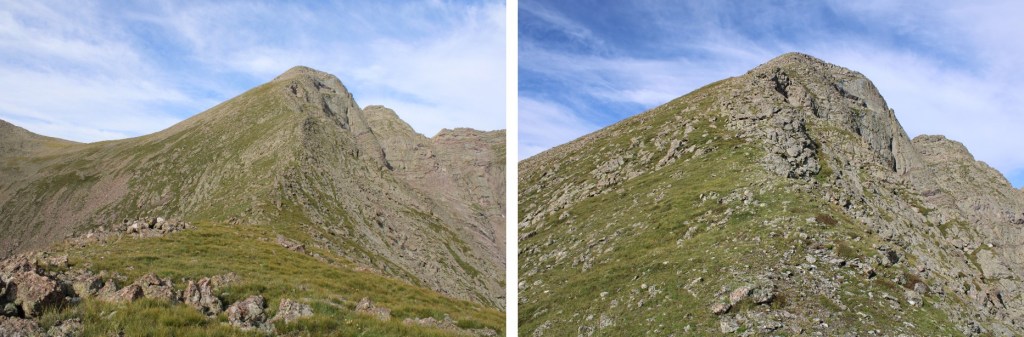
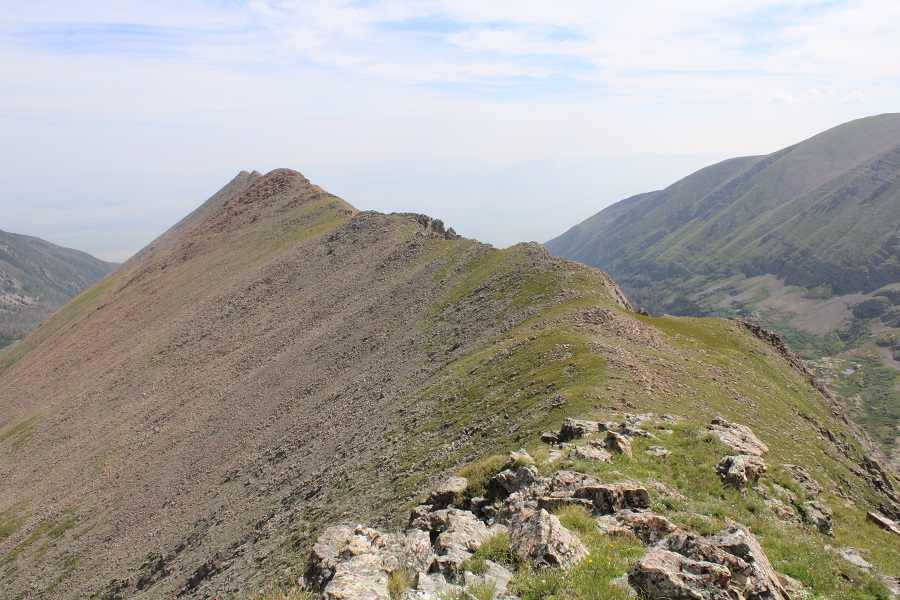
Most of this ridge to PT 13541 is just a tundra hike, until the end, where it becomes rocky and there are some steep drop offs to avoid. Here’s an overall view of the route: A little more than half way up the ridge I left the ridge and skirted the mountain to the left to head towards the summit
The ridge gets a little rocky, but this stays class 2
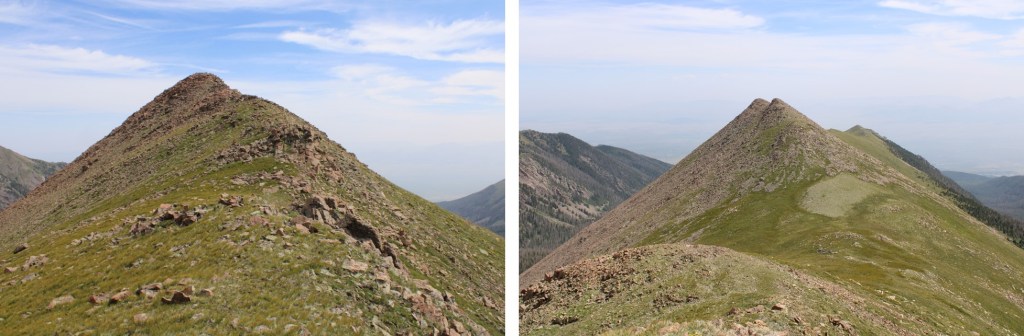
Just when you think you’re at the summit…
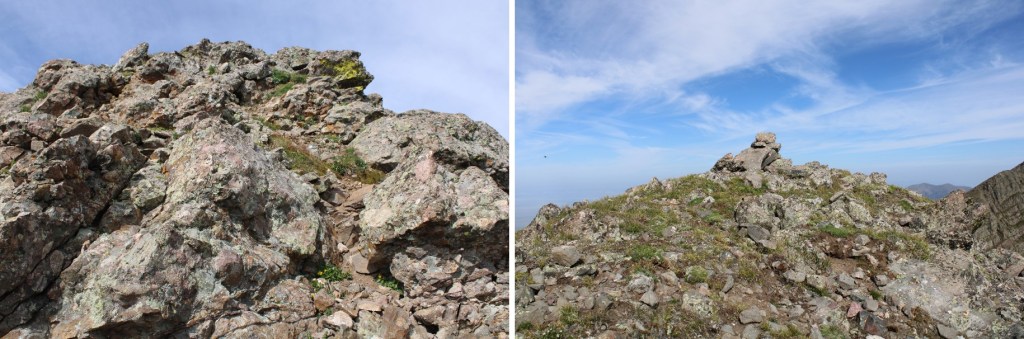
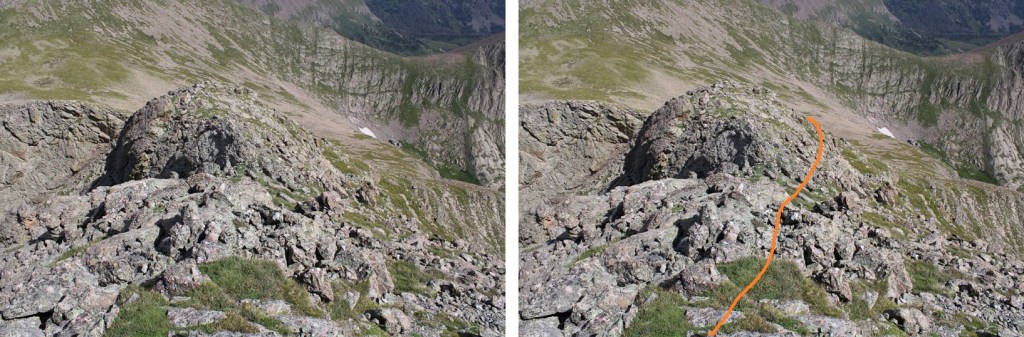
You’re close, but not there yet. I had my helmet with me but decided it wasn’t really necessary. I dropped my gear and headed towards the true summit. This was easy class 3, with plenty of hand/footholds.
You can stay on top of the ridge the entire time, or dip down to the right. The summit is in the middle of this short ridge
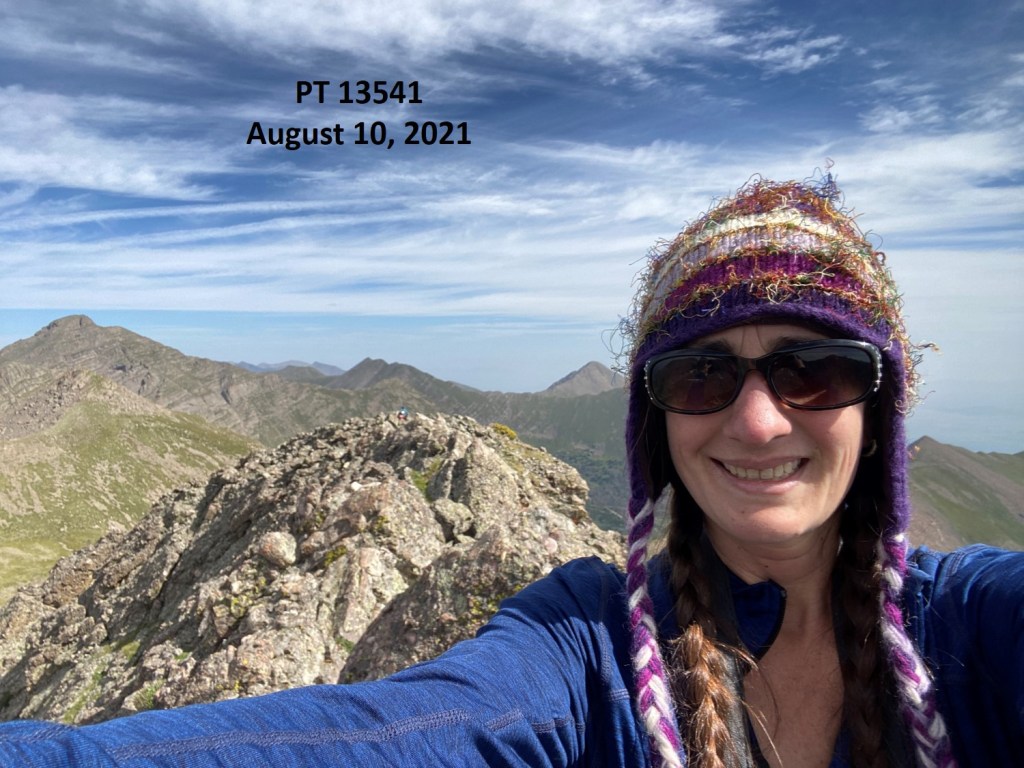
I summited PT 13541 at 9:55am I didn’t feel safe setting up my camera, so I took a selfie
PT 13541:
I left a summit register, and then went back to get my gear.
It was a really nice day, so I enjoyed my time here for a while. I took a ton of fun photos, and did some visual research for another peak I still need to figure out how to climb in the area (next week???). When it was time to head back, I made my way back to the 13517/13541 saddle the way I’d come, then traversed over to the 13517/Little Baldy Mountain saddle. This was all class 2 on tundra and talus
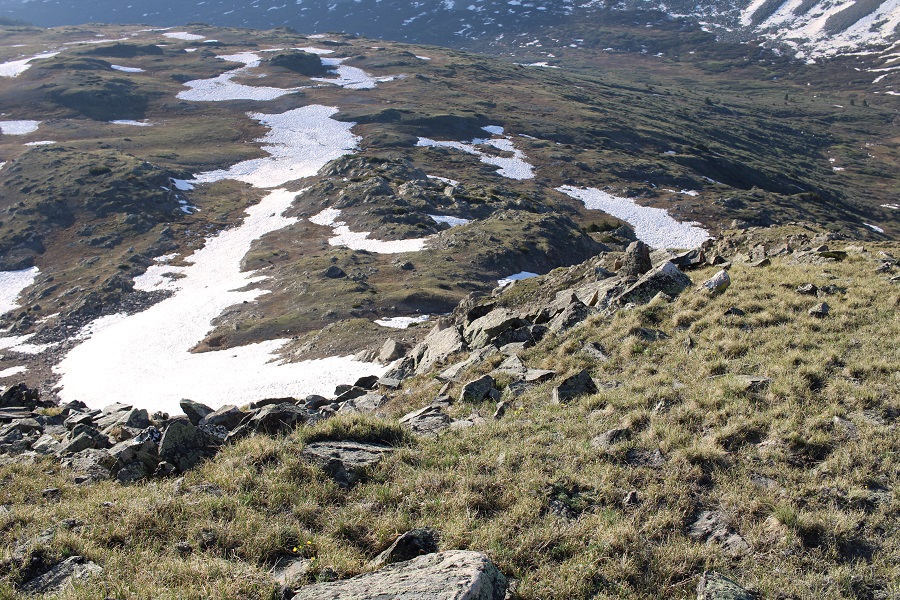
Here are some more visuals:
From the saddle, here’s looking back at PT 13541
Once at the saddle I followed the ridge back up and over Little Baldy Mountain and the two small humps
After the second rocky hump I left the ridge and descended southeast, back towards Macey Lakes
Once in the trees I just kept aiming southeast until I made it back to the trail (Macey Trail 1341)
Now on the trail, I followed it back to the Rainbow Trail
And then followed the Rainbow Trail back to the trailhead
I made it back to my truck at 2:30pm, making this a 19.45 mile hike with 5950’ of elevation gain in 10 hours.
The road was nicely plowed from the Crane Park area to the trailhead, so I continued driving up the road and parked at the beginning of Trail 100.
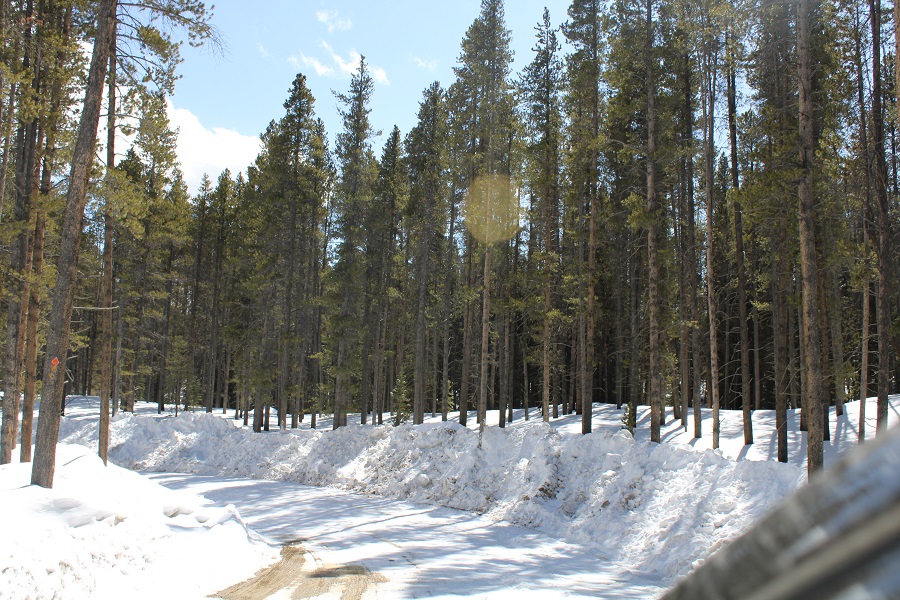
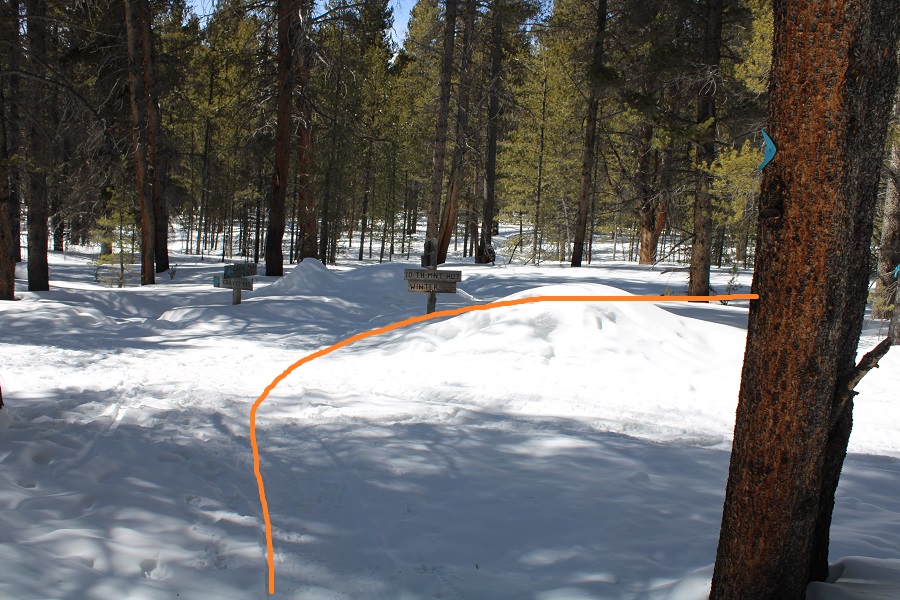
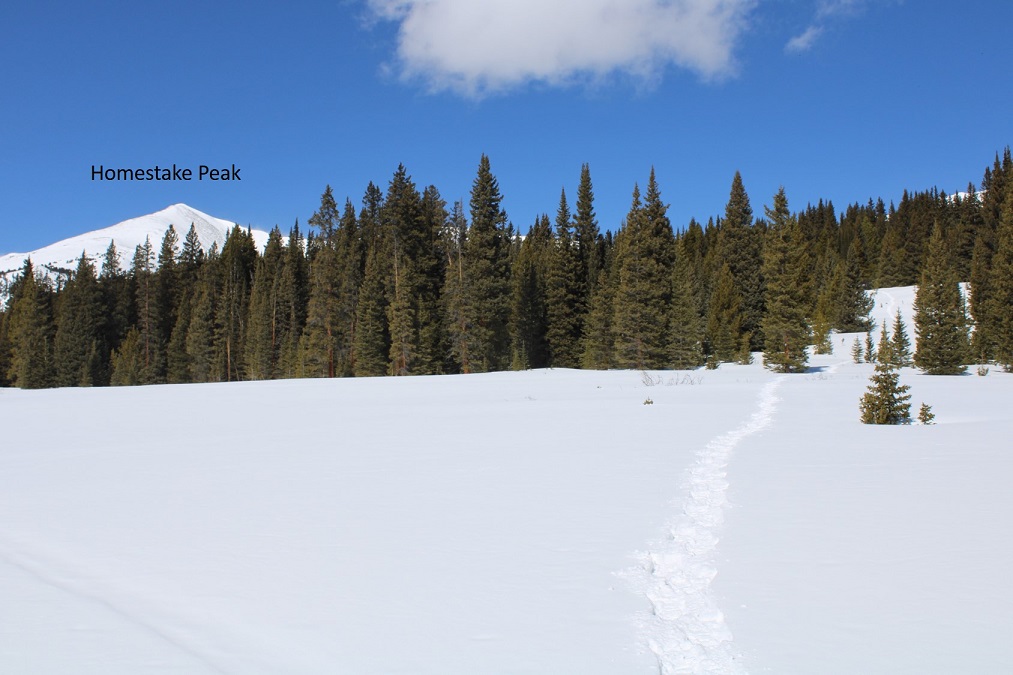
I was the only vehicle in the lot, and it was supposed to snow this afternoon, so I didn’t anticipate a lot of people on the trail today. I put on my snowshoes and started out. The trail starts by heading northeast for a third of a mile before turning onto the trail that leads you to the 10th Mountain Division Hut. I took the winter route.
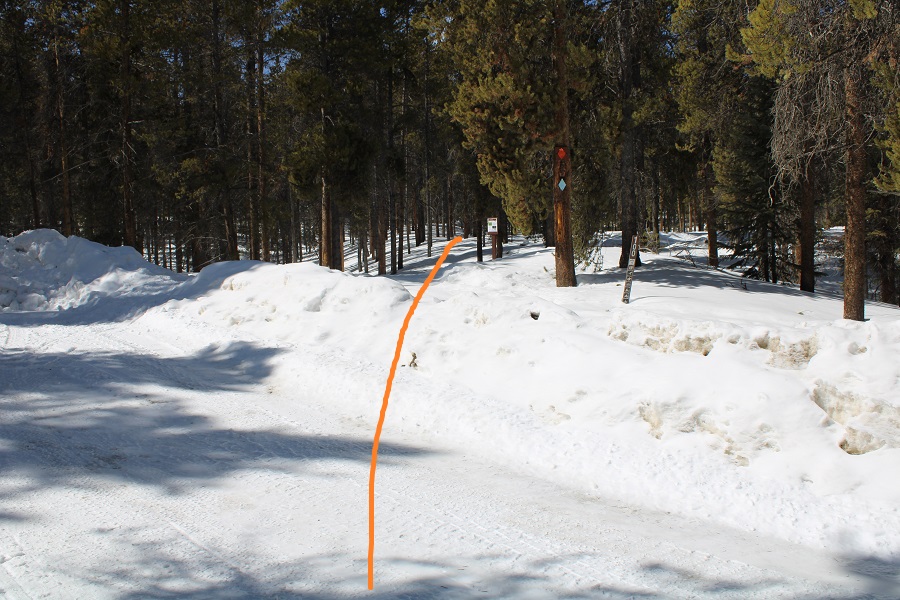
I followed the trail for about a mile to a junction, losing elevation as I went.
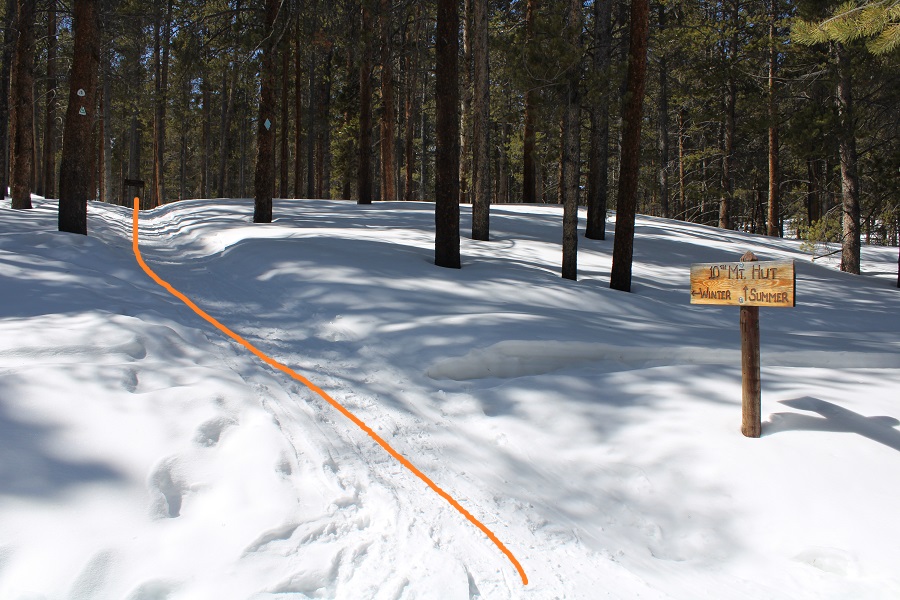
When I made it to this junction it was dark and I misread the sign. I ended up continuing straight and it wasn’t until I crossed the second bridge I thought to myself “I don’t remember crossing any bridges when I did this trail last time” and realized I should have turned right at the junction, instead of continuing to follow the Colorado Trail. This mistake cost me a mile of hiking. So, long story short, turn right here and follow the 10th Mountain Division hut signs, and if you come to any bridge, you’ve gone too far.
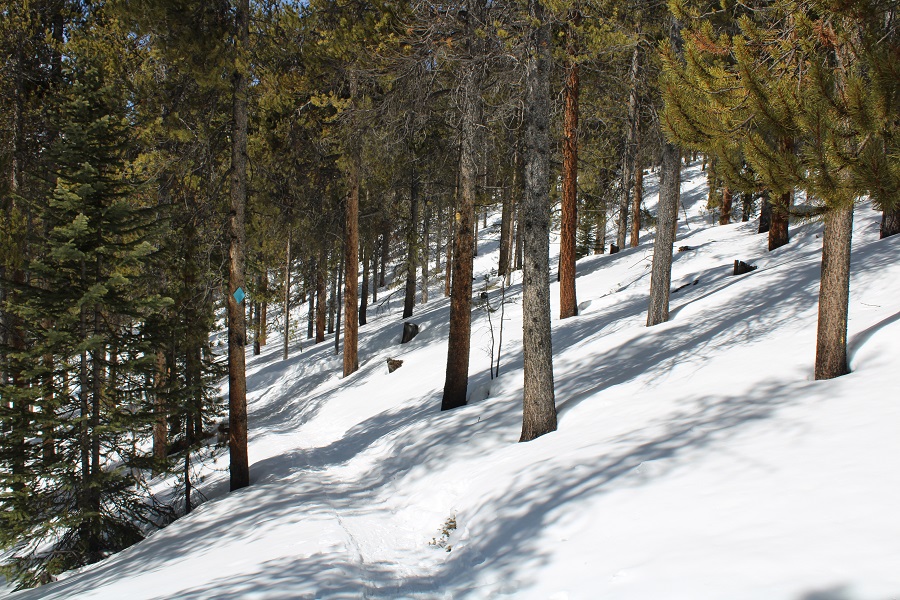
This put me on a 4WD road that took me to a marshy area, covered in fox prints. Here the snowmobile tracks ended and I’d be trenching the rest of the hike.
From the marshy area I followed the blue arrows to the 10th Mountain Division hut. The arrows are conveniently placed along the trail every 20 yards or so. When the trail is covered in snow and just when you aren’t sure which way to go, you find another blue marker. These were extremely helpful, as I was trenching at this point (and for the rest of the hike). There were tons of rabbit tracks in the area on the recent snow.
Just as I made it to the 10th Mountain Division Hut I came across what looked to be a recent ski trench. Even though it was earlier than I’d planned on heading west I turned left and followed the trench (I was getting tired of trenching). This trench led me to a bunch of skis standing in the snow.
I didn’t see anyone with the skis, and I knew I’d hiked too far following the trench (hopeful it turned and headed to Homestake’s ridge, which it didn’t), so I backtracked and found a low rib to hike up and follow northwest to the upper basin.
At this point I was frustrated: I was in a bad mental attitude I had to kick myself out of. Due to a recent conditions report I expected there to be a trench to treeline, and there wasn’t. I was having trouble finding any semblance of a trail, and the trenching was getting tiresome. I kept trudging along and backtracking, telling myself I’d only stop if the snow became more than I could handle (usually for me this means postholing past my waist). Also, this was my second attempt at this peak, as the last time I was here the snow was too soft to trench. I didn’t want to come back a third time if I could help it. I knew I was off the typical trail, but I also knew I was headed in the right direction, and I had the added benefit of being able to follow my tracks on my way out.
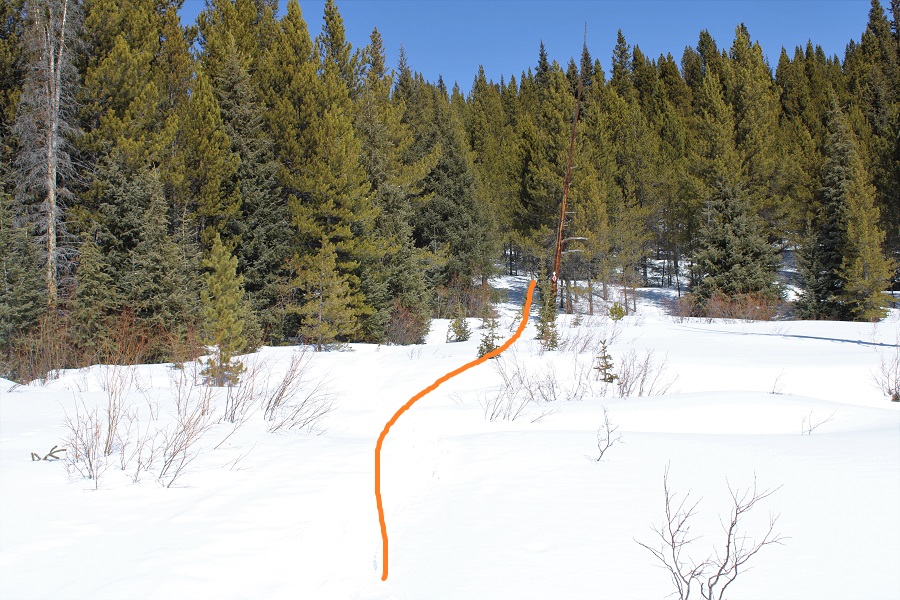
Once in the upper basin I turned left and followed a rib to the ridge.
Here’s the access point to the ridge at treeline
And a picture of the beginning of the ridge
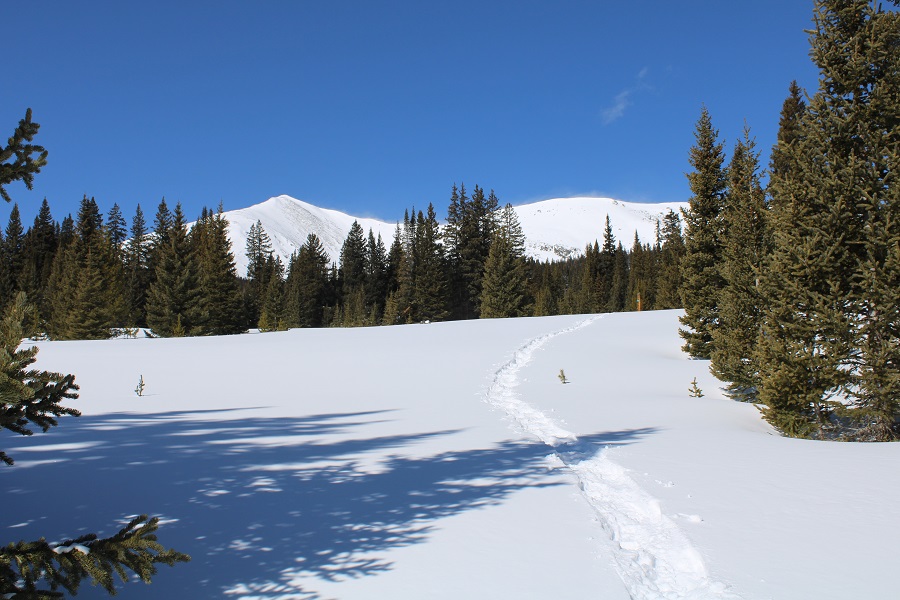
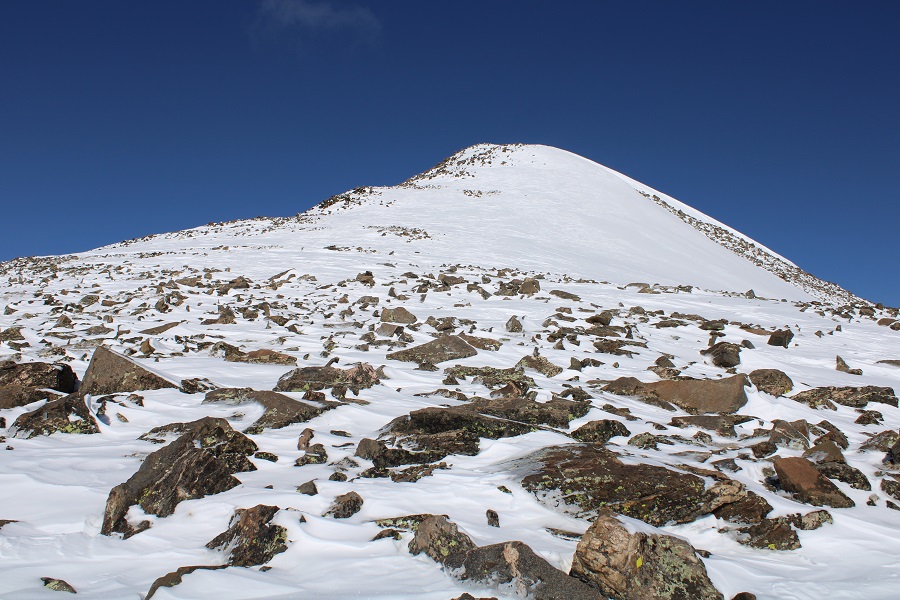
Once on the ridge I turned right and followed it northwest to the summit. This looks like a great place to do some skiing! Here’s the overall route
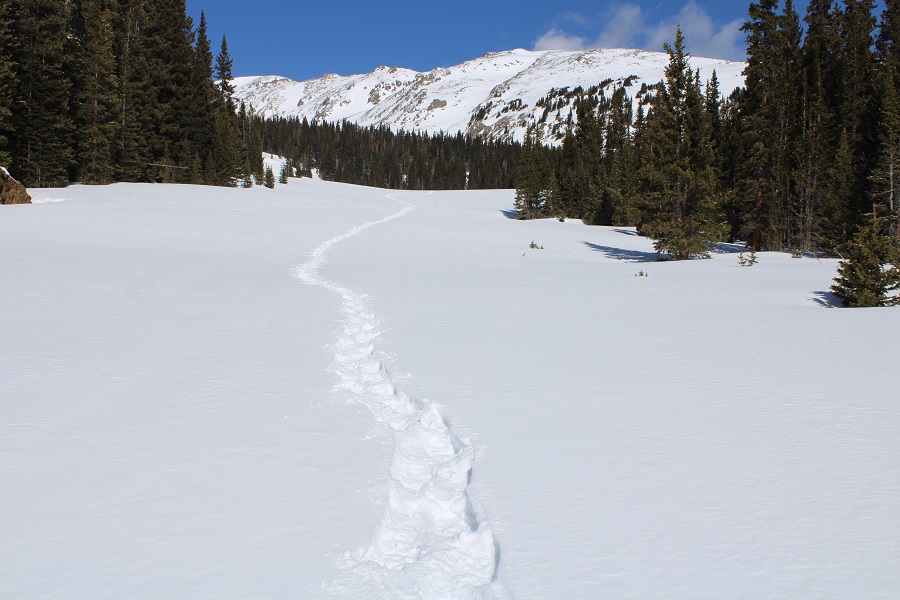
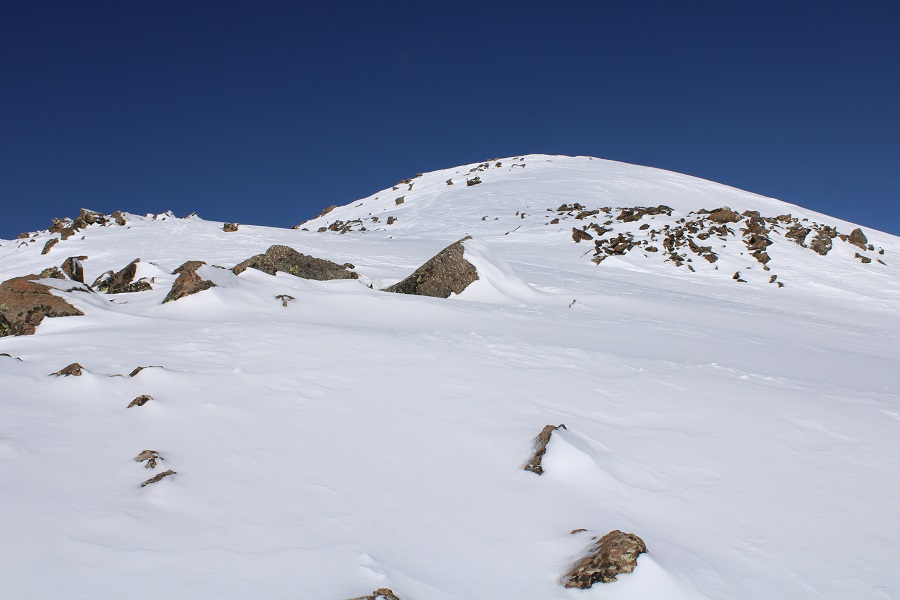
This ridge was about a mile of steady elevation gain. The snow was firm but the wind was picking up. Here are some pictures of the hike to the summit
Towards the top everything was windblown and the snow became sugary. I was slipping and sliding a bit, but other than my snowshoes, no other equipment was needed.
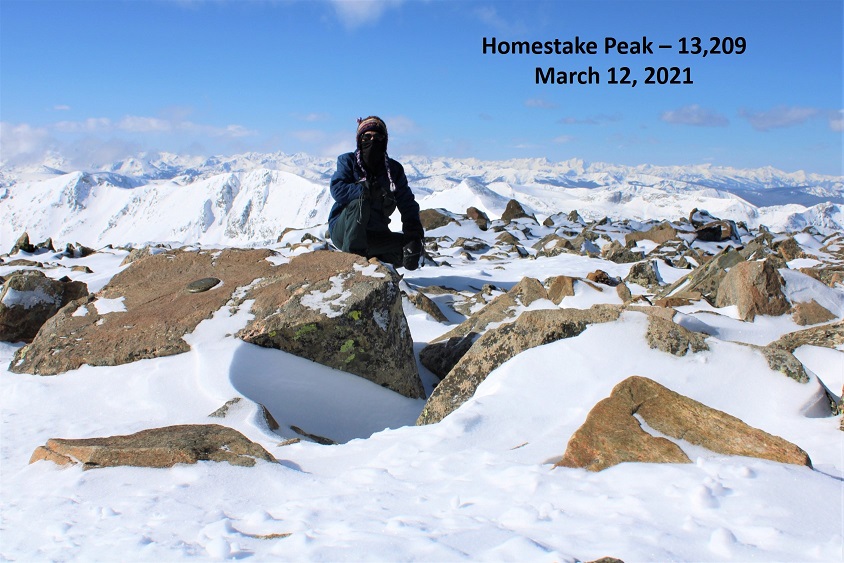
I summited Homestake Peak at 9am (there’s a benchmark at the summit)
Homestake Peak:
The wind kept picking up, bringing in the Albuquerque Low we’re expecting tonight and through the weekend. I was cold, so after leaving a summit register I hurried back down the ridge.
Check out the wind
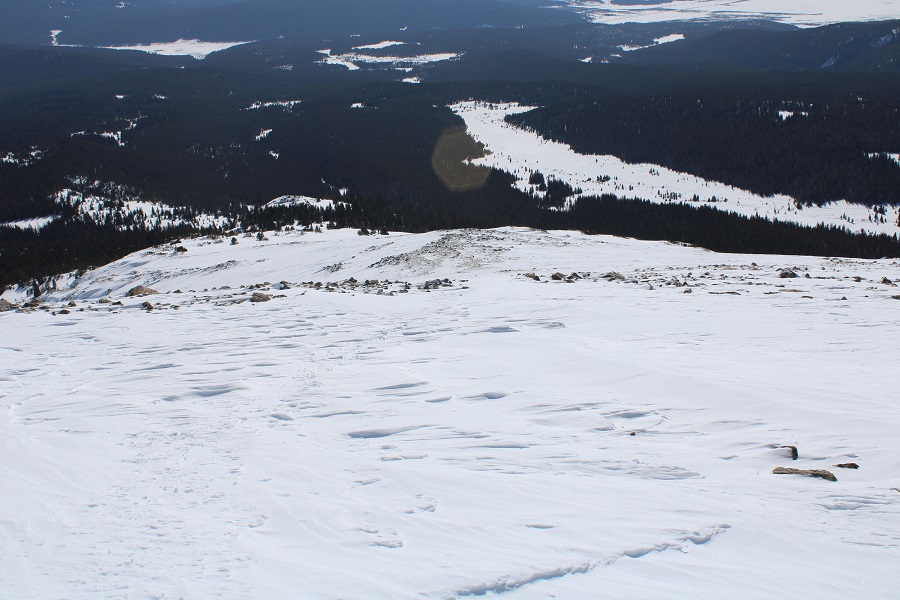
Here’s a look down the access point to the ridge and my trek down.
The wind had blown some of my tracks in, but I was able to still follow them back to the ski trench
I took the ski trench back to the hut, and then followed my tracks back to the marshy area
Once back in the marsh, just before the 4WD road I could smell a fox (they have a strong scent too, similar to a skunks, just more mild). I looked around and saw one prancing about 100 feet away. She was a magnificent red fox, quite large and all fluffed up due to the cold, making her look even bigger. She stopped only briefly to glance my way, and then carried on. I watched as she pranced through the willows and disappeared into the trees. No pictures: I just decided to enjoy the experience, as I knew pictures wouldn’t turn out anyway from this distance. All those tracks must have been hers.
At the end of the marshy area I came to the snowmobile tracks that led me back to the junction to the trailhead
I turned left at the trail indicating Crane Park and followed the trail to the trailhead. This was actually the most difficult part of the hike, as my thighs were tired from trenching earlier, and at this point every step I took included 5 pounds of snow sticking to the bottom of each snowshoe. I trudged here slowly, using my trekking pole to knock off excess ice and snow every few feet.
I could hear the wind screaming through the trees. Yep, the storm was coming in. I made it back to the road, and followed it to my truck
I made it back to my truck at 11:45am, making this a 13.33 mile hike with 3363’ of elevation gain in 6 hours, 45 minutes. Note, as you’ll see from my topo map, I made a few wrong turns and did some backtracking. I’d still recommend this overall route however (minus the wrong turns and backtracking).
Peal Pass road is no joke. I drove up late at night (a little after midnight) because I had appointments until 7:30pm, and I was glad I’d decided to drive in so late: there were no other vehicles to pass on this road. Also, it was a Monday night, so I’d missed the weekend traffic. I would have been in trouble if I’d met another vehicle on this road: in the 10+ miles I only saw 2 or 3 possible turn out areas. There are many areas that are shelf road with no visibility of vehicles coming from the other direction. There were potholes several feet deep: more than once I got out to make sure my truck could handle the terrain. The stream crossings were only about a foot deep and easily crossable, but committing since you couldn’t see vehicles coming from the opposite direction.
Since it was night the shadows played tricks, but my truck was able to successfully make it to 10,420’ where I parked it for the night at the junction of 738/402. There was a 4Runner in the 2 vehicle lot and I backed in right next to it. My truck could have made it the last mile should I have chosen to drive further. Knowing I was only going to get a few hours of sleep tonight (it was almost 2am) I quickly went to bed and got up at 4:45am. I was no the trail by 5am. The trail heads up and northeast, following the 4WD dirt road.
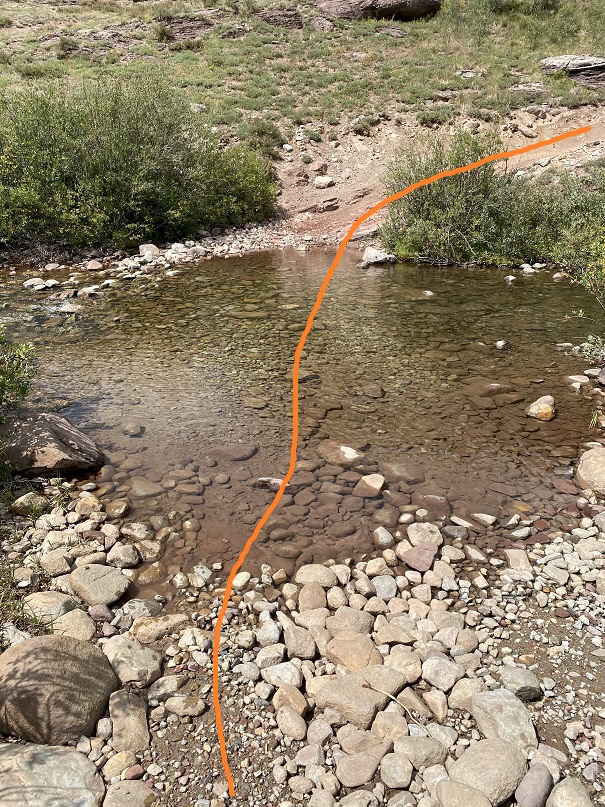
I came to another creek crossing and decided to take off my shoes to cross (I kept them on when I crossed on my way back, as I could see the rocks better)
Here’s the rest of the 4WD road
At this point I’d like to stress how much easier this hike would have been had I started in daylight: the trail is faint and hard to find/follow. See the trail?
In the dark I missed it, and continued to follow the road. No worries though, because it was easy to take the road back to the trail when I realized my mistake. Here’s the trail
It aims towards the trees where there’s a registration box. It doesn’t look like this area gets a lot of use.
And now I was ready to hit the trail, but this is what I saw
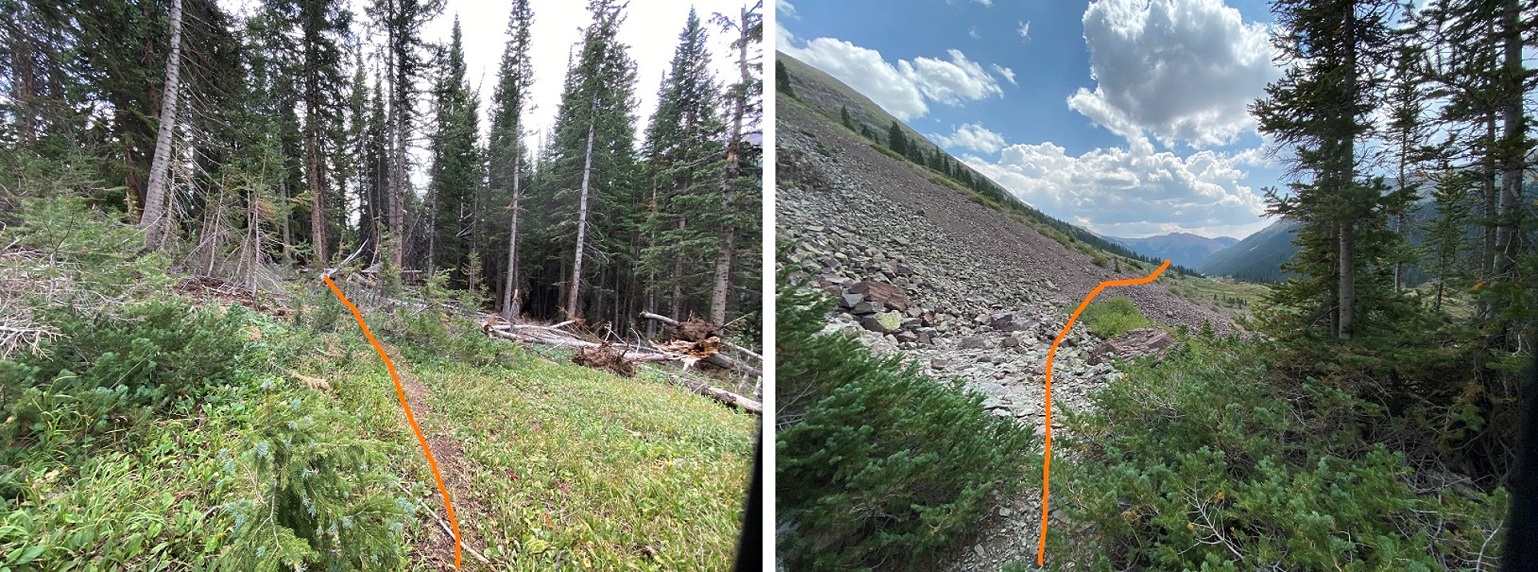
No real trail to speak of. There are a lot of game trails in the area, which can be both helpful and confusing. I’ll save you the misery I went through route finding in the willows/trees in the dark, and give you the description of the clearer trail I was able to follow on the way back. Basically, avoid the temptation to go right into the trees. Stick as close to Middle Brush Creek as you can for the first 1.3 miles after the trail register, keeping the creek and beaver ponds to your left at all times (you’ll never need to cross the creek, but you can stay close).
The willows become problematic around 11000’, and these willows don’t quit. They range from 2 feet tall to about 10 feet tall, and where they’re over 4 feet tall they grow over the trail towards each other. There is no clearly defined trail that remains constant, but a lot of game trails that weave in and out.
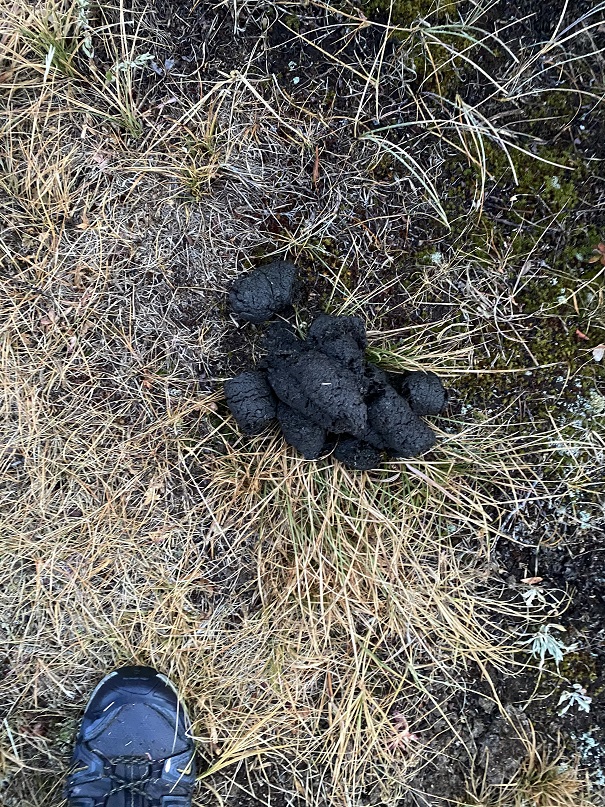
Bears don’t seem to have difficulty finding the trail however
As soon as I entered the willows I started getting wet, and I was confused, as it hadn’t rained last night? Within a couple of yards I was dripping with water. My waterproof jacket was soaked, my pants spongy and my shoes were oozing water. I kept getting hit in the face with cold, wet branches and I had leaves covering my clothes. When I got home I noticed I had red streaks where the branches had whipped my legs. Have I mentioned I’m not a fan of willows? I was getting cold, and encouraged the sun to rise. Fast.
After wretchedly whomping through the willows, and after 4 miles of hiking I came upon a trail to the right (east). I headed towards the trail in the distance and followed it
This was a nice trail through the trees, and then once again, willows.
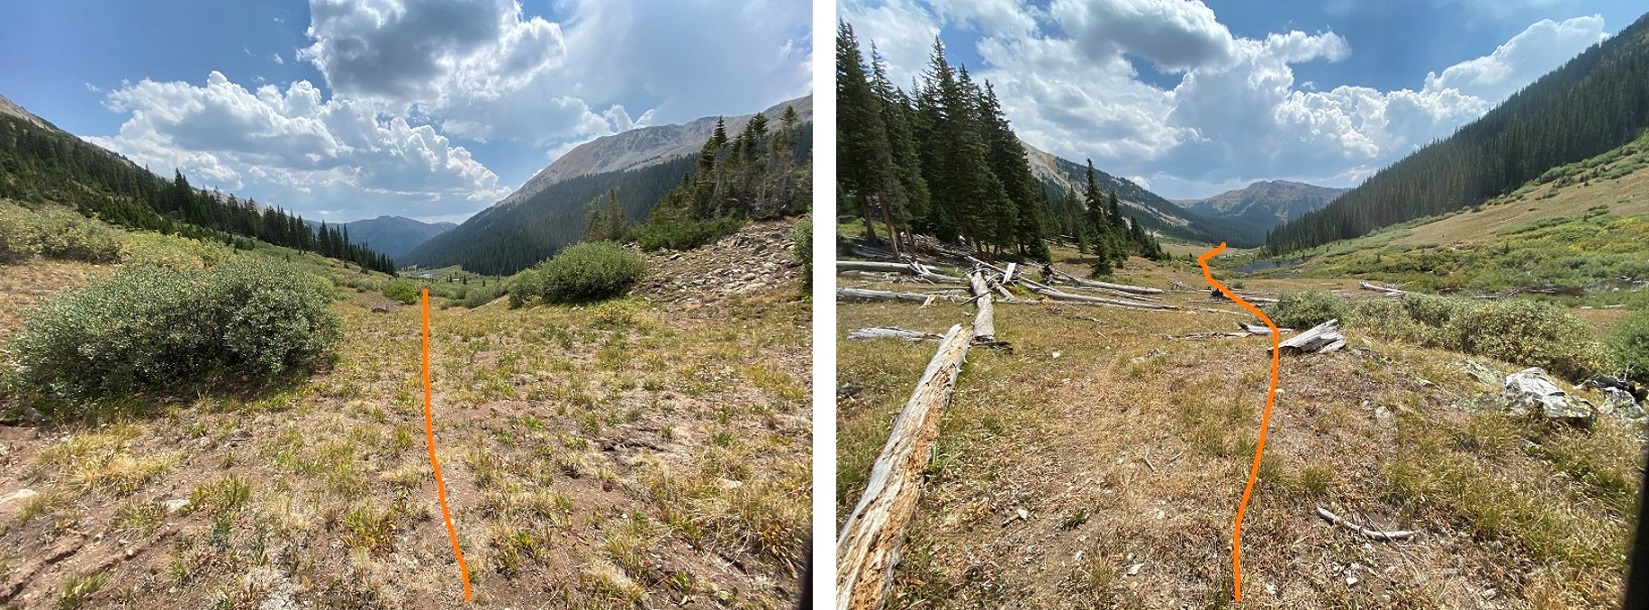
From here the trail is very obscure until you reach the upper basin. The willows have many, many game trails that make accessing the upper basin possible, but time consuming. I just kept aiming northwest, keeping the creek to my left and rejoicing when I found a game trail. I still got hit in the face with willows, but could see a trail below my knees.
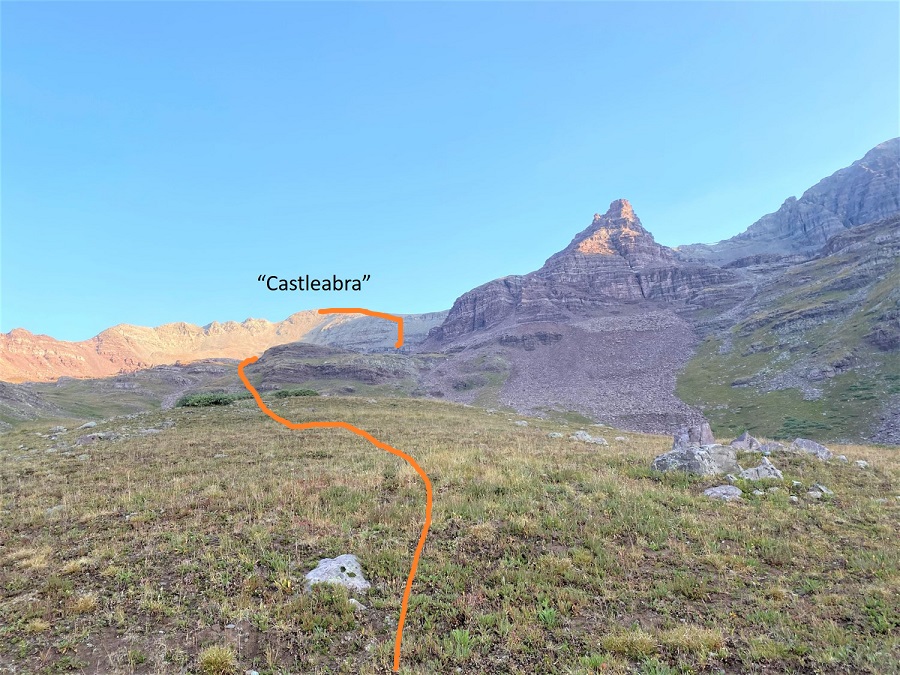
I finally made it out of the willows at 12000’. Here’s the overall route I took to get to “Castleabra”
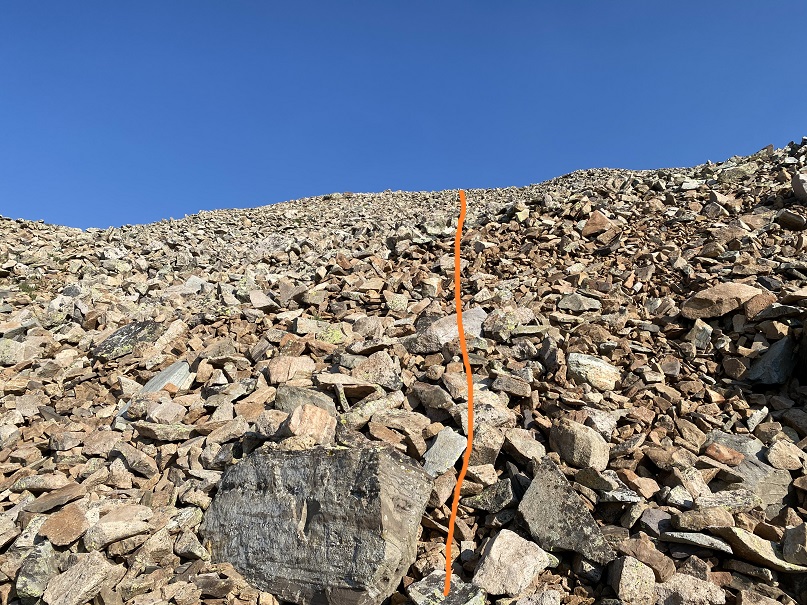
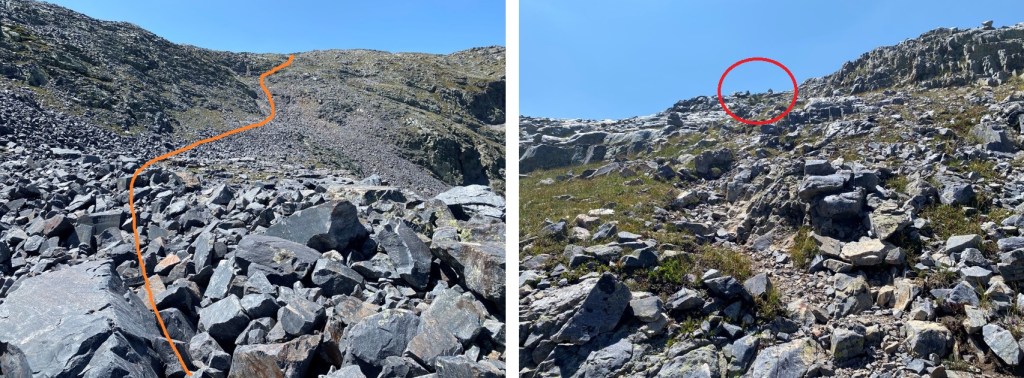
There are several ways to get to “Castleabra’s” ridge. I went directly up the south face, but could have also taken the gully to the right or left. I didn’t do this because there was a herd of about 30 goats having a grand old time kicking down rocks to the right and I didn’t bring my helmet. I was worried the scree would be brutal to my left going up, so I went straight up the middle. Here’s the route up the south face. This is all class 2 on unstable rock, and there are several access gullies. All go, just pick your line.
After gullies there’s some rubble to deal with to gain the ridge
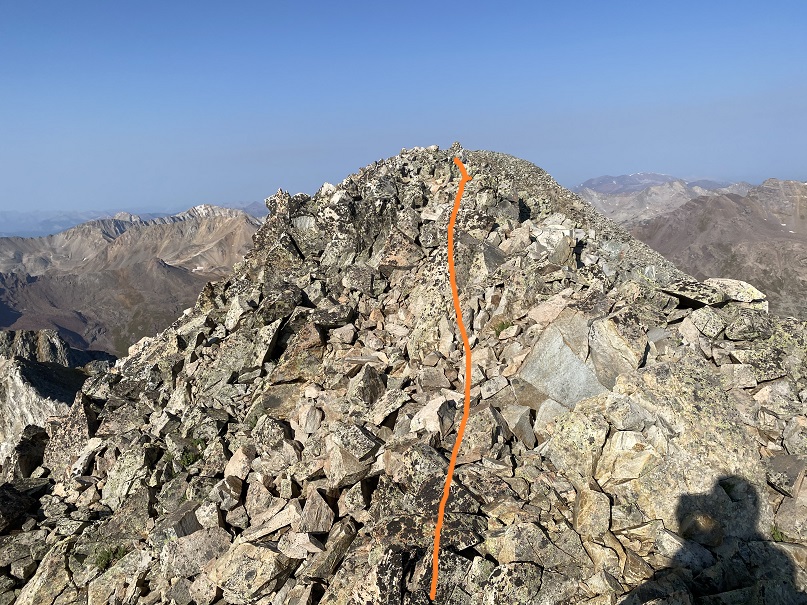
Once I’d gained the ridge I turned left and headed west
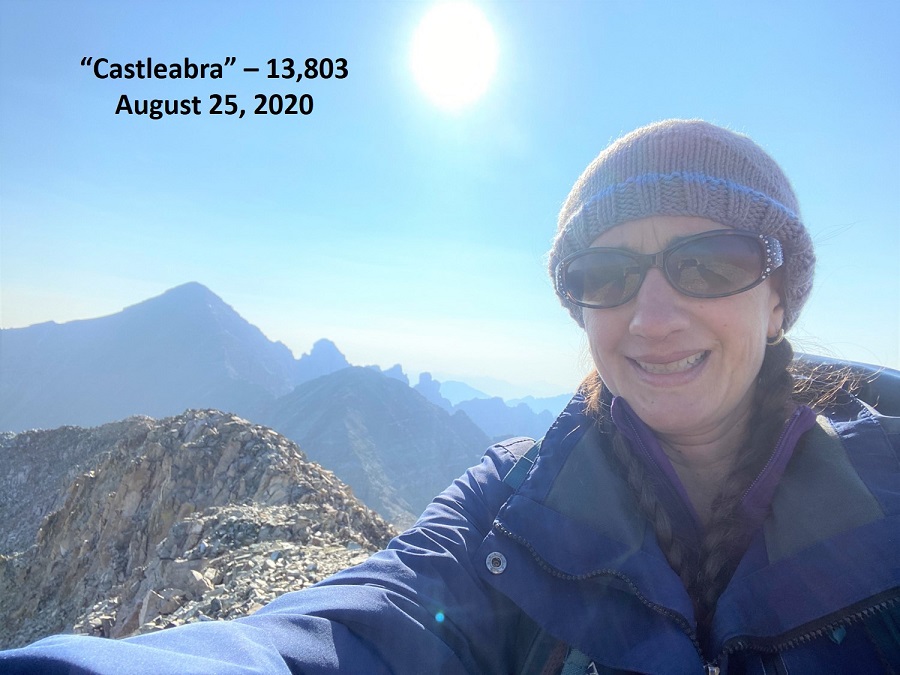
I summited “Castleabra” at 9am. Unfortunately, I’d forgotten my camera at home, so these are all cell phone pics and due to that you get selfies (and sometimes the side of my finger in shots).
Castleabra:
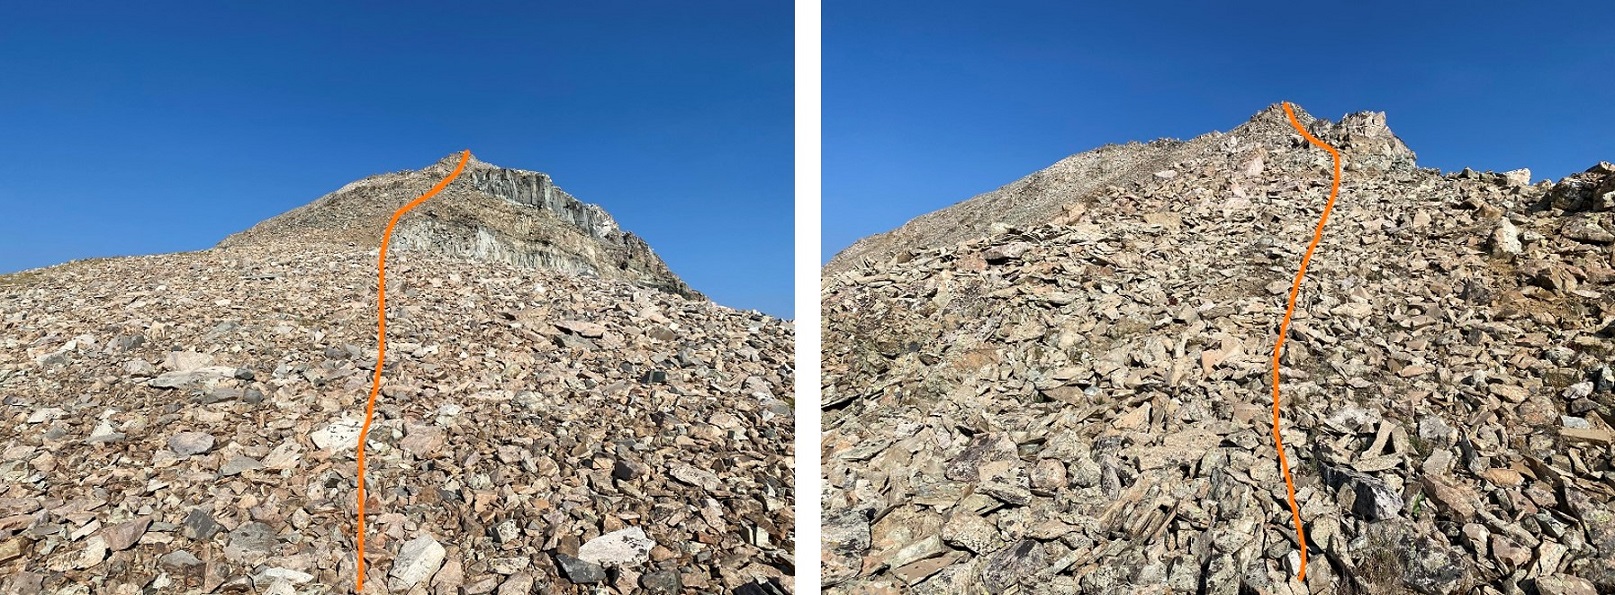
Here’s a look at the route I took in
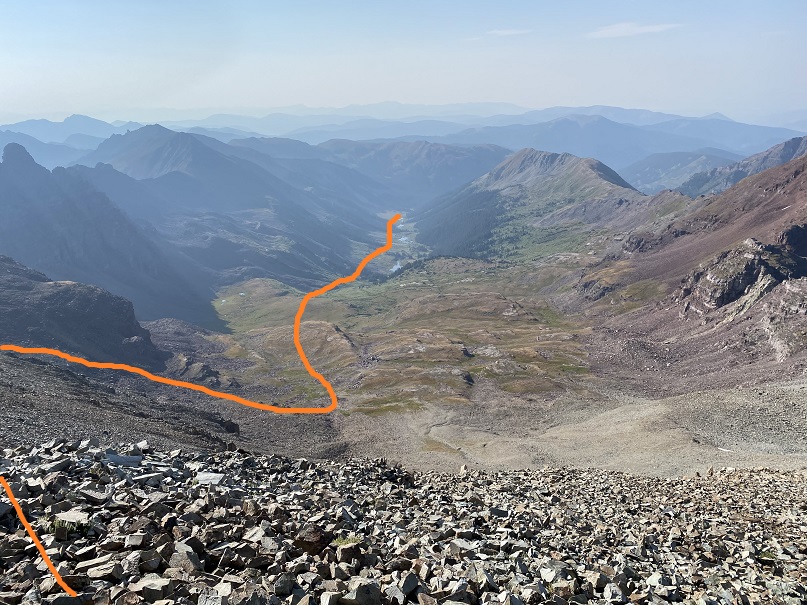
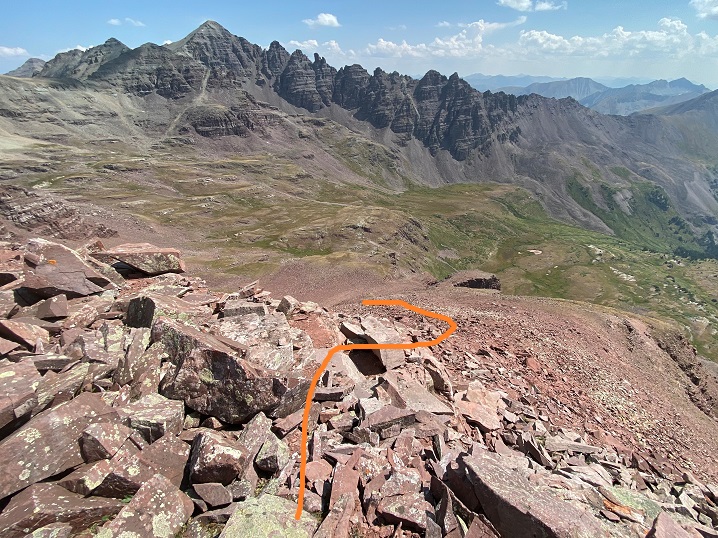
I was making this a loop, adding in PT 13550 as well. To do that I headed back the way I’d came, then angled down the scree towards the basin. There is no solid trail here, and none of the area cliffs out, so you can descend at any time and make your way scree-surfing towards the basin. Here’s the overall route I took
And step by step, back down the ridge
Here’s looking back up at the route I took down from “Castleabra”. As you can see from this photo, there are several options to gain the ridge for this peak, and the entire ridge is class 2.
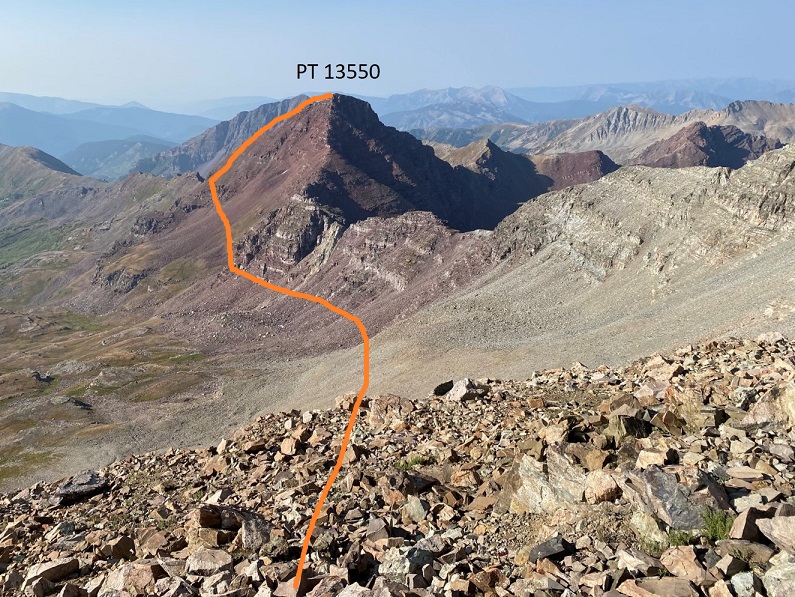
Now on to summit PT 13550. The trick is to stay high and gain the ridge as quickly as possible. Don’t dip down further than you have to, because you’ll just have to re-gain the elevation later.
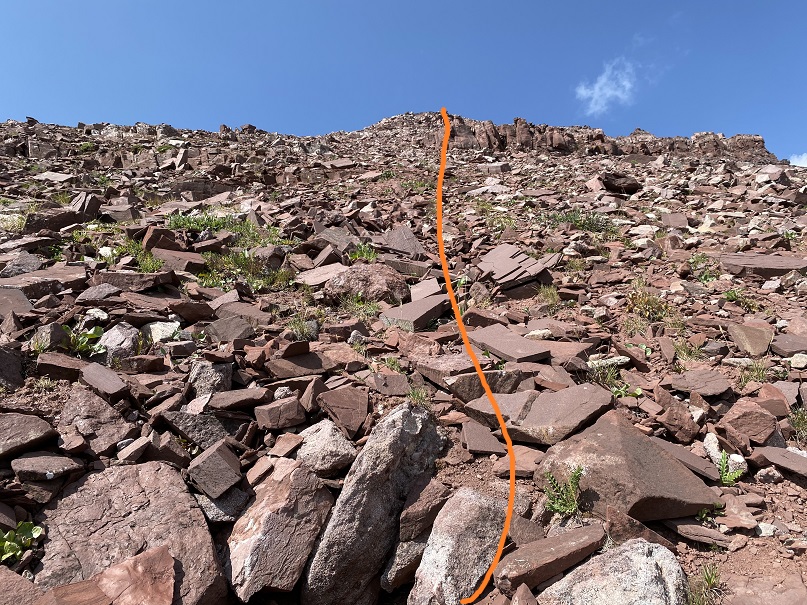
Once on the ridge it’s loose and rocky but all class 2. I followed the ridge to a false summit
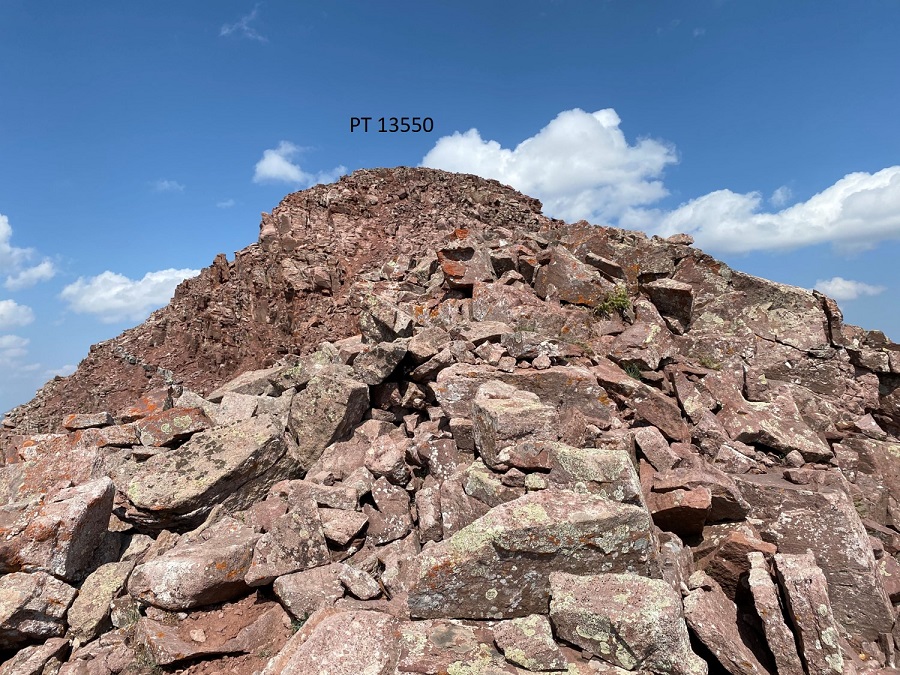
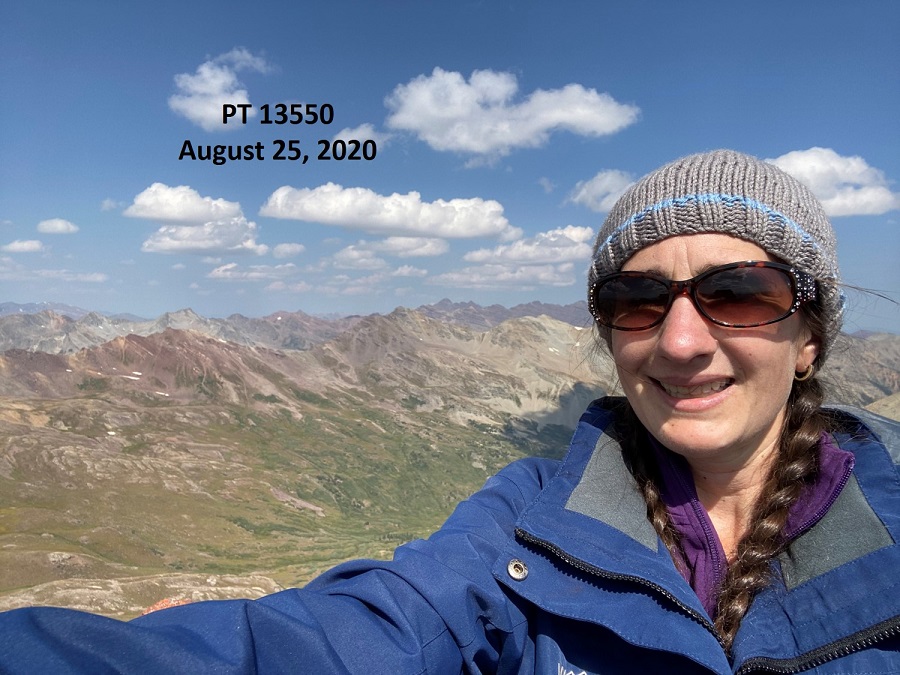
I summited PT 13550 at 11am
13550:
Here’s a look back over at “Castleabra” and Castle Peak
It had been a long day and I was tired. I hadn’t gotten much sleep last night, and I was hiking slower than usual in the heat (but at least it’s warmed up and I’d dried out). Time to head back down the ridge
Here’s the route I took down the ridge and through the upper basin
And back down to through the willows. Luckily, I had a good idea of where I was going and the willows had dried out in the afternoon sun, so they weren’t as miserable as on the trek in. Here’s the overall route through the willows
And step by step. Yes, I was on a trail. Anyone have a chainsaw?
Back through the trees and across the talus trail
And back down to the creek/beaver ponds, following game trails where available
I picked up the faint trail that led back to the trailhead
And took the 4WD road back to my truck
I made it back to my truck at 2pm, making this a 15.2 mile hike with 4393’ of elevation gain in 9 hours.
When I got back to my truck I noticed a faint dusting of water droplets had landed on my truck last night. Just a few here and there on the dirt that coated the vehicle from the drive in. The skies had been clear when I went to bed, and I didn’t get more than 2.5 hours of sleep, but it must have sprinkled a bit in that time. Even a quick, light sprinkle of rain can cause the willows to turn into a nightmare. Next time I’ll wear my waterproof pants when willows are involved, no matter the weather.
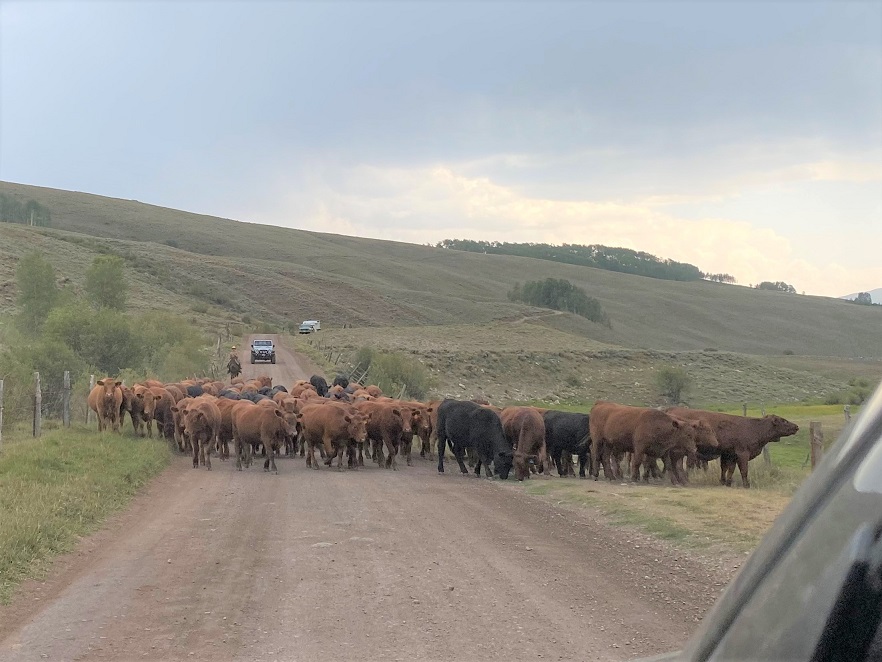
Luckily, since it was a Tuesday I didn’t pass another vehicle on my way down (I’d been worried about that). Oh, and someone was moving cattle on my drive out. The wrangler was clicking and clucking to the cows and making swishing noises. She thanked me for stopping to let them by, and I thanked her for allowing me to take a photo and complemented her on her chaps (they were really cool). I miss farm/ranch life (kind of…). Time to head home and get more work done.


 After gullies there’s some rubble to deal with to gain the ridge