Snowdon Peak – 13,090 and ‘N1’ – 12,647

RT Length: 8.42 miles

Elevation Gain:  2746’

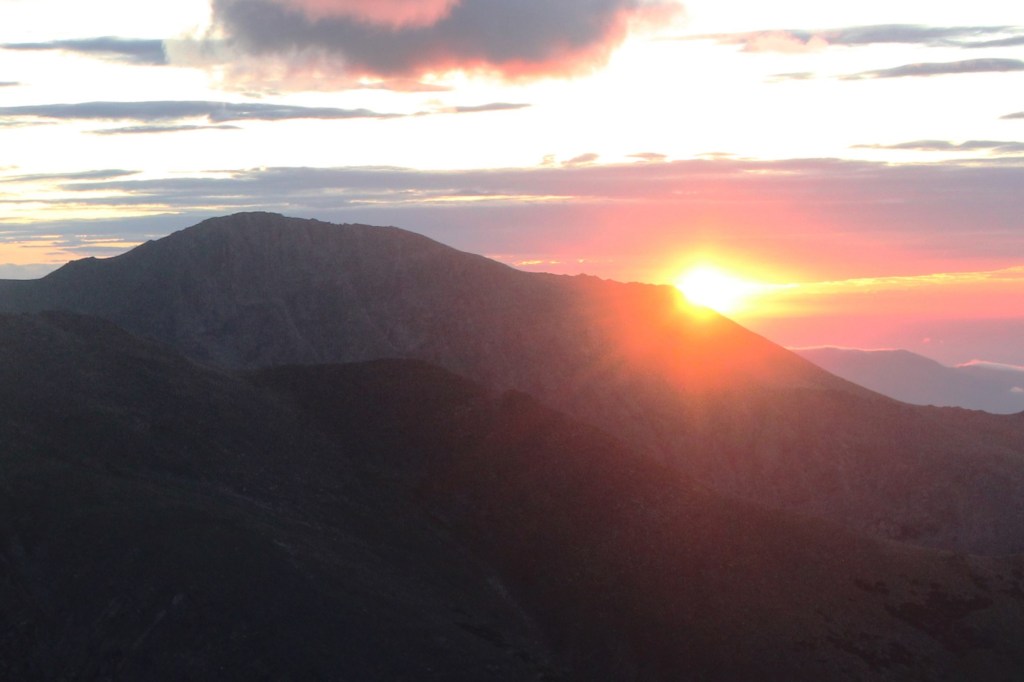
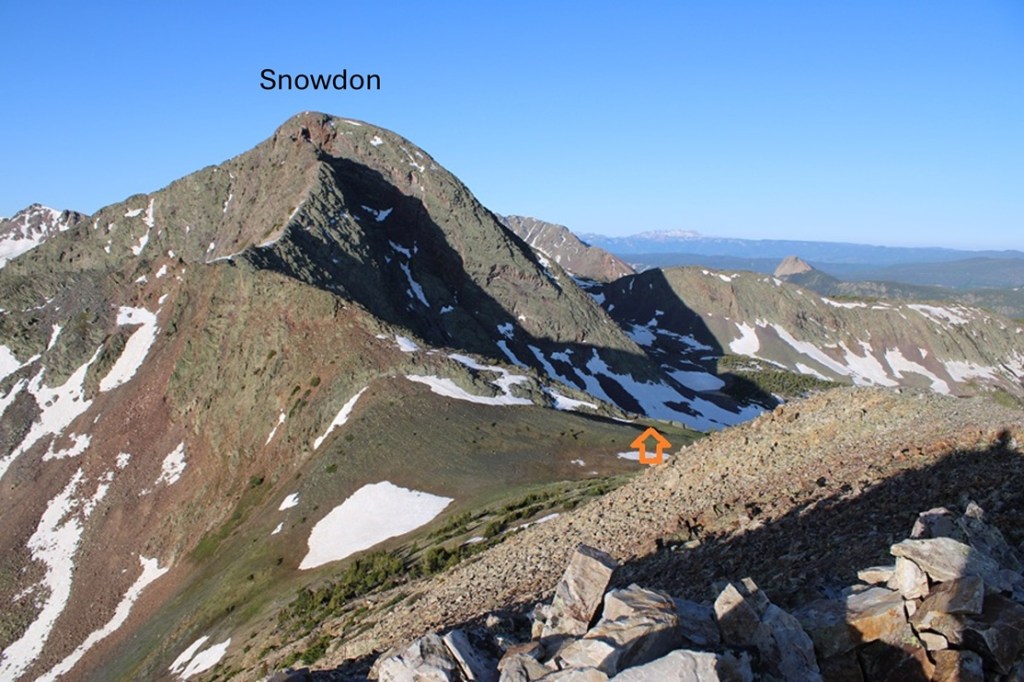
Yep, it’s been a while.  Those of you who follow me on my socials know what I’ve been up to, and I’ve been busy!  I’m really excited to have a few months off to tackle more peaks (kind of… I still need to travel for work most of August.  WHY is that my busiest climbing month, and my busiest work month???).  Most of the 13ers I have left still need to ‘melt out’ before I can climb them, but when I heard Snowdon was all clear I drove down to Andrews Lake and had to see for myself. 

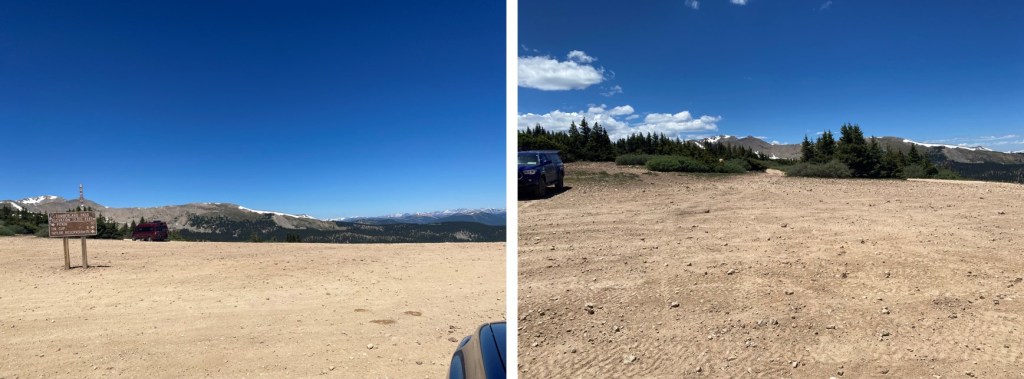
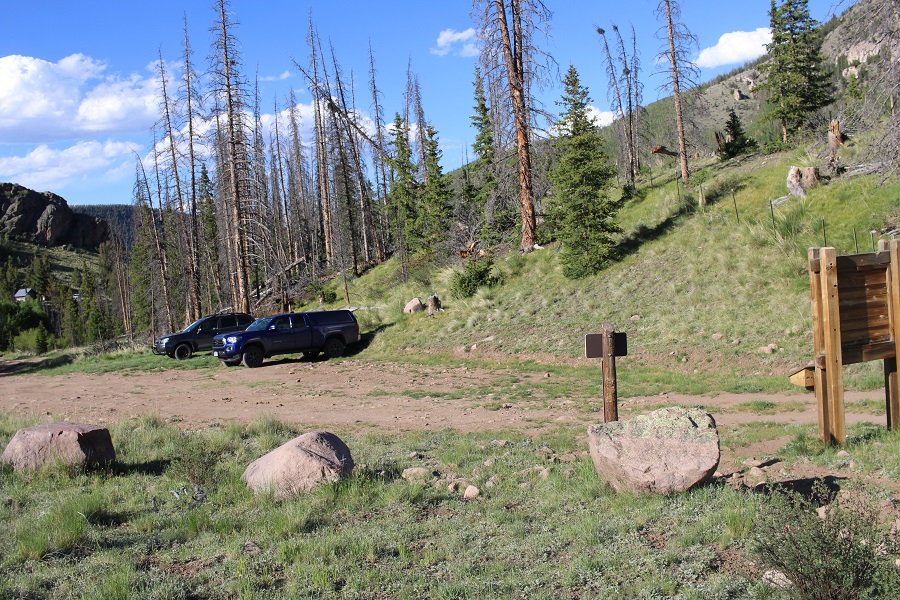
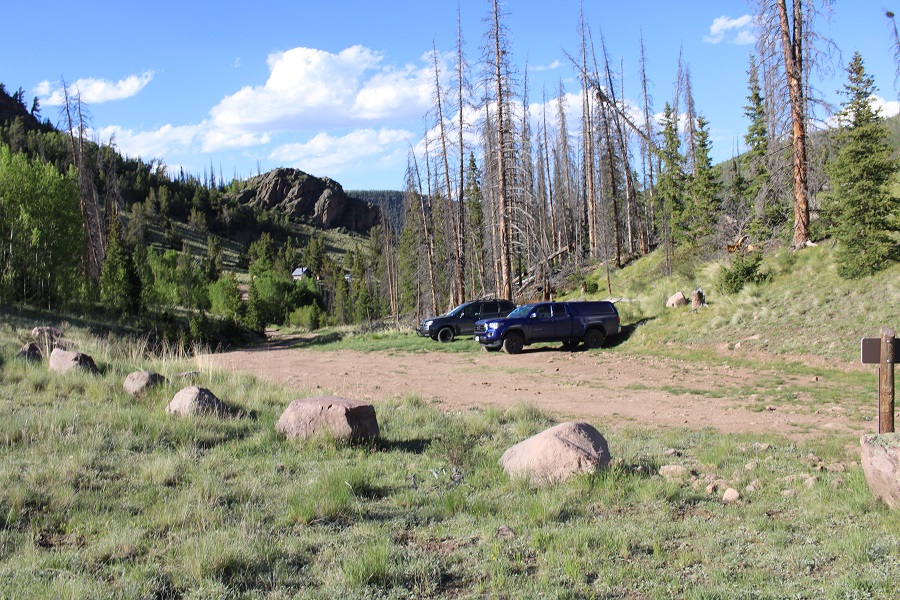
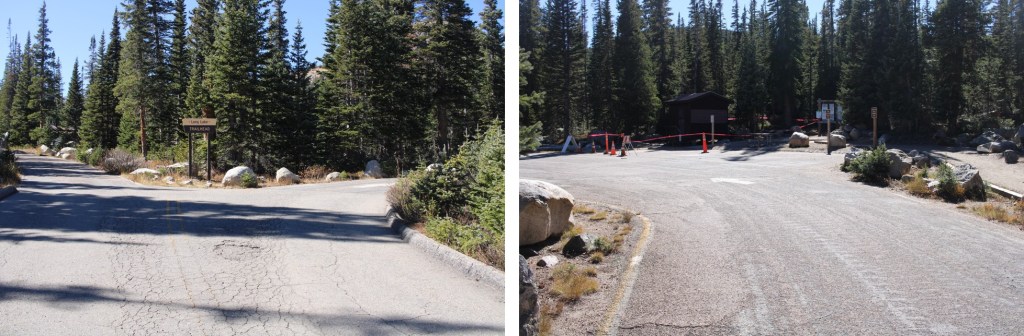
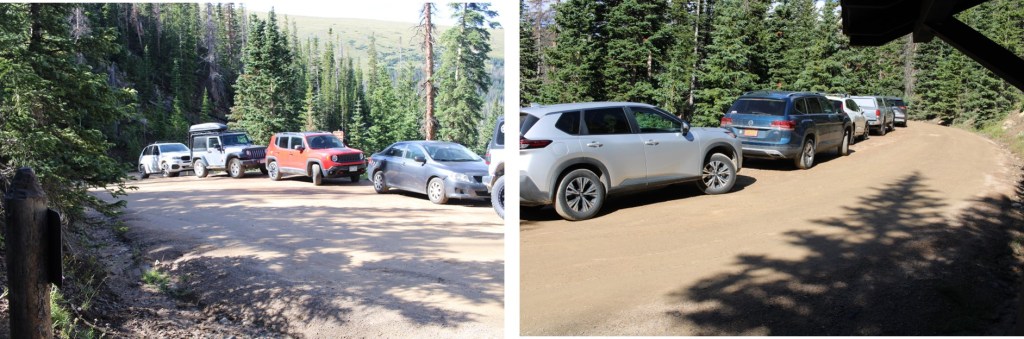
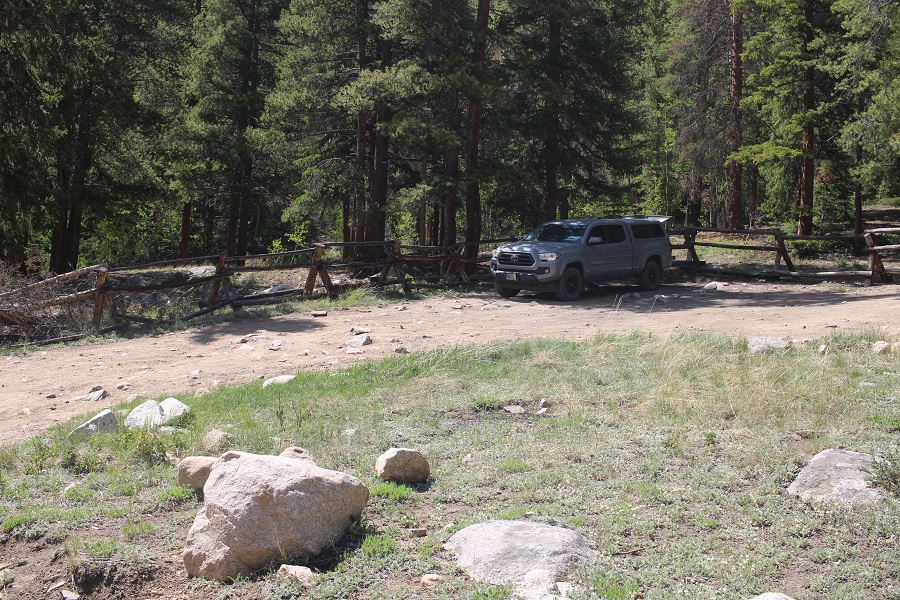
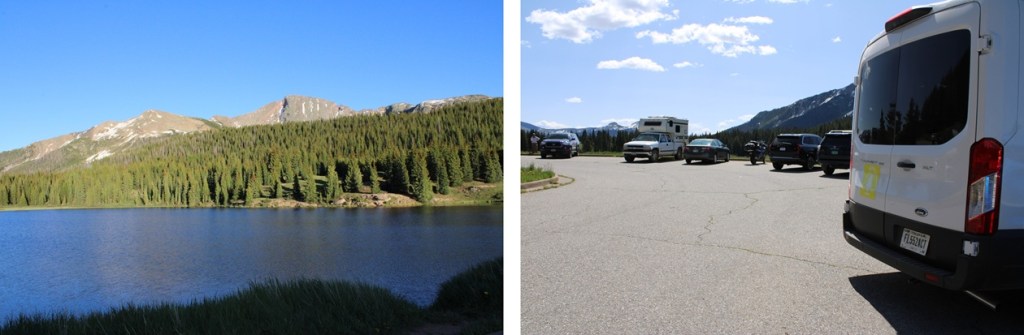
Andrews Lake has plenty of parking, and even an overflow lot.  However, that didn’t stop it from being full when I arrived.  Also, the bathrooms were dirty (and bring your own toilet paper).  Last time I was here the bathrooms didn’t lock. I was pleased to see they had been fixed.

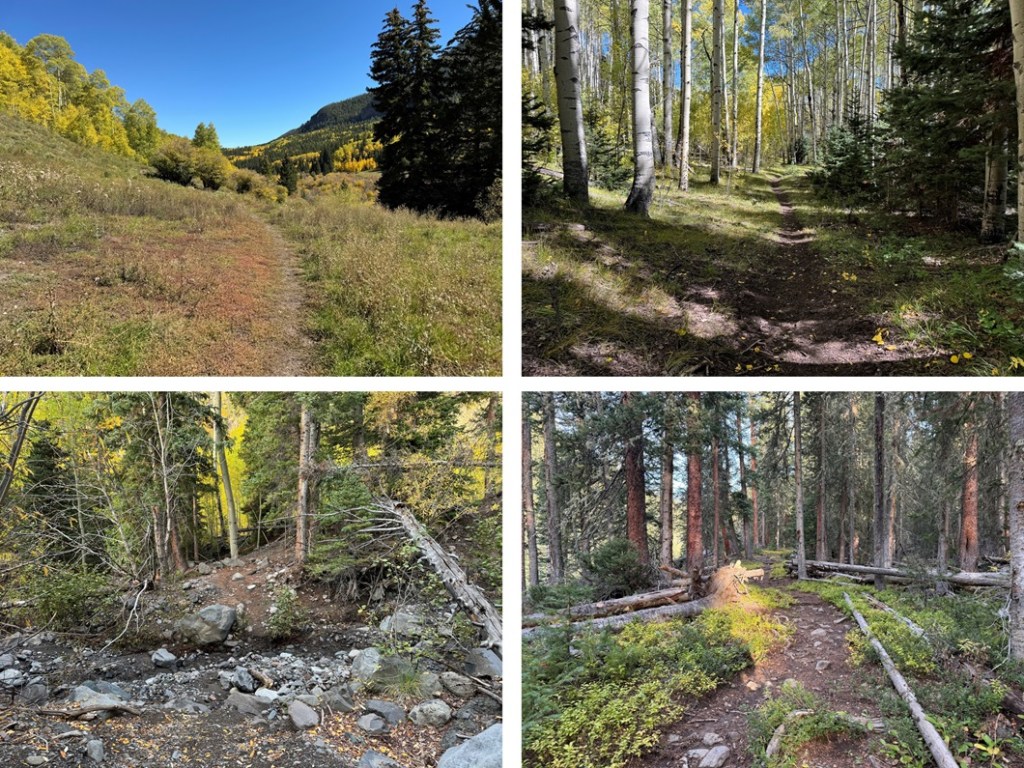
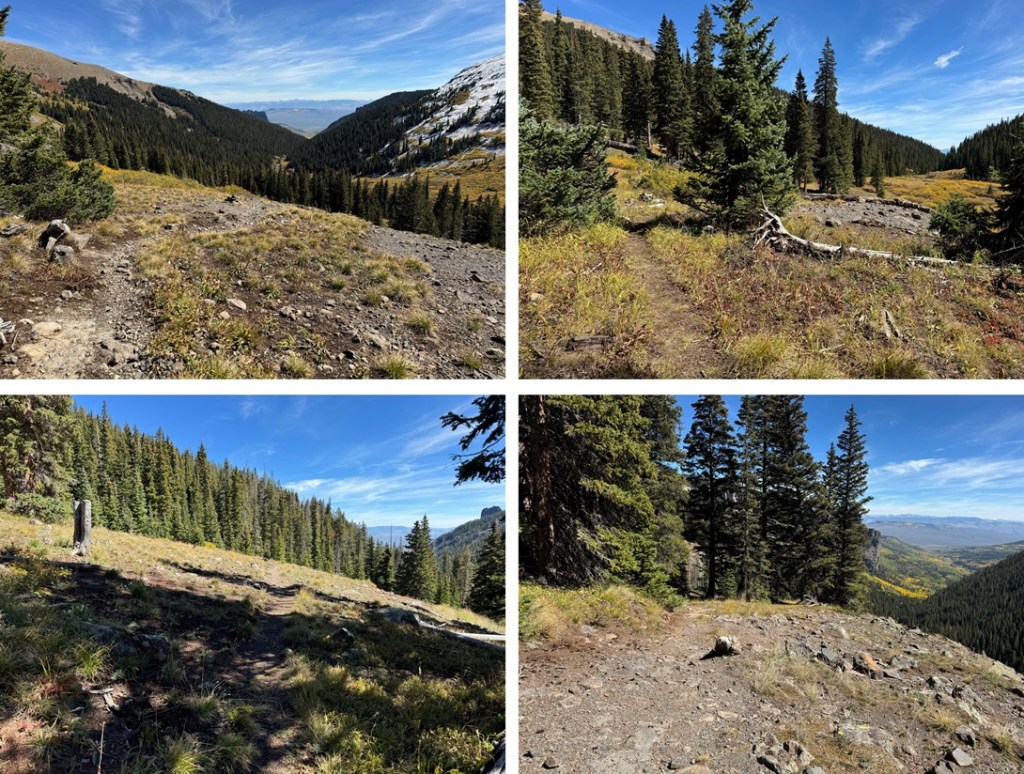
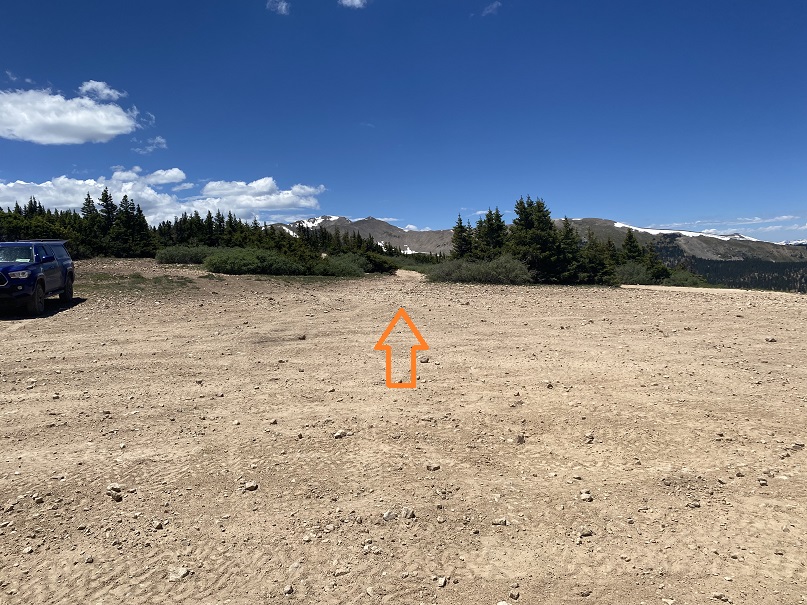
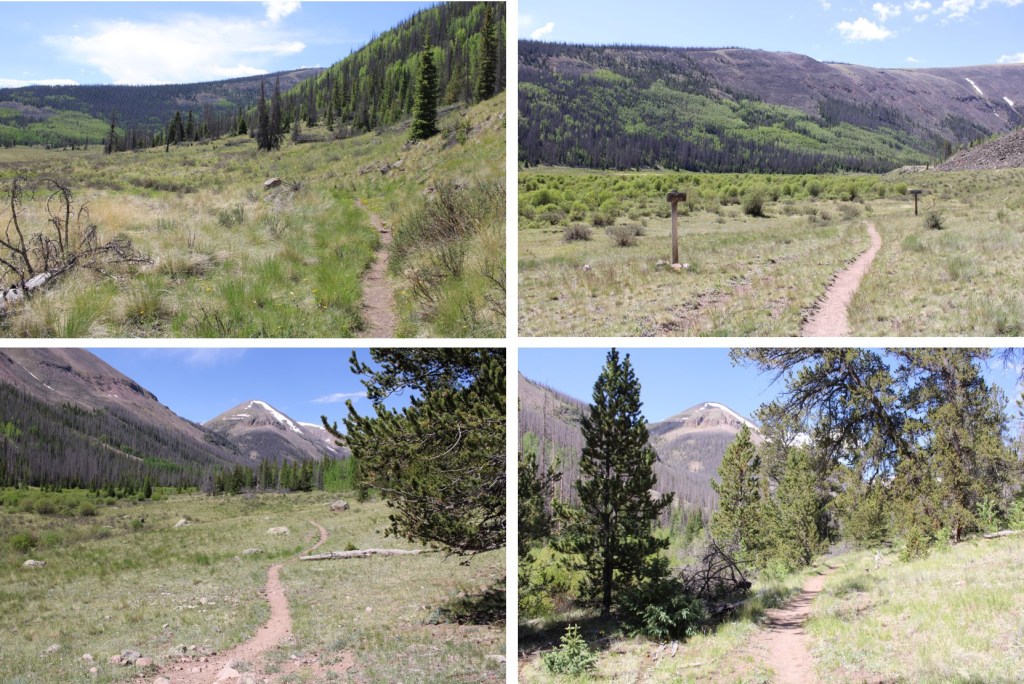
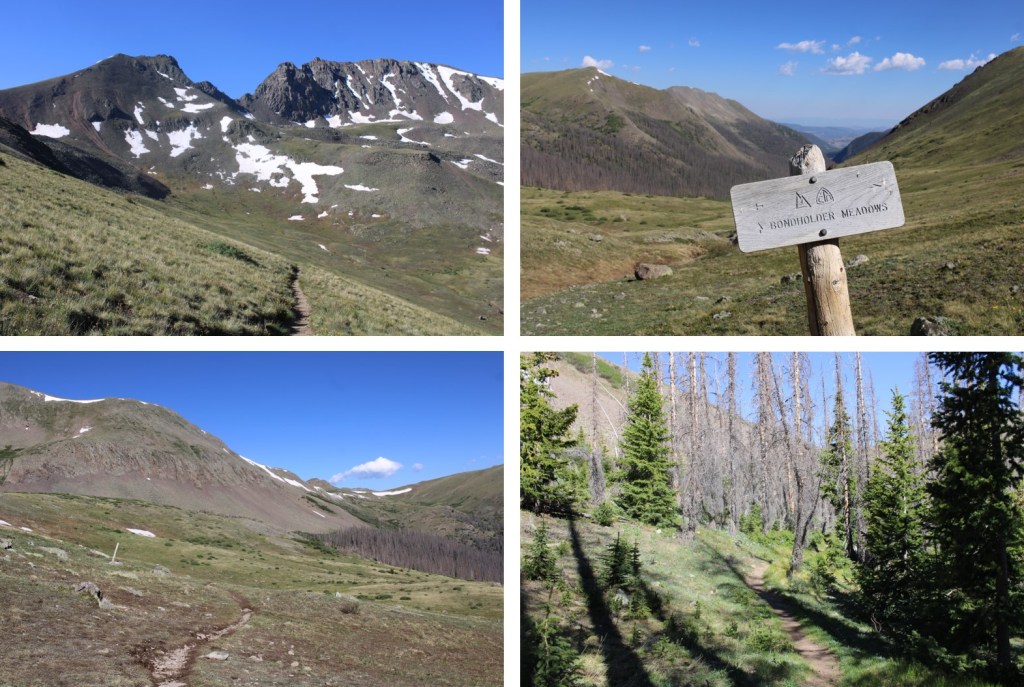
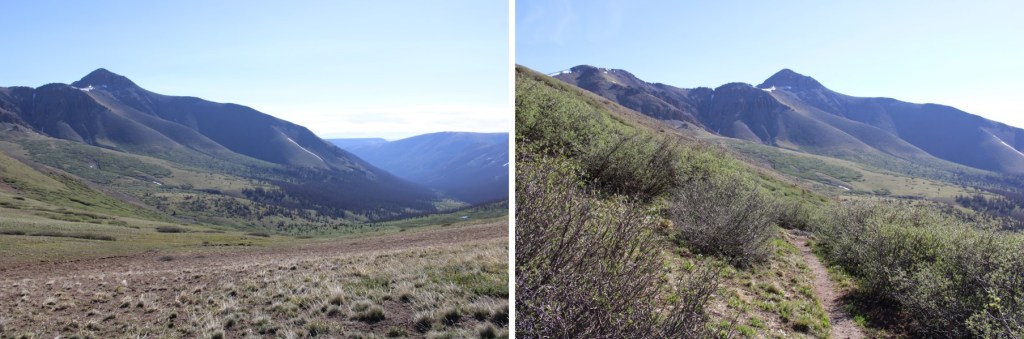
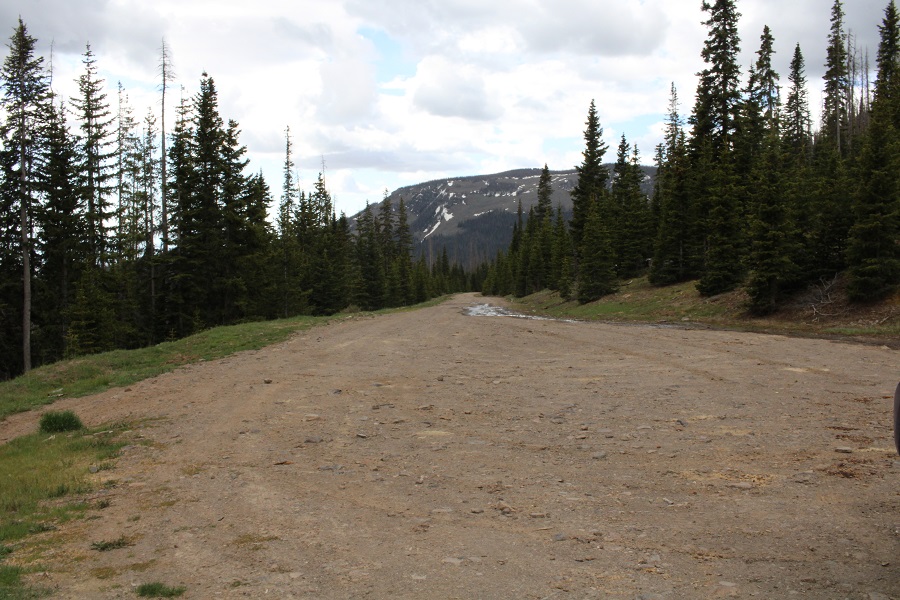
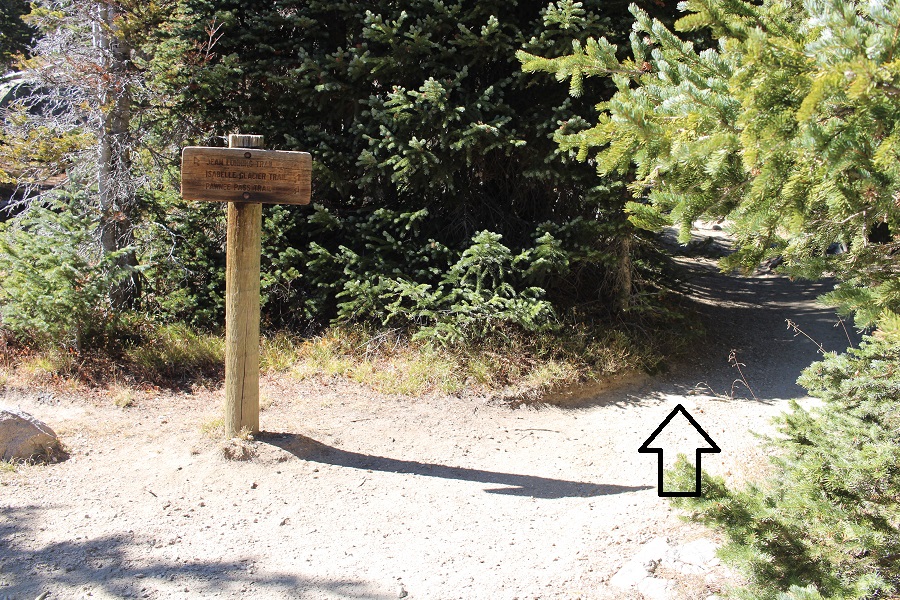
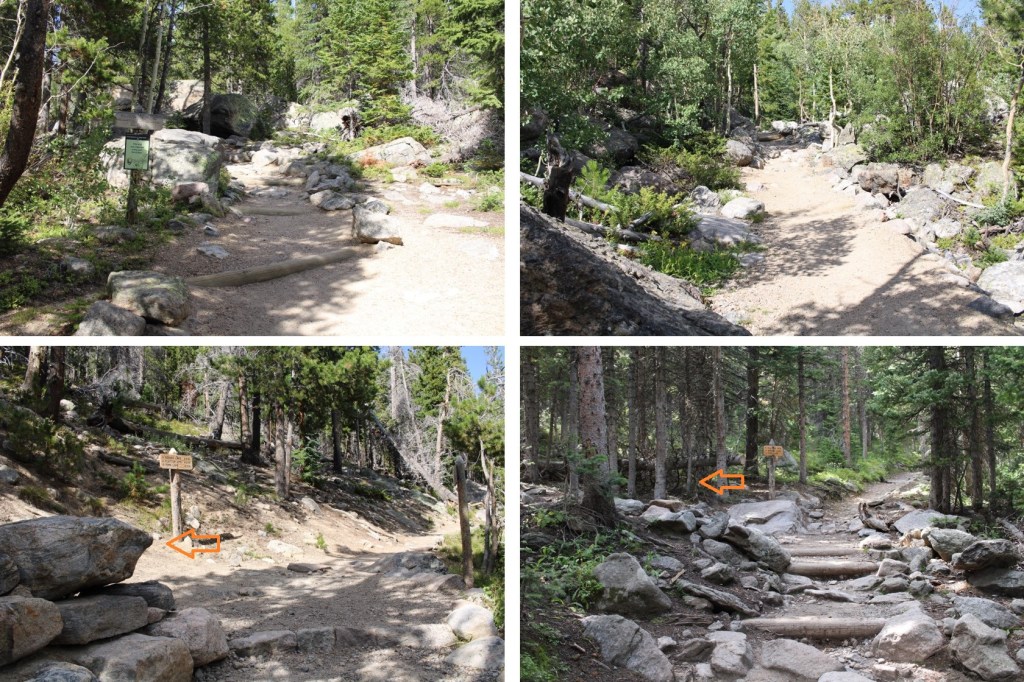
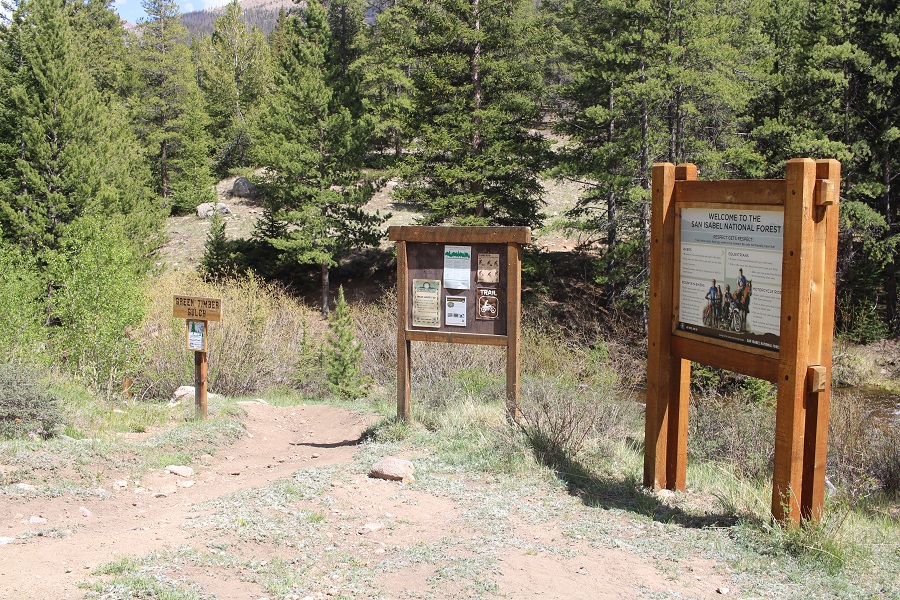
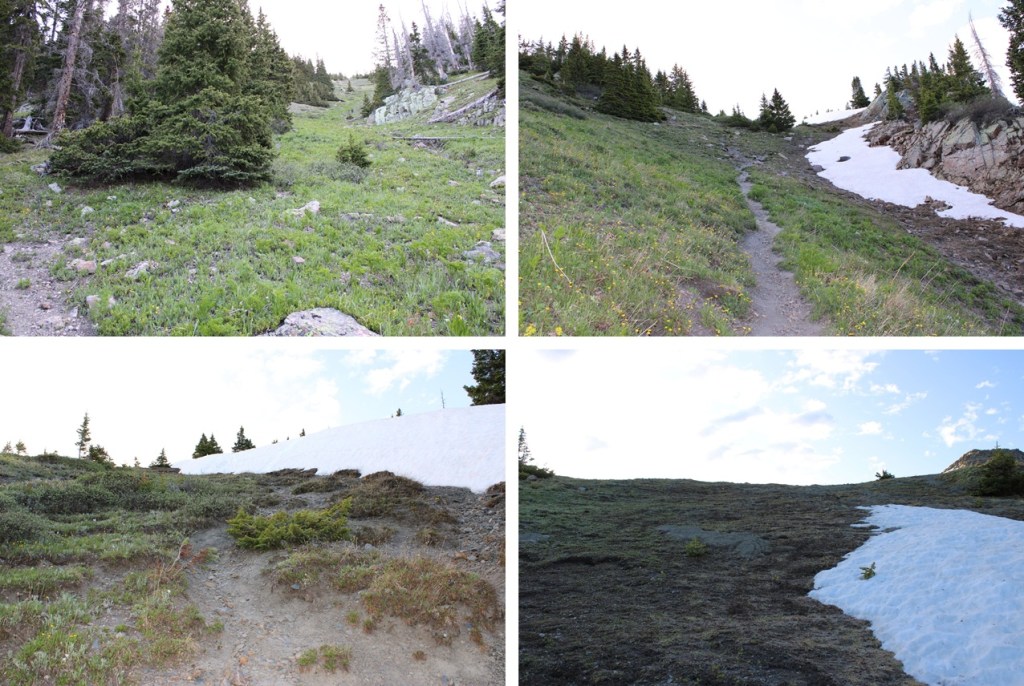
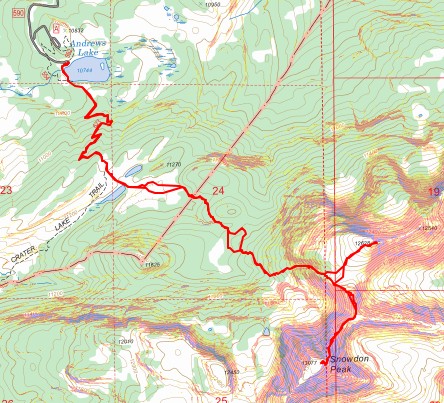
I started from Andrews Lake at 5:30am, skirting the east side of the lake to the trail.

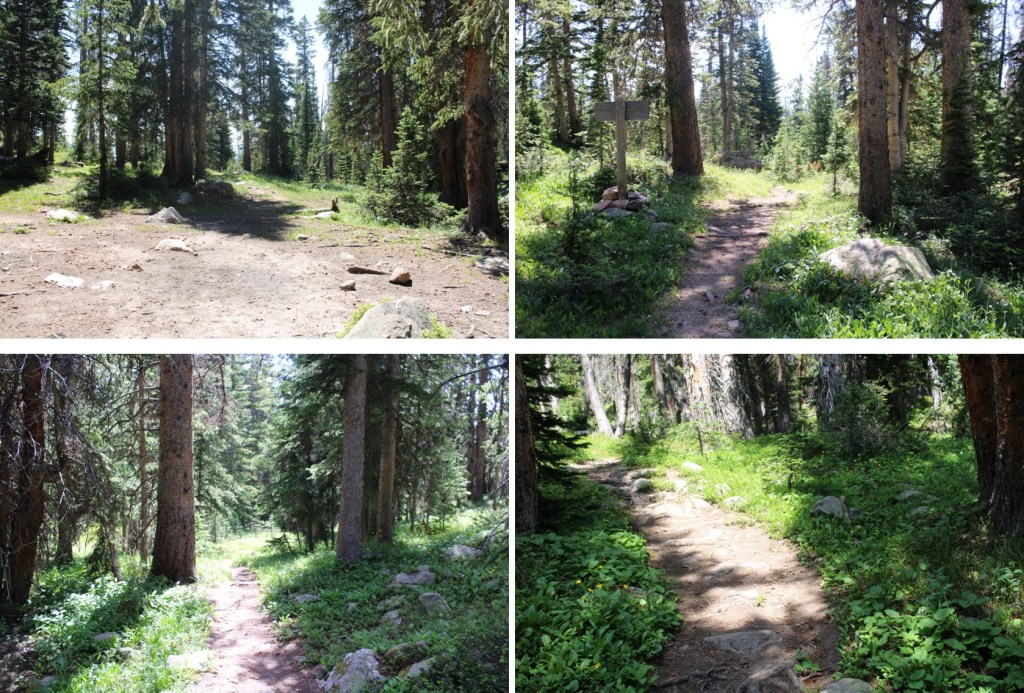
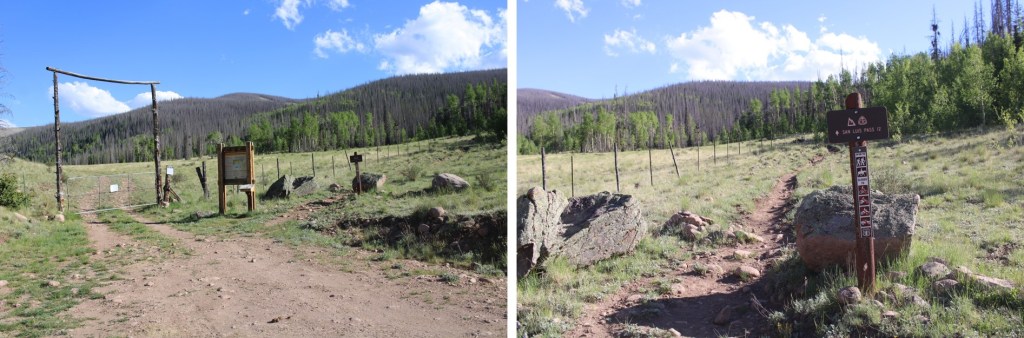
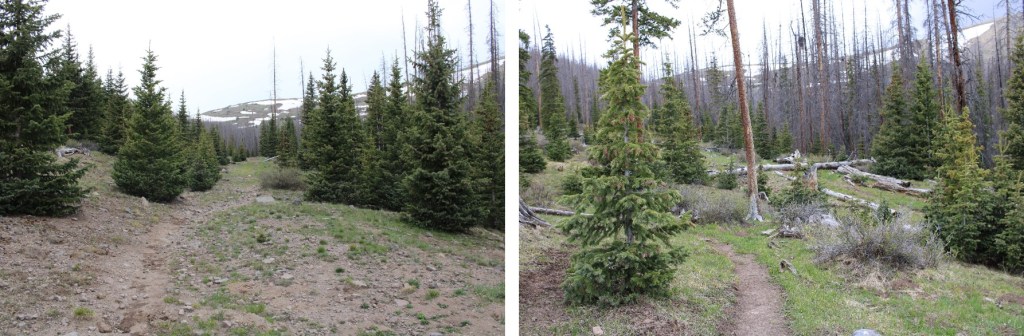
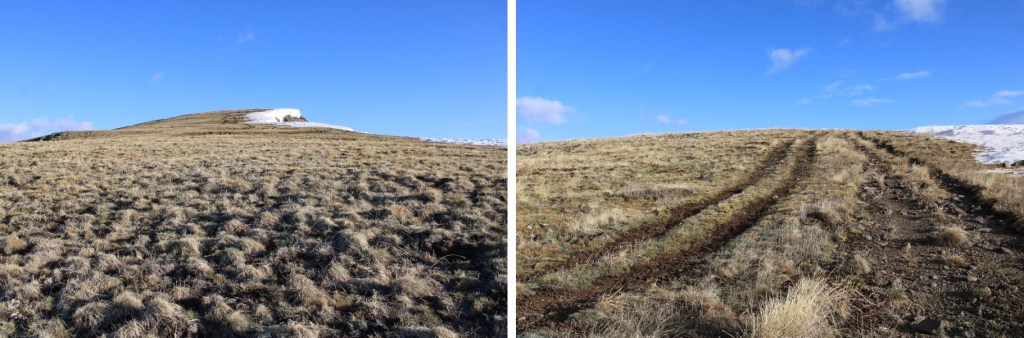
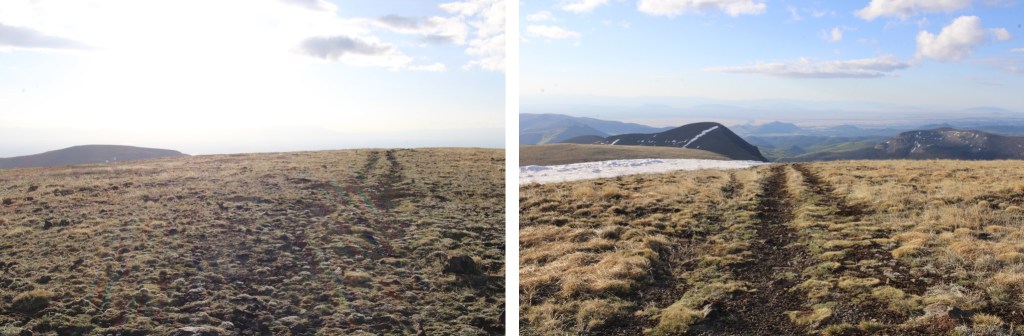
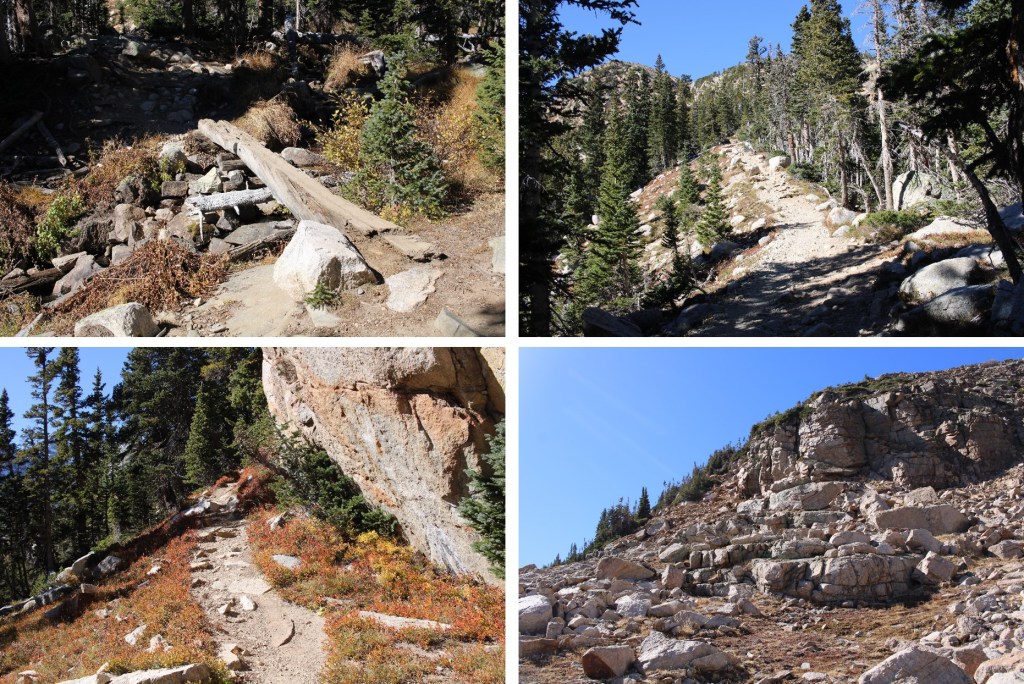
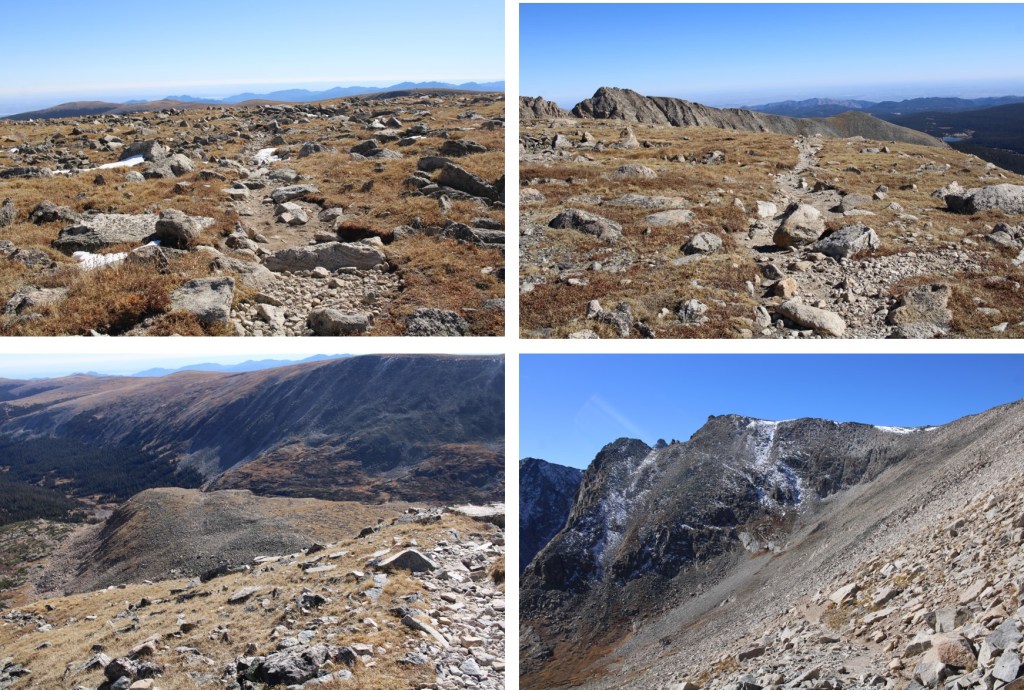
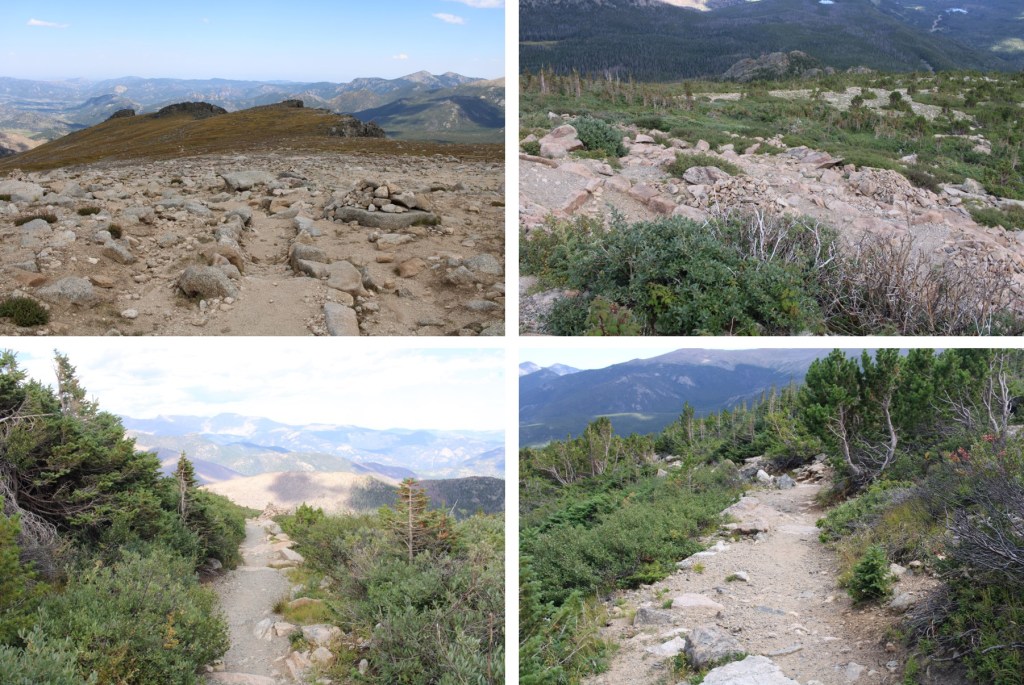
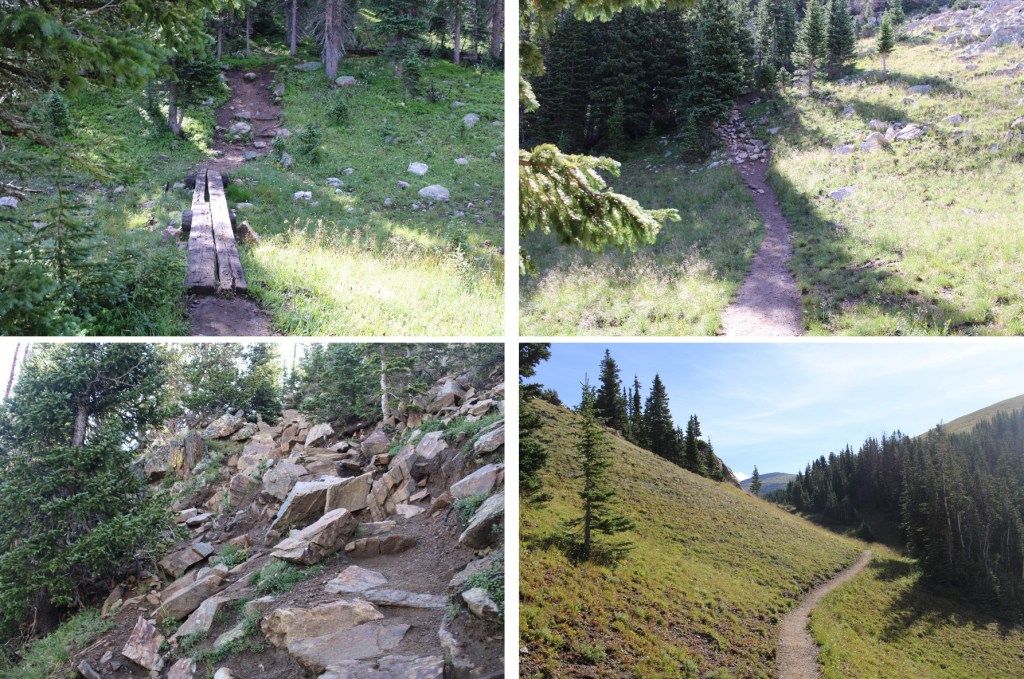
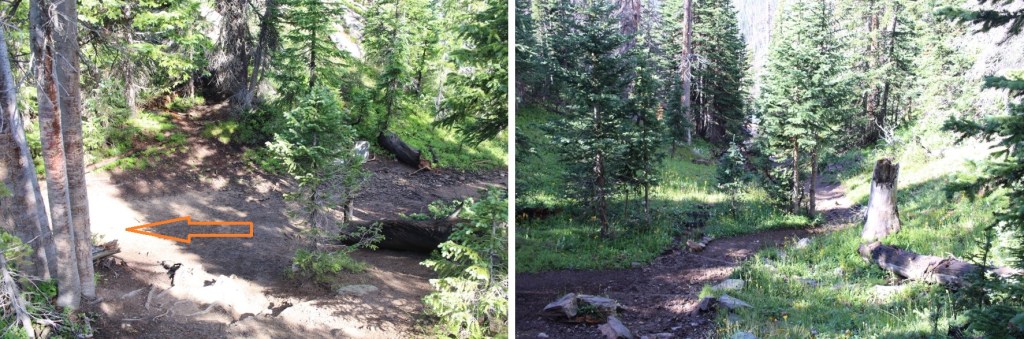
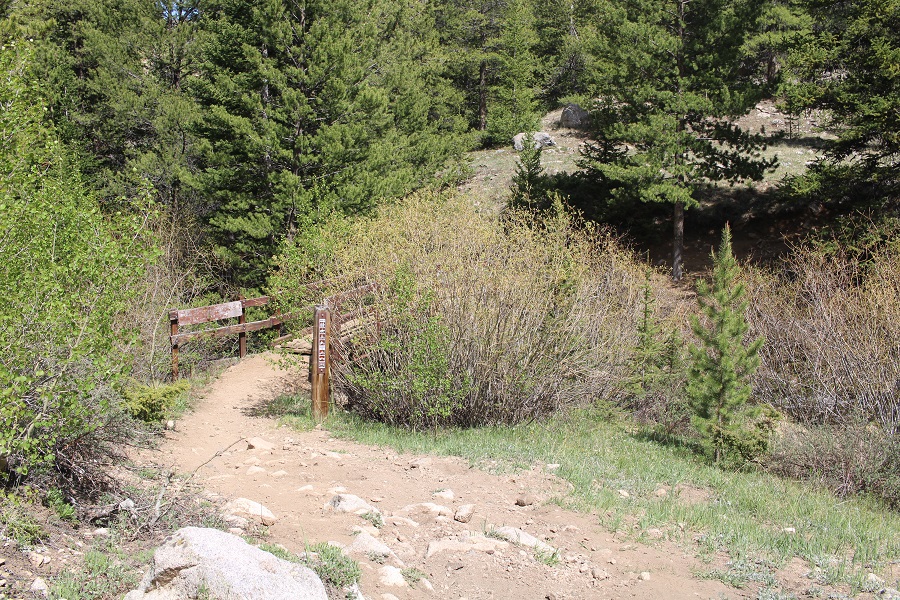
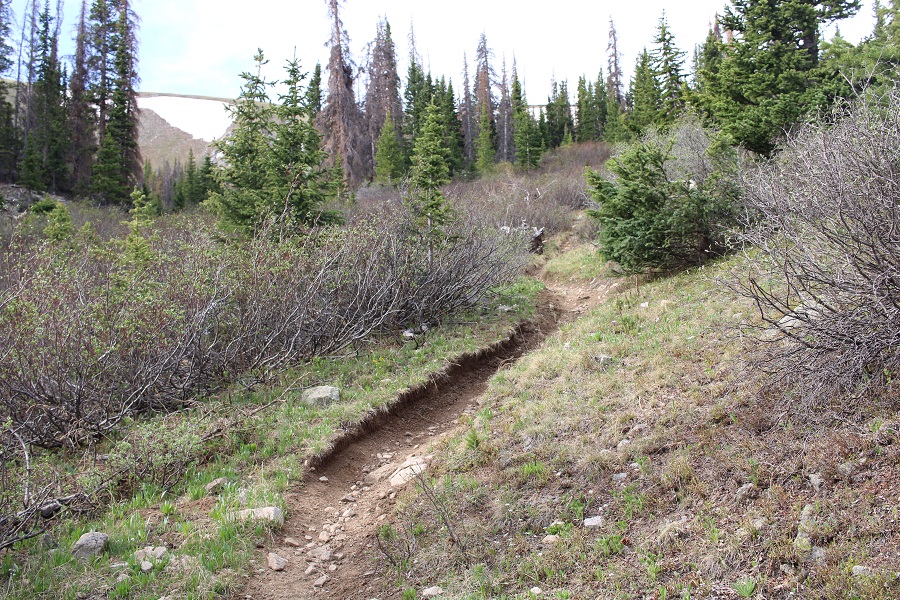
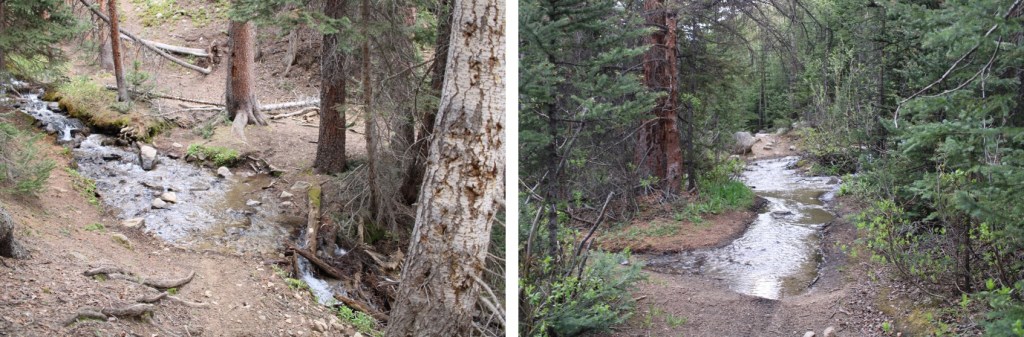
I followed this class 1 trail for about 1.3 miles to a junction with a trail register.

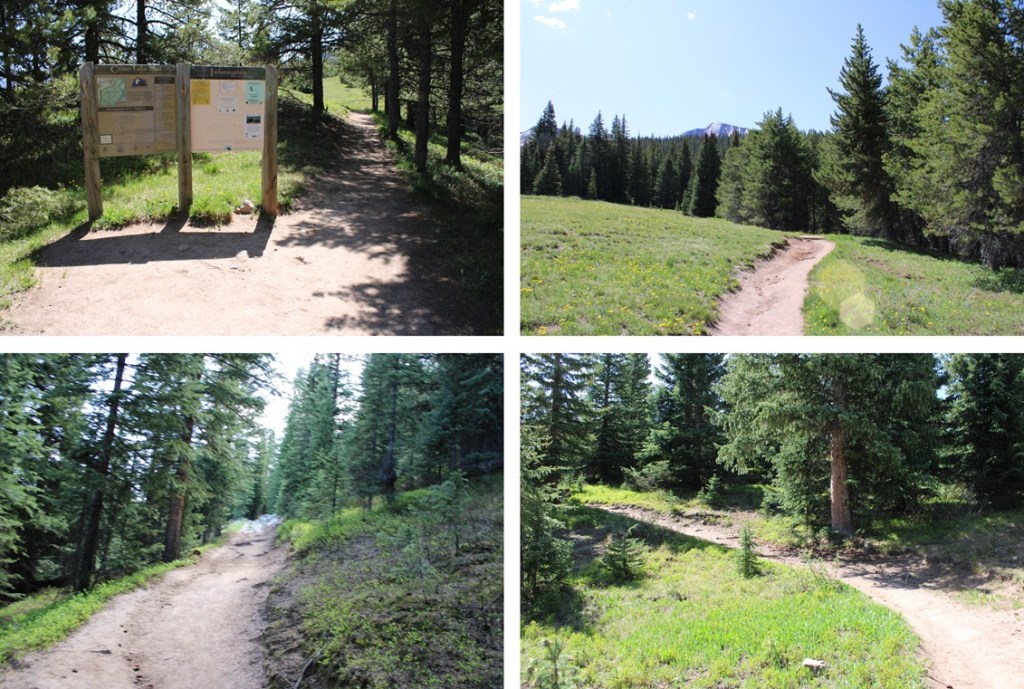
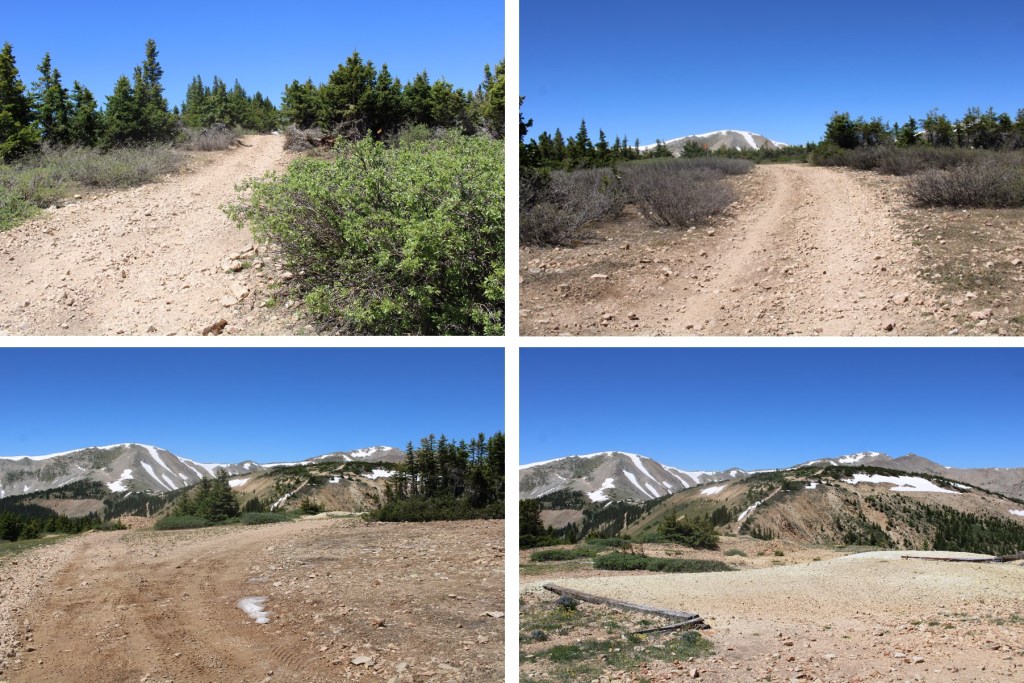
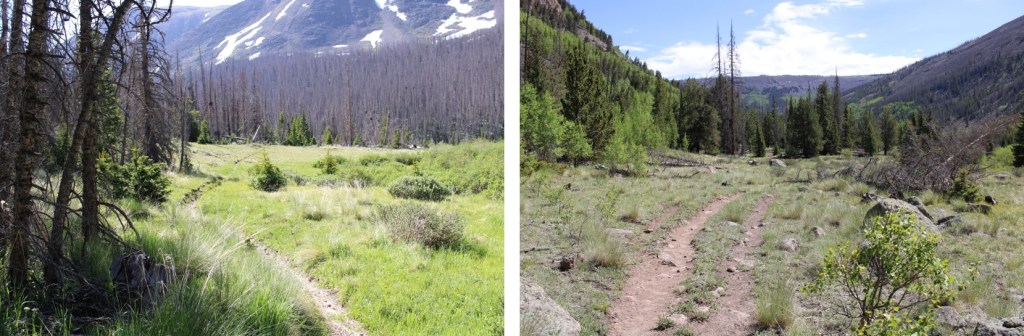
At the junction/trail register I turned left and followed an unnamed trail east/southeast.

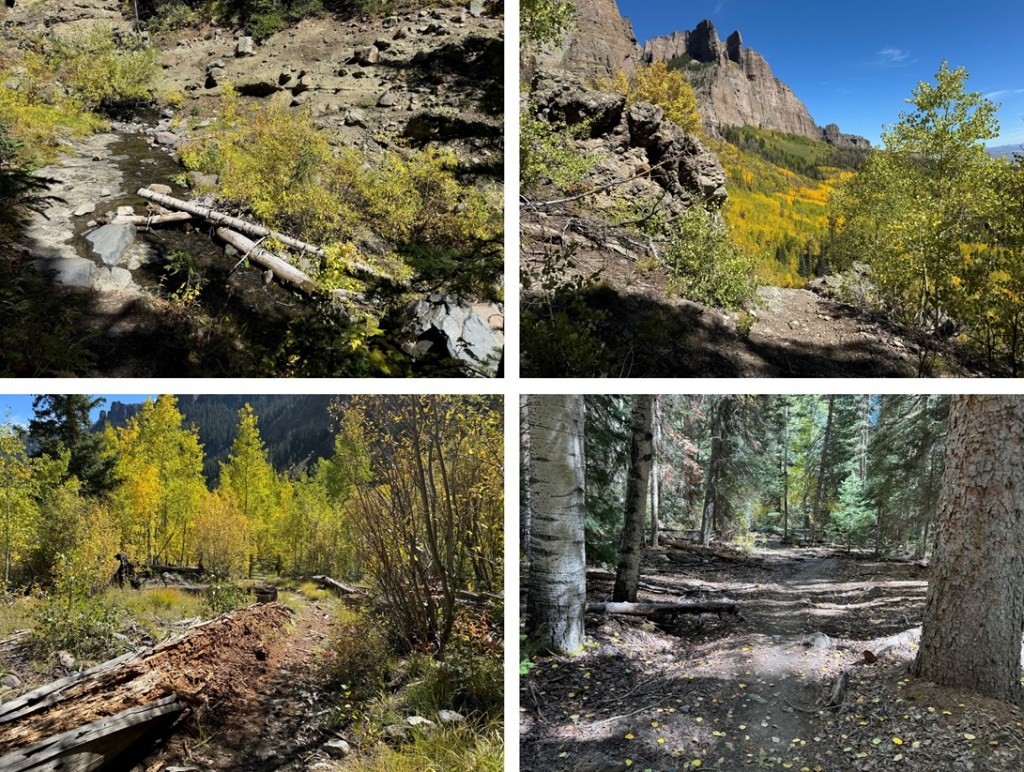
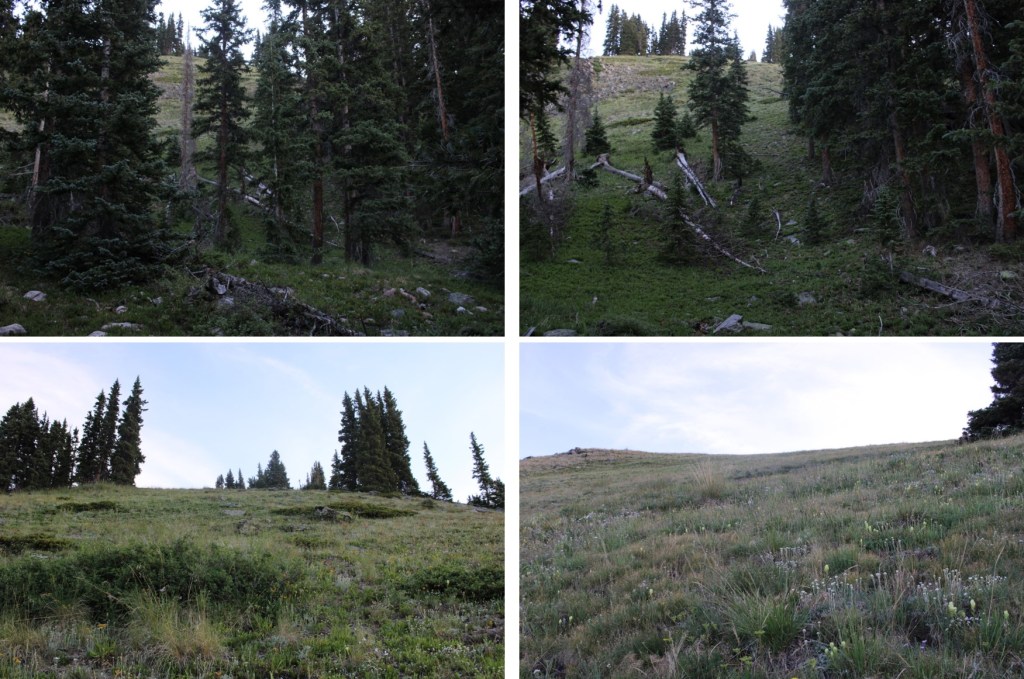
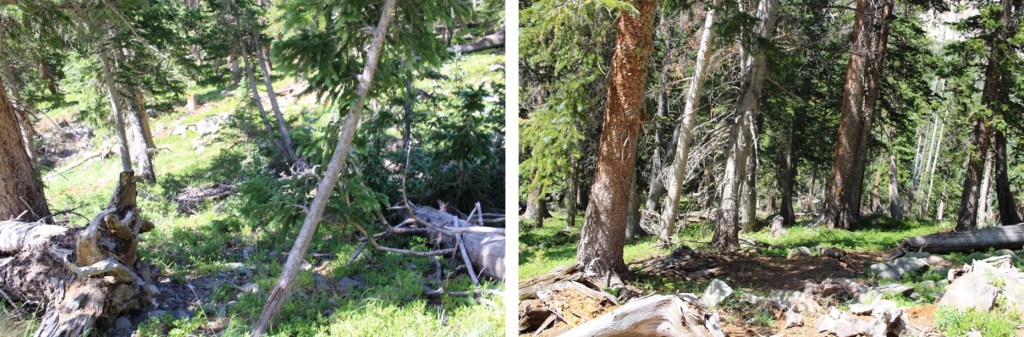
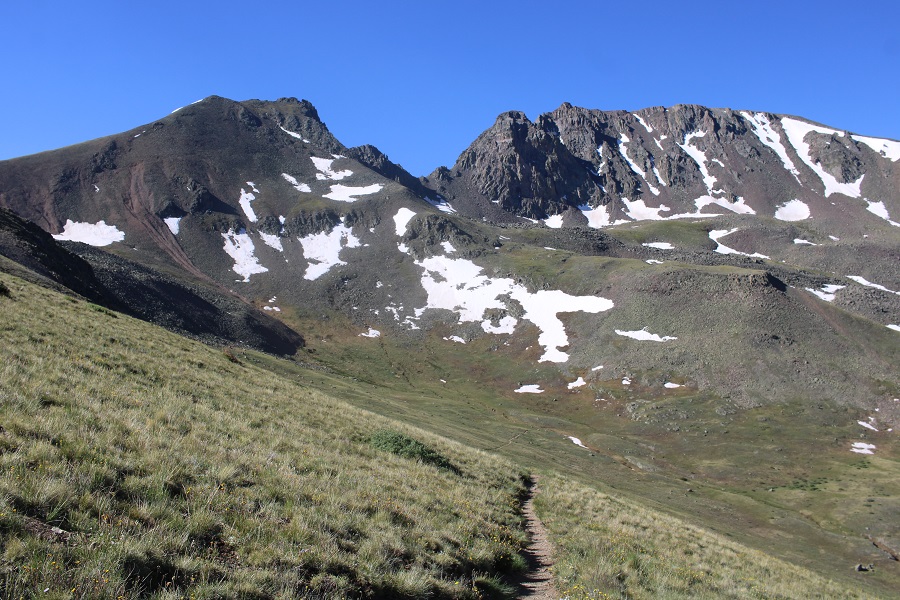
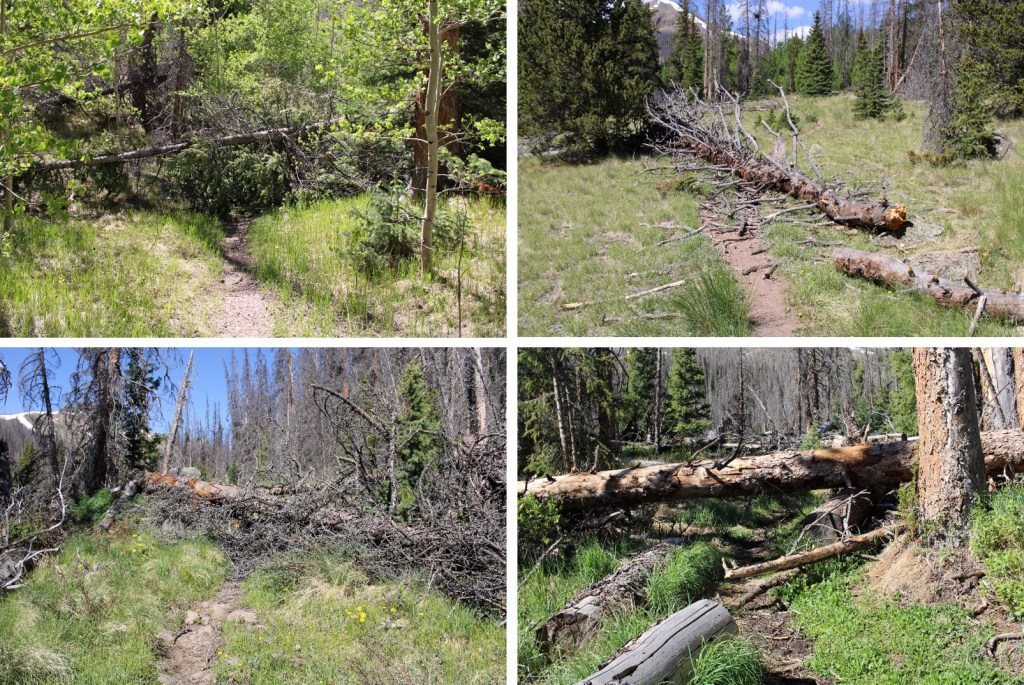
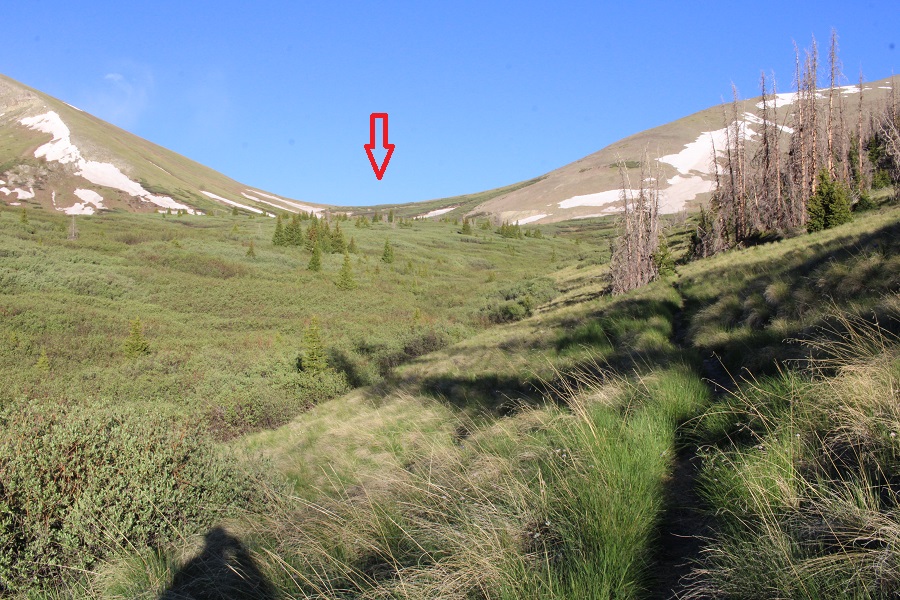
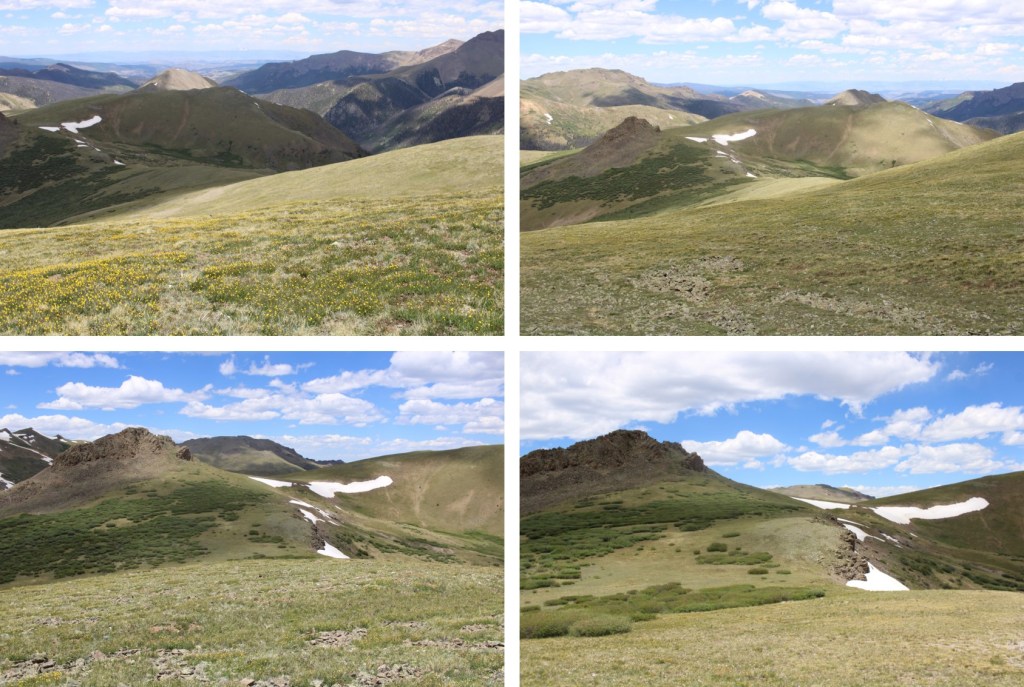
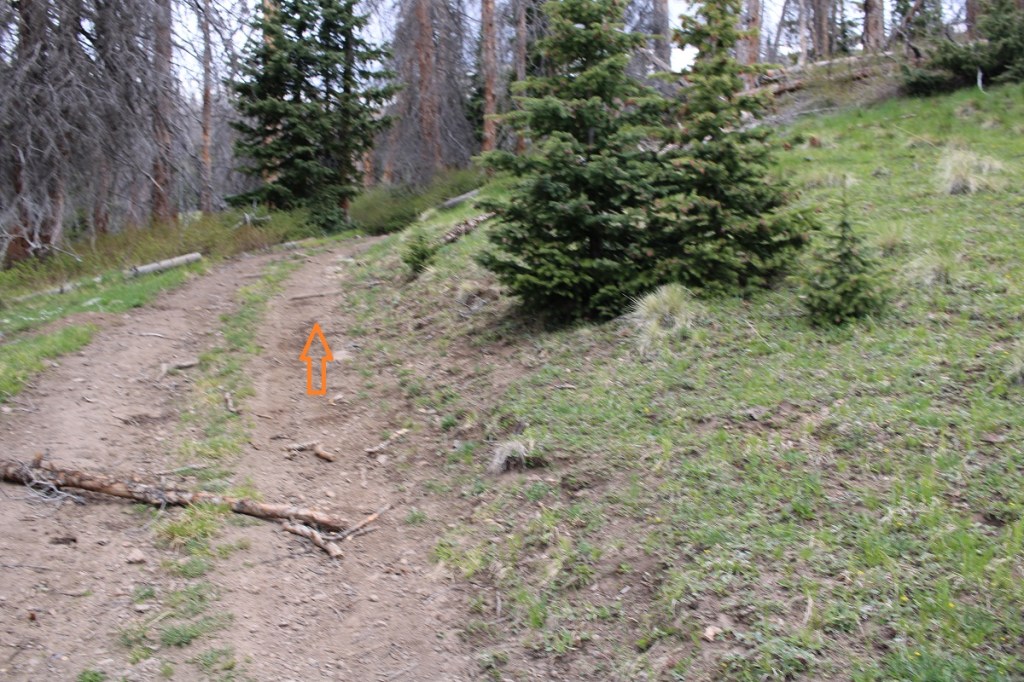
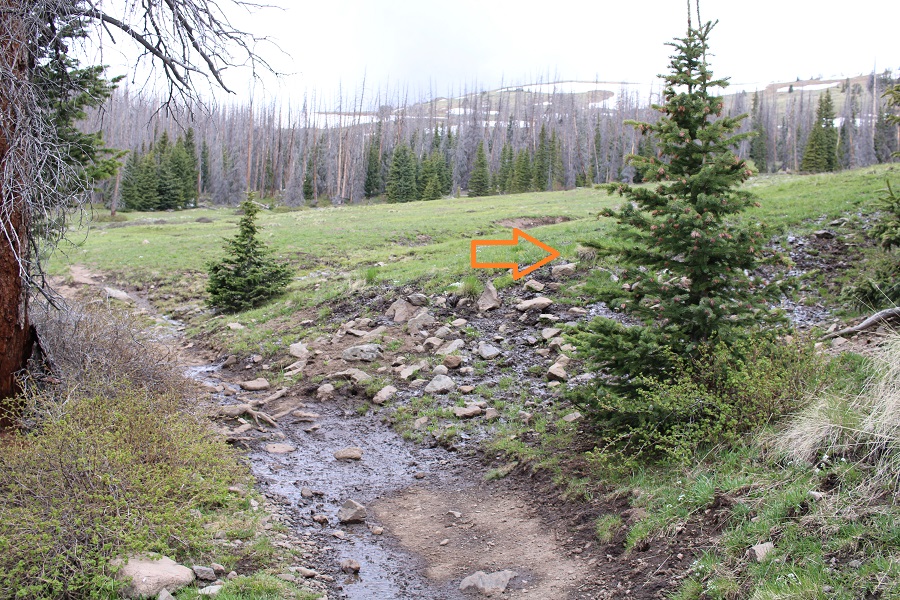
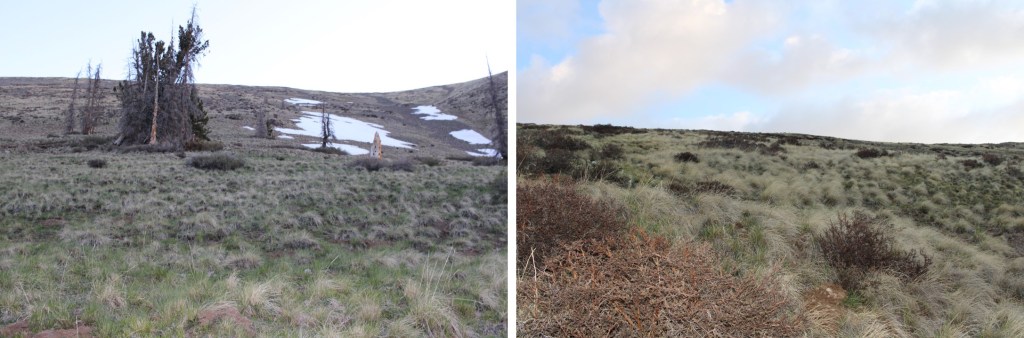
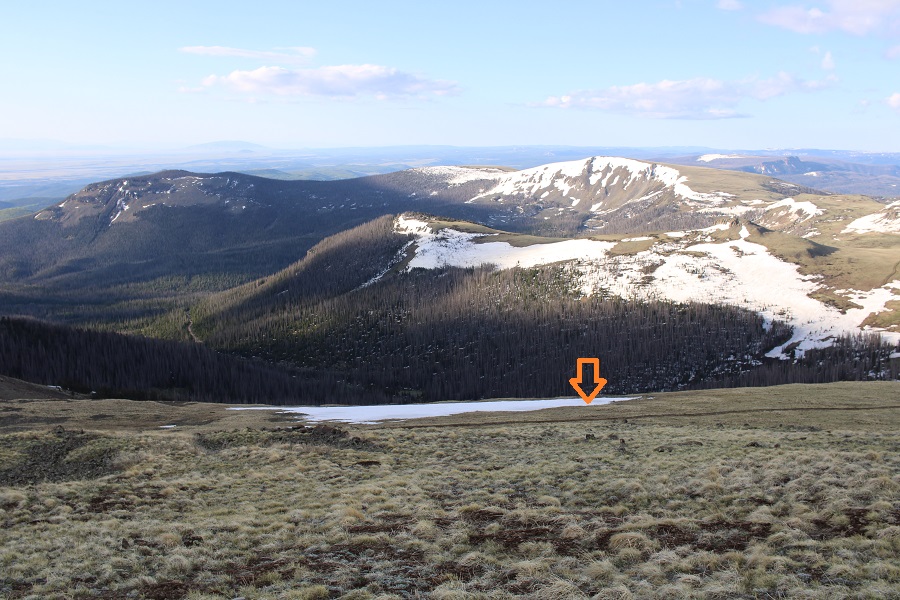
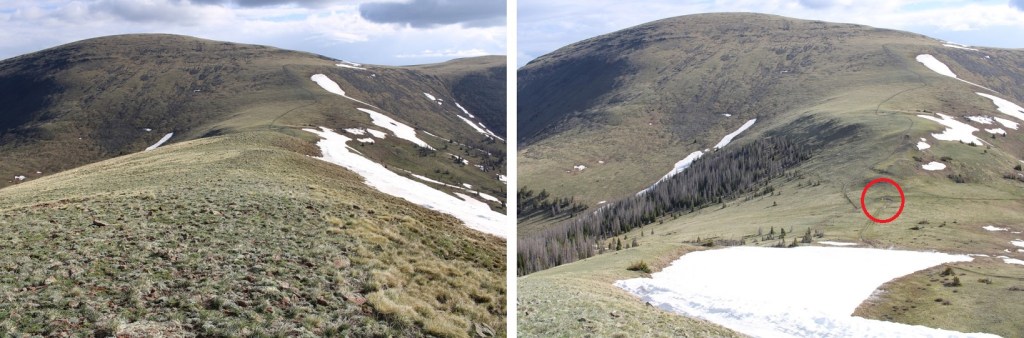
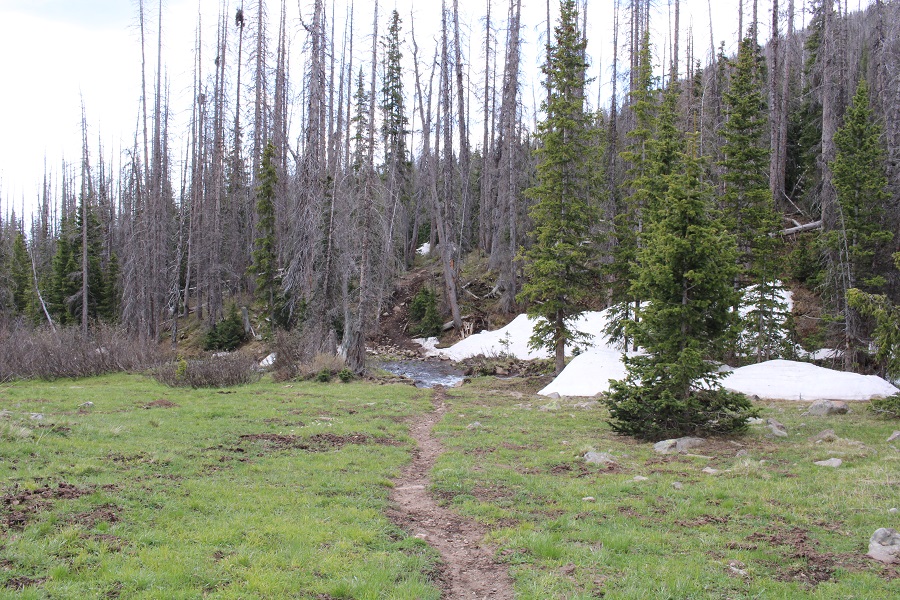
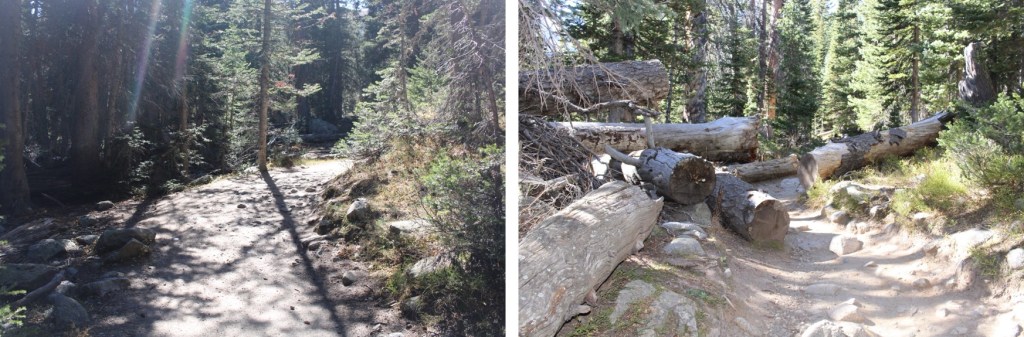
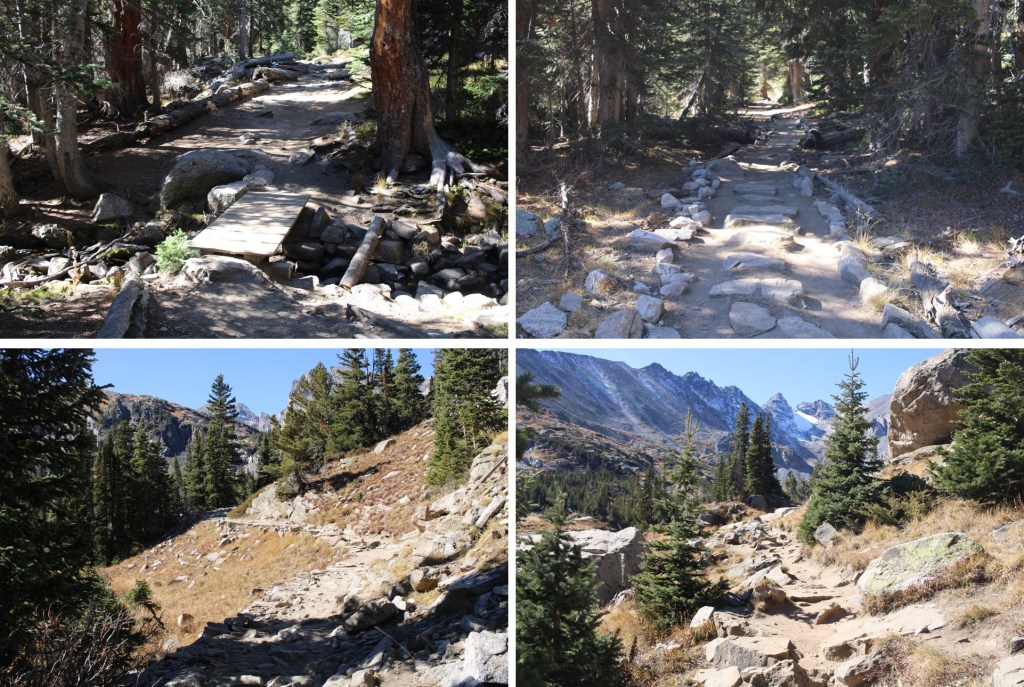
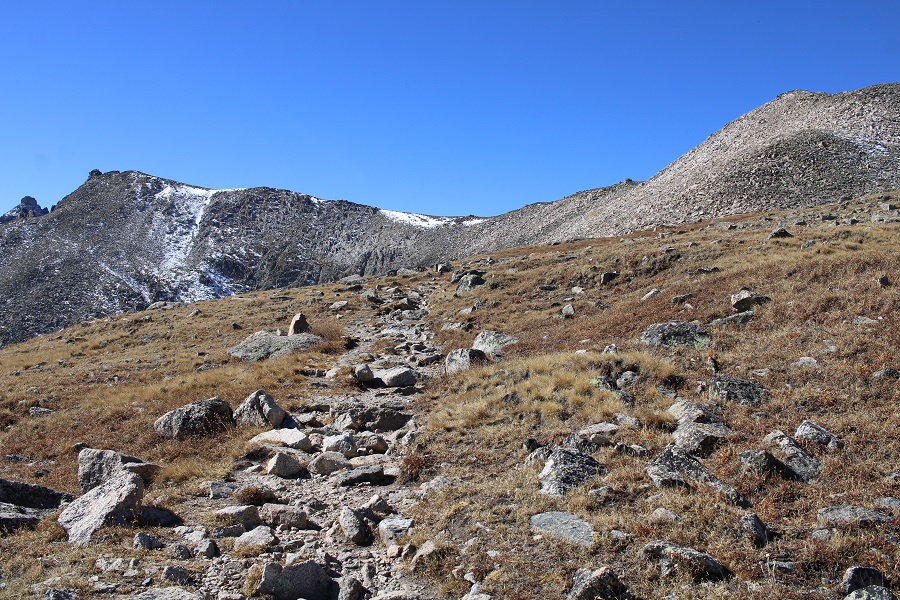
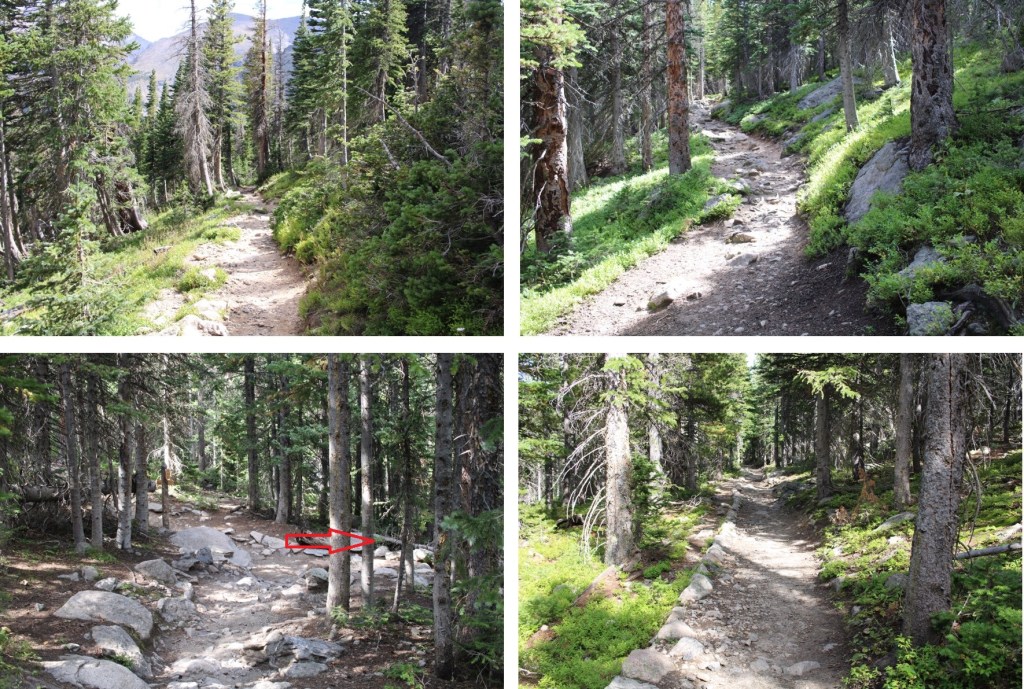
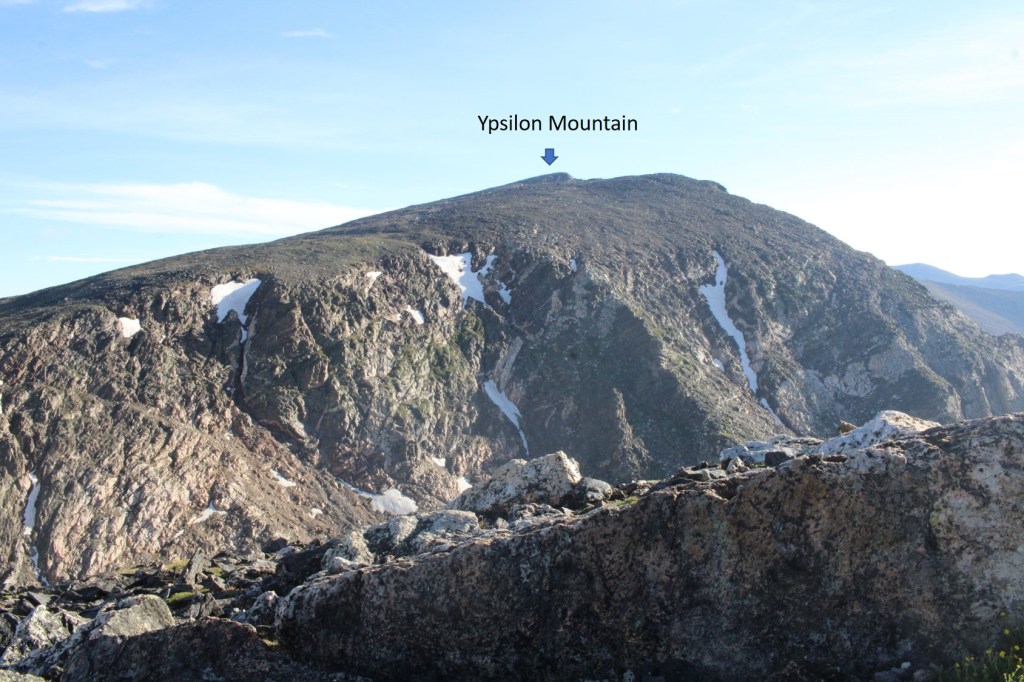
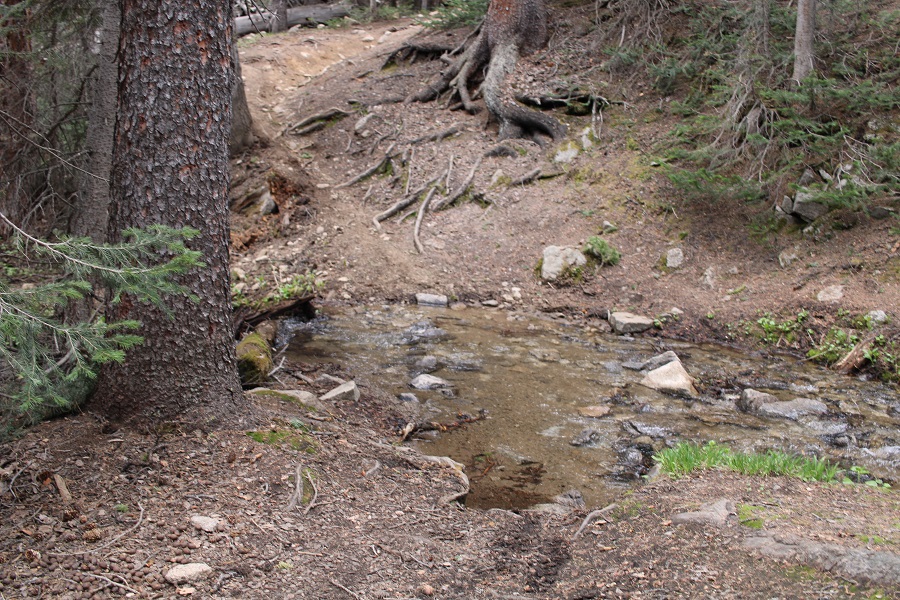
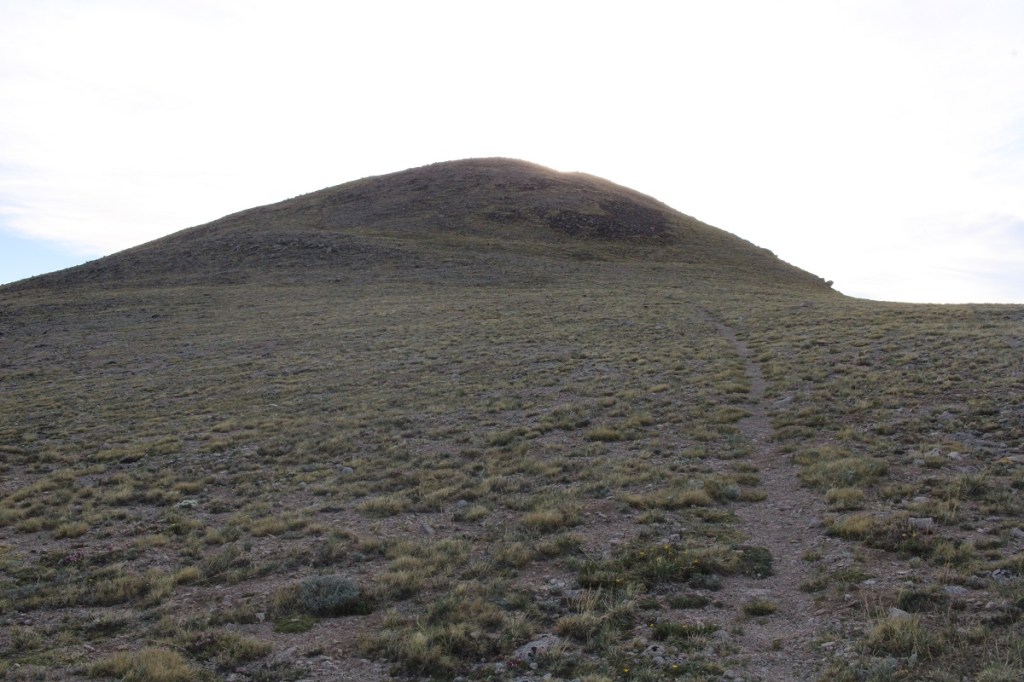
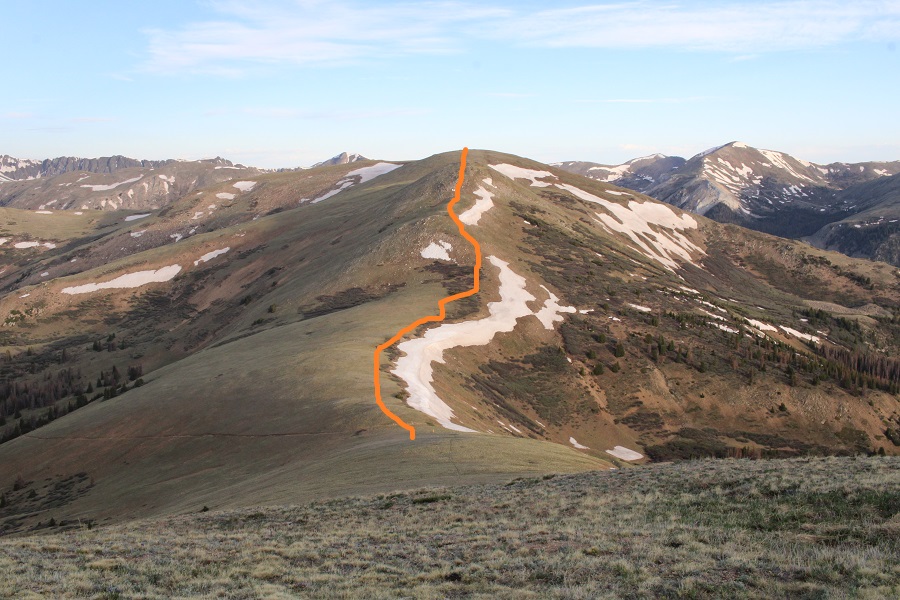
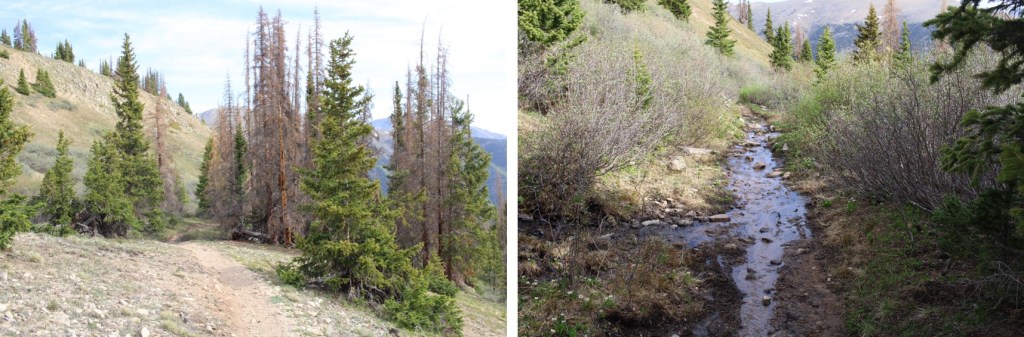
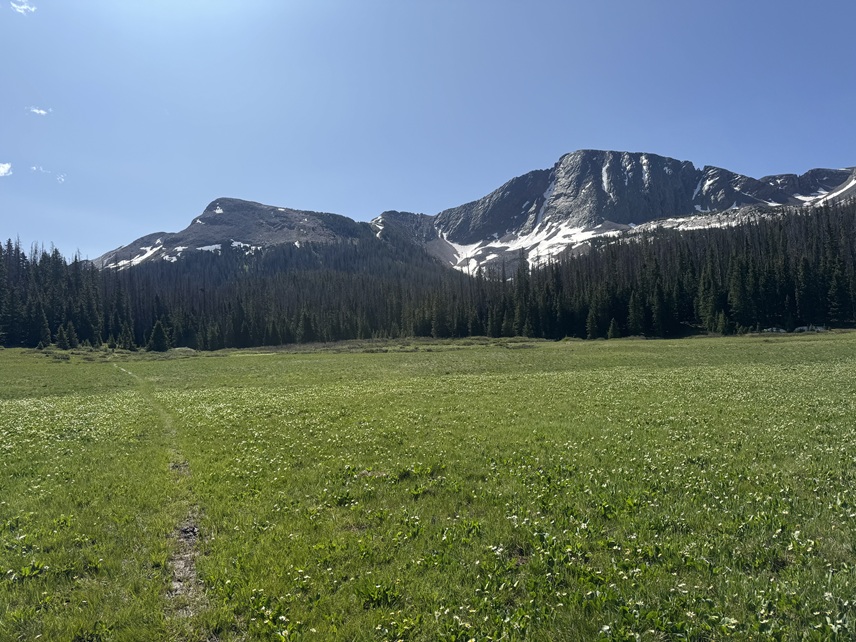
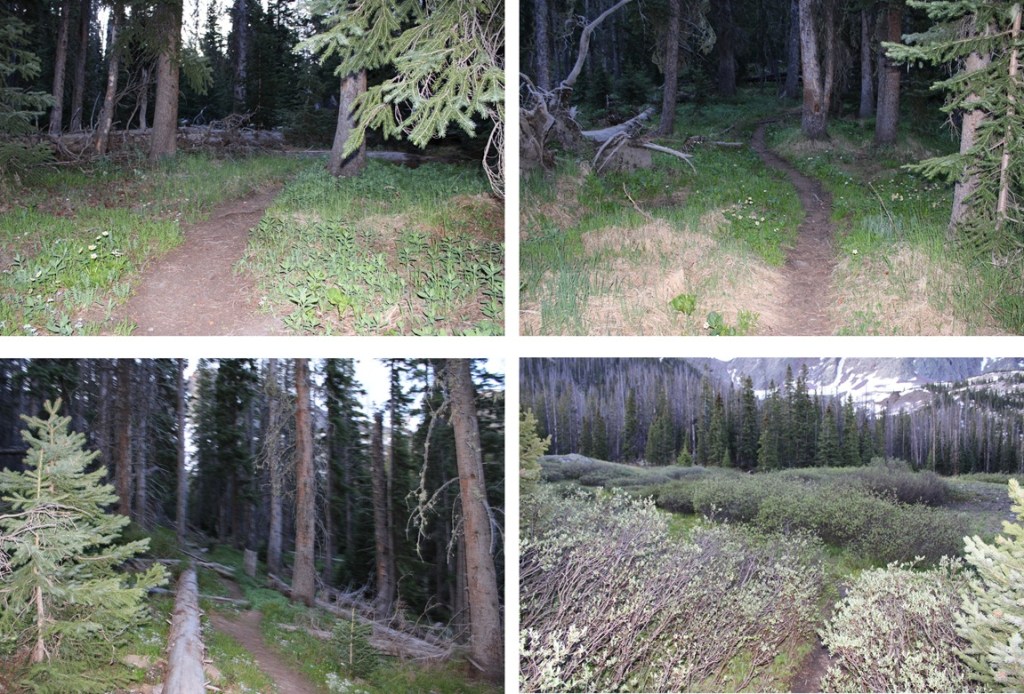
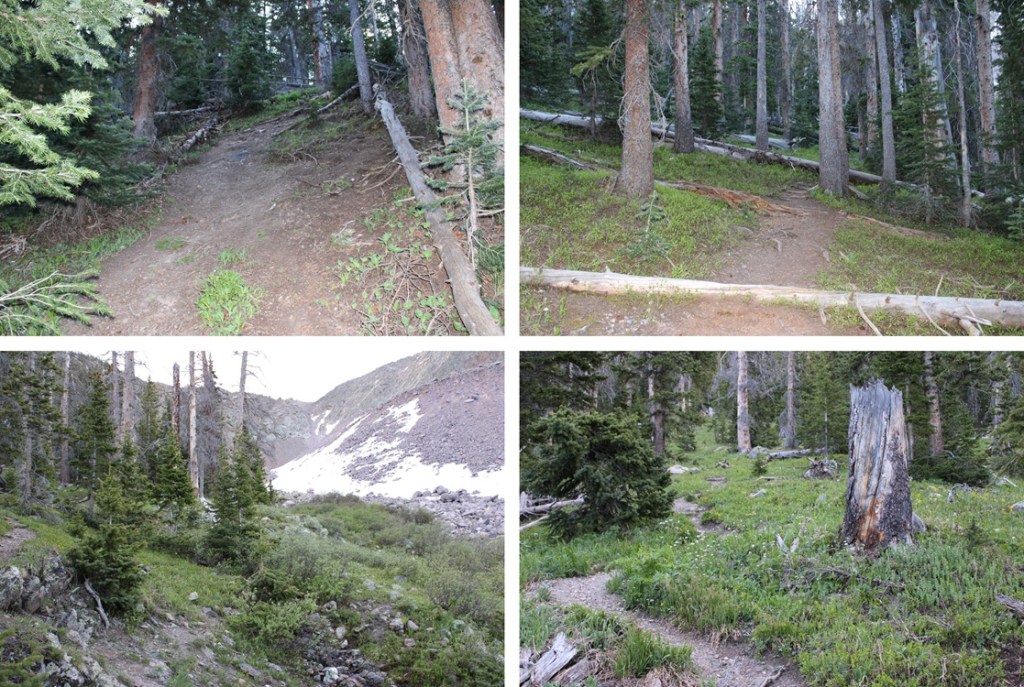
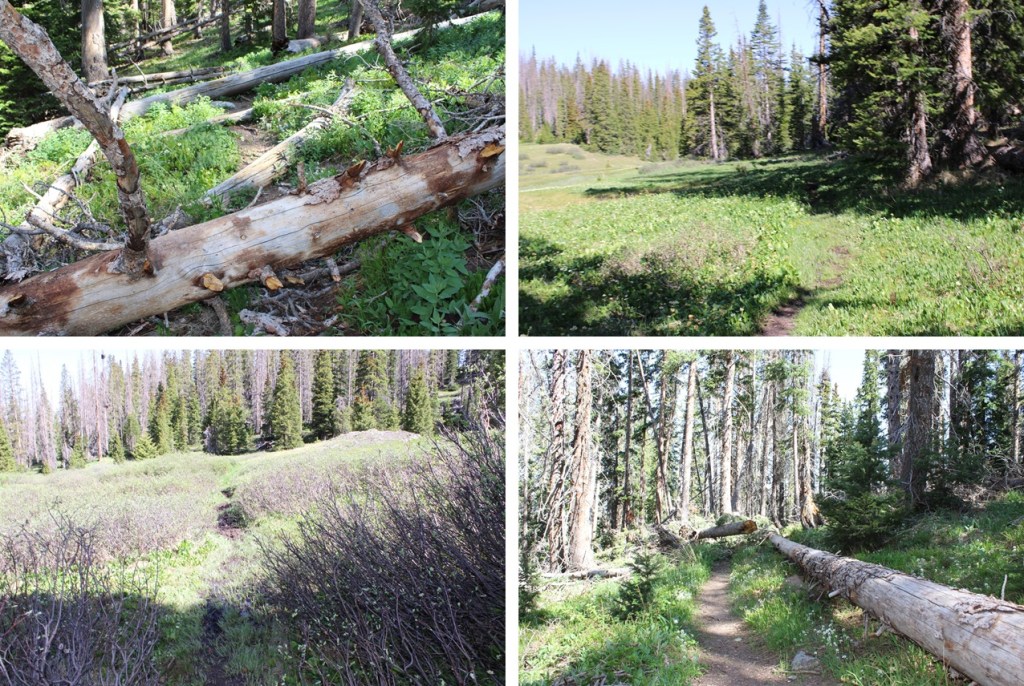
This trail was well defined in the beginning, but in the marshy areas became non-existent and I had to route find a bit.  There were areas with willows, marshes, and trees.  There were a few downed trees along the trail, but nothing too difficult to cross. I was headed towards this gully (there’s a good trail at the base). 

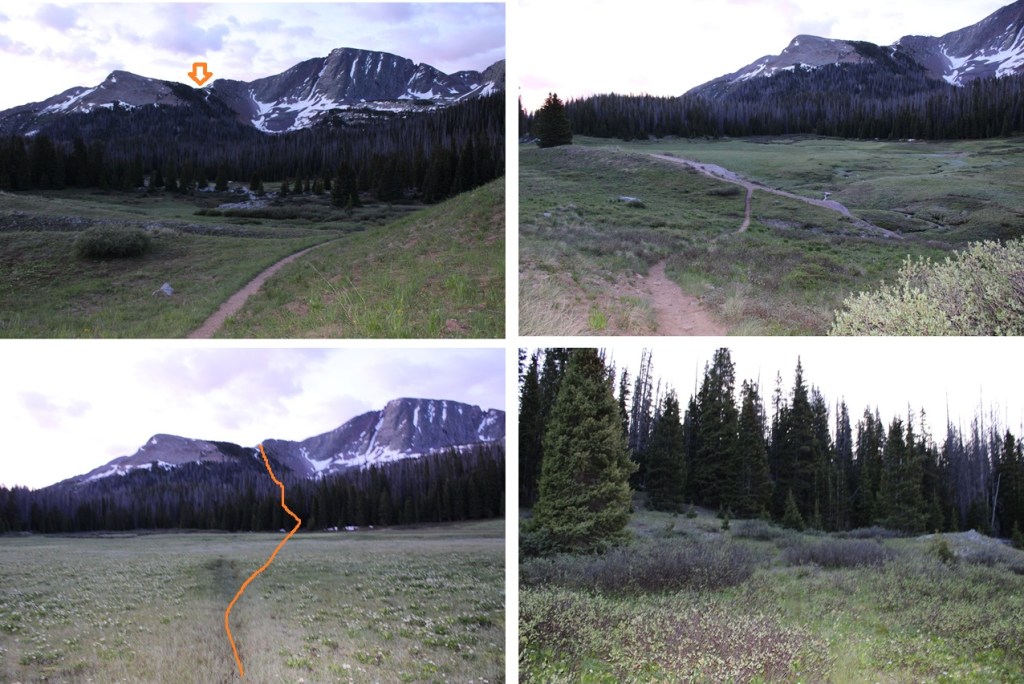
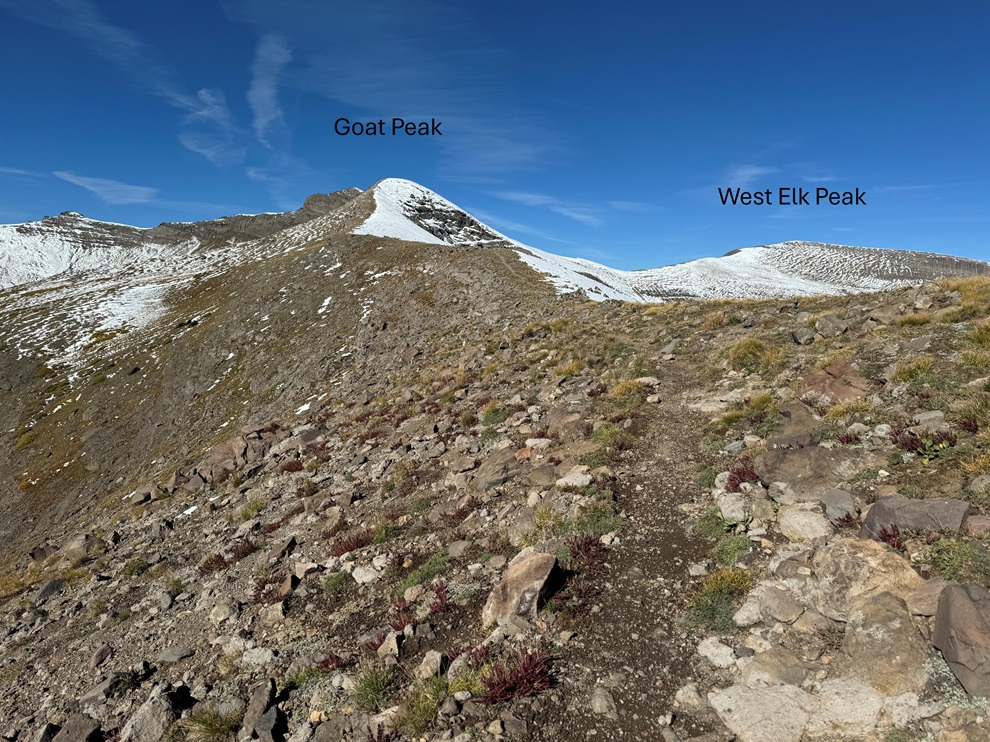
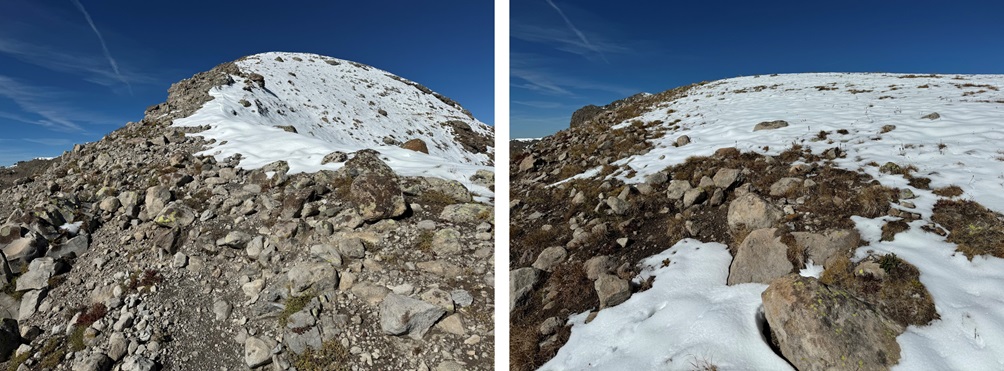
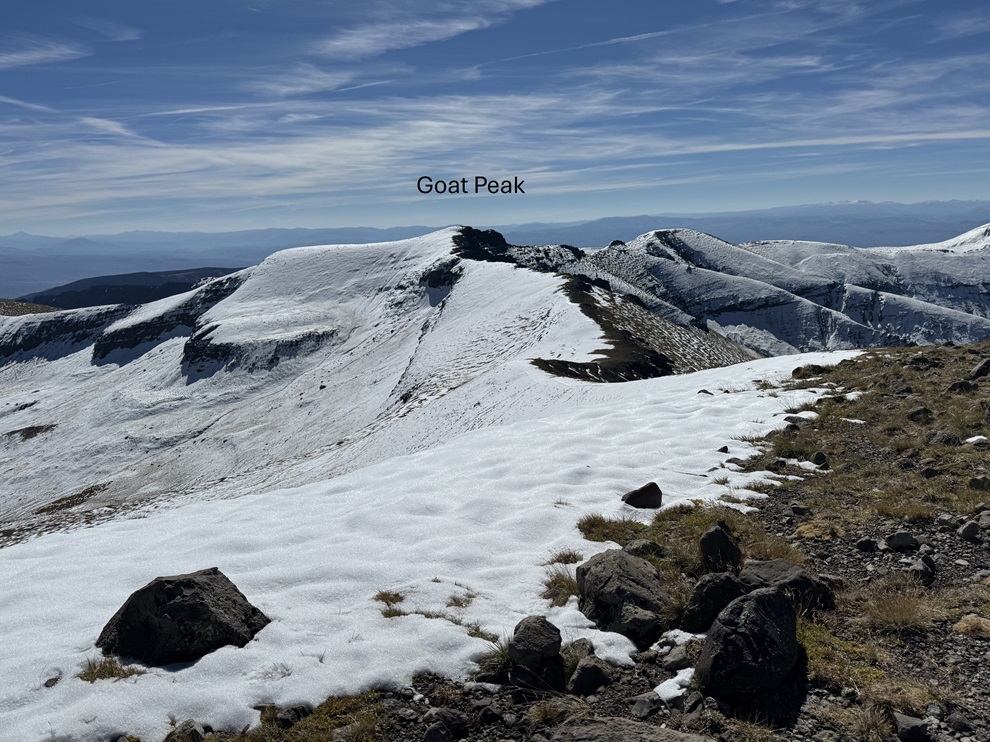
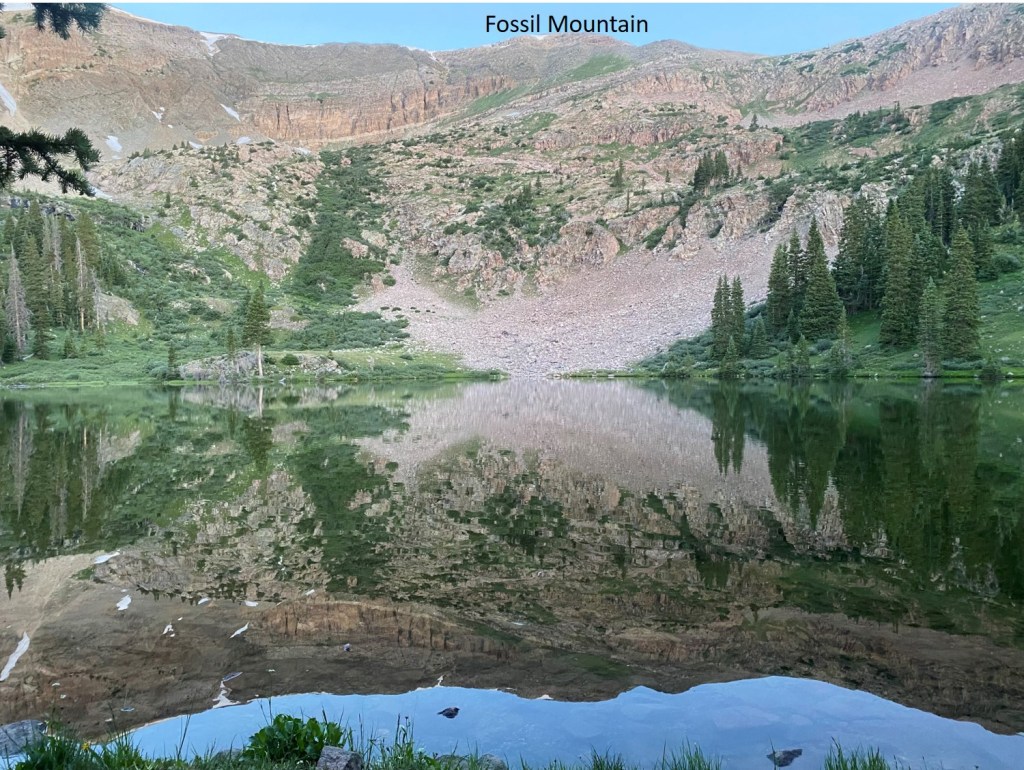
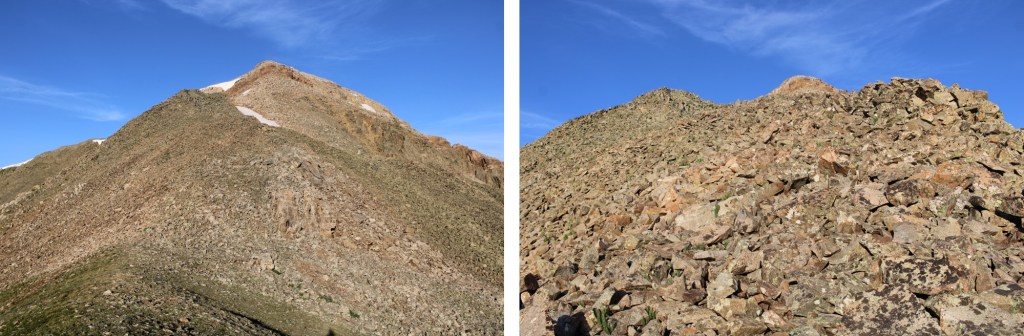
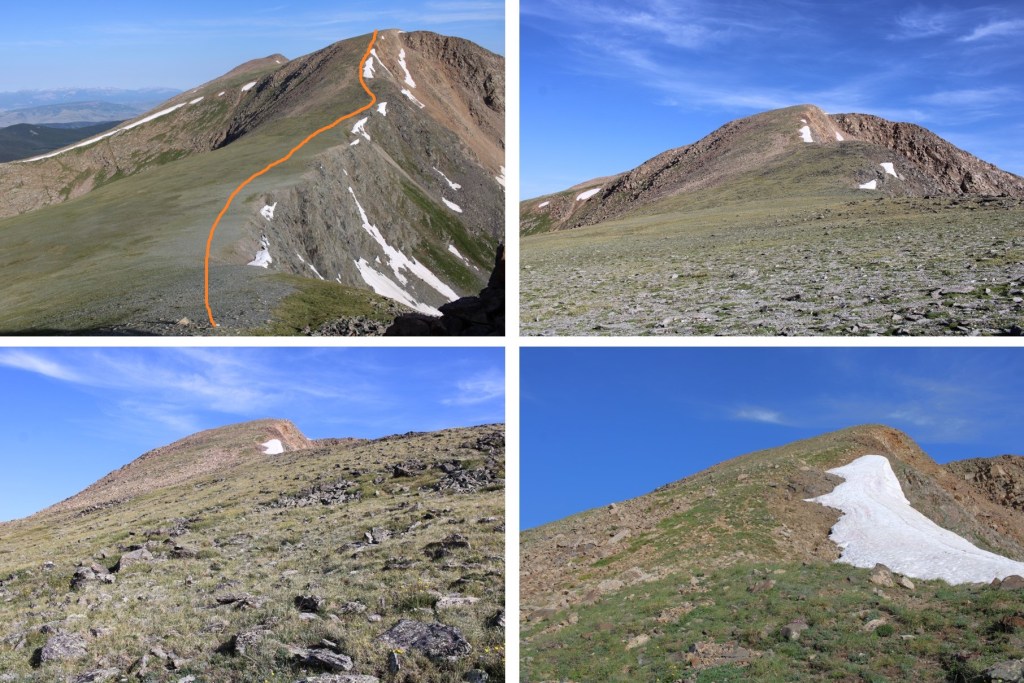
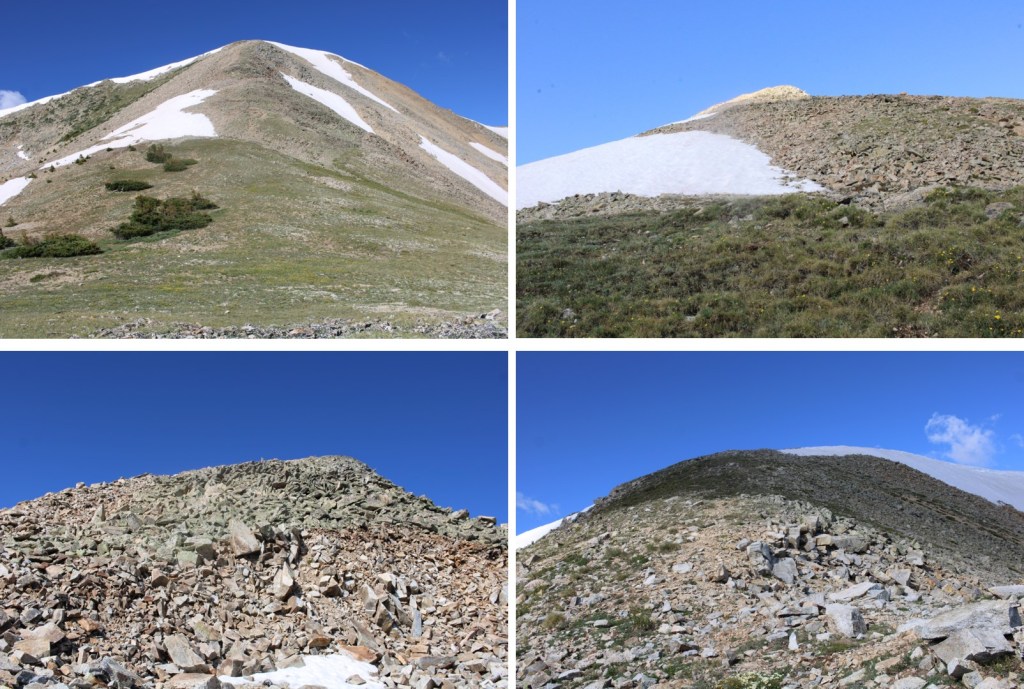
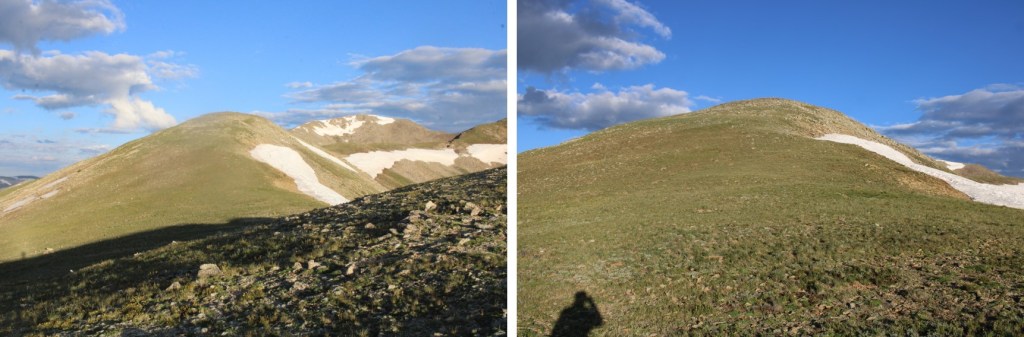
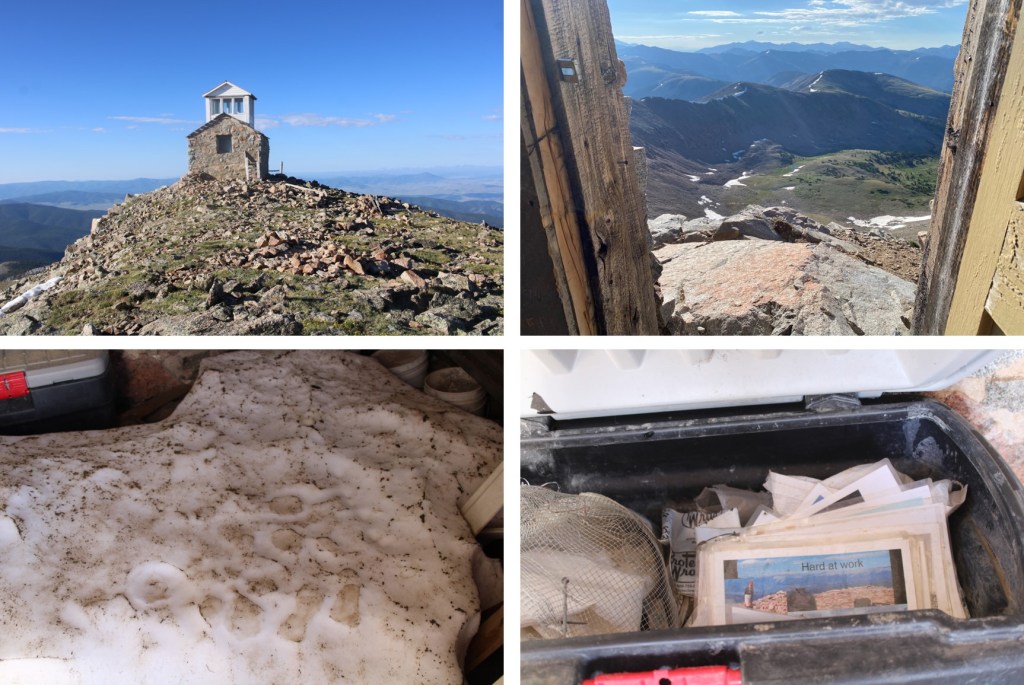
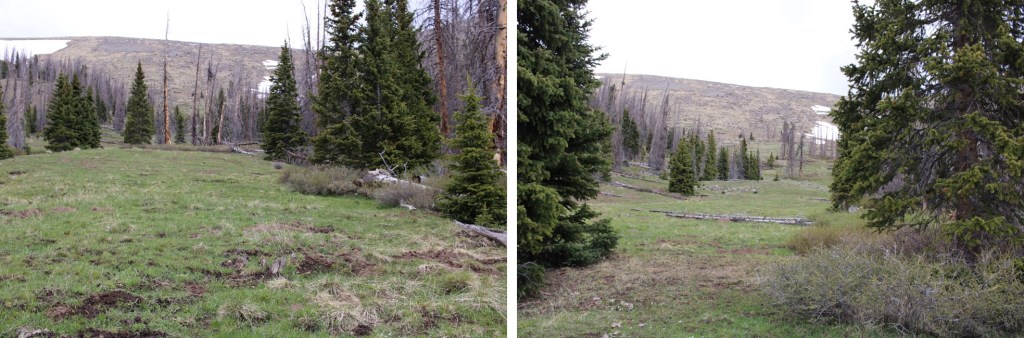
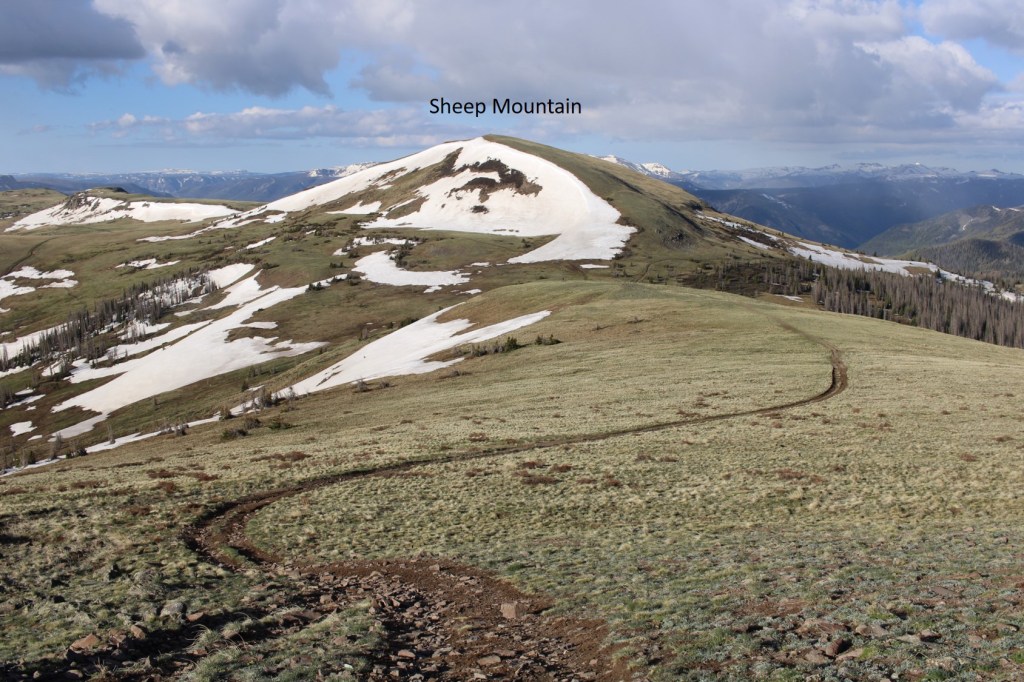
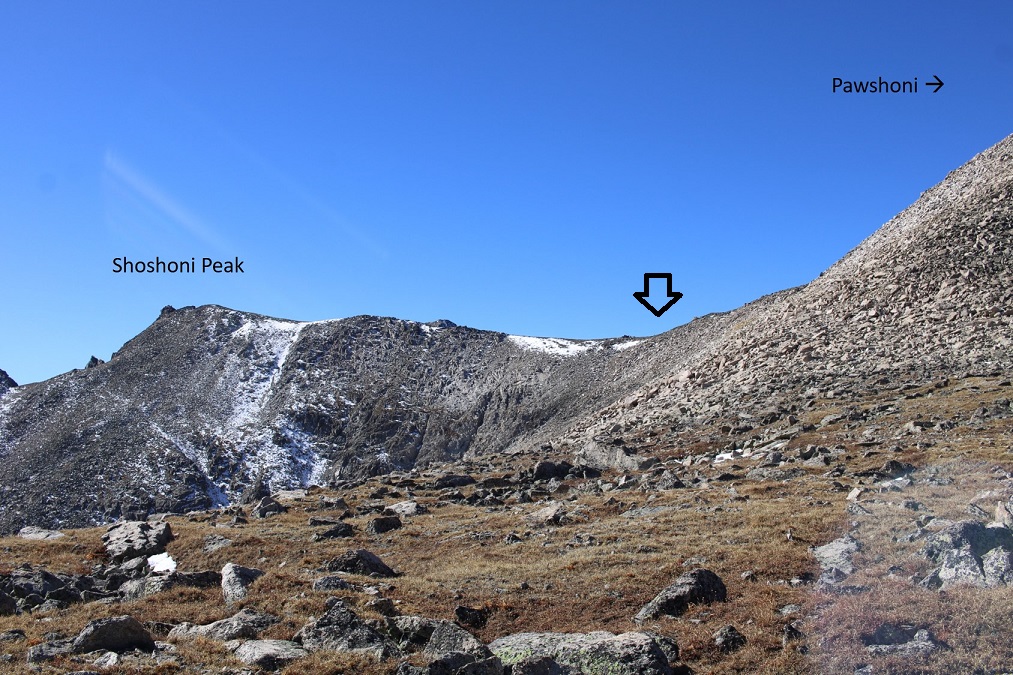
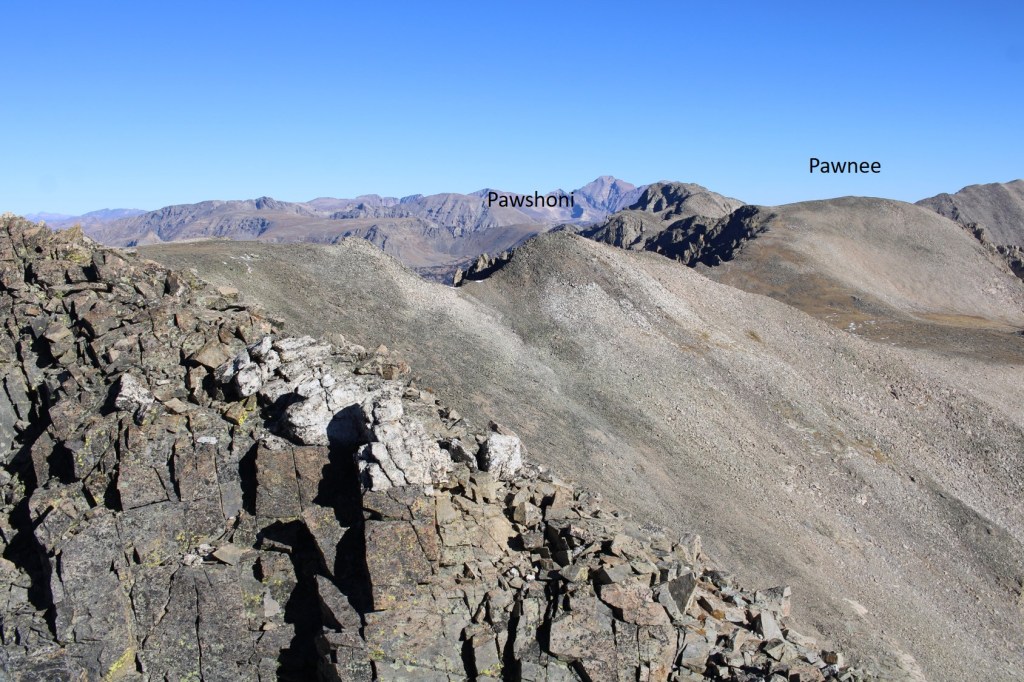
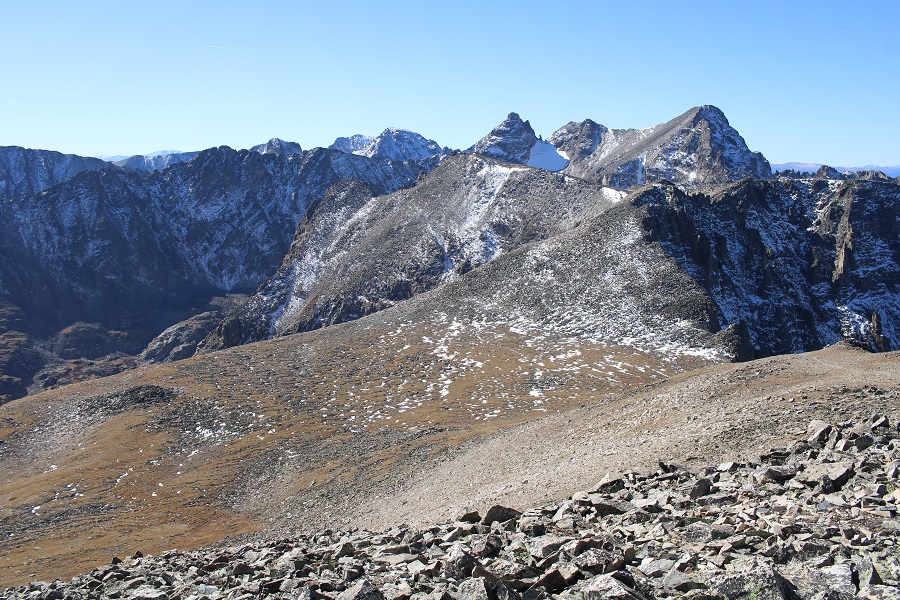
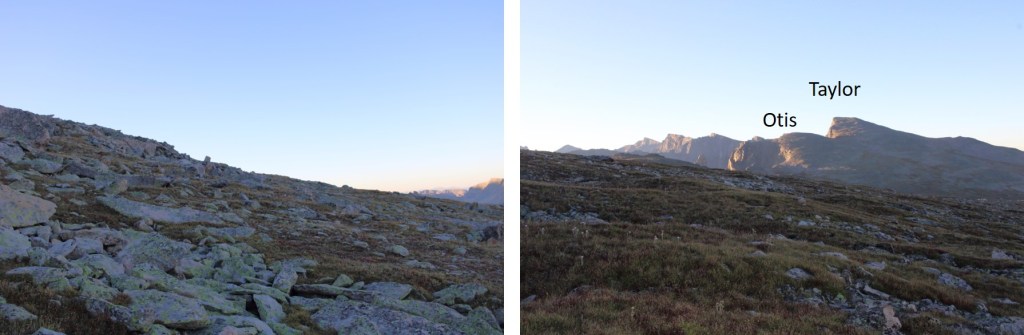
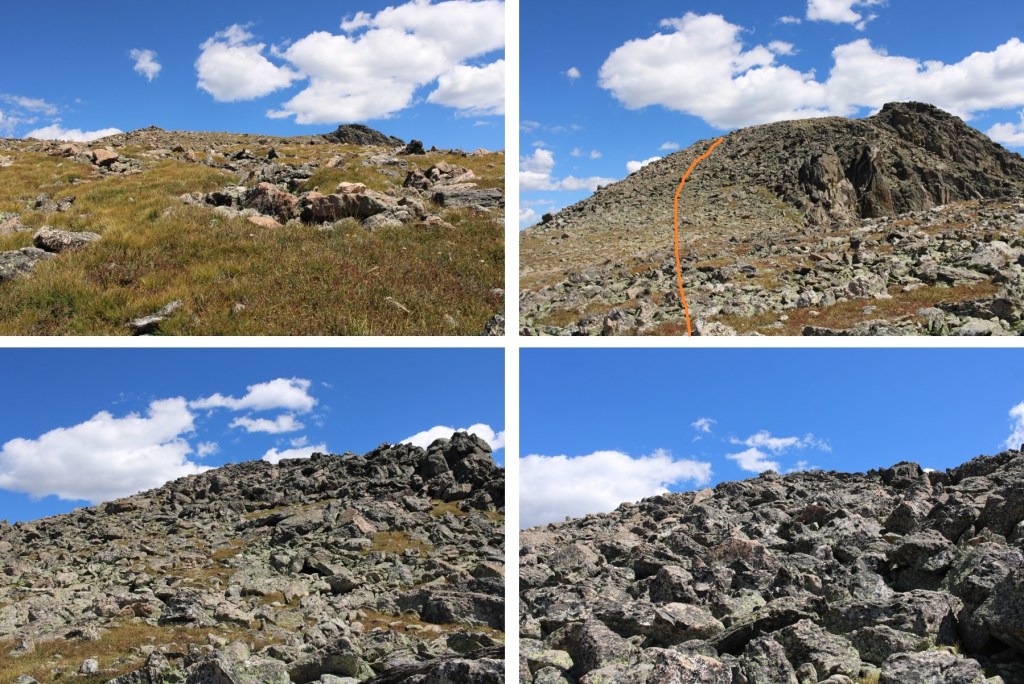
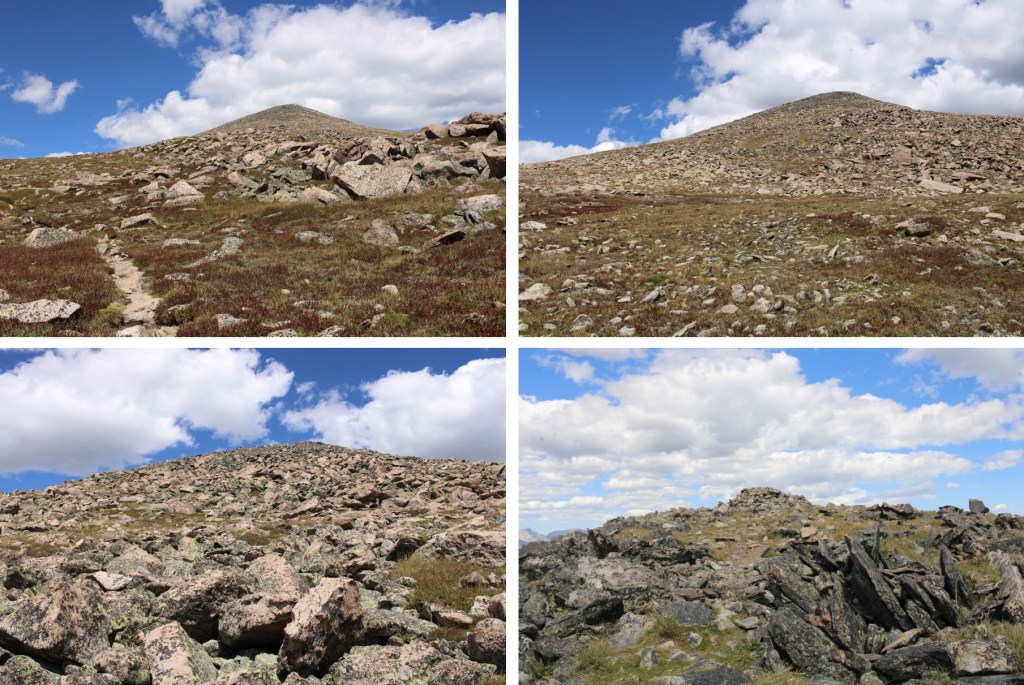
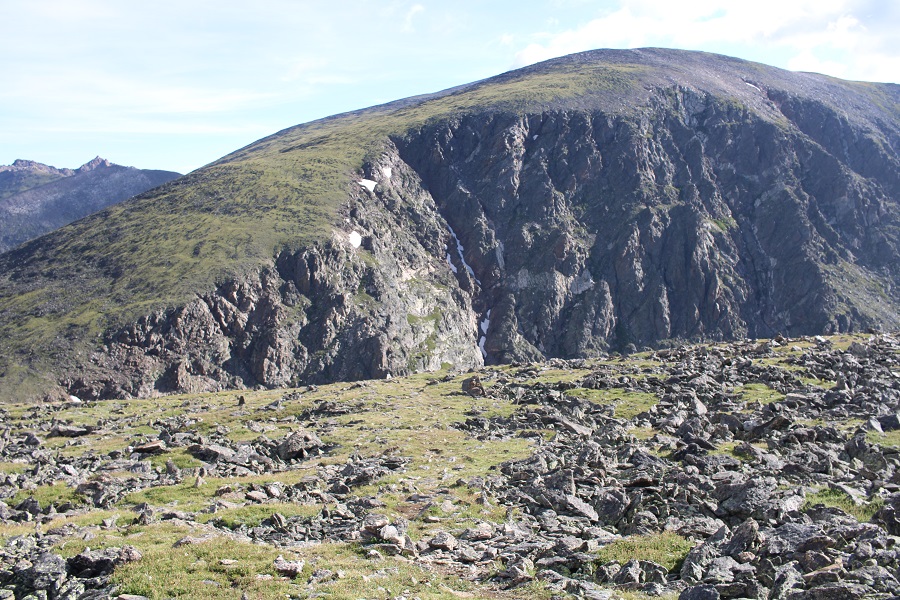
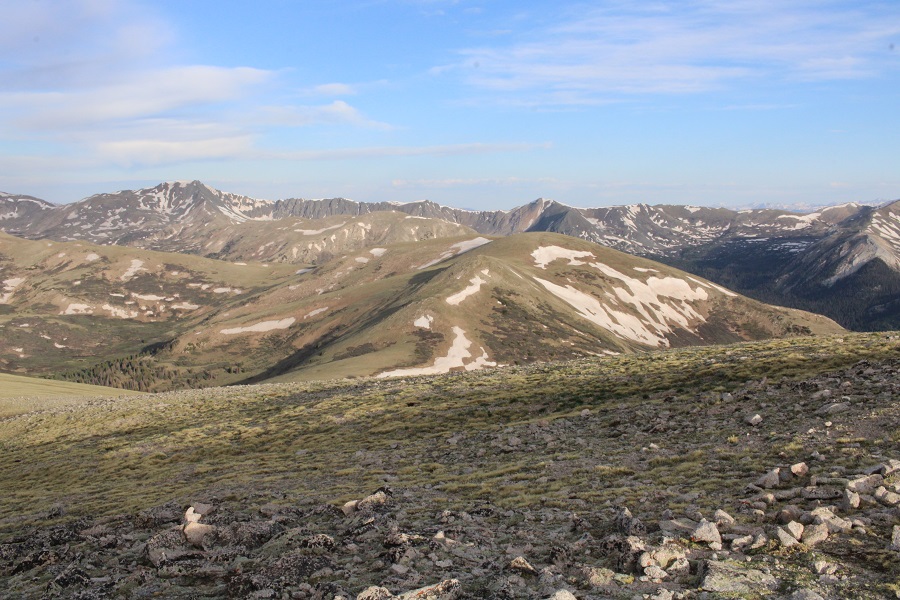
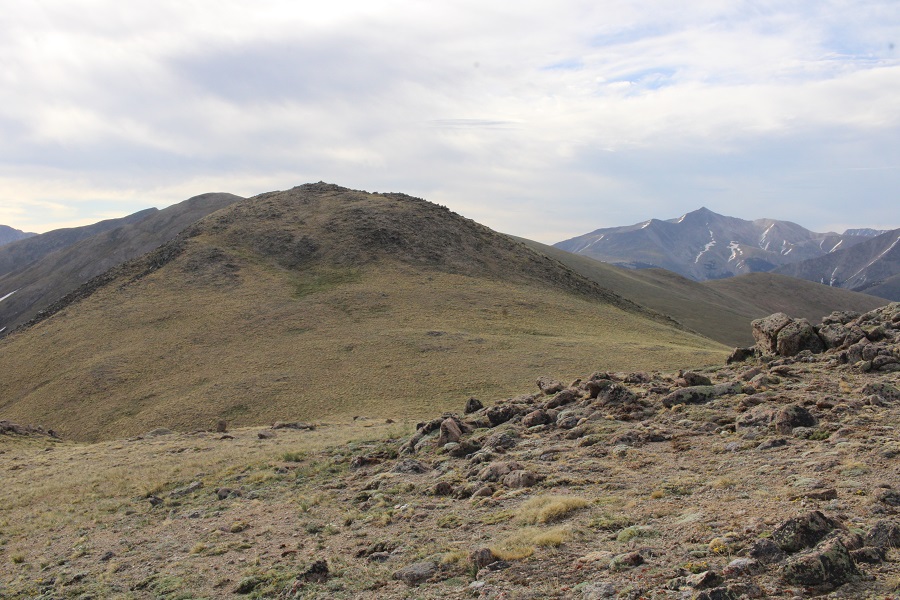
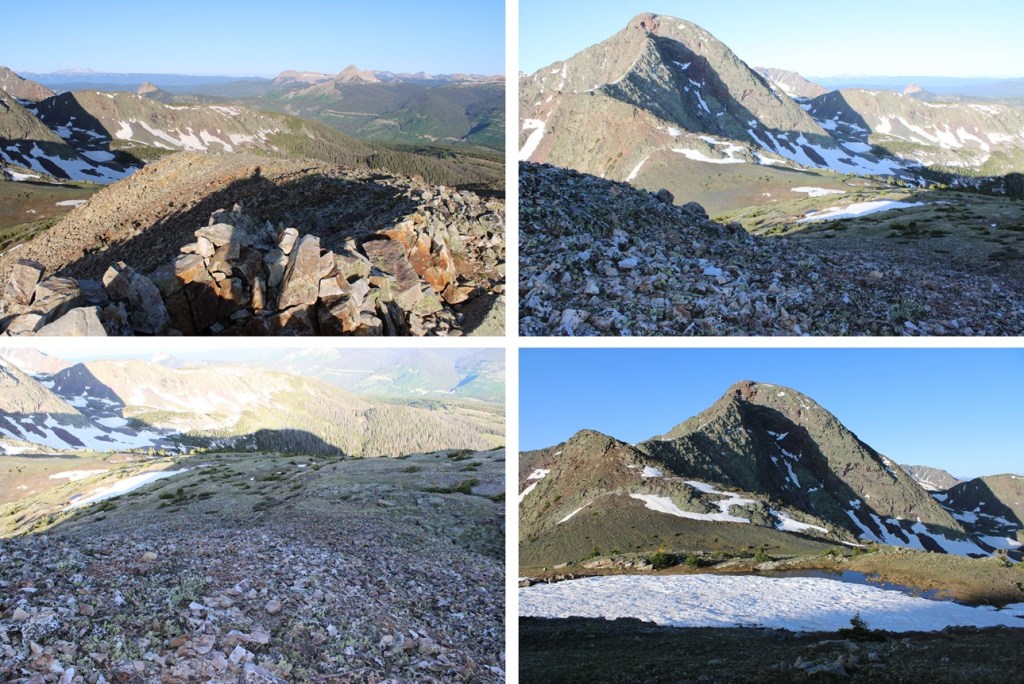
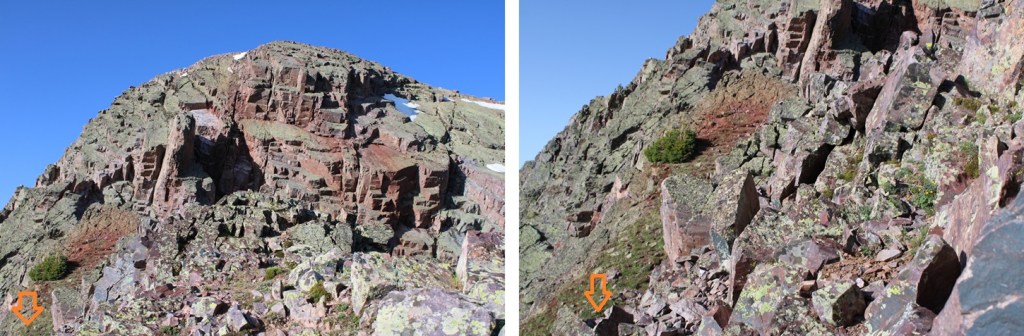
For reference, these are N1 and Snowdon

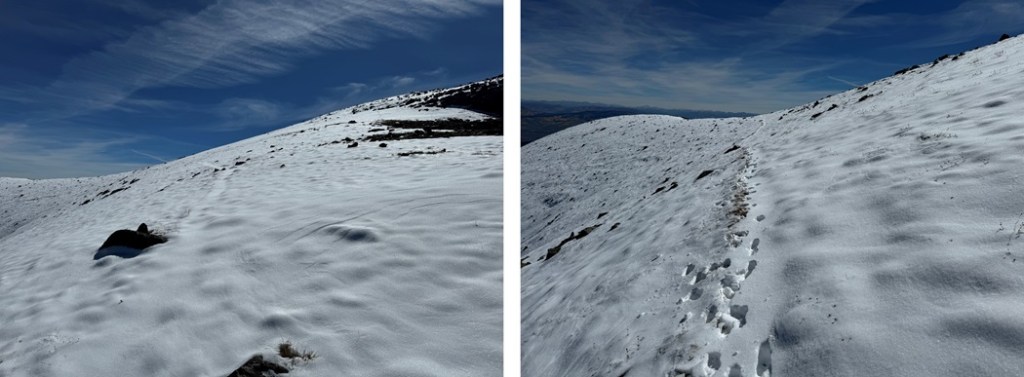
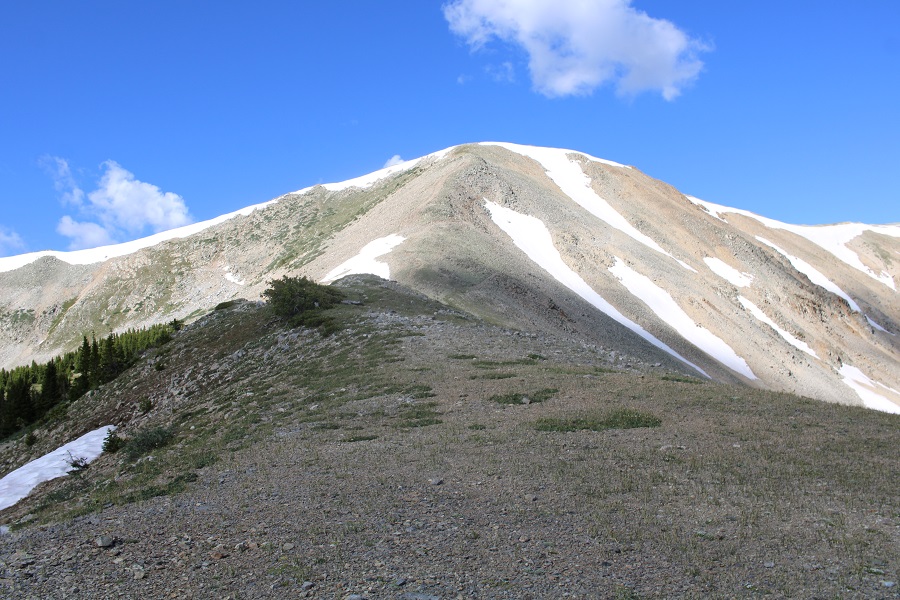
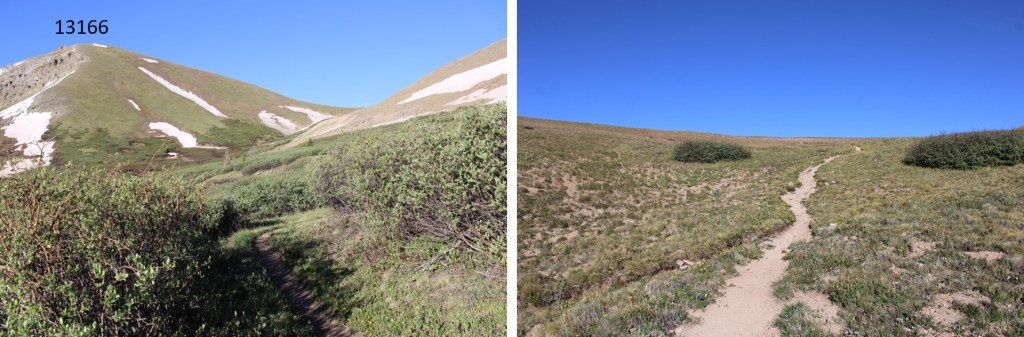
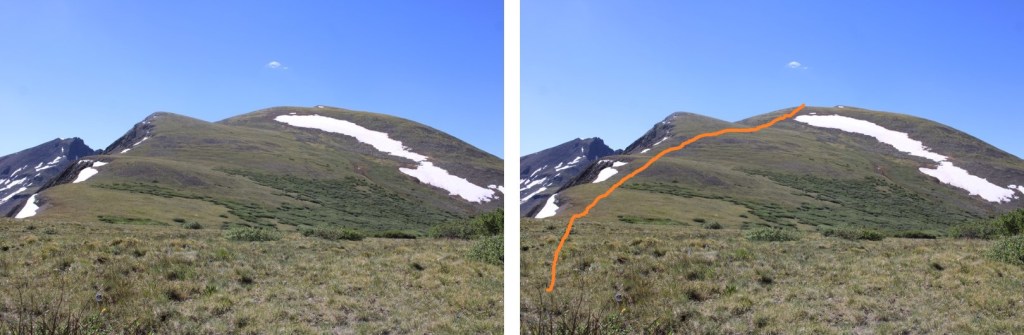
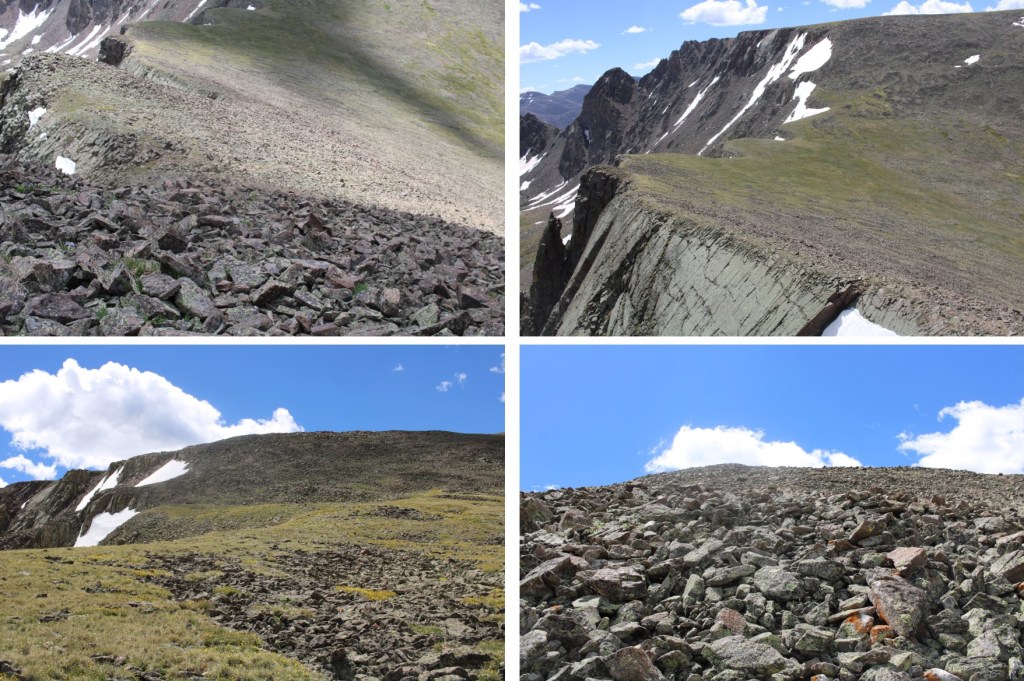
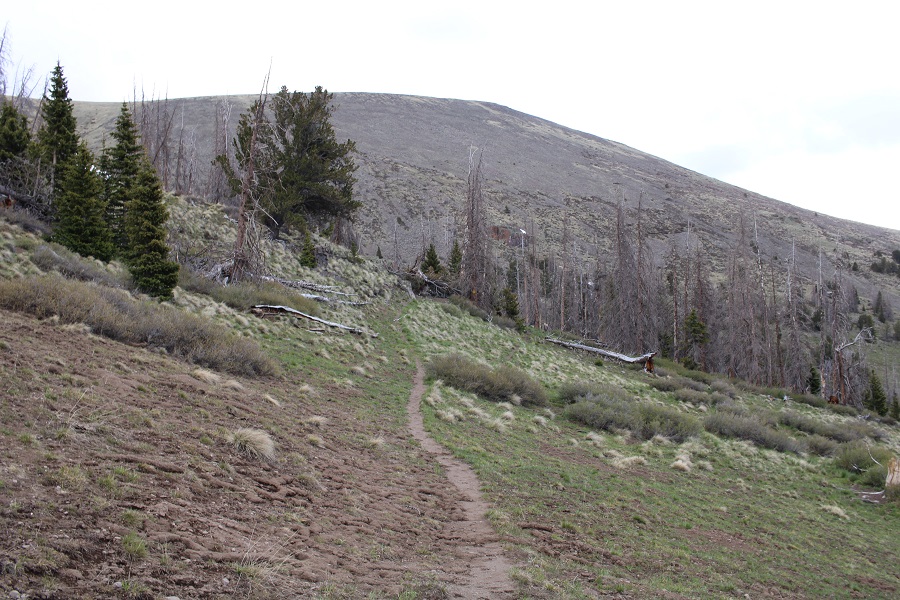
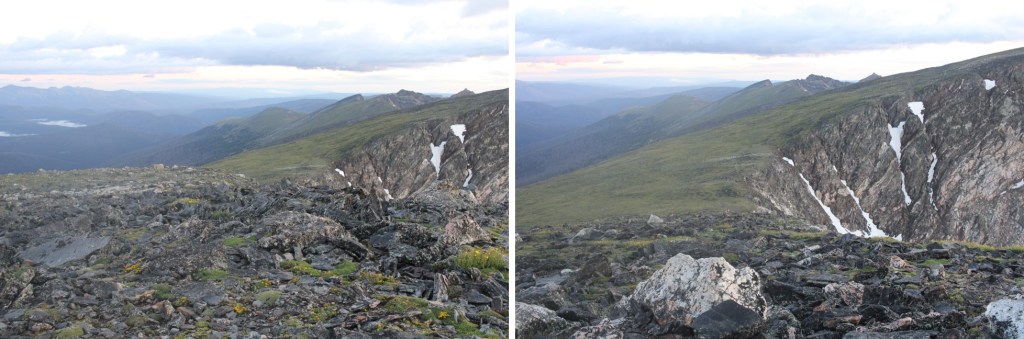
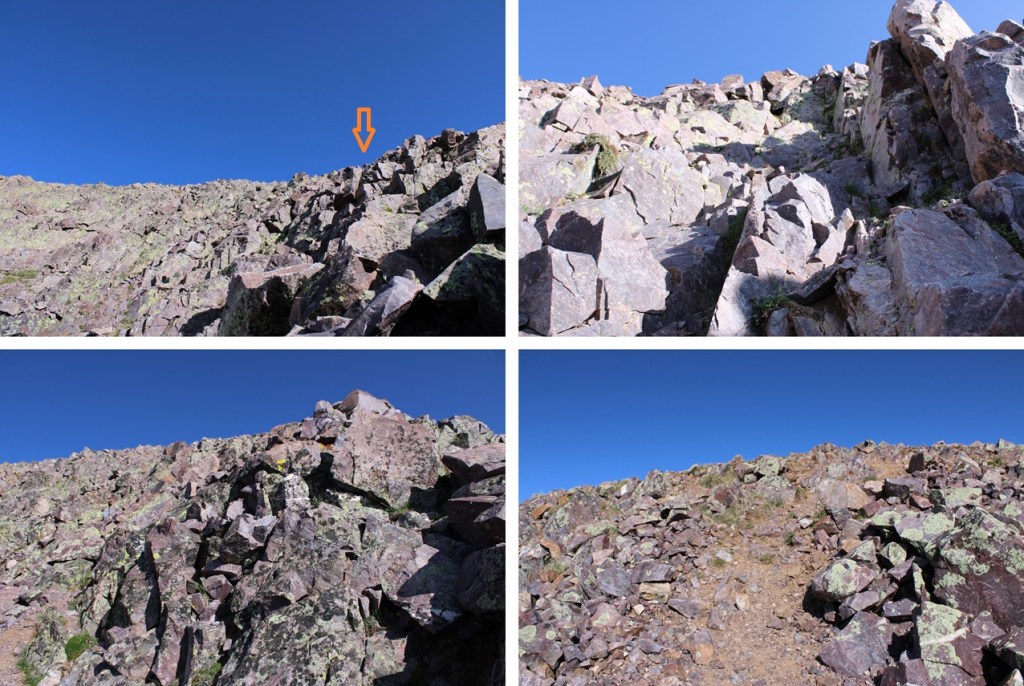
I followed the gully up a class 1, steep trail for 550’ in elevation.

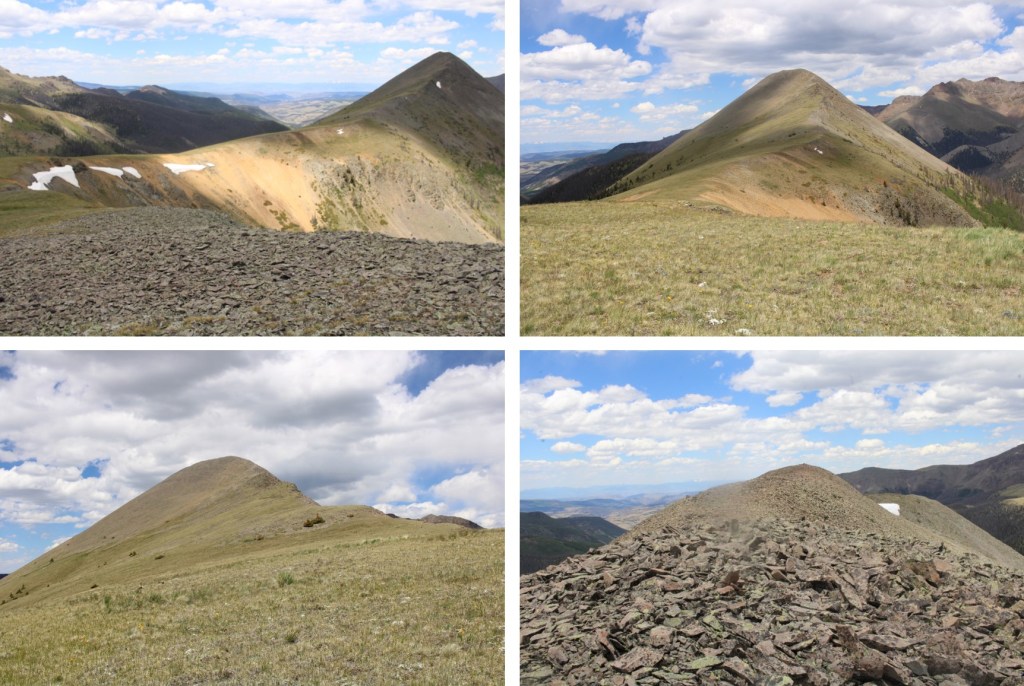
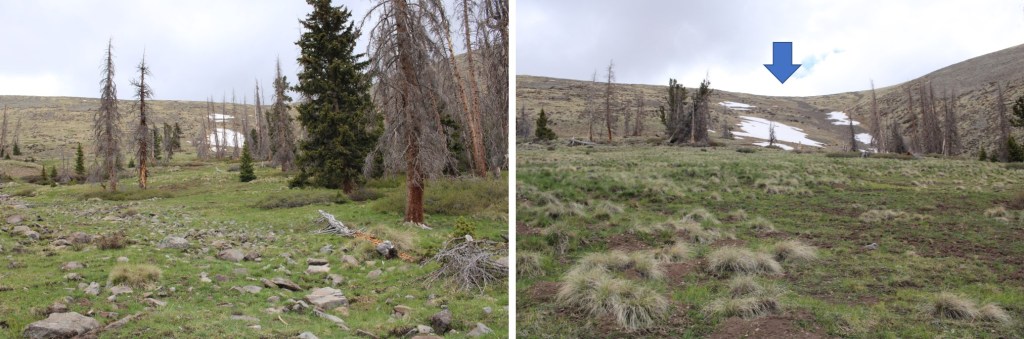
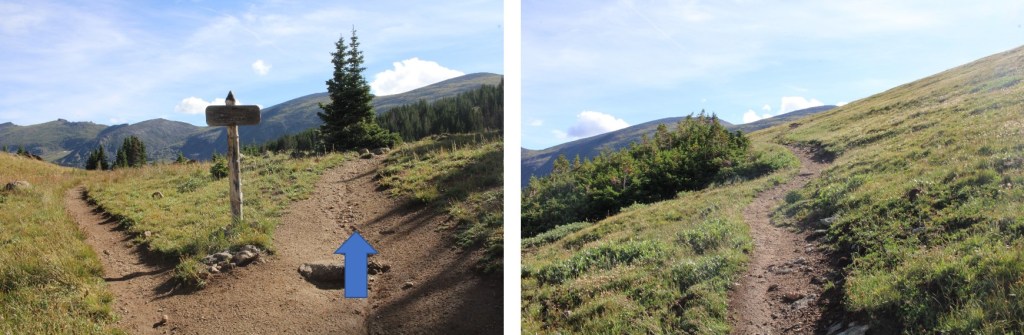
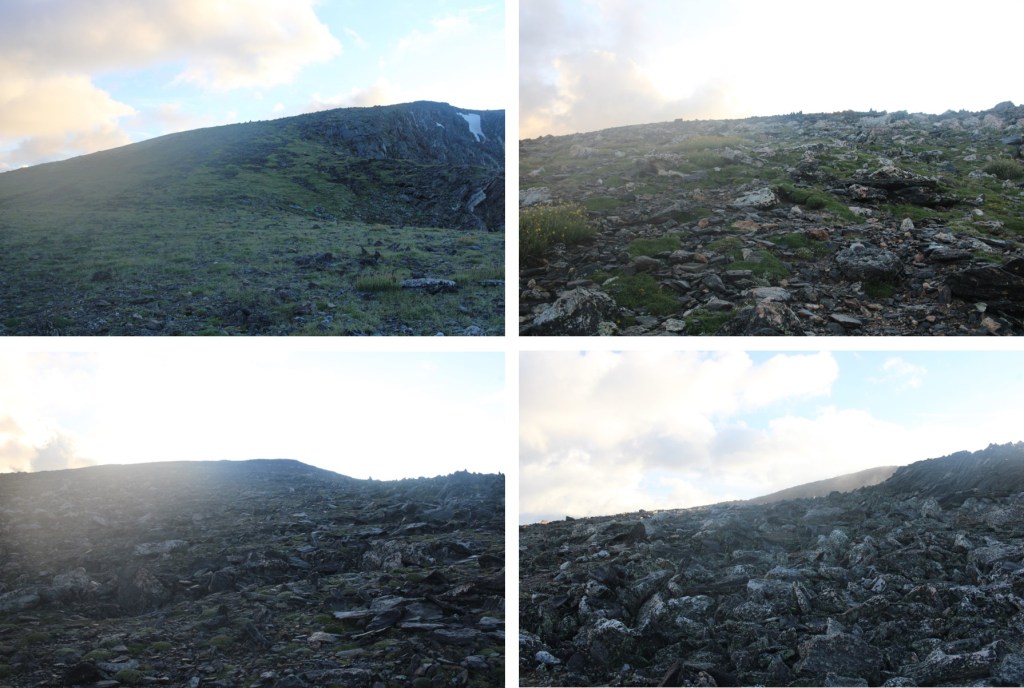
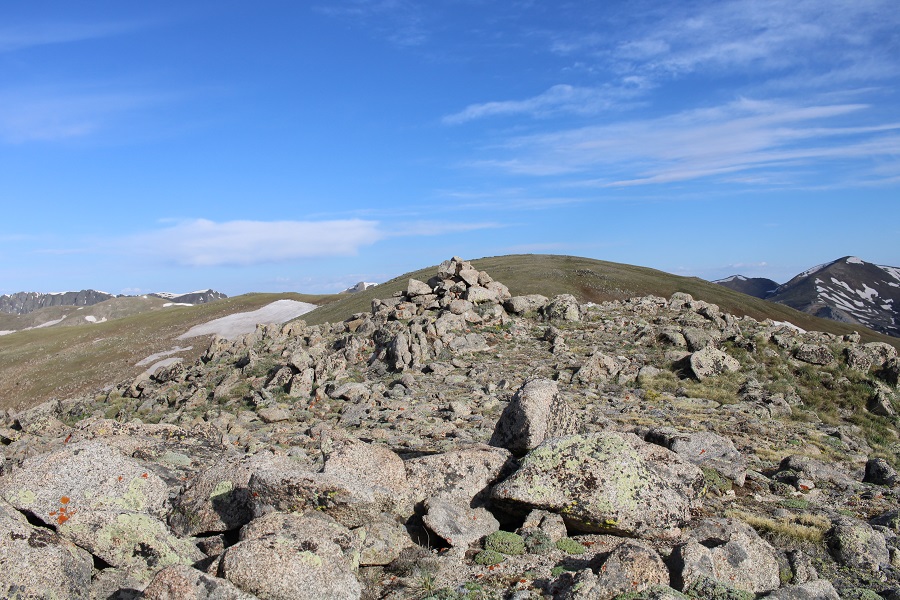
At the top of the gully the trail ended.  I went left and headed northeast towards the summit of N1.  This was all class 2 and the route was obvious.  It felt “too easy”, almost like it shouldn’t have been ranked.

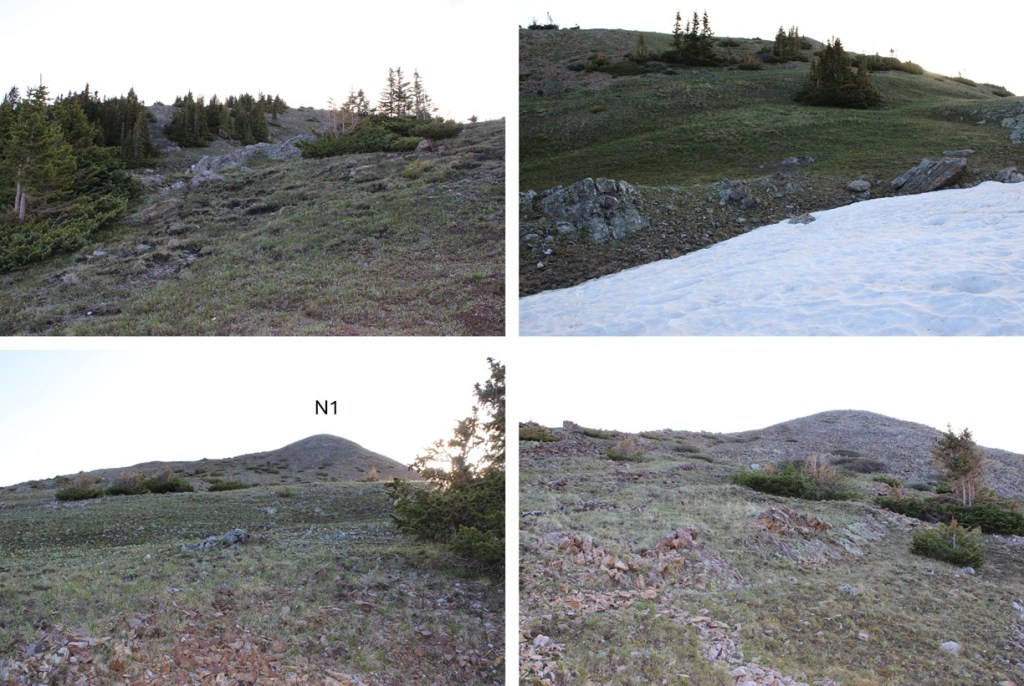
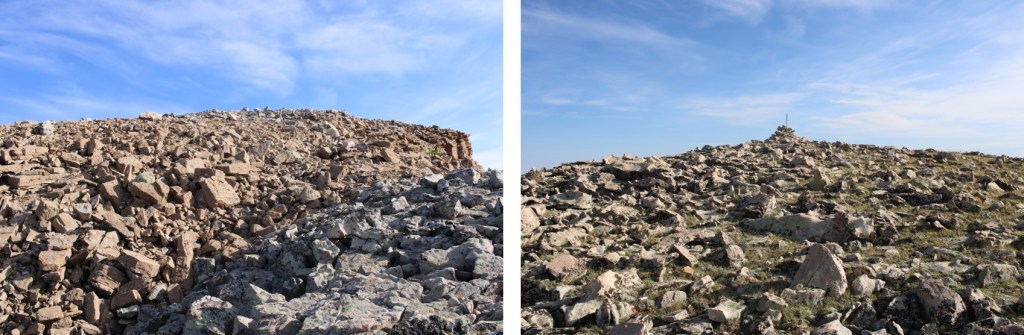
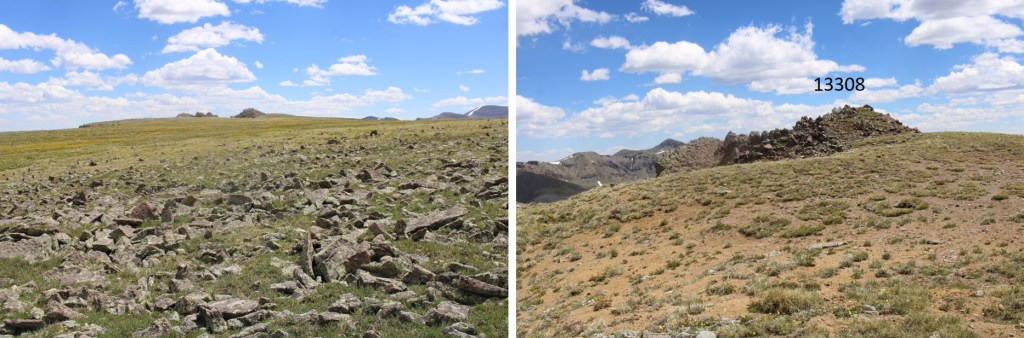
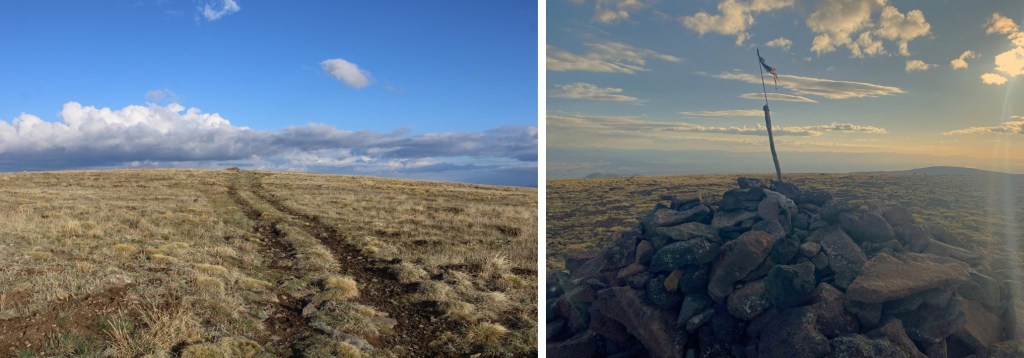
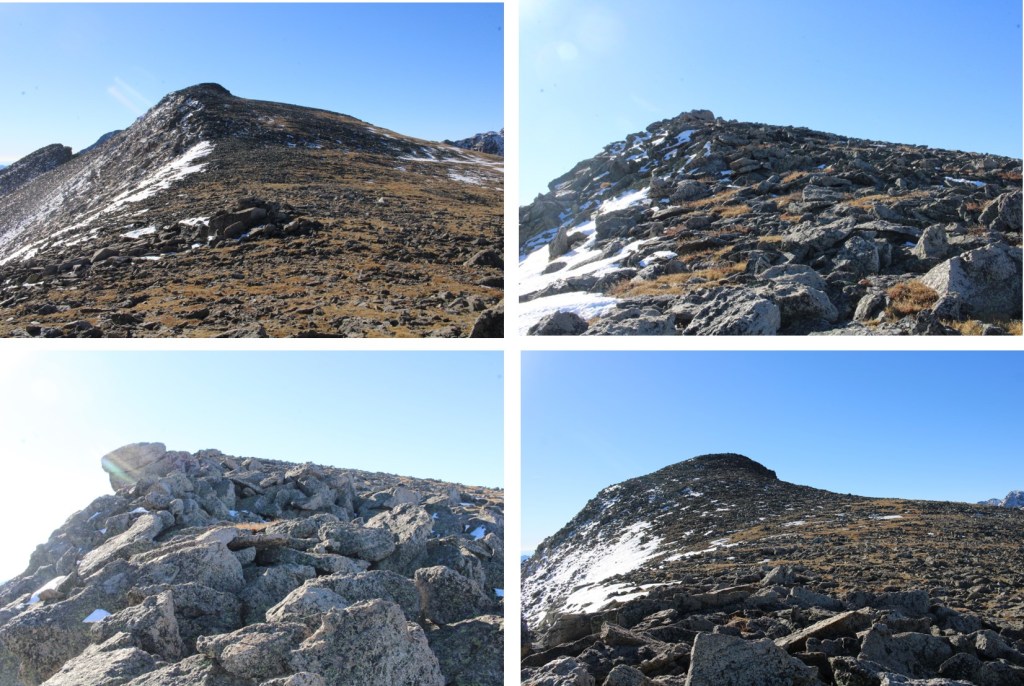
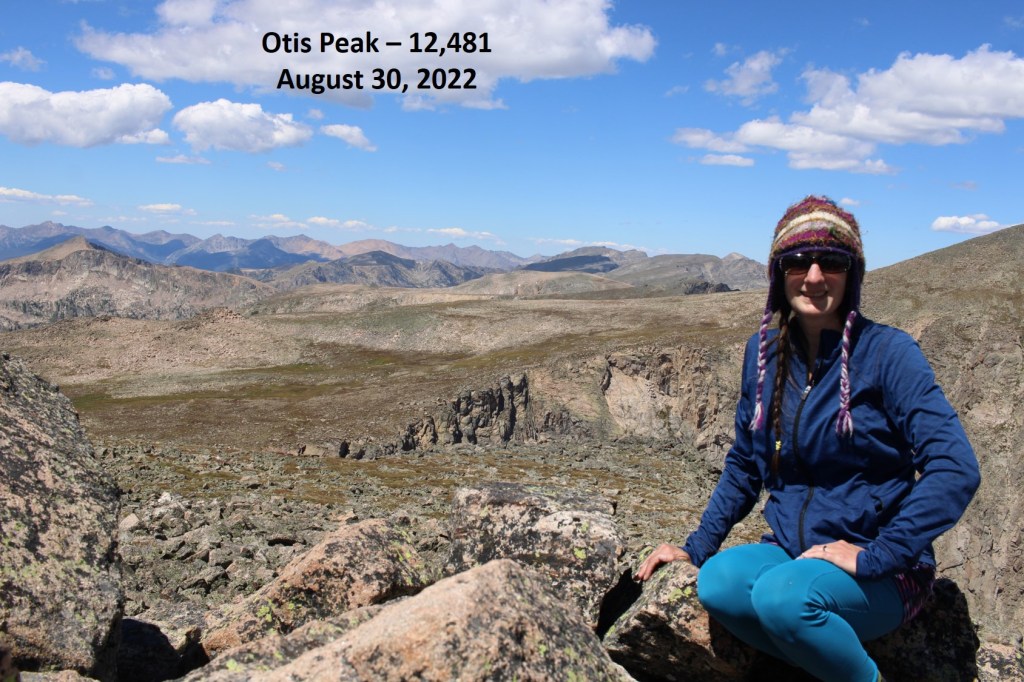
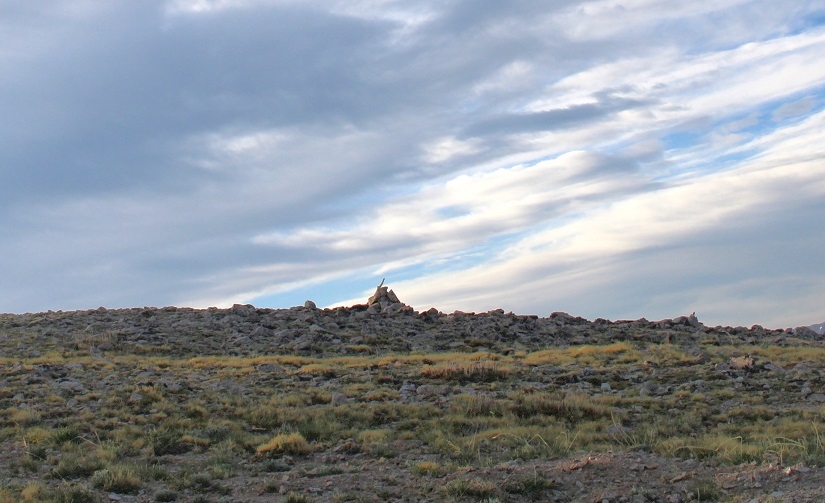
I summited ‘N1’ at 7am
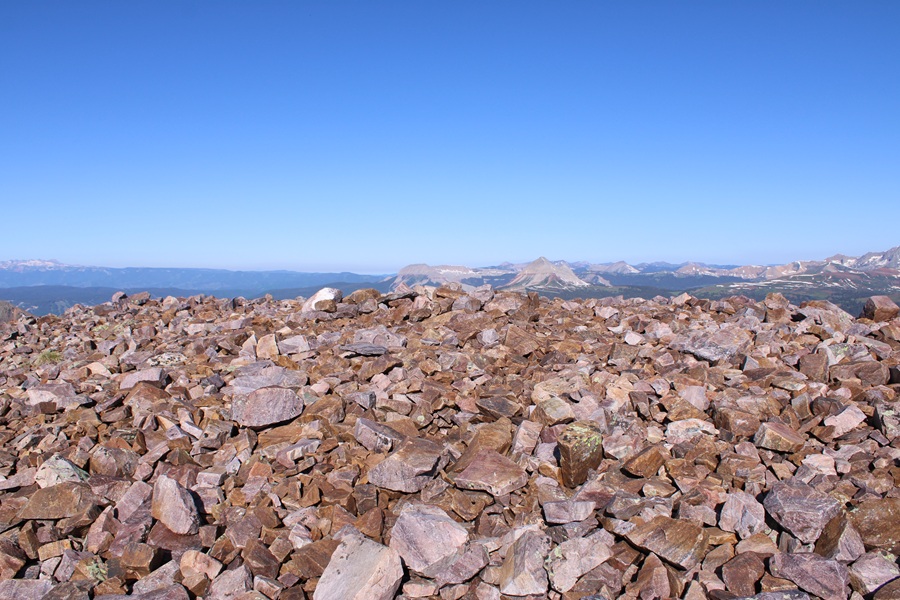
N1:

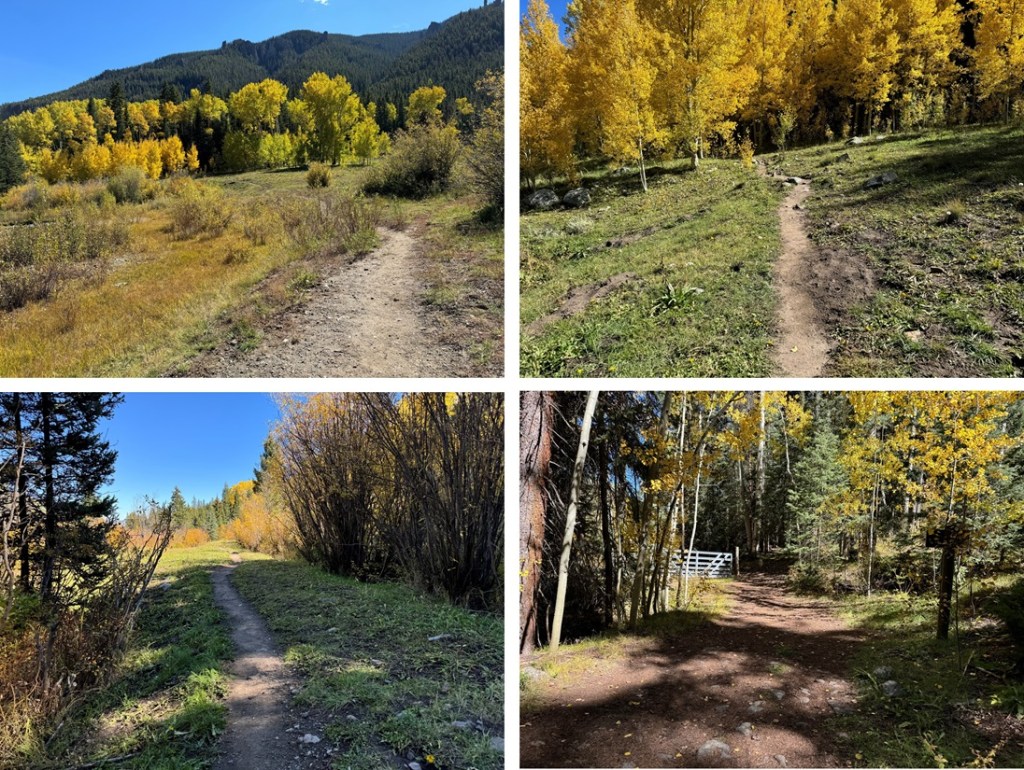
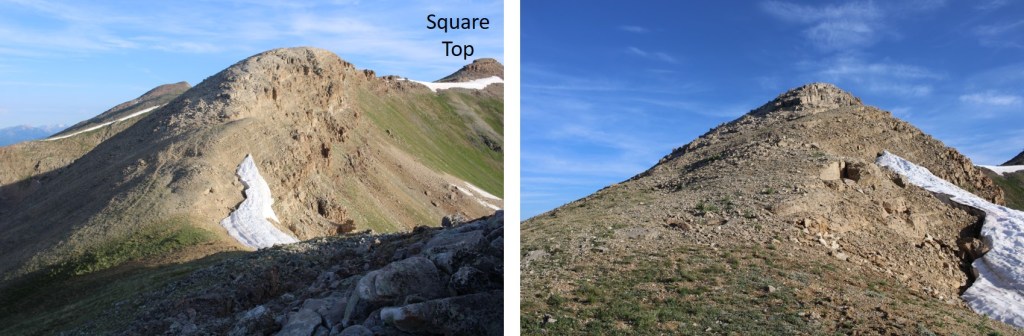
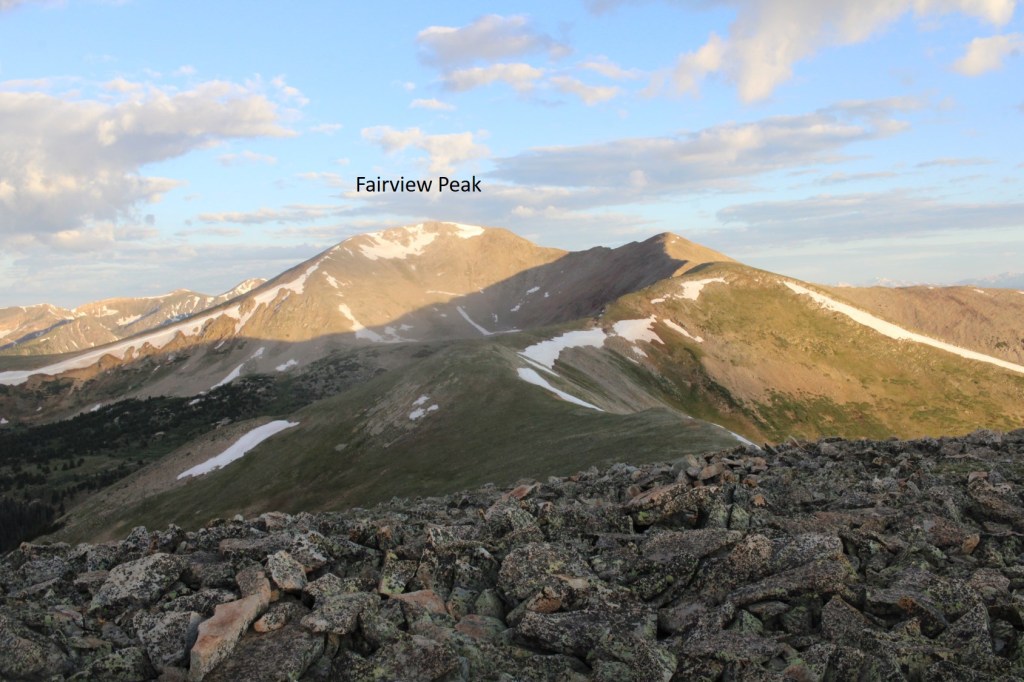
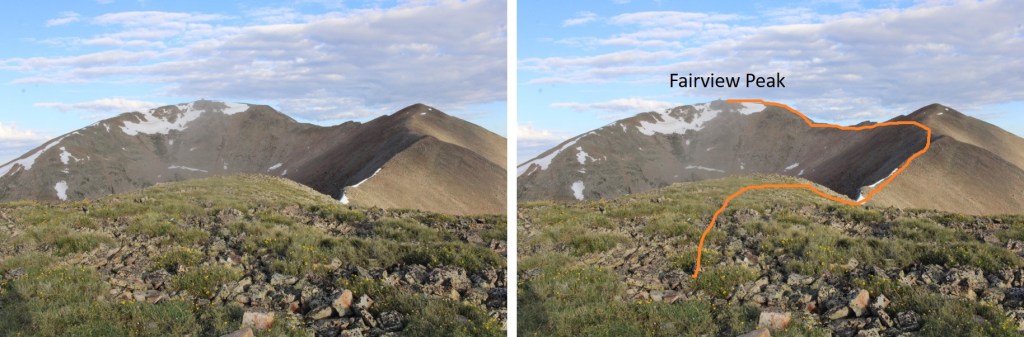
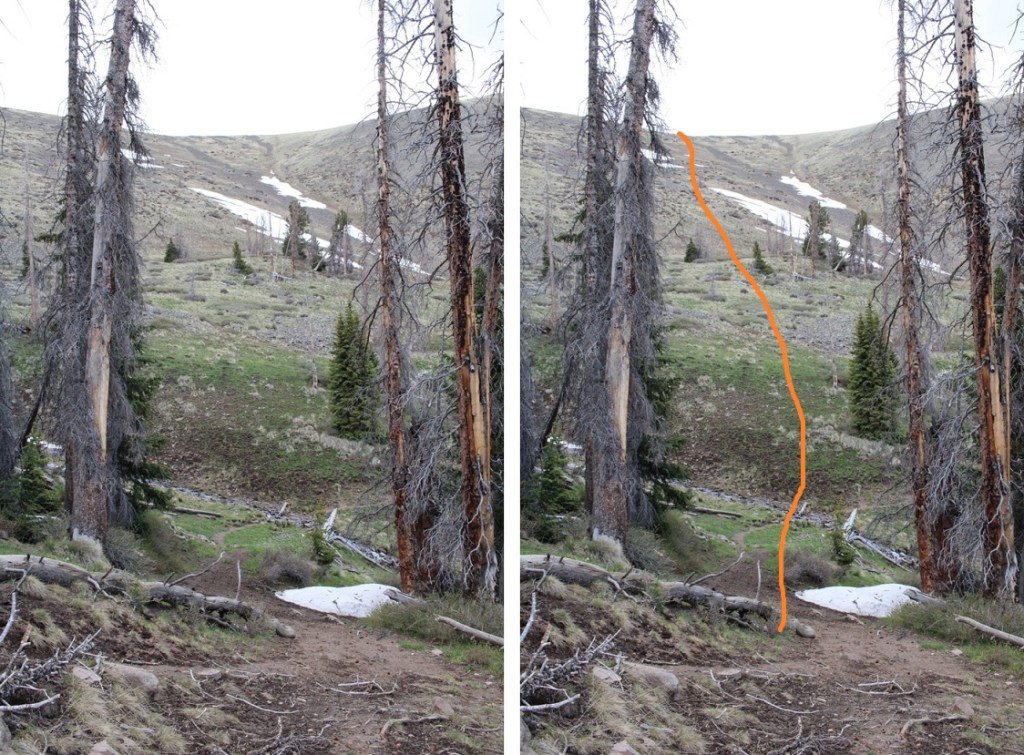
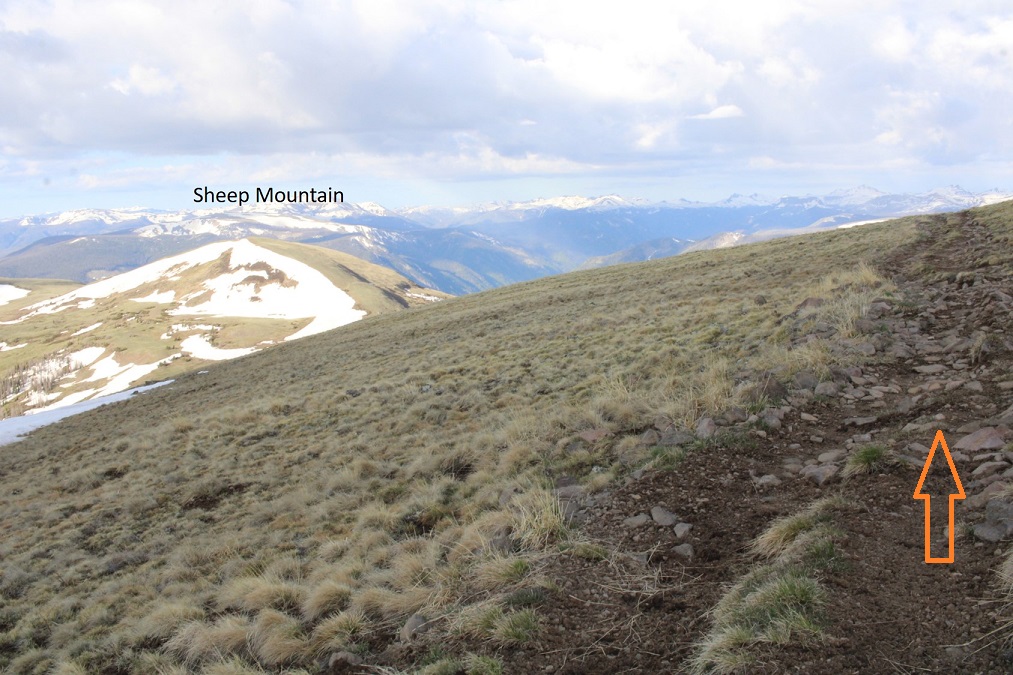
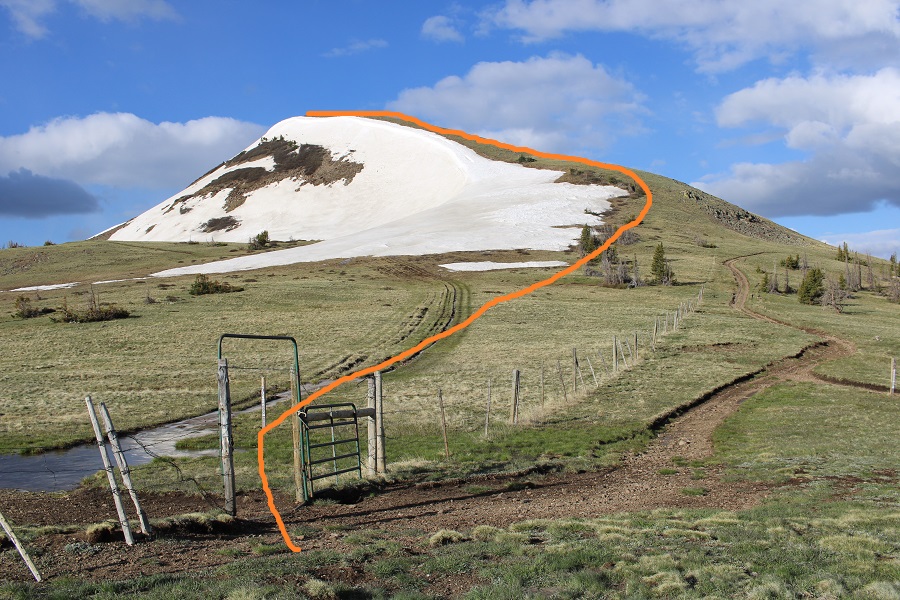
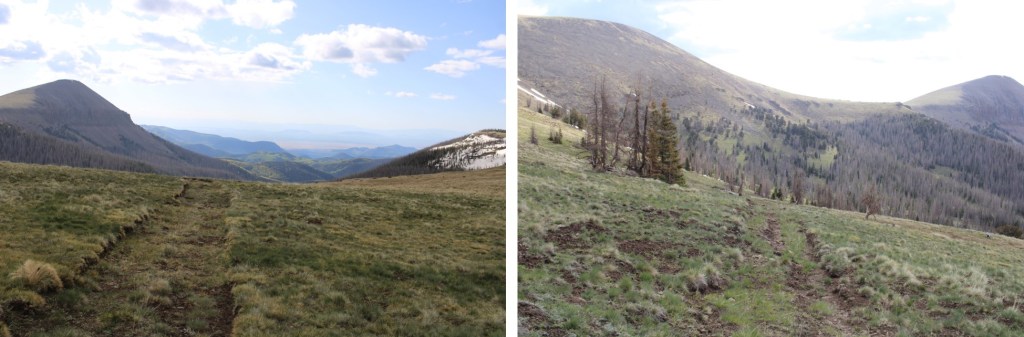
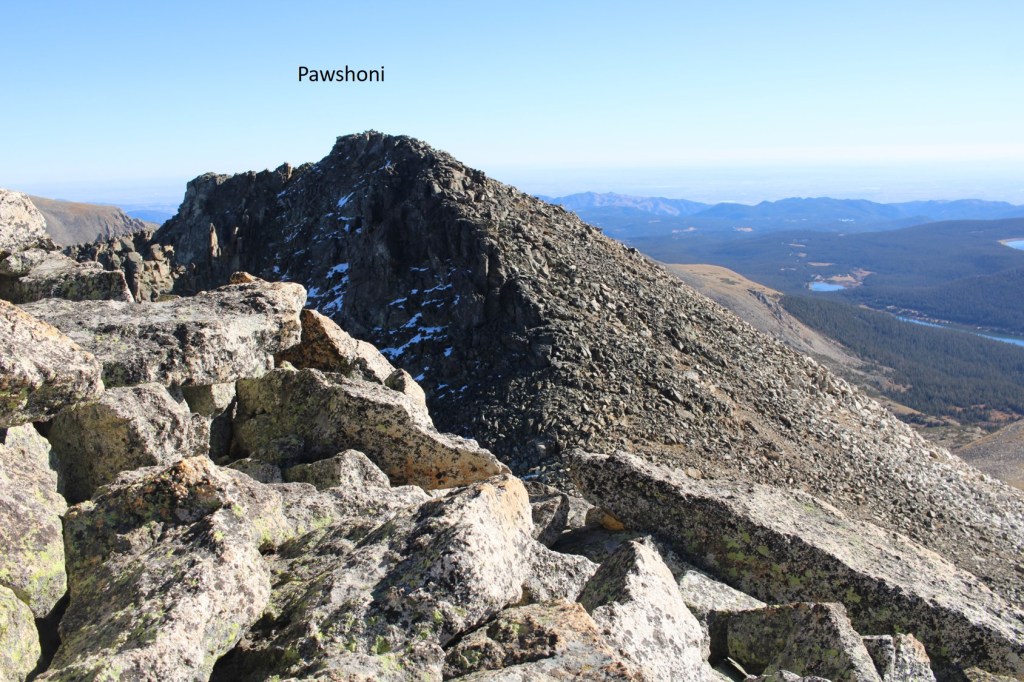
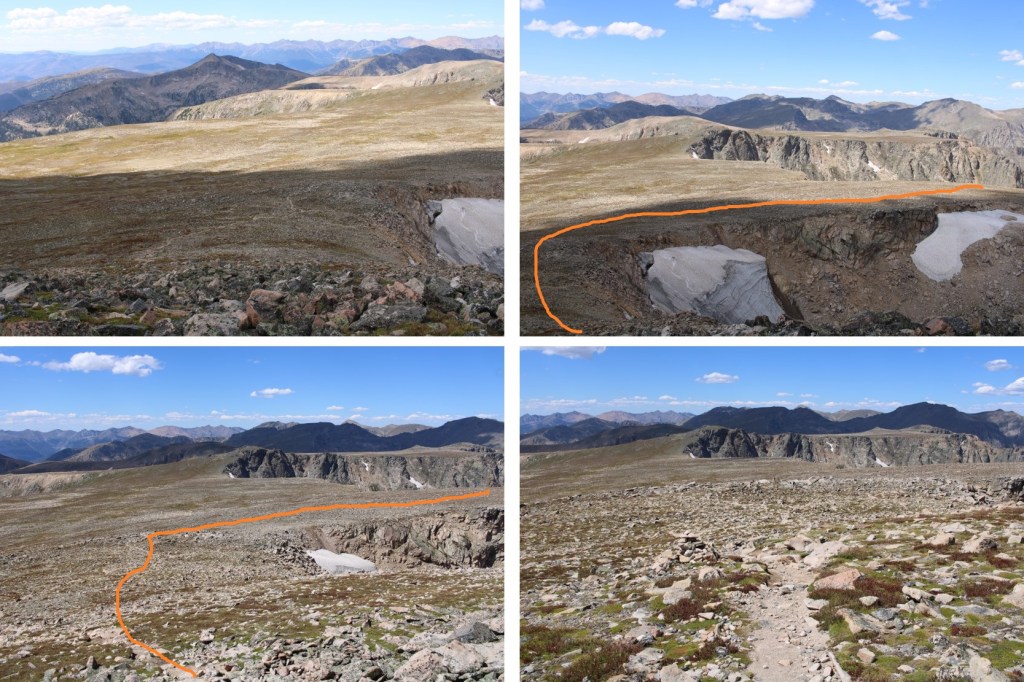
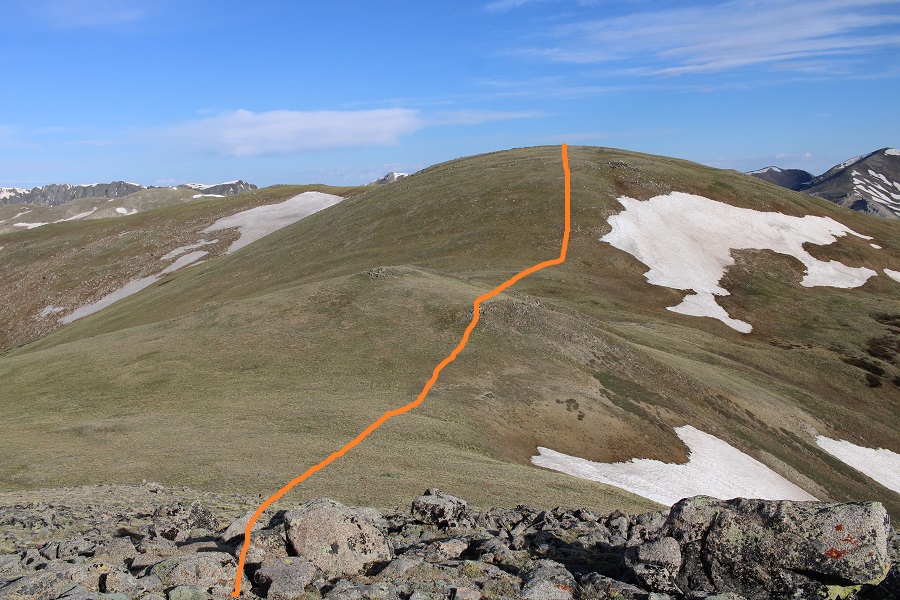
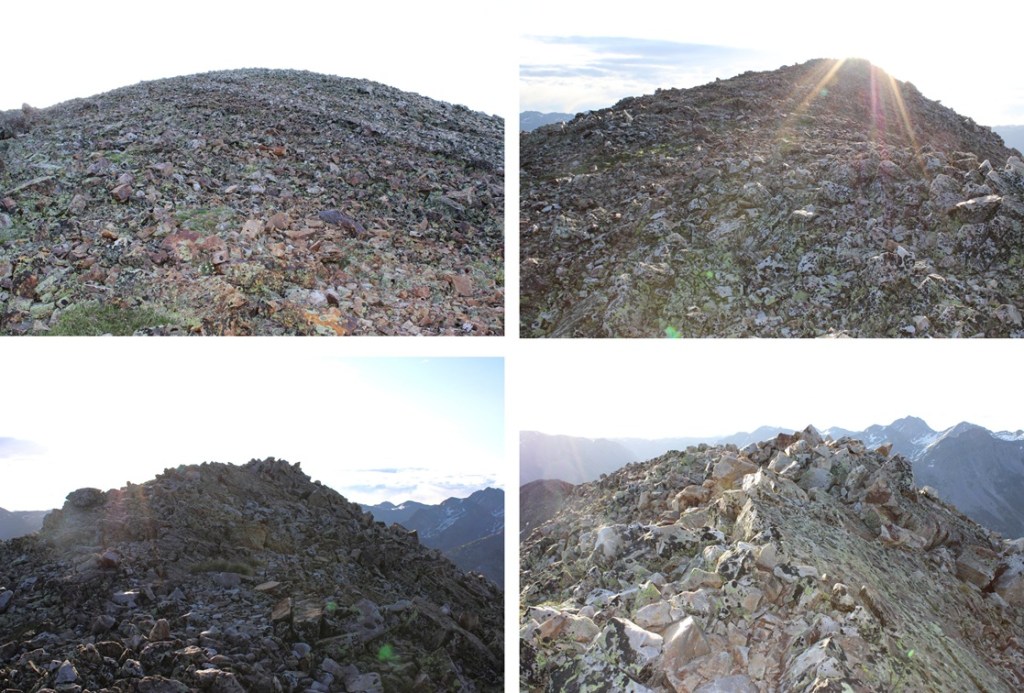
Now for Snowdon Peak.  I turned and headed southwest back to the Snowdon/N1 saddle, to the right of the ridge.

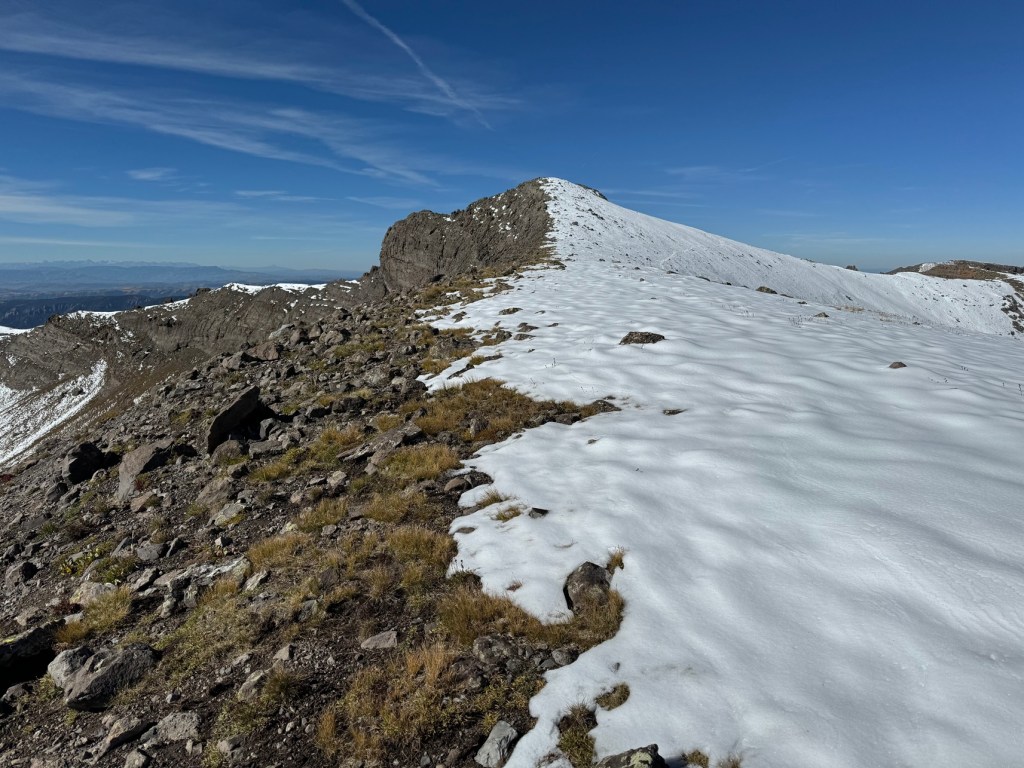
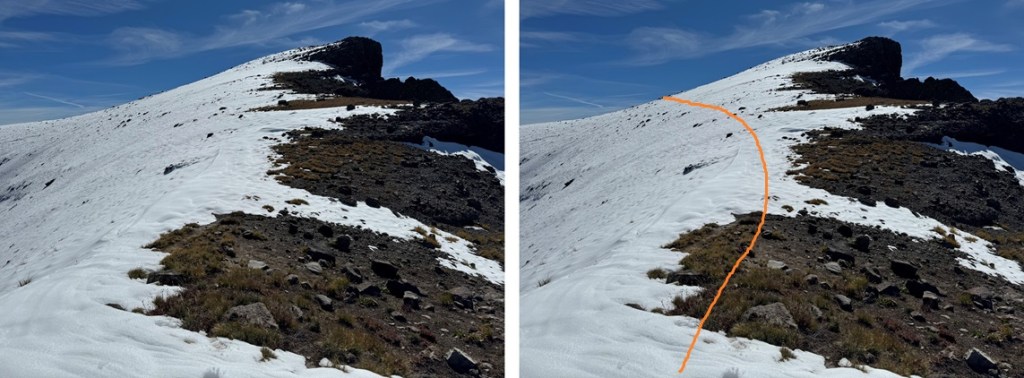
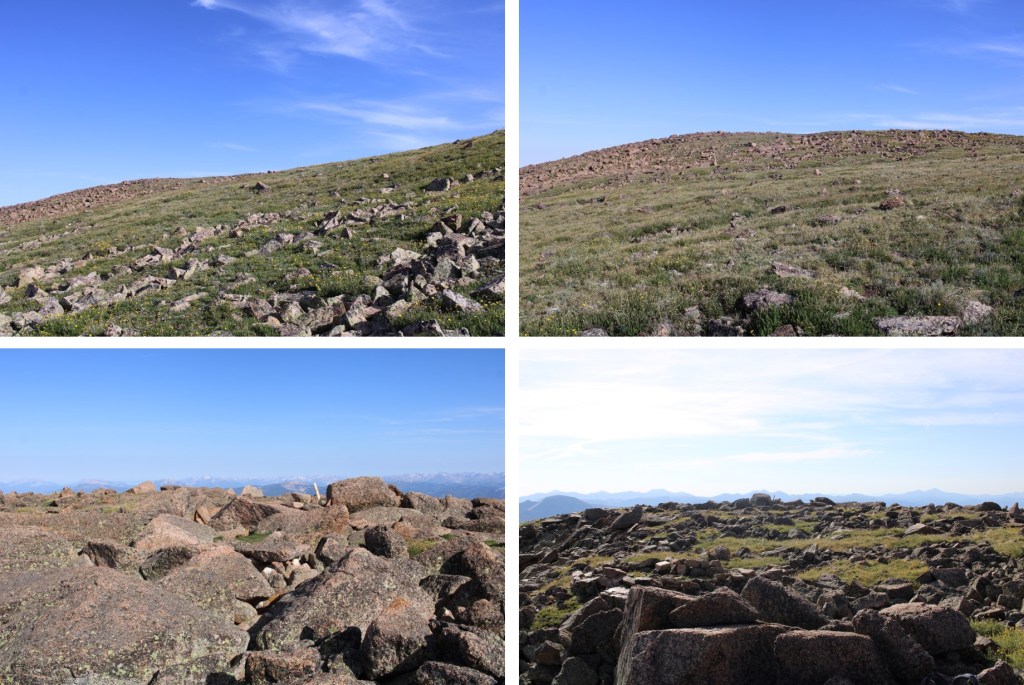
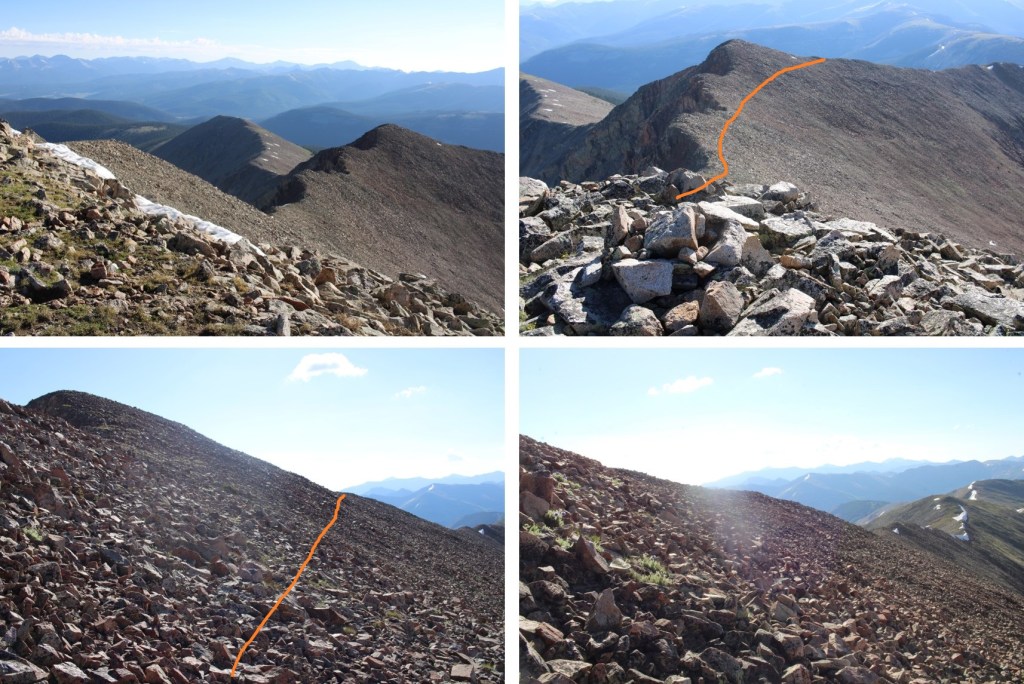
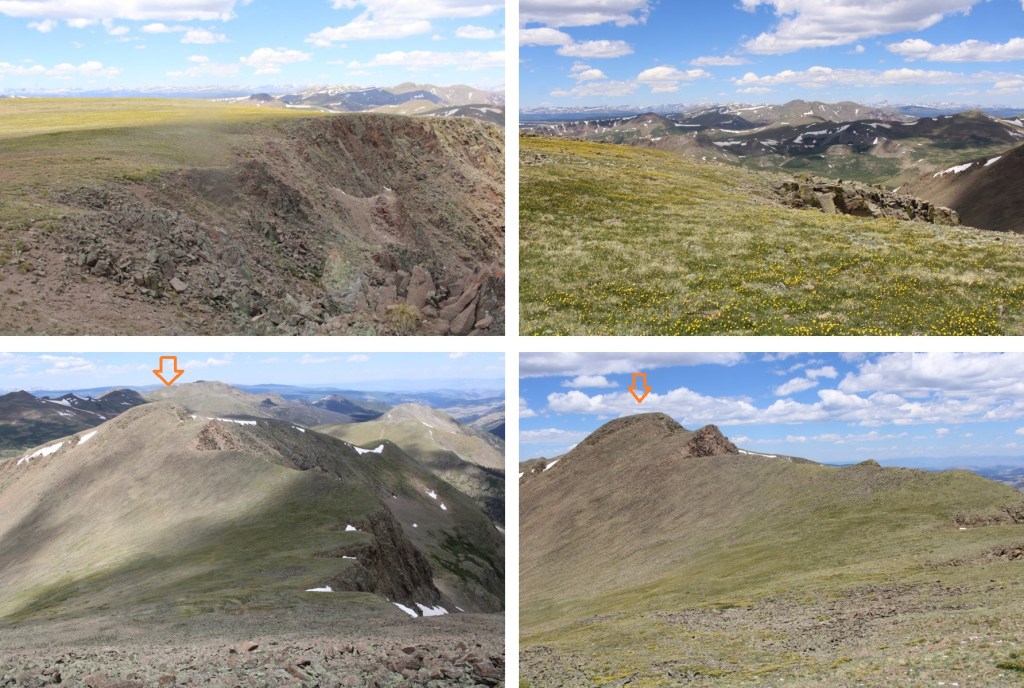
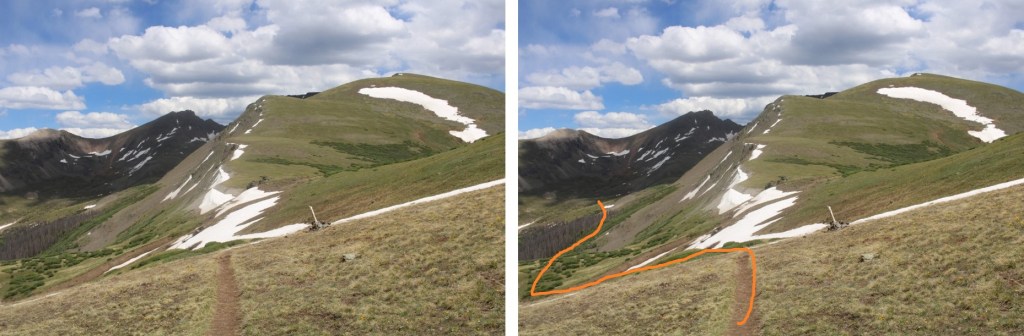
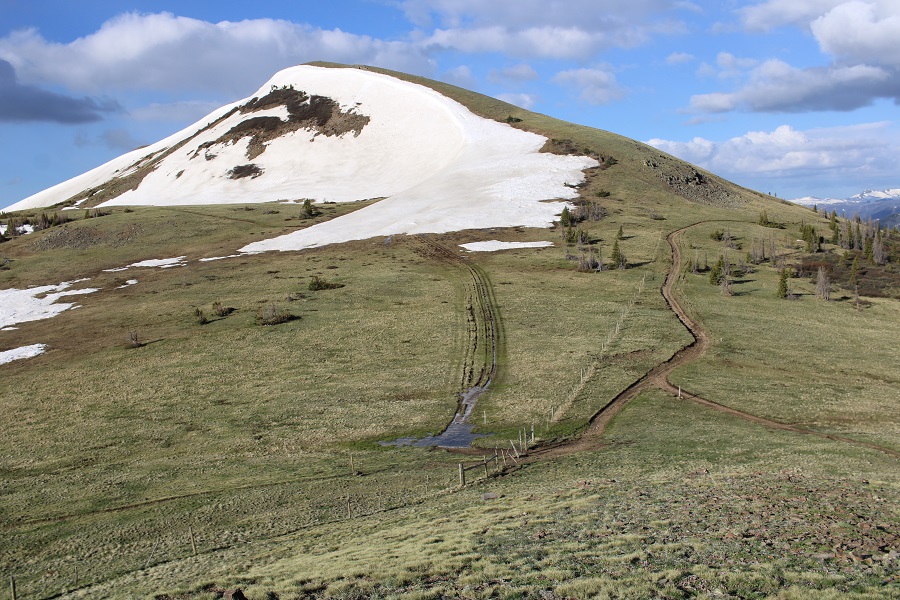
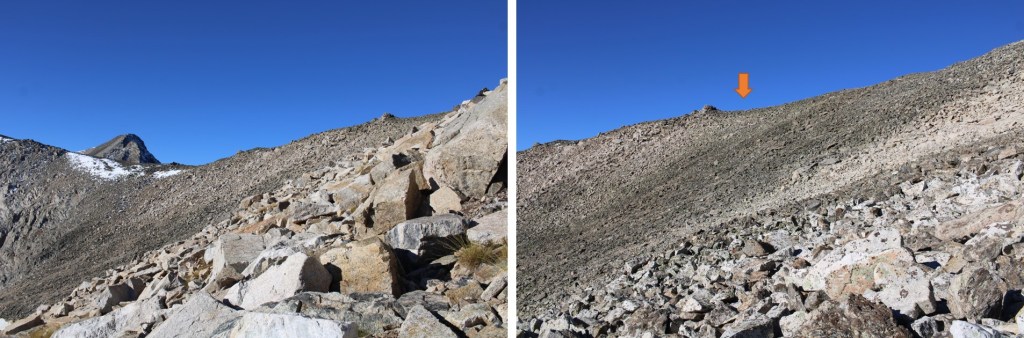
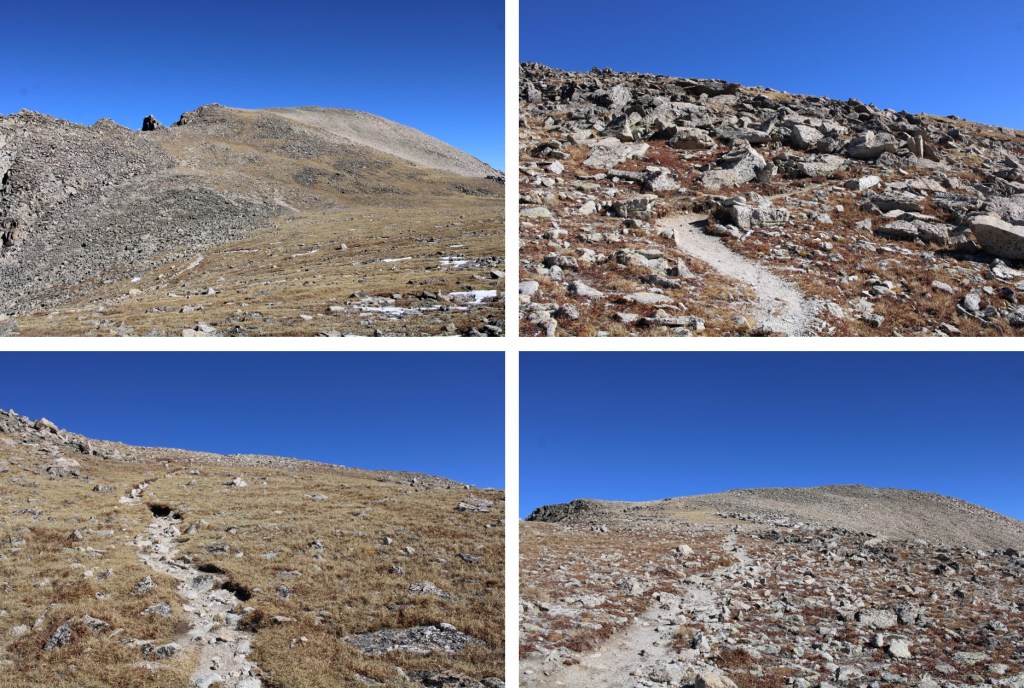
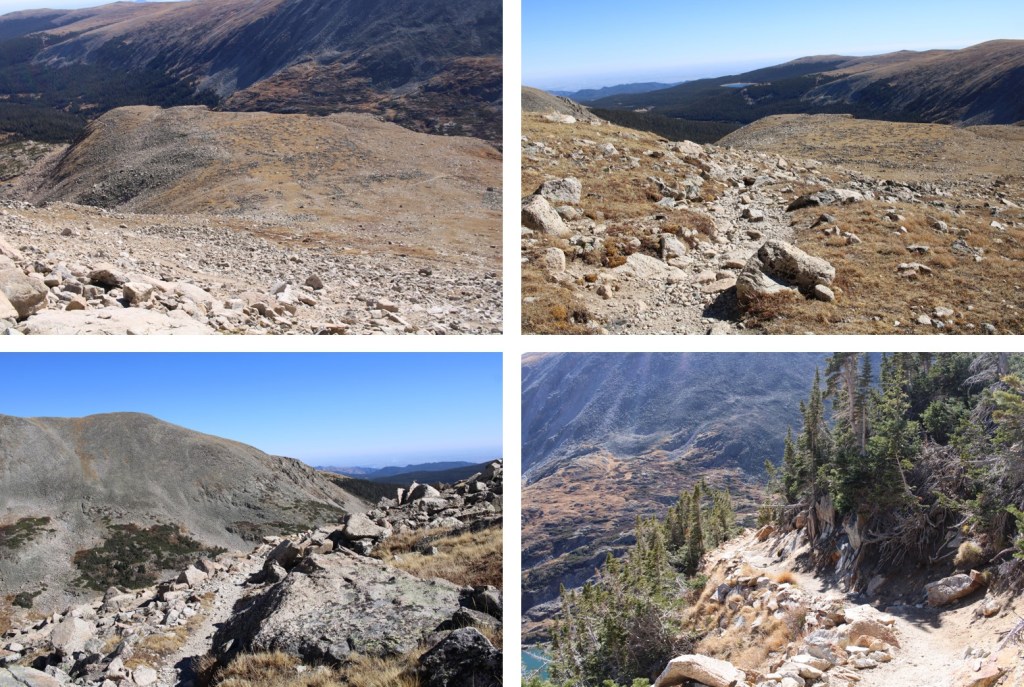
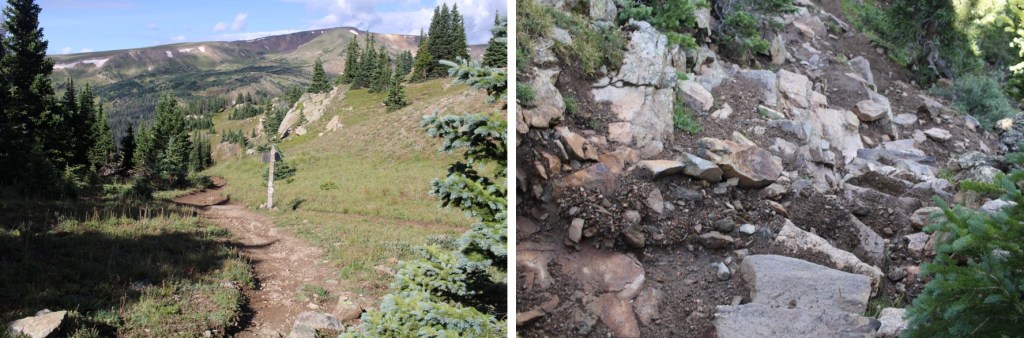
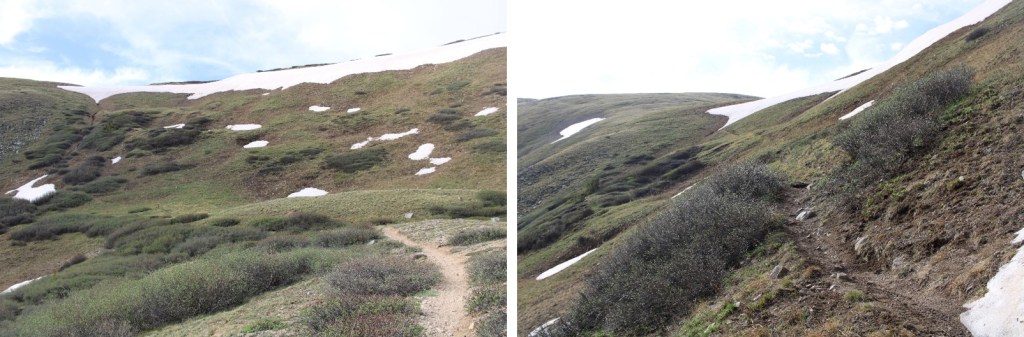
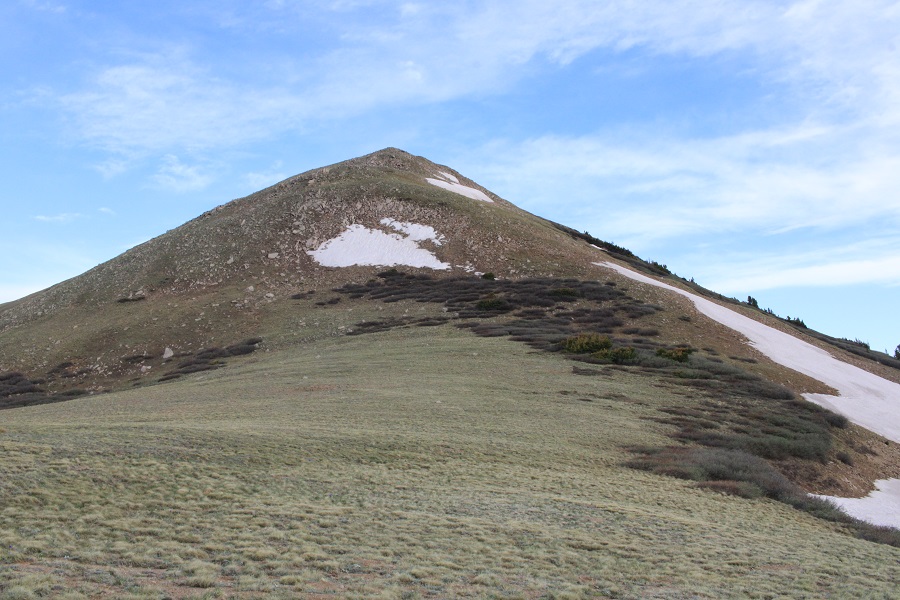
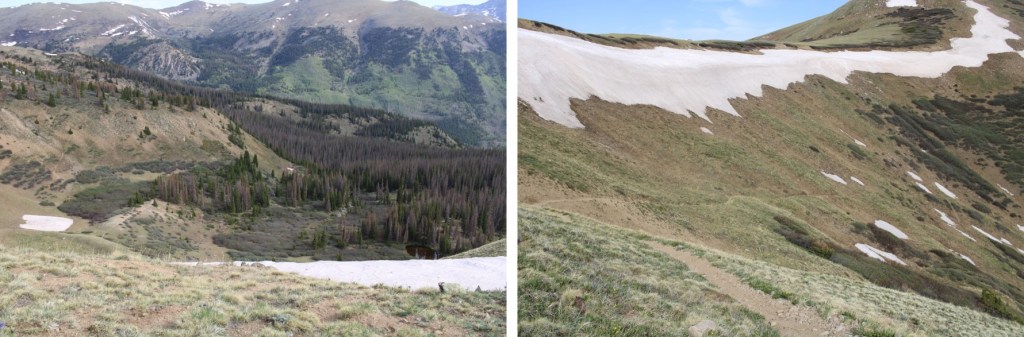
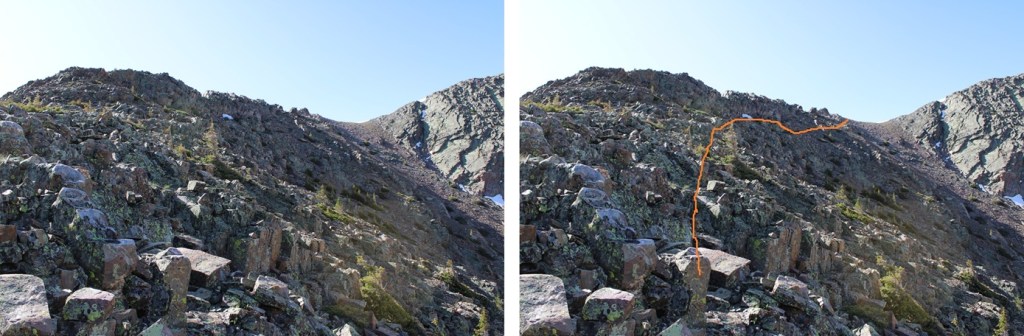
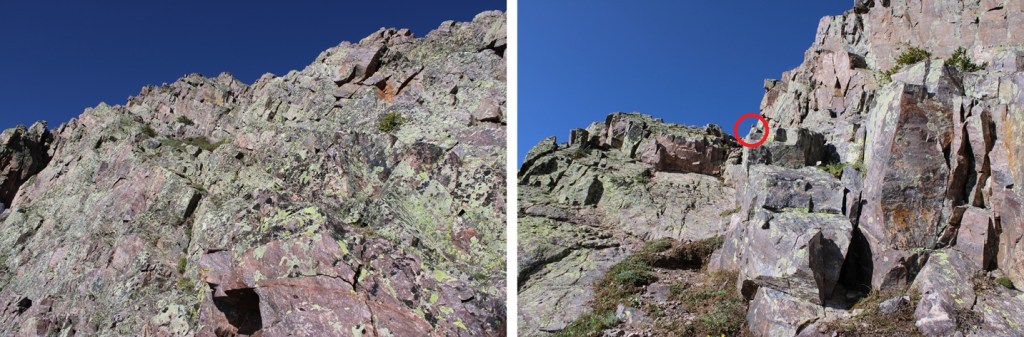
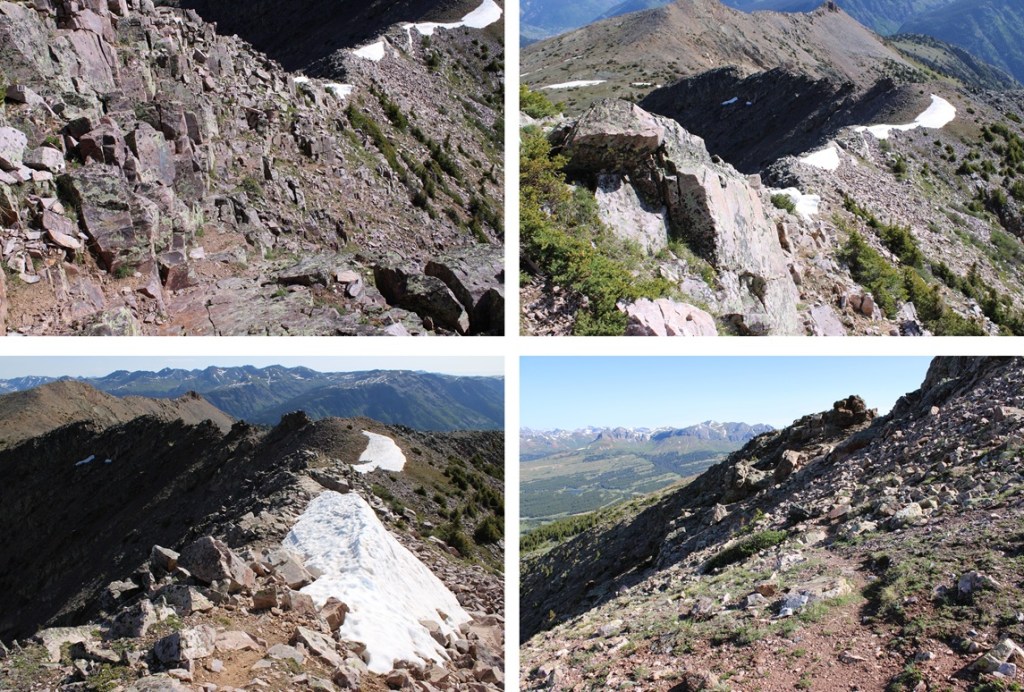
Now to head up the ridge.  There are several ways to do this.  On my ascent I stuck to the ridge proper, which went at class 3.  On the way back down I found a faint trail that kept this area at class 2 after climbing about halfway up the ridge.  Here’s a picture of that trail:

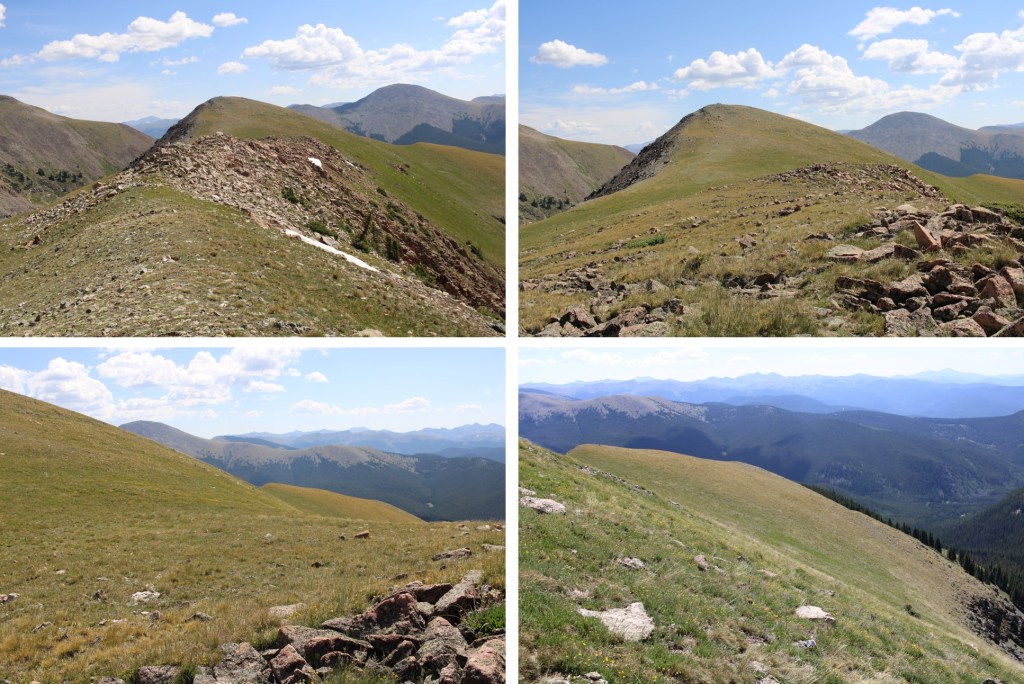
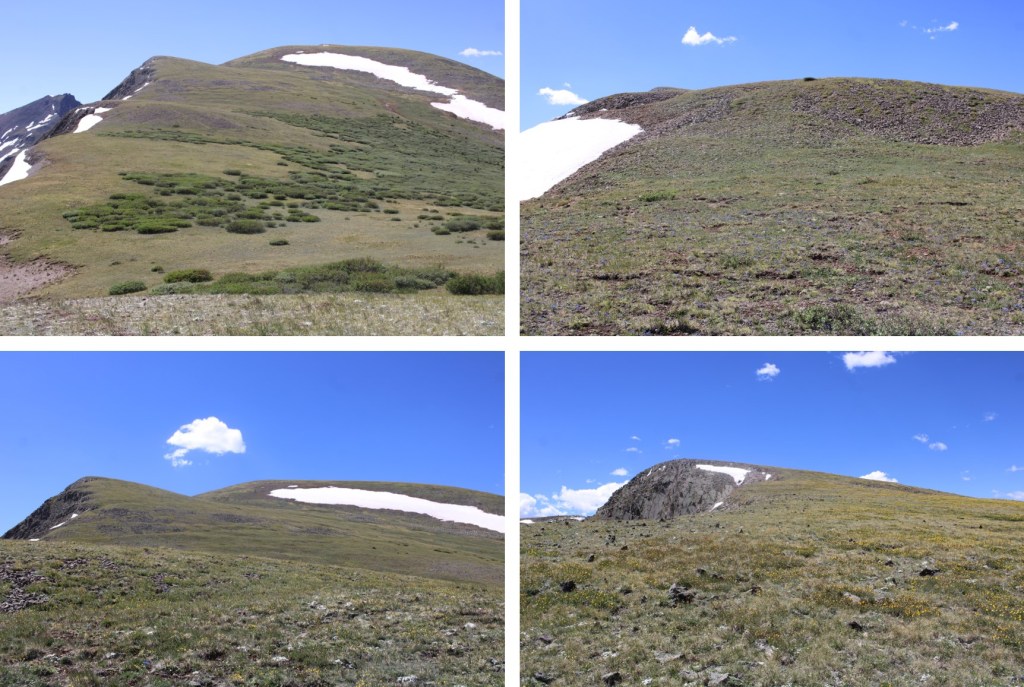
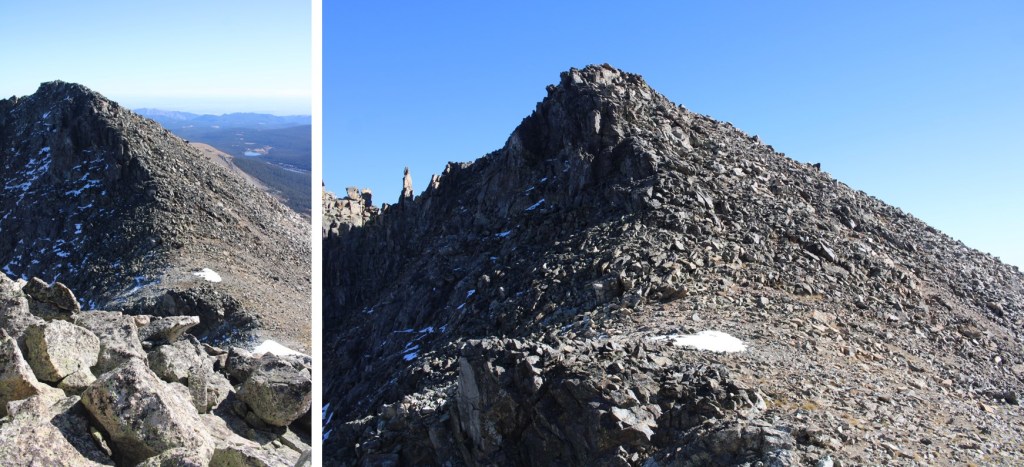
And some pictures of the ridge.  I was able to take the ridge proper to the next saddle until I came across the game trail, which was much easier.

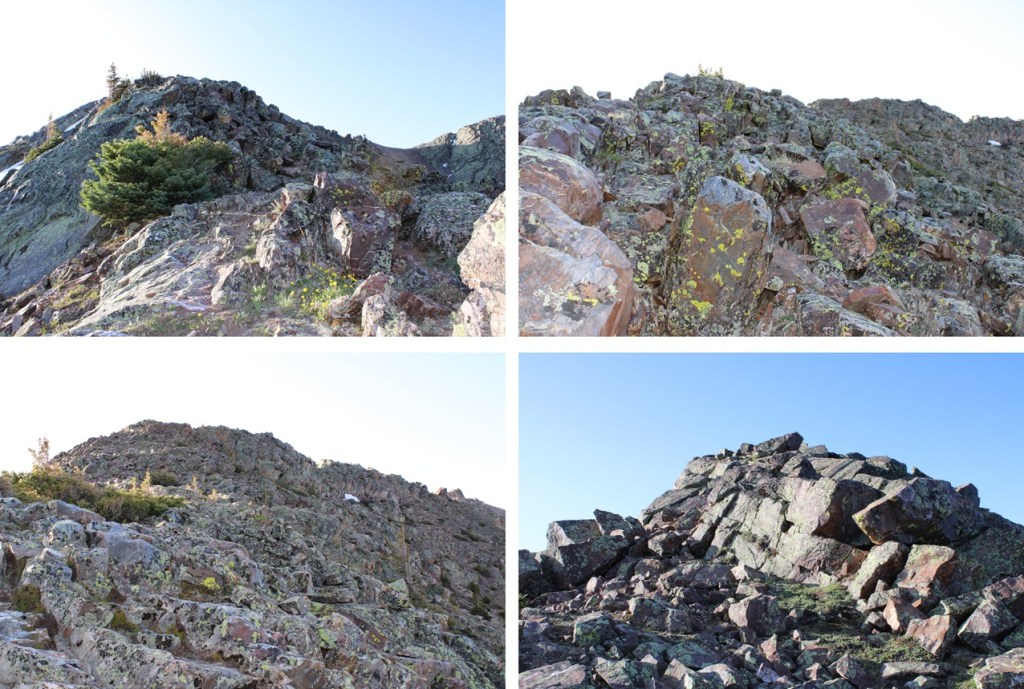
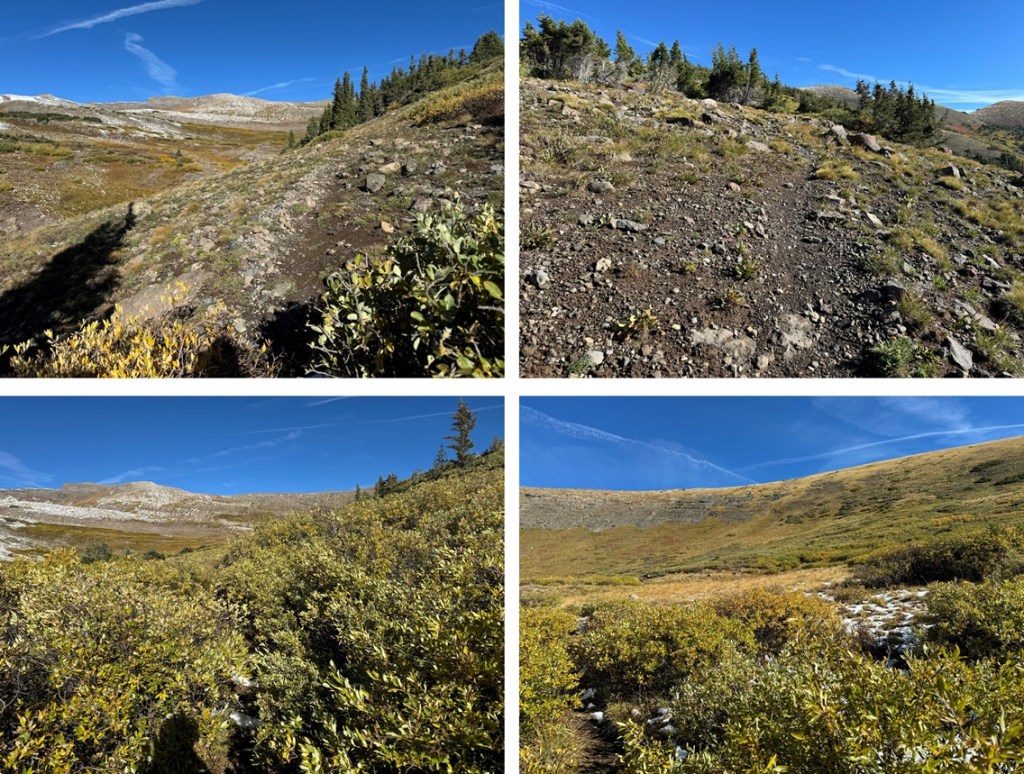
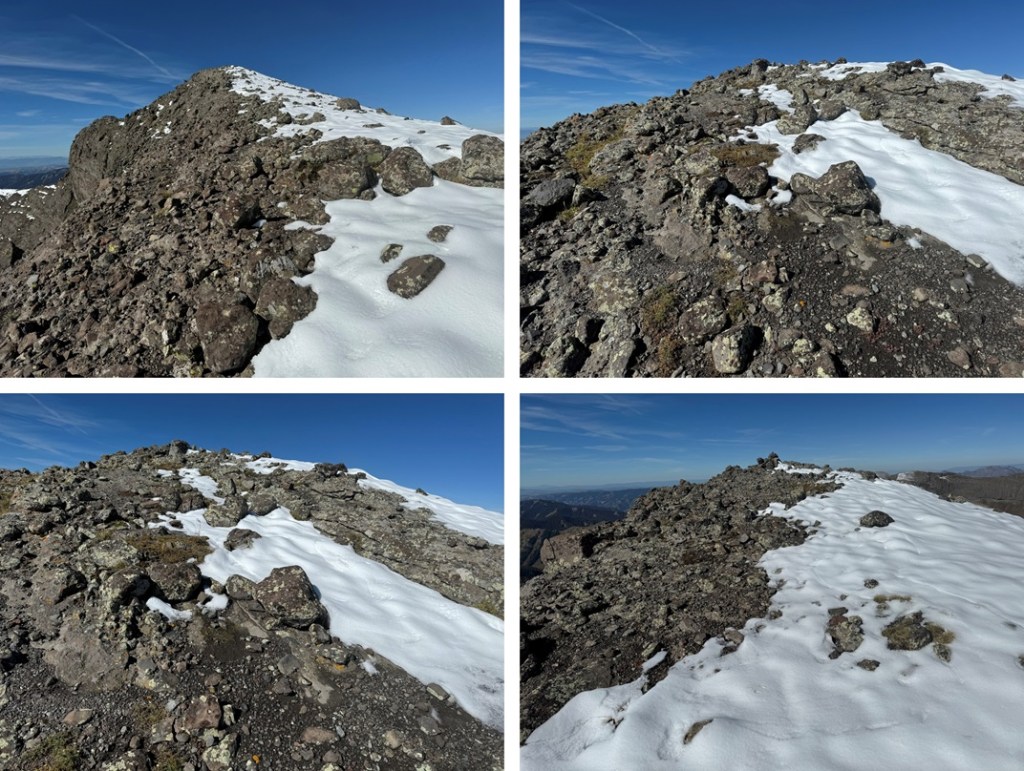
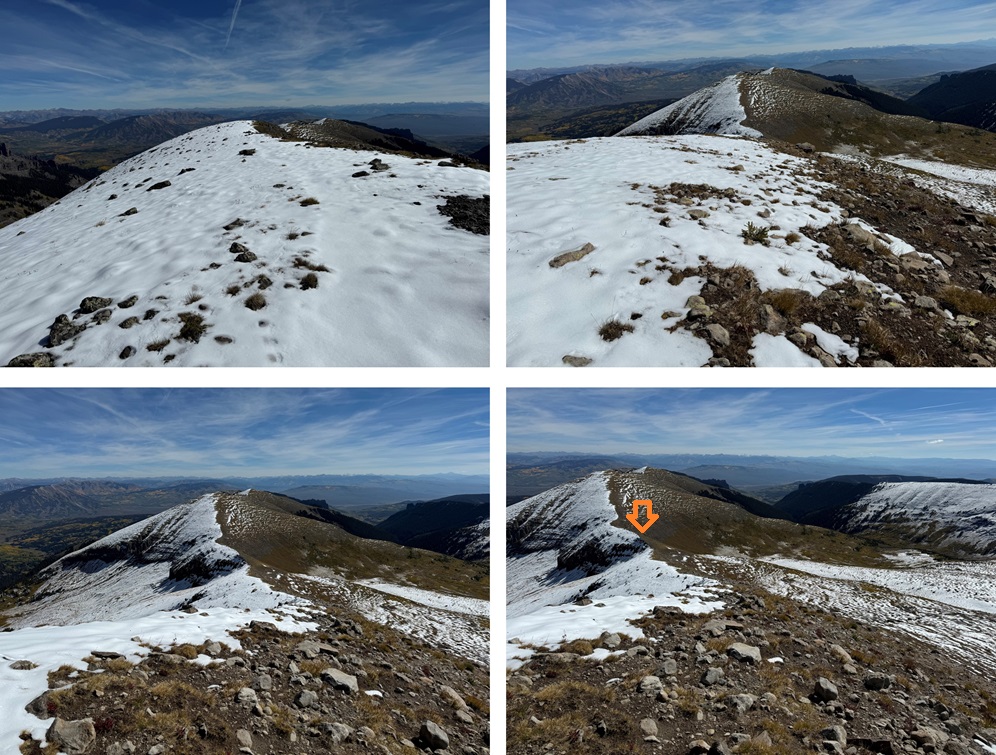
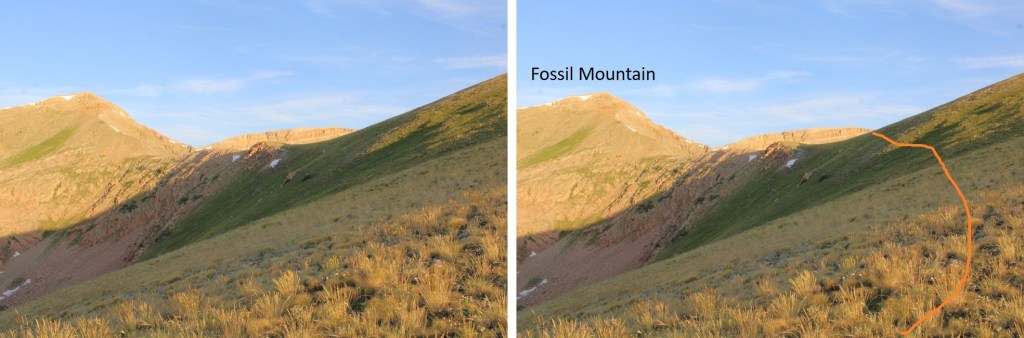
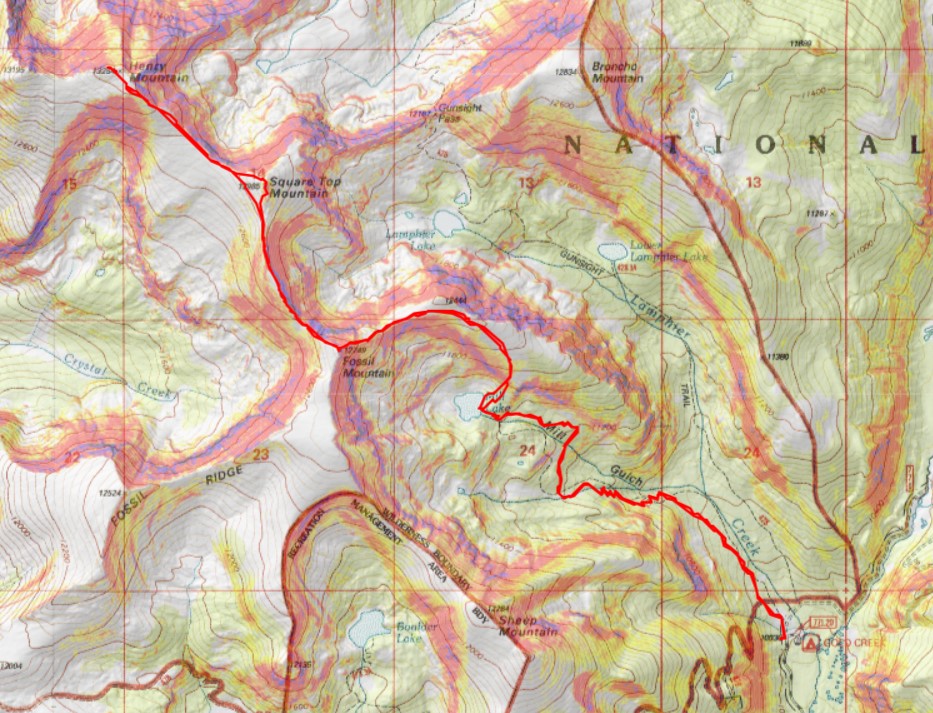
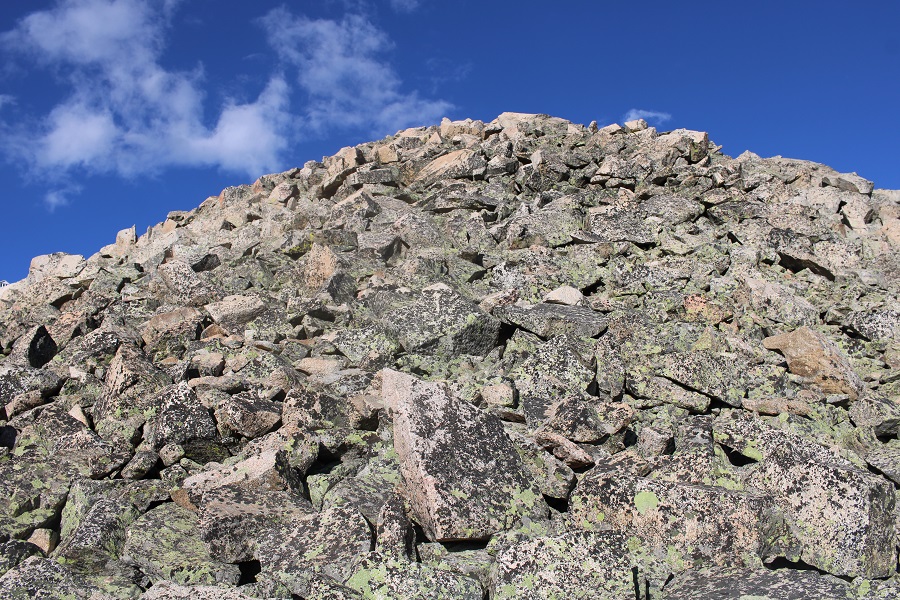
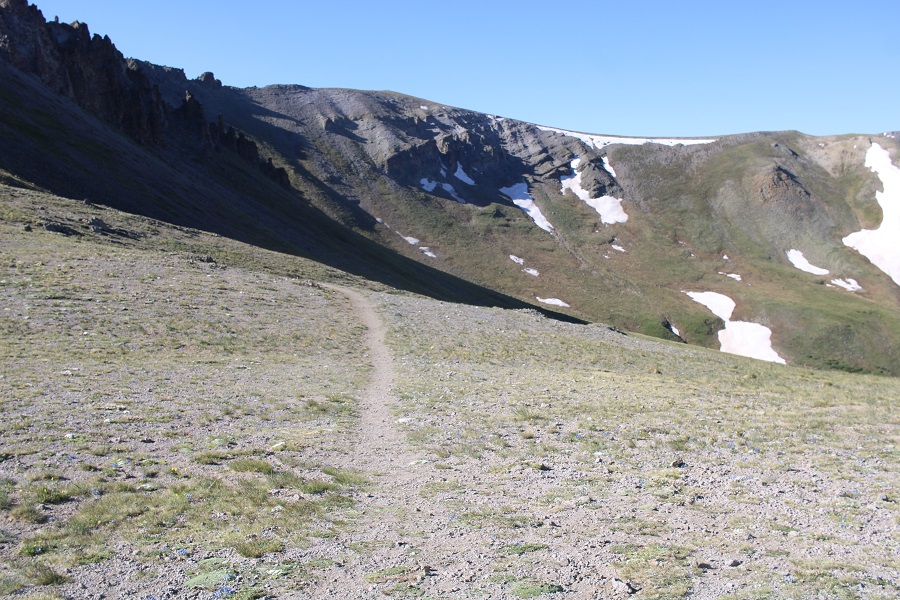
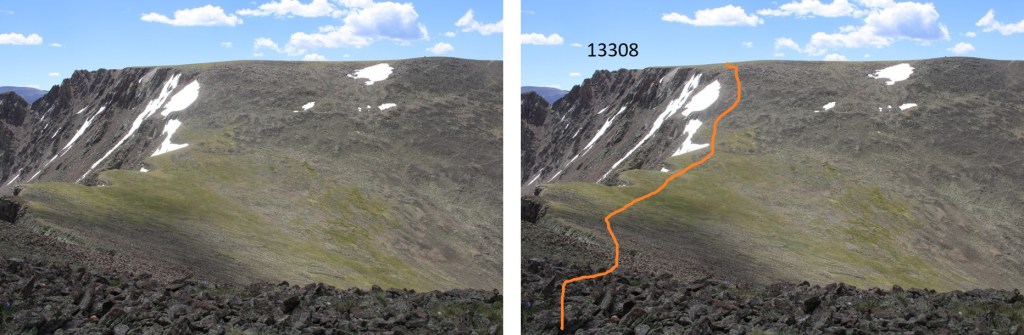
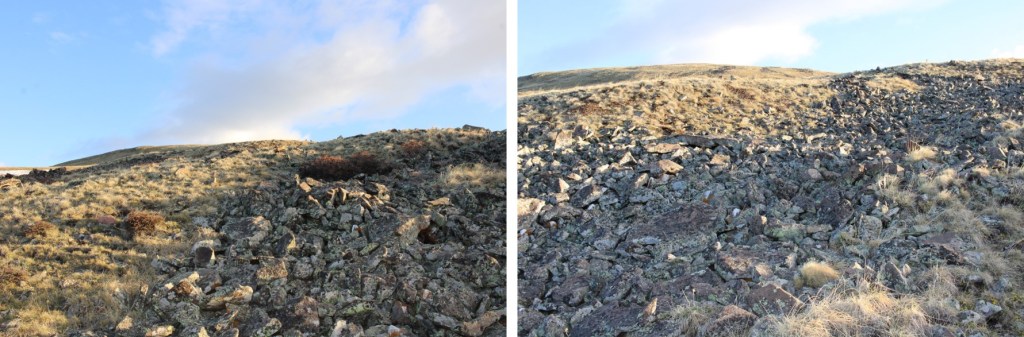
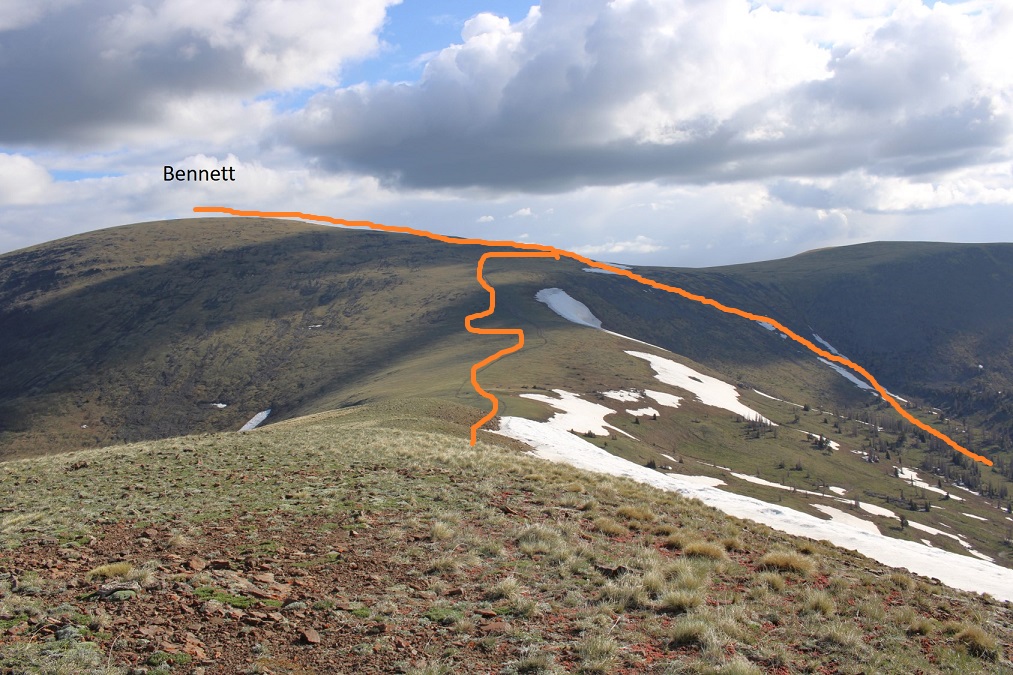
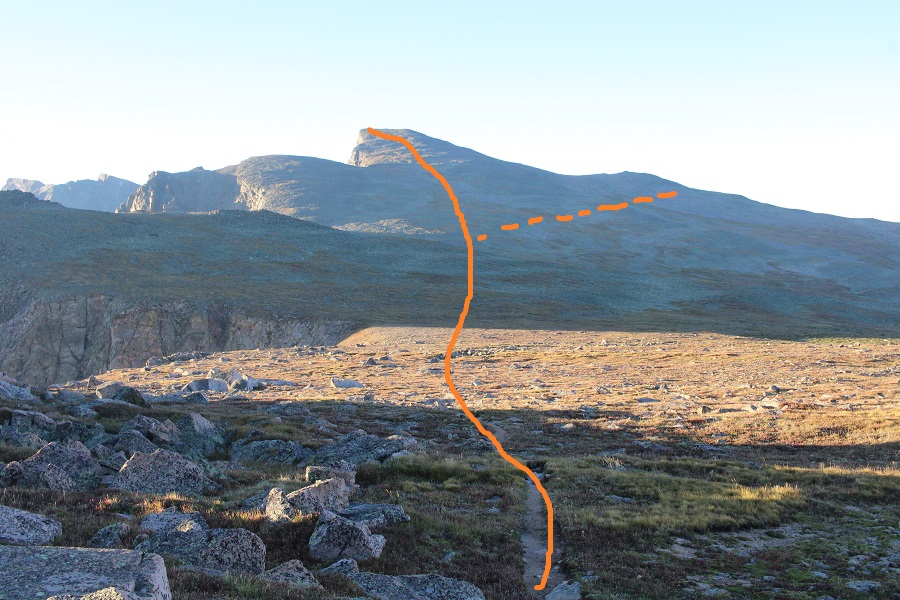
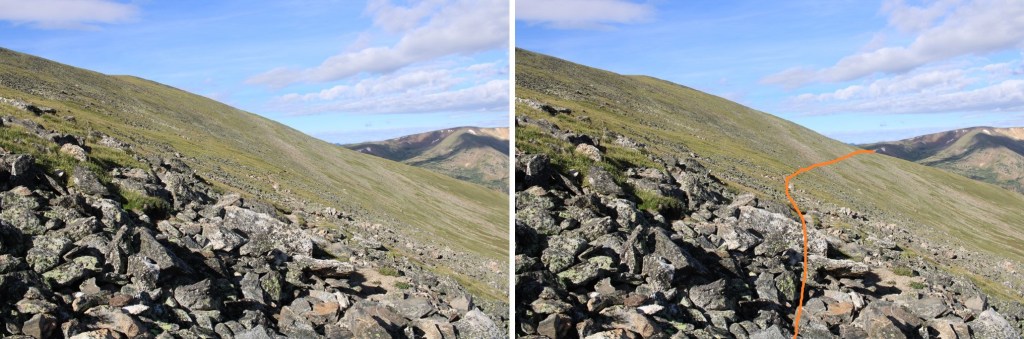
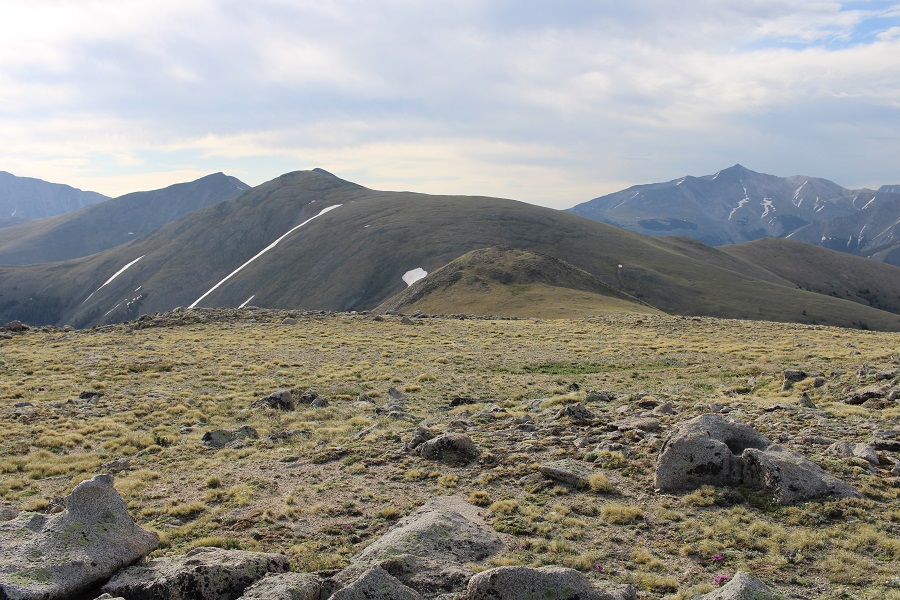
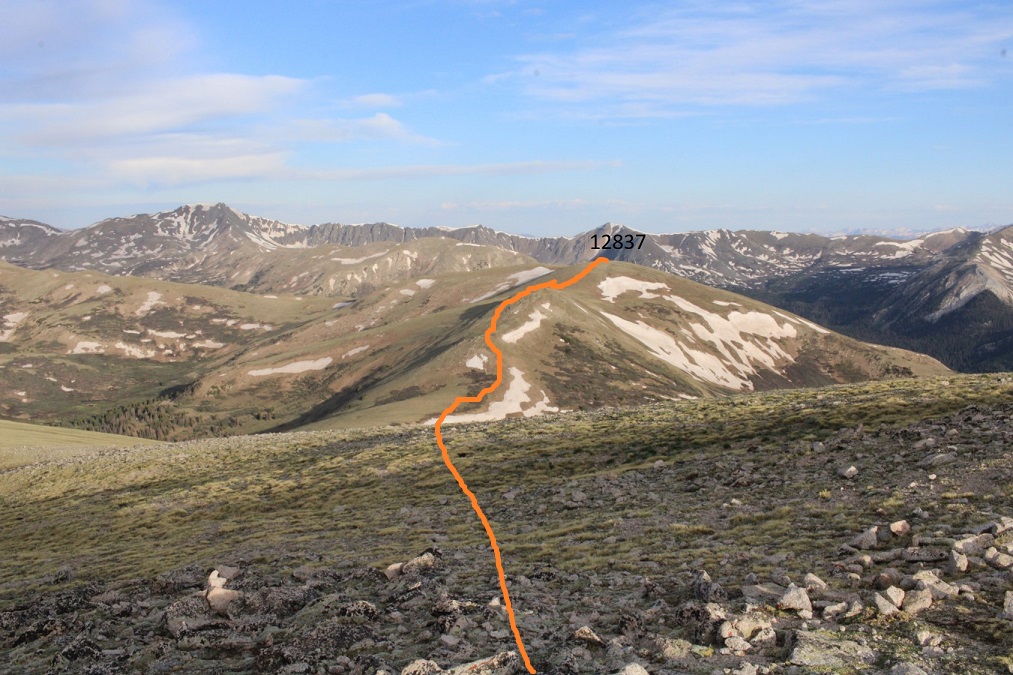
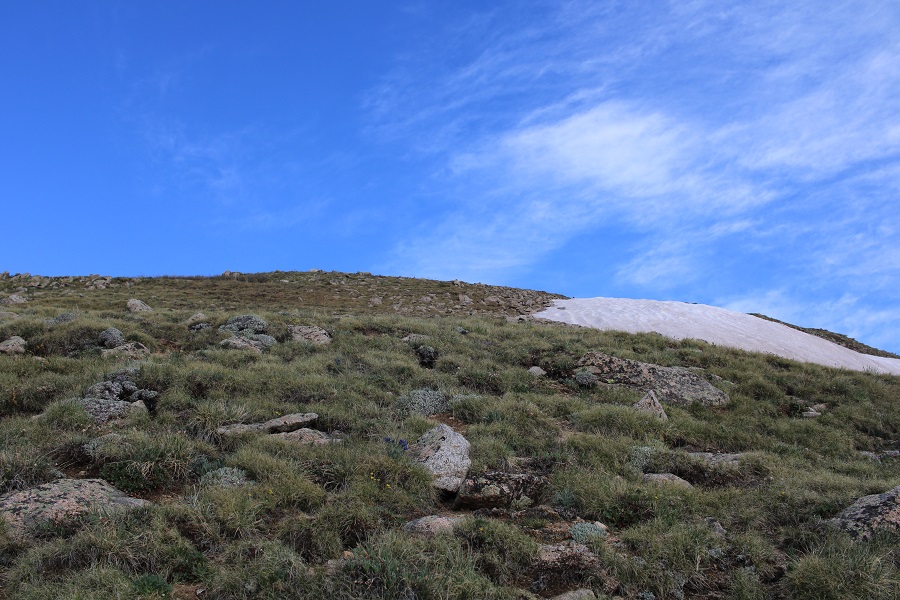
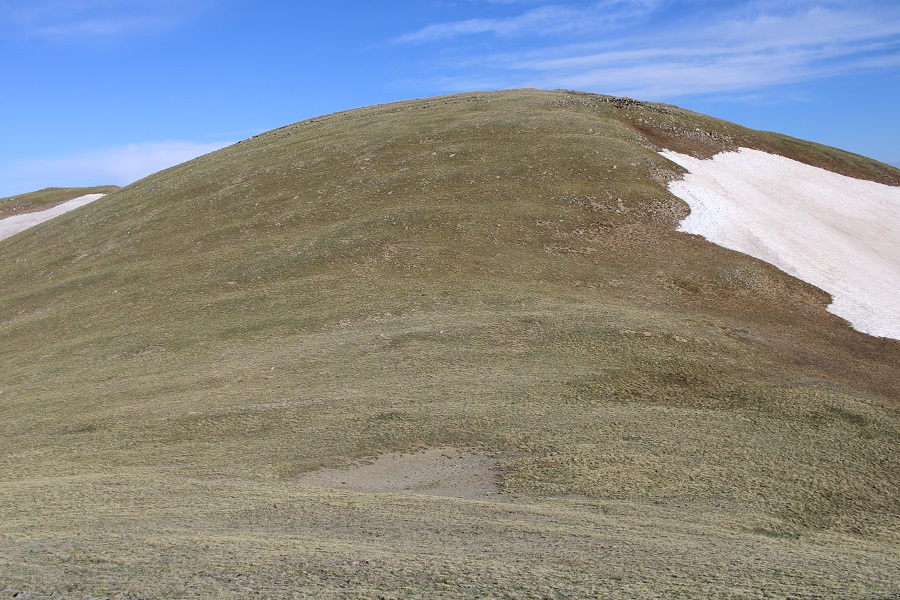
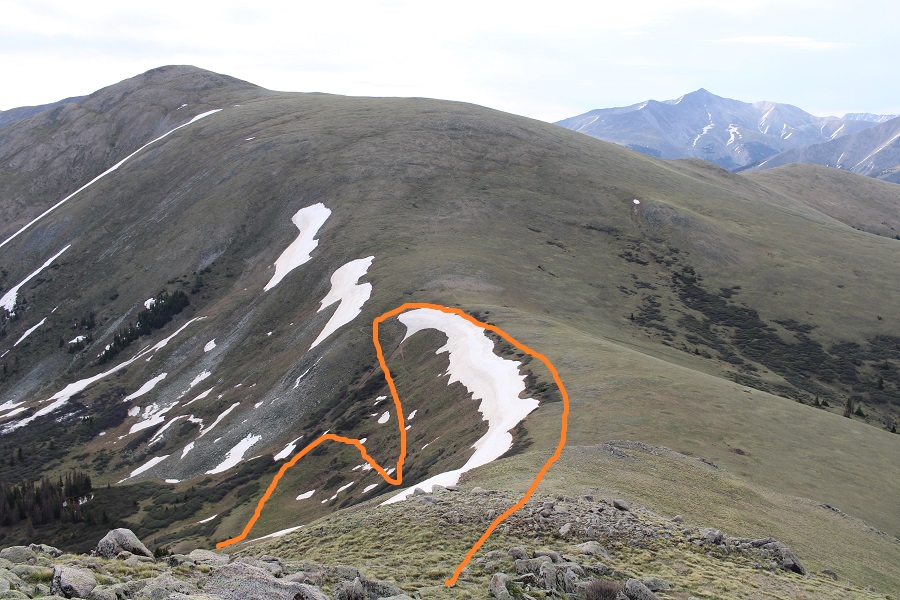
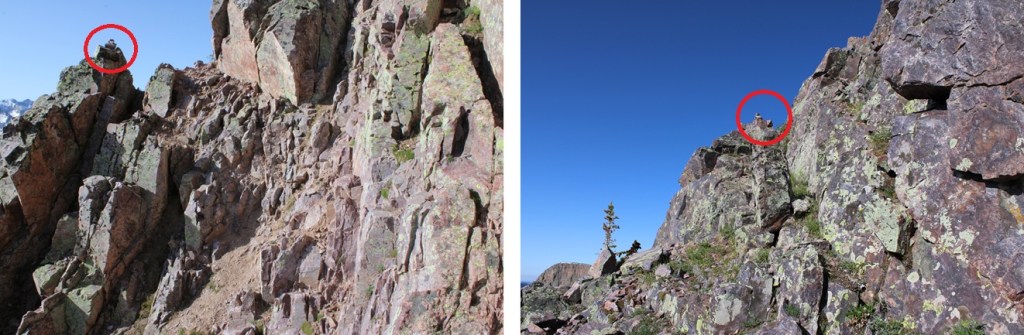
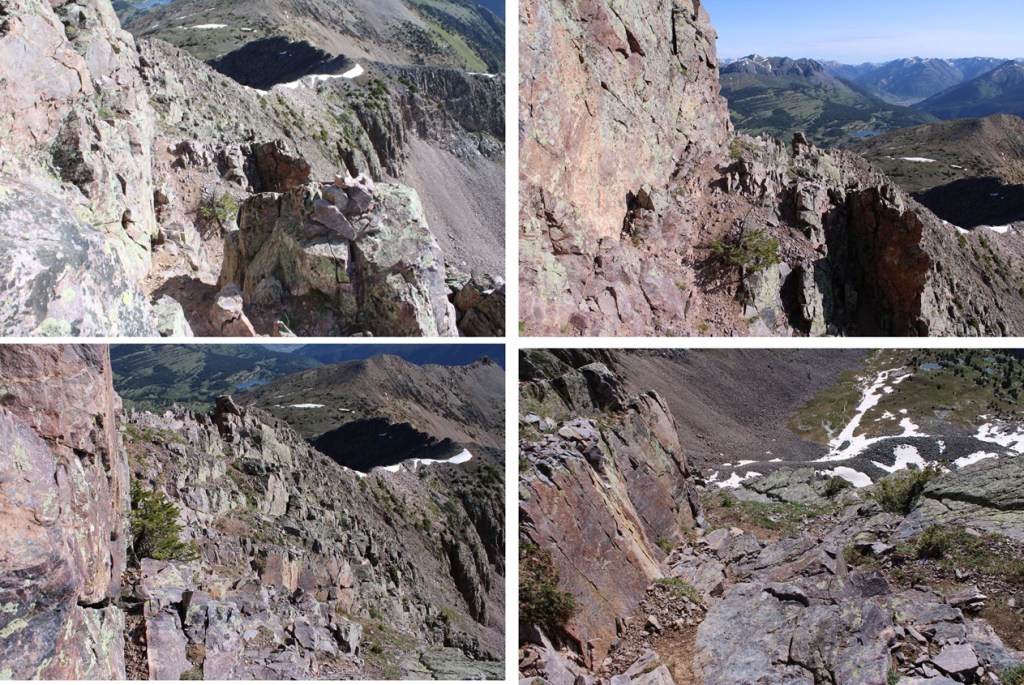
If you don’t already have your helmet on now is the time to do so.  There are several routes up this ridge.  I took the ridge proper at class 3 all the way to 12900’ before dipping down and south, then traversing around the east side of the mountain to get to the summit (lots of cairns to help once I dipped down).  However, you don’t need to take the ridge proper to this point.  If you stay to the left of the ridge there are game trails that keep you about 50 feet below the ridge on class 2 terrain most of the way.  Here are the routes:

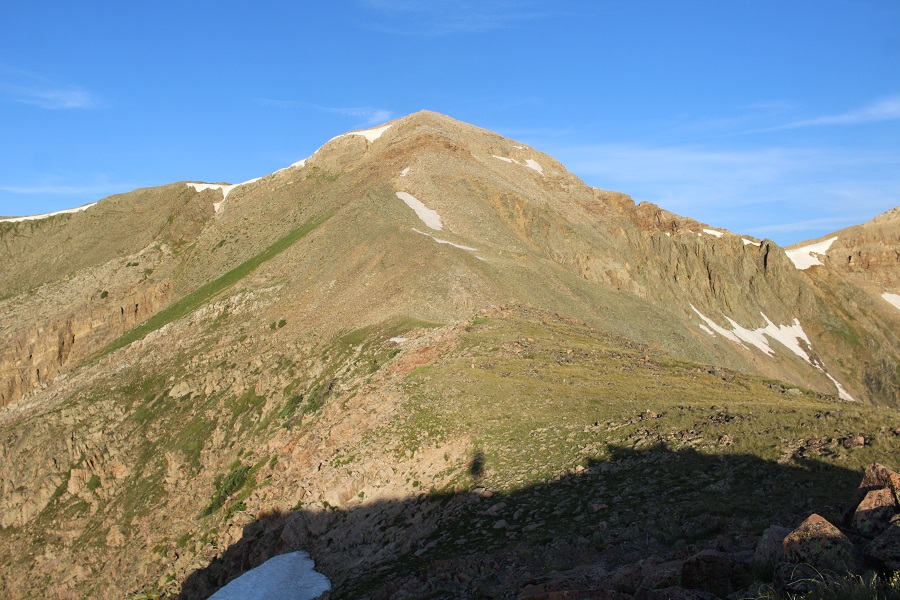
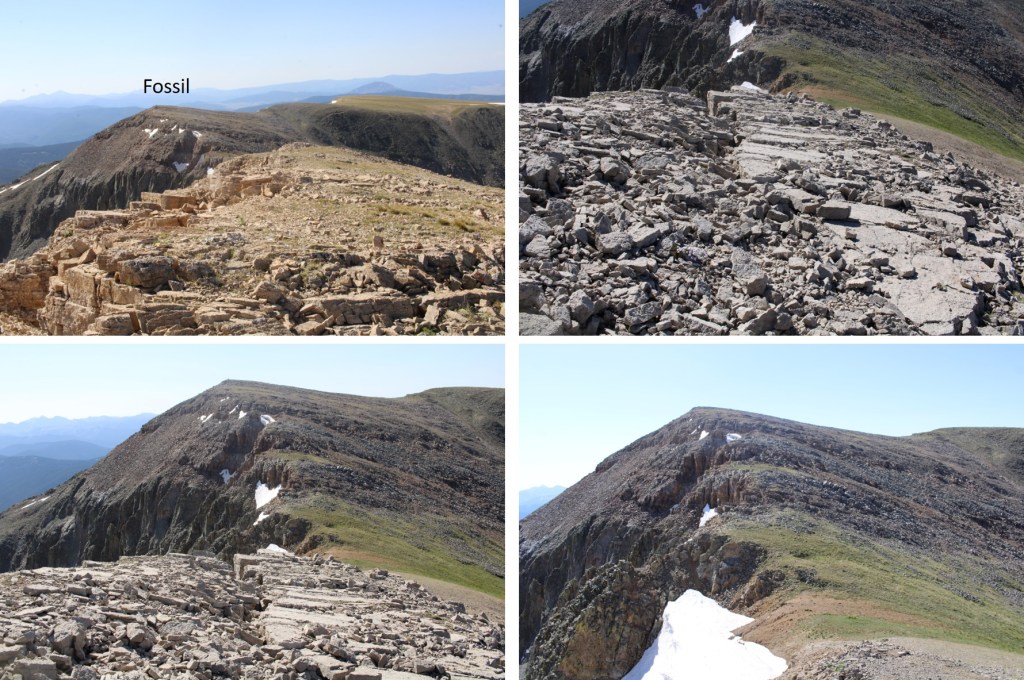
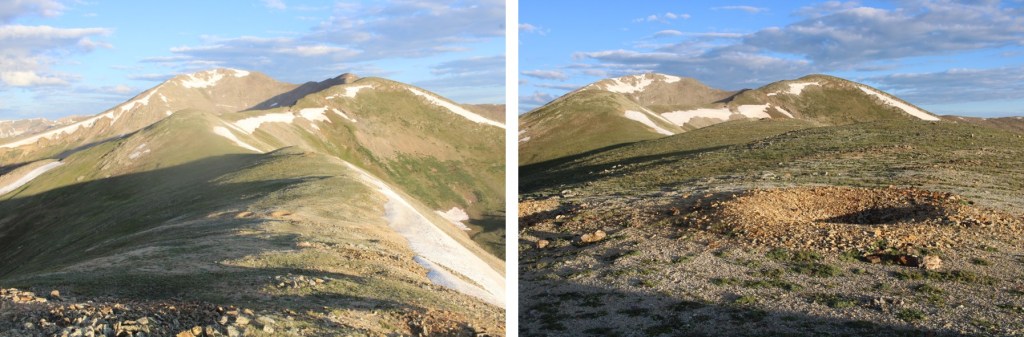
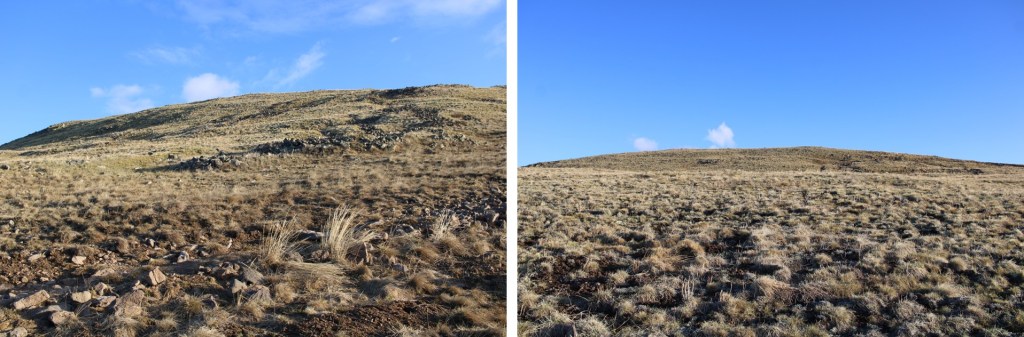
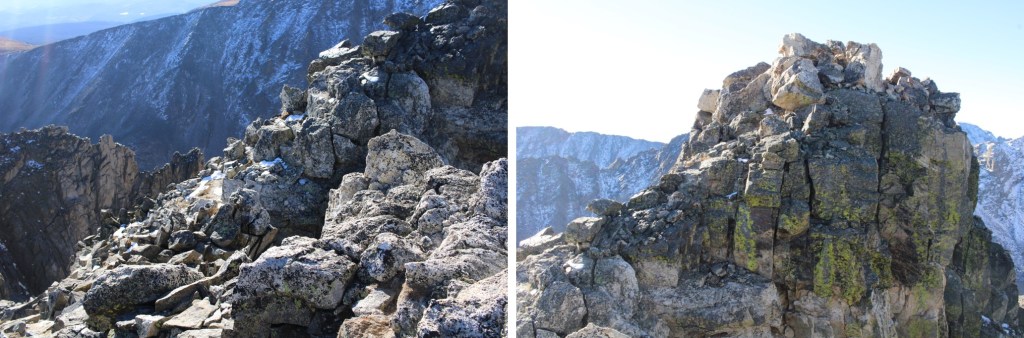
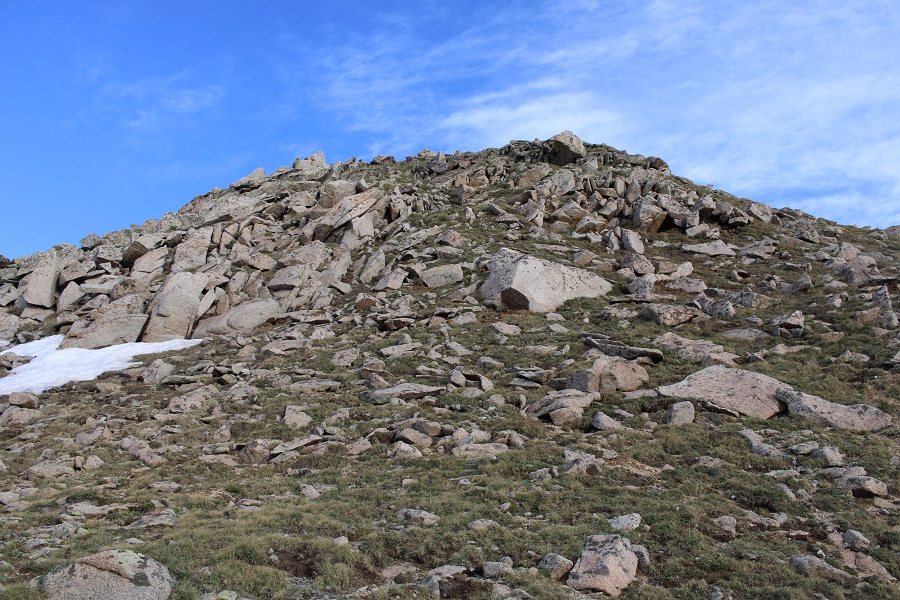
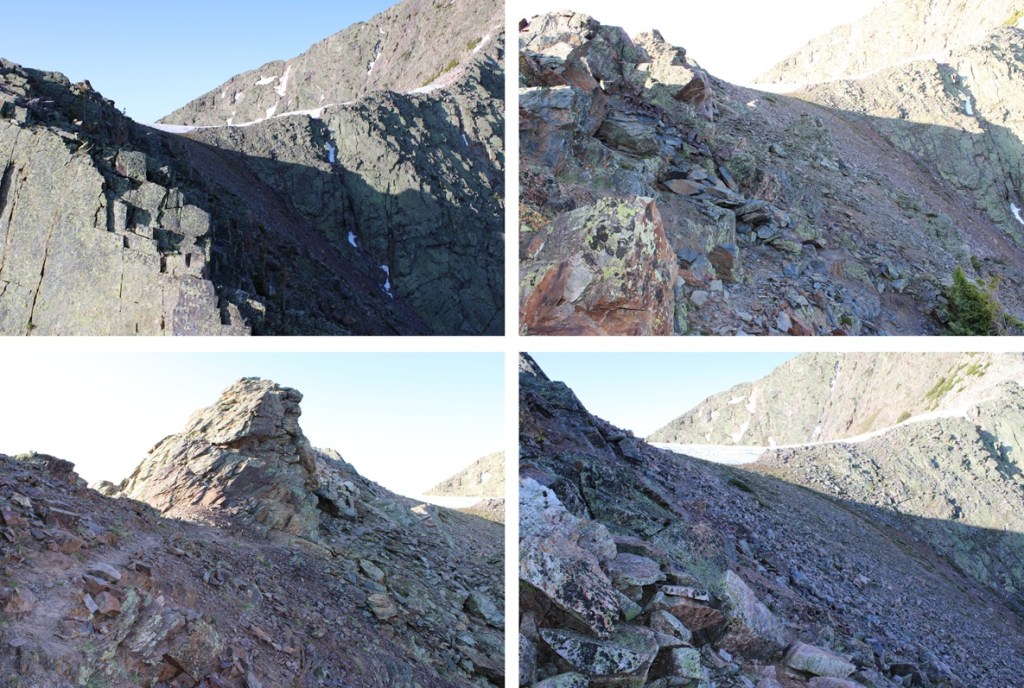
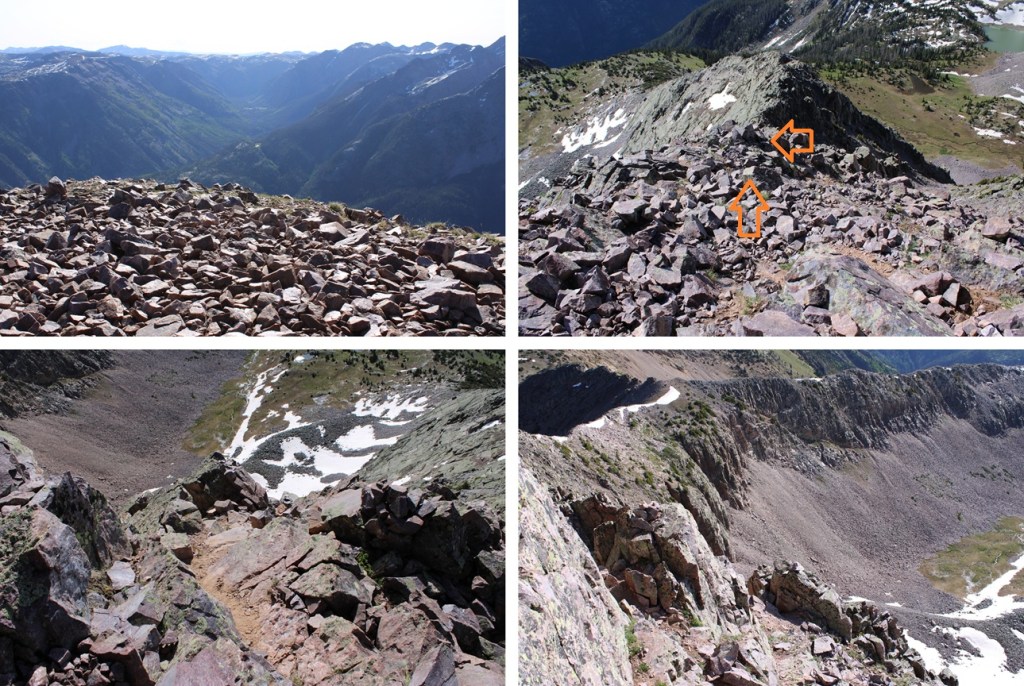
Here are some pictures of the ridge route I took to 12,900’

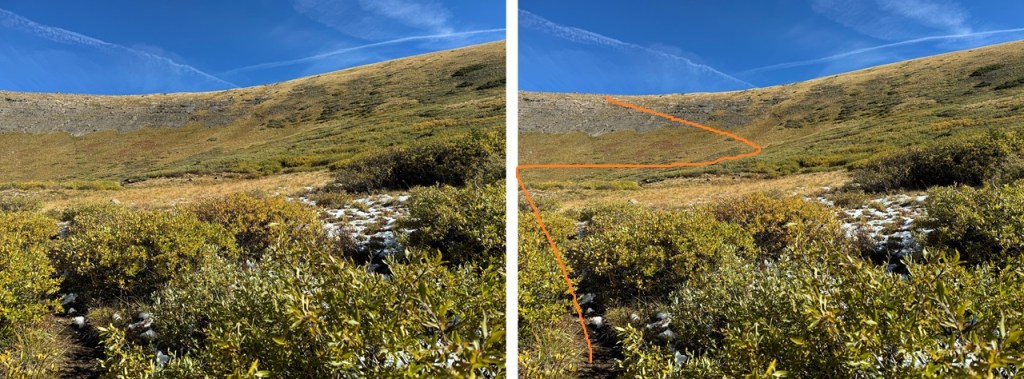
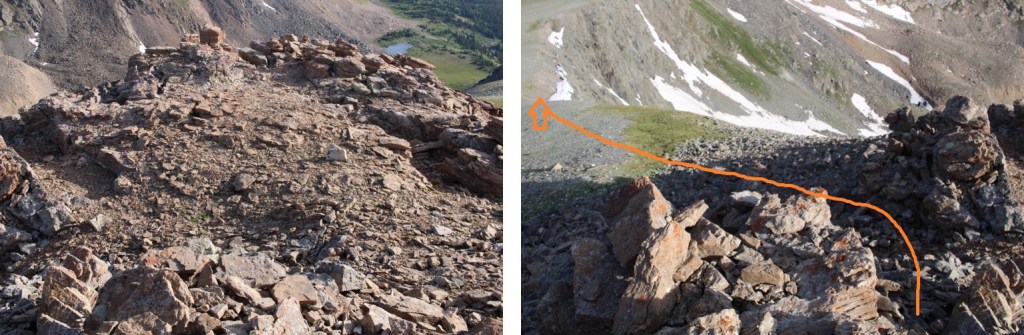
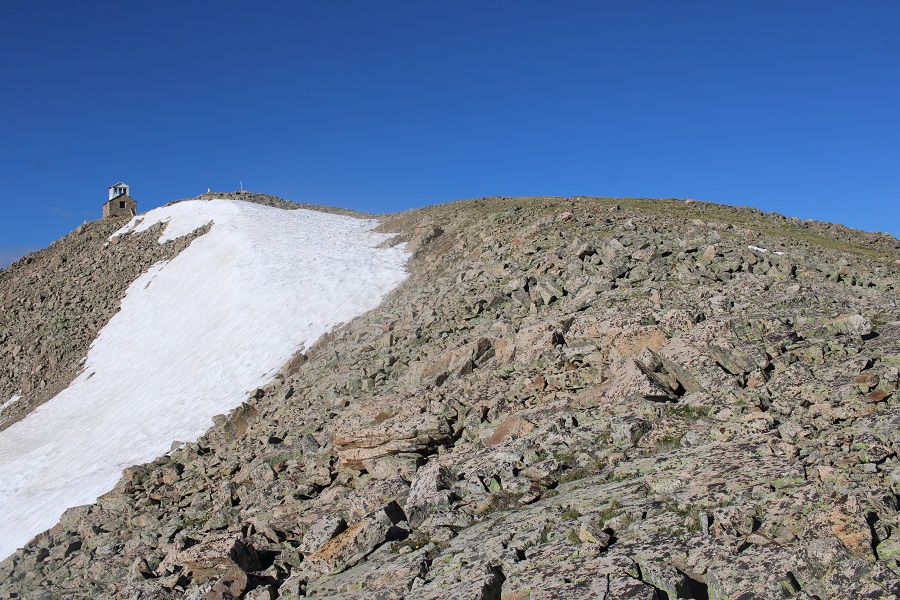
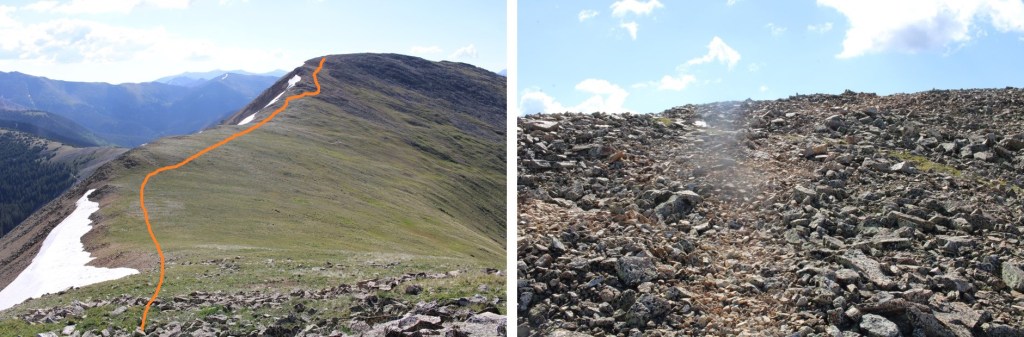
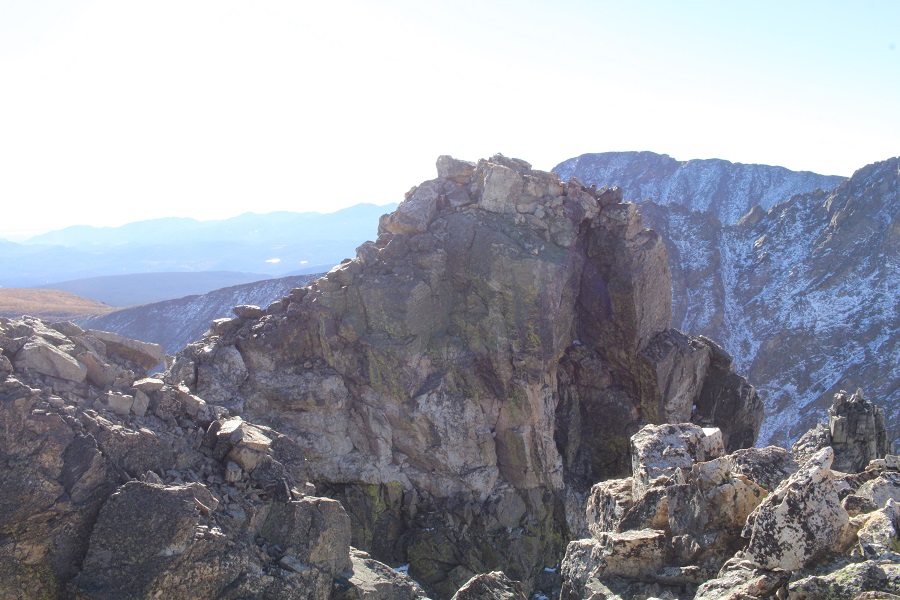
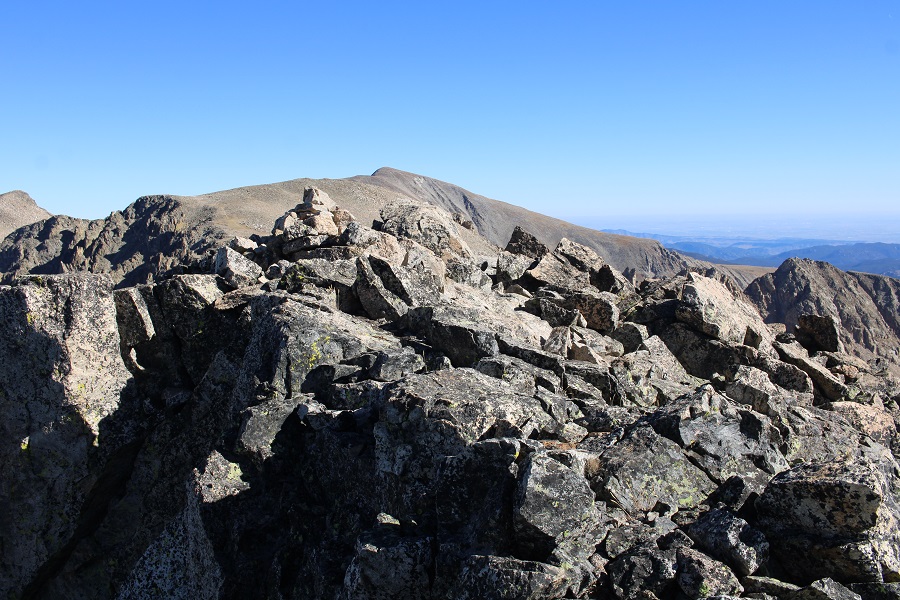
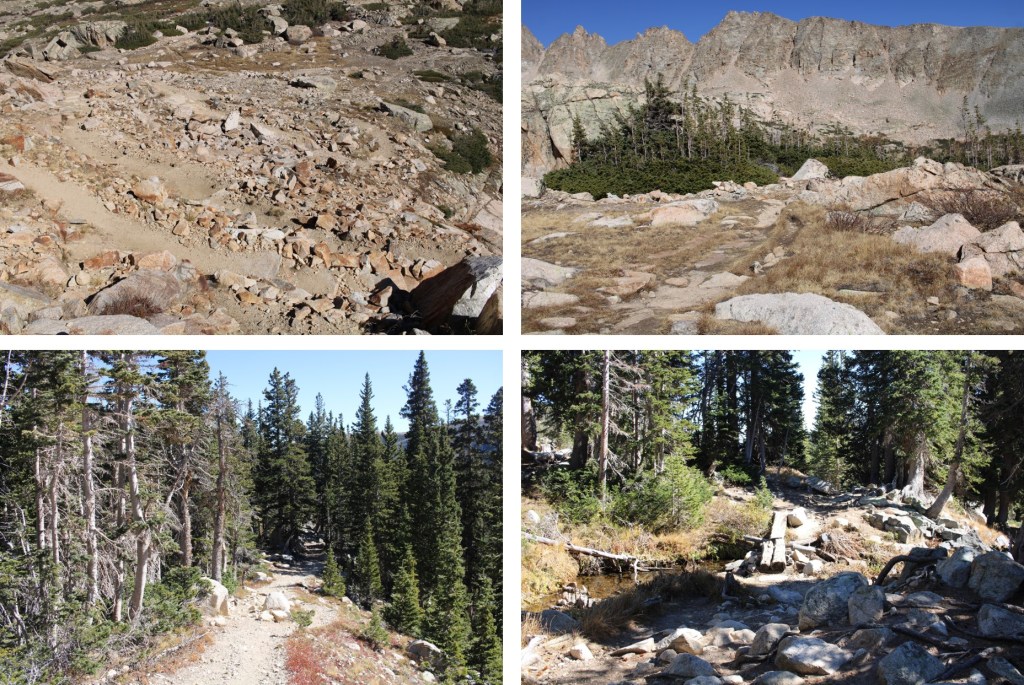
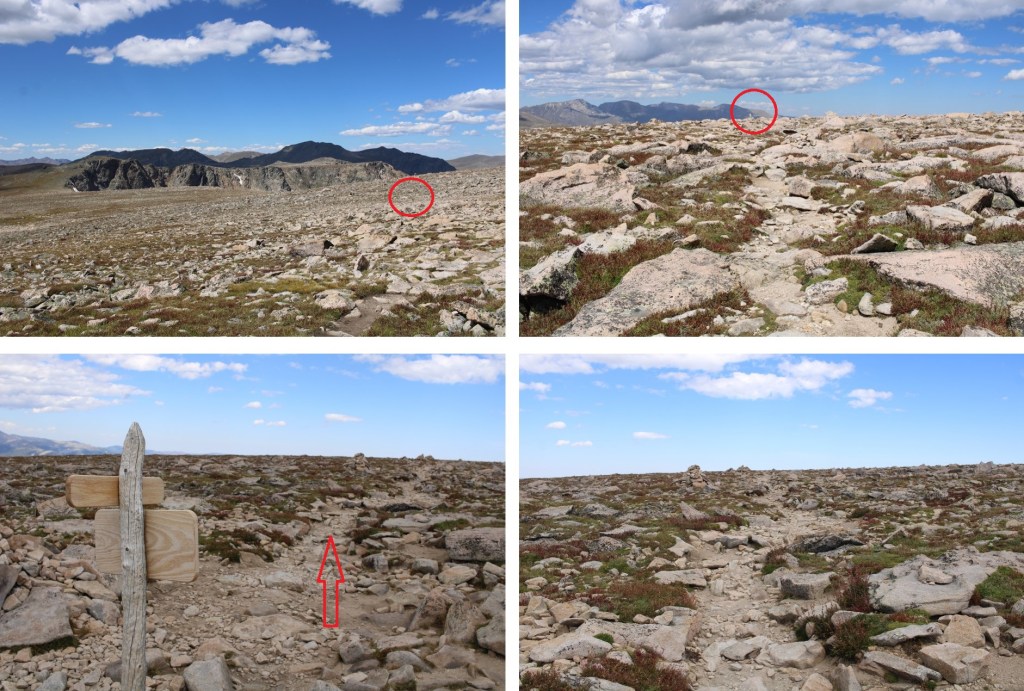
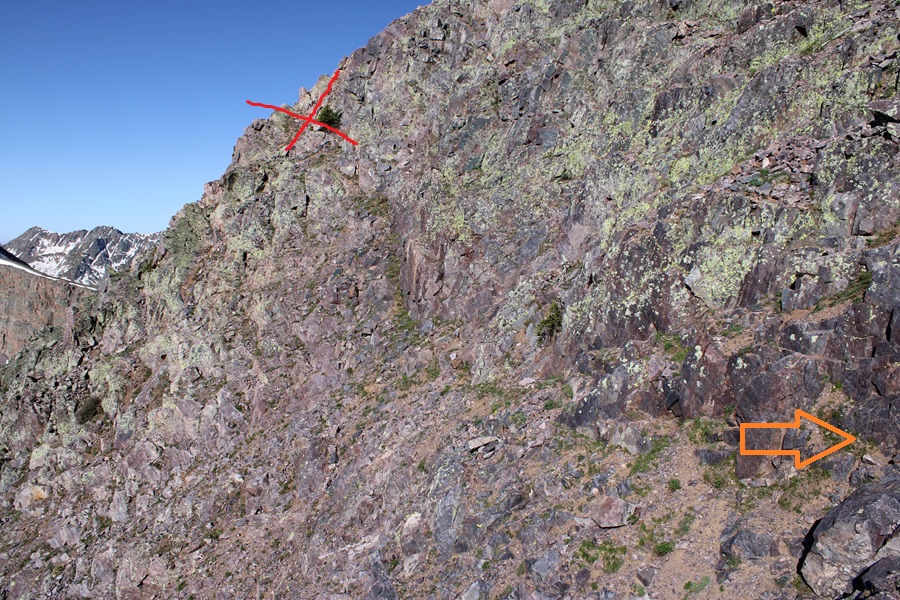
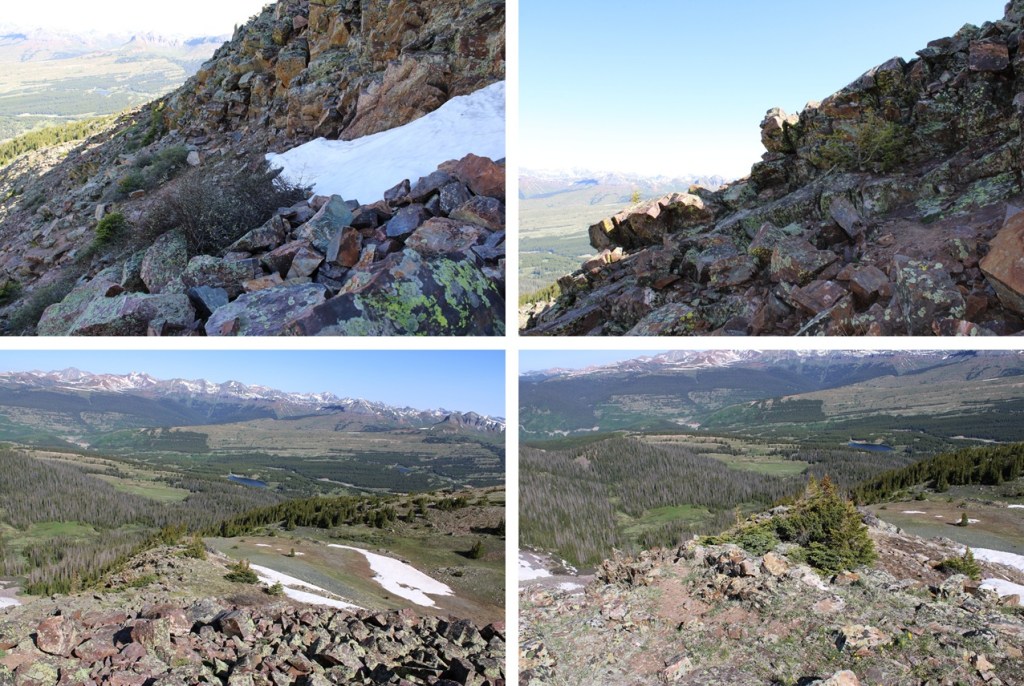
On the ridge at 12,900’ I hit a snag, and realized I needed to drop down where I saw this gully.  Directly below it I saw a cairn and headed that way.  Here’s a visual of where you should go when you hit this area.  Head down, not up, and continue around the left side.

From here on out there are cairns to the summit.  If you don’t see a cairn, you’re off route.  I kept heading left, and every time I wanted to ascend it seemed like I had to descend as well, but there were always cairns to help lead the way.  This is class 3.

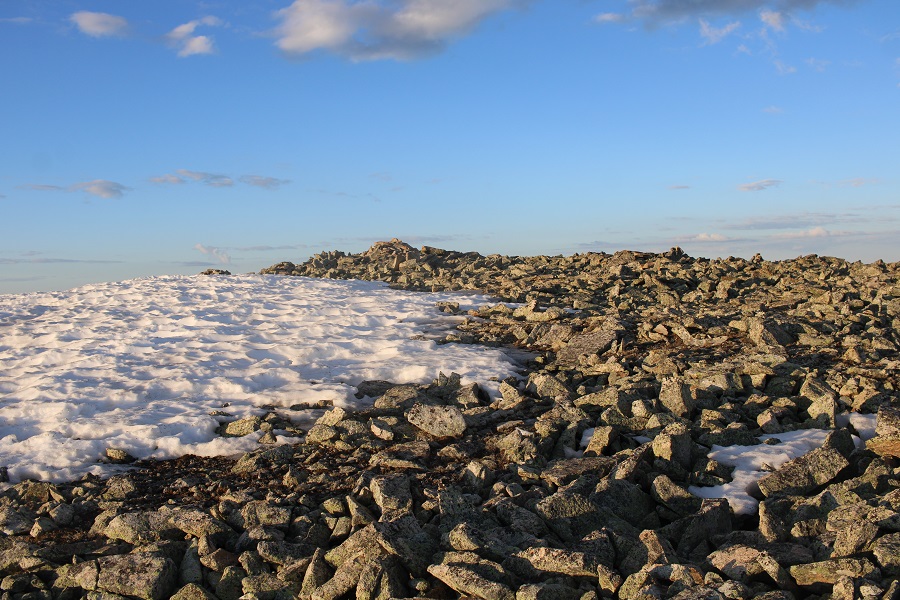
When I got to 13,010’ I saw this in front of me, and a cairn in the distance.  Don’t head for that cairn.  This is where you just scramble to the top from where you are. 

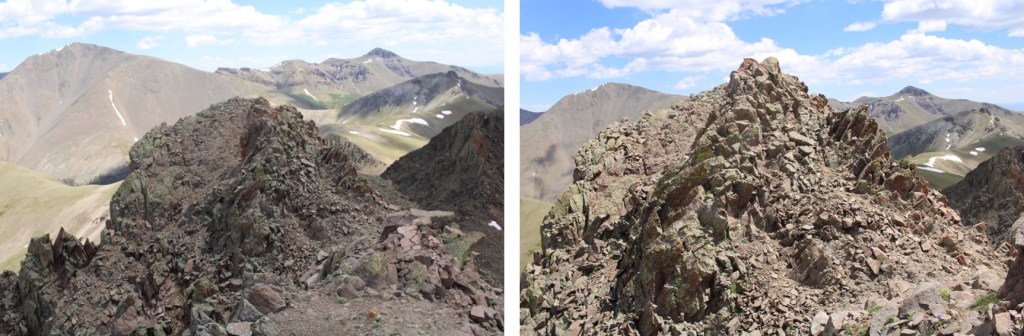
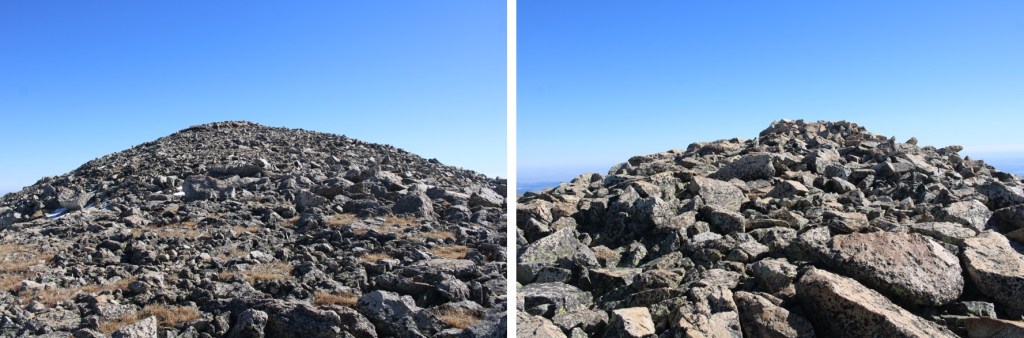
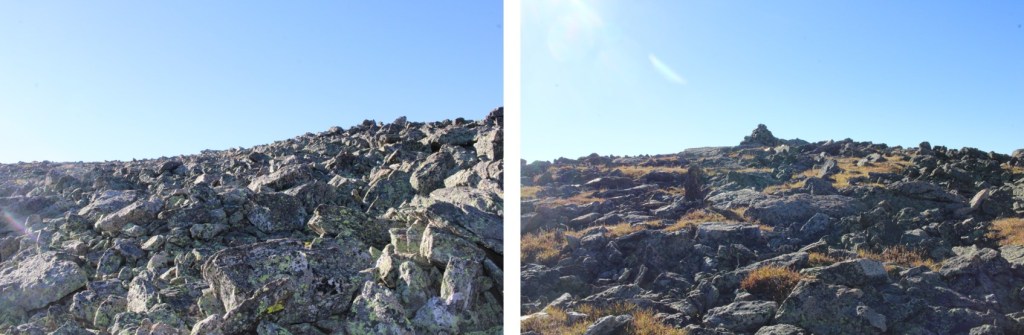
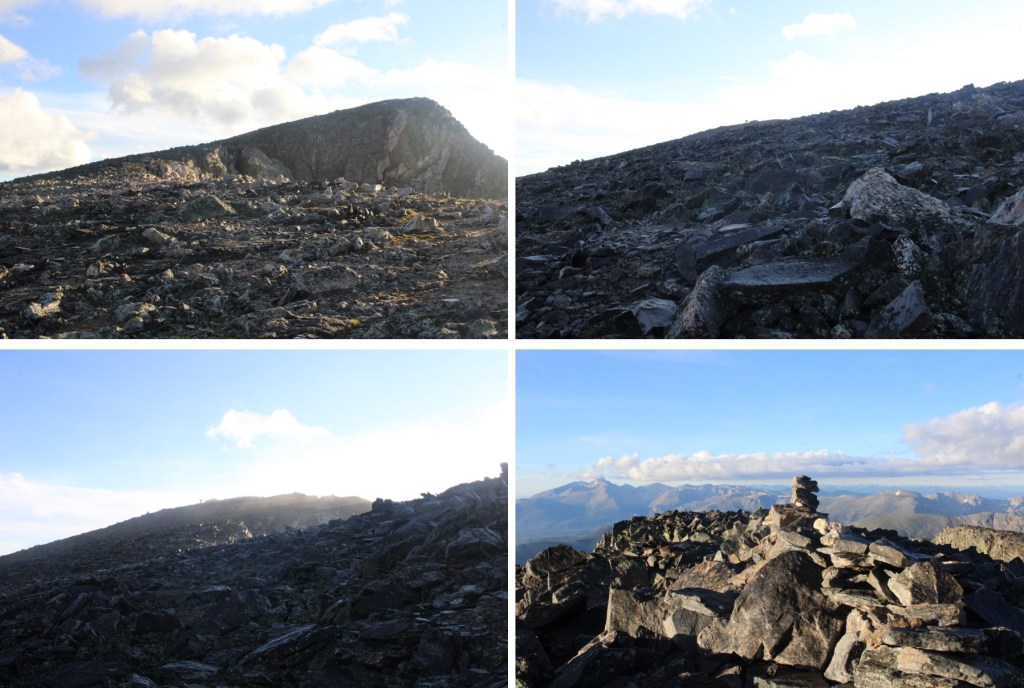
It’s a short scramble, and soon I was on the relatively flat summit

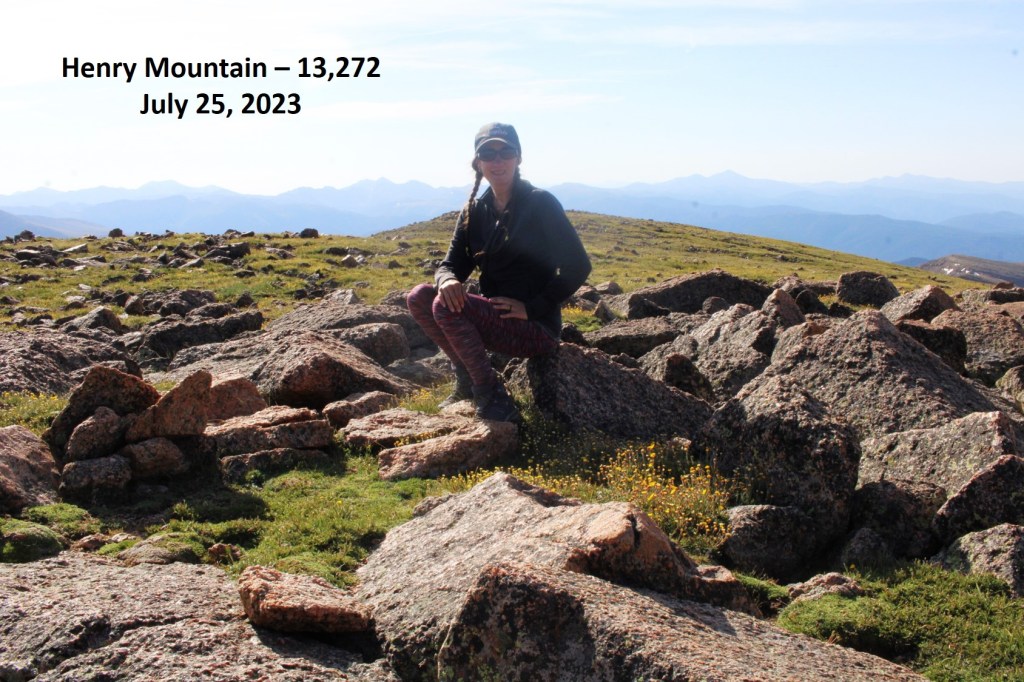
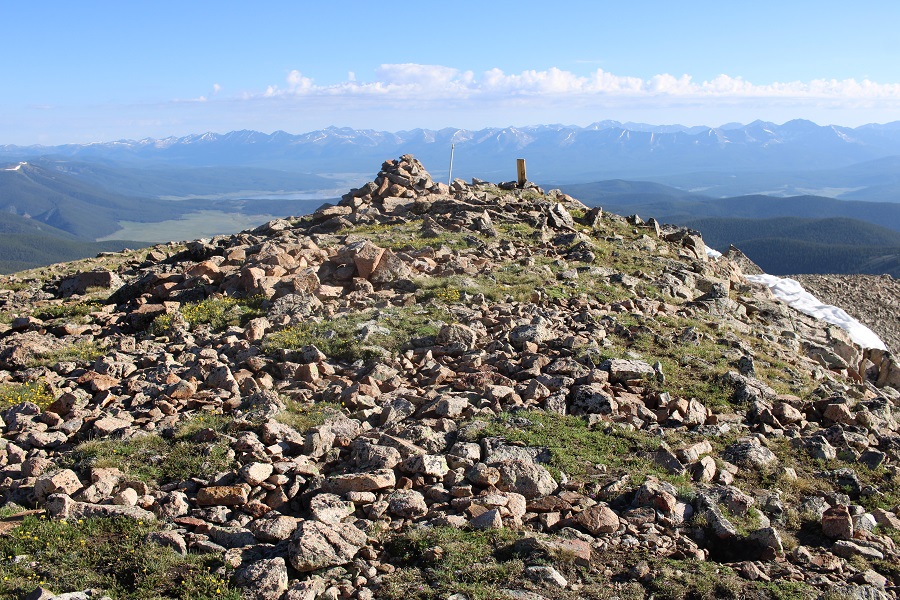
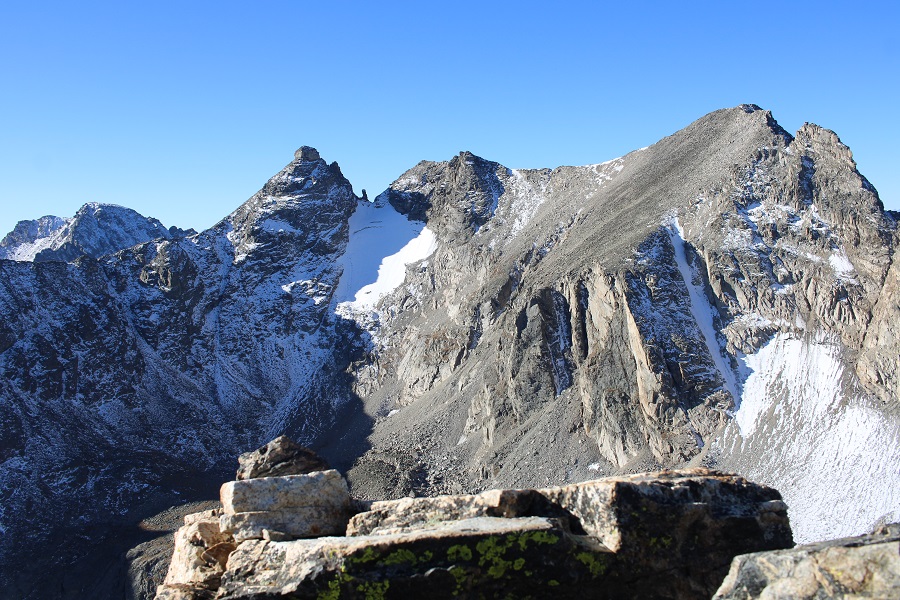
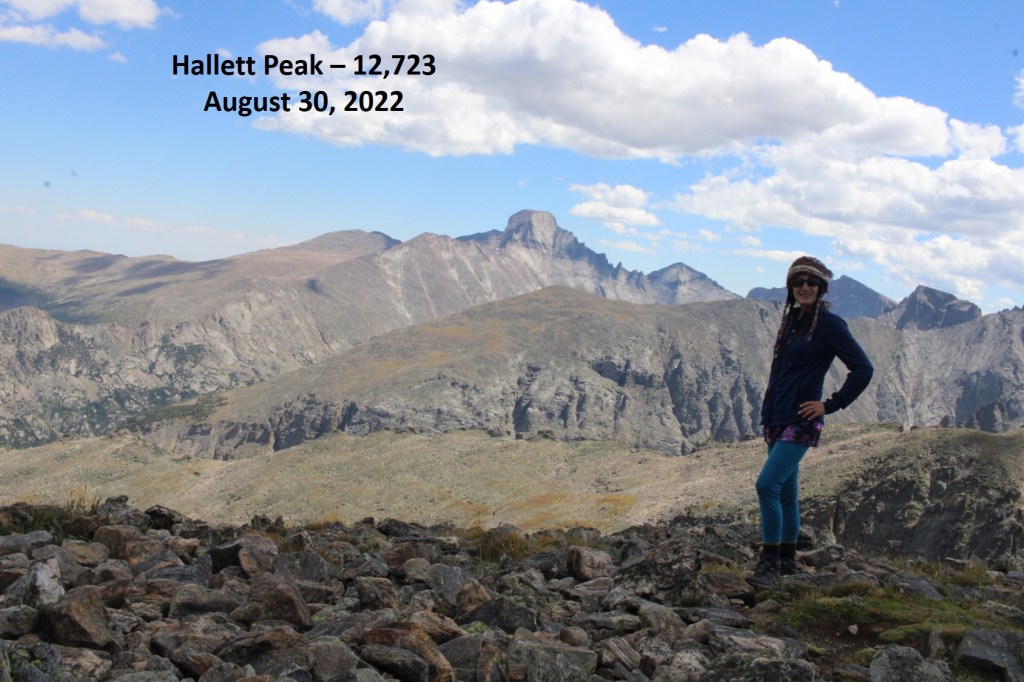
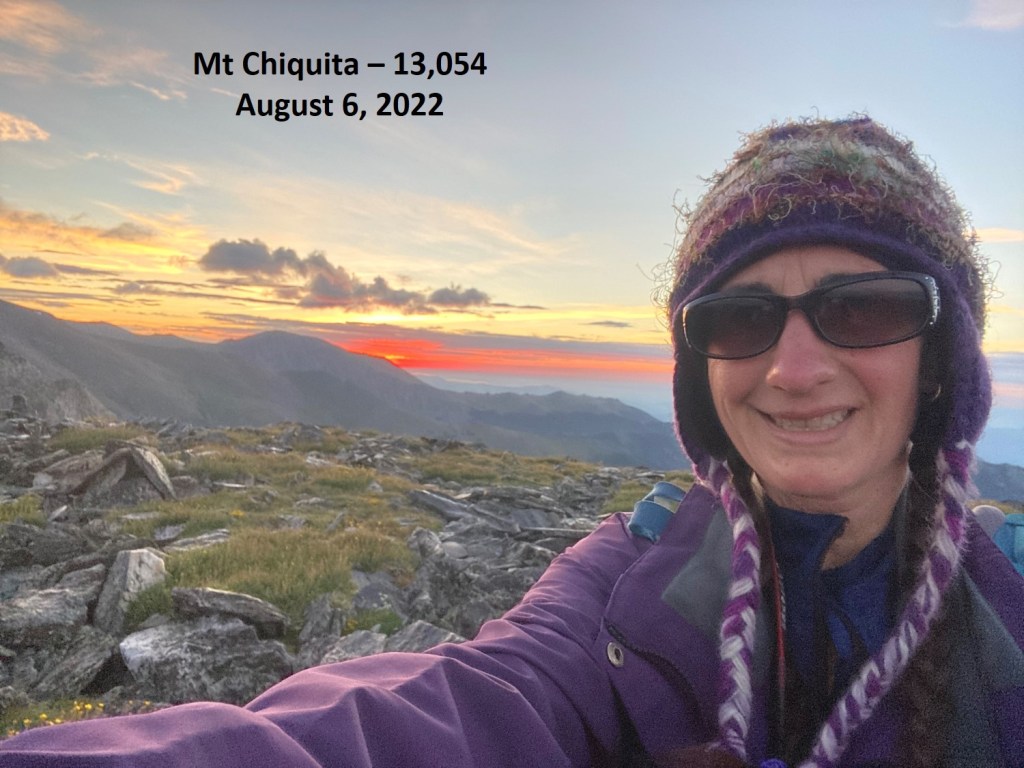
I summited Snowdon Peak at 8:20am
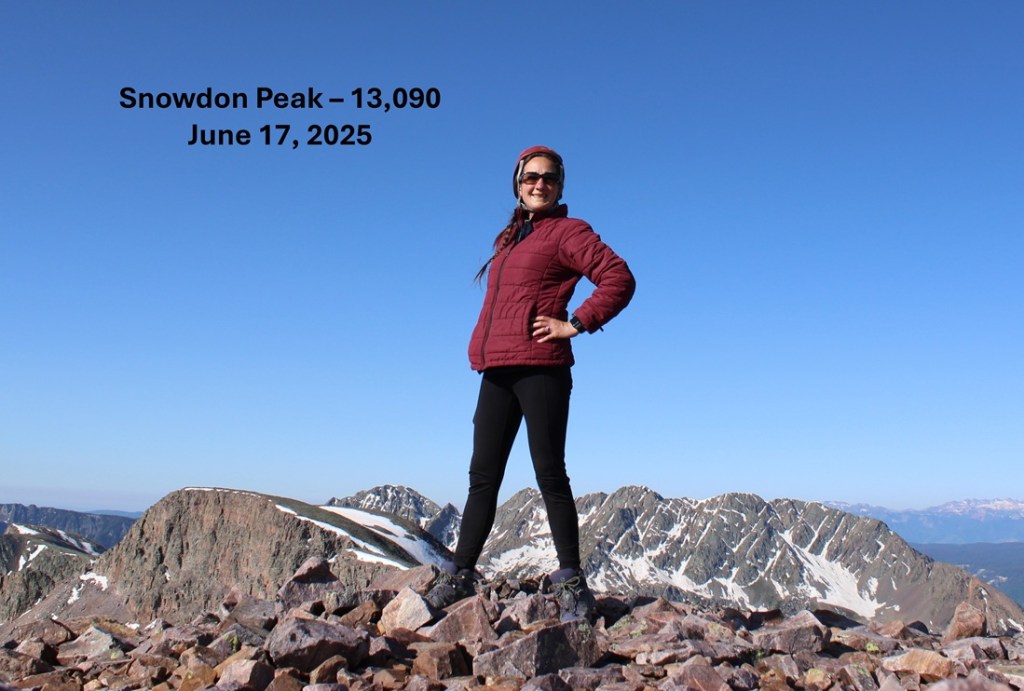
Snowdon Peak:

Now to head back down.  I took the same route back to the ridge following the cairns as I descended.

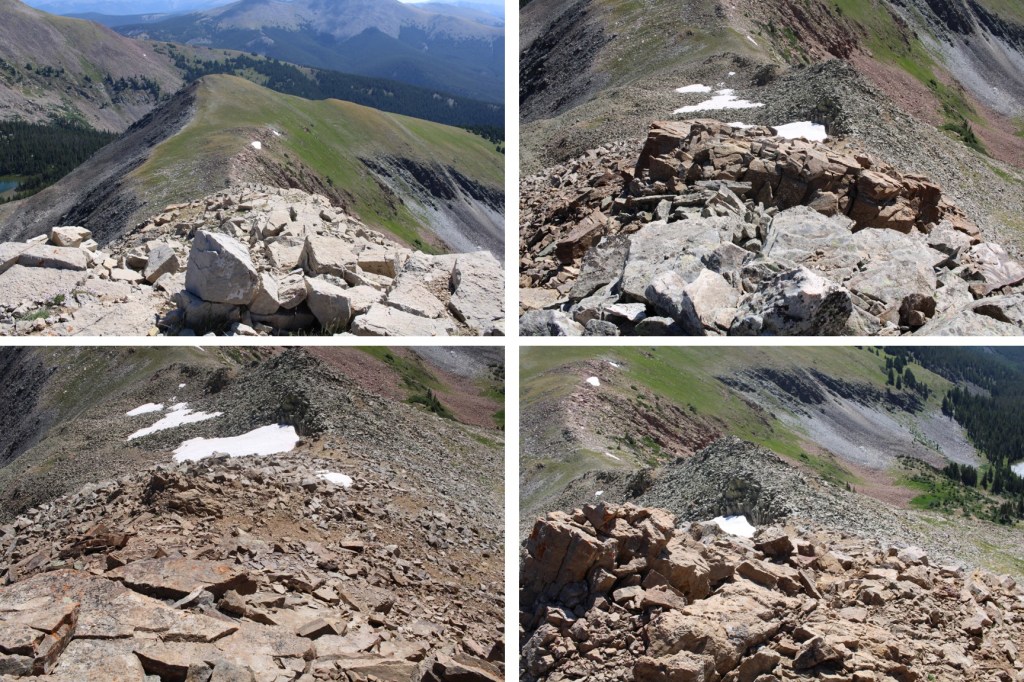
And now to follow the ridge back to the saddle.  Here’s a visual of the route I took:

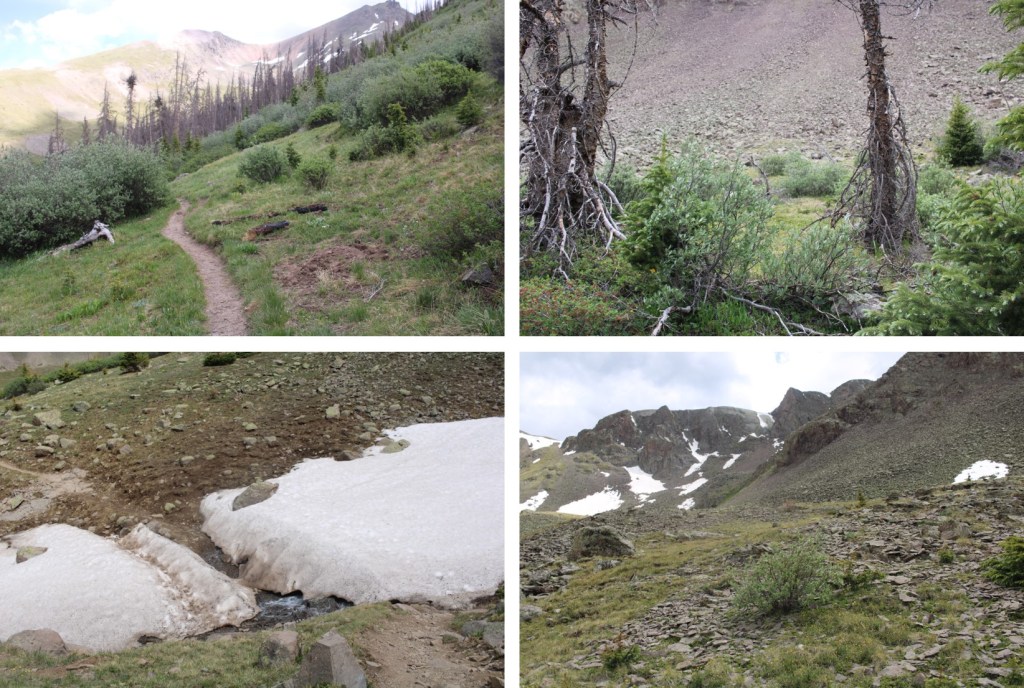
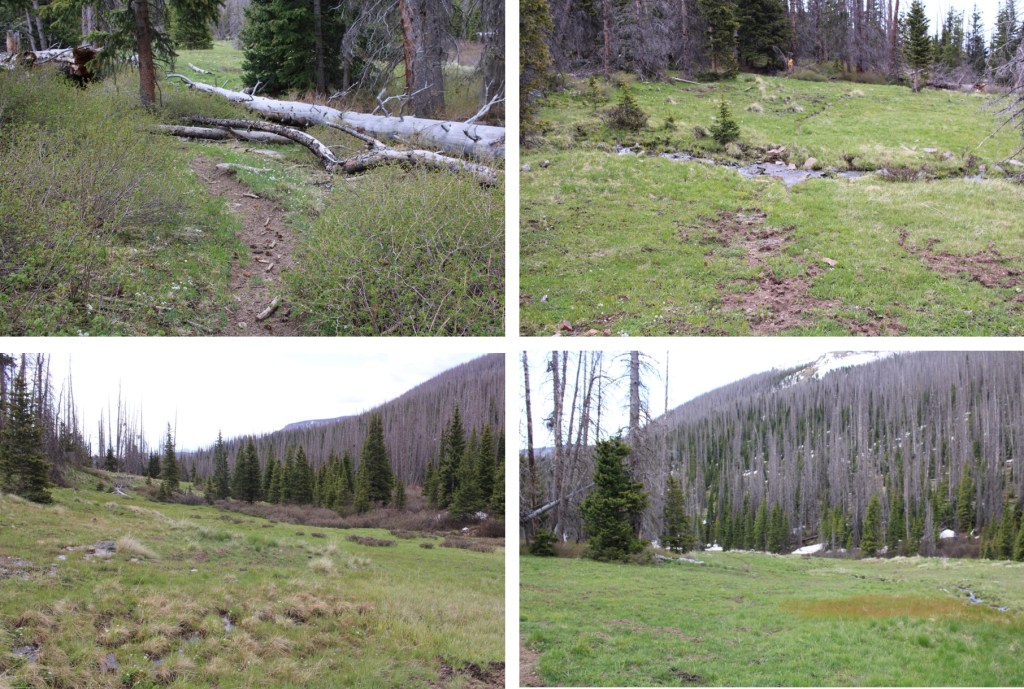
I found my access gully and headed back down to the trail.

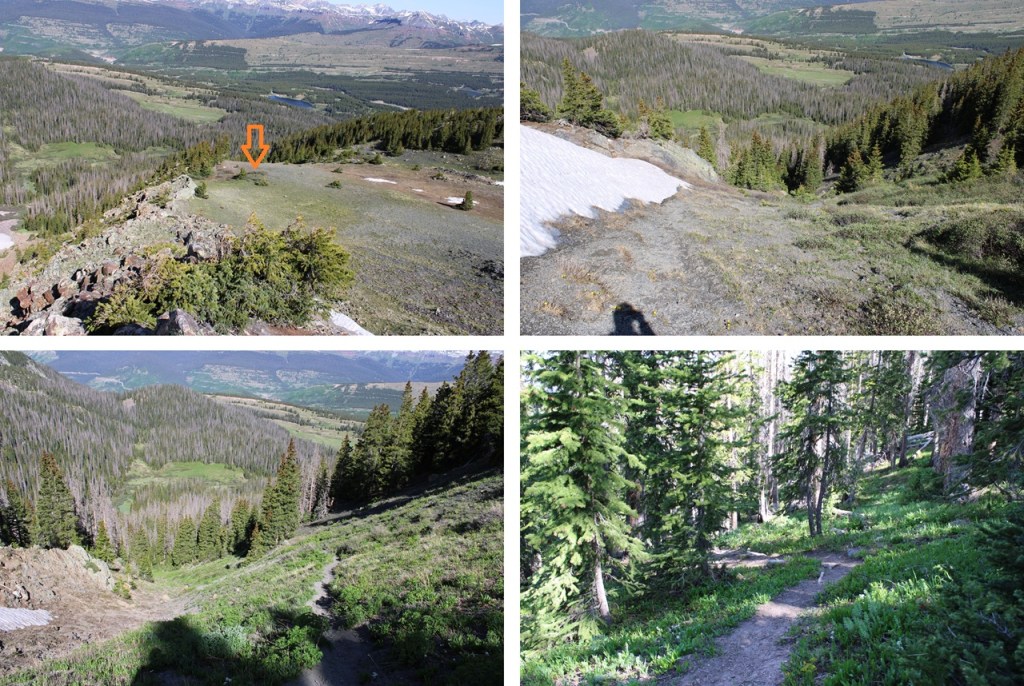
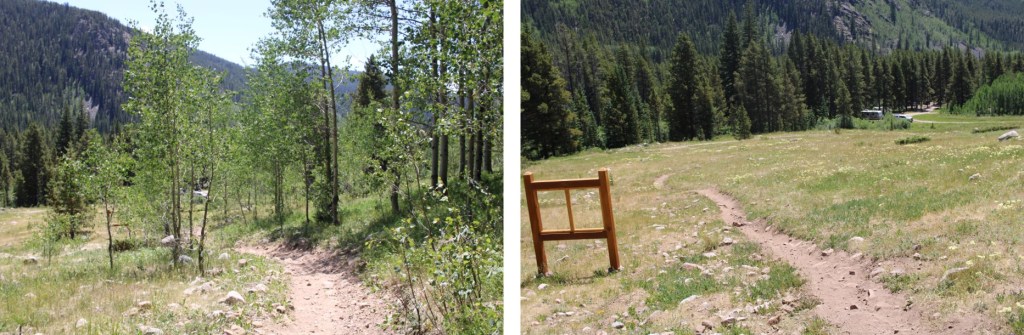
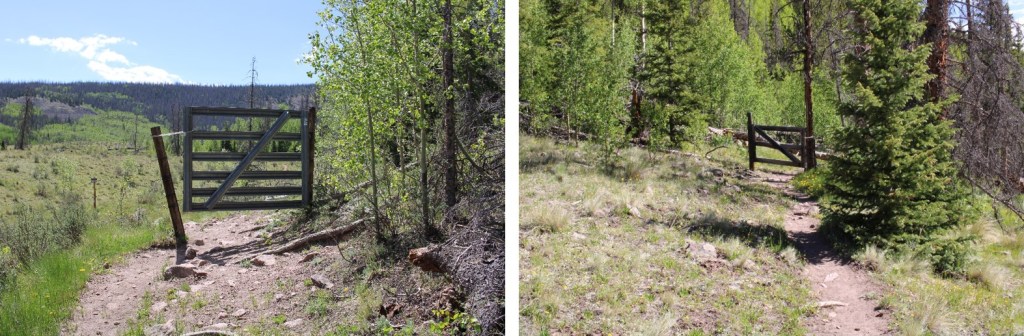
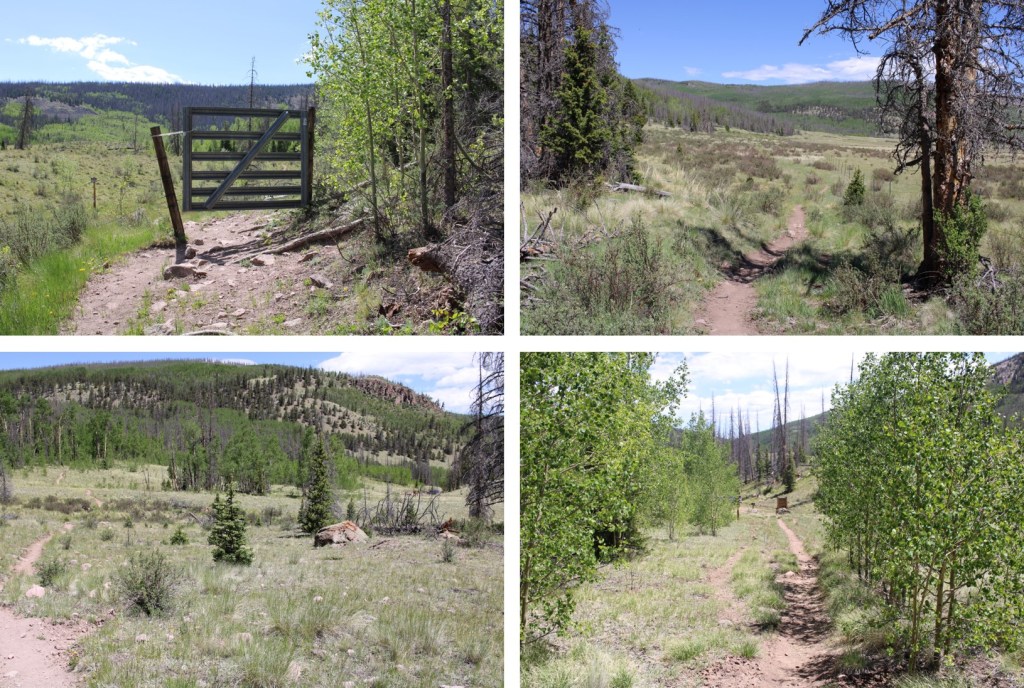
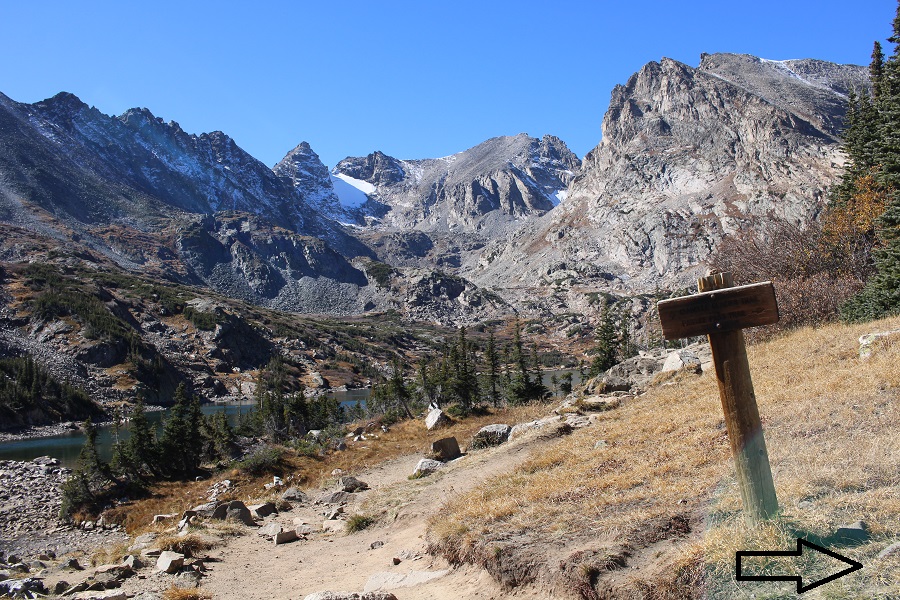
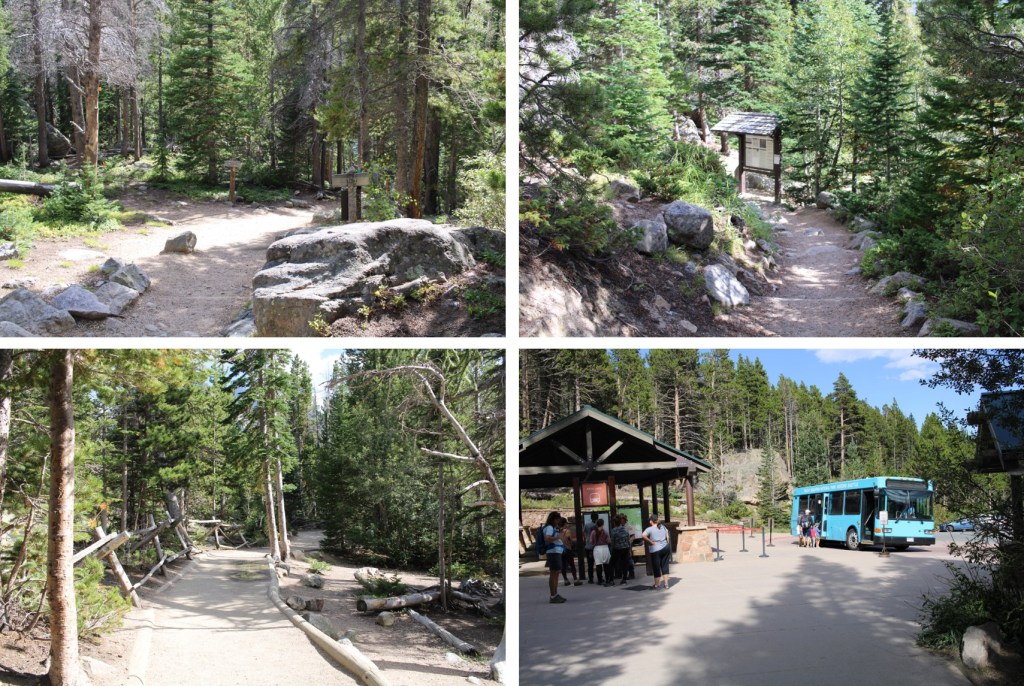
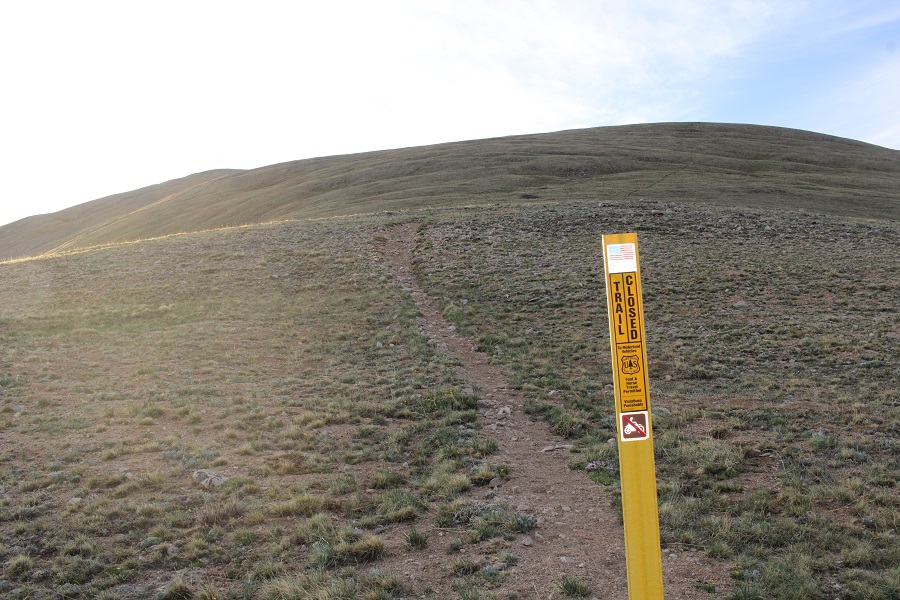
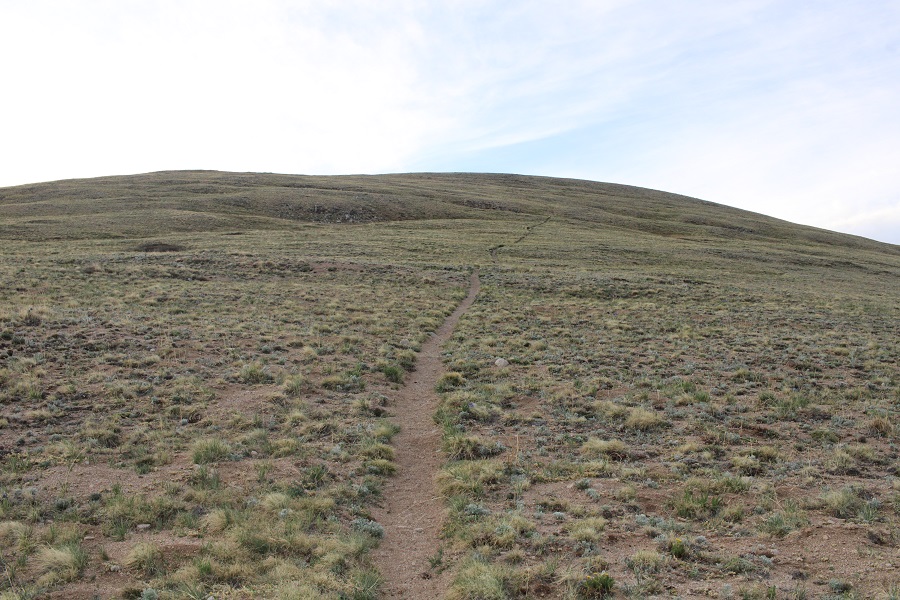
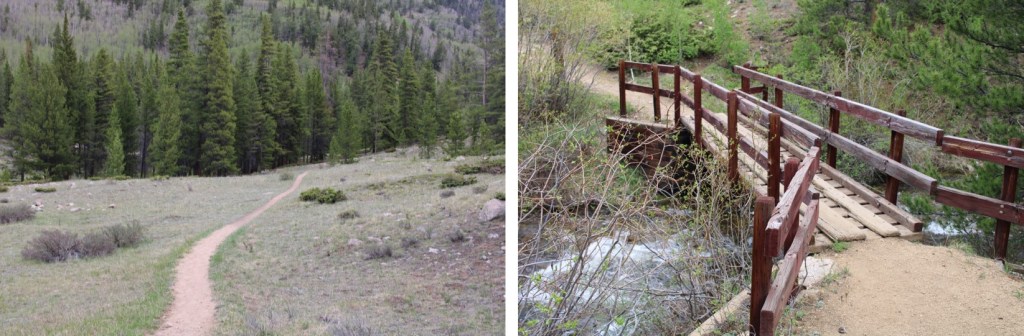
I then followed the trail back through the marshes and trees towards Andrews Lake.

Once back on the Crater Lake Trail I followed it back to Andrews Lake.

I made it back to Andrews Lake at 10:30am, making this an 8.42 mile hike with 2747’ of elevation gain. 

And for those of you wondering, my past few months consisted of:  Getting married, buying property, Mexico, Cookie Cupboard for 2 months (I love Girl Scouts!!!), Florida, Washington DC, my son visiting from South Korea, 2 of my kids graduating College in different states during the same week (one of them Valedictorian!), Georgia for a week, South America for a month,  building a ranch from the ground up (empty land, but after a few months of hard work I now have a well, a vineyard, an orchard and the animals have corrals).  Raising yaks and alpacas (all the females are pregnant), a nasty tick bite that left me out of the sun for a month but gave me time to do a  a couple of dozen podcasts, teaching Wilderness First Responder courses and several outdoor survival skill classes to multiple groups.  Oh, and last week we got a puppy, so it’s been a little busy around here!

On to the next trailhead!

Goat Peak – 12,987 and West Elk Peak – 13,040

RT Length: 19.82 miles

Elevation Gain: 4778’

While this trail looks long, it’s actually quite easy.  The elevation gain is gentle, and the views are amazing.  It looked like fall below treeline, and winter above, which was a neat contrast. I parked at the upper Mill Castle Trailhead.  The last mile and a half or so require high clearance, but a 2WD should make it.  If not, there’s a parking area below with vault toilets and plenty of parking.

I was on the trail at 6:30am.  The trailhead is obvious, and as with most of this hike, it starts to the west.

The trail (Mill Castle Trail) starts by going through a gate to what used to be a 4WD road, then changes to a trail.  There aren’t any junctions to this trail, so I followed it west as it paralleled Mill Creek.  There are several creek crossings, as I was hiking up through a drainage, and runnels were entering into the creek from both sides.  It felt as if I was gaining and losing elevation most of the time until I made it to treeline. Every time I’d switchback up a hill, I seemed to head back down for another creek crossing.  It was almost 7 miles to treeline.  On a positive note, the trail was easy to follow, and it was nice hiking in the trees, listening to the birds and squirrels go about their day.

At treeline the trail went through some willows, then west into Mill Basin.

Once in the basin, the trail switchbacked to the right, up to Storm Pass.

Once at Storm Pass, I could see unranked 12er Goat Peak to the west, and West Elk Peak to the northwest.

I followed the ridge west on a class 1 trail towards Goat Peak.  I’m assuming the entire trail to West Elk Peak is class 1, but there was snow on the rest of the route, so I’m not entirely sure.  If anything, it’s easy class 2. The snow was solid in the morning, so the terrain was easy to navigate.  Here are some pictures of the ridge to Goat Peak

This was a bit of a false summit. Here’s the true summit of Goat Peak

I continued following the ridge as it became rocky.  Still class 1 or 2, depending on snow.

From the summit of Goat Peak I followed the ridge northwest to the summit of West Elk Peak on easy terrain.  I did not see any evidence of a trail here, but it could have been covered in snow.

I summited West Elk Peak at 10:45am

West Elk Peak:

West Elk Peak was my main goal for the day, so I turned around and headed back towards Goat Peak

However, on my way back I could see a faint trail under the snow that skirted Goat Peak to the left, so I took that back to the ridge.  I’m not sure if this is an actual trail or a game trail, but it went.

There were some game tracks about half way through skirting the peak, which I followed to the ridge

Once back on the ridge, I followed it east towards Storm Pass

I then picked up the Mill Castle Trail and followed in down the switchbacks, back into Mill Basin

And then all the way back to the trailhead

29

I made it back to my truck at 2:30pm, making this a 19.82 mile hike with 4778’ of elevation gain in 8 hours.

On to the next trailhead!

Henry Mountain – 13,272, Fossil Mountain – 12,764 and Square Top Mountain – 13,007

RT Length:  10.96 miles

Elevation Gain:  3927’

I started from Gold Creek Campground outside of Ohio City.  The road in was an easy 2WD dirt road, that led me to a dispersed campground maintained by volunteers.  There are about 5 sites, with vaulted toilets.  I didn’t feel right using the empty campsites, as I wasn’t really camping, but sleeping in the back of my truck, so I parked at a dispersed site directly across the road, near the trailhead, at about 10,050’.  Also, it was quieter, as a family with two small children and rather loud dog were staying in the campground.  There was a makeshift corral for horses there as well.

I was on the trail at 5am the next morning. The trail starts at the north end of the camping area. 

I followed Trail 532 northwest for 2.5 miles to Mill Lake.   This is an easy to follow, class 1 trail the entire way to the lake.

There is one junction early on that isn’t on a topo map, but it’s well marked.  Just keep going towards Mill Lake.

At Mill Lake you can clearly see Fossil Mountain.  The easiest way to get there is to turn right, and head northeast through the trees until you see the ridge.  It’s a short (100 yards at most) hike to get there, and the bushwhacking is easy.

The route will be easily visible.  There are rock ledges if you go to far left or right.  You want to take the tundra northeast until you make it to the ridge, and then turn left and follow the ridge west. Here I gained 850’ of elevation in .75 miles

Here’s looking at the last bit of the route to the ridge. There’s no need to hike all the way to the top of this little bump in the ridge, as it isn’t ranked.  I skirted it and headed towards Fossil Mountain.

Now the hike became fun.  The ridge goes at a class 2 scramble until the base of Fossil Mountain, then becomes an easy class 3 scramble to the summit. 

Here’s the overall route I took

And some step-by-step pictures

I went straight up and over this large rock formation.  It was easy class 3.  You can go to the right to get around it, but you’ll be met with loose talus and a gully. 

I summited unranked Fossil Mountain at 7am

Fossil Mountain:

From the summit of Fossil Mountain, looking to the northeast you can see the other two peaks I was headed for today, Square Top Mountain (unranked), and Henry Mountain

It was a straightforward ridge hike to get to Square Top Mountain, where I pretty much stayed on the ridge.  There were some easy class 3 moves, and at times I needed to dip to the left or right.  The rock is very loose in areas, and very stable in others, so basically it keeps you on your toes.  I lost about 180’ of elevation going to the Fossil/Square Top saddle.  Here are some pictures of the ridge to Square Top Mountain.

From the saddle, here’s looking up at the path towards Square Top.  The first half was on tundra, and then the rocks began

It was here I noticed a small herd of elk.  I stayed where I was until they noticed me, then watched them watch me as they ran away.

Check out the herd of elk:

Ok, continuing with the ridge.  This part looked difficult, but I found it was easy class 3 if I just kept to the ridge. 

Now to summit Square Top Mountain.  This was relatively simple, as there were several options.  I went up the gully nearest me (and down the one on the other side).  The rocks here were loose, but the angle was light.  

After ascending the gully, I turned left and easily walked to the summit

I summited Square Top Mountain at 8am

Square Top Mountain:

Looking to the northwest I could see Henry Mountain

I descended Square Top Mountain to the northwest, and hiked on tundra to the summit of Henry.  There were some very faint fame trails here I utilized.

As I came to the top of the ridge, I was greeted by 4 mountain moats.  Usually, mountain goats are pretty tame and just watch me.  These ones did for a while, but as soon as I got out my camera and they could hear the shutter snap, they took off.  Well, three of them did, the other one stood and looked like he was ready to fight, but then turned and followed the others

The summit of Henry Mountain is to the northwest, so I headed northwest towards the obvious highpoint on more tundra

I summited Henry Mountain at 8:40am

Henry Mountain:

This was an out and back hike for me, so I turned around and retraced my steps back to Fossil Mountain

Here’s the overall route I took, skirting Square Top this time

And some pictures of that rocky ridge between Square Top and Fossil

Then down to the Fossil/Square Top saddle

And up the ridge, back to the summit of Fossil. This part was class 2

At the summit of Fossil Mountain I was greeted to 4 ptarmigans on the summit cairn.  They actually led me for a bit down the trail.

I descended Fossil Mountain to the northeast, staying directly on the ridge.  Here’s the overall route.  Note where I entered/exited the trees, as it kept me on tundra and avoided the rocky sections and brought me back to Mill Lake.

Here’s looking at that easy class 3 section down the ridge. Once again, I stayed directly on the ridge and kept it easy class 3

Then back towards the tundra

As soon as I came to the first group of trees on the tundra I turned right, and headed down towards the lake

After a quick bushwhack in the trees, I could see the lake and a trail below

I followed the trail around the east side of the lake, back to Trail 532, and then followed that trail back to the trailhead

I made it back to my truck at noon, making this a 10.96 mile hike with 3927’ of elevation gain in 5 hours.  Please, note, I spent a lot of time admiring the wildlife and looking for cool rocks.

On to the next trailhead!

Fairview Peak – 13,224 and Green Mountain 12,692

RT Length:  7.75 miles

Elevation Gain:  2314’

I drove up to Cumberland Pass from Pitkin the night before my hike, and settled in.  The road was dirt 2WD, with a few places where clearance would be helpful, but otherwise it was an easy drive.  There was someone in a tractor grading the road, so I can only imagine it will get better from there.  I people watched for a few hours, then had the pass to myself for the next 18 hours, as it was only busy during the afternoon.

The next morning, I was on the trail at 5:30am.  I actually followed a 4WD road, at the west end of the parking area.  Side note:  On this hike I saw over a dozen grave markers.  I’m not sure if there were bodies buried underneath, or ashes spread, but it seemed excessive. 

I followed this road west and then southwest as it gained and lost elevation. 

After hiking for a little over a mile the road didn’t end, but it was snow covered, so I followed the ridge. 

Here’s the route up to Green Mountain

I could tell there was a road here at one time, but it hasn’t been used in quite a while.  At points it was a small trail, and at others it resembled a runnel.  It was rocky, but only about 650’ of elevation gain to reach the unranked summit. Here are some pictures of the route.

The summit was to the left (south)

I summited Green Mountain at 6:20am

Green Mountain:

From Green Mountain I turned around, and looked northwest.  I could clearly see the summit of Fairview Peak, and the route I needed to take to get there.

This was going to be a ridge hike, with a lot of ups and downs, but also fairly straightforward.  I headed northwest, and followed the ridge.  There were a lot of mines in the area.

Here’s the view looking over at PT 12556 (not ranked, etc.).  There were 5 crosses in a circle at the summit.  I’m not sure of their significance.

This was fairly easy terrain, mainly tundra that eventually became rocky

From 12556, this is the route I took over to Fairview Peak, skirting one of the points on the ridge to the left by traversing over rocky, but stable terrain.

Here are some pictures of the route, which was very rocky

At the top of the ridge, I could clearly see the summit hut at the top to my left.  I headed south to the summit

I summited Fairview Peak at 7:45am

Fairview Peak:

The summit hut was open, so I went inside.  There was still a lot of snow on the floor.  It didn’t look like anyone had been there yet this year.  There were tools, ladders, and a box with the history of the structure and improvements being made inside. 

From inside the structure, I could see Green Mountain to the southeast

I turned and headed back the way I’d come, back down the ridge

Here are some pictures of my route back to Green Mountain

Here’s a look at re-gaining the last 225’ to the top of Green Mountain

From the summit of Green Mountain, I headed northeast.  I could clearly see the road I was aiming for that would take me back to Cumberland Pass.  I’m sure you can see the road in this picture, but snow blocked my access to get to it, so this is the route I took.

Here are some pictures of my way back to the 4WD road, which started out rocky and then turned to tundra

And from the road back to Cumberland Pass

I made it back to my truck at 10am, making this a 7.75 mile hike with 2314’ of elevation gain and a ton of searching for cool rocks in 4.5 hours.

On to the next trailhead!

13,308 and 12,580

RT Length:  31.68 miles

Elevation Gain: 6041’

I drove to the Eddiesville trailhead the night before, and was up and on the trail at 4:30am.  I’ve been in this area for over a week, and was fairly confident I wasn’t going to need microspikes or an ice axe (I didn’t).  The trail starts at the south end of the parking area, and follows the Colorado Trail. 

I followed the Colorado Trail for 8.25 miles, all the way to the San Luis Peak/13166 saddle.  This was a very well-marked trail, which made it difficult to get lost.  Also, there weren’t many trail intersections, also making it easy not to get lost.  I crossed several small creeks and downed trees on my way, and passed through two gates (latched, not locked). 

Here are some pictures of the terrain, which followed Cochetopa creek up the basin.

After hiking for 7 miles, I crossed Stewart Creek

I was now above treeline, and could see the 13166/San Luis Peak saddle. 

The Colorado Trail nicely brought me there.

I would now lose 255’ of elevation as I headed down west, towards another pass, still following the Colorado Trail

Here’s the route

It was all pretty easy, class 1 hiking

I arrived at the next pass, and lost another 460’ of elevation, once again, on a nice class 1 trail.  This one took me through Bondholder Meadows

Here’s the route

After hiking for a total of 12.5 miles, and at 12290’ of elevation, I saw this cairn, and turned left, leaving the Colorado Trail.  I headed south a short ways to the ridge.  There was a little bit of snow here, but spikes (etc.) were not needed.

Once on the ridge, I turned left again and followed it southeast.  Here I stashed my backpacking gear and started hiking with a daypack with just the necessities.  Please keep in mind, what you see here is a false summit.  This was all easy class 2 on tundra.

At the false summit, I could see the true summit of 13308.  I would need to descend about 135’, and then re-ascend another 335’ to make it to the summit.  This area was a mix of tundra and rocks.  I followed the ridge southeast.

Once I reached the top of the rocky ridge I was greeted with Alpine tundra.  I headed east towards the summit.

When I got there, I was unsure if I was at the summit, or if it were the pint further, so I climbed up and down (still class 2) to the summit further east, but when I got there, the first summit looked higher.  When I checked my altimeter, both summits had the same elevation, but when I got back to the first summit, there was a summit register, so there’s no need to climb back and forth.  Here’s the view looking at the second summit

And a view from the second summit looking back at the first

I summited PT 13308 at 11:45am

PT 13308:

I headed back down the ridge to where I’d stashed my gear, first descending, then reascending, then descending again.

Here’s looking at that rocky false summit

From that summit, I could see my next peak, 12580

This is where the wind picked up.  Forecasted winds were 20-25mph, but I’m sure these exceeded 50mph.  I had to hold onto my bandana, as it kept getting blown off my head.  I made my way back to my stashed gear, then back to the Colorado Trail.

Once on the Colorado Trail, I continued following it northwest for about .75 miles

I rounded the side of a hill, and PT 12580 came into view.  I left the trail, and headed towards the summit.  This was all class 2 on tundra, then class 2 on rocks

There was a summit register, which hadn’t been signed in over a year, so I’m thinking this isn’t a very popular peak.  I summited PT 12580 at 2pm

PT 12580:

Now to head back down the trail.  I took the same way out as I did in.   I wanted to sleep close to Bondholder Meadows, but preferably in the trees. 

I ended up hiking further than intended, because the campsites I found were full of very dead trees, each placed perfectly to fall on me wherever I chose to sleep.  With the current wind gusts, I didn’t want to chance it, so I hiked to the very end of the trees, and found a place to camp surrounded by willows, near a creek that still had a little bit of snow.

I set up my bivy, ate dinner, and bedded down for the night.  It was an uneventful and warm night, except for the purring I heard around midnight and the thundering hooves I heard when I woke up.  I never saw either animal.

The next morning I was up and on the trail by 6am, headed northeast along the Colorado trail.  Here are the two passes I needed to go over

At the top of the last pass, now all I had to do was follow the class 1 trail back to the trailhead. 

Here are some pictures the rest of the way back to the trailhead.  I saw a couple of bull moose munching in the willows, but that’s common for this area.

I made it back to my truck at 10am. 

This was a 31.68 mile hike with 6041’ of elevation gain.

On to the next trailhead!

Bennett Peak – 13,203 and Sheep Mountain – 12,492

RT Length:  6.91 miles

Elevation Gain: 2451’

I started at 5am from the South Fork Trailhead, at the end of 28 and Trail 702.  The road was a well maintained dirt 2WD road, with about 5 parking spaces at the trailhead.

Instead of taking the trail, I followed the road that had been blocked off

This road eventually became a trail.  I followed that trail northwest to the stream crossing

The I was able to cross by hopping across the rocks and jumping a few feet at the end.

A trail picked up on the other side, but quickly dissipated.  To combat this, I just kept heading north-northwest up the basin, towards the gully I could see ahead of me to the northeast (I know that sounds contradictory, but I had to make my around the trees to get there.  If you’re doing this in the daylight, the gully should be obvious above the trees).

After hiking a total of .81 miles, I came to South Rock trail, turned left, and followed it about 20 yards to a small stream crossing and a ravine.  I turned right, and followed the ravine to the gully, staying in what looks like an avalanche runout.

This is the route I took up the gully.  This was easy to navigate, all class 2.  I just kept heading north.

Here are some pictures of the route

At the top of the gully I headed northwest, which included a lot more class 2 ascending on grassy tundra

I eventually came upon an ATV road, and followed that to the summit

I summited Bennett Peak at 6:45am.  It was 2.37 miles to the summit from where I parked.

Bennett Peak: 

My next objective was Sheep Mountain, but I wanted to take the ATV road to get there, so I headed back south, the way I’d come in, towards the road.

Here you can see the road below I was aiming for

When I made it to the road I turned right, and followed it southwest to the Bennett/Sheep saddle

As you can see, this was an easy descent to the saddle

I hiked down to an open gate at the saddle, walked through it, and ascended the ridge

Here’s my route

And some pictures of the class 2 ridge covered in tundra

And the false summit

Here’s the real summit

There was no summit register.  It was 1.6 miles from Bennett to Sheep

I summited Sheep Mountain at 8am

Sheep Mountain: 

Here’s a look back in the route from Bennett Peak to Sheep Mountain

And the route I took up the gully to the summit of Bennett, and over to Sheep

I turned and headed back towards the Bennett/Sheep Saddle.  Specifically, to that open gate

Once at the gate, I turned right and followed Trail 700 back towards the gully (I’d noticed it on my way up, and thought it would be a convenient way back down).  You could also take it to the saddle and summit that way.

It actually became a nice trail

When I made it back to where I’d ascended the gully, I turned right and followed it south, and then southeast,  back down to the road

This was a drainage, and very marshy

I turned left at the road, and followed it for about 20 yards before turning off the road and heading back down to the creek.

There are a lot of game trails here, but they aren’t all consistent

I crossed the creek again, which was a little more difficult with the rising temperatures and rising water level

I then picked up the trail on the other side, and followed it south back to my truck

I made it back to my truck at 9am, making this a 6.91 mile hike with 2451’ of elevation gain in 4 hours.

On to the next trailhead!

Shoshoni Peak – 12,979, Pawshoni – 12,888 and Pawnee Peak – 12,943

RT Length: 19.63 miles

Elevation Gain: 3728’

Imagine my surprise when I was heading towards the Long Lake trailhead, only to find the entire area was closed a the Brainard Lake entrance station.  While I’d known the permit system ended October 15 (yay!!!) I’d not heard they planned to lock the gate as well.  Have I mentioned I’m not a fan of the permit system?  In any event, I parked in the winter lot, and was on my way at 5:15am.

I walked for 3.1 miles west, on a snow-free, dry, and clear paved road, to the Long Lake trailhead.

Now on the trail, I followed it west.  This is a very well-marked, class 1 trail, all the way to Pawnee Pass.

There are several junctions.  I went right at each one. First to follow the Pawnee Pass trail.

The second to also keep following the Pawnee Pass Trail

And the third time, just before making it to Lake Isabelle, to also keep following the Pawnee Pass Trail. 

I followed the Pawnee Pass Trail almost all the way to Pawnee Pass

At 12530’ I left the Pawnee Pass trail, and headed southwest towards the saddle of Shoshoni and Paswhoni

This was straightforward, class 2 rock hopping.

When I made it to the saddle I turned left, and followed the ridge south towards Shoshoni Peak

When I got to what I thought was the peak, I saw this

Not sure which was the actual peak, where I was standing or the outcropping in front of me, I decided to climb up the rocks, just to be sure.  This was class 3 climbing.  I ascended on the left

At the summit, the views of Navajo and Apache were amazing

I summited Shoshoni Peak at 9:45am

Shoshoni Peak:

I climbed back down, and retraced my steps to the Shoshoni/Pawshoni saddle on class 2 terrain

I followed the class 2 ridge northwest and then northeast all the way to Pawshoni

I summited Pawshoni at 10:30am

Pawshoni:

Next up was Pawnee Peak, to the northeast

I continued to follow the ridge down to Pawnee Pass, and the up to Pawnee Peak.  Once at the pass, there was a game trail I could follow to the summit.

I summited Pawnee Peak at 11am

Pawnee Peak:

There were some amazing views of the peaks I’d just summited, as well as other 13ers

I turned and headed back towards Pawnee Pass, following faint trails along the way

Back on the trail, I followed it as it wound its way and switchbacked east towards Lake Isabelle

Then I followed the trail east back to the trailhead

From the trailhead it was a 3.1 mile walk along the paved road back to my truck

I made it back to my truck at 2:15pm, making this a 19.63 mile hike with 3728’ of elevation gain in 9 hours.

On to the next trailhead!

Taylor Peak – 13,157, Powell Peak – 13,197, Otis Peak – 12,481, Hallett Peak – 12,723 & Flattop Mountain – 12,330

RT Length:  19.75 miles

Elevation Gain: 5983’

I started from the Flattop Mountain Trail inside Rocky Mountain National Park, at the Bear Lake parking area,  at 4am.  I’ve been to this trailhead a few times, and it fills up before 6am, so plan on getting there early to secure a spot. 

There is great signage in this area, leading you to the trailhead

I followed the class 1, well-marked trail for 5 miles up to Flattop Mountain, gaining almost 3000’ of elevation in the process

As soon as I hit treeline the sun began to rise, and I saw a small herd of elk, led by one male bull.  He bugled to me, and the ptarmigans began to chirp .

Elk Bugling:

Ptarmigans waking up:

I continued following the class 1 trail to Flattop Mountain (which is really just a plateau).

At the top of the plateau is a sign.  At this sign I turned left, following the cairns.  Note:  there isn’t a sign indicating there is a trail to the left, but there will be dozens of rather large cairns to follow towards Hallett Peak

While you could certainly summit Hallett Peak first, my main goal were some 13ers further ahead, so I skirted Hallett Peak to the right, staying at about 12360’, which kept me on rocky tundra.

As I headed southwest, staying on the rocky tundra, I could see both Otis Peak and Taylor Peak.  It was my objective to summit Taylor Peak next, which meant I’d need to lose about 400’ of elevation to the Otis/Taylor Saddle (also where top of Andrews Glacier/Andrews Pass is located)

Here’s my route up to Taylor Peak from the Otis/Taylor Saddle. Note, my route up is solid, my route back down (after summiting Powell) is dotted.  I would recommend these routes in the same order I completed them.  The entire day consisted of class 2 terrain for all the peaks I summited.

Here are some close-up pictures of the terrain to the summit of Taylor Peak


I summited Taylor Peak at 8:30am

Taylor Peak:

From Taylor Peak I could see Powell Peak to the southeast. 

To get there, I’d need to contour southwest down the south side of Taylor, and then follow the ridge towards Powell Peak.  The route is obvious, and easily kept class 2.

Here’s the route from the Taylor/Powell Saddle

And some close-up pictures of the route

I aimed for the highpoint, a large rock on the ridge

Here are some closer pictures of the route to the summit

Powell Summit rock, easily scaled from the left

To be honest, I’m not sure where the true summit lies.  When I got to the large rock outcropping I saw what looked like a cairn a short distance away, further southeast, but when I went further southeast to that point, the rock looked higher.  When I got home my track showed the rock was the highpoint, but there wasn’t anything indicating it was (no cairn/summit register/etc.)  A point further northwest looked high too, so I made sure to walk over there, but my photos are from the rock outcropping.

I summited Powell Peak at 10:15am

Powell Peak:

https://youtu.be/0oxEIaN_wYg

I then retraced my steps back to the Taylor/Powell Saddle

But instead of re-summiting Taylor Peak, I skirted the summit to the left, staying at around 12750’

This was all class 2, but required a bit of rock hopping

As I continued to round Taylor Peak, Otis Peak came into view.  The path towards the summit was obvious

I made my way down to Andrews Pass, and then up towards Otis Peak

I summited Otis Peak at 12:45pm

Otis Peak:

I could see Hallett Peak to the northwest, and descended to the Otis/Hallett saddle

And then headed northeast up to the summit of Hallett Peak

I summited Hallett Peak at 1:45pm

Hallett Peak:

Now to head back to the trail.  This was all class 2, and there were cairns to guide the way.  Be careful not to aim for the obvious trail in the distance, as it will not lead you back to the trailhead.  This is the route you should take.   If you look carefully, you can see the sign you’re aiming for from earlier in the morning

At the junction I turned right, and followed the class 1 trail back to the trailhead

I made it back to my truck at 4pm, making this a 19.75 mile hike with 5983’ of elevation gain in 12 hours.

On the way out, I was stopped by another herd of elk, walking along the road.

On to the next trailhead!

Mt Chiquita – 13,054, Ypsilon Mountain – 13,513, Mt Chapin – 12,454

RT Length:  10.2 miles

Elevation Gain:  3555’

I parked my truck at the Chapin Pass trailhead and was on the trail at 4am. 

The trail starts out heading directly up to the pass. 

After hiking for .25 miles I came to an obvious junction and turned right, heading towards Chapin, Chiquita, and Ypsilon summits

The trail was very easy to follow.  I followed it east and rounded the north side of Mt Chapin (saving it for later).

The trail changed from Class 1 to Class 2 as I made my way up to the top of Chiquita, heading northeast. 

I made it to the summit just as the sun was starting to rise

 I summited Mt Chiquita at 6am

Mt Chiquita:

From the summit of Mt Chiquita I could see the summit of Ypsilon Mountain to the north. 

It was an easy ridge walk to get there, with a small false summit along the way. I just followed the ridge down 270’, and then up 722’ to the summit of Ypsilon.

I summited Ypsilon Mountain at 7am

Mt Ypsilon:

This was going to be an out and back for me, so I retraced my steps back to Chiquita, losing 722’ of elevation, and then gaining 270’

Back at the summit of Mt Chiquita I continued following the ridge southwest, back to the trail.  There is a trail to the summit of Mt Chapin from there.

Here are some close up pictures of the class 1 trail

I summited Mt Chapin at 8:30am

Mt Chapin:

I turned and retraced my seps back to the trail below

Once back at the junction with the main trail, I turned left and followed it west to Chapin Pass

I even saw a few bull elk lounging along the way

Back at Chapin Pass, I turned left, and followed it back to the parking area, which was now overflowing with dozens more vehicles than could fit in the area.  If you want to do this hike, get there early.

I made it back to my truck at 9:15am, making this a 10.2 mile hike with 3555’ of elevation gain in 5 hours, 15 minutes.

On to the next trailhead!

13078 and 12837

RT Length:  9.62 miles

Elevation Gain:  3588’

My beta was wrong.  It was my fault, and I knew it on my drive in.  When there are avalanche conditions in the high country, I spend my time putting together potential routes and topo maps.  Then I print them out and put them in a binder I keep in my truck, so I’m always ready for a hike. 

However, my spreadsheet had different information than I was seeing at the time.  Specifically, a “No Trespassing” sign on what was supposed to be public lands.  This could completely have been my fault, as wine might have been involved while I was putting together topo maps.  Actually, it most assuredly was.   This changed my plans a bit, but I could still get in a hike. 

I parked at the Green Timber Gulch Trailhead after driving through thousands of tourists fishing at Cottonwood Lake, and the slowest driver I’ve ever encountered on a 4WD road.  He had a 4WD vehicle, but didn’t go over 5mph on this easy 4WD road (dirt 2WD?) and refused to pull over.  There were 10 vehicles behind him.  Not cool. 

Anyway, as I was sitting in the parking area putting together a trip report from that morning, a family pulled up beside me, then got into their Razor and took off.  They came back covered in more dirt and dust than I’ve ever seen, and were laughing hysterically.  I was glad they were having fun. Instead of hopping into the creek they took a wet-wipe bath, which caused more harm than good.  They looked like they were covered in volcanic ash.  In any event, eventually they left and I had the site to myself for the night.  Note:  No camping here, but I was sleeping in my vehicle, so I was just parked.

The trail is obvious, and starts with a bridge crossing.

I followed the Green Timber Gulch Trail all the way to treeline and to the 12,837/13,078 saddle, for 3 miles.  This is a class 1 trail, with a few minor creek crossings.  It’s currently spring conditions, so there was a lot of water on the trail.  There was a lot of moose scat on the trail (I mean, a lot), but no tracks, so I’m assuming the moose has moved on.  This is also a motorized bike trail, so watch out for bikes.

Once at treeline I turned left and headed east towards 13078. This was a straightforward tundra walk, and there was even a faint trail most of the way.  Oh, and the sign says trail closed to motorcycles… hiking is ok.

I summited 13078 at 6:45am

13078:

I left a register, and turned and headed back to the saddle. 

My next goal was PT 12837.  From this height, you can clearly see the three false summits, which actually have more drop and gain than it looks like from here.  This is the route I took

Here are some step by step pictures.  First, to the saddle

Then I looked for a break in the willows, and cut over to the ridge, avoiding the rocks to the left, and snow to the right

Here’s the first false summit

There was a large cairn at the top, but was obviously not the true summit.  Here you can see the cairn, as well as the second false summit

Here’s the route I took to the summit (all very straightforward)

I summited 12837 at 7:50am The ground was relatively flat, so I jumped for the picture

12837:

Here’s looking back at the route from 13078, as well as my route back to the saddle

I headed back to the 13078/12837 saddle

And then picked up and followed the Green Timber Gulch Trail back to the trailhead.

I made it back to my truck at 9:30am, making this a 9.62 mile hike with 3588’ of elevation gain in 5 hours.

On to the next trailhead!