This one felt way too easy. The most difficult part was the drive in.
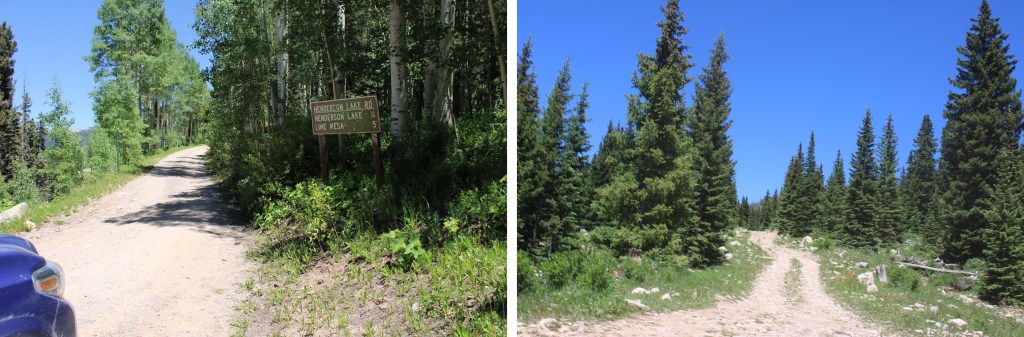
The road to Lime Mesa Trailhead is mostly 2WD. Mostly. At the turnoff point just before Henderson Lake it’s another 5 miles to the trailhead. The road stays 2WD for about 2.5 miles, then becomes 4WD. The road just gets worse as you drive, so as soon as you feel uncomfortable with the conditions pull over and park. There are several dispersed camping areas along the road.
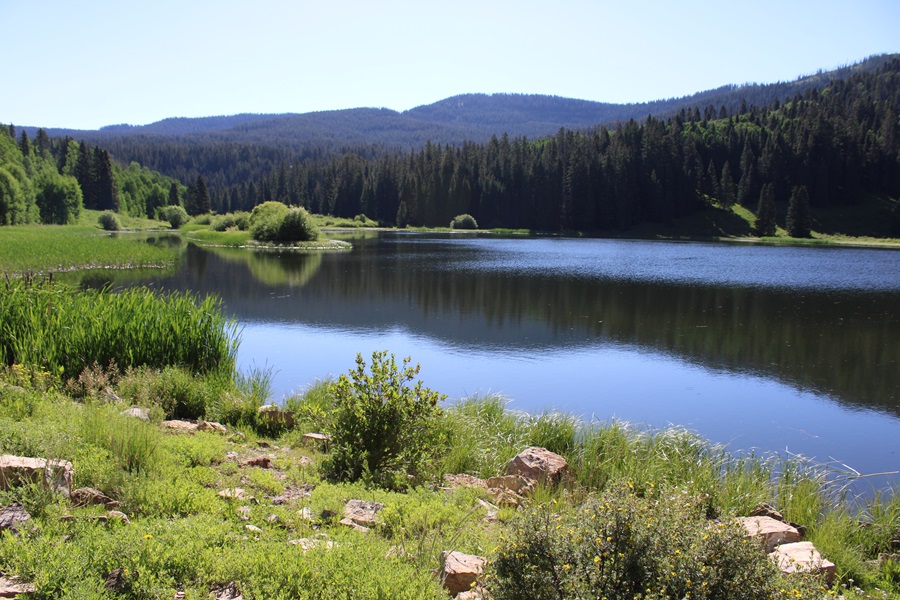
Henderson Lake:
Road after Henderson Lake:
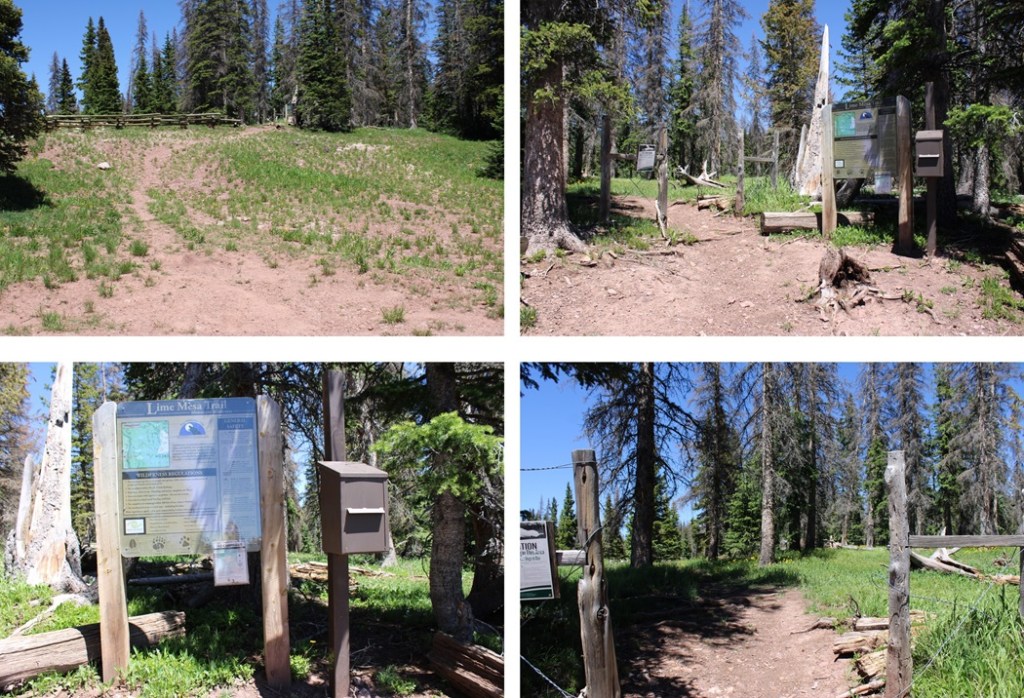
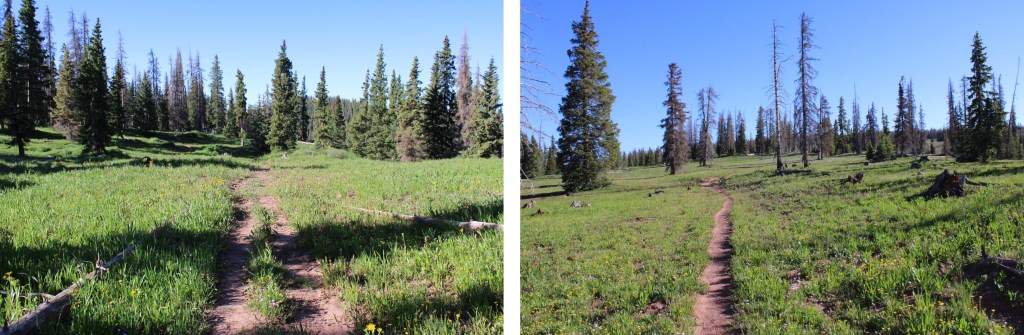
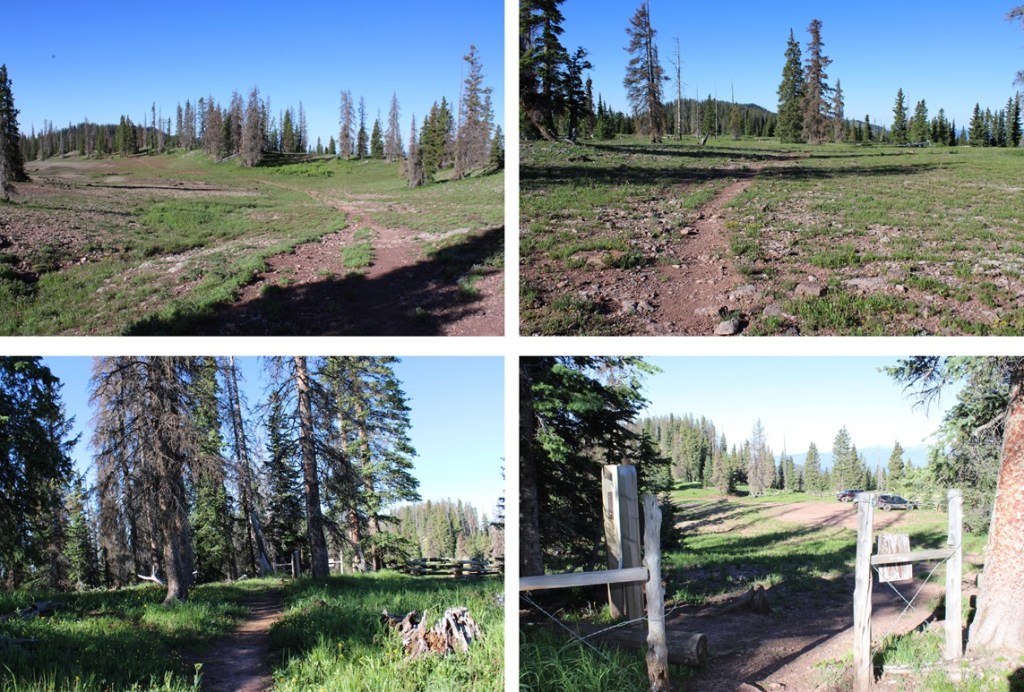
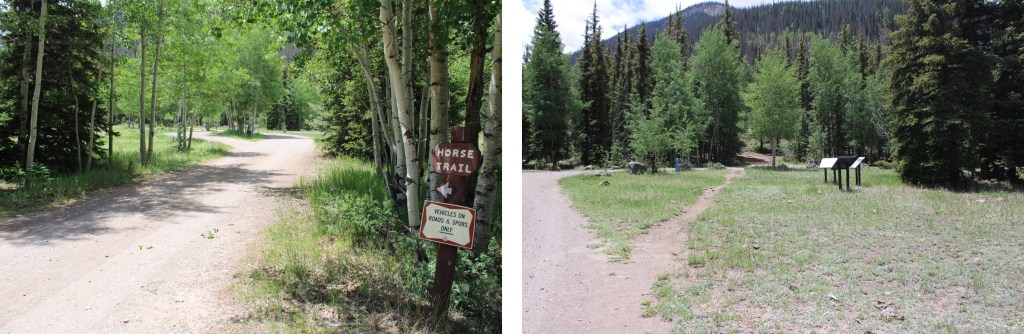
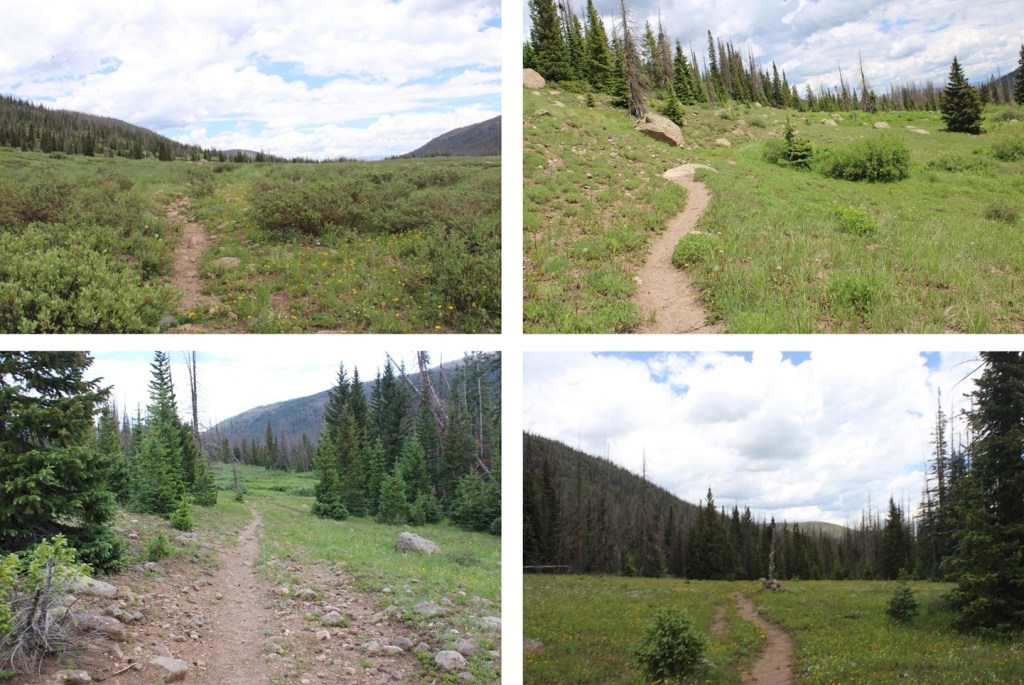
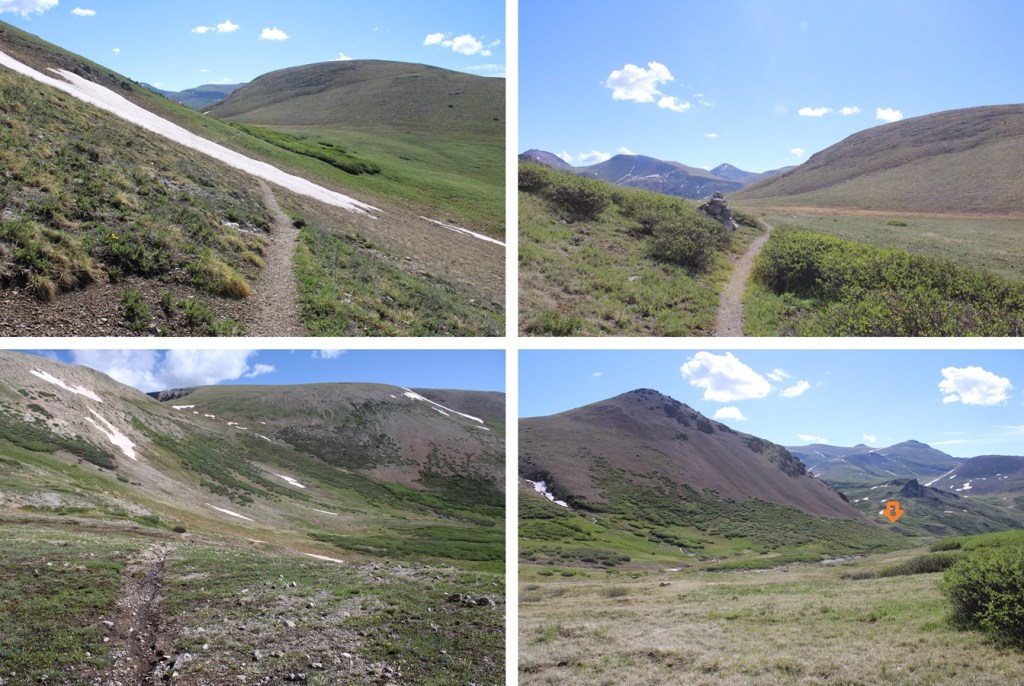
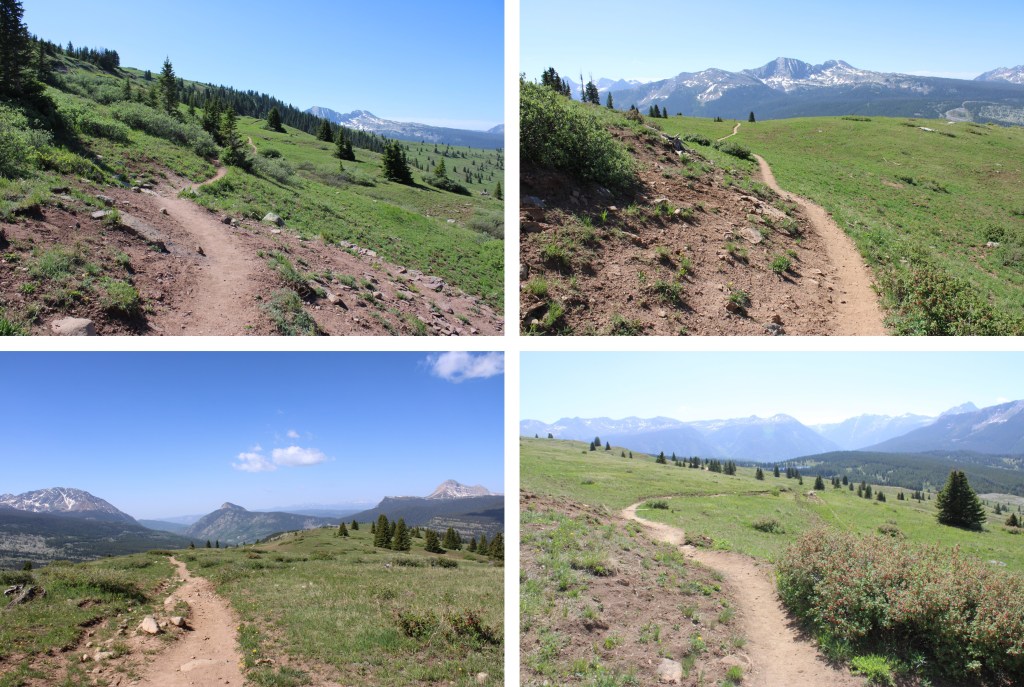
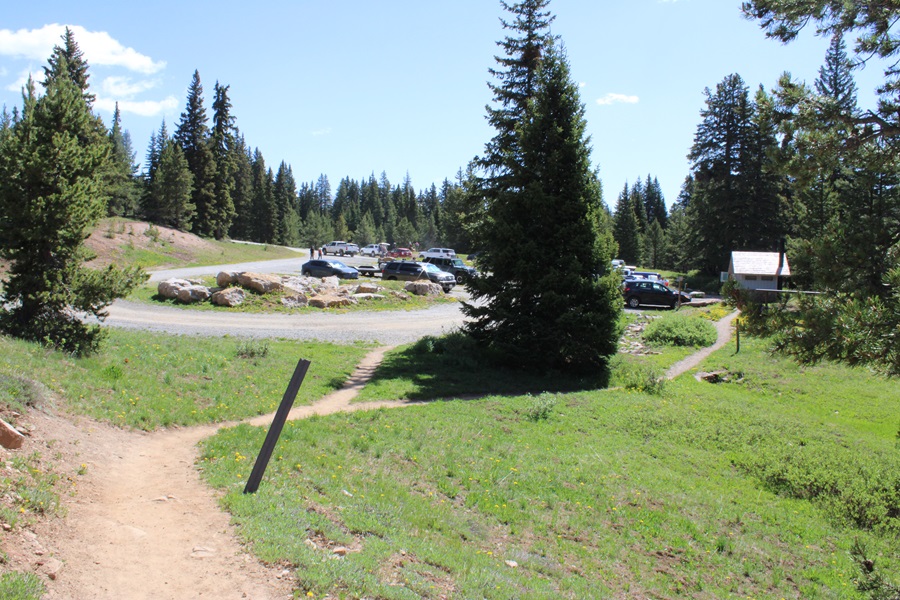
The trailhead is obvious, and starts at the north end of the parking area, I was on the trail at 5am.
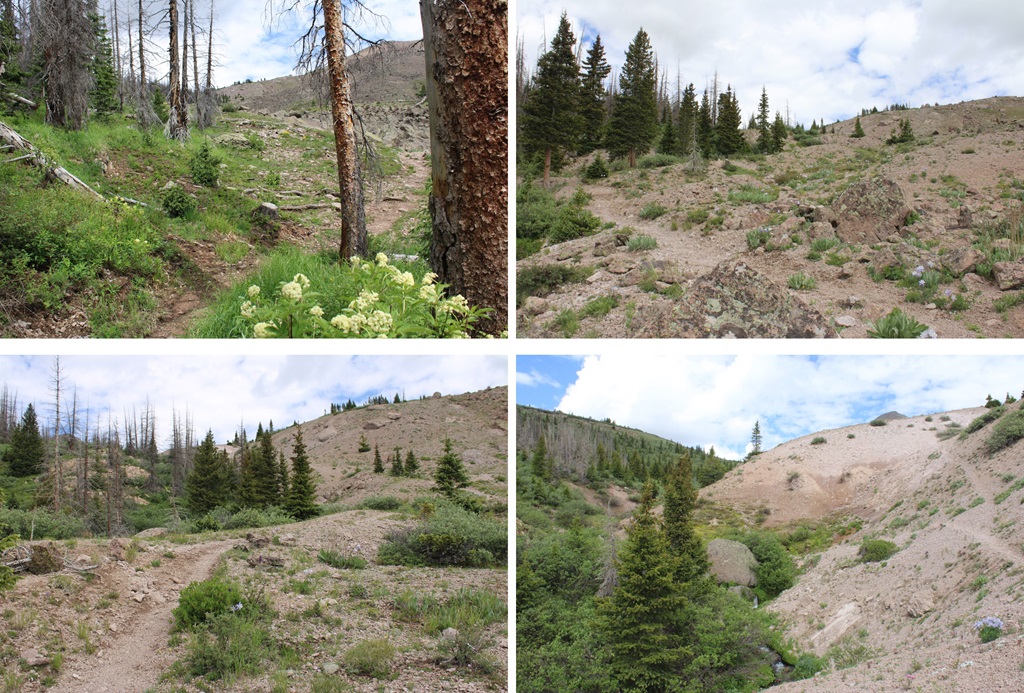
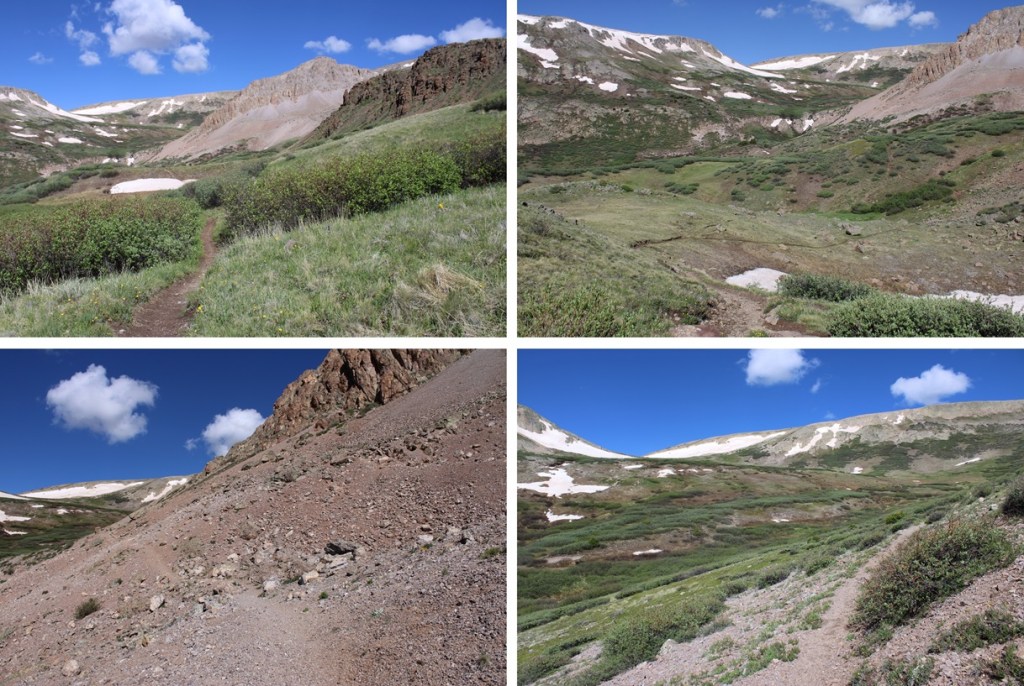
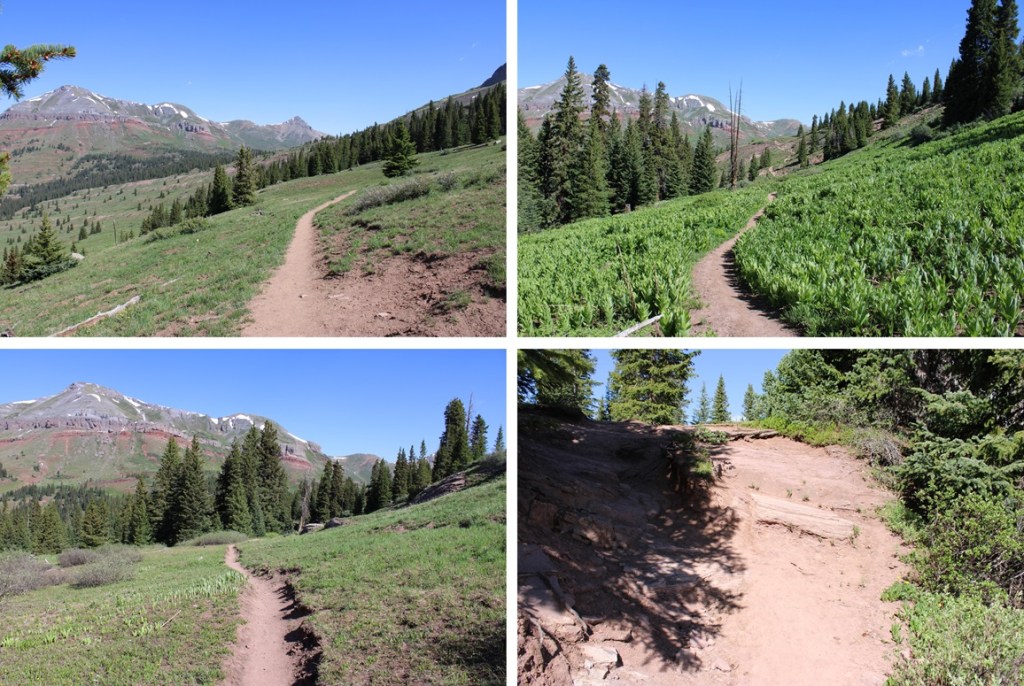
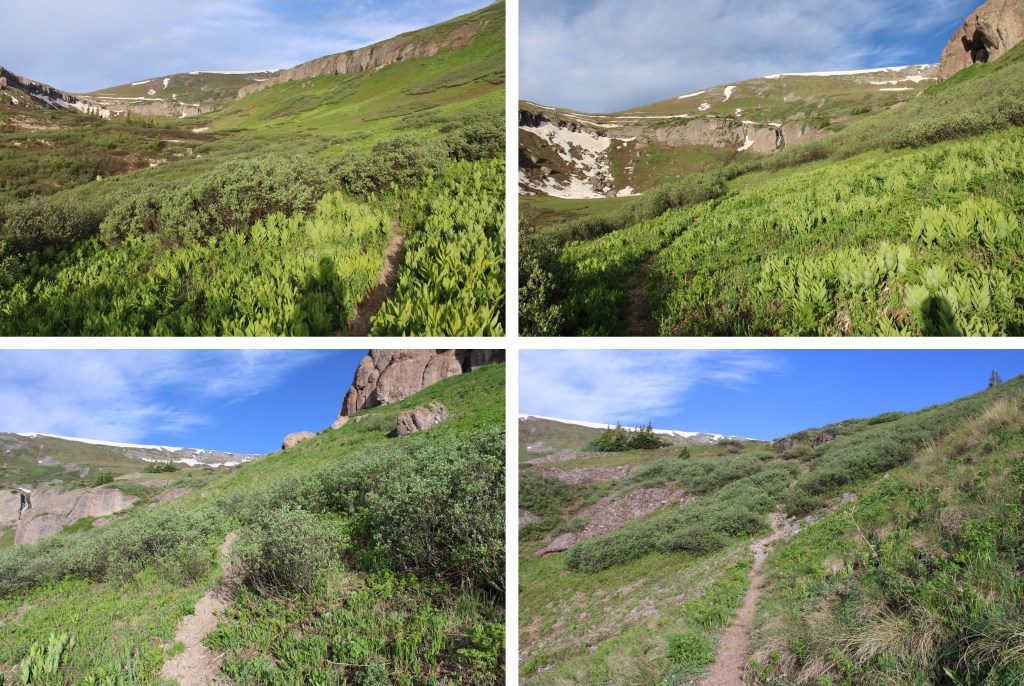
I followed the class 1 Lime Mesa Trail North for 3.4 miles. After hiking for about half a mile I came to a junction, and went left.
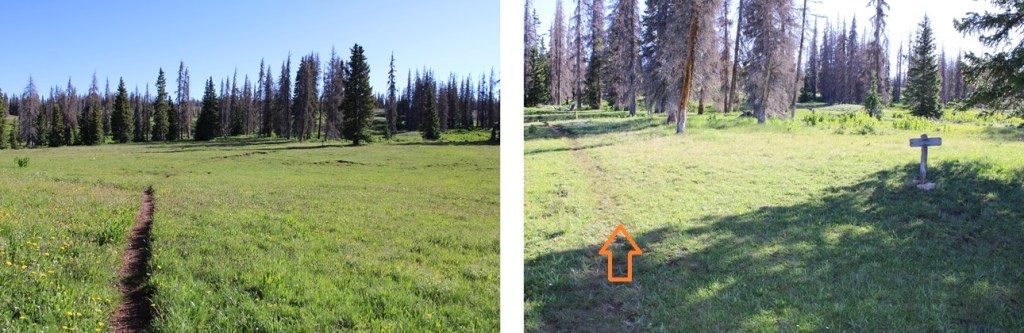
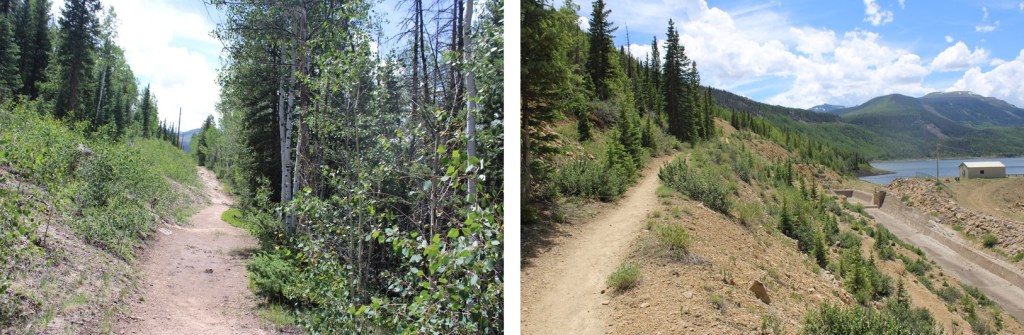
I kept hiking along the class 1 trail as it wound north through Lime Mesa
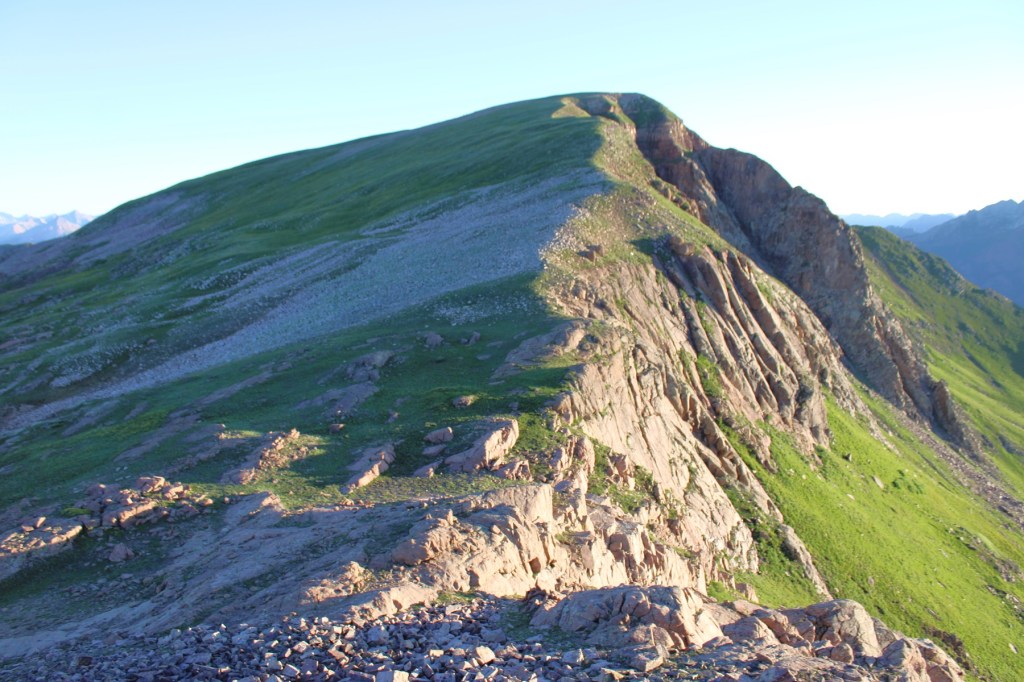
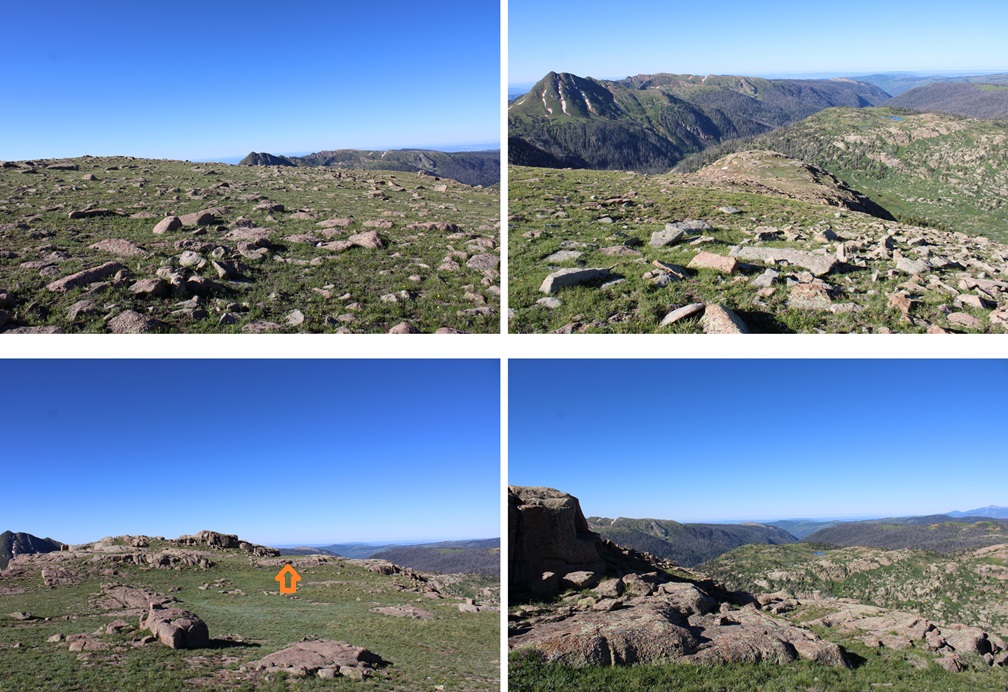
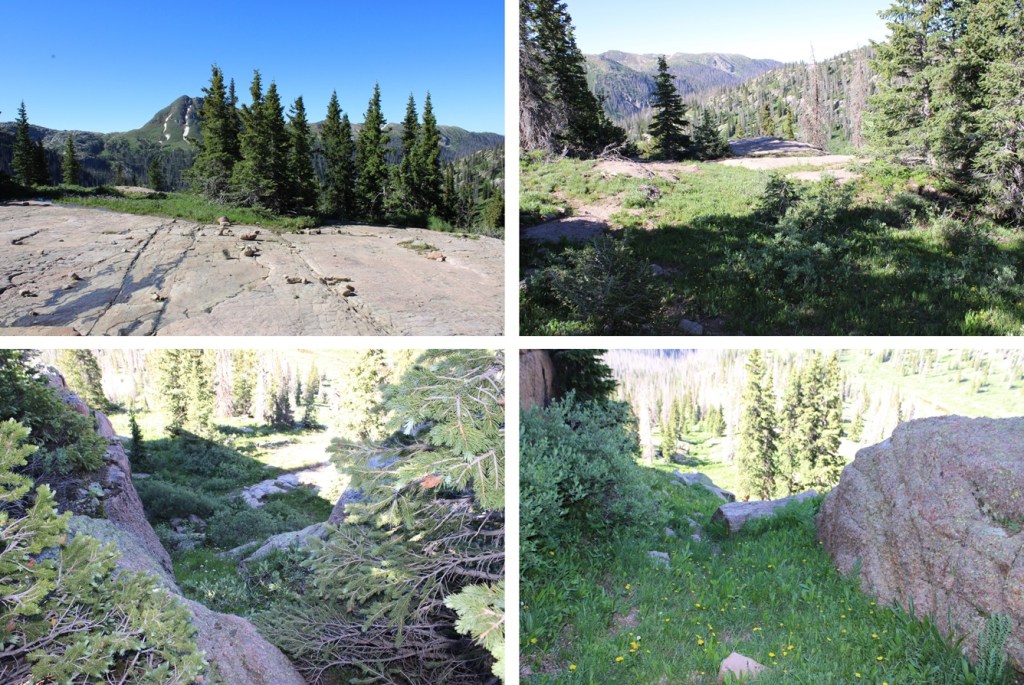
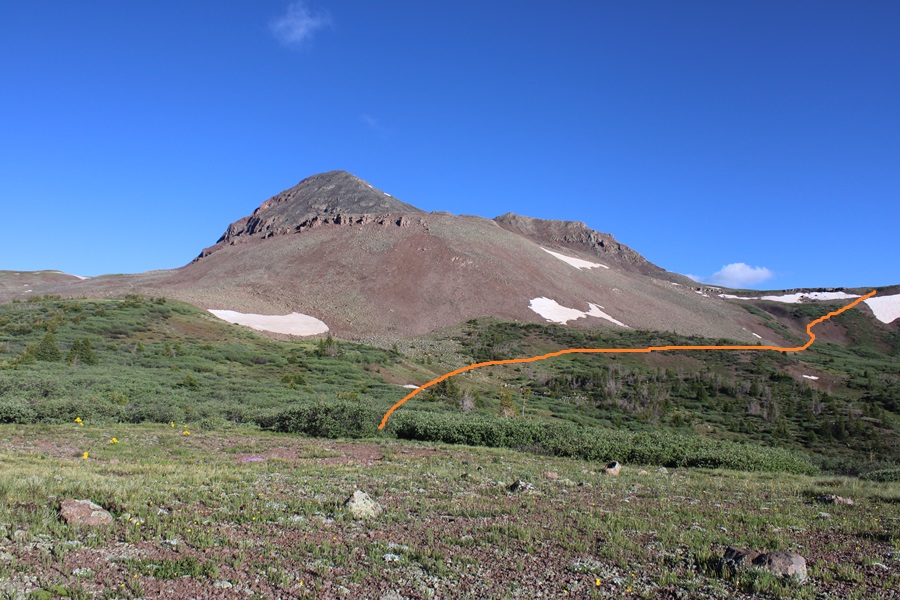
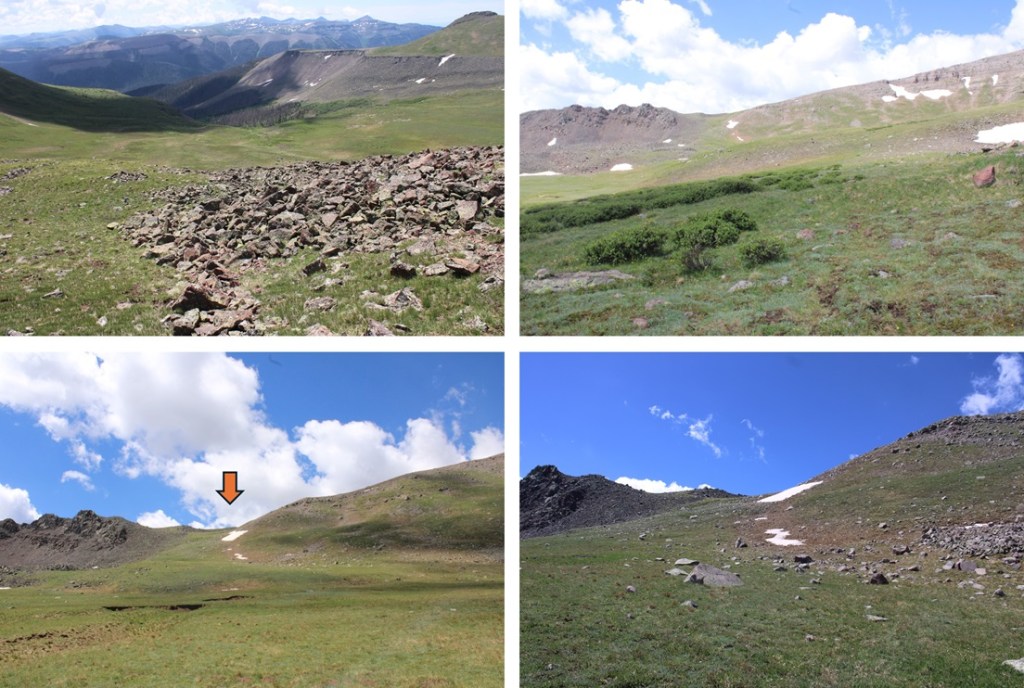
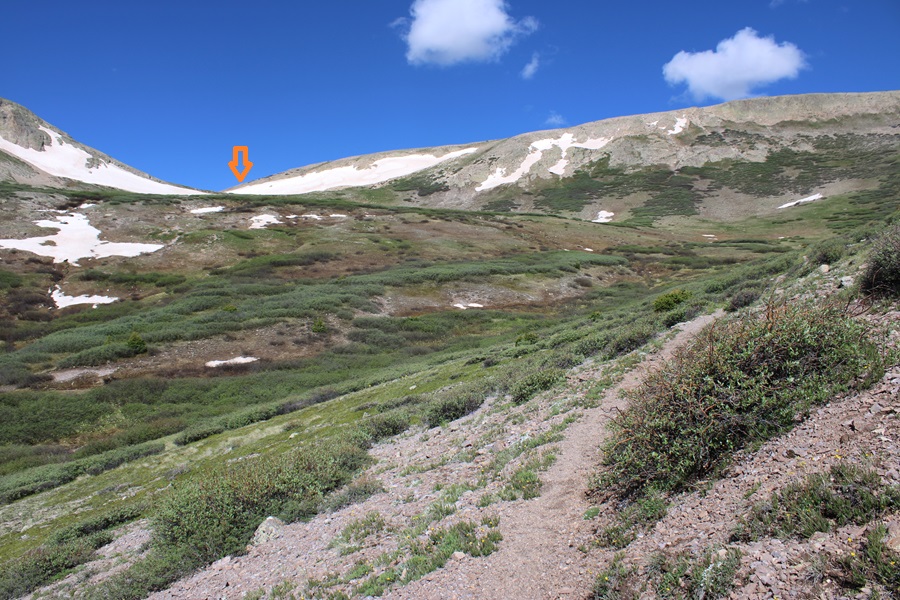
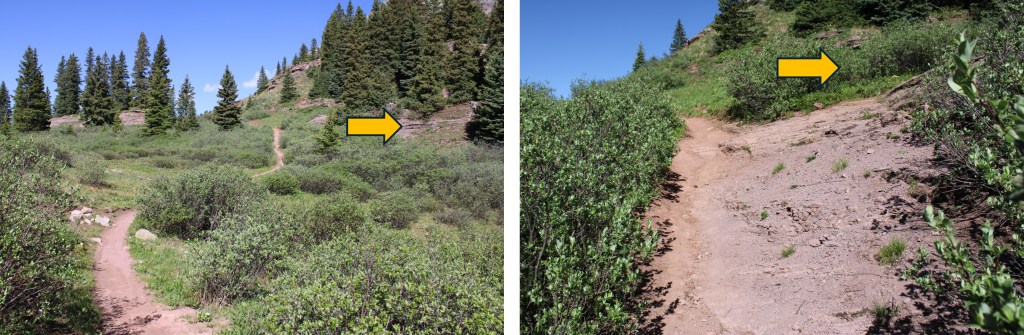
After hiking for a total of 3.4 miles, and at around 12420’ of elevation, I left the trail that had started going east and headed north.
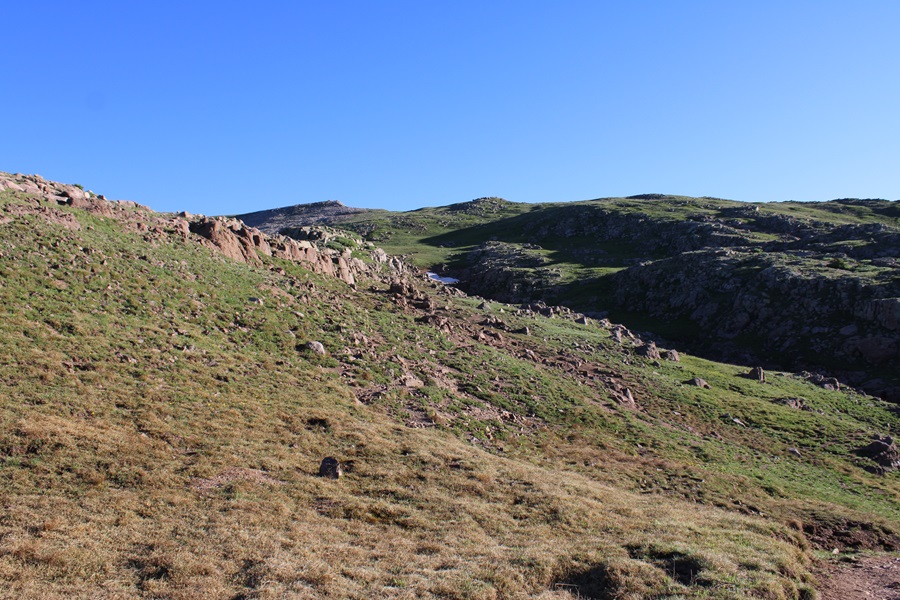
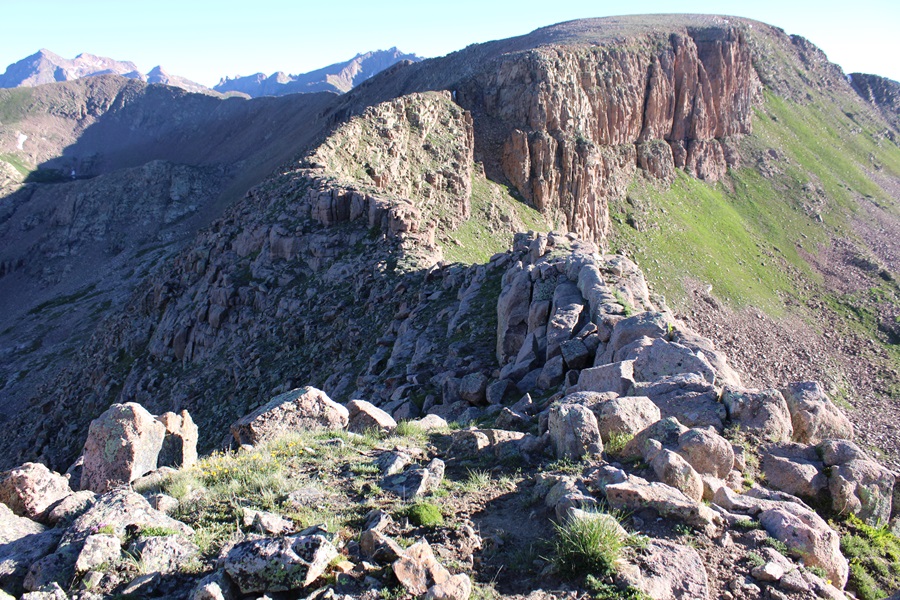
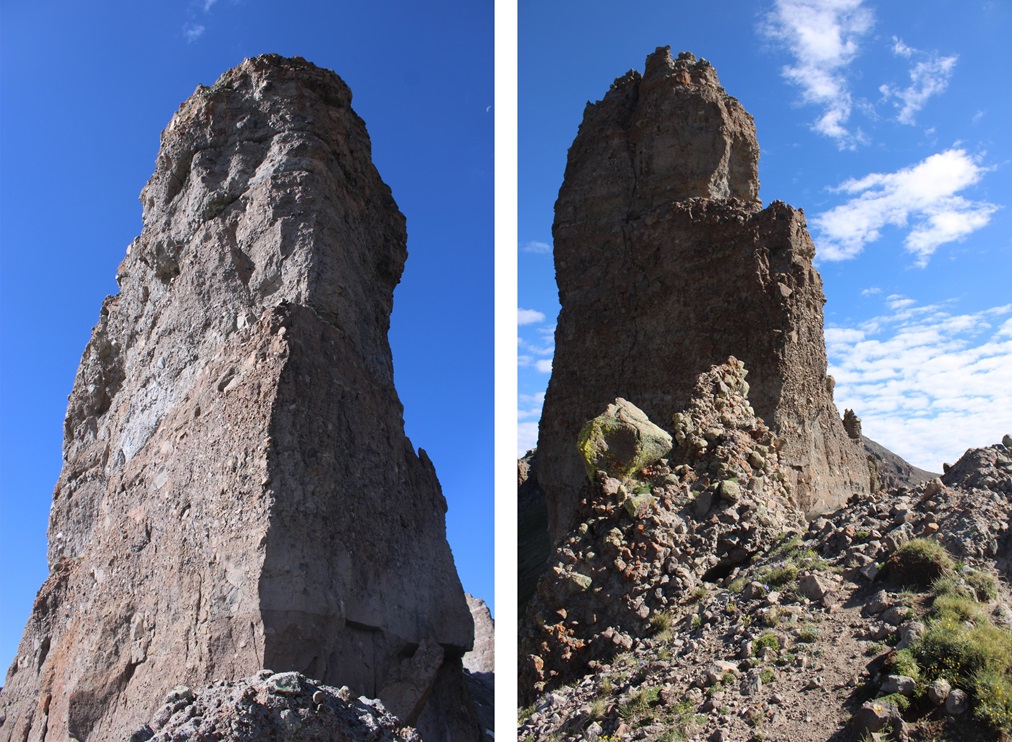
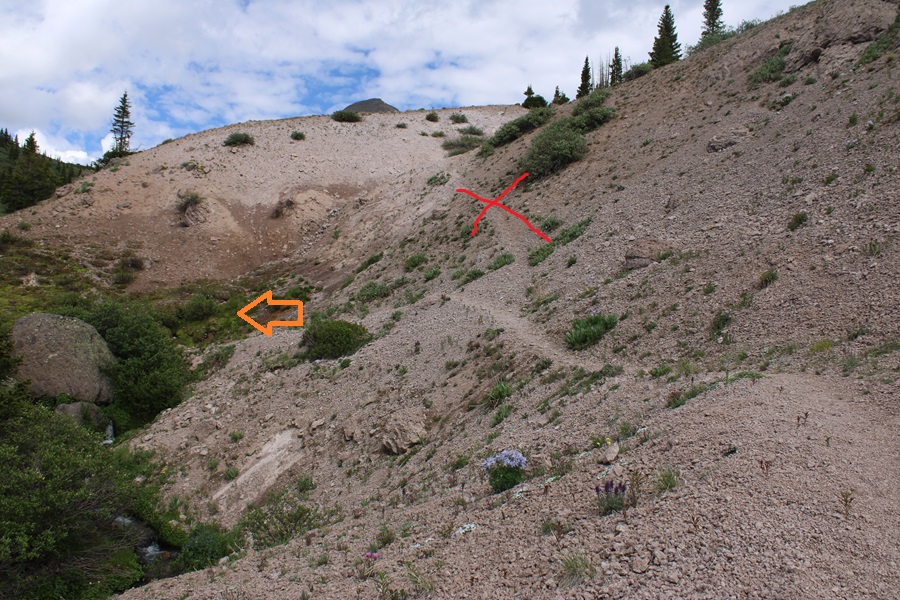
This is where I was headed
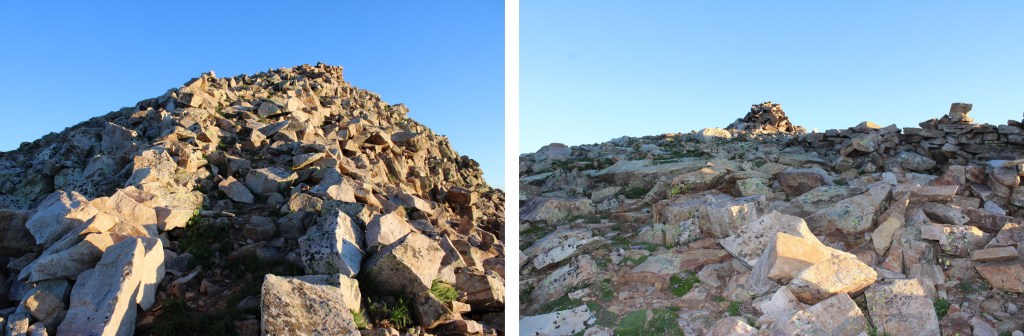
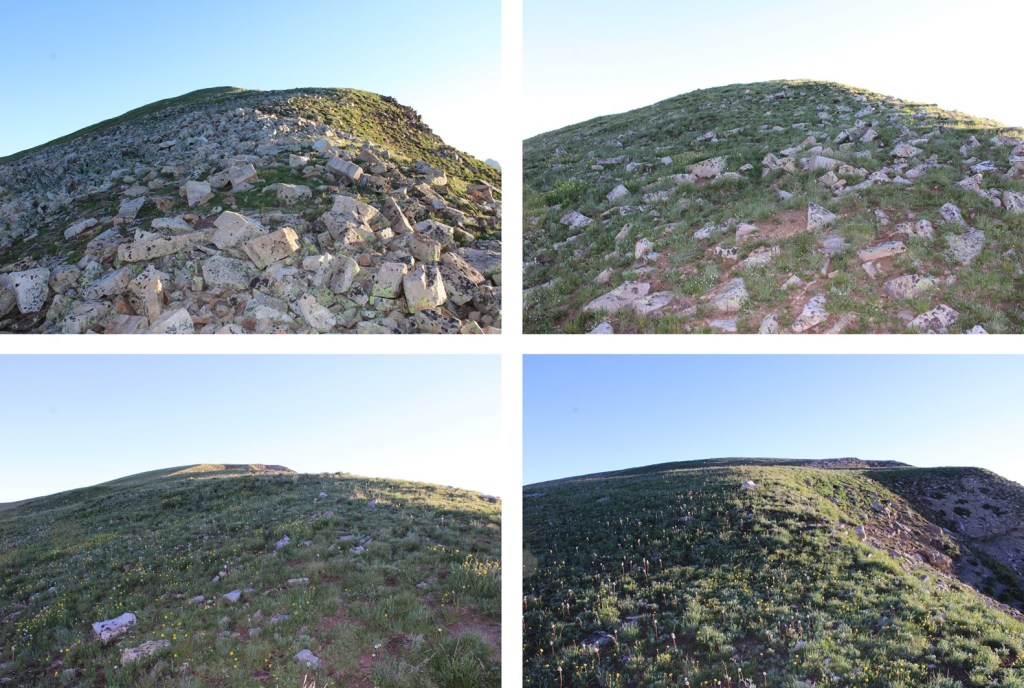
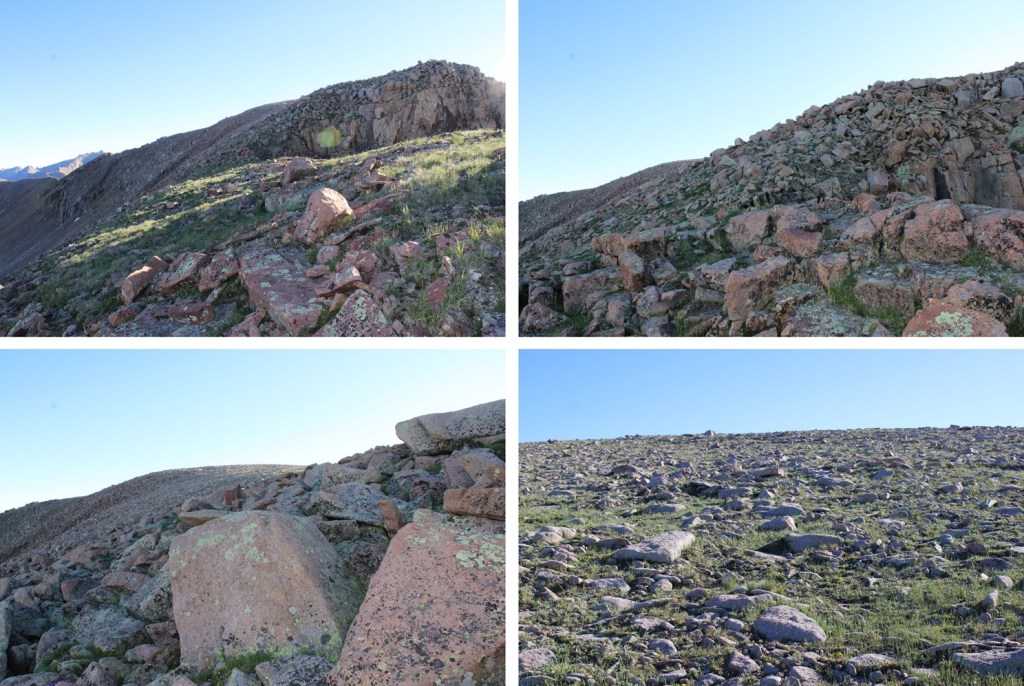
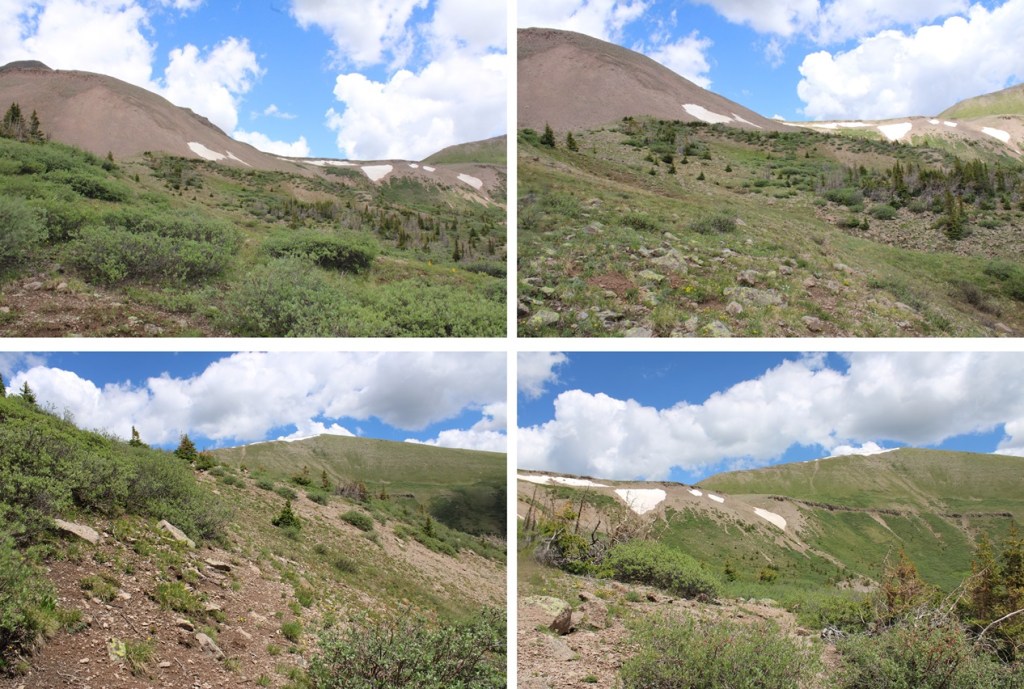
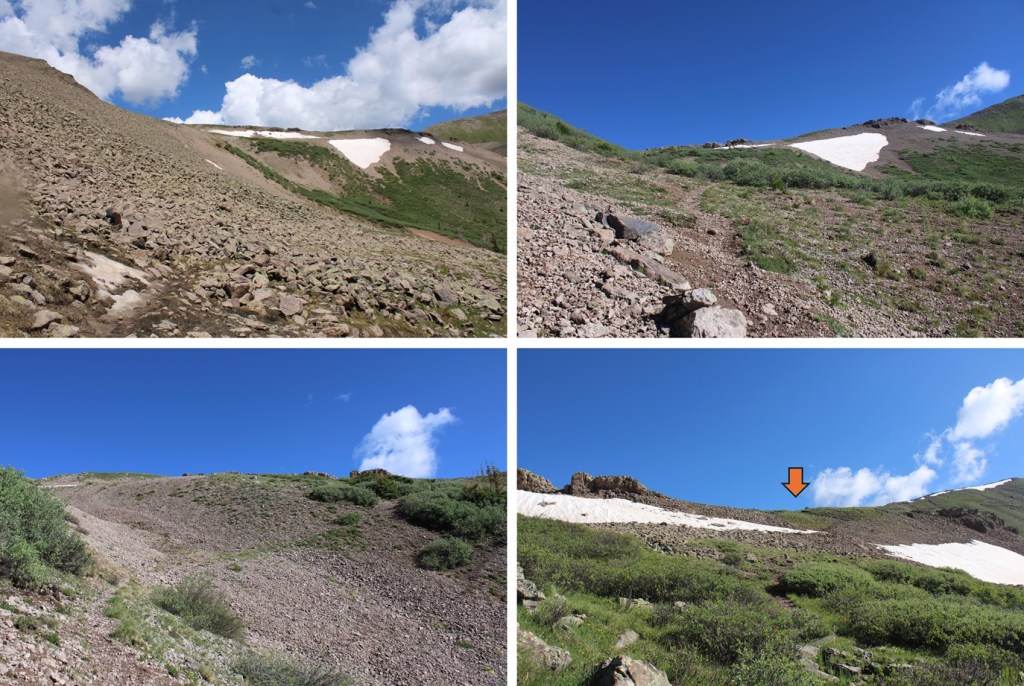
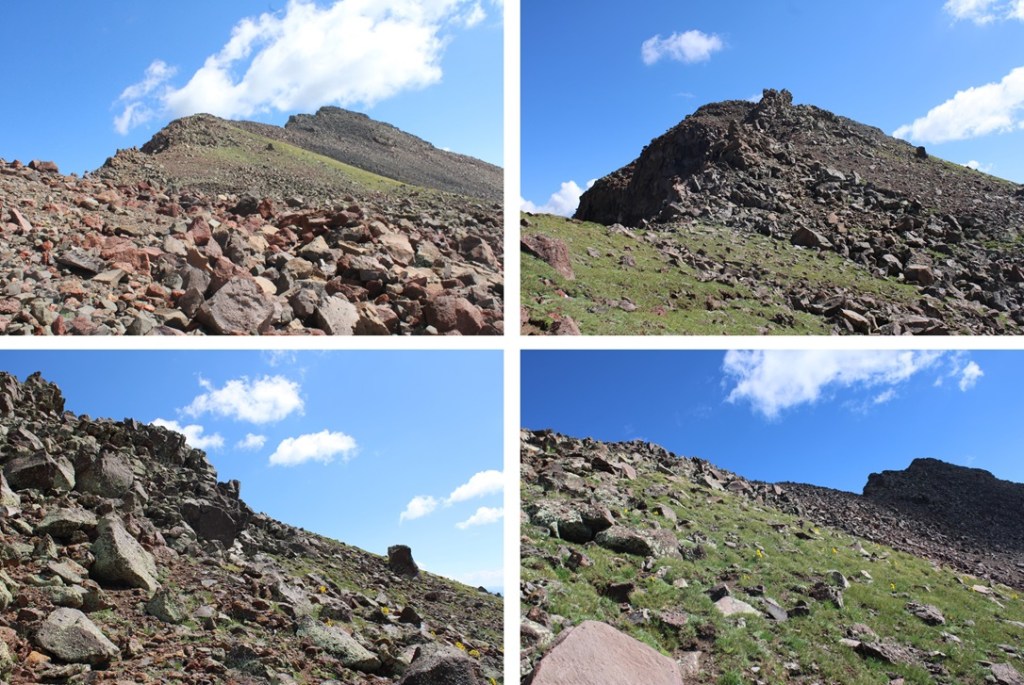
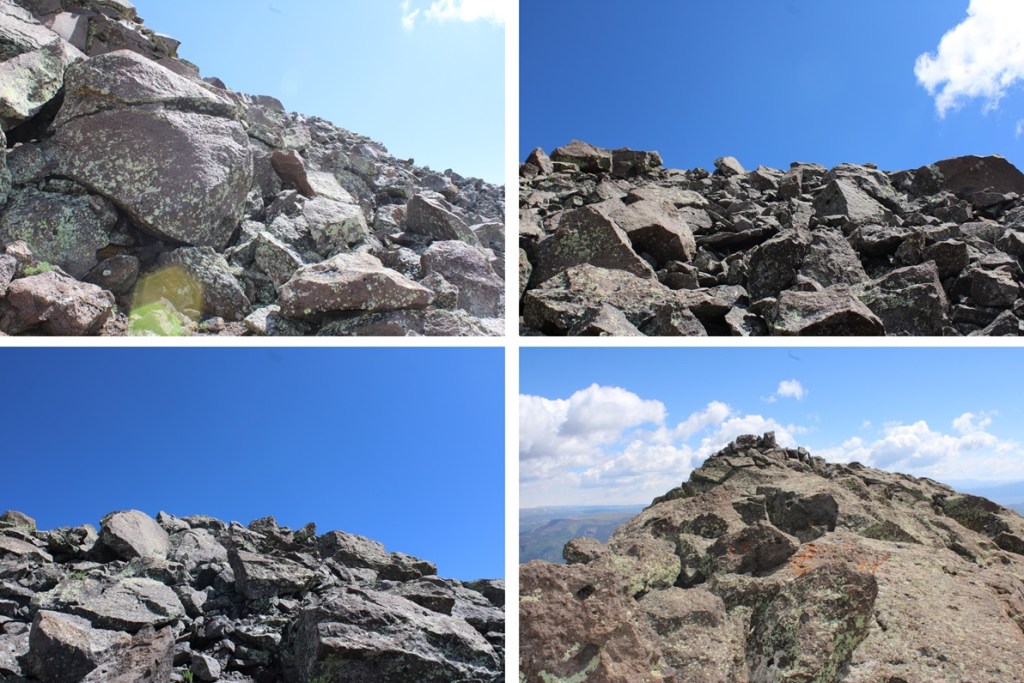
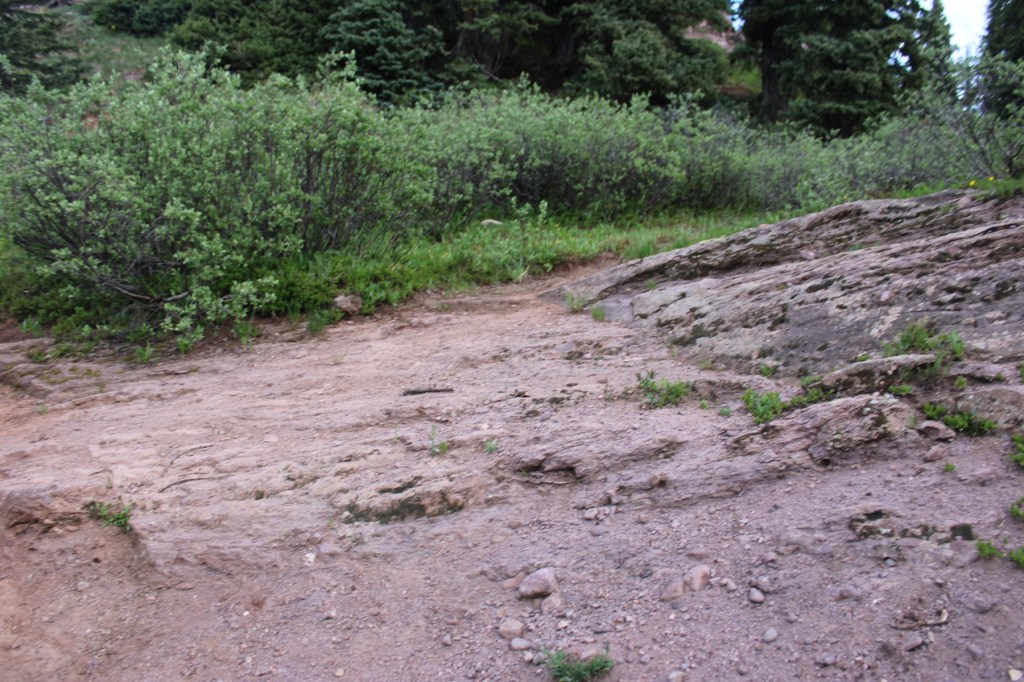
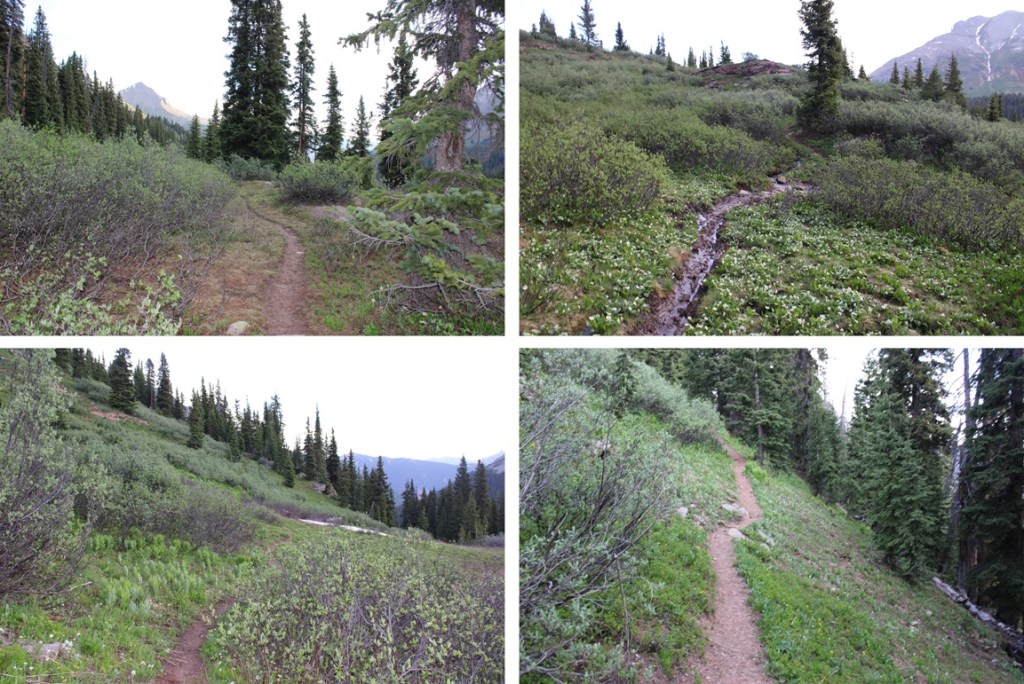
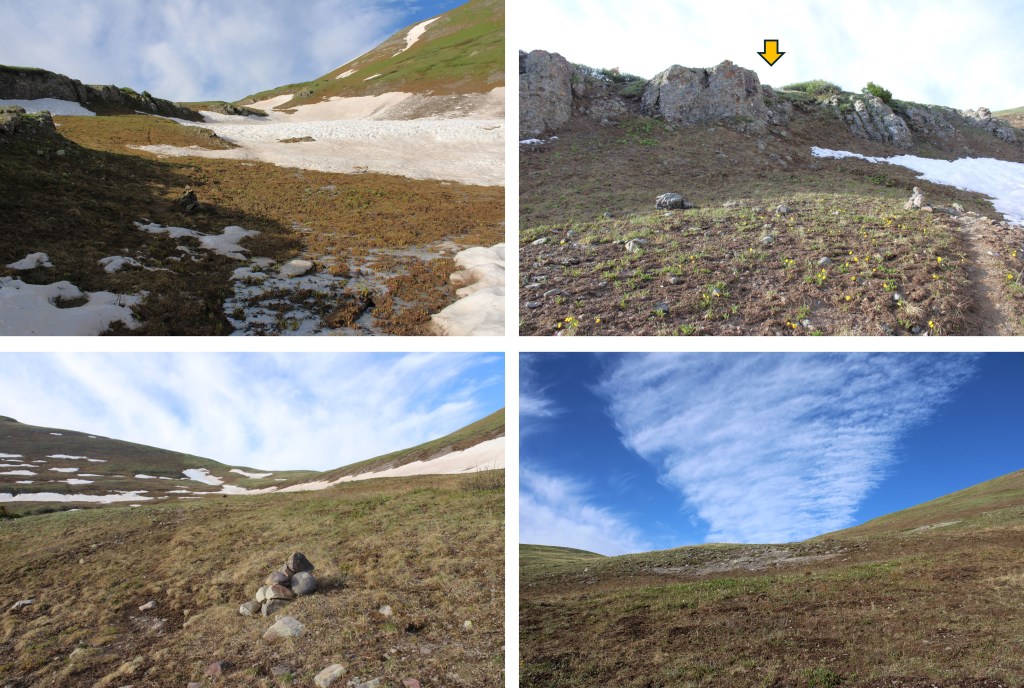
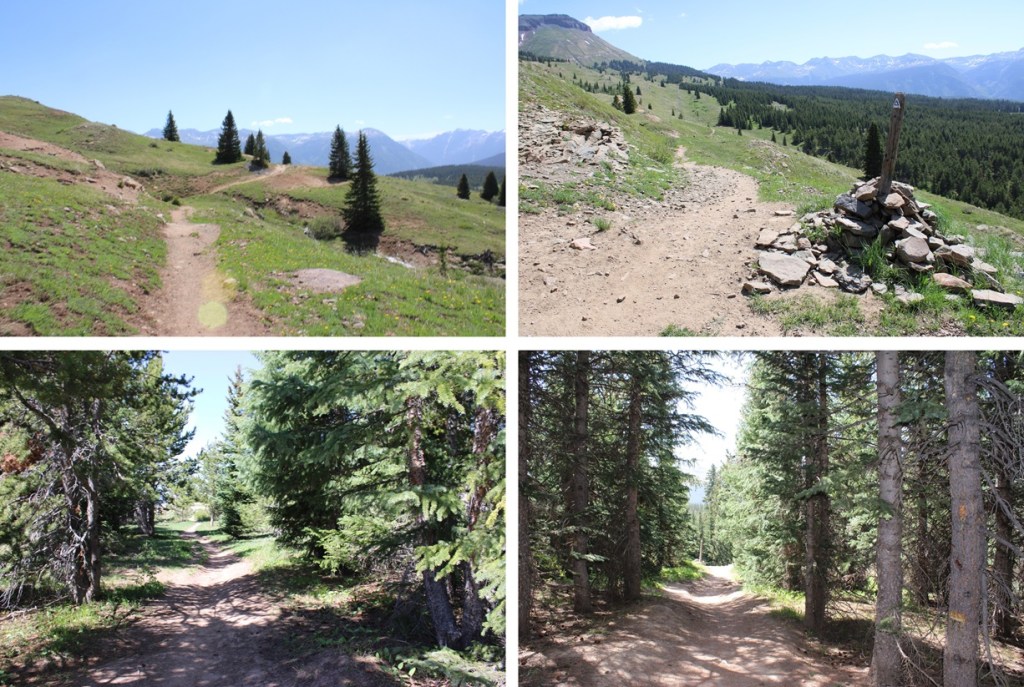
I ascended a gully, then headed towards the ridge. This was mostly tundra, until the end, when it became rocky. All class 2.
There was a big cairn at the top of the ridge
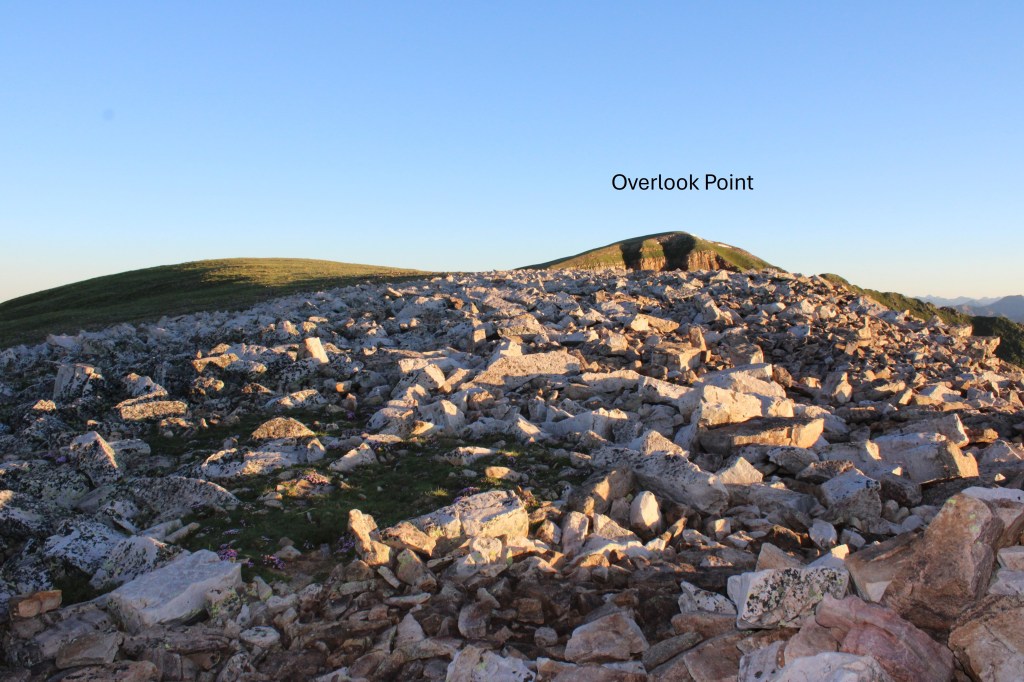
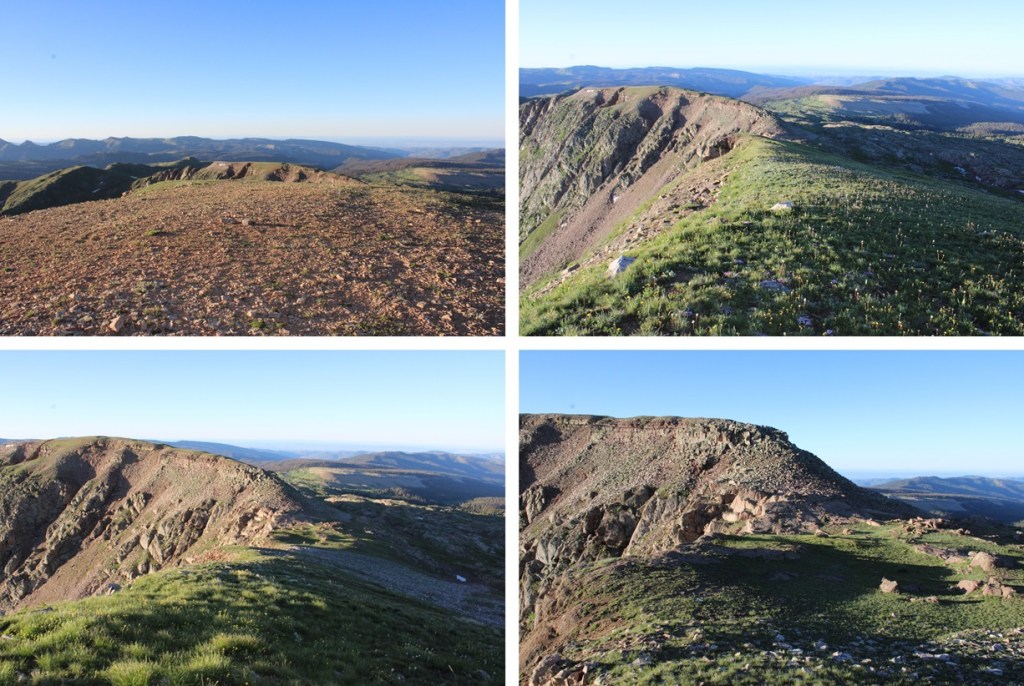
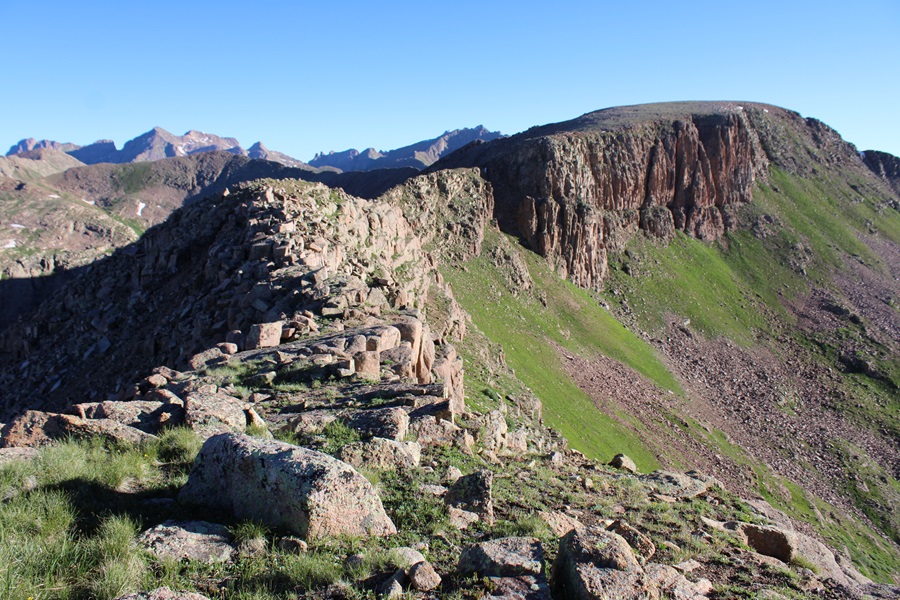
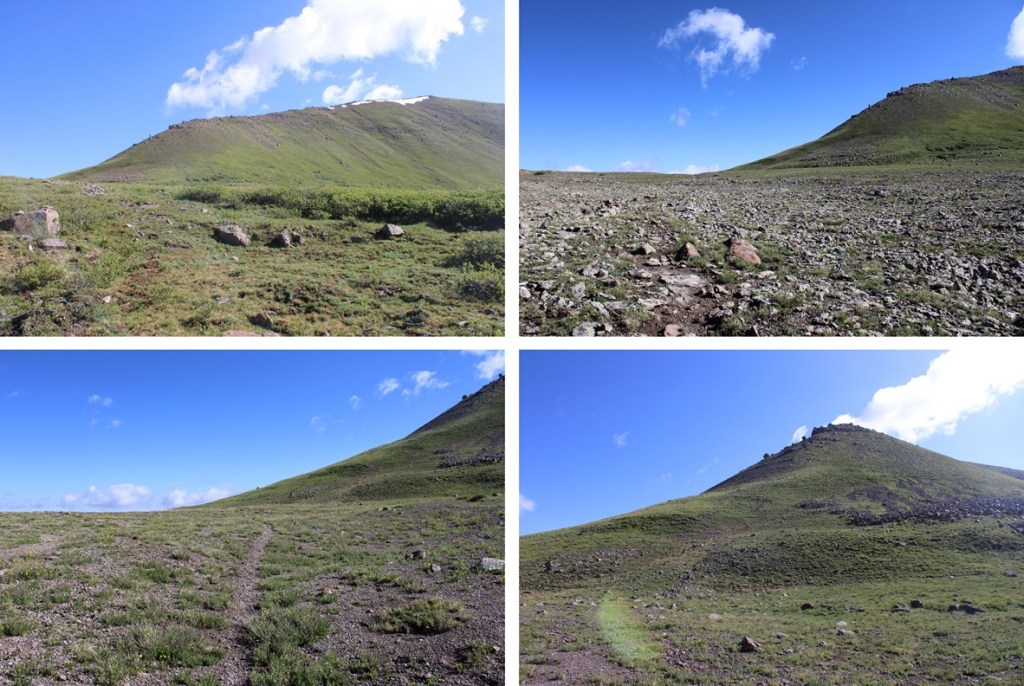
When I got to the top of the ridge, I was at PT 12802. I could see Overlook Point to the north.
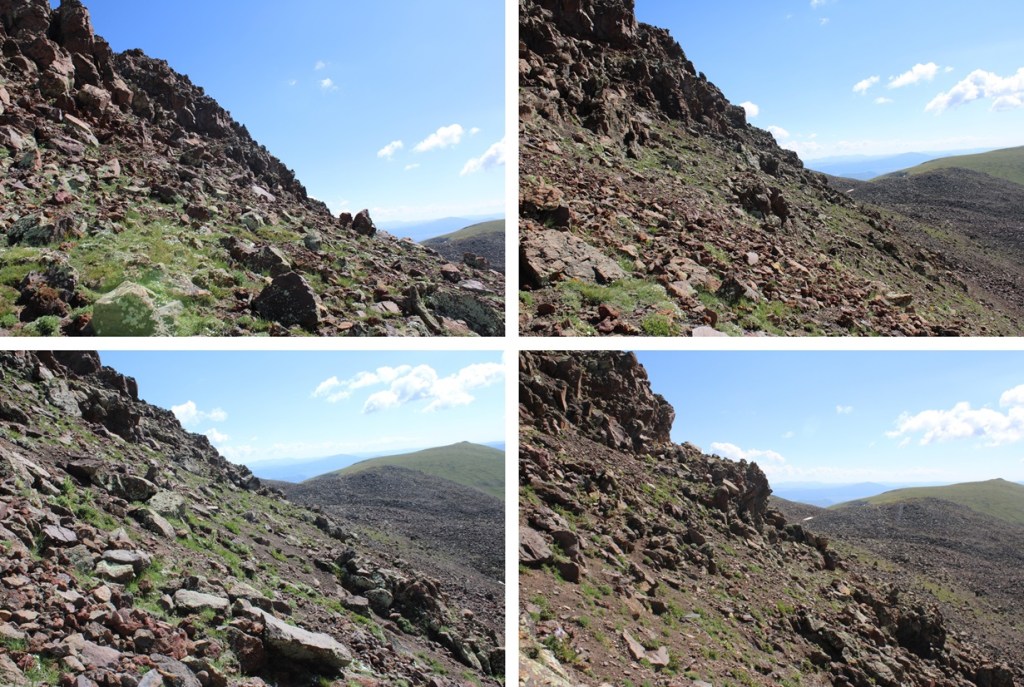
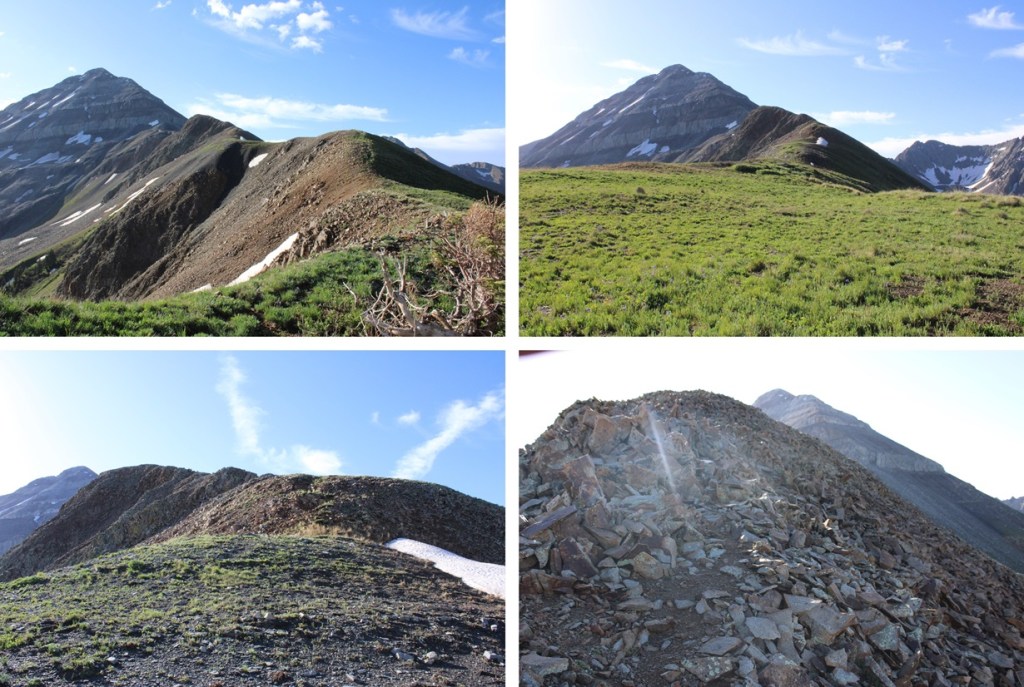
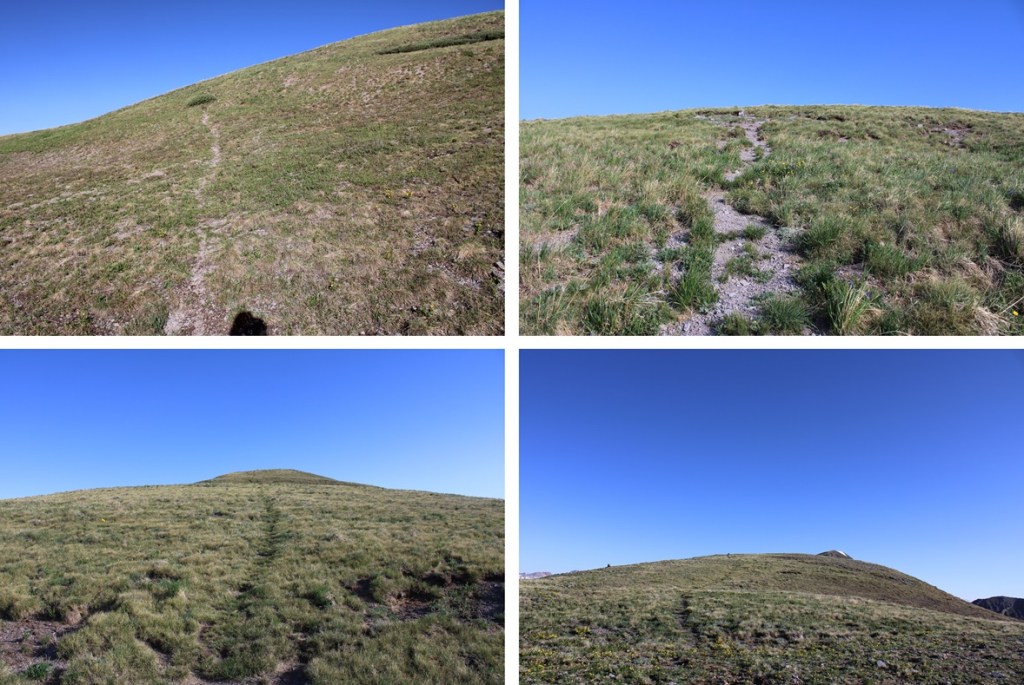
I continued following the ridge towards Overlook Point. Rocks became tundra, and then the tundra became rocky again.
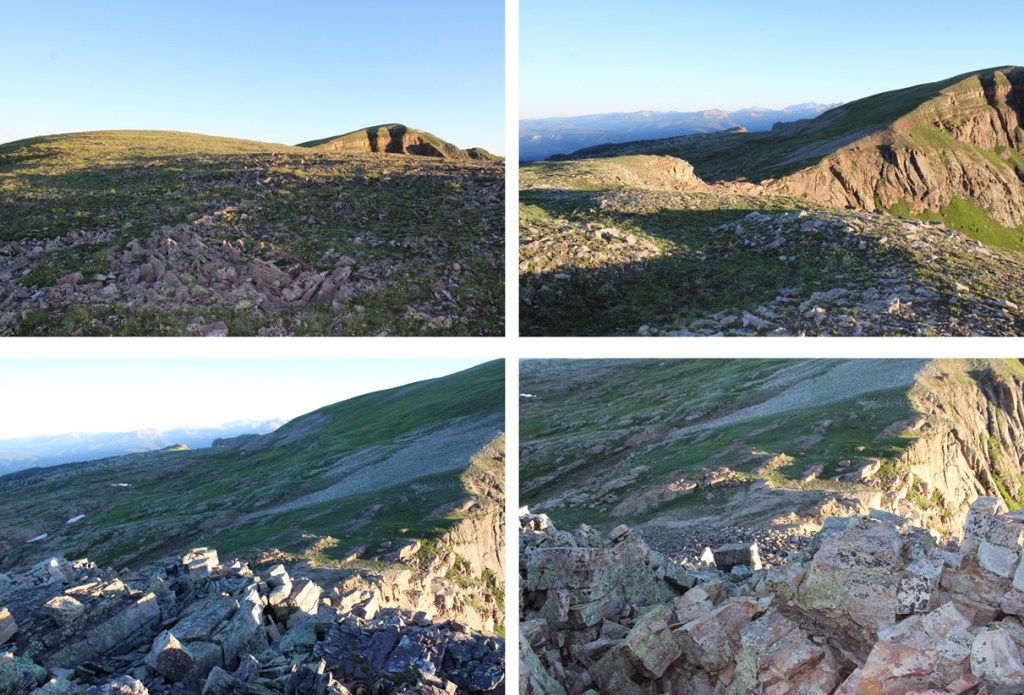
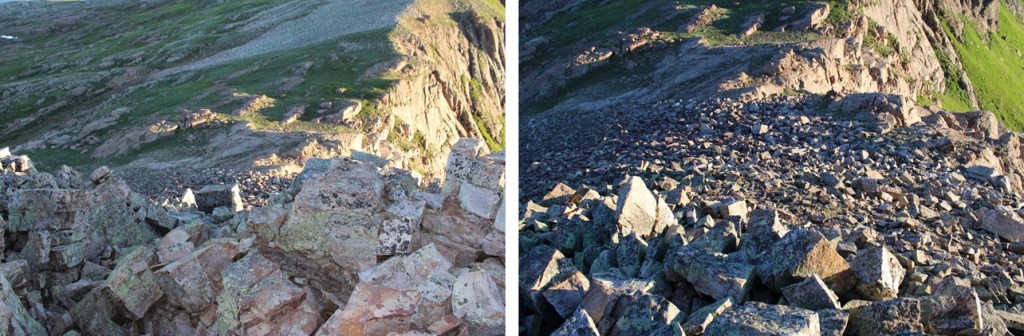
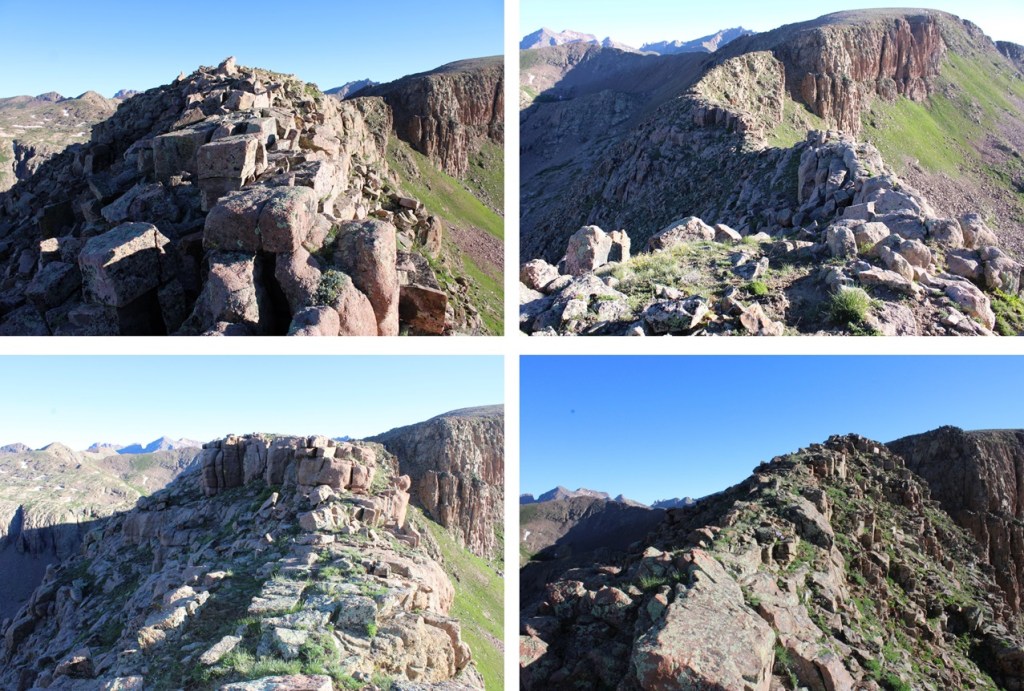
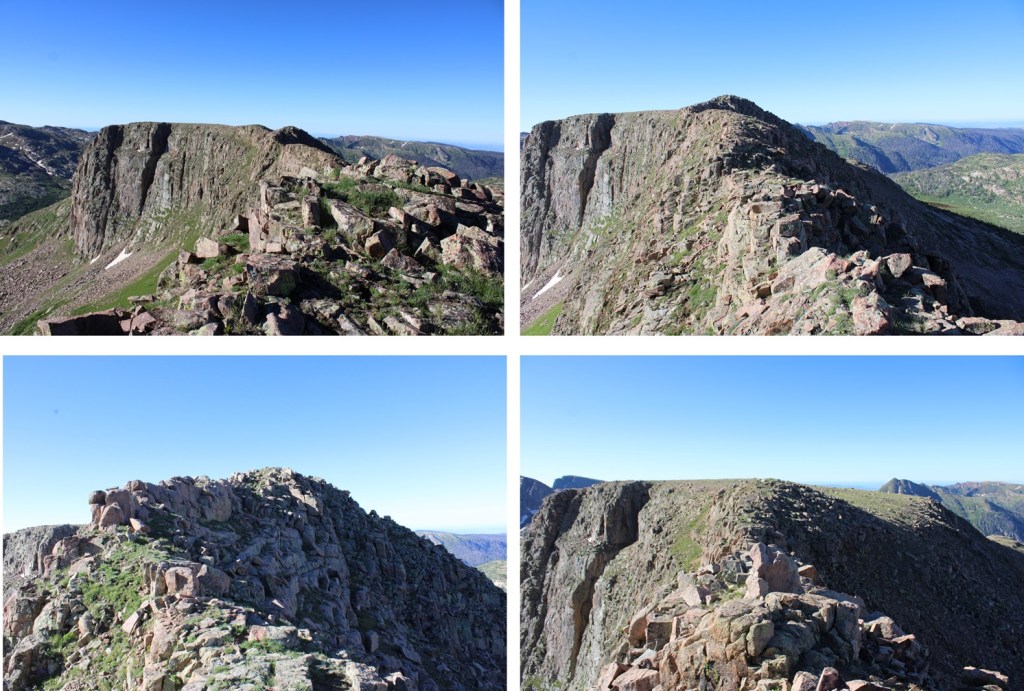
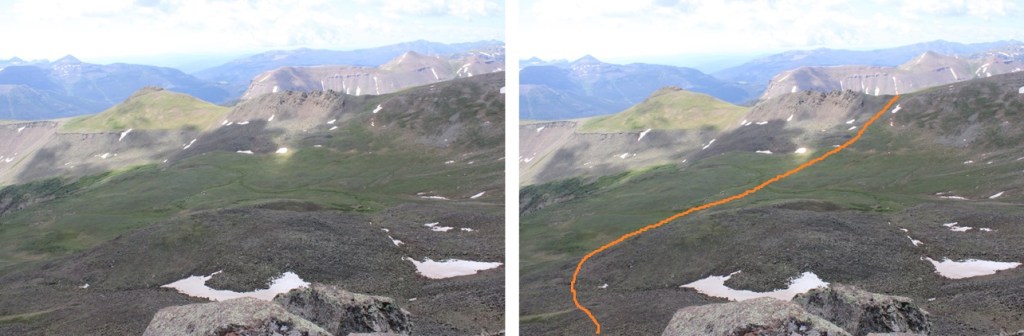
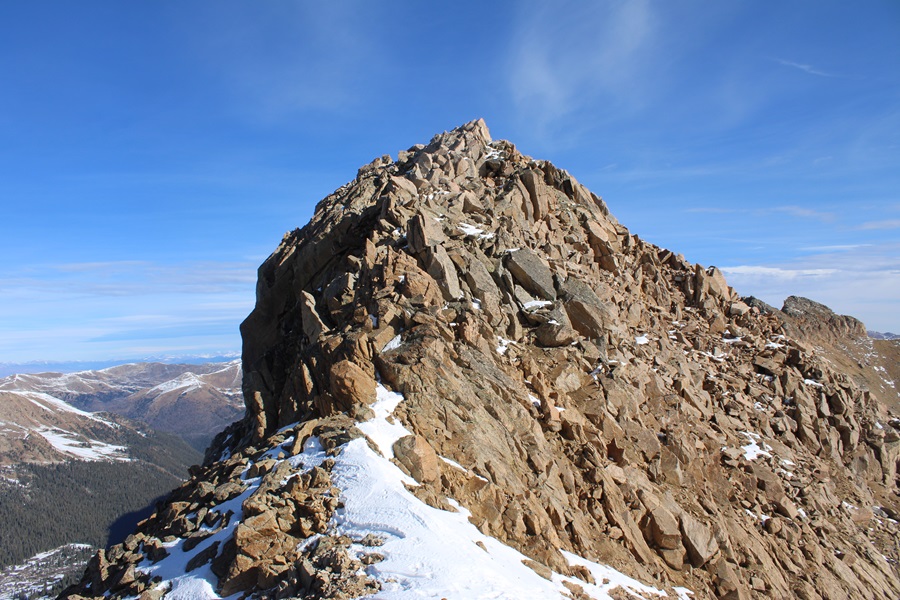
Following the ridge, I eventually came to a rocky area. This is easier to descend than it looks. It can be kept class 2 if you just follow the gully down. Here I lost about 100’ of elevation as I made my way towards the saddle.
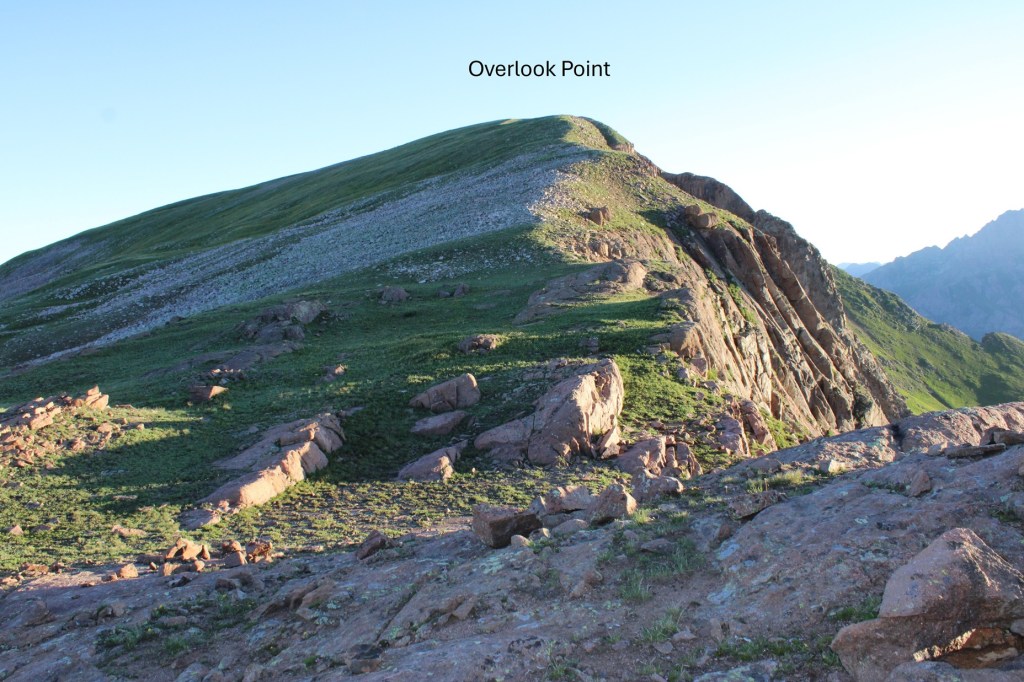
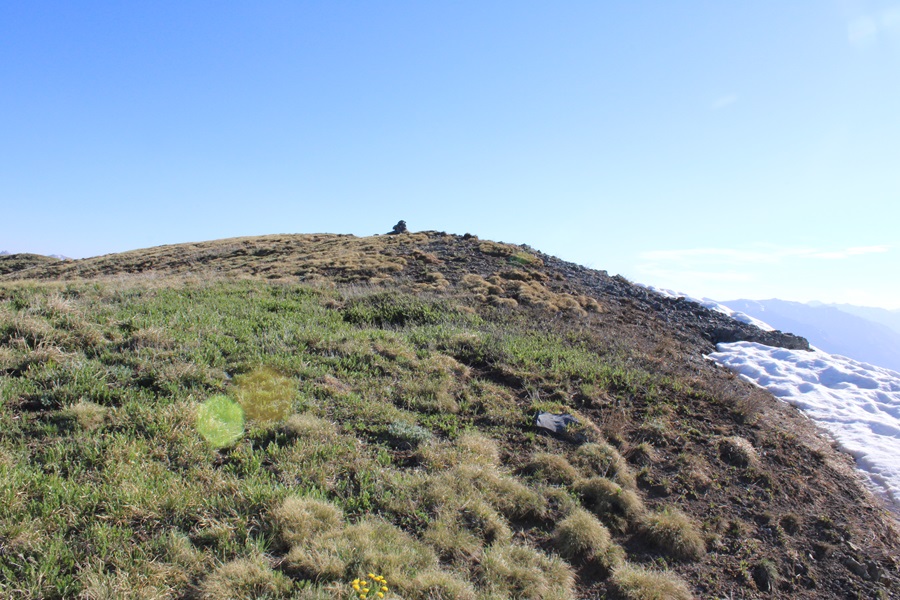
And now to gain the ridge. This was a fairly easy ridge hike, where I gained about 300’ of elevation to the summit. I just kept to the ridge.
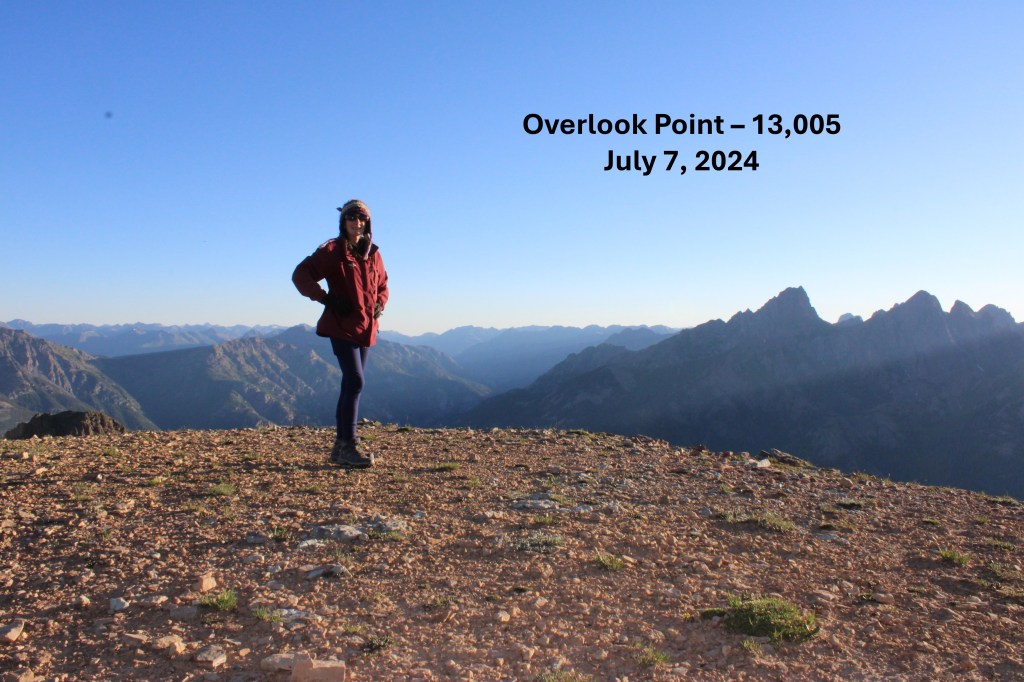
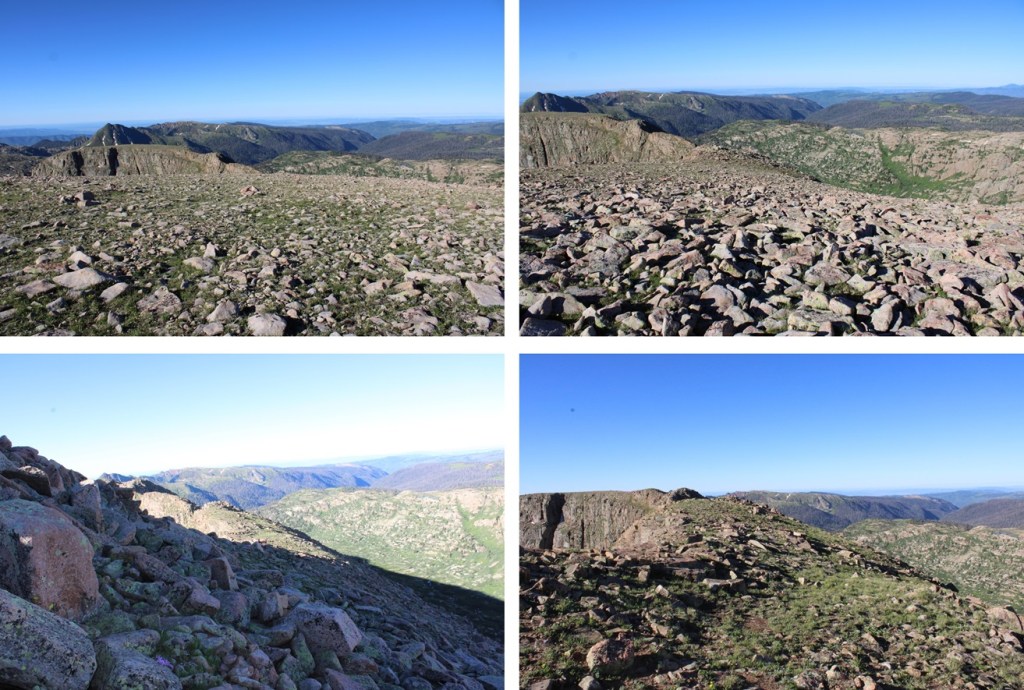
I summited Overlook Point at 6:40am
Overlook Point:
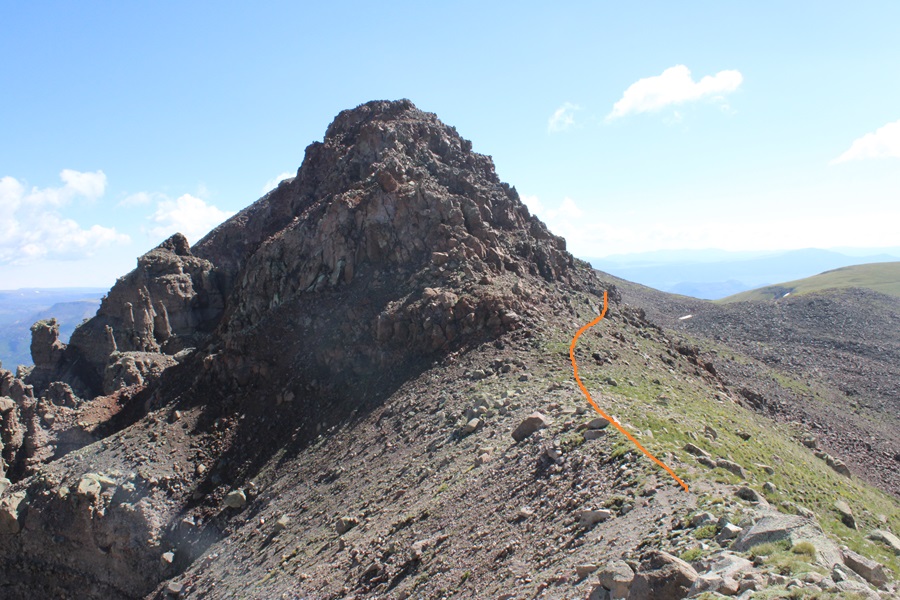
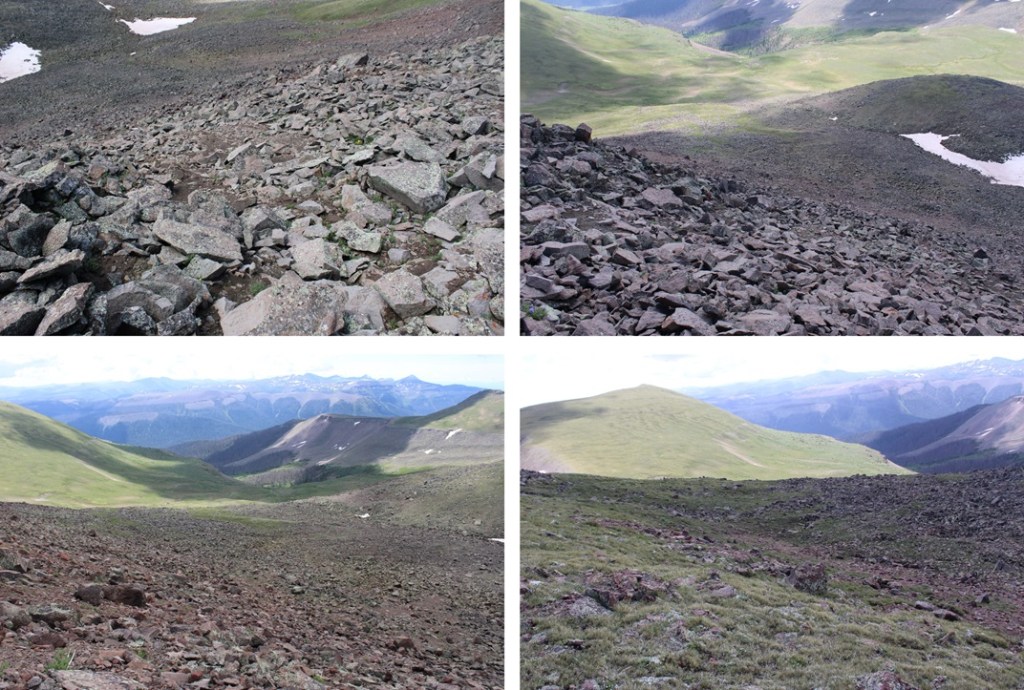
And now to make my way back towards PT 12802. I turned around and descended the ridge to the saddle.
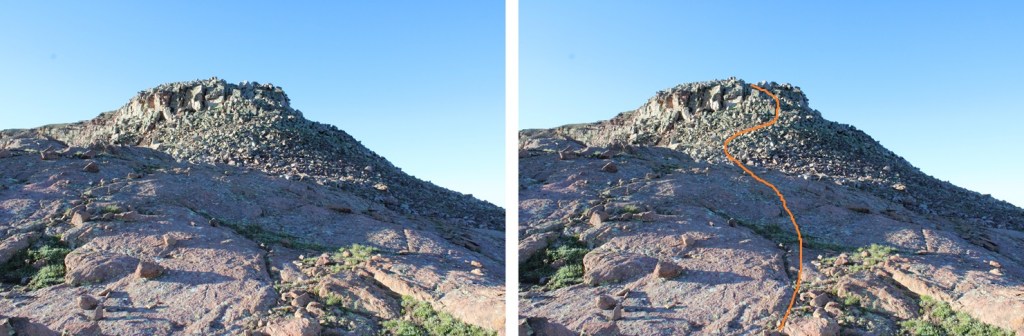
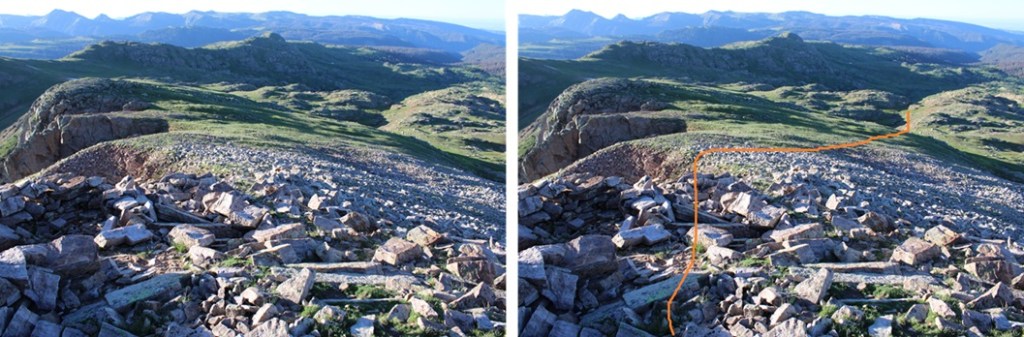
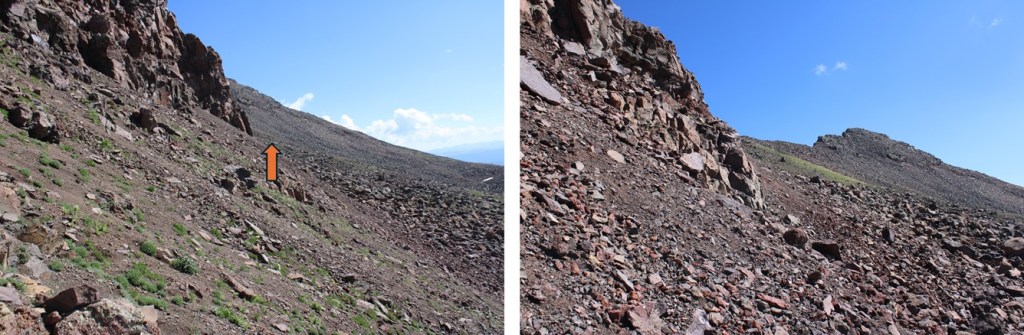
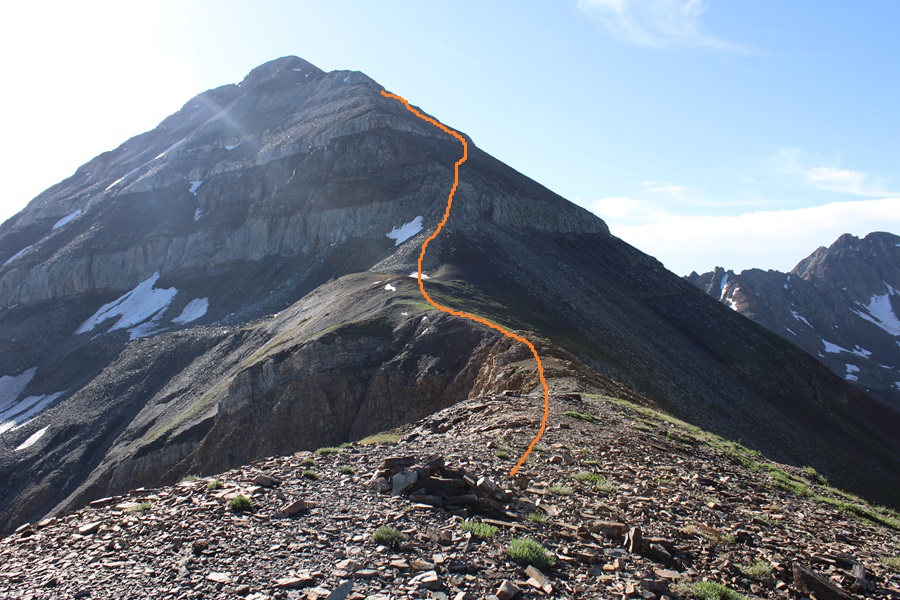
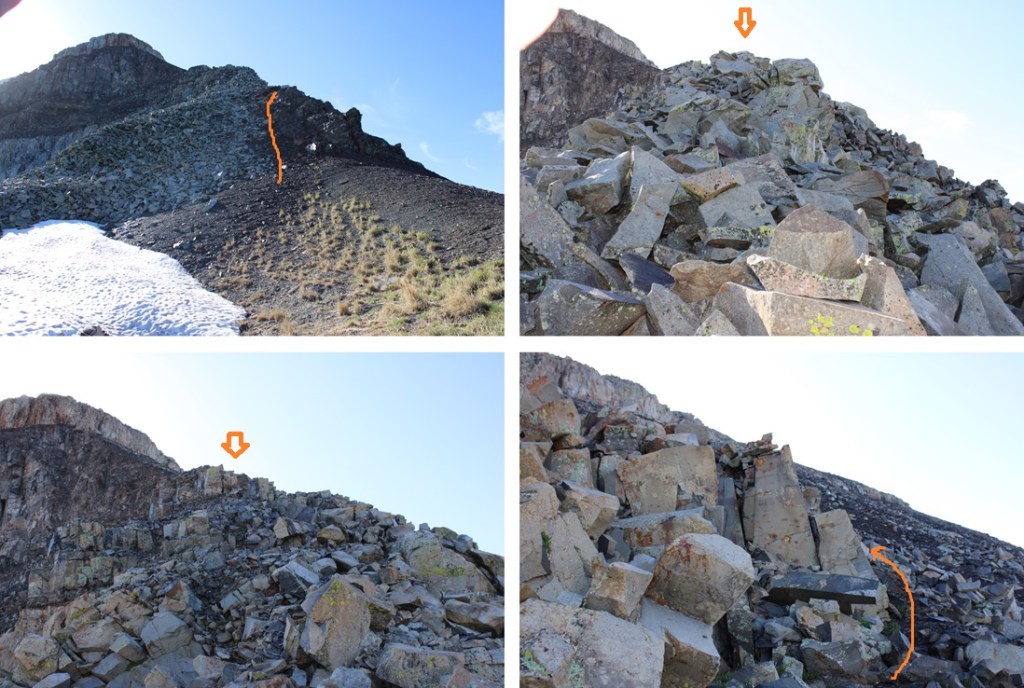
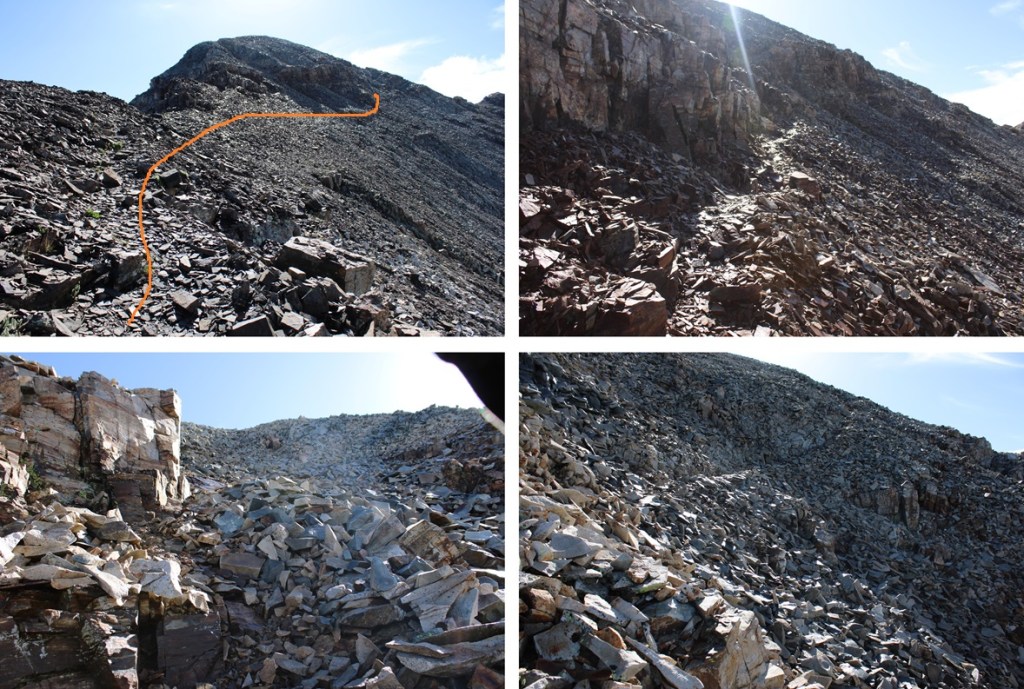
Then it was up the rocky sections. This is the route I took
Then southeast following the ridge to 12802
And then back down to the Lime Mesa Trail
I turned right onto the Lime Mesa Trail, and followed it 3.4 miles south back to the trailhead.
I made it back to the trailhead at 8:15am, making this a 8.89X mile hike with 1872’ of elevation gain in 3.5 hours.
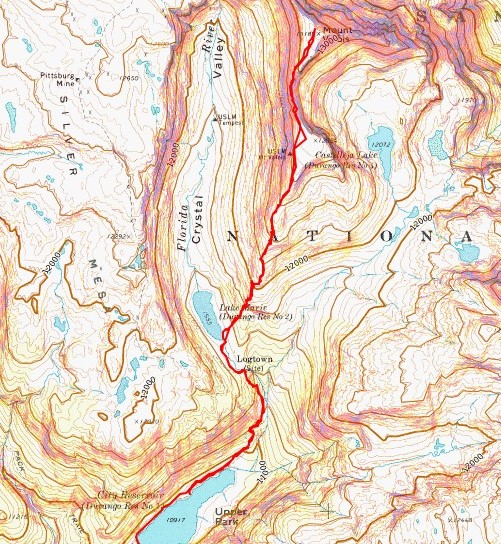
RT Length from Endlich Mesa Trailhead: 21.45 miles
Elevation Gain from Endlich Mesa Trailhead: 5078’
The approach to City Reservoir is a total of 7.35 miles and 1220’ of elevation gain (but also over 1500’ of elevation loss) from Endlich Mesa Trailhead and City Reservoir. You can view the approach to the saddle here.
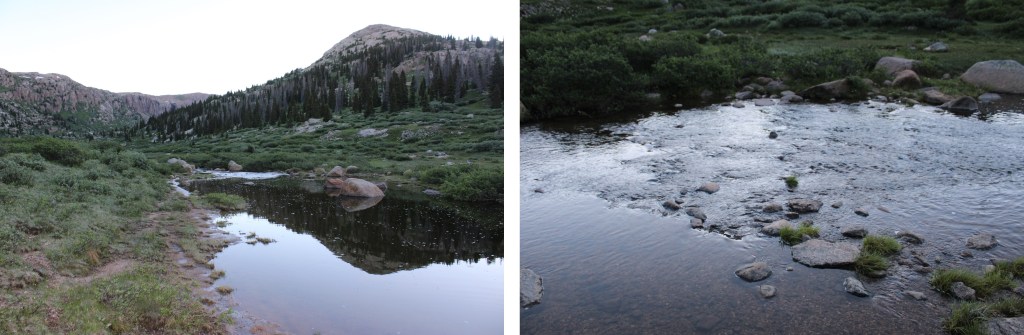
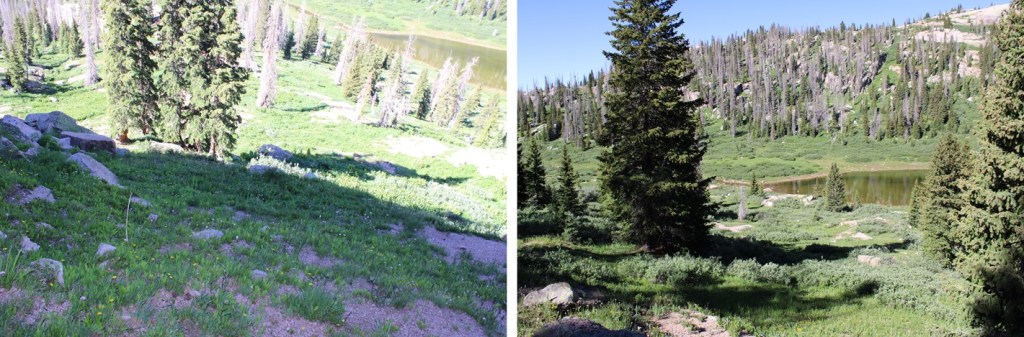
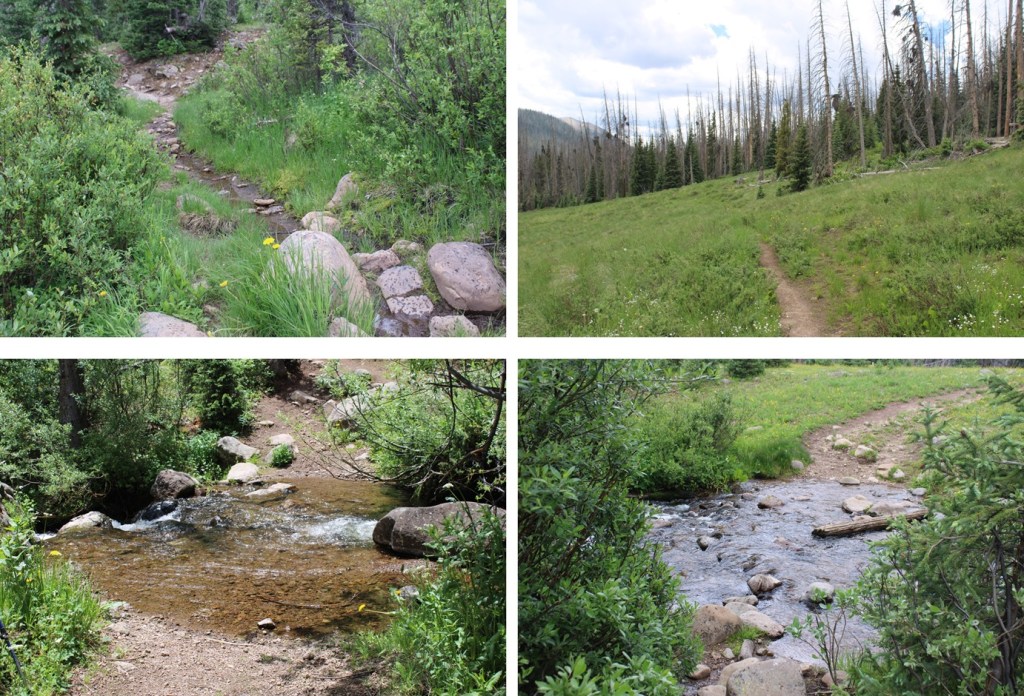
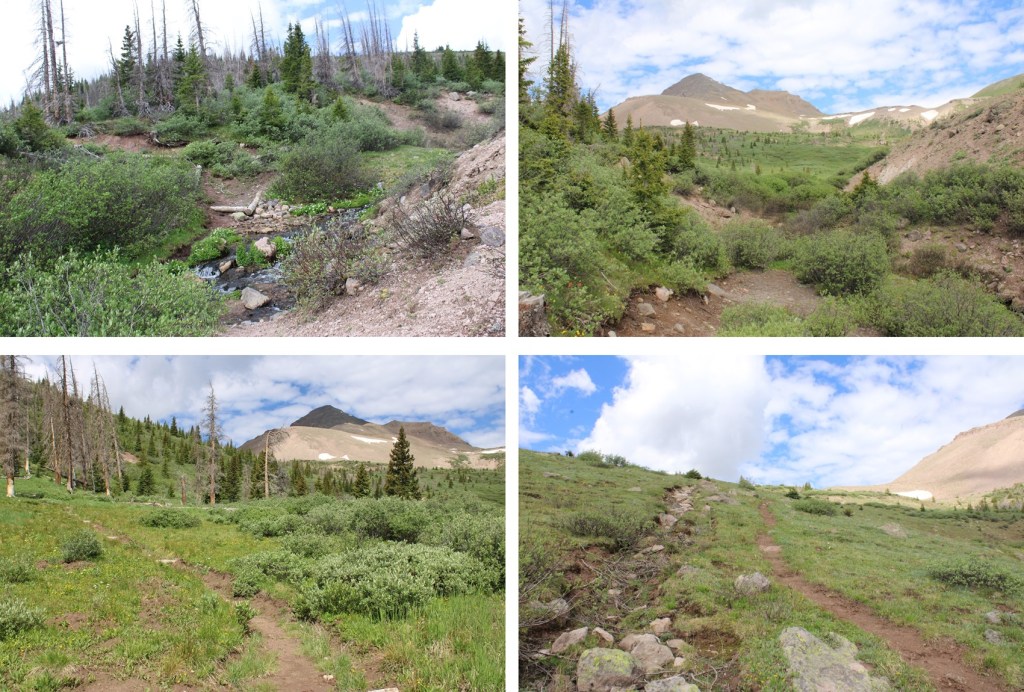
I awoke from my campsite at City Reservoir and was on the trail at 7am. I followed the Endlich Mesa Trail towards Lake Marie.
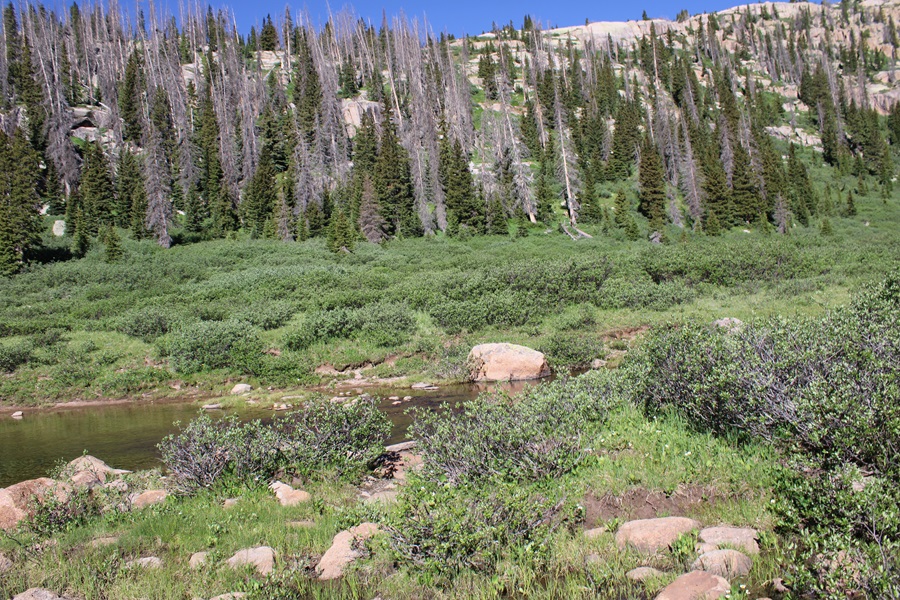
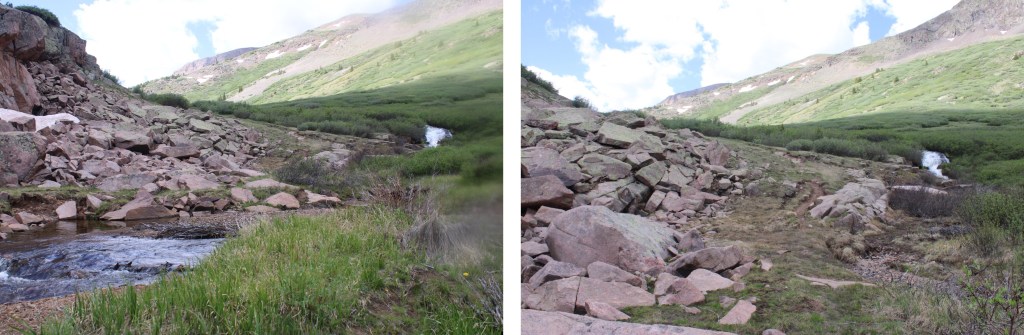
When I reached the south end of the lake, where a stream flows out, I crossed the stream
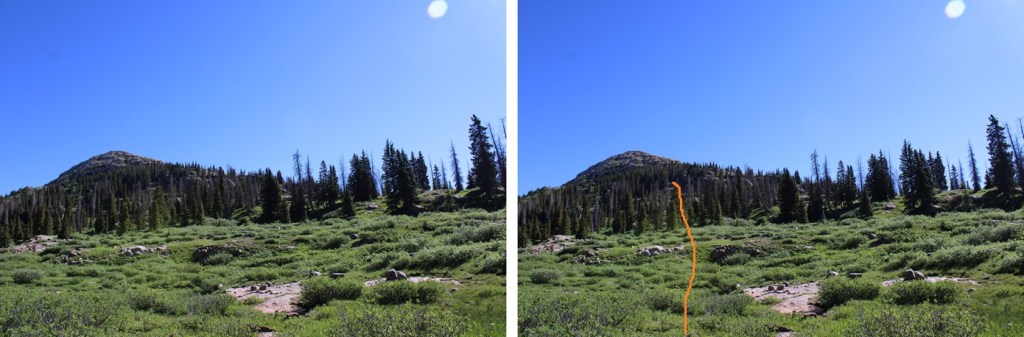
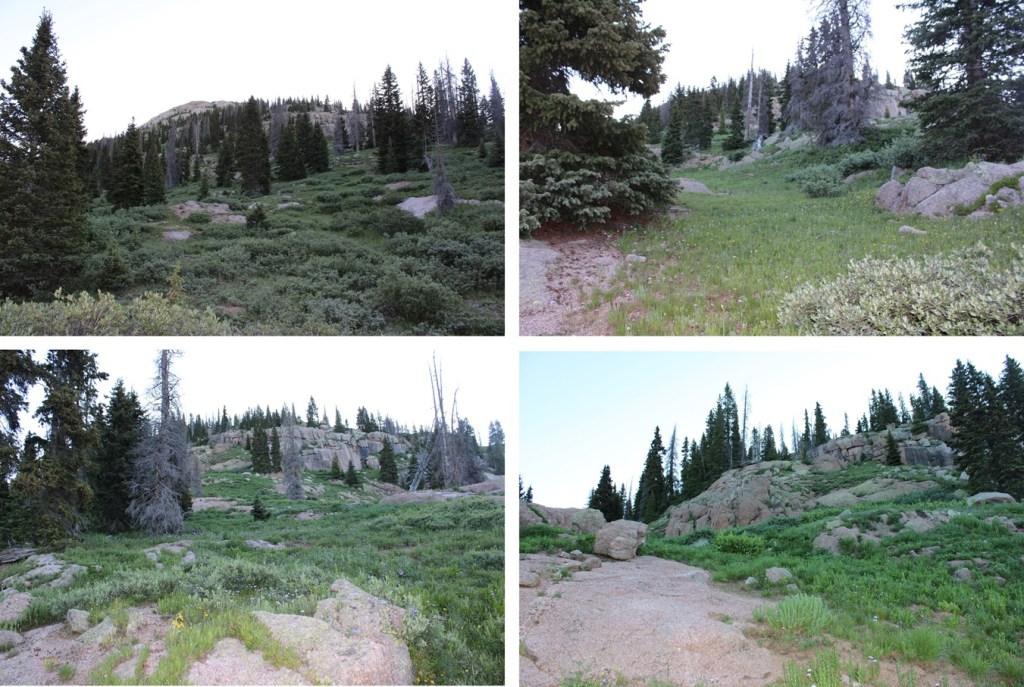
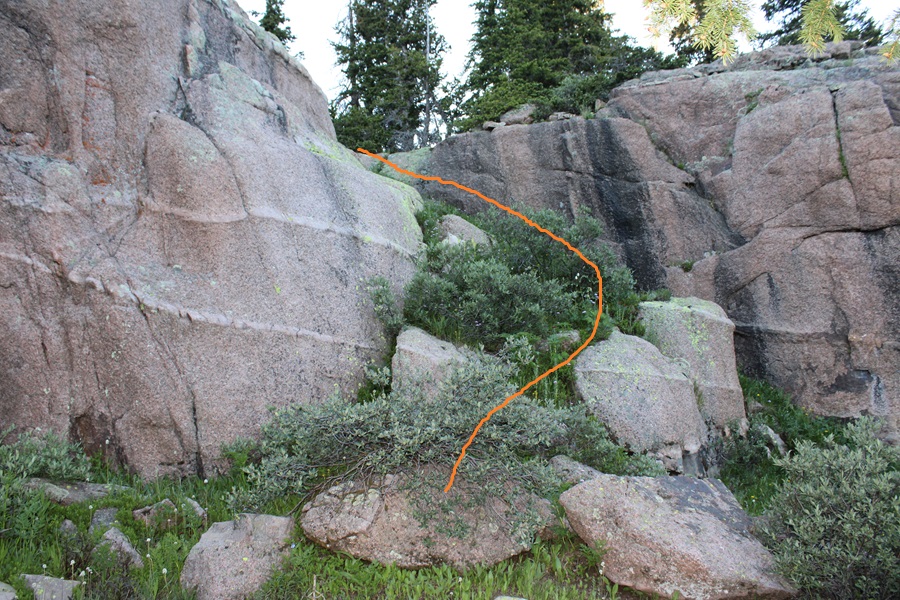
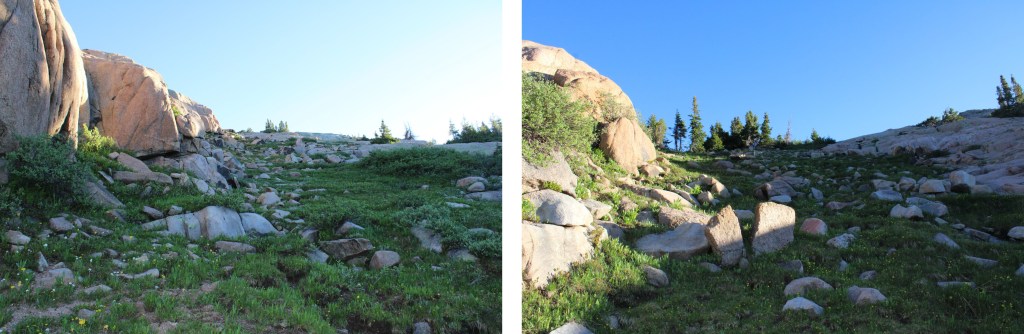
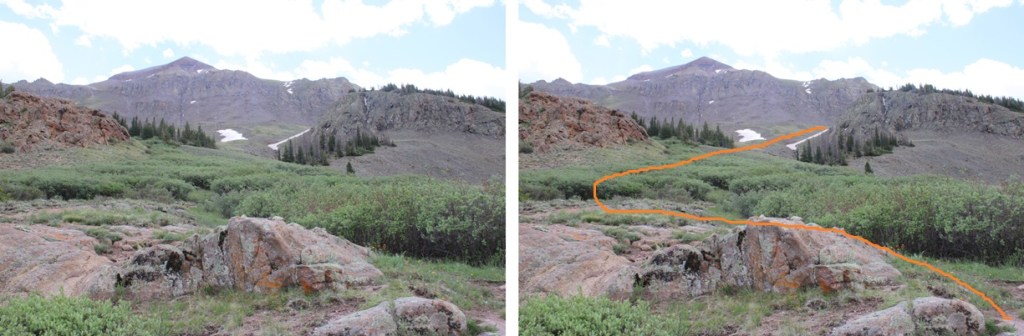
After crossing the stream I headed northeast towards the ridge and the rocky outcropping. The ridge actually has a lot of route finding, so I’ll do my best to explain how to navigate it. This is all class 2, with route finding below treeline.
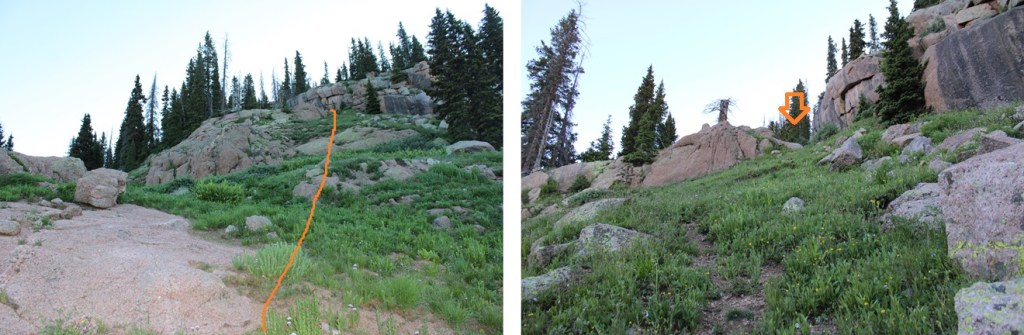
At the first rock outcropping, head for the tree that’s cut in half at the top of the rocks
Next, ascend this small gully
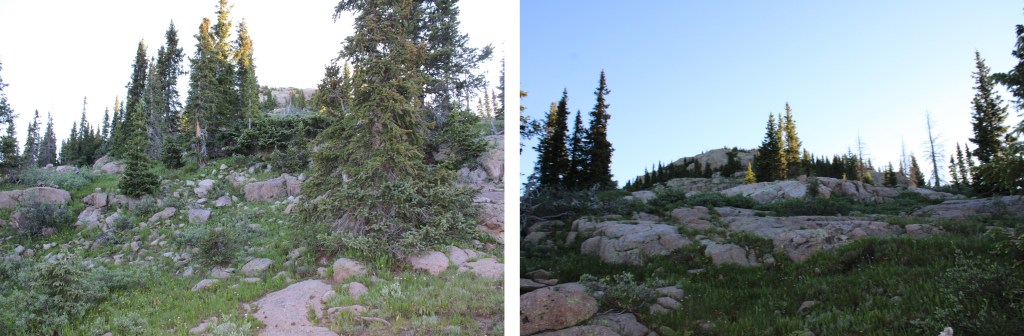
And continue heading northeast
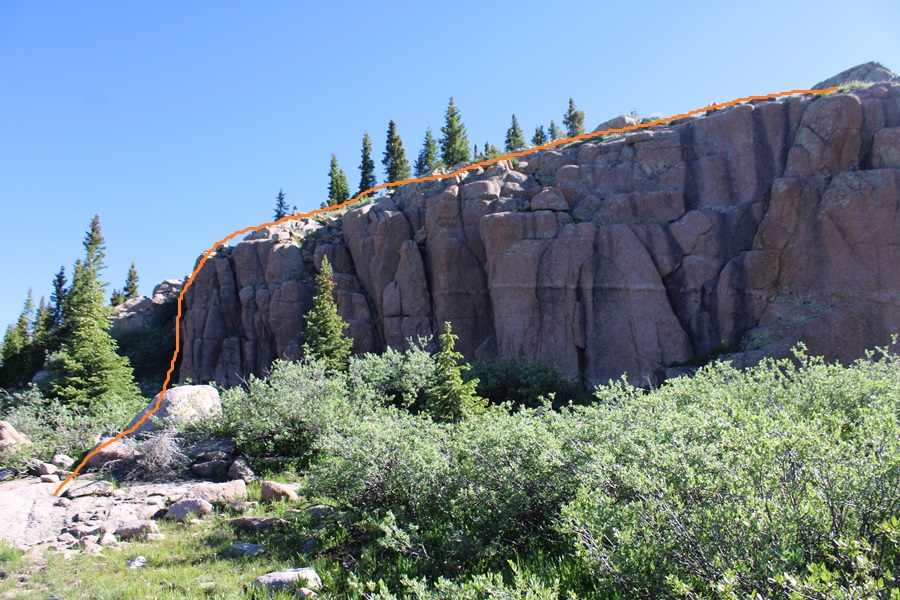
You will eventually come to this wall. If you navigate around to the left, you’ll find a grassy ramp to ascend. Ascend, then walk back towards the wall to navigate around the rocks.
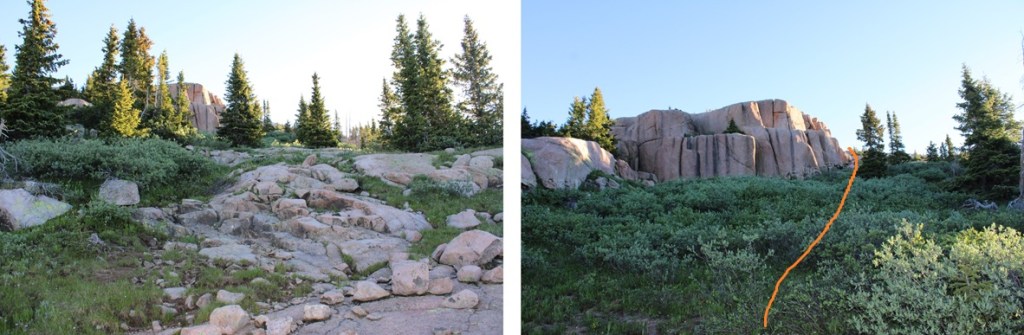
After going east around the large rock face, again head northeast along the ridge. You’ll encounter another large rock face. This time, go right, and ascend a grassy gully.
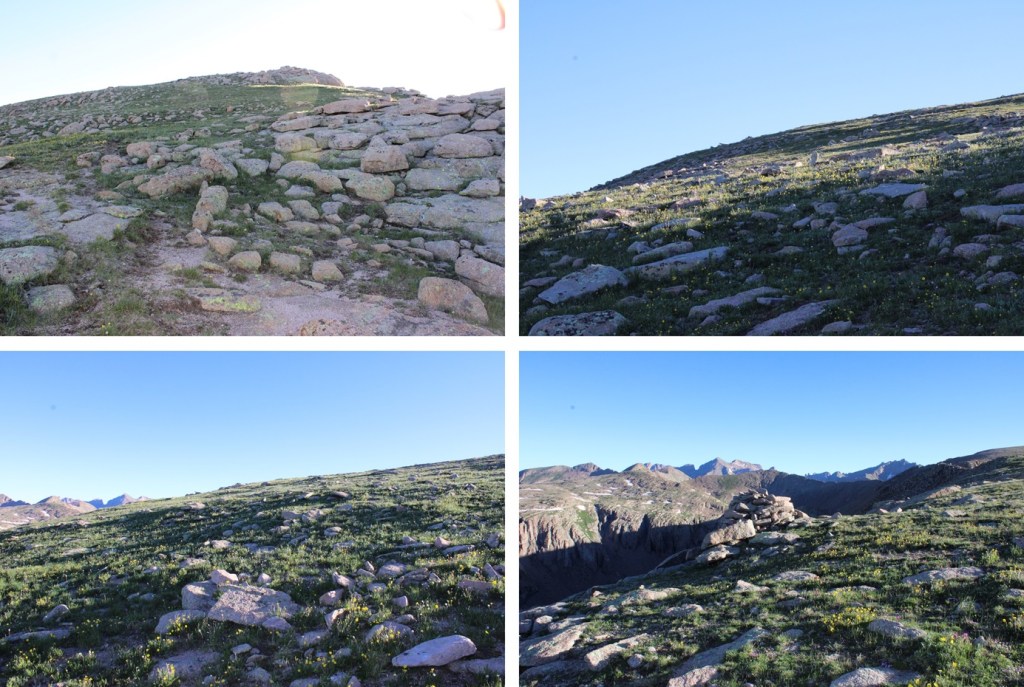
Now you should be looking at the rocky ridge, but at least you’re above treeline. I pretty much stayed to the center of the ridge, and kept heading northeast, following the ridge. If you have an option to go left on grassy slopes, do that.
From here on out, this is a straightforward hike. I climbed northeast up this class 2 ridge to a rather large cairn.
From there I headed east towards this large cairn, but I could have just kept heading northeast along the ridge.
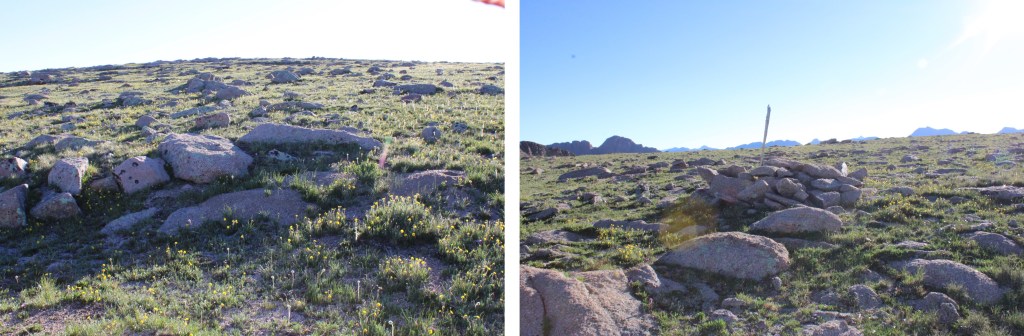
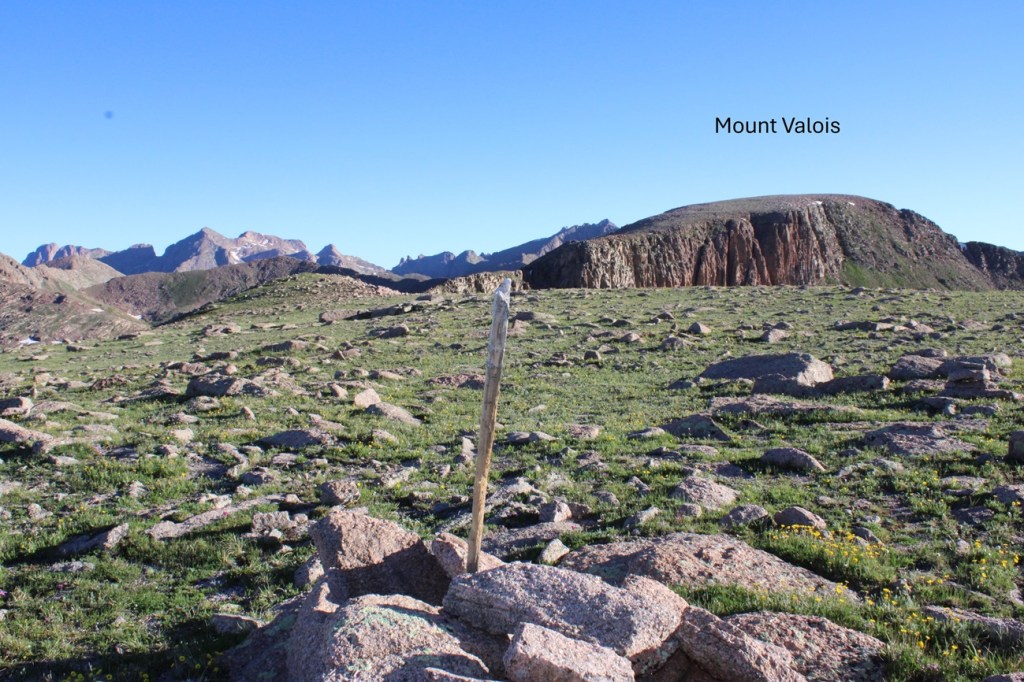
From this second large cairn I followed the ridge towards Mount Valois. It may look daunting, but it’s all class 2. The ridge goes, but if it feels sketchy there’s a way to drop down to the left and use game trails.
Here are some pictures of the ridge.
Then it’s an easy rocky tundra walk to the summit
I summited Mount Valois at 7:45am
Mount Valois:
Now to head back to City Reservoir. I retraced my steps back down to the ridge
Then across the ridge
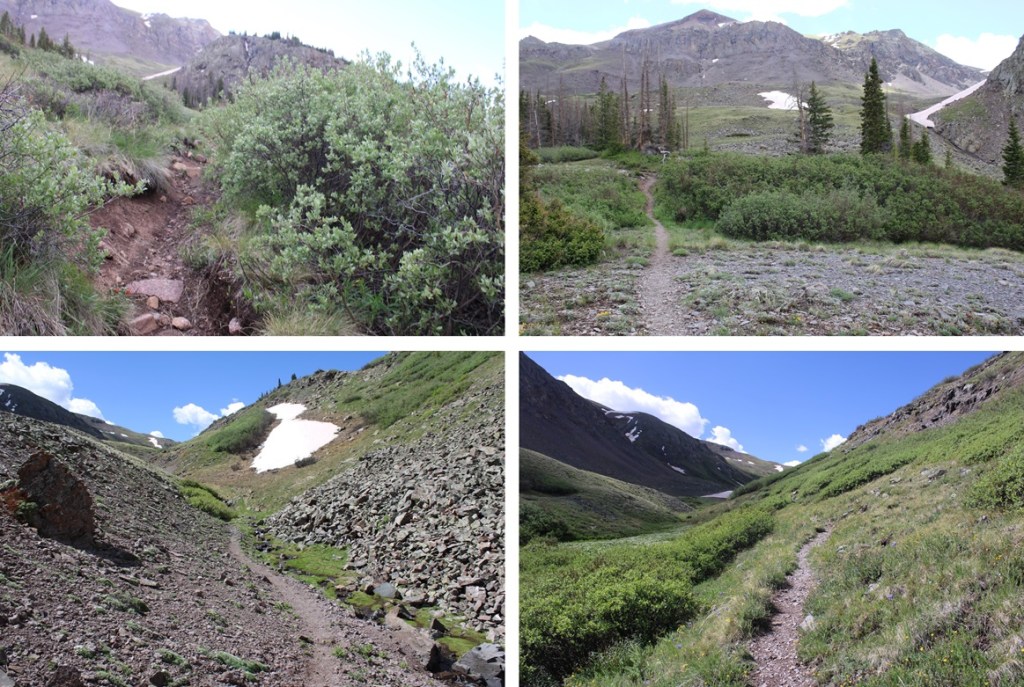
Here are some pictures of the route back down to Lake Marie
Back down the gully
And across the rocky ledge
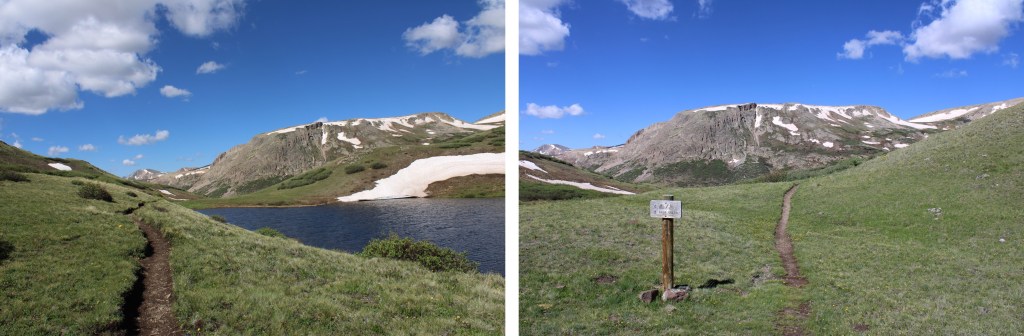
Then southwest towards Lake Marie
I crossed the stream, and headed south on the Endlich Mesa Trail back to City Reservoir.
I made it back to City Reservoir at 9:30am, making this a 6.5 mile hike with 2310’ of elevation gain from City Reservoir in 3.5 hours.
The approach to the saddle between Emerson and Peak Twenty Two is a total of 11 miles and 3250’ of elevation gain from Endlich Mesa Trailhead and City Reservoir. You can view the approach to the saddle here.
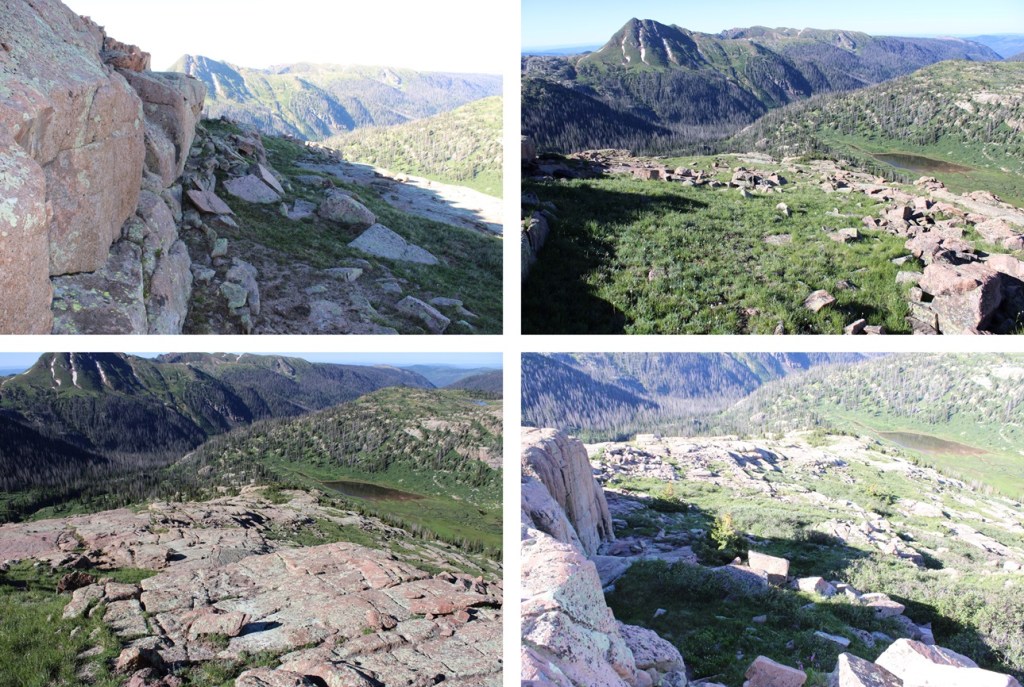
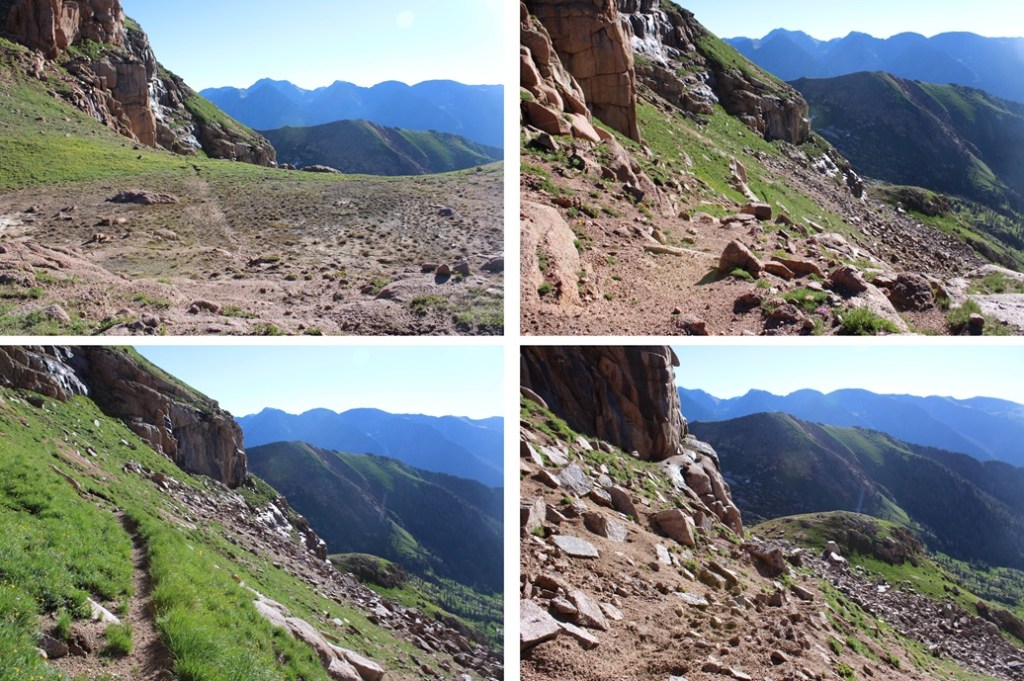
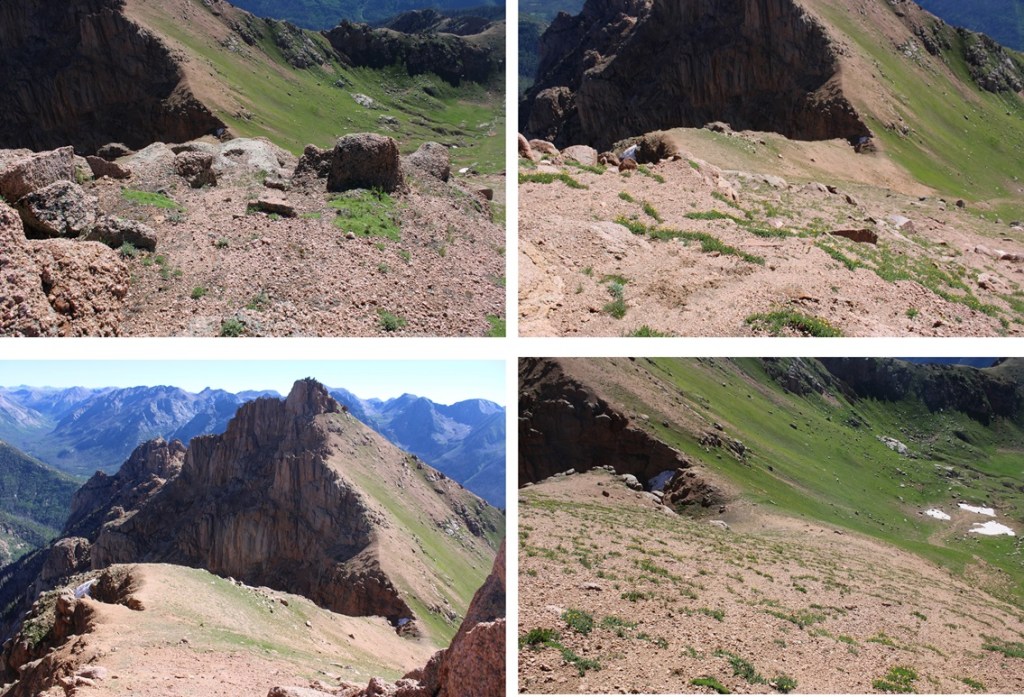
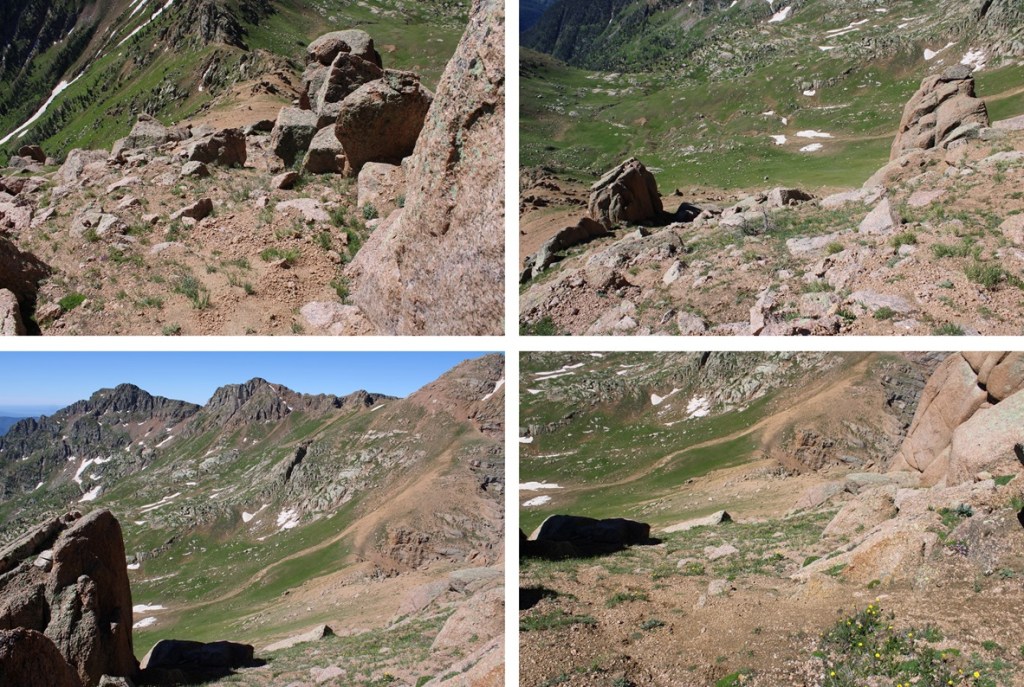
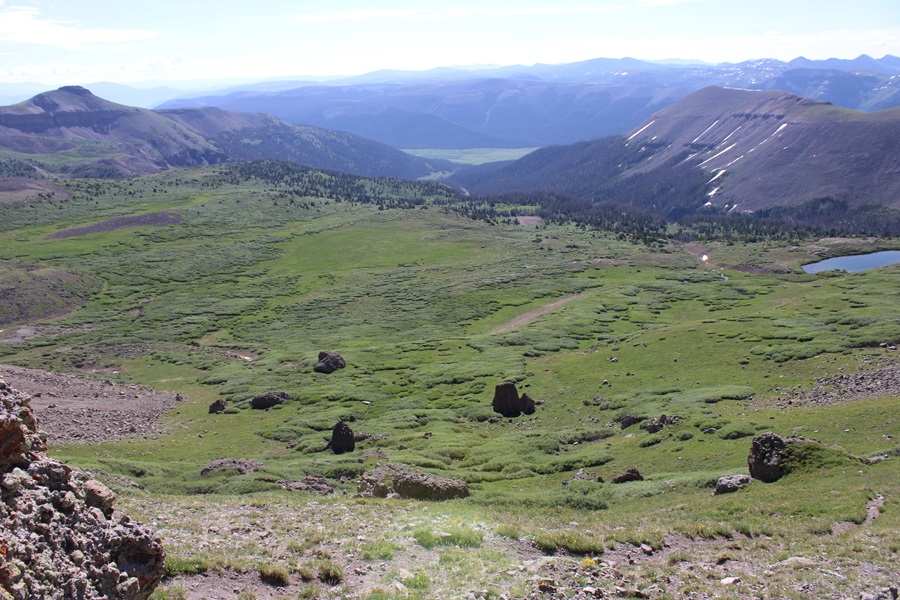
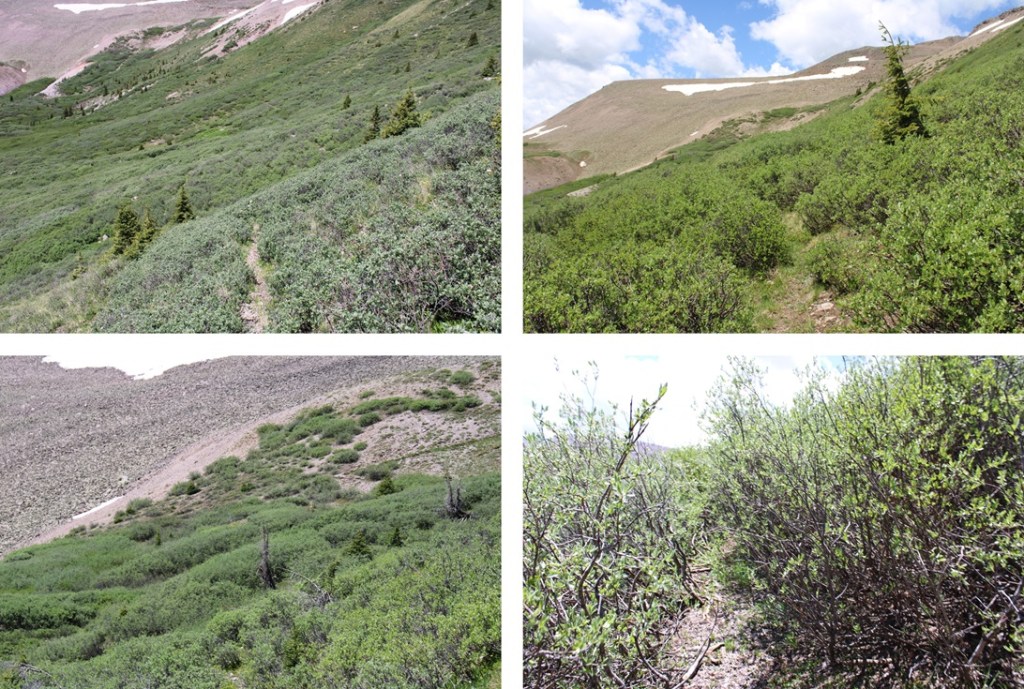
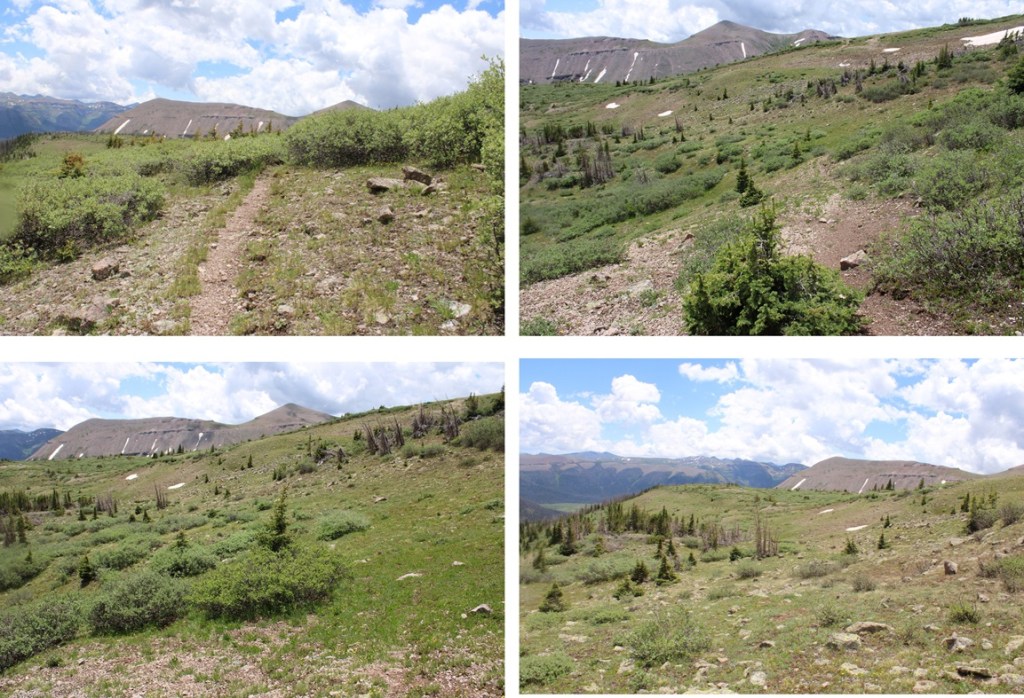
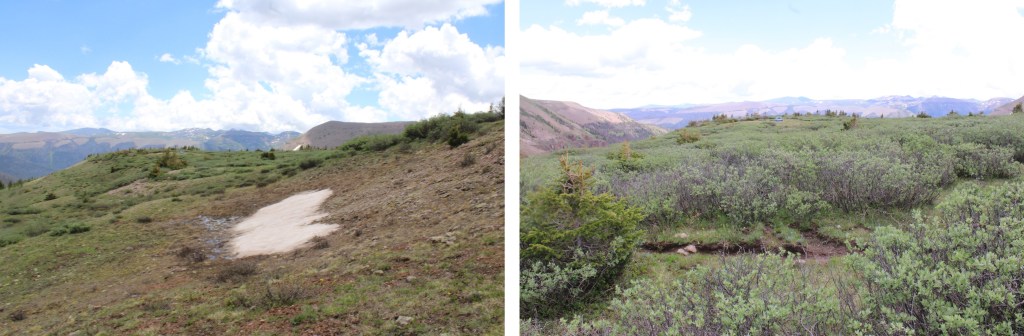
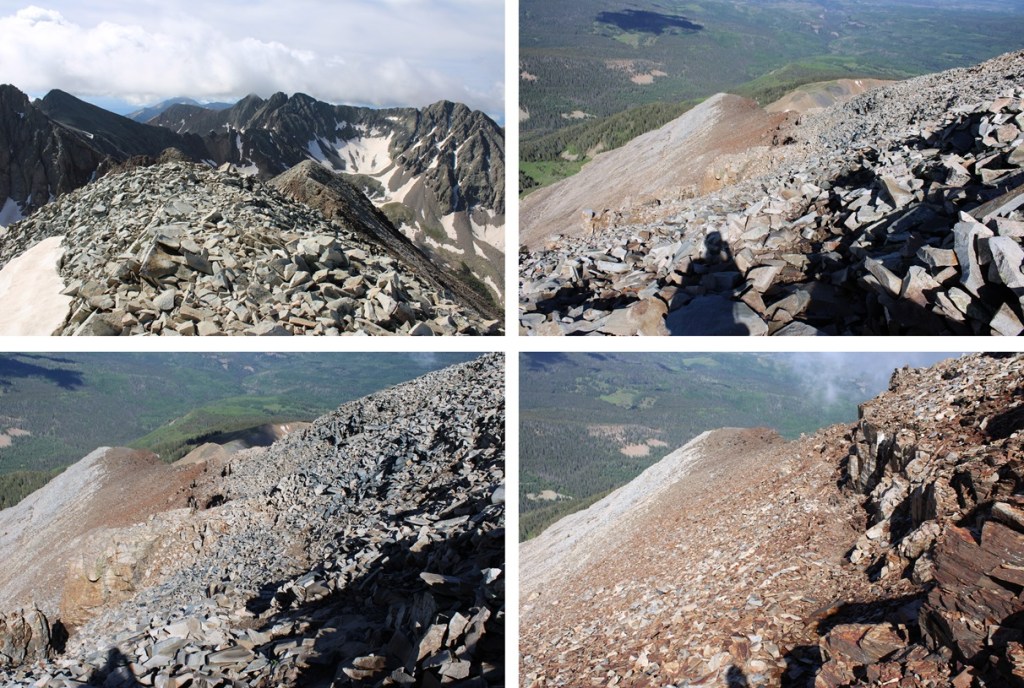
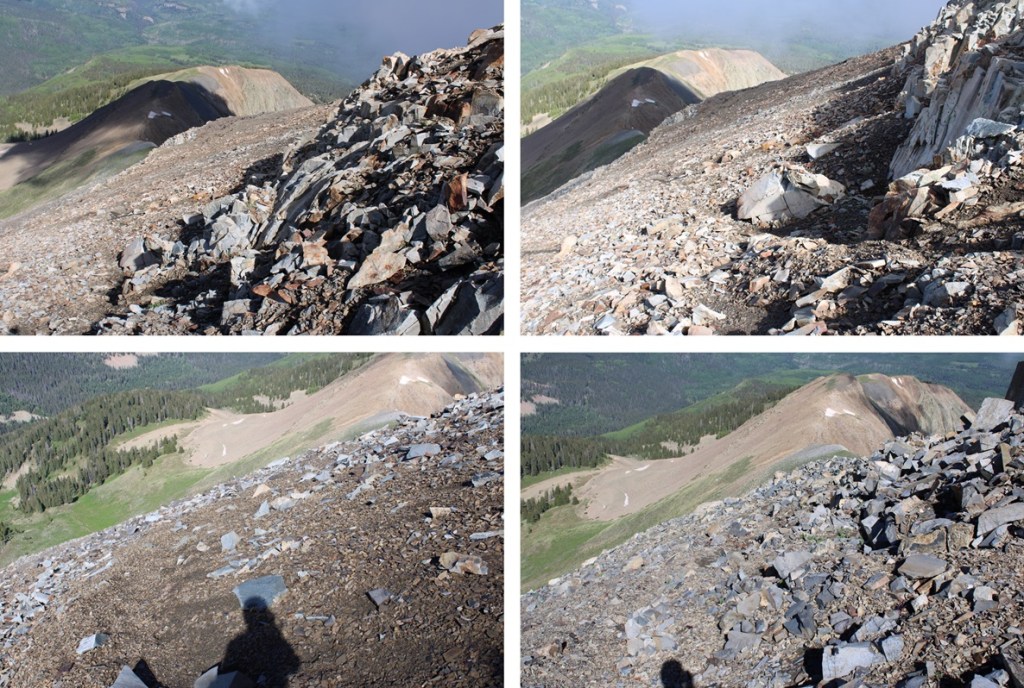
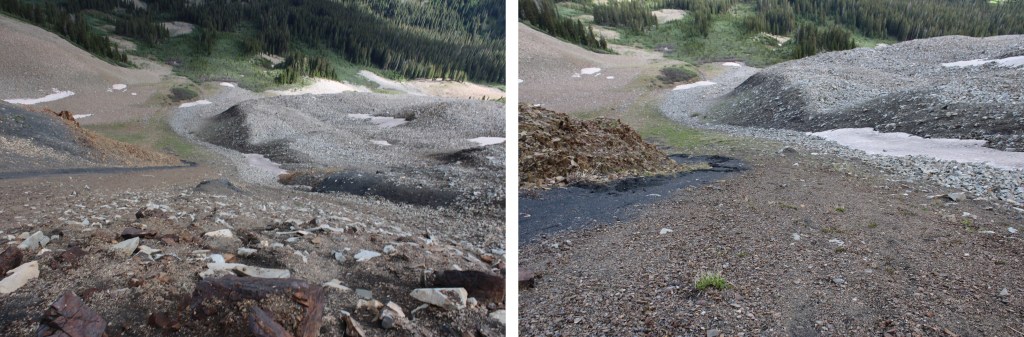
From the saddle of Emerson and Peak Twenty Two, I continued following a scree-filled game trail northeast skirting the east side of Emerson, losing 450’ of elevation as I wound my way towards an upper basin.
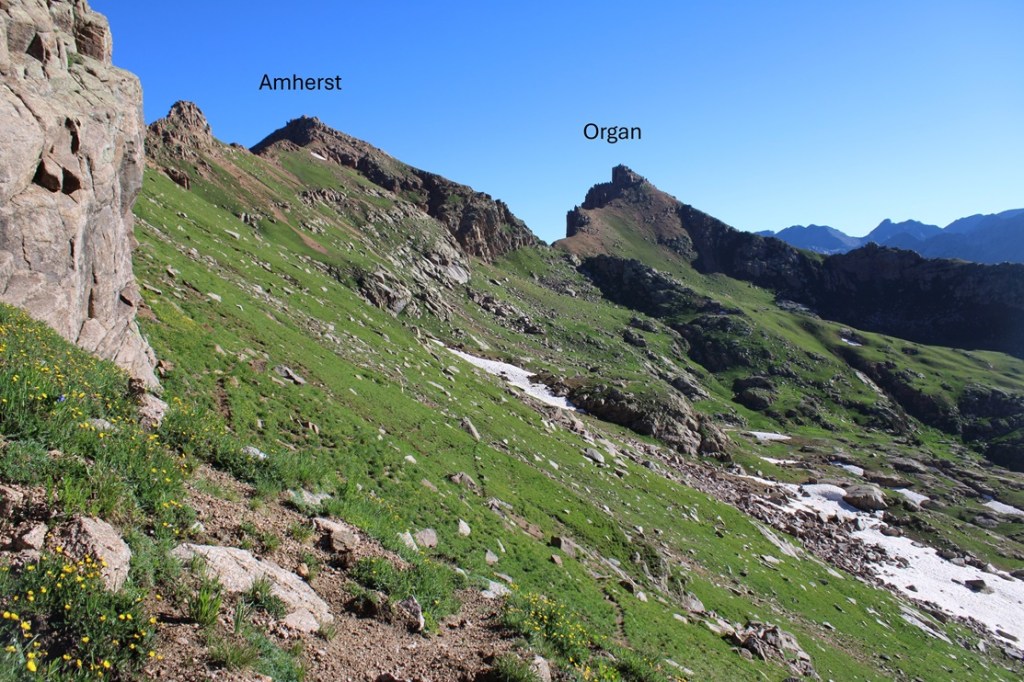
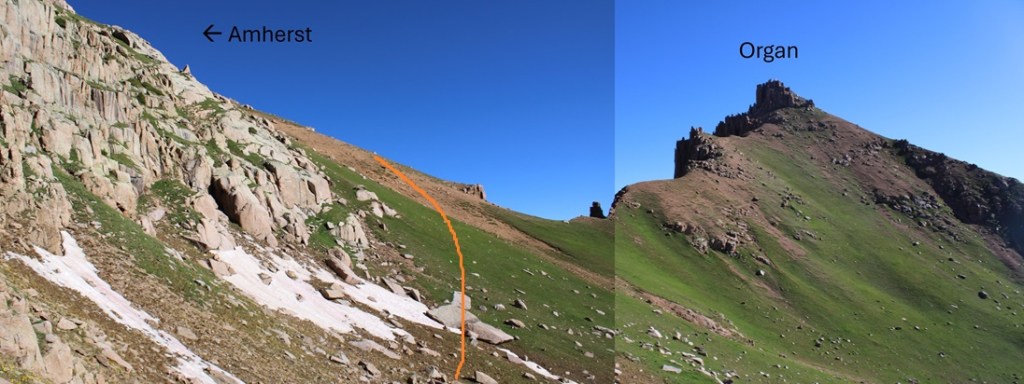
Here you can see Amherst and Organ
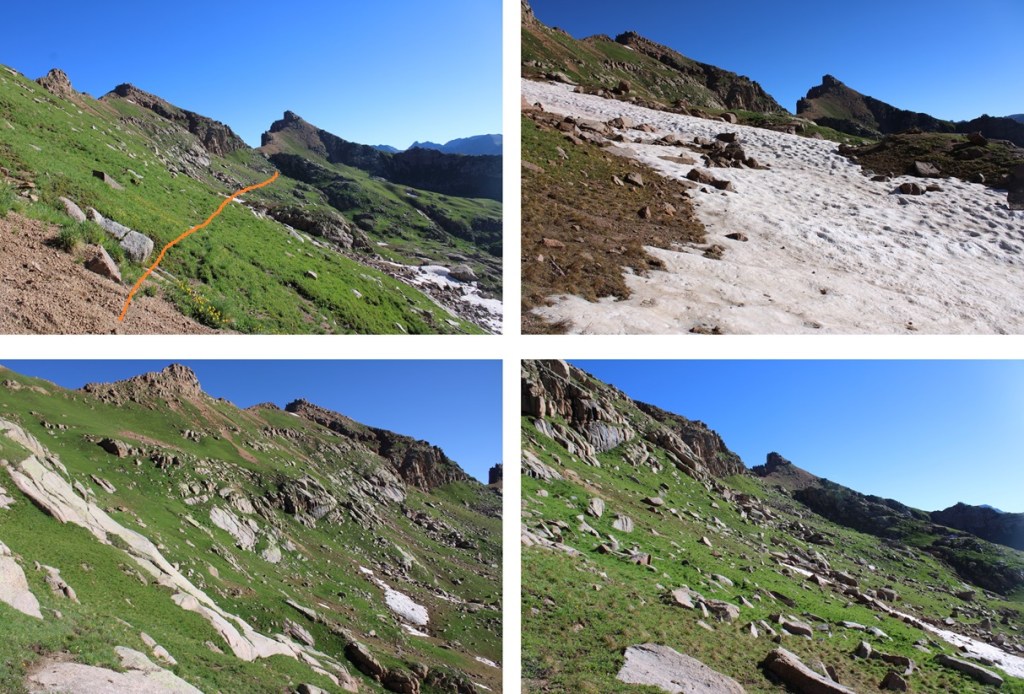
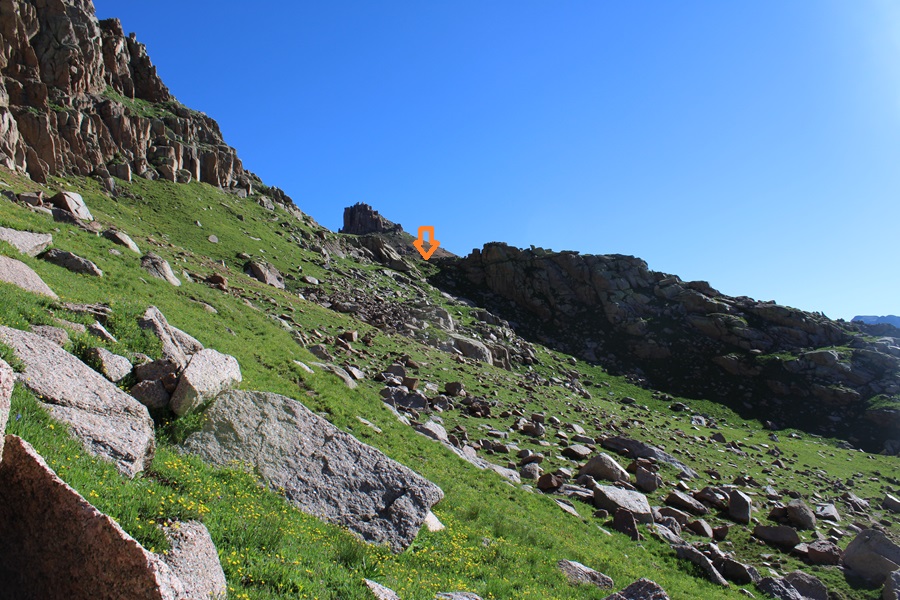
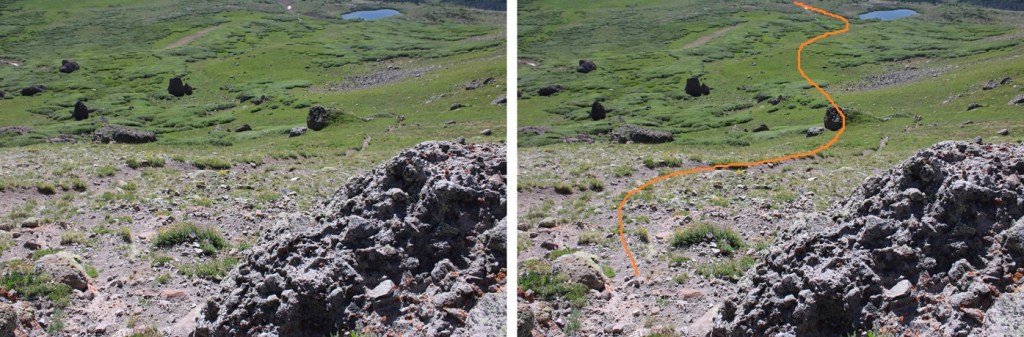
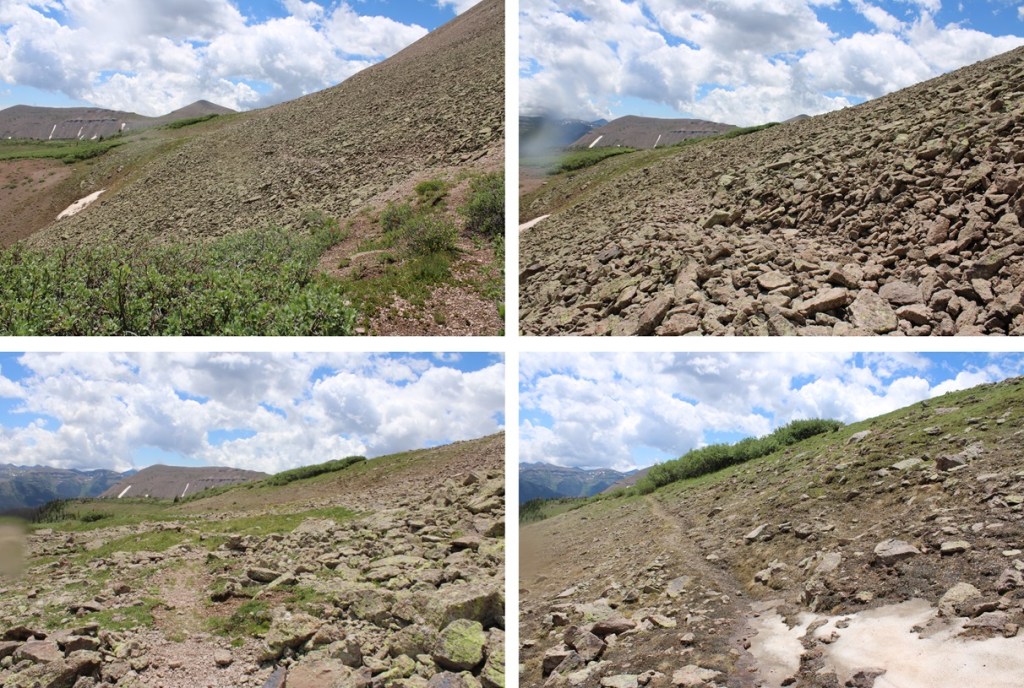
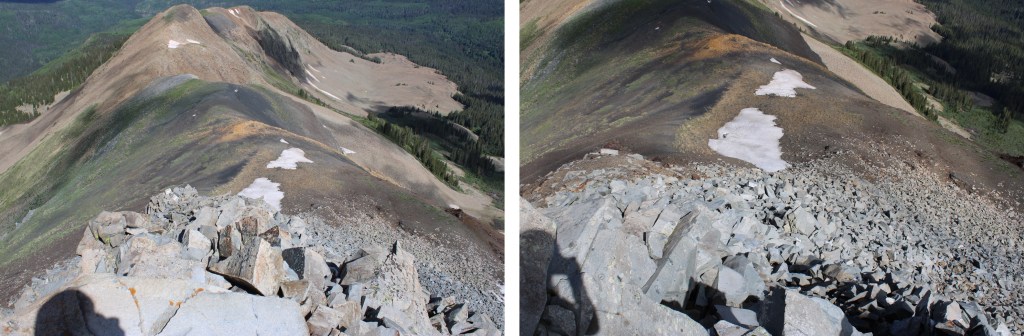
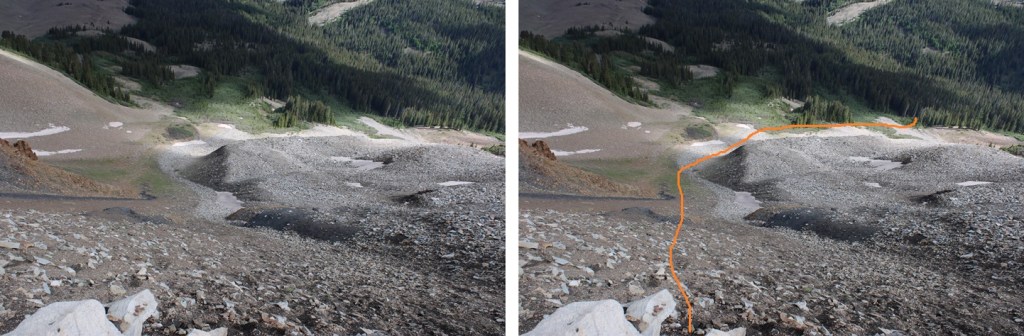
I continued following this trail until I kind of lost the trail, then stayed at about 12400’ of elevation as I made my way towards this gully
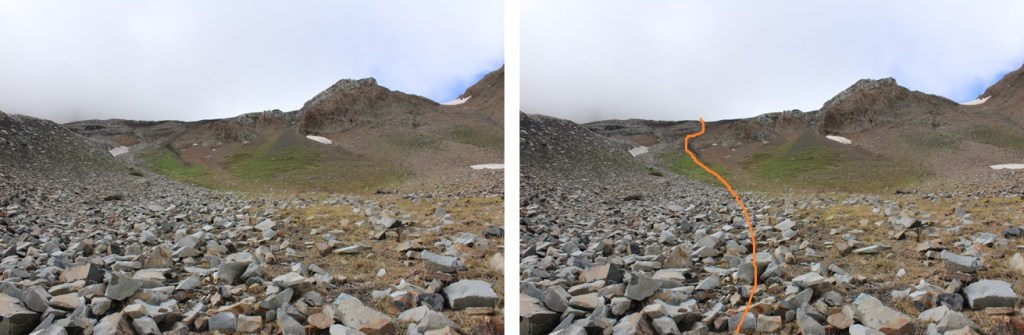
I aimed for this gully, and ascended it.
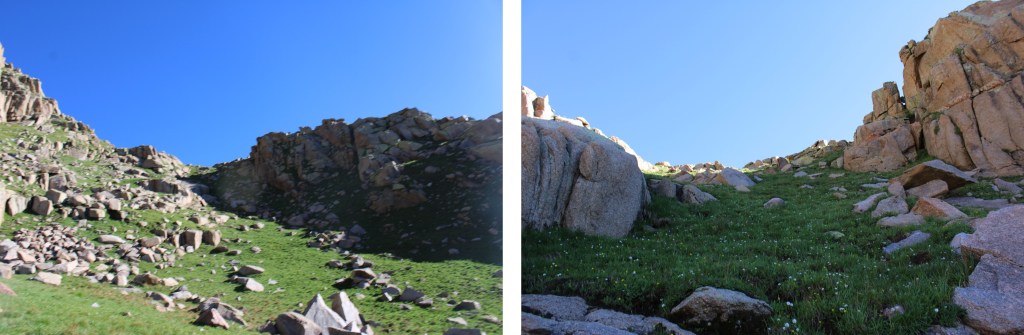
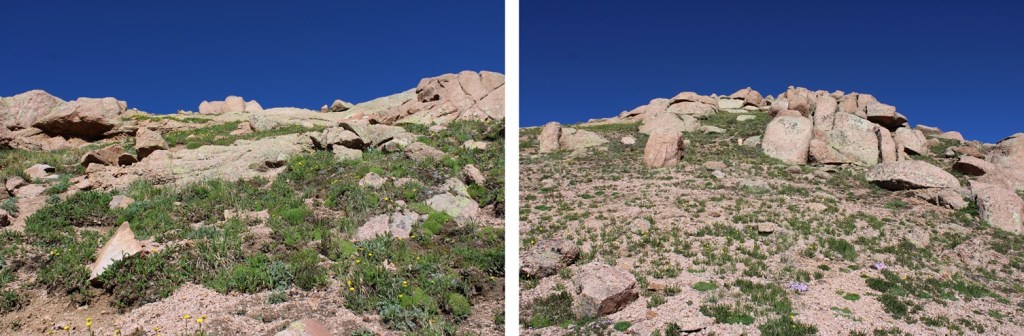
At the top of the gully I could see the saddle between Amherst and Organ. You can aim for the saddle, or just turn left and ascend Amherst. I aimed left, and ascended 800’ on very steep tundra terrain, which eventually gave way to rocky class 2 terrain.
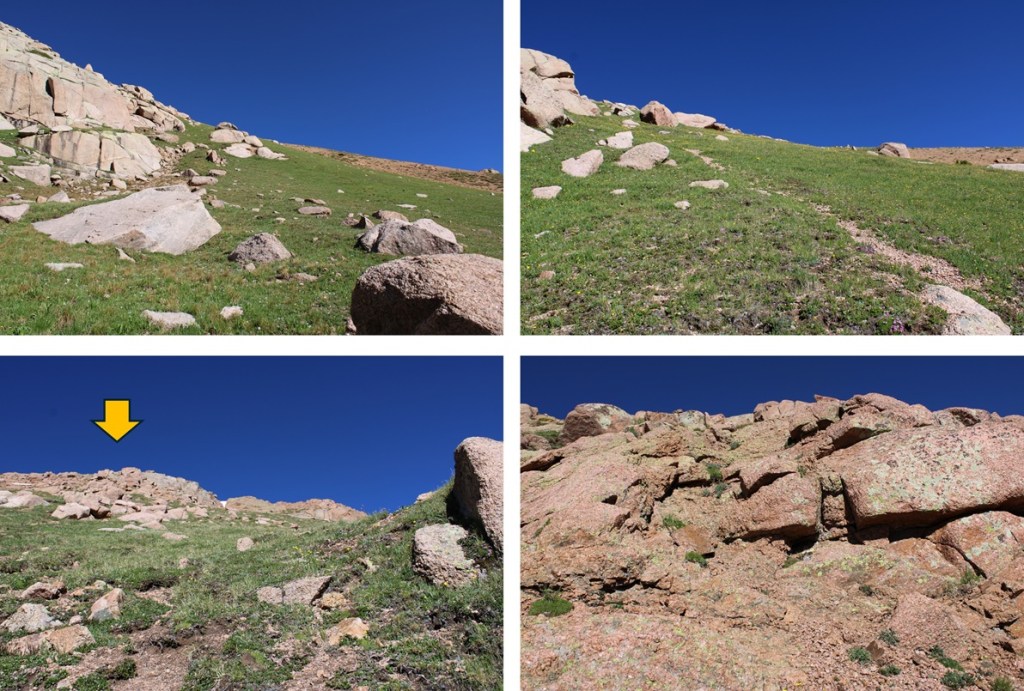
At the top of this rocky area I looked right, and it looked like the area to the right was higher than I was, so I continued following the ridge north.
But when I got to the other side, it looked like where I had been was the highpoint, so I headed south back to the other side.
My altimeter gave both points equal height, and there wasn’t a summit register, so I’m not entirely sure which is the true summit. There was what you could call a cairn on the first summit. In any event, they are both easy to tag.
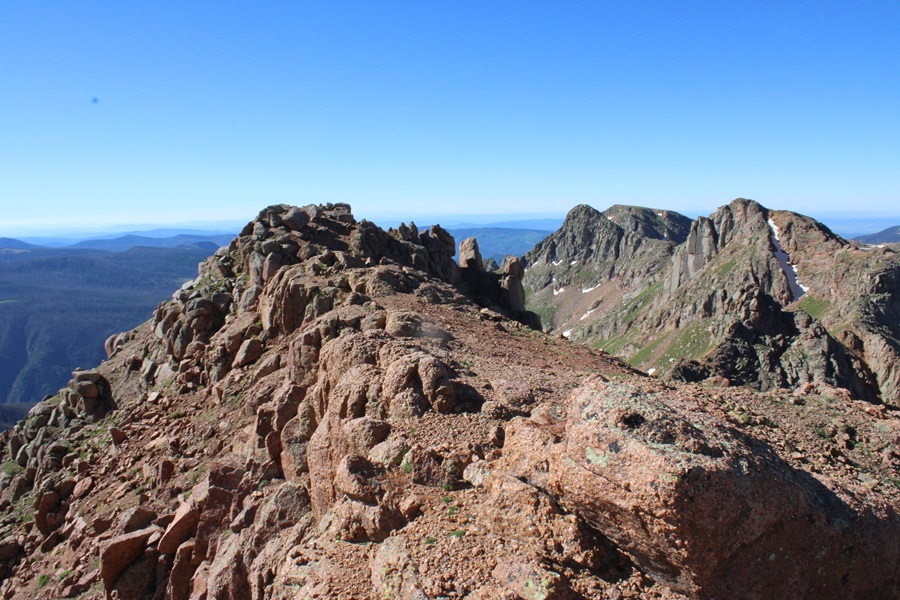
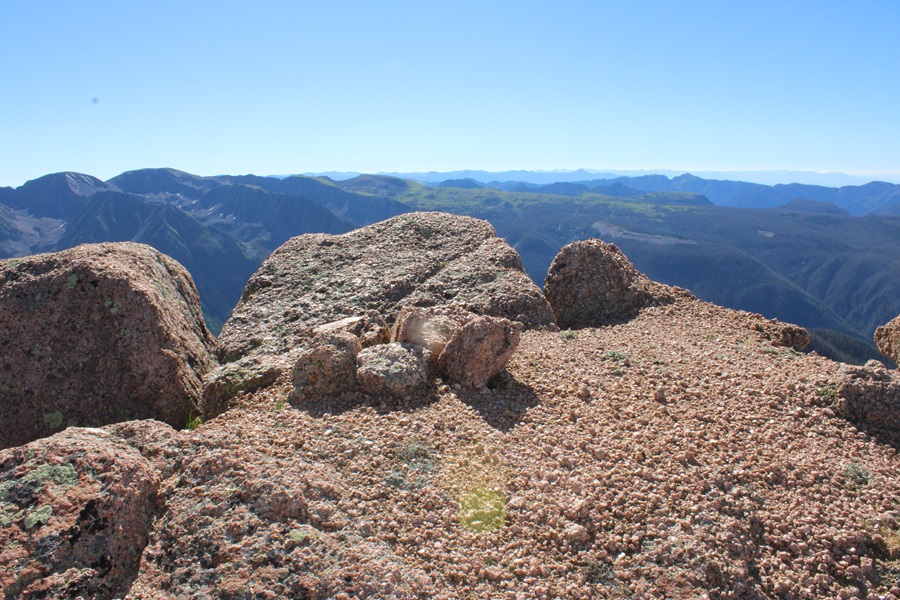
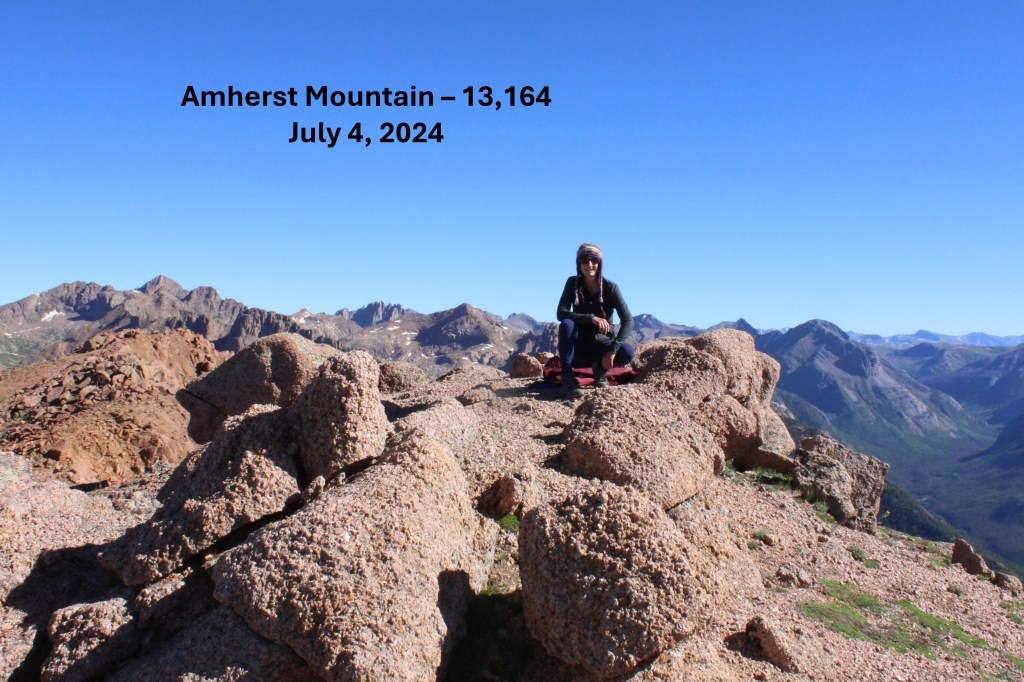
I summited Amherst Mountain at 9am
Amherst Mountain:
From the summit I could see Organ Mountain to the northeast
It looked like it would be a simple ridge hike, so I headed down to the Amherst/Organ saddle.
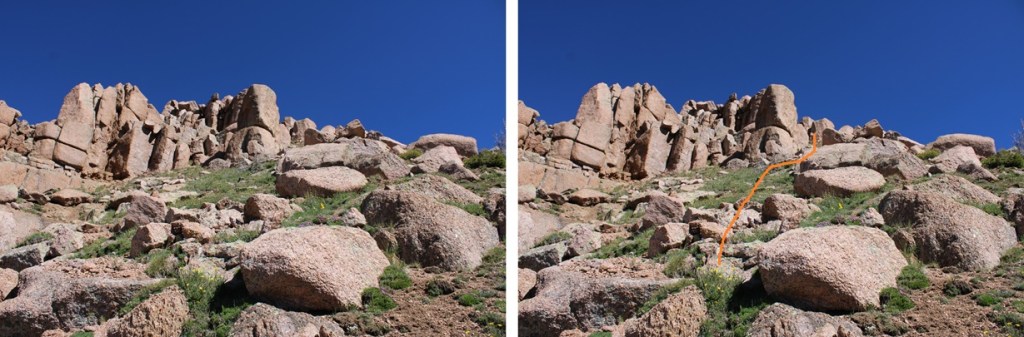
From the saddle, this is the route I took to the summit, aiming for the ramp to the right. This initial part was all class 2 on either scree or tundra.
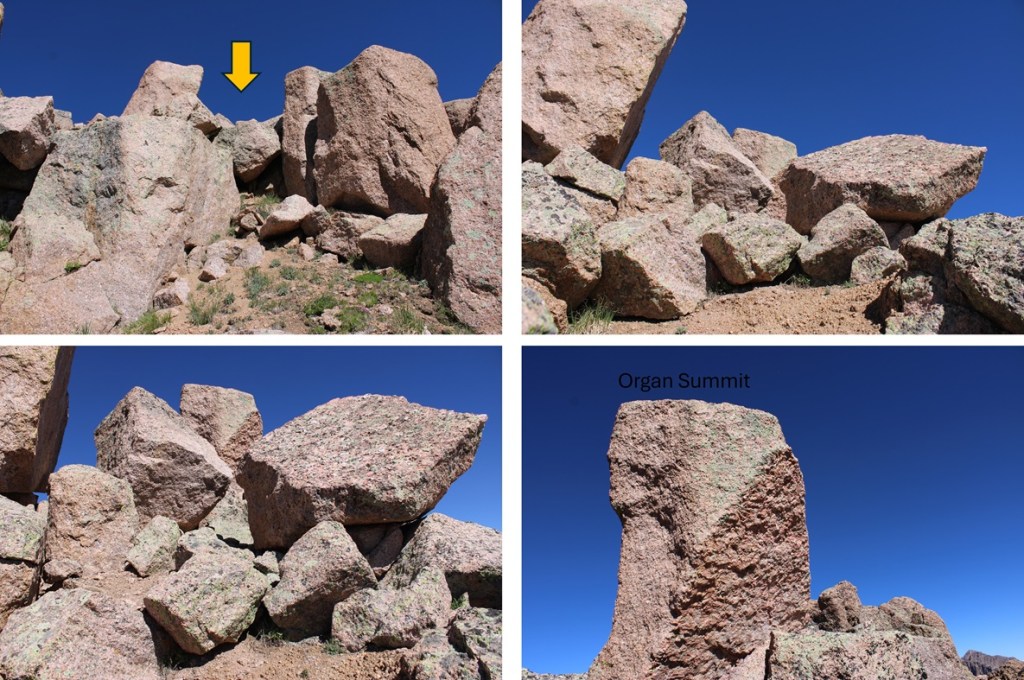
Once reaching the top of the ramp however, it became choose your own adventure, with some short class 3 climbing included at the very end. I hopped over a few rocks, and could see the summit boulder to the north. Climbing this was class 3, and a little airy, but easy access was found to the right of the summit block.
The summit block
I summited Organ Mountain at 10am
Organ Mountain:
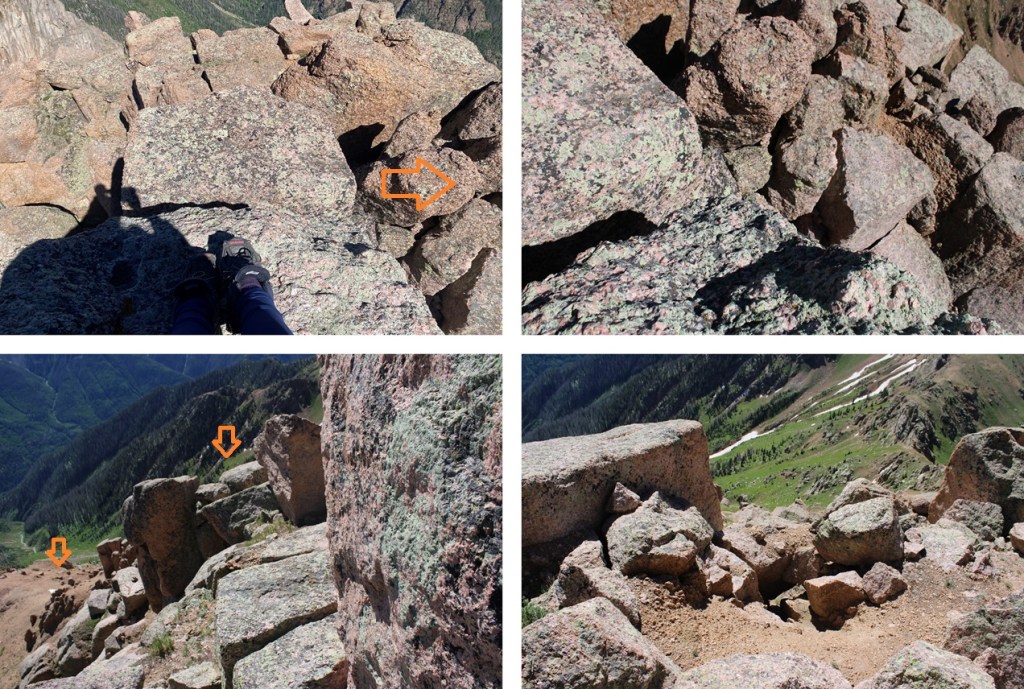
I turned around and headed back down to the Amherst/Organ saddle.
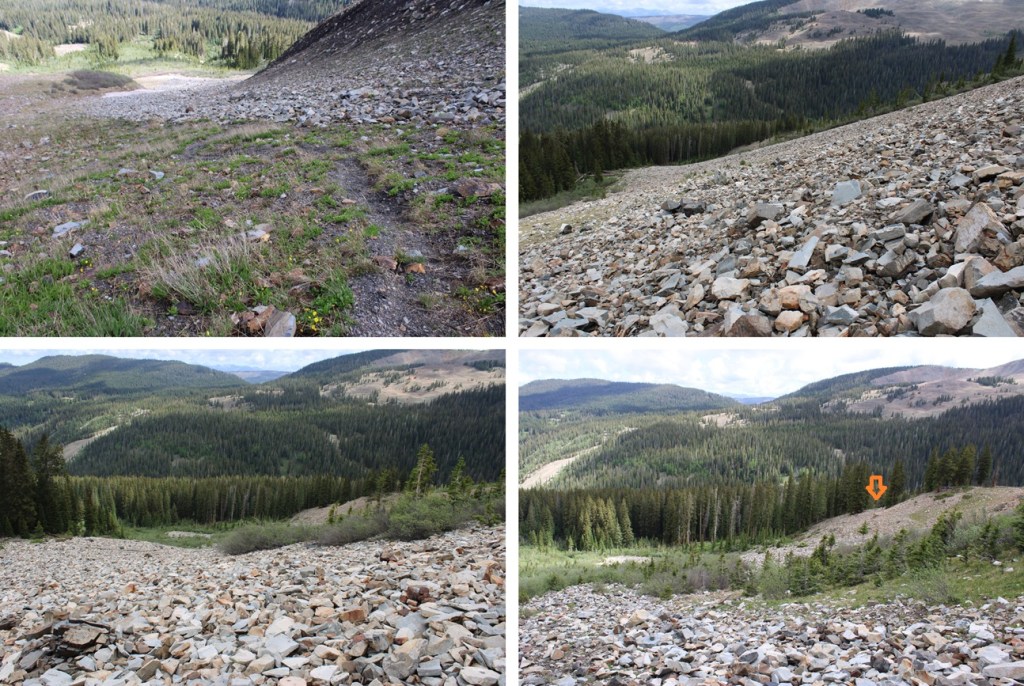
From the saddle of Amherst/Organ I made my way back over this gully, then descended to around 12400’ as I wound my way back around the basin and up to the saddle of Emerson/Peak Twenty Two.
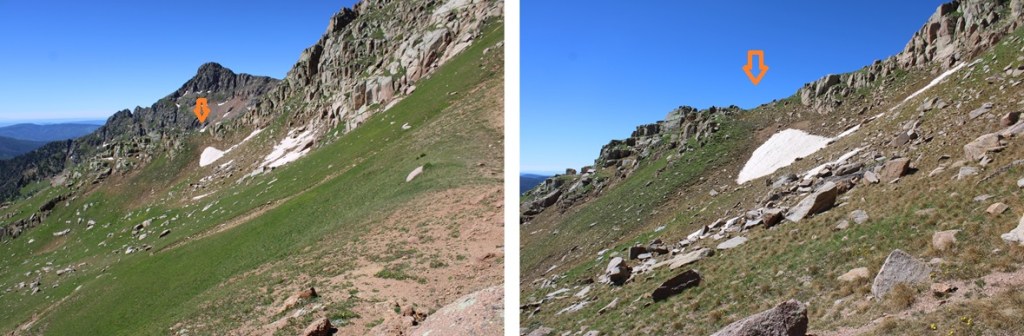
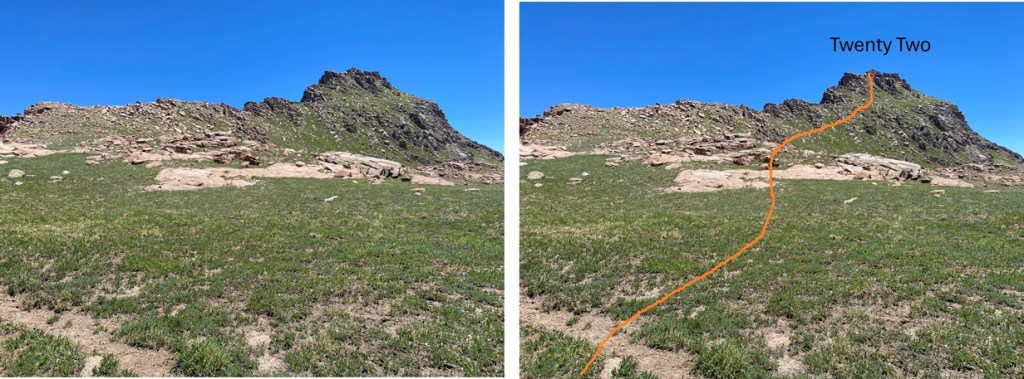
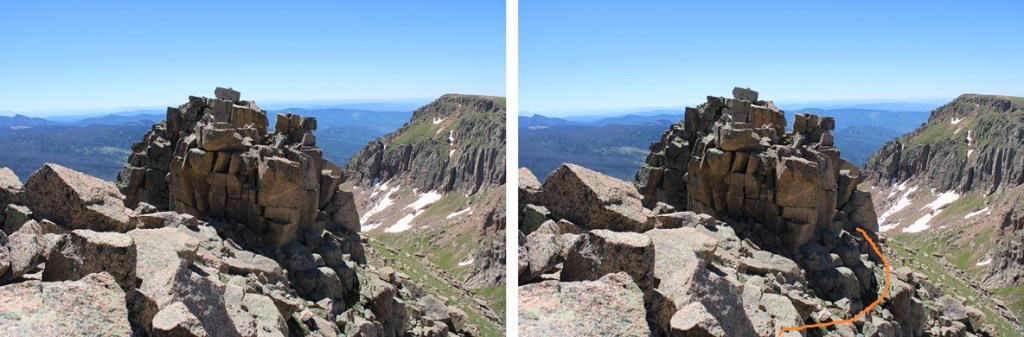
Now to head over towards Peak Twenty Two. From the saddle, I turned left and headed southeast towards Peak Twenty Two. I bypassed most of the ridge, and instead took a grassy gully towards the summit. Here’s the overall route I took to gain the summit.
This part was easy. I just followed the tundra line up the ridge.
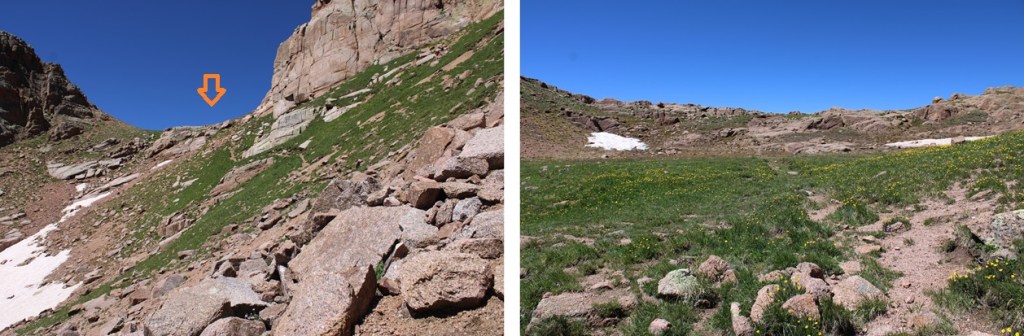
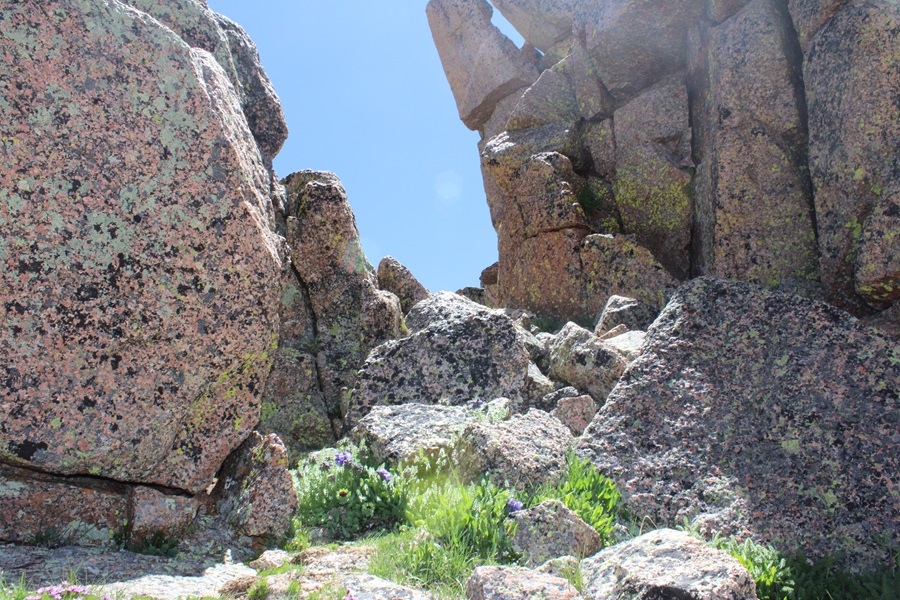
At the top of the tundra I thought I’d be at the peak, but I turned right and could see a rocky formation in front of my. I descended a few feet to the right, and skirted the rocky area.
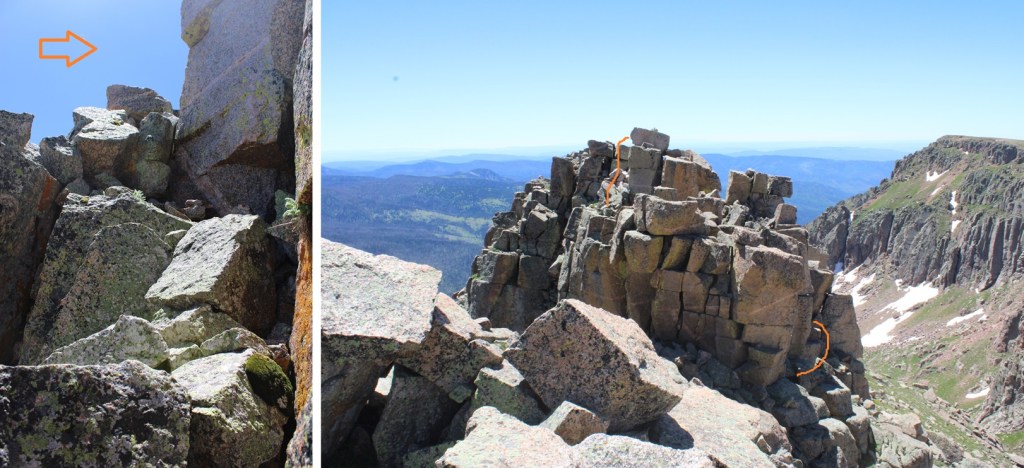
I then found a ramp and climbed up.
This is where it became class 3, or maybe class 4 depending on which route you take. There are two more rocky ramps you can ascend. One to the right, and one to the left. I looked at both, and liked the one on the left better. They were both very exposed and required scrambling, but the one on the left felt “less” exposed. Here’s the ramp I took:
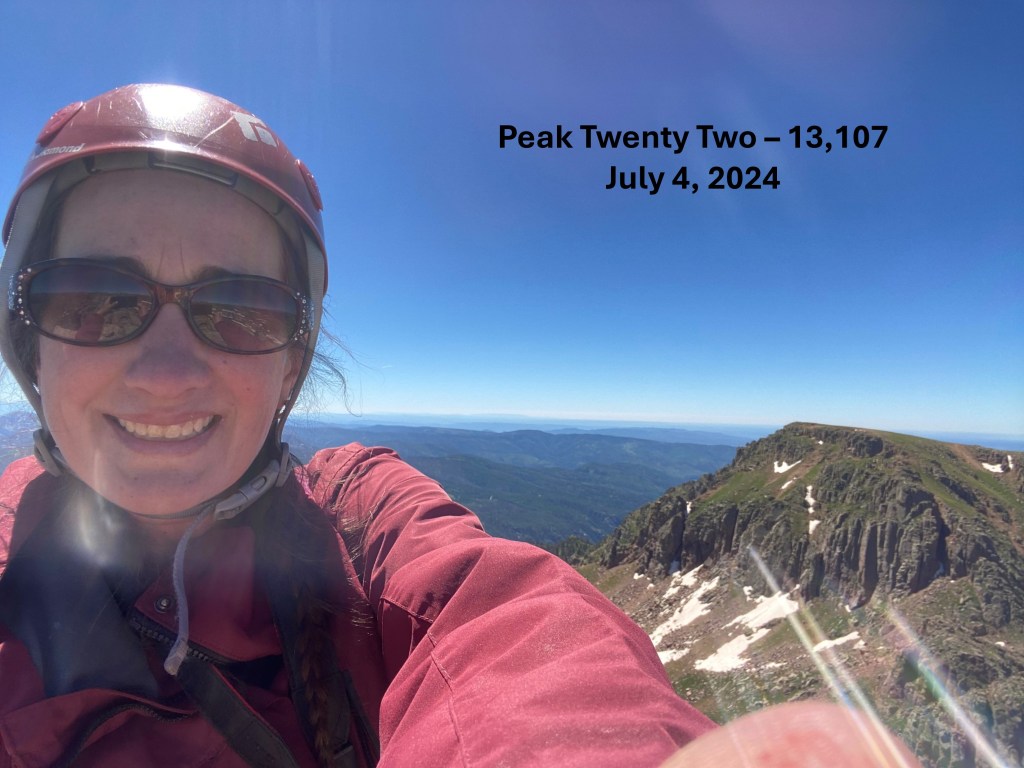
I summited Peak Twenty Two at 11:45am
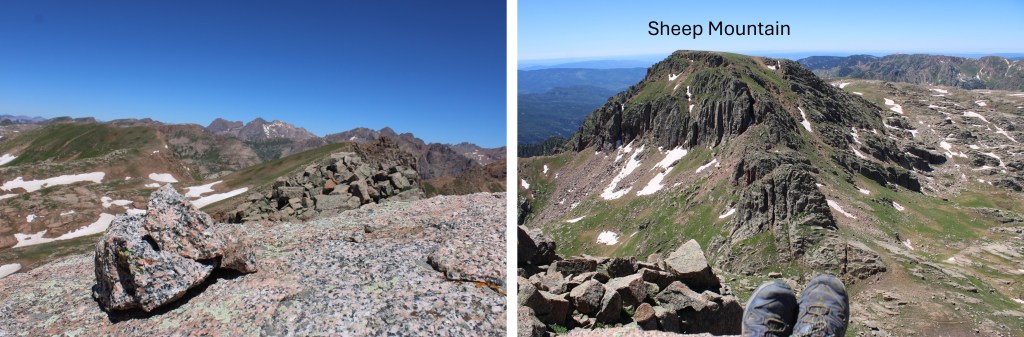
Peak Twenty Two:
I could see sheep mountain to the south, but first I was going to need to descend the way I’d come and head back towards the grassy access ramp.
I gingerly left the summit, and headed back towards the grassy ramp.
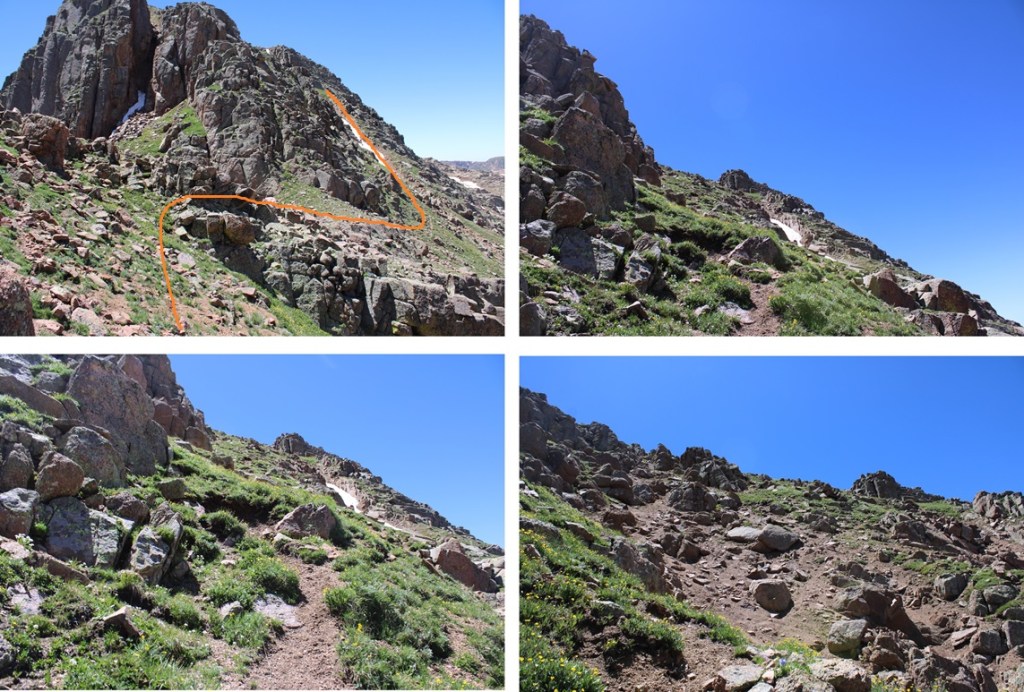
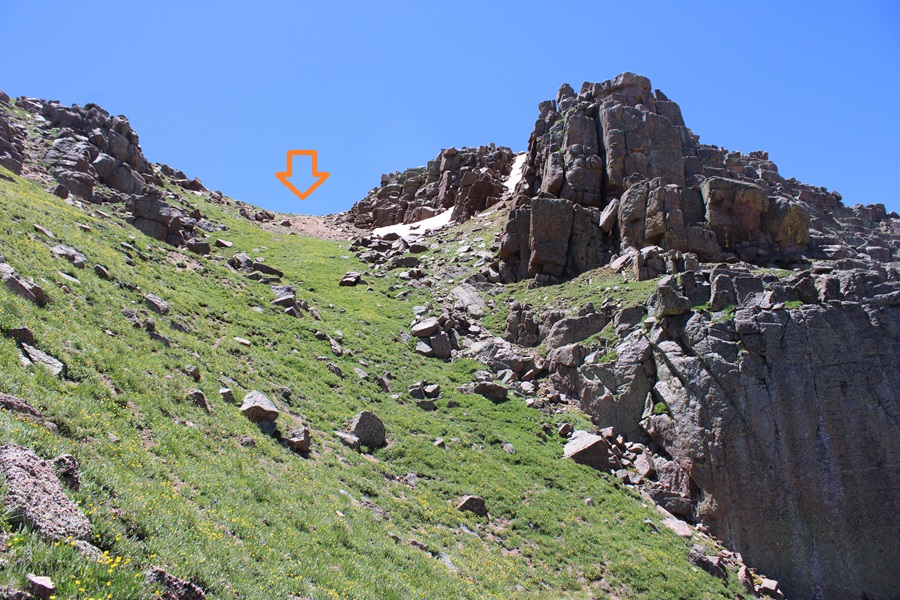
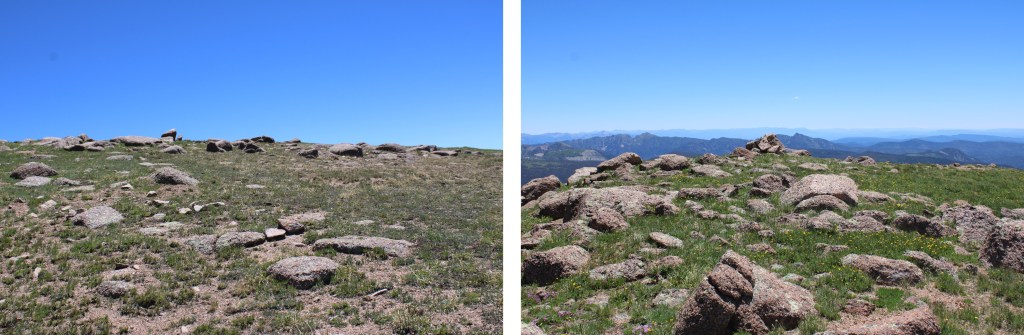
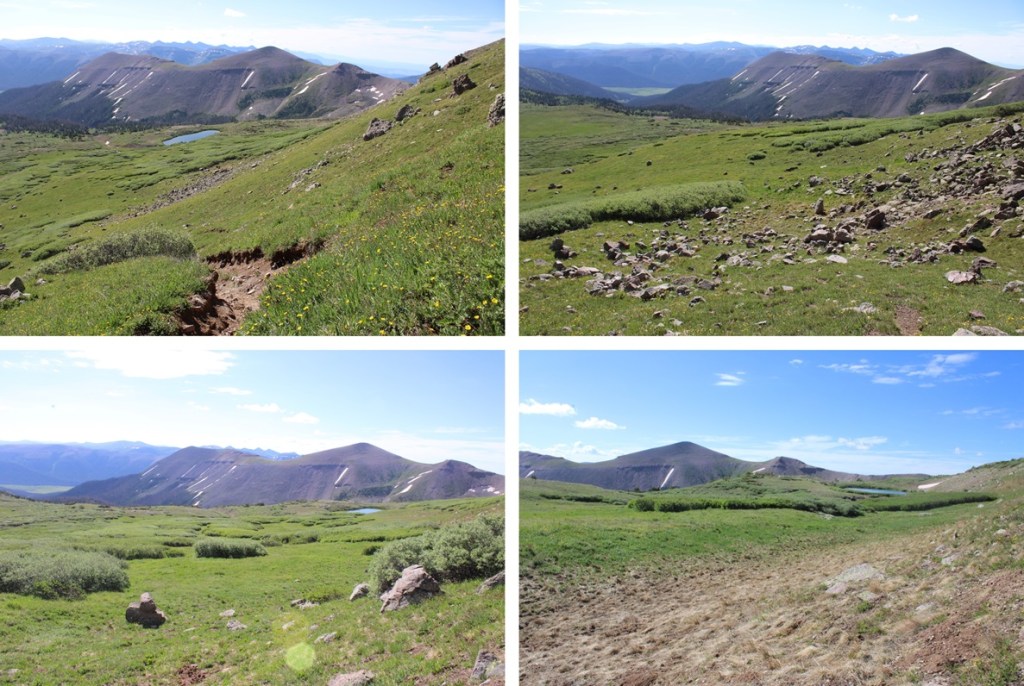
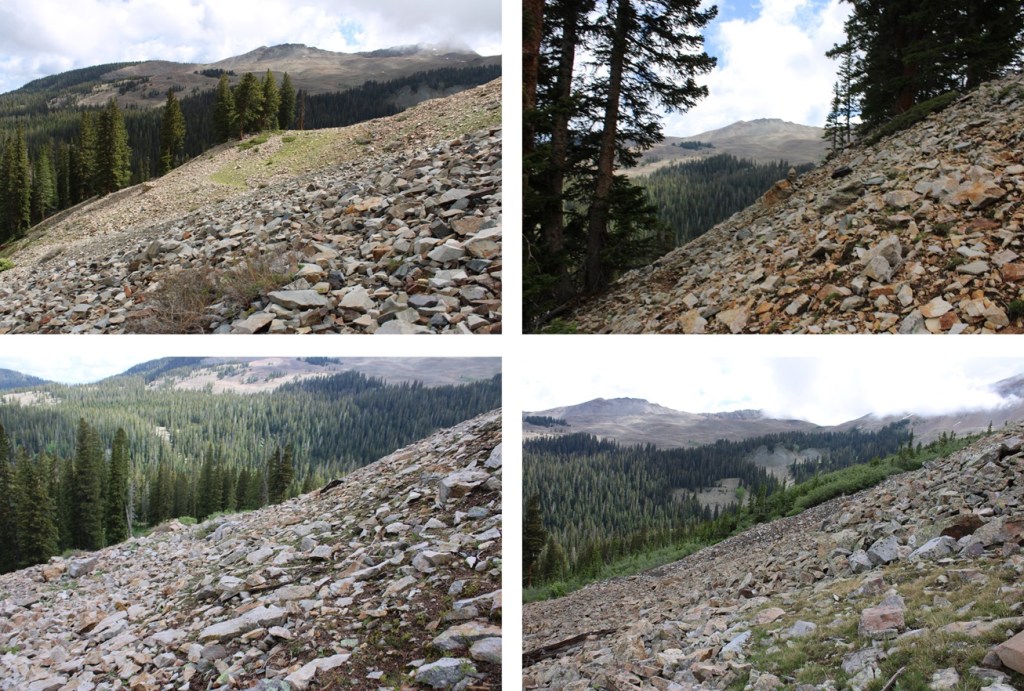
When I’d descended to about 12800’ I turned left and headed south towards Sheep Mountain. This peak was much easier to ascend, all class 2, with a few game trails thrown in. This is the route I took to gain the ridge:
And some step by step pictures, first heading south along the tundra, then looking for a grassy ramp.
I then dropped a little in elevation, and gained the gully to the ridge.
Once on the ridge, it was very flat. I aimed east and up towards the summit.
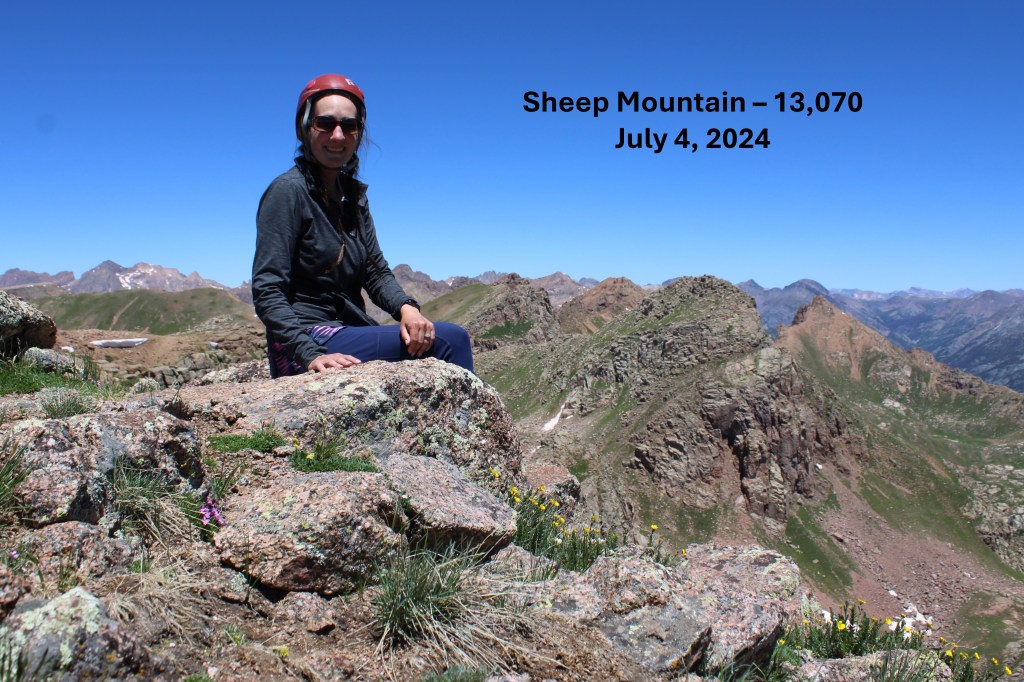
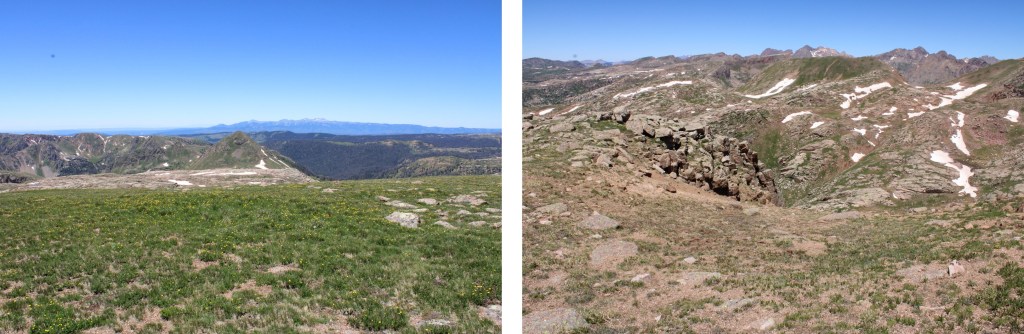
I summited Sheep Mountain at 12:30pm
Sheep Mountain:
Now to head back to the Emerson/Peak Twenty Two saddle. I descended back down the gully, then headed north towards the saddle.
Round trip from the Emerson/Peak Twenty Two Saddle to Amherst, Organ, Peak Twenty Two, Sheep, and back to the saddle was 6.57 miles with 2550’ of elevation gain. From City Reservoir, it was 13.5 miles with 4495’ of elevation gain.
Note: there’s a long approach for these peaks, so I decided to make this a backpacking trip. I found a great basecamp for the Rio Grande Pyramid 13ers (and others). The approach is about 10 miles and 3100’ of elevation gain, coming from Thirtymile Campground. The approach can be found here.
I’d hiked up to 12210’ the day before, summited some peaks, and spent the night at my camping spot, so I was able to get up early and refreshed the next morning to hit the trail at 5:30am.
This time, I was heading southwest on the Continental Divide Trail.
This trail was easy to follow, and well established. I followed it for just under 2.5 miles to the saddle of 13022 and Window Peak.
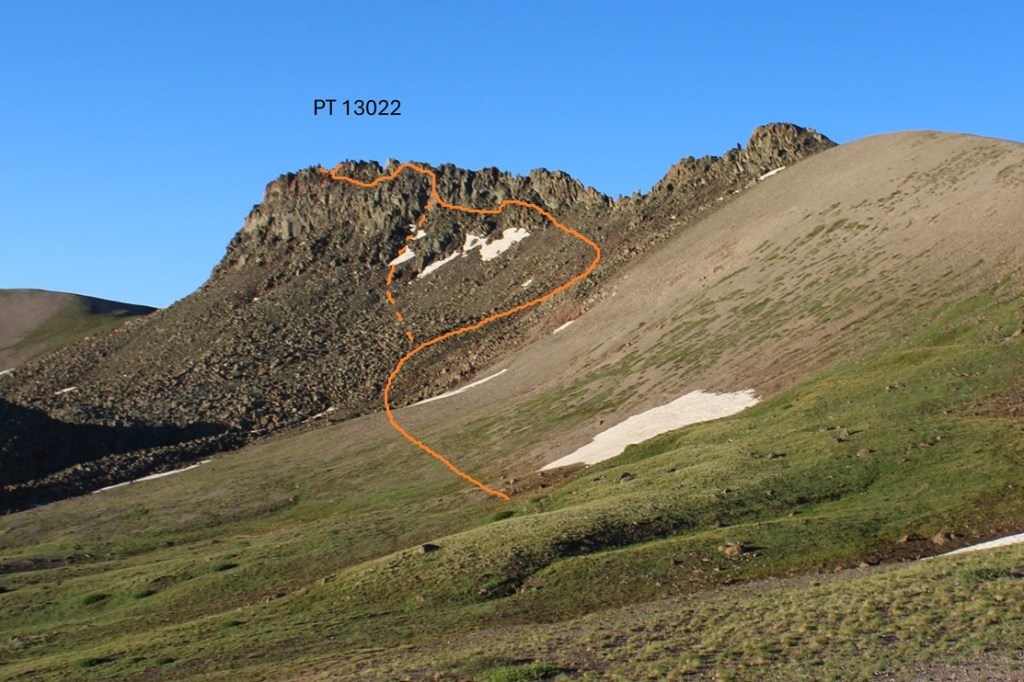
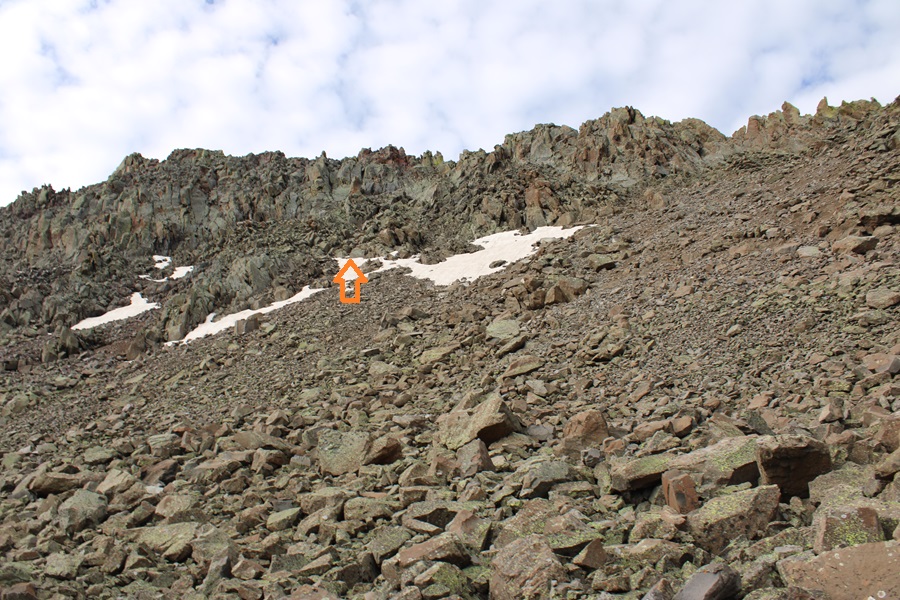
From the saddle I turned left and headed towards PT 13022. I did not follow the saddle, but instead cut across to the rocky basin.
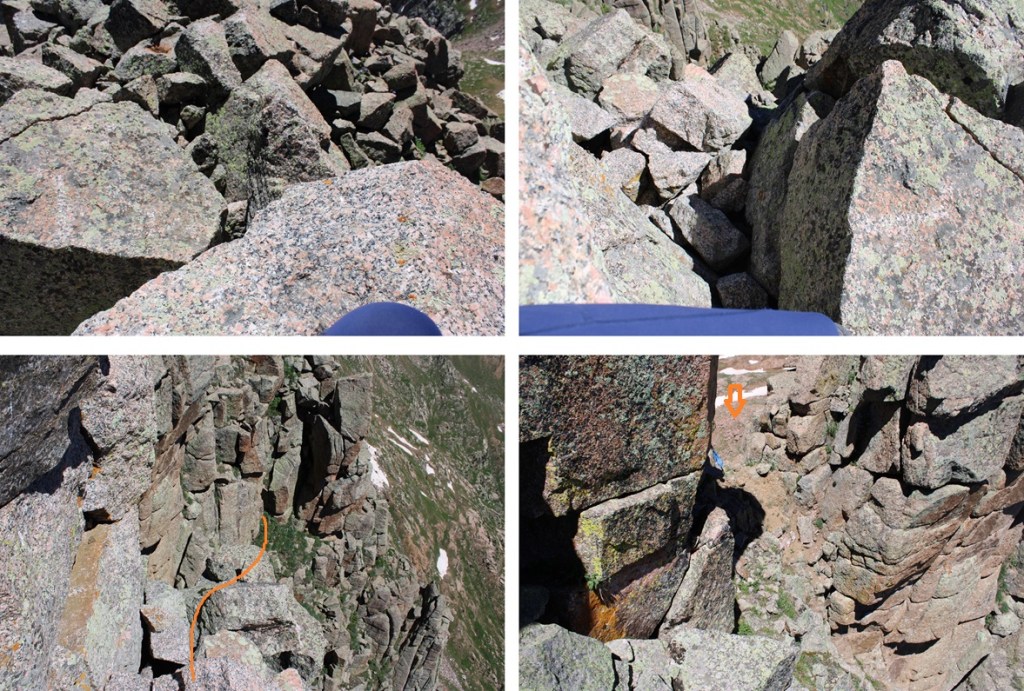
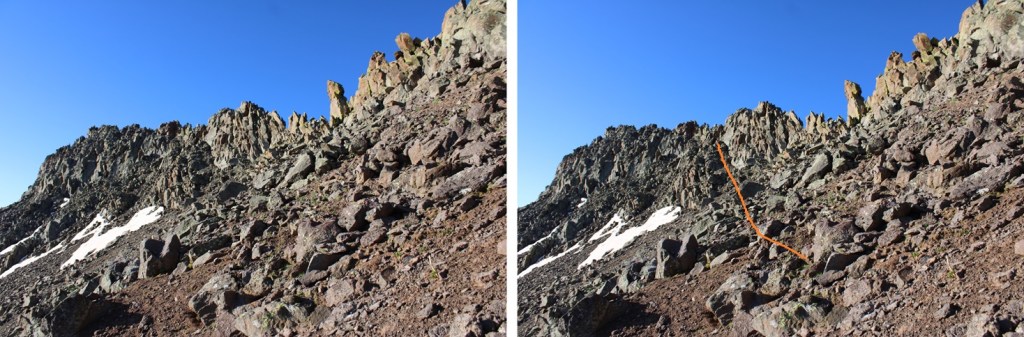
There wasn’t a trail here to the summit, and it looks like a viable route changes from season to season due to rockslides, etc. This is the basic route I took to the summit, and back down. The solid line is the route I took up, the dotted line is the route I took down. I’d recommend taking the route I took down both ways. The climbing here was class 4. In fact, I saw a (very old) anchor set up along my route, so people at one point at least used ropes to descend.
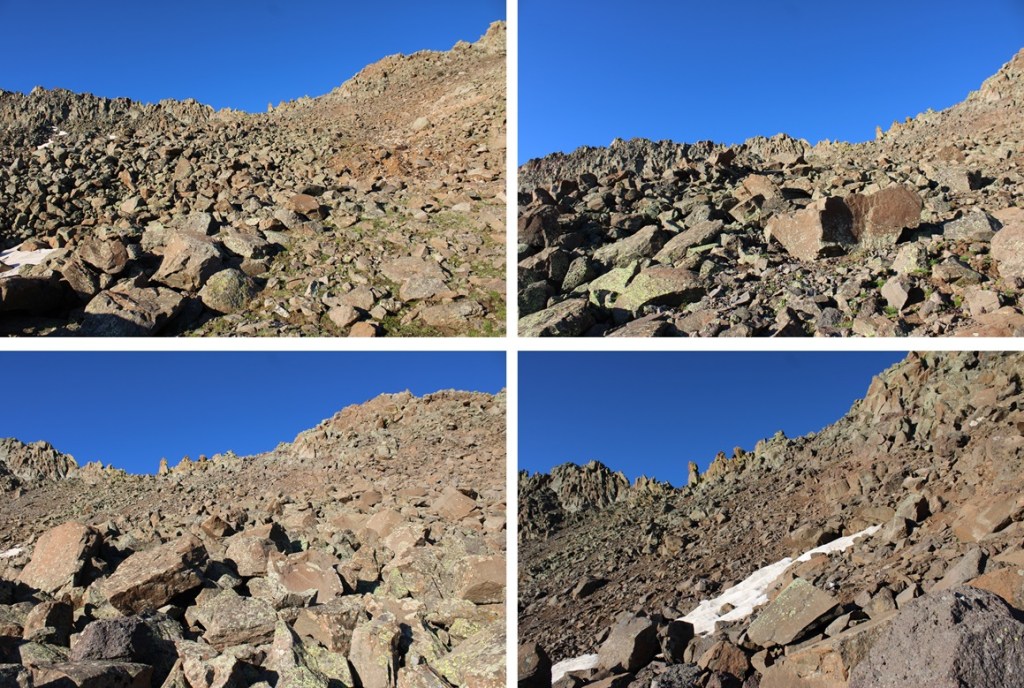
First, I made my way up the rocky basin.
Then I headed towards and up this rocky ramp
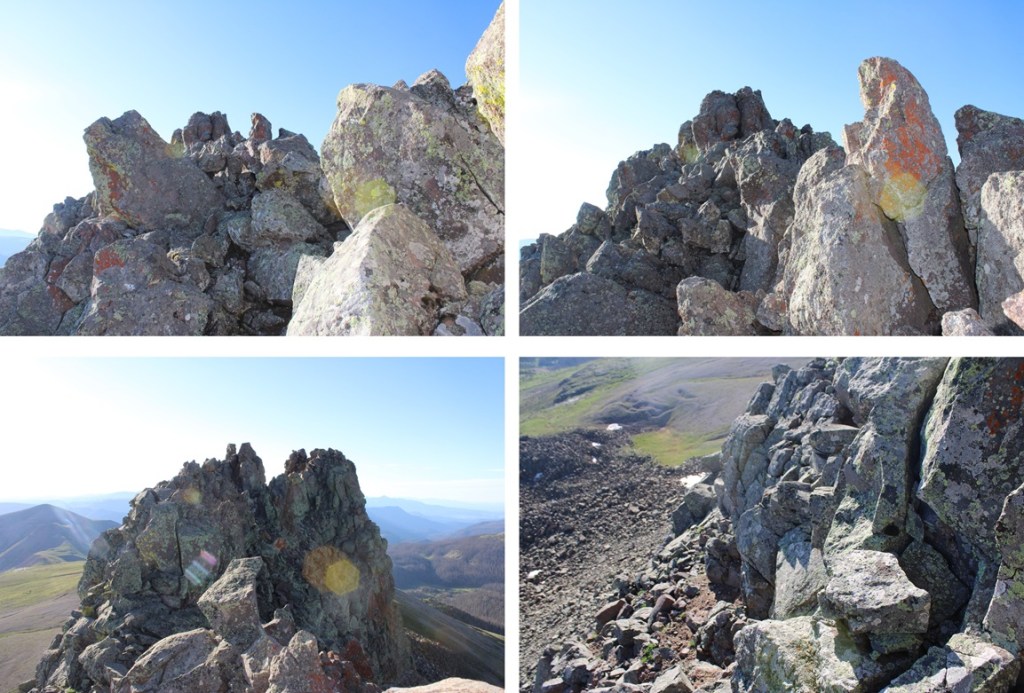
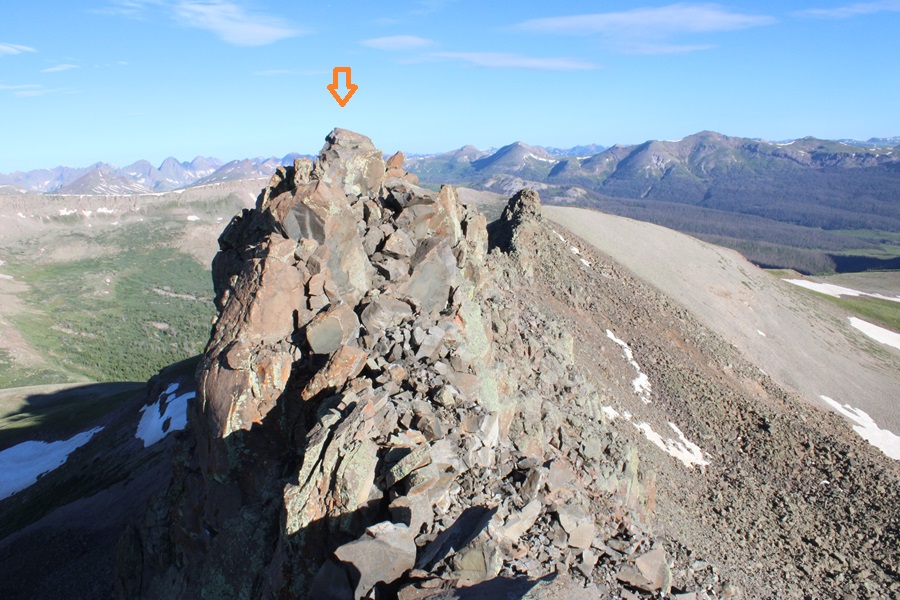
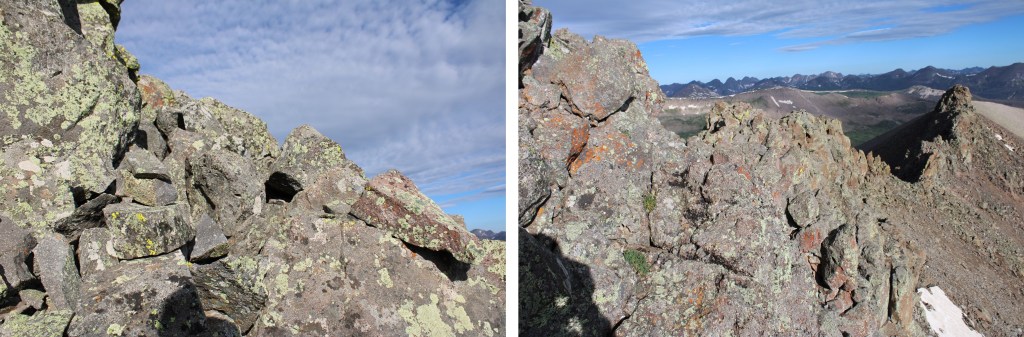
At the top of the ramp is where it really got interesting. There were a few cairns here, but as I said earlier, it looks as if the route changes. I scrambled my way up to the ridge, had about 20 feet of ridge climbing, then had to descend to find a viable route east.
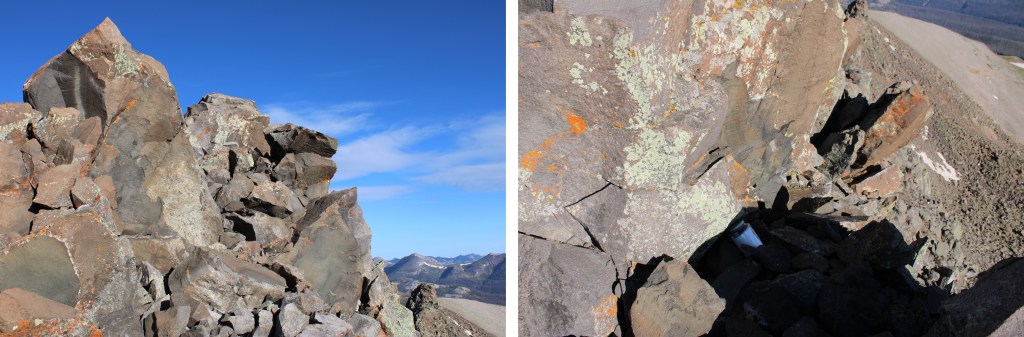
Ahead of me there was a rock perched atop a spire that looked like a cairn, and I assumed this was the summit. Here is where I was aiming.
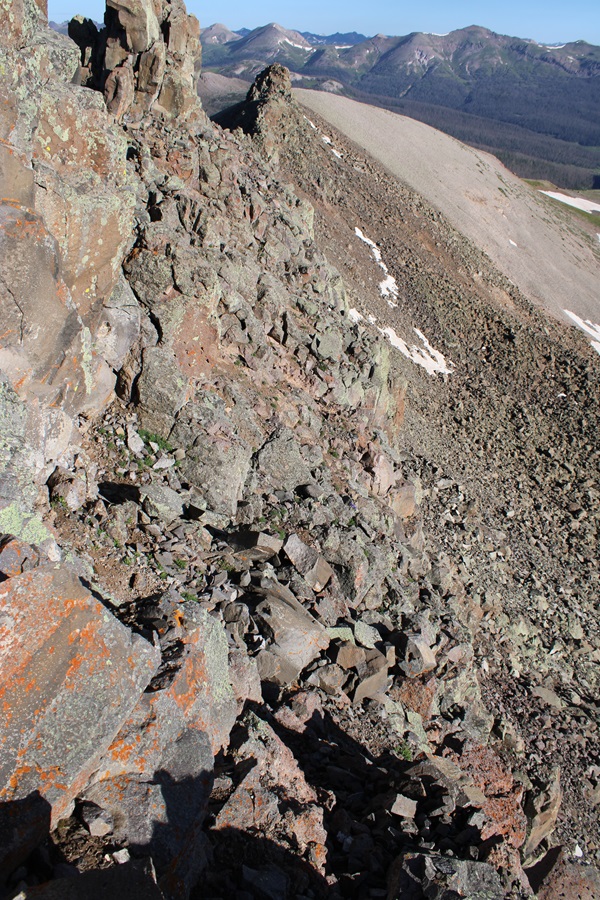
I did my best to follow game trails and cairns where I could find them, staying below the ridge, doing my best not to fall down the loose gullies, making my way east. Yes, there were times I had to crawl around rocks with serious exposure to avoid climbing the ridge. I did not feel the ridge ‘went’.
Here’s that anchor I was talking about
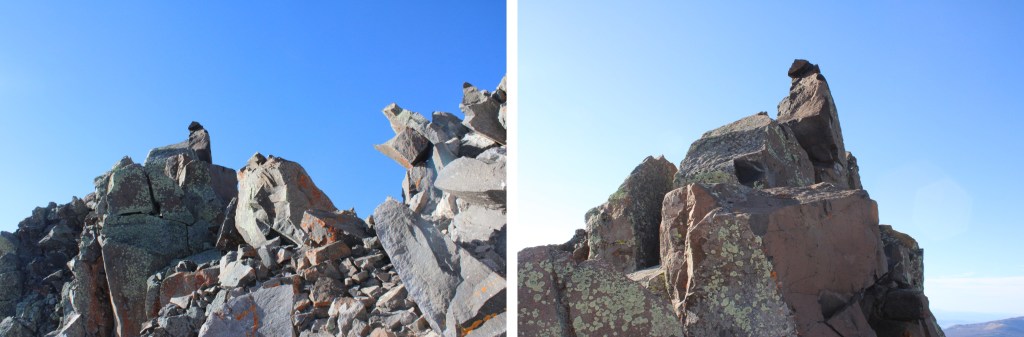
I kept aiming for the cairn
I made it to the cairn, scrambling up some class 4 rock to get there, sat and took a video.
I turned and looked to the west, and it seemed as if the point just a few yards away was higher, so I scrambled my way over there as well.
When I got there, I found a summit register (which I couldn’t open) so I’m guessing it’s the true summit, although both points looked to be of equal height.
I summited PT 13022 at 7:30am
PT 13022:
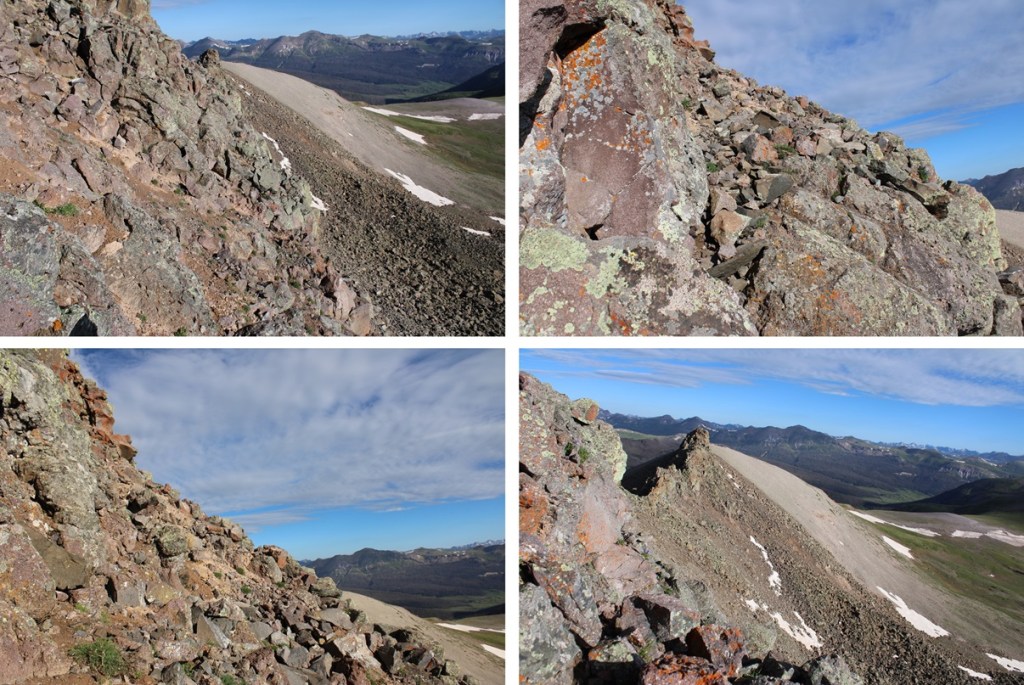
Now to make my way down. On my climb up I had a better view of the mountain, and found a gully I thought looked safer to descend. I downclimbed from my perch and started out by heading back the same way I’d summited, west.
Hey look! A cairn!
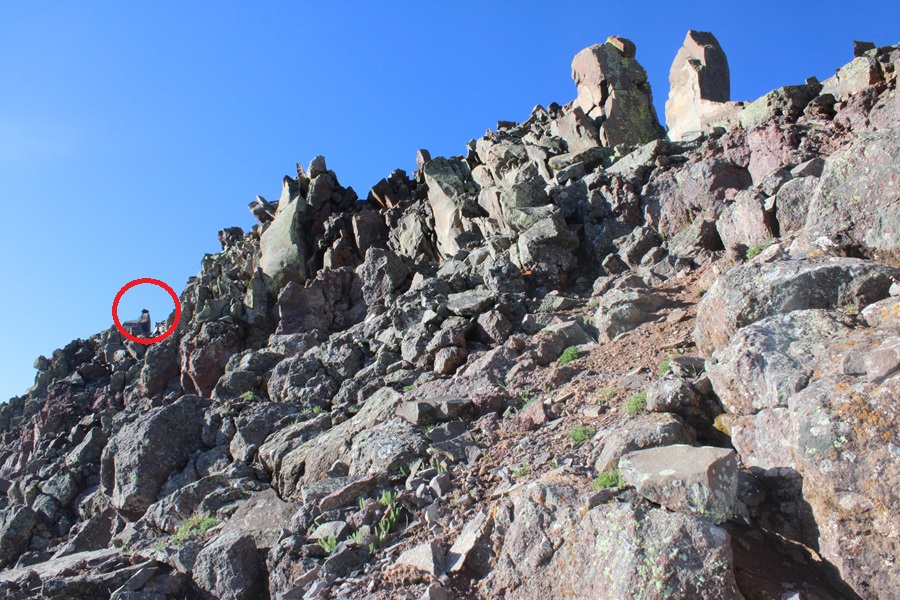
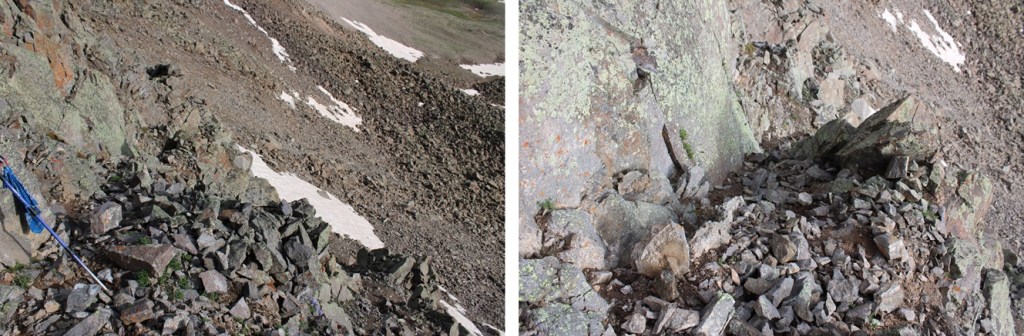
Just for perspective, here’s a photo of where I left my trekking pole. I scrambled around this rock to get back there. If you look closely, you can see a cairn on the rock to the left of the trekking pole. This was the crux of the route for me, both in and out.
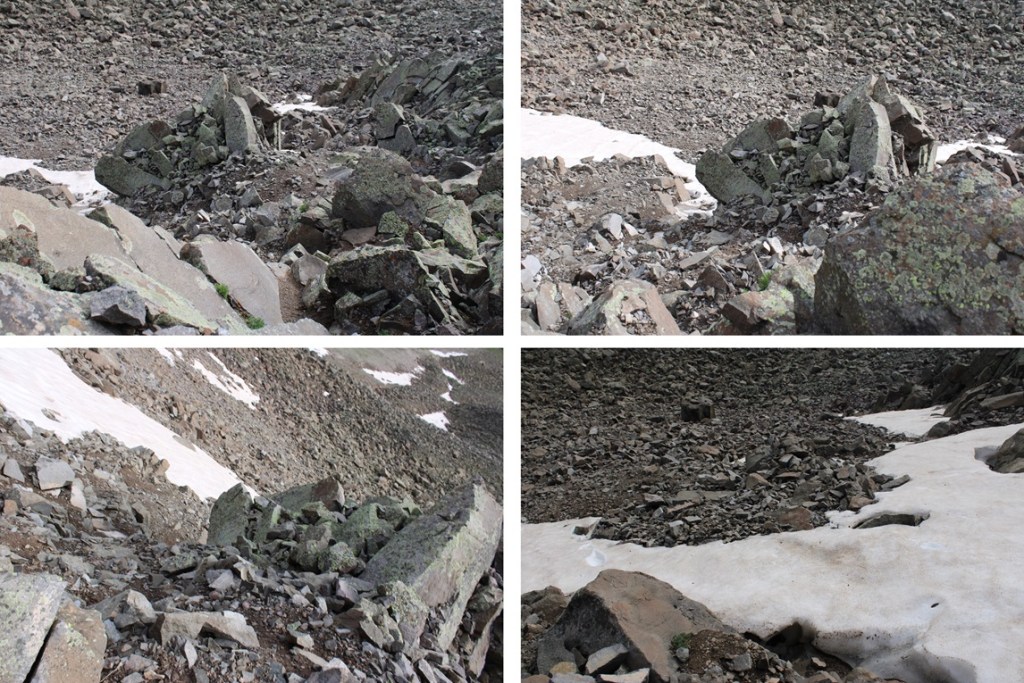
I continued west, found a gully that looked stable-adjacent, and headed down.
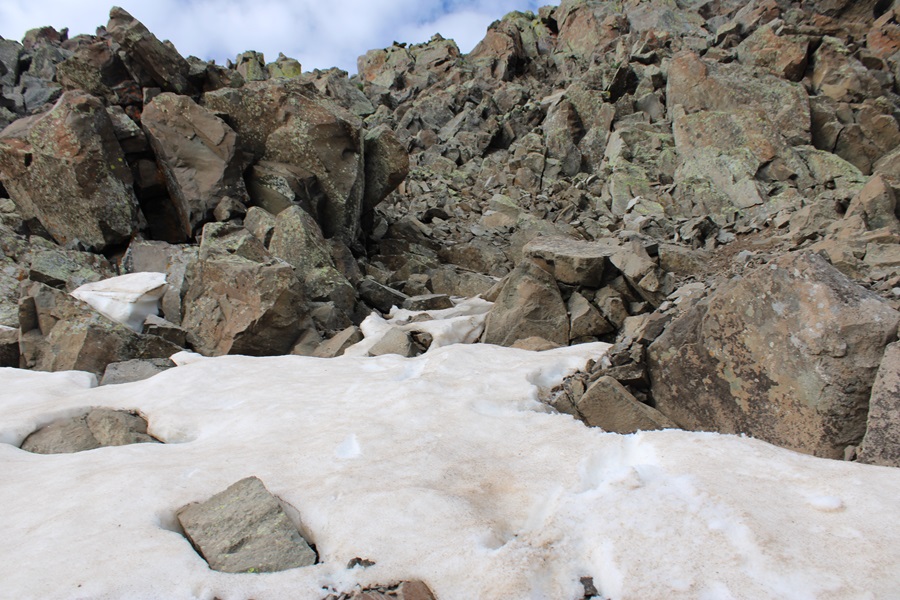
Here’s looking back up at the gully I descended
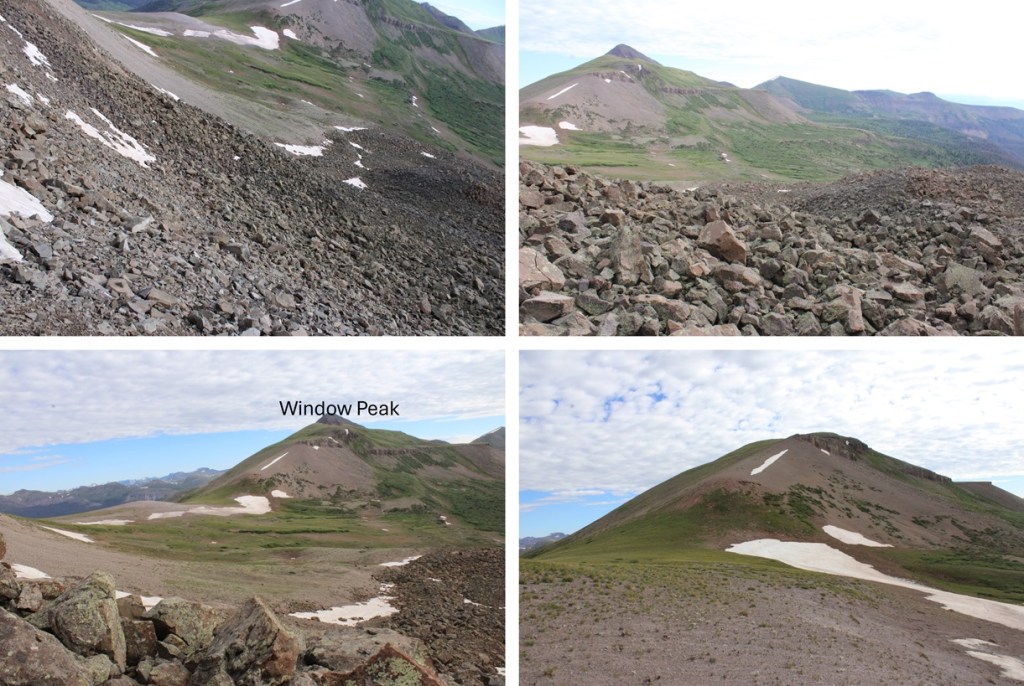
And now to head back down the rocky basin and make my way back to the saddle with Window Peak.
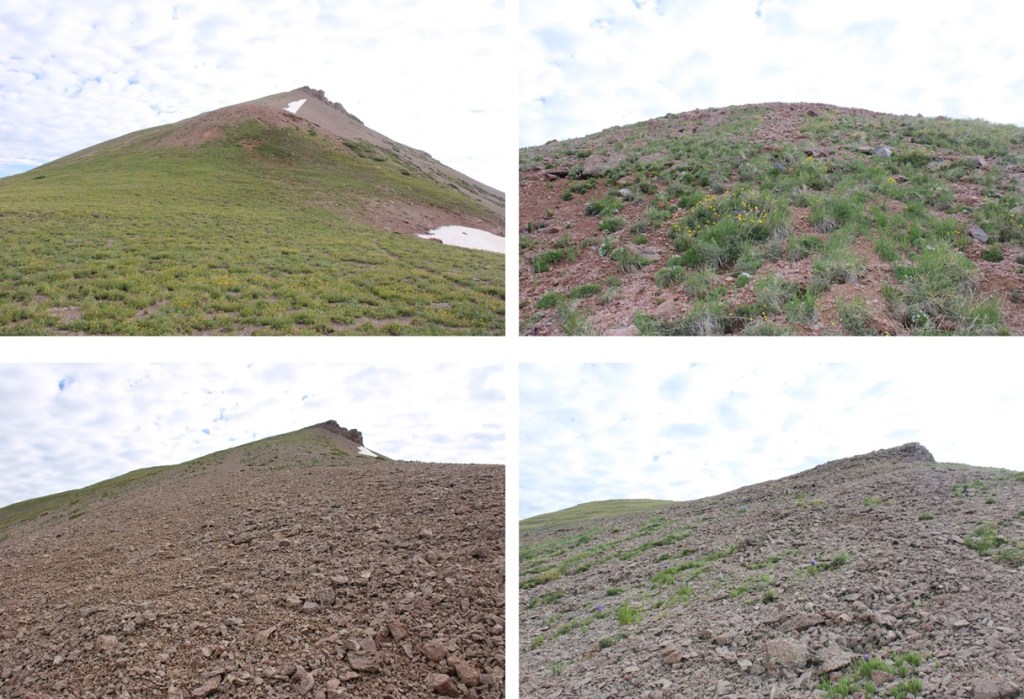
Window Peak isn’t ranked, but I needed an easy win, so I headed north, and followed the grassy slopes, which changed to rocky slopes, to the summit of Window Peak
There was a bit of a false summit here, so I just kept following the ridge
There were also some pretty cool rock formations along the way
I summited Window Peak at 8:50am
Window Peak:
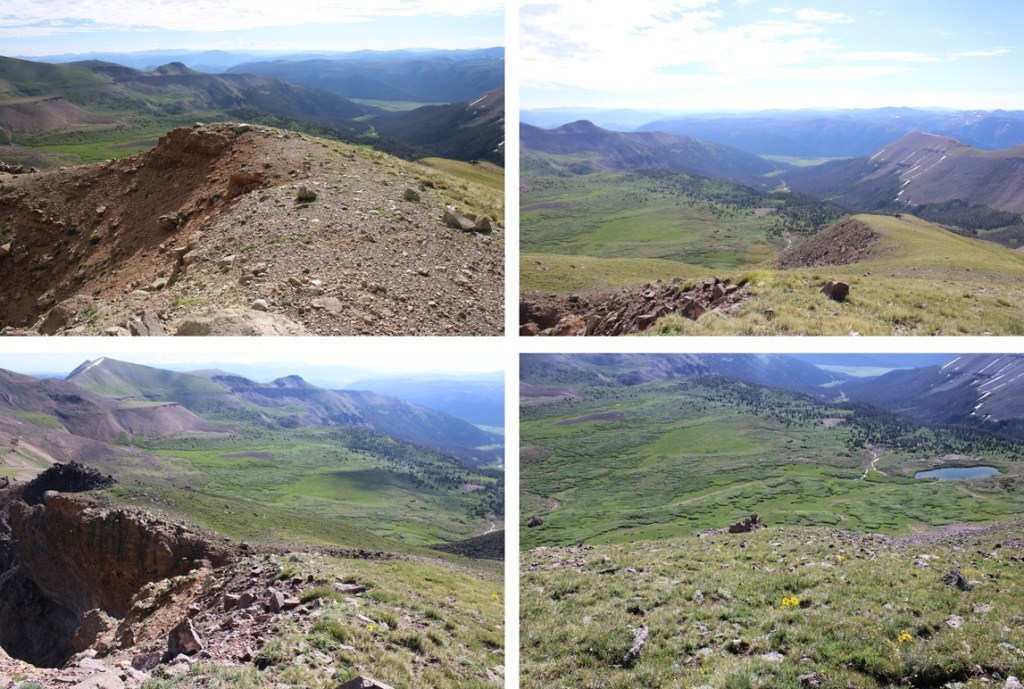
I wanted to hike to the actual window, so I continued north along the ridge, descended a grassy gully until I was at 12900’, and then traversed north to The Window.
Now to head back to my campsite. This was actually fairly easy. There was a solid trail that descended from The Window, which eventually went away. I followed the trail as far as I could, then just aimed east for the Continental Divide Trail, which I could see located by the pond in the distance.
Here’s a view of Window Peak
And my route back to the trail
Back on the Continental Divide Trail, I followed it northeast back to my campsite.
I made it back to my campsite at 9:45am. This was a 6.88 mile hike with 1471’ of elevation gain from my campsite at 12210’.
Note: there’s a long approach for these peaks, so I decided to make this a backpacking trip. I found a great basecamp for the Rio Grande Pyramid 13ers (and others). The approach is about 10 miles and 3100’ of elevation gain, coming from Thirtymile Campground. The approach can be found here. I started from Thirtymile campground at 2:30am and made it to 12210’ at 7:30am.
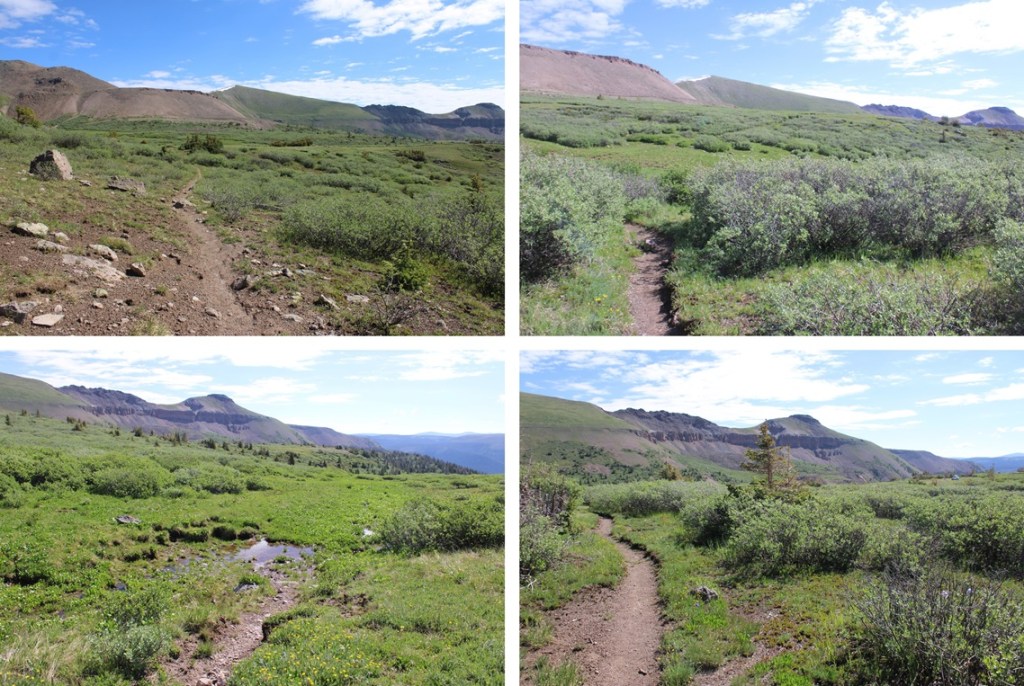
I took some time to set up my campsite, and was on the trail again at 8:30am. From my campsite near the Continental Divide Trail I headed northwest. Maps show a trail here (Skyline Opal Lake Trail), but it was difficult to find. Much of the trail was overgrown with willows and grass, so when I couldn’t find a trail, I kept heading northwest, and eventually found it again.
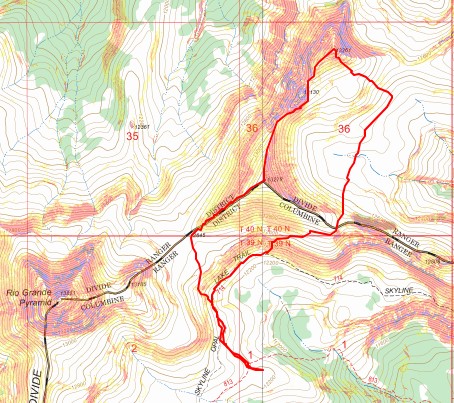
This is the overall route I took to gain the saddle between Rio Grande Pyramid and Fools Pyramid:
There is a point where you have the option to go east through the willows, or north on the gravel. It’s a difficult junction to see, but if you see it, go north (it’s the way you’ll want to go anyways, because it’s a more defined trail. Here are some pictures of the route to the saddle
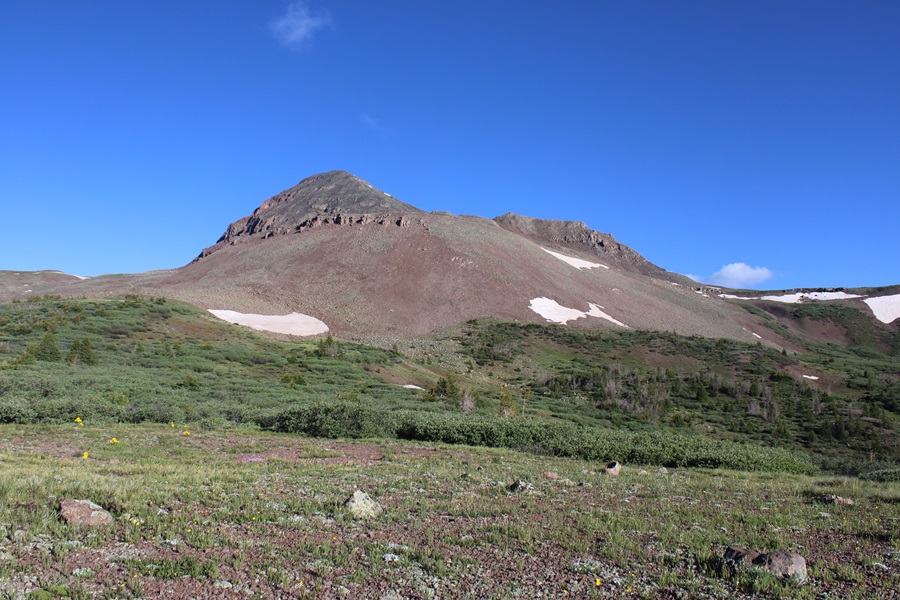
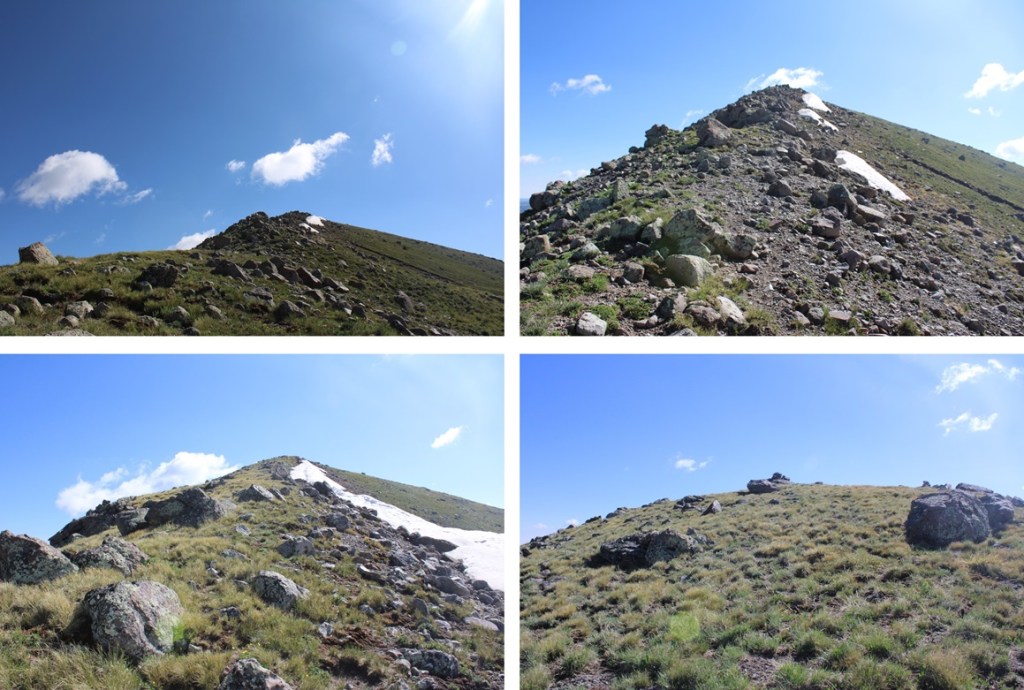
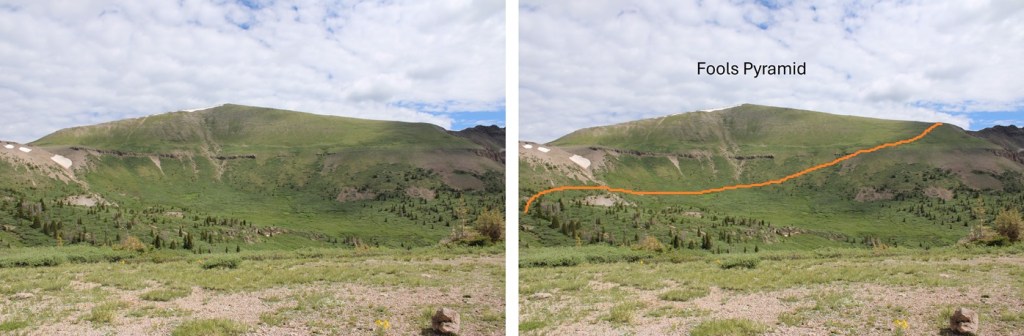
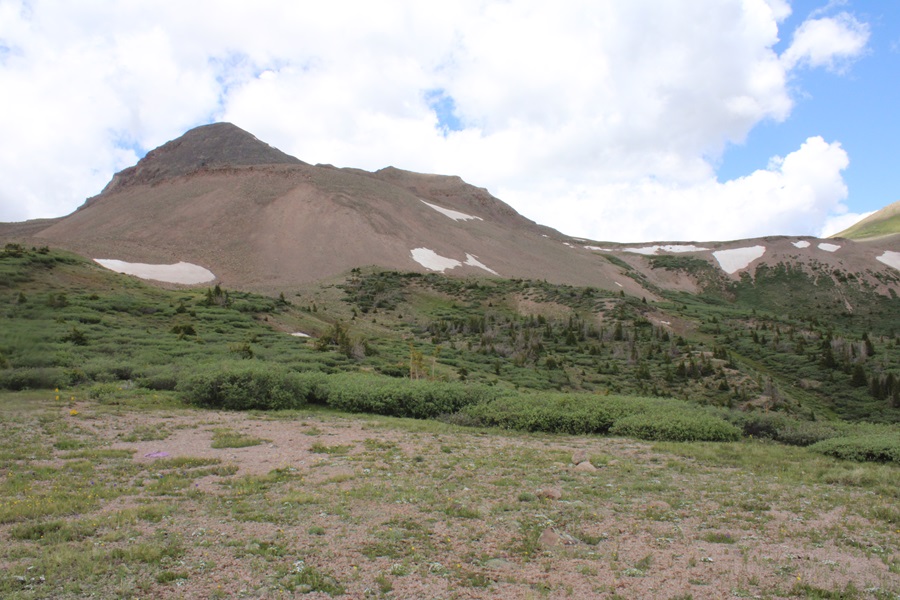
Once at the saddle, I had a clear view of Fools Pyramid
As you can imagine, it was an easy class 2 tundra walk to the top, with some rocks thrown in. Here’s the overall route I took, heading straight for the ridge and then climbing the ridge to the summit:
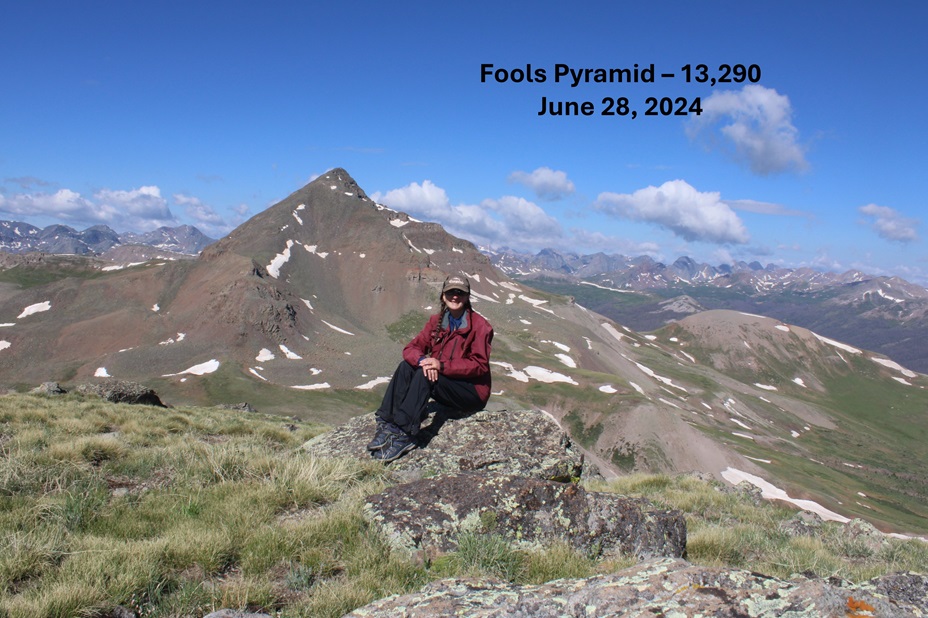
I summited Fools Pyramid at 9:30am
Fools Pyramid:
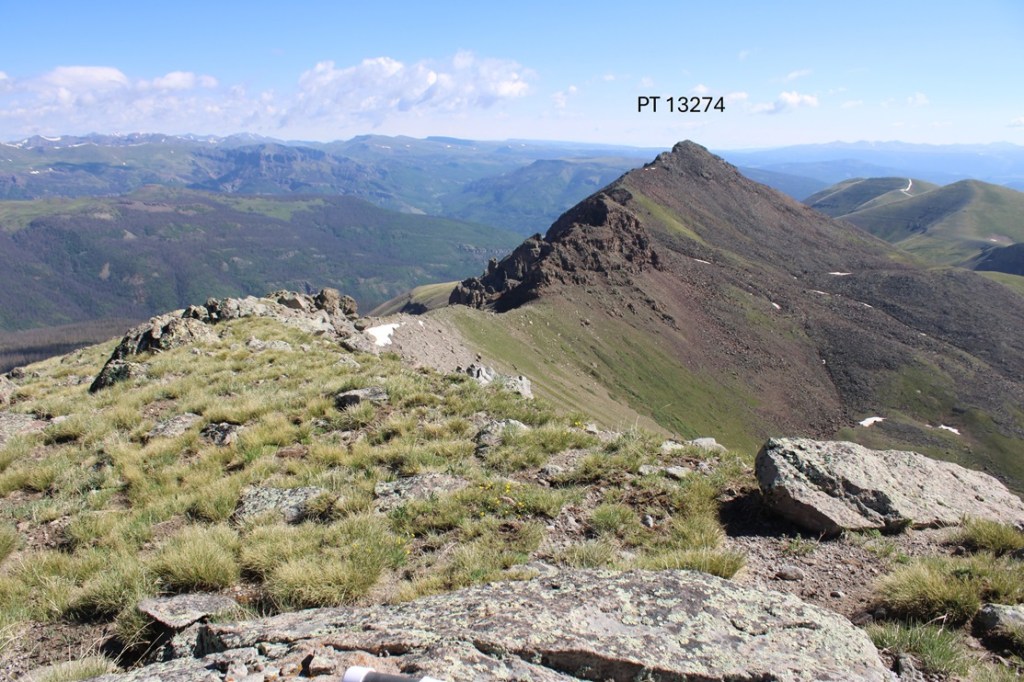
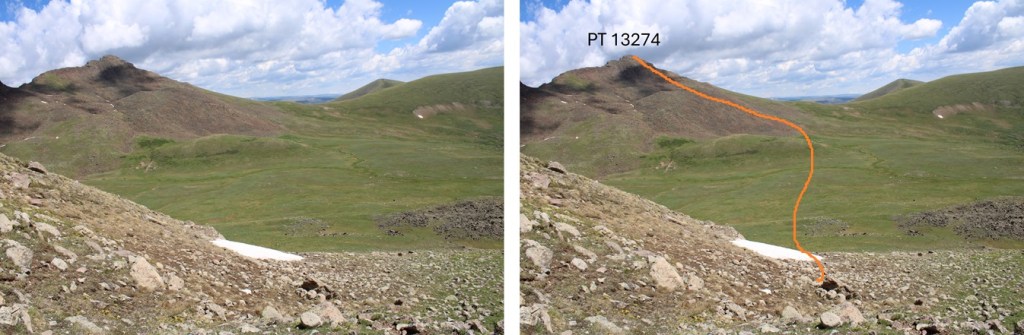
To the northeast I could see PT 13274
This looks daunting, but the route can be kept class 2 if you skirt the ridge. Here’s the overall route I took:
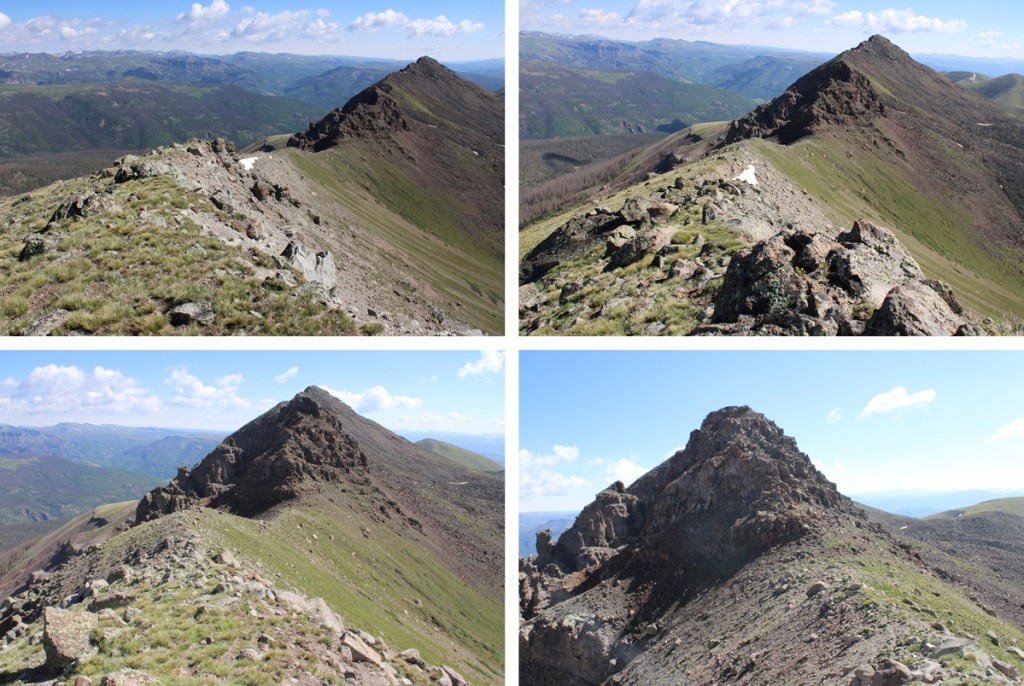
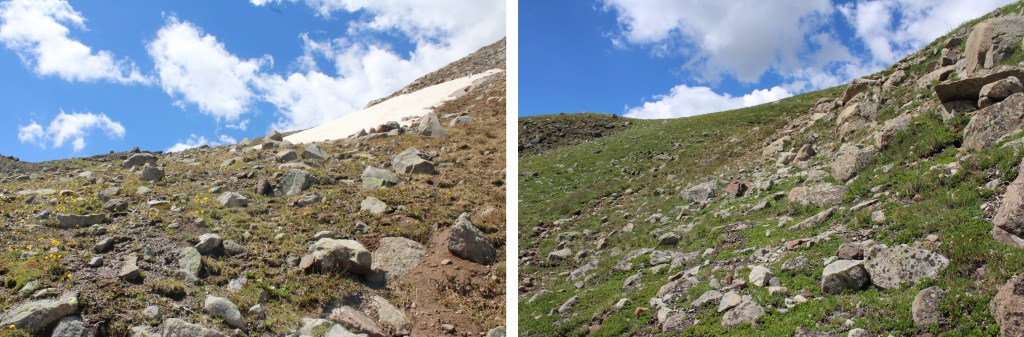
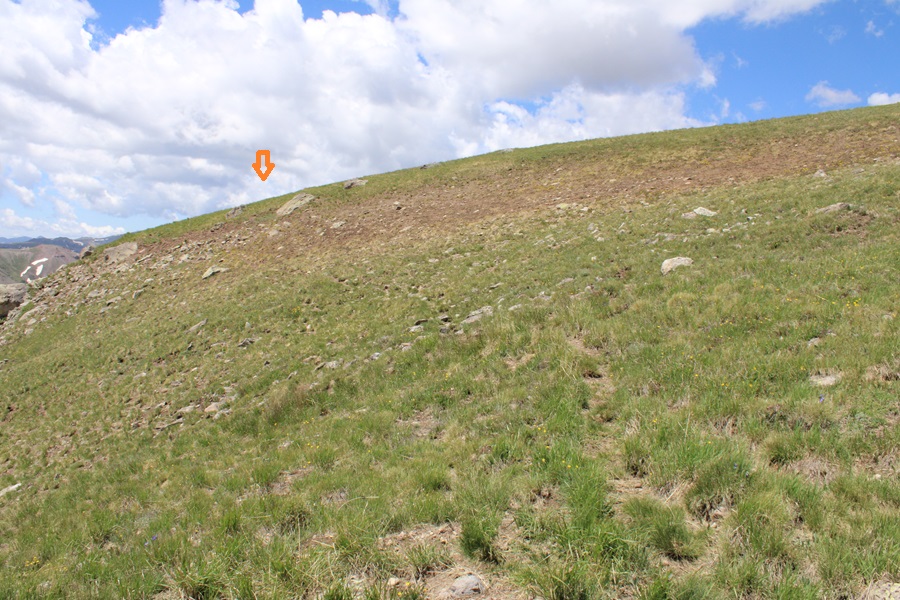
First, I headed north towards the Fools Pyramid/PT 13274 saddle
At the saddle I skirted the crumbly rock formations to the right, dropping down to about 12990’
Then I found a gully and re-gained the ridge.
I then followed the ridge to the summit. Even though it’s rocky, this can be kept class 2. If you’re in class 3 territory, you’re trying too hard. Here are some pictures of my route to the summit. I stayed to the right of the ridge the entire time.
I summited PT 13274 at 10:30am. Funny story, I didn’t realize I’d lost one of my lenses until about 20 minutes after taking this picture. I later found and replaced the lens (which had popped out in my pocket).
PT 13274:
From the summit, here’s looking back on Fools Pyramid and Rio Grande Pyramid
I was making this a bit of a loop. From the summit of 13274, this was my overall route to the saddle to the south. This was choose your own adventure, but the route was obvious.
I found a lot of game trails here to get me down into the basin. I lost 770’ of elevation heading down into the basin, then re-gained 340’ of elevation up the saddle.
From the saddle, here’s a look back at my route down from PT 13274
The saddle was wide, so I headed a bit to the right, staying on the tundra.
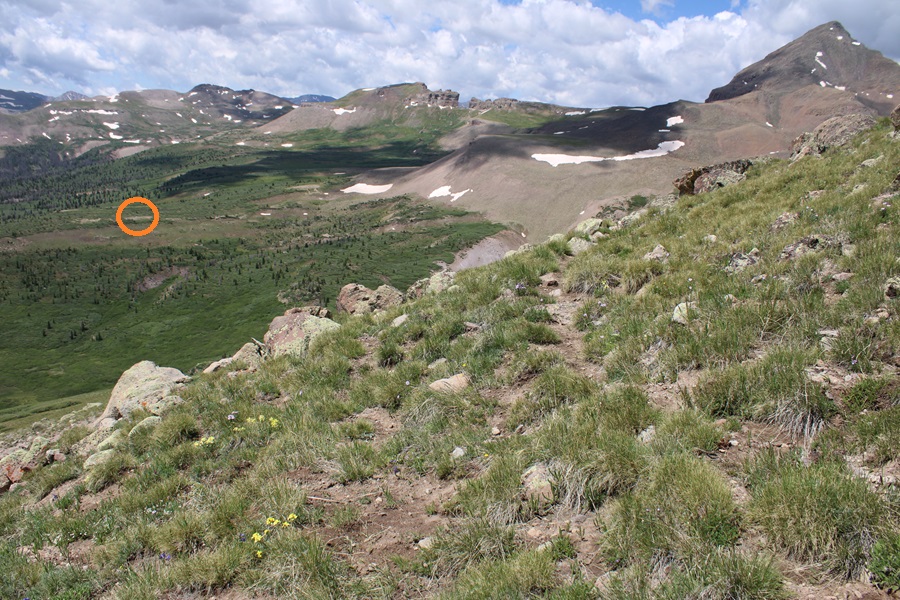
From the here, I could see my campsite to the southwest.
There are several ways to make it back down into the basin. I considered just staying parallel with the ridge at about 12600’ and picking back up the trail I came in on at the saddle of Rio Grande Pyramid and Fools Pyramid. There are no established trails here, but I knew the Skyline Opal Lake Trail was directly below me, so I decided to do my best to make it back down to the trail. If you look closely, you’ll see the trail below you.
I headed east and south down the slope to find the Skyline Opal Lake Trail
Now on an established trail, I followed it as it hugged the side of the basin, losing it every once in a while and finding it again through the willows.
This brought me back to the trail I came in on, near the rocky area
I followed the trail south as best I could back to my campsite at 12210’
From my campsite, here’s a view of my descent from the saddle back to the Skyline Opal Lake Trail.
I made it back to basecamp at 12pm, making this a 5.12 mile hike with 1858’ of elevation gain from 12210’
This report will get you to many of the 13ers and 12ers in the Rio Grande Pyramid Group, starting from the trailhead in Thirtymile Campground. It’s a 10 mile trek with 3150’ of elevation gain just to this basecamp, not including adding on mileage and elevation gain for the peaks, so while these peaks are certainly doable in a day if you’re fit and experienced, I decided the last time I was here to take my time and make it a several day trip on my next adventure. As an added bonus of spending the night at this basecamp, the views of Rio Grande Pyramid, Fools Pyramid, PT 13022, and Window Peak/Window Rock are breathtaking.
There are several ways to get to this basecamp at 12210’, and I’ve taken many of them, but the one I’m detailing here is by far the most direct and easiest to follow. The other trails require good route finding and navigating through endless willows, making the trail more difficult to find/follow, especially in the dark.
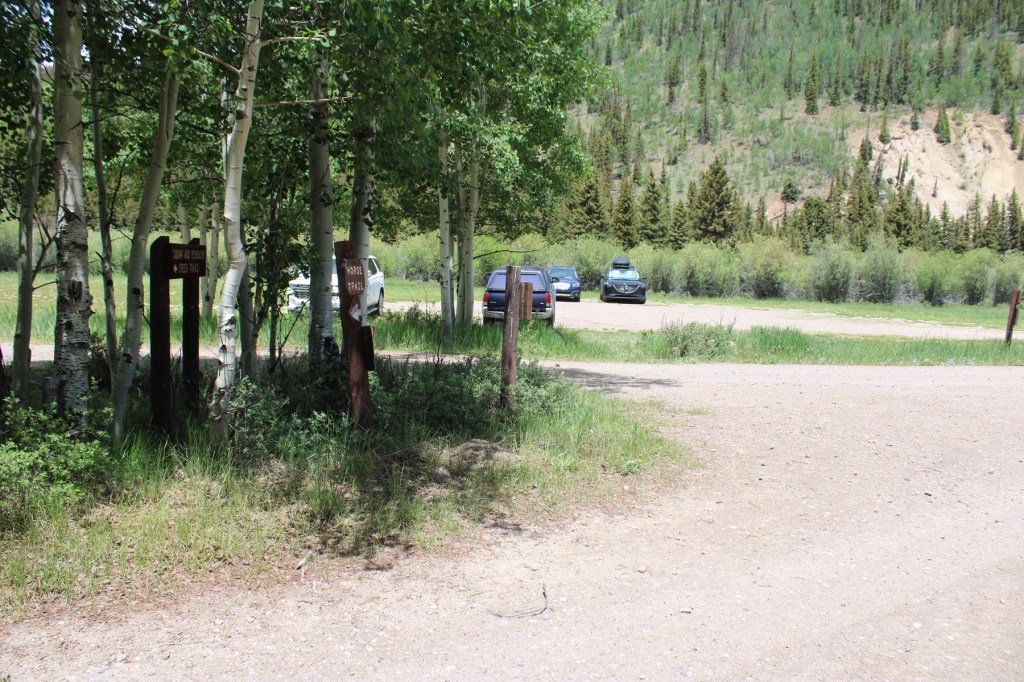
I started by parking at the hikers parking lot at Thirtymile Campground. There are plenty of spaces here, and bathrooms nearby.
The trail starts to the south of the parking area, and is clearly marked
After hiking for a short distance you’ll come to a trail register. Here you have two options: Squaw Creek Trail to the left, or Weminuche Creek Trail to the right. Take the trail to the right.
I followed Weminuche Creek Trail (818) for a total of 7.25 miles. This trail starts off by skirting the south side of Rio Grande Reservoir
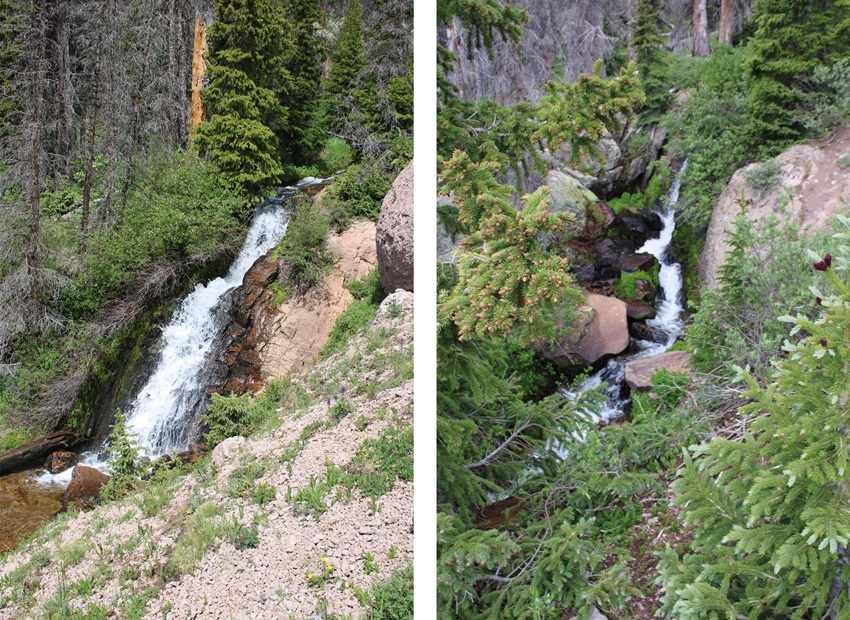
Then the trail goes through a rocky section before crossing a waterfall. The waterfall is about 2 miles into the trek.
After the waterfall, there was a quick uphill section that would bring me to a large gulch, sprinkled with sections of hiking in the trees and small creek crossings. I followed the trail southwest for another 5 miles.
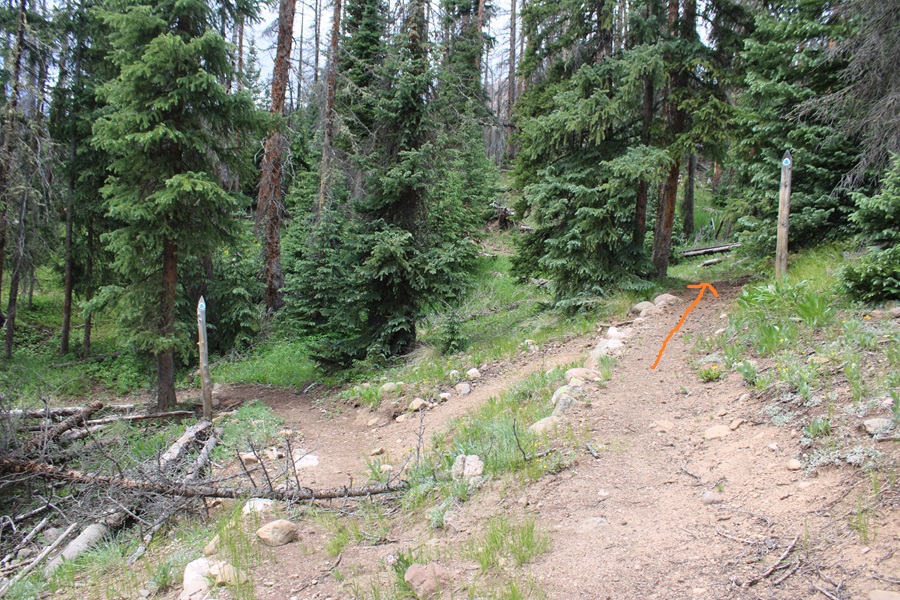
Just after this post (which indicates the cutoff for the Opal Lake Trail, which I wouldn’t recommend taking, as it will lead you through bushwhacking adventures to the murderous willow section), there are some nice camping spots to the left, should you want to camp here. There’s a fire ring, and the ability to filter water.
I continued on the Weminuche Trail, always staying to the right of Weminuche Creek.
After hiking for a total of around 7 miles, I came to the cutoff for the Continental Divide Trail. Here I went right, onto the Continental Divide Trail.
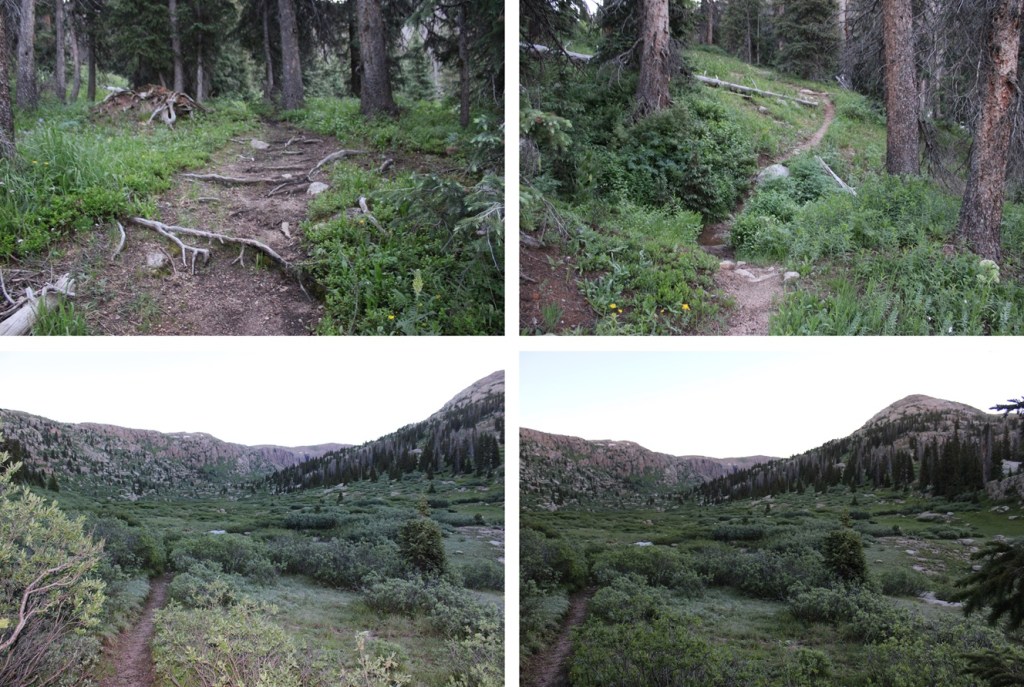
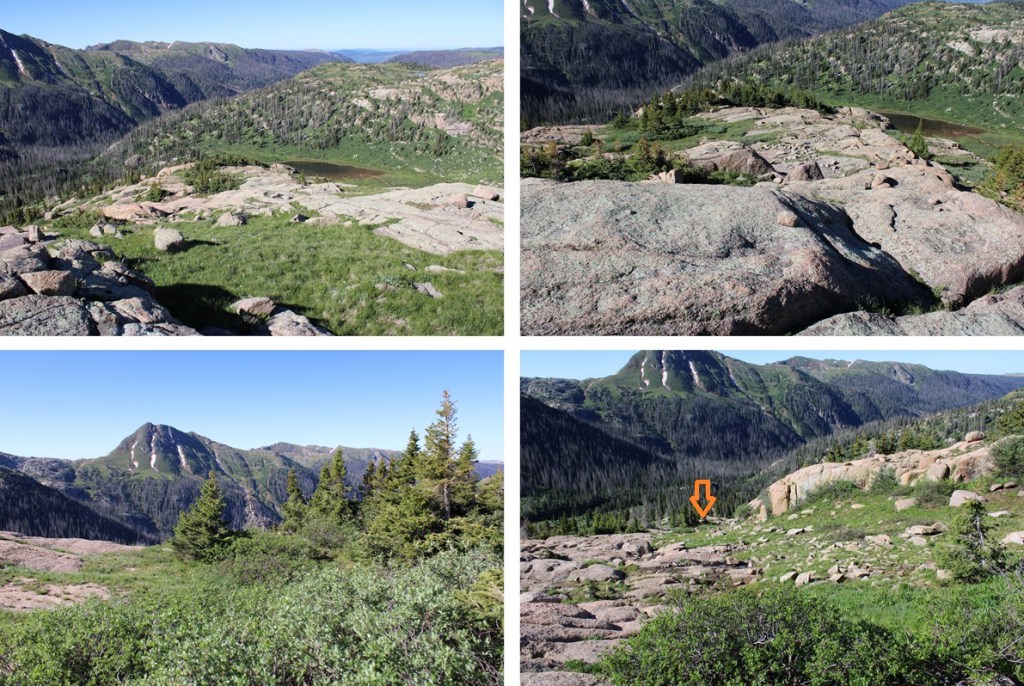
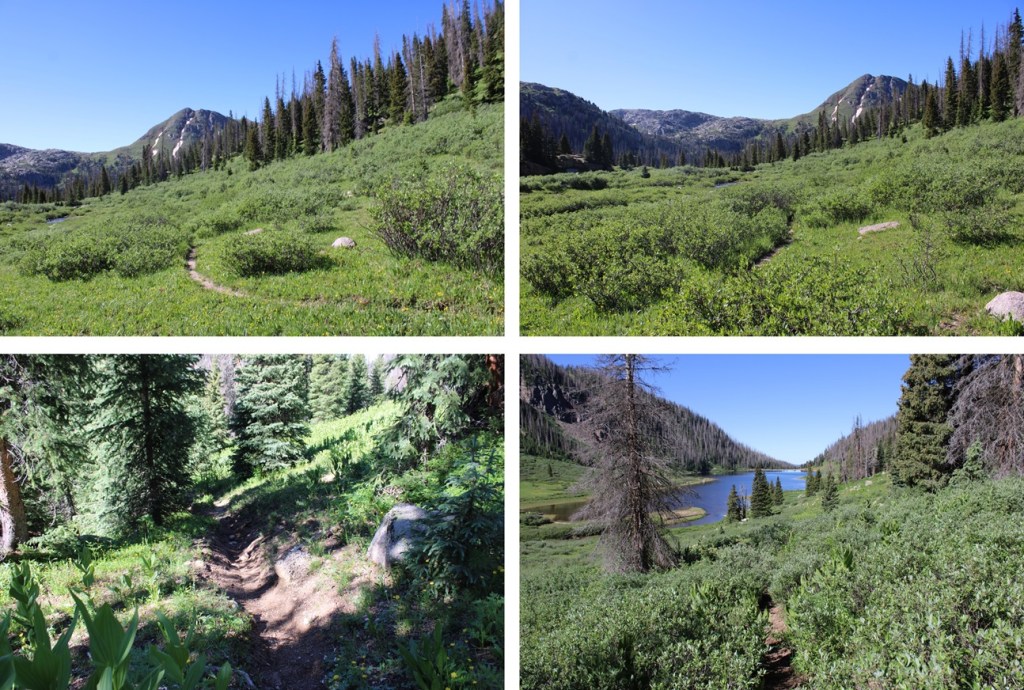
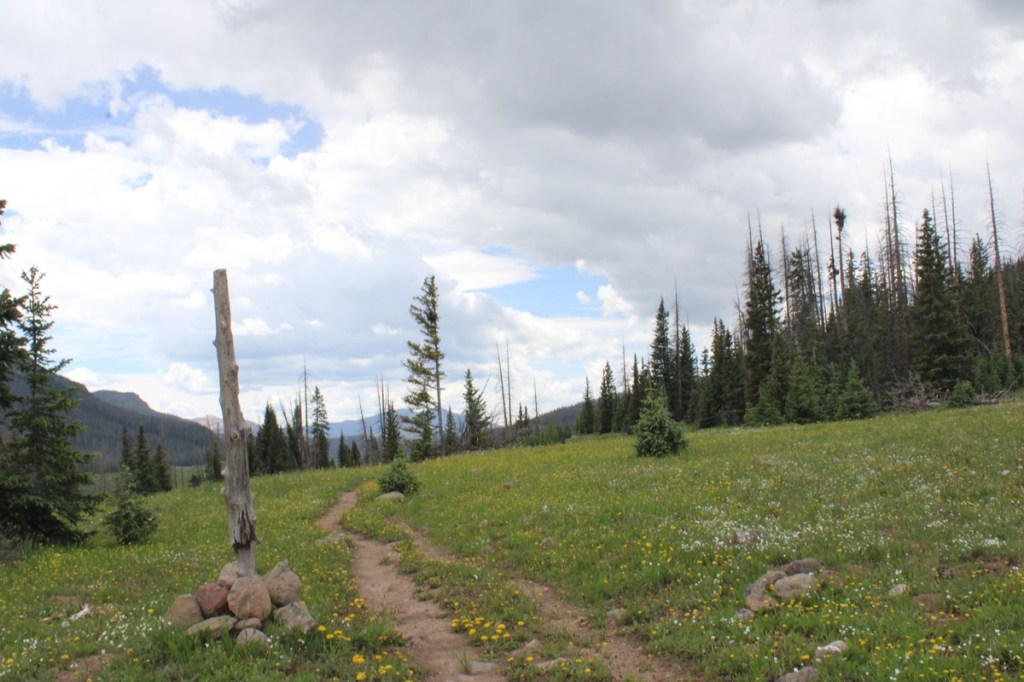
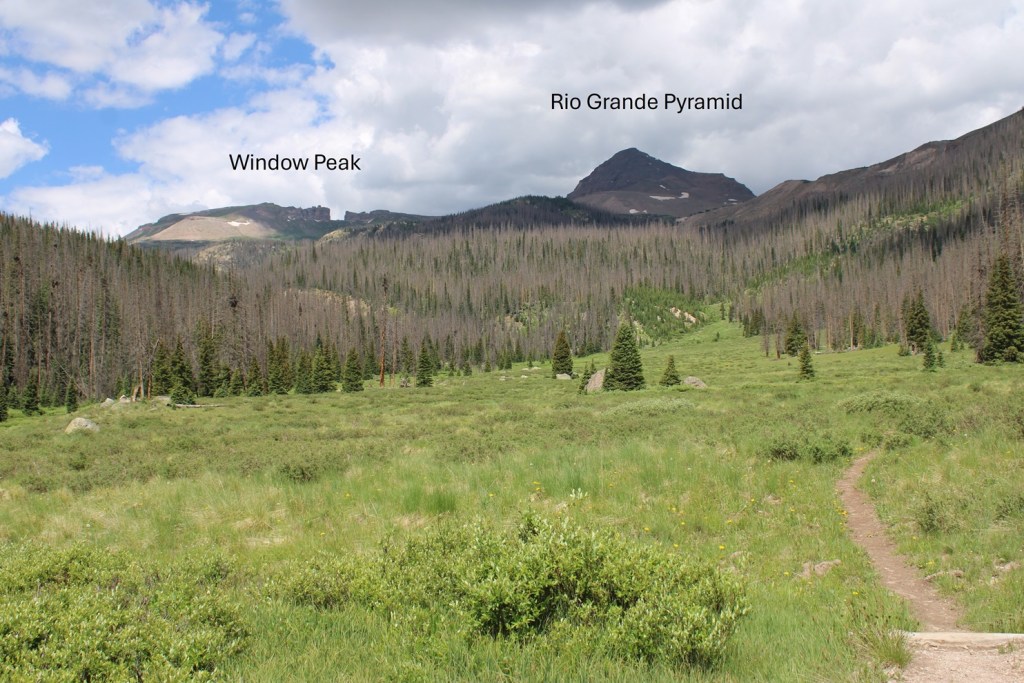
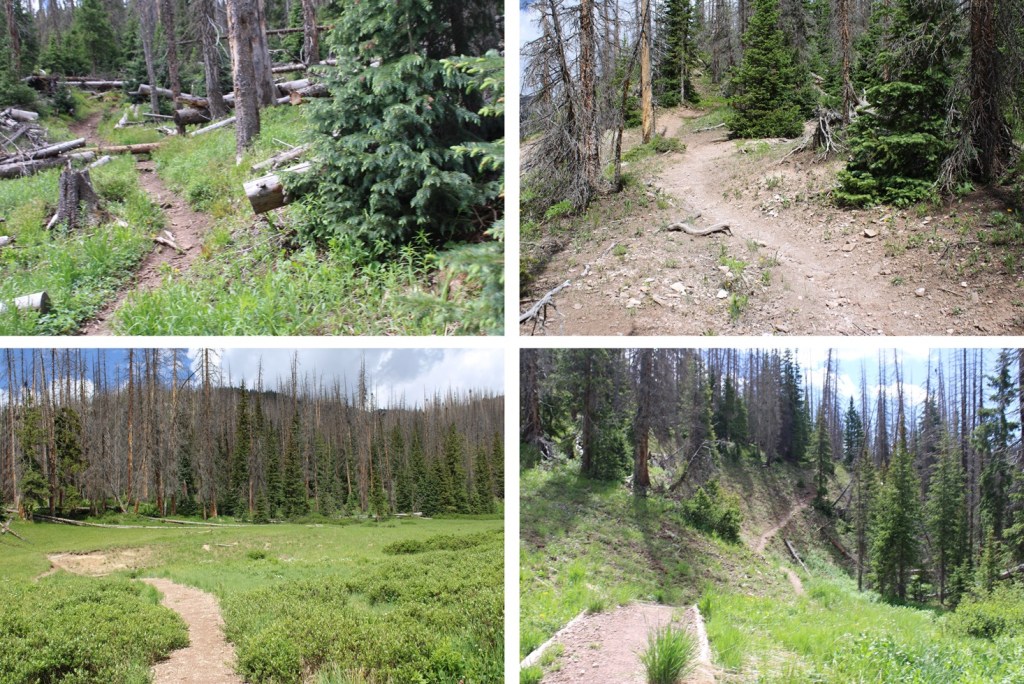
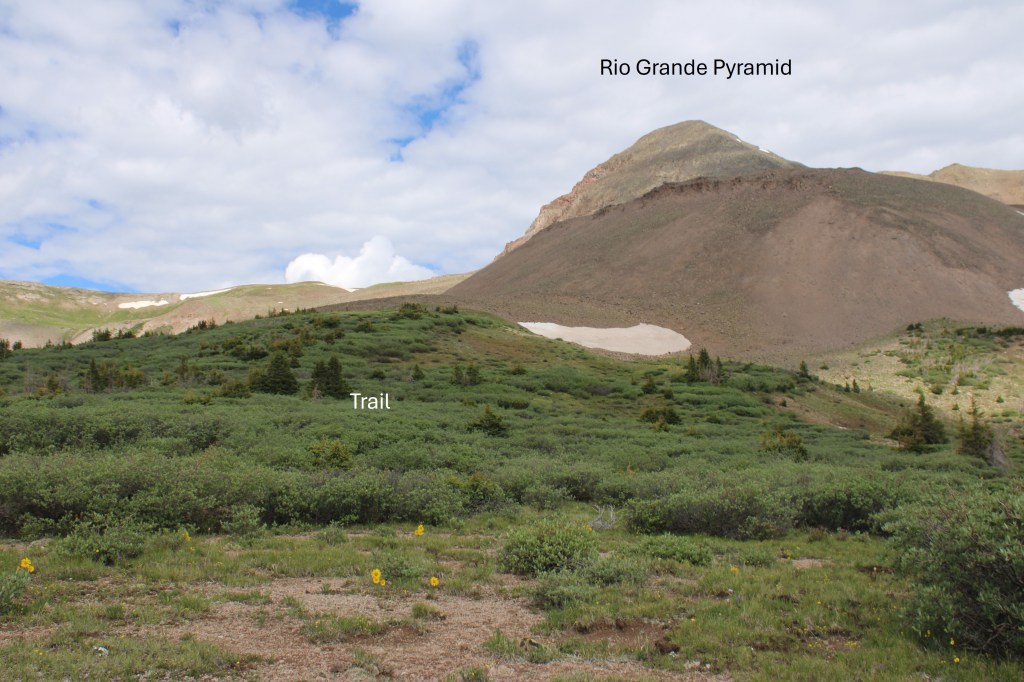
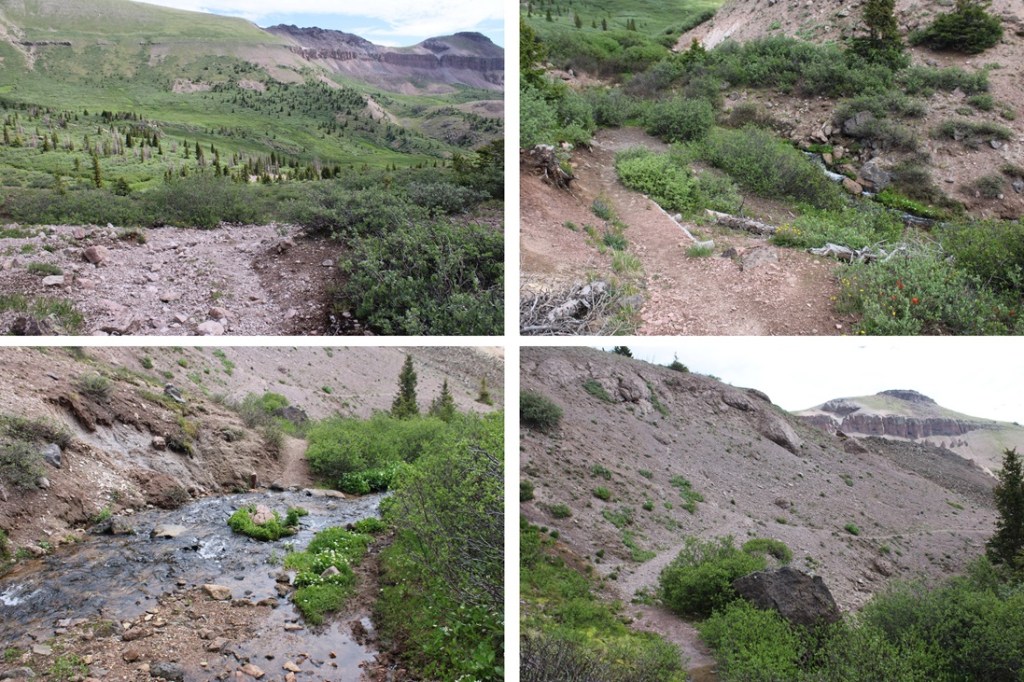
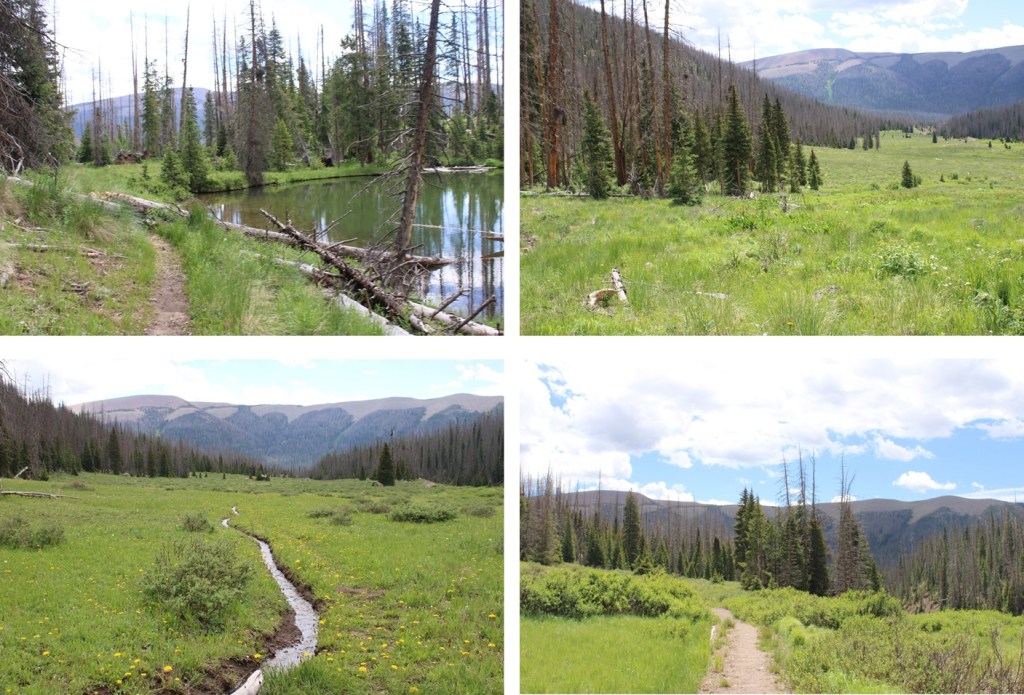
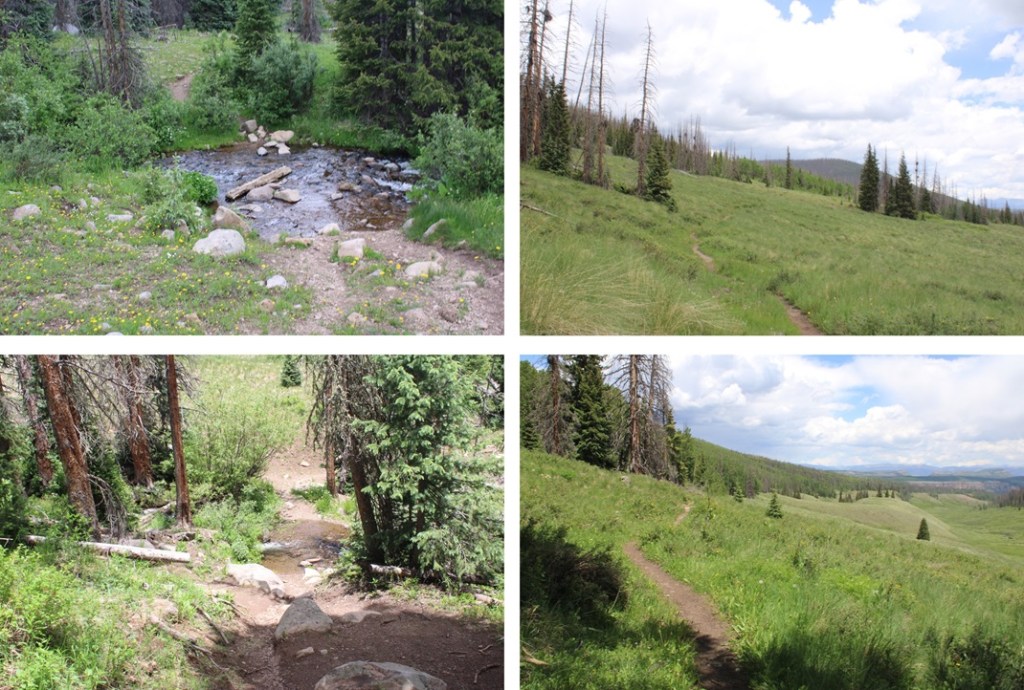
This is where the fun (elevation) begins. For the next 3 or so miles it was uphill all the way, across meadows, around ponds, through trees, beside waterfalls, and through rocky areas. From the very beginning you can see Rio Grande Pyramid to the northwest. Just keep heading that way.
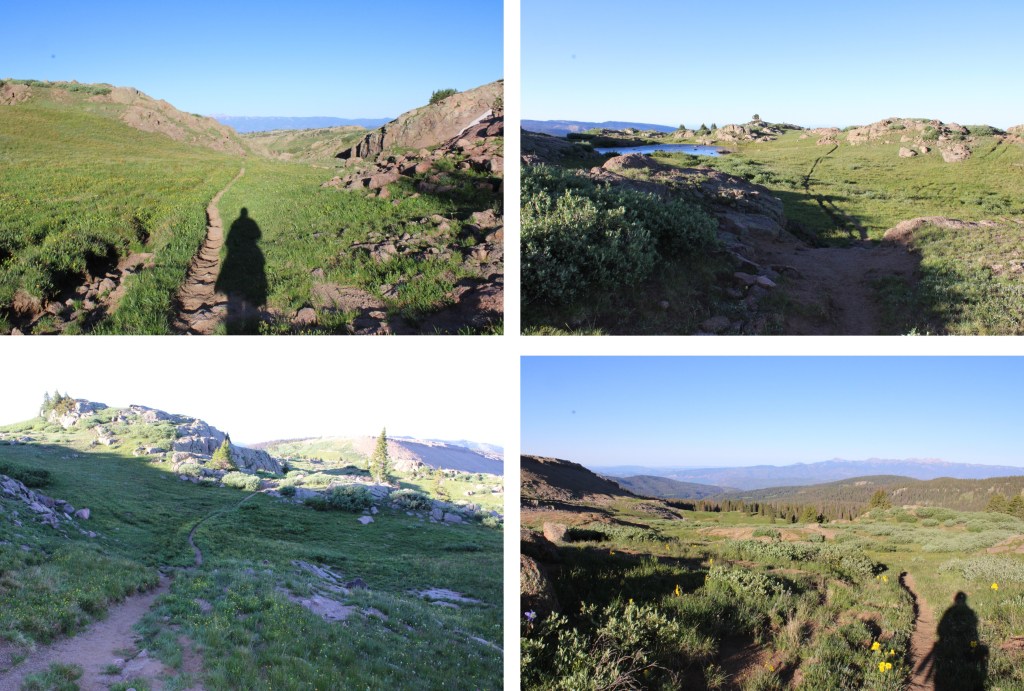
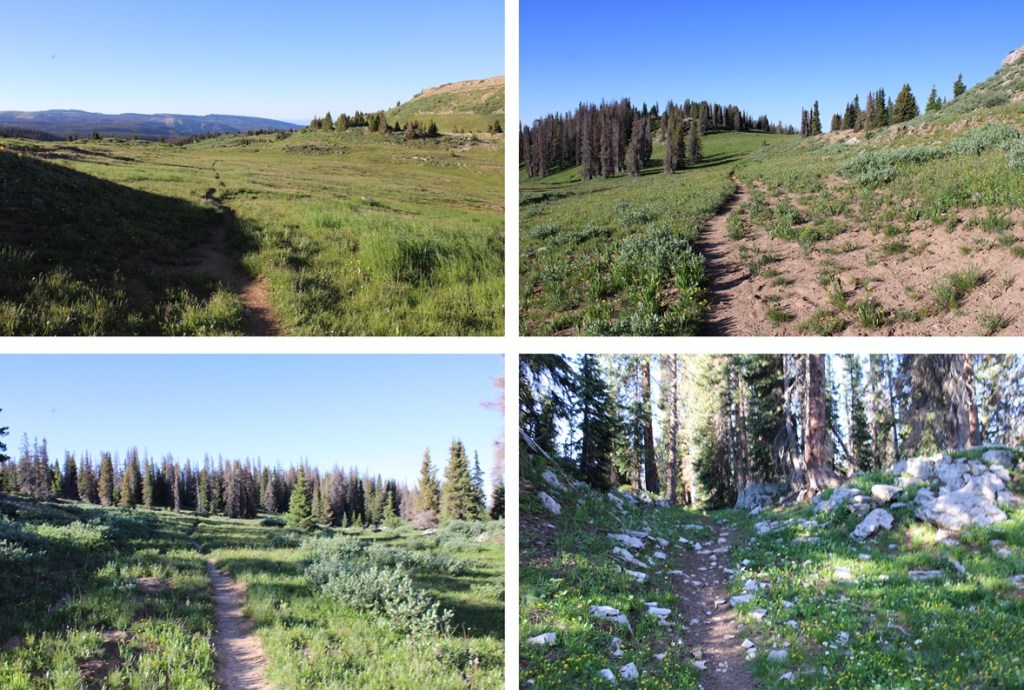
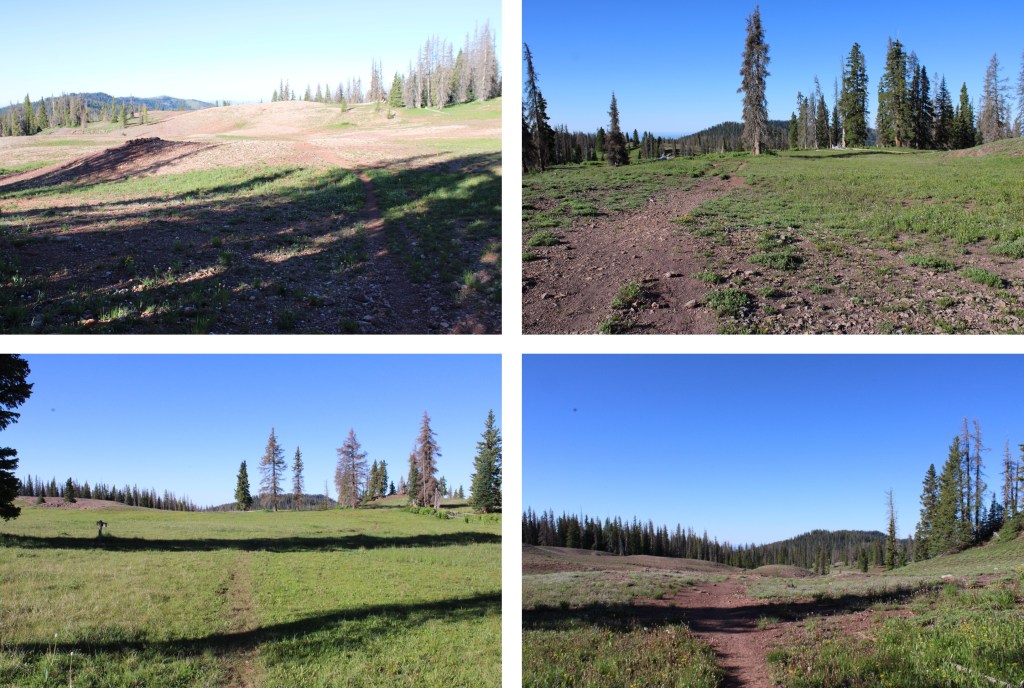
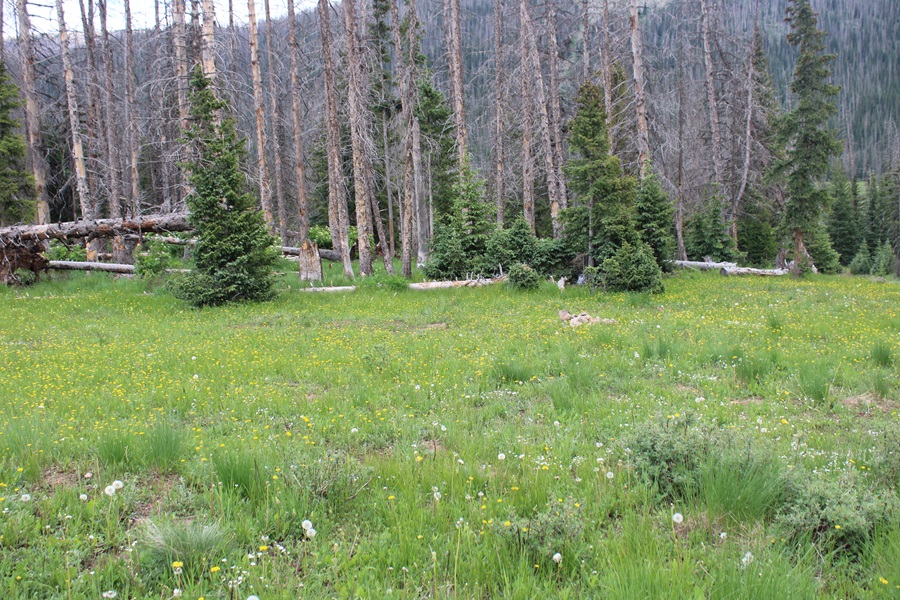
Here are some pictures of my way towards treeline
Just before treeline I came to a sandy area. I’d been here before. Make sure you take the trail to the left, across a small creek, and DO NOT take the sandy trail that goes straight. This will lead you into the willows.
I crossed the small creek, and followed the trail for about another half mile, to about 12210’ of elevation.
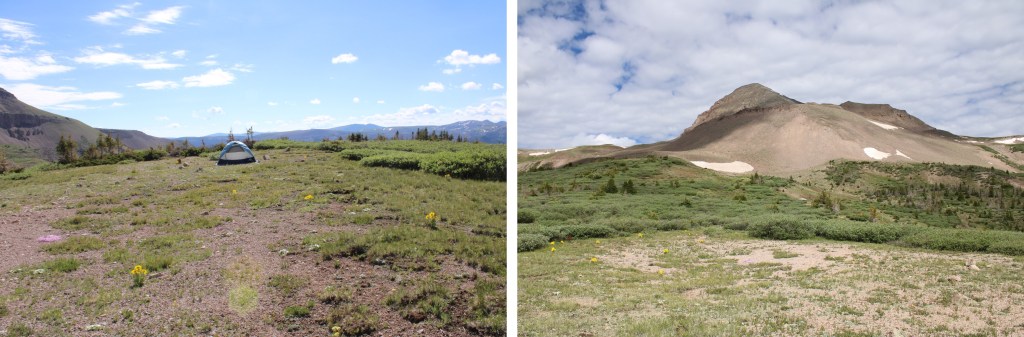
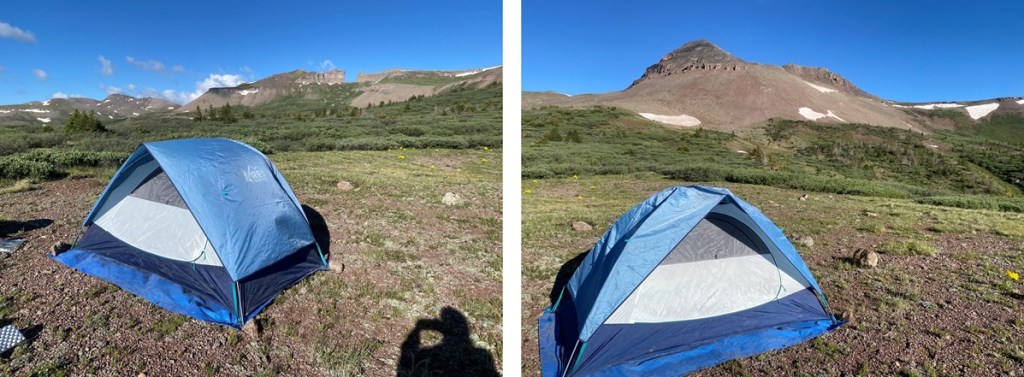
Here there was a willowy area to the left, and a few yards away, plenty of camping space. The camping area are hard to see from all those willows, but trust me, they’re there.
From my campsite, here’s my view of Rio Grande Pyramid. The trail is in those willows.
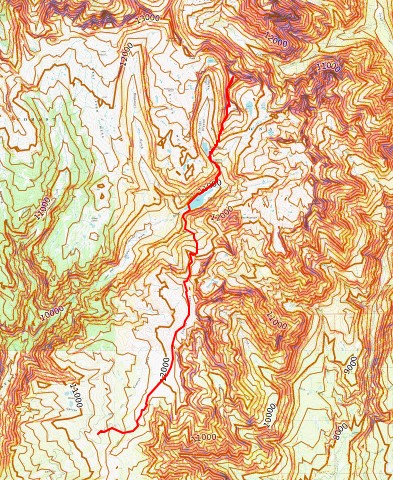
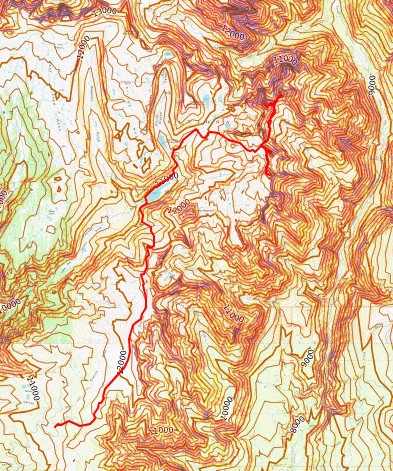
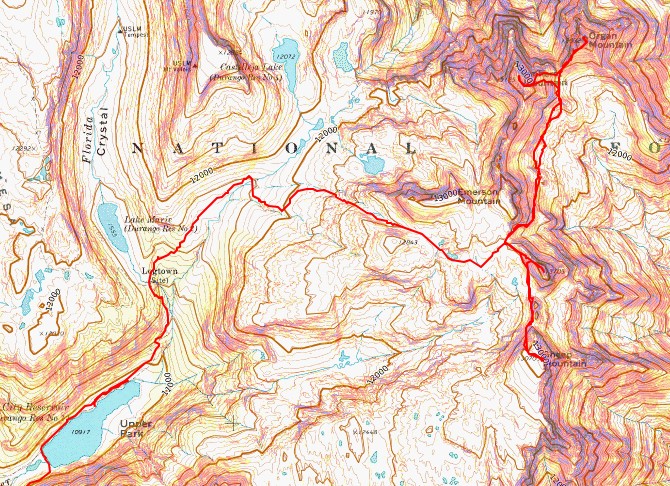
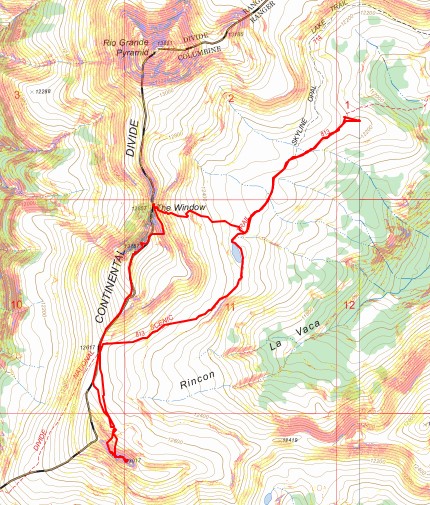
From here you’re at a great base area to climb 13022, Window Peak, Rio Grande Pyramid, Fools Pyramid, 13274, and various other peaks in the area. Here’s a topo map of the route thus far:
I really wish I would have linked up this peak with PT 13164 when I did it in 2019, but then it wasn’t a known ranked 13er. In any event, today was a long day, so I was getting an early start so I could drive back home for work the next morning.
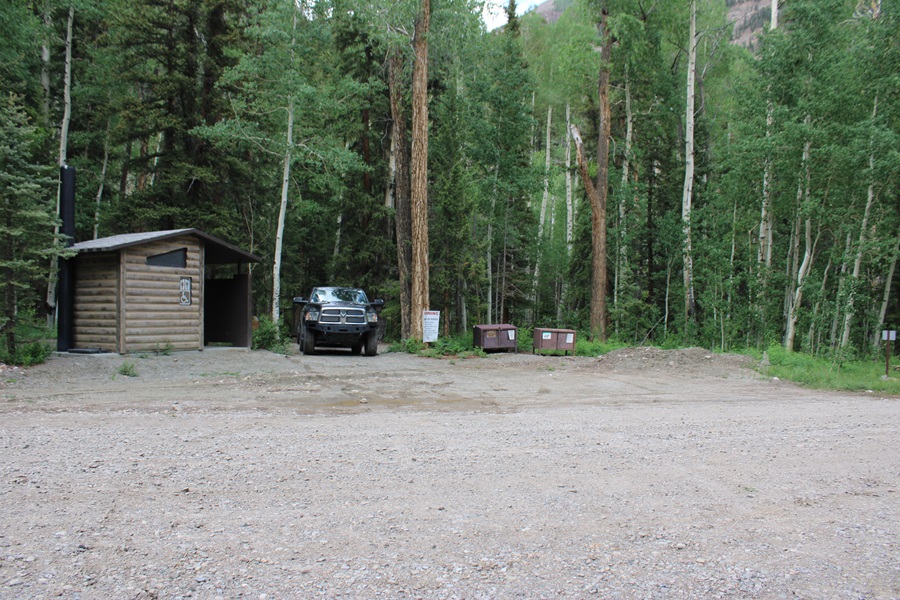
I parked at the Cataract Gulch Trailhead and was on the trail at 3:30am. The trailhead has several parking spaces, dispersed campsites, and bathrooms.
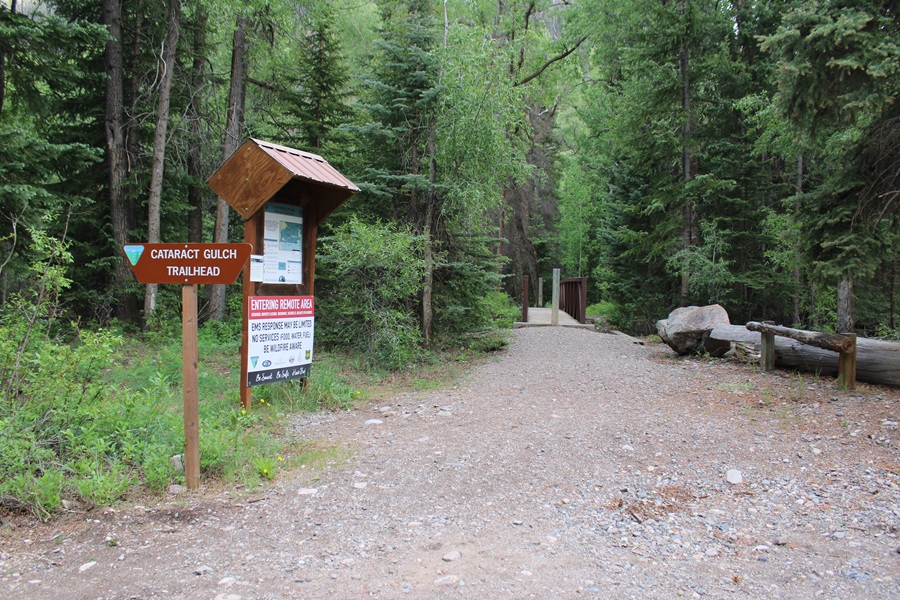
The trailhead is clearly marked, and easy to find.
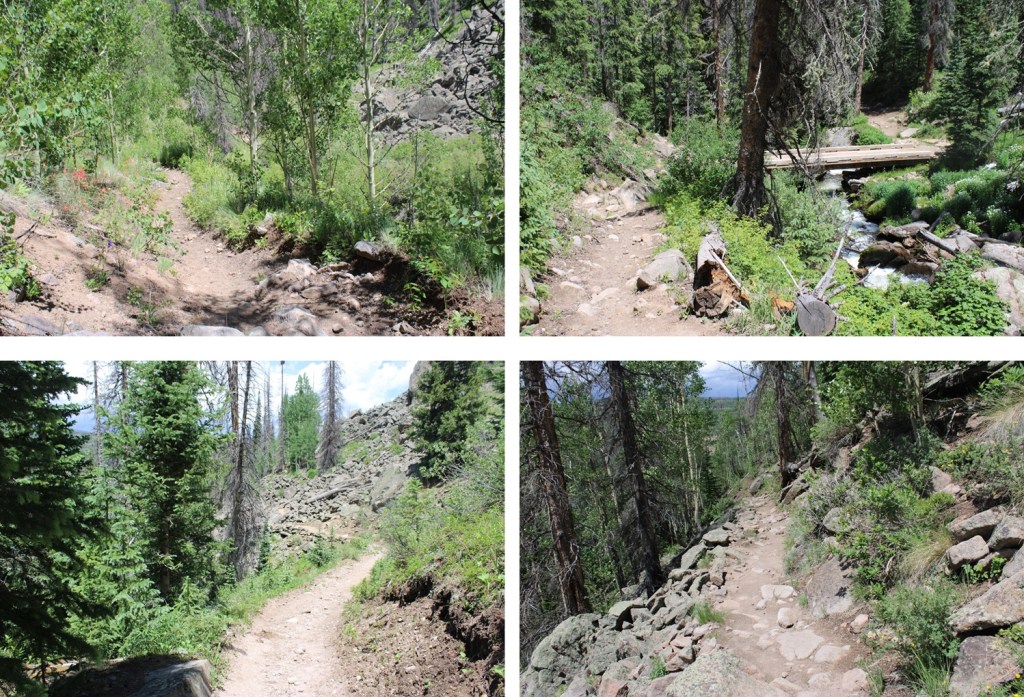
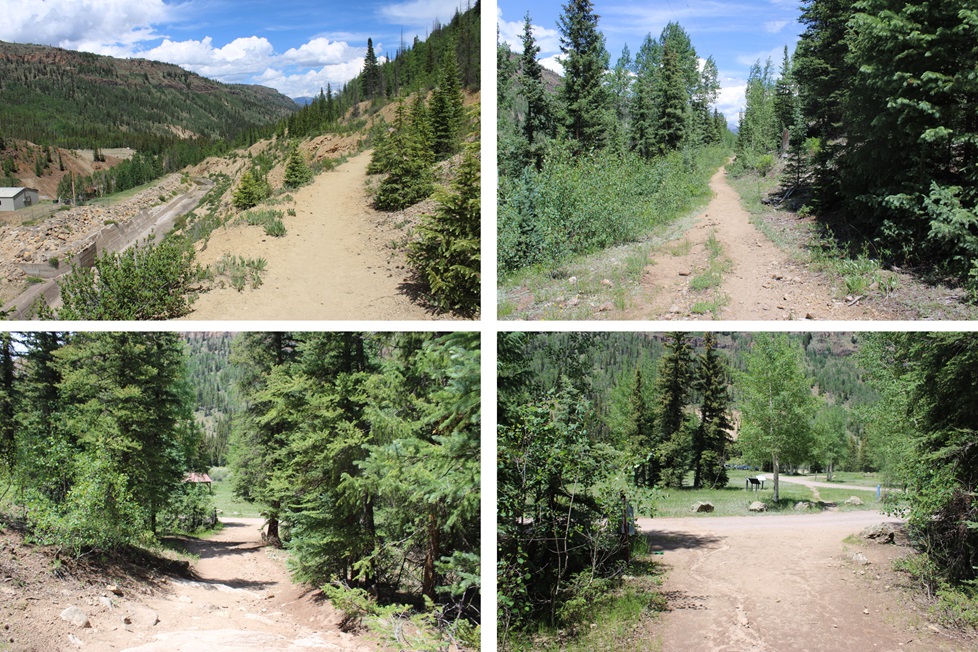
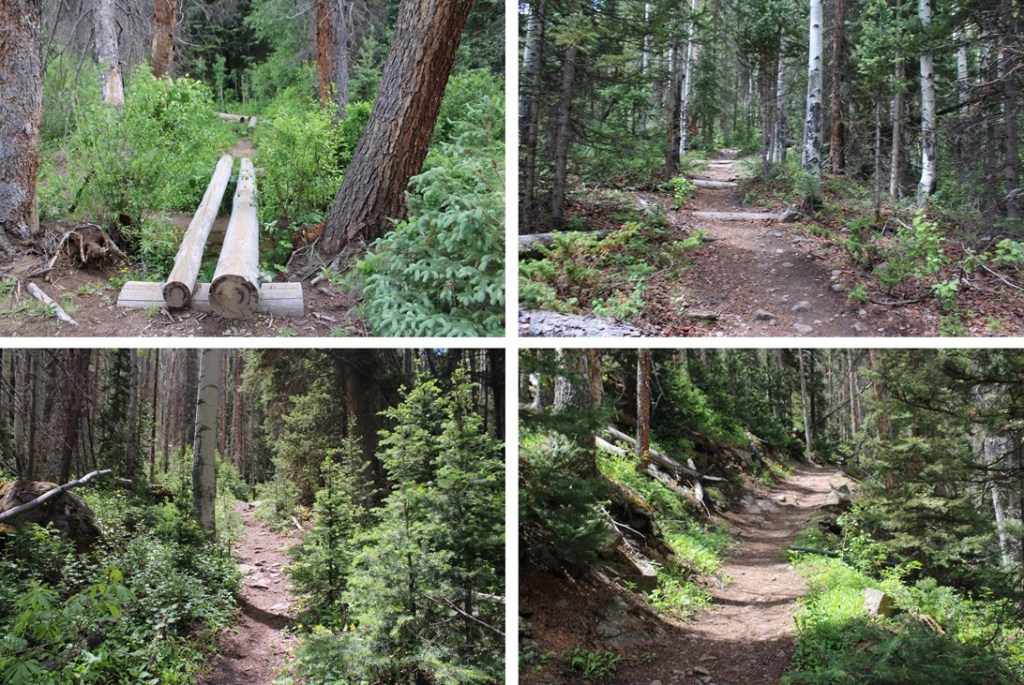
I followed the class 1 Cataract Gulch Trail south, towards Cataract Gulch.
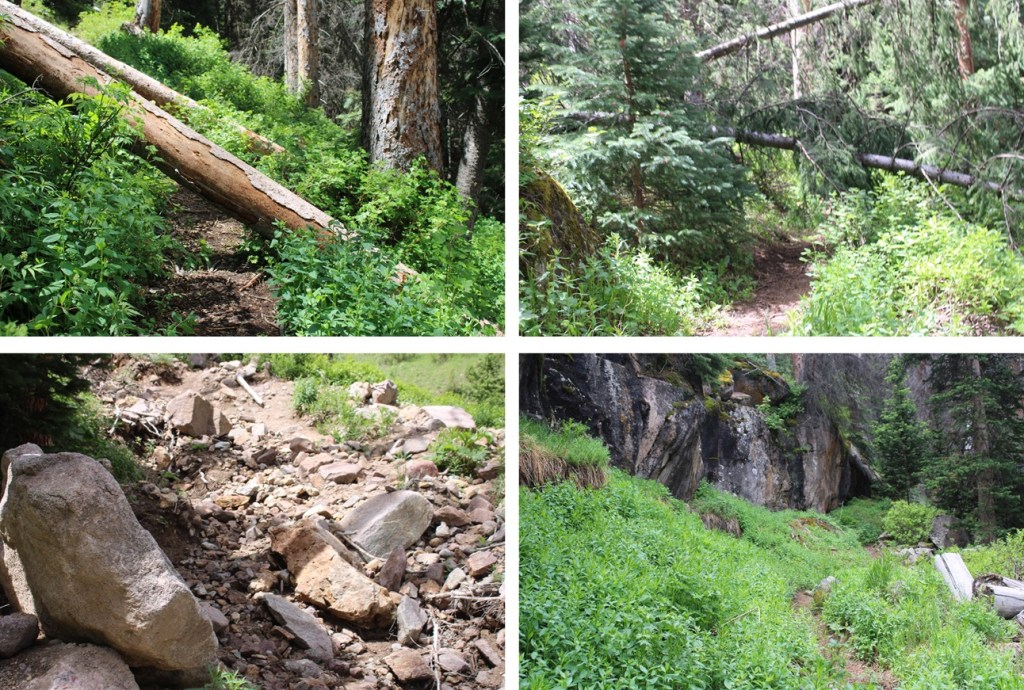
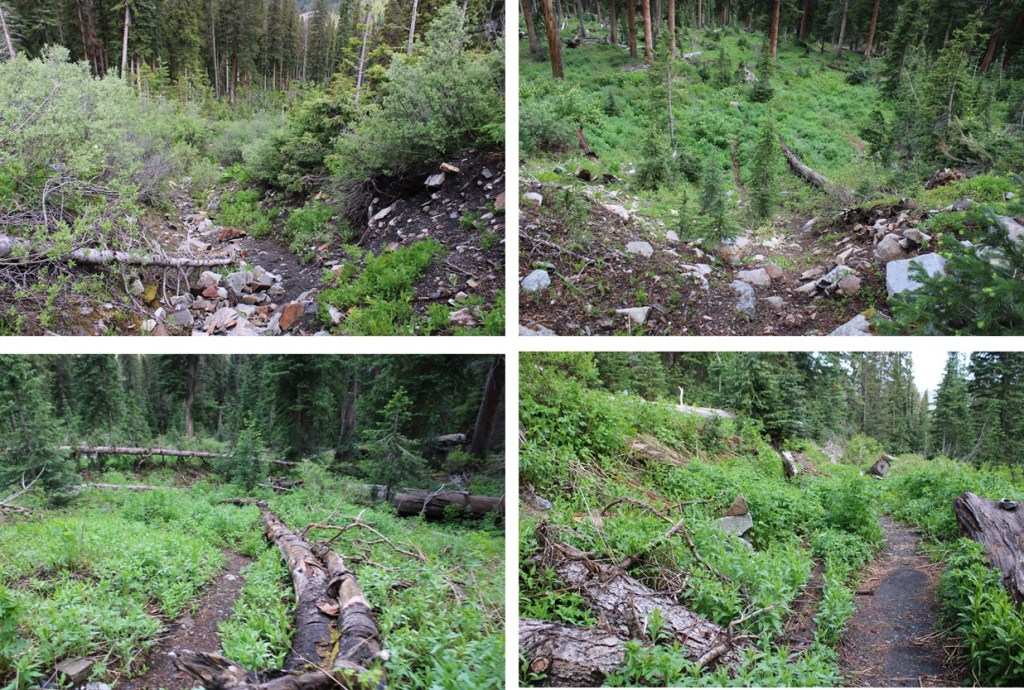
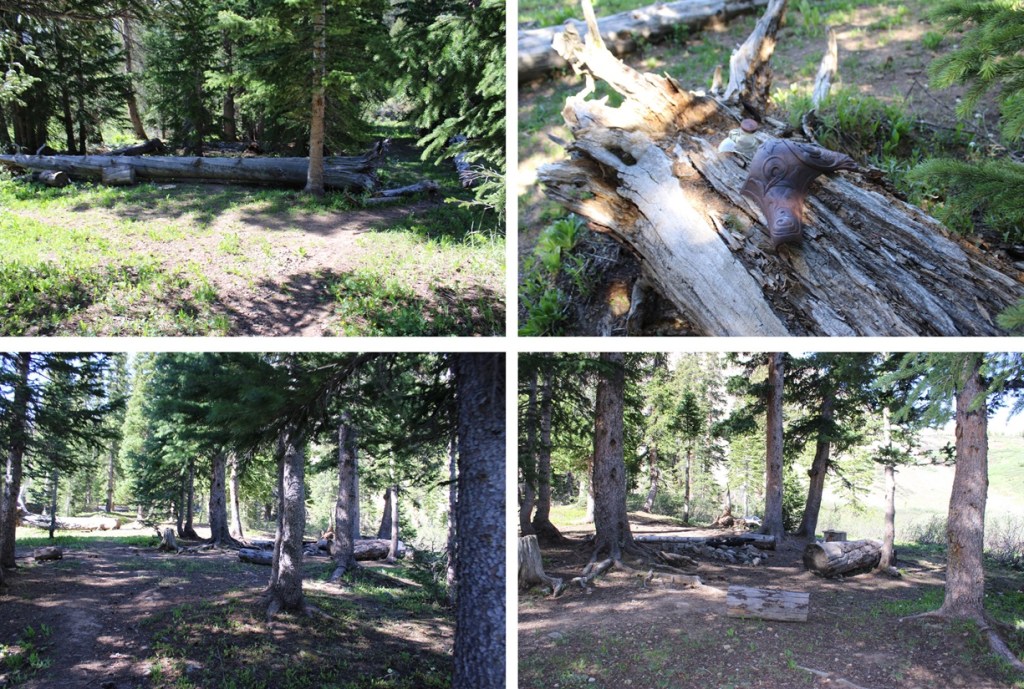
There were several downed trees on the trail, but it was easy to navigate.
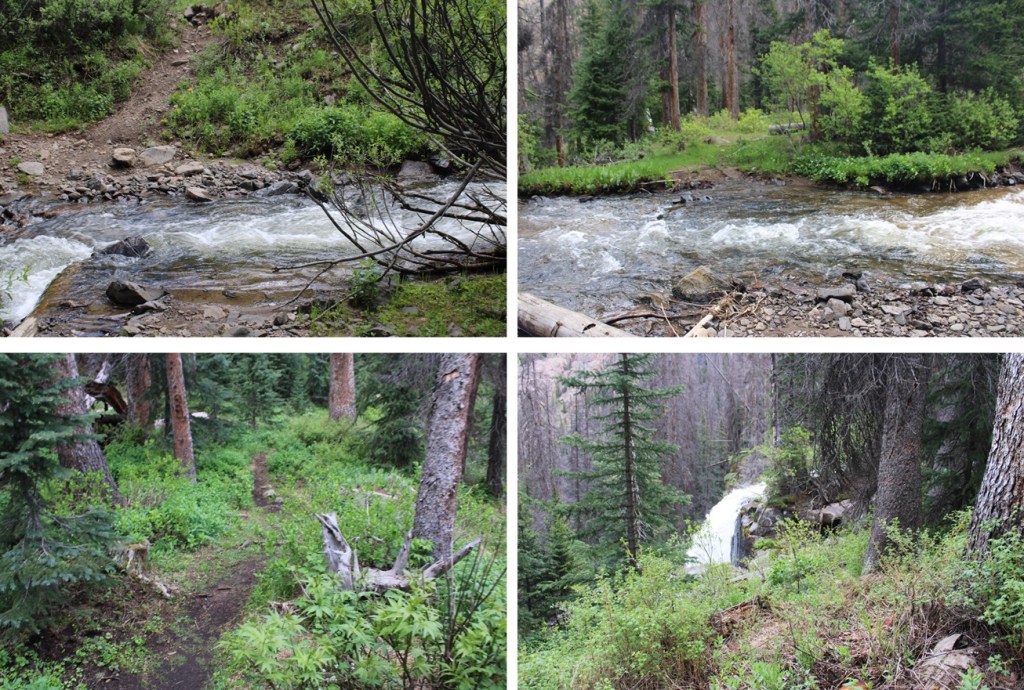
Just before reaching the waterfall about 2.5 miles up the trail, I crossed the creek on a couple of logs.
This is where many people get lost. I headed up the slope, and there was a large tree blocking the path. I went left, navigated willows and some boulders, then regained the trail.
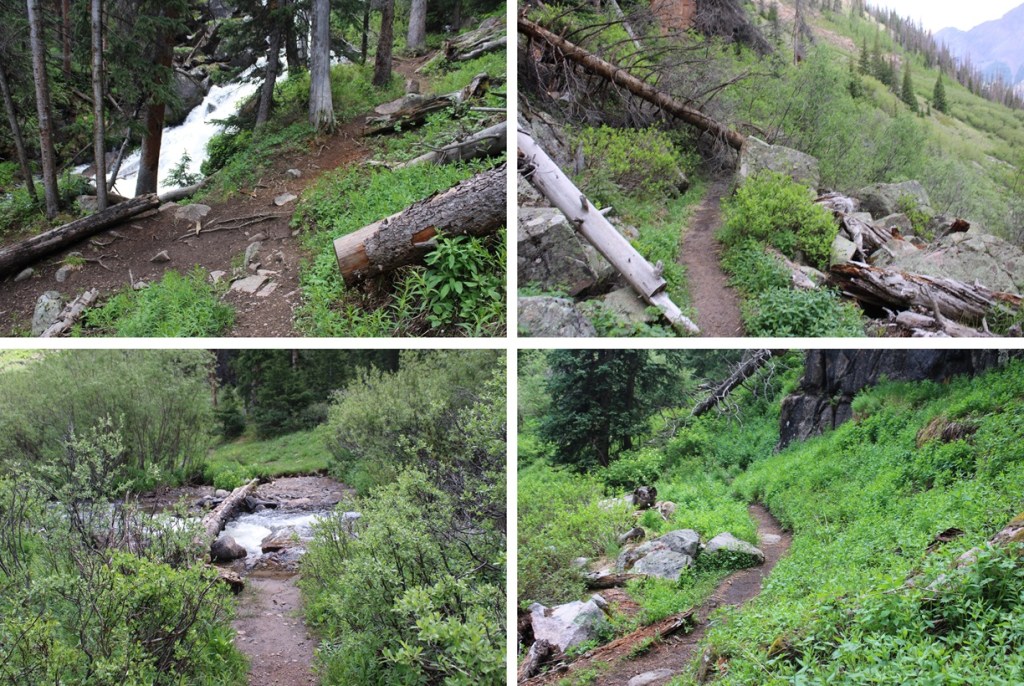
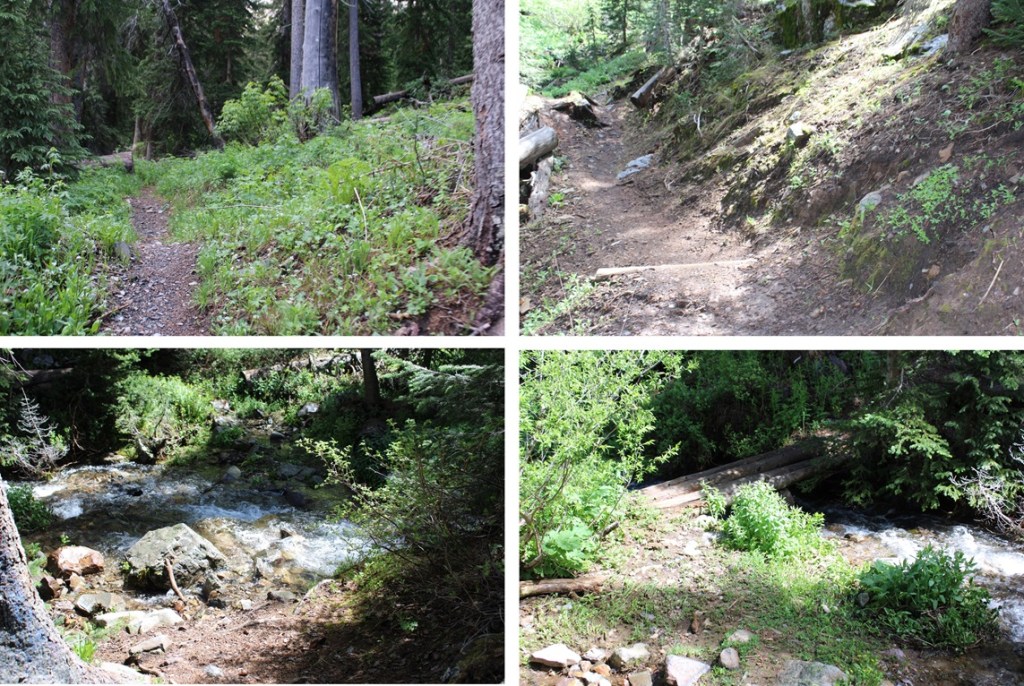
I could now see the waterfall clearly. A lot of people continue straight here, towards the waterfall, following the social trails. Instead, look for a trail to the right that goes up and behind the waterfall.
Next, to cross the creek. I crossed directly above the waterfall. Probably about 10 feet from where it drops off. At night I knew where to cross because there are little reflecting circles on the trees across from the water that glow when you shine your flashlight across them. The water was running high today, and I didn’t want to go over the edge, so I crossed carefully. The water was up just past my knees.
I picked up the trail on the other side, and quickly came to a second creek crossing.
I picked up the trail again on the other side, and ascended through a cairned, rocky area.
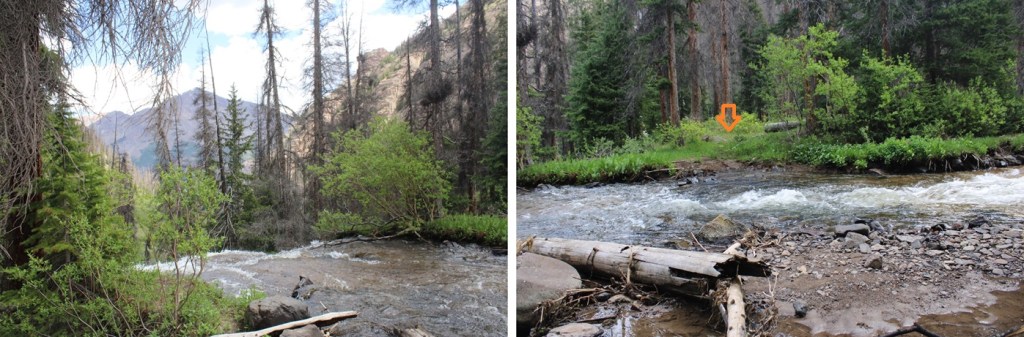
This led me to my final creek crossing of the morning.
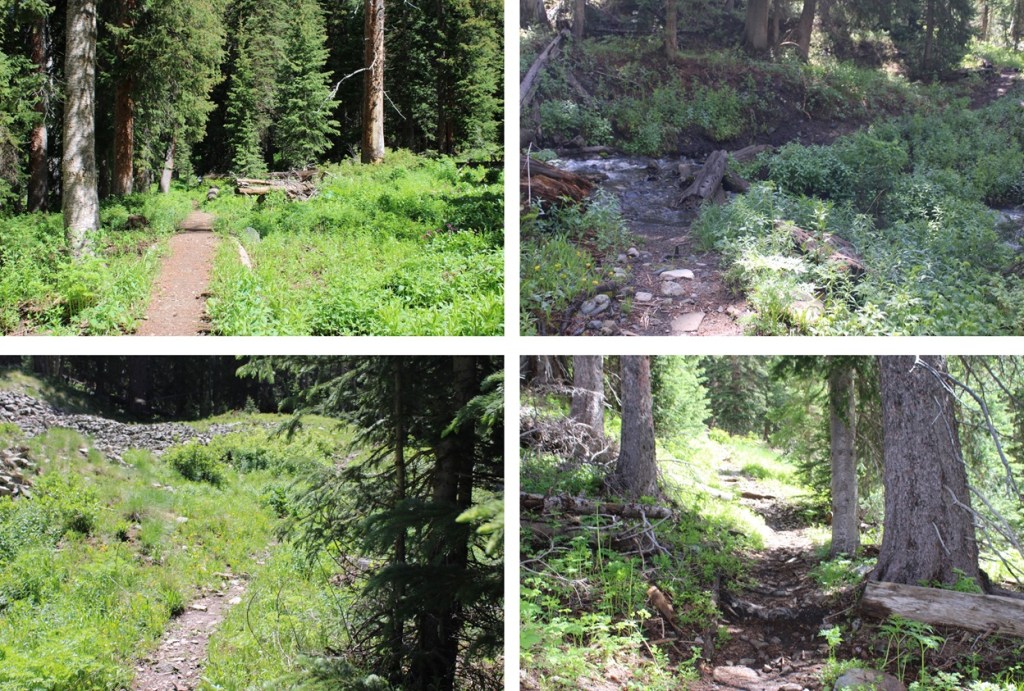
I crossed the creek one more time, and picked up the trail on the other side. It led me up and around to the left, behind boulders and through a small canyon.
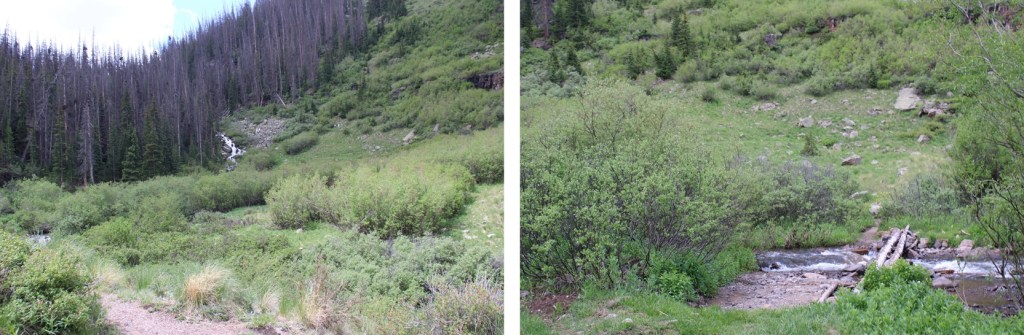
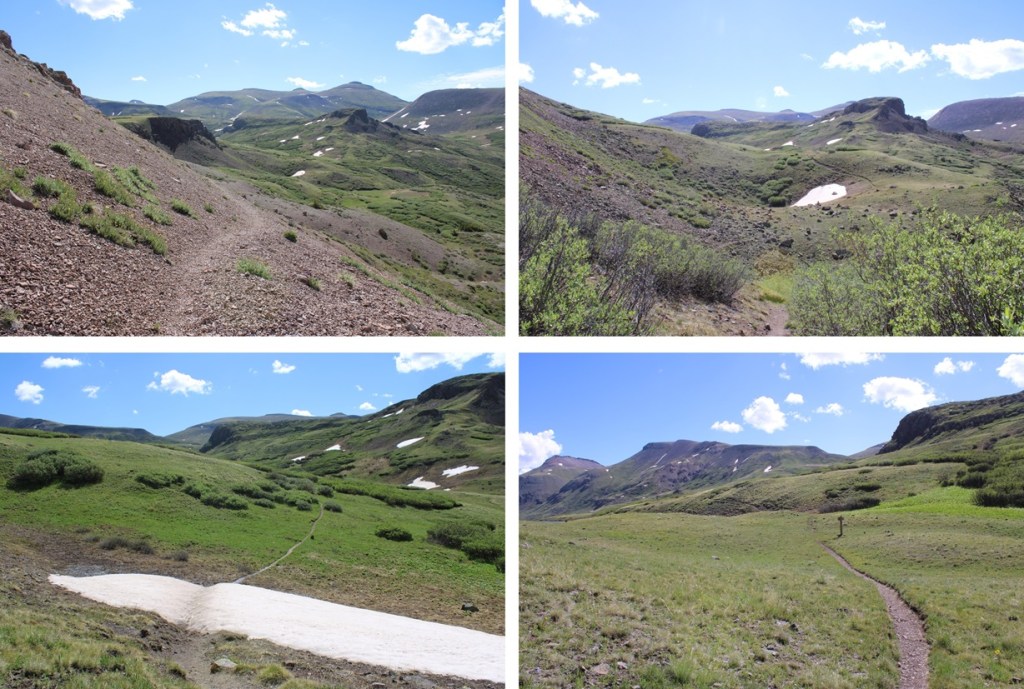
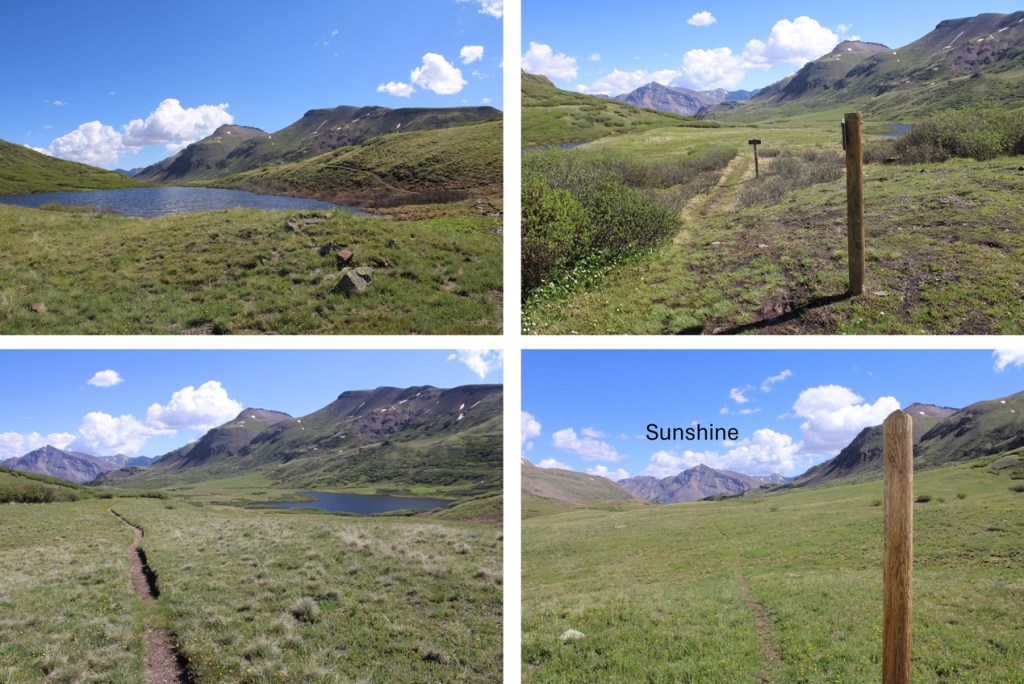
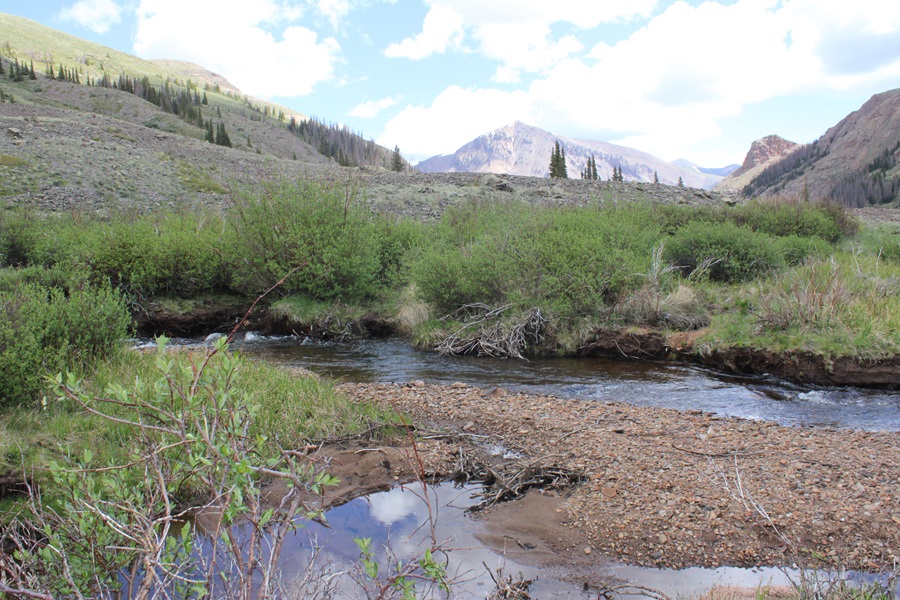
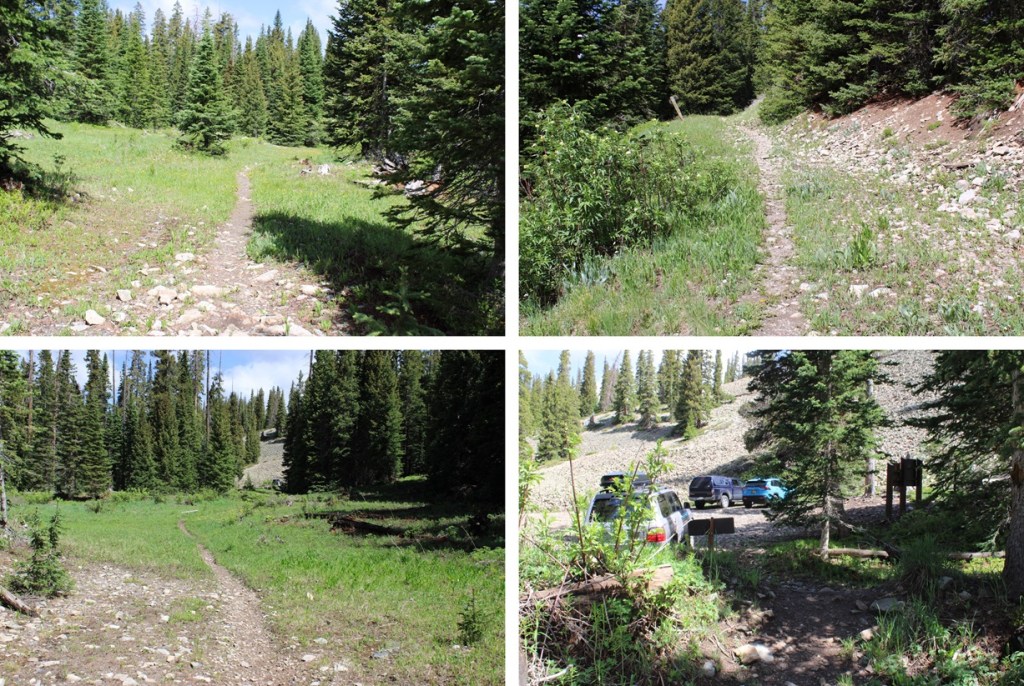
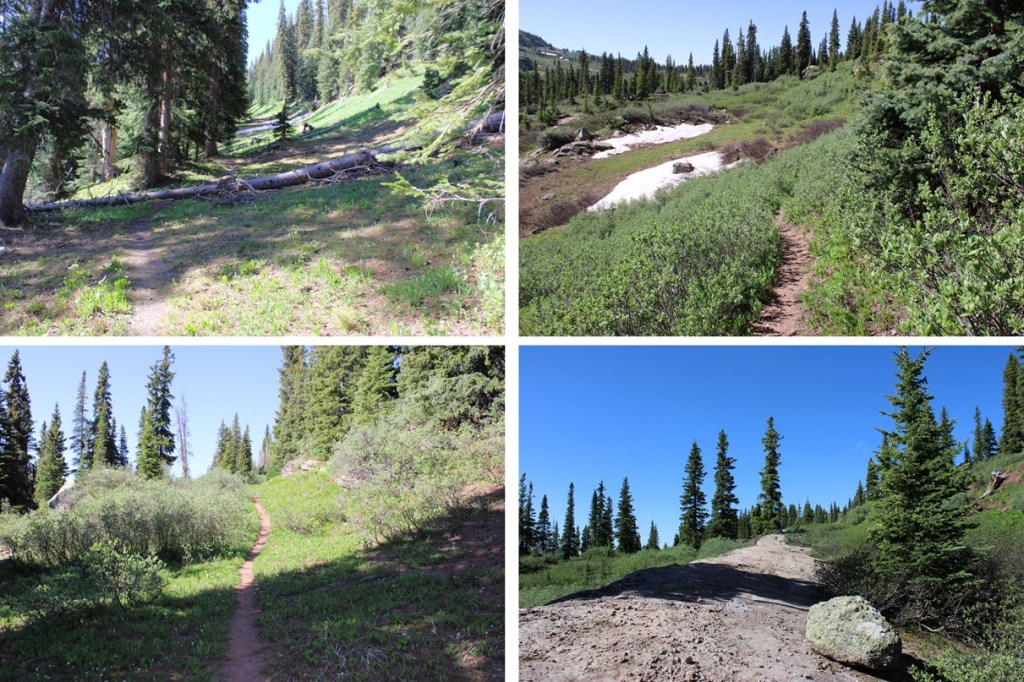
I was now headed south towards Cataract Lake. There’s a pretty good trail here, but every once in a while it gets overgrown. The trail slopes slightly downward as it goes across the tundra and through the willows. There are posts to help guide you if you lose the trail. I was headed here:
I passed Cataract Lake to my left, and a small lake to my right. Here the trail picked up with the Colorado Trail, and I followed it right, west, towards Cuba Gulch.
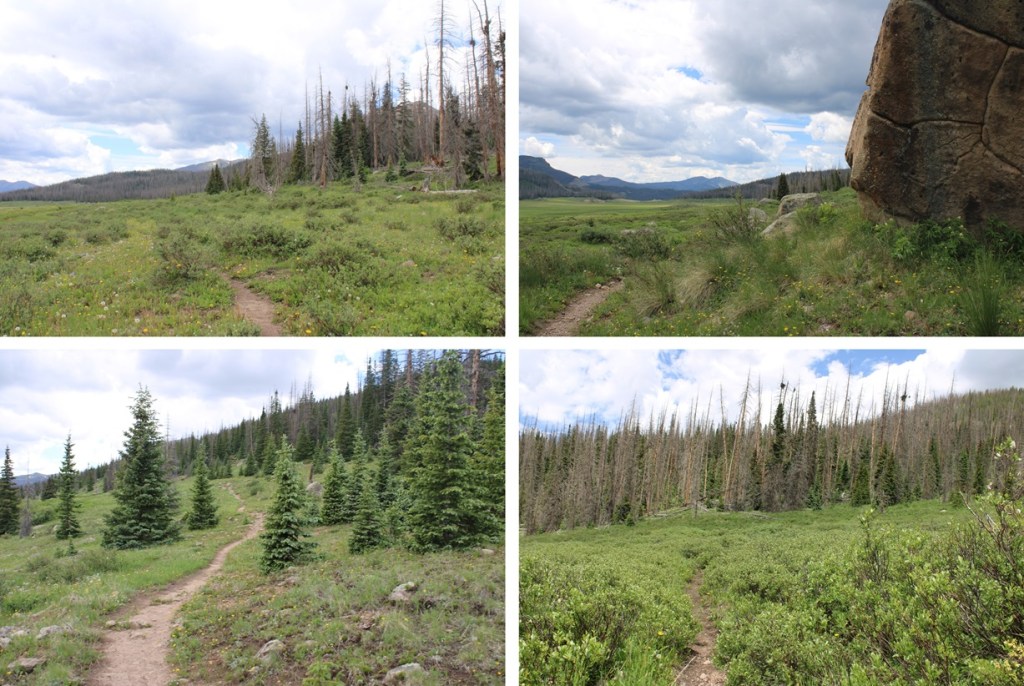
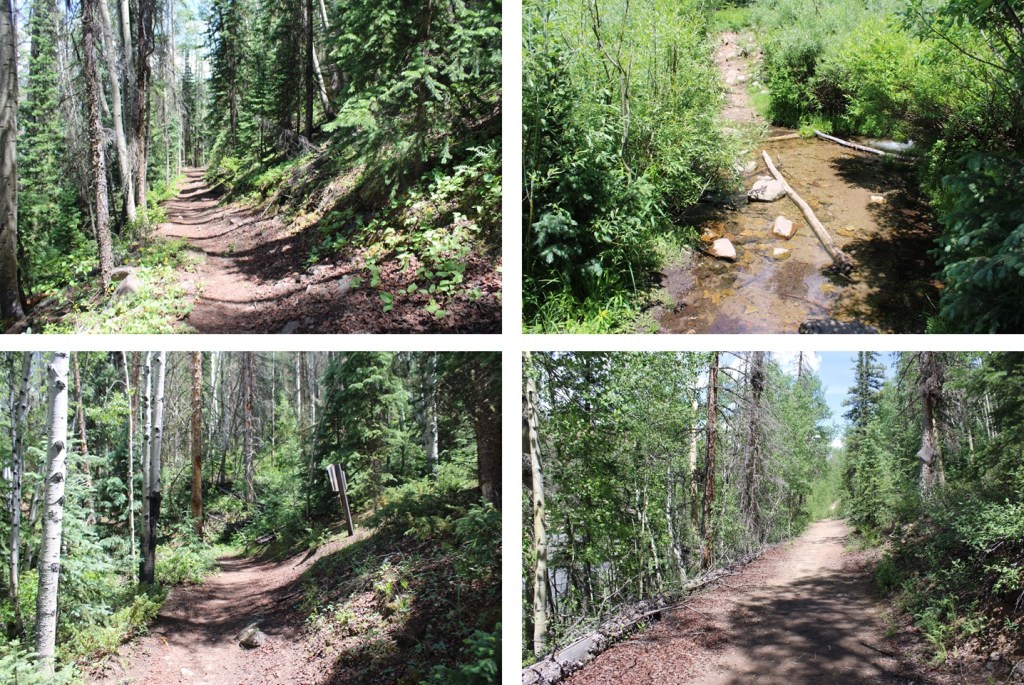
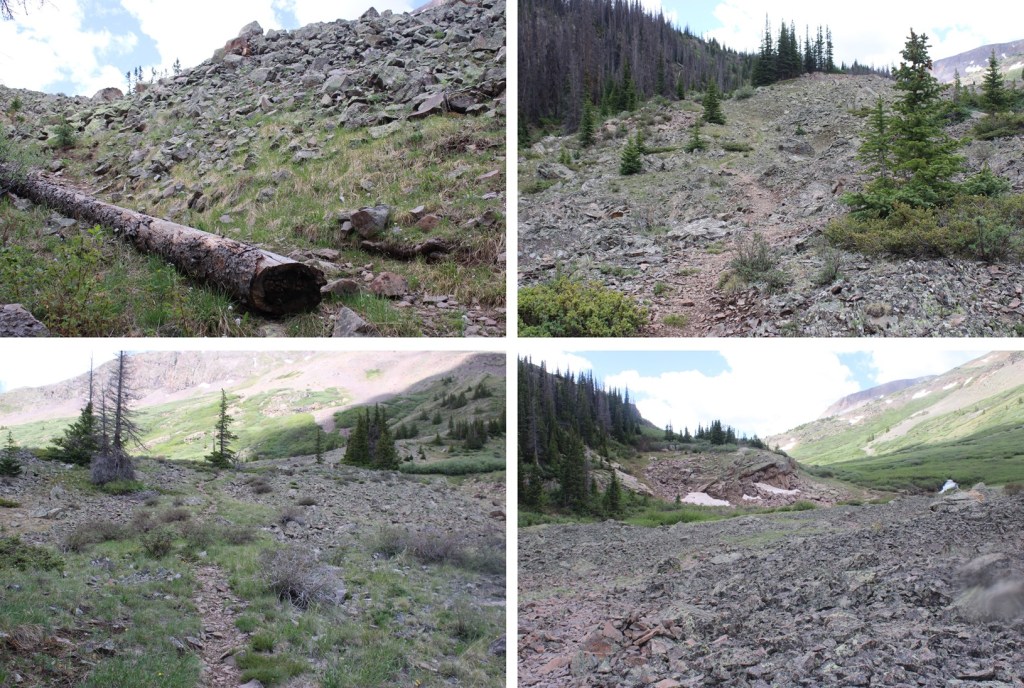
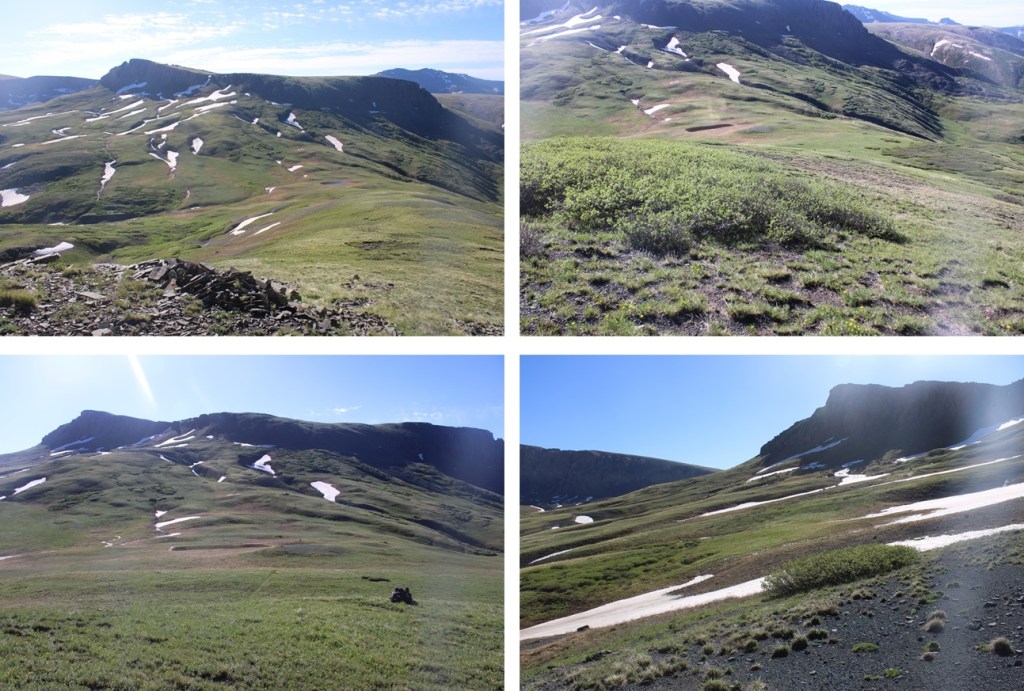
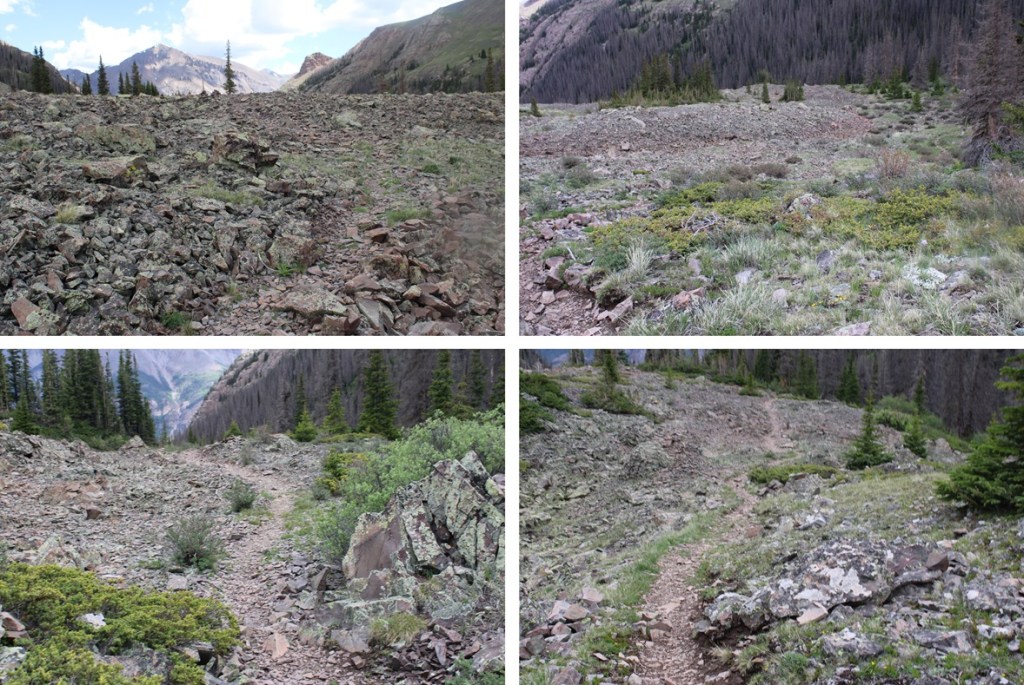
I stayed on the Colorado Trail (East Fork Middle Pole Trail) for most of the rest of the hike. Here are some pictures of the trail.
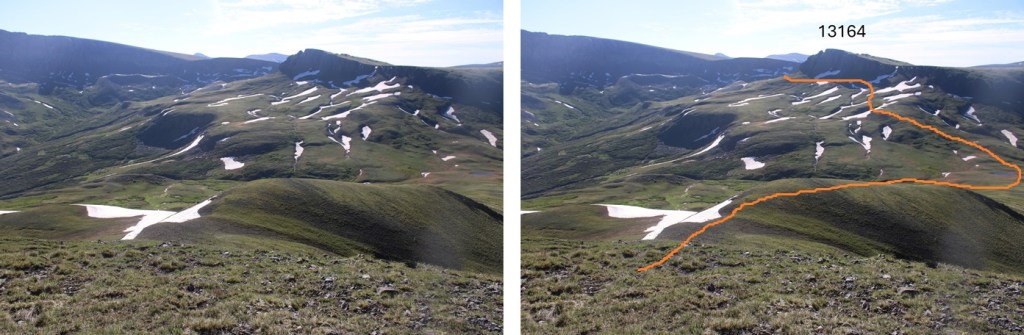
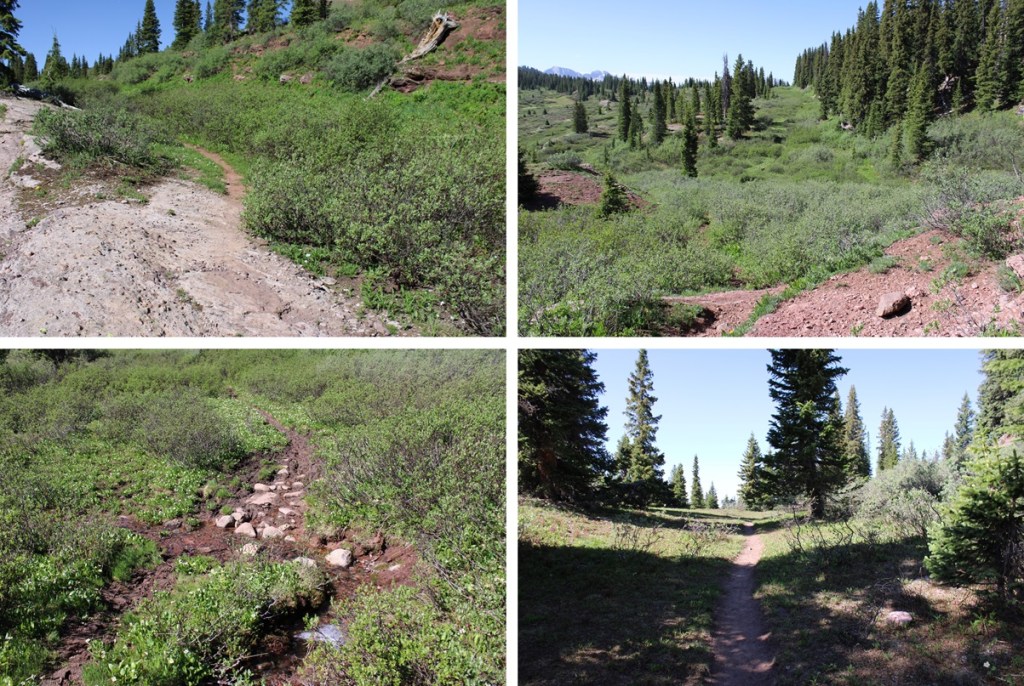
The trail meanders it’s way to a saddle:
I skirted around the north side of 13164, navigating through a could of ice patches.
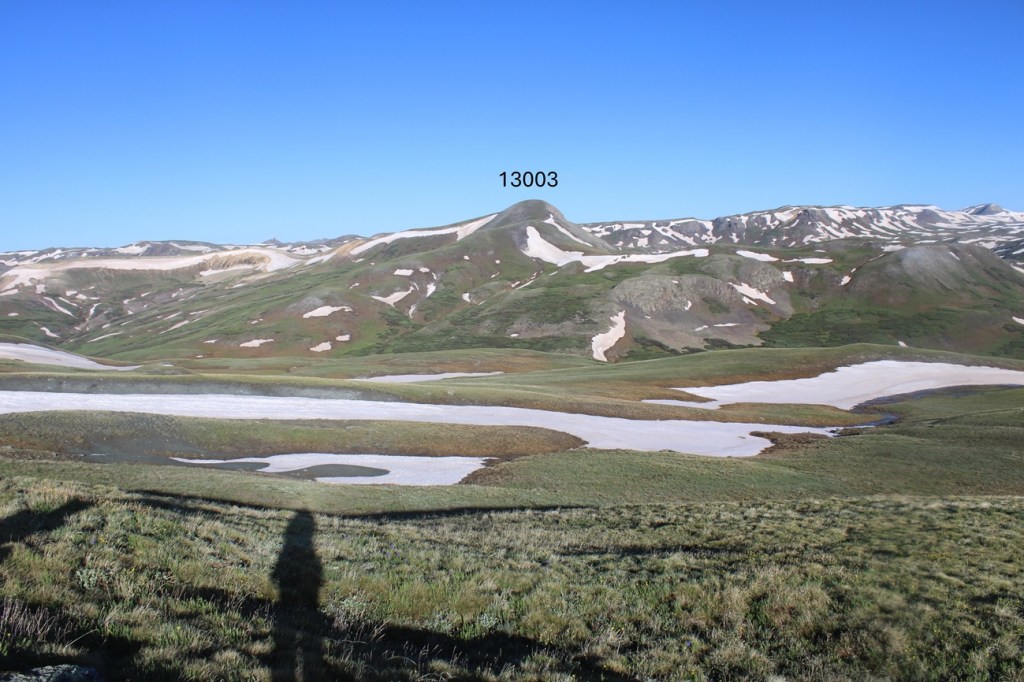
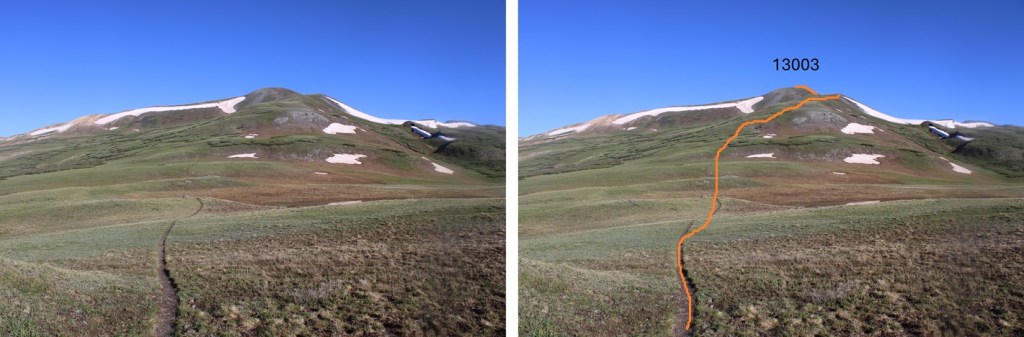
Now on the north side of 13164, I could see 13003 to the west.
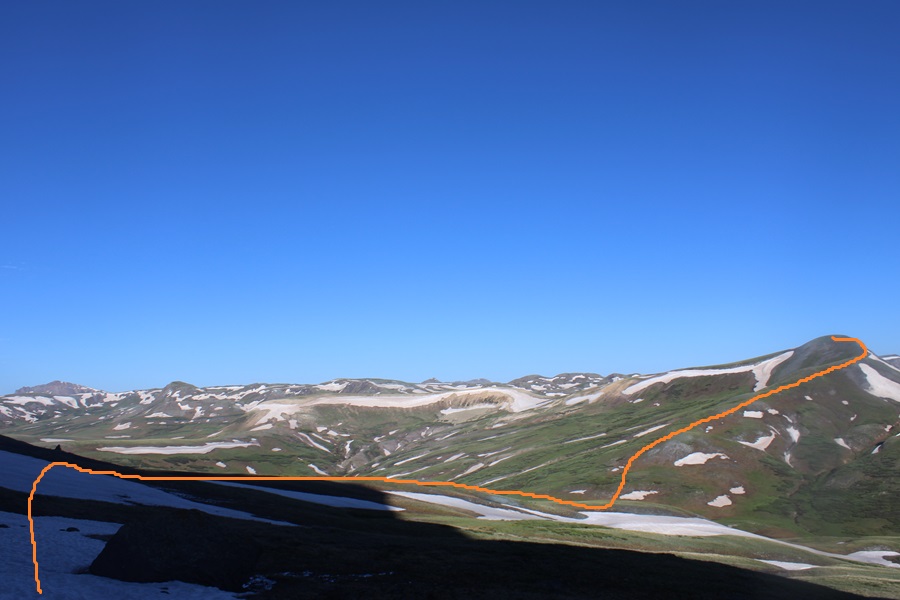
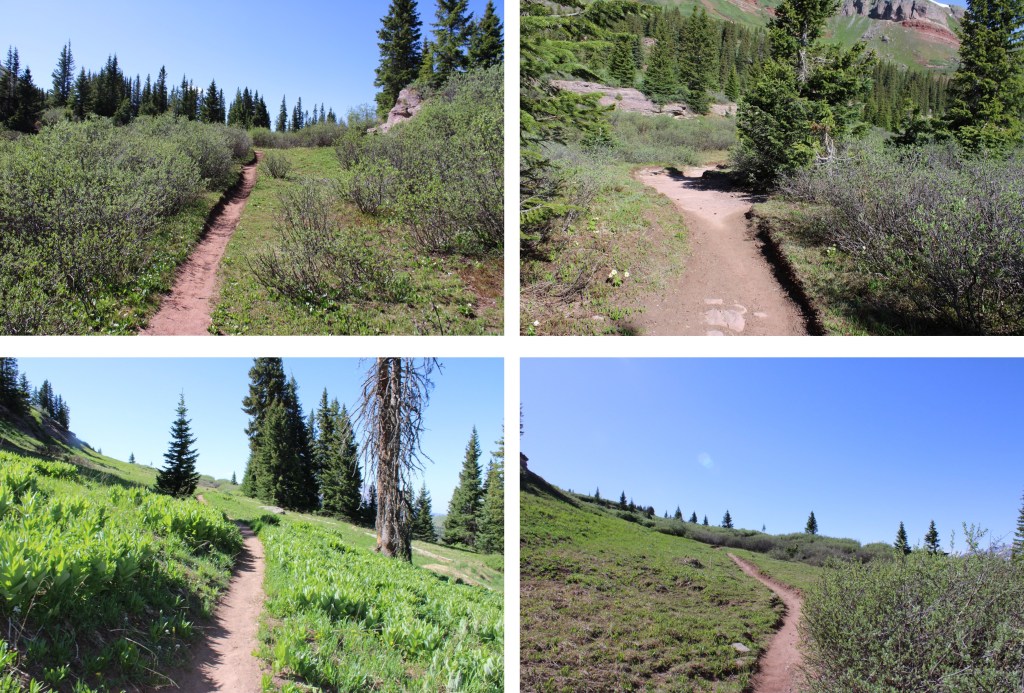
I stayed on the Colorado Trail until I hit the saddle of 13164 and 13003, losing about 500’ of elevation, then left the trail and took the tundra covered ridge to the summit. This is the route I took.
I made my way to the saddle
Then hiked the ridge to the summit
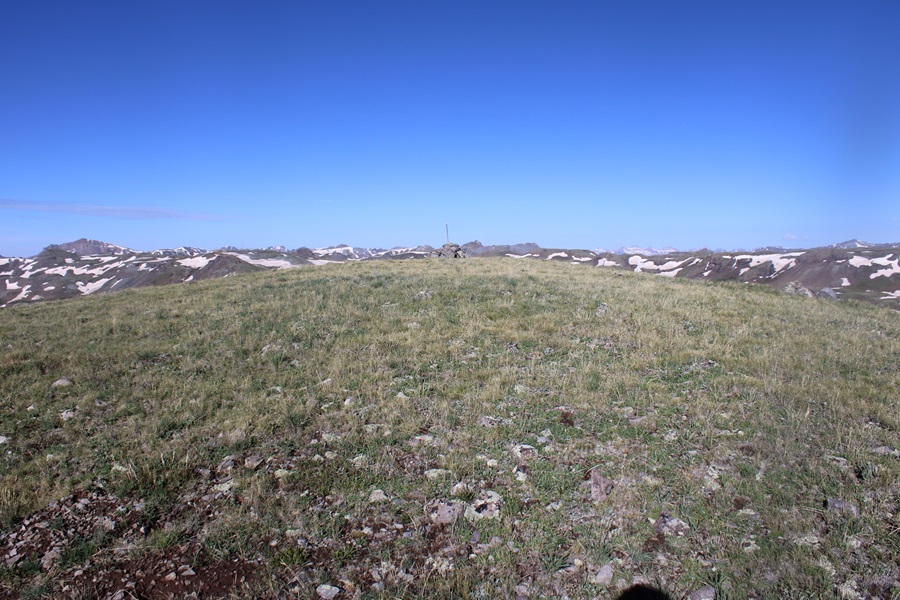
I summited PT 13003 at 8:15am
PT 13003:
This was an out and back hike for me, so I turned around and retraced my steps. Here’s my route back down the saddle, skirting around the left side of PT 13164, following the Colorado Trail.
I then continued following the trail as it wound back to the Cataract Gulch Trail
Past the lakes and through the upper basin, I kept following the trail, aiming for Sunshine Peak to the north.
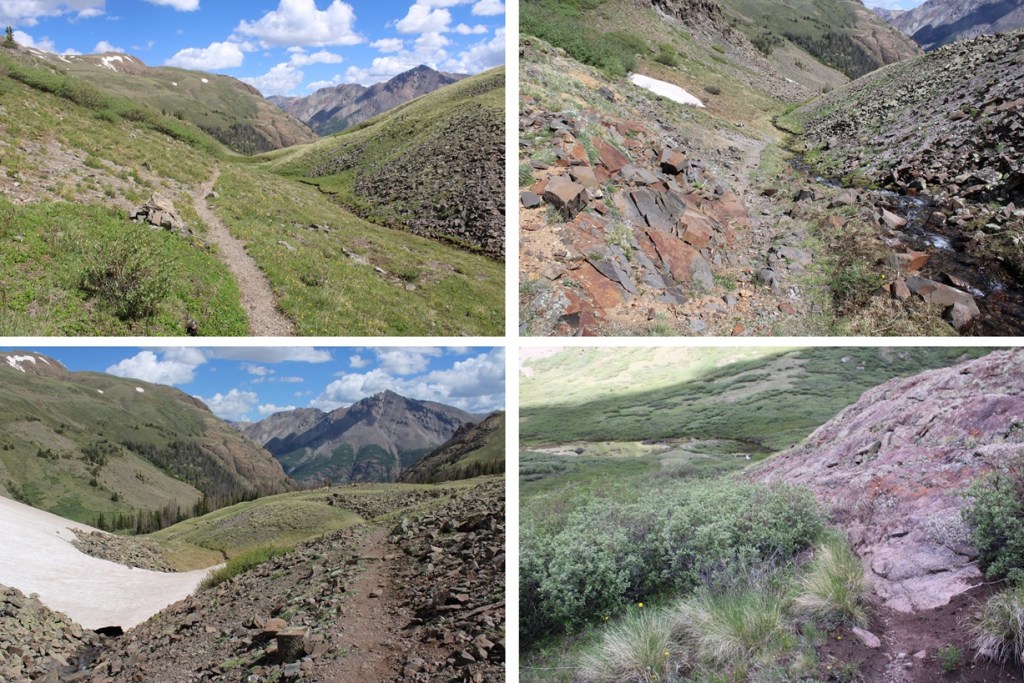
I crossed the creek
Then descended through the rocky basin
I crossed the creek twice more, and then followed the trail back down around the waterfall and back to the trailhead.
I made it back to the trailhead at 12pm, making this a 17.1 mile hike with 4750’ of elevation gain in 8.5 hours. Note: My Strava glitched about 2 miles into this hike, so I drew in my route for this peak on the topo map. This was easy because most of the route was on a trail, so it auto populated. My phone and watch gave me 19.1 miles for the hike, but I got 17.1 miles when I drew the map in CalTopo.
Also, every time I’ve been to Cataract Gulch I’ve seen moose. Today was no exception.
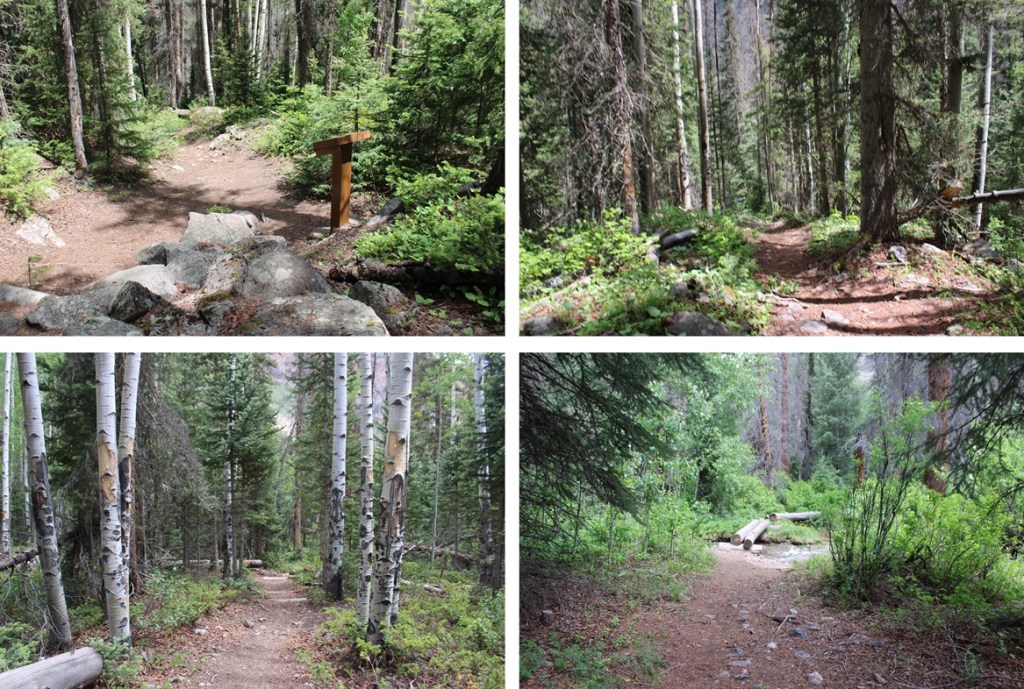
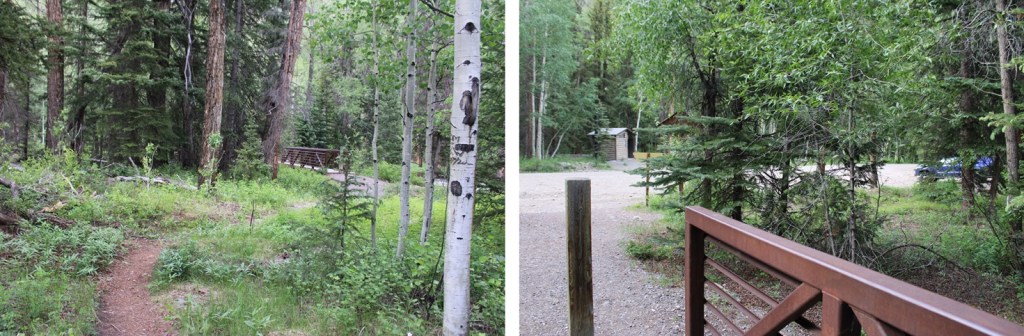
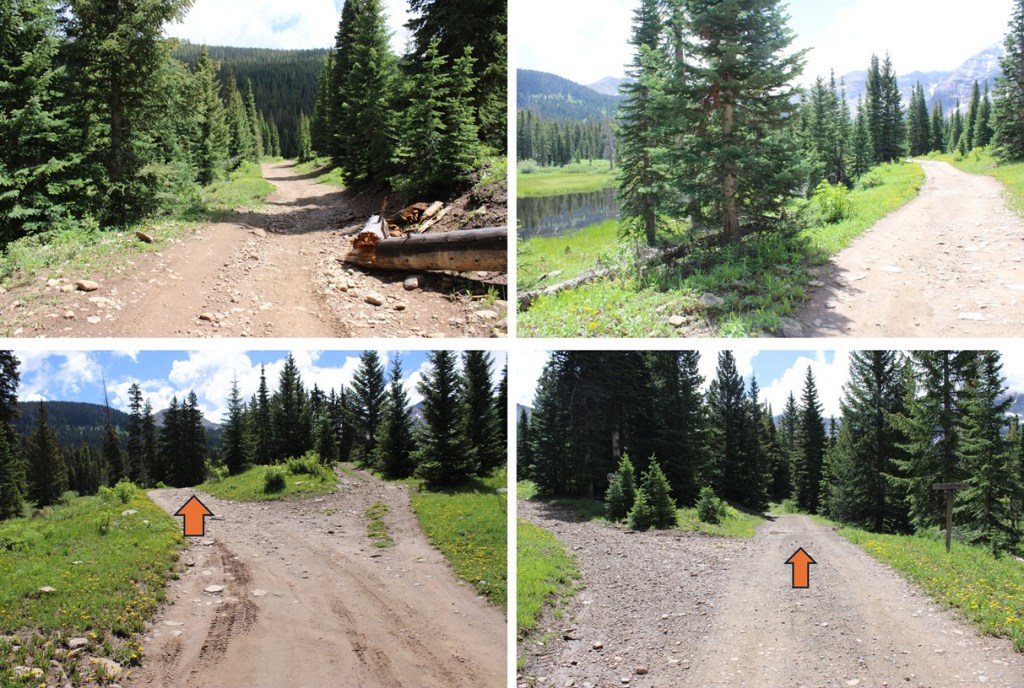
I parked at the 2WD Sharkstooth Trailhead the night before and waited out a thunderstorm. If you’re not familiar with the area, be sure to double check your directions: Google Maps kept trying to route me on ATV roads, and I got turned around several times trying to get to the actual trailhead. When I got there, I found there weren’t any parking spaces (as in, no place to park period… there weren’t any other vehicles there), so I had to park in a turnout a couple dozen yards from the trailhead. The drive was 2WD on a dirt road up until this point. This is what the lower trailhead looks like.
The next morning, after battling a night of storms and mosquitoes, I was up and on the trail at 5:30am. I realized rather quickly the 4WD road to the upper trailhead wasn’t all that difficult to navigate, and I could have easily driven all the way there. There were also several dispersed campsites along the way.
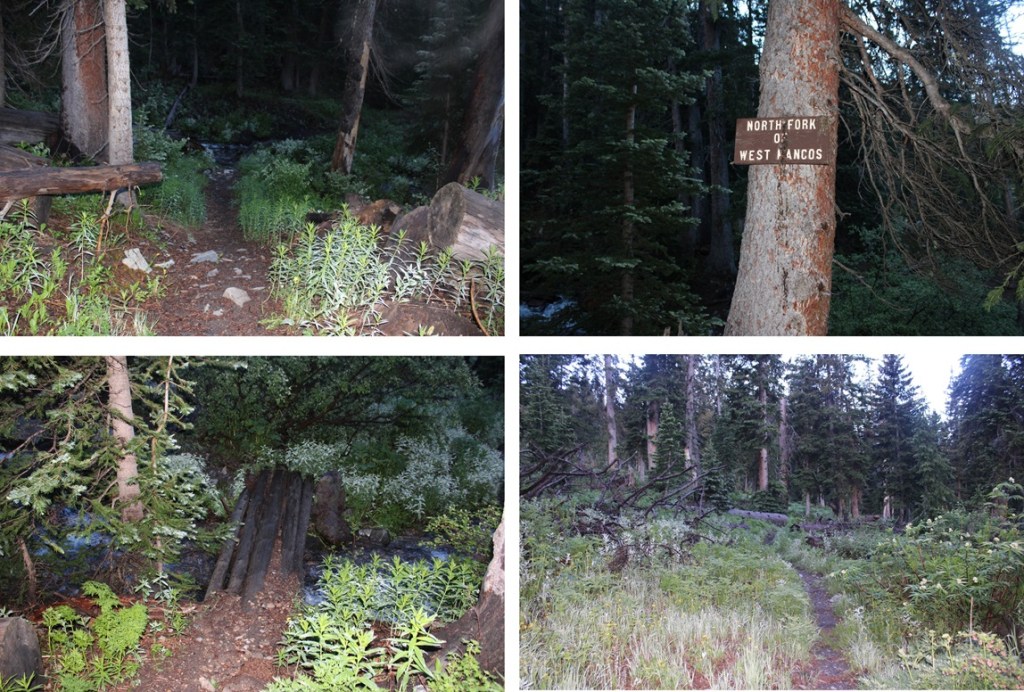
Now at the upper trailhead, I started following West Mancos Trail 621, which was the trail to the right.
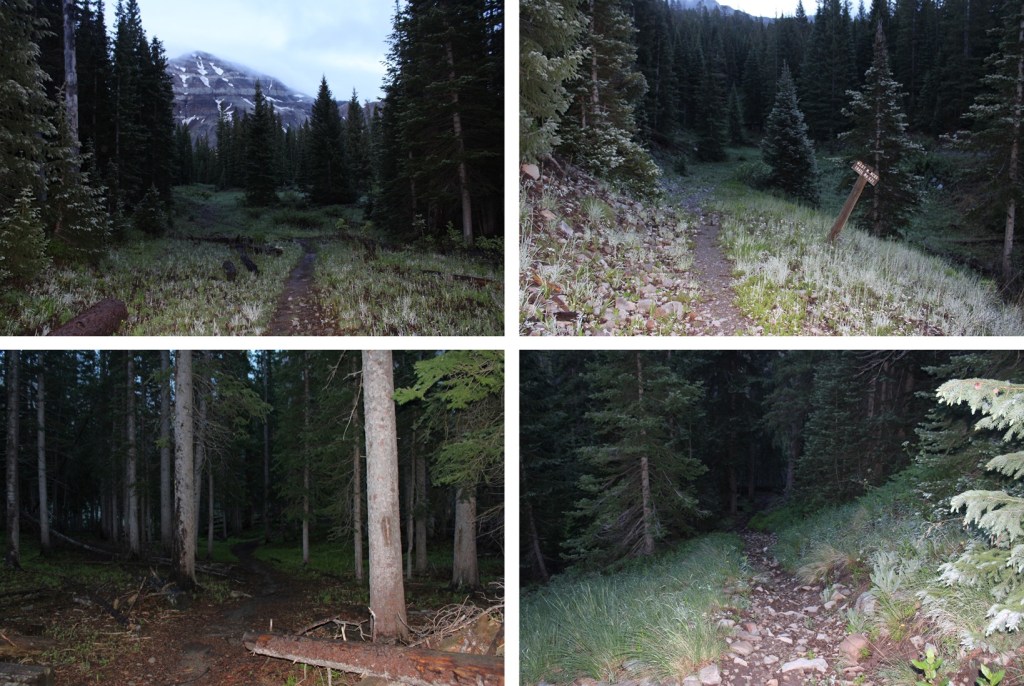
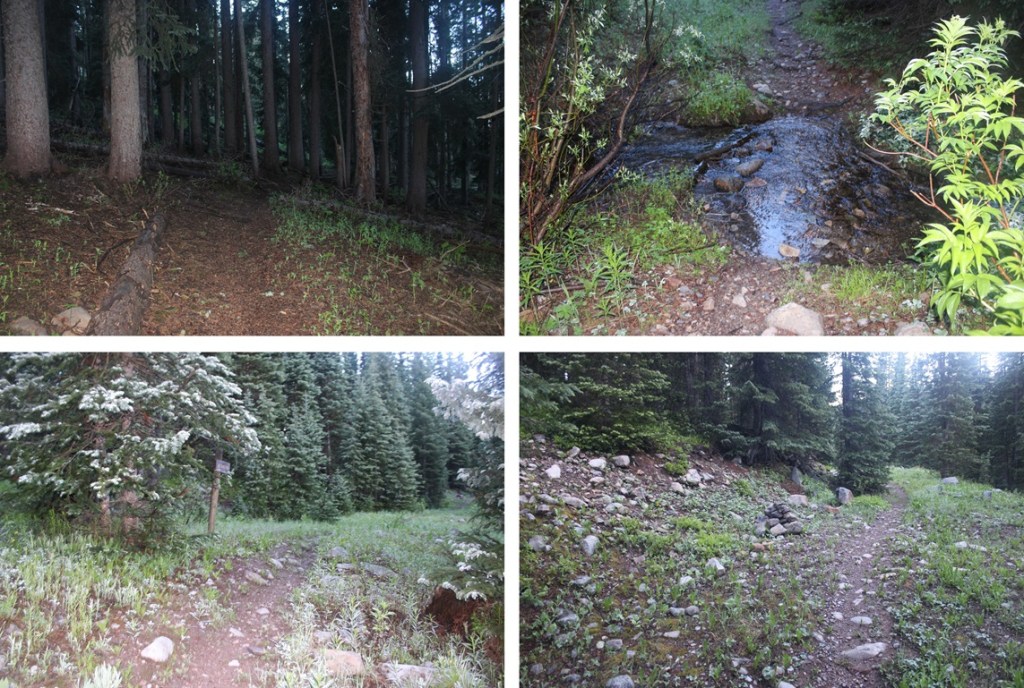
Hearing mixed reviews about how to climb this peak, I decided to take the ridge up, and the gully down. This meant descending about 600 feet and 2 miles from the upper trailhead to my turnoff point. I just kept following the West Mancos Trail. There were plenty of signs along the way to remind me I was still on the West Mancos Trail.
At about 10400’ of elevation, after I’d been hiking for a total of 3.9 miles, just when I was thinking I should leave the trail and head for the ridge, I saw a large cairn, indicating the cutoff point for heading towards the ridge.
I turned left, and bushwhacked my way southwest towards the ridge. There was no visible trail here, but I soon made it out of treeline.
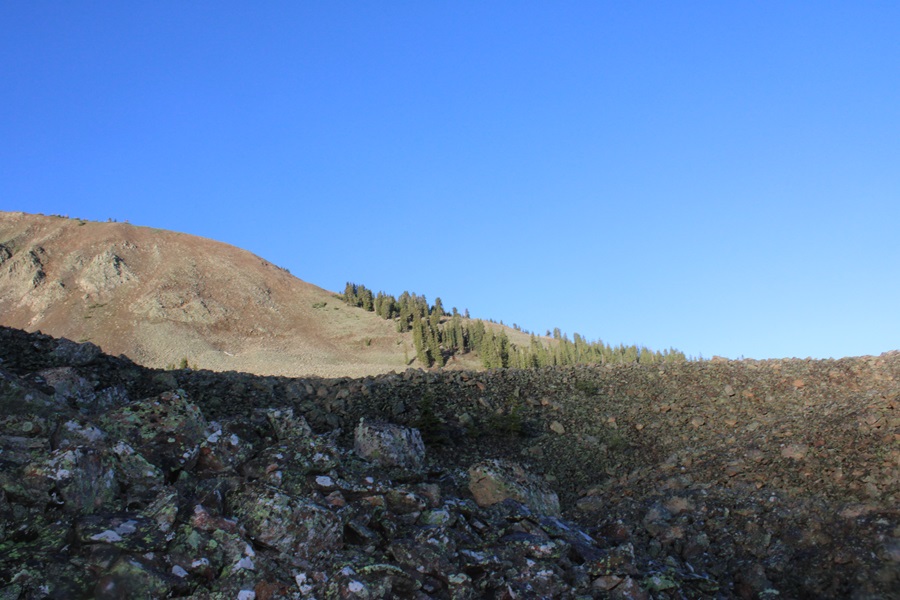
At treeline I came to a huge basin of rocks. To get to the ridge, I was going to have to head southwest, through this basin of loose, unstable rock. I did my best to stay low, and try to skirt the piles of rocks, but eventually I had to go up and over.
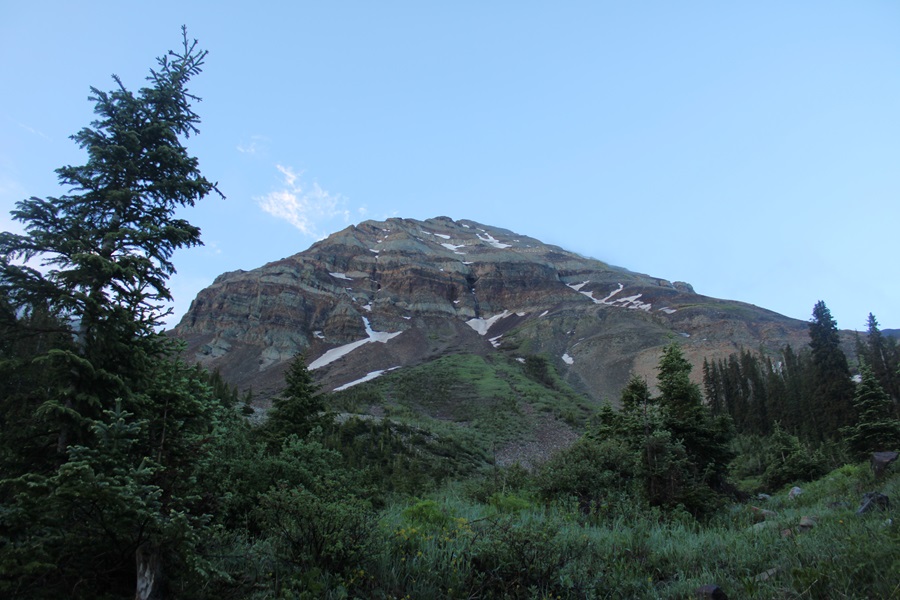
I now had a clear view of the ridge.
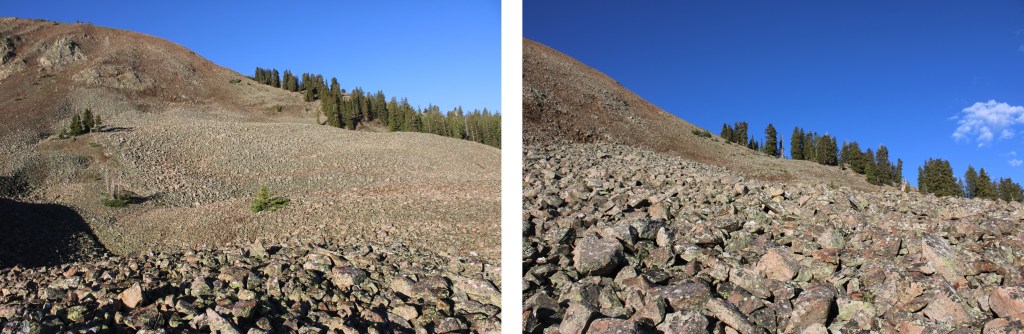
This is choose your own adventure, and none of it was pleasant. It was full of loose, rolling rocks. This is the route I took to gain the ridge.
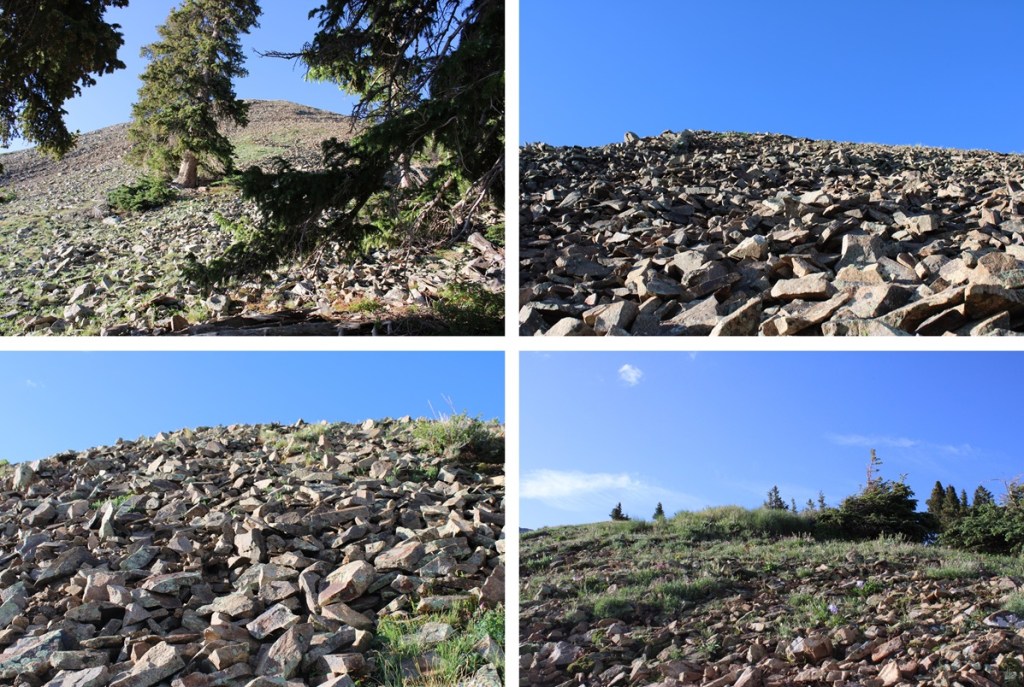
Once on the ridge, I turned left, and encountered the most difficult part of my day: Tons of mosquitoes and 350’ of elevation gain in 1/10th of a mile on dinner plate sized, extremely loose talus. There was no clear path or game trails, I just kept heading up. It was so miserable, I decided then and there I was not going to go back down this way if I could help it.
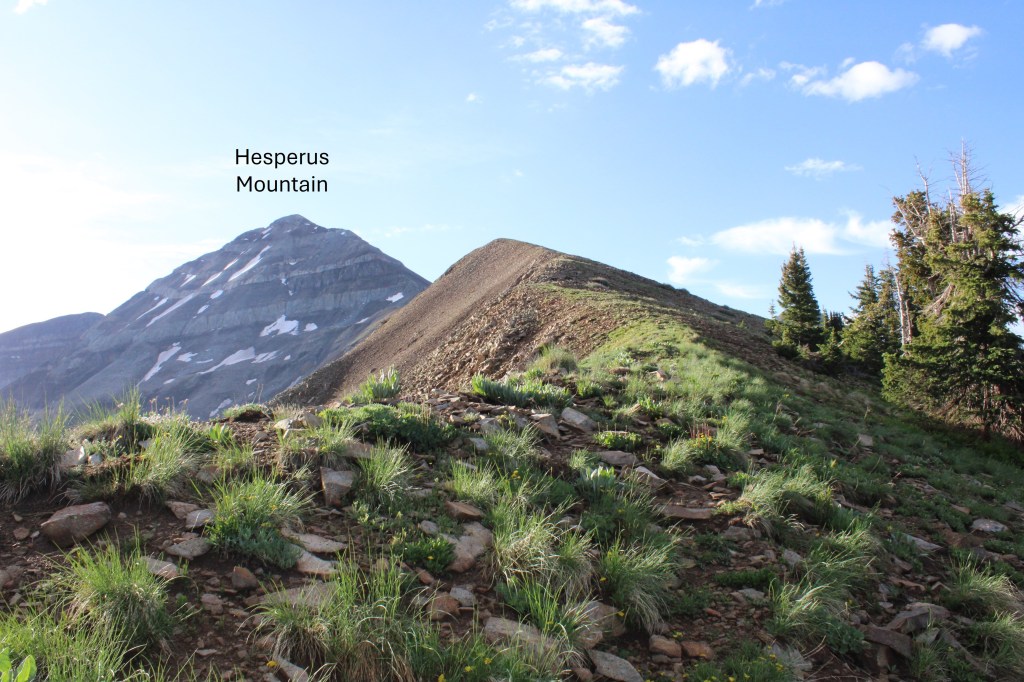
I was greeted at the top with a nice, gently sloping ridge that was easy to follow southeast towards Hesperus Mountain. There were some rocky sections, but clear game trails to follow.
I came to the end of the ridge and where the fun began.
There were quite a few game trails here, and the sun was in my eyes the entire time, so I’m not sure if I picked the correct route. If you go to the right of the class 3 section you can keep it class 2, but it’s easy to get lost. I decided to head straight up the rocks, then found a game trail that wound me around up to the summit. As I kept getting higher and higher up the mountain I found more and more trails, all seeming to lead to the same place. As long as you’re headed up and east, you should be good. This is the route I took:
And some step by step pictures of the route I took, first navigating the class 3 section
I was then able to pick up game trails that led me to the summit. I took a different path up than I did on my way back down, but all the game trails that went up led to the summit. As long as you’re keeping it class 2 you should be fine.
The summit was to the left of the trail, filled with large, loose boulders, and a wind shelter.
I summited Hesperus Mountain at 9:15am
Hesperus Mountain:
After spending considerable time on the summit, I turned and headed back down to the ridge. Once again, taking a slightly different route than I had on the way up, as trails were easier to see with the sun behind me instead of in front of me.
I made my way down the class 3 section
Ahead of me I could see the route I’d taken in, along the ridge
I looked to my right. I had a choice to make. I didn’t want to descend the same way I’d ascended, so I went over and took a look at the gullies. There were at least three to choose from, and I picked the middle one to descend, as it didn’t have any snow and I had a clear view of my exit route back into the trees.
Here’s the route I took down the gully. Since it had rained the night before, the scree was a bit muddy, and easy to grip.
And a look back at the gully I came down. As you can see, I had several options to make it down from the ridge.
At the base of the gully I followed the rocks to the north (right), finding cairns along the way that led me towards a trail in the trees.
I followed this trail through the willows and into treeline north, back to the West Mancos River Trail.
Back on the West Mancos River Trail, I followed it back to the upper trailhead, crossing the West Mancos River, and gaining elevation as I went.
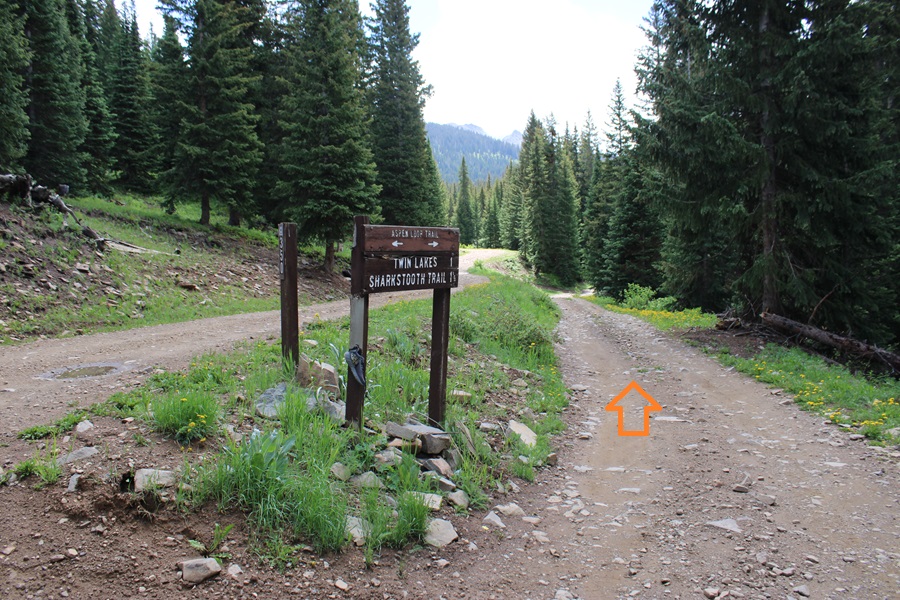
At the Upper Sharkstooth Trailhead, I followed the 4WD road northeast, past Twin Lakes, just under 2 miles back to the 2WD trailhead.
I made it back to my truck at 11:30am, making this an 11.08 mile hike with 3440’ of elevation gain in 6 hours.
I don’t know why more people don’t hike this peak. It’s class 1 98% of the time, the trailhead is easily accessible, the views are amazing, and there’s abundant wildlife. In any event, I’m recommending it to trail runners especially because it looks like good terrain for trail running. I felt this peak was almost too easy.
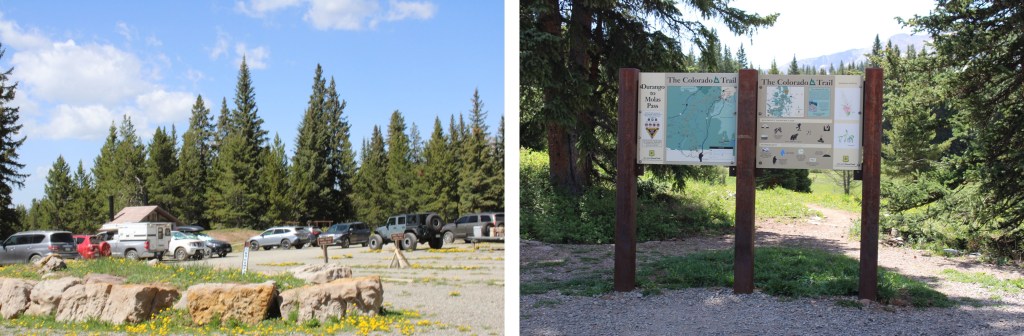
I started at the Colorado Trail Segment 25 Trailhead near Little Molas Lake. There are several dispersed campsites here, public restrooms (although the women’s side was closed for the season), and tons of parking.
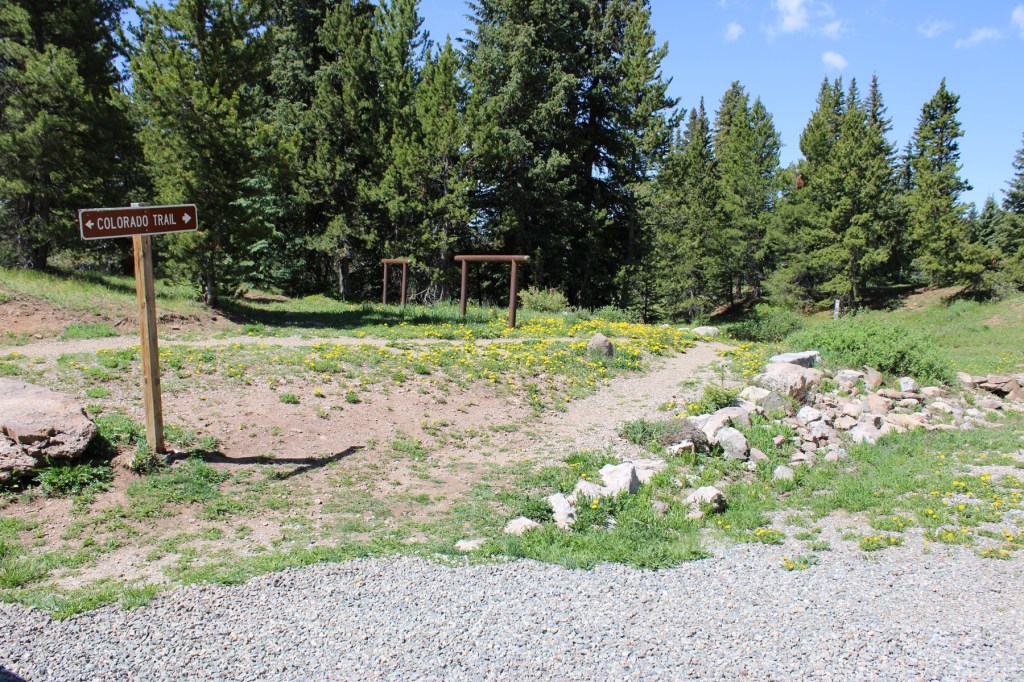
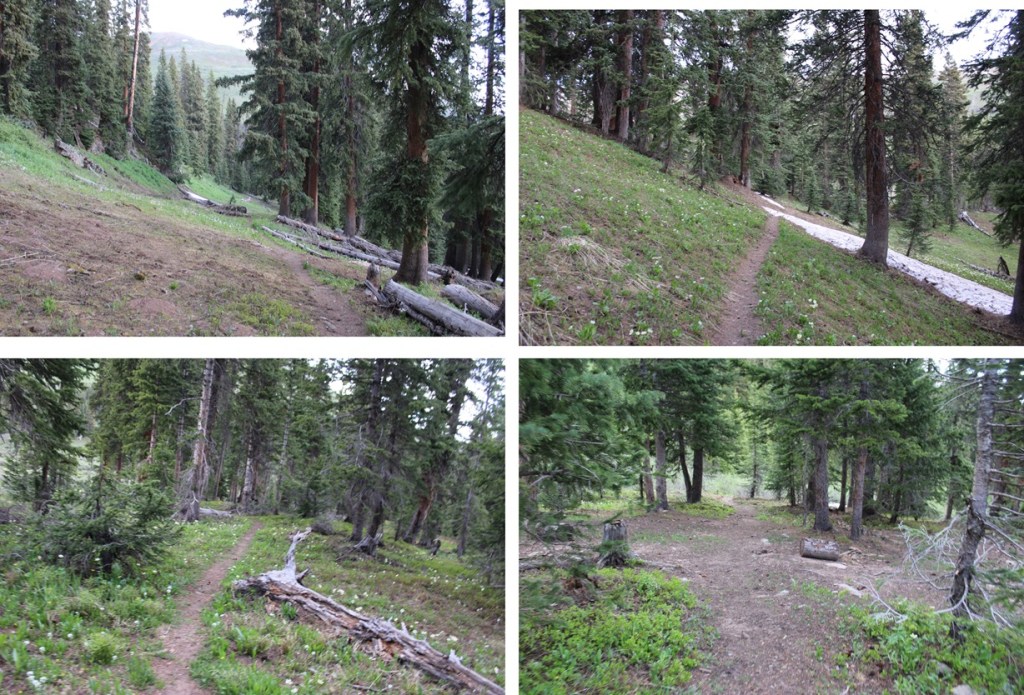
The trail is easily marked, and starts at the south end of the parking area
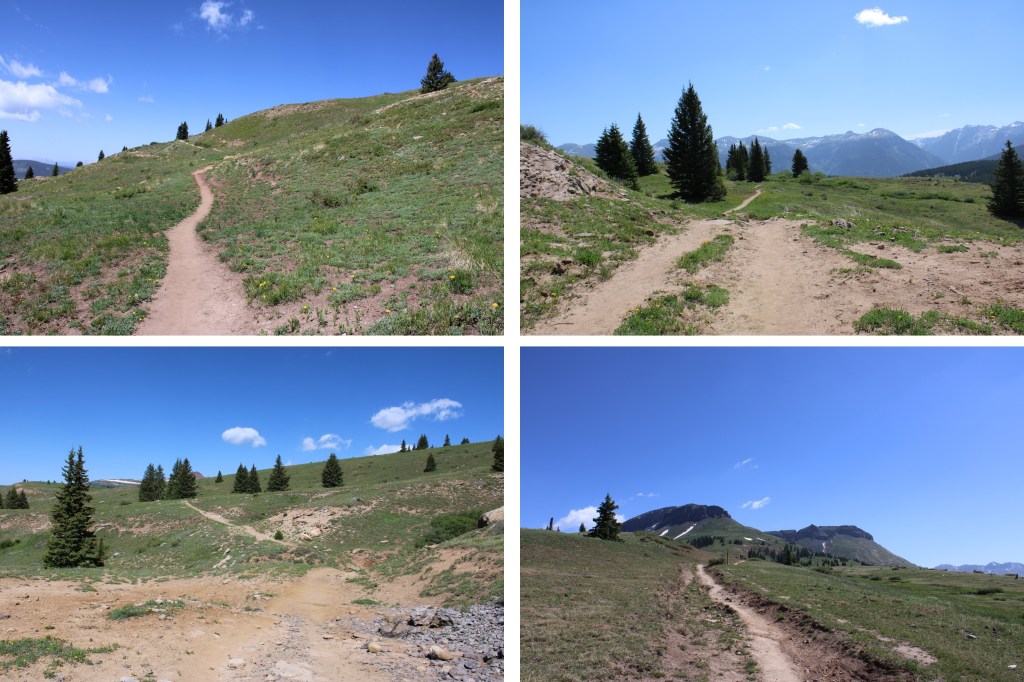
I followed this well-defined trail for just under 3.5 miles as it wove in and out of treeline. (Note, between miles 2-5 of this hike I gained and also lost a lot of elevation).
After hiking for just under 3.5 miles I found myself at the base of PT 12,864. The Colorado Trail continues to the left, but if you look closely, at the top of the rock formation here there is also a trail to the right. I left the Colorado Trail and took the trail to the right.
While not named, this is also a well-established trail. By the looks of all the tire tracks, it’s popular for the mountain bikers. It took me up and down and around to the north, towards Putnam Basin.
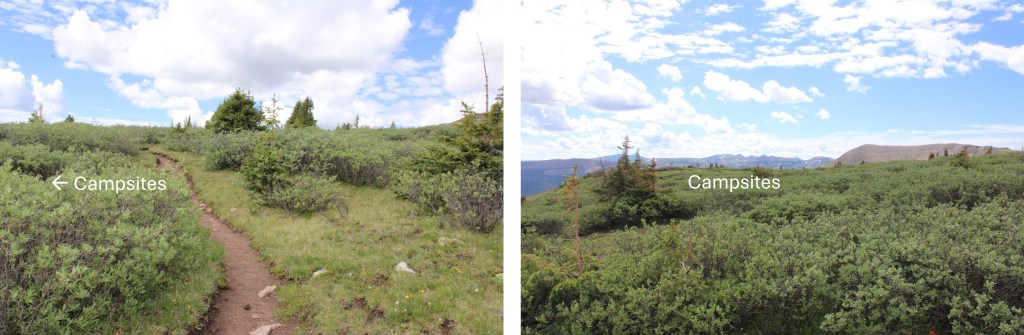
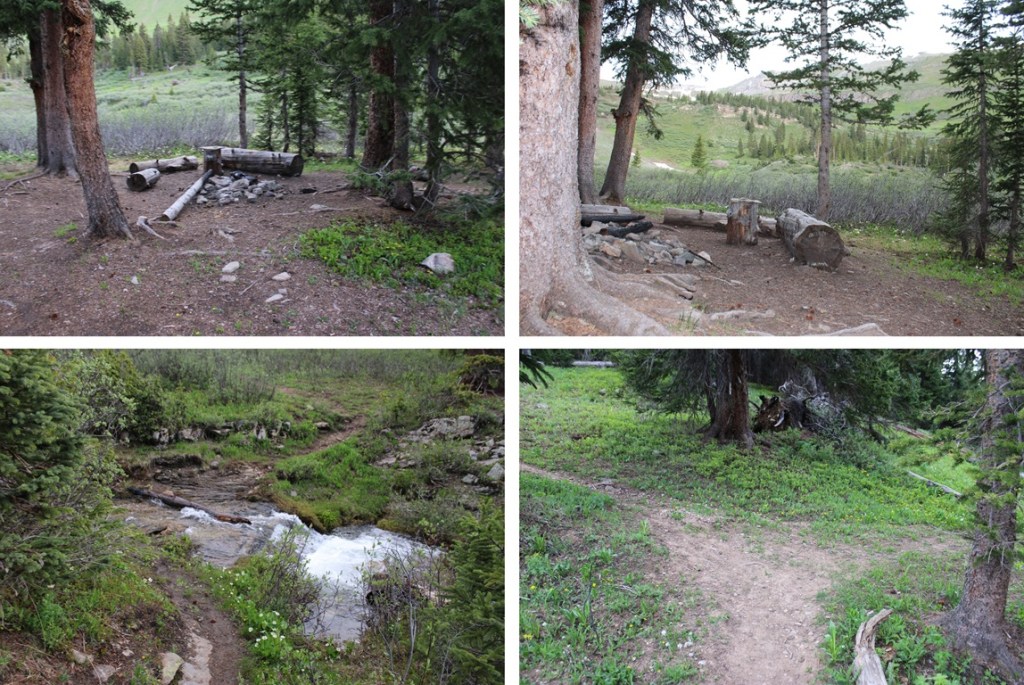
Just before the basin were a few campsites, and a creek to cross. There are a few social trails in the area due to the campsites, so if you’re given the option, go left.
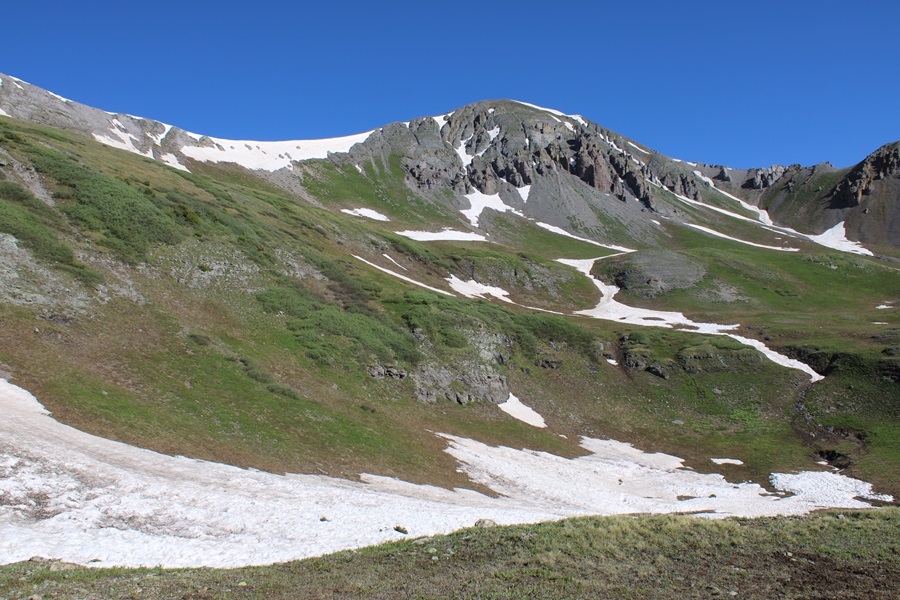
Now at the base of Putnam Basin, I had a clear view of the route ahead of me. No more losing elevation, I would just be gaining for the rest of the hike. This is still on a class 1 trail, all the way to the saddle.
This is the route I took
And some step by step pictures of the route:
Just before the ledge that brought me to the saddle there was some snow on the route, so I had to get a little creative. It’s all straightforward though, and there are several cairns to follow if you cannot see the trail. I just aimed for the saddle.
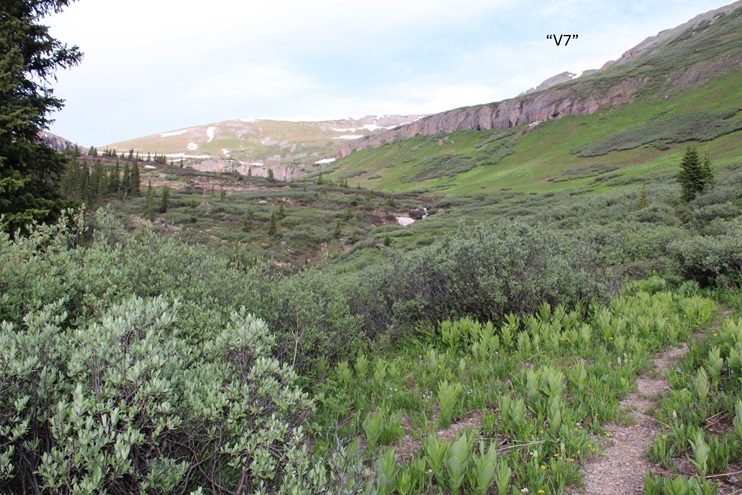
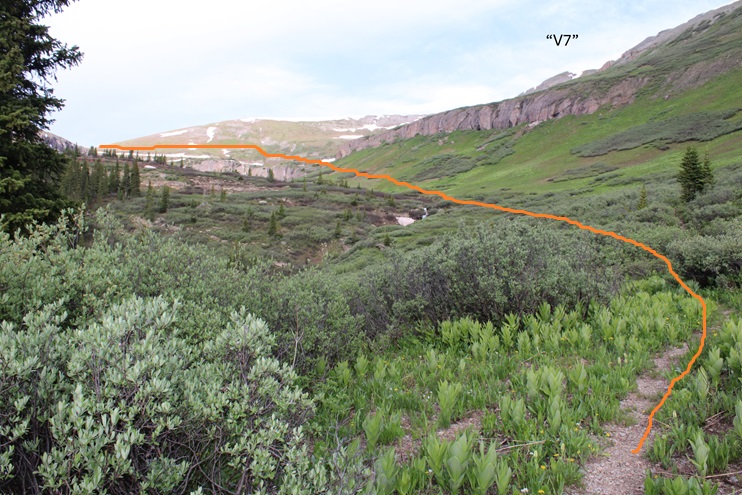
Once at the saddle, I turned right and followed the ridge north to the summit. If you’re lucky, you’ll find a game trail that leads all the way to the summit. Just make sure you stay on the ridge proper, as there’s a trail that goes to the left as well that will skirt “V7” and bring you towards Twin Sisters. The ridge is tundra the entire time.
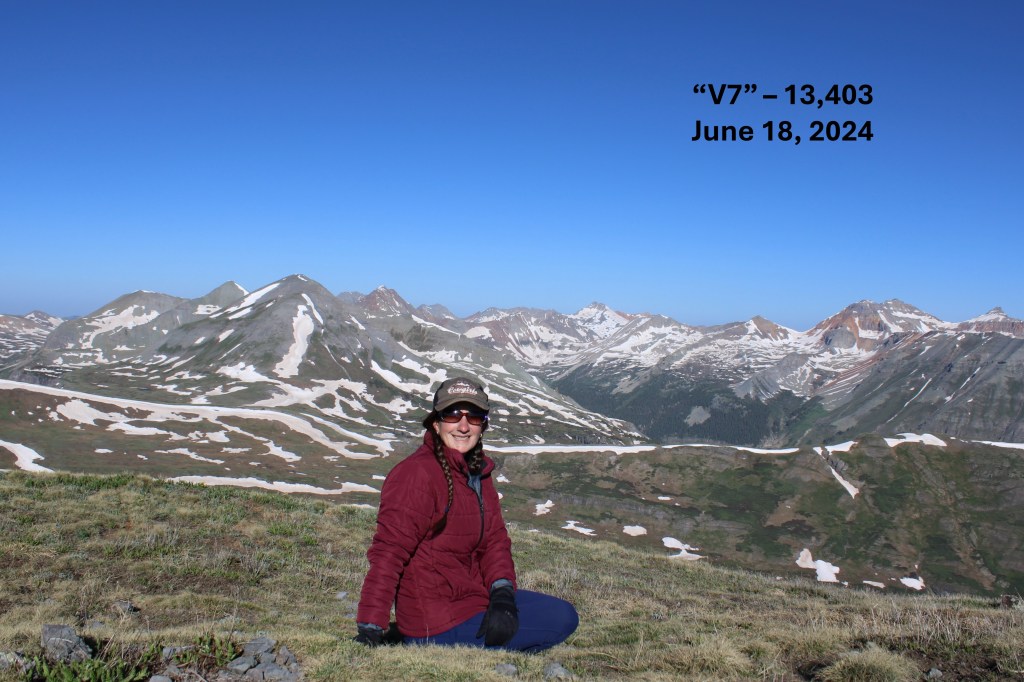
I summited “V7” at 7:45am
“V7”:
Now to head back down. This was an out and back hike for me, so I turned around and followed my route in. I followed the ridge and headed south, back to the saddle.
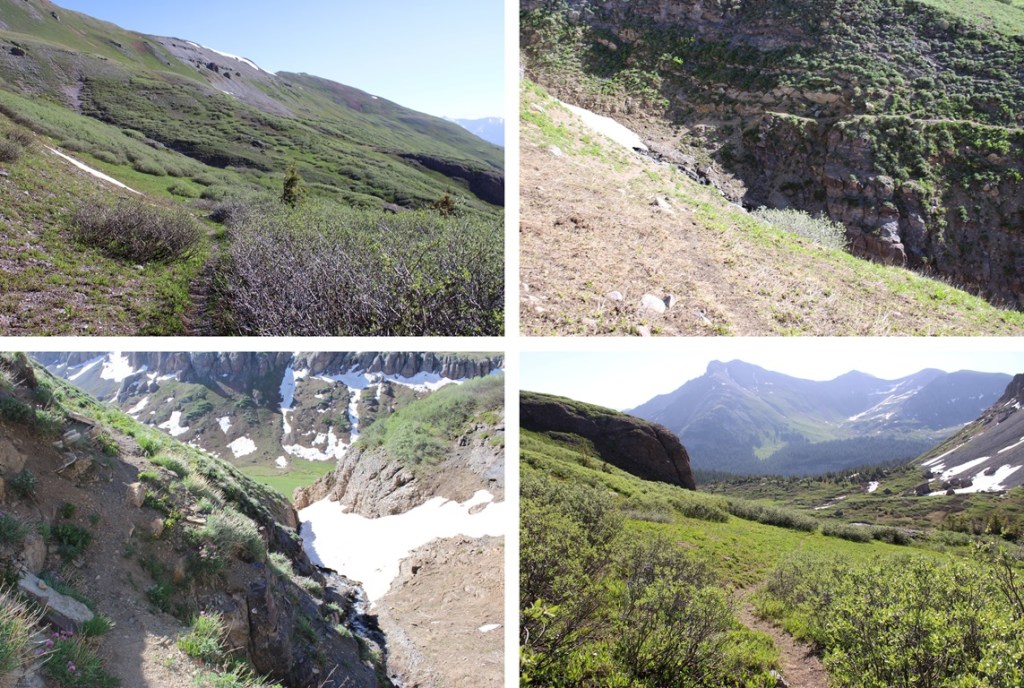
Here’s a view from the saddle of Putnam Basin.
At the saddle I turned left, and headed northeast, following the cairns back to the trail
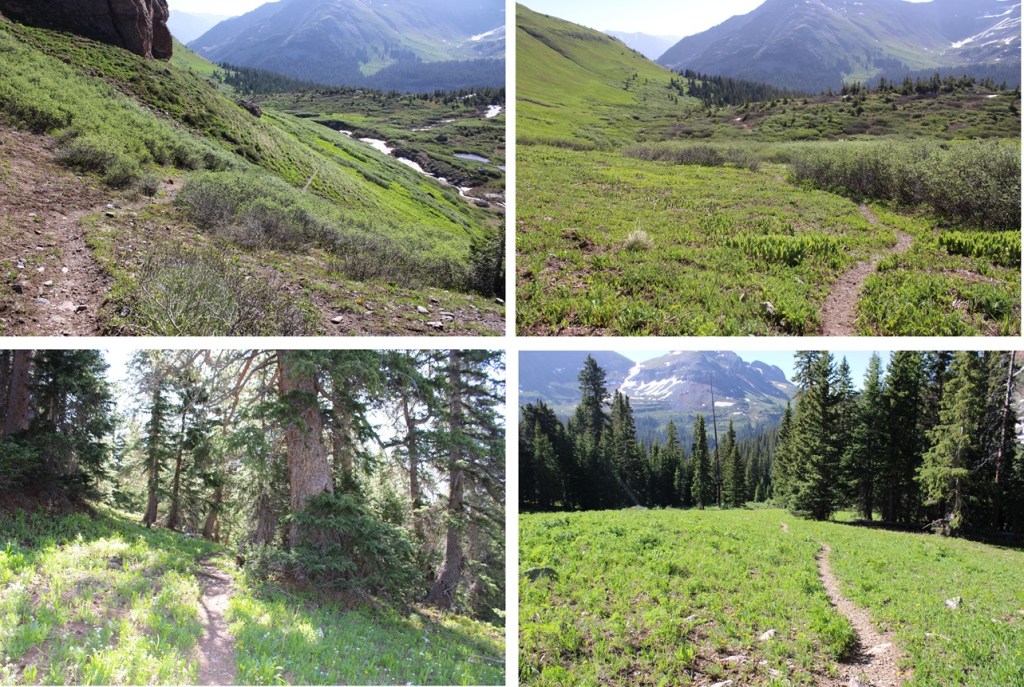
I picked up the trail again, and followed it down the basin, sticking to the left side of the basin/creek.
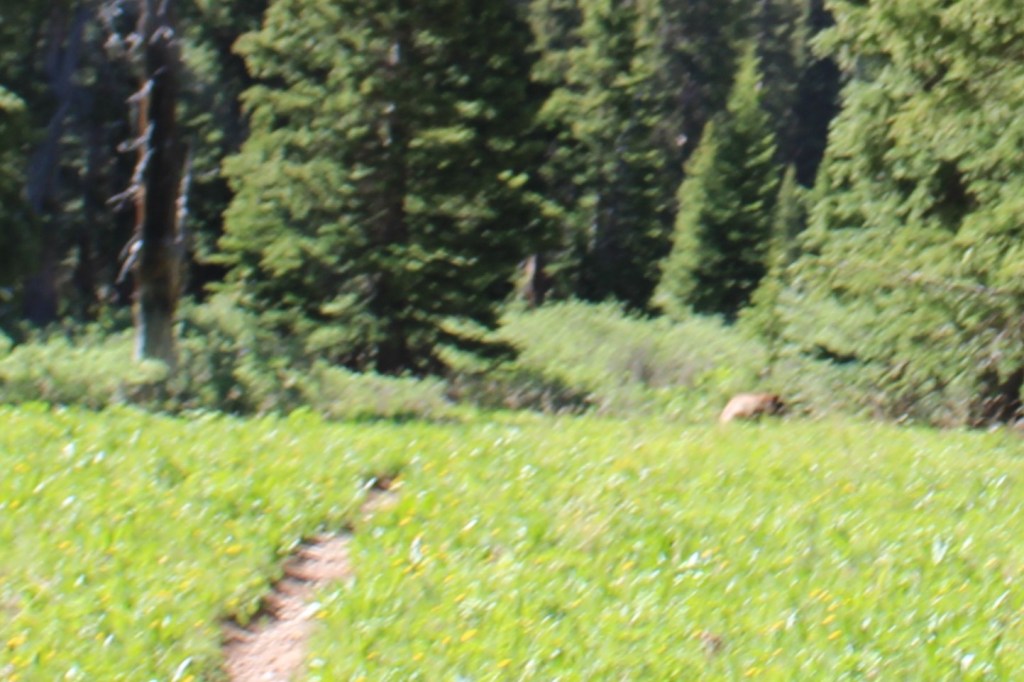
I’d seen quite a few deer that morning. Mostly from afar, but deer nonetheless. As I was nearing the camping area near the base of the basin I saw one running towards me in a funny way, and realized quickly it wasn’t a deer, but a bear. As soon as the bear noticed me, it jumped 90 degrees, and started running the other way. I kind of got a picture, but it’s fuzzy, as the bear was quick.
I started wondering what the bear had been running from? About 20 feet later, I realized what it was: I spied a mama moose with her calf.
I hid behind a tree to watch them while giving them space. I love watching moose calves, especially the really young ones. They tend to bounce around everywhere, turning in circles, braying, and excited about life in general. After this video the calf got really jumpy, but I’d already turned around and started hiking away so as not to bother them.
Mama moose with calf:
I passed the camping area, and continued following the trail, now headed south (and uphill).
I made it to the Colorado Trail cutoff, turned left, and followed it 3.5 miles back to the trailhead.
I made it back to the trailhead at 10:30am, making this a 13.78 mile hike with 3029’ of elevation gain in 5 hours 15 minutes.
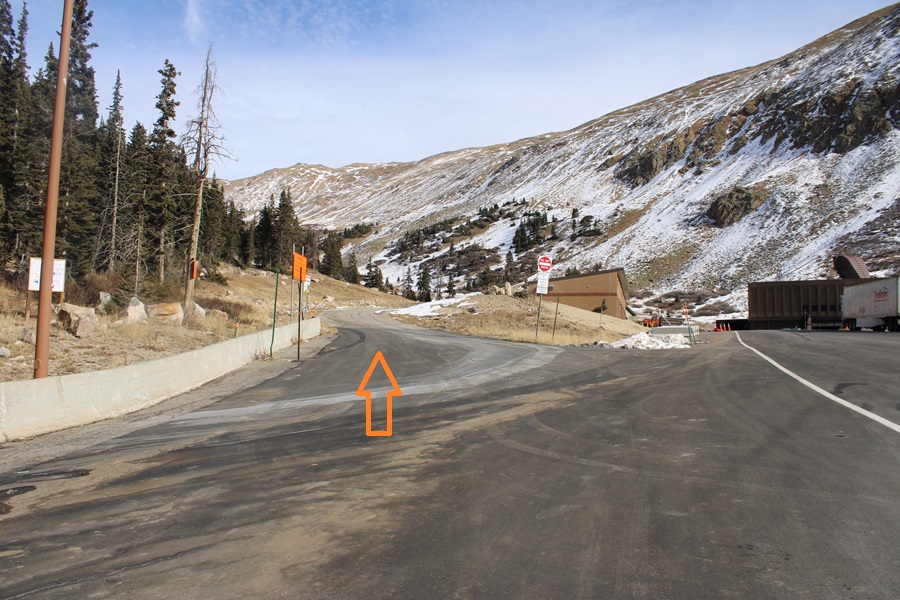
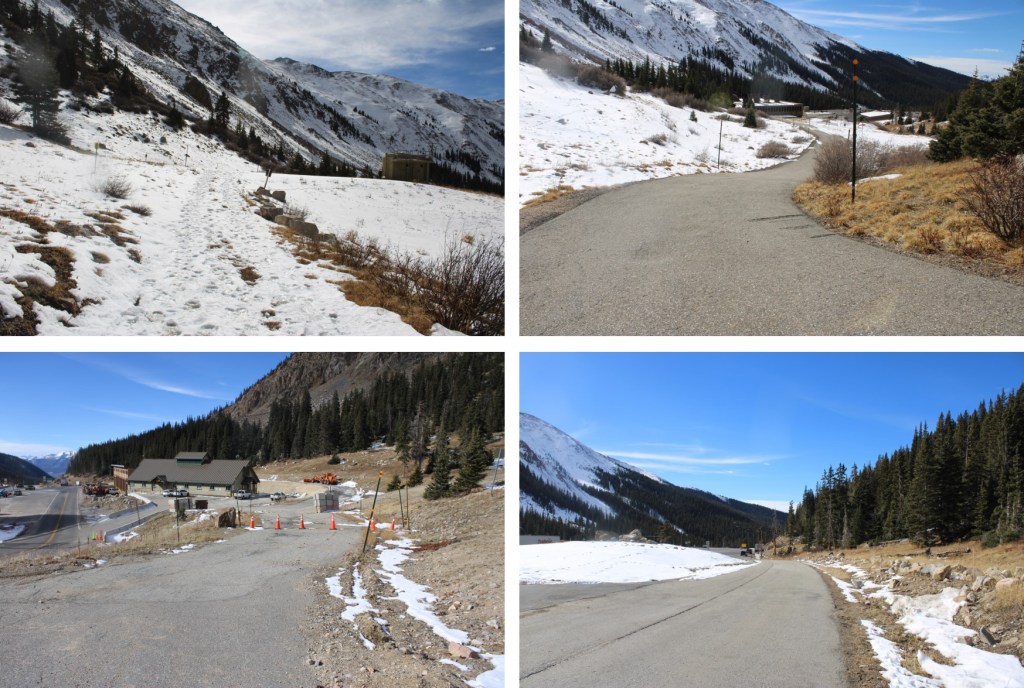
I parked behind some semis at the I-70 MM 213 Westbound Chain Station and was on the trail at 6:20am. I started by taking a paved service road northeast.
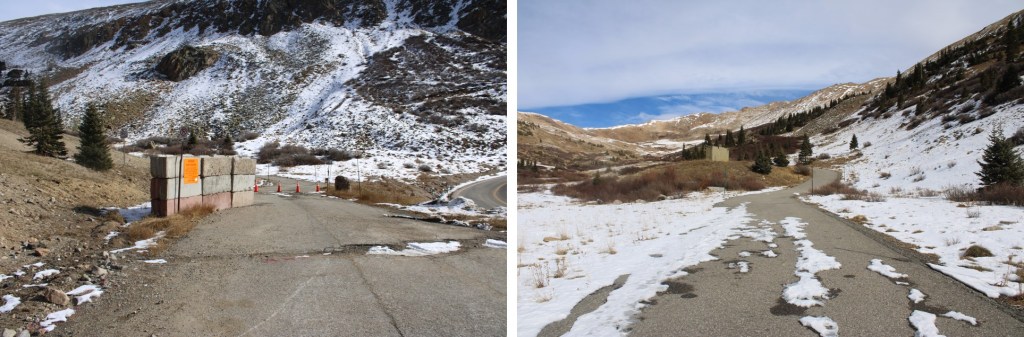
The road eventually becomes a dirt road
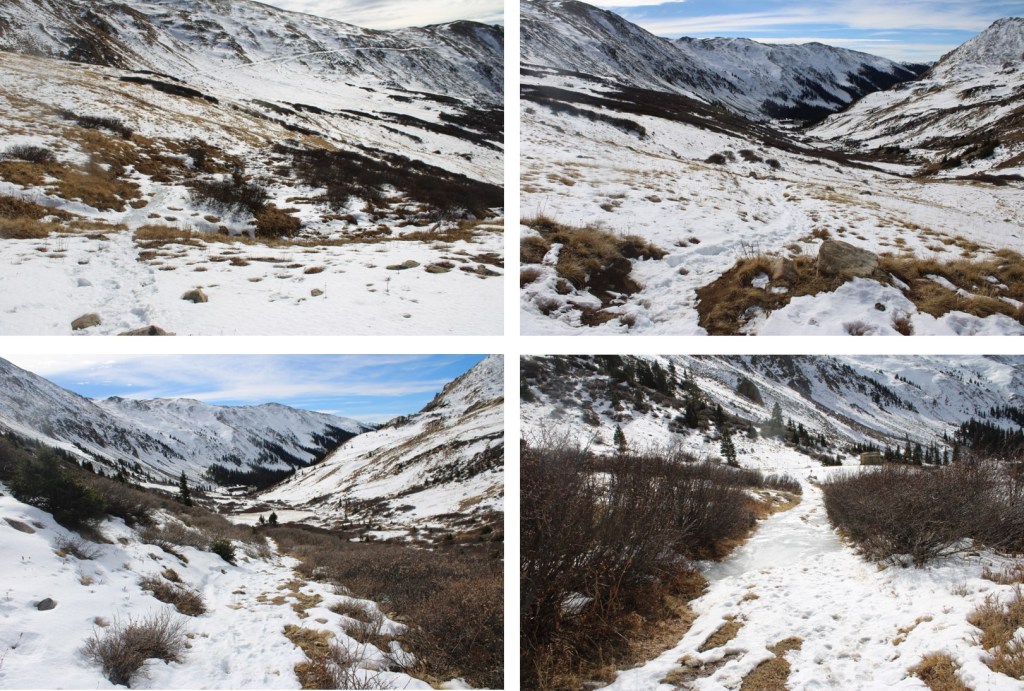
The dirt road quickly becomes a trail, and this morning that trail was filled with a couple of inches of ice. The kind that microspikes slip on. I followed it as it headed northeast into a basin
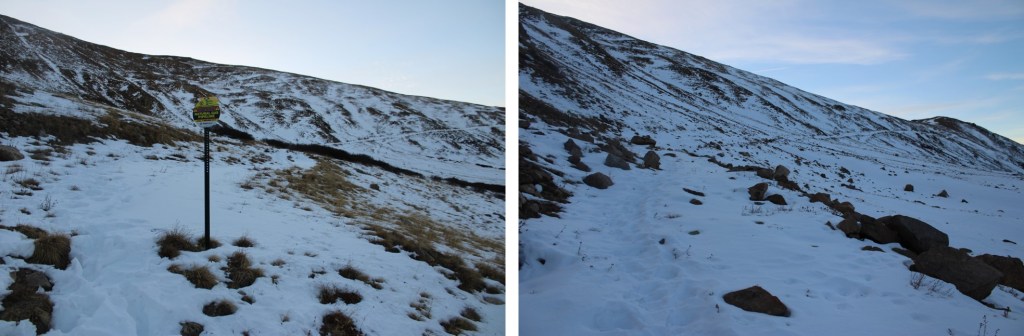
After hiking for 1.3 miles I came to a service road and turned right to follow the road towards the ridge.
As you can see from further away, this road goes all the way to the ridge.
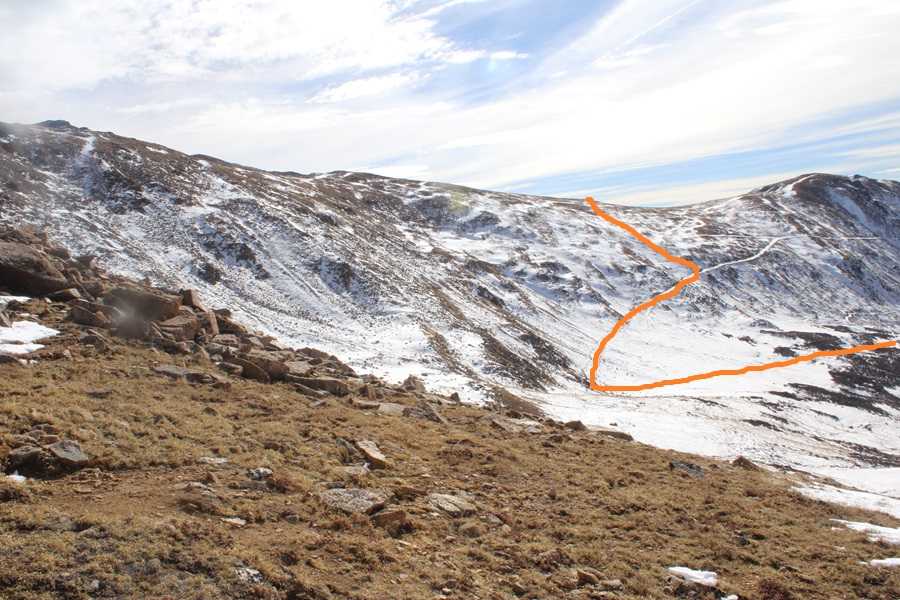
However, I did not take the road to the ridge. The road was full of several feet of snow, but the mountainside only had a few inches of snow, so instead of trenching the route, I headed east towards the ridge. This is the route I took.
Here are some pictures of the road
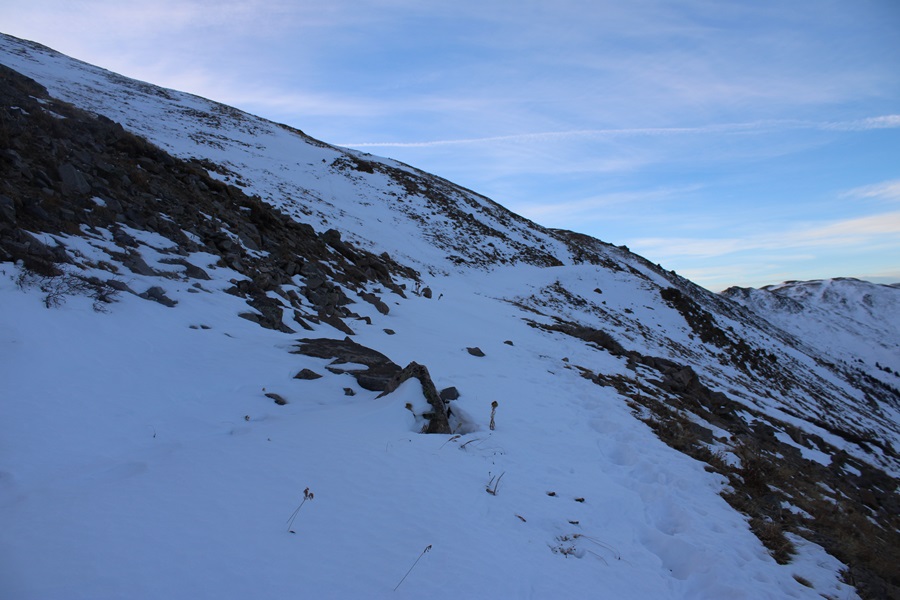
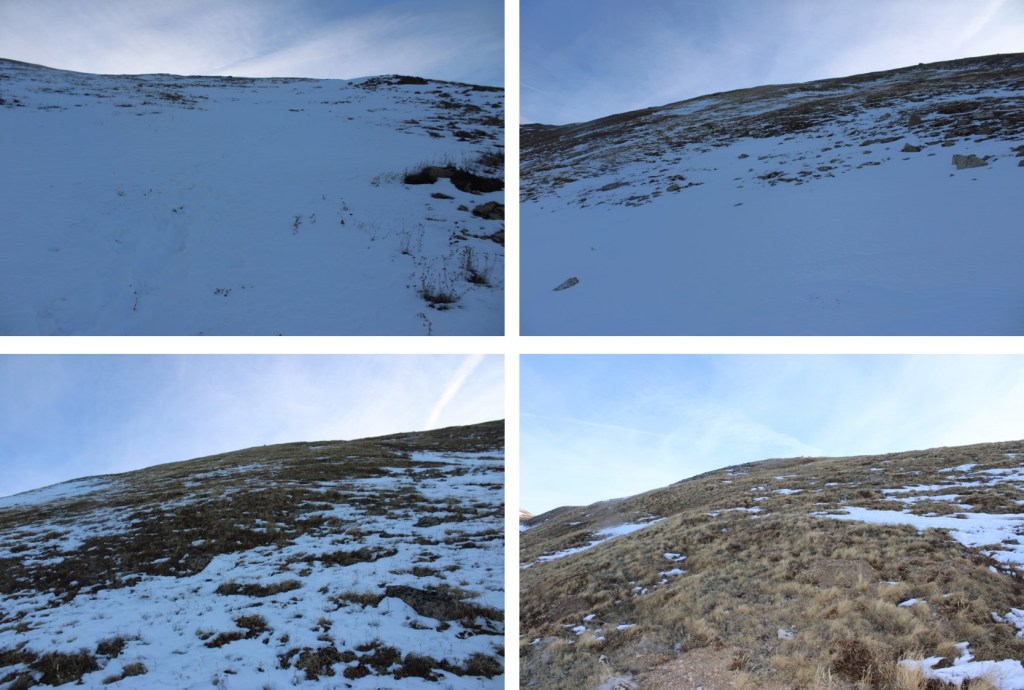
At 12160’ I left the trail and headed up towards the ridge
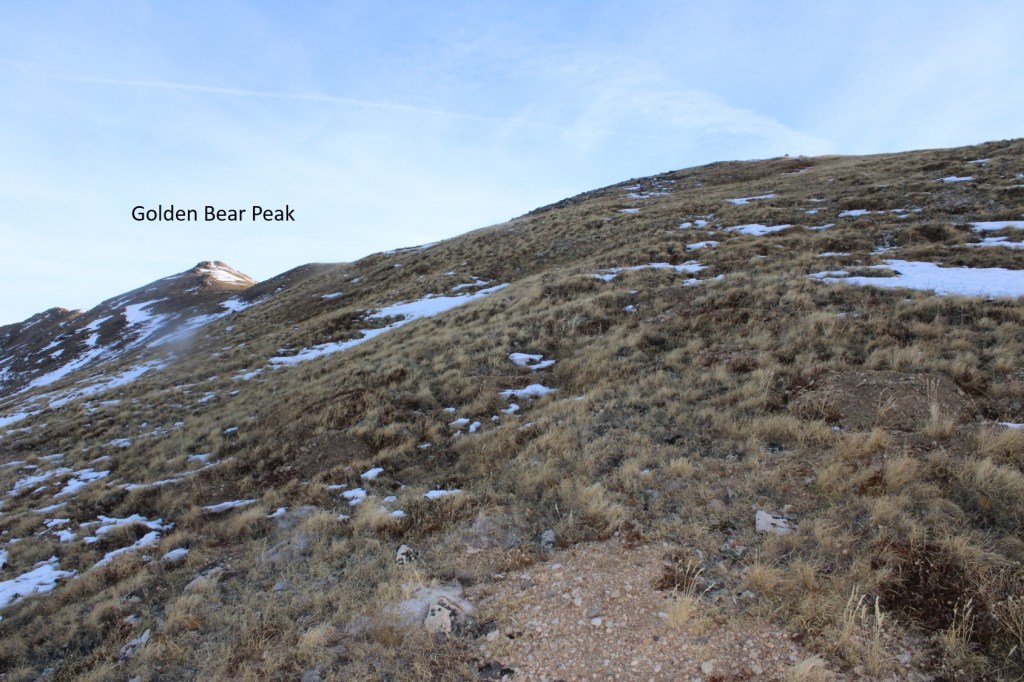
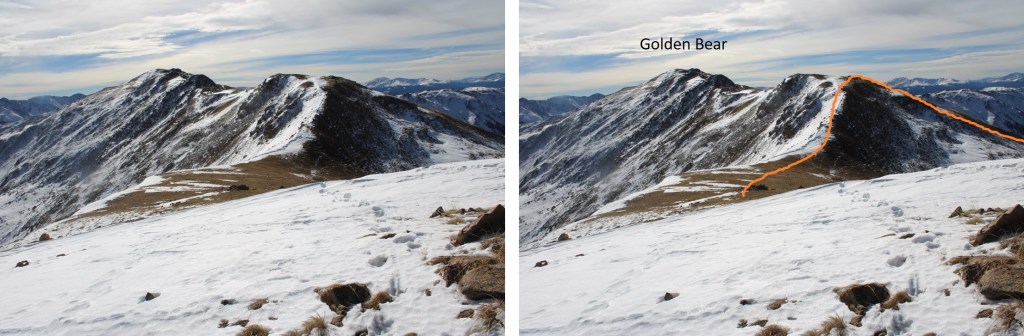
I could now see Golden Bear to my left.
I gained the ridge, and followed it north to the summit of Golden Bear. This was all class 2
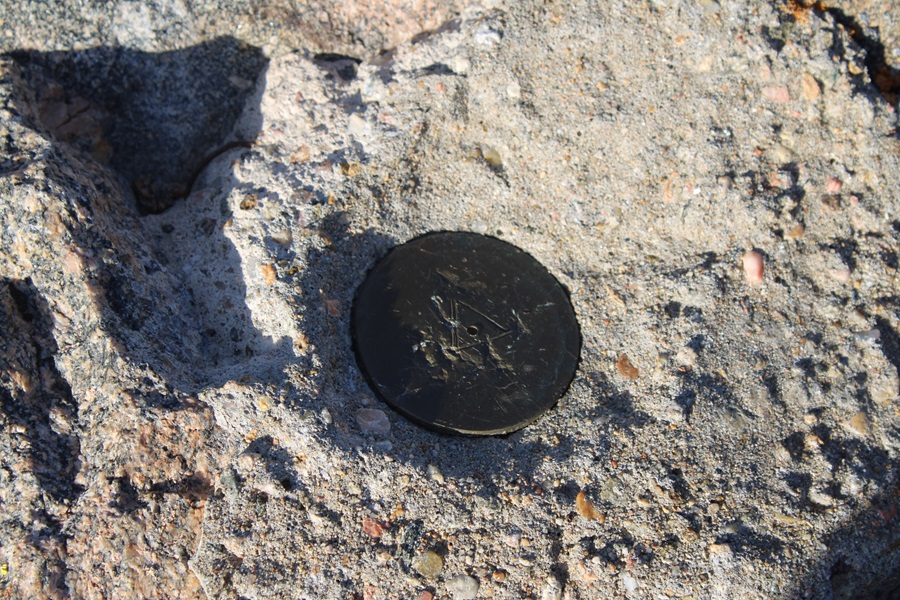
There was a marker at the summit
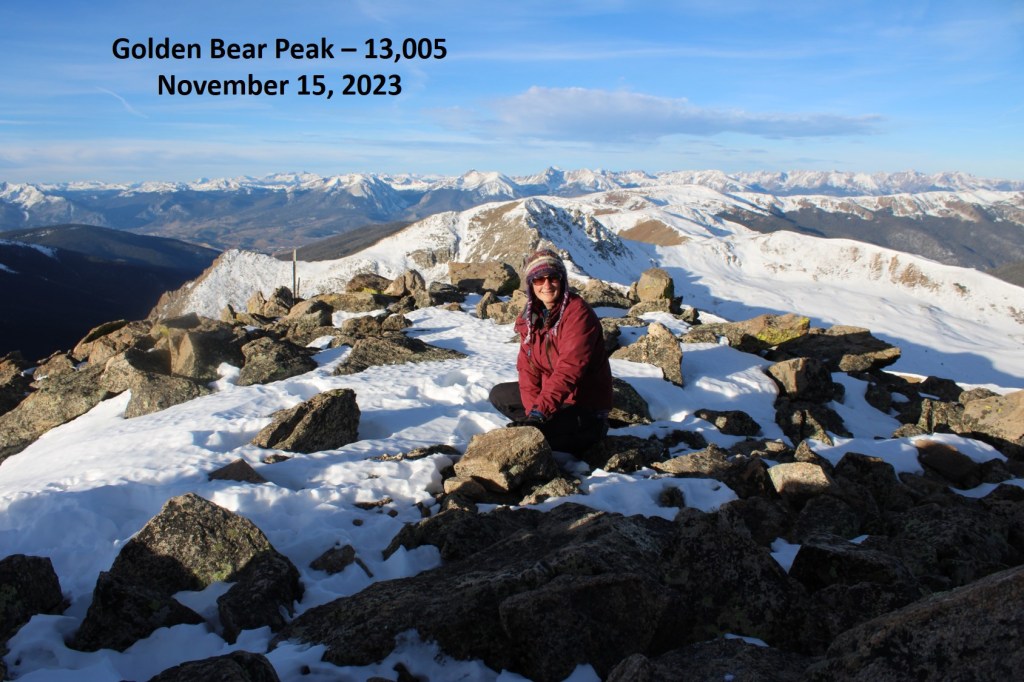
I summited Golden Bear Peak at 8am
Golden Bear Peak:
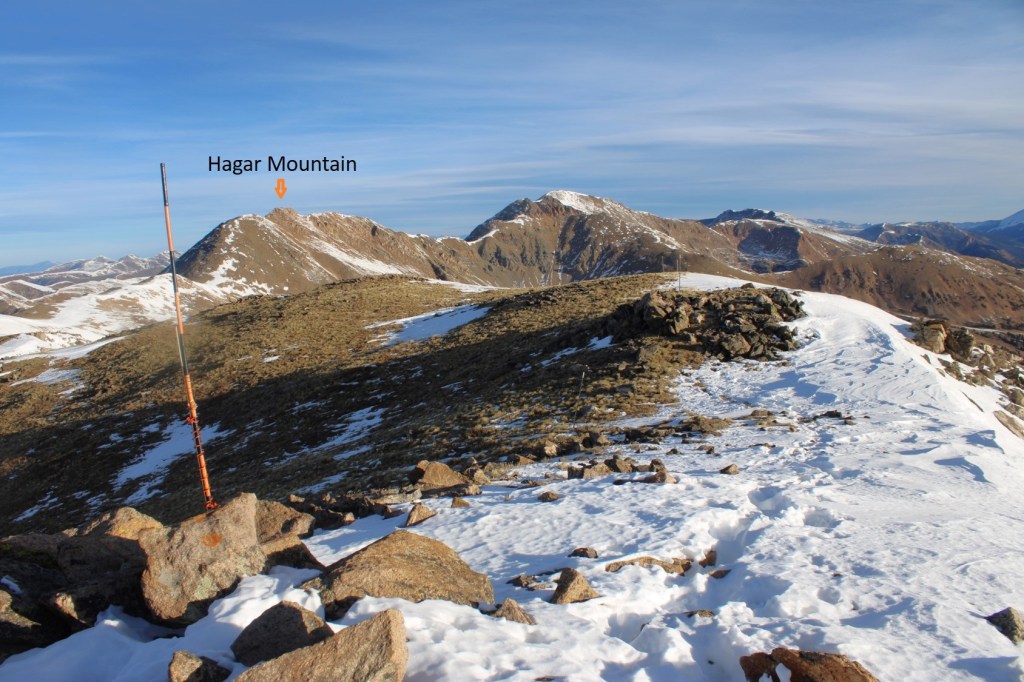
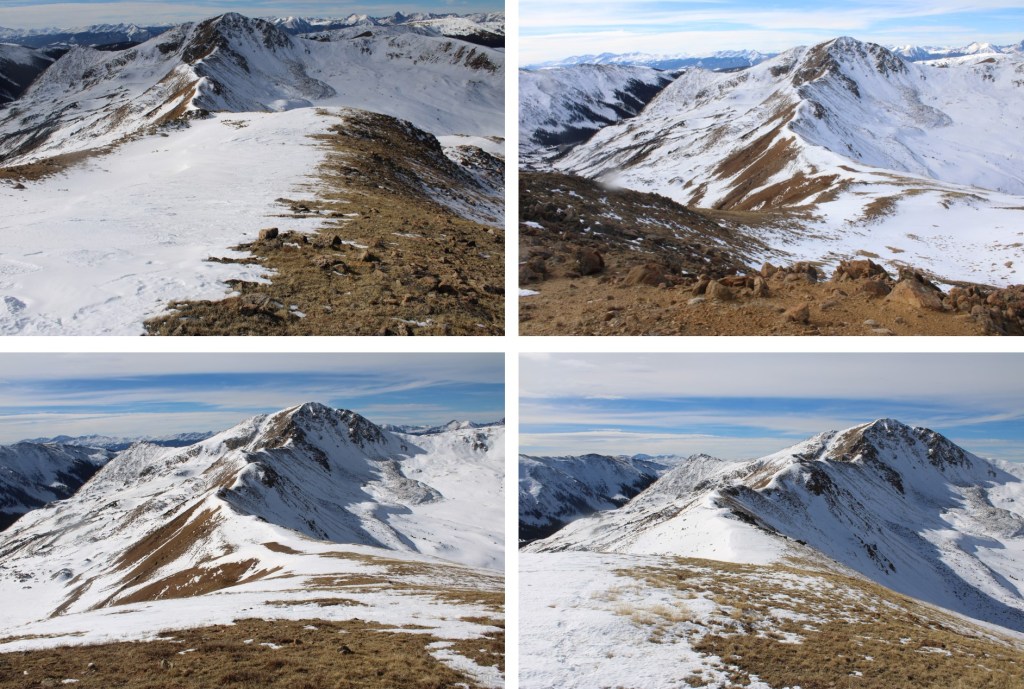
I could see Hagar Mountain to the north
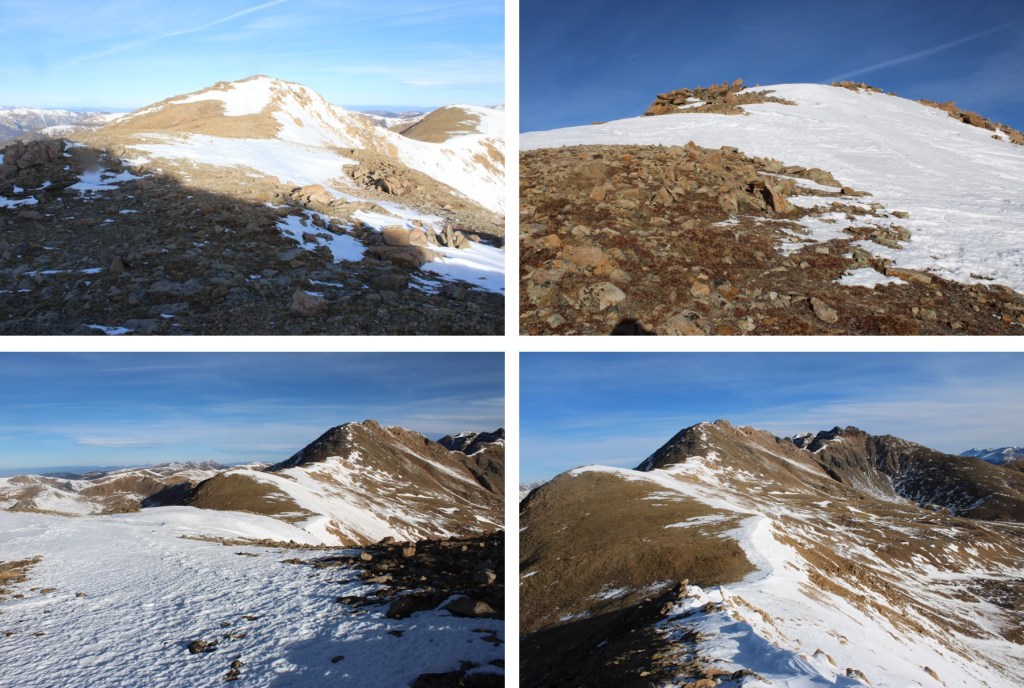
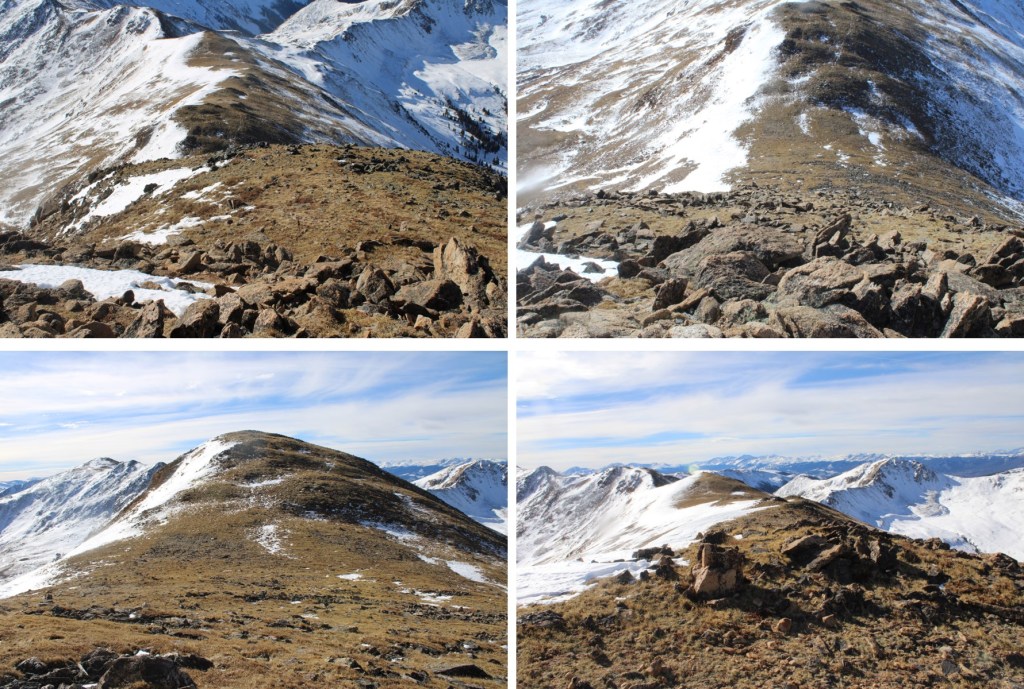
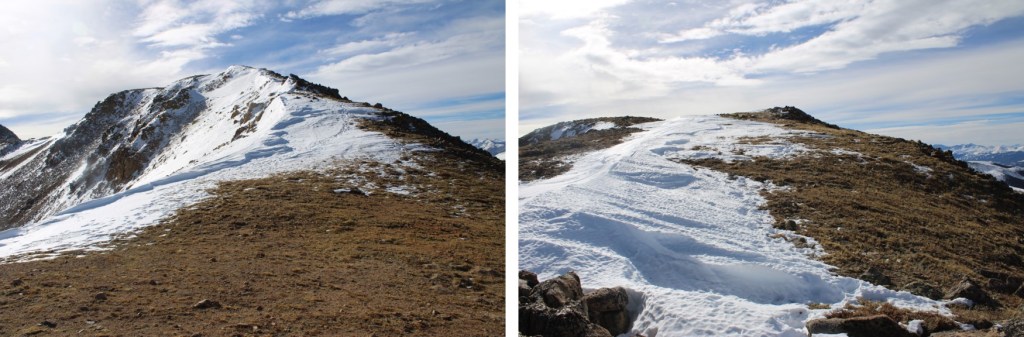
To get there, I continued following this class 2 ridge. There were a lot of ups and downs, but it remained class 2 (until the last 50 feet of elevation gain or so). Here are some pictures of the ridge
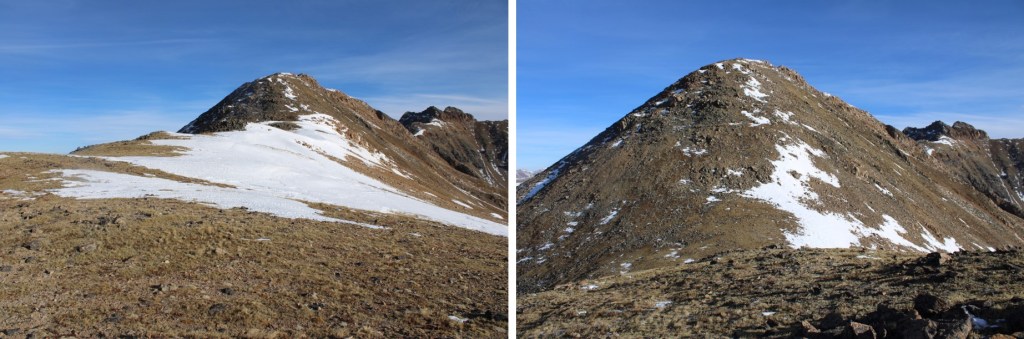
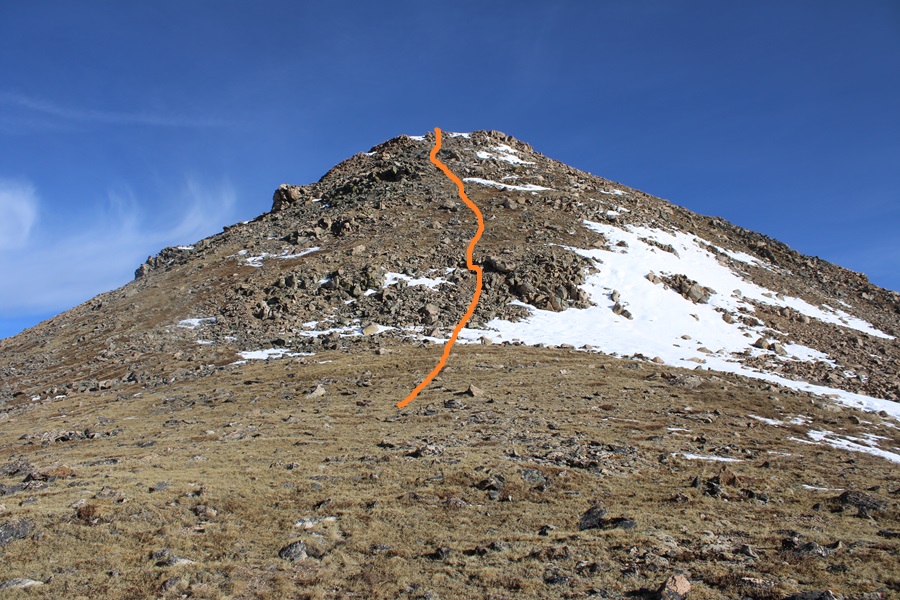
Now the fun begins. It’s class 2 to the top of this ridge. There are a few cairns, but it’s basically choose your own adventure. I went straight up. It’s steeper than it looks, so get a good view before you ascend. This is the route I took.
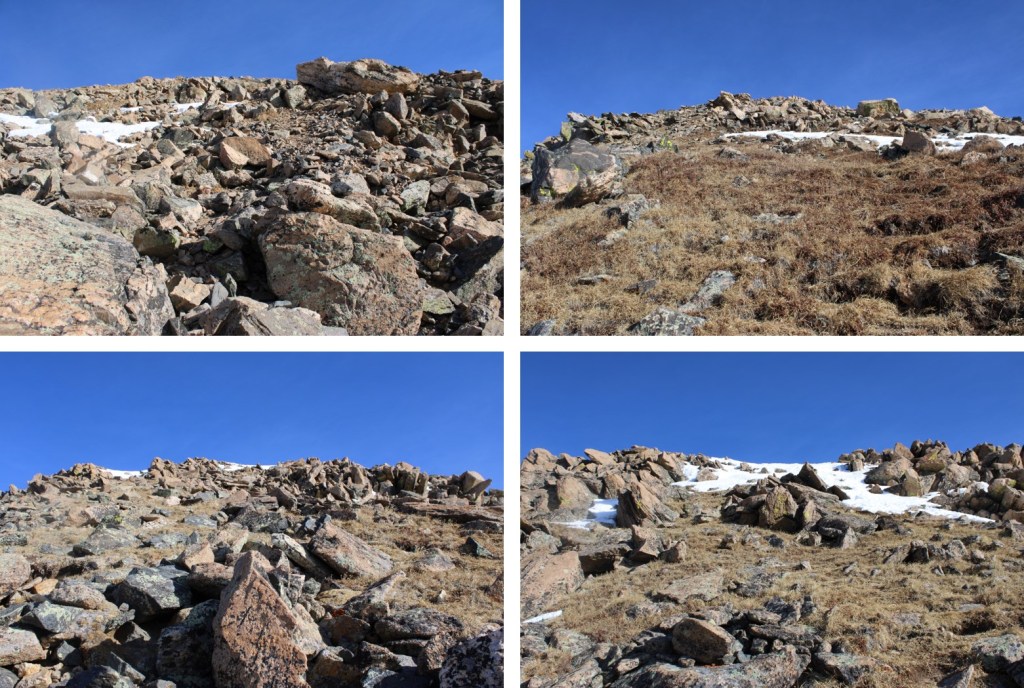
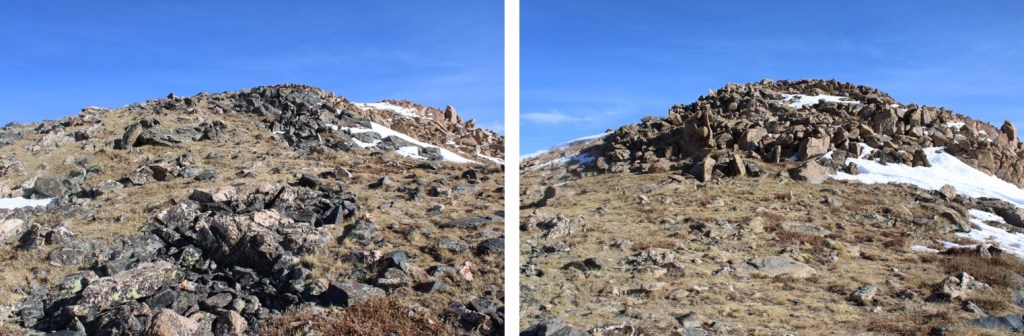
And some pictures of the route up.
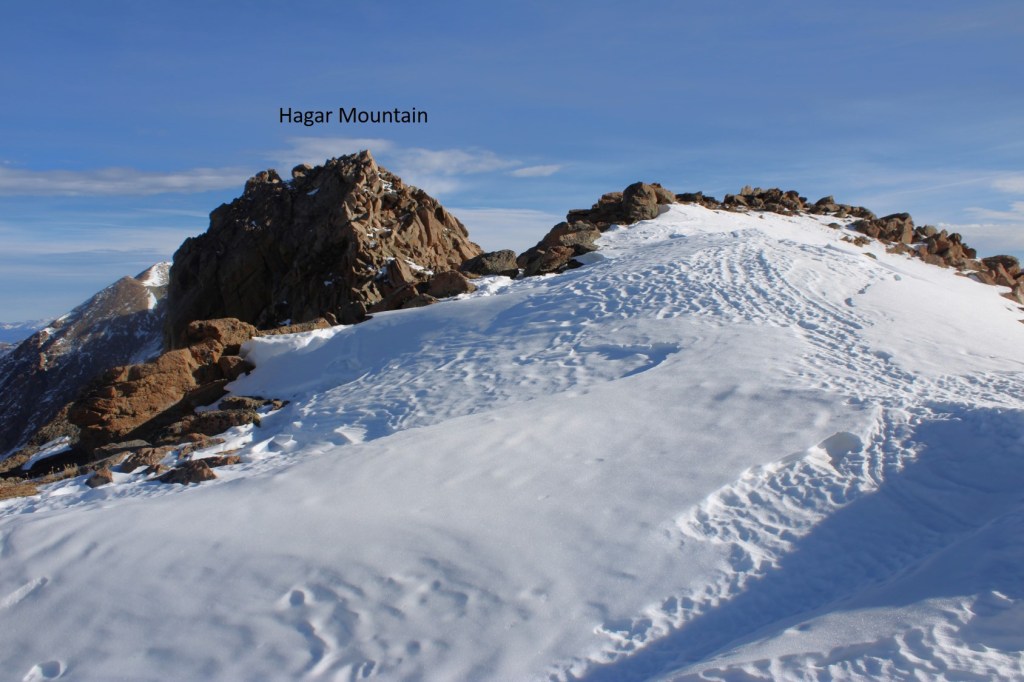
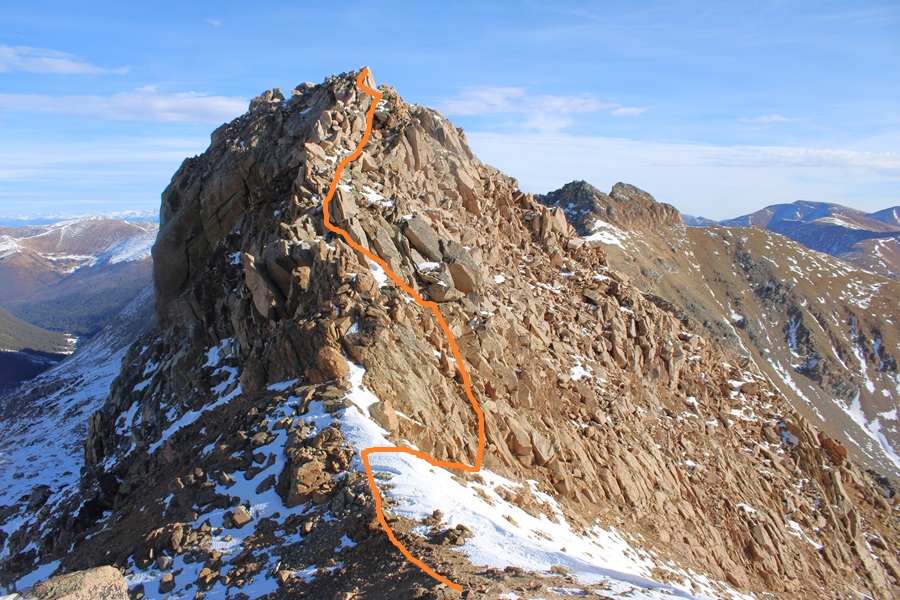
At the top I was greeted with a view of the final approach to Hagar Mountain.
To be honest, I hadn’t done a lot of research on Hagar, and was surprised to find the last bit was class 3. In other words, I didn’t have a helmet. Be sure to bring one! I dropped my pack, descended a bit to the saddle, and then started climbing up.
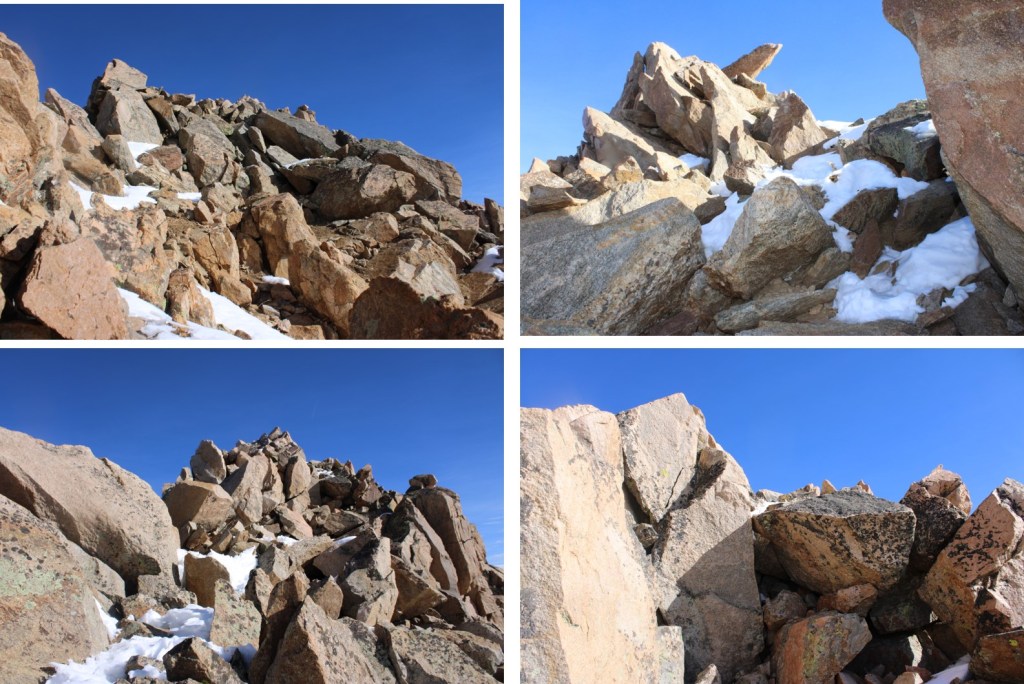
This is again choose your own adventure. This is the overall route I took.
And some pictures of the scramble
Here’s the actual summit block. It’s the first one you come to.
I summited Hagar Mountain at 9:20am
Hagar Mountain:
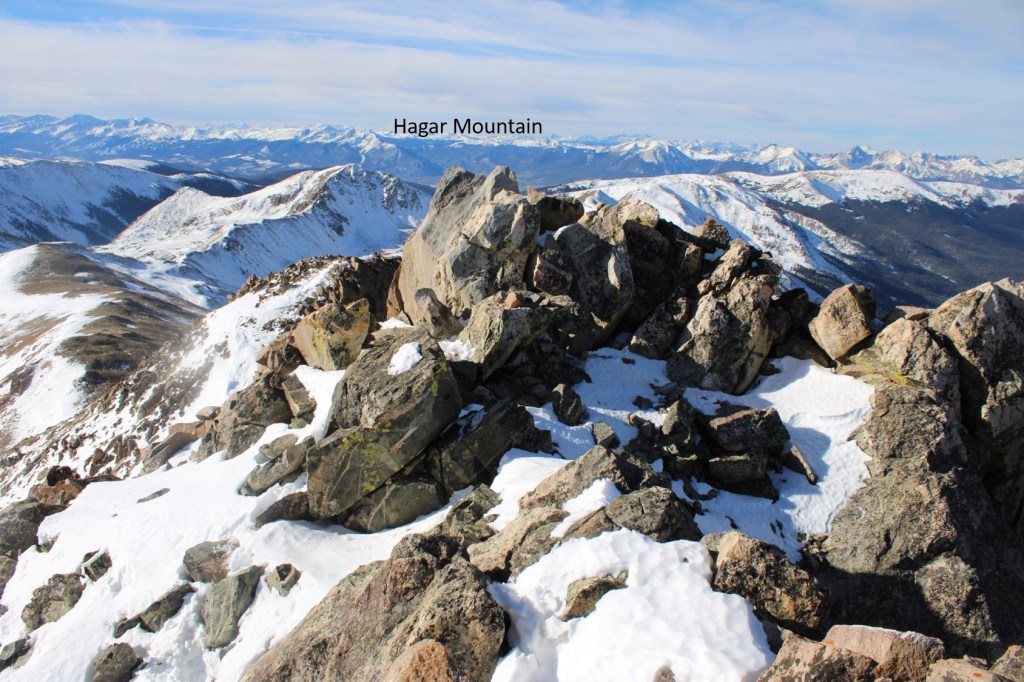
From the summit looking north, it seemed as if the next point was equal height to where I was currently, so I scrambled over there too in case any LiDAR issues should arise.
Here’s looking at Hagar Mountain from the second block
I trekked back over to the first block, and found a summit register, so I’m assuming the first block is the true summit. Now to head back. I retraced my steps, aiming for the Golden Bear/Hagar saddle.
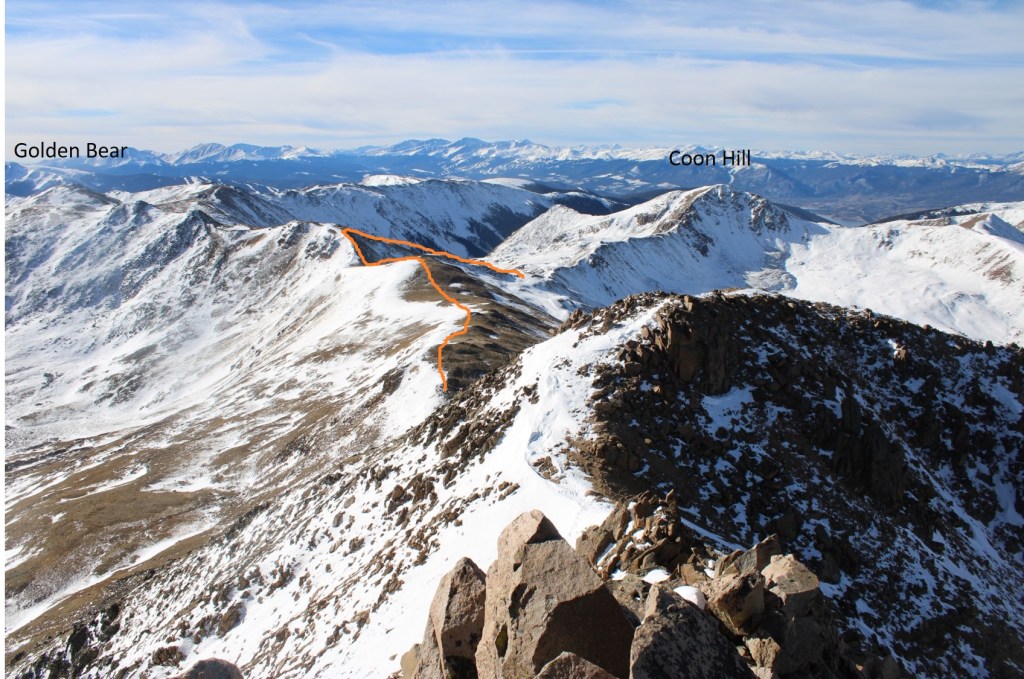
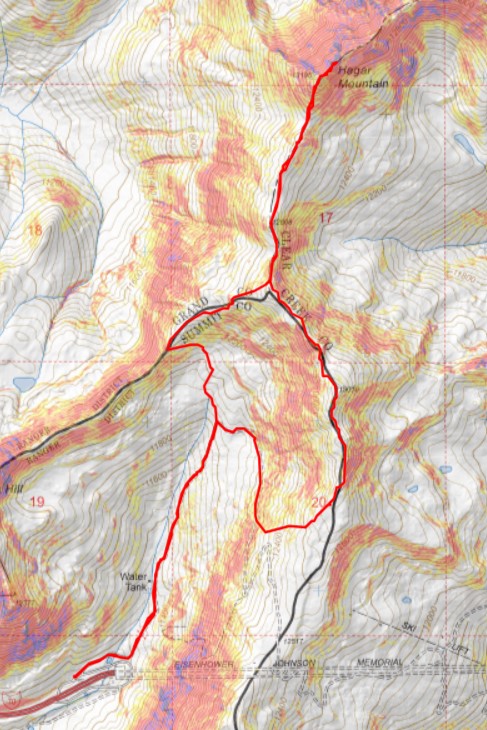
Here’s the overall route I took back to the basin, aiming for the Golden Bear / Coon Hill saddle
First I headed back down Hagar the way I ascended
After making it to the saddle, I followed the ridge up to 12830’
At 12830’ I turned and headed southwest towards the saddle.
At the saddle I found an obvious trail and turned left. This led me back down into the basin and back to the trailhead.
I made it back to the trailhead at 11:20am, making this a 7.82 mile hike with 2760’ of elevation gain in 5 hours.