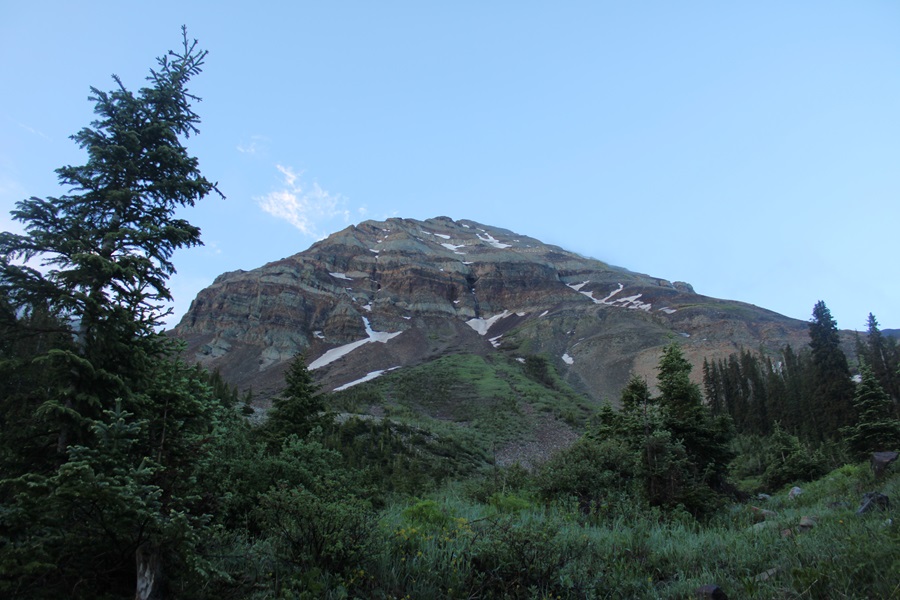
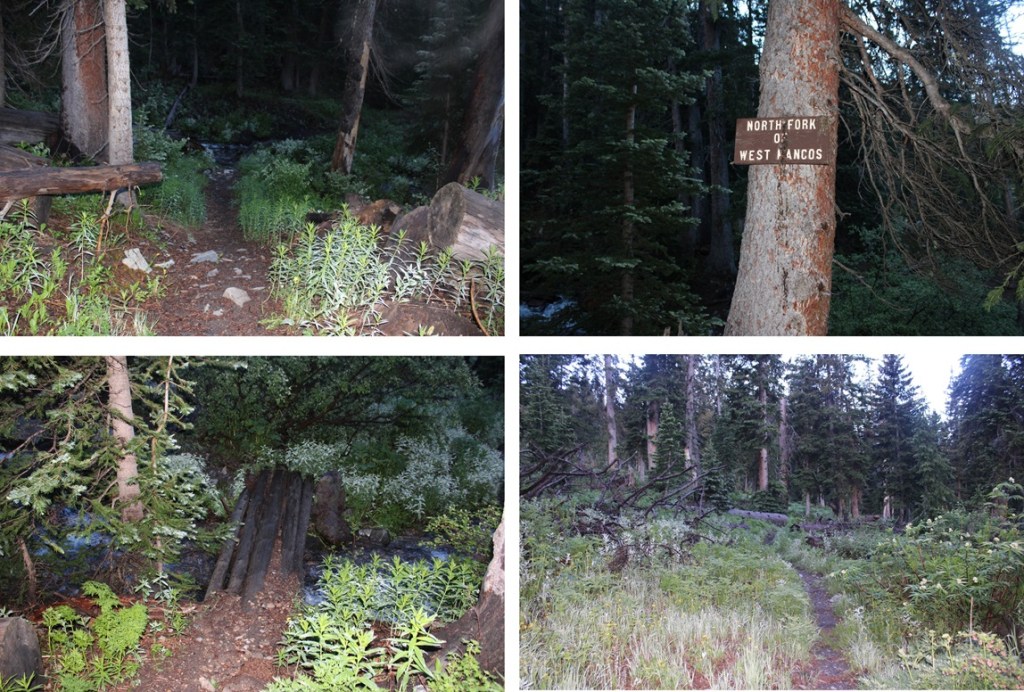
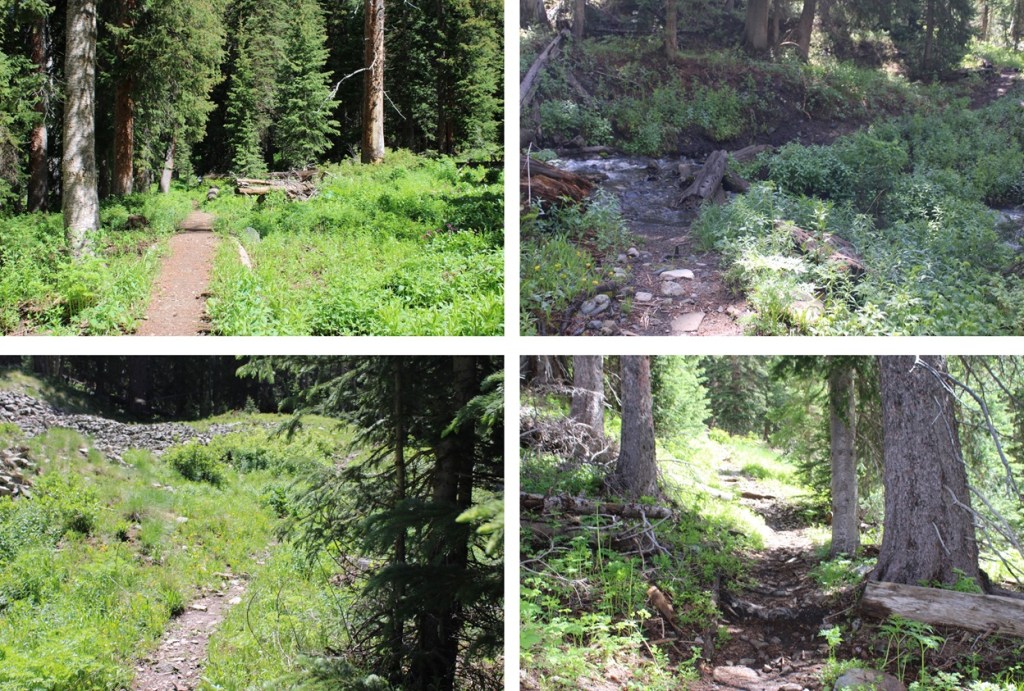
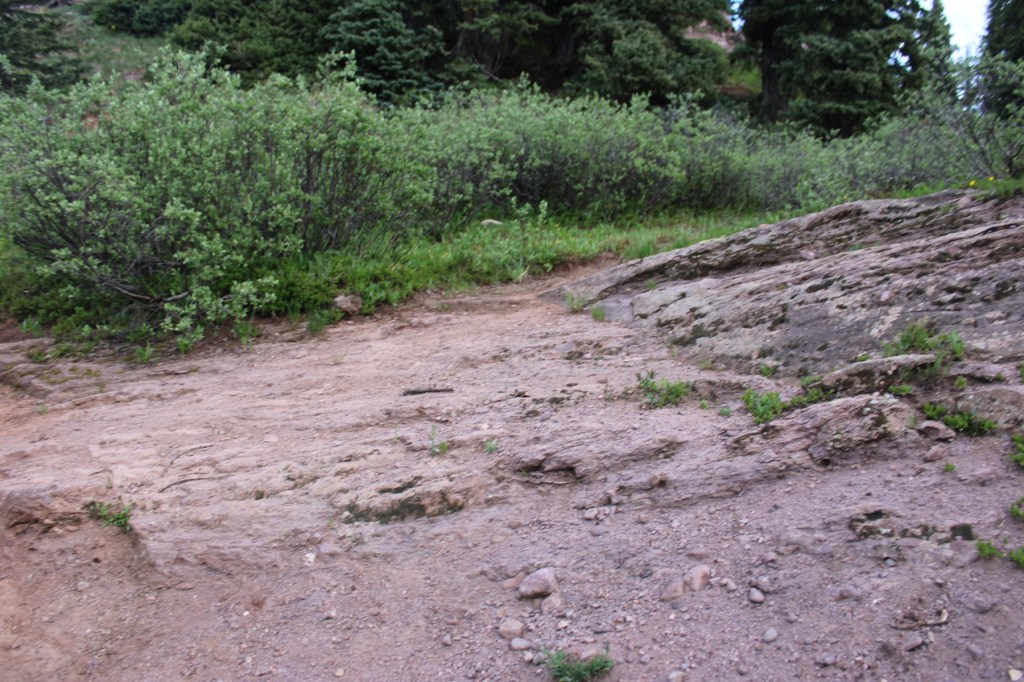
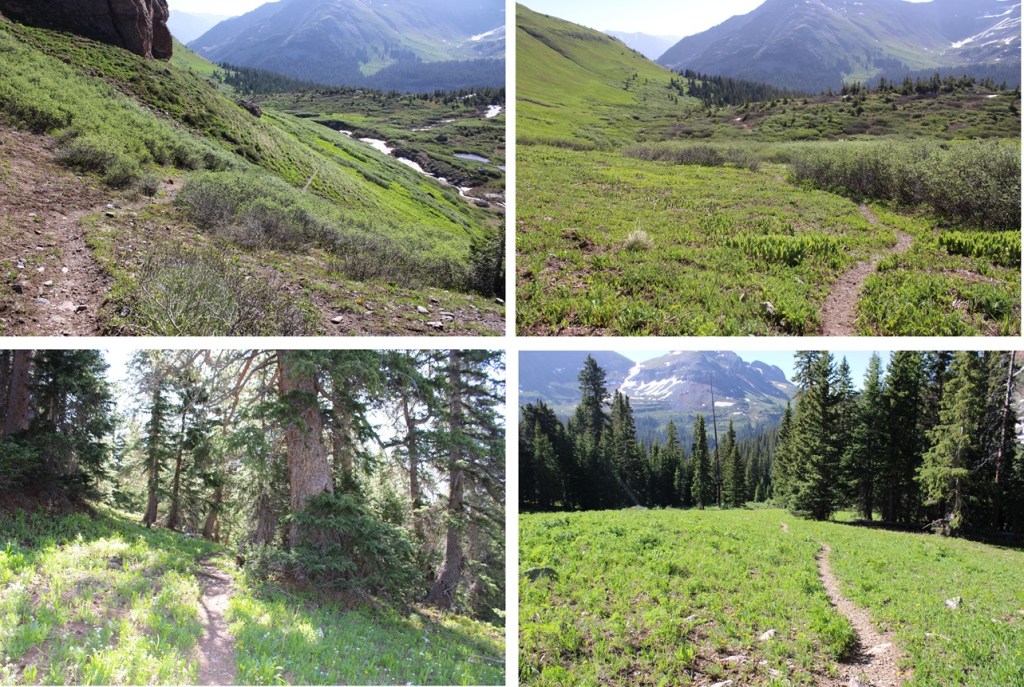
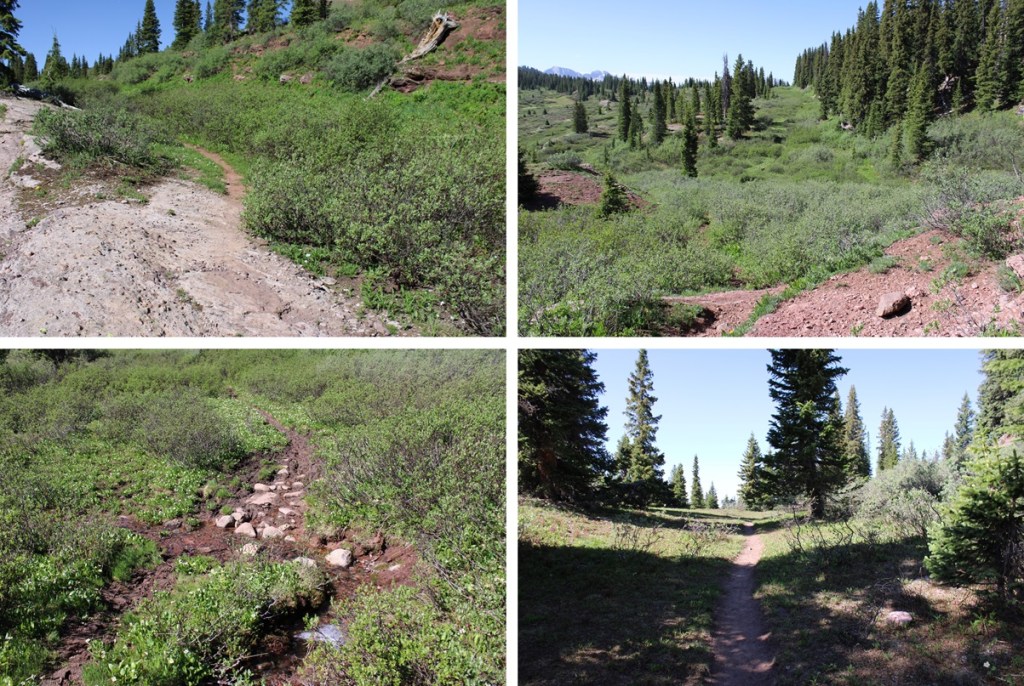
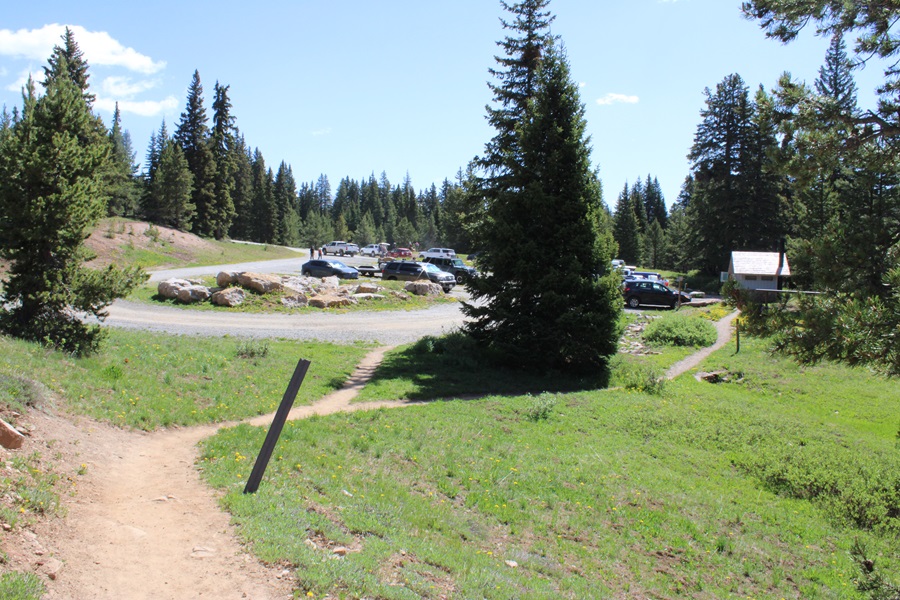
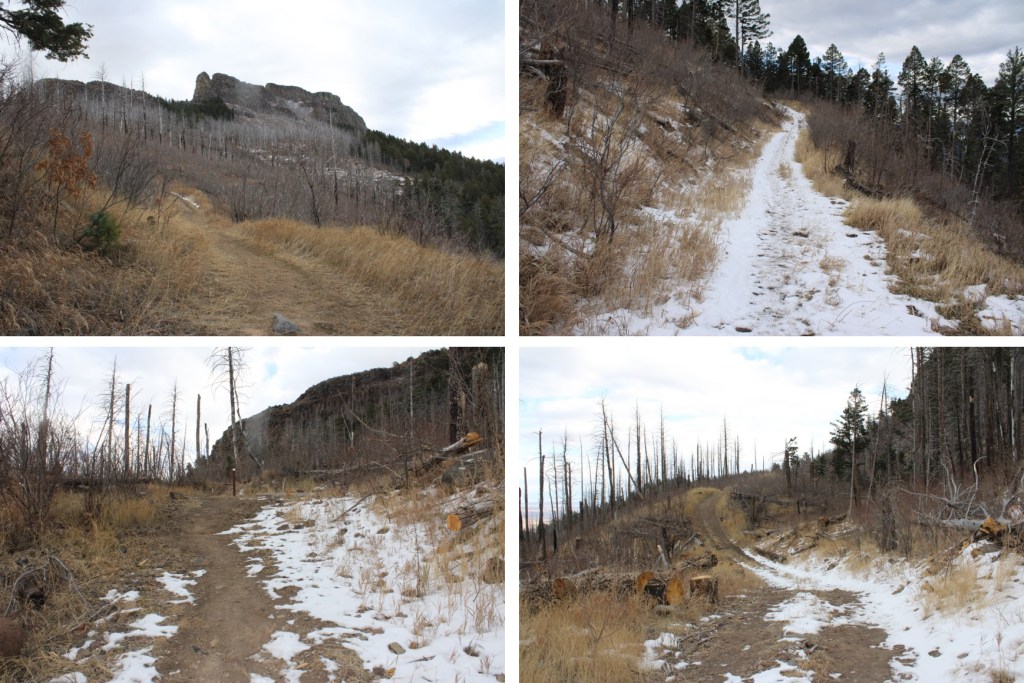
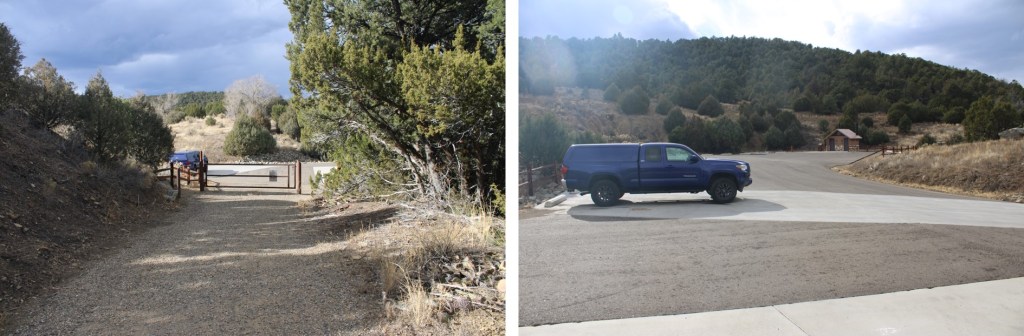
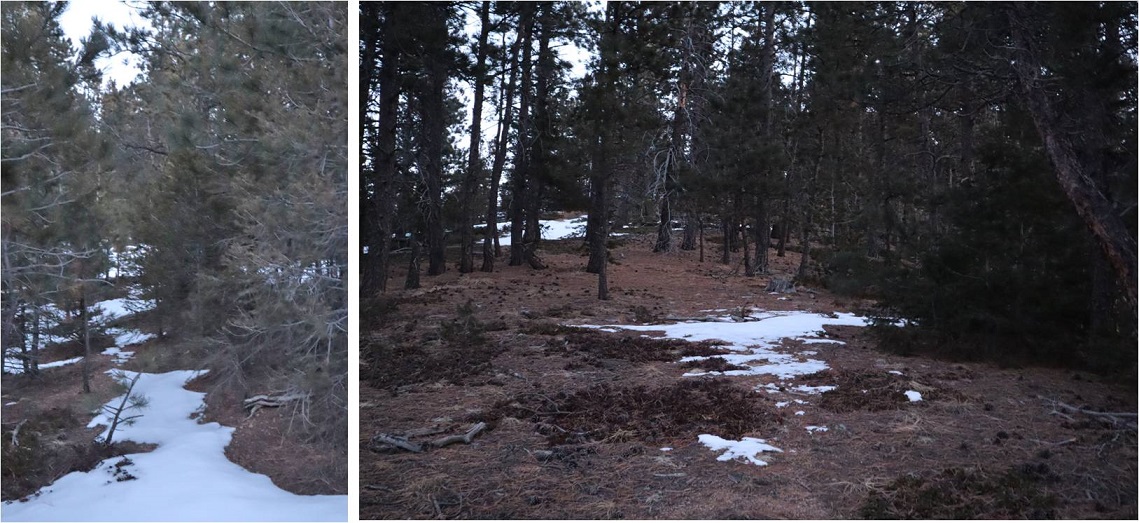
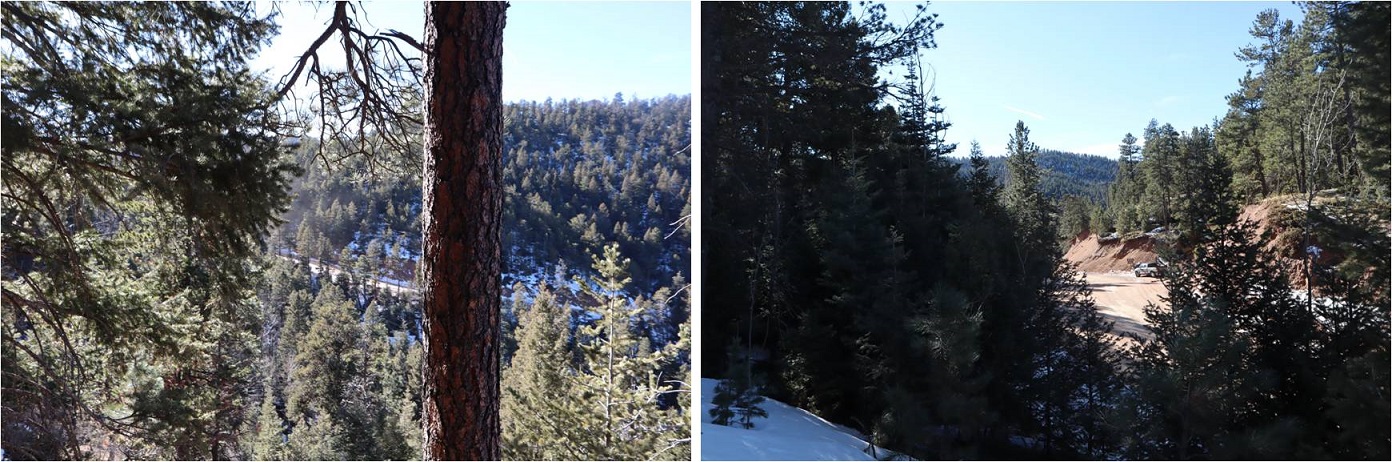
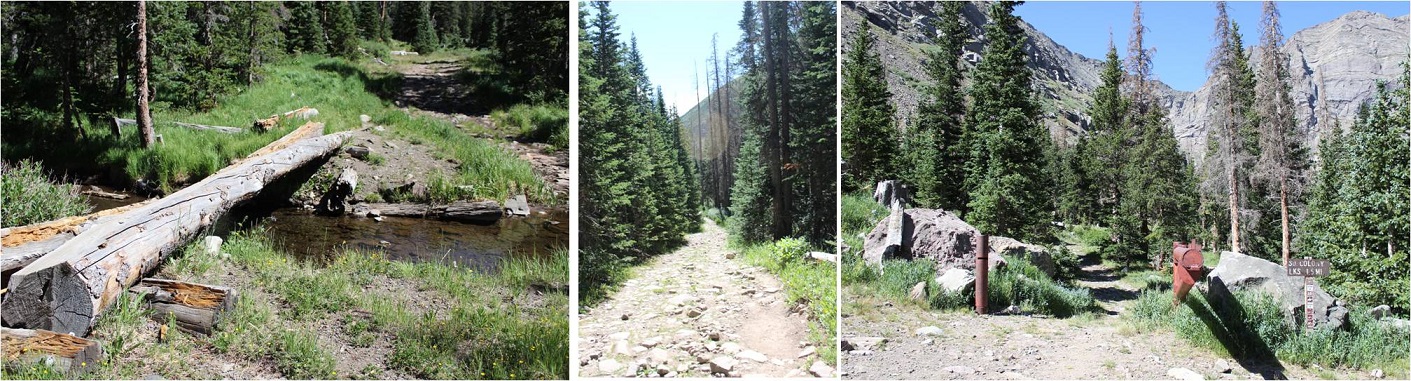
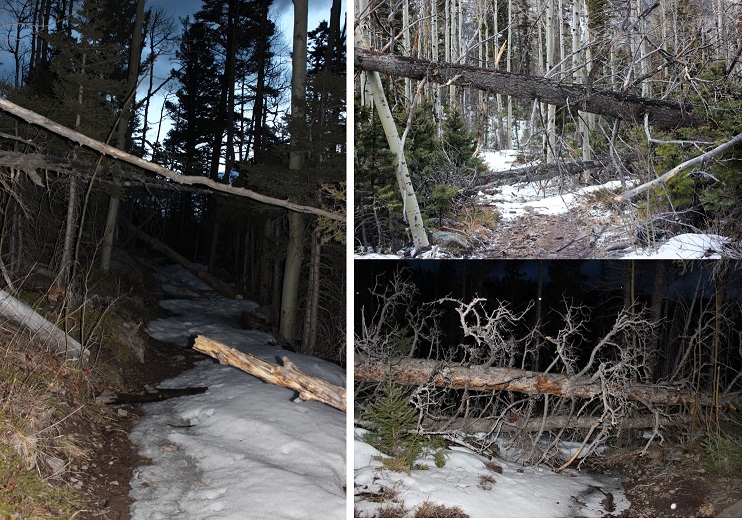
I parked at the 2WD Sharkstooth Trailhead the night before and waited out a thunderstorm. If you’re not familiar with the area, be sure to double check your directions: Google Maps kept trying to route me on ATV roads, and I got turned around several times trying to get to the actual trailhead. When I got there, I found there weren’t any parking spaces (as in, no place to park period… there weren’t any other vehicles there), so I had to park in a turnout a couple dozen yards from the trailhead. The drive was 2WD on a dirt road up until this point. This is what the lower trailhead looks like.
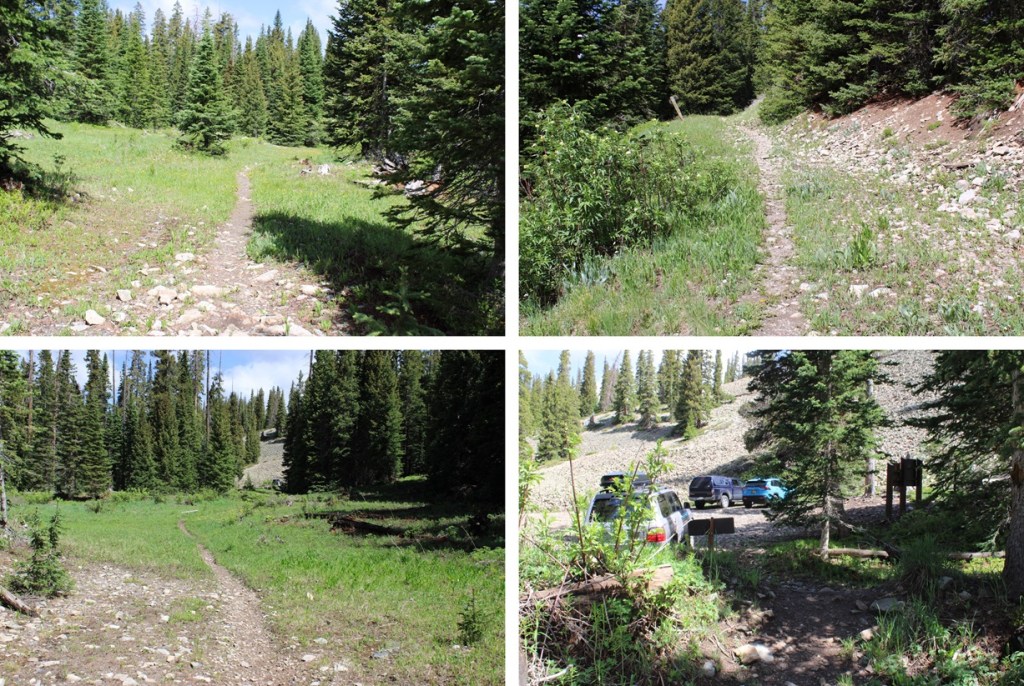
The next morning, after battling a night of storms and mosquitoes, I was up and on the trail at 5:30am. I realized rather quickly the 4WD road to the upper trailhead wasn’t all that difficult to navigate, and I could have easily driven all the way there. There were also several dispersed campsites along the way.
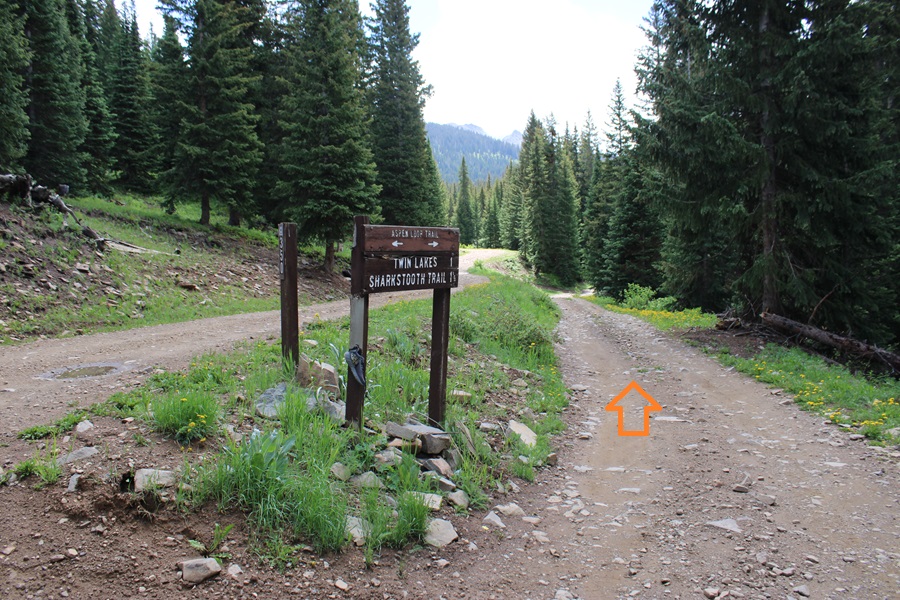
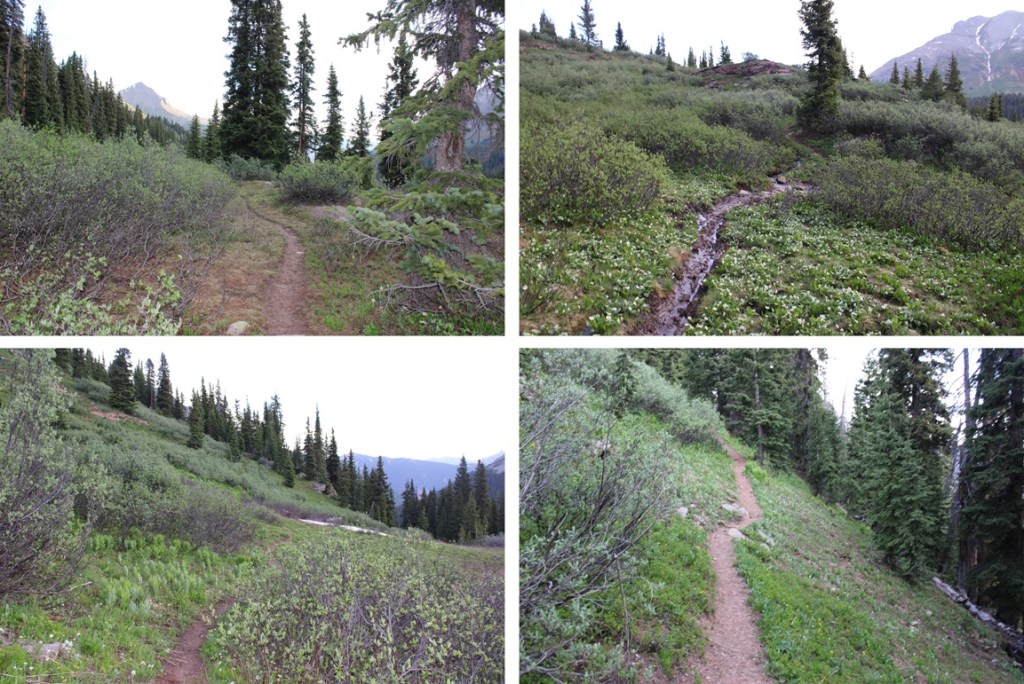
Now at the upper trailhead, I started following West Mancos Trail 621, which was the trail to the right.
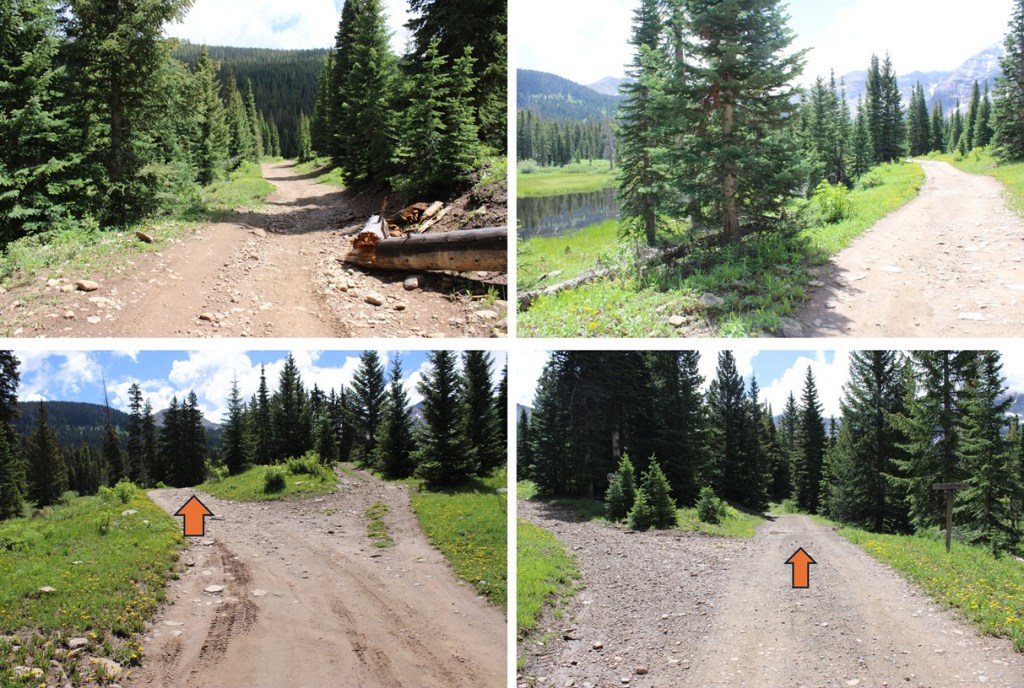
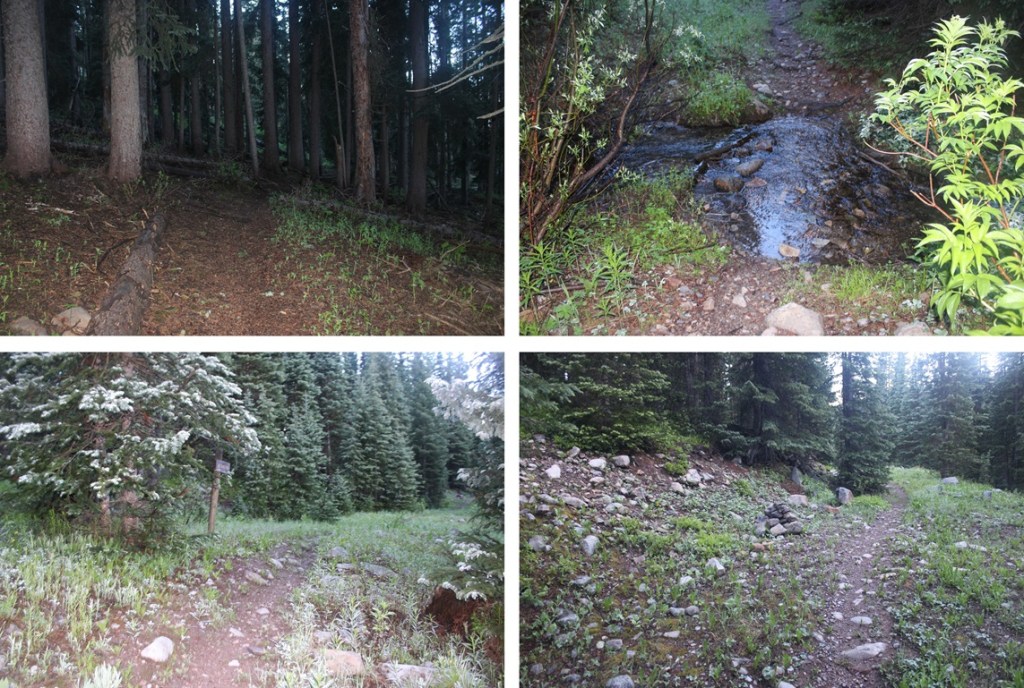
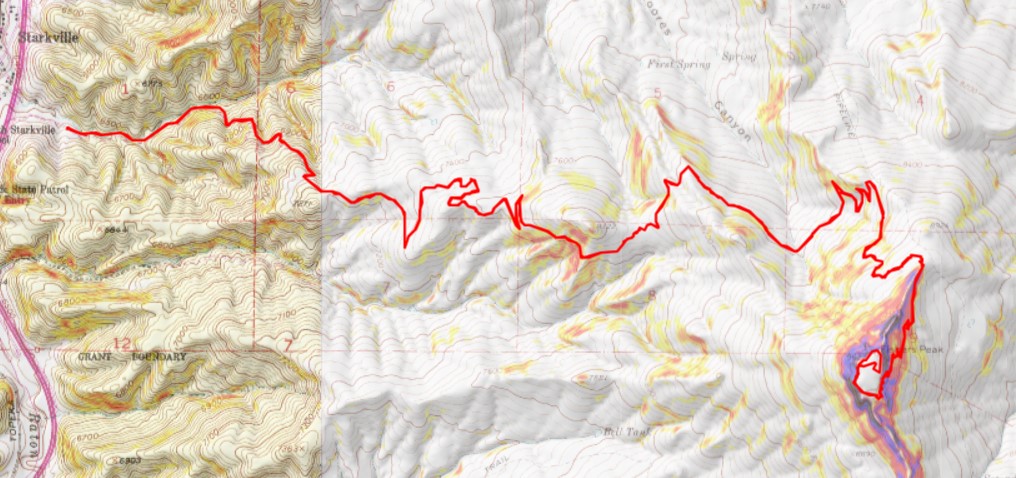
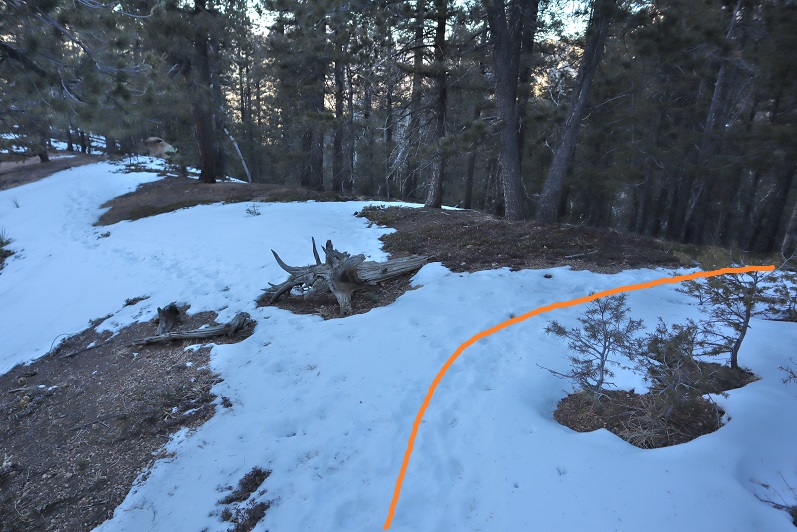
Hearing mixed reviews about how to climb this peak, I decided to take the ridge up, and the gully down. This meant descending about 600 feet and 2 miles from the upper trailhead to my turnoff point. I just kept following the West Mancos Trail. There were plenty of signs along the way to remind me I was still on the West Mancos Trail.
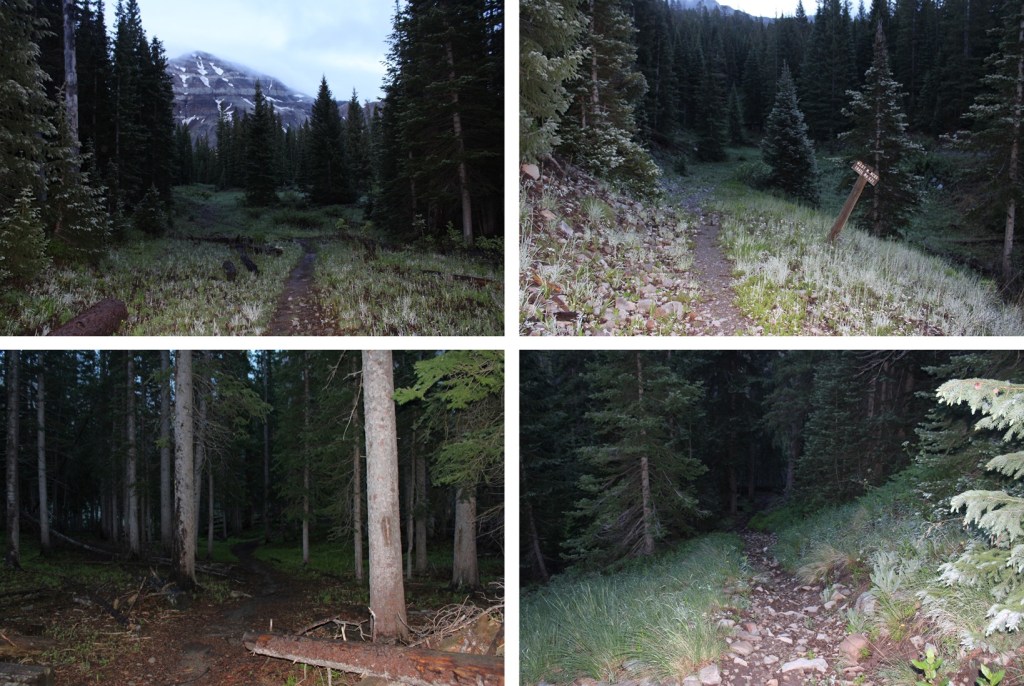
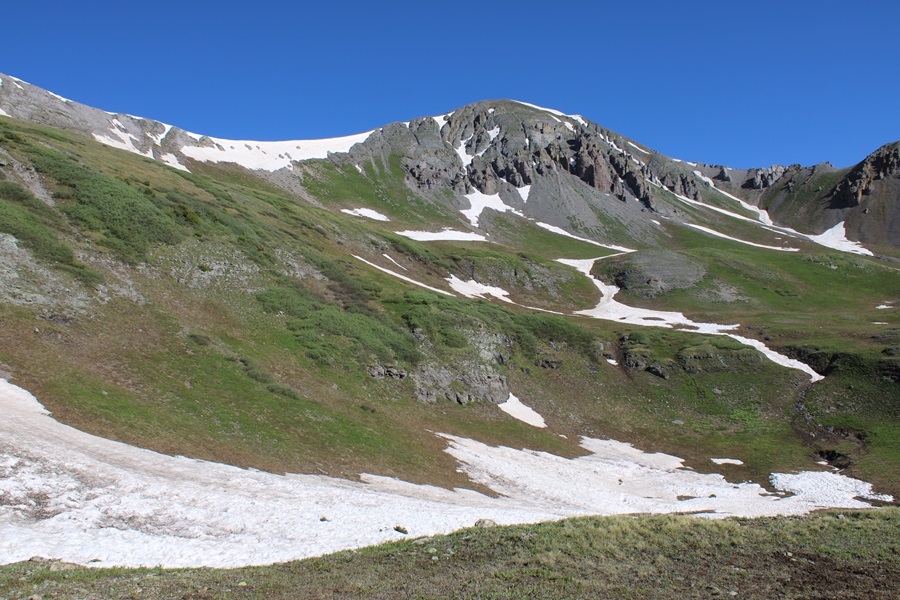
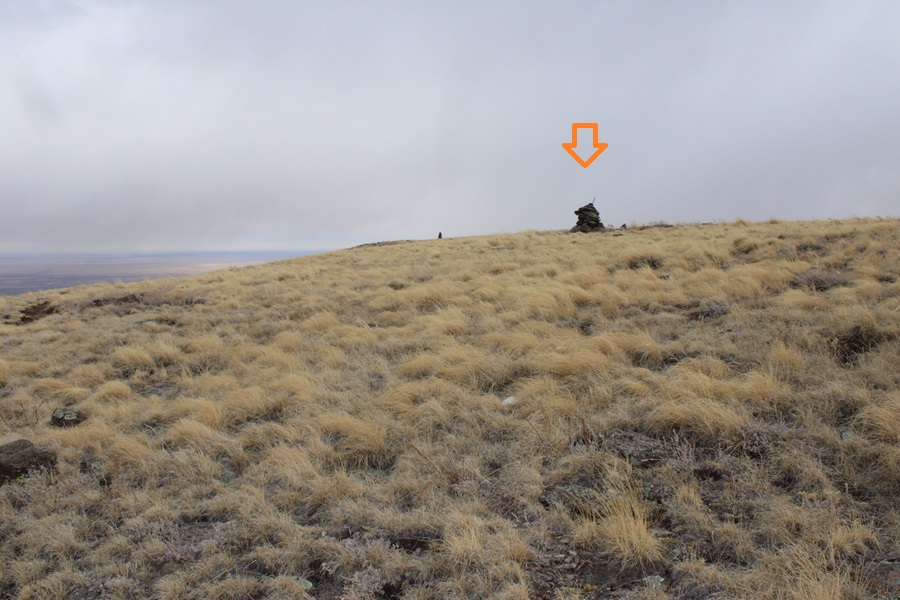
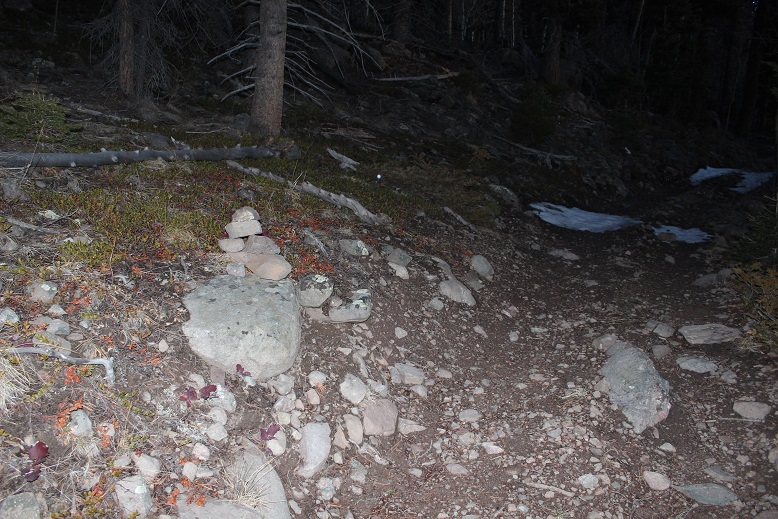
At about 10400’ of elevation, after I’d been hiking for a total of 3.9 miles, just when I was thinking I should leave the trail and head for the ridge, I saw a large cairn, indicating the cutoff point for heading towards the ridge.
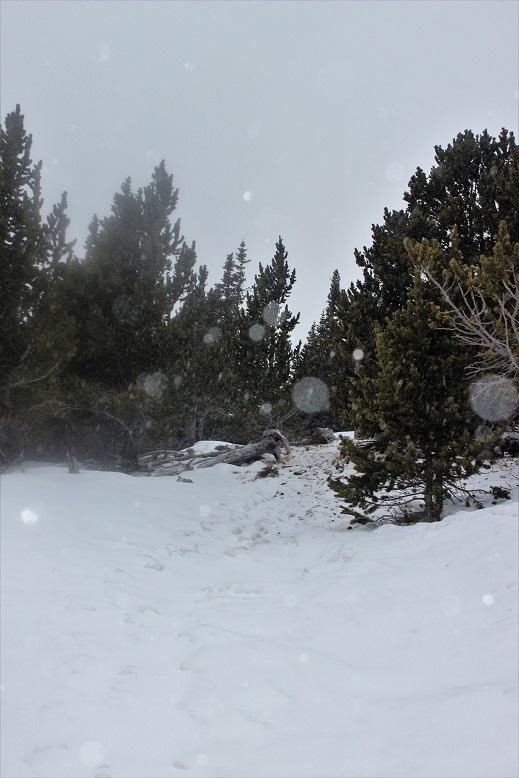
I turned left, and bushwhacked my way southwest towards the ridge. There was no visible trail here, but I soon made it out of treeline.
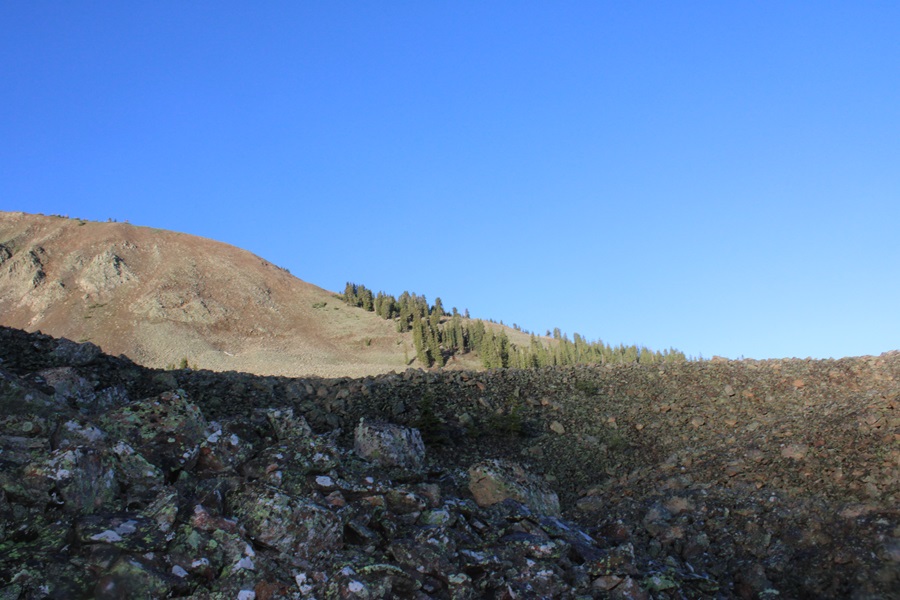
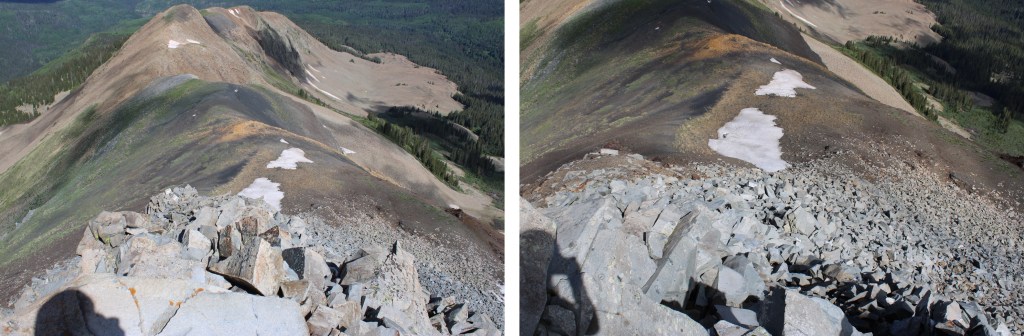
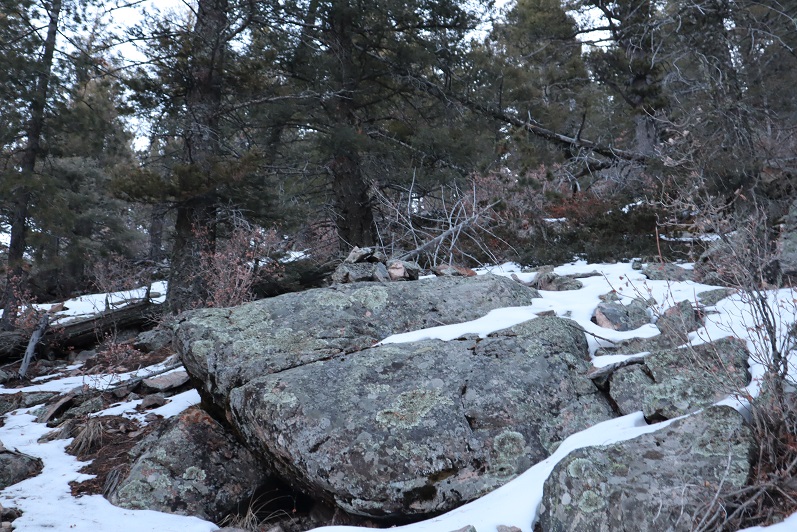
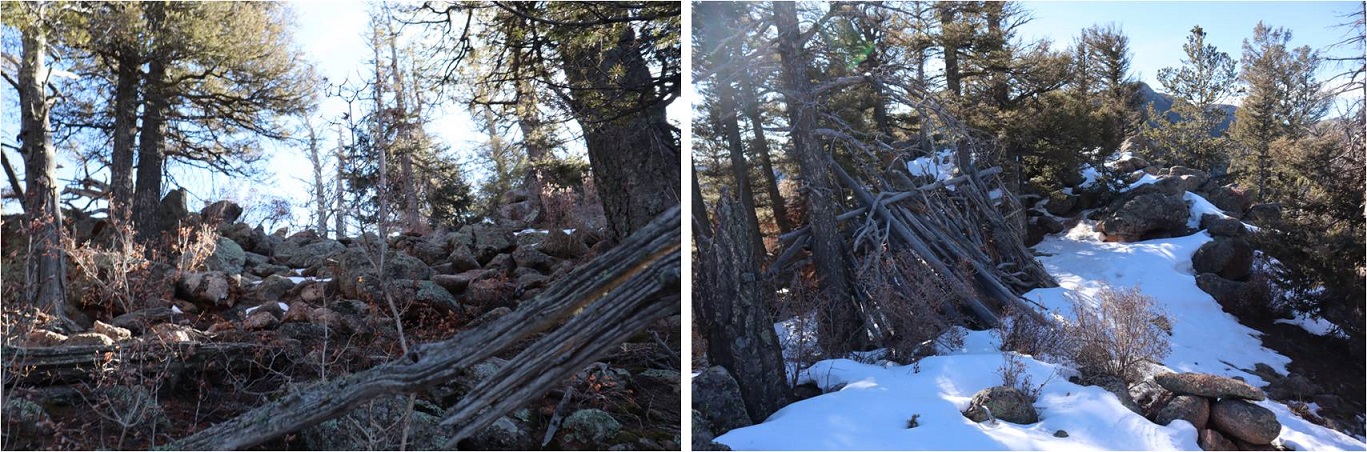
At treeline I came to a huge basin of rocks. To get to the ridge, I was going to have to head southwest, through this basin of loose, unstable rock. I did my best to stay low, and try to skirt the piles of rocks, but eventually I had to go up and over.
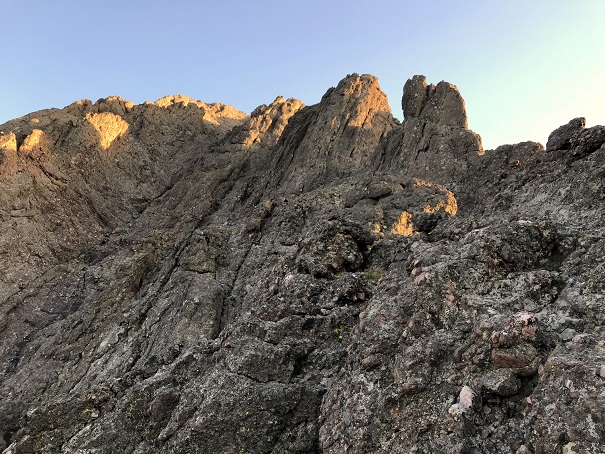
I now had a clear view of the ridge.
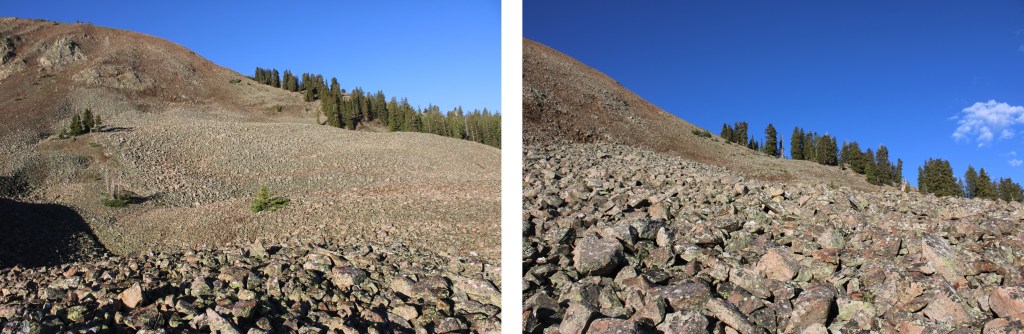
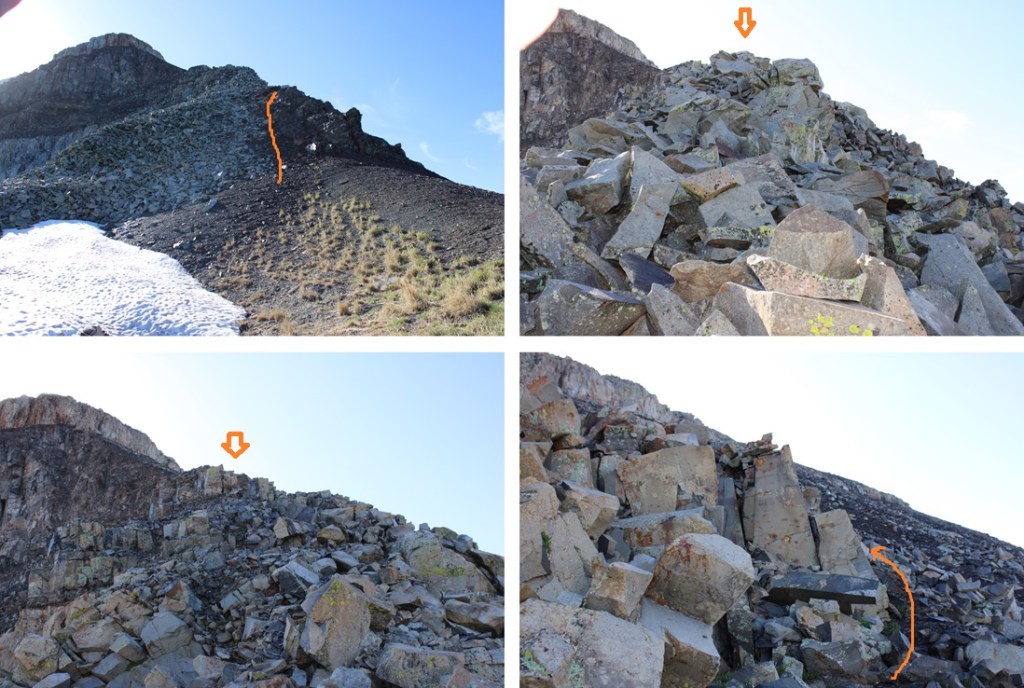
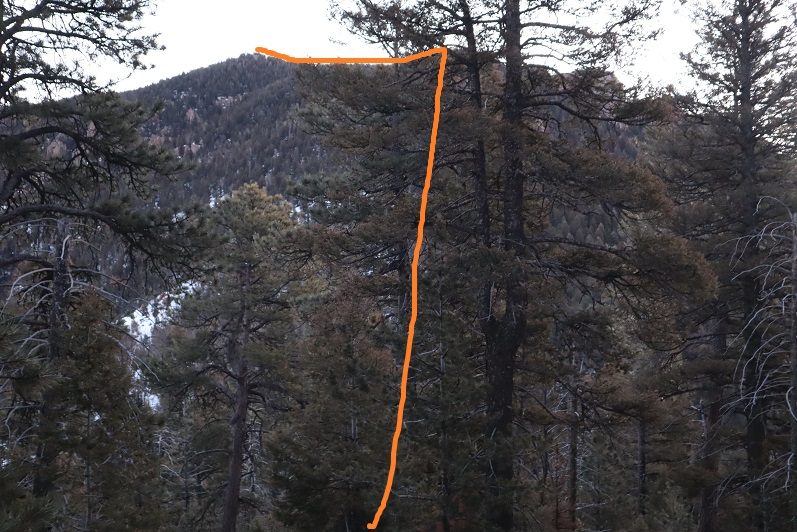
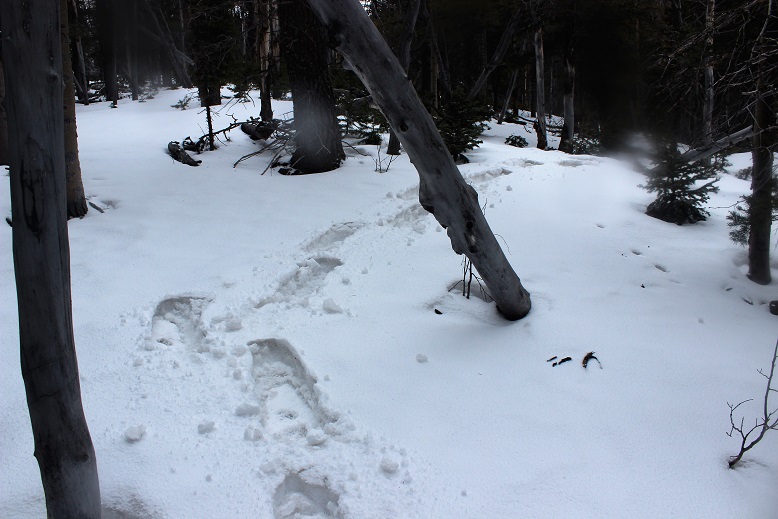
This is choose your own adventure, and none of it was pleasant. It was full of loose, rolling rocks. This is the route I took to gain the ridge.
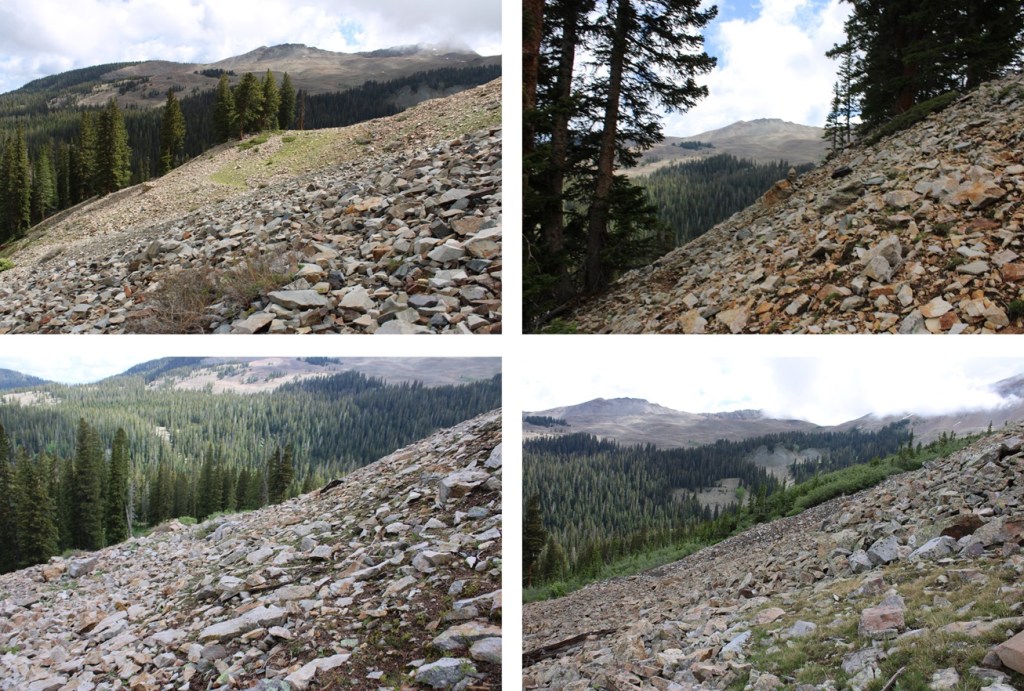
Once on the ridge, I turned left, and encountered the most difficult part of my day: Tons of mosquitoes and 350’ of elevation gain in 1/10th of a mile on dinner plate sized, extremely loose talus. There was no clear path or game trails, I just kept heading up. It was so miserable, I decided then and there I was not going to go back down this way if I could help it.
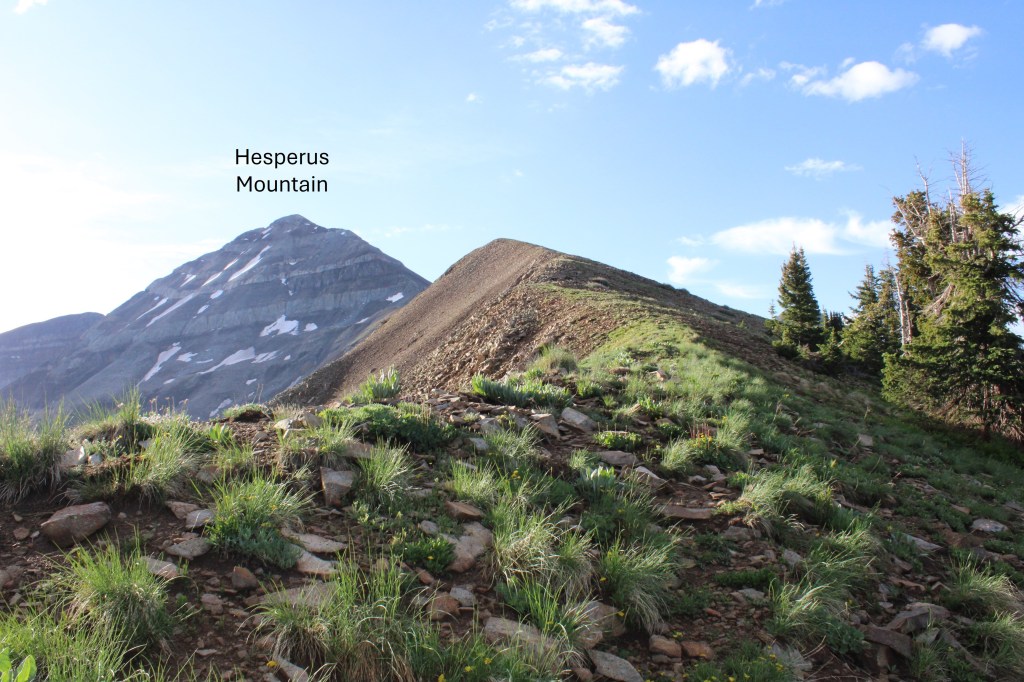
I was greeted at the top with a nice, gently sloping ridge that was easy to follow southeast towards Hesperus Mountain. There were some rocky sections, but clear game trails to follow.
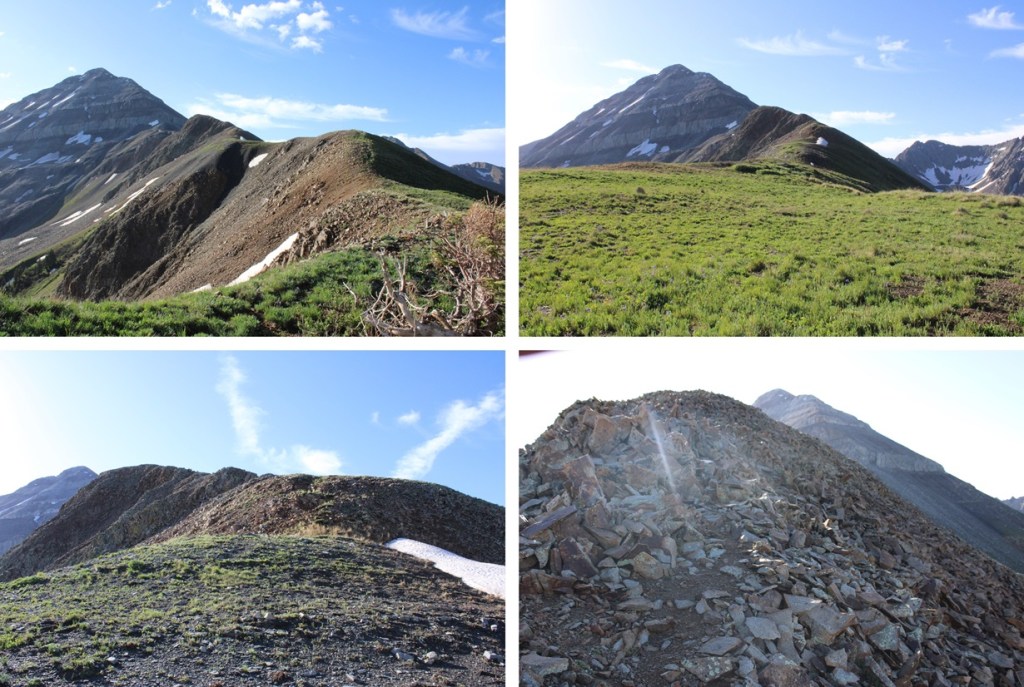
I came to the end of the ridge and where the fun began.
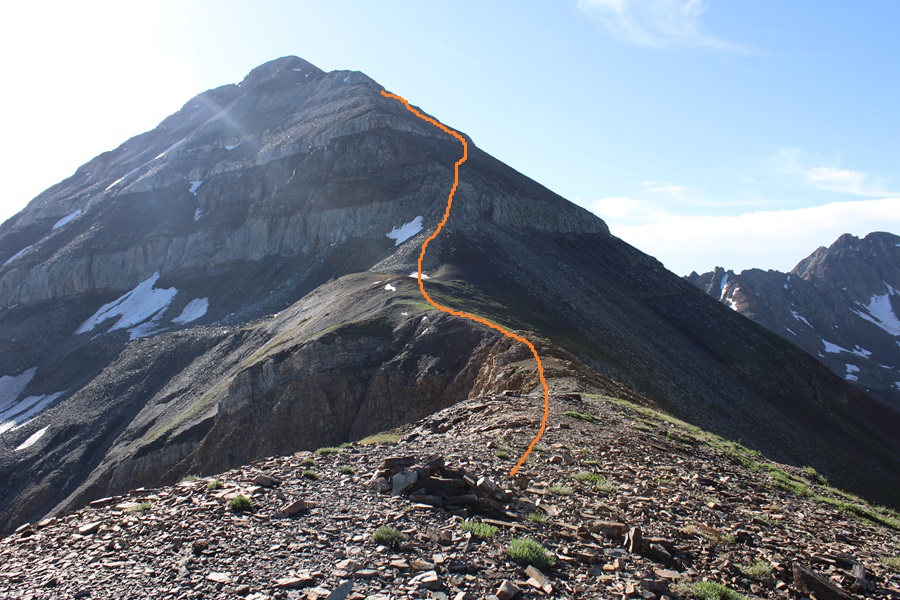
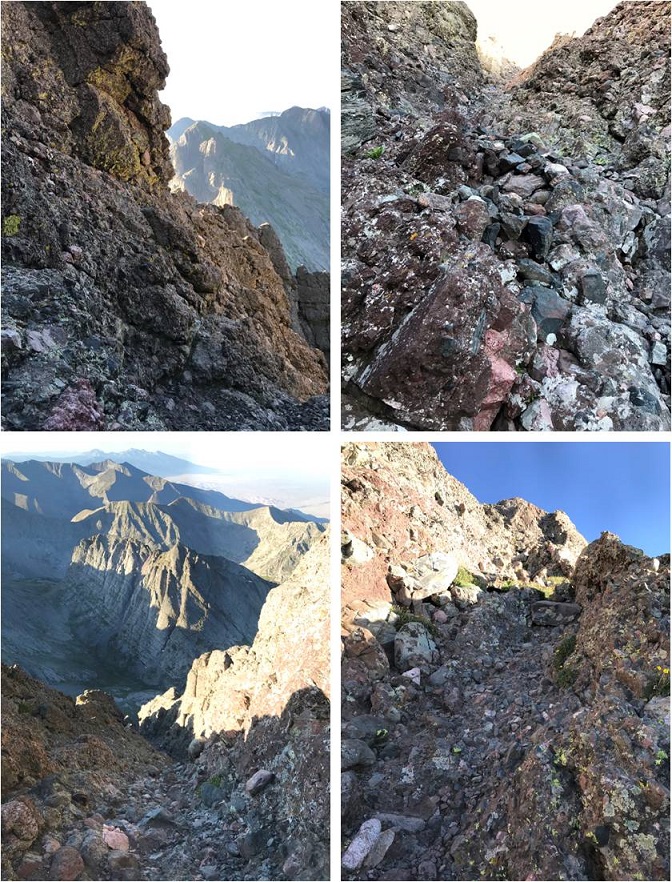
There were quite a few game trails here, and the sun was in my eyes the entire time, so I’m not sure if I picked the correct route. If you go to the right of the class 3 section you can keep it class 2, but it’s easy to get lost. I decided to head straight up the rocks, then found a game trail that wound me around up to the summit. As I kept getting higher and higher up the mountain I found more and more trails, all seeming to lead to the same place. As long as you’re headed up and east, you should be good. This is the route I took:
And some step by step pictures of the route I took, first navigating the class 3 section
I was then able to pick up game trails that led me to the summit. I took a different path up than I did on my way back down, but all the game trails that went up led to the summit. As long as you’re keeping it class 2 you should be fine.
The summit was to the left of the trail, filled with large, loose boulders, and a wind shelter.
I summited Hesperus Mountain at 9:15am
Hesperus Mountain:
After spending considerable time on the summit, I turned and headed back down to the ridge. Once again, taking a slightly different route than I had on the way up, as trails were easier to see with the sun behind me instead of in front of me.
I made my way down the class 3 section
Ahead of me I could see the route I’d taken in, along the ridge
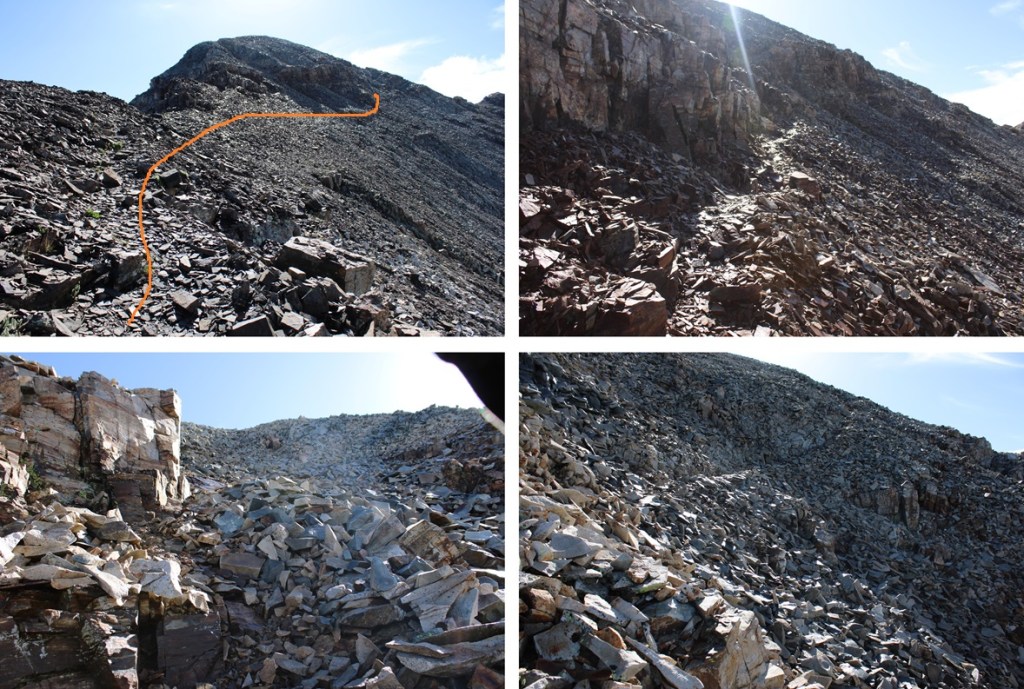
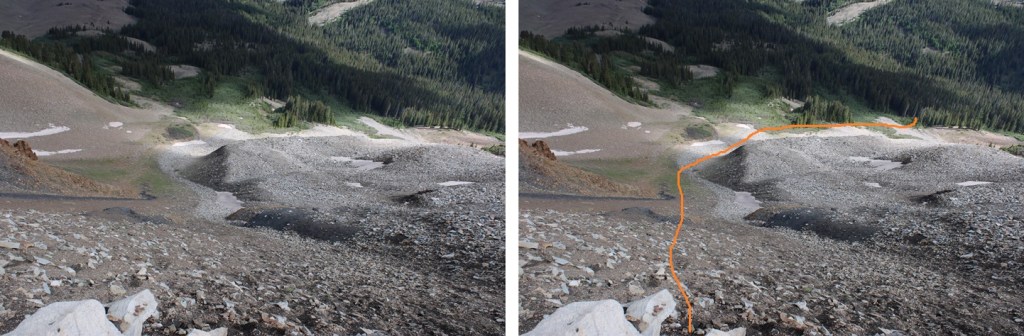
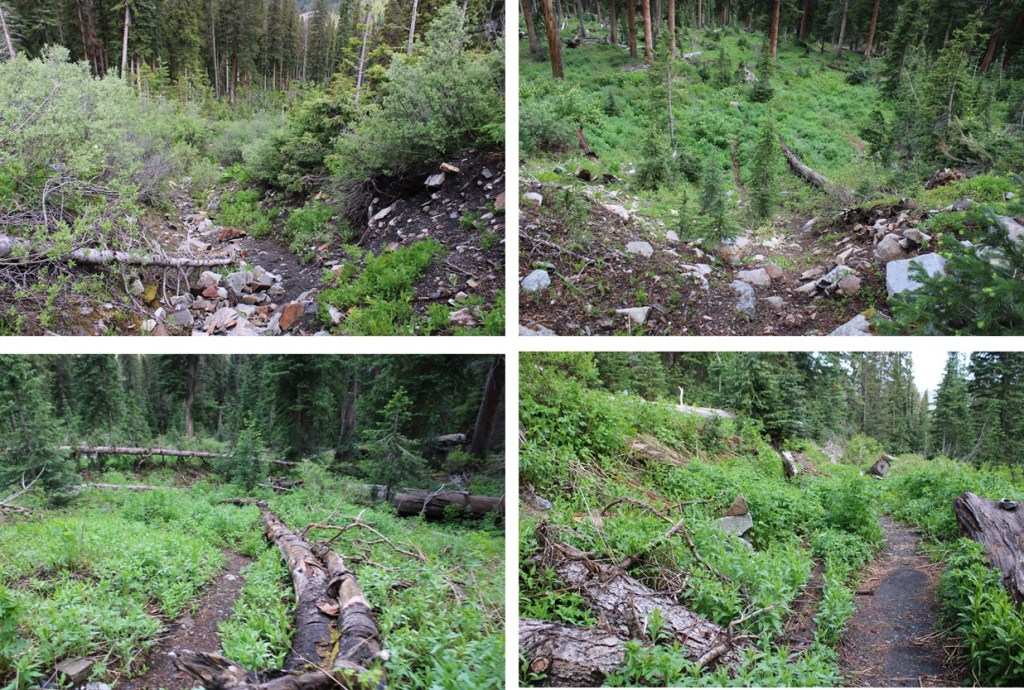
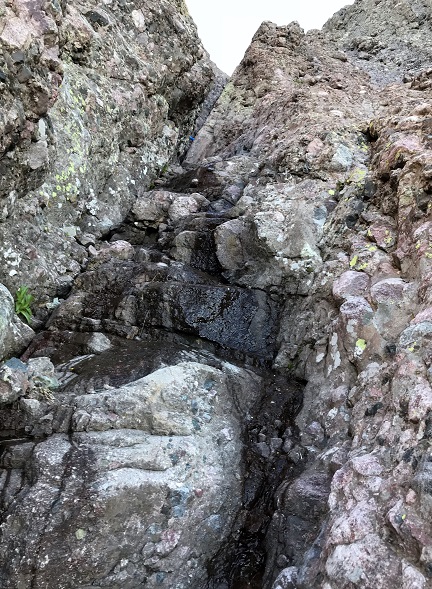
I looked to my right. I had a choice to make. I didn’t want to descend the same way I’d ascended, so I went over and took a look at the gullies. There were at least three to choose from, and I picked the middle one to descend, as it didn’t have any snow and I had a clear view of my exit route back into the trees.
Here’s the route I took down the gully. Since it had rained the night before, the scree was a bit muddy, and easy to grip.
And a look back at the gully I came down. As you can see, I had several options to make it down from the ridge.
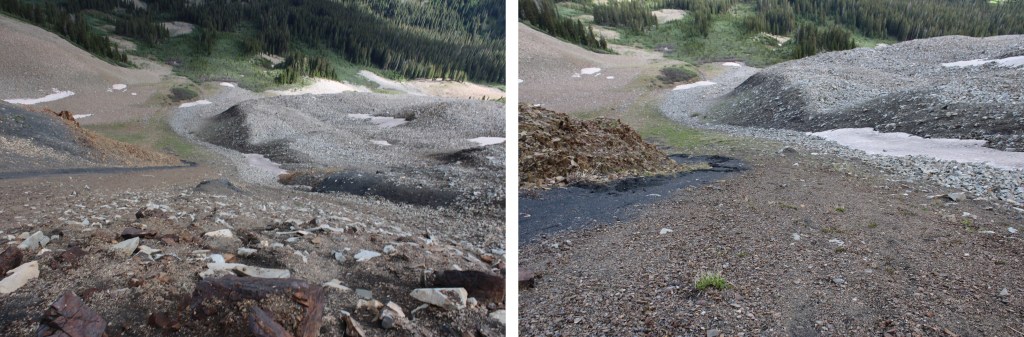
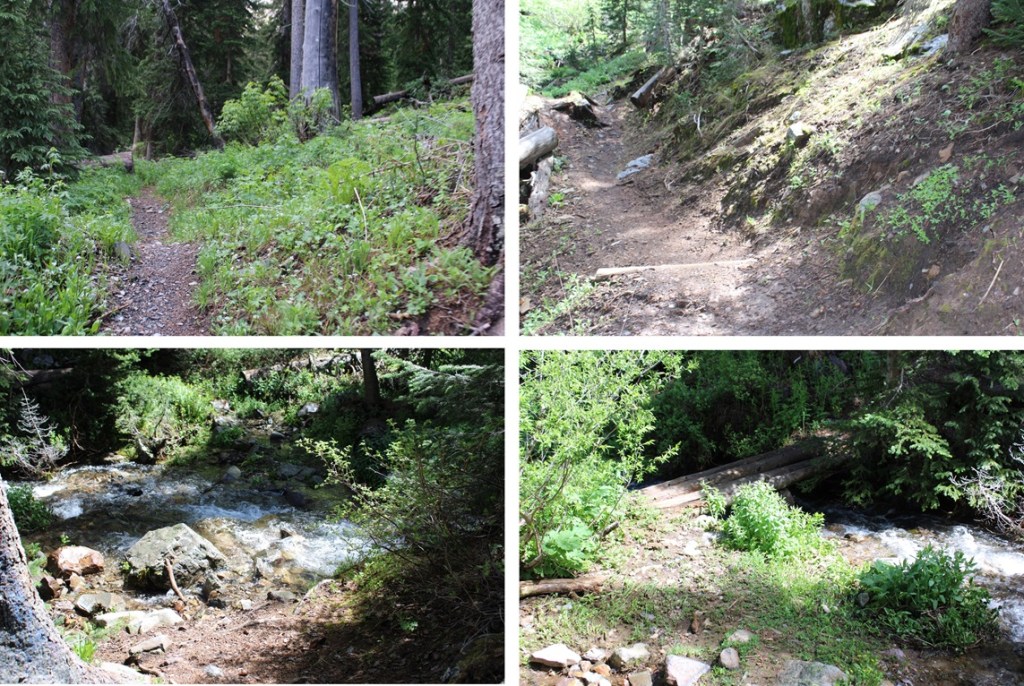
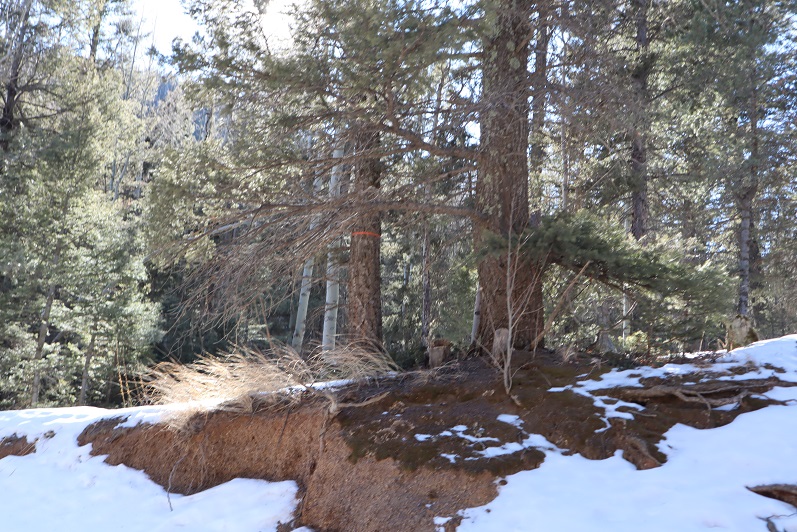
At the base of the gully I followed the rocks to the north (right), finding cairns along the way that led me towards a trail in the trees.
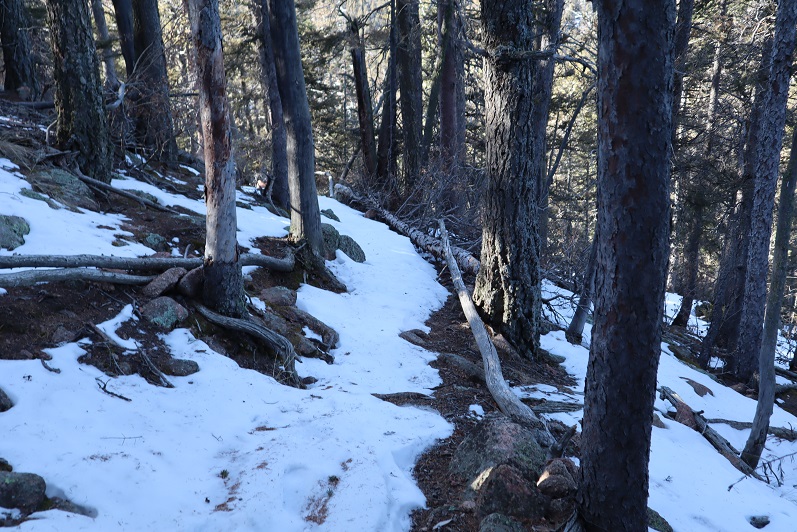
I followed this trail through the willows and into treeline north, back to the West Mancos River Trail.
Back on the West Mancos River Trail, I followed it back to the upper trailhead, crossing the West Mancos River, and gaining elevation as I went.
At the Upper Sharkstooth Trailhead, I followed the 4WD road northeast, past Twin Lakes, just under 2 miles back to the 2WD trailhead.
I made it back to my truck at 11:30am, making this an 11.08 mile hike with 3440’ of elevation gain in 6 hours.
I don’t know why more people don’t hike this peak. It’s class 1 98% of the time, the trailhead is easily accessible, the views are amazing, and there’s abundant wildlife. In any event, I’m recommending it to trail runners especially because it looks like good terrain for trail running. I felt this peak was almost too easy.
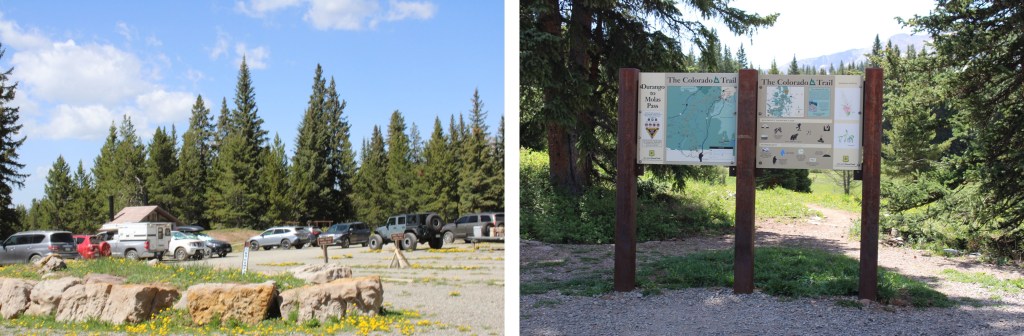
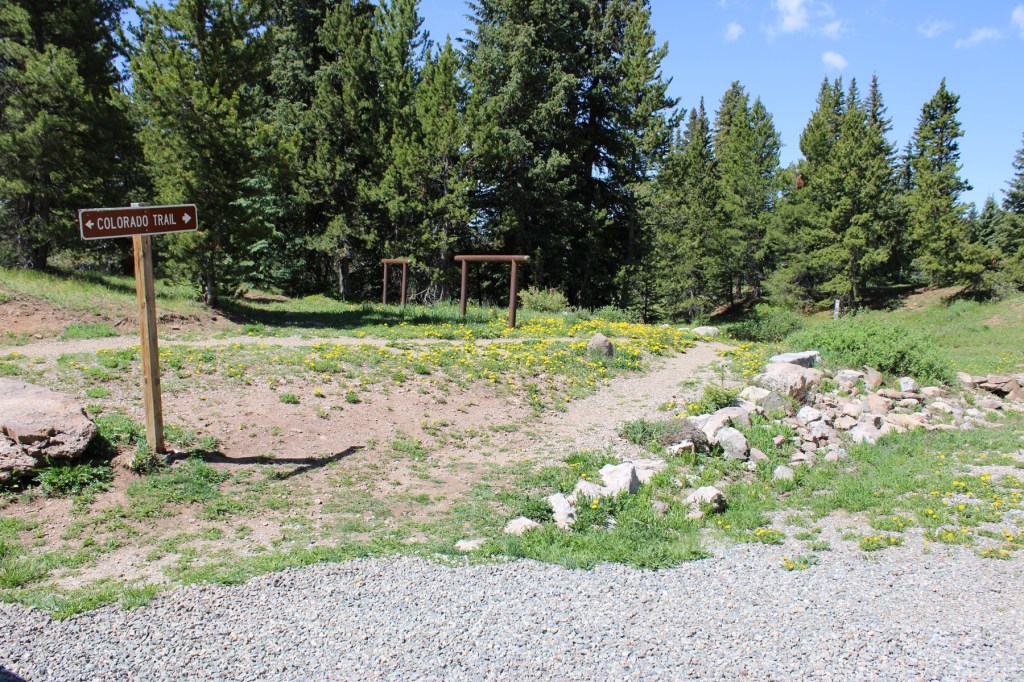
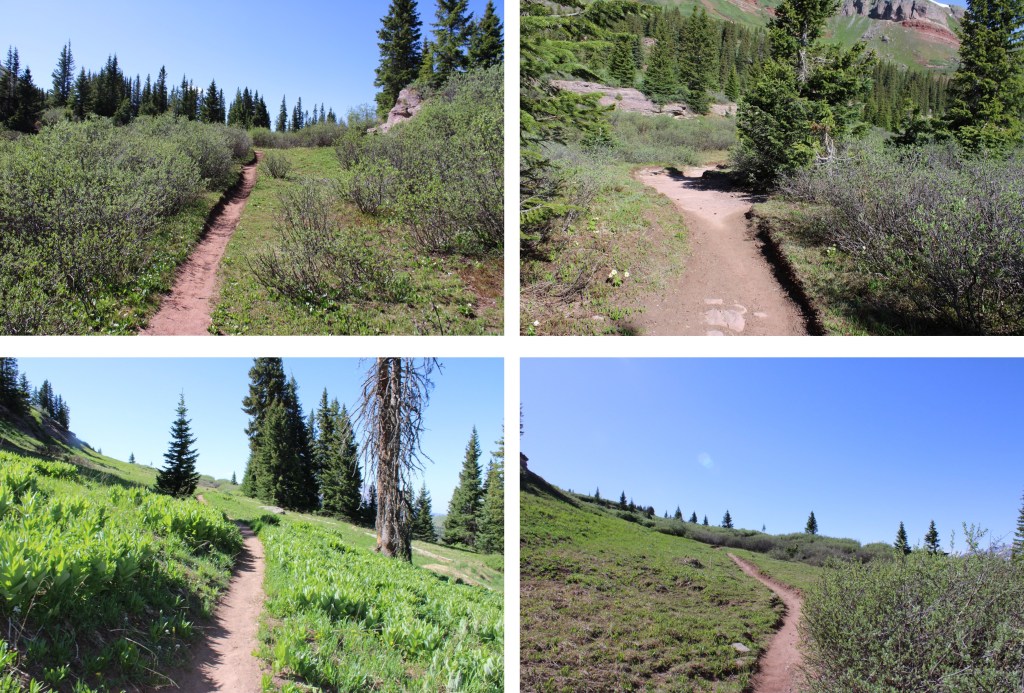
I started at the Colorado Trail Segment 25 Trailhead near Little Molas Lake. There are several dispersed campsites here, public restrooms (although the women’s side was closed for the season), and tons of parking.
The trail is easily marked, and starts at the south end of the parking area
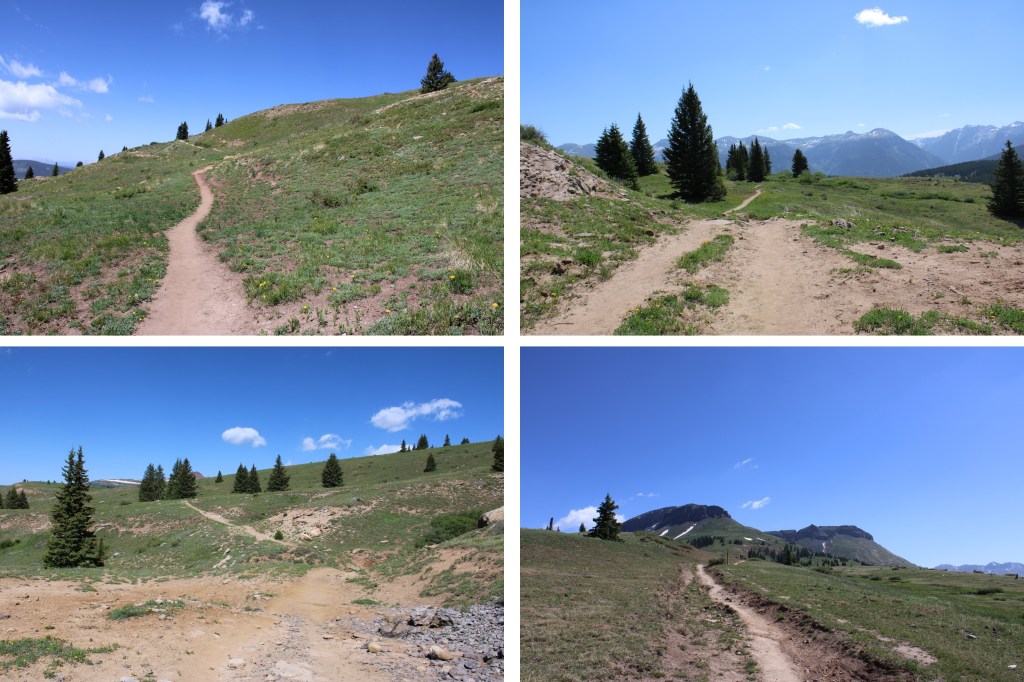
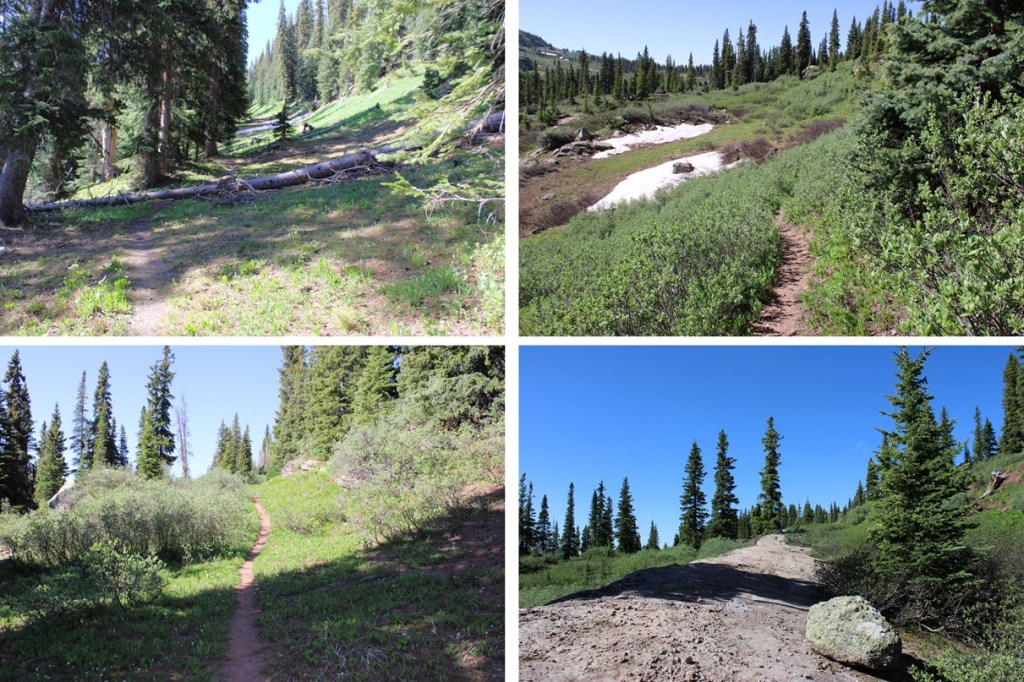
I followed this well-defined trail for just under 3.5 miles as it wove in and out of treeline. (Note, between miles 2-5 of this hike I gained and also lost a lot of elevation).
After hiking for just under 3.5 miles I found myself at the base of PT 12,864. The Colorado Trail continues to the left, but if you look closely, at the top of the rock formation here there is also a trail to the right. I left the Colorado Trail and took the trail to the right.
While not named, this is also a well-established trail. By the looks of all the tire tracks, it’s popular for the mountain bikers. It took me up and down and around to the north, towards Putnam Basin.
Just before the basin were a few campsites, and a creek to cross. There are a few social trails in the area due to the campsites, so if you’re given the option, go left.
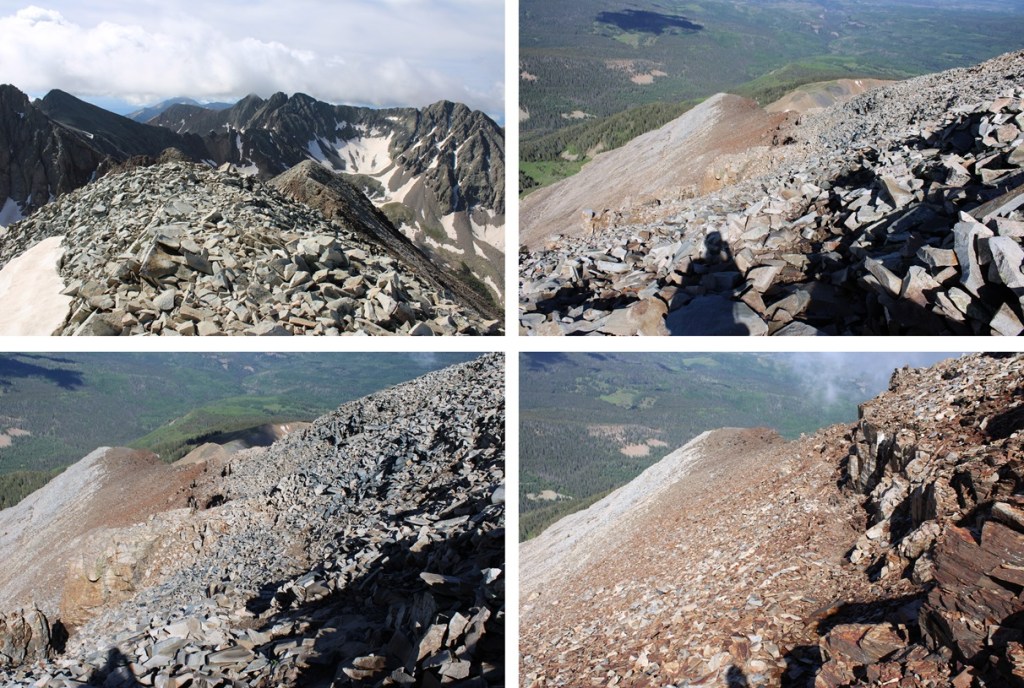
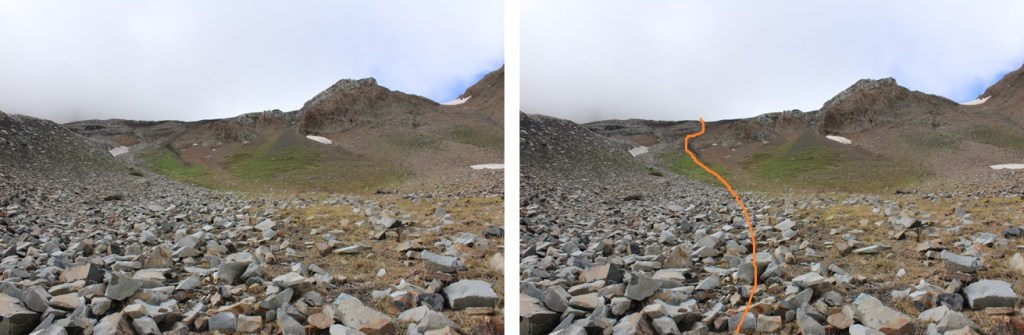
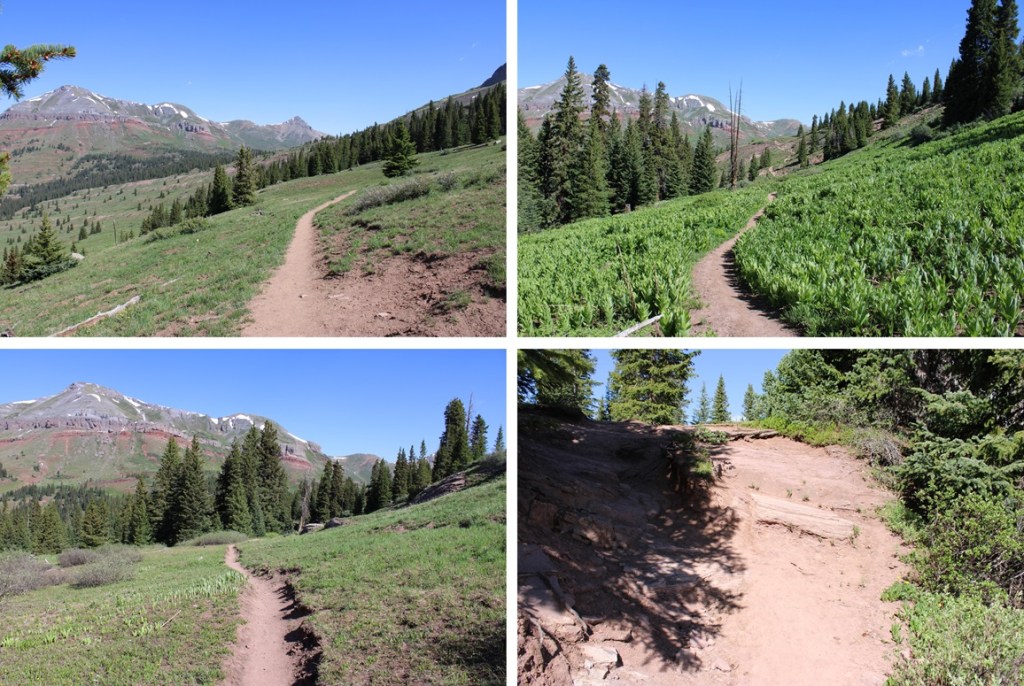
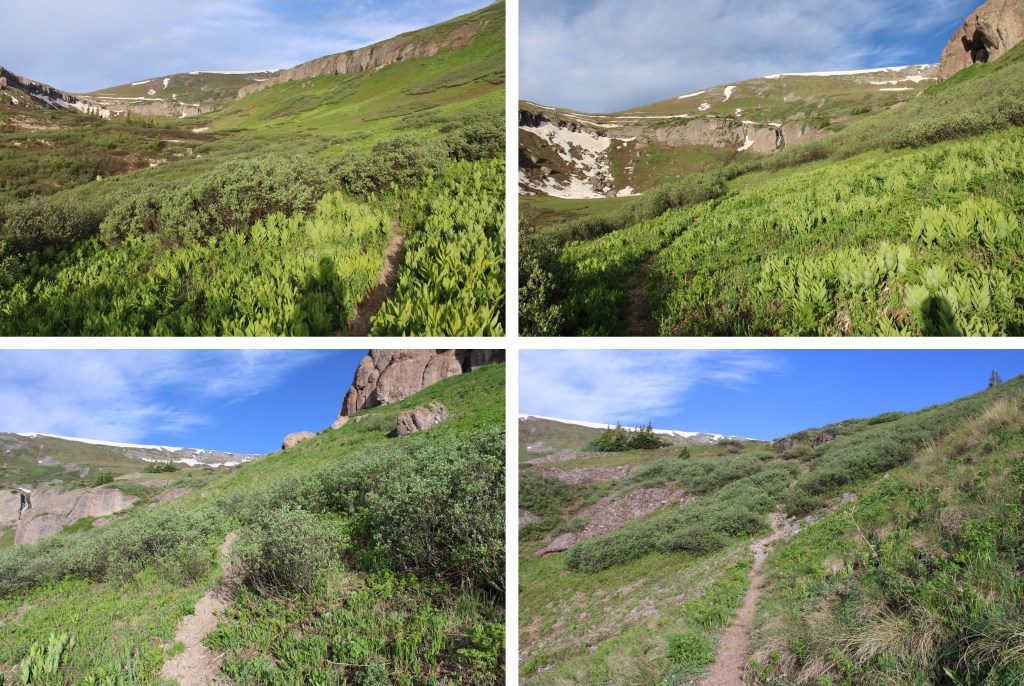
Now at the base of Putnam Basin, I had a clear view of the route ahead of me. No more losing elevation, I would just be gaining for the rest of the hike. This is still on a class 1 trail, all the way to the saddle.
This is the route I took
And some step by step pictures of the route:
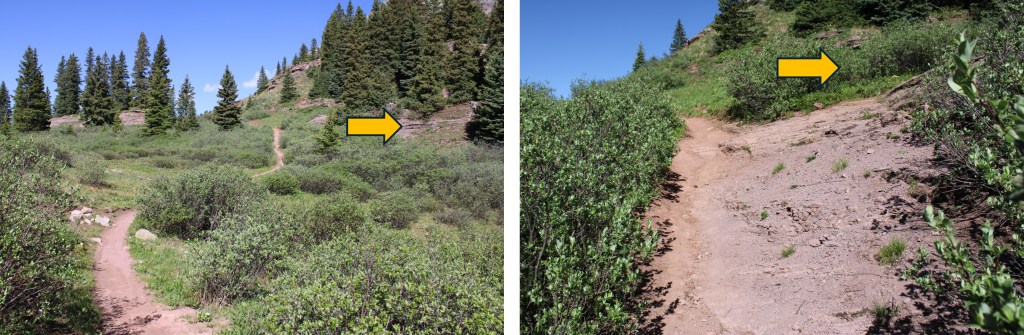
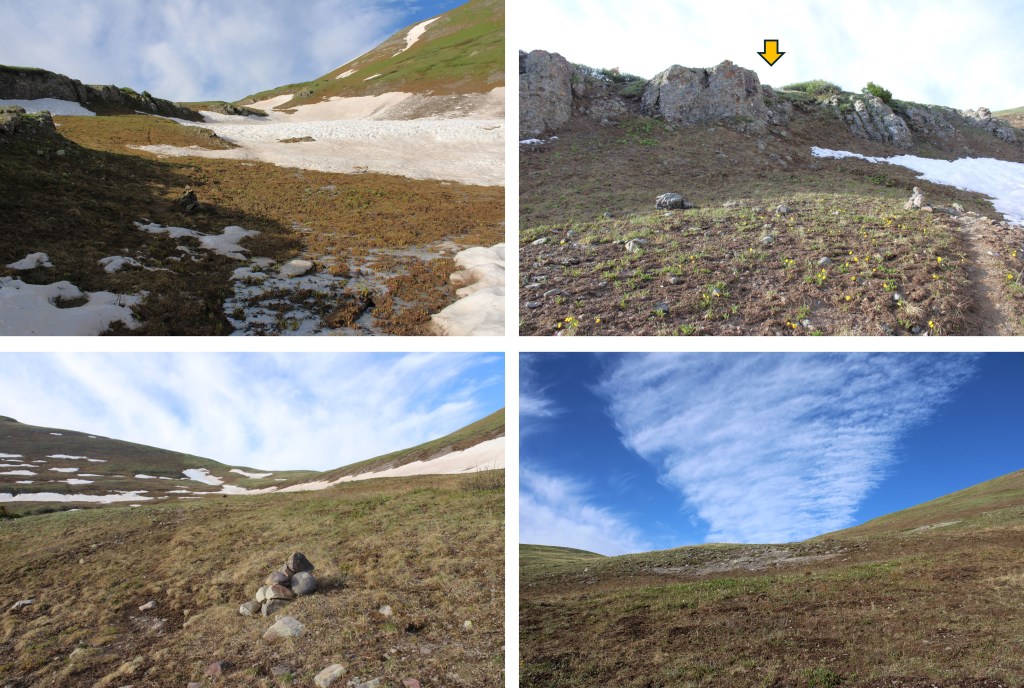
Just before the ledge that brought me to the saddle there was some snow on the route, so I had to get a little creative. It’s all straightforward though, and there are several cairns to follow if you cannot see the trail. I just aimed for the saddle.
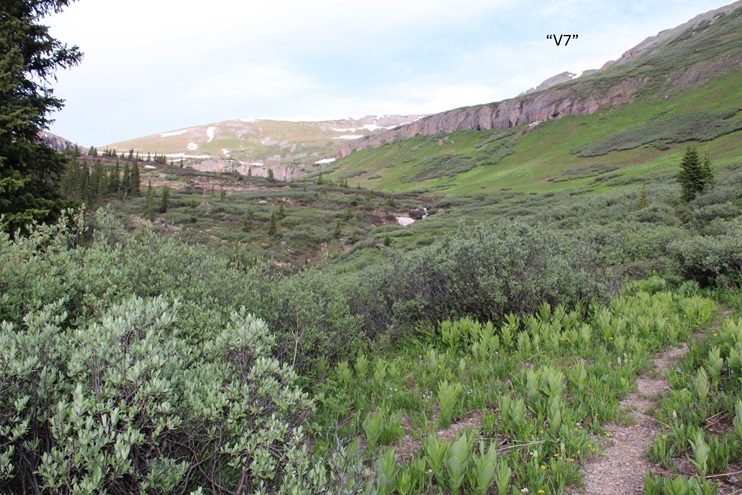
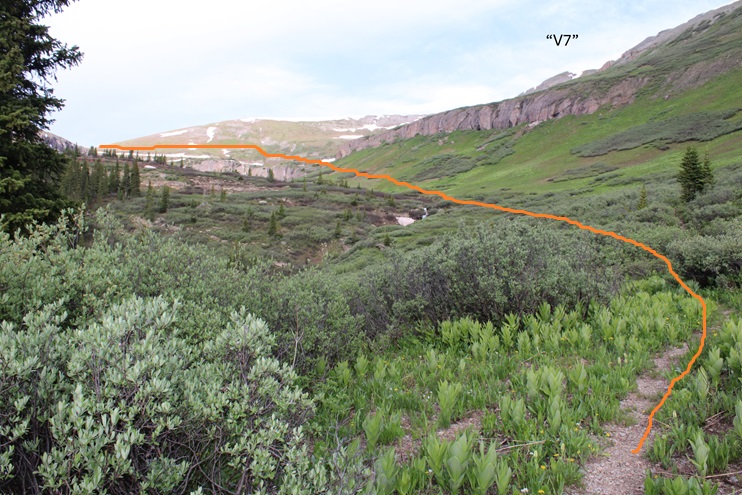
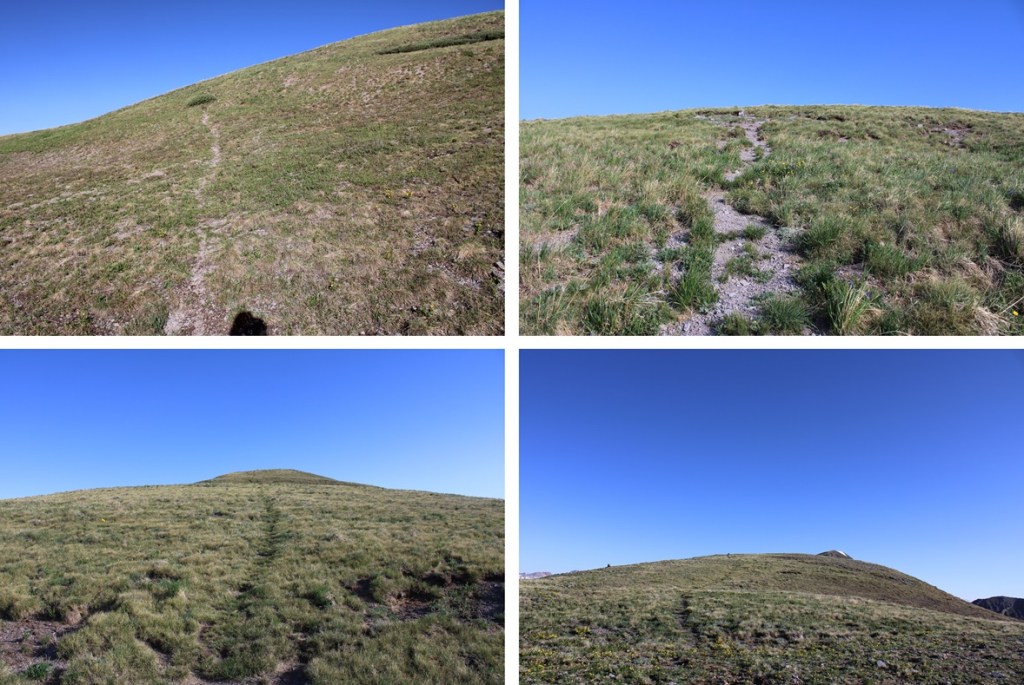
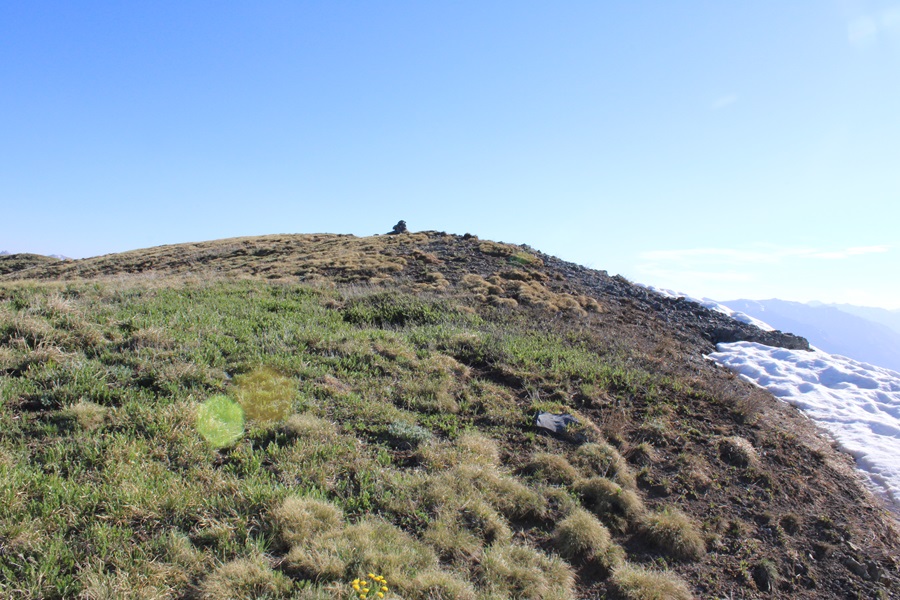
Once at the saddle, I turned right and followed the ridge north to the summit. If you’re lucky, you’ll find a game trail that leads all the way to the summit. Just make sure you stay on the ridge proper, as there’s a trail that goes to the left as well that will skirt “V7” and bring you towards Twin Sisters. The ridge is tundra the entire time.
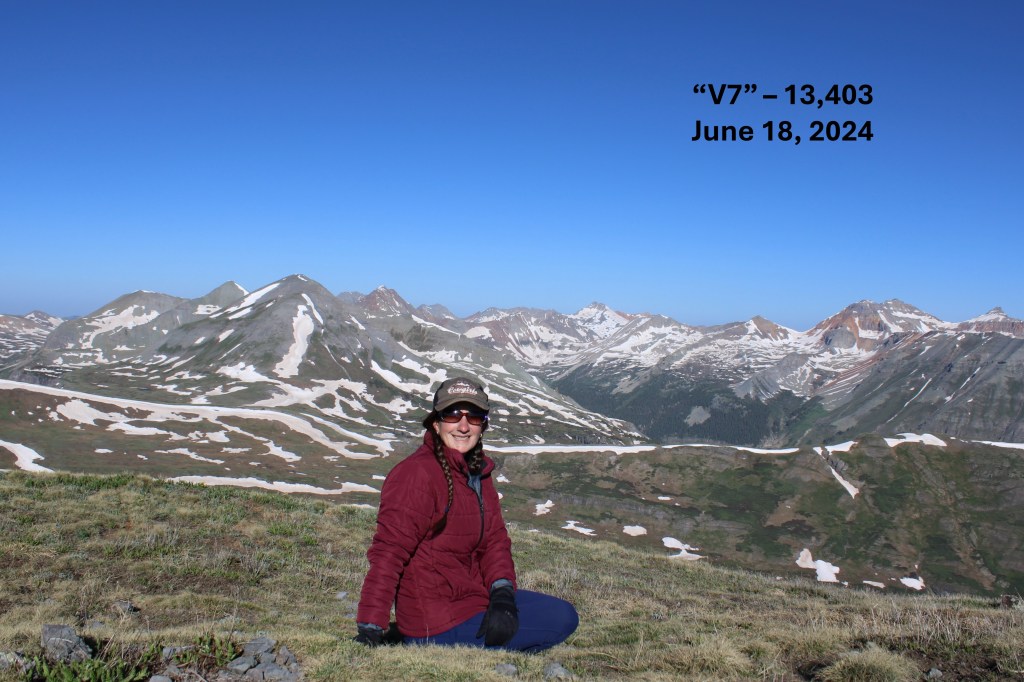
I summited “V7” at 7:45am
“V7”:
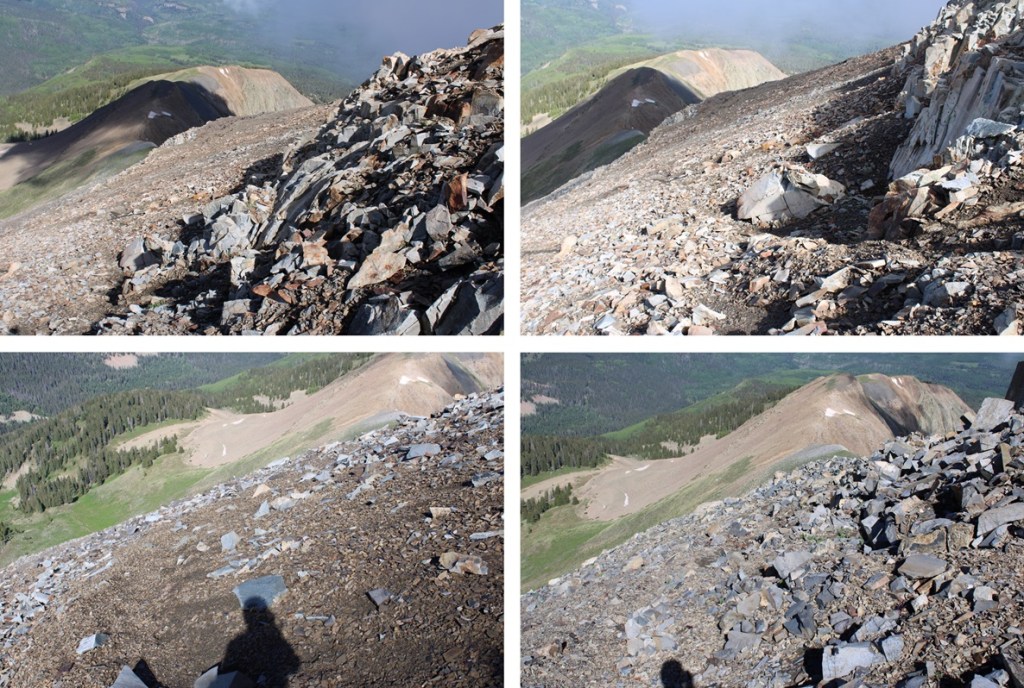
Now to head back down. This was an out and back hike for me, so I turned around and followed my route in. I followed the ridge and headed south, back to the saddle.
Here’s a view from the saddle of Putnam Basin.
At the saddle I turned left, and headed northeast, following the cairns back to the trail
I picked up the trail again, and followed it down the basin, sticking to the left side of the basin/creek.
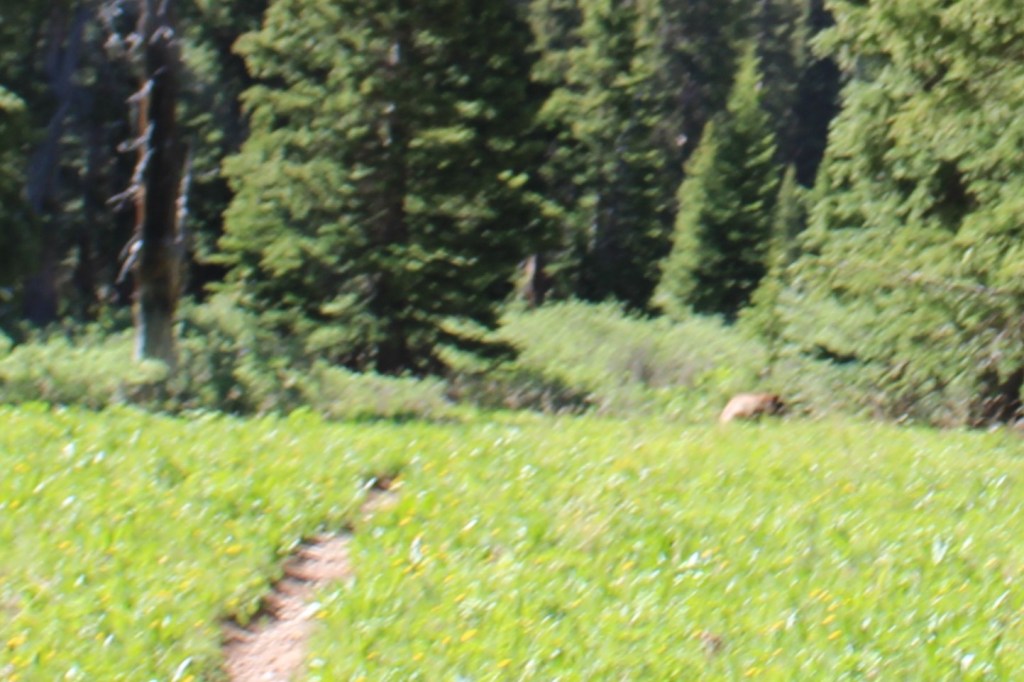
I’d seen quite a few deer that morning. Mostly from afar, but deer nonetheless. As I was nearing the camping area near the base of the basin I saw one running towards me in a funny way, and realized quickly it wasn’t a deer, but a bear. As soon as the bear noticed me, it jumped 90 degrees, and started running the other way. I kind of got a picture, but it’s fuzzy, as the bear was quick.
I started wondering what the bear had been running from? About 20 feet later, I realized what it was: I spied a mama moose with her calf.
I hid behind a tree to watch them while giving them space. I love watching moose calves, especially the really young ones. They tend to bounce around everywhere, turning in circles, braying, and excited about life in general. After this video the calf got really jumpy, but I’d already turned around and started hiking away so as not to bother them.
Mama moose with calf:
I passed the camping area, and continued following the trail, now headed south (and uphill).
I made it to the Colorado Trail cutoff, turned left, and followed it 3.5 miles back to the trailhead.
I made it back to the trailhead at 10:30am, making this a 13.78 mile hike with 3029’ of elevation gain in 5 hours 15 minutes.
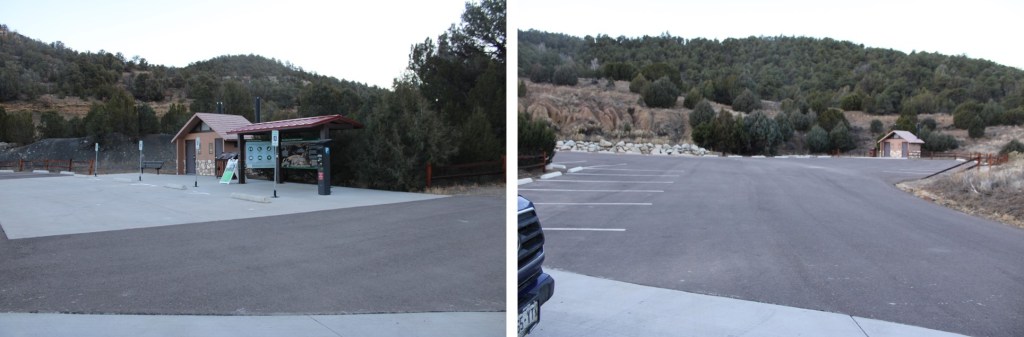
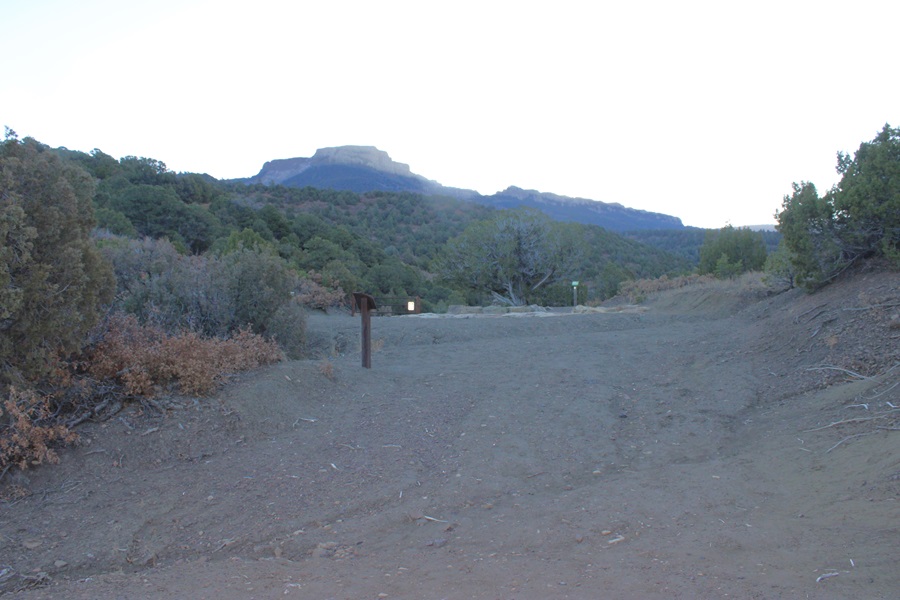
This peak has been on my bucket list for a while, but it was located on private property. Recently this property became a Colorado State Park (currently you need the Colorado State Parks Pass or to pay the $10 to park at the kiosk), and I was able to legally climb the peak. The park is open sunrise to sunset, so I didn’t get my usual pre-dawn start. There is plenty of parking at the trailhead, along with vault toilets and trailhead signs.
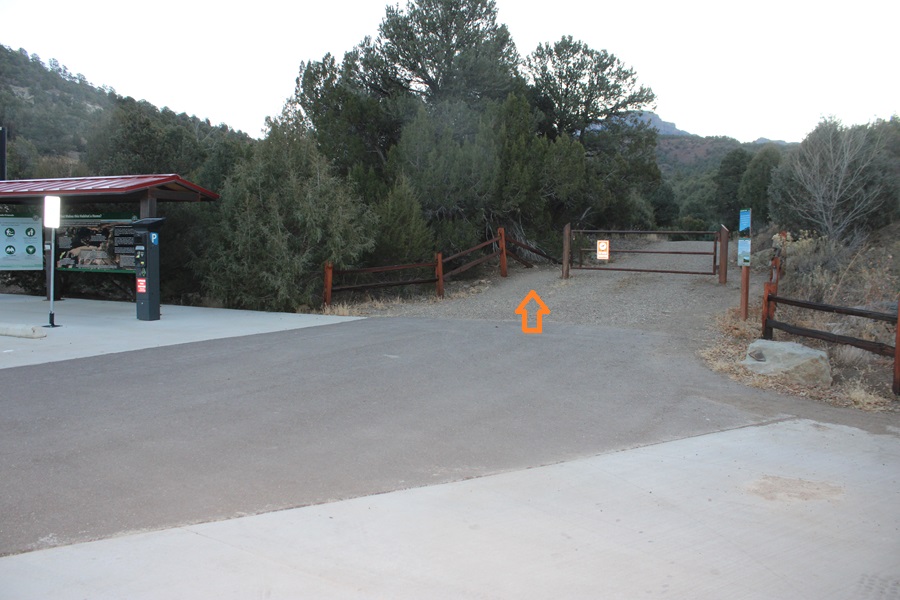
I parked at Fishers Peak Trailhead (the only trailhead in the park) and was on my way at 7am. The trailhead is obvious, at the east end of the parking area.
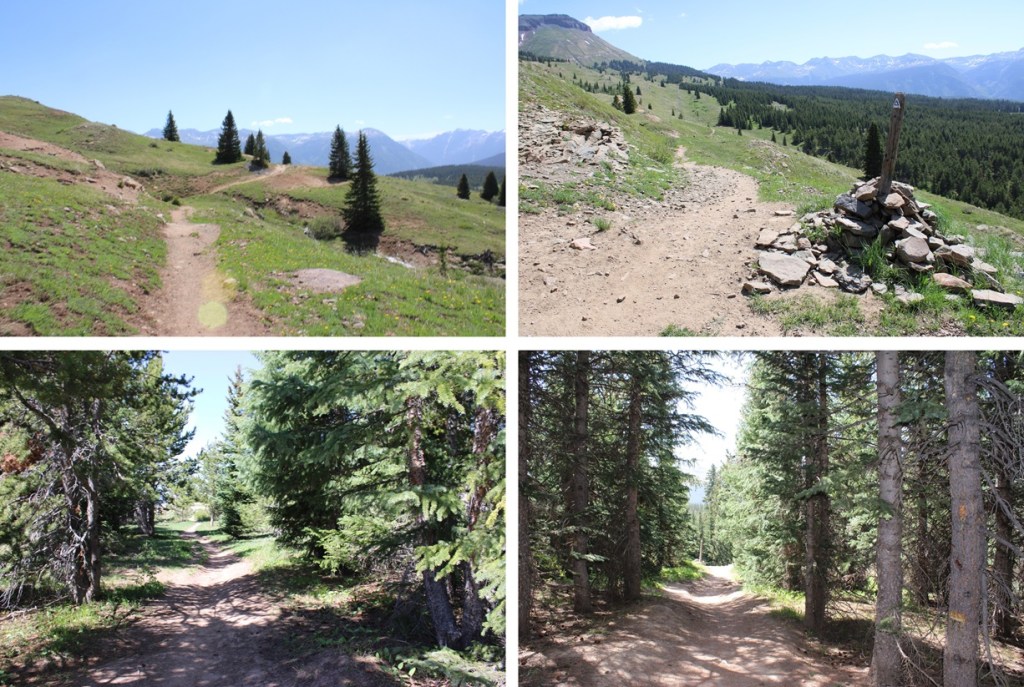
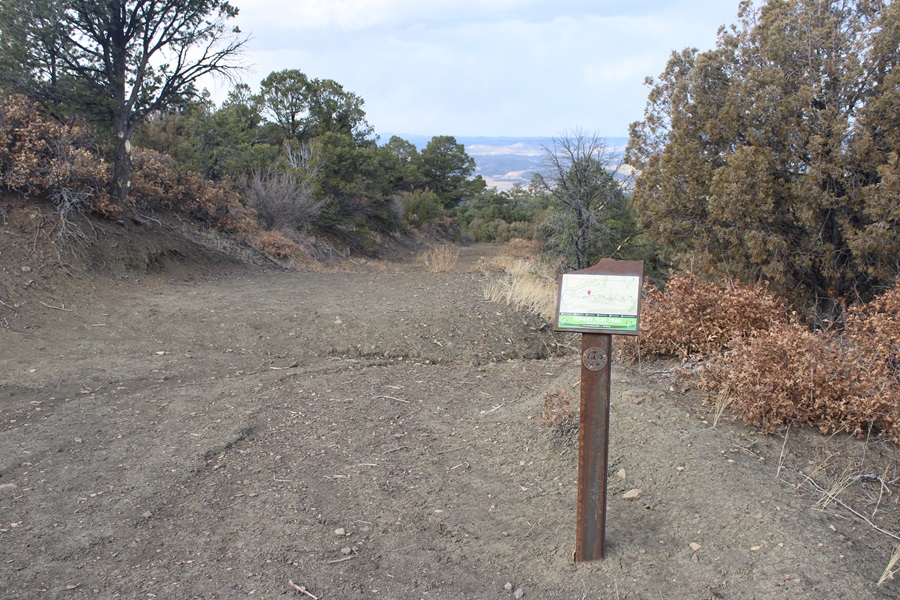
There were a limited number of trail maps at the trailhead, and I snagged one. If there isn’t one there, here’s a copy. I can tell you this isn’t the best map, and the signs can be confusing, but you basically want to take trail 1 to trail 2 to trail 3, then 4, 5, and 6. This may sound obvious, but trail 8 and 10 and 9 all lead to trail 2 as well (they just meander a bit).
Trail 1: Navy Blue on Map, Challenge Hill Section
Trail 2: Dark Magenta on map (as opposed to light Magenta), Osita Ridge Section
Trail 3: Blue on map (as opposed to Navy Blue or light blue), Shady Forest Section
Trail 4: Green on map, Stone Guard Section
Trail 5: Light blue on map (Peak Approach Section)
Trail 6: Brown on map (Summit Loop Section)
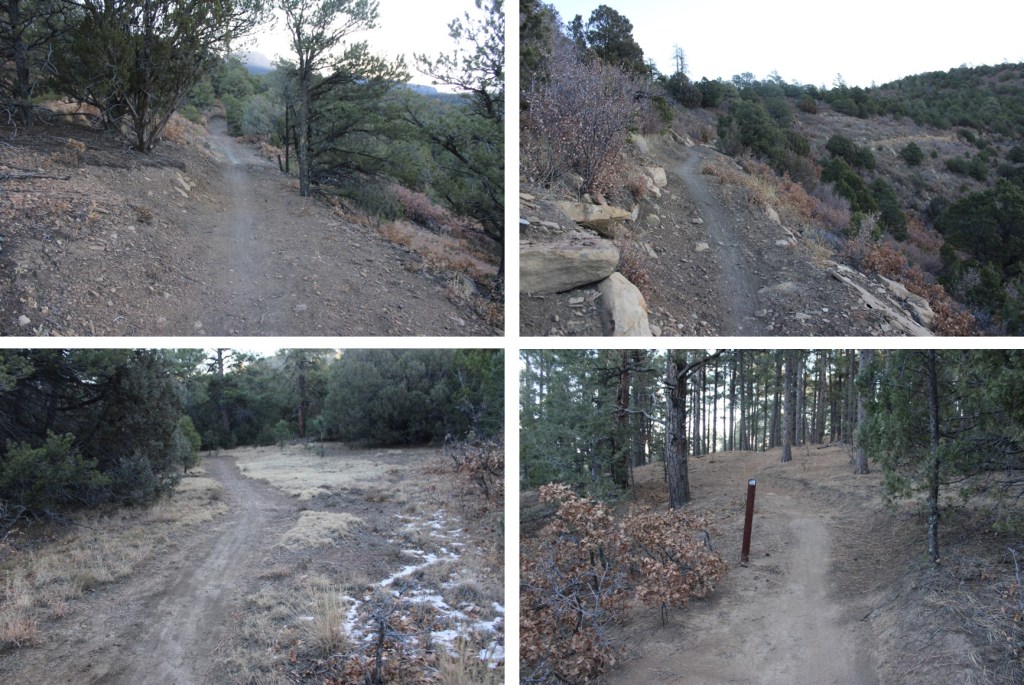
I followed the Challenge Hill section for a short while (maybe 100 yards) before coming to a junction with several other trails. I could see Fishers Peak from the parking area.
At the junction I stayed on the Challenge Hill Section, which is the wide path that goes straight (yes, this can be confusing, stay on the road).
The road quickly begins to gain in elevation. I gained 770’ of elevation in just under 1.5 miles.
After hiking for about 1.3 miles, I came to another junction. If you accidentally took trail 10 or 8 or 9, you’ll end up here as well.
I continued east, taking the Osita Ridge Section
Now the trail became more of a bike trail than a hiking trail. It meandered around mountainsides instead of over them, and had a lot of small ups and downs, which I’m assuming make biking up hill easier? I can see problems in the spring with rain and runoff collecting in pools on this trail, but for now it was just mildly annoying.
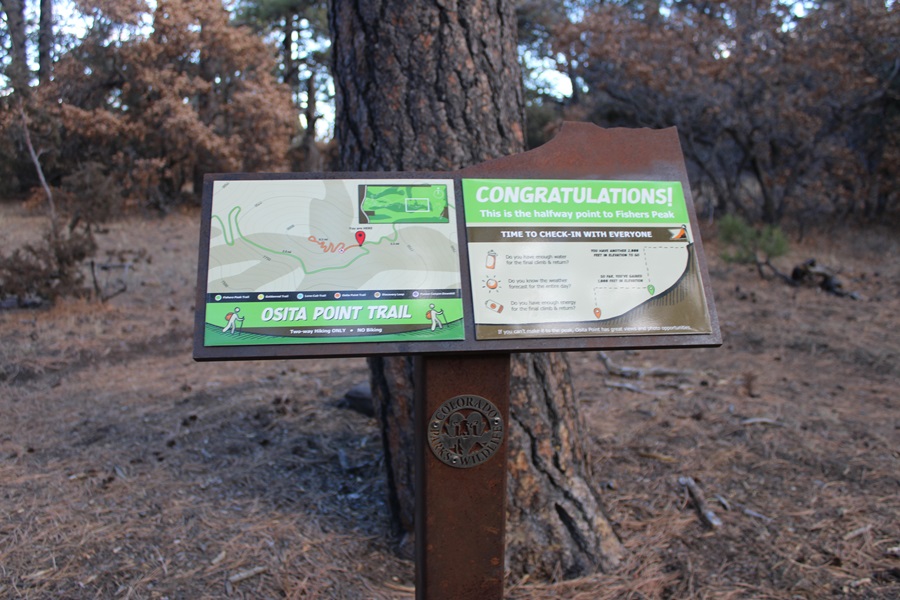
After hiking for 3.85 miles I came to a junction, which congratulated me for making it halfway. I like how the sign asks the hiker if they are truly prepared for the second half of the hike.
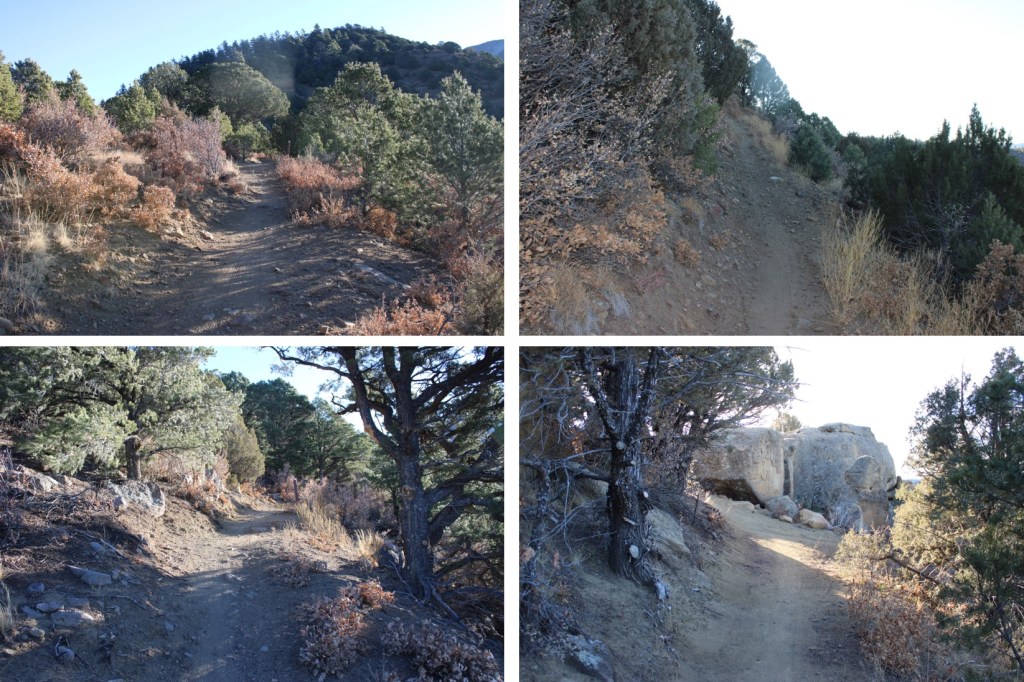
At this junction I turned right, and followed the Shady Forest Section. If you go left, you can hike .4 miles up to Osita Point.
About 2 miles of hiking brought me to a gate. The sign says this portion of the trail is closed March 15-July 31 for Raptor breeding season. So if you’re going to do the peak, don’t plan on coming during that time. This is also a good place to leave your bike if you rode one, as the trail becomes much more rocky and there are stairs involved.
I was now in the Stone Guard Section, and followed the class 1 trail south as it gained the ridge.
There are a couple of gates here, but the trail doesn’t intersect them, and the path is obvious
I came upon some stairs, which is the beginning of the ‘hard’ part of this climb. This is a fairly new trail, but the workmanship in the stair and narrow areas doesn’t look like it will last long. I can see it eroding in a year or two, or even after this winter/spring season. Although this is a class 1 trail, care should be taken not to dislodge a rock or slip off the side of the trail.
When you see these signs, you’re almost to the summit. There’s a little bit of scrambling here, but only for about 20 feet or so.
The trail here is not obvious, but you’re trying to ascend these rocks.
At the top of the rocks I was surprised to be greeted by a mesa. There is a well-established trail here, that goes around the mesa. You can go either left or right. I went left. This is the Summit Loop section of the trail.
The actual summit can be difficult to discern, as there are multiple large cairns that look like the summit. It you go left as I did, the summit will be the first large cairn you come to. Because I wasn’t sure at the time, I went all over the mesa to make sure this was indeed the true summit.
I summited Fishers Peak at 10:15am. This video is from the middle of the mesa.
Fishers Peak:
Now to head back down. I simply re-traced my steps back the way I came
Back down the rocky area
Then I followed the trail backwards, taking sections 5-4-3-2-1
It wasn’t supposed to start snowing for another two hours, but mountains have a way of making their own weather. It started graupeling pretty heavily.
Graupel:
I continued on through the graupel, following the well established trail
At the junction of trail 1,2,9 & 10 I followed trail 1, the Challenge Hill Section (the one that’s a dirt road), back to the trailhead. You can take any of the routes, the others will just be longer.
When I got back to the trailhead, my truck was still the only vehicle in the lot, leading me to believe not many people know the park is open
I made it back to my truck at 12:45pm, making this a 15.3 mile hike with 3588’ of elevation gain in 5 hours, 45 minutes
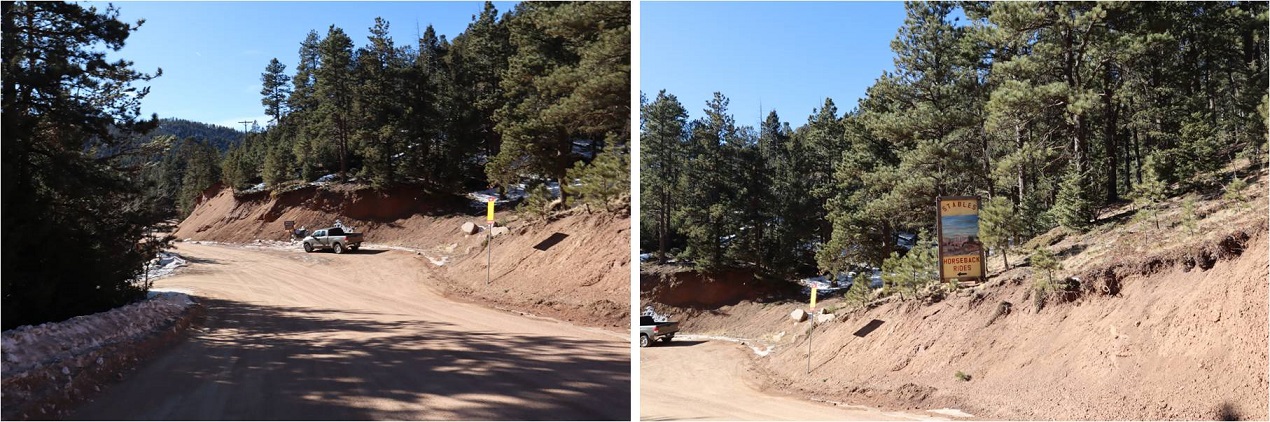
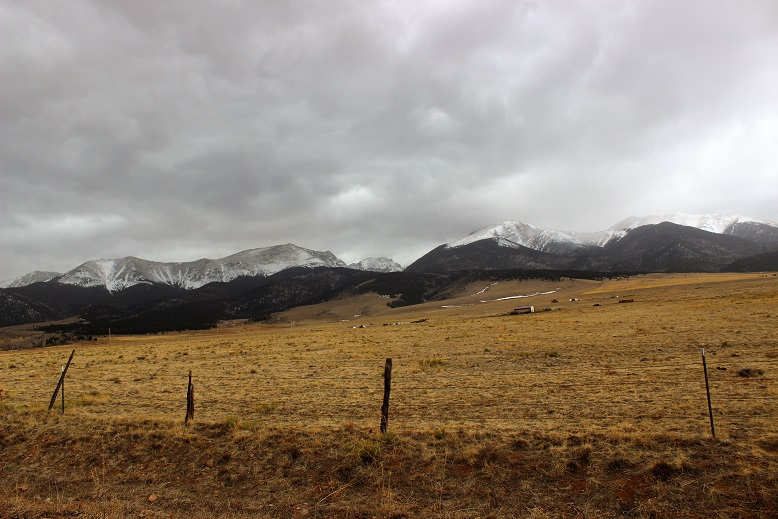
With the weather iffy in the high country I decided to tackle one of my 2020 goals early: climb 3 El Paso County Highpoints. Steffen is training to hike 14ers this year so I invited him to go along. Before heading out I used Caltopo to make a route of the drive in, not being sure just how Old Stage Road would look this time of year. It ended up being almost completely clear of snow. I parked near the stables.
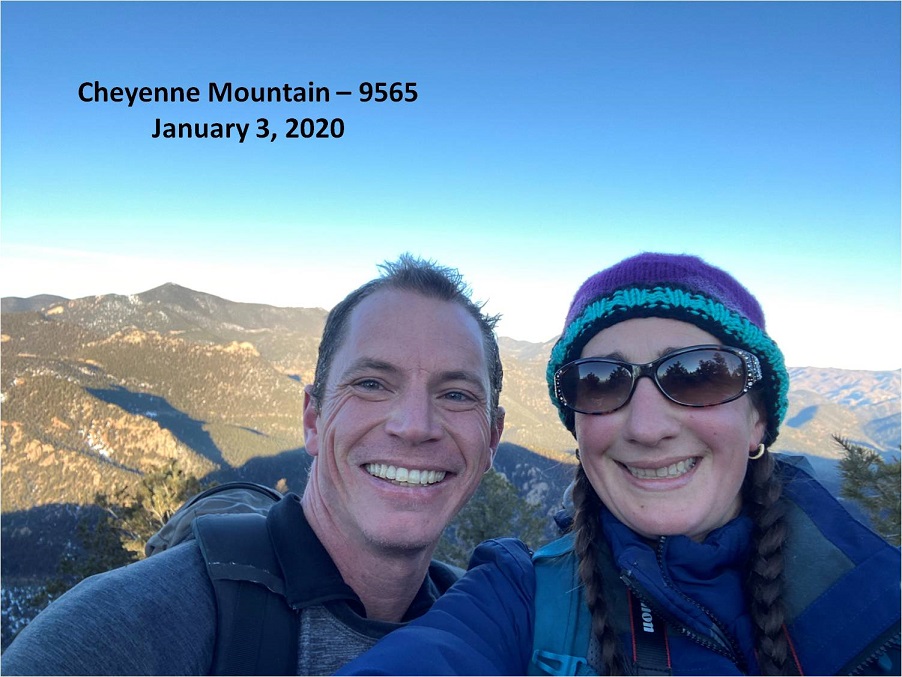
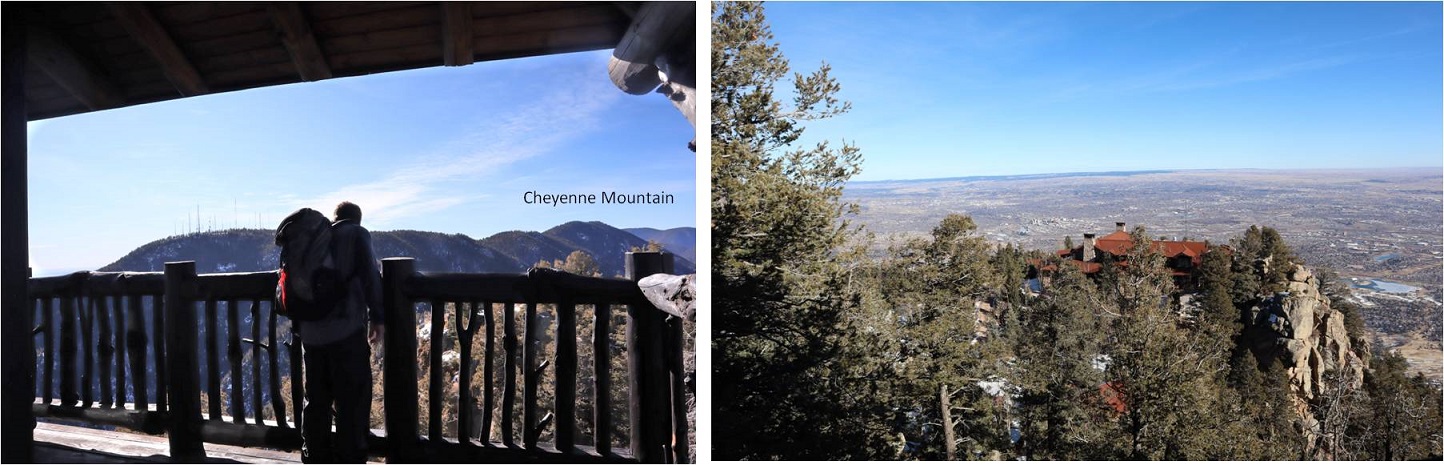
Cheyenne Mountain 9565’:
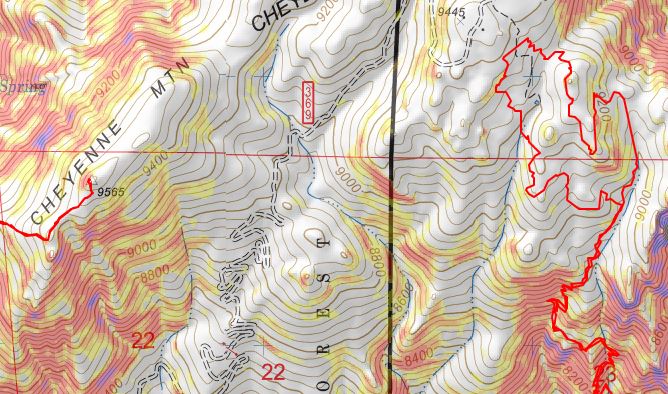
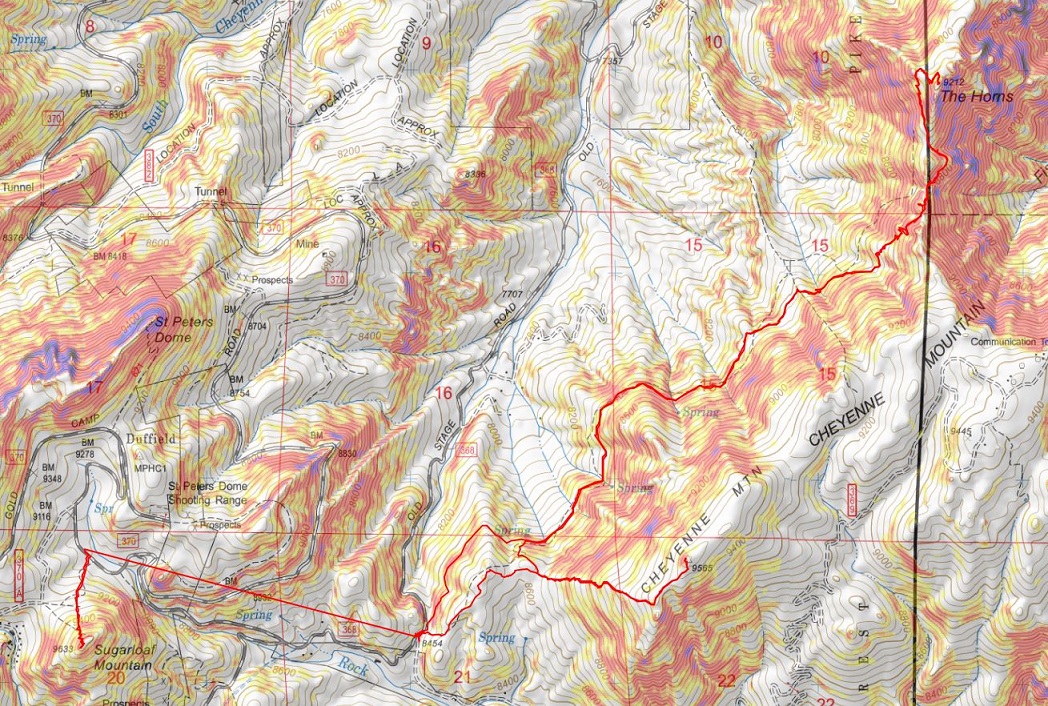
Just to clarify, we summited the highpoint of Cheyenne Mountain. There have been articles written and news posts stating the Dixon Trail goes to the top of Cheyenne Mountain: It doesn’t. The Dixon Trail goes through Cheyenne Mountain State Park and up the side of the east side of the Cheyenne Mountain range near the communication towers, but it doesn’t summit anything, and in fact if you were to go off trail and scramble to the top of Robbers Roost you’d still be over 100 feet shy and about a mile of bushwhacking away from the true summit of Cheyenne Mountain. Here’s topo proof: On the left is the true summit of Cheyenne Mountain, and on the right is where the Dixon Trail takes you.
In any event, at 6:30am it was 14 degrees outside when we donned our gear (microspikes) and headed east over a snow bank and up the mountainside, dipping about 200 feet before starting the ascent.
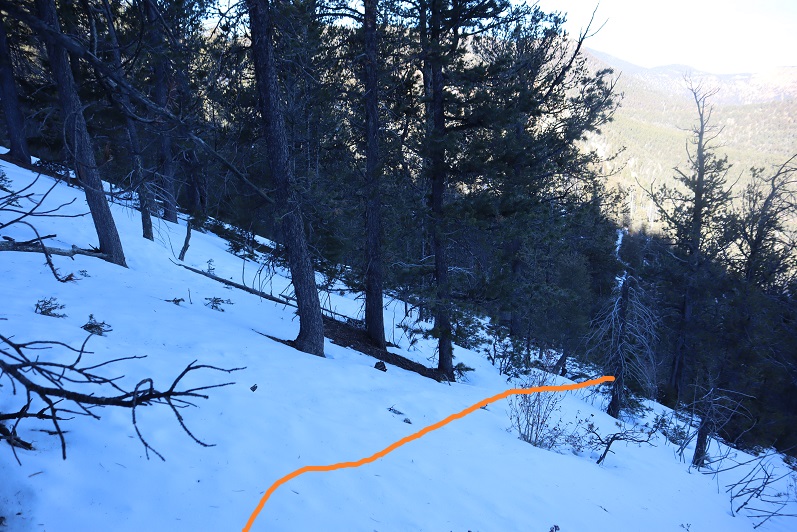
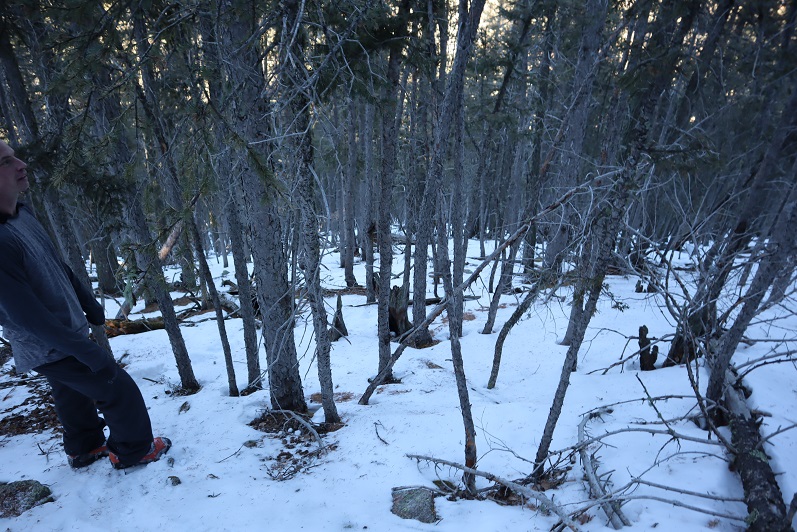
This hike was entirely below treeline with no distinct trail so we just aimed for the ridge and ascended the mountain on its west side. The ground had many dry spots but we tried to stick to the snow as much as possible so we’d see our footprints upon our return.
About three quarters of the way up the mountain we started running into cairns and surveyors tape, which was a nice surprise (until they stopped). We also found some bear scat that looked to be from last fall. This seemed a good area to find a bear.
Once on the ridge we came across some mountain lion tracks that looked to be a few days old. This area also seemed like a good place for a mountain lion to den, with a lot of large rocks and boulders to hide in. We followed the ridge left (north) to the summit.
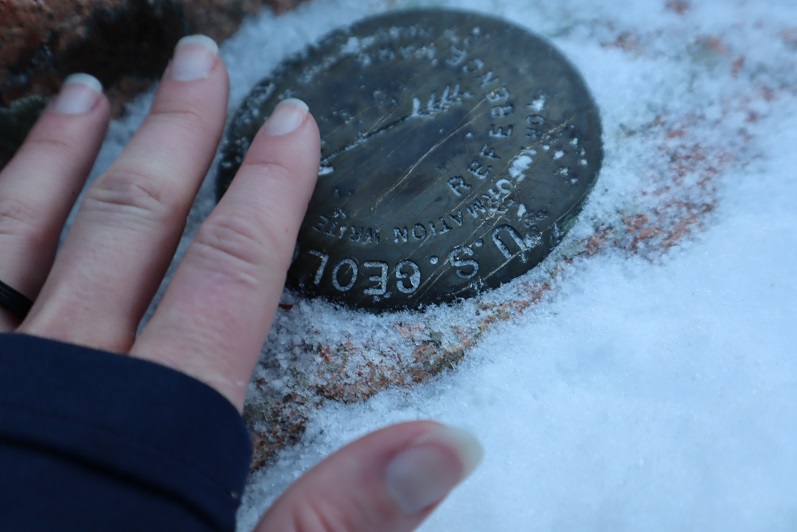
Once at the summit we found a summit marker! This was cool because it was totally unexpected.
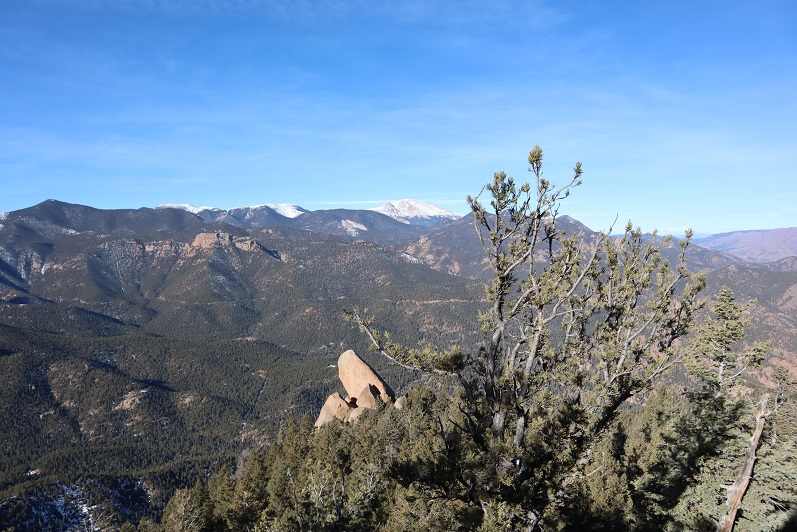
Our summit views included Colorado Springs, Almagre with Pikes Peak, and The Spanish Peaks
Summit Picture
There was about 6 inches of snow on the ground towards the top so we followed our tracks back down the ridge
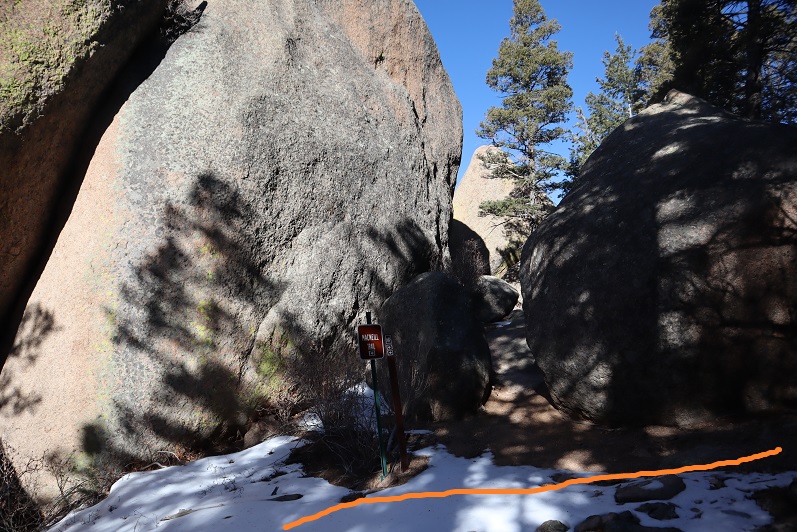
Cheyenne Mountain wasn’t our only goal for today, and after looking at a topo map we didn’t want to re-ascend the hill that led back to the parking area. We decided to traverse the north side of the mountain instead. There was more snow on the north side and we were frequently knee deep in powder
But after just a few minutes we came across the MacNeill trail, and check it out: it had tracks!
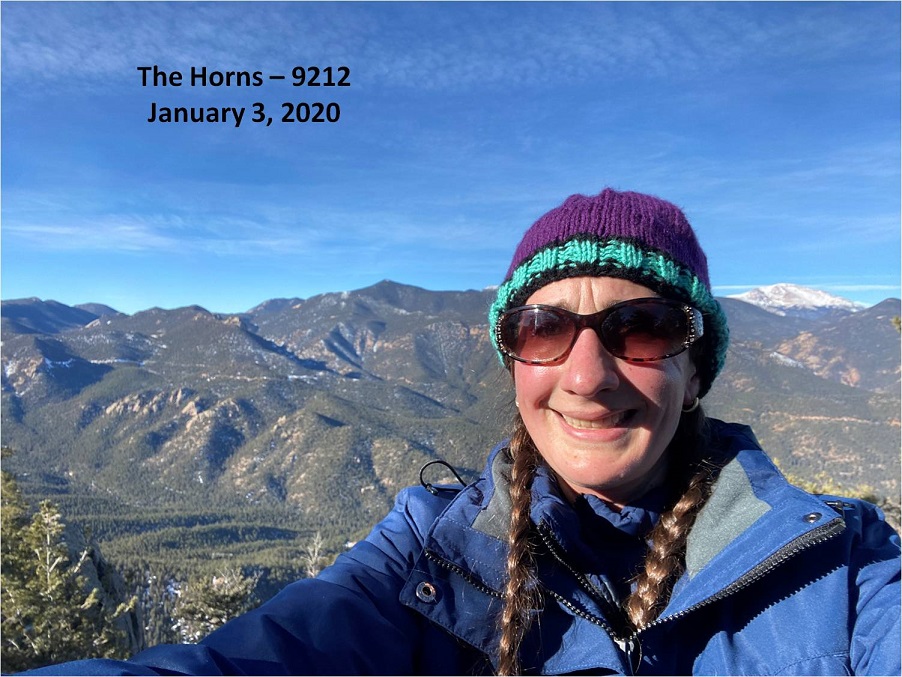
The Horns 9212’:
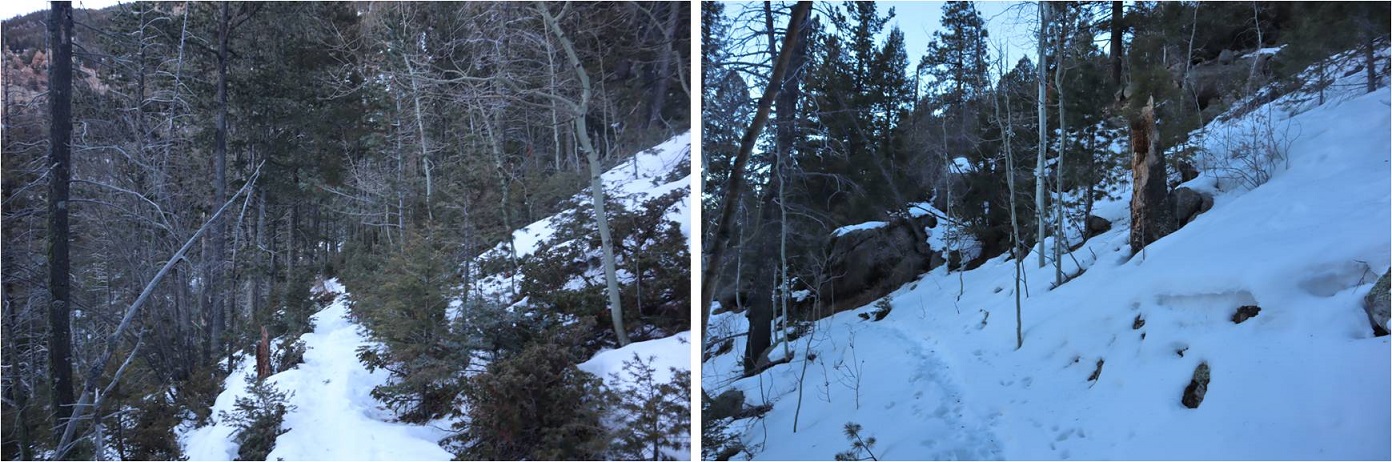
This was awesome! We just followed the class 1 trail as it curved northeast around the mountainside
It can be tempting at times to veer off trail, so be sure to stick to the side of the mountain. There were downed trees everywhere. There is also a lot of up and down, meaning you’ll gain elevation on the way out as well.
We came across an old water pump and frozen waterfall/stream
There were broken pipes littering the trail from here just about up to the summit, as well as varying depths of snow. We kept our microspikes on.
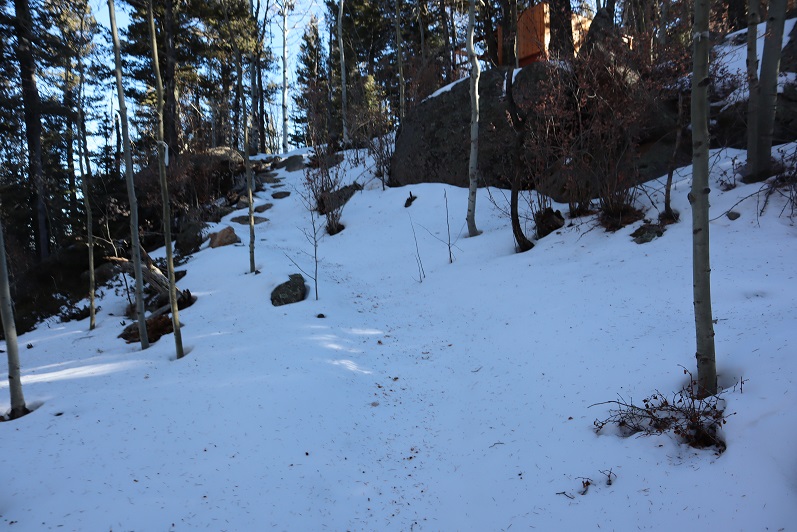
We made it to the top of the ridge and now lost elevation as the trail continued on the east side of the mountain and then snaked back to the west side. Here’s where the tracks ended, but luckily the trail was still easy to follow. There was more snow on the east side.
The trail snaked back around to the left (west side) and into an area filled with boulders. There was one spot that was tricky to pass due to the snow, but with the help of microspikes and trekking poles it wasn’t too bad. I didn’t touch the pipe.
We continued on the trail as it once again curved east around the mountainside
And came across a trail sign
We followed the trail towards what looked most likely to be the summit on top of a rocky area
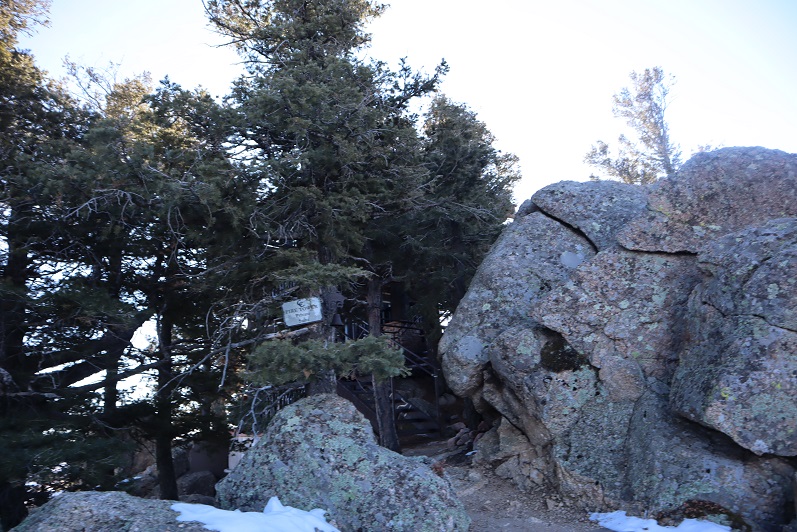
We came across cabins, which I wasn’t prepared for. There wasn’t a camp on my topo map (Pikes Peak Atlas). It didn’t look like anyone was at camp today so we continued on towards the highest point, which seemed to be up these stairs
At the top of the stairs was a large boulder and what looked to be a fire tower.
We climbed the boulder carefully (class 3) and looked around. It seemed this was the summit, so we took a few pictures. There was a puddle of ice over what we assumed was the summit marker (if there was one?)
As we looked around it was unclear if we were at the true summit or if the rock about 15 meet away but near the cabin was the true summit, so we downclimbed and walked up the stairs of the fire tower. This was referred to as “The Horns” so it made sense there were two rocks.
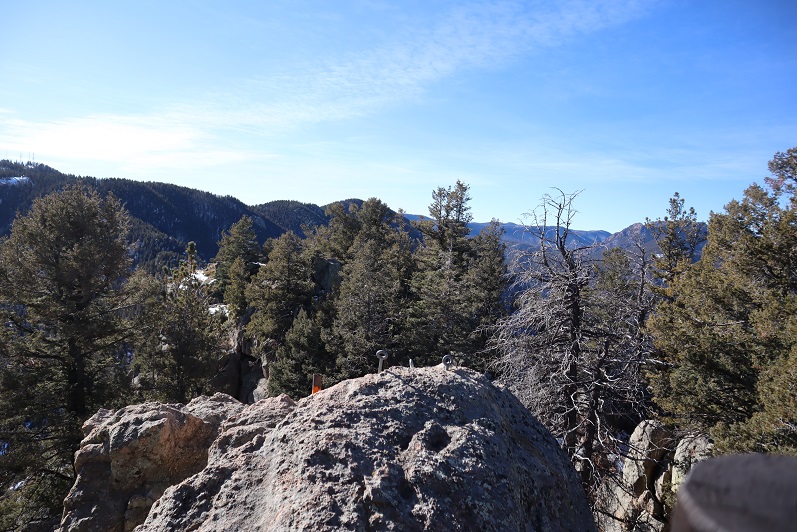
The points looked to be about even, with the one on the north maybe just a little higher? It was here we noticed the security cameras. There were many and although we weren’t doing anything wrong we decided to leave. From the tower we could tell this place was bigger than we’d thought (later we realized this is “Cloud Camp” owned by the Broadmoor).
Time to head back down. The boulders here really look fun to climb/rappel.
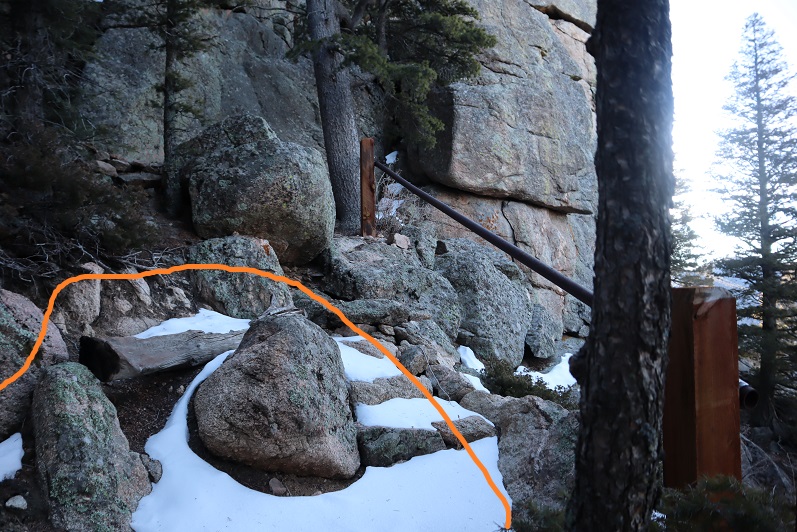
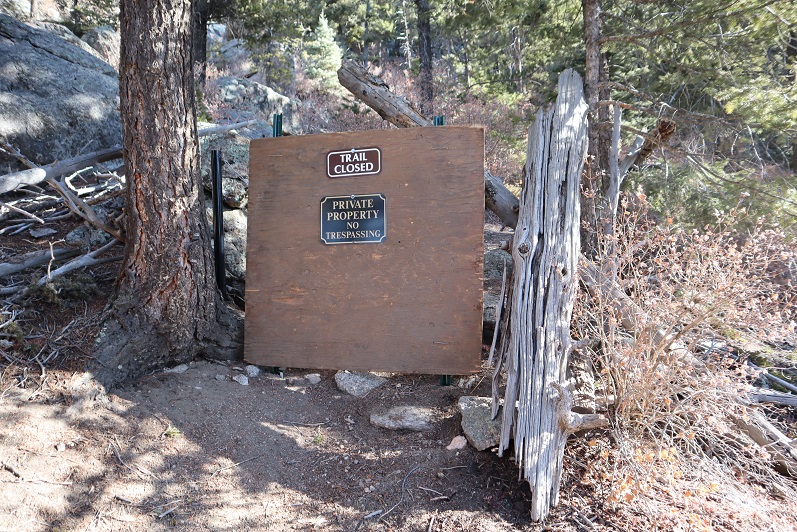
We hiked along the MacNeill trail for a little ways and suddenly came across a small wooden gate in the middle of the trail. Why hadn’t we seen this before? We walked around a bit and realized the gate had a sign that said “Trail Closed”
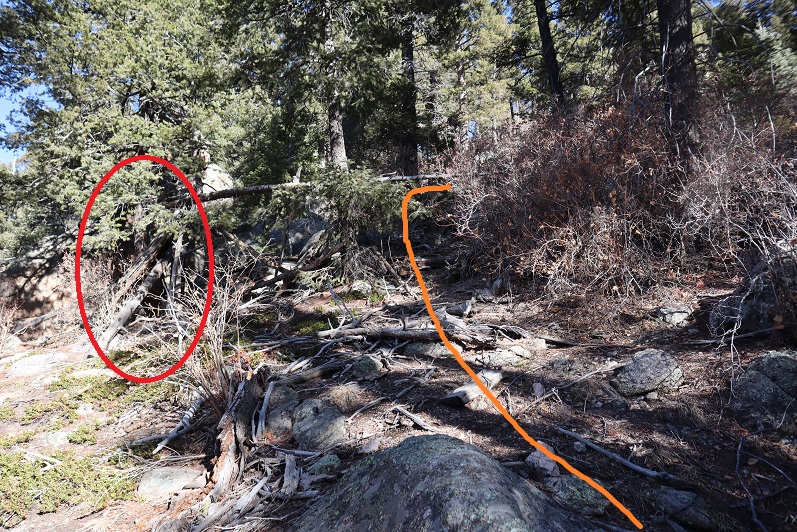
Whoops! Due to the switchbacks and amount of snow we’d never even seen the sign! Check this out: this is the way we hiked in, and the red circle is where the sign is located
As you can see, from the trail going to the summit the gate closure isn’t obvious, but on the way back down or from a different angle you can see it perfectly. In fact, you run into it.
I’m not sure about the legalities here, but it seems they don’t want the public highpointing on their property. They need to work on the placement of their signage if this is the case. This was the only sign we saw.
We continued to head back down and got a good glimpse of the fire tower (a fire tower wasn’t on my topo either?)
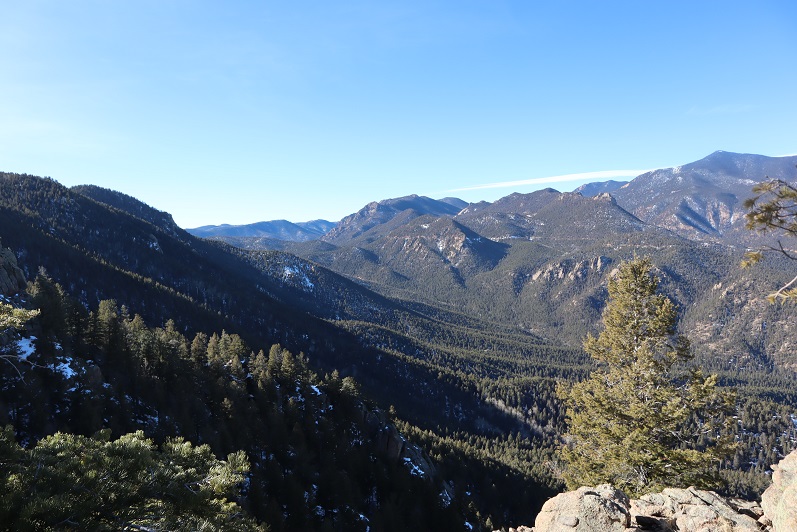
There was also a good view of our way in/back out
And of Pikes Peak (etc). I had fun naming all of the summits from here…
On the way back we decided to follow the footprints on the trail instead of our tracks back the way we’d come (if we could avoid it we didn’t want to re-ascend the hill). This ended up being a great idea and in no time at all we could see Old Stage Road and my truck. This trail ended just where we’d began, it just went more north than east (the way we’d begun)
We made it to my truck at around 12:30pm, but our day wasn’t over yet.
Sugarloaf Mountain 9633’:
Without taking off our gear we drove further along Old Stage Road and parked directly at the base of Sugarloaf Mountain.
It looked like a quick hike to the top of this El Paso County Highpoint, so we headed off into the trees, starting at the surveyors tape tied around a pine.
If there was a trail here it was covered in snow, so we just trekked south, straight up the hillside. This area was steeper, covered in more snow, and more heavily treed than the other mountains had been today. Downed trees made the trek ‘fun’
When we were about 30 yards from the summit we came across a trail, which started from the opposite side of the mountain (south) and worked north. We hadn’t taken this established trail because I believed it started on Private Property (but couldn’t be sure). In any event, I didn’t want to push my luck.
We came across a rocky area and a wiki-up
And quickly found ourselves at the summit. It had totally been worth adding the extra peak: In total it only added about a mile to the day.
There wasn’t a summit marker or registry, but we were sure we were at the summit.
We once again followed our tracks back down, Steffen aspen tipping along the way
We made it back down to my truck at 1:20pm, making this a 10.5 mile hike with 4712’ of elevation gain in just over 6 hours.
The decision to hike Crestone Needle today didn’t come until late yesterday. I’d had this day on the calendar for this particular hike for over a month, but the fires in the area had me hesitant. I did a lot of online research and was 80% sure the road to the trailhead I needed to take was open. That was a chance I was willing to take. What I wasn’t thrilled with was the possibility of inhaling smoke for the entire hike. The weather looked good, and in the end I chose to take the hike because it’s my last 14er I need to complete the Crestones and I was afraid if I waited too long the fire would expand and I’d miss my opportunity to hike.
I woke up at 12:15am and drove to the trailhead. All roads were open from Colorado Springs South, but there were more deer on the roads than I’ve ever seen. I’m assuming they were displaced because of the fires. Most deer I see when driving at night are female, but these were mainly male deer in the velvet. I was just glad I was the only one on the road so I could drive cautiously and stop when needed.
I turned South on Colorado 69 and saw a flashing sign indicating the highway was closed ahead and only open to residents. I crossed my fingers and drove on. I was able to make it to the turnoff (Colfax) before the road closed. The drive in past the 2WD trailhead was worse than I remember it being back in April (but not worse than last year at this time). The drainpipe was a bit steep.
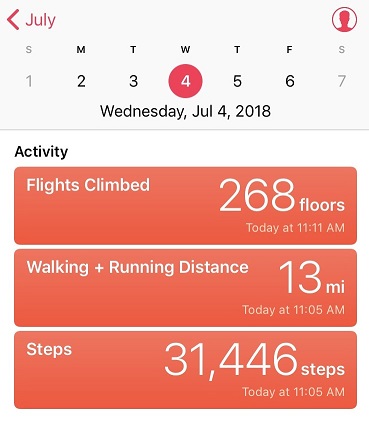
When I arrived at the trailhead at 3am the parking lot was almost full, which I’d expected even though it was a Wednesday morning. After all, it was the 4th of July! There was a lot of activity in the parking lot as people were getting ready for their respective hikes. I hate leapfrogging people, so to get a head start I jumped out of my truck and hit the trail, grabbing a bagel to eat on the way. There was no smell of fire in the air and I hadn’t been able to see flames the entire drive.
At 3:15am I signed the trail register and was on my way. BTW, the trail log book is in serious need of repair/updating. The pages are mostly loose, and there’s no clear order to signing it. I found a blank page and signed in, but if there was an emergency (say, a fire) and they needed to know who was hiking in the area it would take them a very long time to figure it out.
This is my third time this year hiking in through the South Colony Lakes trailhead. I have to say, it’s much easier and faster without snow to navigate through! It’s amazing how easy the trail was to follow without snow, and how difficult it is to navigate when snow is present. The hike in didn’t take me long at all. I was way ahead of schedule. Last time I was here the creek was frozen over and there was snow up to the footbridge. Today there was no snow to be seen.
I made it to the South Colony Lakes and saw many tents lit up as people were preparing for their hikes today. It looked like there were dozens of people camping by the lake. I made it up Broken Hand Pass around 5:30am and looked behind me at the trail of lights from hikers taking the pass as well.
The only other time I’ve hiked Broken Hand Pass it was filled with snow and there was no clear path to follow, so I crossed the slope wearing snowshoes. Today the path was clearly visible, yet harder to hike without traction. I kind of missed the snow here! As I looked around me at the slope I realized back in April I must have been hiking on over 10 feet of snow! What a difference the snow made!
The trail up and through Broken Hand Pass is very well cairned. I now know why those cairns are so big! They looked small (or were non-existent) under the snow.
Last time I did this hike I forgot to put on my helmet until it was too late and I was in a position where it was too dangerous for me to take my helmet out of my pack to put it on, so this time I put it on before it was needed. Here are the first class 3 moves up the pass.
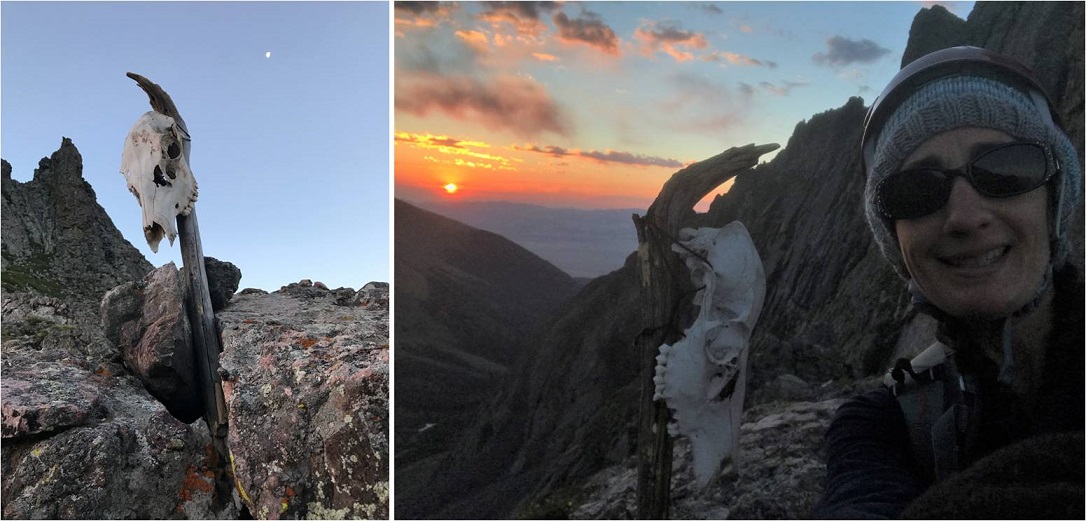
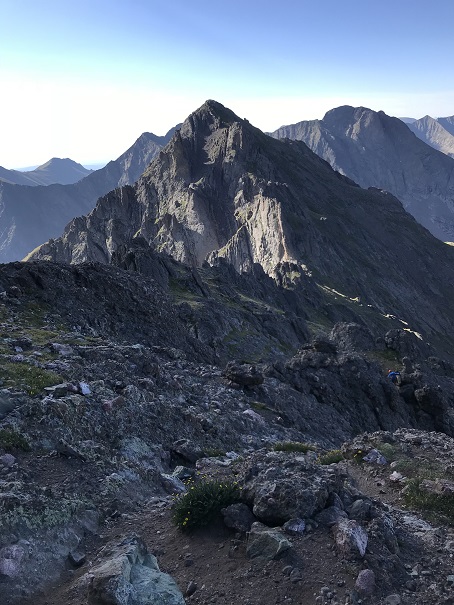
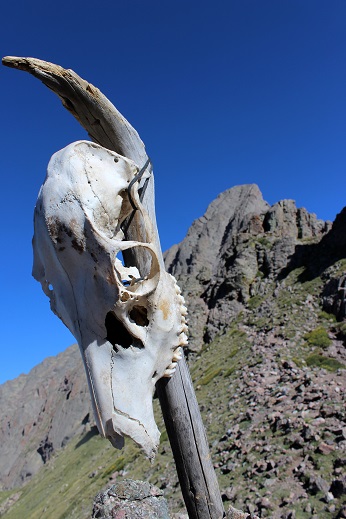
I made it to the saddle just as the sun was coming up, and when I looked over to my left I saw a skull that wasn’t there last time, placed on a large stick. Of course I went over to investigate. As the sun rose I made friends with Skully and got a few selfies with my new pal. He seemed to be keeping sentinel over the area.
I was way ahead of schedule at this point, but decided to keep hiking so I wouldn’t get cold. I followed the ridge and went to the heavily traveled trail to the right, and realized it cliffed out, so I turned left and encountered more class 3 moves.
The trail was well marked, although sometimes it split into two parallel trails. They both followed the South side of the mountain and ended in the same place. Here’s a look back at the trails and Broken Hand pass.
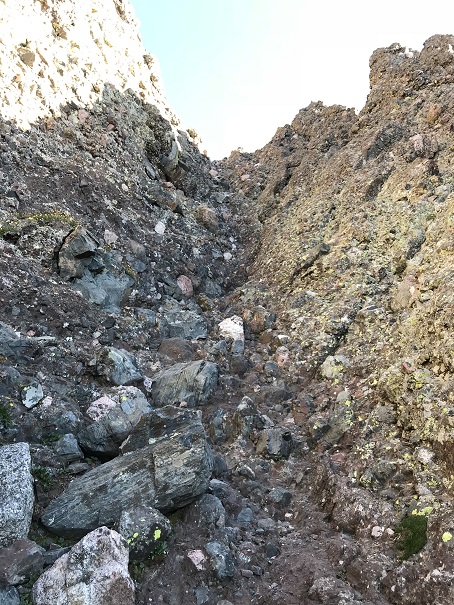
After hiking the slope the trail abruptly stops. I knew this was going to happen, but was surprised at how abruptly it did just… stop. I mean, it just ended at a rock.
I looked up and down and then got out my directions. I needed to hike down about 75 feet, then over to the east gully. Here’s a picture of the route before me.
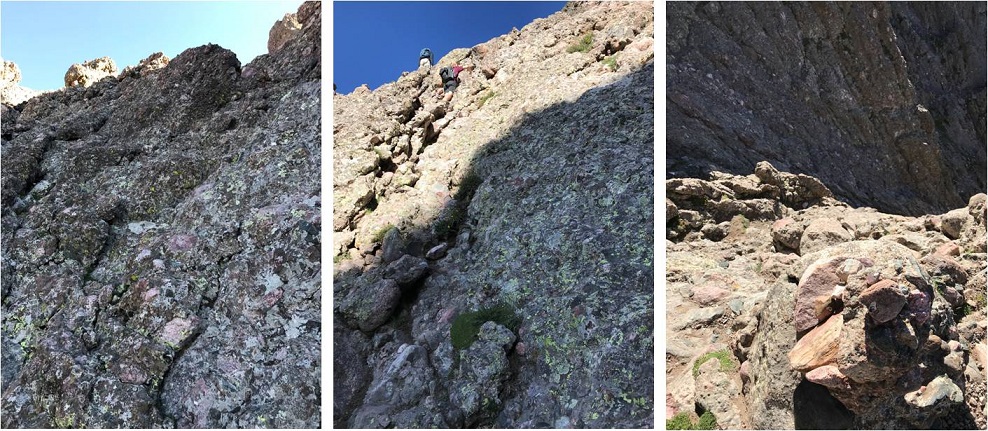
This is where the fun began! Climbing the gullies is a lot of fun! There was exposure, sure, but plenty of hand and foot holds available. I once again praised myself for joining a rock climbing gym and going weekly. This was child’s play! While this class 3 scrambling should have been challenging, for me it was really just fun.
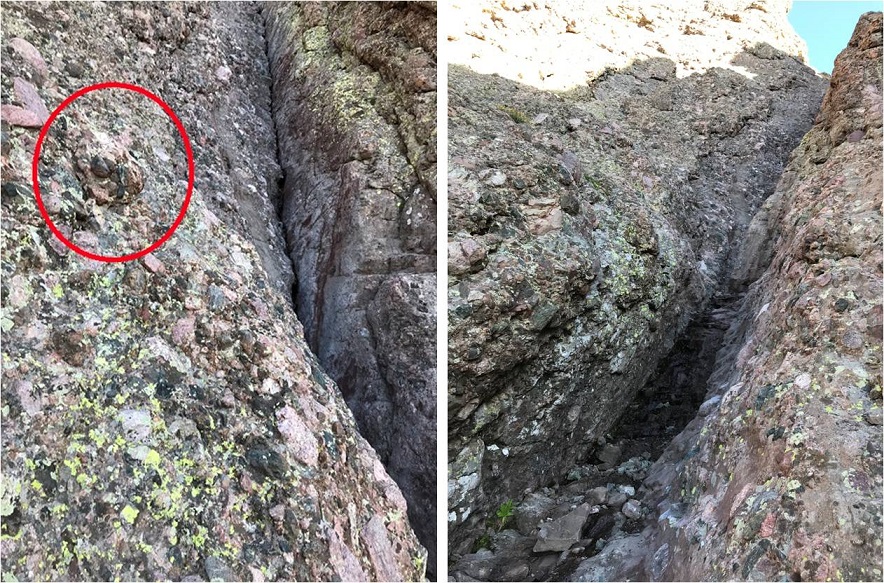
The route wasn’t heavily cairned, but there were enough cairns in just the right areas so you knew you were on the right path (which I prefer to multiple cairned paths). For me the crux of the climb came at the dihedral, where you switch from the east to the west gully. The dihedral was obvious to find but difficult to cross. It’s much larger in width and depth than this picture suggests, and my task was to climb on top of it, locate a cairn, and cross the rib. There was a trickle of water running down its base, just enough to make climbing up slippery with wet soles.
I’m not a large lady, and while I’m pretty flexible, here my 5’4” height was a hindrance and flexibility wasn’t much help. There were hand and foot holds all over this mountain, except in the dihedral. The rock here was smooth and there weren’t many places to grip. The width was just far enough apart where I couldn’t stretch across (although I’m assuming it wouldn’t be much difficulty for someone over 5’10” to navigate). So I was stuck: I couldn’t climb up the dihedral to cross over, and I couldn’t climb across the gap either. I searched and located the cairn on the rib above me and to the left. I knew that’s where I needed to be, but getting there seemed impossible! (The cairn is in the red circle)
I took a deep breath. This had to be traversable. There had to be a way across, I just wasn’t seeing it yet. I went back to where the dihedral was narrowest and tried again. There were a few stretch moves, but I was able to successfully climb up the wall and back over to the left where the cairn was located. Woot! I’d made it!!!
This is where the real climbing began! I climbed up the ridge and aimed for a notch. Here’s a picture from my way back down when I passed three male climbers heading up (who’d had trouble with the dihedral too, so it wasn’t just me!).
The exposure here was real! One of the other hikers told me this part almost made him lose his breakfast. Personally, I loved it! Yes, the exposure was extreme, but there wasn’t much danger from loose rock and there were plenty of hand and foot holds, so as long as you didn’t slip and fall you were fine.
I couldn’t help but thinking how awful this route would be with snow, and once again praised myself for not trying this peak after completing Crestone Peak last April and the waterfalls that were present then. It wouldn’t have ended well.
There were several large gullies to climb, all with the same secure rock and lots of holds.
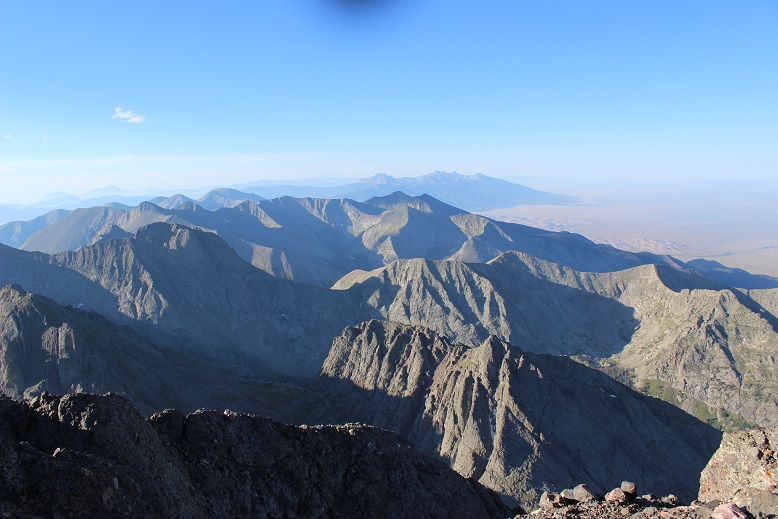
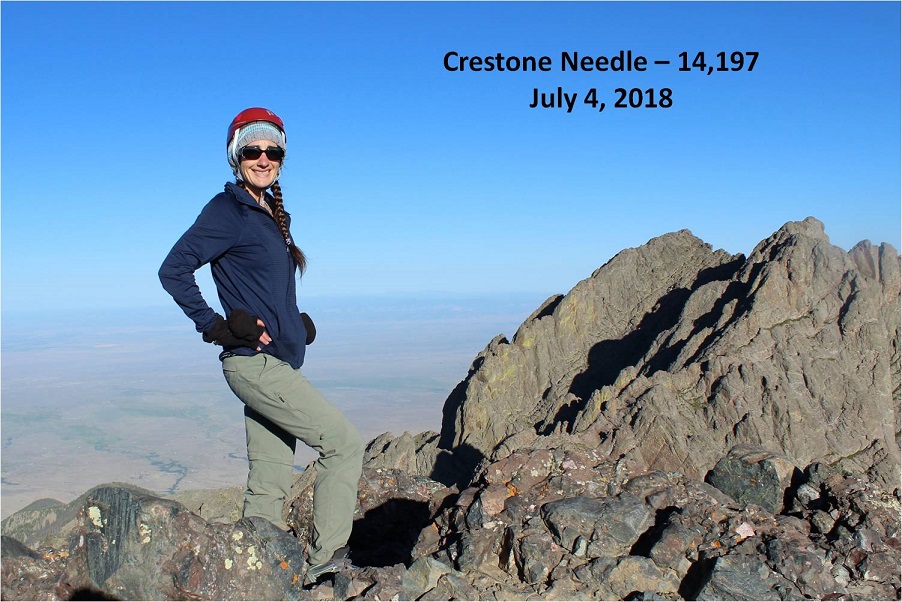
At 7:20am I summited! I had a great view of Crestone Peak
As you’ll notice from the video, there isn’t evidence of a fire anywhere
For the first time while hiking a 14er I was able to see the Sand Dunes in the distance
I took a summit selfie to prove I’d summited
And while it was still early I headed back down because I was only half way through with this hike. It was too early to celebrate yet.
Remember all those steep gullies I’d climbed up? Well, now it was time to climb back down them. They were pretty steep, so I turned and faced the wall and began climbing down, once again grateful for all the holds.
Thankfully the dihedral was much easier to navigate heading down than up. I just pressed my stomach on the wall and slid off and down into the open space below, using friction for balance, knowing I didn’t have far to fall if I did.
I have to pause for a second here to talk about down climbing. I may not know a lot about rock climbing, but I do know I have better balance when I’m facing the wall on the way down. I passed a hiker who was heading down these gullies feet first. He was continually off balance and honestly scaring me.
So I engaged him in conversation: “Have you tried turning and facing the wall when you down climb? You’ll thank yourself for it!”
I got no response, so I figured he must not have heard me. We parted but caught up to each other once again in another gully, where he was once again tip toeing down and sliding feet first.
I tried again: “Do you rock climb?”
Hiker: “No”
Me: “Oh, well if you turn and face the wall you’ll find your center of gravity isn’t off and the gully will be easier to navigate”
Once again, no response and he continued doing what he was doing. All I could think was “He’s going to fall and I’m the only one anywhere near him. He’s going to slip and tumble headfirst down one of these gullies and I’m going to have to rescue him because I’m the only other person out here”. I’d already warned him twice and he hadn’t listened. I decided to just sit and take a break for a while and let him get far enough ahead of me where we wouldn’t pass each other again. This way I wouldn’t have to watch him scare me half to death. I’d just keep an ear out for him falling. (Luckily he never did)
I made it back to Broken Hand Pass at 8:40am. The sun still hadn’t made it over the ridge
I waved to Skully and got a picture of him with the Crestone Needle in the background
Ahead of me were Humboldt and Broken Hand Pass. I was completely ready for the class 3 moves back down and got to it.
About 1/3 of the way down I heard a very loud and deep chirp, looked up, and saw a rather large marmot ahead of me skid to a stop on top of a pile of rocks. The rocks then went tumbling down the pass, making quite a racket and causing a rockslide. Wow! That marmot was a jerk! He’d just put about 4 people in danger of getting brained by rocks the size of my fist. I called down to the hikers below me, made sure they were ok, and blamed it (rightly so) on the marmot. See people? Wear your helmet, even if you’re the only person on that mountain!
I passed quite a few hikers on the way out. South Colony Lakes is a trailhead for multiple 14ers, as well as a great place to backpack and fish. Most people I passed who’d been there for a few days had no idea there was a fire or that the roads were closed.
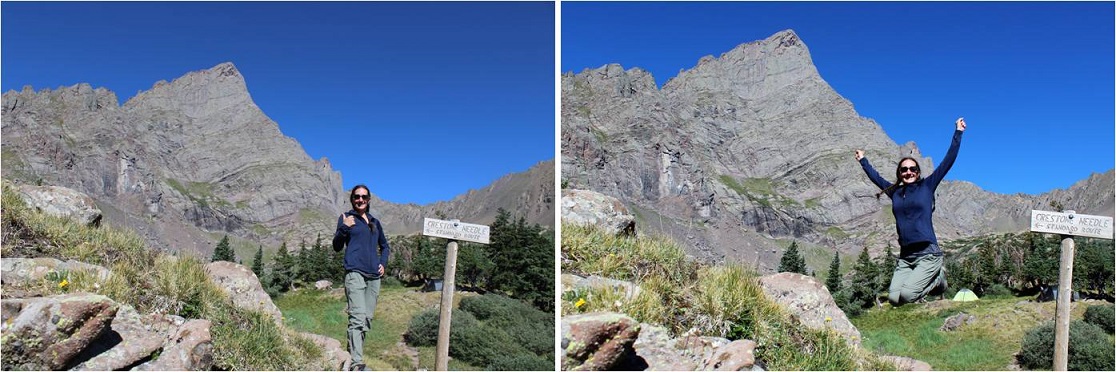
As I hiked the last few miles out I marveled at what an awesome day it was. The weather was gorgeous, the wildflowers were just starting to bloom, the trail was in full summer conditions, and I’d made a quick and successful summit of what’s considered the 6th most difficult 14er in Colorado. So why wasn’t I jump up and down happy? Well, I kind of was. I took a few celebratory photos once I was back near the lakes.
But I wasn’t euphoric as I had been for many other hikes. No fist-bump, high five kind of feeling. This hike had been too easy. Don’t get me wrong, it’s not an easy hike, but it wasn’t as difficult as I’d anticipated and been looking forward to. Yes, there was exposure. Yes, there was climbing involved. Yes, it was a long hike with elevation gain, but it wasn’t as technical as I’d anticipated and everything I did was well within my abilities. There wasn’t even any snow to navigate!!! I wasn’t tired at all and even considered hiking up Humboldt to make the day a little more aggressive. Maybe I wasn’t tired because I wasn’t carrying all the stuff I’ve needed lately (crampons, ice axe, snowshoes, extra jacket, etc)?
I know the conditions were awful when I hiked Crestone Peak last April, but that seemed much more difficult than today’s climb of the Crestone Needle, and this was supposed to be harder. I didn’t feel challenged. Hmmmm… So I came to the conclusion these hikes are indeed tough, I’m just advancing in my skills. What scares me is I enjoy a challenge. I enjoy being tested and learning new skills. That’s something I’ll seriously need to spend some time considering.
I made it back to my truck at 11am, making this a 13 mile hike/climb in 8 hours. This also means I was home by 1:30pm, in plenty of time to wake up my kids (yes, they’re teenagers, with nothing scheduled for today they were still sleeping when I got home) and grill some steaks for the 4th of July!
I’ve been itching to do a 14er, but my schedule and the weather hasn’t been cooperating. My hiking days are typically Friday, and for some reason the weather in the high country’s great all week, but when Friday rolls around the temperatures drop, the winds picks up, and it starts to snow.
The weather didn’t look too great today, but I’d been following the weather surrounding Humboldt all week. Humboldt is the only 14er (out of 35) I haven’t hiked solo, and to make this whole thing official I figured I’d try it from the winter (East Ridge) route since I took the West Ridge last time. The weather wasn’t great, but I had noticed in the past few days the predicted snow levels had gone down consistently (from 4-7 inches to 2-6 and finally down to 1-3) so that was a plus. Unfortunately the wind levels were picking up (those rose to 55mph). The temperatures hovered around the low 30s, which was great except that meant post-holing.
I didn’t need to summit today. I’ve already summited this peak, so I figured I’d go into this as a learning experience. Kind of a way to test my skills and see how far I could go without needing to commit to summiting. I don’t have a ton of winter 14er experience and I wanted to see what a hike would be like in these conditions. I could always turn back when I felt I’d had enough or if I didn’t feel safe.
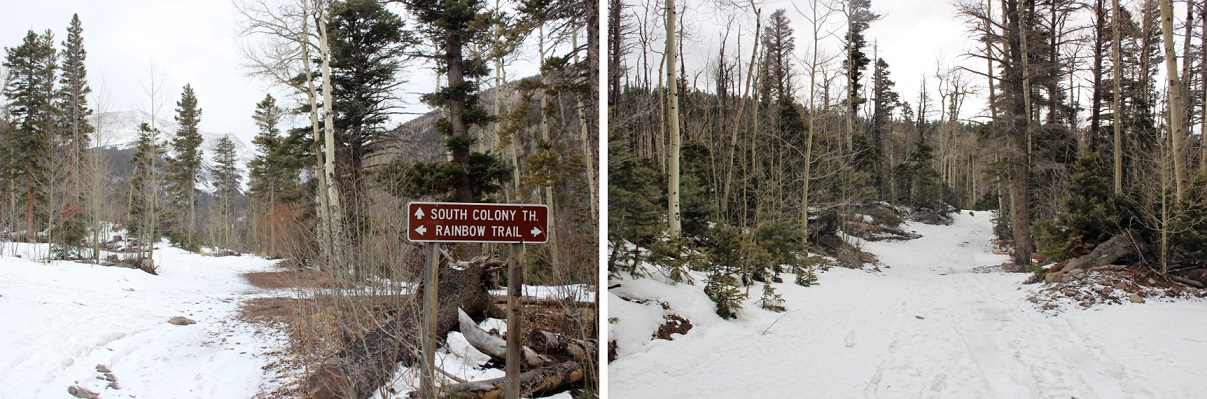
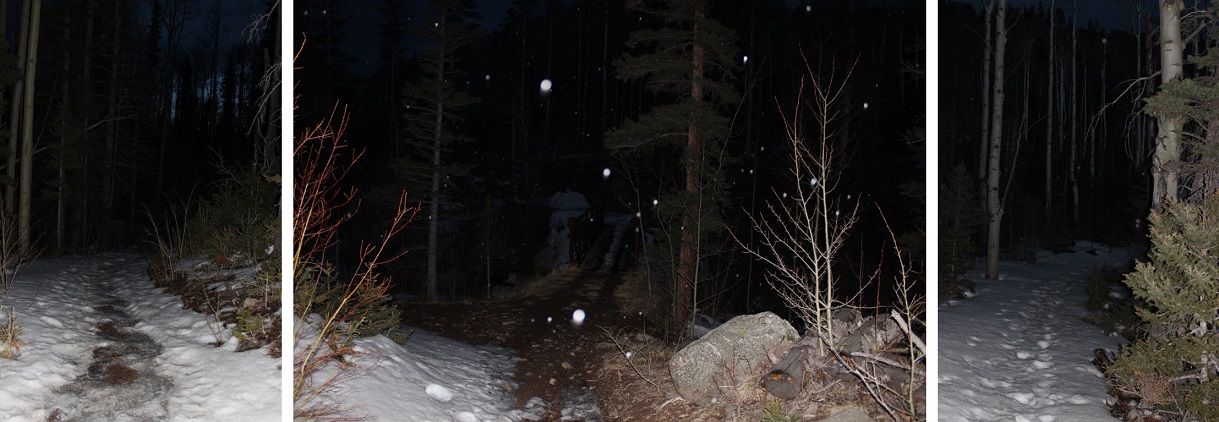
First of all, that drive to the trailhead: Insane! I have a Tundra, and that thing can handle a lot. I’ve done the South Colony Lakes 4WD trail in early June, and it was nothing compared to this! I put my truck in 4WD and tackled it head on. I wouldn’t recommend it an any time of year if you don’t have a high clearance 4WD, but particularly not now when the trail was covered in ice and mud and slush, and in the dark it was difficult to tell which was which. I’m pretty confident driving off road, but I’ve never done the whole off-roading in this much ice/mud/slush before, so I didn’t want to push it too far. I probably drove further than I should have, and parked about ¼ of a mile before the Rainbow Trail Trailhead. There were no tire marks after this point (note: I took most of these pictures on the way back because it was snowing too hard or too dark to take pictures in the morning).
I started at 6:45am. The trail at this point was pretty dry. I crossed South Colony Creek and turned right.
There were tons of downed trees on this trail!
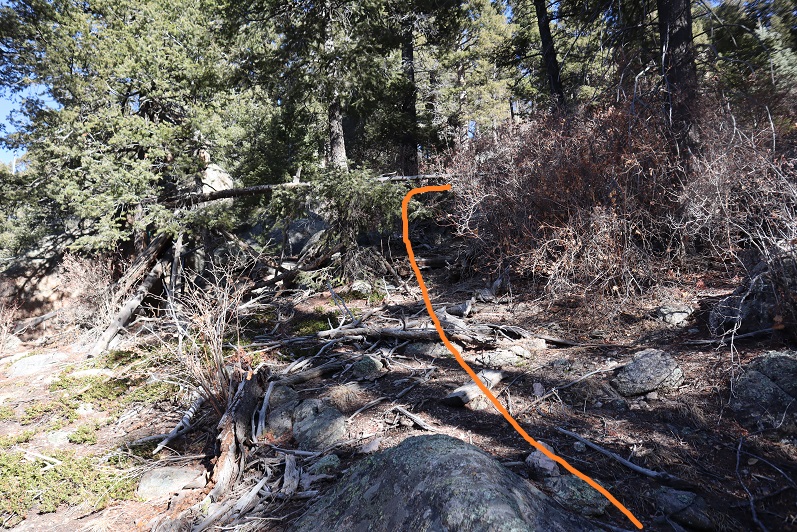
After hiking about a quarter mile I saw a cairn to the left. It’s small, and you really have to be looking for it. With more snow it’s most likely covered.
This was my indication to start hiking northwest through the trees. This is what that looked like.
Obviously I wasn’t hiking this trail in “winter enough” like conditions. I hiked up towards the ridge, and then followed the ridge southwest.
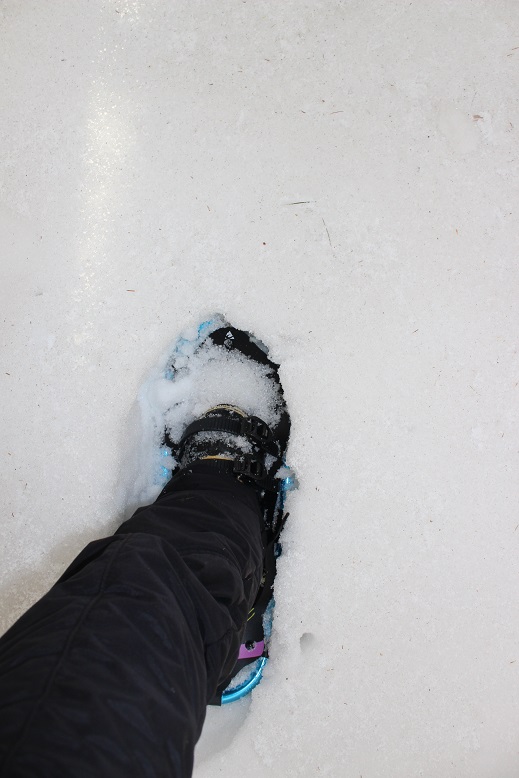
I was fighting putting on my snowshoes, but I was postholing. Each step put my boot at least a foot under the snow, and finally I said enough is enough! I’d paid for those snowshoes and hiked them in this far, I might as well put them on! So I did. Woot! This was great! I was still postholing, but only about 6 inches or so instead of a foot or more.
The snow on the ground got thicker and so did the snow falling. I made sure to step extra hard into the snow so it’d be easy to find my tracks on the way back down. I wasn’t necessarily breaking trail, but there wasn’t a clear trail to follow either. The last tracks were old and most of them had been covered by snow or melted. The snow was falling as predicted, but it wasn’t intense. It was actually kind of nice because it wasn’t freezing out. The snow cooled my face.
As I hit about 11,500’ the wind started picking up. I headed west until I made it to treeline. At this point the snow had been thick, but abruptly stopped here, so I took off those snowshoes and put on my balaclava and goggles.
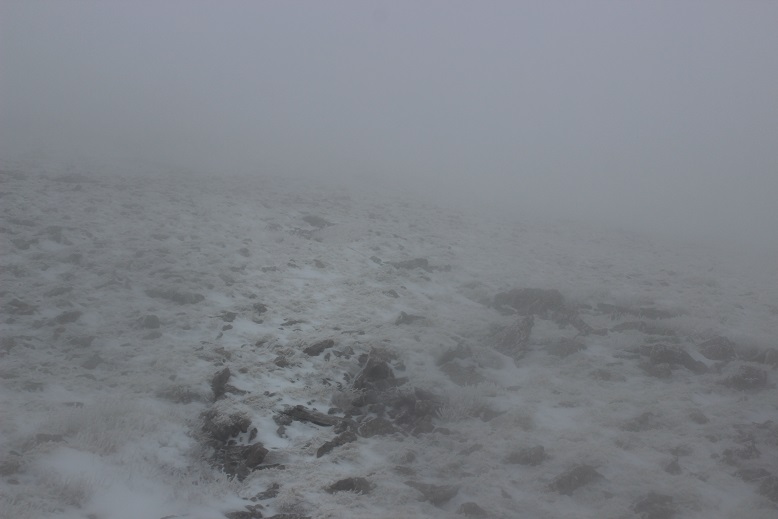
From treeline there was no direct route to the top: you’re supposed to make your own trail. My directions said from here the rest of the route would be visible: Just look for the peak and head towards it. Um… not possible. This was my view:
The wind was really insane here and there was no visibility. Wind was blowing at a constant 35-40mph with many wind gusts (I’m guessing 55mph+, as predicted). I could feel the wind gusts approaching. After the second one knocked me down I decided to anticipate them and lie flat whenever I felt one approaching.
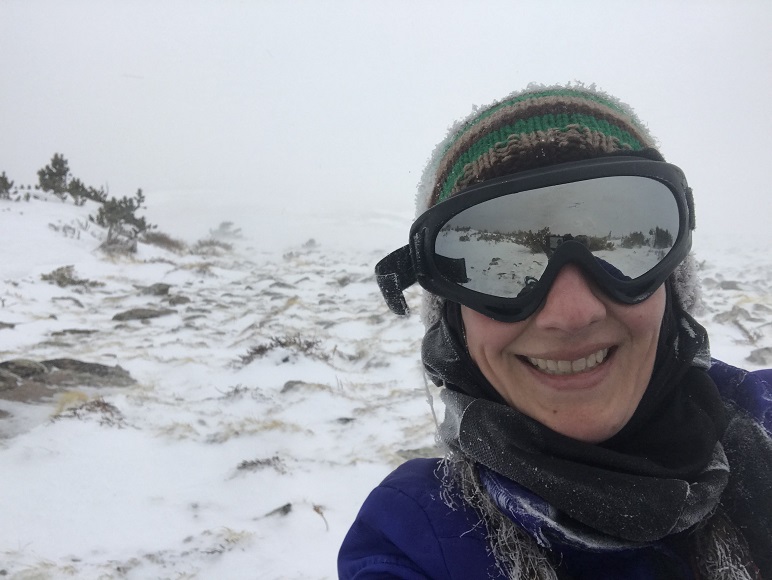
The only good part about those wind gusts was it cleared the visibility to about 50 feet in front of me for 2 or 3 seconds after it passed, so I’d hunker down, and then look up towards where I wanted to hike to see what was ahead of me. I never was able to see the top of any mountain. I took this selfie because I noticed everything about me was frozen and I thought that was pretty cool because I wasn’t that cold!
I couldn’t see where I was supposed to go, or even more than about 10 feet in front of me, so at this point I had a choice to make. Turn around and head back, wait out the weather (it was supposed to clear around noon and it was about 9:30am) or pull out my map and compass and practice those orienteering skills I teach to others for situations like this. You can guess which one I chose. (Note: I should have turned back).
I headed northwest up the ridge, being careful not to get too close to the edge of the ridge and trying to stay away from large areas of snow (I used those as landmarks). I kept trudging on, following the ridge. I’m 95% sure I made it to the summit, because when I pulled out my phone and looked at the GPX file it said I was there. You’d never guess though by the picture…
I went to get some pictures with my cell phone, and before I could do so noticed I was at 41% battery. Time to head down. Wait, 37%… 35%… 31%… all lost within about 10 seconds. Argh! No!!! This was insane! I turned off my phone and booked it down that ridge! I have a lot of great survival skills, but knowing my phone was going this fast made me start to worry. It’s like a safety blanket I didn’t want to lose. Yes, I know, I know, (I know!!!) but when it hits you as reality in these types of conditions your priorities change: you really do want that phone to work! (I’d left my portable charger in the truck because this was only a 9 mile hike: never again!).
That ridge lasted forever. Did I really hike all this way up? It felt like it would never end, and without visually being able to see how much route I had left I kept checking my compass to make sure I was headed in the right direction and my altimeter to see how much further I should have to go.
I made it back down to where I’d exited treeline and looked for the snowshoe tracks I’d so carefully made. They weren’t there. Drat. The wind had completely filled in those 6 inch post-holes with fresh snow! This is what I saw…
I quickly put on my snowshoes and started jogging as fast as I could carefully jog down. I wanted to get off that mountain. At this point the visibility was great… there just weren’t any tracks to follow. I headed towards the ridge, and when I made it I breathed a sigh of relief! Now all I had to do was follow the ridge until it ended and head southeast.
At this point my anxiety dropped because I could see where I was and I knew where I was headed. But I was also exhausted! I was wearing winter hiking boots, trudging through the snow in snowshoes that were postholing, and that wind took a lot out of me. I haven’t been this tired at the end of a hike in a very long time. And it wasn’t even that long of a hike! I’d guess it was less than 9 miles total, but in those conditions, it was insane!
I noticed a small dam at the bridge…
I learned so much from todays hike. I really tested my abilities, and I’m proud I was able to use the skills I have to stay safe in a not so safe situation. Also, I don’t think I’ll be purposely doing that again. Anyway, I’m back at it!
Oh, and the weather cleared up as I headed back down.
I purposely saved this hike for fall: I’d been told by many the fall colors were magnificent,
and they were right! I also needed to
hike and get back home early today (my daughter has homecoming football game
tonight) so I needed a short hike.
Last night I checked the weather: 50% chance of snow overnight, but clear and
windy in the morning. I threw a pair of crampons
in my pack and loaded the truck so all I had to do was pour coffee at 2am and I
was on the road.
I was doing great on the drive until about 7 miles down road
390. That’s when my GPS said “You’re
here!”, but I clearly wasn’t. So I got
out my backup instructions (I always have several) and figured the rest of the
way out from where I’d ended up.
Basically when you get to Winfield you turn left:
And then the 4WD road starts. It is most certainly a 4WD road. Here are pictures of some of the worst of it
And some of the parking at the trailhead.
I made it to the trailhead and started at 5:45am. (Yes, these pictures were taken on the way back). I LOVE trailheads with obvious signs!
It was pitch black, so I couldn’t see if it had snowed, but
it was obvious it had rained overnight. There
was a lot of wind, and it felt like a crisp fall morning with leaves raining
down. I crossed a stream
And then came the switchbacks. There were tons of switchbacks, and for some
reason they all had alternate trails at the curves (see picture below). This isn’t a big deal in the daylight, where
you can tell which way the main trail goes, but in the dark it’s not so
obvious. And this was at every single
switchback! It’s like people hiking this
trail really need a place to relieve themselves at each switchback? Anyway, after the second time I figured out
to just expect the trail to actually curve and go up the hill and not to go
straight. I really had to pay attention to the trail to look for it curving
up.
The trail looked like this until I made it to the basin
Just before making it to the basin it began to get light out
and I could see snow on the mountains around me. It was beautiful! I gave myself a silent hi-five for packing
the crampons and tried to capture a few pictures in the dark.
It was like something out of a Thomas Kinkade painting!
I made it to the top of the hill and entered a basin. Huron is the peak to the right.
This is where the hike started getting cold. Really, really cold. Water had frozen on the ground and made the hike
slippery. And that wind! Just as predicted it was flying by at about
25-30mph, and not letting up.
I continued through the basin and saw fresh tracks. They looked to be coyote or bobcat.
Then I saw more tracks (hooves) of an adult and baby,
followed by the tracks I’d seen before.
At this point I realized it was probably a goat or sheep mama
and baby being hunted by the owners of the previous tracks. I never saw any animals this morning. Not even a pika or marmot (but lots of
tracks)
The trail here is pretty well maintained, but the ice made
it slippery.
At the end of the basin the trail was covered in snow and
slippery in most spots, so I decided to put on my crampons. This was an excellent choice! The snow was over a foot deep in places and where
there wasn’t snow there was ice.
If you don’t own crampons (microspikes) you should. They are amazing! I was able to walk on the ice on the boulders
without slipping. They’re a
lifesaver!
It was still cold however, and very windy. I’m overly susceptible to the cold
(read: I was miserable and lost feeling in
my fingers). I should have packed a
scarf. Oh well, next time. At least I
had my ski gloves and beanie.
The sun still hadn’t risen over the ridge when I made it to
the final gain for the summit
When I reached the ridge I was greeted with SUN! The temperature rose a good 15 degrees, but
the wind picked up too. There were
several times it knocked me over, and I thanked the peak for not having serious
exposure. I stuck to the ridge.
The final 500 feet or so of elevation was a bit of a climb,
but fun in my crampons. It looks like loose dirt/scree under that snow, so I’m
not sure how much fun it is to climb sans snow.
The views from the summit were phenomenal! The combination of snow with the changing
colors of the fall made for an amazing backdrop!
I took a summitselfie to prove I’d made it and started my
way down. (I summited at 7:45am).
Funny thing, there wasn’t much wind on the summit, but as
soon as I started back down the wind picked up again. And I was hiking back in the shade until I
made it back down to the basin (read: I was cold until I reached the basin). I saw one other person before making it to
the basin, then 4 people in the basin, and two at the end of the trail. Not many people out today! Oh, and several of these people were wearing
shorts, and were in for a big surprise when they hit the snow!
I made it back to the trailhead just before 9:45am, so I did
the 7 miles in 4 hours (including stopping at the summit and for pictures).
When I got to the trailhead I saw a small pond I hadn’t seen
before
And beauty everywhere!
The 2WD part of the drive back was magnificent as well! I love the colors of fall!
If you’re reading this because you want to do the Mt. Harvard and Mt Columbia combination route my advice to you is to climb them both separately. Unless you have extensive mountaineering and route finding experience and are extremely comfortable not following a trail for miles through a gulley and over a ridge do not attempt this route.
Last week I got some good online advice from Bill. He suggested I invest in a GPS unit to help me stay on my intended route. Bill doesn’t know this about me, but I have quite a bit of mountaineering/outdoor survival experience. I teach outdoor survival skills, and I’m pretty good with a map and compass, not to mention surviving if I do become lost. (I’d like to note here I’ve never been ‘lost’. Although I have ventured off route many times I always realize this quickly and find my way back quickly).
In any event, I’m always glad to take the advice of someone with more experience than me, so I went to work researching a GPX viewer (etc.) for use with navigation. I’ve steered clear of GPS units because I like traditional route finding and feel they’re ‘cheating’, but I agree they are a useful tool. I found one I liked and downloaded the route GPX files (all 4 of them for the area even though I wasn’t taking all the hikes). The night before the hike I opened the route I was taking and it looked easy enough to use. I wanted to start getting familiar with the whole process before using it on more challenging hikes.
OK, now to the hike. The dirt road to the trailhead was easy to navigate, and navigable by any 2WD up to the actual parking lot (which was riddled with medium sized rocks in the dirt road). The road also indicated with several signs I was on the right route to the “Mt. Harvard and Mt. Columbia Trailhead”. However, once I reached the trailhead there weren’t any actual signs indicating I was in the right place. No maps, no signs saying which trailhead this was or which mountains were near. I don’t know why I expect such information, but it would be useful, especially since alpine hikers arrive in the dark (possible Eagle Scout project(s)?). Here are the photos of the information provided I took after I was done with my hike.
See, nothing that indicated Mt. Harvard or Mt. Columbia. Yes, this info should correlate to my maps, etc., but call me crazy if I like a bright sign saying I’m in the right place before venturing out into the wilderness in the dark. But I digress.
I got out my GPX file, opened it, and was confused. It placed me about 7 miles from where the trail started. I knew that couldn’t be right, so I figured I had the wrong file. Nope. I eventually figured out the file was wrong. Even though I downloaded a file that was supposed to be the route from the trailhead up to Mt Harvard, the site had uploaded the wrong file. No big deal however, as this file indicated the second half of my journey. I’d just use it when the time came and in the meantime use the maps I’d printed out. I crossed the stream in the dark and was on my way.
The trail was pretty straightforward and easy to follow for the first 5 miles or so. Besides being quite muddy in places and the fact the few turn offs I saw didn’t have signage (and I assumed went to Mt Columbia) I was able to find my way easily.
I crossed a few streams…
I saw some cool mushrooms…
And thistles…
I didn’t even pull out my map (but I had it in my pocket). I knew as long as I stayed to the left but not so far left I ran into Bear Lake I’d be fine.
Then I ran into Bear Lake. Drat! I must have turned off somewhere without seeing a turn-off.
So I turned back the way I’d come and found what I hadn’t noticed in the sunlight and mistook for water drainage had actually been a trail. It was only about 20 yards out of my way, so no big deal. Once again, no signs indicating trail forks or name
Here’s a picture of the beginning climb to Mt. Harvard. As you can see it passes a large rocky area, but luckily it’s also a very well marked trail with lots of cairns.
Here’s a picture looking back at Bear Lake and the trail from about halfway up Mt. Harvard
Please note here THIS is the summit of Mt. Harvard. It’s not hard to get to, but it was difficult to find as there were many false summits and this one isn’t market (there’s no way to know you’re actually at the summit). I actually passed it and had to backtrack.
I took a summit photo and got out my GPS to start on the second half of my route
Woohoo! It showed I was exactly where I was supposed to be to make the trek from Mt. Harvard to Mt. Columbia. Awesome! Let’s see how this thing works…
Here’s a look at the trail I started following towards Mt. Columbia
And here’s a picture of Mt. Columbia from Mt. Harvard. Notice where the trail ends? That’s where it ENDS. Notice Mt. Columbia is about 1.25 miles in the distance
I had a bunch of directions for this hike, but none of them indicated the trail ended and didn’t start again. None of them indicated the extent of the route finding I’d need. But they did have a pretty accurate description of how to navigate this hike. I followed the directions and was pretty sure I was on the right track.
I pulled out the GPS and I was right where I was supposed to be. I took out my pictures of the route and what was before me was what was in my pictures. I took out my altimeter and was shocked to find I was at 9800 feet. WHAT?!?!? I was supposed to be at 12,800! I know it had been a steep descent, but how did I lose 3000 feet in elevation that quickly (and how was I going to make it up?!?!?) About 2 seconds later I did a mental check and realized if I was at 9800 feet I’d be below treeline (which I most definitely wasn’t) so something must have been off with the altimeter. I took a deep breath and looked at the route again.
Then I looked at my watch. This was supposed to be a 15 mile hike. It was already 11:15 in the afternoon, which meant I’d been hiking for over 6 hours. I did some mental calculations and got a bit scared. I wasn’t scared I was lost or that I couldn’t get to where I was going (I could see Mt. Columbia in the distance, so I knew where I was headed, and I was confident I could get back the way I’d come). I was worried this hike was going to take a lot longer than I’d anticipated due to the route finding necessary. I had to pick my daughter up from band camp at 6pm, and at this rate I wasn’t going to make it in time. But there was really nothing I could do: Going back the way I’d come would take longer than going forward. This was something I hadn’t anticipated but will take into account on future treks.
I had to pass every single section of snow to get to where I needed to be. Since it’s August and it was in the middle of the day there was postholing involved, which wasn’t fun in the rocky areas. I have several bruises on my shins to prove it. And the icy areas were slippery. Because of this (and the scrambling aspect in many areas) I put my camera in my backpack and focused instead on the task before me, so sorry, no pictures except this before shot
I stopped at the ridge about 600 feet in elevation below the summit for a break, but I needed to keep up the pace to get home, so I was on my way. This part of the hike doesn’t have a trail either, but as long as you stay to the left of the ridge you’ll be fine.
Here’s a look back at Mt. Harvard (the way I’d come)
I summited and there was someone there to take my picture!
I didn’t stay long however. I opened the GPX file indicating the rest of my route and headed down the mountain. I could tell by my topo map this was going to be quite a bit of elevation loss in a very short distance. I was hoping that didn’t mean scree.
It didn’t but it wasn’t fun either. It was a lot of loose rock mixed with sand, and to combat this, switchbacks.
No, it wasn’t fun trekking down this path, but it would have been worse hiking UP this trail. Someone had a very small dog they were trying to hike with. At this point they were carrying the pooch and heading back down, as the trail was cutting up his paws.
Once I made it down Mt. Columbia the hike was easy, just long. I was doing my best to hike as fast as I could to make it back to my truck and in time to pick up my daughter. I had fun following the GPS the rest of the way but must confess it felt like cheating. It was just too easy. I’ll continue to use it though (safety first!).
I’m not averse to hiking the same trail twice (I did Pikes Peak 12 times last summer via the Barr Trail route) but I have no need to ever hike these two peaks again. Mt. Harvard wasn’t too bad, but Mt. Columbia wasn’t fun at all, and I can only imagine hiking UP the way I hiked down would have been even worse.
I made it to my truck and when I turned on directions home it said I’d be back by 6:30pm. OH no! I needed to pick up my daughter at 6pm. So I hopped in the truck and did my best to drive as quickly/efficiently/safely as possible to get there on time. I wasn’t being dangerous or erratic, but I was making good time. I showed an estimated arrival time of 6:02pm when I got behind a line of drivers stuck behind someone going 45 in a 55 in an area too dangerous to pass. Not cool! Feel free to drive at whatever speed you feel comfortable, but if you’re that far below the speed limit and you have a trail of cars behind you PULL OVER. PLEASE! You may not be in a hurry, but others might be. Me in this instance. I saw my estimated arrival time of 6:02pm go to 6:30pm, mentally cried I’d lost all the time I’d made up, and then got a call from my daughter saying they’d been let out 30 minutes early just as the radio announced the roads were a mess and to expect long delays on side streets as well as the freeway. Sigh. So I had someone else take her home and felt like a terrible mom for not being home to do it myself. Note to self: don’t plan a long hike when you have somewhere to be later in the day, even if you think you have plenty of time.
Notes:
I saw several camp groups with middle schoolers hiking/backing the trails. The ones towards the beginning of the trail were clean and had bright, happy faces. I high-fived their counselors, knowing what was in store for them in the next few miles or so. “Happy trails!”
Horses on trails: I know they’re allowed, but for the last 4 miles of my hike I saw fresh horse poop every 10 yards or so that hadn’t been there that morning. In fact, there hadn’t been ANY horse droppings on the trial at all when I’d hiked in the morning, and now it was covered in poop. I’m not exaggerating: It was all over the place! I know horse owners can’t control this, but the sides of the trail were torn up too from horses walking too close to/over/on the sides. Moss and small plants were strewn all over the trail in many areas. This is something horse owners can control and is unacceptable. I was saddened by the destruction this caused.
There was a father with his son (probably 8 years old) on the trail. They were backpacking and hiking. I saw them first at the summit of Harvard, and the kid seemed to be thoroughly loving the whole hiking experience. Rock on dad!
I chose this hike specifically because it’s supposed to be easy. It’s only a 3.5 mile hike with 1,475 feet of elevation gain in 1.75 miles. The route looked pretty standard and easy to follow. It’s a popular hike because it’s so close to Denver and visible to its residents. I chose it for this week because ALL the 14ers still have snow on them. I figured if I was going to hike a 14er this week I might as well chose Mt. Evans as I was going alone and the trail is difficult to get lost hiking. Indeed, there is a road that goes to the summit, making it the highest paved road in North America, and the entire trail is above treeline.
I’d be able to see this road for my entire hike. In addition, it was an easy hike that included snow, so it would give me some realistic practice, and make the hike more challenging. Oh, and since there WAS snow on the trail it was a sure indication it wouldn’t be swarmed with hikers. I’m not a fan of hiking with a lot of people.
I woke up at 2:30am and started some coffee. As a side note, I’m never hungry this early in the morning. I didn’t eat anything until I got back to my truck, and didn’t drink anything either besides that first cup of coffee (I did have a full camelback, I just don’t get thirsty hiking). I was out the door by 3 and at the trailhead by 5 after stopping for gas. I drove the entire way in the dark and actually kept to the speed limit because I wasn’t in much of a hurry. There was a full moon to follow the entire way. I figured if I was going to get up early and miss the gym for an ‘easy’ hike I’d at least enjoy myself. The road to the summit just officially opened this week due to snow, so it was also my first real chance to get the hike in. I stopped on Mt Evans road several times for pictures.
There was a small convenience center at the Summit Lake trailhead, as well as a way to pay to park during non-operating hours. It was $15 per car to stop on the side of the road or park anytime between 8am-5pm. I did some mental calculations as I put on several layers of gloves and clothes (snow/cold in general is dangerous for me because I have Raynauds, so I have to over prepare) and figured with just a 4 mile hike I’d be back well before 8am, so I didn’t pay the fee and hit the trail at 5:20am.
My directions said to follow the paved road for 0.6miles and look for the unmarked trailhead to the right. I kept looking to the right for the trailhead, but couldn’t resist also looking left at the sunrise.
After walking well over the 0.6mi looking for the trialhead I doubled back. I realized the trailhead was probably covered in snow, and maybe I’d see it coming from a different angle. I didn’t. Just for future reference, I did find the trail on the way back down. It’s between these two poles and yes, it’s covered in quite a bit of snow.
While I couldn’t find the trail to begin I could look over the piles of snow and see the visible steps from previous hikers further up the mountain. I figured I’d come this far and wasn’t going to lose the opportunity to hike due to a technicality. So I aimed toward those steps and did my best not to disturb the alpine tundra: I walked on the snow or boulders to avoid destroying tundra, which, due to the short growing seasons at 14,000 feet takes hundreds of years to grow. Stay on the trails people!
Luckily, most of the way up was covered in snow so this wasn’t much of an issue. While I was the first one to hike this morning, several other hikers must have hiked yesterday or earlier this week as there were postholes already made in the snow. Since it was early in the morning still they were frozen and there was little chance I’d posthole myself. I put my feet in their tracks and climbed the snow stairs.
I found a friend! The pikas here were actually a bit more sociable than on Pikes Peak. While I couldn’t get close to them, they didn’t run away if I took their picture.
This hike was indeed all uphill. It felt like I was climbing stairs (which I kind of was, stepping into other hikers tracks). About ¼ of a mile below the summit the snow dissipated, I found the trail and started maneuvering around and over rocks of all sizes.
Don’t be fooled by the above picture. This is actually a false summit. And it was really, really windy here! I’m not a big girl, and I was wearing a winter jacket that turned me into a kite. Several times the wind blew me into the mountain and I had to wait for it to stop before I could stand back up. The hike wasn’t too demanding (besides the trudging up stairs part) but I was at over 14,000 feet, and it was difficult to breathe. I had to stop to breathe (not necessarily because I was tired).
Once I reached the top of the false summit I was greeted by a parking lot, an abandoned summit house, and some educational signs about the area.
This was only a false summit however, and I still had a little ways to go. This is the actual summit. There’s a man standing on it taking pictures. He drove up today to get some pictures as it was the first day the road was really open (no one had advertised it’s opened until last night).
This trail was also covered in snow, so I just headed straight up towards the top. And when I got there, what an amazing view!
It was also really, really, really windy. So windy you can’t hear my narration of Mt. Evans in this video, but you can enjoy the view.
I found the summit marker!
I tried to take pictures, but the wind just wasn’t having it. I’d spent some quality time this week making a summit sign out of a Girl Scout Cookie box. I was really proud of it! It had the name, elevation, date, and #2 on it. It was the perfect size, lightweight, and fit into my pack. As soon as I took it out of my pack the wind blew it away. I was holding onto it and it was blown out of my hands. Ugh! So now I was a litterer and I didn’t have that sign. Oh well. I set up my camera to automatic and did my best. I’d just fill in the important info later with a picture editor.
The wind wasn’t happy (it kept blowing both my hair and the camera over) so I had to get creative. I got an ‘ok’ shot, but to keep the camera out of the wind I had to angle it weird, so I didn’t get a good view.
I was getting frustrated. I’d hiked all this way and wanted a good picture for my 14er Challenge Poster. This was the problem with hiking alone So I tied my hair back, balanced the camera on my water backpack, and set the timer. This one turned out ok. I added the important info to it since my sign had blown away.
It was now time to trek back down. I’d probably spent 30 minutes on the summit, which is an awful long time (but I really wanted a good picture!). The way down was more challenging than the way up because the snow was starting to melt and the footholds were now slippery. I had to lower my center of gravity to avoid falling and sliding. This was not snow to glissade on.
I did posthole a few times, but it wasn’t too bad.
I even found a snow spider friend! But not the mountain goats this hike is famous for. Oh well, maybe another time.
I was able to find the trail better on the way down and stuck to it as much as possible. When I made it back to the road (without seeing anyone on the entire trail, woot!) I stopped to put the snow into perspective.
Wow! That was a lot of snow! I took a selfie because I was really proud I’d made it without falling and sliding down and hurting myself. The wind had been torture on my hair: That had been in a bun when I’d left the summit, but I couldn’t re-do it because of my gloves… and the wind.
And here’s a shot that shows you how deep the snow was
After I made it back to the road I did see one other hiker. He was hiking the road to the summit, and also backpacking in general. The views from the road were beautiful!
I was back at my truck at 7:40am, changed out of a few layers of clothes, and headed to the gym to get in a few more miles (and a shower).
So I made it back down, and had even remembered to collect a ‘summit rock’ from the summit. This picture is of Mt. Evans, but not the route I took (I took a route to the back left of this picture)
If I had to compare this hike to anything, I’d say it was like hiking the last 2 miles of Pikes Peak, without the switchbacks and without being exhausted from already hiking another 11 miles to get there. It looked similar and the terrain was similar as well (but more slippery due to small rocks). #2 is bagged! Time to plan #3!
I’ve been trying to attend one of these
events for almost a year but I just haven’t been available on the dates they’ve
occurred. I wasn’t available today
either, but our Rocket Troop meeting got cancelled at the last minute, so I
re-arranged an appointment for 8:30pm instead of 7pm and decided to go. By myself.
Going alone was a conscious
decision. There are several people I
could have invited, and who I would have enjoyed going with. Rebecca even offered to go with me and be my
designated driver, but I knew if I went
with someone I knew I wouldn’t have mingled and met other people, and that was
my main goal of attending this event: to
meet other like-minded 14er hikers and pick their brains.
I don’t get out much, so I had Rebecca
and Emily help me get dressed. Jeans and
a cami and heels. I felt
respectable.
Before leaving the house I quickly
posted to the event page: “Woohoo! I’m actually going to make it tonight! Long
time listener, first time caller… I’m excited to meet you all!”
I hopped in the truck and drove downtown
to the Cerberus Brewing Company. I’d
never been there before but had no trouble finding the place. Parking was insane! My truck was too big for their little parking
lot, but after a 20 point turn I was able to drive back out and was extremely
lucky to find someone vacating their spot just across the street. I pulled up as far to the curb as I could but
my truck still stuck out a little ways into the street. I was a bit of a hazard but I was legally
parked.
I saw people already seated that looked
like they’d be a part of the 14er crowd, so I quickly went to the bar to order
a beer. There were 4 of us in a line
that took 20 minutes. This was so not
cool! Since we were at a brewery (not a
bar), everyone in line ahead of me wanted to try several different beers before
ordering. UGH! The line at the bar should have been for
people who already knew what they wanted.
IMO, if you don’t know what you want, sit at a table and be served. Anyway, the bartender didn’t think far enough
ahead to take the order of people who knew what they wanted while those in
front of them were still deciding. When
it was finally my turn I asked for their largest option for beer (thinking it
was the 32oz) because I didn’t want to stand in that line again. I had hoped on ordering fries or something to
eat as well (I hadn’t eaten dinner yet), but that wasn’t possible at the walk
up counter. I was handed a 16oz Amber (which was very good
by the way) and headed out to the patio to meet some fellow hikers, resigned to
waiting in line again at a future point.
I saw two men sitting and talking at a
table outside that looked like hikers, so I introduced myself. No, they weren’t
hikers but bicyclers who’d just finished a ride. Whoops!
It was then I realized everyone there pretty much looked like a serious hiker. Gotta love Colorado!
We made small talk and I did get a lot
of great information from them about some trails at the Air Force Academy. We chatted for about 15 minutes before I left
them to enjoy their time.
Next I headed over to a circle of chairs
where everyone seemed to be introducing themselves. This looked like the right spot, so I made
myself comfortable and began chatting.
Some notes from the evening:
The brewery was crowded, especially for a Wednesday night. I’m not sure if it was because their beer is stellar (it was pretty good) or because they’re the only place to go in the area, but they were full from 6pm when I got there until 8pm when I left. Great for them, not so good for me (I’m not a fan of crowds or waiting for beer). I’ll probably visit this brewery again when I have more time and it’s less crowded. Just wondering when that may be?
I was overdressed. Usually I say you can never be overdressed, but it was a bit of a detriment in this case. The women there didn’t want to talk with me, and the men didn’t take me seriously until I’d talked with them a bit and proved I was a serious hiker. Note to self: wear hiking clothes next time.
Everyone was nice and cordial. This was a nice surprise because there are a few trolls on the FB site and I was hoping this wasn’t a culture type thing.
There were probably 30 of us all together.
There were way more men there than women (by a 7 to 1 ratio at least I’d say)
There was a woman there who hikes Pikes Peak every month (she’s done this for 60+ months in a row). I’ve never seen her on a trail, but she hikes during the week so our paths wouldn’t likely cross. I’m really bad with names, but I think her name is Yin Ling.
Other than her, the other hikers had only hiked Pikes Peak once. This surprised me since its right in our backyard. I was very surprised to hear most of them took the Crags route, and those who took Barr Trail took the train back down. Hmmm. They seemed to think I was crazy for hiking it so many times up and back. Oh, and they were impressed with my time too.
There were people there of all different hiking abilities.
Half of us were first timers to the event, the other half were regulars.
I was by far the novice with only hiking one 14er, but gained points for hiking it so many times.
I met several people, but in no way had time to meet everyone. I felt as if I had to cut a lot of conversations off early because I wanted to meet more people and I was time constrained. I could easily have stayed a few more hours. I felt bad for leaving so early.
No one had a regular workout routine, they just hiked 14ers.
I’m really bad at remembering names, so here are the names of some of the people I met, in hopes I’ll remember them better: Stephanie, Joe, Matt, Scott, Yin Ling, Matt, David, Karthik (KK, works for CTU, West Cost Swinger, from India)
I felt as if everyone was asking me
questions, and I didn’t get enough time to ask them questions back. I did learn several things however. Flat tires seem to be a problem on many of
the 4WD trails. I should do these with
other people and preferably with someone who has a jeep.
At one point I asked the group I was
sitting with “So, what allows you to hike?” and was met with blank stares. I was sitting in a group with all men, and
this apparently wasn’t a concern to them.
Their hobby was hiking, so they hike.
End of story. It’s not the same
for women hikers. I’m a full time mom
and I work full time, but my kids are getting older. Having my kids in school and not working
Fridays is what allows me to hike at this point in my life. Once again, this concept was foreign to them,
so I moved on to another subject. Hiking
goals.
I was surprised at how many of them had
already hiked all of the 14ers and are now working on 13ers. I met one man who
lives 2 blocks away from me who’s already hiked them all (Scott Davis). His advice was good advice: the shortest or standard route isn’t always
the best route. Many of them are boring
and I should seriously look into all routes before making the decision of which
to take. This seems like pretty good
advice, and something I probably wouldn’t have considered. We exchanged phone numbers and while he isn’t
really interested in hiking the 14ers again, he’d be open to giving me advice
on them all if needed.
This event was really a good way to meet
people with similar hiking goals. Everyone
was sharing information on previous trips, planning new ones, talking about
gear, etc. I saw several groups make plans for backpacking trips and several
14ers right there. There are a bunch of
peaks I know I’ll want hiking buddies (especially ones with technical gear and
possibly a Jeep). I need to figure out
how to be a part of this, which means I’ll definitely be attending the next
14er Happy Hour (if I can make it… I’m seriously going to try).
I left at 8pm because I had an 8:30
appointment, but I left wanting more.
After meeting other 14er hikers and listening to their stories I’m more
excited than even to begin this journey. In the course of taking with these
people I realized if they can do it, I can do it. As I’ve told many hikers while hiking: Start and stop stopping. Just keep going and you’ll make it. There’s a
book title in there somewhere.