PT 13509 and Telluride Peak – 13,514

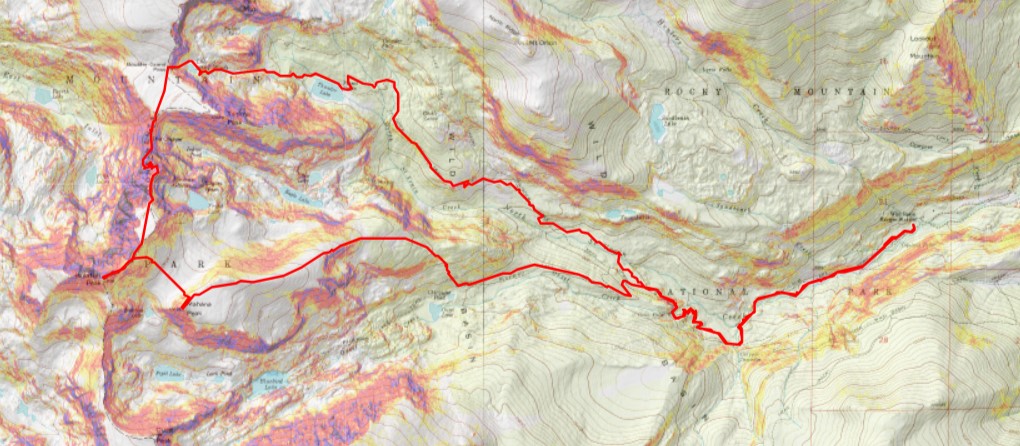
RT Length:  8.39 miles

Elevation Gain: 2744’

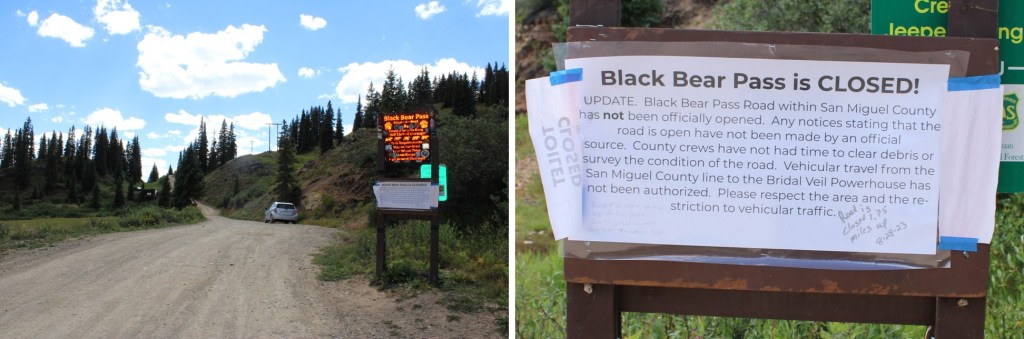
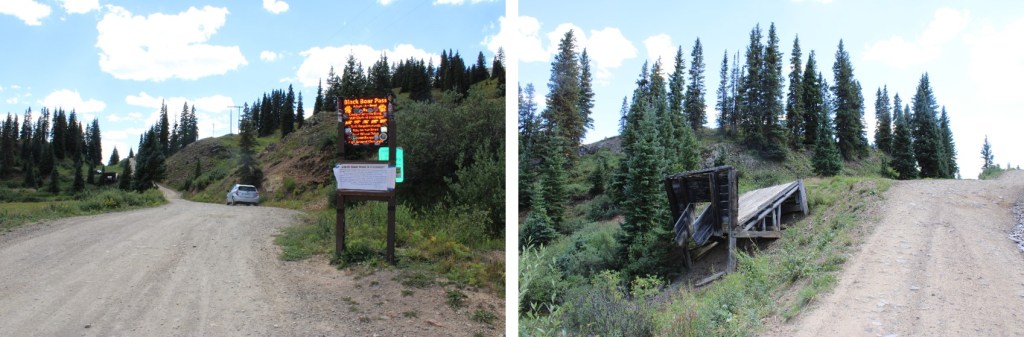
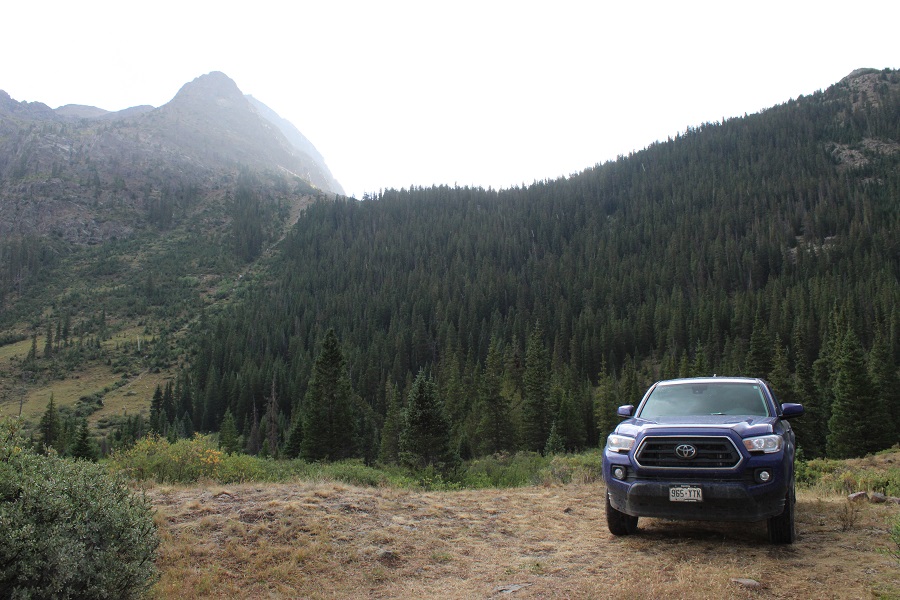
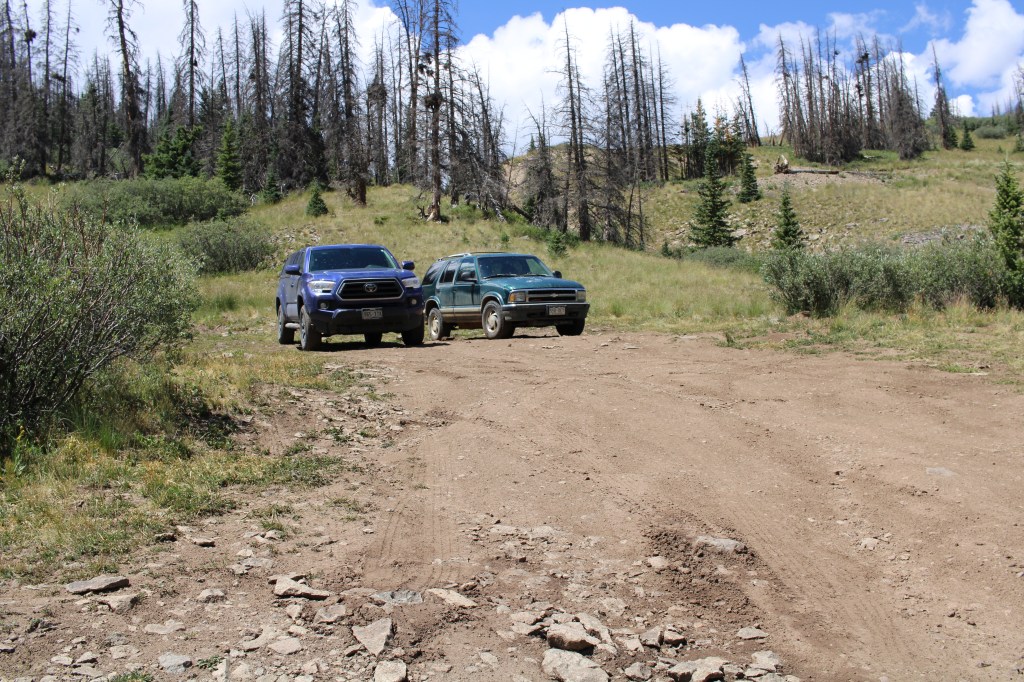
I’d spent the past few days dispersed camping at Red Mountain Pass, which is where I began my hike. 

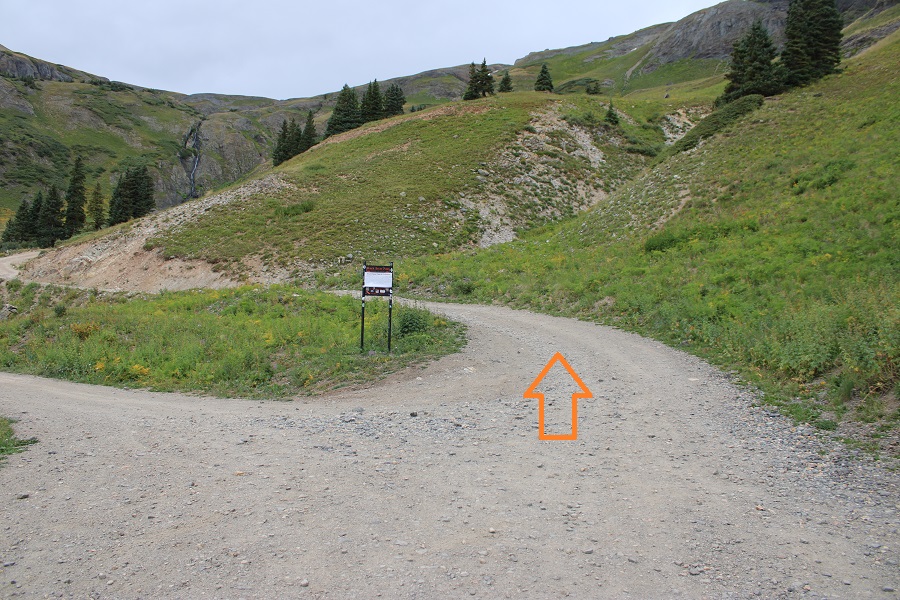
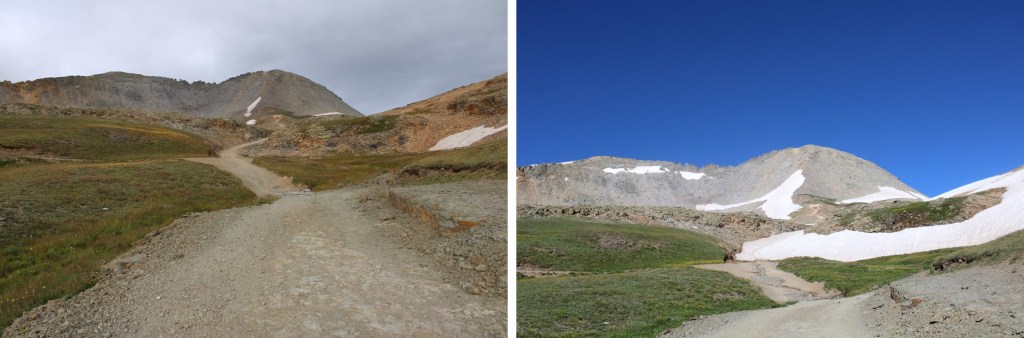
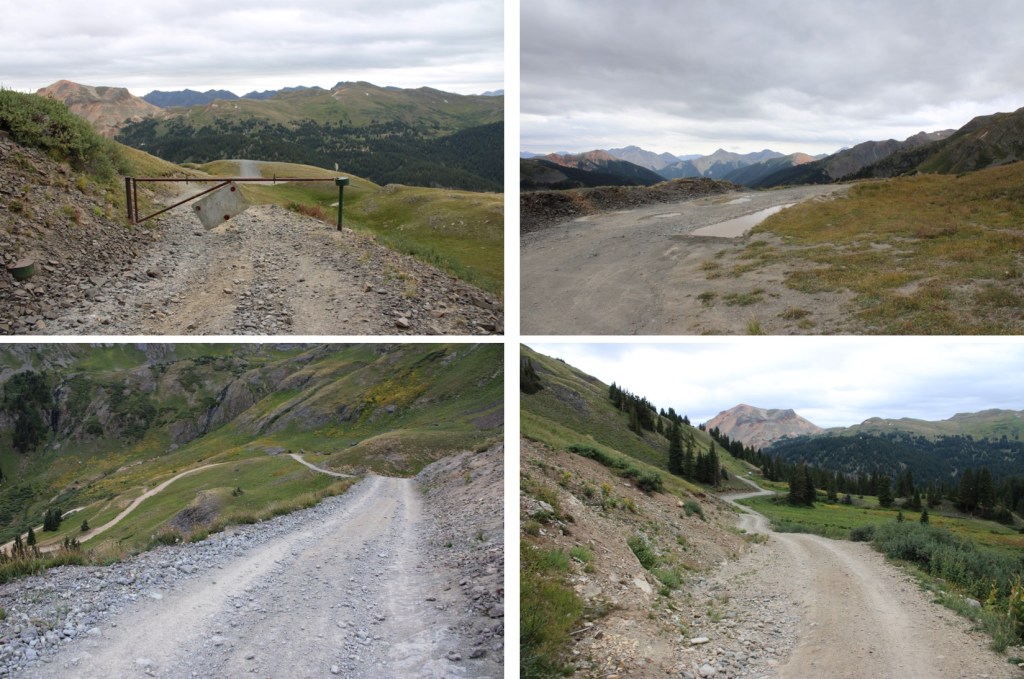
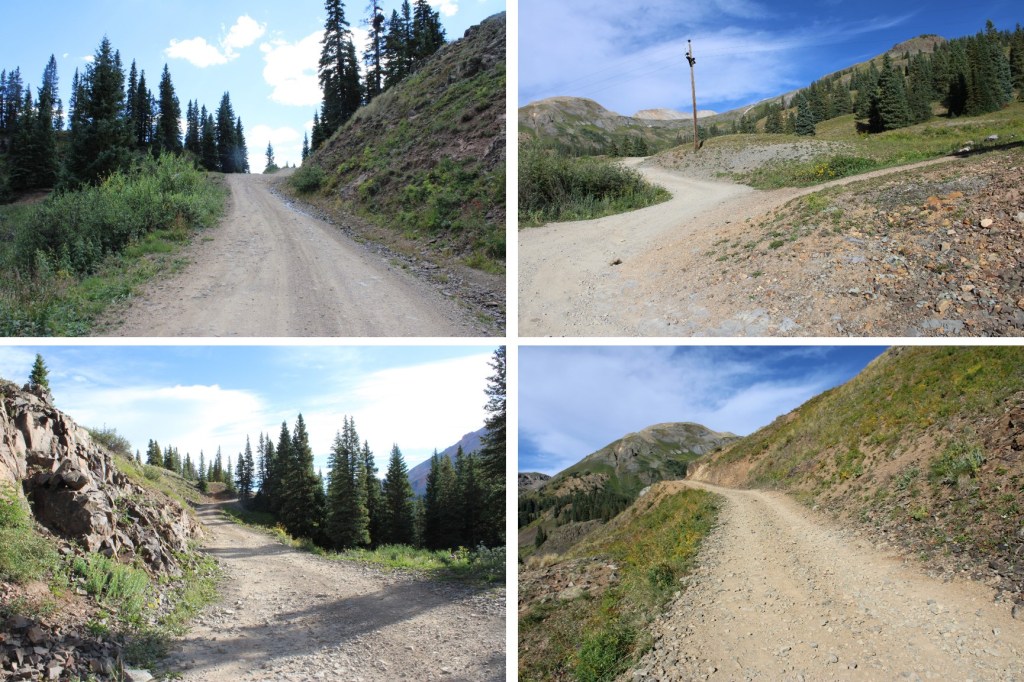
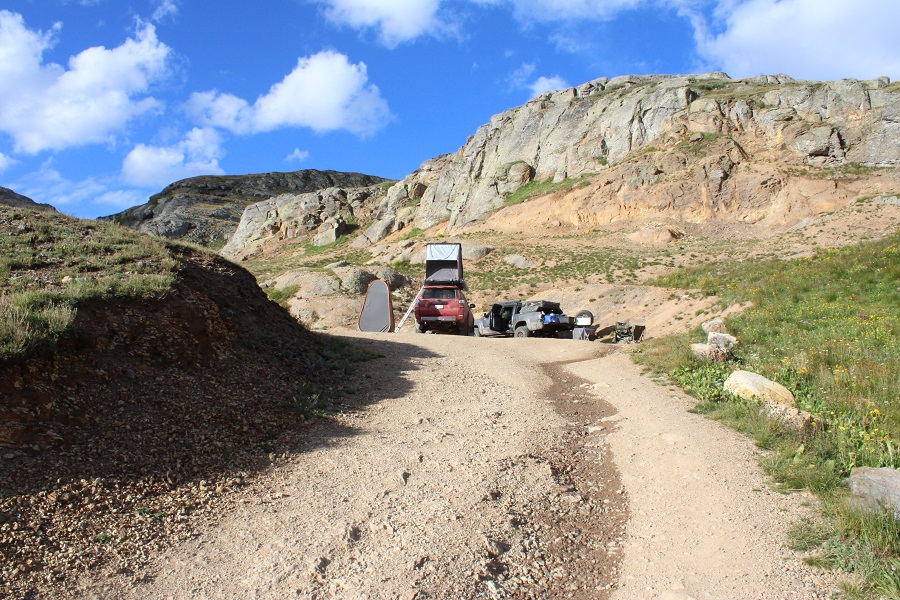
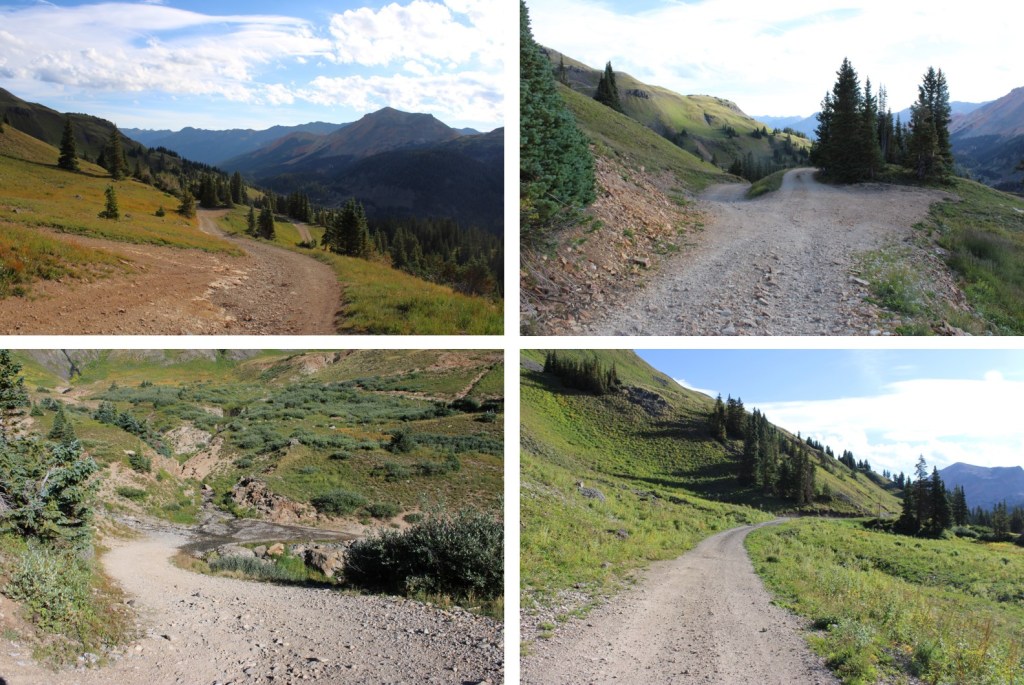
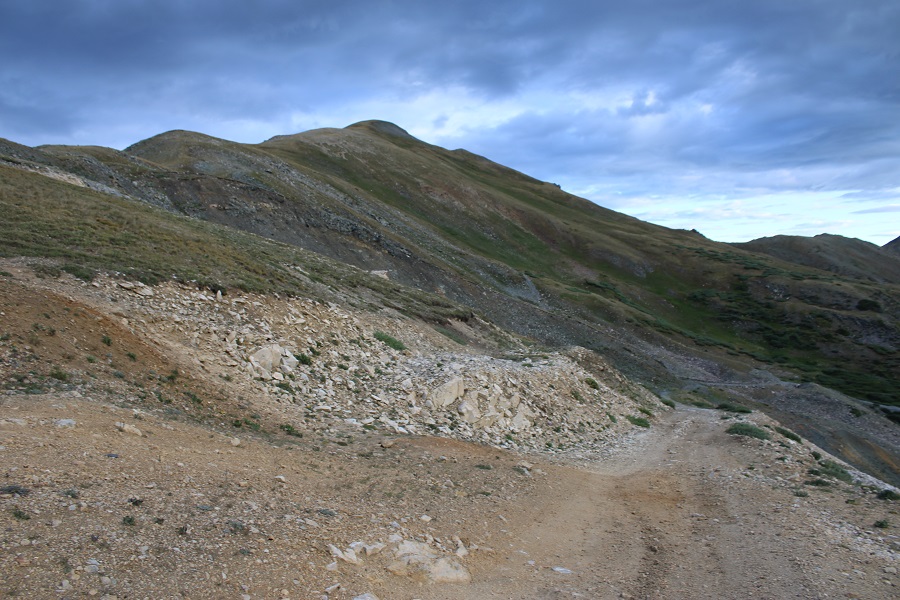
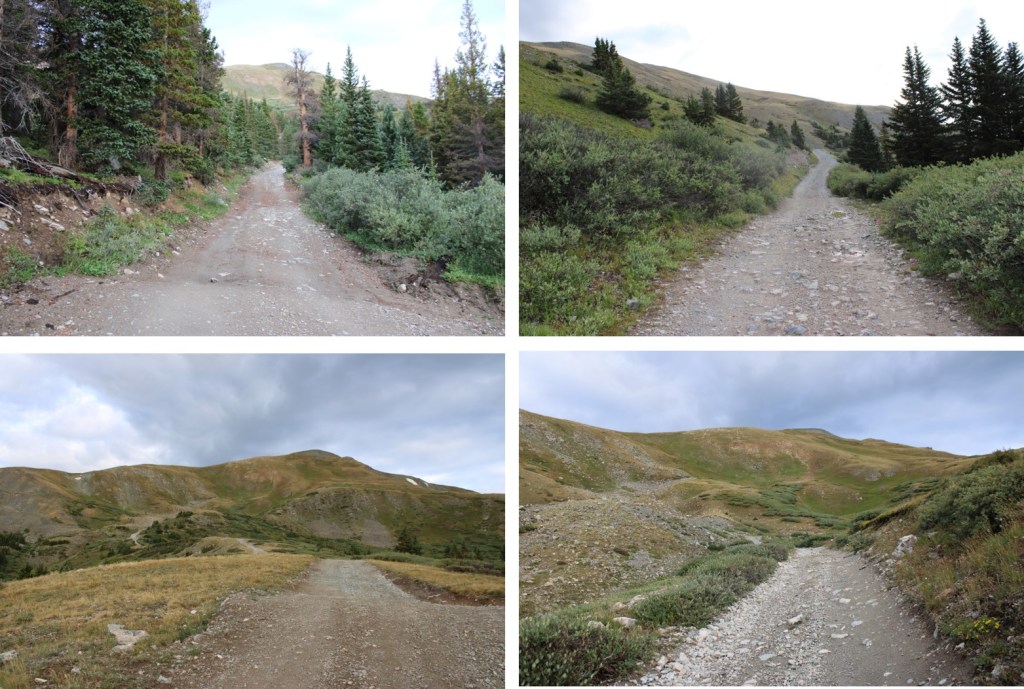
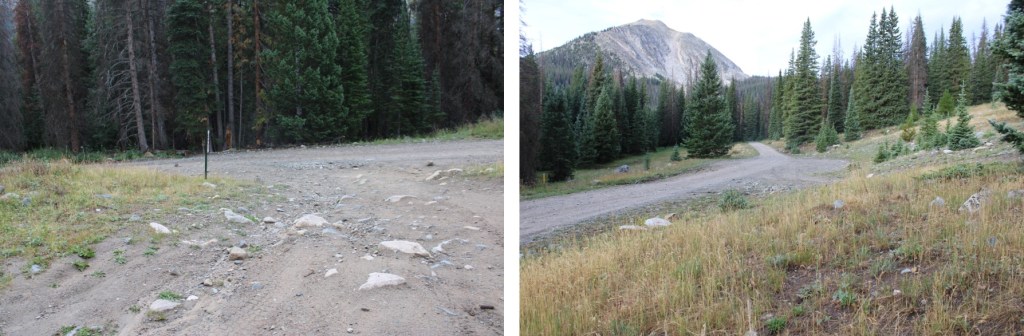
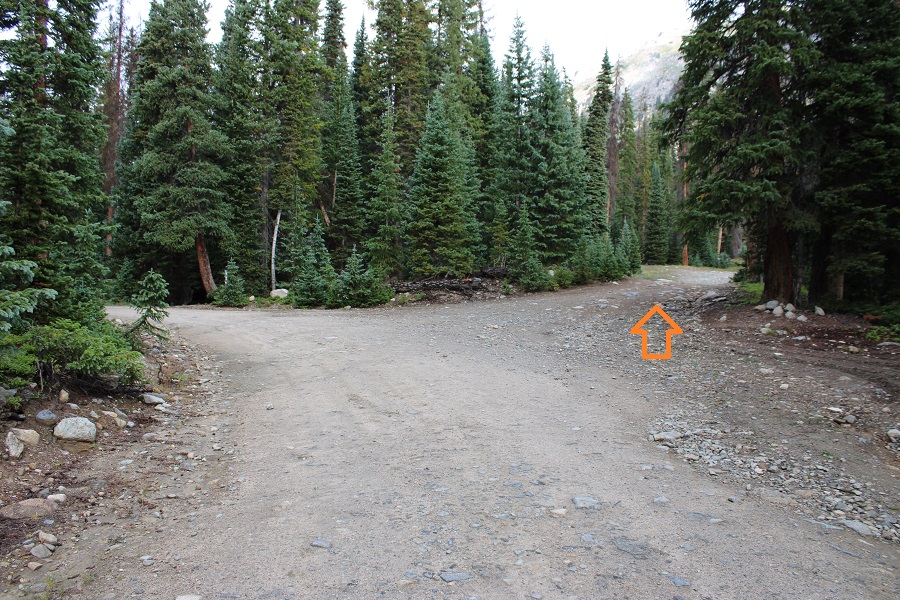
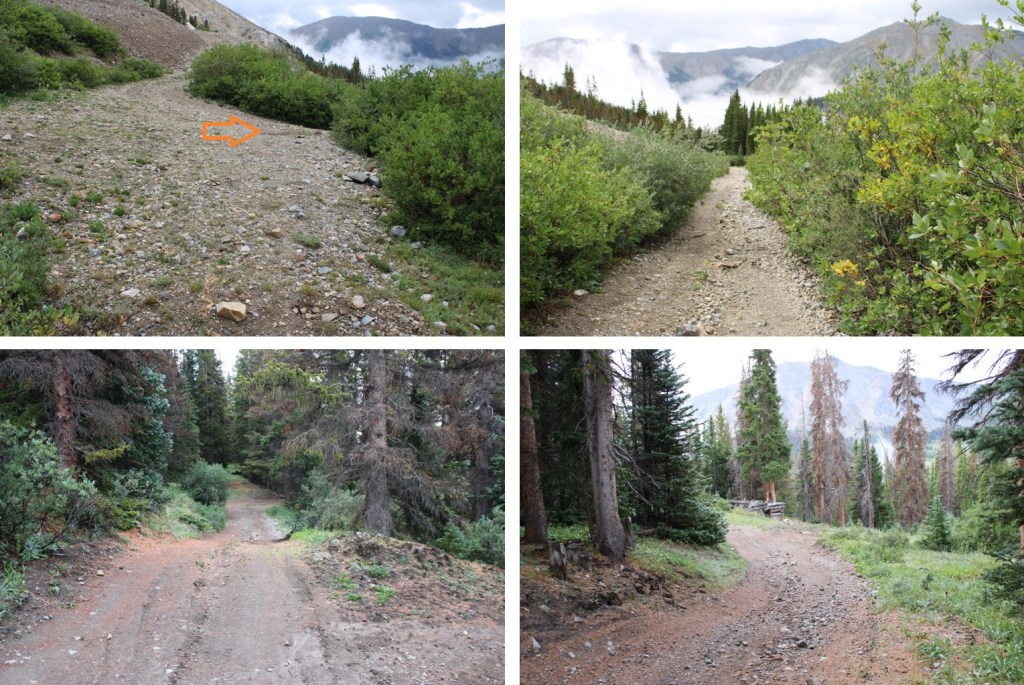
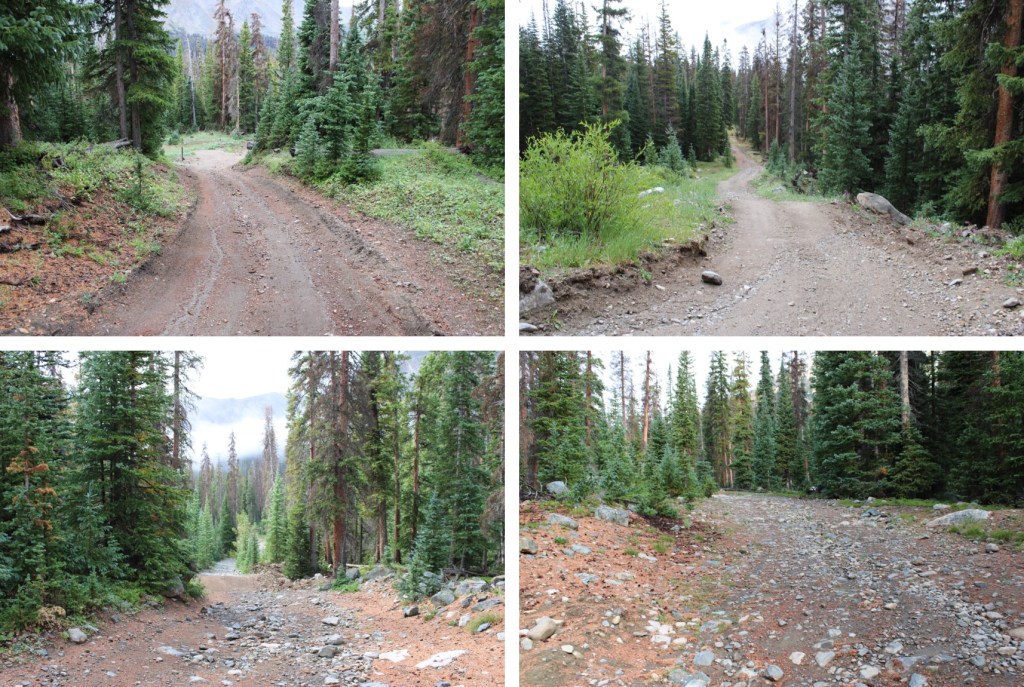
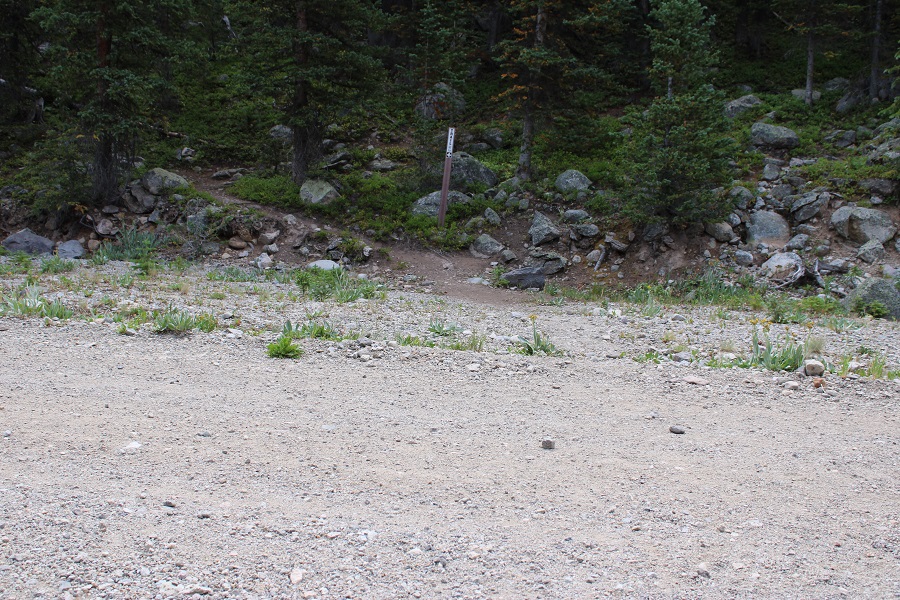
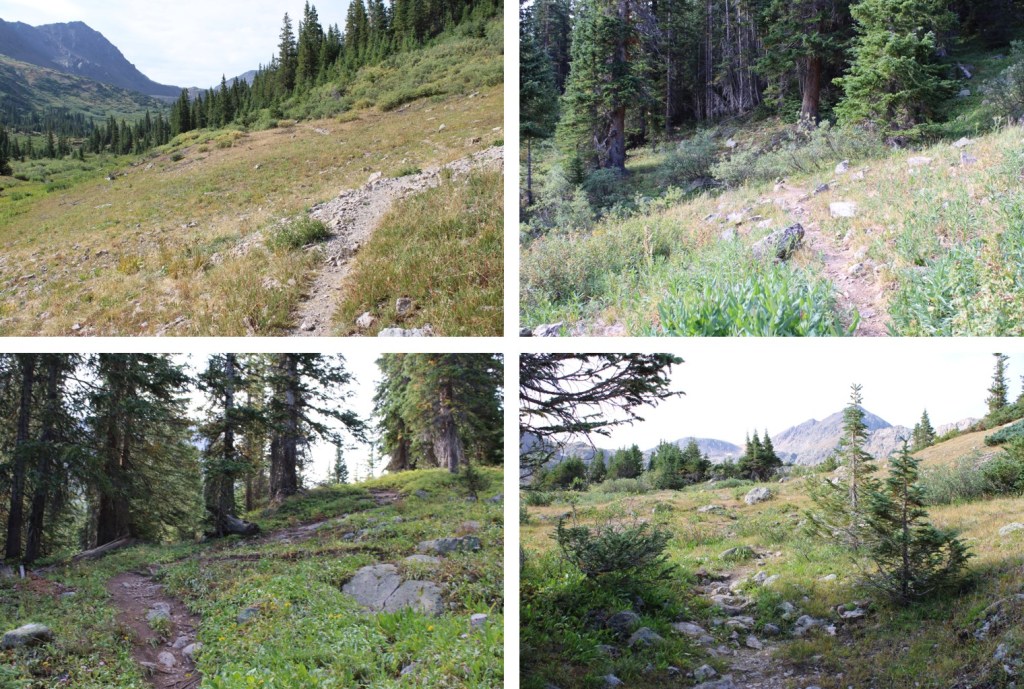
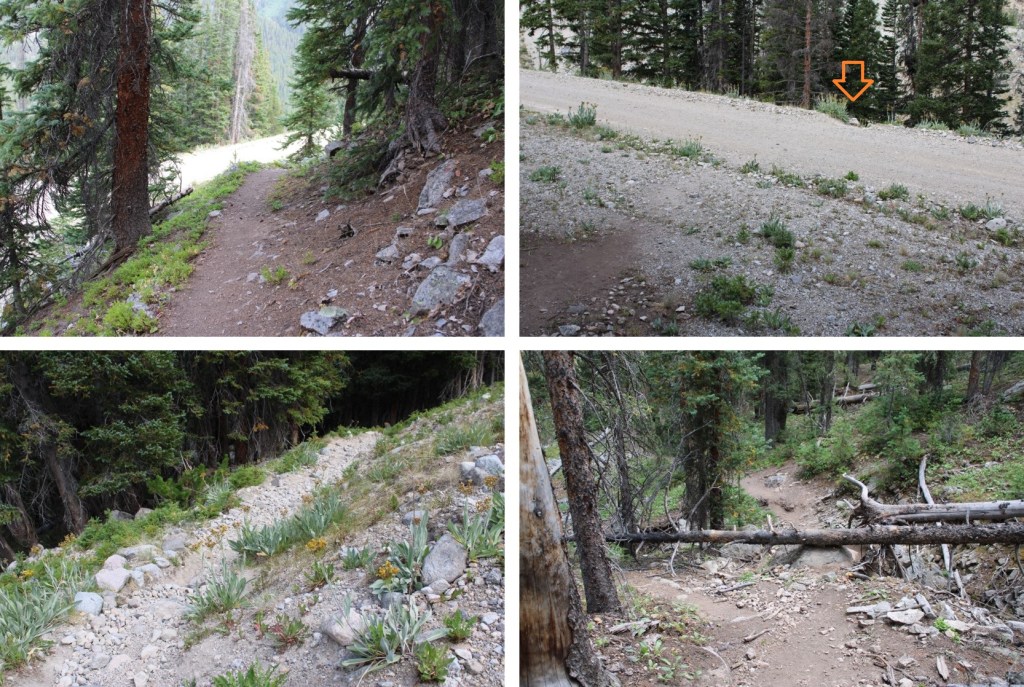
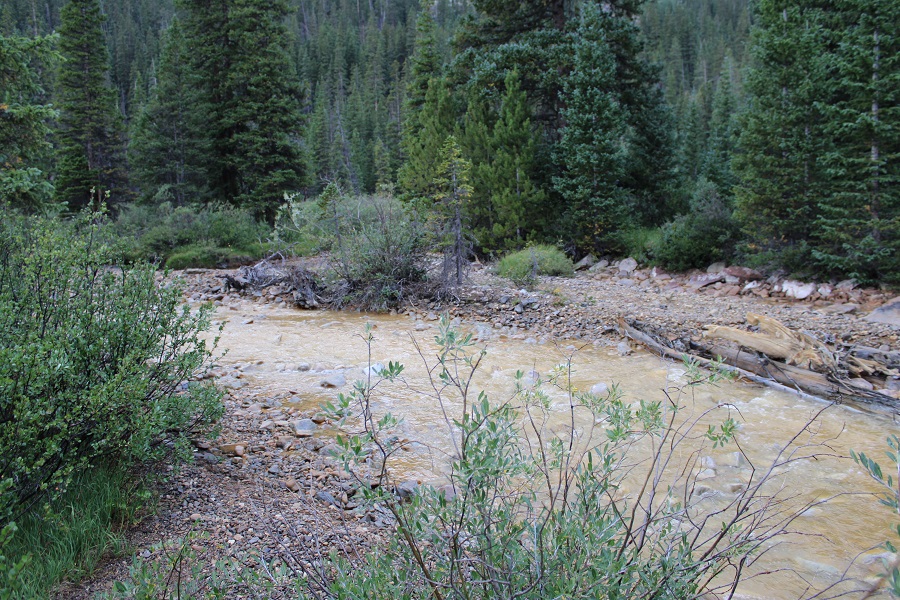
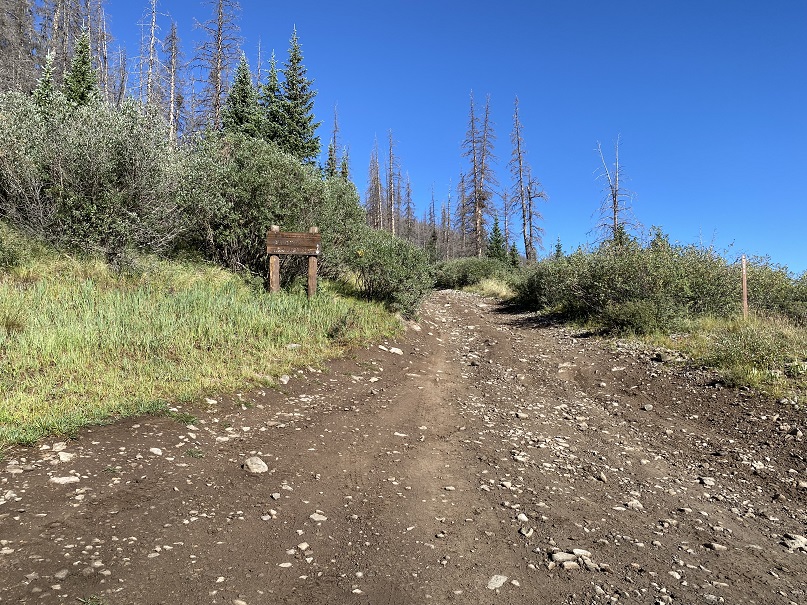
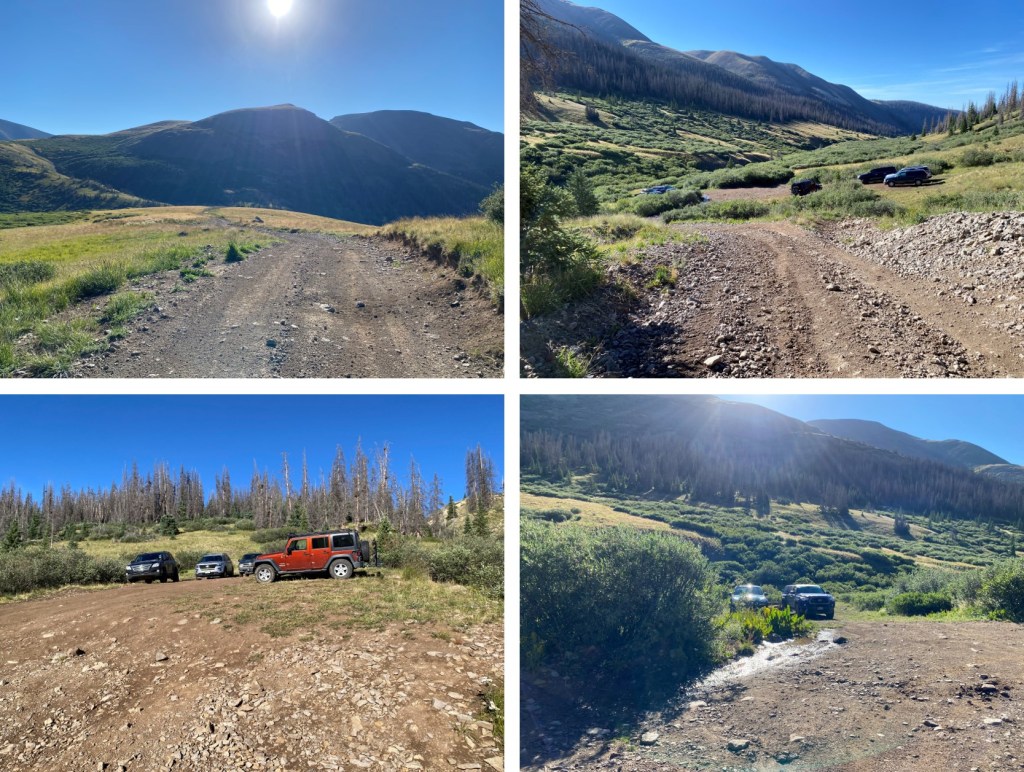
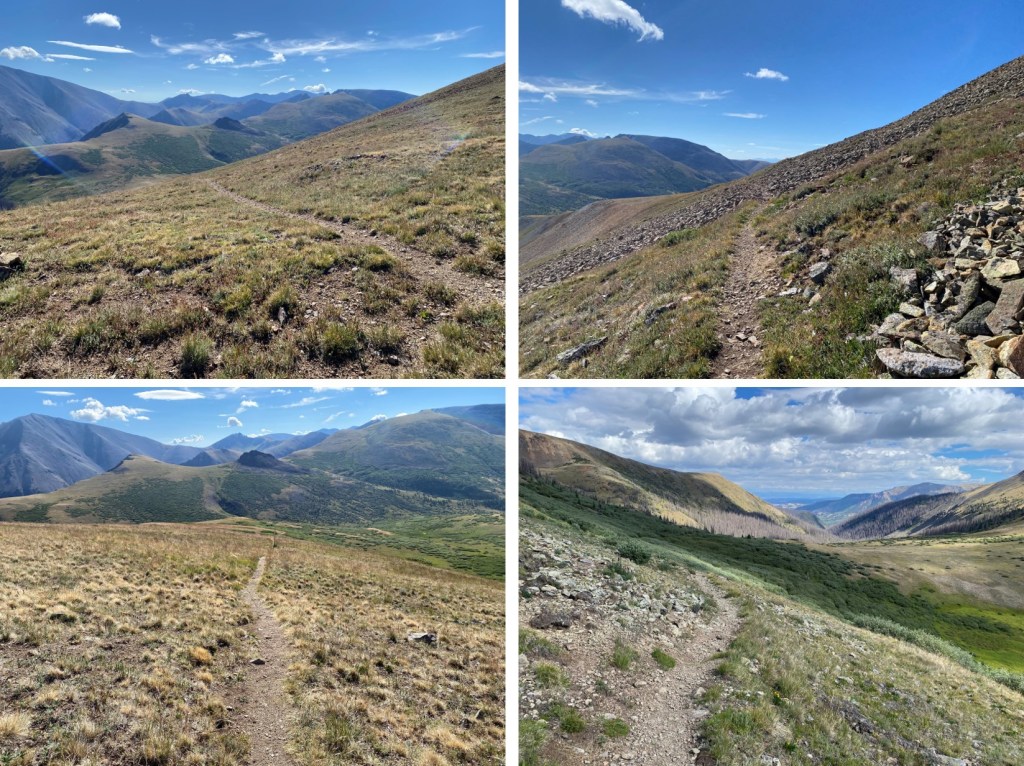
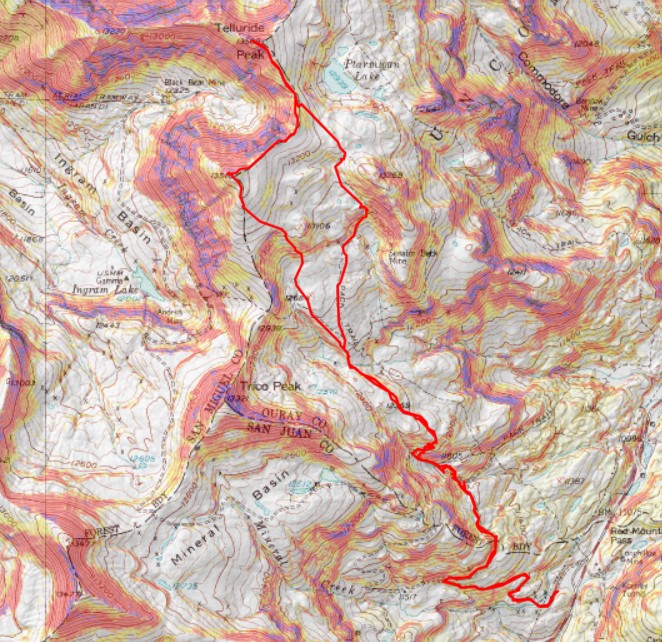
I was up and on the trail at 5am, hoping to beat today’s storms and make it to Independence Pass to join some friends camping that afternoon.  I started our following the dirt road for .75 miles

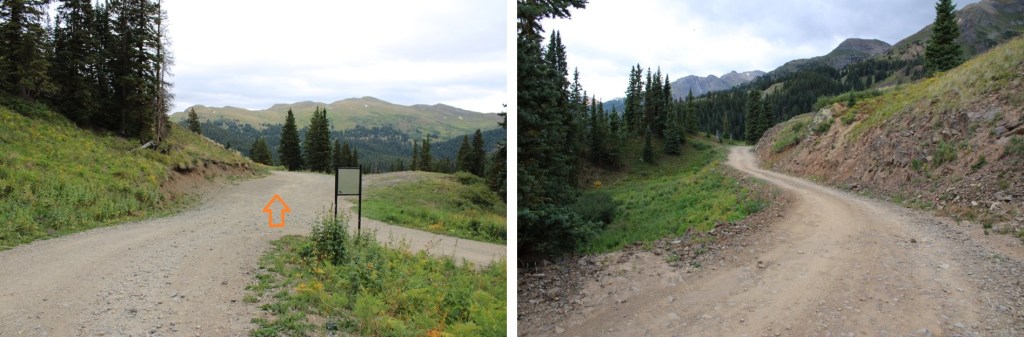
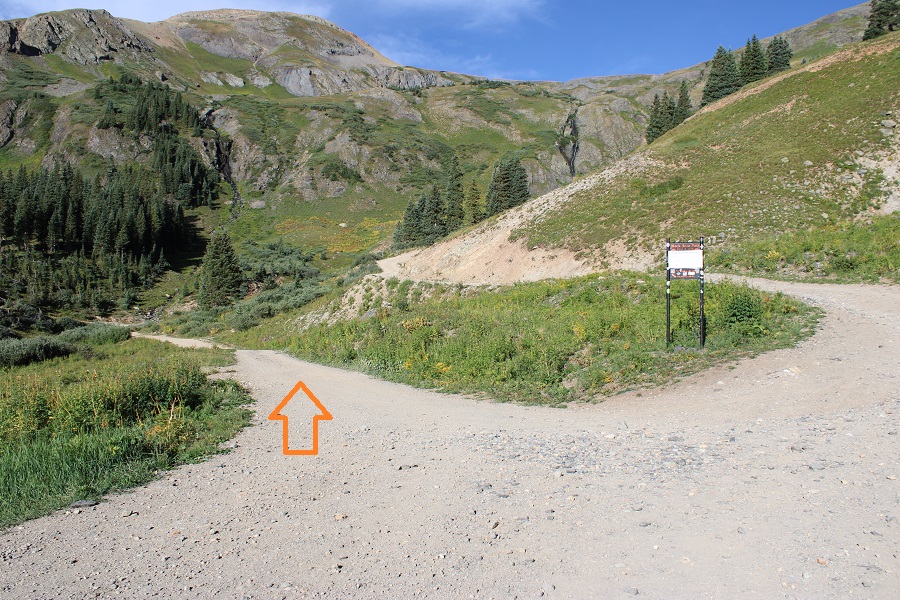
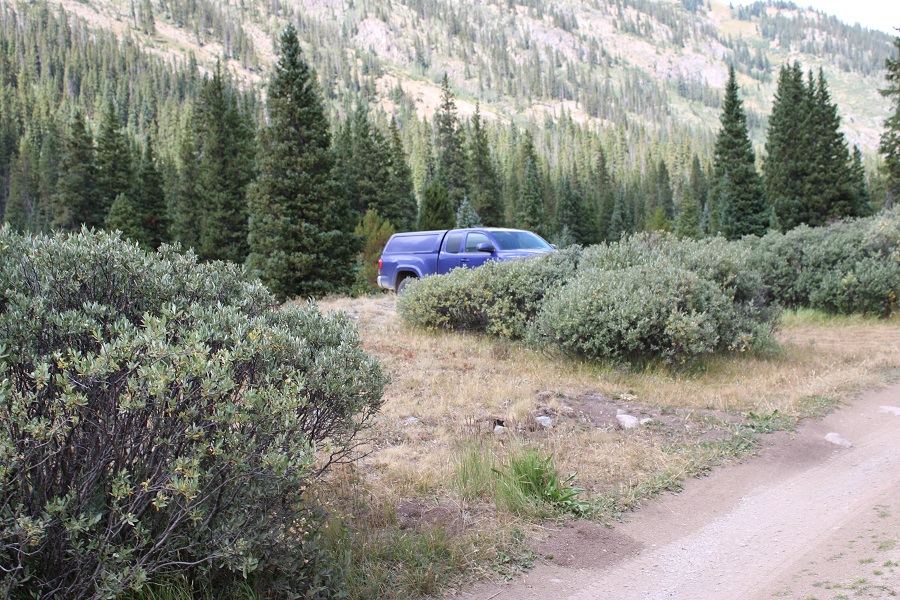
Just before the Black Bear Pass / Porphyry Basin junction, I turned right onto a side trail.  A 4WD vehicle can easily make it here.  There’s room for one vehicle to park (yesterday I saw a full-sized Ford F250 parked here).

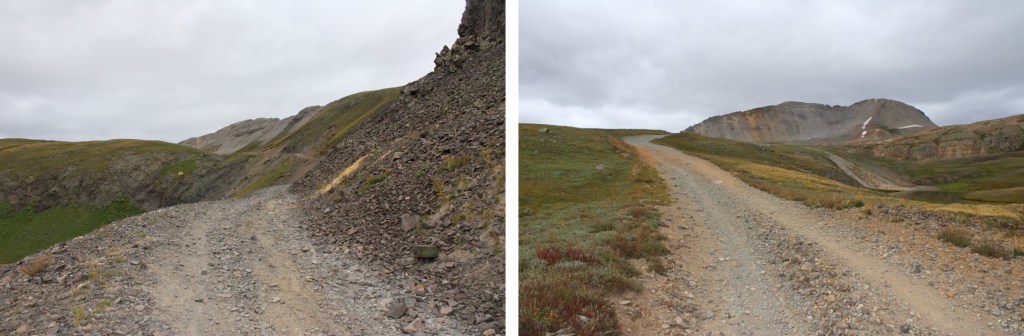
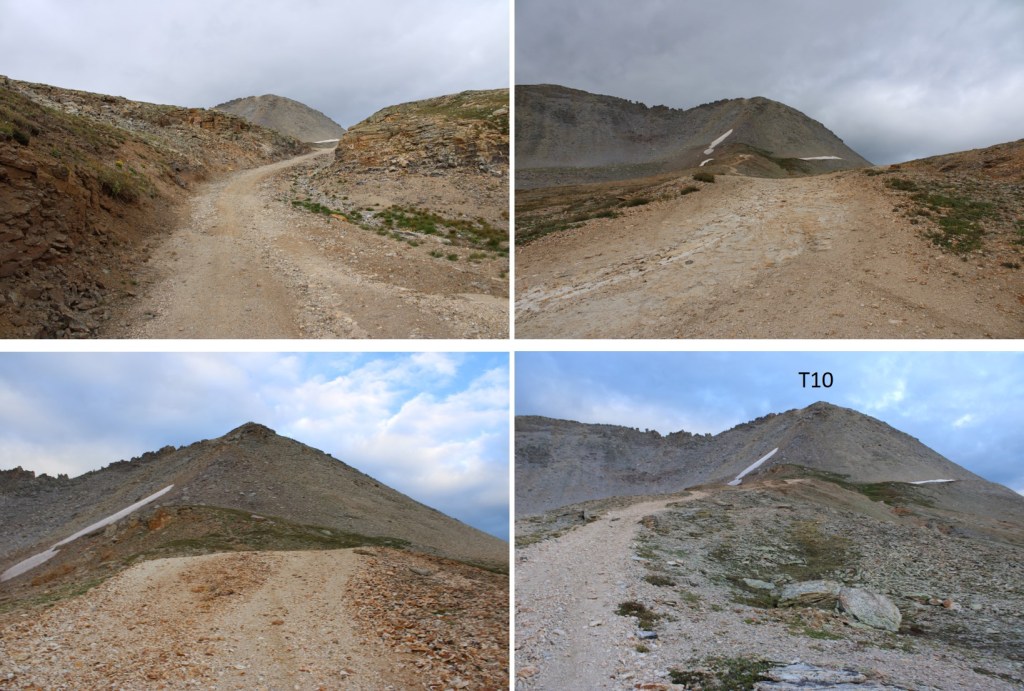
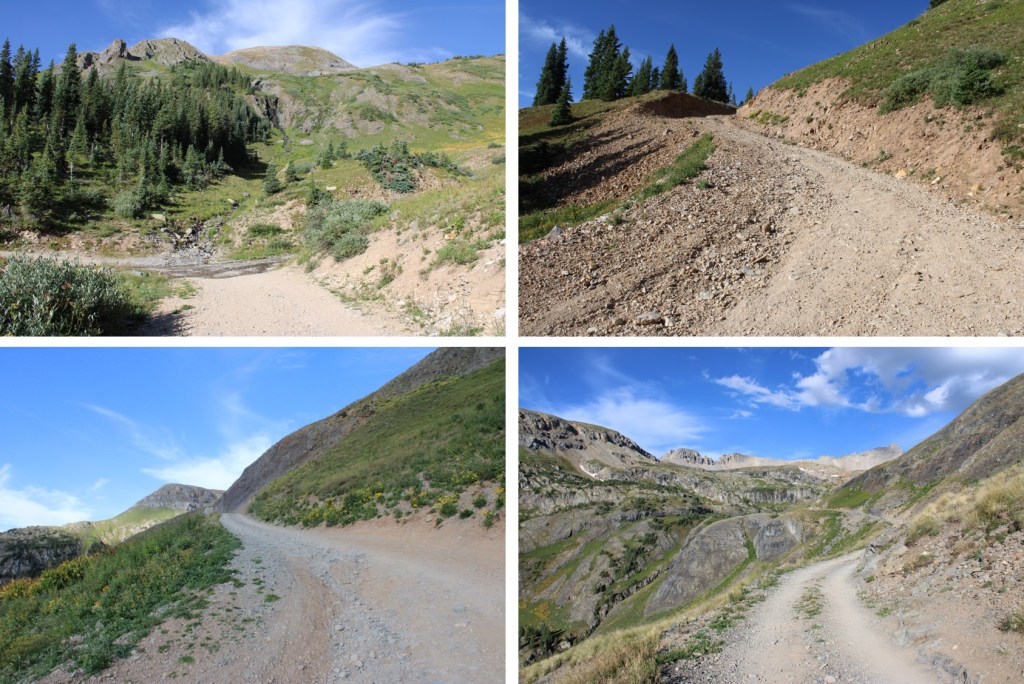
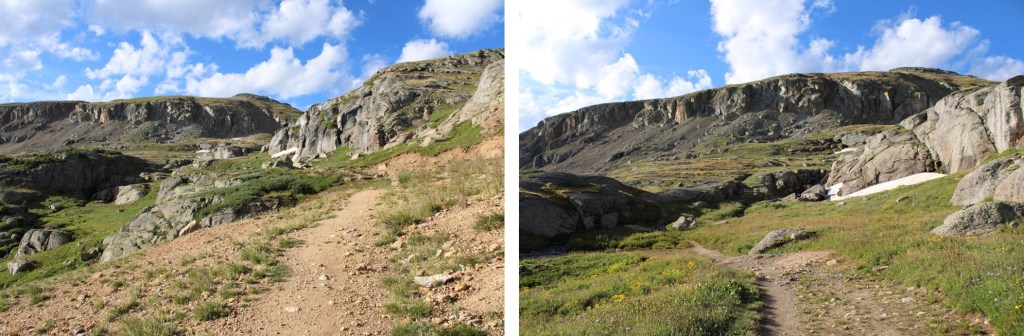
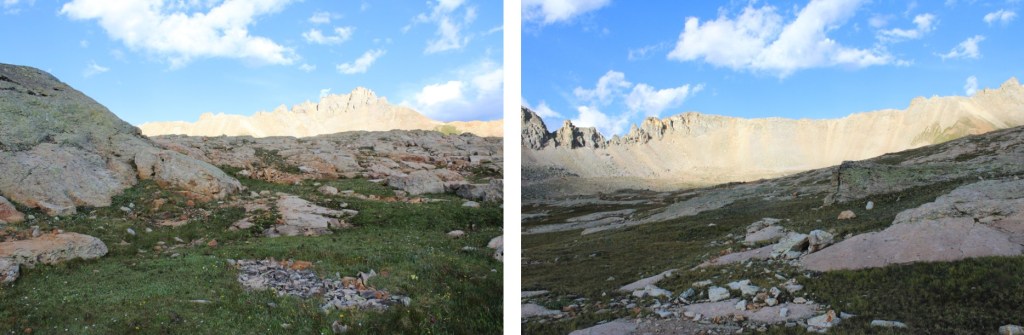
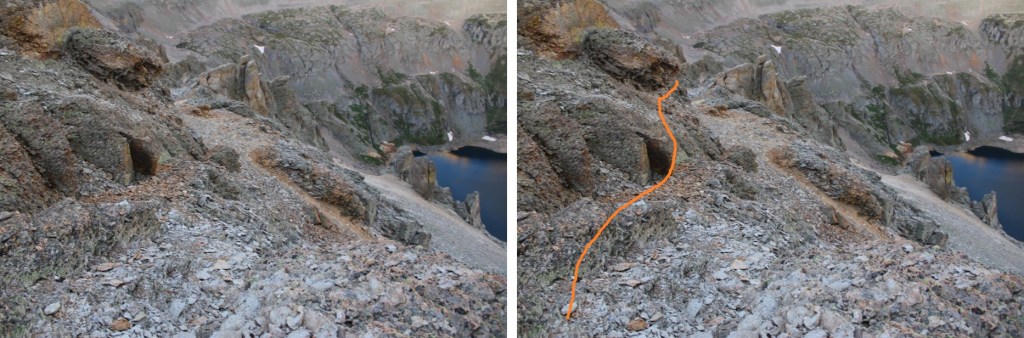
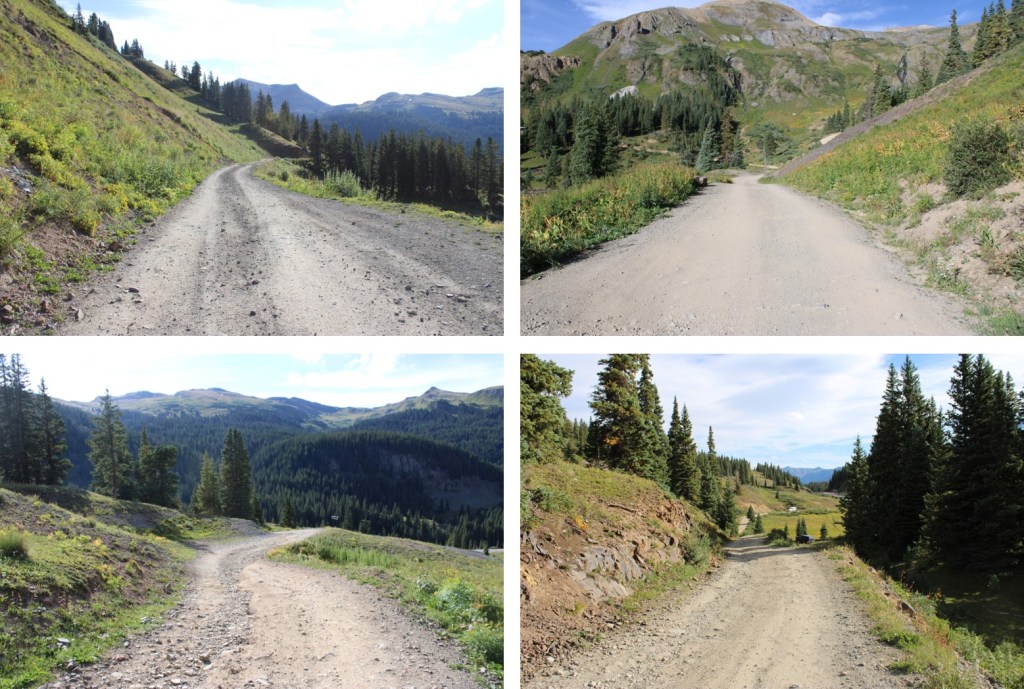
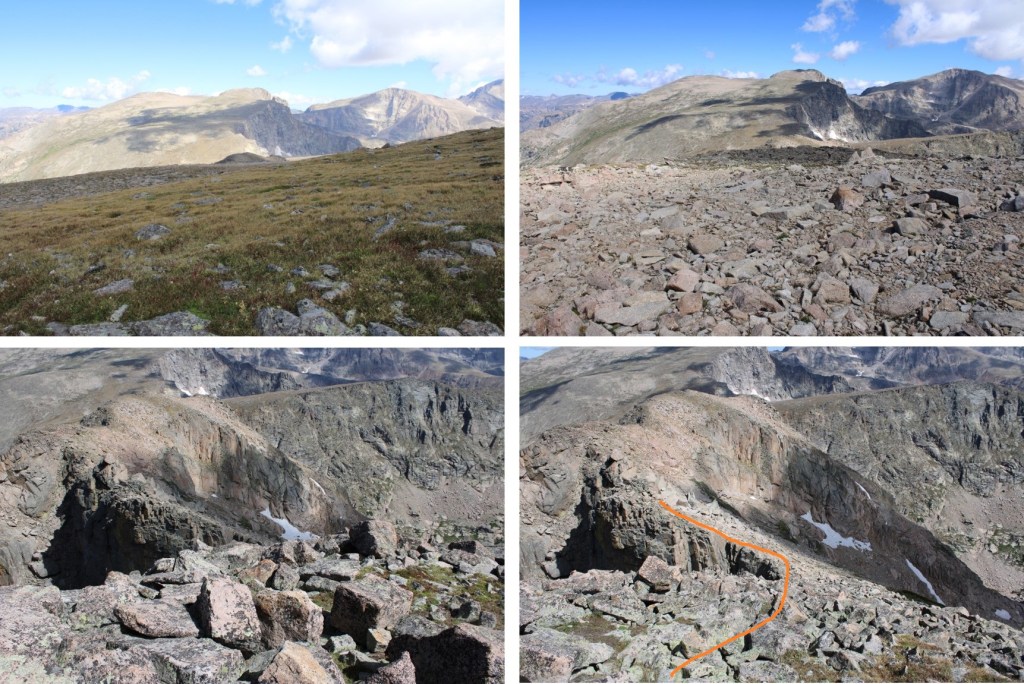
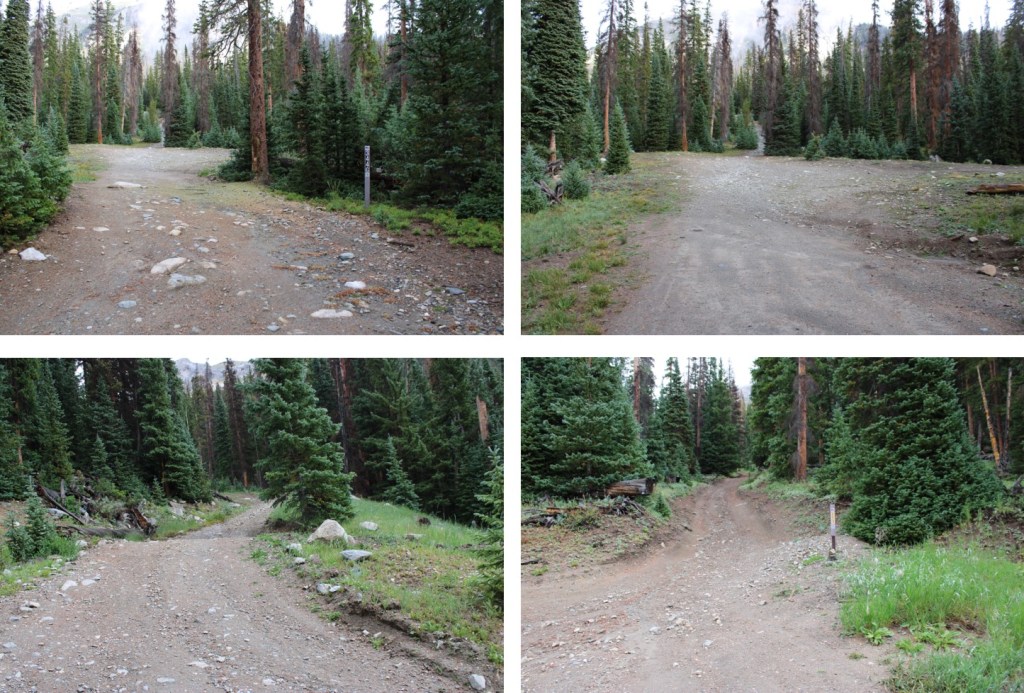
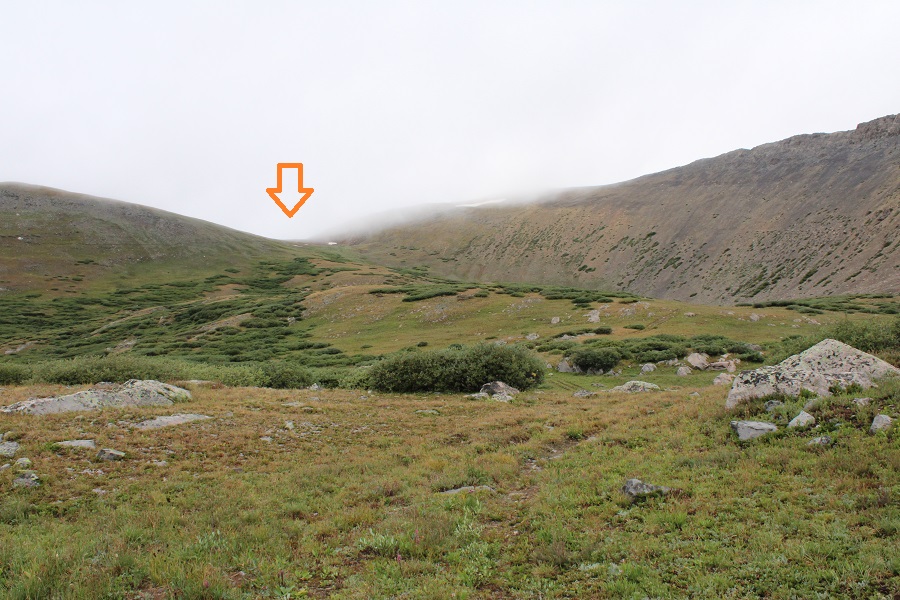
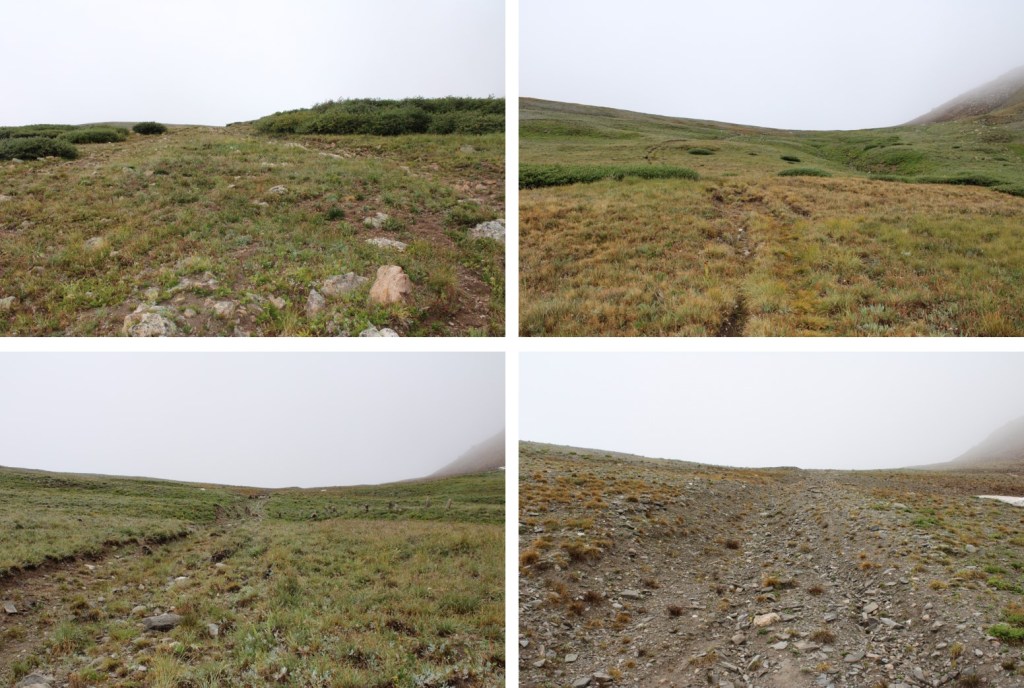
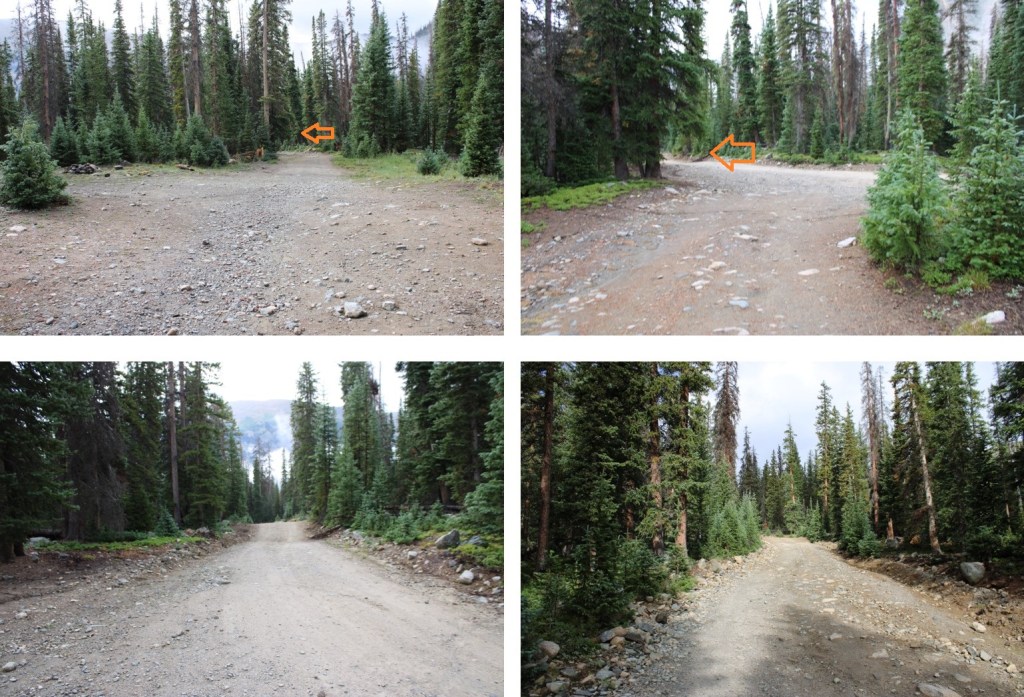
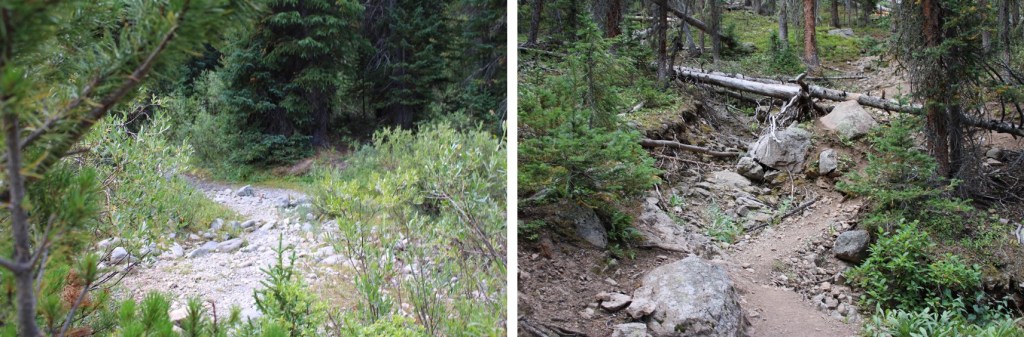
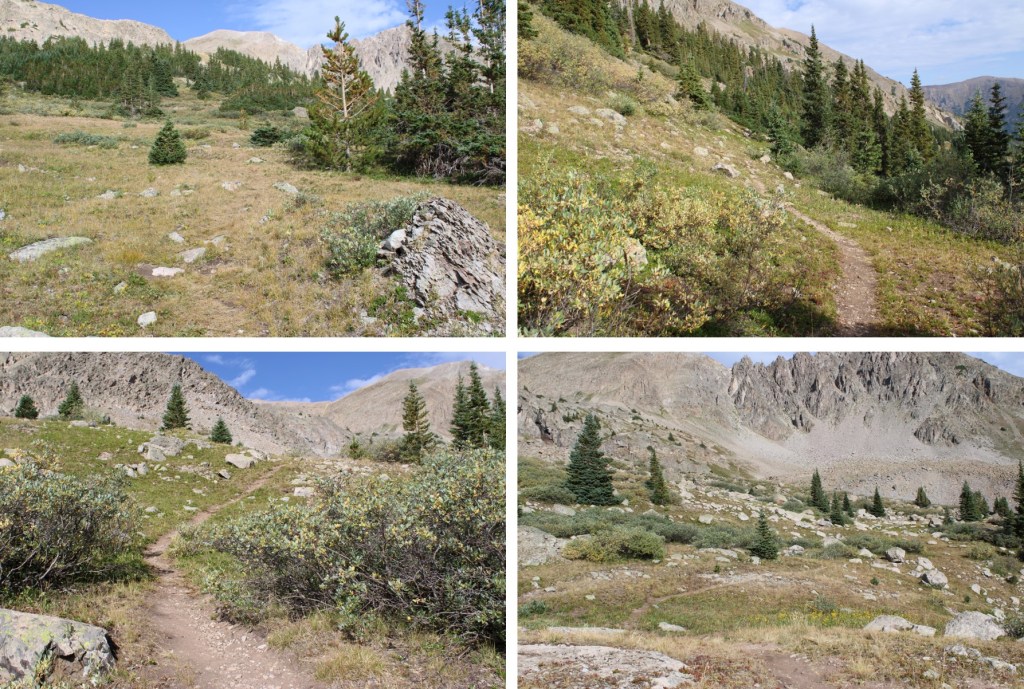
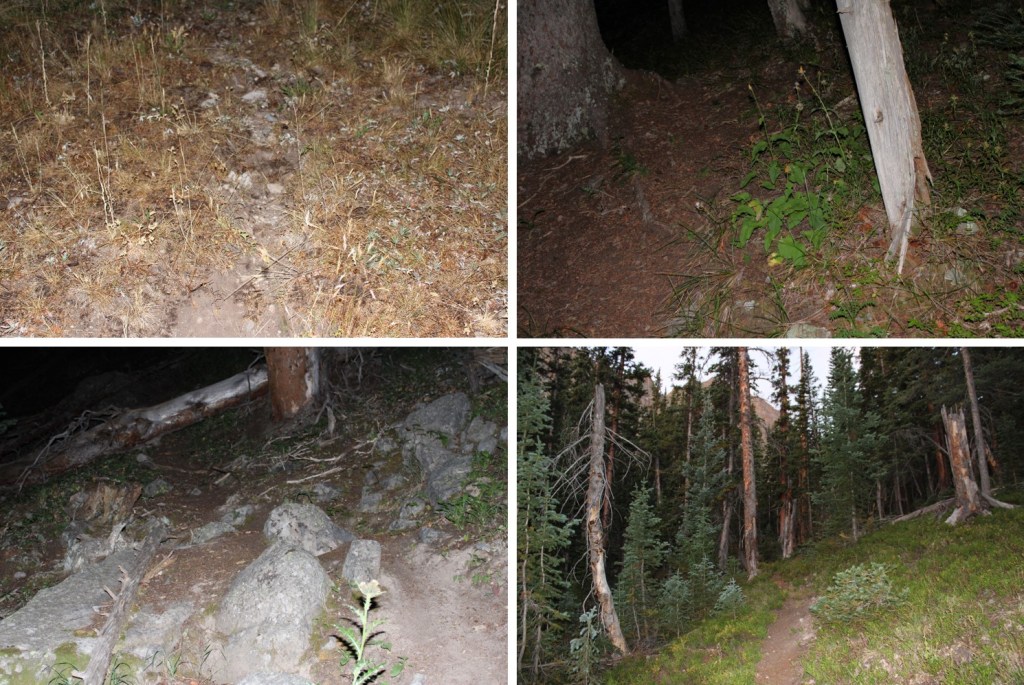
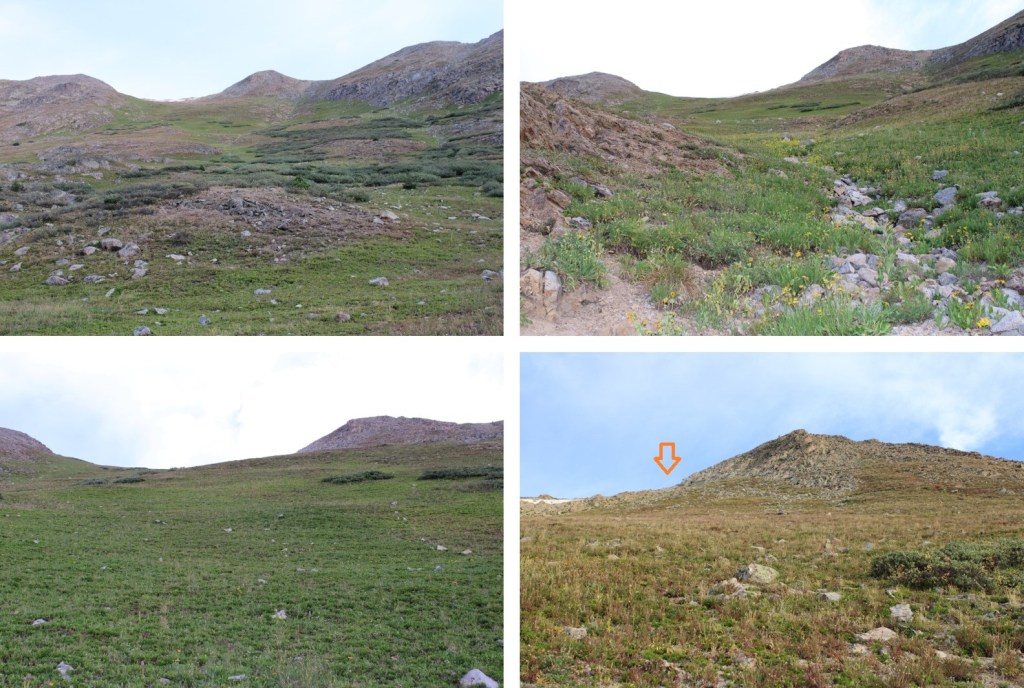
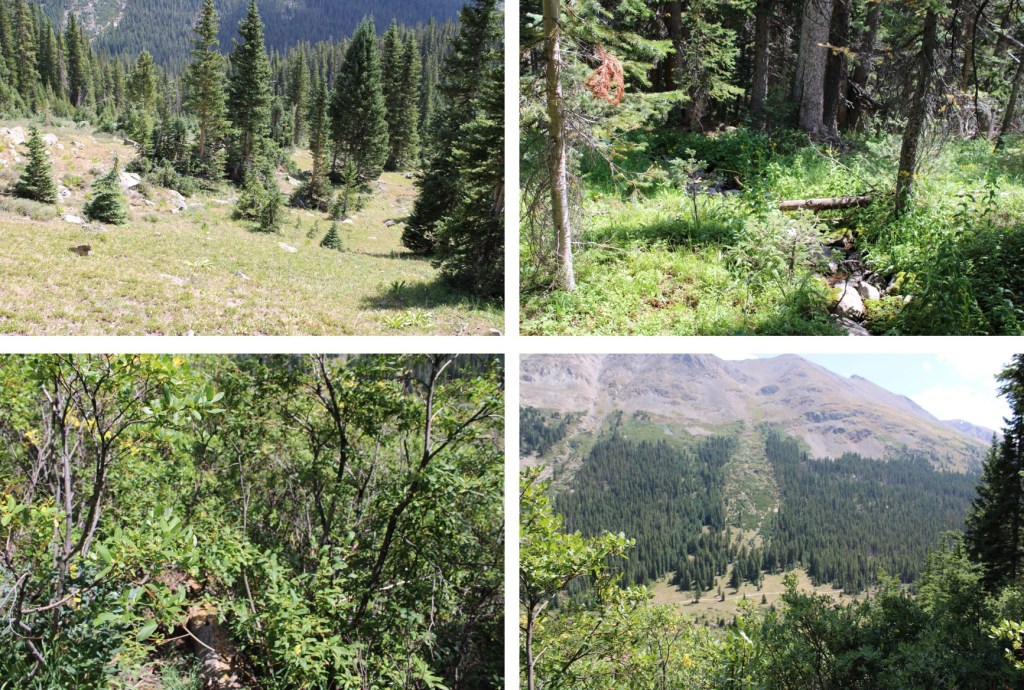
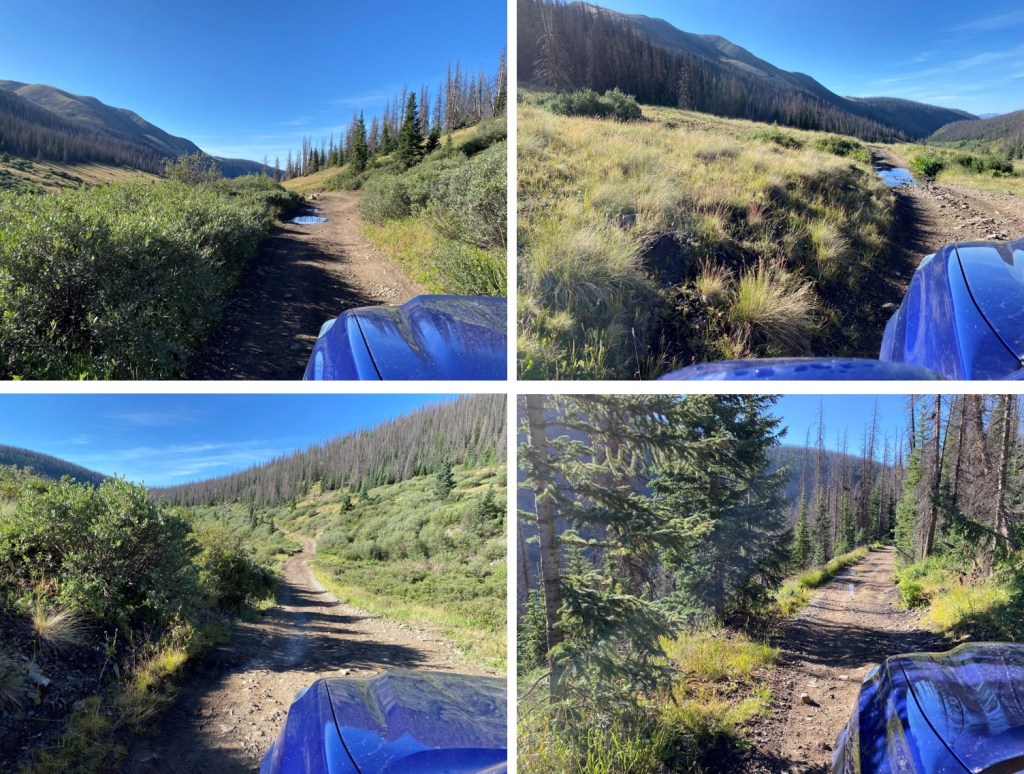
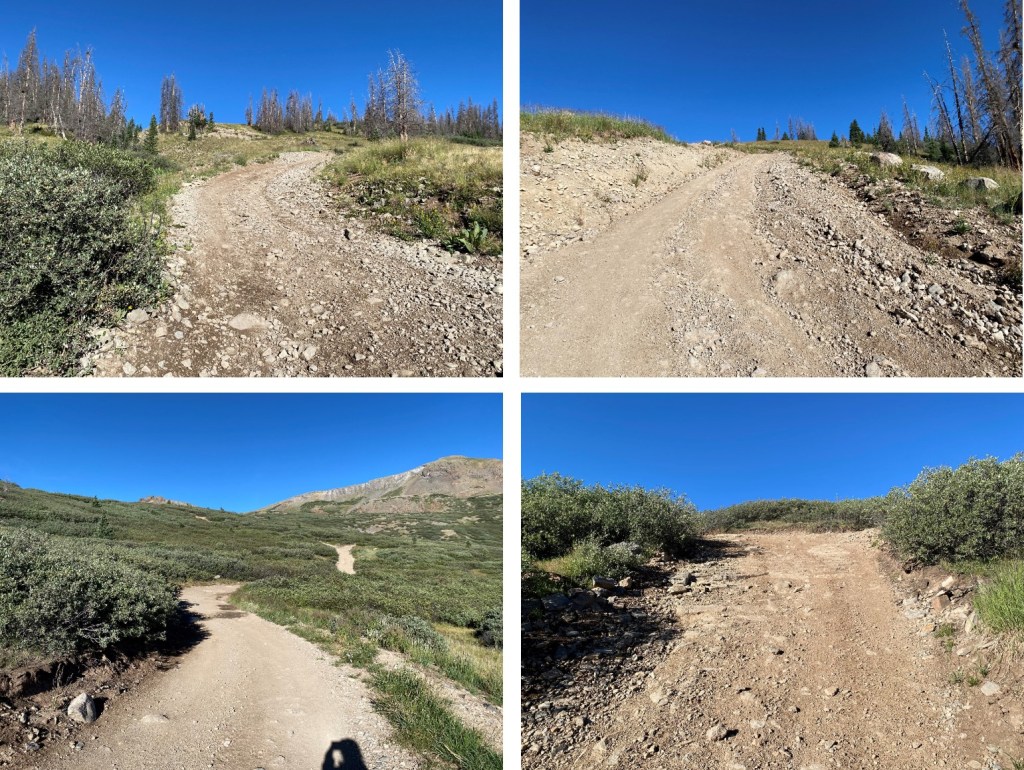
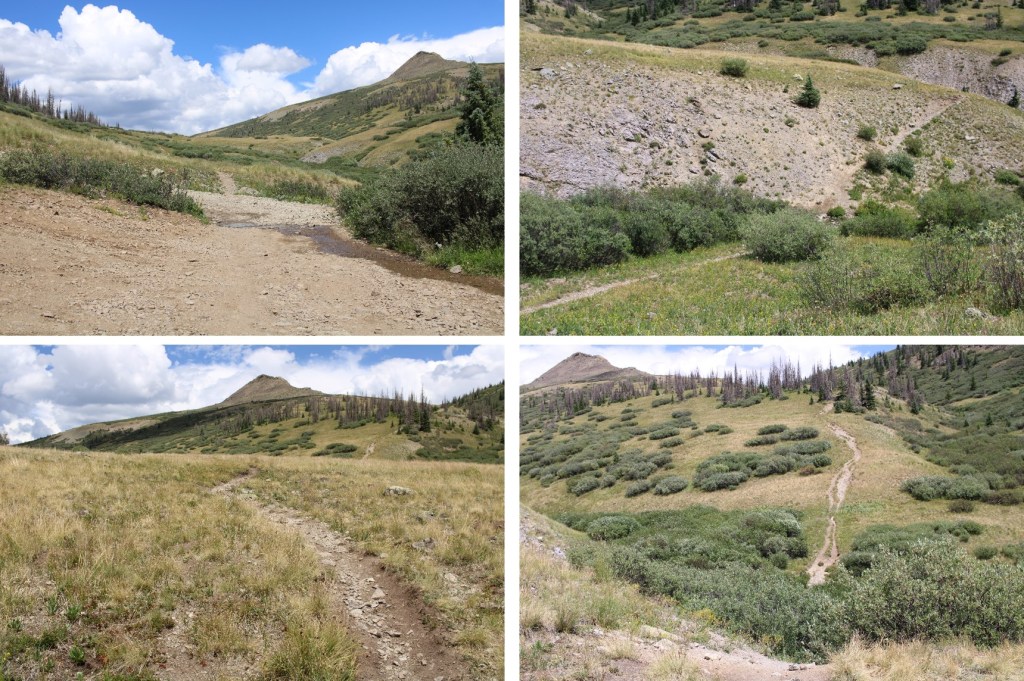
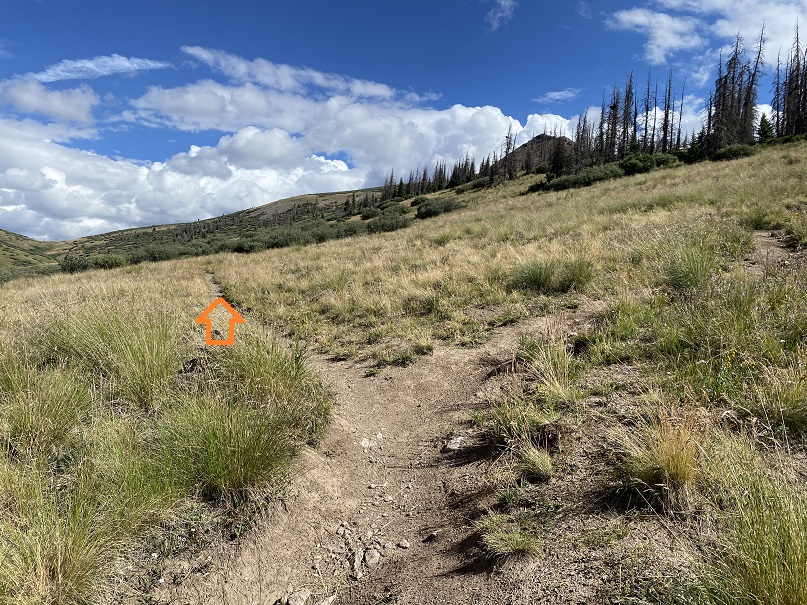
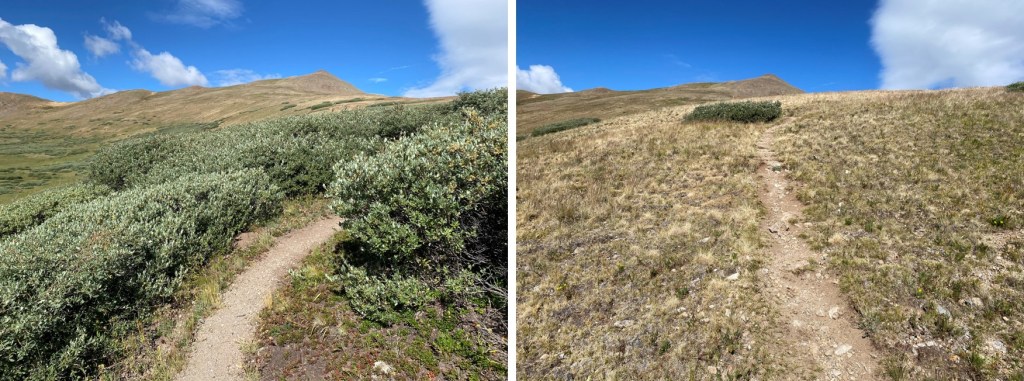
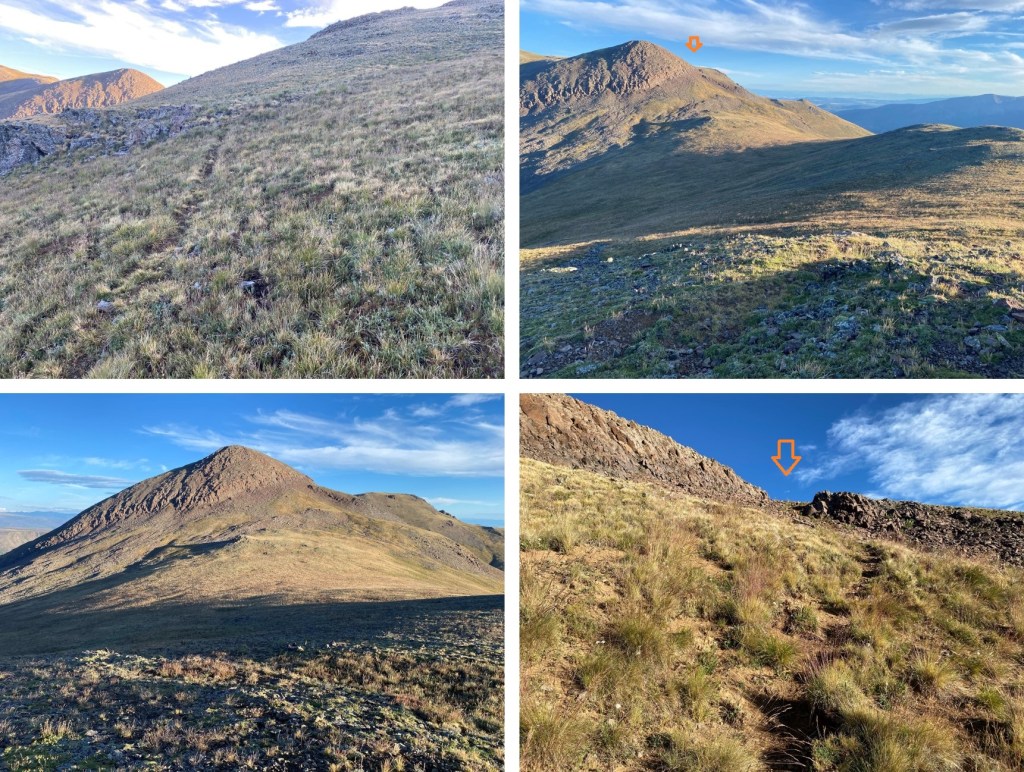
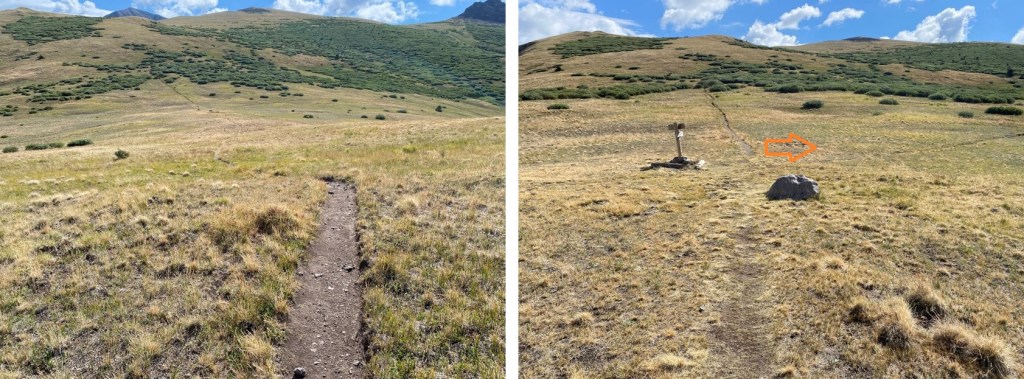
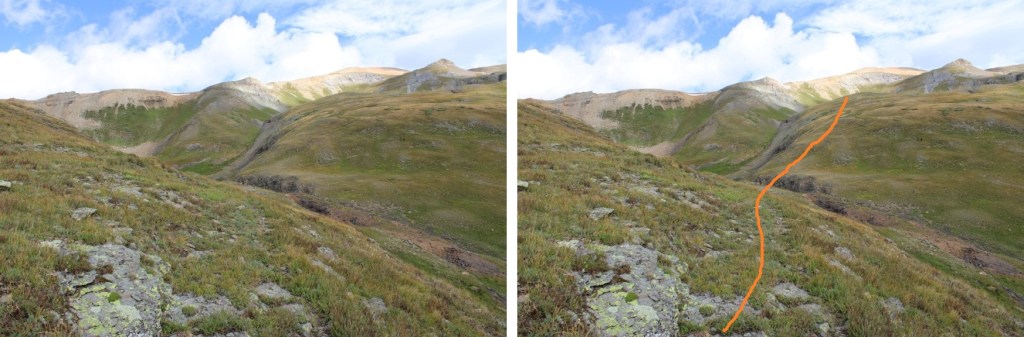
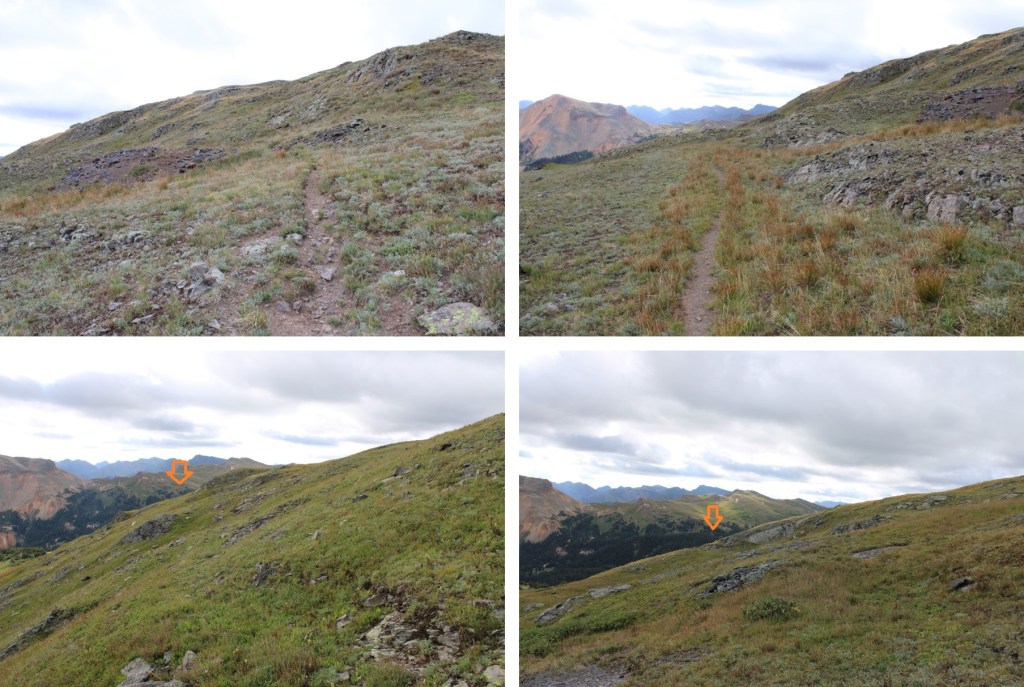
I was now on a “pack trail” that looks like it used to be a road.  I followed this trail until I came to a mine.

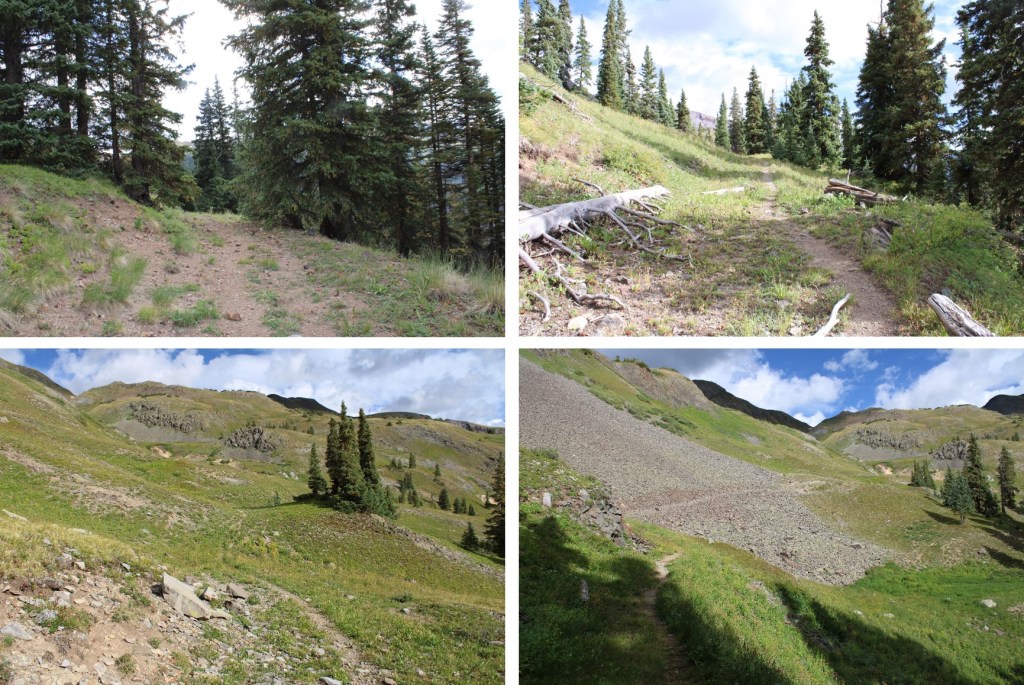
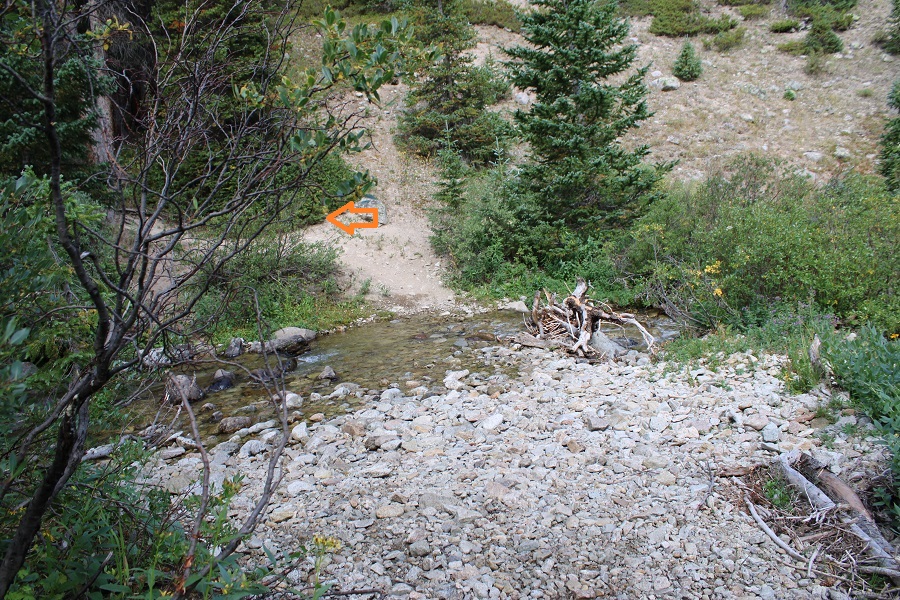
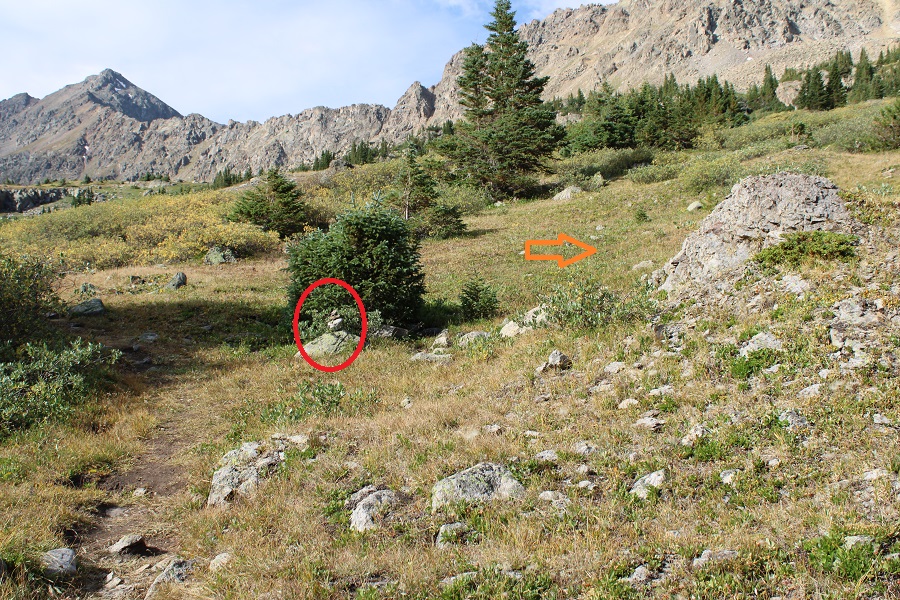
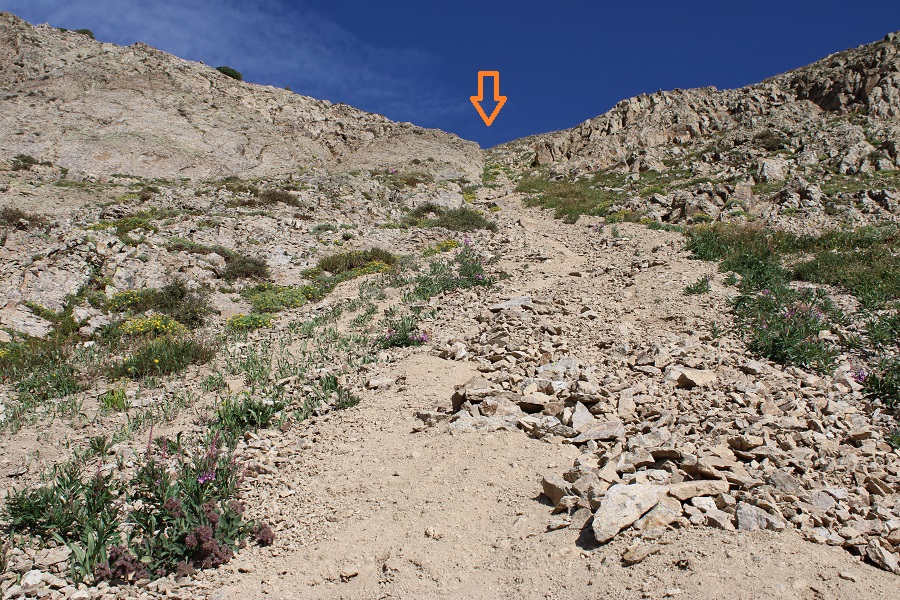
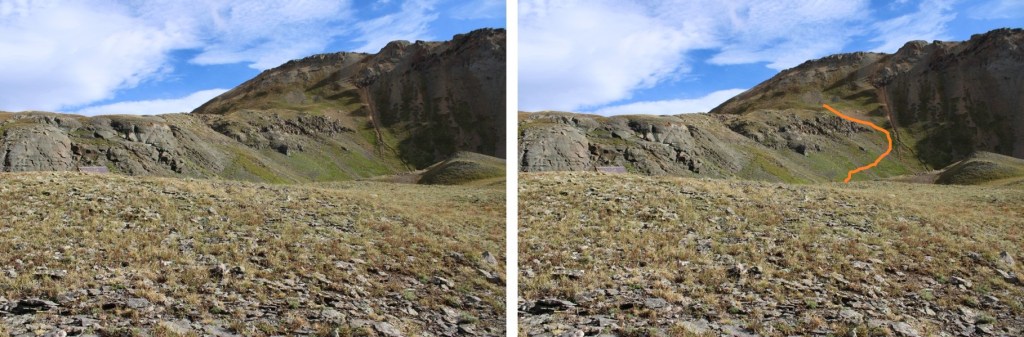
This is where I left the “trail” and route finding became tricky in the dark.  In the daylight, it’s pretty easy. There are a few game trails here, which I tried to pick up when I could find them. 

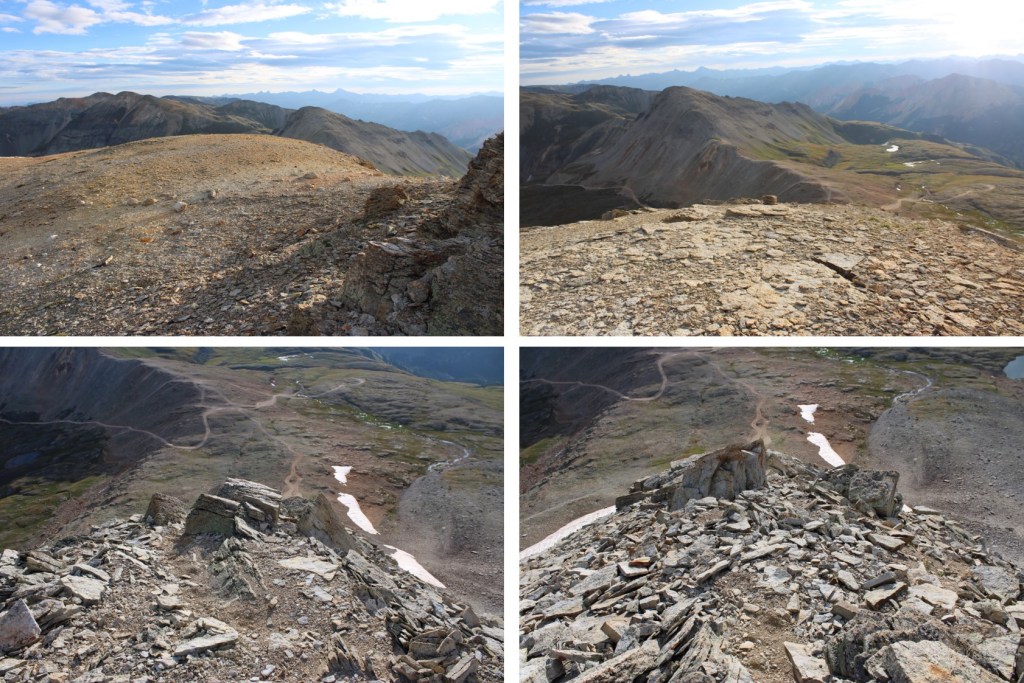
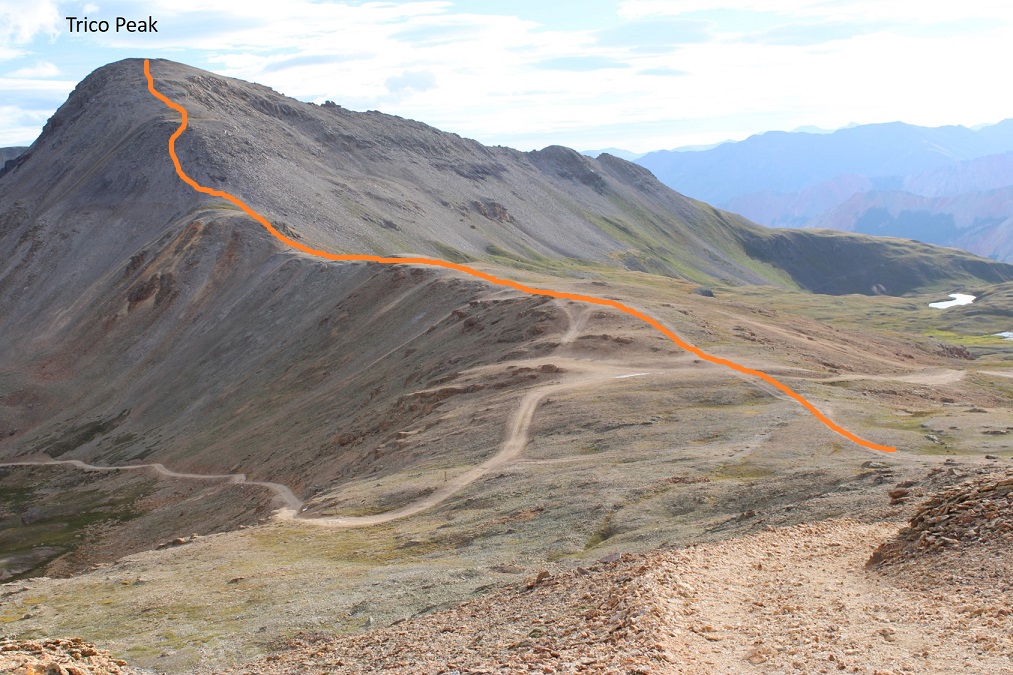
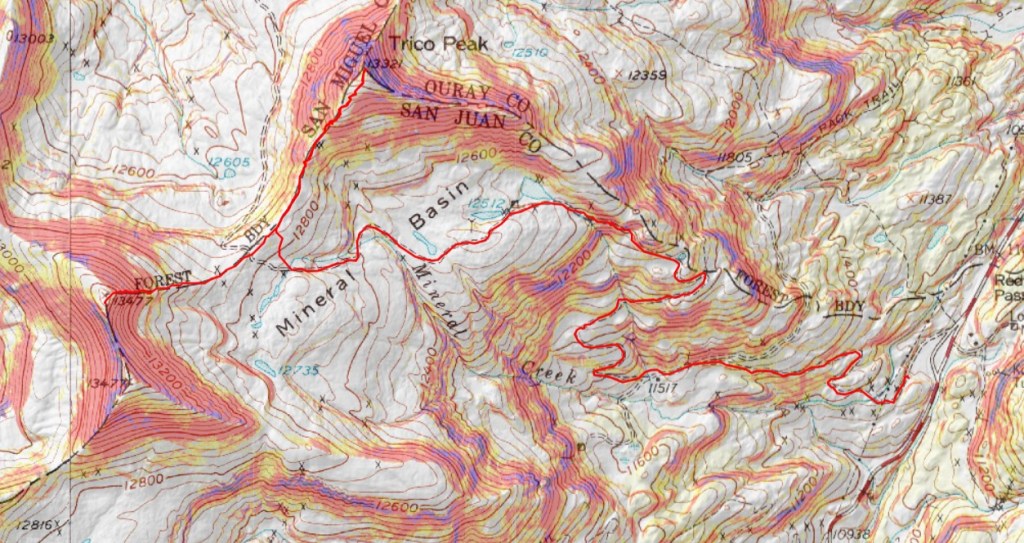
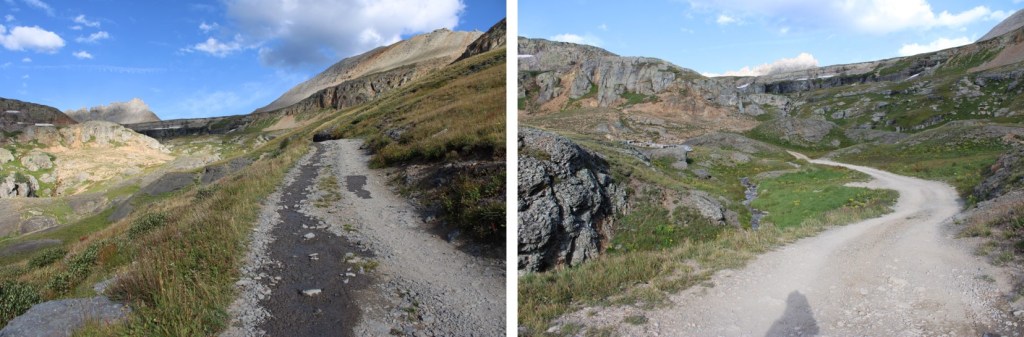
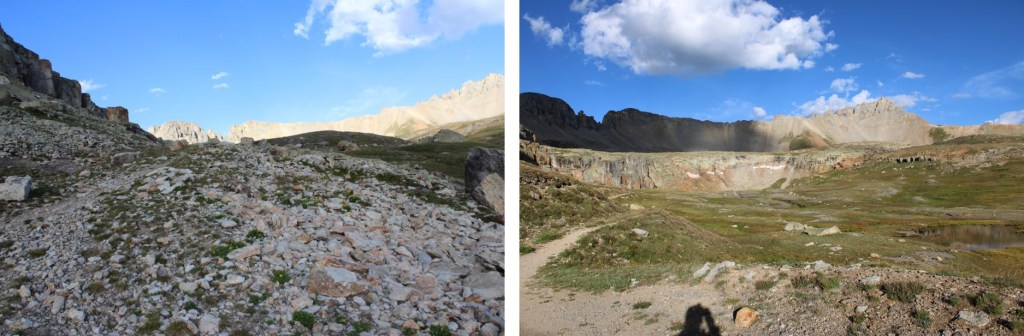
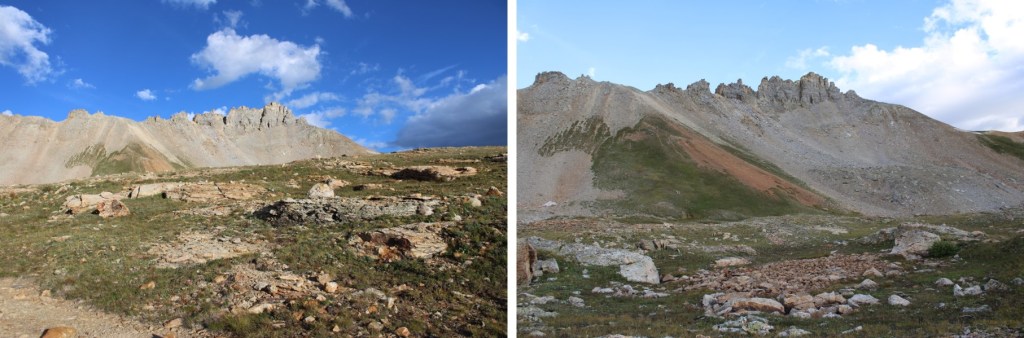
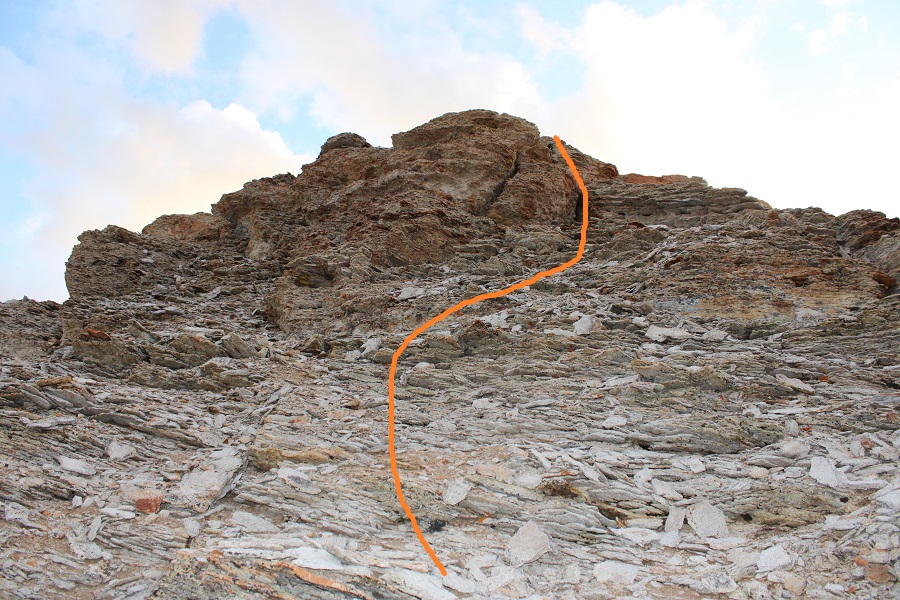
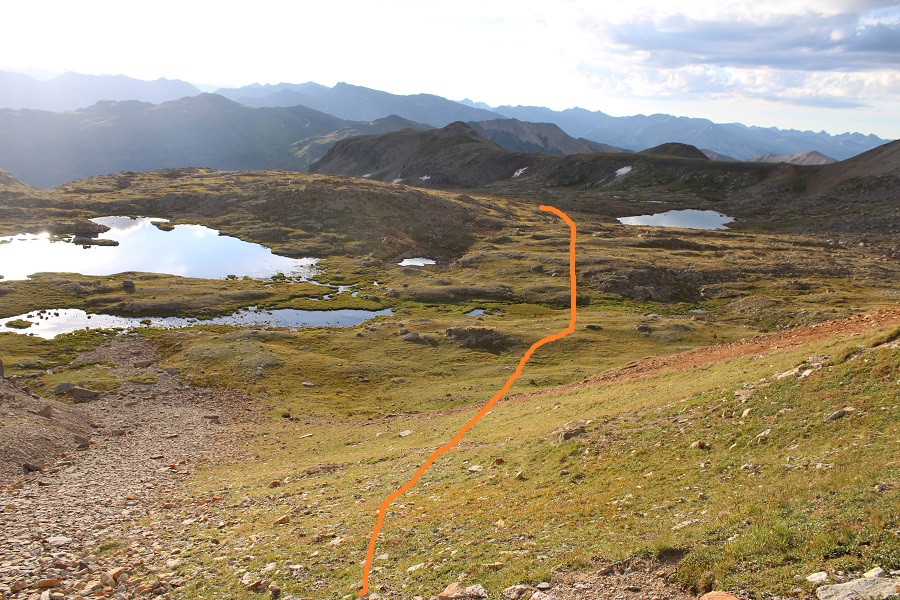
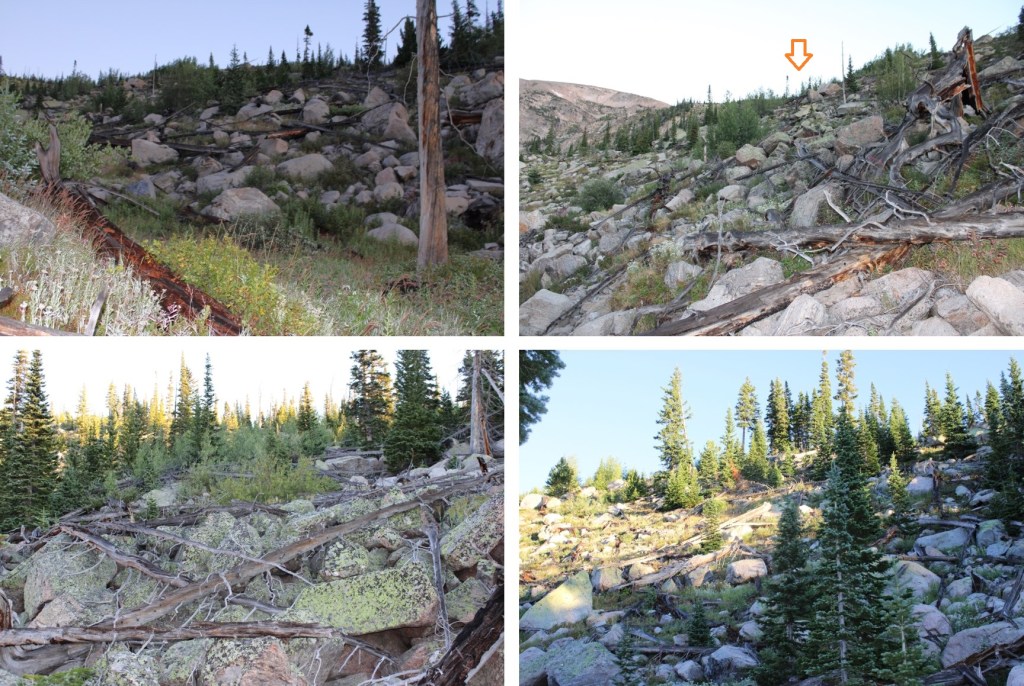
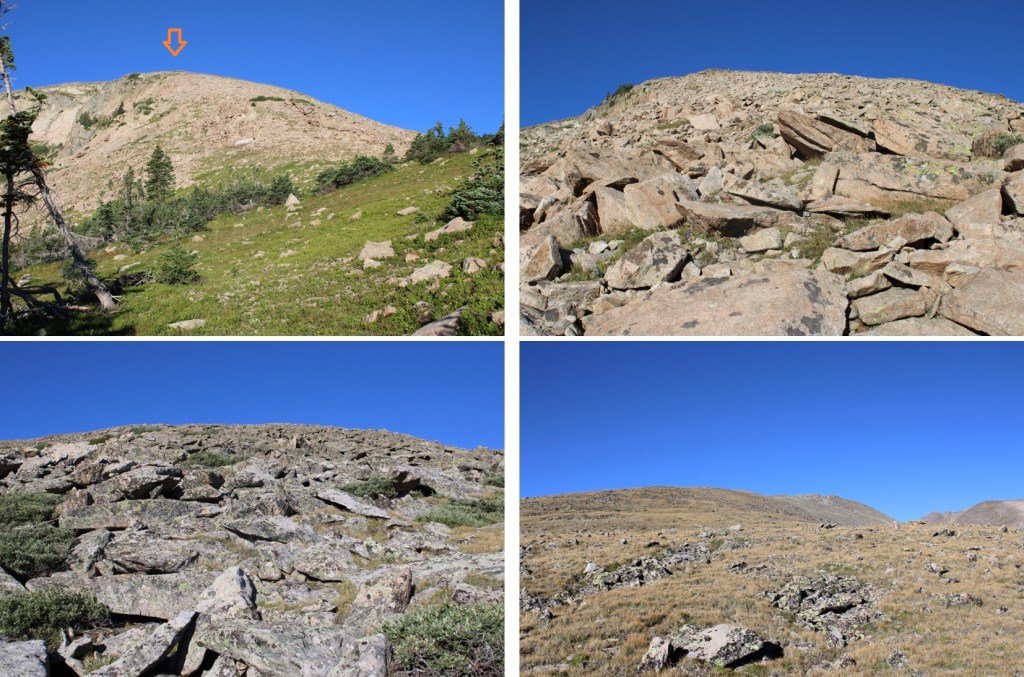
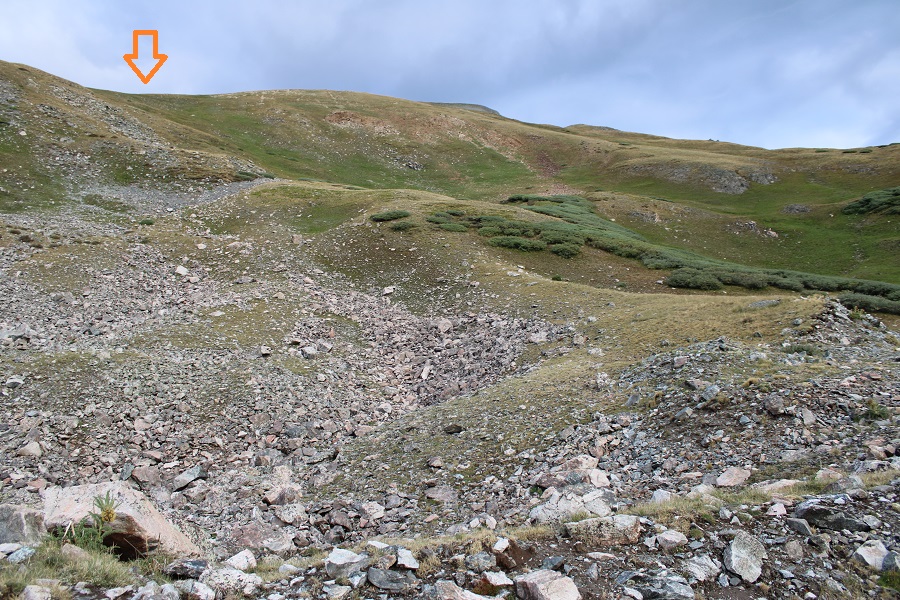
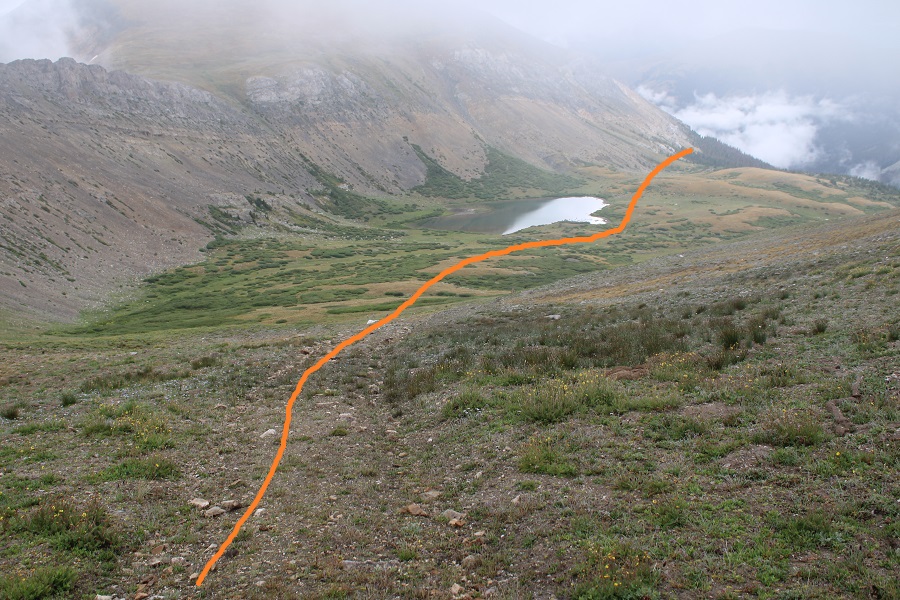
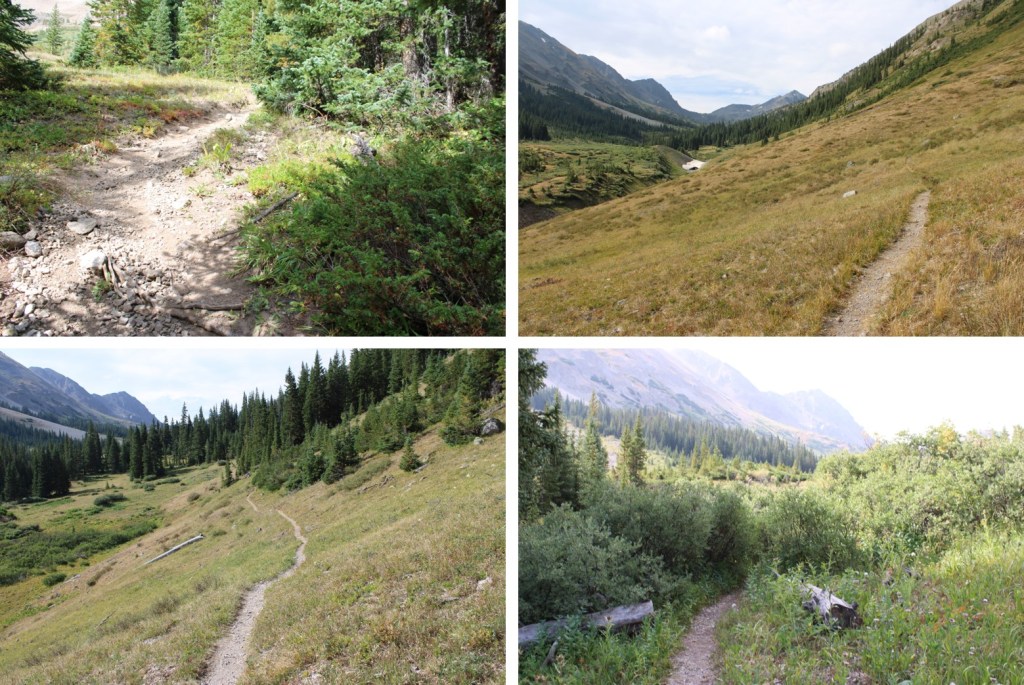
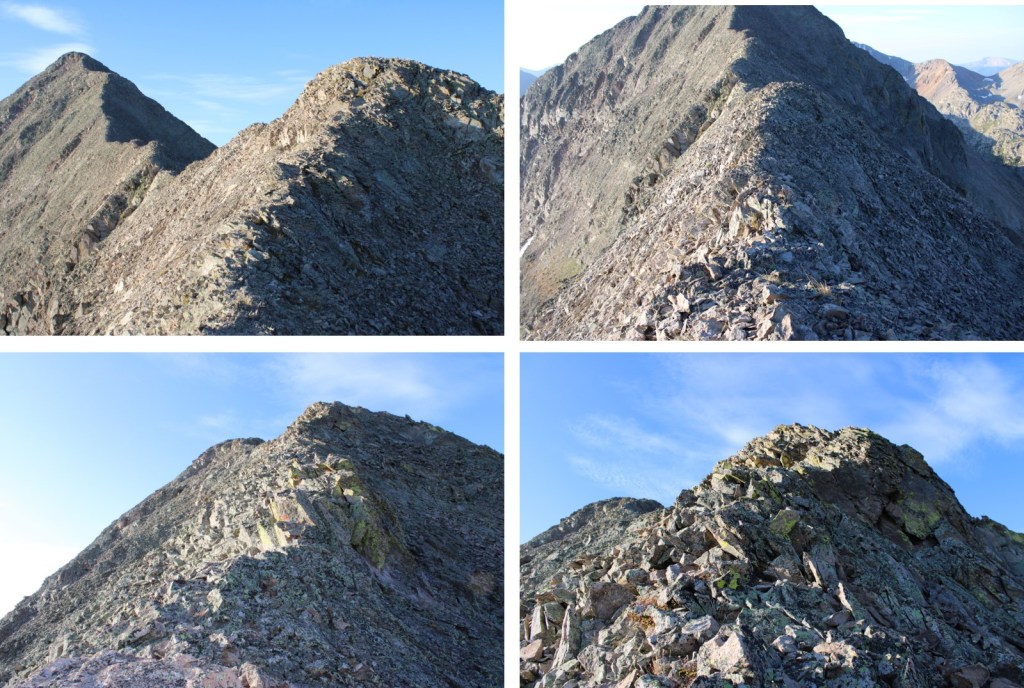
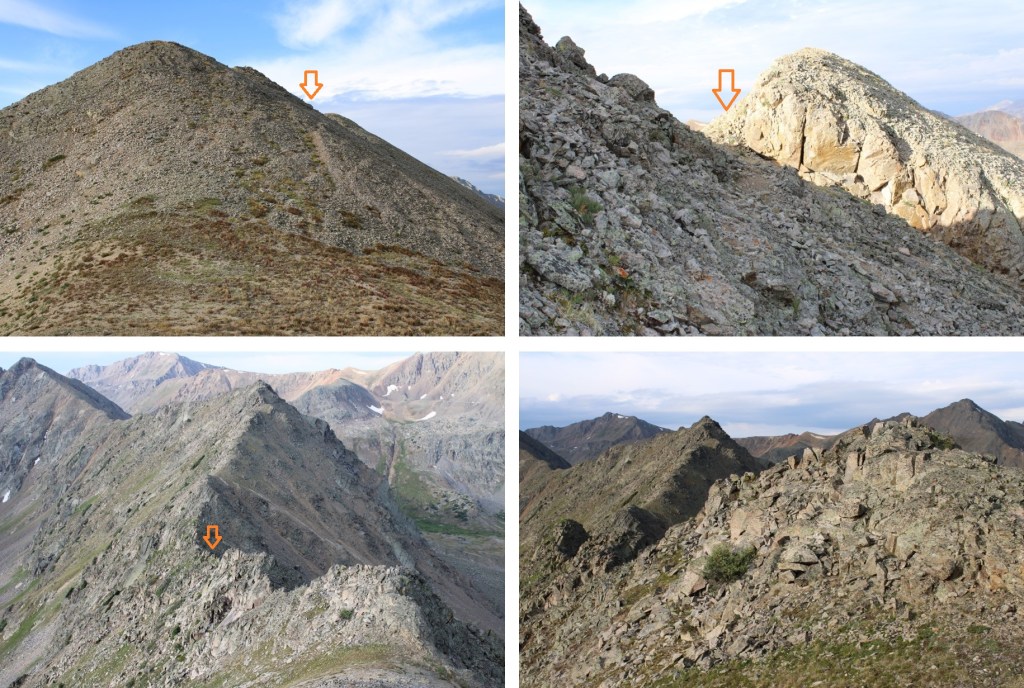
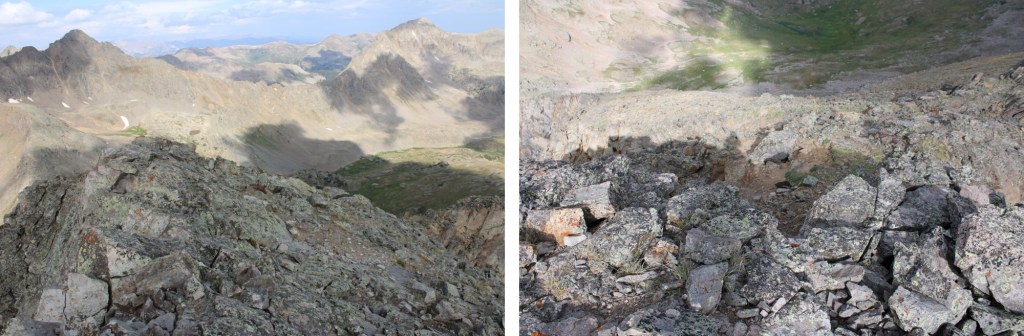
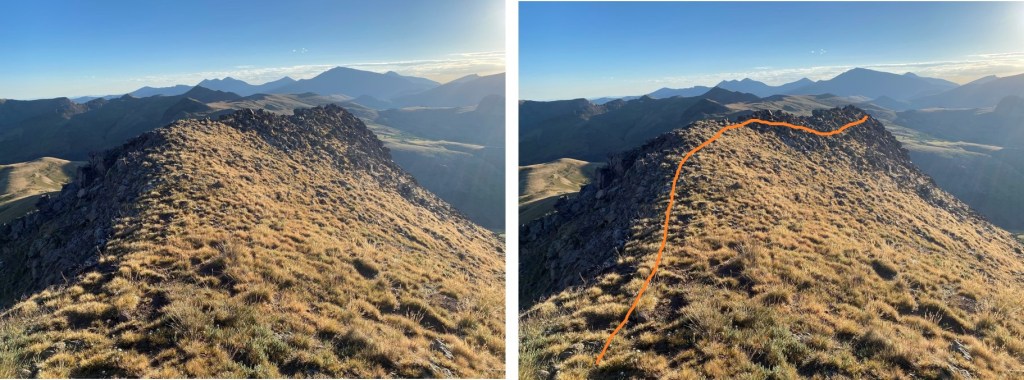
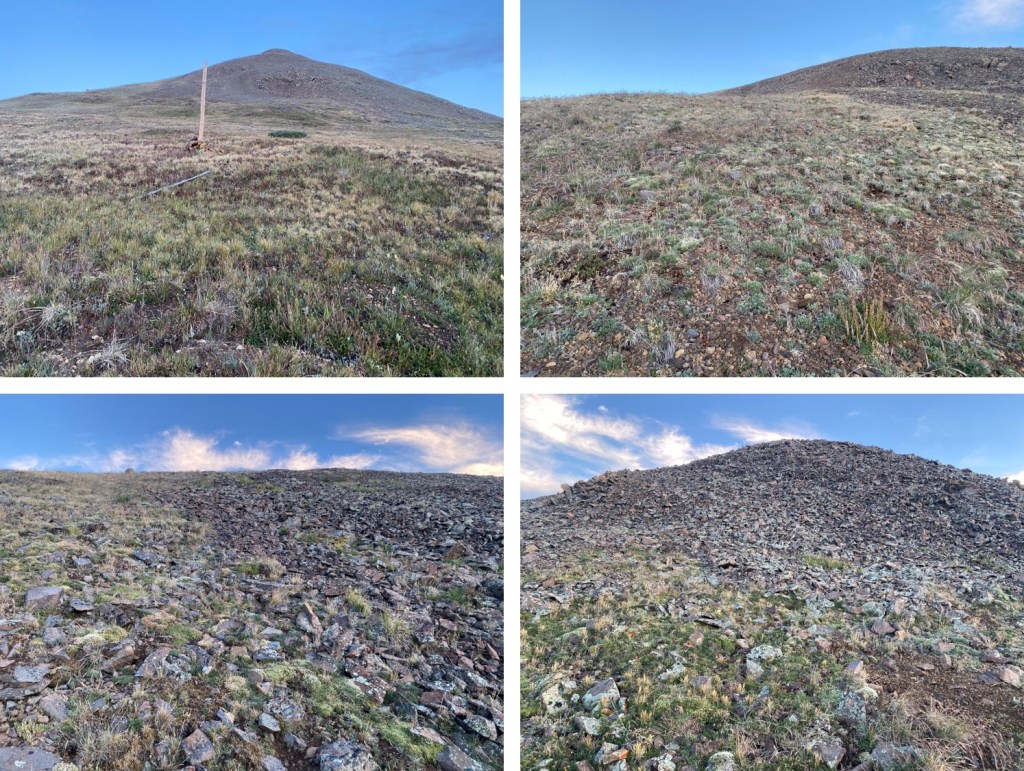
Here’s the route I took after the mine

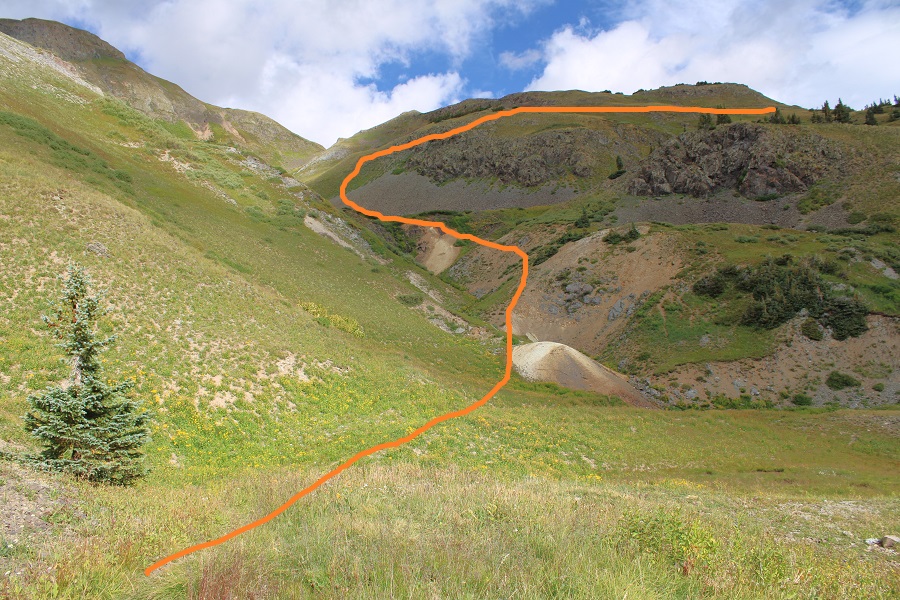
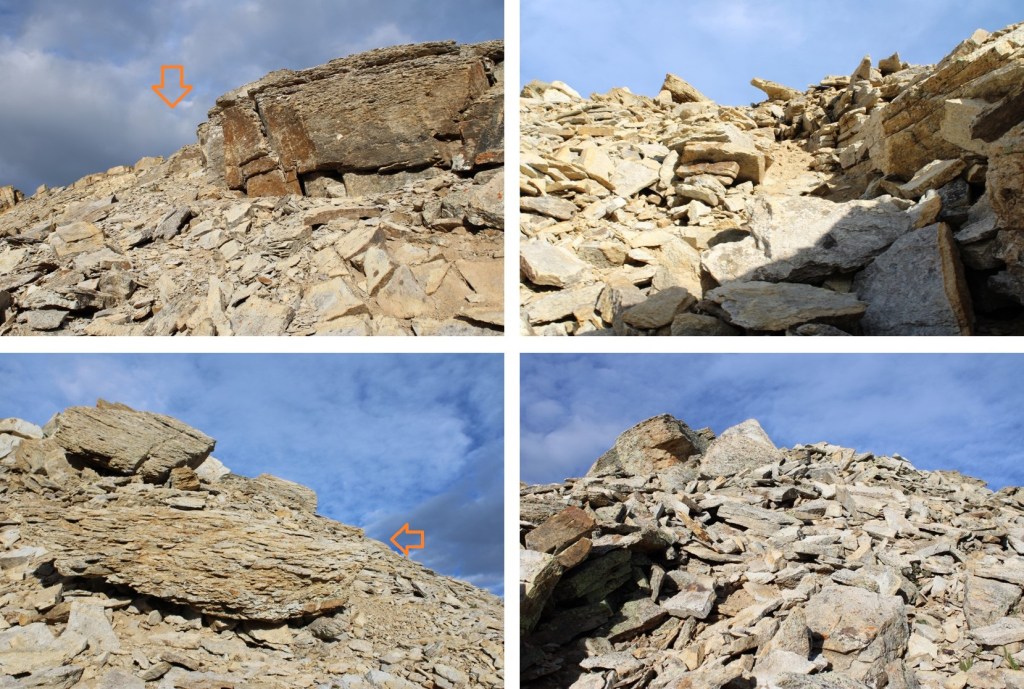
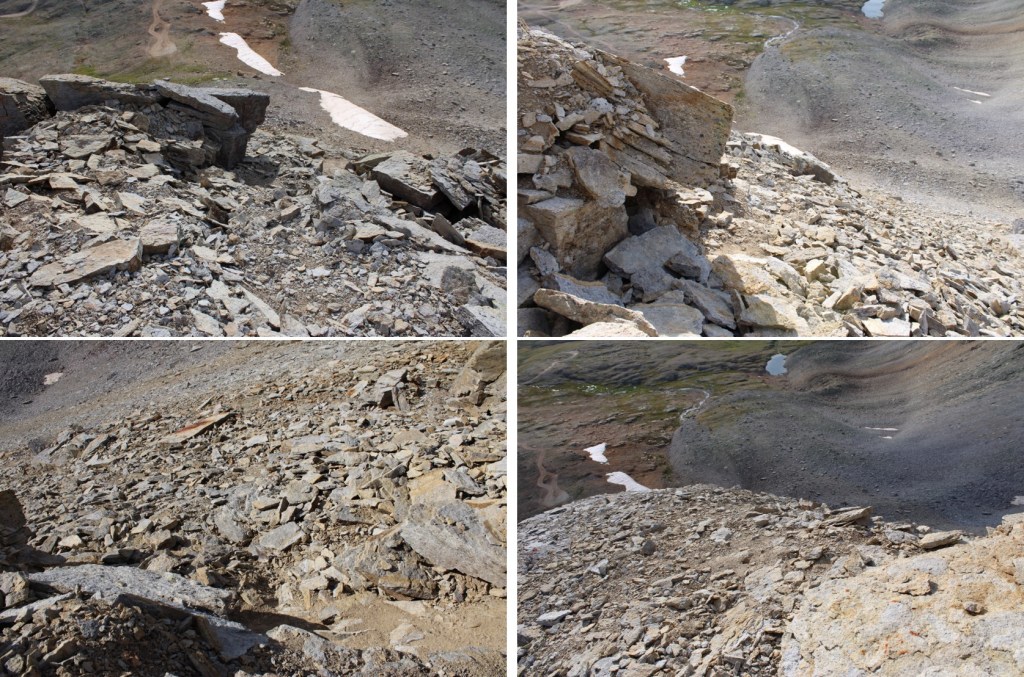
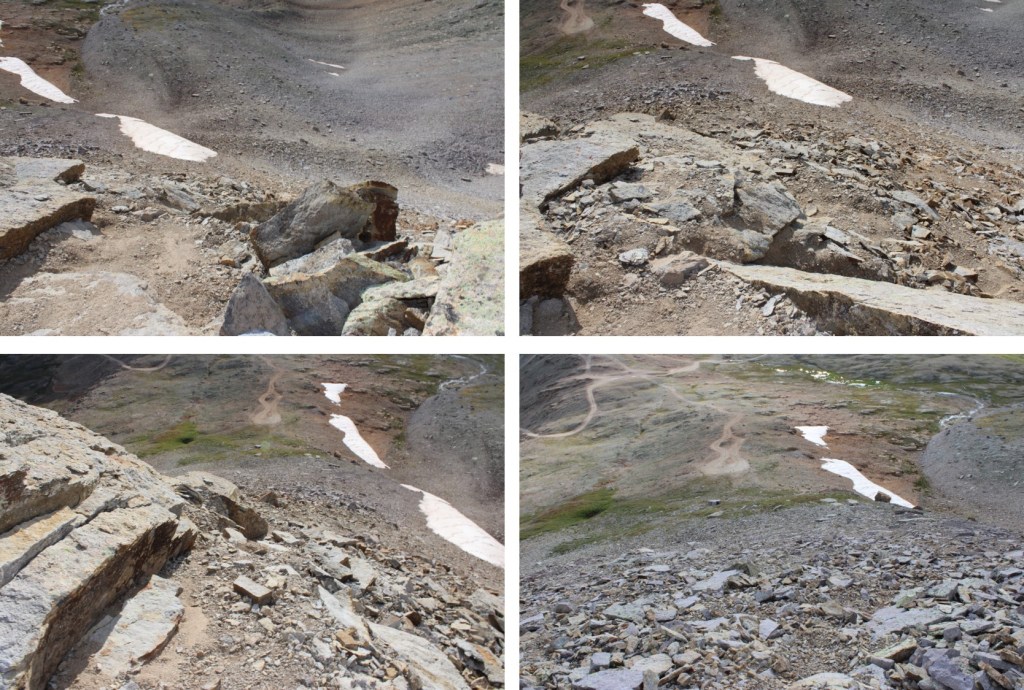
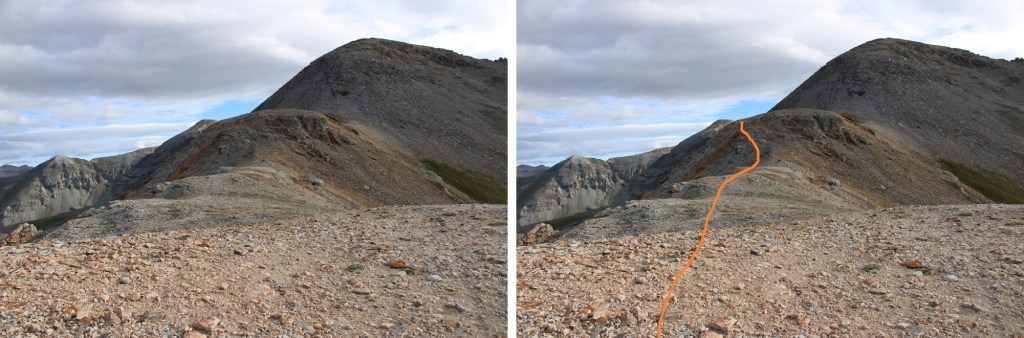
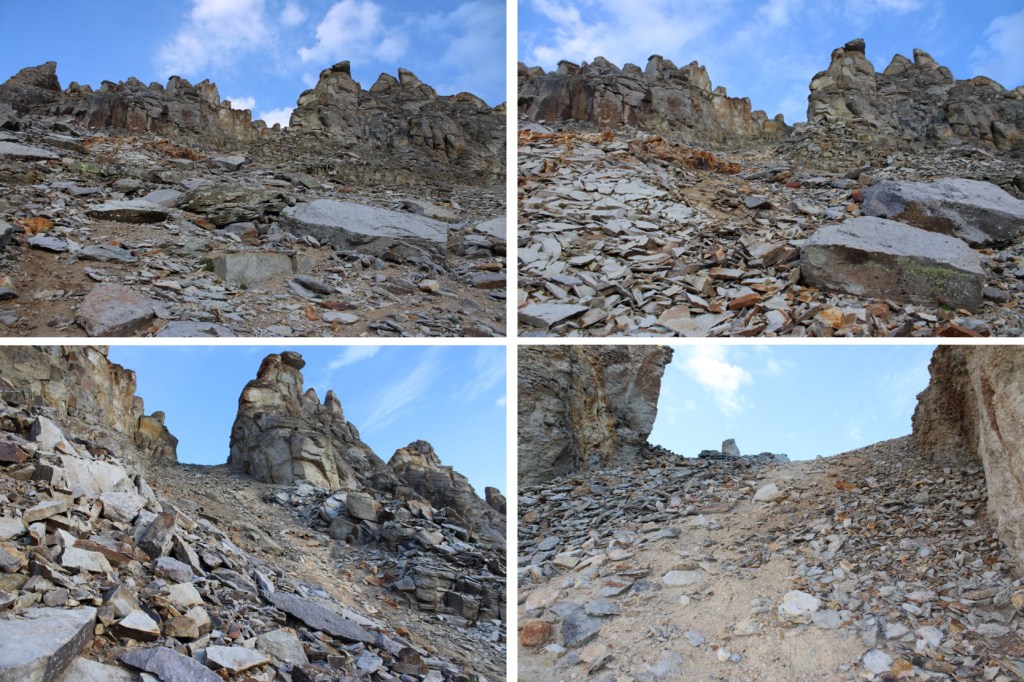
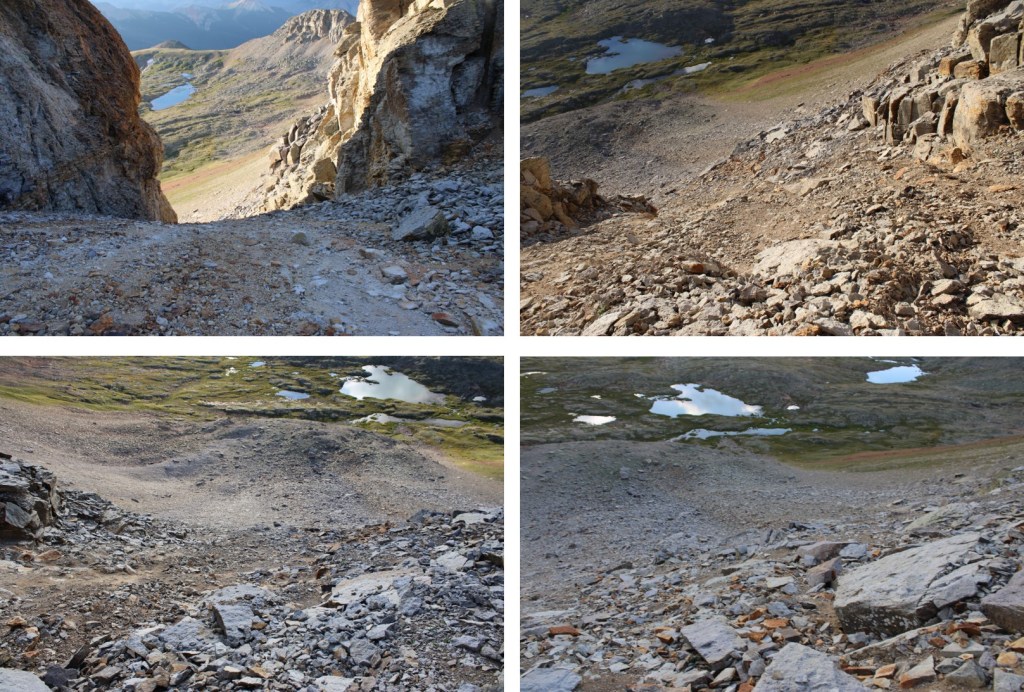
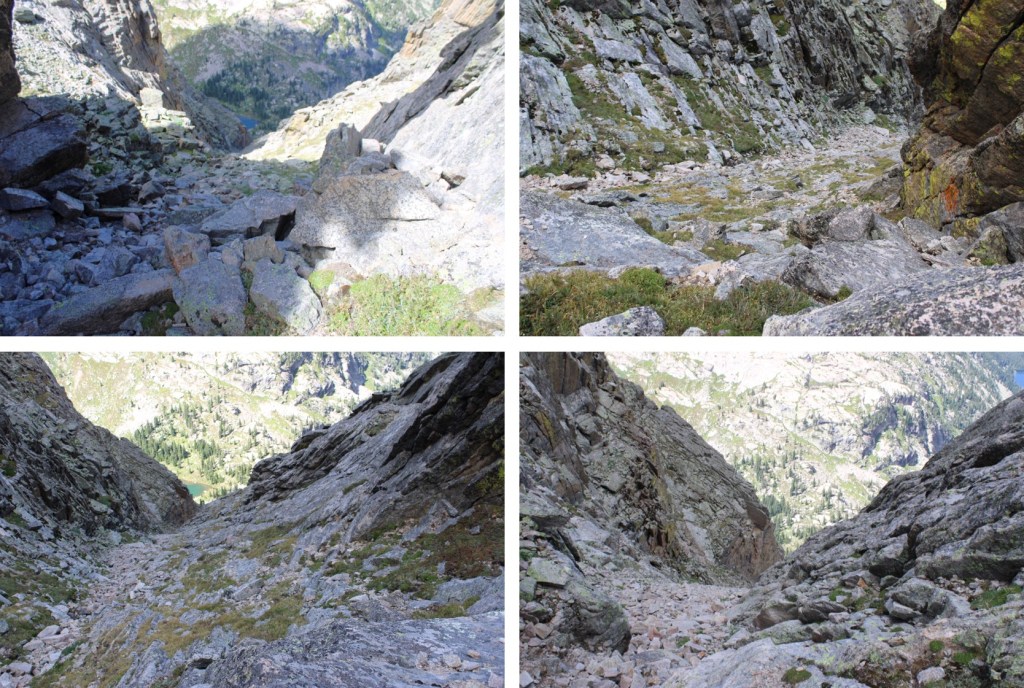
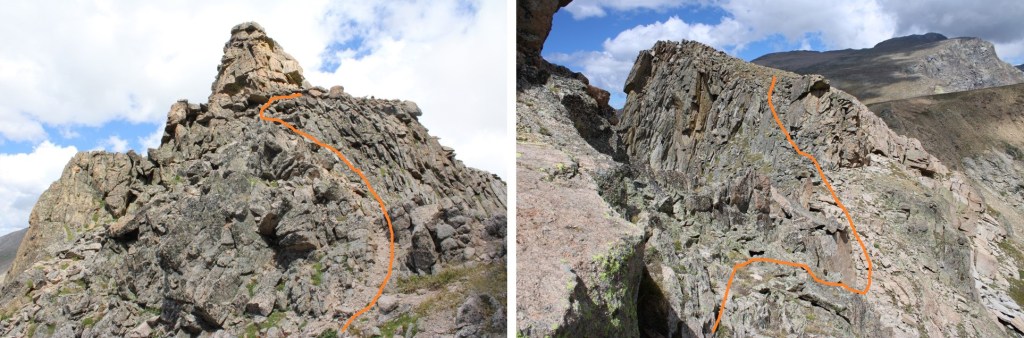
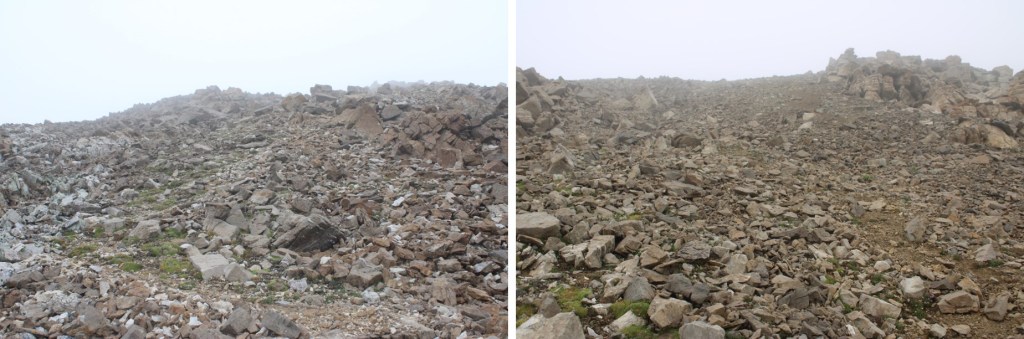
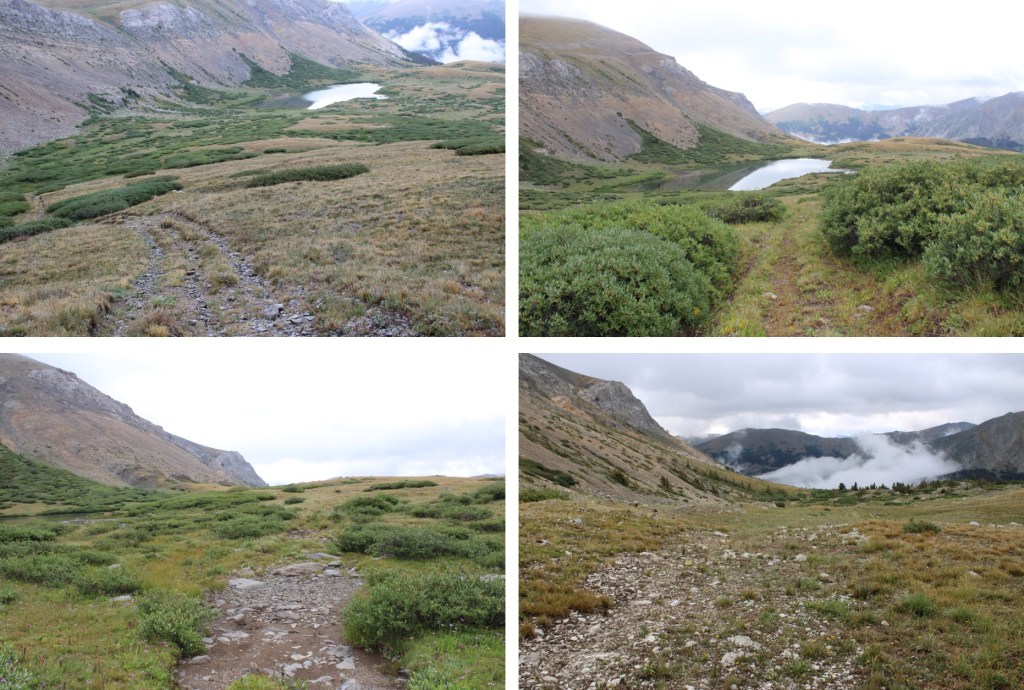
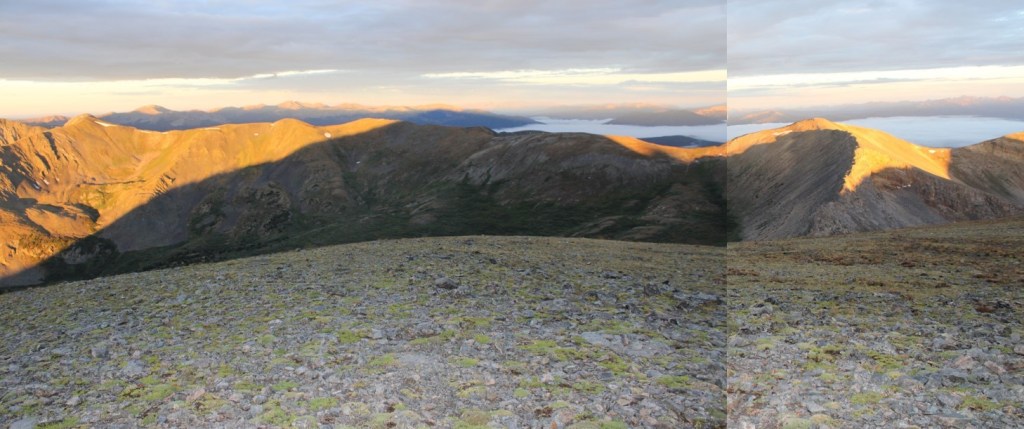
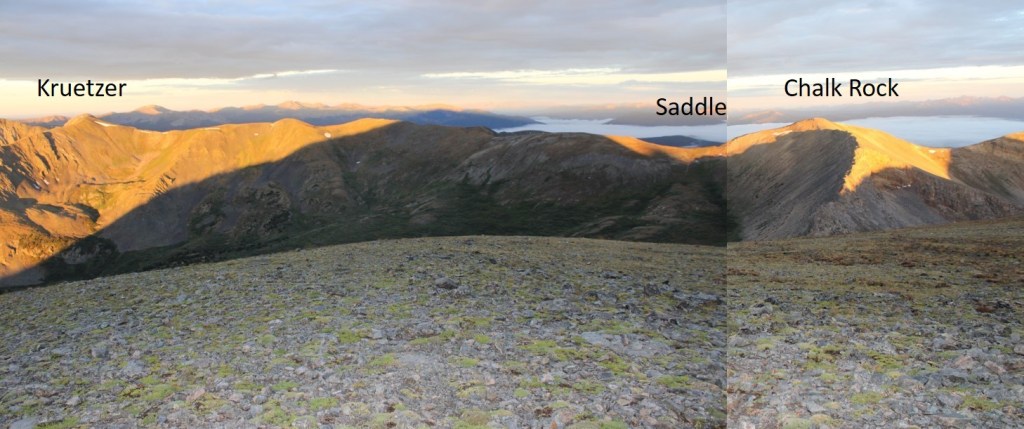
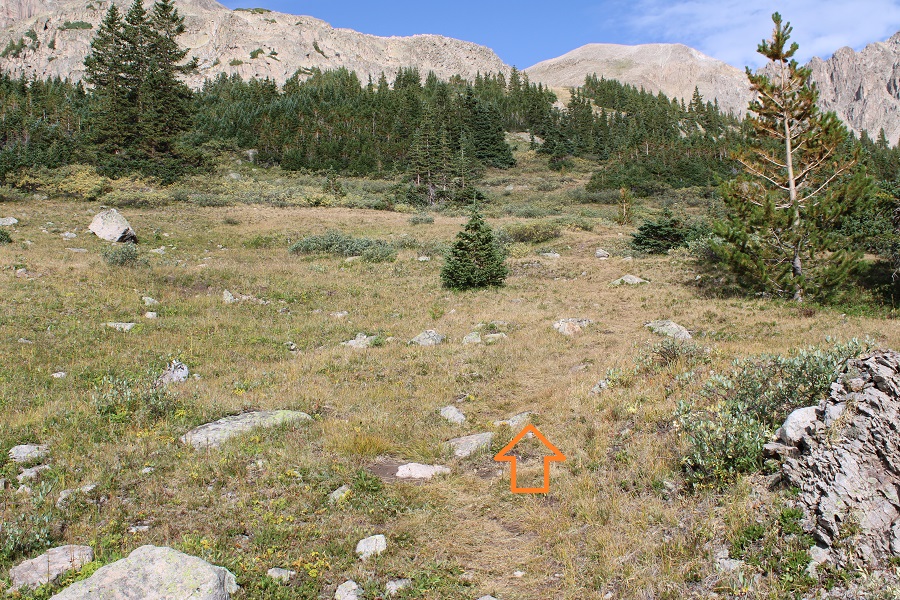
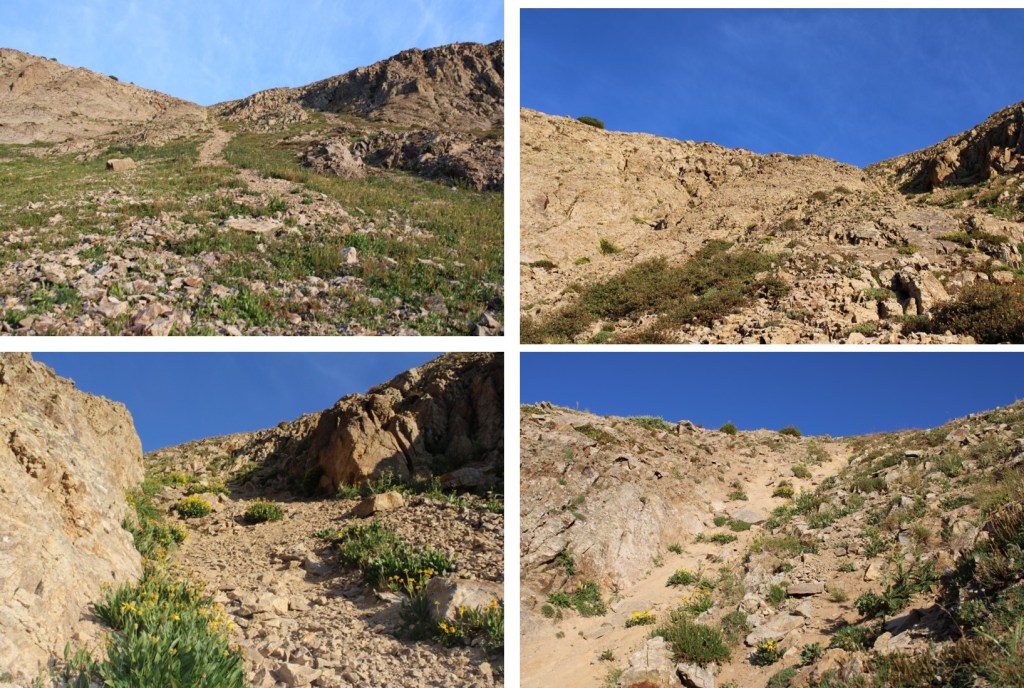
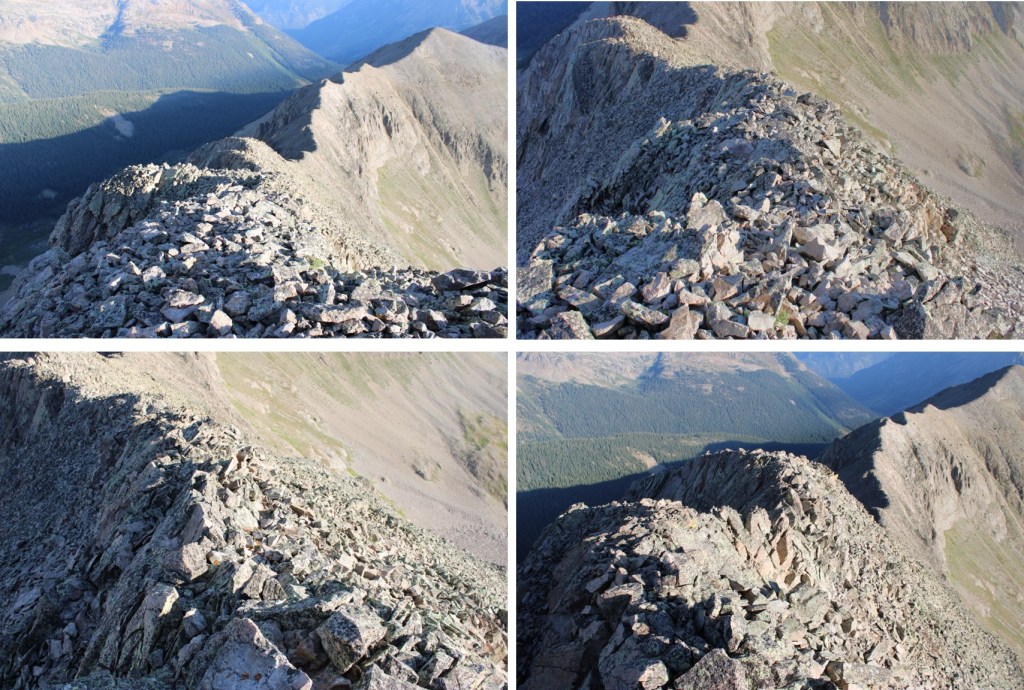
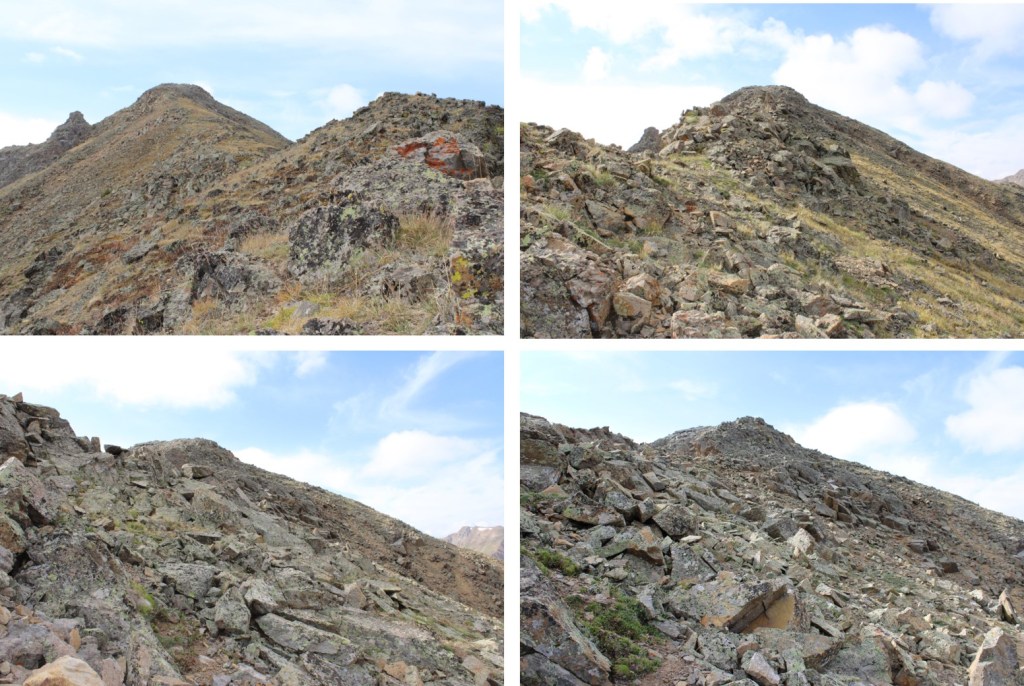
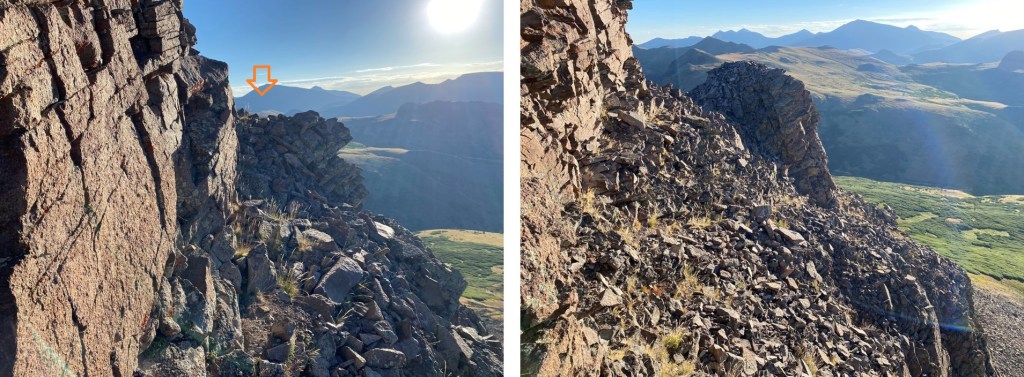
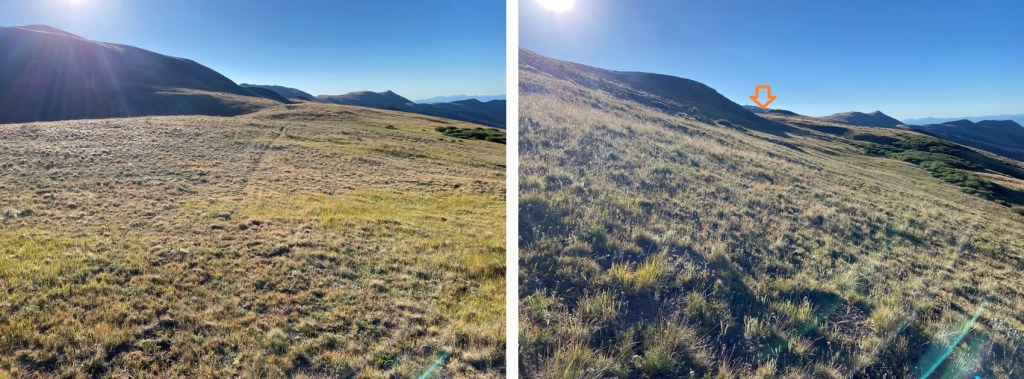
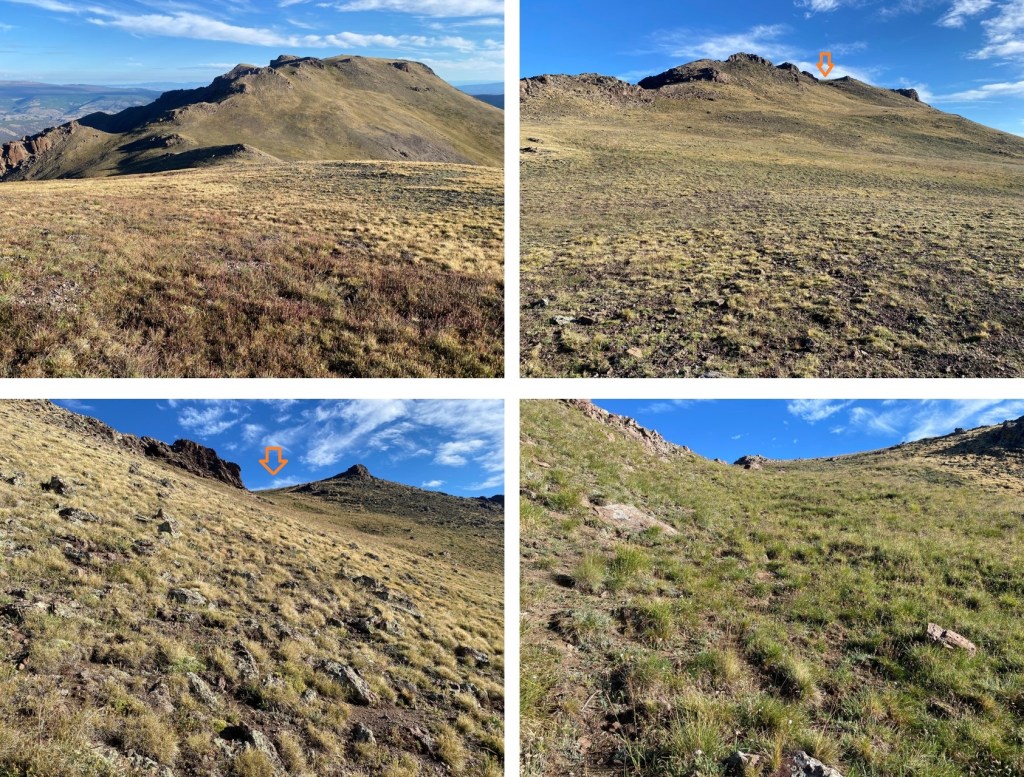
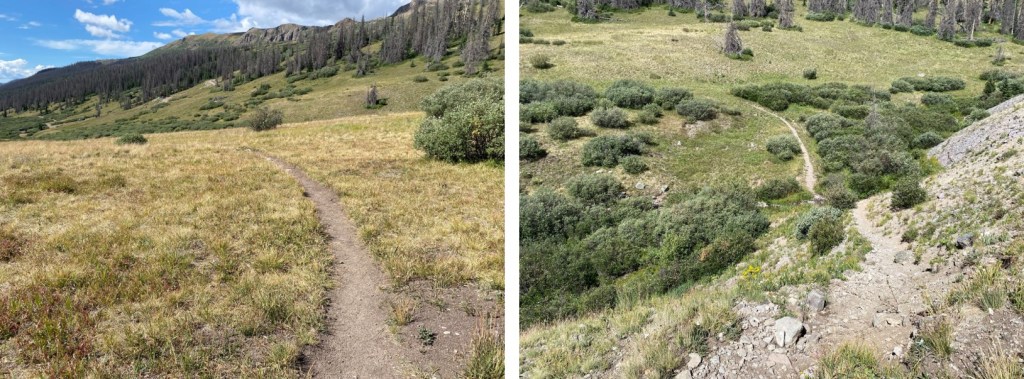
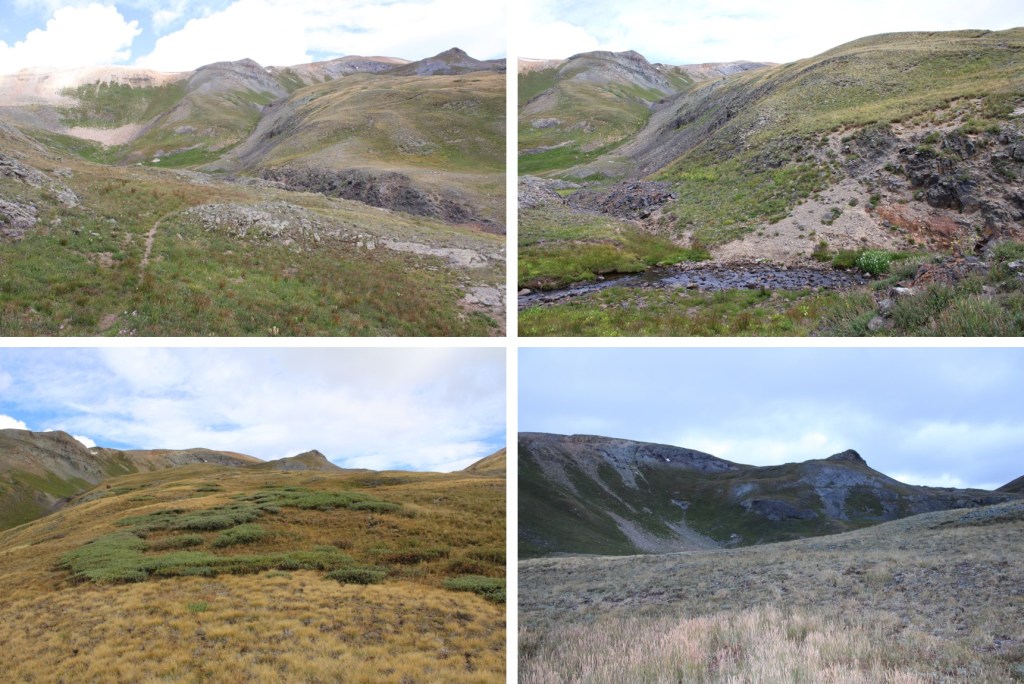
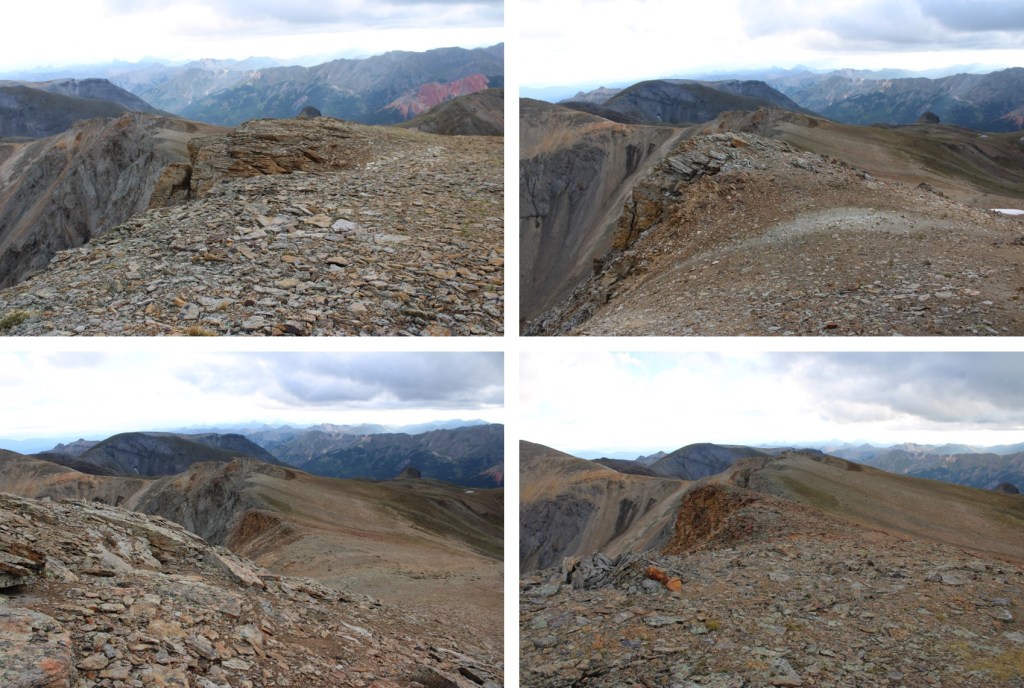
And some step-by-step pictures as I made my way northeast, hugging the mountainside

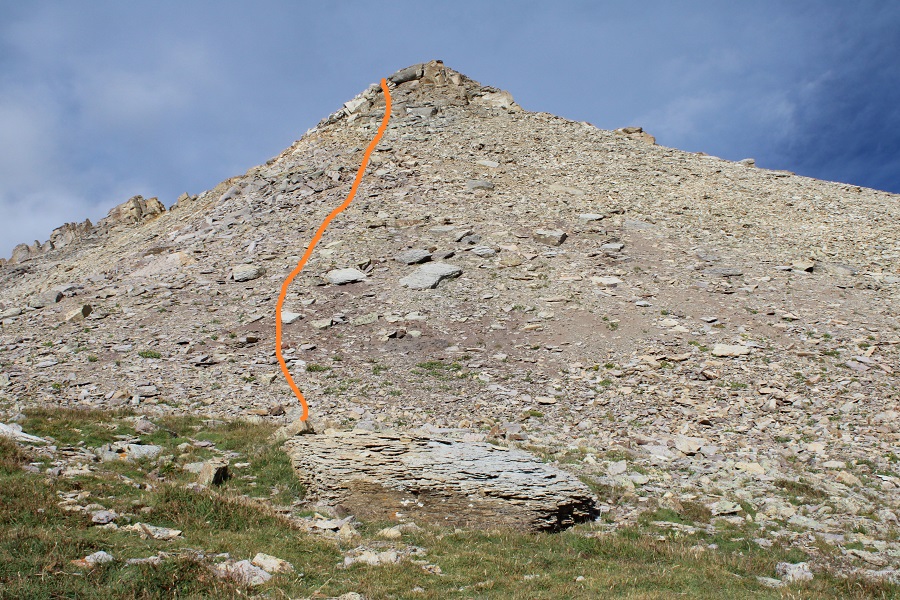
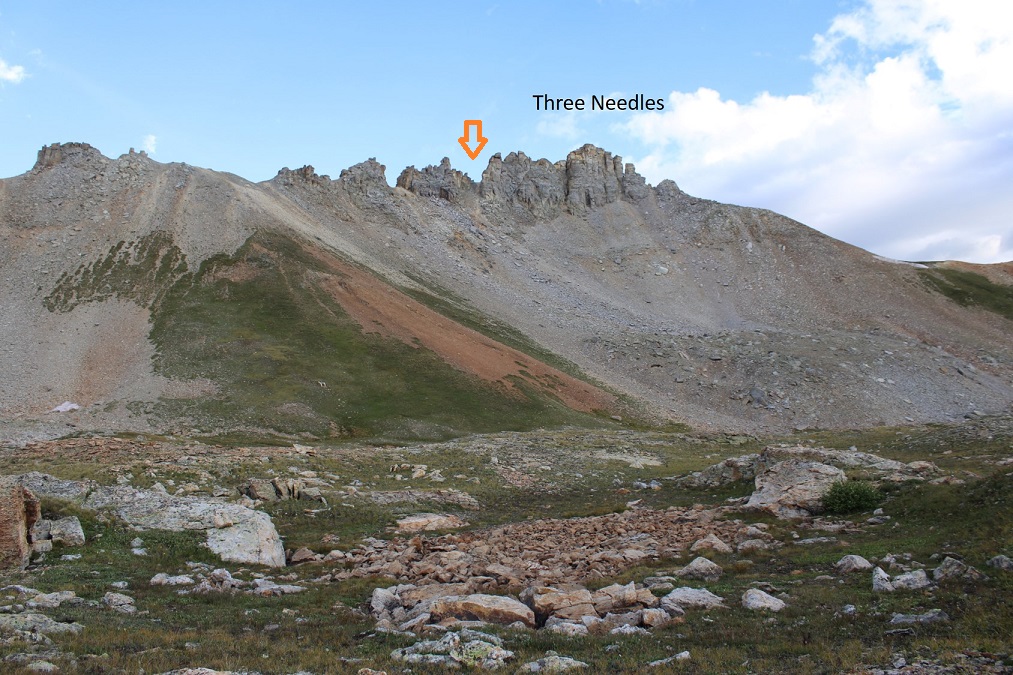
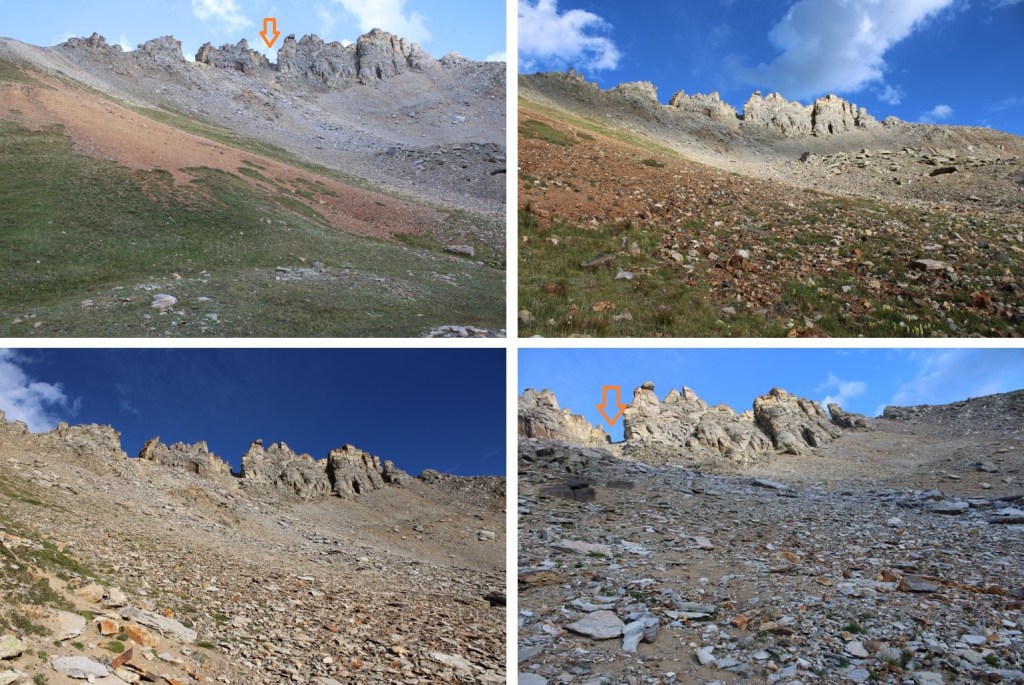
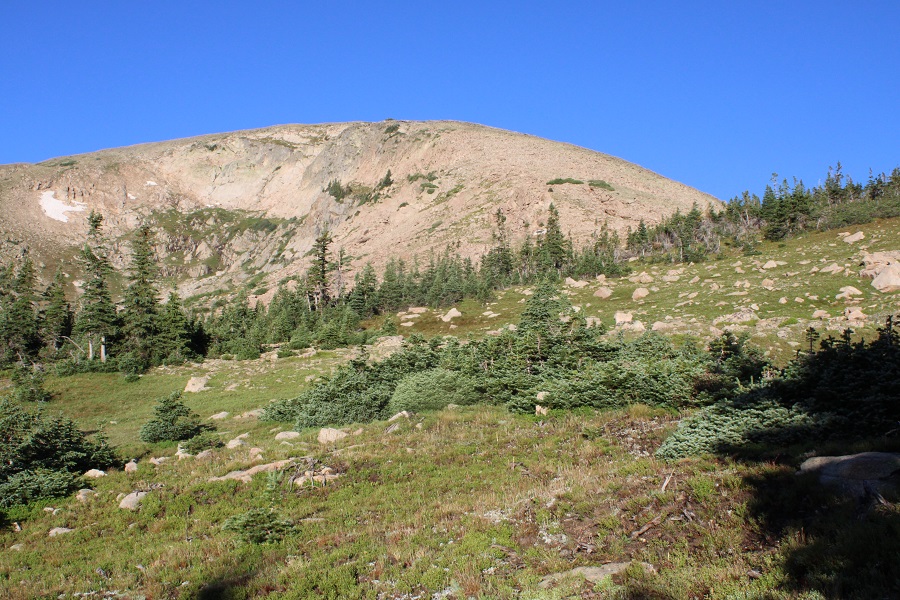
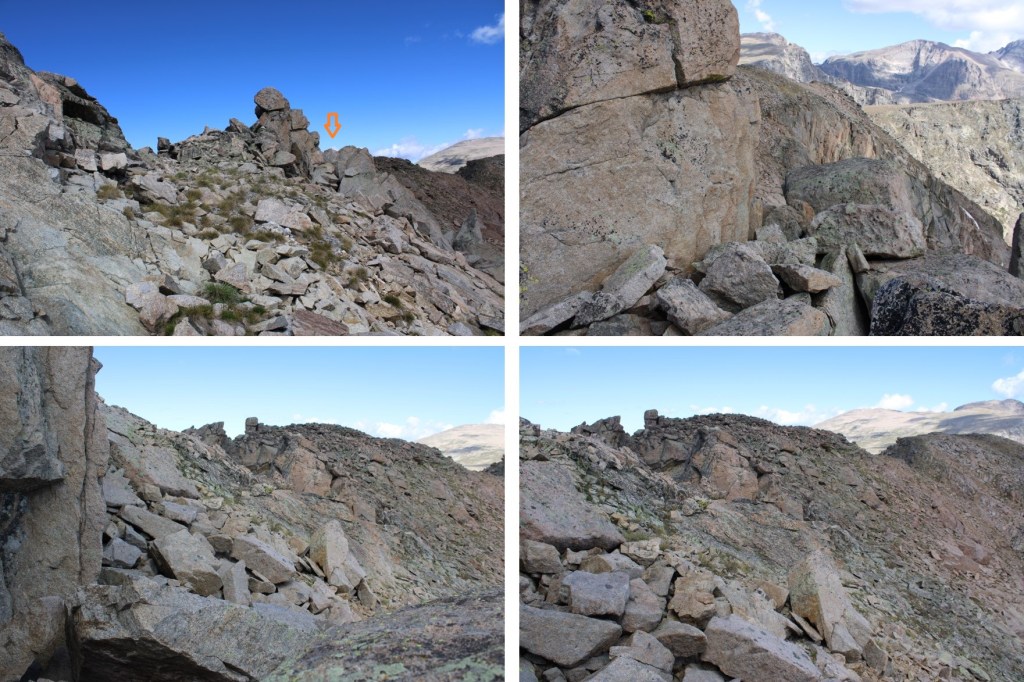
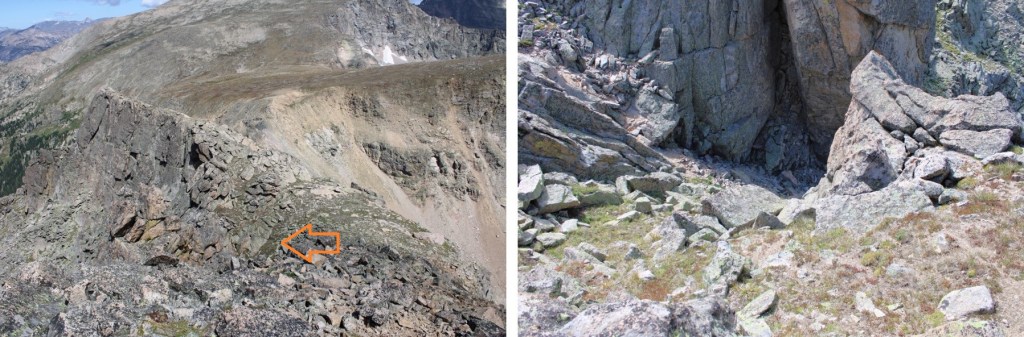
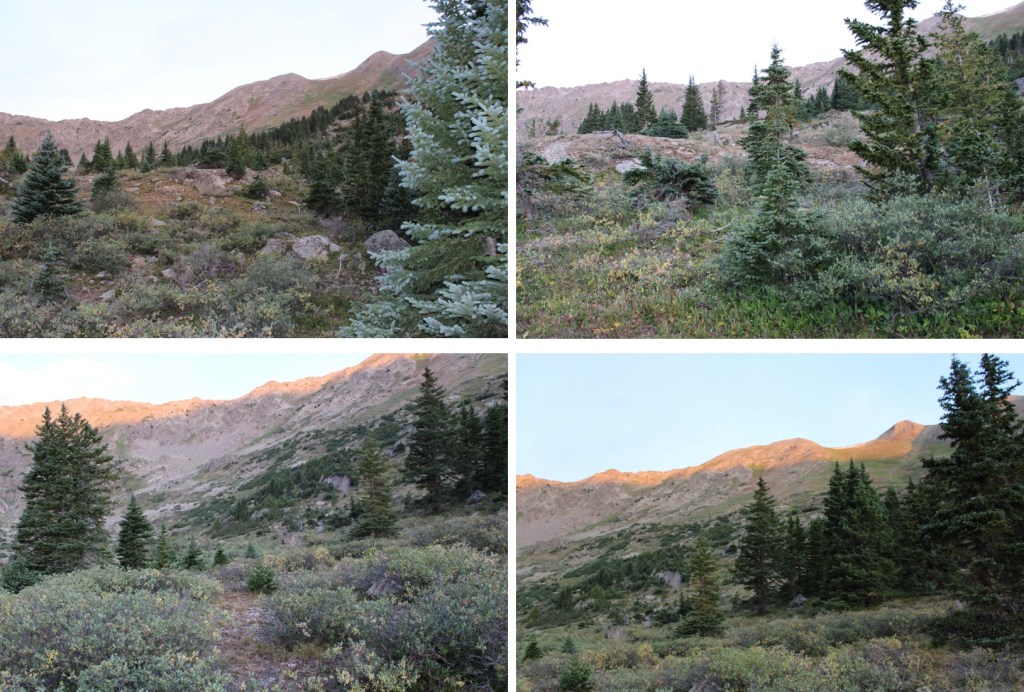
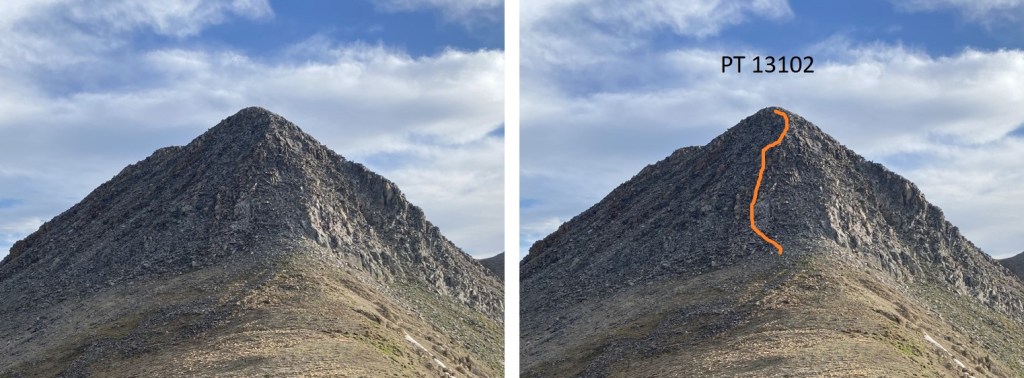
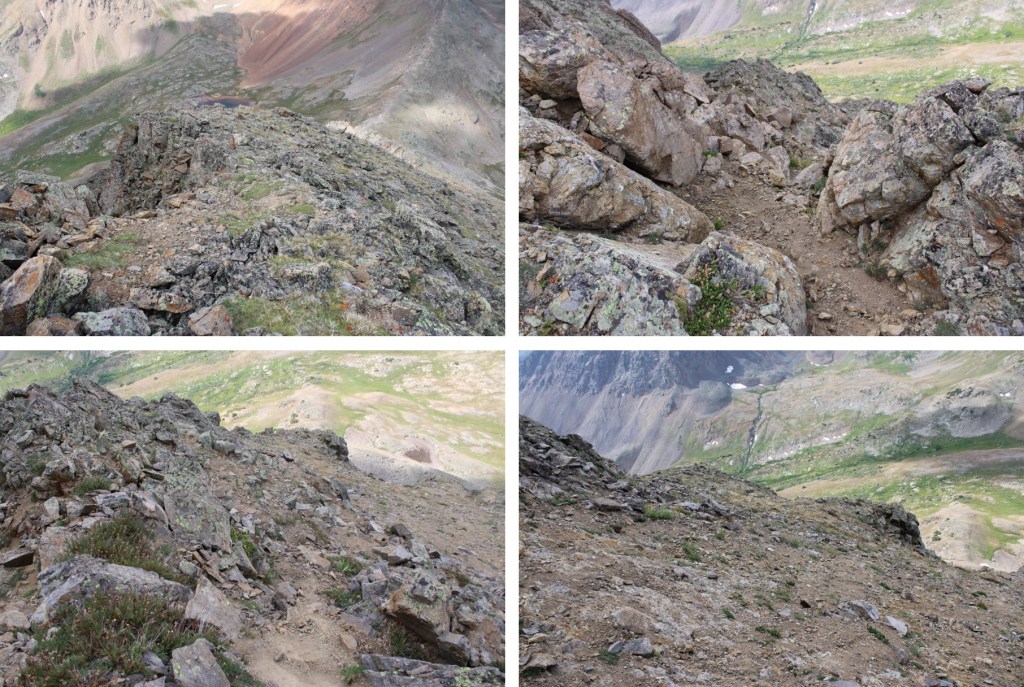
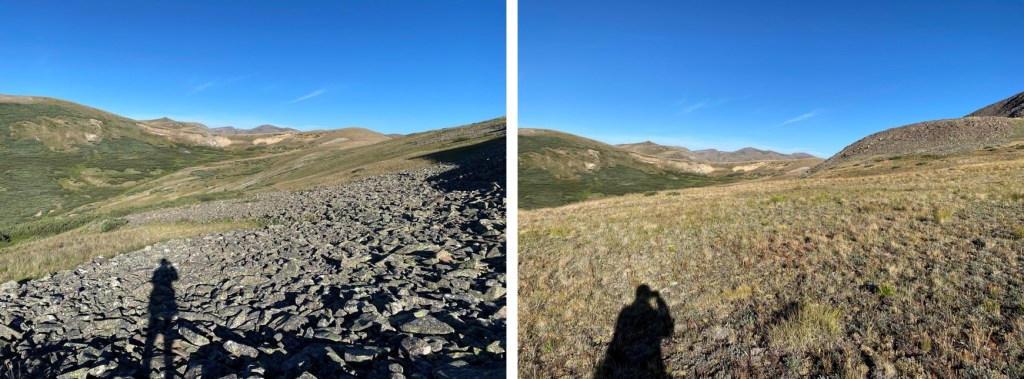
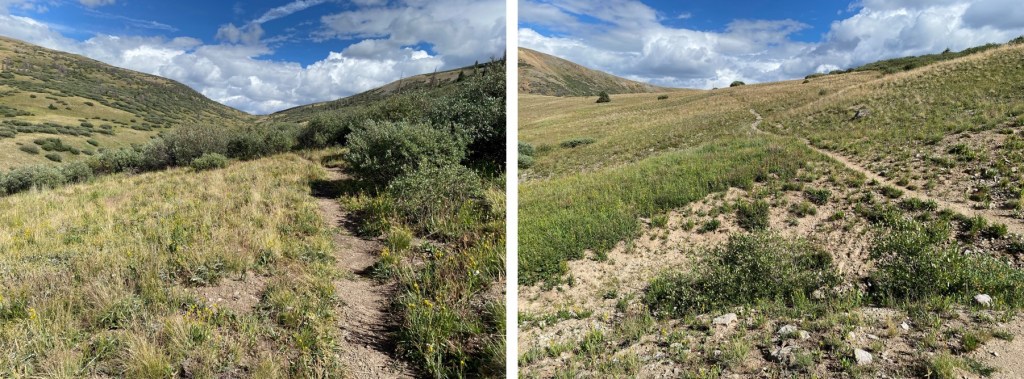
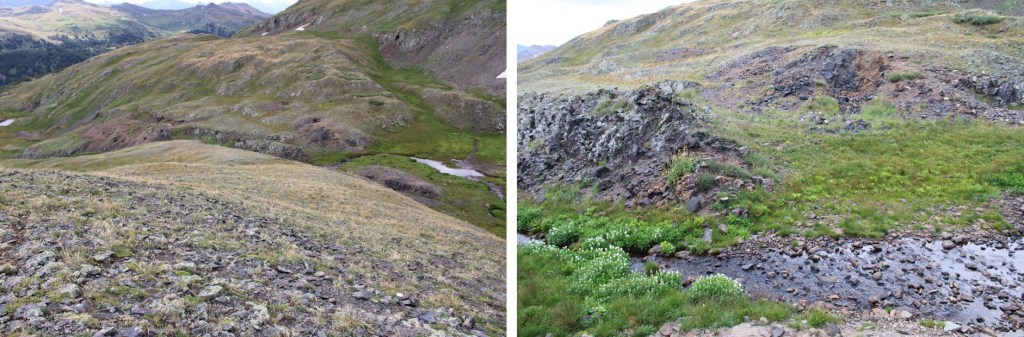
I crossed a mining area, then headed up the slope

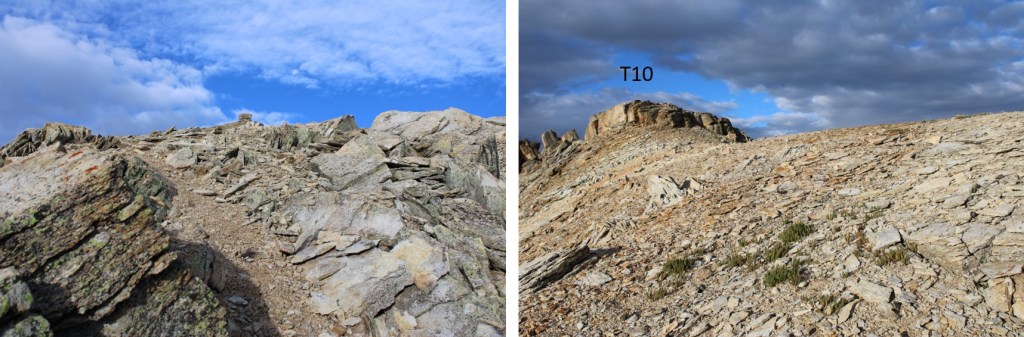
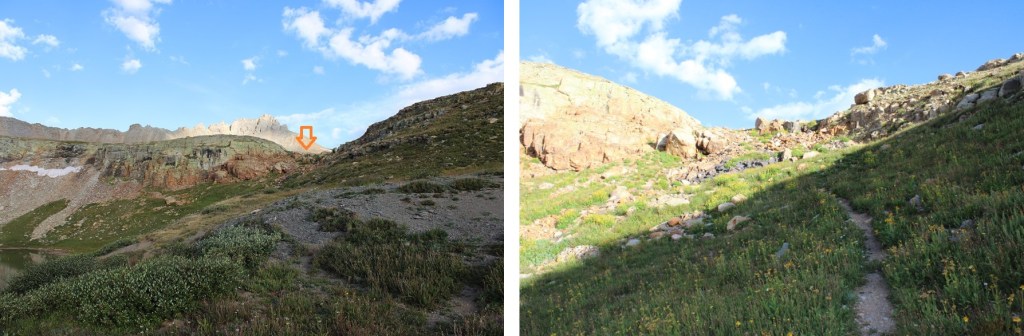
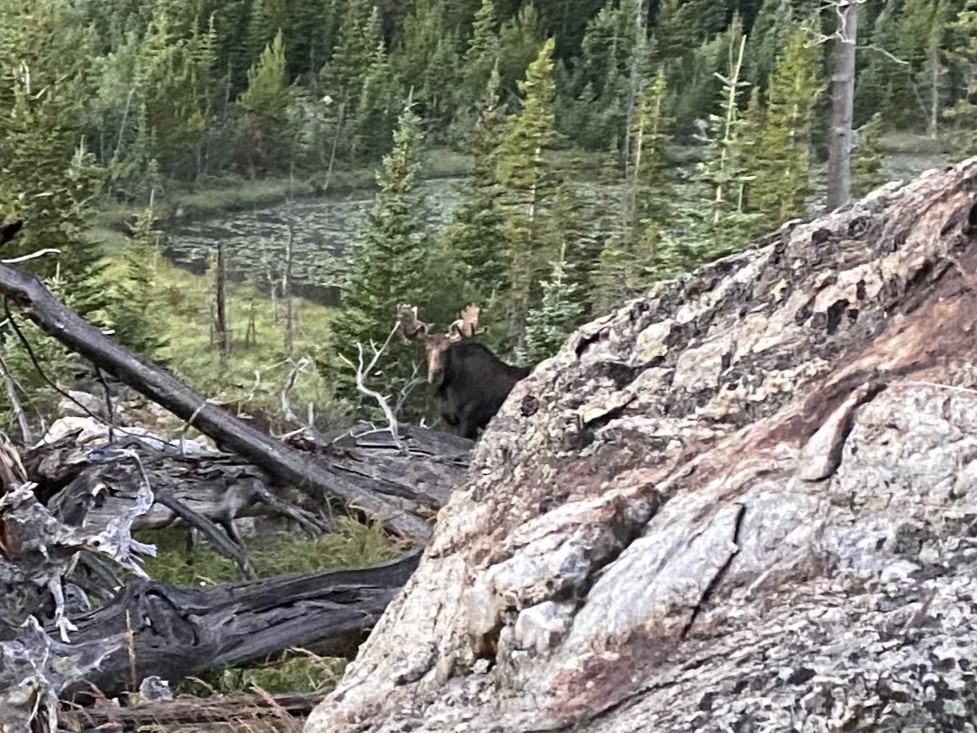
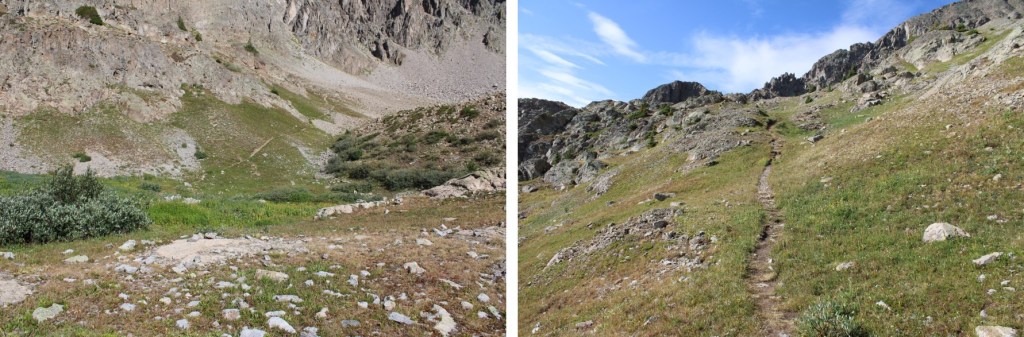
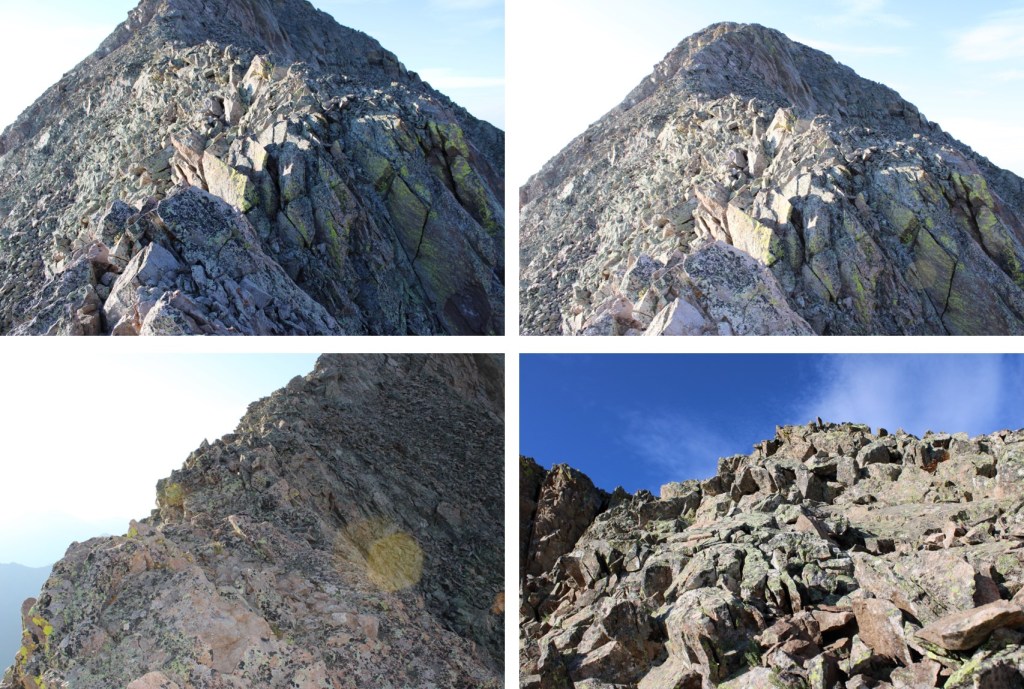
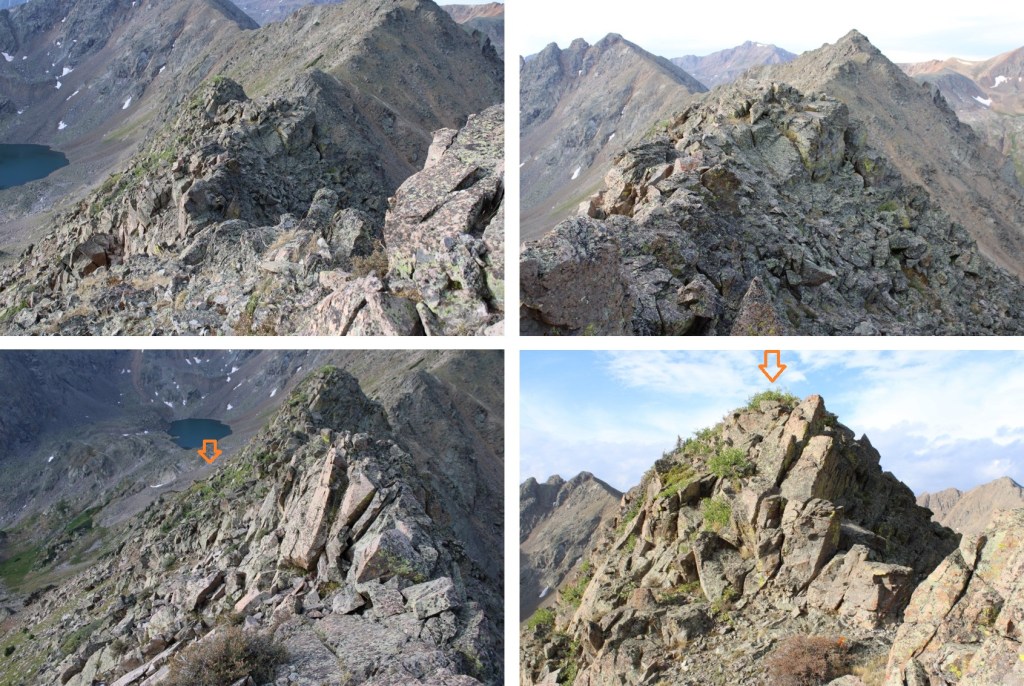
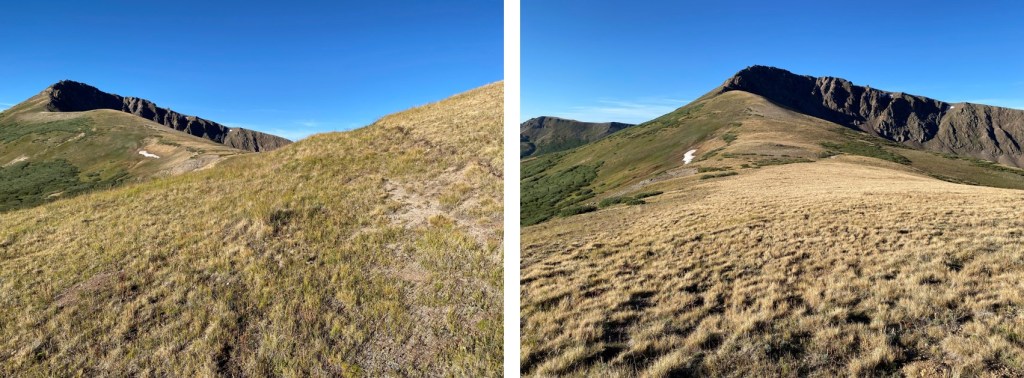
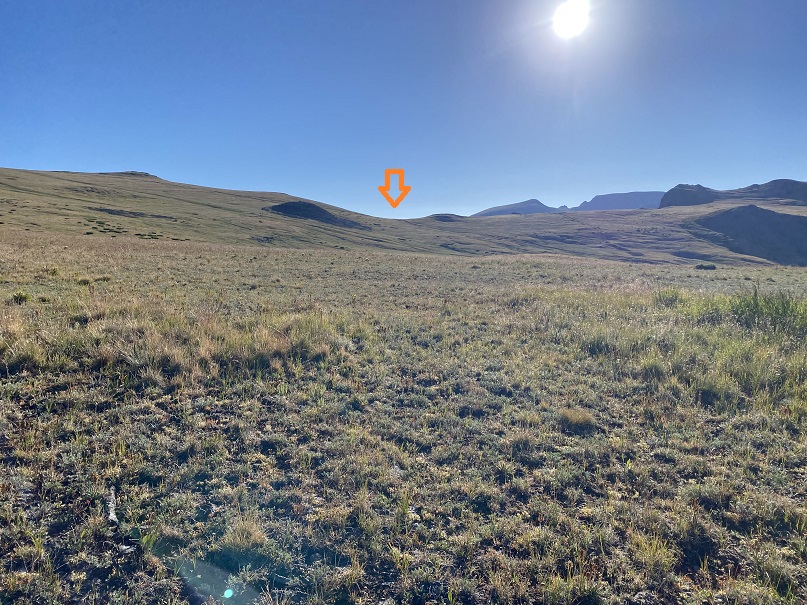
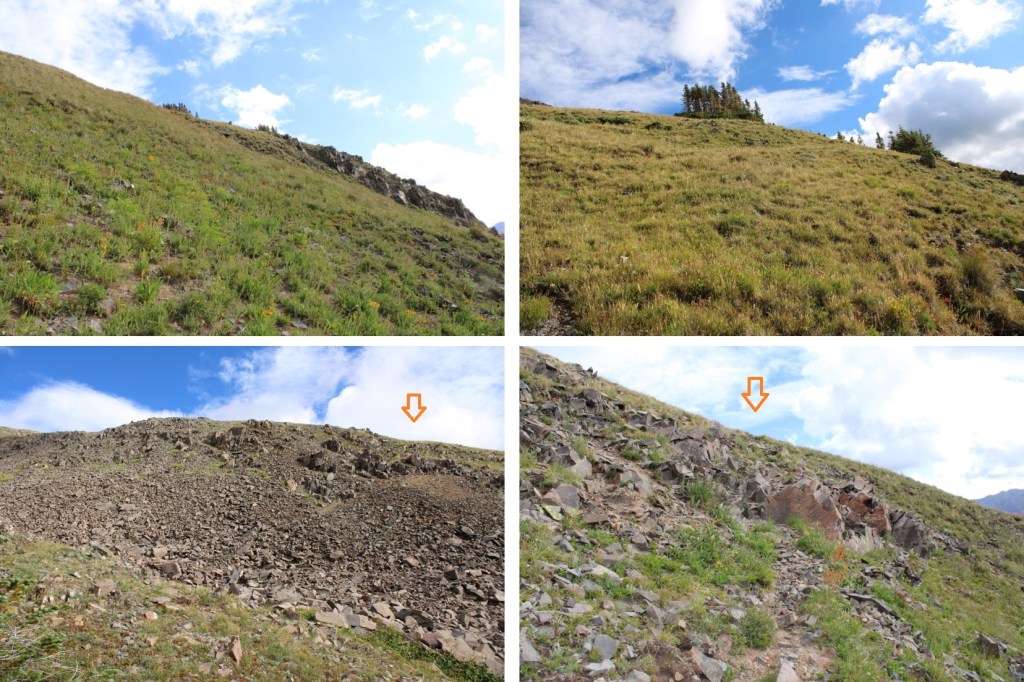
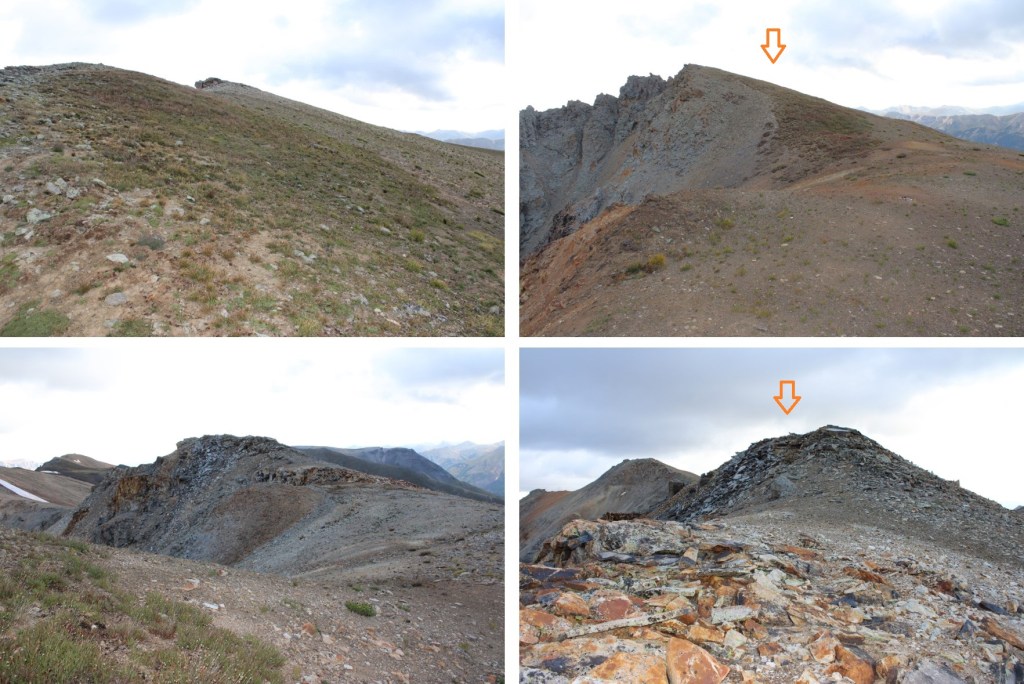
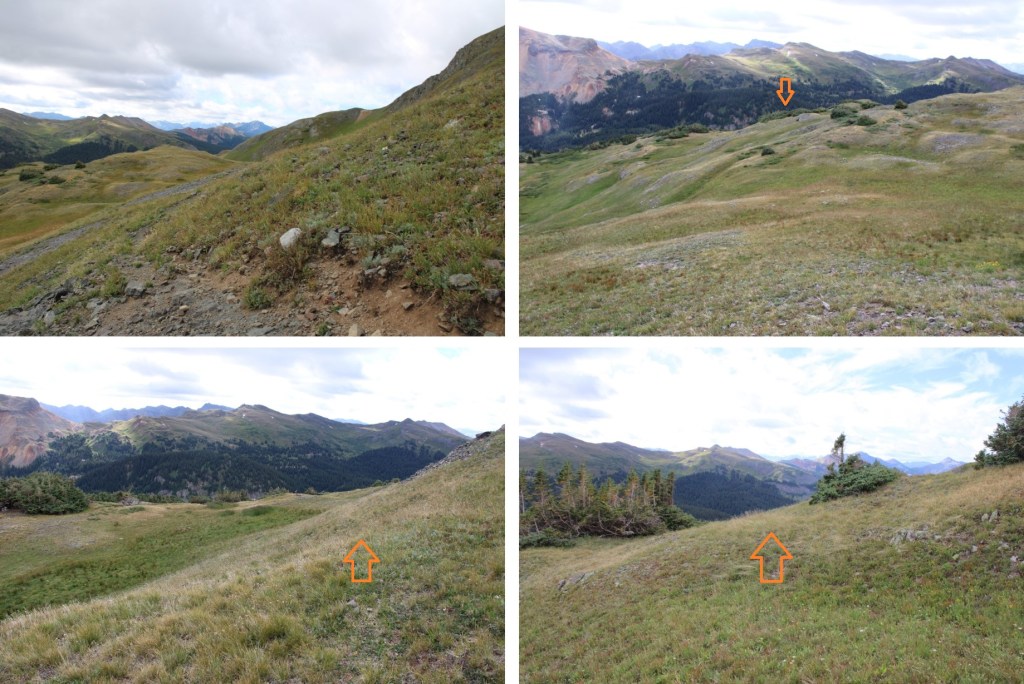
I now had a view of how I wanted to gain the ridge.  I was initially going to gain it to the left, and this would have worked as well, but I saw a small herd of deer grazing and I didn’t want to disturb them

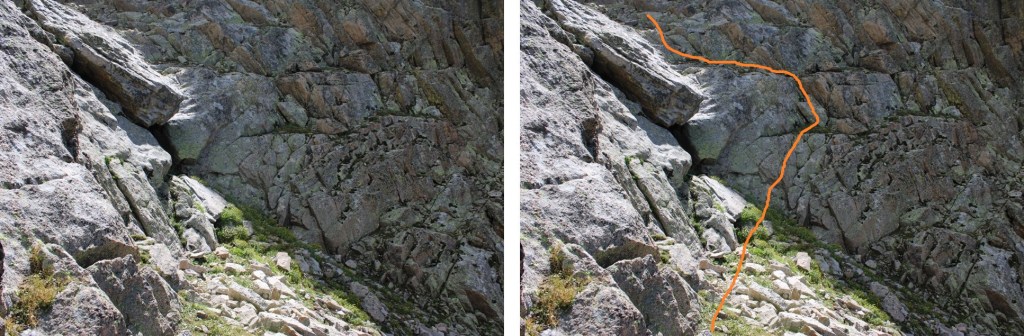
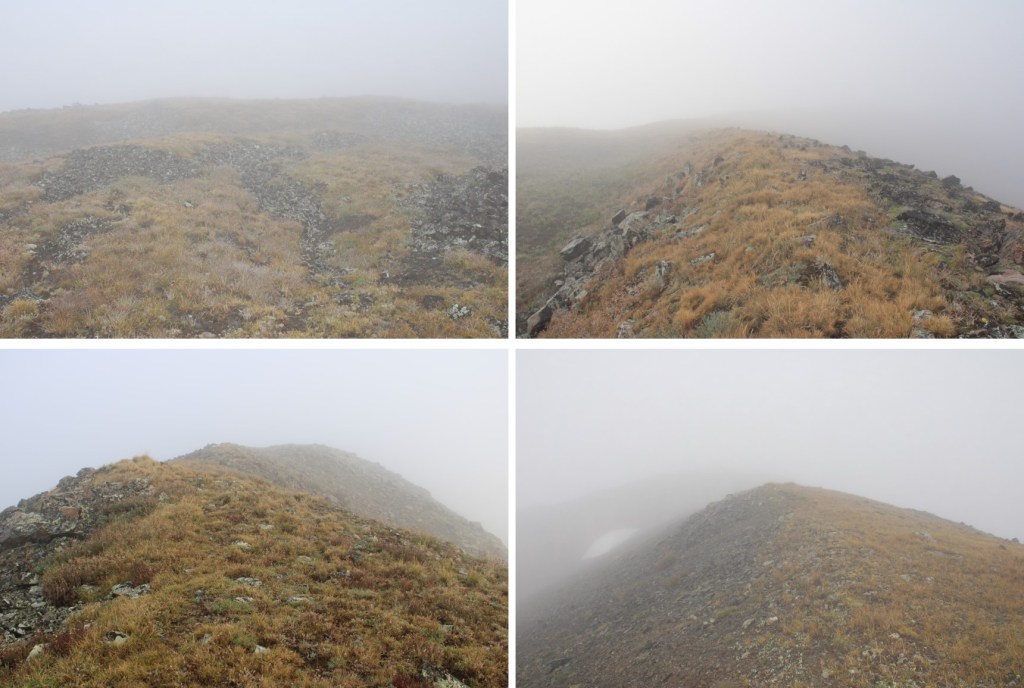
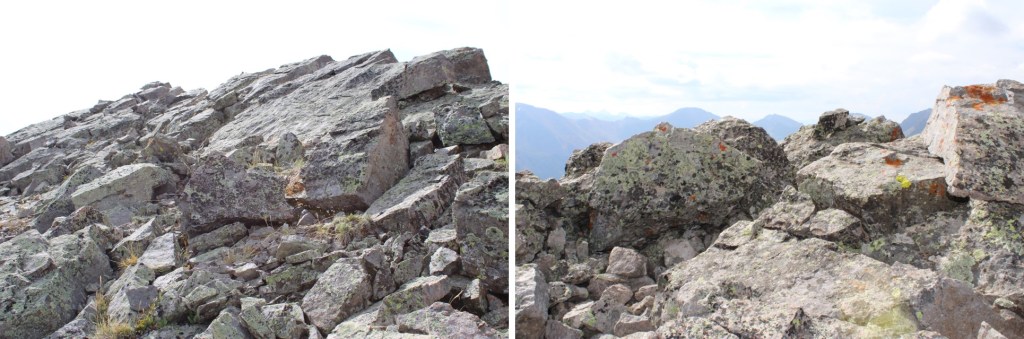
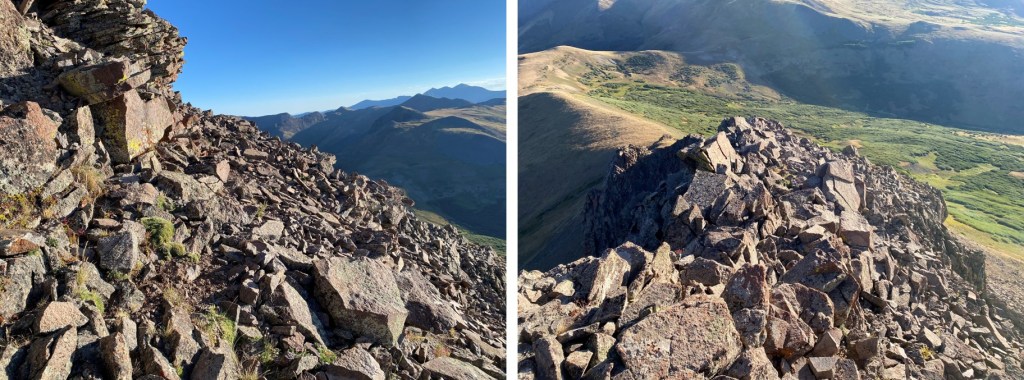
This is how I gained the ridge, on easy, class 2 terrain

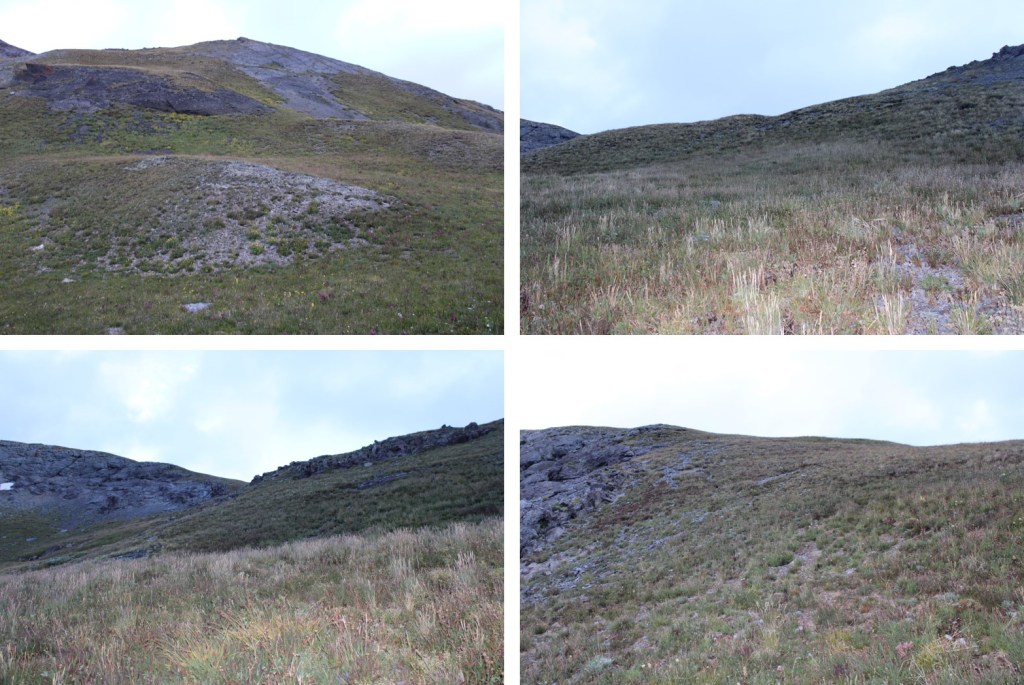
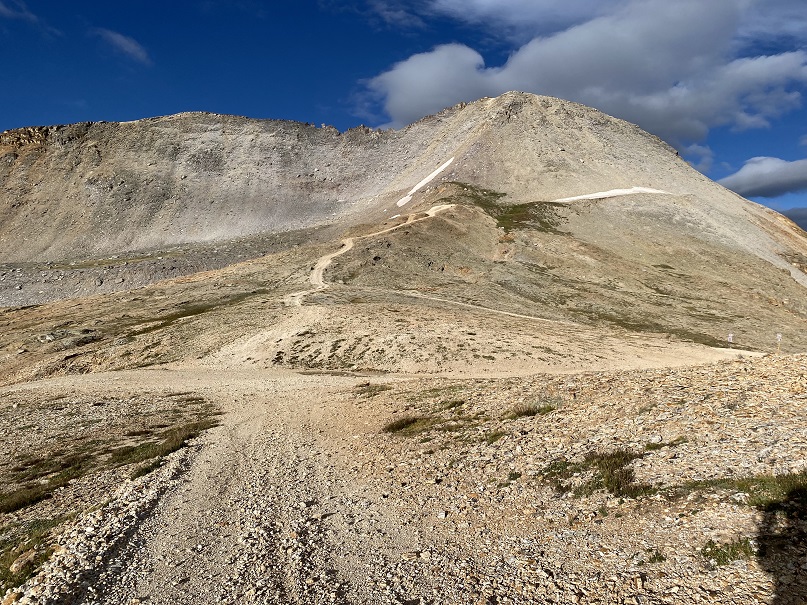
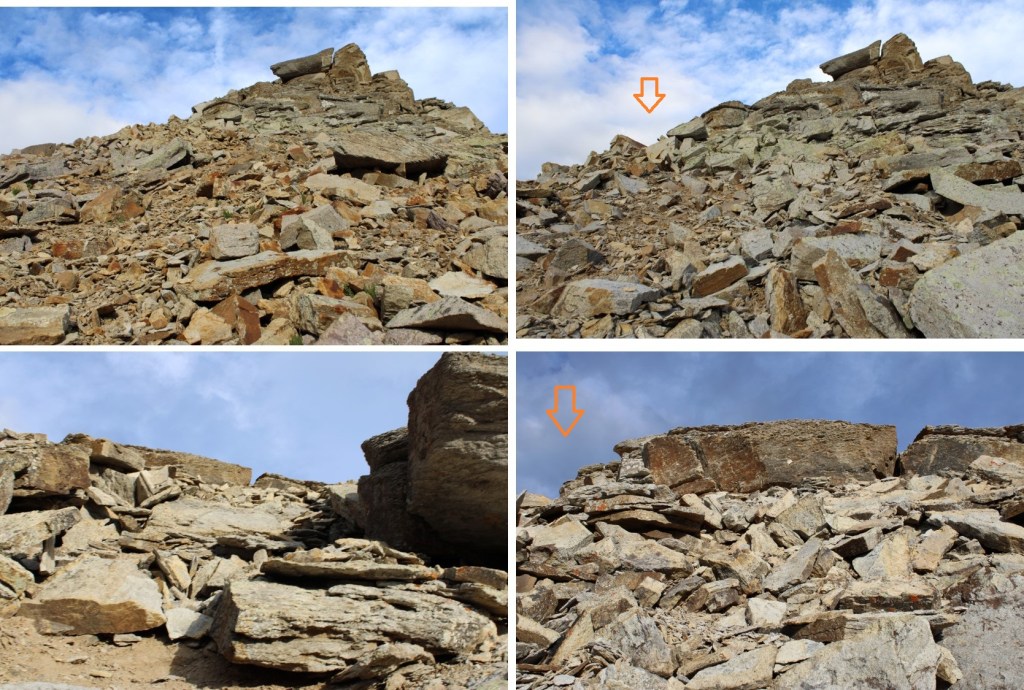
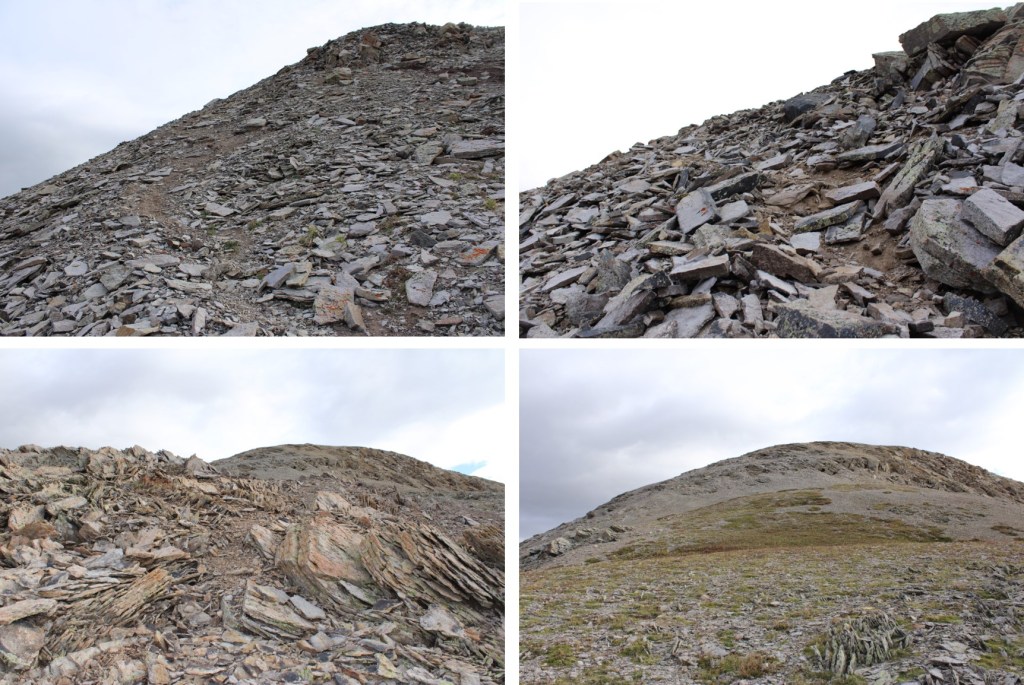
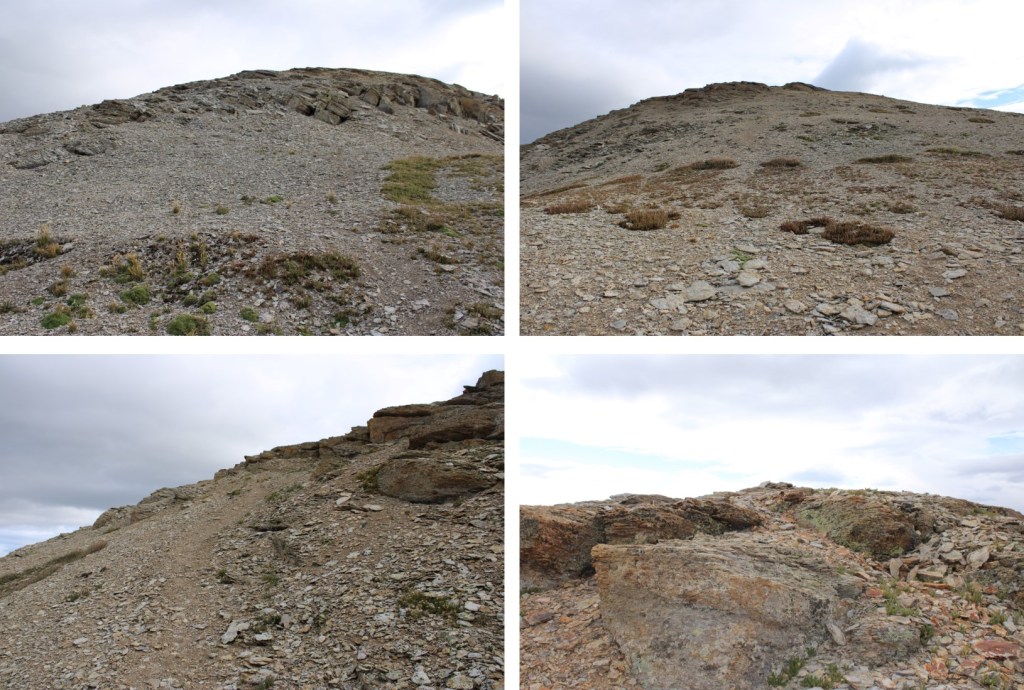
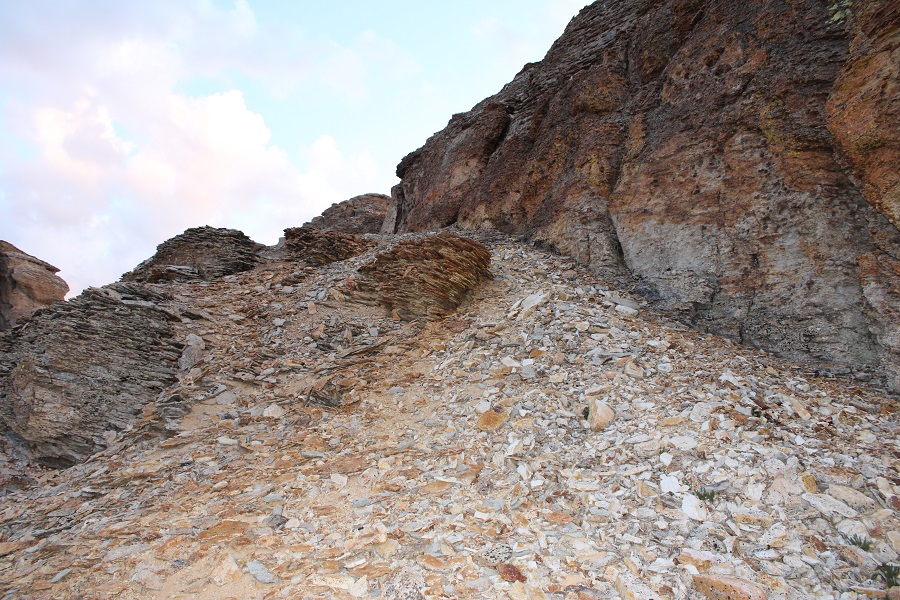
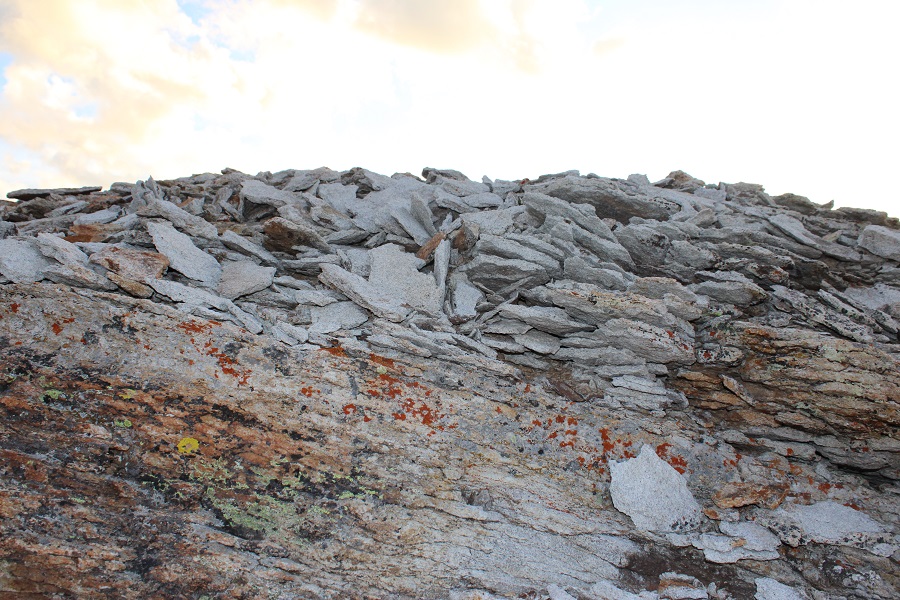
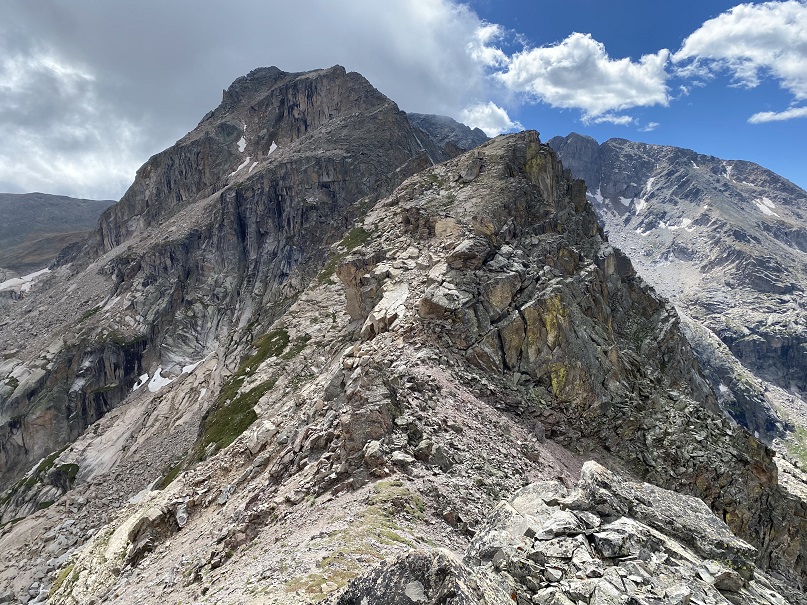
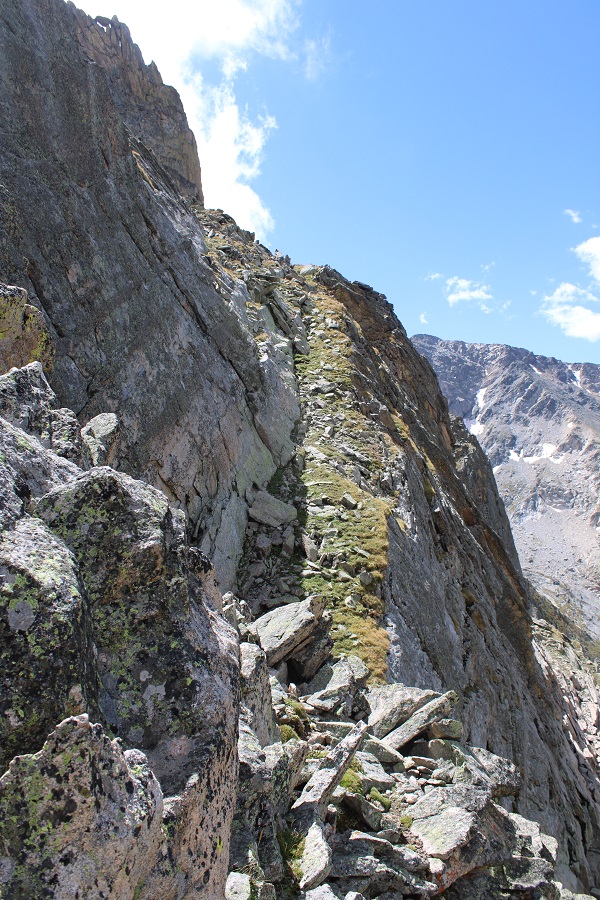
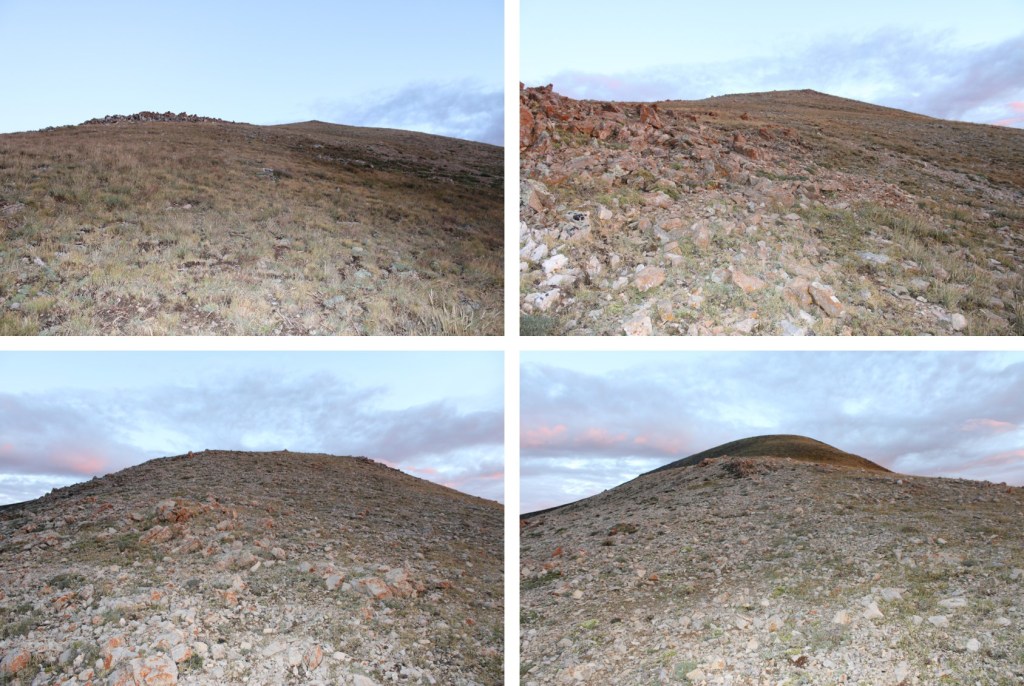
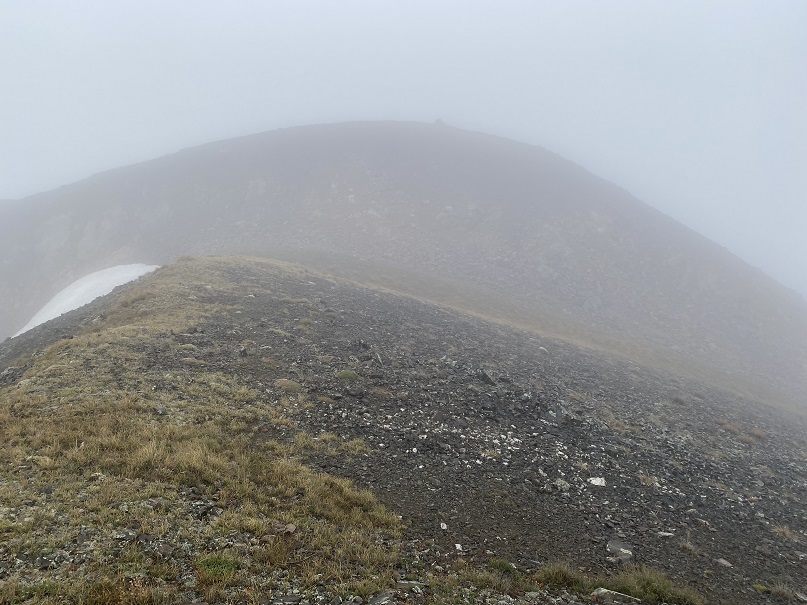
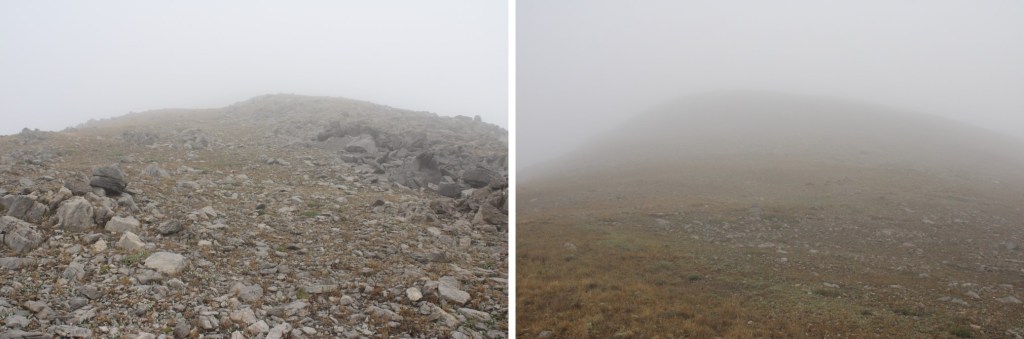
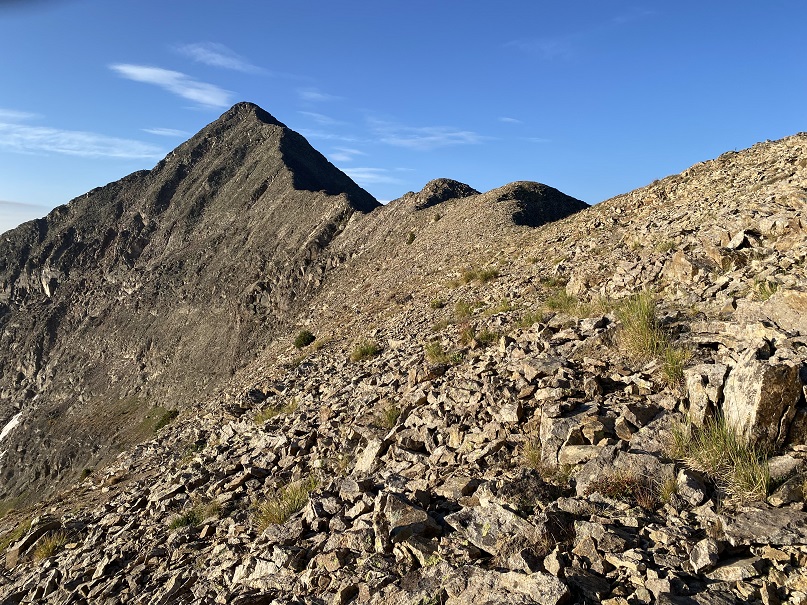
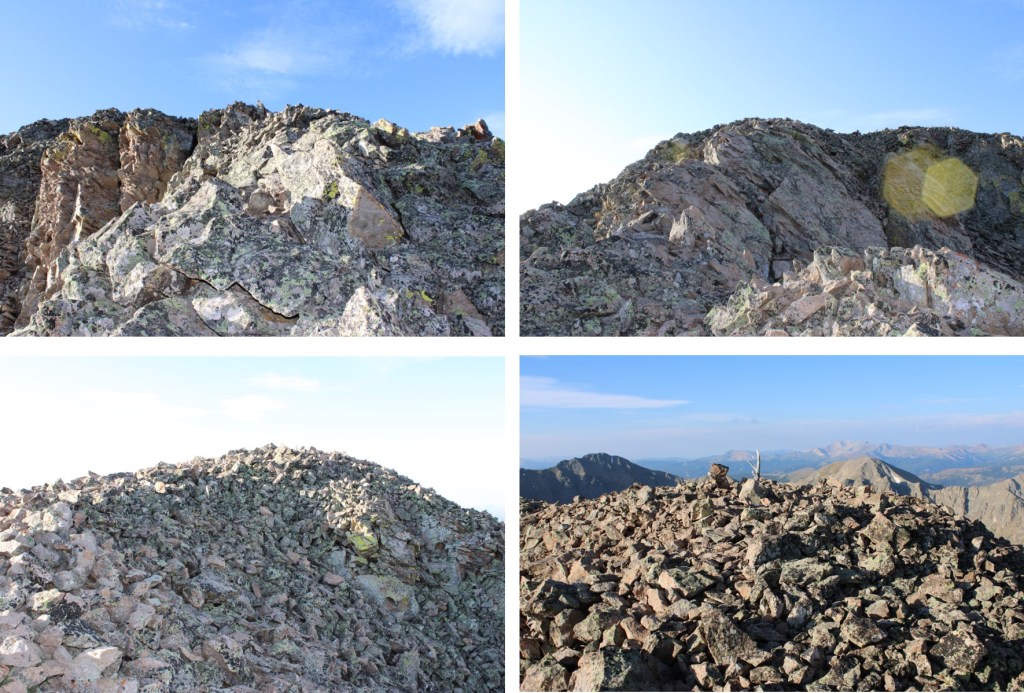
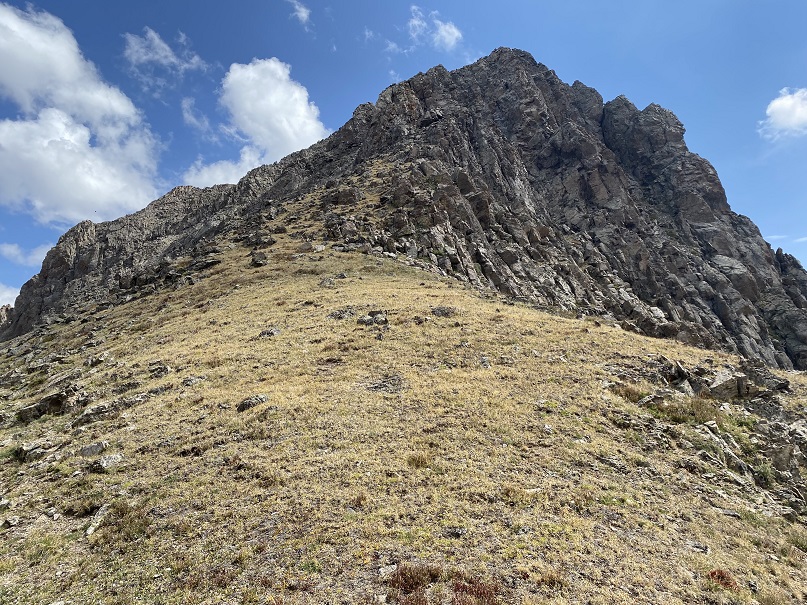
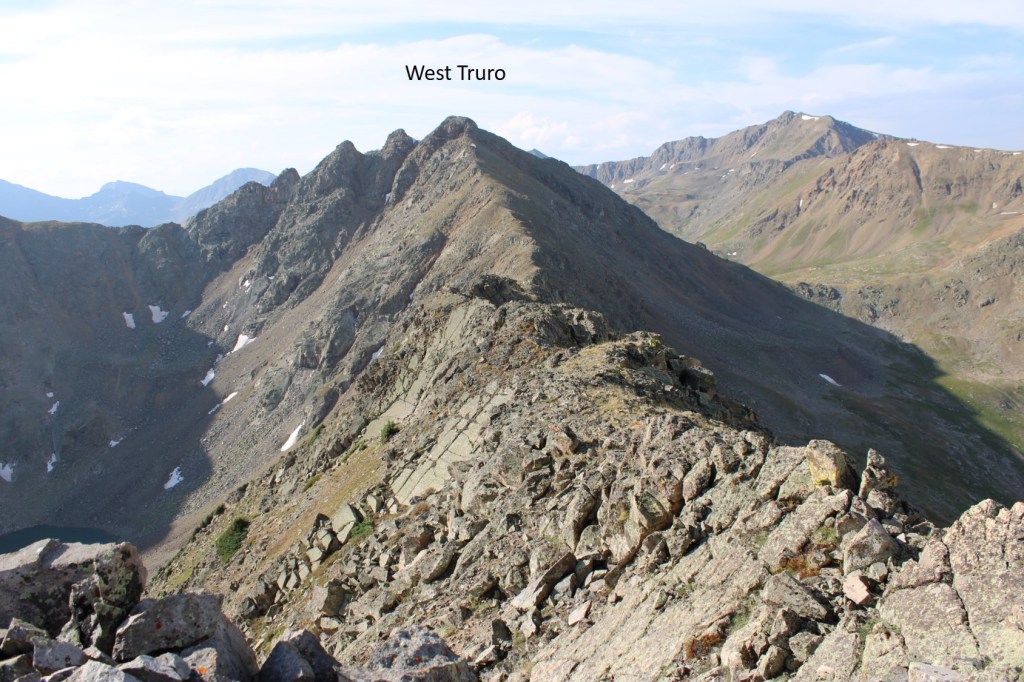
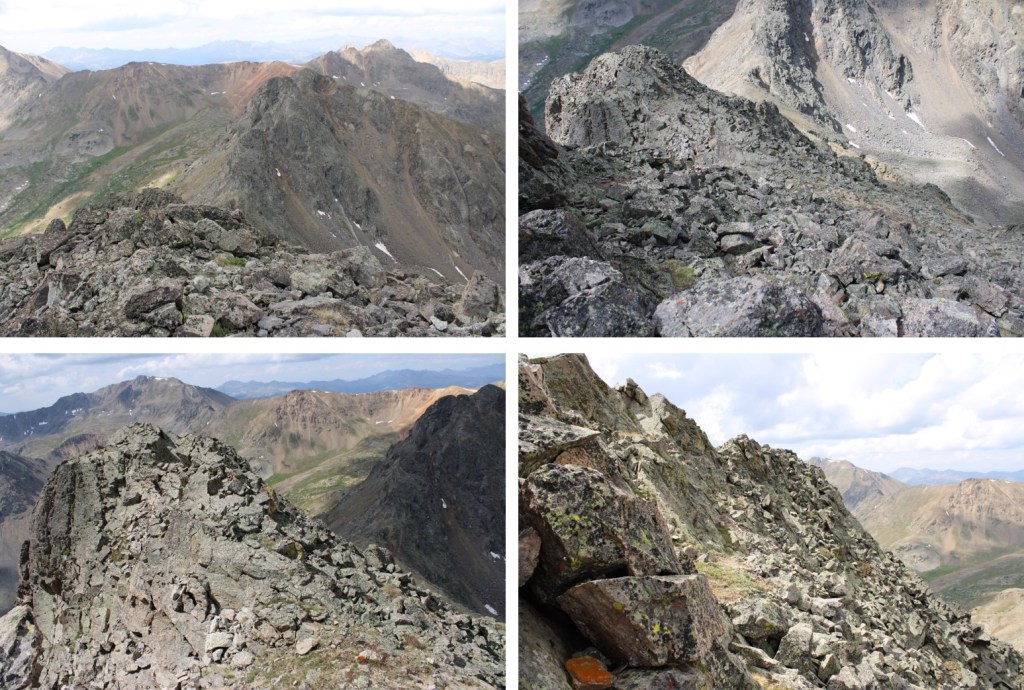
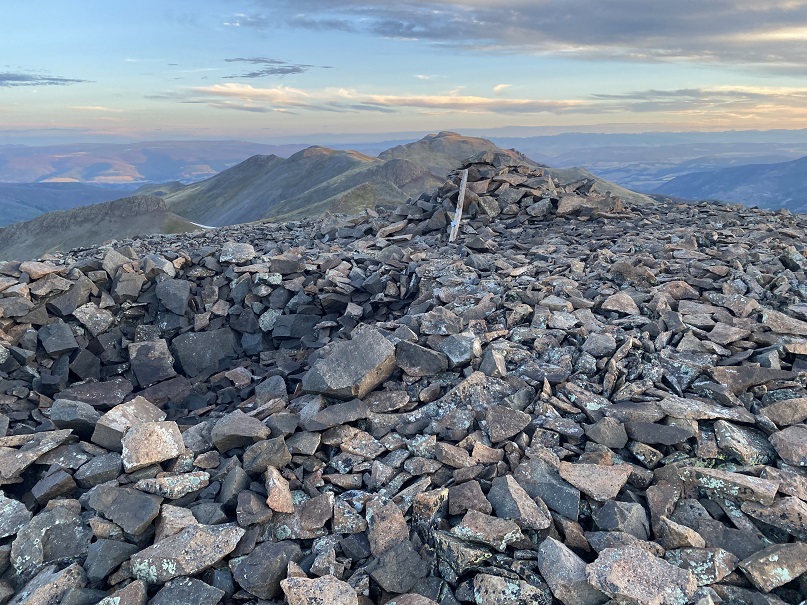
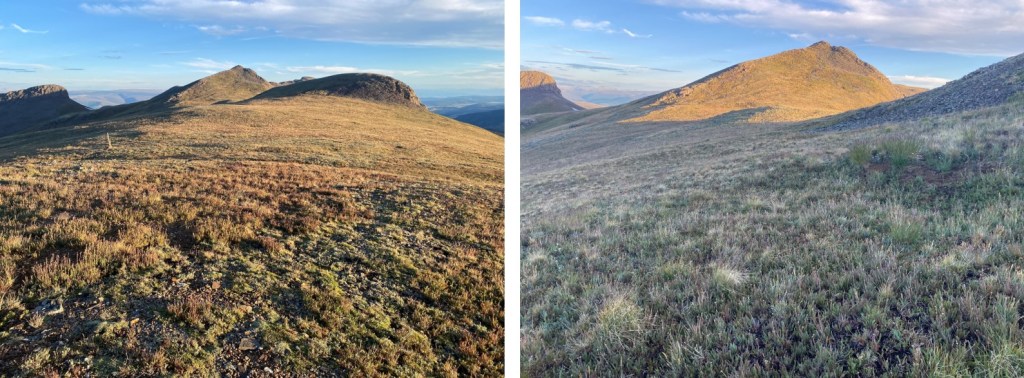
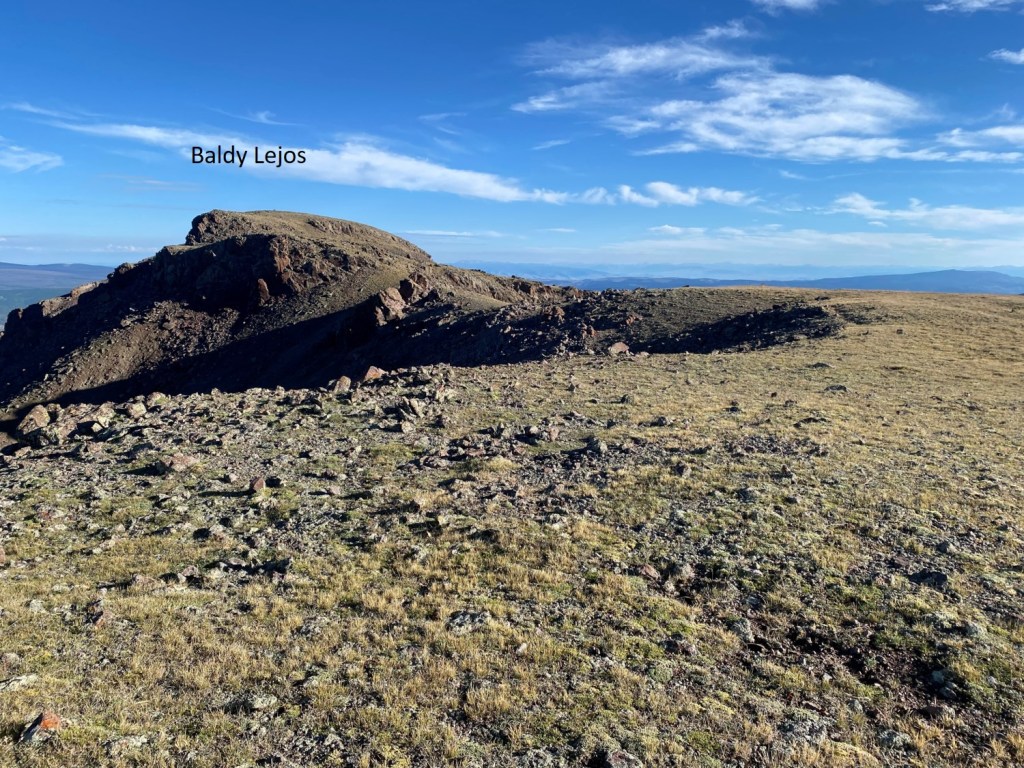
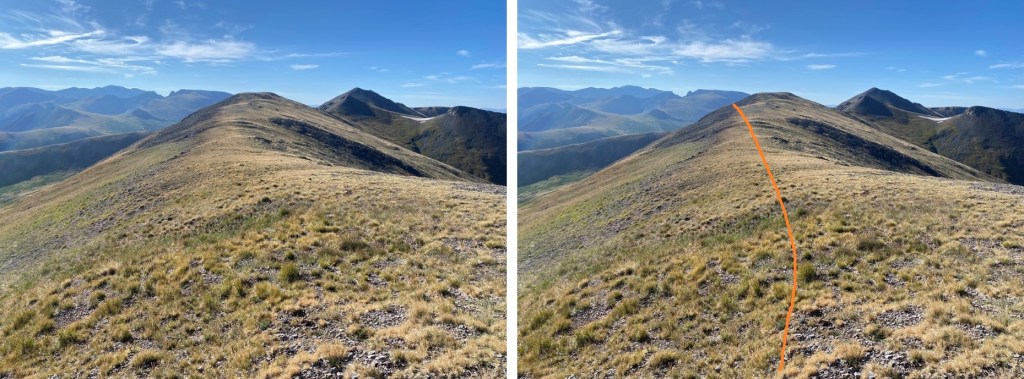
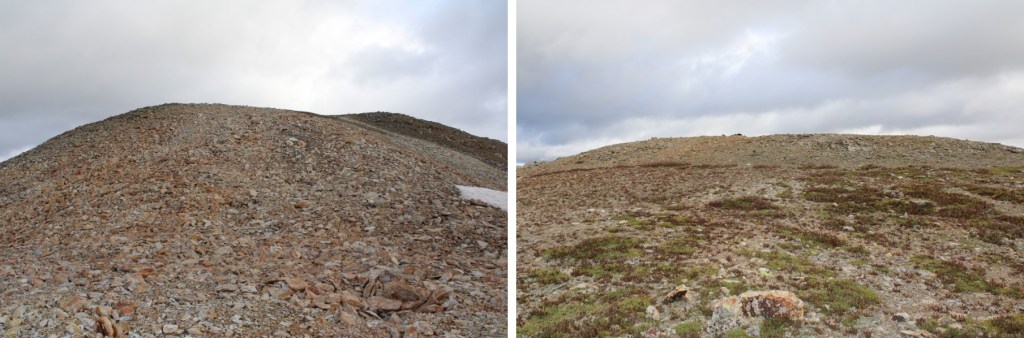
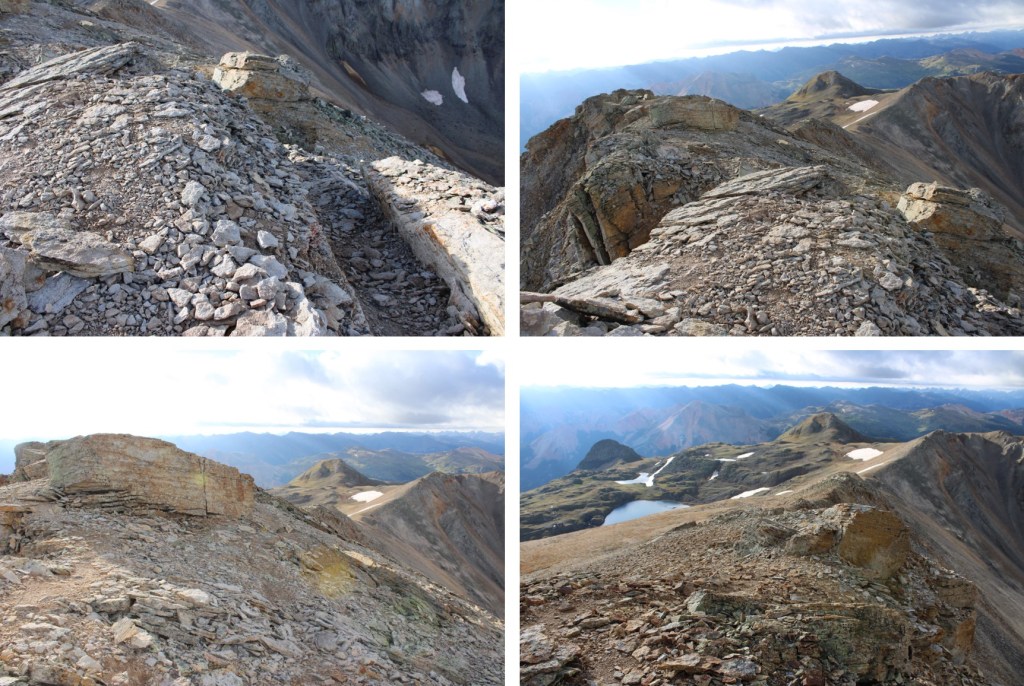
Once on the ridge, I followed it north towards the summit, as the tundra gave way to shale, which had game trails to follow

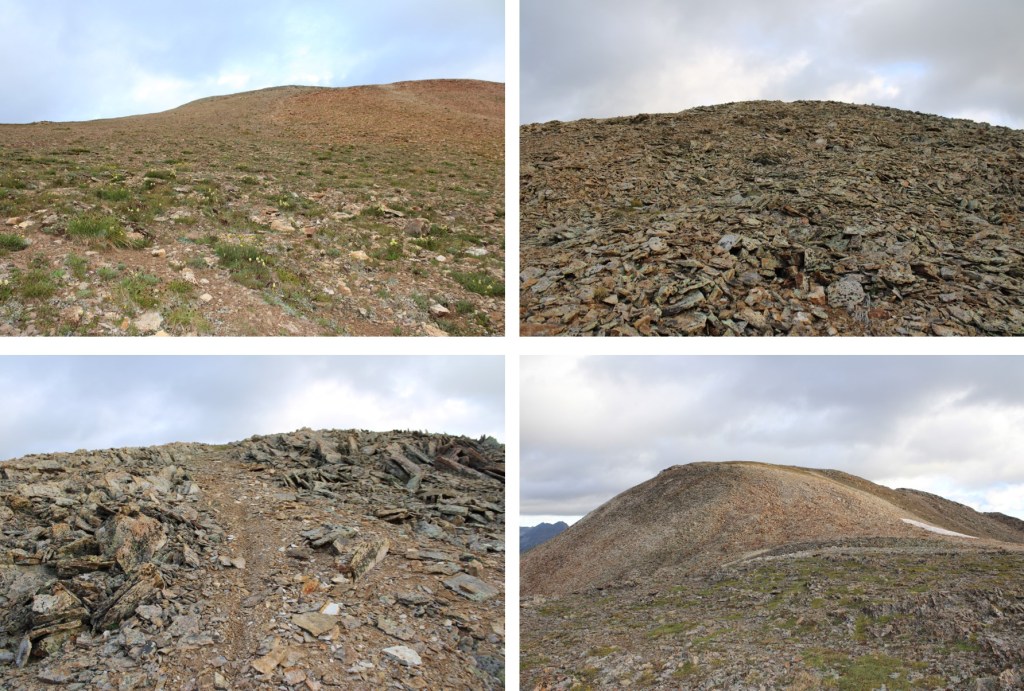
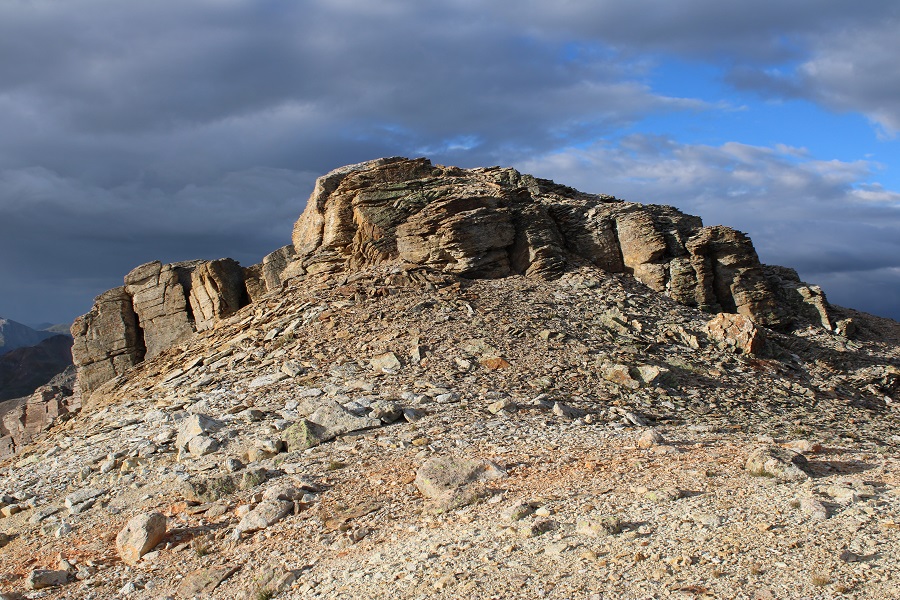
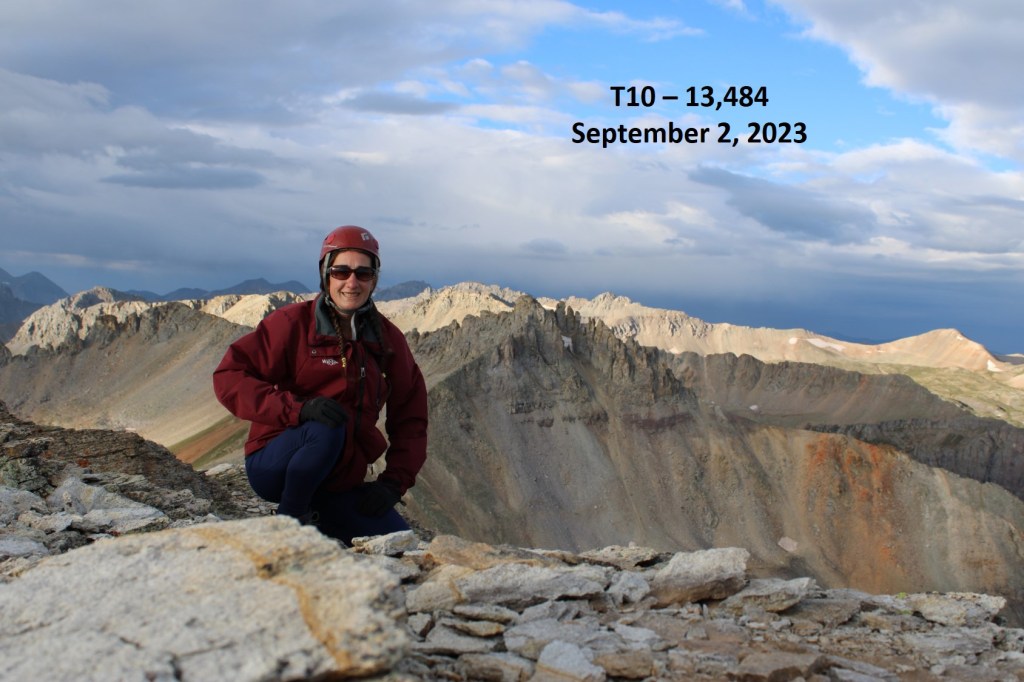
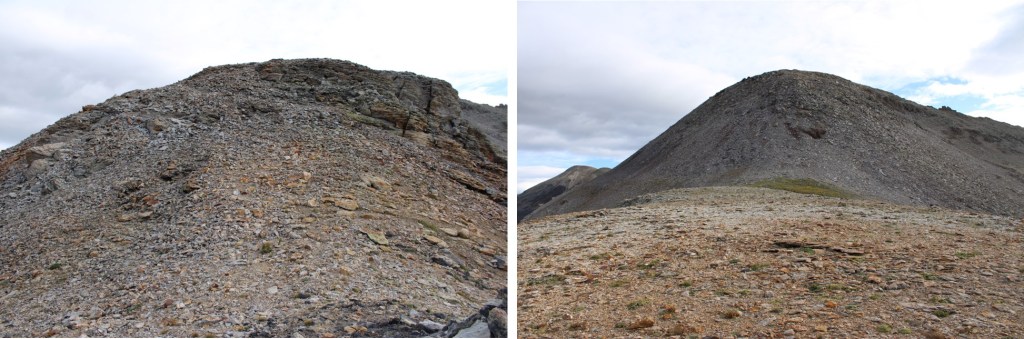
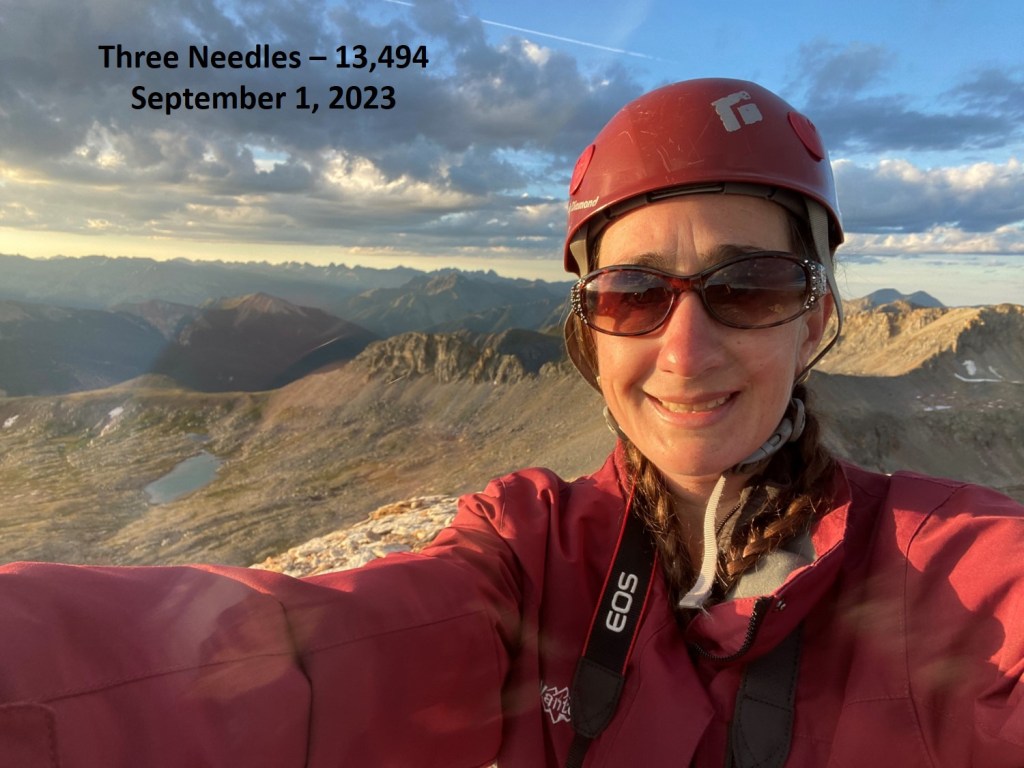
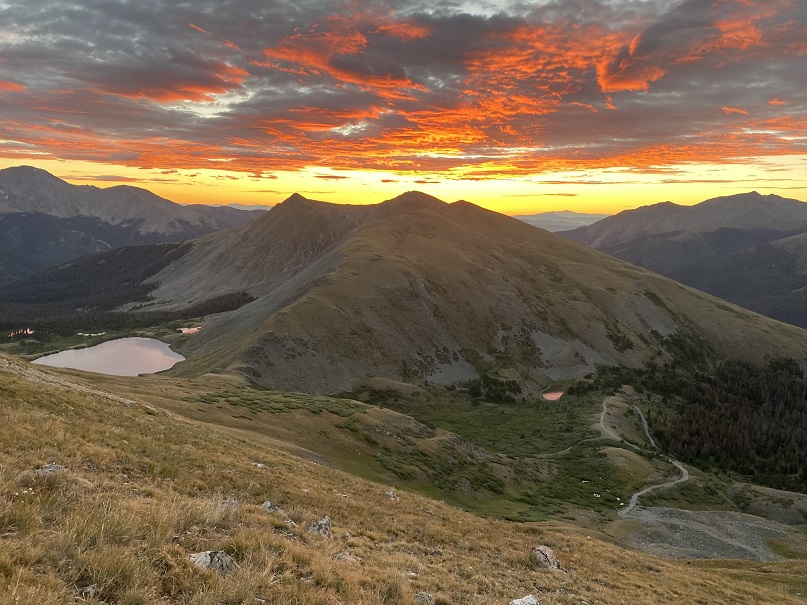
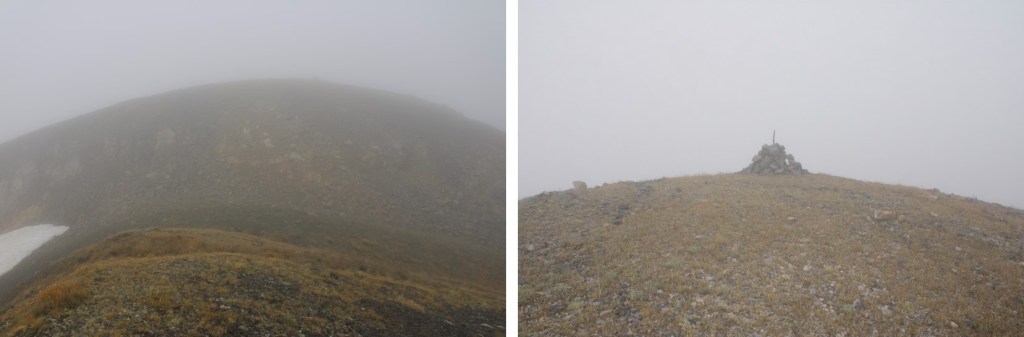
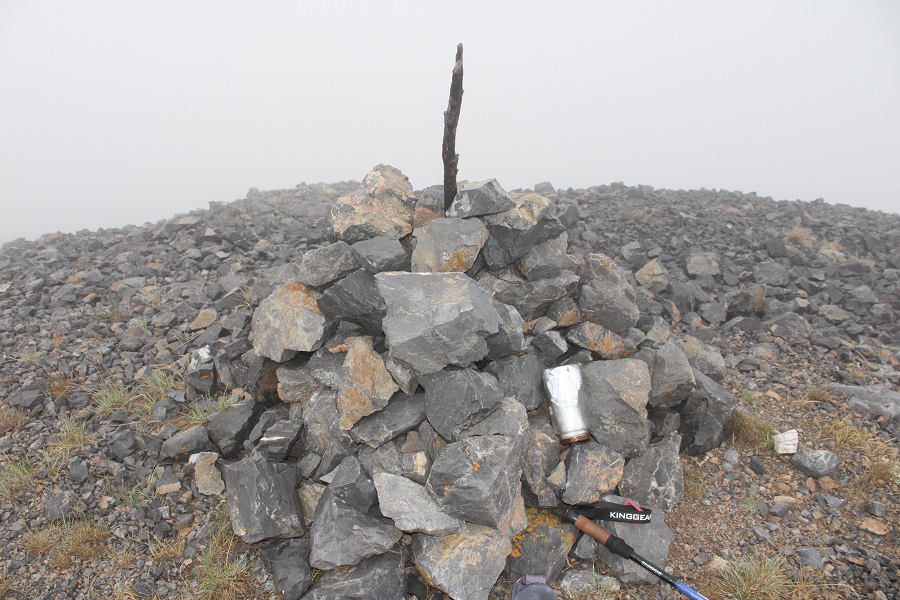
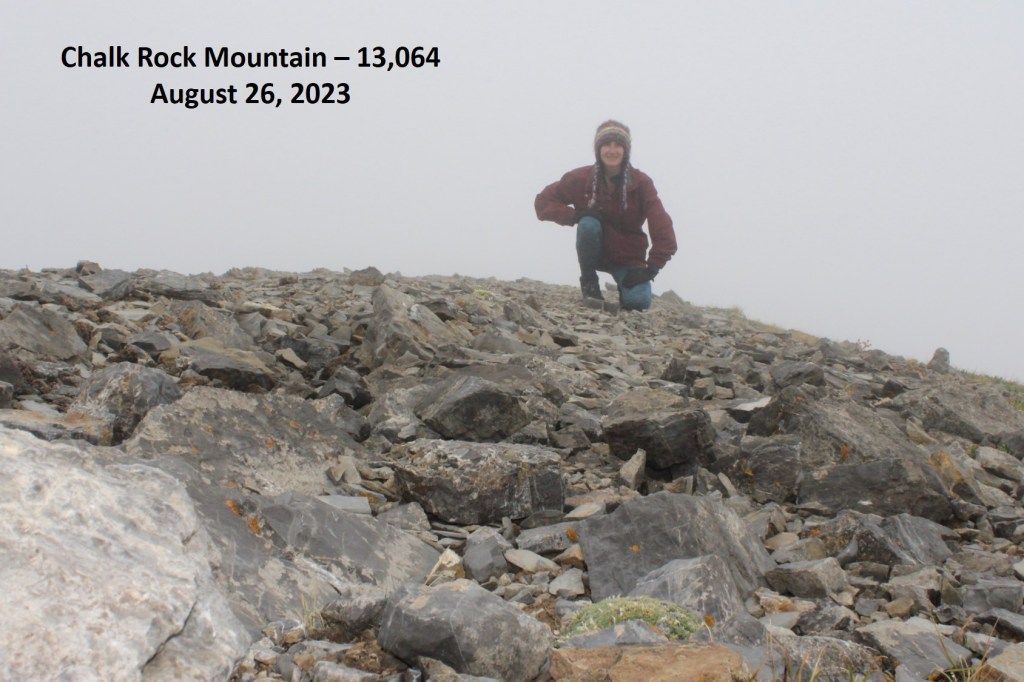
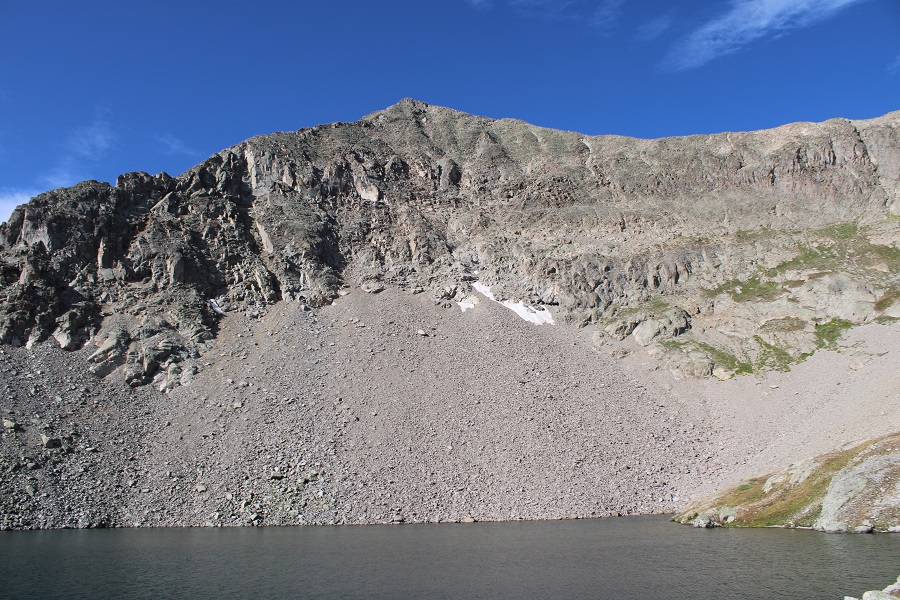
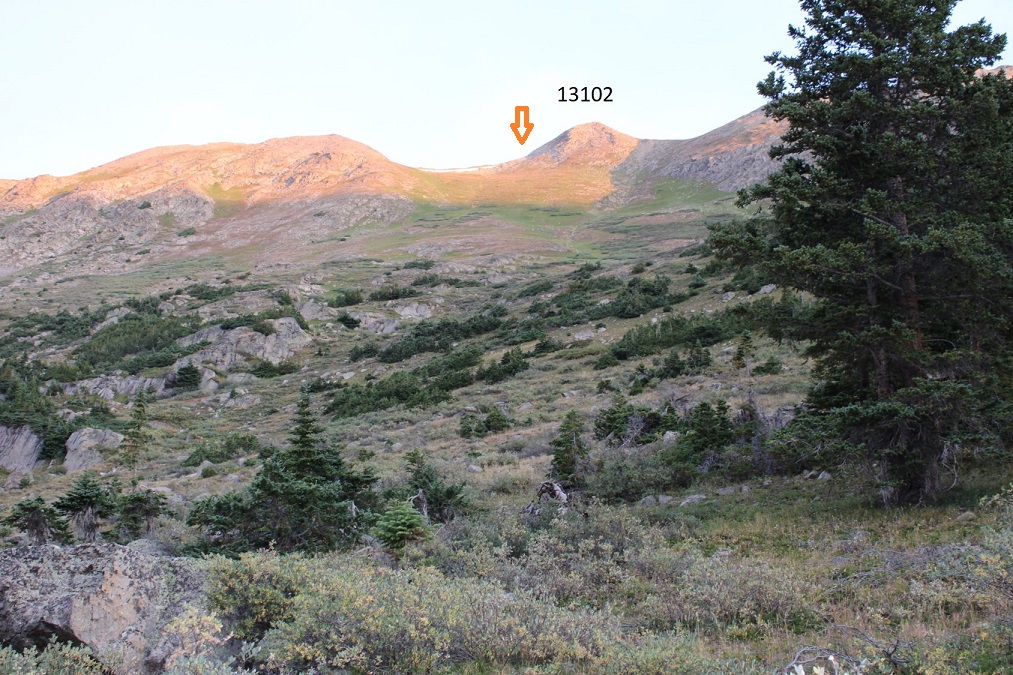
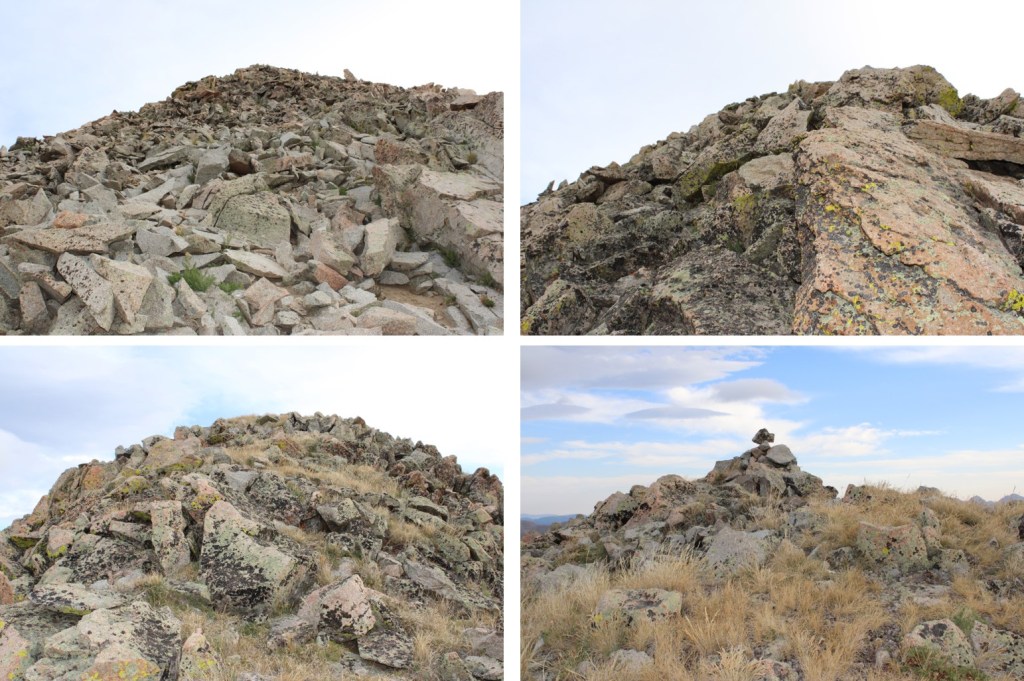
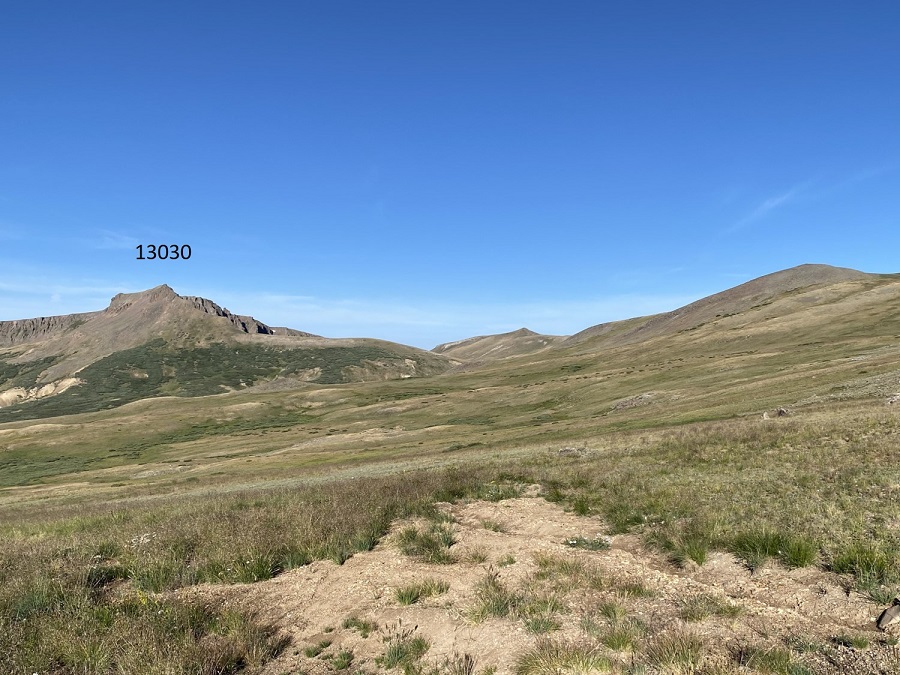
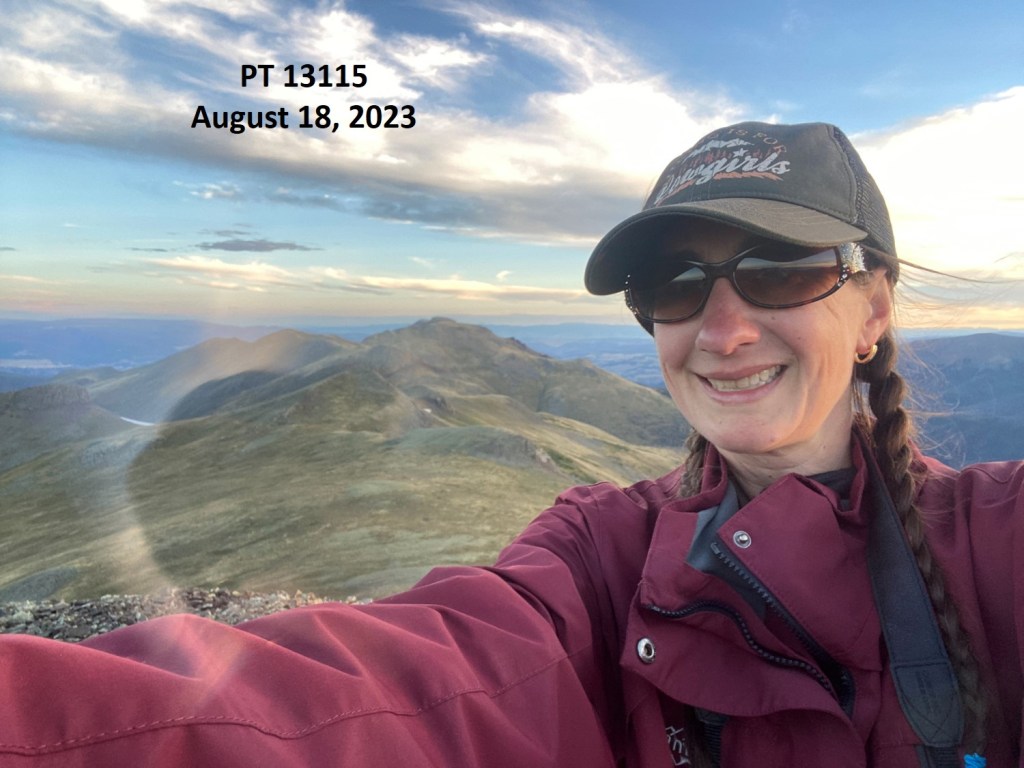
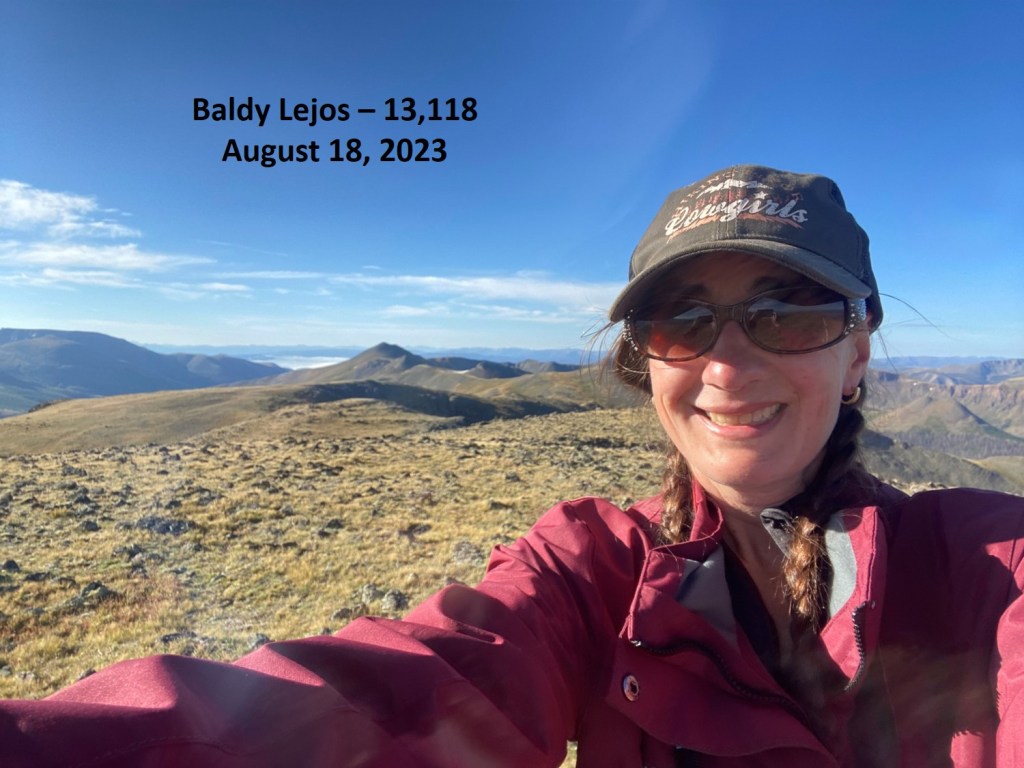
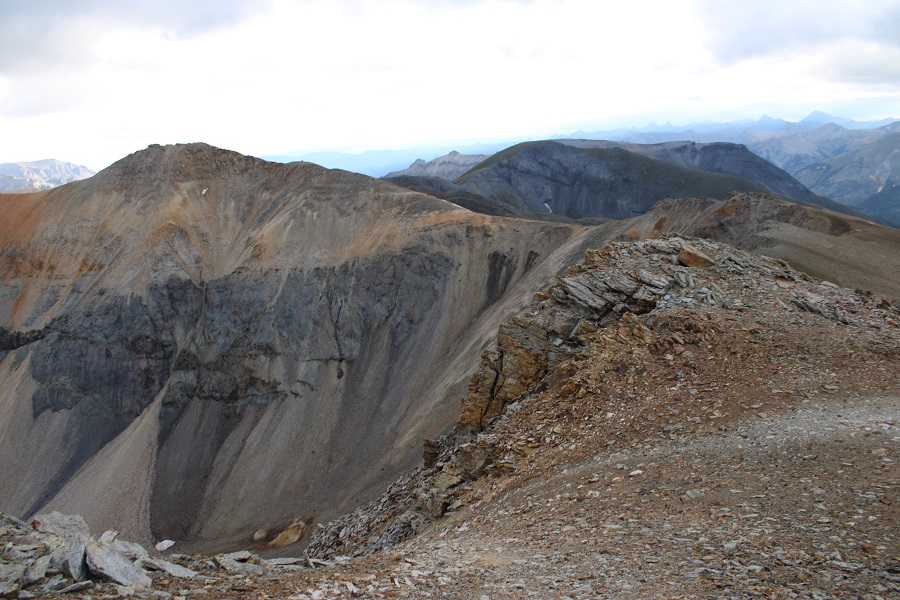
I summited PT 13509 at 7:20am
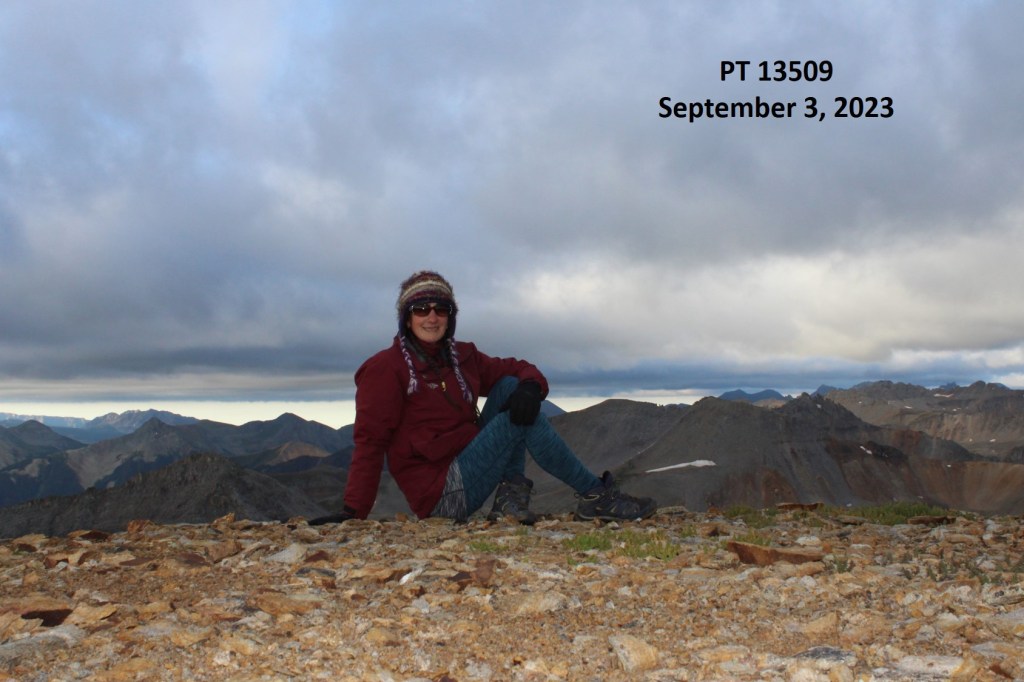
PT 13509:

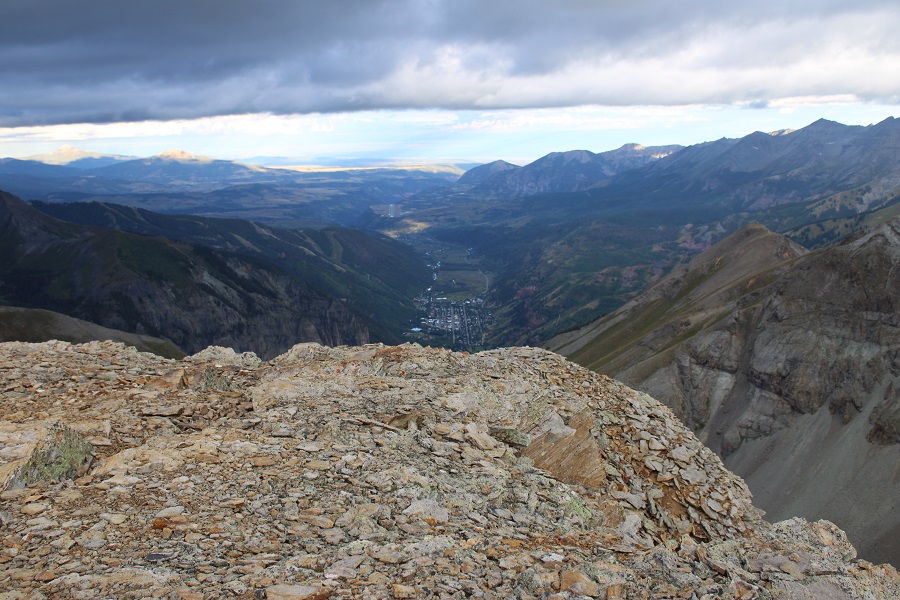
I could see the town of Telluride to the west

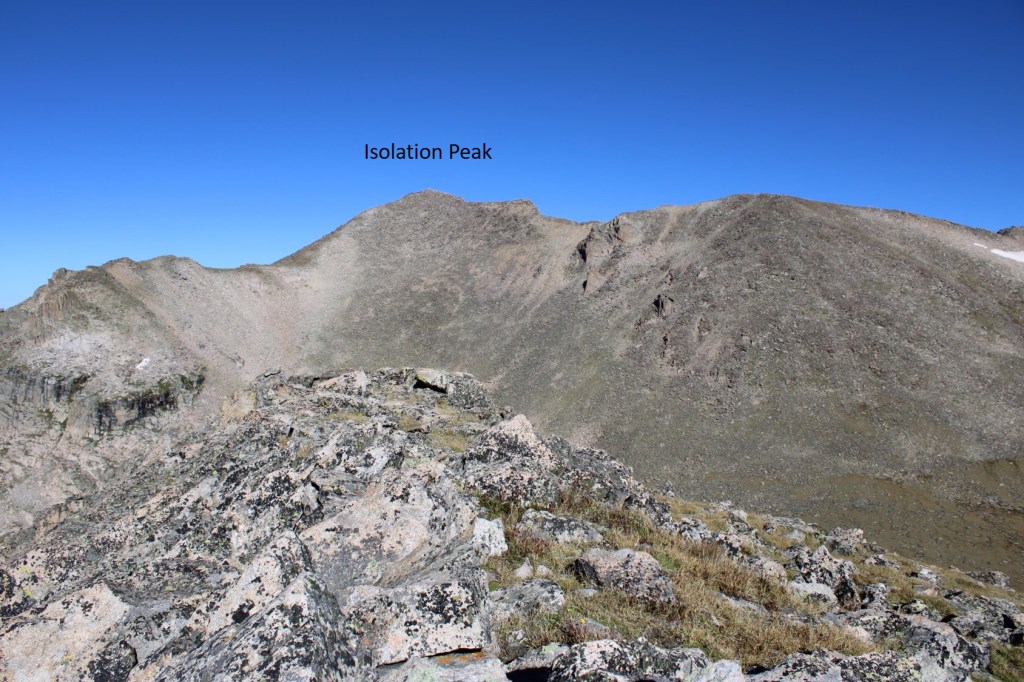
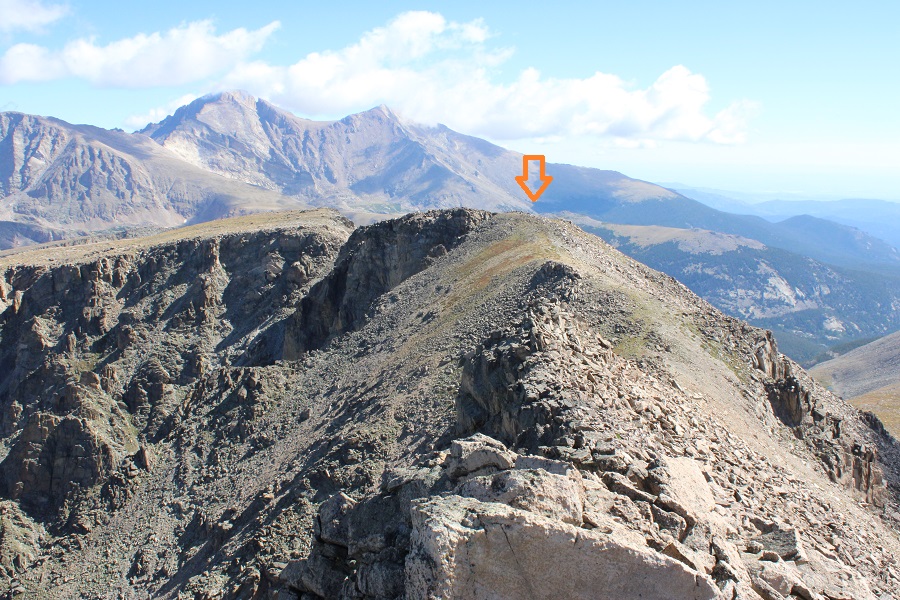
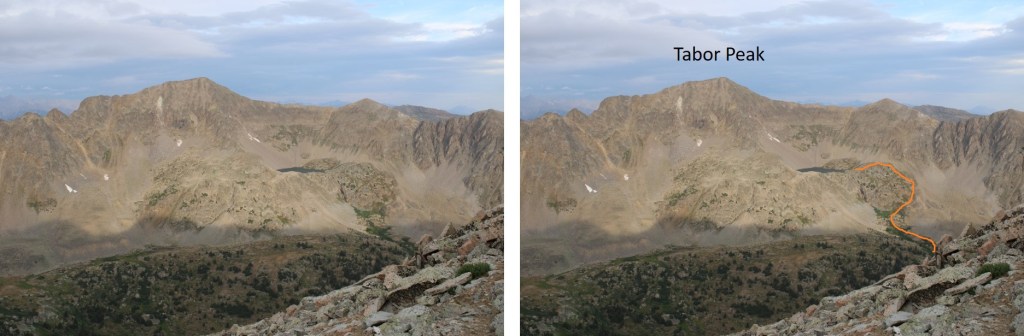
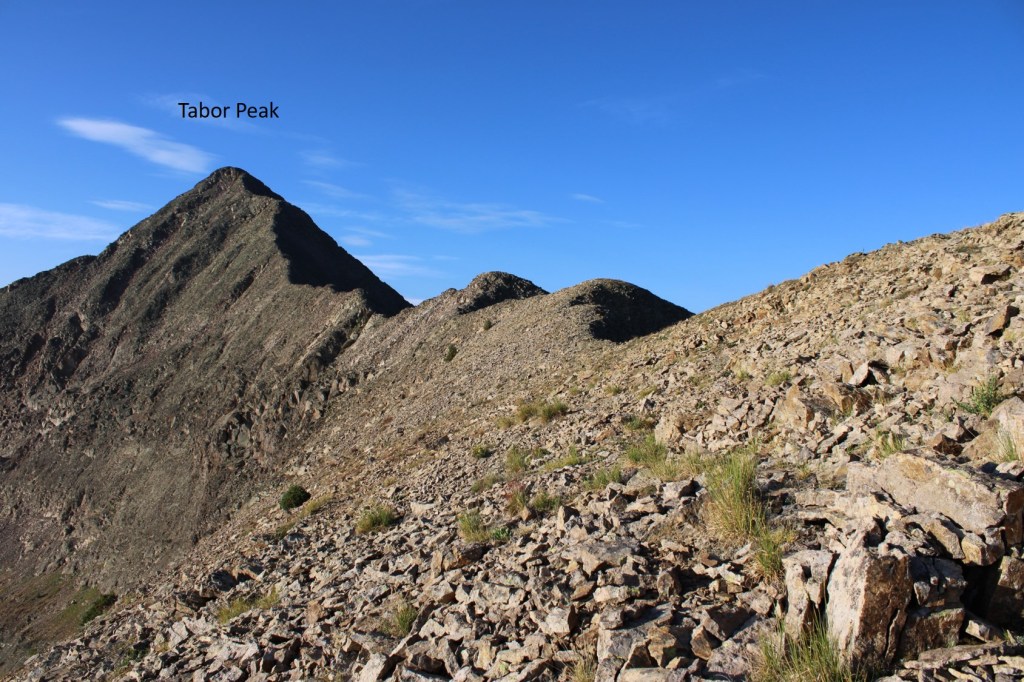
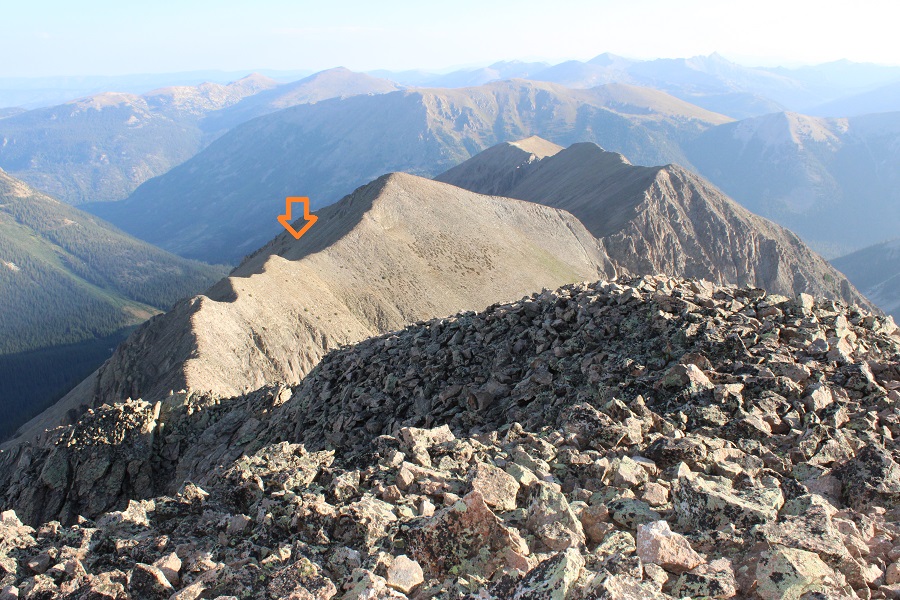
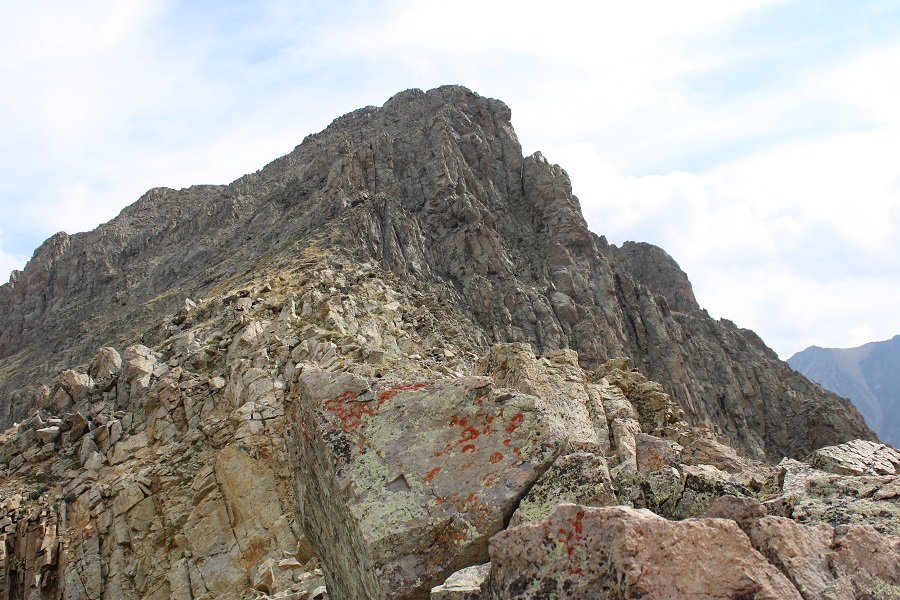
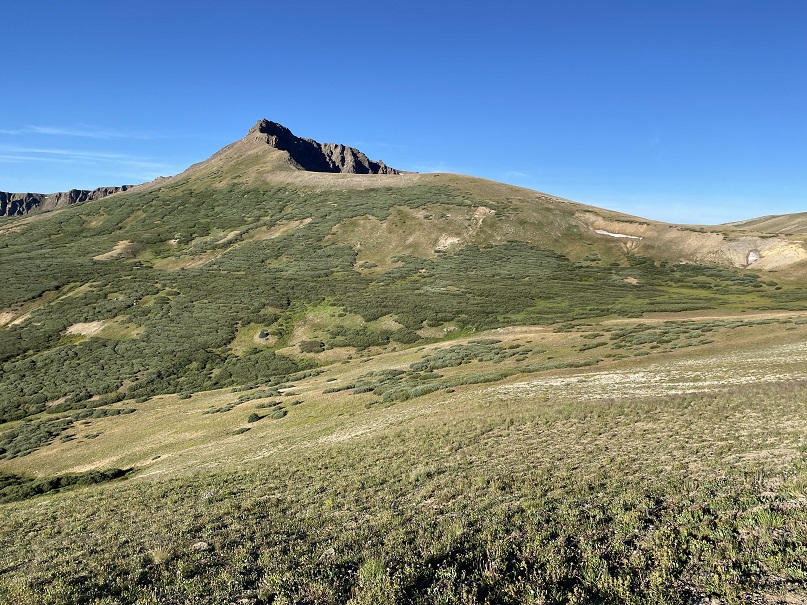
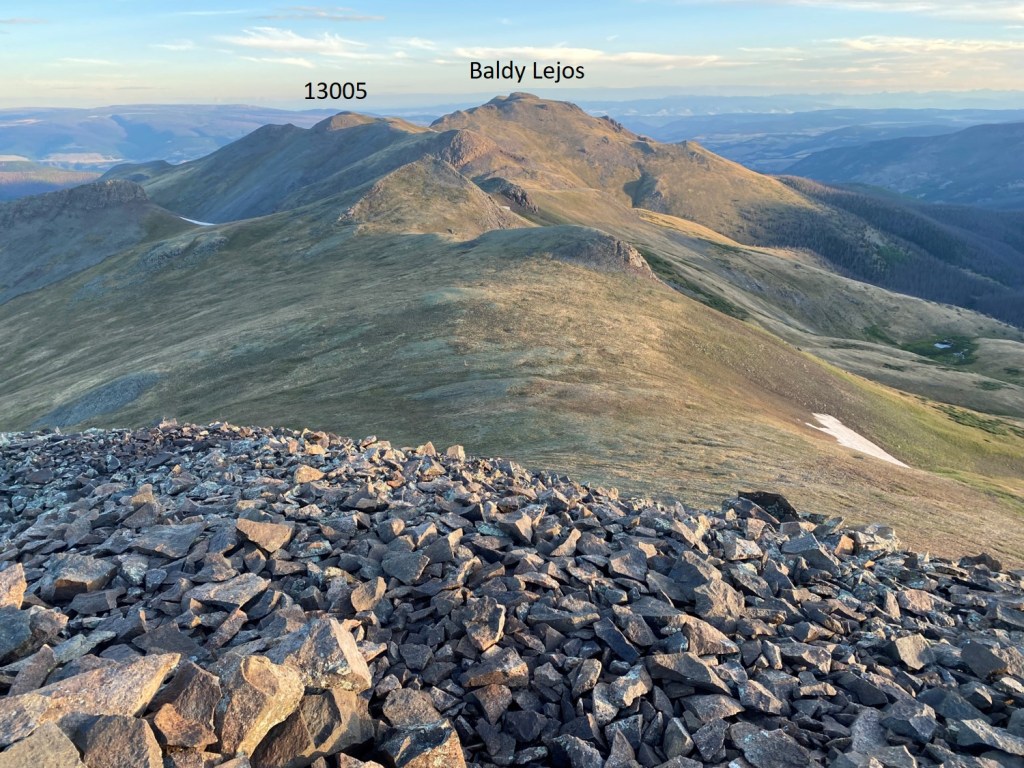
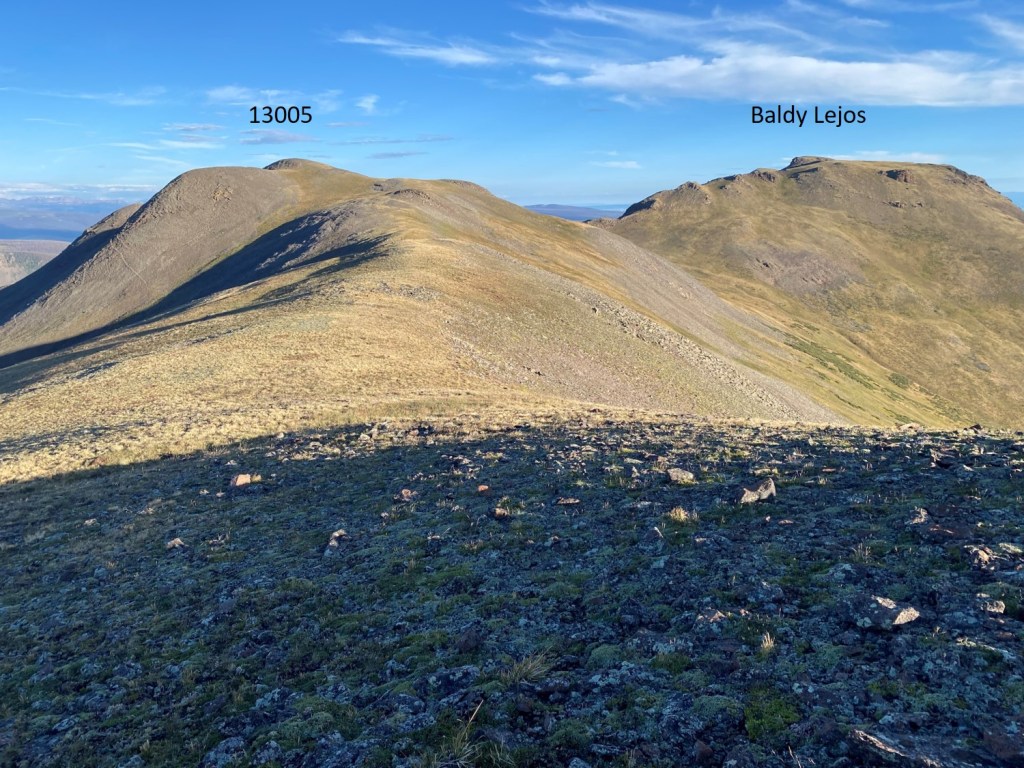
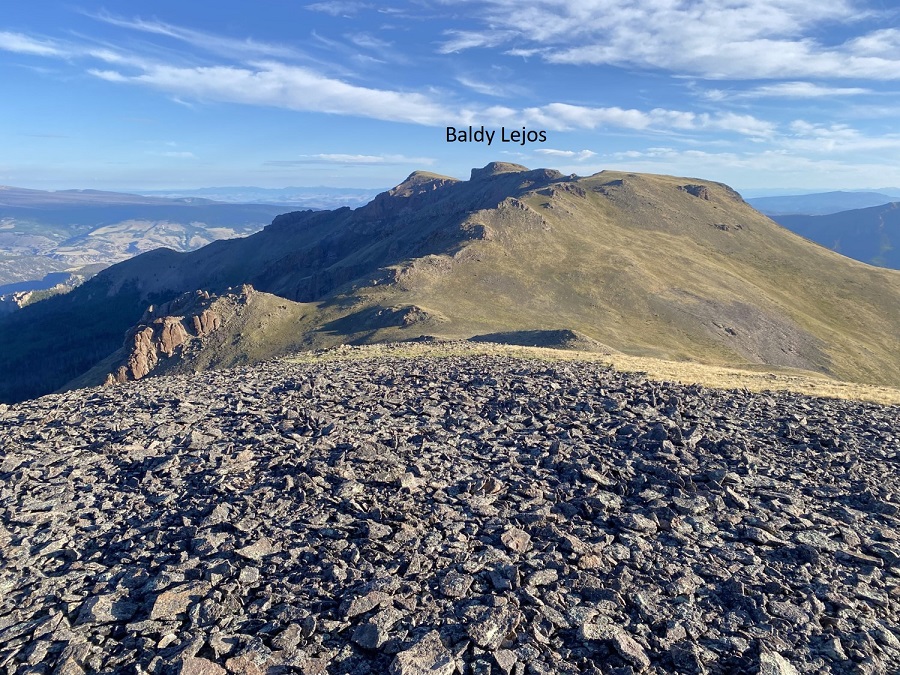
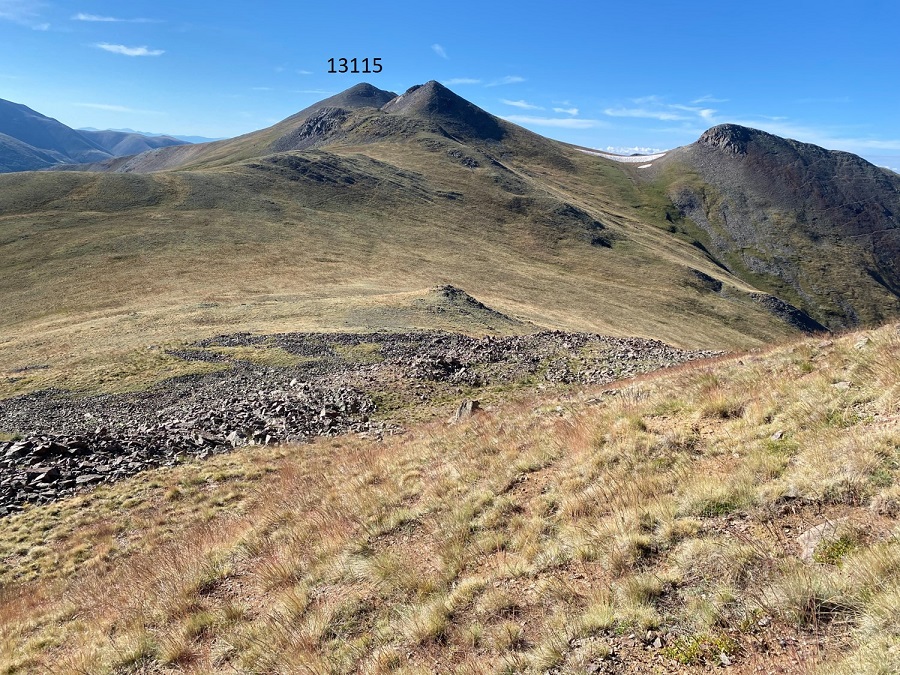
Looking north, I could see Telluride Peak

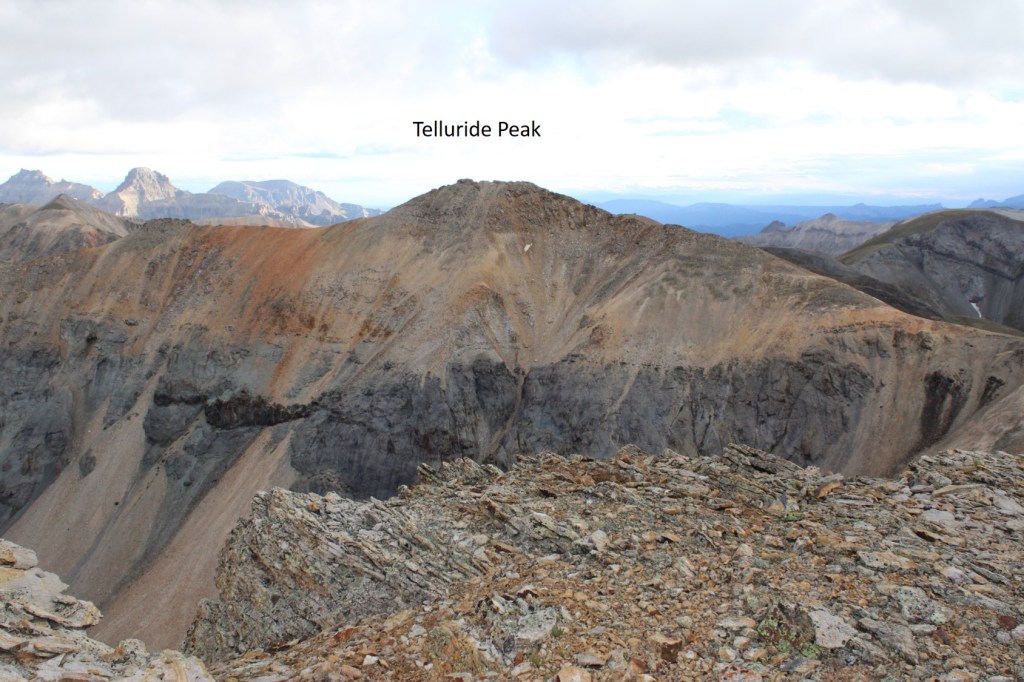
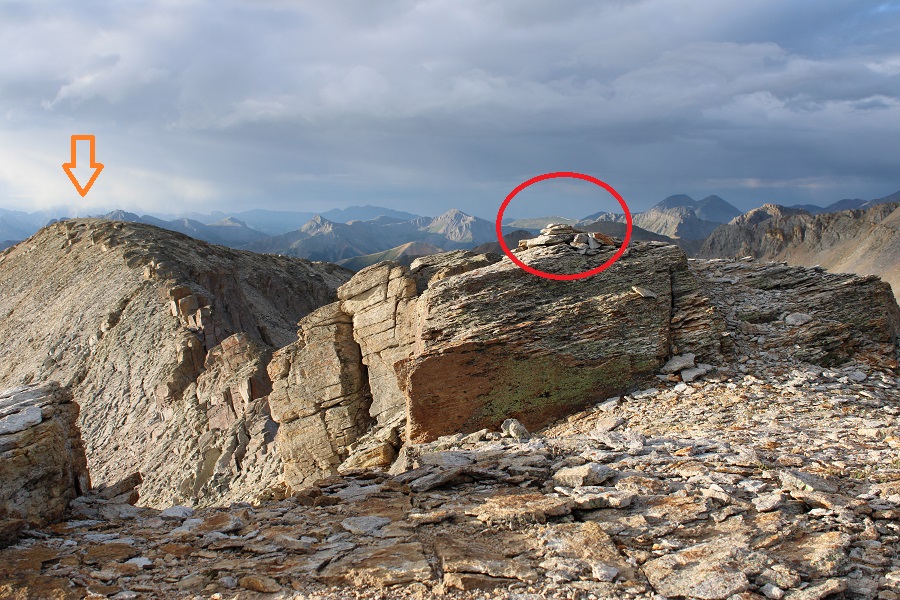
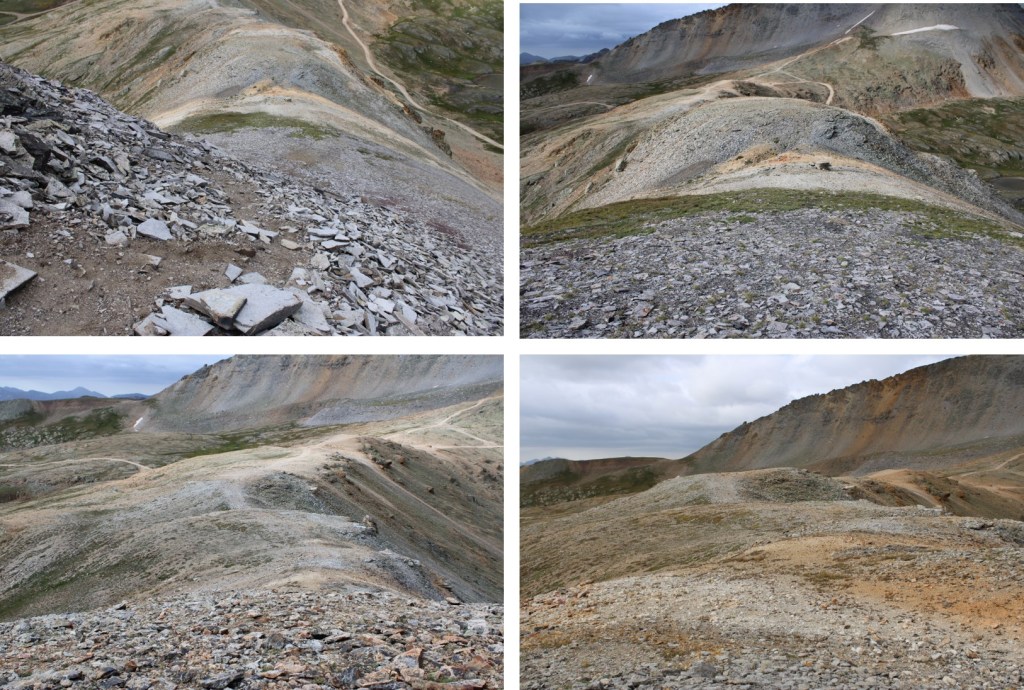
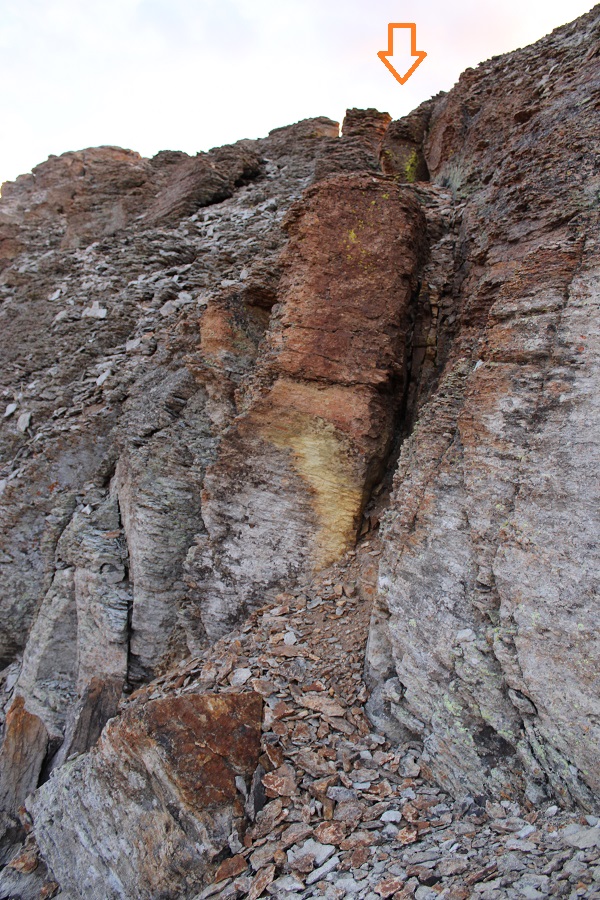
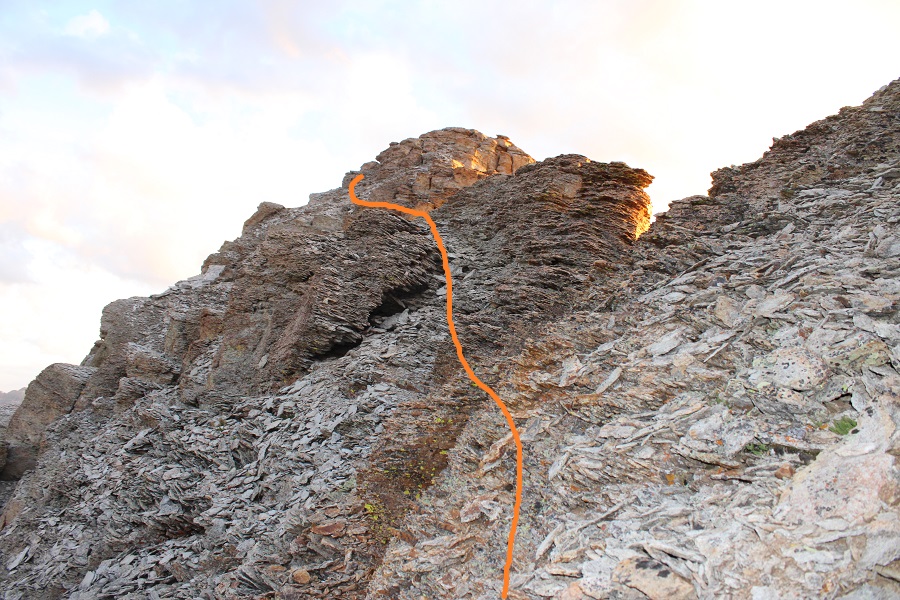
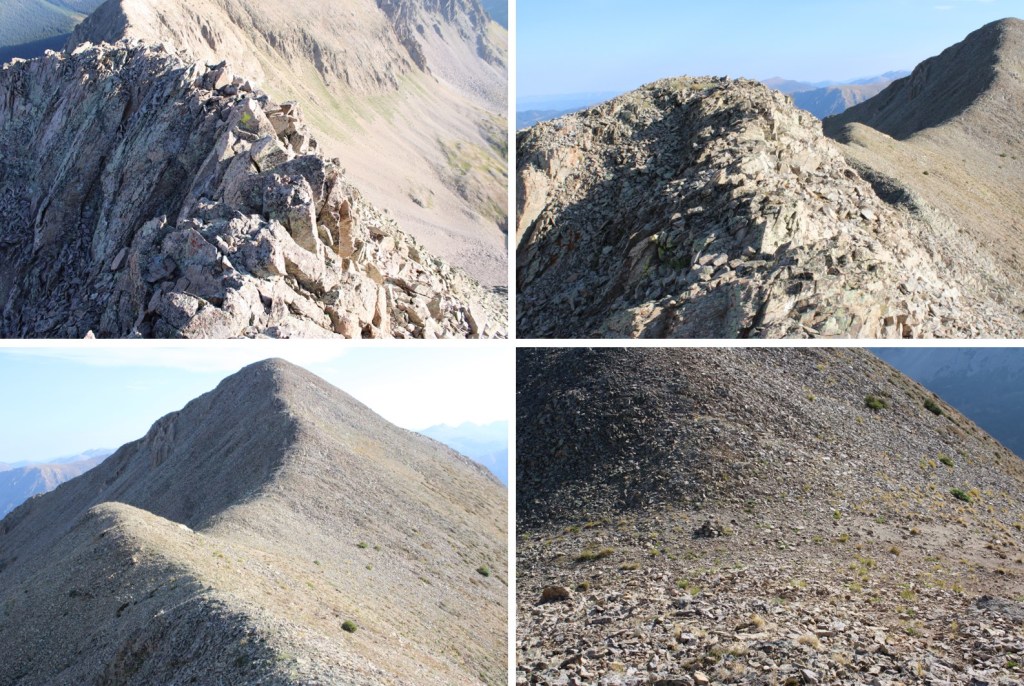
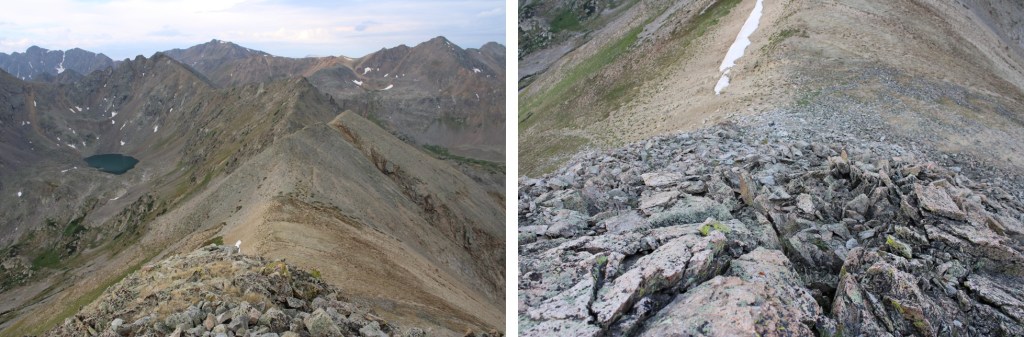
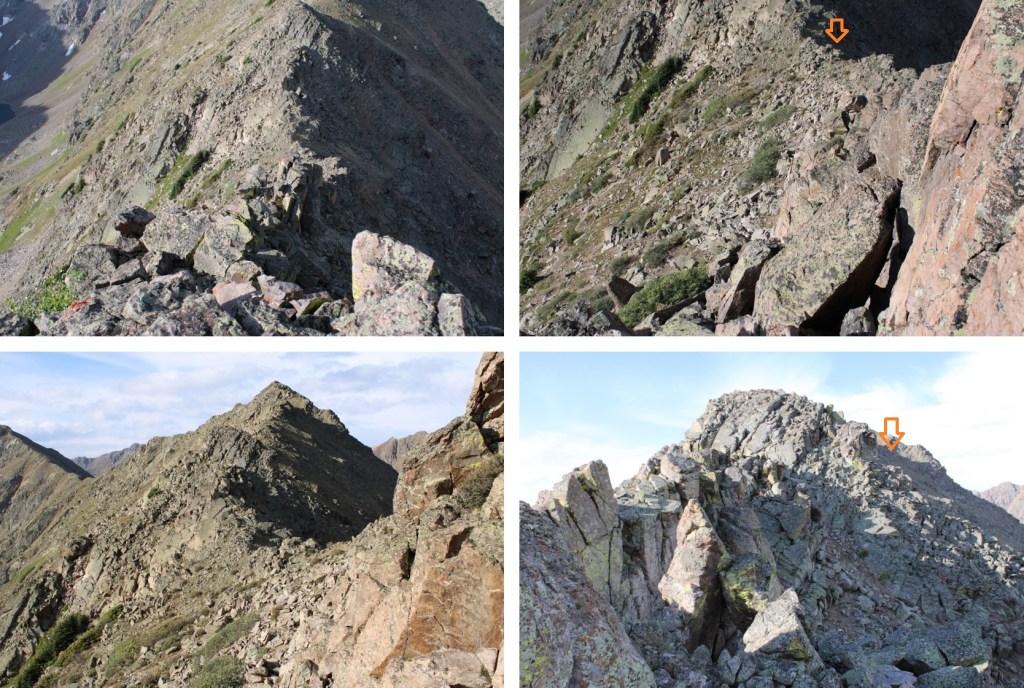
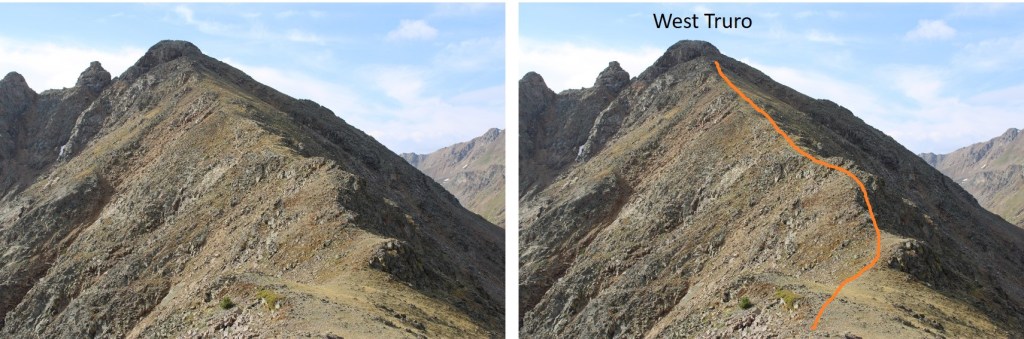
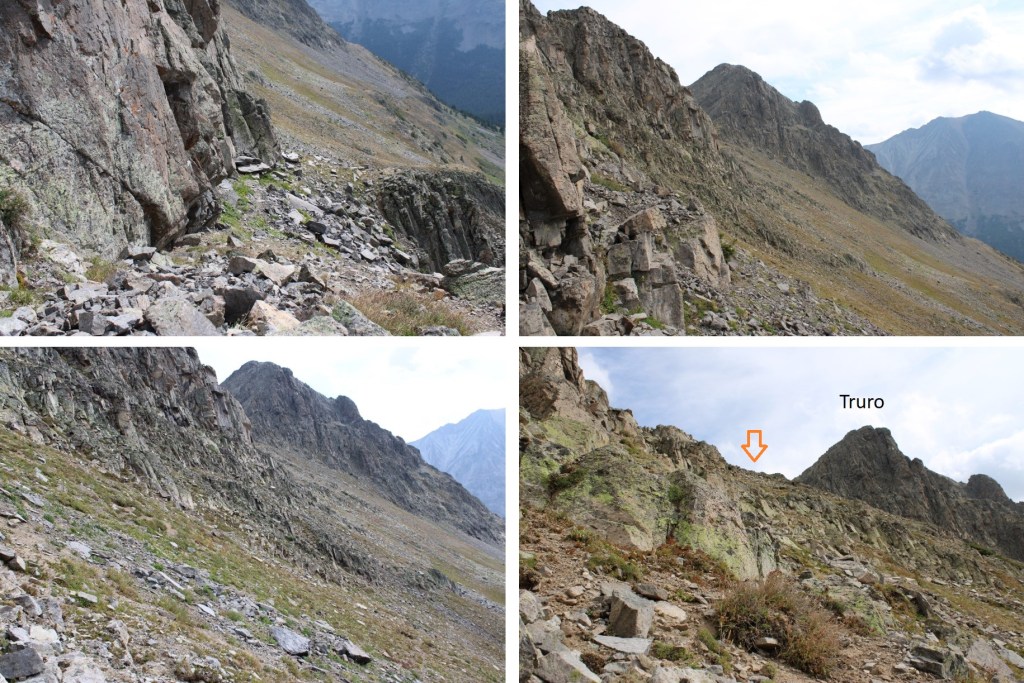
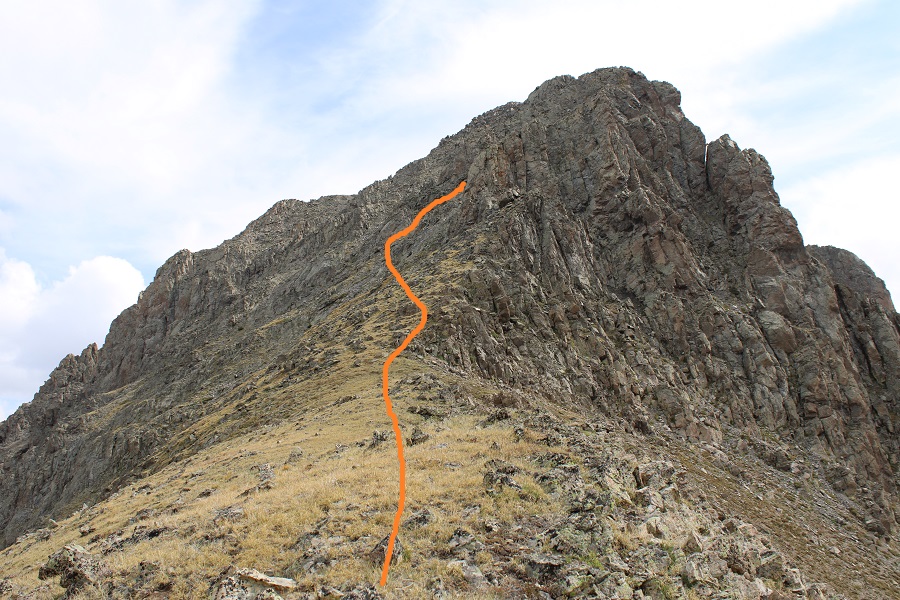
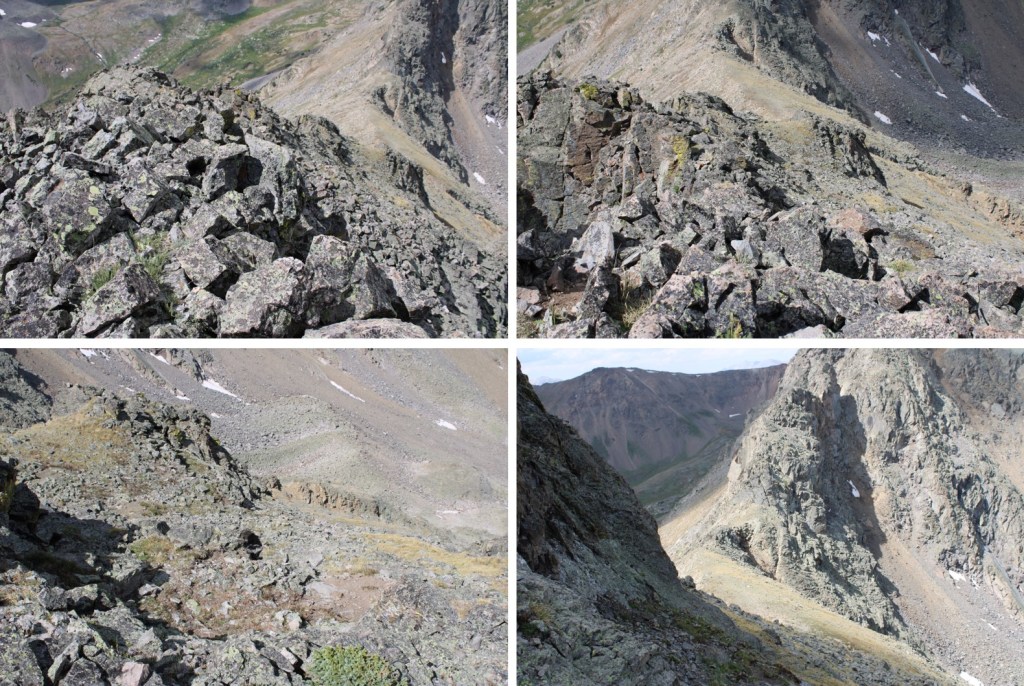
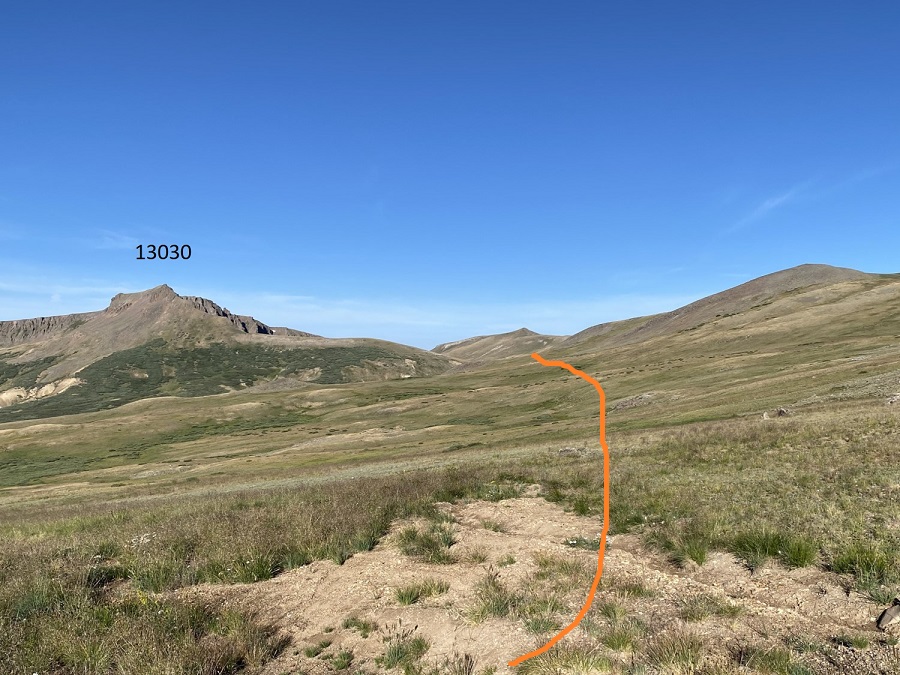
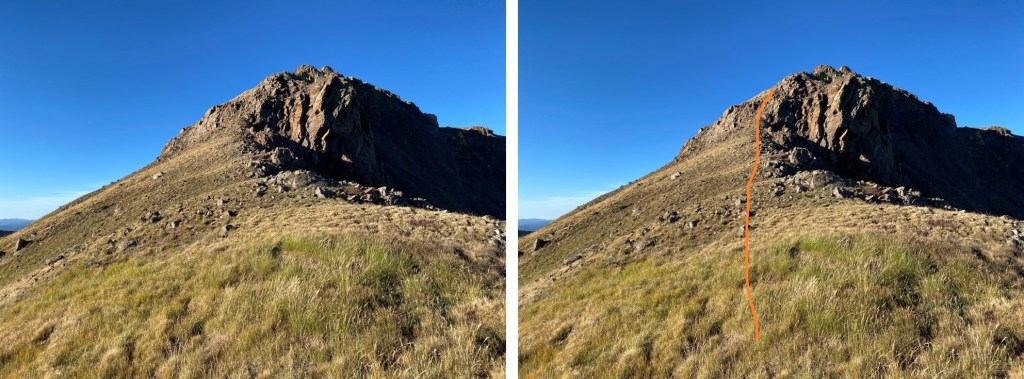
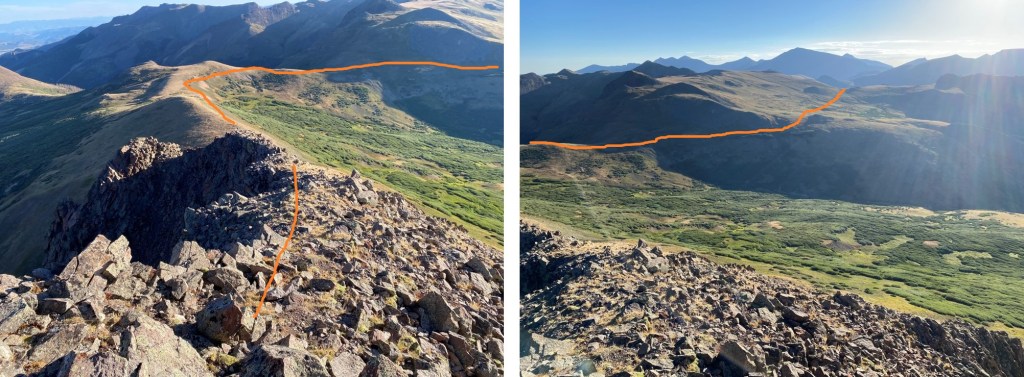
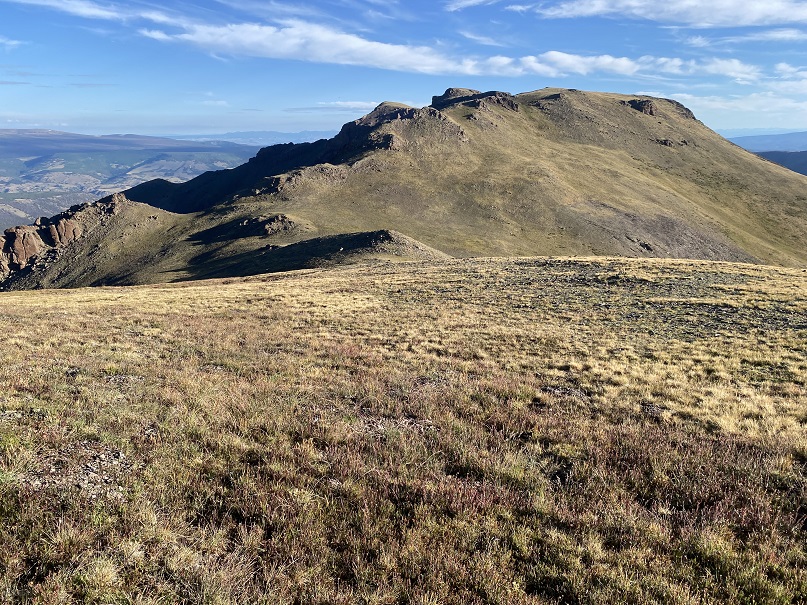
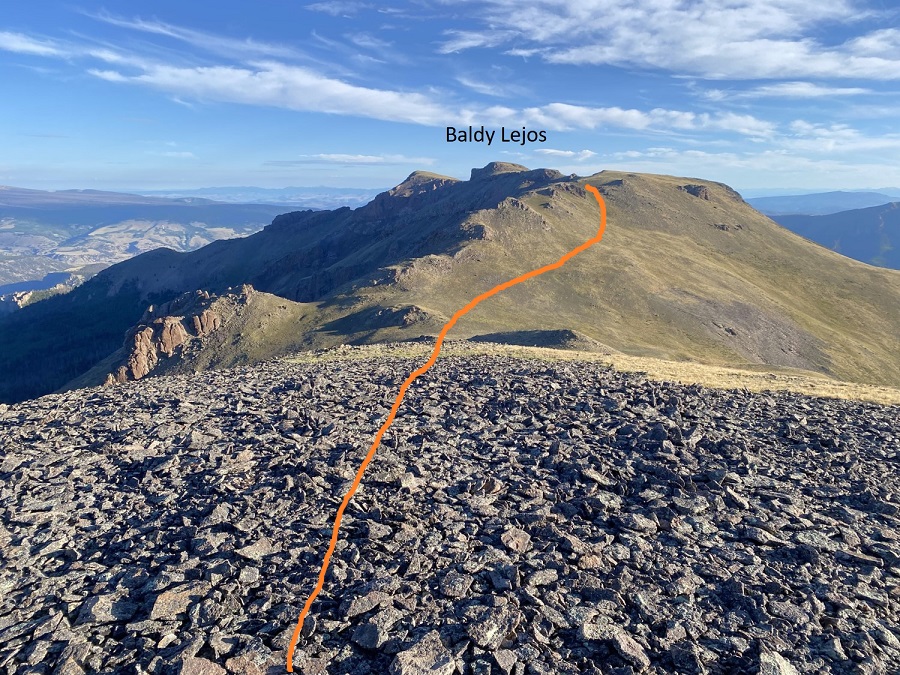
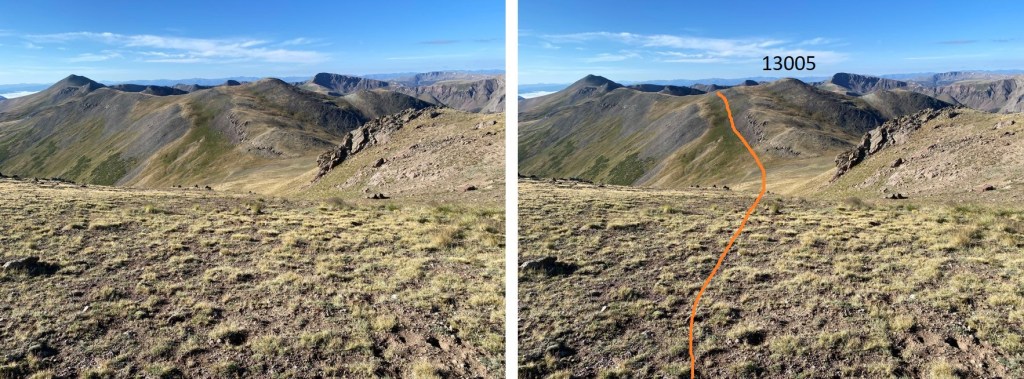
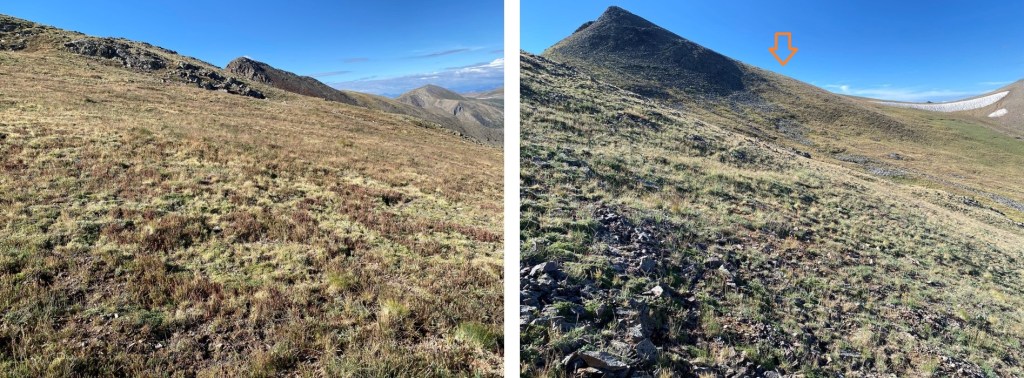
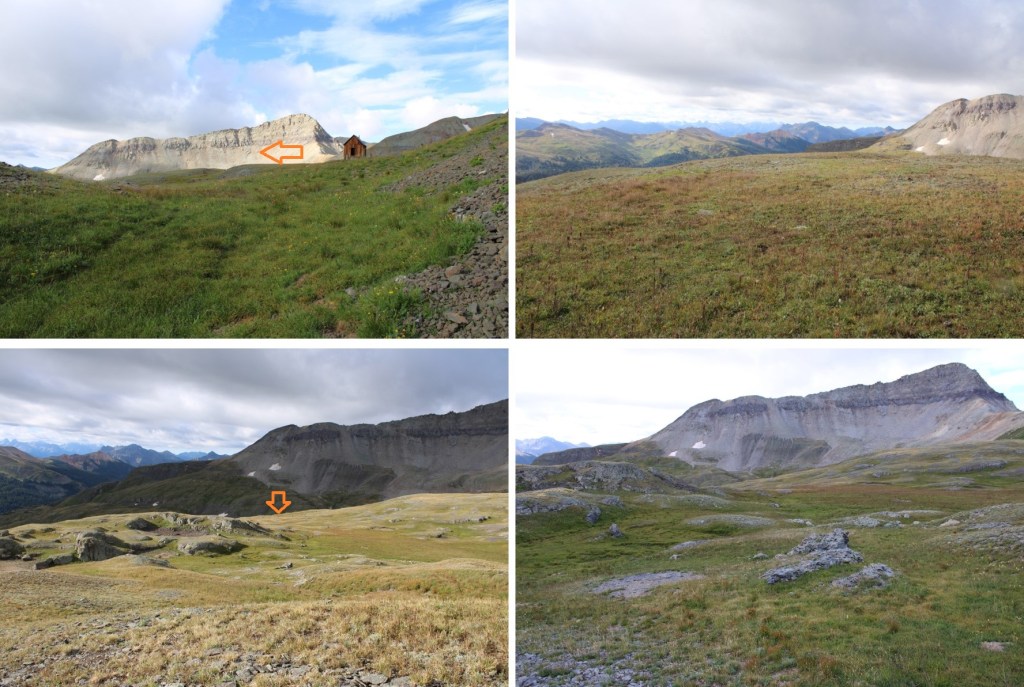
To get there, I made my way northeast to the 13509/Telluride saddle, then northwest to the summit of Telluride.  This was a chossy, class 2 ridge hike with a few game trails mixed in.

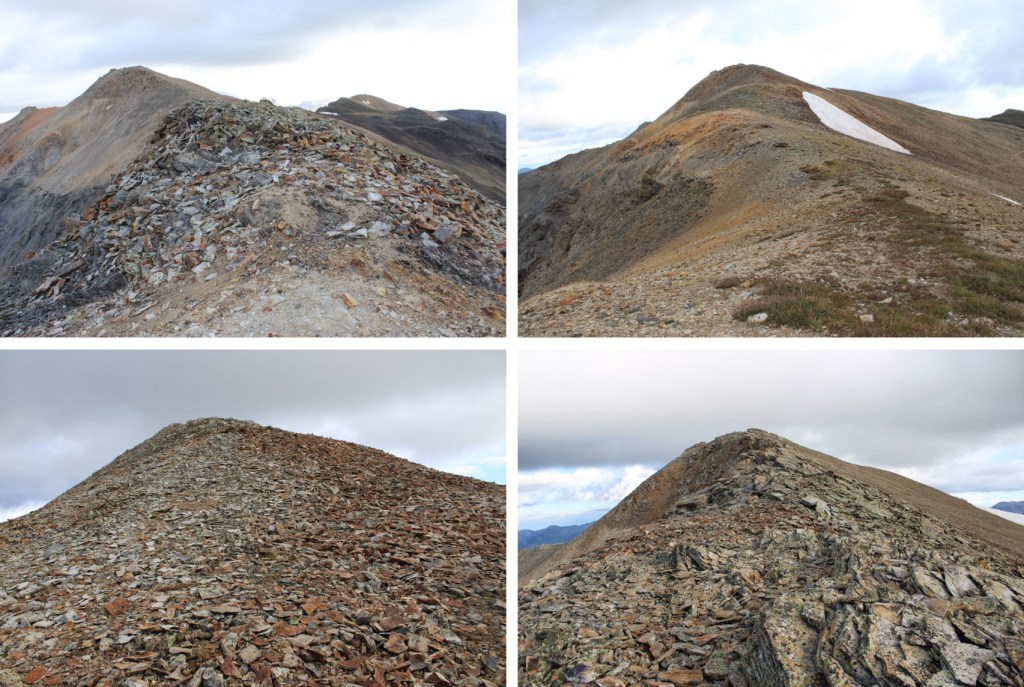
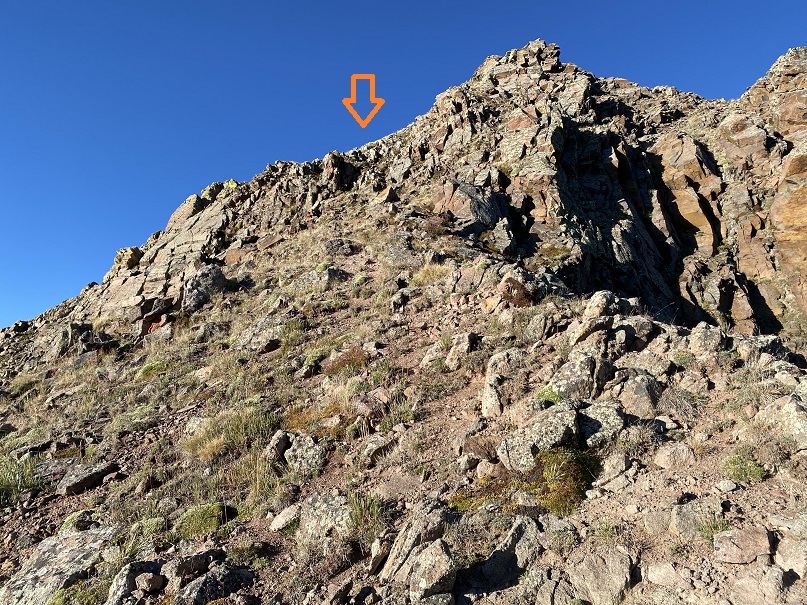
The easiest way to access the summit is from a class 2 ramp to the left of the summit boulder

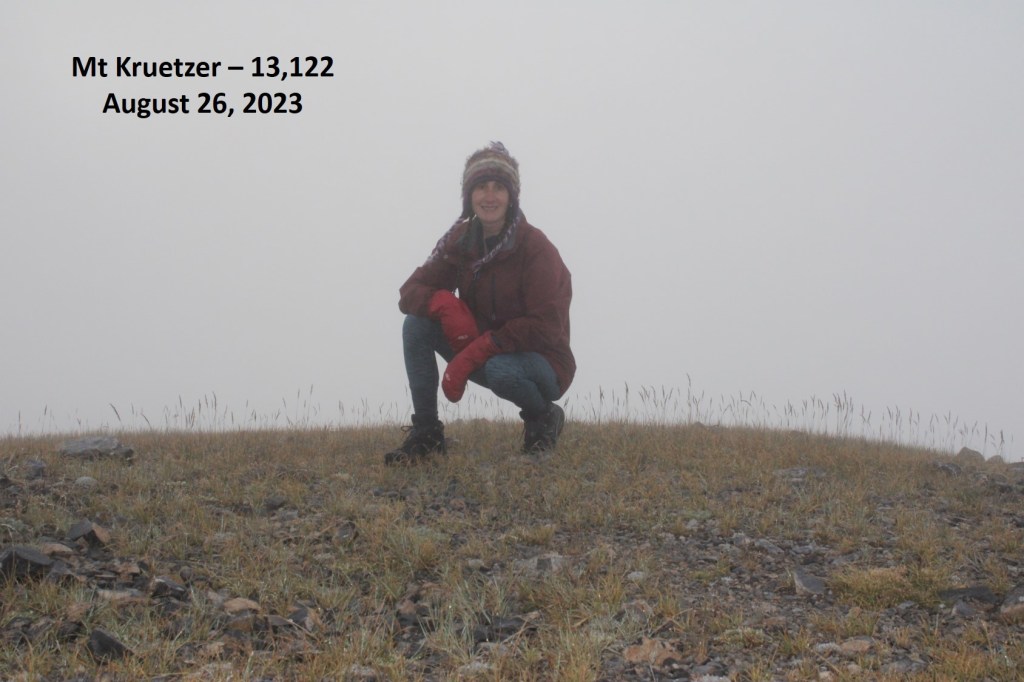
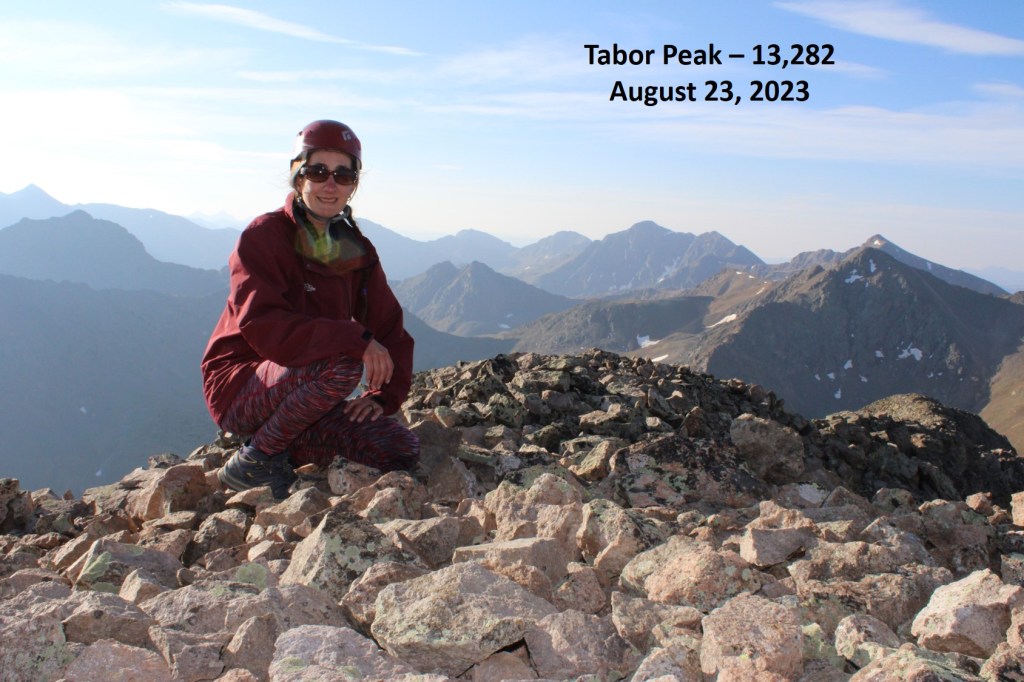
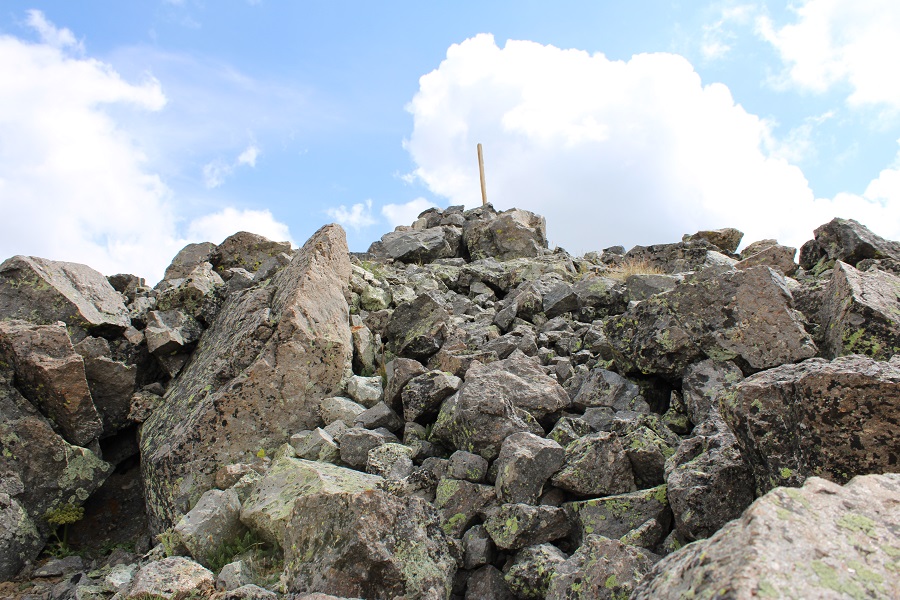
I summited Telluride Peak at 8am
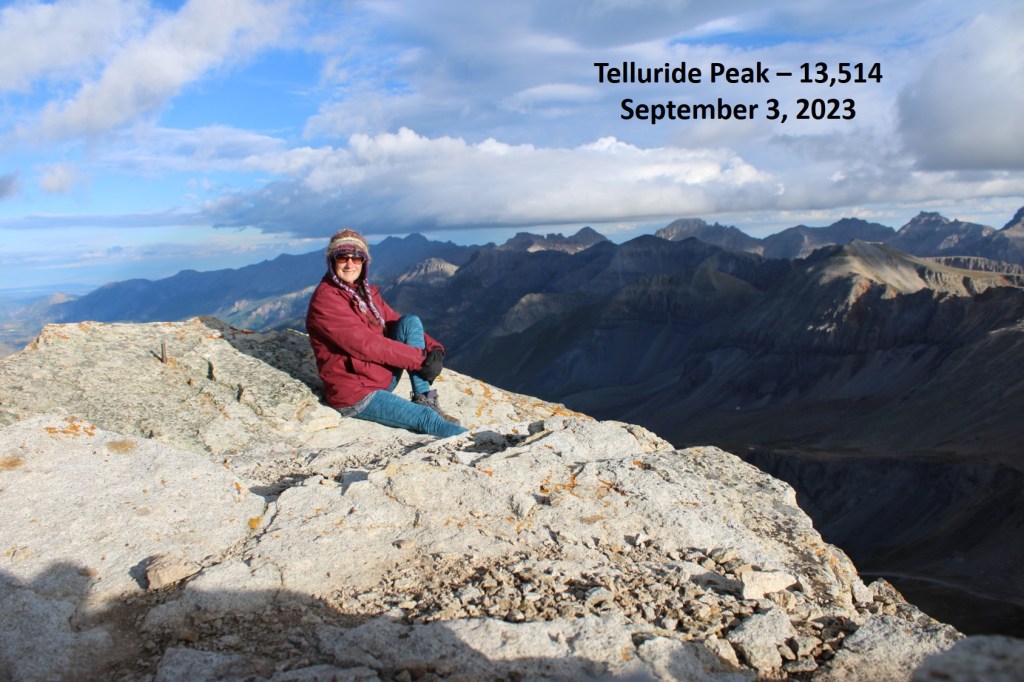
Telluride Peak:

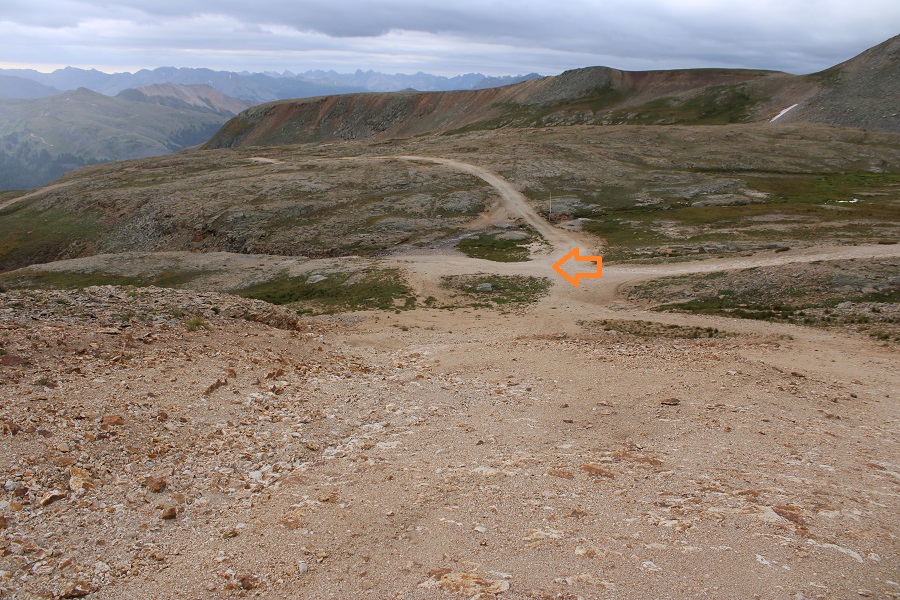
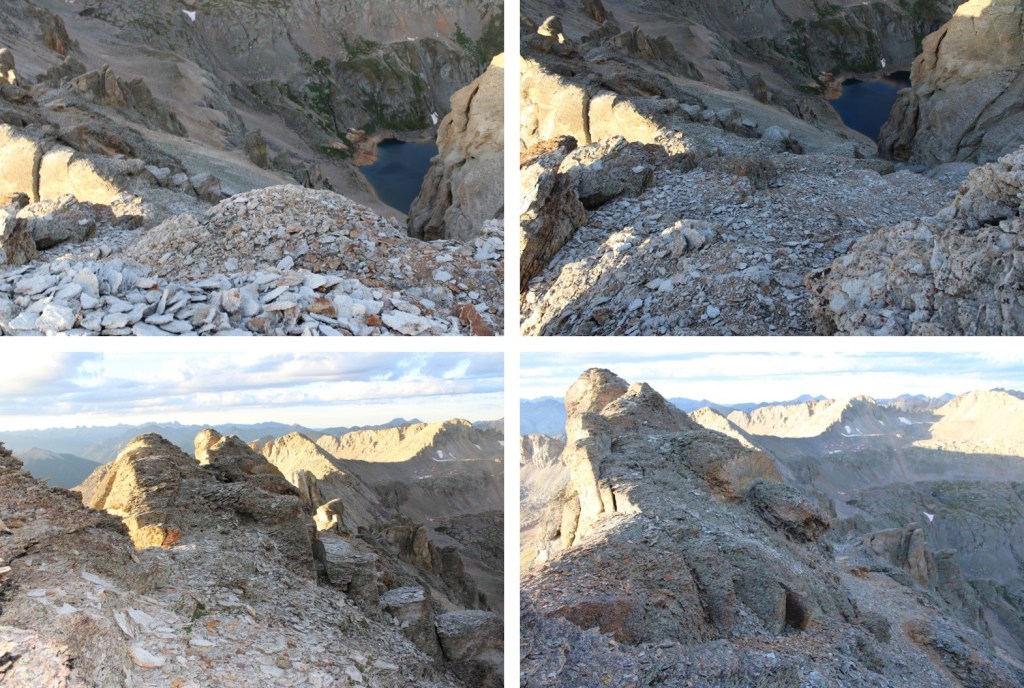
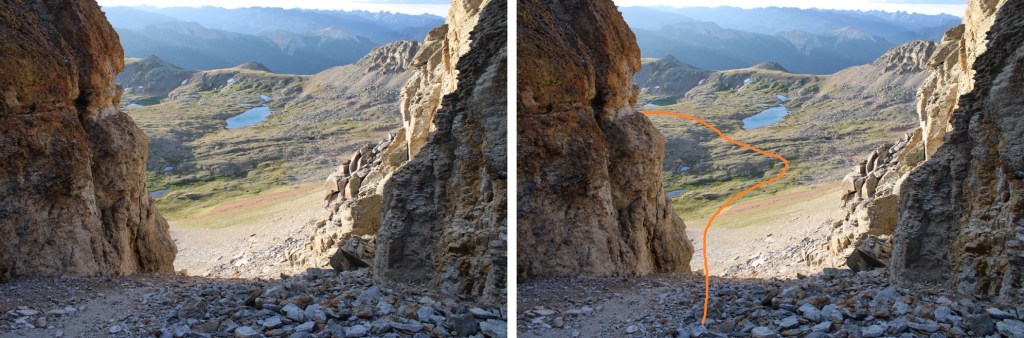
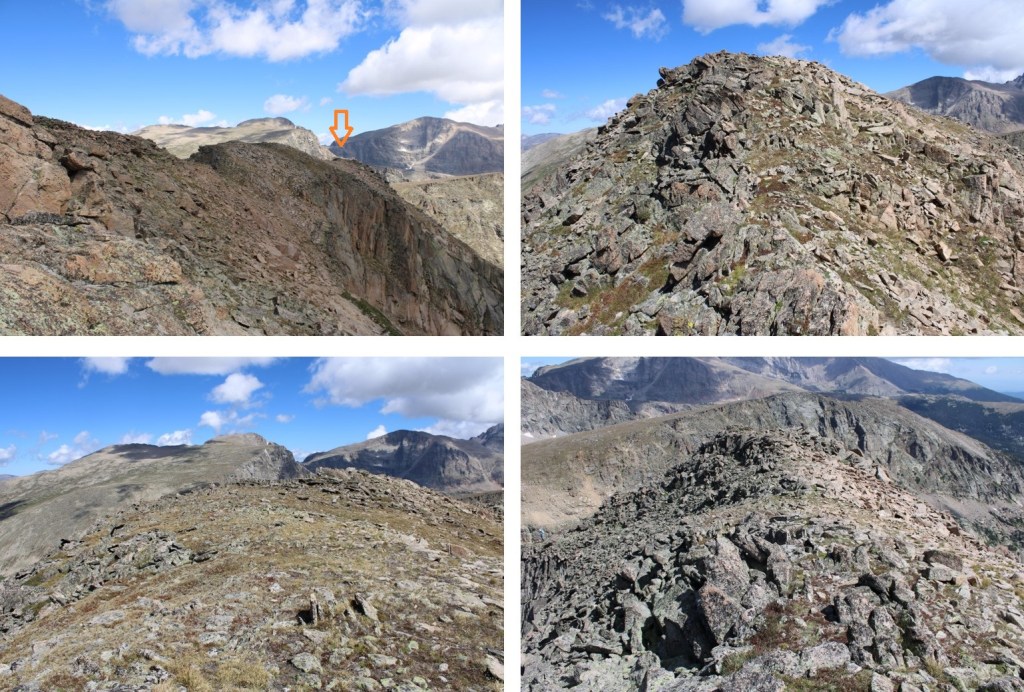
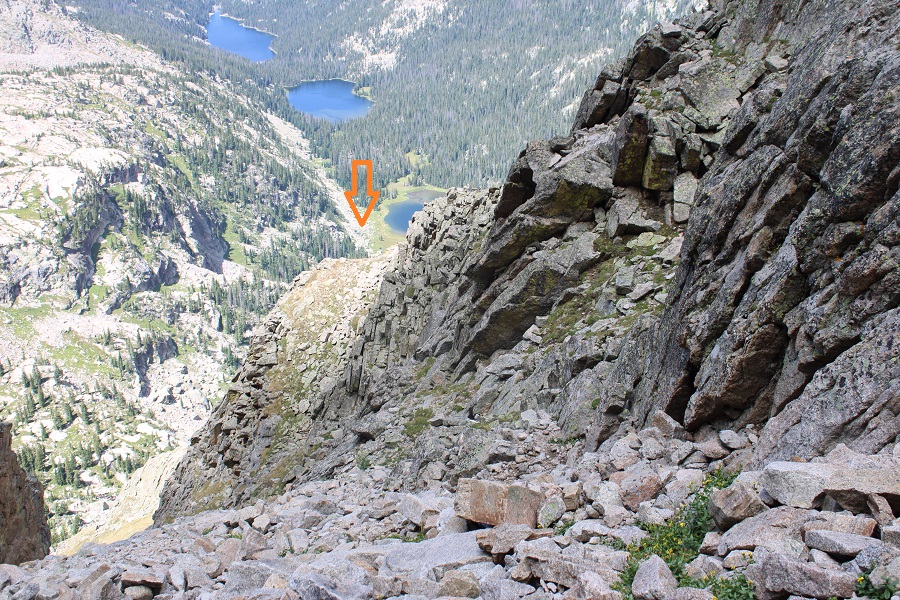
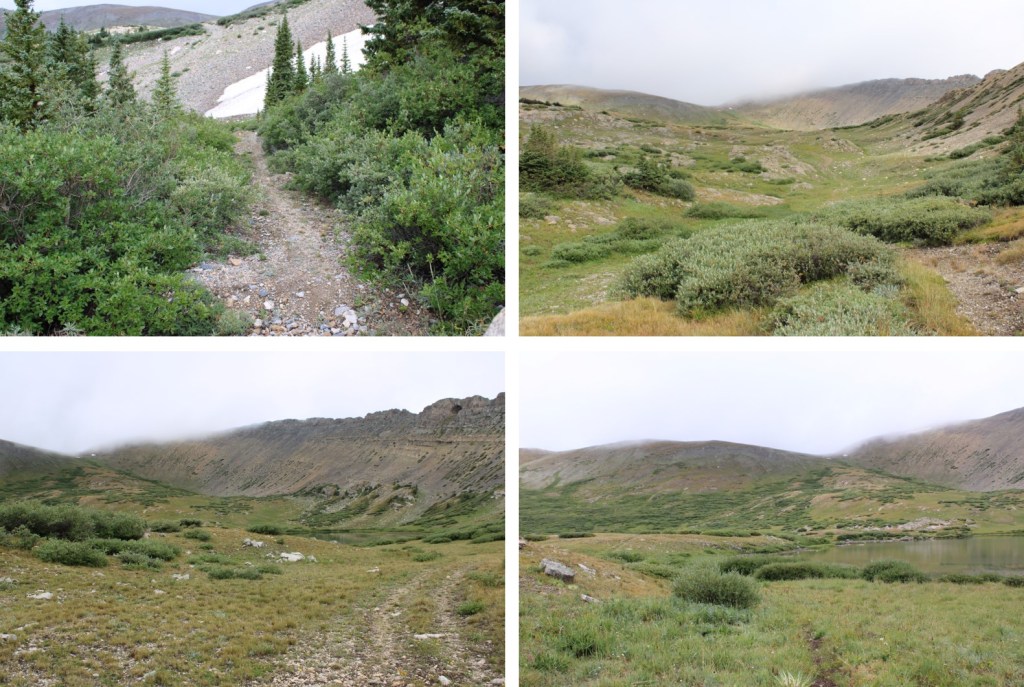
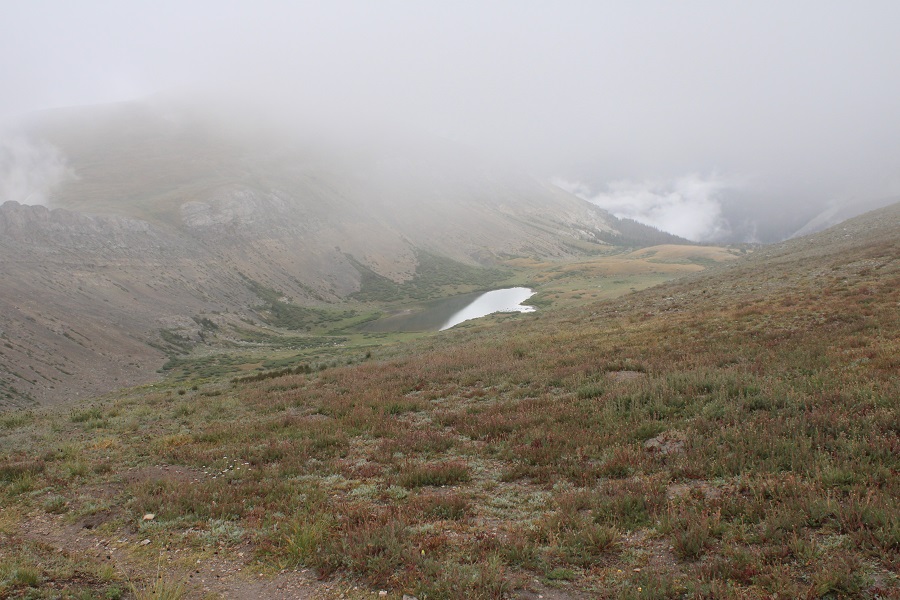
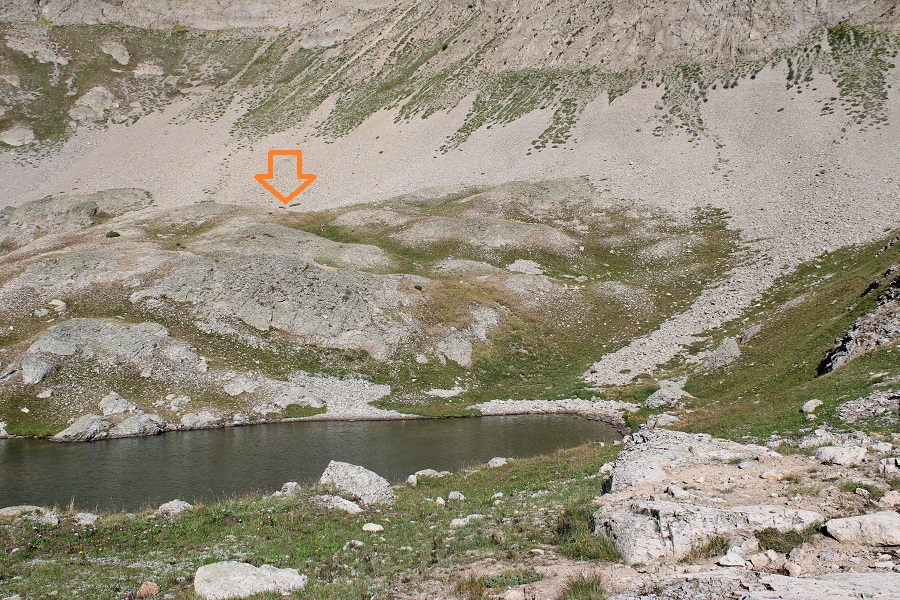
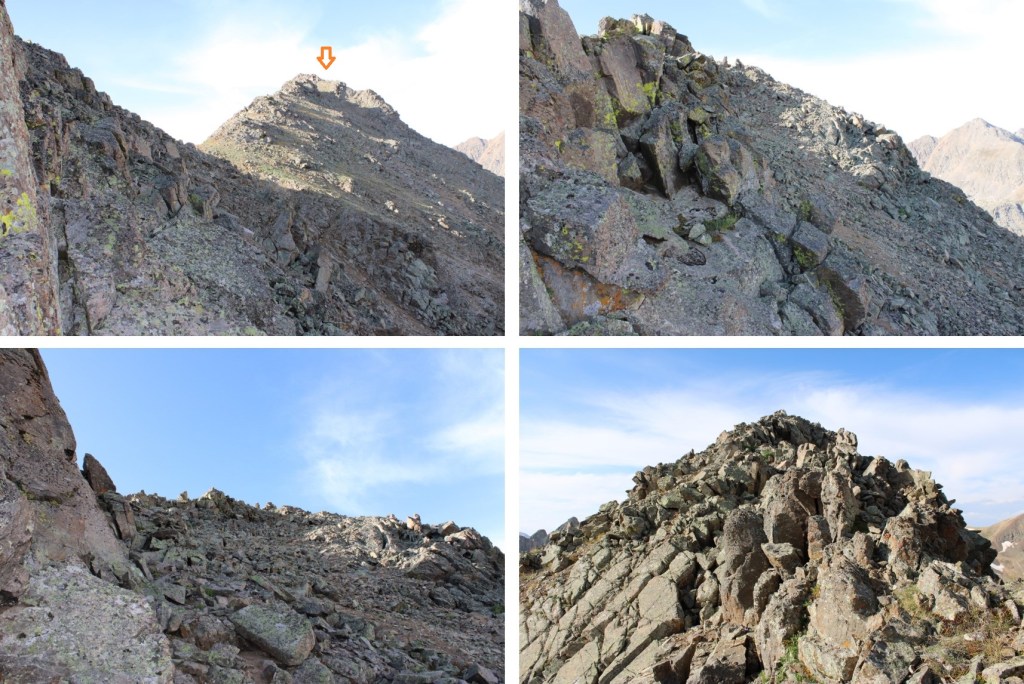
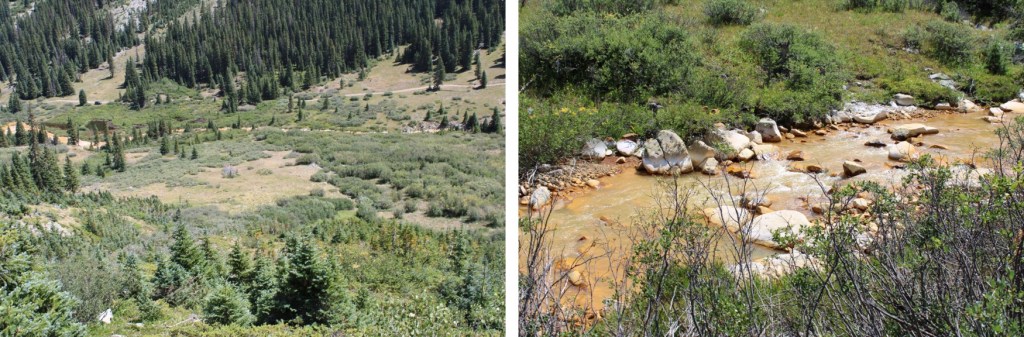
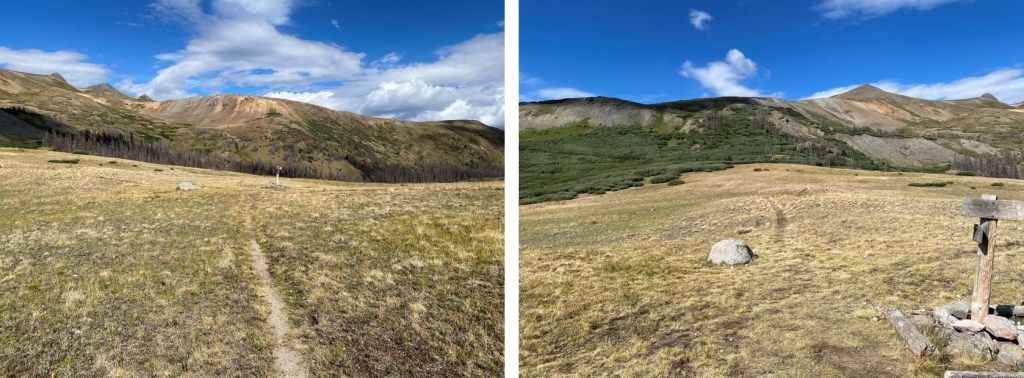
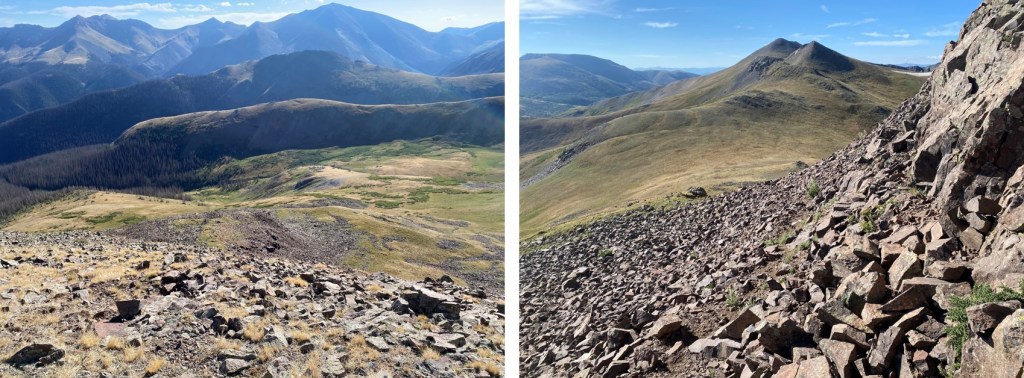
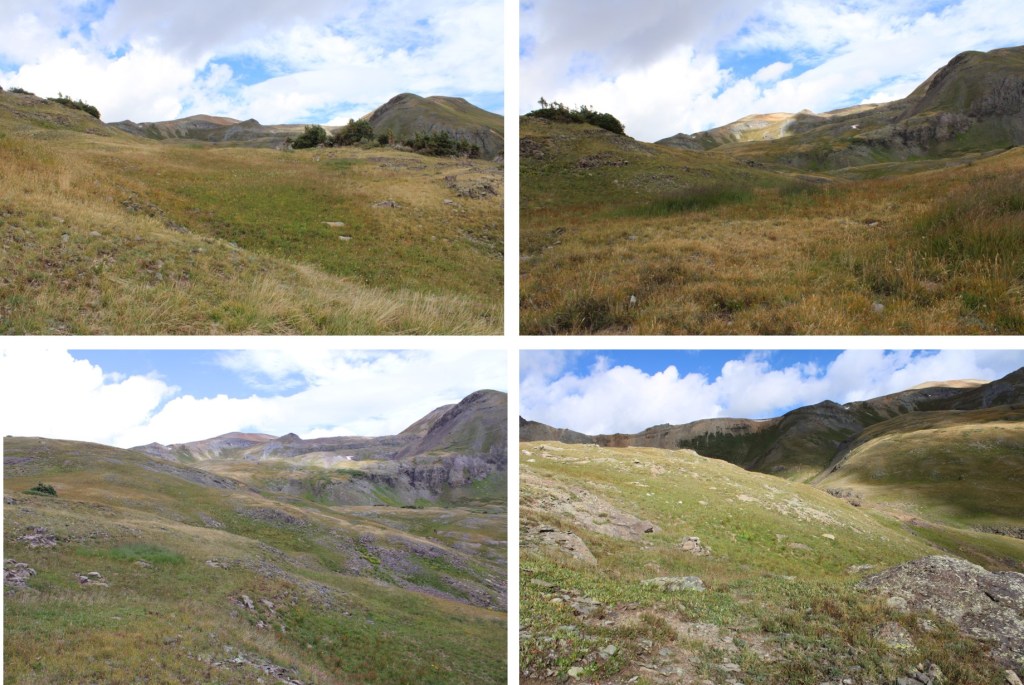
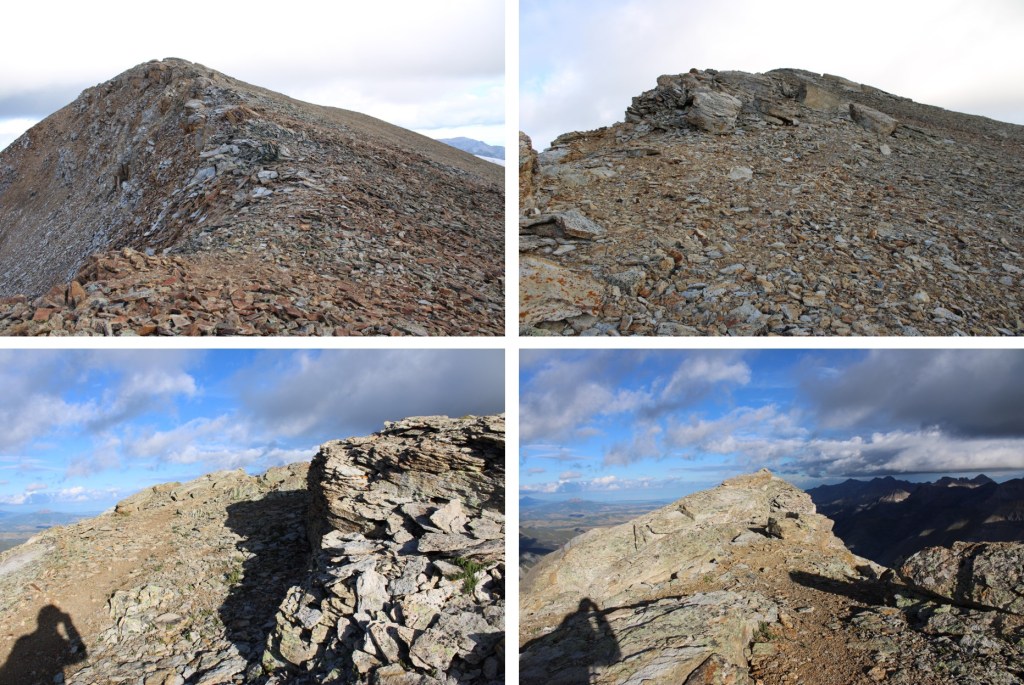
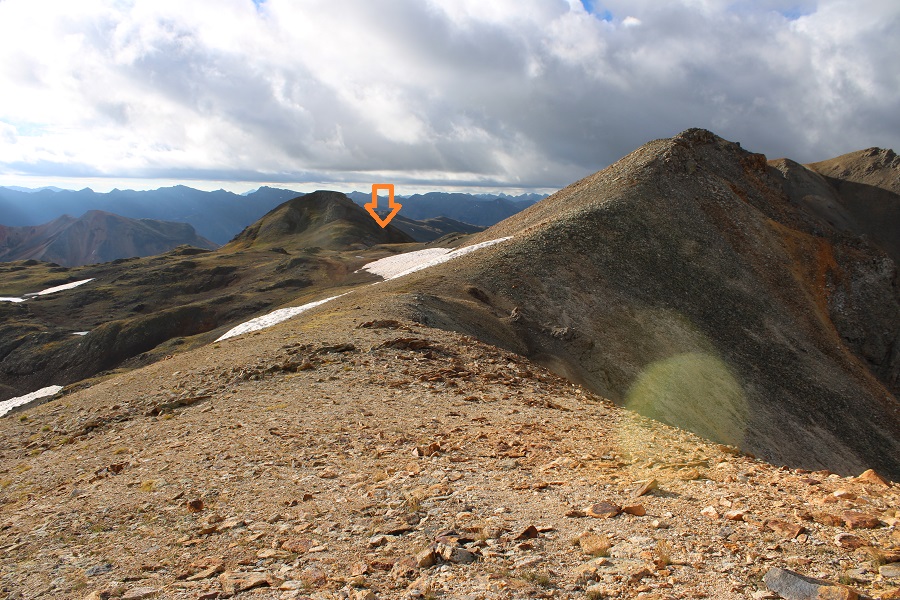
Now to head back to the trailhead.  I looked southeast, and could see Ptarmigan Lake.  I didn’t want to descend that low, so instead I made my way back to the 13509/Telluride saddle

I then continued heading southeast to this point

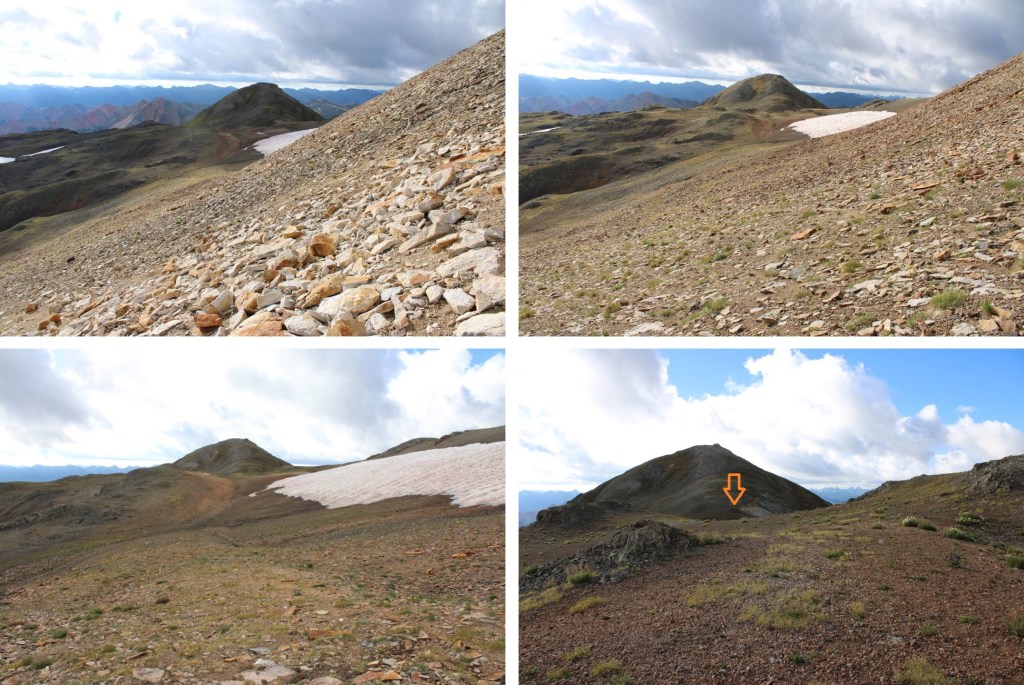
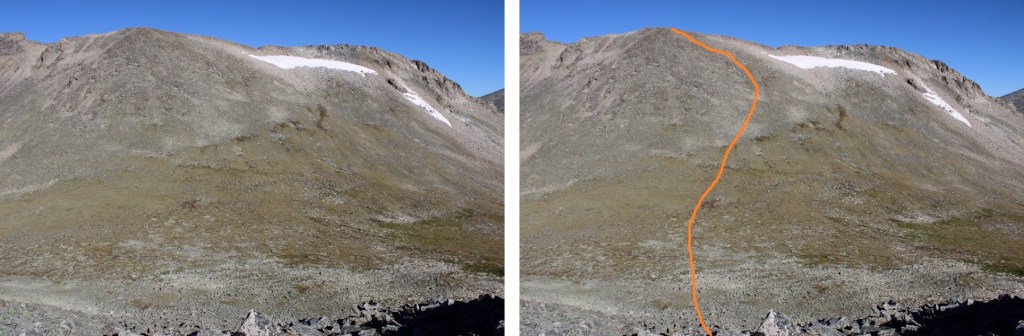
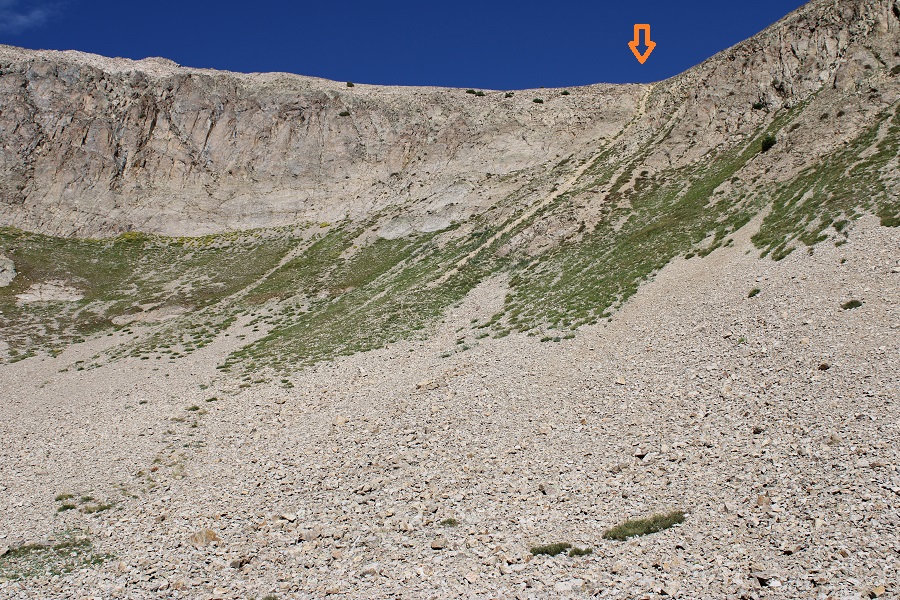
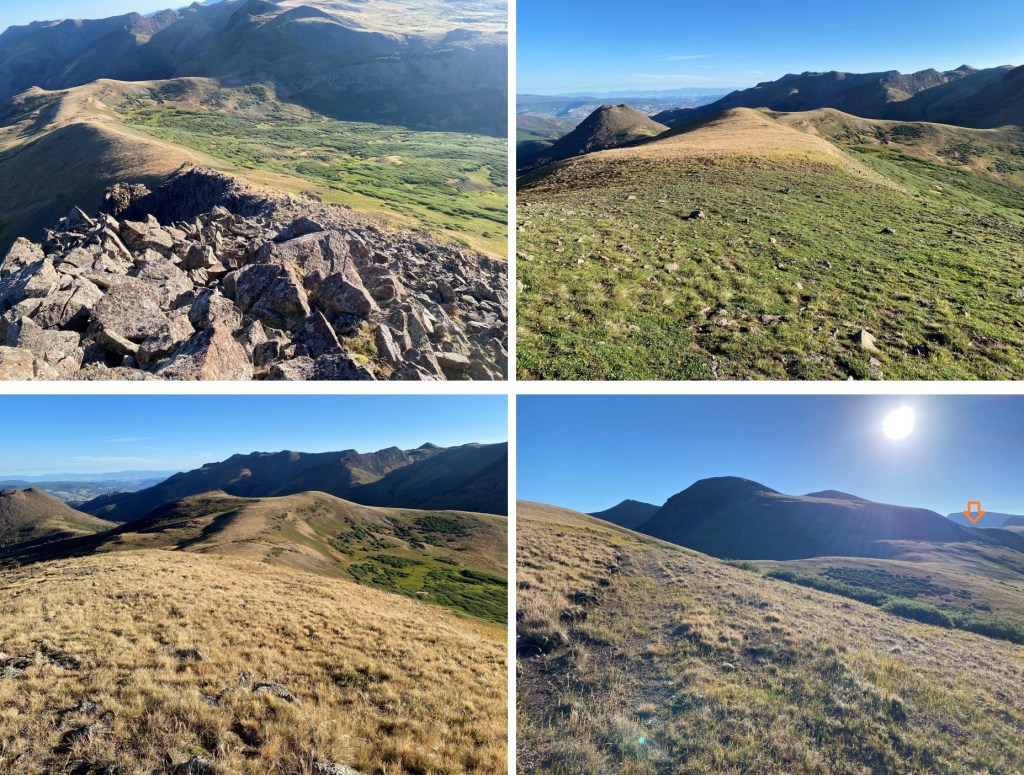
Once there, I turned right and hugged the side of PT 13265 until I came to a gully

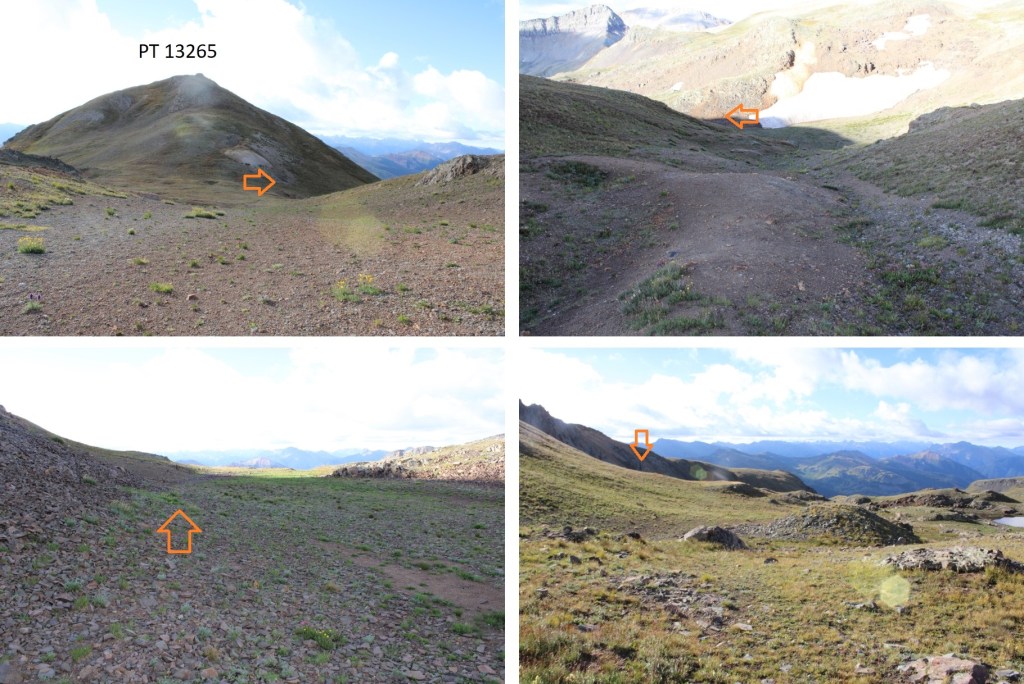
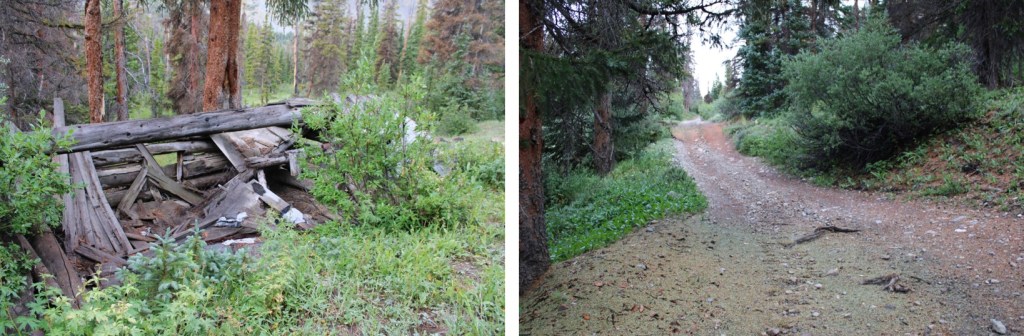
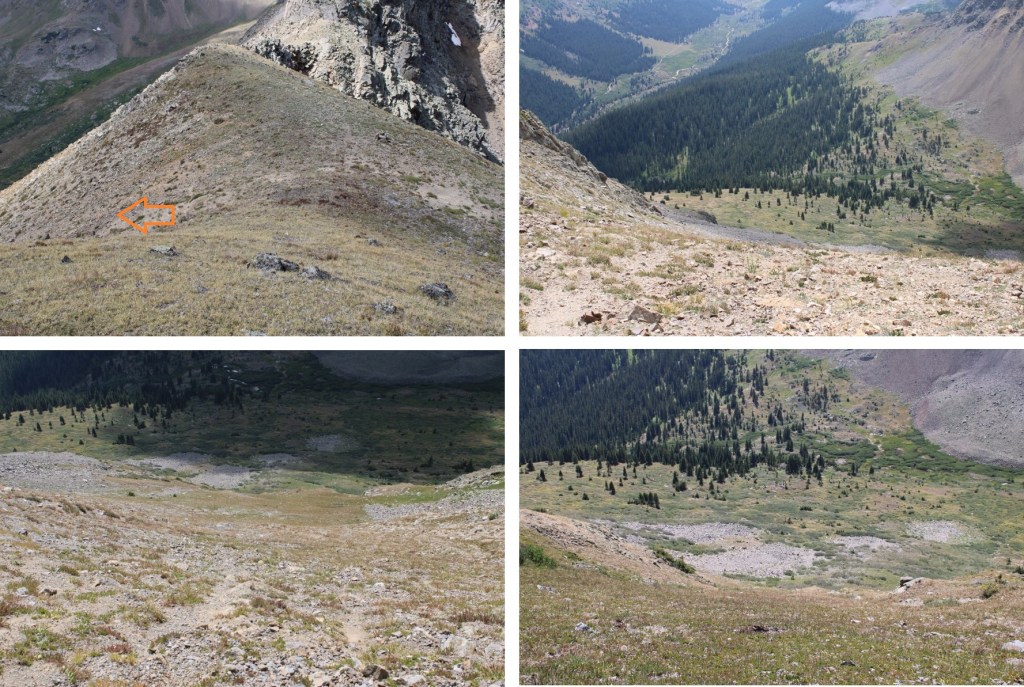
I descended the gully, and aimed for an old cabin I could see to my right

Here’s looking back at the gully I descended

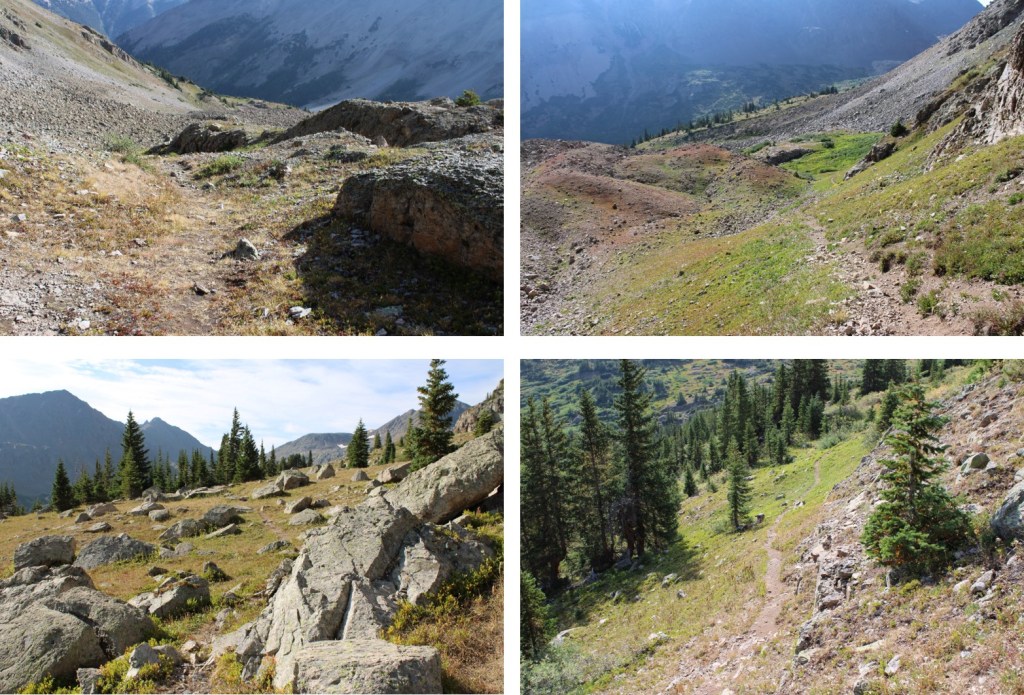
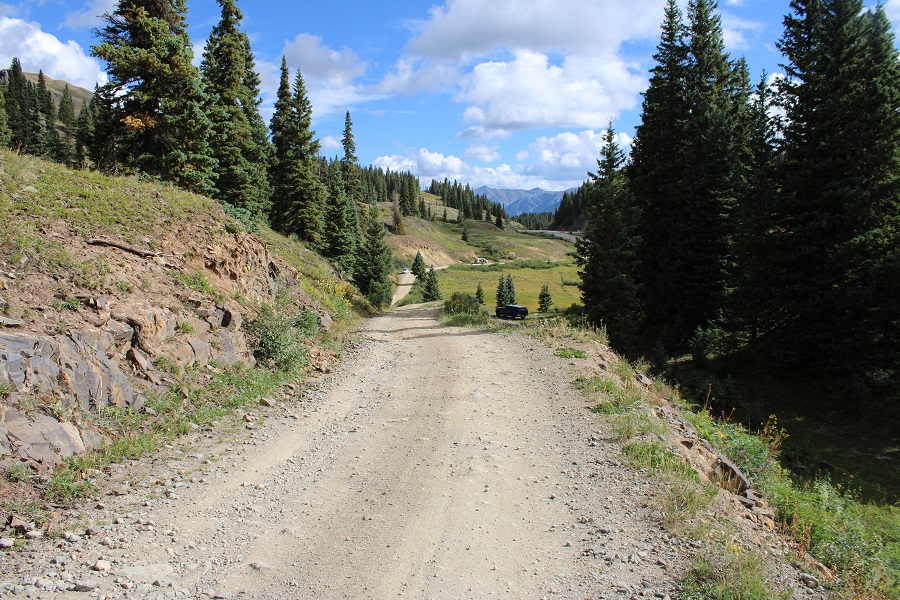
At the cabin I turned left, and headed south through the basin

As I descended, I could see my route in, and decided to take the same route out of the basin.  I could even see the game trail that picked up on the other side (it doesn’t last for long).

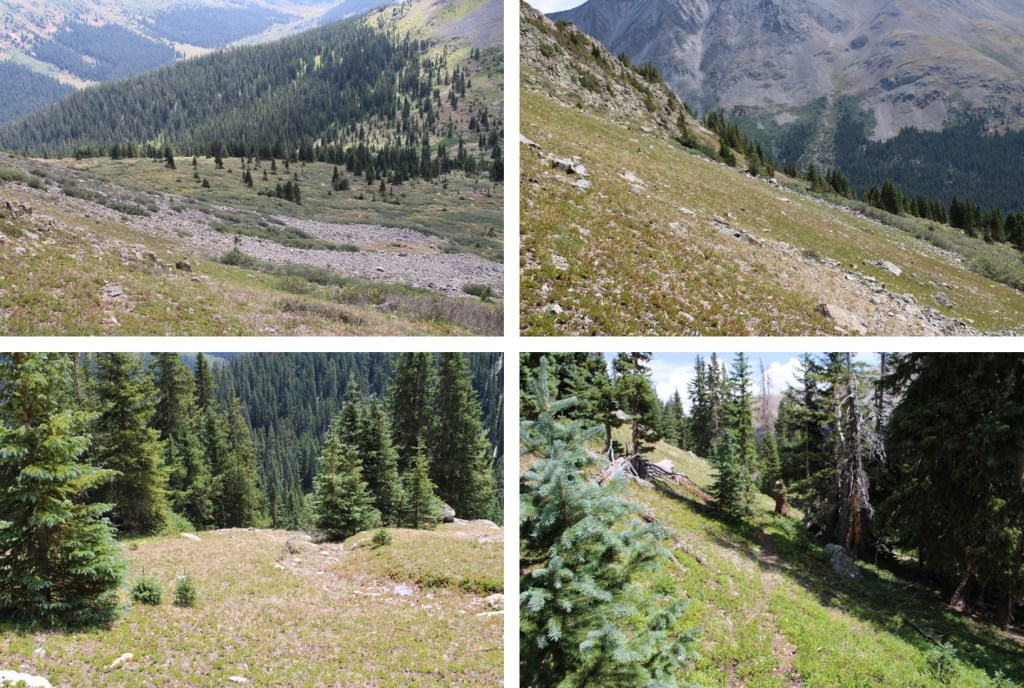
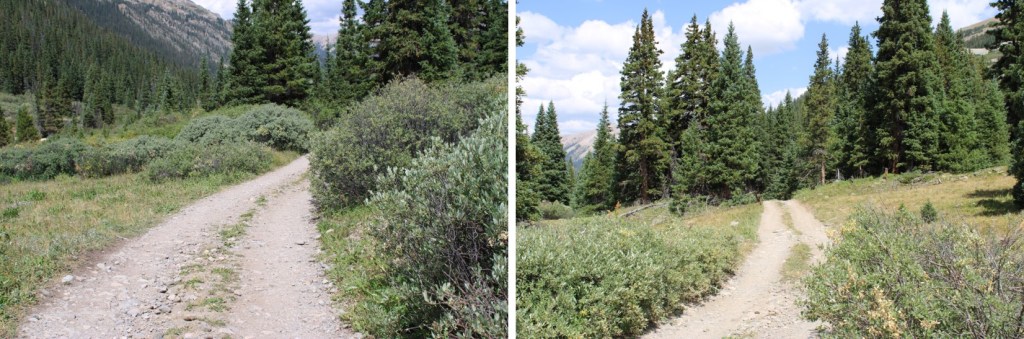
Back on the “trail” I followed it southeast as it hugged the mountainside

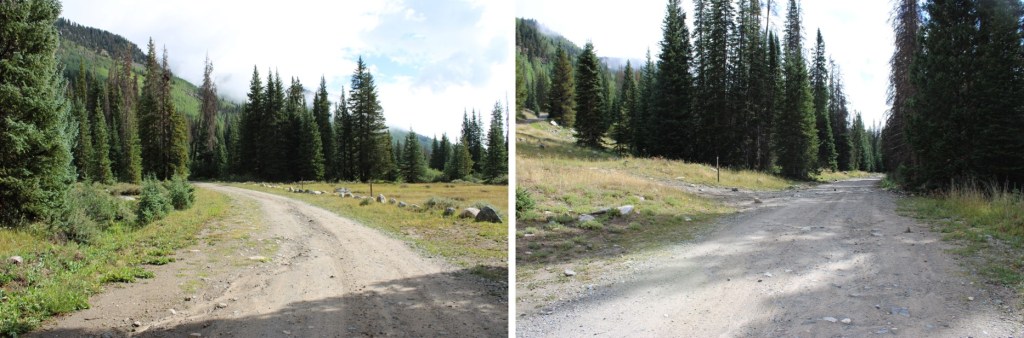
Then it was back down the drainage that led to the mine

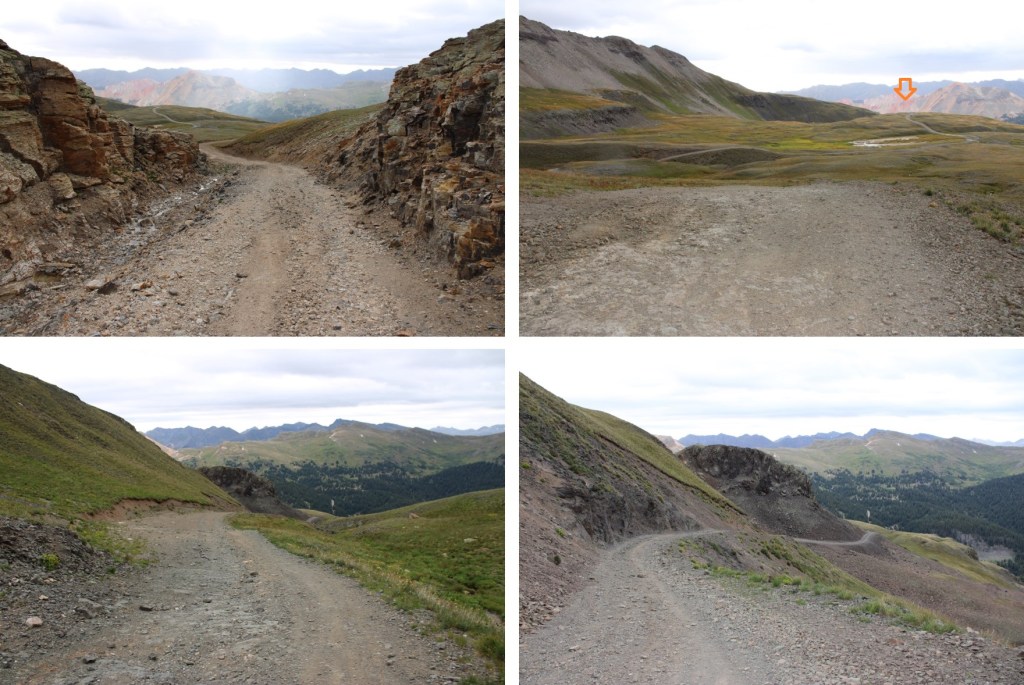
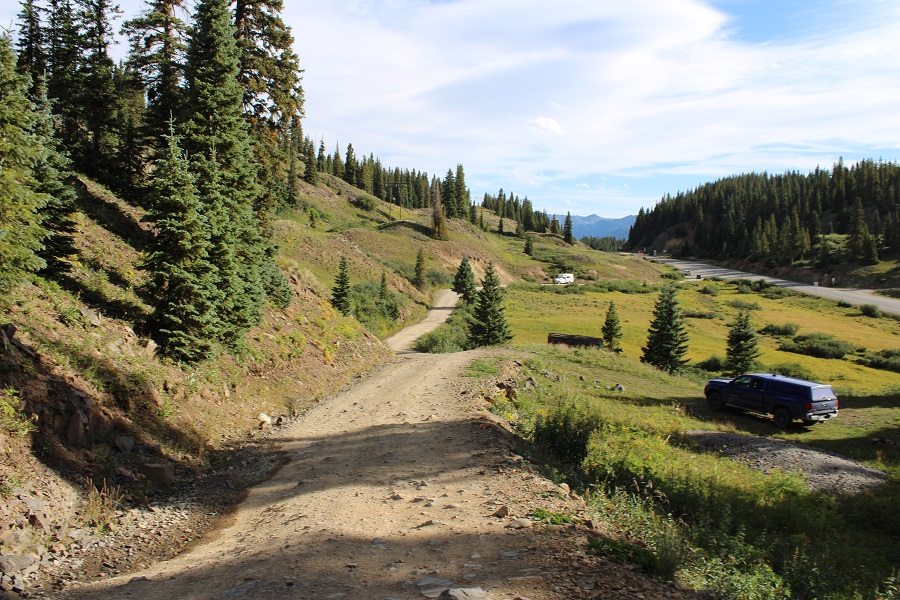
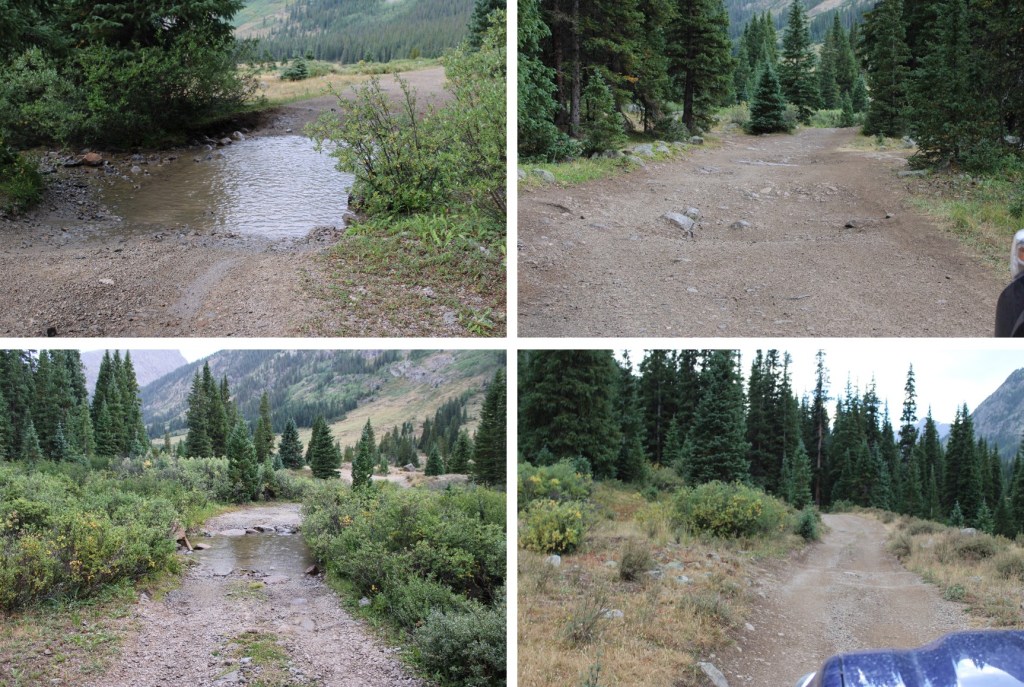
Back at the mine, I picked up the trail that led me back to the 4WD road

Then I followed the road back down to Red Mountain Pass

I made it back to the trailhead at 9:30am, making this an 8.39 mile hike with 2744’ of elevation gain in 4.5 hours.

On to the next trailhead!

T 10 – 13,484 and Trico Peak – 13,321

RT Length: 9.52 miles

Elevation Gain: 3260’

I’m not gunna lie, this was my third attempt at T10.  I’d attempted it twice earlier this year, when there was too much snow to access from the Three Needles side, and another time when I felt the terrain was too loose on the Trico side.  Both times I’d made it to within 100 feet of the summit, but called it for safety reasons.  Also, I’d been in the area, took a bunch of pictures, and I had a plan.  I wanted to make this a class 2 hike in a different way.  Spoiler alert:  I was unable to make that happen. Sorry folks, T10 is class 2D/2+ (both mean steep scree,  and honestly, I’d much rather climb a class 3 peak) from Black Bear Pass, sketchy class 3 from the Three Needles side. 

I was parked at Red Mountain Pass, which had a sign indicating Black Bear Pass was closed to vehicular traffic. Now, a 4WD vehicle can make it to the pass from this side (it was open when I was here in July of this year) but they’ve closed the gate, presumably from difficulties on the other side of the pass, because this side was and has been clear to go.

I and on the trail at 5:30am.  I took 4WD 823 to the Black Bear Pass/Prophyry Basin junction.

I quickly came to the Black Bear Pass/Prophyry Basin junction and continued straight towards Black Bear Pass

Although steep at times, a standard 4WD should be able to make it to the pass if it were open

The pass was indeed closed to vehicular traffic.

I walked around the closure and continued towards Mineral Basin.

The road continues through Mineral Basin all the way to Black Bear Pass. I could now see T10

The road splits before the pass, but both roads circle back to the same place.  I’m assuming the road to the left is for when there’s still snow on the main road, as there was late July of this year.

There is an obvious road that goes all the way to the base of T10

At the end of the road I sat down and strapped on my helmet and microspikes, and looked at the route up. 

Last time, I’d gone too far to the right, and the terrain became too steep to climb.  This time I stayed more to the middle.

There were tons of game trails here, which most likely weren’t game trails at all but runouts from the snow.  The rocks were not stable, no matter what size they were.  Lots of scree here as well.  Here are some pictures of my route up T10.   Be forewarned, it looks like the rocks shift every year.   Some large rocks were in a different place than they were 2 months ago.

Once on the ridge the summit was clear. 

Here you can see the ‘other’ 13477 to the left and the summit cairn circled)

I summited T10 at 7:30am

T10:

There was a storm coming in, so it was windy and cold.  I didn’t stay long, and instead headed back down towards Black Bear Pass the way I’d summited

Back down on the road, I looked over at Trico Peak, and around at the weather. 

It had been sprinkling off and on, and the wind was fierce, but I knew from the last time I did Trico it was a quick and straightforward hike.  I decided to go for it. This is the overall route I took

After the road ends, there is a game trail that goes pretty much all the way to the summit, keeping Trico Peak class 2.

I summited Trico Peak at 8:20am

Trico Peak:

I’d made it, but the wind was fierce, and I could see storms all around me.  I jogged back down to the pass, stopping only a few times to take pictures of the route

Back on the 4WD road, I turned left and followed it back down Mineral Basin to Red Mountain Pass

I made it back to my truck at 9:30am, making this a 9.52 mile hike with 3260’ of elevation gain in 4 hours.

Three Needles – 13,494

RT Length:  8.82 miles

Elevation Gain: 2420’

I drove up the night before, and parked at Red Mountain Pass.  There’s a dispersed campsite you can see from the road that I like, so I parked there.  There are a few more sites further up.

Knowing the area was supposed to get rain and storms starting at 9am, I was up and on the trail at 4:30am.  I followed Road 823 to the junction with Black Bear Pass.

At the junction with Black Bear Pass, I turned left and followed Road 622 through Porphyry Gulch

It was 2.6 miles from Red Mountain Pass to the upper trailhead, on an easy 4WD shelf road with few passing areas.  When I got to the upper trailhead, I was surprised to find someone had set up camp in the upper parking lot/turn around area.  Normally, there’s room for 7 cars here, but these people took up at least 4 spots.  When the ant train of 4WDs come up later today, they are not going to be happy.

The trail starts to the left of the parking area, and is initially well defined.

In the dark, the trail was difficult to find for a bit.  I was aiming for these rocks

Just behind these rocks, a nice trail picks up to the right, and brings you to Bullion King Lake. 

Here’s where the trail ended.  I skirted the lake to the right, and started heading northeast into Porphyry Basin

There’s no need to climb all the way to the top here.  I skirted to the left, and continued heading northwest.  If you look around, you’ll see remnants of old mining equipment and structures in the area, but they’re all flattened at this point.

Here is where I strapped on my helmet and microspikes. I could clearly see Three Needles in front of me.  I went straight up this gully.

The gully was full of shale and scree.  It was loose, and hard to get stable footing.  I was glad to have on my microspikes.  It looks like the terrain shifts every year, as well as every time it rains. Towards the top there are game trails, but they were more needed down below.  Here are some pictures of the gully

At the top of the gully, I turned right, and followed the scree

I was headed here

I looked for a weak point to ascend, and found this chimney.   I didn’t climb up the chimney, but you certainly could

Instead, to the right of the chimney I found a narrow ledge.  Yay!  Being short is finally working out for me when it comes to scrambling!  I climbed up to the right of the chimney, they traversed left to the ridge.

The ridge was short but full of kitty litter and talus. It never got worse than easy class 3, but it was loose. 

This is the overall route I took to the summit

And some step-by-step pictures

I summited Three Needles at 6:45am

Three Needles:

I had cell service, so I checked the weather, and even though I could see dark clouds and virga in the moonlight this morning, it looked like the weather had been pushed back until later in the day.  So I decided to sit on the summit for a bit, and enjoy the cell service and sunrise.

This was an out and back hike for me, so I retraced my steps to the access gully

Once again, I did not descend the chimney, but ducked under a rock ledge to the left, then headed down

At the bottom of the chimney I turned left, and headed back to the access gully

From the top of the gully, I could see my route out of the basin

The gully was much easier to navigate heading down, but still very loose.

Now to make my way back to Bullion King Lake

And pick up the trail on the other side that lead me back to the 4WD road

Back at the upper trailhead, I followed the 4WD road back to Red Mountain Pass


I made it back to Red Mountain Pass at 9am, making this an 8.82 mile hike with 2420’ of elevation gain in 4.5 hours.

Mahana Peak – 12,643 and Isolation Peak – 13,114

RT Length:  21.79 miles

Elevation Gain:  5665’

I parked at the Wild Basin Trailhead inside Rocky Mountain National Park and was on the trail at 4am. There’s plenty of parking here, but they have timed entry from 9am-2pm every day. 

The trailhead starts at the south end of the parking area

I followed the signs for Ouzel Lake/Bluebird Lake.  This class 1 trail is really well marked, so it’s difficult to get lost if you read the signs.  I passed several waterfalls (Copeland Falls, Calypso Falls, and Ouzel Falls).

After hiking for 4.75 miles I came to the junction for Ouzel Lake and Bluebird Lake.  I turned right onto the Bluebird Lake Trail.

I didn’t stay on this trail long however.  Maybe about 10 yards or so. Then I left the trail and headed northeast to gain the ridge

This is where I startled a moose.  He was about 15 feet away from me when I saw him, so I quickly ducked behind a large boulder.  Usually, moose run away when they see you, or ignore you, but this guy seemed interested in me.  I’ve seen probably over a hundred moose in Colorado, and I’ve only been charged once.  This guy looked like he wanted to charge me, so I remained hidden.  For a solid 15 minutes, every time I peeked out from behind the boulder, he was still staring at the boulder I’d hidden behind.  I know moose have poor eyesight, so while he knew I was still there, he was probably trying to figure out if I were a threat or not.  (That’s Chickadee Pond in the background).

Eventually I crawled away on my hands and knees so he couldn’t see me in the brush, and continued my way up the ridge.  This included a lot of bushwhacking through downed trees.  A lot of downed trees.

Once I made it to the ridge, I followed it west to treeline

The route from here was straightforward.  I stayed o the ridge, following it west.  The terrain started out as loose rocks, then changed to tundra.

When you get to the tundra, don’t be fooled:  this is a false summit.  Stay to the left of it

This is the true summit of Manaha Peak.  It’s easy class 2 to get there

I summited Mahana Peak at 9am

Mahana Peak:

From Mahana Peak, I could see Isolation Peak to the northwest

To get there, I headed northeast along the ridge until I came to a low point, and then headed northwest towards the ridge.

This is the overall route I took to gain the ridge of Isolation Peak.  If you look carefully, you will see a green band of grass that makes the route easy to follow.  I descended on rocky terrain, then was greeted with tundra, then rocky tundra as I ascended.

Once on the ridge, I turned left and could see Isolation Peak to the southwest. This was a class 2 hike, sticking to game trails either directly on or to the left of the ridge, until the last 10 feet or so, when it was a quick class 3 scramble to the summit

I’m pretty sure this block is the summit.  I sat on it, but briefly.  Pictures/video were difficult.  The summit rocks didn’t feel stable, and I could see through them to air below if I looked down. 

I summited Isolation Peak at 10:30am

Isolation Peak:

Here’s looking back at Mahana Peak from Isolation Peak

If you’re not up for class 3-4 scrambling, now’s the time to head back the way you came in, towards Mahana.  It’s the fastest route.  If you’re up for some scrambling, strap on your helmet if you haven’t already, and head northeast along the ridge.  Some of this ridge I’d consider choose your own adventure.  This is the route I took, keeping it class 3, with some easy class 4 scrambling (down chimneys/gullies).

I was now back to where I ascended the ridge, and followed the ridge northeast.  There is a lot of elevation gain and loss on this descent

I went to the right of this boulder.  Getting through was sketchy class 3.  The boulders were large, but there was a lot of empty space between them, and they didn’t feel solid. 

My next objective was to make it here (this was class 2, sticking to the ridge)

This is where it got a bit tricky.  I turned left, and descended into a rather large and steep gully.  I spent a lot of time in this gully route finding, and my advice is to stick to the gully proper until you make it down to 12160’.  You’re trying to go below this rock formation, which goes a lot further down than you’d think.

I turned left, and descended into the gully

I came to a place that looked like it cliffed out, but it was really just a drop onto a boulder, then a 7-foot downclimb. 

Here’s looking back up at the gully

And a look at the final drop.  The boulder in the middle was essential to the descent.

This was at about 12160’, where I stopped descending the gully, and looked for a grassy ledge climbers right. 

I made it to the ledge, descended another grassy ledge, then reascended a grassy ledge to re-gain the ridge

For those of you doing this the opposite way, here’s a look back at the grassy ledge I descended.  You can see why I had to drop down so low in the gully, with the sheer cliff face to navigate.

Here’s how I got around the next few obstacles

And that was it for the climbing for today.  I kept my helmet on because I still had a scree-gully to descend, but all the class 3 and 4 stuff was done.  I’d wanted to head over to Mt Alice today too, but clouds were forming and I didn’t think it was a good idea.  I headed towards Boulder-Grand Pass, turned right, and descended the gully towards Lake of Many Winds.  From the pass, it was 9.5 miles back to the trailhead.

A good trail picks up here, and leads all the way back to the Wild Basin Trailhead.  Here you can see Thunder Lake.  This trail becomes the Thunder Lake Trail, skirting the lake to the left.  This is a class 1 trail.  Once again, it’s very well marked, with signs indicating the route back to the Wild Basin Trailhead

I made it back to the trailhead at 4:45pm, making this a 21.79 mile hike with 5665’ of elevation gain in 12 hours, 45 minutes, at least according to CalTopo.  Strava gave me drastically different numbers

On to the next trailhead!

Jones Mountain B – 13,214

RT Length: 6.04 miles

Elevation Gain: 2361’

I’d parked about 6 miles past Cottonwood Lake, at the junction of 344/349.  There are a few dispersed campsites in the area, and a few further up as well.  I was up and on the trail at 4:45am, hoping this would be a quick hike because I had other things to do this afternoon. 

The trail starts by following 4WD road 349.  It’s a narrow 4WD road, but if your vehicle made it this far, it can make it all the way to the top of the road

I followed the road for 2.3 miles, up to about 12,330’. 

I didn’t know it at the time, as it was still dark, but I could have taken the road all the way up to the ridge, and then taken the ridge to the summit, which would have been easier.  I’ll have pictures of that route on the way back down.  Here’s where the road goes to:

Anyway, I didn’t take the road up, instead, I decided to gain the ridge here

This route was very straightforward

I also got to see a beautiful sunrise

From the I turned right and followed the ridge northeast.  From the ridge it was a short .25 mile hike to the summit. 

I summited Jones Mountain B at 6:30am

Jones Mountain B:

It was rather cold and windy on the summit, making it feel like fall.  I turned around and, in the daylight, noticed the road I’d hiked in on went all the way to the ridge, so I followed the ridge southeast back to the road.

Some ptarmigans overlooking Ptarmigan Lake

Here’s the route up the ridge from where the ridge meets the road

Back on road 349, I followed it all the way back down to road 344

I made it back to my truck at 7:45am, making this a 6.04 mile hike with 2361’ of elevation gain in 3 hours.

Now it’s time to head back home to harvest a couple hundred apples from the tree in my backyard before the thunderstorms hit for the day. 

Mt Kruetzer – 13,122 and Chalk Rock Mountain – 13,064

RT Length: 10.43 miles

Elevation Gain: 3117’

My plans for this weekend changed last minute.  I got gas and was on my way, but suddenly my engine light turned on, saying there was a transmission problem, and to get to my dealer right away. I have less than 25,000 miles on my truck, so this concerned me.  I decided to pull over on the side of the road to google what could be wrong.  The next exit I came to there was a man wearing only jeans, holding a 6 foot 2×4 over his shoulders, swaying back and forth on the side of the off-ramp.  It was 1am.  I decided to wait for the next exit. 

I googled the warning notification, and it turned out the light could be one of over 40 things wrong.  With cars and mountaineering, hope is not a strategy.   I thought about it for a minute, and finally decided driving 6 hours and then another hour off road was probably a bad idea, so I turned around and headed to the nearest dealership, and slept in my truck until they opened at 7am. 

Bugs.  Bugs were what was wrong.  Bugs on my windshield and bugs on my grille were obscuring the sensors from doing their jobs.  The sensors were now clean, and I was good to go, with the admonition I should wash my truck more often.  To which I replied “It’s a truck.  It’s supposed to get dirty.  If not, you have no business owning a truck.”  Seriously though, washing my truck in the summer lasts a good 6 hour drive to the next trailhead, and doesn’t seem worth the money.  I got a high five and was out of there, now a day behind, so summit modifications would need to be made. 

I made it to the trailhead in a thunderstorm, which I’d expected.  It was my plan to wait it out, and start in the morning.  I parked 6 miles past Cottonwood Lake, at the junctions of 344 and 349.  There are dispersed campsites closer, but I planned to be here for a few days and this made a good base camp. 

I was up and on the trail at 4:15am to a clear, starry night ski, hoping to get in my summits before the clouds and rain came at 9am.  I followed road 344 west for 1.4 miles.

I then turned right onto  344G.  There were several dispersed campsites here as well.

I followed this road all the way to 12,020. 

I passed an old log cabin

Staying left, I continued to 12,020

At 12,020 I turned left, and followed a trail northeast through Mineral Basin

This is where I was headed, towards the saddle.  The road is sometimes a trail, sometimes two ruts, but it goes all the way to the saddle.

I’m going to apologize for the pictures on the ridge.  The weather forecast said 57% sky cover until 9am, when the clouds were supposed to roll in, but as you can see, they arrived early. I thought about waiting the clouds out, but it was obvious they were just accumulating.  At one point I even turned back, knowing I’d need to do this hike again anyway to get better pictures, but turned around again and summited, because I was so close.  While this is a class 2 ridge hike, I hiked it with my compass out the entire time, as I couldn’t see more than a few yards ahead of me at a time. I’m going to show you some really terrible pictures of the route, but know from the saddle it’s .7 miles southwest, and then .8 miles south/southeast along the ridge, mostly on tundra with a few rocks thrown in. 

At the saddle I turned left, and headed up the ridge

The summit is obvious, after quite a few false summits.  Here I saw a mountain goat run past me into the mist.  The summit was noted by an obvious cairn (that needs a new summit register)

It’s important to note by this time I was feeling like a popsicle.  I could not feel my hands and my feet felt like blocks of ice. Apparently it’s wet and cold hiking inside of a cloud. 

I summited Mt Kruetzer at 7am

Mt Kruetzer:

I made my way back to the saddle.  I’ll apologize again for the terrible pictures, and promise to climb these peaks again someday so I can get better photos of the route.

Back on the saddle, I headed northeast towards Chalk Rock mountain

This is the route I took up.  It was obvious why it’s named “Chalk Rock Mountain”.  There were game trails here, and the summit was surprisingly close. From the saddle, it was only .3 miles to the summit.

The summit was relatively flat, without a noticeable cairn

I summited Chalk Rock Mountain at 8:10am

Chalk Rock Mountain:

More than ready to be out of the clouds, I turned around and headed southwest back to the saddle.

Back on the saddle, I turned left and followed the road back down into the basin

This is the route out of the basin

I turned right onto the road and followed it back down

Back at road 344 I turned left, and followed it back to my campsite

I made it back to my truck at 9:45am, making this a 10.43 mile hike with 3117’ of elevation gain in 5 hours, 30 minutes. Now it’s time to dry out my shoes, socks, and feet for tomorrow morning.

On to the next trailhead!

Oh, and this is what the mountain looked like as I hiked down.  The clouds never went away!

The next morning I hiked Jones Mountain B.  Unlike yesterday, the there were no visible stars, as the sky was cloudy.  However, once I made it to the ridge, I could see Kruetzer and Chalk Rock were clear.  Here are some more visuals of the route

As you can see, it’s mostly a ridge hike.

Tabor Peak – 13,282

RT Length:  9.72 miles

Elevation Gain:  3055’

I parked at the Tabor Creek Trailhead (2185) and was on my way at 4:30am. 

I followed the class 1 trail south as it crossed Lincoln Creek, and then began gaining elevation.

After hiking for .5 miles I came to a road, crossed it, and continued following the trail on the other side

I crossed Tabor Creek, and continued on this class 1 trail, staying to the right (west) of the creek for the rest of the hike.

The trail brought me through a gulch, and in and out of treeline and willows several times.

After hiking for 3.2 miles, and at 11630’ of elevation I turned right onto a game trail and headed west.  Actually, the trail isn’t visible the first few yards, but once you find it, it’s a class 1 game trail.  I put up a small cairn to indicate where it starts, but if that gets knocked down, notice the unique shaped rock in front of it.  That’s where you turn right.

I followed this trail all the way to Tabor Lake. For reference, here’s a view from PT 13102 of the route

And some pictures of the terrain

Tabor Lake and Tabor Peak

I skirted the lake to the north

Then sat down and put on my microspikes,  My next goal was to make it to the top of this gully

The gully doesn’t really look that bad, and for the first third of it or so, it wasn’t. There was plenty of scree to use for footholds, and it was easy climbing.  However, the further up I went, the less and less scree there was, and more and more hard, compact dirt.  I wasn’t able to get a footing on the dirt, even in microspikes, and ended up ascending via the rocky area to the left.  This was better, but not much. The rock was steep and filled with kitty litter.  I still felt safer on the rocks than I did in the gully.  You can also take the rocks to the right.  I felt this would have been much easier with snow.  Here are some of your options:

At the top of the gully was a cairn to congratulate me

I turned left, and followed the ridge south

There’s not much to say about route finding on the ridge.  I was able to stay directly on top of the ridge the entire time and kept it at easy class 3.  The rock was chossy and loose, so I had to watch my hand and footholds, and I had to stop a few times due to excessive wind, but it was a straightforward ridge climb.  With exposure.  Here are some pictures of the ridge

I summited Tabor Peak at 7:50am

Tabor Peak:

Oh, and this was the summit register.  No pen/pencil, and all the paper was wet.  Maybe the next person can bring a proper one?

This was an out and back hike for me, so I turned around and headed back down the ridge to the gully

At the cairn I turned right, and headed down the gully towards Tabor Lake.  I stayed on the rocks to climbers right for most of the descent, then took the gully proper the rest of the way down.

I then skirted the lake to the left to pick up the trail back down

I followed this trail back down to the Tabor Creek Trail

Back on Tabor Creek Trail, I turned left and followed it north back to the trailhead

I made it back to the trailhead at 20:15am, making this a 9.72 mile hike with 3055’ of elevation gain in 5 hours, 45 minutes.

On to the next trailhead!

PT 13102, West Truro – 13,149 & Truro Peak – 13,298

RT Length: 8.49 miles

Elevation Gain: 3489’

As I sat down to type this up, I’m already at the next trailhead.  I got out my computer, camera, etc. and set it all up to write a trip report.  Just as I was starting, a huge gust of wind blew through the site, creating a whirlwind of dust.  All that dust is now inside the topper of my truck, as well as all over my computer, bedsheets, etc.  Oh, the joys of living out of your truck!  I swept it up as good as I could, but dirt and dust went everywhere!  My poor electronics.

Ok, on to the trip report.  I parked past Grizzly Reservoir at 10800’ at a nice dispersed campsite to start this hike. 

The drive in was easy 4WD, with a lot of creek crossings and potholes to maneuver. 

I was up and on the trail at 5:45am.  The trail starts at the wests end of the parking area, and almost immediately crosses Lincoln Creek.  I put on my stream crossing shoes and was on my way.

Here is an over view of where you’re going.  There are game trails to get you to the upper basin, but there are a lot of downed trees to contend with.  I just kept heading west, staying right of Truro Creek I could hear in the distance, following game trails as I went

Once I made it up the ridge, I continued west to treeline.

Once I got past the trees, PT 13102 was to the northeast.  It was choose your own adventure to make it to the ridge. 

Here are some pictures of the easy tundra walk to the ridge

I put on my helmet, turned right, and headed north to the summit.  This was class 3, but solid and relatively short. 

I summited PT 13102 at 7:30am

PT 13102:

From here on out, this was a ridge hike to West Truro.  There were sections of class 2 and 2+, but most of it was class 3 and it was slow going, trying to figure out the best route to take.  I believe there are several ways to do this ridge, so you can choose how spicy you make it.  I found I stayed on the ridge proper, dropped to the left, and dropped to the right about equal amounts of time.  Just be forewarned:  once you commit to the route, there are few bailout points. 

I headed southwest back down the ridge.

From here on I was following the ridge basically west.  Since this is choose your own adventure, I’ll highlight a few pictures, and the route I took.

I was now halfway through the ridge to West Truro.  I sat down for a bit of a rest, and looked at the route before me.

This second half of the ridge looked easier than the first, and indeed it was.  For this part of the ridge, I stayed mainly to the right.  Here are some pictures of this easier part of the ridge

Most of the ascent up West Truro from the saddle was class 2 and stayed on the ridge, until just before the end.

There was a short class 3 chimney to scramble (class 4 is to the right), and then a short scramble to the summit.

I summited West Truro at 9:30am

West Truro:

I could see Truro Peak to the northeast of me

Just for reference, this is how I climbed it (although this is choose your own adventure as well)

I wanted to skirt the south side of West Truro to make my way over to the West Truro/Truro saddle, so I made my way back down that class 3 chimney.

At 13050’ I descended down a game trail that led me to a scree filled gully.  I put on my microspikes for this part. 

This is where I was headed, so I lost and then gained elevation back to this point.

From here on our I just hugged the side of the mountain, making my way back up to the saddle.  This is also choose your own adventure, all class 2

Now at the West Truro/Truro saddle, I had a good view of Truro Peak

I stayed to the left on the tundra, and when the tundra ended the class 3 climbing began, and lasted until I made it to the summit.  On the class 3 section I stayed to the right and took the ridge, but it looks like there’s tons of class 3 options here.

Just before the summit I dropped down to the left, then scrambled up.  There are game trails here to guide the way.

I summited Truro Peak at 10:45am

Truro Peak:

I turned and headed back to the Truro/West Truro saddle

From the summit I had the brilliant idea to descend via the gully that goes left (south) and skirt the east side of the mountain to make it back to the trailhead.  My reasoning was I didn’t want to descend the steep, scree-filled east gully back to Truro Lake, and then rock hop for half a mile before hitting a trail.  Solid reasoning, but in implementation, I wouldn’t recommend the route I took.  Bushwhacking at the end proved cumbersome, whereas with the north gully, it would have all been above treeline.  In any event, this is how I descended.  I’d still recommend going right and taking the north gully if you’re ok with a steep, scree filled descent.

I stayed high to avoid the willows, and then dropped down into the trees.  I stayed climbers left of Galena Creek (east), and made y way back into the trees, following game trails where I could and getting whacked in the face with willows where I couldn’t.

I could finally see the dirt road, and made my way towards it, crossing Lincoln Creek in the process. 

Back on the road, I turned left and followed it north back to my truck

I made it back to my truck at 1pm, making this a 8.49 mile hike/climb with 3489’ of elevation gain in 7 hours, 15 minutes.

On to the next trailhead!

PT 13030

RT Length:  7.36 miles

Elevation Gain: 1920’

I started from the West Willow Creek 4WD trailhead at 11550’.  If you don’t have 4WD, park below, just before the road turns to 4WD.  This will add 3 miles and 500’ of elevation total to the hike.

Here are some pictures of the 4WD road in

There are a few dispersed campsites here, and a parking area for about 5 vehicles.

I was on the trail at 5am.  The trail actually continues following the 4WD road, and if you have gotten this far, you can do the next few miles on the dirt road.  I chose to hike in, to get some extra mileage.  I followed 4WD road 505.1 west for 1.5 miles as it climbed into the upper basin.

At the top f the pass I could see PT 13030.  At about 12500’ I left the road and headed for the ridge, staying at about 12,500’ of elevation.

Here’s an overall look at the route I took to the ridge.  CalTopo will tell you there’s a road here.  There isn’t.

And some step-by-step pictures

There’s a small game trail that will lead you up the saddle

Once on the saddle I turned left and followed it south to the rocky area

If you plan on rock scrambling, now is the time to put on your helmet.  I continued southwest up the ridge, following a tundra and rock filled slope

Then I went left, below this large boulder, keeping it class 2

From here you have two options.  You can either gain the ridge for a quick class 3 scramble to the summit, or stay about 20 feet below the ridge to the left, and keep it class 2+.  Here’s looking at the route to the ridge for the class 3 scramble, which is stable but narrow and airy.

And here’s the class 2+ option, heading southwest, and then gaining the ridge

Once on the ridge, it was a quick walk to the summit

I summited PT 13030 at 7am

PT 13030:

I took the class 3 ridge option on the way in, and decided to take the class 2+ option on the way out.  Here’s the route I took back

There are two rocks placed as if they had been a cairn at one point, indicating where to descend from the ridge to keep it class 2.  It’s not obvious, and might not even be a true cairn at all, but it’s a good place to descend.

Then it was back to navigating around the large boulders

And heading back down to the ridge

Here’s an overall look at the route out of the basin

This is the route I took

And some step-by-step pictures. Once I was on the ridge there was a faint game trail to follow much of the way back to the road.  Unlike you’ll see on CalTopo, there is no road here. I stayed above the willows but below the rock rubble.

Ahead of me I could see two roads in the distance.  I was aiming for the closer dirt road

Back on 4WD dirt road 505.1, I followed it east back to the trailhead.

I made it back to my truck at 8:30am, making this a 7.36 mile hike with 1920’ of elevation gain in 3 hours 30 minutes.

On to the next trailhead!

13115, 13005, and Baldy Lejos – 13,118

RT Length:  10.19 miles

Elevation Gain: 2879’

I started from the West Willow Creek 4WD trailhead at 11550’.  If you don’t have 4WD, park below, just before the road turns to 4WD.  This will add 3 miles and 500’ of elevation total to the hike.

Here are some pictures of the 4WD road in

There are a few dispersed campsites here, and a parking area for about 5 vehicles.

I was on the trail at 5am.  The West Willow Creek trail starts at the north end of the parking area, and follows West Willow Creek north on a class 1 trail for 1.4 miles, to Sa Luis Pass and the Colorado Trail.

After hiking for .4 miles, I came to a junction and turned left

Then continued towards San Luis Pass.

At Sal Luis Pass I turned left, and followed the Colorado Trail west.

This was still a clearly defined trail

I could now clearly see PT 13115.  This is the route I took to get there.  I would advise summiting from the southeast, as the north side is very chossy.

I left the Colorado Trail, and hiked on class 2 tundra and rocks to the summit

I summited PT 13115 at 6:30am.  Also, this is where my camera officially died, so it’s selfies at summits until I get a new one.

PT 13115:

To the northwest I could see my other two summits for the day, PT 13005 and Baldy Lejos

I descended the north side of PT 13115 on some loose rocks, and headed over to the point ahead of me.  Note:  this isn’t ranked, but it does have a summit cairn.  It was a class 2 hike to get to the top, but there’s a game trail to the left that will take you around this point.

I crossed the Colorado Trail and headed on over

To my left I could see a game trail below that would get me to my next objective, so I descended this point to the west and picked up the game trail

Following the ridge northwest, following a faint game trail, this is the route I took to the next point on the ridge

I ascended a small gully, then ascended the ridge

It was an easy tundra walk to the summit of 13005

I summited unranked PT 13005 at 7:45am

PT 13005:

To the north was Baldy Lejos. 

This is the class 2 route I used to avoid the ridge

Most of this was on easy tundra

From the top of the small, grassy gully, I could see Baldy Lejos

I followed the ridge to get there

I summited Baldy Lejos at 8:15am

Baldy Lejos:

Now to head back to the trailhead.  I took a slightly different route on my way back, to avoid the extra elevation gain.  I headed back down the ridge to the grassy gully

Instead of re-ascending PT 13005, I stayed on the grassy slope to the left to gain the ridge.  There are some game trails here.

Back on the ridge, I followed it south and then dropped down to the left to descend

I could now see PT 13115, but did not want to re-ascend the unnecessary point, so I skirted it to the right on a game trail

I could now see PT 13115 and the Colorado Trail.  I headed back to the Colorado Trail

I followed the Colorado Trail back to San Luis Pass

And at San Luis Pass turned right onto the West Willow Creek Trail

And followed West Willow Creek trail back to the trailhead.

I made it back to the trailhead at 10am, making this a 10.19 mile hike with 2879’ of elevation gain in 5 hours.

On to the next trailhead!