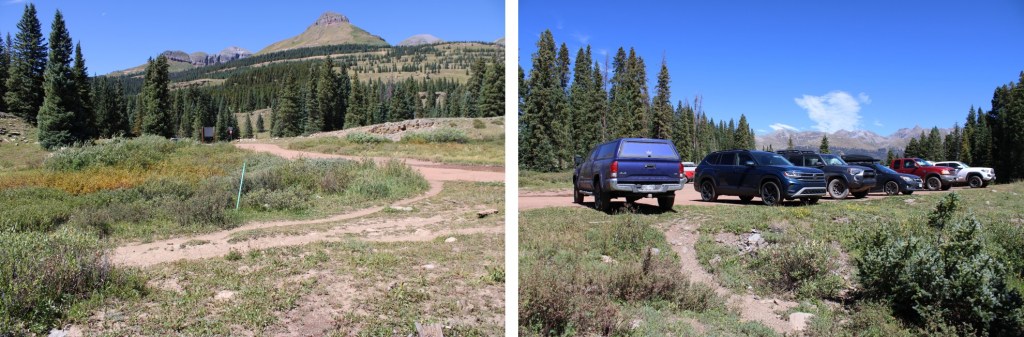
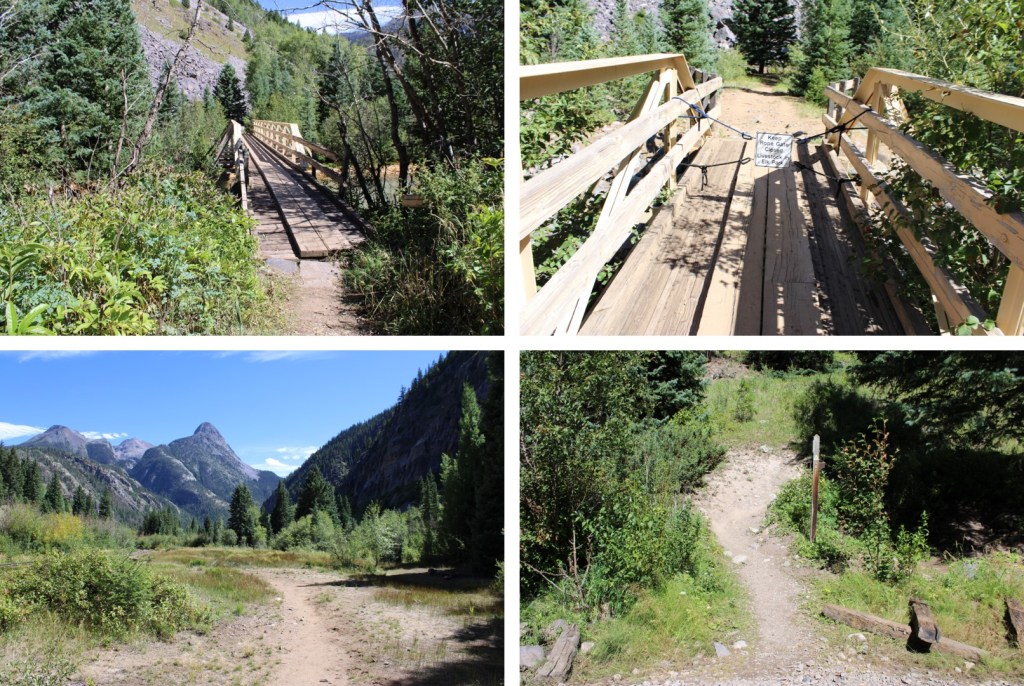
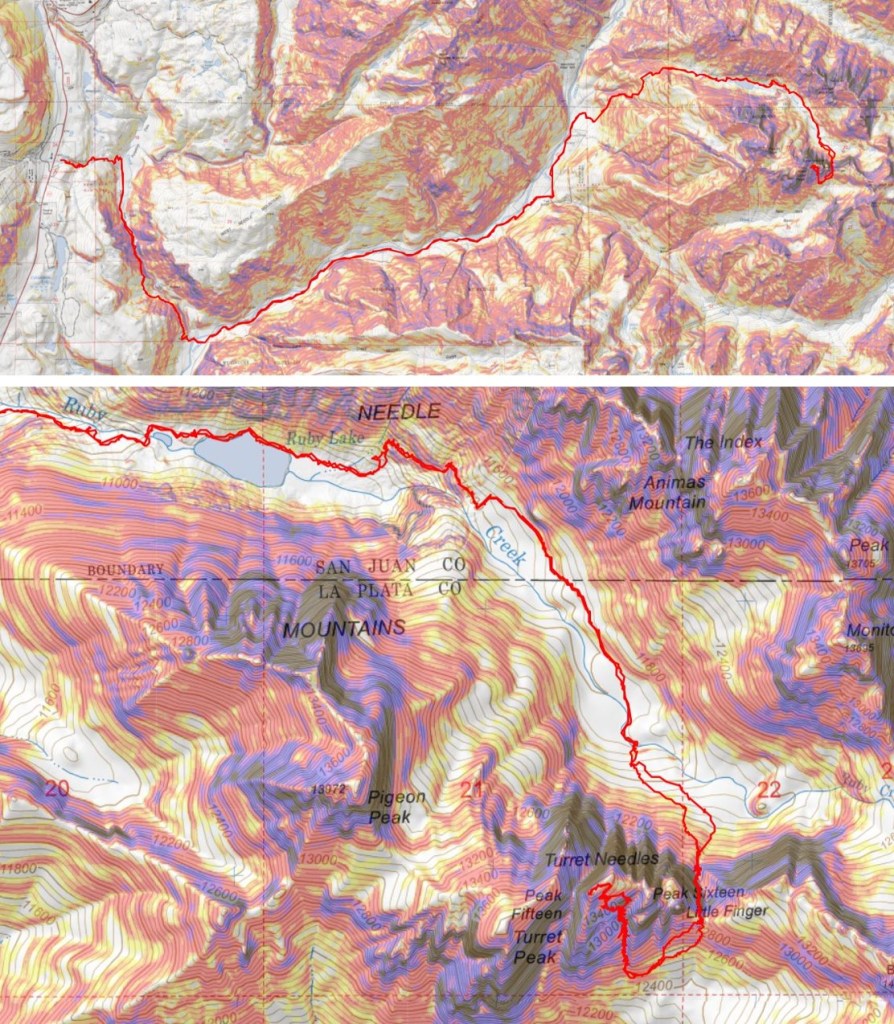
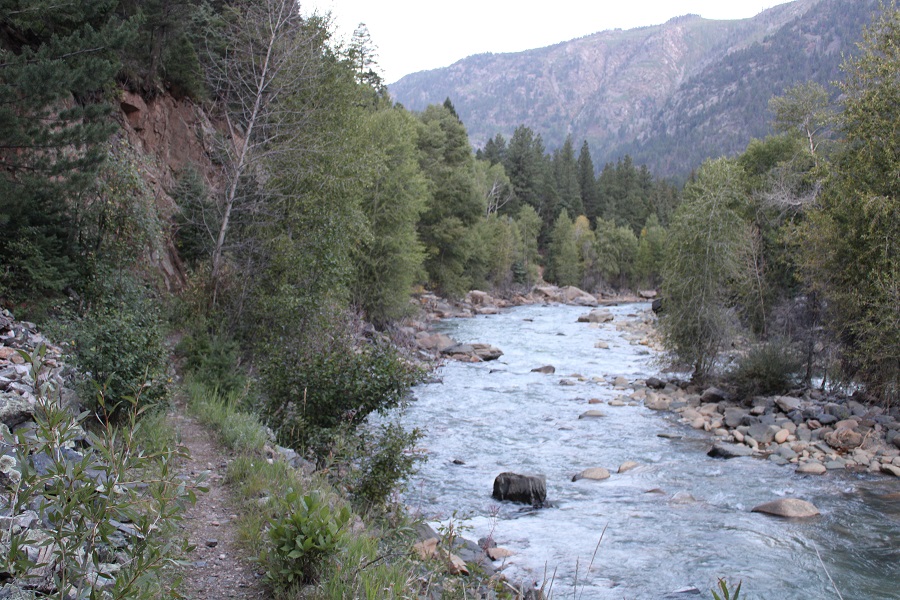
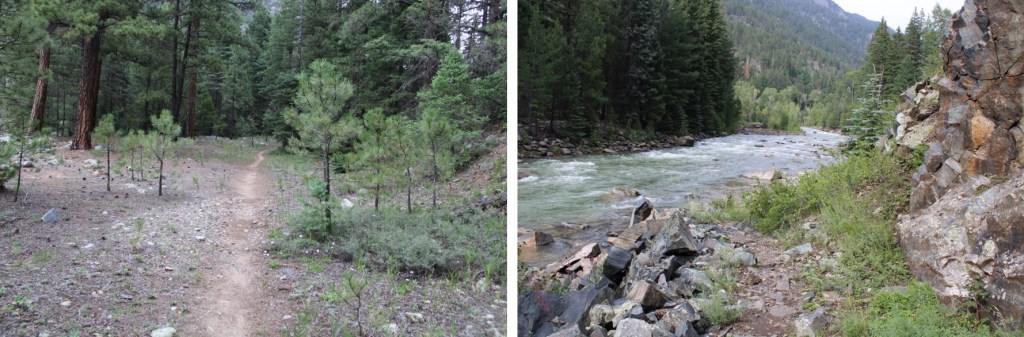
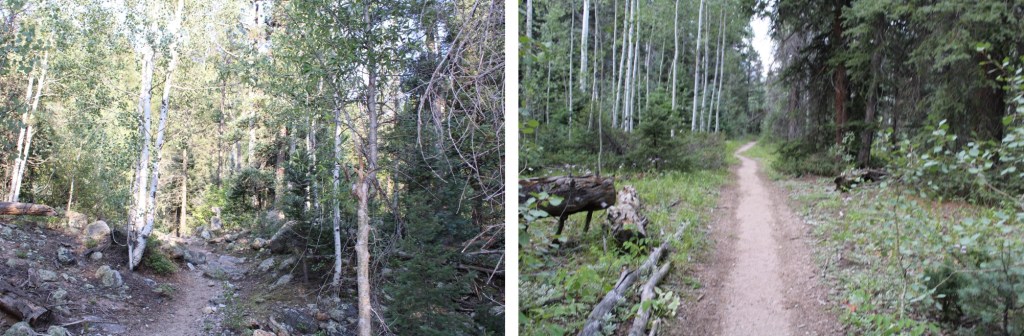
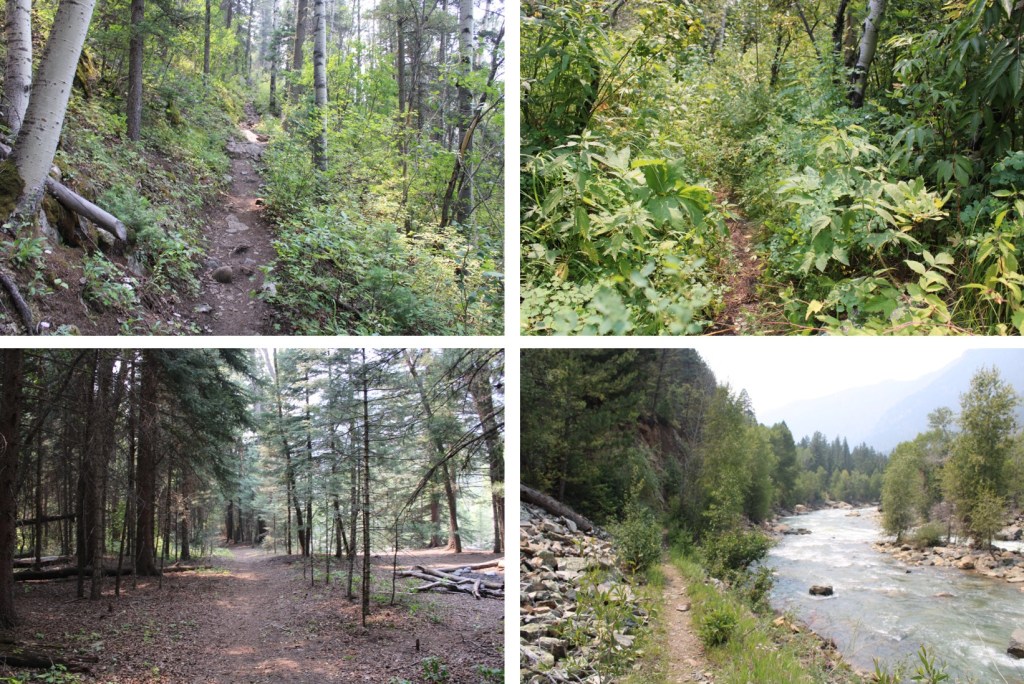
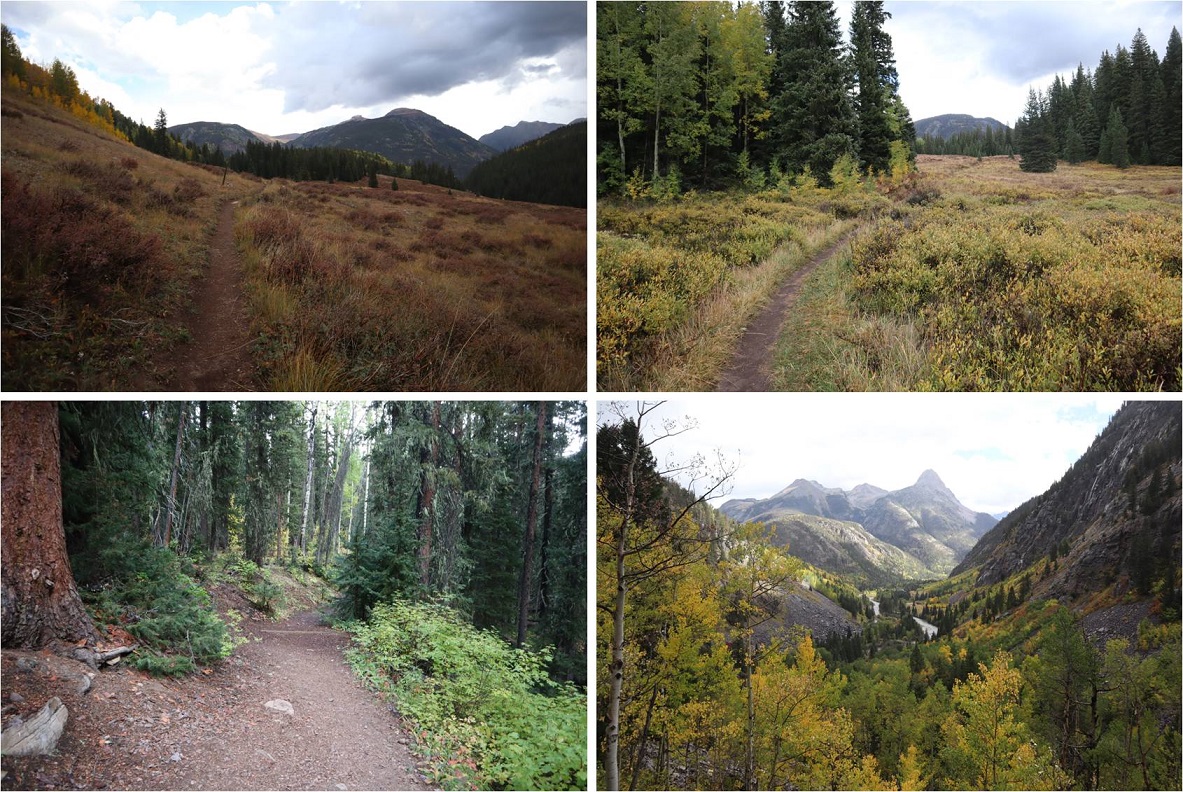
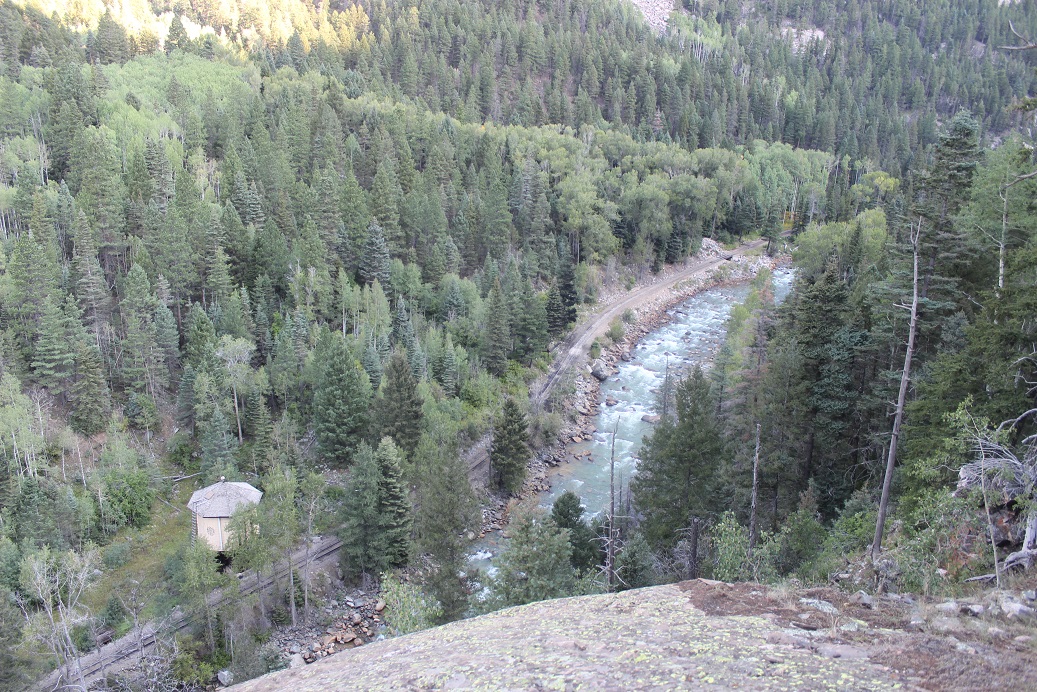
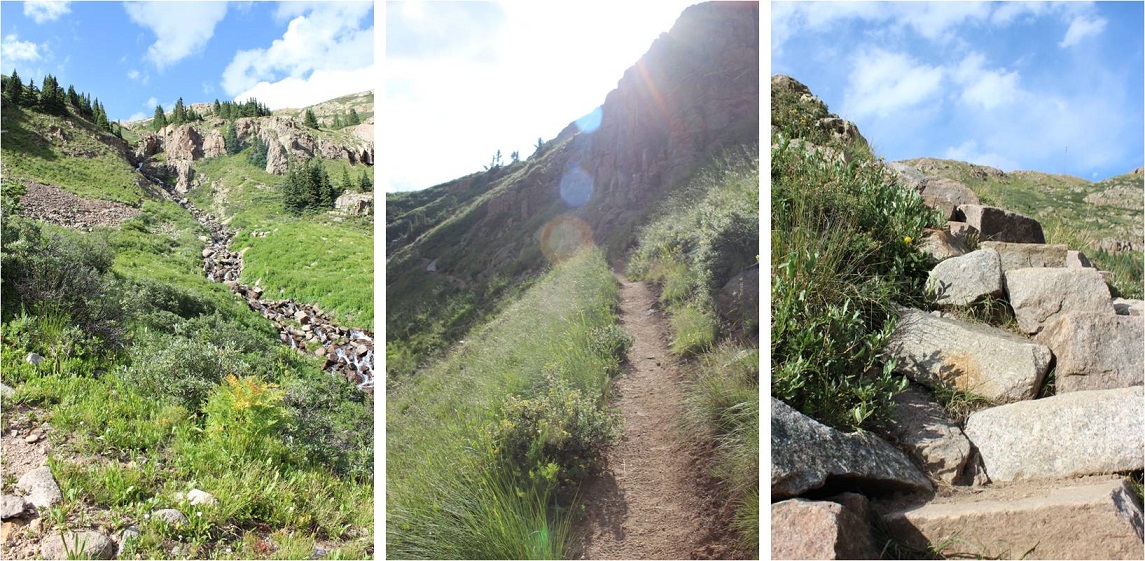
I started from the Molas Trailhead parking area. This trailhead has plenty of parking, and is a popular spot among CT hikers.
The trail starts at the south end of the parking area.
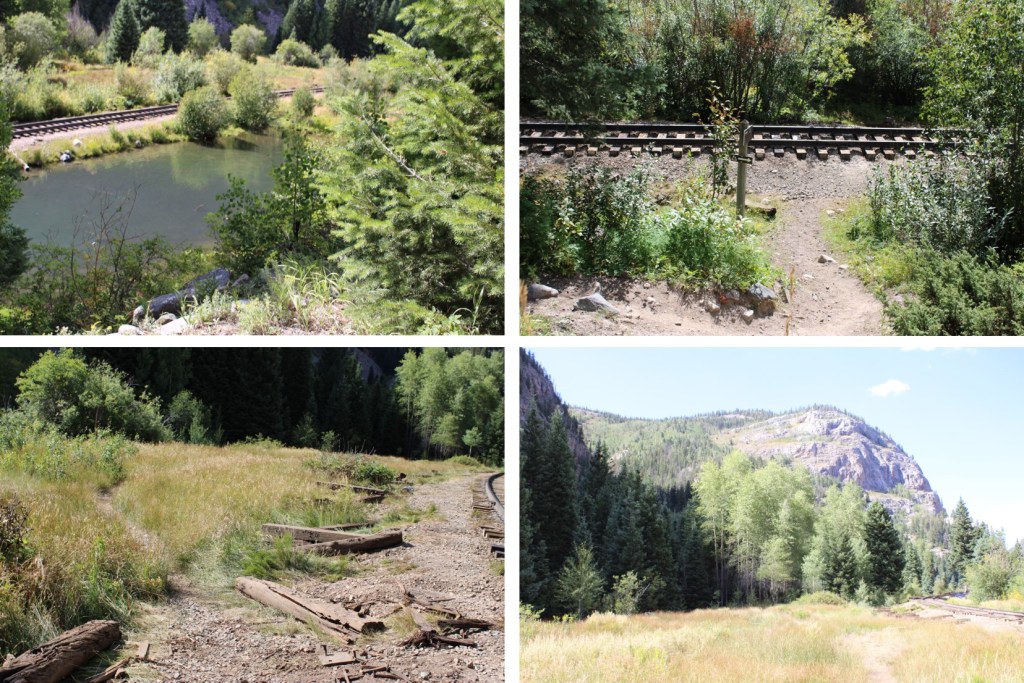
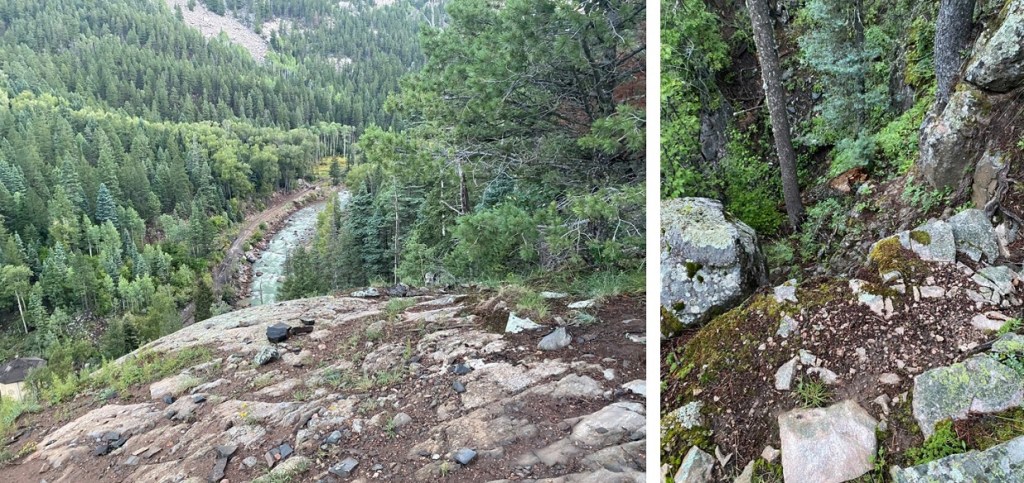
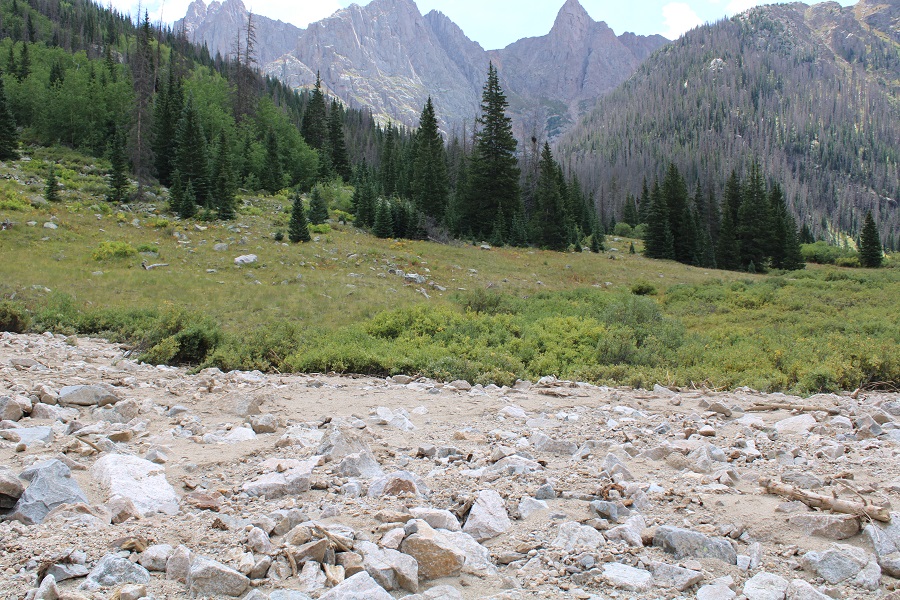
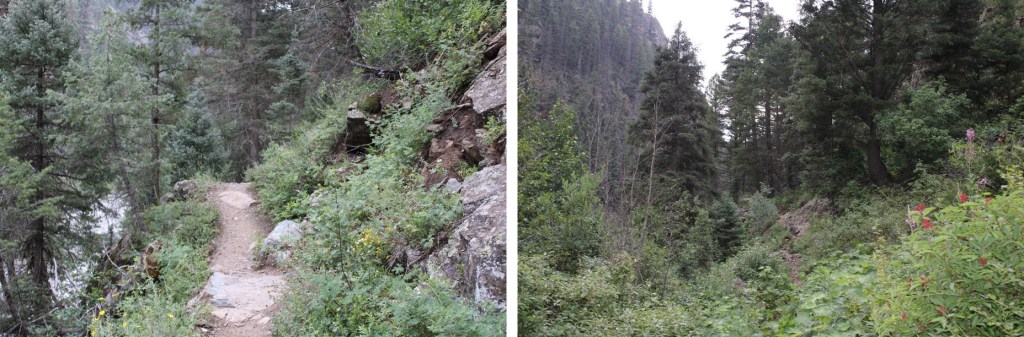
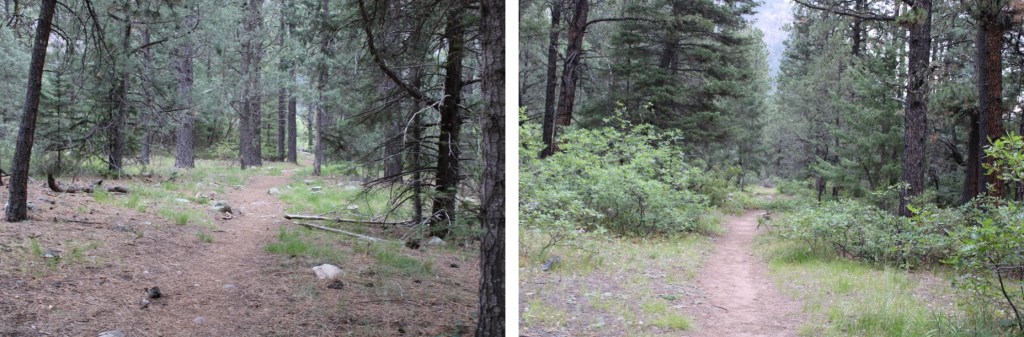
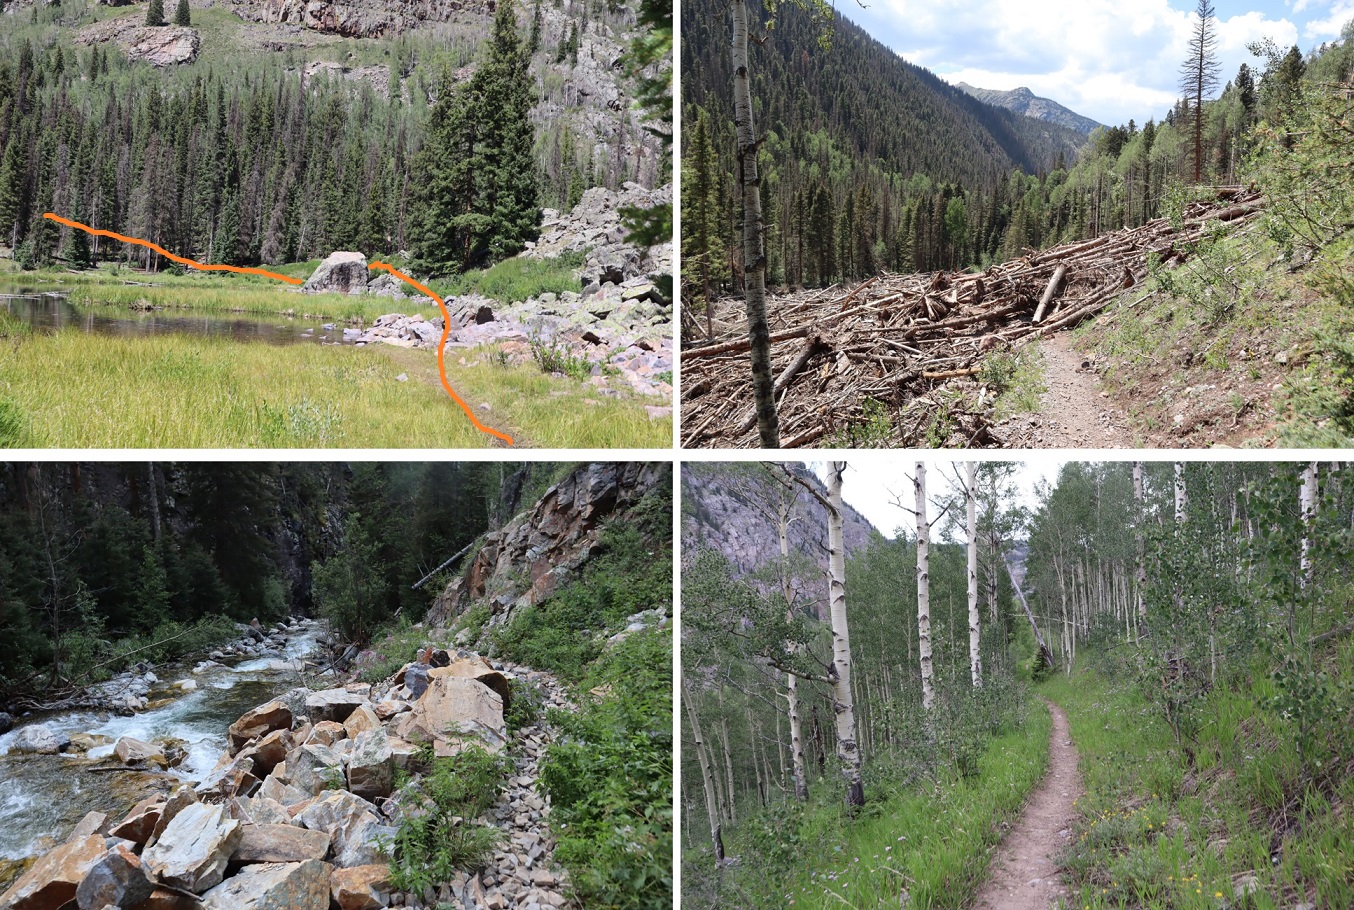
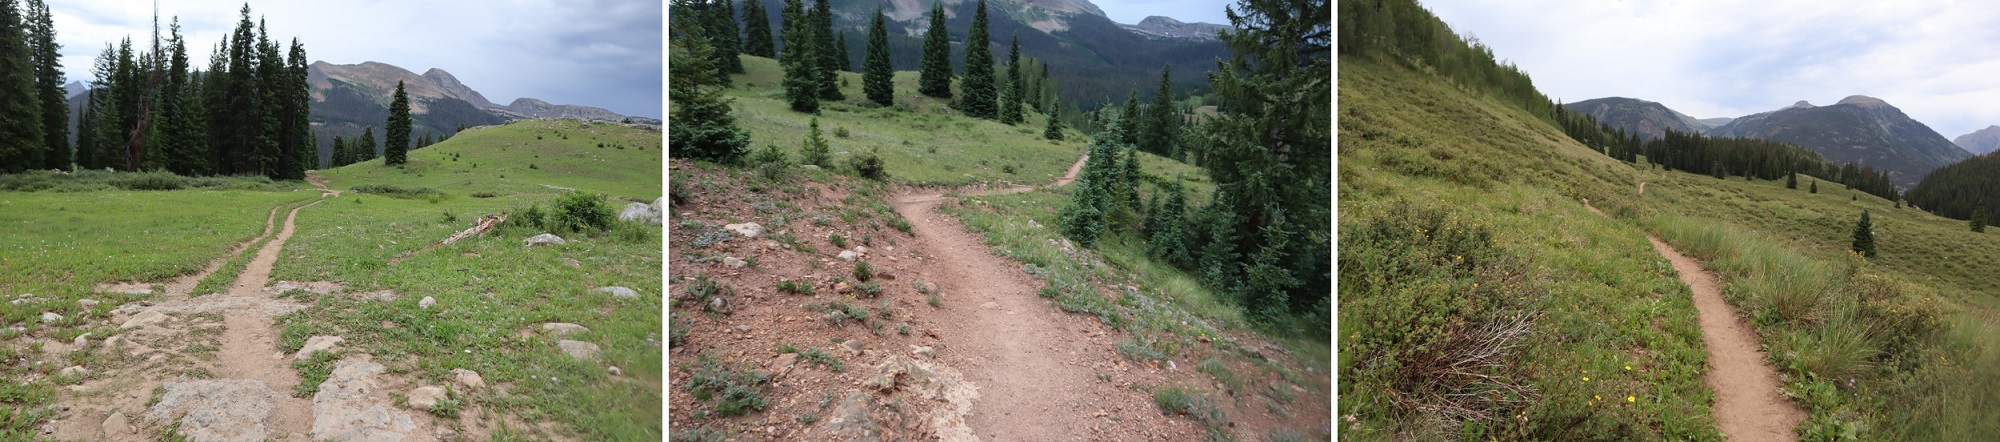
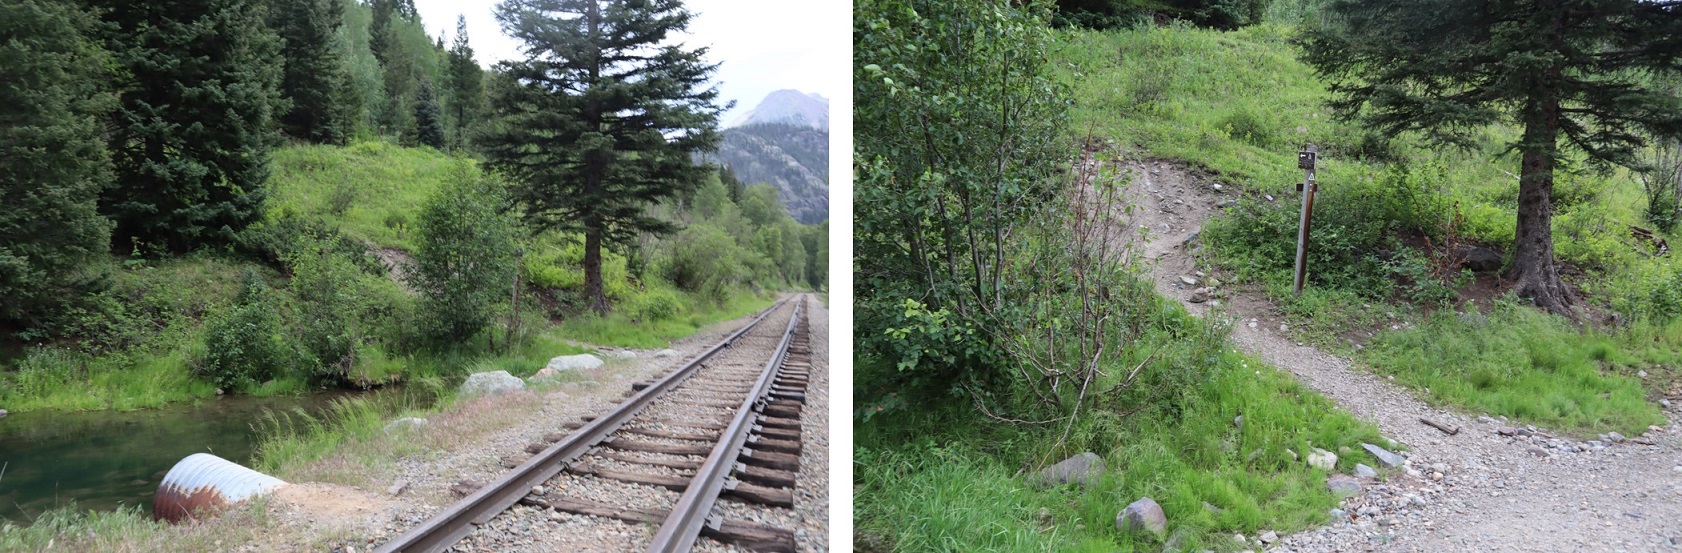
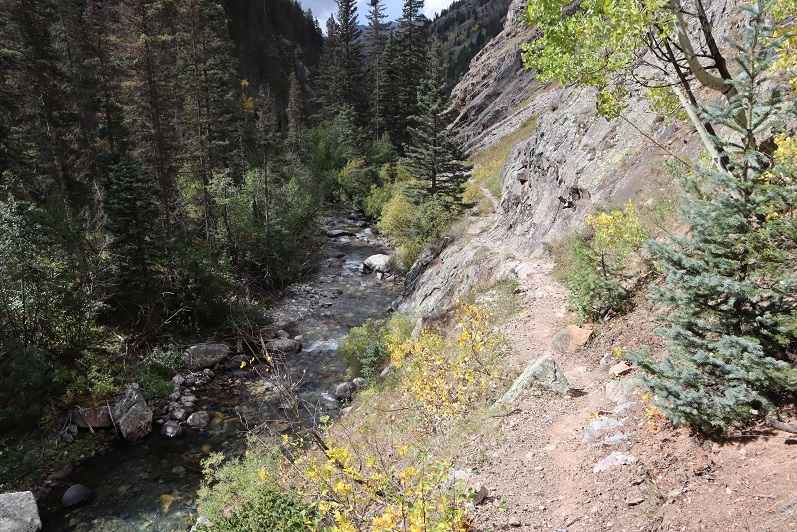
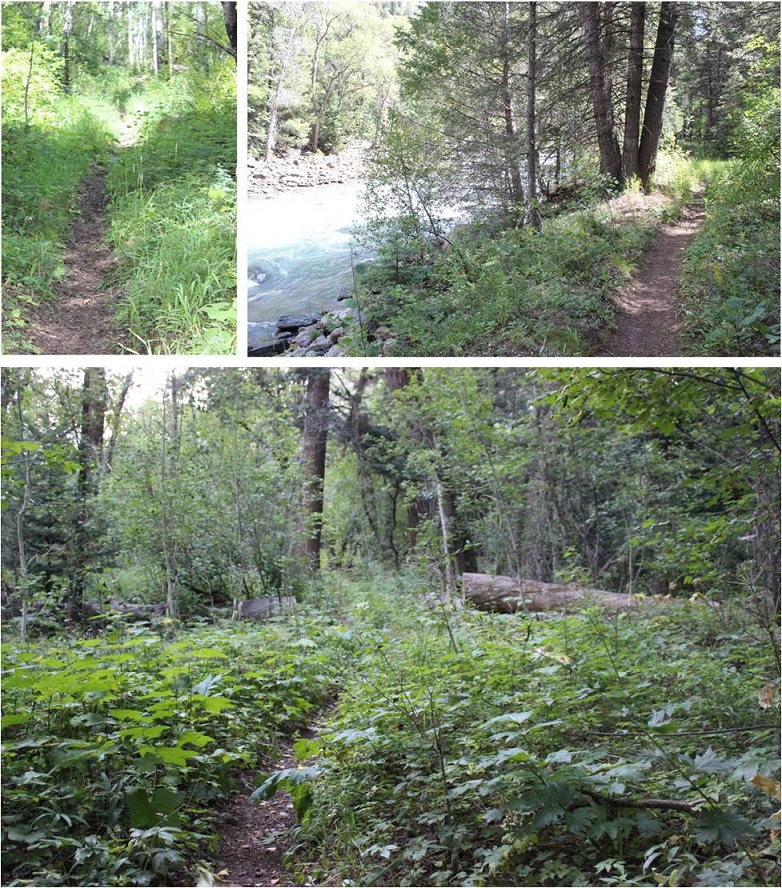
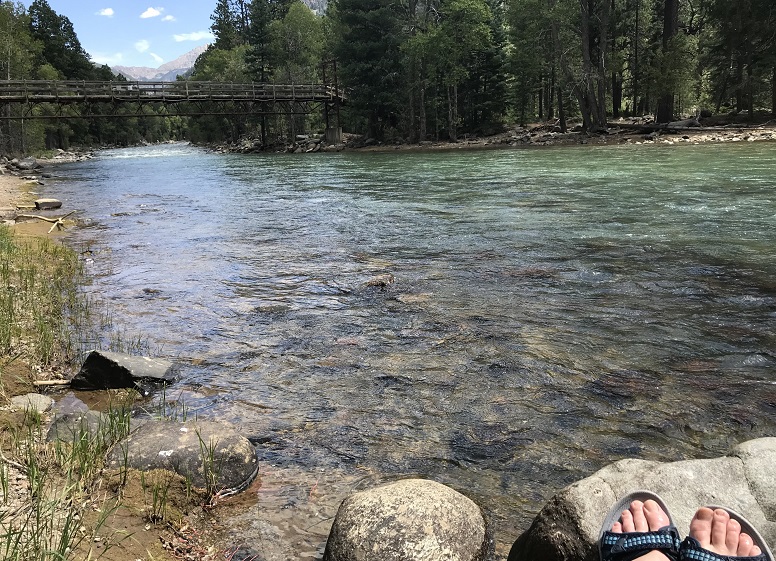
Much of the approach route follows the Colorado Trail, so it’s well maintained and easy to navigate. I followed the trail as I descended 1700’ to the Animas River.
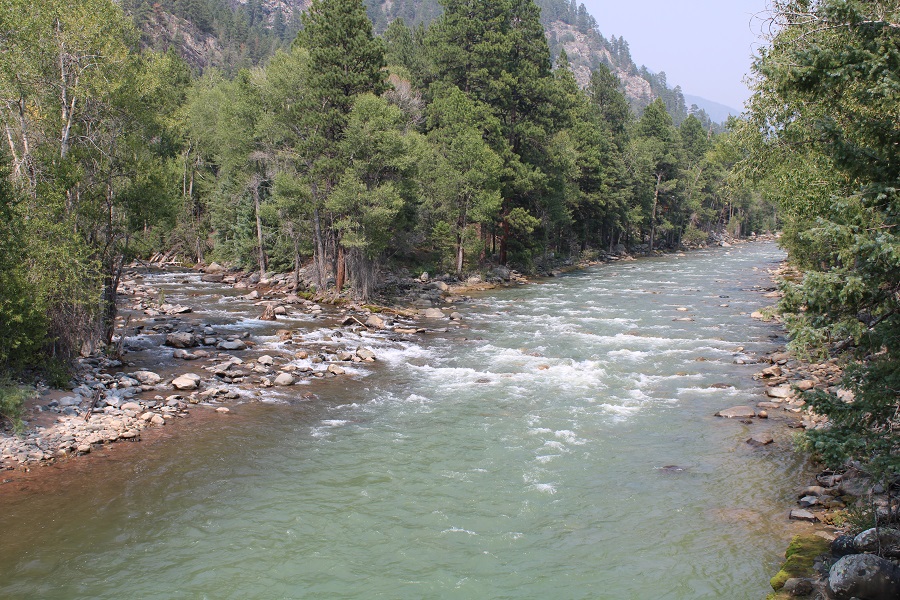
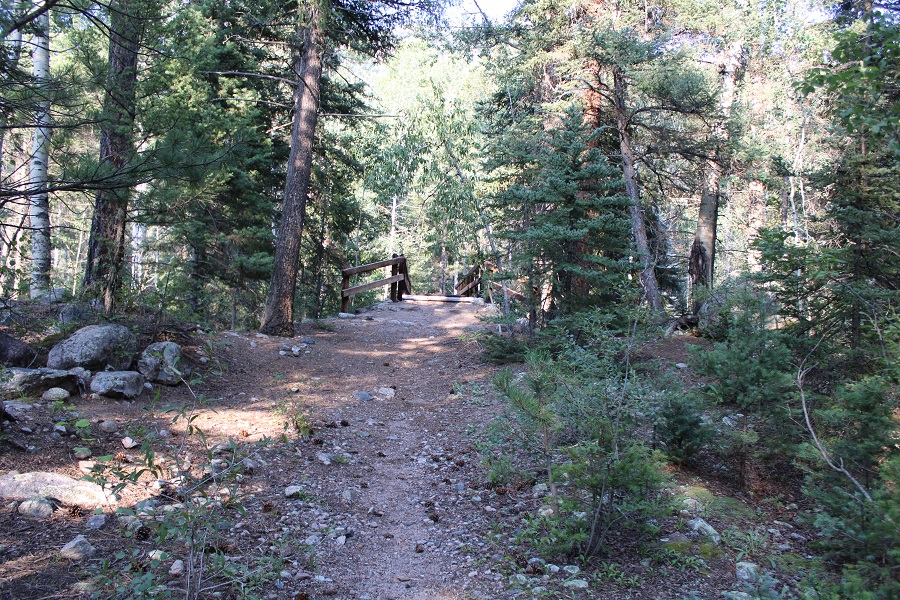
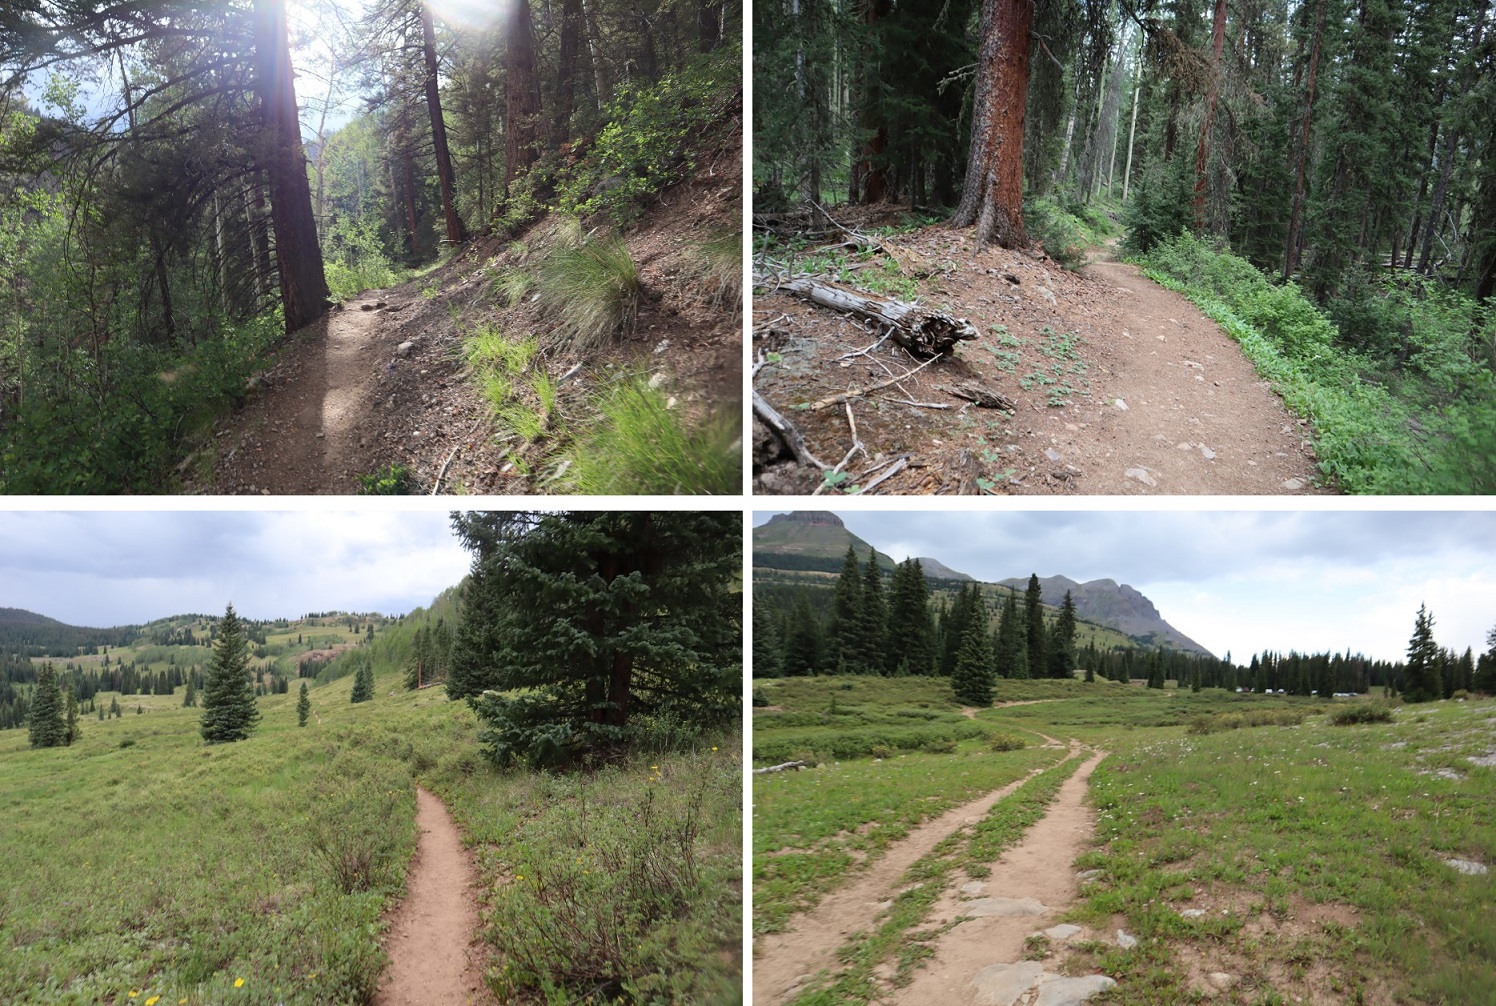
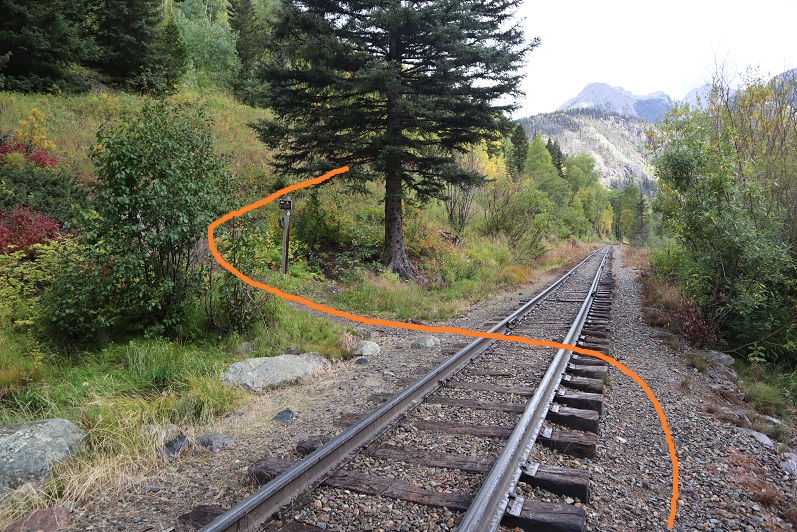
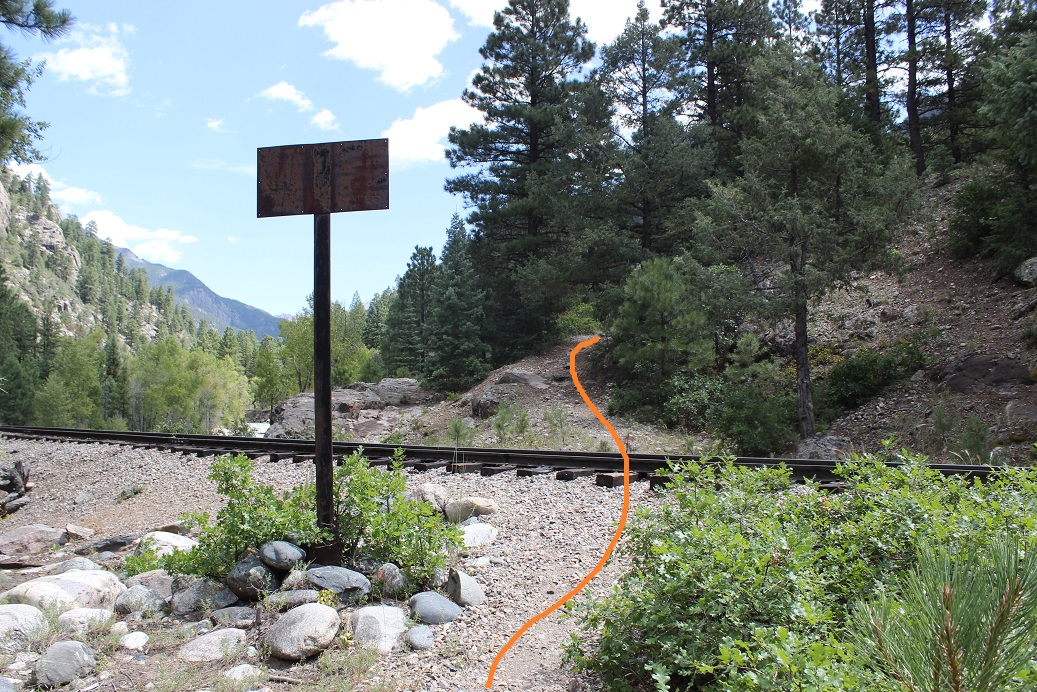
I crossed the river on a well-maintained bridge, and then followed the trail as it crossed the railroad tracks
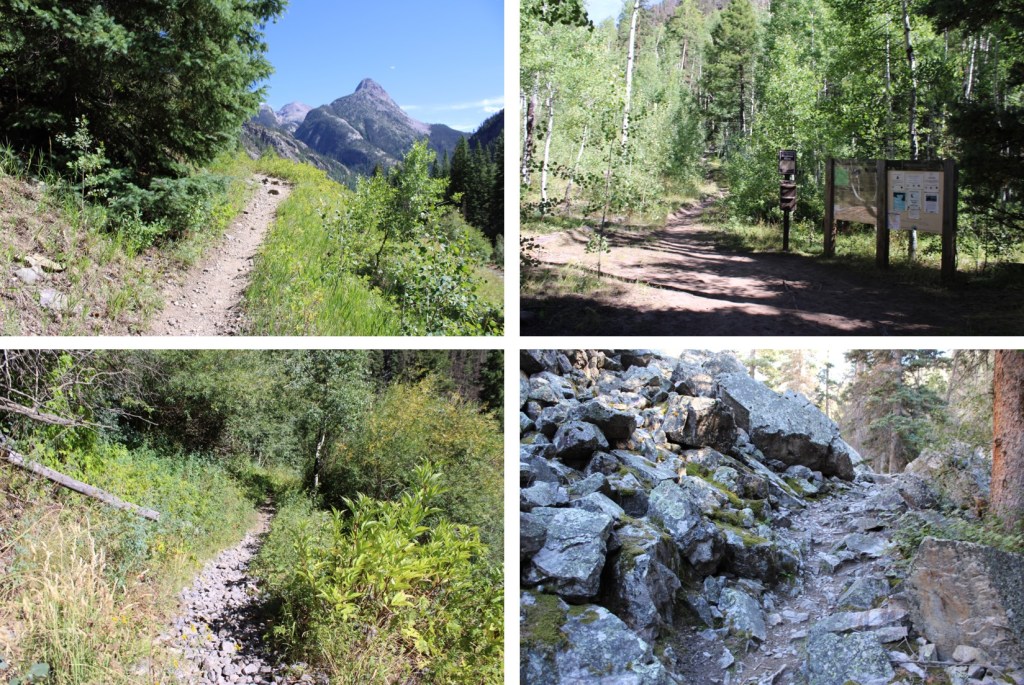
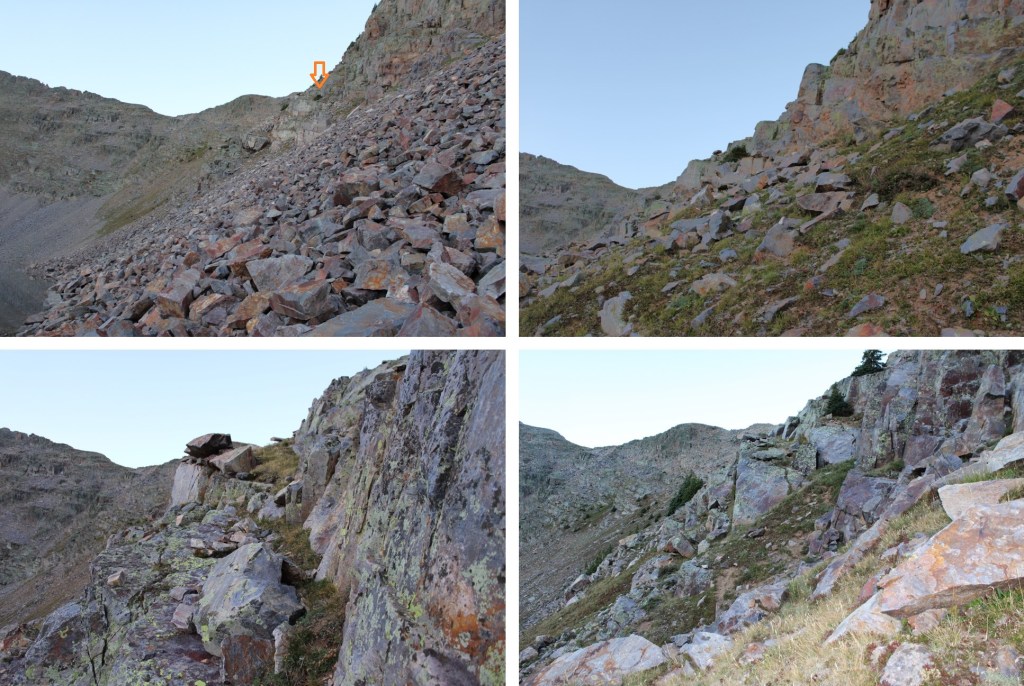
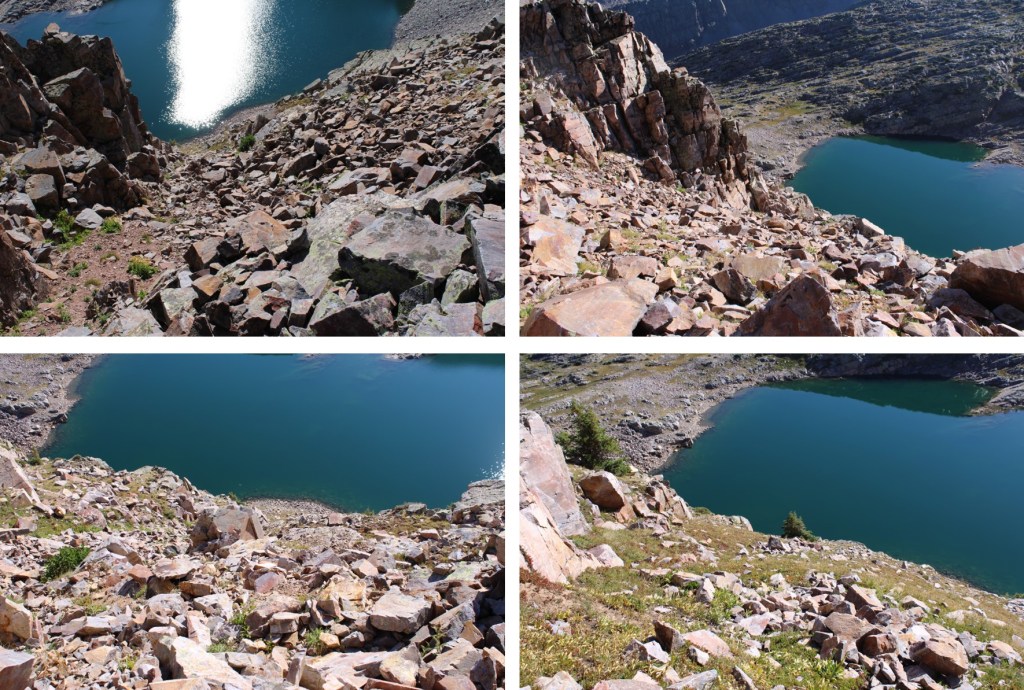
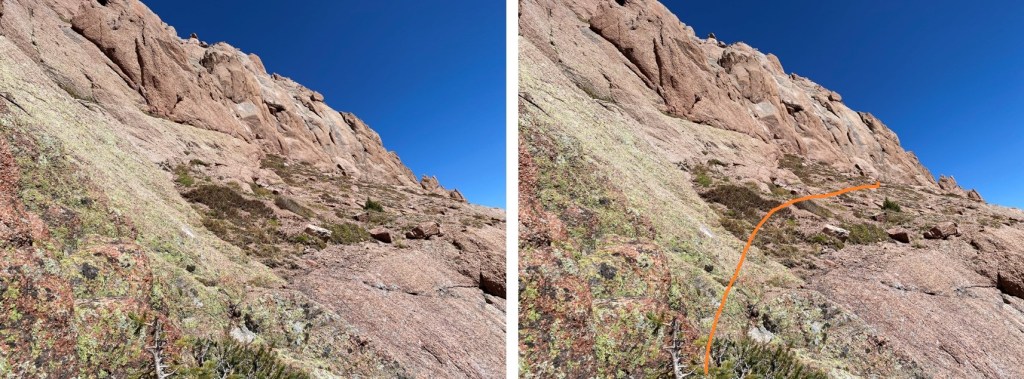
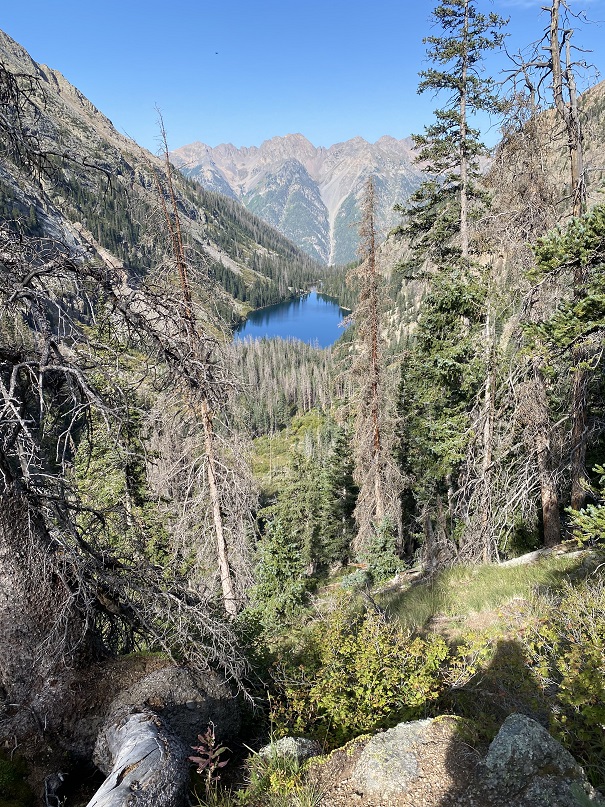
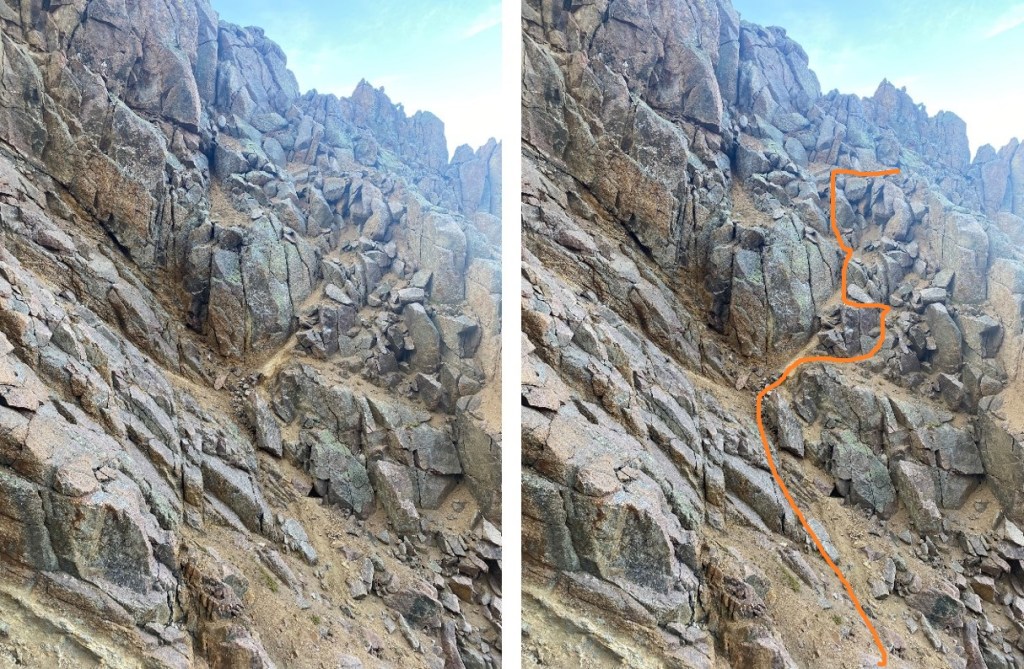
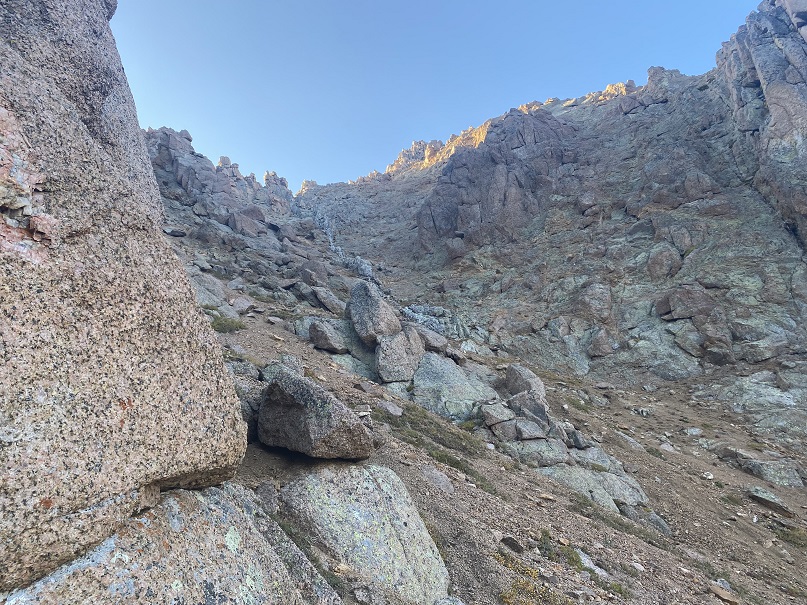
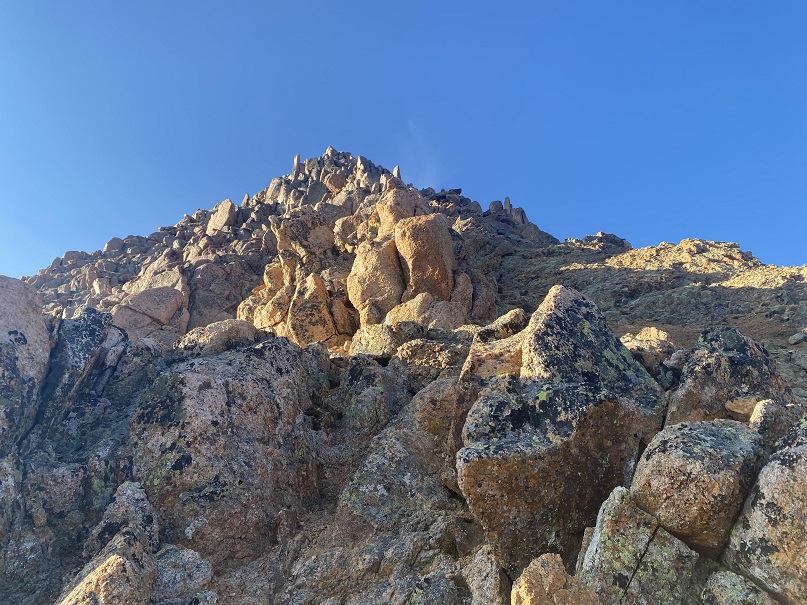
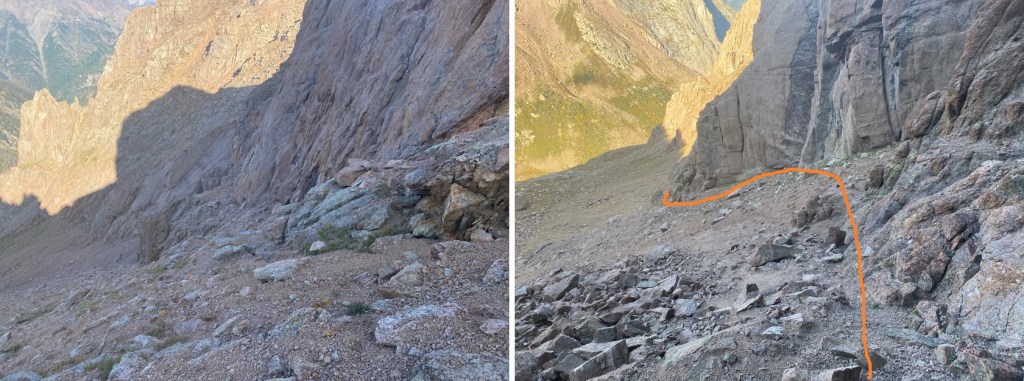
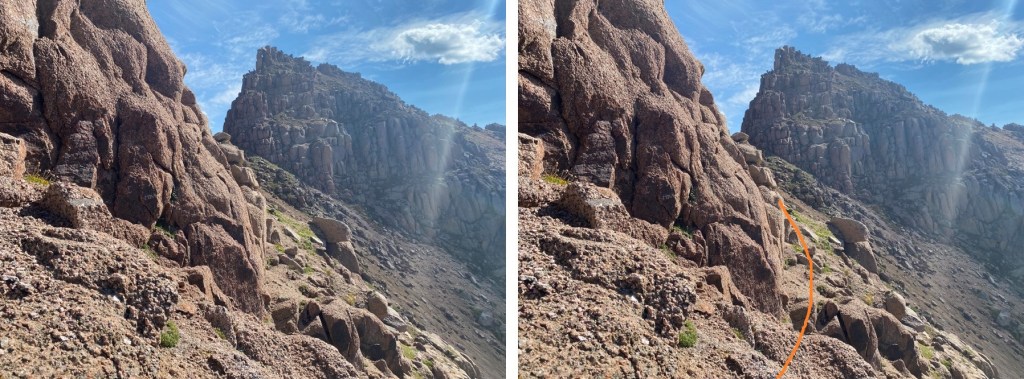
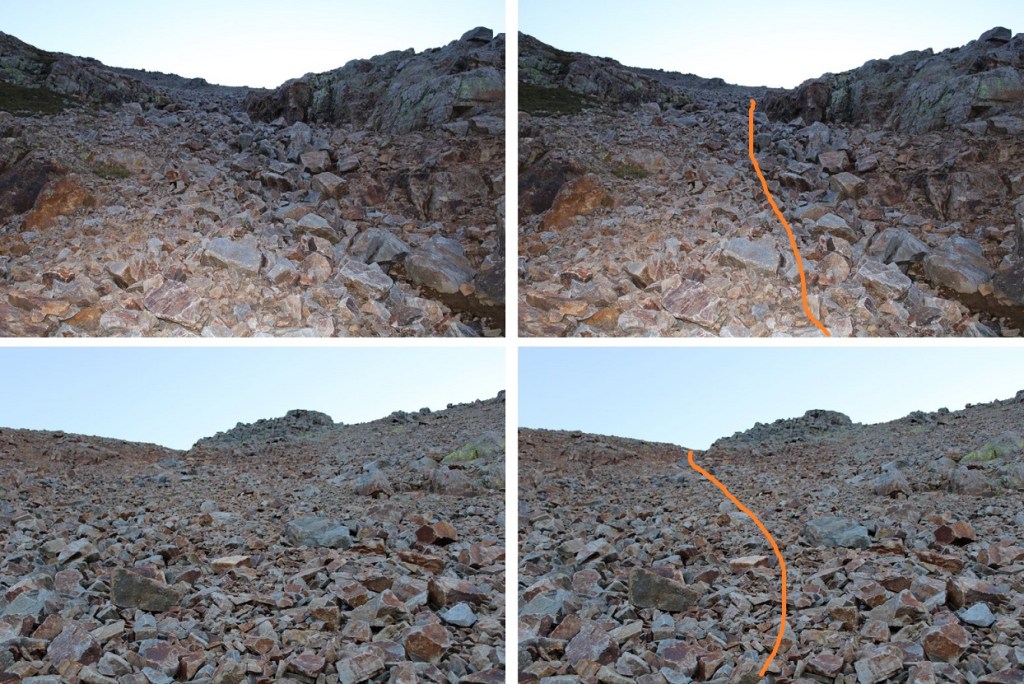
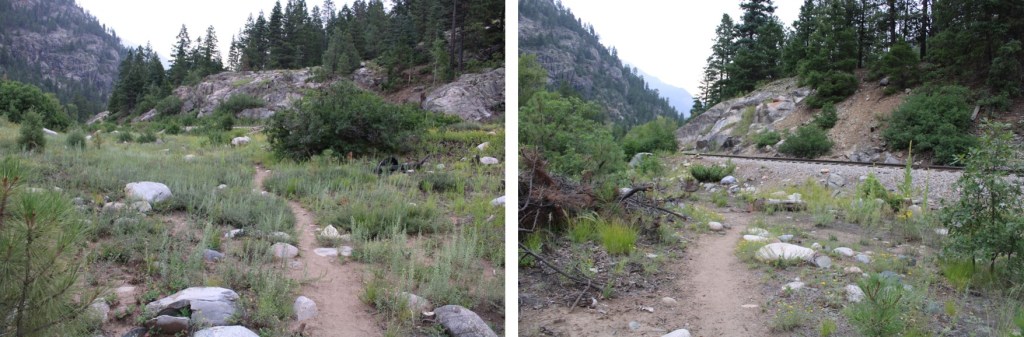
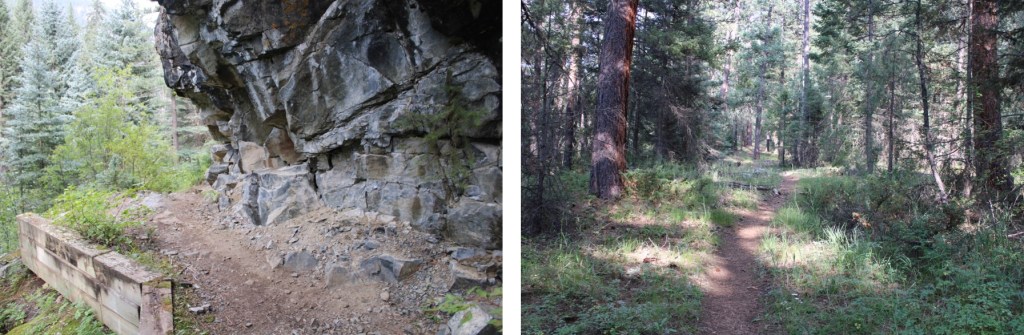
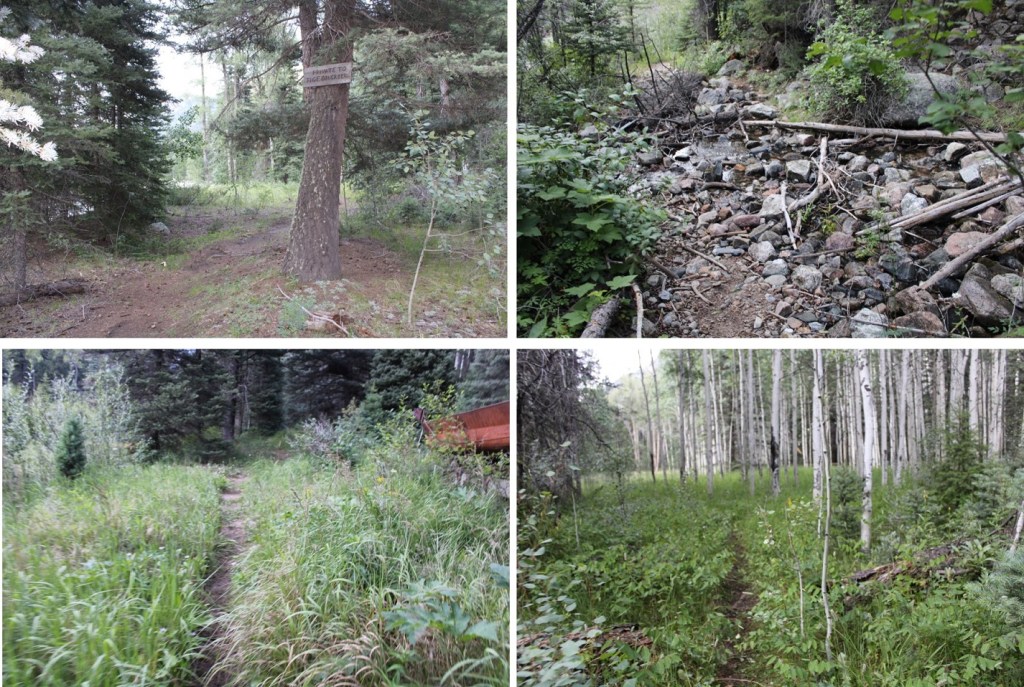
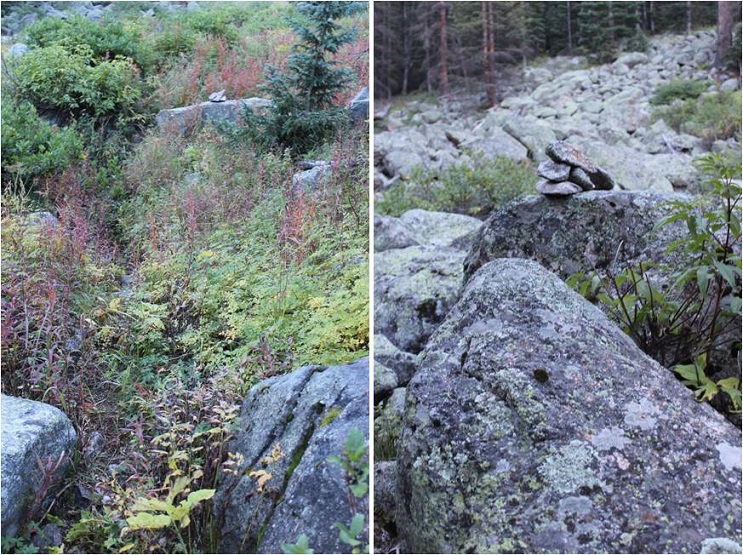
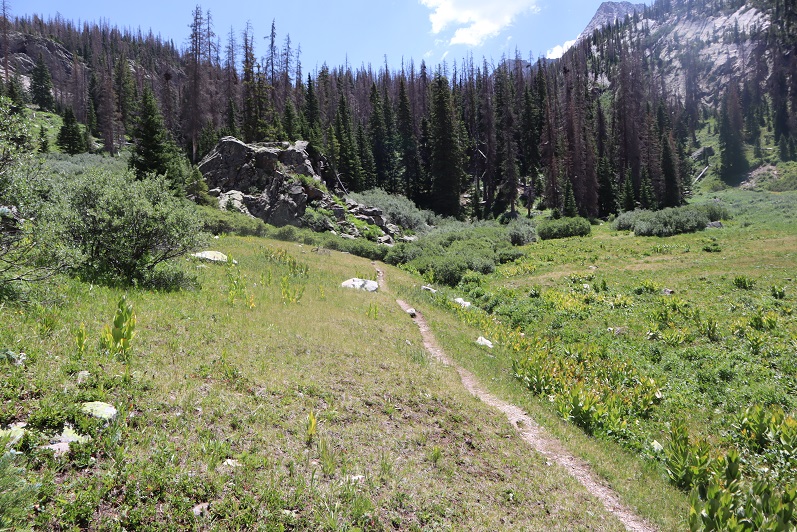
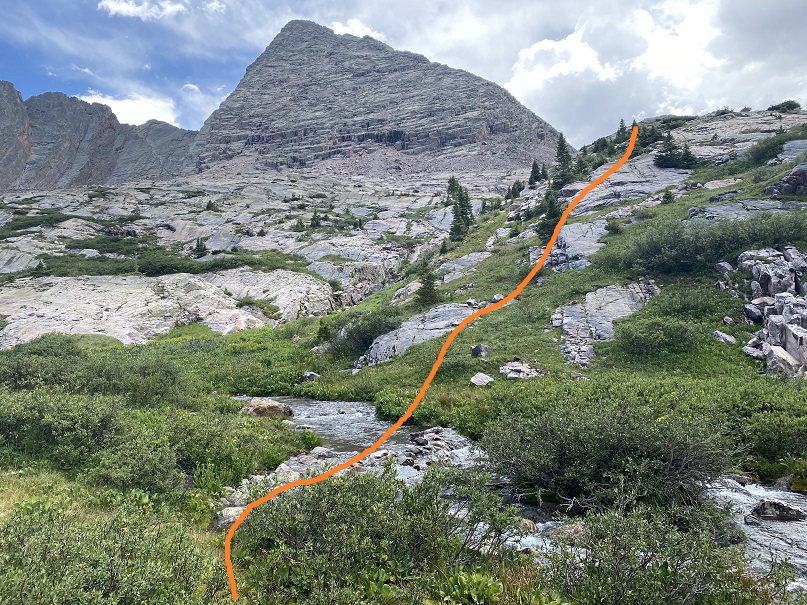
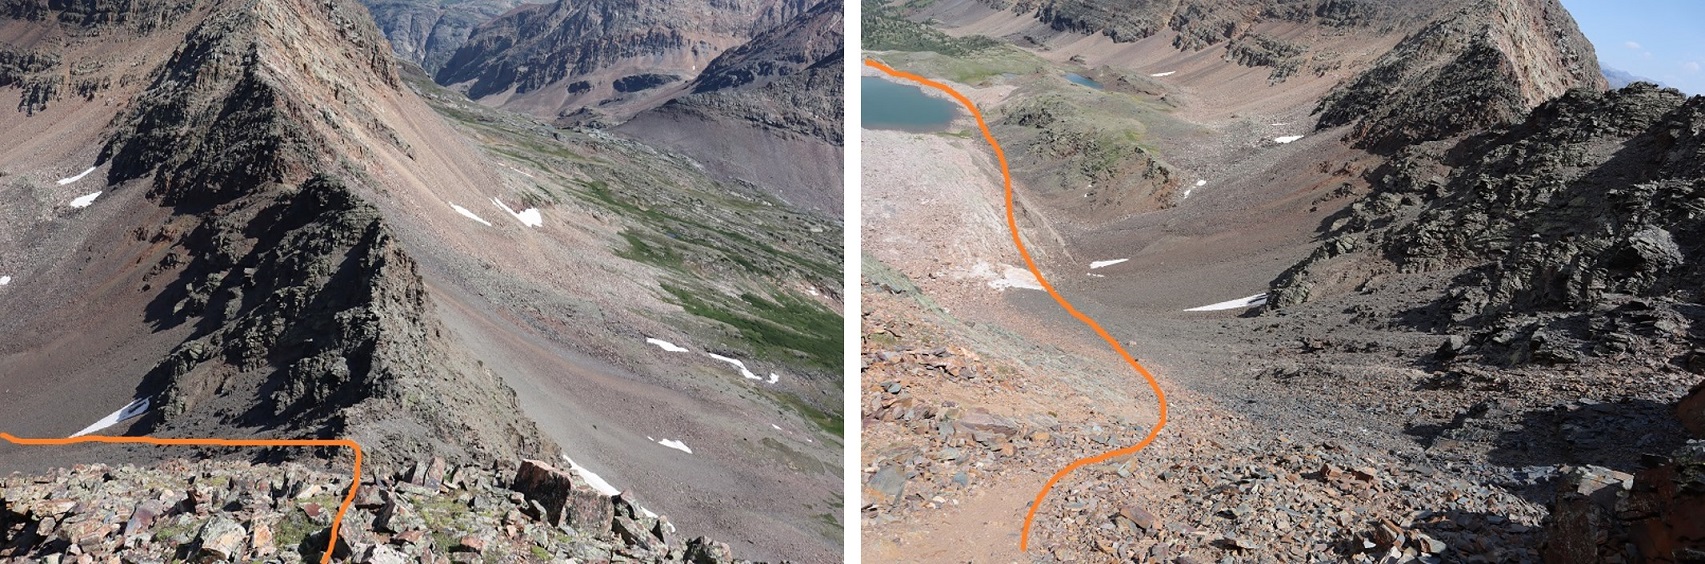
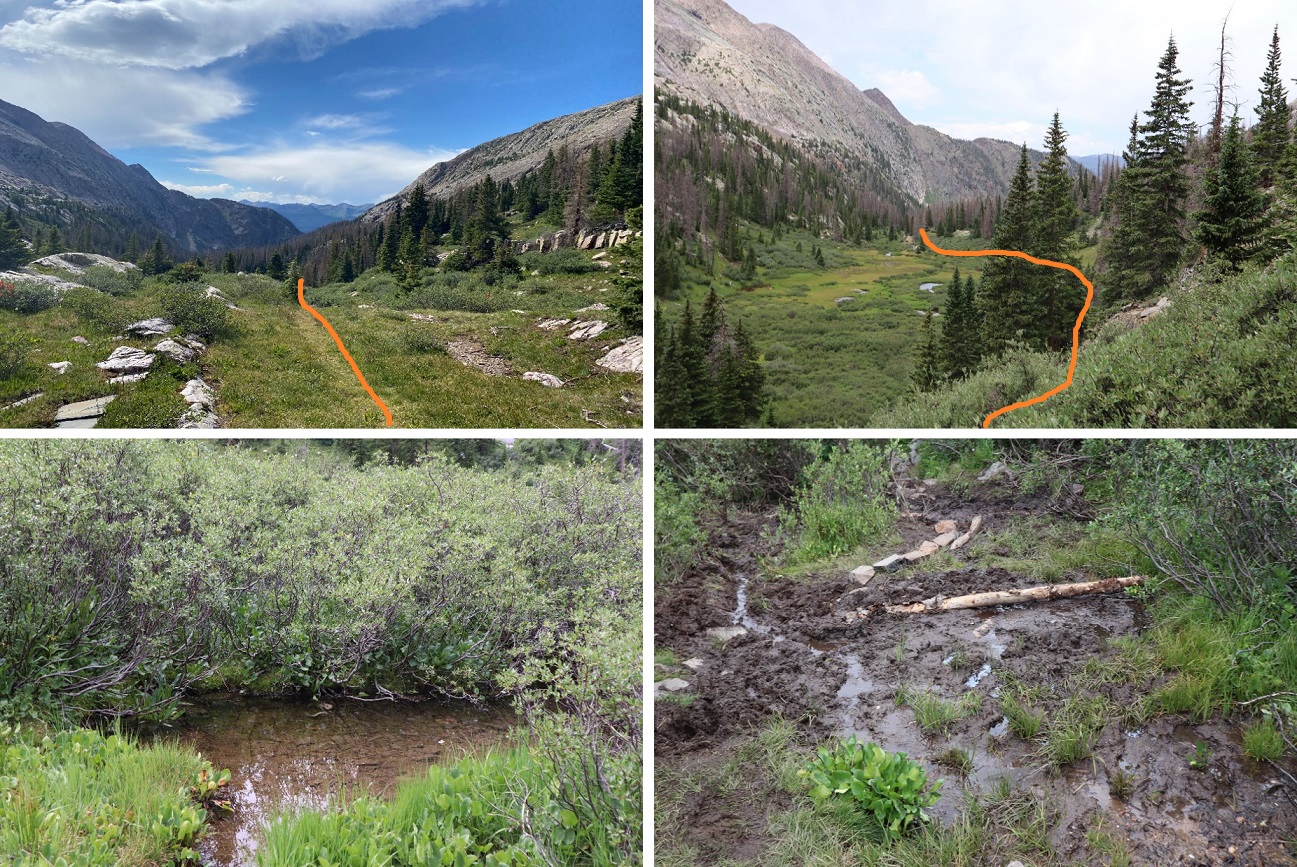
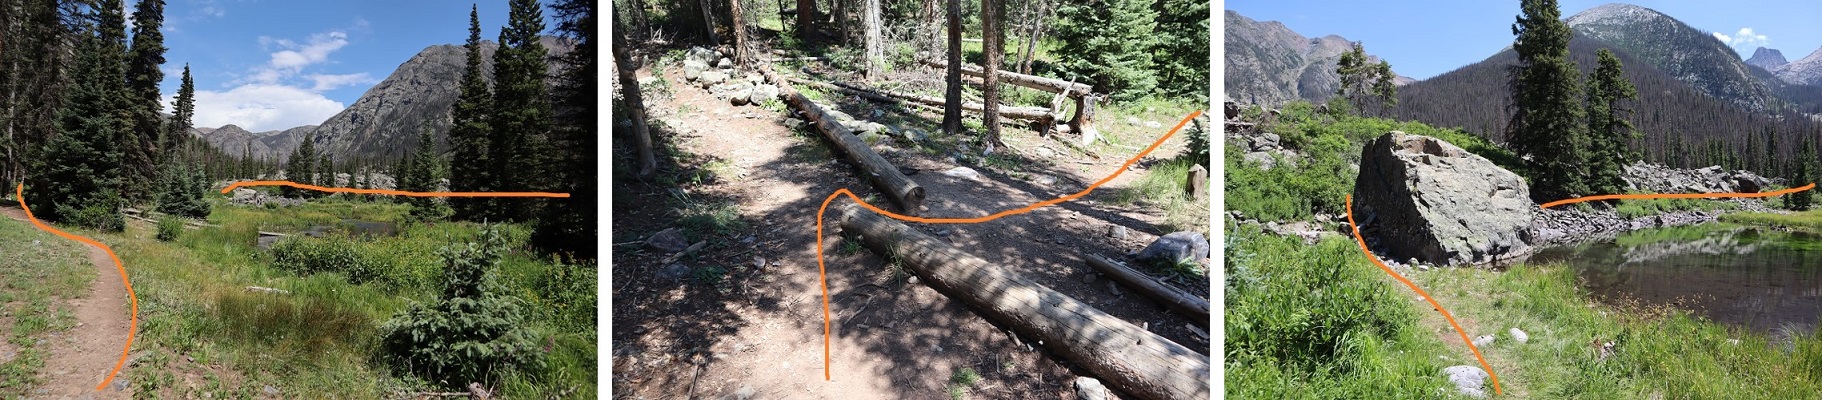
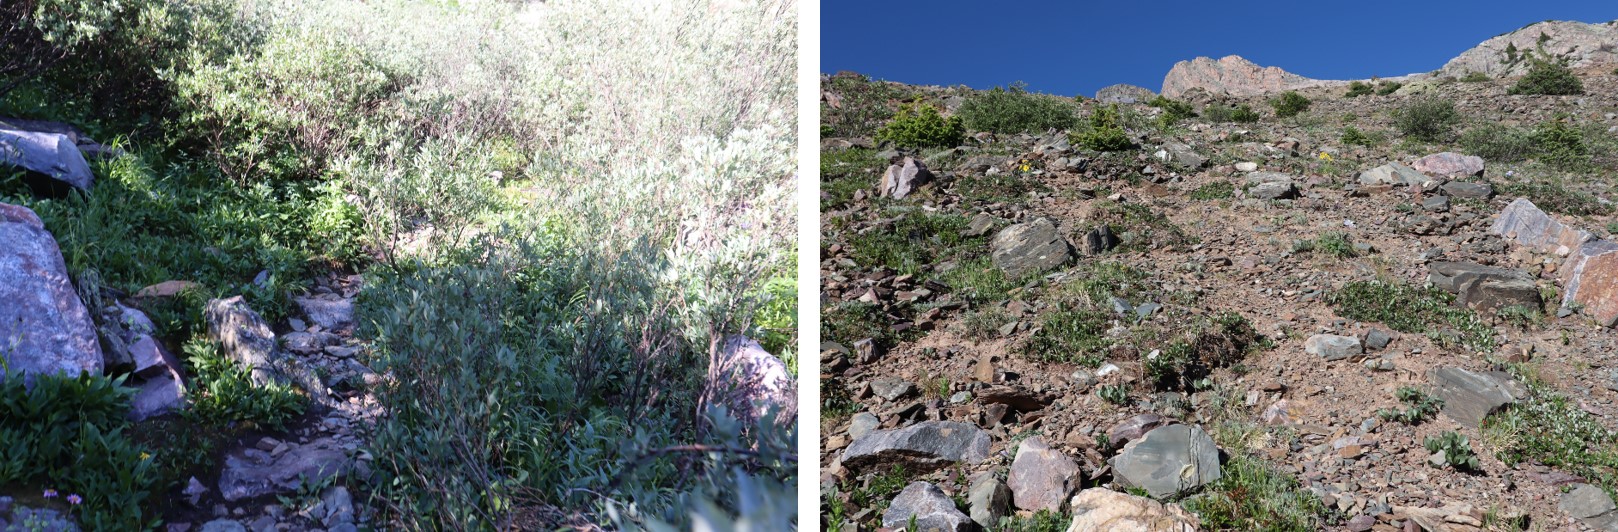
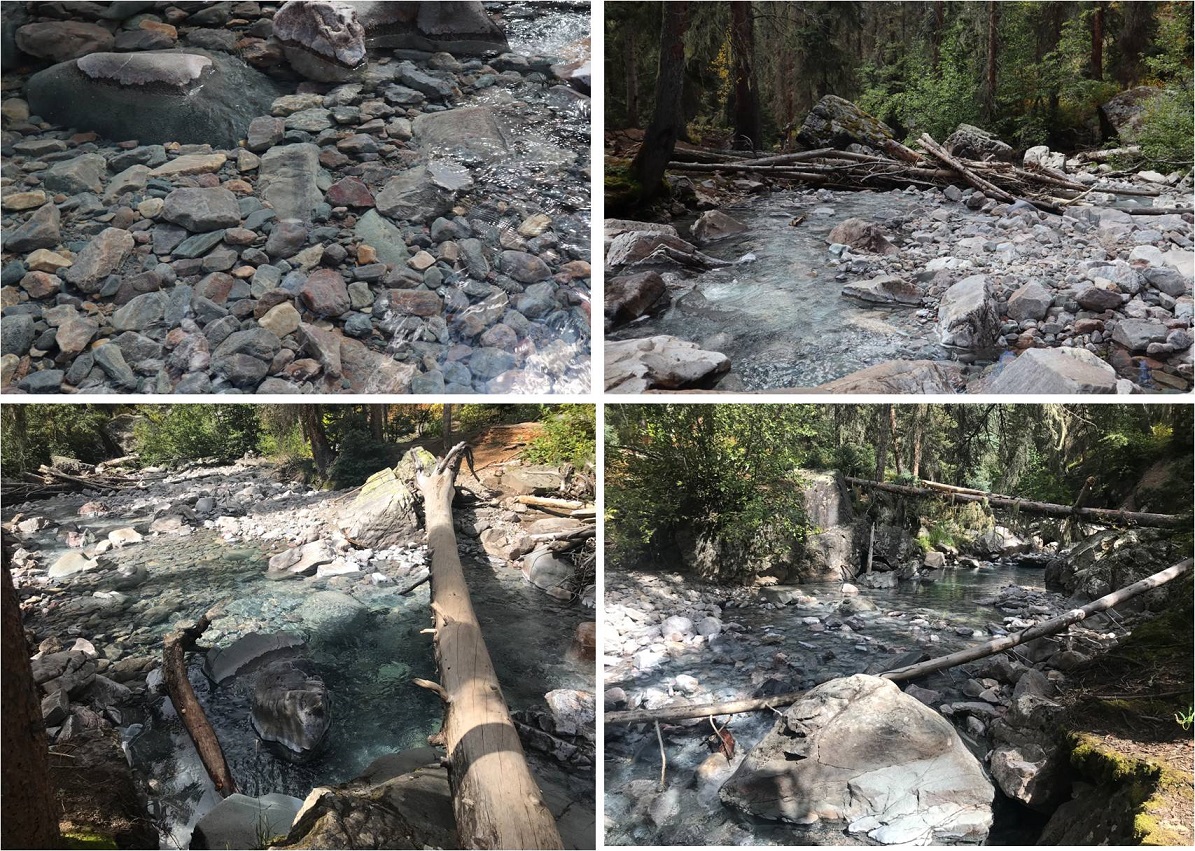
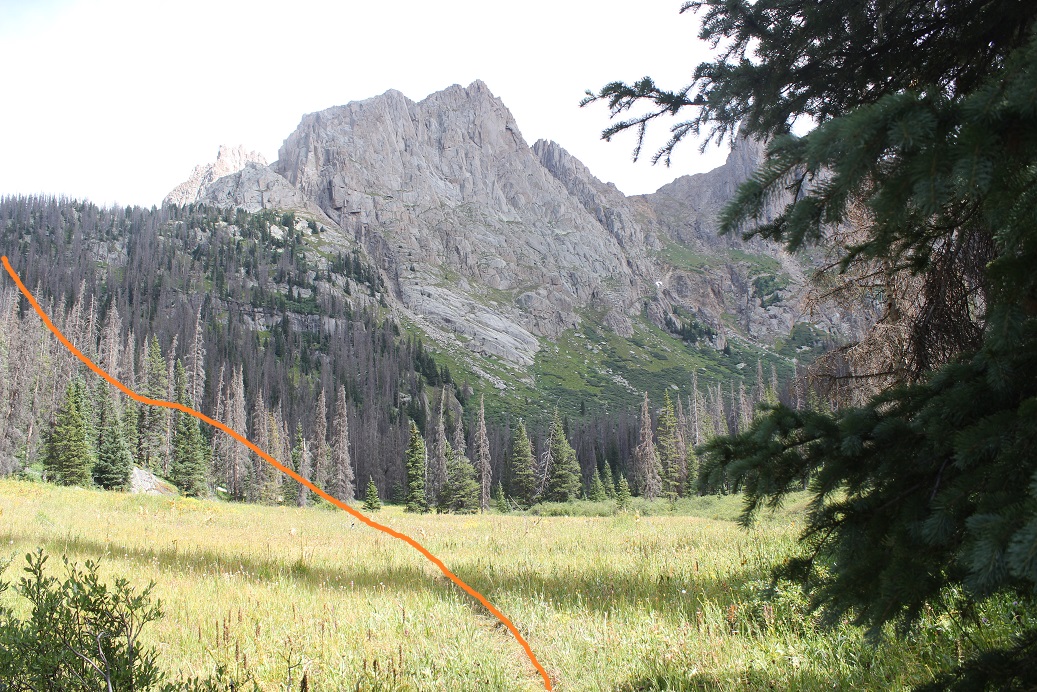
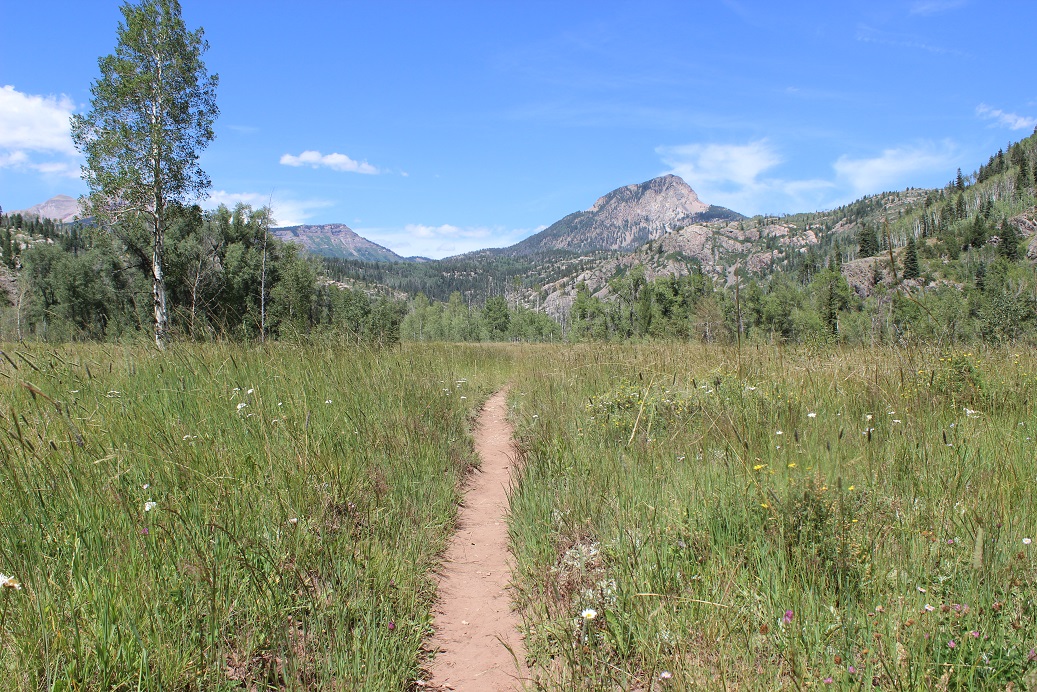
Here is where the elevation gain begins. I hiked along the Colorado Trail east to the Beaver Ponds, following Elk Creek and passing through a couple of cleared avalanche areas. This trail is easy to follow, with no trail junctions.
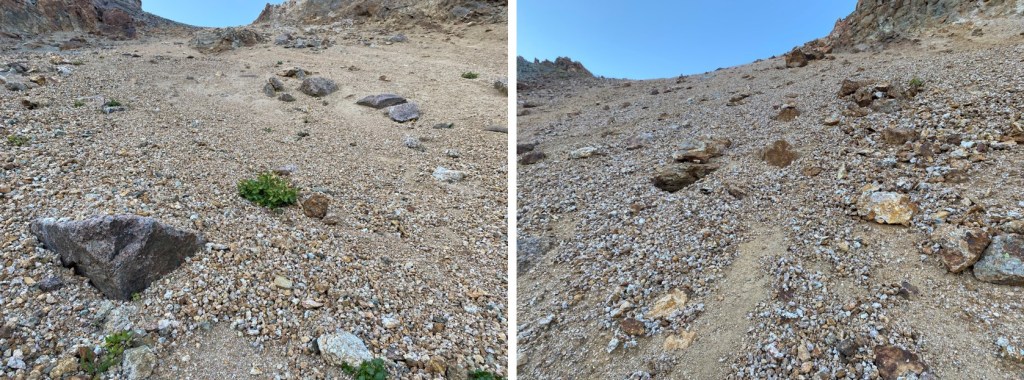
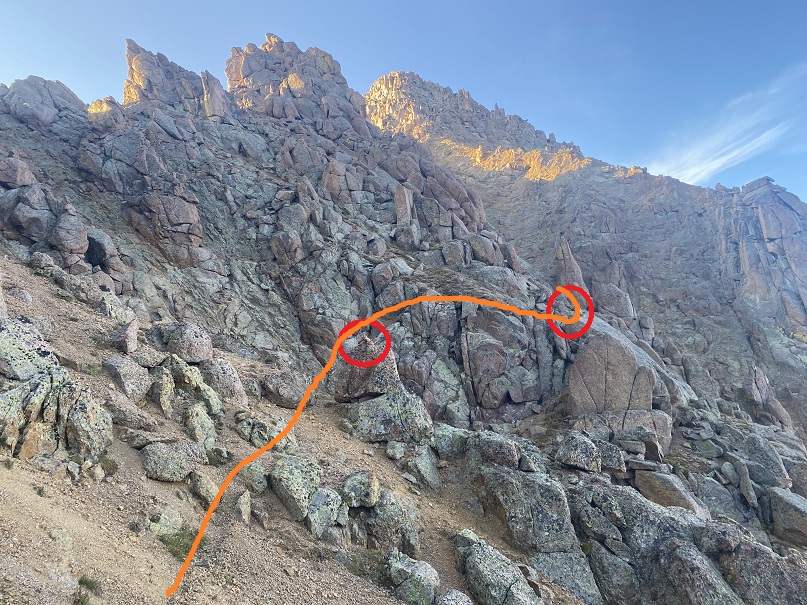
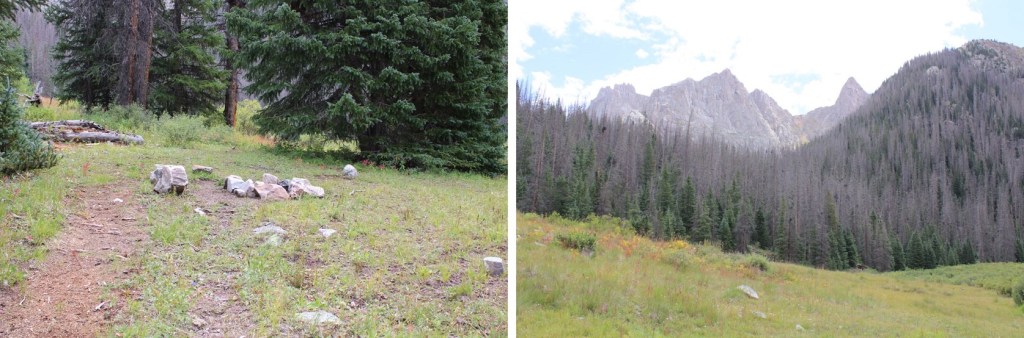
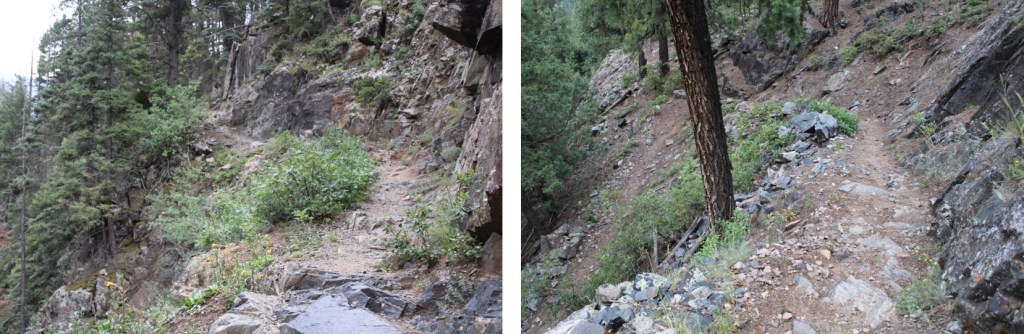
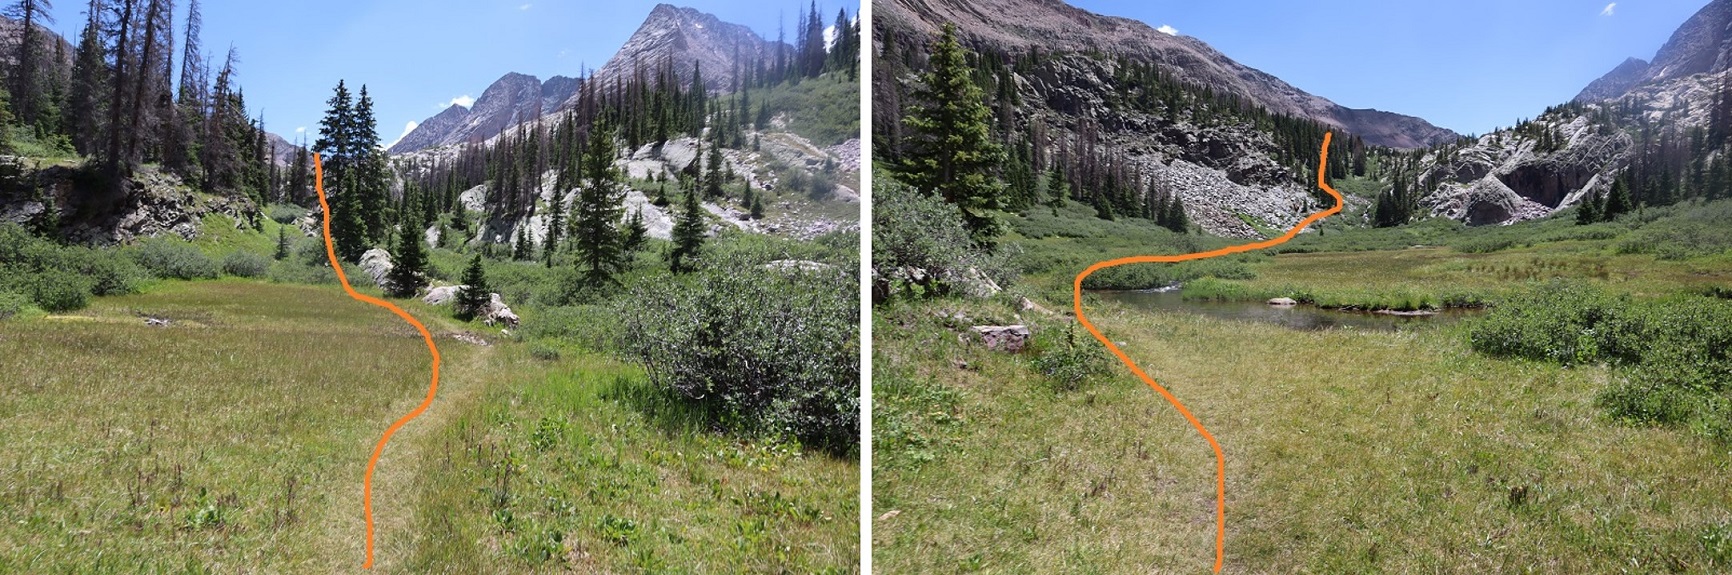
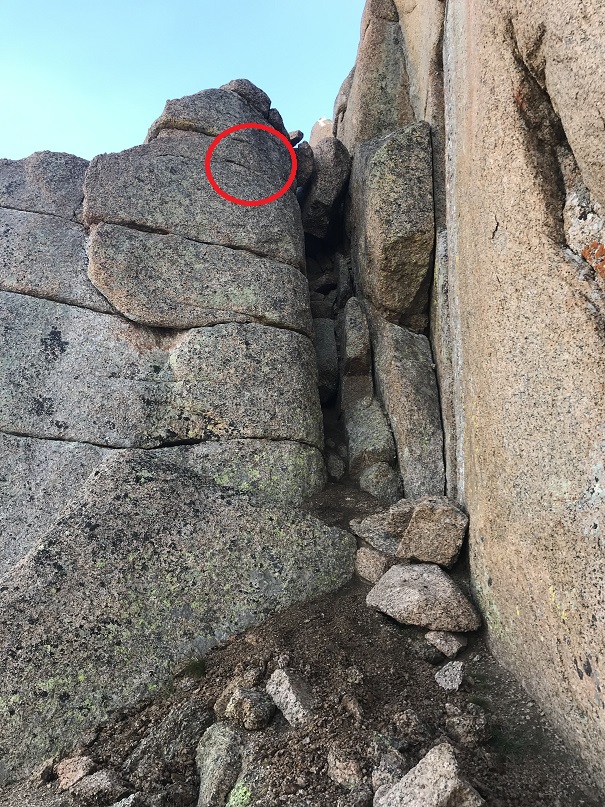
This part trips people up all the time when headed towards Vestal Basin: Once at the beaver ponds, I turned right off the trail and traversed behind this large boulder. There’s a faint trail here that picks up again once you’re past the ponds.
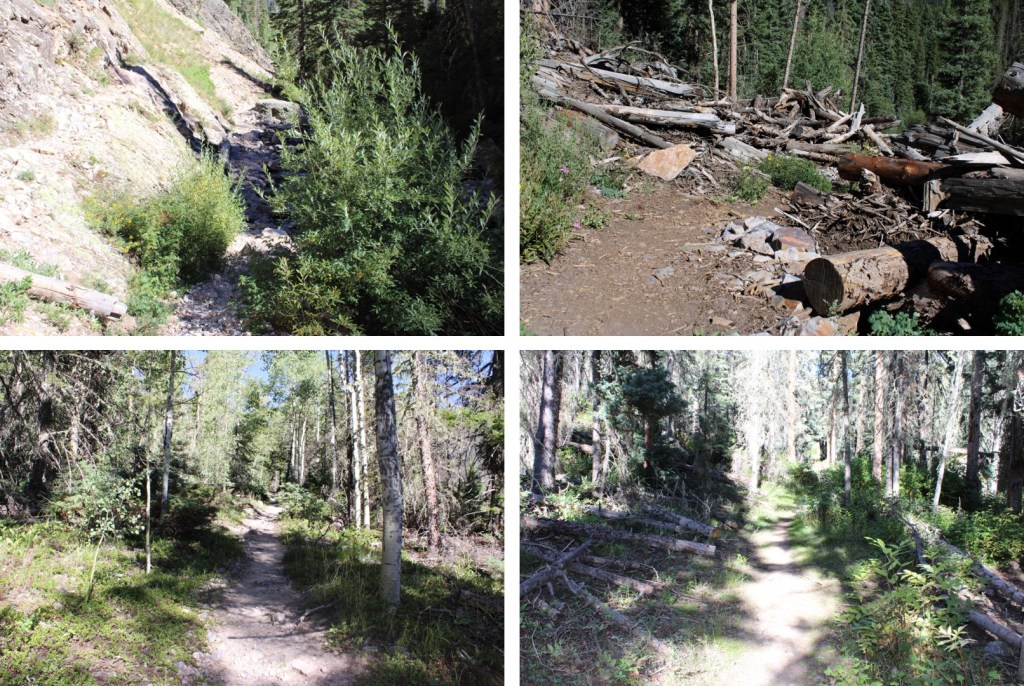
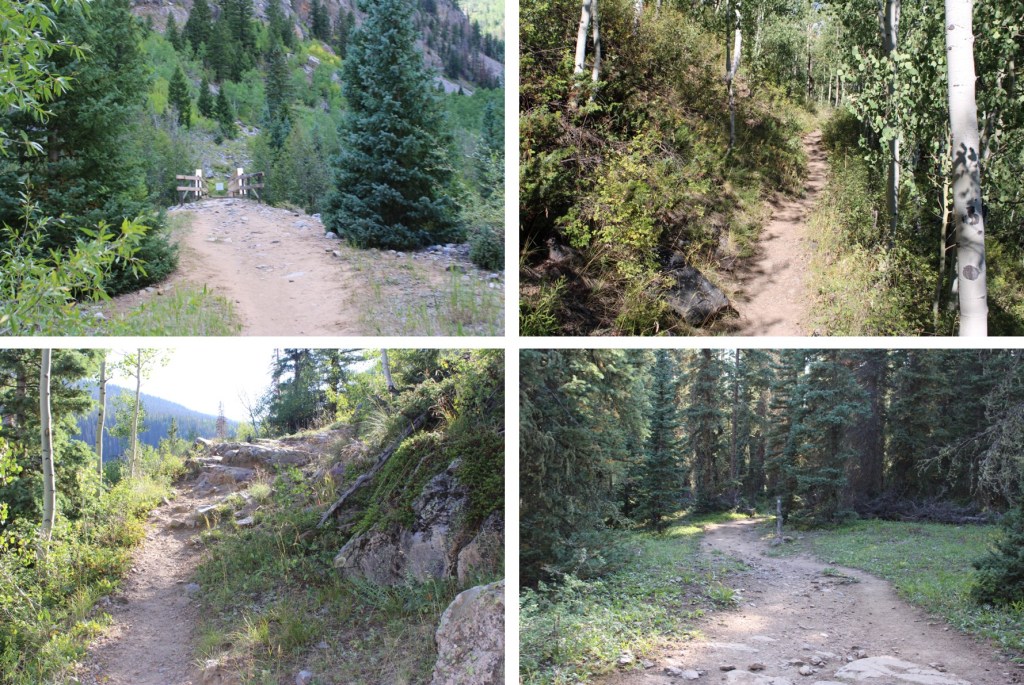
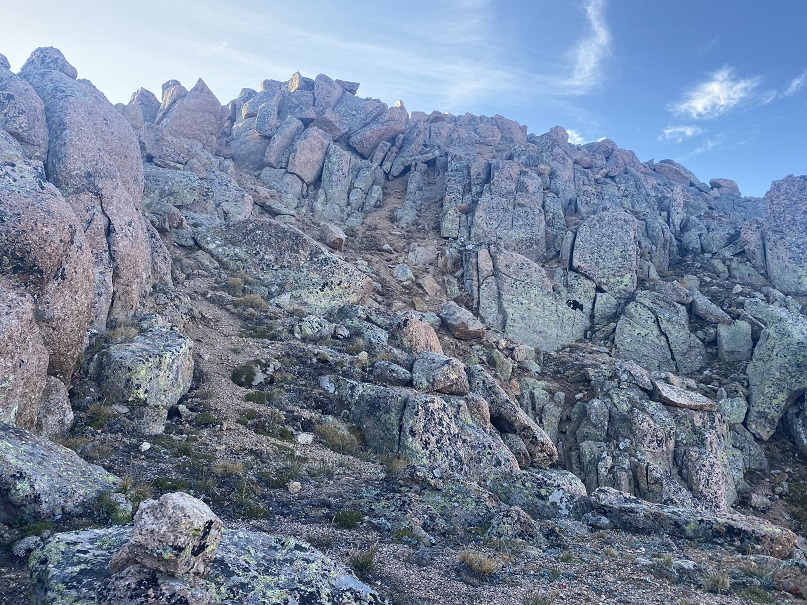
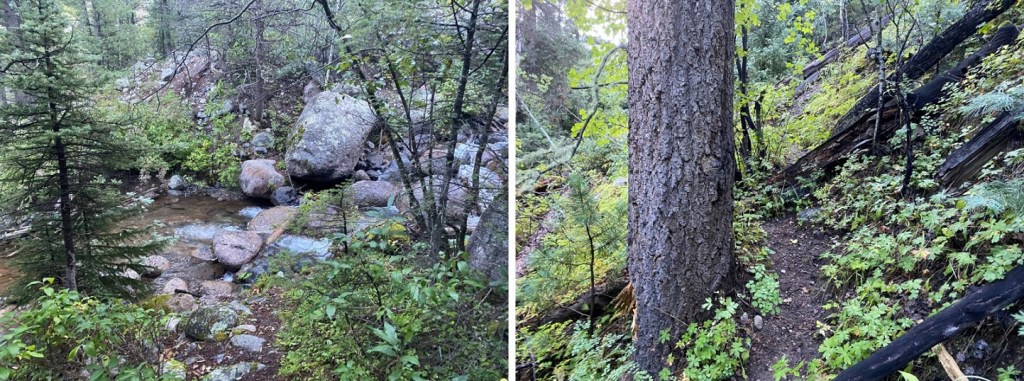
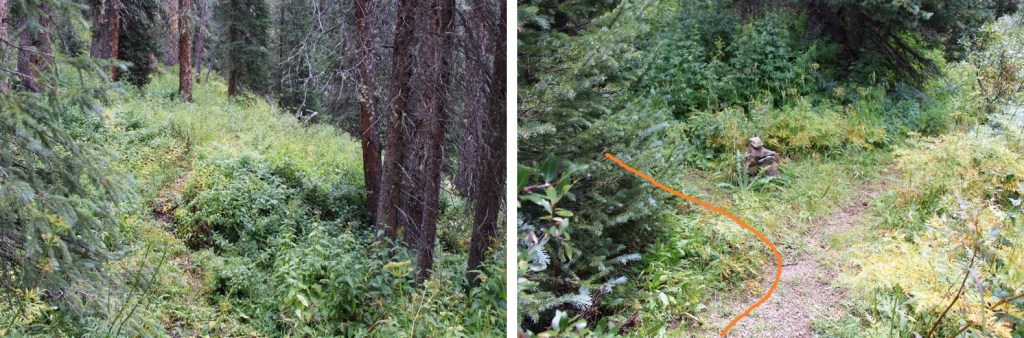
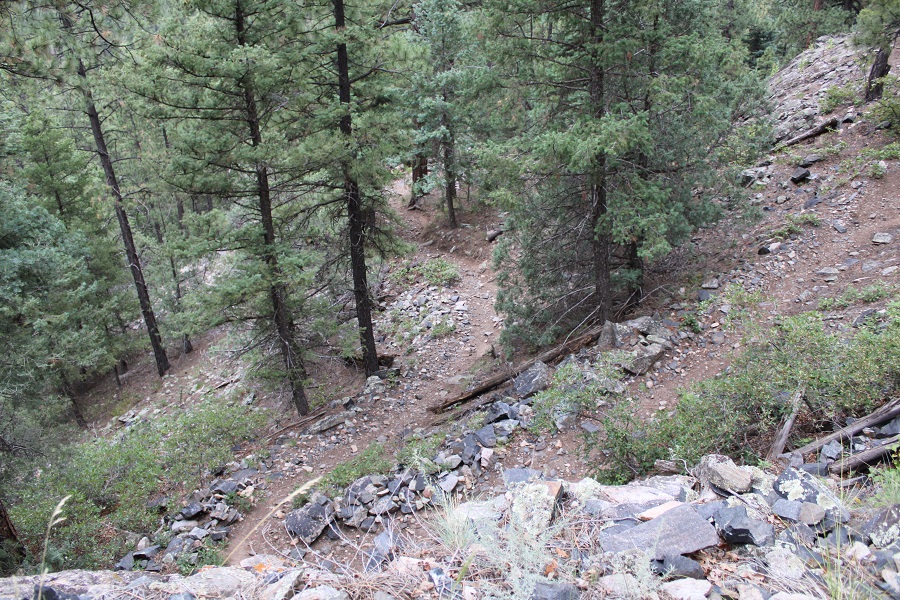
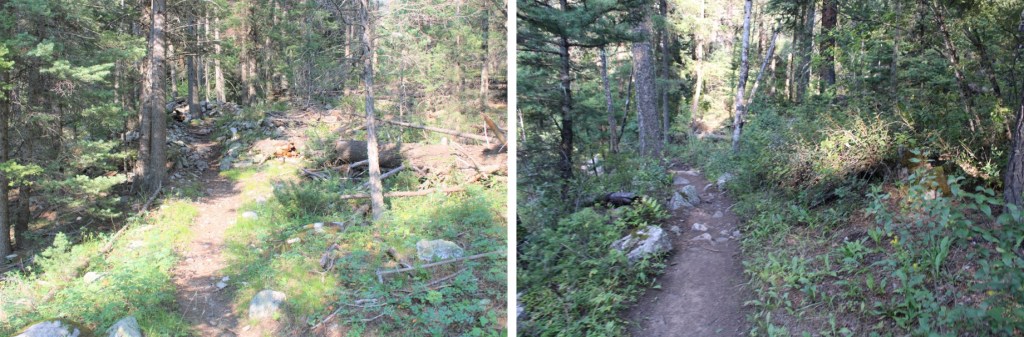
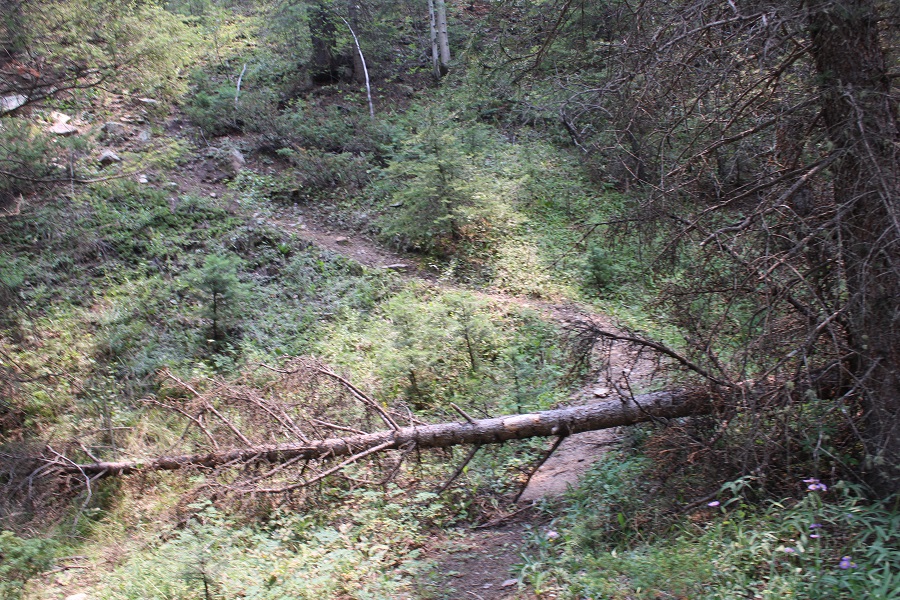
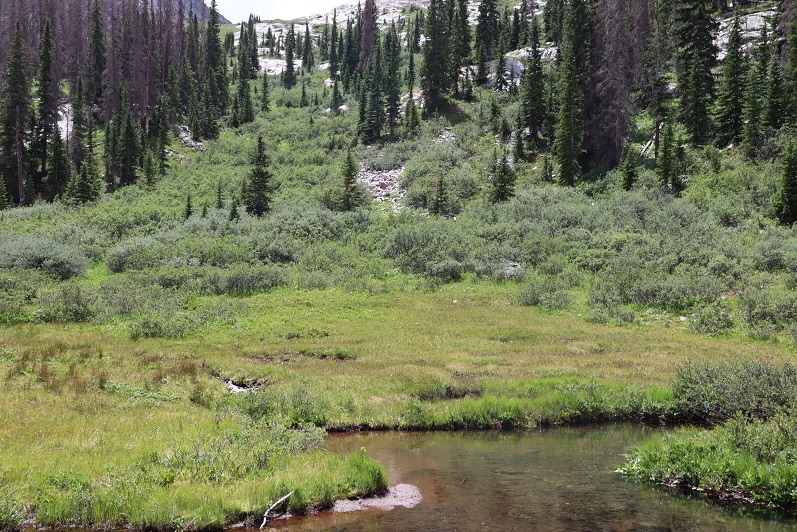
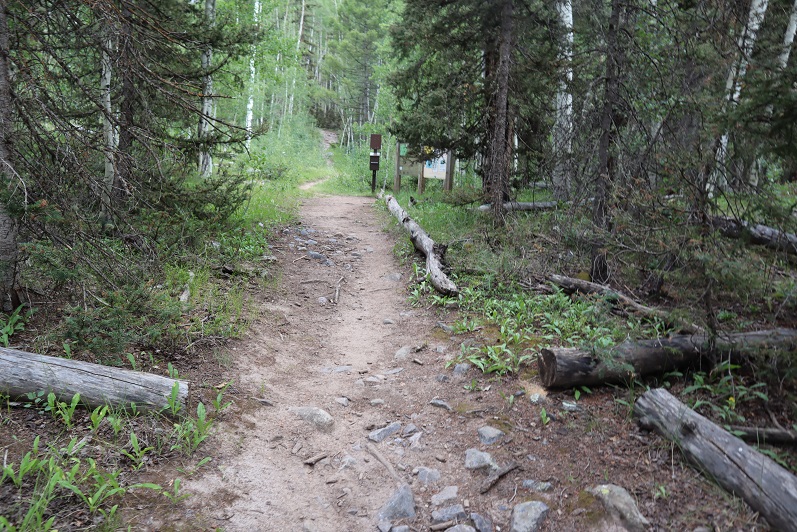
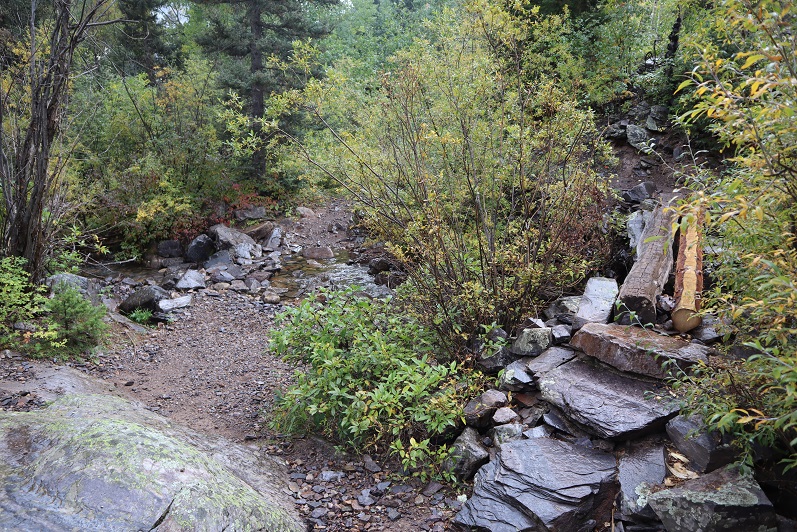
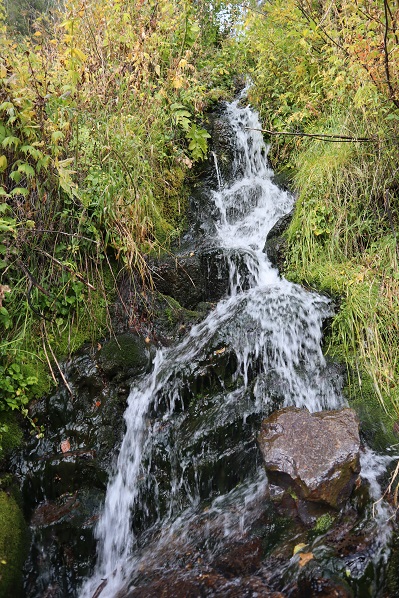
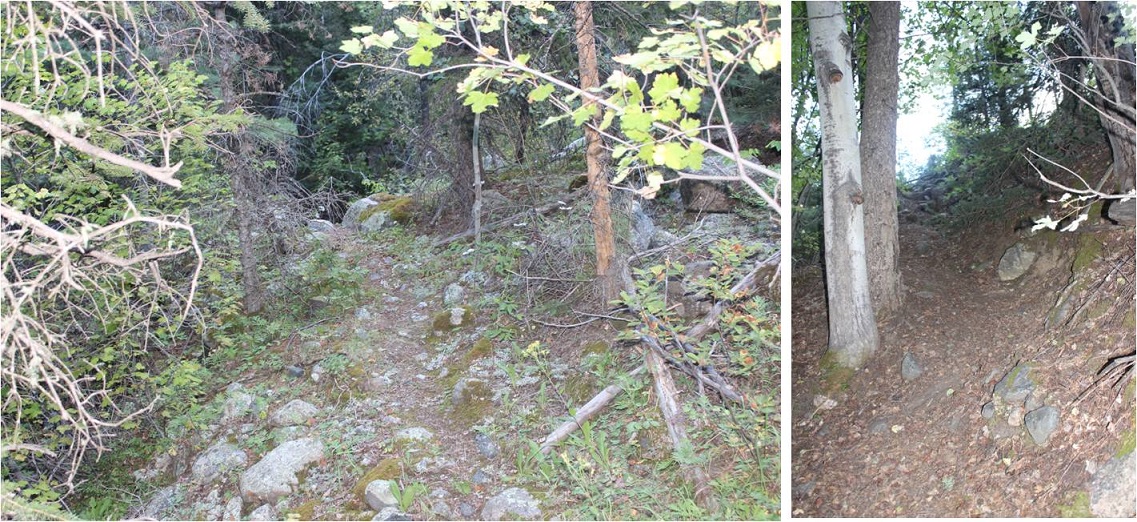
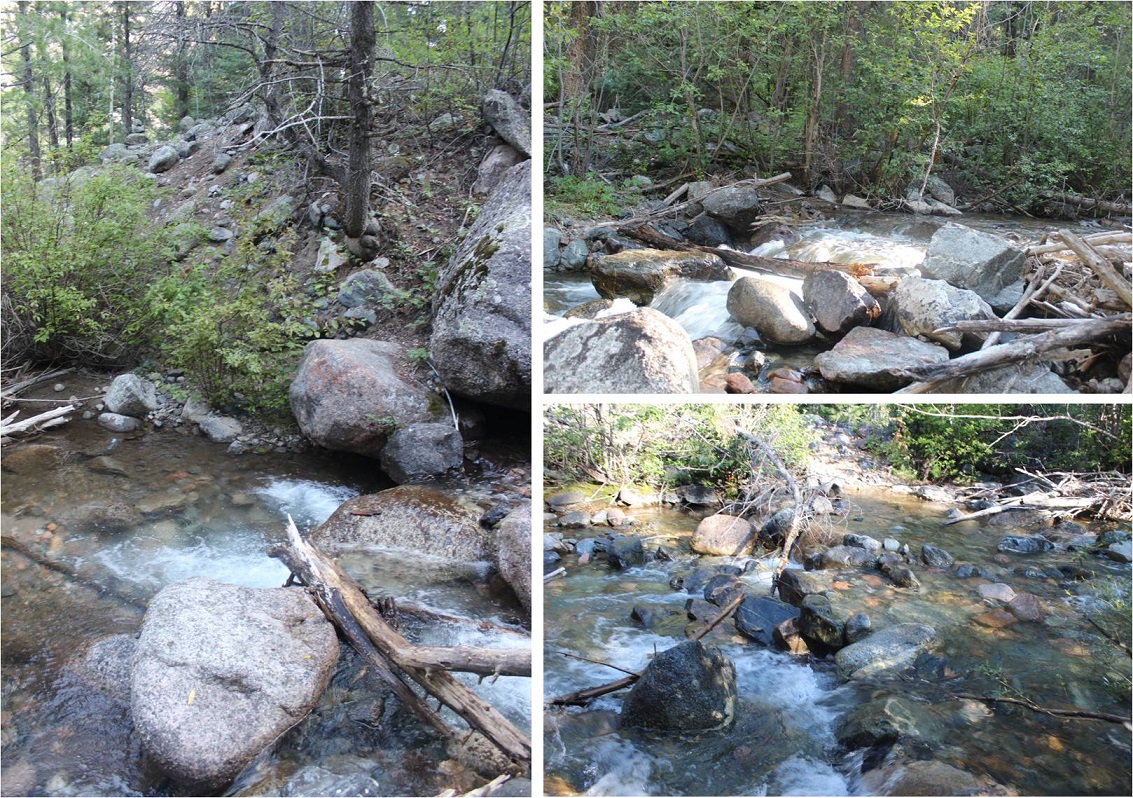
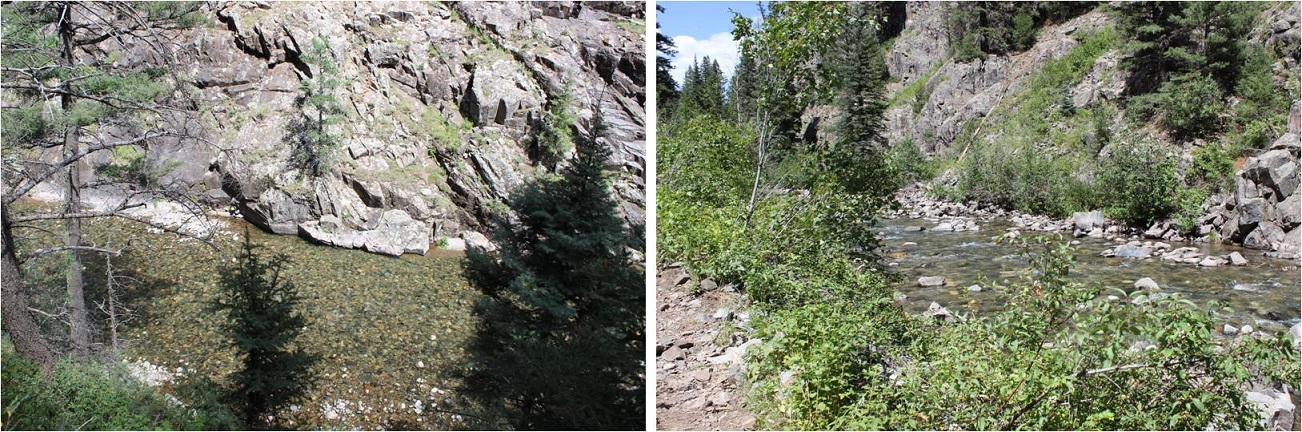
The trail picks up again after the beaver ponds, but it’s no longer as well maintained as the Colorado Trail. There are fallen trees to navigate, but the trail is easy to see. I followed the trail as it crossed a beautiful creek and headed south.
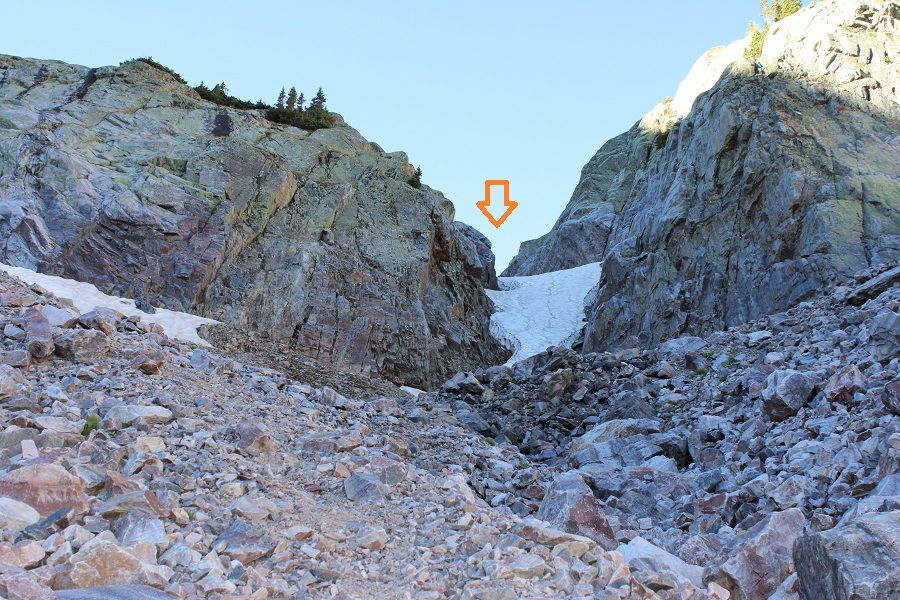
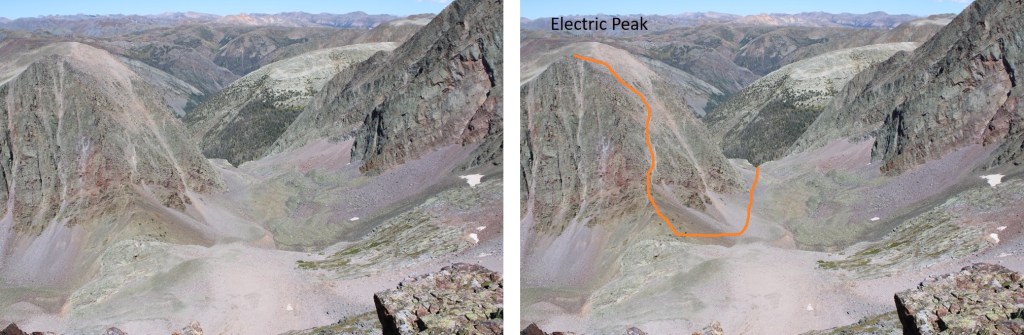
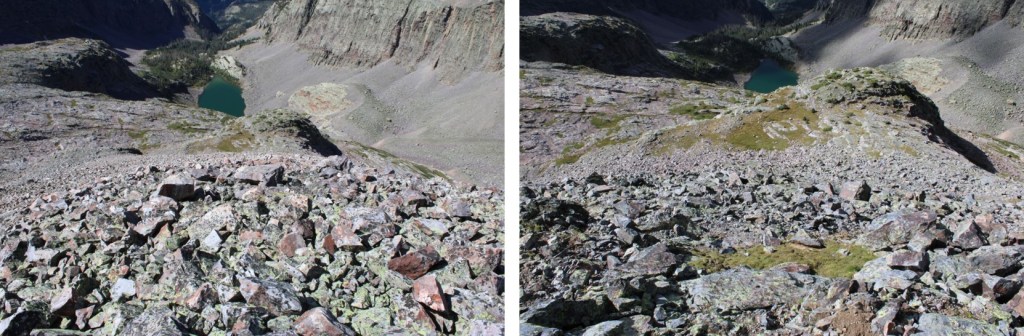
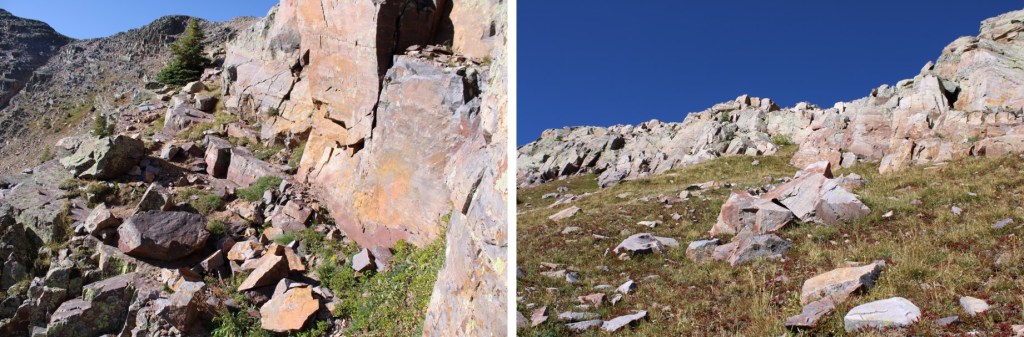
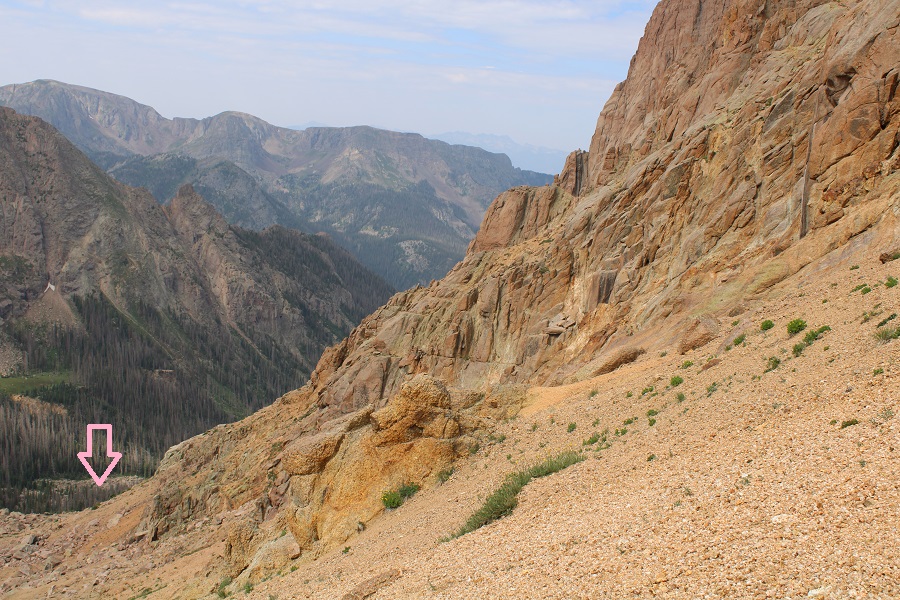
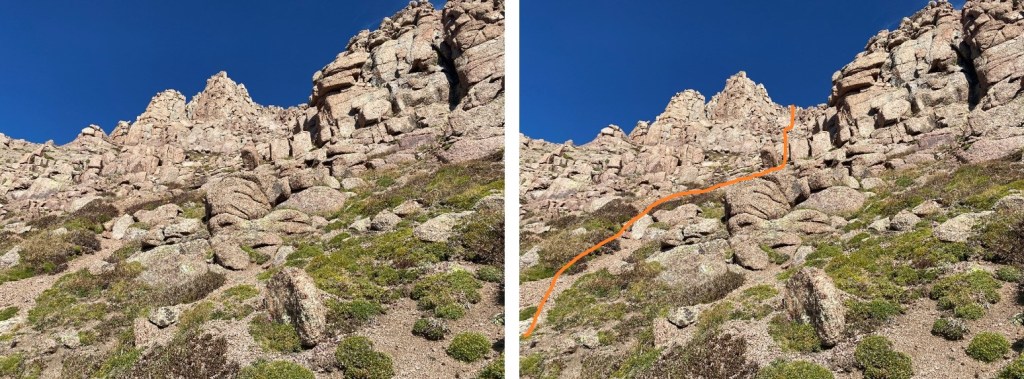
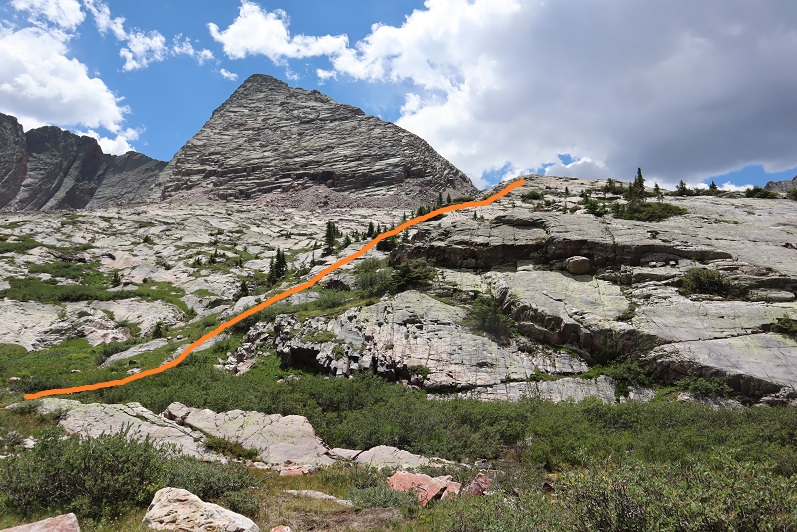
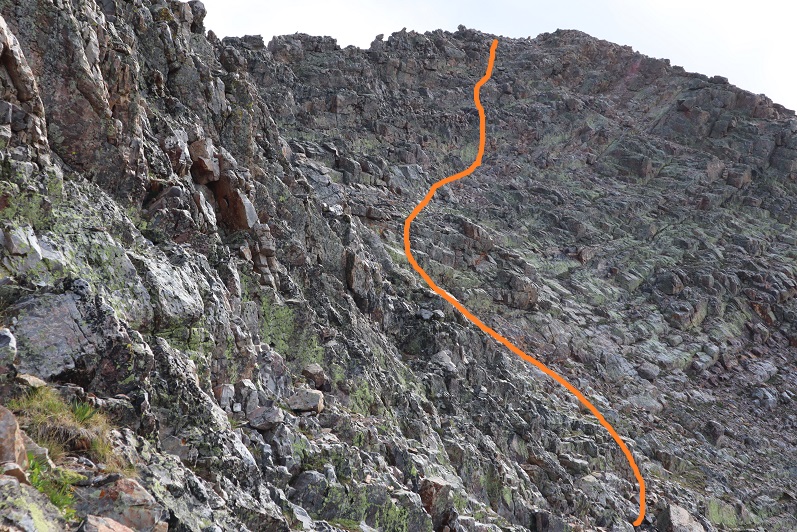
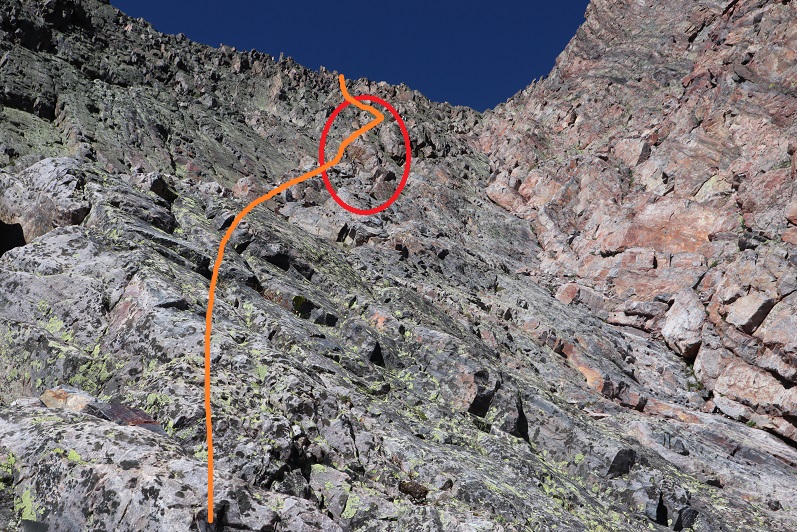
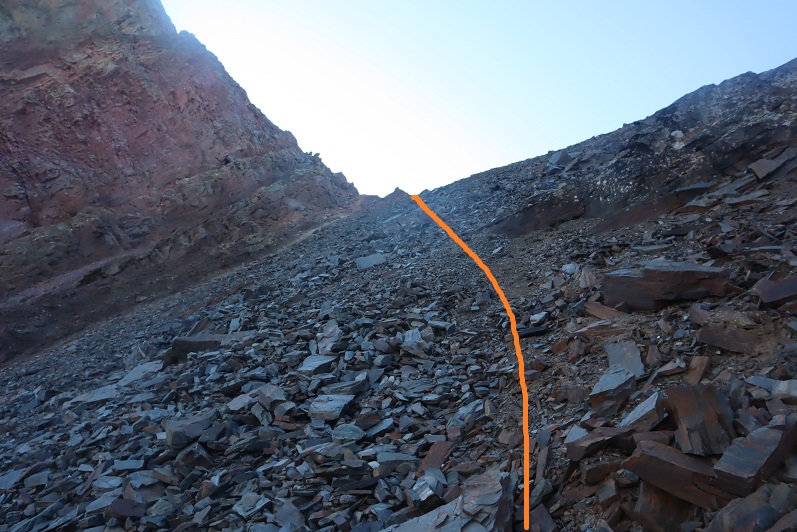
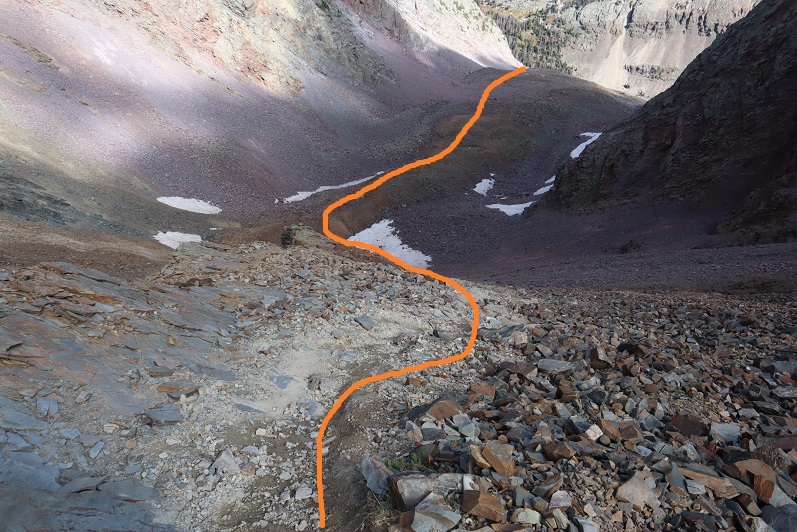
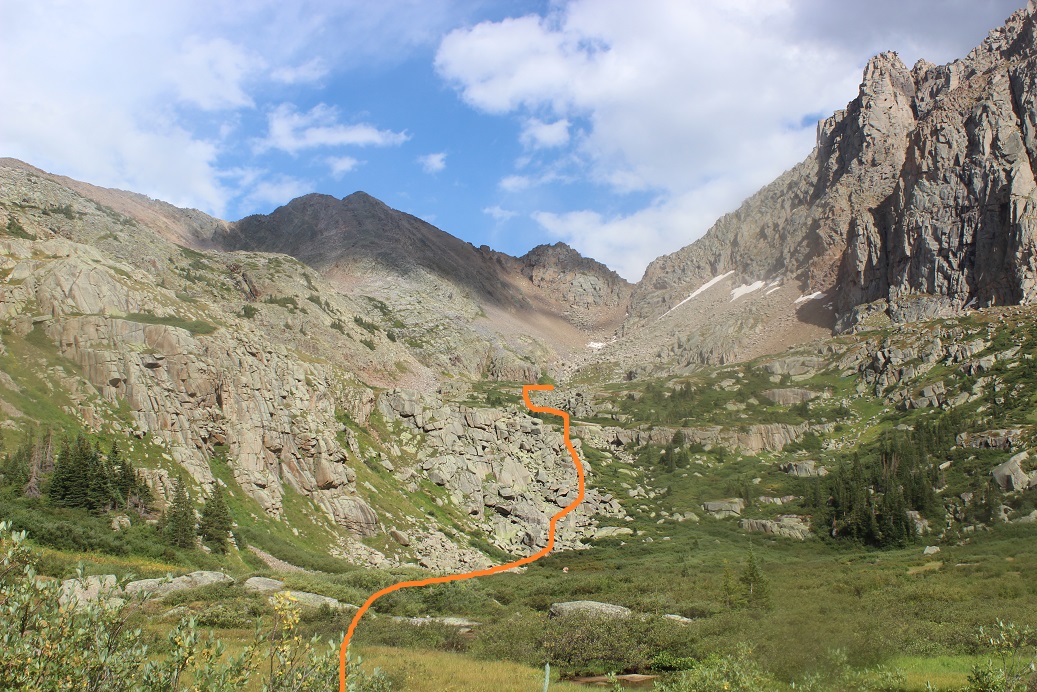
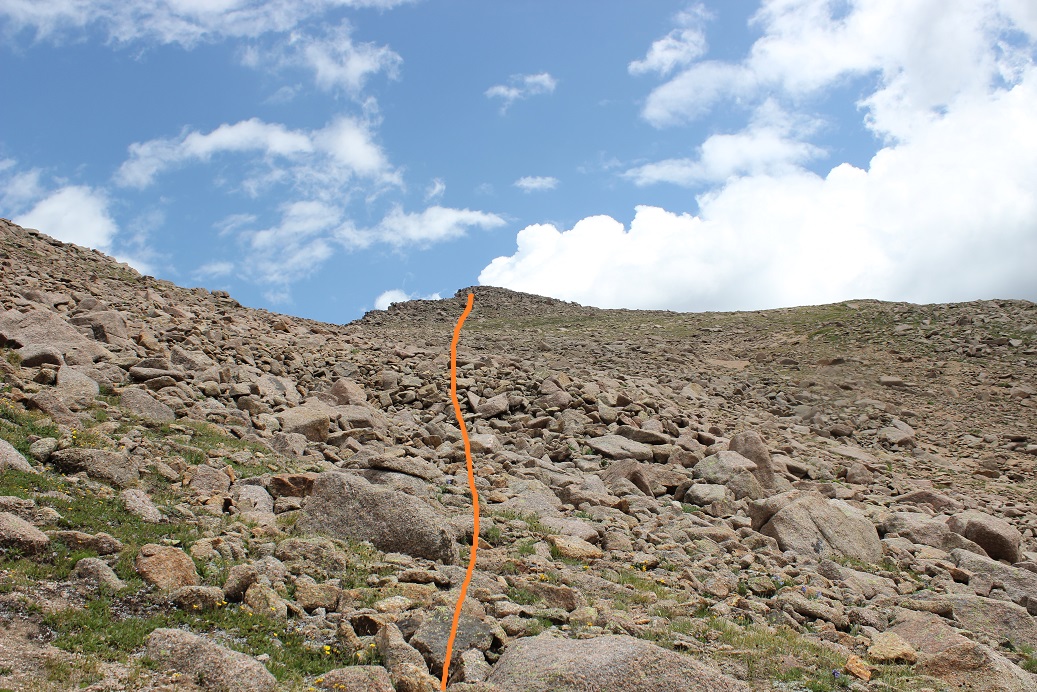
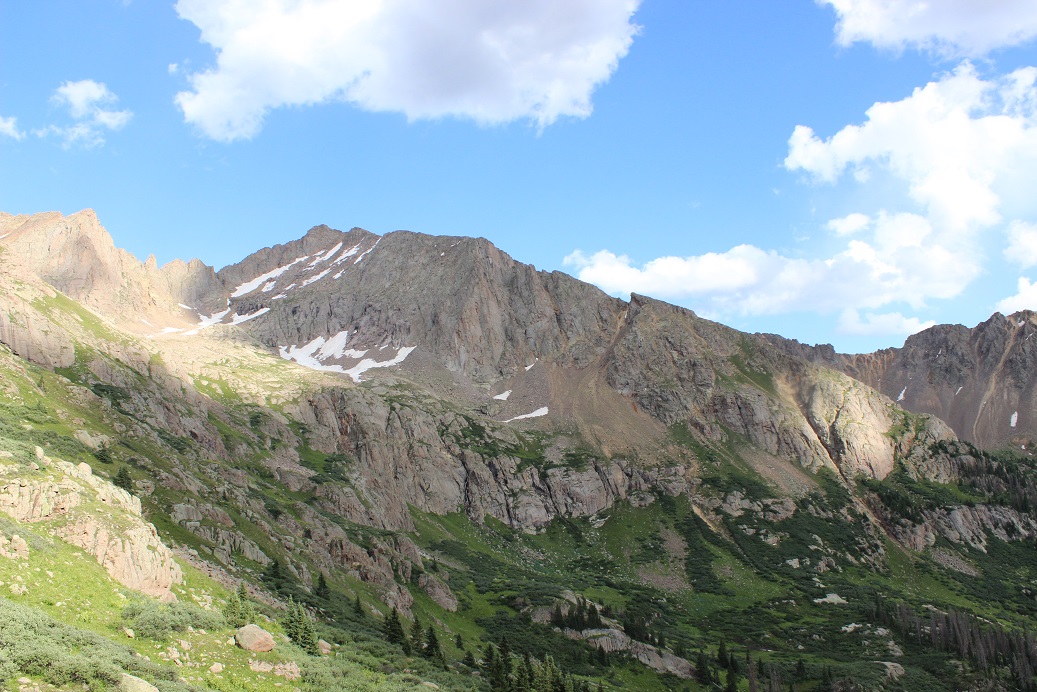
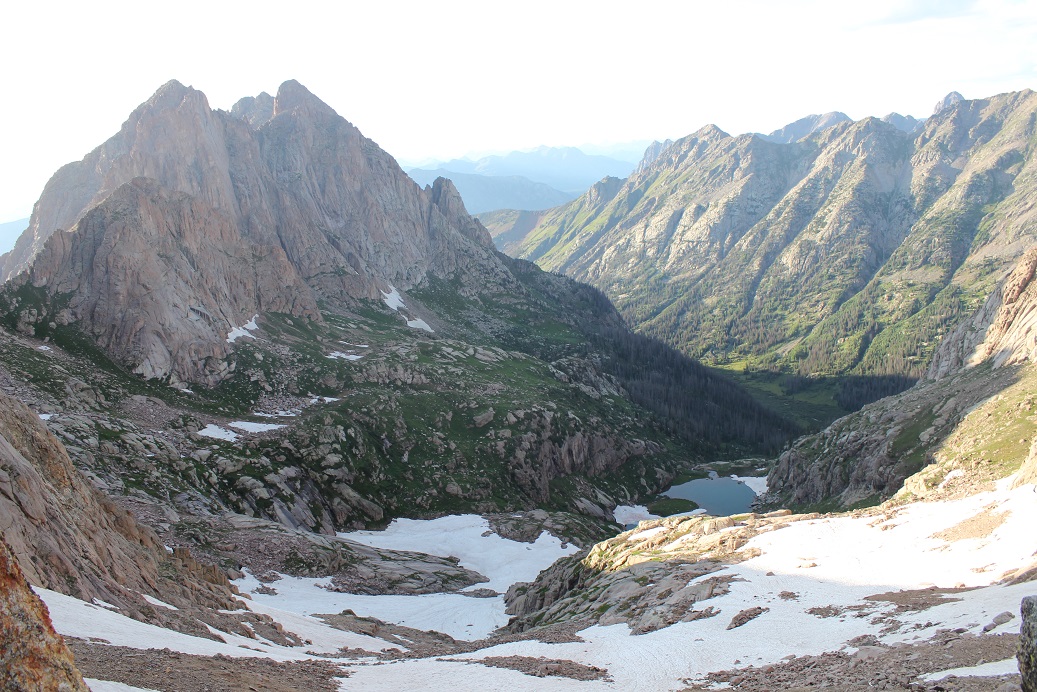
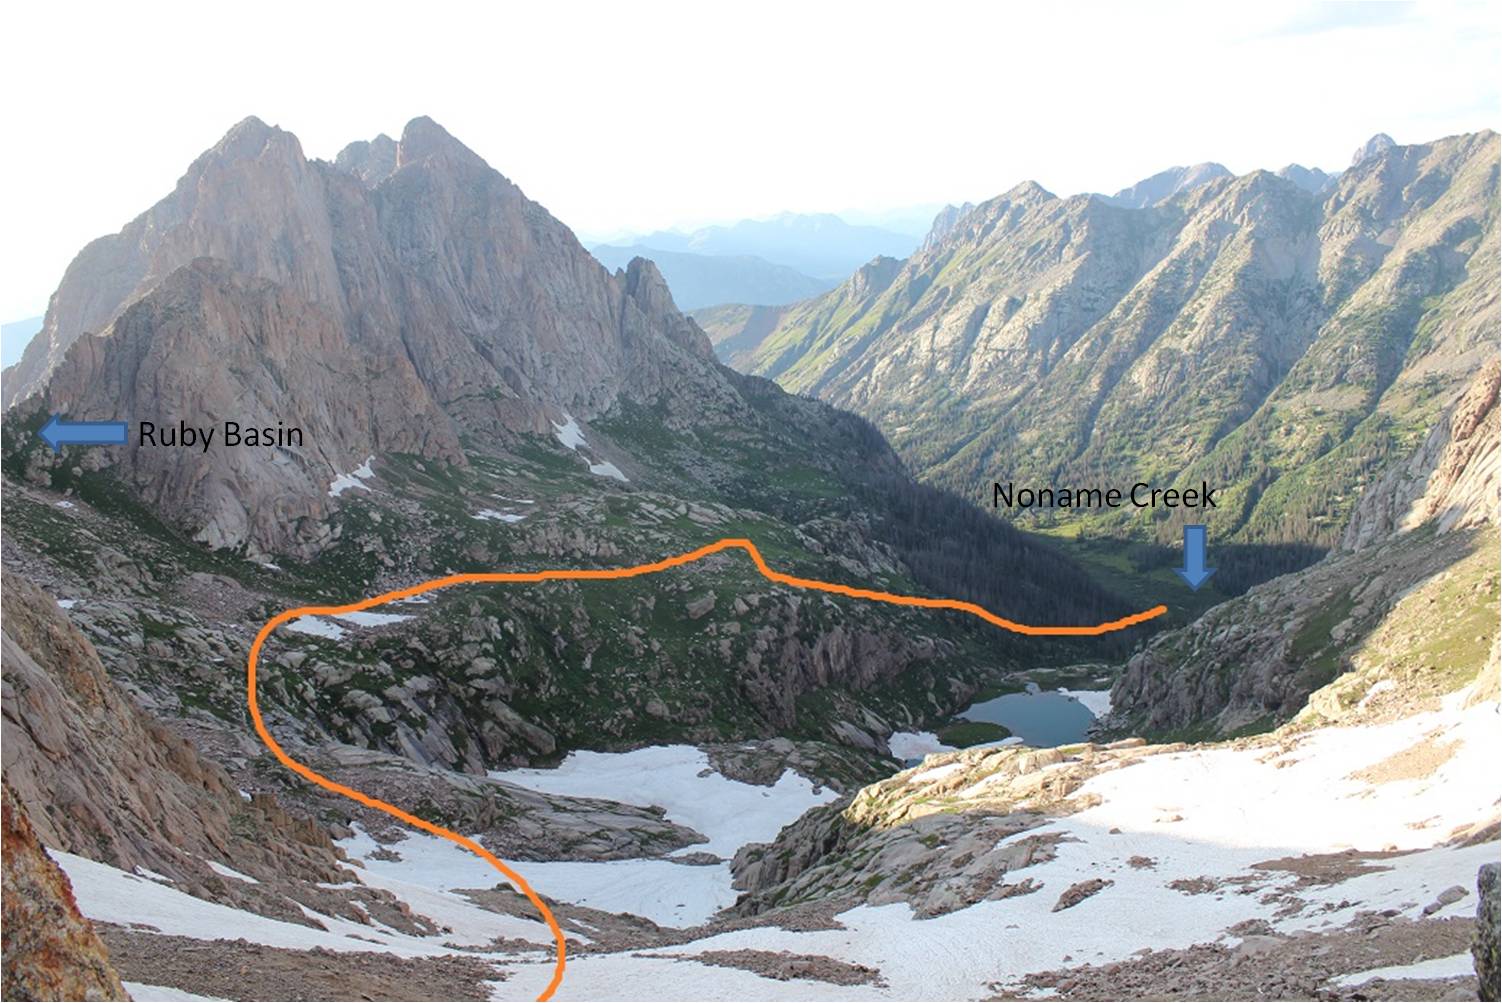
At 11260’ of elevation I left the trail. There are several options to do this, but here’s a visual of where I was headed.
This is the route I took:
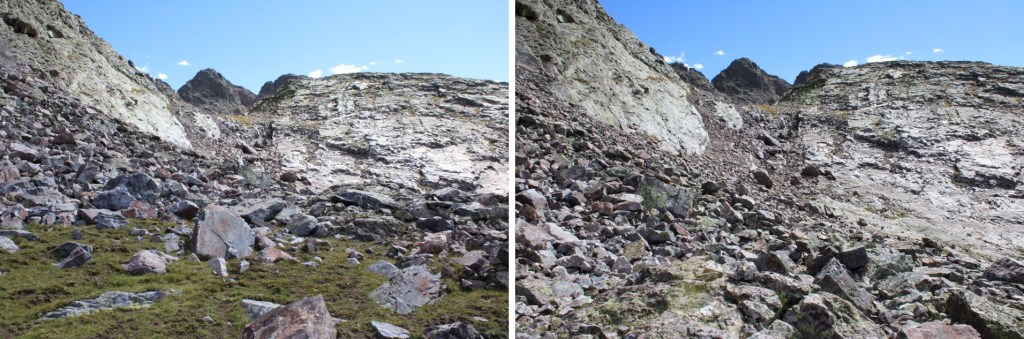
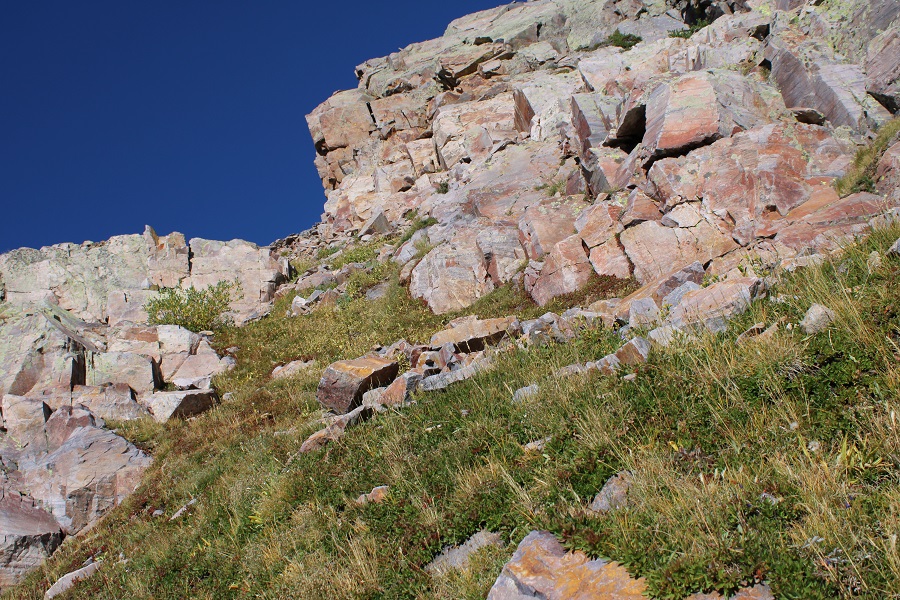
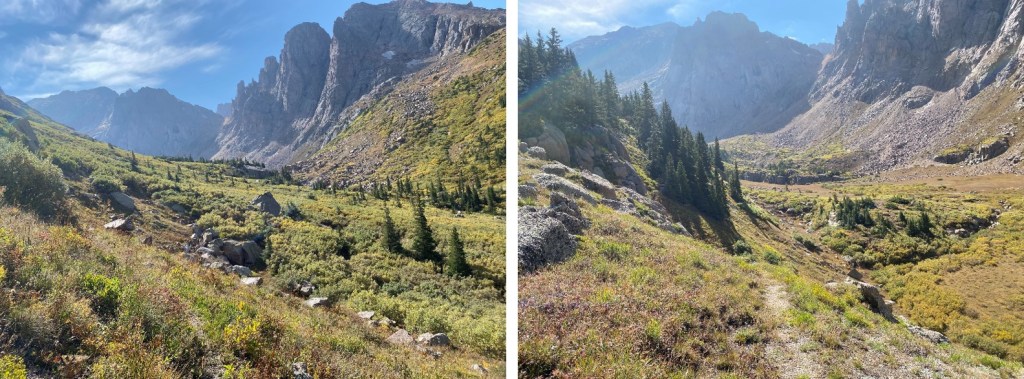
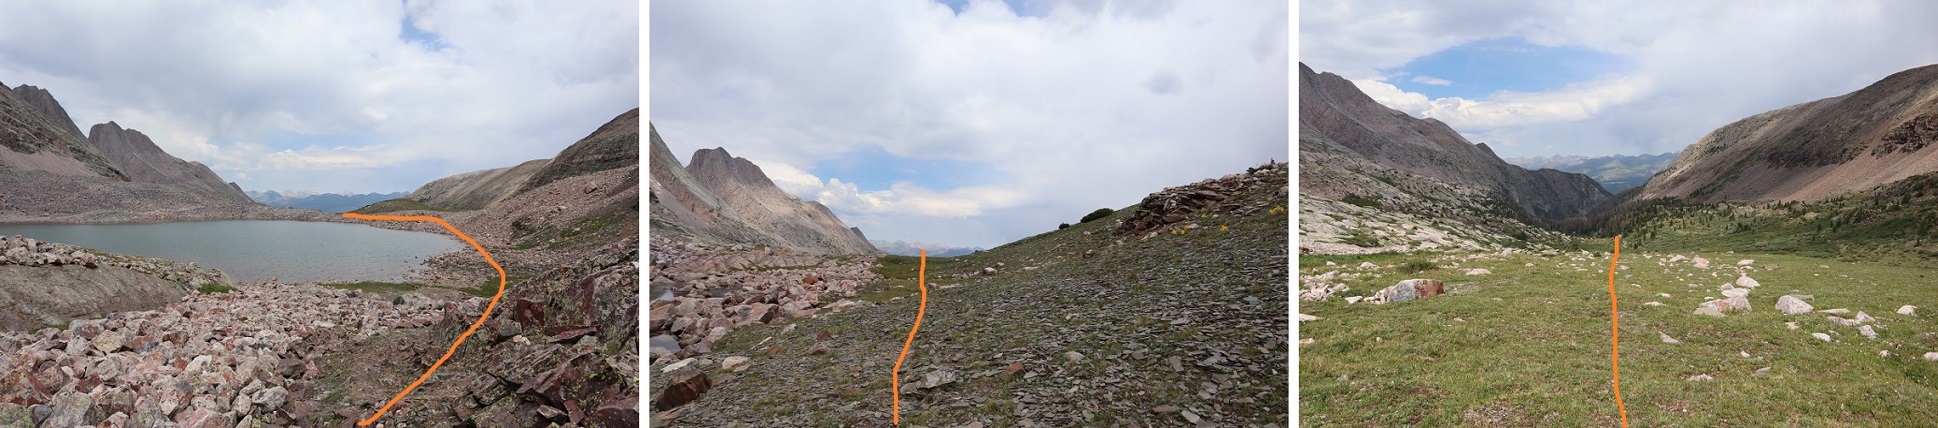
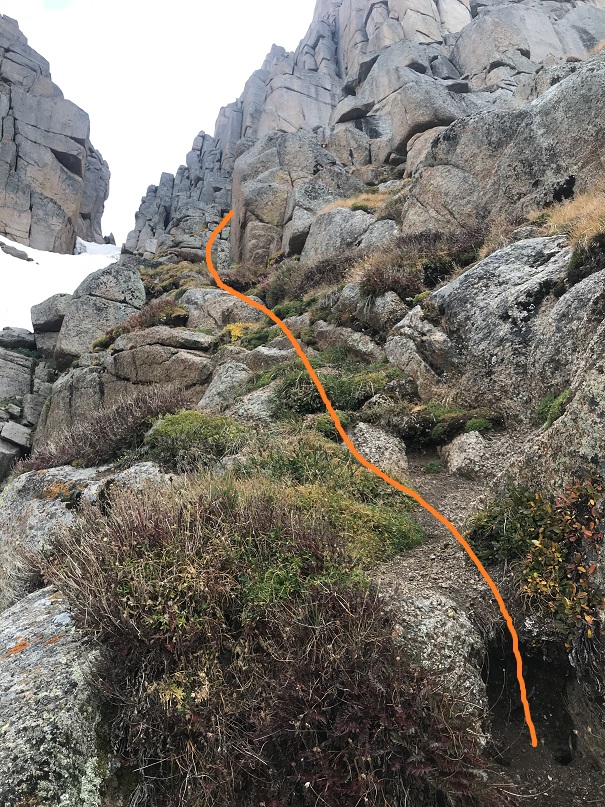
I headed a little further up the trail, crossed the creek at an easily accessible spot, and headed southwest up the slope. However, this is choose your own adventure, and you can climb straight up the talus/scree if that’s your choice. I decided to skirt around it.
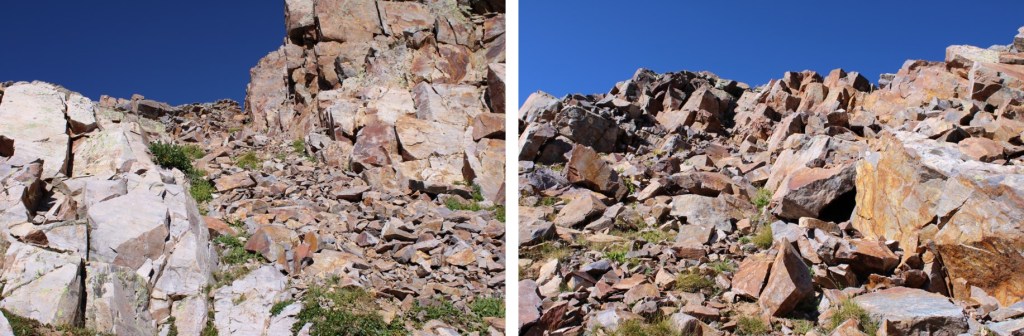
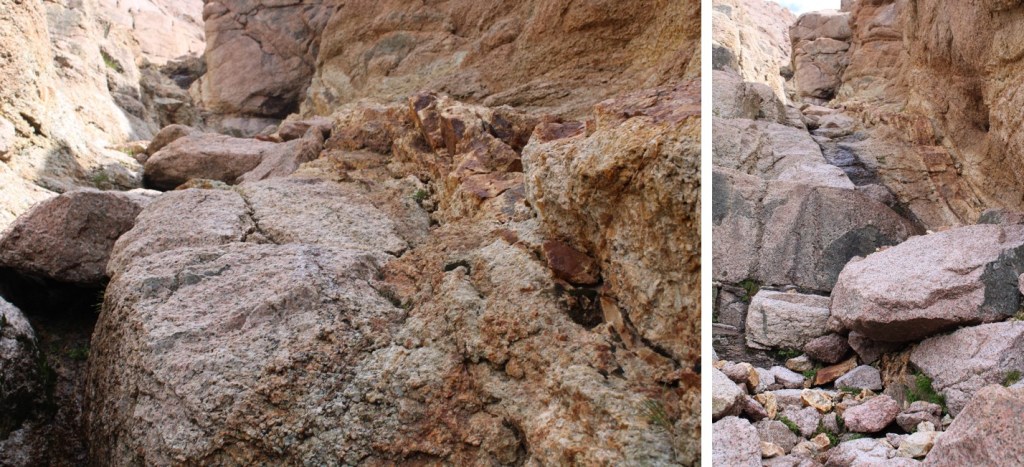
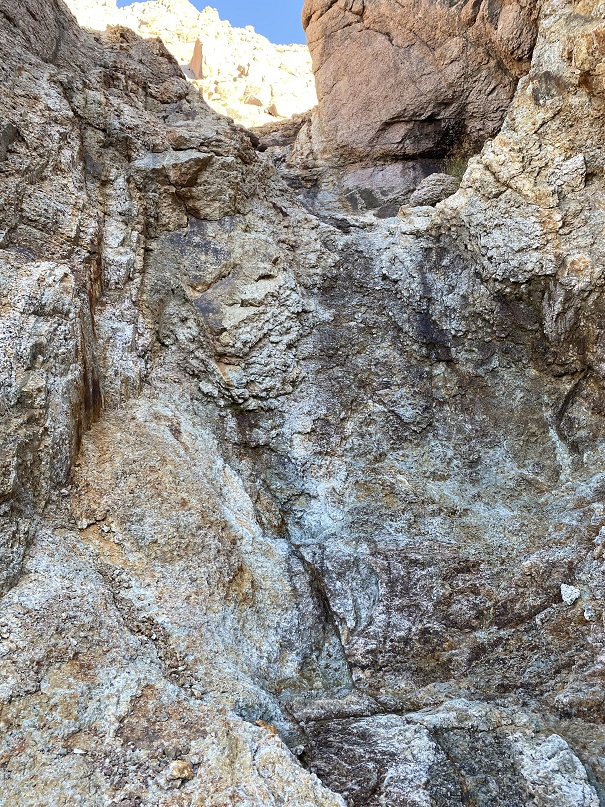
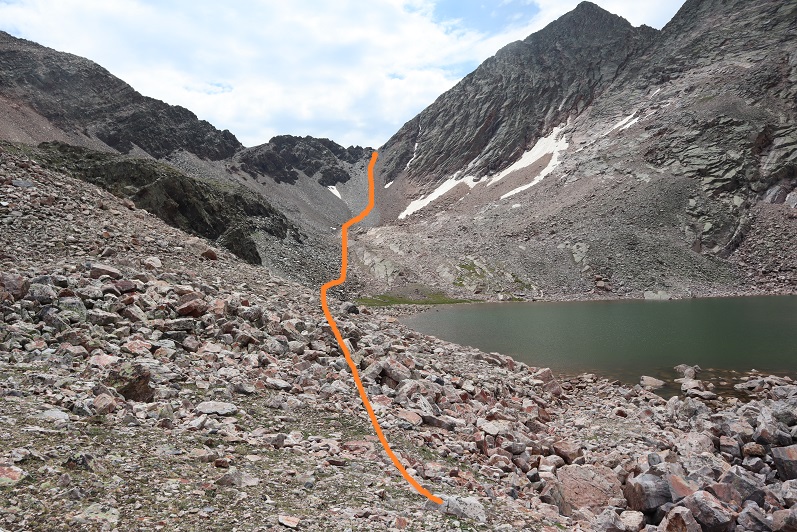
This gully wasn’t too bad as far as gullies go, but I put on my microspikes anyway.
Towards the top I could see quite a bit of snow still left in the gully.
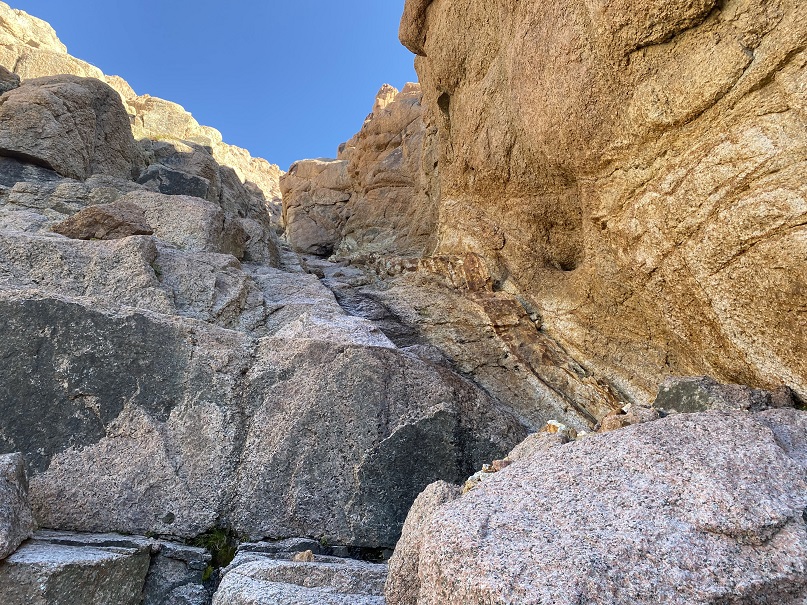
I traversed the gully to the right, finding there was about 2 feet of space where the snow had melted away from the rock. The snow was avoidable until the last 30 feet or so, when I climbed on top of the snow and walked to the top of the gully on several feet of rock-solid snow.
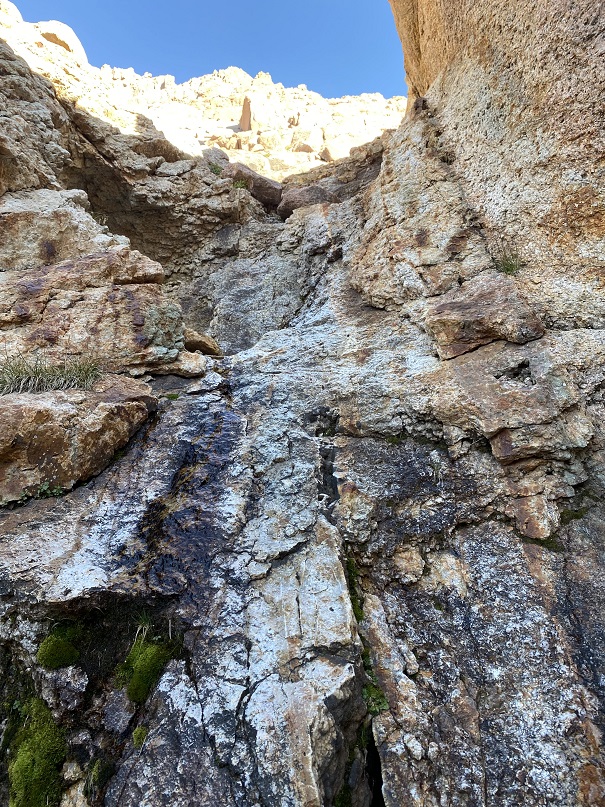
However, if this is outside of your comfort zone, you can also traverse to the left and make it to the top of the gully on more scree. Both routes lead to the same place (I took this route on my way down).
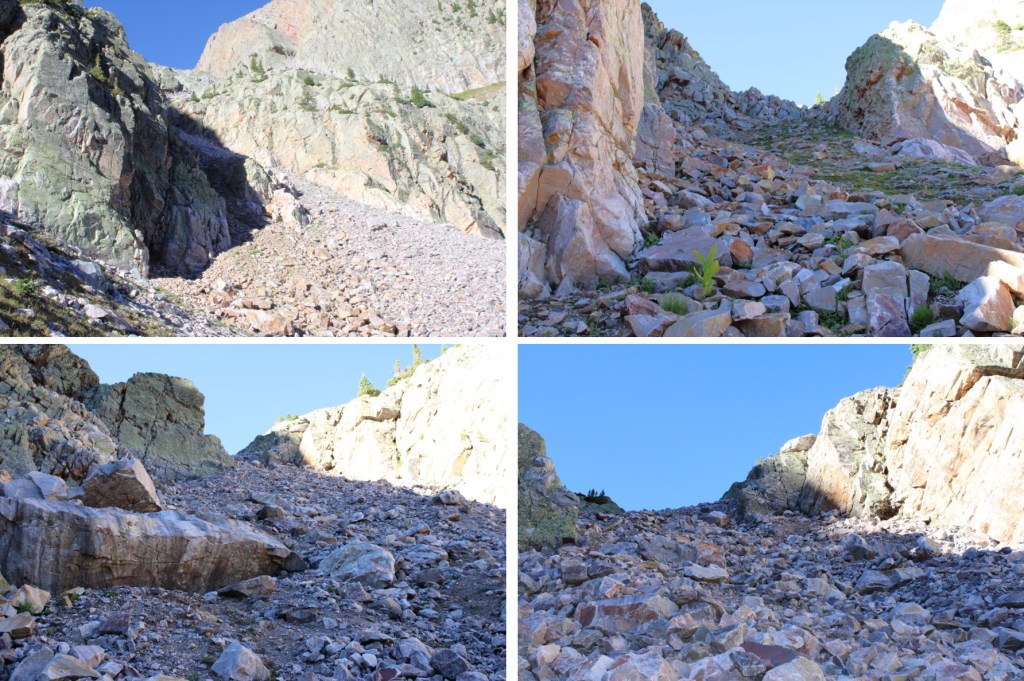
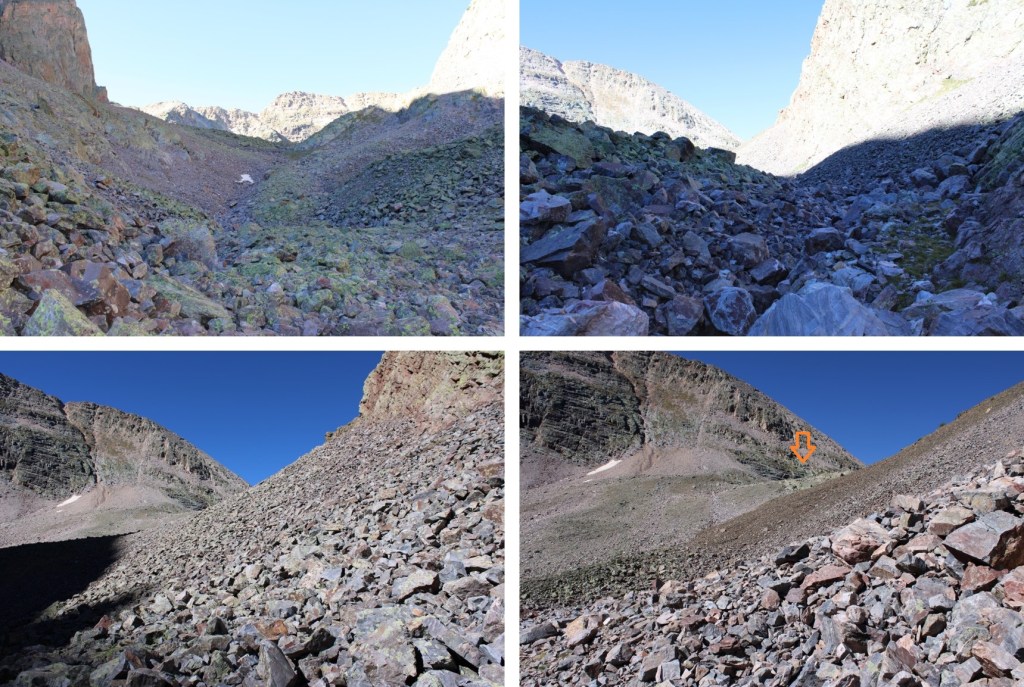
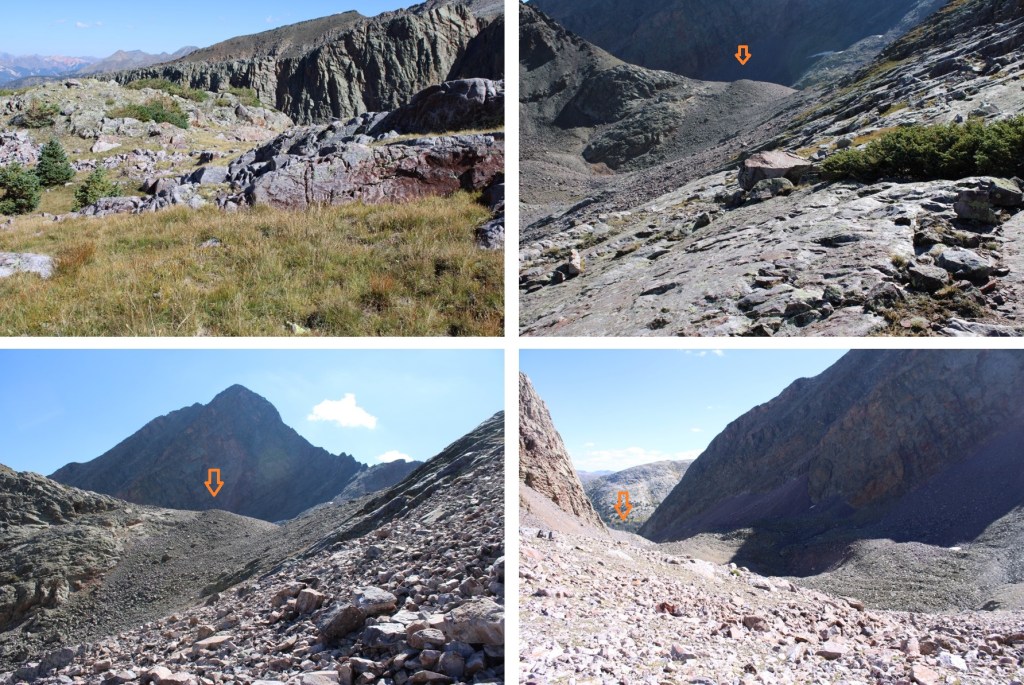
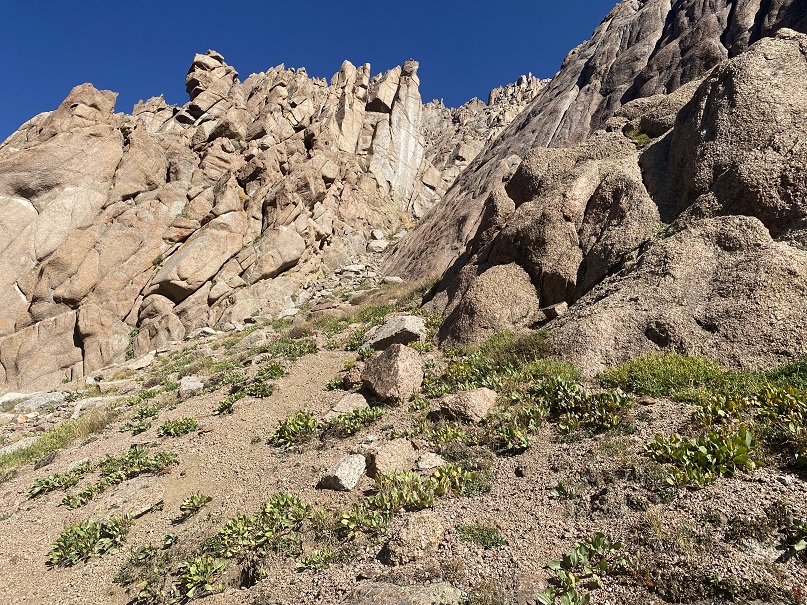
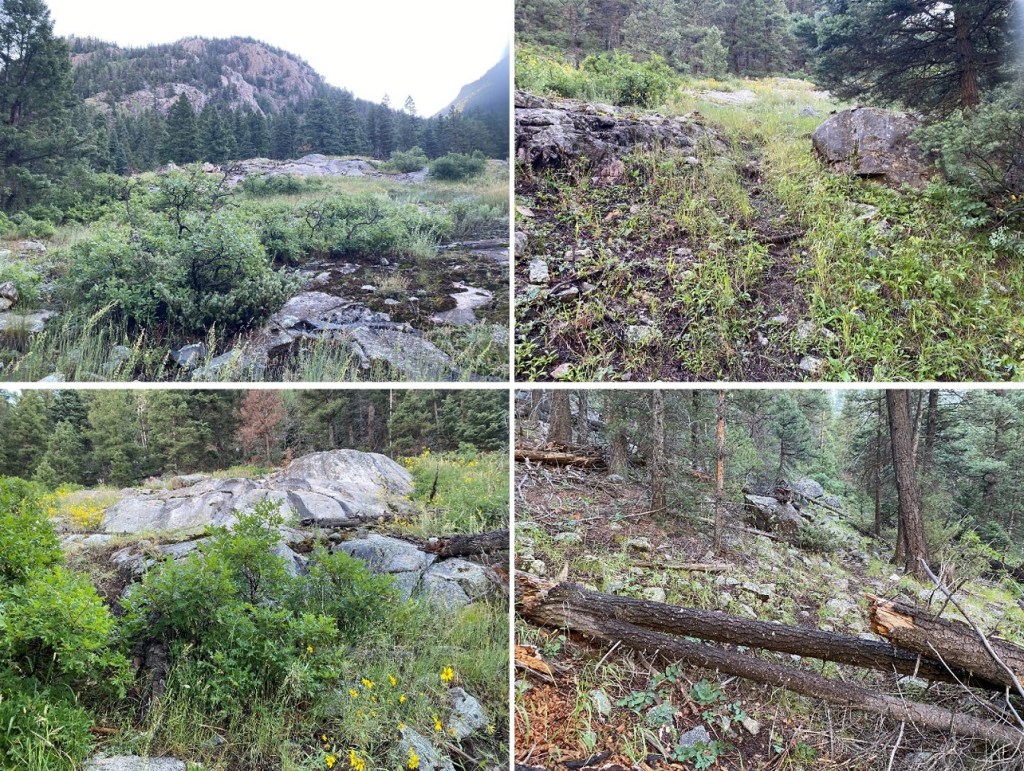
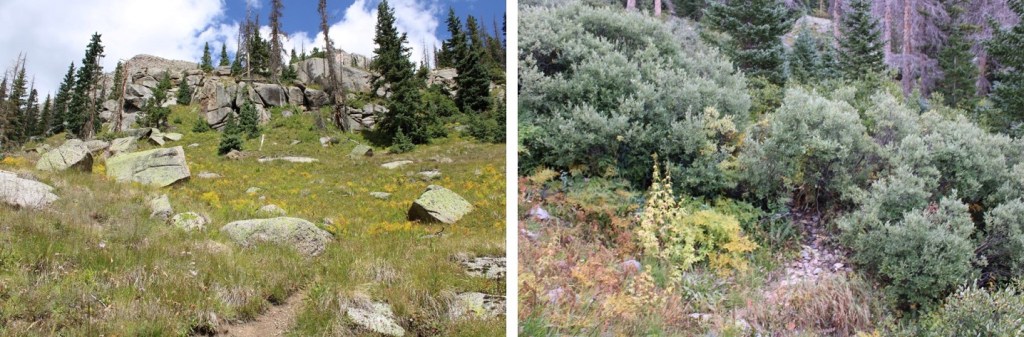
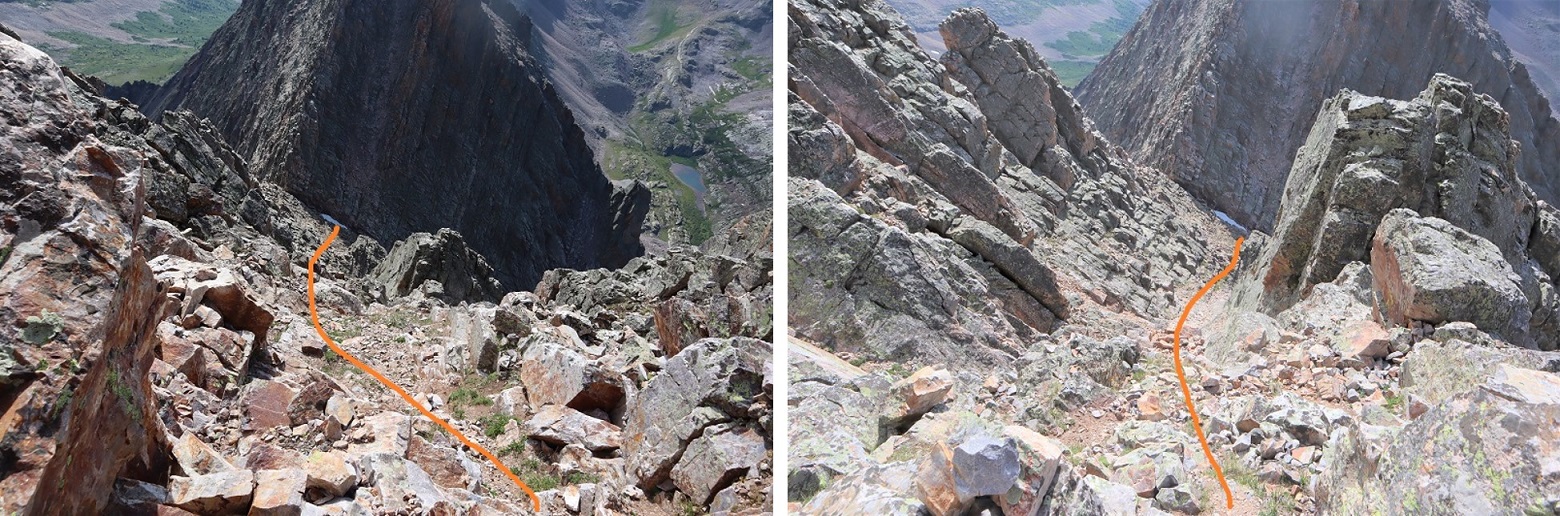
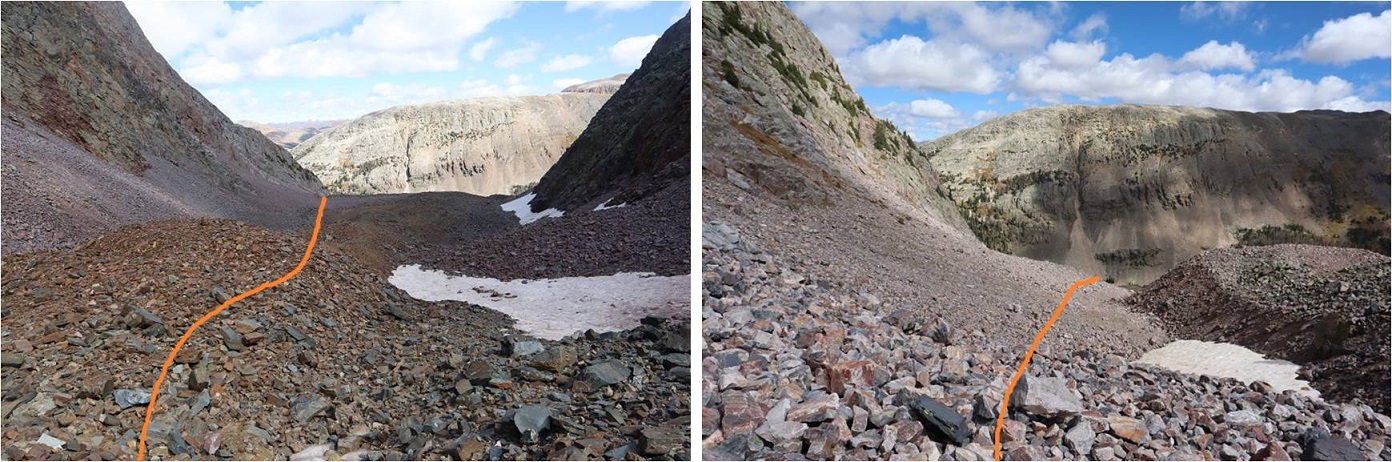
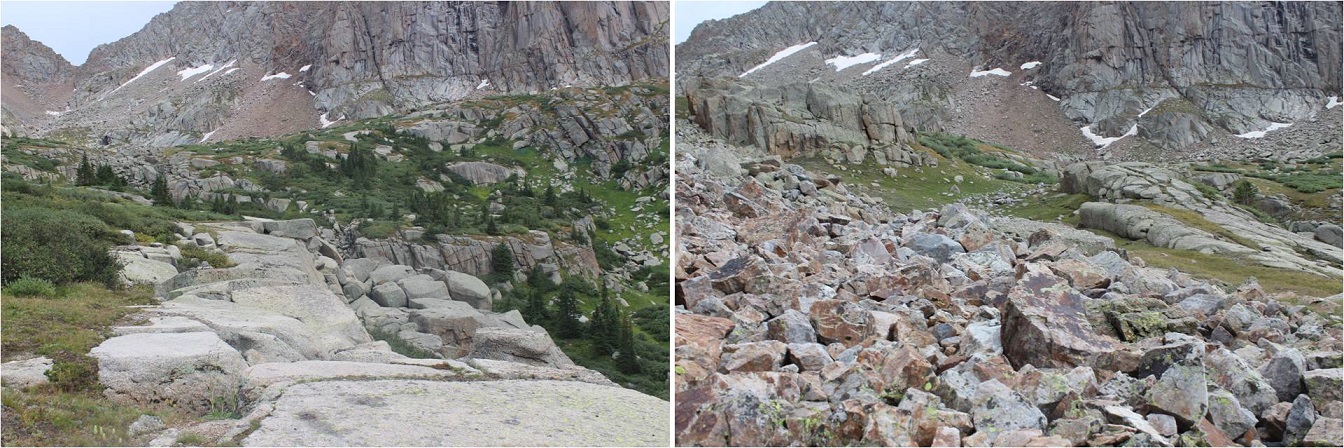
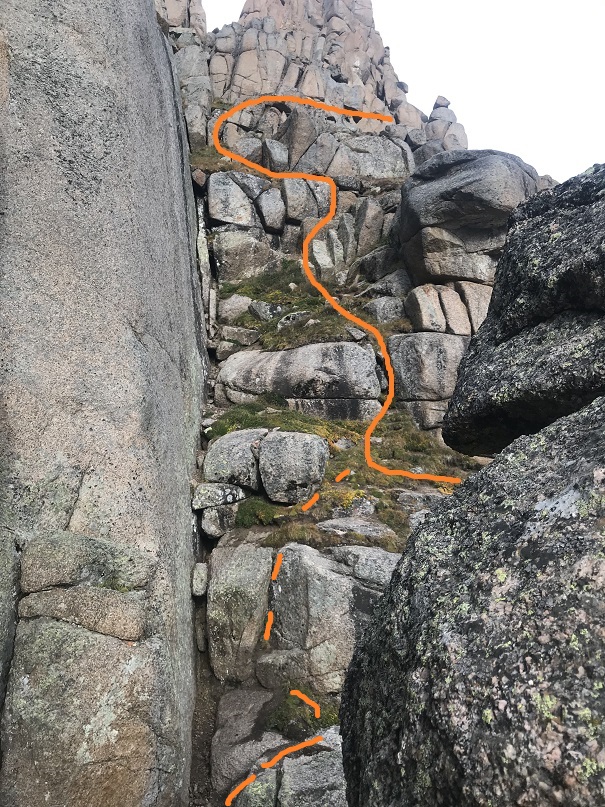
I was now in an upper basin, full of all different sizes of loose rocks. This wasn’t difficult to navigate, but it was extremely time consuming. I was headed southwest, staying to the right.
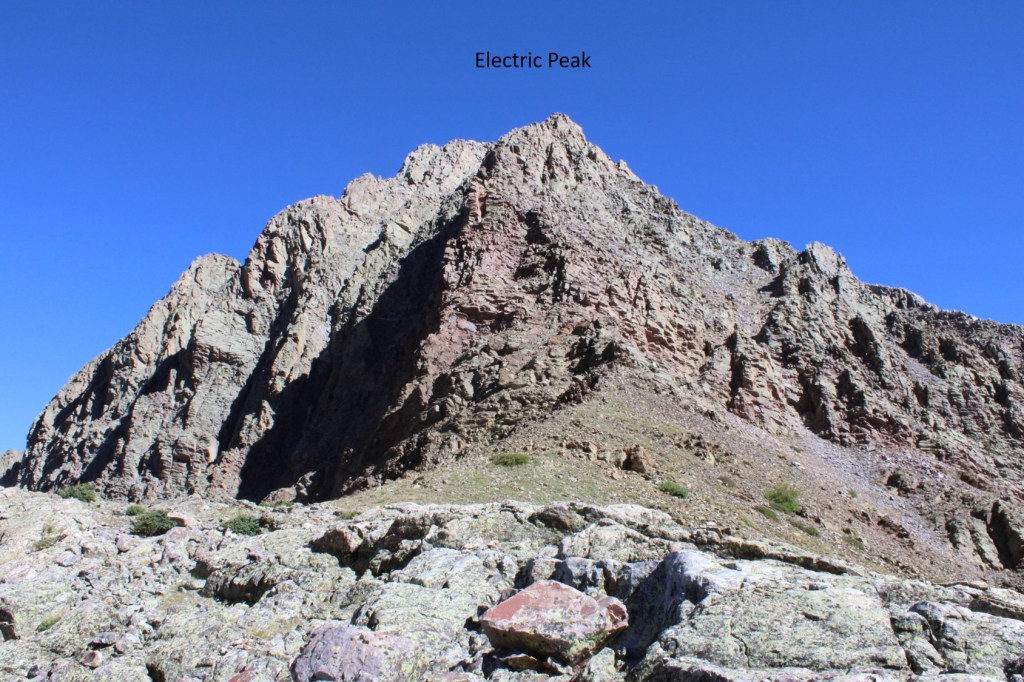
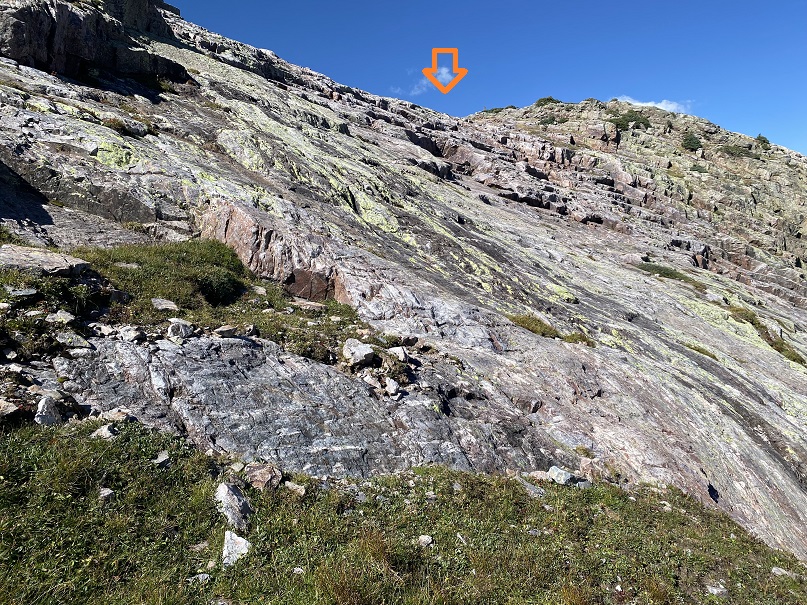
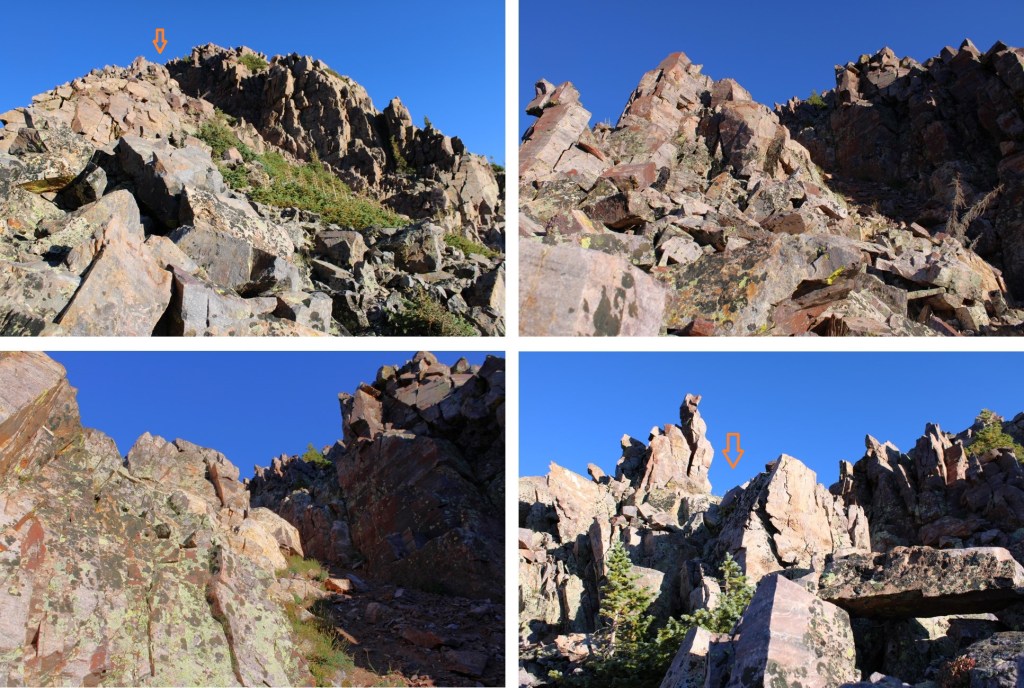
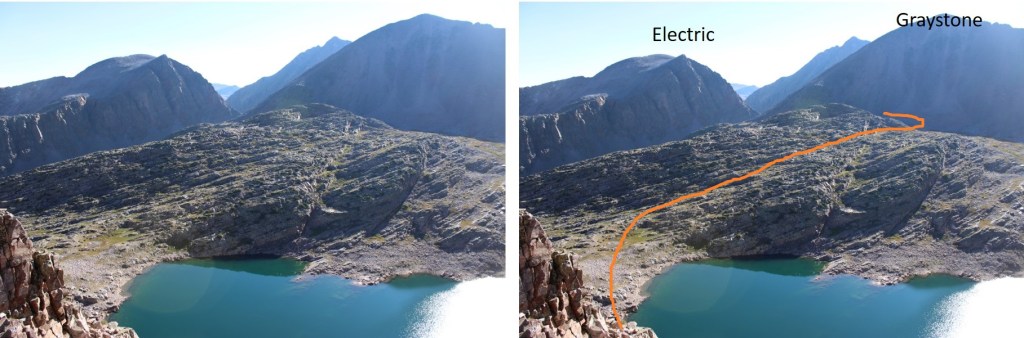
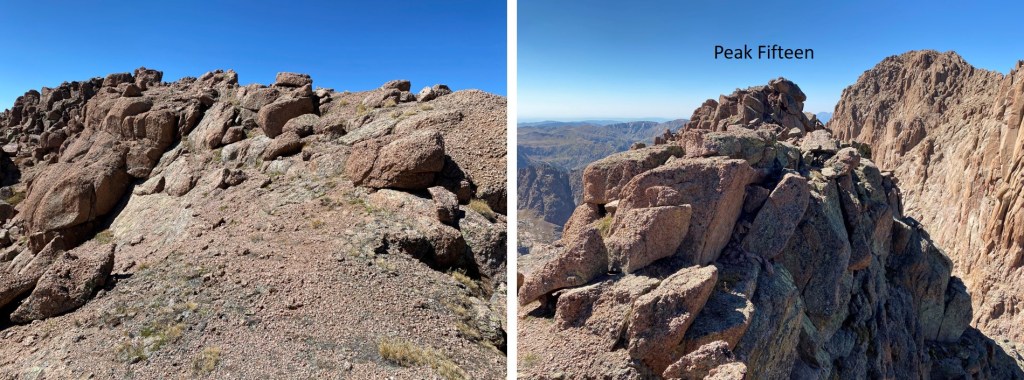
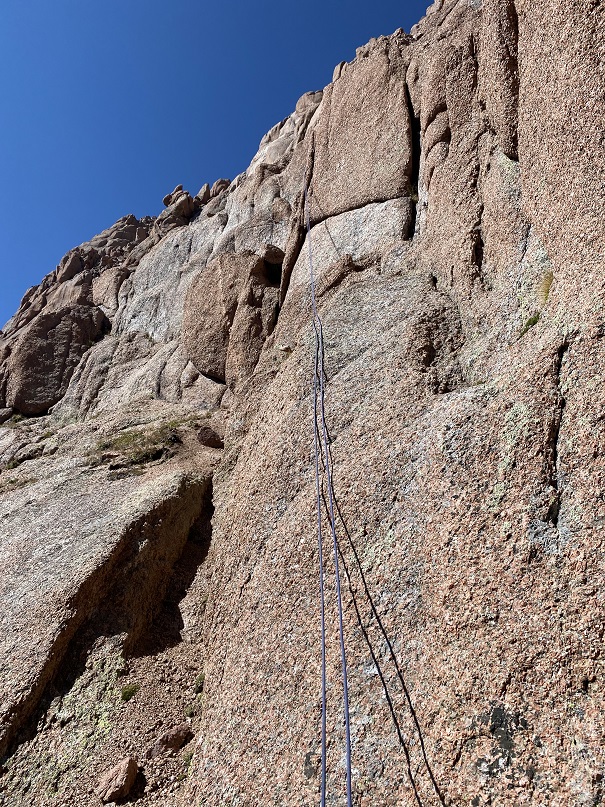
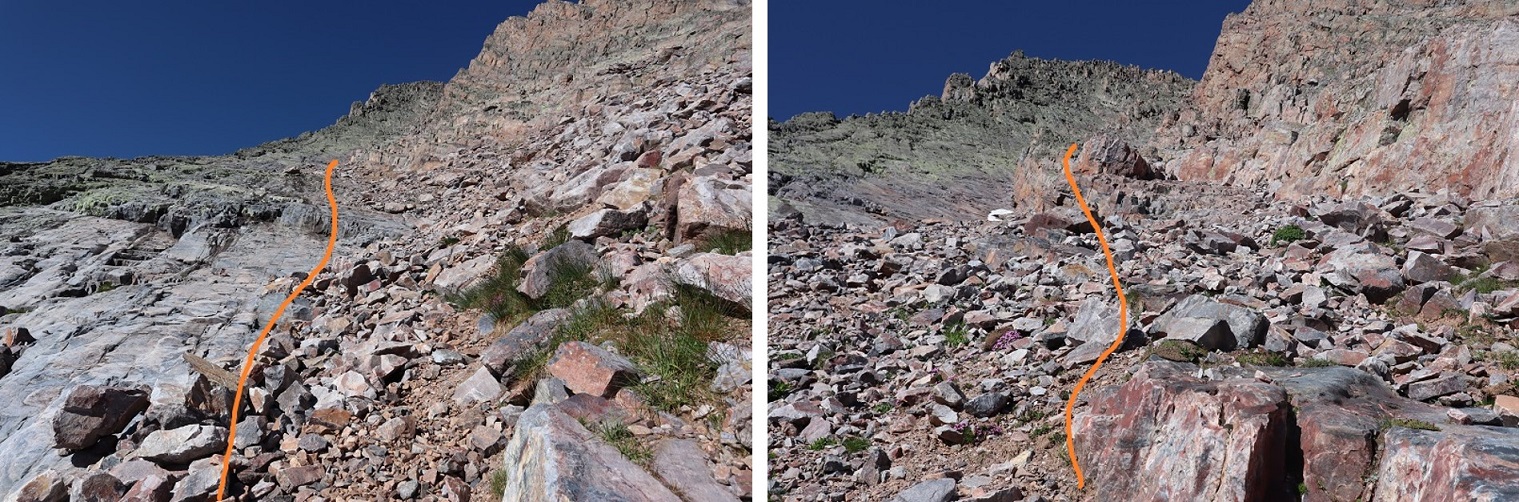
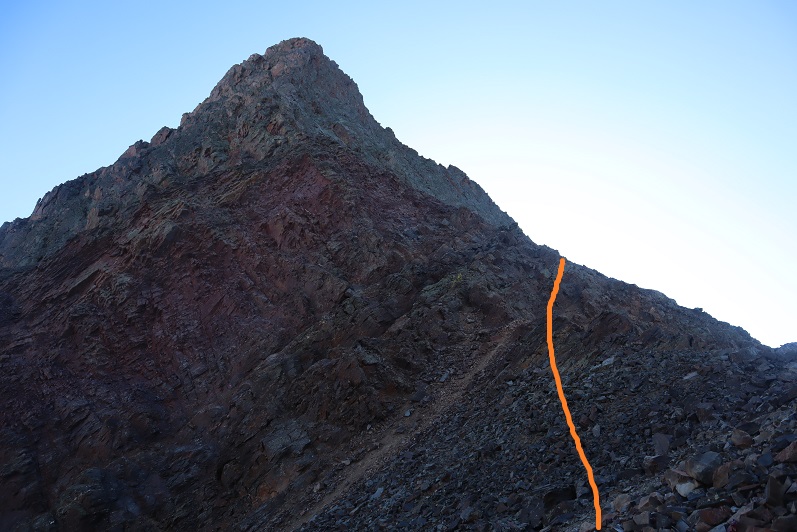
At 12500’ of elevation I turned right to start my climb up Electric Peak’s south side. If you don’t already have your helmet on (I usually put them on for scree-filled gullies) now is the time to do it.
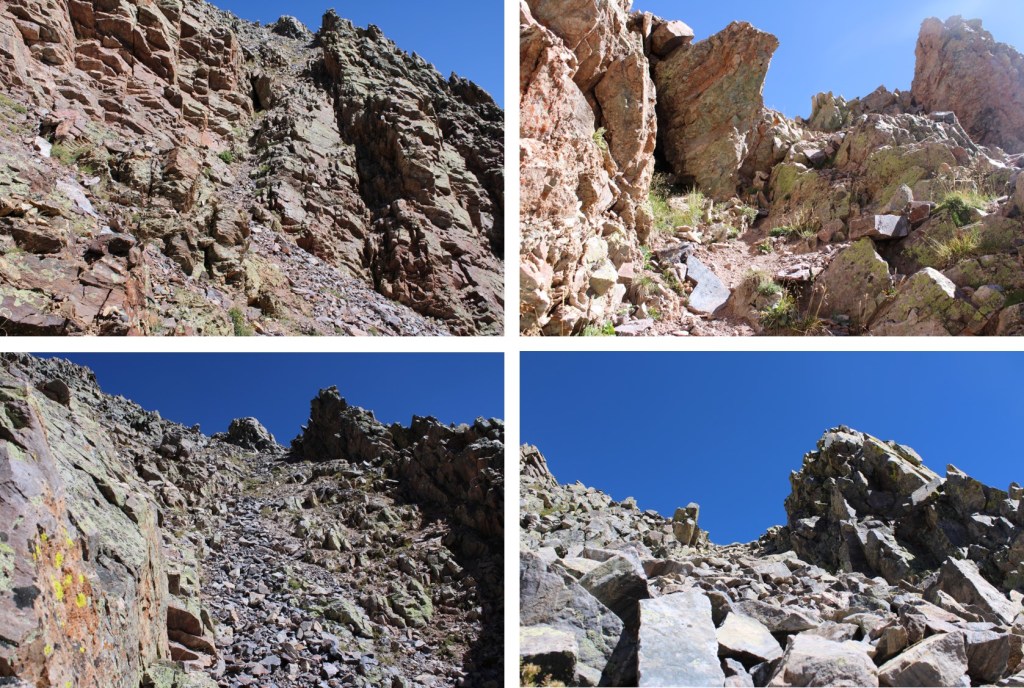
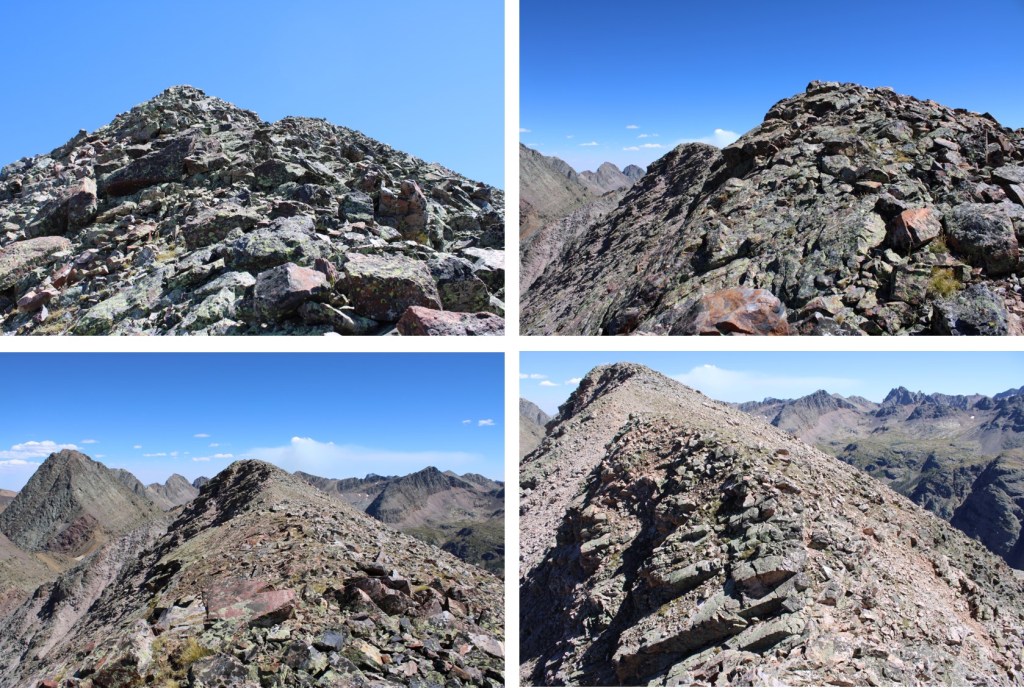
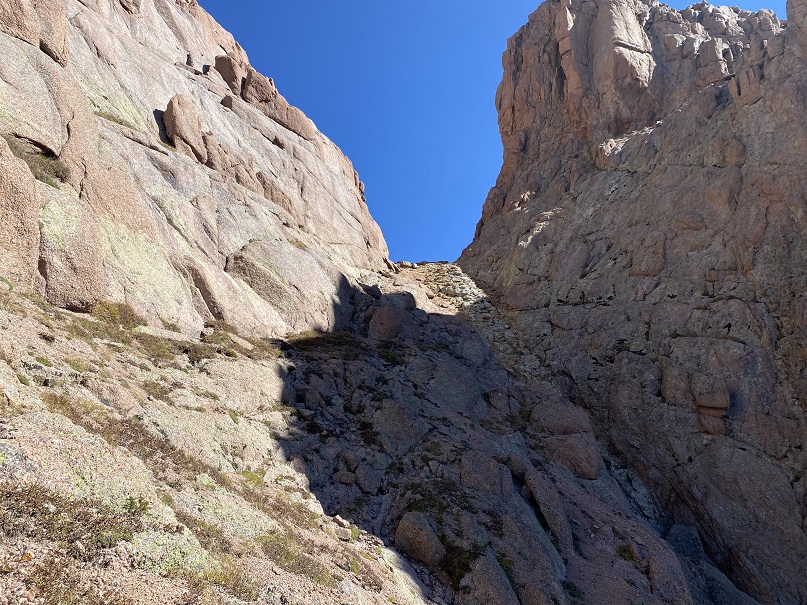
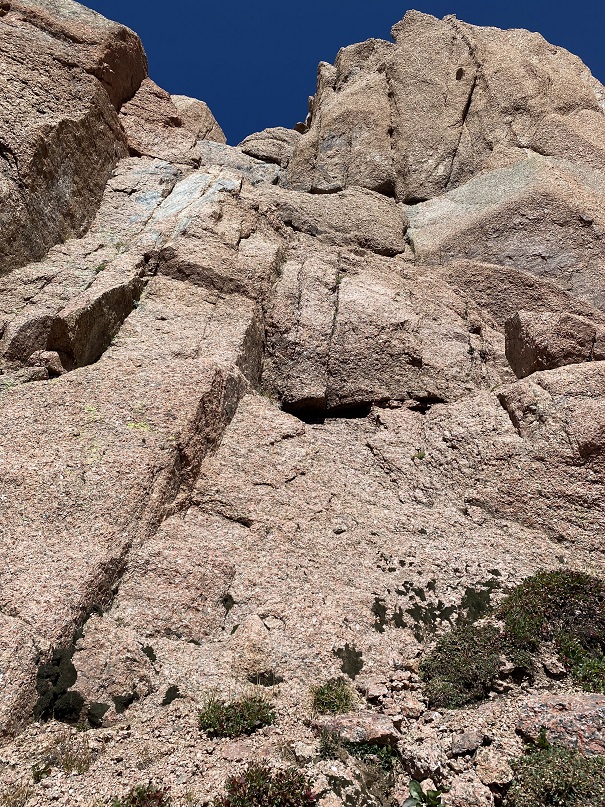
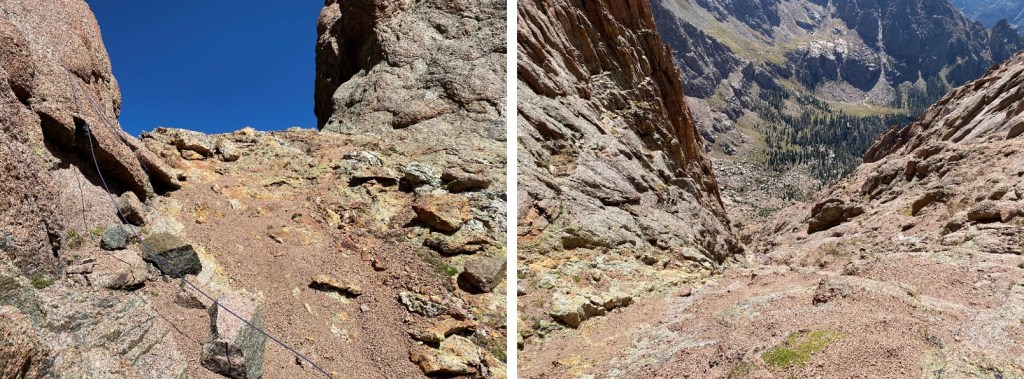
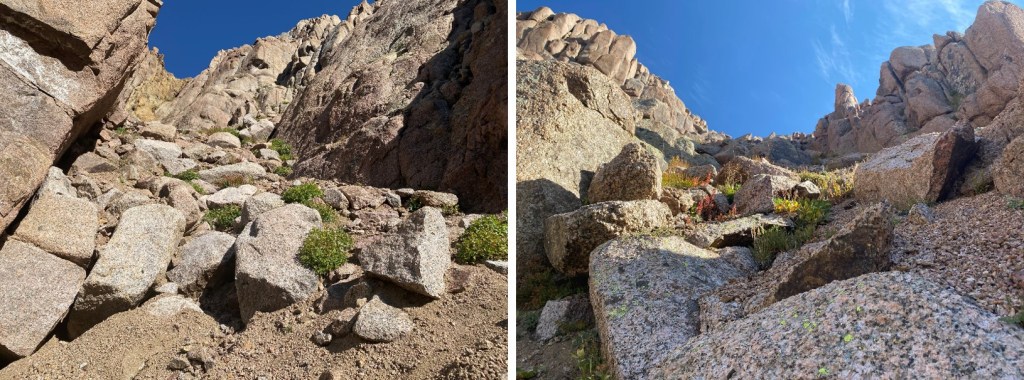
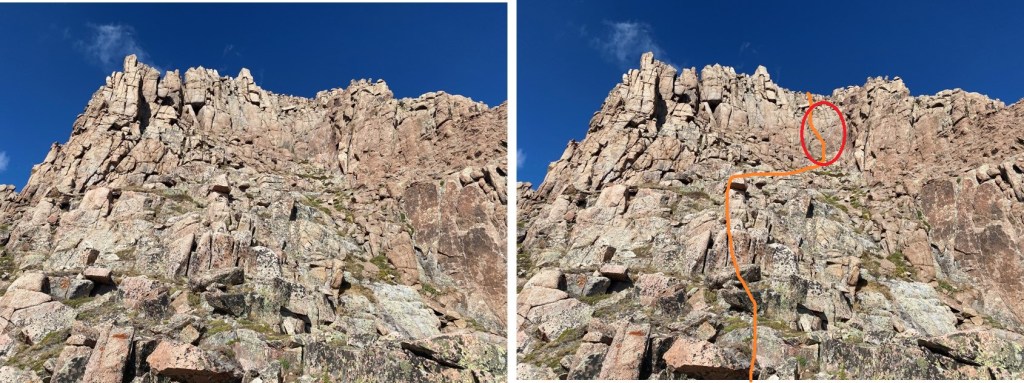
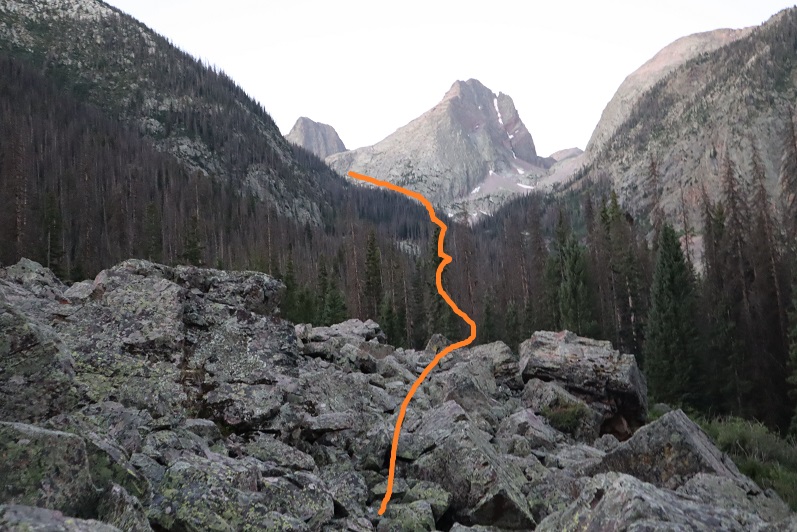
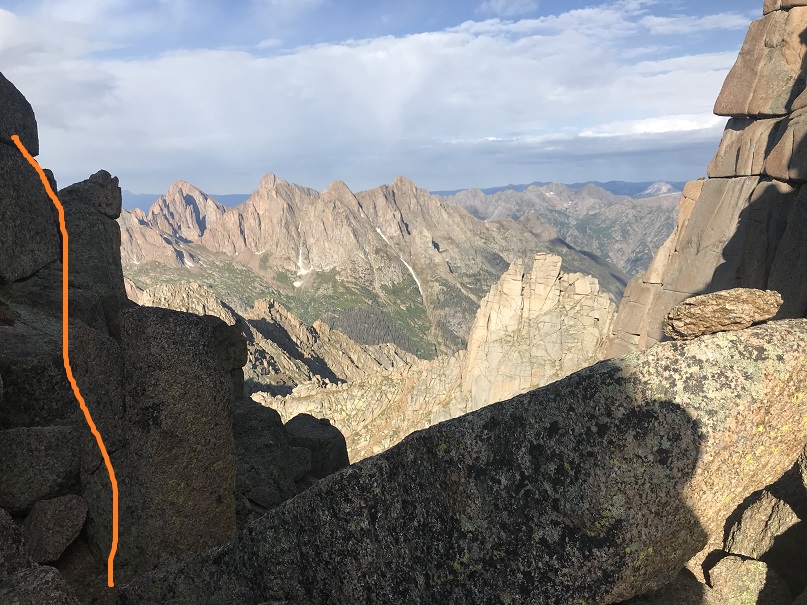
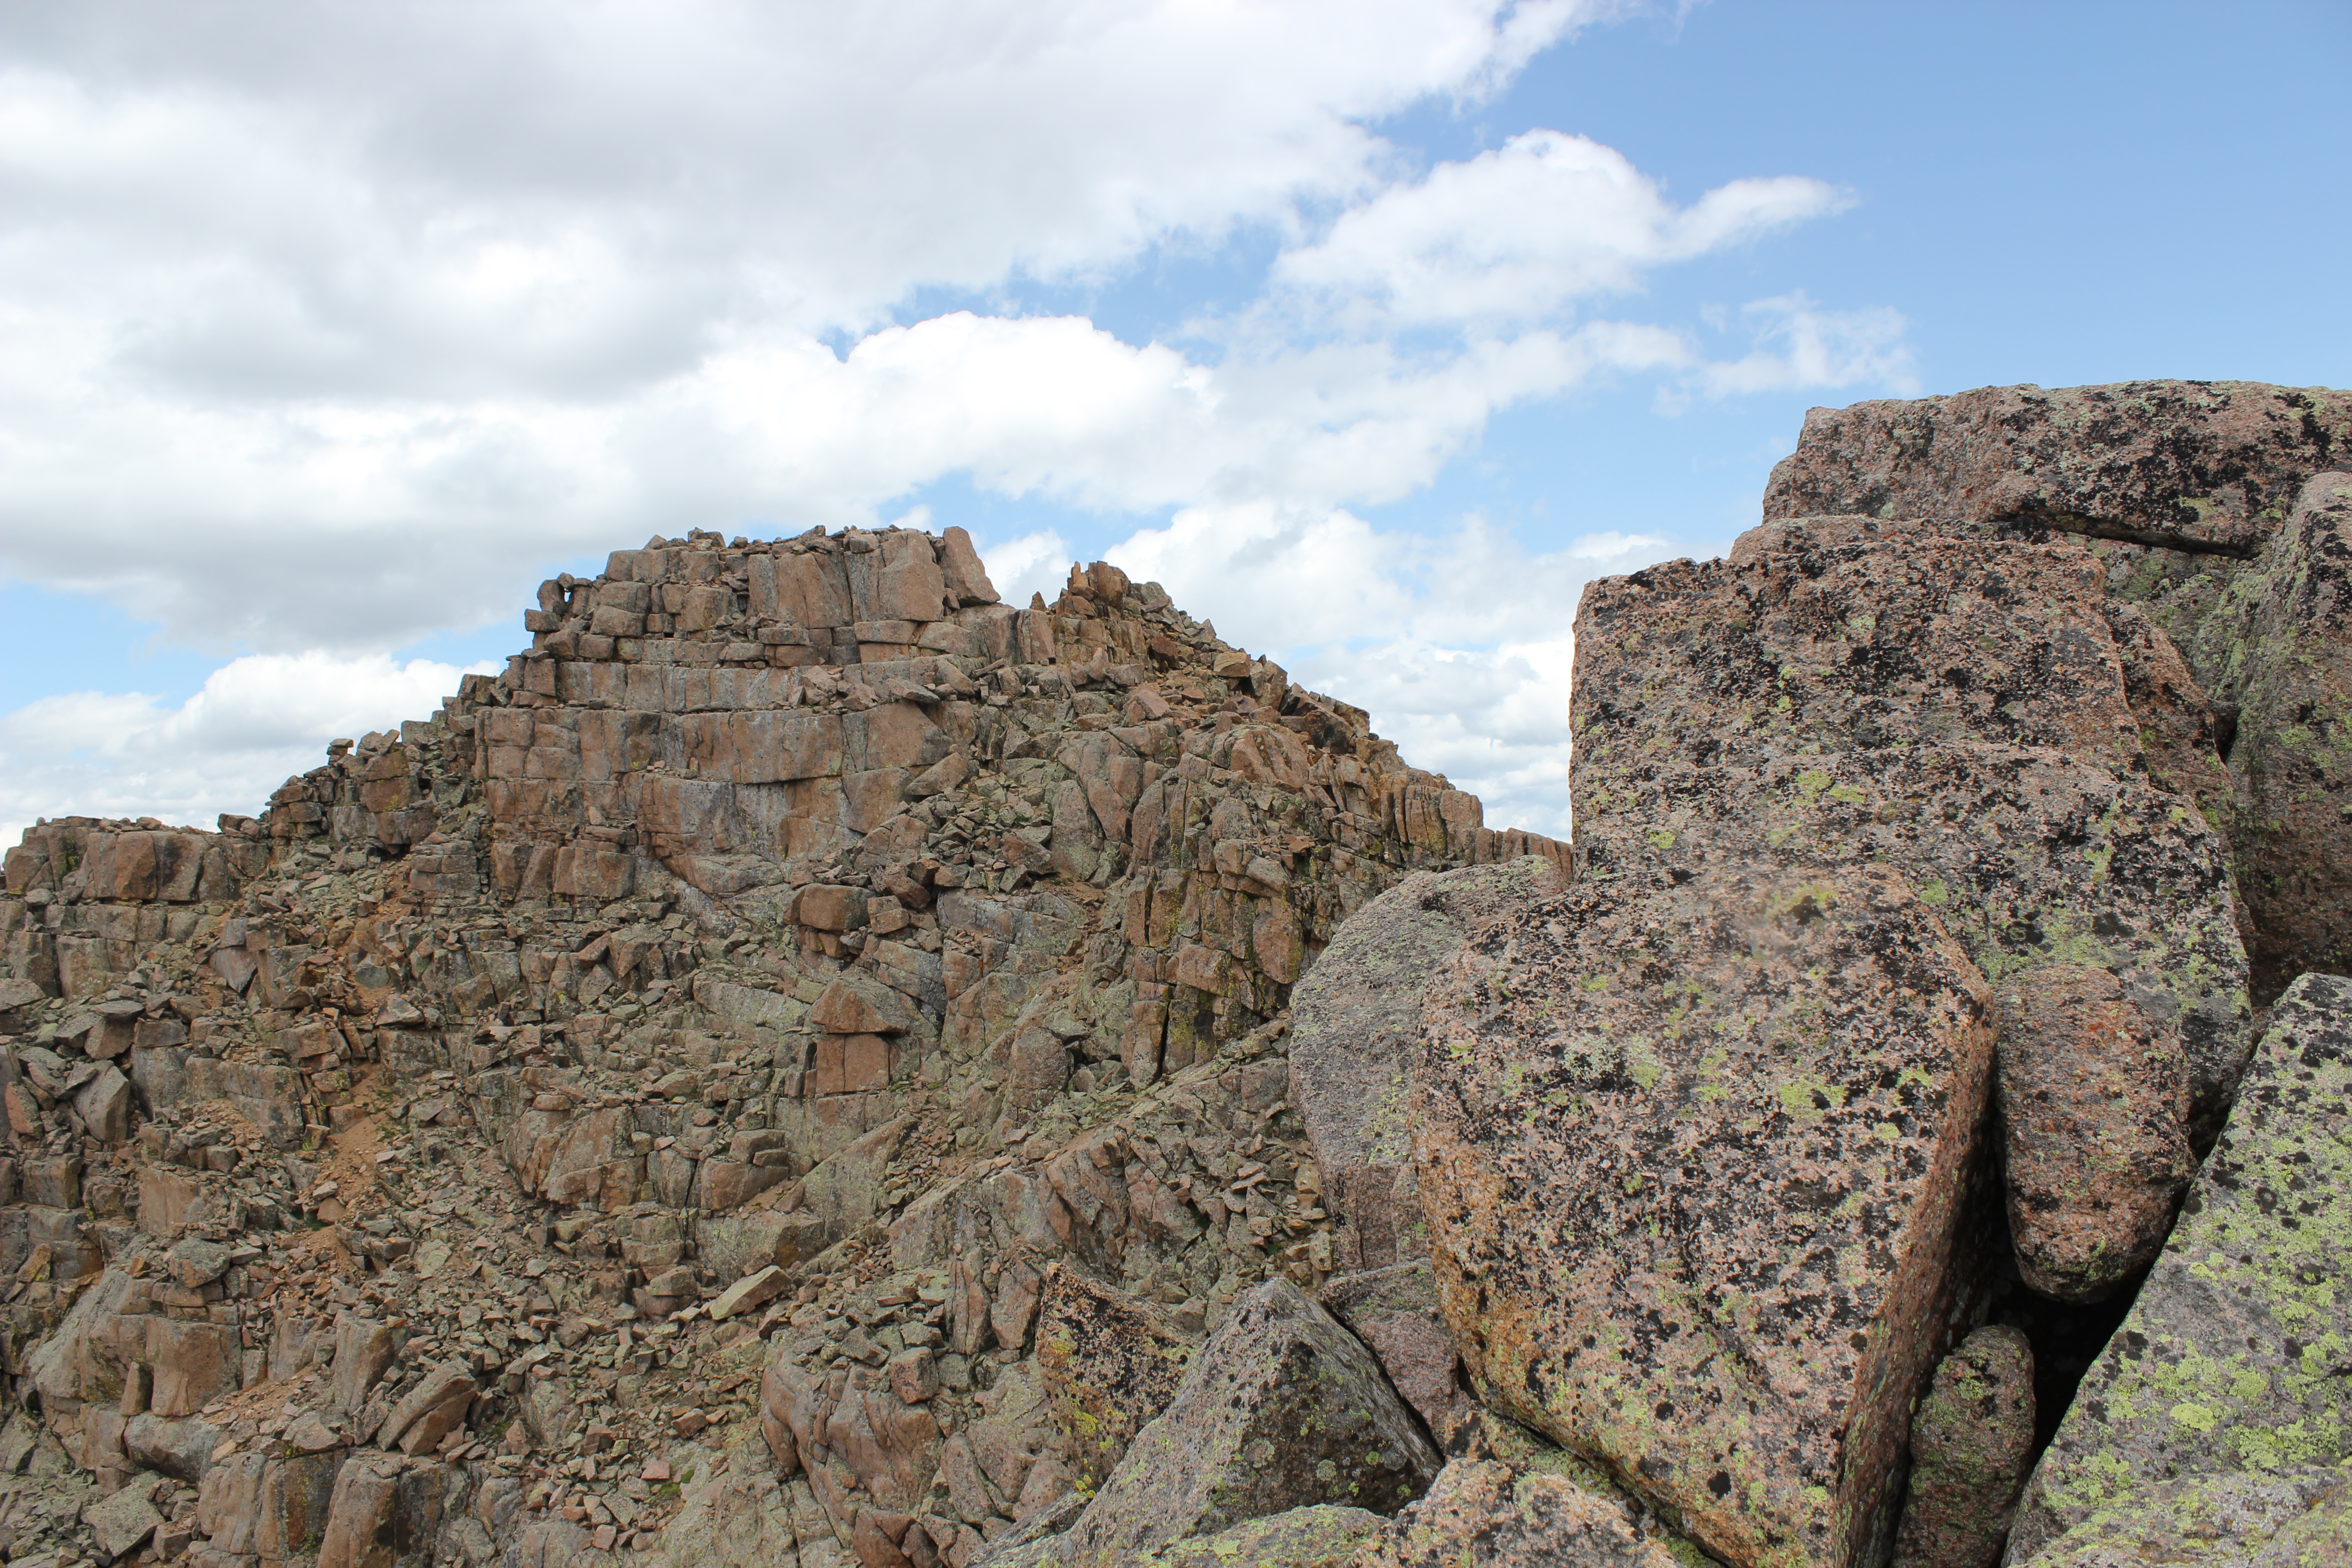
Much of the route to the summit is hidden at this time. I started by climbing up a class 3 gully to the right
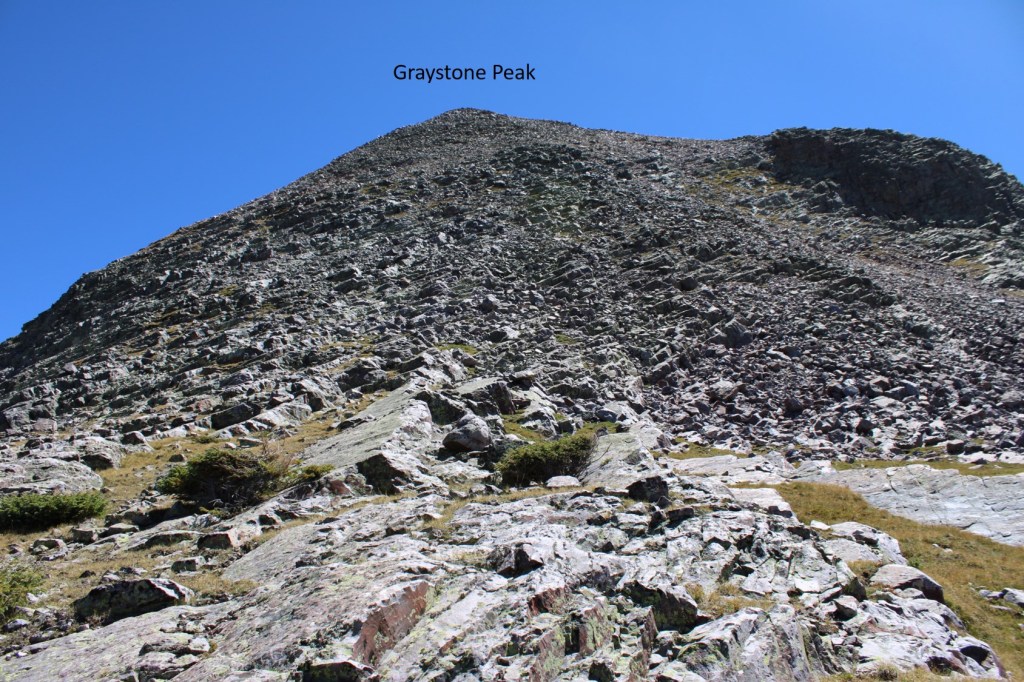
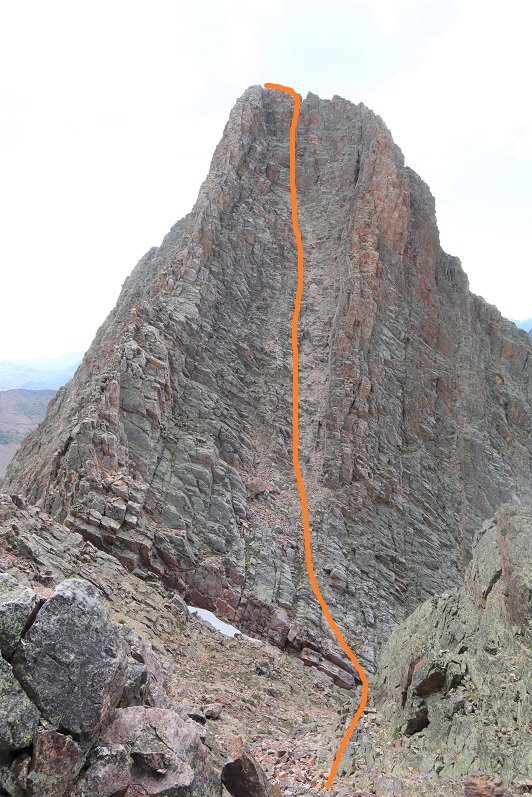
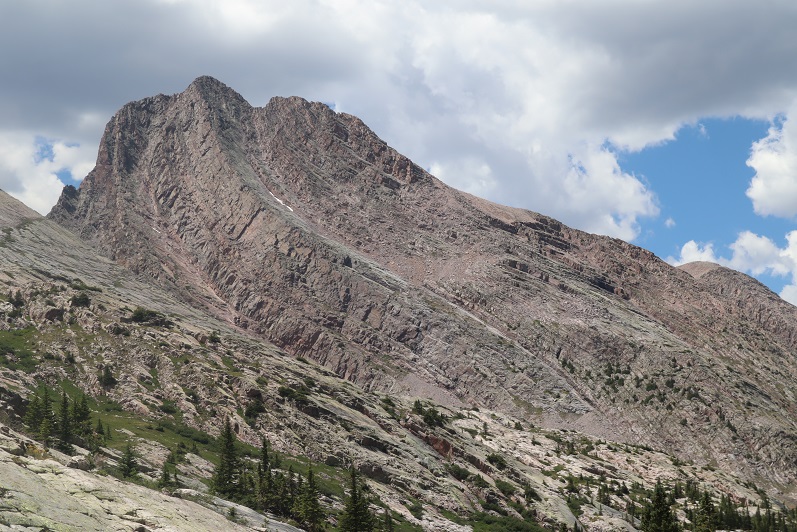
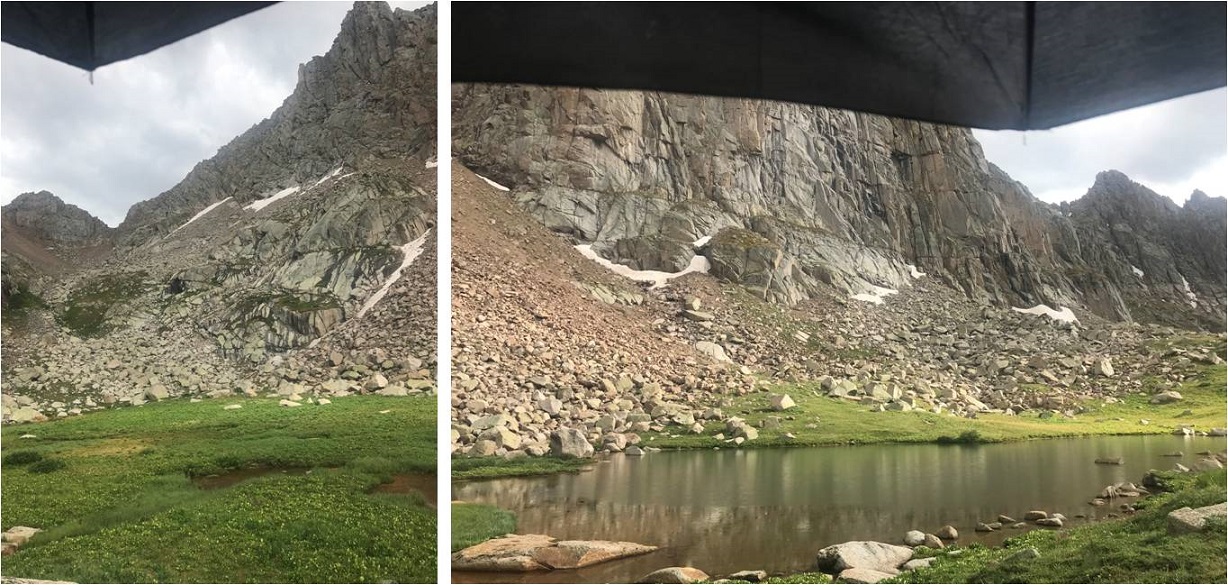
From Graystone Peak, I had a good visual of the route I took, keeping it mostly class 2 after the initial class 3 gully
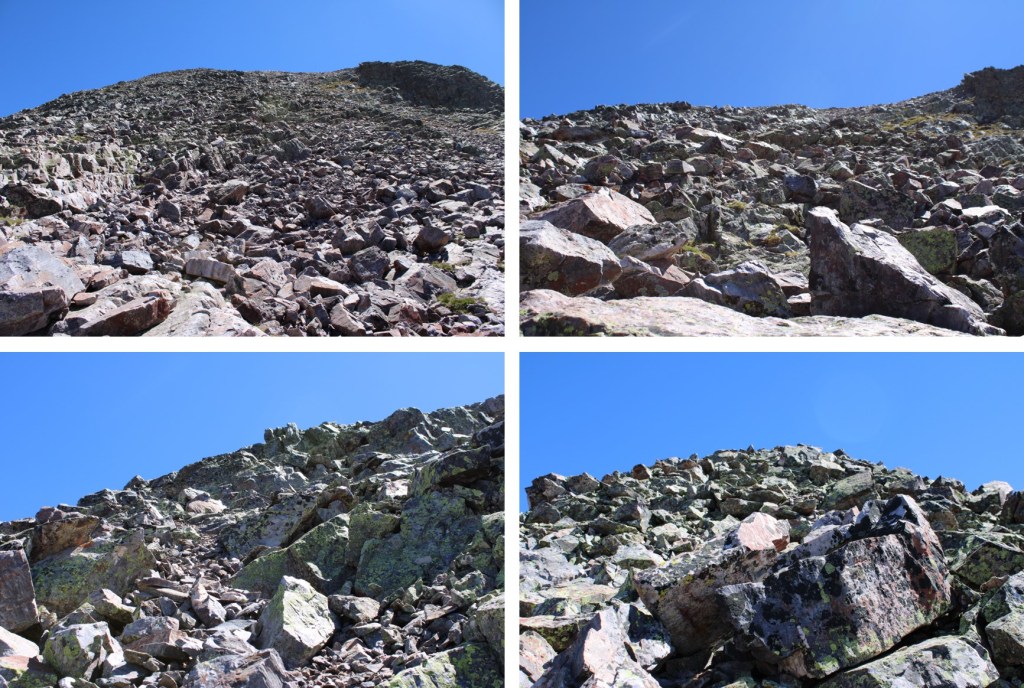
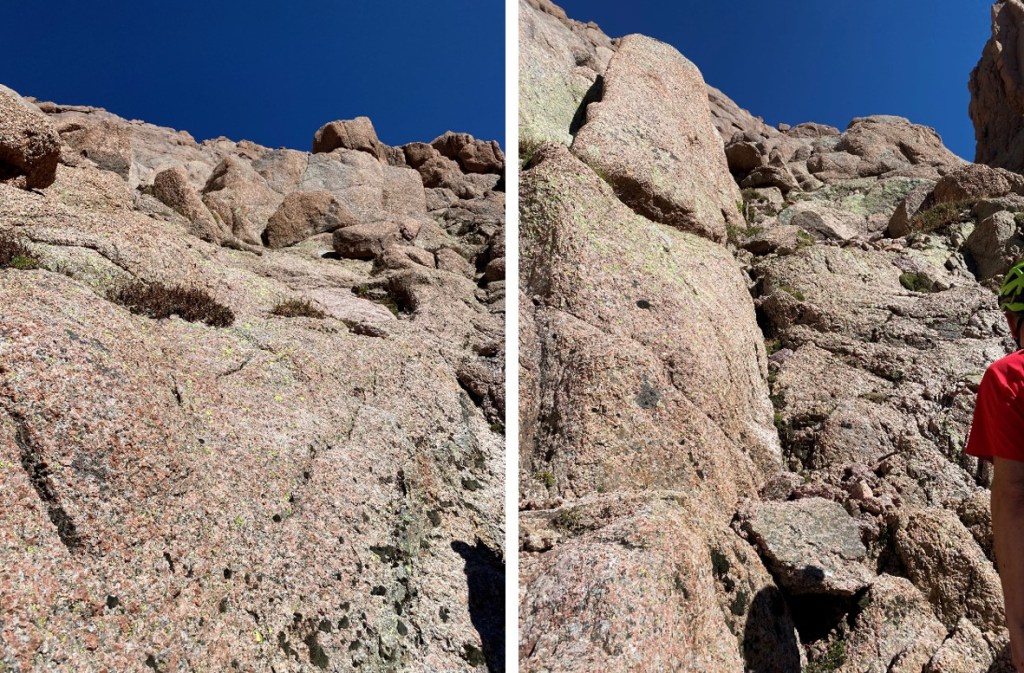
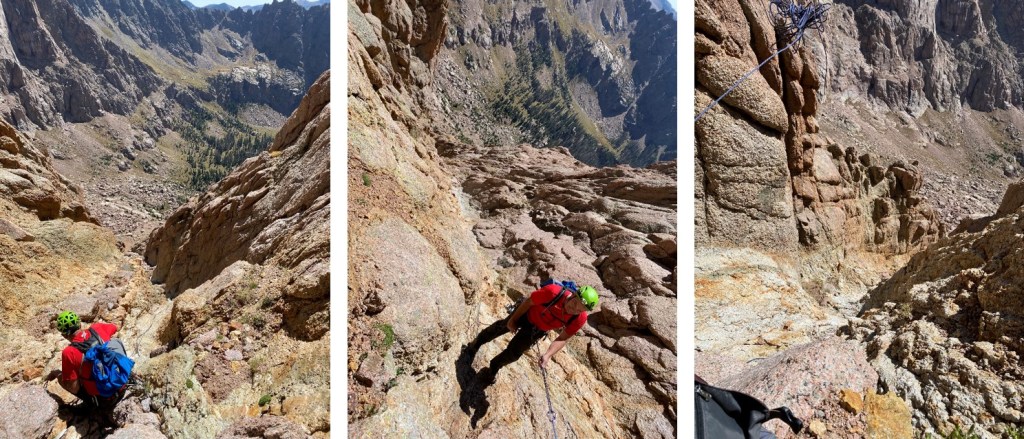
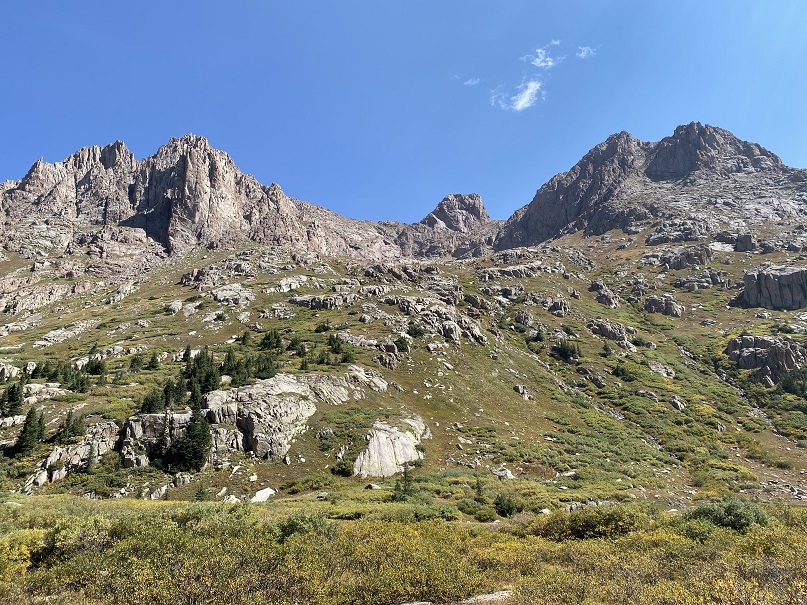
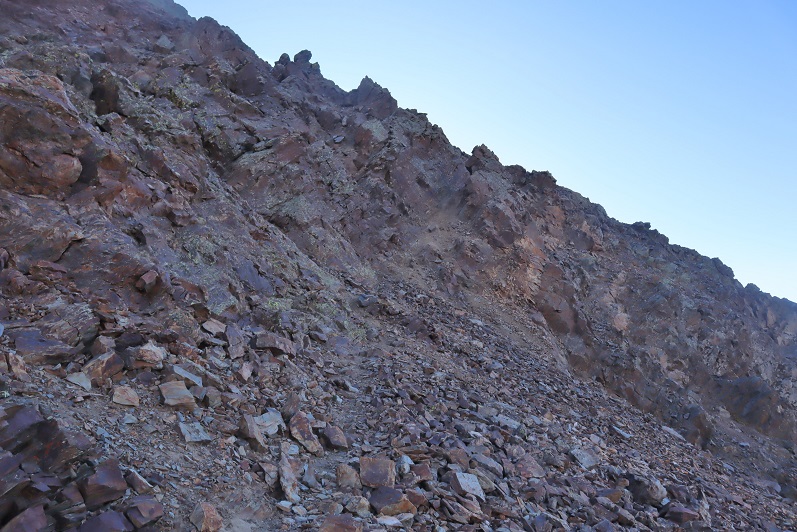
Once on top of this gully, there are several options to make it to the summit. Here are some on the ground pictures. The terrain was rocky most of the way to the summit.
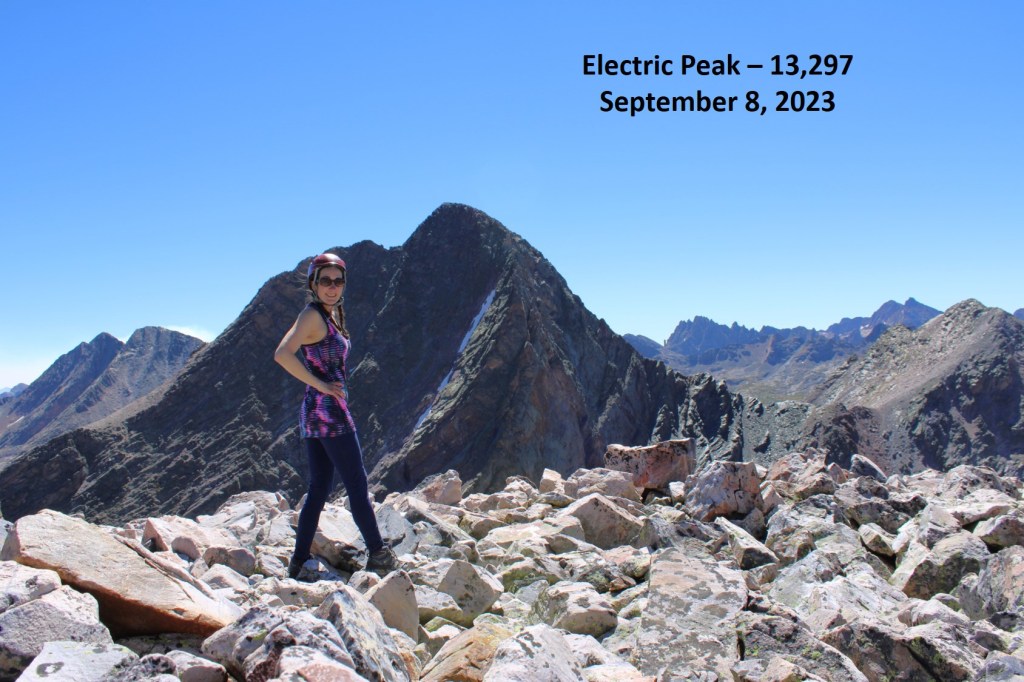
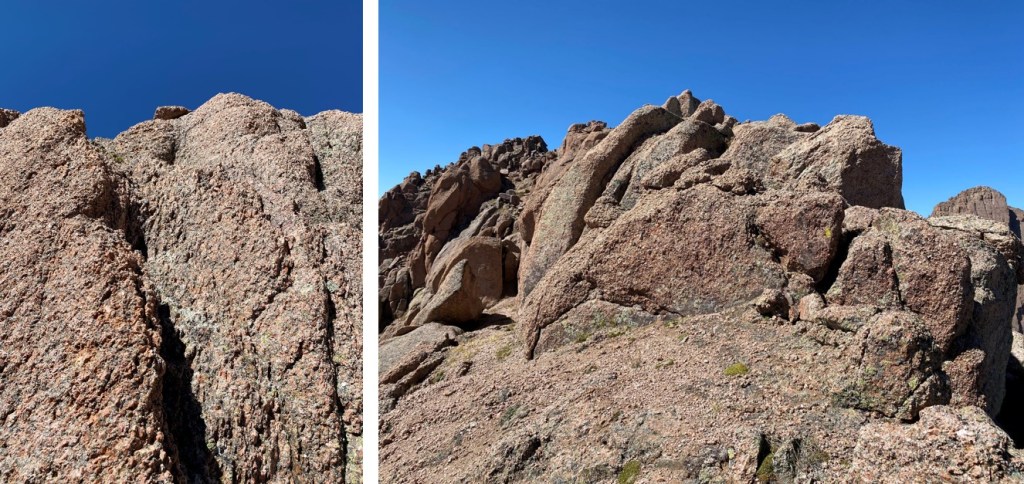
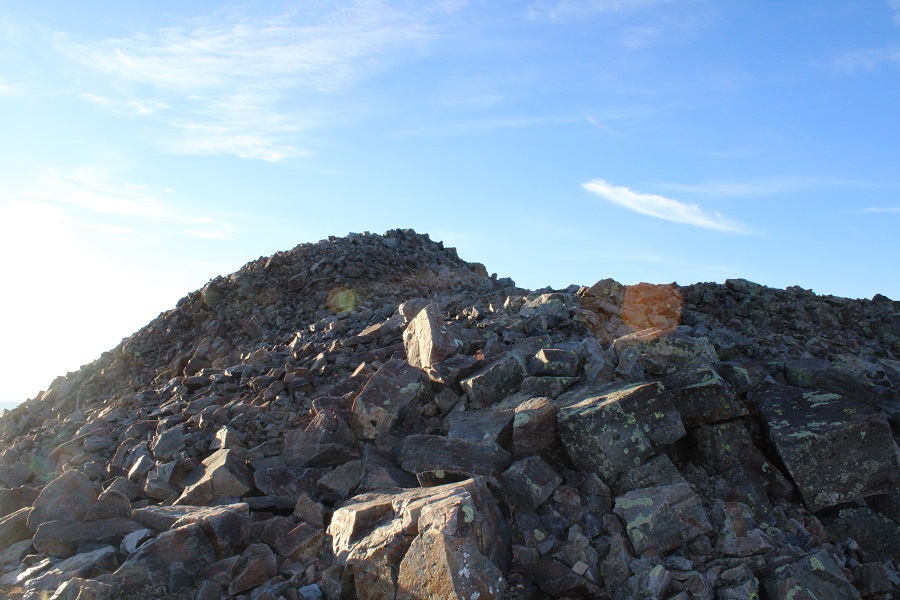
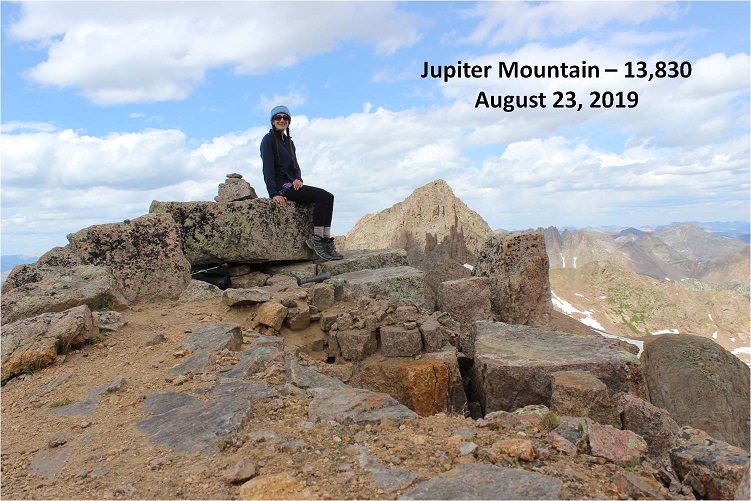
The summit was fairly flat and rocky.
Electric Peak:
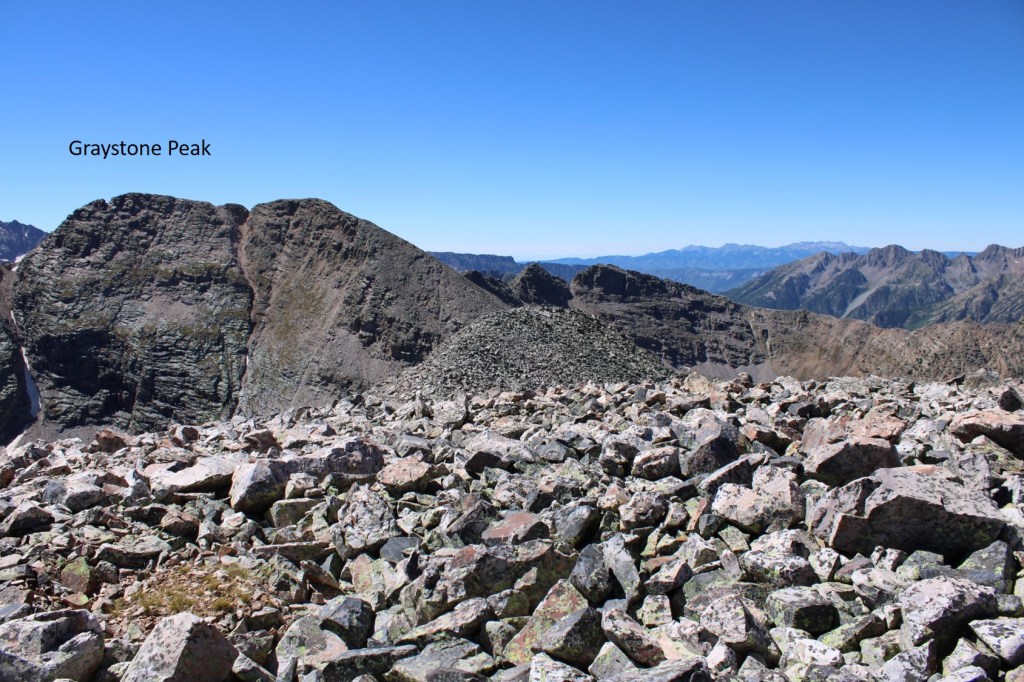
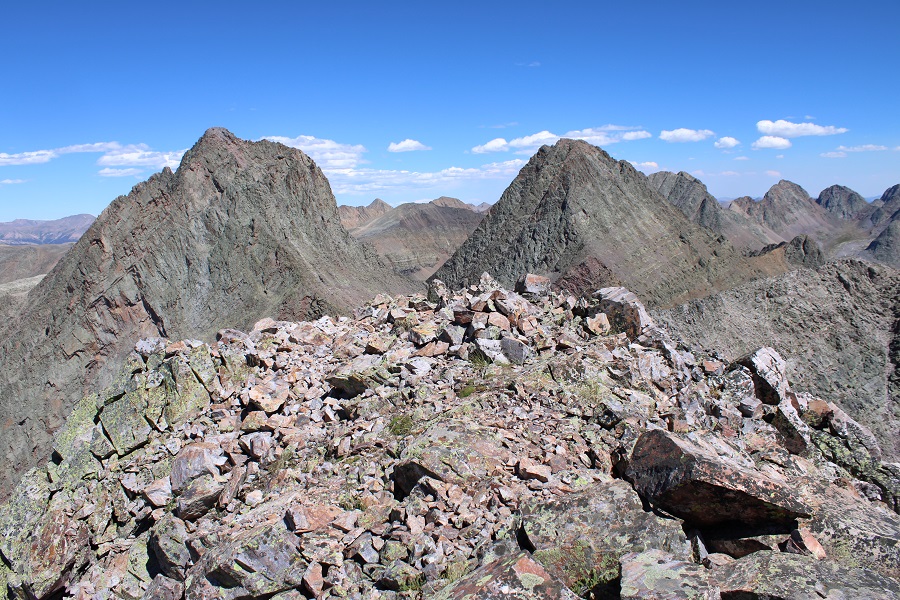
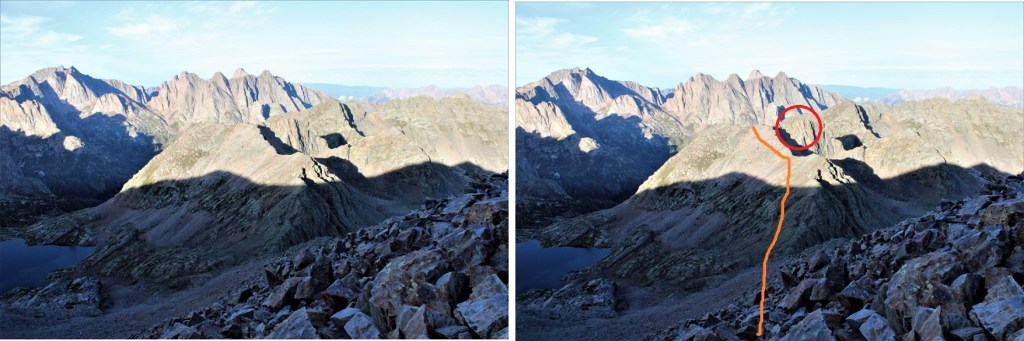
From the summit of Electric Peak, I could see my next objective, Graystone Peak, to the south.
I re-traced my steps back to the saddle
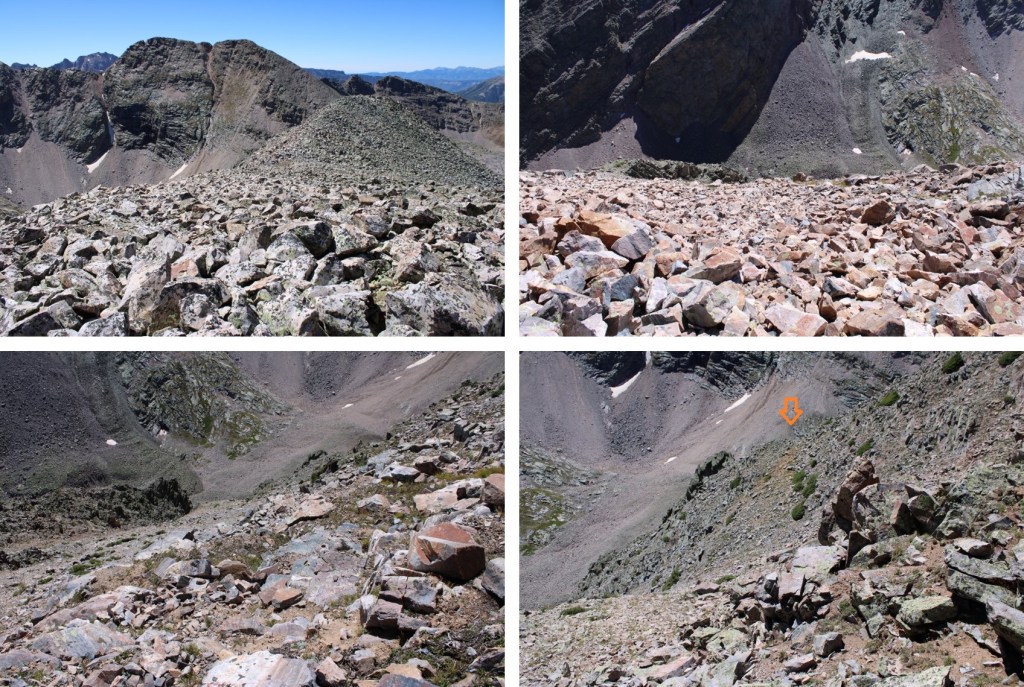
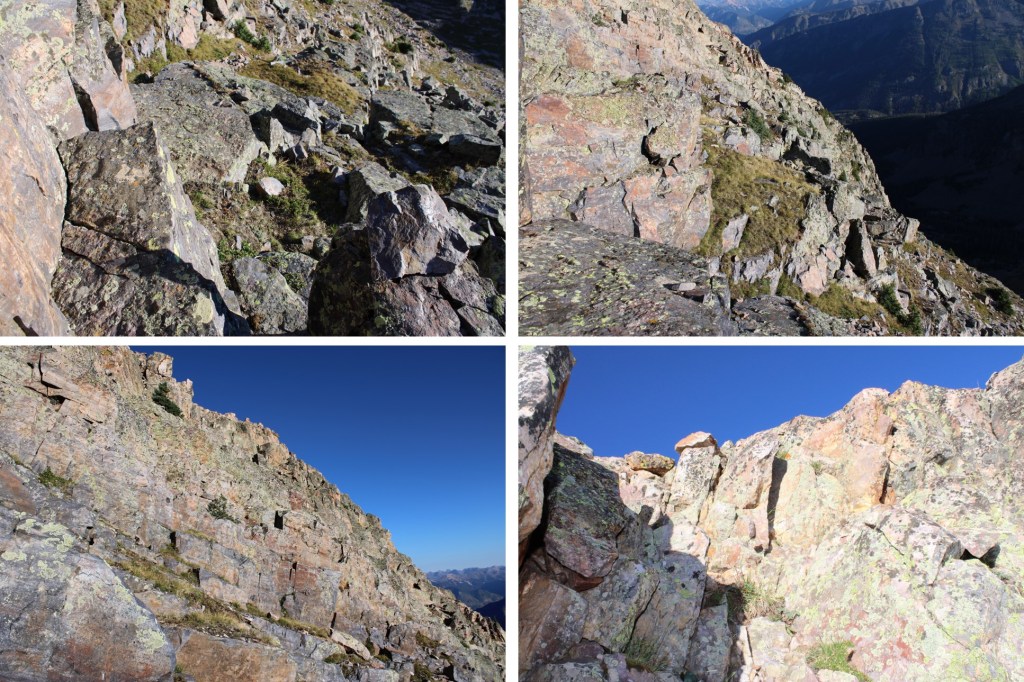
Now to head over towards Graystone Peak. I looked east, and saw these wonderful rock slabs.
Traversing up and down large rock slabs is mostly a mental exercise in not freaking out. I kept telling myself “My shoes have got this, trust your shoes. Also, don’t look down”. This is the route I took. There’s no avoiding the slabs.
Another view of the rock slabs, with a little bit of climbing towards the end (which was favorable to the smooth slabs)
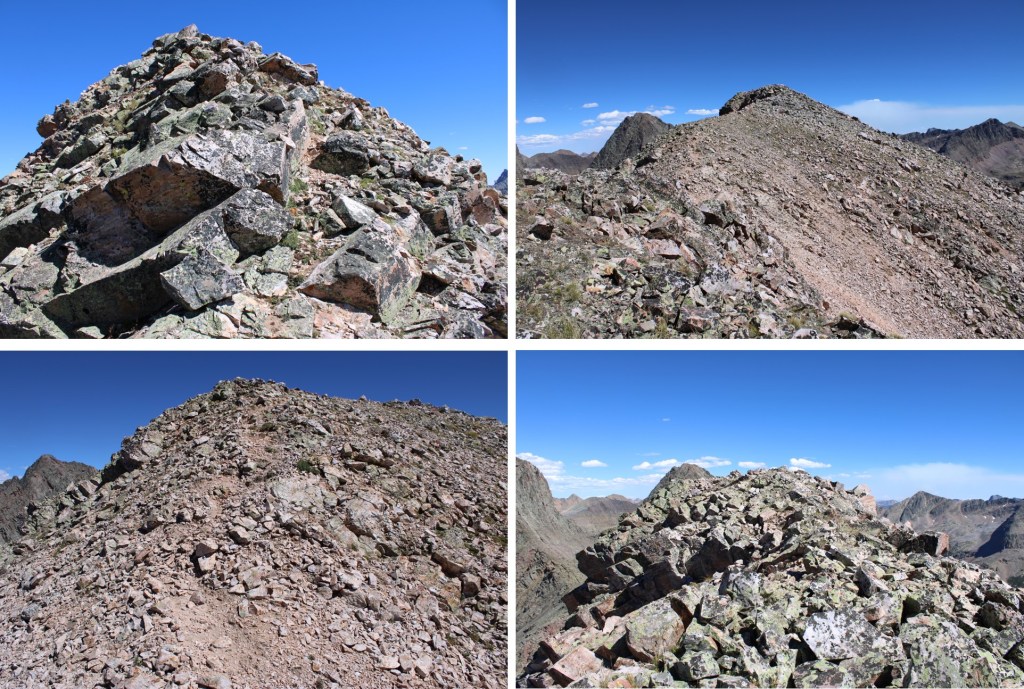
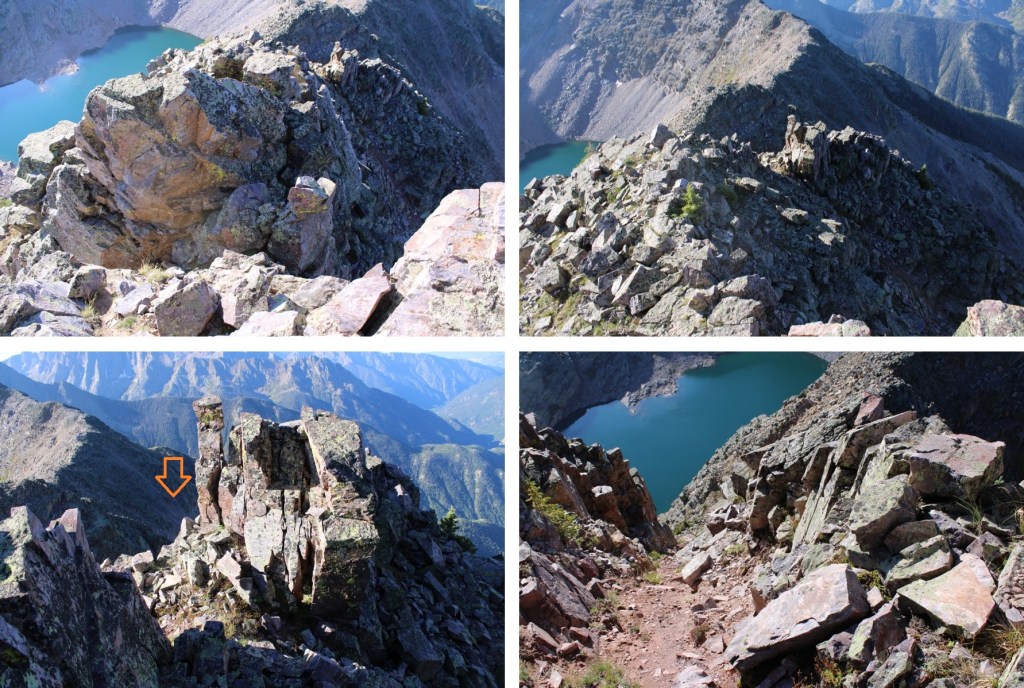
After making it up the rock slabs, I turned left, now ready to scale Graystone Peak
Scaling this peak is exactly what it looks like: straight up the side with a lot of various sized rocks to traverse that are loose. I headed southeast up the mountainside.
Once making it to the ridge, I stayed on the ridge proper to the summit, with some easy class 3 ups and downs along the way.
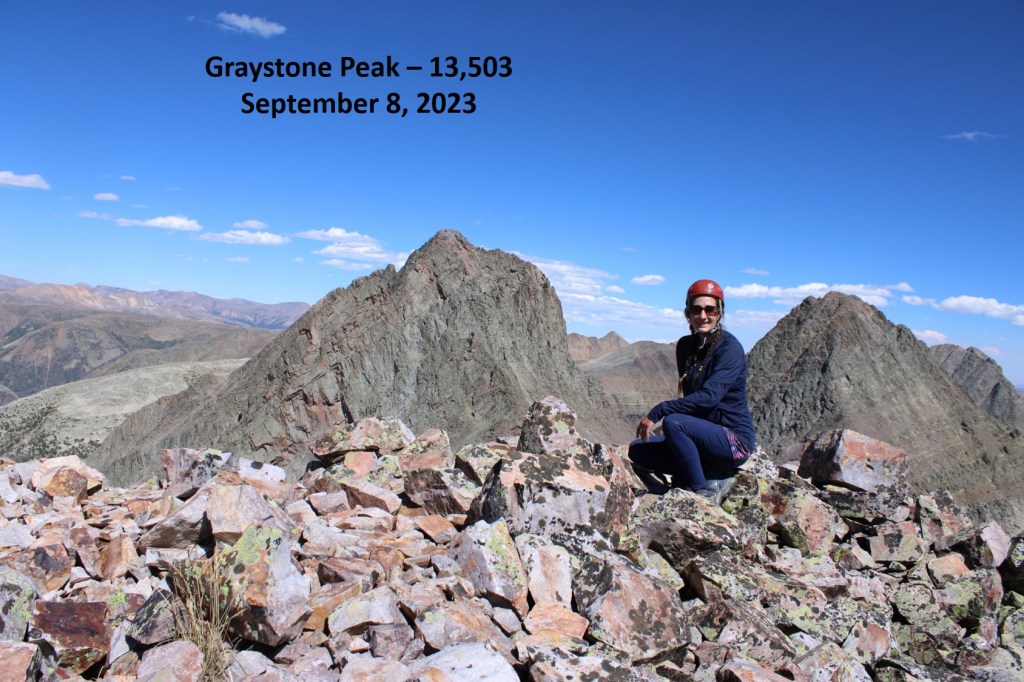
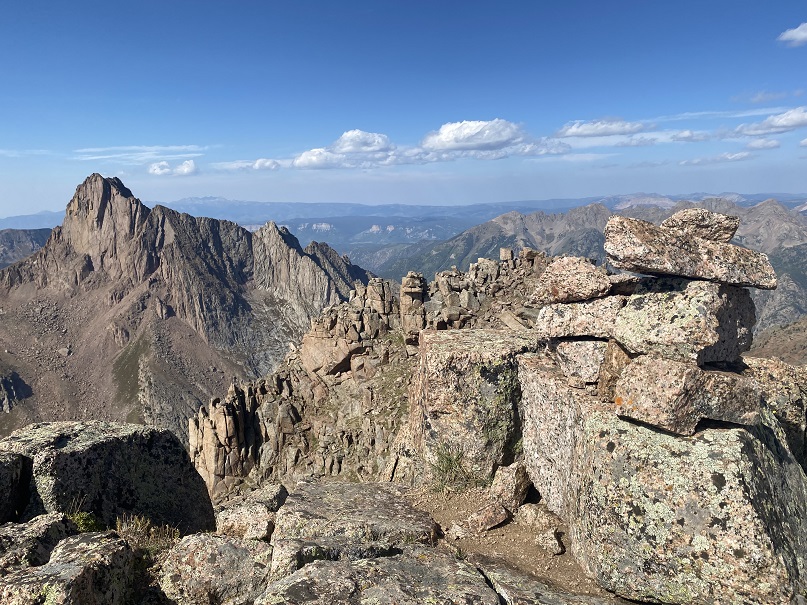
There was a large cairn at the summit
Graystone Peak
I turned around and headed back down the peak the way I’d ascended, doing my best to keep my balance and navigate the loose rocks.
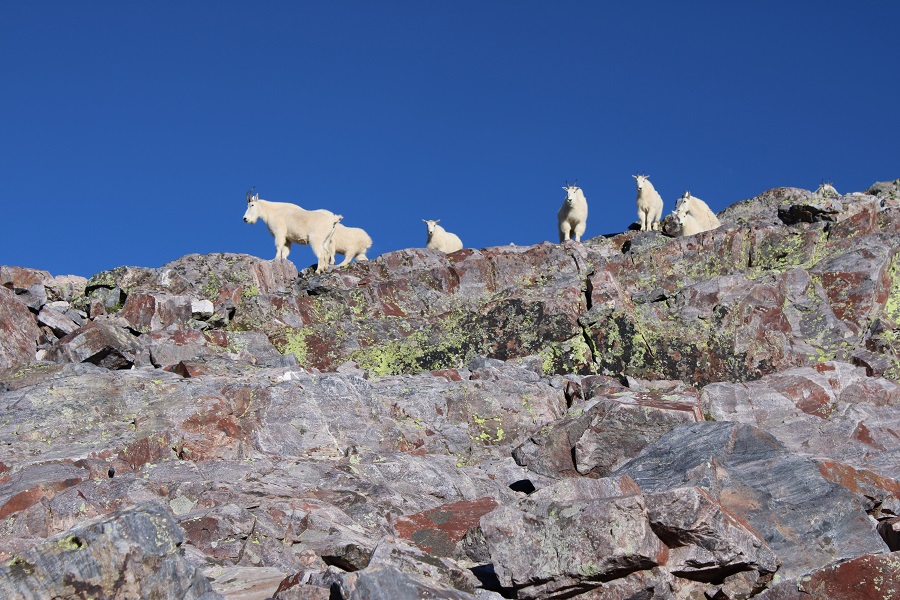
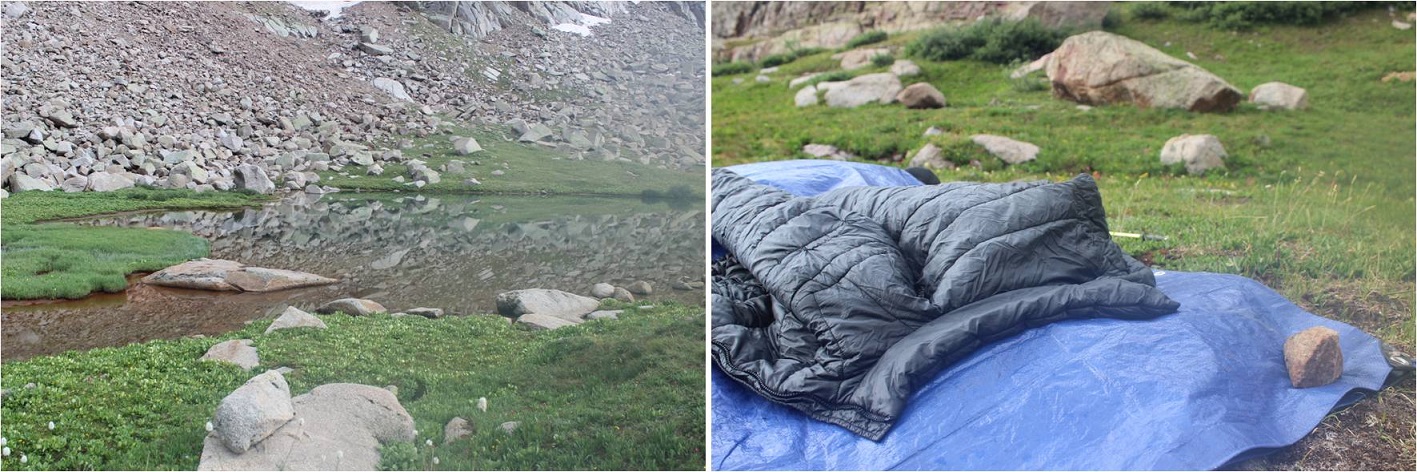
It had been a long day, so once I made it back down to the little patch of grass at the base of Graystone Peak I decided to call it a night and set up my bivy. I dried out my clothes, ate some dinner, and wrote notes down in my journal. Just before settling down for the night, I heard rocks tumbling and then skidding to a halt behind me. I turned around, and about 30 mountain goats were standing on the ledge, about 20 feet away. Most of them dashed away before I got a picture, but they seemed just as surprised to see me as I did them. They were probably headed towards the patch of grass I was using as a bivy site, and seemed a little disappointed to find me already occupying the space. I wish I could have told them I wouldn’t bother them and they were free to stay, as there wasn’t any other grazing areas around, but they all bounded away to find another site.
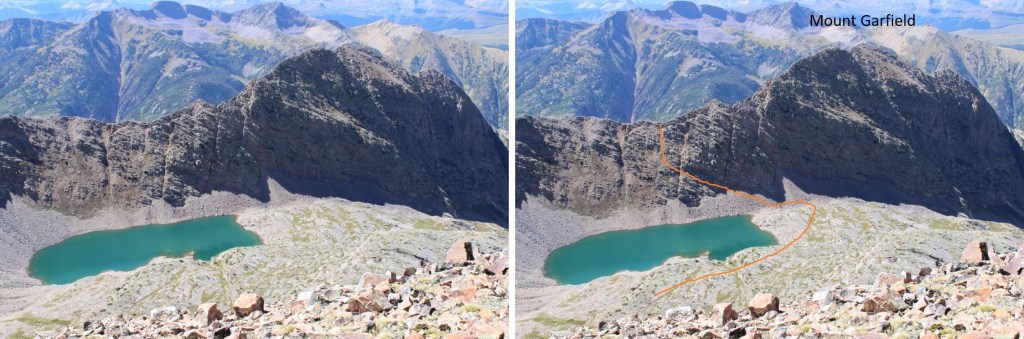
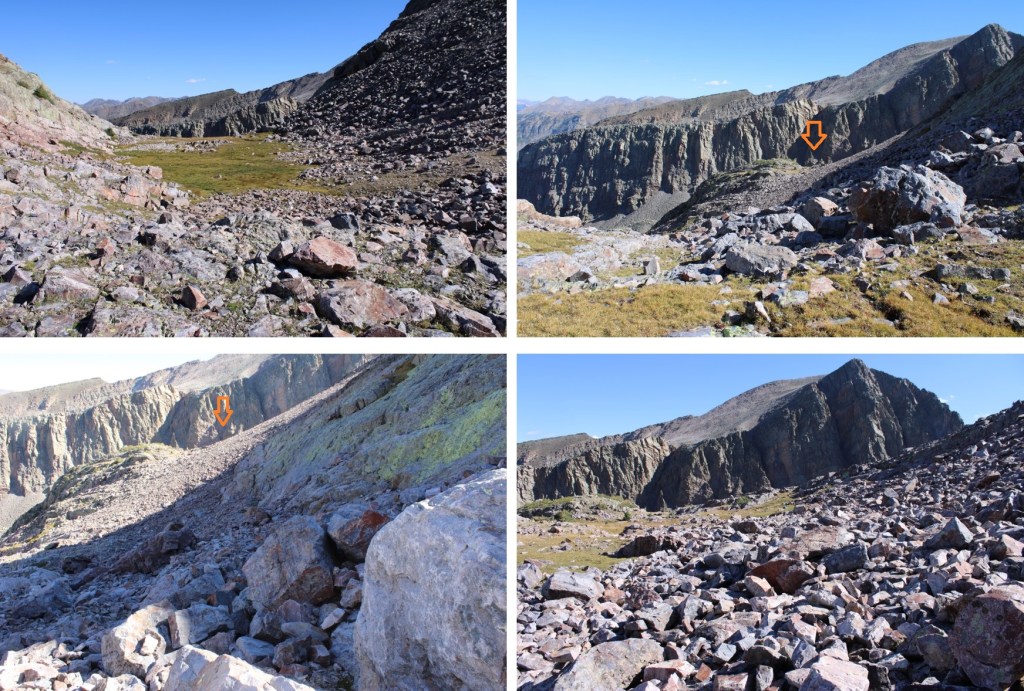
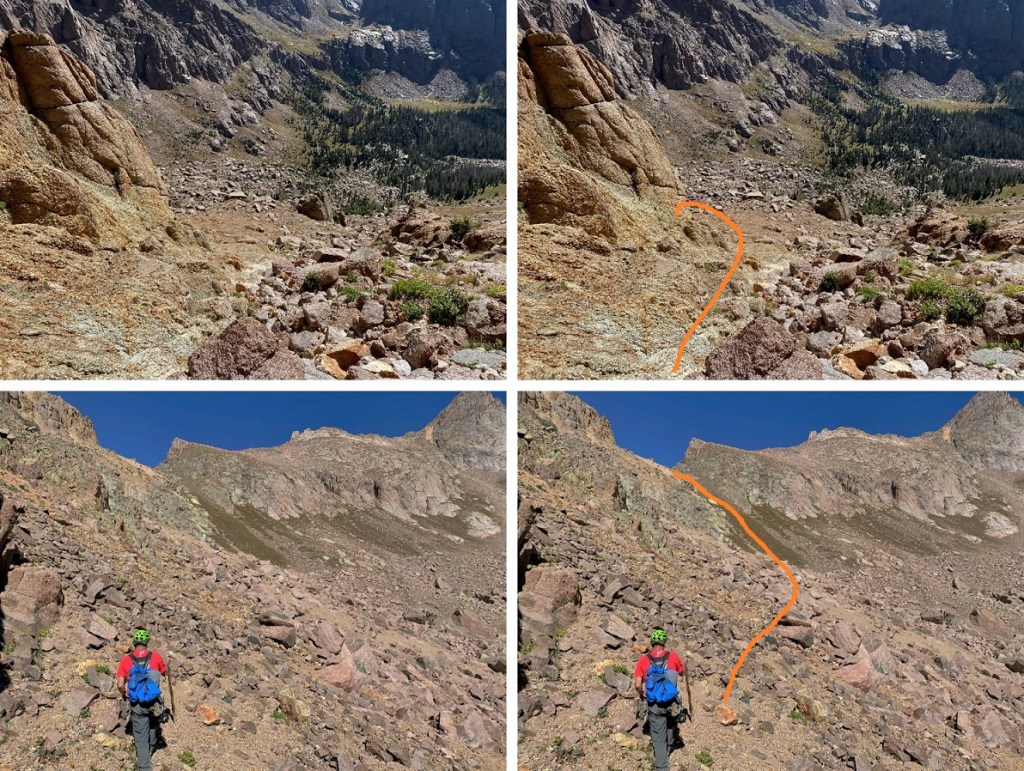
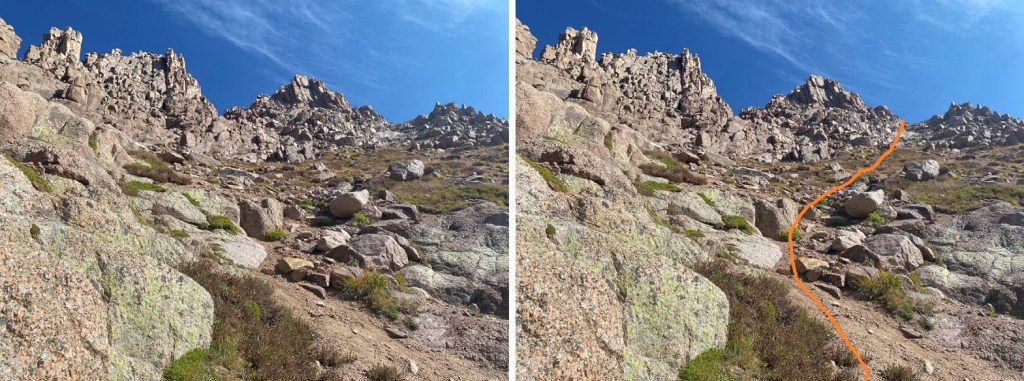
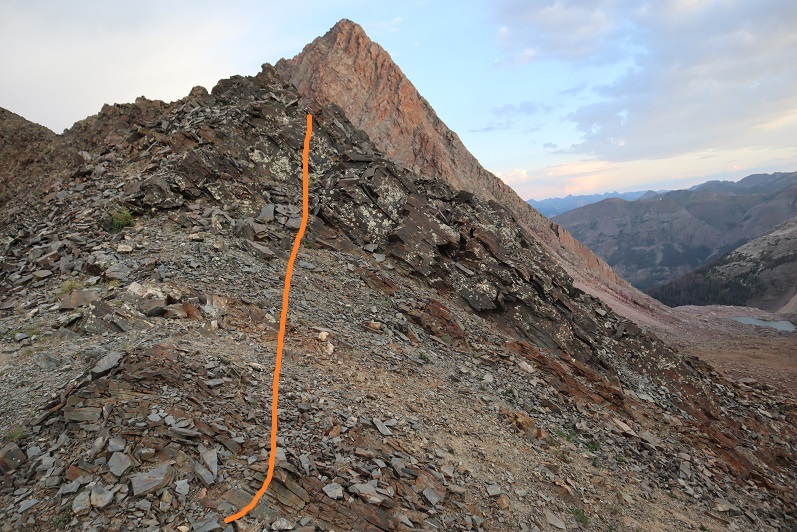
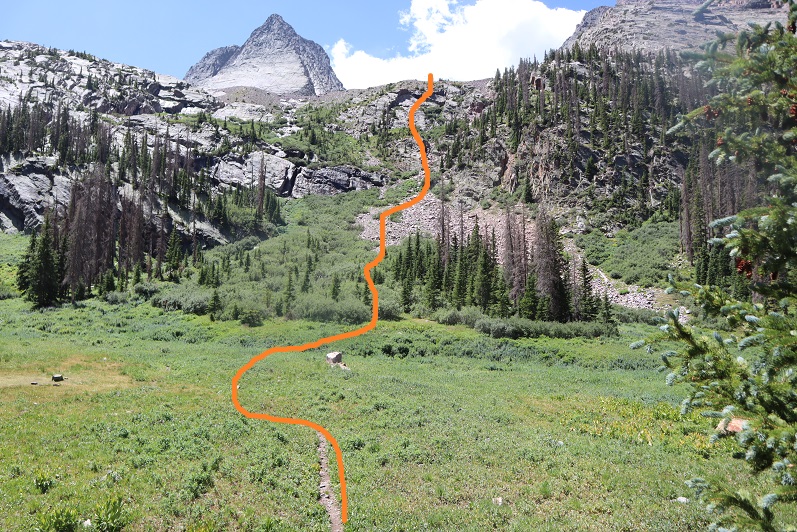
I was up early the next morning and on route to Mount Garfield. Even though this was the shortest of the peaks I was doing this weekend, it was by far the most challenging. Once on the ridge it was consistent class 3 the entire way. I started out by heading southeast around the base of Graystone Peak. I was headed here:
This was a quick and easy gully to climb. Once out of the gully, I passed through an open grassy area and then descended over 300 feet down grassy slopes to the right, towards Garfield Lake.
Once at Garfield Lake, I needed to gain the ridge. This can be done in several ways, but this is the overall route I took. There were a couple of nicely placed trees I used as a guide on the ledges. I just aimed for one tree, and then the next. Here’s an overview of the route to the ridge as seen from Graystone Peak
From Garfield Lake, I aimed for the rock ledge with two trees on it, spaced about 300 feet apart. It was class 2 to the ridge.
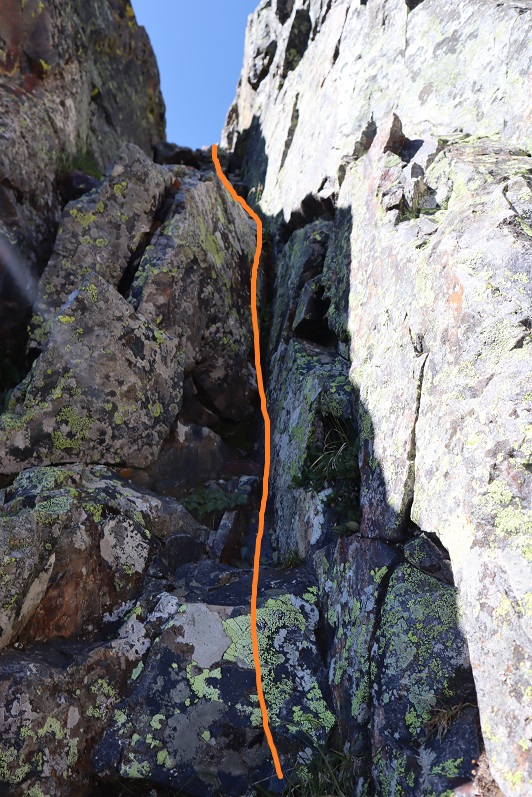
When I’d passed the two trees, I looked up and saw this gully.
I made my way straight up the gully to the ridge.
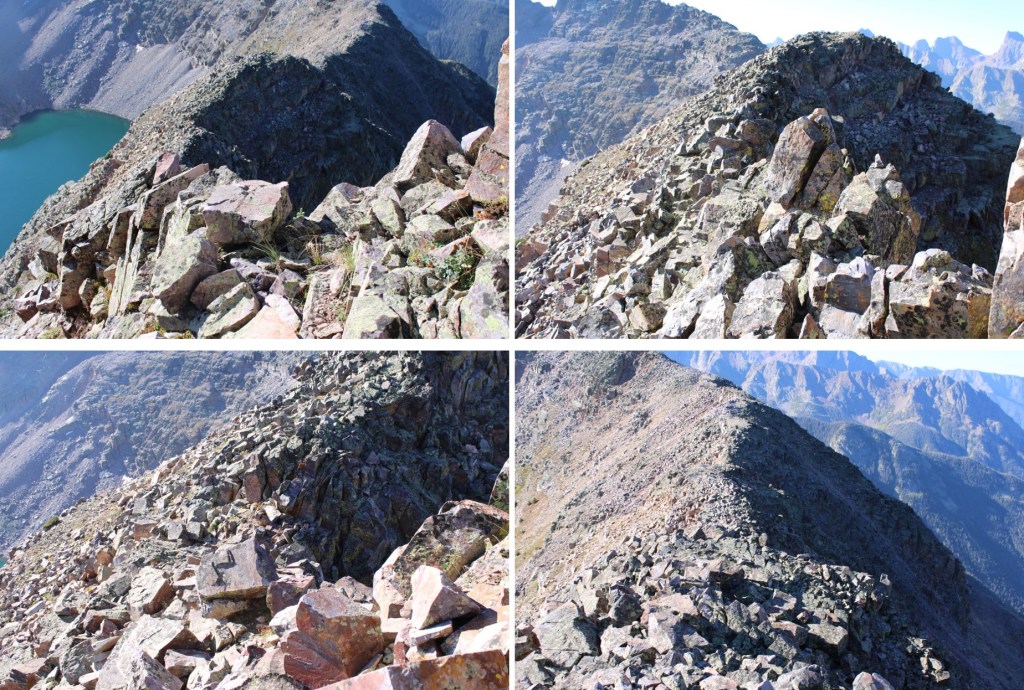
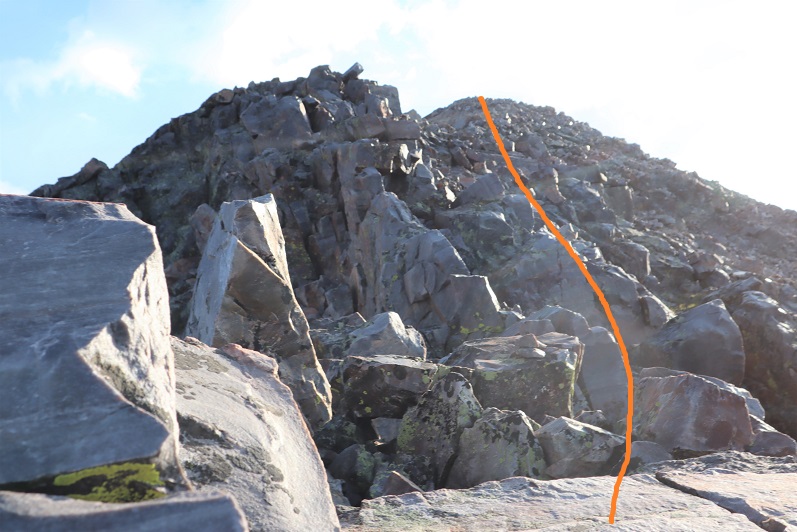
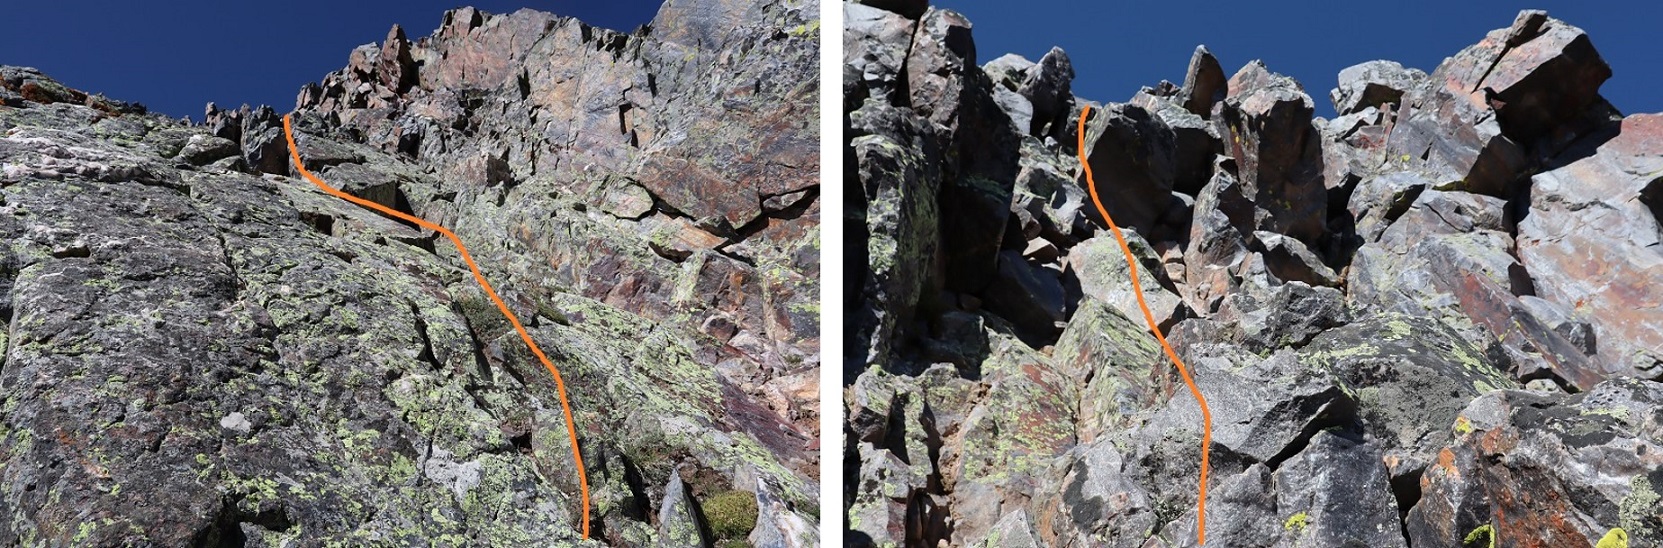
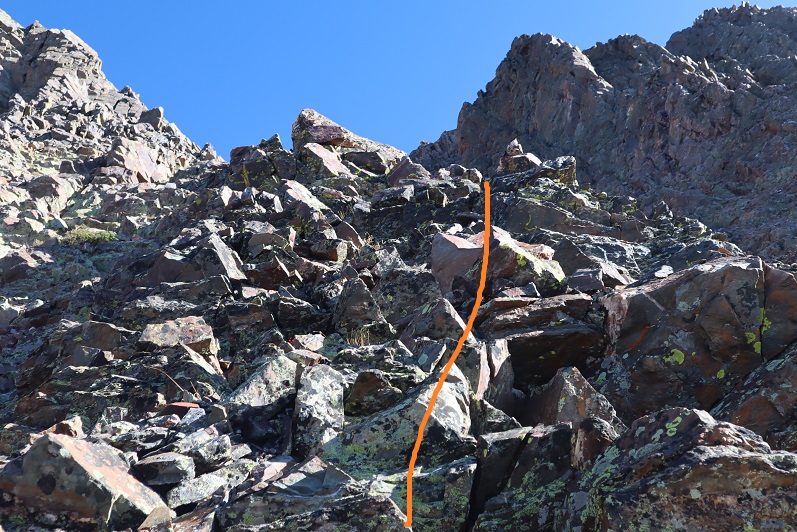
Once on the ridge I turned right, and this became a class 3 ridge hike all the way to the summit. I was able to mostly stay on the ridge, dipping to the right one time. If you encounter a class 4 move, you’re off route. Here are some pictures of the ridge.
I stayed to the left of this gully, climbing up the rocks instead of on the scree.
At the top of the gully I turned right, and continued following the ridge.
The only time I dropped off the ridge was when I came to this large rock. At this point I dropped to the right and descended about 30 feet before re-gaining the ridge.
Back on the ridge, I followed it to the summit, class 3 the whole way
Mount Garfield
Here are some pictures of the route back down the ridge
Then back down the gully to Garfield Lake
Back at Garfield Lake, I took the same route back to the base of Graystone Peak, this time going up the grassy ledges
This was an out and back hike, so I re-traced my steps down the rock slabs, across the rock field, and back down the gully to the trail.
This time, instead of going down the snow-filled gully I went to the right, and descended on scree
Back on the trail, I followed it back to the Beaver Ponds
Then I followed the Colorado Trail back to the Animas River
I crossed the train tracks, and trudged back up to Molas Pass, something I timed just right so I’d be doing later, during the cool part of the day.
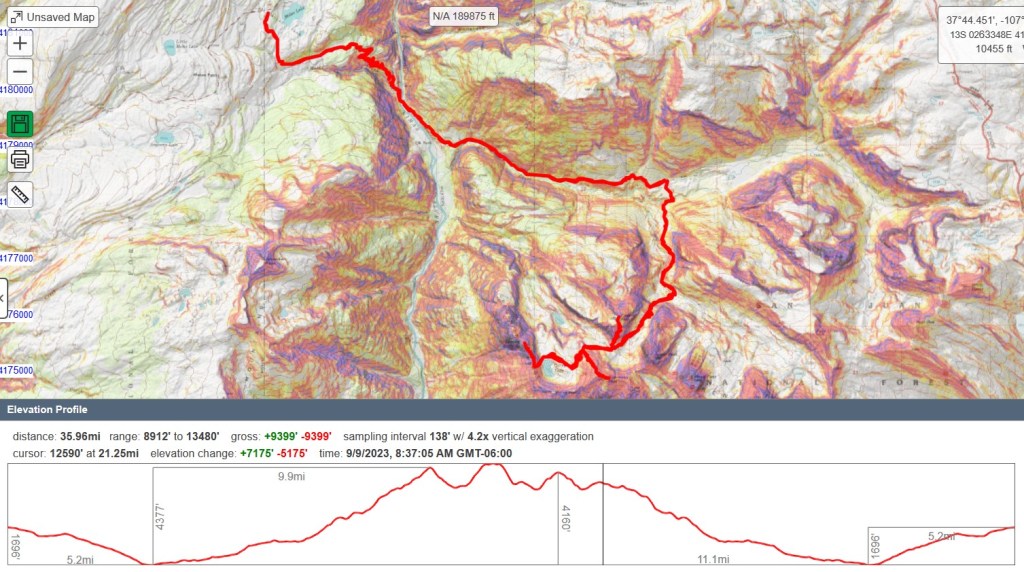
I usually go by CalTopo stats to keep things consistent. CalTopo gave me 35.96 miles with 9399’ of elevation gain, but Strava gave me 27.67 miles with 13,170’ of elevation gain. Take your pick!
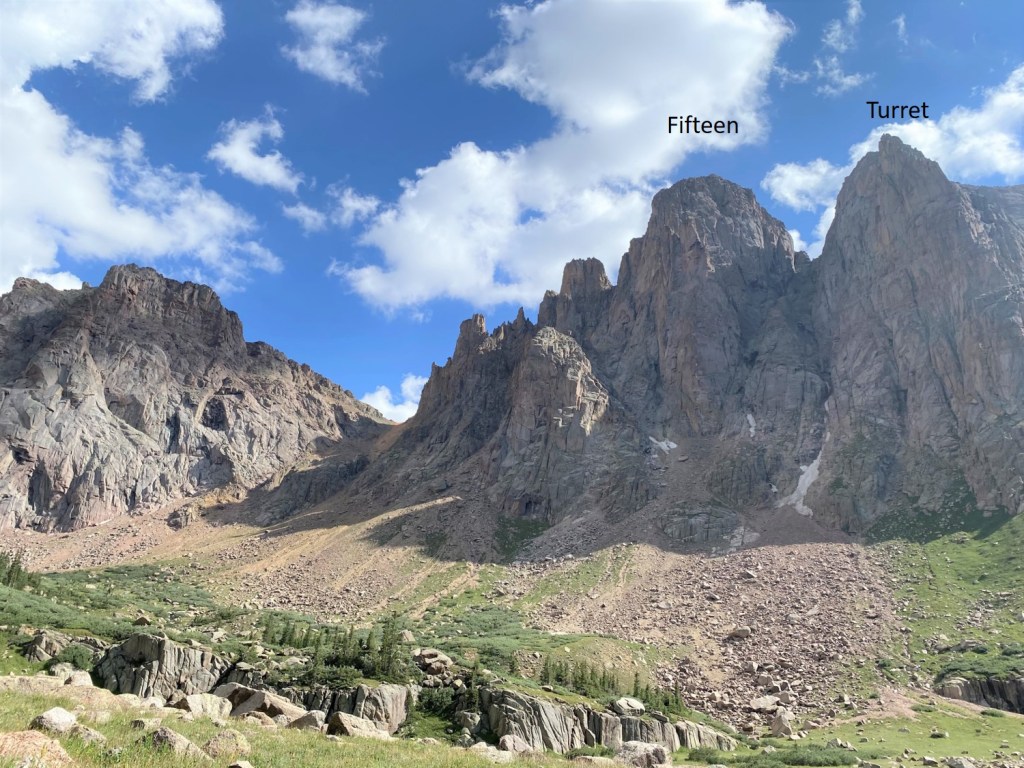
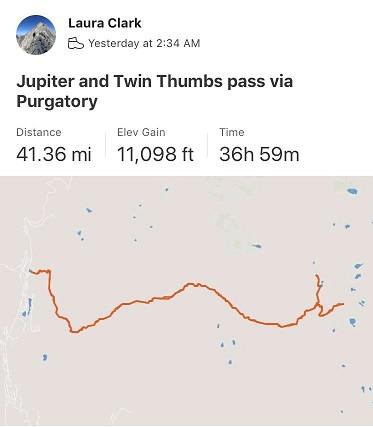
I didn’t want Peak Fifteen to be my Bicentennial Finisher. I really didn’t. In fact, last month I attempted Peak Fifteen, but had to turn around due to several factors: There was too much water in the couloir and if the section I was in was really class 4… my skills had gone south. It hurt to hike all the way in from Purgatory and not get a summit, but I knew the conditions weren’t safe. So, I turned around, went back home, and did more research.
This time, I brought my friend and climbing mentor, Tim. My thoughts were to climb this peak with him, get the hang of it, and attempt it solo at a later date. Spoiler alert: After successfully summiting this peak, I do not think I’ll be attempting it solo.
It was a long hike in from Purgatory. We ended up hiking a little slower than anticipated, so we stayed the night at the campsite at Ruby Lake; something I’ve always wanted to do. It was already dark when we arrived, and I’d only brought one set of clothing, so it was a cold night for me as my sweat turned to ice at night inside my bivy. This made for interesting (zombie filled ) nightmares.
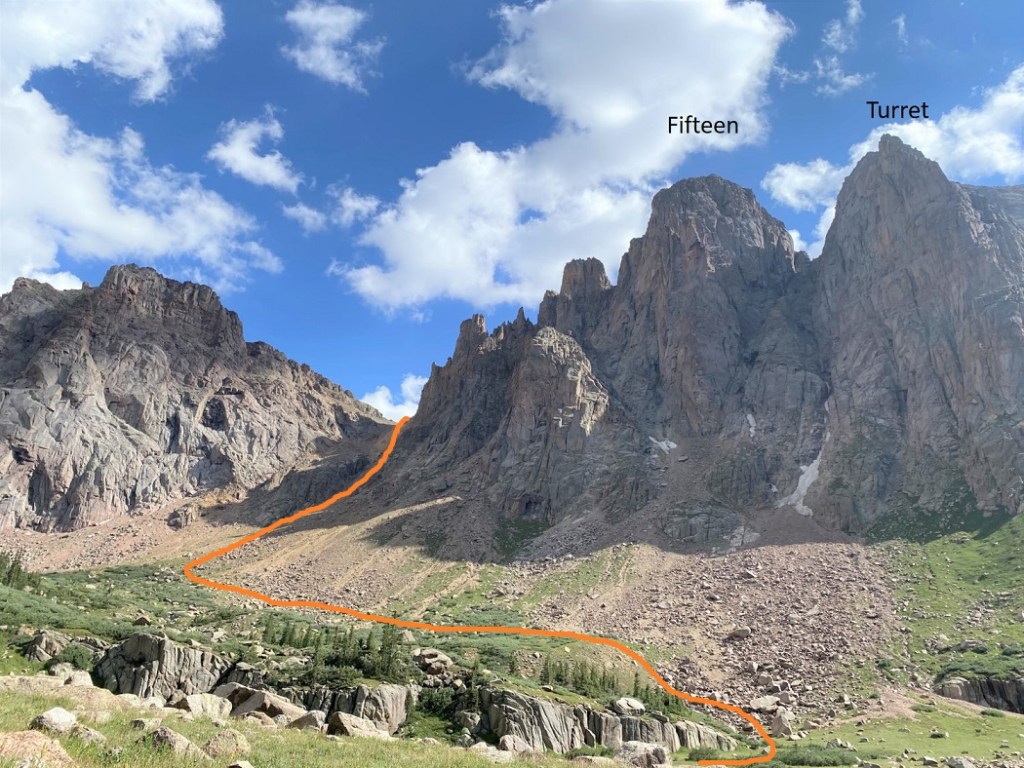
The next morning, we were up before sunrise to be willow warriors and thrash our way into Ruby Basin. We made it just as the sun rose.
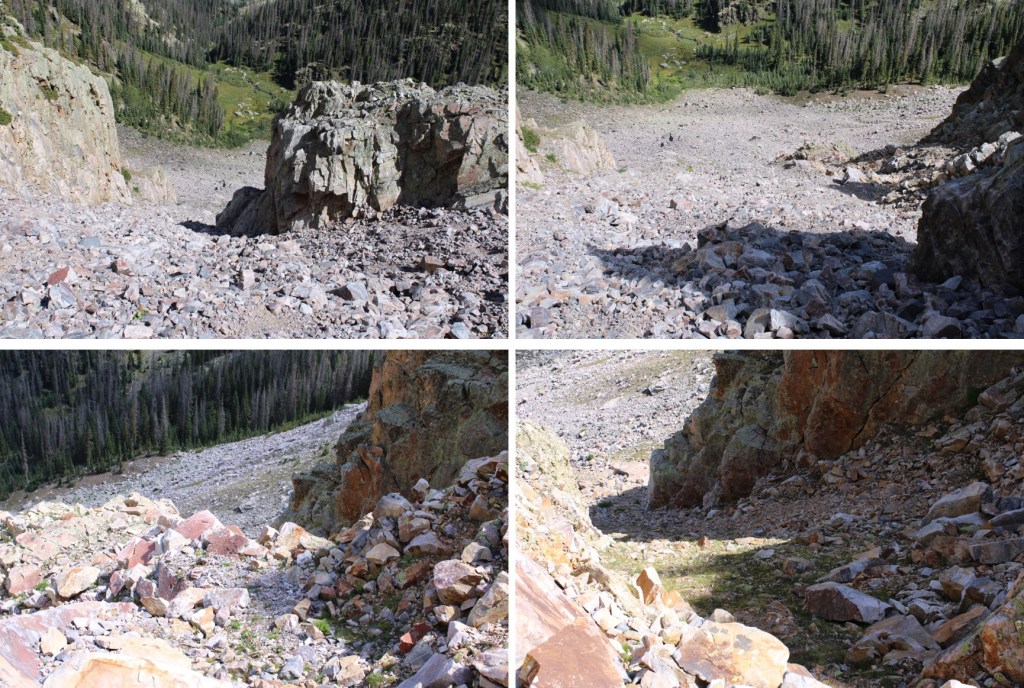
Here’s the route we took up the gully to the saddle. We stayed just above the willows, and hiked southeast across the basin until we were directly below the gully, then ascended the gully.
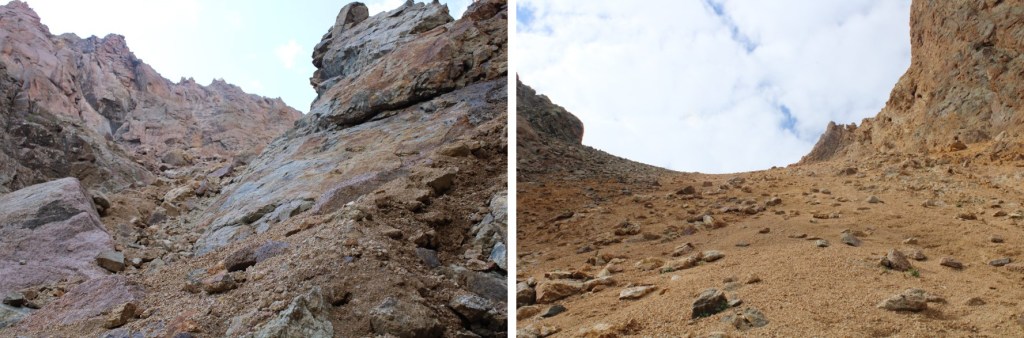
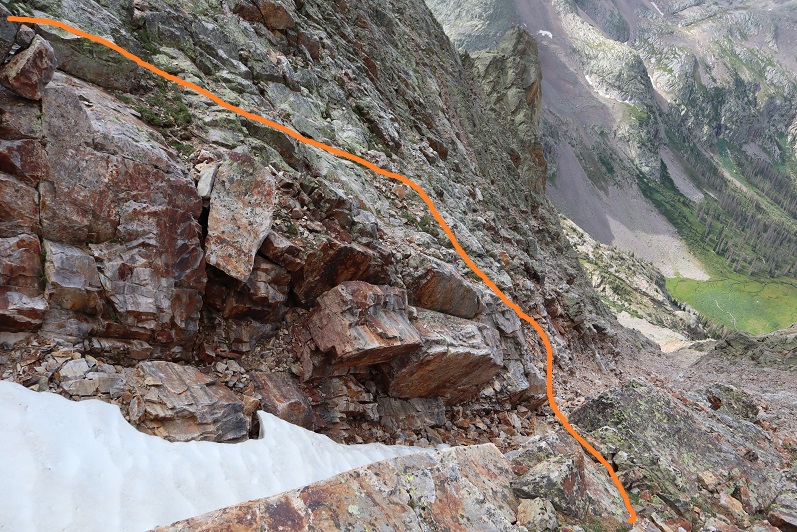
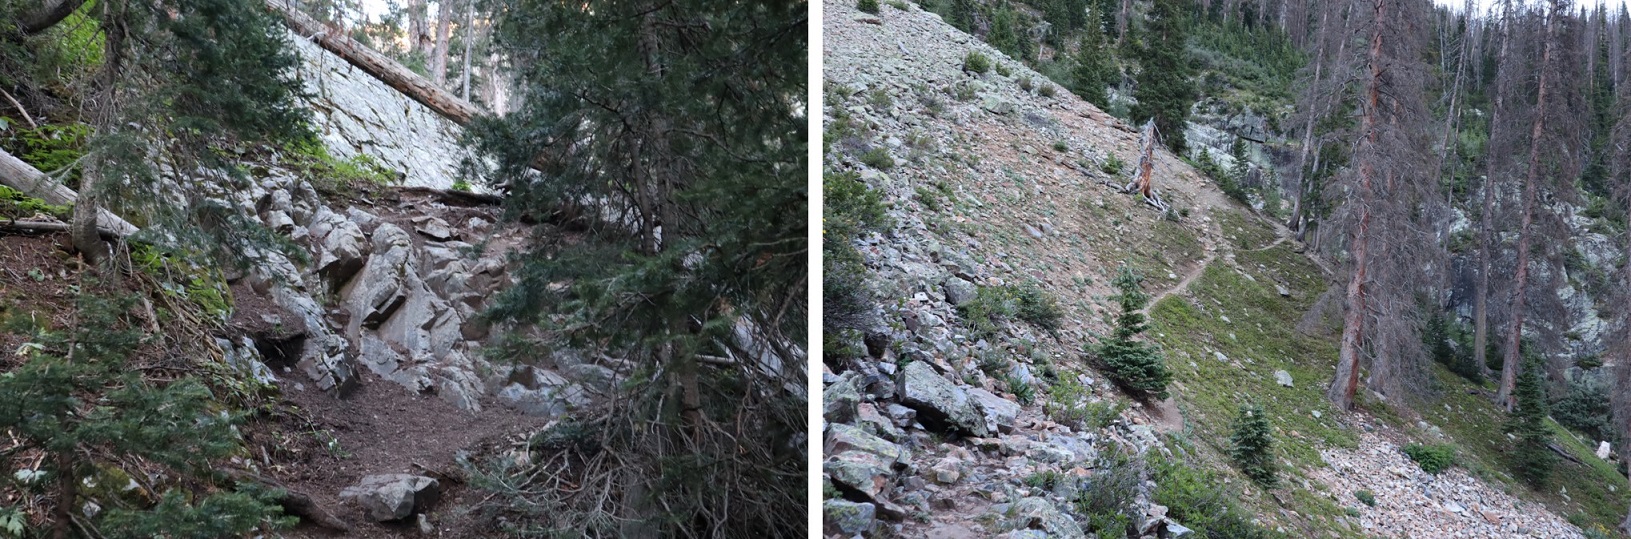
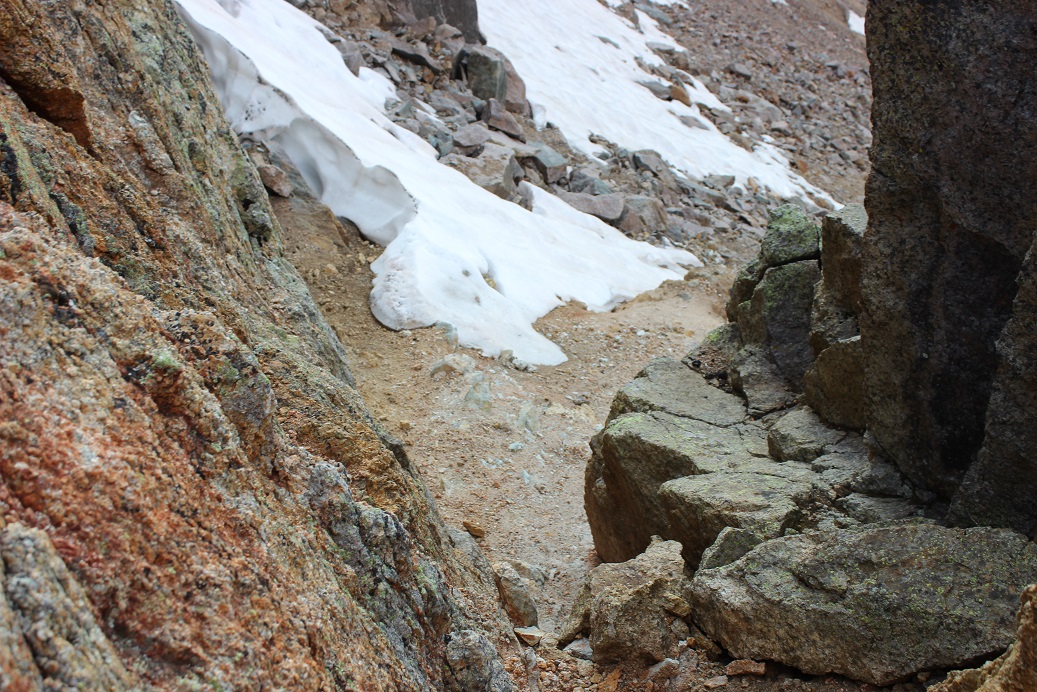
When I was here in August, there was snow under the scree in this gully. Because it was under the scree, I didn’t see it and it caught me by surprise when I unexpectedly sank up to my waist in slush. Back in August, I made it up this gully by going right, but this time we went left. It looks like the conditions change here frequently, so pick the line that goes best for you. Also, microspikes help here with the scree (if you don’t use microspikes on scree you’re making it more difficult than it needs to be: get some spikes for summer too). Here are some pictures of the gully
The second half of the gully is full of large rocks, which eventually give way to scree. This scree is some of the worst scree I’ve experienced. This is where your microspikes really come in handy. Back in August I followed fresh goat tracks to the saddle. Those tracks in September had been used several times and formed nice switchbacks. However, it appears these tracks are destroyed every winter, and need to be remade every summer/fall.
Once at the top of the gully it was time to lose about 350’ of elevation. We did this by following the scree southwest, staying high but just below the rock outcroppings (we took a different approach on the way back).
We continued down to about 12,500’, and then entered the Peak 15/Peak 16 gully
This is the gully you’re looking for. There are cairns here, and it’s the first, obvious route ‘up’
The first part of the gully is class 3, and just requires some rock hopping.
This gully turns into a couloir, and becomes easy to follow, but difficult to climb. This is the first class 4 section. There were no good hand/foot holds, as everything crumbled in my hands. In August it was running with water. Tim spent some time cleaning away the loose rock, making climbing easier. Even in mid-September, there was still water here. Wearing a pack with climbing gear/rope makes the ascent that much more difficult.
The second class 4 section of the couloir was… more than class 4. I started up, and when I got about halfway through realized I may have been in over my head. I couldn’t climb down, so I had to keep going up. Since I was ‘stuck’ it became a mental exercise, where I told myself “If I can do this while on rope, I can do it off rope as well”, but to be honest it was intense and I didn’t feel comfortable soloing this (but I did). There was a lot of deep breathing involved. I’d recommend roping up here, if you can find a way to do so. Climbing shoes would have been helpful (but they were in my pack…). We both felt this was class 5, not class 4. I belayed my partner on this section from above.
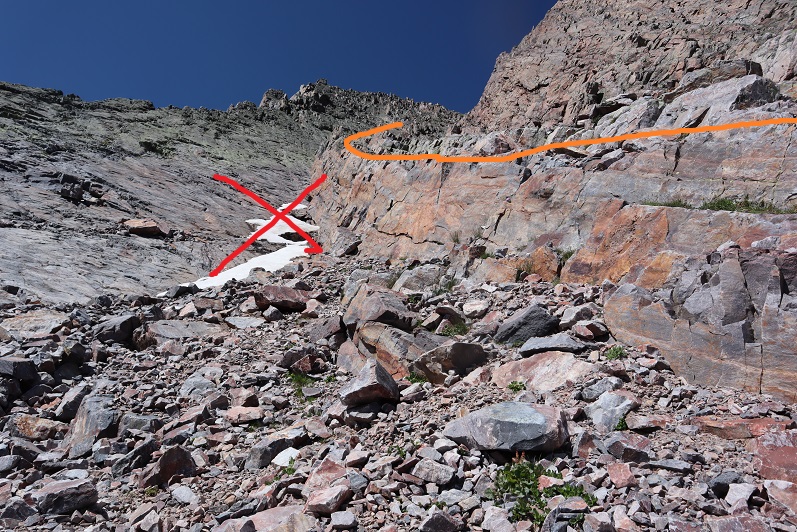
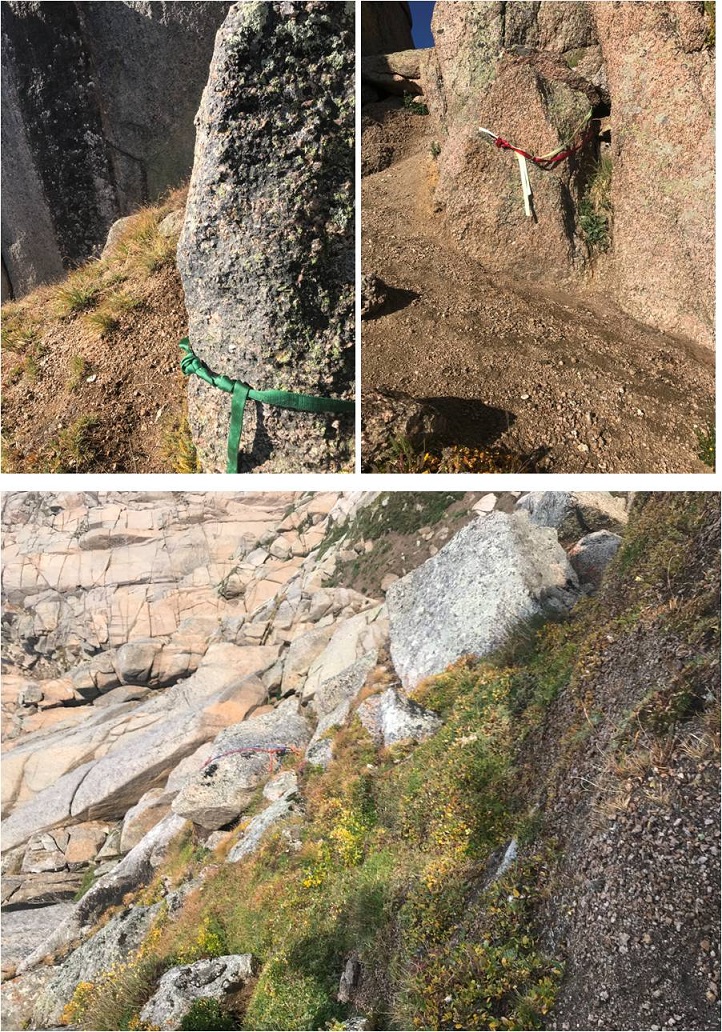
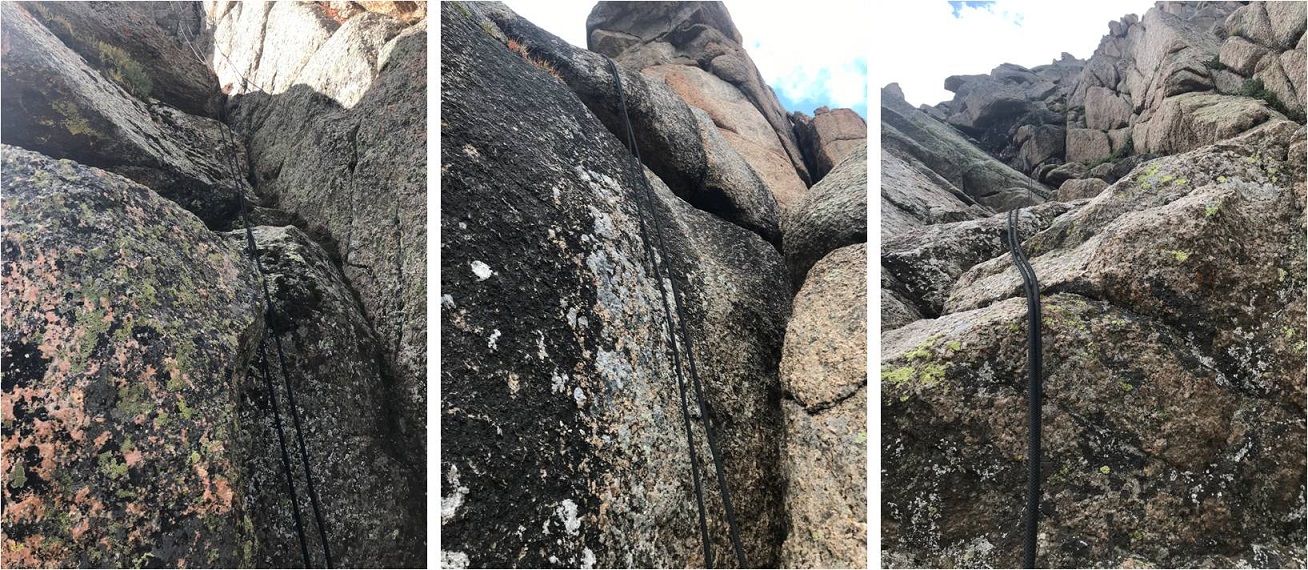
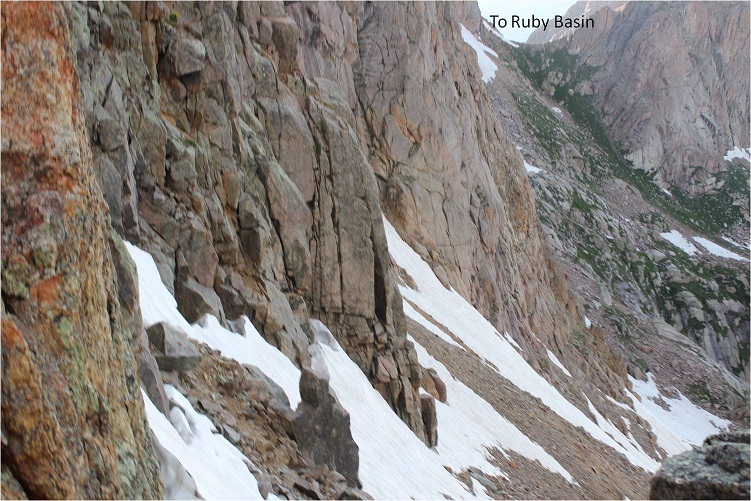
Just above this section there are anchors set up. It’s good to take note of where they’re at as you’re passing them. There will be three sets of anchors in the couloir. Here are some more pictures of the couloir. A lot of the webbing set up looks faded, but there’s plenty there. We cleaned up some of the older webbing and hiked it out (the stuff we didn’t even need to cut because it was frayed and falling apart).
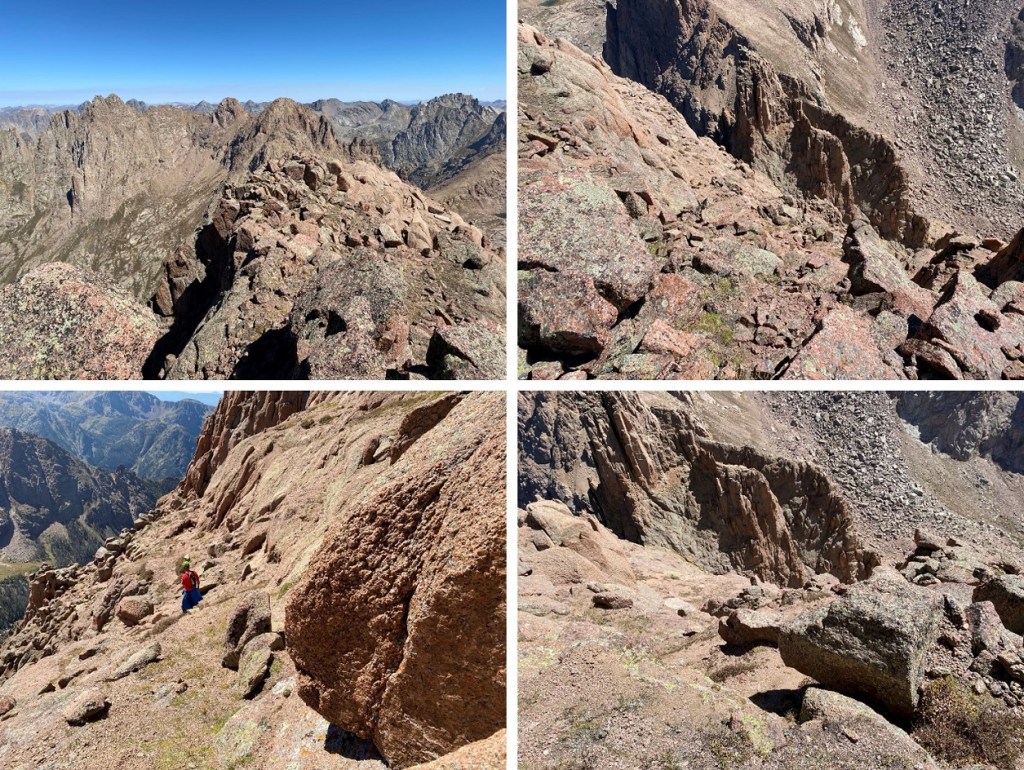
The couloir seemed to last forever. At 13,050’ we exited the couloir, below the 15/16 saddle, and went left up the ledges to 13,300’. This was class 3 scrambling with a lot of kitty litter (kitty litter is the name of the game on this climb). Where applicable, I noted Tim tossed unnecessary obstacles aside, like tumbling rocks and kitty litter, to help clear the route.
When we were about 50’ below the Peak 15/16 saddle it was time to rope up for the slabs. This picture looks at the saddle, but we were headed the opposite way, left/west (this picture is just a good visual of where you’ll be)
We were headed west, across the ledge system.
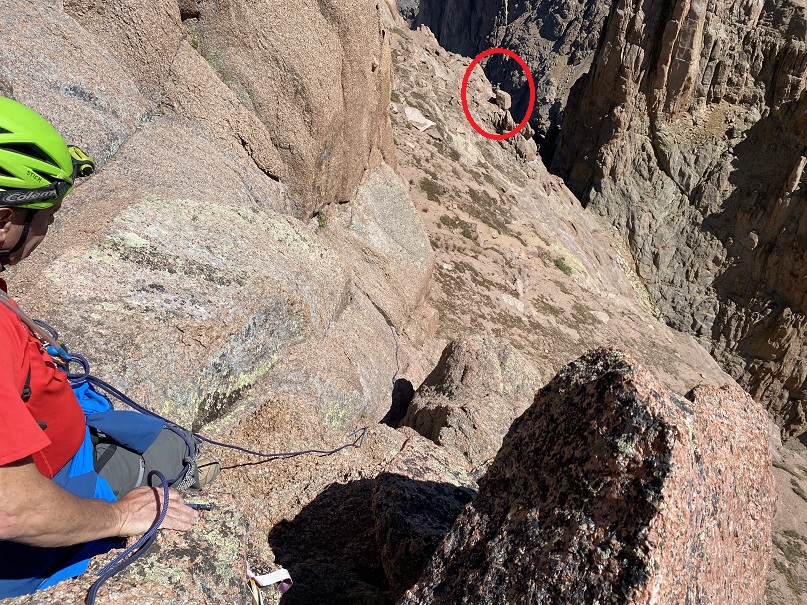
While we were still on level ground, we roped up. Then Tim led the way across the slab. It was good to get roped up first because there wasn’t a lot of room at the rappel area to do so. Here’s an overall view of our roped ascent and the belay stations. I put on my climbing shoes, but Tim didn’t feel his were necessary.
This is what it looked like getting there. We are aiming for the red circle to get to the lower belay station.
Once at the lower belay station I was set up to belay Tim from below as he set the protection and climbed first. Here’s looking back at the traverse
Oh, there’s some exposure here.
Since Tim’s the more experienced climber (WAY more experienced) I’ll let him describe this part of the route, starting with his overview:
Look for a series of shallow ledges that leads to a three foot wide ledge with a horn big enough to straddle. This is still 4th class terrain, so you can simply belay sitting next to the horn without an anchor.
If you feel you need one, wrap the rope end around the horn three times to make a tensionless hitch or use a cordalette. Bring your second up and have them belay from the three foot wide ledge below you. There will be about three horizontal seams you can place pro in ranging from #3 Camalots to .25. I managed to place five pieces total.
After your last piece you want to head for a shallow V slot next to some bulges. This is the 4th class exit and leads past a rock with a crack in it you could build an anchor in. This is exposed and one could fall from there, and you may be out of gear as I was. Continue then above this to where the steepness of the pitch eases off and there are two scrubby evergreen bushes. You can sling some of the roots for a sketchy, but adequate anchor. Once your second is up, you can both walk to the right towards a large, grassy ledge where the final 3rd class gully is.
I’m not a serious climber: I’ve been climbing for a few years, but I’m no expert. I was glad to be roped in, and wouldn’t have wanted to do this part without someone belaying me (or the other way around). A fall would have been fatal. Tim called it “poorly protected 5.4”. He placed 5 pieces of protection.
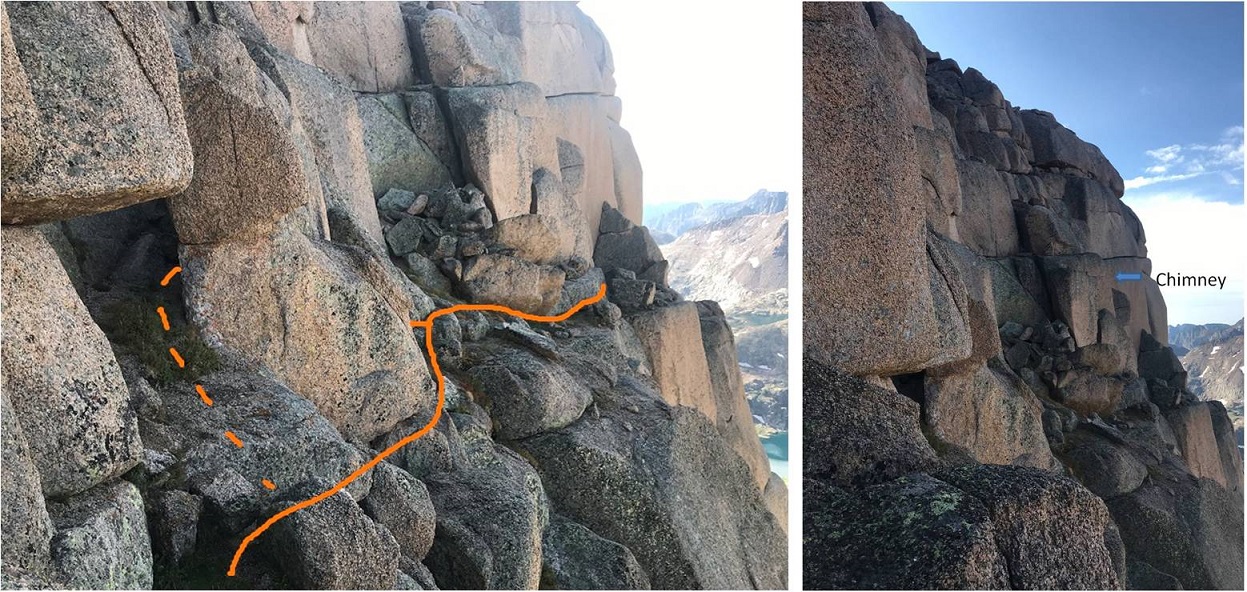
From the upper belay station, we turned right and followed the slopes east, looking for an access gully/kind of a small chimney.
The gully is about halfway to the saddle. This is what it looks like from below
From the east side it’s easier to see. This is class 3, with a cairn at the bottom.
Once up the gully, we followed the ledges northeast to the ridge. This was “choose your own adventure”, but we aimed for the northeast corner of the ridge
Once the furthest northeast we could go, we ascended the ridge via a short, easy class 3 ramp, and scrambled west to the summit
Final, class 2 scramble to the summit (easier than it looks)
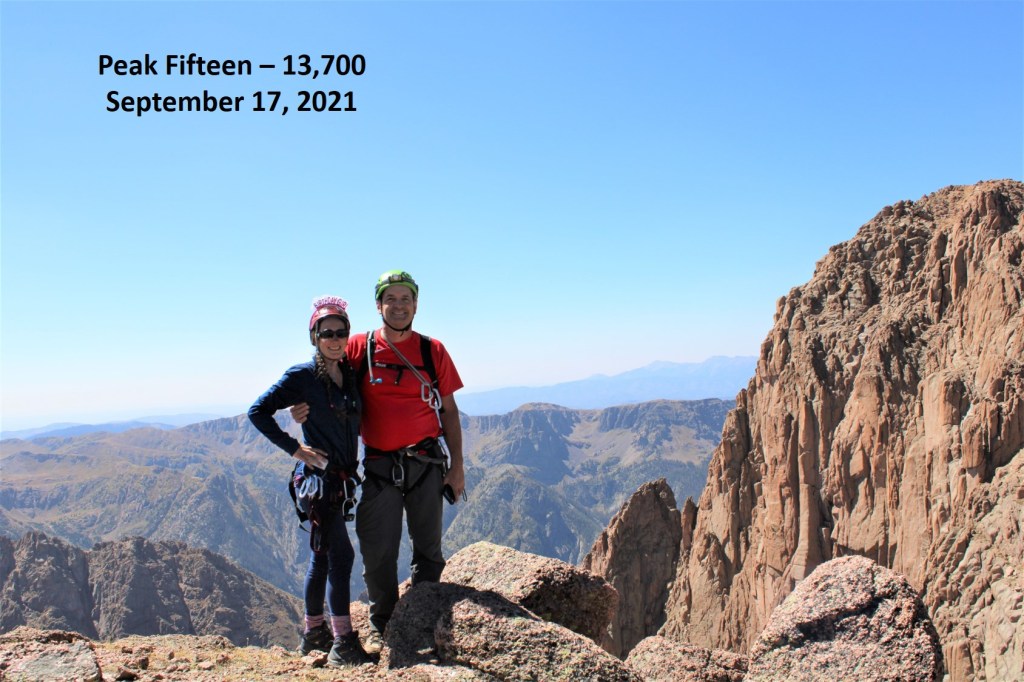
We summited Peak Fifteen at 12.30pm. Also, yes, it was my birthday, so I was celebrating not only my bicentennial finisher, bust also turning 41. Woot!
Peak Fifteen:
We stayed at the summit for quite a while, enjoying the beautiful day and awesome views. The summit register was a tube, so naturally the paper inside was wet. I added a pencil to the register, signed my WW’s, and we headed back down.
Note: we rappelled 6 times before making it to the bottom of the couloir. That’s a lot of rope work! There were adequate webbing/rings set up, which held just fine but are bleaching and might need to be replaced next season (see pictures). We cleaned up some of the ripped/damaged rope and brought it out. We brought a 60 meter, 7.9mm rope. It worked perfectly for the ascent and rappelling down, but being smaller in diameter, tended to get stuck in the cracks. Also, this is where I learned Tim curses when ropes get stuck.
We followed the ridge east back to the ledges, which we followed southwest.
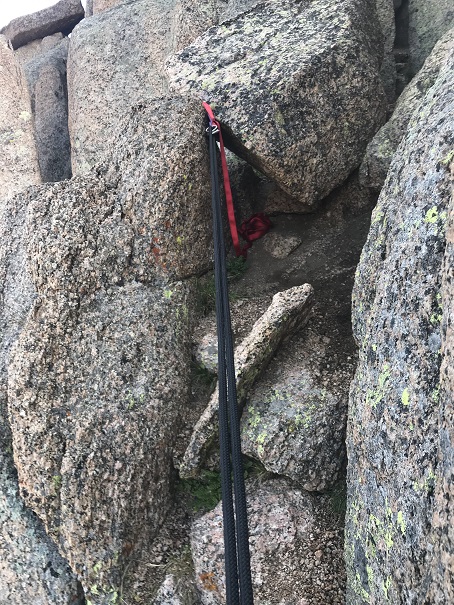
At 13570’ we headed back towards the saddle and the anchors. We rappelled down from the first anchor, and afterwards headed towards the second anchor, circled in red.
The second rappel
Here’s looking up from the bottom of the second rappel
The third rappel brought us to the Peak 15/16 saddle
Here’s looking up and down from the saddle
Once at the saddle, we went southwest on slopes, following the couloir to the right
We made our way back to the couloir, and rapped 3 more times to the bottom. We counted 6 rappels in all.
From the base of the couloir, we made our way back to the scree-saddle, this time taking the direct, grassy/tundra approach, to avoid the scree. We saw mountain goats here.
And then back down the scree filed gully, scree surfing to the basin
From the basin we hiked back through the willows to our campsite at Ruby Lake, making it back around 6pm. Round trip from Ruby Lake to the summit of Peak 15 and back to Ruby Lake made for about a 13 hour day. All that rope work sure took its time! We celebrated with some whiskey and wine; after all, this was my bicentennial finisher, and it was my birthday… no one got hurt, and, this was much harder than anticipated by both of us for different reasons and we were successful. All reasons to celebrate!
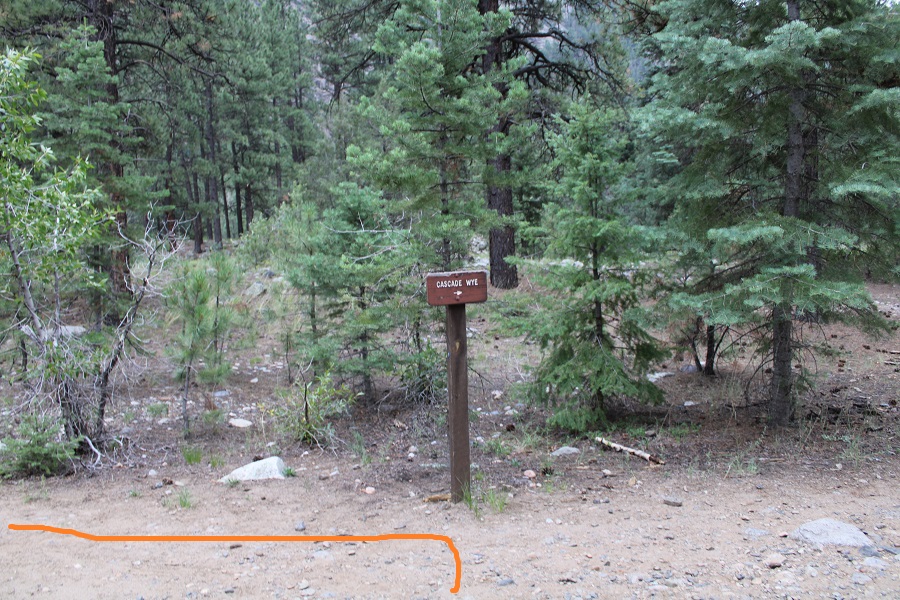
We made it an early night and were up at 6am to hike back to Purgatory. The night was much warmer, if only because I didn’t go to sleep in wet, sweat filled clothing. The hike out went fast, as we talked much of the time. We made it to the Animas River/Purgatory trail bridge, and were surprised to see people in sandals carrying small children (some of them crying). Apparently, the train stops at Cascade Wye now for passengers to get off and walk around (not sure if it’s ever done that before?).
We made it back to Purgatory Trailhead around 2:30pm. My tracker says we went 53.34 miles, with 13765’ of elevation gain.
I would like to thank Tim for being my climbing partner and accompanying me on this trek, which I’m sure ended up being more of an adventure than he bargained for! I believe this climb takes two experienced climbers to complete safely; It was nice to have someone I could trust join me. In addition, he’s been my climbing mentor, voluntarily taking me climbing and ‘teaching me the ropes’ for years. He’s the one who taught me how to set up anchors, how to climb and rappel safely, and all about proper gear. I couldn’t have done all the other class 5 bicentennial peaks without his instructions. I still keep his safety checklist with me in my climbing gear.
I also want to thank everyone who has posted trip reports in general, but specifically trip reports for Peak Fifteen, as for me it was the hardest of the bicentennials. We all experience hikes/climbs differently, and it was nice hearing the difficulty/route finding levels from other climbers. If you plan to climb this peak, please take it seriously, and read all trip reports you can find on this peak before attempting a climb, as they all offer great insights.
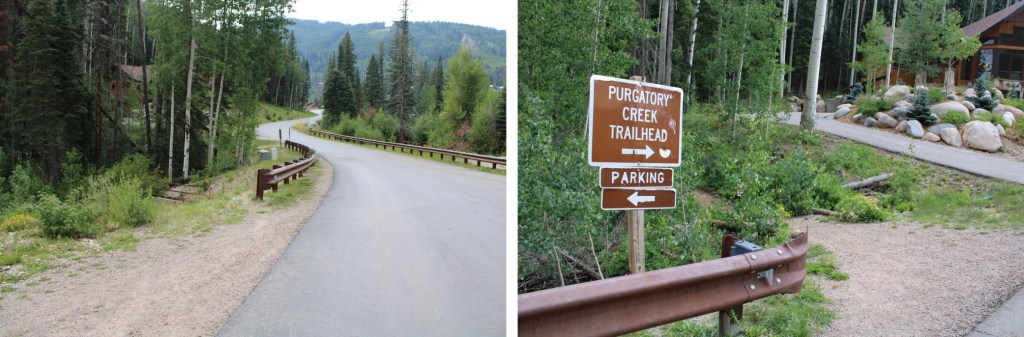
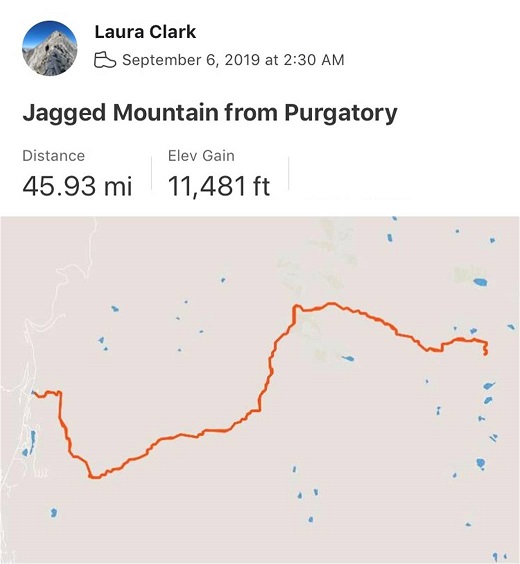
I started this hike from Purgatory Creek Trailhead. I’ve put together a route description of the trek from Purgatory to Ruby Basin, which can be found here.
For my first day in, I decided to camp at the Ruby Basin junction. I started at 3pm and made it to my camping spot at 6:45pm. I made it to the train tracks just as a train was approaching, to which a passenger pointed at me and said “Hey look: Wildlife!” and everyone got out their cameras and waved at me. I smiled and waved back. I gathered some acorns to snack on as I hiked (just before the railroad tracks there are tons of scrub oak, and the acorns are now in season).
I was so glad it didn’t rain! I think this is the first time I’ve done this approach where it hasn’t rained. As I got closer to my camping spot, I came across two girls camping there already. I chatted with them for a minute: they were headed to Ruby Basin too, to hike Turret. I wished them well and picked a spot closer to the Ruby Basin junction to set up for the night. I dried out my clothes as best I could, ate some popcorn, and went to bed.
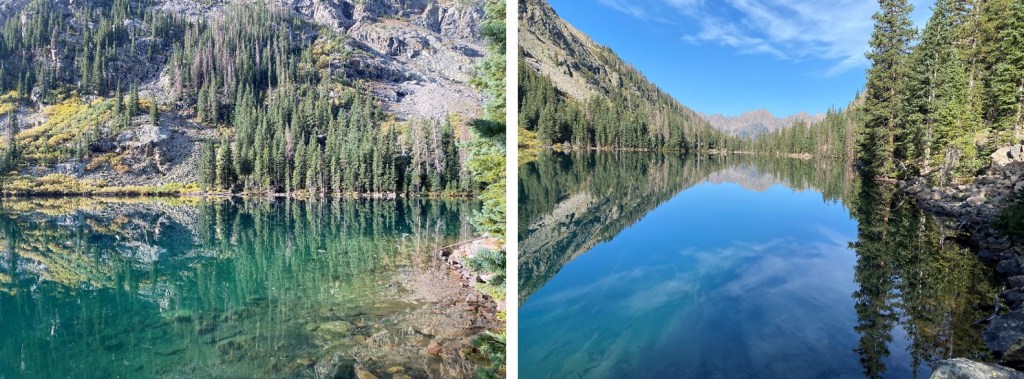
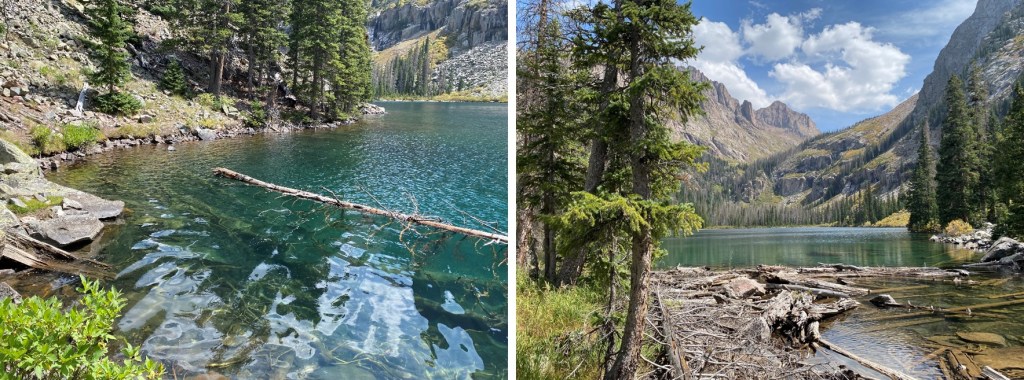
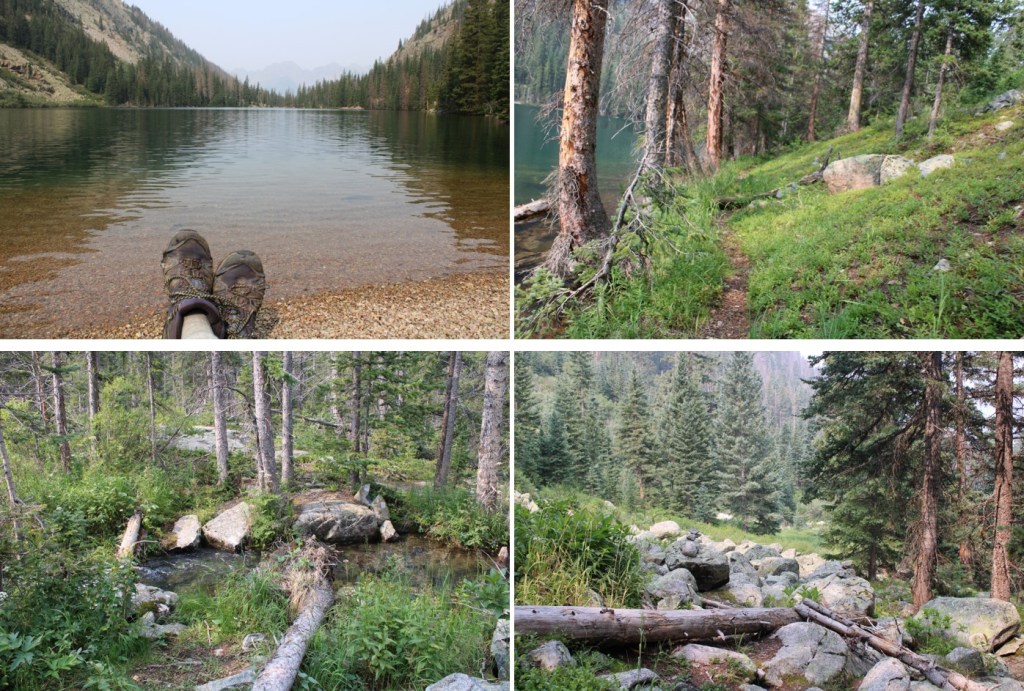
It was a warm but windy night. I was up early, and spent a good half hour just stargazing. Eventually I got up and was on the trail at 5:45am, headed to Ruby Lake. I made it to the lake just before 9am. Today I was taking my time, so I sat by the lake for a bit, filtered water, and watched the trout swim by the shore, every once in a while snagging a fly for breakfast.
My only goal today was to make it to Ruby Basin. I knew it wouldn’t take long, but I wanted to hike in the cool of the morning, instead of the heat of the day. Here’s looking back at Ruby Lake from just before making it to the basin
I made it to Ruby Basin, in all its willow filled splendor, at 10:45am. For those doing the math, it took me less than 5 hours to hike from the Ruby Basin cutoff to Ruby Basin, and I took my time.
There was a tent set up in the far side of the basin (east), but I didn’t see anyone camping there. Basically, I had the basin to myself. I strapped on my creek crossing shoes and took a walk in the creek(s). They were running at a trickle.
I relaxed for the next few hours, drying out, enjoying the sunshine, and going over my notes for my day tomorrow. This was my second attempt at these peaks. It hurt to turn around last time, but I had bad beta (and not enough beta, as I had other goals in mind and these peaks had been secondary). I’d been up in my head that entire weekend, and in the end turned around much sooner than I should have. I went home, got better beta, and was now back to attempt these peaks again. Around 2pm I saw the girls I’d met the night before enter the basin, and to my surprise, they headed directly up Turret. Rock on ladies!
Also, there were bees and crickets. Crickets everywhere! They jumped around my ankles as I walked through the basin, munched on my journal and hopped onto my gear. I ate dinner and went to bed as the sun was going down (it goes down over Turret early this time of year).
Once again, I got up before my alarm, and spent some time stargazing. I saw several shooting stars, and a few airplanes coasting across the night sky. There was no moon, but I could see the stars clearly. I made out a few constellations, and noted the frost on the outside of my bivy. I wanted to start at first light, but ended up starting a little earlier, around 6am. These are the peaks I was attempting today
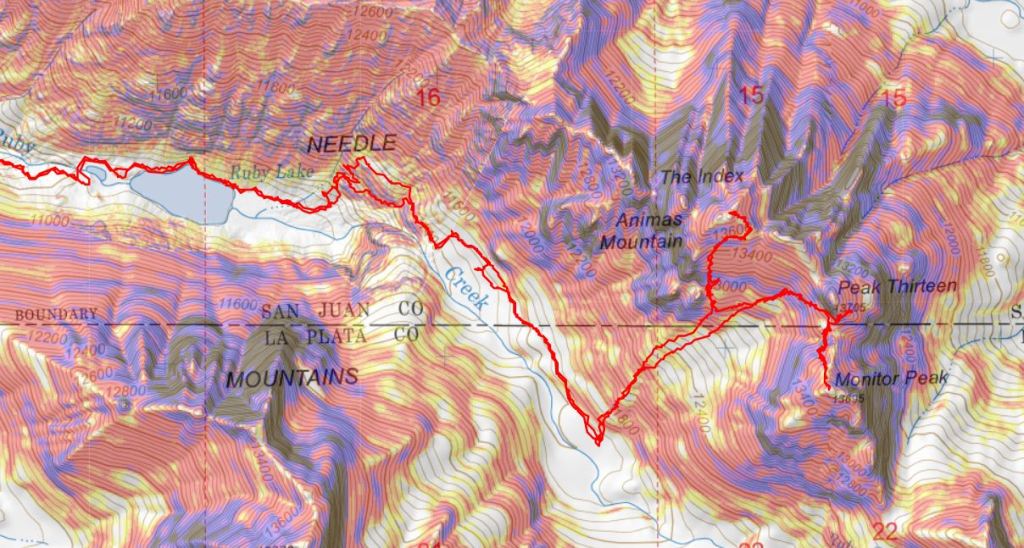
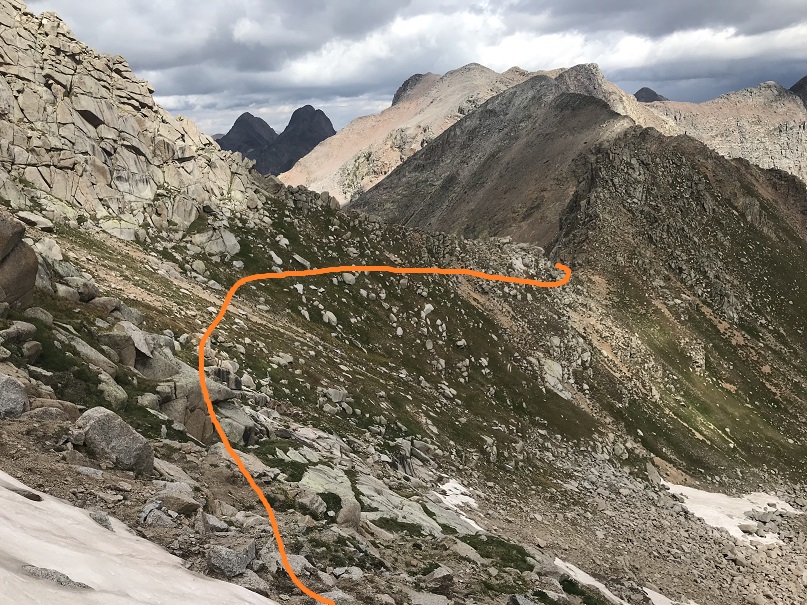
Here’s an overview of the route from Ruby Basin to the upper basin below Animas, Peak 13, and Monitor. After about 20 feet of willows, I was able to stay on tundra the entire time. This is choose your own adventure, but it’s easy to find a class 2 route into the upper basin. I just kept aiming towards Peak 13.
Here’s a look at the upper basin.
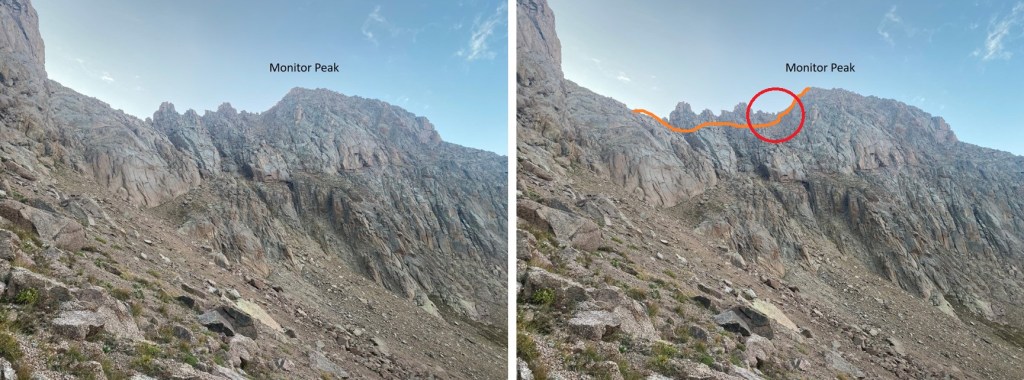
I was headed towards Monitor Peak first. There are several ways to do this. This time I took what I consider to be the ‘easy’ approach. Directly below Peak 13 there are two ramps you can ascend. I chose the further one, as it was less steep. I followed the basin northeast, towards an obvious ramp. It’s just below a section of a white and black streaked slab.
Here are some closer pictures. There are two ramps here, an upper ramp and a lower ramp. Both go, but the upper ramp is less steep, and all class 2 in my opinion.
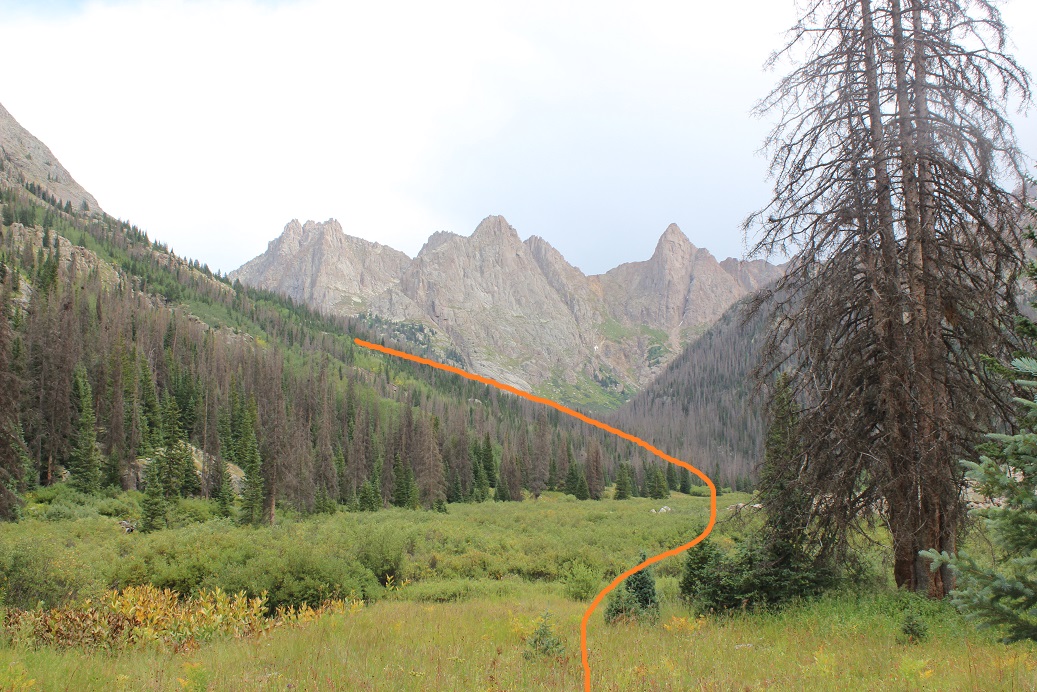
Also, while you’re here, look to your right. Find this gully (circled in red). It’s the gully you will be aiming for when ascending the ridge (ascending to the ridge before this point is fruitless). Here’s an overall view of the climb to Monitor from the Peak 13/Monitor saddle. You’ll know you’re in the right gully because there’s a white vein of rock going through it (more on this later, but from this spot you can clearly see the white vein, so it’s a good time to get a visual of where you’re aiming).
But first, let’s get to the saddle, by going up that ramp. As you can see, it’s wide, and easy to navigate.
The top of the ramp deposited me at the Peak 13/Monitor saddle. Well, actually, I didn’t need to go all the way to the saddle. I skirted the saddle and continued south across scree, following the ridge.
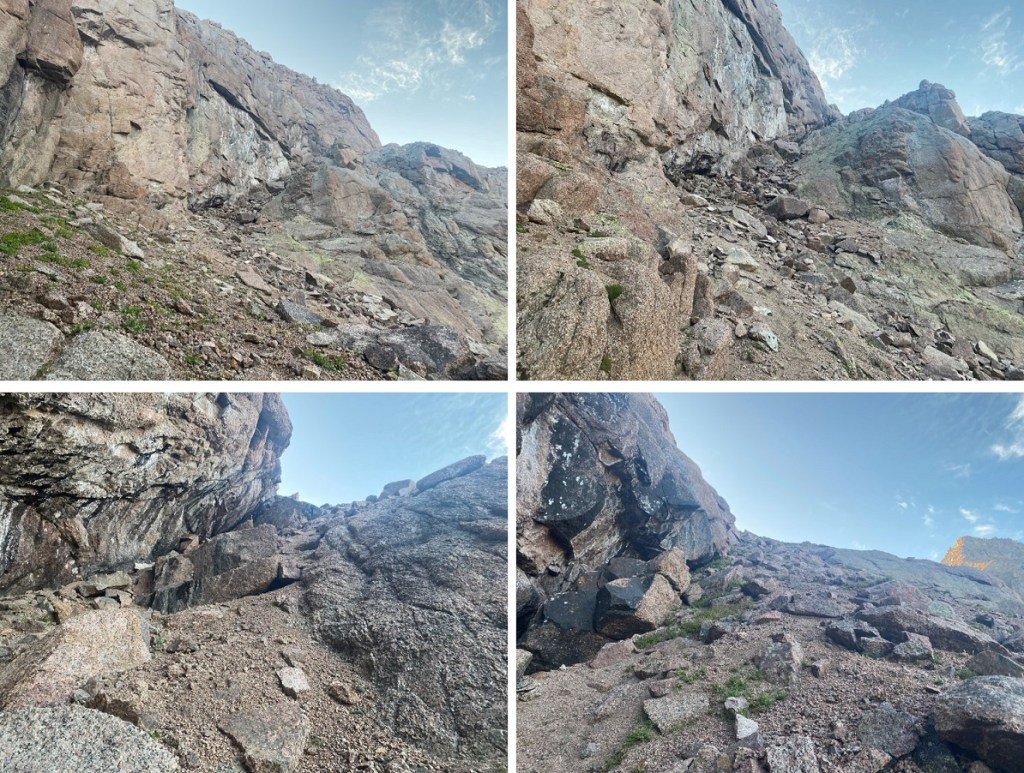
Now for the gullies. There are several of them, and in order to cross the first one I had to descend about 100 feet down, then re-ascend. Before doing that however, I got a good look at my route. This looks harder than it is. Here’s the route I took after re-ascending the gully.
But first, I had to descend on kitty-litter scree, and then re-ascend.
When re-ascending there were a couple of ways I could have gone (all felt class 3). This is the way I chose.
Get a good look at your intended route from above, as this is what it looks like from below. Hint: aim for this rock, go behind it, turn right, and follow the areas covered I dirt.
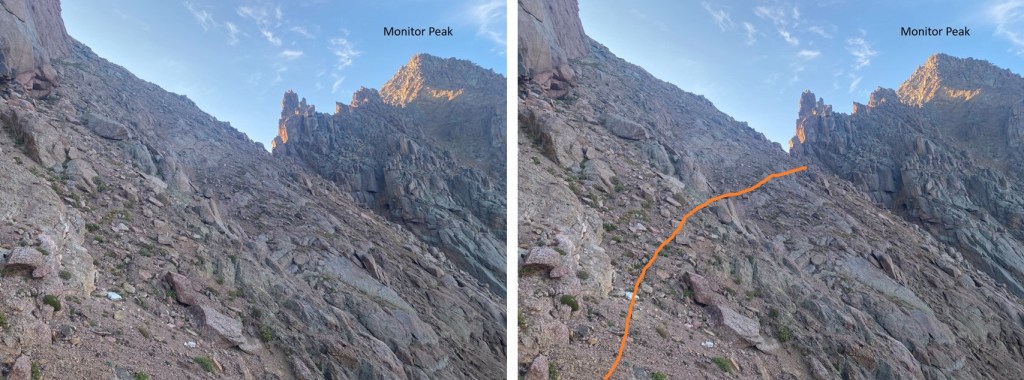
Ok, now to find that gully. Luckily, from here there were cairns, and even a bit of a game trail. I followed them south, staying well below the ridge
I rounded the corner, and could clearly see the correct gully. I followed this gully to the ridge
Once on the ridge, I turned right, and followed it to the summit, dipping to the right at the end, but always following a class 2 game trail.
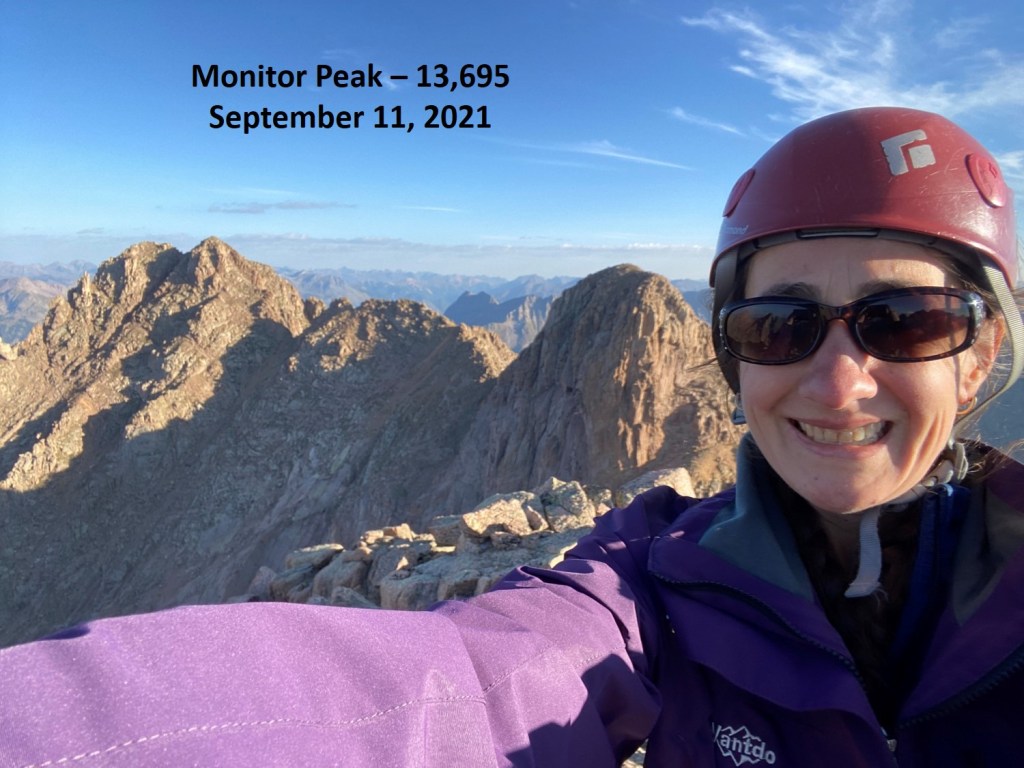
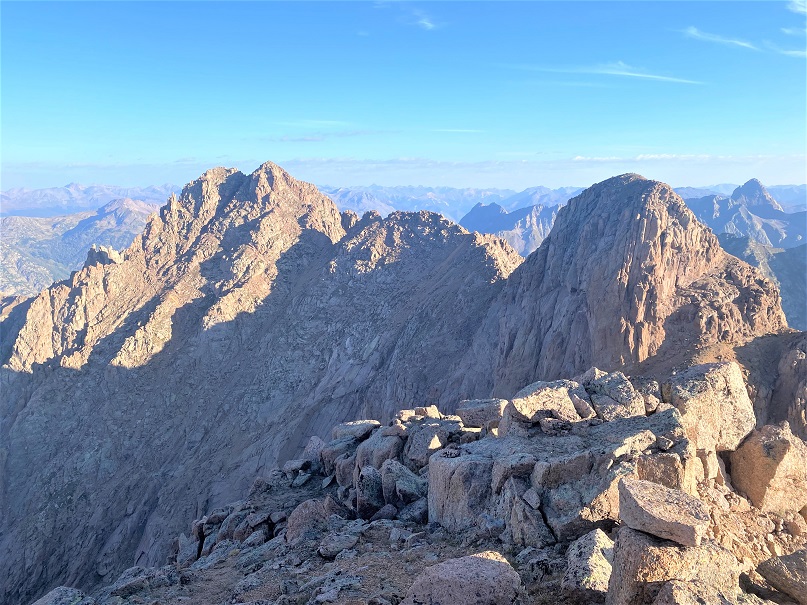
I summited Monitor Peak at 8am.
Monitor Peak:
There was a summit register in need of new paper (but with 2 pencils), and great views!
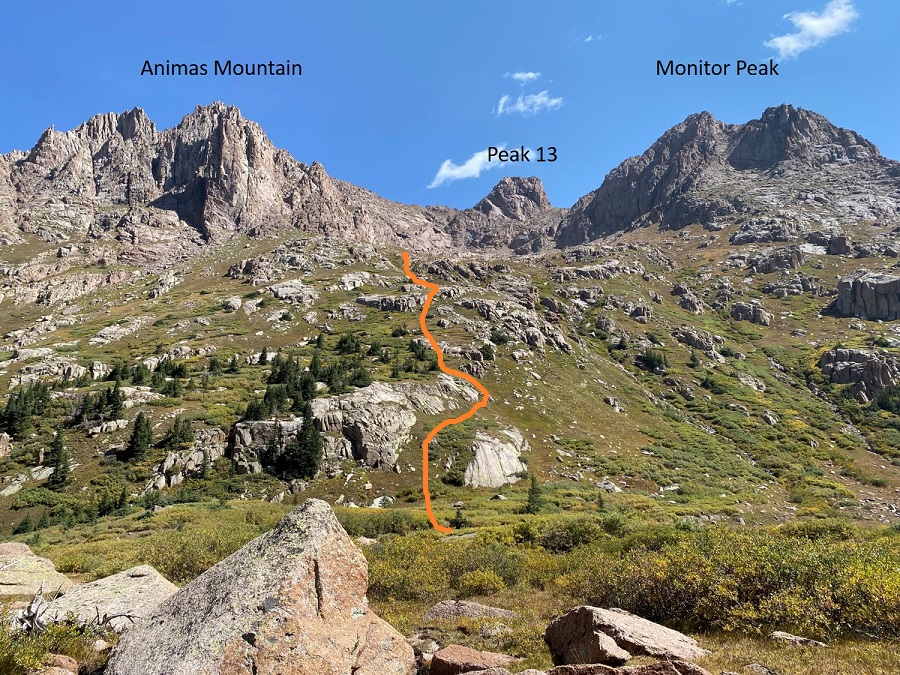
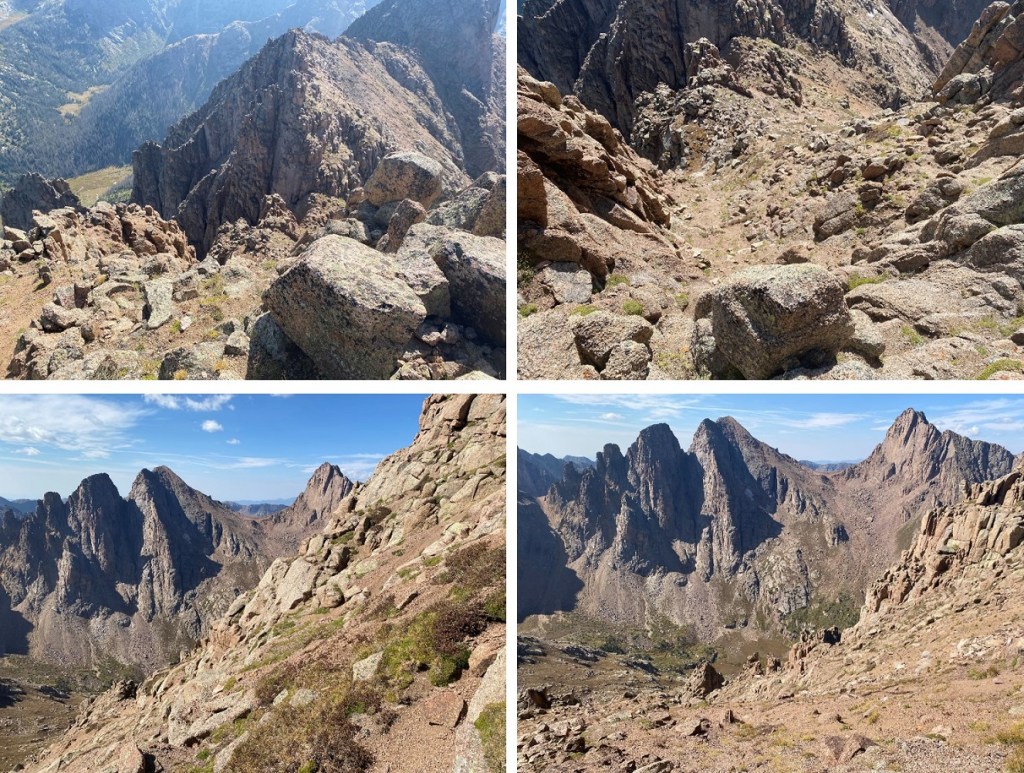
Next on the agenda was Peak 13. Spoiler alert: I didn’t summit Peak 13. When I got to the area where I was supposed to “just go straight up” I found that while it was class 4, there were no hand/foot holds, and everything I tried to grasp turned to kitty litter in my hands. Since I hike solo, I have a rule not to upclimb anything I don’t think I can downclimb (if I don’t have rope), and while I could probably have upclimbed this, I wouldn’t have been able to downclimb it, and a fall would be deadly (lots of exposure). In any event, I’ll describe the process of getting there. Now is also a good time to get a visual of how I climbed Animas Mountain as well. These were my routes:
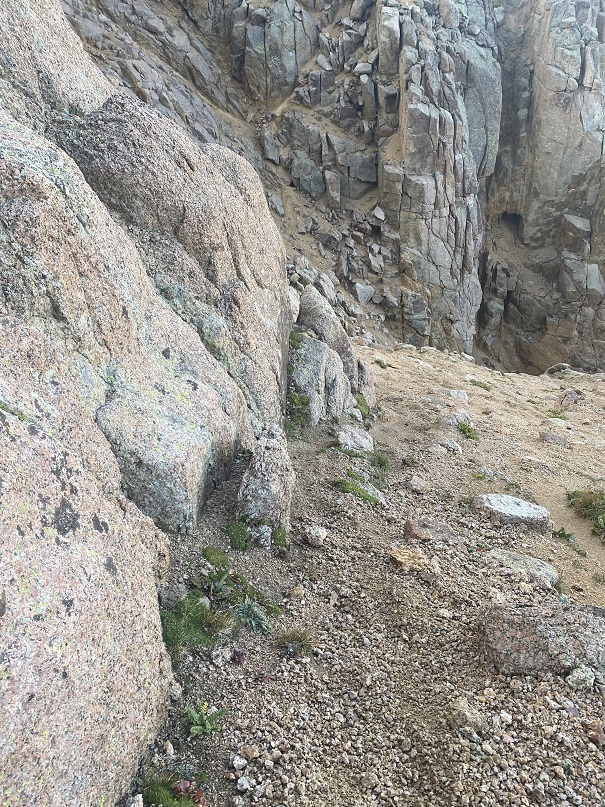
From the summit of Monitor Peak, I headed back to the Monitor/13 saddle, retracing my steps
Once at the saddle I followed it northeast, to an obvious stopping point. Here I turned to head up, and, like I said before, I deemed it unsafe, so I turned around, tried several other ‘ledges’, and in the end decided to just head back to the upper basin and summit Animas from the gully. I was very happy with this choice. Here are pictures of the two possible routes up to Peak 13 I decided not to take
Instead, I descended back into the upper basin by way of the upper ramp.
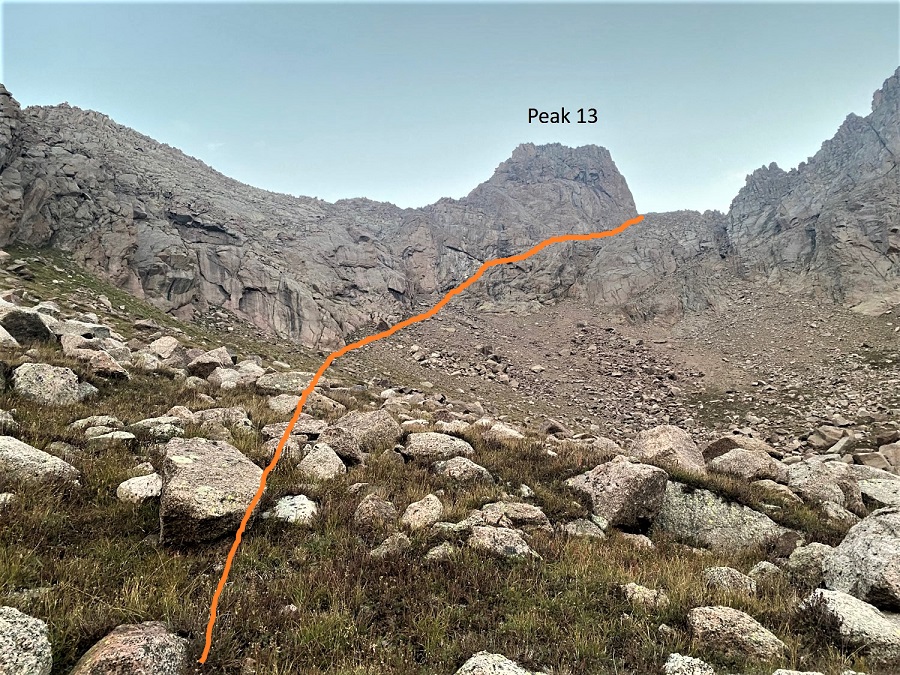
I followed the contour of the mountain all the way down to 12860’, and the only obvious gully that ‘went’
I then followed this gully north. There are lots of divergences here, but if you keep heading north, they all seem to ‘go’. I just kept the spires to my left and followed the obvious contour of the gully. I as able to keep this all class 3. If you’re in class 4 territory, back up and look for an easier route.
When I made it to 13580’ I headed east, towards the sandy saddle between Monitor and 13500’
I didn’t go all the way to the saddle however, because I saw cairns leading me up the ridge (class 2).
Here’s the overall route to the summit, all well cairned. The circled area is a brief class 4 chimney section (less than 10 feet or so) that is the only obvious way out of the gully. When you make it above the chimney you’re about 20 vertical feet from the summit on easy to navigate ledges.
To get up the chimney I jammed my arms into either side and used my forearms to lift myself up. On the way down, I faced the rock and put both hands/arms in the left crack to lower myself down. You may be asking yourself why I was fine climbing this chimney and not the class 4 section on Peak 13? It’s because the rock here was firm, and I didn’t have to worry about it crumbling in my hands as I was climbing. When I made it to the top of the chimney I turned right and followed the cairns to the summit.
I summited Animas Mountain at 10:30am
Animas Mountain:
There was a trail register in dire need of paper. With no place to sign I put it back and turned and descended the same way I ascended, back to the saddle, and then down the gully. Note, I did not descend the scree filled gully, but instead the rocky one I ascended, this time keeping the rock spires to my right.
Once in the upper basin I headed southwest on the slope, back to my campsite. It helped to stay to the right of the waterfall area, on the tundra.
I made it back to my campsite in the Ruby Basin at 11:40am. I ate lunch, packed up my gear, thanked the marmots for not messing with it this time, and headed back through the willows towards Ruby Lake. It was a really hot day. I stopped at the lake to dip my bandana in the water and cool off my face. The water felt so good! As I was skirting the lake and looking at the clear water I couldn’t help but want to jump in. I did some mental calculations, and before I could stop myself I set all my stuff aside and went into the lake. I swam around for a few minutes, hopped back out, dried off in the sun (it only took about 30 seconds in the dry Colorado heat) dressed and was back on the trail within 10 minutes.
I made it to the Chicago Basin cutoff and decided to once again spend the night. There was a woman in a hammock waiting for her husband, who was running the Chicago Basin 14ers (woot!). I couldn’t help thinking to myself how I wish I could find a partner who would support me like that (or join me?). I set up my gear, talked with a man who’d lost his water filter and had a busted eyebrow (he got it crossing the creek?). I told him where to find the train, and campsites, and made it an early night (again). I woke up before my alarm, and was on the trail at 4am, out and back at the Purgatory trailhead at 8am. Side note: hiking in the Purgatory Flats area on the way out was by far the coldest part of my weekend. By this time I’d already taken off my coat and gloves, but had to put them back on because the temperatures were so cold. I’m thinking this isn’t the best place to camp for the night.
CalTopo tells me my stats were 45.07 miles with 12724’ of elevation gain.
So as not to reinvent the wheel here, if you’re considering this hike from Purgatory, please see my detailed Purgatory Approach Trip report from earlier this month.
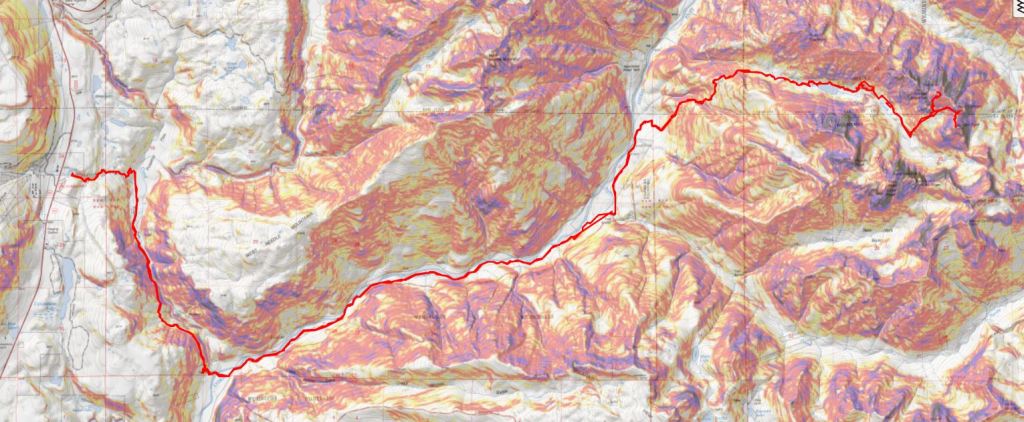
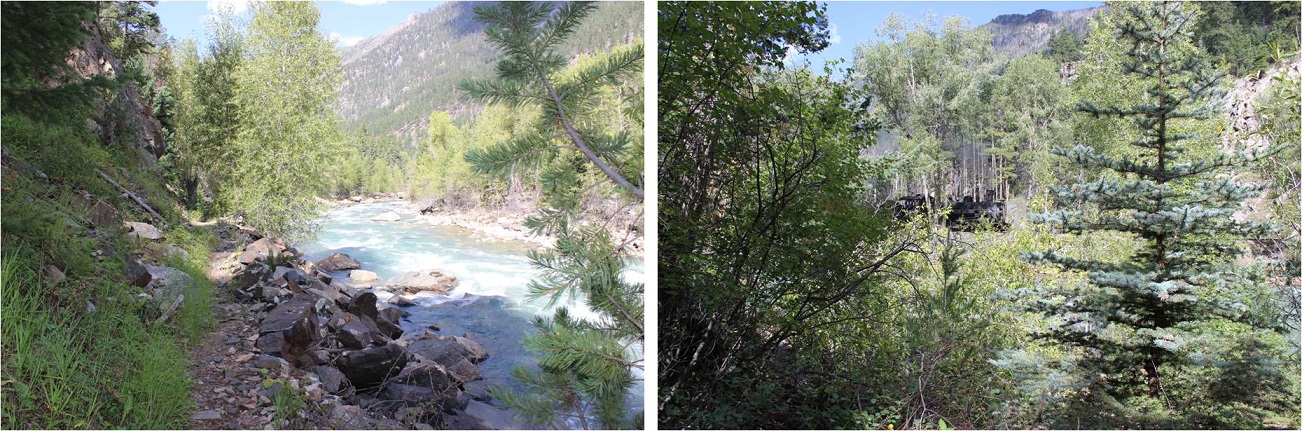
I started this day at the Purgatory Creek Trailhead around 3pm, but will start this report from the Needleton Train Stop. Oh, and it rained the entire first day. The. Entire. Day. I had on rain gear, but was soaked, and my camera lens fogged up. I was so glad to have on new hiking shoes that were still waterproof. From the Needleton Train stop, I followed the Animas River on somewhat of a trail. This trail starts out going through private property (it’s private all the way to Pigeon Creek), so please stay on trail.
I crossed Pigeon Creek, and continued paralleling the Animas River, doing my best to follow the cairns.
After hiking a little over a mile from Needleton I ascended Water Tank Hill, and called it a day. (For those of you wondering, Water Tank Hill is at 8250’ of elevation, and the trek up isn’t that bad, just under 200’ of elevation gain). It wasn’t raining anymore, so I set up my bivy. Note: I don’t advise this. Since I was solo and only had a bivy it was doable, but I wouldn’t set up a tent here, or camp with a bunch of people, as there isn’t much room. Also, it smells like goats. There are campsites just a bit further up the trail.
I did my best to air out my wet gear, jotted some notes down in my journal, ate some popcorn (diner!) and got to bed as the sun went down. With all the clouds in the sky it was a beautiful sunset, but my camera was still fogged up, so no pictures.
2 hours later I heard a big clap of thunder, and just like in the movies, it started pouring rain. Great. All that gear that was drying out was no longer drying out. I stuffed my jacket and pants inside my bivy, and covered myself up as the rain turned to snow (and back to rain again). As water droplets slowly dripped on my face, I thought to myself: it’s going to be a long night.
I set my alarm for just before sunrise, but I didn’t need it. I woke up, watched the bats flitter back and forth, catching their breakfast, and within 7 minutes had gathered my gear and was on my way again, still following the Animas River north.
I crossed Ruby Creek
Passed some primitive campsites, and then crossed Noname Creek
After hiking for 2.25 miles from Water Tank Hill I made it to the junction with the Noname Trail. This is actually where the trail became clearer and easier to follow. The junction is hidden by some trees. Look for the two cairns, outlining a trail, to the right. At the top of this entrance area are several blueberry bushes (but be sure to know your berries: they all grow in the same place, but they’re not all edible).
I followed the cairns east, paralleling Noname Creek as I made my way into the basin.
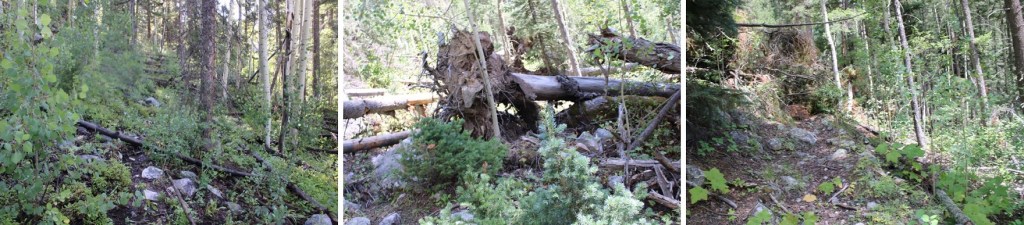
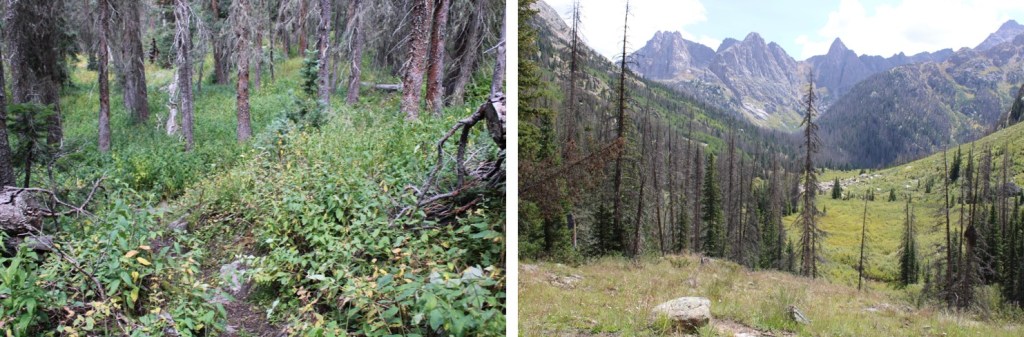
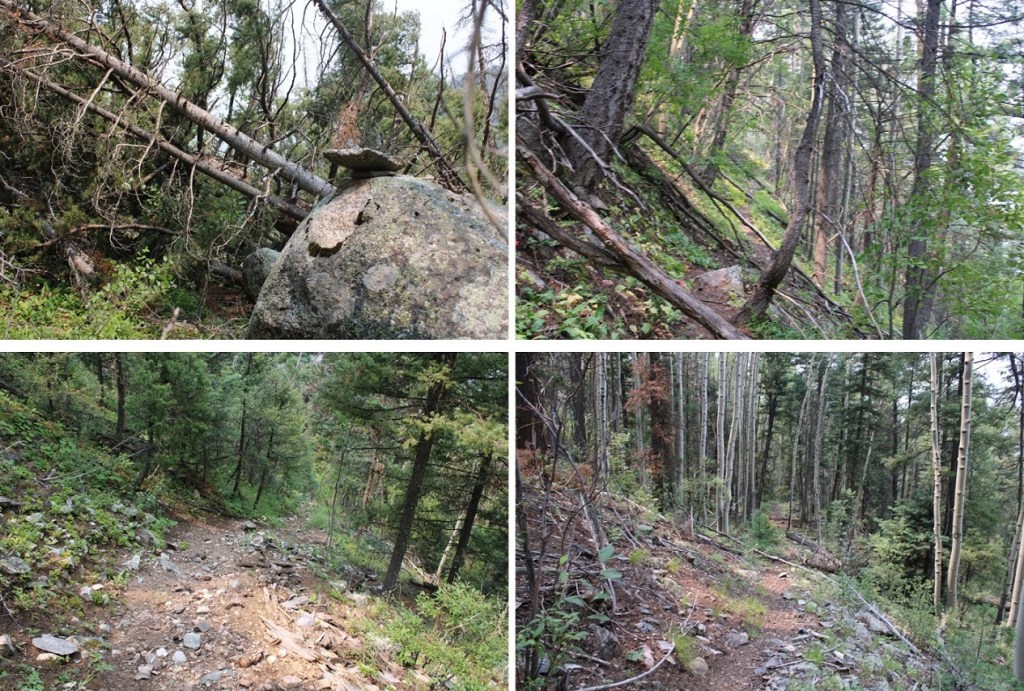
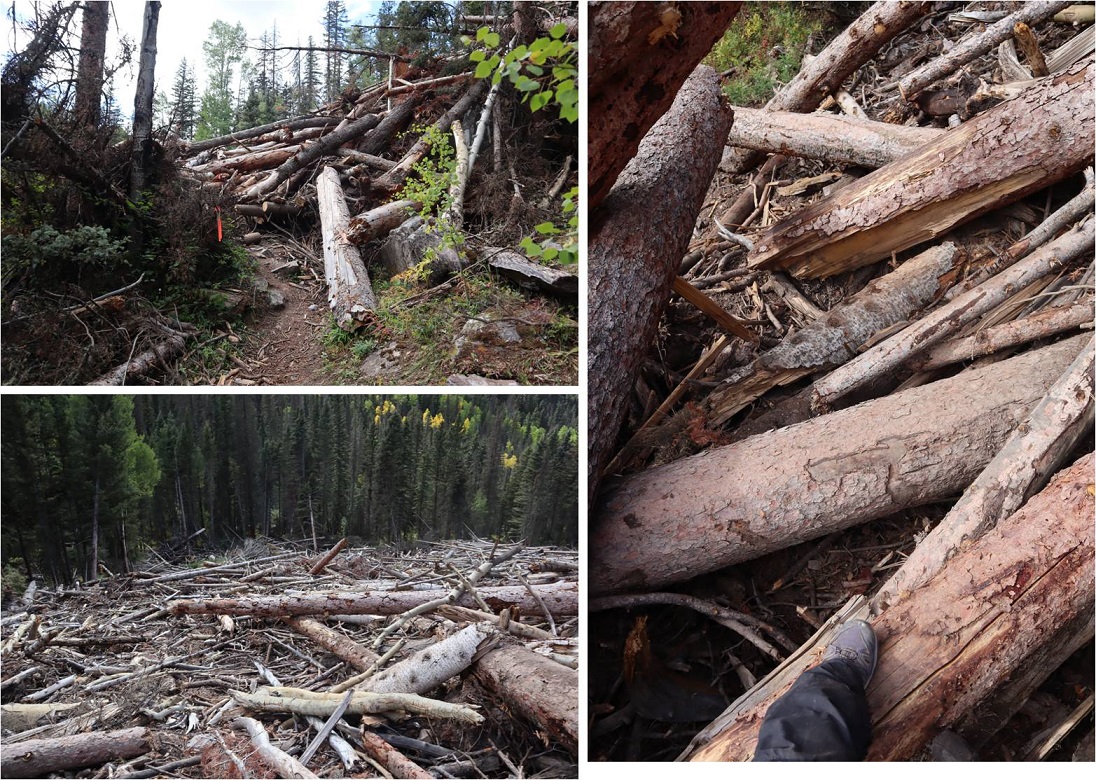
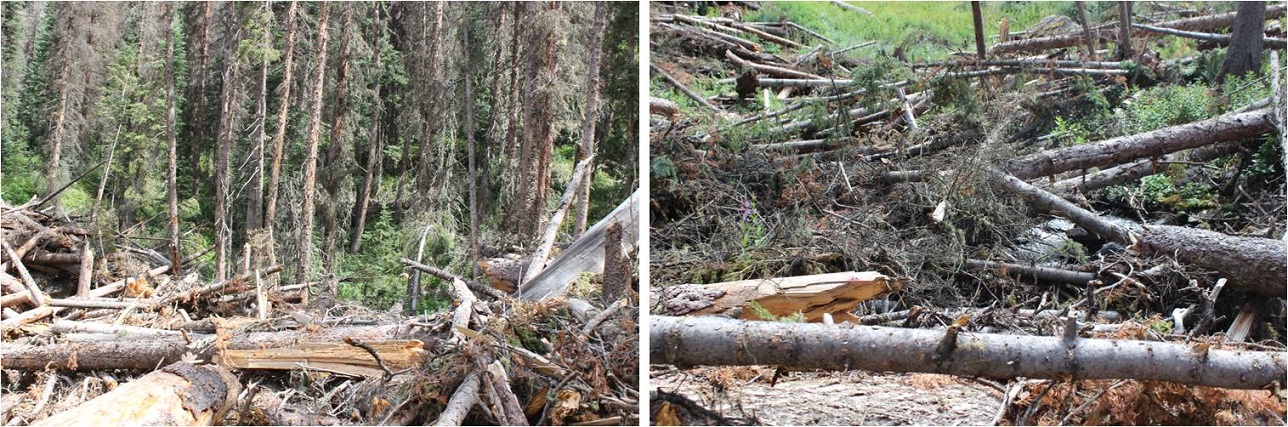
The trail here wasn’t too bad when compared to the past 3 miles. There is a slightly defined trail into the basin. The only difficult part here are all the fallen trees. Many don’t yet have a workaround, and they’re annoying. You can still see a pretty good trail though.
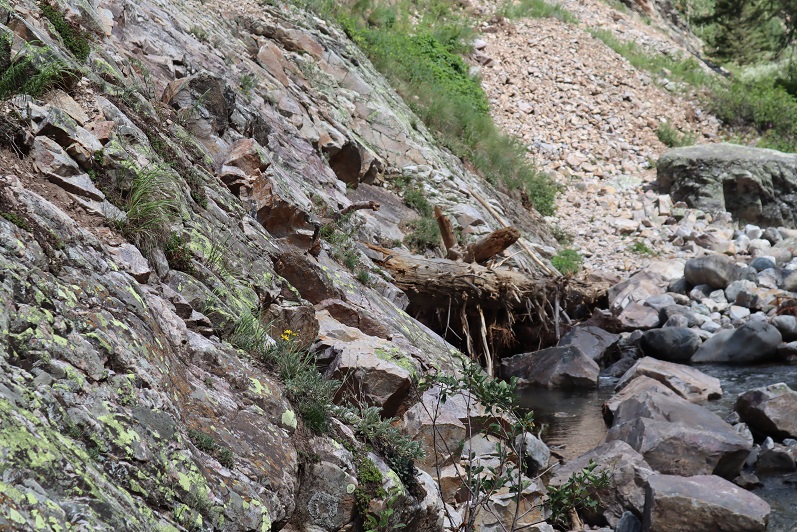
About halfway to the basin on this trail I came across the avalanche debris from a few years ago. I’m sad to say, there still isn’t much of a trail through this stretch. However, if you find a game trail, follow it! The trail parallels Noname Creek, and to follow this ‘trail’ properly you’ll need to stay further north than would seem intuitive of the creek (don’t cross the creek, always stay on its north side). This is what the avy debris looks like: it’s overgrown, so look for game trails. Note: watch your step, as the grass/flowers here are taller than the debris and you could easily find your ankle stuck between the logs, but there is a defined trail of tromped down grasses if you can find where it begins.
I came across a mudslide runout that hadn’t been here last time, finally found a solid game trail, and followed it to Jagged cabin
At Jagged cabin I was halfway through the basin, and decided to take a break. I ate lunch and aired out my gear from the rain/snow the night before. Within 20 minutes, it was all dry and I was ready to go again.
My 20 minute break over, I continued following the basin east. Willows are involved here, but the trail is much easier to follow.
I crossed a second, new mudslide runout area, placed some cairns, and continued along the trail
There’s a nice campsite right along the trail
I entered more brush, and found a junction. I went left at the junction and followed the trail northeast up the mountainside.
There’s more than one trail here, but they all lead to the upper basin. If you’re on a game trail headed north, you’re in the right area.
Just before reaching the upper basin there are willows. These are easy to navigate as far as willows go.
Once in the upper basin I messed up a bit, as you can probably see by my GPX track at the bottom of this post. I didn’t go with my gut instinct, and instead went with a GPX file I had. I didn’t realize until later it was a hand drawn GPX file. (Side note, it should be REQUIRED for you to post you hand drew the file if you’re going to make it available for download: I was smart enough to turn around, but not everyone would have made the same choice). In any event, here’s the path you should take to Lake 12,522, both routes work and stay at class 2:
If you have a GPX file that says to go further around the rock outcroppings, know it’s drawn in (although, to be fair, there is a way to go from the Jagged Mountain route, but that’s now what happened here). I had more than one GPX file that said to follow the outcropping and then ascend to the north, but when I attempted it, I was wearing a full pack and it was more than class 4: this should be a class 2 hike, which leads me to believe someone hand copied someone else’s hand copy, which isn’t cool (that’s the only reason I’m addressing it here; because I had more than one similar file. Go with your gut instinct and follow the obvious rock gully… you’ll even come across some cairns).
OK, enough on that rant. Here are some close-up pictures of the route to the lake at 12522’
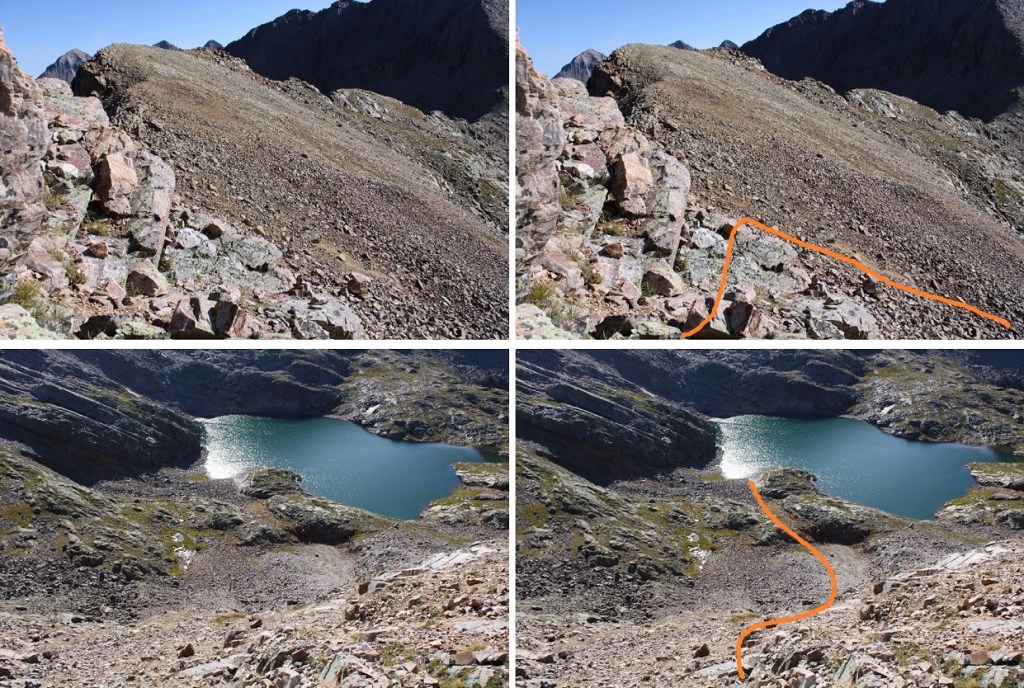
You can’t see it in this picture, but the lake is to the lower right. To get there, I skirted the rocks high, just below the strip of tundra, and made my way to a gully runout below Peak 5, following that to the lake.
This lake has several spots to camp, but most of the shoreline is solid rock slabs that drop off into the water. It would be difficult to walk the perimeter of this lake. I set up camp on the north side. The next few hours were spent jotting down notes (I was mad I’d wasted over an hour of time route-finding, and had a lot of venting to do), trying my best to eat something, enjoying the view of Jagged, and listening to the pikas keep tabs on what I was doing, executing a call and response tactic from all across the lake. I once again made it an early night.
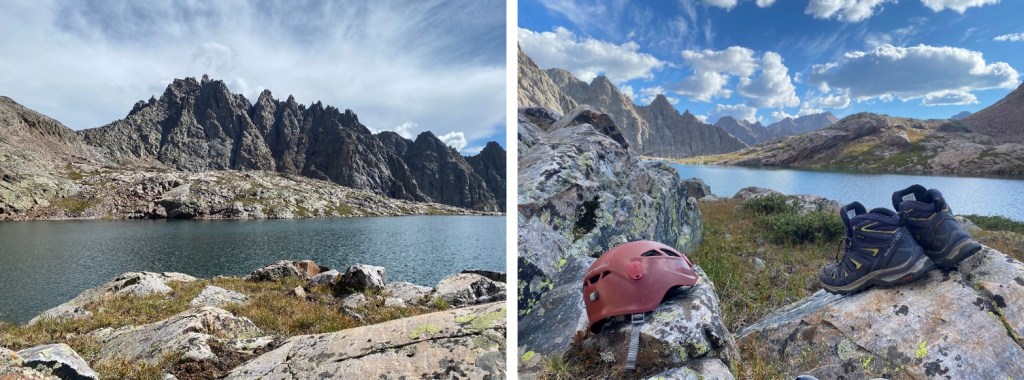
Pikas:
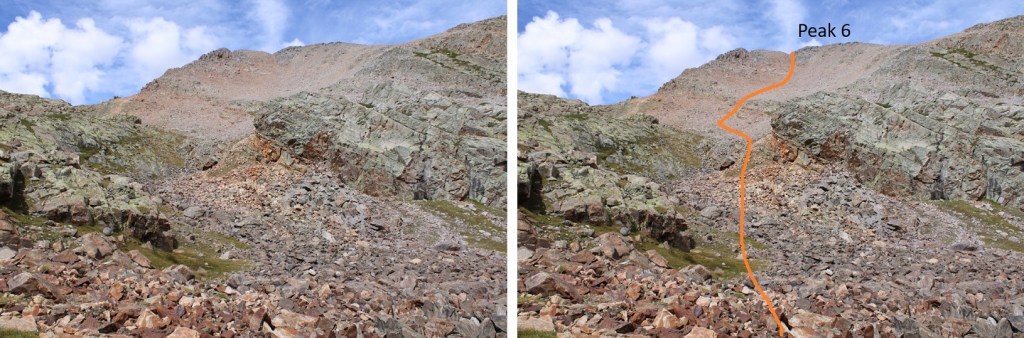
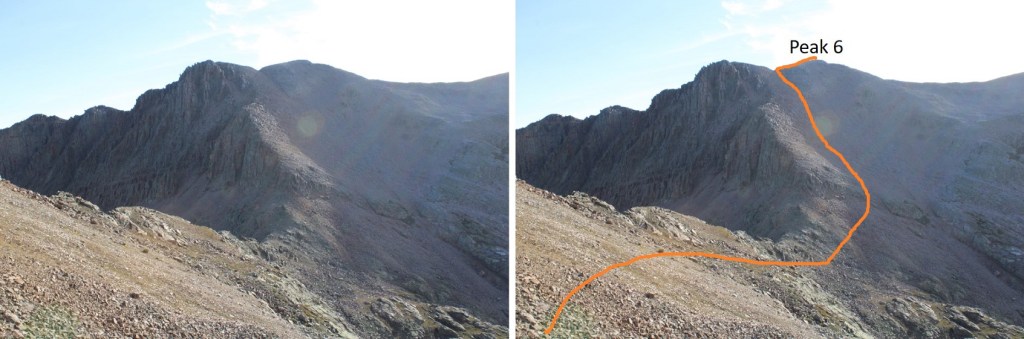
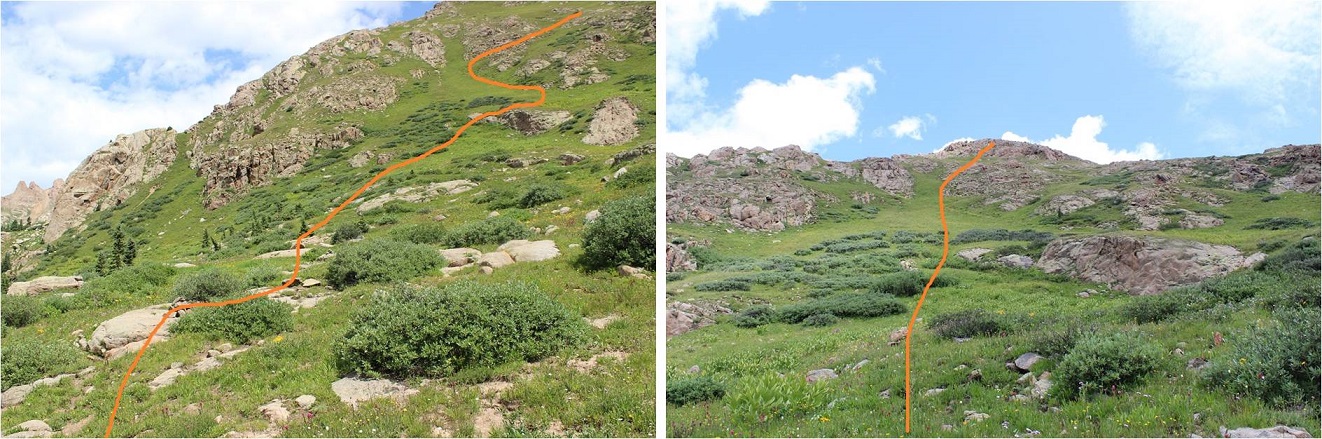
I was up at first light the next morning. To summit Peak 6, I headed northeast from my campsite, following the scree. Here’s an overall view of my route
And some step by step pictures. There was scree here, and the rocks were steep, but I felt the entire route was class 2. I stayed close to the rock outcropping in the upper gully, and I saw a swift moving pine marten near the upper ridge.
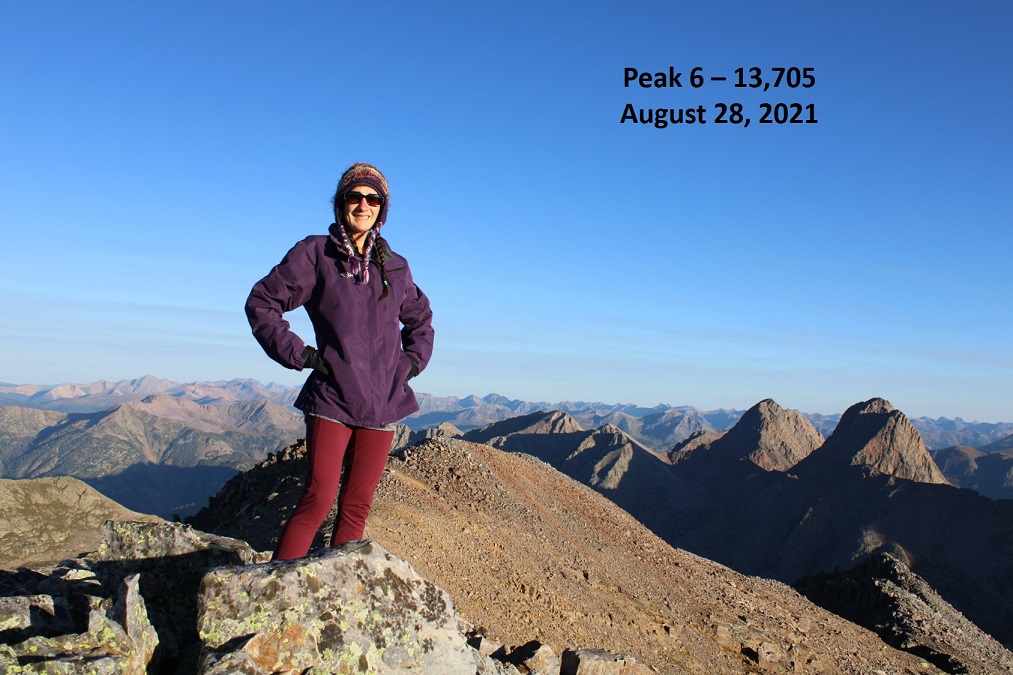
Once on the ridge I turned right and easily walked to the summit of Peak 6
I summited Peak 6 at 7:15am (and had cell service!)
Peak 6:
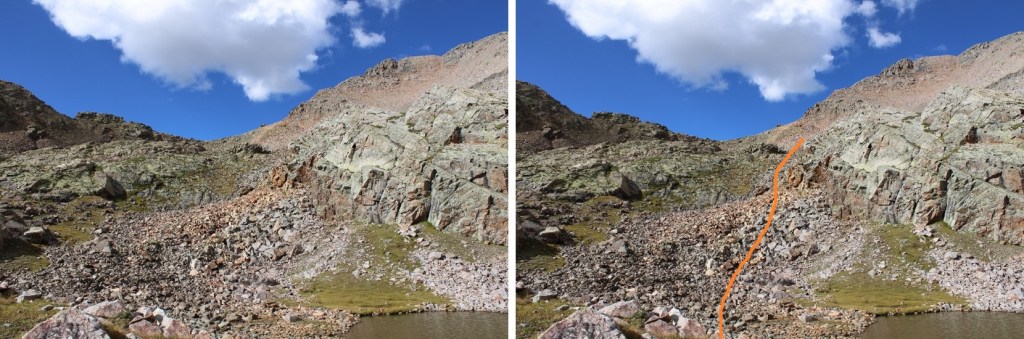
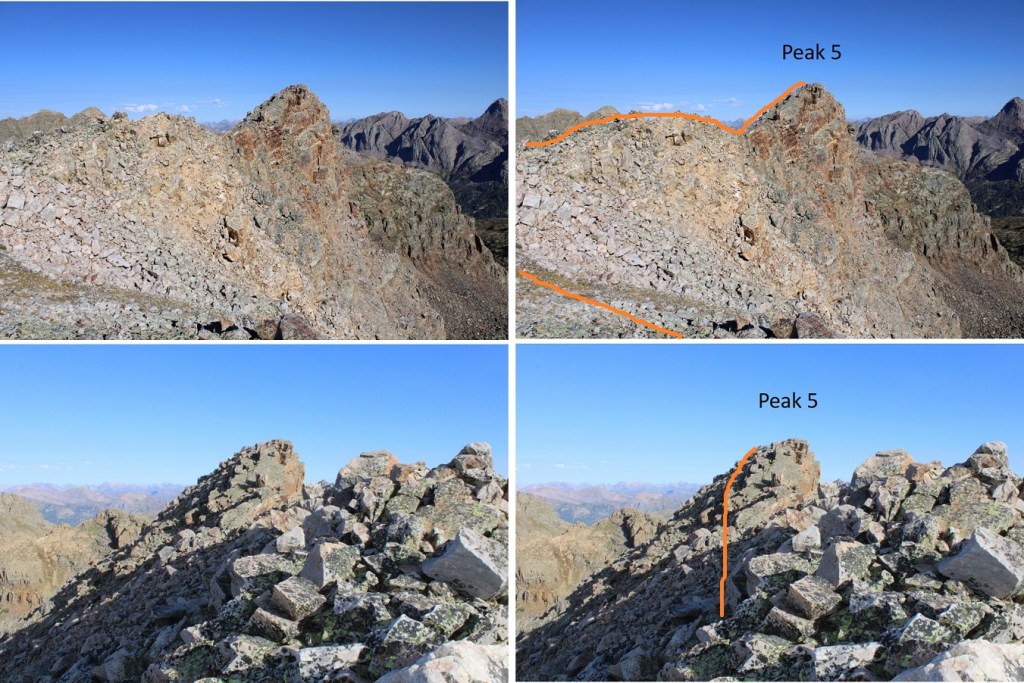
I intended to summit Peak 5 today as well, but was having trouble… seeing it? For reference, here’s Peak 5 as seen from Peak 6, along with my route. Peak 5 is circled in red
The ridge from Peak 6 to Peak 5 doesn’t ‘go’, so I descended down Peak 6, staying as high as I could on the scree, making it to just below the Peak 5/6 saddle. From there, I looked for black band in the rock, skirted under that, then aimed for a grassy patch, ascended the grassy patch, and aimed for the saddle. There is no need to stick to the ridge here
Once on the small saddle I could see Peak 5, and was a little apprehensive: that looked more than class 3. I dropped my gear, put on my helmet, and made my way over, only to find it’s an easy class 2 hike from the west side. I re-gathered my gear, and made my way over to the summit.
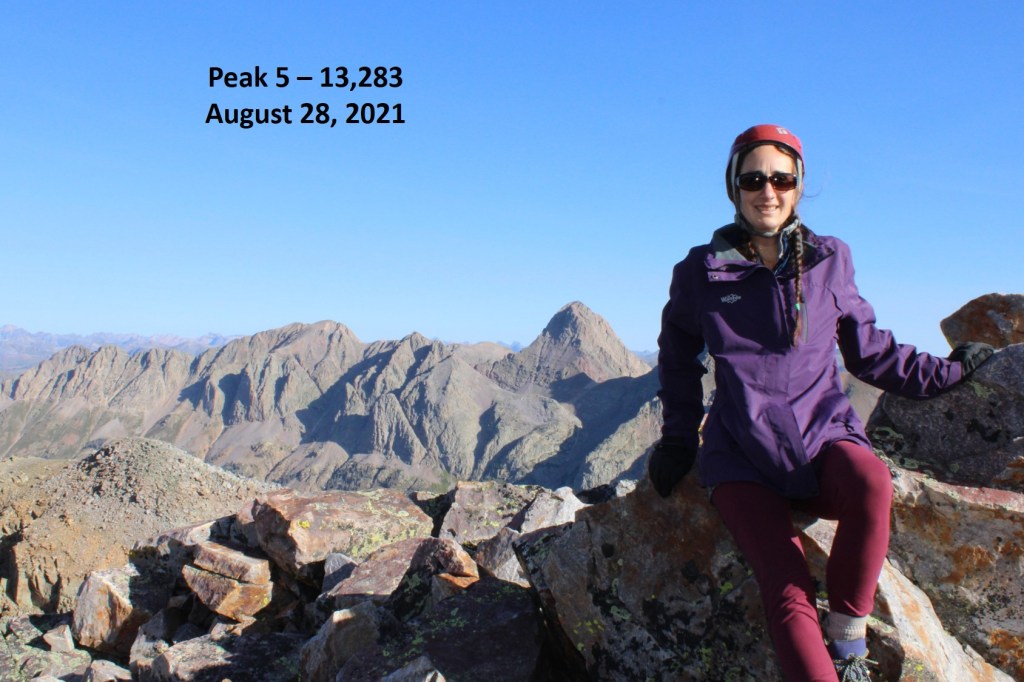
I summited Peak 5 at 8:45am. Unlike with Peak 6, I did not have cell reception here.
Peak 5:
I made my way back to the ridge, where I had a good view of my route down from Peak 6 to the ridge on Peak 5
I looked for the scree gully, and followed it back down to my campsite.
It would be hard to cliff out here, but you should get a good idea of your intended route from below before you start out for your peaks. Here’s what my route looked like from the lake, down from Peak 5 (you could also take this route in reverse, ascending this way)
I retrieved my gear. It was now 10am (I’d started around 6:30am, so it was less than a 4 hour loop) and made my way out of the lake area and back to the upper basin.
Then followed goat trails through the willows to the lower basin
It took me 2 hours to make it to Jagged Cabin from my camping spot by the lake. It was now noon, so I had a snack and a quick break before heading on through the avalanche area. It was much easier to find game trails on my way back than it had been on my way in.
The trail was easy to follow to the Animas River, and I had an easier time up and over Water Tank Hill than I thought I would have (it’s really not so bad). I arrived at the hill the same time as a train, and watched it for a few minutes fill up. Then it was on my way towards Needleton and the Chicago Basin area cutoff. Along the way, just before Pigeon Creek, I saw a small bit of bear scat that hadn’t been there on the way in. I know there’s a mama bear (and sometimes cub) that frequents this area, and wondered if I’d get to see her today? (I didn’t)
There was a family staying at one of the houses at the Needleton Train Stop. They had a fire going, a generator, and were pulling water from the river. I waved as I passed and continued on towards Needle Creek. When I made it there, I decided to just spend the night. I’ve always wanted to spend the night here, but it hasn’t worked out with my schedule. I was in no real hurry to get home at this point, so I set up camp. I had the whole place to myself the entire night. It’s weird not to have a compelling reason to hurry home; now that I’m an empty nester, I’ll be able to get in more hiking time. Side note: I made the decision not to bring deoderant on this backpacking trip because it was a smellable and added extra weight. Added to that, I was wearing the same clothes the entire trip, so what good would deoderant do anyway? On this third night backpacking, curled up as tight as possible inside my bivy to stay warm in the cold, shivering and not able to get a breath of fresh air from outside the bivy due to the cold weather conditions, I regretted this decision; I could strongly smell myself and it wasn’t ideal. Good news: by the next morning I was nose blind.
Chicago Basin cutoff:
Up early the next morning, I was on the trail by 6am, and made it back to the Purgatory parking area by 10am, making this a 54.06 mile trek with 12383’ of elevation gain.
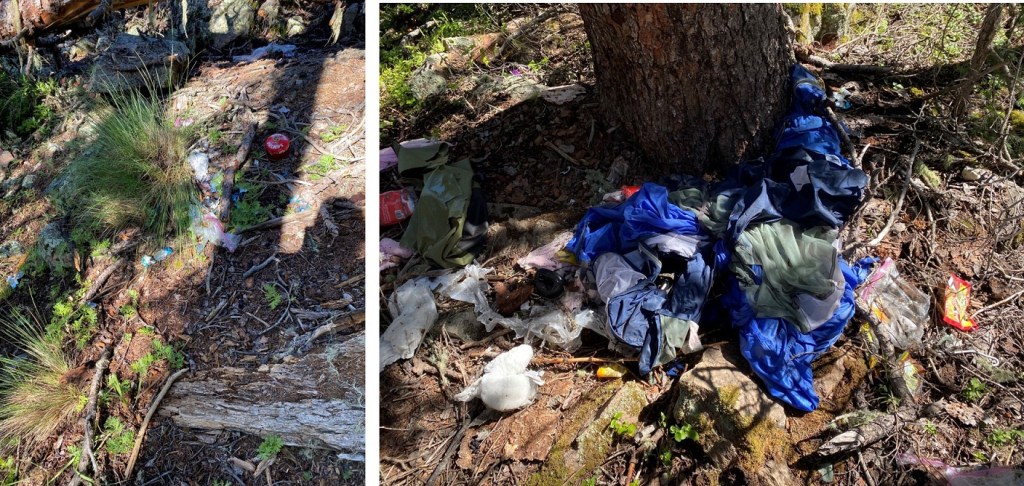
Final side note: Just before getting to Jagged Cabin, on top of a hill but paralleling Noname Creek on an obvious game trail, I found what looked to be a recent cache torn open and destroyed by critters. I’m not sure if someone left this to be used later this summer, if they ‘forgot’ their gear, or if they left it after finding it ruined, but it’s all destroyed and useless at this point. It’s also trash. There’s a full tent that looked like it had been stored properly (torn to pieces now, of course), tons of food wrappers (like, at least 10 different wrappers from Ramen, and lots of snacks: it was a ton of food at some point, but diminished to empty wrappers now), a small radio, a destroyed first aid kit, an Ursack that had been ripped into pieces, etc. I took what I could, but there was a lot to carry out. Maybe if everyone took a little bit we could clean the area up?
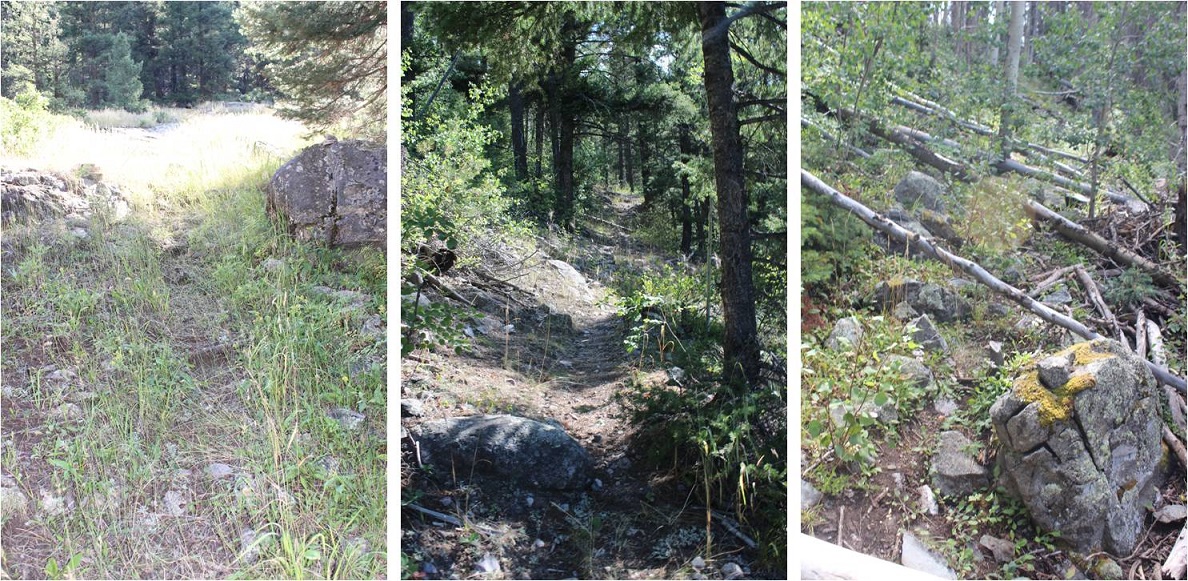
I’ve done this approach several times, but always in the dark. I decided to put together a detailed route description for those looking to head to Ruby Basin, or those interested in what it looks like hiking from Purgatory to the Chicago Basin cutoff. I feel this route has improved over the years, but unfortunately now has more downed trees blocking the trail, making route finding interesting at times.
I arrived at 2pm on a Thursday afternoon and the parking area was full. They’re doing a lot of construction/new housing in the area, and there were a ton of visitors to the lake. I actually had to wait about 15 minutes for someone to leave before acquiring a spot. It might have been the time of day, but come prepared (I’ve never had trouble finding a spot before, but I usually arrive in the middle of the night).
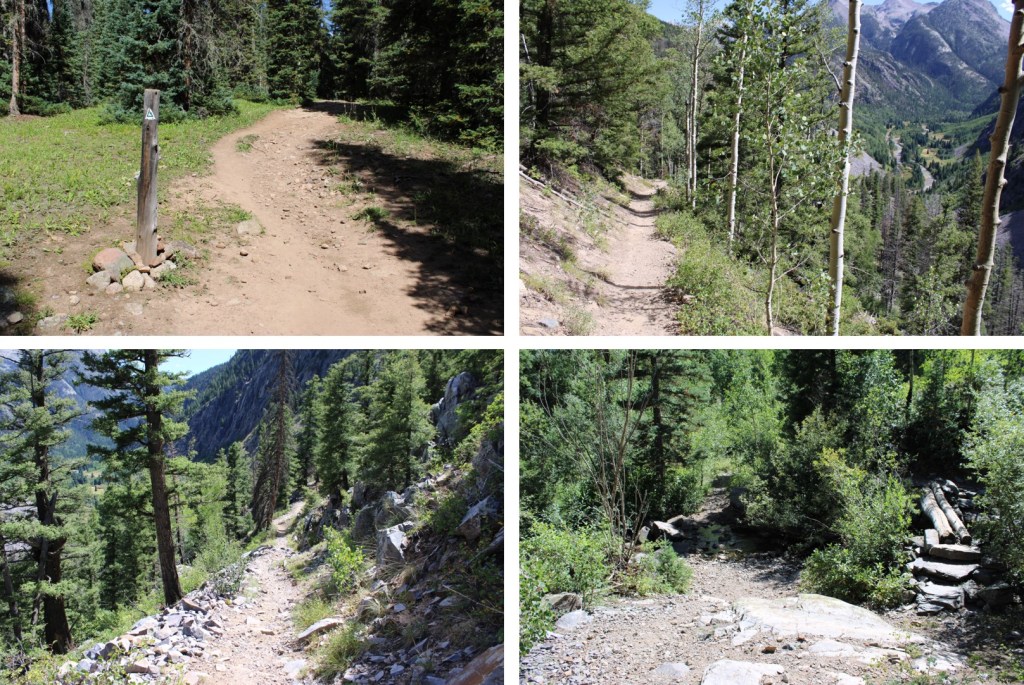
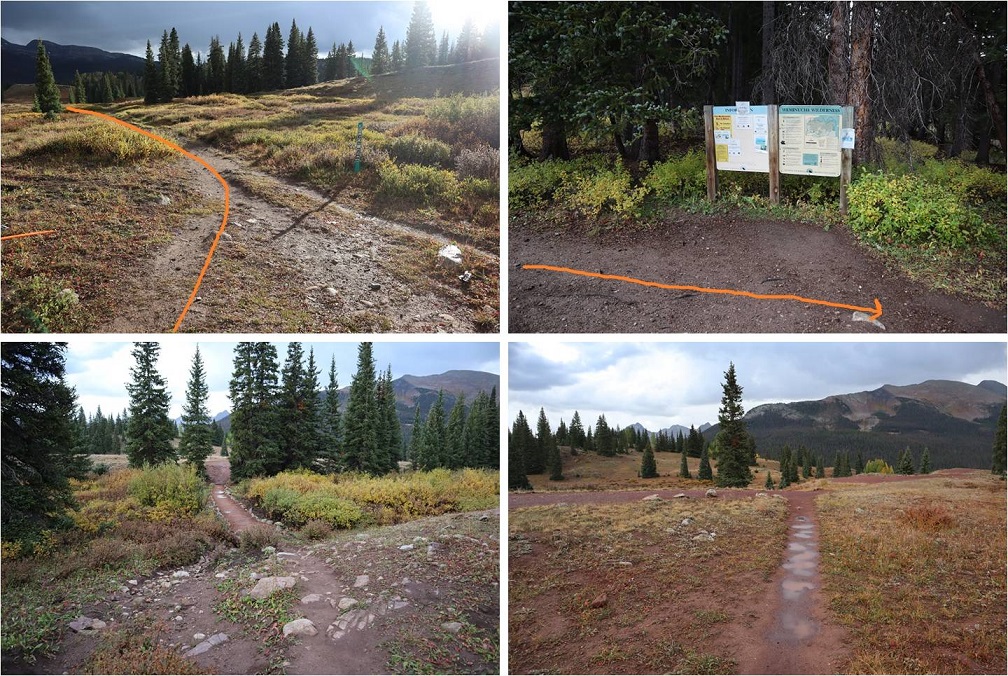
The trailhead is clearly marked, and starts at the west end of the parking area
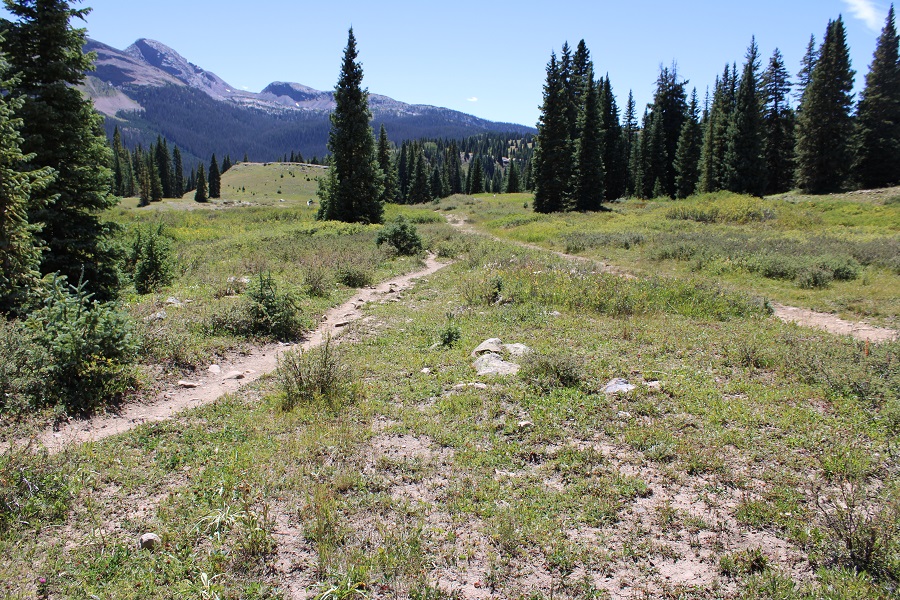
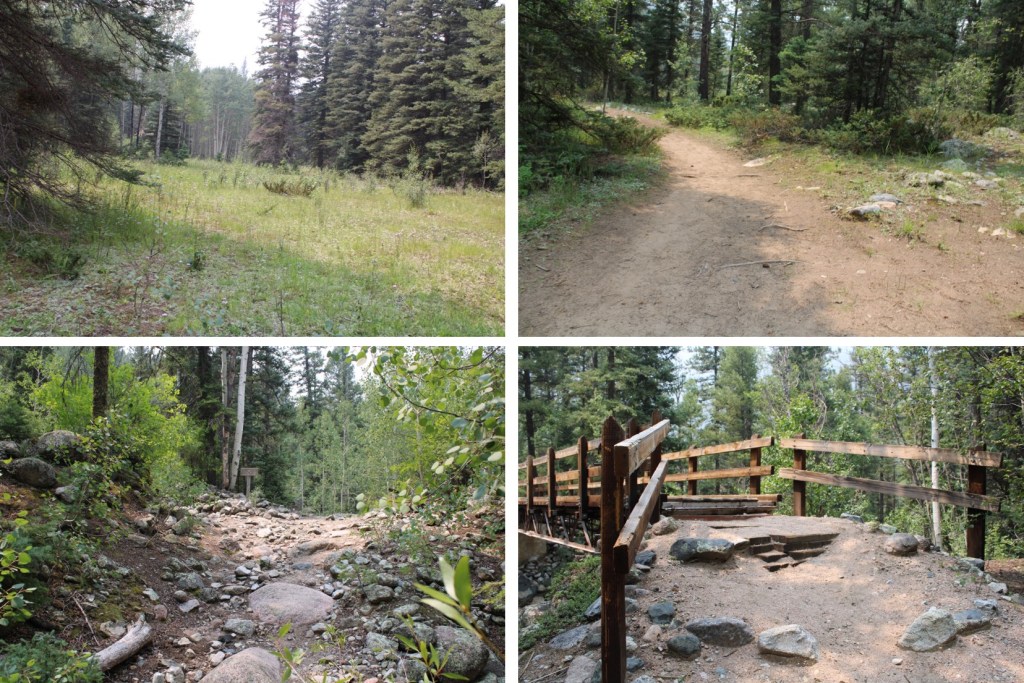
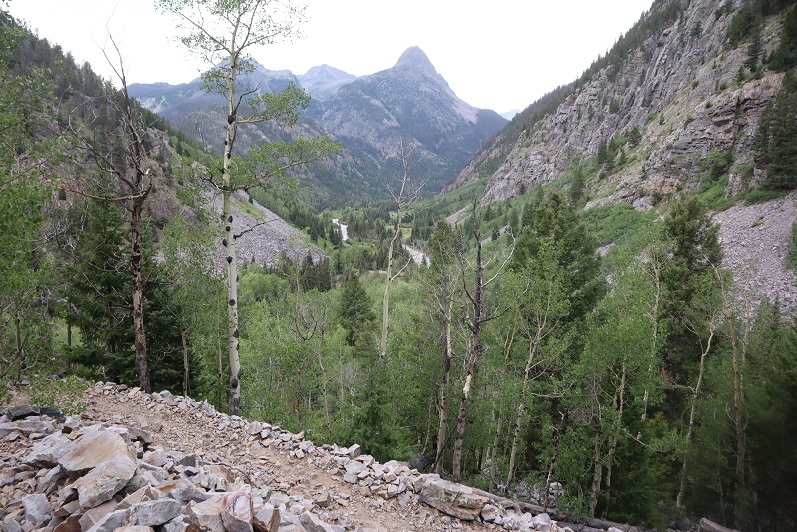
From here, the trail is class 1 as it heads east for 1.3 miles, and then turns right and follows Cascade Creek south to the Animas River. This part of the trail is nice on the way in, as you lose about 1200’ of elevation, but can be frustrating on the way out. I’d recommend hiking this part out in the cooler part of the day (or night). Here are some pictures of the trek down to Cascade Creek
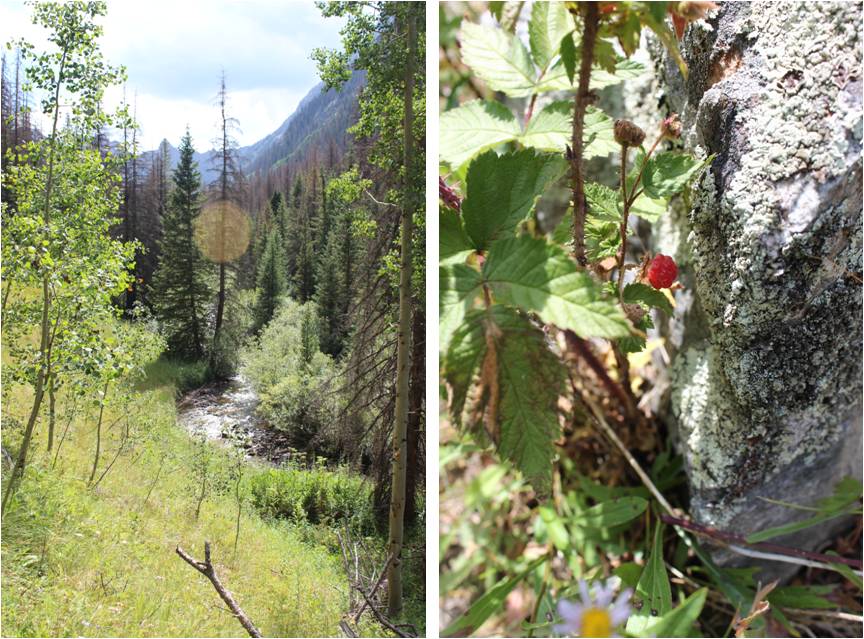
And from the creek to the Animas River. Here the trail will gain and lose elevation multiple times before descending to the river. In the late summer and early fall you’ll find wild blueberries, raspberries, strawberries, and lots of foliage here.
Just before getting to the Animas River the trail descends 400’ to a flat area
Here there are picnic tables and camping spots, and finding the exact trail can be confusing. If you get lost, just head west towards the river
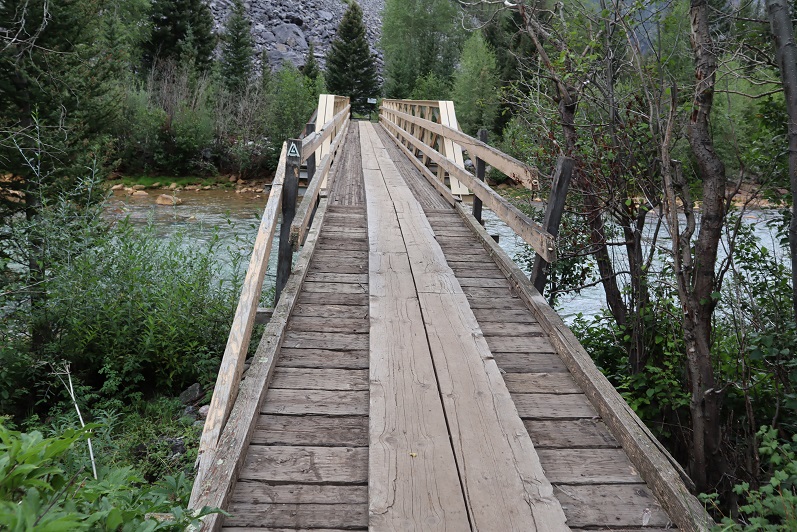
There is a very large and very obvious bridge to cross. This is also a good place to filter water (either on your way in or out). CalTopo told me I hiked 4.62 miles to this point.
As you’re crossing the bridge you can see where Cascade Creek and Animas River meet
As soon as you cross the bridge, you’ll see this sign. Go LEFT here
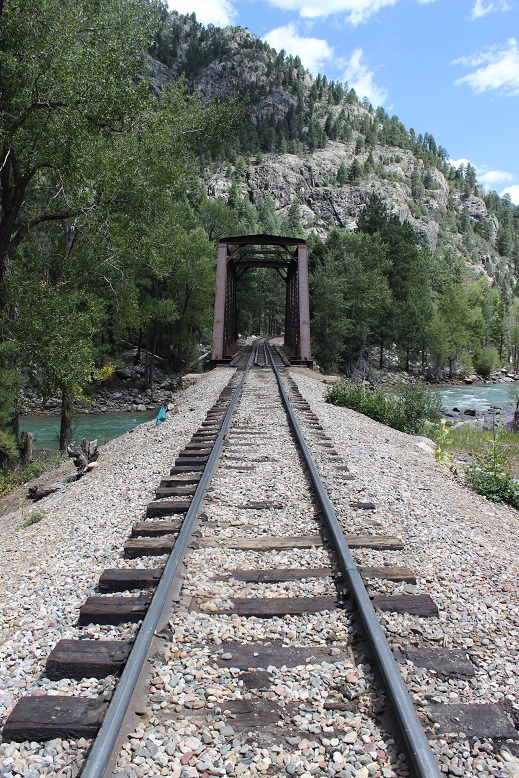
And follow the trail to the railroad tracks
There will be an obvious place to cross the tracks. Funny story: when I was crossing the tracks this time and taking pictures the train blew its whistle from what felt like very close. I’m sure they do that to warn people to get away from the tracks at the crossing (I also heard it on my way back). If you hear the whistle, you have less than a minute to remove yourself from the tracks before the train arrives. Cross the tracks and continue on the class 1 trail as it hugs the Animas River and the Mountainside
From here the trail stays pretty level as it follows the Animas River. If it’s rained recently, you’ll want rain gear, as the foliage covers the trail in many areas and you’ll get very wet. There are many places to camp along this stretch.
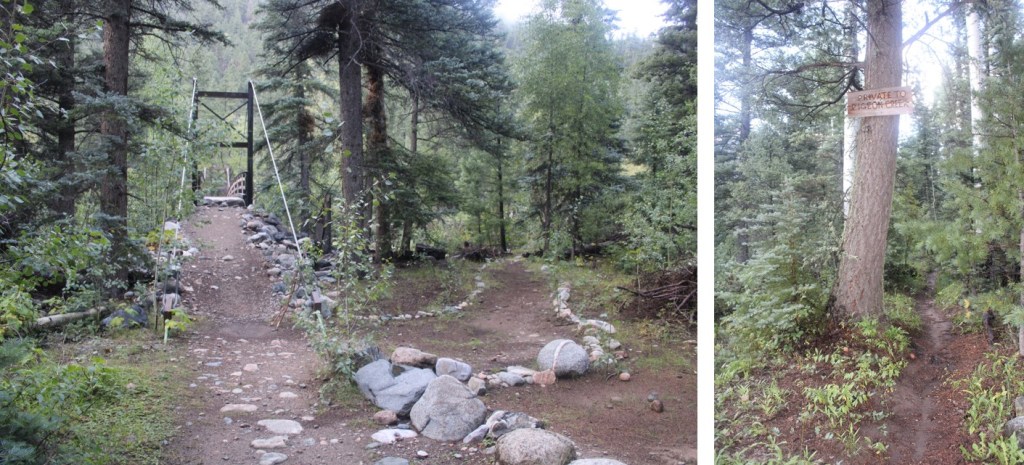
From the Animas River Crossing, it’s just under 6 miles to the cutoff for Chicago Basin (or 10.5 miles total from Purgatory). Here you’ll cross Needle Creek on another sturdy bridge. This is also another good place to filter water.
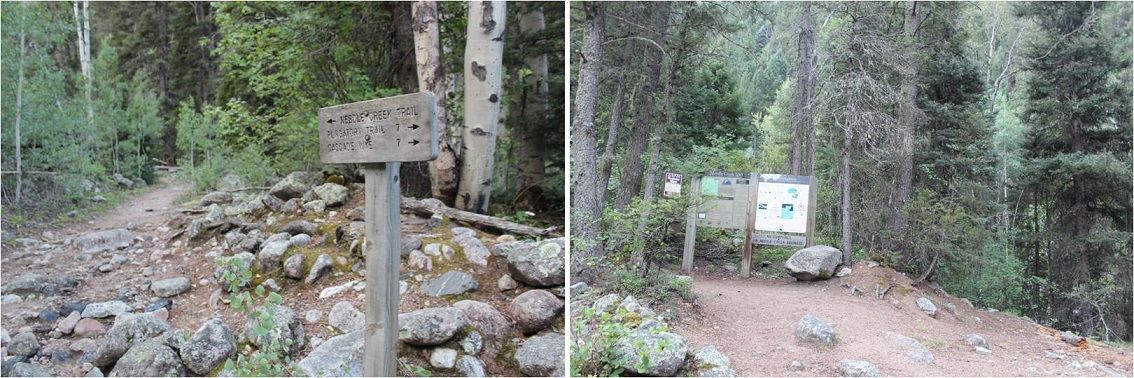
If you’re headed to Chicago Basin, there are obvious signs that will guide you there.
If you’re headed towards Needleton/Ruby Basin (etc.), continue following the trail north for another mile.
There’s new signage here. Please note, this is a public trail through private property. If you need to filter water, cross the bridge, filter, and then come back.
Here’s where the trail gets fun! Don’t cross the bridge. Instead, follow the trail to the right
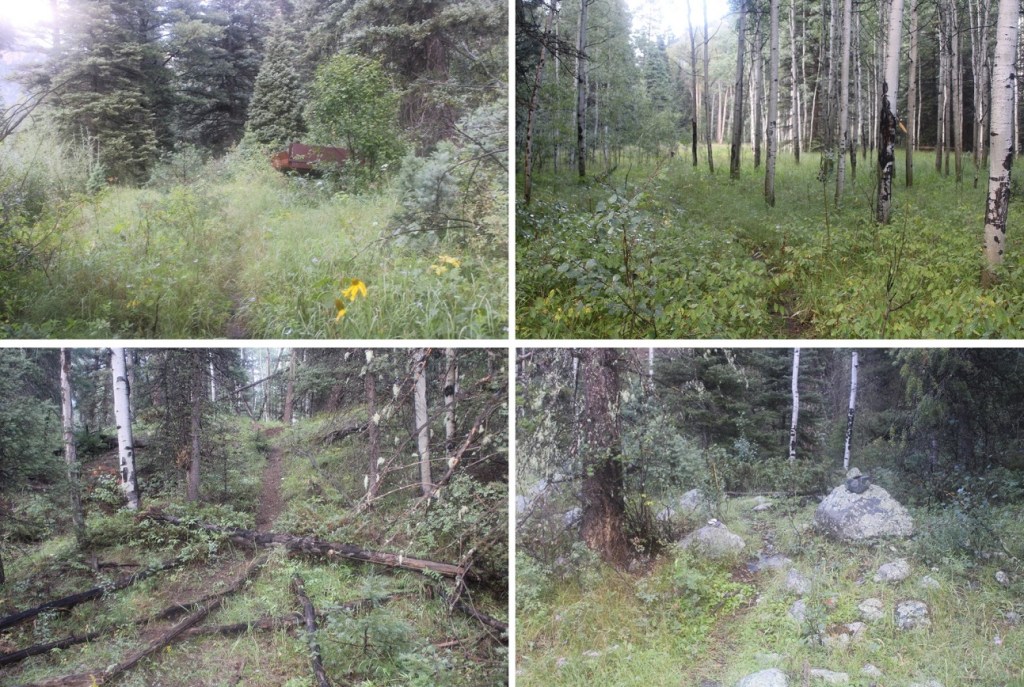
You’ll follow this trail for just under half a mile until you get to an Aspen Grove. This is a good place to spend the night before the elevation gain begins. You’ll have hiked a total of (almost) 12 miles to this point.
Here you’ll turn right, and follow an obvious trail up the hillside
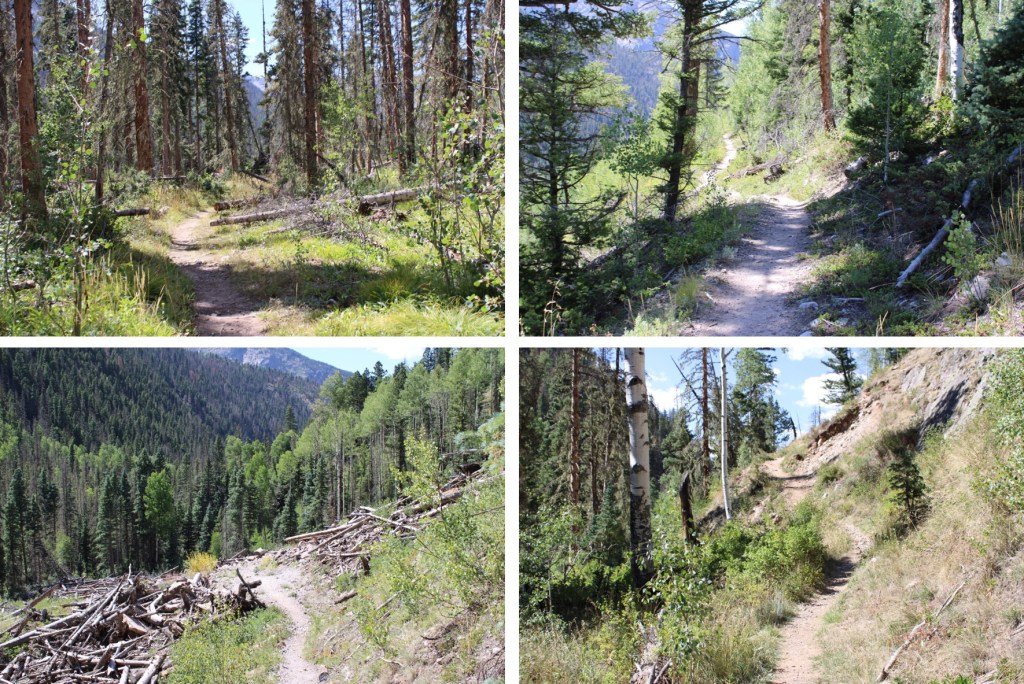
This is where the elevation gain starts and doesn’t quit.
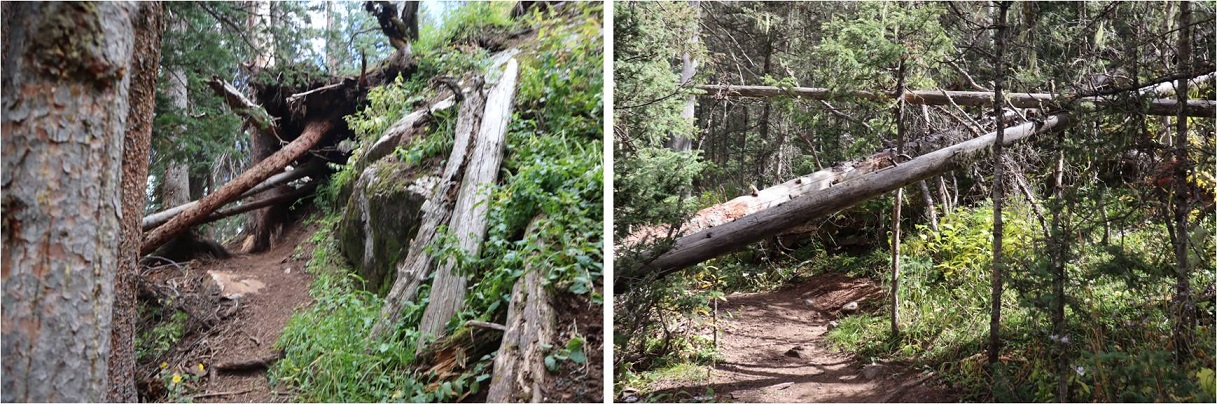
There are a lot of newly downed trees in this area, without an established workaround. Most of the trail is easy to follow, so if there’s a large downed tree in your path (and there will be), just try to be logical about where the trail should go, get around the tree, and you should be able to pick it back up again. This is tons of fun in the dark, and much easier when it’s daylight.
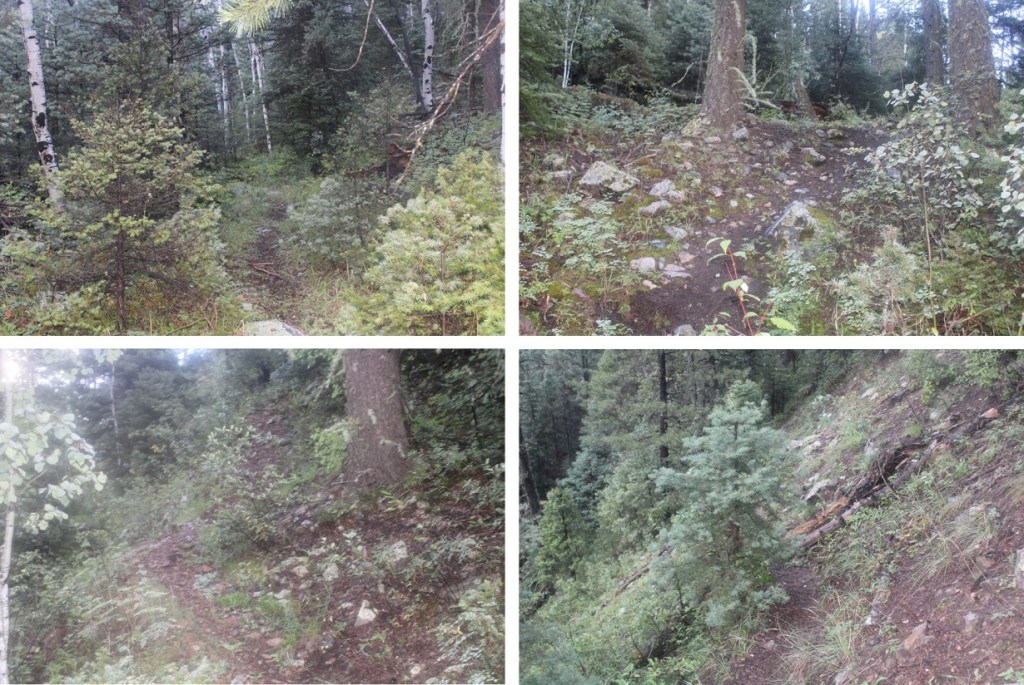
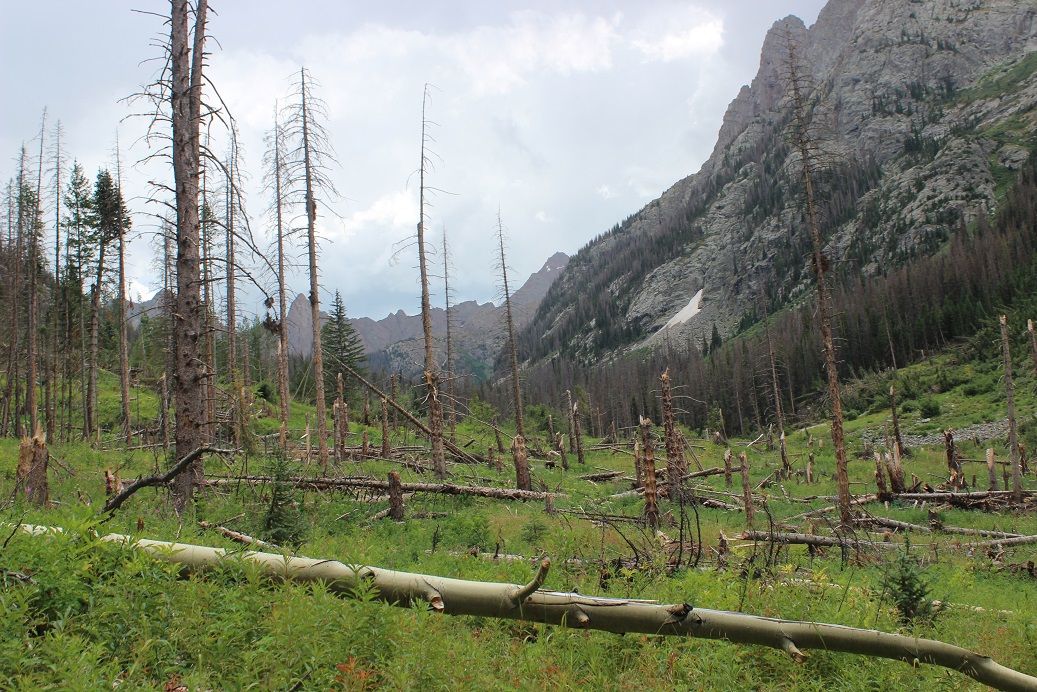
Another fun part: after gaining and gaining and gaining in elevation, at around 10,330’ you’ll LOSE about 200’ of elevation, quite quickly. Pictures looking down don’t do it justice, so here’s LOOKING BACK UP at the elevation you’ll lose
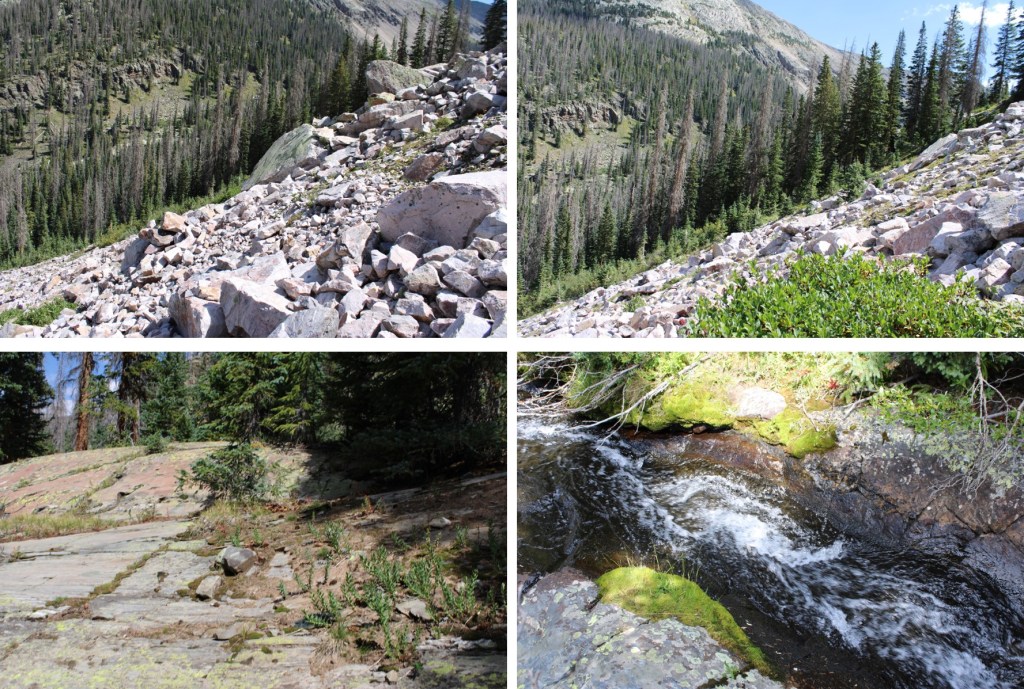
At this point the trail becomes a little more difficult to follow, but there is a trail and cairns. You’re hugging the mountain, following Ruby Creek east. Once again, this part of the trail is overgrown, so if it’s been raining, you’ll want to wear your rain gear to avoid getting soaked from the dew on the plants.
You’ll pass through a rocky area, with raspberry bushes and cairns to guide you
After hiking for 17 miles, and at 10800’ of elevation, you’ll arrive at Ruby Lake. Cross where the stream and lake meet, and skirt the north side of the creek.
There are also a few nice camping spots here, and the ability to filter water
Be sure to stay close to the water’s edge here, as there’s a trail and it’s much nicer on your feet than rock hopping. There are cairns here as well.
The goal now is to ascend into the upper basin. There is a trail here, but once again, a lot of downed trees and very overgrown with grass, flowers, etc. Keep heading east, staying below the rocks to your left.
At about 10900’ the trail abruptly ascends into the upper basin by aiming north.
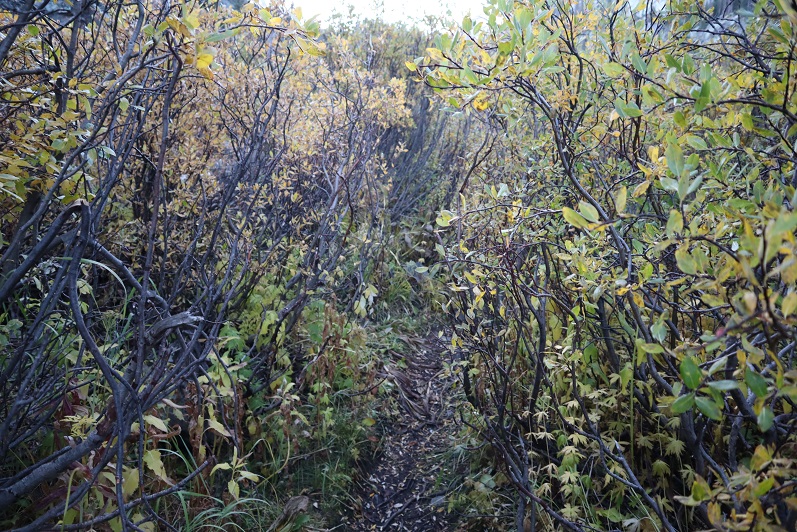
Where you’ll be greeted with: Willows! It is now your job to navigate through these willows to Ruby Basin. I promise you, there are trails here that ‘go’. They’re goat trails and anything above your waist will be gnarly, meaning you should plan on getting whacked in the face with willow branches, but trails are here. It’s important to find the entrance to the trail, and then go with your gut. Obvious cairns are circled in red. You’re aiming for the orange arrow:
Here’s what the entrance to the trail looks like
When you make it to that orange arrow, the rest of the trail into the basin will become obvious
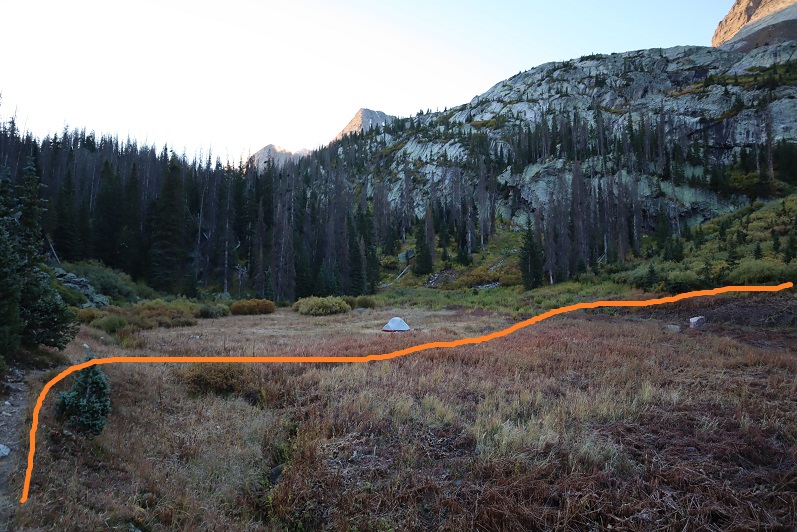
Pick your place to camp. There’s always plenty of water here flowing through the basin. The marmots will chew up anything not hung up, which is difficult in this treeless basin. I’ve seen Mountain Goats and Moose here a few times. This is a great starting place for several 13ers in the area. If you’d like my GPX file for the route send me an email wild.wanderer@aol.com
Here’s a view of the Ruby Basin from the east side of the basin, looking west at how you enter the basin.
Here’s the topo route
And just for fun, a compilation of pictures of the route out.
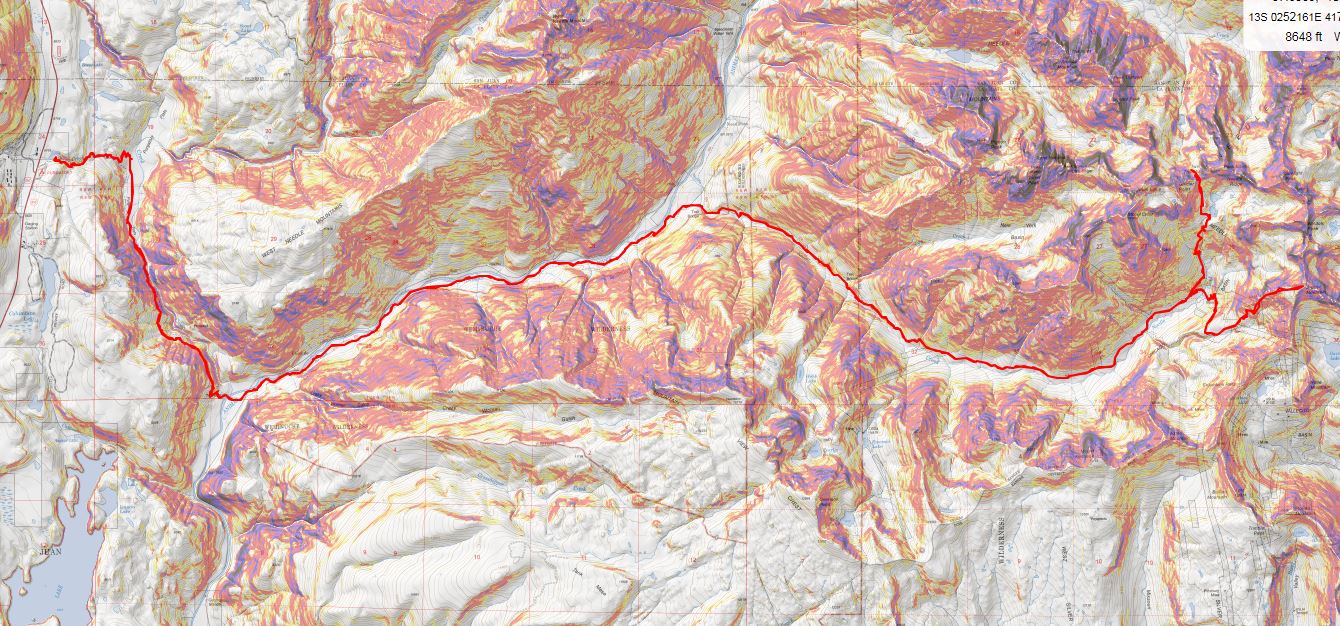
* I did these peaks with Arrow Peak as a weekend hike. CalTopo put the entire route at 41 miles, 10511′ of elevation gain, Strava gave me 30.9 miles and 15795′ of elevation gain. Either way, it was a good workout (see photos at end). Approach directions can be found here.
After hiking Arrow Peak I decided to get a look in the daylight at the approach to the Trinities. I continued southeast along the same trail I’d hiked in on until I came to the area where I was supposed to begin the ascent up to the Trinities
However, when I got there I noticed there wasn’t a place to set up camp, and the area had a lot of water. I couldn’t find a good place to cross the water without getting seriously wet. I did not want to start a hike early in the morning wet and cold.
I thought about the route for a minute, went through some pictures I’d taken earlier in the day from Arrow Peak, and decided to continue along the trail for a bit to see if I could find a better spot to set up camp, and a better entry point. This hike is a loop, so I just continued heading southeast. The trail became more and more faint as I hiked along
After hiking for a mile and a half I came to the area I intended to spend the night at 11,970’. There were waterfalls here, a creek, willows, and a few trees.
I set up a bivy under a tree, filtered some water, ate an early dinner, and jotted notes down in my journal.
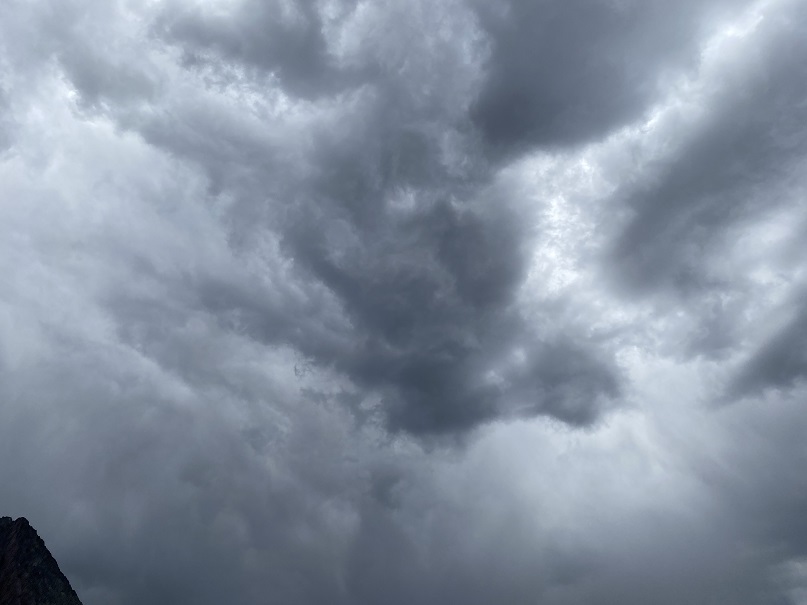
There was a 20% chance of rain today, and wouldn’t you know it? It started to rain. Also, the clouds looked like they were going to attack me.
Luckily the rain stopped and I decided to head over to the creek again. This creek looked much easier to cross then the marshy area, but in the interest of not needing to change out of my hiking boots and into my sandals tomorrow morning (thus eliminating unnecessary gear) I decided to build a rock bridge over the creek. I put on my water sandals and got to work. It was my intention to hike up this side of the mountain and connect with the proper trail once in the basin. I wasn’t 100% sure the route ‘went’ but it seemed like a better option than ascending from below. I figured it this didn’t work I’d turn around and start with East Trinity instead, and get wet on my way out.
When I was done making the rock bridge it was still too early to go to sleep. There wasn’t much to do so I relaxed, enjoyed the view, and broke out the whiskey. Before the day was out I had about 16oz of whiskey (I knew because I’d placed it in a marked sports bottle. Also, I have a high tolerance for alcohol and don’t get hangovers so this isn’t out of character for me). I saw a group of hikers come over the pass and head towards me. They were doing Vestal tomorrow and were looking for a place to camp for the night. I told they they’d have better luck near the approach and they were off. Not long after that I went to bed. It was still early, but it had been a long day. Whiskey puts me to sleep.
I woke up well before my alarm. It was still dark out but there was a full moon and I could see the mountains clearly. I saw shooting stars and thought to myself how lucky I was to be here right now. I was actually warm (that’s rare for me when I backpack) and I didn’t want to get up. I also didn’t need to for a while. I watched clouds come in and started to worry: there was a 40% chance of rain after noon today and I didn’t want to get stuck in the rain while on the traverse. I’d heard from other hikers yesterday it took about 8 hours to complete. I did some math in my head and decided to get up and get going. The last time the weather had said 40% chance of rain after noon I got caught in a thunderstorm at 9:30am.
I’d prepped most of my gear last night, so this morning all I had to do was roll up my sleeping bag and put away my bivy sack and ground cover. I filtered some more water and I was off. (side note: I’ve had the same water filter since 1998, and wouldn’t you know it, they’ve improved since then? This week I bought a gravity bag water filter, and it’s AMAZING! I can fill my entire water bottle in 2 minutes, and since there’s a lot of water in the area I convinced myself to drink as much as possible this weekend. Normally I don’t drink while hiking, but this weekend I filled up my Nalgene 3 times!)
It was just beginning to get light out when I set off at 5am. I hiked straight up the side of the mountain, and when I reached the top I was thrilled to see my idea had worked: the route easily connected with the trail (there wasn’t a trail exactly, but the routes lined up and I was now going in the right direction).
There were several headlamps already shining on Wham Ridge. Looks like they got an even earlier start than I did. Smart. I was a little worried about the cloud cover. I could see rain in the distance and the clouds were forming fast. I told myself I’d keep going until I felt uncomfortable. I didn’t feel my real point of no return would come until I summited West Trinity and decided to either head back or continue on for the day.
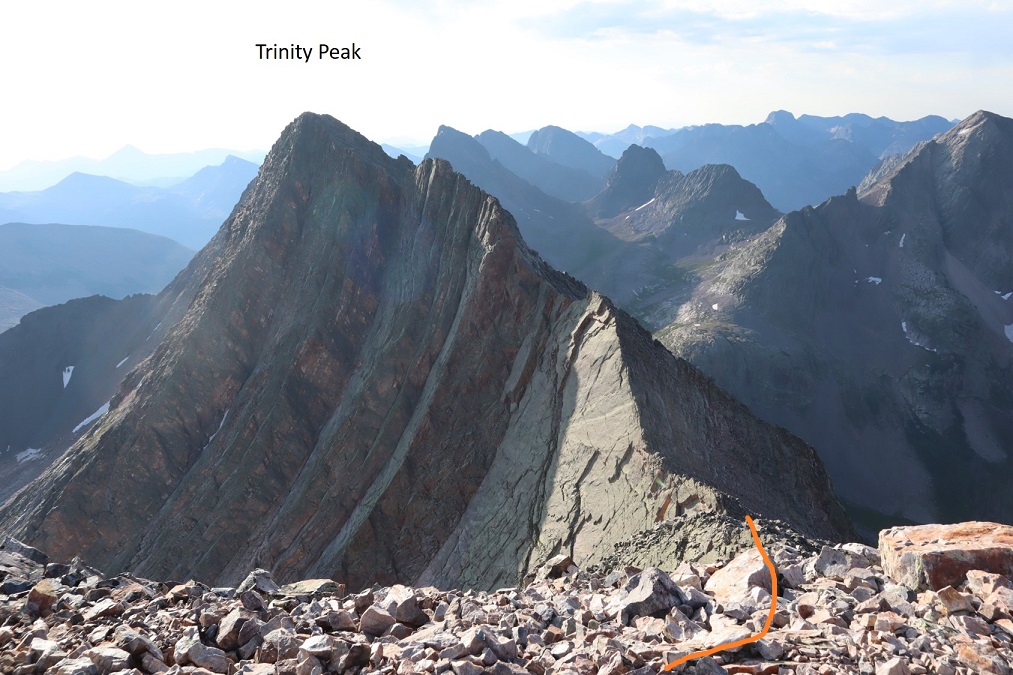
I dipped down a bit into the basin and headed south towards the ridge. There seemed to be a couple of options to ascent the ridge. I chose the gully directly in front of me.
The gully started out with large boulders and ended with scree. I took it slow and kept an eye on the weather.
At the top of the gully I turned left and headed east to the saddle. This was a very simple trek that followed a faint trail behind the ridge.
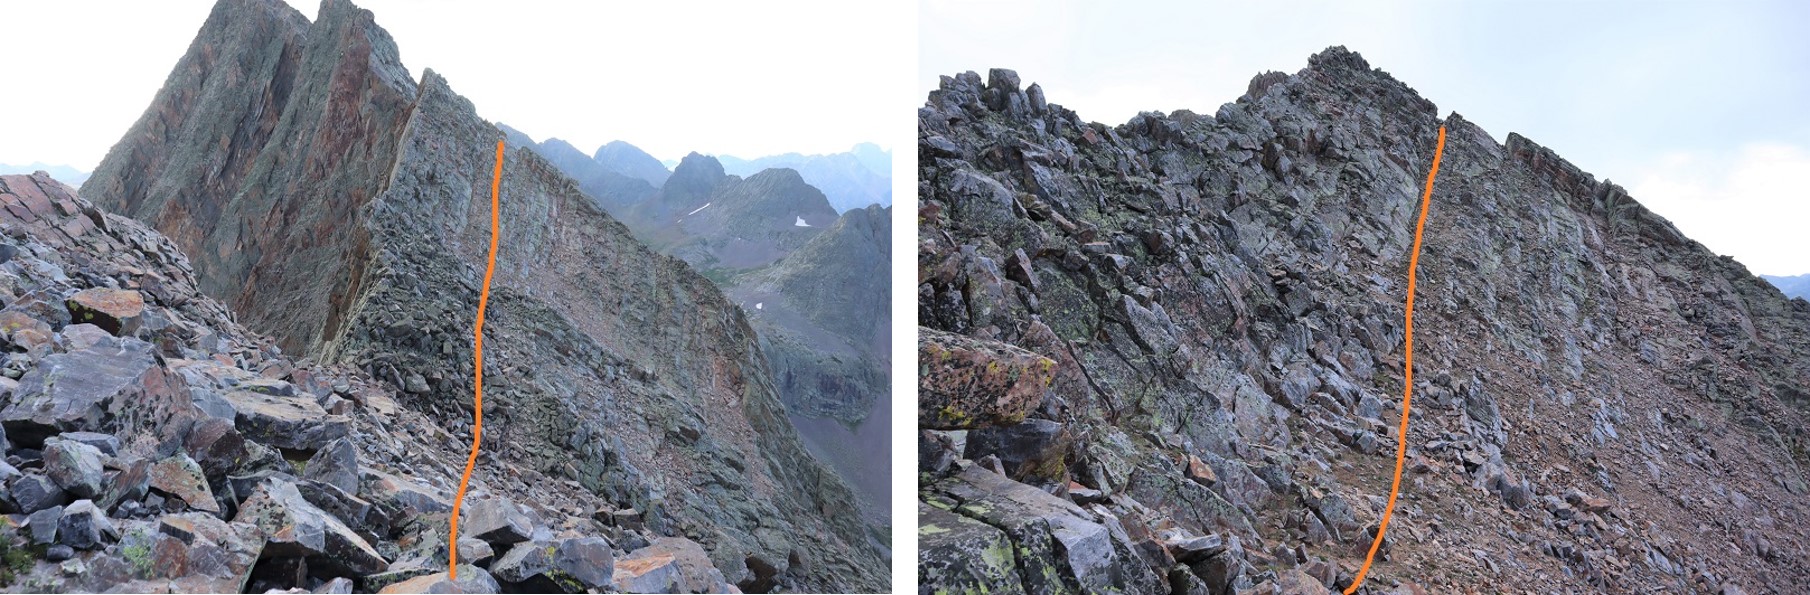
The first part of this trek was simple and straightforward as I hiked up the ridge
Then it became more tricky. There were no cairns here. I stayed on the south side of the mountain and continued climbing east. I encountered a series of class 4 gullies and took them up. There were several gullies and they all seemed to ‘go’. (Side note: when I got home I pulled up 4 different GPX files of this route and none of them lined up in this area, so it seems there are several ways to climb this part).
The gullies eventually brought me to the ridge, which I followed to the summit
I summited West Trinity Peak at 8am
West Trinity Peak
The weather looked like it would hold so I made the decision to continue towards Trinity Peak (also, I didn’t want to downclimb those gullies! Definitely do this traverse west to east if you’re not a fan of downclimbing gullies, as the gullies don’t quit and you’d have to downclimb every one of them heading east to west).
I continued southeast towards the West Trinity/Trinity Saddle
Instead of following the ridge, take the gully down. It’s class 2 and leads you to the saddle. You won’t be losing any unnecessary elevation.
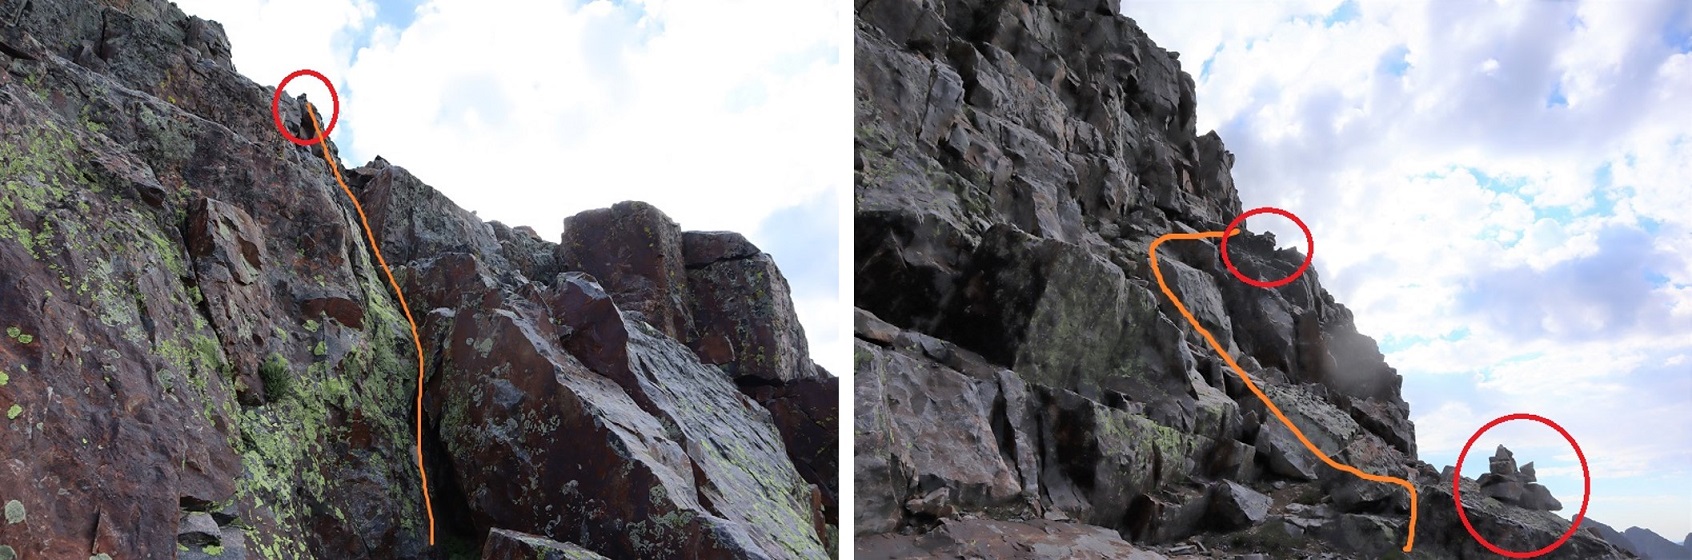
Interestingly, there were cairns between West Trinity and Trinity Peak. This is interesting because they would have been useful elsewhere, but were only present for this short section.
Don’t stick to the ridge, but follow the cairns as they skirt the south side of the mountain
The cairns (circled in red) were very helpful here
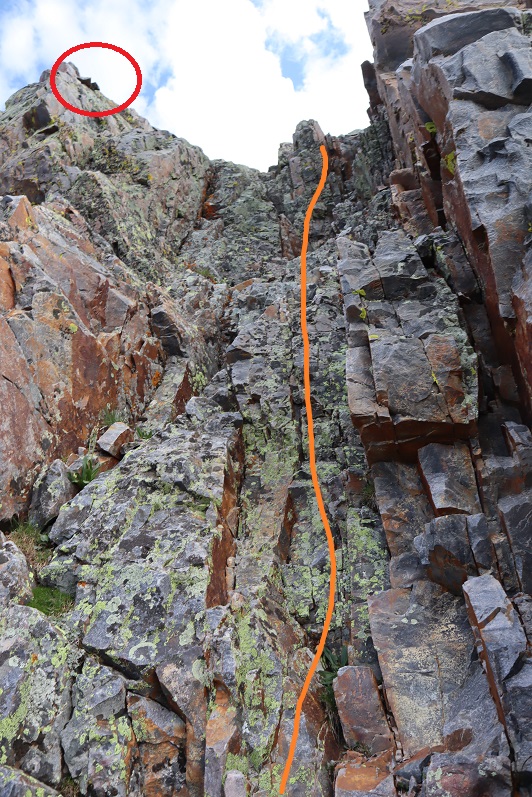
They led me to a class 4 chimney. Climbing today seemed extremely easy. It was really nice to just hike with a flimsy drawstring pack instead of my normal backpack. The difference in my climbing ability was amazing. I wasn’t off center and pulling myself up was a breeze.
At the top of the chimney you’ll want to keep heading right towards the ledge, but DON’T DO THIS!!! I did, and I can tell you that ledge is super scary (but doable if you hug the ridge: there’s less than a foot of space to walk on and not much room when the boulders bulge out). However, you’ll need to do it twice because it doesn’t go anywhere and cliffs out.
Instead, go left and you’ll once again find cairns that will lead you north and then east to the summit
I summited Trinity Peak at 9:25am. It took less than an hour and a half to get from the summit of West Trinity to Trinity.
Trinity Peak
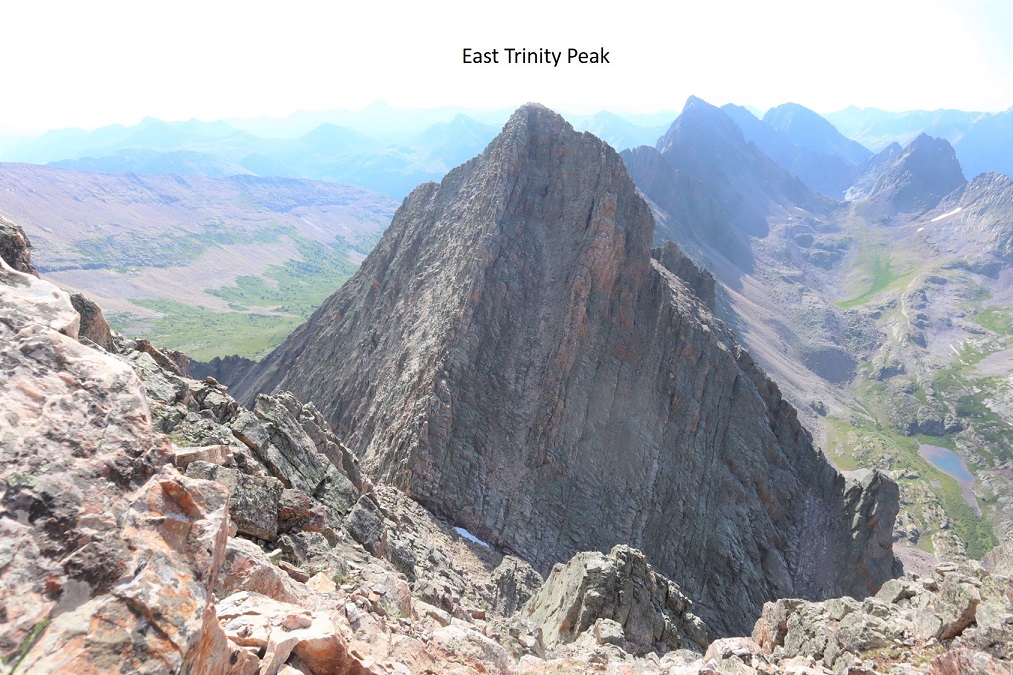
Here’s a look over at East Trinity Peak
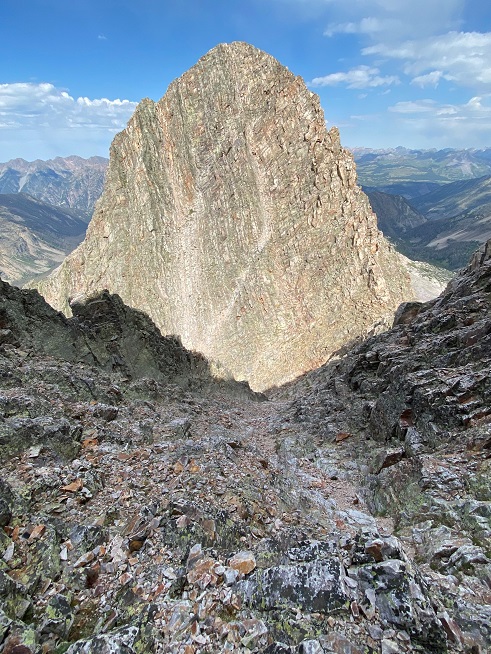
I took the gully down to the saddle of Trinity/East Trinity
The entire time I was descending I kept my eye on East Trinity, looking for the best way to ascend. It looked to me like the best option would be to keep towards the center until the end, where I wanted to summit towards the left to avoid any difficult traverse there may be if I topped out on the right (side note: there didn’t appear to be any difficulties if I’d chosen to summit to the right instead). You can’t see it in this picture, but at the very top there are two chimneys to the left. Take the one on the right (I cliffed out about 10 feet from the summit and had to retreat and find a different route).
At the saddle there was a gully to cross before heading up
Once inside the gully the rock was surprisingly stable, but there were a lot of large rocks that were easy to kick down, so if you’re hiking with a partner be careful not to dislodge rocks.
The only time I had trouble was when I got towards the top. Like I said before, stick to the left, and then choose the gully to the right.
This was class 4 climbing.
To my left I saw another ‘kissing camel’ formation. The cool thing about this one is it includes a heart
After taking the wrong route, cliffing out and backtracking, I headed a little more south and found an area I could climb and make it to the ridge
I was thrilled when I topped out and could see the summit an easy hike away!
I summited East Trinity Peak at 10:30am. It had taken me less than an hour to make it to East Trinity from Trinity.
East Trinity Peak
Here’s a look back at Trinity Peak. I was talking with someone on my hike out who told me she’d attempted the traverse a few years ago, but couldn’t find a way to summit Trinity Peak. They’d ‘missed the peak’. If you’re unable to find the access points, or want to keep this part of the hike class 2 (or easy class 3), just make your way to the Trinity/East Trinity saddle and hike back up the gully to summit Trinity Peak (shown below)
Time to head back down. The ridge down from East Trinity was straightforward.
With a couple of surprisingly steep sections
I made it to the saddle and scree-surfed down the gully to the lake
I skirted the right side of the lake and headed back down to my camping area
Here’s a look back at the route I took down from the East Trinity ridge
I made it to my stashed gear at 11:22am. The traverse had taken me just under 6.5 hours to complete. Notes on the traverse: It’s very committing, there’s a lot of route finding, and I felt in the route I took there were a lot of class 4 moves. I got a lot of good scrambling practice in, and honestly wish I would have attempted this traverse earlier: I felt like I leveled up in my class 4 climbing skills, and I was deliriously happy with this hike. And the weather had held! Woot!
I filtered some more water, took off my shoes to air out my feet, and ate a couple of sliced mangoes (my first food of the day: I get nauseous when I eat and hike but figured I needed some calories for the way out).
Time to head out. I found a stick that made a great trekking pole to replace the one I’d lost yesterday and headed out the same way I headed in, after about a mile of wading through willows and water to find the trail.
Connecting back up with the class 1 trail that would lead me to the beaver ponds, through the avalanche area, straddling the creek and bringing me back to the Animas River. I saw a ton of people on the trail, and talked to every one of them.
Once at the river I crossed the bridge and sat down for a while to rest before tackling the 4 miles and 1700’ of elevation gain back up to Molas Pass. I took off my shoes and soaked my feet in the river, filtered more water, and tried to eat a packet of tuna (I ate half). There were CT hikers across the river from me. They shouted and asked if I minded if they bathed. I’ve been there, and I didn’t care. They seemed overjoyed at the idea of a bath, and I wasn’t going to deny them that gift.
There were mosquitoes and fleas here so I didn’t stay long. I packed my gear back up and started switchbacking up the mountain to Molas Pass
I left my newfound trekking pole at the information sign and made it back to my truck at 6pm. It had taken me about an hour and 45 minutes to hike those 4 miles and 1700’ from the river. I got different mileages/elevations from Strava and CalTopo for my triup, so I’ll leave those here.
In the end, I was thrilled I’d decided to hike today! Sometimes it’s really difficult to get started, but once I’m going I’m really enjoying myself, and the sense of accomplishment I get from summiting peaks and challenging myself is amazing.
Also, I’ve done this approach as a day hike (with Vestal) and this time backpacking for Arrow and the Trinities. For me a day hike is absolutely the way to go: The extra weight made the trek in and out so much more tiring than it needed to be. Long days don’t bother me. Everyone’s different, but I much more enjoyed the hike in and out from Vestal than I did this time.
* I did this as part of a 2 day hike, so my mileage and elevation gain aren’t included here. CalTopo says my mileage to the top of Arrow Peak was 15.23 miles.
My son is in the Air Force and came home for some unexpected leave. I haven’t seen him in over a year, so I was thrilled to spend the past couple of weeks with him. This also meant it’d been a few weeks since I’d done any serious hiking, so it was so nice to get out hiking again this weekend. I drove to the Molas Pass trailhead and parked the night before the hike so I could start early the next morning. I’ve done this approach before for Vestal Peak, so I already knew what to expect. I drove in, parked, and walked around a bit to stretch my legs after that 6.5 hour drive. It was a beautiful day, and I kind of wished I could just start hiking now.
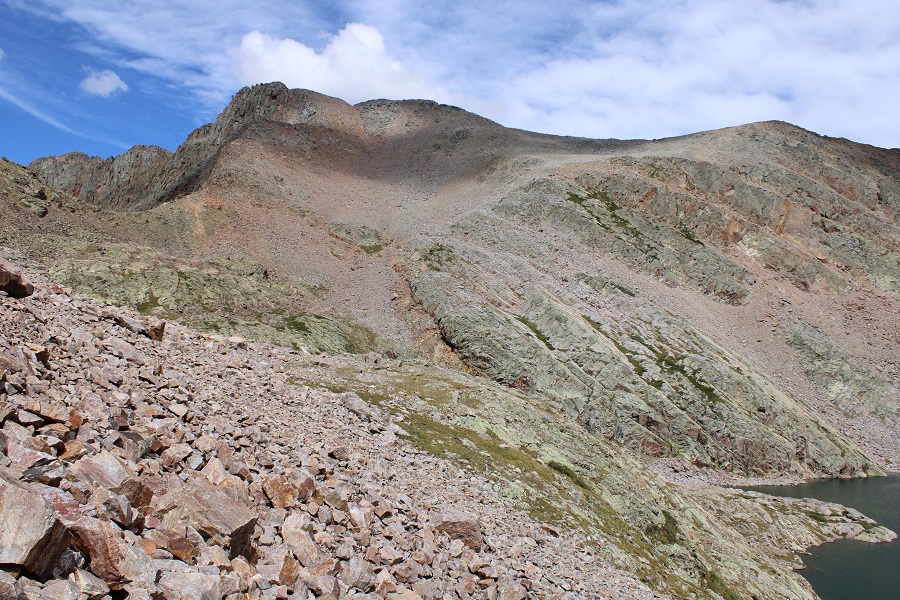
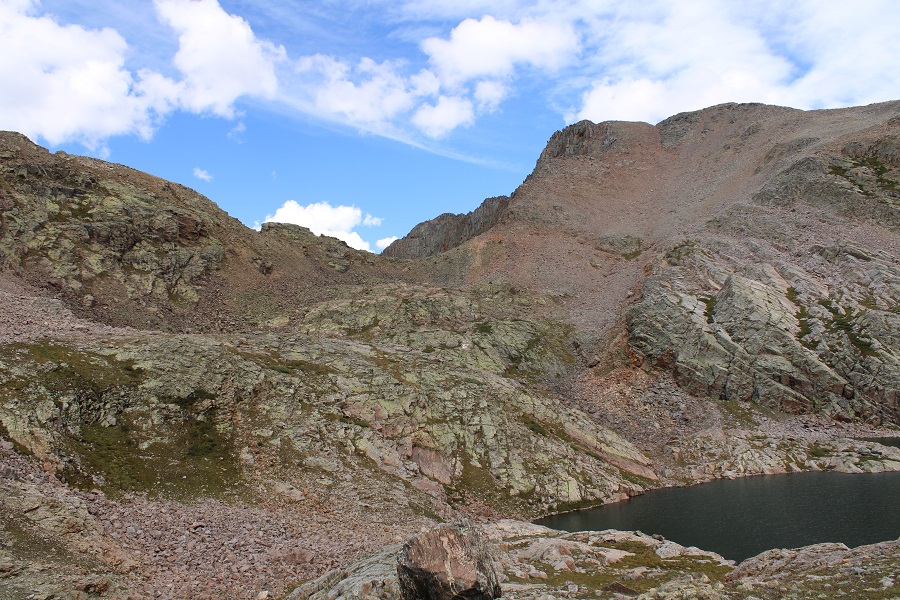
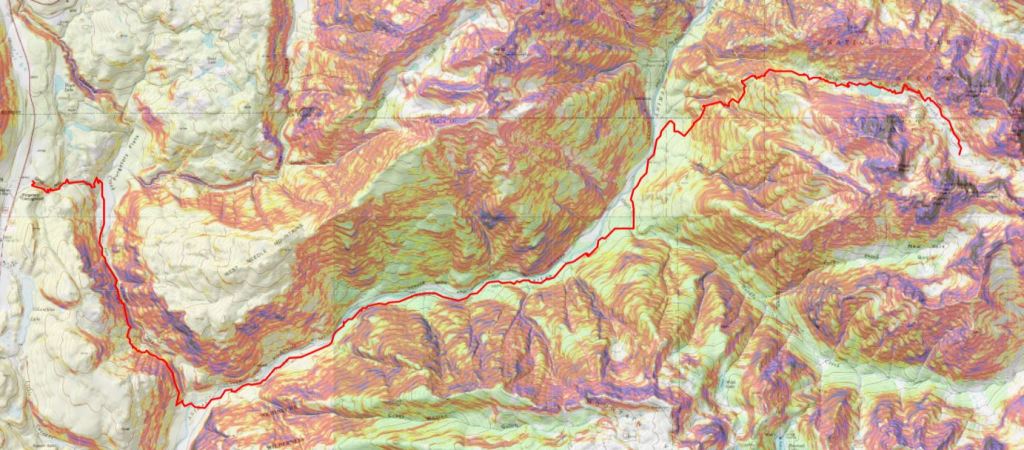
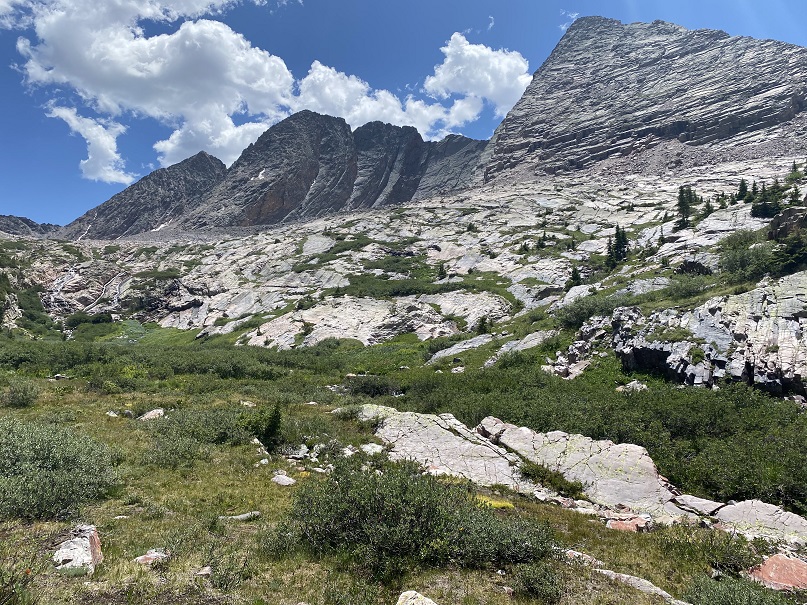
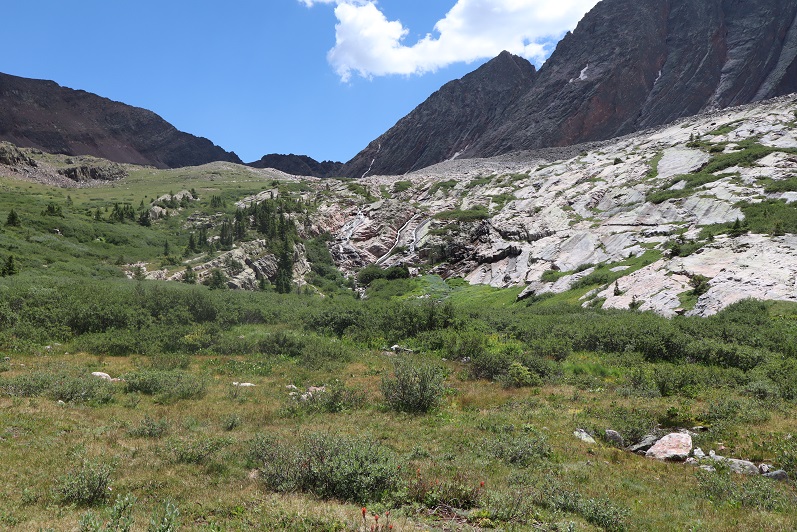
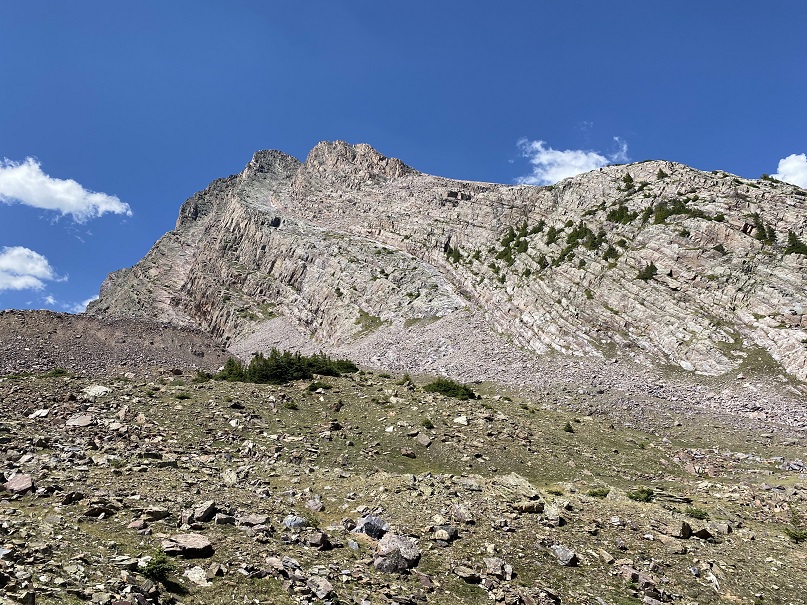
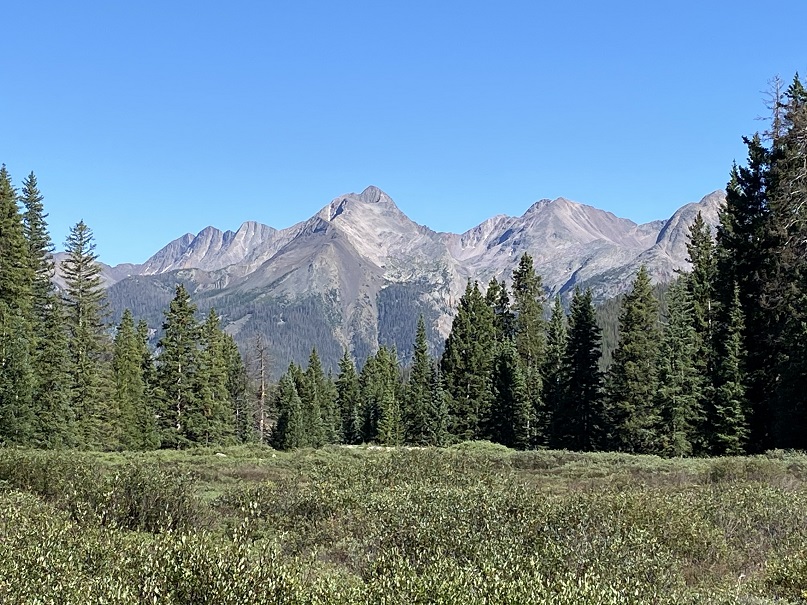
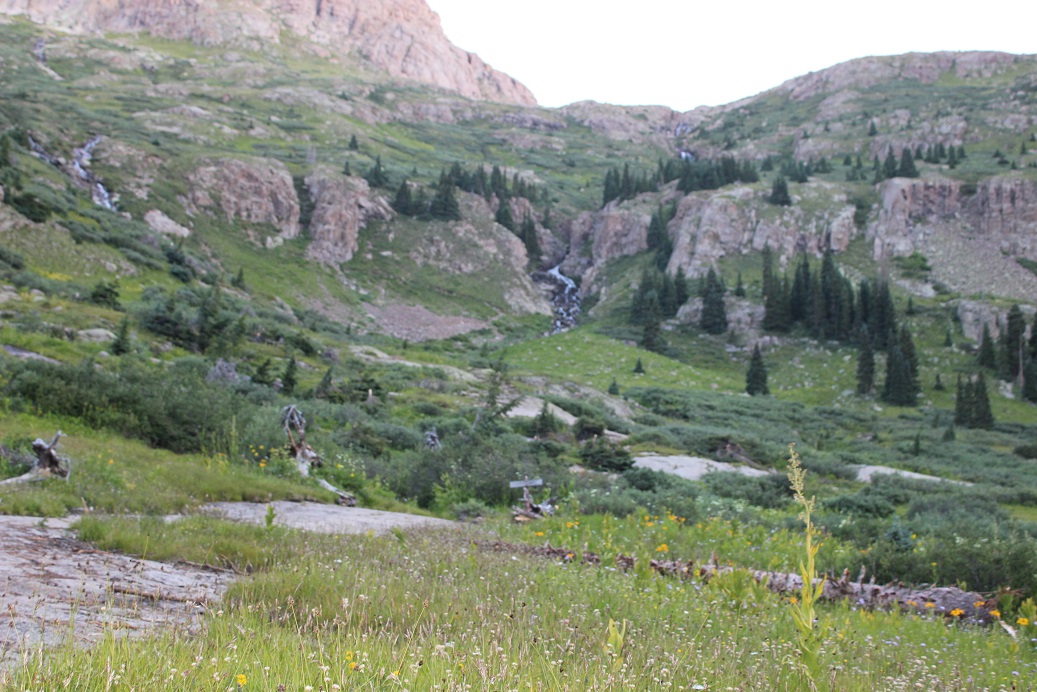
Here’s a look at the peaks from the trailhead
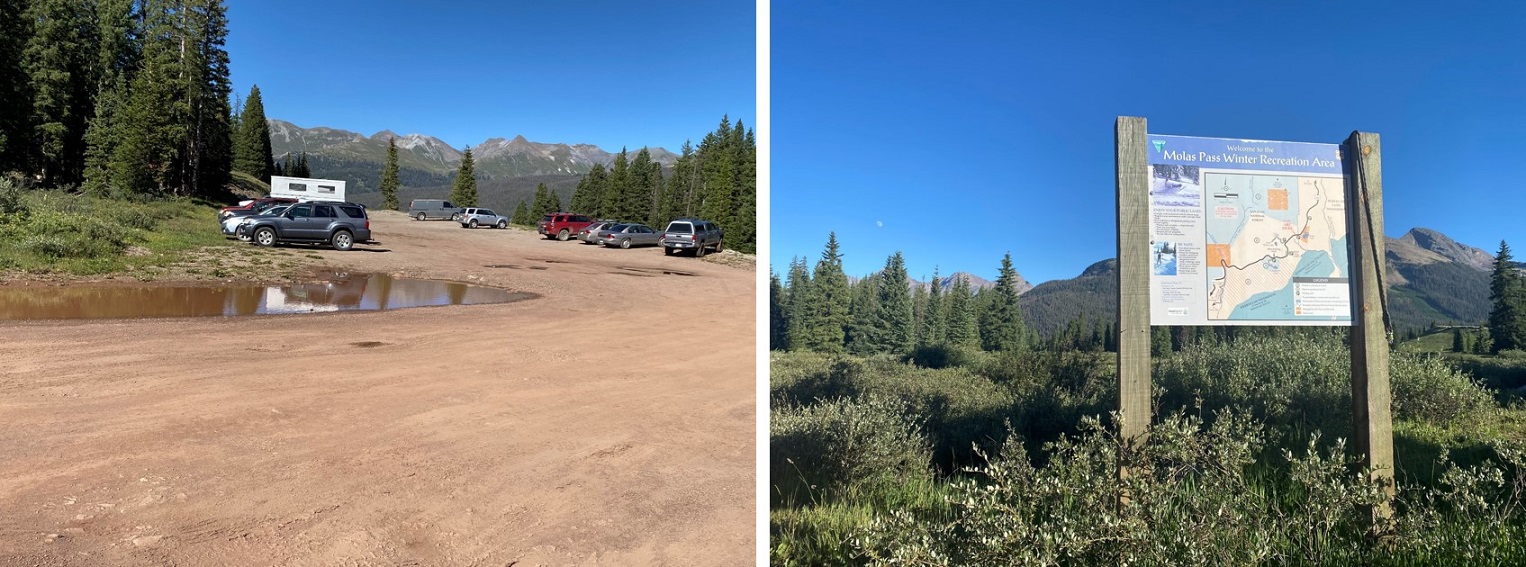
There’s limited cell service at the Molas Pass Trailhead. Unfortunately, I saw evidence of two separate vehicles having their windows smashed.
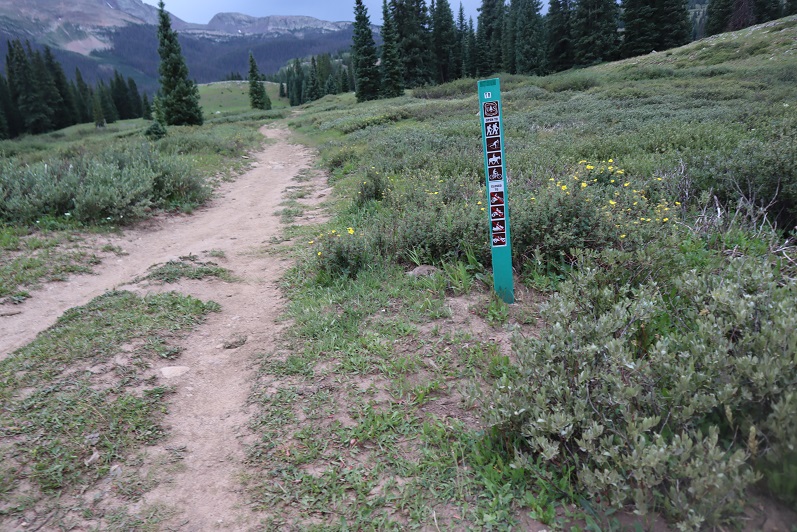
I spent an hour or two in the back of my truck relaxing, looking at topo maps, and eating dinner. I saw another hummingbird fly by, so the record held of seeing a hummingbird at every trailhead I’ve slept at so far this year. I went to bed and was up and on the trail by 2am. The trail starts at the south end of the parking area.
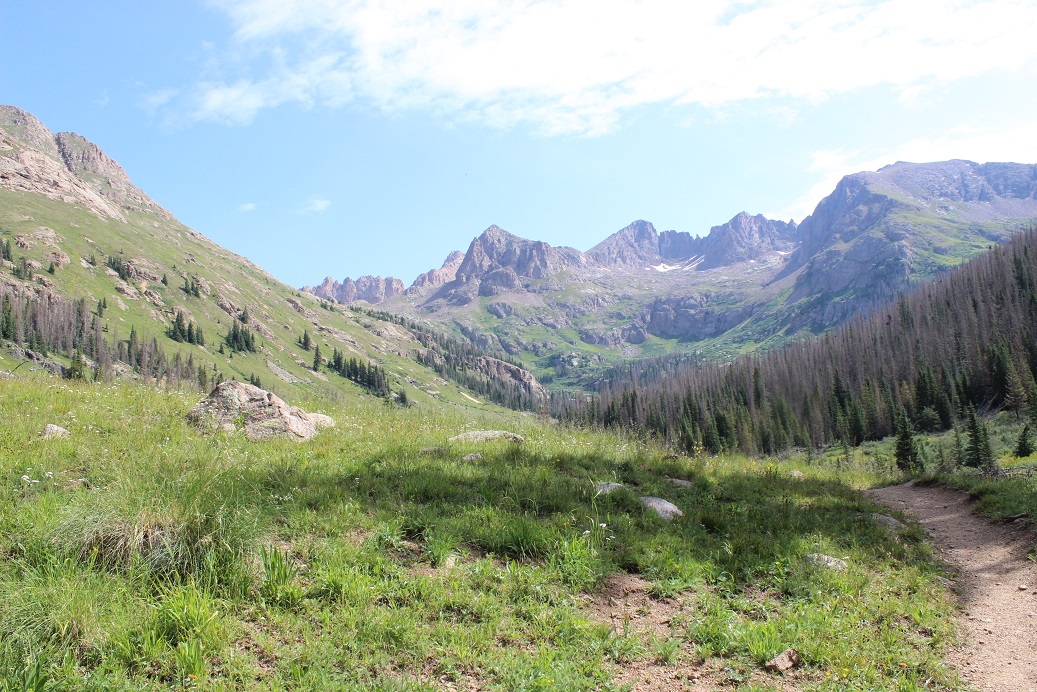
From there the trail is easy class 1 all the way down the 4 miles and 1700’ to the Animas river, and back up to Vestal Basin (9.6 miles total).
Just before the river there’s a creek crossing
Then a solid bridge across the Animas River
Then I followed the train tracks (very briefly) and took the obvious trail up to the Vestal Basin.
At 4.7 miles there’s a trail register (a trail register that’s legit: it actually looks like they track the pages here)
Note: I crossed this area in the dark, and it seemed as if I needed to use the log to make this part of the trek. In the dark the rocks didn’t look close enough together to cross. So instead of taking the rocks across I sat down and scooted across the log until I made it back to the trail. On my way back I realized I was wrong: take the rocks 😊
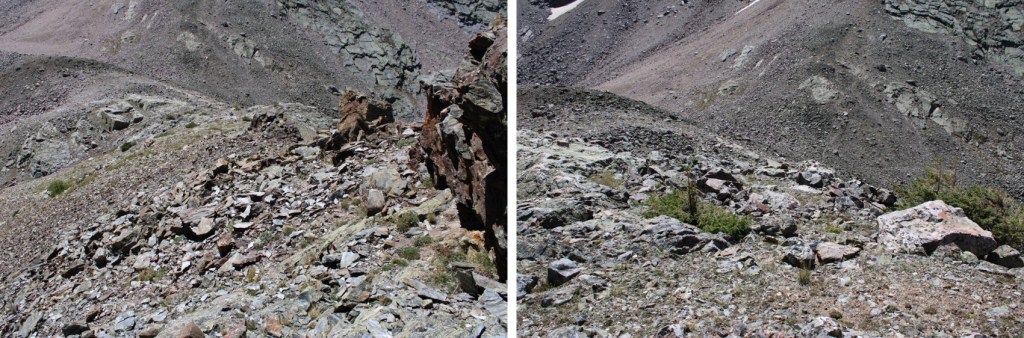
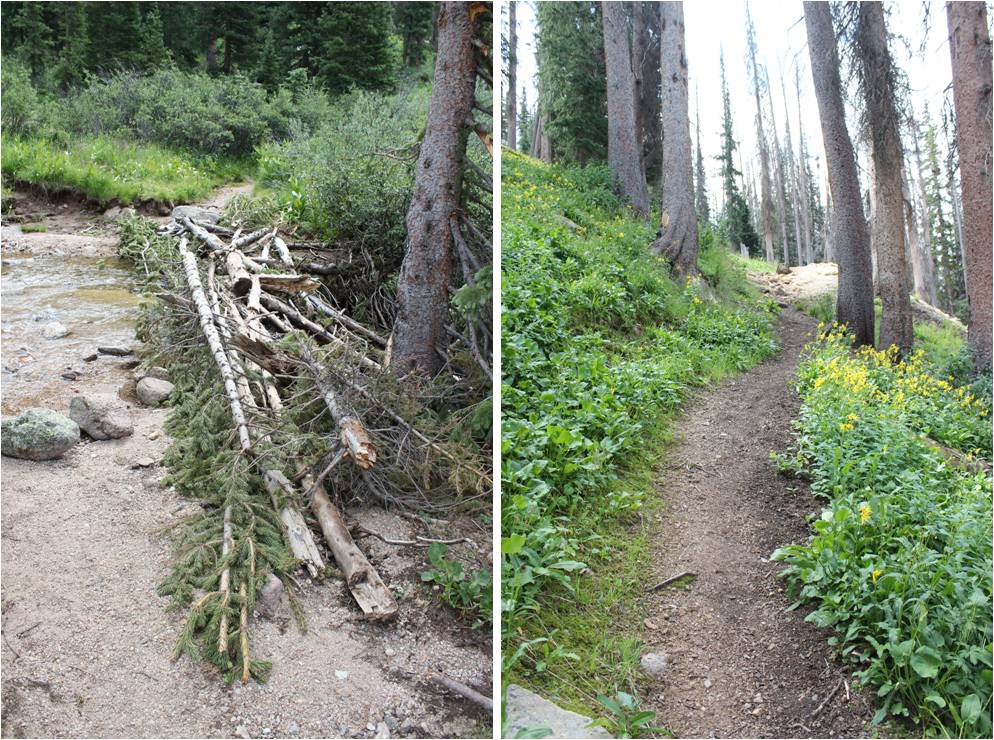
The avalanche area was much easier to pass this year than last year: there are triple the amount of surveyors’ tape markings in the area. However, I still managed get off track at the last and final crossing. I wanted to stay high on the ridge and in the dark couldn’t locate any more tape. I should have stayed lower.
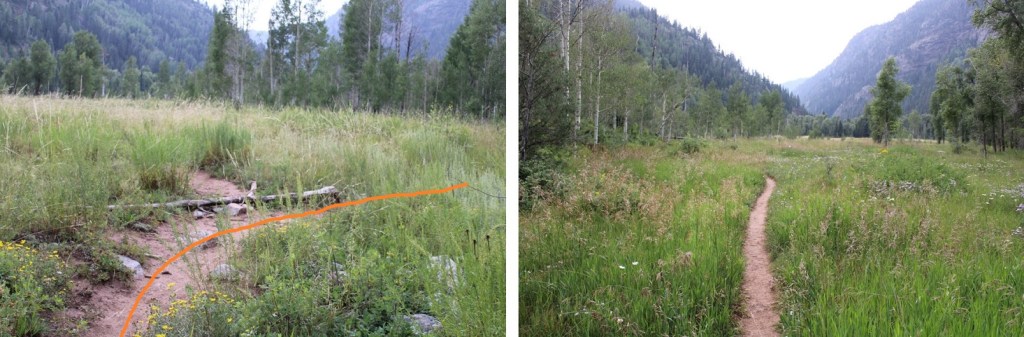
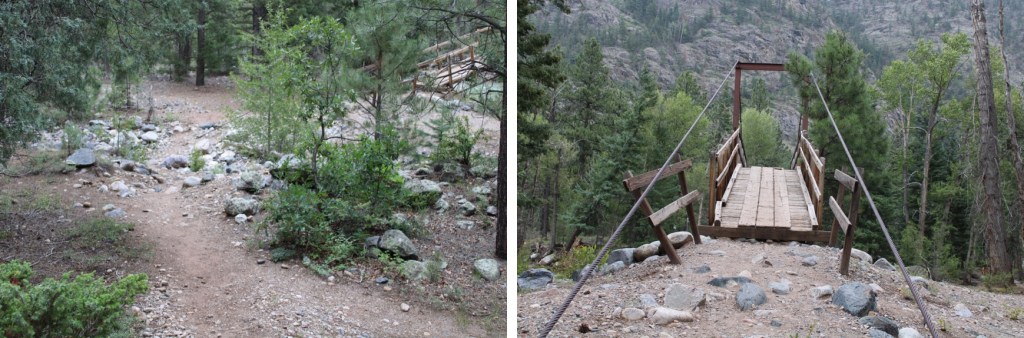
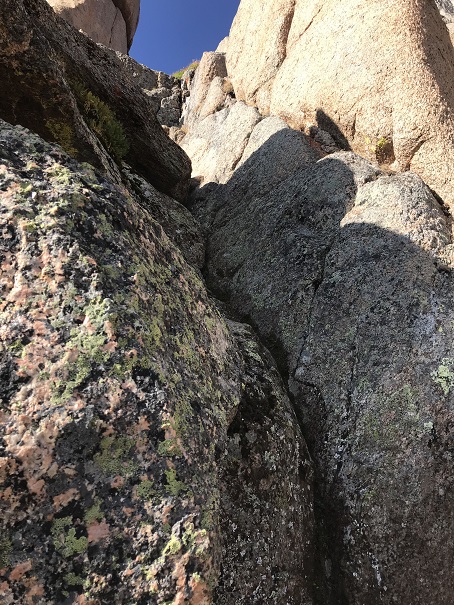
At the beaver ponds I took a right behind the boulder by first going through two logs onto an unmarked trail (it seems counter intuitive, but it’s the correct path), and followed the rocks until I once again caught up with the trail.
I followed the class 1 trail up to Vestal Basin.
There are willows to contend with here, and water, which equals mud. Prepare for your shoes to get muddy (or throw rocks/sticks down to walk over the muddy areas)
There is a really good campsite in the Vestal Basin, just where you turn off to hike both Vestal and Arrow Peak. I stashed my pack here behind a tree, filtered some water, and packed only what I needed in a small sack before heading up and tackling Arrow Peak. Here’s the route to the upper basin
The creek crossing was easy. I took off my shoes but didn’t need sandals
There’s a semi-well defined trail to the upper basin, through willows to begin with, and then scree.
In the willows I lost one of my gloves. I realized it about 50 feet after I’d lost it, but wasn’t in the mood to go back and get it (I didn’t want to re-gain any elevation today if it wasn’t absolutely necessary). I hoped it would be there when I went back. There’s a cairn at the top to indicate the upper basin. Here’s an overview of the route from there.
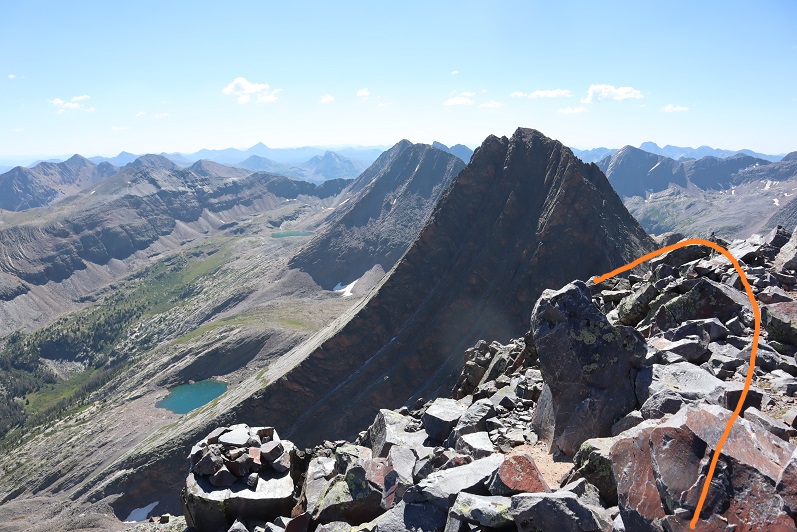
Note: For some reason I thought Arrow Peak was class 2, so I didn’t do much research on this peak. Luckily, I’d brought my helmet, because this is definitely class 3 and requires some route finding. The first objective is to find the access area to the rib that will lead you most of the way up. There’s a cairn indicating the way. Aim for the greenery, head up and right, then left. I stashed my trekking pole at the entry point and headed up, as it was obvious I’d be doing scrambling from this point on and a pole would just get in my way.
It looks more difficult than it is. The rock is solid and grips nicely. Be sure to pick the largest rib (it’s obvious and is a good 50+ feet wide)
I followed the rib as is ascended
There will be a point where the rib will become more prominent. Stay right. It looks like going left may be doable to go left later in the year, but at this point (July 31st) I opted to go right and that worked well (avoiding the snow).
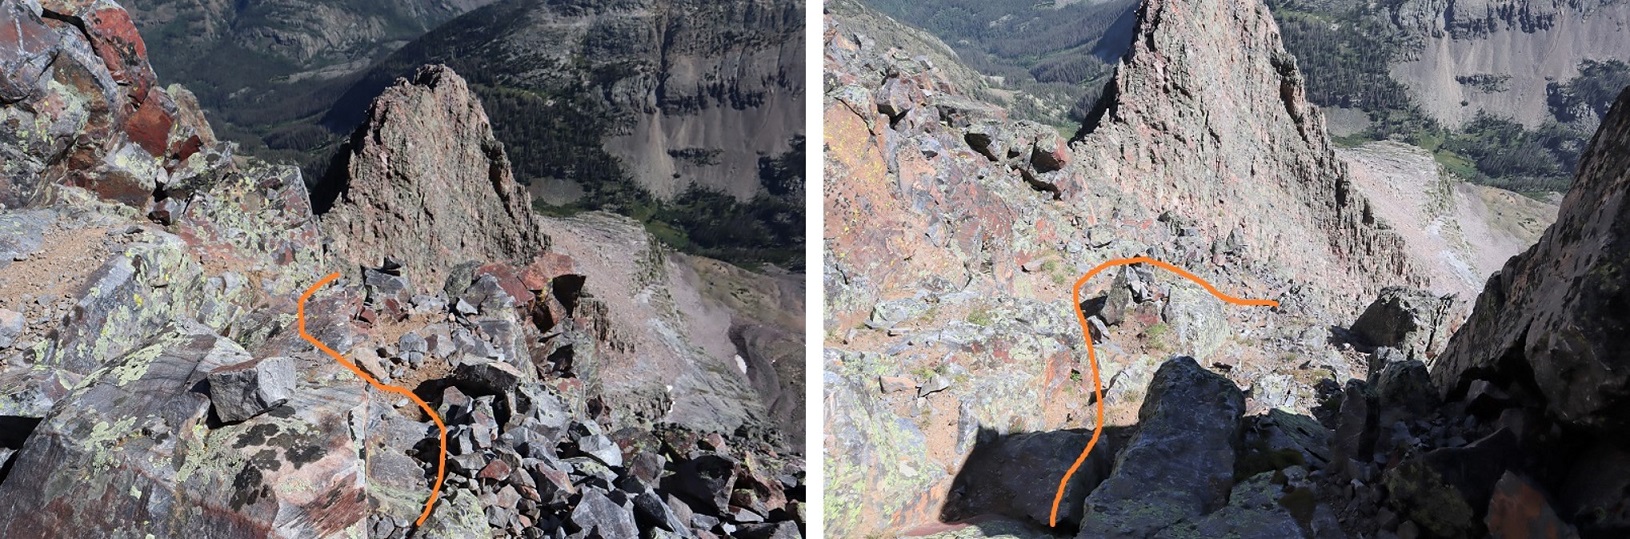
It’s hard to tell in the picture below, but I’m following the rib. There’s a point where it’s hard to tell if you go left or right (circled in red), but you go left here and then right. If you look closely you’ll find cairns here indicating the way (they’ll be above you).
Going left you’ll see a gully on your left. It looks doable (and probably is) but it’s easier to ascend by going right. This is pretty well cairned.
Going right will lead you to a short ledge
at the end of the ledge go left (following the cairns) and then head northwest up some serious class 3-4 climbing to the summit.
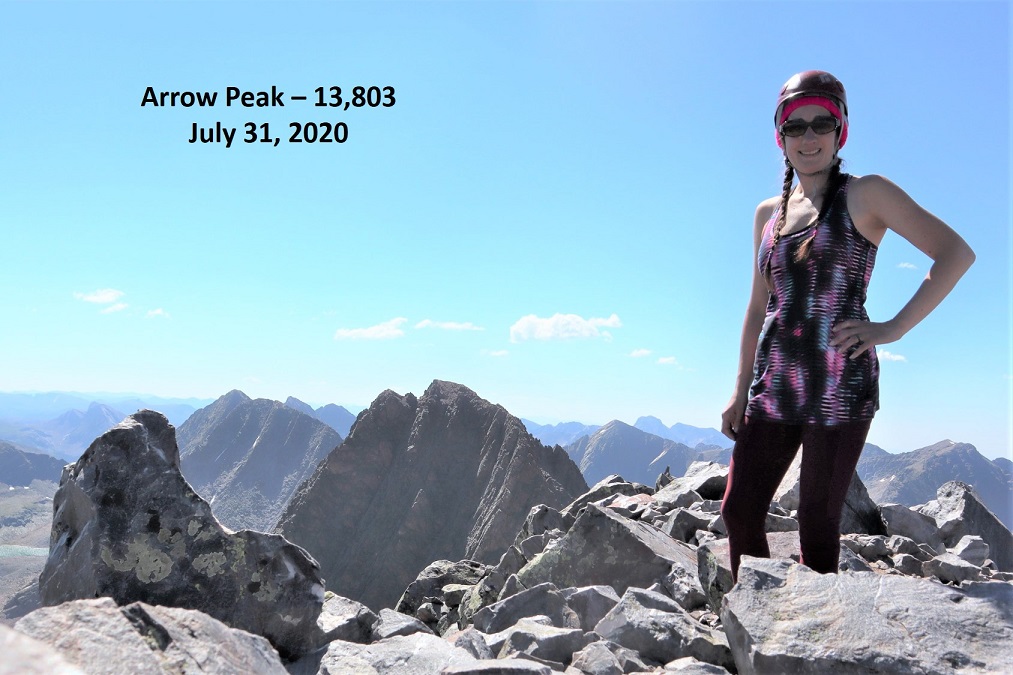
I reached the summit at 10:15am, after 15.27 miles and just over 8 hours of hiking
Arrow Peak:
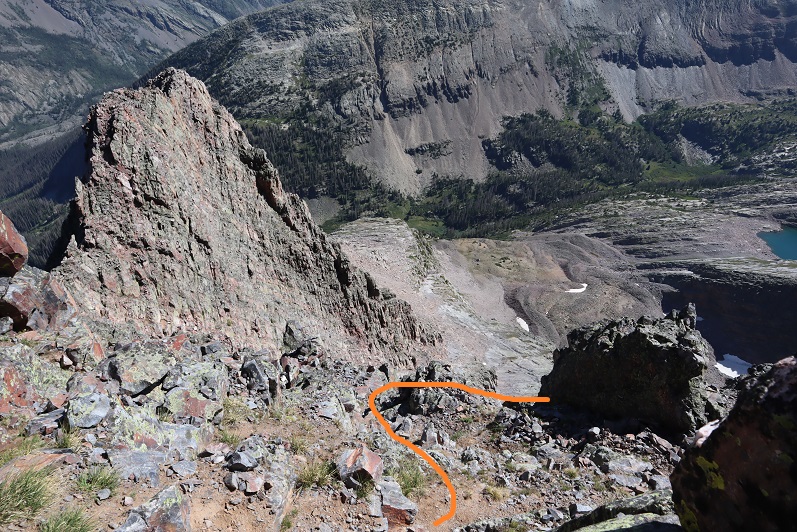
The trek down was much easier than the trek up, as it was easier to see the cairns and I already knew which direction I was headed. Here are the basic highlights:
Back down to the ledge, then following it to the right and then left (the cairns are very helpful here)
And then following the ridge back to the basin, sticking to the solid rock whenever possible because the scree was slippery and the rock was stable (but would have been slippery in the rain)
I made it back down to the basin, and check it out: someone (or a marmot) stole my trekking pole! I looked all around for it and was unable to find it. I had passed about 10 people on the way up/down, so it could have been one of them, but that would’ve been poor form and not cool, especially since I talked with all of them and they seemed super nice, so I’m assuming it was an animal. From the basin there’s a trail back down to the camping area
Someone had found my glove and made it super easy to find by sticking it on a branch right in the middle of the trail. Thank you!!! (they’re expensive gloves…). Then it was a quick creek crossing and I was back at my gear.
Total mileage will be with my Trinities Report, but the mileage from Molas Pass, up to Arrow, and back to the camping area where I’d stashed my pack was 17.71 miles according to CalTopo, 12.7 miles according to Strava (to be discussed in my next trip report: gotta love app discrepancies). Here’s a picture of the route from my camping area the next day (without route markings)
Here’s the CalTopo of the entire route, including the hike the next day up the Trinities.
After a full week of work in Tennessee where I gorged myself on comfort food (fried chicken, fried oysters, collard greens, cornbread, etc.) and went highpointing in Mississippi because I could, my flight got in at 1:30pm and I drove from Denver to Molas Pass and slept for about 3 hours in my truck before waking up at 1:30am and hitting the trail. There was one other truck in the large parking area when I arrived.
I checked the weather reports and anticipated rain/snow/wind for today so I put on my snow pants and went light on gear. Initially I’d planned on camping in the Vestal Basin and hiking Arrow and the Trinities as well, but with snow in the forecast I decided to make this a one summit/day trip. The trail started at the south end of the parking lot. It was really easy to follow and had plenty of signs
For about a mile the trail stayed pretty much level, and then it descended 1500+ feet down to the Animas River
At 3.8 miles I crossed a small creek
And heard a rustling in the bushes. I knew there was an animal about 6 feet off the trail, and it felt larger than a coyote but smaller than a bear. I tapped my trekking pole loudly against a rock a few times to flush it out/scare it away. Usually when I do this the animal quickly runs in the opposite direction, but this time it started advancing towards me in the dark. Thinking this was not a good sign I braced myself as the animal came closer to me, moving through the tall brush. Was it a rabid raccoon? A baby bear? (I swung my head from side to side: Oh no! Where’s mama???) and then suddenly it was on the trail in front of me and I realized it was a rather large beaver.
This beaver wanted nothing to do with me, it was just aiming for the trail as an escape route, and kind of looked like a land manatee (BTW, I just finished reading the book “On Trails” by Robert Moore and the experience of hiking has broadened for me and I was immediately reminded of why animals are attracted to trails. It’s a good book with no direct conclusion but connects many aspects of hiking: you should check it out).
Seeing the beaver was cool: it was much larger than I thought they’d be. The downside? I had the “Beaver Song” in my head for the next 2 hours. Not as much fun as it sounds…
At 3.9 miles I crossed the bridge that goes over the Animas River
Turned right (southeast) and followed the train tracks for about a dozen yards, crossed the tracks, and followed the trail up the mountainside.
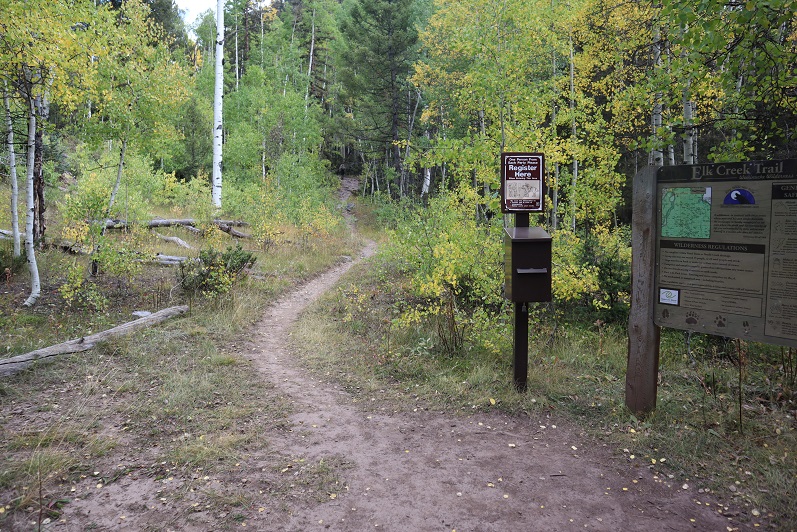
At 4.7 miles I came across the trail register and signed it in the dark.
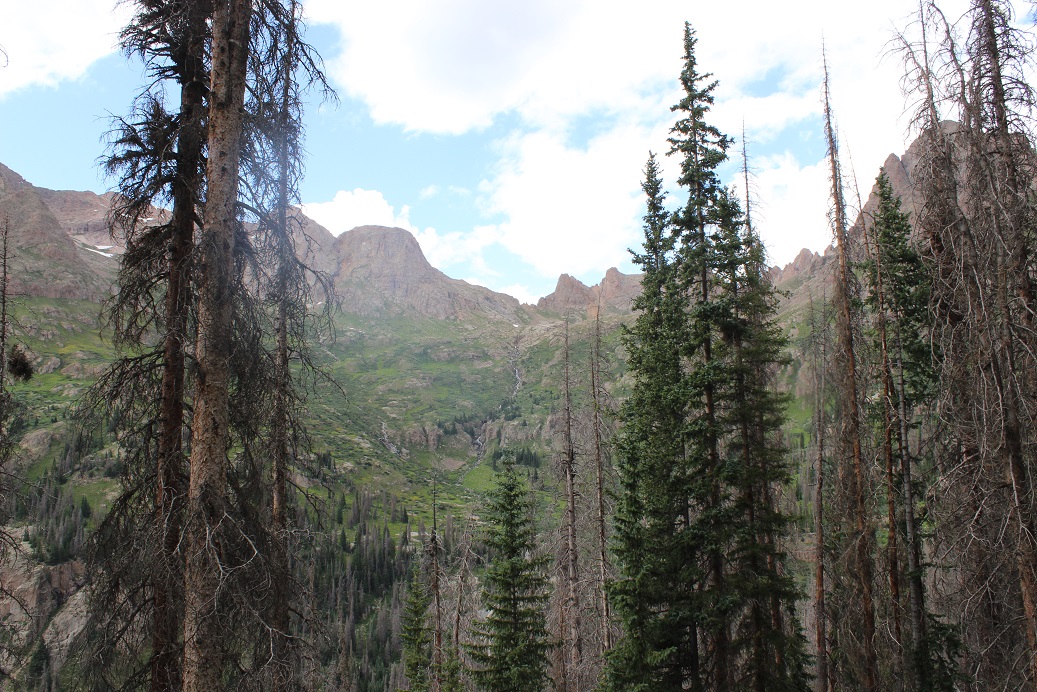
The trail parallels Elk Creek
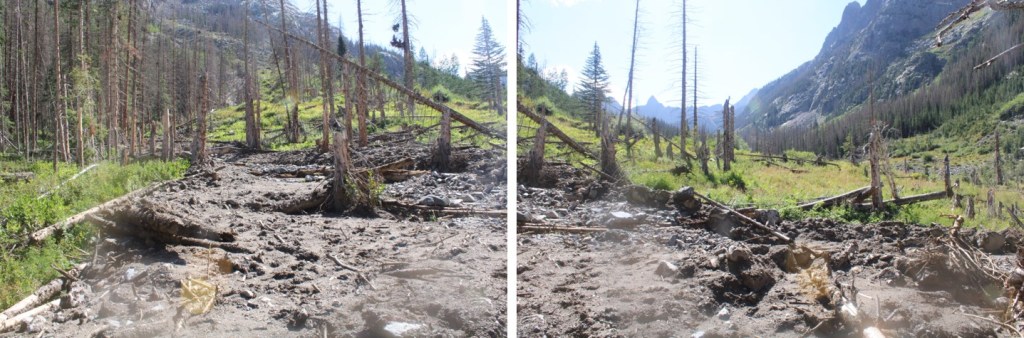
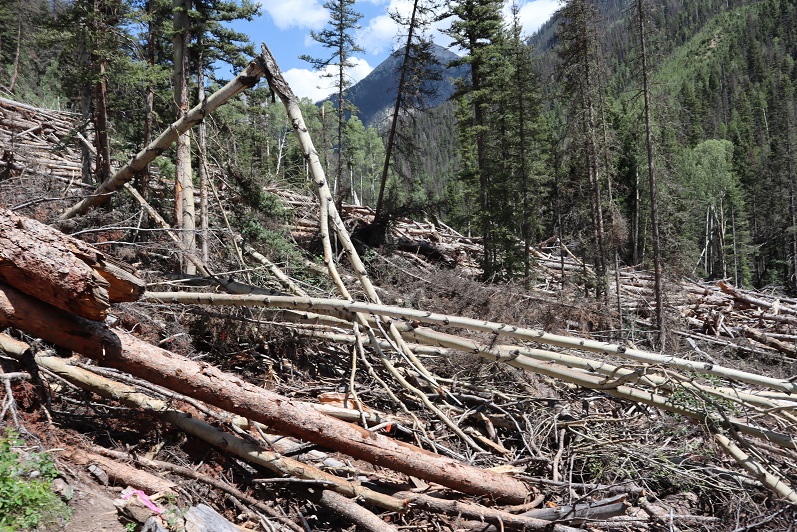
At 6.1 miles I came across the first area of avy debris. I’m guessing there were 3-4 slides all in close proximity that kind of ran together. I’d heard there’d been avalanches here and to just follow the marked tape through them, but was surprised at how dense and large the debris was. I was able to follow the marking tape easily through the first area but got lost in the second and ended up climbing a little higher than necessary.
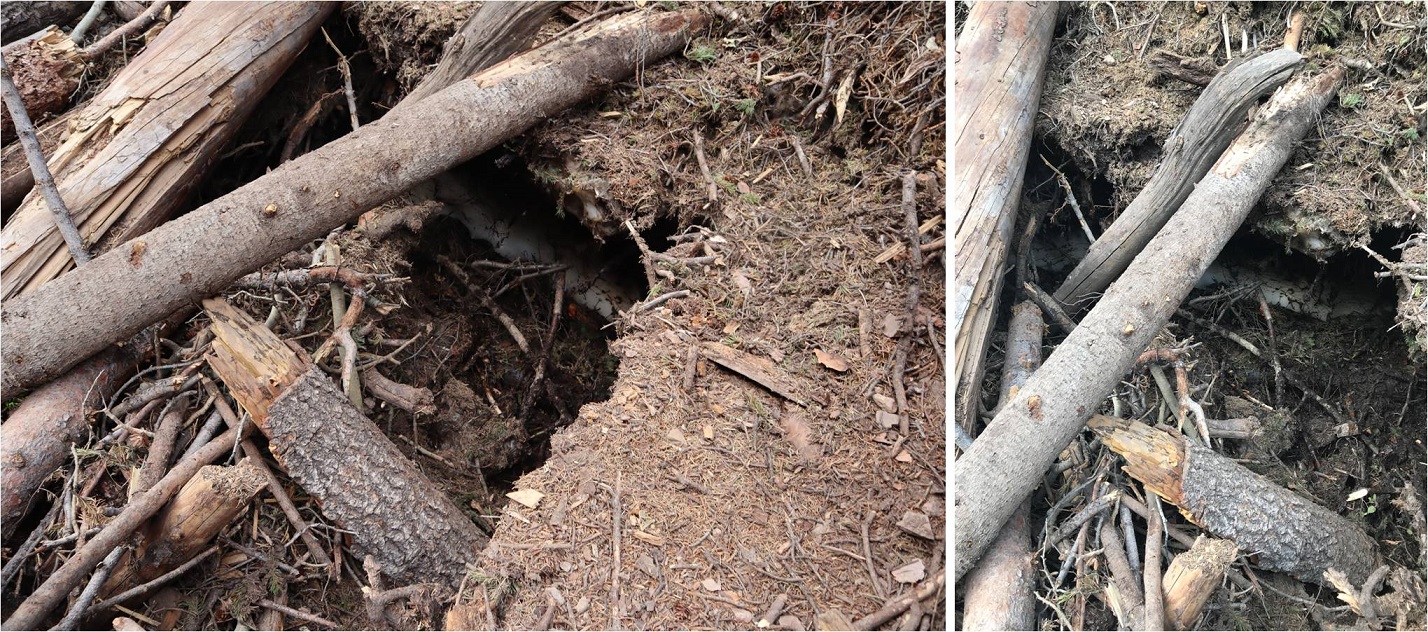
In the daylight I had no issues getting across the debris, but noticed there’s still ice and snow under the logs that’s melting and forming caverns, so be careful where you step! There were flies circling the debris.
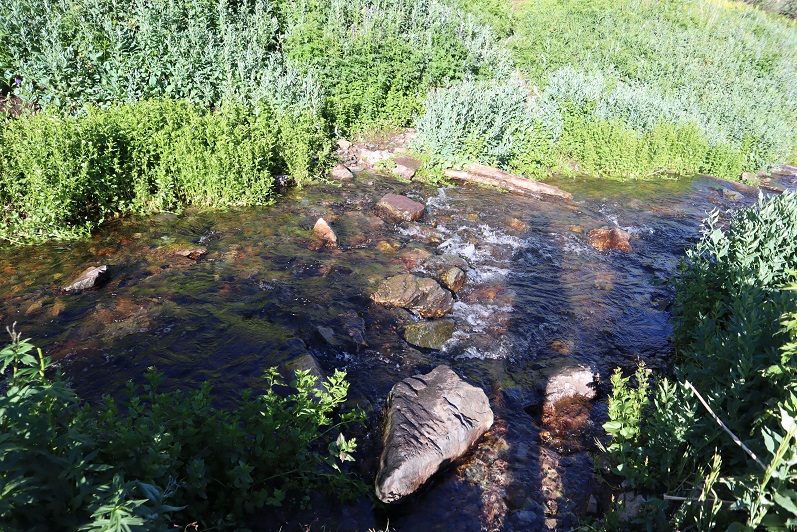
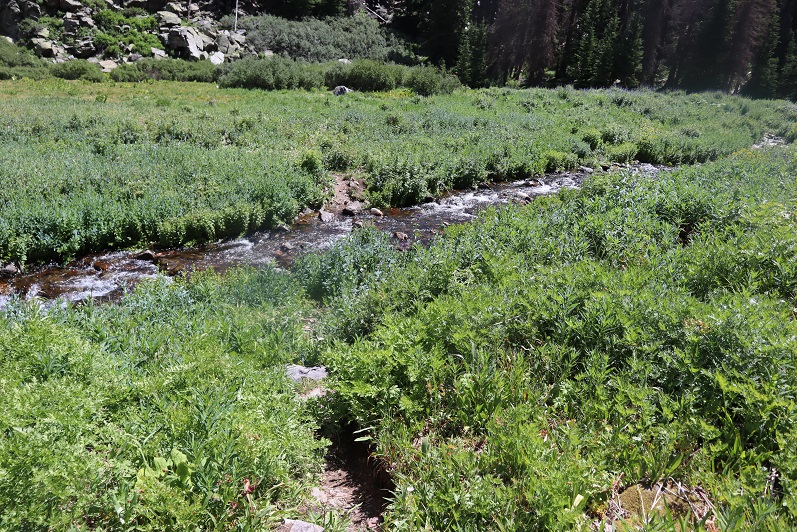
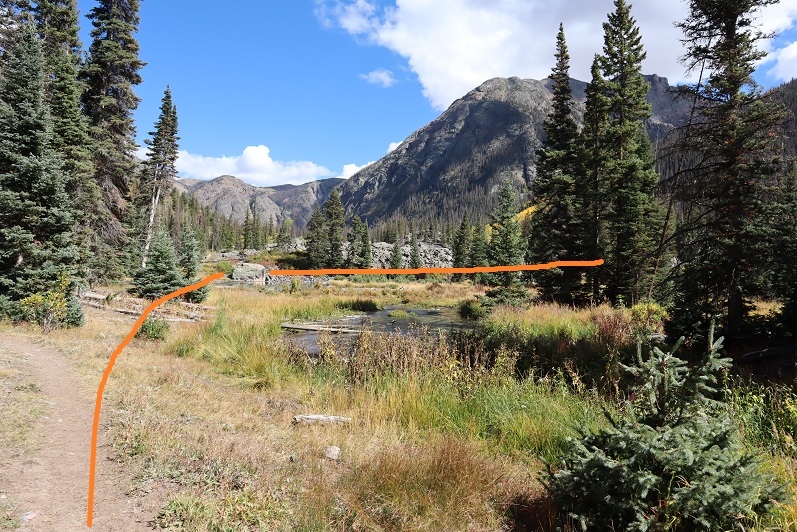
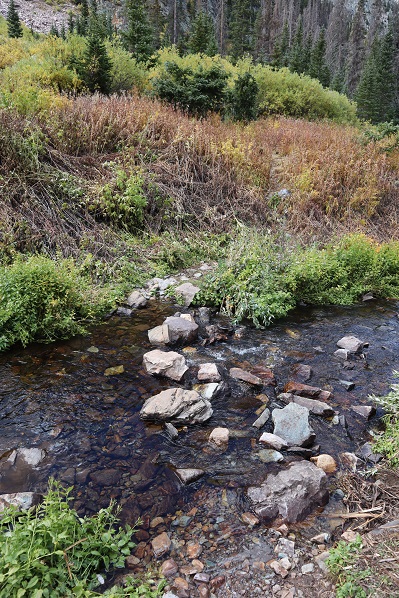
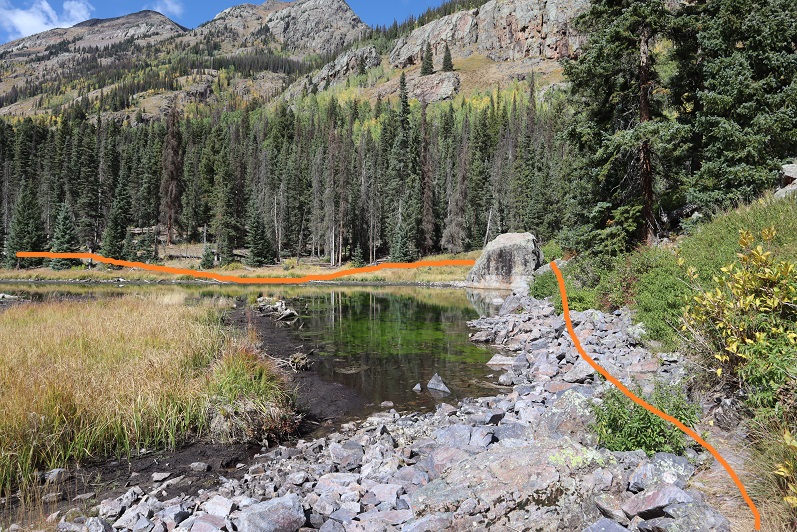
After the avy area I came across some beaver ponds and turned right (south). The best place to do this was just after the large boulder: the trail parallels a pond at this point
There was a good camping spot after the beaver ponds. Side note: anyone else’s carabineers hanging off your pack double as bear bells?
Mile 7 was the mile of creek crossings. What I couldn’t tell in the dark was this was some extremely clear water (it was refreshing on the way back to dip my bandana in it and cool off). All of the creek crossings were easy and had several options (rocks and fallen trees abound)
The trail continued to climb up the mountainside. There were frequently fallen trees on the trail (not from avalanches) but they were all passable and for once I celebrated in being short because I could pass under them easily.
This part of the hike was really cool because I started hearing elk bugling. I tried to get some of it on video but it’s hard to hear (turn your volume to the max). The bugling lasted for over an hour and came from all directions.
Elk Bugling:
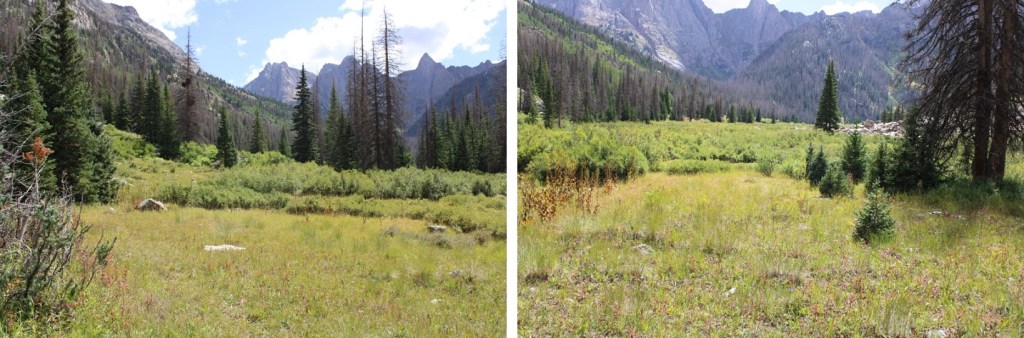
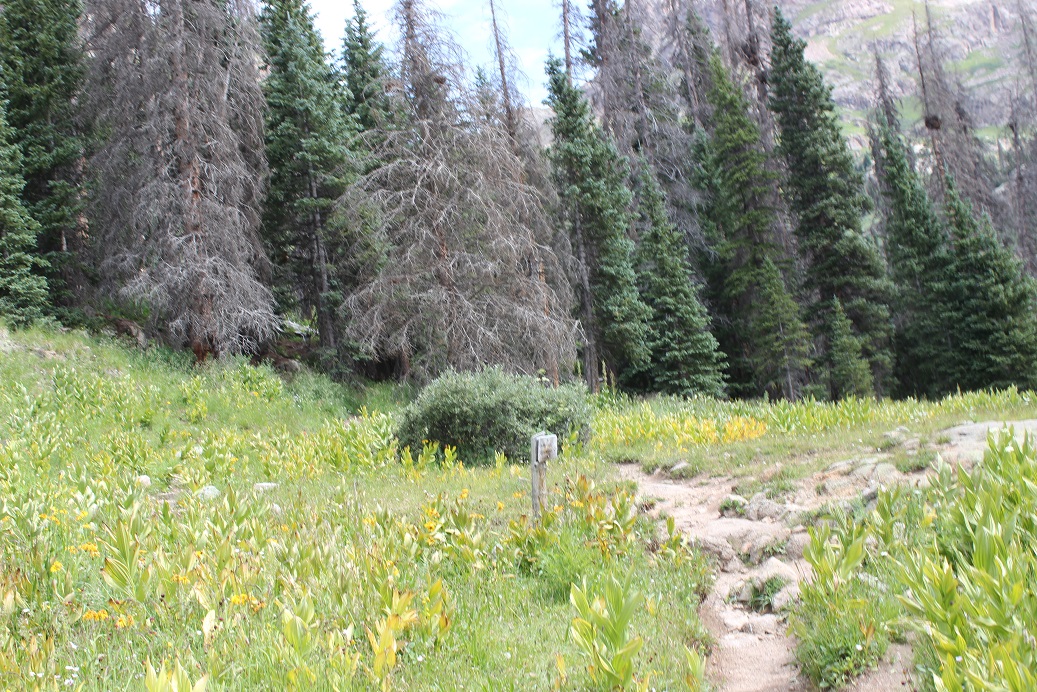
The trail was well defined all the way to the basin. I reached the basin at 9.1 miles, just as the sun was coming up. There was a light dusting of snow on the Trinities.
I followed the trail through the willows and lost one of my gloves. No worries though, because of my Raynaud’s I always bring at least 2 pairs (I had 3 today).
There’s an obvious campsite in the basin. I turned right (southwest) at the campsite at 9.8 miles- 11,380’, careful not to make too much noise because the campers were obviously still sleeping.
The trail crosses another small creek
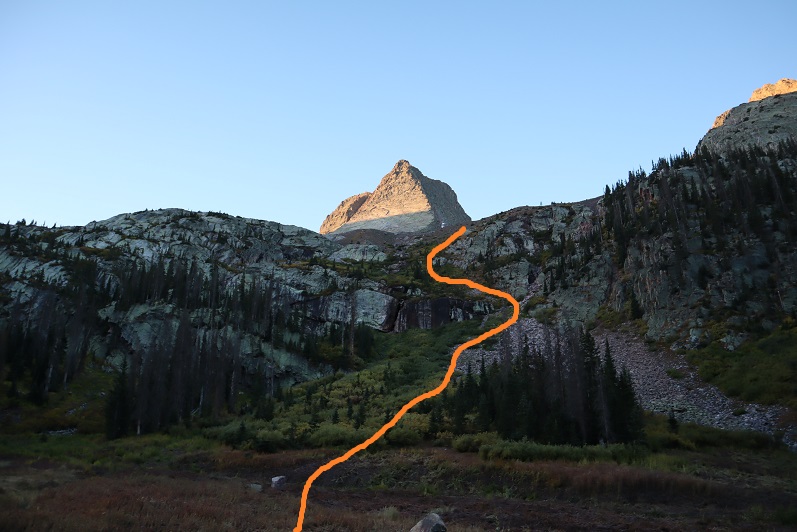
And then climbs up the hill to another (rocky) basin/amphitheater
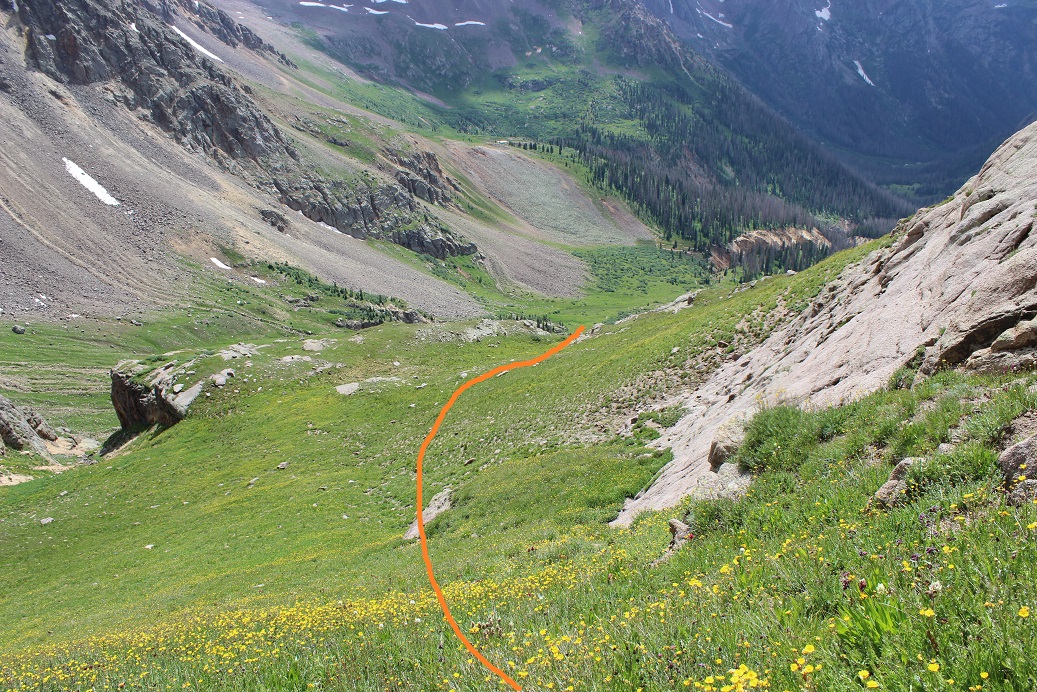
This is where the trail ends. I made my way over the talus, hiking closer to Arrow than Vestal
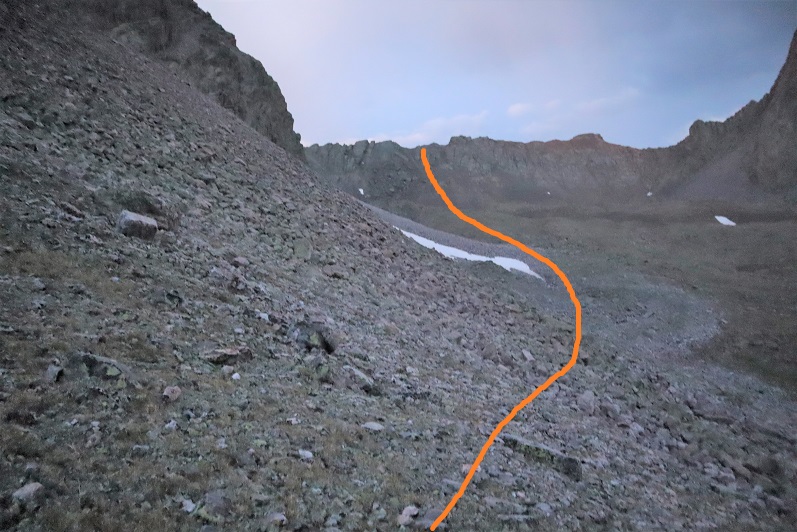
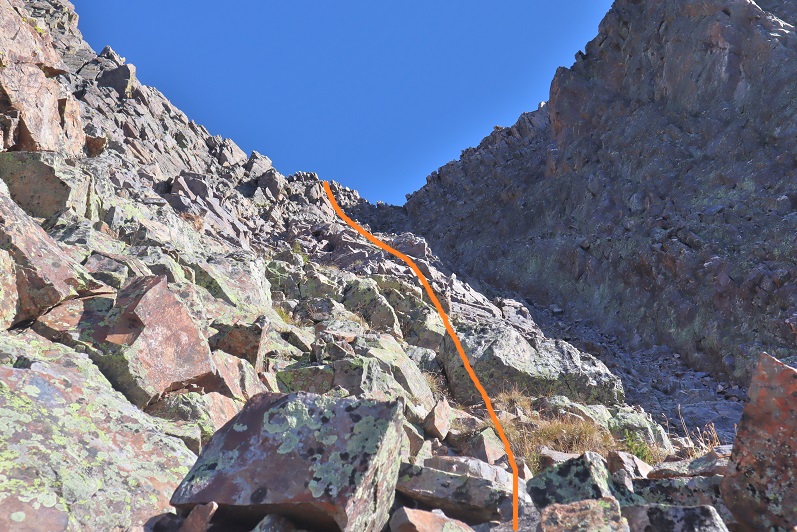
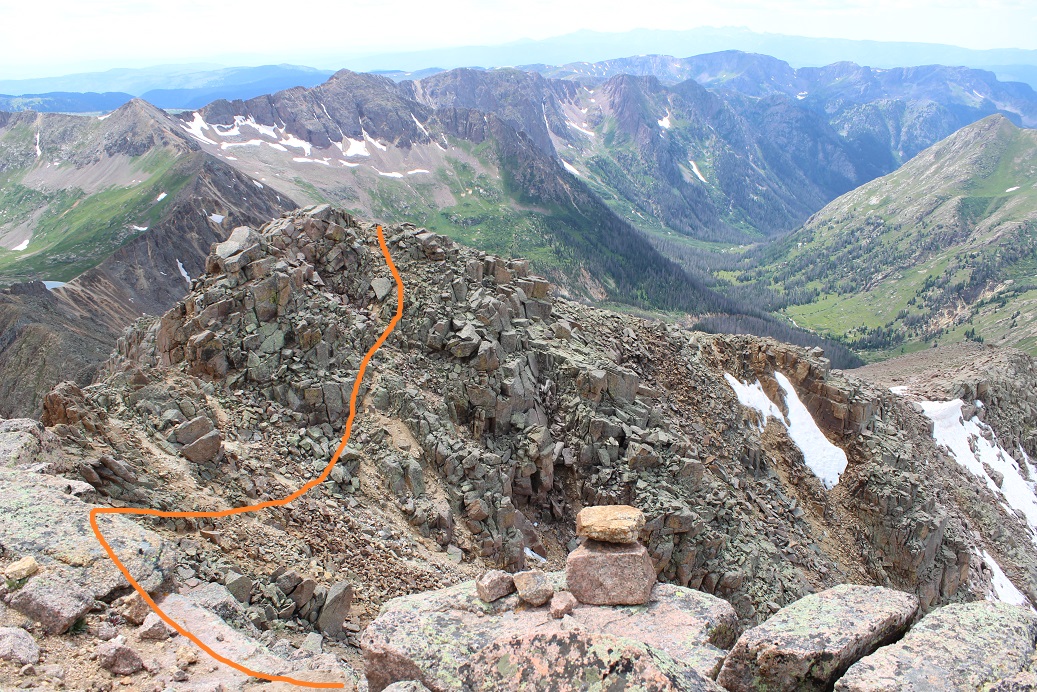
The goal is to gain the saddle at the top of the gully. This was harder than it sounds because that scree/talus is terrible. I was glad I’d worn my helmet. I strapped on my microspikes and took the solid line up, dotted line down. I’d do it the same way if I did it again.
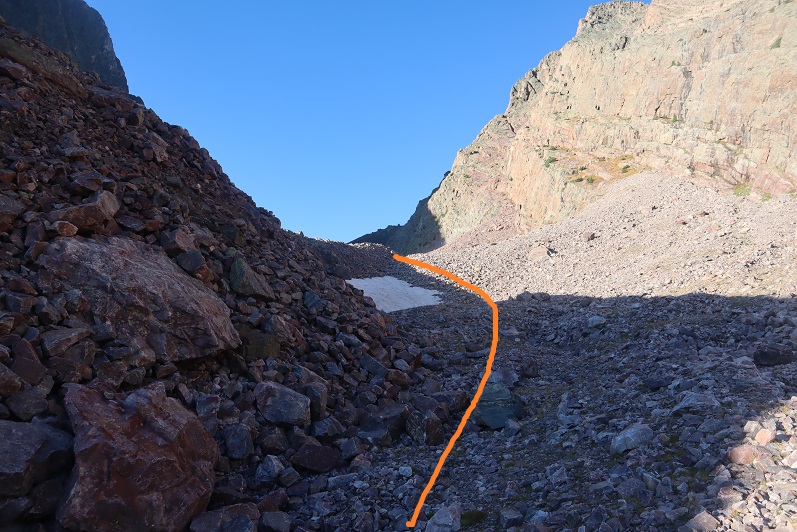
Once on the saddle I headed southeast around the backside of Vestal
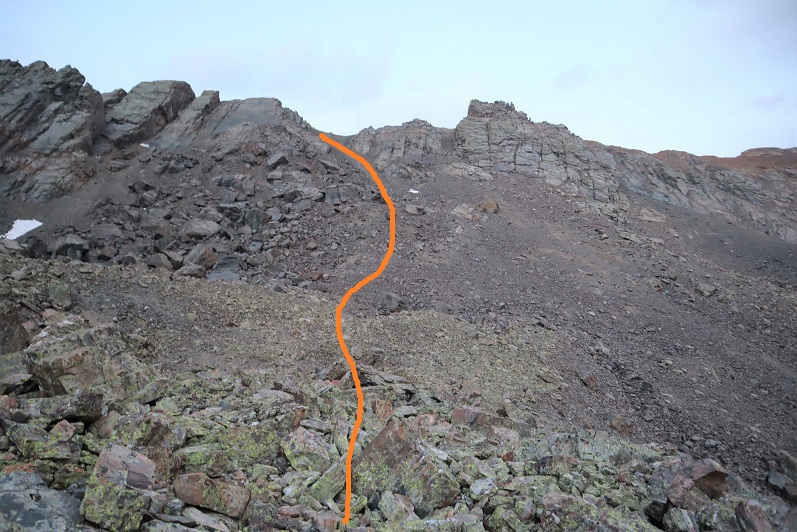
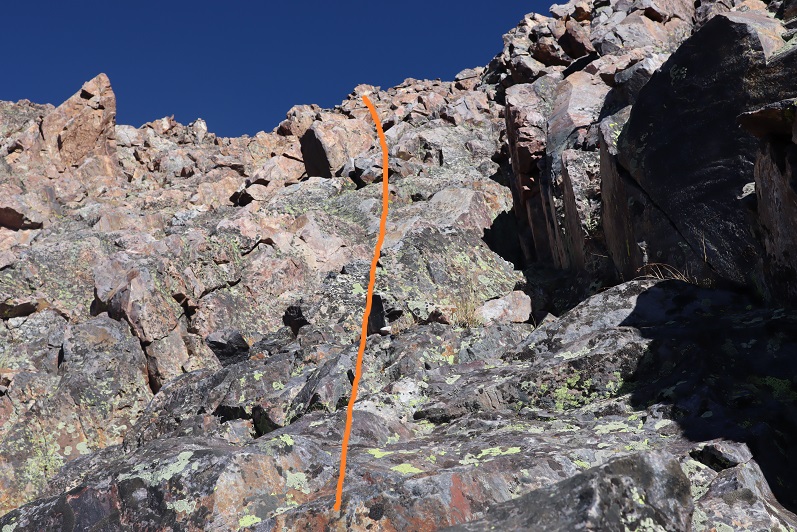
This eventually led me to an area of the mountain separated by a gully. Here I turned left (north) and climbed what I’d consider class 3 terrain towards the summit, careful not to go into the gully, aiming for where the gully originates.
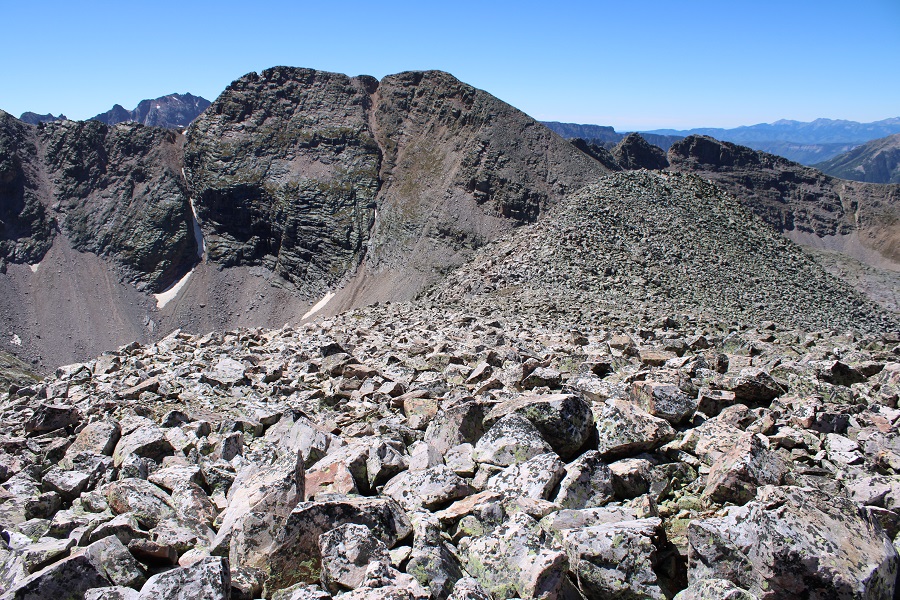
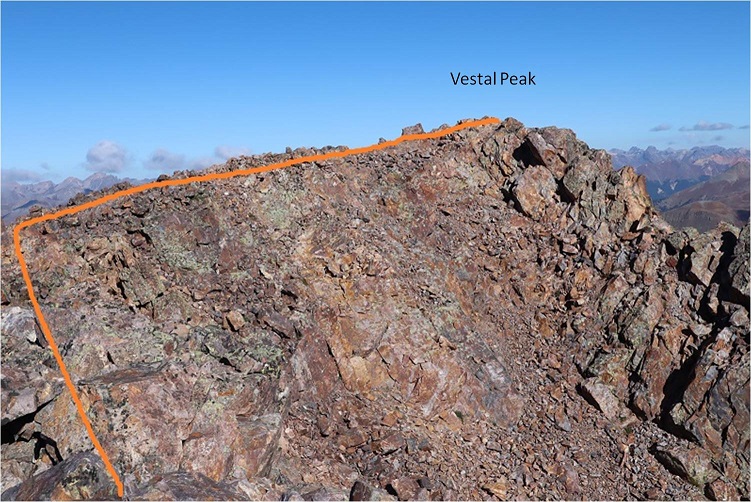
At the top there’s a false summit, but the true summit isn’t far off
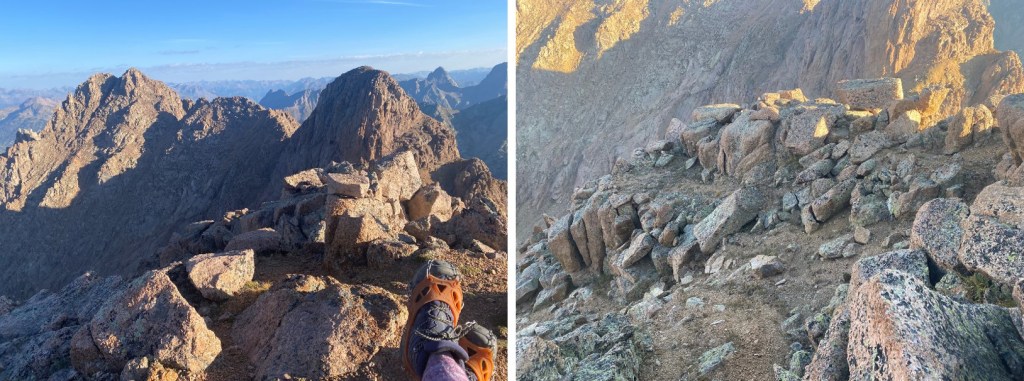
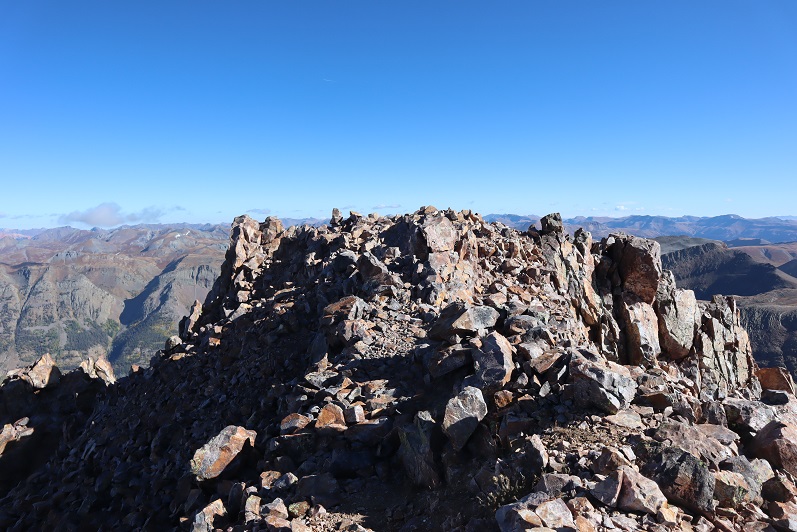
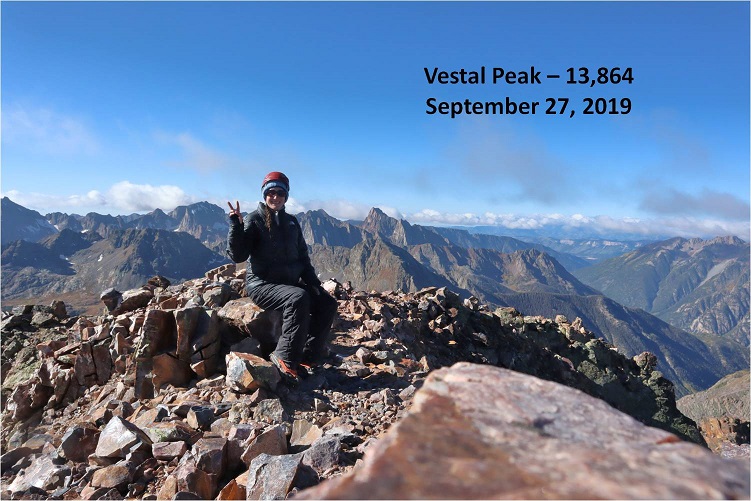
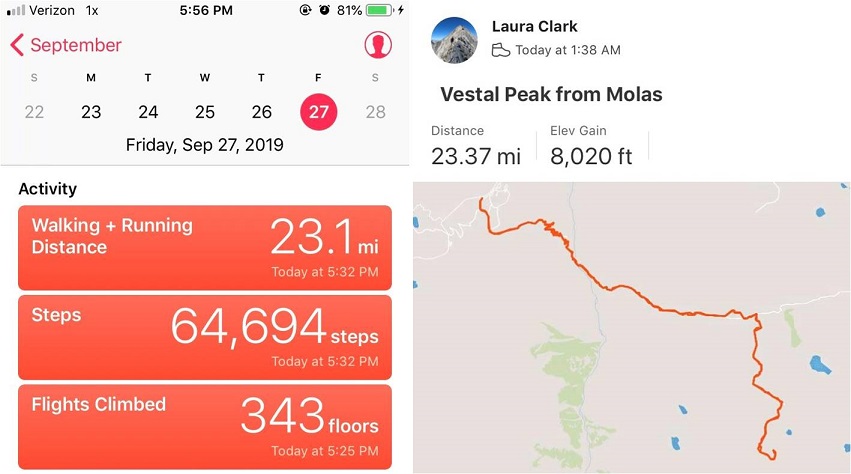
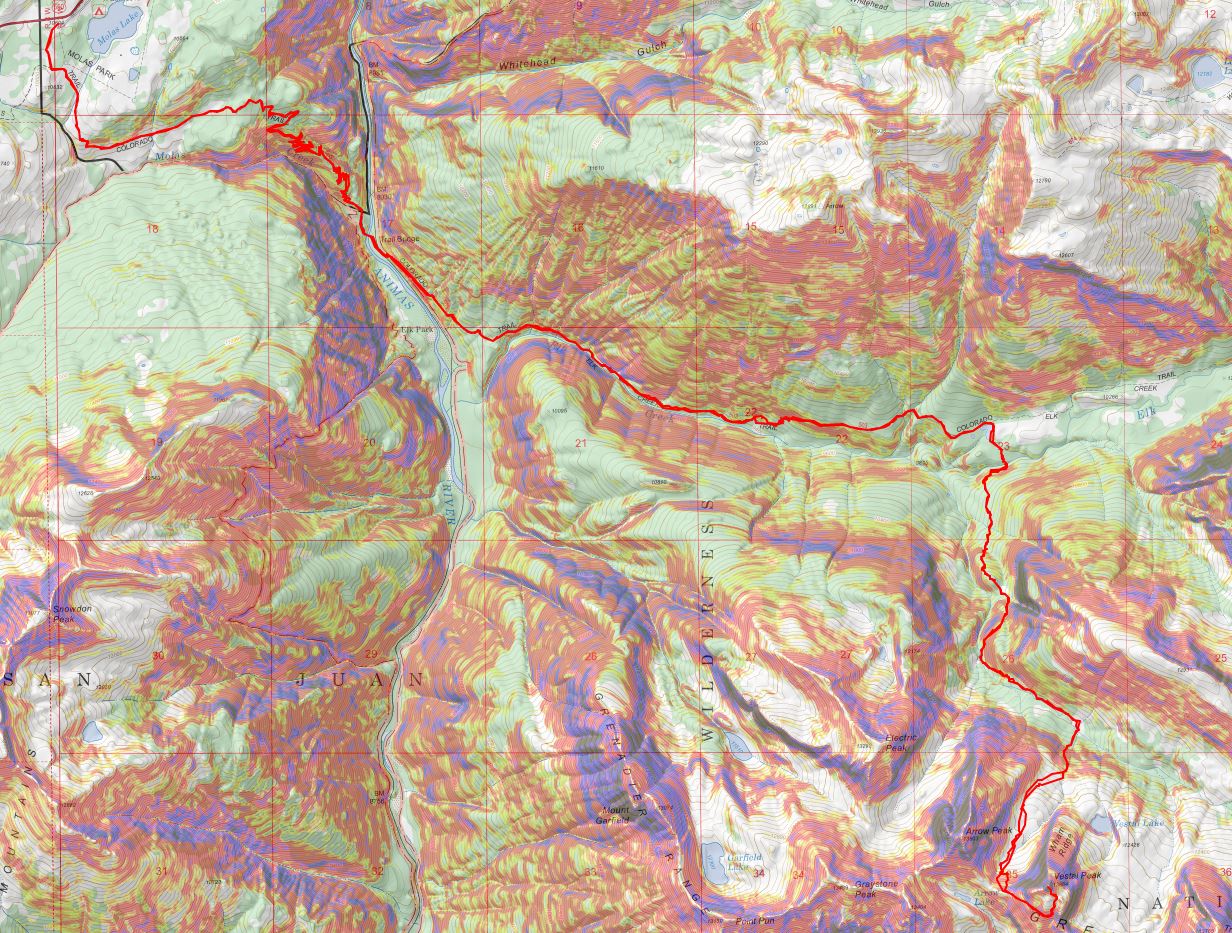
I summited Vestal Peak, my 100th Centennial, at 10am, after 8.5 hours and 11.4 miles of hiking.
Vestal Summit:
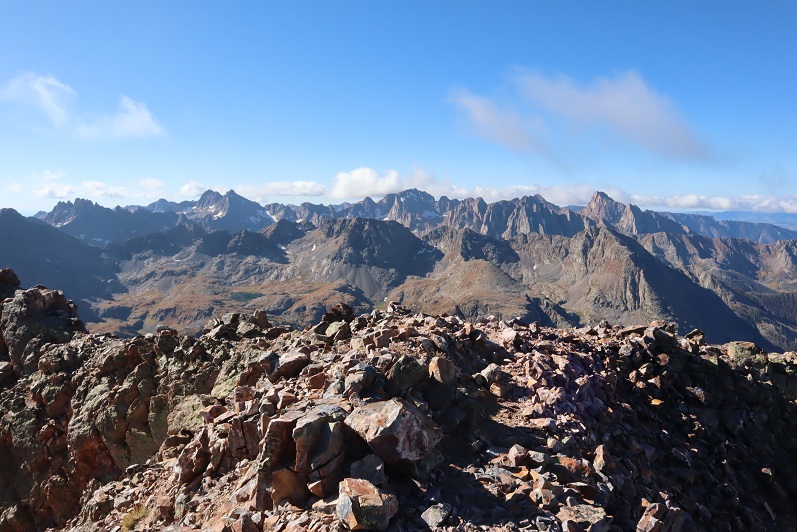
Despite the forecasted winds and cold temperatures and rain/snow it was a perfect day! I spent over half an hour on the summit, something I’ve rarely done, and took pictures of the Grenadier range and the beauty of the San Juans
Knowing the weather was nice now but it was supposed to turn I decided it was time to head back.
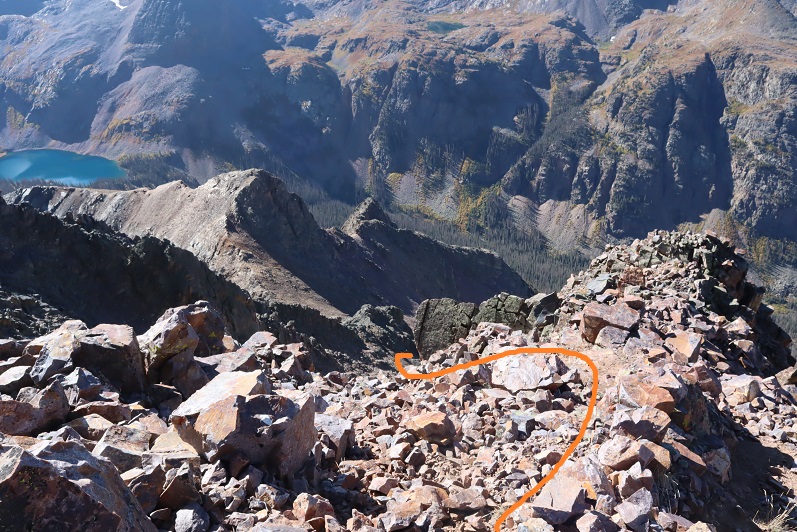
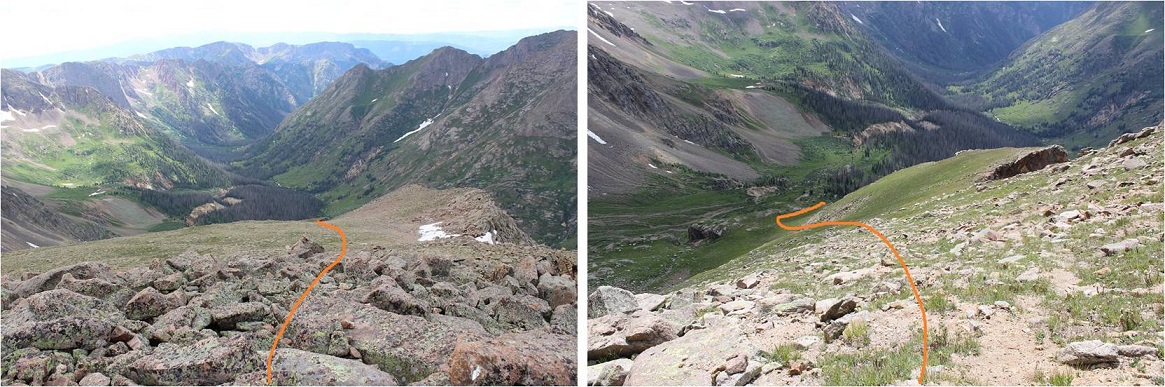
Here’s the path I took back down into the talus basin
It wasn’t pretty. In fact, I did something to a ligament in my ankle and it became very sore on the way down (still hurts, but it’s just bruised)
I decided to keep my microspikes on until I made it back down to the camping area. As I approached the area above the campsite I could hear someone shouting excitedly about nothing in particular and it looked like there were two people just finishing tearing down their tent. I figured it was a parent and child out camping and slowed down a bit to give them time to head out before me.
At the camping area I sat down for a bit, enjoyed lunch (peanut butter and pretzels) and took off my microspikes.
Here’s a look heading out of the basin
I found my lost glove (woot!) and caught up to the couple within about a mile of hiking. They were two girls in their early 20s who were out backpacking together. They seemed like they were having a terrific time (or high on something: I don’t judge) and were wonderfully boisterous. One of their boyfriends had dropped them off at one trailhead and was picking them up tonight at another one so they could make it a longer trip. We chatted for a bit and then I was on my way. The best part about the conversation? No one mentioned we were women out here alone.
The hike out was beautiful in the daylight. I made it back to the beaver pond area (I suspect the beavers moved to down by the Animas river because there’s no current sign they’re here anymore).
The avalanche area was much easier navigated in the daylight. I followed the Elk Creek Trail back to the Animas River
There were a few waterfalls along the way
I made it back to the trail register and even though it was sunny it started raining. For the rest of the hike it rained and didn’t stop. I was glad I’d worn waterproof clothing, even if it hadn’t been needed for much of the day. The rain was nice in the beginning but eventually the thunder started and I got a bit antsy. It was a beautiful hike out though, and much better than the trail back to the Purgatory trailhead (I’d take Molas over Purgatory any day).
The downside to the rain was the mud. It got really bad about half a mile before the trailhead and mud was starting to stick in layers to my boots. The last mile felt like it took forever to finish, but that was most likely because by this time I was quite tired. I’d made a good decision to make this a day trip: as I turned and looked back at the Vestal Basin I could see it was covered in dark clouds full of rain/snow/graupel/etc.
I made it back to my truck at 5:30pm, making this a 23.5 mile hike with 8020’ of elevation gain in 16 hours.
I changed in my truck into new hiking clothes and took a quick wet-wipe bath. I re-braided my hair, ate a packet of tuna and drove to the next trailhead. It rained the entire 5 hour drive there.
50 meter rope was perfect (but tie the ends, because it was close)
I knew the risks going in: The weather didn’t look all that great and my first day in would be from no sleep from the night before, but I’m used to these circumstances and decided to go ahead and attempt Jagged Mountain this weekend.
If I were to do this climb again and I had the time availability I’d stretch it into 4-5 days. Unfortunately, with my work/volunteer/mom schedule I knew I’d never get that much time off in a row, so my plan was to hike up to the base of Jagged Pass the first day, either summit Jagged that night or the next morning, hike back down to the Animas River the next day and camp somewhere between the cutoff to Noname and the base of the Purgatory Trail, and hike out the third day, with the understanding I could change plans as I went (one of the benefits of solo hiking).
I’d spent quite a bit of time going through my gear to make it lighter, and I think I shaved off about 10lbs, making my pack a much more manageable 35lbs (including rope, harness, webbing, etc.)
I drove the 6.5 hours to the Purgatory Trailhead and was on the trail by 2:30am. This is the third time I’ve hiked in from Purgatory, and the third time doing so in the dark. I decided to get some stats from Strava this time.
First Trail Bridge @ 4.3 miles, 2 hours of hiking.
Second Trail Bridge (cutoff to Chicago Basin) @ 9.9 miles, 4 hours 30 min of hiking
Needleton Bridge @ 10.8 miles, 4 hours 50 min of hiking
The Needleton Bridge area has some private property surrounding it, and several social trails to cabins. This is the correct trail to bring you towards Pigeon Creek and Noname Creek. It starts just to the right of the Needleton Bridge.
The path here is easy to follow and brings you to the “campers meadow” / Aspen Grove at the turnoff for the Pigeon Creek approach to Ruby Basin
From here the path was much better than I’d anticipated. There were cairns and a semi-worn footpath to mark the way north through the forest, paralleling the Animas River
Then, for no reason whatsoever (except of course the river below) comes Water Tank Hill. It’s worse than it sounds: 200’ straight up the side of the mountain (and then back down to the river afterwards).
When I got to the top of Water Tank Hill I noticed the water tank was actually on the other side of the River. I decided this would be a great place to take a rest. As I sat down I noticed a Black Bear racing over the tracks and through the yellowish/green grass in the middle right of this photo. I was reaching for my camera when I saw her cub bounding after her. I wasn’t fast enough to get a picture, but thought to myself: Cool! About 10 years ago I’d taken the trail from Durango to Silverton and asked one of the workers how often they saw bears, and he said in the 25 years he’s worked there he’s only seen one. I felt pretty special to get to see this pair this morning. I also asked myself what they were running from?
I sat here for a bit and had breakfast (I decided to force myself to eat this time). Beef Jerky and Almonds for breakfast isn’t all that bad. After a short rest I put back on my gear and headed down Water Tank Hill, which was just as bad as the way up
Back at river-level the trail was once again straightforward. I thought to myself how this trail was much easier than the Pigeon Creek trail (but to be fair I’d done that one twice in the dark both ways, and I was doing this one in the daylight).
I crossed several creeks
And turned right (east) and followed the Noname Creek trail. Once again, the trail was easy to follow (but obviously not maintained)
It follows the Noname Creek. I found a patch of raspberries growing as the crow flies from the raspberry patch on the trail to Ruby Creek, as well as thimbleberries (which always seem to grow alongside raspberries)
The difficulty came when I reached the first avalanche area (I think there are 3 in total, but two of them kind of run together). I’d heard to avoid most of the debris to cross the creek, and so I did so. This ended up being a terrible idea (maybe I crossed at the wrong section?). There were trees piled on top of trees that reached heights well over my head. This made crossing the river a bit dangerous, as the trees weren’t stable and there were huge gaps. Hundreds of trees criss-crossed the creek.
Eventually I had to cross the creek again and there was still avalanche debris to contend with
The above picture is deceptive, as there are still large areas of trees piled on top of each other to cross and no clear path to take. The trees are tumbled together and rotting. I had to secure each step carefully, even if it looked like the log was solid (some would roll). Crossing this area took a long time, and is not something I’d recommend doing in the dark. As I came out of the 2nd avalanche area I realized what I should have done was stick more to the left (north) and I told myself I’d do that on the way back. I was so excited when I reached a trail again!
About half a mile after I found the trail again I hiked a bit up a hill and found myself at the Jagged Cabin, which was more run down than I’d anticipated. I made it here after 18.2 miles in 10 hours, 42 min. I’m sure the avalanche area slowed me down…
I took off my pack and rested for a bit, going over the next part of the route.
I put back on my pack and headed east through willows and more forest and more uphill. I went left at this junction and came across another small avalanche area that was annoying but not difficult.
I entered another clearing and went left again, up the hill to the basin below Jagged Pass
Here route finding was a bit of a challenge because there were so many trails, but as long as I stayed on a trail and kept the stream to the right of me I was headed in the correct direction
It started raining halfway up this hill, and this is where my troubles began. I’d totally expected it to rain (each day called for rain between 12-5pm). I just hadn’t anticipated how drenched I’d get from just a little rain. You see, I was hiking through overgrown grass and willows
The rain collected on the plants and soaked my pants as I walked through them. I think it’s worth noting everything I was wearing was “waterproof”, including my socks, pants, and jacket(s). Within 15 minutes I was soaking wet. No worries though, because I had a change of clothes in my pack and I could dry off once I reached my campsite. Here’s the rest of the route to the small lake I camped at. There was no trail here and the route I took included some boulder hopping
I made it to my campsite at a pond just below Jagged pass (12,210’) after 21.1 miles and 13 hours 30 minutes of hiking. Note, this is NOT the unnamed lake at 12,522’
Jagged Campsite:
It was about 4:30 in the afternoon. I set up camp quickly, thankful the forecast only called for rain until 5pm. Camp was just a tarp, bivy, and sleeping bag, so setting up didn’t take long. I changed my clothes, laid out my wet pants and socks to dry, ate dinner (more jerky and nuts) and filtered some water. There were flies and mosquitoes, but the flies seemed particularly interested in me. I’d been sweating all day and they were intrigued.
As I was filtering I found an umbrella that had seen better days. I wondered how it got here? In any event, it soon became “useful” (not really) as it started raining again. I quickly packed up the clothes I’d set out to dry and sat under the mangled umbrella, watching the rain.
The rain didn’t look like it was going to stop anytime soon, so around 5pm I decided to take a nap. I woke up around 7pm to a fantastic view of my campsite in the evening glow.
I was also a little bummed: Had I just missed my opportunity to summit Jagged by taking a nap? There wasn’t a cloud in the sky, so the rain couldn’t have lasted too long. Oh well, it had been a long day, so I decided to go back to sleep to prep for tomorrow.
It rained most of the night. On the positive side, I was nice and warm and dry inside my bivy and sleeping bag. I woke up several times: a few because it got stuffy and I couldn’t breathe (but due to the mosquitoes I’d wanted to keep my set up as air tight as possible). Another time it was to rain, and once to a very loud grinding noise coming from below me. It sounded like a rabbit slowly biting through a carrot, and a little like a hand saw slowly cutting through wood. I heard this a few times and figured out it was most likely a marmot burrowing below me, extending its tunnels (or something).
At 5am I woke up to clear skies and sat in my bivy for a full half hour just gazing at the stars. I could make out dozens of constellations, a few satellites, and at least 4 meteors flying through the sky. I was pleasantly surprised at the lack of clouds.
Curiously, I thought I saw a flash light up the mountains. The first time I saw it I thought my eyes were playing tricks on me. The second I looked around for lightening (sure that was what it had been). No clouds, so it couldn’t have been lightening. The third time I saw it I thought maybe it was someone hiking in the dark and their flashlight was causing it? That didn’t make much sense, and I couldn’t see anyone with a flashlight below, so I ruled that out as well.
I didn’t want to move, not only due to the amazing nighttime view but also because it was a bit chilly; but I needed to get a move on.
I left all my nonessential gear under my tarp, put on my helmet, and even though it was dark I headed in my intended direction. There was a grassy slope to the left (north) of me I took to a rocky area and up and over the pass
I made it about 5 minutes before I had to stop because I couldn’t see anything and it was getting dangerous traversing over the wet, rocky area. I sat in one spot for about 20 minutes, allowing the sun to rise before continuing on. As I sat there I could see what I hadn’t been able to from below: a storm to the west. It had been lightning I’d seen, but luckily the storm seemed to be petering out.
This gully was full of rocks and nasty scree that took careful foot placement but was straightforward
At the top of the gully I turned right (south) and got my first good look at Jagged Mountain
I spent some time planning my route. Here’s the route I took, staying below the areas of snow and just to the right of the gully.
This area is steeper than it looks
Here’s the path to the first crux, just to the right of the gully
I turned to look back on the way I’d come and noticed that storm that looked like it was going away wasn’t. In fact, it was coming right at me! Ugh! It was only around 7am and it wasn’t supposed to rain until noon but yet here was obvious rain headed my way. I was glad I wasn’t in the Vestal Basin right now.
The rain started falling and I got out my poncho, put my back to a rock, and sheltered in place for half an hour, waiting for the rain and graupel to stop. While I sat there I did a lot of thinking. I knew due to this rain the rocks would be wet, so I’d have to be very careful. Also, I needed to set a turn back time, which I set for 12pm. In my mind I was thinking this rain could be a good thing: It wasn’t supposed to rain until noon and it was raining now: maybe this would be it for today? (insert God laughing here).
Once the rain stopped I set to work at the first crux. You’re supposed to go over these grassy slopes, but I wasn’t able to get over the first bit. I wished I’d brought my rock climbing shoes!!! I tried and tried and tried but I just wasn’t tall enough to get myself up and over the first rock: I had no traction with my feet and nothing to hold onto with my hands. There had to be another way?
I went to the right and found another area that looked “easier”. I attempted to gain the slope this way but wasn’t able to pull myself up here either. Ugh! So I went back and tried the slopes again, but it just wasn’t working. I went back to the second area, took off my pack, and was easily able to climb up. This was no good though because I needed my rope to rappel. So I attached a small rope to my pack and tried to haul it up after me: the rope broke. Face palm.
Ok, next idea: I rummaged around in my pack for my knife but was unable to find it? My idea had been to use it kind of like an ice pick for leverage on the grassy slope (since there were no rocks/etc. to grab onto). I was upset I couldn’t find my knife, but I did find my microspikes and decided to put them on. These gave me the traction I needed to pull myself up and onto the slope from below. I then made my way around and finished the first crux. (The dotted line is how I think you’re supposed to get over this area, but I wasn’t tall enough to make it happen).
The climbing became steep. I’m assuming this is the second crux
There weren’t cairns here but I knew I was on the right track because I kept seeing anchors set up. I inspected each one on my way up and they all looked good enough to use on my way down.
I made it to the notch, got my first good view of the sky and turned left. It looked like the weather was going to hold out for me today after all!
Here’s that airy traverse. There’s a lot of exposure here but luckily for me the rocks were dry and it was a short section. I took the solid line, but if I hadn’t been wearing my backpack I could have fit through the hole where the dotted line is (behind the rock is a tight fit with a pack).
I was feeling pretty good about myself at this point as I rounded the corner and saw the chimney. It used to be a class 3 chimney but there had been a rockfall and the top two rocks in the chimney were “new”. I’d heard they weren’t that difficult.
So I decided to just go for it. Indeed, the first part of the chimney was easy. Easy until I came to the place just below those new top two rocks. They were positioned in such a way they were overhanging the rocks below. I tried and tried and tried but I wasn’t able to get around the rocks, so I retreated to the bottom of the chimney and studied the route again.
It looked like the way to get over this area was to balance on the ledge to the left and haul myself over. So I tried again, but that crack was smaller than a pencil and there was no way I was going to be able to balance on it without rock climbing shoes. Drat!
I was getting seriously frustrated and tried several more times from numerous different angles and was unsuccessful. What was really demoralizing was I was so close to the summit! I went back down the chimney (again), took off my pack, and studied the rocks. There had to be a way up and over this area, and I had to bring my rope with me (there was no way I was soloing down the chimney without a rope). I told myself I was going to keep trying over and over again until my turnaround time at noon. I was kicking myself for the second time today for not bringing along my climbing shoes, but I wasn’t ready to give up yet.
I just needed a little bit of leverage. That’s when I got an idea! I put on my climbing harness, attached my rope to the belay device (because I’d need the rope on the way down but couldn’t carry it up in my hands). I took some webbing and carabineers with me and left everything else (including my camera) at the base of the chimney.
I climbed back up the chimney again and this time when I made it to the rocks at the top I turned around and faced away from the chimney. What I did next I’m sure isn’t kosher, so I’m not going to describe it in detail (but if you’re interested I’ll tell you at a 14er HH). It involved a lot of upper body strength, some webbing, and a move I learned in elementary school when I’d play on the bars at recess. My feet made it up and over the right side of the chimney first and I hauled the rest of my body over, thrilled I’d figured this problem out!!! Here’s the route I took and a look back down from the top of the chimney
There was an anchor set up about 10 feet from the top of the chimney that looked sketchy. I was glad I’d brought my webbing and rope up with me and decided to secure it now before summiting, lifting and pulling the rope hand over hand until I had it all above the chimney. I didn’t need a lot of webbing but I’d been unable to find my knife, so if you get up there and wonder why someone left all that webbing I can assure you it wasn’t on purpose: I just didn’t have anything to cut it with (I did have more webbing in my pack however, so this wasn’t all of it).
I summited Jagged Mountain at 10am
Jagged Summit:
Here are some summit views and a pretty robust anchor set up if you want to rappel the 165 feet down instead of heading back the way you came (that’s a lot of rope!)
Jagged Mountain was by far the most challenging summit I’ve ever attempted. I was very proud of myself for not giving up, even when I seriously wanted to. Now I just had to get back down to my campsite safely. I turned to exit the way I’d come and rappelled back down the chimney, retrieved and recoiled my rope and put back on my gear.
Here’s looking at the traverse back to the notch
I used every anchor station on the way back down, collecting and recoiling my rope after each descent (that’s exhausting!)
I brought a 50 meter rope with me and it was exactly the right length. I rappelled 4 times (including the chimney) and on the last rappel to right above the snow my rope just touched the ground (a great reason to tie a knot in the ends of your rope!).
I was coiling my rope here when I saw the flight for life helicopter heading towards the Animas River. I said a silent prayer for those involved (stay safe adventuring out there friends!), put on my microspikes and headed back to the pass, keeping an eye on the weather.
At the pass I took a selfie just because I could and because, hey, it’s Jagged
Here’s the route to my campsite (note I camped below the unnamed lake: I didn’t see a reason to hike all the way up there?) and the path out through the basin.
I made it back to my campsite around 12:45pm, making this about 6 hours campsite to summit to campsite: that’s a long time for 2 miles round trip! (I blame it on the rain…)
It had been my intention to hike back to my camping area, eat lunch, gather my gear, filter some water, and head back. Mother Nature had other plans. As soon as I made it to my camping area it started to rain, so I turned myself into a tarp burrito and rested for about an hour. When it became apparent the rain wasn’t letting up anytime soon I had some choices to make. I didn’t have any dry clothes but the ones I was wearing because I’d been unable to dry my wet clothes from yesterday. I could:
Stay where I was and wait out the rain and hike back the entire route tomorrow. By doing this I’d be chancing the snow forecasted for tonight and the conditions would be similar to today since the sun wouldn’t have been out to dry the rain
Hike back now in the rain and stop somewhere along the way to camp in wet clothes
Hike all the way to Purgatory in wet clothes (approximately 20 miles)
I knew I’d gotten more sleep last night than I usually get in 2 nights time so I was well rested. I also knew if I tried to sleep in wet clothes I would just shiver all night (and sleeping naked wouldn’t have been any good since I’d need to put on wet clothes in the morning and hike out anyway, so I might as well just hike out now). I have a lot of energy and need to exhaust myself to go to sleep: staying put didn’t mean rest.
Curiously, the umbrella that had been there yesterday was now gone. I’m assuming a marmot took it?
I decided to hike out, so I packed up my gear (found my knife in my sleeping bag: It must’ve fallen out of my pocket last night) and in the beginning tried to use my tarp to shield me from the rain (in case you’re wondering, it didn’t work). I was soaking wet in the first 5 minutes. Everything, including my waterproof pants, socks, jacket, and shoes were sopping wet. I could actually see the water oozing out of the top of my shoes and when I put my arms down I saw water dripping out of my sleeves.
It rained. And rained. And rained. After about 2 hours I screamed (to no one in particular) ‘”STOP RAINING!” It didn’t work and it didn’t really matter: the ground and trees and bushes were going to be wet for days (the forecast called for more rain/snow).
My main concern was getting past the avalanche area while it was still daylight. I stayed north this time and went over some boulders, avoiding trees where I could, which ended up being the better idea. There was still no trail to follow, but I was able to pick up faint game trails at times through the 3-4 foot brush. The difficulty of the avalanche area was compounded by the rain and slick conditions. I was slipping and sliding over tall-grass camouflaged wet rocks and trees; the only consolation being I was doing it now instead of tomorrow (in worse conditions).
In case I didn’t describe it properly last time, the avalanche area is full of enormous trees and branches piled on top of each other in various states of decomposition and some areas are like trap doors: they looked olid but you could fall right through them. My shins and thighs and forearms are covered in bruises. My hiking pants are completely torn up and I’m in the market for a new pair. I kept falling and about halfway through my phone stopped working (I’m guessing because it was waterlogged). I didn’t dare get out my DSLR in these conditions so I mentally resigned myself to losing pictures/my track, which stunk because I really wanted them from this climb!
Thankfully I made it out of the avalanche area and back on the Noname Trail in the daylight, and from there booked it down to the Animas River. I wanted to get as much of this hike done in daylight as possible so I wasn’t taking breaks. I was taking “bend over to get the weight off my shoulders and pump my thighs up and down” breaks though, usually for 5 seconds worth of ujjayi breath before continuing on.
As I hiked I looked for fresh animal racks in the mud and unfortunately didn’t see any. There were brief periods where the rain stopped, but I’d only get about halfway dry out before it started raining again. I didn’t bother being careful crossing the creeks: my feet were already soaked, so a little creek water wouldn’t hurt any.
I made it to about a mile before Water Tank Hill when a man surprised me. He was dressed head to toe in rain camo. “Oh, I didn’t see you” I announced (well, duh) and we talked for a bit. He looked like a hunter but I noticed he had a tripod in his pack and guessed he was a photographer. He had an accent that suggested Eastern Europe. He was soaking wet as well and had no idea how he was going to get dry tonight. When I told him I was hiking back to Purgatory he first said “wow, that’s a long way!” and then asked me if I’d come this way on my way in. We had a laugh over 200 feet of “why am I doing this?” (Water Tank Hill) and then I was on my way.
I made it up Water Tank Hill and decided to take a short break. It was 8pm. I played with my phone again and was finally able to get it to turn off and reboot. Once it was done I was able to open my phone again: yes!!! I hadn’t lost my data and it looked like my tracker was still going. I was still soaking wet and my feet felt like I was hiking in water shoes, but this, this was a major win!
From here it didn’t take long to make it back to Needleton, where I breathed a huge sigh of relief, knowing I still had 11 miles to go but they would all be on a well established trail with no route finding. I just needed to keep going, slow and steady.
I’ve hiked the Animas River Trail several times, and it’s getting easier to know where I am and how much further I have to go, even in the dark. For the first time I didn’t see any campers (most likely due to the weather forecast). I stopped for another break at the base of the Purgatory Trail. Despite not having time to filter water I still had plenty so I didn’t filter any now. I had some peanut butter and was on my way again to hike the last 4.3 miles up to the trailhead.
I’ve done this last part three times: once in the daylight and twice now in the dark. Let me tell you, hiking up Purgatory in the dark is the way to go! The daylight sun in demoralizing. Sure, tonight I was soaked due to the rain, but I wasn’t gulping down water every few seconds to stay hydrated. Also, the first couple of times I hiked this trail I got frustrated due to all the ups and downs in elevation. It’s no fun to gain elevation just to lose it again. So I changed my mindset this time: I was going to have to do the last mile directly up from the river anyway: I might as well enjoy the downhill times while I could.
I made it back to my truck around 1:45am, making this a 46 mile hike with 11,481’ in elevation gain in 47 hours. I took off all my gear, cleaned myself up, and decided to take a nap before heading home. I tried for 30 minutes to fall asleep, couldn’t, and got up and just drove home (too much sleep yesterday?)
There had been a 30-70% chance of rain today from 12-5pm, but it had rained at 7am, 12-5pm, 7pm, 8-10pm, and as I turned my truck on to leave it started pouring again…
I did a ton of research before setting out for this hike. It was my goal to link up the Chicago Basin with the Noname Creek Approach via Twin Thumbs Pass. All of my research said it was “doable”, but I hadn’t found a trip report indicating it had ever been done, so I went in kind of expecting to fail. I was trying to eliminate hiking into the Chicago Basin to summit Jupiter and then hiking back out and attempting Jagged Mountain via the Noname Creek Approach. If I could link up the hike via Twin Thumbs Pass I’d be saving about 20 miles and several thousand feet of elevation gain. And it almost worked…
Sleep is for armatures, so I left my house at 8pm after hosting a Girl Scout awards ceremony, arriving at the Purgatory Trailhead at 2:15am. I was on the trail by 2:30am. The first 10 steps hurt. A lot. My pack was wayyyyy too heavy. I’d gone through it multiple times eliminating what wasn’t absolutely necessary and it was still painfully heavy. I’m not sure how much it actually weighed (I was too scared to weigh it) but I’m guessing it was around 45-50lbs. That’s excessive, especially for someone who only weighs 105lbs. But I just couldn’t lose any more weight: I’d already thrown out unnecessary items like a camp stove (it was all peanut butter and beef jerky for me this weekend) a pillow (not needed), a change of clothes, bug repellant, etc. and had switched my “good” backpacking sleeping bag for a lighter weight one. What was weighing me down was all the gear: rope, harness, carabiners, webbing, etc. All that stuff was necessary if I wanted to attempt Jagged this weekend, which I did.
So those first 10 steps hurt and I should have known then to stop and reassess this adventure, but I told myself it would eventually get easier if I just kept moving so I just kept moving. Yep, I kept moving but it didn’t get easier. I gingerly hiked my way down the Purgatory trail towards Cascade Creek, losing elevation the entire way and thinking to myself “hiking down shouldn’t be this difficult”.
The trail follows Cascade Creek southeast towards the Animas River. There’s a bridge here to cross
and a good trail to follow to the Railroad tracks. I crossed the tracks and continued on the Animas River Trail.
The trail is easy to follow, but was overgrown in areas. It follows the Animas River, which I could hear but not see in the dark.
While the trail follows the river it still has numerous small ups and downs in elevation, which I thought were completely unnecessary: I’d rather stay at a steady elevation. The sun started to rise and I made it to the Needleton/Purgatory/Cascade Junction and followed the Needleton Creek Trail to Chicago Basin. Side note: It is not 7 miles to the Purgatory Trailhead. From this point my tracker says it’s 10 miles. A little ways up there’s a trail register and information area. I didn’t sign the trail register because I hadn’t intended on exiting this way.
From this area it’s another 6 miles to the Chicago Basin. This part of the trail follows Needle Creek as it climbs towards the basin. I loved hearing the water rushing past and seeing the waterfalls along the way.
It seemed like it took forever to make it to the basin. I realized I was almost there when I saw the avalanche debris. There really wasn’t very much damage, and luckily there were already clearly established trails as a workaround.
The hike into Chicago Basin is indeed beautiful!
I didn’t see much evidence of mountain goats. I was here last year and they were everywhere. This year I saw a couple, but nowhere near as many as before.
Normally I like to do the hardest peak first, but today the easier peak was my first goal for several reasons: I wanted to get a look at the backside of Jagged to see how much snow there was on route and I wanted to see if there was still snow on Twin Thumbs Pass. I knew I didn’t need all my gear to summit Jupiter so I stashed my pack and just brought the essentials: water, my camera, and some snacks. Oh yeah, snacks. I should probably eat something? I had about 12 almonds and kept them down so I considered it a win.
If you go left at this junction it takes you up to Twin Lakes. If you continue straight it will take you on a well established path towards Jupiter.
The trail crosses Needle Creek and heads west up the hillside
About halfway up the hillside there’s an old mine. I’d already explored this mine the last time I was here so I didn’t feel the need to go inside, but I did see a pack outside, and called in to say hello to whoever was exploring.
I met a man who was really excited about the mine. His hands were white from the walls, and it looked like he’d been having a time. We chatted for a bit: He’s already hiked the Colorado Trail and was now looking for a way back to Durango. He asked me if I knew if the trail “went” and since I’d already done a lot of research on the Johnson Creek/Vallecito trails when planning this trip I knew if he made it to the saddle he could take Columbine pass over. I envied this man his freedom to just explore and not worry about time and wished him luck. I wish I had more time to adventure!
I continued on the trail to treeline, crossed a creek, and here the trail (mostly) stopped. I felt so much better hiking with just the essentials: I felt like I could skip up this mountain!
There were a few cairns and what looked like overgrown social trails but no established trail after the small creek crossing. Here’s the route I took up the side of Jupiter.
It’s much steeper than it looks, but the wildflowers made up for the difficulty.
About halfway up the hillside I started getting worried about the weather. There was a 30% chance of rain today between 2-4pm, and the clouds forming didn’t look good. Luckily the wind was blowing them away from me, but I kept an eye on them just in case. I really, really didn’t want to turn back at this point (but I would have if necessary). I kept looking for the man I’d met, watching for his ascent of Columbine pass, but I never saw him again (even from a distance).
I continued on and came across cairns. There seemed to be several ways around this part. I took the solid line up, the dotted line back down.
I continued up the side of the mountain, aiming for the cairn I could see at the top of that pile of rocks, sure that was the summit (spoiler alert: it wasn’t)
Imagine my surprise when I made it to the top of that pile of rocks, only to see… this
Wait? I thought this was a class 2 hike? That looked like class 3 scrambling to me. I was a little put off I’d left my helmet back with my gear in the basin and a little upset with discovering this had been a false summit, but decided to just go ahead and finish. I took the solid route up, the dotted line down. I felt the dotted line route was indeed class 2+, but the solid route was class 3. There were several ways to summit here, and so many cairns they lost their intended purpose.
I summited Jupiter Mountain at 2pm.
Summit Video:
I’d been hiking for almost 12 hours at this point, but without my full gear for the past 2 hours I was feeling pretty good. I decided to take a look around. Jagged from this side was mostly snow free!
Twin Thumbs pass was obscured by Point 13,472, but it looked mostly clear of snow as well. This was all good news. Now I only had to worry about the north facing sides of the mountains (which hold snow longer).
Time to head back. Here’s the route I took off Jupiter (this also shows Columbine pass in the background)
And back down to treeline
Back at treeline I had a better view of Twin Thumbs pass. It appeared clear. Now it was time to retrieve my gear and head up to Twin Lakes.
I saw my first mountain goat of the day here
I re-crossed Needle Creek and stopped to filter some water. It was a warm day and I was forcing myself to drink. It was making me nauseous, but at least I wasn’t light headed. The cool water felt really good, and I started just drinking it from the filter to save time. After my water bladder was full I went to find my pack. Argh! I wasn’t able to find it! This was not good. I was sure I’d left it by the sign? After about 5 minutes of searching I realized there were two similar signs and I was at the wrong one. I made my way about 10 yards further and was relieved to find my pack where I’d left it, and as an added bonus, no goat/marmot damage to be seen. The downside? There were so many mosquitoes here! I’d wanted to rest for a bit, but the mosquitoes wouldn’t quit, so I decided to just get going.
My pack was on the ground so I sat down to put it on and groaned as I leaned to the side to stand up. That pack was heavy!!! Time to trudge up to Twin Lakes. Luckily this is a very well marked trail.
About halfway up I saw my second set of goats for the day. They were directly on the trail and looked me straight in the eye as I got close. I was wondering how we would pass each other politely when one of them just veered off the path a little to the left, went around me, and then hooked back up with the trail. They must be used to this…
From this angle Jupiter looks imposing
As I continued on I saw a sign that said “No camping beyond this point: Including Twin Lakes Basin”. Well shoot. There went my “Plan B” of sleeping at Twin Lakes if I couldn’t make it over the pass. Oh well, it looked like the path was clear, so it shouldn’t matter anyway.
I made it to the Twin Lakes area and had a great view of my intended route. There looked to be a little snow, but nothing I couldn’t handle
Also, there’s hidden snow here, more than anticipated
No worries though: I just put on my crampons, tested the snow for stability, and easily traversed over to the final gully before Twin Thumbs pass. I took the solid route up, and the dotted route down (the dotted route is the better route).
There were no cairns or paths or footprints here, or anything indicating anyone had used this route in the past. I was huffing and puffing by this point but really wanted to just get over the pass. When I made it to the top this is what I saw
Ok, this looks good! I could see where I wanted to be and the path I wanted to take to get there.
Right now I was pumped! I probably had 2 hours left of daylight and a clear visual of where I wanted to be. And it was all downhill. I began my descent through a class 4 chimney (not as easy as it sounds with a full pack on my back. Also, this move wouldn’t have been necessary had I taken the dotted line route.) I was immediately taken aback by how steep the scree here was.
It quickly became apparent the route up to Ruby Basin (should I need to use it) was much steeper than it looked on a topo map.
This is where my trouble began. I made it to the first patch of snow and thought it would be similar to the snow I’d encountered in the Twin Lakes area. I stepped on it and promptly sank up to my waist. My feet however were still dangling in the air beneath the snow. This was not good. It wasn’t lost on me I’d narrowly avoided breaking a leg. My large pack is what had caught me and kept me from sinking further. It took some time but I was able to get myself out of the hole I’d fallen into.
A bit shaky now I stood where I was and considered my options. I probed the snow a bit with my trekking pole and realized there was a layer of snow a couple of inches thick over the rocky ground. This layer broke easily (obviously) and I did not feel comfortable traversing on it, even with crampons. I looked for a clear line of scree/rocks to traverse to get me where I wanted to go and just couldn’t make out a snow free path.
I could continue to descend and look for a snow free path, but I gave finding one a low probability since the areas I couldn’t see were the steeper parts of the route. It looked like no matter what I was going to have to cross snow. The sun had already gone down behind the mountains and I figured I had about an hour of daylight left. There was nowhere to camp on this side of the mountain.
I had two options: either continue on and hope to find an area without snow I could cross or to turn around and head back. The choice was obvious. I wept a few silent tears, turned around, and started my ascent back up and over Twin Thumbs Pass: making it to Noname creek was optional, making it back to my truck was mandatory. Here’s the path I took back up to the pass. The dotted line is the path I took down. I’d recommend the solid line.
Ok, so I turned to head back to the pass but my shoes immediately slipped as if I were wearing ice skates. This wasn’t good. The scree here was terrible for an ascent. I hadn’t brought along my microspikes (to save weight) but I did have my crampons, so I took those out, strapped them on, and wouldn’t you know it? Better than microspikes! Sure, I was ruining the crampons, but at this point the benefits outweighed the risks.
I knew I was racing against the clock: the sun was rapidly setting and I needed all the daylight I could get. I found an unexpected boost of adrenaline and booked it up to the pass. I was shocked at how quickly I moved, and actually entertained the idea of hiking all the way back to Needleton tonight and attempting Jagged in the morning.
I made it up and over the pass and kept my crampons on until I made it past the snow near Twin Lakes. Here I stopped to take off my crampons and at this point the adrenaline stopped and exhaustion took over. I took off my crampons but was too tired to take off my pack and put them away so I carried them in my left hand. This worked well until it got too dark to see and I needed to carry a flashlight (I’m not a fan of headlamps).
I was stumbling in the dark. Stumbling because at this point I was exhausted and also because I’d completely ruined my hiking boots: they had holes in them the size of quarters and the tread was completely gone. That pass had been more brutal than I’d anticipated. Every few steps I’d slide due to lack of traction and catch myself. One time I didn’t catch myself quick enough and I landed on my shoulder in a bunch of willows. Ouch. That was it; I needed to stop and set up camp. Now. Gone were my fantasies of setting up camp at Needleton, or even in Chicago Basin for that matter.
But I’m a rule follower and I’d seen the sign. I wasn’t allowed to camp here, and I knew it. So I kept on. It seemed like I’d hiked for miles before I finally made it to the “no camping past here” sign, and when I did I dropped all my gear and haphazardly set up my tent directly in front of it. I did a terrible job: I couldn’t see in the dark and honestly I was too tired to care what I was doing. It took me twice as long as it should have to set up and I did so directly beside the trail. Dumb move, and I knew it, but I didn’t care. I needed to rest. Oh, and eat. So far all I’d had were a few almonds and I knew I needed more calories. I opened my bear sack and had tons of options: beef jerky, tuna, almonds, peanut butter. I chose dried mangoes. Not the most caloric but it was what my body was craving. I only wished I’d brought more.
I fell asleep around 10:30pm and woke up every half hour after midnight. You see, I was camped directly next to the trail, so every set of early morning hikers intent on Eolus, Windom, and Sunlight passed right by me. As they did so they all directed their flashlights at my tent. What they most likely didn’t realize is that when you shine a light on a tent it doesn’t allow you to see inside of it, but it does brightly illuminate the inside of the tent. So every 30 minutes or so it was like someone turned on a light inside my tent. My fault for so many reasons I know, but I was too tired to care. And cold. It had been a bad idea to swap my good sleeping bag for a lighter weight one.
In the middle of the night I could hear a goat beside my tent. It was occupying itself with the bandana I’d left outside. I could actually hear him a foot or so from my head, and mentally visualized him picking up the bandana with his teeth and swishing it from side to side.
I left my tent at daylight. My bandana was now separated from my trekking pole but lying inches from where I’d been in my tent. Apparently the goat didn’t want the souvenir. I wasn’t hungry but forced myself to eat a packet of tuna and quickly packed up my gear. Taking down the tent was the worst: my fingers were frozen stiff, despite it being about 40* the night before. My whole body ached from yesterday. I wasn’t sure I was going to be very efficient today, and laughed at myself for thinking last night I could even attempt Jagged today. I was honestly considering camping at Needleton and making the rest of the journey tomorrow.
It was Saturday morning but I didn’t pass many people as I exited the basin. I hurt all over, but especially my shoulders, and specifically my right shoulder. I was worried I’d broken my clavicle when I’d fallen into the willows yesterday. Every hundred feet or so I had to stop and lean over to take the weight off my shoulders for a bit. I tried re-adjusting my straps to distribute the weight more evenly but that wasn’t helping. When I made it to the bridge 2 miles from the Needleton junction I stopped and took off my pack. I realized one of the upper straps had come unbuttoned and fixed it. This seemed to help a bit, but I was still worried about my shoulder. It was red and sore and there was an unfortunate bump right on the collarbone. It wasn’t lost on me I’d carried most of this gear for nothing…
I’d rested for a bit and decided that was enough for today and was on my way. I met a trail runner who stopped to talk for a bit. “Isn’t Chicago Basin as close to heaven on Earth as you can get?” she asked. I agreed, but mentally thought Purgatory was a more apt name, and most likely why Chicago Basin felt like heaven. I really thought she was running to the junction and back but I never saw her again (and she should have caught back up with me if she were doing so).
I was bummed. The weather was perfect, which meant I was wasting a perfect day not summiting something. And I hurt. I was sore and each step hurt more than the last. My shoes were trashed and I’d carried 30 extra pounds of unnecessary gear for dozens of miles and elevation gain for naught except conditioning. Suddenly Sherpas made sense. By the time I made it to the Animas River I was done feeling sorry for myself and instead decided to focus on the positive: I’d been here three times but never hiked the trial in the daylight. I was going to enjoy the view of the river and the shade and the occasional view of the train passing by
I was actually making good time and made it to the railroad crossing around lunchtime.
I’d made a deal with myself here I’d take off my pack for a long time (at least 15 minutes) and have lunch and soak my feet in the river. The mosquitoes had other plans however. Eventually I figured out they came in small swarms and if I killed all 12-15 of them I’d have a solid 2-3 minutes before the next swarm arrived. On the positive side the water was cool and it felt good to sit for a bit.
Animas River:
Lunch was a couple spoonfuls of peanut butter. I strapped on my gear and got ready for the hardest part of the hike: the last 4 miles and several thousand feet of elevation gain. I headed northwest and hugged the side of the mountain
I was pleasantly surprised to realize this trail is mostly in the shade. I was also surprised to realize just how closely this trail comes to Cascade Creek. Hiking this at night I’d always assumed the creek was down much further from the trail than it actually is.
So the shade was nice but the elevation gain was exhausting! I kept gaining and then losing elevation for what seemed like no purpose whatsoever. Why couldn’t the trail just gain steadily in elevation? It was disheartening to gain a couple hundred feet just to lose it again.
There were raspberries on this trail, and while I’m not fond of raspberries these were by far the best I’ve ever had. I couldn’t collect them fast enough (sorry woodland creatures that would have benefited from them, but they were delicious).
This meadow looks totally different in the daylight
The last quarter mile was the worst of the entire hike for several reasons: This part was a steep uphill climb, the sun came out again from behind the clouds, I was tired, my pack was heavy, and I ran out of water just as it began. This last quarter mile took me half an hour to complete (which is very, very slow for me).
Last time I was here I’d hiked Pigeon and Turret’s 39 miles in a day and I’d had hallucinations. This time I realized I’d gladly hallucinate again if it meant not being in this much physical pain from carrying such a heavy load. The only redeeming factor to the weight was I’d used every piece of equipment I’d brought (except the climbing gear, but that was necessary if I’d intended to climb). The physical pain was terrible, and I wondered to myself how long it would take me to forget the torture I’d put myself through over the past two days. Hopefully less than two weeks because I totally plan on doing this again. Soon.
I made it back to my truck at 2:30pm, making this a 41.5 mile hike with 11,098’ in elevation gain in 37 hours.
But my adventure wasn’t over yet. I limped back to my truck and set my pack on my tailgate. I unlocked my truck and downed an entire 2 quart bottle of cranberry juice in-between huge gulps of air. It was still early enough to make today productive, so I decided to drive to a Subway, get dinner, and then sit in my truck and figure out what to do next. A nap was definitely in the plan.
Did you know it’s difficult to find a place to sleep in your car in Durango? Seriously. Every parking lot I entered had “no camping” signs, and many even had “no sleeping in your car” signs. So I drove to a park on the edge of town, thinking this would be a good place to rest for a while. I got out my list of peaks I want to attempt in the next few months and did some calculations. None of them were close enough to drive to tonight to make them worth summiting tomorrow. Drat. It looked like tomorrow was shot as well. Which was probably for the best seeing as how I couldn’t move at the moment, but I was still disappointed.
It was too hot to sleep in my truck without the windows open and there were a surprising number of children screaming at the park as if being there itself were pure torture. I gave up on the nap and drove for a few hours until I found a National Forest Trailhead I could park at for the night, avoiding suicidal deer running across the road. This was a fabulous idea and I was able to sleep under the stars.
I woke up as the sun began to rise and drove the rest of the way home. I was itching all over, and when I looked in the mirror I noticed I had so many mosquito bites it looked like I had the chicken pox. Lovely. I randomly picked a CD out of the glove compartment and began singing 9-5 at the top of my lungs along with Dolly, my mood instantly improved. Until I stopped for gas. I slid out of the truck and my legs buckled underneath me. I quickly looked around to make sure no one had noticed me, and then pulled myself back up into my truck, laughing at myself for even thinking I could’ve hiked another peak today. My body needed a few days to rest, and I need to figure out a way to lighten my pack…