Hesperus Mountain – 13,238

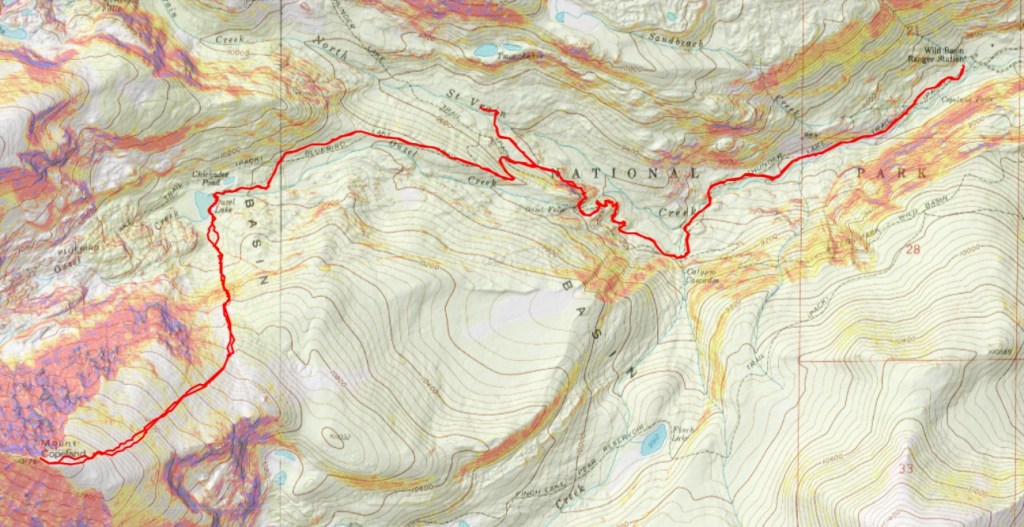
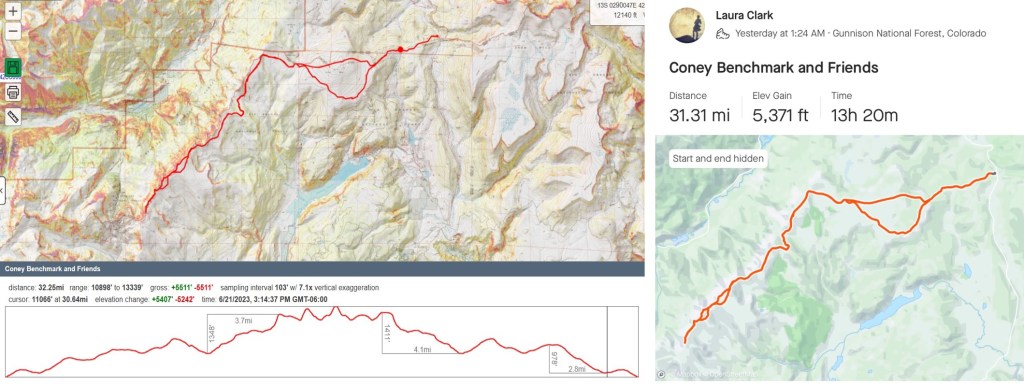
RT Length: 11.08 miles

Elevation Gain: 3440’

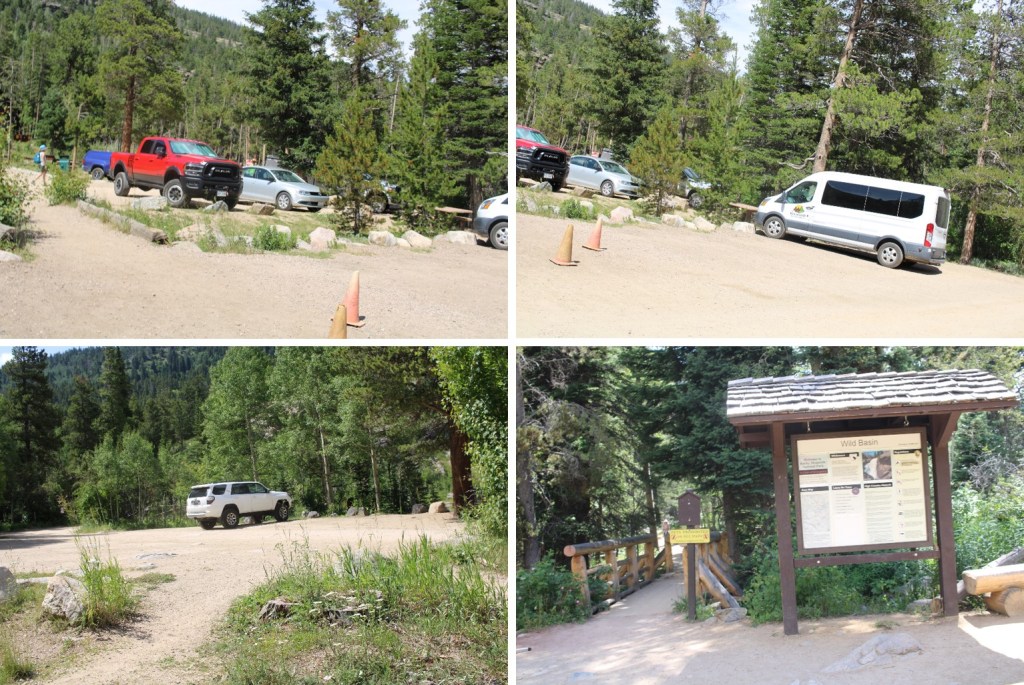
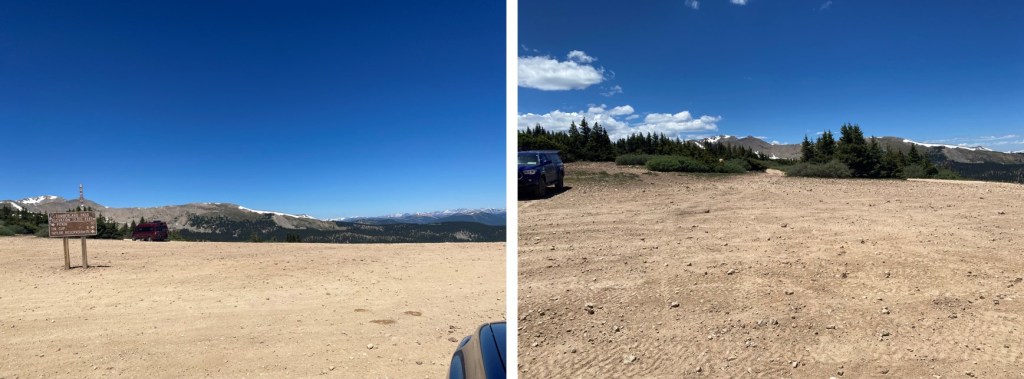
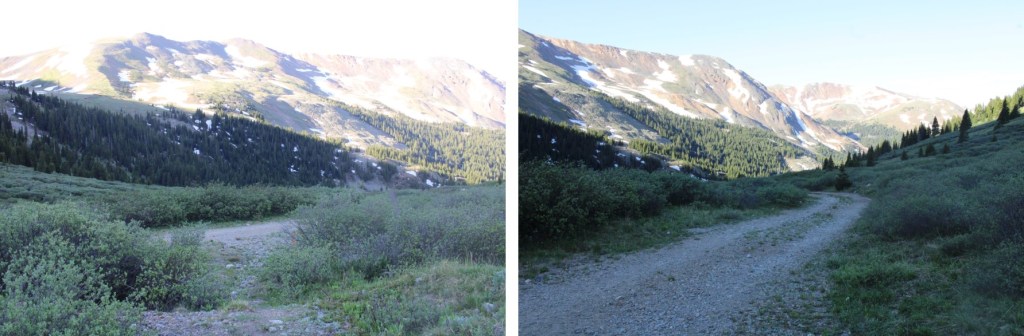
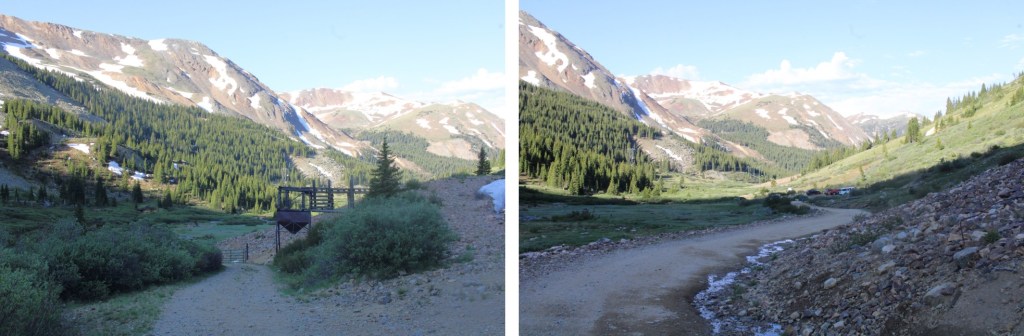
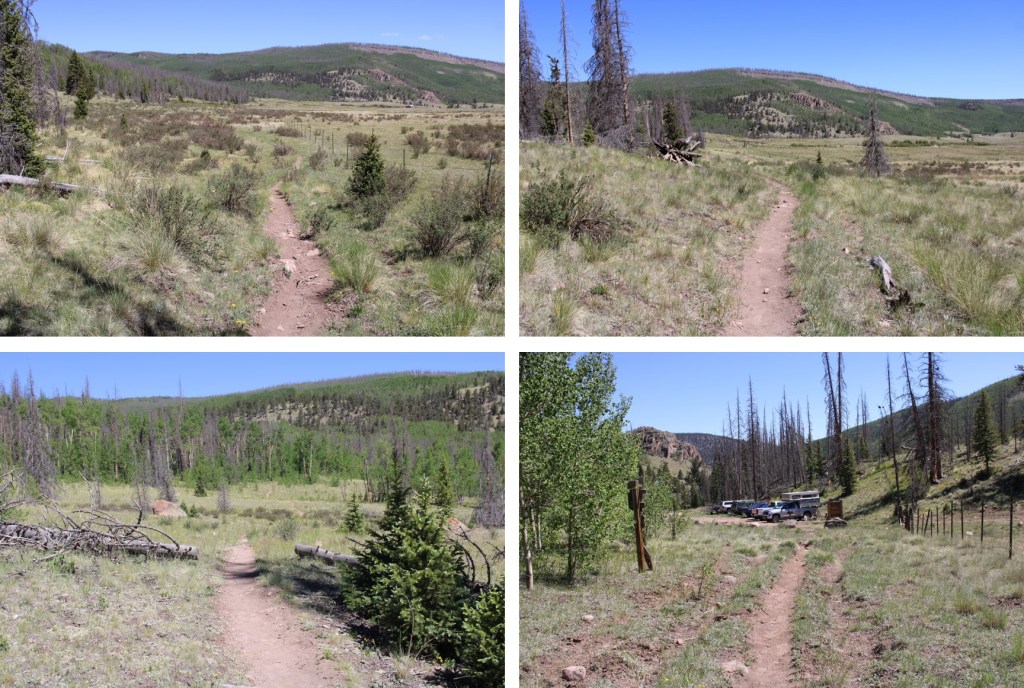
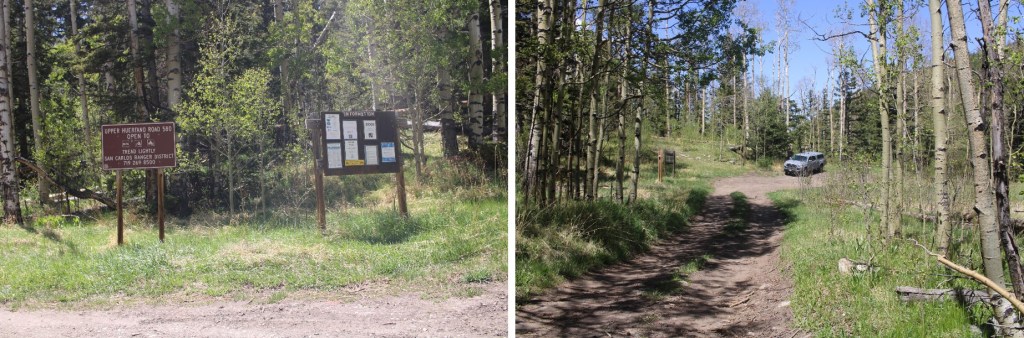
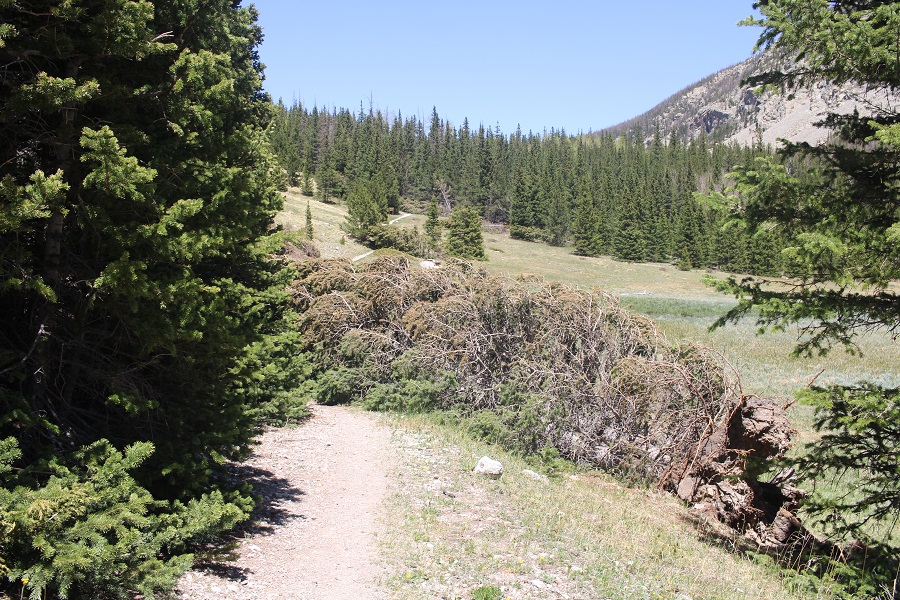
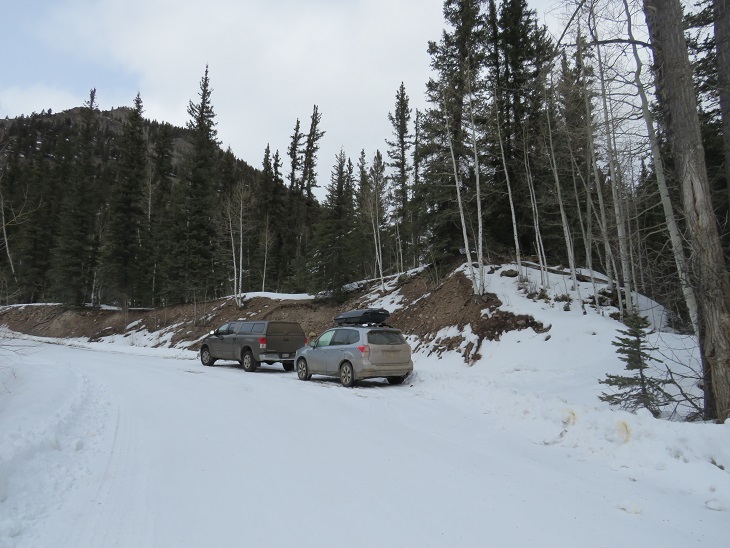
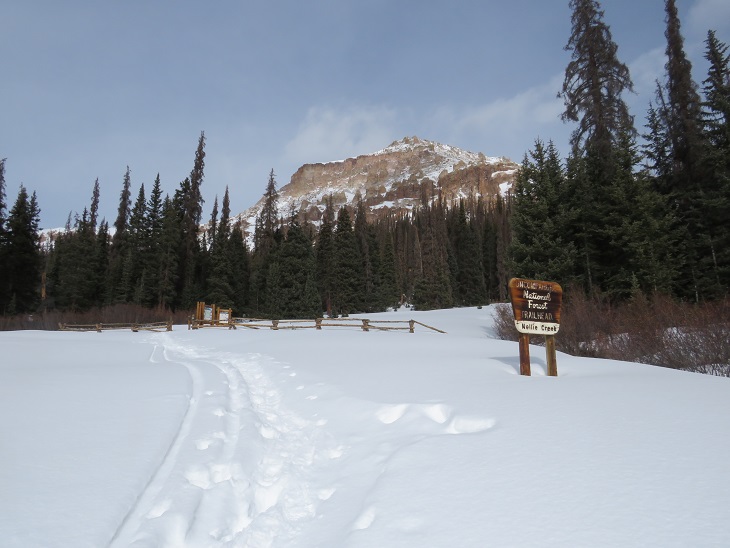
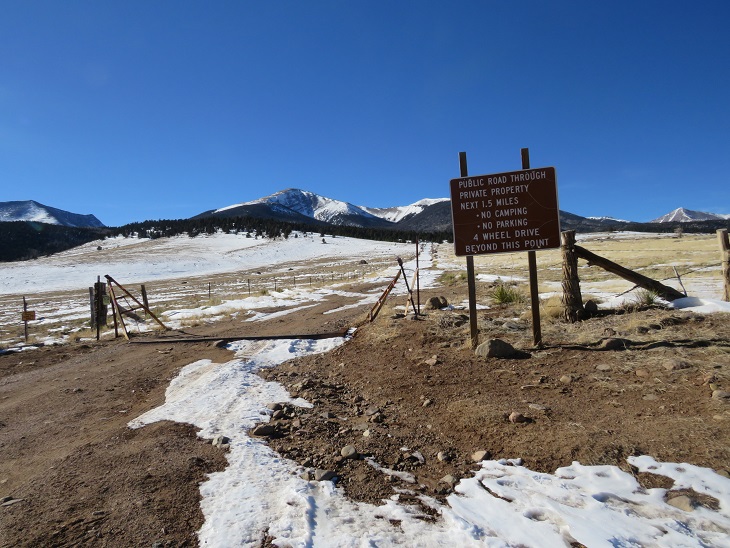
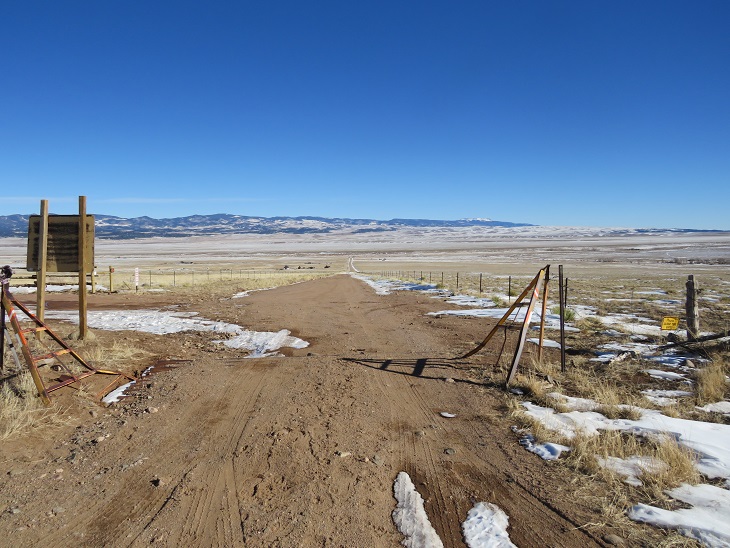
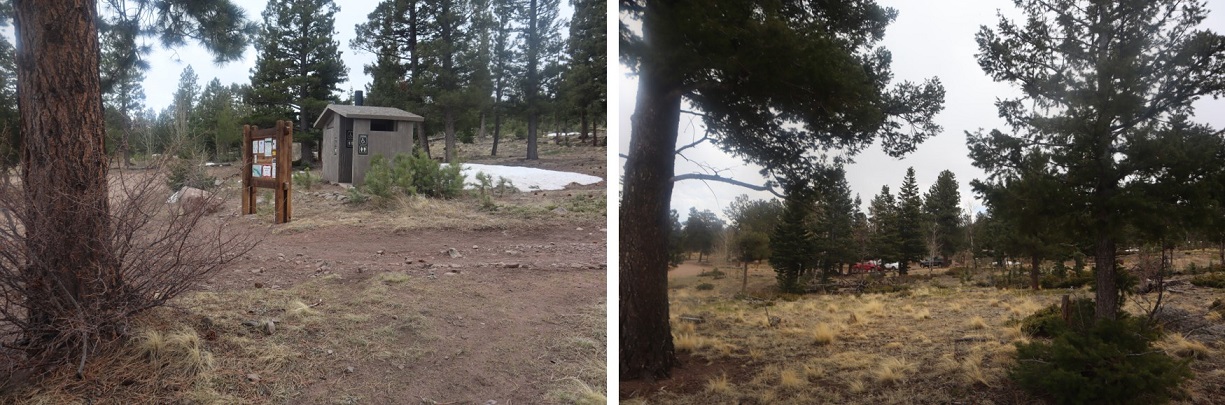
I parked at the 2WD Sharkstooth Trailhead the night before and waited out a thunderstorm.  If you’re not familiar with the area, be sure to double check your directions:  Google Maps kept trying to route me on ATV roads, and I got turned around several times trying to get to the actual trailhead.  When I got there, I found there weren’t any parking spaces (as in, no place to park period… there weren’t any other vehicles there), so I had to park in a turnout a couple dozen yards from the trailhead.  The drive was 2WD on a dirt road up until this point.  This is what the lower trailhead looks like.

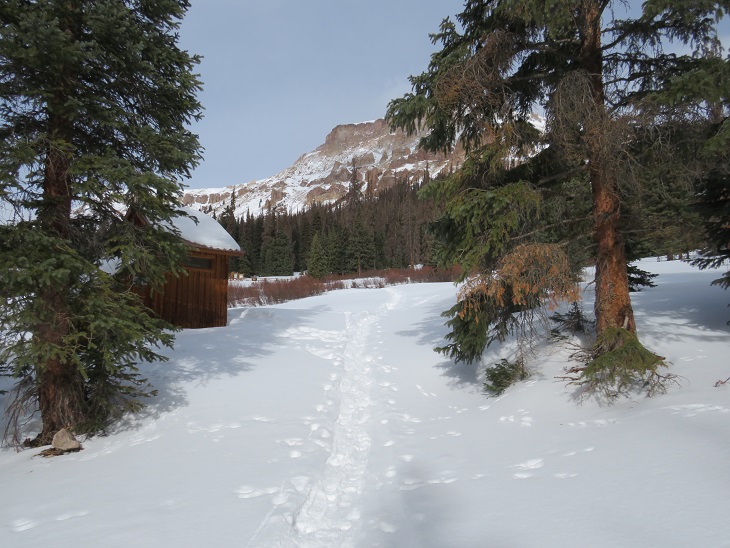
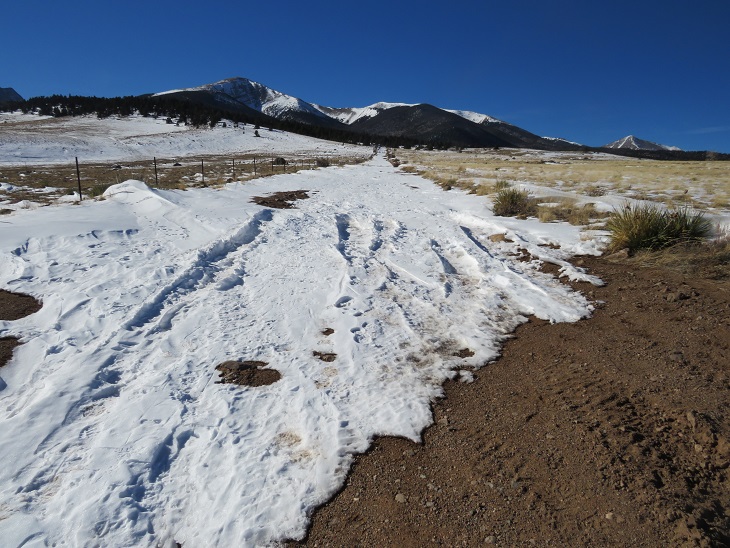
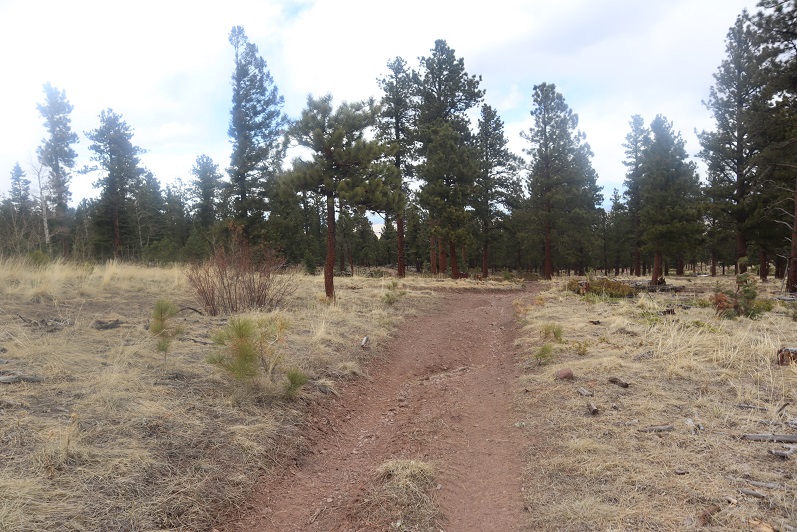
The next morning, after battling a night of storms and mosquitoes, I was up and on the trail at 5:30am. I realized rather quickly the 4WD road to the upper trailhead wasn’t all that difficult to navigate, and I could have easily driven all the way there.   There were also several dispersed campsites along the way.

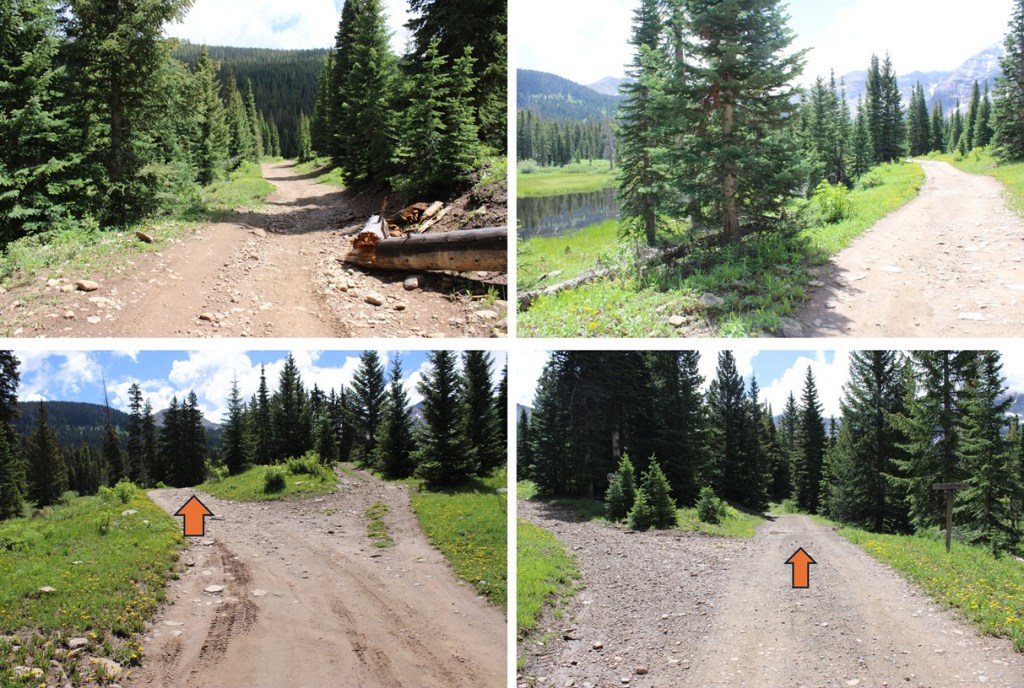
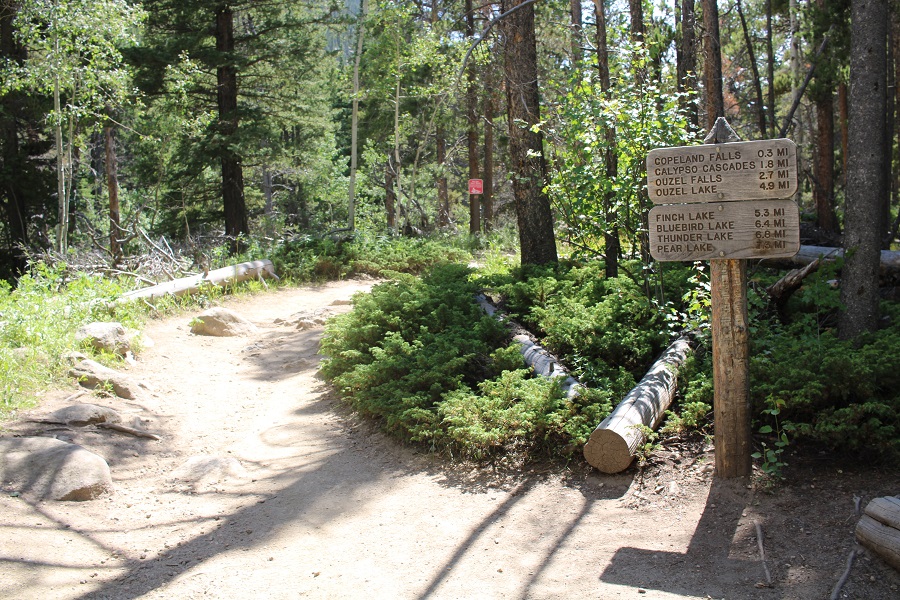
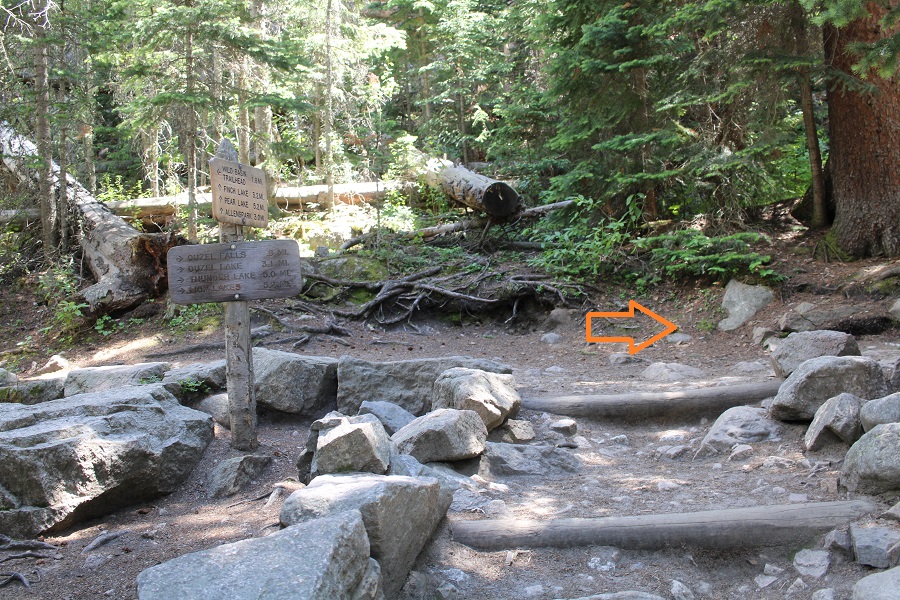
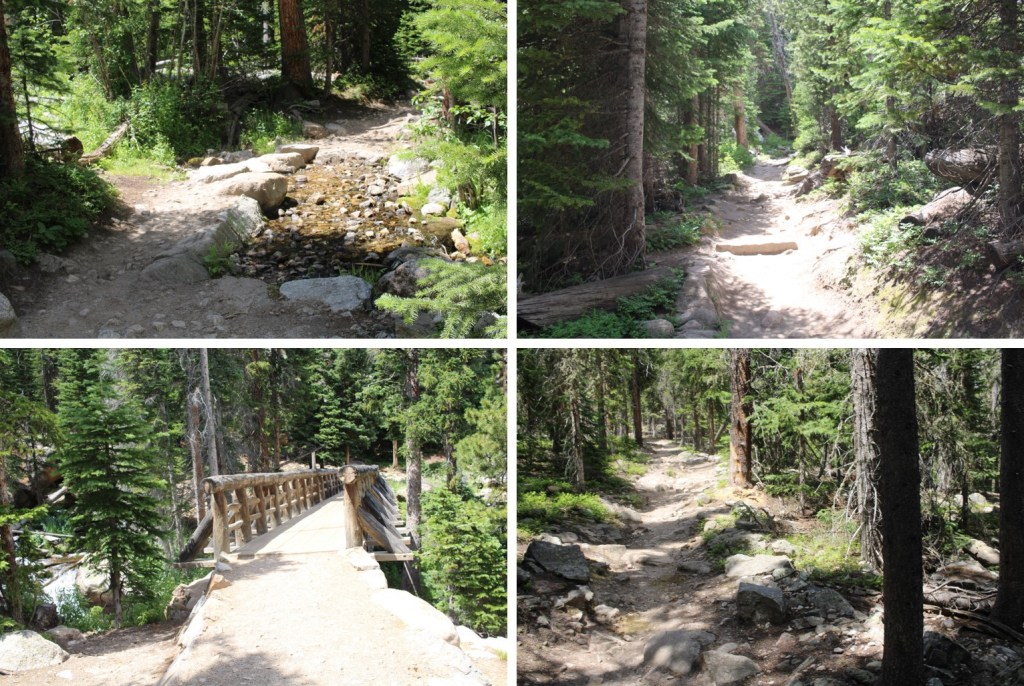
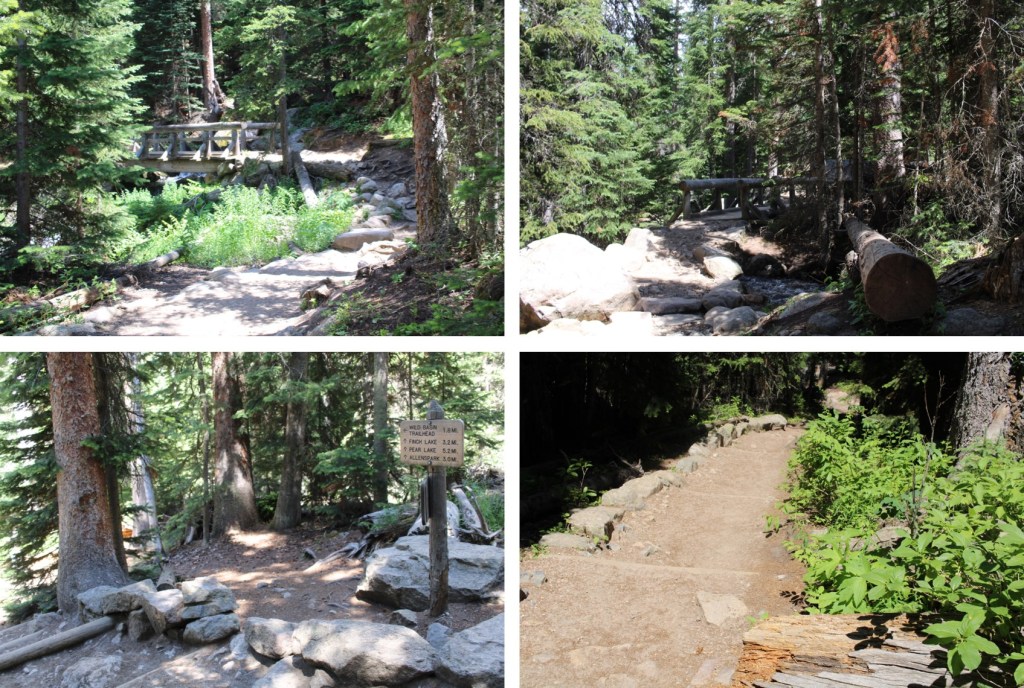
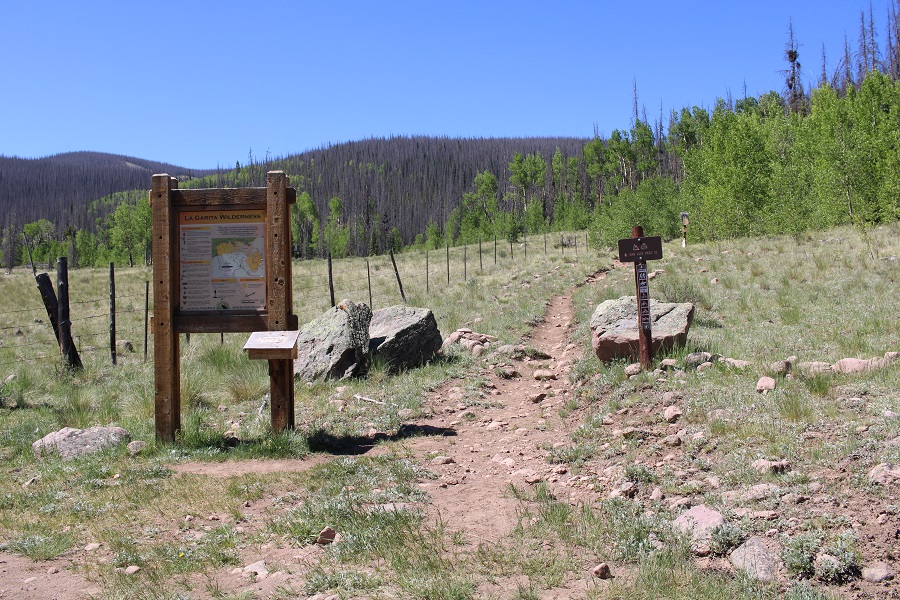
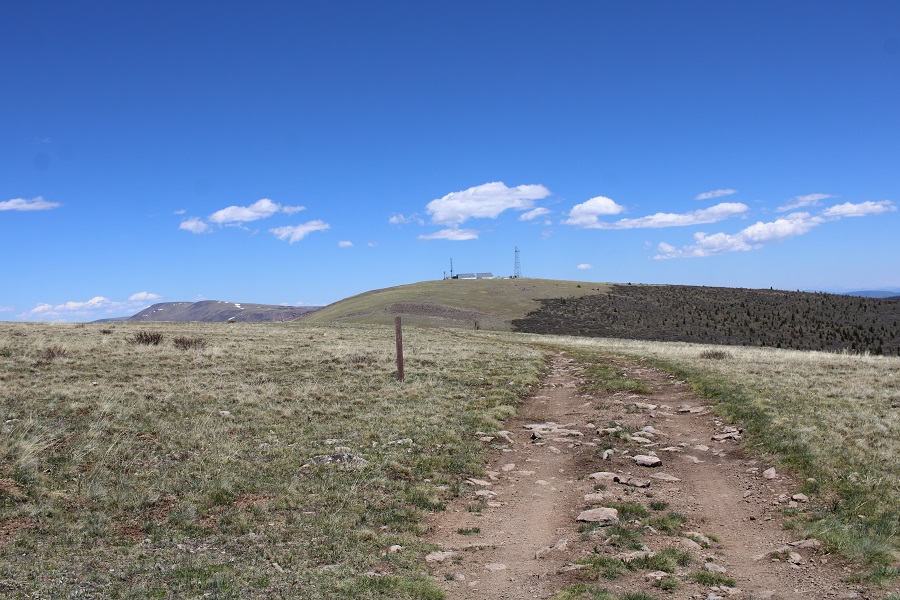
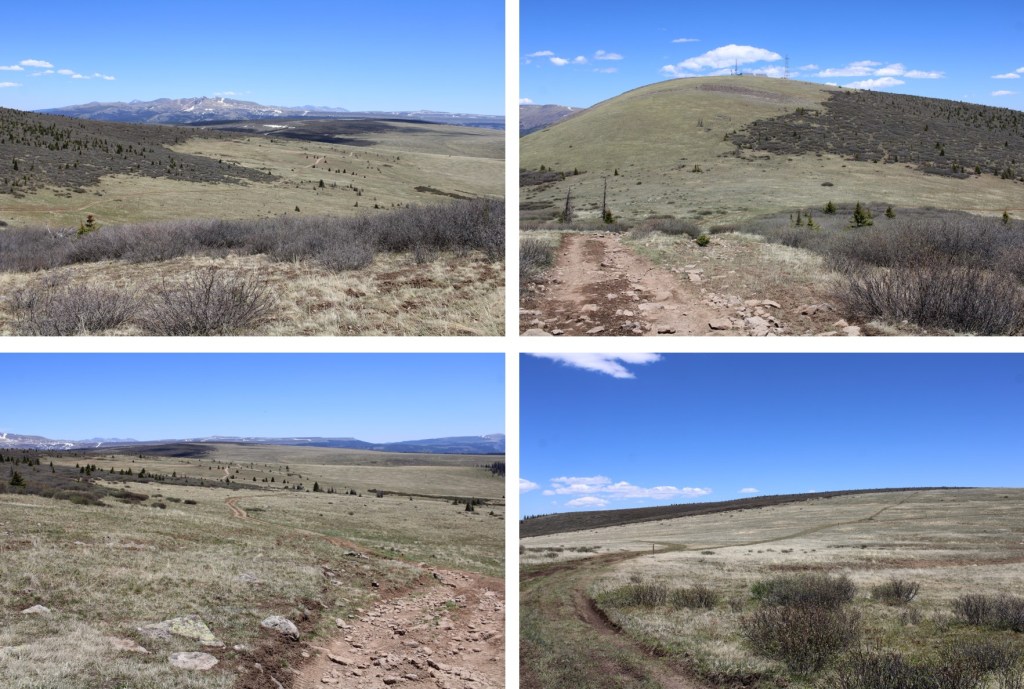
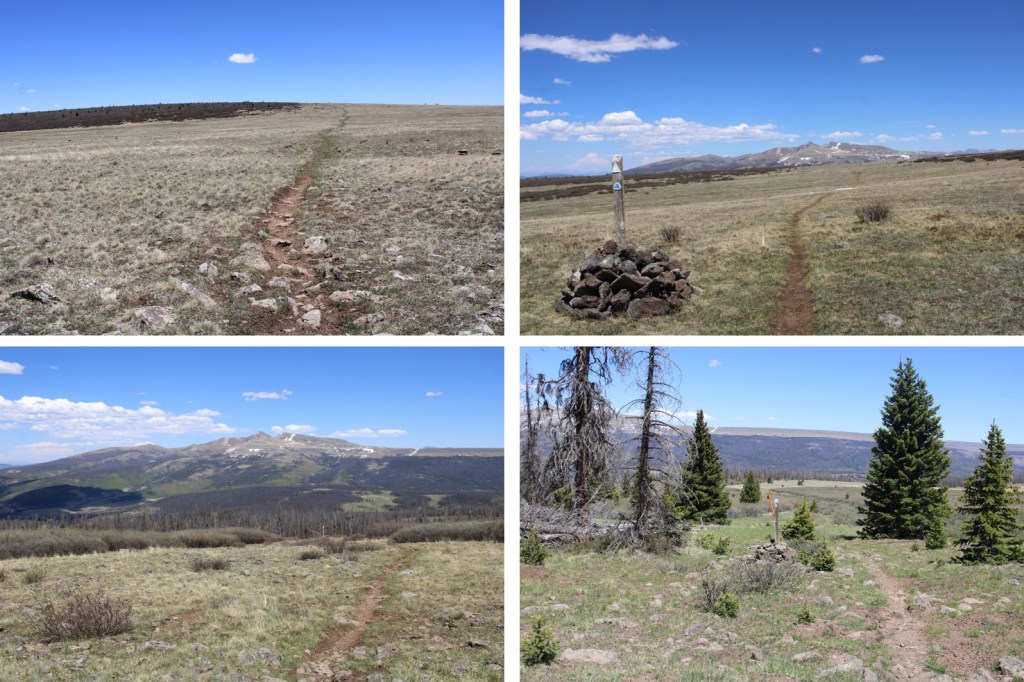
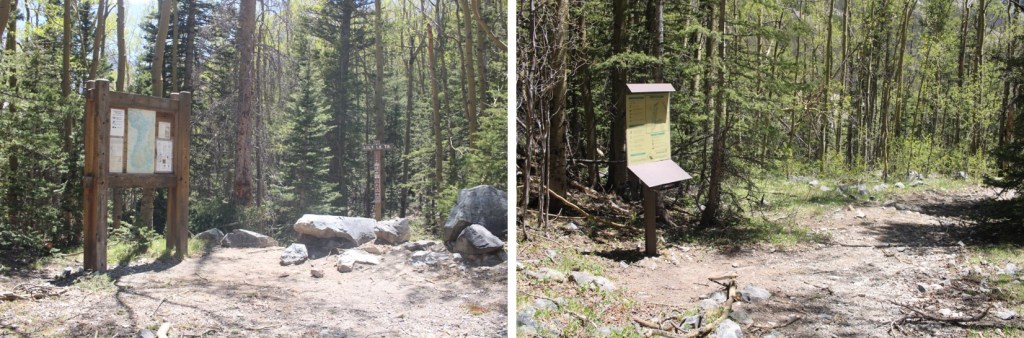
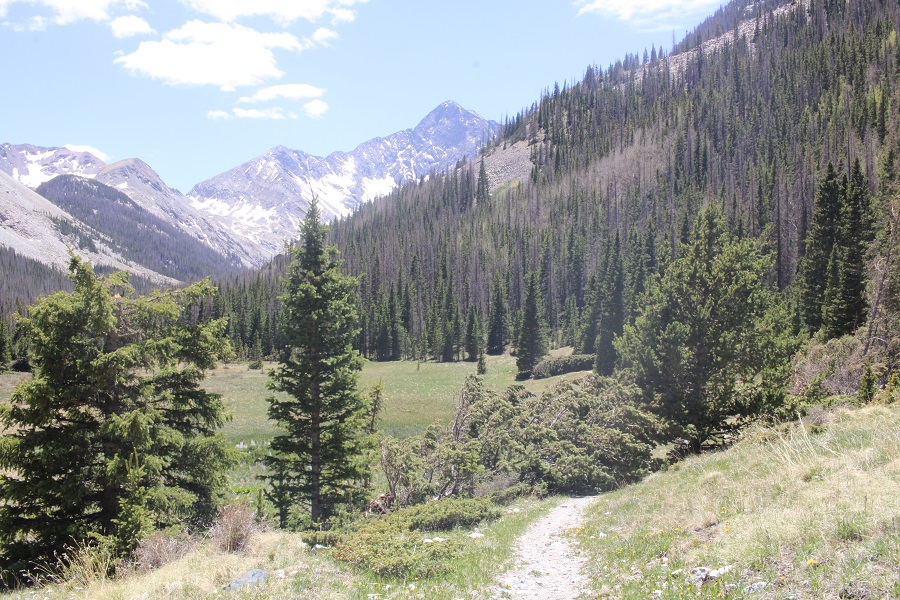
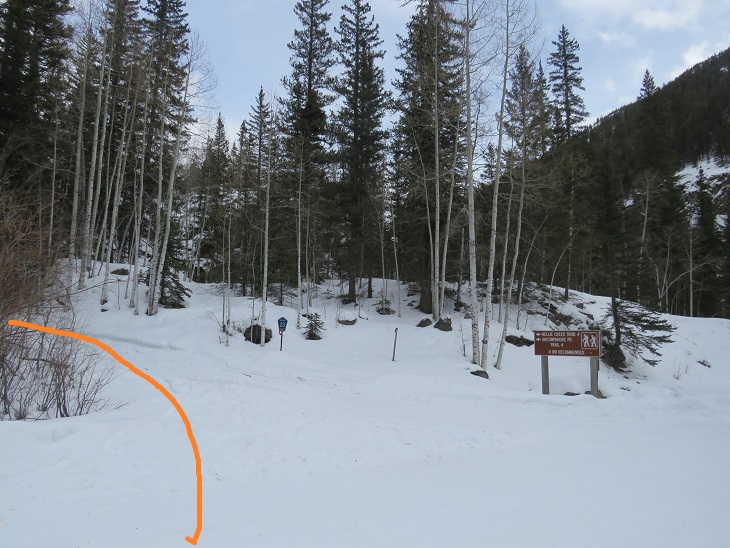
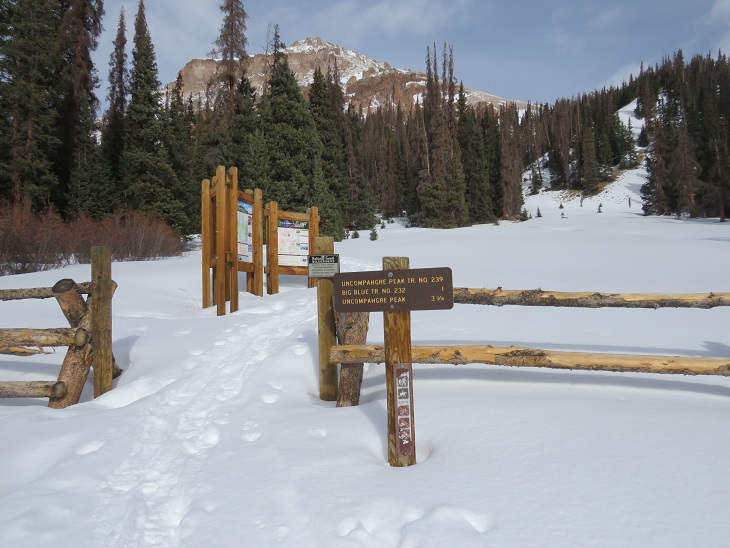
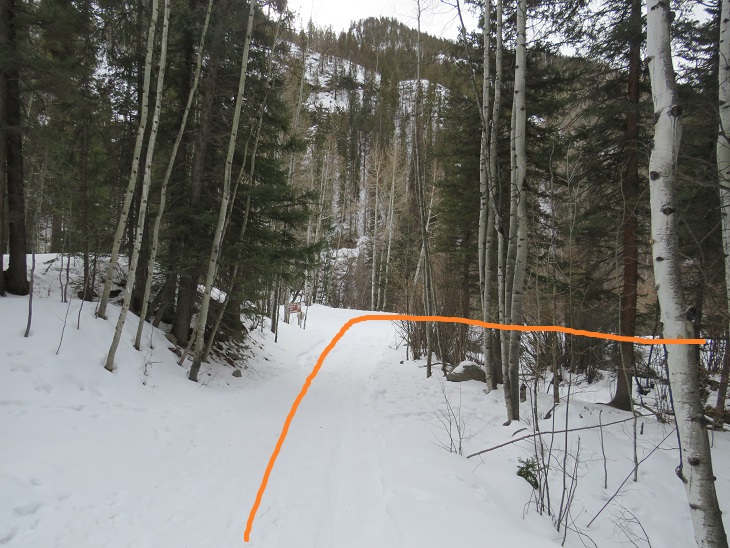
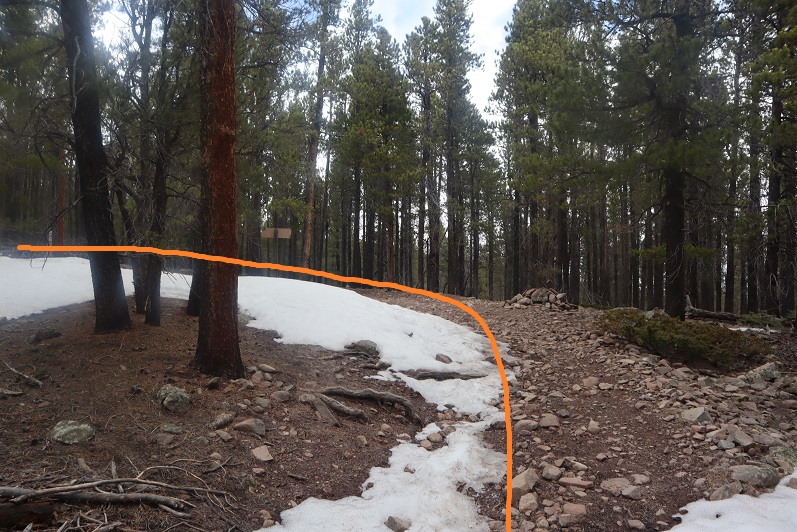
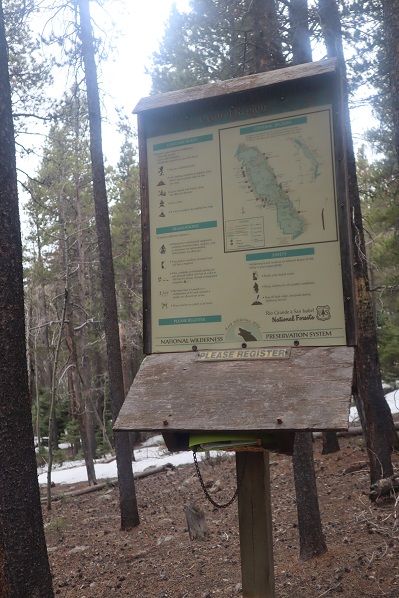
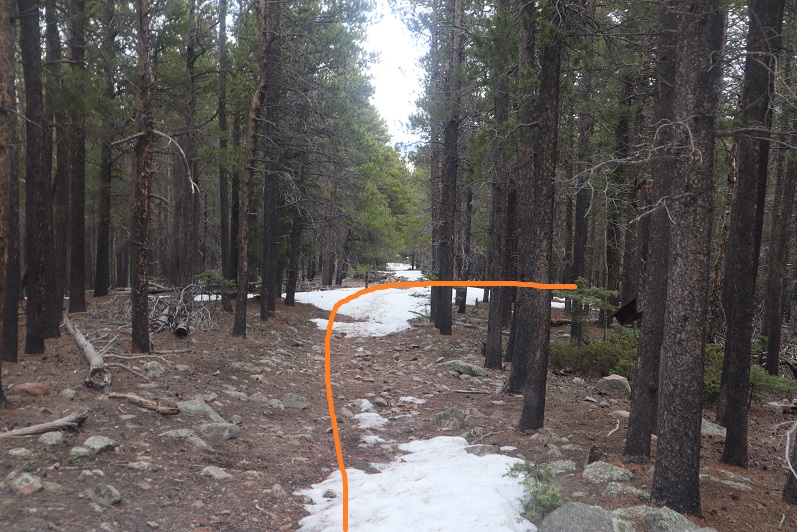
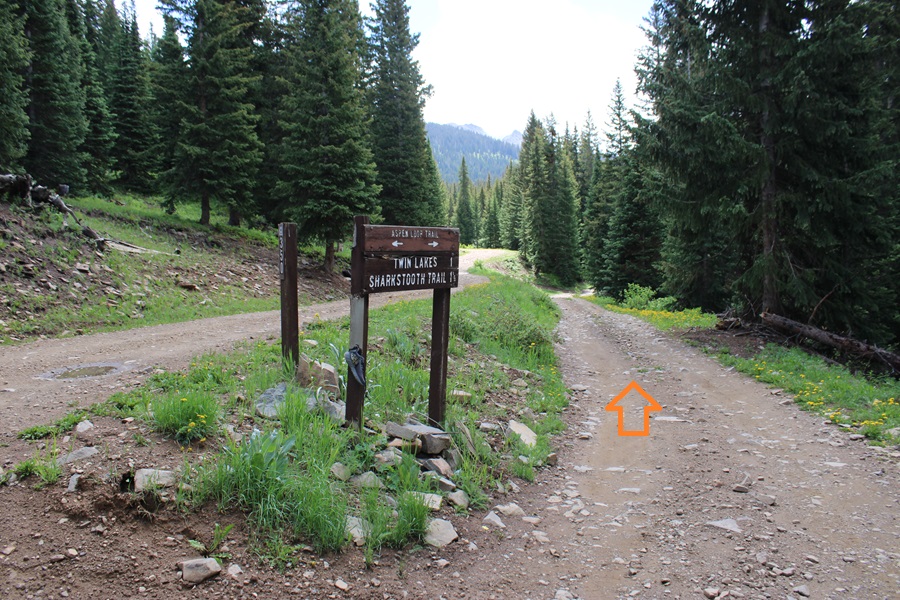
Now at the upper trailhead, I started following West Mancos Trail 621, which was the trail to the right.

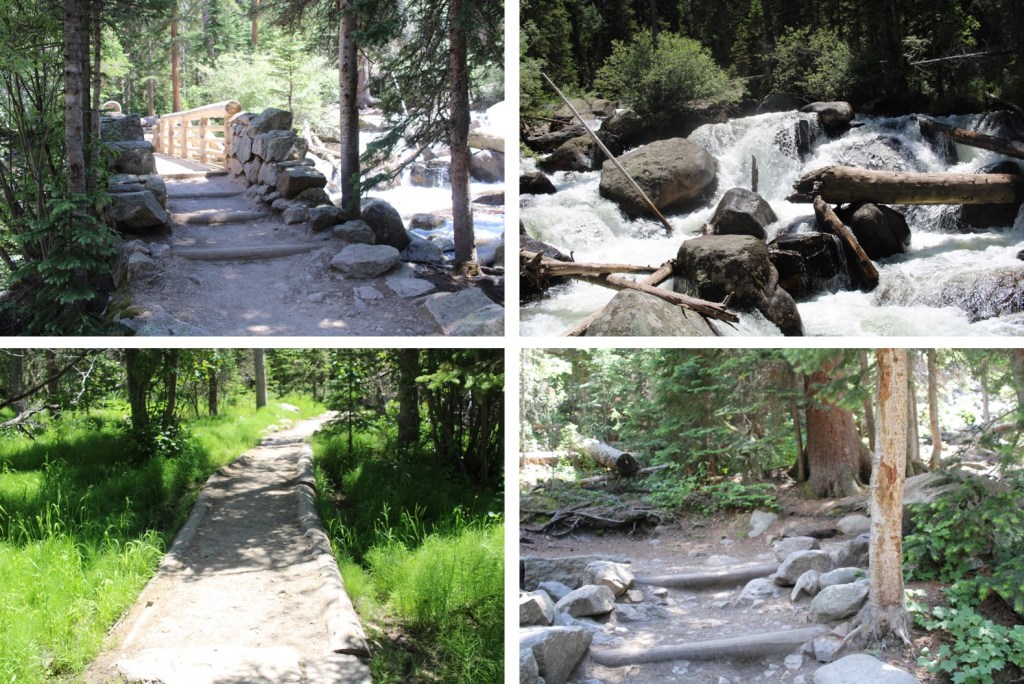
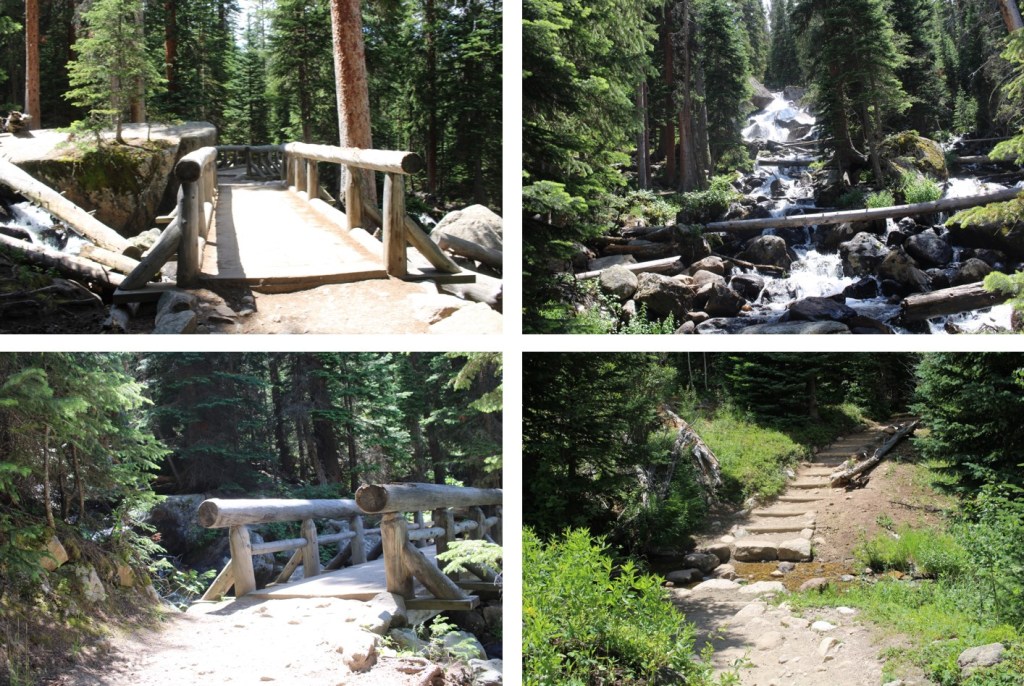
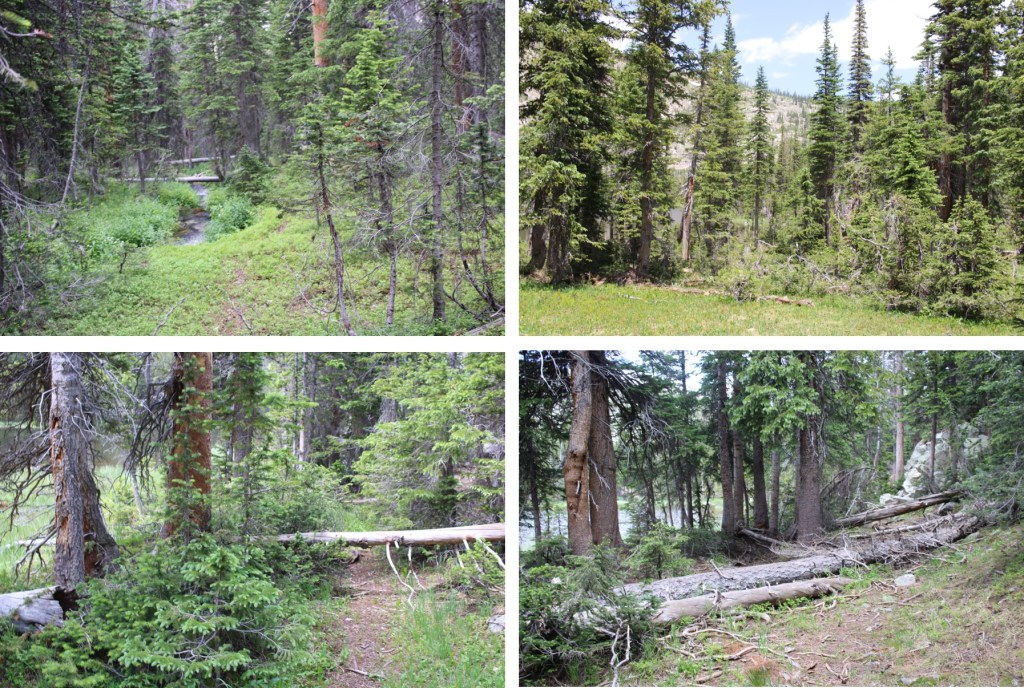
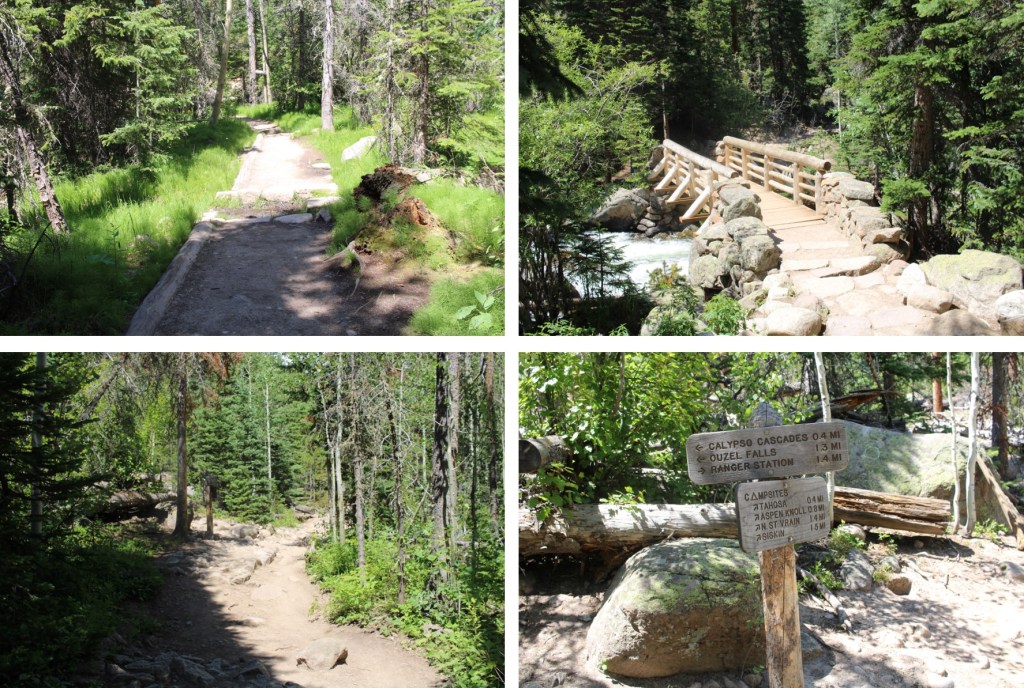
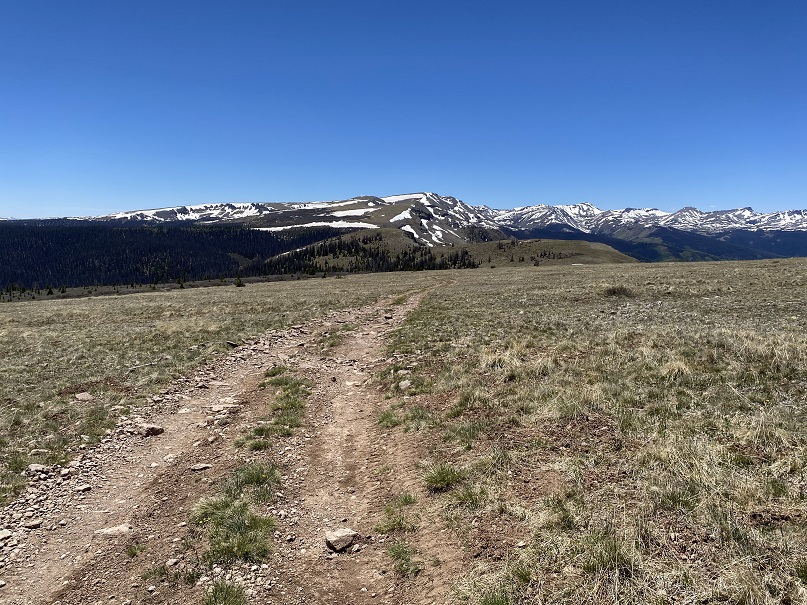
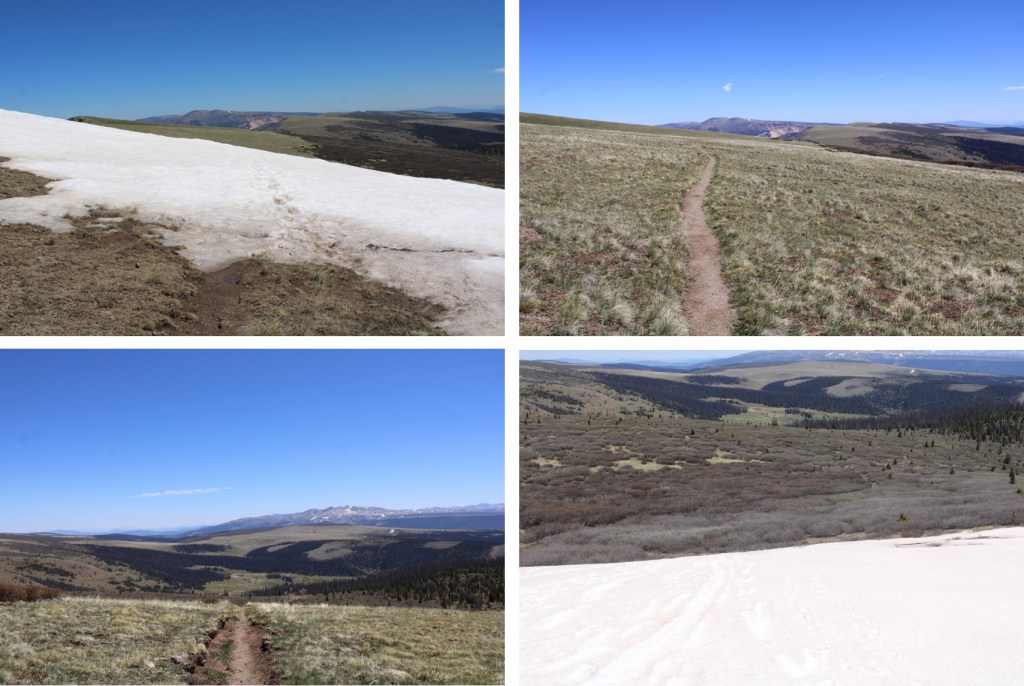
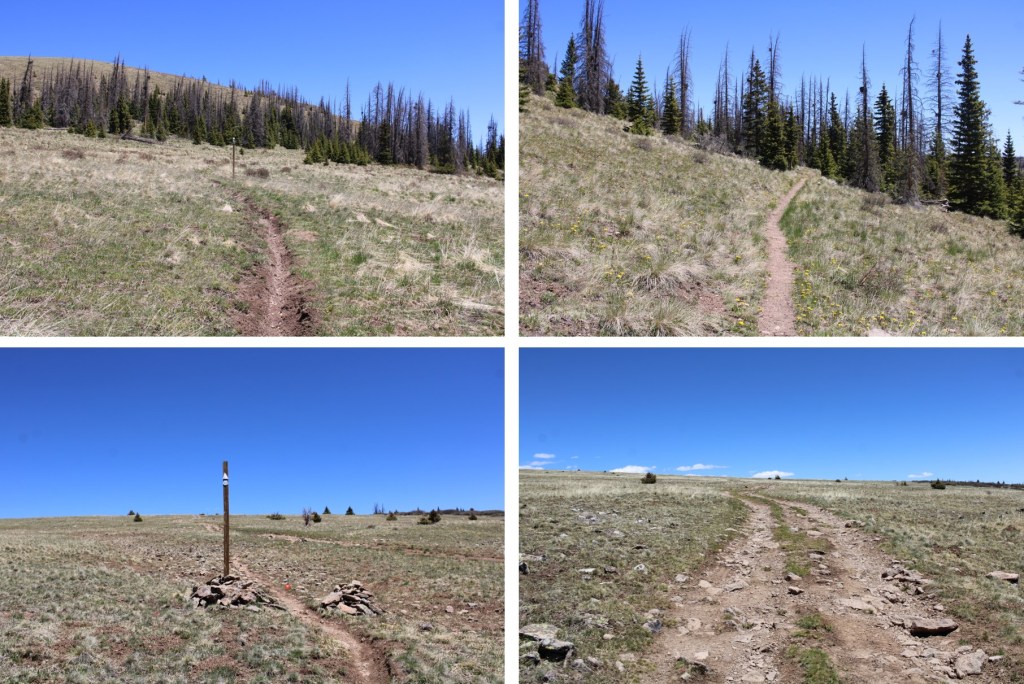
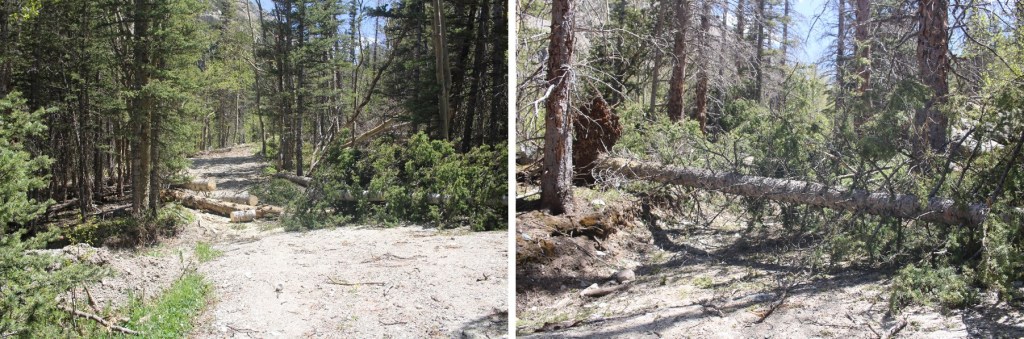
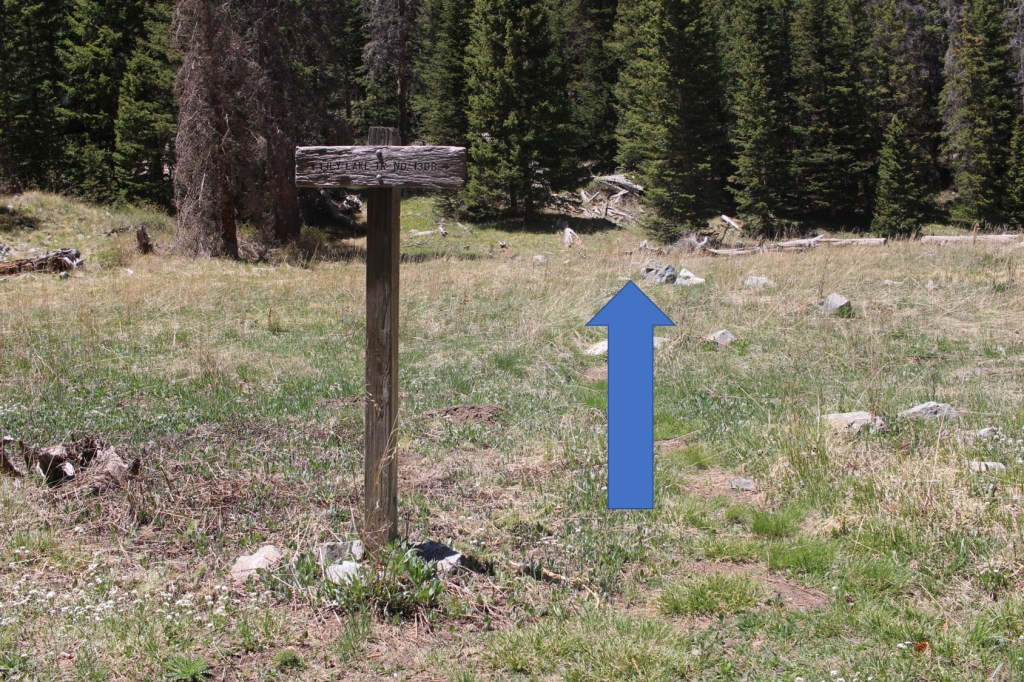
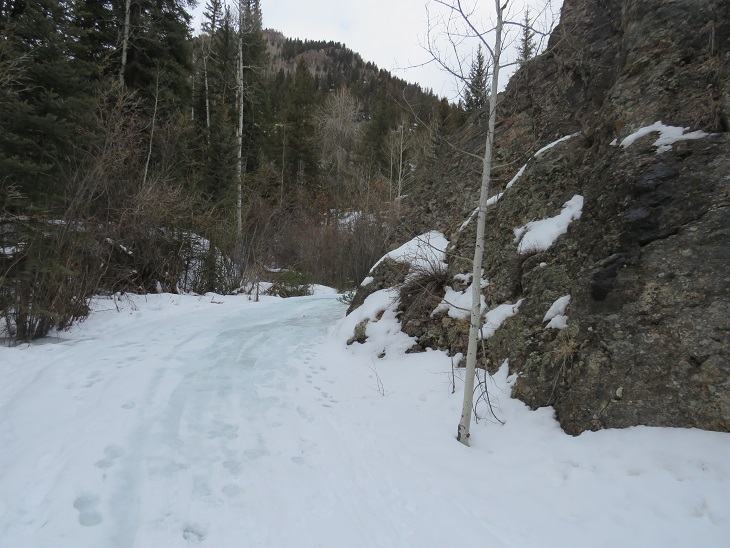
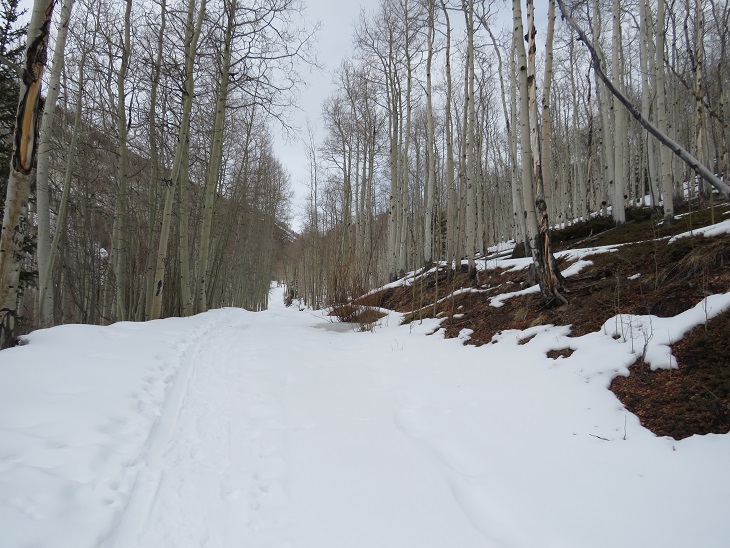
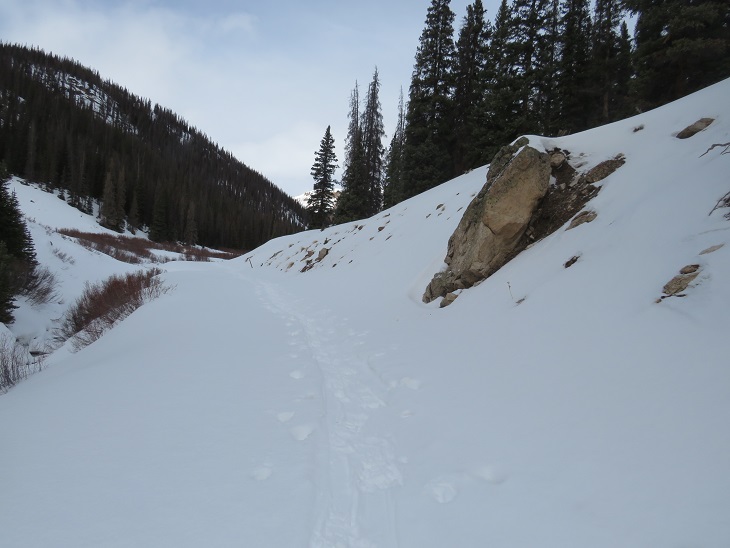
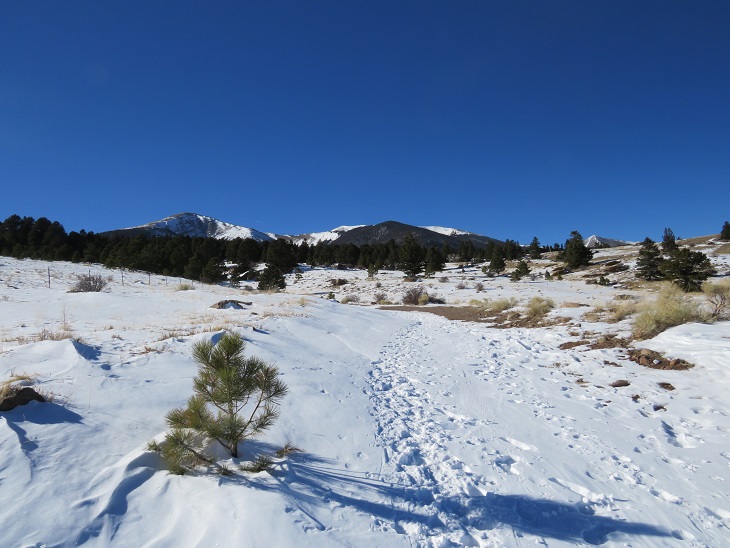
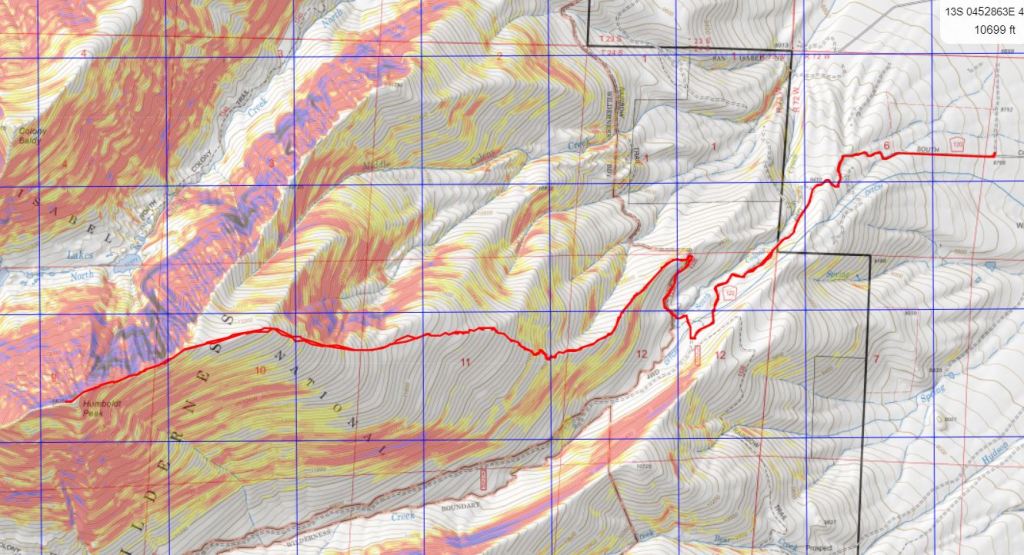
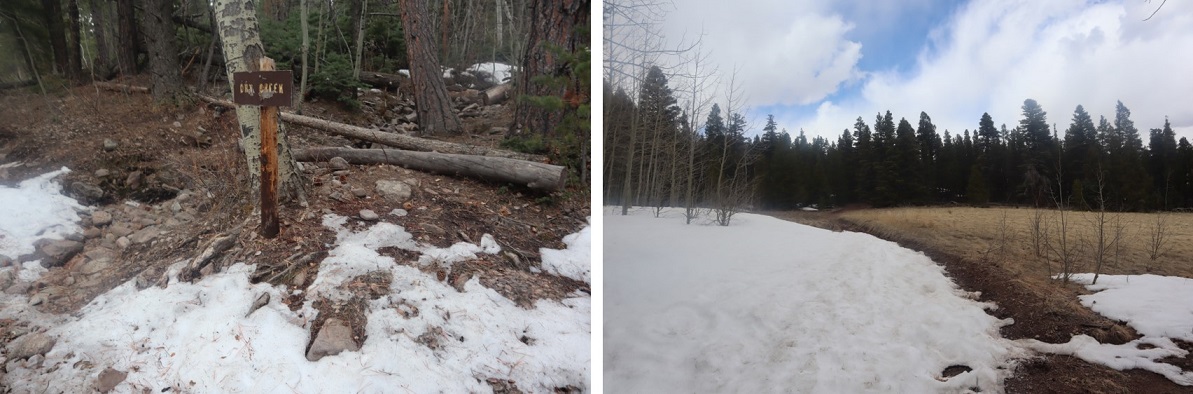
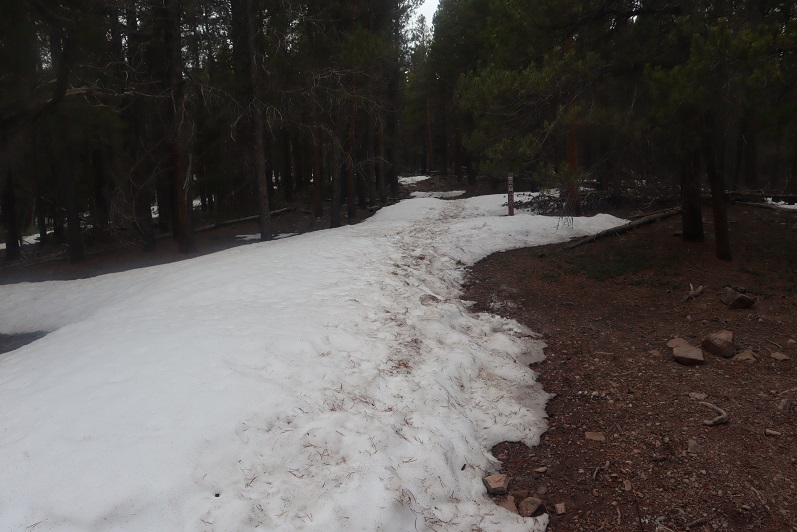
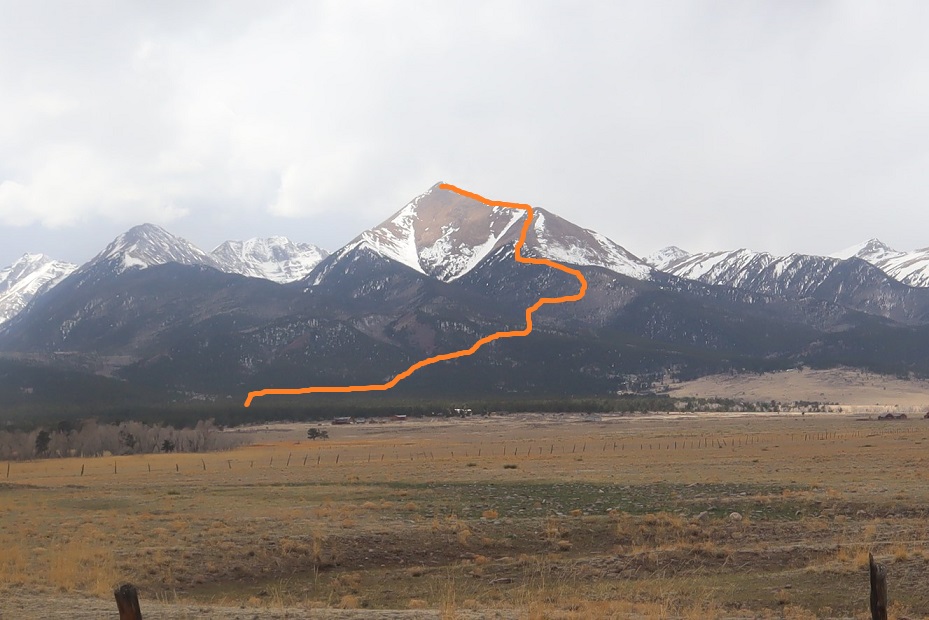
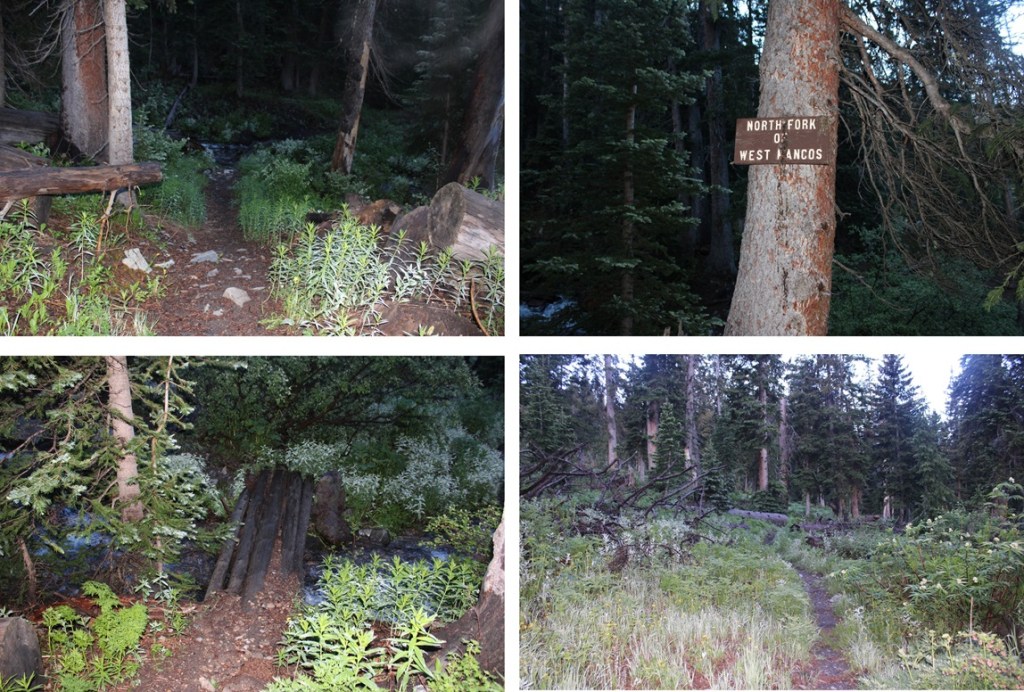
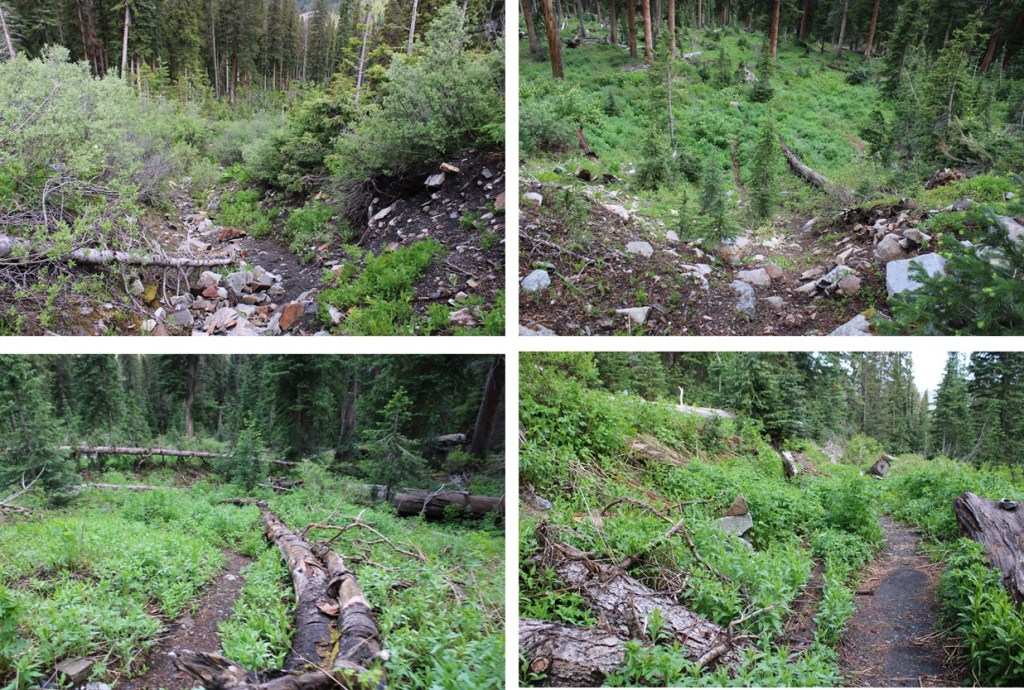
Hearing mixed reviews about how to climb this peak, I decided to take the ridge up, and the gully down.  This meant descending about 600 feet and 2 miles from the upper trailhead to my turnoff point. I just kept following the West Mancos Trail.  There were plenty of signs along the way to remind me I was still on the West Mancos Trail.

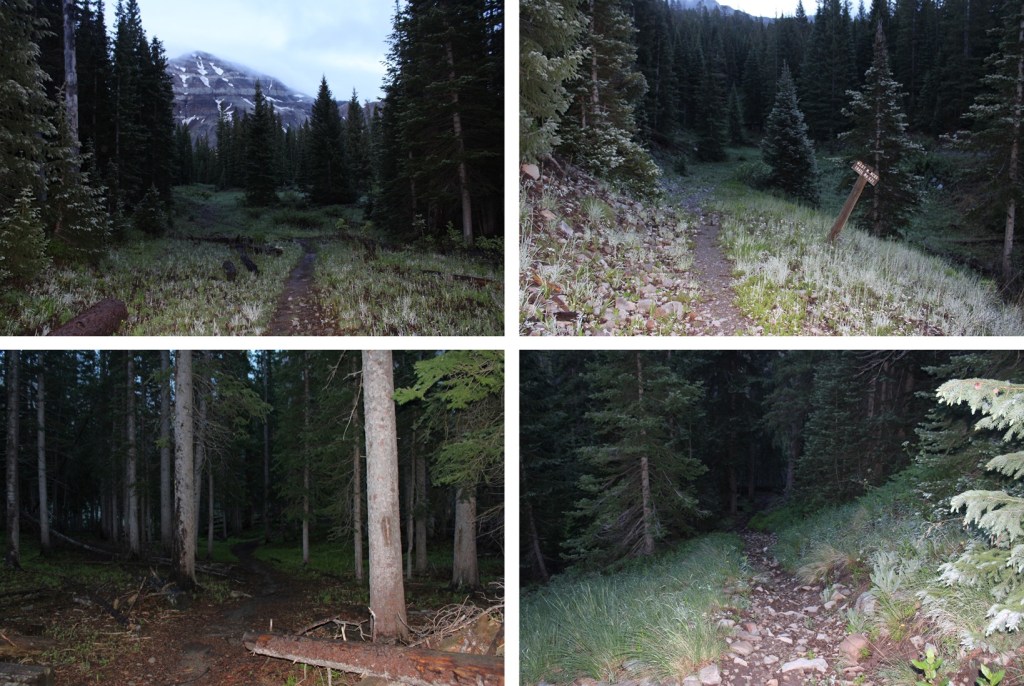
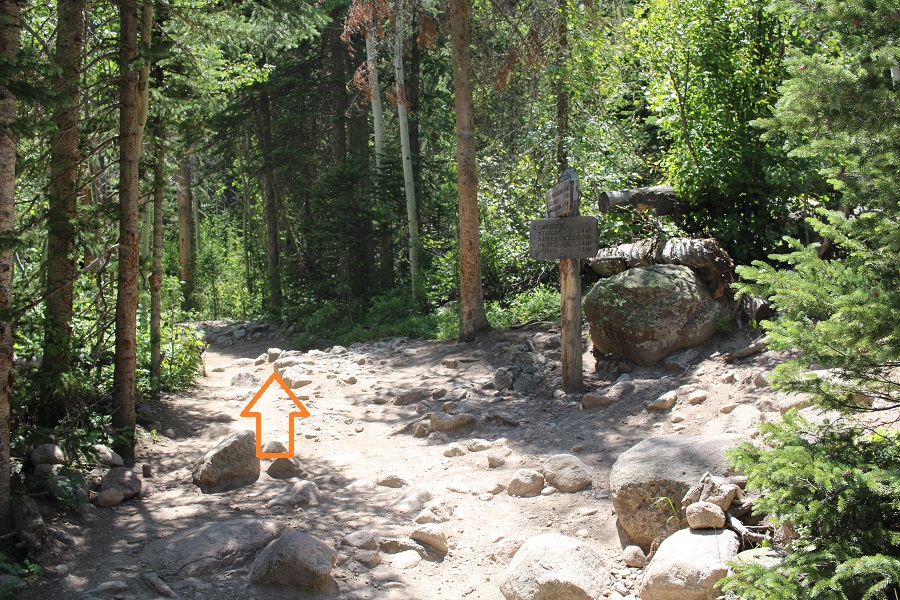
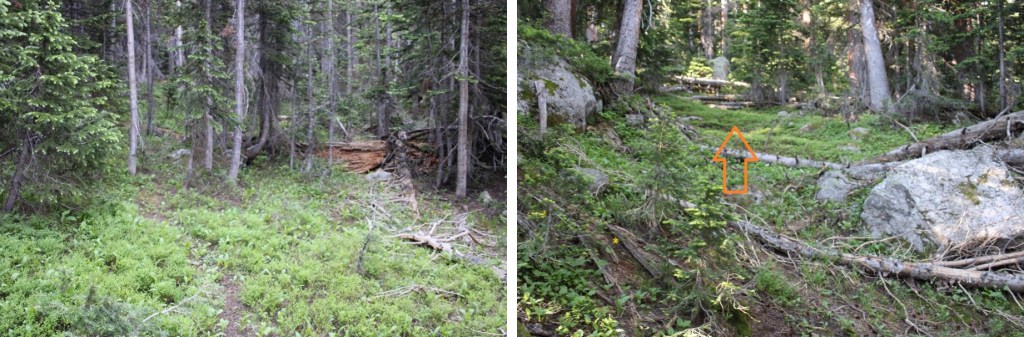
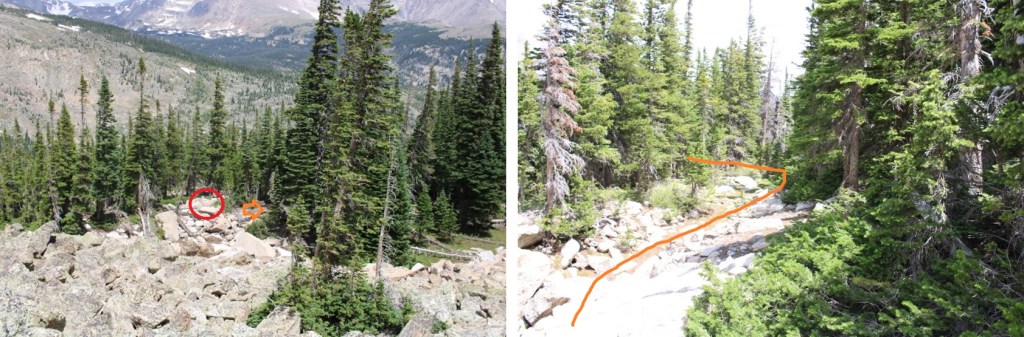
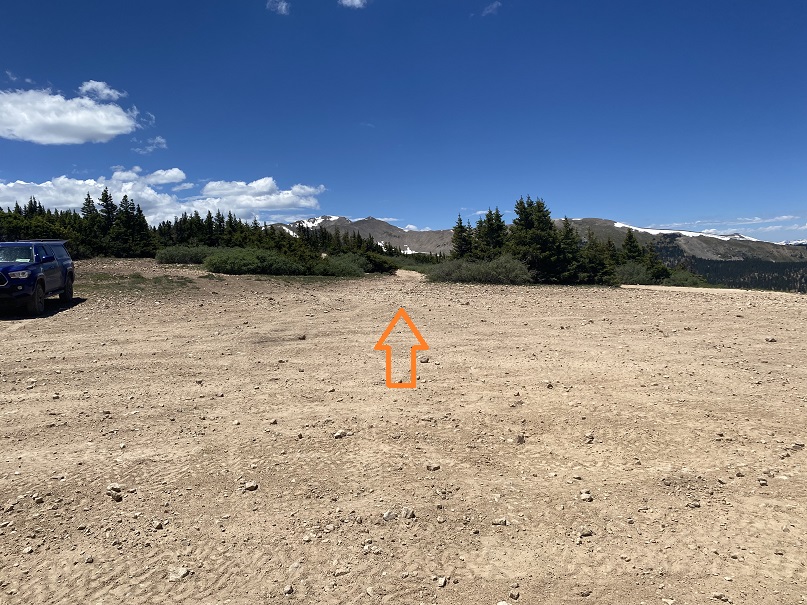
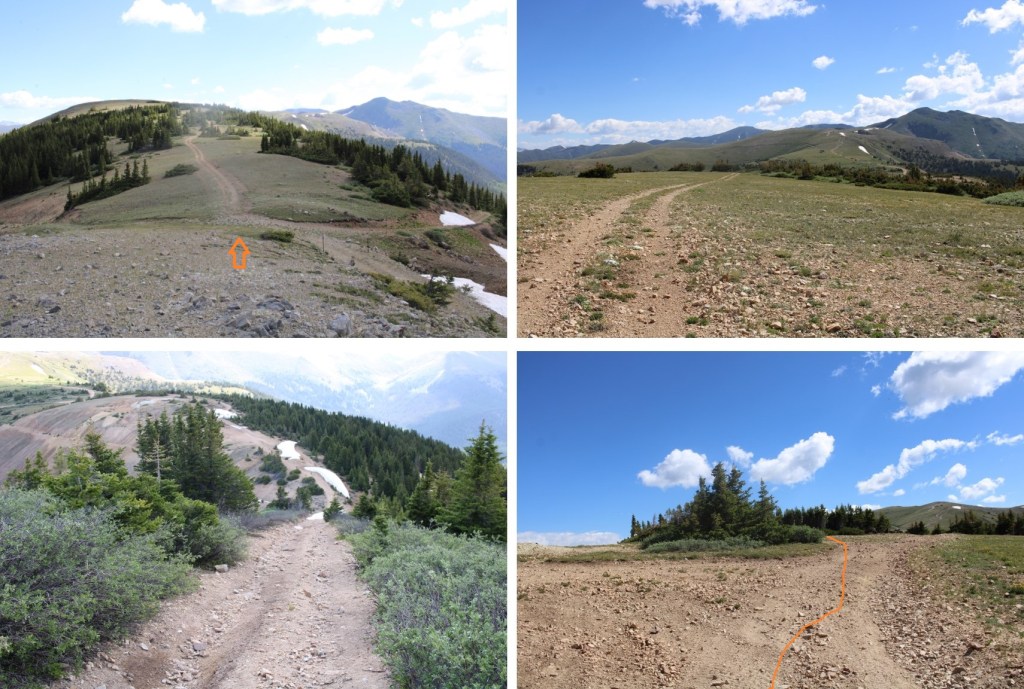
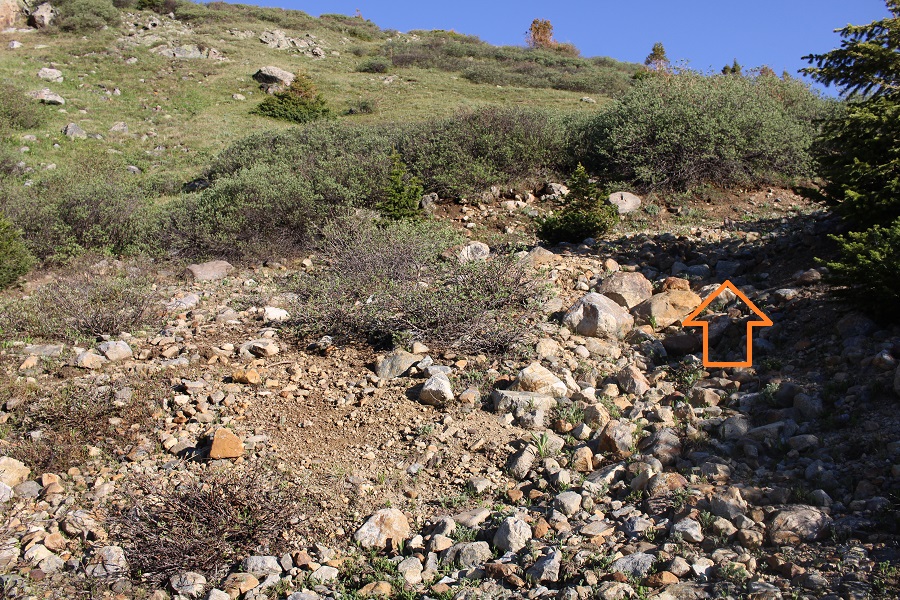
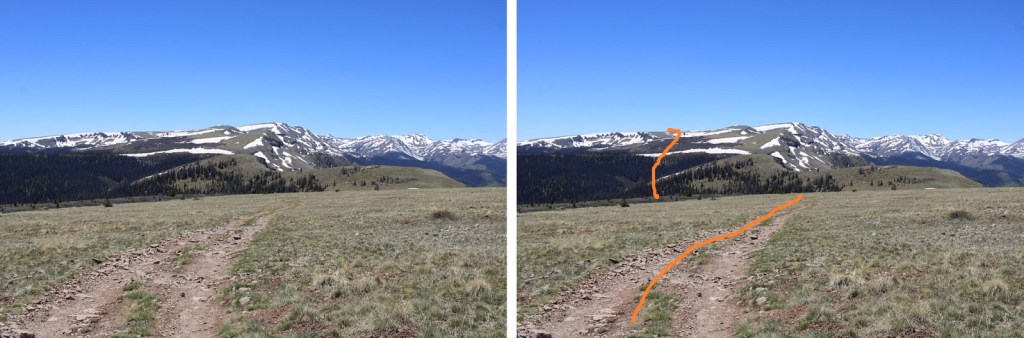
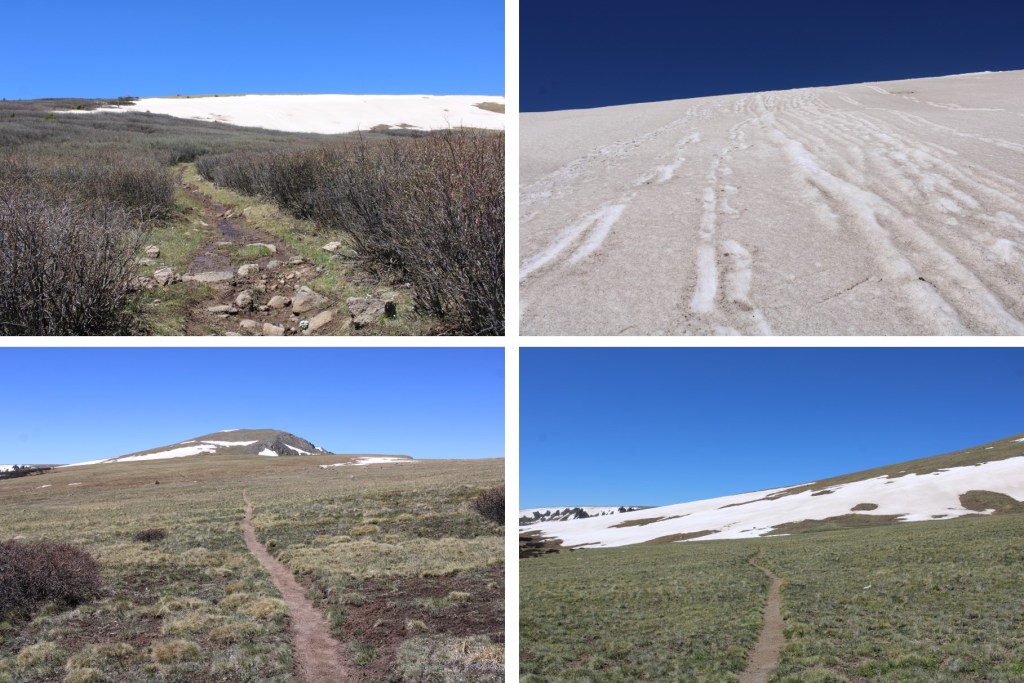
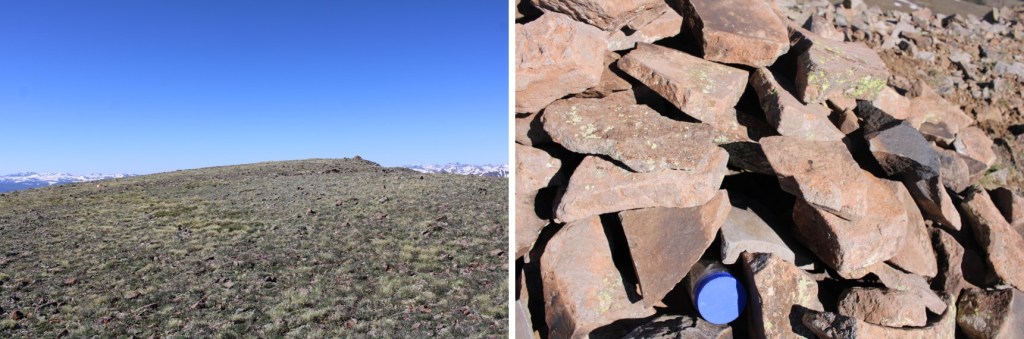
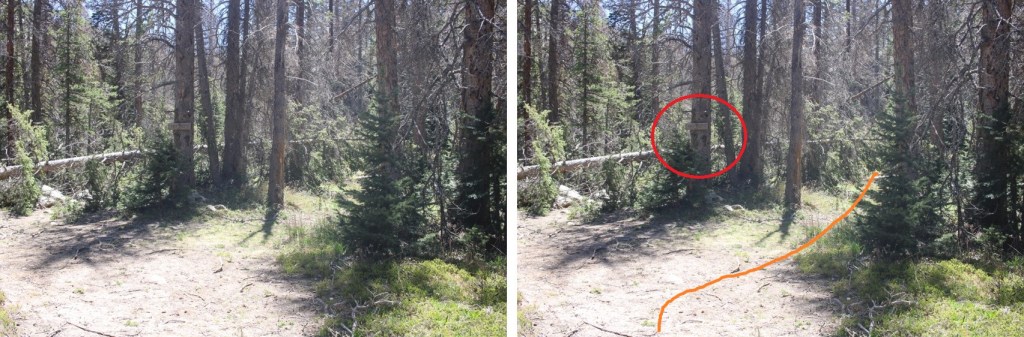
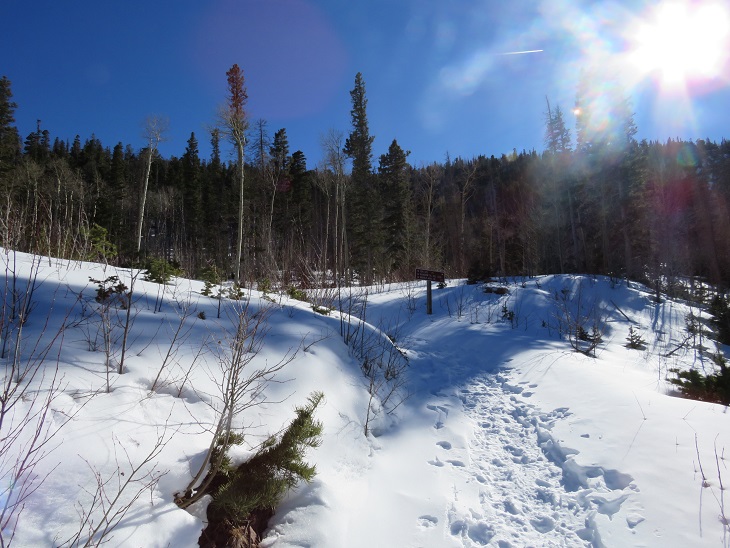
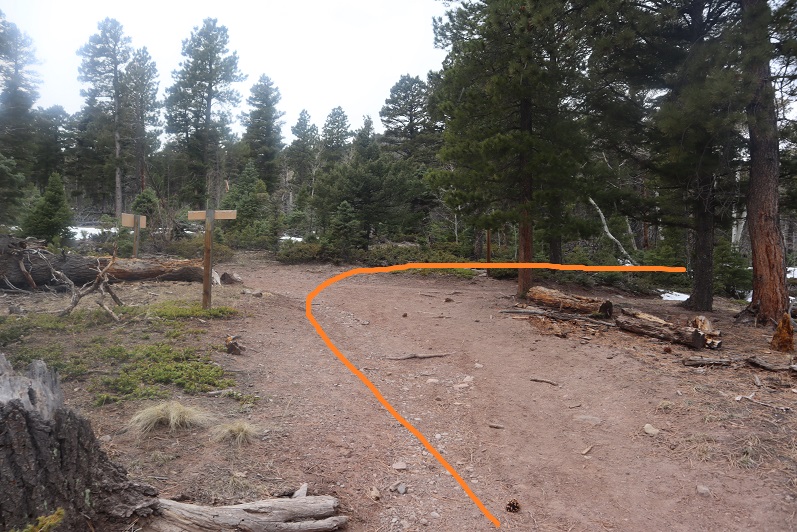
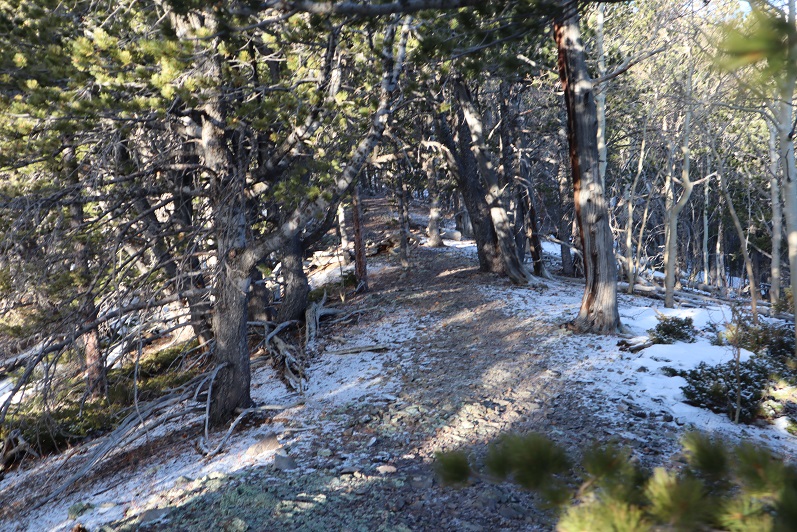
At about 10400’ of elevation, after I’d been hiking for a total of 3.9 miles, just when I was thinking I should leave the trail and head for the ridge, I saw a large cairn, indicating the cutoff point for heading towards the ridge. 

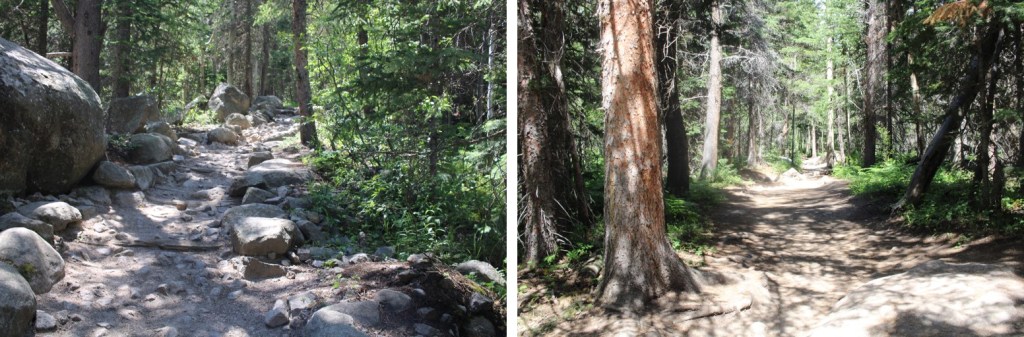
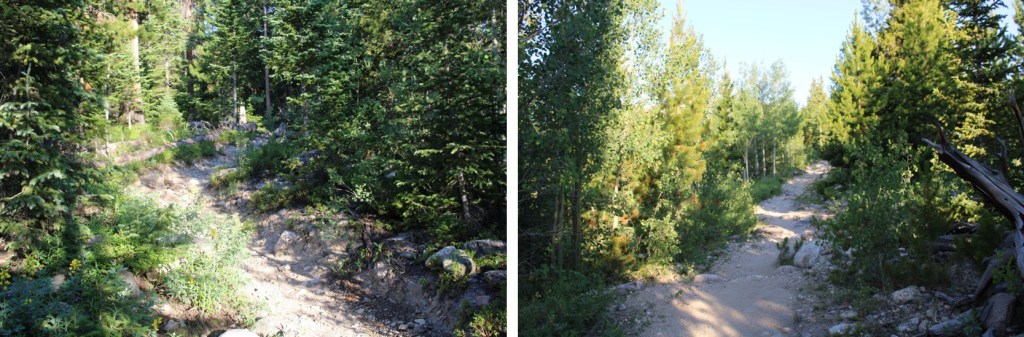
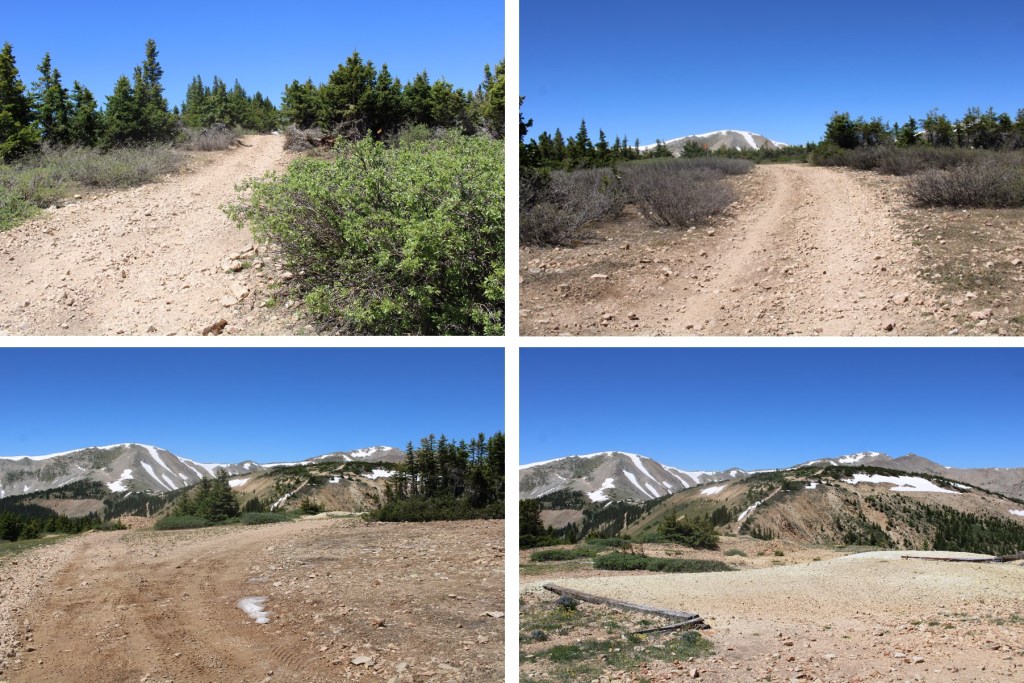
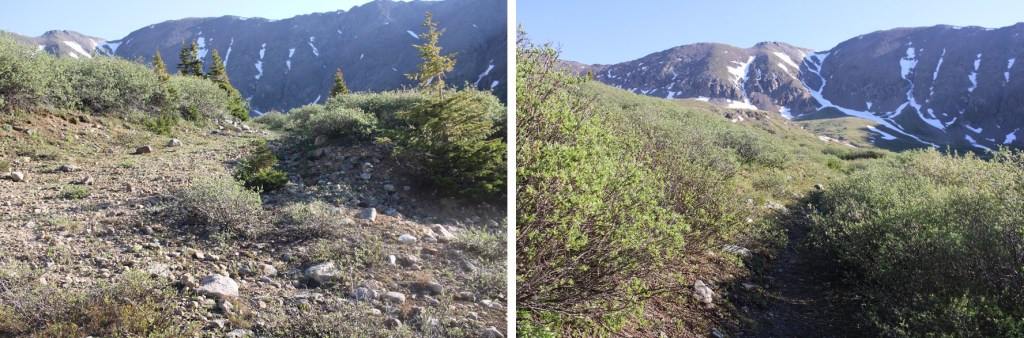
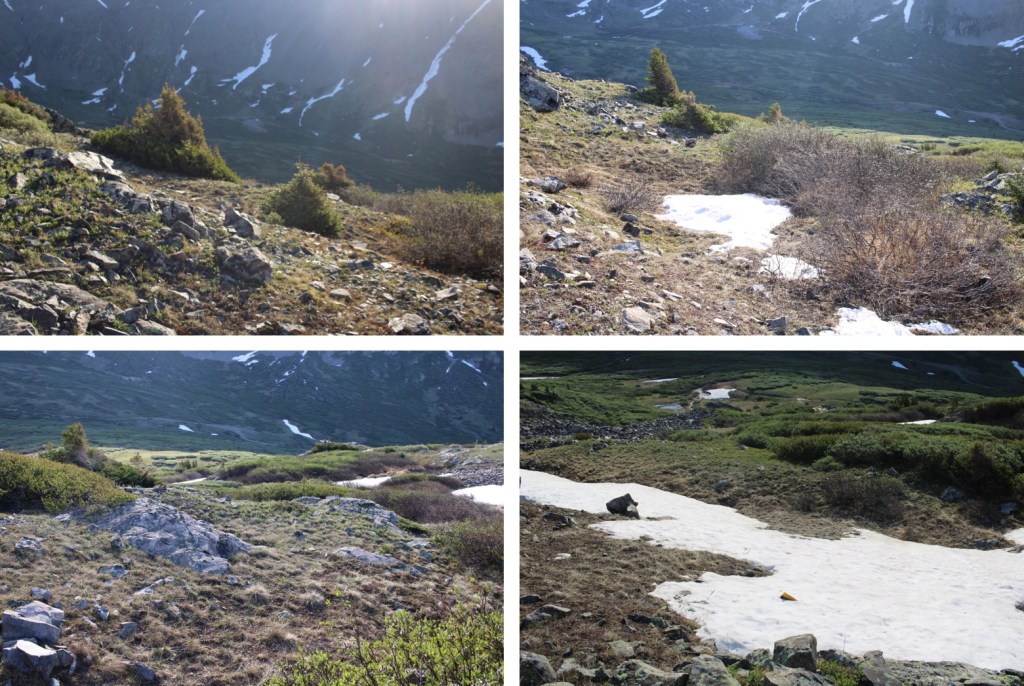
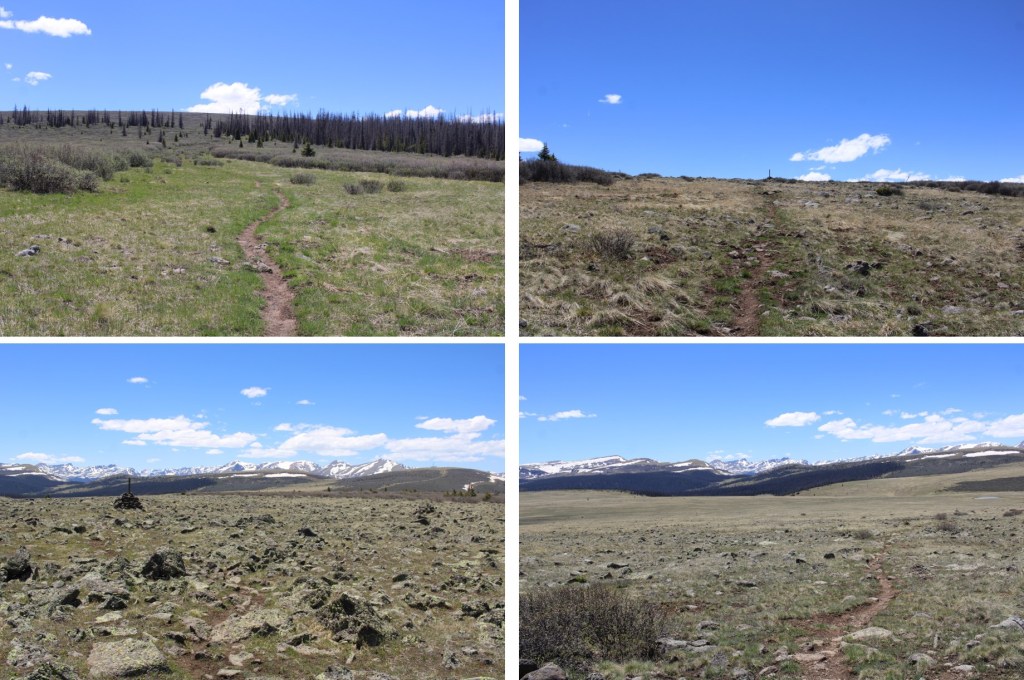
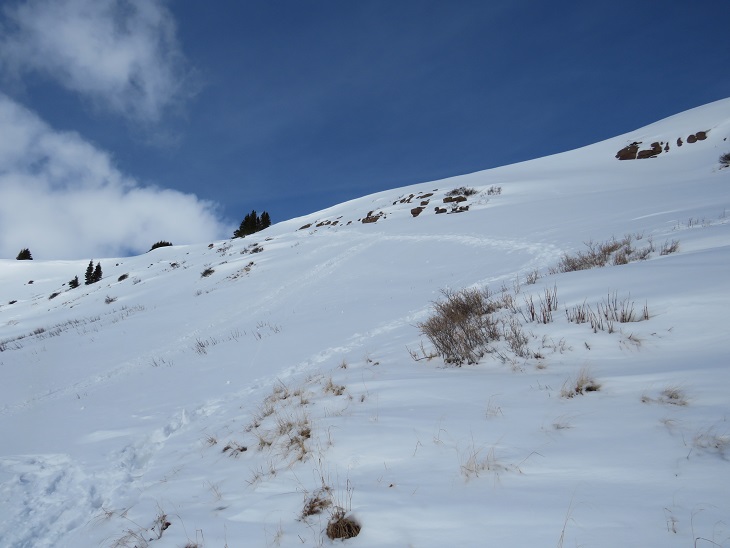
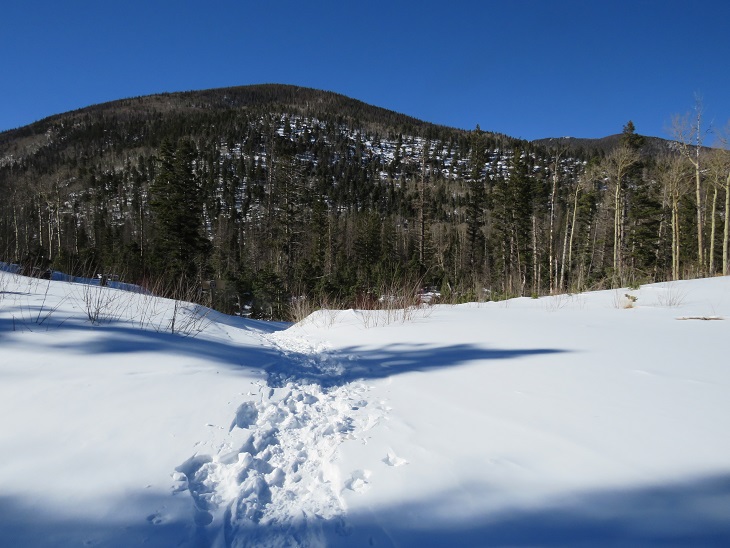
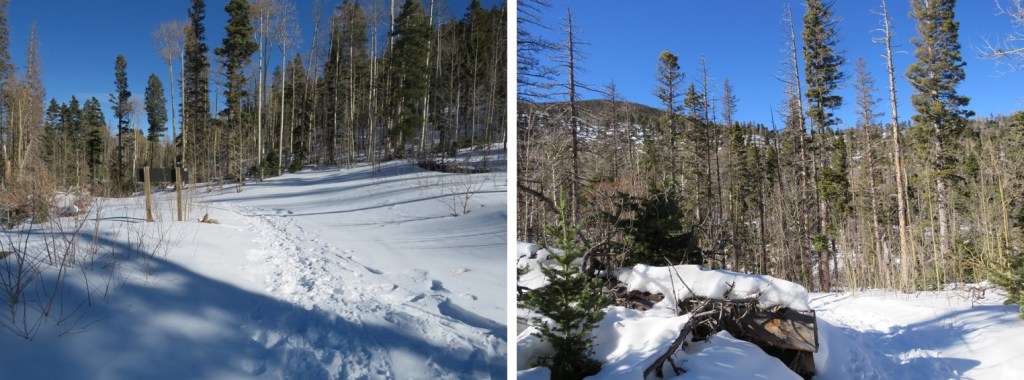
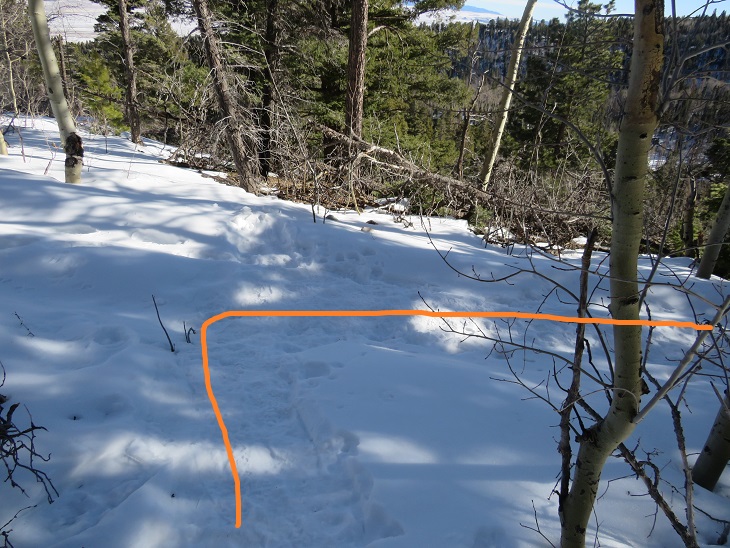
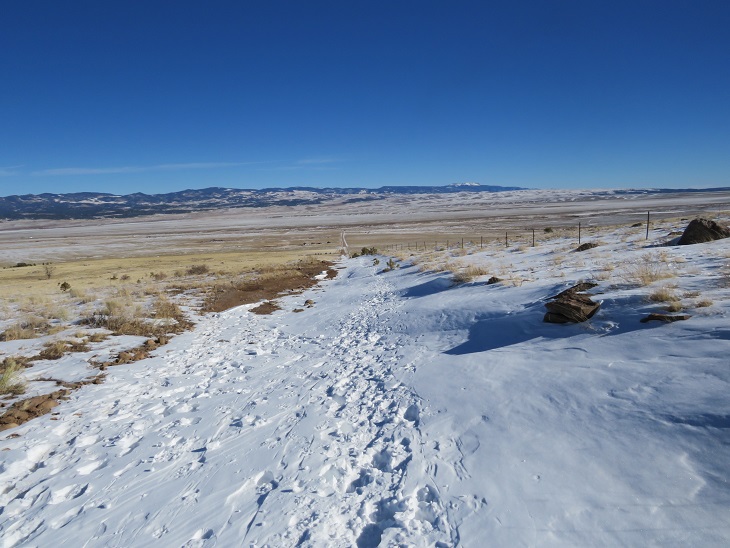
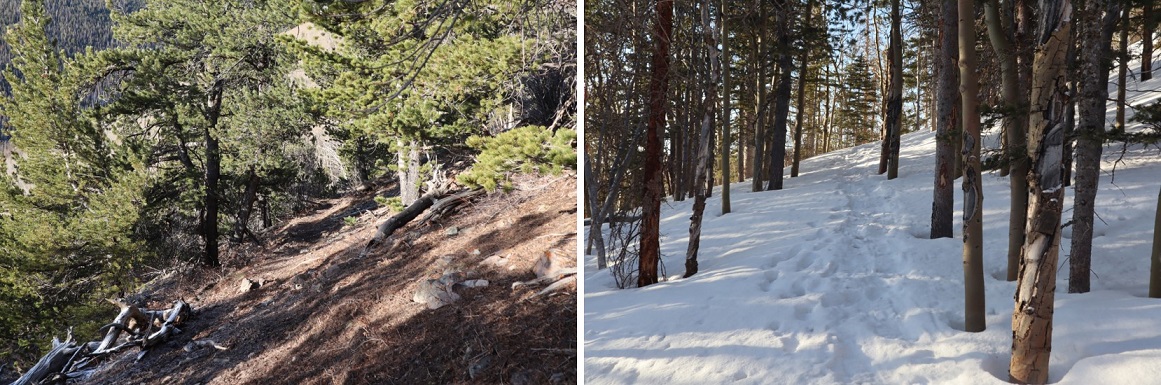
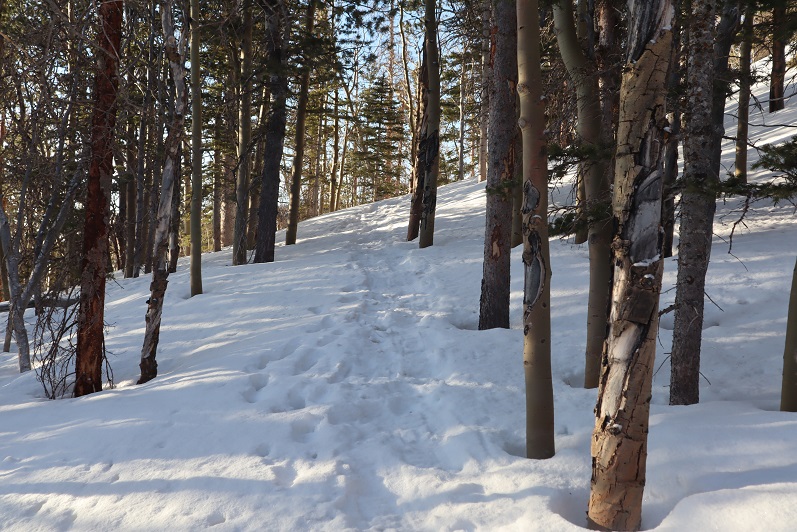
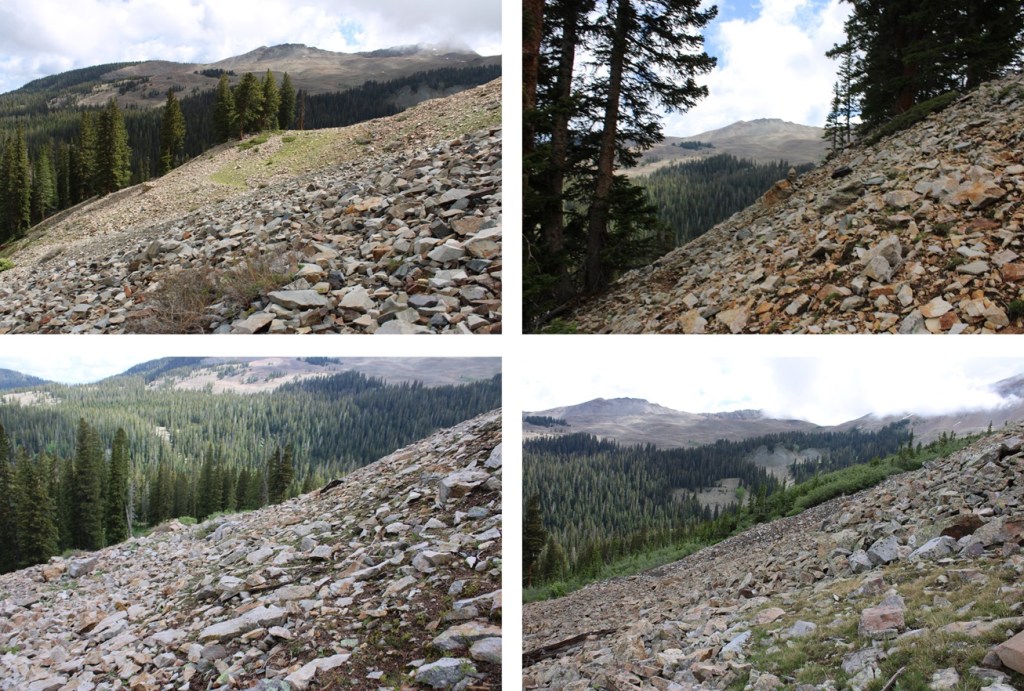
I turned left, and bushwhacked my way southwest towards the ridge.  There was no visible trail here, but I soon made it out of treeline.

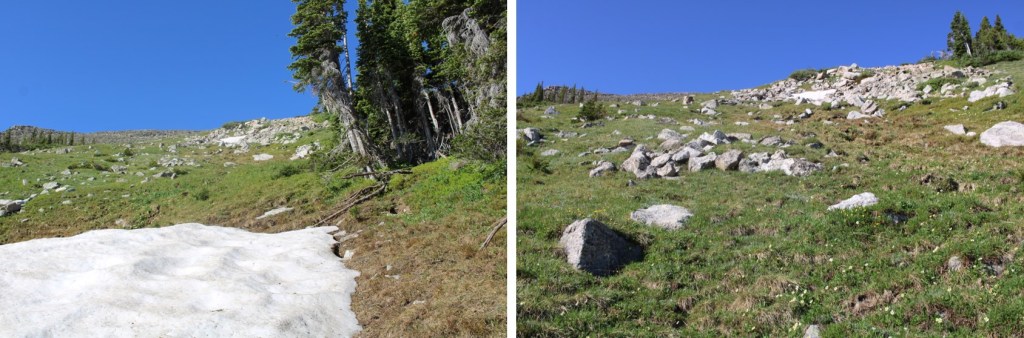
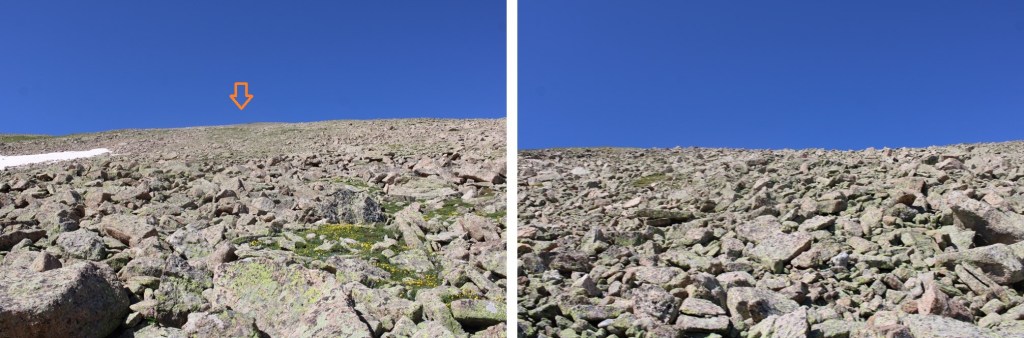
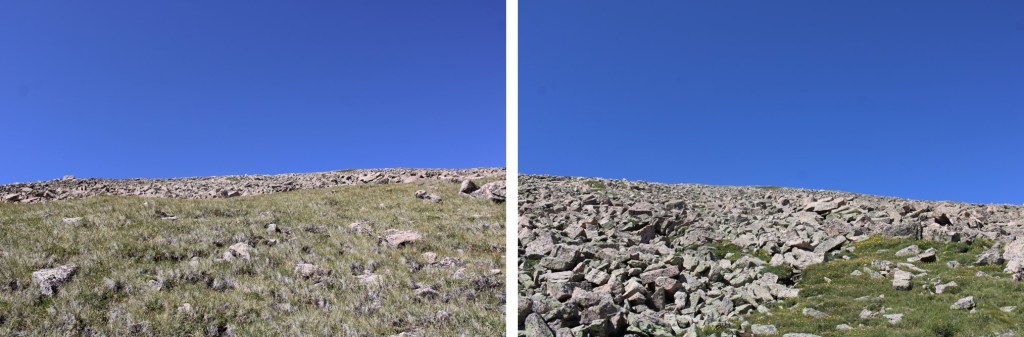
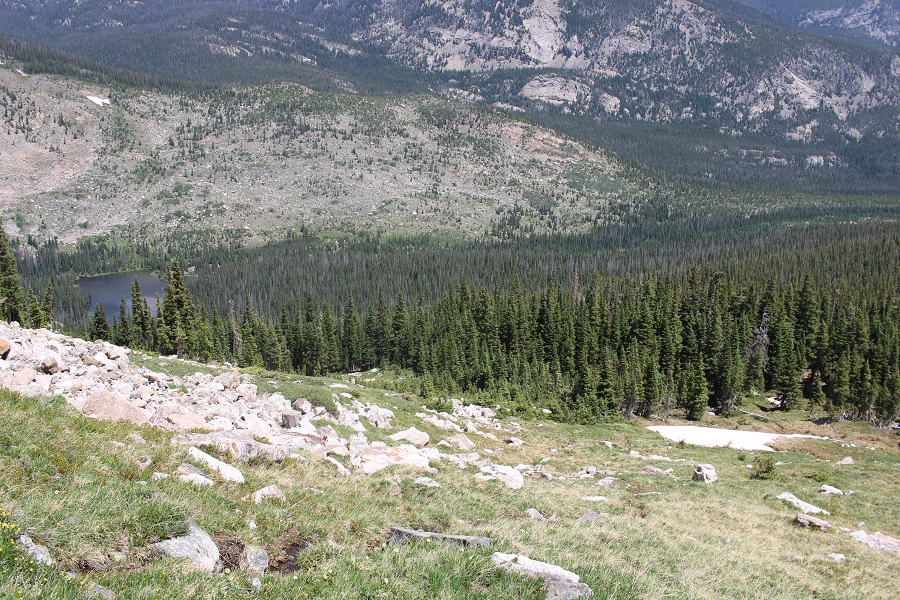
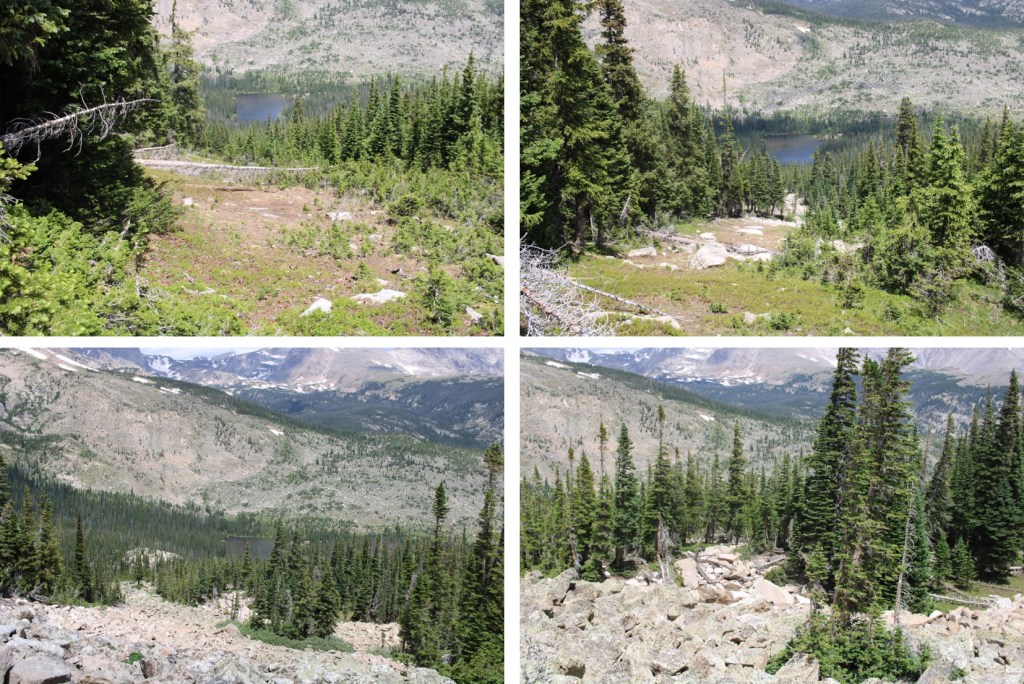
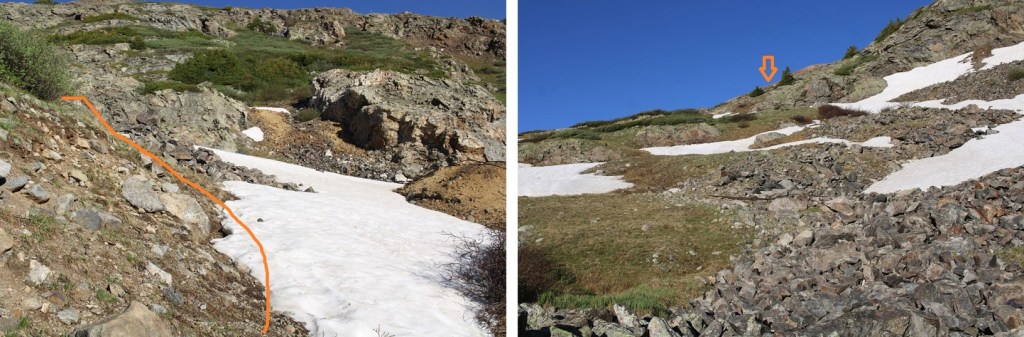
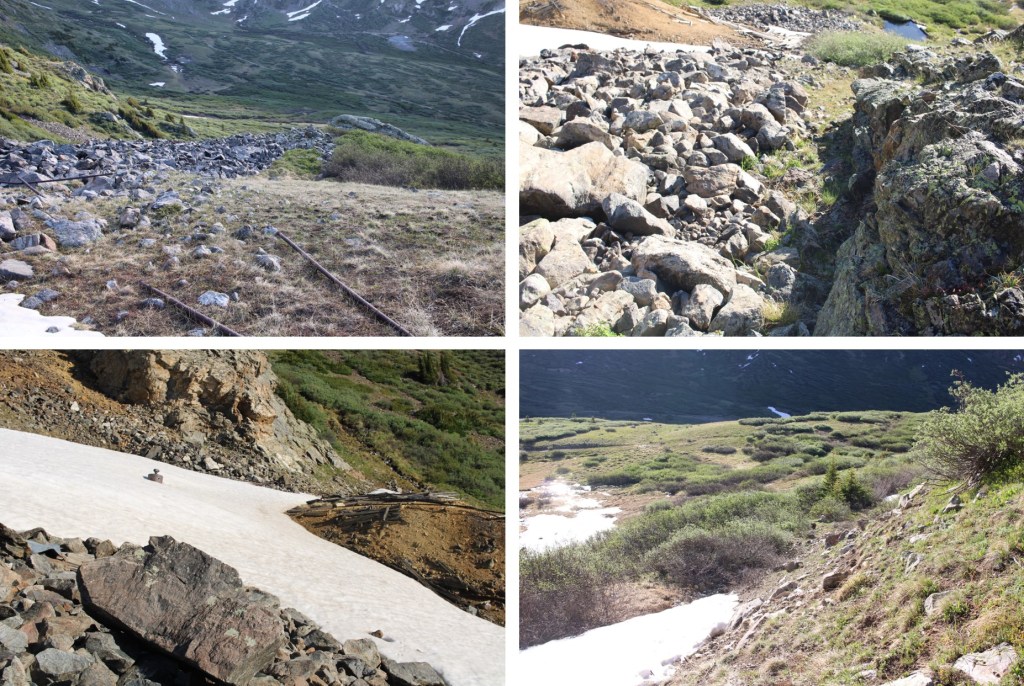
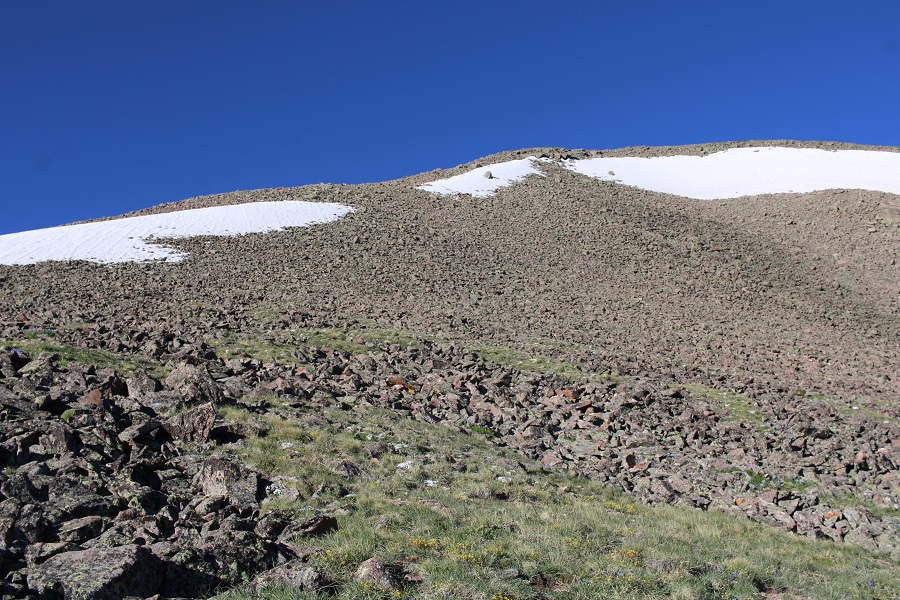
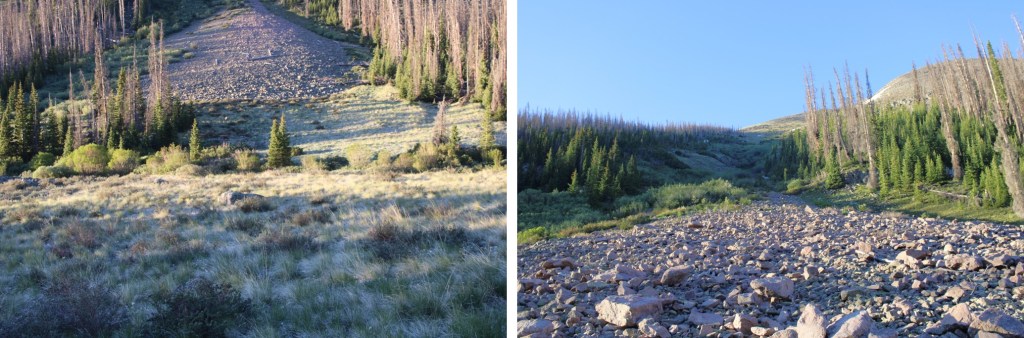
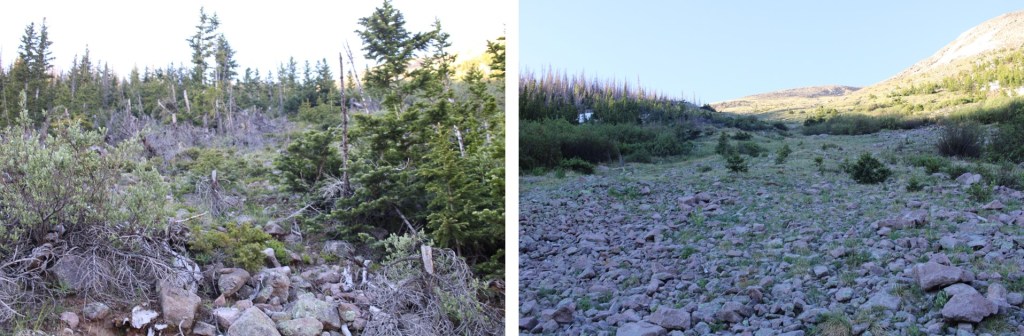
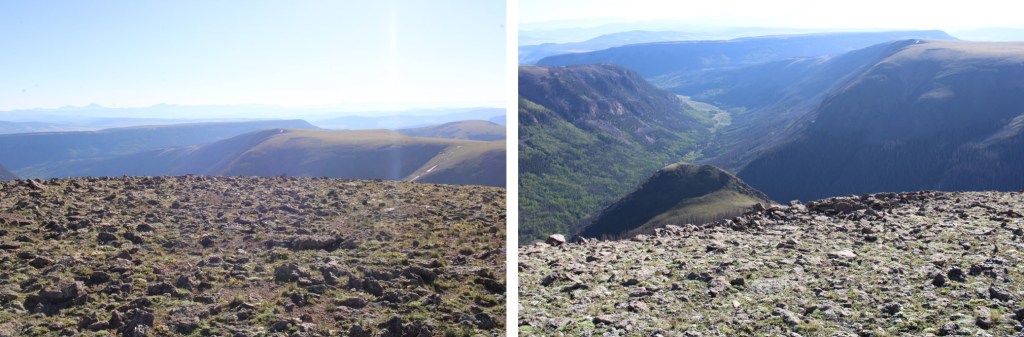
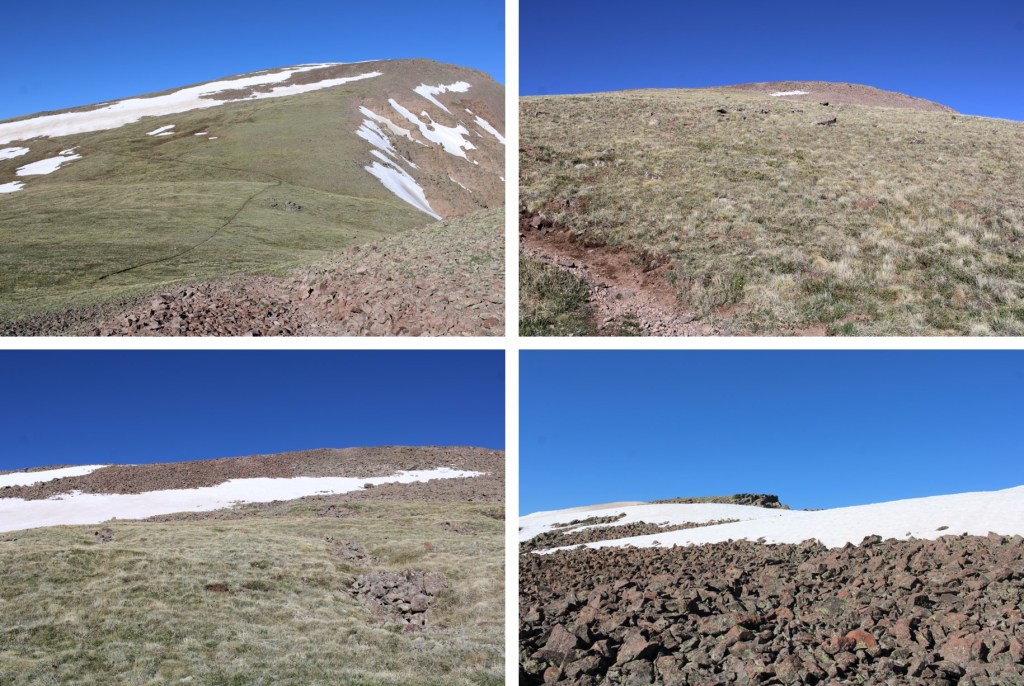
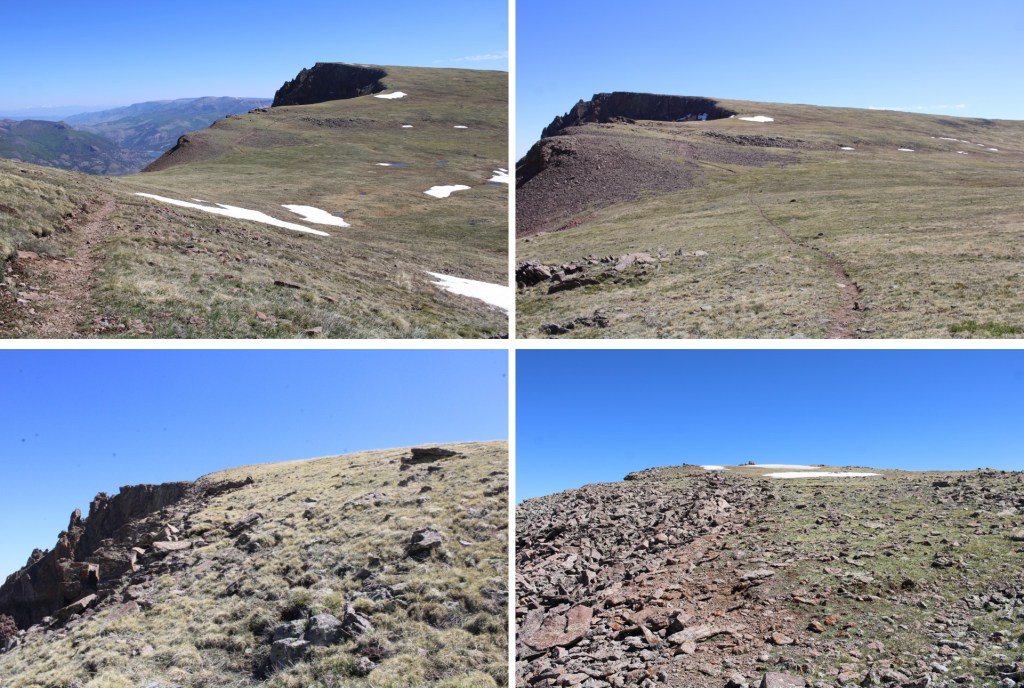
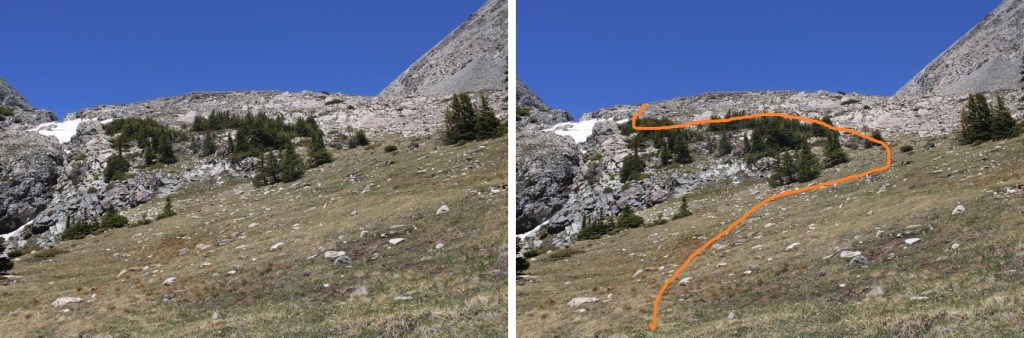
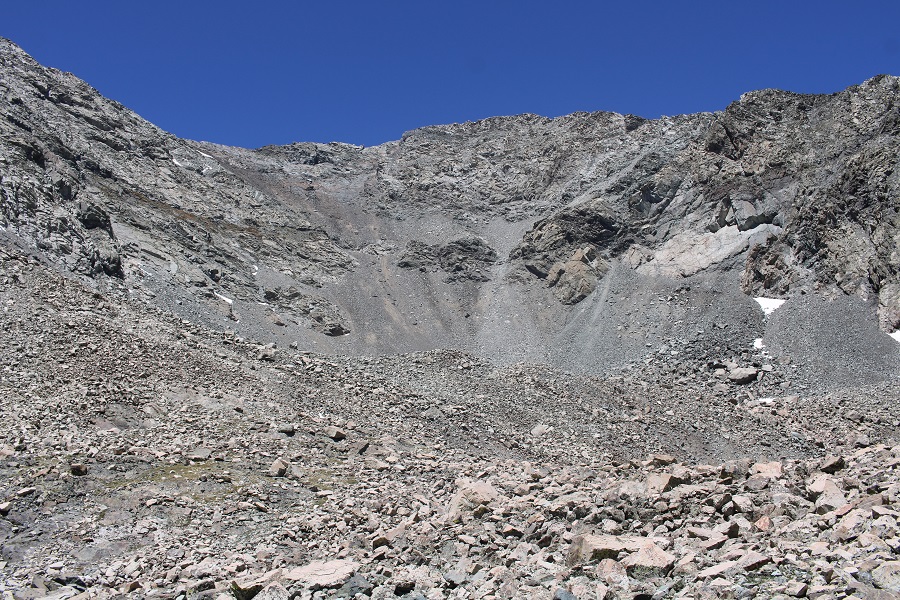
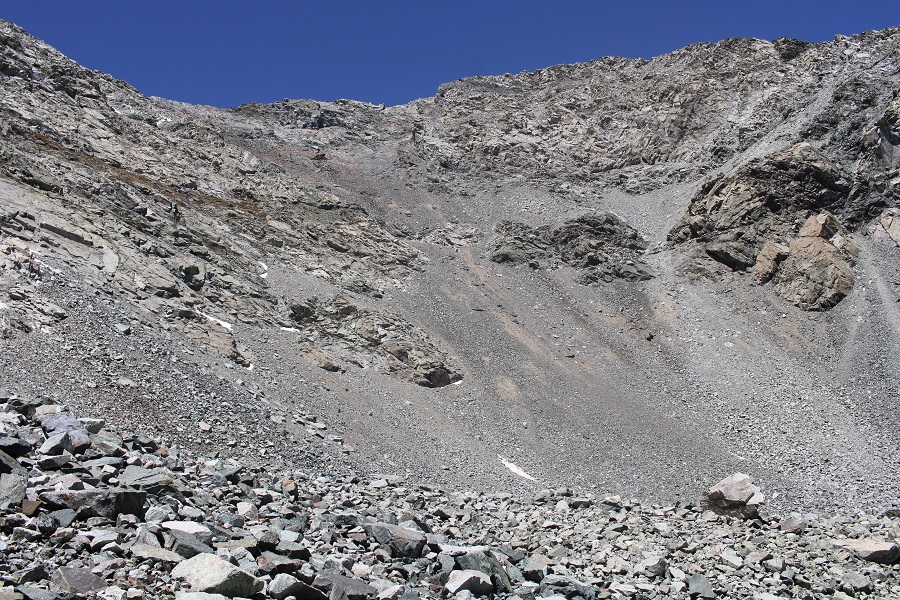
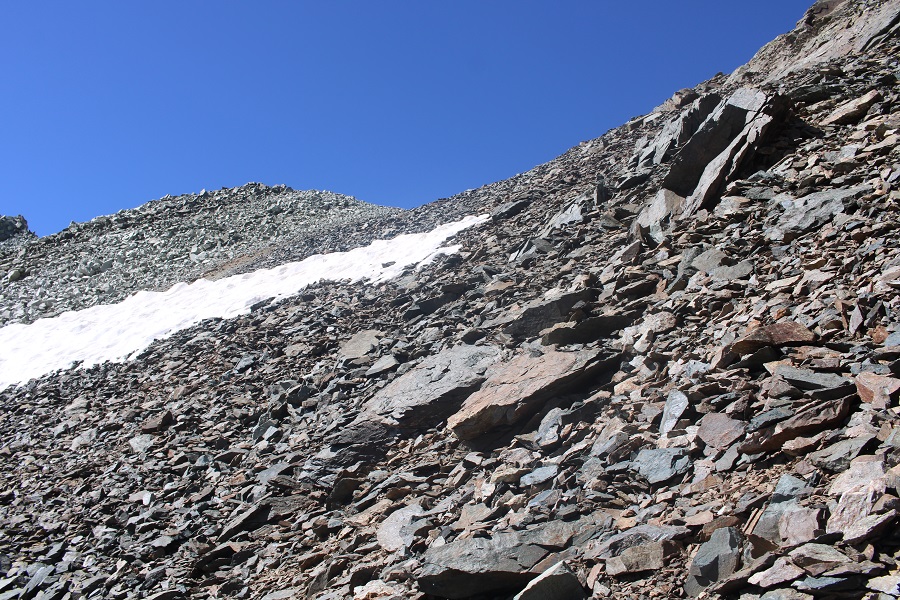
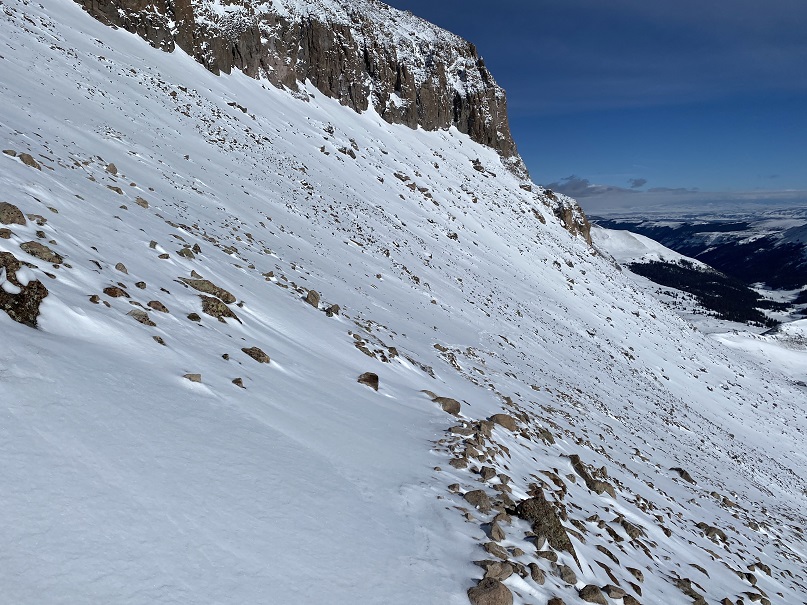
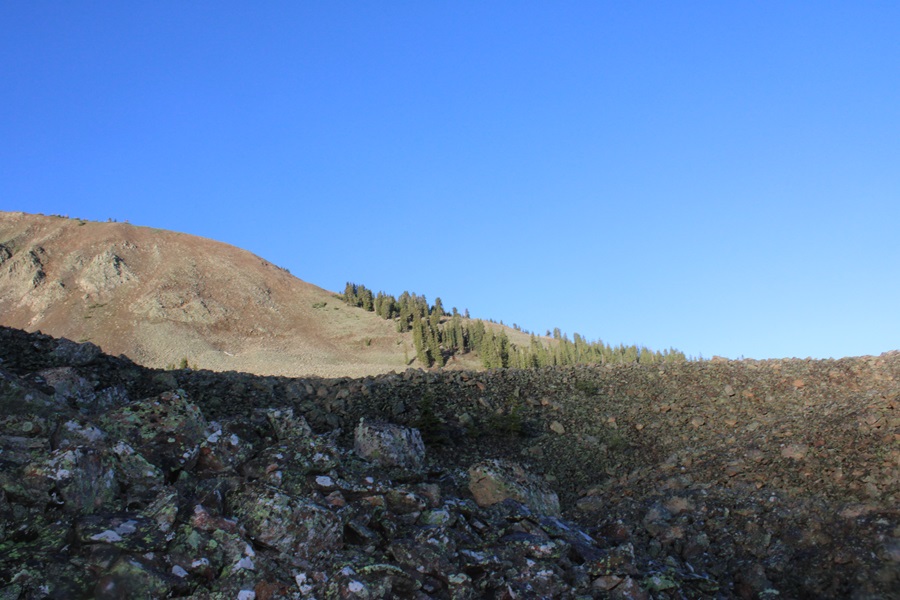
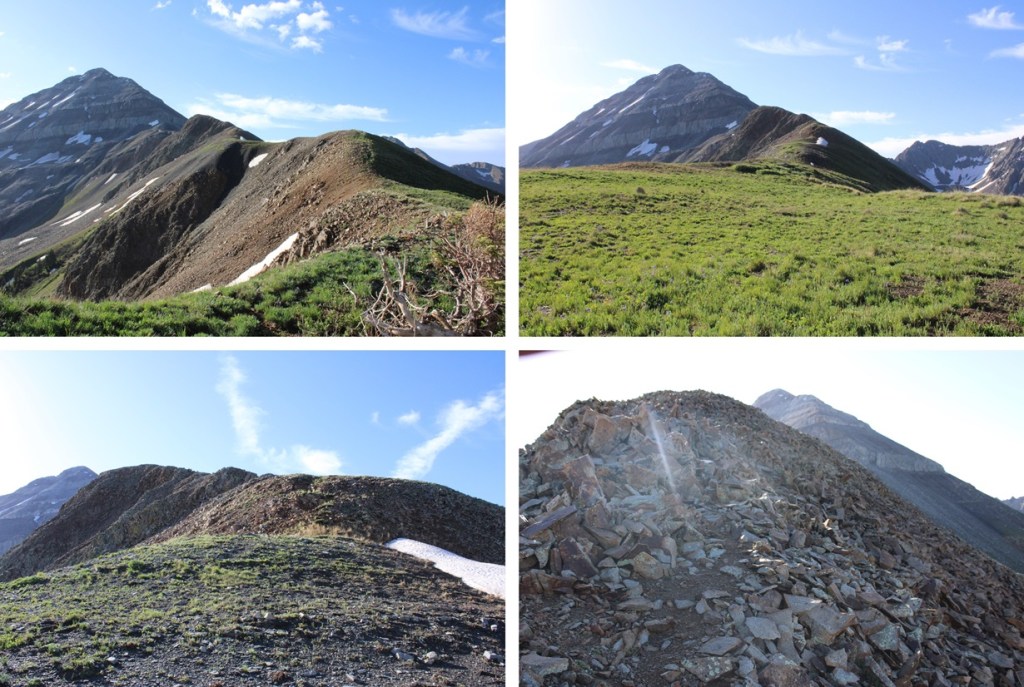
At treeline I came to a huge basin of rocks.  To get to the ridge, I was going to have to head southwest, through this basin of loose, unstable rock. I did my best to stay low, and try to skirt the piles of rocks, but eventually I had to go up and over.

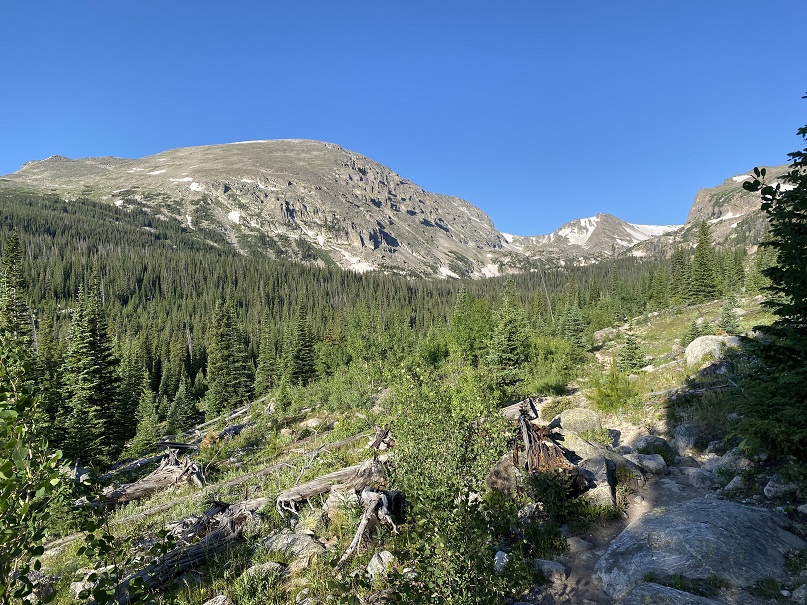
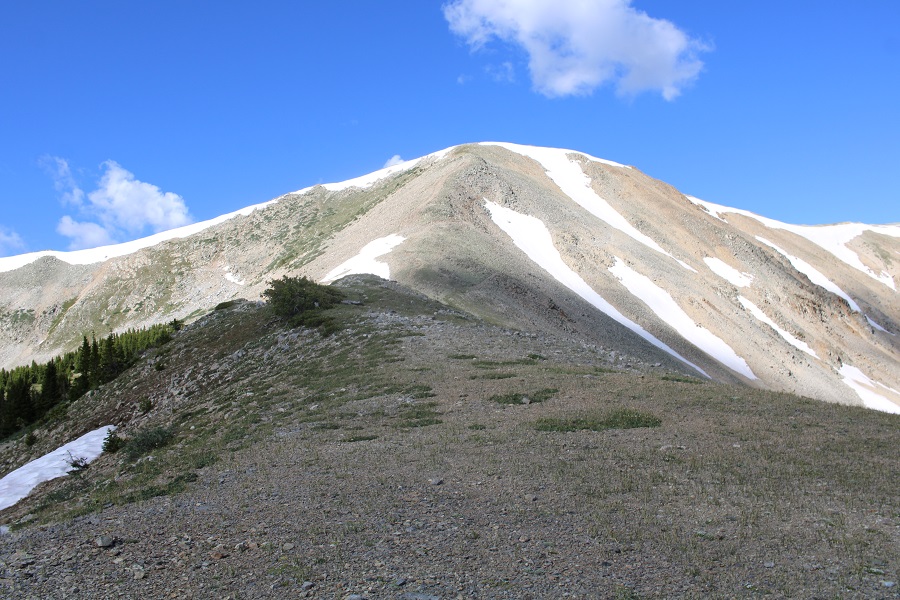
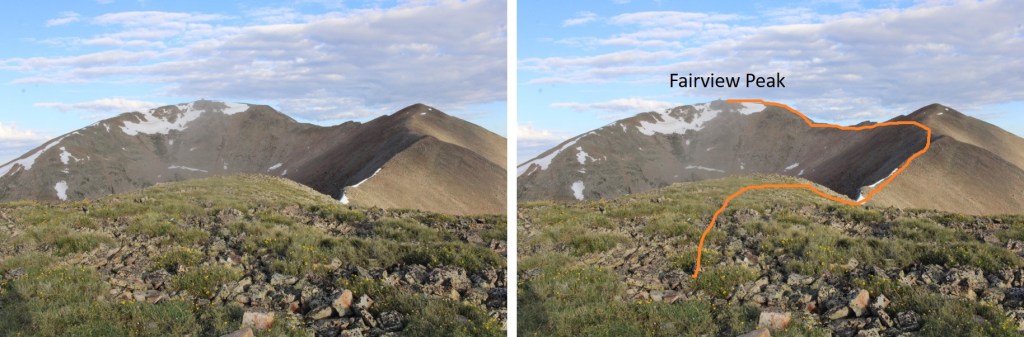
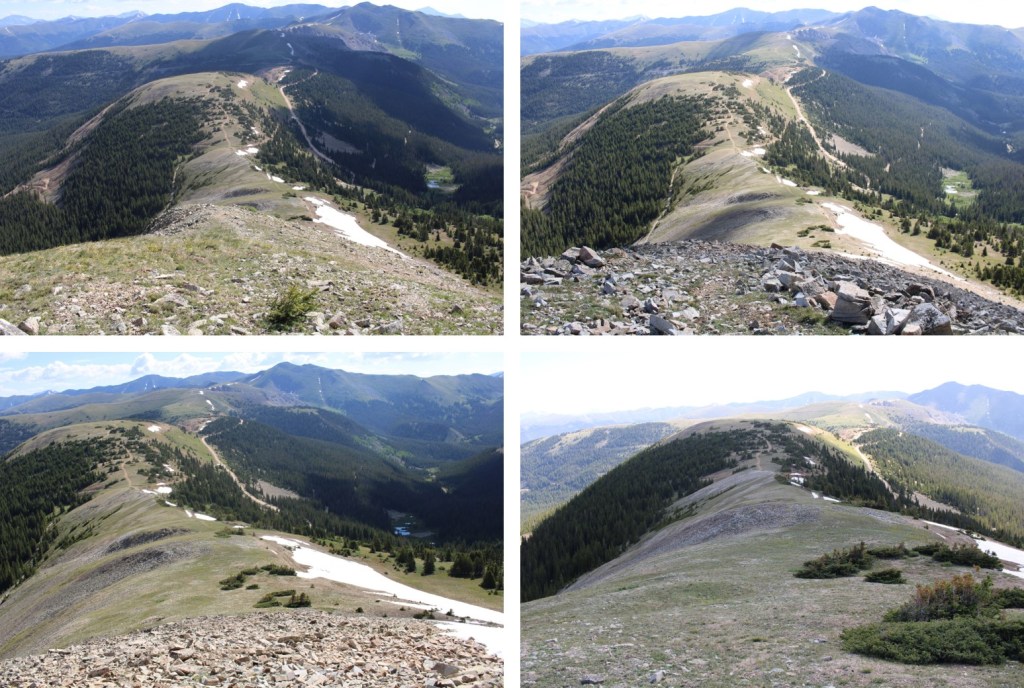
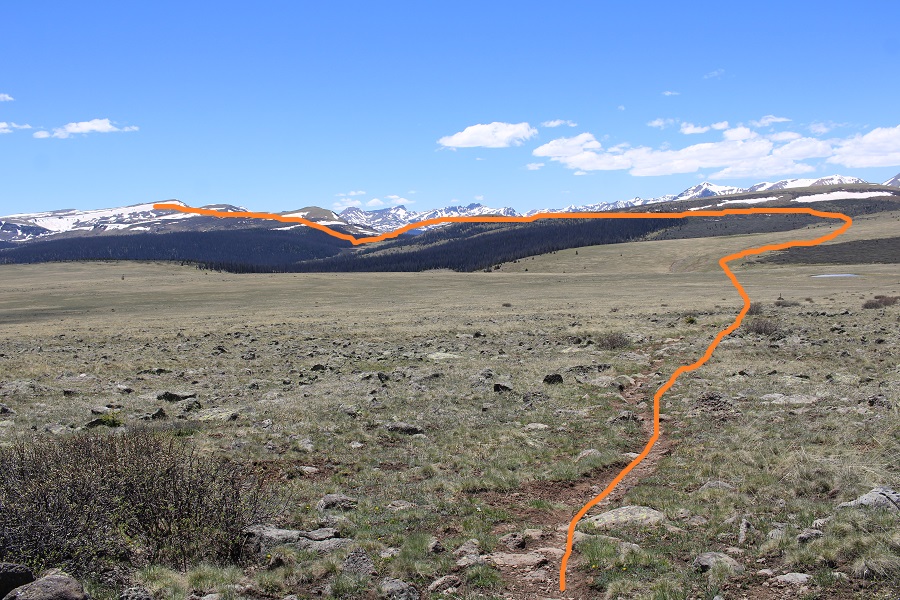
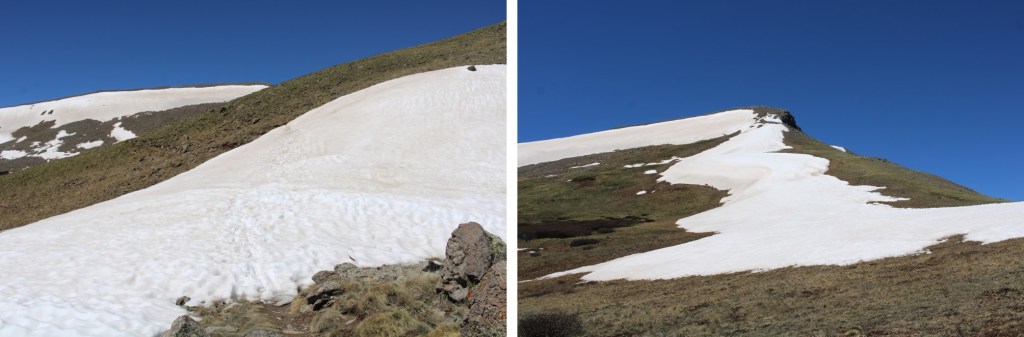
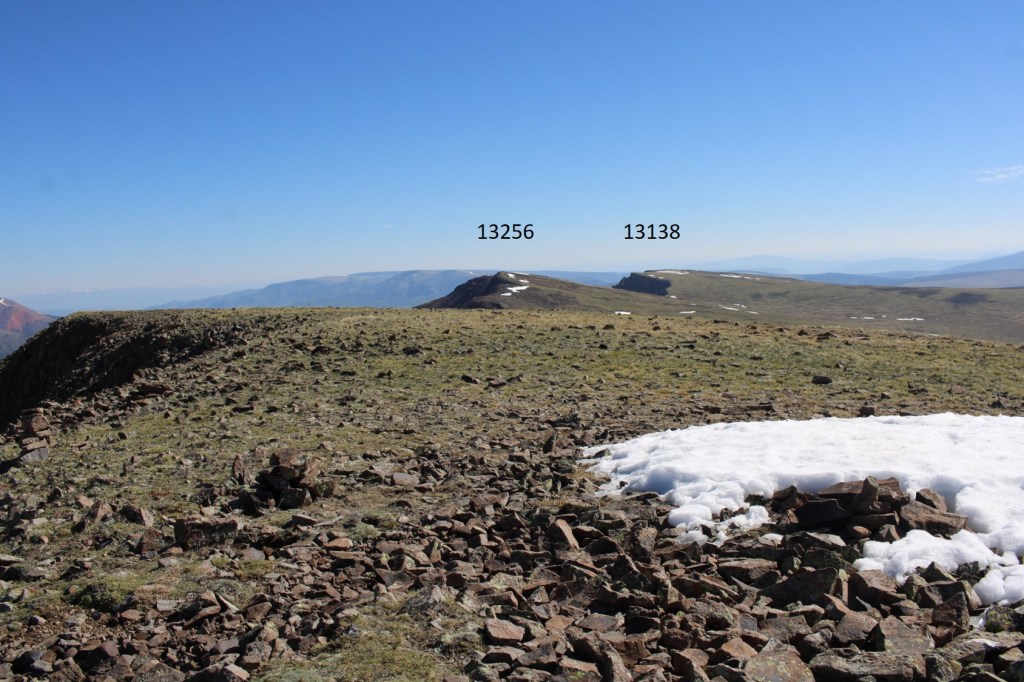
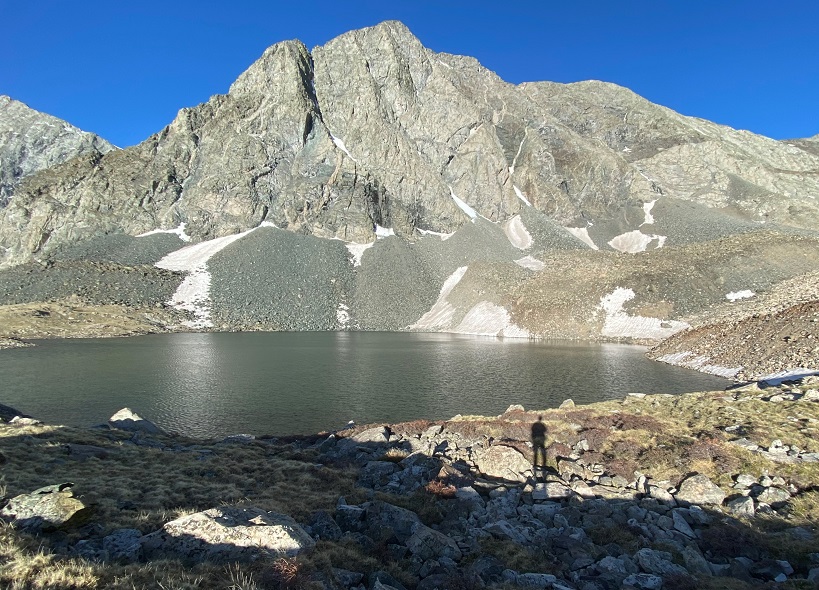
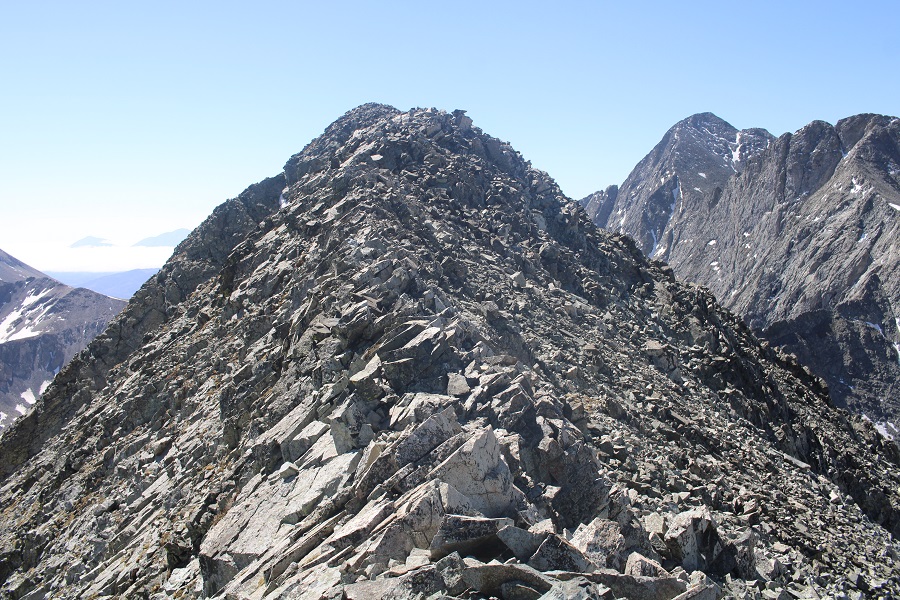
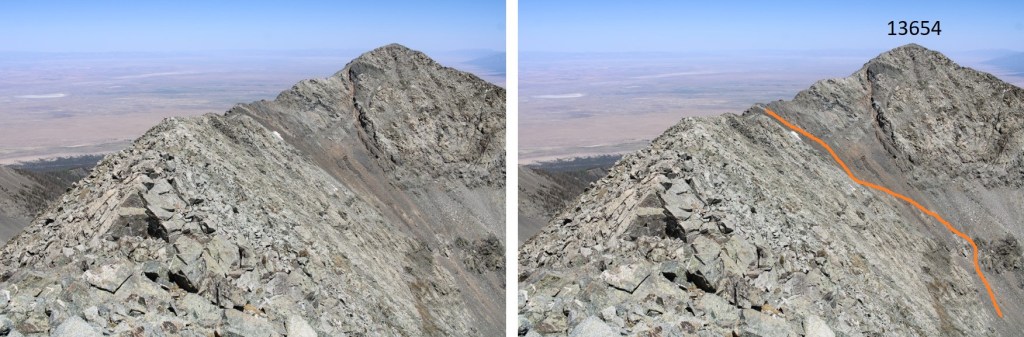
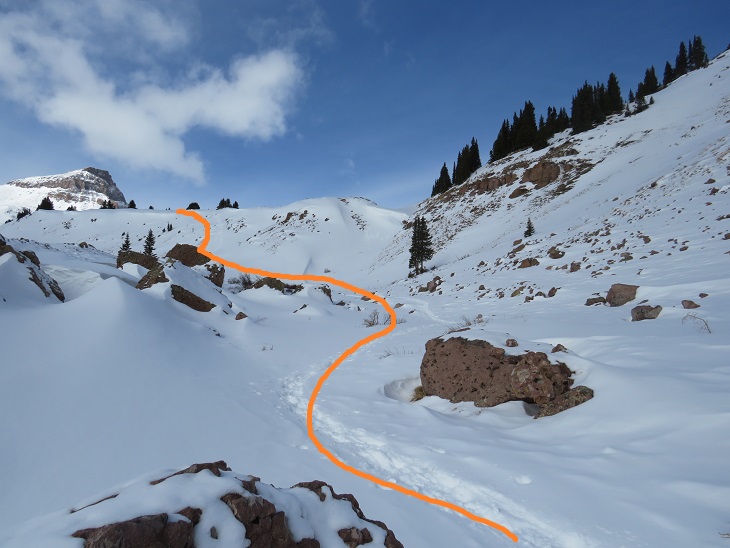
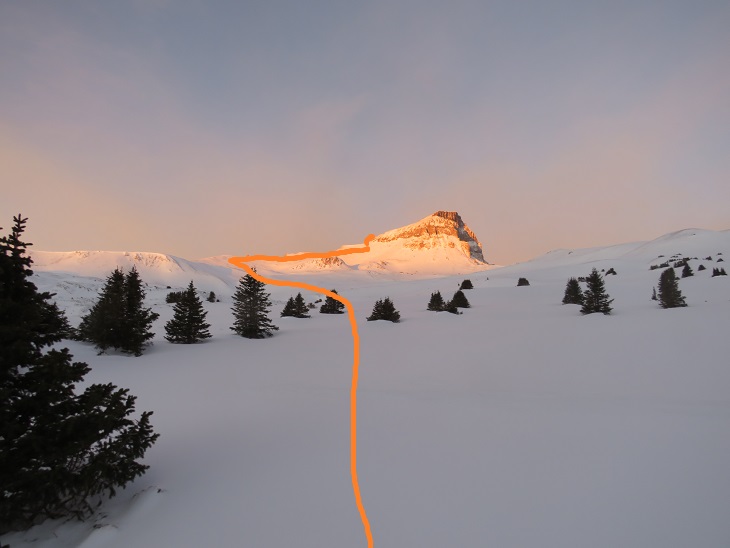
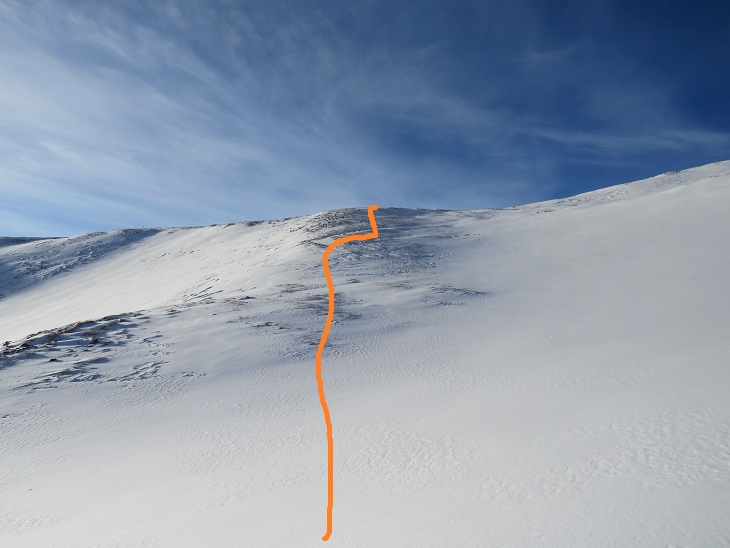
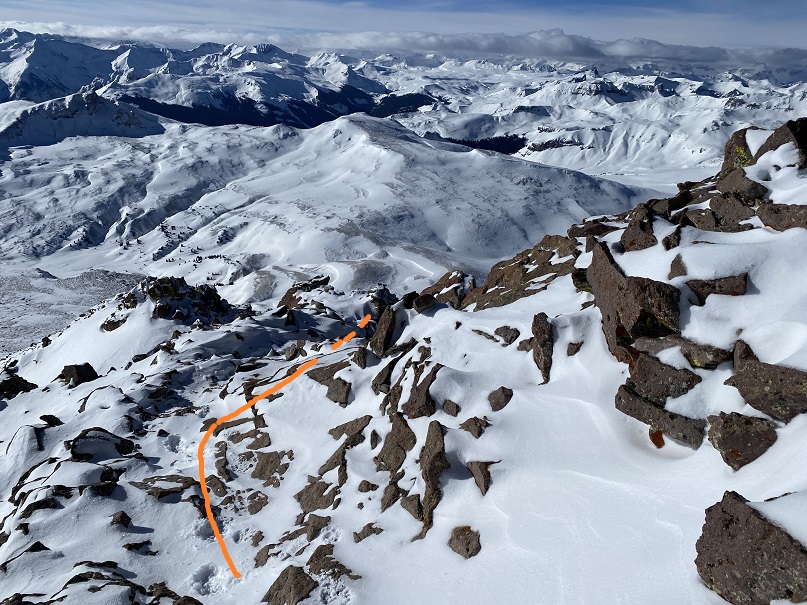
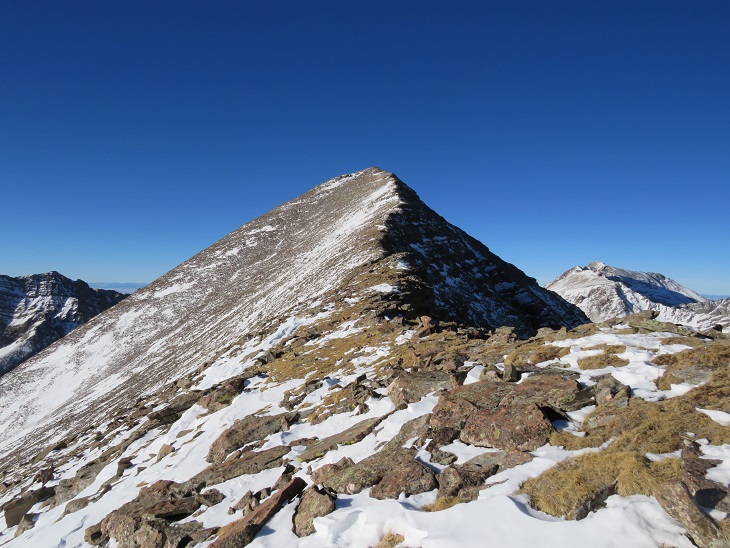
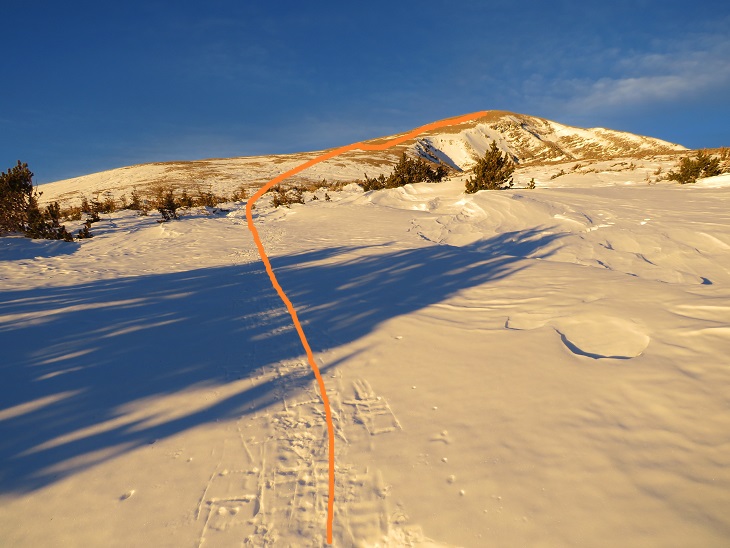
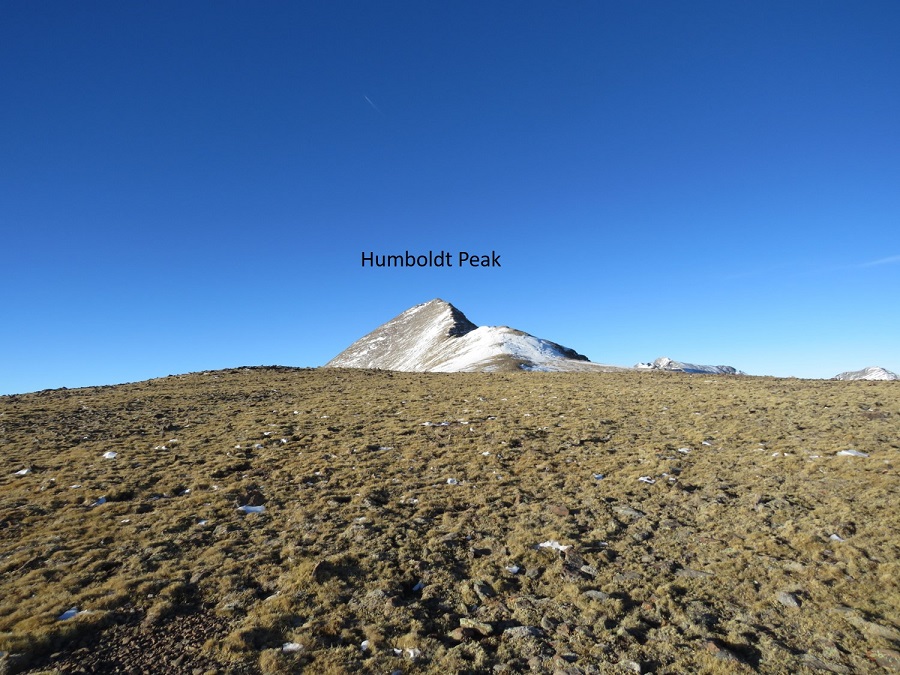
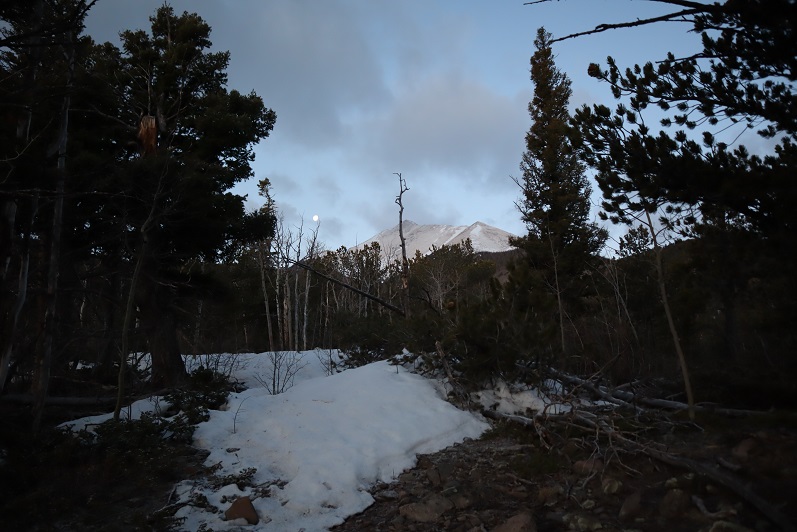
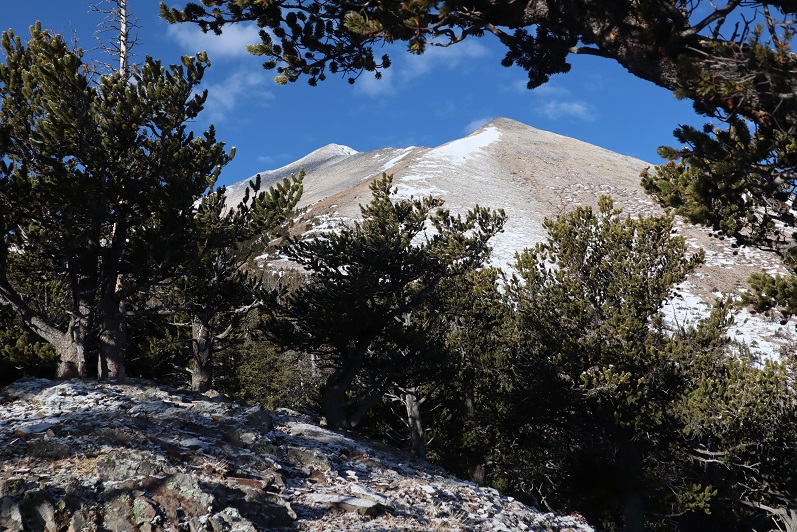
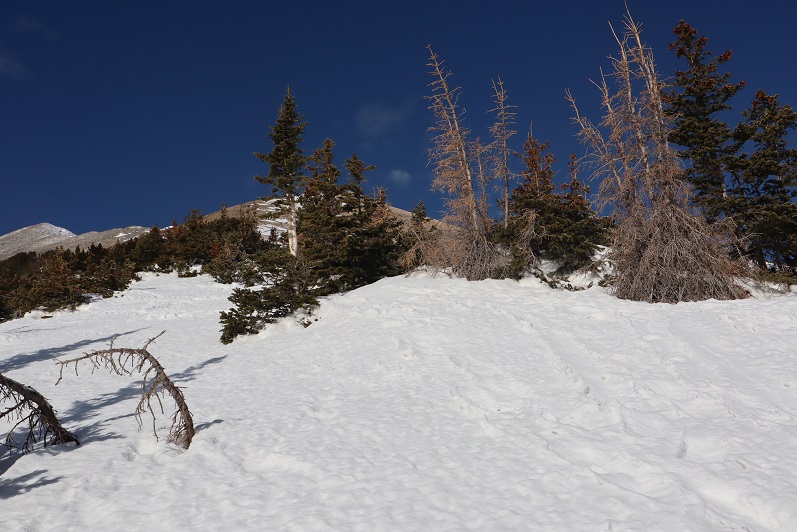
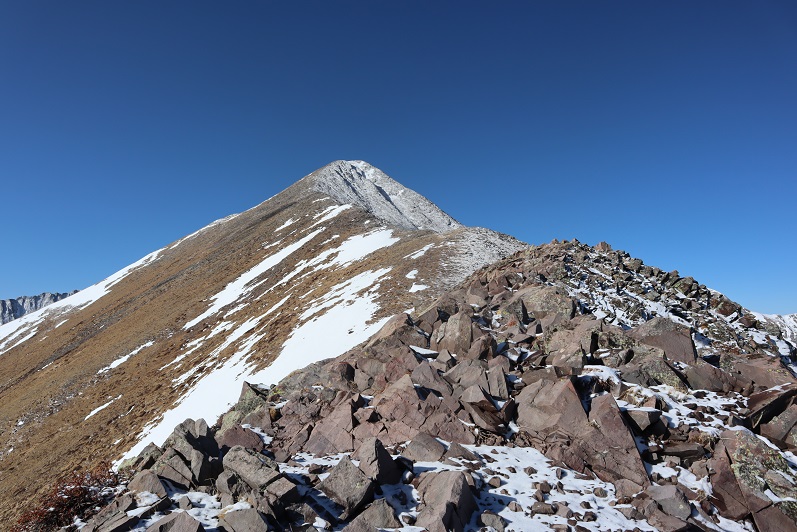
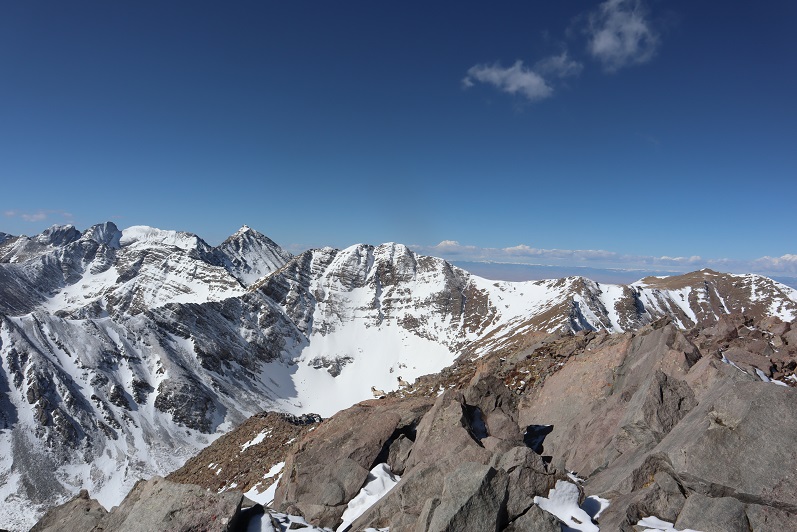
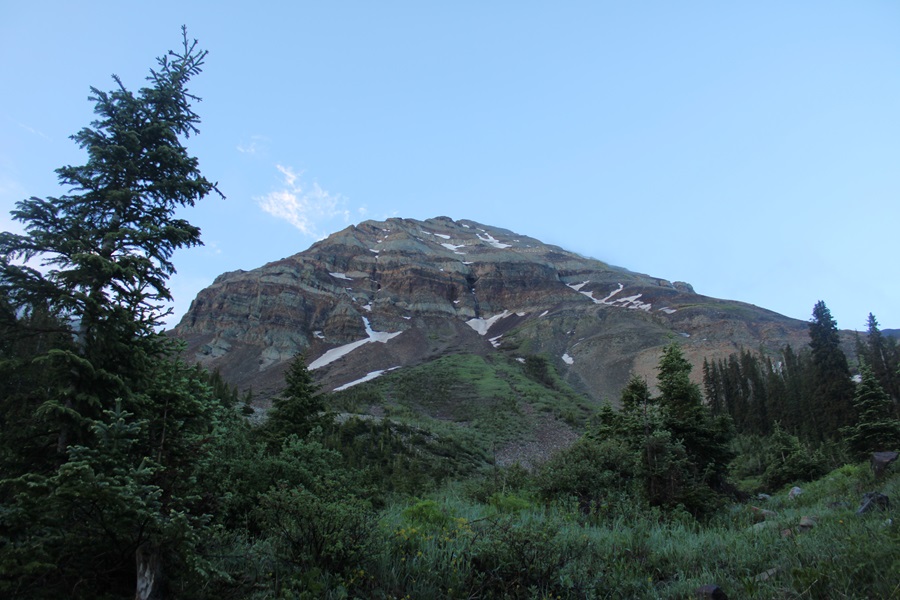
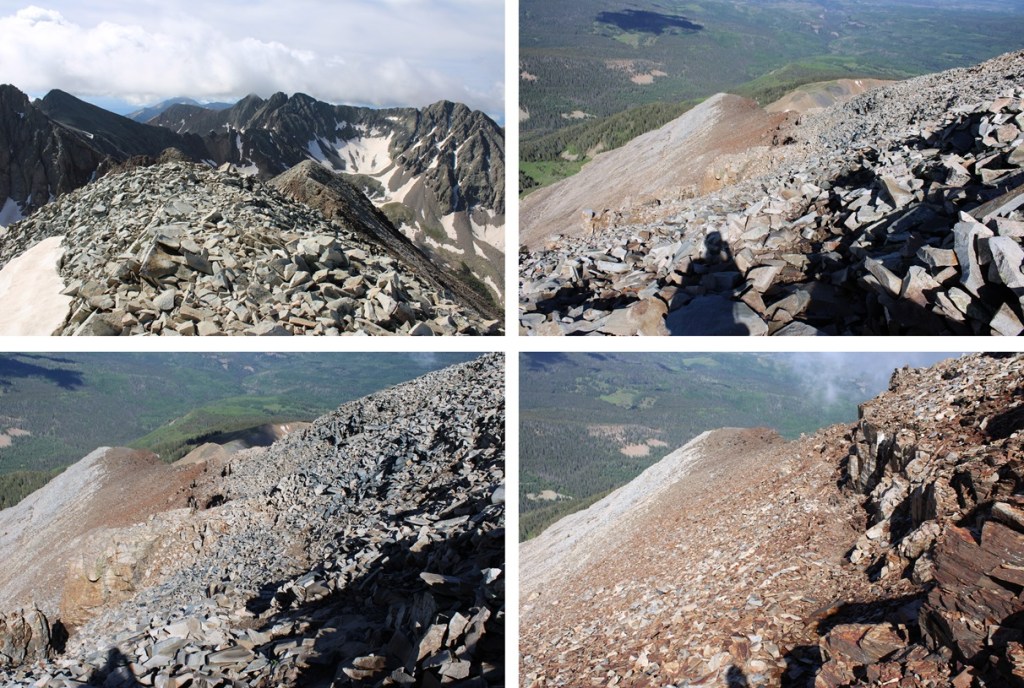
I now had a clear view of the ridge. 

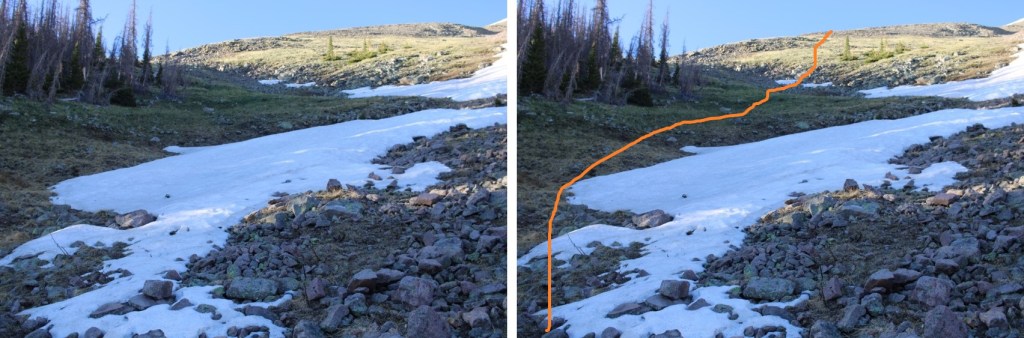
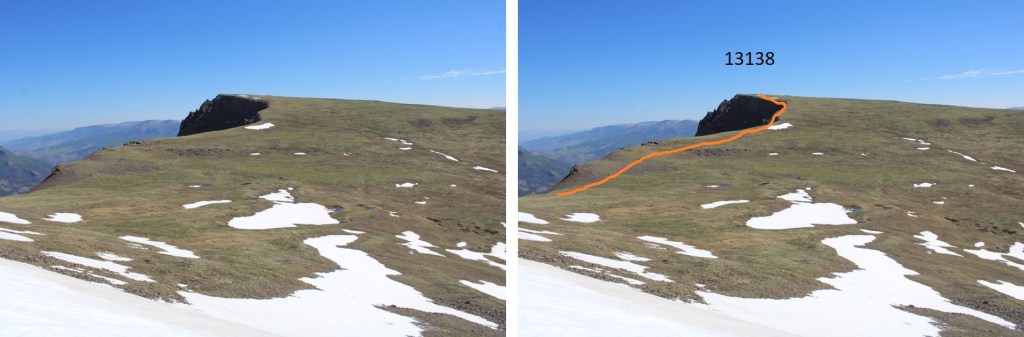
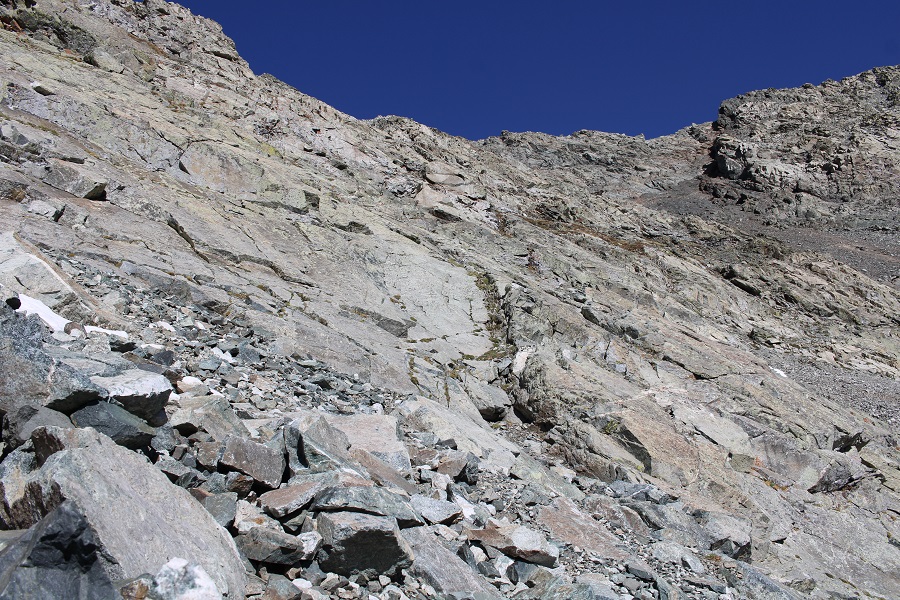
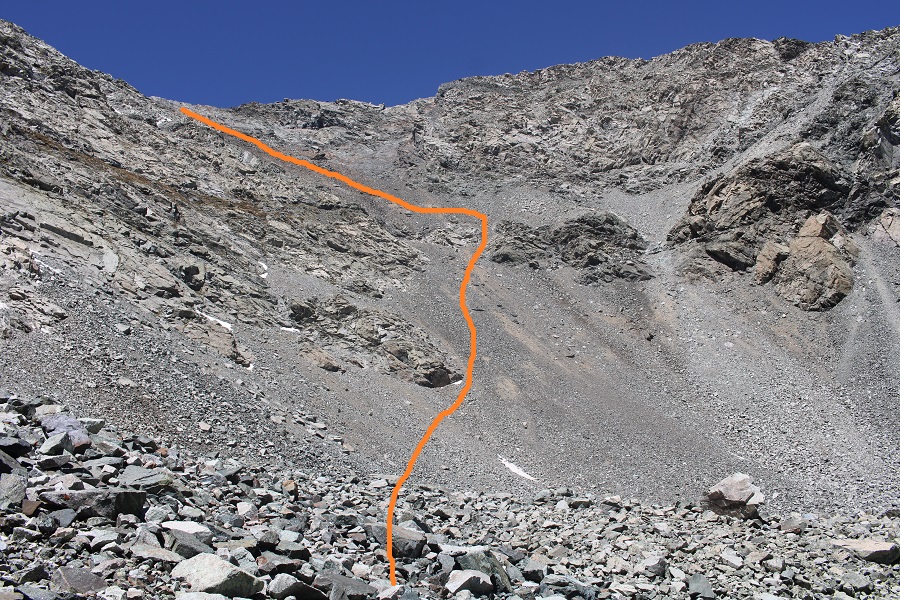
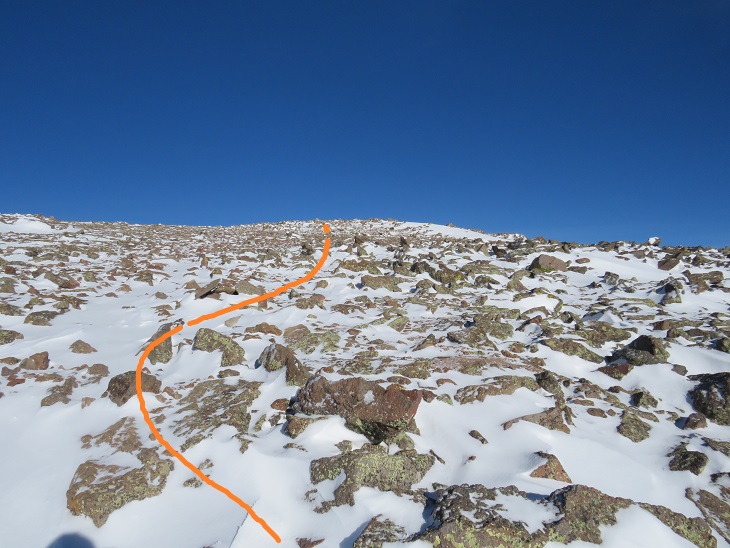
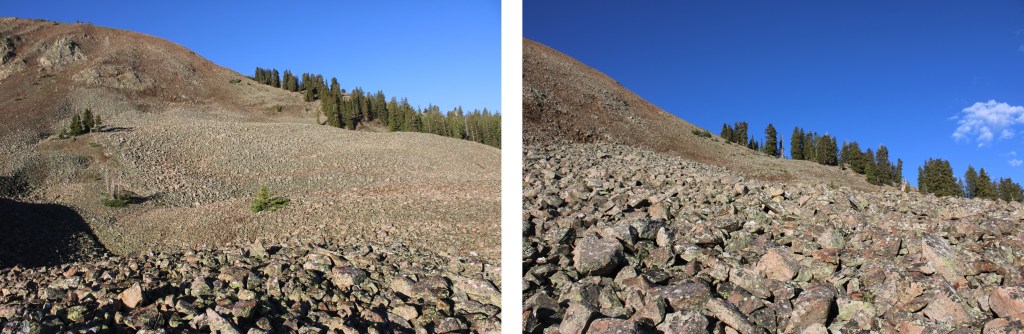
This is choose your own adventure, and none of it was pleasant.  It was full of loose, rolling rocks. This is the route I took to gain the ridge.

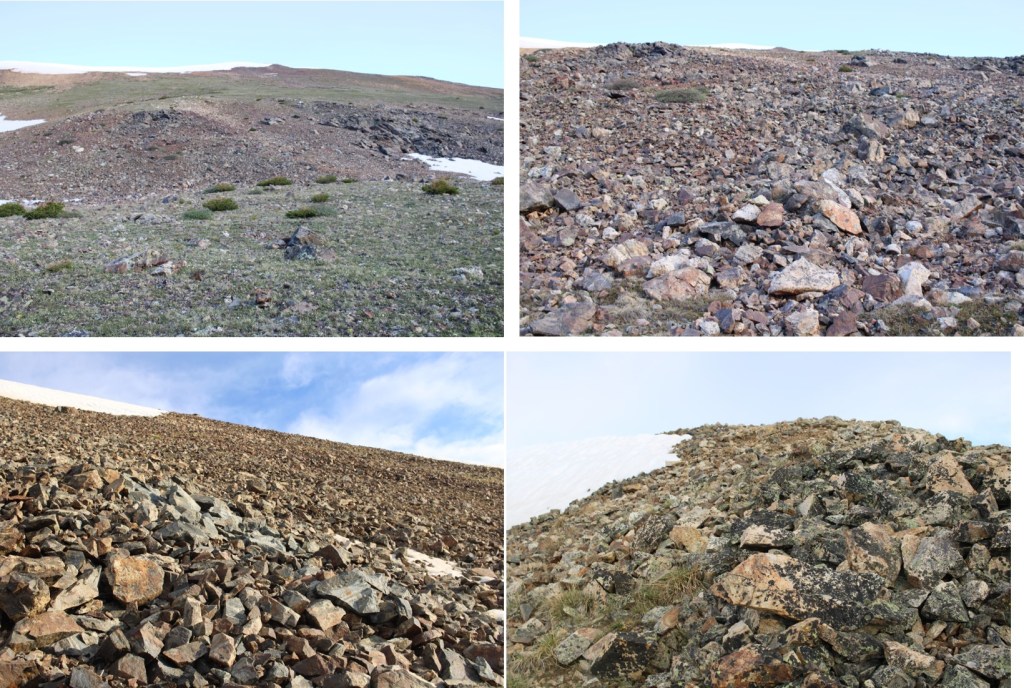
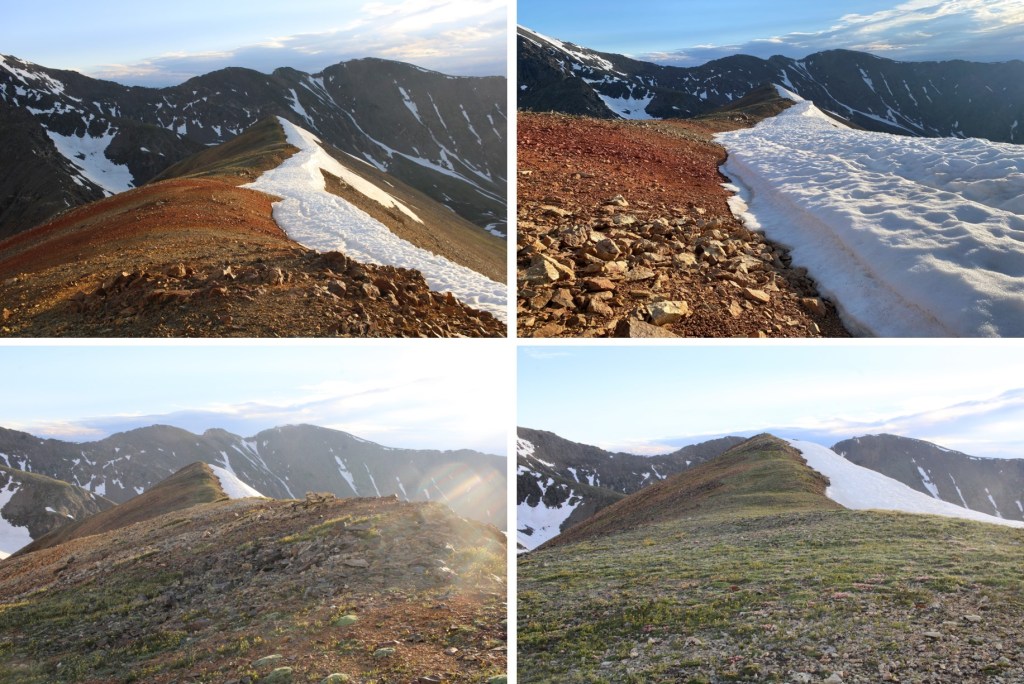
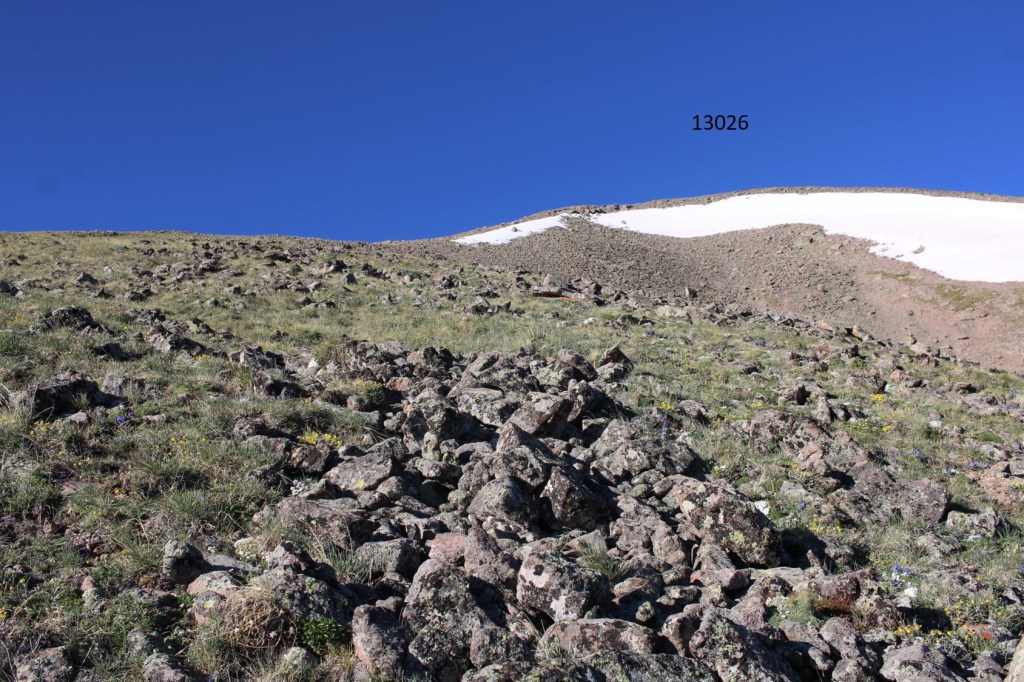
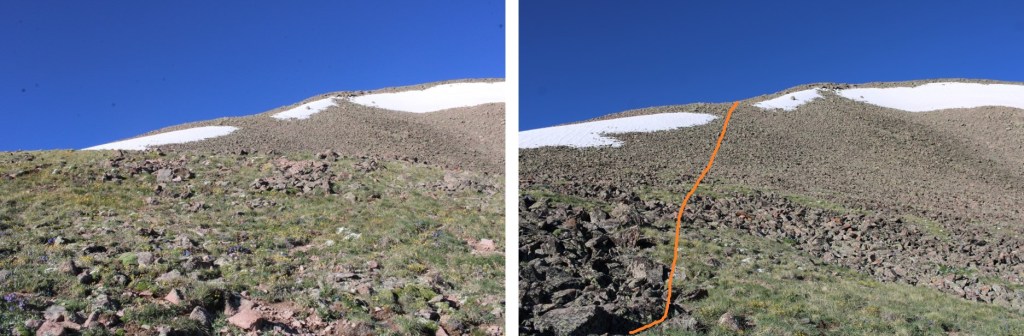
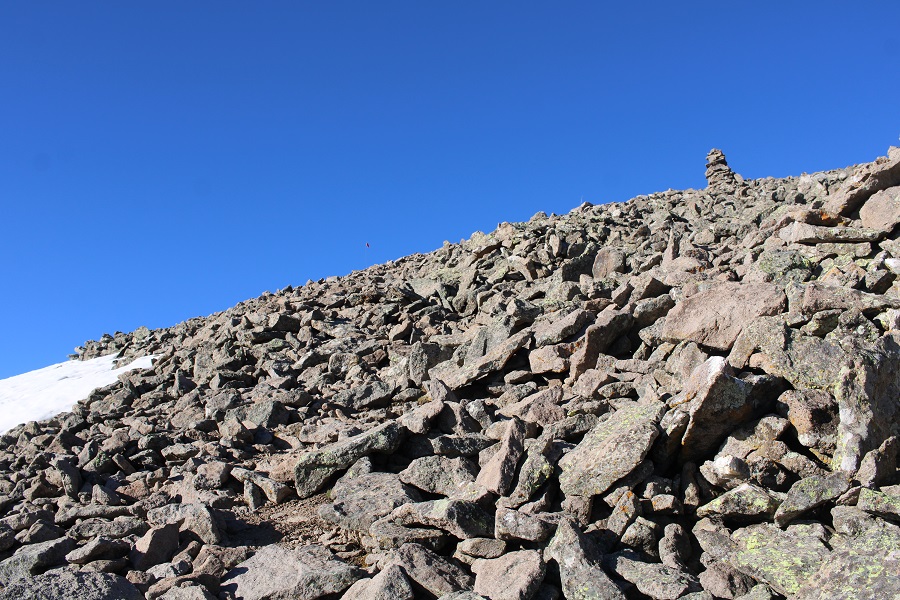
Once on the ridge, I turned left, and encountered the most difficult part of my day:  Tons of mosquitoes and 350’ of elevation gain in 1/10th of a mile on dinner plate sized, extremely loose talus.  There was no clear path or game trails, I just kept heading up.  It was so miserable, I decided then and there I was not going to go back down this way if I could help it.

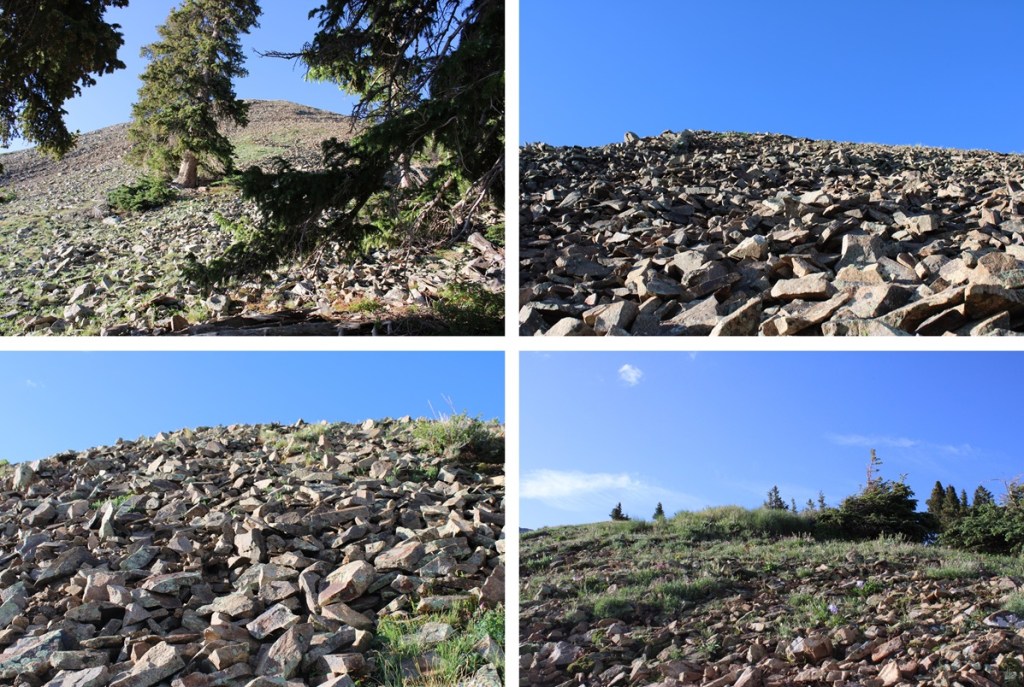
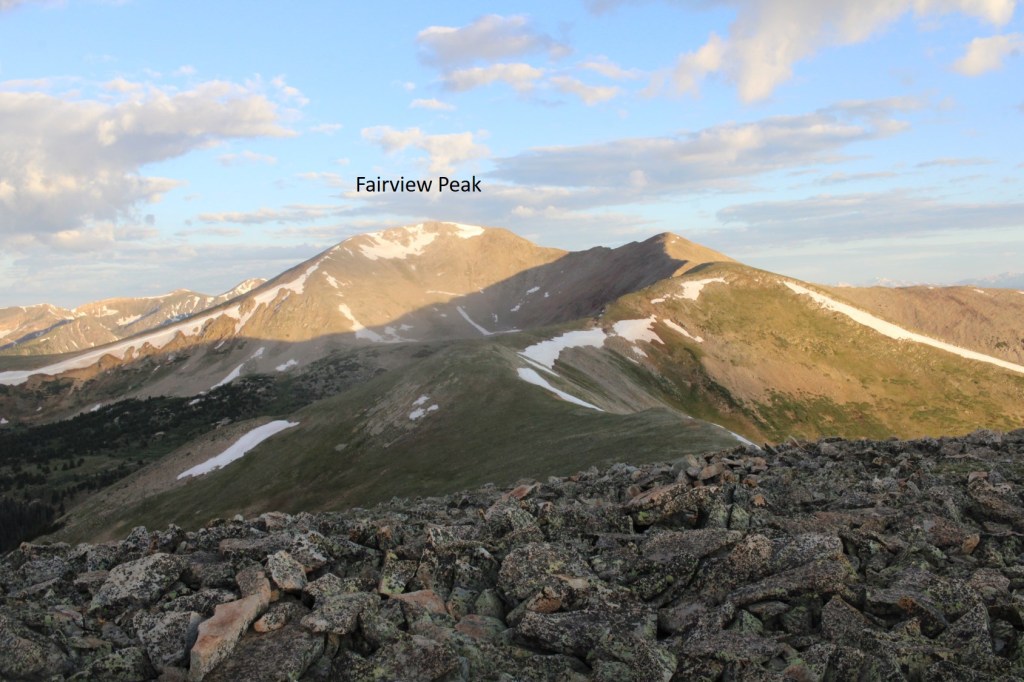
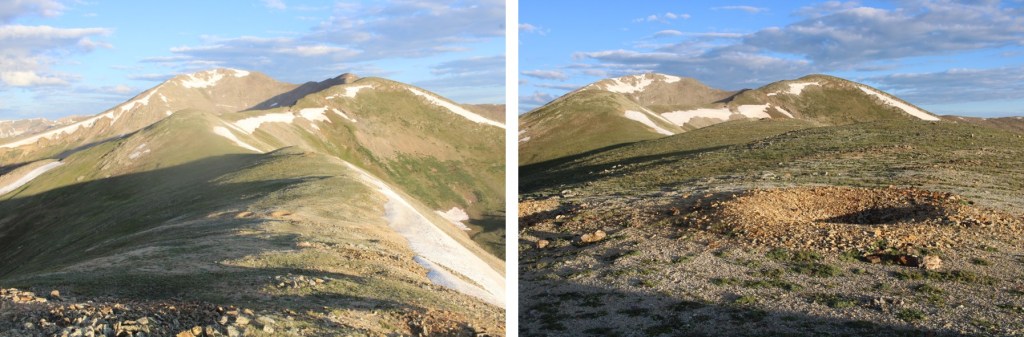
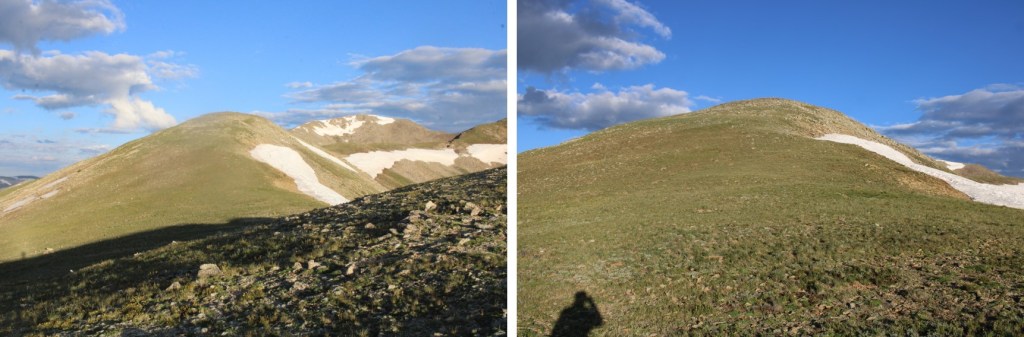
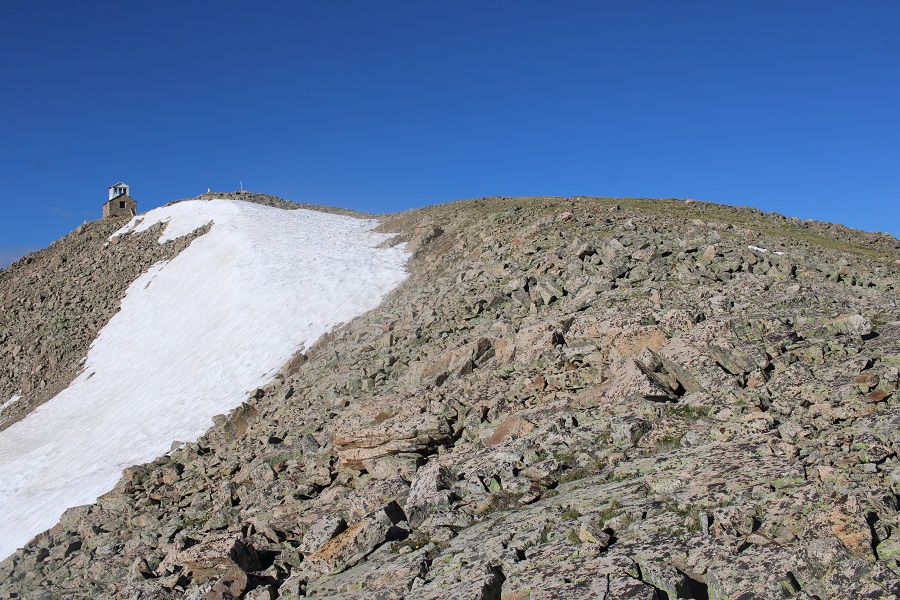
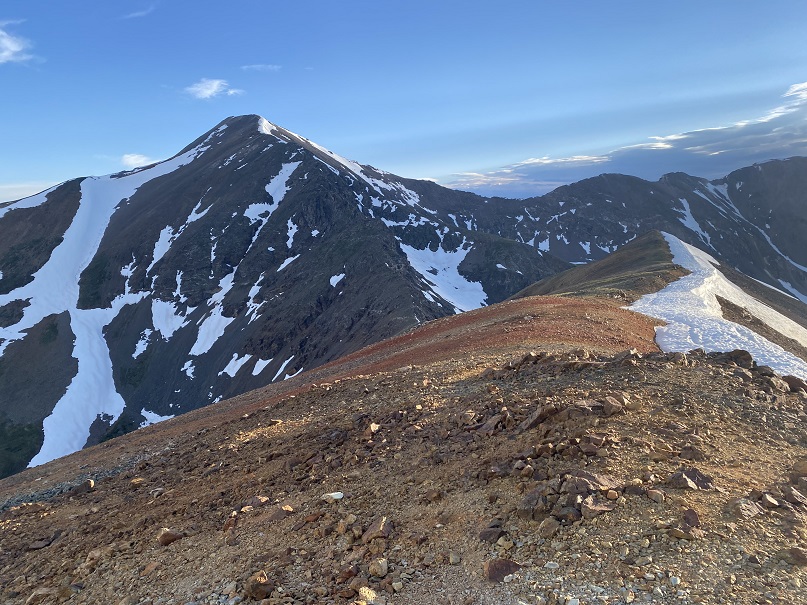
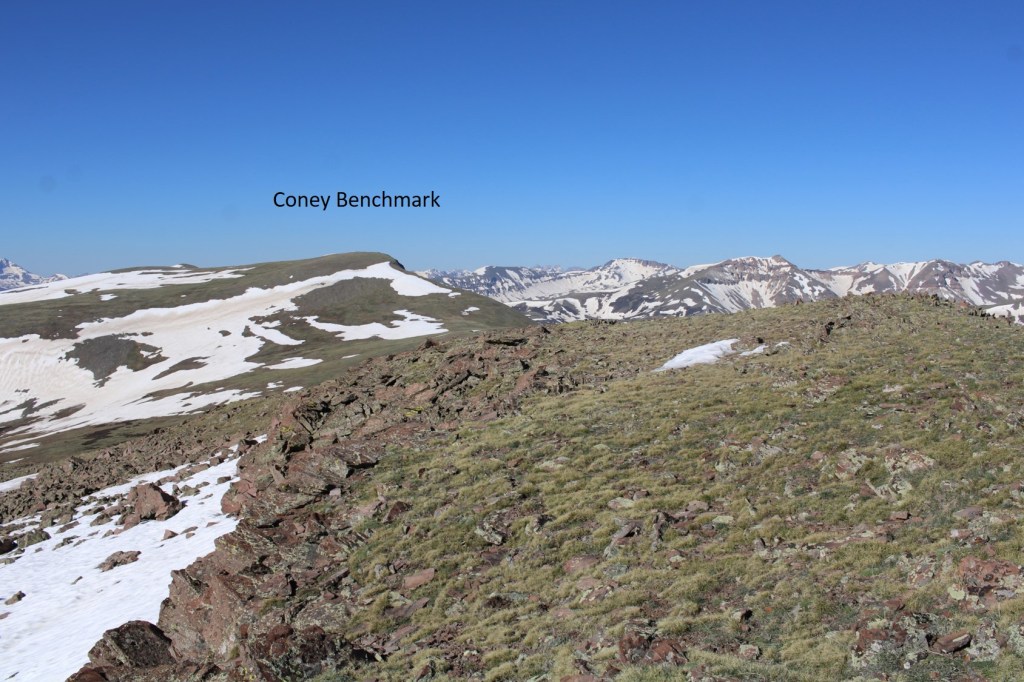
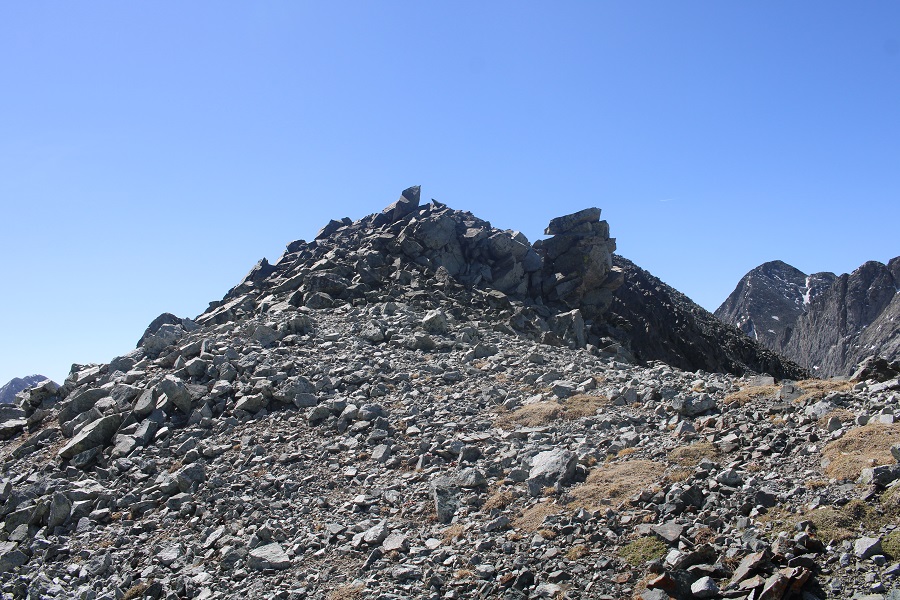
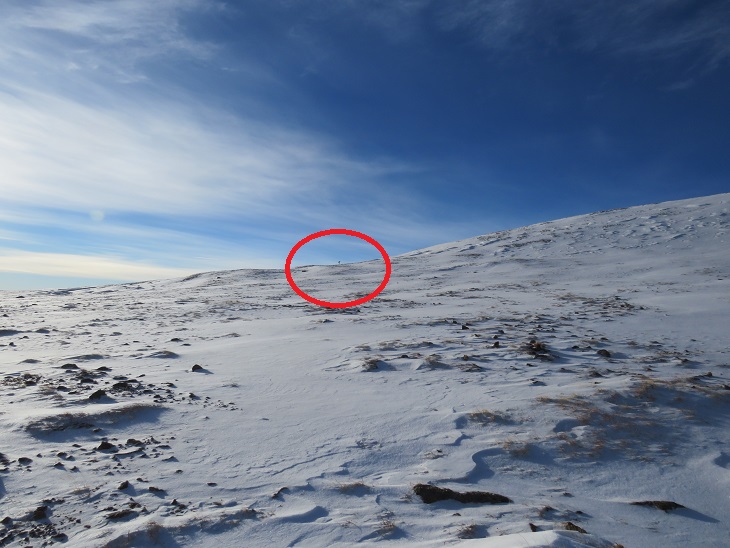
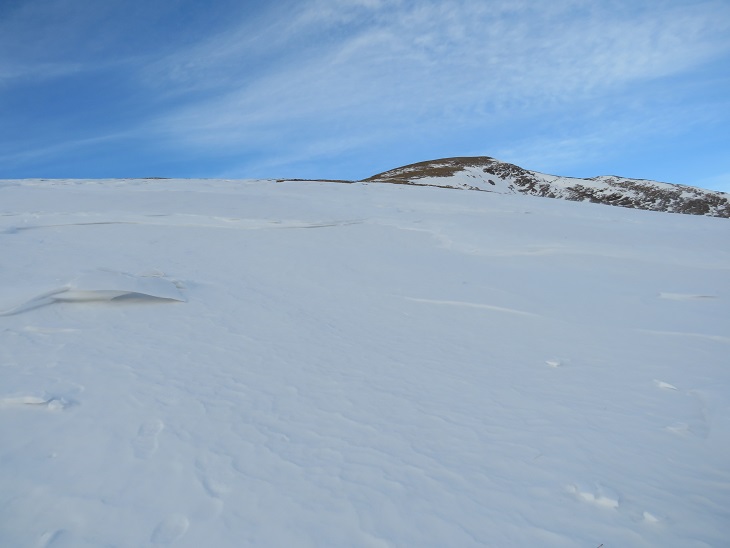
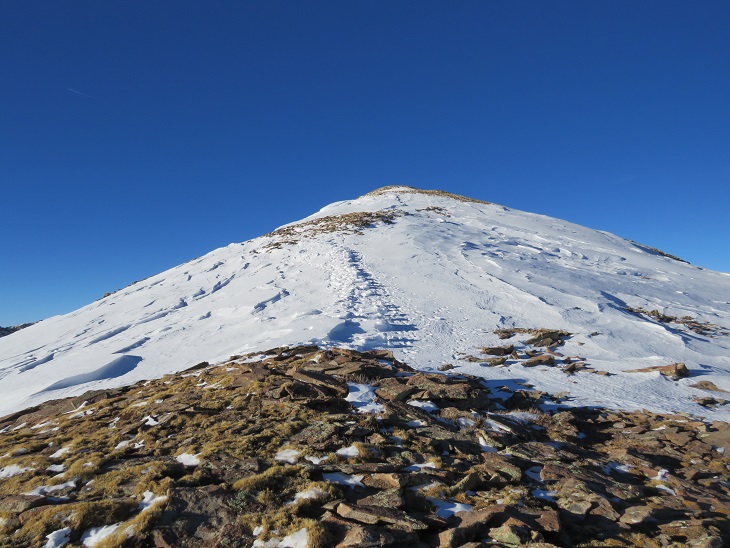
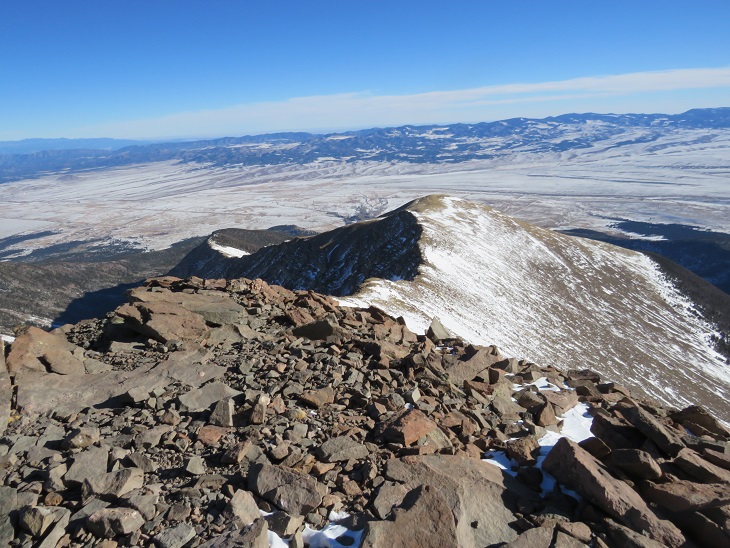
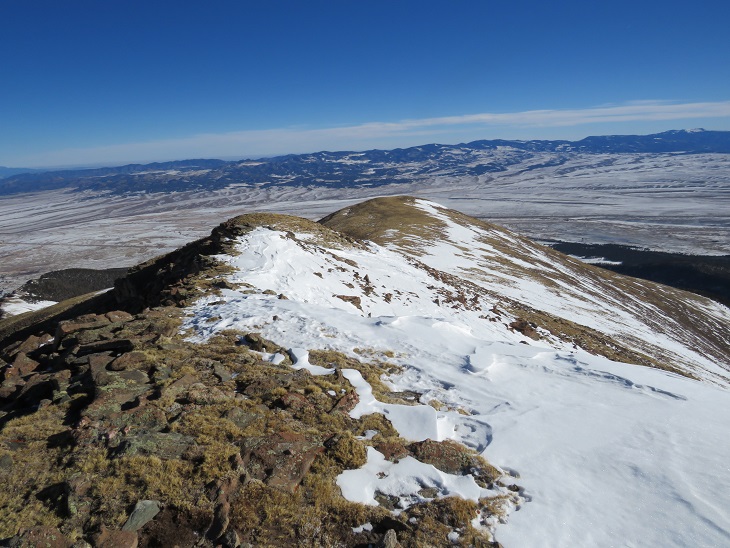
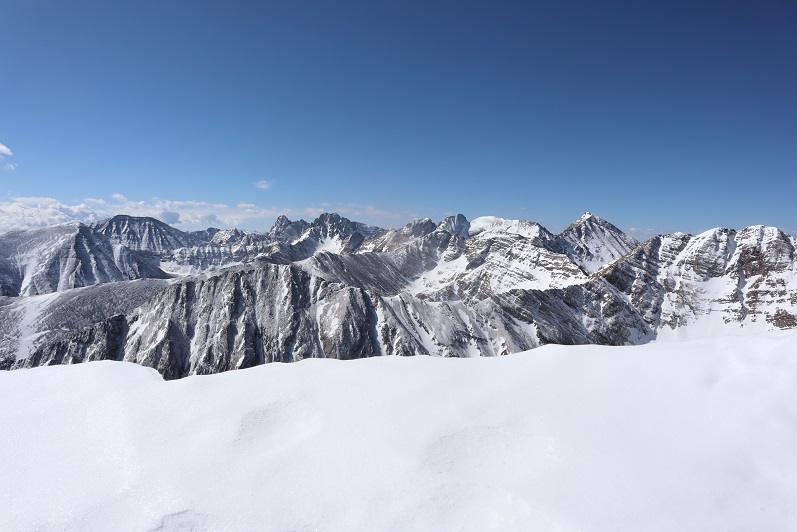
I was greeted at the top with a nice, gently sloping ridge that was easy to follow southeast towards Hesperus Mountain. There were some rocky sections, but clear game trails to follow.

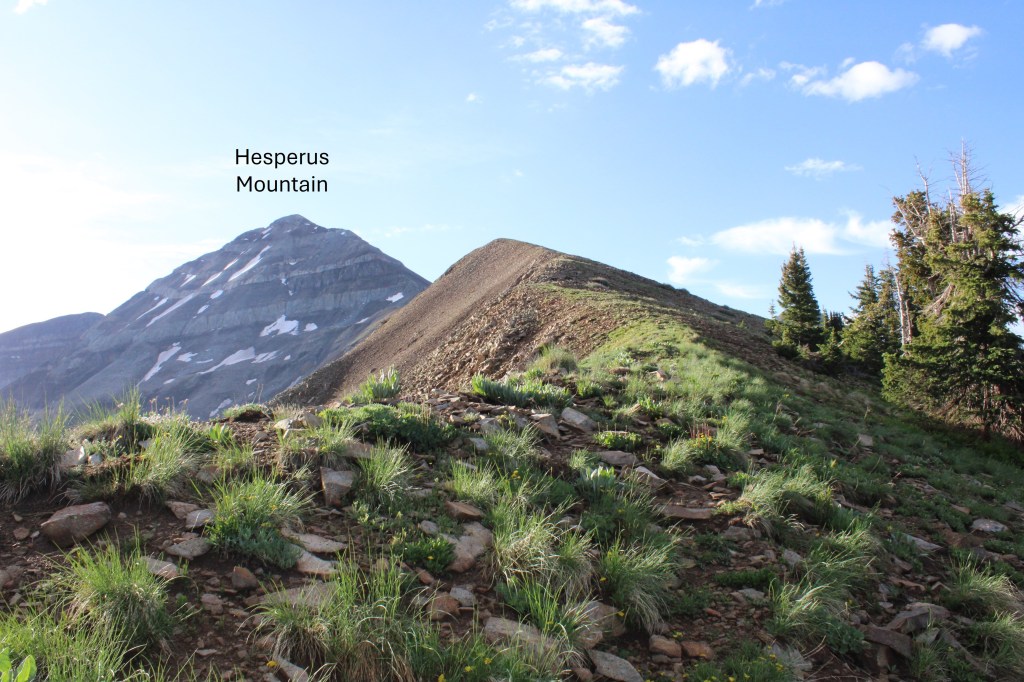
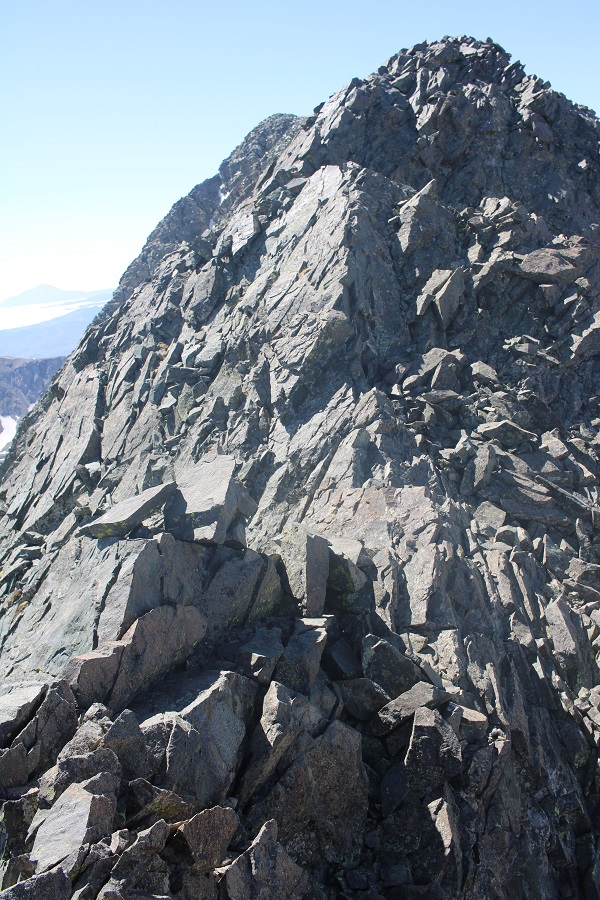
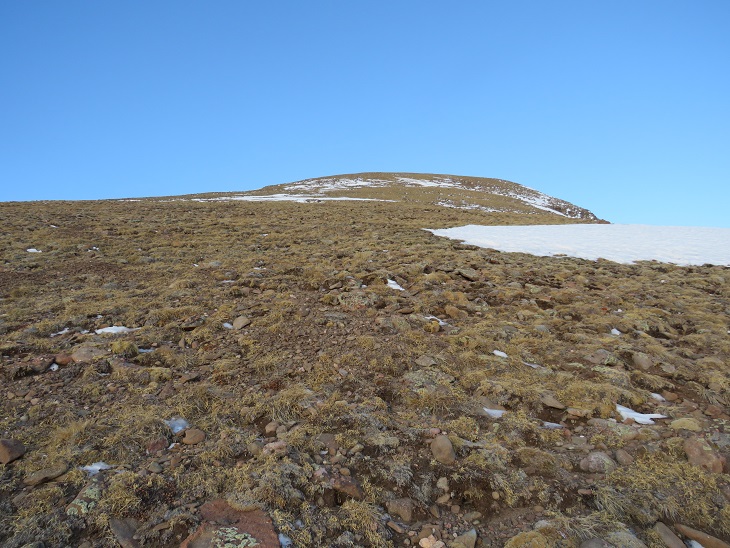
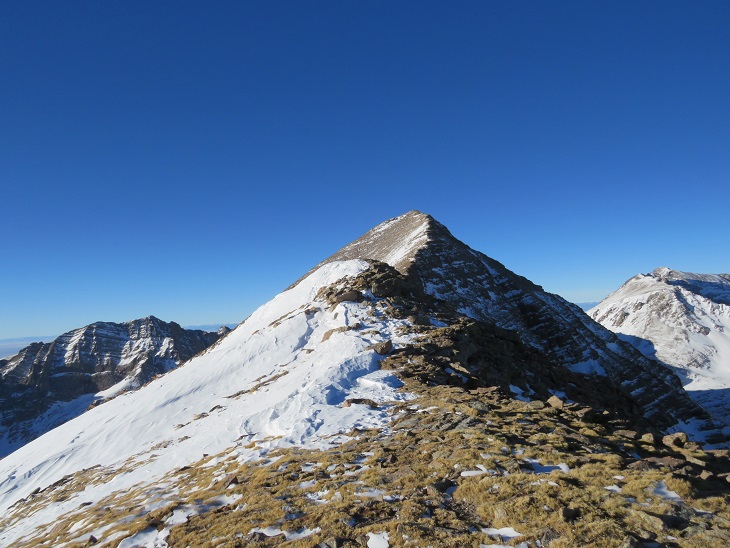
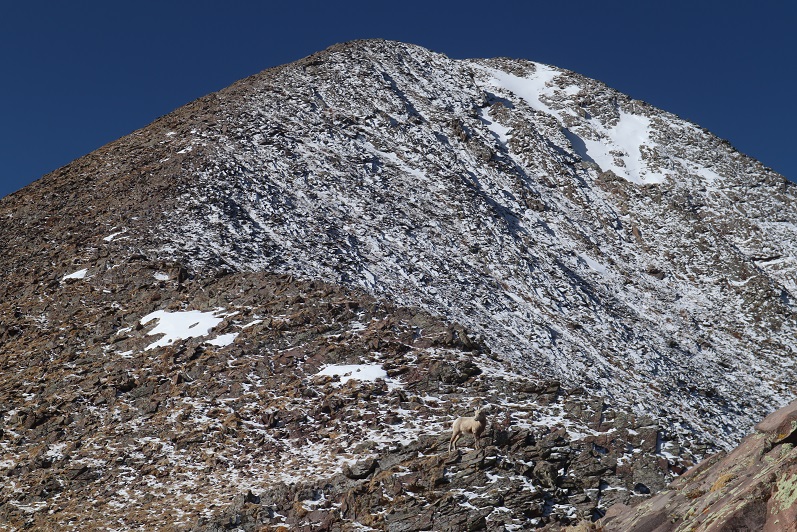
I came to the end of the ridge and where the fun began. 

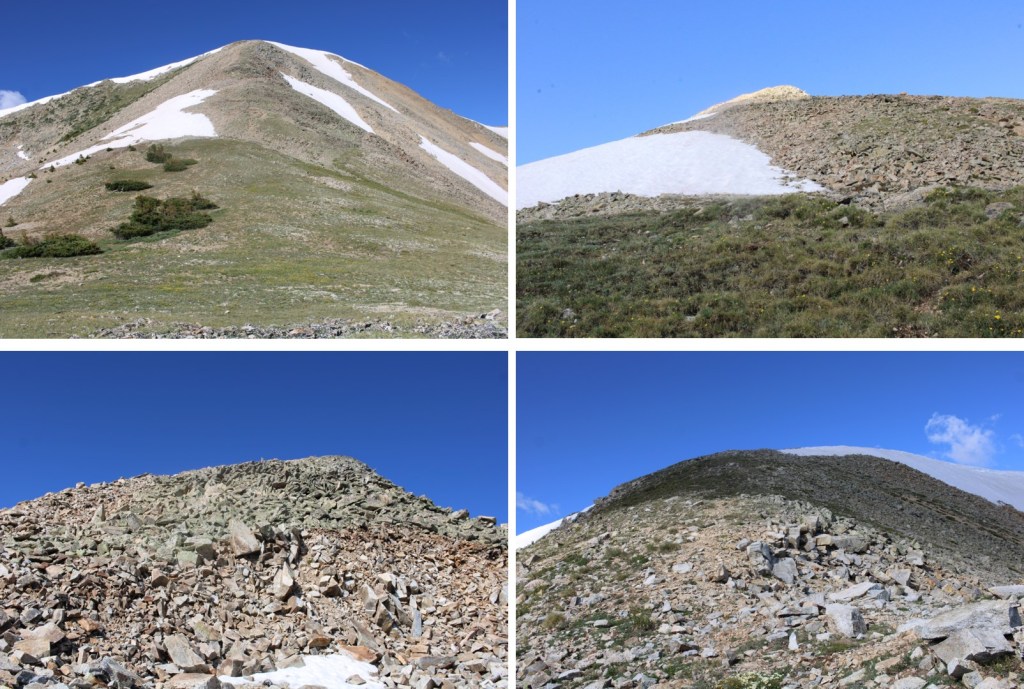
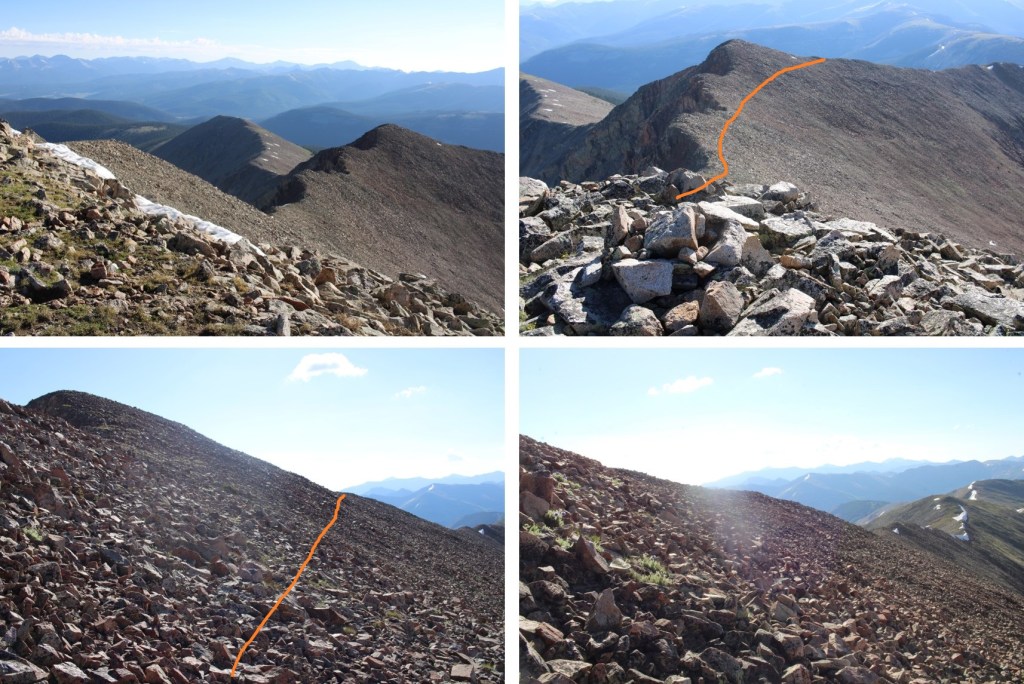
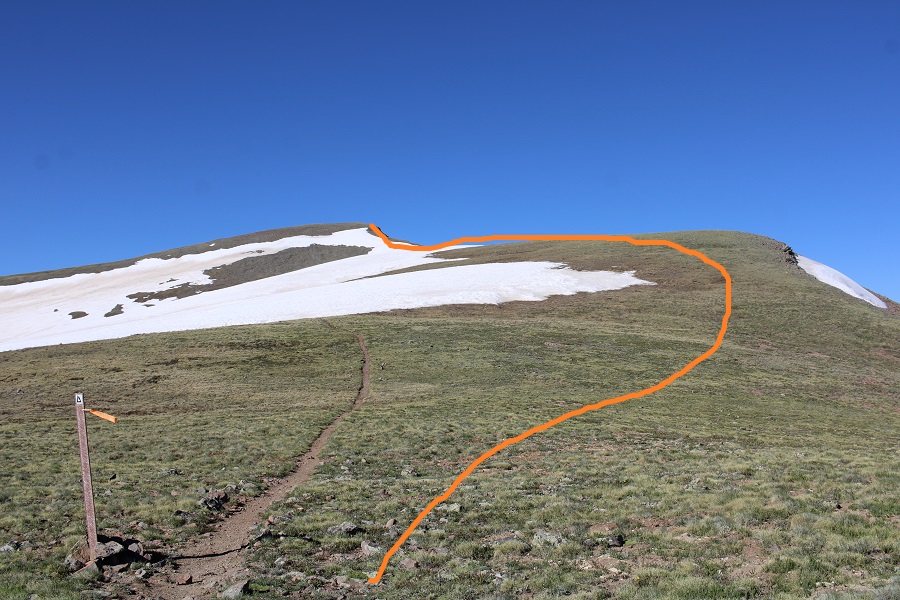
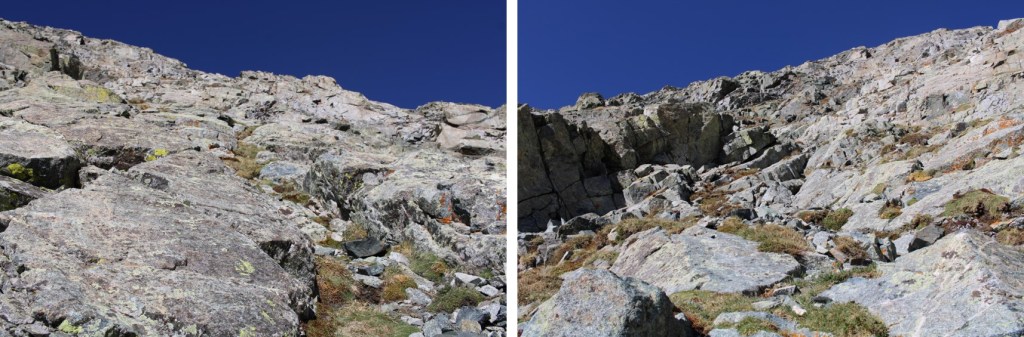
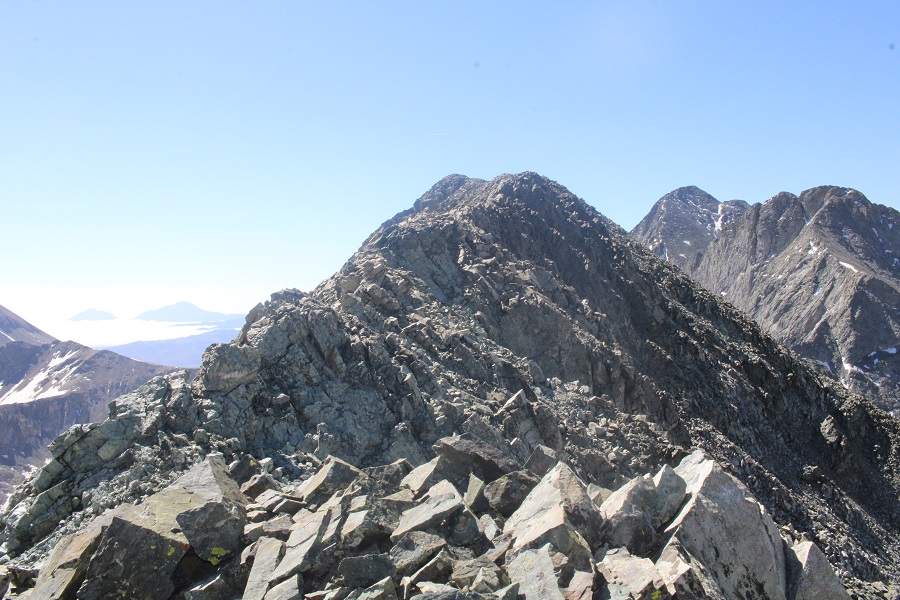
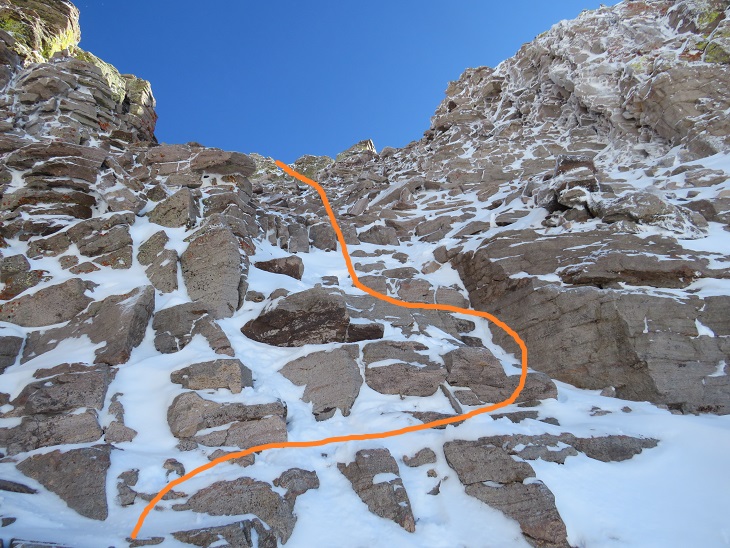
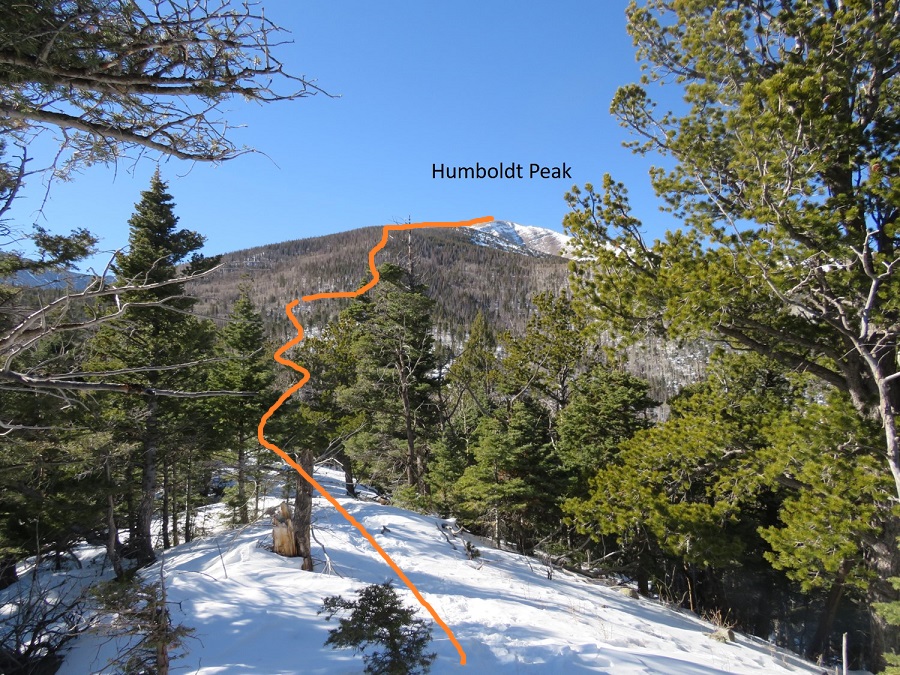
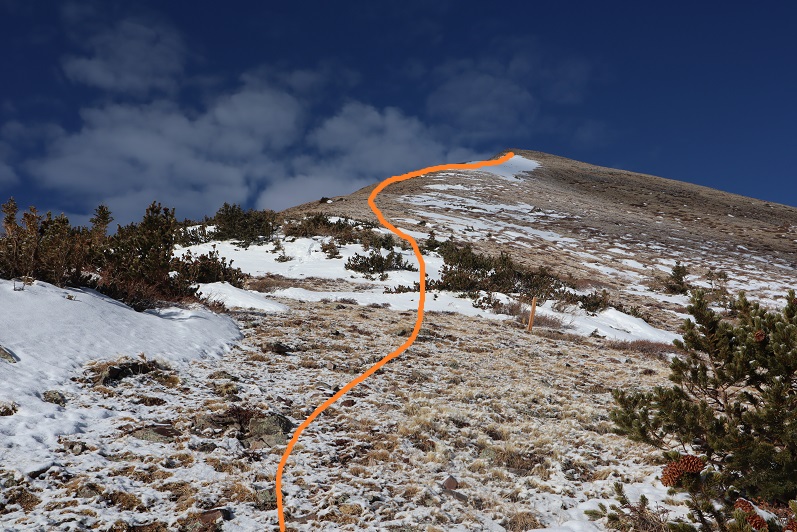
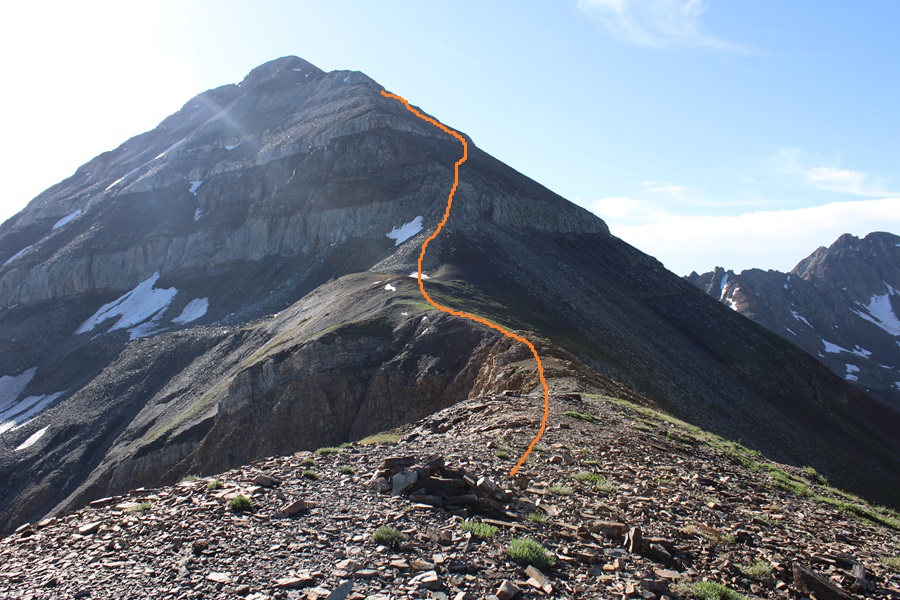
There were quite a few game trails here, and the sun was in my eyes the entire time, so I’m not sure if I picked the correct route.  If you go to the right of the class 3 section you can keep it class 2, but it’s easy to get lost.  I decided to head straight up the rocks, then found a game trail that wound me around up to the summit.  As I kept getting higher and higher up the mountain I found more and more trails, all seeming to lead to the same place.  As long as you’re headed up and east, you should be good.  This is the route I took:

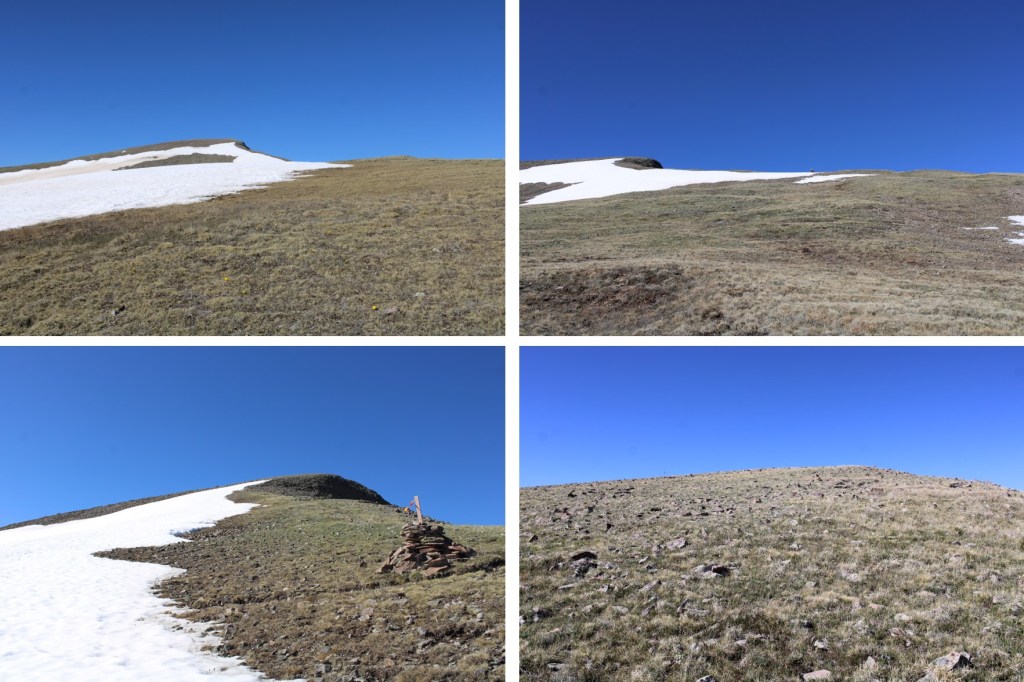
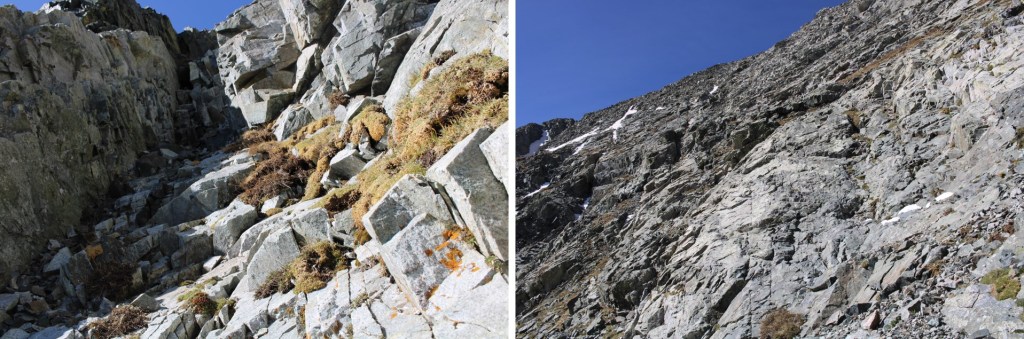
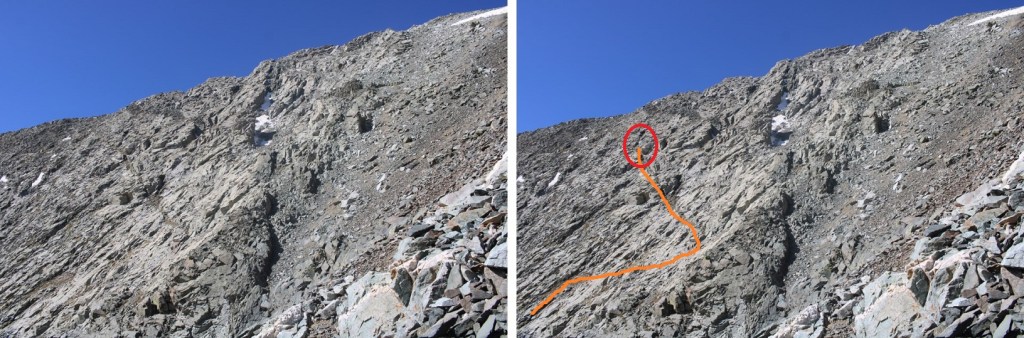
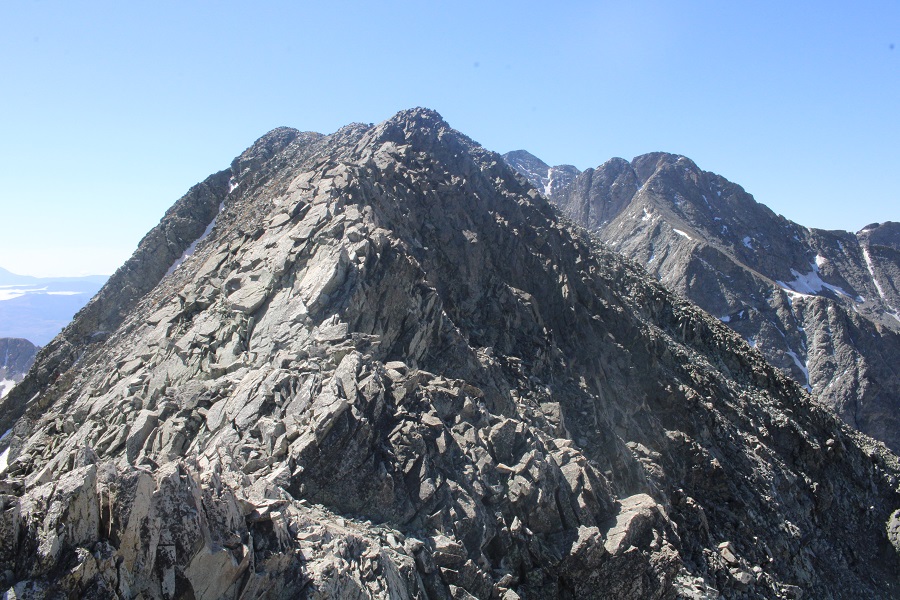
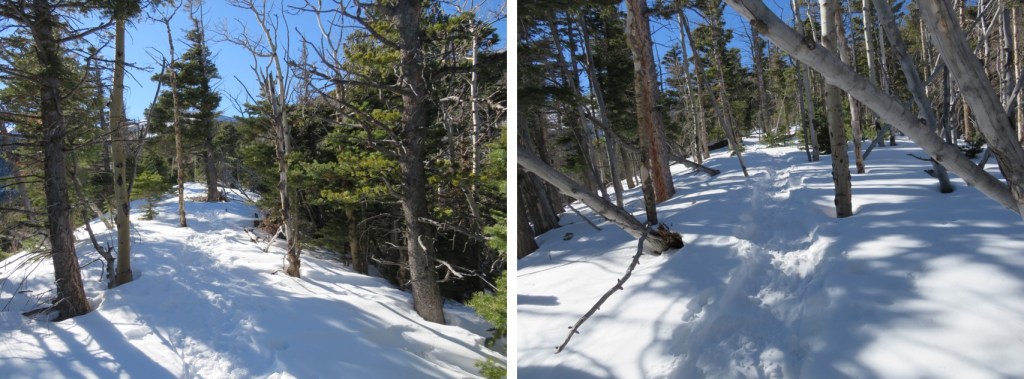
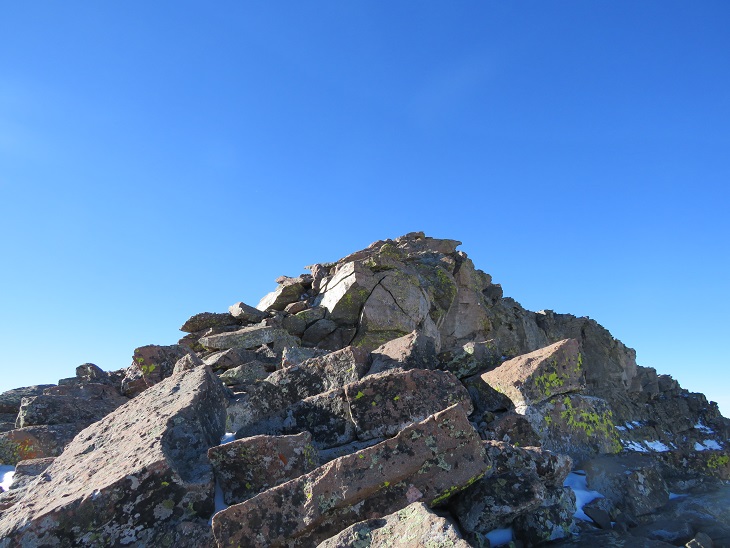
And some step by step pictures of the route I took, first navigating the class 3 section

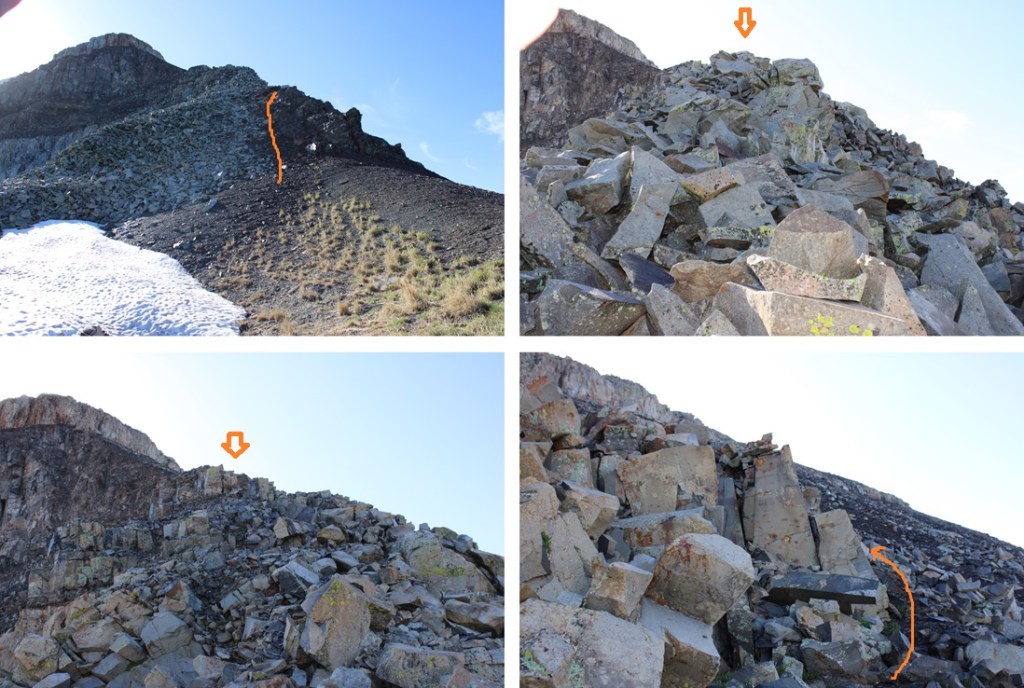
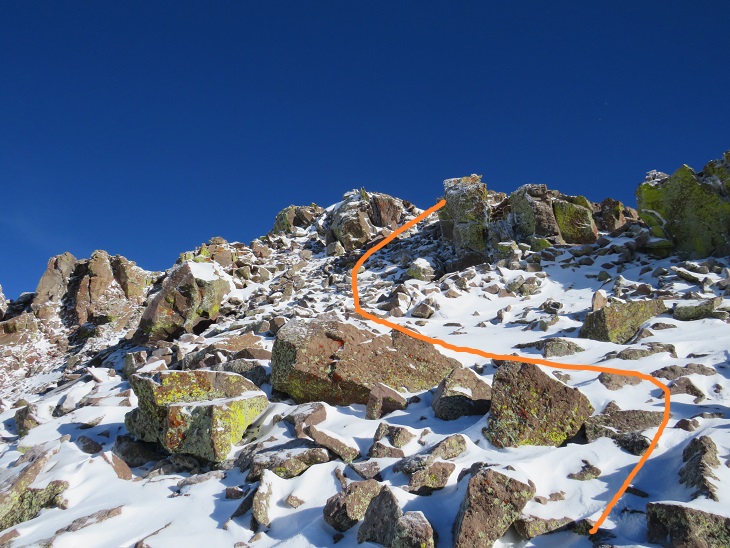
I was then able to pick up game trails that led me to the summit.  I took a different path up than I did on my way back down, but all the game trails that went up led to the summit.  As long as you’re keeping it class 2 you should be fine.

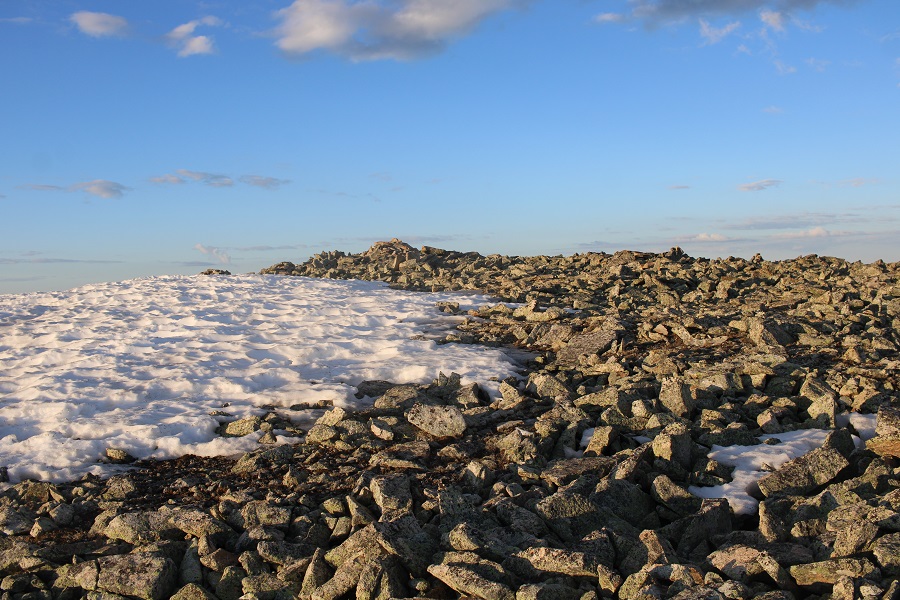
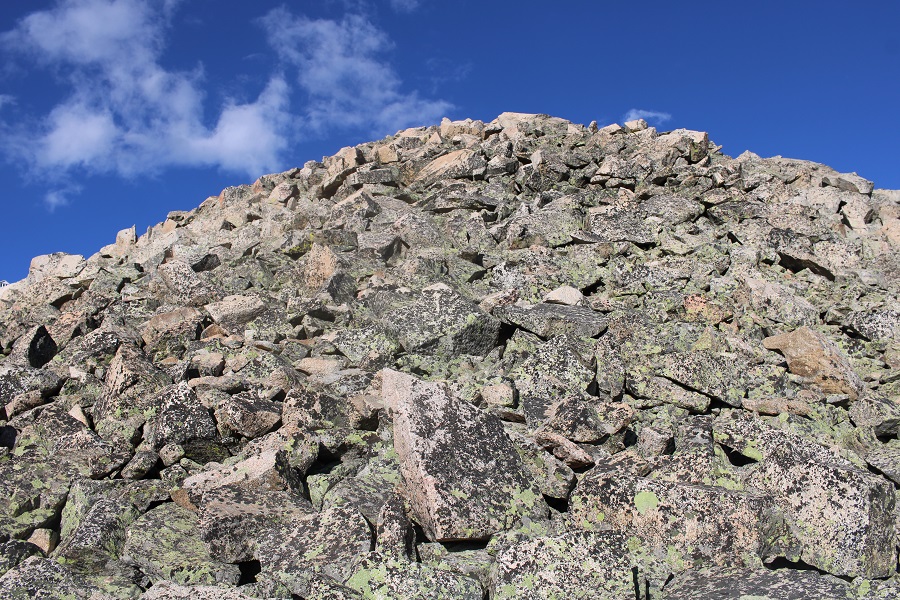
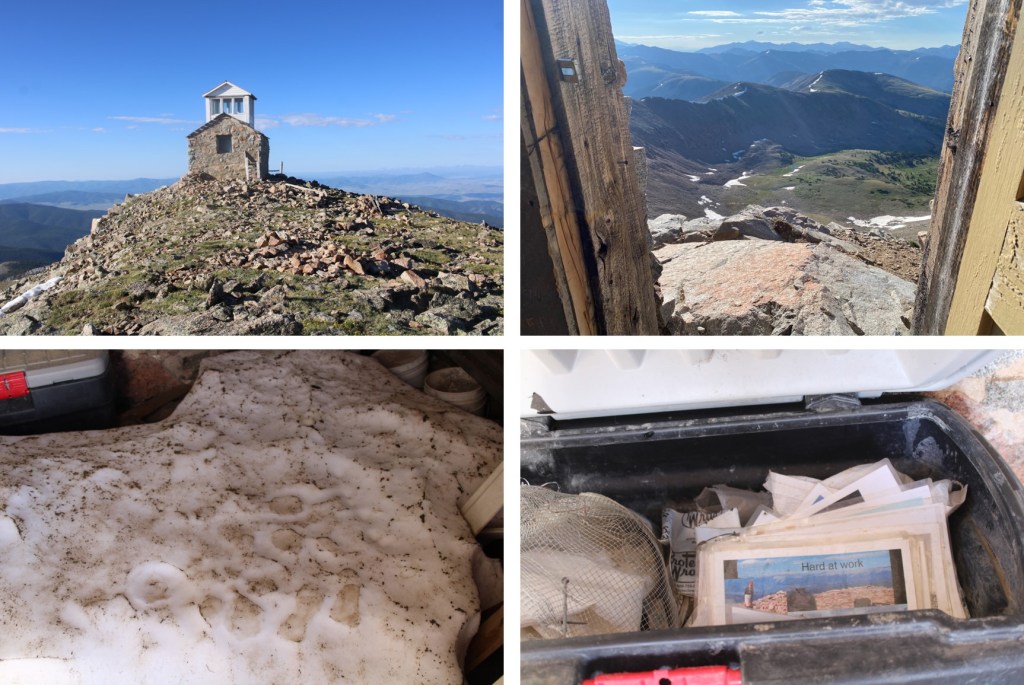
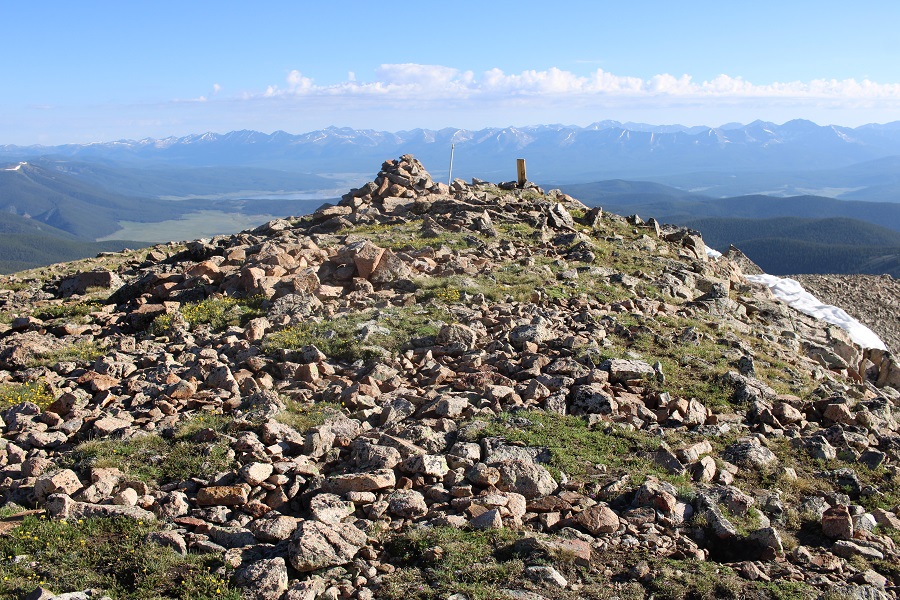
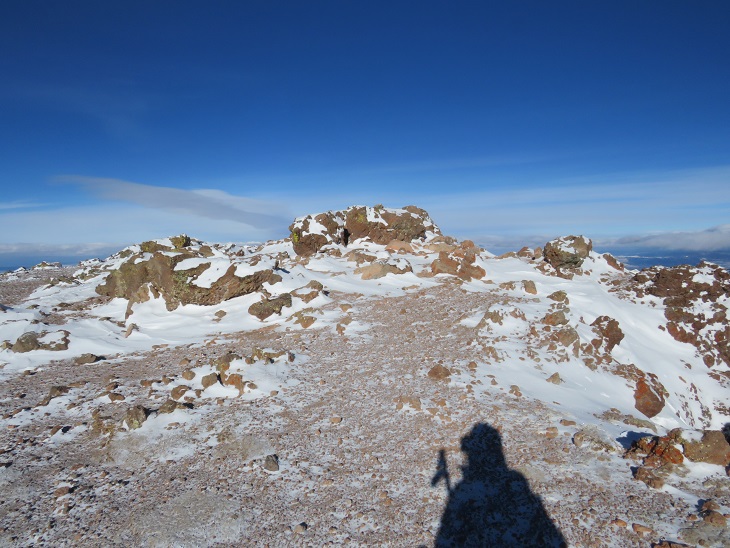
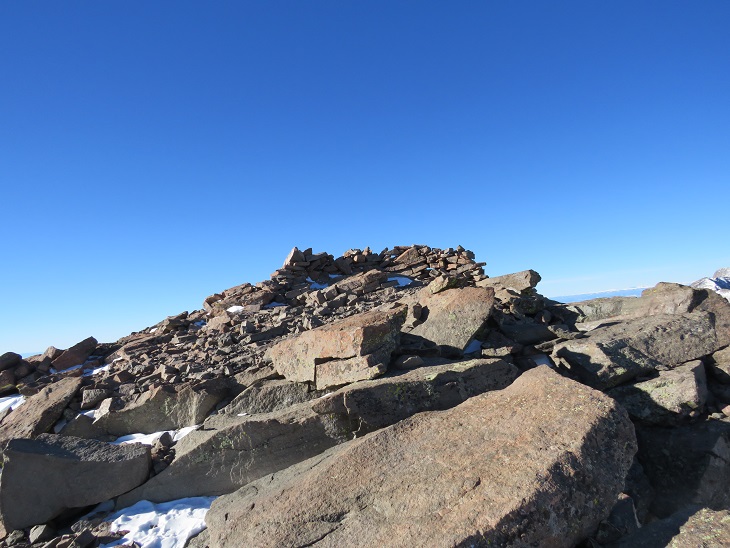
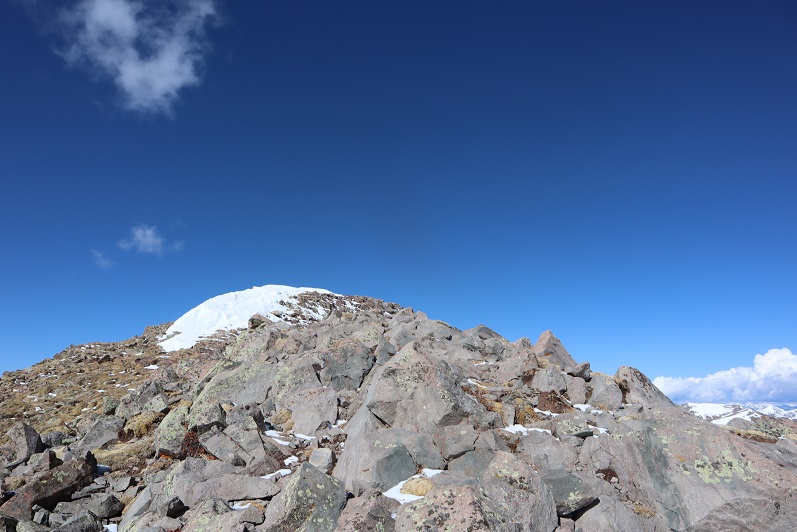
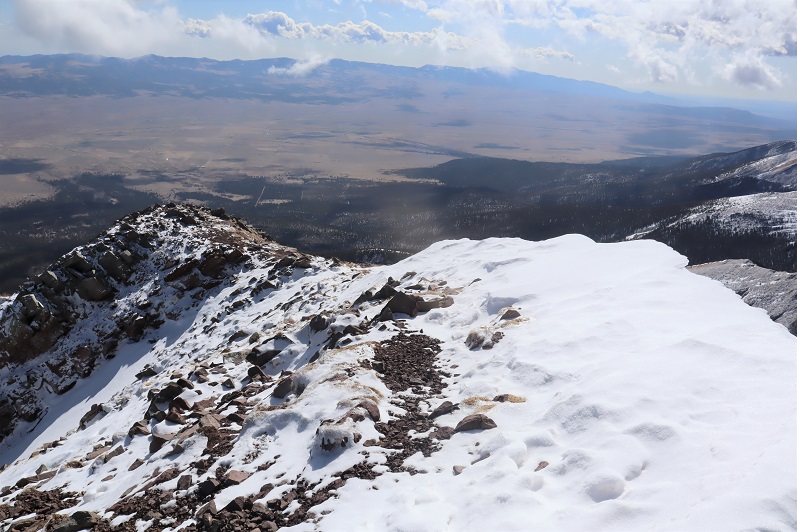
The summit was to the left of the trail, filled with large, loose boulders, and a wind shelter.

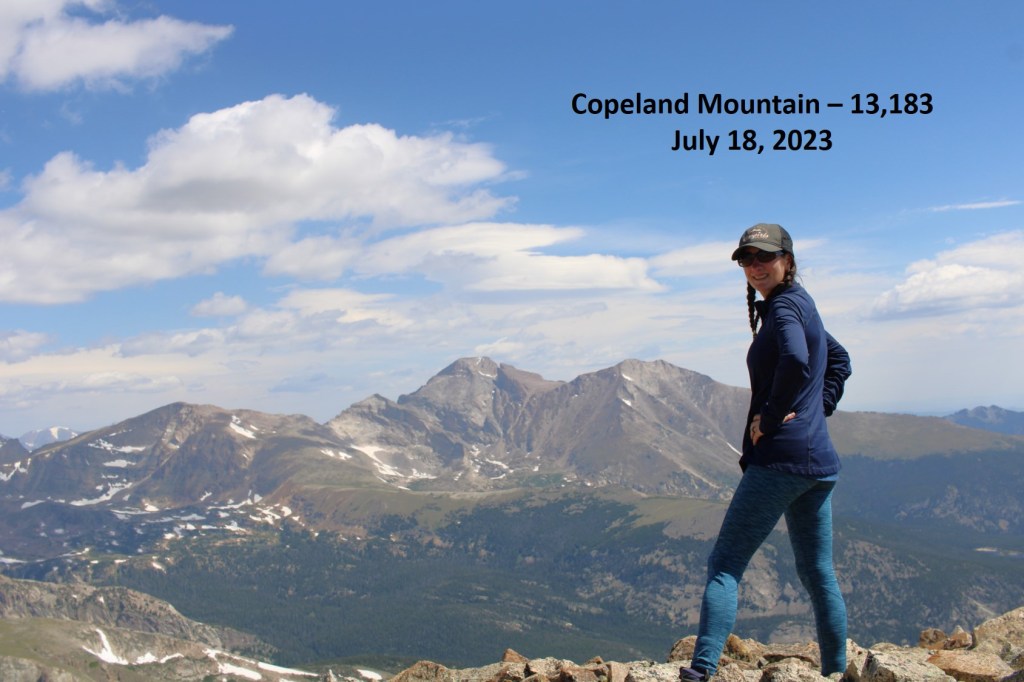
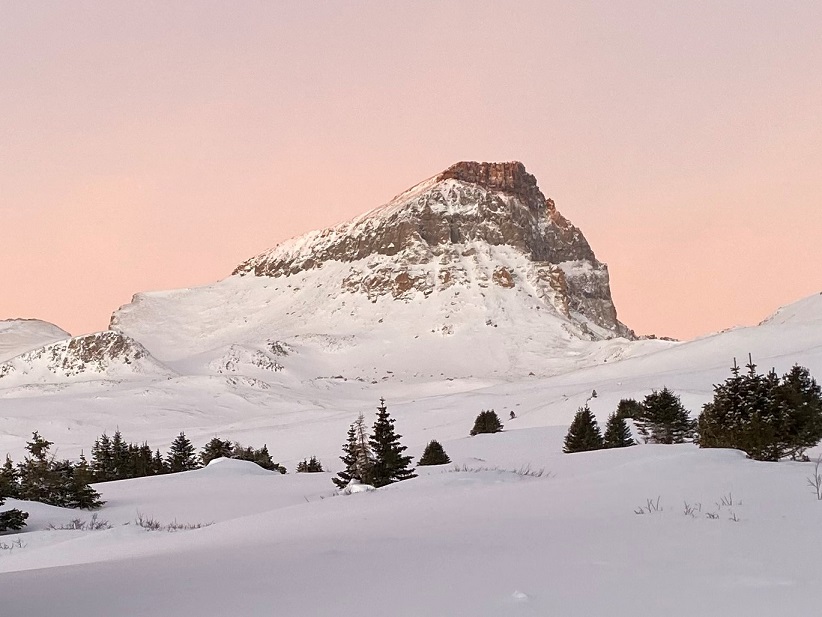
I summited Hesperus Mountain at 9:15am

Hesperus Mountain:

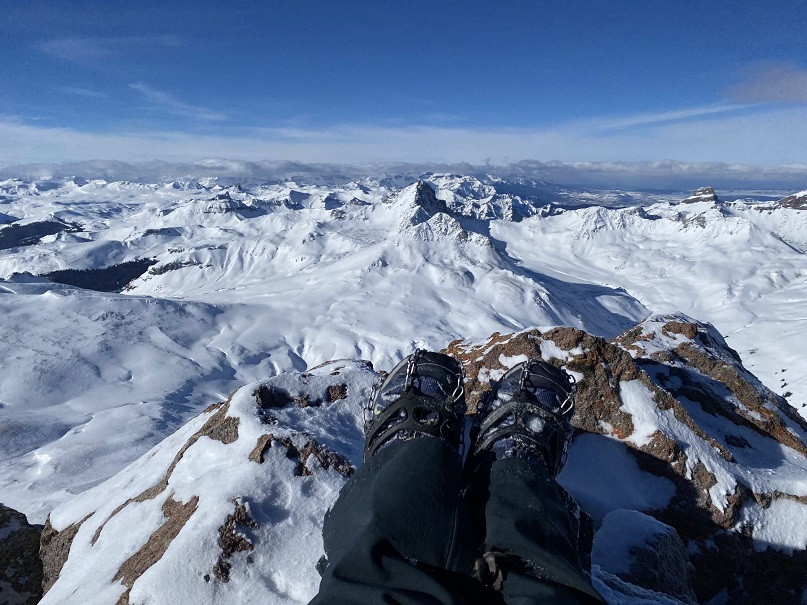
After spending considerable time on the summit, I turned and headed back down to the ridge.  Once again, taking a slightly different route than I had on the way up, as trails were easier to see with the sun behind me instead of in front of me. 

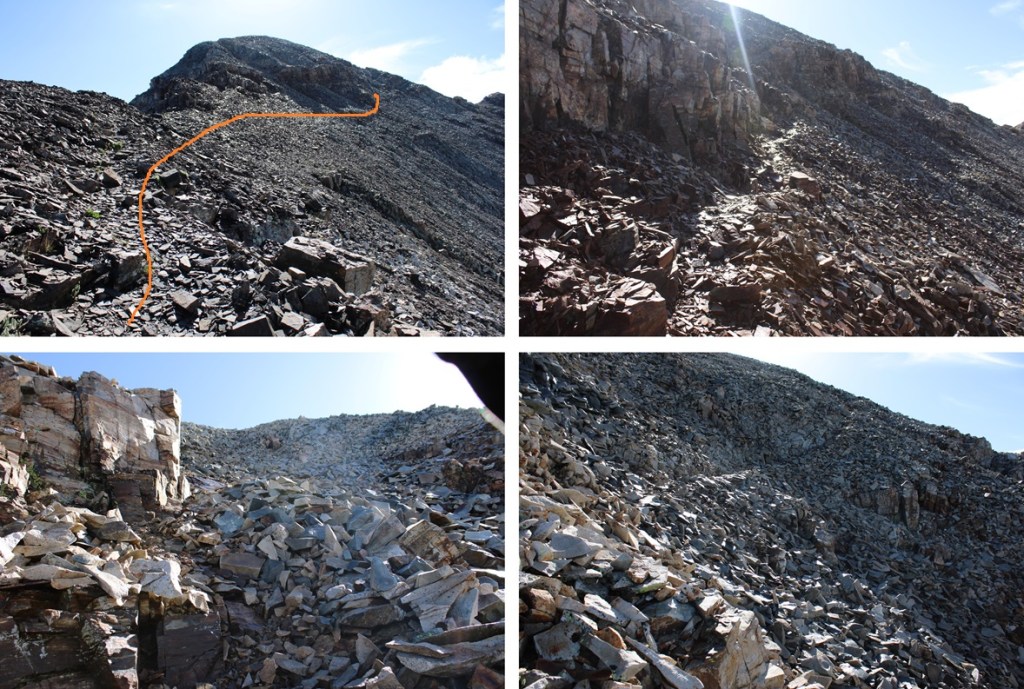
I made my way down the class 3 section

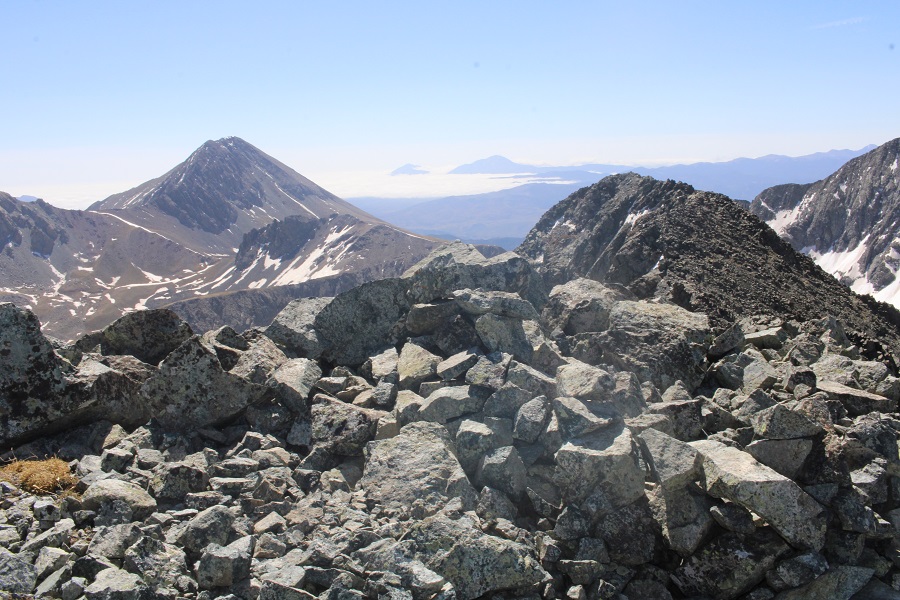
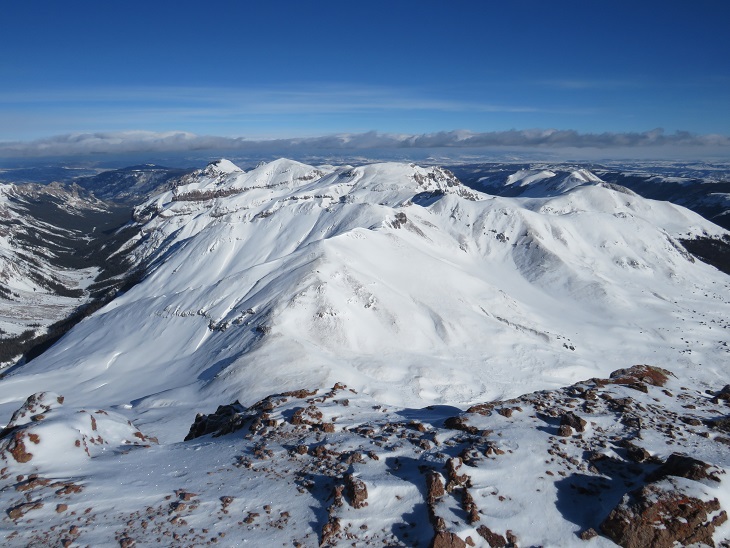
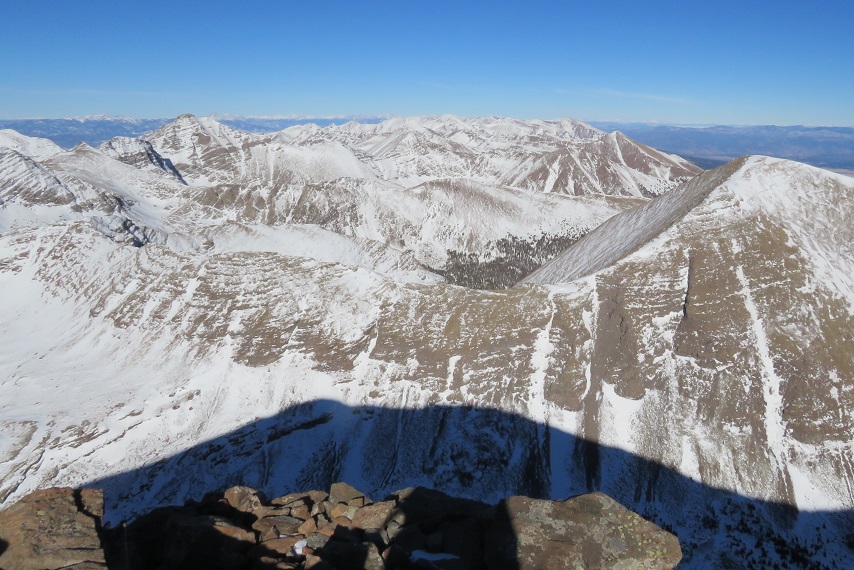
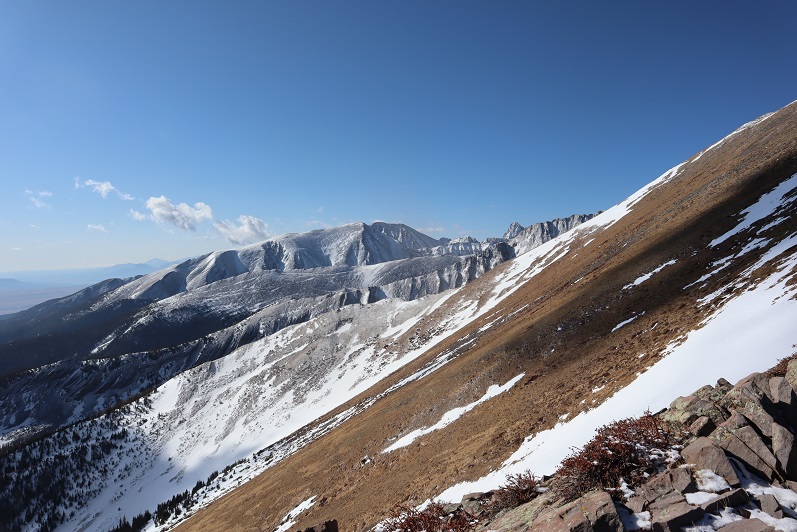
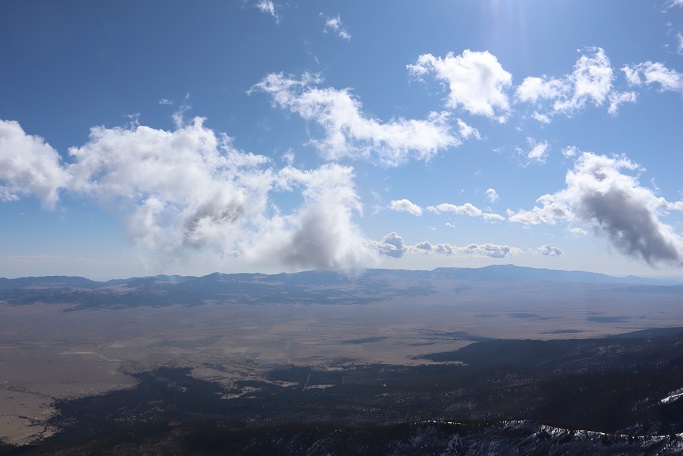
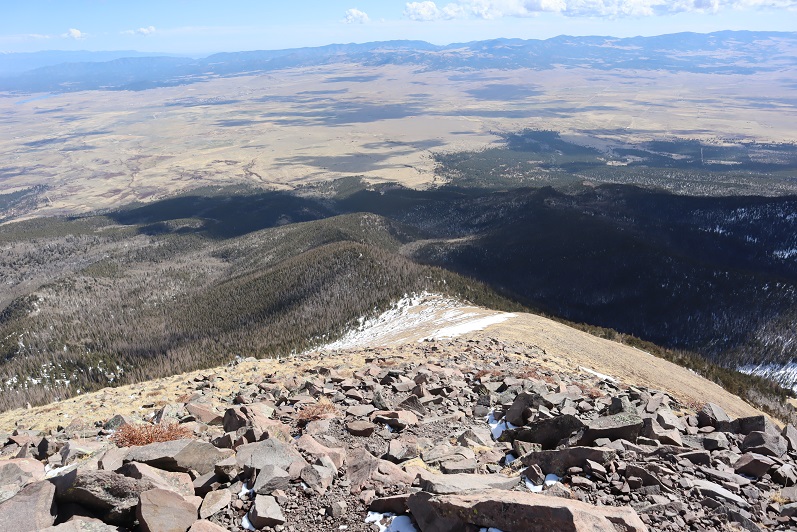
Ahead of me I could see the route I’d taken in, along the ridge

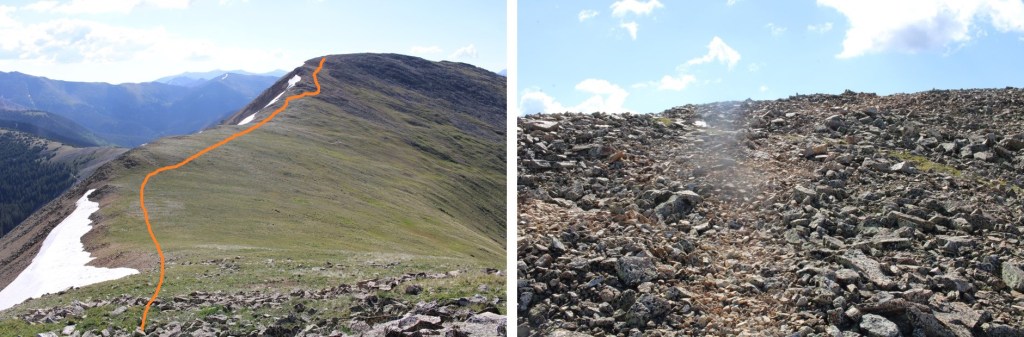
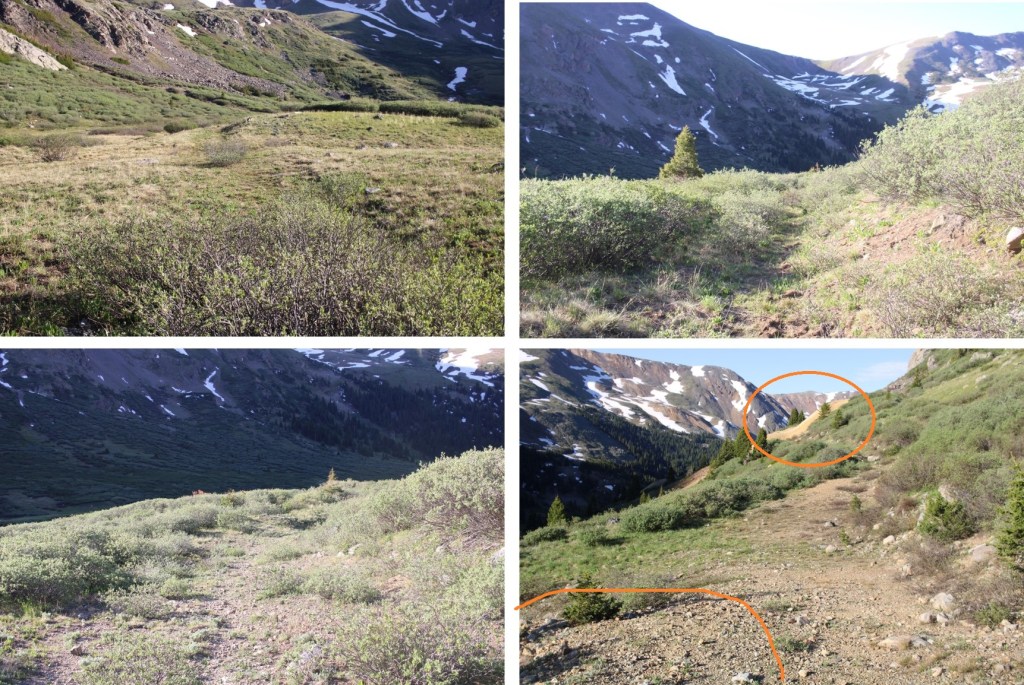
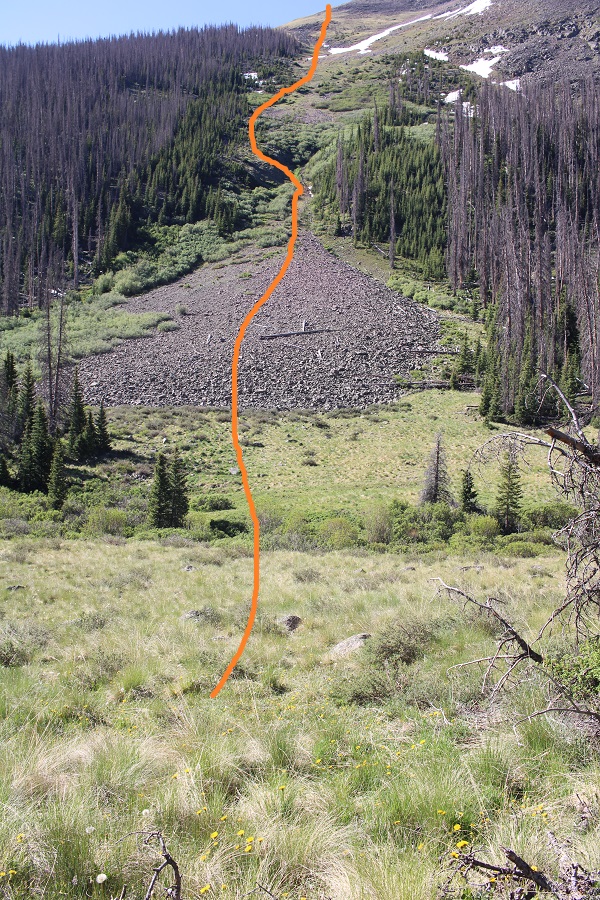
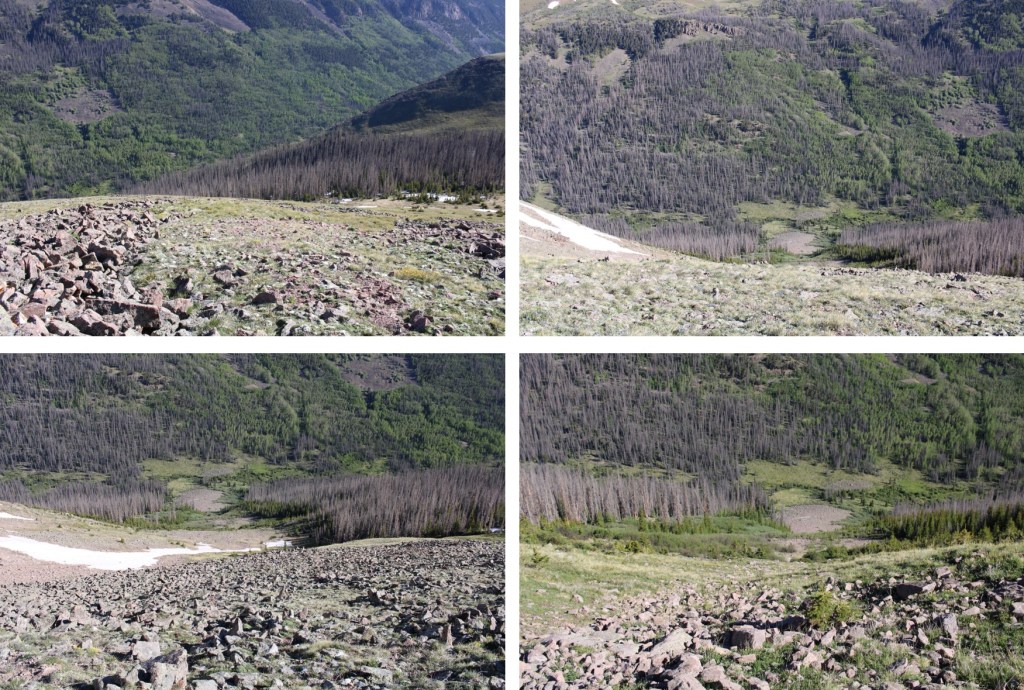
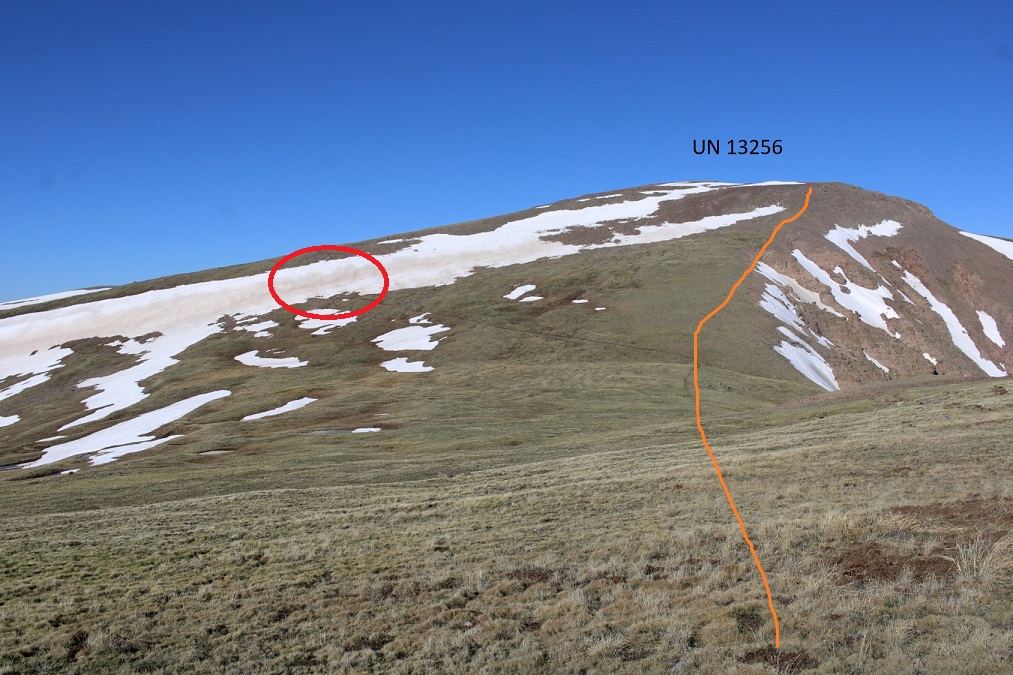
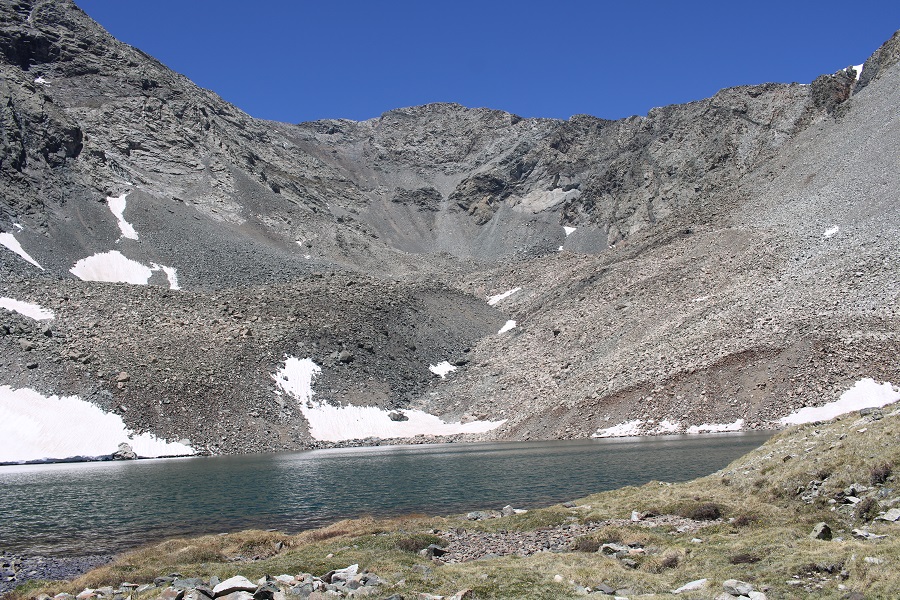
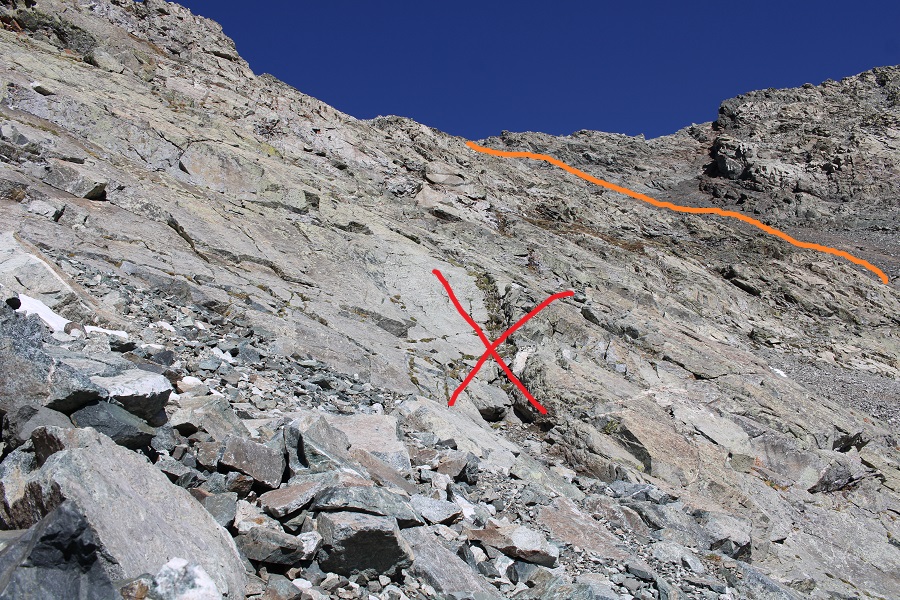
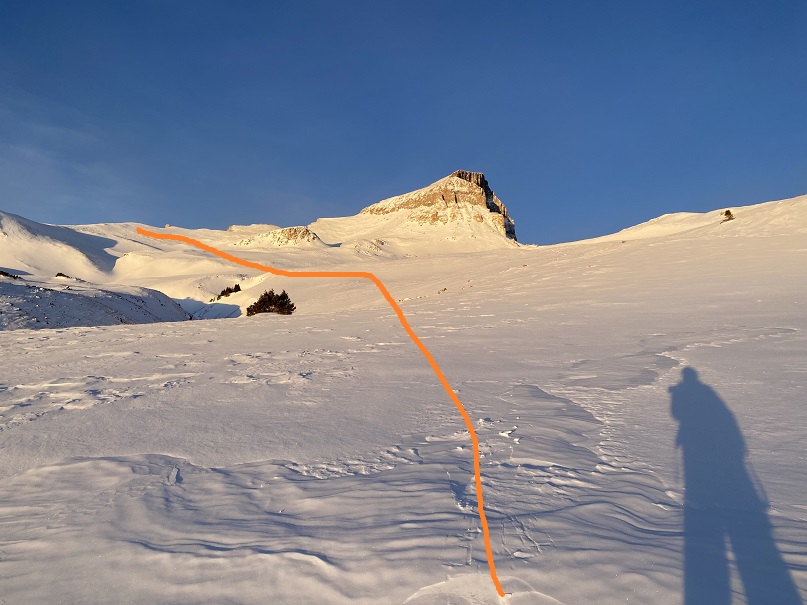
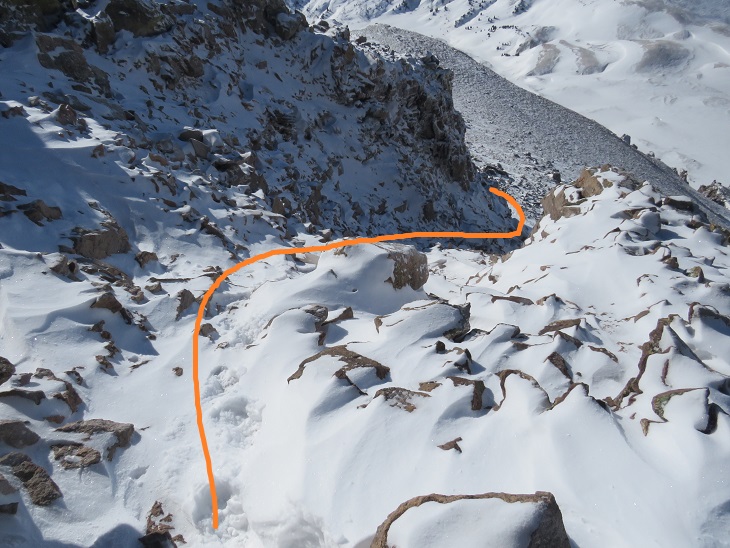
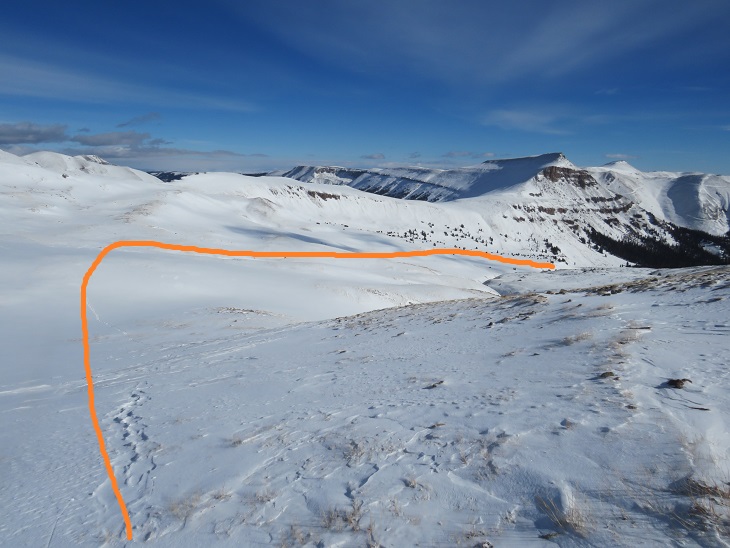
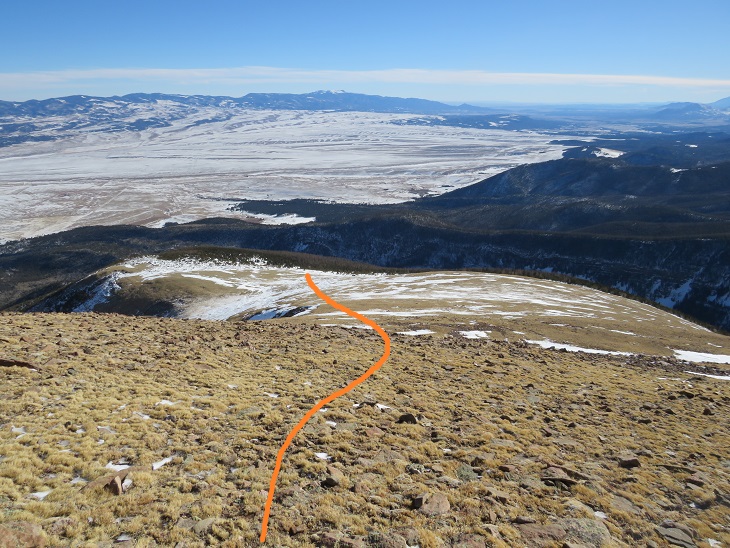
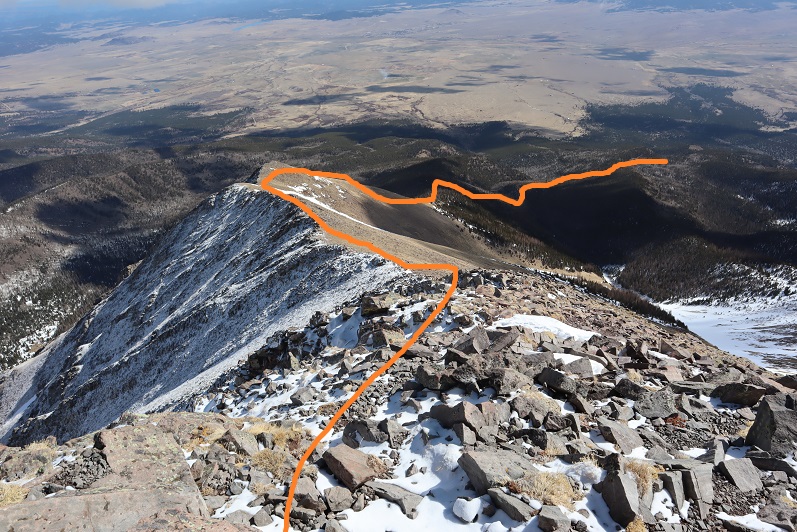
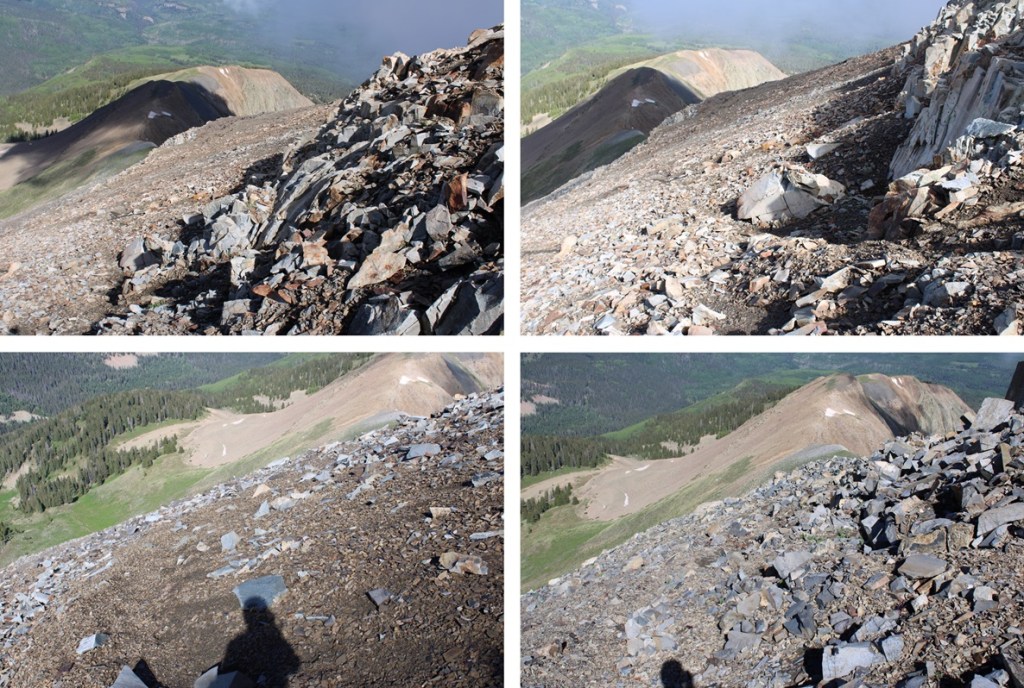
I looked to my right.  I had a choice to make.  I didn’t want to descend the same way I’d ascended, so I went over and took a look at the gullies.  There were at least three to choose from, and I picked the middle one to descend, as it didn’t have any snow and I had a clear view of my exit route back into the trees.

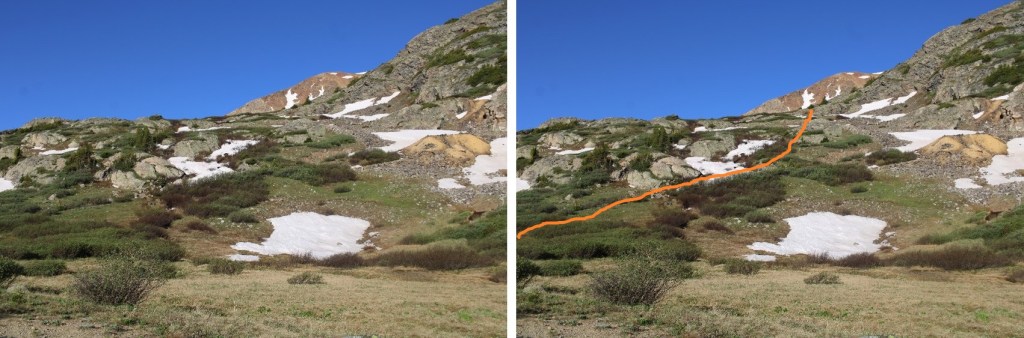
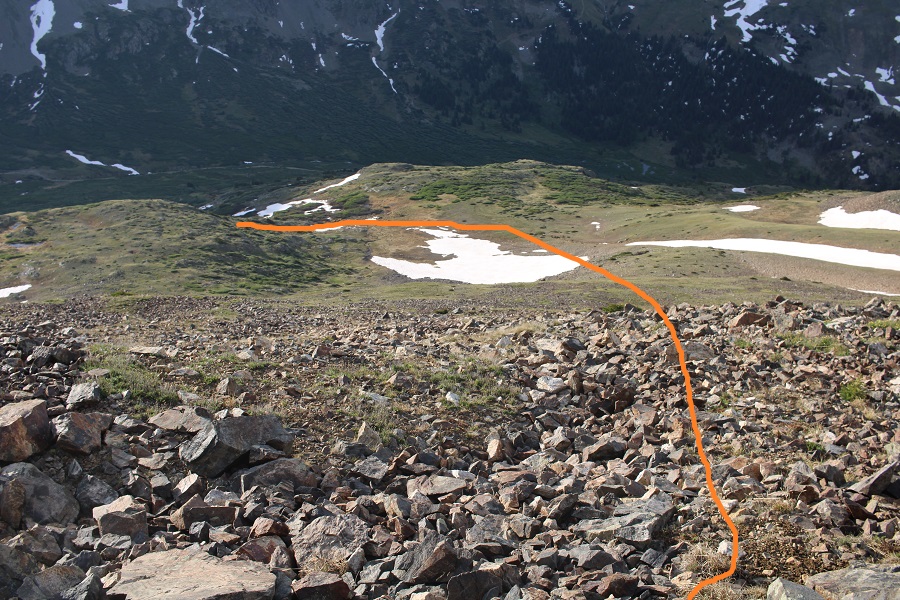
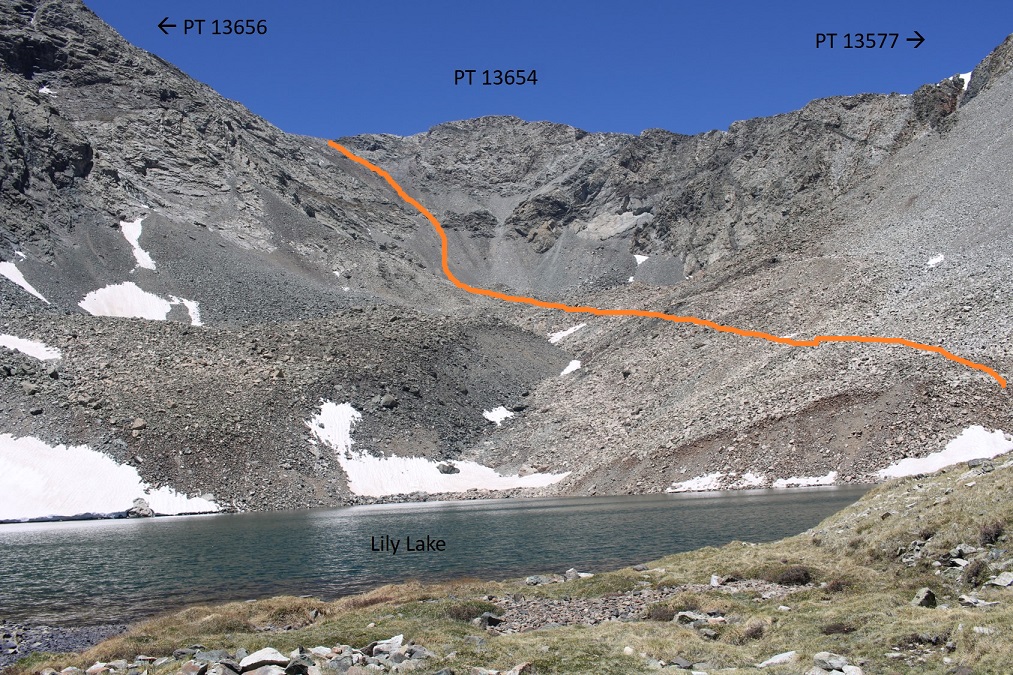
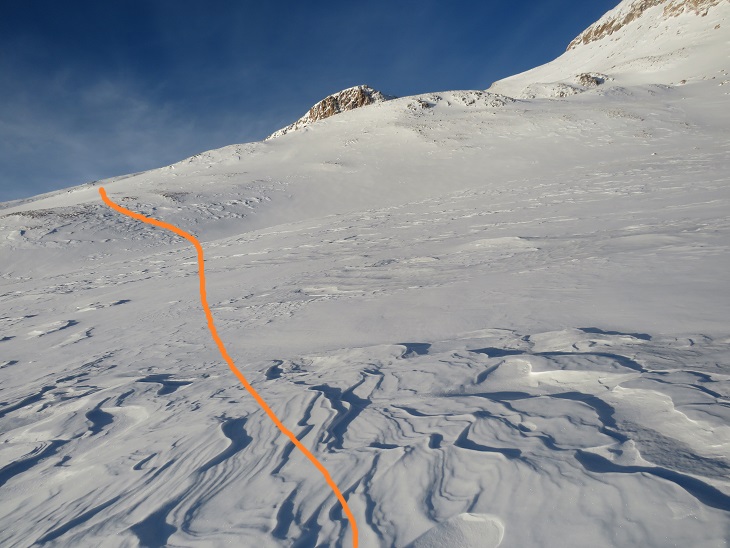
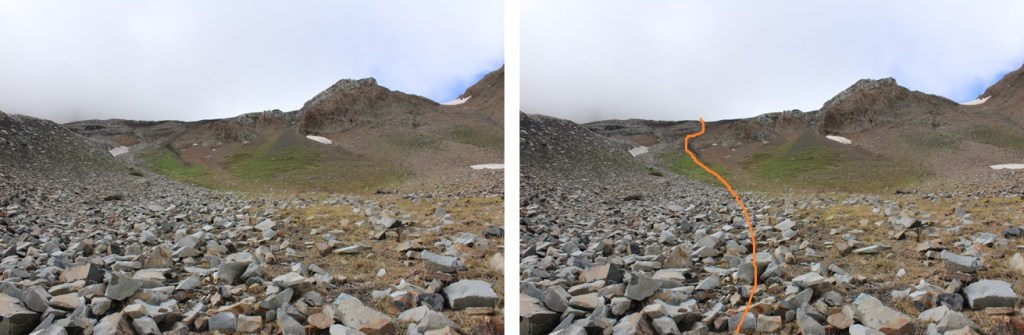
Here’s the route I took down the gully.  Since it had rained the night before, the scree was a bit muddy, and easy to grip. 

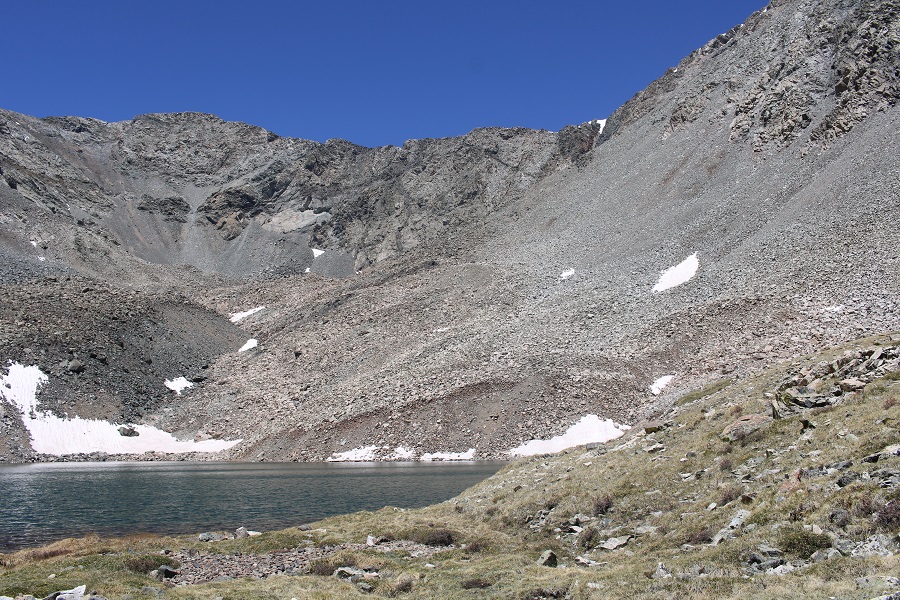
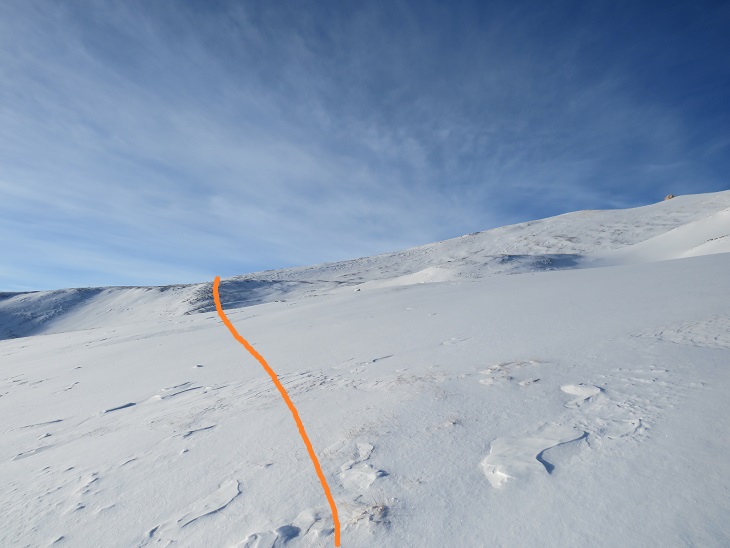
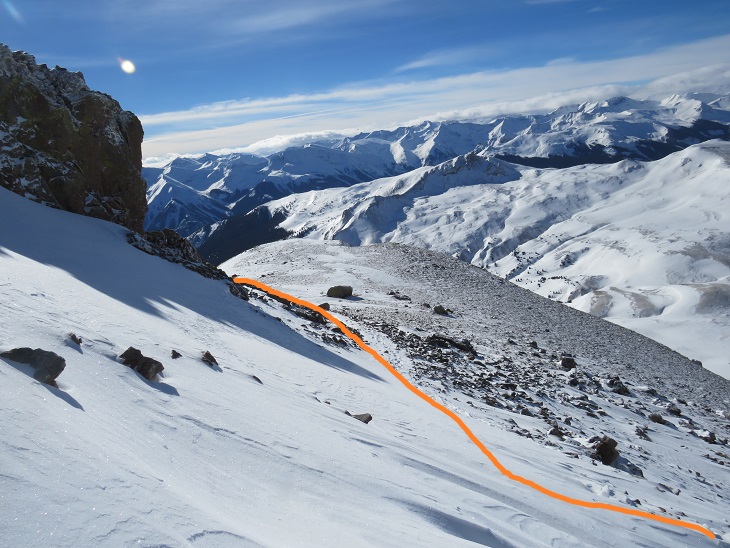
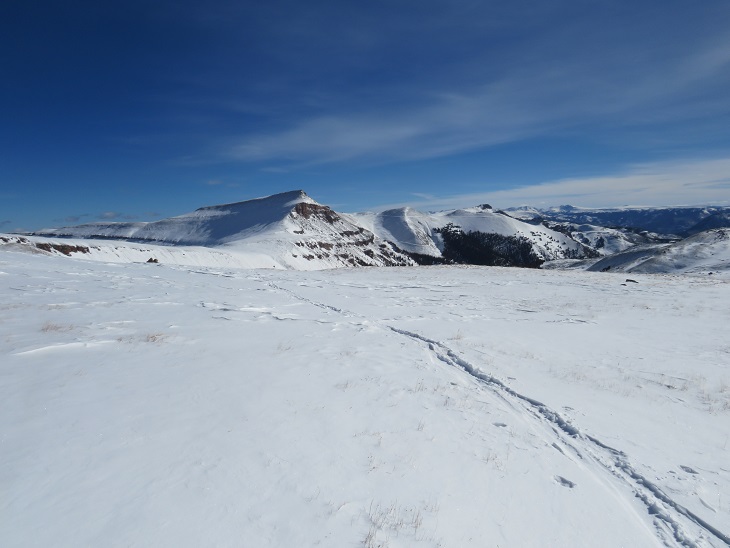
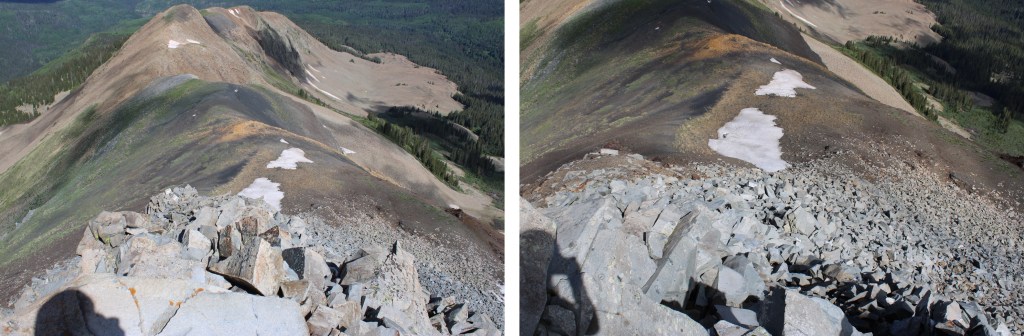
And a look back at the gully I came down.  As you can see, I had several options to make it down from the ridge. 

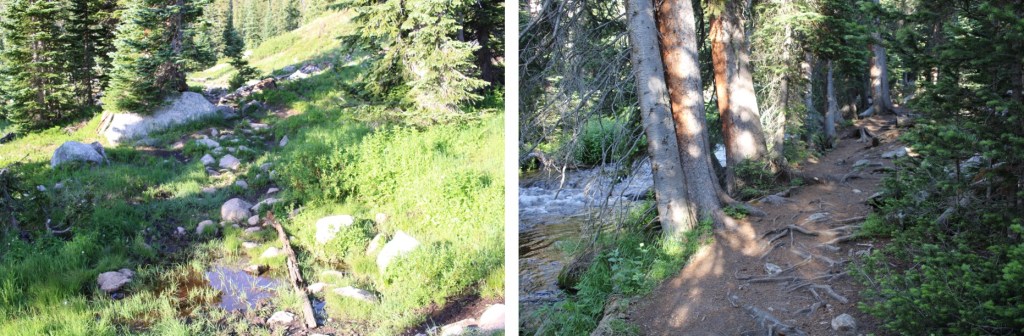
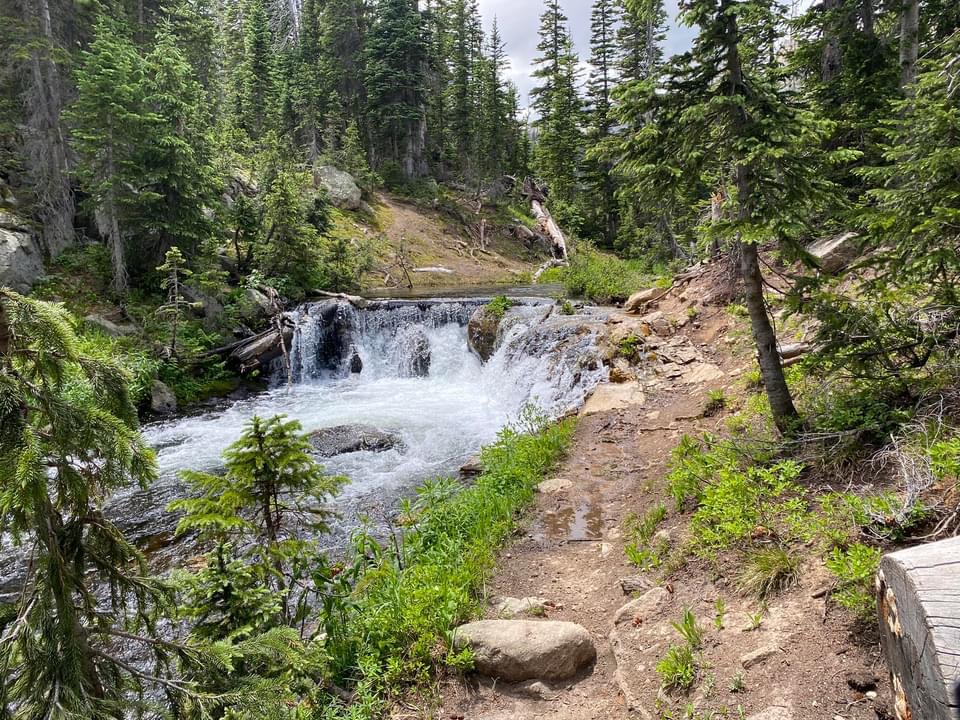
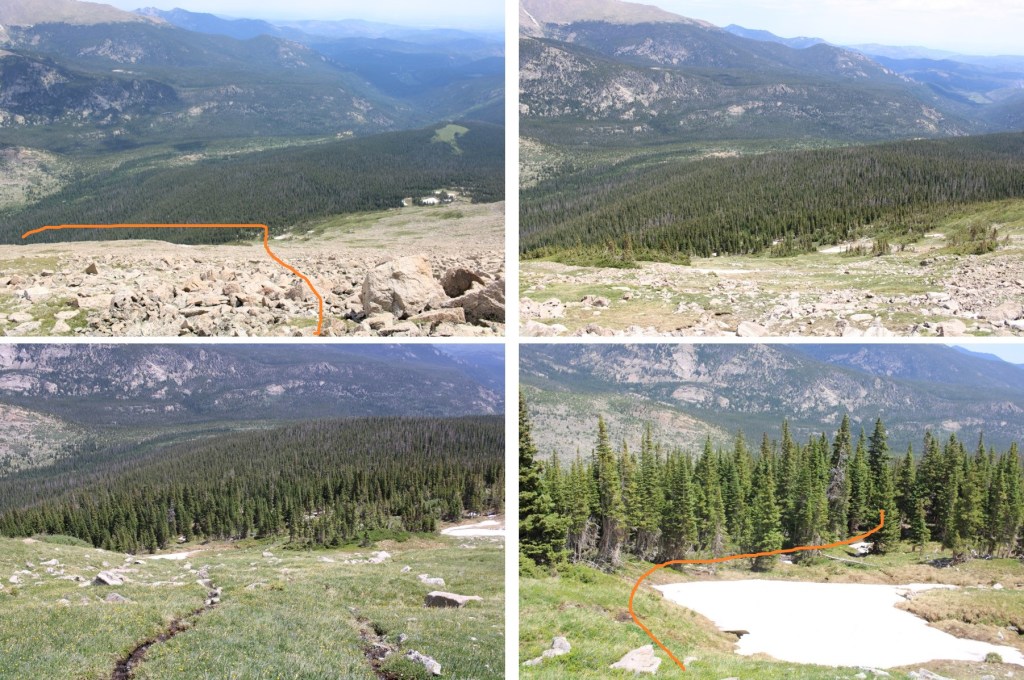
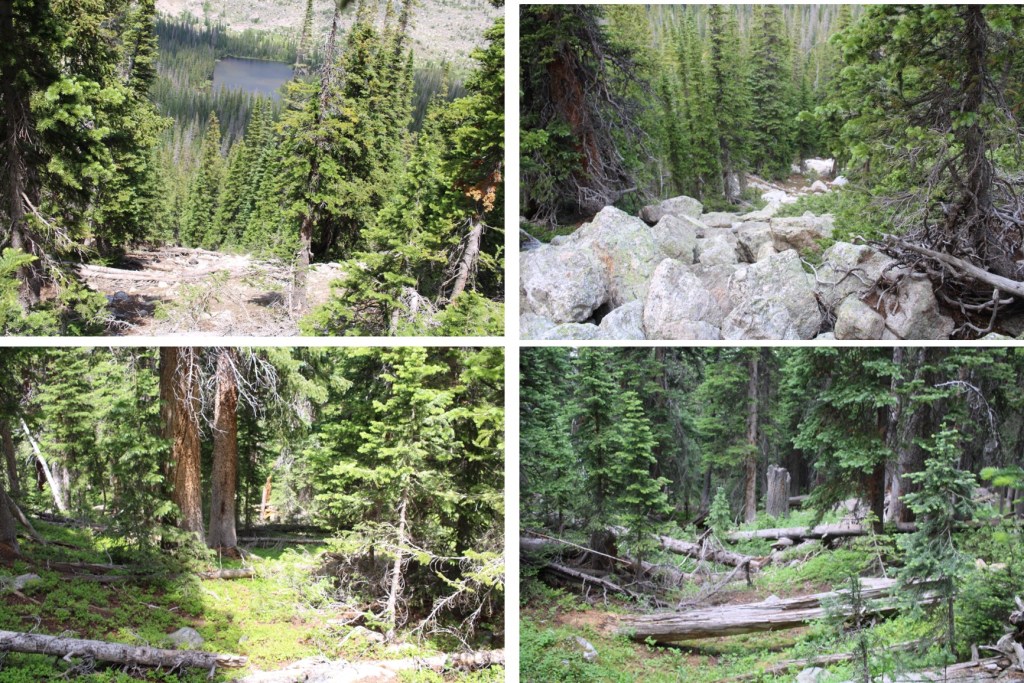
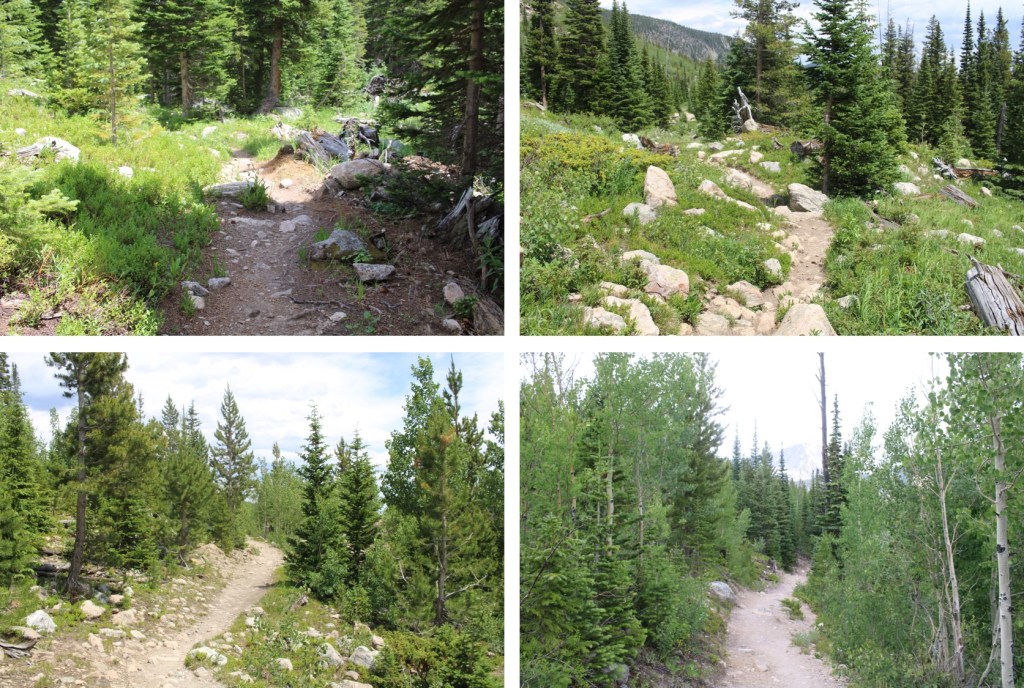
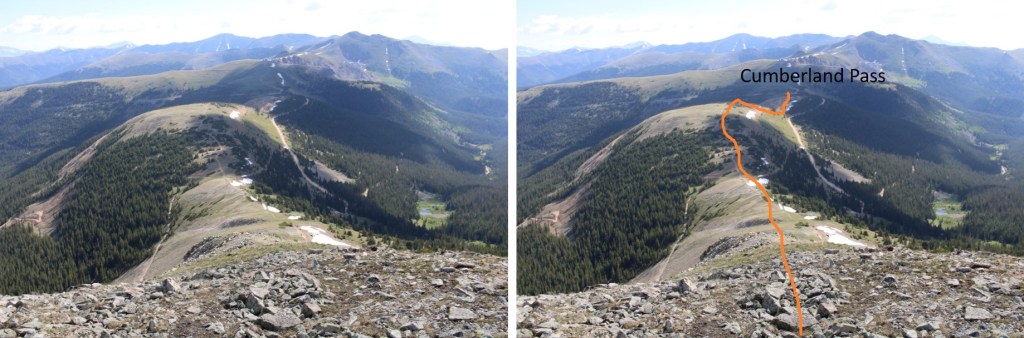
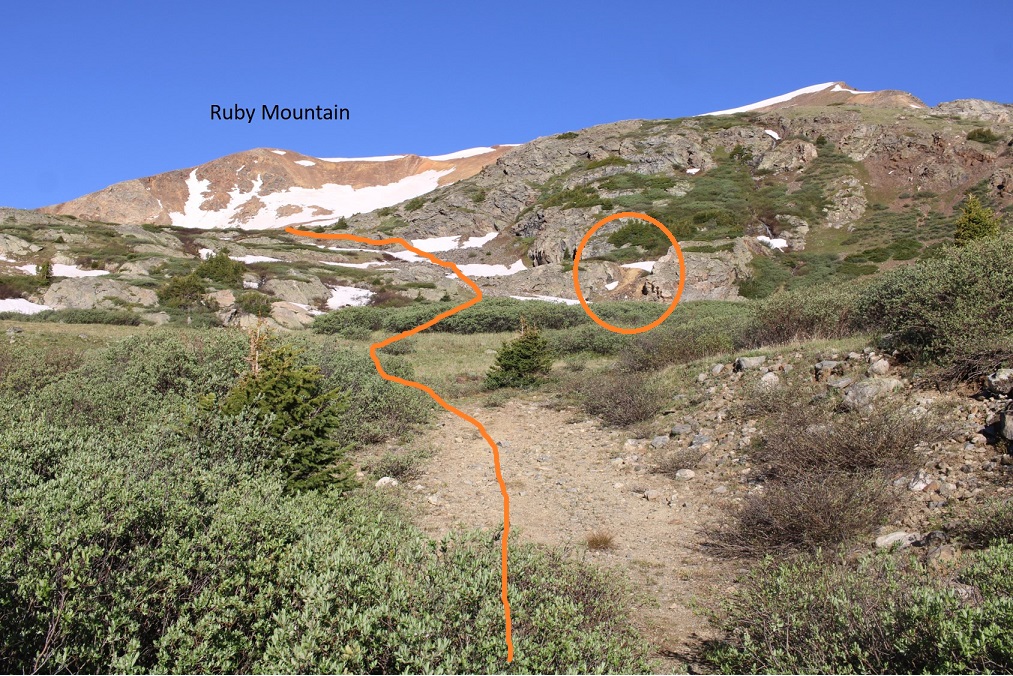
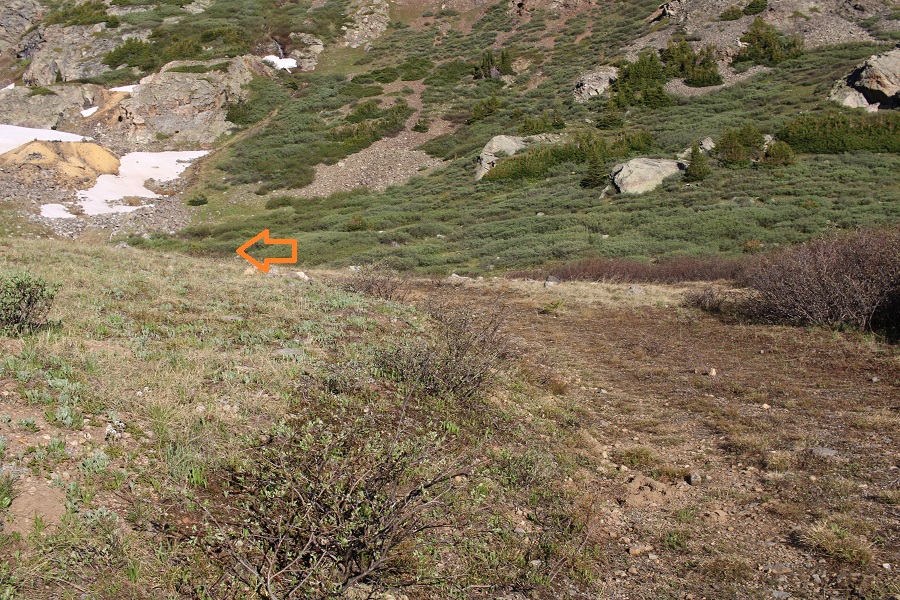
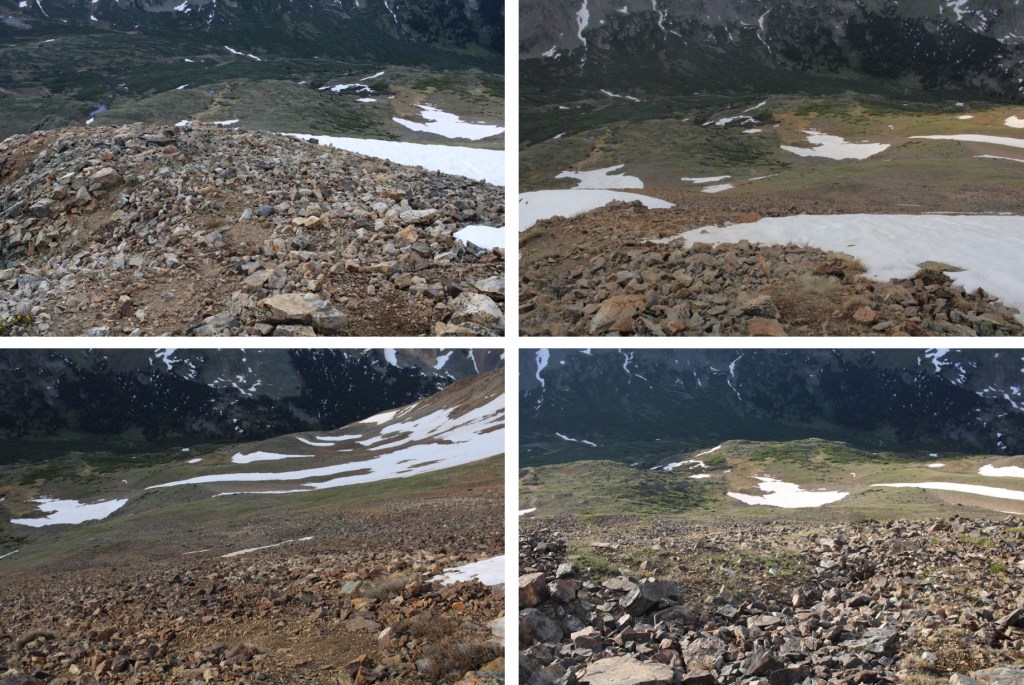
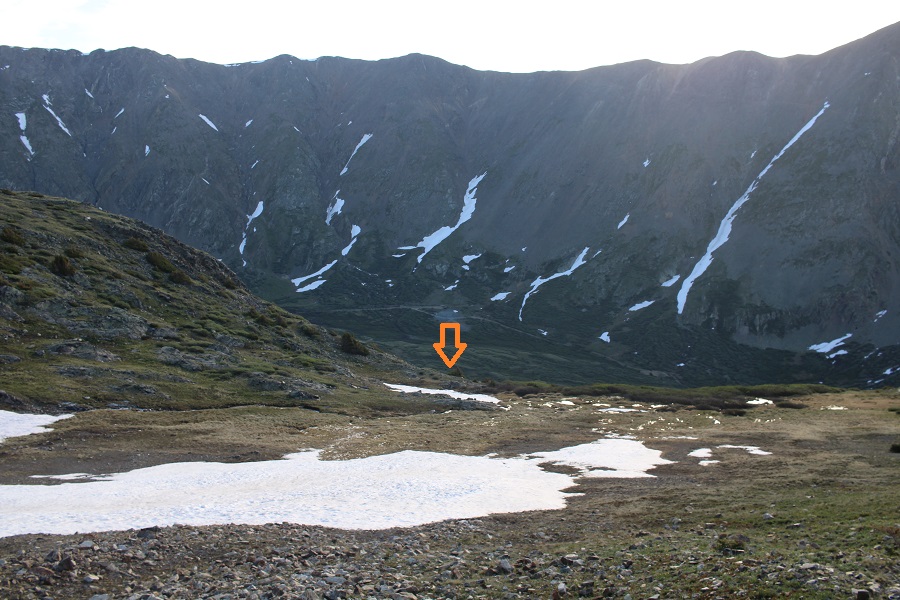
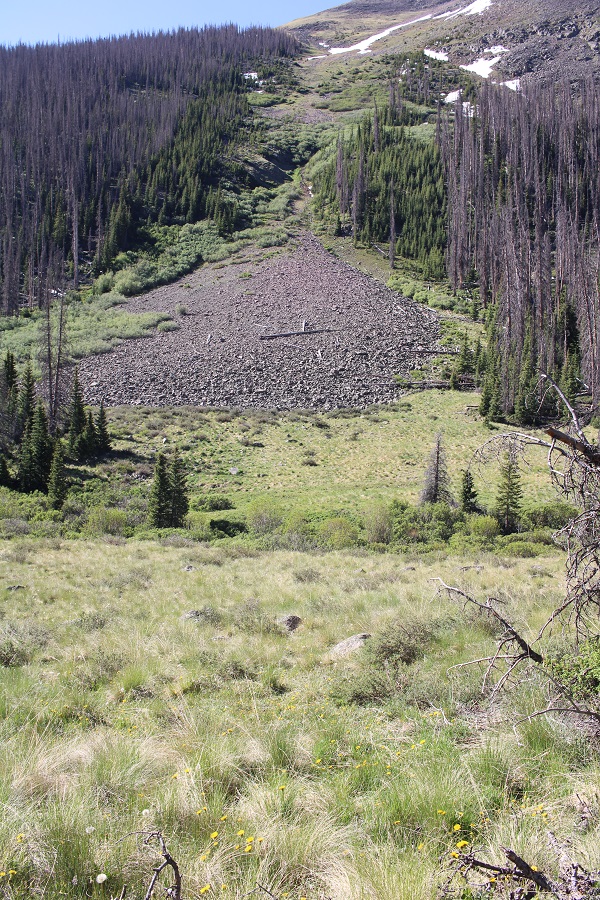
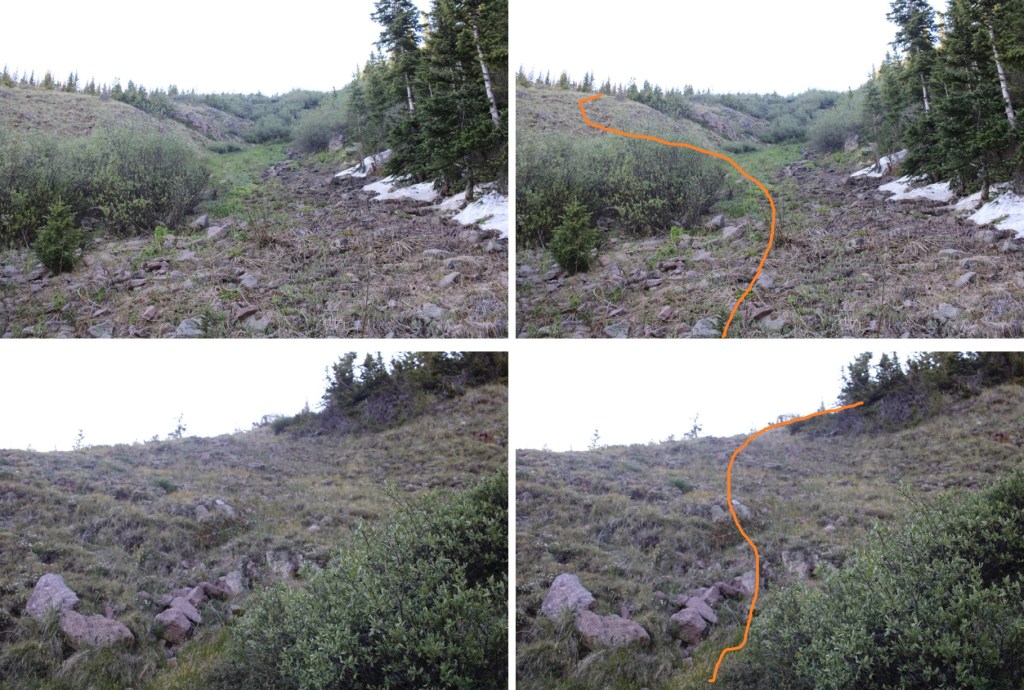
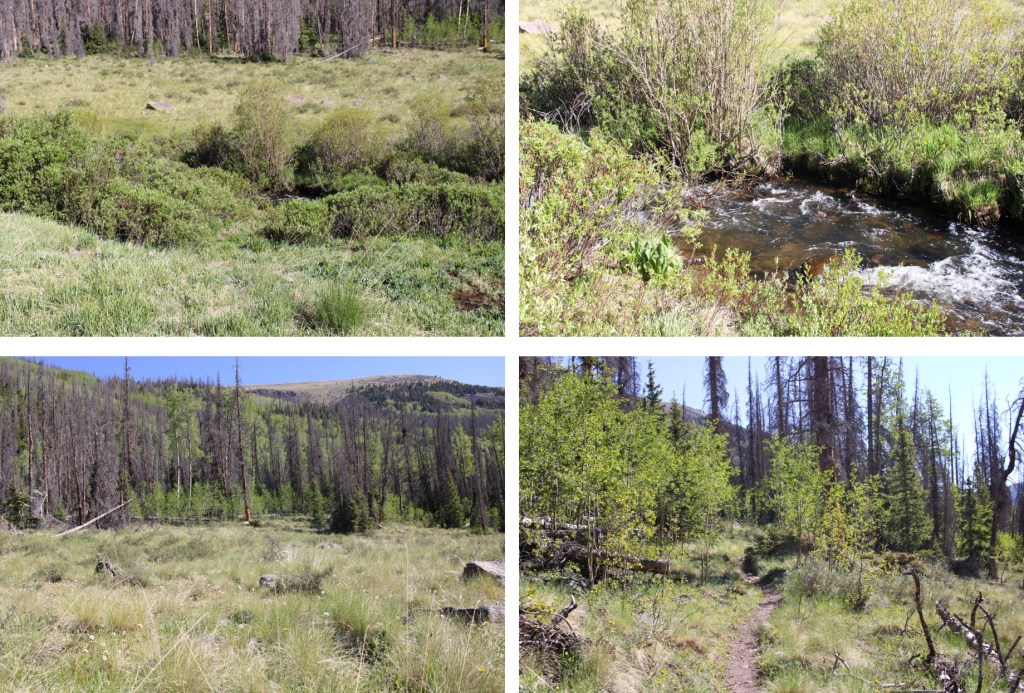
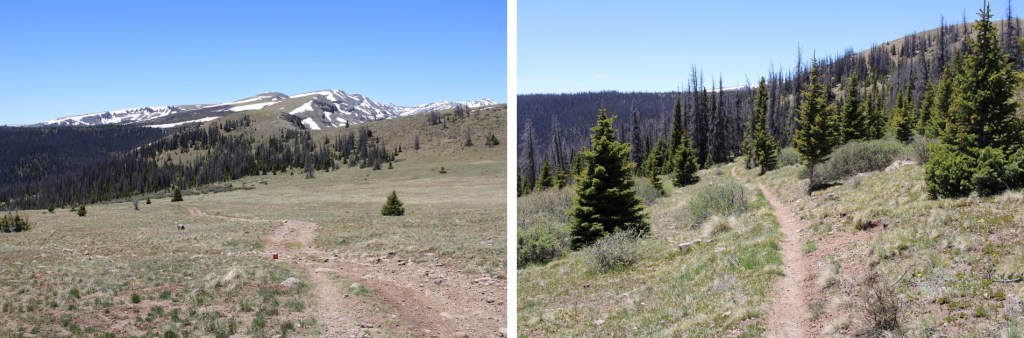
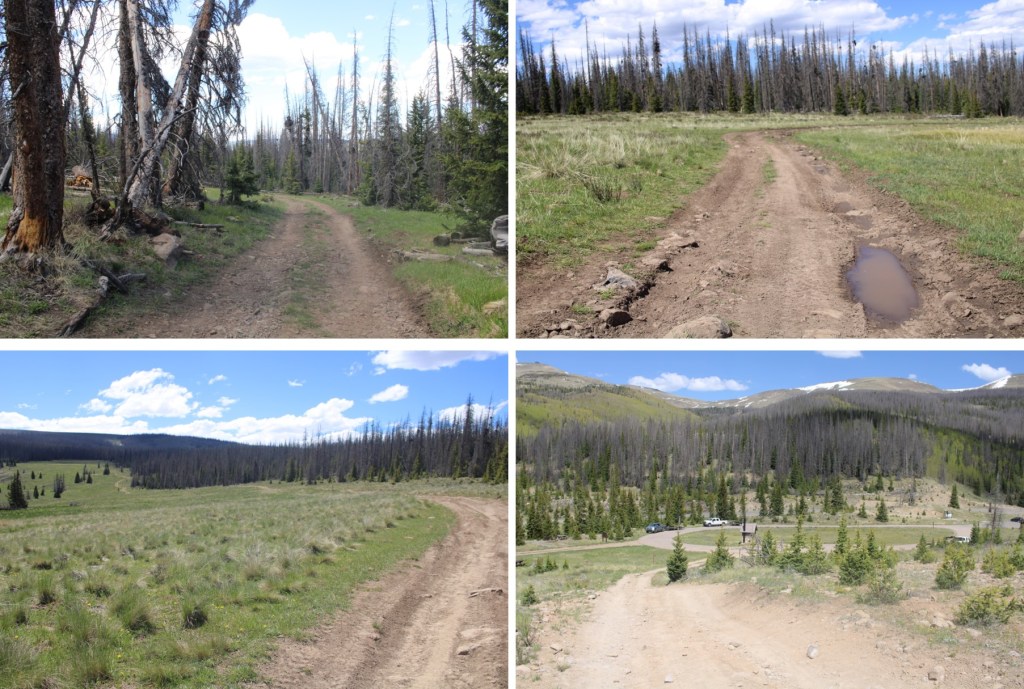
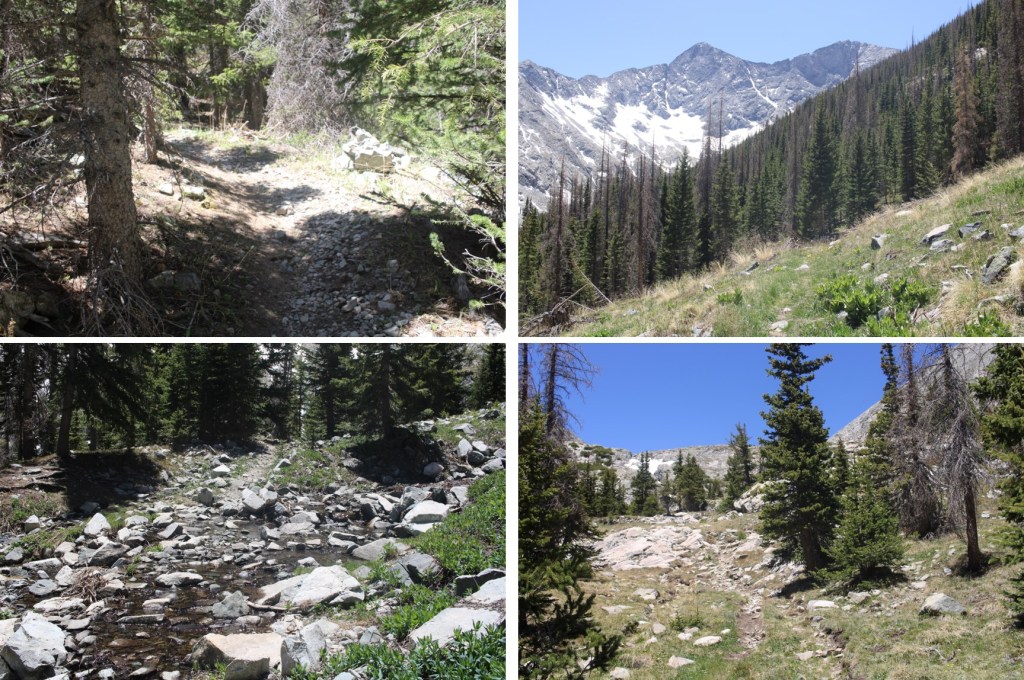
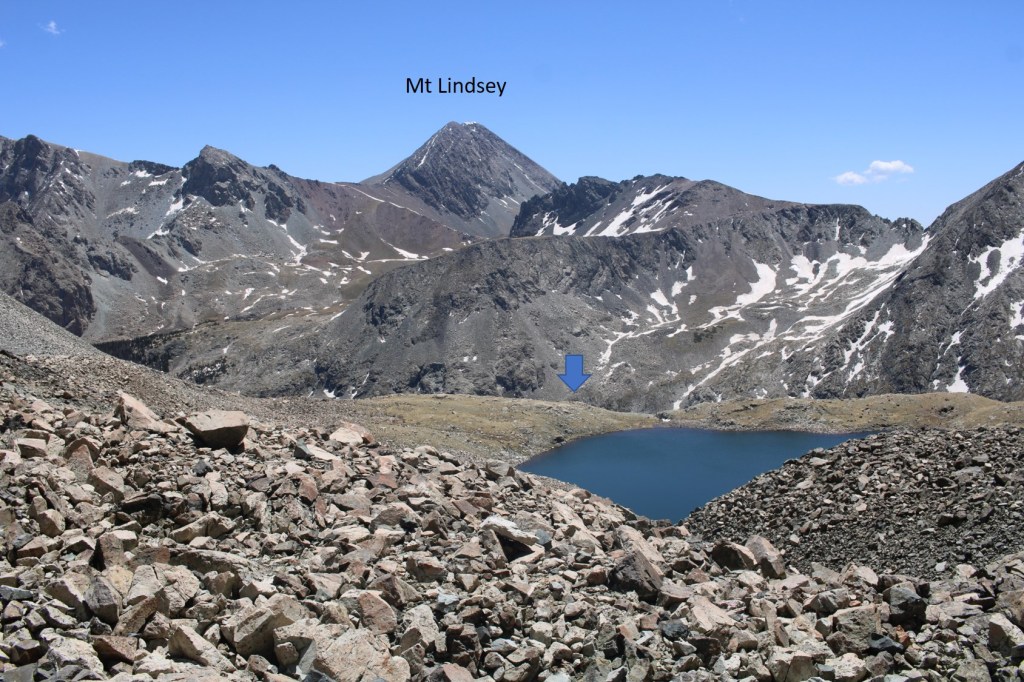
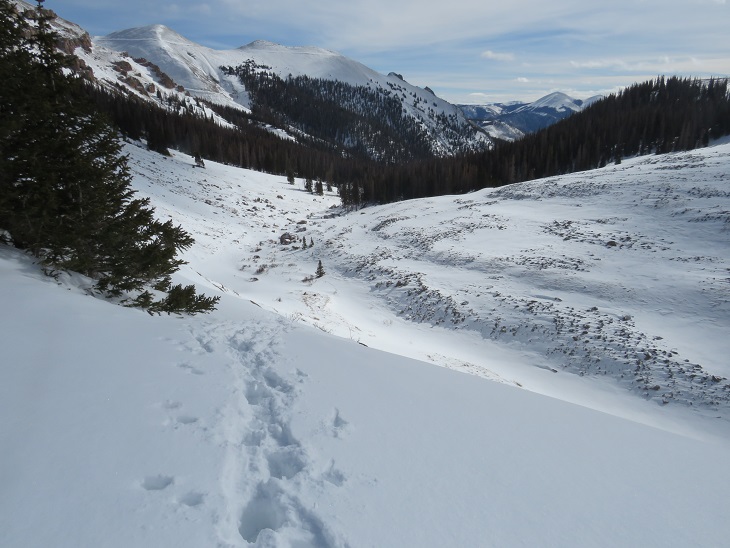
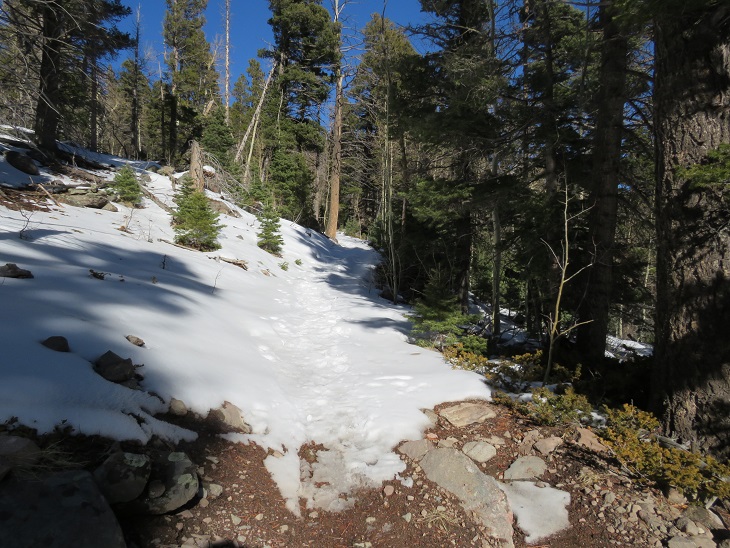
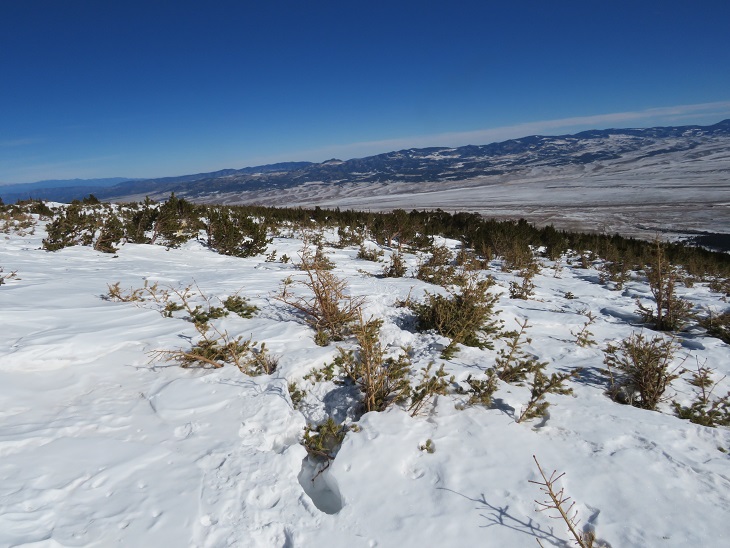
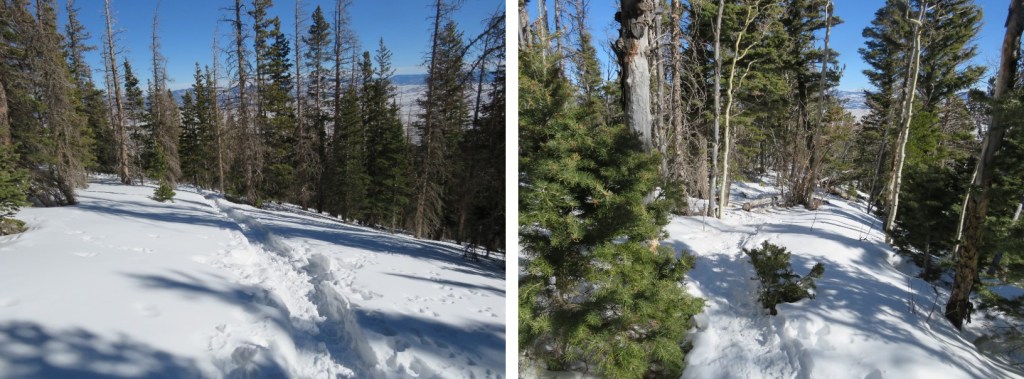
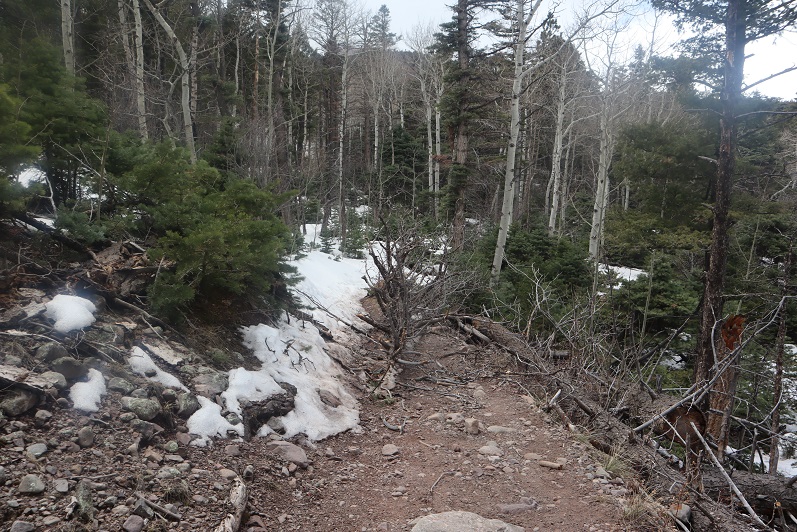
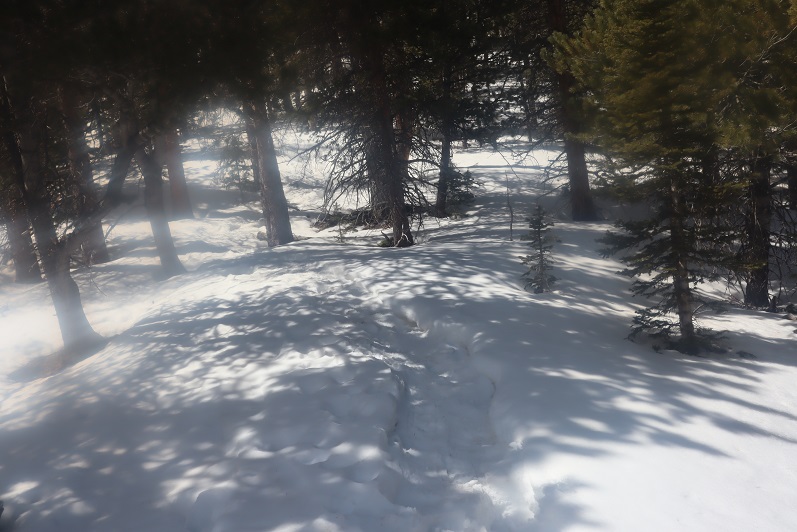
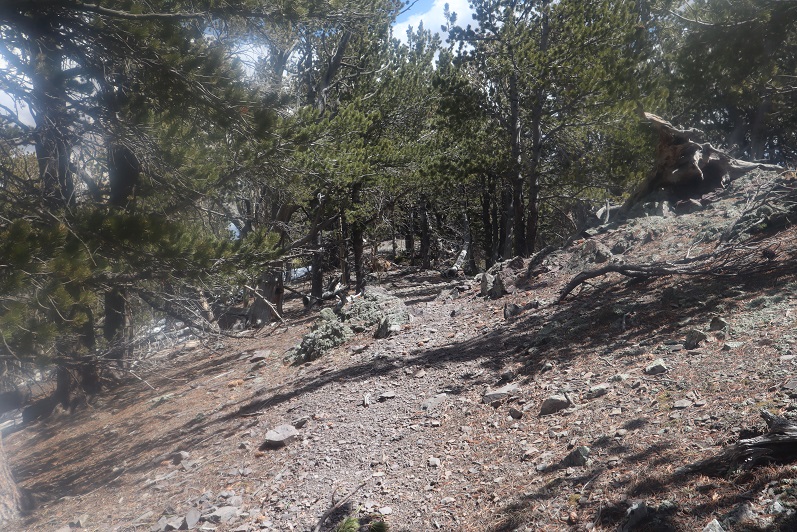
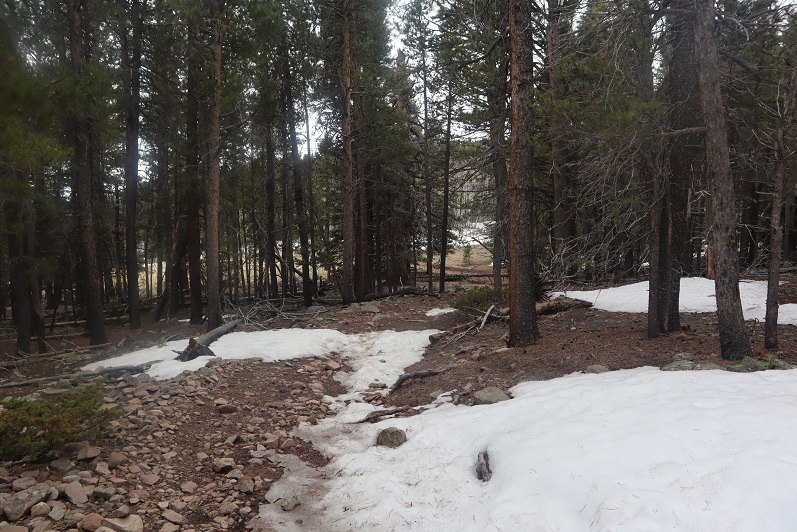
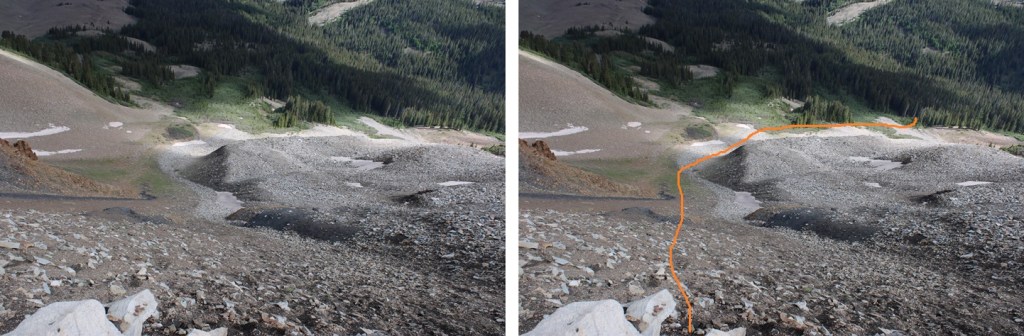
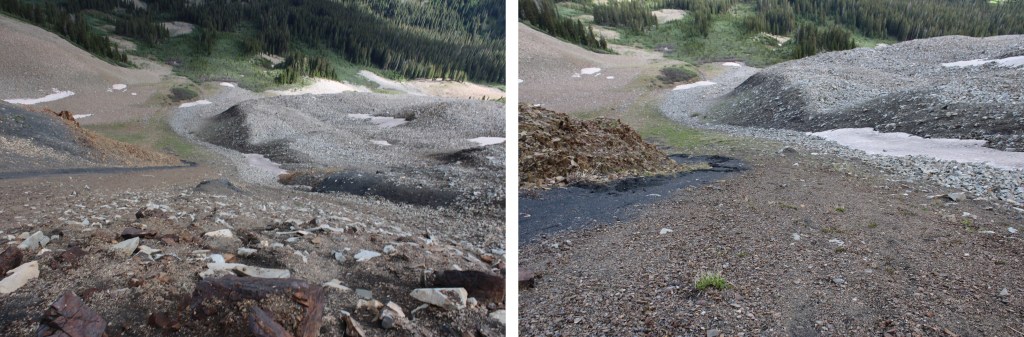
At the base of the gully I followed the rocks to the north (right), finding cairns along the way that led me towards a trail in the trees.

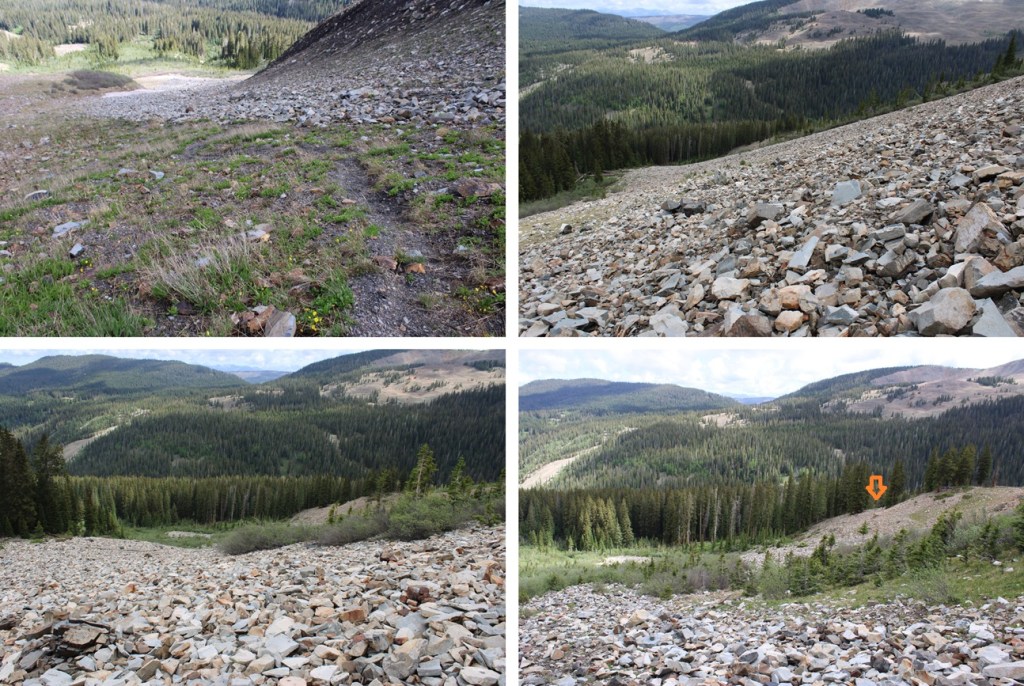
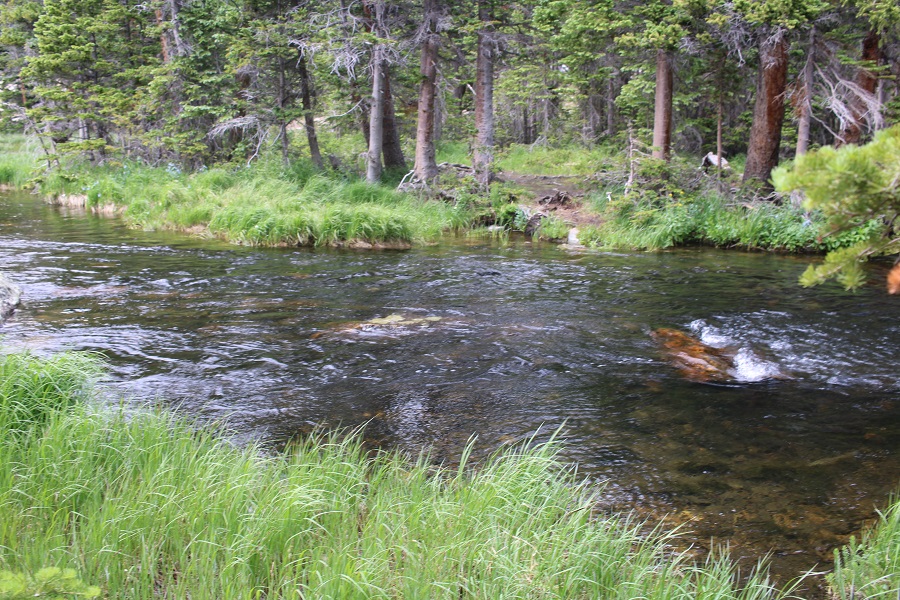
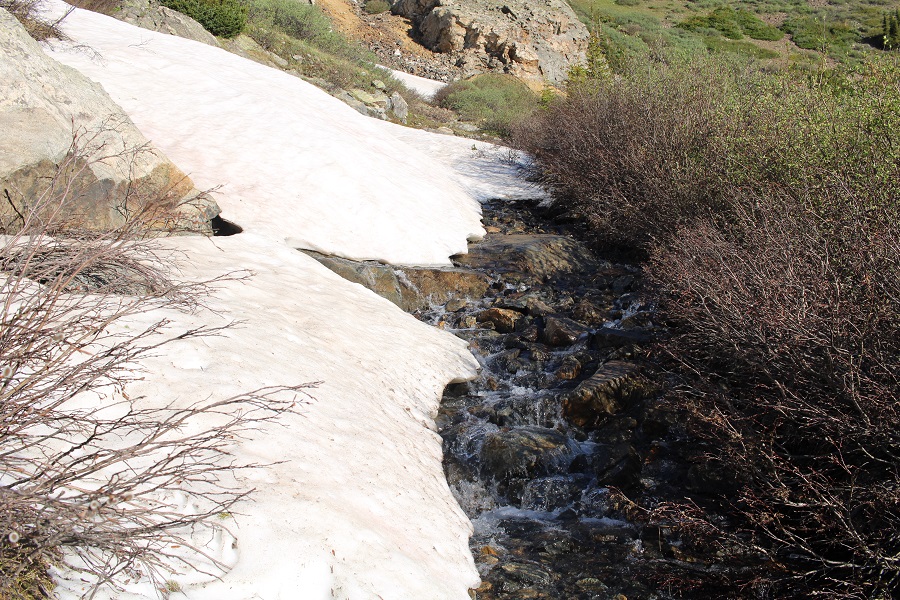
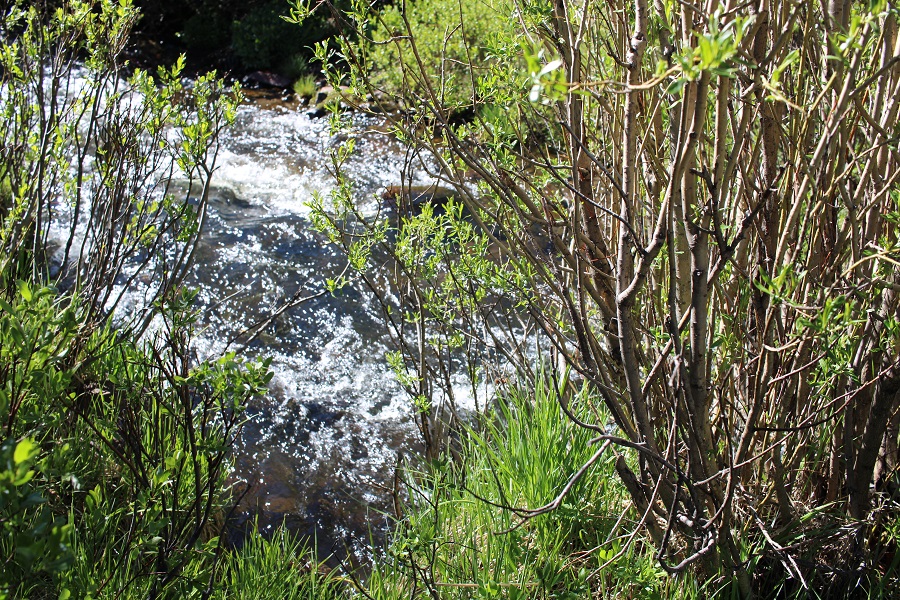
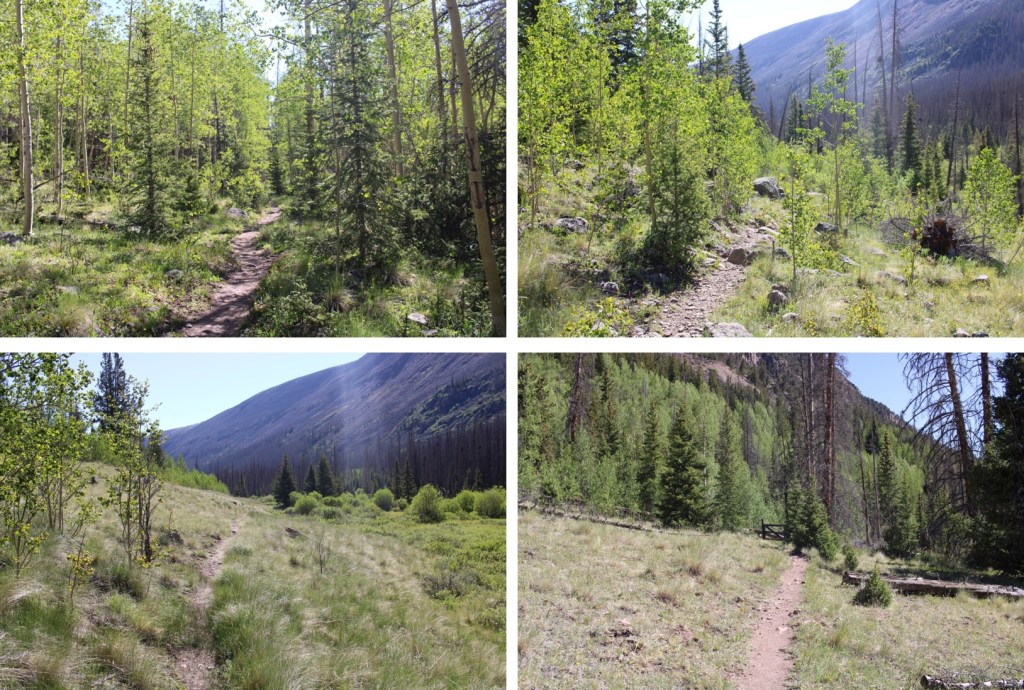
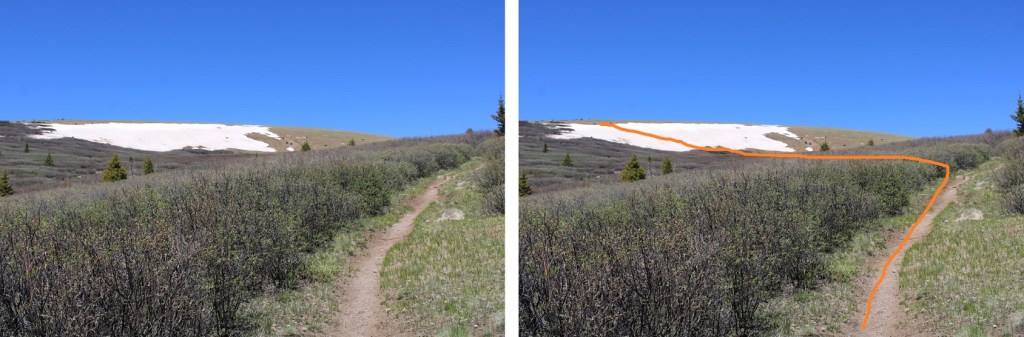
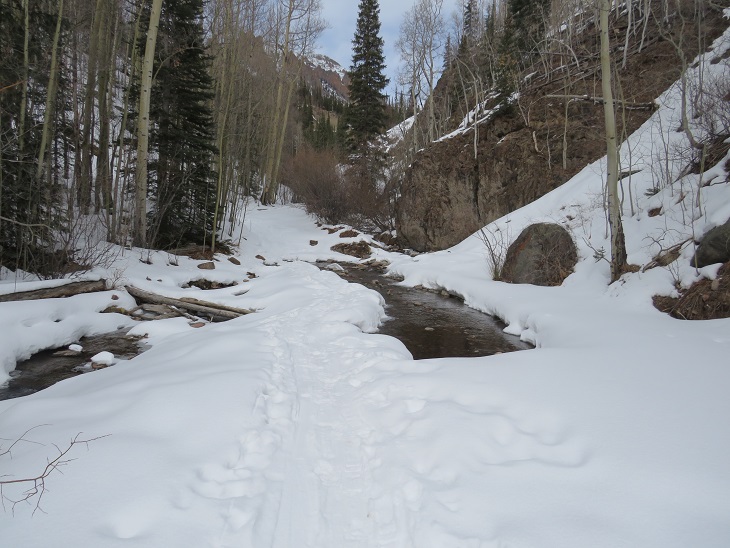
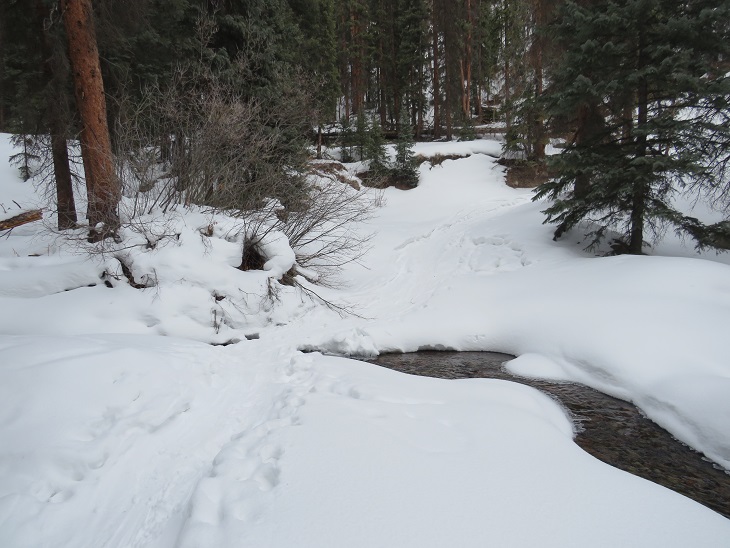
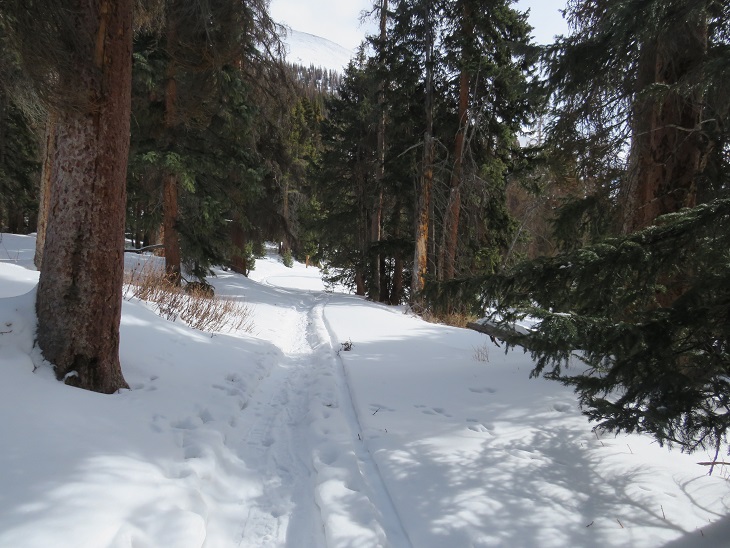
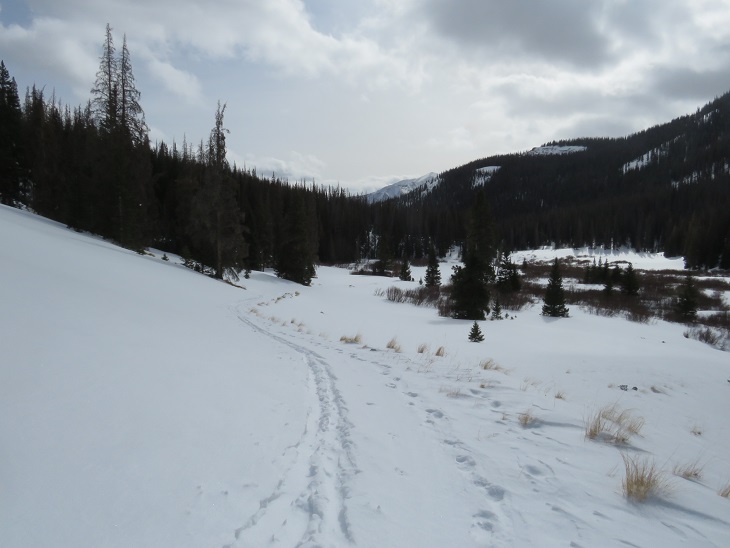
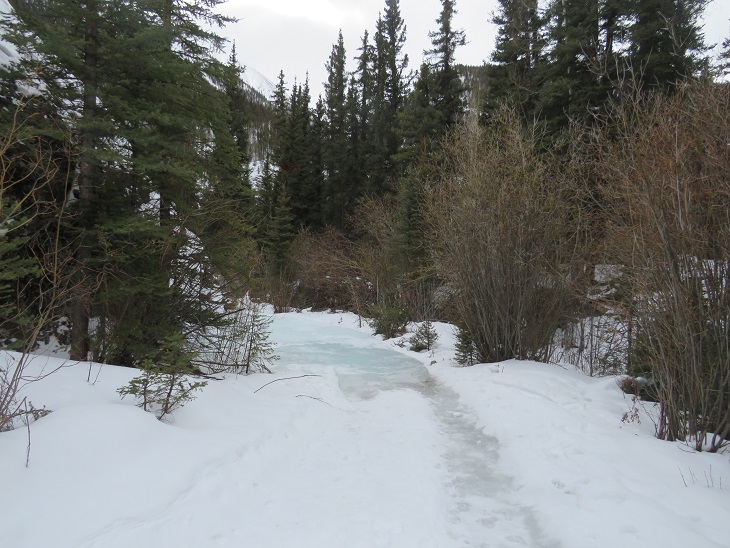
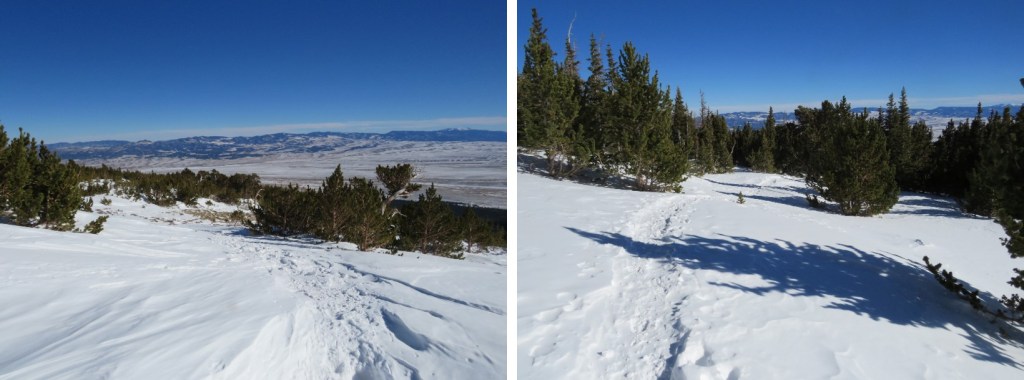
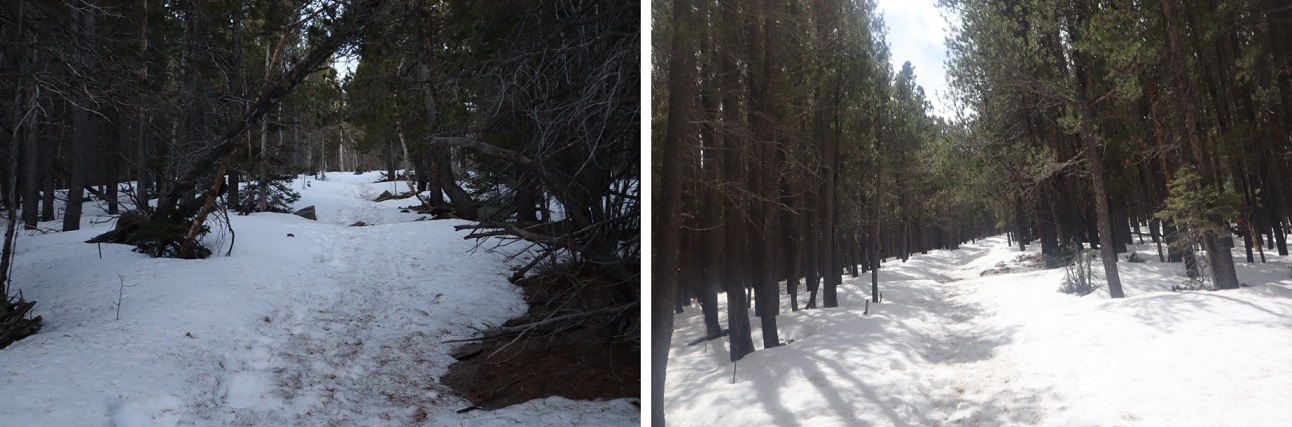
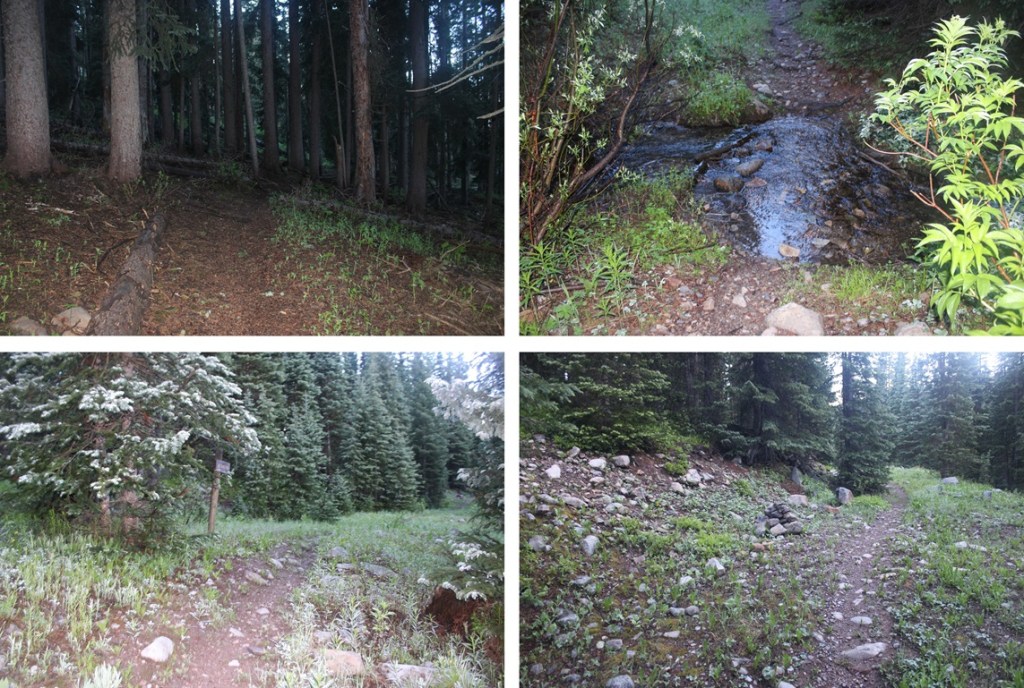
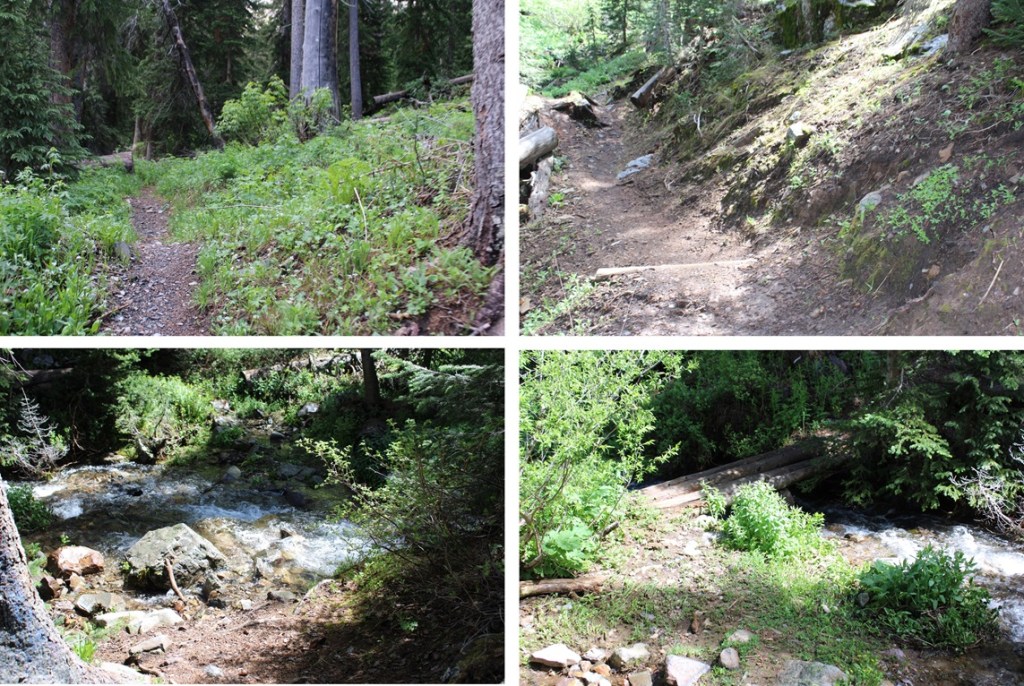
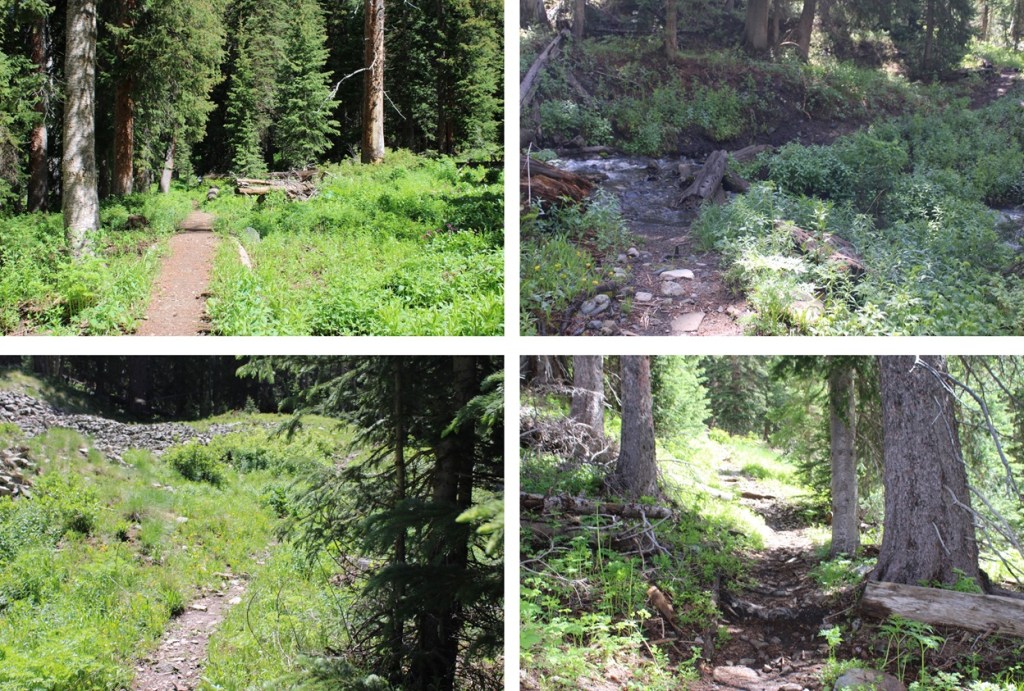
I followed this trail through the willows and into treeline north, back to the West Mancos River Trail.

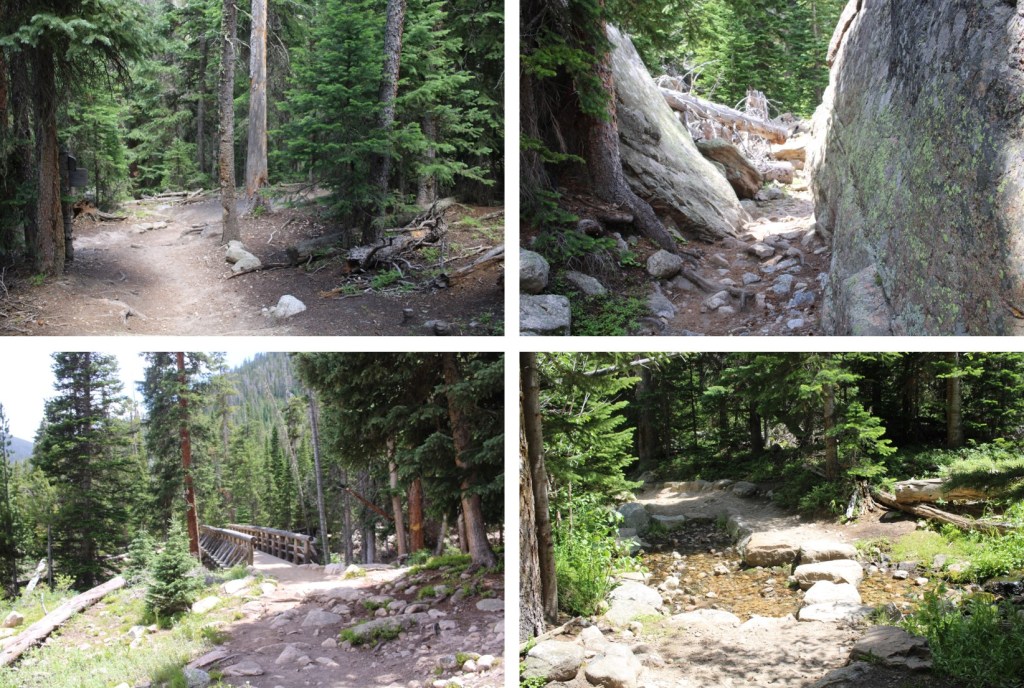
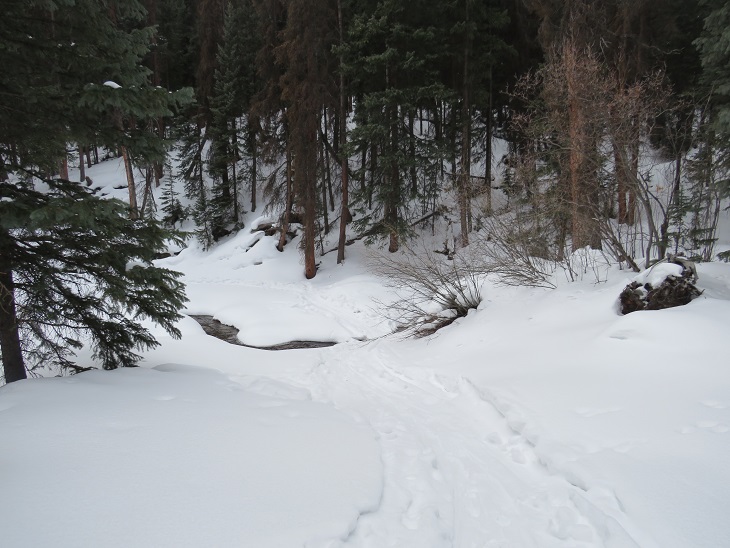
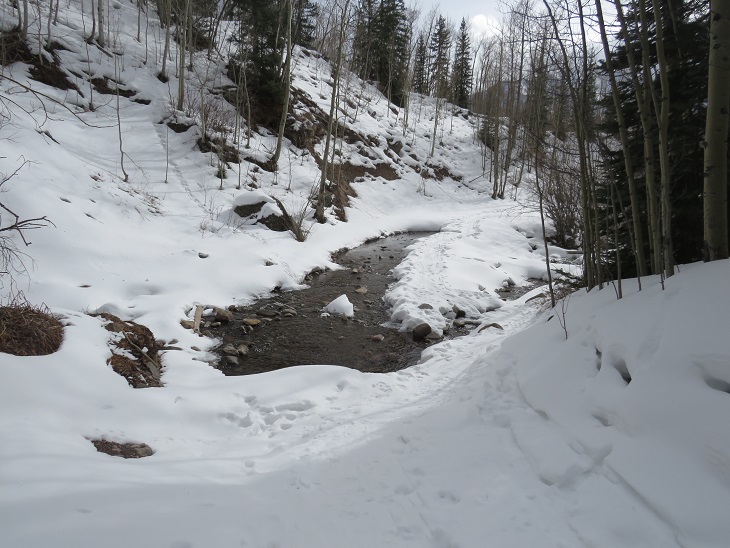
Back on the West Mancos River Trail, I followed it back to the upper trailhead, crossing the West Mancos River, and gaining elevation as I went.

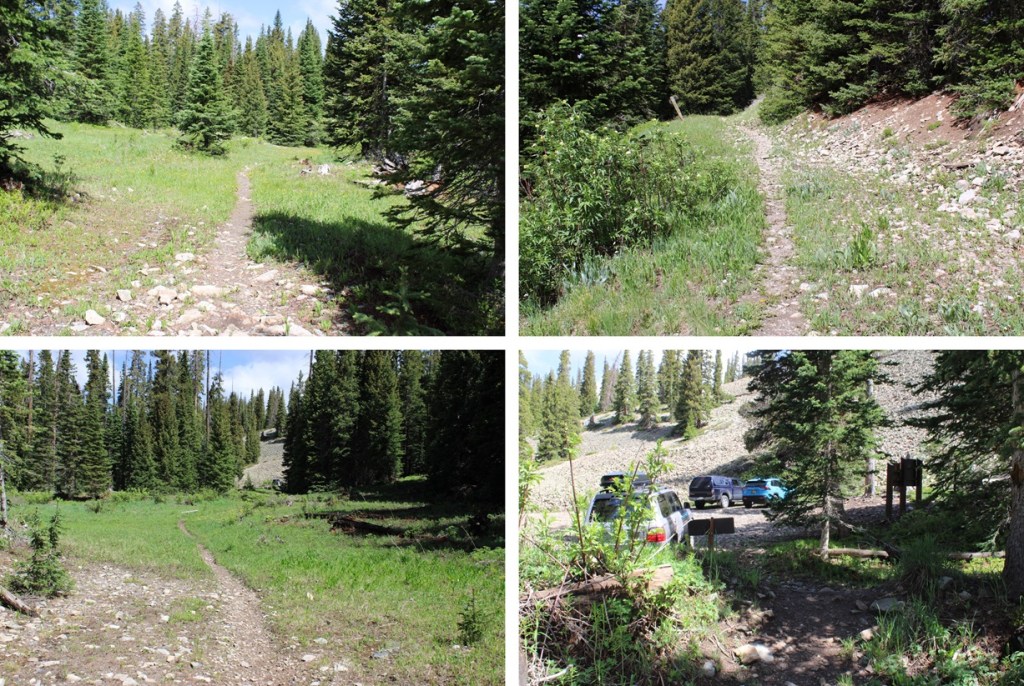
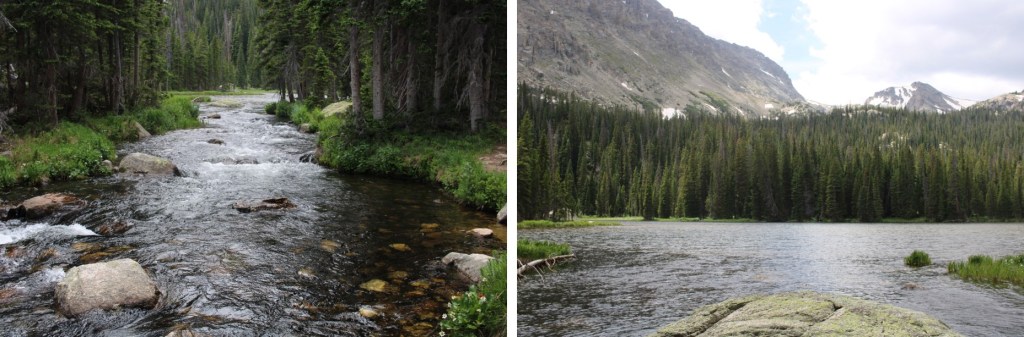
At the Upper Sharkstooth Trailhead, I followed the 4WD road northeast, past Twin Lakes, just under 2 miles back to the 2WD trailhead.

I made it back to my truck at 11:30am, making this an 11.08 mile hike with 3440’ of elevation gain in 6 hours.

On to the next trailhead!

Copeland Mountain – 13,183

RT Length:  17.49 miles

Elevation Gain:  4975’

I arrived at the Wild Basin Ranger Station I RMNP at 4:30am and was on the trail at 5am.  There are several adjoining lots in the area, with room for about 50 vehicles.  The very well market trail starts at the southwest end of the parking area.

I was headed to Ouzel Lake, on a trail that first passed Copeland Falls, Calypso Falls, and Ouzel Falls (that’s a lot of falls) along the way. 

In true RMNP fashion, this is a well maintained, class 1 trail.

After hiking for 1.5 miles, I continued straight (towards Calypso Lake and Ouzel Falls) at this junction

I continued to follow the well-maintained trail southwest, crossing several bridges

After hiking for just under 2 miles, I came to another junction, where I turned right and continued following the trail towards Ouzel Falls

Here’s where I made a mistake.  After hiking for about 3 miles there’s a junction where you turn left. In the dark, I didn’t see this junction, and continued on another half mile before realizing my mistake.  In any event, turn left at this junction, and continue heading towards Ouzel Lake.

It is along this part of the trail you’ll get your first glimpse of Copeland Mountain.

Here’s the final junction before coming to Ouzel Lake.  Follow the signs and continue straight.  Also, tale note of the gully on the left.  That’s what you’re going to want to ascend, and it’s a bushwhack below treeline with very little for sense of direction. That’s where you’re going to want to aim for to gain the ridge.

The trail was a bit washed out just before making it to the lake

After hiking for a total of 6.75 miles, you should make it to the lake.  It was more than that for me, because of my little side trip.

The water level was high, so the place where I would usually cross was underwater.  I changed to my creek crossing shoes, and waded the creek here.  The water level was up to my thighs.

This is where the bushwhacking begins.  I followed light game trails as they skirted the east side of the lake, then found a creek/drainage (not on a topo map), and followed it south to the ridge.  When you see it, you’ll know it’s an obvious drainage, the trouble is finding it in the dense growth.  Here are some pictures of the terrain.

Once you find the drainage, which will be full of vegetation and downed trees, and maybe even some water, continue heading south.

The drainage became rocky, which meant route finding was easier.

I headed up the rocks until they stopped, then turned right, and followed what could have almost once been a road for about 10 yards west, turned left, and followed another rocky drainage south to treeline. There was actually a cairn here (circled)

The rocks were solid, and easy to scramble over.  The rocks eventually became dirt, and I briefly entered the trees before making it to treeline, but I was always going south

From the lake, it was 1.2 miles, with 1100’ of elevation gain to treeline.  At treeline, I turned right, and followed the slope southwest towards the summit, gaining another 2100’ in 1.2 miles.  While a topo map makes it look like a gentle slope, it was anything but. The summit always looked out of reach.  It was one long false summit, where you thought you were almost there, and then you were surprised by more rock. The terrain started out as tundra, then switched to rocks that tended to roll if you weren’t careful. Route finding and terrain were all class 2.  There was also a lot of water here.  Even at the summit, I could hear the water rushing under the rocks.  Below, on the tundra, I saw several small streams of water flowing downhill.  This was all choose your own adventure.  Here are some pictures. 

At what I thought was going to be the summit I was met with some unexpected snow.  The snow was punchy, so I skirted it to the right and regained the ridge

Only to find more rocks,  Here you can see the true summit of Copeland Mountain

I summited Copeland Mountain at 10:45am

Copeland Mountain:

There was a plastic tube summit register at the top, which needs more paper. The only paper in there was (of course, since it’s a plastic tube) wet.  Here are some of the views from the top of other peaks in the area

I turned around and headed back the way I came, but navigation was a bit tricky, as everything looked the same

I headed northeast, and knowing if I went too far north I’d cliff out, I kept this meadow in my sights and aimed for it until I could see a proper route back down

Here’s the route I took back to treeline

Note where Ouzel Lake is to the left, as that’s where you’re headed.

Here are some pictures of the gully down

And the short traverse to the east

Then the bushwhack back down to the lake, following game trails where I could find them

I once again put on my creek crossing shoes and crossed Ouzel Creek.  I’d really recommend creek crossing shoes, as the rocks under the water were very slippery

Here are some pictures of the trail back to the trailhead.  The signs (in daylight) make route finding easy.  Keep heading east towards either the Ranger Station, or Wild Basin Trailhead (the signs differ, but they get you to the same place).

I made it back to my truck at 2:45pm, making tis a 17.49 mile hike (with a bit added due to missing my cutoff) and 4975’ of elevation gain in 9 hours, 45 minutes. 

Side note:  if you see strange looking tracks, that look like a cross between a moose and a deer, they’re probably Alpaca Tracks.  I saw a trekking company with a few guests and 6 alpacas hiking into the basin to camp.  It looks like they do this a lot.  Make sure to step aside for them as they pass by you on the trail.

On to the next trailhead! 

Or so I thought… While I’d been hiking they had closed off the parking area, with about 15 vehicles in the lot.  As I tried to exit, a ranger asked me if I’d mind waiting a few minutes, as they were felling trees in the area.  While I waited for about 45 minutes, not one single tree was felled, and they decided to let me go.  I drove out, and someone was grading the road, so I waited for him to pass by.  He asked me to drive slower (although I’m not sure how I could drive much slower than 5mph).  When I got to the gate, it was locked, and I had to wait again for someone to open it. Apparently, they’d closed the roads for mitigation/tree work, etc. but hadn’t put up any signs warning people arriving before they got there they were going to close the road.  3 hours later, I was on my way home. 

Fairview Peak – 13,224 and Green Mountain 12,692

RT Length:  7.75 miles

Elevation Gain:  2314’

I drove up to Cumberland Pass from Pitkin the night before my hike, and settled in.  The road was dirt 2WD, with a few places where clearance would be helpful, but otherwise it was an easy drive.  There was someone in a tractor grading the road, so I can only imagine it will get better from there.  I people watched for a few hours, then had the pass to myself for the next 18 hours, as it was only busy during the afternoon.

The next morning, I was on the trail at 5:30am.  I actually followed a 4WD road, at the west end of the parking area.  Side note:  On this hike I saw over a dozen grave markers.  I’m not sure if there were bodies buried underneath, or ashes spread, but it seemed excessive. 

I followed this road west and then southwest as it gained and lost elevation. 

After hiking for a little over a mile the road didn’t end, but it was snow covered, so I followed the ridge. 

Here’s the route up to Green Mountain

I could tell there was a road here at one time, but it hasn’t been used in quite a while.  At points it was a small trail, and at others it resembled a runnel.  It was rocky, but only about 650’ of elevation gain to reach the unranked summit. Here are some pictures of the route.

The summit was to the left (south)

I summited Green Mountain at 6:20am

Green Mountain:

From Green Mountain I turned around, and looked northwest.  I could clearly see the summit of Fairview Peak, and the route I needed to take to get there.

This was going to be a ridge hike, with a lot of ups and downs, but also fairly straightforward.  I headed northwest, and followed the ridge.  There were a lot of mines in the area.

Here’s the view looking over at PT 12556 (not ranked, etc.).  There were 5 crosses in a circle at the summit.  I’m not sure of their significance.

This was fairly easy terrain, mainly tundra that eventually became rocky

From 12556, this is the route I took over to Fairview Peak, skirting one of the points on the ridge to the left by traversing over rocky, but stable terrain.

Here are some pictures of the route, which was very rocky

At the top of the ridge, I could clearly see the summit hut at the top to my left.  I headed south to the summit

I summited Fairview Peak at 7:45am

Fairview Peak:

The summit hut was open, so I went inside.  There was still a lot of snow on the floor.  It didn’t look like anyone had been there yet this year.  There were tools, ladders, and a box with the history of the structure and improvements being made inside. 

From inside the structure, I could see Green Mountain to the southeast

I turned and headed back the way I’d come, back down the ridge

Here are some pictures of my route back to Green Mountain

Here’s a look at re-gaining the last 225’ to the top of Green Mountain

From the summit of Green Mountain, I headed northeast.  I could clearly see the road I was aiming for that would take me back to Cumberland Pass.  I’m sure you can see the road in this picture, but snow blocked my access to get to it, so this is the route I took.

Here are some pictures of my way back to the 4WD road, which started out rocky and then turned to tundra

And from the road back to Cumberland Pass

I made it back to my truck at 10am, making this a 7.75 mile hike with 2314’ of elevation gain and a ton of searching for cool rocks in 4.5 hours.

On to the next trailhead!

Ruby Mountain – 13,278

RT Length: 4.74 miles

Elevation Gain: 2212’

I started from the Argentine Pass Trailhead at 5am.  The 214 road in was easy 4WD, with a lot of small potholes, so I took it slow.  There’s room for several vehicles at the trailhead.

I continued following 214 northeast (the road parallels Peru Creek)  and quickly came to a gate and Shoe Basin mine.

I passed the gate, and continued along the road. 

After hiking for about half a mile I turned left onto what used to be a road, but is now more of a trail.

I continued following the trail until I came to a junction. Going left will take you to the Peruvian Mine, and going left will take you to the Paymaster Mine.  I turned right, and continued following the road.

The trail became overgrown with willows but was still easy to follow

I now had a pretty good overview of the route into the upper basin. The Paymaster mine is circled.

And some step-by-step pictures along the way.  There is a cairn marking where you leave the trail.  The willows here are pretty thick, but only lasts for 20 feet or so.

There was still melting snow and water on this part of the trail

Just before making it to the mine, I turned left and climbed up the hill.  The route was obvious.

Now in the upper basin, the route seemed obvious to me.  I was going to take the snow free slope to the ridge.

This was all class 2.  Here are some step-by-step pictures of the route I took to the ridge

The tundra quickly turned to talus, but was all class 2 and easy to navigate.

Once gaining the ridge, I turned left and followed the ridge southwest to the summit.  This was an easy tundra stroll

I summited Ruby Mountain at 6:30am

Ruby Mountain:

Here’s a view of Gray’s Peak from the summit of Ruby Mountain

It was a windy day on the summit, so I turned around and headed back the way I came.  Also, beware of the cornices… there’s plenty of tundra to walk on, so use that.

Here are some pictures of the descent route back to the basin

Back in the basin, I turned left and headed northeast towards the Paymaster mine and back to the road

I followed the road back towards the Peruvian mine (circled), turned left, and followed it back to 214.

Then I followed the road back to the trailhead

I made it back to the trailhead at 7:45am, making this a 4.74 mile hike with 2212’ of elevation gain in 2 hours, 45 minutes.

On to the next trailhead!

13,026

RT Length:  12.96 miles

Elevation Gain:  2979’

Day 3 at the Eddiesville Trailhead, and I really, really didn’t want to get out of bed.  It had been between 25-30 degrees the past two mornings when I woke up, and this morning it was going to be even colder.  There had been a thunderstorm last night, and I knew there would be a thick layer of frost on the ground.  And it was cold.  I mean really, really, cold, and I had a creek crossing I knew I was going to have to get through.  I have Raynaud’s, so this is actually something rather dangerous for me to attempt, especially in cold weather so far from communication.  And all I had to wear were yoga pants and a thick jacket.  The weather forecast had called for warmer weather, so I hadn’t brought my warm snow pants.  I stayed under the covers for about 15 minutes, contemplating if I should even go out.  I mean, I didn’t even know if the route I was going to attempt ‘went’.  Then, all of the sudden, something clicked.  I started asking myself if it were really worth it, and immediately my attitude changed, and I shot out of bed.  No, I love mountaineering, and that comes with being uncomfortable sometimes.  This was all mental, and I needed to get myself out of this funk.  I never regret a hike, and I was just being silly.  Once I started hiking, I’d warm up.  I had to just rip the band aid off and go. 

I was on the trail at 4:15am.  The trail starts off at the south end of the parking area.

I followed the Colorado Trail south and then southwest for 5.4 miles.  This is a well maintained, class 1 trail, easy to follow, even in the dark.

After hiking for about 5.4 miles, I came to a clearing, and to my left I could see an avalanche runout.  It was my plan to climb up this runout and see if I could summit the peak this way.

I left the trail, and sat down on a rock to exchange my hiking shoes for my stream crossing shoes.  The creek was too big to pole vault across, and the water level was too high to rock hop, so even though it was 5am and freezing cold out, I was going to cross the stream and get my feet wet. 

Imagine my surprise when the water was warm!  Well, not warm exactly, but warmer than the 25-degree air I’d been hiking in.  It was an easy stream crossing, with the water coming up to just above my knees.  I exited the stream, changed back into my socks and hiking boots, and was on my way. 

This is the route I took up the avalanche drainage

And some step-by-step photos.  This ended up being about 2000’ of elevation gain in 1 mile.

Eventually, the terrain gave way to tundra

Once I made it to the ridge, I turned right, and followed it southeast to the summit.  The terrain here was still all class 2, starting out as tundra and then changing to rocky.

I summited 13,026 at 7:45am

13026:

And now, to head back down. I just retraced my steps back to the avalanche runout, heading northeast

And then made my way back down to the creek

I crossed the creek again, and headed back to the Colorado Trail

I then took the Colorado Trail northwest back to the trailhead.  I’d been on this trail 3 times in the past 3 days, and this afternoon I noticed bear tracks along the trail.  A bear must have come through last night, as these tracks hadn’t been there before.

Here are some pictures of the trail back to the trailhead

I made it back to my truck at 10:45am, making this a 12.96 mile hike with 2979’ of elevation gain in 6.5 hours.

On to the next trailhead!

UN 13256, Coney Benchmark – 13,339 & UR 13138

RT Length: 32.25 miles

Elevation Gain: 5511’

I know the traditional way to do this peak is from Carson Pass, but the last time I drove that road I told myself it would be the last time.  I had marmot issues parking at the pass, and lost my 4WD on the way down.  It wasn’t ideal.   Earlier this summer I had attempted to make it to Carson Pass from the bottom of the trail, near where CR 30 and 36 meet.  I was greeted with hoards of mosquitoes, and decided to hike another peak instead. 

This time, I parked at Spring Creek Pass, knowing it was going to be a long day.  What I hadn’t anticipated were all the elevation gains and losses along the way.  The parking lot holds about 20 vehicles if everyone parks nicely.  Another bonus:  It’s a paved 2WD road to get there, and the bathroom was stocked and clean.

I parked and was on my way at 1:45am.  I followed Trail 813/Colorado Trail/Continental Divide Trail for most of this hike.  On the way in, in the dark, I took the 4WD road 547.1, which eventually connected back up with the Colorado Trail, but added about an extra mile.  I followed the very well-marked trail west for  8.25 miles.  Here are some pictures of that well marked trail, as it went in and out of the trees (which it seemed to do the entire hike).

Here’s an overview of the route you can see at this point

After hiking about 8.25 miles, the road curved to the left, and I was now heading southwest.  Here the trail loses about 500’ of elevation as it brings you back into the trees.

I passed through some willows, and continued following the trail to gain the ridge.  This is where the snow began and the trail was no longer obvious.  I was able to do all of this with just microspikes, but on the way back, I really, really wished I had an ice axe.  

Here the trail was again obscured by snow, so this is the route I took to gain this ridge, keeping it mostly snow free

It was rocky near the top, but still class 2, and there was a large cairn to guide me.

The trail picked back up again, and I followed it southwest, skirting below UN 13138

After hiking for 14.5 miles, I could finally see the two ranked peaks I was aiming for today

To avoid the snow on the way up (circled in red) I decided to just ascend straight up the slope.  (I crossed the snow on the way back down, and this is mainly where I wished I’d had an ice axe).

The terrain quickly turned from tundra to rocks (still class 2)

After gaining the ridge, the summit was to the southwest.

I summited UN 13256 at 8:15am.

UN 13256:

To the southwest, I could see Coney Benchmark.  I would lose almost 400’ of elevation to get there.

Knowing the Colorado Trail was down there somewhere, I headed south until I found it.

I then gained 475 feet to the summit of Coney Benchmark.  Here’s the route I took.

This was all class 2 to the summit.

The summit was easy to find, but someone put a plastic summit register at the top, so of course the paper inside was wet.

I summited Coney Benchmark at 9:15am

Coney Benchmark: 

Looking northeast, back the way I came, I could see UN 13256 and UR 13138

I retraced my steps back to the Coney Benchmark/13256 saddle

This time I skirted around 13256 and followed the Colorado Trail

This was the sketchy part, where I wished I’d had my ice axe.  It’s steeper than it looks.

To summit 13138, I made my way to the 13256/13138 saddle, and just followed the ridge.  All class 2.

I summited UR 13,138 at 10:35am

UR 13,138: 

Knowing if I continued to follow the ridge northeast I’d come back to the Colorado Trail, that’s what I did.

I picked up the Colorado Trail, and followed it 13 miles back to the trailhead, losing and gaining elevation the entire way back.

I made it back to my truck at 3:45pm, making this a 32.25 mile hike with 5511’ of elevation gain in 14 hours. 

Check out all that elevation gain/loss!

On to the next trailhead!

PT 13656

RT Length: 16 miles

Elevation Gain: 4031’

Please note, my stats are off.  This summit took some route finding, and additional miles/elevation gain.  Your numbers should be lower.

I’ve been going crazy for about a month. It was May 21, while we were getting 2 feet of snow during a spring storm, when I went online to check some summits for an upcoming trip.  It was then I noticed I no longer had 200 bicentennials, but 199.  I panicked!  And of course, did some research. It was then I noticed we now had a new bicentennial, PT 13656.  I’d summited what I’d thought were all the Bicentennials last September, and spent the next 7 months writing a book about my journey, which was published May 8th.  I knew my completion date still stood because I’d completed the Bicentennials as listed at the time, but it didn’t feel right marketing my book so soon after the change without completing this peak as well.  So I didn’t.  Instead, I planned. 

I couldn’t find much information about this peak, so I pulled up my previous trip reports from other peaks in the area, and came up with 3 possibilities of summit options from the Upper Huerfano/Lily Lake trailhead, and upper Lily Lake:

1: Take a line in south to the ridge, which looked like it ‘went’ (It didn’t)

2: Take the gully

3: Summit 13577 and take the ridge to 13656 (I’m glad I didn’t end up needing to do this, as the ridge looked rotten).

I was in Minnesota, hiking its highest point, Eagle Mountain.  (Side note: If you’ve ever wanted to experience mosquito swarms of biblical plague proportions, along with questionable foot bridges through swamps teeming with water snakes, this hike is for you!)  I was only there because of Charles Mound, the highest point in Illinois.  For those of you who know about state high pointing, you know the highest point of Illinois is located on private property, and only open a few days a year.  Long story short, I decided to hit this high point instead of PT 13656 because of accessibility issues, but, when I was in Minnesota I checked the weather and did the math, and realized if I drove with a purpose, I’d be able to make it to the Upper Huerfano/Lily Lake trailhead the next day, and could attempt a summit.

I made it to the trailhead at 4:15am, parking a little lower than necessary because I’d heard there were blowdowns across the road.  There were, so this was a great idea.  I parked at about 10,200’.

I was on the trail at 4:30am, and followed the 4WD road to the Lily Lake Trailhead.  Crews have done a great job clearing downed trees, but there were very few places to pass other vehicles, and honestly, there are still a lot of trees to be cleared.

It was about 2.3 miles from where I parked to the trailhead.  The parking area as littered with branches, but once the downed trees along the way are cleared, it should be good to go.  I signed the trail register, which is in need of more paper, and was on my way.

Did I mention the blowdowns?  There were quite a few alone the trail as well.  They weren’t difficult to navigate around, just a bit annoying.  You can see a few here at the beginning

And here are a few more…

I followed the class 1 (minus the downed trees) trail to the Lily Lake cutoff, and turned right (the path to the left, that goes towards Lindsey, was blocked by a downed tree).  This junction was 1.25 miles from the upper trailhead.

I then followed the trail to another junction, .2 miles away, which is where I made my first mistake of the day.  The sign showed the Lily Lake trail as going straight, so that’s what I did, I continued hiking straight. But I should have turned off the trail and headed north at this point.  You’d think, because I’ve been on this trail, I would have remembered this, but… I didn’t.  I ended up hiking along a path that paralleled the Huerfano river for way too long before noticing my mistake.  Here’s some advice:  If you see yellow surveyors tape and are heading through avalanche debris but you’re on a trail… you’re on the wrong trail. The good news is they parallel each other, so if you head west, you’ll eventually connect with the correct trail. Here’s the junction and the way you should go:

This trail is easy to follow, and will lead you to Lily Lake

Here’s the final push.  There is a trail here, it’s just overgrown.

After 4.1 miles of hiking from the upper trailhead I was at Lily Lake, where the trail ended.

Here’s the info you need.  This is the route you want to take.  Trust me. 

Here are some pictures on the way to the upper lake.  The rocks aren’t stable, and a lot of them roll, so make sure you watch your step while rock hopping.

Here’s where I made another mistake.  I tried to take a route to the left first, by following a dry couloir and what looked like a line filled with tundra/dirt. This was a bad idea.  It started out as class 3, then sustained class 4 (for about 300’).  I quickly felt out of my depth as it increased to class 5.  I had a helmet, but seriously felt I needed a rope.  I got to a place where it was decision time, and decided to descend those 300’ and try a different route. I knew I was close to the ridge, but could not justify the exposure and class difficulty.  I reminded myself I had 3 potential routes for this peak, and an event I was speaking at tomorrow talking about managing risk and being a positive mentor to Girl Scouts.  I did not feel I could continue on and still remain truthful tomorrow, so I backtracked.  Climbing down was much more difficult than climbing up: I had to face the mountain and take it one step at a time.  This entire side was sketchy.  Please don’t use this route, especially since the gully can be kept at 2+.   Here are some pictures of the route you SHOULD NOT TAKE

Instead, here’s what you want to do:

Take the gully!  It’s slippery due to the scree, but with microspikes, manageable

I aimed for the 13654/13656 saddle.  Once again, slippery scree, but manageable

Here’s a view of that line I was trying to take earlier in the day.  The red circle is where I retreated.  Once again, don’t take this line!!!

I kept working my way towards the saddle

Here’s a view of PT 13656

Once at the saddle I turned and followed the ridge southeast.  This was all class 3 scrambling.  I was able to stick to the ridge the entire time.  Here are some pictures of the ridge

I summited PT 13656 at 10:15am. 

I spent a lot of time on that summit, making sure the true summit wasn’t further to the southeast.  I pulled up Peakbagger (not yet updated), CalTopo, my Compass (which read 13660) and several other sites. In the end, I determined this was the true peak, and left a summit register.

PT 13656:

The route back was now very straightforward.  I worked my back down the ridge towards the saddle

Oh, and the route up to 13654 looks sketchy…

And then scree surfed back to Lily Lake. Once again, this is very loose scree, and I wore microspikes.  I consistently had 6 inches of scree sliding beneath me, and as long as I kept up with it, I kept a good pace.

Here’s my route back to the lake

This is where I picked back up with the trail

Following the route back was easy, except for all those blowdowns. 

I made it back to my truck at 2:30pm, making this a 16 mile hike with 4031’ of elevation gain and a ton of route finding in 10 hours.  I hope this trip report was helpful, and I’m sure you can do this route faster!  It felt so good to check this one off the list!!! 

On to the next trailhead!

Uncompahgre in Winter – 14,309

RT Length: 16.42 miles

Elevation Gain: 5068’

This was a last-minute decision.  I left the house at 10:30pm and made it to the trailhead by 4am, after a rather tricky/slick/whiteout conditions drive over Monarch Pass (note to self:  check the weather along the route, not just for the peak you’re climbing).  I also had a gas station mishap in Gunnison (long story) so my truck smelled like gasoline when I parked.  I was pleasantly surprised to find CR 20 nicely plowed from Lake City.  There was 1 other vehicle at the trailhead, and only room for 2.

The other vehicle looked outfitted for sleeping, and there were window coverings on the windows, so I wasn’t sure if there was someone sleeping inside.  I tried to be quiet as I hit the trail at 4:30am.  This is the lower trailhead, so I followed the 4WD dirt road (now packed with snow) for 4 miles to the upper trailhead.

There was some ice on the trail, but it was mostly an easy road to follow

And here’s a look at the stream crossings.  There were snow bridges over the water, and you could hear water flowing under the snow.

I was still hiking in the dark when I saw a flashlight behaving erratically up ahead.  As I got closer, I realized it was a skier.  My flashlight was acting funky, so I couldn’t see him clearly, which was good, because he told me he was changing his pants (putting on warmer ones).  His name was Paul and he sounded like he was in his 20s.  He said he’d “see me up there” and I continued on. 

From this point it was clear he’d been trenching with his skis, but even so, I didn’t need to put on snowshoes until I made it to treeline.  I continued hiking along the road

I made it to the upper trailhead and the bathroom (I didn’t check to see if it was open, but it looked like there were game trails leading up to the door)

This is where the trail got ‘iffy’.  There was no longer a trench, but if I strayed from the old trench I’d sink up to my waist in snow.  I put on my snowshoes and only postholed every 30 steps or so.   Here’s the upper trailhead

From the upper trailhead the trail heads northwest to treeline and then through willows.

Once at the willows I had to gain this small ridge.  This was easier to do in the morning than in the afternoon (pics of my glissade route later).  Here’s my path

Just as I made it up this ridge the sun began to rise.  I had a great view of the sunrise over Uncompahgre

And looking back

There was no trench here, nor any sign of a previous one, so I got to make my own.  Here’s my basic path

And step by step.  Lots of trenching, but pretty straightforward.  Your goal is to gain the ridge.

You’re aiming for this sign on the ridge.  There are a lot of these signs in the area, all saying to be careful of vegetation, so make sure you aim for the one obviously on the ridge.

Once on the ridge, I turned right and followed a faint trail northwest.  The snow on the switchbacks was a bit sketchy.

I gained the ridge again and traversed a short distance along the backside, looking for a short gully to climb

I took off my snowshoes at the gully and climbed up, carrying them (bad idea)

At the top of the gully I found cairns and a trail that wound back to the east side of the mountain to the summit, so I stashed my snowshoes and kept going.

I walked back and forth all along the summit to make sure I hit the actual summit. The summit is towards the middle… the pictures were better towards the west though.  Also, usually when there’s a lot of snow I can see herds of animals, or at least their tracks in the basins below or on the ridges.  No tracks today, so they’re all probably below treeline now.

It was a long drive back home, so I turned and retraced my steps

I made my way back to the gully and found my stashed snowshoes.  I seriously wished I’d stashed them below the gully, but because I wasn’t sure of the conditions above I’d brought them with me.  I carried them gingerly in my left hand as I headed down

At the bottom of the gully I put my snowshoes back on and kept them on for the remainder of the hike.  I turned left and followed my tracks back to the ridge.

Once in the ridge I had some switchbacks to go down before following the ridge proper.  It had only been about an hour or so, but the tracks I’d made on my way in were already gone, so I got to make new ones.

Once down the switchbacks most of my tracks were still there, so I followed them back down the basin.  Side note:  From here I could see the skiers tracks, and the skier still in the basin below.  He’d chosen a different route to gain the ridge, and seemed to be stopping for lunch.  Since he was on skis I expected him to pass me on the way down.

This is where I ran into a little bit of trouble… The skier had gone over my tracks on his way in, and in doing so made them slippery as the sun warmed.  They’d turned into ice, and my snowshoes couldn’t grab onto my tracks.  The snow was too soft to make new tracks.  I tried to retrace my steps down, lost footing on the ice, and glissaded into the willows. The slipping wasn’t calculated, but the glissading was:  Once I’d started I quickly assessed the risks and just decided to keep going.

Here’s a look back on that short glissade

And now, to hike out.  The trench was still in place, so it was relatively easy.  Here are some pics.

I made it back to my truck at 1:30pm, making this a 16.42 mile hike with 5069’ of elevation gain in 9 hours.  I never did see the skier.  Here’s a topo map of my route

Also, on the way out there’s ice climbing!!!

Humboldt Peak in Winter

RT Length:  14.02 miles

Elevation Gain: 5562’

This was my third time hiking Humboldt, but my first time in calendar winter.  The last time I was here there was a terrible wind that was causing the snow to become clouds, and I couldn’t see the summit when I arrived (or my own 2 feet). This time I was here for better pictures of the route, and to count it as an official snowflake.  I arrived at the South Colony Lakes lower trailhead and was the only one in the lot when I parked my truck.  I put on my gear, using only microspikes as my footwear, and was on the trail at 4:30am.  As usual in winter, the snow started just past the 2WD parking area.  I always find it amusing to see how far the tire tracks try to go up the road.  This time, they didn’t go far.

The snow on the road started right away, but there was a good trench. I followed the road for 2.3 miles to the junction with Rainbow Trail.  It was still dark out, and as I rounded the last corner of the trail where I could still ‘see’ the trailhead I noticed there was another car parked there.  It seems there would be hikers about a mile behind me today.  Also, my flashlight started flickering.  Time to change the batteries!

At Rainbow Trail the trench spiked, one side going towards Marble Mountain, the other towards Humboldt Peak’s East Ridge.  There weren’t any tracks headed further down the road to South Colony Lakes.  I turned right and followed Rainbow Trail for .5 miles. 

I quickly came to a bridge, then took the trail to the top of a slope

At the top of the slope I was thrilled to see there was a trench in place leading up the ridge.  Last time I did this hike I’d had to trench it myself, and it had taken quite a bit of work.  Today, I was going to poach someone else’s trench!  Woot!

And what a trench it was!  I followed it as it for 2 miles as it ascended the east side of the ridge, all the way to treeline.  Here’s an overview of the route up to Humboldt Peak

If you keep heading west and stick to the rib/ridge, it will take you to treeline.  I could hear the wind above the trees, and got a bit anxious for the above treeline part of the hike.

As I hit treeline the sun started to rise.   I took a few minutes to enjoy the view.  (side note: there were a lot of rabbit tracks here)

The trench ended near treeline.  I could see where it was supposed to go, so I kind of re-trenched it as best I could wearing just spikes.  

Here’s the general overview of my route up the ridge

The wind had been intense all morning, but once I was above treeline it became difficult at times to even stay upright.  So much for the forecased 11-17mph winds!  I’d started early to avoid the most intense winds that were supposed to start around 11am, but it seems they started a little early.  I had to hunker down at times and turn away from the wind, which turned the snowflakes into glass, and was side-stepping as I hiked just to stay in a straight line.  I tried to take pictures, but unfortunately, wind is invisible.  I kept my gloves on and was glad I’d put on my balaclava at the trailhead.  Here are some pictures of the ridge. 

Here I noticed some bighorn sheep in the distance.  They also noticed me and trotted off.

At the top of the ridge was another ridge, so this had been a false summit.  Here’s the actual summit of Humboldt Peak.  It’s a straightforward ridge hike to the summit, nothing above class 2.

Here are some pictures of the ridge.  There was some snow, but it was all firm enough not to need traction

On this part of the ridge the wind really picked up.  I had to hide behind rock structures to get out of the brunt of it, and the noise it made as it came up and over the rocks was creepy.  The balls of my feet were frozen at this point (due to Raynaud’s) and it felt like I was walking with large rocks in my shoes (I wasn’t, it was just the ball of my foot that had frozen).  Several times I hunkered down to maintain my balance, but it was still a straightforward ridge hike.

I knew I’d made it to the summit when I found the wind breaks.  I never saw a summit marker, but I don’t think there’s one here?

I’ve summited Humboldt Peak twice before, so I knew I was at the summit at the first wind break, but I walked further west for better pictures.

I summited Humboldt Peak at 9:45am

Humboldt Peak: 

The views of the Crestones/Sange de Cristo range were beautiful!

Time to head back down the ridge

The wind was still fierce, and I was worried I was getting a nasty windburn in all the areas my balaclava didn’t cover.  The wind speeds weren’t supposed to be this high, so I’d left my goggles at my truck.  Note to self:  next time, bring the goggles. On my way back down the ridge I saw the Bighorn Sheep again.  They quickly turned when they saw me and headed over the mountainside.  There was a big drop on the other side, and I was surprised I couldn’t see them again when I passed. 

This was a simple ridge stroll, or, it would have been, without the wind

Here’s looking at my route back down the ridge to treeline

Here I met some hikers heading up.  The wind had died down considerably by this point, so I figured they had the better weather of the day (I found out later it picked back up again, and they said their summit was just as windy as mine).  My feet started to de-thaw, and I had a minor Raynaud’s attack:  think insane pins and needles as the blood started flowing again.  It lasted about 30 minutes, and to combat it I just kept hiking.  On a positive note, I could feel my toes! Finding my tracks back to the trail was a bit of a challenge, but I came across them eventually.

Then I followed the trench back to Rainbow Trail.  I should have put on snowshoes here, as I postholed ever 30 feet or so, but I really didn’t want to stop.  I was just glad I’d started early enough in the day not to need snowshoes (spikes worked just fine).  Anyone heading back down later than me would need snowshoes. 

Once back at the trail I followed it a half mile to South Colony Lakes Road

Once on the road I hiked the 2.3 miles back to the trailhead, noticing a lot of dog tracks along the way. As I neared the trailhead I saw a couple walking with two beautiful dogs.  It seems they were out on a day hike, and I thought this was a great idea, as it was a beautiful day below treeline.

Here’s a look at the trailhead on my way back. Easily 2WD accessible.

I made it back to my truck at 1pm, making this a 14.02 mile hike with 5563’ of elevation gain in 8.5 hours. 

Unfortunately, when I made it back to my truck I could hear the conversation the couple with the dogs were having. The man kept cussing at his female companion, and the dogs, over simple things like an overturned water bowl.  To me there’s no need for vulgar words, and he was using multiple ones in each sentence he uttered.  I felt the urge to say something, but no one else in his party seemed to mind his behavior, so I kept it to myself.  I’m not sure why women allow themselves to be treated that way?

The Humboldt Peak Summit Sticker can be bought here

Horn Peak – 13,450

1
RT Length: 9.5 miles
Elevation Gain: 4600’
After binge watching Stranger Things this week I was a little worried about hiking alone for miles in the dark but decided to go for it anyway. It was snowing at the trailhead but I could see stars in the sky so I figured the snow wouldn’t last long. I arrived at the trailhead at 5:15am and was on the trail by 5:30am. The parking lot was empty when I arrived (two other vehicles were there when I got back.

2

It was apparent after the first 20 feet or so I wasn’t going to be spooked hiking solo in the dark. I’ve done this hundreds of times before and still felt comfortable. In fact, I was a little upset I hadn’t started earlier. From the parking area I walked west to the Rainbow Trail

3

At the Rainbow Trail I turned right and headed northwest for 8/10 of a mile

4

The trail here was covered in fallen trees and snow, but was still manageable

5

I crossed dry creek (yes, it was dry) and continued to just past a meadow,

6

before turning left onto an unnamed trail that would lead me to the summit of Horn Peak.

7

Right about now the sun was starting to rise, and I got my only scare of the day: I heard a strange noise coming from behind me to the left and jumped a bit before realizing it was a turkey gobbling. Must have been because day was breaking. I saw some turkey tracks here too

8

I followed this new trail southwest to a trail register

9

10

Signed the register and was on my way. The trail was easy to follow, but kept going up, up, up for about a mile and a half

11
The snow here was soft, and I could tell I’d need my snowshoes on my return. I got my first view of Horn Peak and saw it had a light dusting of snow

12

I was able to wear microspikes until I came to the gully that crosses over from one side of the mountain to the other. Here I donned my snowshoes to traverse the small gully. I’m not sure I could have made it without them

13

Once past the gully the trail conditions kept changing. The trail could be dry, covered in snow, or a mixture of both. I kept my snowshoes on, even when unnecessary.

14

I made it to the ridge after hiking 3.3 miles

15

Here I turned left and followed the ridge to treeline.

16

I saw 5 or 6 ptarmigans and some ptarmigan tracks. The birds were quick to fly away when I startled them, so no pictures of the actual birds. I was surprised the ptarmigans were already brown, figuring they’d still be in their winter whites

17

There was an old trench I re-trenched to treeline, which was slow going but it was nice not to need to route find.

18

19

At treeline I stopped to take off my snowshoes, as I could see they wouldn’t be needed for the rest of the hike to the summit. Here’s the route I took to point 12665

20

It’s actually much steeper than it looks

21

Once at point 12665 I turned left and started hiking the rest of the ridge to the summit

22

About halfway along this ridge I saw some bighorn sheep. I noticed them before they saw me, so I got to see them startle when they saw me. They jumped a bit, and then walked away. Here’s one of the younger ones

23

Bighorn Sheep

At about this time I started keeping a close eye on the weather. Clouds were forming around 13K. Not big clouds, but it was supposed to snow after 3pm and the clouds seemed to be forming pretty fast. It was neat to be eye level with them

24

The ridge was full of loose rocks the size of toaster ovens so I was careful with my foot placement

25

In no time at all I found myself at the summit!

26

Here I saw the Bighorn Sheep again

27

The views of the Crestones were absolutely amazing!!!

28

Here’s my summit photo

29
Summit Views

https://youtu.be/BL60mdxhDQg 
I wanted to stay on the summit forever! There was no wind, the weather was perfect, and the views were amazing. It wasn’t lost on me how lucky I was to be here right now. But, watching the clouds forming I realized I should get going, so I turned to head back down the mountain

30

Here’s the route I took back down the ridge

31

Point 12665

32

And the ridge back to treeline

33

I could see a small grass fire starting in the distance. I think they put it out quickly because I saw a fire engine leaving the site on my way back

34

Once back below treeline I put on my snowshoes. The snow was indeed soft and progress was slow going as I kept postholing in slush. On the positive side I could follow my previous tracks when there was snow, and the trail when there wasn’t

35

36

37

38

I kept watching as the sky kept getting darker and darker, and then as little snow flurries began to fall. Hmmmm. It wasn’t yet 1pm and it wasn’t supposed to snow until after 3pm. I was glad I’d left the summit when I did, as it was now covered in snow filled clouds. I made my way back to the trail register and signed myself out. Then headed right (southeast) on the Rainbow Trail

39

40

I made it back to my truck at 1:30pm, making this a 9.5 mile hike with 4600’ of elevation gain in 8 hours. Slow going, I know, but that’s a lot of elevation gain for such a short distance!

41

For those interested, here’s the path I took

42

Disclaimer: Due to Covid-19 concerns, before attempting this hike I contacted the County Sheriffs department to see if I could hike in the area. In fact, I contacted several different counties, and when they told me their trails/cities were closed I just went on down the line, looking for an open place to hike. I was told by this county the trails and trailheads were open but they weren’t openly endorsing/encouraging people to hike. I was asked to not stop in town for gas/food/etc. and was notified the bathrooms would be locked (as they usually are this time of year) and if I was in need of rescue it would take extra time for SAR to be deployed. I was ok with all of these stipulations and decided to hike. I didn’t see another person all day and was glad I’d made the decision to head to the high country.