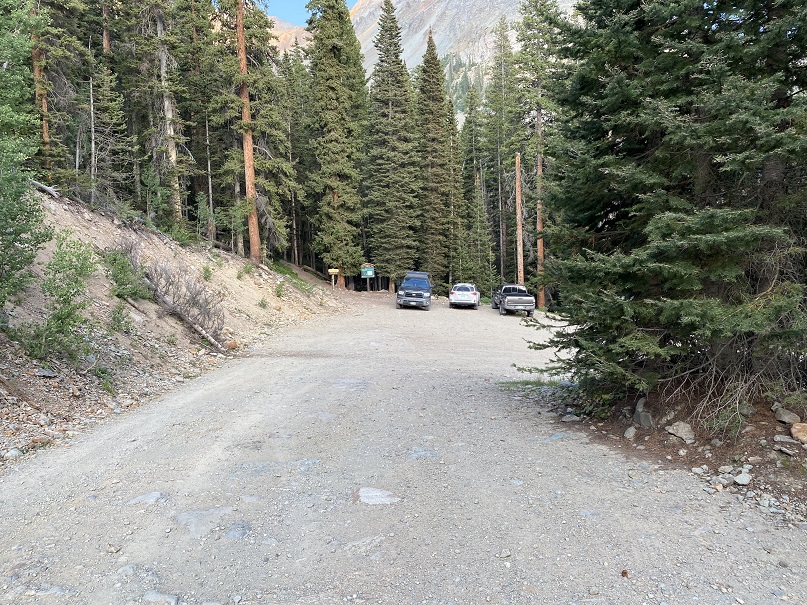
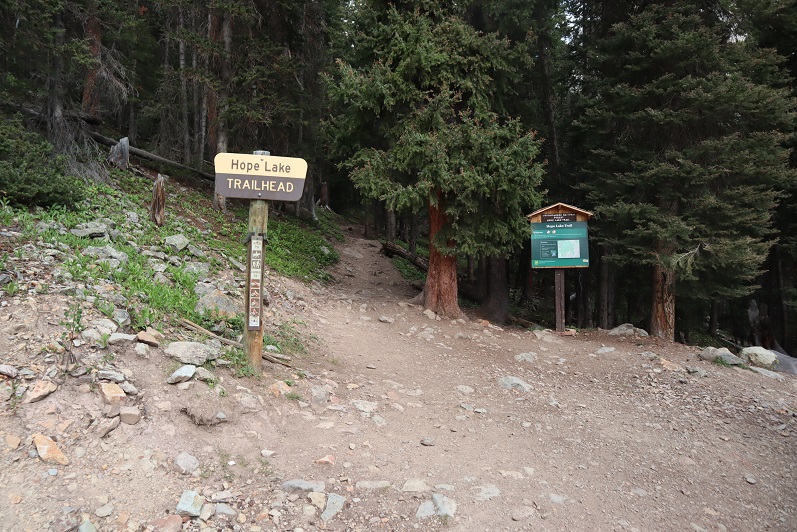
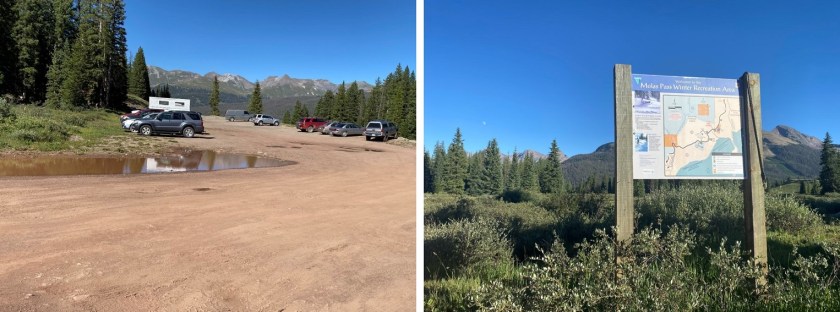
Wow! What a busy trailhead! There was parking, and overflow parking, and parking along the side of the road, and all spots were full. I was lucky enough to snag a spot as someone was leaving directly in front of the trailhead sign. The trailhead is at 10,700’, and I planned to spend the night here before hiking the next morning (there was only 1 other vehicle in the lot when I got up the next morning to hike)
I’d already had a long day but it was early, so I ate dinner, got out a glass of whiskey, and jotted down some trip notes from my hike today. There were dogs barking and tons of people coming back from their hikes. I even saw one family of 4 (and a dog) setting out. I thought it was a little late to set out for the hike, but they looked like they were backpacking in and planned to camp at the lake. I guess it’s better to hike after 3pm when it’s cooler (and there was still about 3 hours of daylight left: they had a good chance of making it in time). The kids (both under 10 years old) were thrilled, and bouncing up and down, ready to head out. They kind of reminded me of my kids when they were little: full of energy and excited to be outside, everything new and exciting. Now when we go camping as a family we’ve done it so much we all have our ‘roles’ and everything just kind of happens. It’s no longer novel, but I do have some great campers (and fire starters, outdoor cooks, etc.). My 20 year old son still makes a tradition of climbing the tallest tree he can find just to prove he can, a tradition he started at 5 years old. Bravo to this family for starting them young!
I talked with a bunch of hikers and made it an early night. Bonus: the mouse that had been residing in my truck must have left because I didn’t hear a squeak all night.
I was up and on the trail by 4:45am.
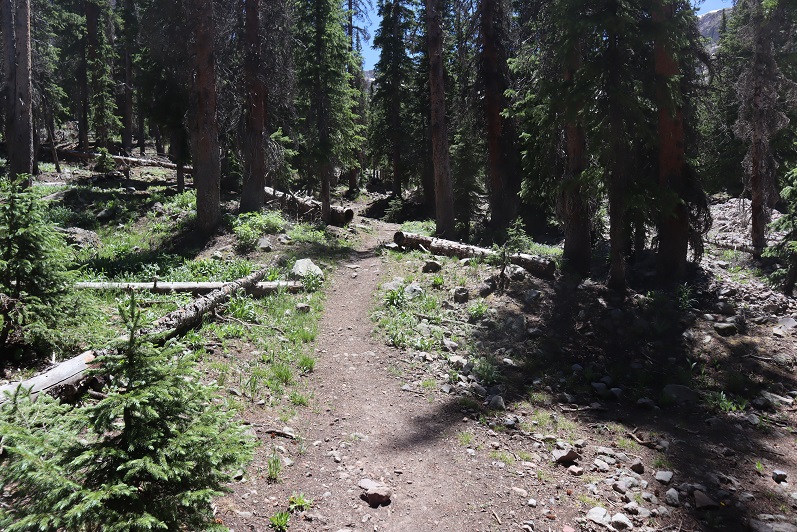
This is a class 1 trail that goes for 2.5 miles to Hope Lake.
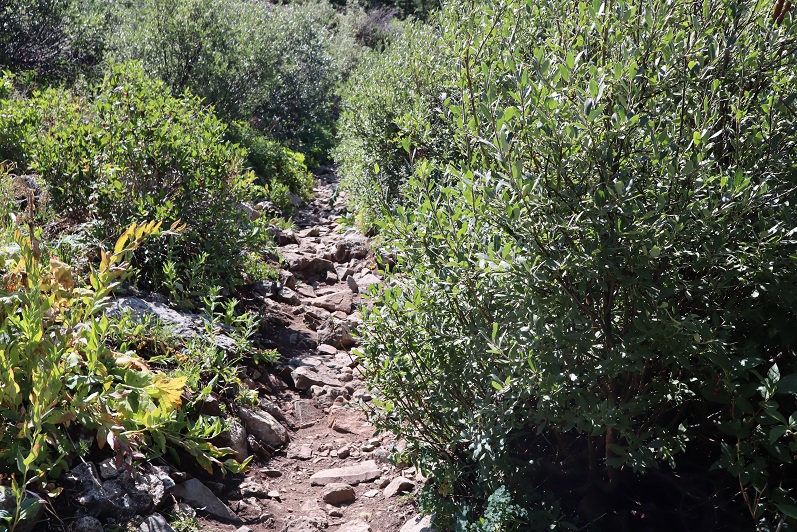
The only downside here all the willows/bushes lining the trails: I was the first one out this morning and got spiderwebs in the face to prove it. After the third web I started pole swinging…
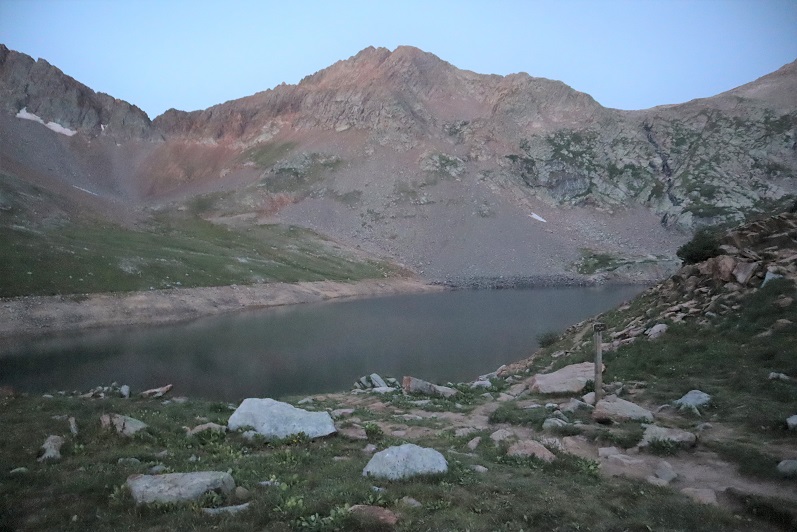
I made it to Hope Lake just as the sun was coming up.
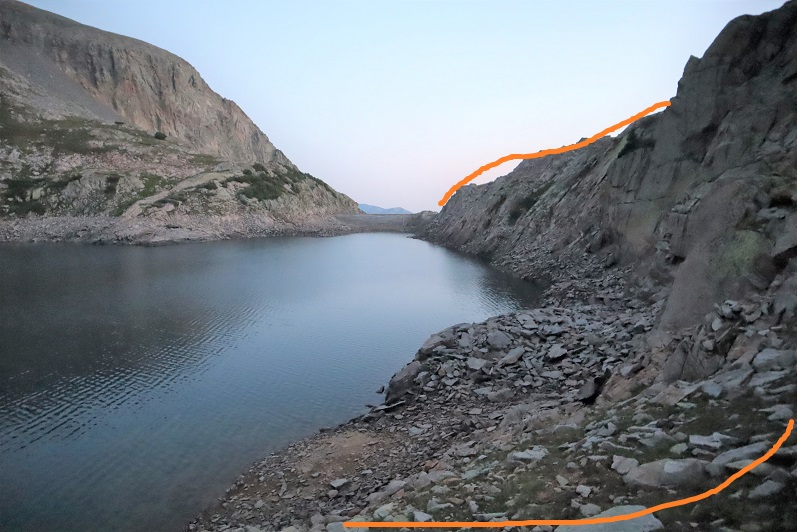
This lake isn’t much to look at in the morning, but once the sun came up it was beautiful! I made my way west, following the lake. Here I saw a tent set up, presumably for the family I saw hiking in last night. I tried to be quiet and not disturb them as I walked right past their tent and followed the lake. I wanted to cross the dam here, but the water level was too high to allow me to walk along the shoreline
So instead I gained the ridge and made my way over to the dam.
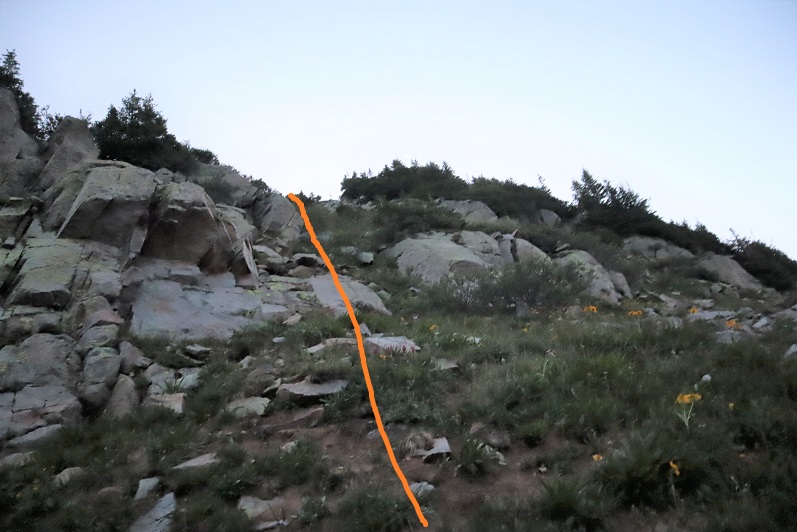
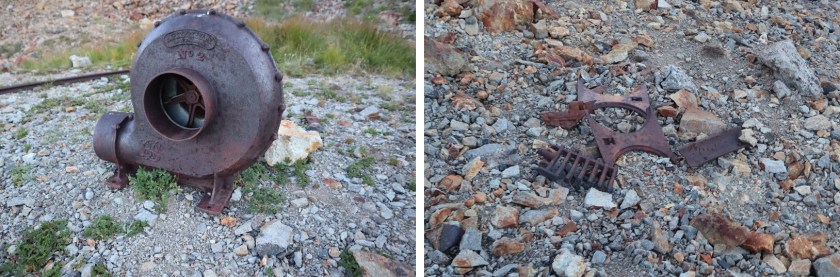
As I was gaining the ridge the family’s dog came up to me. It was nice, I gave it a pet, and was on my way, wondering to myself why the dog wasn’t sleeping inside the tent with the family? It wasn’t a large dog, and would totally have fit with them inside their tent. Also, not much of a guard dog: it licked my hand and didn’t bark once. I was confident the family was still asleep as I passed their tent again to gain the ridge. I followed the ridge to the dam, crossed the dam, and headed southwest up the side of the mountain (note, there is a lot of old ‘trash’ here: tin cans and cast iron and the like).
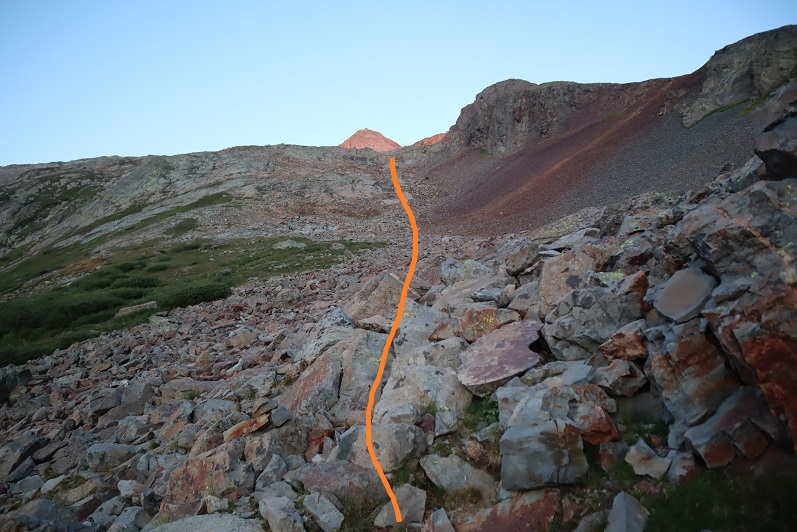
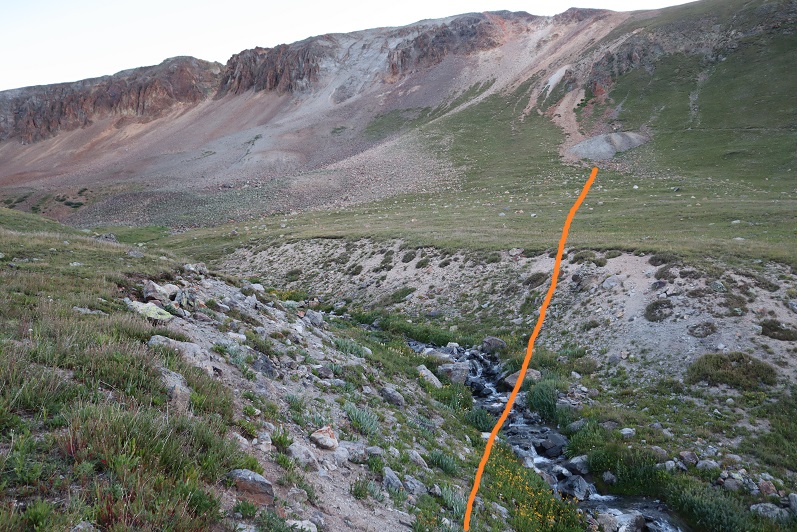
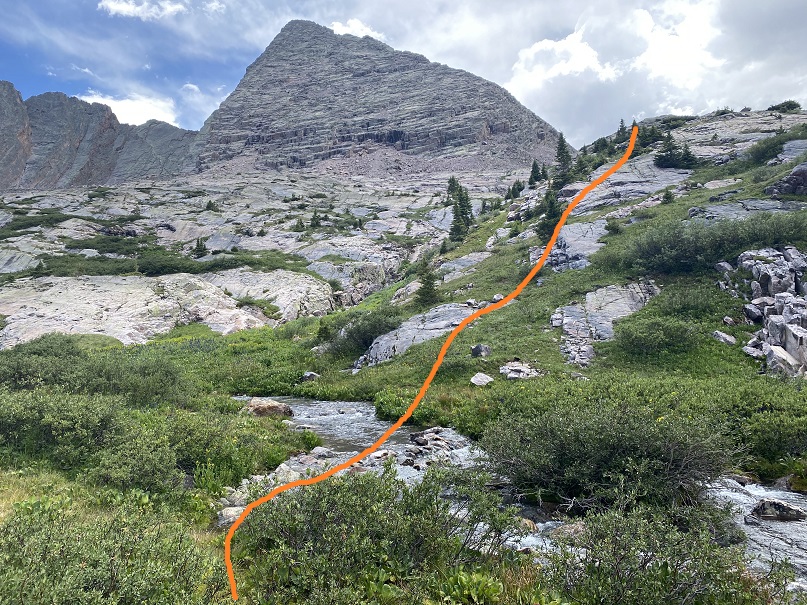
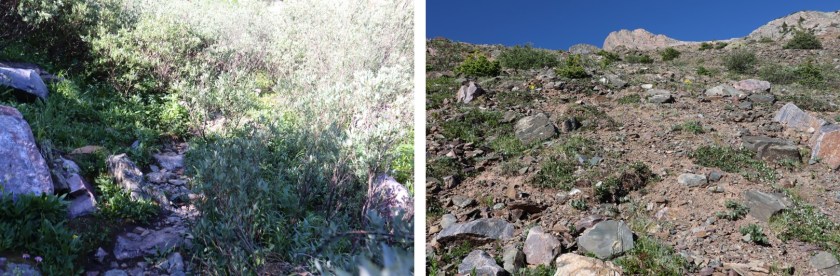
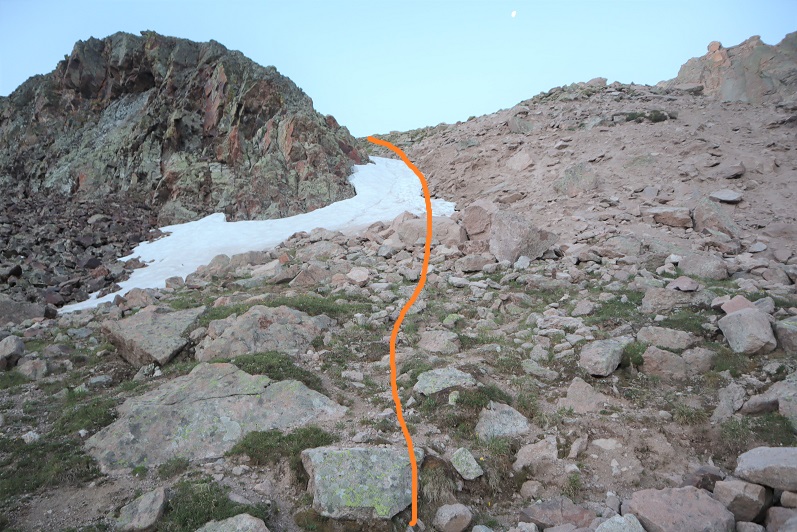
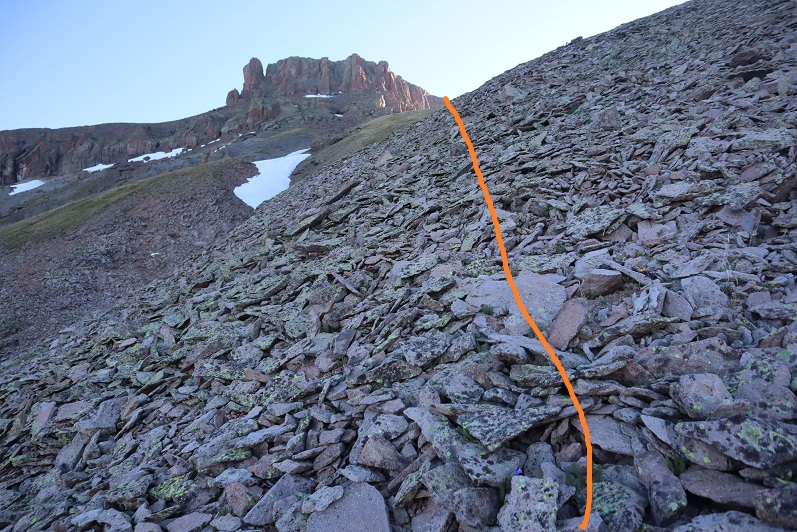
There were a few cairns here, but I basically just followed the gully southwest up the mountain
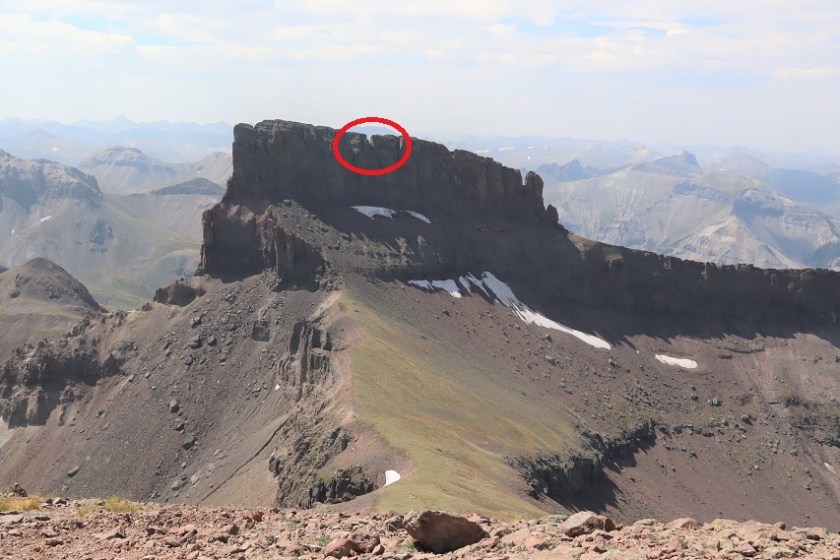
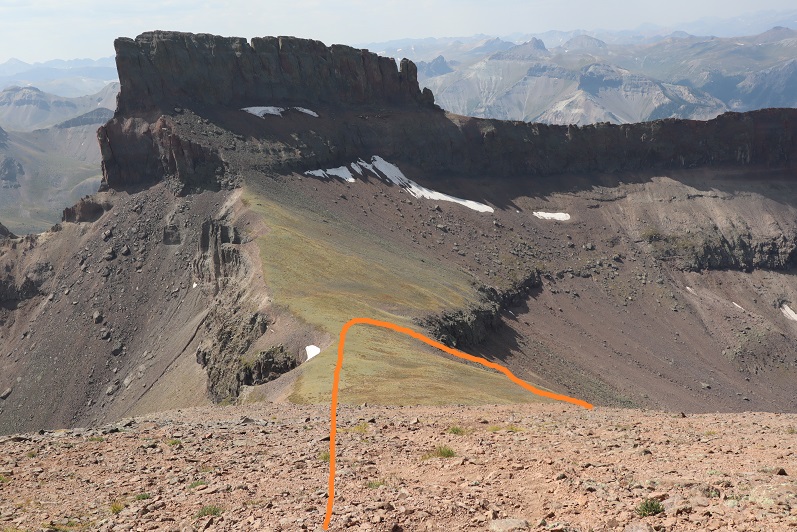
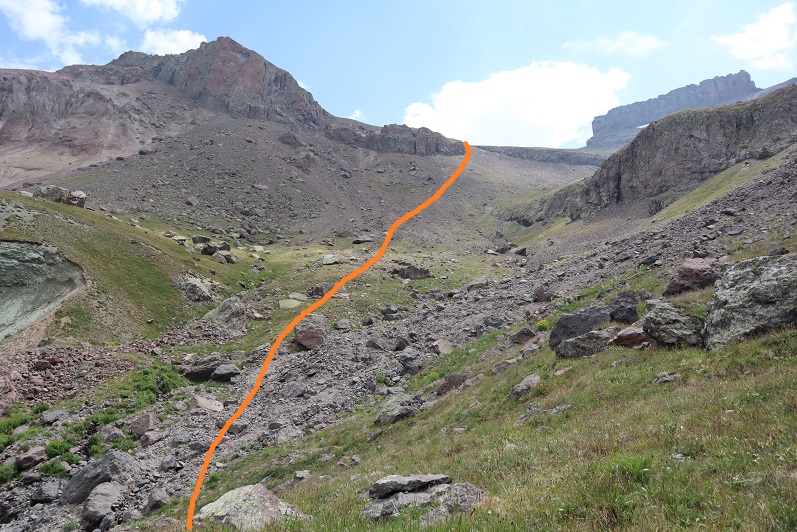
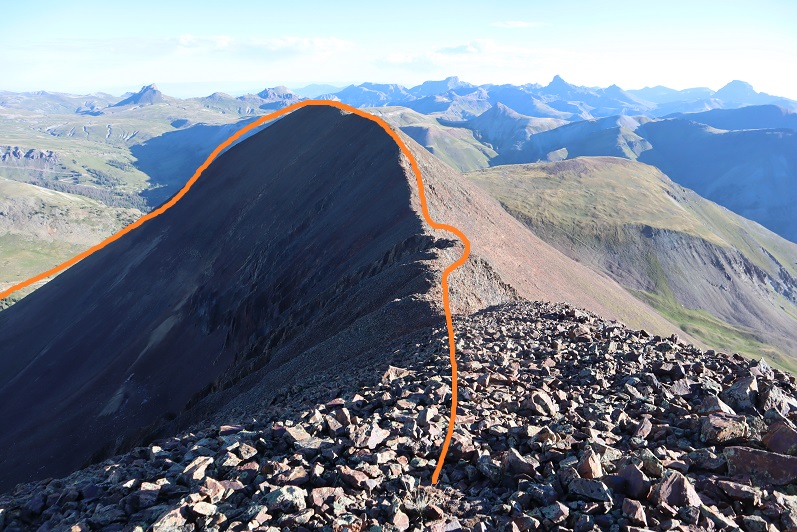
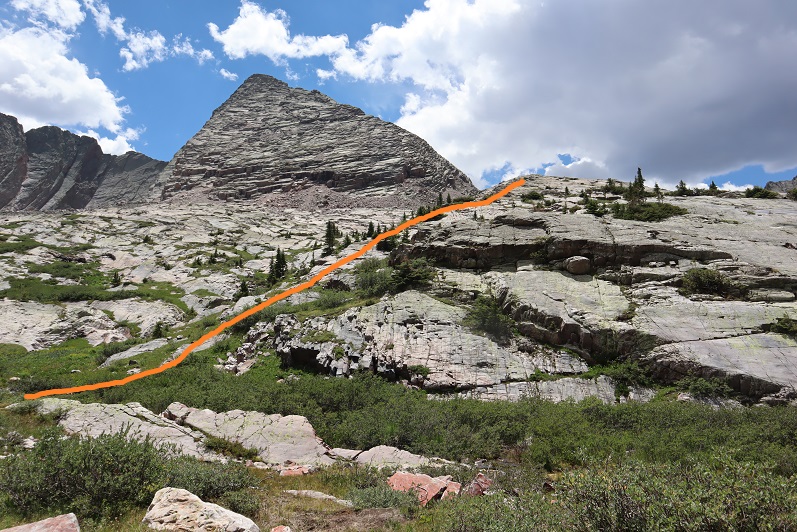
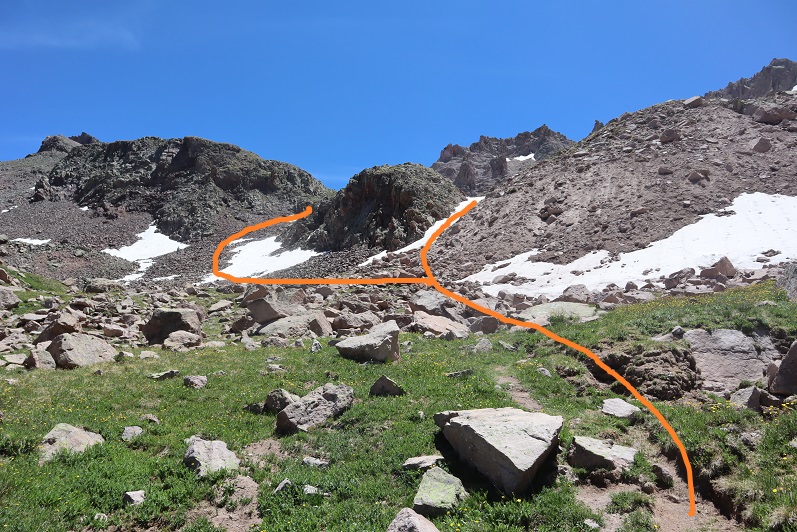
As I was hiking I erroneously believed this was the summit of San Miguel Peak. It’s not. I ended up going straight up the face, but here’s the way you should go instead:
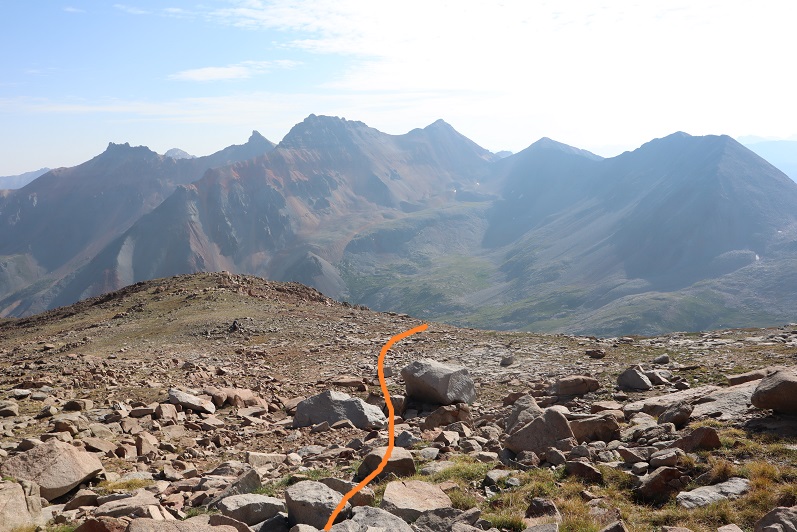
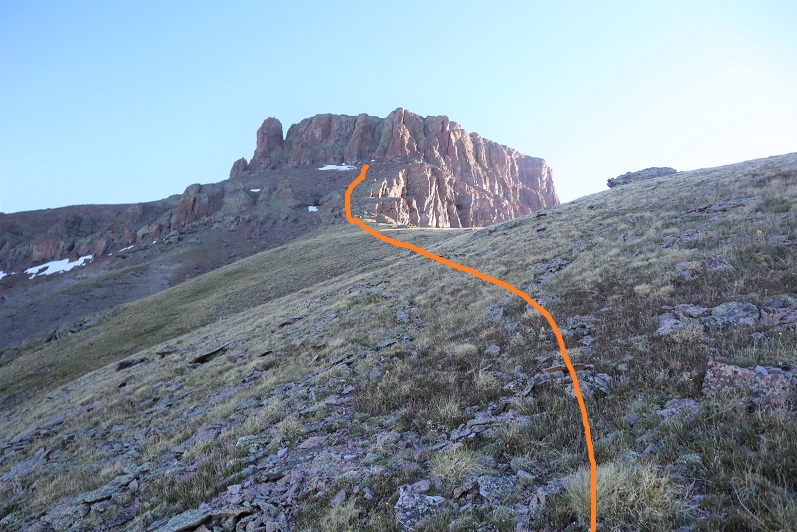
Once at the top you’ll see a ridge. The ridge goes for about 500 feet. I followed it…
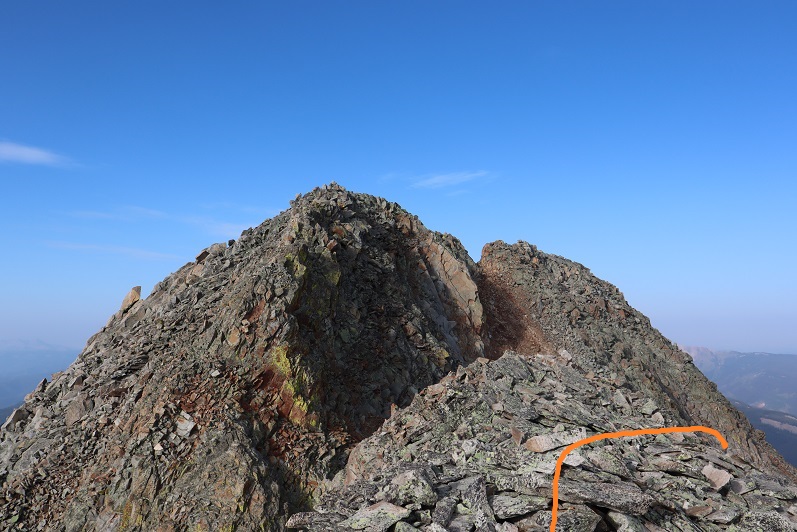
And at the end came to an unexpected drop off.
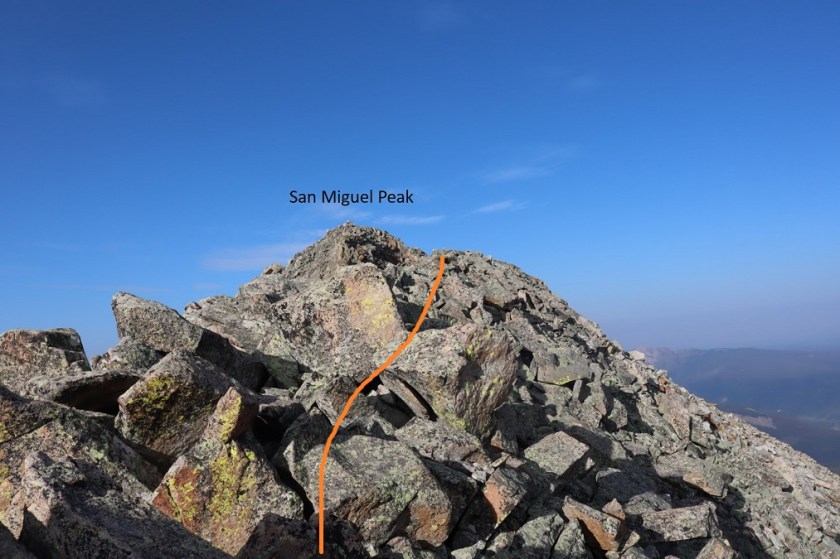
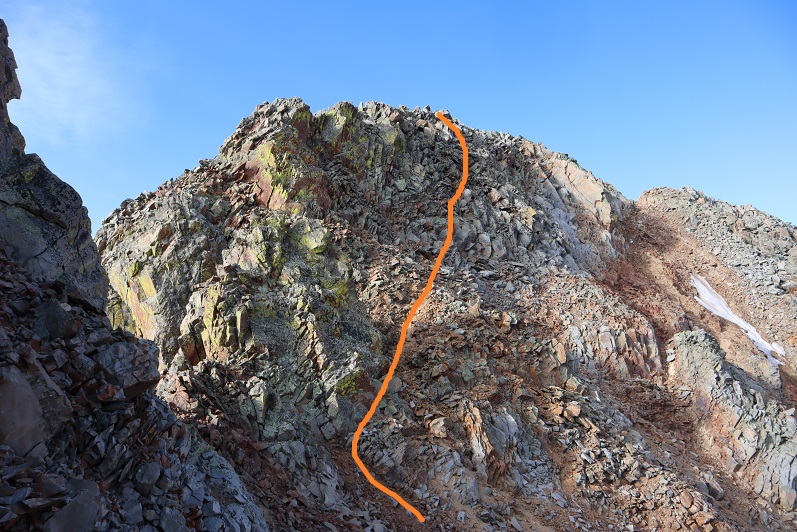
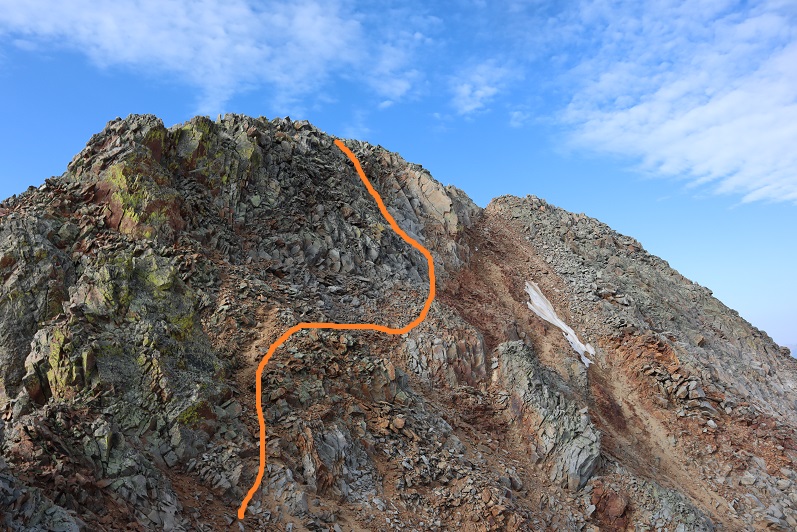
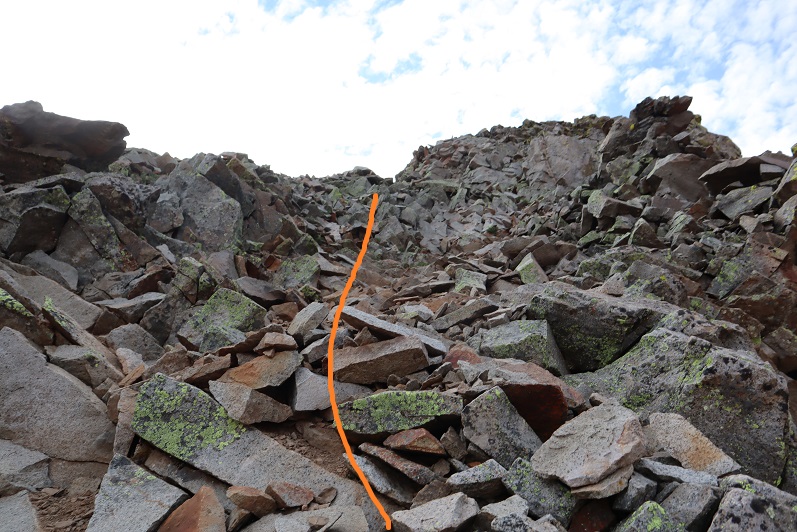
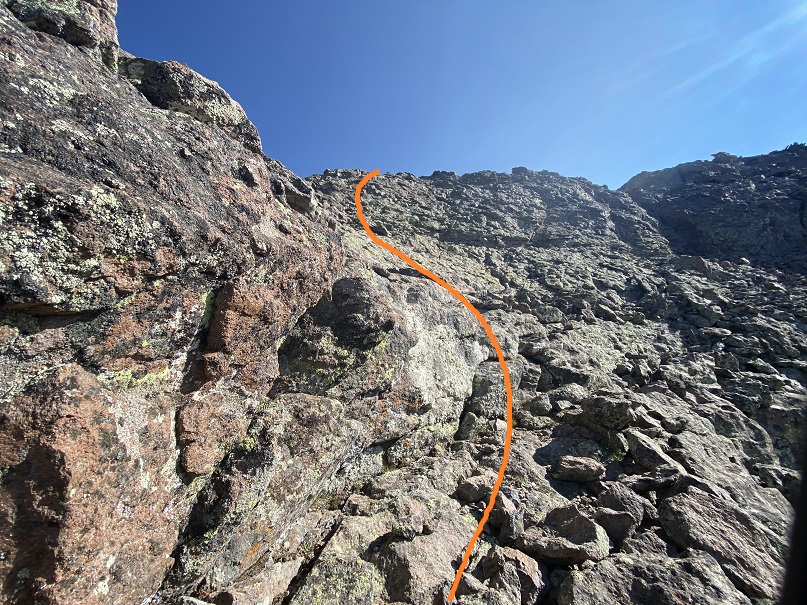
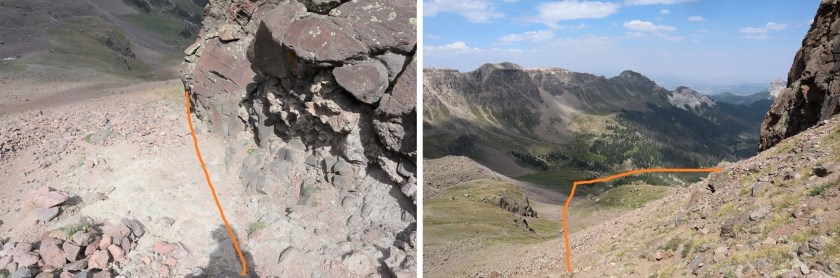
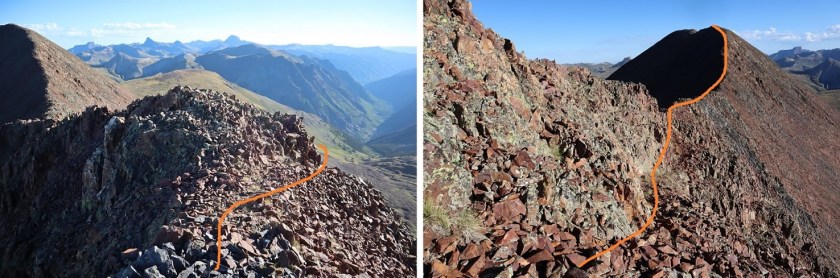
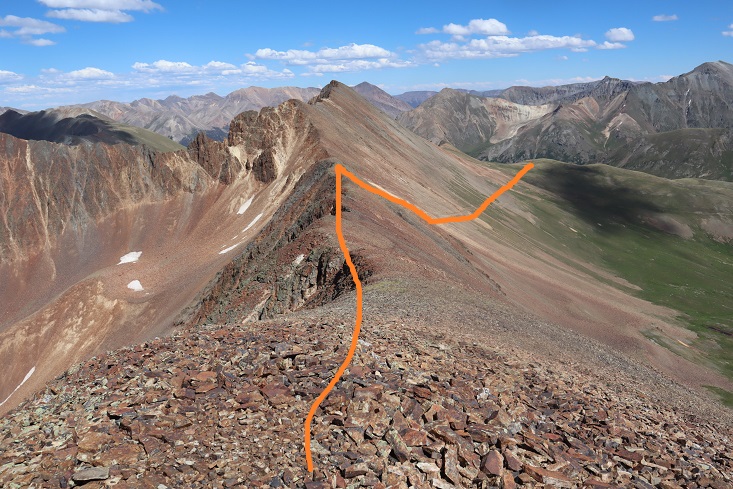
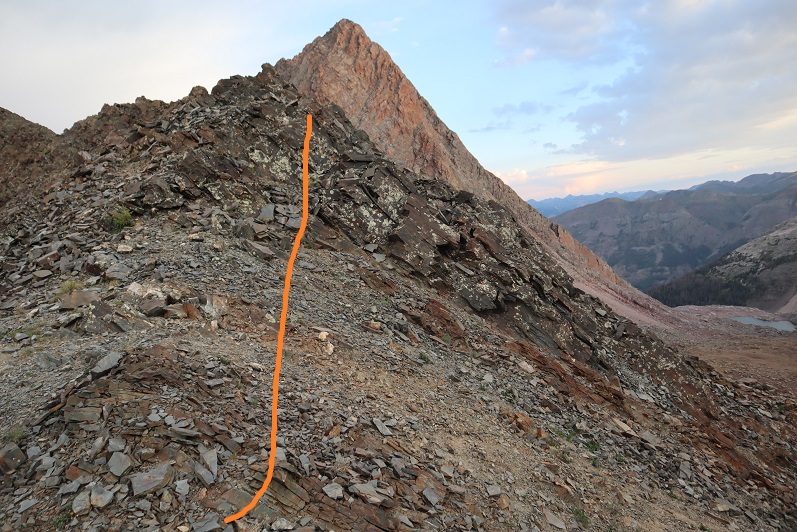
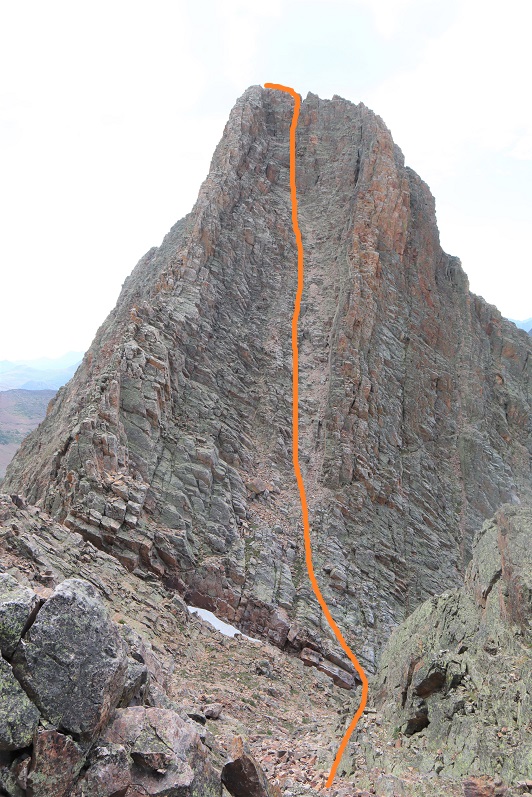
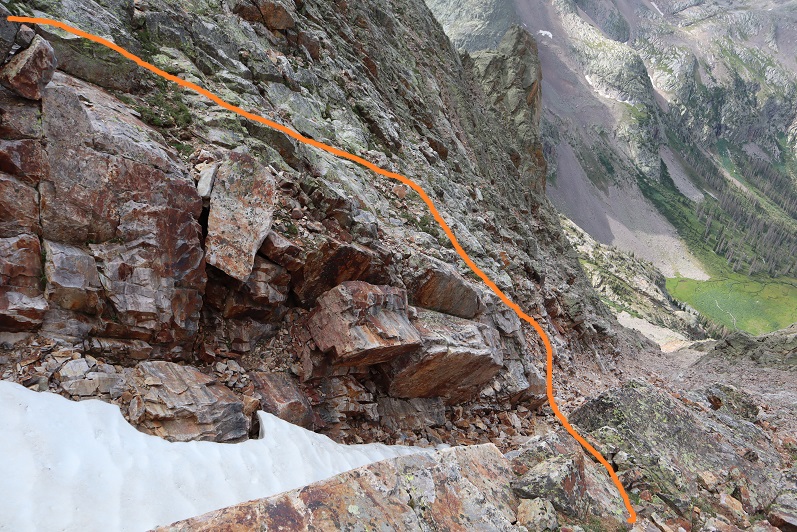
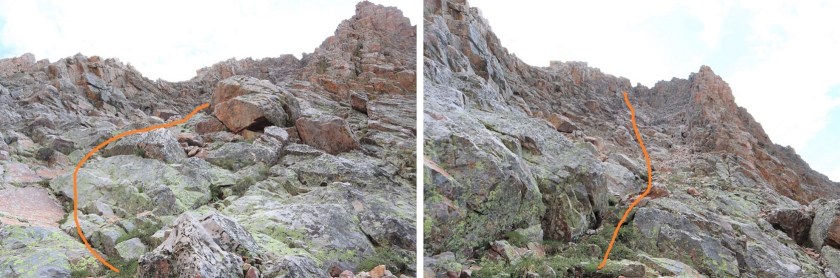
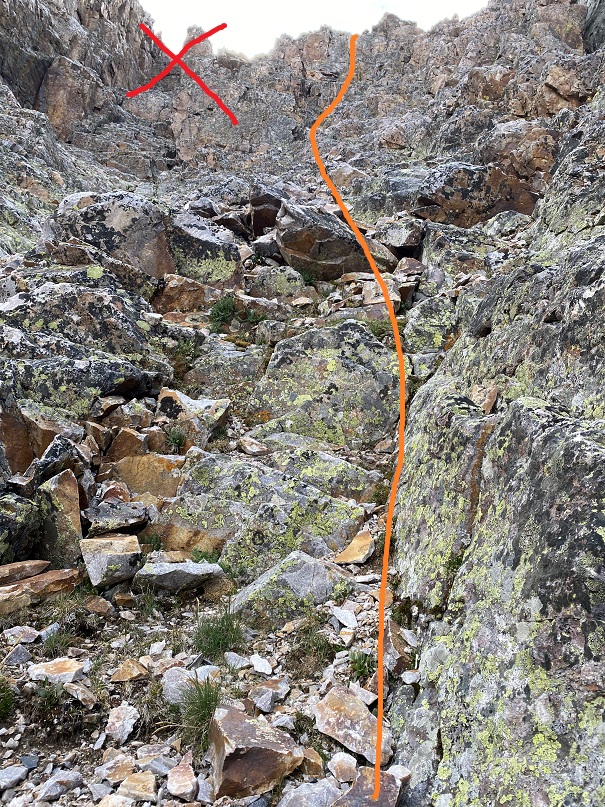
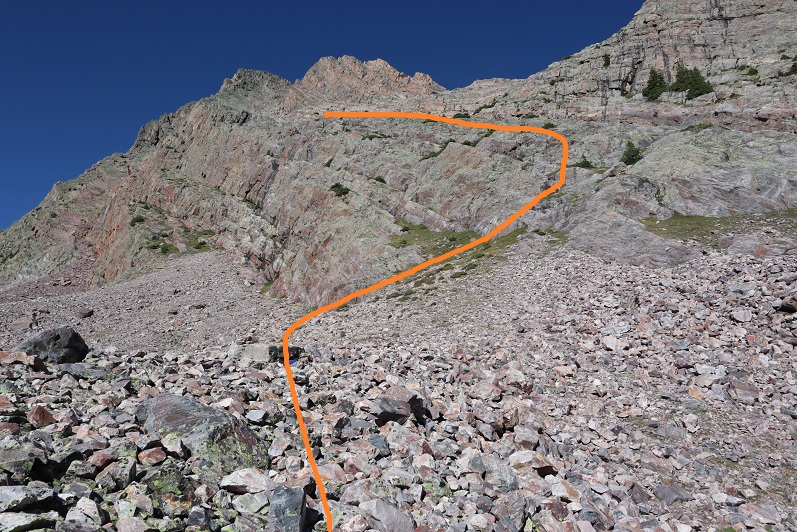
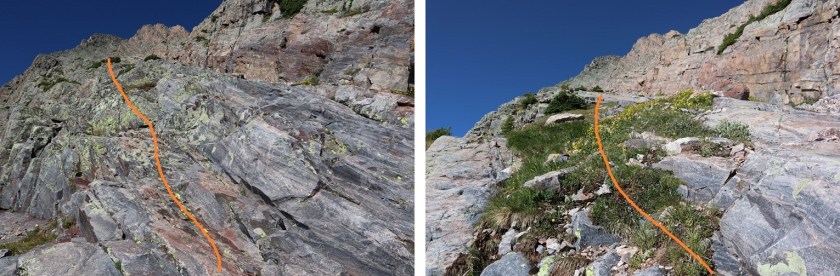
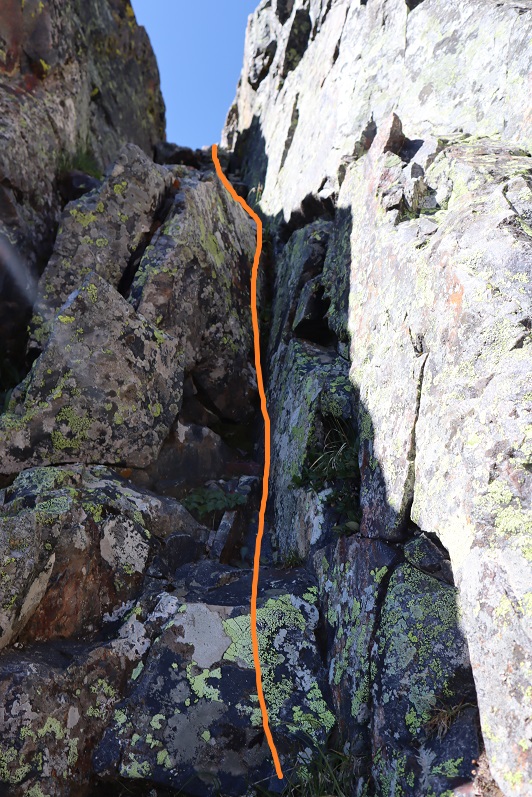
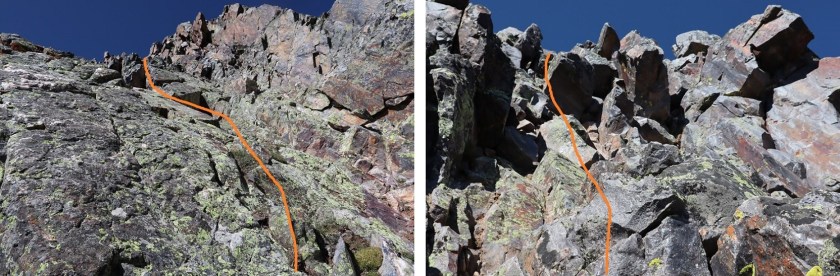
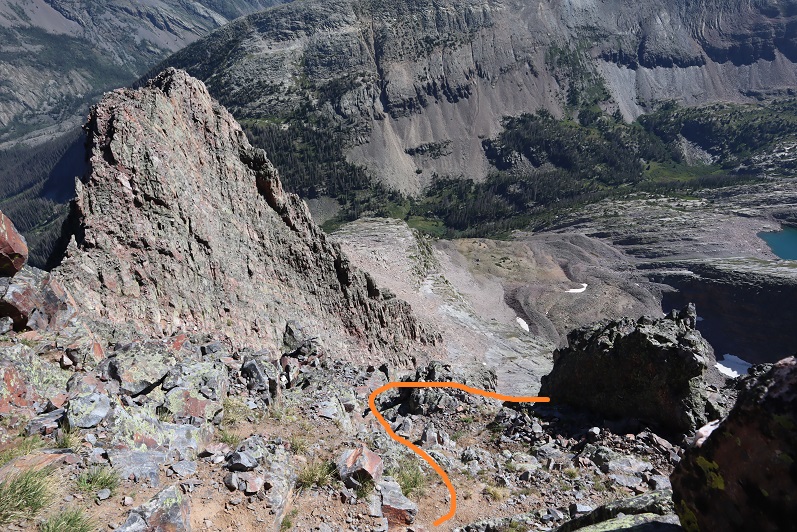
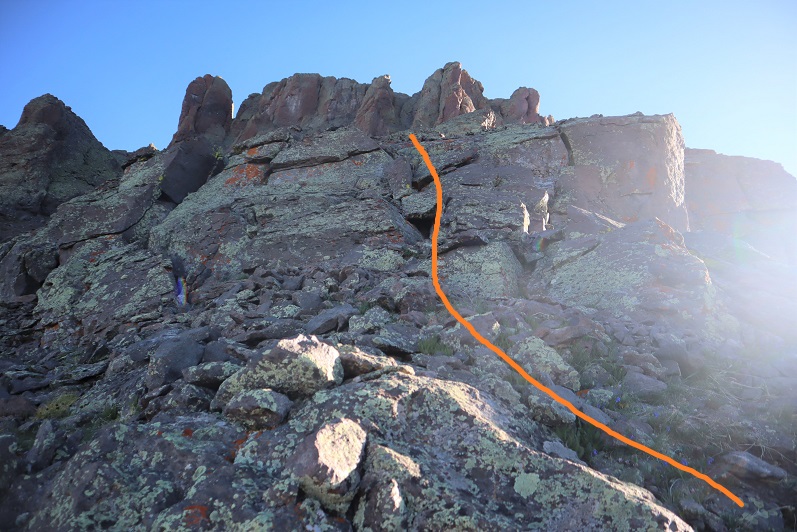
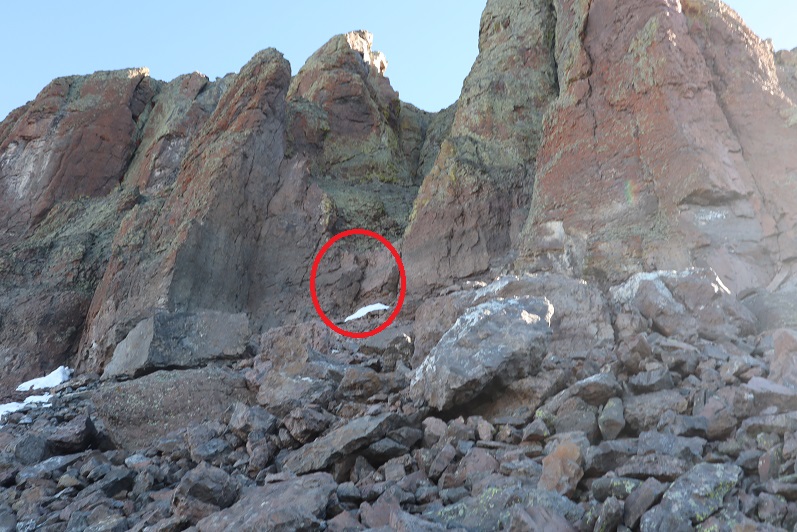
This is where the hike became interesting. I looked at my options and I felt going right was safer than going left. (the left side of the mountain absolutely looks summitable, just more loose and time consuming). Here’s the route I took to the summit. Note: This was class 3 climbing, and on my way up I stuck to the solid rock (as opposed to the scree filled gully… the rocks were still loose here). Luckily I’d brought a helmet. I put it on and started towards the gully.
I summited San Miguel Peak at 8:30am (this one didn’t have a great place to set my camera…)
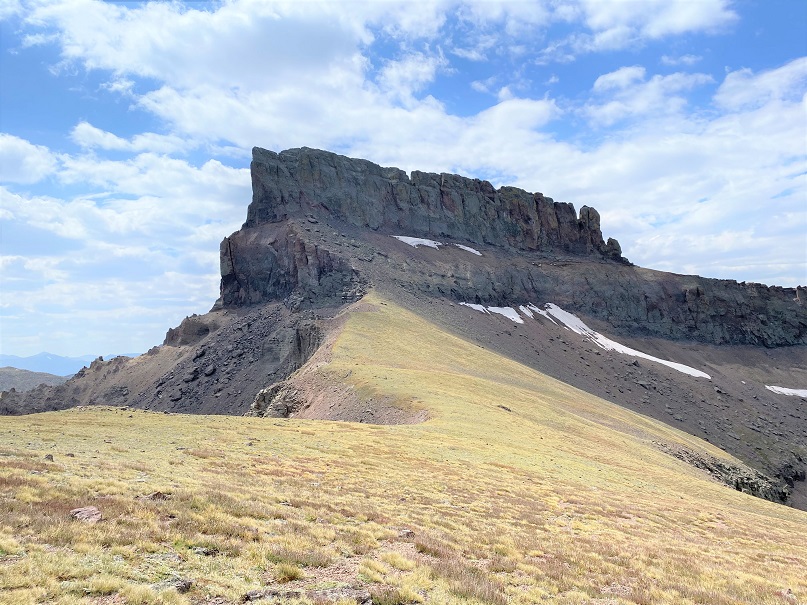
San Miguel Peak:
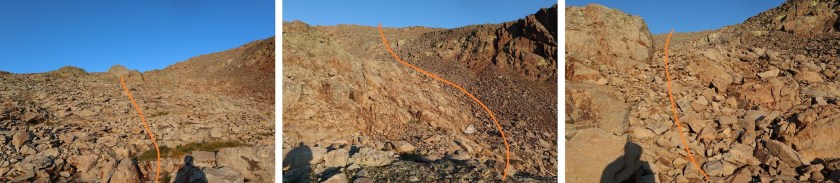
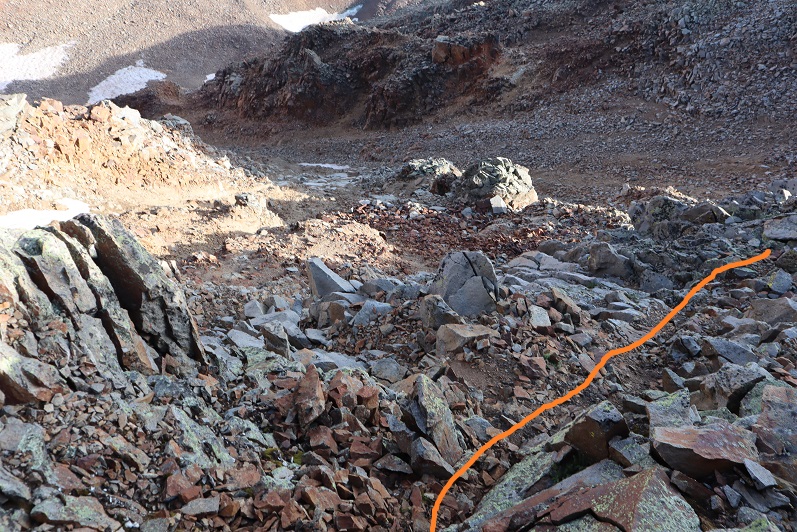
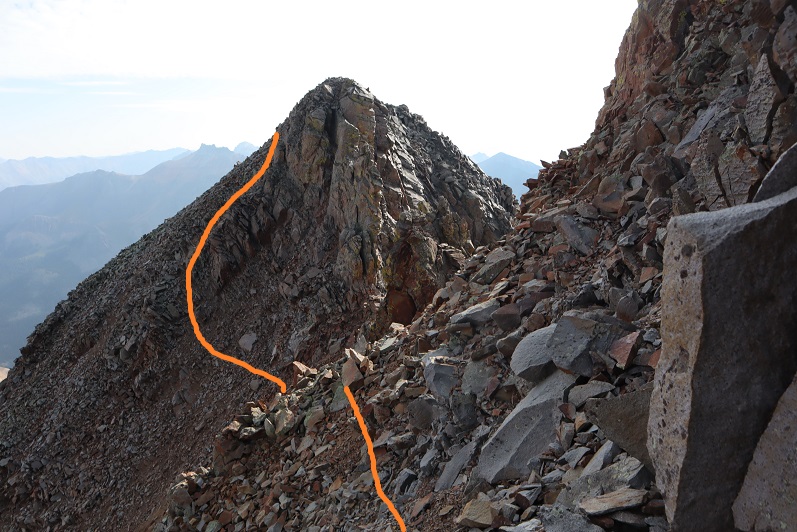
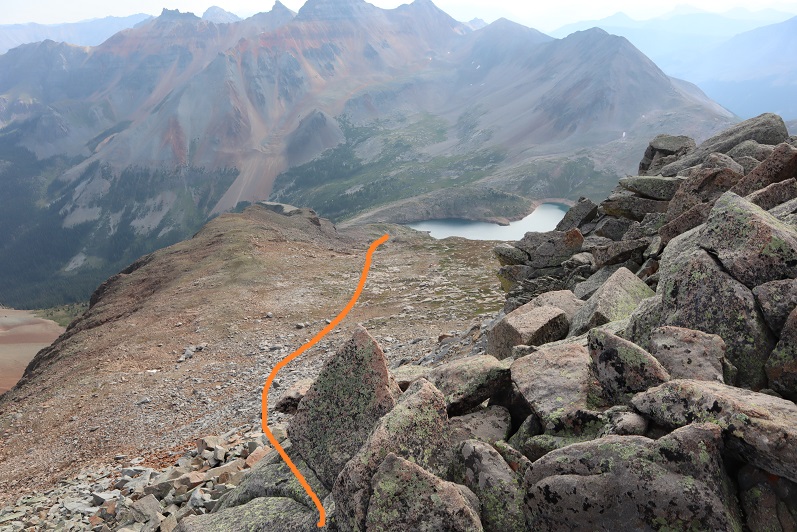
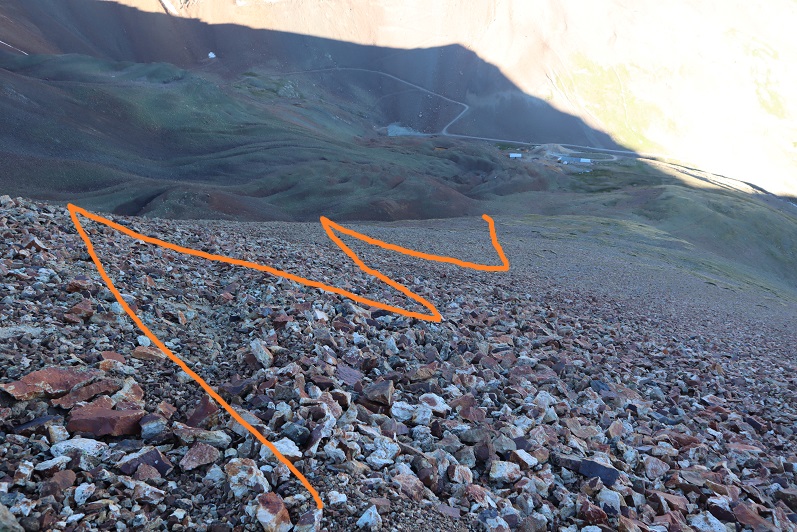
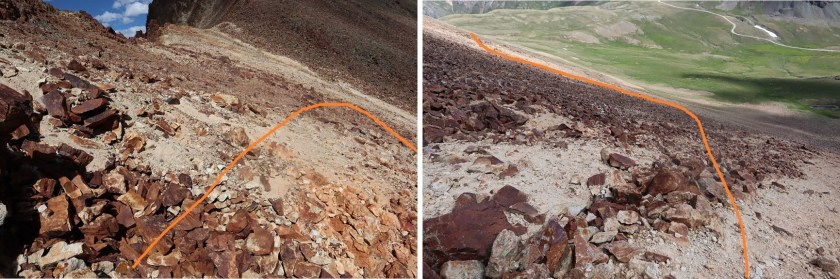
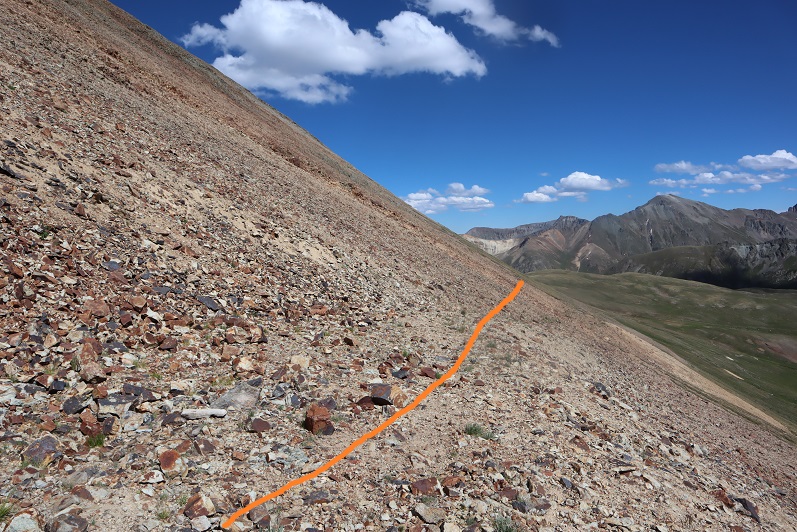
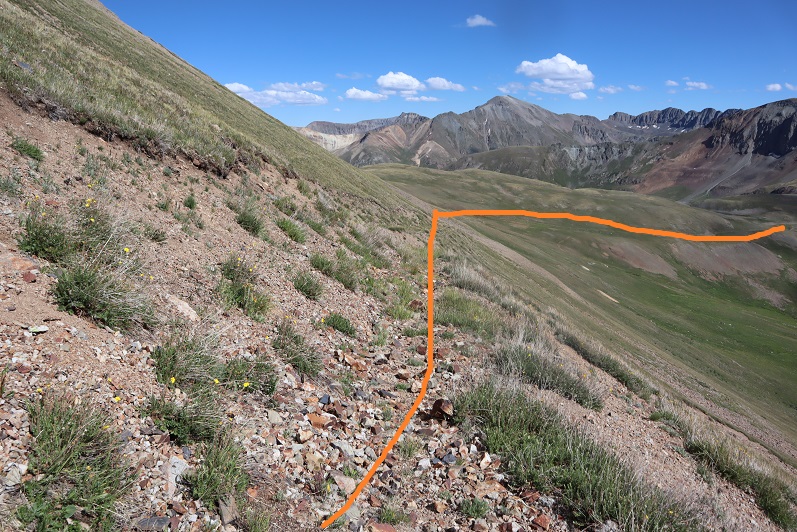
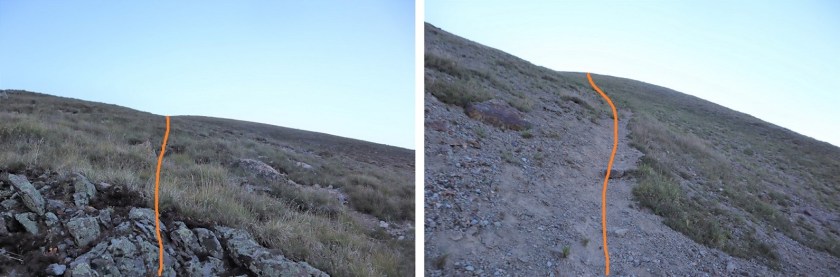
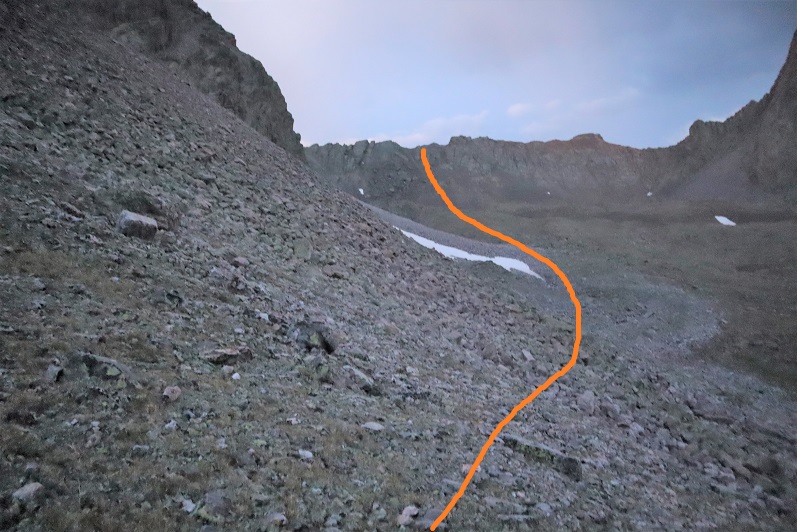
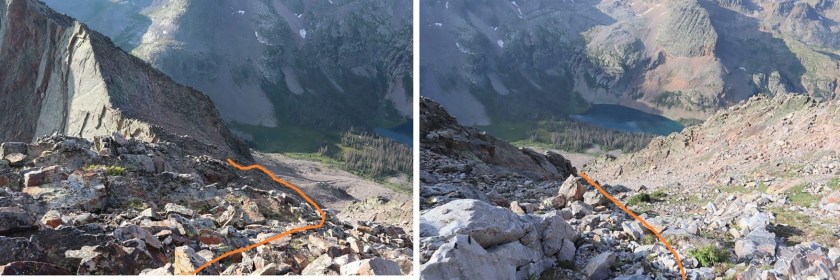
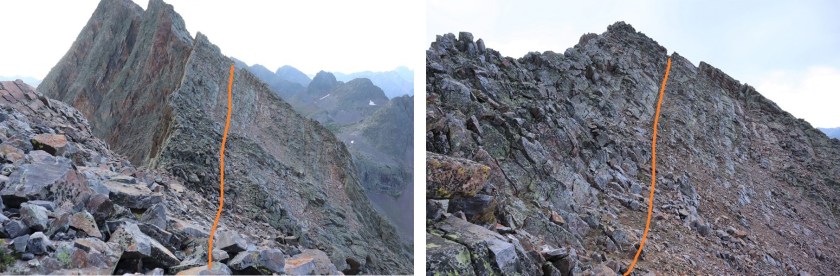
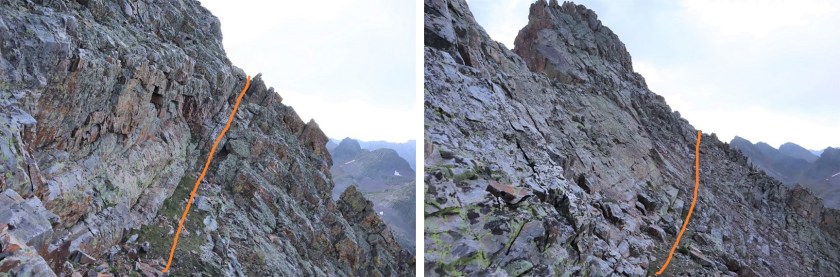
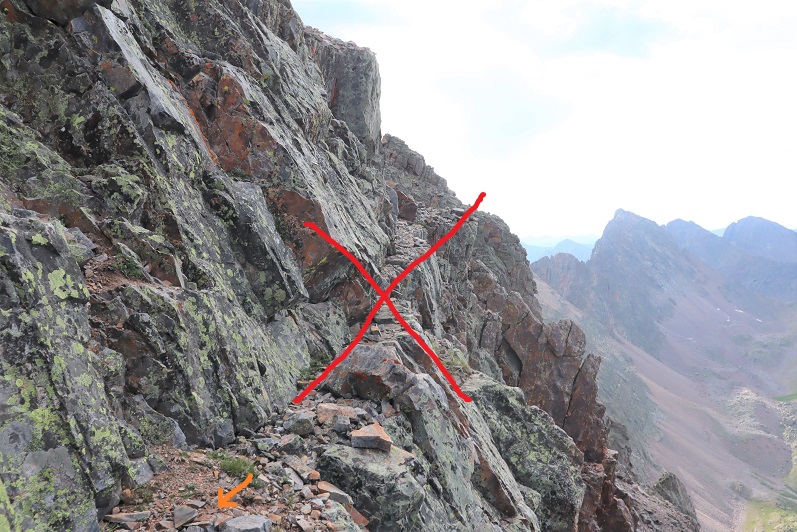
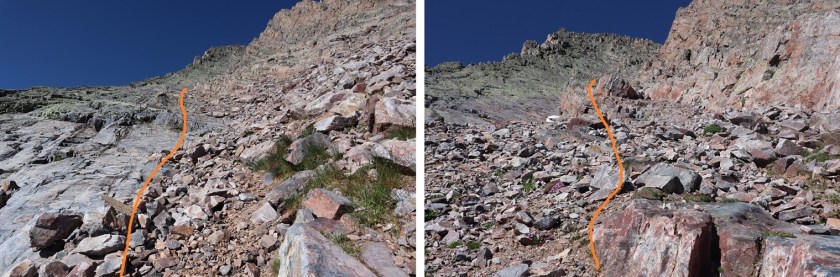
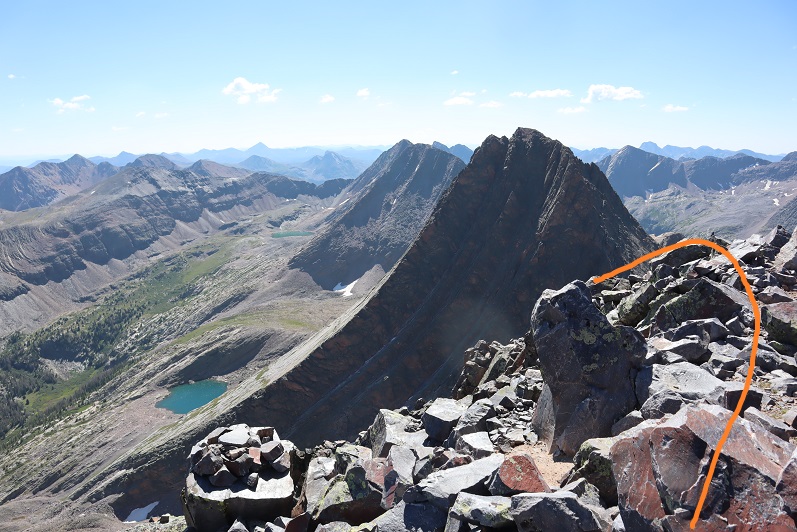
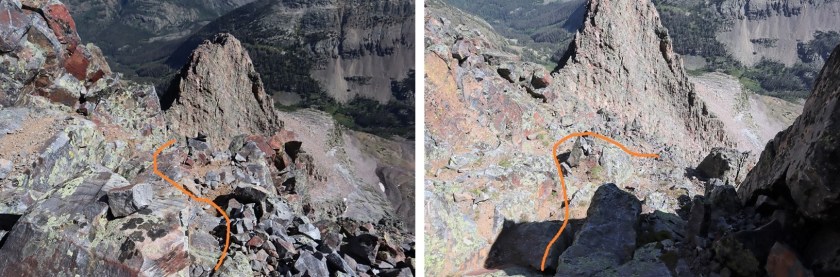
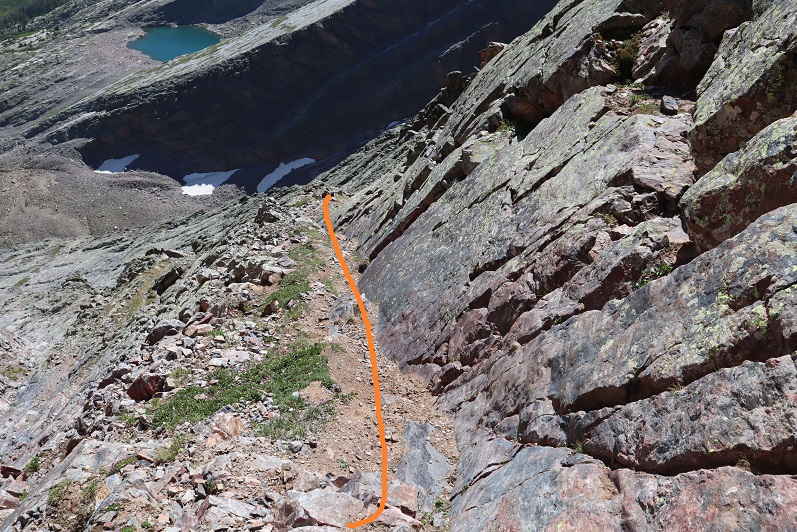
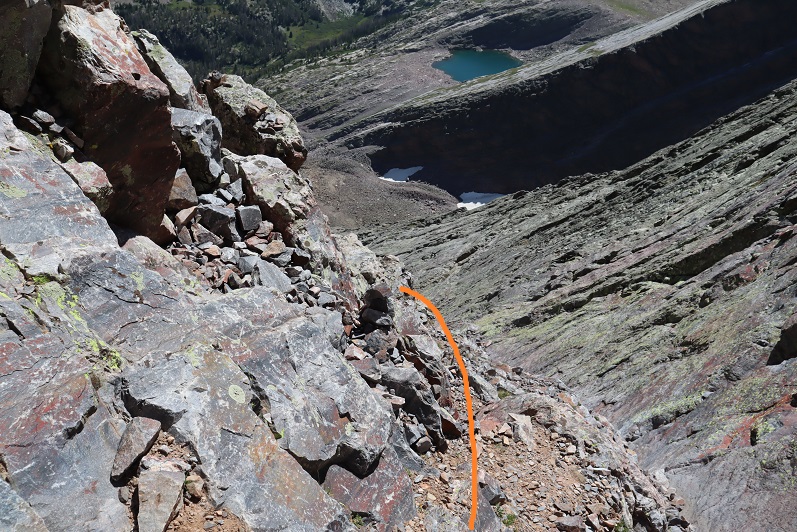
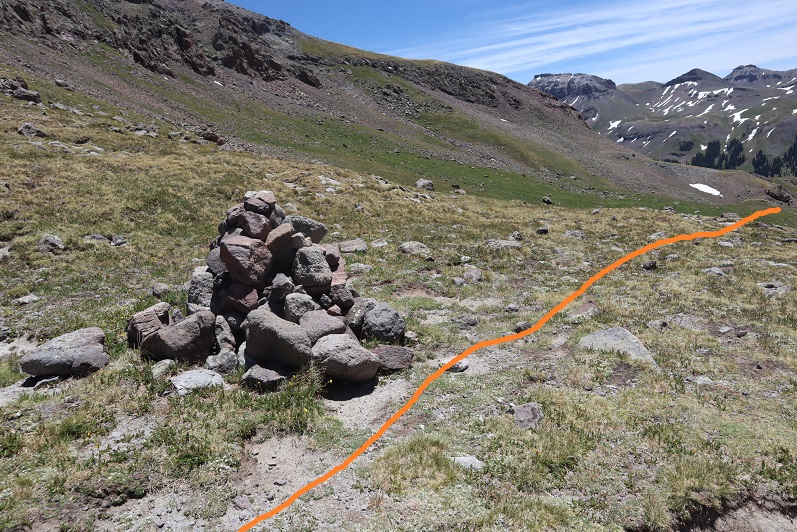
Time to head back down. I took a slightly different approach on the way down, following this track (mainly because at the summit I found a cairn indicating this was the ‘trail’ and started off in that direction…)
Here’s what it looked like, and I’d like to note neither way was better than the other (one was more exposed but on relatively stable rock, the other was on loose scree over rocks)
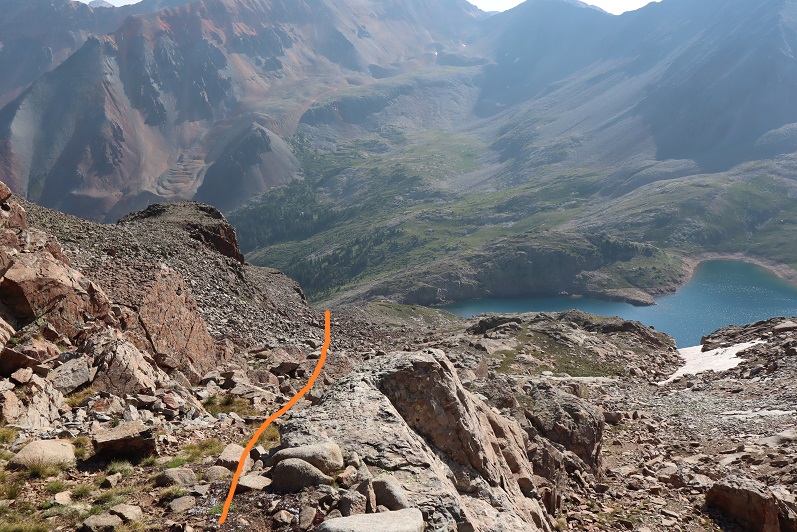
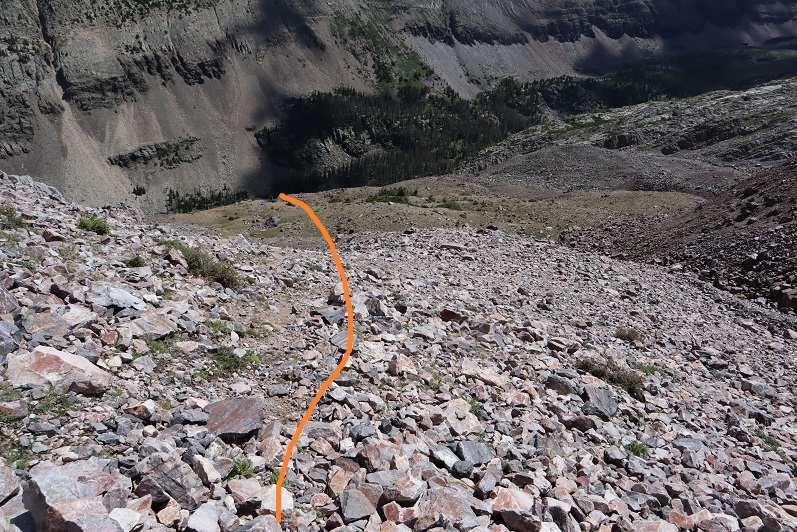
Back up to the ridge
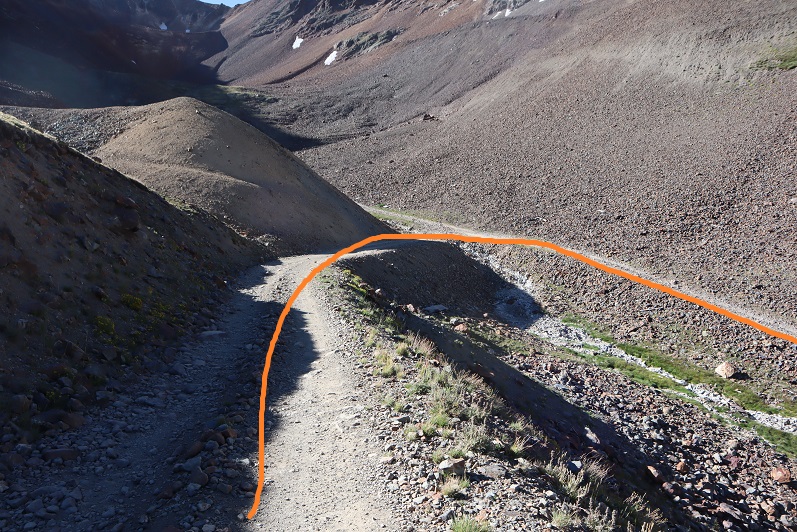
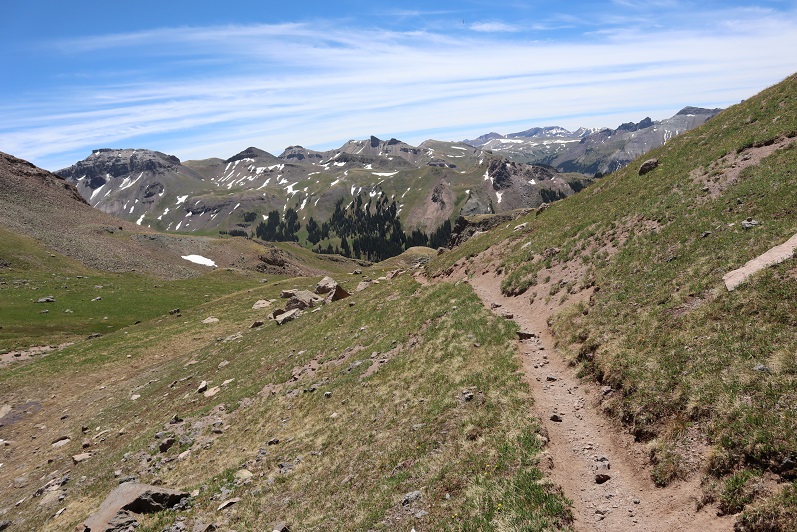
And then back down to Lake Hope
This time, when I got to the lake I crossed the dam, and then just went over the hill, heading northeast until I came to the trail I’d hiked in on… passing a lot of old mining trash along the way. I could hear the family that had been camping having a grand old time: the kids were obviously thrilled with their adventure, and the parents were too. They genuinely sounded happy (I could hear their excited exclamations from the summit all the way back down to the lake). Once again, rock on mom and dad! Well done!
Once back at the trail, I followed it back to the trailhead. I passed dozens of people hiking. Every one of them had a dog, and more than half were obsessed with their masks (not judging, just stating). There were tons of kids out, and they all looked miserable. Who starts a hike with kids in the afternoon and expects them to be ‘excited’ hiking while they’re miserable and hot? I’ve been a park ranger, scout leader, and a mom, and I can tell you from experience, hike early or late, but don’t do the bulk of your hiking between 11-3pm if you want happy little hikers.
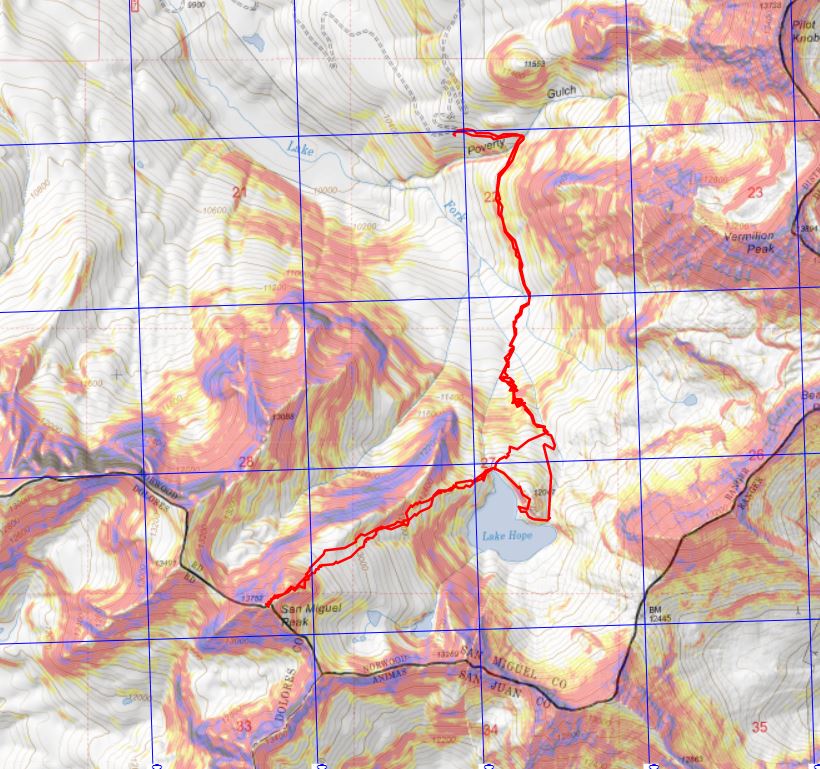
I made it back to my truck at 11:15am, making this a 10.69 mile hike with 3834’ of elevation gain in 6.5 hours.
This had been a fabulous morning, it was early and I wasn’t tired, so… on to the next trailhead!
I’ve been up in my head about this peak since my failed attempt last month. Last time I’d turned around because I wasn’t 100% sure I was in the right area and I was afraid of cliffing out. All of the information I had on Coxcomb was conflicting (some called areas class 3 and others class 5, etc.) and none of the pictures I had from others lined up with what I was seeing. After going back home and researching more I realized I had been in the correct area, and now I was ready to try again.
I drove to the Wetterhorn Trailhead and was surprised to see no one else parked in the lot. The last time I was here there were several other vehicles. I got out, walked around, and signed the trail register so I wouldn’t need to in the morning. It was cloudy and windy but on the plus side there were no mosquitoes.
I tried to pump myself up for the hike tomorrow, but was still having trouble mentally. I told myself to just enjoy the hike and focus on learning something, even if I didn’t summit (again). I got out the book I’m (still) reading: Death in Yosemite, and noted I was still on the ‘death while climbing’ chapter. It may sound macabre, but reading about how other, more experienced climbers have died while climbing puts climbing into perspective for me: gravity never sleeps, and I can never be too careful (which is another reason why I turned around last time). I like to review potential mistakes so I don’t make them.
A group of three (shirtless) guys in their early 20s walked by, carrying gear and pads. I stopped them to see where they were headed and they told me they were just out bouldering. Hmmmm… I didn’t think the area was good for bouldering, but I wished them luck.
I made sure to get to bed early, and wouldn’t you know it, I heard a mouse moving around under/inside my truck as I was trying to sleep. I guess those mothballs don’t work. Also, I believe it was the same mouse as last week: it’s most likely been living in my truck, building a nest, etc. I was going to need to get some traps asap.
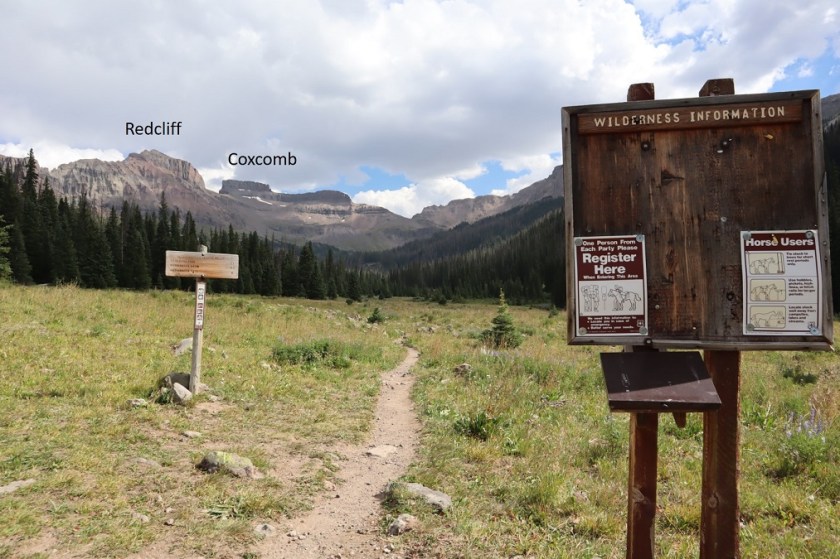
I woke up and was on the trail at 4:30am, taking the same route as last time. There’s an obvious trailhead with a register.
I followed the class 1 trail for 3.4 miles up to the top of the pass, and then lost 450’ of elevation as I descended into the basin.
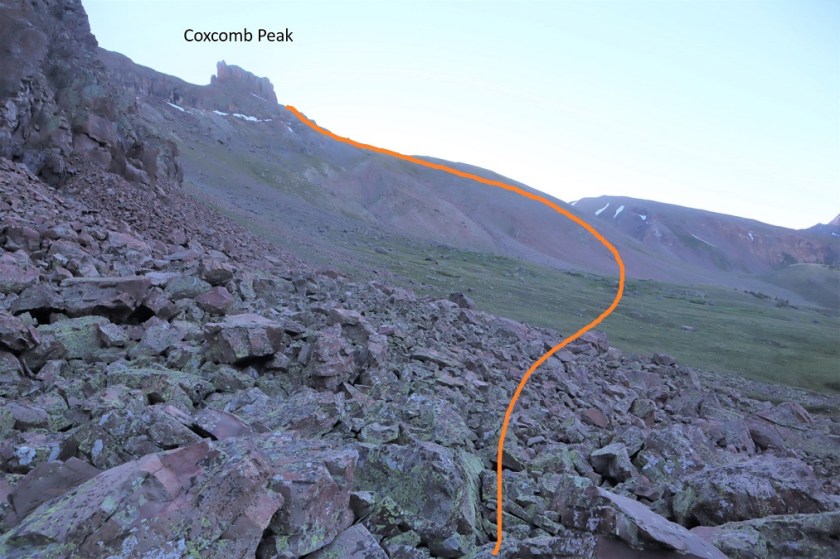
I’ve heard of others who’ve stayed high here instead of going into the basin, and from my perspective, the rubble and talus and scree aren’t worth it: I’m ok losing a little elevation, and I’m actually convinced it saves time. Once in the basin I left the trail, crossed the basin and followed the ridge up to the base of Coxcomb
There was a little bit of scrambling to get to the base
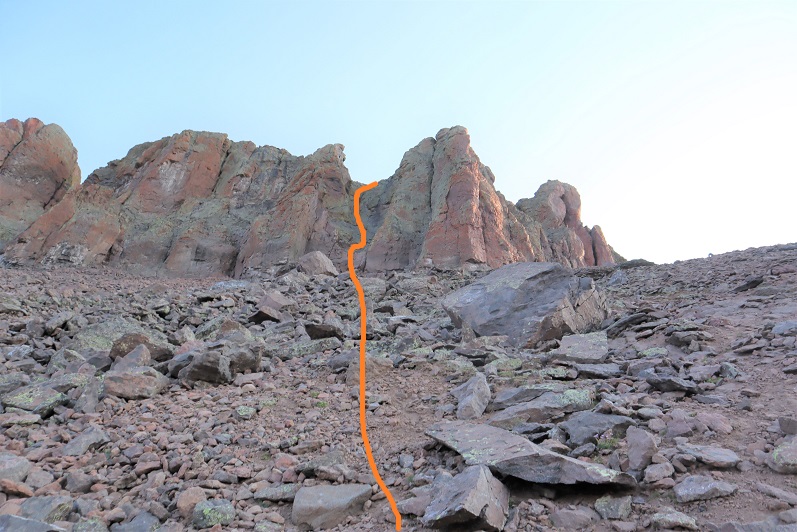
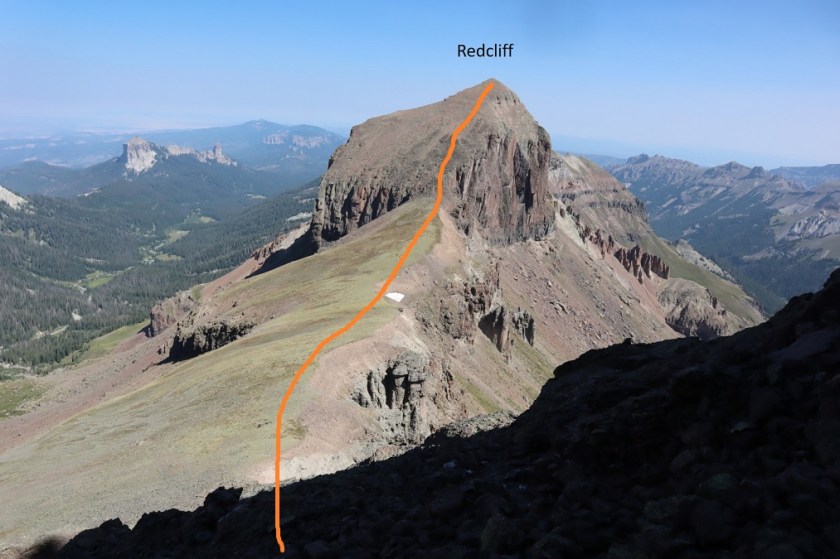
Here’s an overall view of the route up
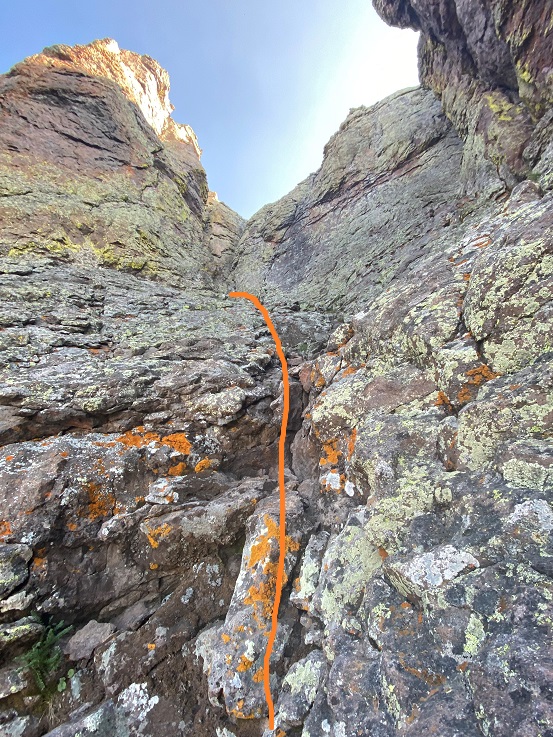
Once there I was happy to see the rocks I’d placed in the chimney were still where I’d put them. I sat down, put on my helmet, and mentally prepared myself to begin. Here’s the first chimney
I made my way over to the chimney and tried to climb up. No dice. I love to boulder, but I haven’t been since COVID started due to the gym being closed and now requiring masks (say what you will, but I cannot work out with a mask on. I respect the rules however, and thus choose not to go). All this to say I’m a little rusty when it comes to my bouldering skills.
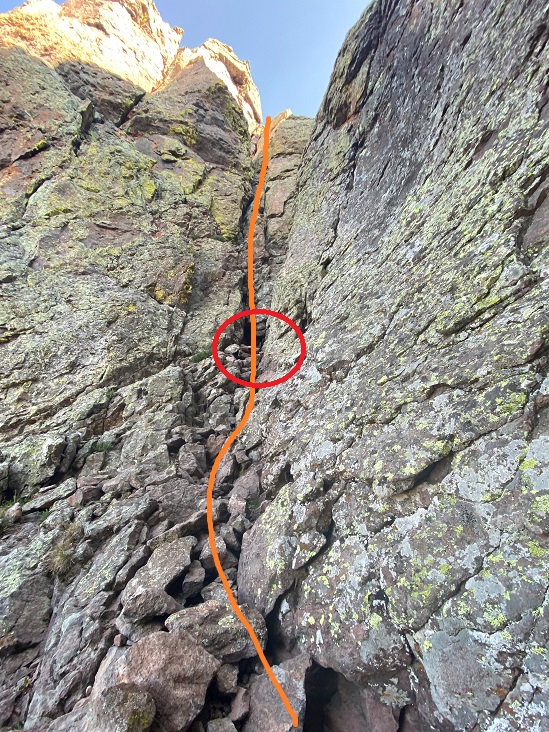
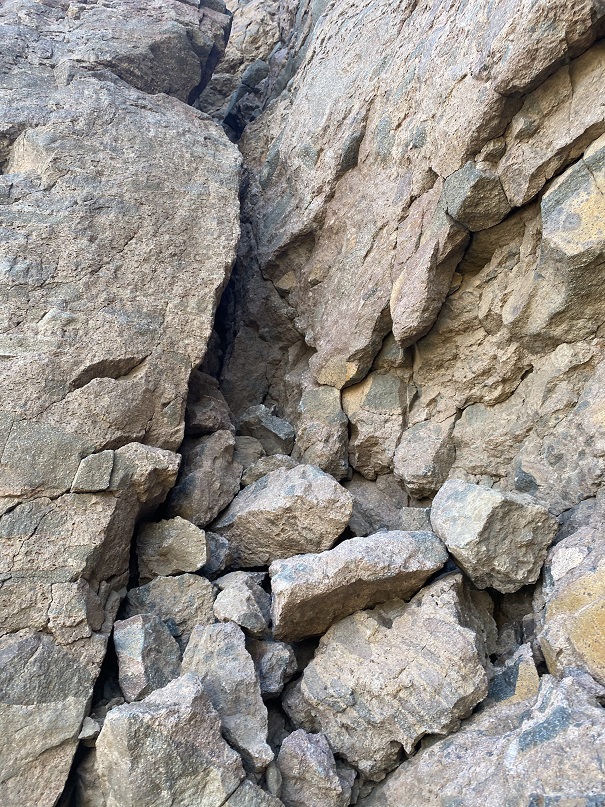
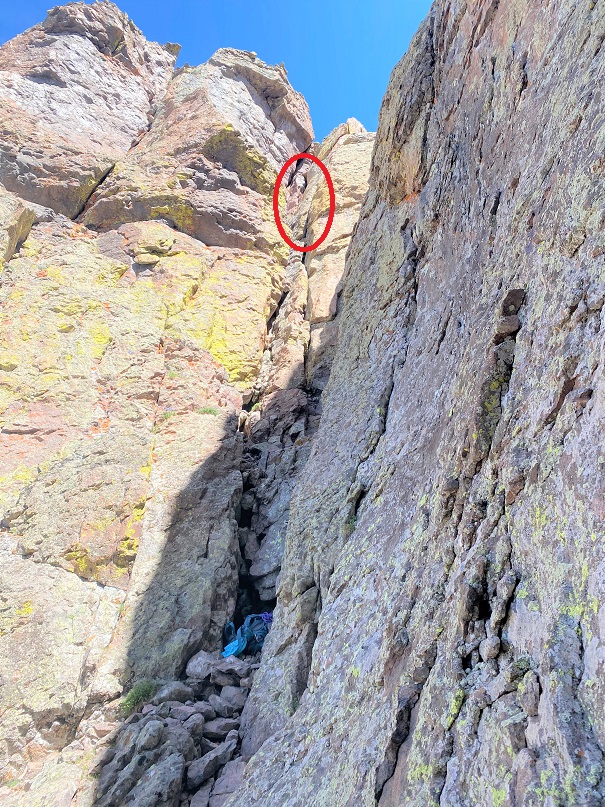
Ok, so if I couldn’t just climb up I’d do what I did last time: I took off my pack, attached a rope to the pack and my harness, and tried climbing up without a pack. The rock was cold and my fingers were stiff and I tried and tried but was unable to climb up the chimney. What was wrong? I’d been able to do it last time! Ugh. That was when I realized last time I’d worn climbing shoes. I guess they did make a difference. Oh well, I was just going to need to get creative. I tried once again, this time angling myself sideways, putting my thigh into a crack, shimmying around, and pressing into the side of the rock with my inner thigh and hoisting myself up. This took me halfway up the chimney. From there I was able to hoist myself up and use my arms to do the rest. I made it to the top of the chimney, hauled up my gear, and prepared for the second part for the climb. The red circle is where I ‘sat’
The next section was easy class 3. I re-coiled my rope, put on my pack, and made my way to the base of the next chimney
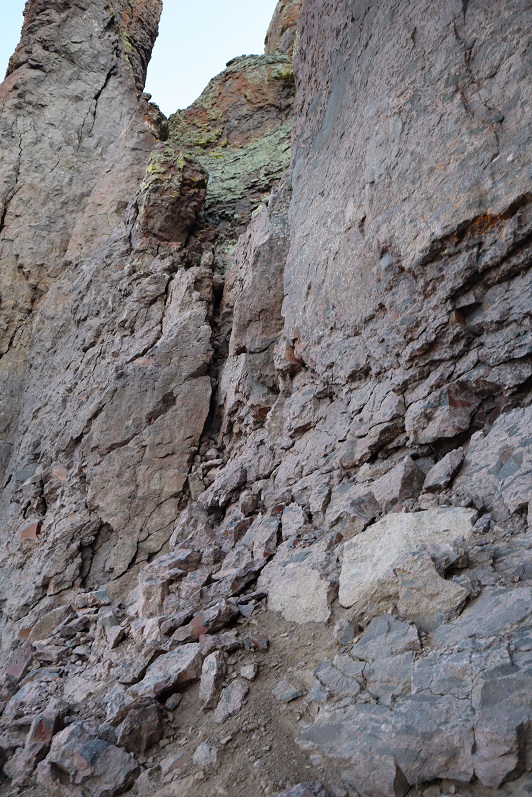
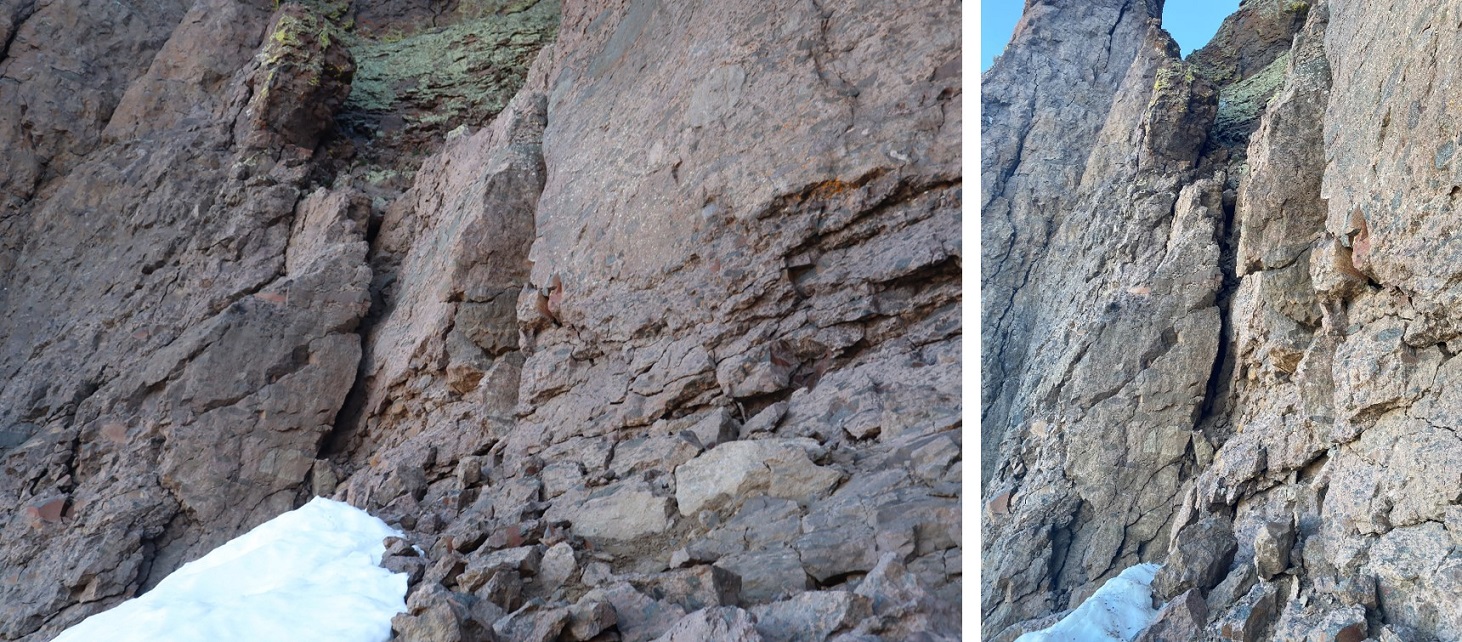
This is where I’d gotten stuck last time. This time however, I was sure I was in the correct spot. I initially tried to climb this with my pack on, realized that wasn’t going to happen (the pack was too heavy and put me off balance) and decided to try climbing this chimney without my pack. The red circle is where I took off my pack.
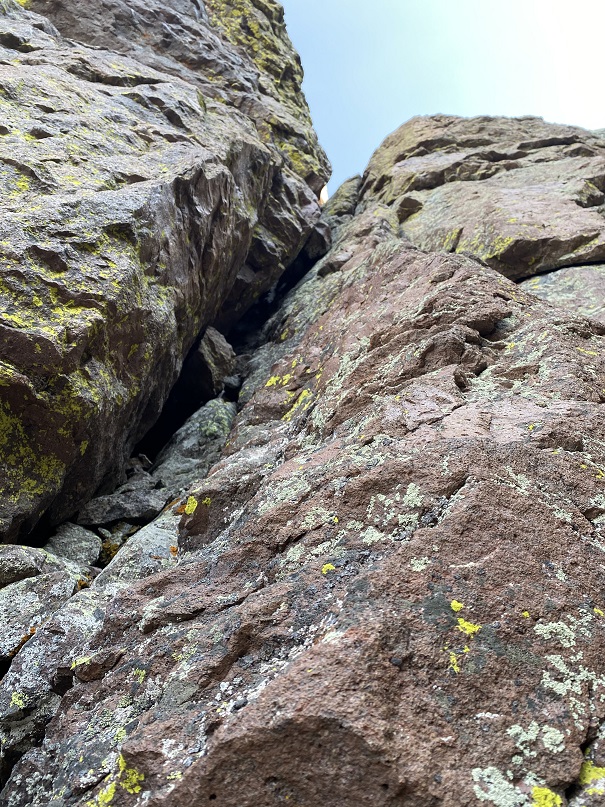
Here’s what the climb looks like from there. Knowing I wouldn’t be able to climb this with my gear, but also knowing I needed my gear to descend I decided to once again tie the rope to my harness and loop it around my pack. I was very careful to make sure my rope didn’t get tangled, and I had an exit strategy in case the whole ‘rope around the pack thing’ didn’t work in this area. I wouldn’t recommend this tactic unless you put a lot of thought and planning into its execution, as so many things can go wrong in this scenario. Here’s a look at the beginning of the route
I made it halfway up and stopped.
At the halfway point I hauled up my gear to where I was positioned. I figured this would lessen the chances of my pack getting stuck when I hauled it all the way up, and also gave me a chance to test whether or not hauling the pack would work in an area where I still felt I could downclimb safely. This tactic proved successful, so I continued on.
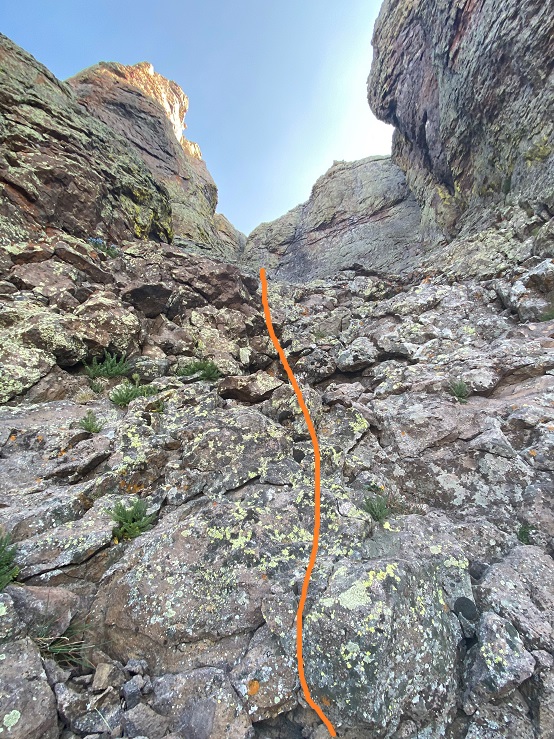
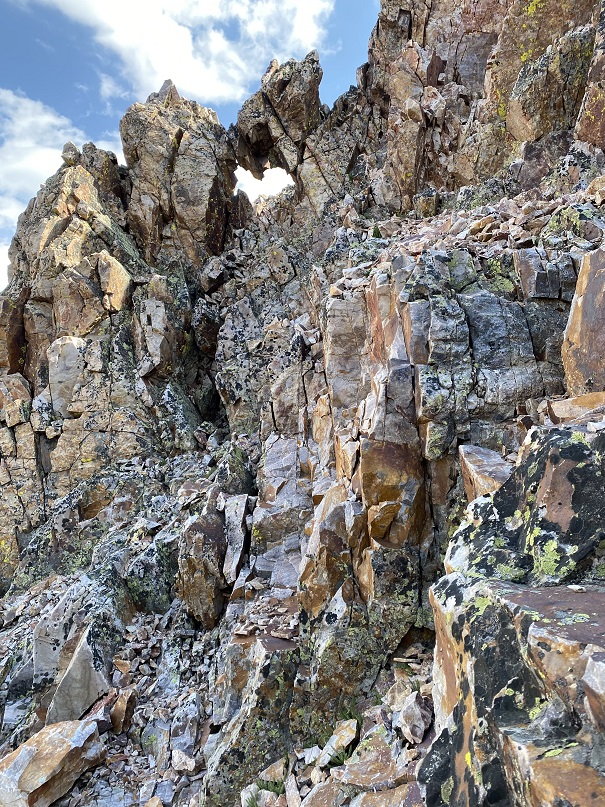
From the halfway point, here’s looking up at the rest of the route
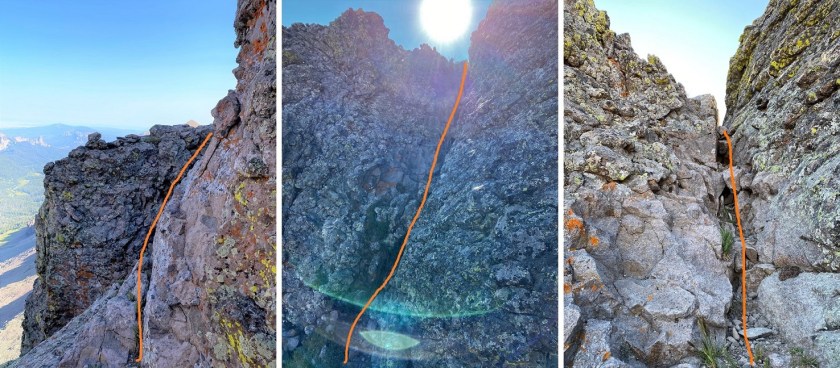
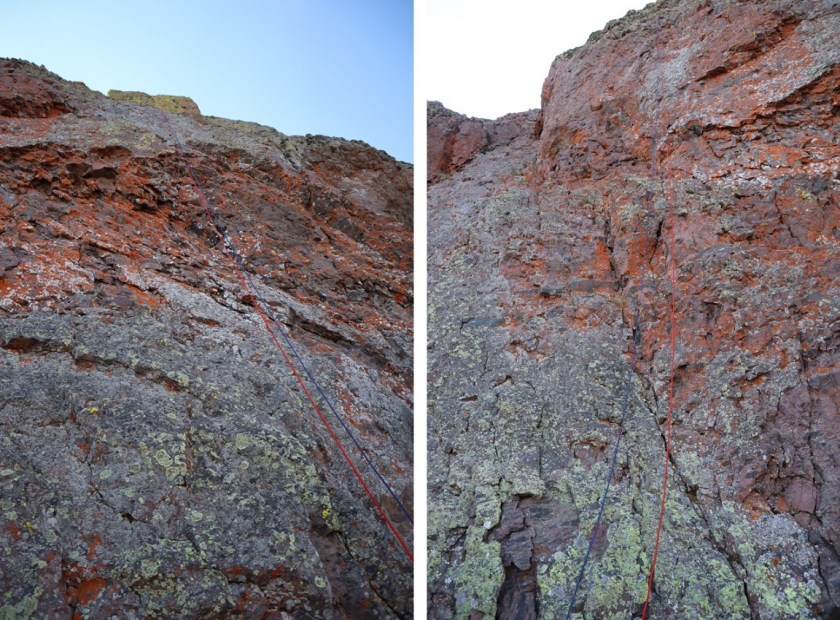
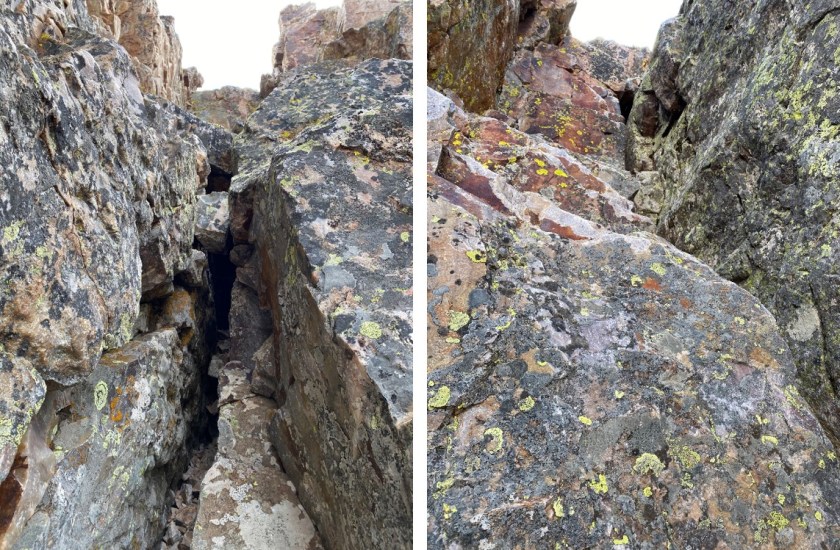
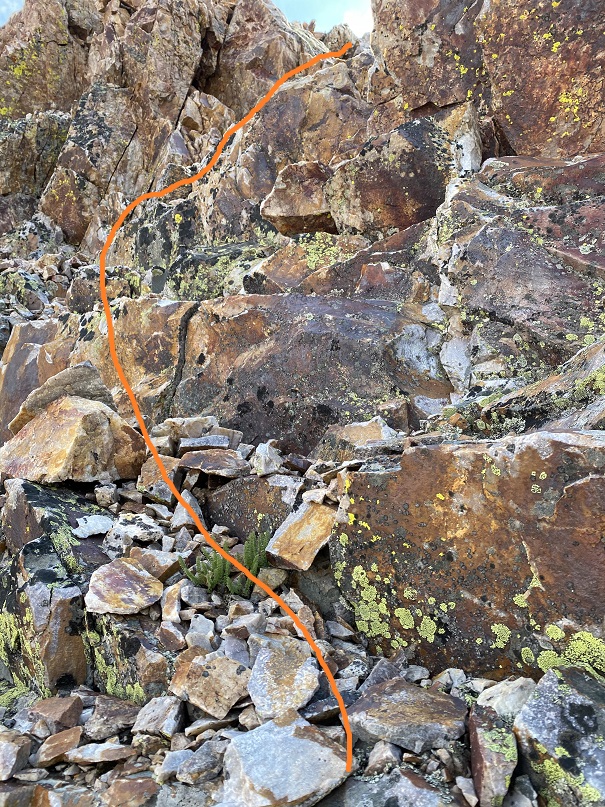
This is a class 5.2 chimney that requires some stemming/fun/creative moves to ascend. At one point I even used a crack climbing technique to get a good hold with my arm vertically and hoist myself up. This is the point I wasn’t able to make it past last time, but after talking with others who’d successfully climbed this area I felt confident I’d be able to as well. There are some sketchy moves, but plenty of opportunities for stemming/hand holds to make the ascent doable. I was terrified but just told myself not to look down, to focus ahead, and soon enough I’d made it out of the chimney. Here’s the route I took
Once at the top of the chimney I turned and hauled up my gear, feeling pretty pleased with myself for making it this far. I recoiled my rope and put it in my pack.
I’ve heard it’s class 3 after this point to exit the chimney, but it felt class 2 to me
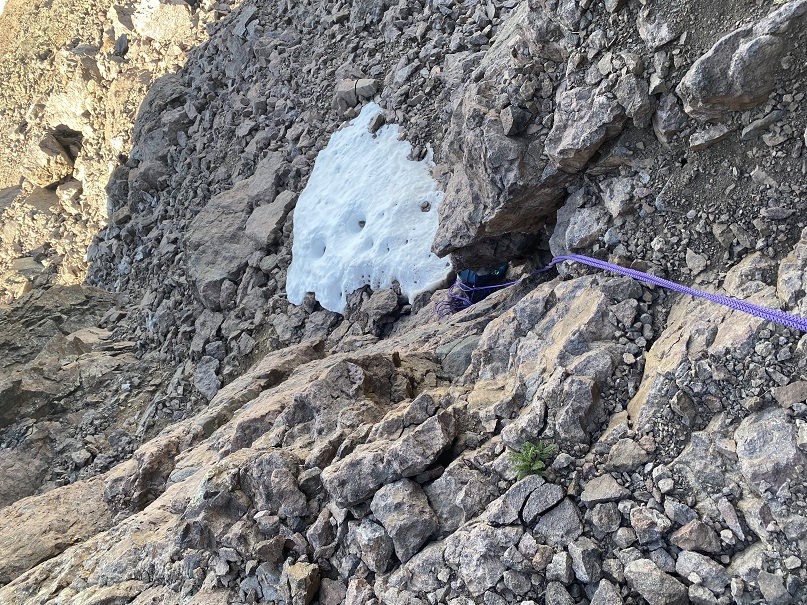
Last time I’d been worried I was in the wrong gully. Since I hike solo I’m extra careful, and probably turn back more often than I should when uncomfortable. One of the reasons I’d turned back here last time was I was worried if I ascended the wrong gully I’d be cliffed out. It turns out that wouldn’t have been the case, so if you’re worried about cliffing out in this area don’t be: all chimneys exit in the same area, and it’s solid. Here’s looking back
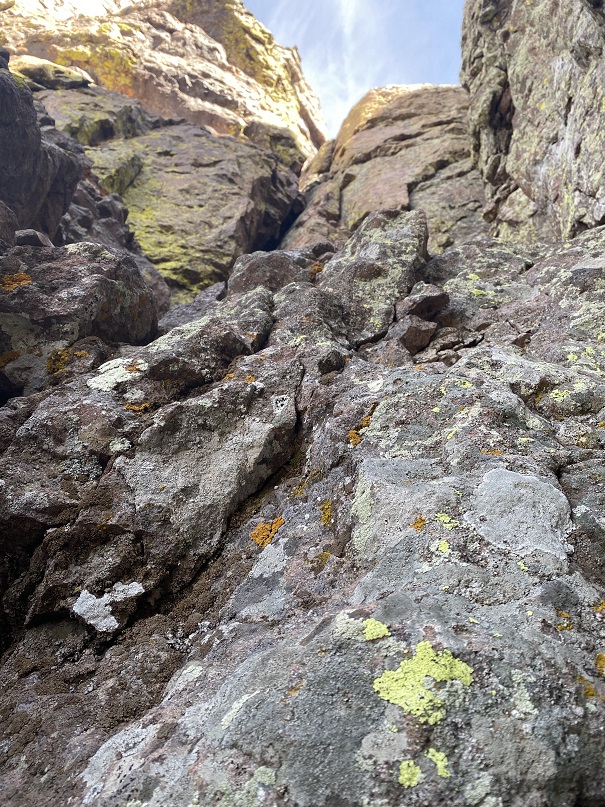
And forward towards the summit of Coxcomb
There was still one more obstacle before reaching the summit: a 25 foot notch I’d need to rappel before upclimbing to the summit.
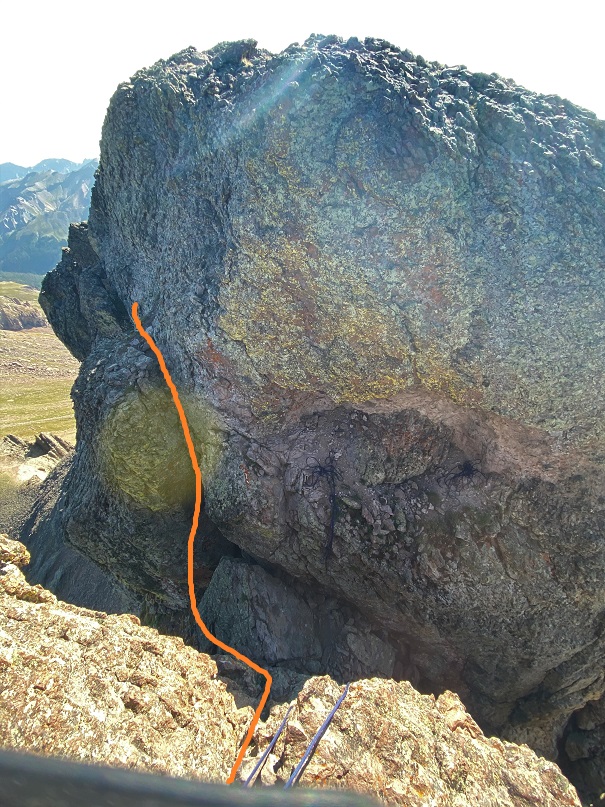
I got out my rope, attached it to my gear and the anchor (which looked solid so I didn’t replace the webbing) and rappelled down into the notch. This is committing because it’s class 5.6 to climb back up. I’m not a climber, and I knew I wouldn’t be able to upclimb this section on my own: forward was the only way from here on out. This last bit included rappelling down, then climbing out of the notch
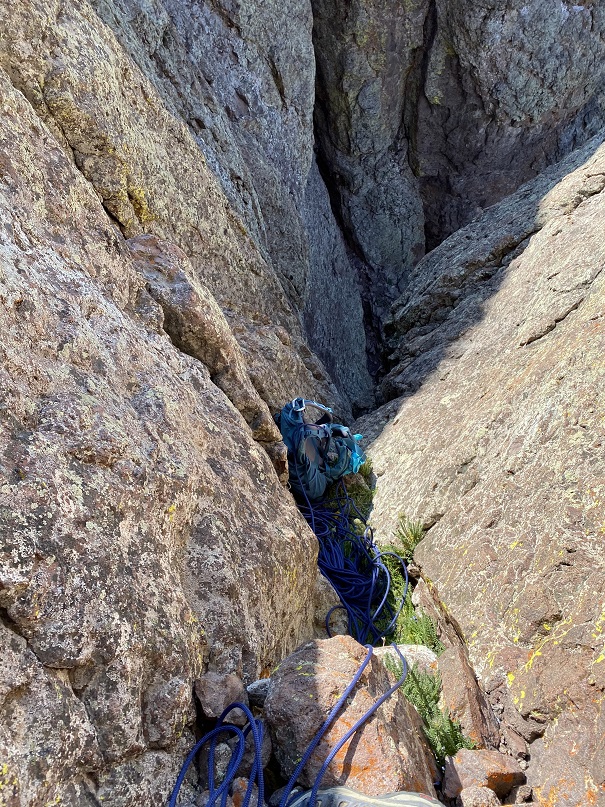
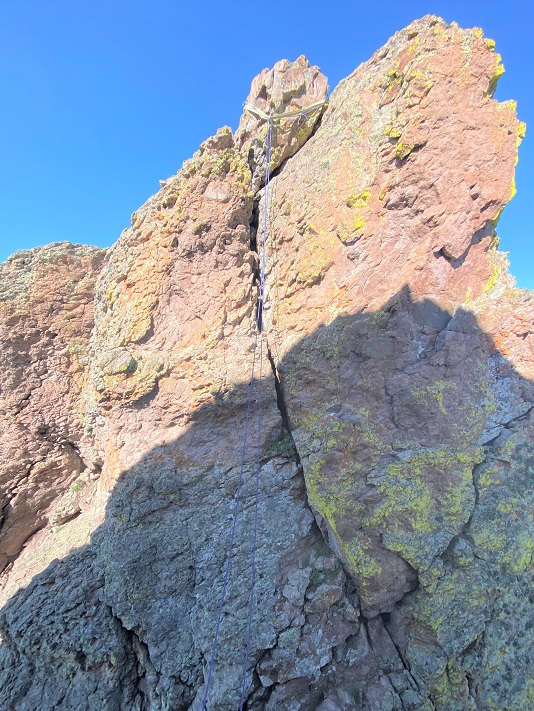
Here’s a look back up at this section from inside the notch
I once again retrieved and recoiled my rope, and got ready for the final pitch to the summit. I went north, following the cairns, and climbed up an easy chimney
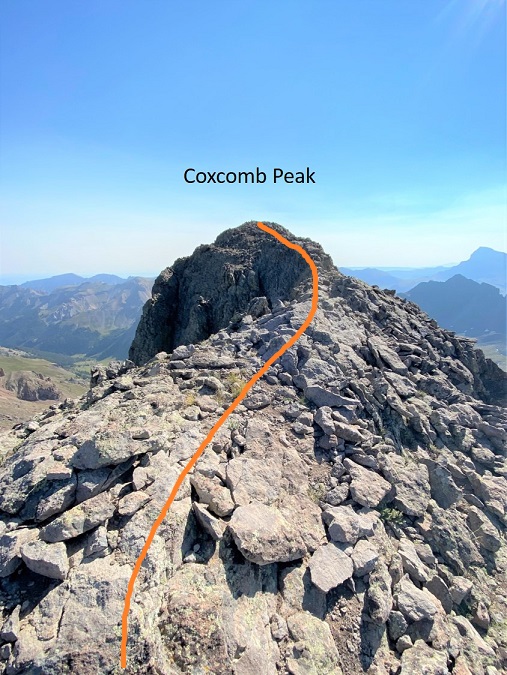
From there it was an easy walk to the summit
I summited Coxcomb Peak at 9:30am. There was a summit register in a powerade bottle that should probably be replaced. I didn’t open it, but it looked like the papers were smushed in there.
Coxcomb:
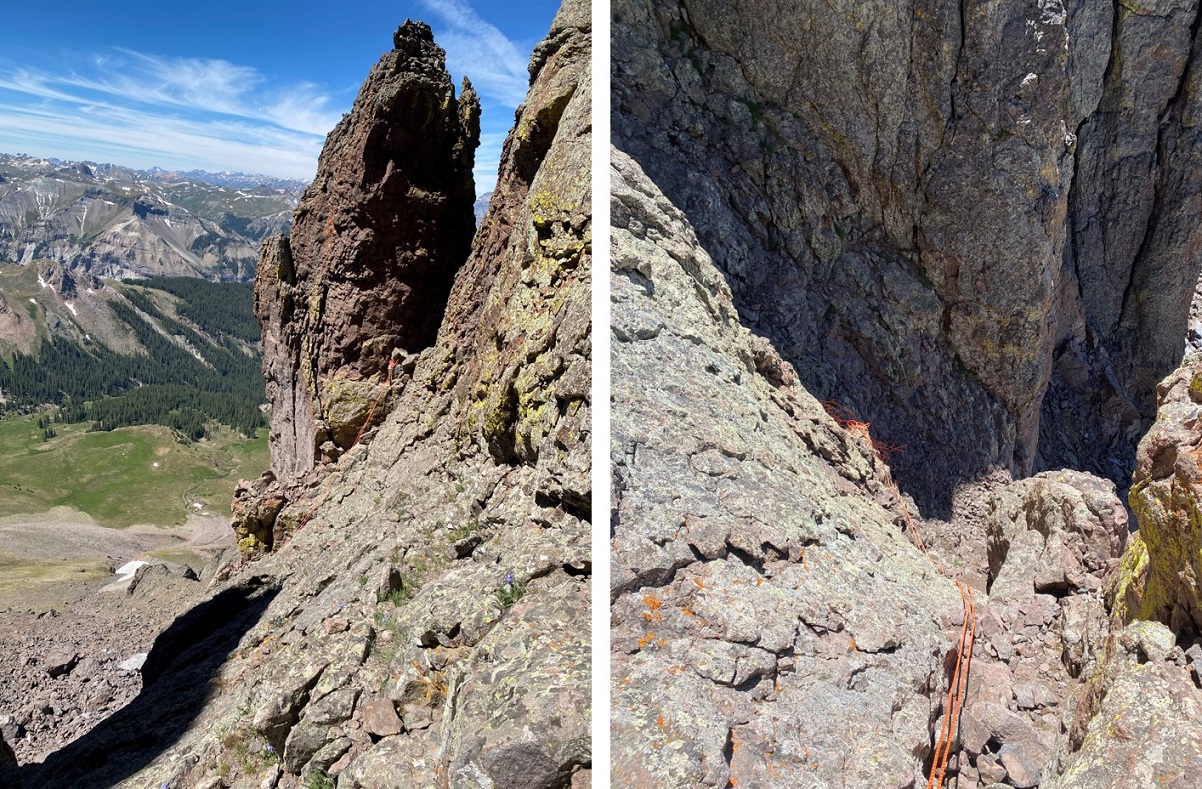
I was thrilled I’d made it this far, but I still had the 170’ rappel to accomplish. I went to work, looking for the webbing and anchor set up. It was easy to find and still looked good, so I decided to use what was already there.
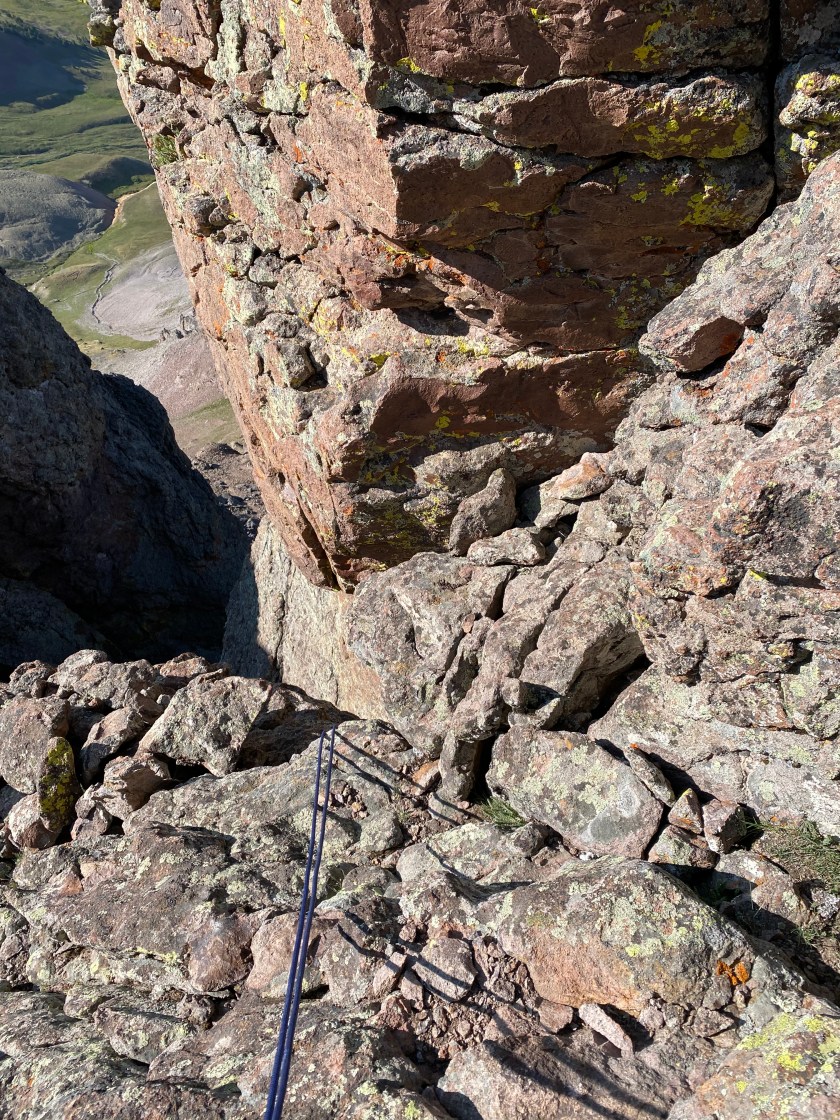
I tied my two ropes together with a double fisherman’s knot and threw my ropes. It was quite windy, and the wind was coming at me, so it took a couple of tries to make sure the ropes made it all the way to the ground. This was quite frustrating, but worth the extra effort to make sure it was done correctly. Next, I tested the rope, watched my knot to make sure it was secure, unclipped my safety, and started the rappel. Everything went smoothly. I even noticed 2 more anchors set up below where I’d rappelled, so if you brought just one rope it would have been enough (the webbing looked old though, and should probably be replaced).
My feet touched the ground and I gave out a “Woot!” I was so excited! I’d done it!!! I’d solo’d Coxcomb Peak, a peak I wasn’t sure I’d ever be able to climb, let alone solo. I gave myself a minute to let it sink in, and then went about retrieving my ropes.
I had two ropes, one purple, one orange. I always pull the darker one. I pulled the purple one and was thrilled when it moved. I pulled it about 10 feet when it stopped. Hmmm. Ok, maybe it got stuck? So I pulled the orange rope back a few feet, and then tried the purple one again. Once again, it got stuck. I whipped the ropes and they moved as far as I could see, so one of the ropes must have been stuck up at the very top. I spent the next hour doing everything I could think of to retrieve those ropes, to no avail. In the end I made the very difficult decision to leave them there. I did put a note in the trail register on the way down and I posted to some climbing social media sites about their whereabouts, so at this point I’m fairly confident they’ve been retrieved. It hurt to leave them there, not only because of LNT, but also because this is the first time I’ve used them (besides the initial breaking in).
Here’s the rappel
I sighed heavily and turned to hike up Redcliff.
This was a very short, simple, and straightforward climb. I summited Redcliff at 11:15am
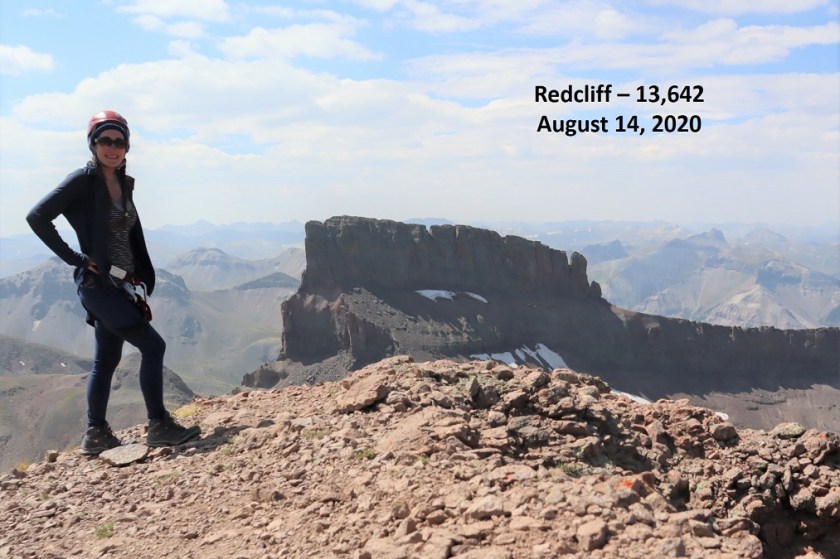
Redcliff:
Here’s looking back at Coxcomb. I’ve circled the notch that needs to be rappelled down and then climbed back up
I turned and headed back to the Coxcomb/Redcliff saddle, and then descended west into the basin
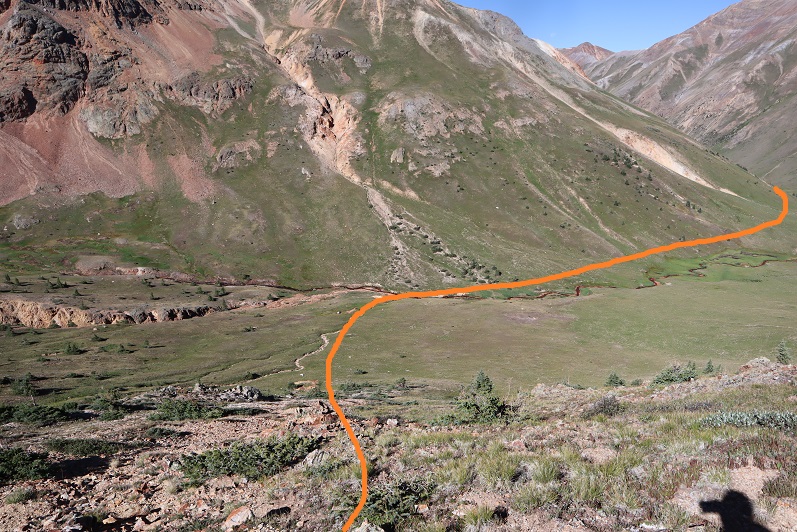
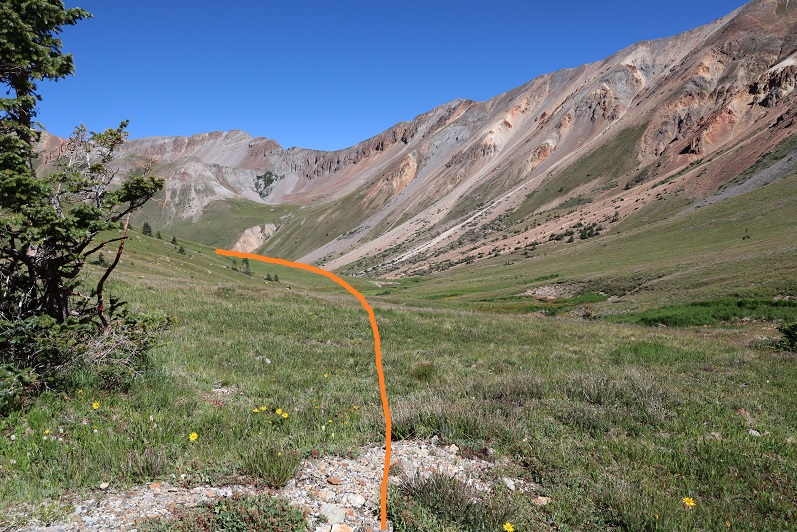
There wasn’t a well stablished trail here, but the route was easy enough to figure out. I just aimed for the visible class 1 trail below I’d taken on my way in this morning
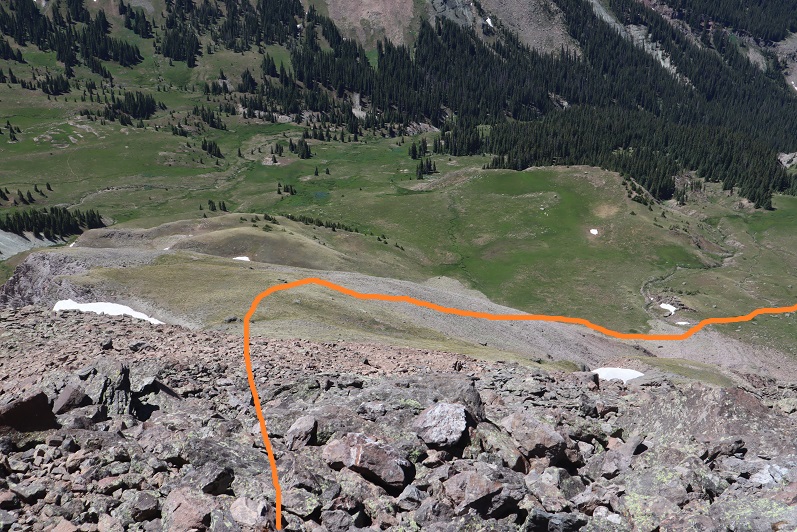
Here’s looking back at the route from the saddle to the trail
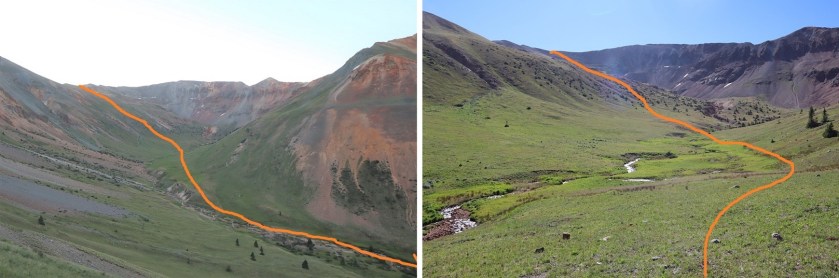
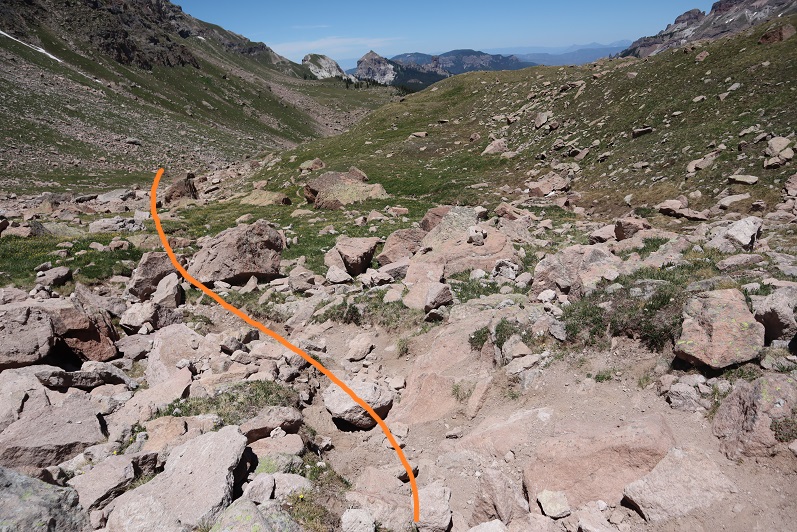
And a look at the hike out
I made it back to the now full trailhead and my truck at 1:10pm, making this a 13.24 mile hike with 4654’ of elevation gain in 8 hours, 40 minutes.
I was thrilled with today’s success, and even though I’d lost two new climbing ropes I drove to the next trailhead on a bit of a high.
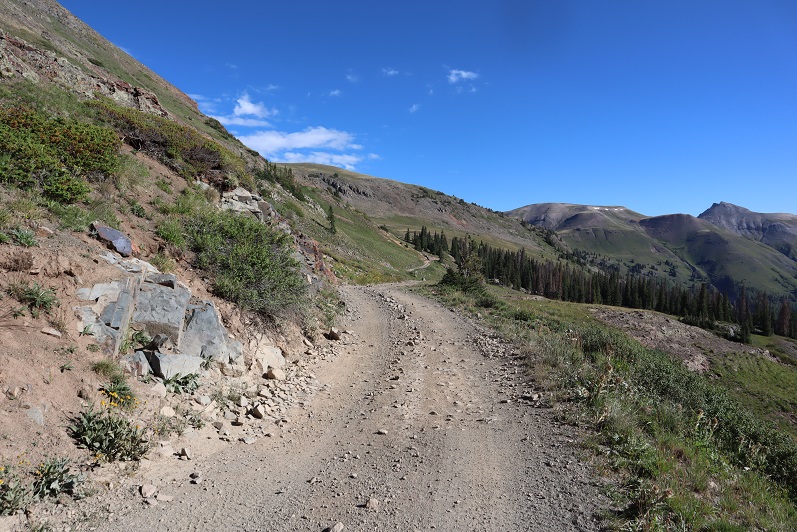
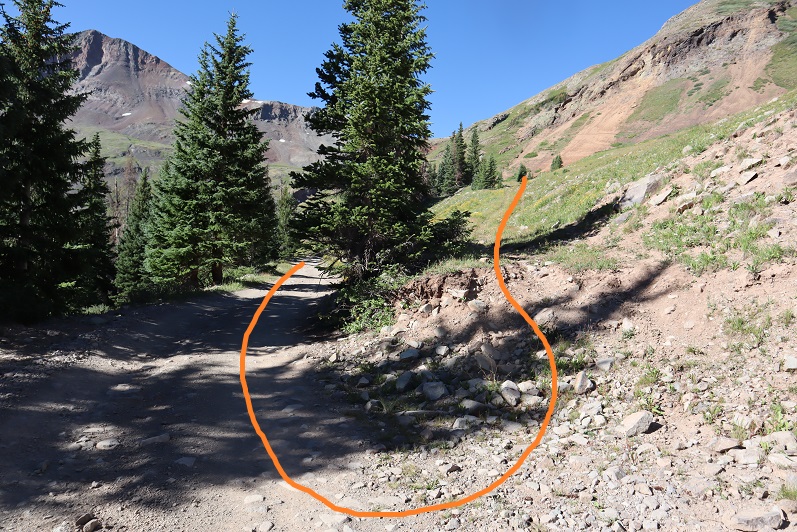
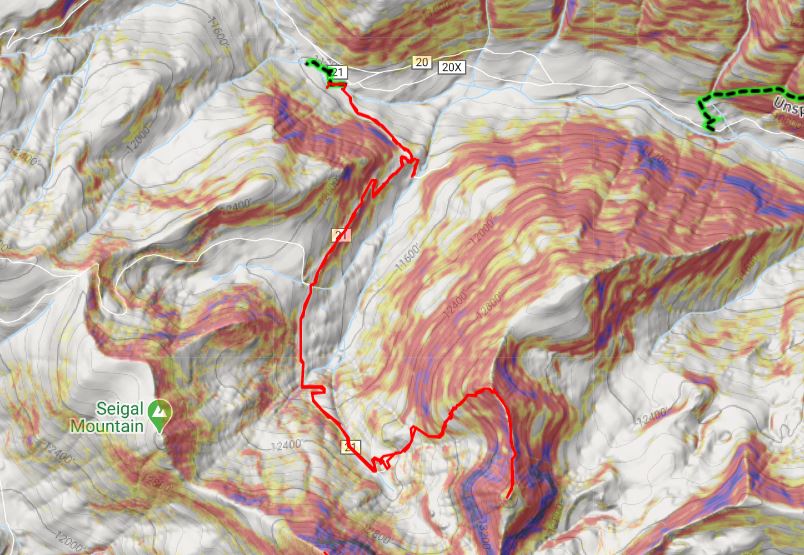
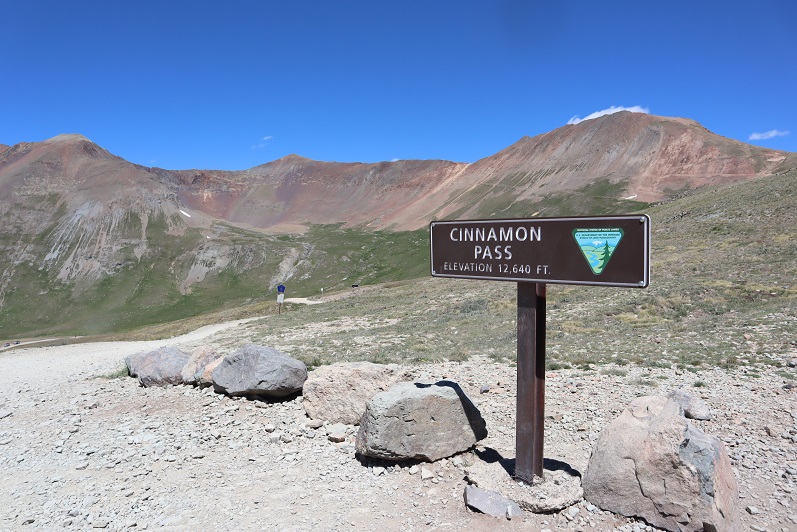
I left Cinnamon Pass after hiking some bicentennials in the area, intent on driving to the Henson Creek Trailhead that leads up to Hurricane Basin. I put together a gpx file on CalTopo which had me taking Road 5 to 2, which is the road that goes over Engineer Pass. However, I wasn’t going to take the pass, I was going to take another road that cut down to 21. I was all excited about this until I drove to the cutoff. At the cutoff all that was there was a sign that said no going off road. Also, the road ended. Hmmm. OK, so there was no road here (or at least, not anymore) so I turned around and drove over Engineer Pass to the trailhead.
I have a stock Tundra, and it handled Engineer Pass just fine. I did see a couple in an OHV, a man in his 40s driving and his wife white as a ghost sitting next to him, clutching her purse as if it were a life vest. She was scared beyond belief, he was having the time if his life…lol! Luckily, since it was after 5pm there weren’t too many other drivers on the road, so I didn’t have to pass too many people. In fact, I didn’t see another vehicle once I went over the pass.
That being said, I wouldn’t recommend driving over Engineer Pass to get to this trailhead: Instead from Lake City take 20 to 21.
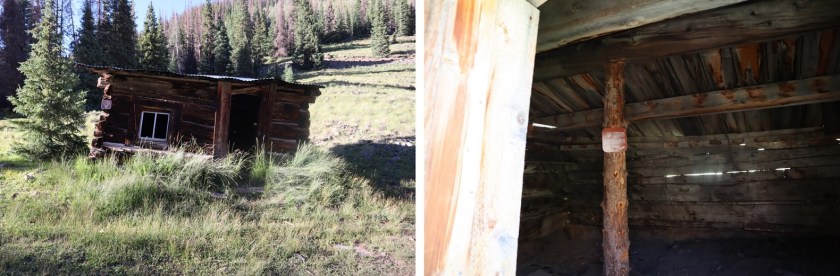
I found a nice dispersed campsite near an old cabin.
I walked around for a bit but honestly didn’t stay up long: it had been a long day and I was beat. I ate dinner on my tailgate and had a rather brave chipmunk and Canada Jay beg for food from me. It looked like they’d been conditioned for this behavior. Around 3am I heard what sounded like a wrapper being manipulated by a small rodent. I figured it was the chipmunk from last night fooling around. I thumped on the side of my truck a few times and it left, only to come back again a few minutes later.
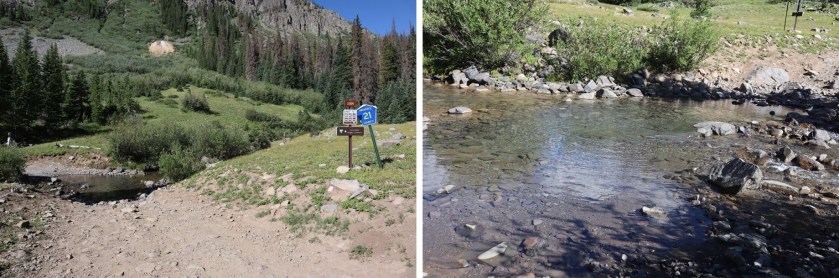
I was finally on the trail at 5am. From my campsite I walked down CO Rd 21
I crossed Hensen Creek and changed out of my sandals and into my hiking boots. (I walked the area the night before and figured since it was a short distance to the creek I’d start off in my sandals and change after the creek to save time).
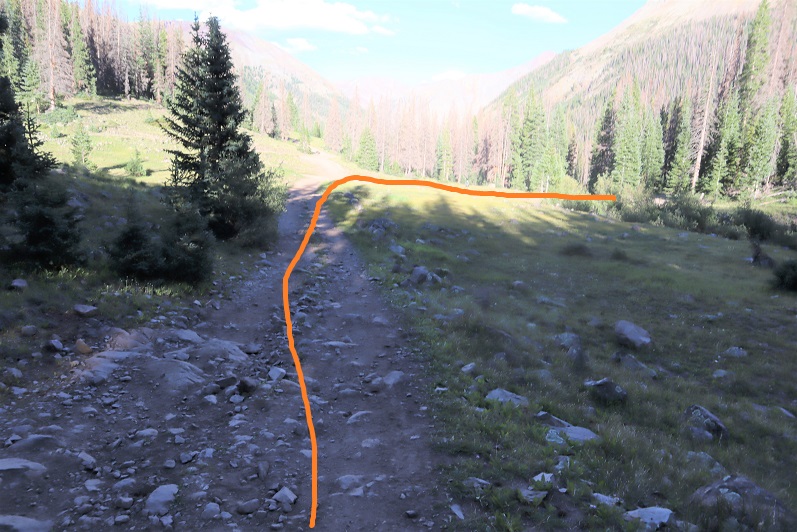
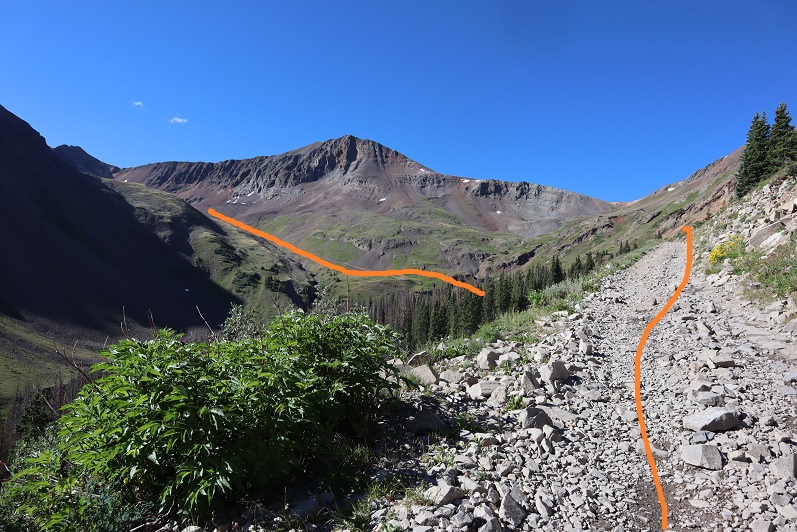
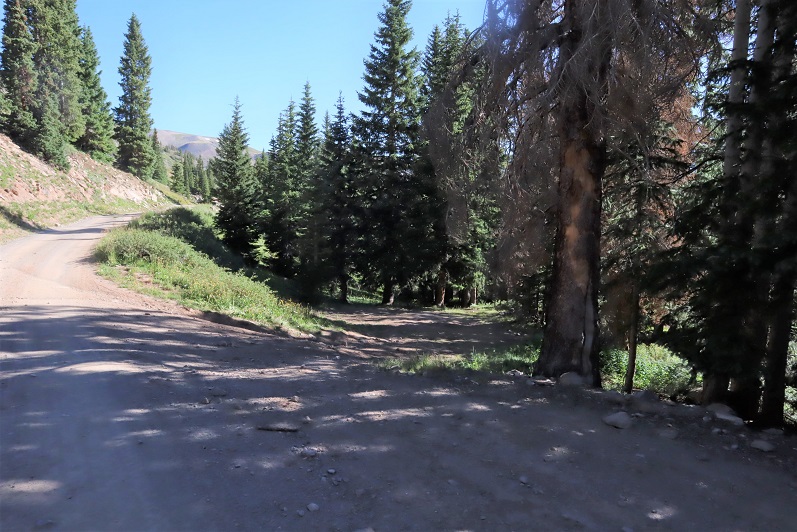
I followed the 4WD road for a very short distance and came to a fork in the road. I went left first, thinking I was supposed to follow the creek, but I ended up coming to private property with ‘no trespassing’ signs. In fact, I should have gone right and followed the road (this is counter-intuitive, but the road actually winds up the mountain).
After backtracking I followed the 4WD road for 2.75 miles, all the way to Hurricane Basin.
Note: my truck could have made it all the way to the mine, but I would have run into trouble if I’d needed to pass someone. There are only 2 passing points on this road, one at the first switchback, and one just before leaving the trees (which also happens to be a campsite, pictured below). If you choose to drive this road note other drivers coming up/down, and realize if they’re already on the road you need to let them drive the entire way before proceeding, as there’s no place to pass.
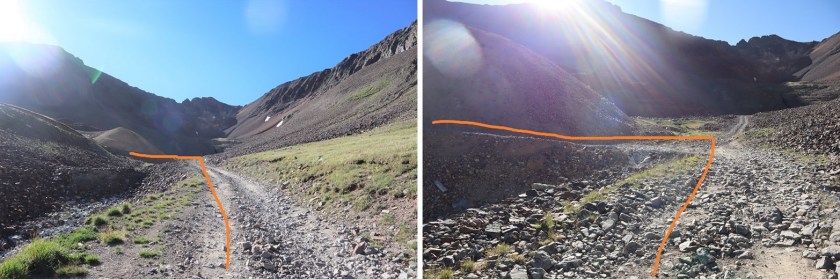
Just before making it to Hurricane Basin the road forked and I took a left
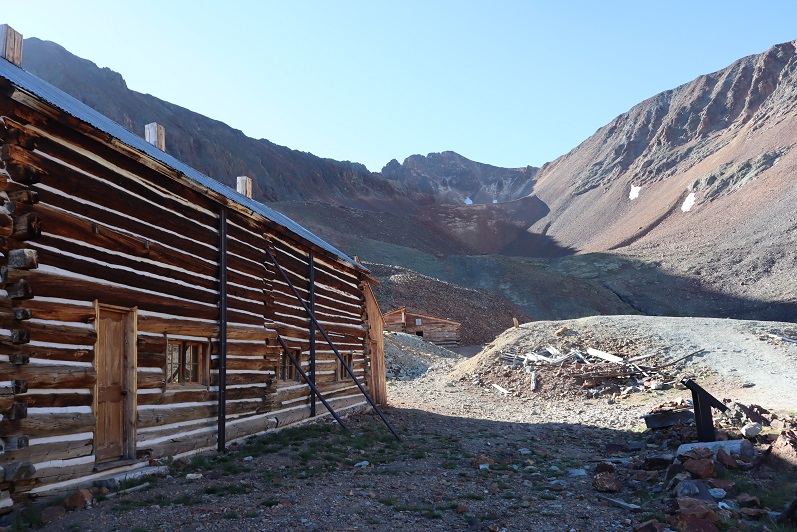
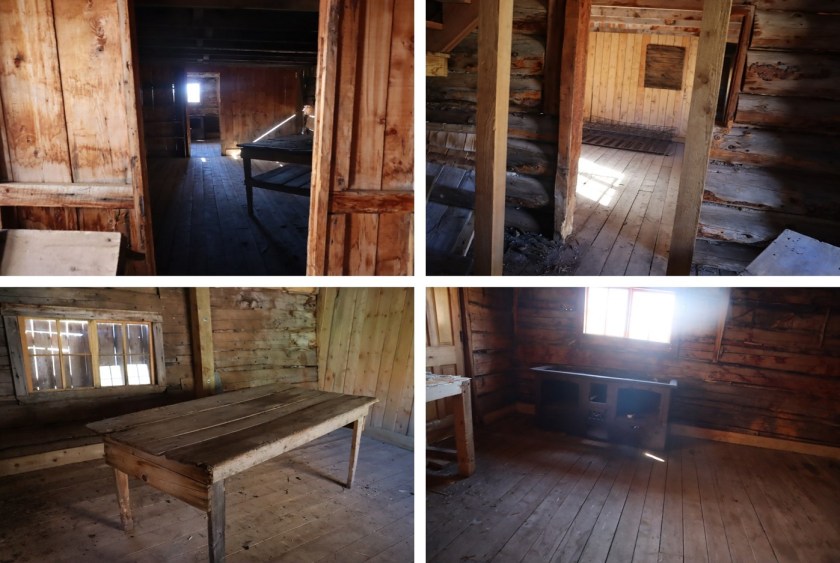
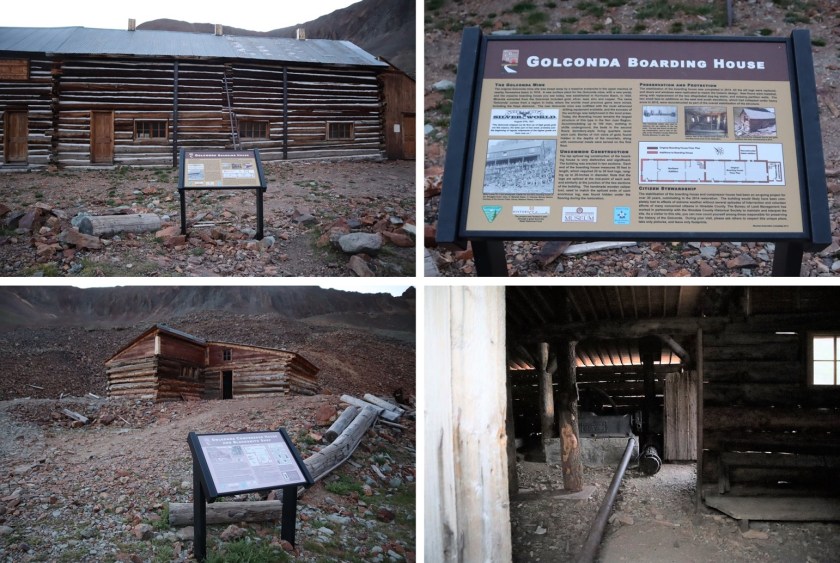
And followed the road all the way to the Golconda Mine. This area is pretty cool, and if you have some extra time I’d suggest you check it out. The mine was refurbished in 2014 but already needs more work, as nature is insane, especially above treeline. The doors open, and you can see some of the original items inside. There’s a blacksmiths’ hut as well, and a lot of leftover ‘trash’ from over a hundred years ago.
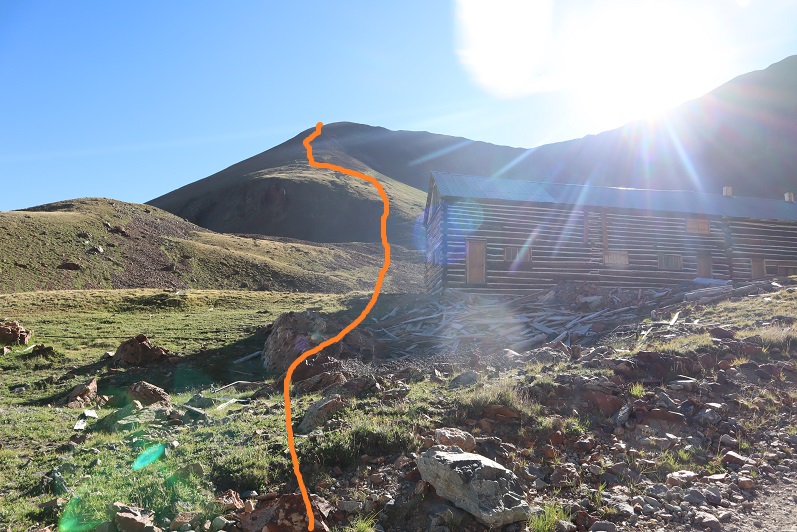
The trail to the summit starts behind the Golconda Boarding House. Well, there’s no defined trail, but that’s the way to start your trek up the mountain. Here’s an overview of the route:
The route starts out in mining rubble
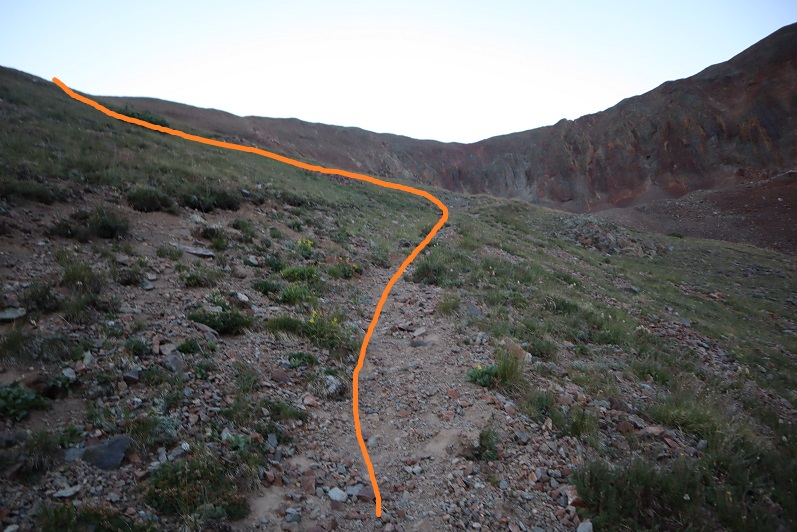
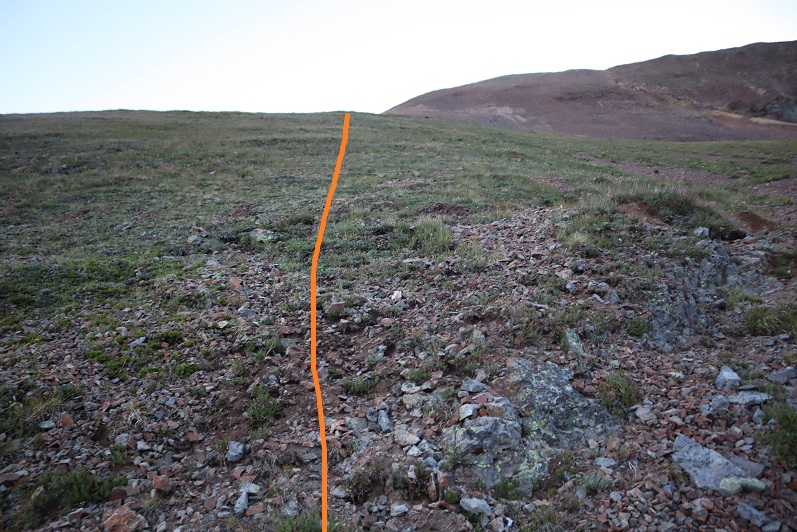
And then changes to tundra. There’s a brief trail here you can pick up and follow for a bit before heading northwest up the mountain
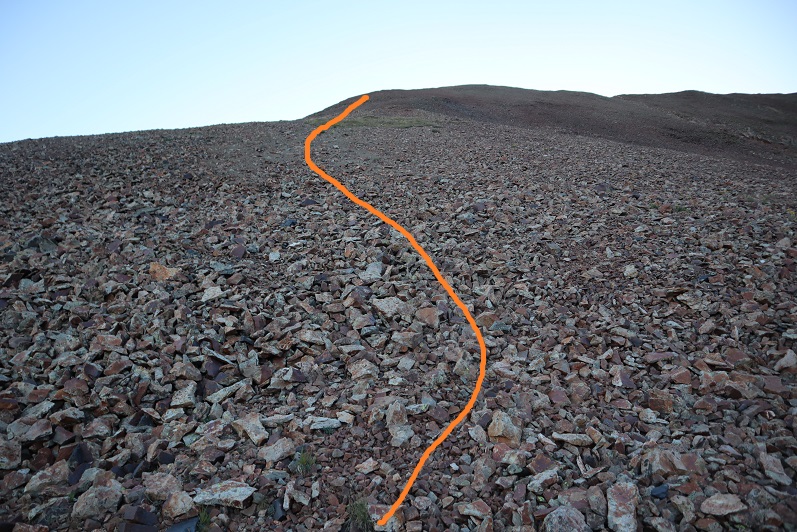
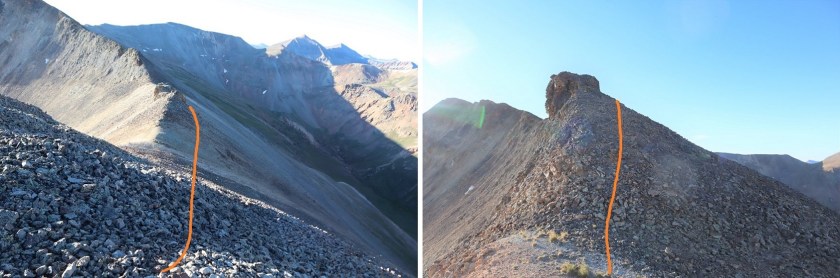
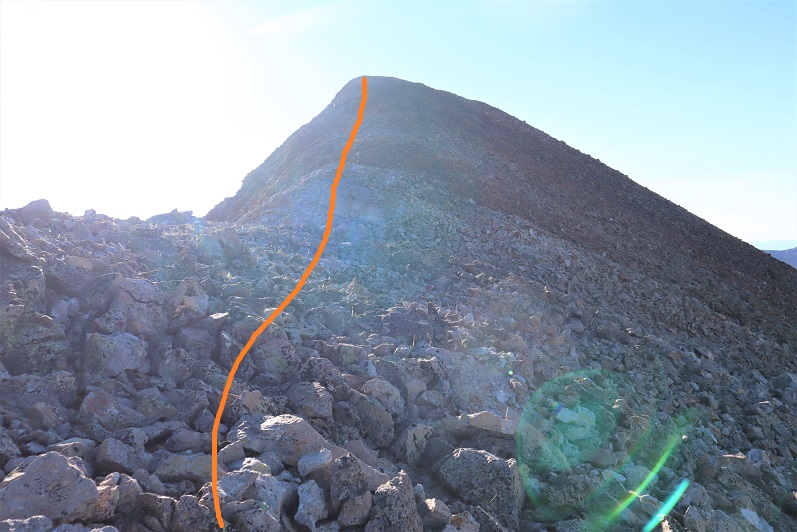
After the tundra came the rubble. There were faint game trails that went up the rubble. On my way down I pushed in steps into the rubble and scree to make more of a defined trail.
I summited unranked Gravel Mountain at 7:10am.
Gravel Mountain:
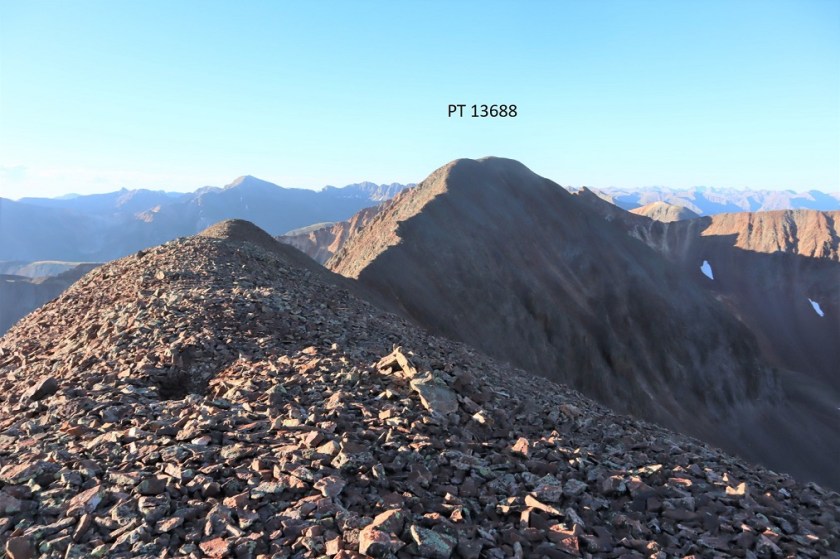
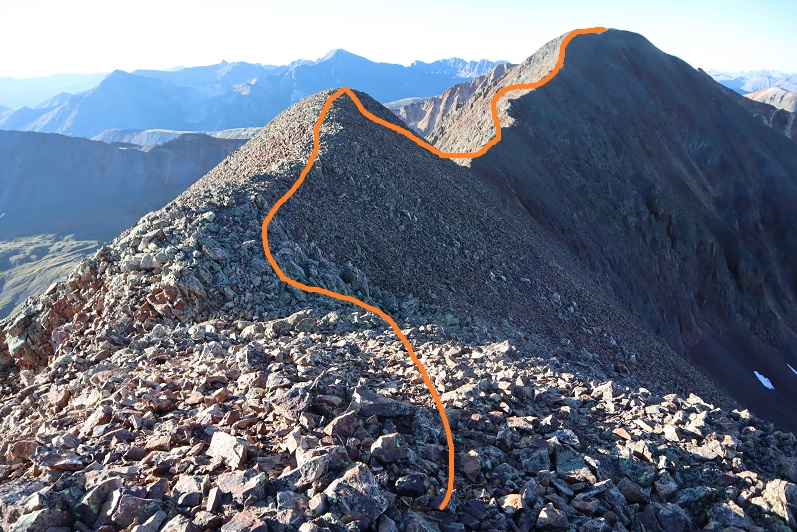
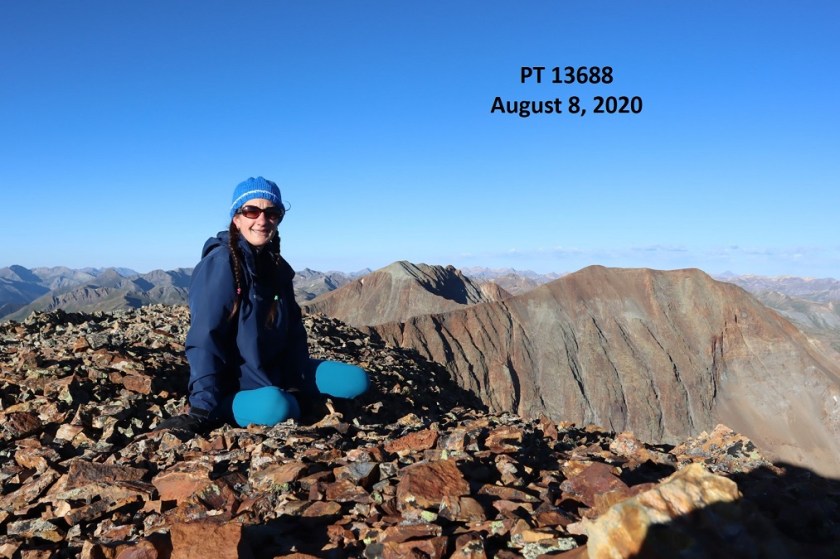
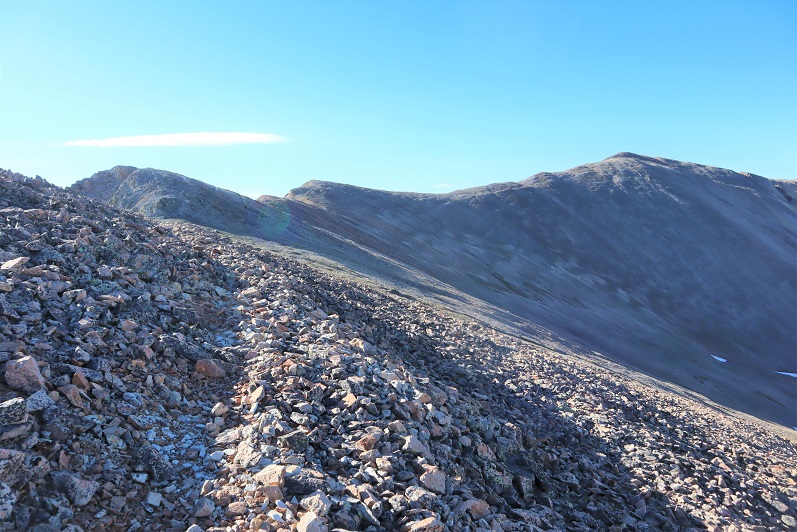
From here PT 13688 is an easy ridge hike away
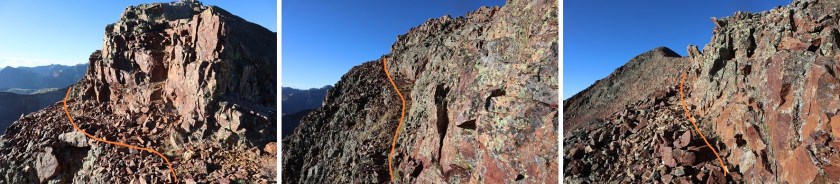
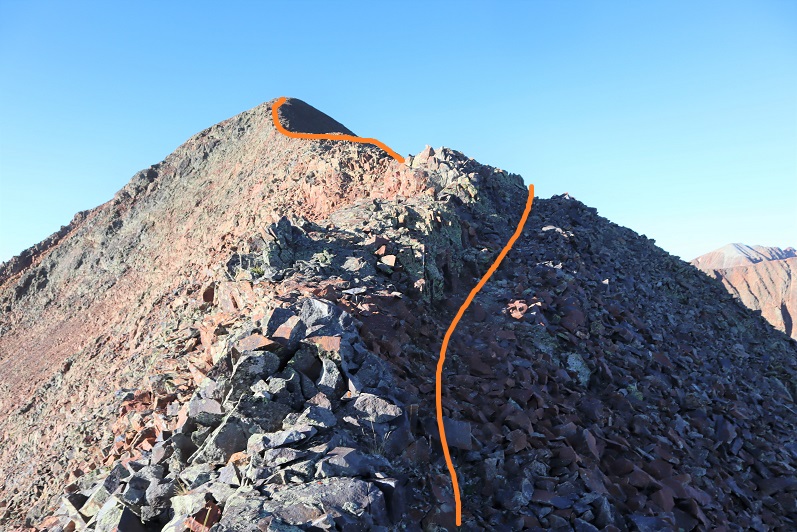
The route is obvious and easy class 2. Here are some highlights:
On the way down I did my best to establish a trail in the scree/rubble
Once at the mine I just followed the road back to my campsite
On the way down I was able to see the ‘road’ I’d intended on driving down to the trailhead. It didn’t look like it’d been used in decades. So, long story short, take 20 from Lake City, and not Engineer Pass (unless you have an OHV).
I made it back to my truck at 9:30am, making this an 8.66 mile hike with 3042’ of elevation gain in 4.5 hours.
I got back to my truck, opened the back to shuffle things around, and found mice droppings lining the edge of my sleeping bag! Ugh! At that moment I realized 2 things: 1) it wasn’t the squirrel last night making noise, and 2) the moth balls don’t work. Ugh. So. Not. Cool. A mouse had made its way into the bed of my truck and was looking around for food. At least I didn’t have any food accessible. I was a bit bummed though the hundreds of moth balls I had lining my truck hadn’t deterred a small mouse (and by the looks of the droppings it was a small mouse).
I had another day free to hike, but chose to drive home to spend it with my youngest instead (who was just accepted into her first college this week: in less than a year she’ll be off to college, and I want to spend as much time with her as possible before she leaves).
After hiking Every Mountain and Cooper Creek Peak I still had some energy left, so I decided to drive up to Cinnamon Pass and get in a few more peaks today. There were a bunch of OHVs in the parking area when I arrived. Mine was the only truck/non OHV there.
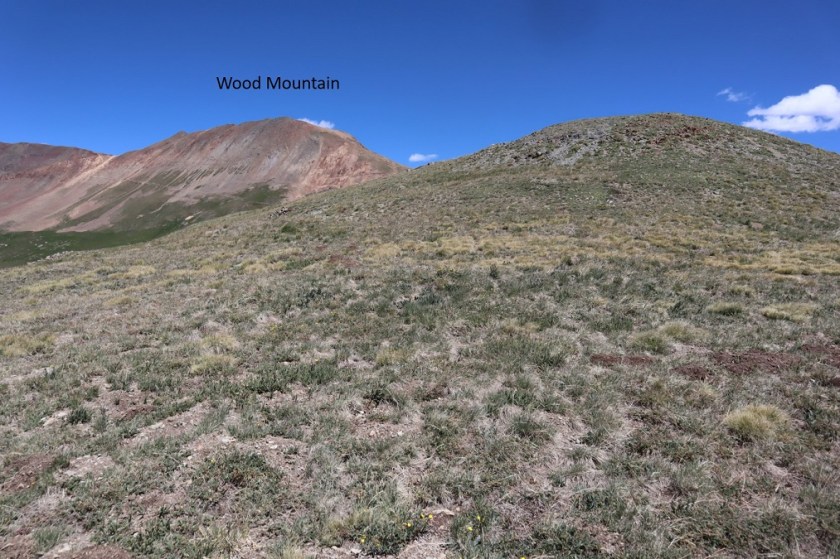
I gathered my gear and started out at 12:30pm. I began by heading north towards Wood Mountain
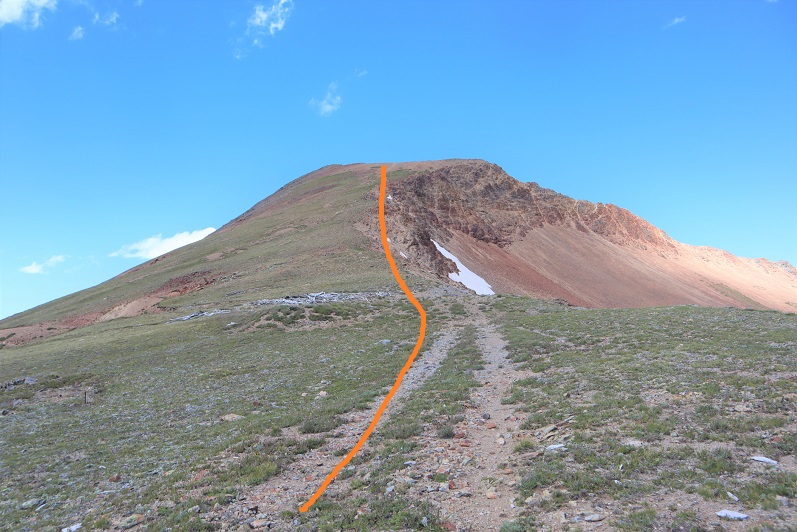
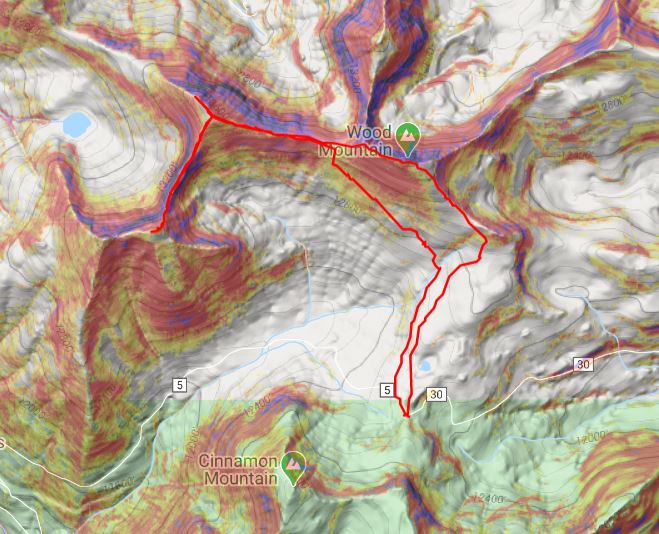
Here’s an overall view of the route
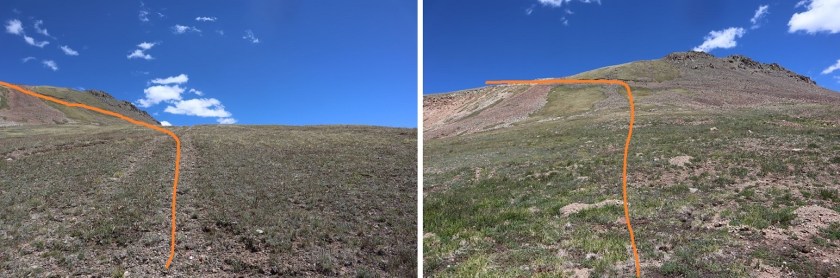
As I was hiking I came across a faint road and followed it up to the ridge
The road ended at what used to be a structure. From there I just hiked up the side of the mountain
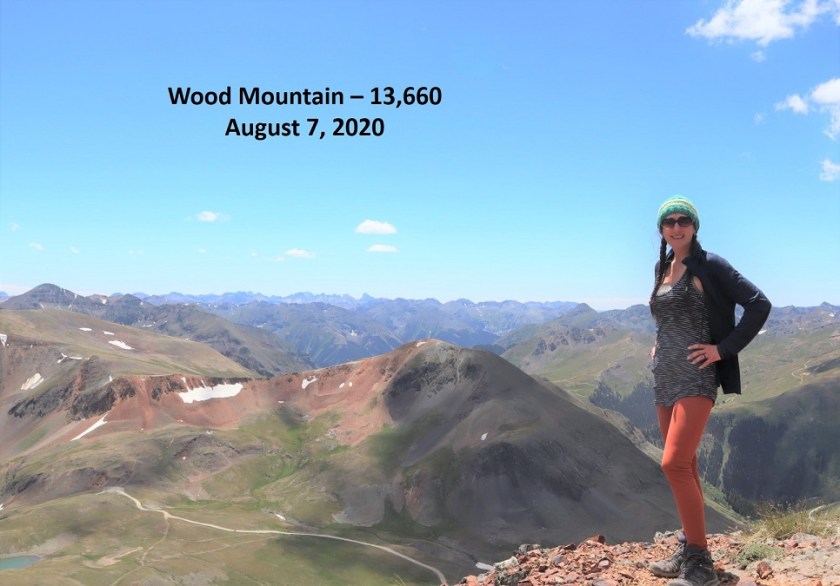
I summited Wood Mountain at 1:15pm, and while I was a little slow/tired from my hike earlier today, I couldn’t believe how easy this summit had been!
Wood Mountain:
Here’s looking back down the ridge I’d just hiked up
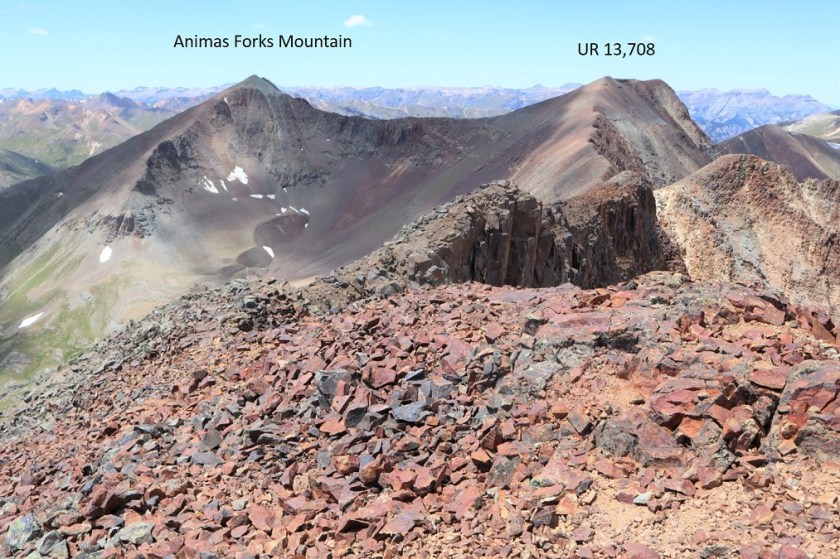
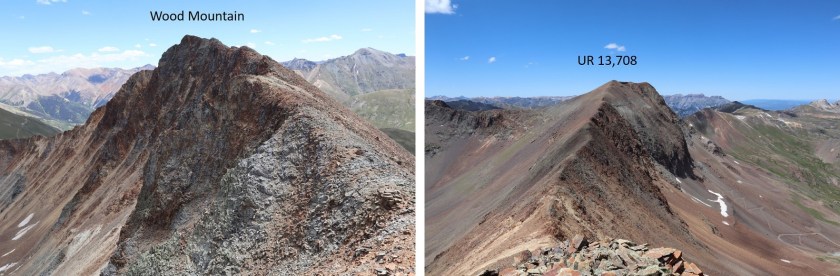
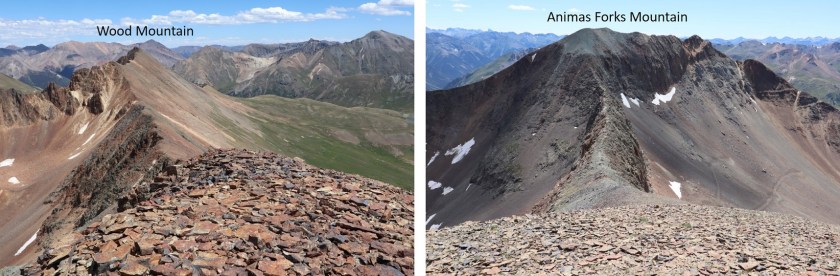
From Wood Mountain you can easily see the other two peaks I’d be hiking today: UR 13,708 and Animas Forks Mountain
There wasn’t a trail to follow, but this was a simple class 2 ridge hike over to UR 13,708
From the saddle, here’s looking back at Wood Mountain and up towards UR 13,708
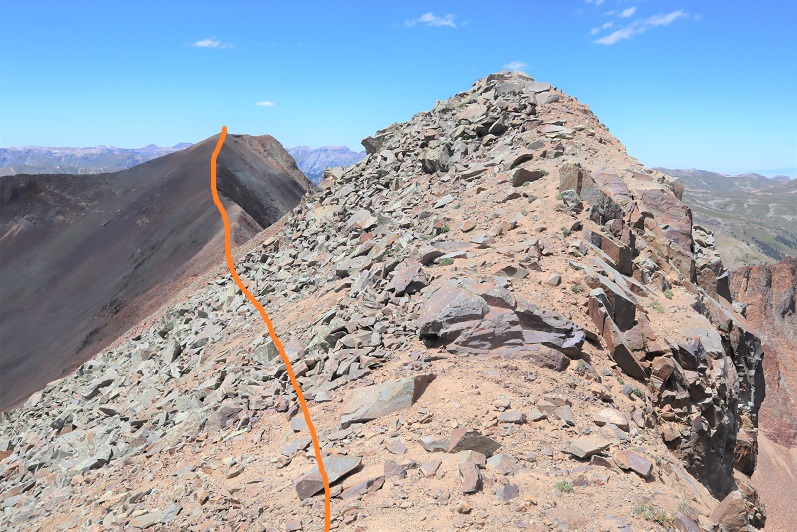
And a good look at the ridge to Animas Forks Mountain
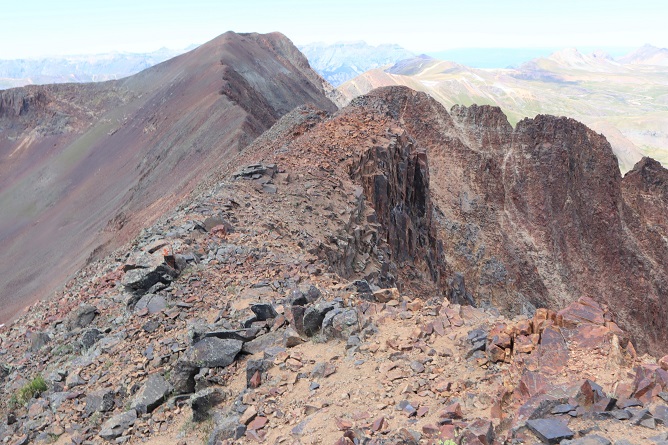
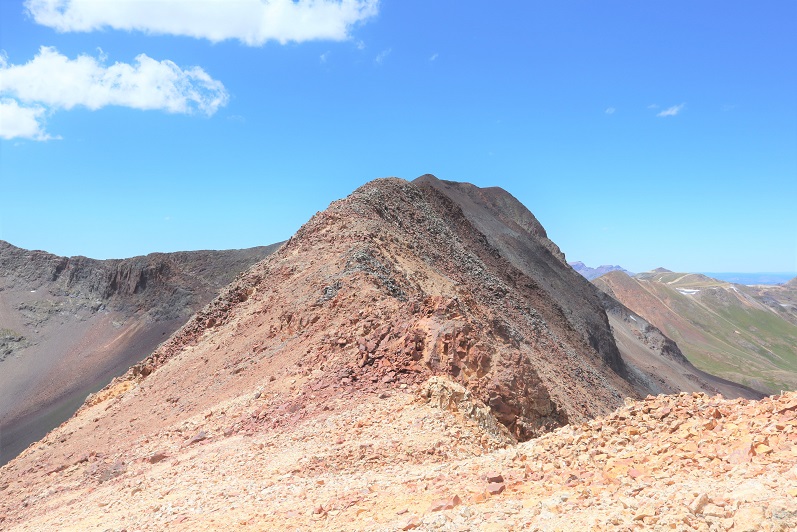
The rock here was loose rubble, but the ridge was easy to follow to the summit
I summited UR 13,708 at 2:15pm. Once at the summit I wasn’t sure I was actually there, so I walked the short distance north to the next point.
Once there I got out my altimeter and determined the first point was actually the highpoint, so I hiked back.
I once again stood on the summit of 13,708 and looked over at Wood Mountain and then over at Animas Forks Mountain
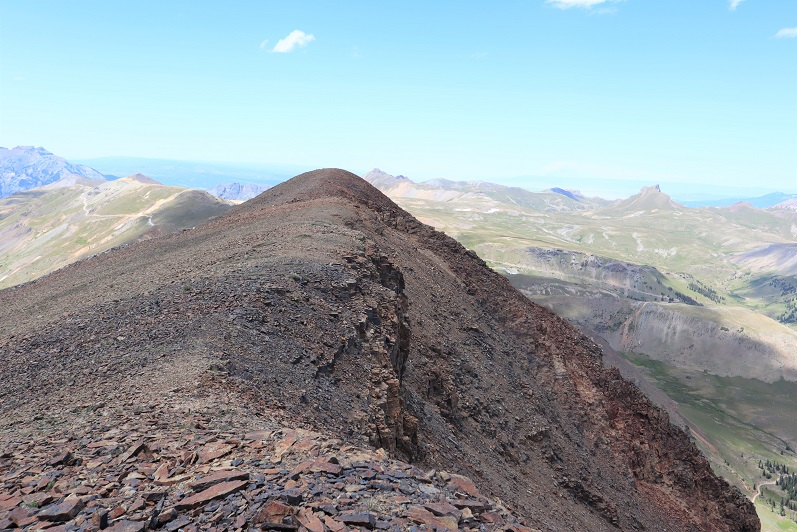
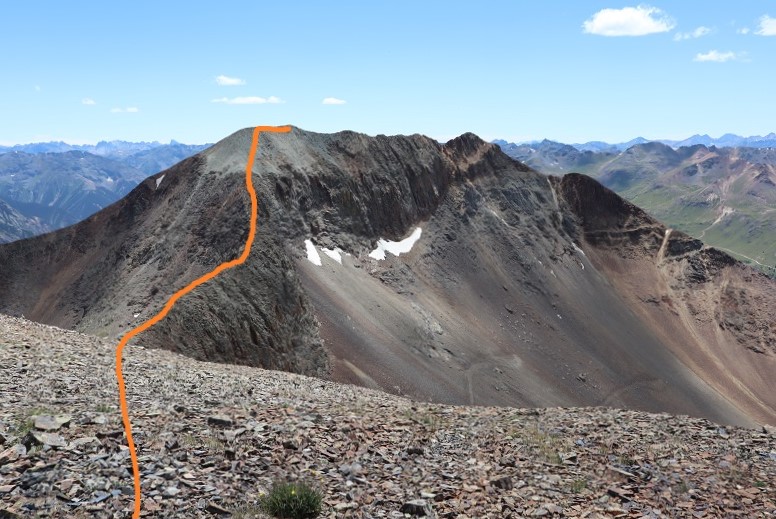
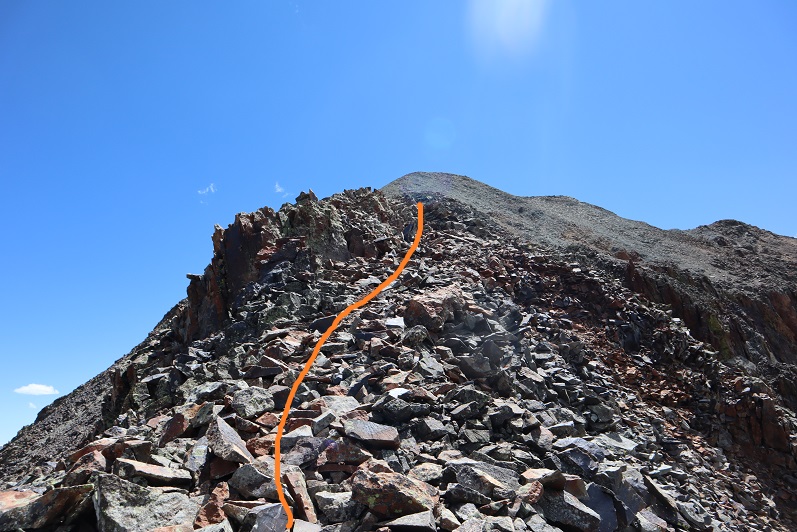
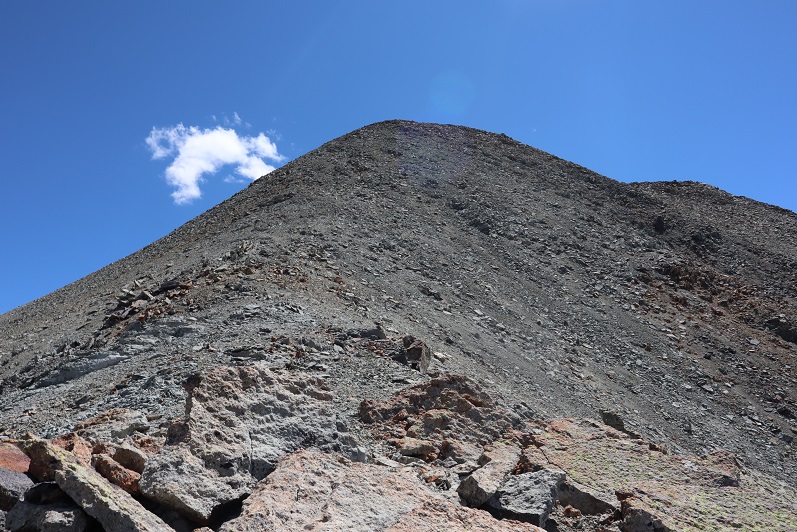
Here’s the route up to Animas Forks Mountain
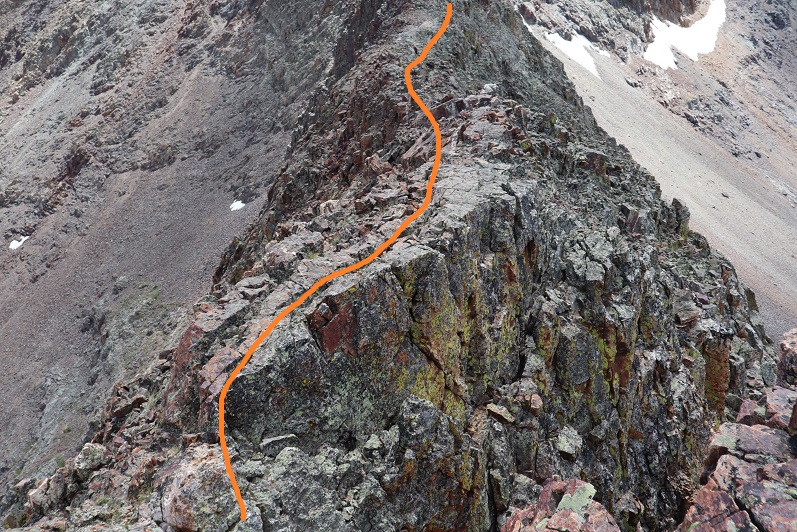
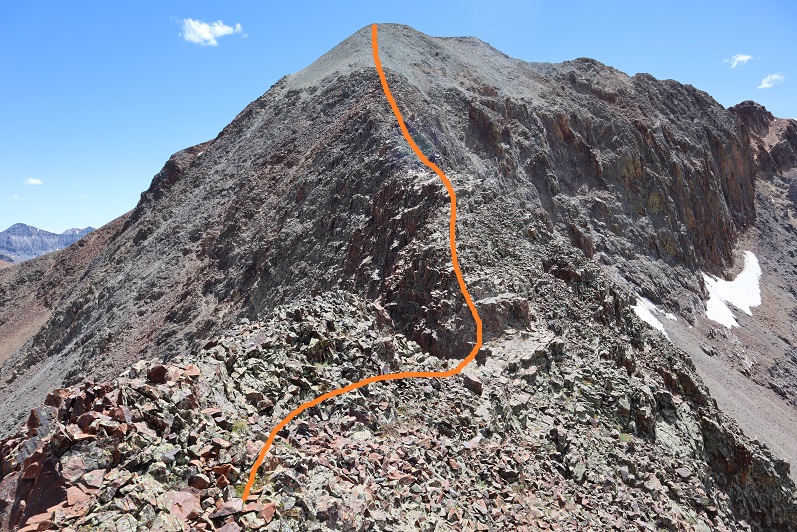
The ridge looked like more than class 2, but if you just follow the ridge it stays at class 2, just with some added exposure.
The rock is pretty solid until the very end, where it becomes loose just before it turns to gravel
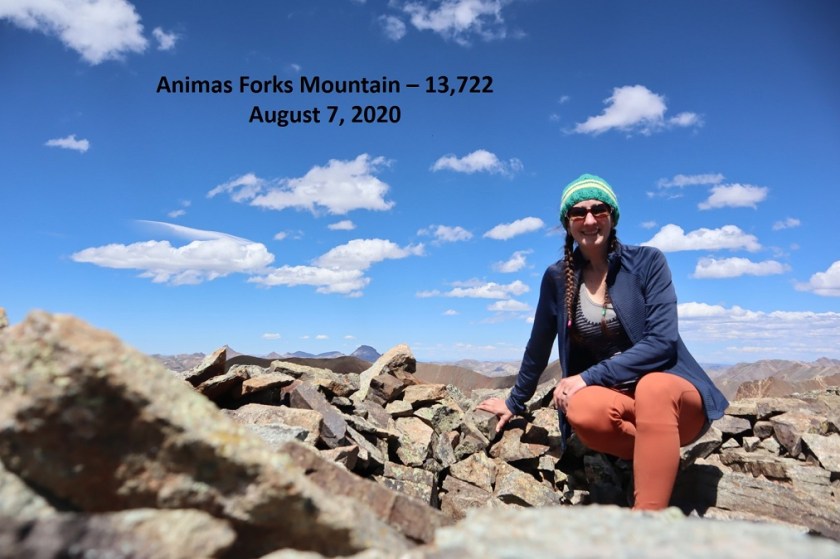
I summited Animas Forks Mountain at 3pm
“Animas Forks Mountain”:
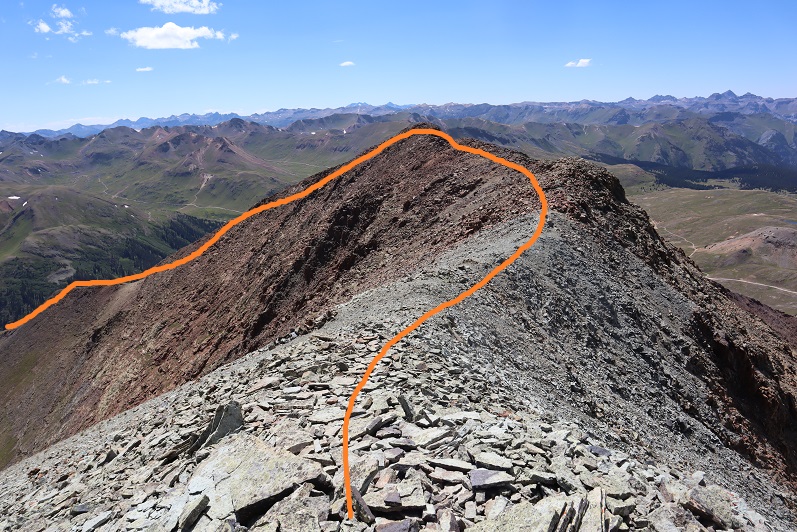
From the summit you can see an easy way to make this hike a loop, just follow the ridge down to the road and hike the road back to Cinnamon Pass.
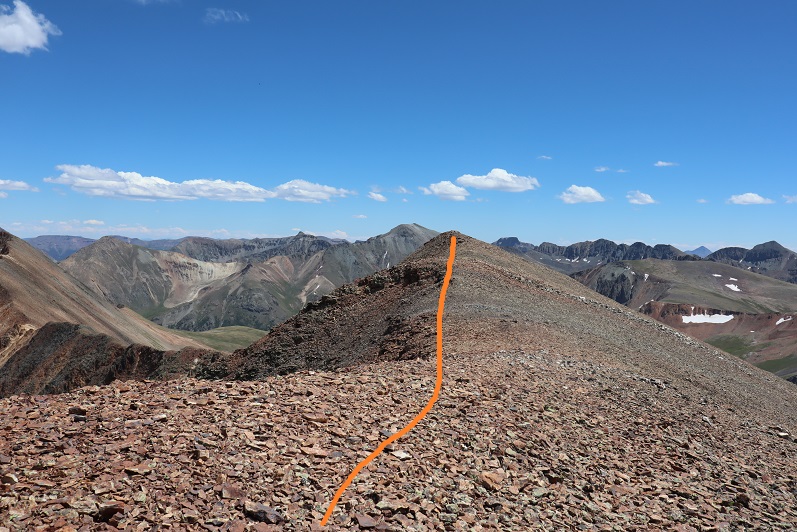
However, there were some mines I wanted to explore below Wood Mountain, so I decided to retrace my steps back UR 13,708. Also, when I’d taken a video at the summit of 13,708 I’d said I was at Animas Forks Mountain, and I wanted a new video with the correct name. Here’s the route back to 13,708
I re-summited UR 13,708 at 3:45pm
UR 13,708:
From here I made my way back to the 13,708/Wood Mountain saddle
Once at the saddle I followed the sand and rock gully down until I hit up with an old mining road
I followed the faint road until I came across a mine
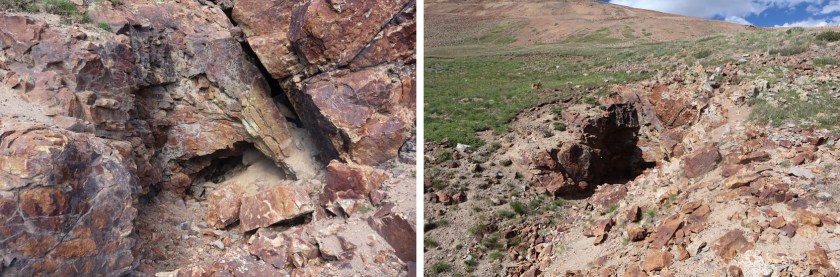
The mine was completely boarded up, without even a gate/lock that would open. It was still neat to peer inside. It looked like they’d collapsed the inside.
I continued following the road southeast until I came across another mine, this one not boarded up
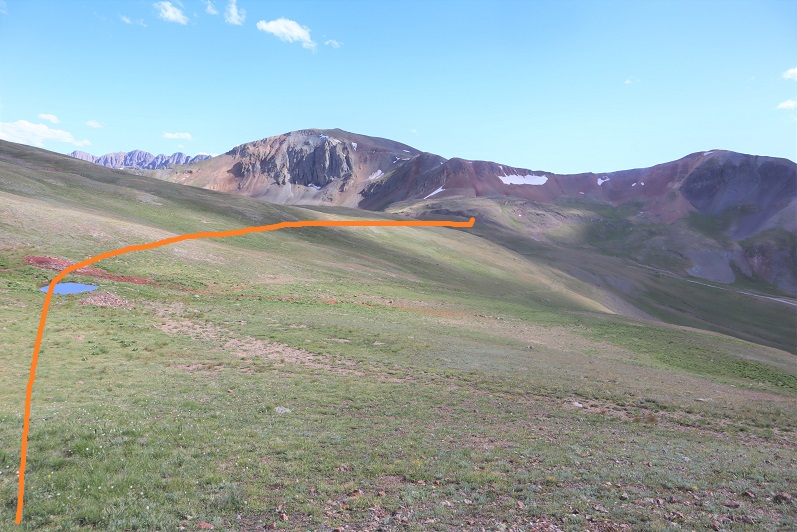
From there it was an easy hike back to Cinnamon Pass
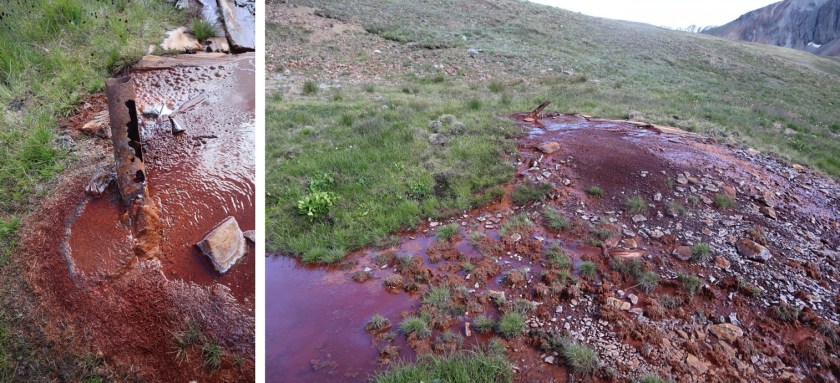
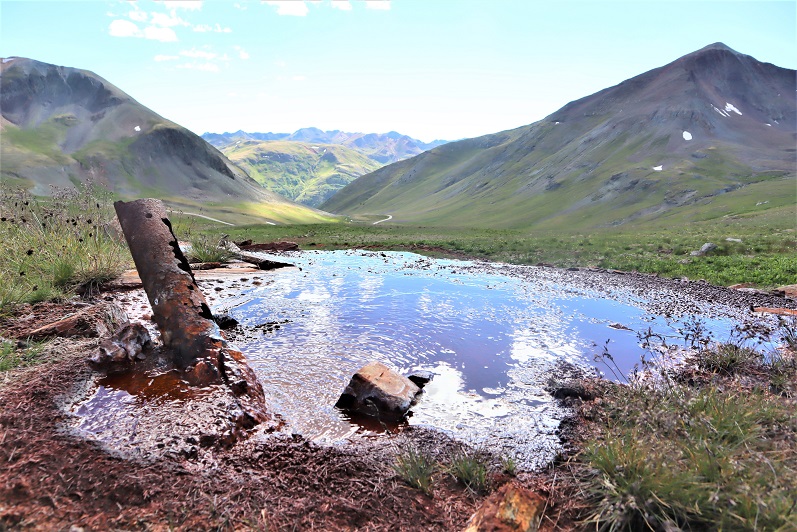
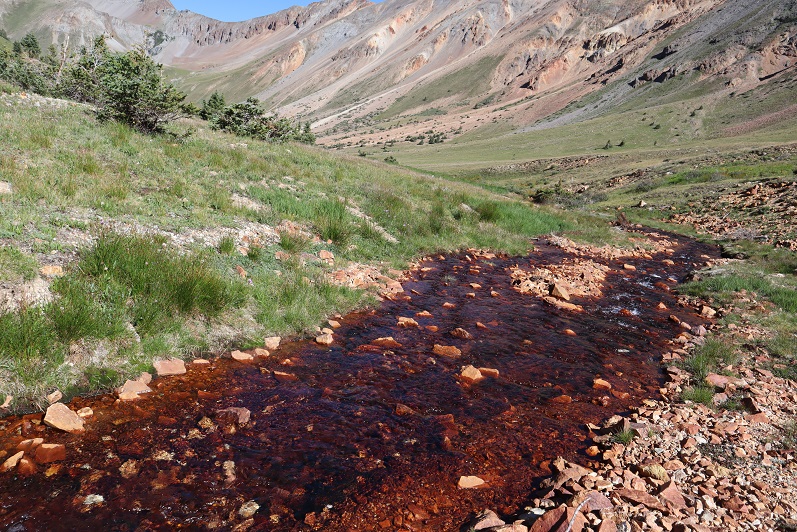
I passed some water coming out of a pipe that didn’t look fit to filter. The water was more red in color than orange, and made me wonder if that’s how Cinnamon Pass got its name?
Eventually I connected back up with the road and followed it to my truck. My truck was now the only vehicle in the lot
I made it back to my truck at 4:50pm, making this a 6.53 mile hike with 2270’ of elevation gain and lots of time exploring mines in 4 hours, 20 minutes.
I decided to drive to the next trailhead, eat dinner, and get some sleep. It ended up being an eventful and unplanned drive over Engineer Pass.
The Cooper Creek Trailhead is located about a mile past the Silver Creek/Grizzly Gulch trailhead on 30 past Lake City. There were cars parked and camping at the trailhead, so I parked at a dispersed camping spot right next to Cooper Creek.
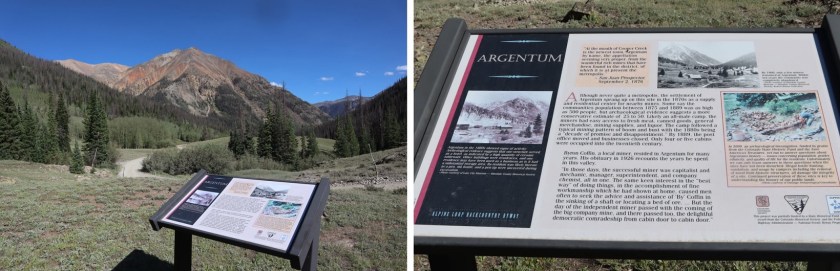
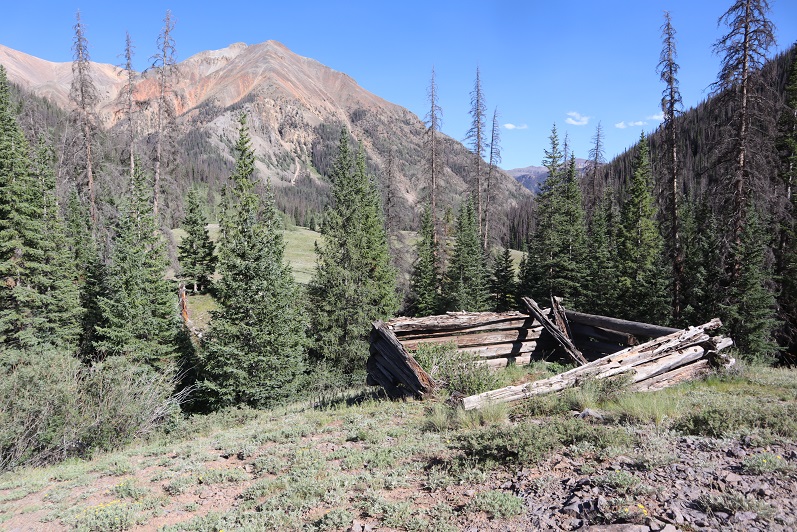
It was still early so I decided to take a look around. The Cooper Creek Trailhead is located in the historic town/settlement of Argentum, and there were still some old structures in the area.
It was an uneventful night. I slept soundly until midnight, when campers at the spot across from me returned from their outing. They weren’t loud, but they did wake me up. I went back to bed and didn’t wake up again until my alarm went off. I was on the trail at 5am. The Cooper Creek Trailhead is just to the west of Cooper Creek, visible from the road.
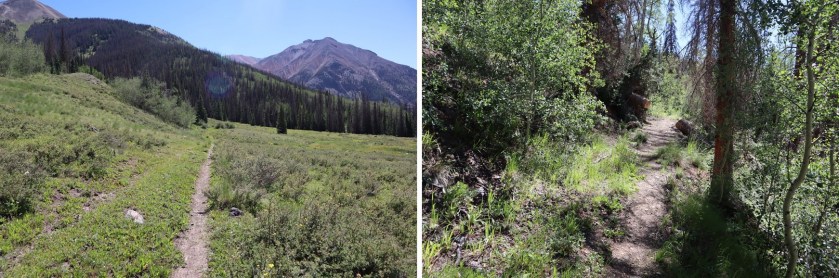
The trail is class 1 for the first 3 miles, and seems to follow an old mining road.
After hiking for 1.5 miles the trail crosses Cooper Creek, just where an overturned trailer sits in the water. It looks like it’s been there for a long time.
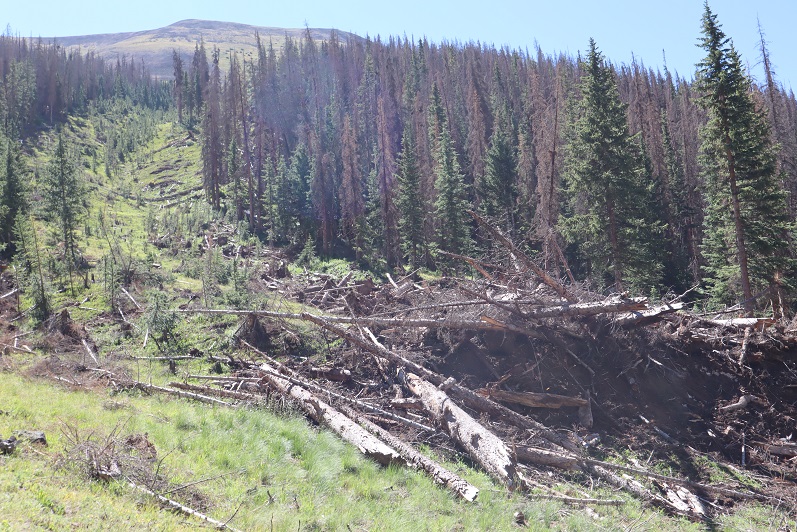
The trail continues to follow the creek up to the basin, passing a fresh avalanche area (there was still snow under the trees, but there was a clear path to follow)
After 3 miles of hiking along this class 1 trail it abruptly stopped. I crossed the creek and headed northeast along the mountainside, eventually picking up another class 1 trail (I’m not sure where it had started, as I crossed the creek at a couple of cairns and must have missed the trail)
The trail eventually leads to a lake in the upper basin (going left), but I didn’t follow it that far. Instead I crossed Cooper Creek one more time and headed towards an old mine to check it out. If you don’t want to check out the mine, here’s the overall route to gain the ridge.
The creek crossing was simple
The mine was filled in, but there were some pieces of equipment lying around.
I turned around and noticed 2 tents set up along the trail that leads to the lake and a couple other 13ers in the area. It was just starting to get light so I decided to be quiet as I gained the ridge. Eventually I found a trail here that led to the ridge as well (it actually goes up and over and down into the basin on the other side of the ridge)
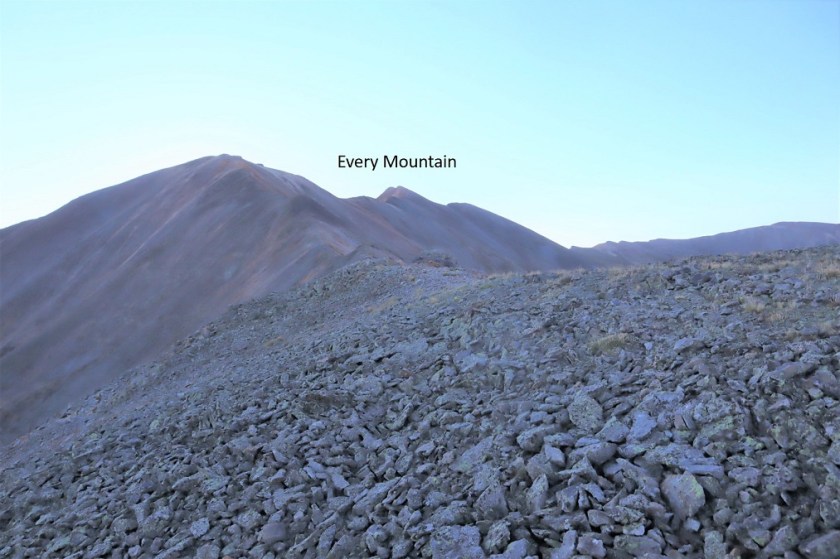
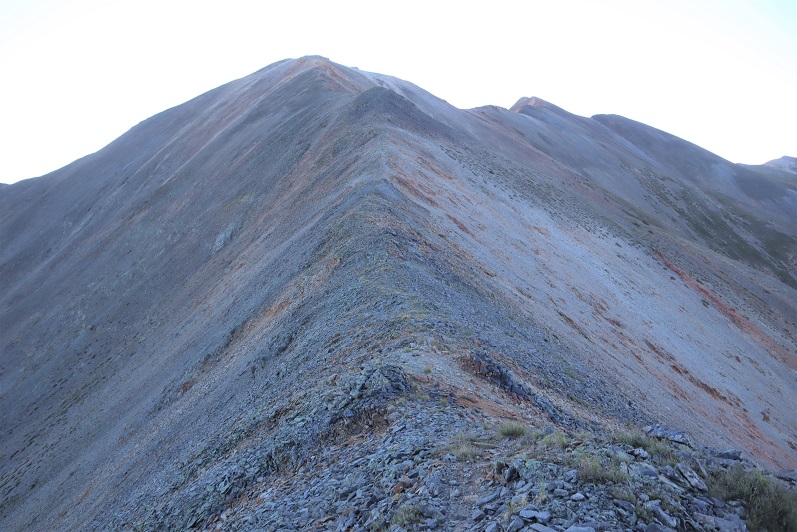
Once I gained the ridge I turned right (east) and followed the ridge towards a false summit.
After reaching the false summit it was a half mile hike along the ridge to the actual summit. This was class 2, with no real obstacles to overcome.
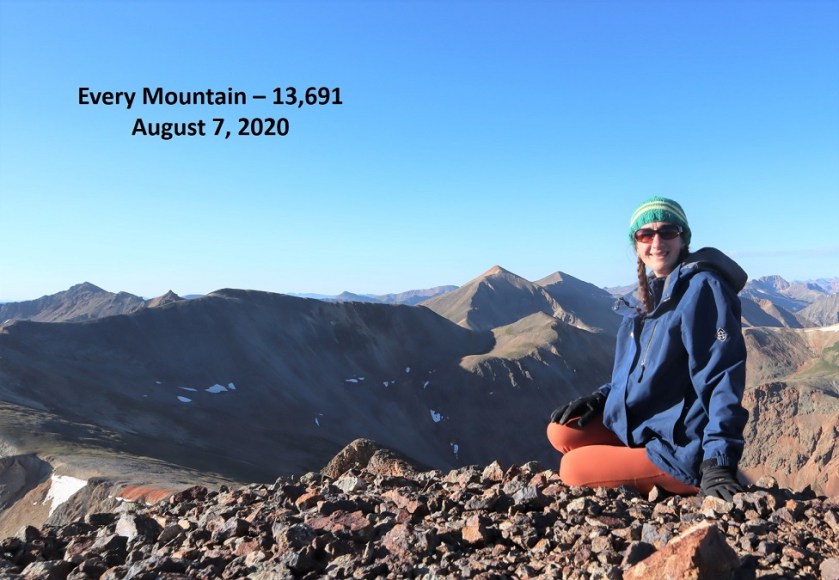
I made it to the summit of Every Mountain at 7:55am
“Every Mountain”
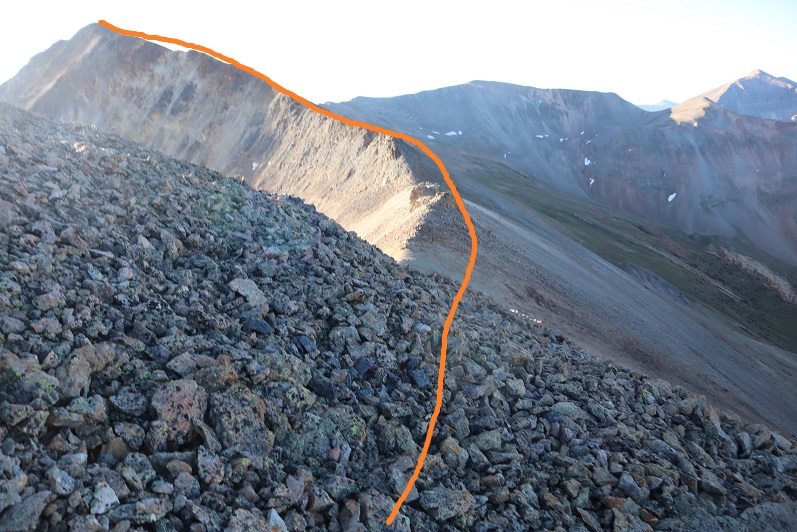
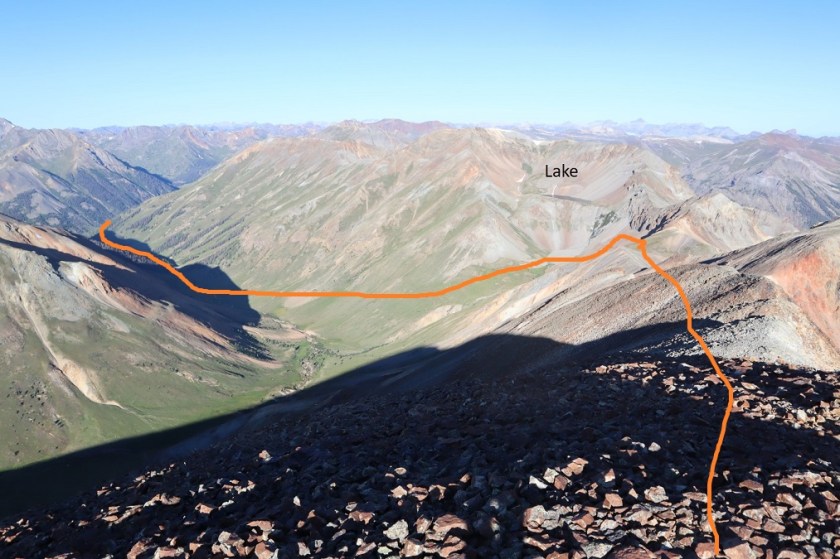
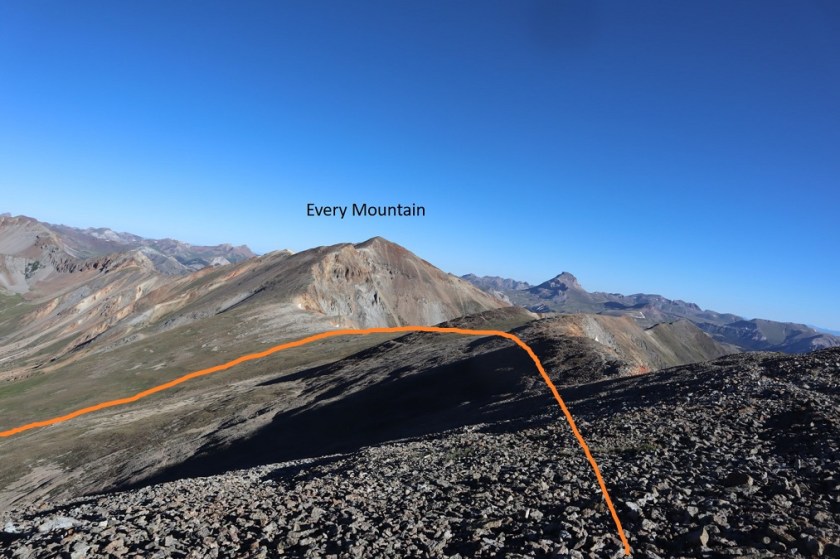
Here’s a look back at my route in
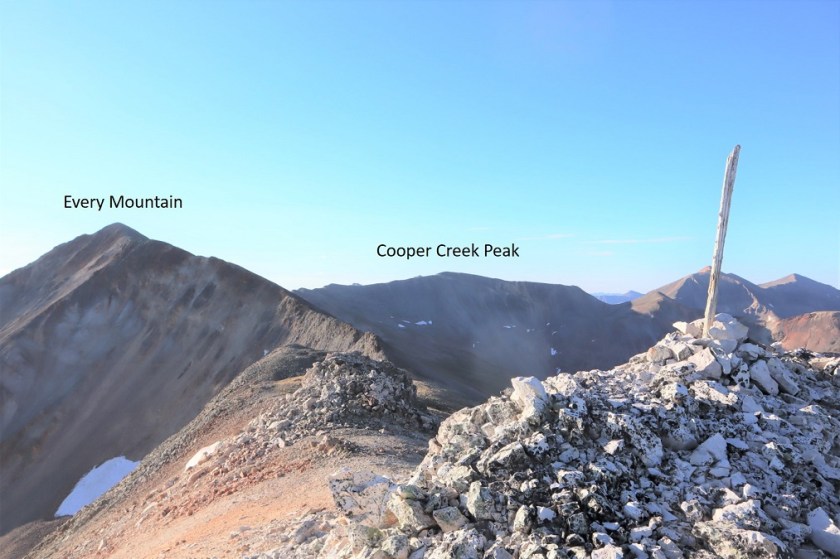
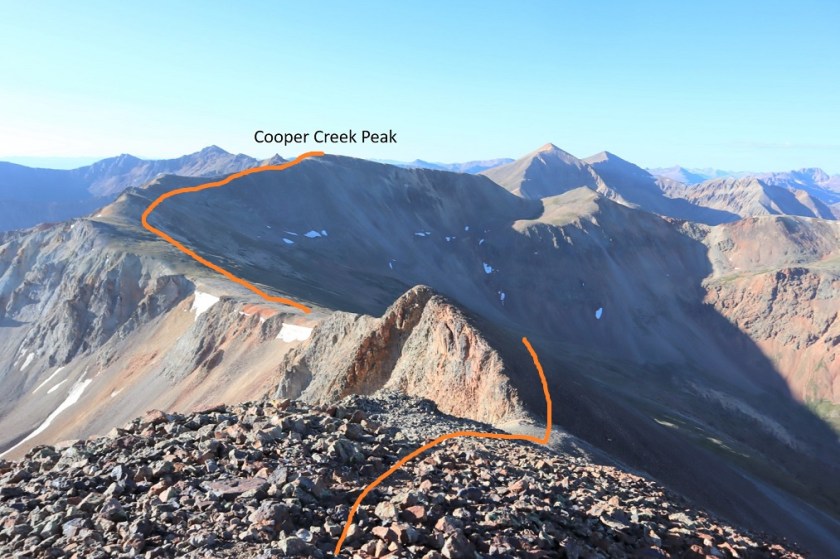
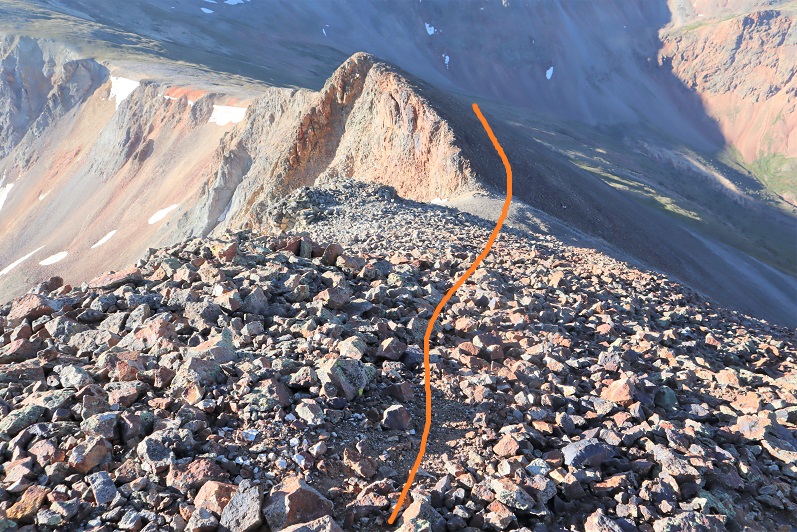
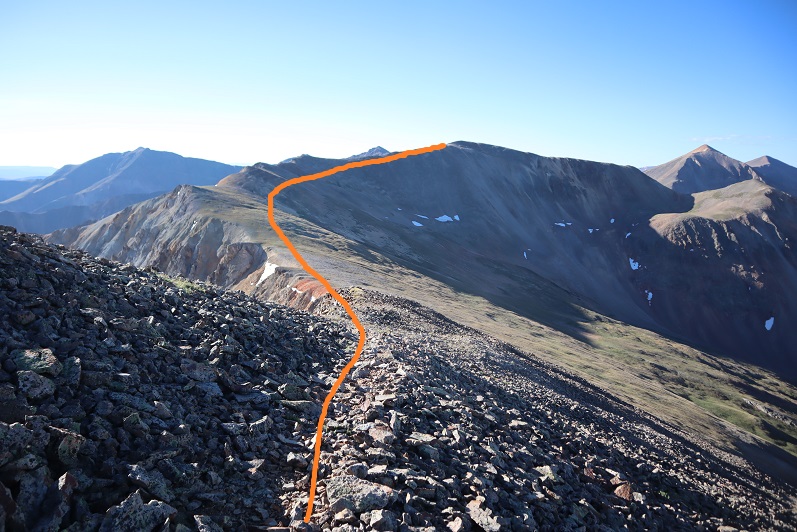
Here’s a look at the route over to Cooper Creek Peak
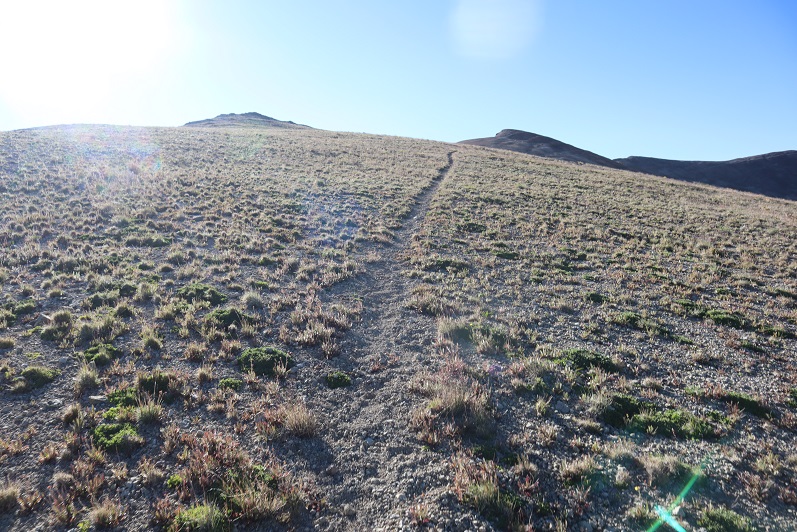
This was another easy class 2 ridge hike without any difficult obstacles. At times there is even a trail. Actually, there are quite a few game trails here.
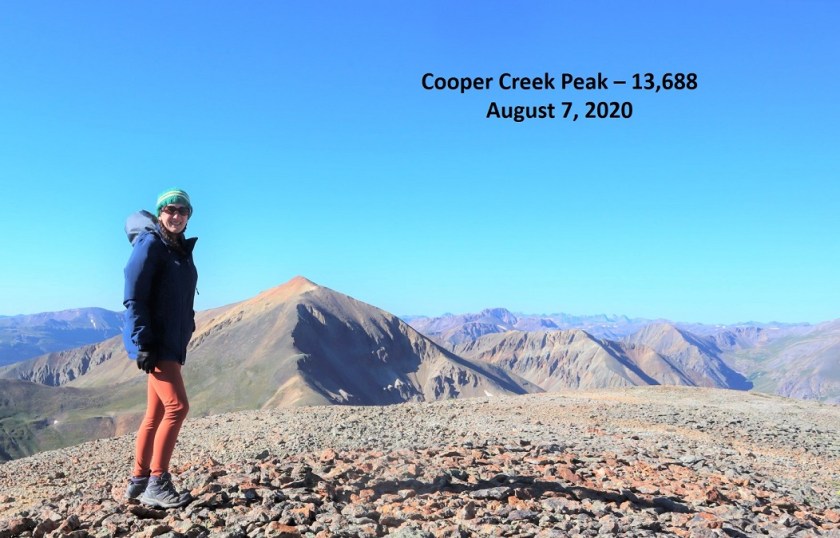
I summited Cooper Creek Peak at 8:50am. It was very, very windy.
“Cooper Creek Peak”
Because it was windy it was also cold, so I didn’t stay long on the summit. Instead I headed back down to the Every Mountain/Cooper Creek Peak saddle and from there down into the basin
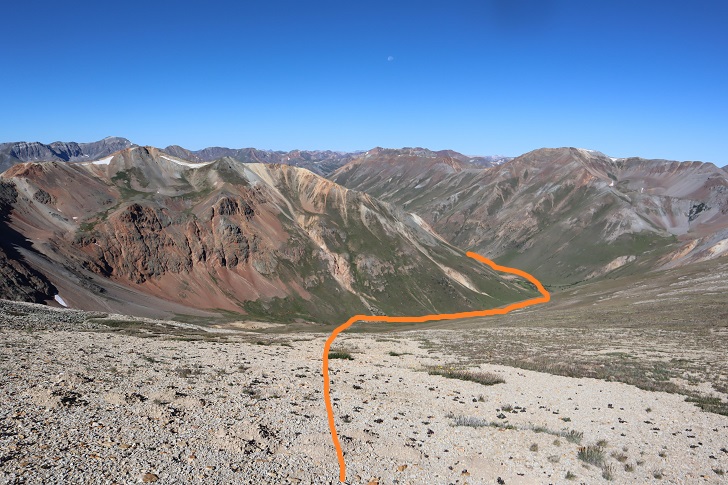
Here’s the overall route
I hiked down the grassy slope, aiming for the creek. I then crossed the creek and stayed a little high to avoid the muddy areas
The creek didn’t look like it had water fit for filtering
Still, I followed it back to the trail
Here’s a look back at my way down the basin
And the route back on the class 1 trail
Back across the creek
And back to the trailhead. On my way out I noticed a trail register I hadn’t seen on my way in
I made it back to my truck at 11:10am, making this a 12.93 mile hike with 3987’ of elevation gain in 6 hours, 10 minutes. Here’s a topo map of my route:
It was still early and I wasn’t yet tired, so I decided to drive to the next trailhead and get in a few more peaks for the day…
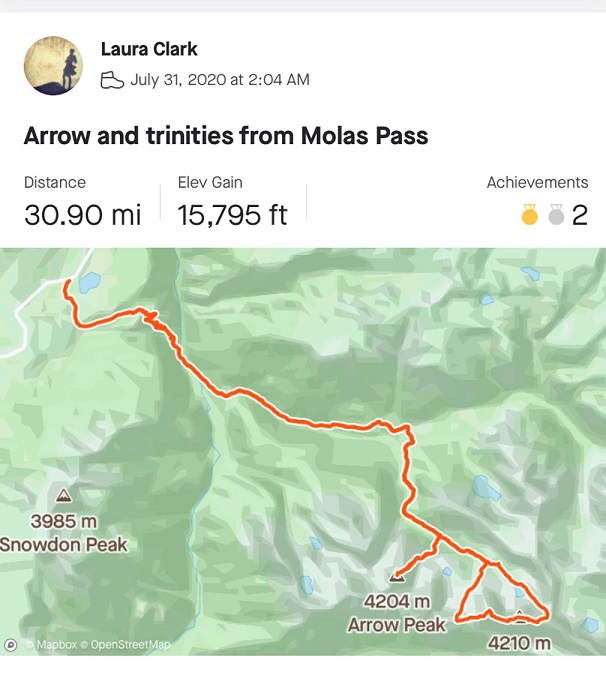
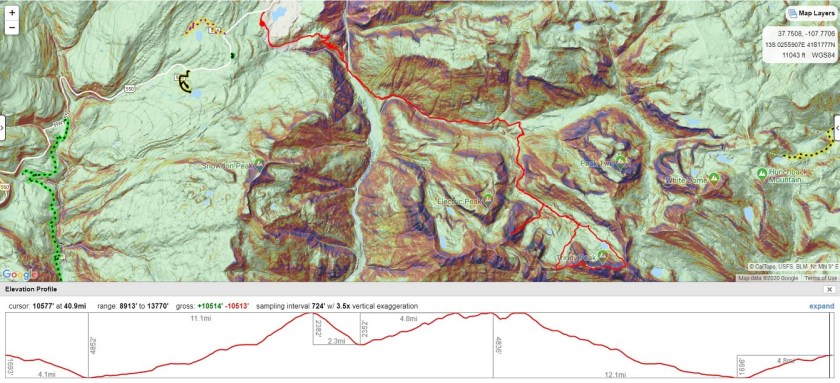
* I did these peaks with Arrow Peak as a weekend hike. CalTopo put the entire route at 41 miles, 10511′ of elevation gain, Strava gave me 30.9 miles and 15795′ of elevation gain. Either way, it was a good workout (see photos at end). Approach directions can be found here.
After hiking Arrow Peak I decided to get a look in the daylight at the approach to the Trinities. I continued southeast along the same trail I’d hiked in on until I came to the area where I was supposed to begin the ascent up to the Trinities
However, when I got there I noticed there wasn’t a place to set up camp, and the area had a lot of water. I couldn’t find a good place to cross the water without getting seriously wet. I did not want to start a hike early in the morning wet and cold.
I thought about the route for a minute, went through some pictures I’d taken earlier in the day from Arrow Peak, and decided to continue along the trail for a bit to see if I could find a better spot to set up camp, and a better entry point. This hike is a loop, so I just continued heading southeast. The trail became more and more faint as I hiked along
After hiking for a mile and a half I came to the area I intended to spend the night at 11,970’. There were waterfalls here, a creek, willows, and a few trees.
I set up a bivy under a tree, filtered some water, ate an early dinner, and jotted notes down in my journal.
There was a 20% chance of rain today, and wouldn’t you know it? It started to rain. Also, the clouds looked like they were going to attack me.
Luckily the rain stopped and I decided to head over to the creek again. This creek looked much easier to cross then the marshy area, but in the interest of not needing to change out of my hiking boots and into my sandals tomorrow morning (thus eliminating unnecessary gear) I decided to build a rock bridge over the creek. I put on my water sandals and got to work. It was my intention to hike up this side of the mountain and connect with the proper trail once in the basin. I wasn’t 100% sure the route ‘went’ but it seemed like a better option than ascending from below. I figured it this didn’t work I’d turn around and start with East Trinity instead, and get wet on my way out.
When I was done making the rock bridge it was still too early to go to sleep. There wasn’t much to do so I relaxed, enjoyed the view, and broke out the whiskey. Before the day was out I had about 16oz of whiskey (I knew because I’d placed it in a marked sports bottle. Also, I have a high tolerance for alcohol and don’t get hangovers so this isn’t out of character for me). I saw a group of hikers come over the pass and head towards me. They were doing Vestal tomorrow and were looking for a place to camp for the night. I told they they’d have better luck near the approach and they were off. Not long after that I went to bed. It was still early, but it had been a long day. Whiskey puts me to sleep.
I woke up well before my alarm. It was still dark out but there was a full moon and I could see the mountains clearly. I saw shooting stars and thought to myself how lucky I was to be here right now. I was actually warm (that’s rare for me when I backpack) and I didn’t want to get up. I also didn’t need to for a while. I watched clouds come in and started to worry: there was a 40% chance of rain after noon today and I didn’t want to get stuck in the rain while on the traverse. I’d heard from other hikers yesterday it took about 8 hours to complete. I did some math in my head and decided to get up and get going. The last time the weather had said 40% chance of rain after noon I got caught in a thunderstorm at 9:30am.
I’d prepped most of my gear last night, so this morning all I had to do was roll up my sleeping bag and put away my bivy sack and ground cover. I filtered some more water and I was off. (side note: I’ve had the same water filter since 1998, and wouldn’t you know it, they’ve improved since then? This week I bought a gravity bag water filter, and it’s AMAZING! I can fill my entire water bottle in 2 minutes, and since there’s a lot of water in the area I convinced myself to drink as much as possible this weekend. Normally I don’t drink while hiking, but this weekend I filled up my Nalgene 3 times!)
It was just beginning to get light out when I set off at 5am. I hiked straight up the side of the mountain, and when I reached the top I was thrilled to see my idea had worked: the route easily connected with the trail (there wasn’t a trail exactly, but the routes lined up and I was now going in the right direction).
There were several headlamps already shining on Wham Ridge. Looks like they got an even earlier start than I did. Smart. I was a little worried about the cloud cover. I could see rain in the distance and the clouds were forming fast. I told myself I’d keep going until I felt uncomfortable. I didn’t feel my real point of no return would come until I summited West Trinity and decided to either head back or continue on for the day.
I dipped down a bit into the basin and headed south towards the ridge. There seemed to be a couple of options to ascent the ridge. I chose the gully directly in front of me.
The gully started out with large boulders and ended with scree. I took it slow and kept an eye on the weather.
At the top of the gully I turned left and headed east to the saddle. This was a very simple trek that followed a faint trail behind the ridge.
The first part of this trek was simple and straightforward as I hiked up the ridge
Then it became more tricky. There were no cairns here. I stayed on the south side of the mountain and continued climbing east. I encountered a series of class 4 gullies and took them up. There were several gullies and they all seemed to ‘go’. (Side note: when I got home I pulled up 4 different GPX files of this route and none of them lined up in this area, so it seems there are several ways to climb this part).
The gullies eventually brought me to the ridge, which I followed to the summit
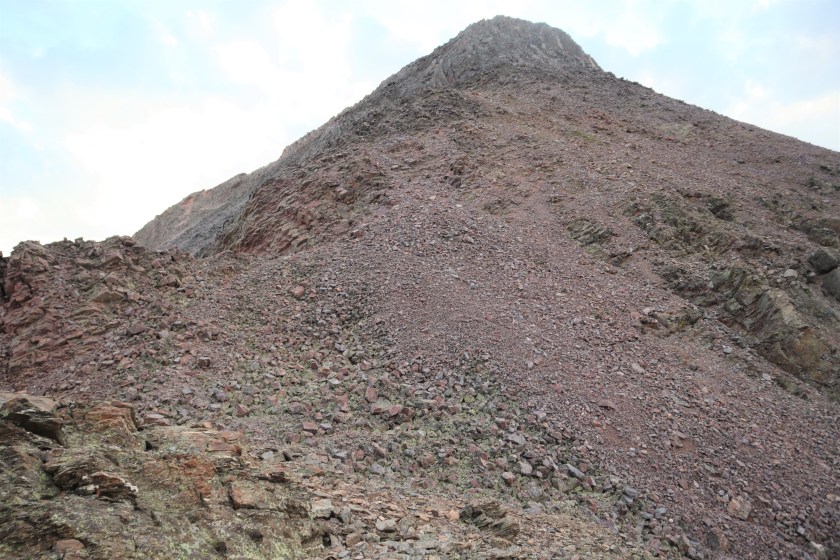
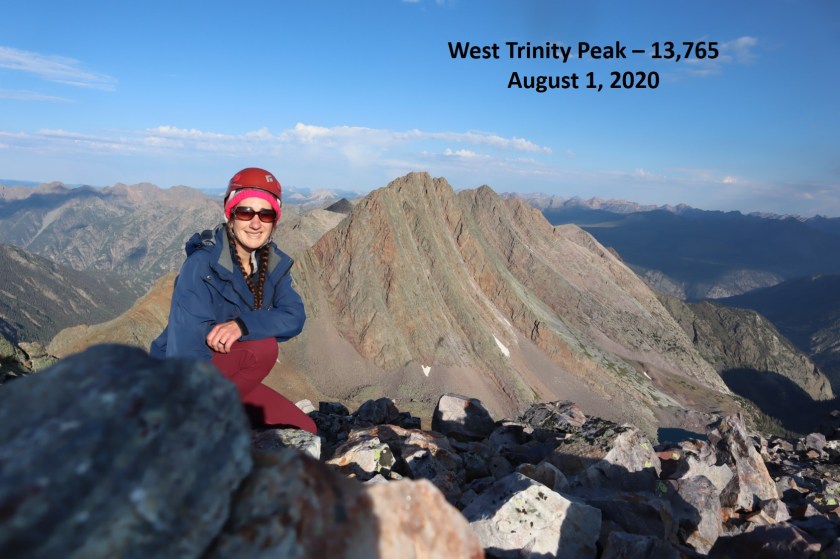
I summited West Trinity Peak at 8am
West Trinity Peak
The weather looked like it would hold so I made the decision to continue towards Trinity Peak (also, I didn’t want to downclimb those gullies! Definitely do this traverse west to east if you’re not a fan of downclimbing gullies, as the gullies don’t quit and you’d have to downclimb every one of them heading east to west).
I continued southeast towards the West Trinity/Trinity Saddle
Instead of following the ridge, take the gully down. It’s class 2 and leads you to the saddle. You won’t be losing any unnecessary elevation.
Interestingly, there were cairns between West Trinity and Trinity Peak. This is interesting because they would have been useful elsewhere, but were only present for this short section.
Don’t stick to the ridge, but follow the cairns as they skirt the south side of the mountain
The cairns (circled in red) were very helpful here
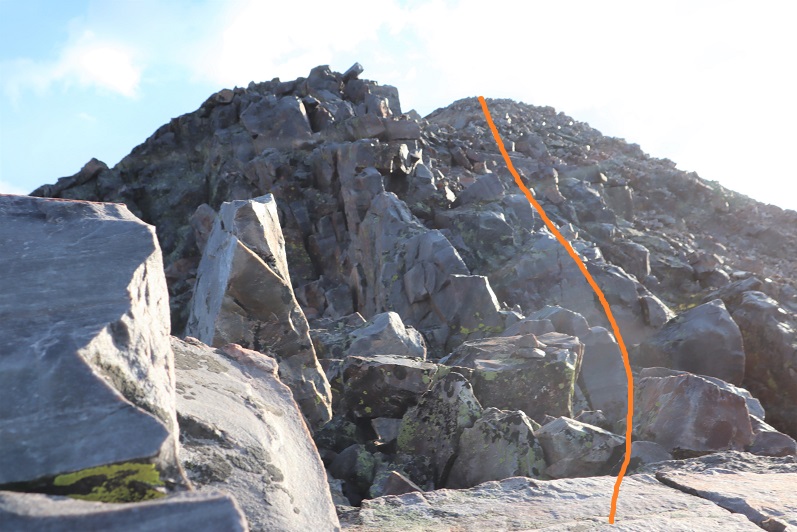
They led me to a class 4 chimney. Climbing today seemed extremely easy. It was really nice to just hike with a flimsy drawstring pack instead of my normal backpack. The difference in my climbing ability was amazing. I wasn’t off center and pulling myself up was a breeze.
At the top of the chimney you’ll want to keep heading right towards the ledge, but DON’T DO THIS!!! I did, and I can tell you that ledge is super scary (but doable if you hug the ridge: there’s less than a foot of space to walk on and not much room when the boulders bulge out). However, you’ll need to do it twice because it doesn’t go anywhere and cliffs out.
Instead, go left and you’ll once again find cairns that will lead you north and then east to the summit
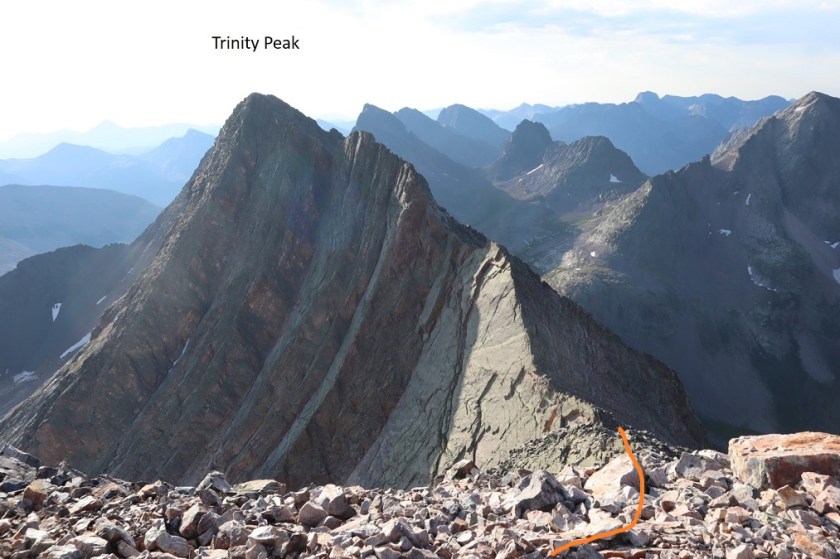
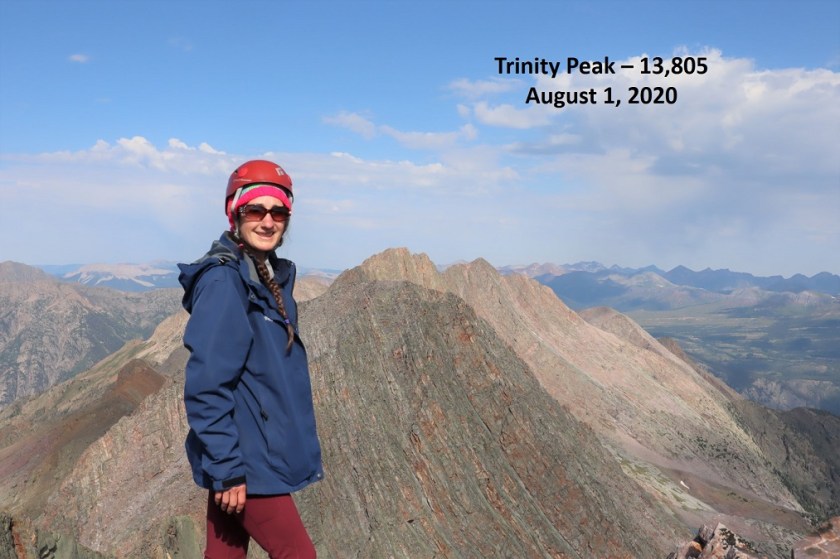
I summited Trinity Peak at 9:25am. It took less than an hour and a half to get from the summit of West Trinity to Trinity.
Trinity Peak
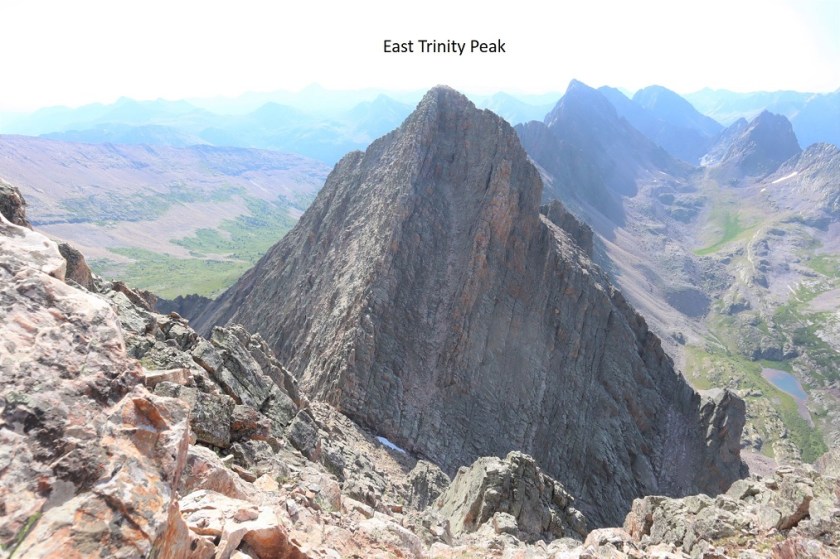
Here’s a look over at East Trinity Peak
I took the gully down to the saddle of Trinity/East Trinity
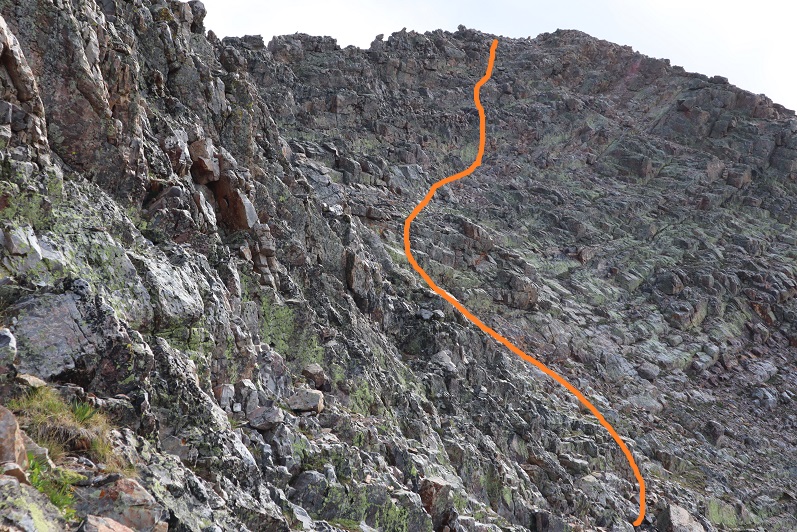
The entire time I was descending I kept my eye on East Trinity, looking for the best way to ascend. It looked to me like the best option would be to keep towards the center until the end, where I wanted to summit towards the left to avoid any difficult traverse there may be if I topped out on the right (side note: there didn’t appear to be any difficulties if I’d chosen to summit to the right instead). You can’t see it in this picture, but at the very top there are two chimneys to the left. Take the one on the right (I cliffed out about 10 feet from the summit and had to retreat and find a different route).
At the saddle there was a gully to cross before heading up
Once inside the gully the rock was surprisingly stable, but there were a lot of large rocks that were easy to kick down, so if you’re hiking with a partner be careful not to dislodge rocks.
The only time I had trouble was when I got towards the top. Like I said before, stick to the left, and then choose the gully to the right.
This was class 4 climbing.
To my left I saw another ‘kissing camel’ formation. The cool thing about this one is it includes a heart
After taking the wrong route, cliffing out and backtracking, I headed a little more south and found an area I could climb and make it to the ridge
I was thrilled when I topped out and could see the summit an easy hike away!
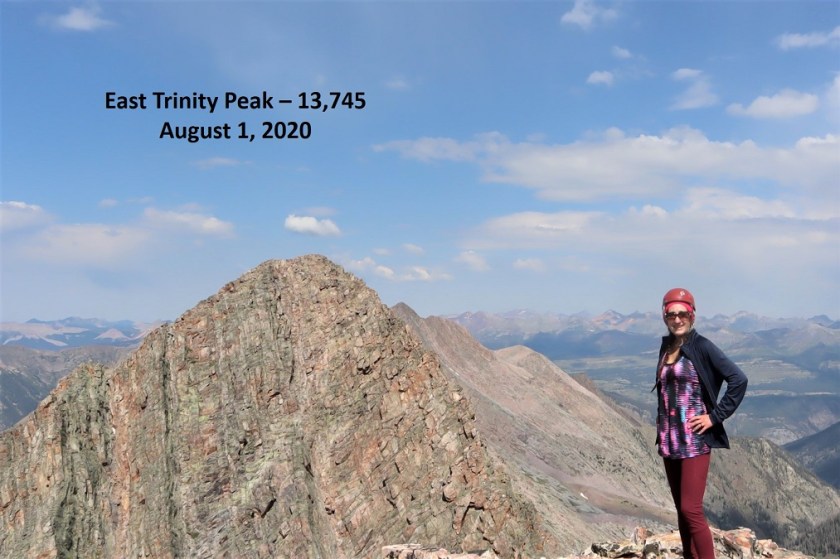
I summited East Trinity Peak at 10:30am. It had taken me less than an hour to make it to East Trinity from Trinity.
East Trinity Peak
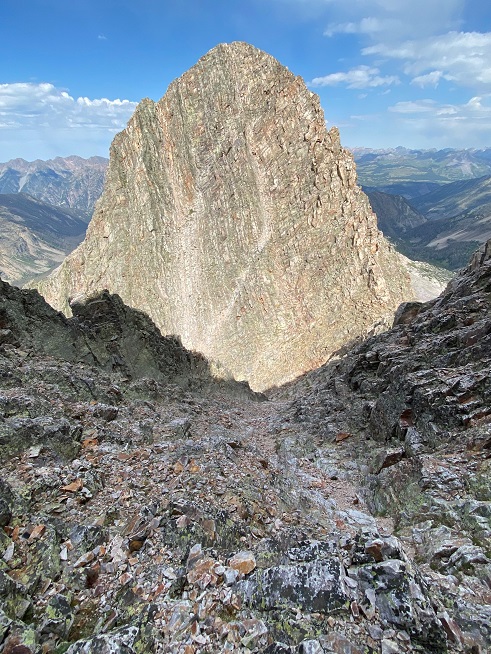
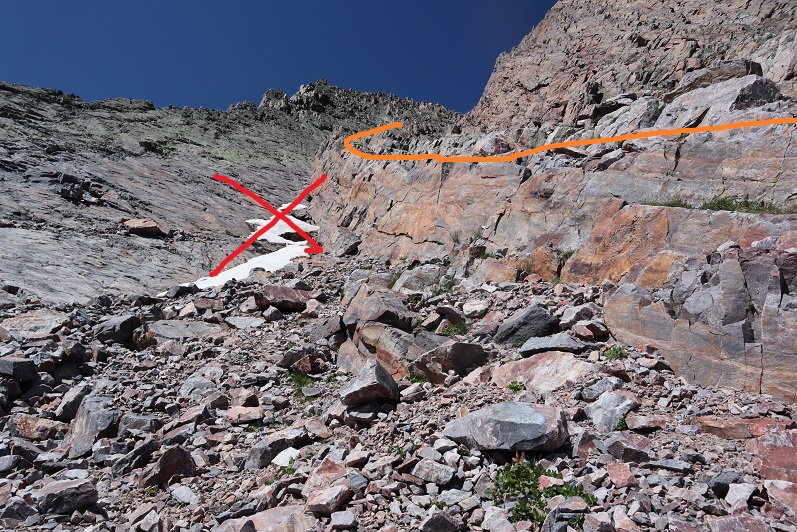
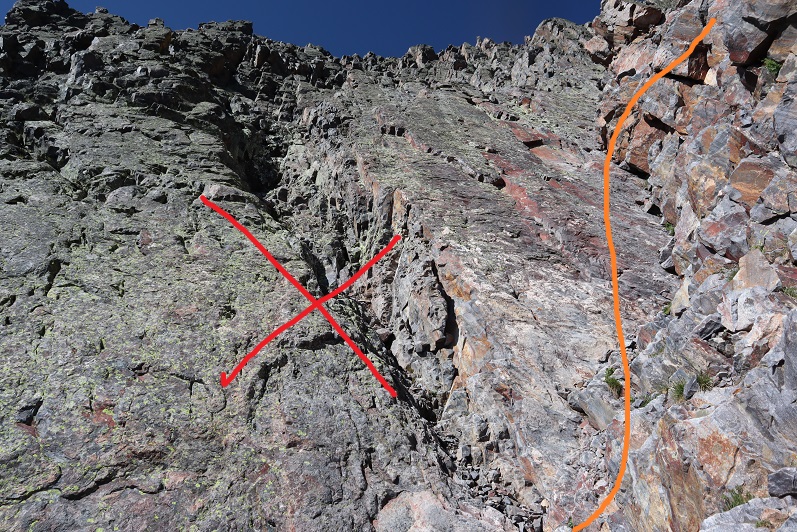
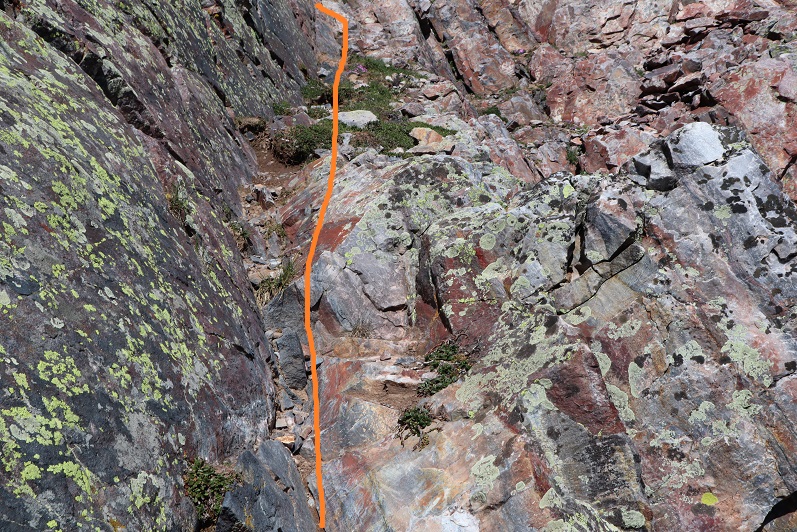
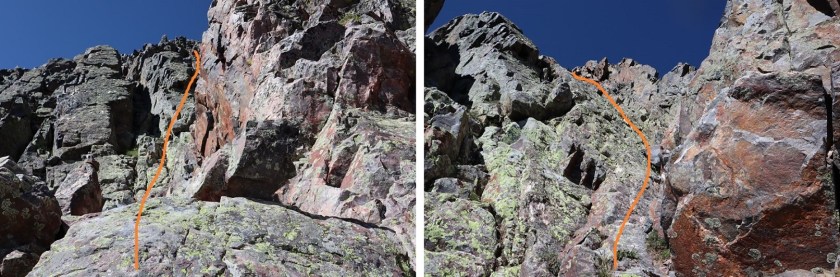
Here’s a look back at Trinity Peak. I was talking with someone on my hike out who told me she’d attempted the traverse a few years ago, but couldn’t find a way to summit Trinity Peak. They’d ‘missed the peak’. If you’re unable to find the access points, or want to keep this part of the hike class 2 (or easy class 3), just make your way to the Trinity/East Trinity saddle and hike back up the gully to summit Trinity Peak (shown below)
Time to head back down. The ridge down from East Trinity was straightforward.
With a couple of surprisingly steep sections
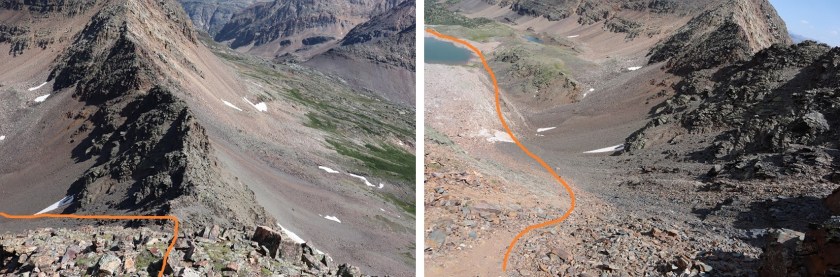
I made it to the saddle and scree-surfed down the gully to the lake
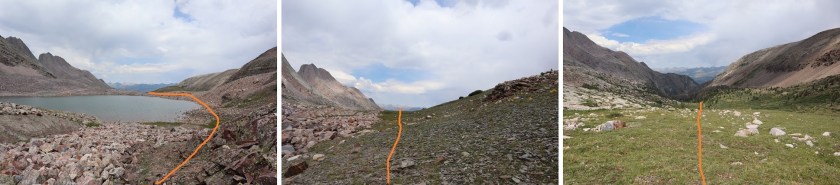
I skirted the right side of the lake and headed back down to my camping area
Here’s a look back at the route I took down from the East Trinity ridge
I made it to my stashed gear at 11:22am. The traverse had taken me just under 6.5 hours to complete. Notes on the traverse: It’s very committing, there’s a lot of route finding, and I felt in the route I took there were a lot of class 4 moves. I got a lot of good scrambling practice in, and honestly wish I would have attempted this traverse earlier: I felt like I leveled up in my class 4 climbing skills, and I was deliriously happy with this hike. And the weather had held! Woot!
I filtered some more water, took off my shoes to air out my feet, and ate a couple of sliced mangoes (my first food of the day: I get nauseous when I eat and hike but figured I needed some calories for the way out).
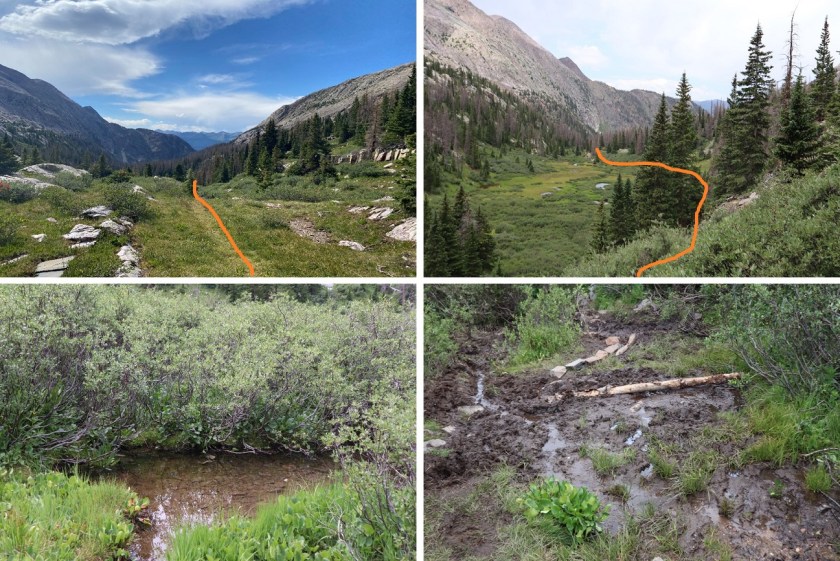
Time to head out. I found a stick that made a great trekking pole to replace the one I’d lost yesterday and headed out the same way I headed in, after about a mile of wading through willows and water to find the trail.
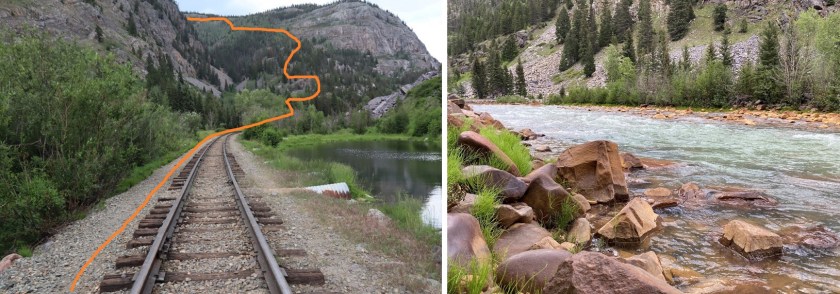
Connecting back up with the class 1 trail that would lead me to the beaver ponds, through the avalanche area, straddling the creek and bringing me back to the Animas River. I saw a ton of people on the trail, and talked to every one of them.
Once at the river I crossed the bridge and sat down for a while to rest before tackling the 4 miles and 1700’ of elevation gain back up to Molas Pass. I took off my shoes and soaked my feet in the river, filtered more water, and tried to eat a packet of tuna (I ate half). There were CT hikers across the river from me. They shouted and asked if I minded if they bathed. I’ve been there, and I didn’t care. They seemed overjoyed at the idea of a bath, and I wasn’t going to deny them that gift.
There were mosquitoes and fleas here so I didn’t stay long. I packed my gear back up and started switchbacking up the mountain to Molas Pass
I left my newfound trekking pole at the information sign and made it back to my truck at 6pm. It had taken me about an hour and 45 minutes to hike those 4 miles and 1700’ from the river. I got different mileages/elevations from Strava and CalTopo for my triup, so I’ll leave those here.
In the end, I was thrilled I’d decided to hike today! Sometimes it’s really difficult to get started, but once I’m going I’m really enjoying myself, and the sense of accomplishment I get from summiting peaks and challenging myself is amazing.
Also, I’ve done this approach as a day hike (with Vestal) and this time backpacking for Arrow and the Trinities. For me a day hike is absolutely the way to go: The extra weight made the trek in and out so much more tiring than it needed to be. Long days don’t bother me. Everyone’s different, but I much more enjoyed the hike in and out from Vestal than I did this time.
* I did this as part of a 2 day hike, so my mileage and elevation gain aren’t included here. CalTopo says my mileage to the top of Arrow Peak was 15.23 miles.
My son is in the Air Force and came home for some unexpected leave. I haven’t seen him in over a year, so I was thrilled to spend the past couple of weeks with him. This also meant it’d been a few weeks since I’d done any serious hiking, so it was so nice to get out hiking again this weekend. I drove to the Molas Pass trailhead and parked the night before the hike so I could start early the next morning. I’ve done this approach before for Vestal Peak, so I already knew what to expect. I drove in, parked, and walked around a bit to stretch my legs after that 6.5 hour drive. It was a beautiful day, and I kind of wished I could just start hiking now.
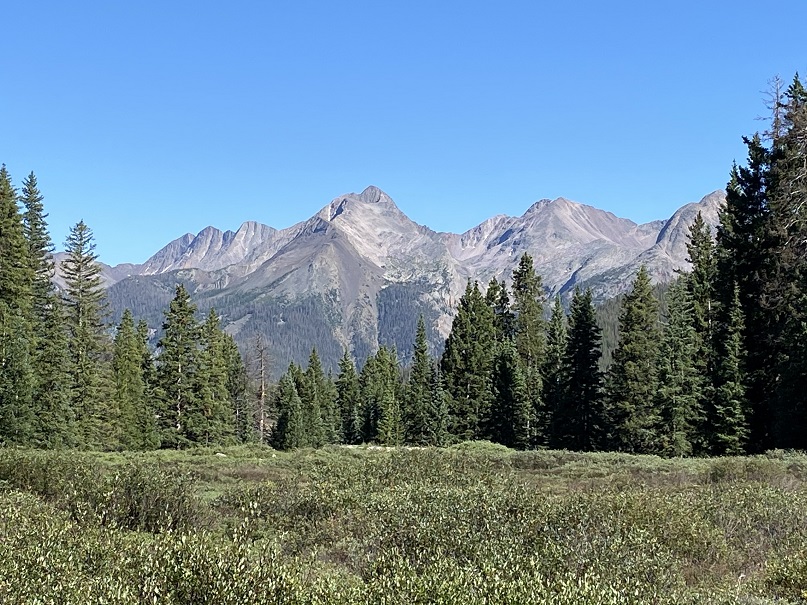
Here’s a look at the peaks from the trailhead
There’s limited cell service at the Molas Pass Trailhead. Unfortunately, I saw evidence of two separate vehicles having their windows smashed.
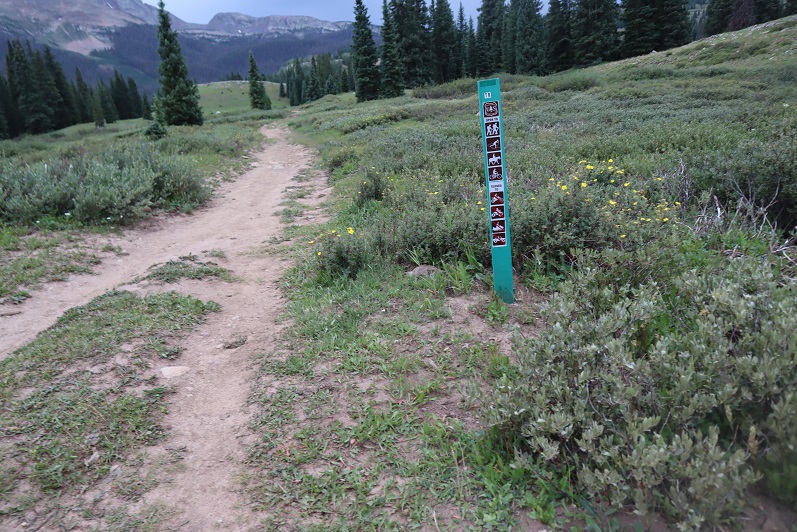
I spent an hour or two in the back of my truck relaxing, looking at topo maps, and eating dinner. I saw another hummingbird fly by, so the record held of seeing a hummingbird at every trailhead I’ve slept at so far this year. I went to bed and was up and on the trail by 2am. The trail starts at the south end of the parking area.
From there the trail is easy class 1 all the way down the 4 miles and 1700’ to the Animas river, and back up to Vestal Basin (9.6 miles total).
Just before the river there’s a creek crossing
Then a solid bridge across the Animas River
Then I followed the train tracks (very briefly) and took the obvious trail up to the Vestal Basin.
At 4.7 miles there’s a trail register (a trail register that’s legit: it actually looks like they track the pages here)
Note: I crossed this area in the dark, and it seemed as if I needed to use the log to make this part of the trek. In the dark the rocks didn’t look close enough together to cross. So instead of taking the rocks across I sat down and scooted across the log until I made it back to the trail. On my way back I realized I was wrong: take the rocks 😊
The avalanche area was much easier to pass this year than last year: there are triple the amount of surveyors’ tape markings in the area. However, I still managed get off track at the last and final crossing. I wanted to stay high on the ridge and in the dark couldn’t locate any more tape. I should have stayed lower.
At the beaver ponds I took a right behind the boulder by first going through two logs onto an unmarked trail (it seems counter intuitive, but it’s the correct path), and followed the rocks until I once again caught up with the trail.
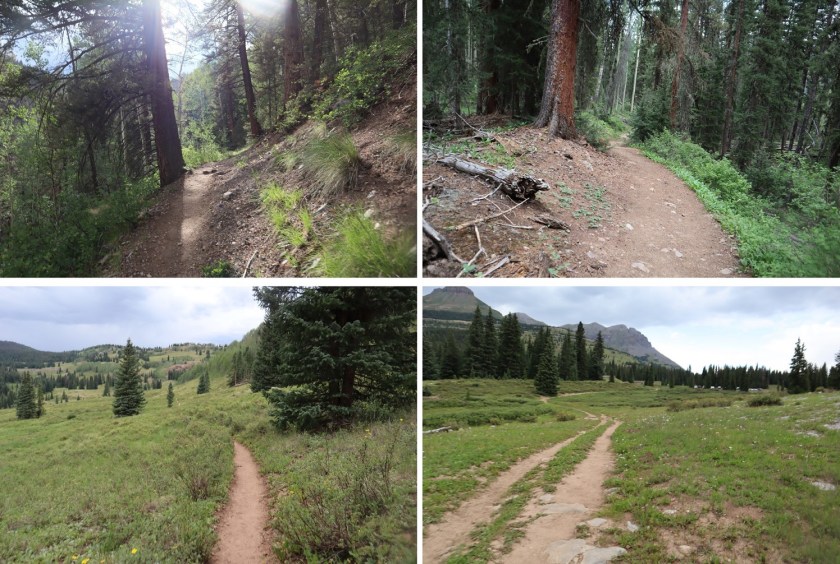
I followed the class 1 trail up to Vestal Basin.
There are willows to contend with here, and water, which equals mud. Prepare for your shoes to get muddy (or throw rocks/sticks down to walk over the muddy areas)
There is a really good campsite in the Vestal Basin, just where you turn off to hike both Vestal and Arrow Peak. I stashed my pack here behind a tree, filtered some water, and packed only what I needed in a small sack before heading up and tackling Arrow Peak. Here’s the route to the upper basin
The creek crossing was easy. I took off my shoes but didn’t need sandals
There’s a semi-well defined trail to the upper basin, through willows to begin with, and then scree.
In the willows I lost one of my gloves. I realized it about 50 feet after I’d lost it, but wasn’t in the mood to go back and get it (I didn’t want to re-gain any elevation today if it wasn’t absolutely necessary). I hoped it would be there when I went back. There’s a cairn at the top to indicate the upper basin. Here’s an overview of the route from there.
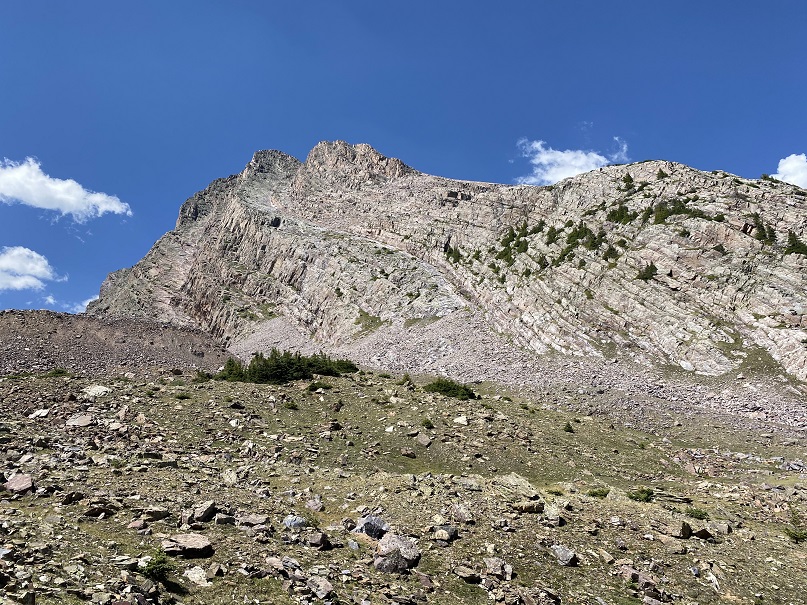
Note: For some reason I thought Arrow Peak was class 2, so I didn’t do much research on this peak. Luckily, I’d brought my helmet, because this is definitely class 3 and requires some route finding. The first objective is to find the access area to the rib that will lead you most of the way up. There’s a cairn indicating the way. Aim for the greenery, head up and right, then left. I stashed my trekking pole at the entry point and headed up, as it was obvious I’d be doing scrambling from this point on and a pole would just get in my way.
It looks more difficult than it is. The rock is solid and grips nicely. Be sure to pick the largest rib (it’s obvious and is a good 50+ feet wide)
I followed the rib as is ascended
There will be a point where the rib will become more prominent. Stay right. It looks like going left may be doable to go left later in the year, but at this point (July 31st) I opted to go right and that worked well (avoiding the snow).
It’s hard to tell in the picture below, but I’m following the rib. There’s a point where it’s hard to tell if you go left or right (circled in red), but you go left here and then right. If you look closely you’ll find cairns here indicating the way (they’ll be above you).
Going left you’ll see a gully on your left. It looks doable (and probably is) but it’s easier to ascend by going right. This is pretty well cairned.
Going right will lead you to a short ledge
at the end of the ledge go left (following the cairns) and then head northwest up some serious class 3-4 climbing to the summit.
I reached the summit at 10:15am, after 15.27 miles and just over 8 hours of hiking
Arrow Peak:
The trek down was much easier than the trek up, as it was easier to see the cairns and I already knew which direction I was headed. Here are the basic highlights:
Back down to the ledge, then following it to the right and then left (the cairns are very helpful here)
And then following the ridge back to the basin, sticking to the solid rock whenever possible because the scree was slippery and the rock was stable (but would have been slippery in the rain)
I made it back down to the basin, and check it out: someone (or a marmot) stole my trekking pole! I looked all around for it and was unable to find it. I had passed about 10 people on the way up/down, so it could have been one of them, but that would’ve been poor form and not cool, especially since I talked with all of them and they seemed super nice, so I’m assuming it was an animal. From the basin there’s a trail back down to the camping area
Someone had found my glove and made it super easy to find by sticking it on a branch right in the middle of the trail. Thank you!!! (they’re expensive gloves…). Then it was a quick creek crossing and I was back at my gear.
Total mileage will be with my Trinities Report, but the mileage from Molas Pass, up to Arrow, and back to the camping area where I’d stashed my pack was 17.71 miles according to CalTopo, 12.7 miles according to Strava (to be discussed in my next trip report: gotta love app discrepancies). Here’s a picture of the route from my camping area the next day (without route markings)
Here’s the CalTopo of the entire route, including the hike the next day up the Trinities.
I had some friends ask if I’d hike with them this weekend a peak I’d already summited. Normally I like to hike solo, but it was fun hiking with others. Everyone seemed to have a similar pace, which was nice. What wasn’t so nice was the reservation system to get a permit to hike. We paid $30 to park in the parking structure and take the bus in because we weren’t able to get a permit. That meant this had to be a multiple day hike. They only let 15 people on the bus at a time (due to COVID).
I don’t have a lot of pictures of the hike because I’ve already done a trip report, so I’ll just post some highlights.
Our campsite, which had about 20 or so other people camping within a few yards
Crater Lake (near the campsite)
The gully, which had an actual TRAIL this time! Last time I was here there was no trail and the scree was awful. What a nice surprise today!
The ridge to the summit after the gully
The “Leap of Faith”
The ledge
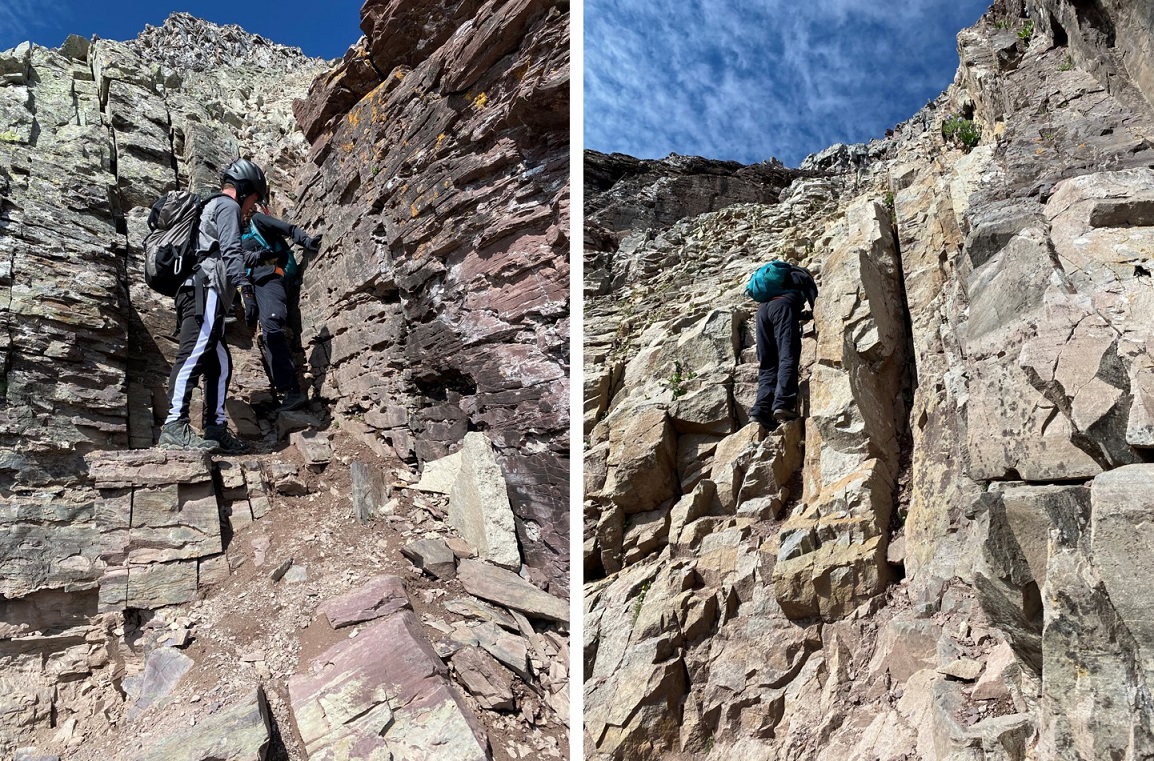
Some chimney climbing/scrambling
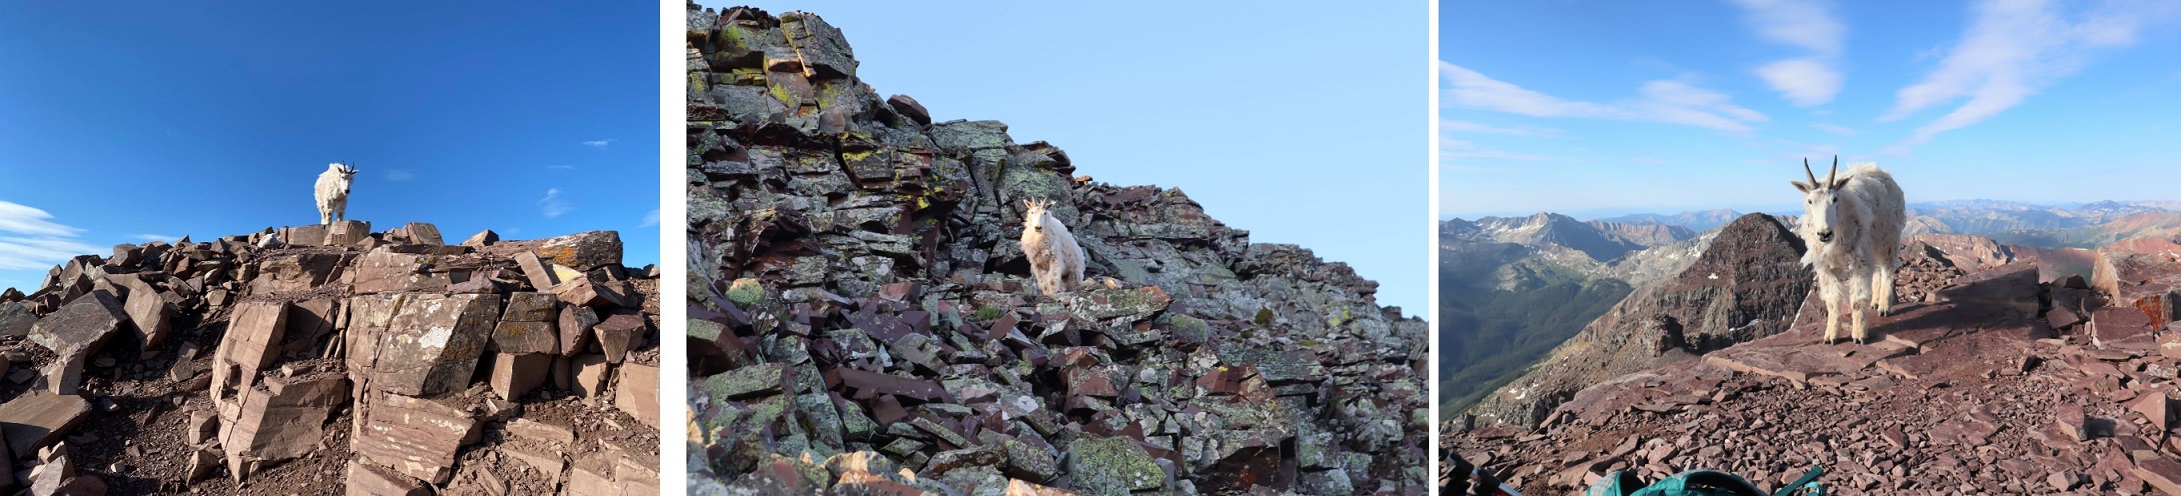
A rather cheeky goat that followed us all the way to the summit!!!
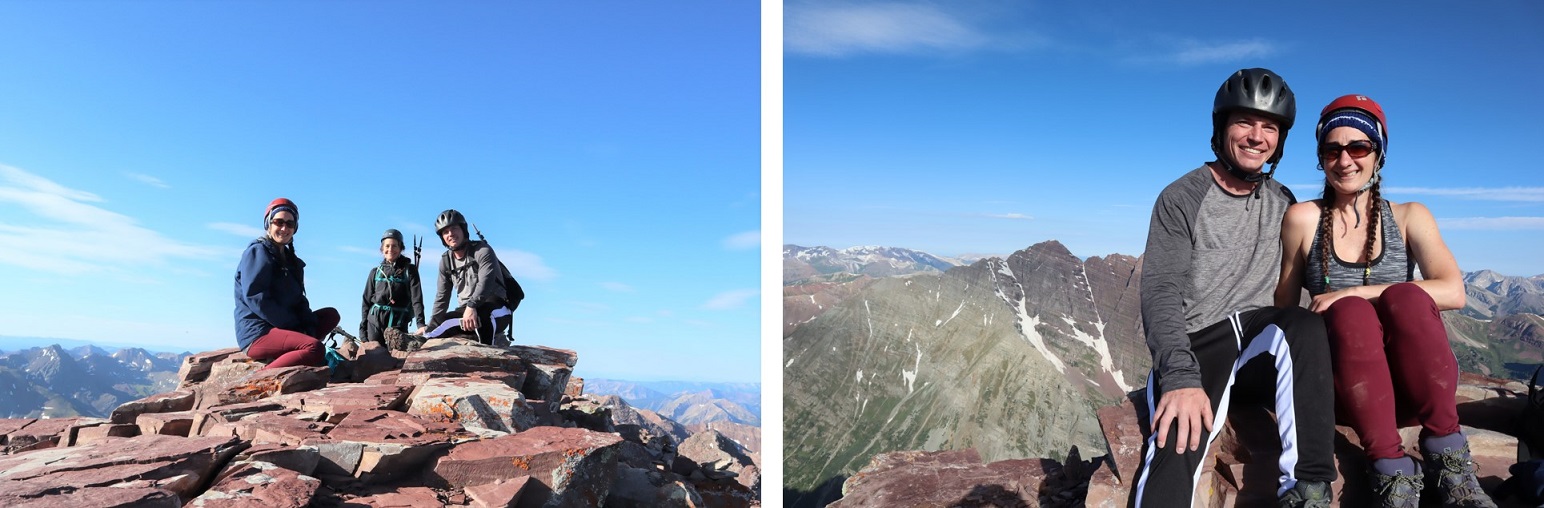
The summit
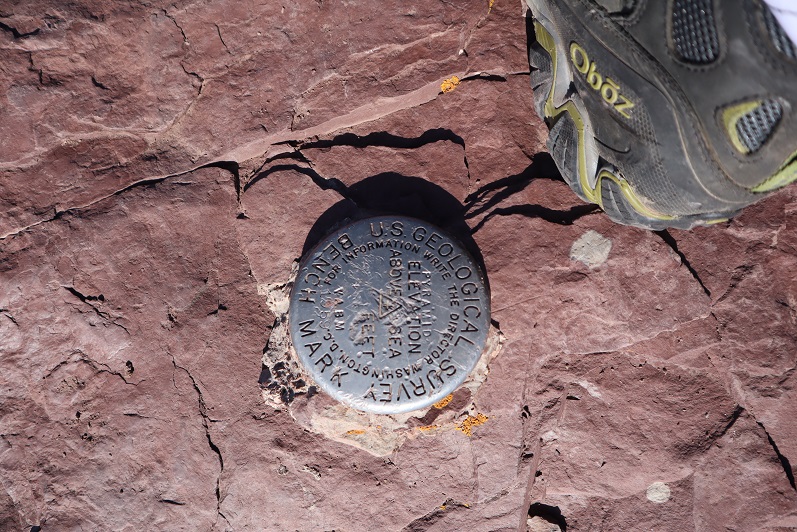
The summit marker
Views from the summit
Some goats just before the gully on the way down… also, a baby goat separated from its herd sounds just like a 3rd grader blowing as loud as they can through a recorder. Seriously.
A look at the amphitheater from the top of the gully
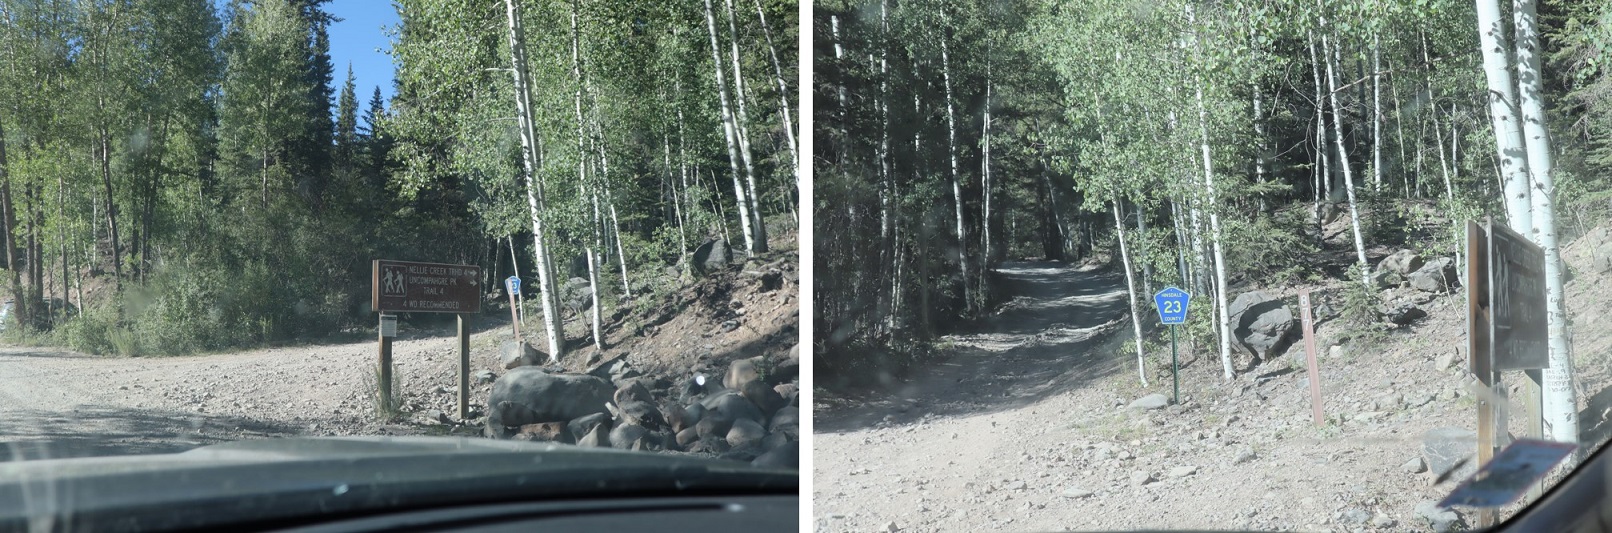
Wow, the 4WD road to Nellie Creek is much worse than I remember! It’s absolutely 4WD from the turnoff, all 4 miles to the trailhead, with 2 creek crossings. Have I mentioned I love my truck?
I made it to the trailhead, which was empty. There were a few dispersed campers in the area however, taking shade beneath the trees.
The trailhead was also very much in the open, so I turned around and drove a short distance and parked my truck in a narrow parking spot under the trees, just off the road. There were mosquitoes all around, so I ate dinner in the back of my truck, jotted down notes and checked my topo map for tomorrow. I decided to go to the trailhead to take a look around and get a visual for the start of tomorrow’s hike. There was a couple with a dog standing in front of the trail maps when I arrived. Their dog charged at me, barking loudly. The couple seemed surprised and apologized for their dogs behavior. That dog barked all night long.
I walked back to my truck, took care of a branch that had been scratching the roof of the truck like a critter trying to get in, and read for a bit before turning out the light.
If you couldn’t already tell by the tone of this post, from the time got to the trailhead I wasn’t ‘feeling it’. This rarely happens to me, and I was thinking maybe I need a short break from my goals? Or maybe expand them a bit? I love to hike, but today I couldn’t seem to get myself out of bed to start. I blame it on yesterday’s failed attempt on Coxcomb, which put my training into a different perspective.
Also, I was still worried about the injured horse. My mind had a lot to think about and I couldn’t turn it off. I finally started on the trail at 4:15am.
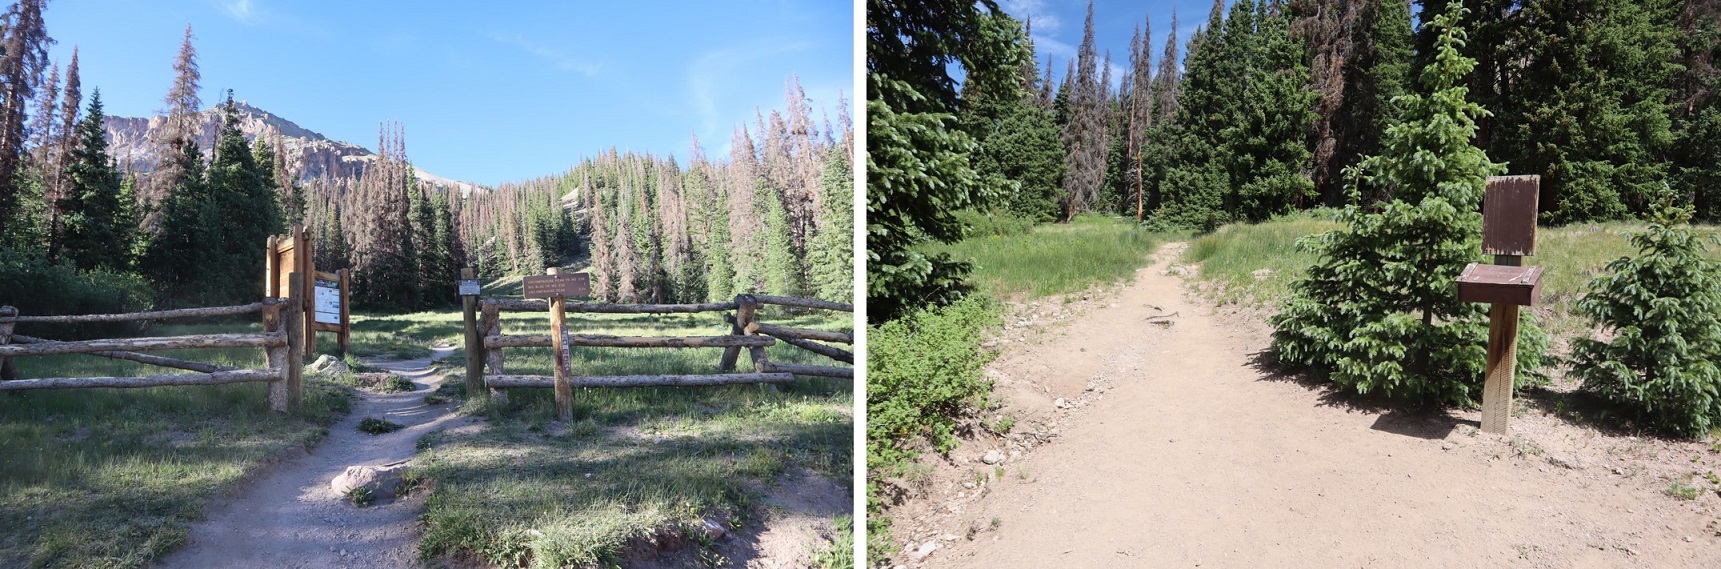
The trail starts at the north end of the parking area and follows a well defined, class 1 trail.
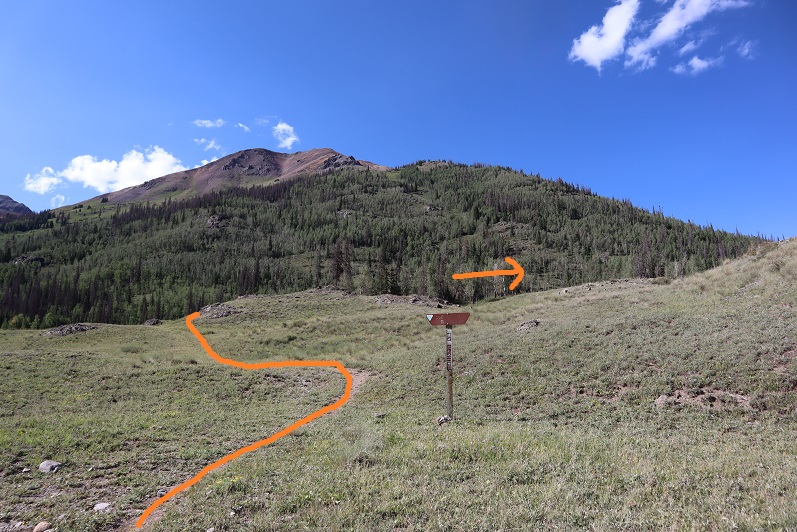
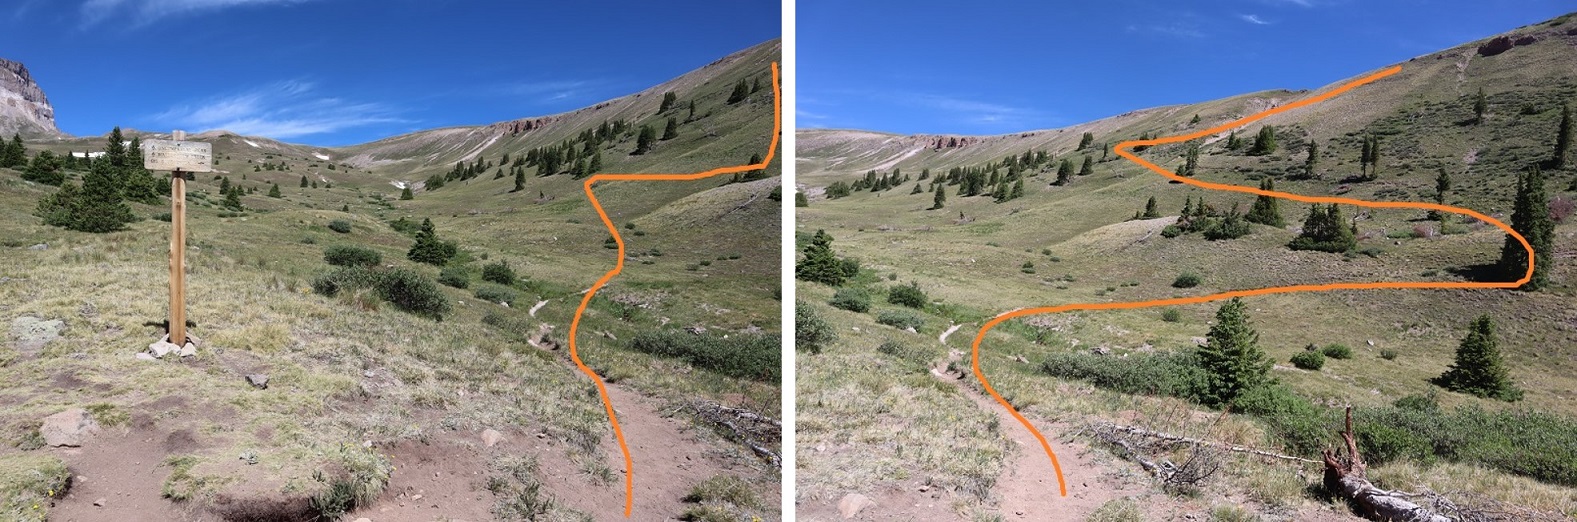
After hiking for 1 mile I turned right at this sign and switchbacked up the side of the mountain
After hiking for 2 miles I made it to the top of the pass
It was still dark at this time, and I knew I needed to descend a couple hundred feet. The trail seemingly ended and it took me a while to figure out which way to go, but there is an actual trail here that picks up again after about 50 feet of absence. In the daylight it wouldn’t have been an issue. I finally found it and descended in to the basin. And descended, and descended, and descended. I looked at my altimeter, concerned I’d lost too much elevation. At this point I’d lost 800’, and I could tell I’d need to lose several hundred more before starting to gain elevation again. The sun was starting to rise and I still didn’t have a good visual of the peak I’d intended to climb. I still wasn’t ‘feeling it’ and didn’t like the prospect of gaining 1000’+ at the end of today’s hike after climbing up gullies (I’m not a fan of gullies). I decided to call it and turn around. I headed back up towards the pass. I’d much rather get my elevation gain in the beginning of the hike, rather than at the end. However, I wasn’t done hiking for the day; just changing my plans. When I made it back to the pass I turned and headed east up the side of Unnamed PT 13106 (which I later found out is nicknamed Nellie Point, so that’s how I’ll refer to the peak. Names are better than numbers IMO).
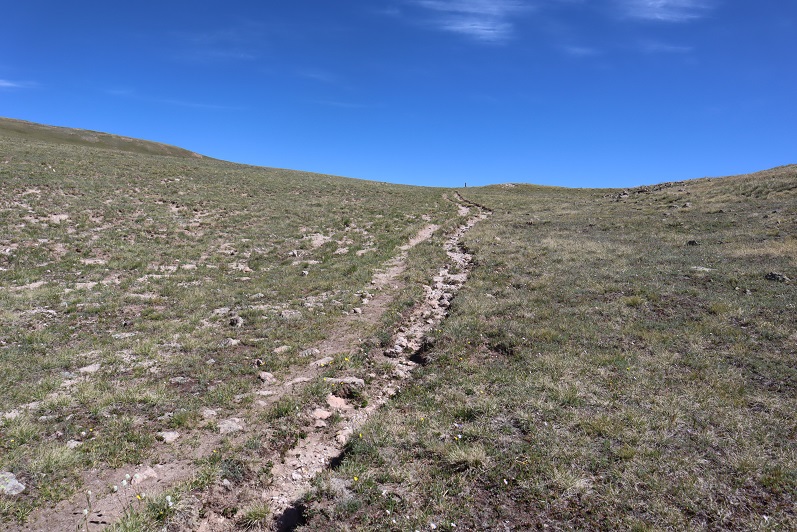
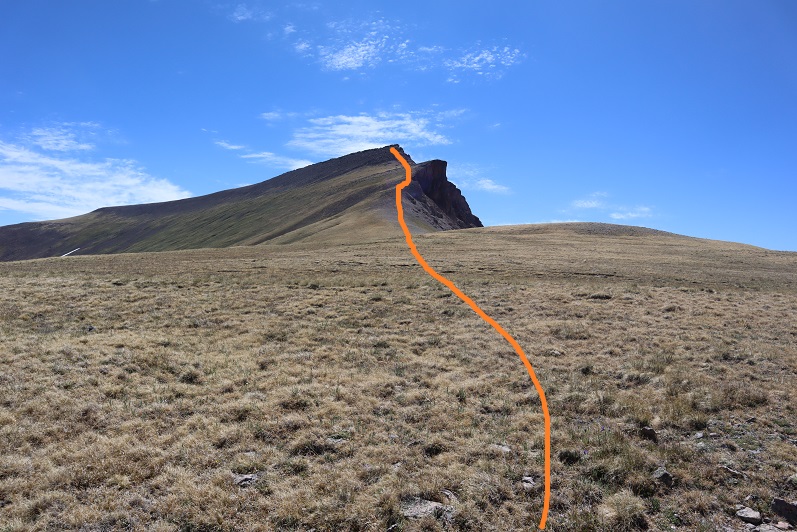
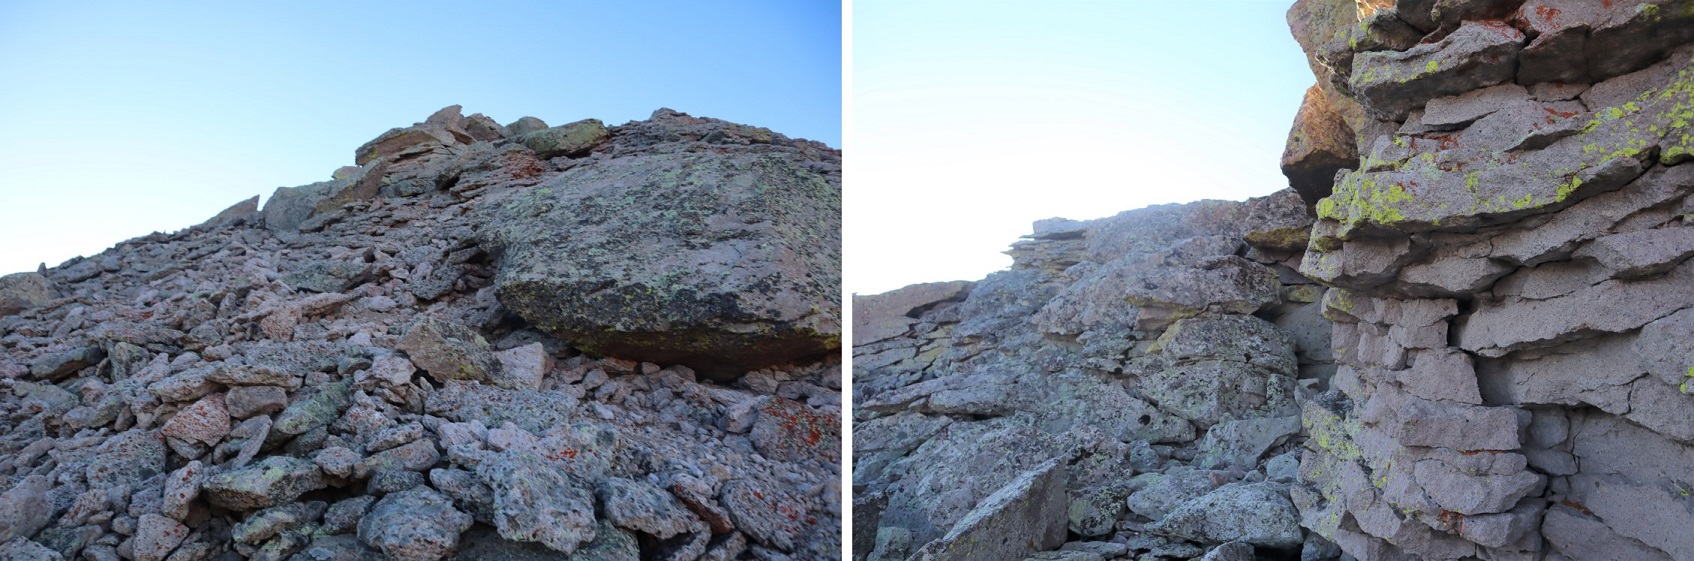
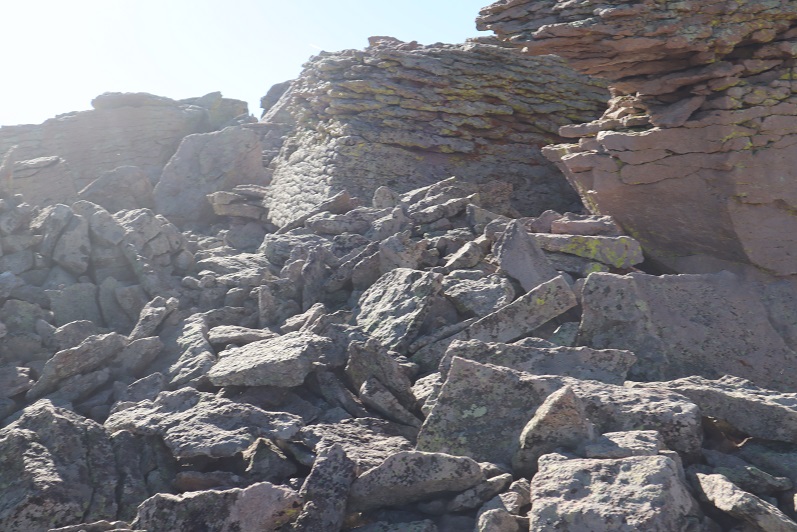
This was mostly a tundra hike until the end, when the tundra turned into very large rocks.
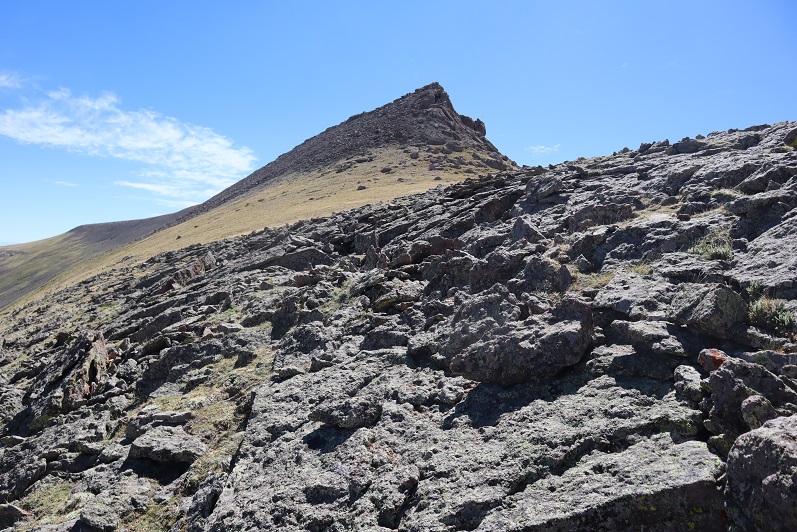
These rocks were fun to navigate, kind of like a maze with large obstacles to go around. All class 2. My mood improved dramatically and I was excited to be out adventuring.
There were several large cairns on the long summit. I wasn’t sure which one was the actual summit until I found a summit register inside one of the cairns. It was kind of in the middle of the summit area (which was about a quarter mile long).
Nellie Peak:
From the summit of Nellie Peak I continued following the long summit northeast. There was still some leftover snow here from winter, which didn’t pose a problem at all.
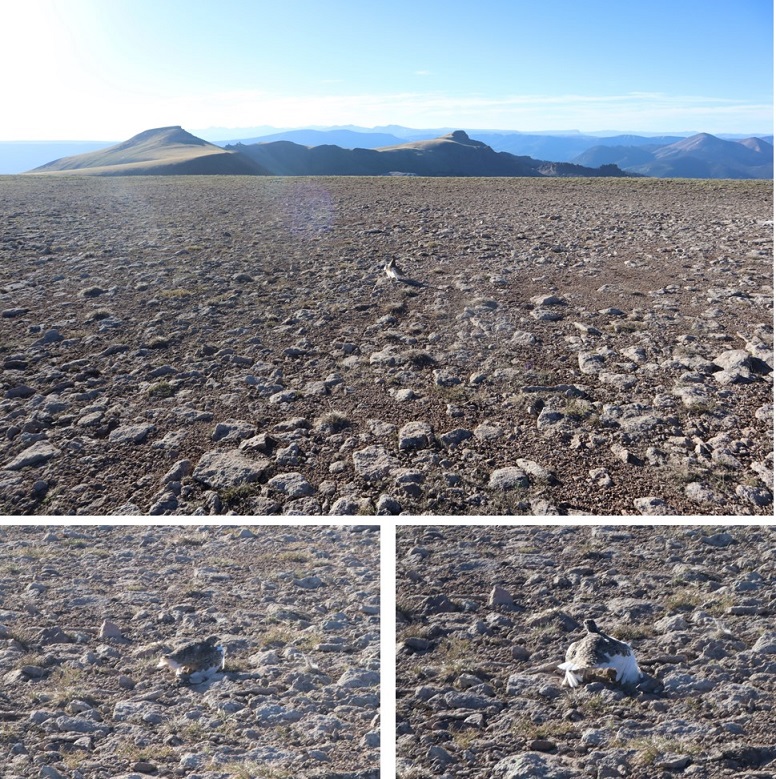
While on the ridge I scared a Ptarmigan mother and her chicks (they scared me too, as I didn’t notice them until the mother squawked). Immediately the chicks dispersed and the mother pretended to be injured, leading me away from her babies. I kept telling the mother I didn’t want anything to do with her or her chicks, but unfortunately she was leading me exactly in the direction I needed to go. She did a wonderful, if unnecessary, job leading me away from her babies. When she felt I was far enough away she flew back in their direction, chirping to gather them all together again.
Ptarmigan:
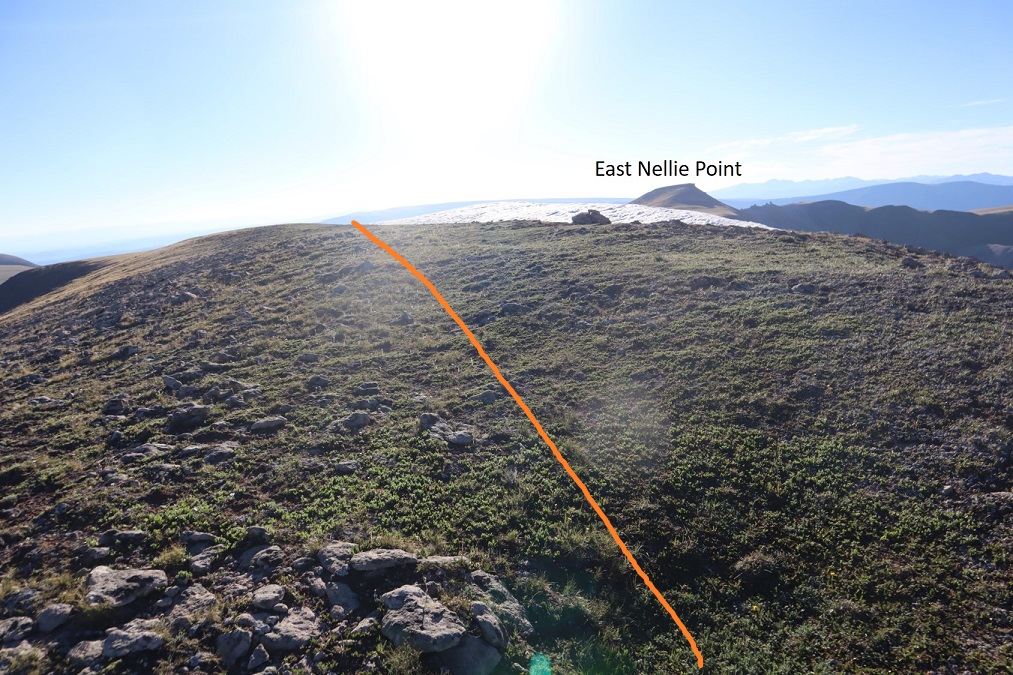
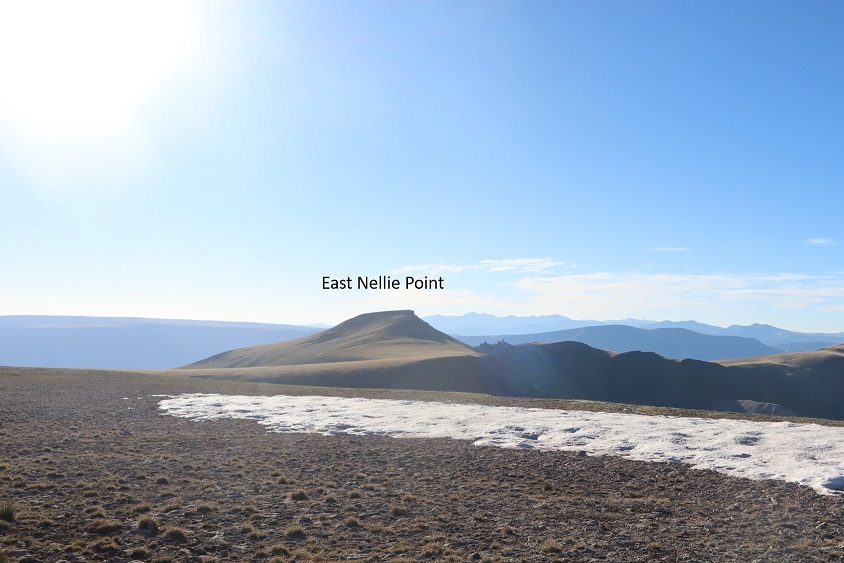
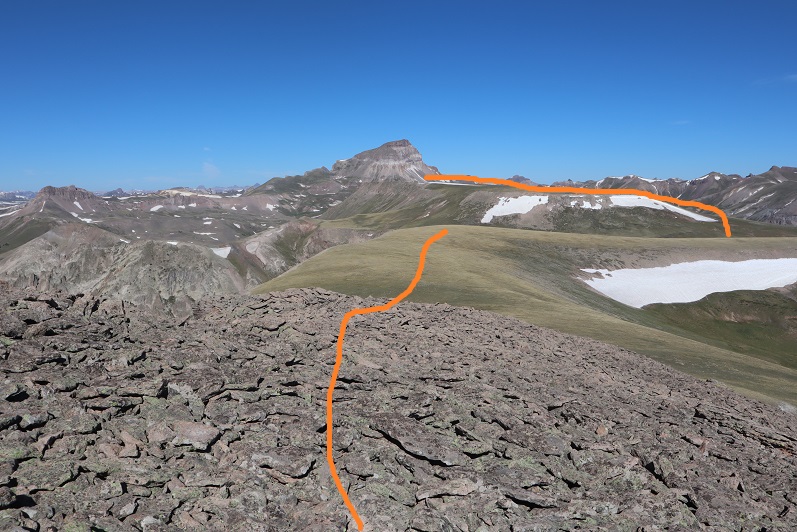
From the summit ridge I could see East Nellie Point, but getting there isn’t as easy as it initially looked.
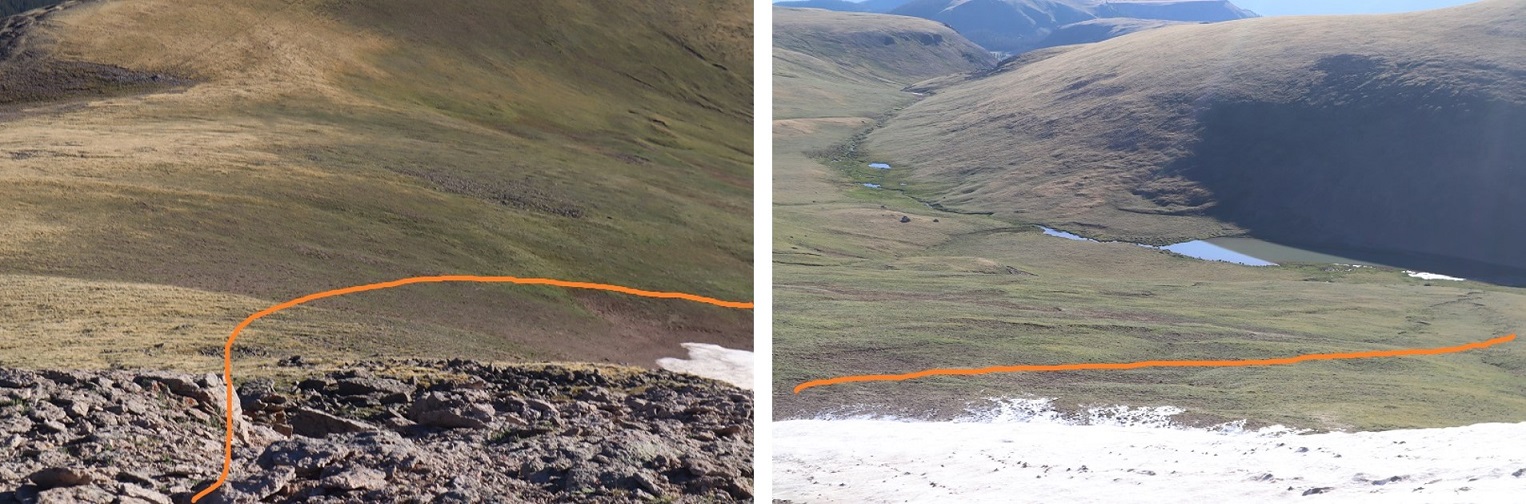
I followed the ridge almost to the saddle and then turned and headed east, losing 600’ of elevation. Luckily this part of the hike was mostly on rolling tundra and wasn’t too taxing.
Once at the bottom I was able to avoid the small pond/creek and ascend the hillside towards East Nellie PT.
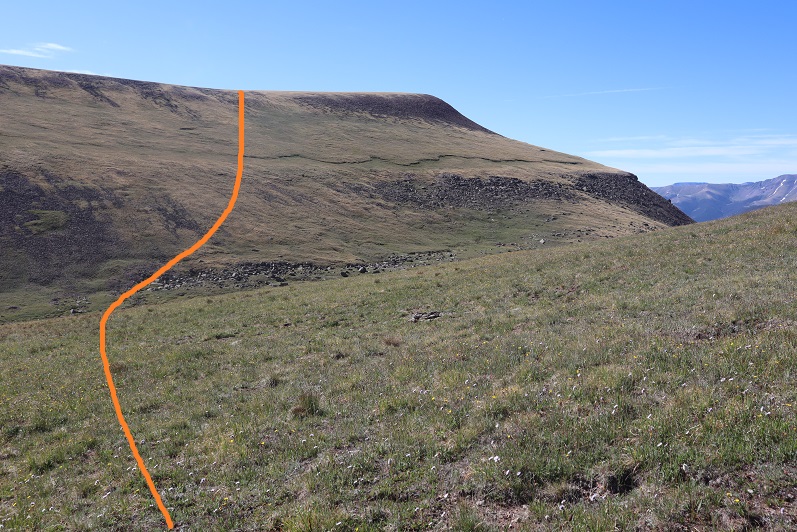
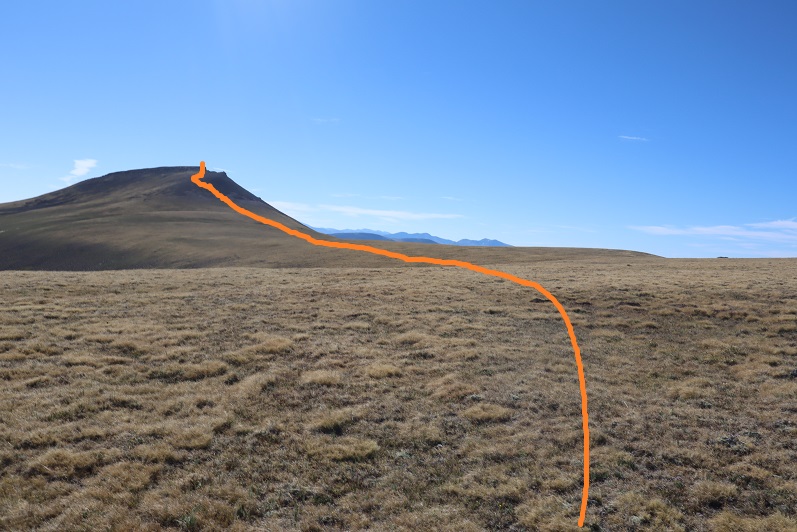
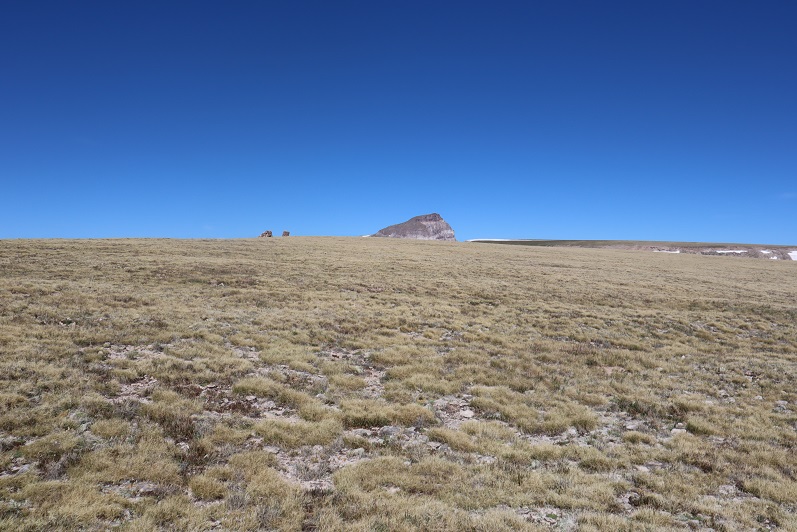
This was still rolling tundra, and there were even game trails in the area (and tons of elk tracks). At the top of the tundra hill I had about a quarter mile of tundra to walk through to the final summit push (if you could call it that).
The final push to the summit was rocky and there was no trail, but it was straightforward
There was a large cairn just before the summit
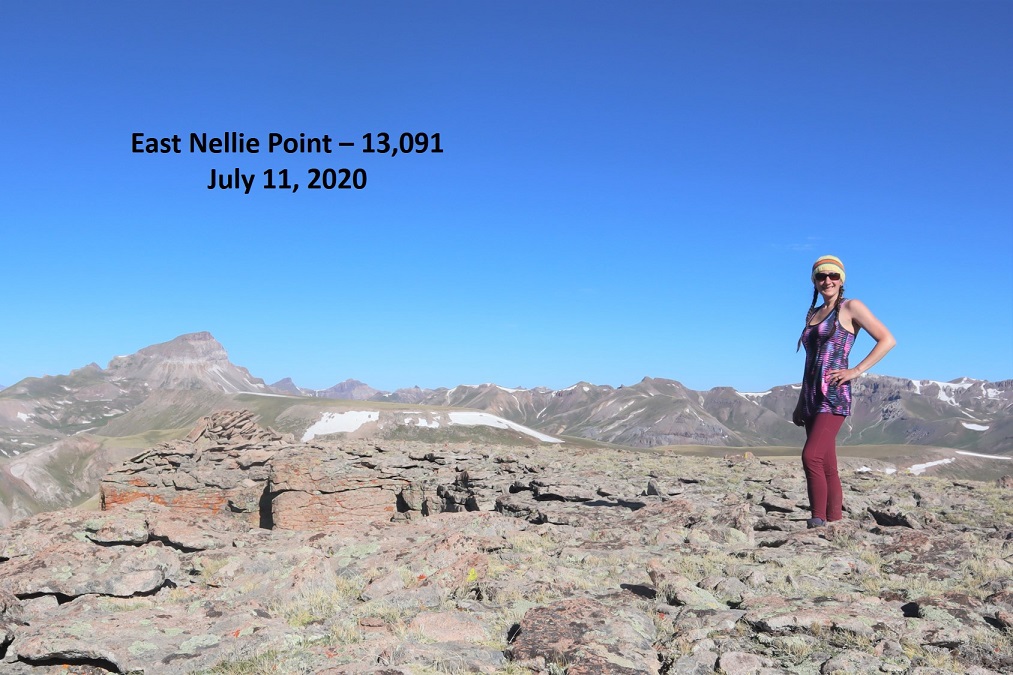
The actual point of this summit was difficult to tell as well. Once again I knew I was at the summit when I found the summit register stashed inside a cairn
Summit Photo:
East Nellie Peak:
Here are some photos from the hike back down. I decided to make this an out and back hike, retracing the steps I took to get here from Nellie Pt.
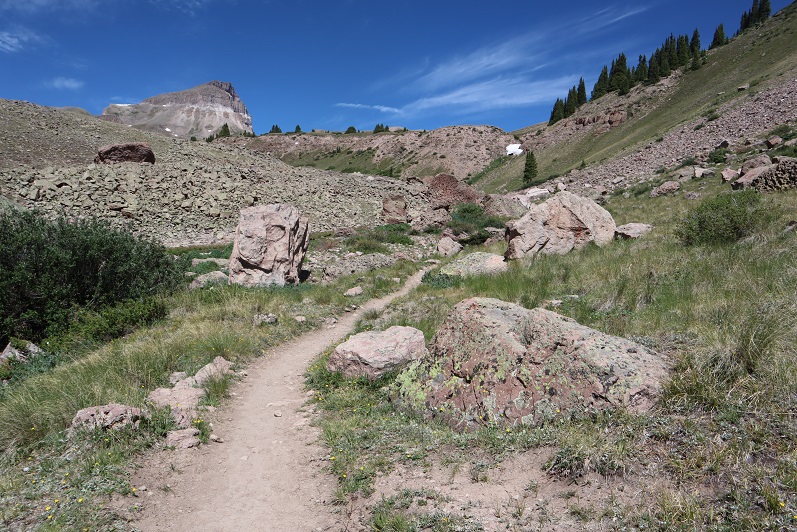
The tundra can be vast. Luckily, I could keep Uncompaghre Peak in my view most of the time, and just kept heading towards that 14er.
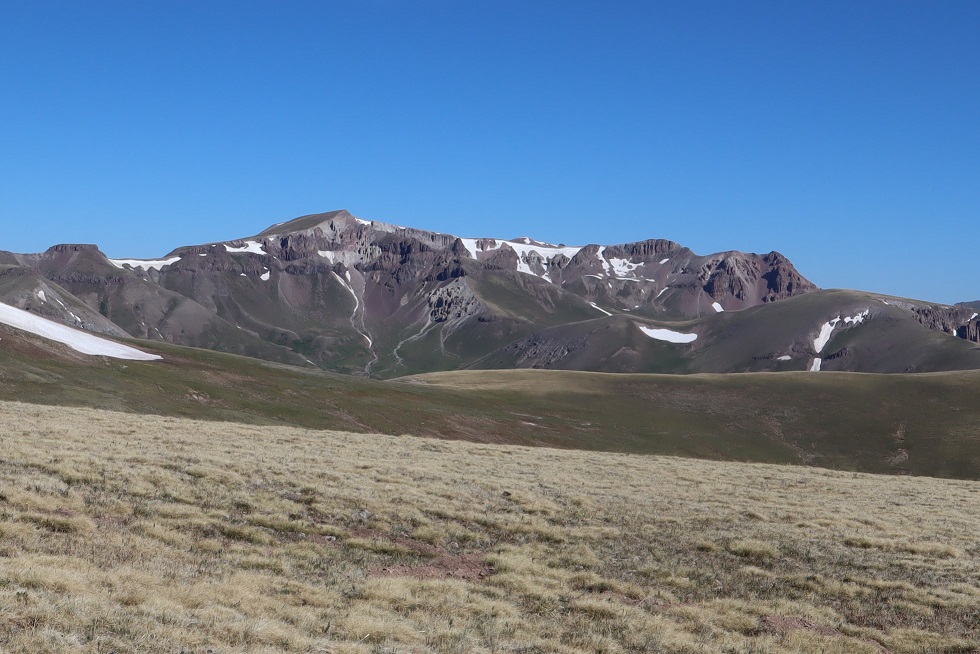
I also had a good view of Silver Mountain (my original choice for a summit today). With this view I could see there was still snow at the top of the access gully, so it had been a good idea for me not to attempt that peak today because the snow was unavoidable and I’d left my ice axe in my truck (I had my crampons). I was feeling better about my choices.
I hiked down to the valley and then back up to the ridge
I followed the ridge back to Nellie Point
And back down to the pass
And the class 1 trail that leads you back to the trailhead
The trailhead now had several vehicles
Also, I came to the conclusion it’s impossible to get a bad photo of Uncompaghre
I made it back to my truck at 11:15am, making this a 13.72 mile hike with 3833’ of elevation gain in 7 hours. Obviously, I made this hike more difficult and added more elevation than needed, but in the end I was happy with today’s hiking change of plans. In fact, I wished I’d have made the choice to change routes earlier. Any day above treeline is a good day. The 4WD road was easier to navigate driving down than it was driving up.
NOTE: I’ve since summited this peak successfully. that trip report can be found here.
I told myself as soon as someone posted a successful summit for either Coxcomb or Peak 15 I’d attempt it as soon as the weather was good (they’re my last 2 class 5 bicentennials). A conditions report was posted for Coxcomb where the couple summited but the woman had to be belayed up. I’ve done several class 5 peaks solo, and I’ve talked to two men who’ve done Coxcomb solo, so I felt confident I could summit this peak solo as well. Now I’m not so sure.
The weather was perfect and I had the day off. The only problem? I needed 2 60 meter ropes for the final rappel, and I only had 1 50 meter rope. I went to REI and Mountain Chalet and bought 2 new ropes (REI only had 1, but on the positive side I got to use my dividend).
Then I spent the afternoon practicing my double fisherman’s knot. That’s how you tie two ropes together so they don’t come undone.
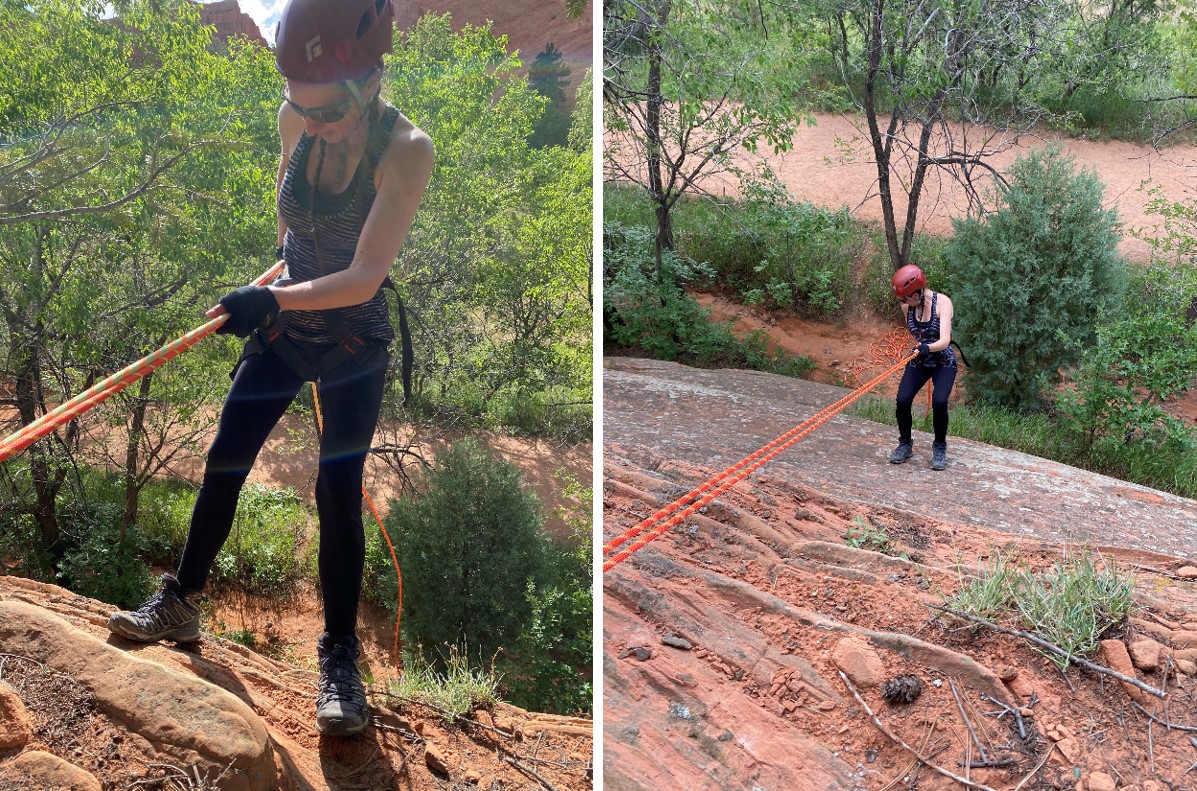
Confident I had the knot down, I wanted to practice rappelling with the two ropes, and I also wanted to break them in before using them for the first time in a scary situation (yes, a 175 foot rappel is committing, and can be scary, especially if you haven’t rappelled all season). I decided to go to Red Rock Open Space to break them in.
Success! I practiced setting up the anchor, tying the ropes together, and rappelling on easy terrain at least 9 times to break the ropes in. Yes, they were heavy to carry, and coiling them was no fun, but everything went smoothly. The weather forecast for the weekend was phenomenal: sunny skies with no chance of rain. I decided to drive to the trailhead the next afternoon and attempt Coxcomb peak the following day.
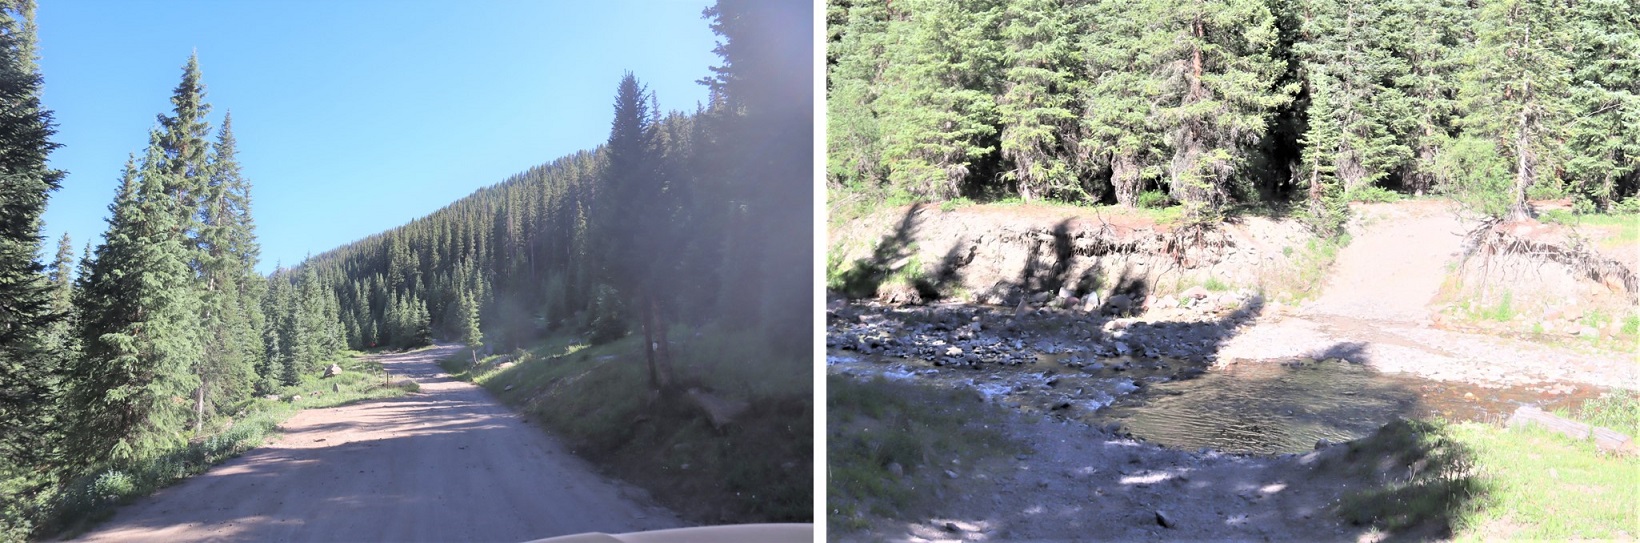
Most of the drive in to the trailhead was on a 2wd dirt road.
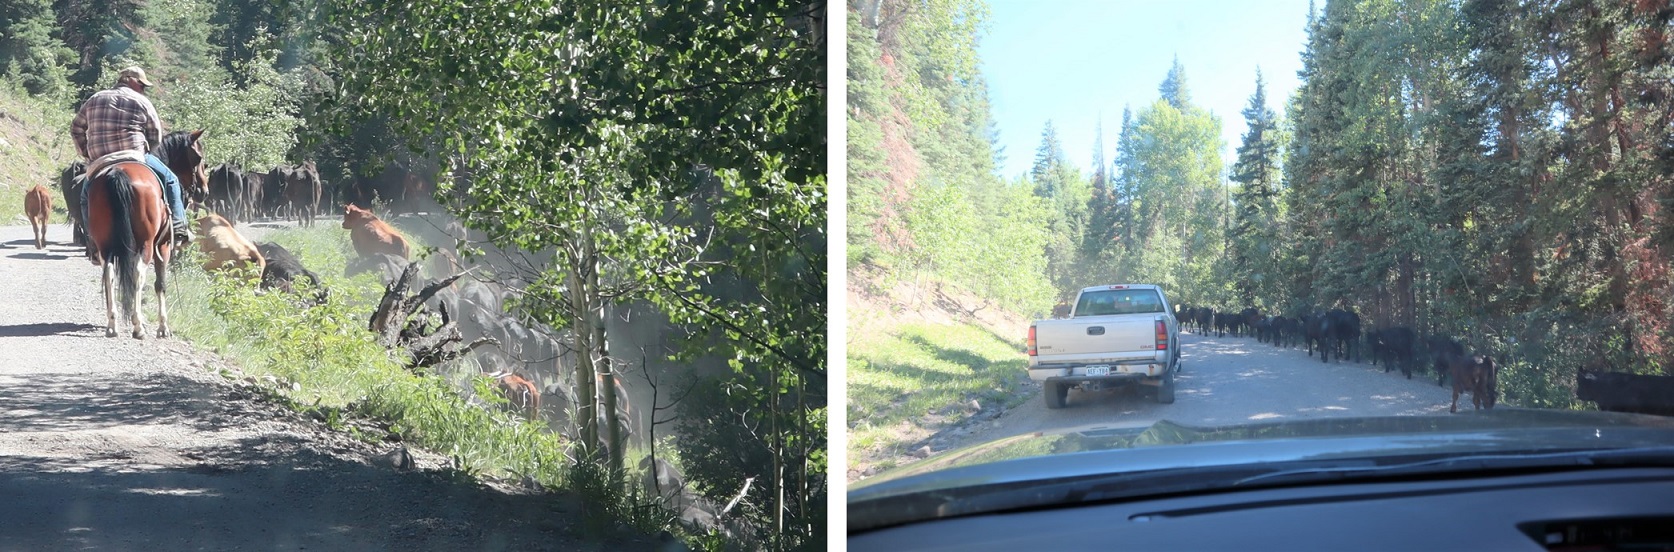
Then all of the sudden I came upon stopped vehicles along the road. A rancher was moving a herd of cattle, and the first vehicle in line didn’t feel comfortable driving alongside the moving herd so he decided to stop and park his car until the herd had moved (despite the rancher continually waving him on: the cattle would have been fine if he’d just drove slowly past). I wasn’t in a hurry so I wasn’t too bothered by the extra time spend sightseeing cattle. A lot of the other drivers were though.
The last 2 miles to the trailhead were 4WD and included a fun creek crossing.
I made it to the trailhead, parked my truck, and got out and took a look around.
I wanted to get a visual of the route for tomorrow’s hike. I took some pictures of the trail entrance, trail register, and the way I wanted to head out tomorrow. Then I ate my dinner, did a little knitting, and generally enjoyed the view as I relaxed in the bed of my truck.
The next morning I was on the trail at 4:40am, armed with my helmet, harness, 3 climbing ropes (2 60 meter ropes and one 30 meter half rope) and my climbing shoes. My pack was completely filled, and I’m guessing it weighed 40lbs. I only took the essentials.
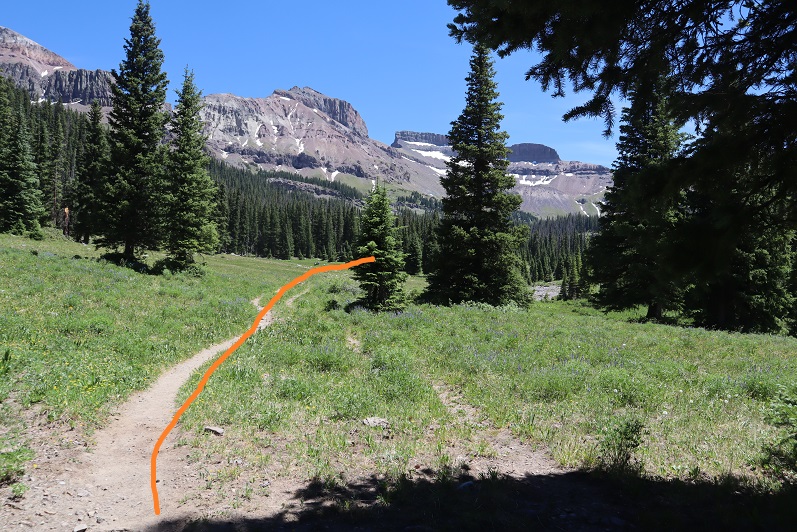
The trail starts at the east end of the parking area and heads south.
I followed the class 1 trail for 2 miles until I came to a steep section
At the pass the trail diverged into two and then kind of ended. I could tell I just needed to get around the small outcropping. I decided to go up right and descend on the left on my way back down. Both sides were easy.
The trail picked up again after I climbed this area.
After 3.3 miles of hiking I came to the top of the pass.
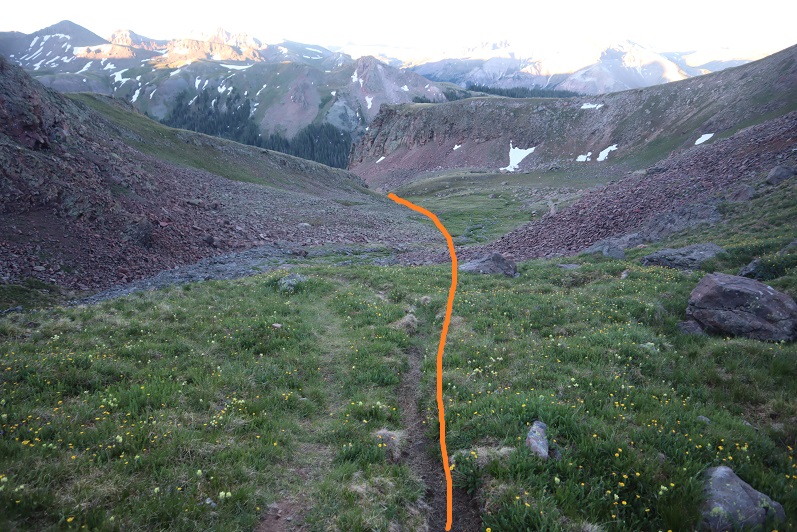
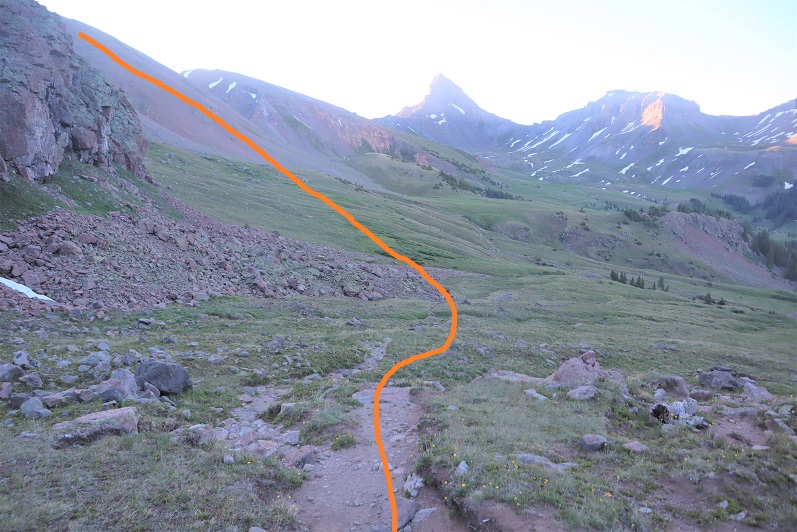
From here I continued following the class 1 trail, losing 400’ in elevation as I went
At the bottom of the pass I left he trail and headed east
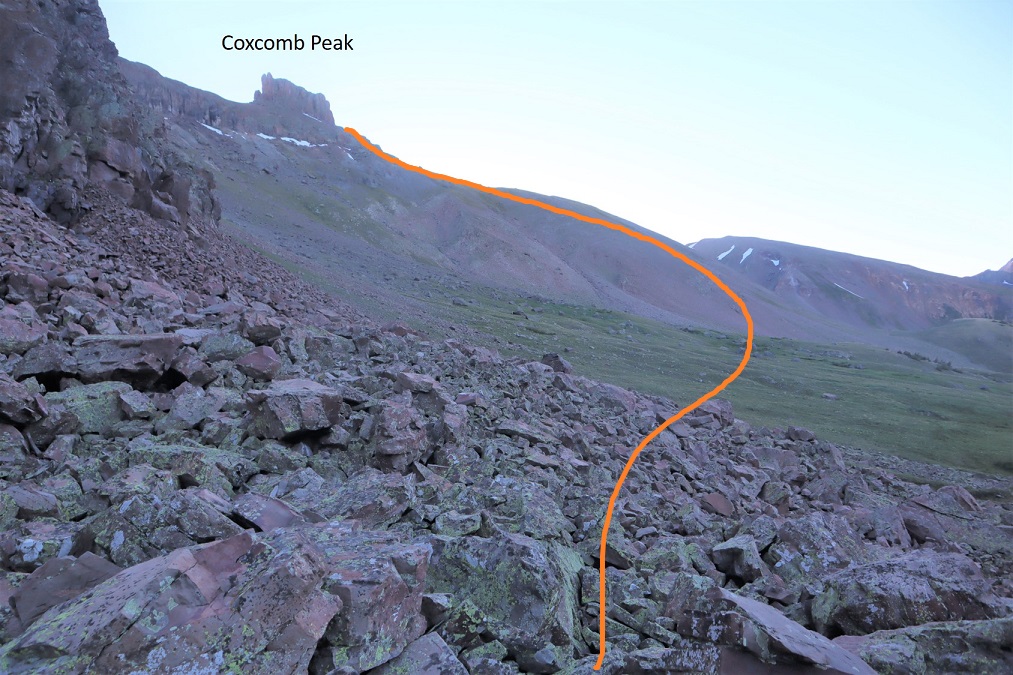
My goal was to gain the ridge and follow it to the base of Coxcomb Peak
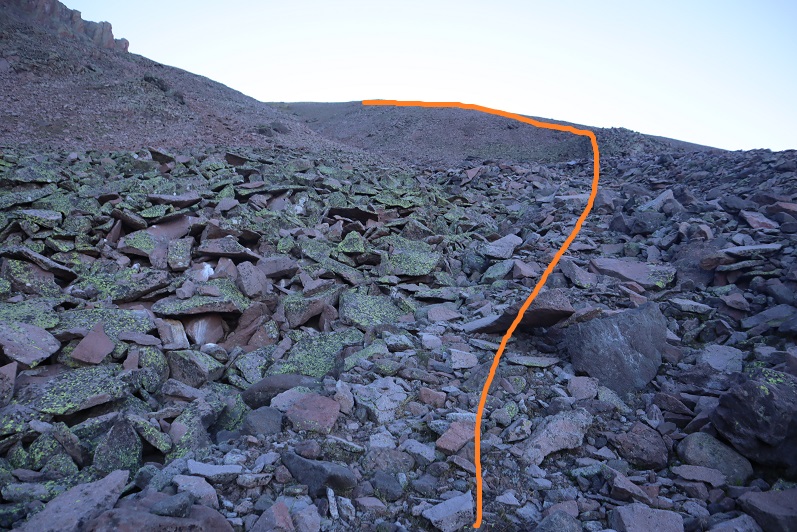
The ridge was full of loose talus
The talus eventually gave way to a little bit of tundra
Then I came to a rocky class 3 section
Which brought me to the base of the crux of Coxcomb. Wow! The approach had been much easier than expected. The entrance to the climb starts at the small gully. I’ve seen a few reports on how to climb this area, and every report rated the difficulty different. Some gave it class 3 (it’s NOT class 3, but there could have been a rock slide since that person posted conditions), some gave it class 4, and some class 5. The couple that summited last week said this was the most difficult part of their climb.
I walked up to the gully and tried to devise a plan. I decided to put on my climbing shoes and just go for it. I tried to ascend, but there just weren’t enough foot/hand holds. I tried and tried and tried. Then I tried ascending to the left but those rocks are loose and kept crumbling in my hands. I wasn’t about to put any physical weight on them. I tried the gully again, and then the rocks to the left again. I spent over an hour trying to figure this problem out! If I were only a few inches taller this wouldn’t have been an issue. Hmph. I sat down to think. Here’s a close-up of the gully
All I needed were a few more footholds. That’s when it came to me: there were rocks all around! I’d just fill the gully as far as I could and use those rocks as stepping stones. I dropped my pack and spent the next 45 minutes or so filling the small gully with rocks. I even put in a chockstone for a handhold. When I felt I’d done enough I tried climbing a few feet to see if the rocks were stable. Success!
I put my pack back on and started to climb but my pack was heavy. It made me top heavy and I couldn’t pull myself over. Drat! I sat back down to think. I could see a rappel set up at the top of the gully. I decided to take my 30 meter short rope, attach it to my backpack and my harness as well, leave my backpack below, and climb up the gully without gear. Then I’d use the rope to pull up my pack. If I wasn’t able to pull my pack up I knew I could just rappel back down with the sling already in place and the rope I’d attached to my harness (I was glad I’d brought the 3rd rope!).
I looped the rope around the straps of my pack, attached the other end to my harness, and easily climbed up the gully. Success! Wow, I felt great! That had been the crux of the route for the couple who were here last week, so I now felt confident I’d be able to make this summit. I hauled up my pack, which took quite a bit of upper arm strength and balance not to fall back down the gully as I was lifting the pack up.
I coiled up my rope, attached it to my pack, and continued on. The next section was class 3, and only lasted about 50 feet or so
This brought me to a class 4 section I had to upclimb. I was able to do this wearing my pack
I’d made it to the base of the chimney area, also rated class 4.
From my research I’d learned to take the ‘easier’ chimney to the left. Um, this did not look easy! I spent a lot of time determining if I was even in the correct area, and backtracked a little just to make sure. Yep, this was it. I decided to just start climbing. Boy, was this tiring work! My pack made climbing so much more difficult, but I wasn’t giving up. I made it about half way up the chimney and wasn’t able to stem with my pack on. I decided to retreat and try again.
Taking off my pack had worked last time, so I decided to try that again. I rigged the rope the same way I had last time and started up. Wow! This was so much easier! I made it about ¾ of the way up the chimney when the hand/foot holds gave out. This was definitely difficult class 4 (if not class 5). The pictures I’d seen of others climbing this part made it look so much easier! They looked like they just walked up this section. They’d been roped in, and about a foot taller than I am, but still, it didn’t seem fair. From here I just needed to stem for about 20 more feet which would put me in the upper gully, and then I’d need to exit via the right side. The problem? I couldn’t see any anchors set up, or even any places to set an anchor, and without a visual of the last part of the gully I didn’t feel comfortable committing to this part of the climb, not knowing if I’d be able to rappel down. I knew if I went any further I would not be able to climb back down, so rappelling was my only option. It was here I made the decision to call the climb for the day. I just didn’t feel like I could commit to continuing on without putting myself in unnecessary danger. I kept thinking how infrequent this mountain is climbed and how I’d be stuck for weeks, if not months (or longer) if I wasn’t able to downclimb.
Note: On my drive home I came up with the idea of tying all my ropes together, carrying an empty pack up, and then hauling the ropes up behind me. The only downside to this scenario is if the ropes got caught on something while I’m trying to haul them up (a very real possibility). I need to do more research and find out if there is a sling set up in the gully, or if I just need to commit. Also, I need to practice stemming in a climbing gym with a full pack. That’s not going to be easy…
Here’s how far I made it up the chimney.
I made it back to my backpack and set up a rappel to head back down. At least I was getting some use out of my 60 meter ropes today.
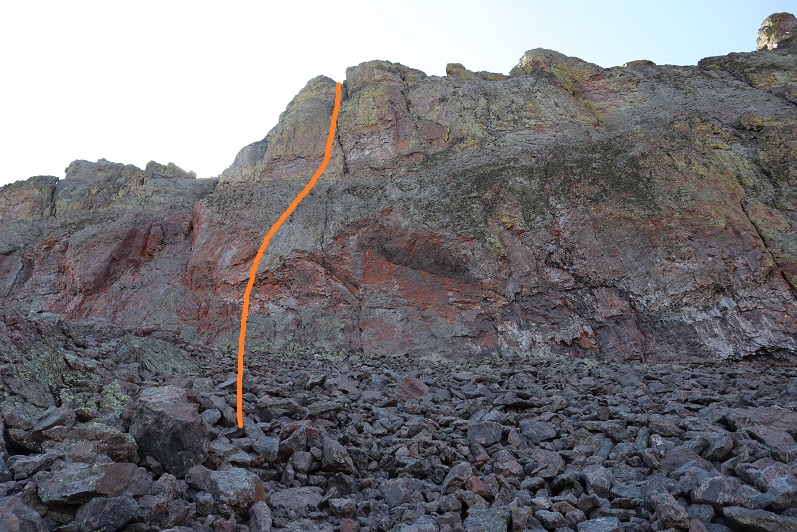
Here’s a picture of the route
I rappelled back down, changed back into my hiking boots, and retraced my steps back down the ridge and back to the trail.
I followed the trail back up the pass, cursing the weight of my pack the entire way
As I was coming back down I noticed blood along the trail, and a few guys with horses down below.
I made it to the bottom of the pass and the oldest man there talked with me for a bit (he looked like a grandpa out with his grandsons). He wanted to know if there was more snow further along the trail. The blood I’d seen had been from one of his horses: it had spooked on the rocks and snow and flipped over backwards when it lost its footing. It had injured its hoof. I was confused as to why they were even contemplating continuing on? They had an injured animal! The man agreed with me and I’m pretty sure he decided to head back. A little further along the trail I met up with a woman who said when the group had passed by their campsite earlier this morning one of their horses stepped on their dog (the horseback riders horse stepped on the horseback riders dog) and caused an awful commotion. And one of the boys had lost his jacket. So the group wasn’t having a great day.
Here’s my route back down the mountain to my truck
The entire route down I ruminated on the days experiences and tried to think if I could have done anything differently. I also considered the need for a climbing partner on this route: someone taller than me who could belay me from the top. This idea doesn’t sound appealing, but it is the safest option. In the end I decided I needed more stemming practice, and I need to actually speak with people who’ve accomplished this route.
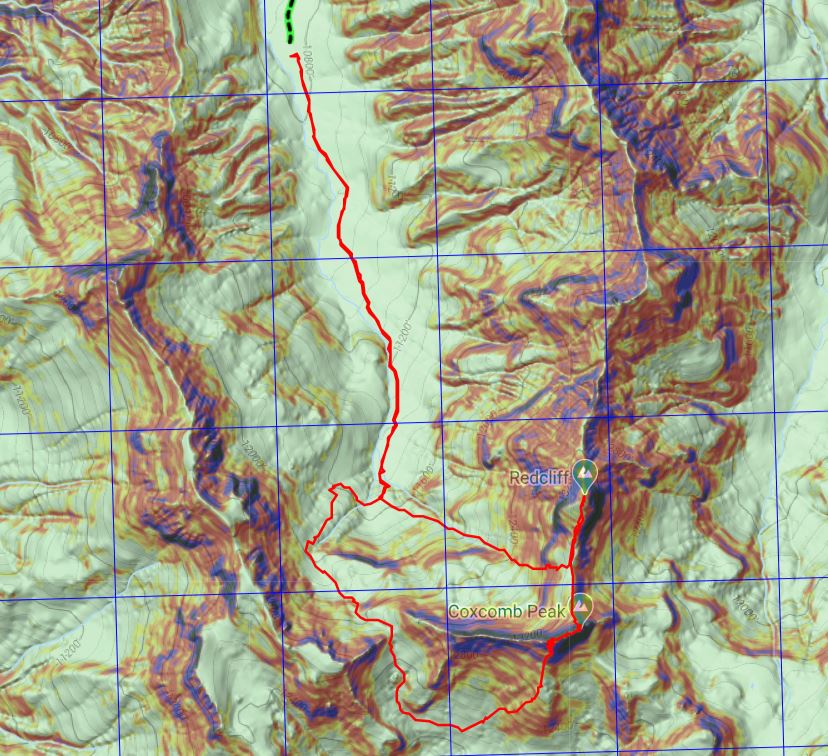
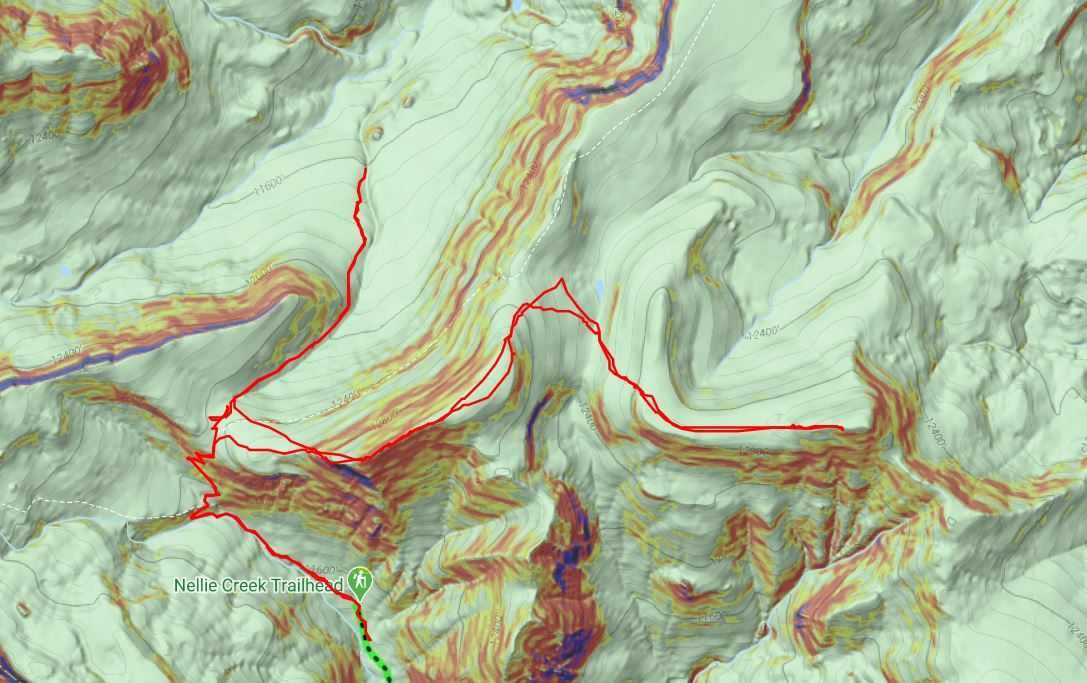
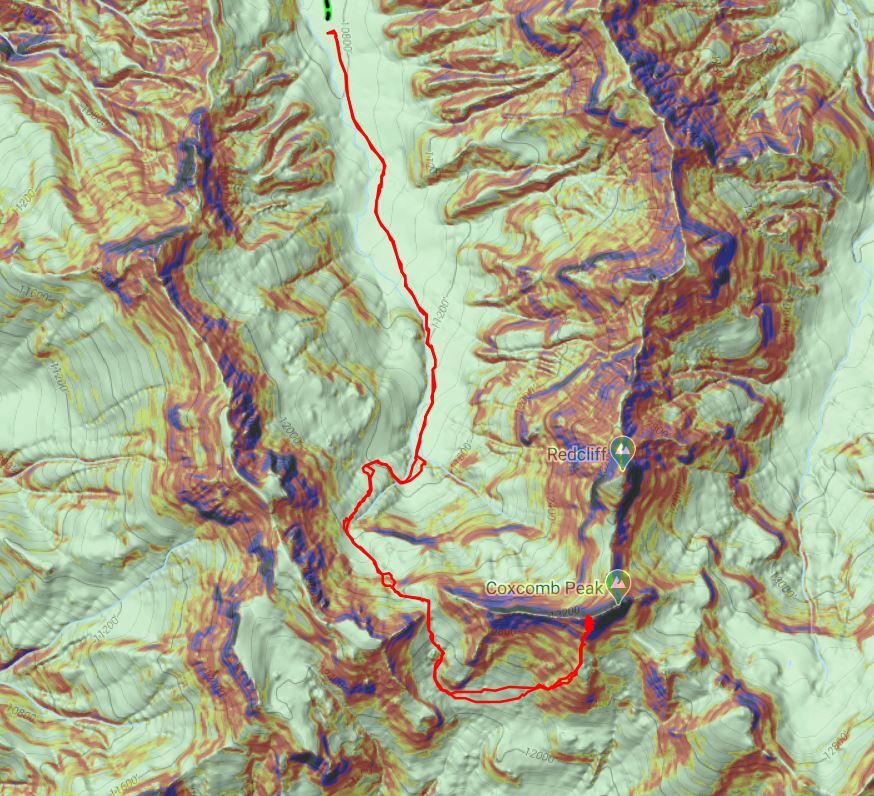
I made it back to my truck at 2:40pm, making this a 17.4 mile hike with 5544’ of elevation gain in 10 hours. Here’s a topo of my route
And just for fun here’s a close-up of my problem solving skills. I worked this problem for a long time!
When I pulled up my gpx file I found I made it to 13,560’, which means I was less than 100 feet from the summit when I turned back. Ouch. On to the next trailhead!

















































































 Wild Wanderer