Sentinel Point- 12,527

RT Length: 8.1 miles

Elevation Gain: 2963’

I’ve wanted to hike Sentinel Point for a while now, but haven’t because it isn’t ranked.  I’ve been kind of waiting for a good excuse to hike it, and today was the day; My oldest daughter flew out from Georgia for the weekend, and this morning I took her to the airport to fly back home, so I needed a hike I could start later in the day.

Oh, and today’s Halloween, so of course I wore a pumpkin dress.  It was also quite cold, so there weren’t a lot of people parked at the Horsethief Falls trailhead.  I gathered my gear, and was on the trail at 9:30am.  The trail is clearly visible from the parking area.

I’d heard it was harder to do this hike counter-clockwise, so of course, that’s the way I chose to do it.  (Spoiler alert:  it is harder this way).  I followed the wide, class 1 trail for 1.4 miles, to the end of Horsethief Park, where the trail abruptly ended at a small waterfall.

At the first junction, I continued straight, heading east

At the second junction, I again continued straight, heading east.   I was also able to see Sentinel Point from here

I was following Horsethief Falls trail

The trail was class 1, until it abruptly ended at what I’m assuming is Horsethief Falls

It was flowing at a trickle.  I crossed the falls, then immediately started ascending the hillside, heading directly east.

From the falls area, I hiked east 1.5 miles to treeline, bushwhacking the entire way, doing my best to avoid the boulders. 

Here’s a picture of the route from later in the day.  You can see the obstacles to be avoided are mainly large boulders/rock outcroppings. 

This is the route I took, gaining about 2000’ of elevation in 1.5 miles

Once at treeline, I followed the ridge north

I was trying to get onto the other side of this rock formation

Once I did, finding the route to the summit proved difficult.  I kept trying to climb the rocks to find a summit, but they kept topping out.  My advice:  stay low and go further north than you think you should before trying to ascend to the summit.  Also, if you do this, you’ll find cairns.  Here are some photos…

This is the entrance area to the summit.  The cairn is circled in red

This was difficult class 3 climbing, but sketchy due to the little bit of unavoidable snow/ice. 

I summited Sentinel Point at 11:30am.  Well, I wasn’t sure if I’d actually summited, because I couldn’t find a cairn/summit register, but I did rock-hop all over those rocks to make sure I hit the summit at some point.  The rocks were stable, but didn’t have a large surface area, so I wasn’t able to get good pictures.  I got a video at one of the most stable areas (and it’s a terrible video, but you get the point)

I was making this a loop, and continued heading north towards the tundra

Here’s looking back at Sentinel Point

From here I actually found a bit of a trail, and followed it north, down to treeline.  Here are some pictures of the route

When I made it past the boulders to treeline, cairns started dotting the route.  Tons of cairns.  While the trail wasn’t well established, there were countless cairns to guide the way back to an actual trail.  Yes, this would have been the easier way to summit.  Cairns are circled in red

I slid down this on my butt, as walking down it seemed sketchy

It should be noted, there were several campsites below treeline along the trail, in case you’re interested in making this an overnight adventure

Once below treeline, I followed the trail northwest.  As I said before, there were tons of cairns to guide the way

Following the cairns eventually brought me to trail 704C, the Ring the Peak trail.  I followed this trail south back to make this a loop.

I made it back to the trail I hiked in on (704A), turned right, and followed it back to the trailhead

I made it back to my truck at 1:30pm, making this an 8.1 mile hike with 2963’ of elevation gain in 4 hours.

Chipeta Mountain South – 12,850 and Chipeta Mountain – 13,472

RT Length:  10.58 miles

Elevation Gain:  3281’

This was my third attempt at Chipeta Mountain this year.  The first time I drove out the road was open but impassible due to snow.  The second time the road was clear, but the gate was closed.  I saw several videos/pictures of people on the pass this year, but later found out they were part of a mining operation and the only ones allowed to access the road.  The road formally opened on May 28.  Today was May 29.  It had already been a long morning:  I’d woken up at the Gibson Creek trailhead, intent on hiking a few 13ers in the area (also not my first attempt these peaks this year), but after about 1000’ of elevation and deteriorating snow conditions I decided to make today a ‘me day’.  I hiked back to my truck, chugged a beer, and came up with a new plan:  I was going to drive to Marshall Pass, see if it was open, spend a day relaxing, and then tackle Chipeta Mountain tomorrow. 

Marshall Pass was open and snow/mud free to the pass.  I was surprised at how few people were dispersed camping this Memorial Day weekend.  I parked near the bathrooms and information signs.

I checked the weather, and it wasn’t supposed to rain until 5pm tonight.  I did the math, figured I had plenty of time to get in a hike before weather set in, gathered my gear, and was on my way.  I was on the trail at 8am.  The usual trail from the trailhead has a sign saying it’s no longer in use, so I took the very short bypass and started along the road instead.  This is road 243G, located at the north end of the parking area.  If was a bit muddy to begin with.

It was obvious from the start motorized vehicles hadn’t been on the trail yet this year, as there were numerous downed trees at the beginning (not much after a mile in, however).

I was following the Continental Divide and Colorado Trails north, along the west side of the mountains. 

After hiking for 1.7 miles snow started covering the trail.  Luckily, this snow wasn’t quite mashed potato snow, and I could get by hiking over it with just microspikes (on the way in),

After hiking for a total of just over 3 miles I turned right and headed east up the slope.  A map will tell you this is trail 484.1, but since it was covered in snow I headed east,  and once I saw them, I followed the posts to the saddle.

Once at the saddle I had a great view of Mt Ouray.  I turned left and headed north along the ridge.

Here an obvious trail picked up (the trail only lasted to the top of this hill).

From here you can see the rest of the hike:  it’s a straightforward ridge hike that starts out with tundra, and ends with a lot of loose rocks the size of tires.  Note:  The drop from South Chipeta Mountain to Chipeta Mountain is more drastic than this image would indicate.

Here are some step by step pictures of the ridge.

There’s a cool Quartz formation, with a lot of interesting rocks lying around

Then it’s on to South Chipeta Mountain

It’s rockier than it looks towards the top

From the top of South Chipeta Mountain (12850) you can clearly see the route to Chipeta Mountain (13472).  From South Chipeta you will lose 200’ of elevation, and then gain 825’ of elevation to the summit of Chipeta Mountain. 

This is also a simple ridge hike, but it takes time and careful foot placement because the rocks aren’t stable and tend to roll.  Nothing above class 2 however.

Weather unexpectedly started coming in early as I neared the summit of Chipeta

I summited Chipeta Mountain at 11:15am, after just over 3 hours of hiking

Chipeta Mountain: 

Here’s the view of Mt Ouray from the summit of Chipeta

I didn’t like the look of the clouds, and there was virga in the direction I was headed, so I didn’t stay on the summit long.  I retraced my steps back over South Chipeta Mountain to the saddle.

At the saddle I turned right and headed back down to the Continental Divide / Colorado Trail

At this point I needed snowshoes.  Strapped them on and followed my tracks from this morning south

I made it back to the trailhead at 2pm, making this a 10.58 mile hike with 3281’ of elevation gain in 6 hours.

I was still intent on taking a ‘me day’, so I decided to sleep in my vehicle here overnight.  Around 5pm a couple drove in, saying they were planning on backpacking part of the CDT/Colorado Trail.  The had along their dog, and a ferret on a leash (the woman had a ferret fanny pack as well, for when needed).  I asked them if they had snowshoes?  The woman slapped the man across the chest and said “See? I told you so!”  They didn’t have snowshoes but headed out anyway. When I woke up at 5am their vehicle was gone, so I’m guessing they didn’t end up staying the night, which was a good idea, considering there was a storm coming in.  I’m not sure what a wet ferret smells like, but it’s probably not ideal.

Humphreys Peak – 12,633 – Arizona Highpoint

RT Length:  10.55 miles

Elevation Gain: 3649’

Last week I saw a post indicating someone had successfully summited Humphreys Peak from the summer trailhead, so I decided to give it a go.  (Humphreys Peak Trailhead / Kachina Peaks Trailhead / Snow Bowl)

I woke up at 2am, worked out for an hour on the treadmill, and then drove to Arizona, stopping along the way for a few work calls.  I’m not a big fan of the New Mexico city of Gallup:  Nothing good has ever happened to me there.  This time, as I was getting gas, a man was sitting in front of the gas station entrance cleaning a knife with a blade at least 8 inches long, swinging it around every few minutes like he was practicing martial arts moves.  Also, all of the bathrooms in the gas stations and fast food establishments in NM and AZ are closed due to covid.  So was the bathroom at the Bookman’s I stopped at in Flagstaff. I had a voucher for Bookman’s I’d received in 2016, and since I was in the area I decided to use it.  I got this very appropriate book

Then I drove to the Snow Bowl, where the trailhead is for Humphrey’s Peak.  There were a lot of skiers driving down the mountain, but I was the only one going up.  On the drive in I saw a sign that said “Skiing Open 10am-4pm, TH-SU”. 

I made it to the parking area and found a place to park.  This is the trailhead

I walked around the trailhead, and noticed the beginning part of the trail goes right under a ski lift.  I also saw this sign:

Ugh.  That was unexpected.  I’d driven all the way from Colorado only to be thwarted by a technicality.  As I was standing there, I noticed two female hikers walking towards me, directly from the ski area where it said pedestrians weren’t allowed.  They told me they hadn’t had any issues (indeed, at least 5 more hikers came down after them, and all said the same thing).  I decided to hike the following morning, early, and try to make it down before the 10am skiing session began.  Side note: these women were badass, and had a great list of mountaineering accomplishments.  We talked for a bit, and I gave them some fireside stickers.

I sat in the back of my truck and started making dinner.  A young man pulled up with a similar set-up and got out to enjoy the sunset.  He spent his time sitting in a chair enjoying a beer, alternating drinking with doing push-ups. I went over and talked with him for a bit, and we ended up doing a few whiskey shots together (both of us had various bottles in our rigs).  He was a nice young man (reminded me of my son) and this was his third time this week at the trailhead.  He hoped to summit the next day as well.  After the sunset I wished him good luck and told him I’d see him tomorrow on the trail (either up or down). 

My view tonight

I went to bed and had a peaceful night’s sleep, waking up to my alarm at 2:45am, I was on the trail at 3am.  Interestingly enough, as I was leaving a vehicle pulled up:  it looked like there was another hiker hiking with me this morning.  We ended up leap-frogging each other on the trail. The trail starts at the north end of the parking area and heads northeast, across the slop and into the trees, before zig-zagging up the west slope.

Plot twist:  When I started out at the trailhead it was dark, all except for a really big light, accompanied by a loud buzzing sound.  Turns out they groom the trails at 3am, and there was a snow groomer working this morning.  Drat!  I decided to turn off my flashlight and wait until the groomer had passed me, then darted across the field to the safety of the trail in the trees, where I turned my flashlight back on.  I’m sure this would have been comical to watch. 

There was another trailhead once I entered the trees.  Note: I wore microspikes for the entire hike, and didn’t need snowshoes.  If hiking later in the day, they would have been necessary.

Once in the trees there was a lot of snow, so I had a hard time following the trail.  There were several downed trees covering the trail, and a lot of social trails.  If you’re doing this peak in summer it will be a straightforward, class 1 trail.  If you’re doing it with snow on the ground expect some route-finding.  I switchbacked northeast to the saddle.  The saddle you’re aiming for is the one that’s directly east of you from the parking area (it’s a clear, skiable path). 

As I neared treeline the snow declined and there was no longer a trail.  I kept heading northeast to the saddle

Once at the saddle I turned left, and followed the ridge north.  (Going right will take you to Agassiz Peak) There’s a faint trail here that picks up as you go along, as well as wooden posts to guide the way.  Stay to the left while on the ridge.

There’s also a trail sign here, indicating the way

I followed the ridge north/northeast as the sun began to rise

The girl I’d been leapfrogging with took a different route up (there were several snowshoe tracks to follow), and when we hit the ridge she got out a sleeping bag and decided to watch the sunrise.  She never did go to the summit, and was gone when I made my way back down. 

I continued on, following the ridge

I made it to the summit at 6:20am.  There were a lot of windbreaks at the summit

I found a buried summit register, left it there, and took a picture with the broken summit sign

Humphrey’s Peak:

It was cold and windy, so I decided to head back.  Here are a few photos of the route down.  I (mostly) re-traced my steps.

Here’s the saddle I was aiming for

And the ridge to get there

Once at the saddle I did my best to follow my tracks back down

Taken from the saddle, the parking area is circled.  Here you can see it’s a straight shot west from the saddle, but that area was all skiable and off limits, so I did my best to switchback down the mountainside, following the summer trail.

I lost the trail several times, but was able to follow snowshoe tracks down.  If you’re blazing your own trail, you can stay in the trees and parallel the ski area by heading west, which will lead you to the parking area.

Here’s the exit route back to the parking area

I was still really early, and there wasn’t anyone on the slopes.  I was making tracks on the newly groomed snow however.

I made it back to a still empty parking lot at 9:00am, making this a 10.55 mile hike with 3649’ of elevation gain in 6 hours. I never did see that man I met in the parking lot last night.  I can only think he had more whiskey than he could handle and had a hangover.  That’s what he gets for drinking with a pro. 

Here’s a topo map of my route

Mt Parnassus – 13,580, Bard Peak – 13,641 & Woods Mountain 12,940

1

RT Length: 10.25 miles

Elevation Gain: 4965’

This was my third attempt going for Bard Peak. The first time I made it as far as Parnassus, but the wind and cold temperatures (and Raynaud’s) prevented me from going any further. My second attempt was from the Berthoud Falls area, and the snow just wasn’t cooperating. Imagine my surprise when I found out today this is actually an easy trail when not in full winter conditions!

I parked at the Herman Gulch trailhead and was on the trail by 4:30am. This trailhead has tons of parking, but beware: it fills up fast. There was a full moon and I could see by looking at the mountains I wouldn’t be needing snowshoes today, so I left them in my truck.

2

The trail starts in the middle of the parking area. I took the Herman Gulch trail to begin, which is just behind the information signs.

3

4

After hiking .2 miles I turned right (east) at this junction to follow the Waterous Gulch Trail.

5

This trail is an easy, class 1 trail all the way to the basin. Last time I was here the area was covered in snow and I had no idea there was a trail that went that far. Today the hike was easy! No real route finding below treeline.

6

7

After hiking for about 1.5 miles I came to a creek crossing in Waterous Gulch, crossed the creek on an icy log by sitting down, straddling the log, and shimmying across (due to the ice I would definitely have slipped if I’d tried to cross standing up). I turned left and headed north through the gulch on a great trail (still the Waterous Gulch Trail).

8

9

10

Starting here there was snow on the trail, but just enough to be annoying: I could still figure out where the trail went

11

I crossed a small stream and continued on the trail. Note: You can also choose to go right and not cross the stream here and take a parallel trail that leads you to the exact same place as the Waterous Gulch trail. I stayed straight here and continued to the end of the gulch on the way in and took the parallel trail on the way out. They were similar, but the one that follows the gulch also follows the stream, which was nice.

12

I followed the class 1 trail to the end of the gulch, and after 2.2 miles of hiking turned right and continued following the trail up to the saddle of Woods/Parnassus. There are a lot of ways to gain the summit of Parnassus. Last time I hiked further south, avoiding the saddle, and I would not recommend that route. Instead, take the easy gully and aim for the saddle and go as far as you can before turning right and heading southeast towards the summit. This is where the intense wind started and didn’t stop. Forecasted winds were 17-24mph, but those winds don’t knock you over. For the rest of this hike I was using my trekking pole for stability, hiking sideways into the wind.

13

The trail stopped here somewhere under the snow. I paralleled the snow to the saddle

14

At the saddle I turned right and headed southeast towards the summit of Mt Parnassus. This is an easy hike on tundra.

15

The terrain gets a bit rockier near the top.

16

The summit is relatively flat. I summited Mt Parnassus at 6:40am, after just over 3.5 miles and 2 hours of hiking. Since this is my second summit of Mt Parnassus I’ll spare you the selfie and let you watch the summit video instead.

Mt Parnassus:

Bard Peak is just over a mile east of Mt Parnassus.

17

There’s a bit of a trail from Parnassus to Bard. I followed it where I could. It was faint, so sometimes I lost it, but mostly followed the ridge. It’s important to follow the ridge when snow is present. This ridge is easy class 2 ‘scrambling’. Just watch for loose rocks. I could see a faint trail go to the right of the ridge (south), but it became covered in snow and would have been difficult to cross. Here’s an overview of my route

18

And some close-ups in order:

19

20

21

When I got to this section I did not feel comfortable traversing without crampons and my ice axe (luckily I had both). I sat down, strapped on my crampons, and crossed the snow. The snow was slippery at this time in the morning (not mushy, more like icy). You could probably traverse this section with just microspikes if you were here at the right time of the day.

22

Because I could I kept the crampons on until the last of the snow.

23

Here’s looking back on the section you want to avoid, and the reason I stuck to the ridge. You can also see a slip here would take you a ways.

24

After taking off my crampons and putting them away I headed up to the summit of Bard Peak, keeping close to the ridge

25

26

I summited Bard Peak at 7:50am, after 4.7 miles of hiking.

27

Bard Peak:

There was a broken summit register and a benchmark on the summit

28

Now to head back to Mt Parnassus. I backtracked down to the saddle, put on my crampons again, got out my ice axe, and crossed the snow.

29

30

31

It was easy to avoid the snow on the rest of the way back to Parnassus

32

33

34

35

From the summit of Mt Parnassus I descended the way I’d summited, back down to the Woods/Parnassus saddle

36

When I made it to the saddle I still wasn’t tired so I decided to summit 12er Woods Mountain as well. This summit doesn’t require much guidance: it’s an easy tundra stroll to the top. This added 460’ of elevation gain to the hike. This is where the wind became the most intense (yes, it was still blowing). It was so windy I was hiking sideways with each step, and had to over-compensate each step to stay in a straight line, crisscrossing my steps as I went.

37

I reached the summit of Woods Mountain at 9:40am. I’ll spare you the selfie of this one as well, since I’ve already summited this peak. Here’s the summit register and a video

38

Woods Mountain:

This wind was insane! Time to head back down to the saddle and back down to the gulch

39

40

41

I followed the trail back down the gulch, over the log bridge, and back to the trailhead. This is where I started seeing a lot of other hikers. When I made it to the trailhead the large parking area was completely full.

42

43

44

I made it back to my truck at 11am, making this a 10.25 mile hike with 4965’ of elevation gain in 6.5 hours. Here’s a topo map of the route:

45

I felt really good about the hike today: The weather had been warm, no clouds, not much route finding, and when I made it back to my truck I wasn’t even tired yet. The only thing that could have been better was the wind. It’s amazing how good conditions can change the outcome of a hike!

Almagre Mountain – 12,367 and South Almagre Mountain – 12,349

1

RT Length: 14.5 miles
Elevation Gain: 2936’

Oh, Old Stage Road, where the speed limit is 20mph but you can’t go above 5mph because the road is so full of potholes. Old Stage Road is a 2WD dirt road connecting Colorado Springs with Cripple Creek, and as of late is becoming increasingly difficult to drive. OK, not difficult if you drive slow, but then it takes forever! We made it to Old Stage Road at 5am and didn’t make it to the trailhead (Frosty Park) for over another hour. The last part (after turning onto 379) was very much 4WD, and fun to drive! There was snow and ice on the trail, and a few deep puddles to navigate.

2

Eventually I came to a place where there was a layer of snow/ice on the road that I didn’t want to navigate with my truck, so I parked a third of a mile before the trailhead and decided to walk the rest of the way. This was an easy walk along the 379 dirt road, and in fact, we stayed on 379 for 3.5 more miles

3

The road conditions varied greatly, but after the first mile snow was present along the entire route. The road followed the Ring the Peak Trail to Deer Park

4

At Deer Park we left the Ring the Peak trail and turned right onto 379A

5

We continued to follow the road, steadily gaining in elevation

6

Snowshoes would have been a good idea, but we were too stubborn to put them on.

7

After 5.25 miles we came to a locked gate and skirted around it

8

This brought us to the defunct Stratton Reservoir.

9
It’s hard to imagine this reservoir ever held much water. Almagre is to the north of the reservoir. Here’s the path we took

10

Stopping to get a shadowselfie on the reservoir

11
Following the road up to the saddle

12

13

And then heading northwest to the summit

14

There was a lot of wind here, and firm snow we were able to easily navigate with just microspikes

15

16

We summited at 9:40am to quite a bit of wind

17

18

There was no summit register, so we decided to leave one we’d brought, crouching down behind the solar panels to get out of the wind

19

The wind was a bitter cold so we didn’t stay long on the summit. We made our way back to the saddle

20

And got a good view of South Almagre Mountain (the microwave towers)

21

We headed back the way we came

22

And only stopped for a bit to re-apply sunscreen. Then we were starting the ascent of South Almagre. While we simply followed the road, the road was covered in snow/ice and was a bit tricky in places. I went first to kick in steps

23

The road didn’t look passable after the first set of switchbacks, so we decided to just head up this wall of snow and straight towards the microwave towers

24

25
As we neared the towers we heard talking, which was confusing since we’d made our own tracks and hadn’t seen anyone all day. Turns out there were some workers up in the towers adding connectivity and network bandwith due to increased demand during the Coronavirus.

26

They’d tried to take the road we hiked in but their vehicle wouldn’t make it, so they instead turned around and hiked in from Elk Park. This is the initial way I’d summited Almagre a few years ago.

Being at the top of South Almagre we weren’t sure if we were indeed at the highpoint. Looking directly east seemed to be just as high (or higher) than the point we were at now, so we decided to traverse over to this pile of rocks

27

While it was fun scrambling, our altimeter showed this area was actually 10 feet lower than the towers had been.

28

29

Satisfied, we decided to head back, following the route we’d come in

30
The snow section below the towers was a little steep, but we’d done a good job kicking in steps

31

32

We followed the road back to the gate

33

And with the increased temperatures were a little worried about avalanche danger here

34

We gingerly crossed this area, and as soon as we were confident we were out of avalanche danger we put on our snowshoes for the long slog back down through snow, ice, and mud.

35
The snow on the roads was now mush, and once we got further down we started seeing tire tracks

36

37

And more and more and more vehicles. I started to get worried we wouldn’t be able to drive out on this road because so many people were driving in.

We made it back to the truck at 2:30pm, making this a 14.5 mile hike with 2936’ of elevation gain in 8 hours. I have to say, the hike felt shorter with more elevation gain, but that may be because I was tired from my hike the day before.

38

I decided to follow a few vehicles back to Old Stage Road, and this ended up being a fabulous idea: There were dozens of vehicles in the half mile back to the road all trying to go the opposite way. I applaud them for social distancing and still getting outdoors!

39

Colorado Mines Peak – 12,493 & Mt Flora – 13,129

1

RT Length: 7.75 miles

Elevation Gain: 2334’

The weather always wins. The day before this hike instead of getting 1-3” of snow we got more like 8” and I’d spent quite a bit of time shoveling my driveway.  This extra snow occurred all over the state and the peak I’d intended to climb now wouldn’t have a reachable trailhead.  So I did the easy thing and just switched my plans to hike a peak with a 2WD trailhead.  Admittingly, I didn’t do much research and just left the house with a topo map and a vague idea of where I was headed.  Luckily this is one of those peaks you can do that with.

2

I’d never been to Berthoud Pass before and was surprised at how large the parking lot was. It was 12* when I arrived around 5am and I decided to put on all my gear while sitting in my truck.   Then I waited for a little bit of light before heading out.  It had snowed here quite a bit yesterday as well and there were several feet of fresh, sugary powder on the ground.  Since there were no tracks I wasn’t sure where the road/trail was so I just headed up the mountain (dotted line).  This was more difficult than I‘d expected, as I kept sinking up to my waist in the snow.  Snowshoes weren’t helping.  Eventually I made my way to a road (solid line) and realized where it went all the way down to the parking lot (whoops!) and took it all the way up to Colorado Mines Peak.   The road is located at the south end of the parking lot and without snow should be easy to find.  In the afternoon there were several tracks made to the road by others who’d known what they were doing.

3

The road was easy to follow because there were poles placed every 50 feet or so along the trail. I was postholing here as well, and my legs were getting quite a workout.

4

As soon as I was out of the trees the wind picked up and never stopped. It wasn’t more than 20mph, but it just wouldn’t let up.

5

6

There wasn’t much route finding on this part of the trek, as the road was easy to follow all the way to the top of Colorado Mines Peak. At the top there were radio towers and buildings, etc.

7

I wasn’t sure where the summit was, so I just walked all around, taking pictures of the various structures.  They’re larger than they look.

8

It was windy and cold and I didn’t feel like setting up my camera so I just got a quick selfie

9

I didn’t see an established trail from the top of Colorado Mines Peak to Mt Flora, but I could see a trail heading up the ridge of Mt Flora so I headed northeast down the side of Colorado Mines Peak towards the saddle

10

The wind was still blowing, forming a cornice along the ridge

11

The trail from the saddle up was easy to see. Snowshoes weren’t needed here, but due to the wind and cold temperatures I didn’t want to take off my gloves to take off my snowshoes, so I left them on.

12

Did I mention the wind? At about this time it was getting really annoying.  I kept thinking every time I went around a corner or over a hill that the wind would die down, but it didn’t seem to matter which side of the mountain I was on: I was getting pounded by the wind (and ice)

13

This was all very frustrating because this was a relatively easy hike, yet I was starting to get a headache from the constant wind

14

15

16

17

After winding around the mountain for what seemed like a long while I could see the last bit to the summit. Here the sastrugi was beautiful and in most places solid, making it easy to cross

18

19

There were several large cairns indicating the path to the summit

20

The summit was large and relatively flat, with cairns, signs, and windbreaks full of snow

21

22

I’m not sure what time I summited, but it still felt like early morning.

23

It was still early in the day when I summited and I wasn’t tired at all, yet I was starting to feel nauseous. This wind was really getting to me.  My balaclava had frozen to my face and I was worried I was getting frostnip on my nose (I was).  I walked around the summit and looked at some of the other peaks I’d wanted to hike today

24

This should have been such an easy hike (and it was) but I decided here not to continue on. Yes, I’d wanted to summit a few other peaks today, but the forecast called for increased winds in the afternoon and I’d already had enough.  This wind was making the morning miserable. Looking ahead at an added 6 miles of wind sounded like torture, and that’s not why I hike. I told myself I’d come back and do this hike again when the conditions were better (less wind). So I turned and headed back towards Colorado Mines Peak

25

As the wind increased and I became ever more nauseous I celebrated my decision to head back and enjoyed the views

26

Instead of going back up and over Colorado Mines Peak I decided to follow the trail that went around the mountain. Until the trail was obscured by snow and I couldn’t follow it anymore.  Then I just made my way around the mountain until I found the road again.

27

The snow here was thicker and I was glad I’d kept on my snowshoes

28

29

Here’s a look back at my tracks to the road

30

Once on the road again I noticed all of the tracks I’d made this morning were gone

31

Here the wind let up and I took a minute to take some ibuprofen. Almost immediately I began to feel better.  I could see the parking lot was full of vehicles and if I had skis I’d just slide my way down there.  The snow was all powder and the skiers seemed to be enjoying themselves immensely.

32

About halfway down the mountain I came across plenty of new tracks and two trenches on either side of the road. Needless to say, hiking down with a trench is a lot easier than trenching on the way up.  I was thankful for everyone who came after me and made a solid trench.

33

34

I was also thankful to be out of the wind. The trees were lined with fresh snow and made for a beautiful trek out.

35

I made it back to my truck around 11am and was surprised to find people tailgating in the parking lot. I guess that’s a skiing thing?  The parking lot was buzzing with activity, too many vehicles, people and pets, and I had to be careful not to run anyone over in the parking lot on my way out.  I looked at my nose in the mirror.  Yep, I’d definitely gotten a little bit of frostnip.  I wish I could find a way to keep my balaclava from freezing?  Hmmmm.  Maybe I just need to try a different brand.

I started this hike around 6am and finished just before 11am, making this a 7.75 mile hike with 2334’ in elevation gain in 5 hours. I was a little disappointed I hadn’t done more today, but felt trenching in powder had given me a good workout just the same.  Any day above treeline is a win.  I’ll be back to complete this hike soon.

36

37

Mt Wilcox 13,408 & Otter Mountain 12,766

1

RT Length: 8.5 miles

Elevation Gain: 3221’

I’d already considered this a successful Memorial Day weekend:  I’d climbed 3 peaks in the San Juans without (major) incident.  Saturday I did all the “mom” stuff:  Washed all the sheets, did the laundry, went shopping, vacuumed, re-planted a few plants destroyed in the storm last week, and took my daughter ice skating.  As we were having dinner I asked my 16 year old what she wanted to do tomorrow?  Sleep and study for finals.  Hmmm… it looked like I had another morning free to hike!  I didn’t want to do anything too far away because it was Memorial Day and I wanted to make something special for dinner, so I did a very quick search of peak conditions and settled on a peak I didn’t need much info to hike:  Mt Wilcox.

Mt Wilcox is generally done as a loop with Argentine Peak and Square Top Mountain, but I’ve already done both other peaks previously and just needed to tick off this one in the area, making it the perfect choice for this morning.

Yes, Mt Wilcox seemed like a quick and easy 13er, and there was a close 12er I could hike if all was going well.  I didn’t do much research but I also couldn’t find much information in the 10 minutes or so I spent gathering information.  I looked at a few trip reports, printed out a shaded topo map and was ready to go.

I arrived at the Guanella Pass Campground / Silver Dollar Road trailhead at 4am and was on the trail by 4:15am.  I put on snowshoes in the parking lot and kept them on for the entire hike.  I did not regret this decision:  they were a bit overkill in the morning, but very helpful on my way back.

2

I followed the Silver Dollar Road Trail for a little over a mile.  The road was still covered in a few feet of crunchy ice.

3

I followed the road all the way to Naylor Lake, which was covered in ice as well.  I steered clear, but it looked like others had recently tried to ski across it?!?!?

4

There were a few cabins here, some mostly covered in ice.  There were footprints and ski tracks everywhere.

5

6

At the lake the trail ended and I headed Northeast through the trees and up a small gully to treeline

7

My beta told me to ascend here, to which (in the dark) I said nope.

8

There had to be an easier way!  I decided to trek along the small basin to see if there was an easier way to get up and over this part.  I knew from looking at my topo map once I got above this area the terrain would just slope.  I came to this point and thought to myself “this is doable”, picked a line, and made my way up.

9

9-2

It was still pretty steep, but nothing as dramatic as the suggested route.  It’s amazing how snow changes things!  On the topo map this area looked very similar to Elkhead Pass, which I was unable to downclimb, yet this was manageable.

10

I made it up this difficult area and then was greeted with a long white climb up snow

11

Every so often I’d look back, waiting for the sun to rise.  The Sawtooth looks pretty cool!

12

I kept heading west until I could see the summit of Mt Wilcox.  When it came into view I thought to myself “That’s it?  That looks too easy!”

13

What I didn’t realize was it’s much further than it looks.    I had a hard time focusing on the path ahead of me because I kept turning around to watch the sunrise.  Alpine sunrises are the best!

14

They turn the snow pink for 5 minutes or so

15

The snow here was very consolidated and easy to navigate.  I wasn’t making any tracks though

16

This hike wasn’t very challenging, but it didn’t seem like I was getting any closer to Mt Wilcox

17

I’d climb over one area, just to be greeted with another slope

18

The summit was snow covered, with amazing views!

19

20

The hike to the summit hadn’t taken me very long and I wasn’t tired, so I decided to head over to Otter Mountain.

21

This was very easy.  I hiked northeast down the slope of Mt Wilcox to about 12,300’ (losing about 1100’ in elevation) and then just ascended Otter Mountain

22

Here’s a look back at Mt Wilcox from the base of Otter

23

The only downside (besides the 400+ feet in elevation gain I had to regain) was the sun was rising as I was hiking up Otter Mountain.  I was hiking directly into the sun, which was less than ideal

24

I kept trying to race the sun, trying to make it to the shadows, hiking faster than it was rising, and when I was almost to the top I won!

25

The last 100 feet or so in elevation gain were on dry tundra, so I took off my snowshoes and hiked the rest of the way with them in my hands

26

Yay summit views!

27

I summited Otter Mountain at 7:15am

28

Otter Summit Views: 

One thing I really like about 12ers is it’s easy to breathe while you’re hiking to the summit.  I turned around to look at Mt Wilcox and the path I’d taken

29

Time to head back.   I knew I could just take the slope of Otter Mountain down to the parking lot,

30

But I wanted to get day pictures of the hike, so I made it a loop.  I stayed high to avoid the drainage area (which was a serious drop from every angle).  Here’s the path I took back

31

Just Because…

32

And a look back at Otter Mountain and the route I took from the Mt Wilcox ledge area

33

Time to try and find my tracks and head back down!  Another reason I wanted to make this a loop was to see how difficult the downclimb would be.  I can climb up terrain no problem, but the downclimb still puts me on edge sometimes, and I considered this great practice without too much commitment (a fall wouldn’t be too far and it would land me in the willows).

34

I hate saying this, but once again, it’s steeper than it looks

35

I made it down successfully to the willows

36

And trekked back to Naylor Lake.  It looked like someone had been skiing in the area recently.  As I passed the cabins I noticed a “No Trespassing” sign near an open gate.  Note: in the dark on the way in I hadn’t seen the gate OR the “No Trespassing” sign.  It wasn’t reflective and had been covered in snow.  The gate was 90% covered in snow, open, and had tracks going straight through it.  The rest of the hike was done in slushy conditions, even though it wasn’t yet 9am.  I was glad I’d worn snowshoes.  I made it back to my truck at 9am, making this an 8.5 mile hike in under 5 hours.  I made it home by 11:30am, 30 minutes before my promised 12pm arrival.

37

OK, so obviously all I thought about on my way home were those “No Trespassing” and “Private Property” signs.  I was mad because I hadn’t realized this was private property and because I’d been following tons of footprints (meaning others hadn’t been respecting private property either).  I was mad at myself for not doing more research before the hike (I hadn’t checked maps that would have given me this information) and I was upset all the trip reports I’d looked at (although few) hadn’t mentioned private property and I’d taken their advice.  Also, I kept seeing NFS trail signs, so I had no idea I was on private property.

The first thing I did when I got home was look up a map and find a way to fix this.  I didn’t have this map on my trek:  I made it when I got home.  (The topo I had just had slope angle and terrain, and didn’t include the lakes (etc)).  Please don’t take my route (the dotted line).  There’s another route you can take to the left of Naylor Lake that will get you around the lake, looks easier than the route I took in some areas, and will keep you on public lands.

38

Also, I will gladly donate tons of Girl Scout cookies to the Naylor Lake Club as penance (and you should close your gates and put up reflective signs for us early birds if you don’t want trespassers… just sayin’).

The best part about my hike?  I met some friends by the side of the road on my way down!

39

40

41

Relive:

Oh, and Memorial Dinner was a great American dish:  Beef with Broccoli (but at least I grilled the beef on the grill before adding the glaze… ).

Rosalie – 13,579 “Epaulie” 13,537 West Pegmatite Points 12,227

1

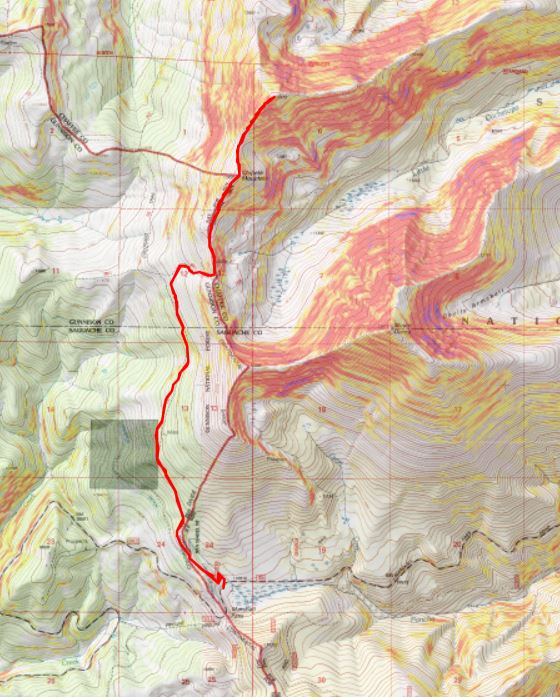
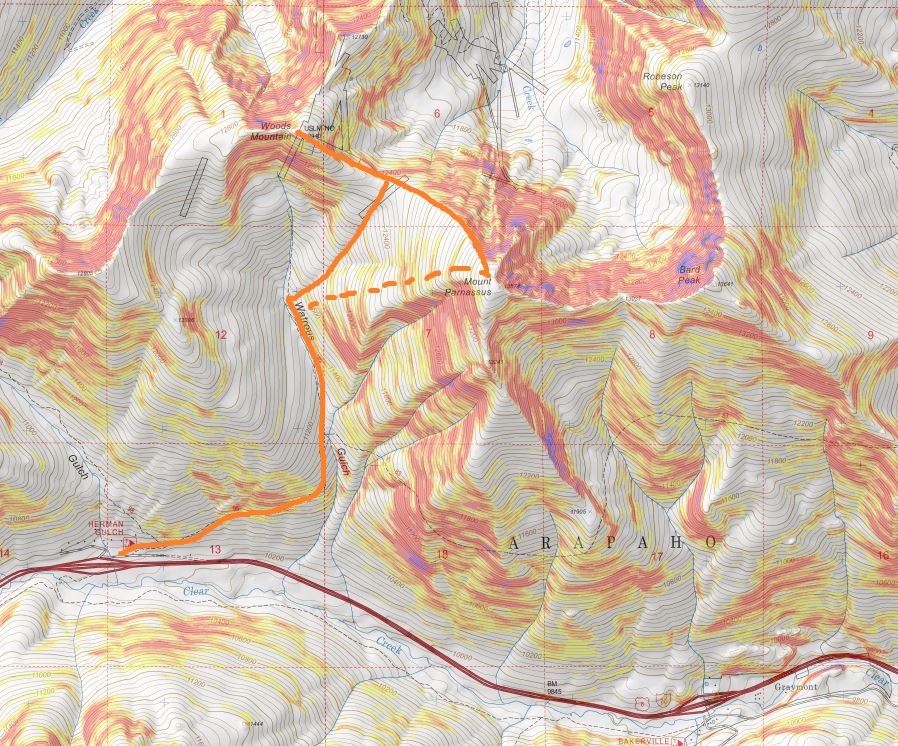
RT Length – 14.5 miles

Elevation Gain – 5920’

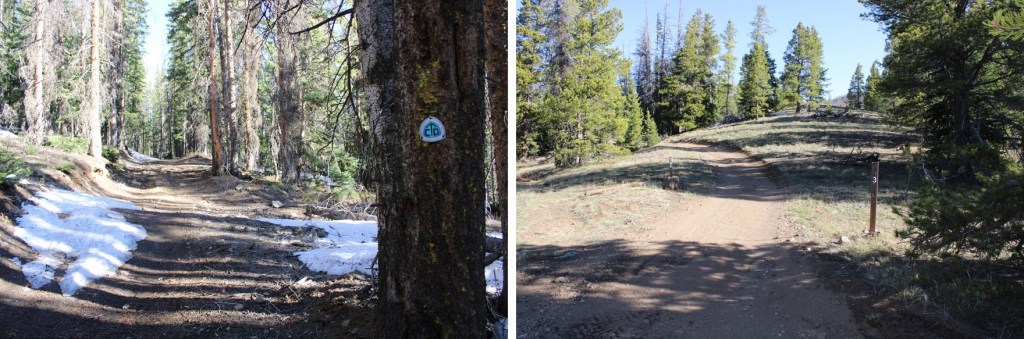
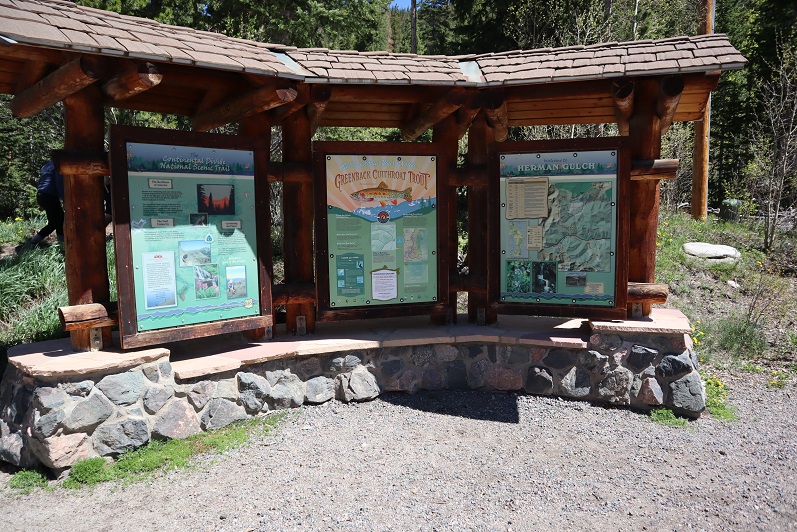
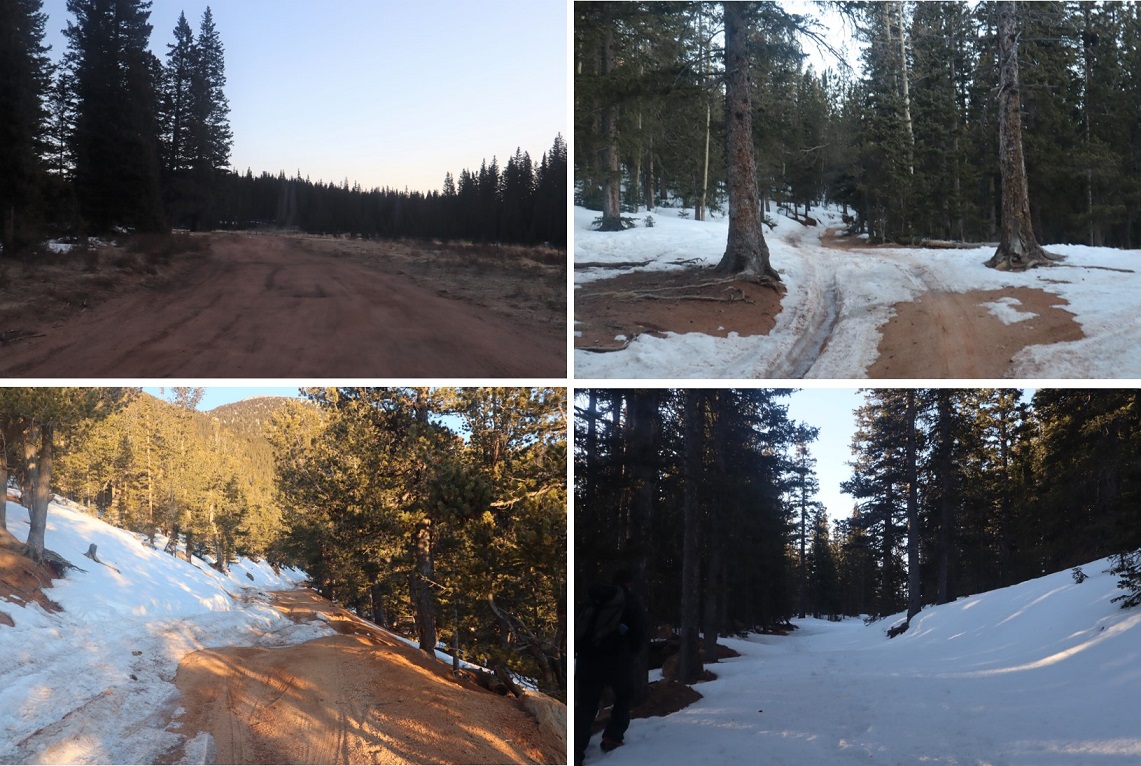
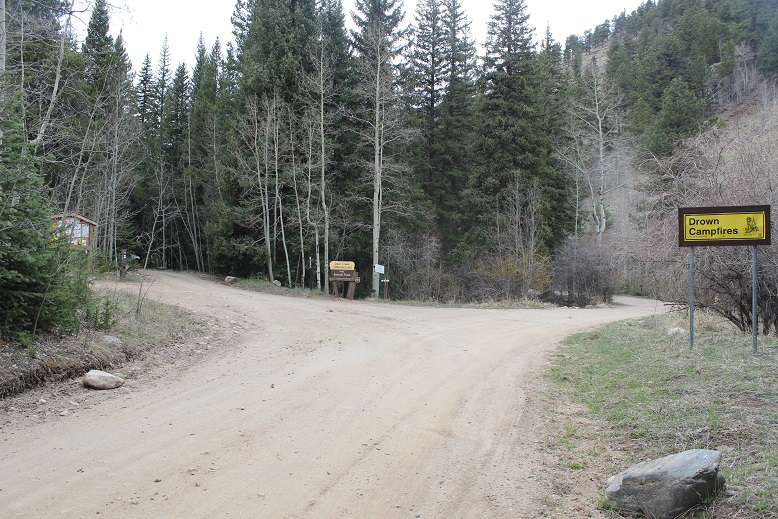
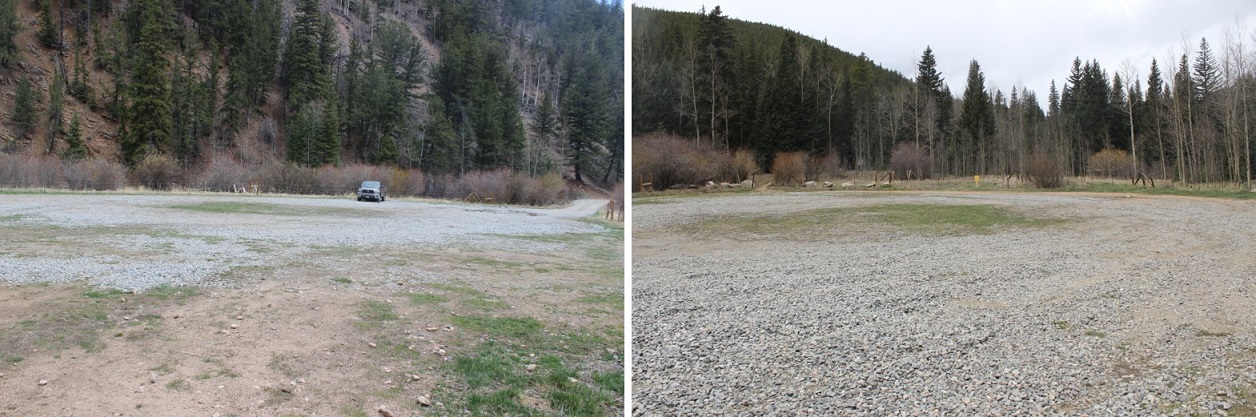
Sometimes hiking in the Spring is similar to hiking in the summer, in that you still need to be off the mountain before noon to avoid encountering storms, but spring storms tend to include snow.  Today’s forecast called for 70% chance of snow after 12pm so I decided to get an early start.  I arrived to what I thought was the trailhead around 3:30am only to discover I was not in fact at the trailhead.  You see Google couldn’t find the Deer Creek trailhead so I just set it for Deer Creek Campground and figured I’d find the trailhead from there.  I made it to the campground, drove through, and took a dirt road .8 miles only to arrive at a locked gate.  I figured this was the trailhead so I found a place to park, got out my gear, and walked to the gate, only to discover this was instead private property, I was being filmed, and there was no public access.  OK, so I went back to my truck and tried again.  It seems you don’t actually enter the campground, but at this sign turn right and follow the road to the end to find the Deer Creek Trailhead.

2

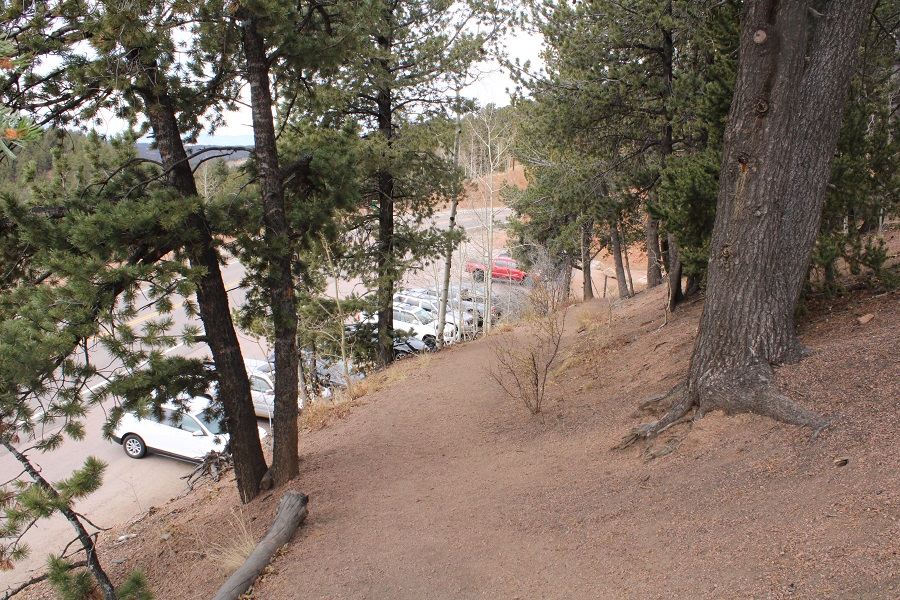
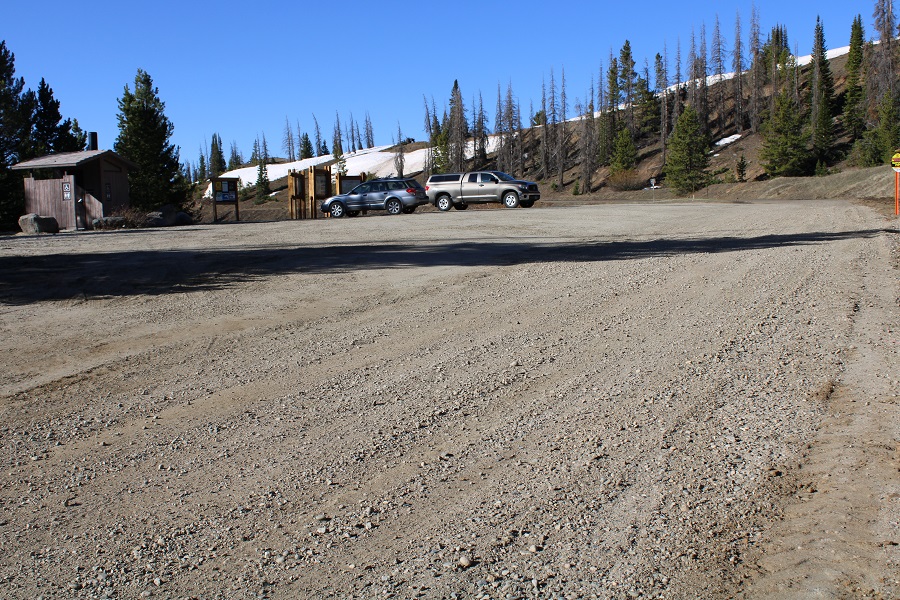
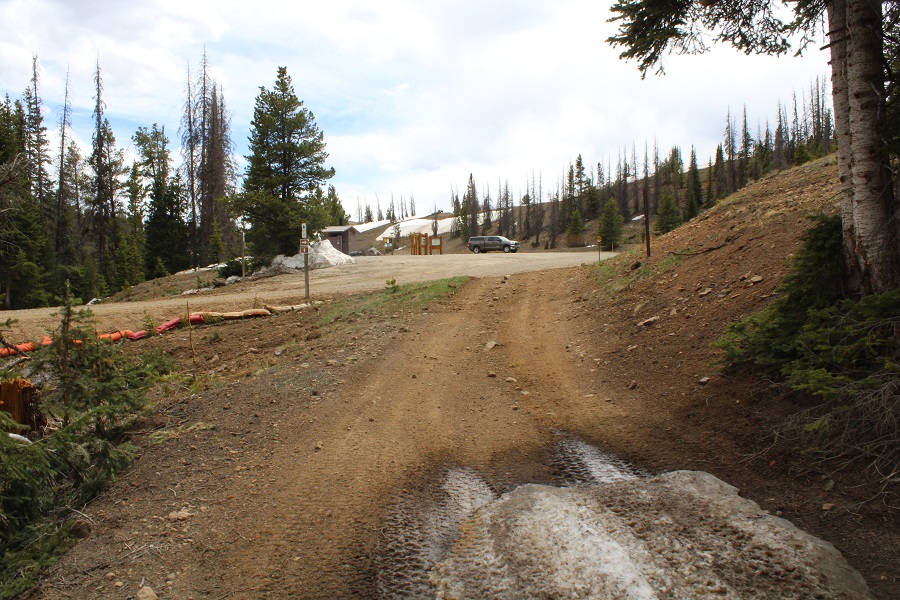
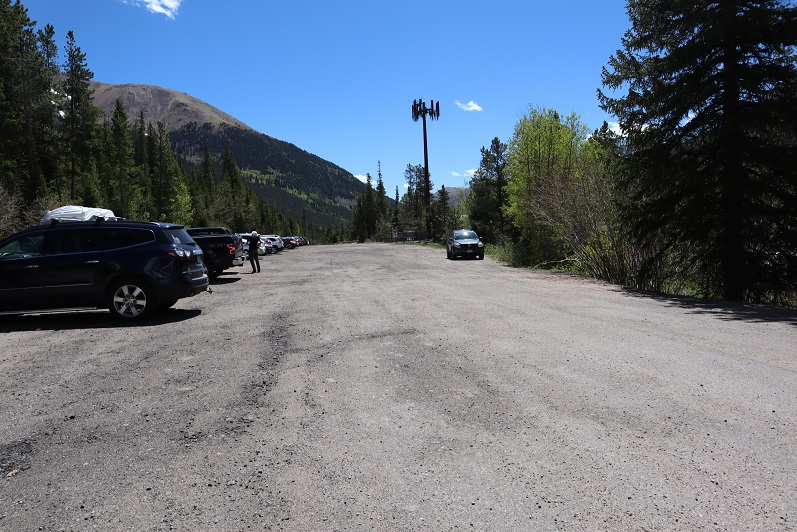
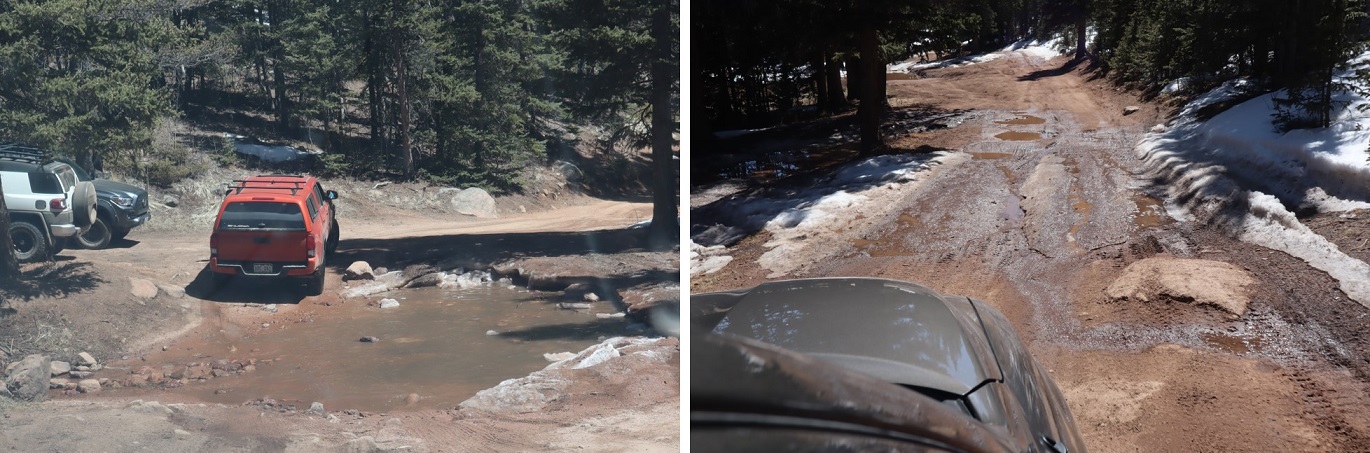
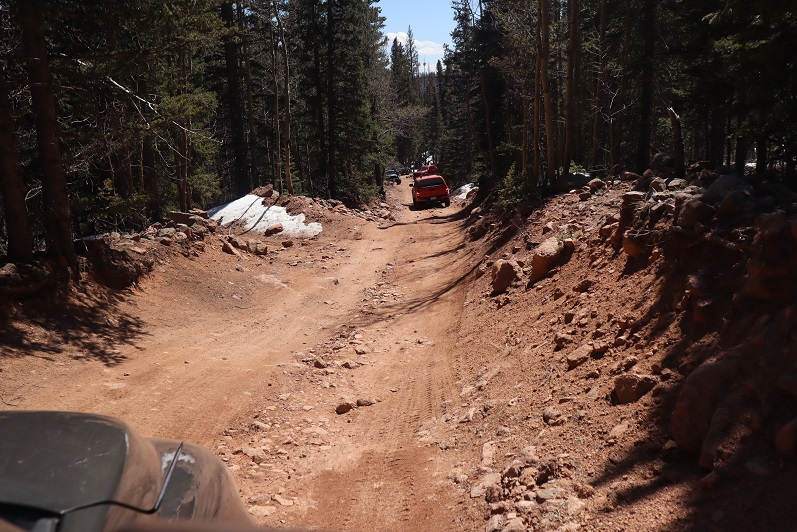
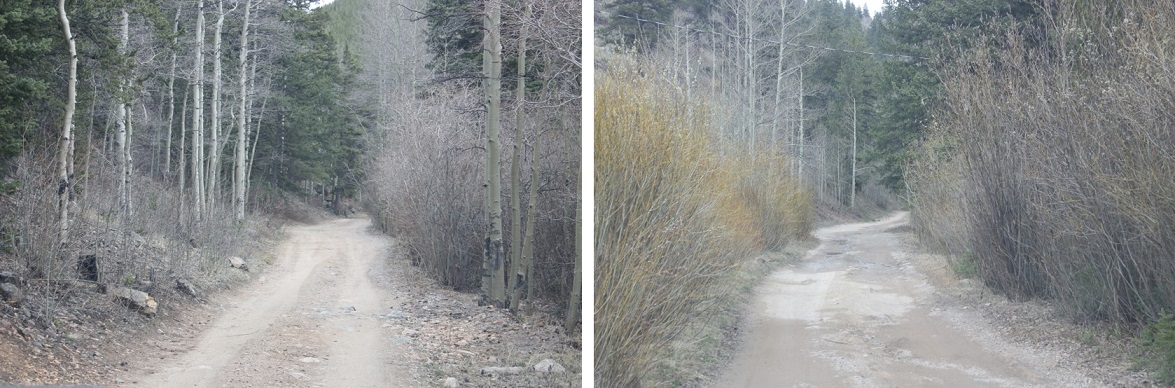
This is listed as a 4wd trailhead and I agree, much of the year it’s probably a 4wd TH, but today it was navigable by most 2wd vehicles.  There was only one short area where it would give me pause if it was raining, but I’m confident most 2wd vehicles can make it to the trailhead today.  It’s located on a well maintained road with several overflow spaces for parking along the road itself.

3

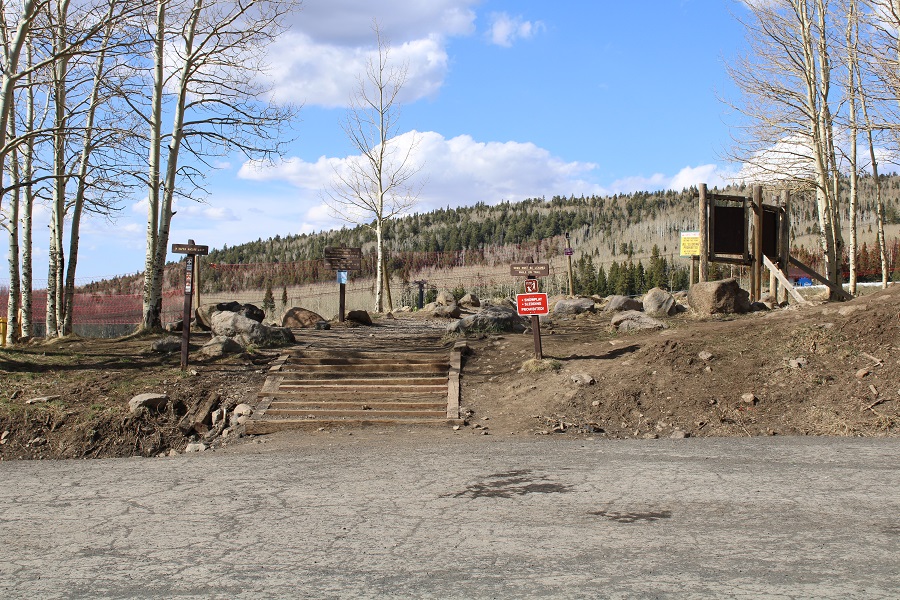
I made it to the new (actual) trailhead and in the dark couldn’t tell if I was seeing snow or mud or rocks so I just parked as near the entrance as possible for easy exit.  I was the only car in the lot when I arrived and when I left, despite this being a Friday (oh, and the parking lot was dry, so I could have parked anywhere).

4

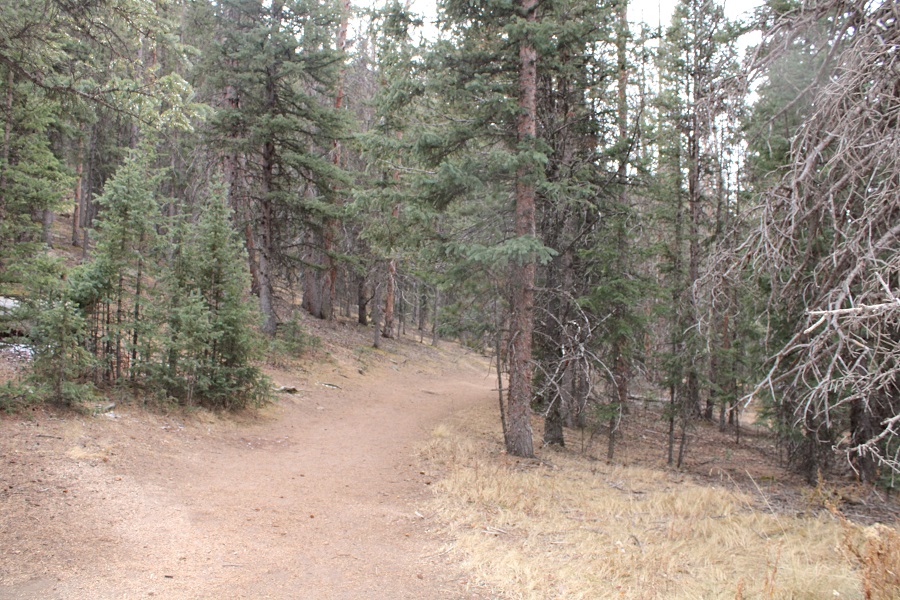
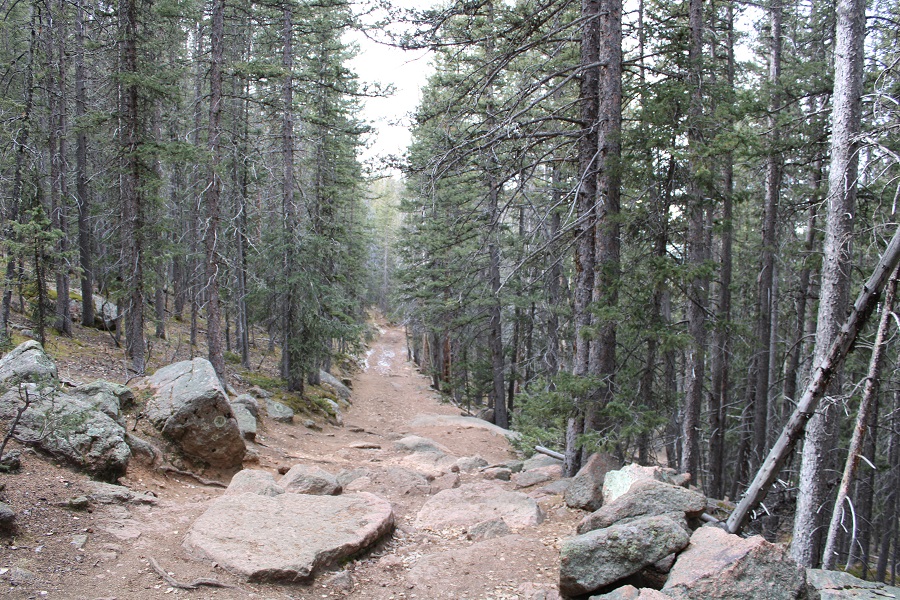
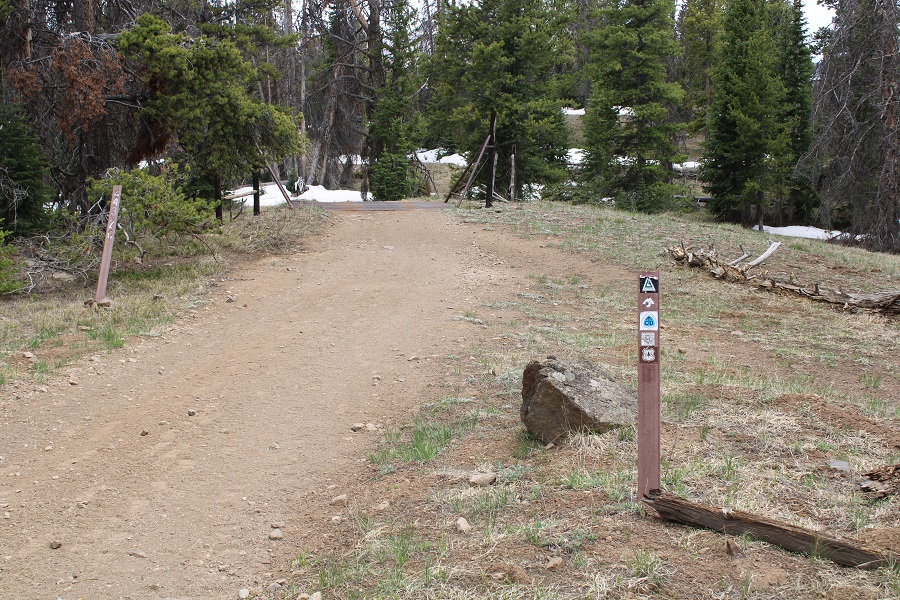
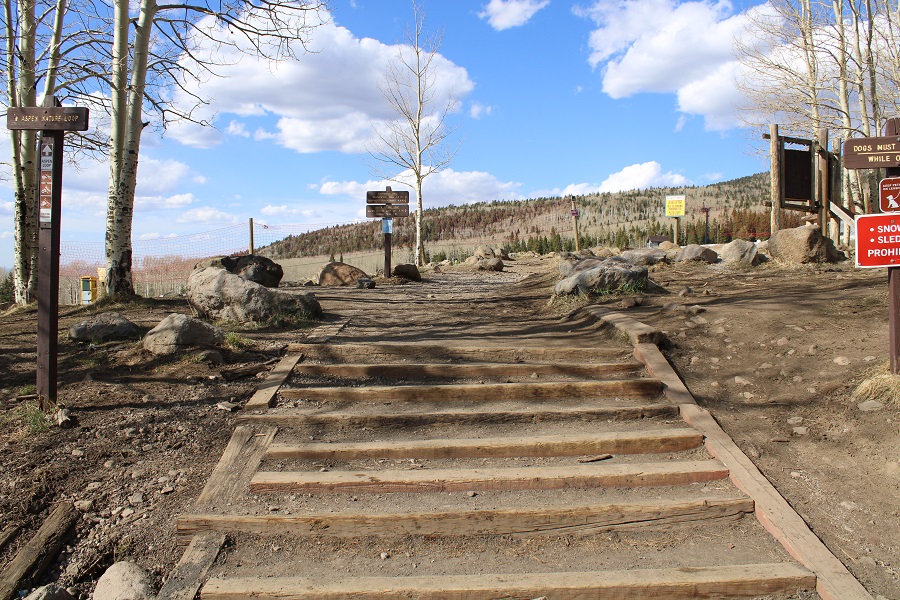
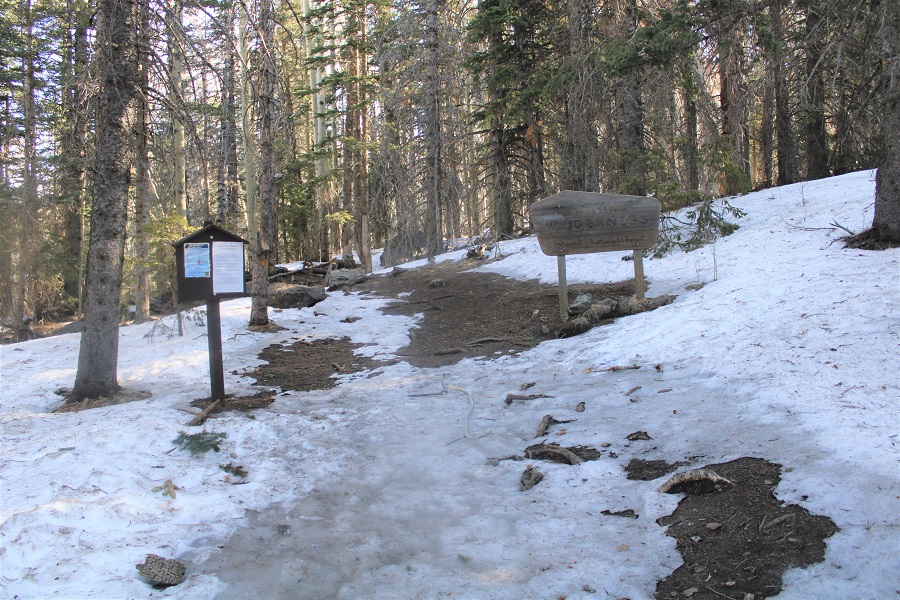
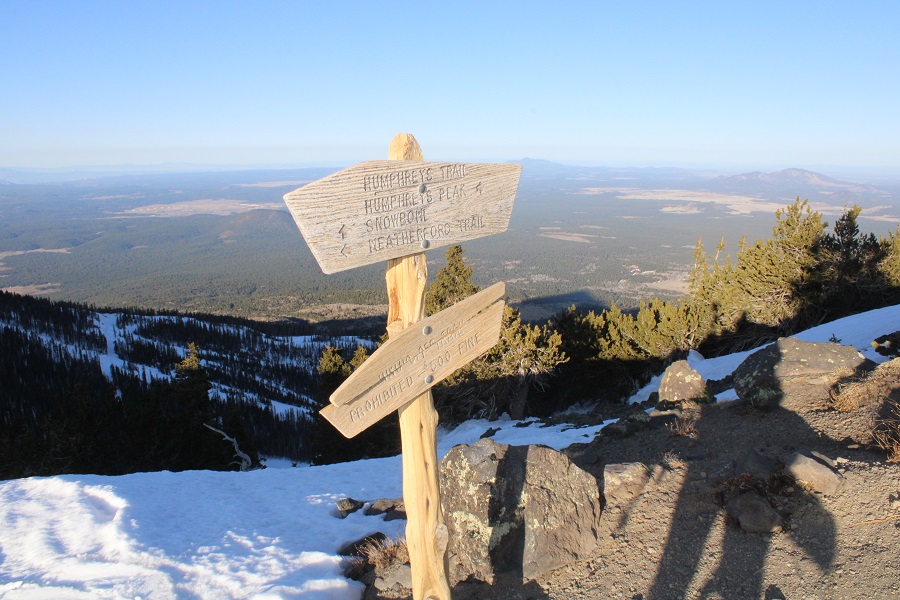
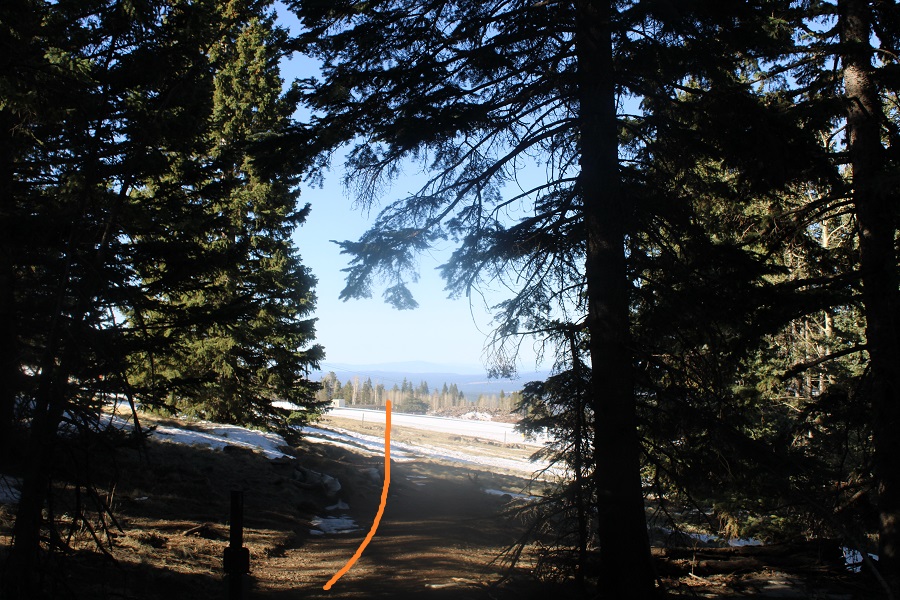
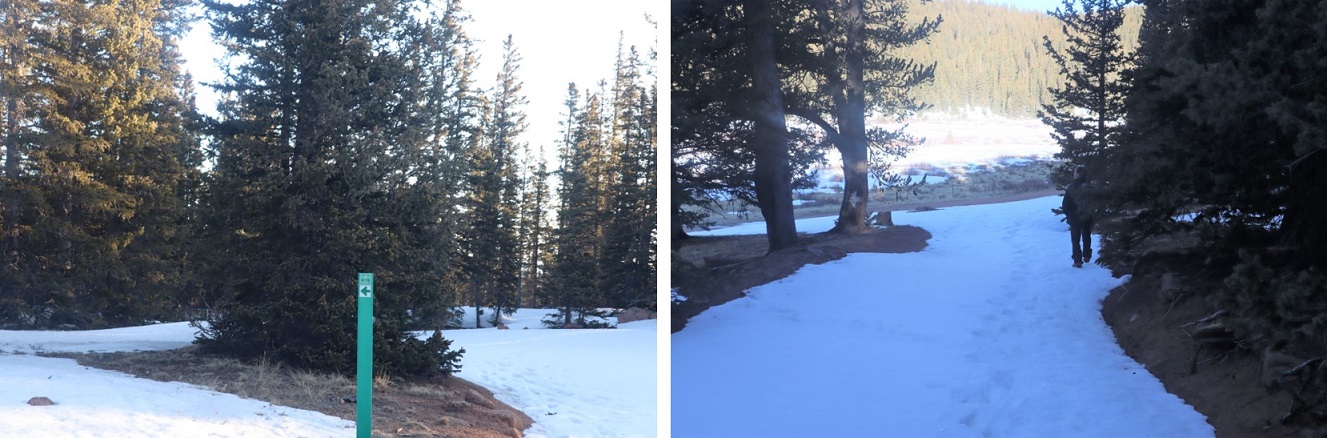
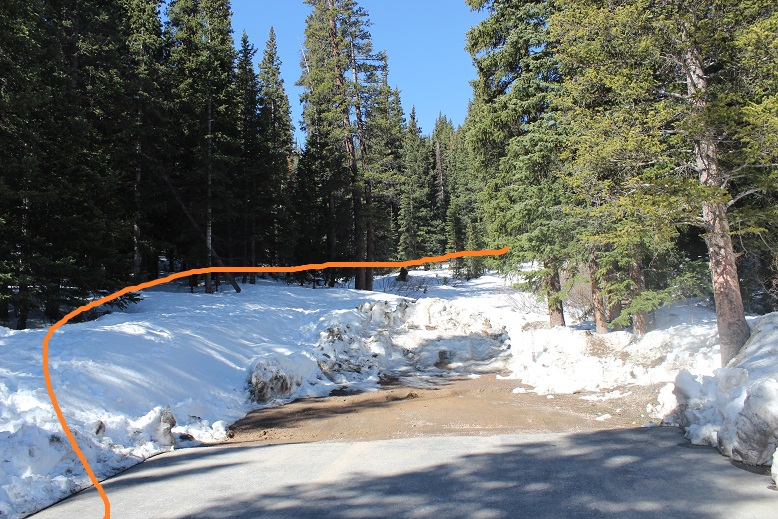
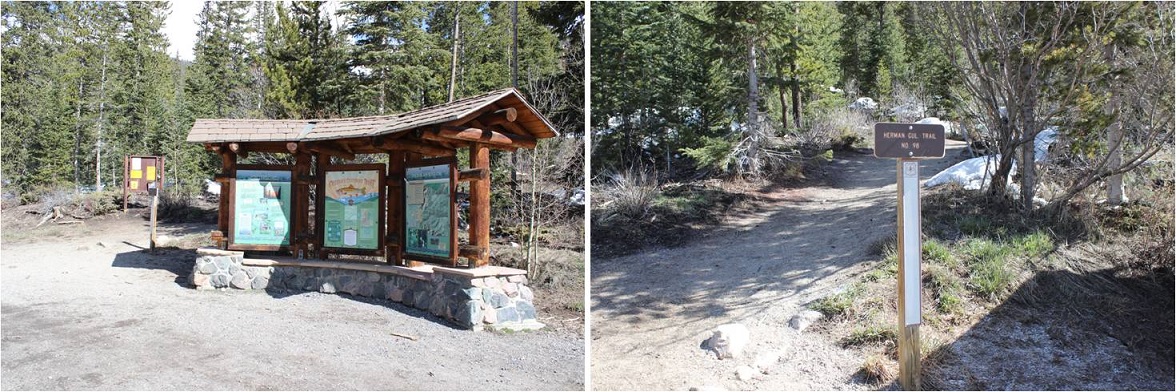
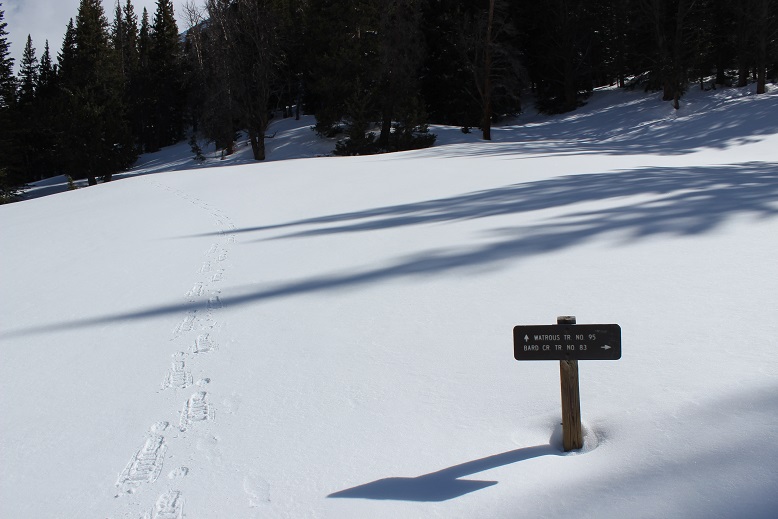
The trail begins at the west end of the parking lot.  I knew I was at the right area immediately because I saw this sign

5

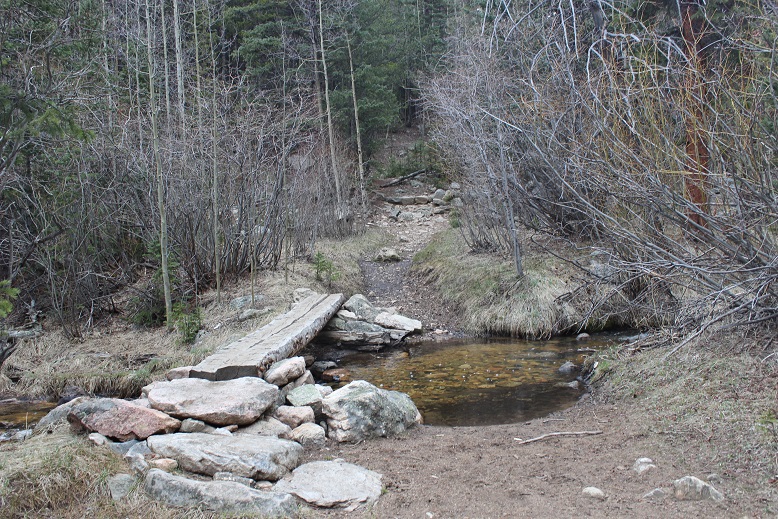
And within a quarter of a mile I saw this bridge.  I hadn’t been expecting a bridge, but I crossed it and continued following the dry trail

6

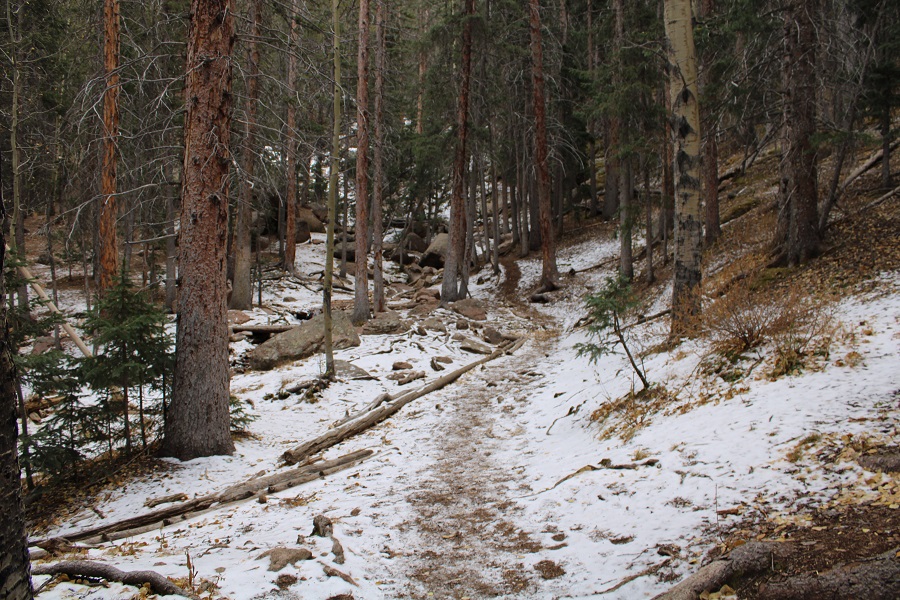
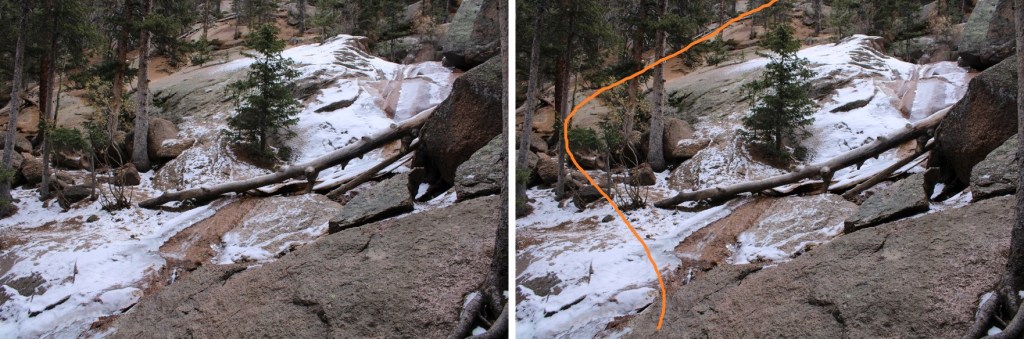
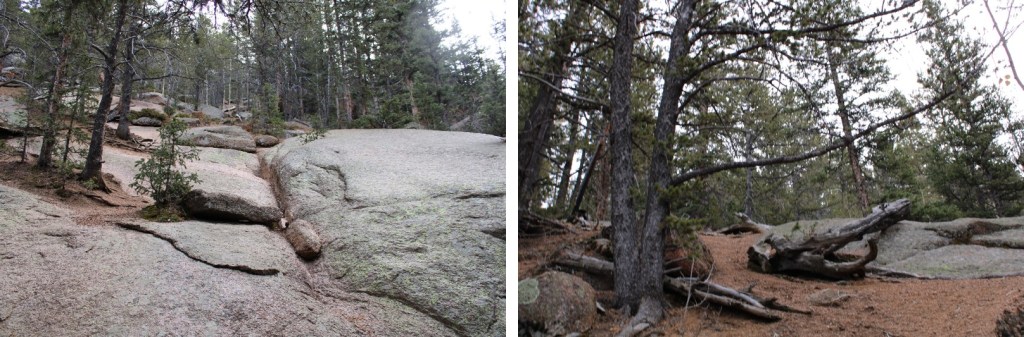
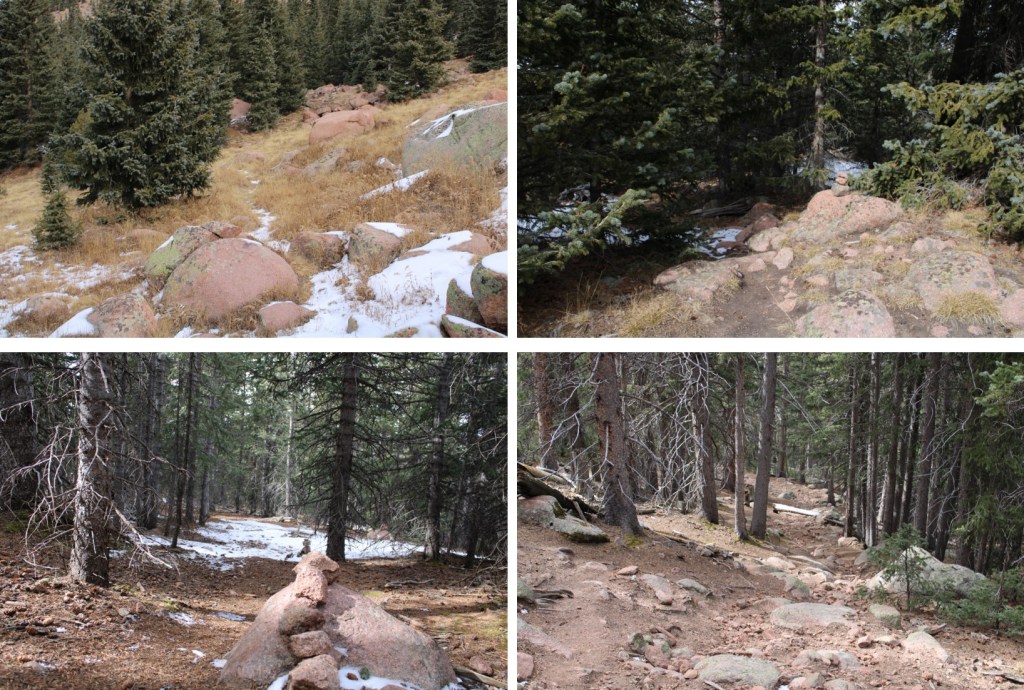
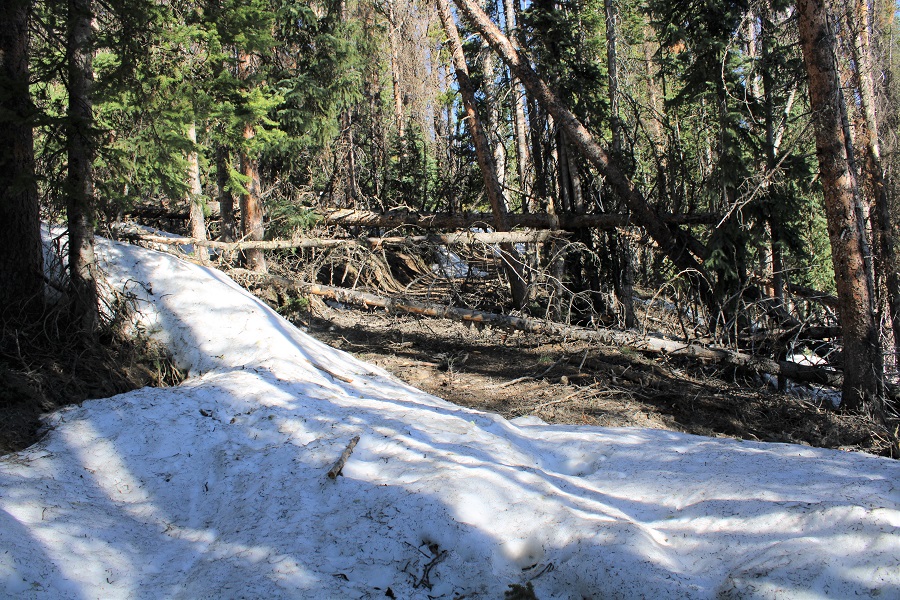
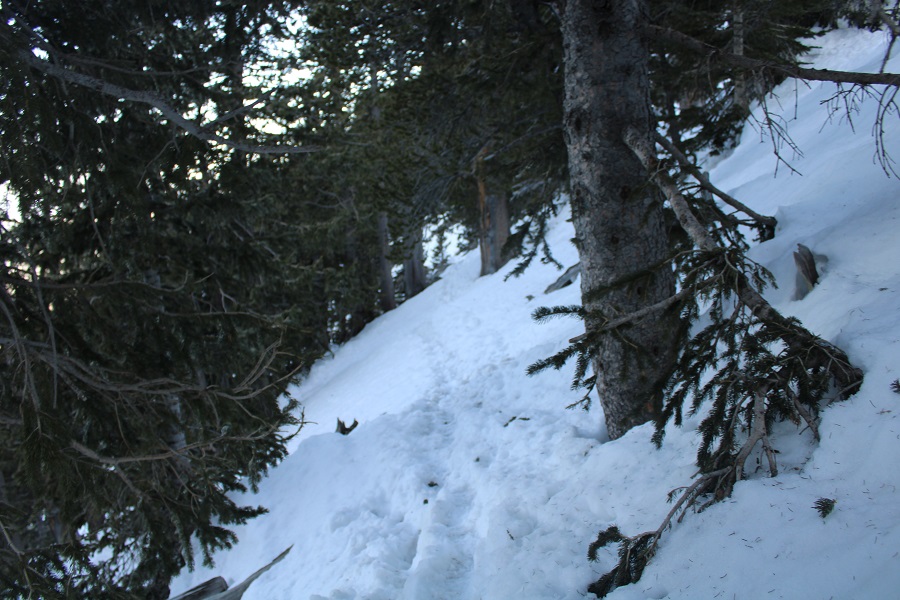
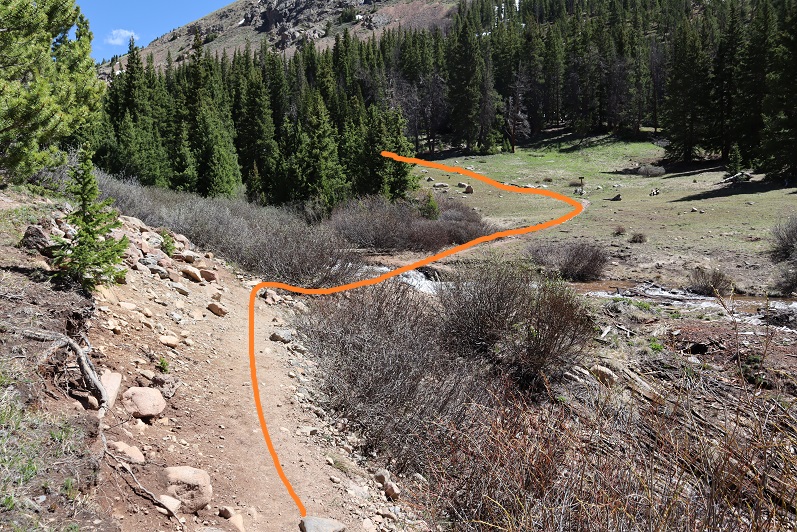
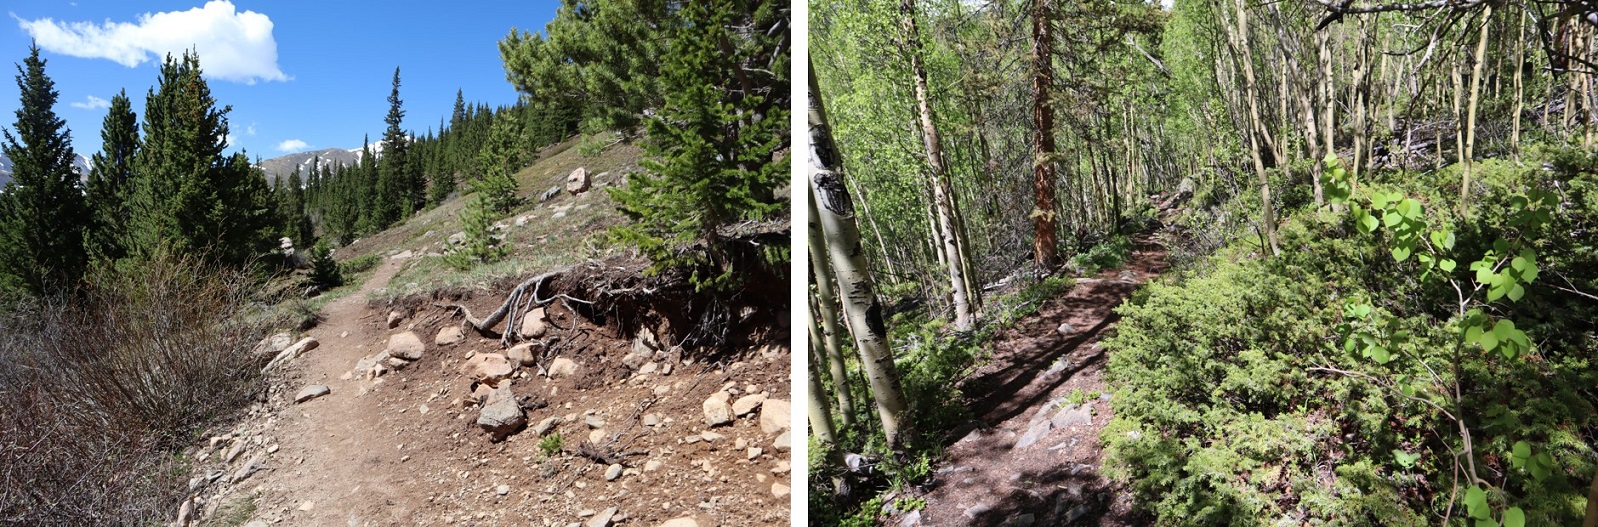
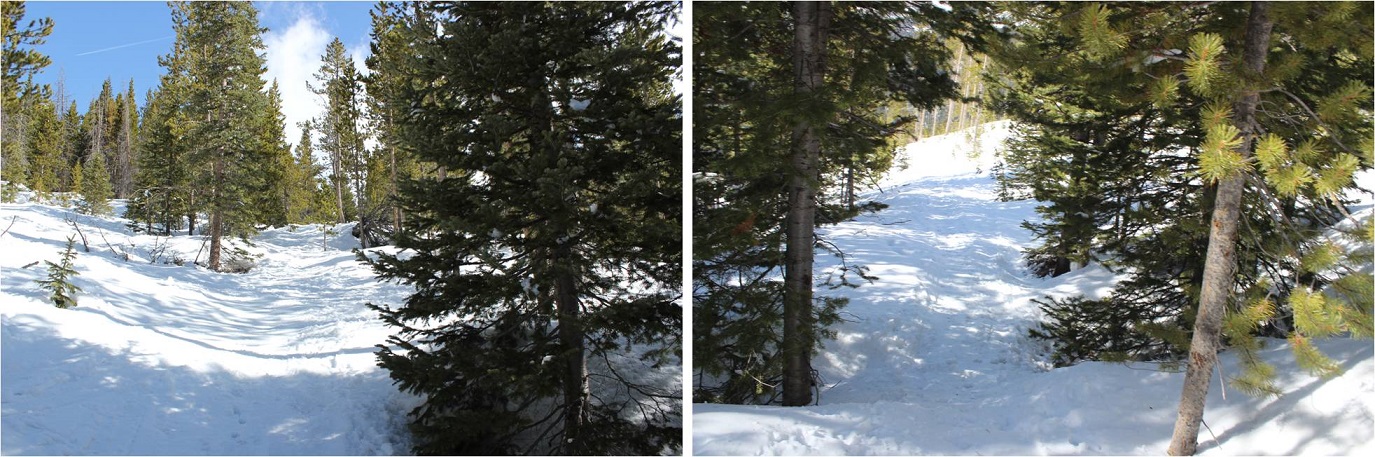
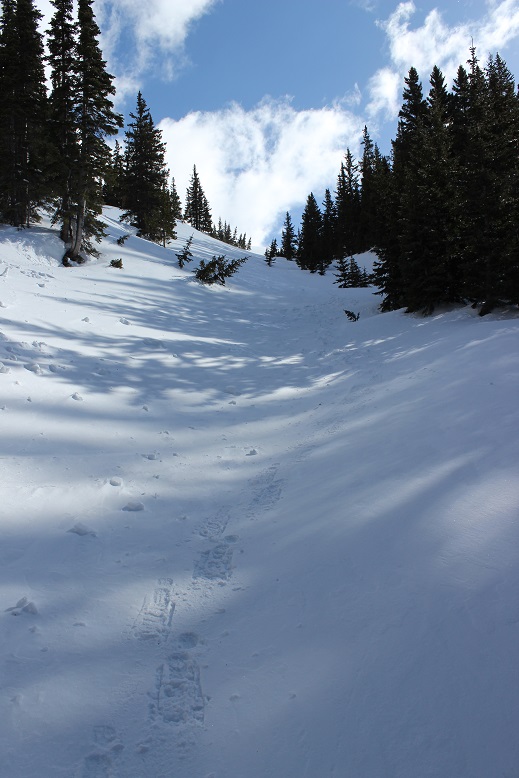
This is a well maintained class 1 approach, but in the dark I took a wrong turn somewhere and ended up navigating around a bunch of downed trees.  I discovered on my way back I was taking an old trail that was closed due to said downed trees, but in the dark the obvious trail wasn’t so obvious.  So, if you’re hiking in the dark note:  If you come to an area that’s not passable in the dark stick to the creek.  There is an easy trail to follow, (as long as you don’t lose it…)

7

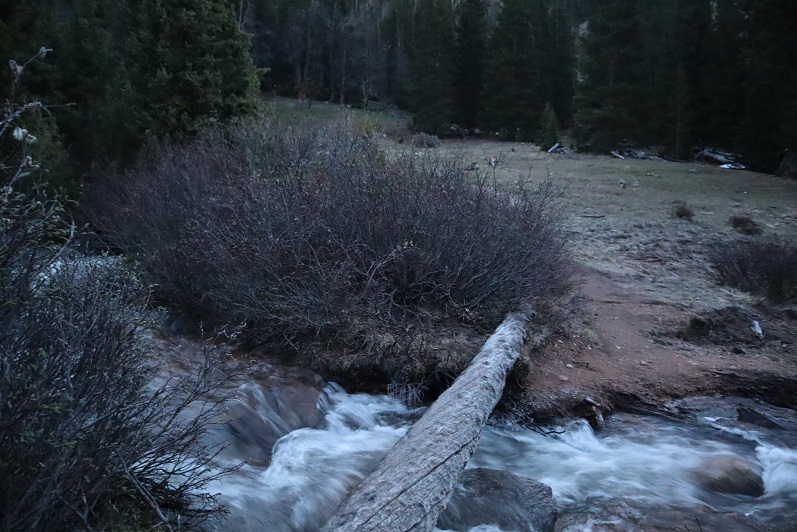
I crossed another log bridge in the dark

8

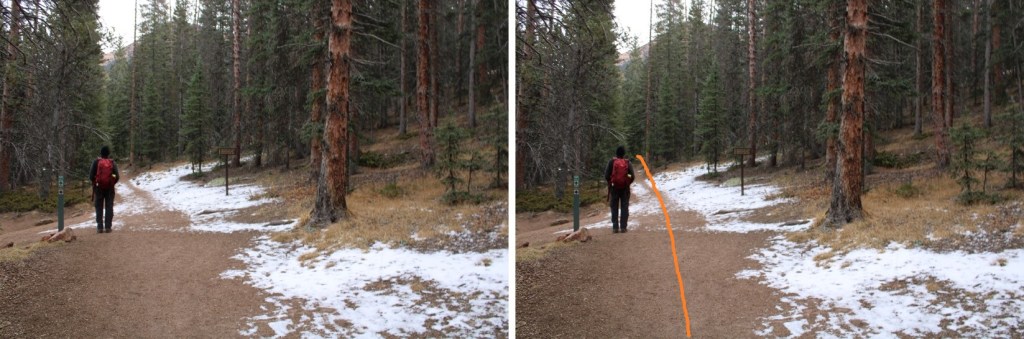
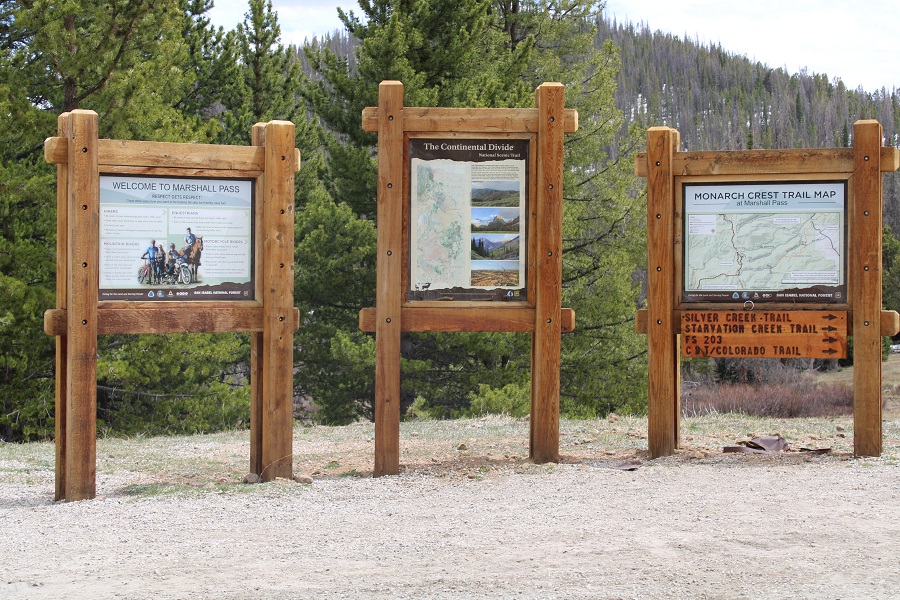
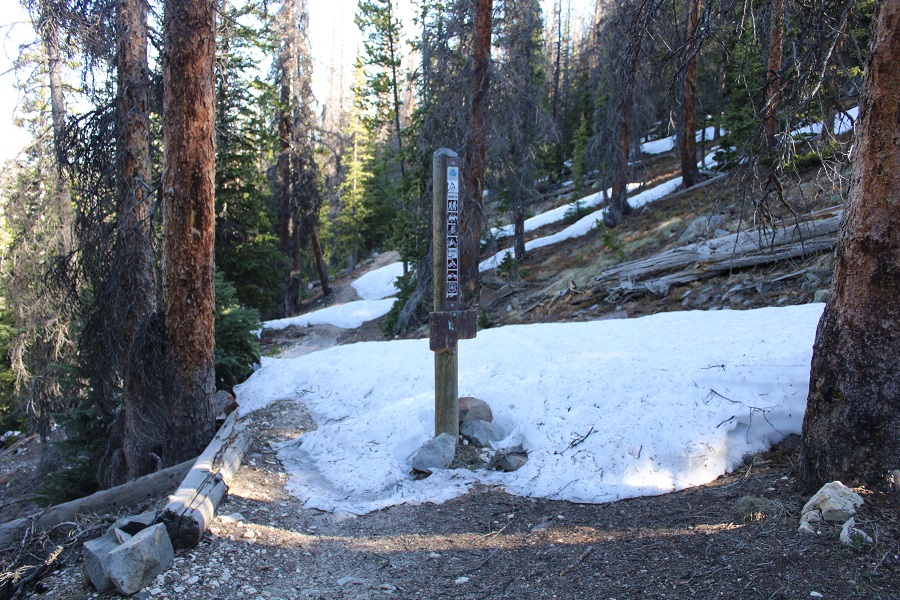
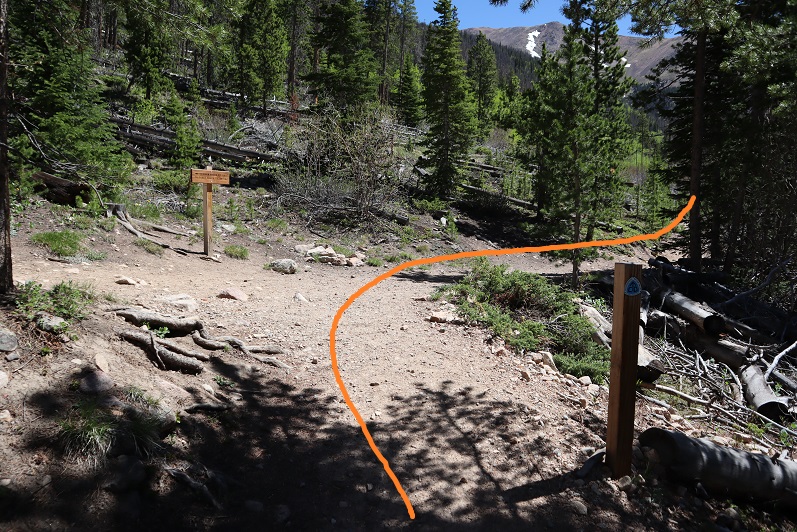
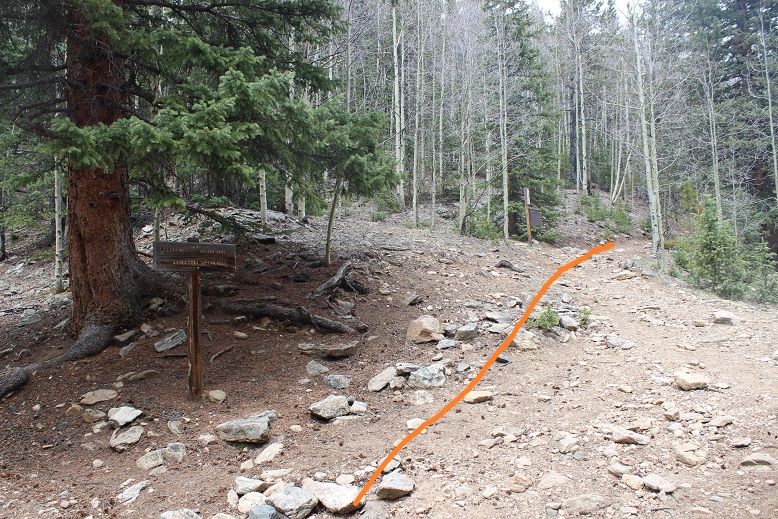
And came to a junction. Here you go right and take the Tanglewood Trail (not the Rosalie trail, even though you’re going to Rosalie).

9

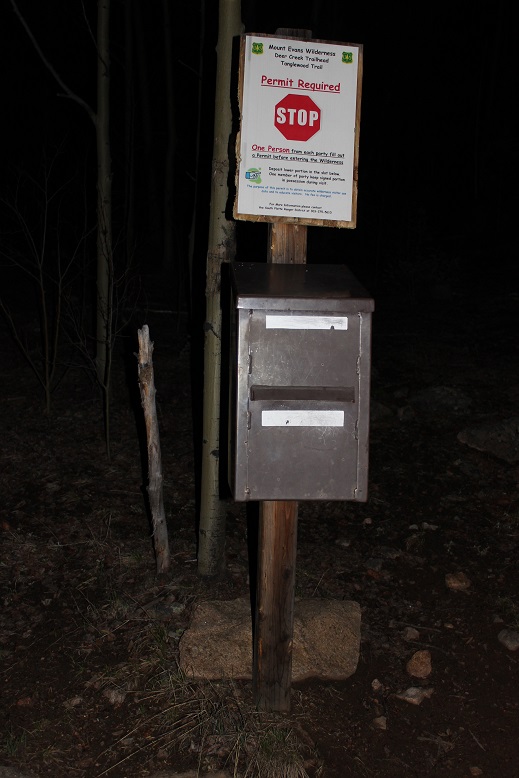
Shortly after this junction there’s a trail register.  A permit is required to hike here.  It’s free and you just fill out the information.  It just lets you know what Leave no Trace is and asks you follow basic trail etiquette.  You let them know how many people are in your party and leave the top half in the box.  There were plenty of permits and pencils.  I filled one out and continued on my way.

10

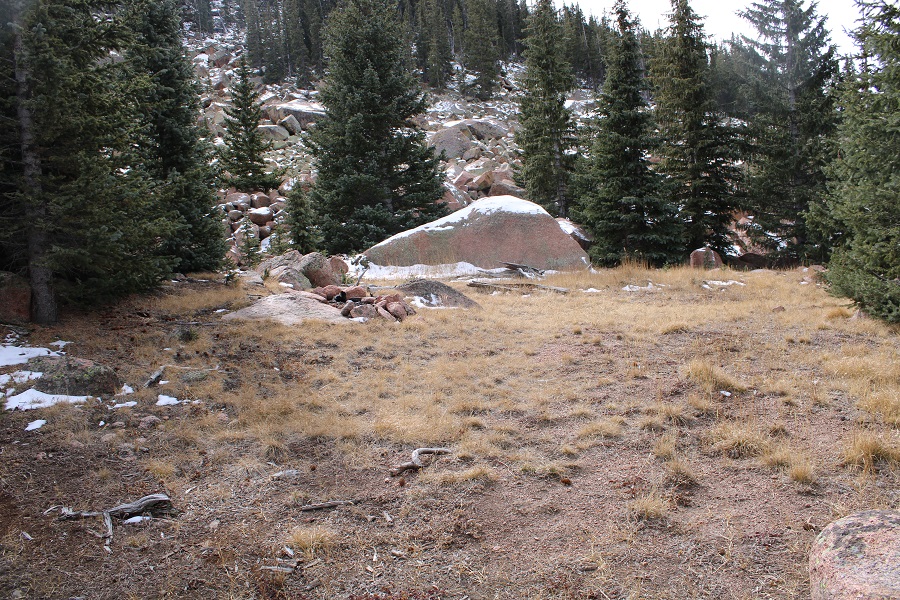
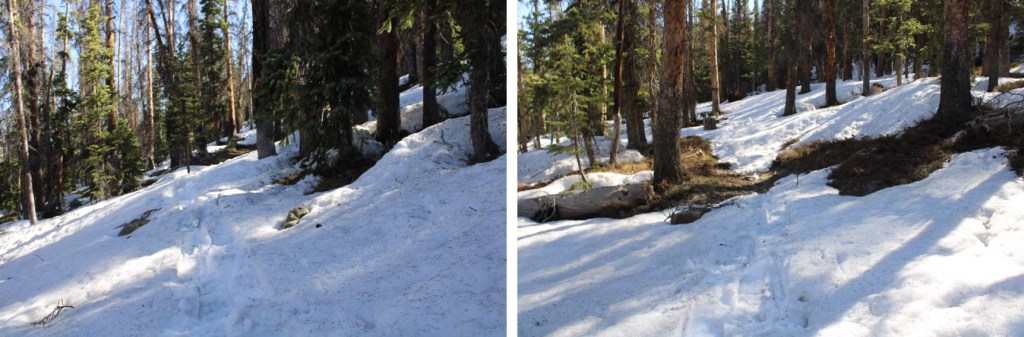
I lost the trail once again for a short while when I encountered old avalanche debris, but turned towards the creek and found the trail again.  Once again, this was a “my bad in the dark” kind of situation.  In daylight there was no issue.

11

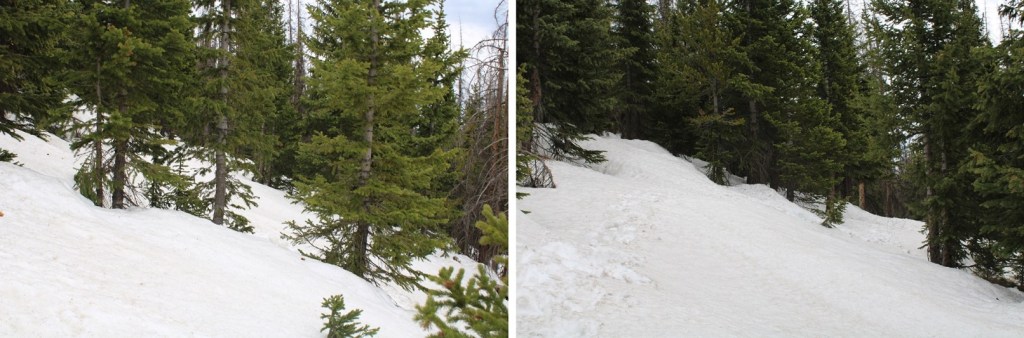
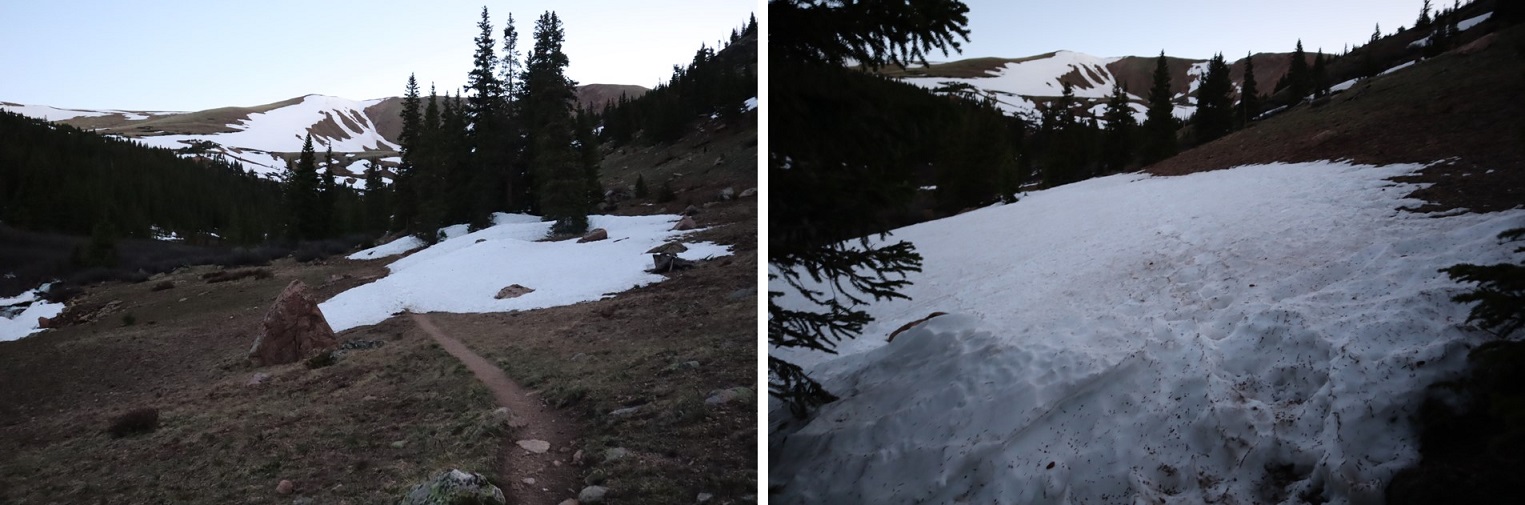
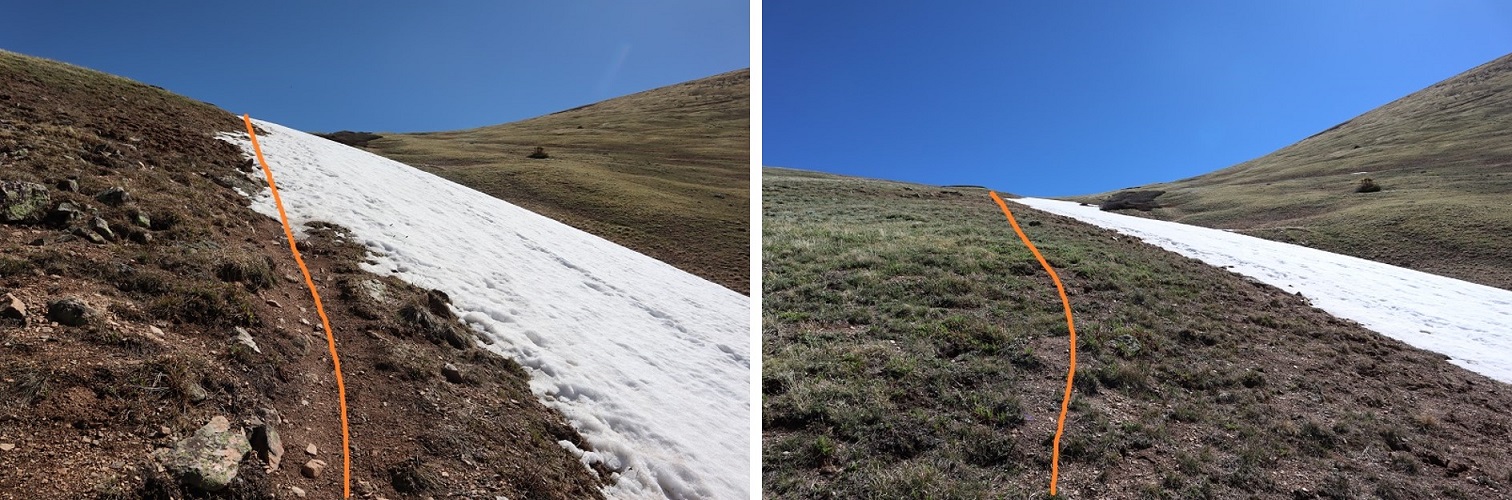
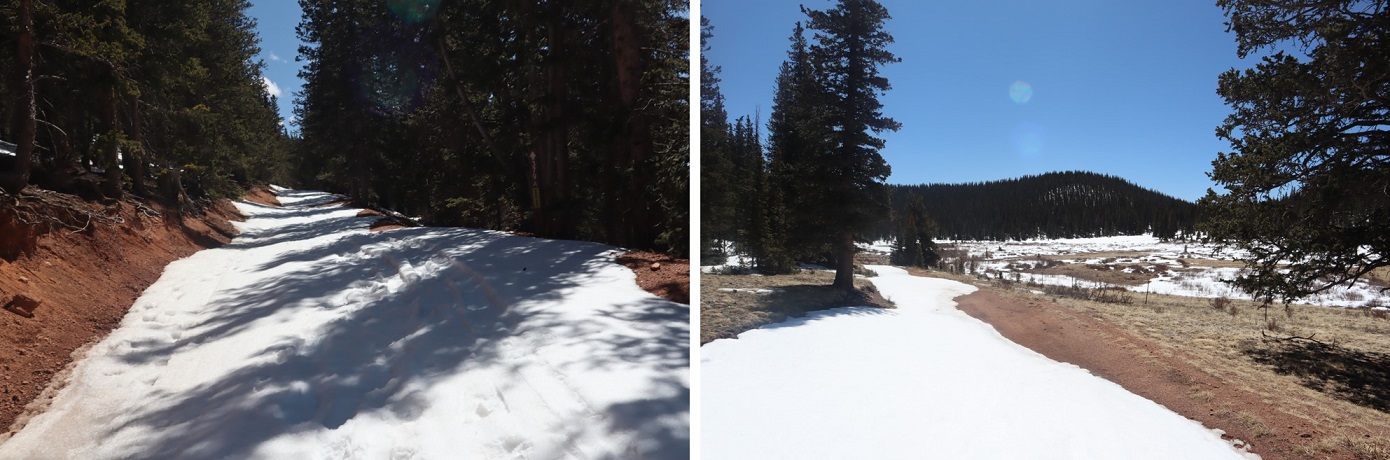
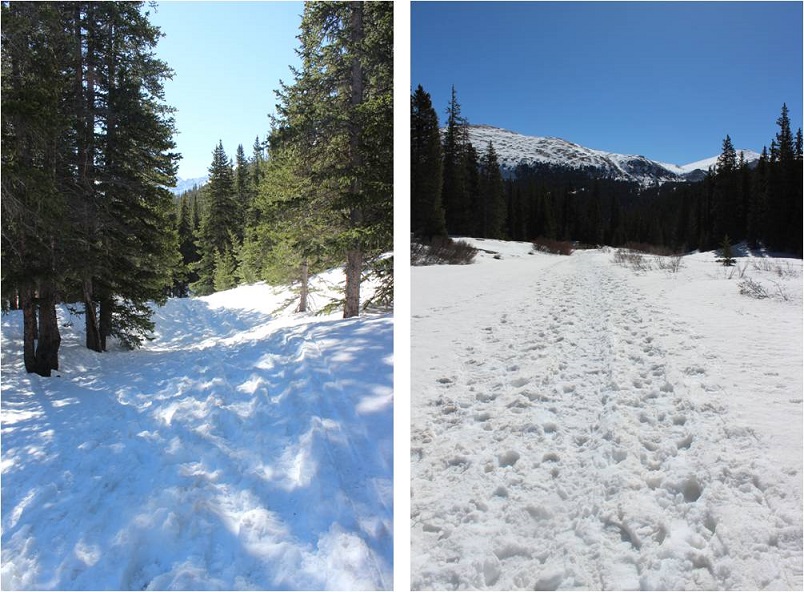
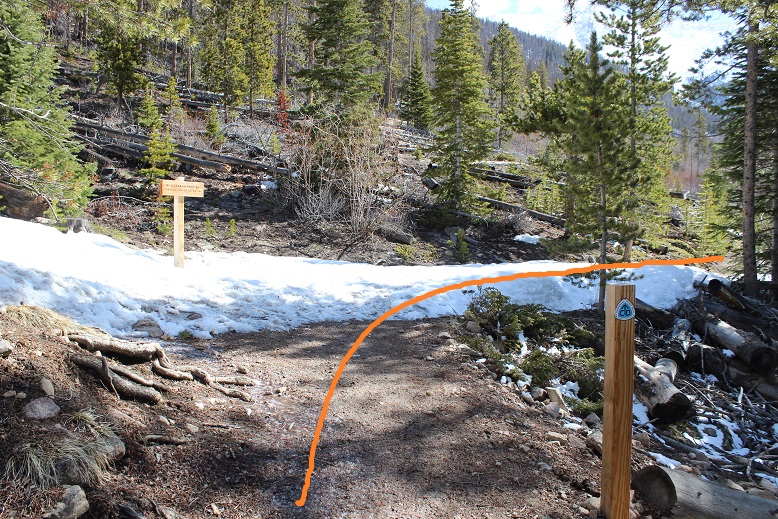
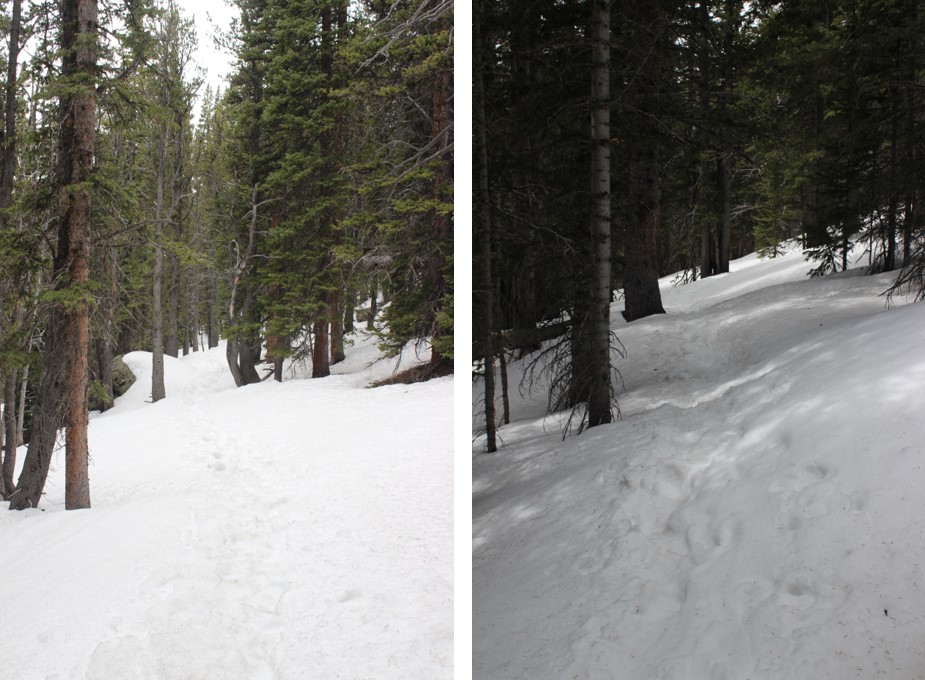
I was now about 2 miles in and the snow began to cover the trail.

12

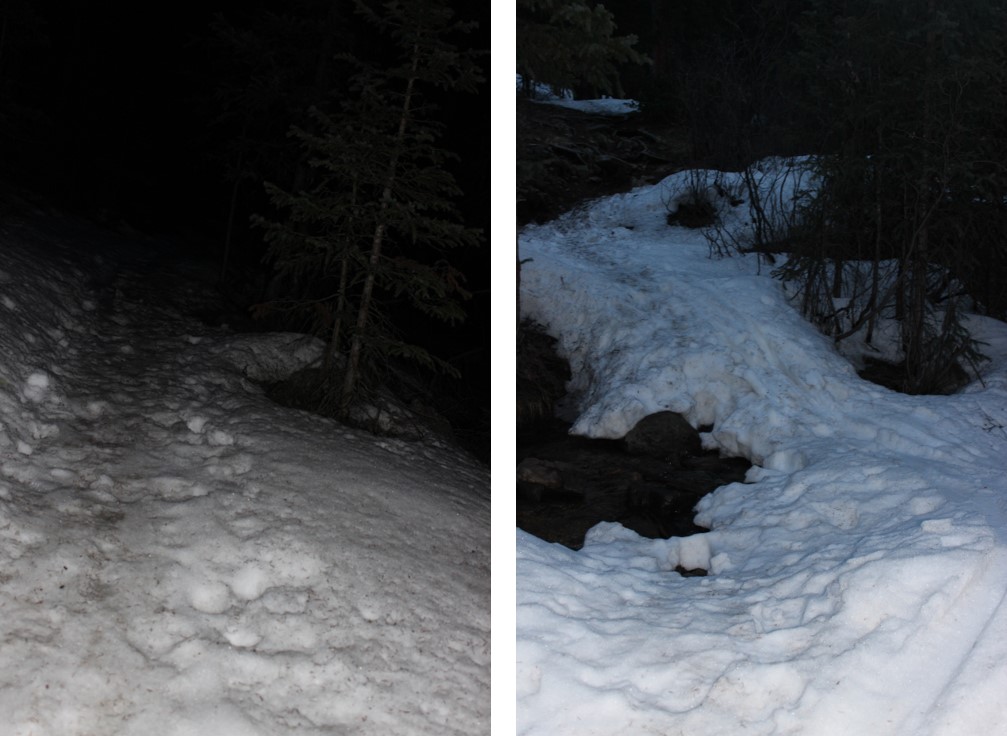
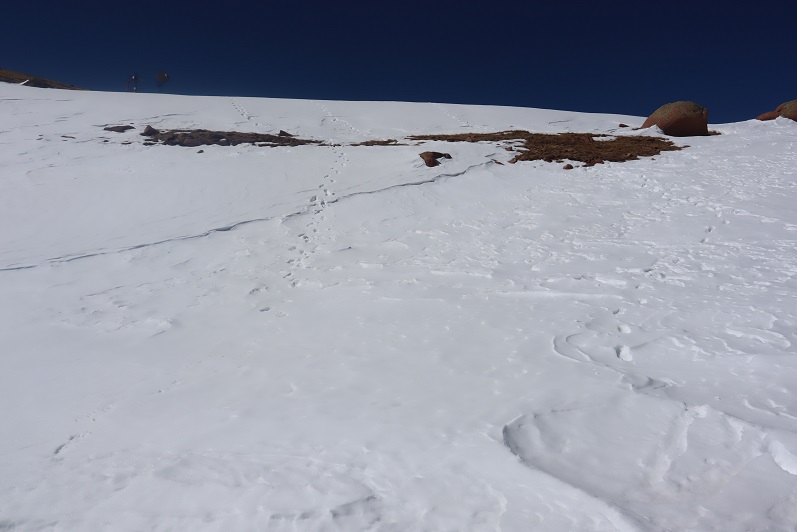
Due to the warm temperatures last night I immediately began postholing.  What’s funny is I started seeing tracks that looked like moose or elk tracks.  I spent a considerable amount of time trying to decide if they were Elk or Moose, but they looked like both?  In the beginning they were confined to just an inch or two of postholing, but eventually the animal(s) were postholing knee deep or more as well.  I bet they’re looking forward to the snow being gone.

13

There were tons of tracks and I was confused because some looked like elk and some looked like moose.  I figured the area was more conducive to moose as the willows and creek provide their food source, but I was seeing mixed evidence of both.  And then I came upon scat.  Tons and tons of scat, and it became evident there are both moose and elk in the area, and probably some babies as well.

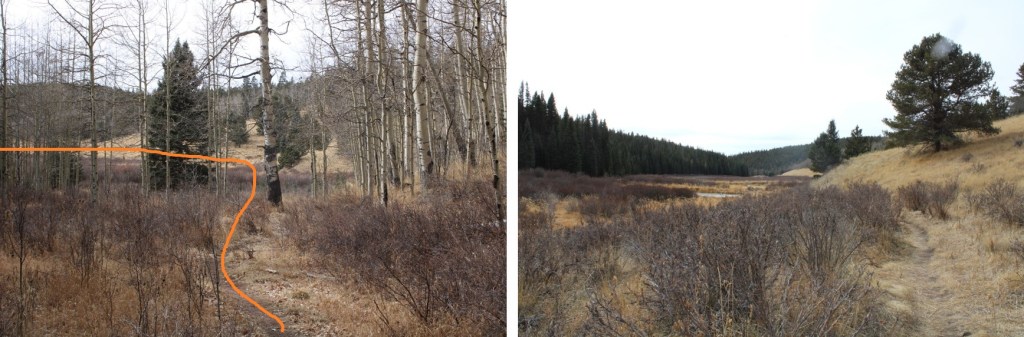
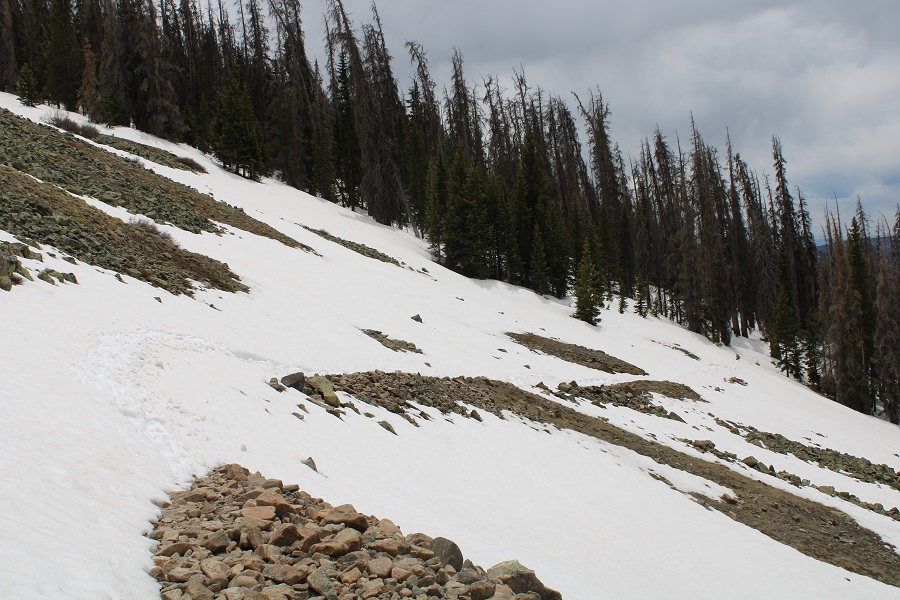
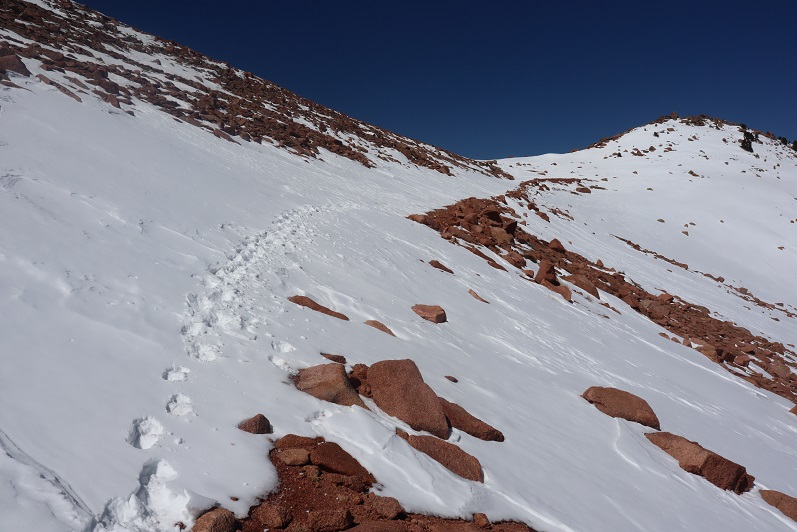
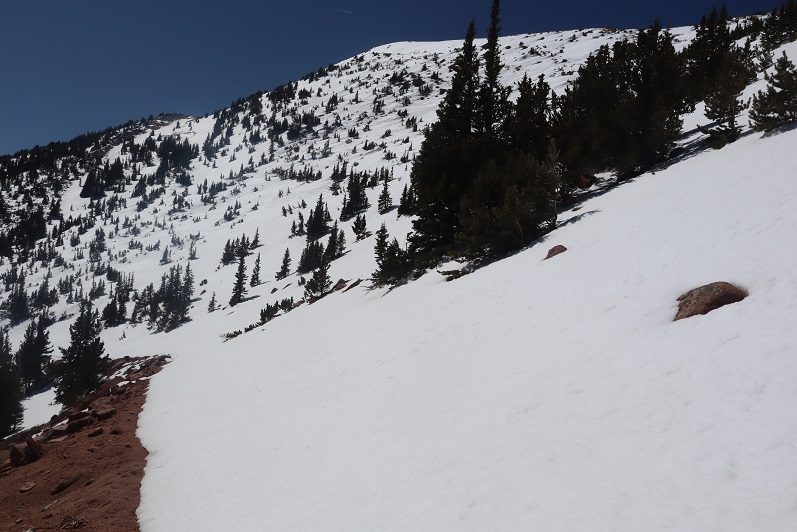
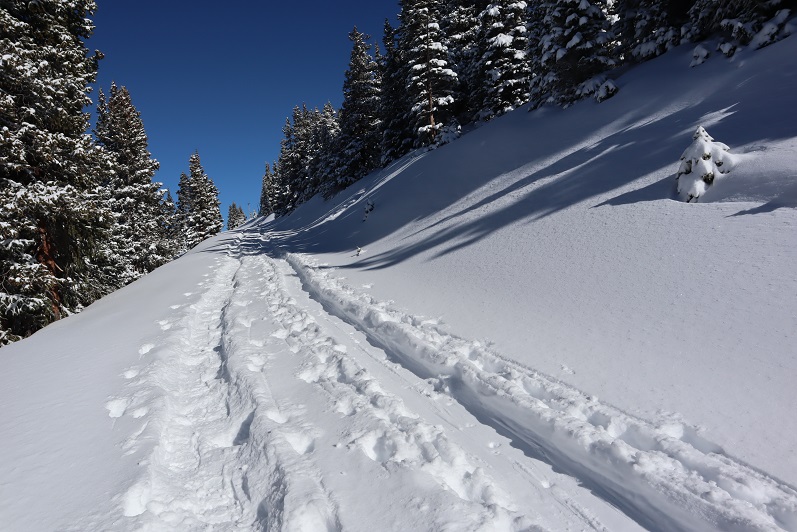
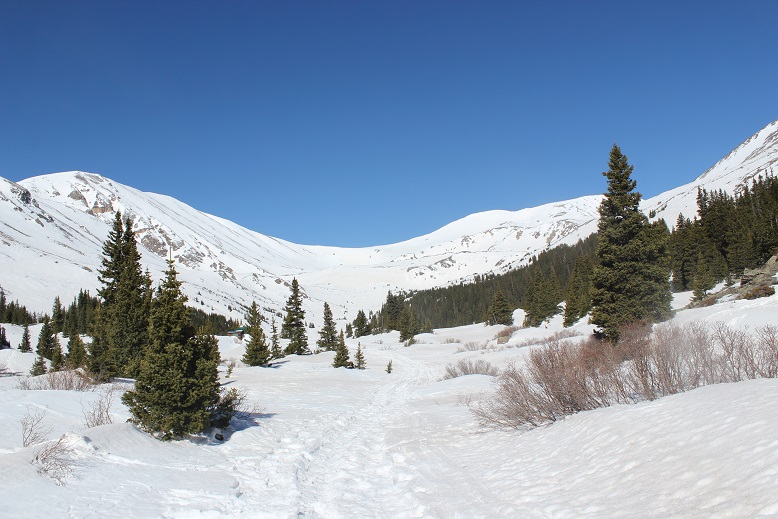
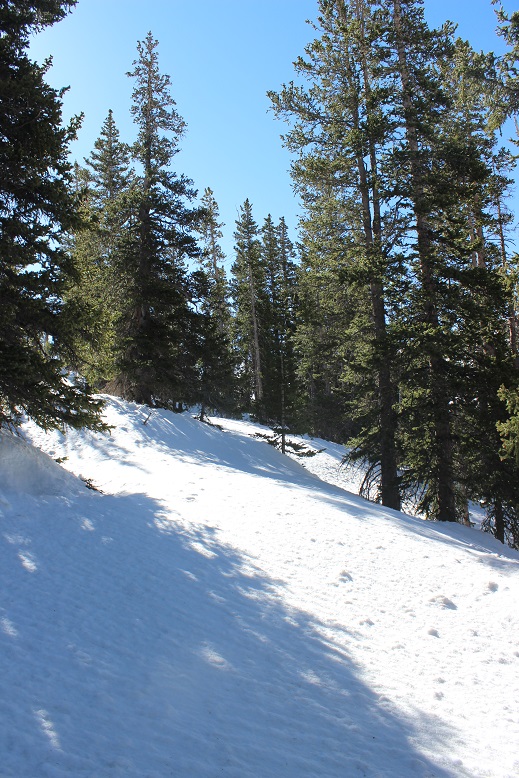
The snow didn’t stop until treeline, and if anything the postholing got worse.  I was stubborn and didn’t put on my shnoshoes until I made it to the willows, where they were absolutely necessary.

14

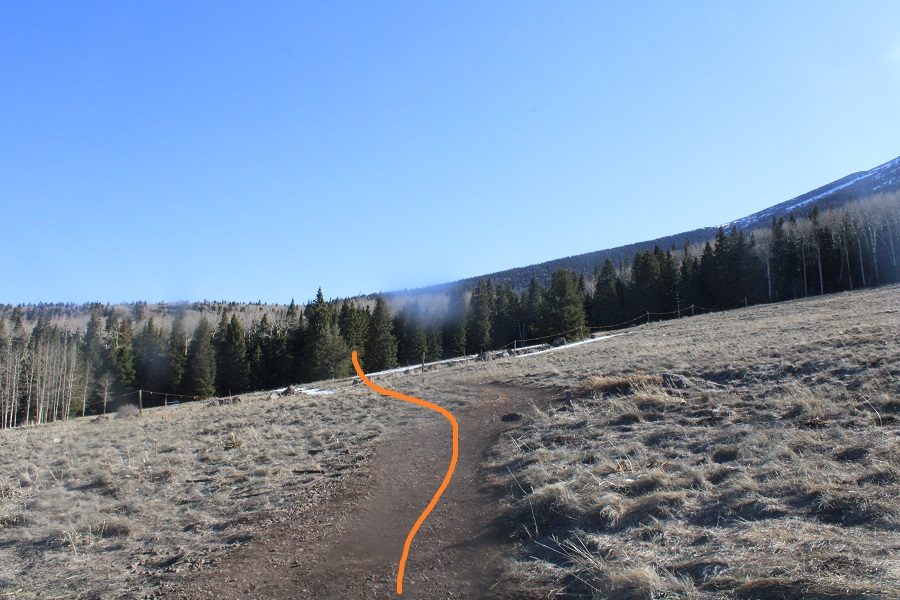
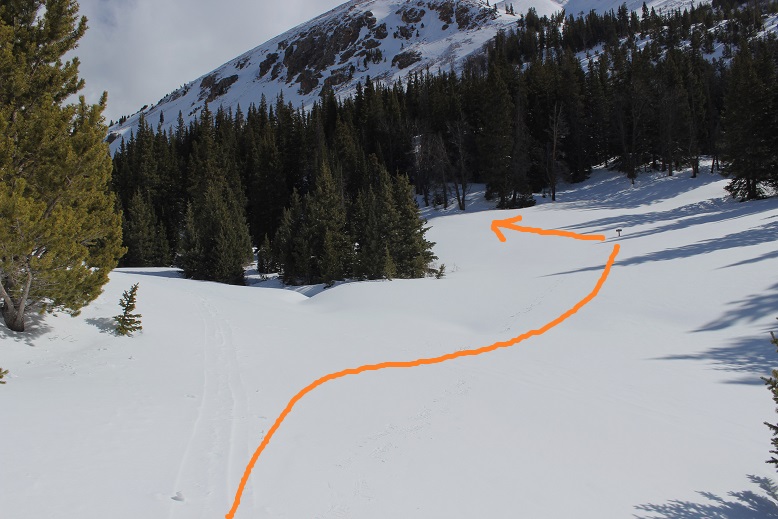
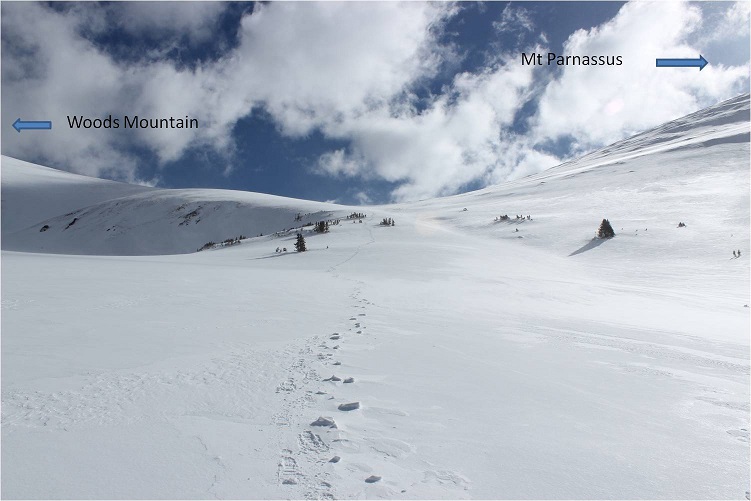
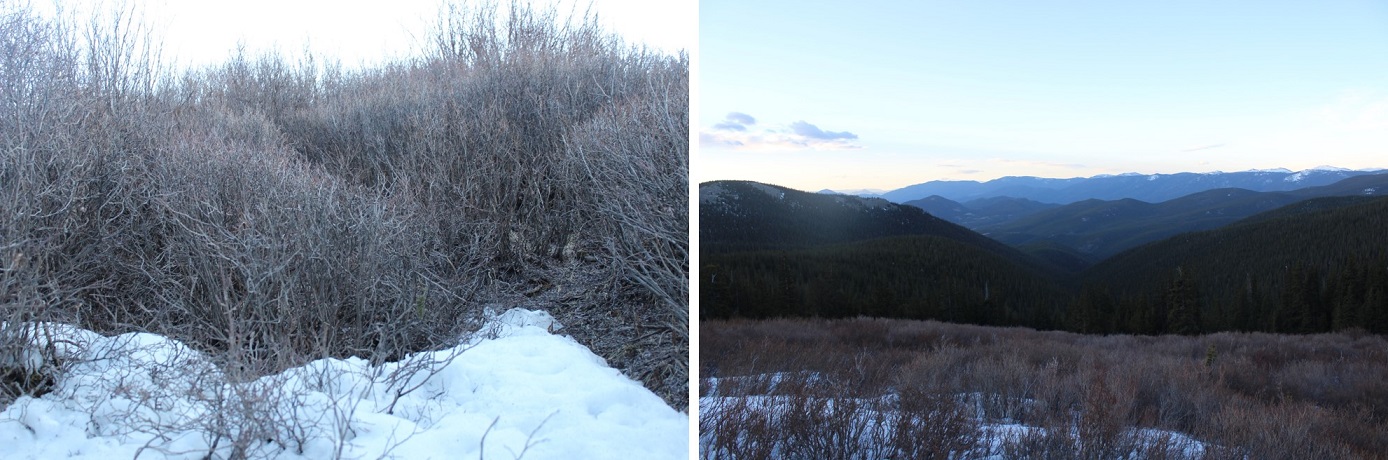
Here I again lost the trail but knew I just needed to gain the saddle so I headed west up and through the willows, only sinking to my waist a handful of times.  Oh, and did I mention the elk and moose scat?  It was covering the floor of the willows; piles and piles at a time.  And those buggers make their own trails through the willows, which stop when they look like they go (and vice versa).   This is definitely an area they bed down in.

15

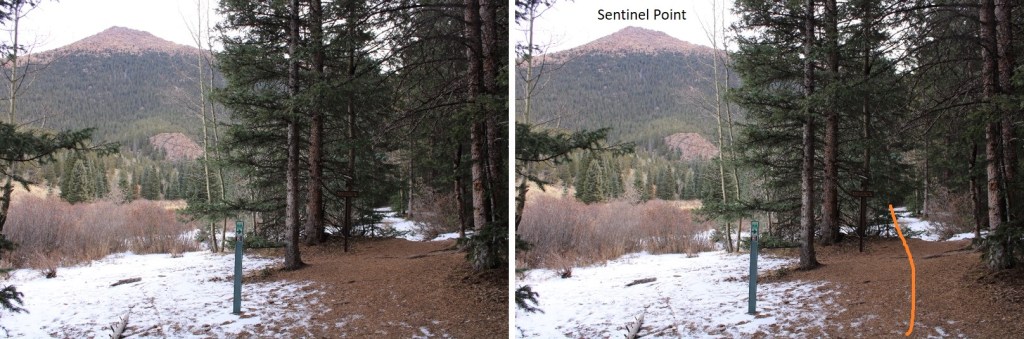
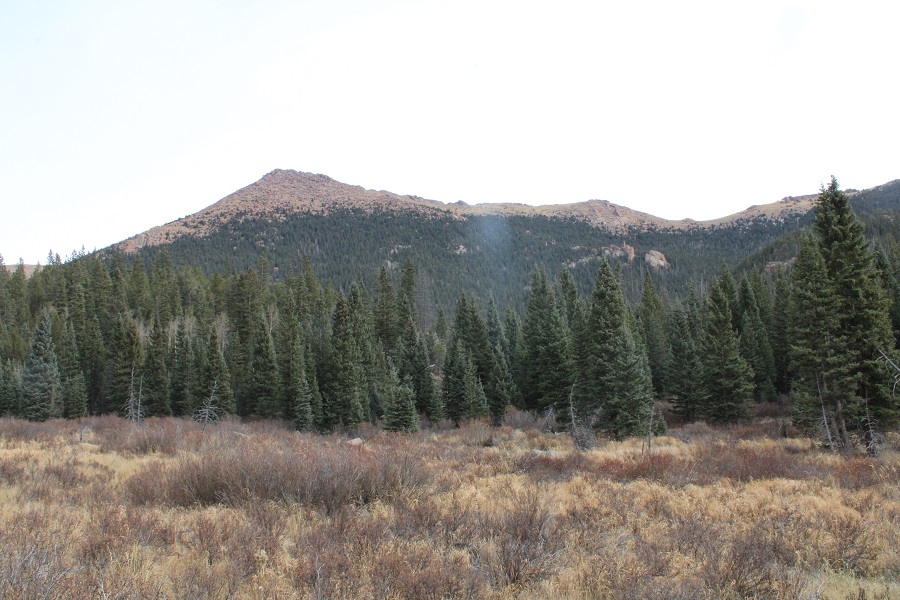
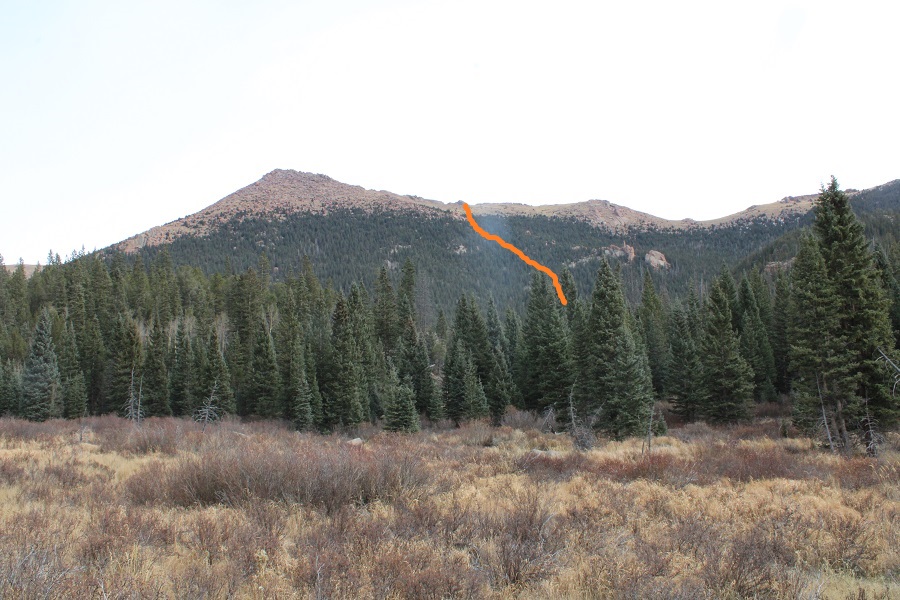
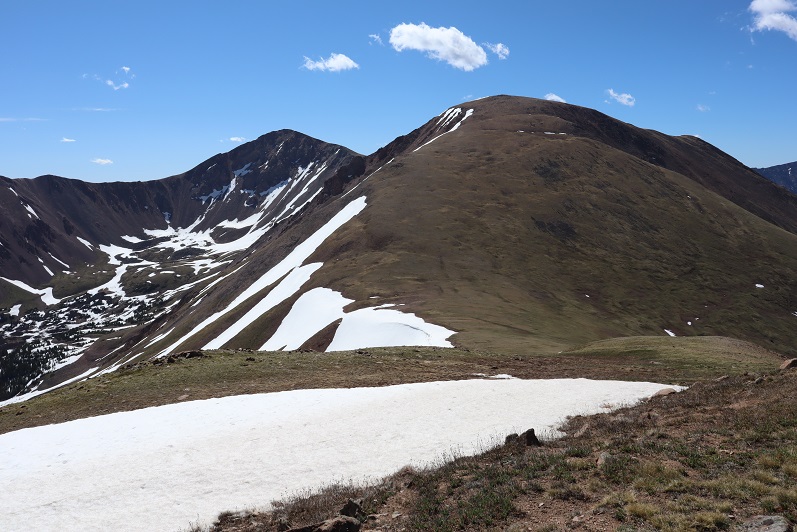
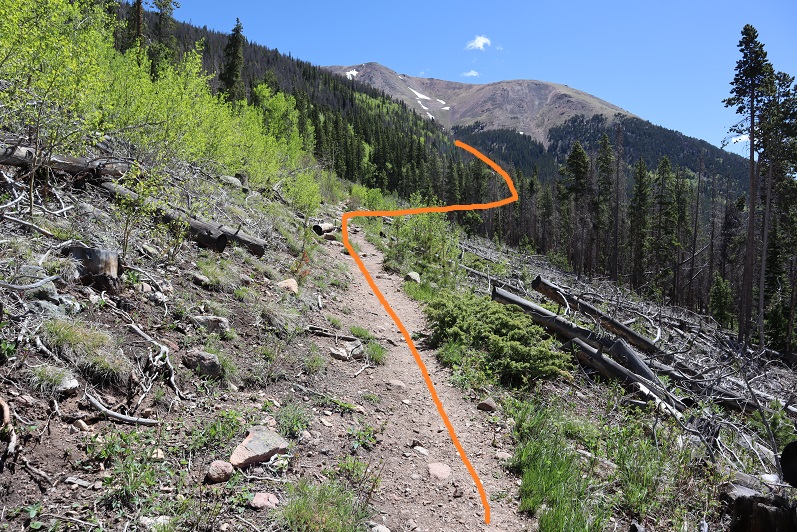
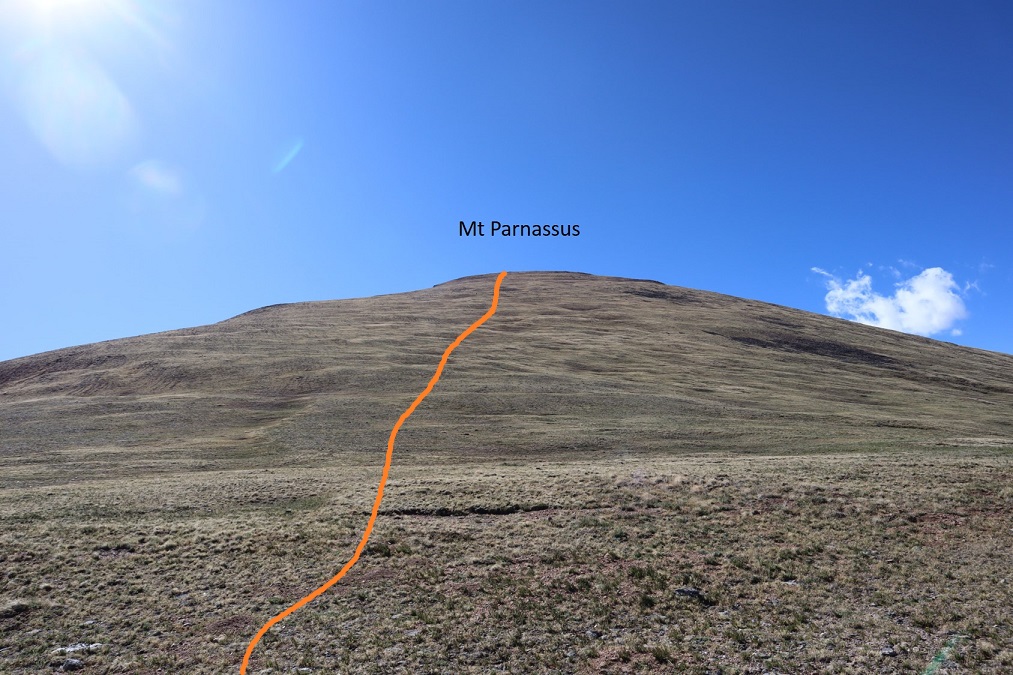
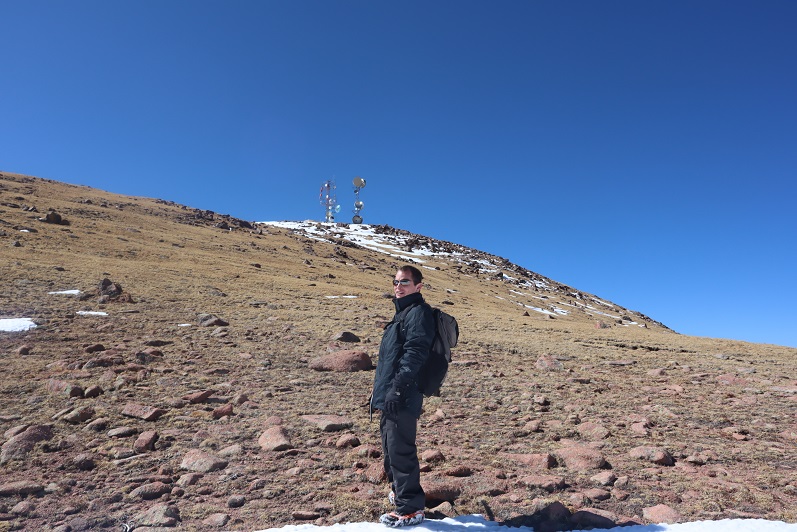
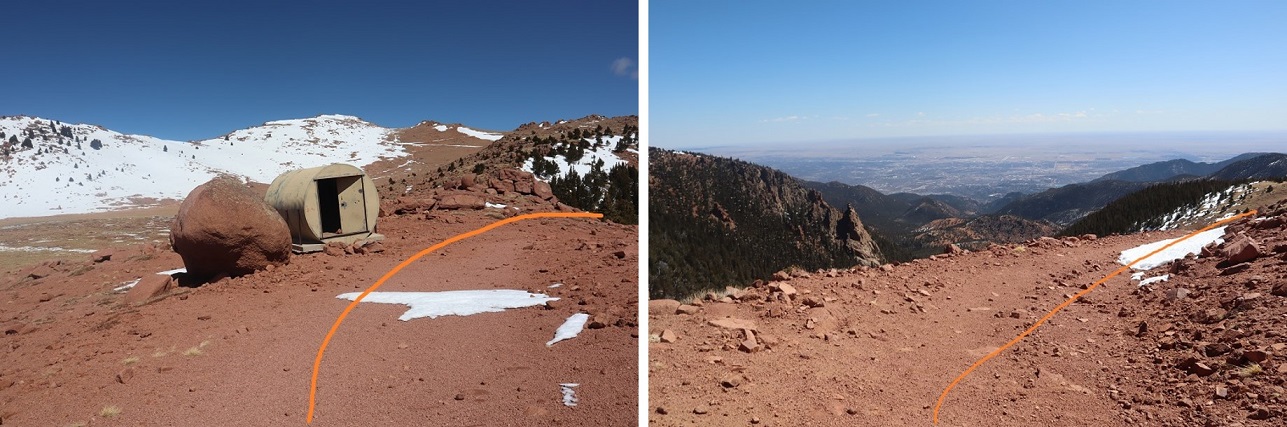
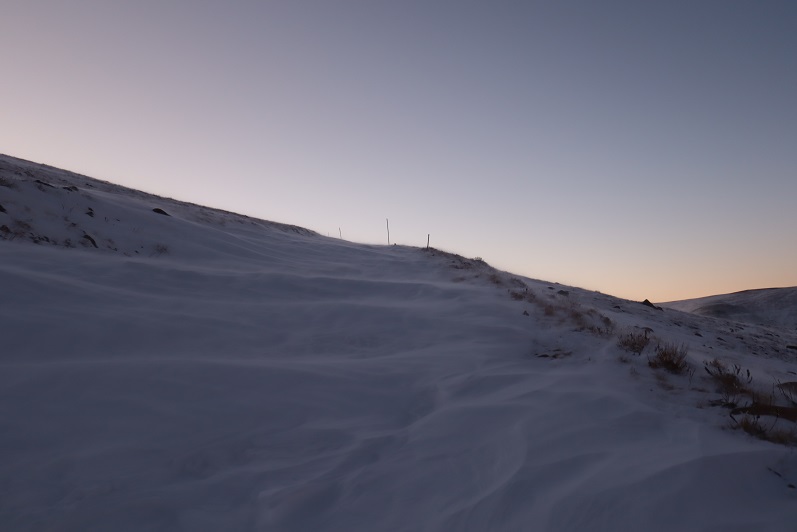
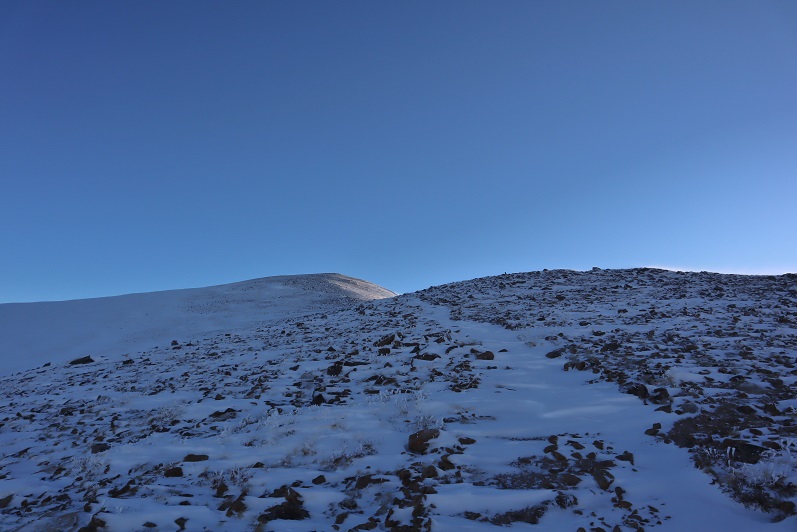
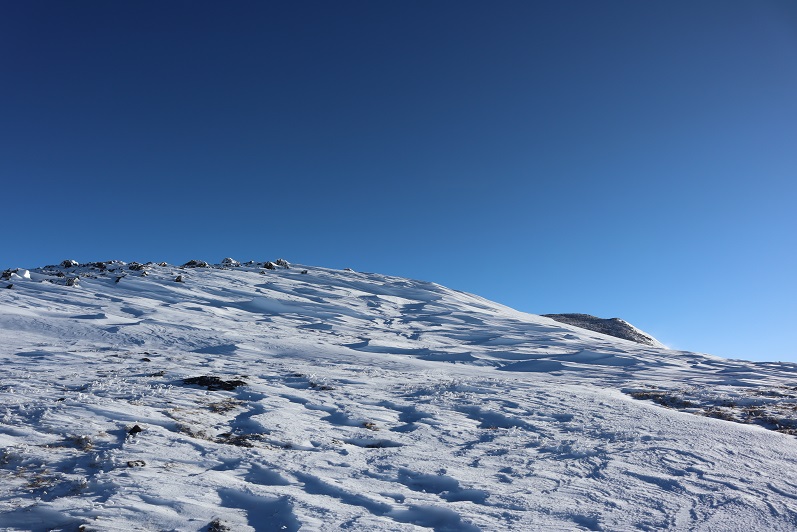
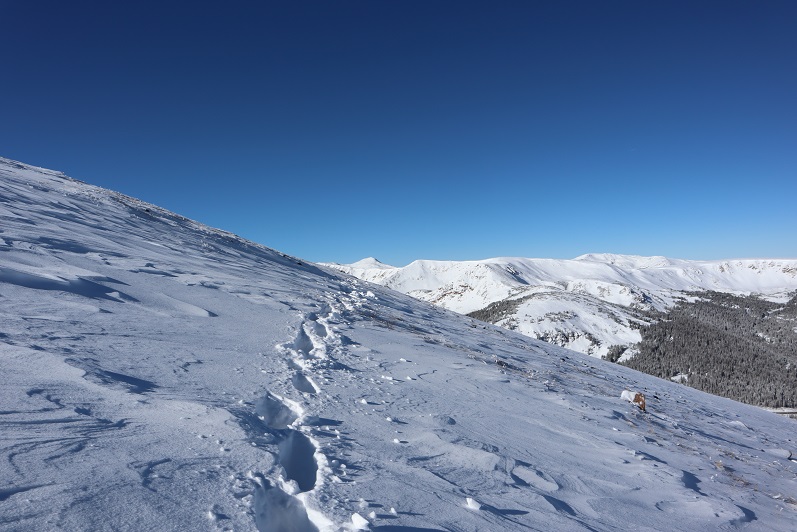
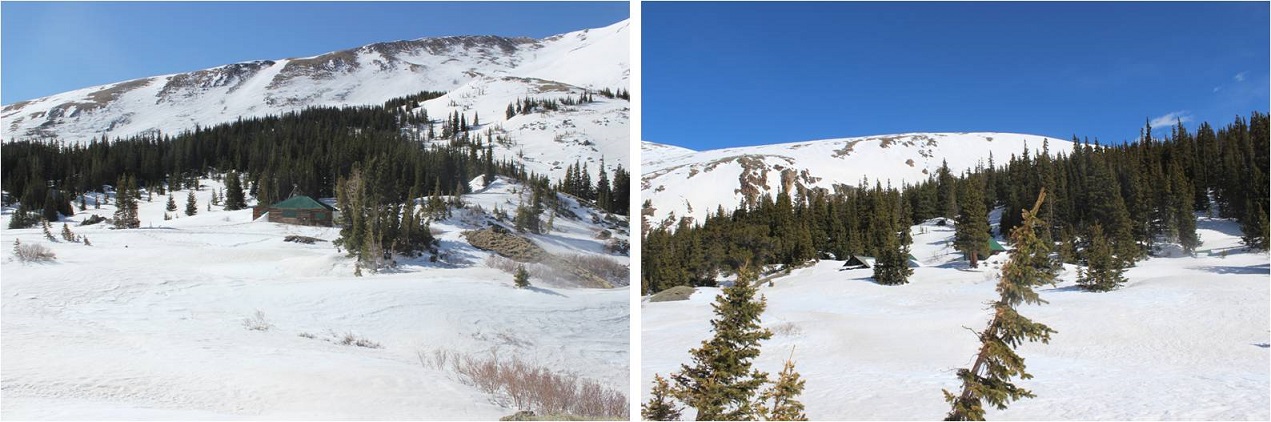
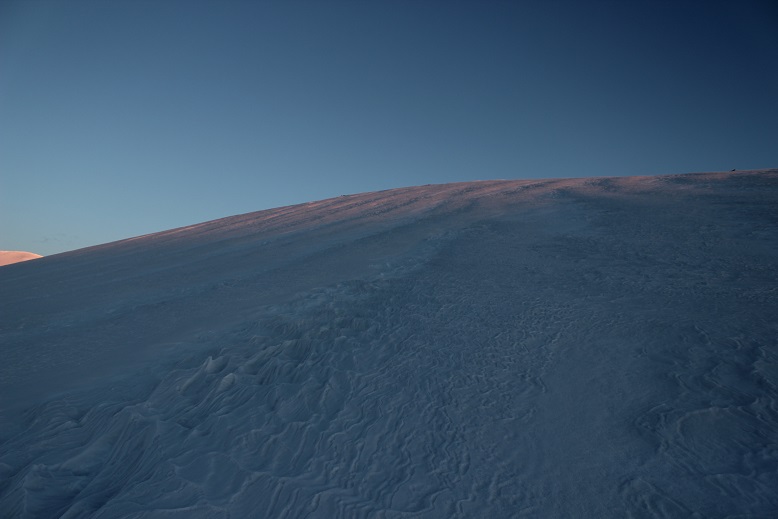
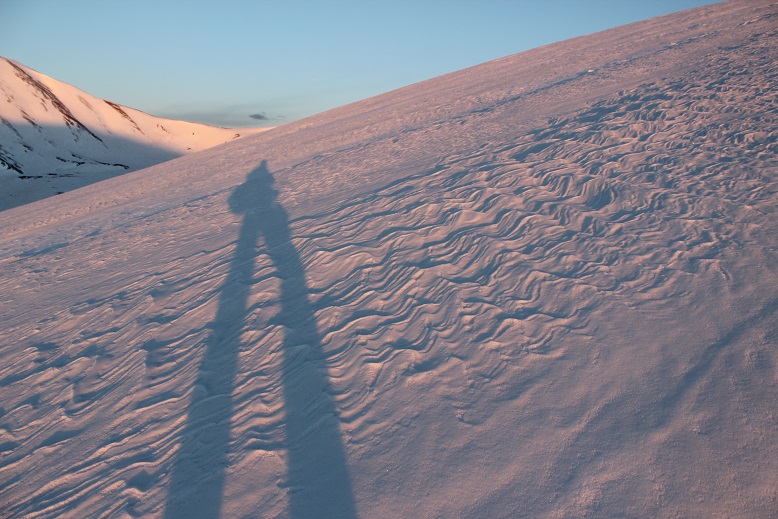
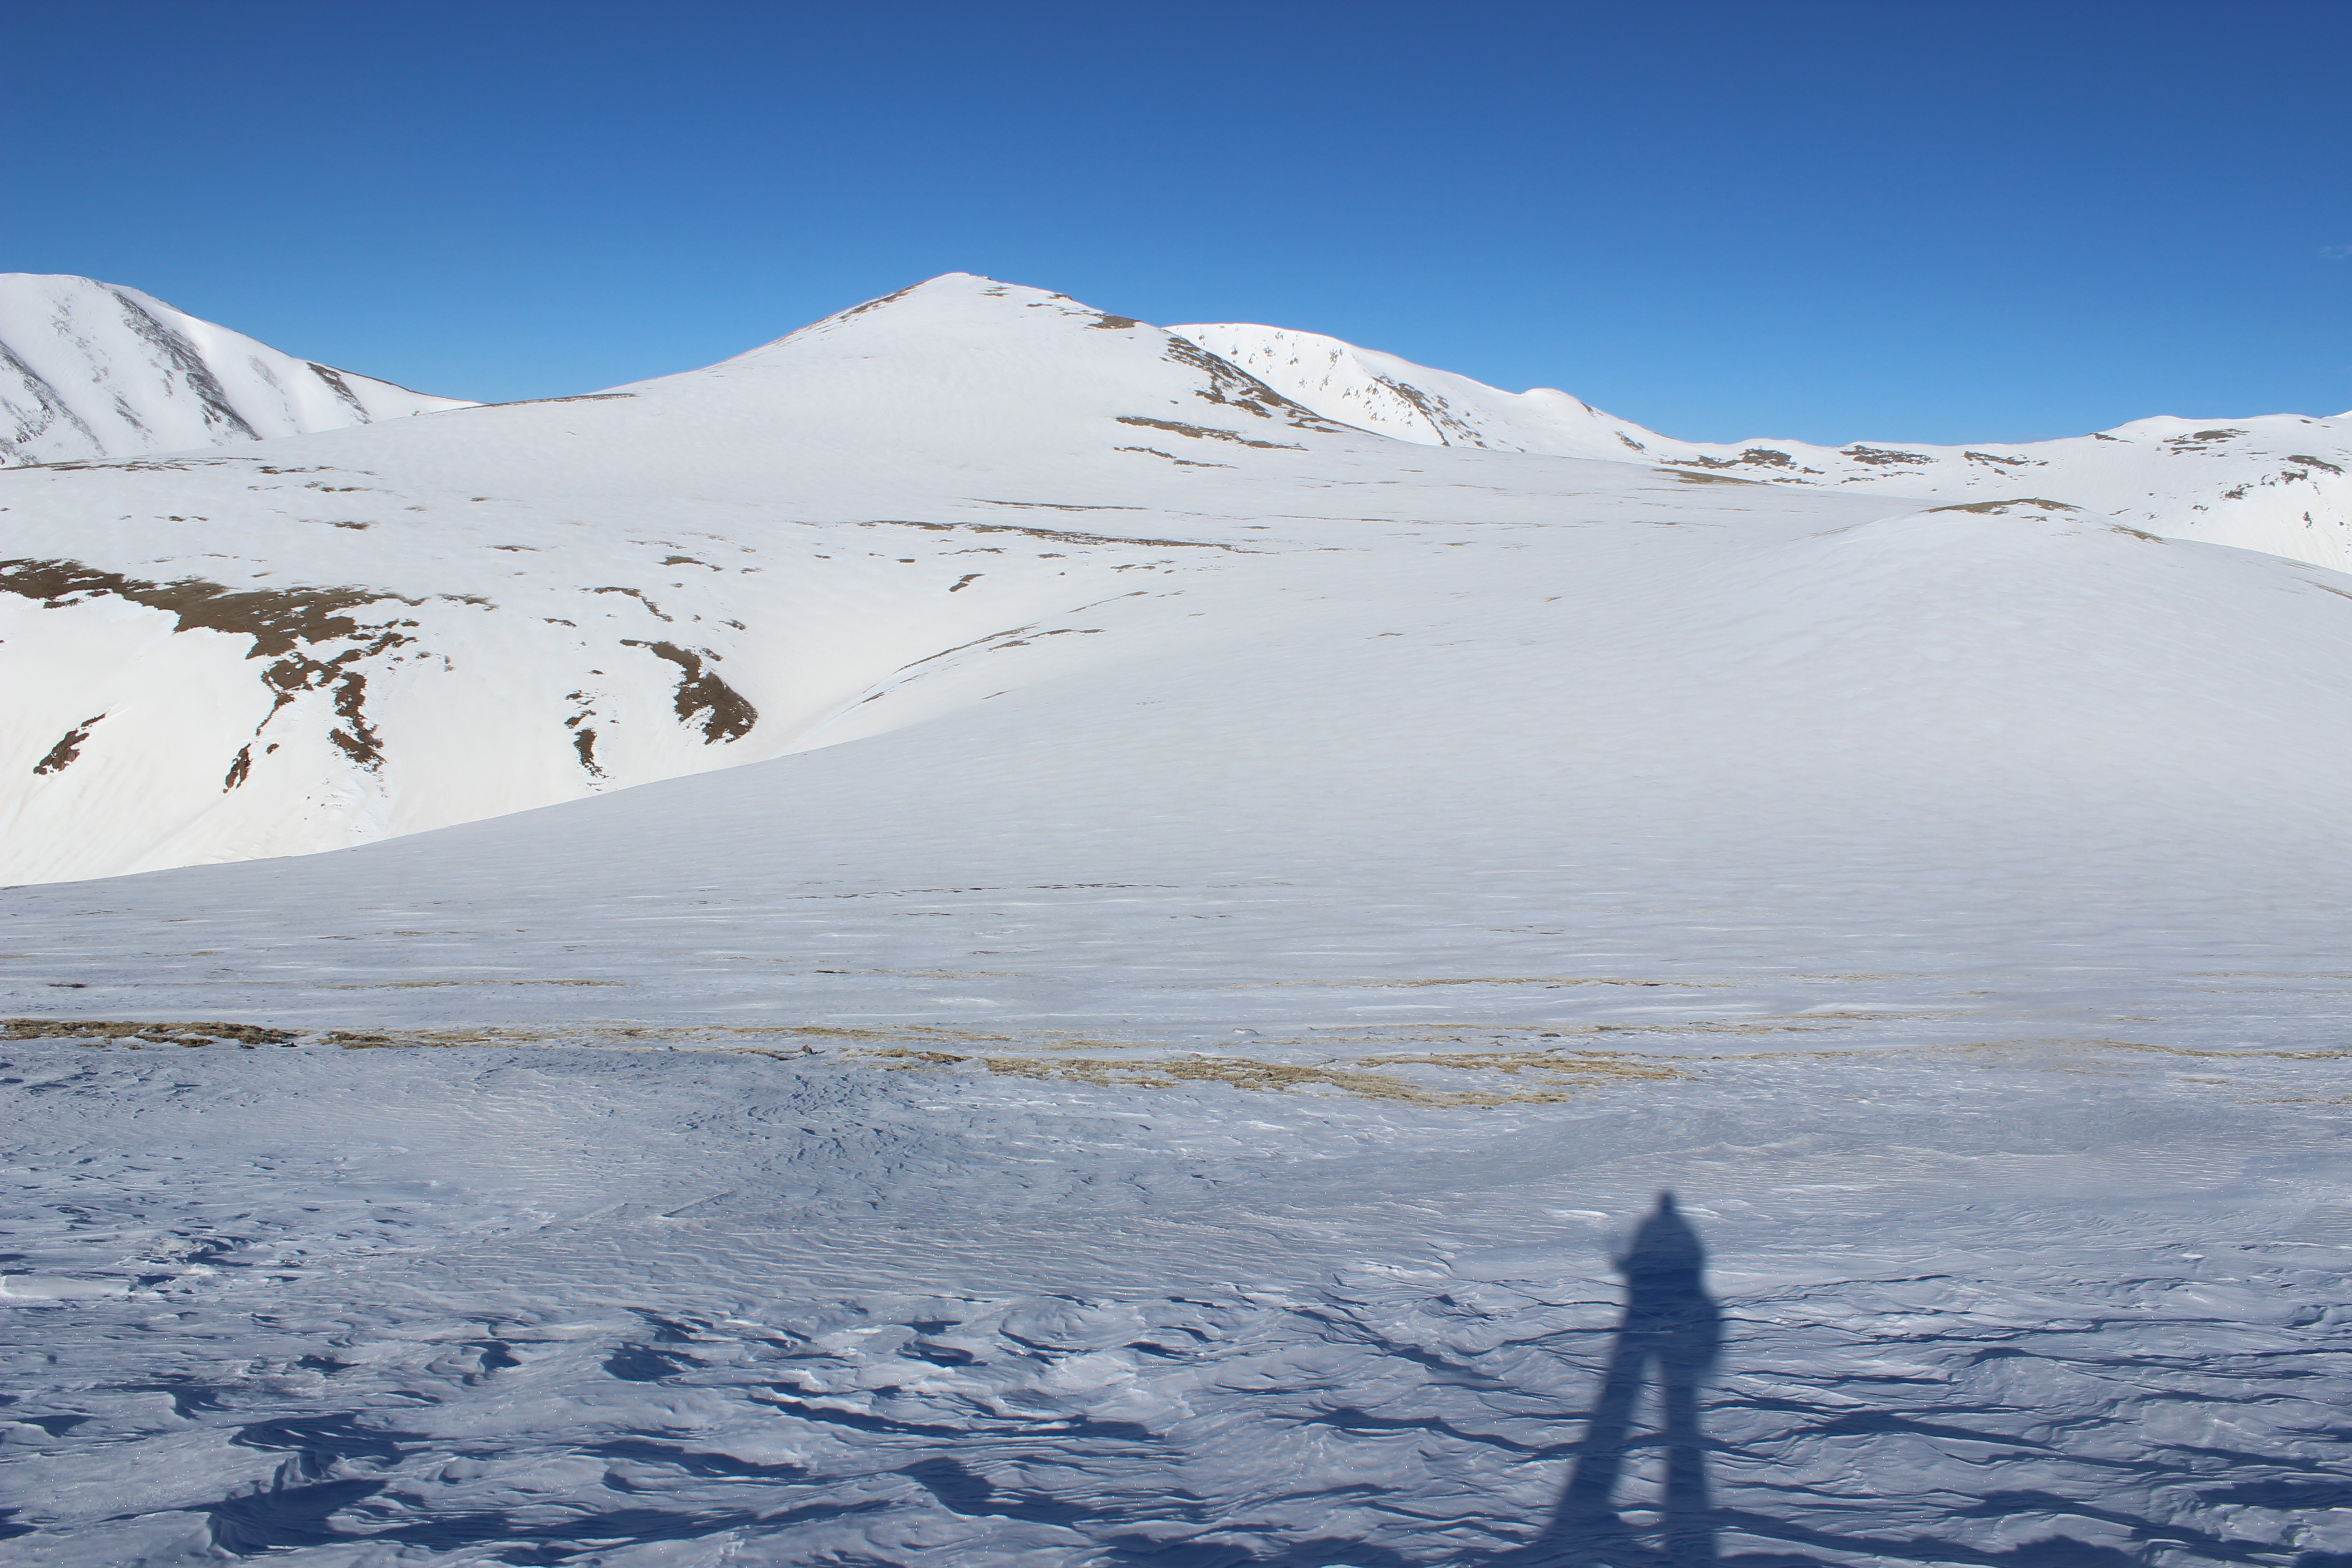
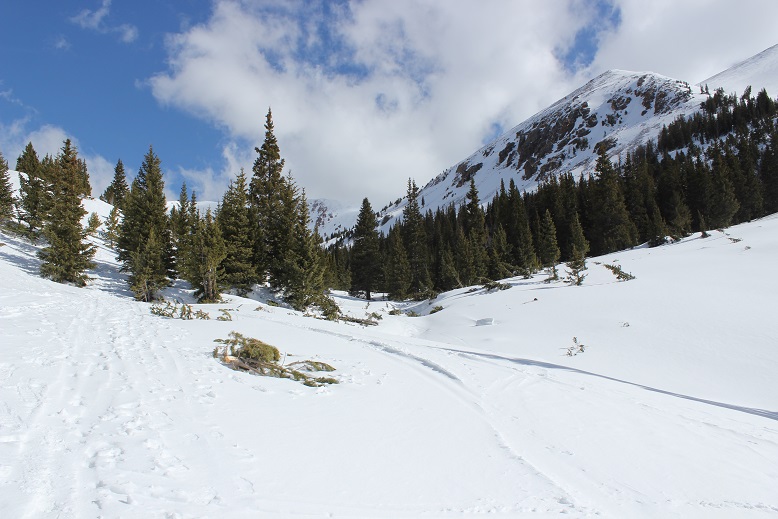
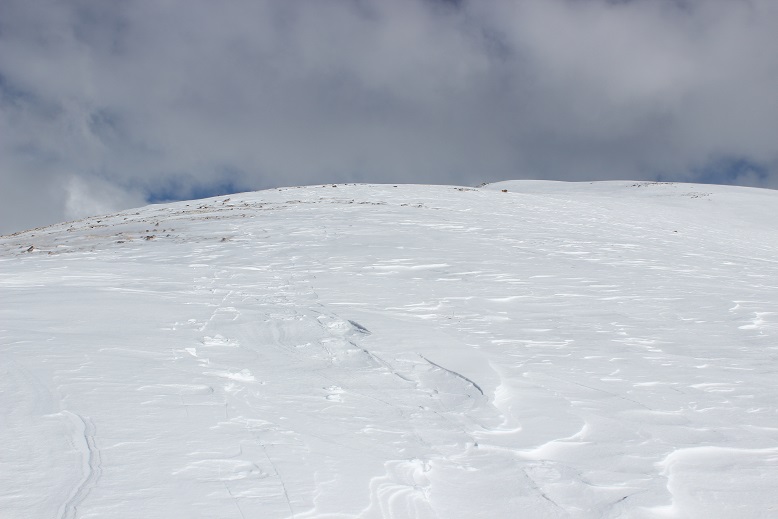
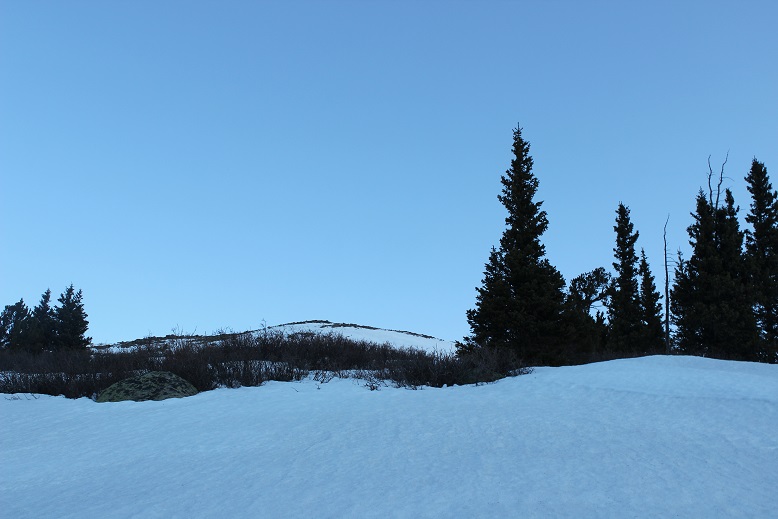
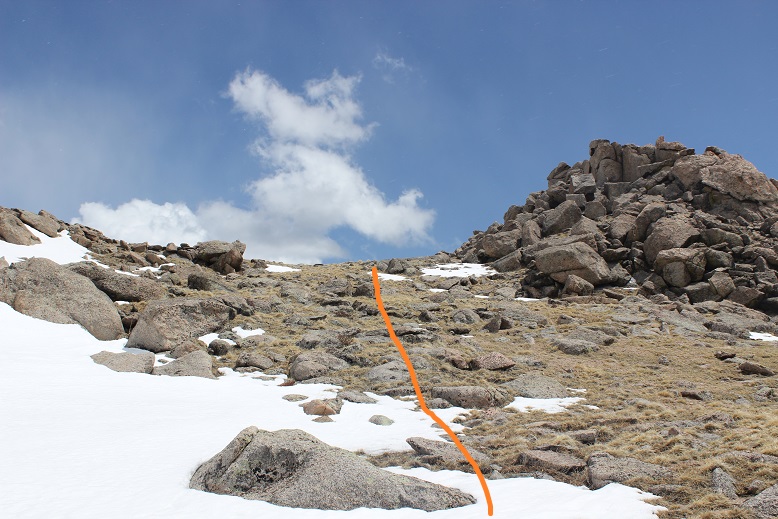
Just heading towards the saddle…

16

17

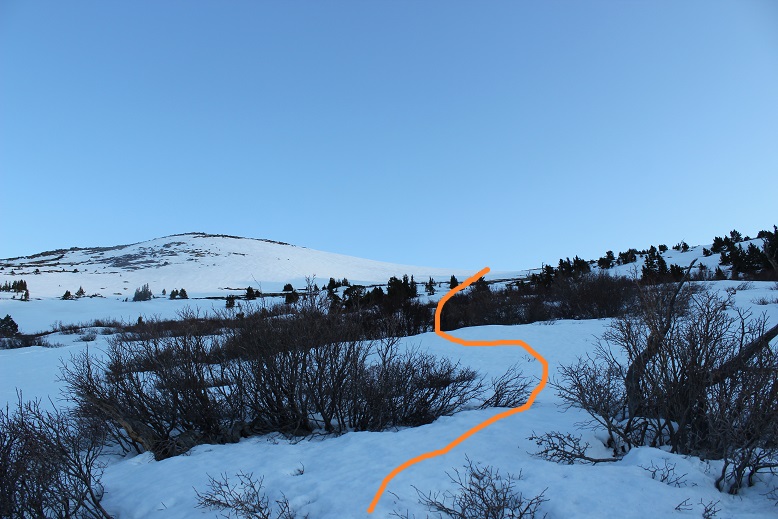
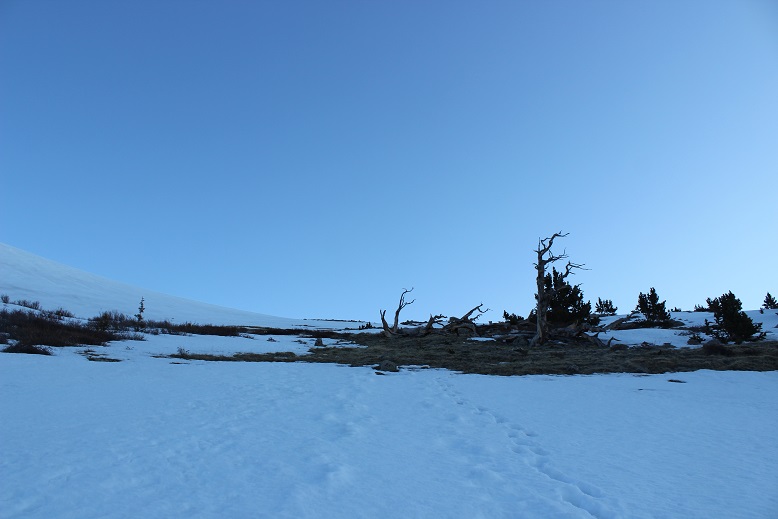
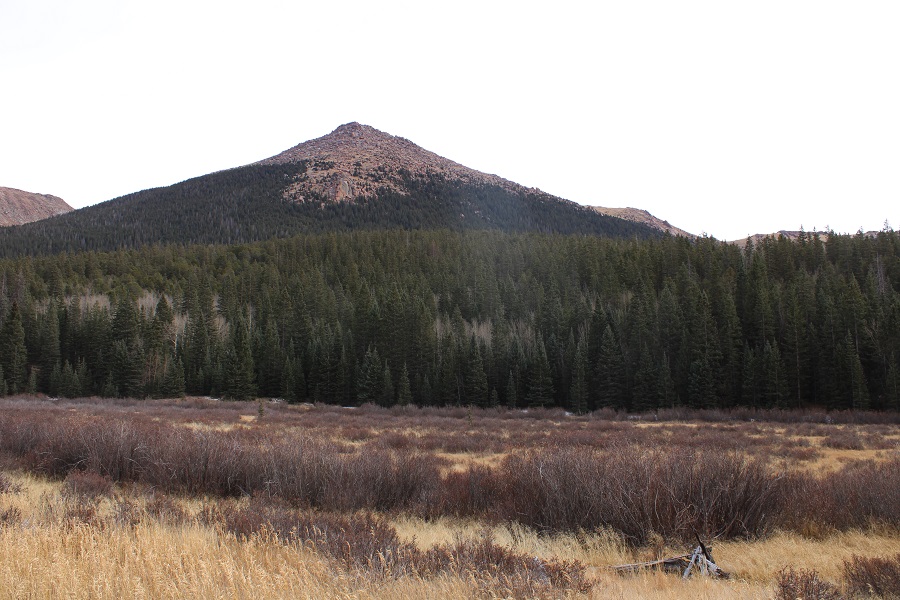
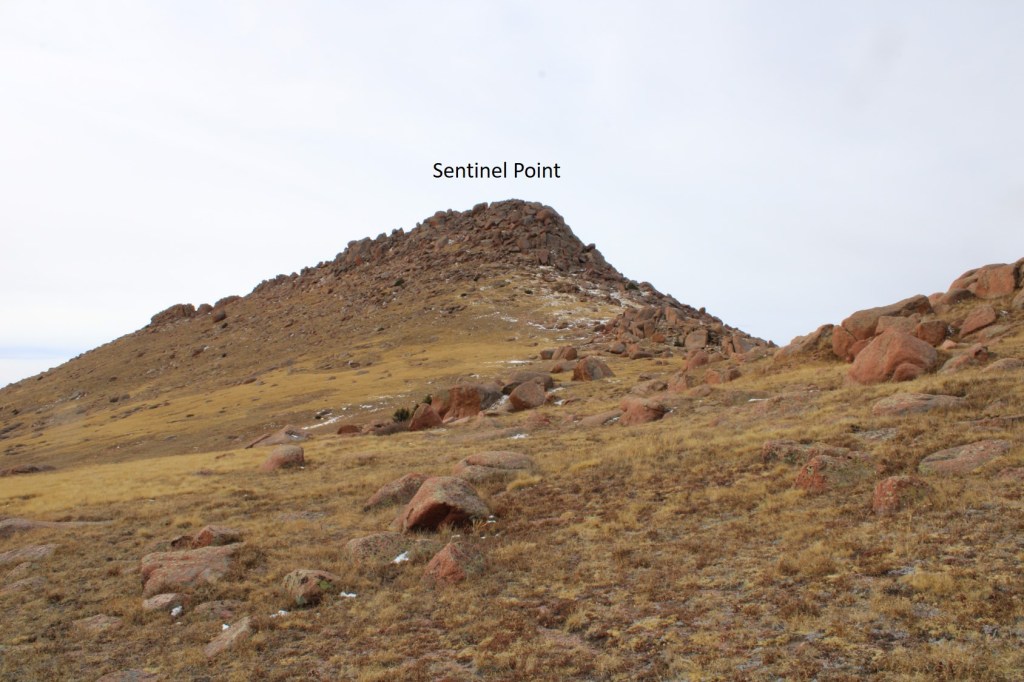
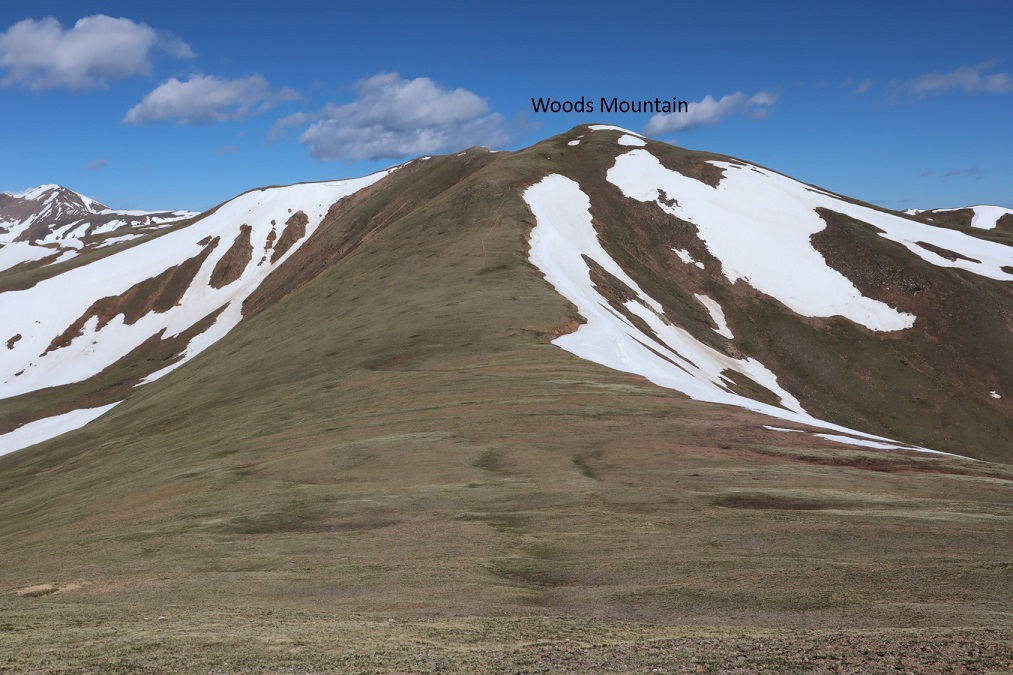
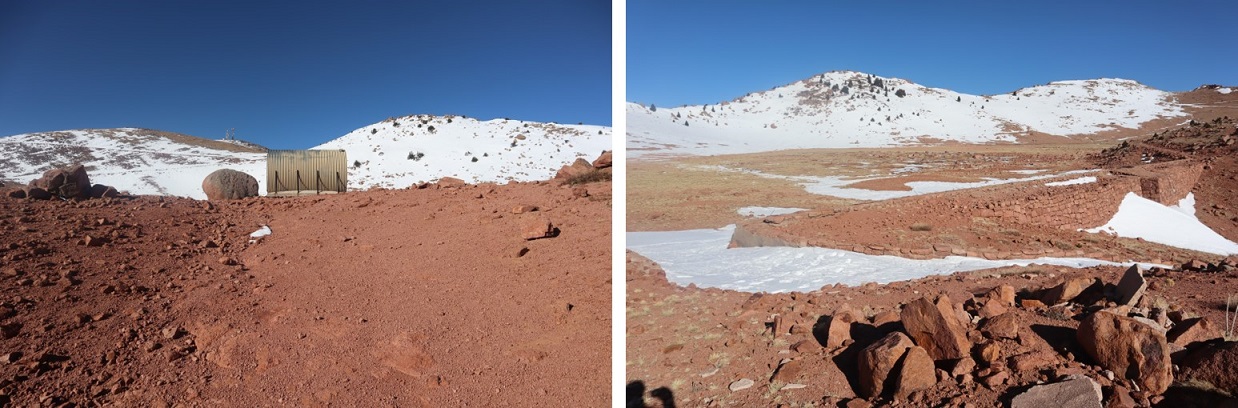
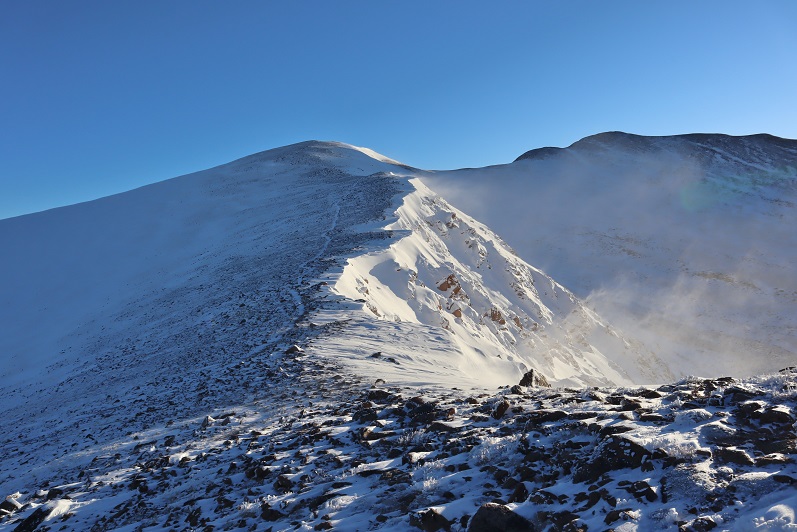
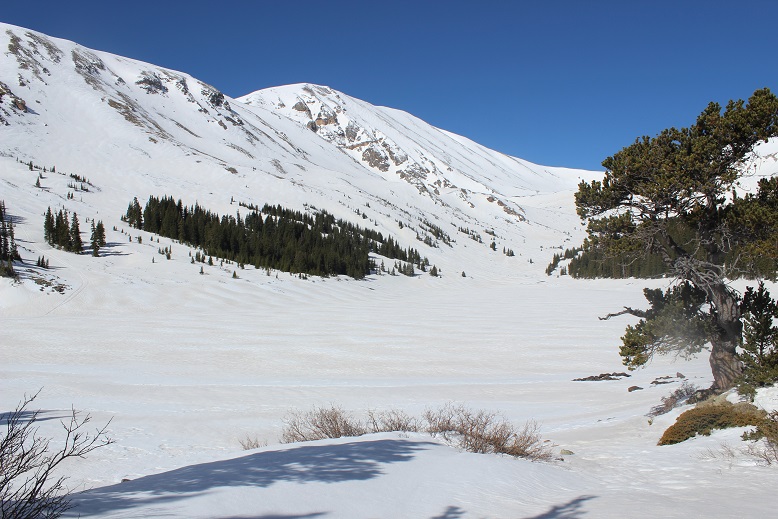
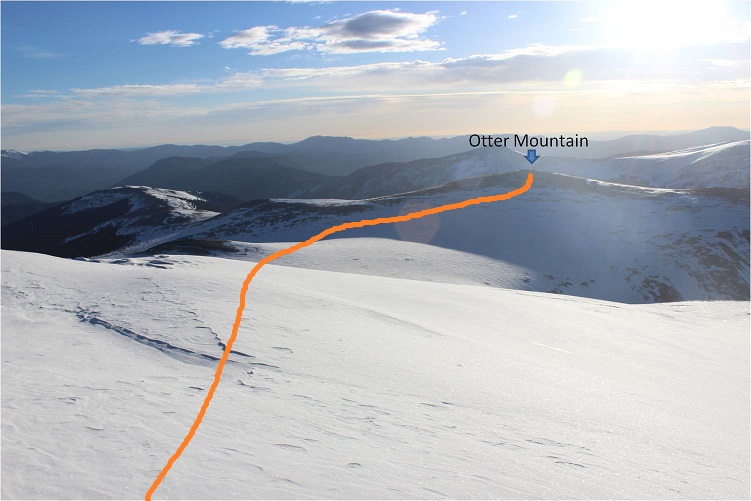
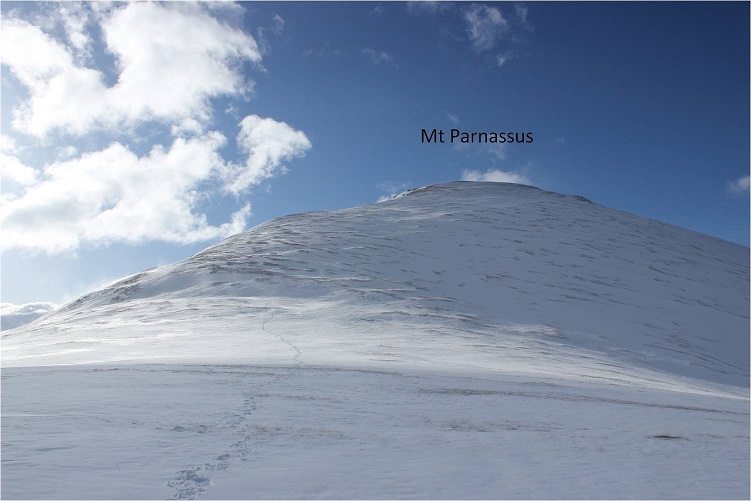
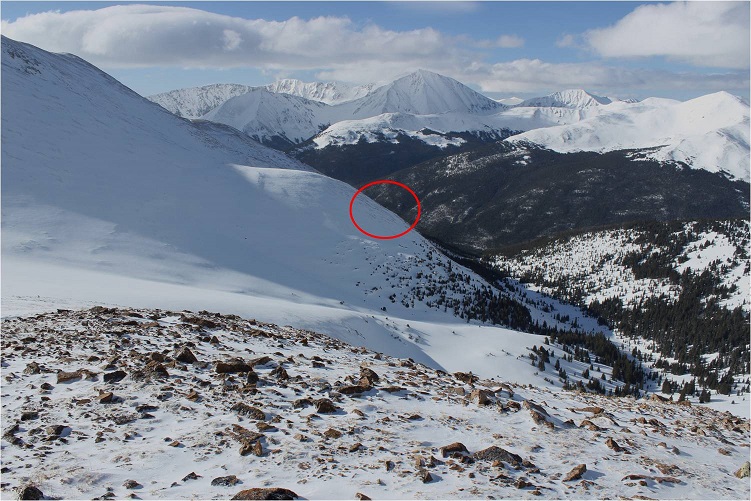
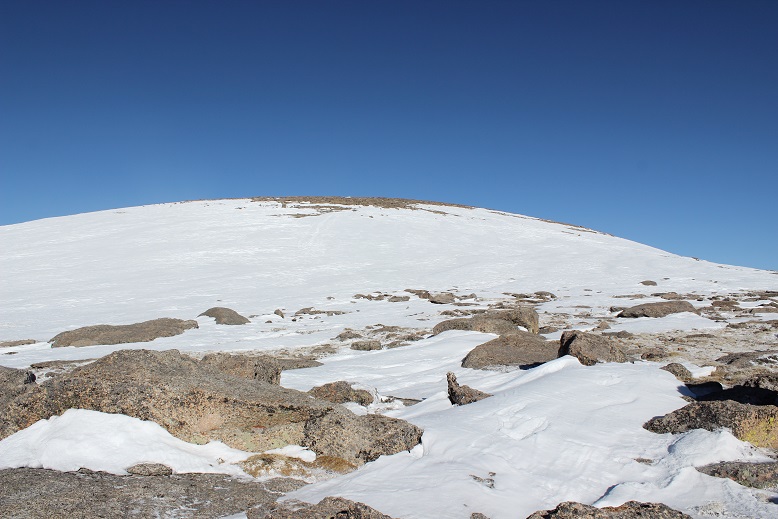
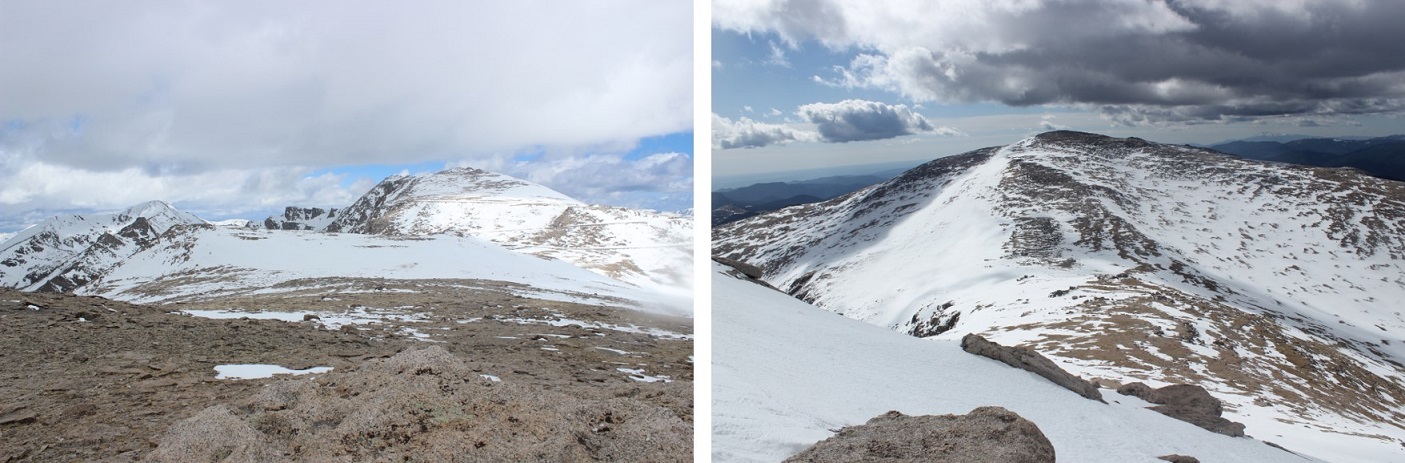
Here’s where I was headed

18

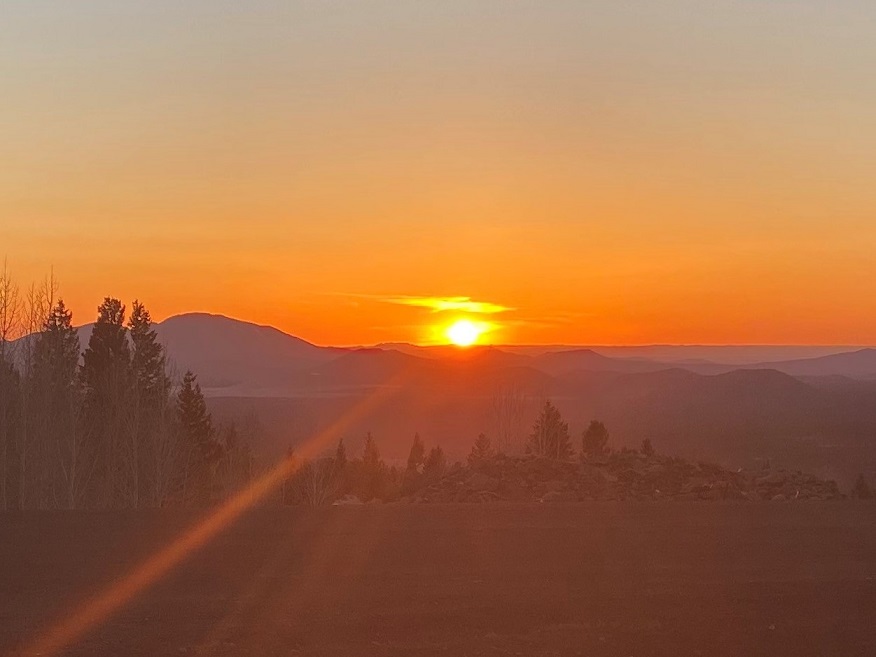
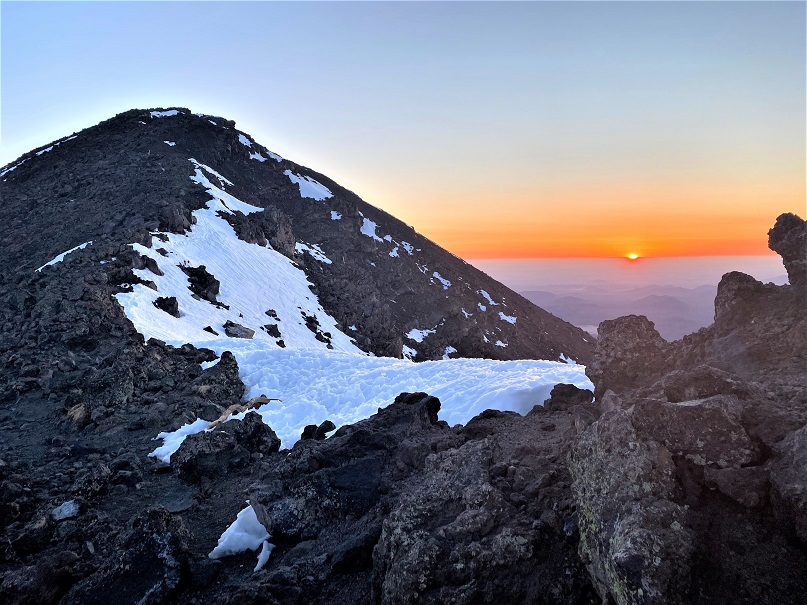
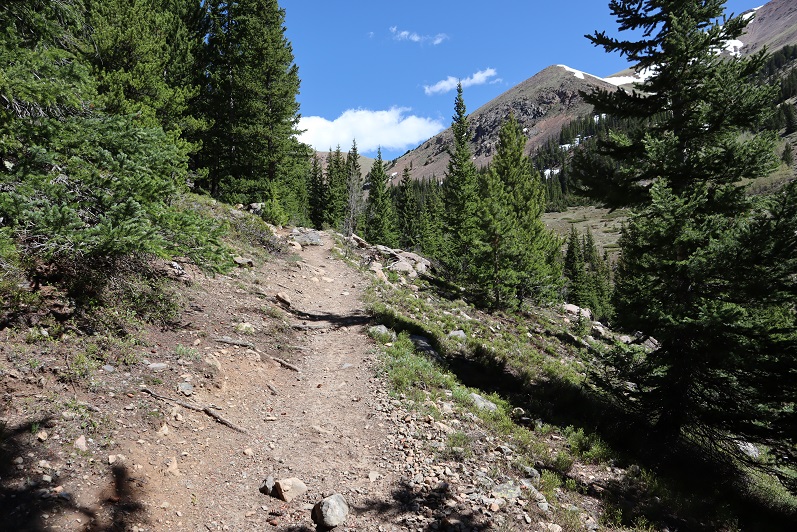
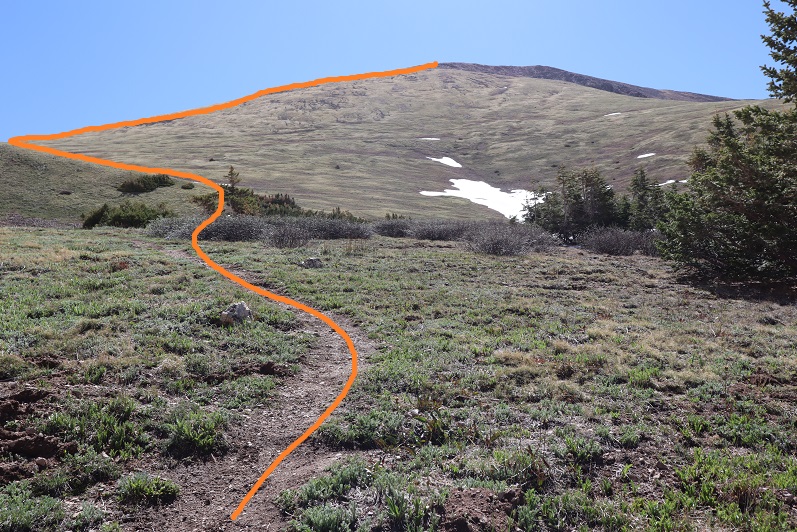
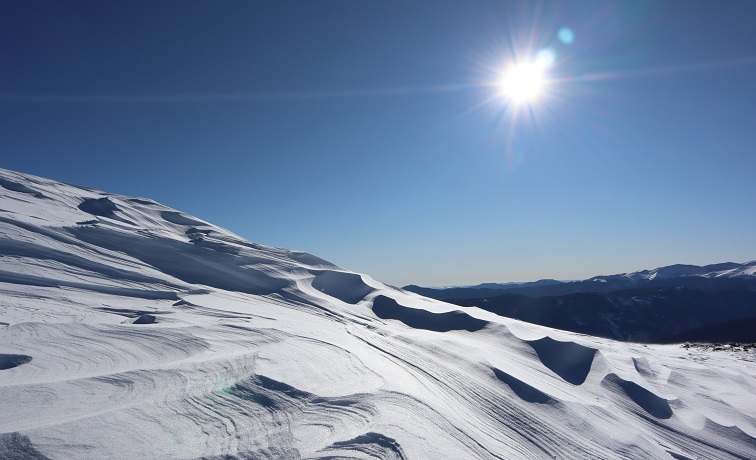
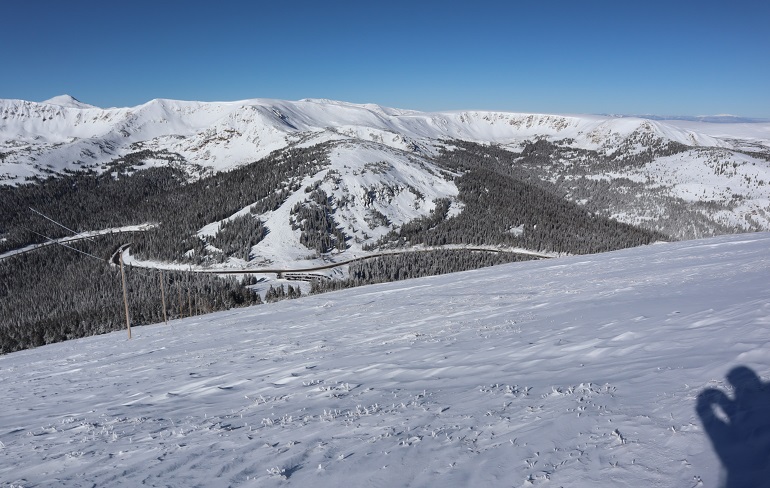
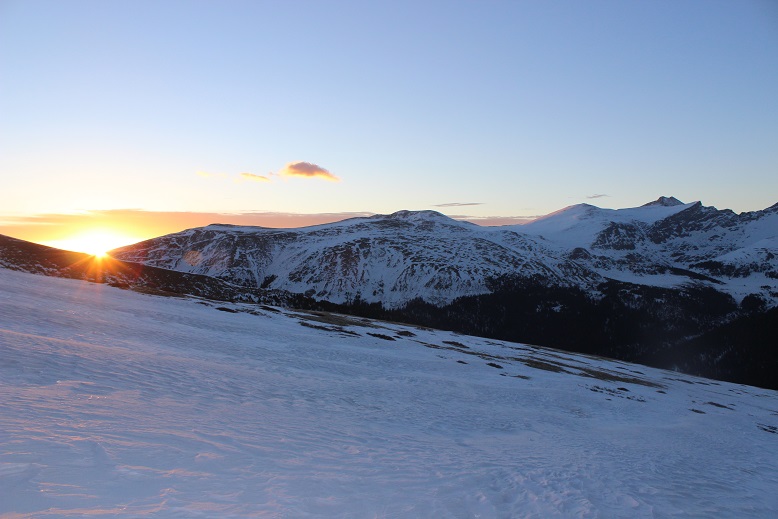
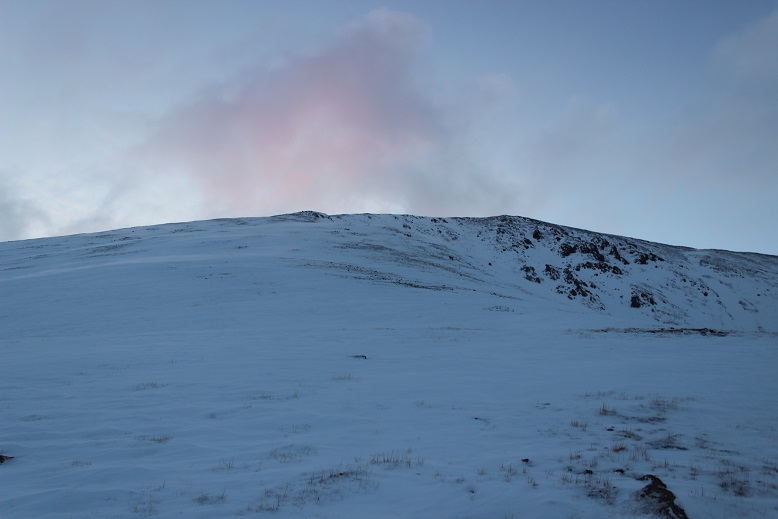
There hadn’t been much of a sunrise (no alpenglow) but I was pleasantly surprised there wasn’t a cloud in the sky!  This was great news, as there were many peaks I was interested in summiting today and it looked like the weather was cooperating.  I gained the saddle and turned left to follow the ridge

19

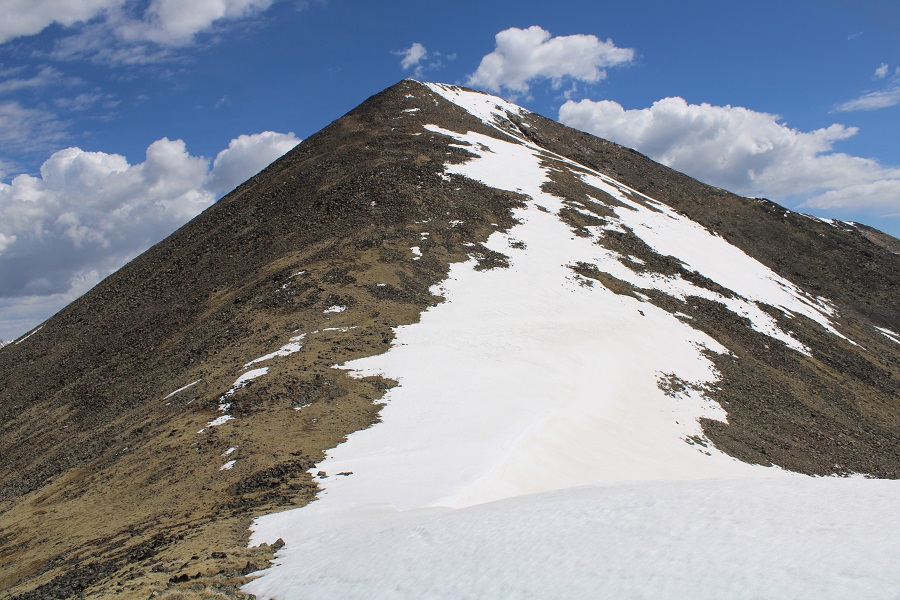
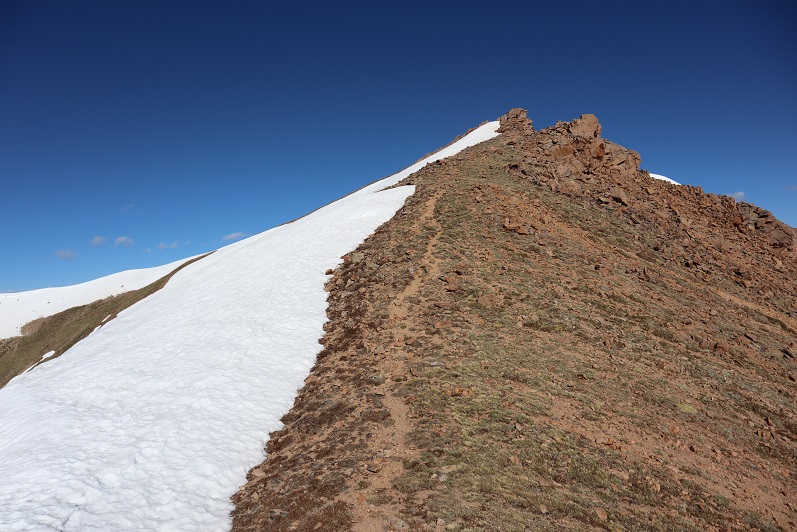
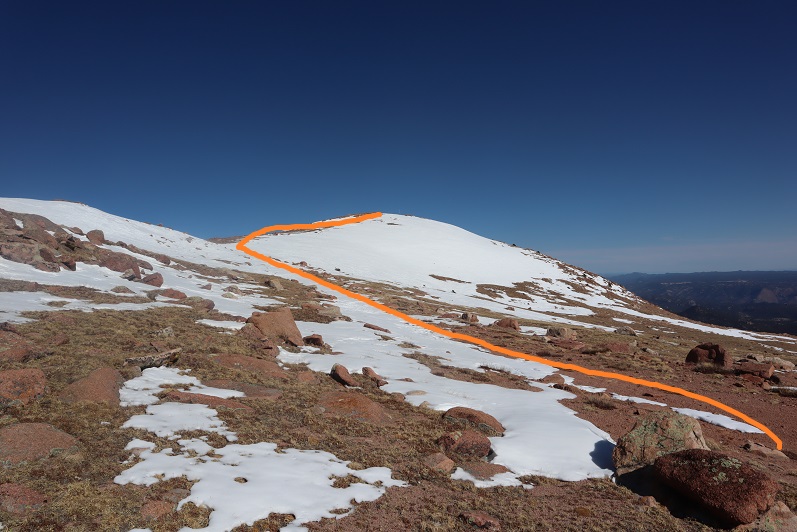
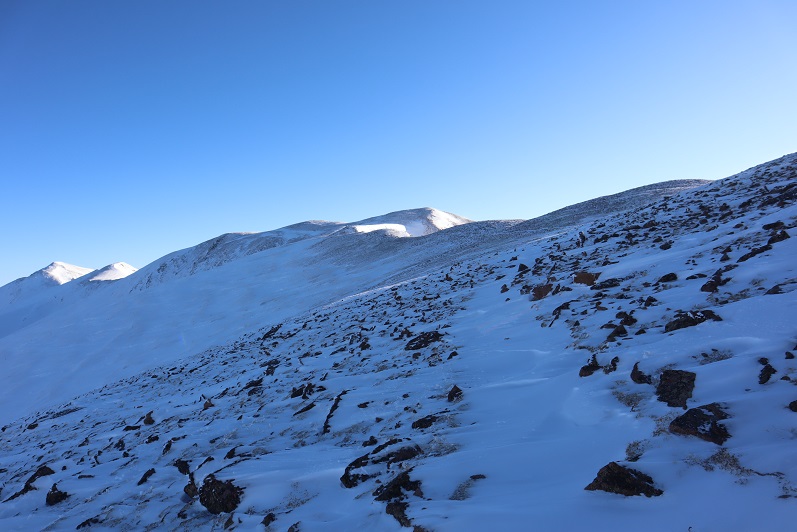
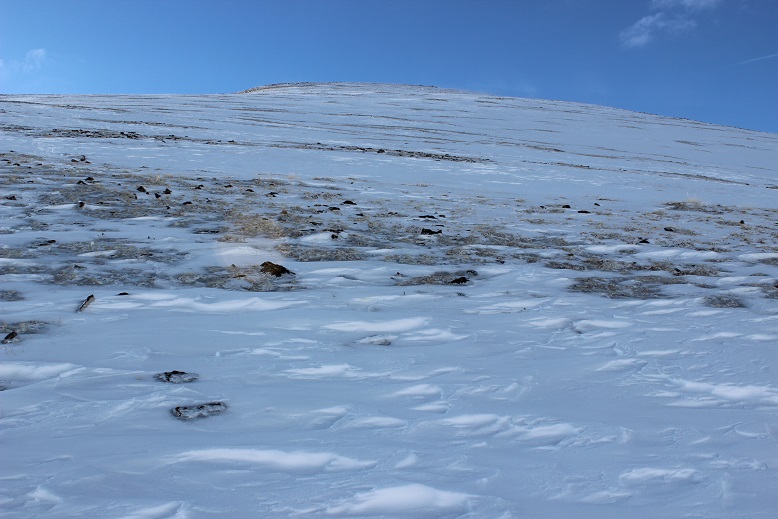
This ridge was mostly a gentle ridge.  I was lazy and didn’t want to take off my snowshoes so I kept to the snow even though it was avoidable.

20

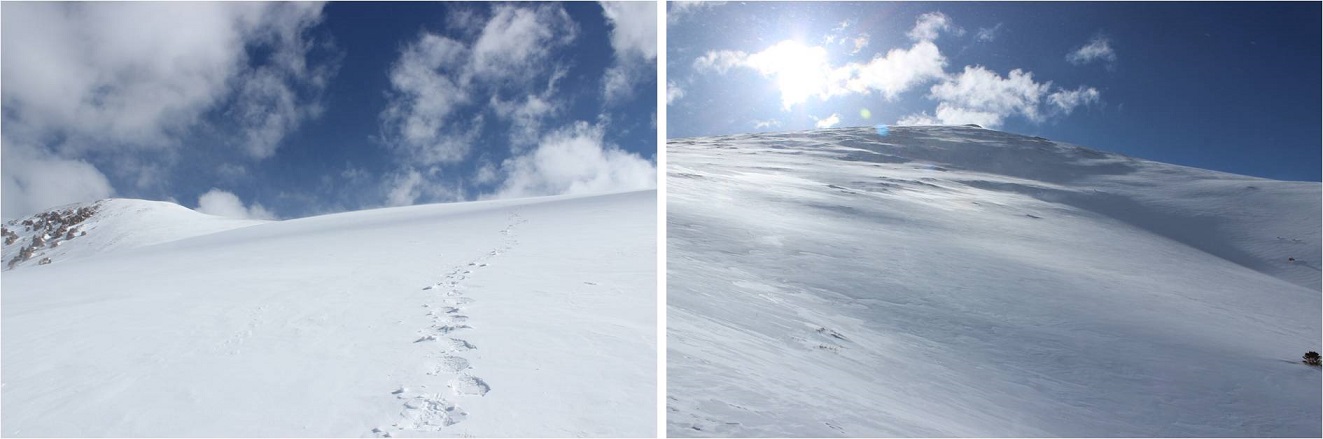
This ridge is longer than it looks, and the snow towards the middle gets steep (but nothing too dramatic, snowshoes were fine).  I just kept aiming towards the next landmark (rock) and hiked on.

21

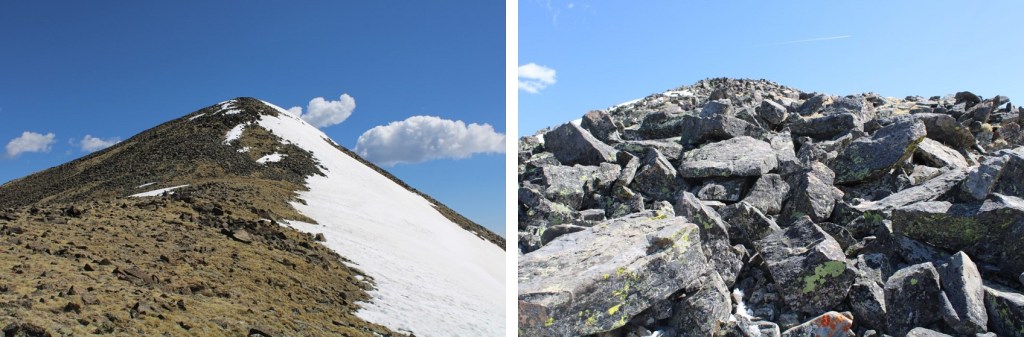
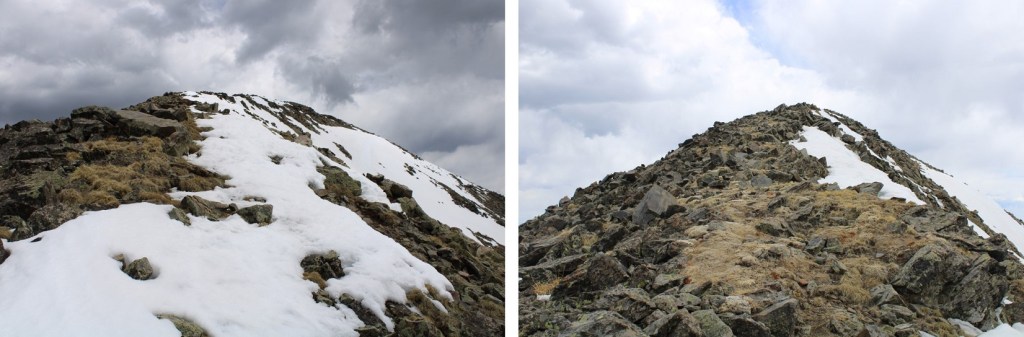
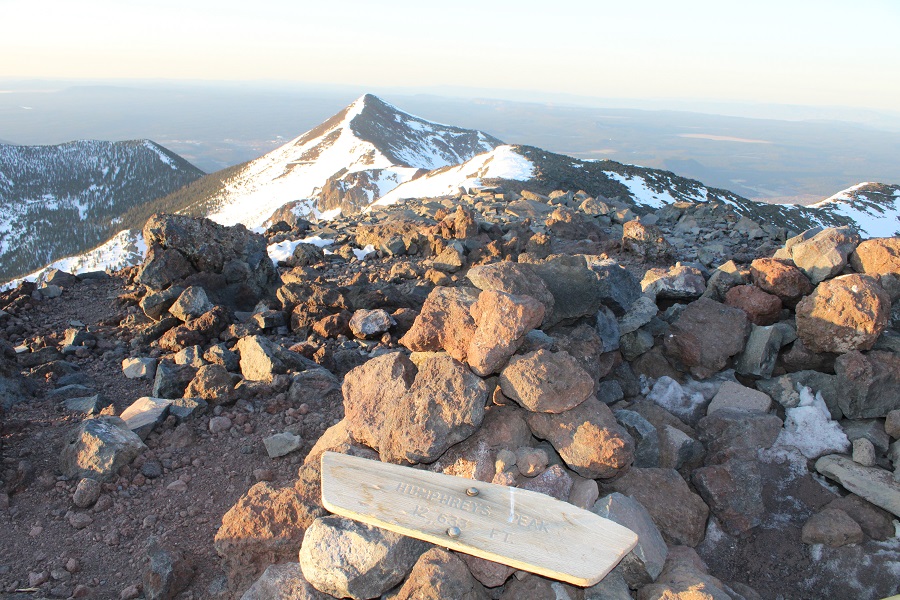
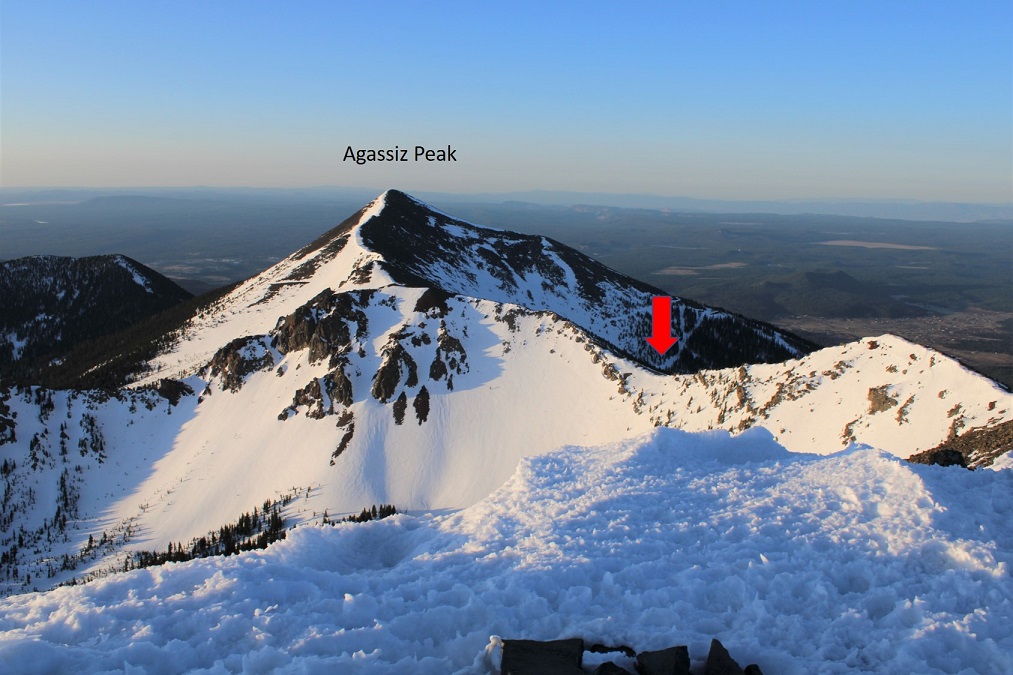
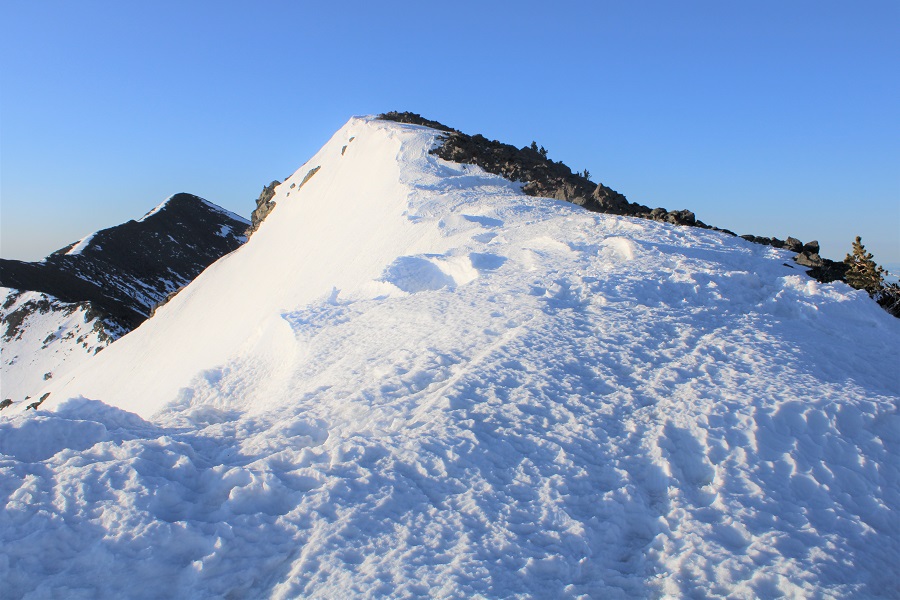
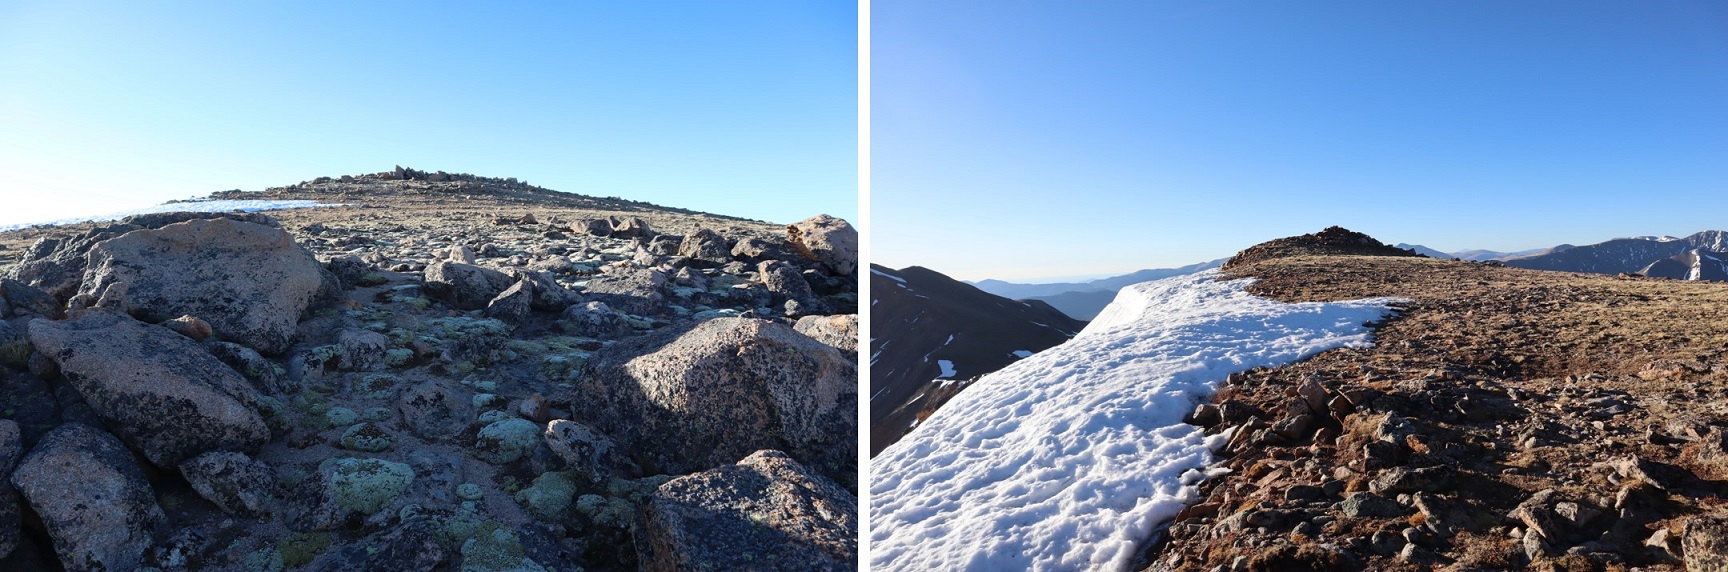
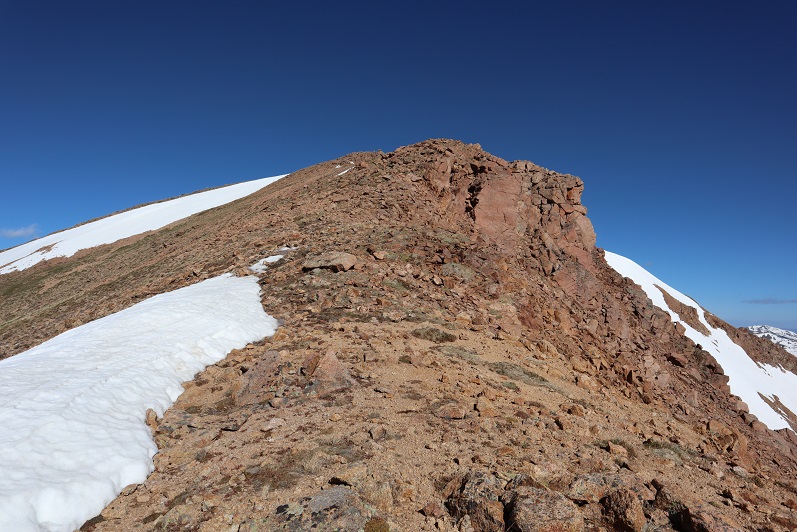
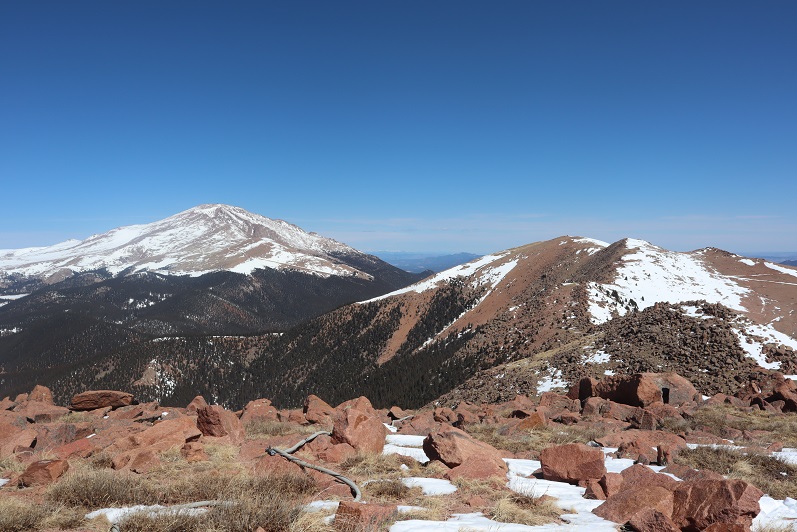
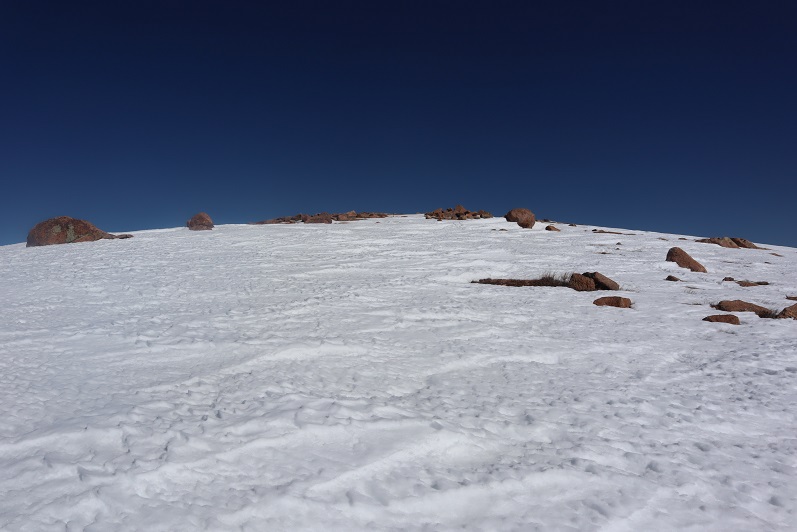
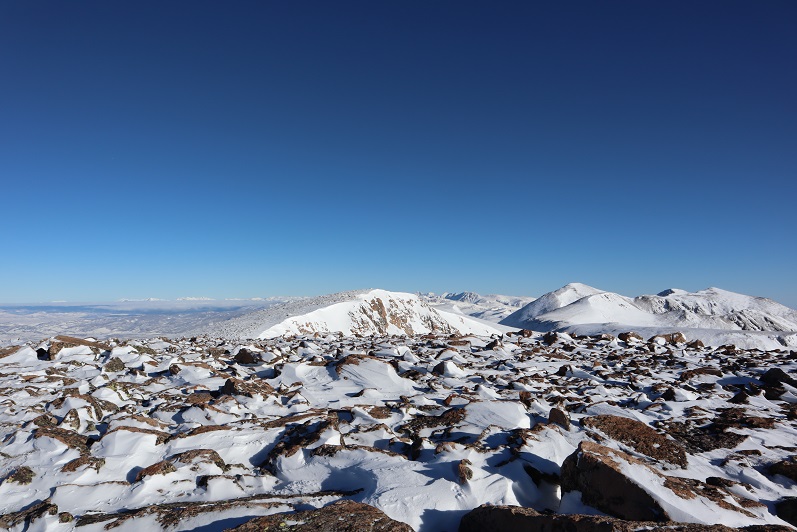
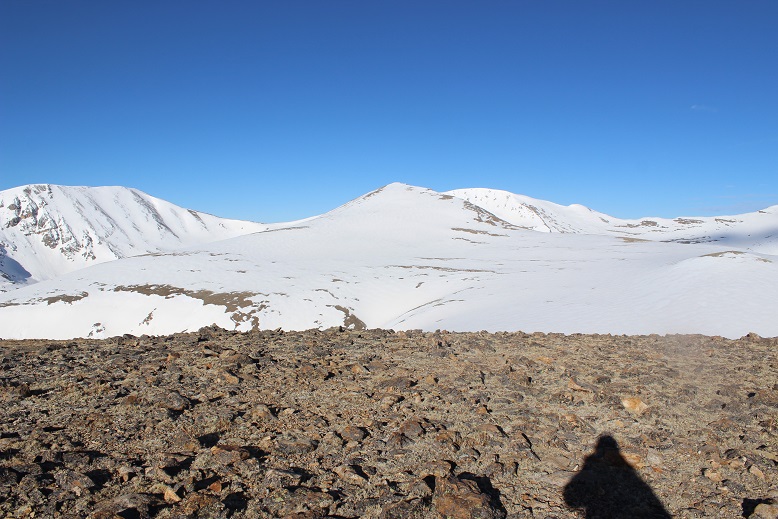
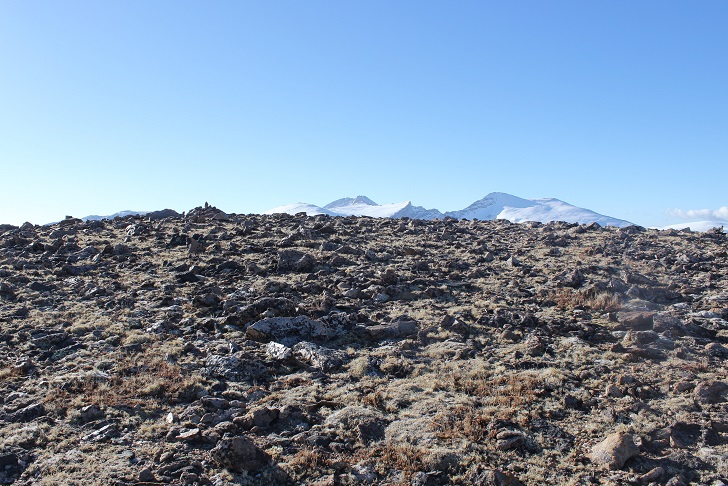
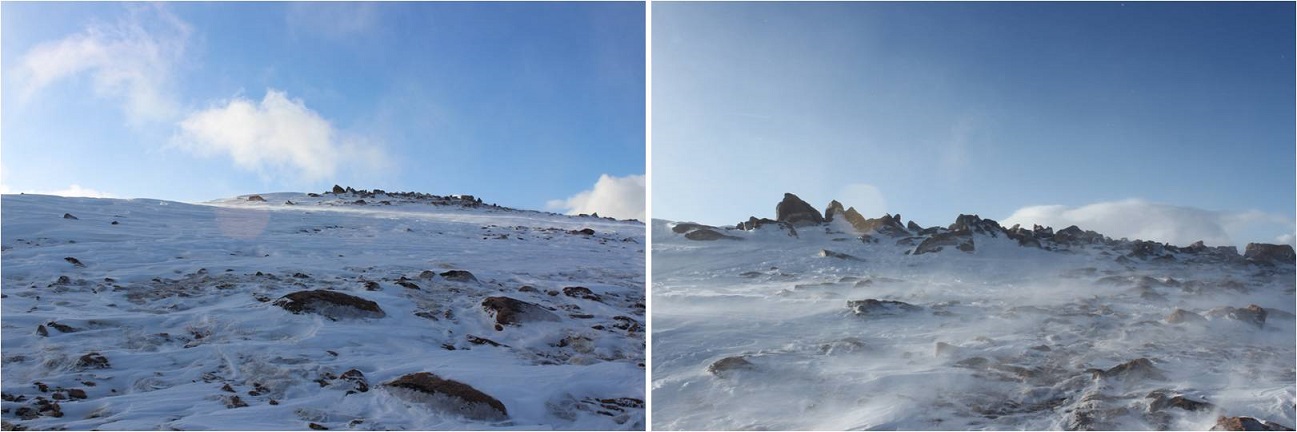
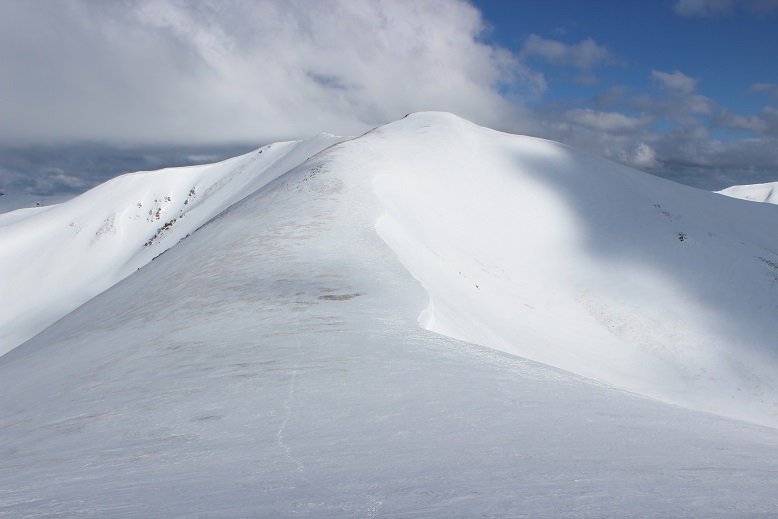
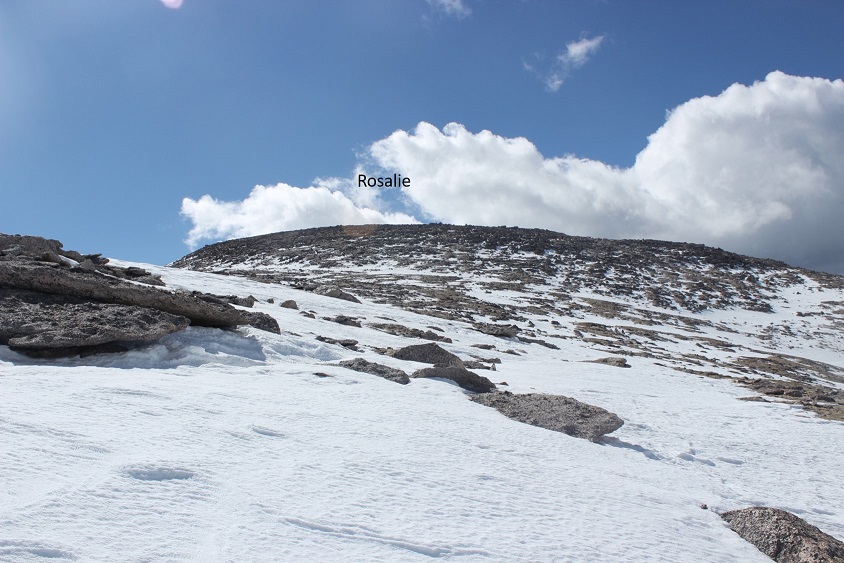
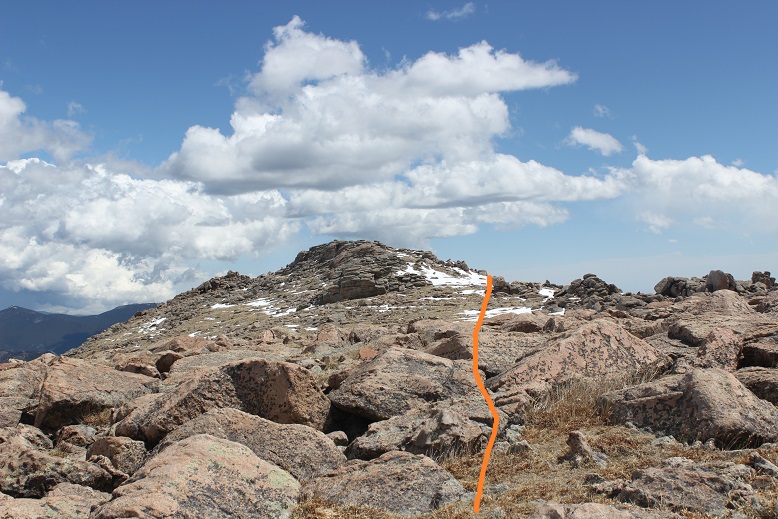
I made it to what I thought was the summit only to be greeted with the true summit in the background

22

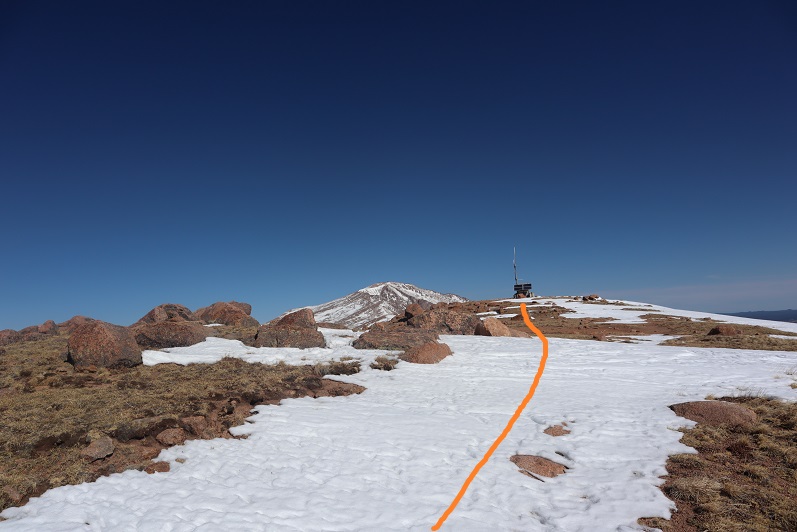
I kept going another quarter mile or so to the summit of Rosalie

23

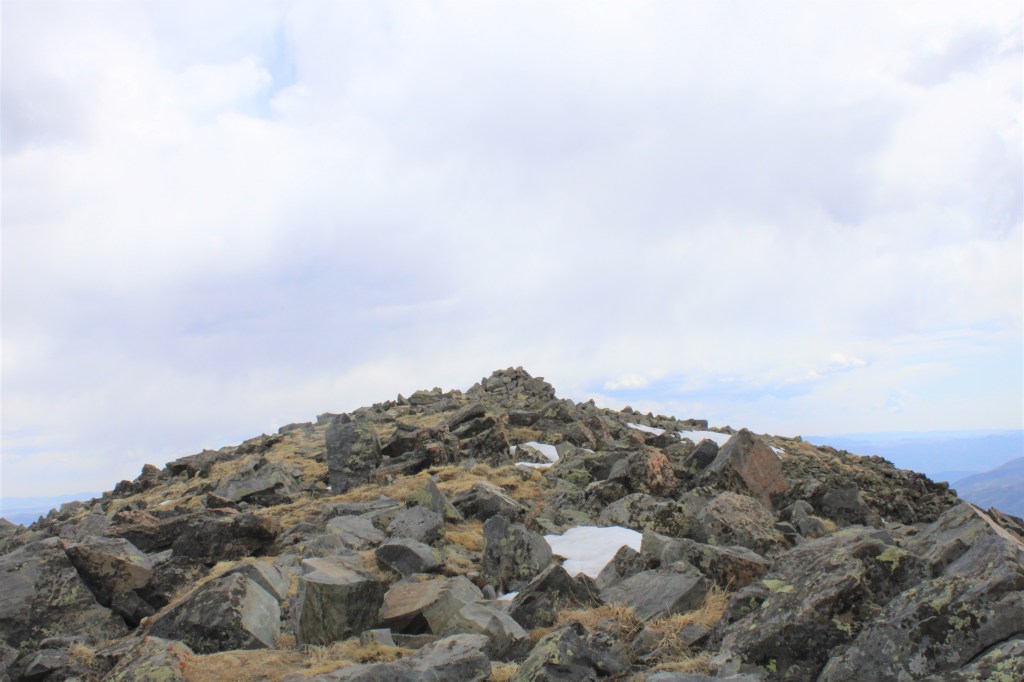
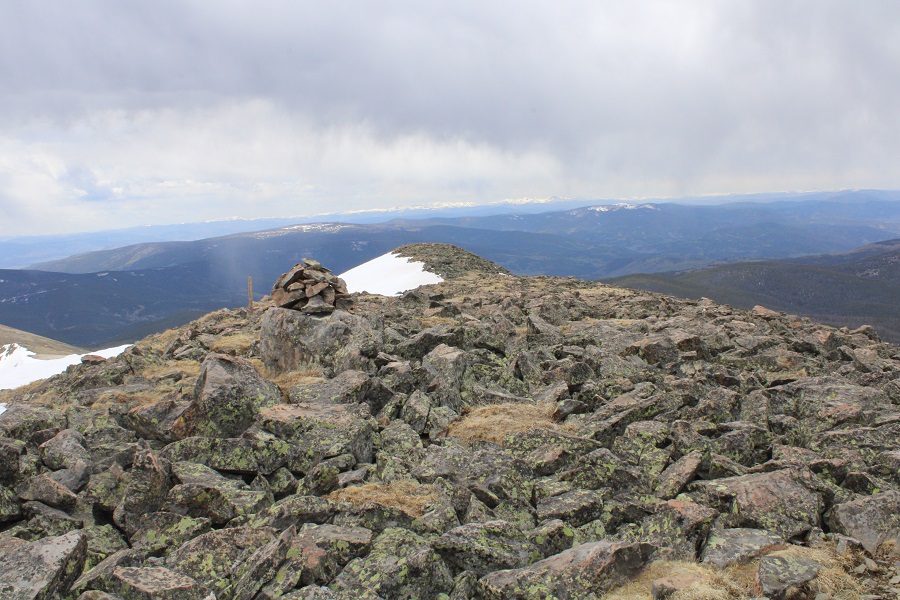
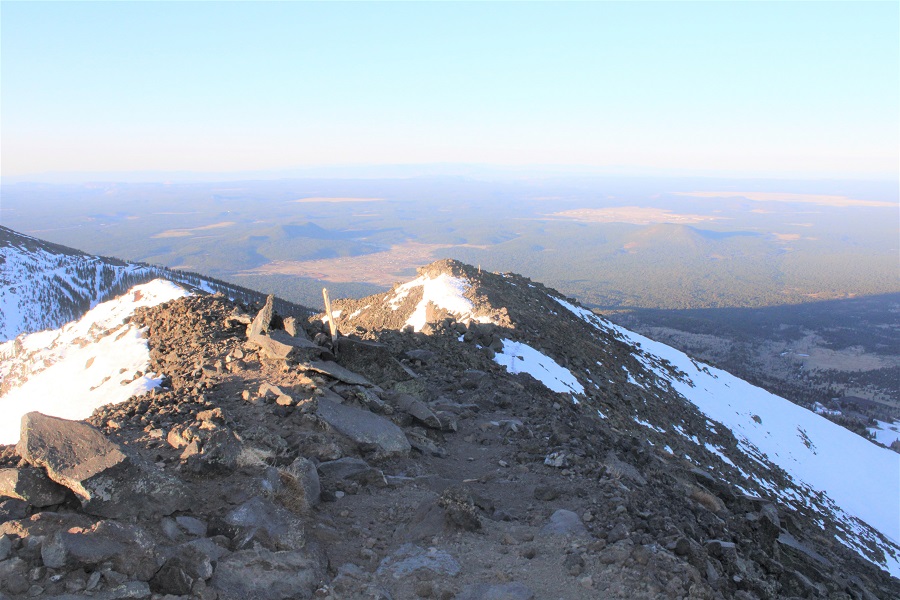
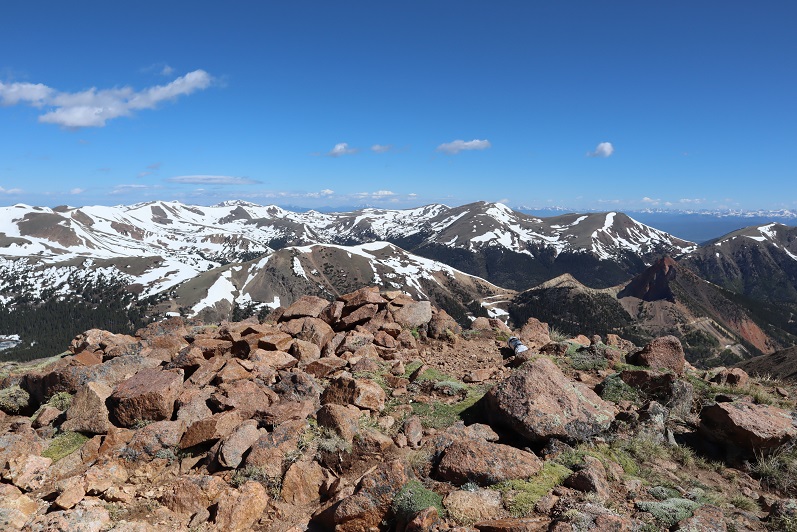
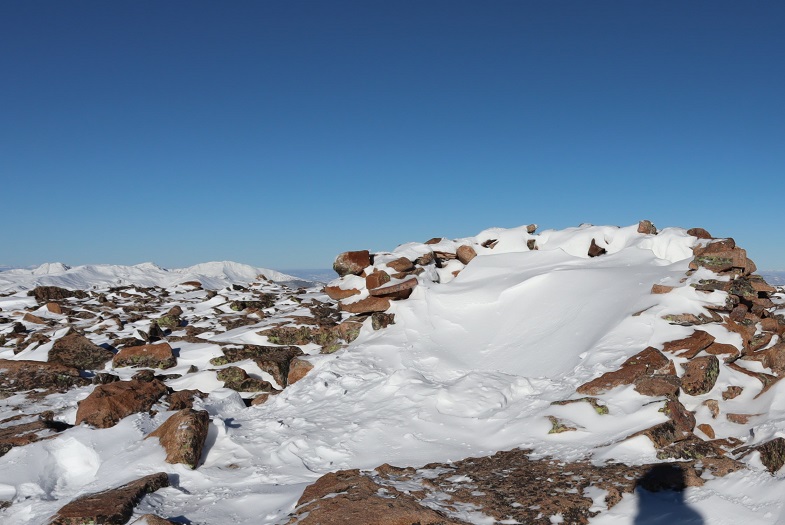
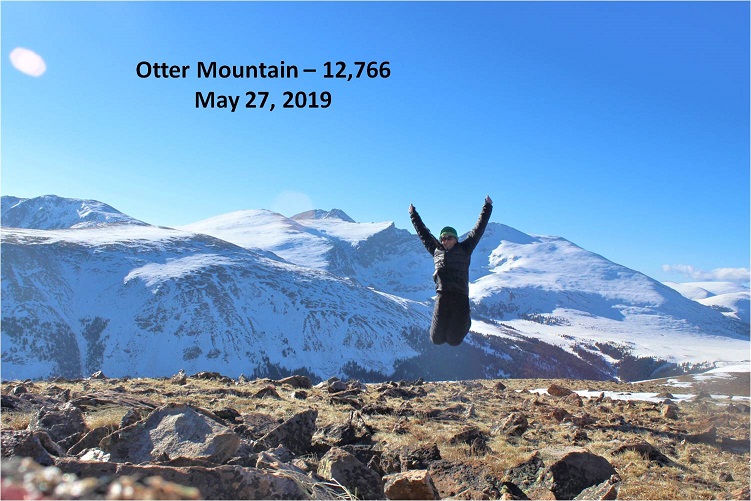
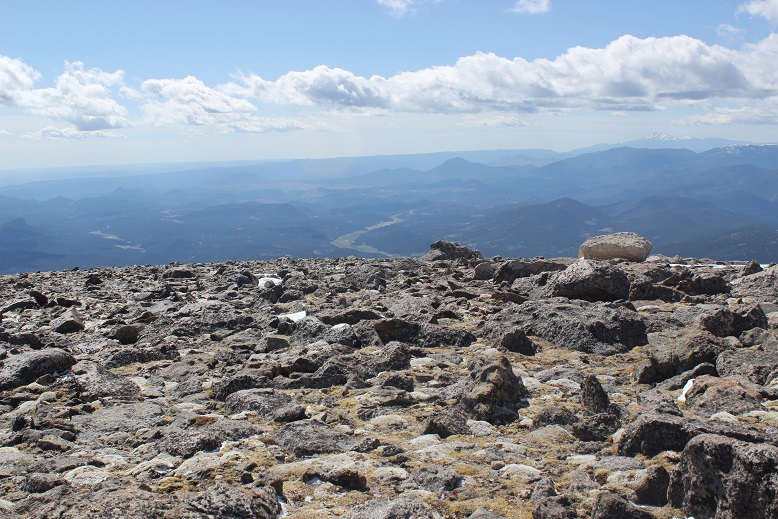
The summit was rocky and dry.  I summited at about 7:50am

24

25

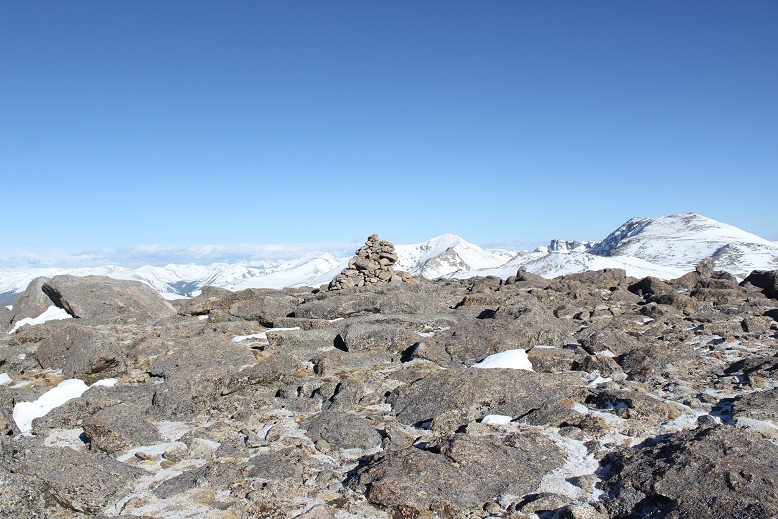
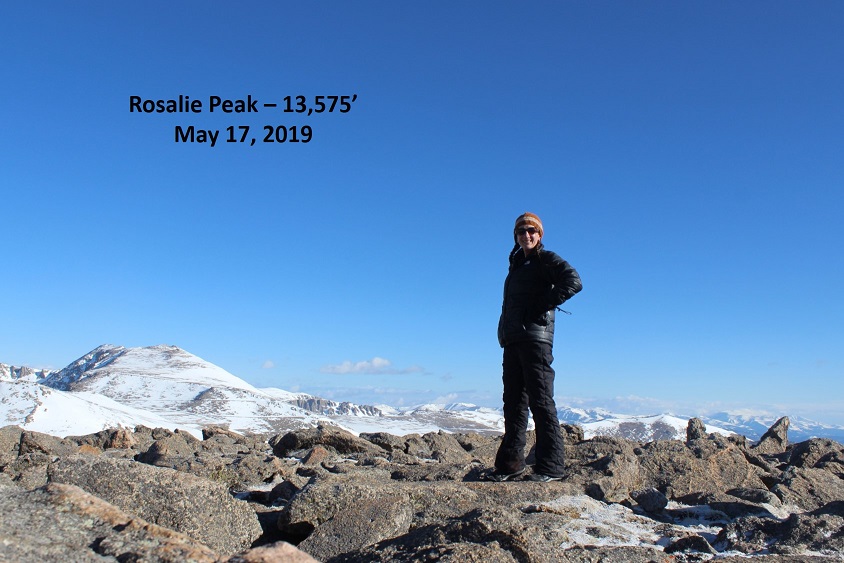
Rosalie Summit: Rosalie

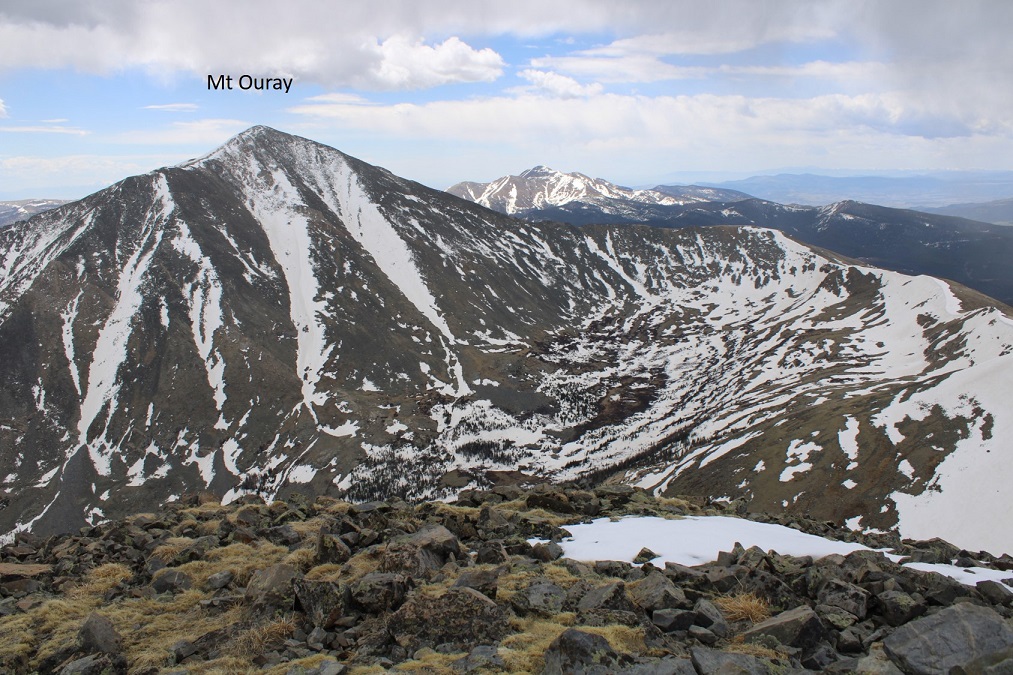
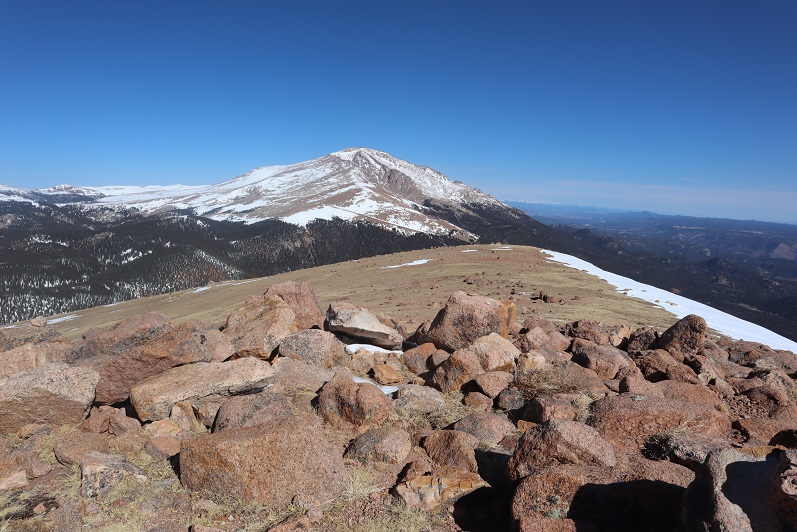
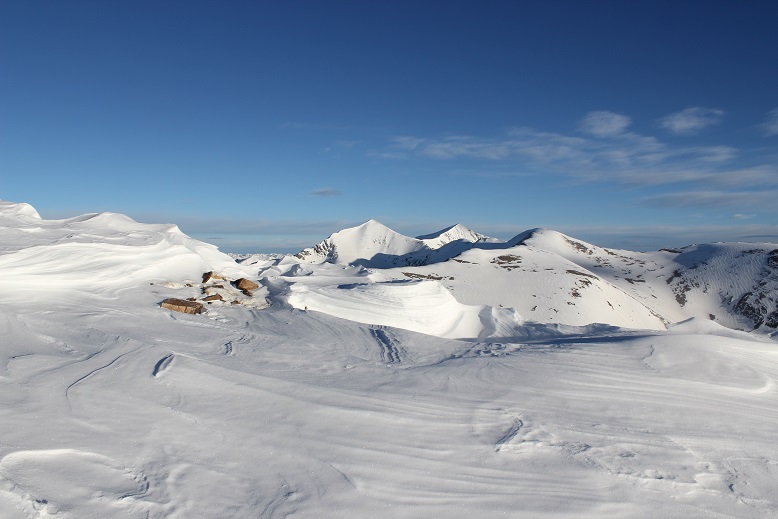
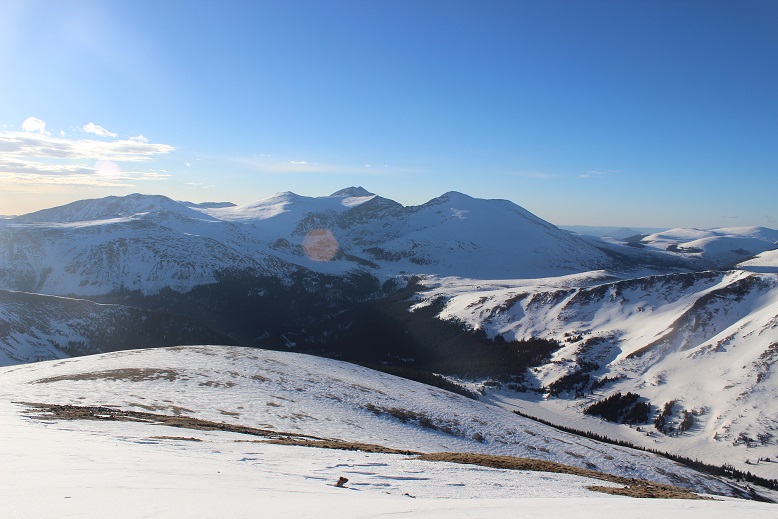
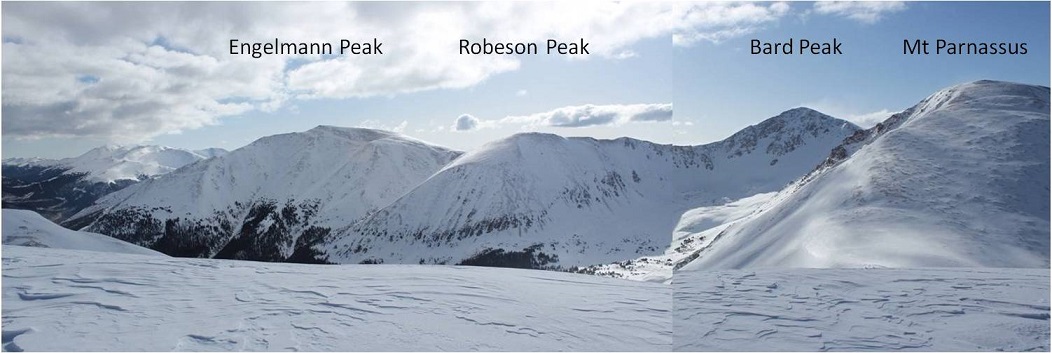
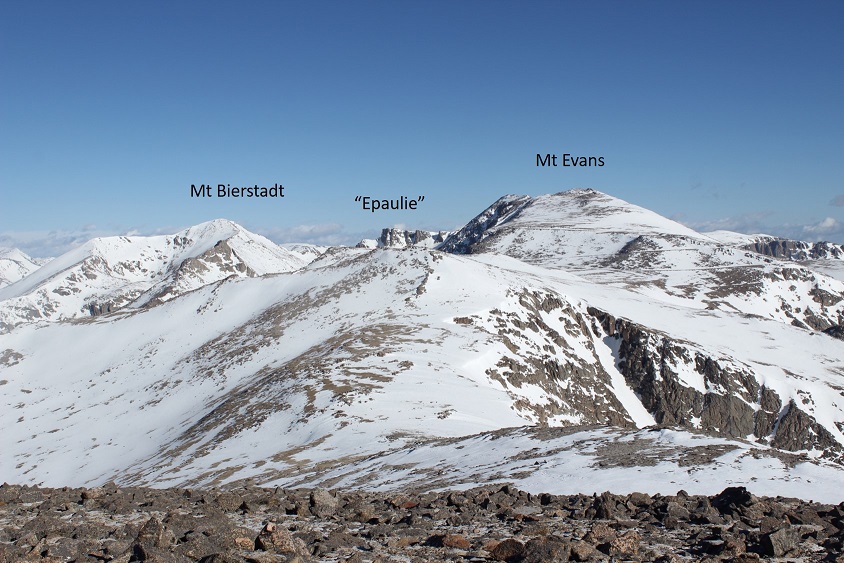
I had some great views of a couple of 14ers, but I was headed towards another 13er: “Epaulie”.  I could see some clouds gathering in the background and the wind was picking up, but I wasn’t too worried about the weather;  I had until noon for snow, right?

26

Hiking down to the saddle of Rosalie/”Epaulie” I took off my snowshoes and navigated the rocky slope.  At least the rocks were stable.

27

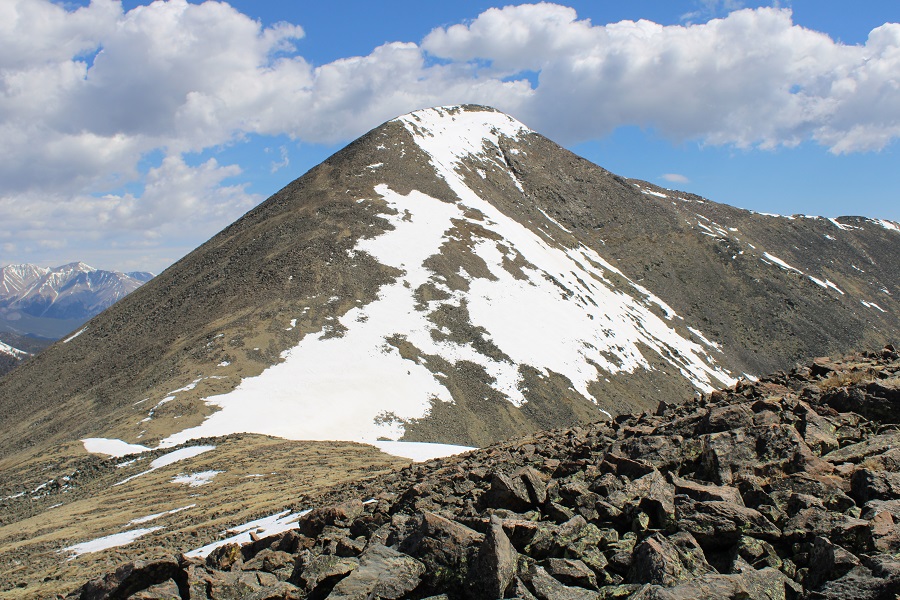
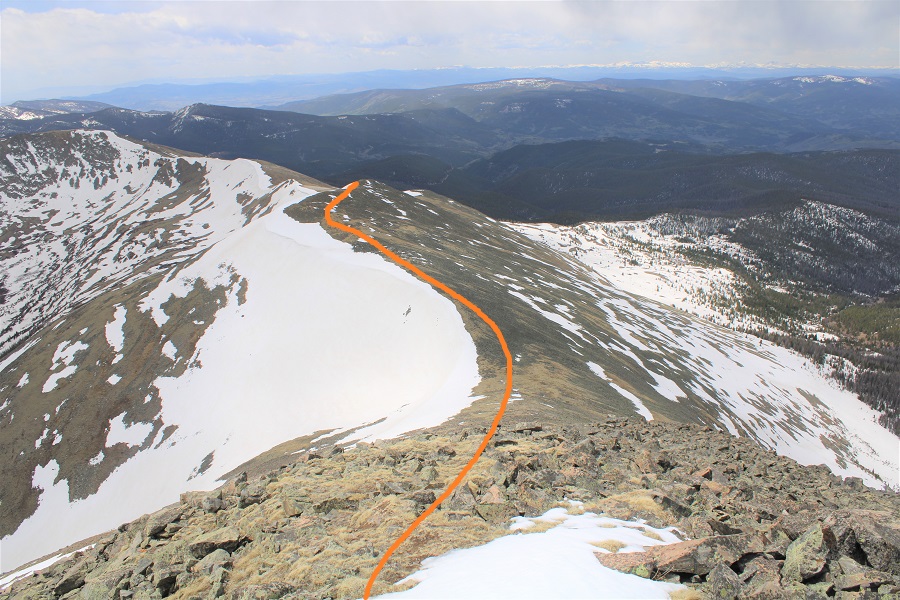
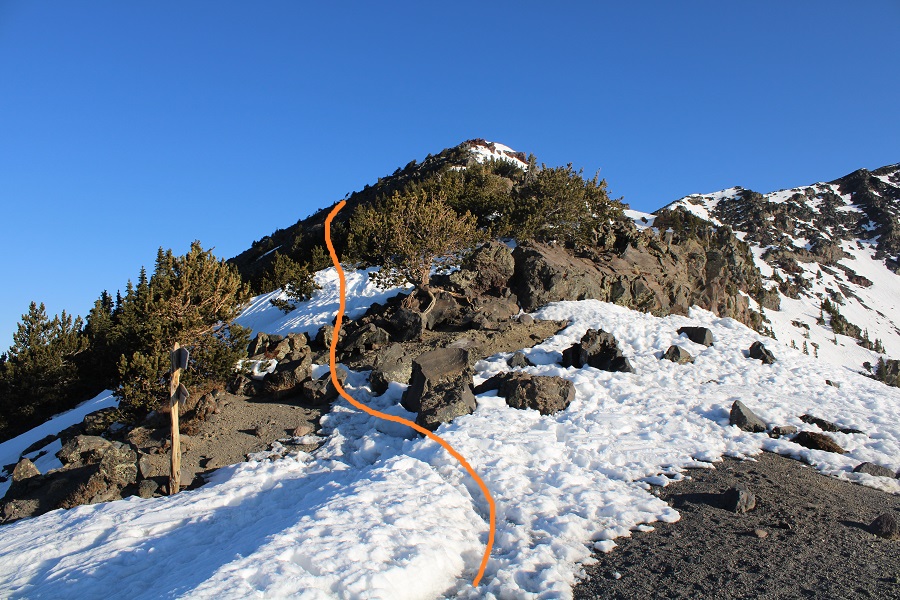
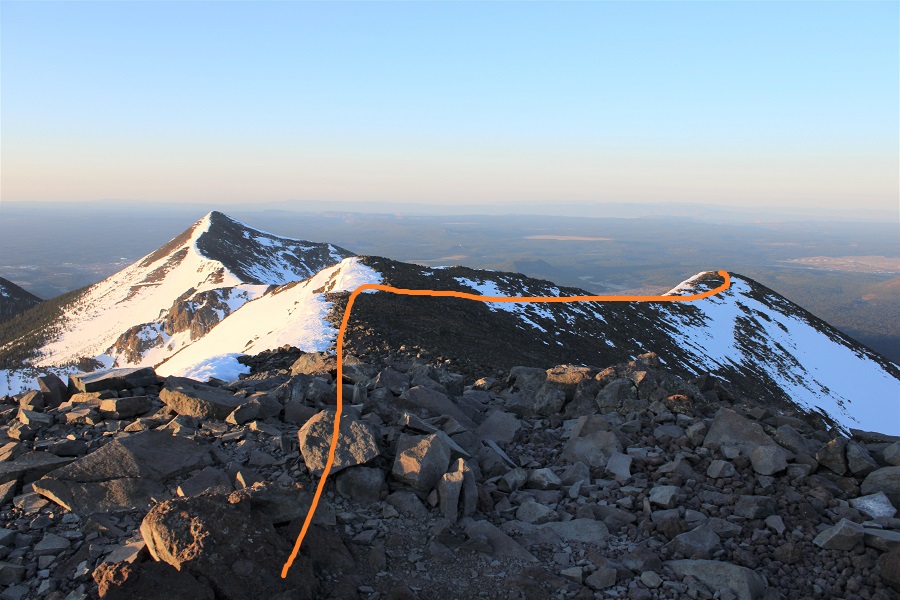
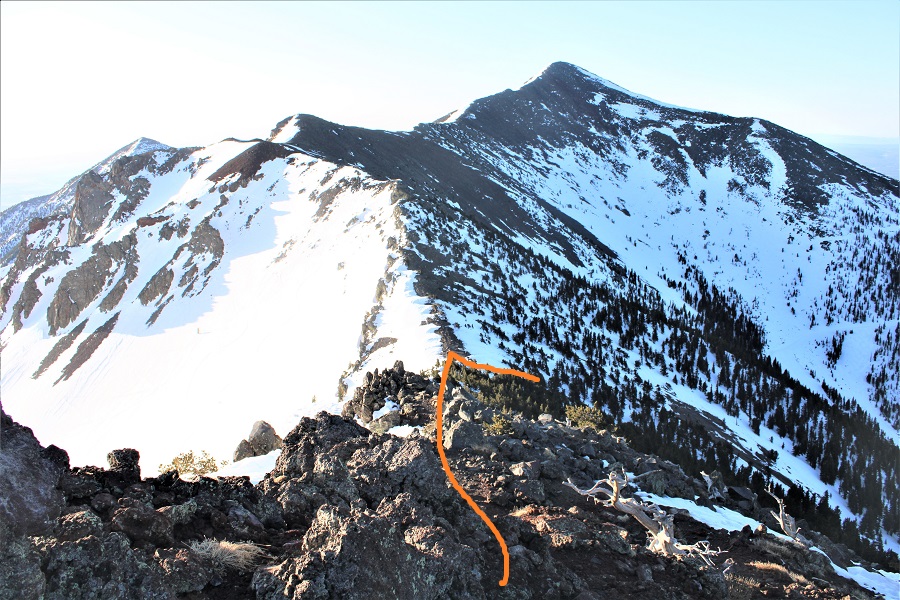
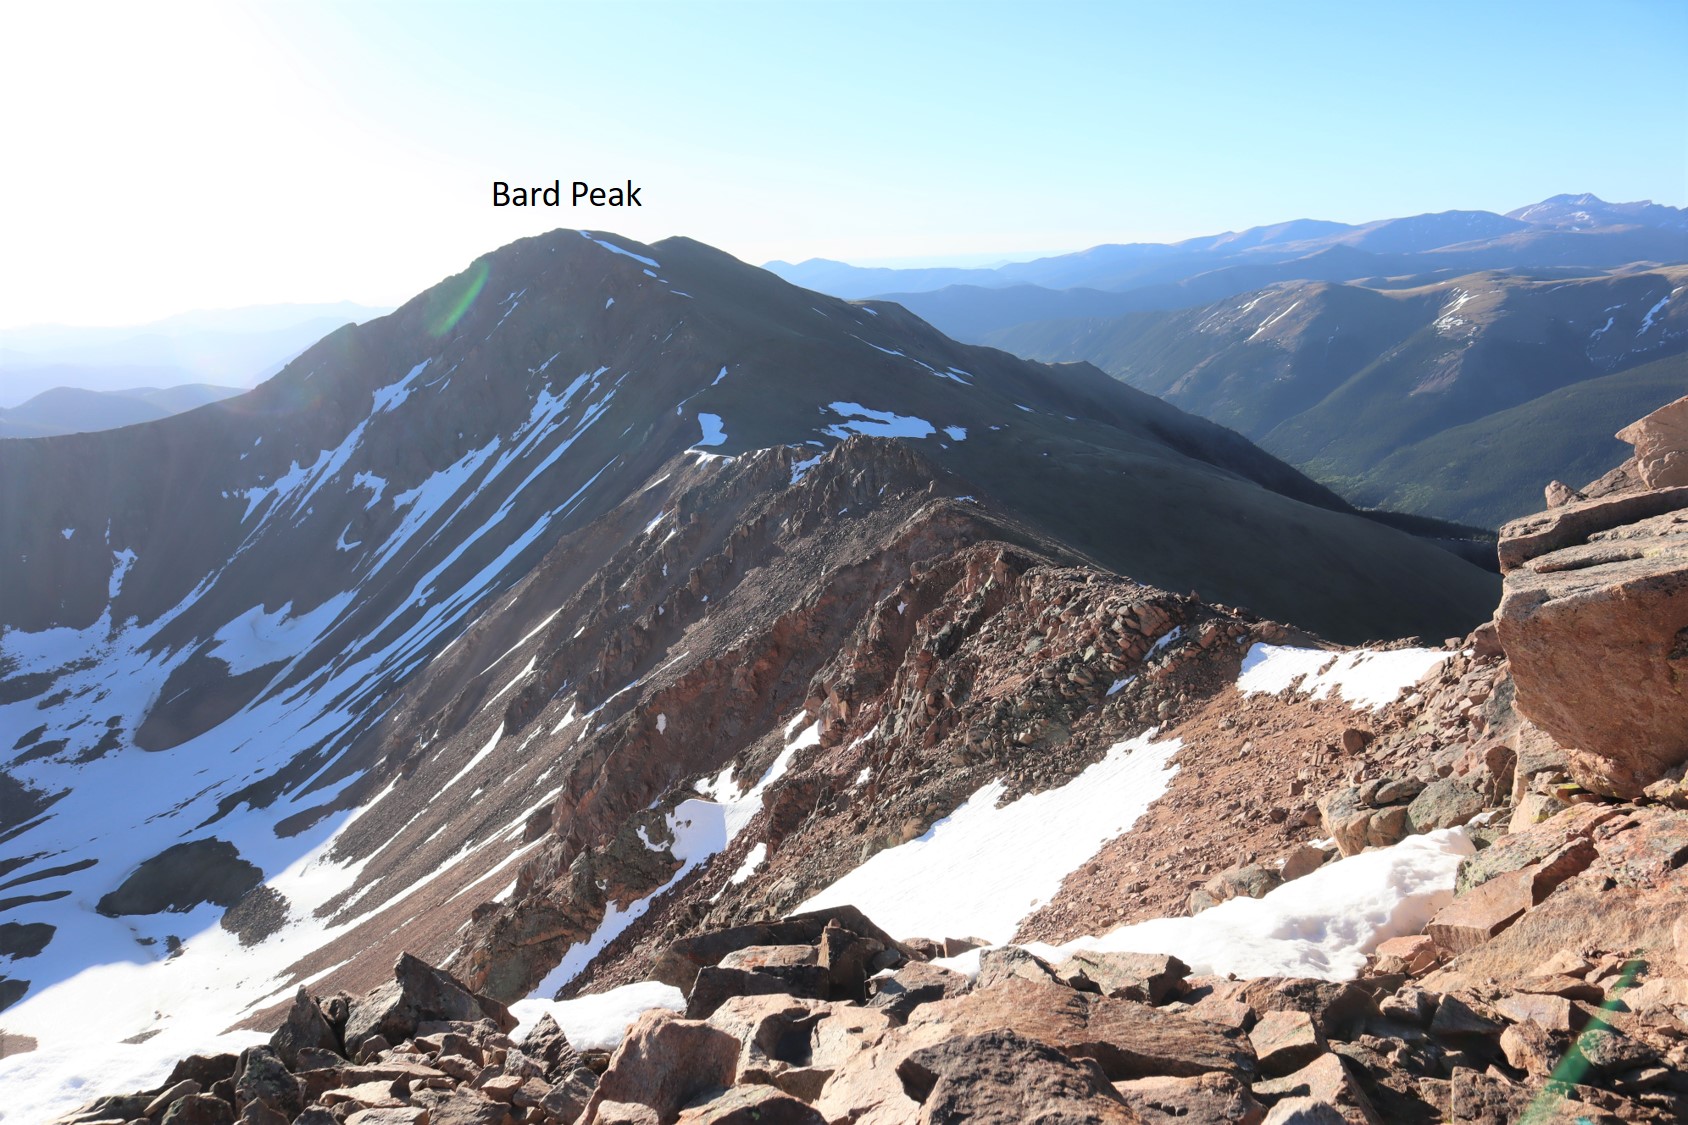
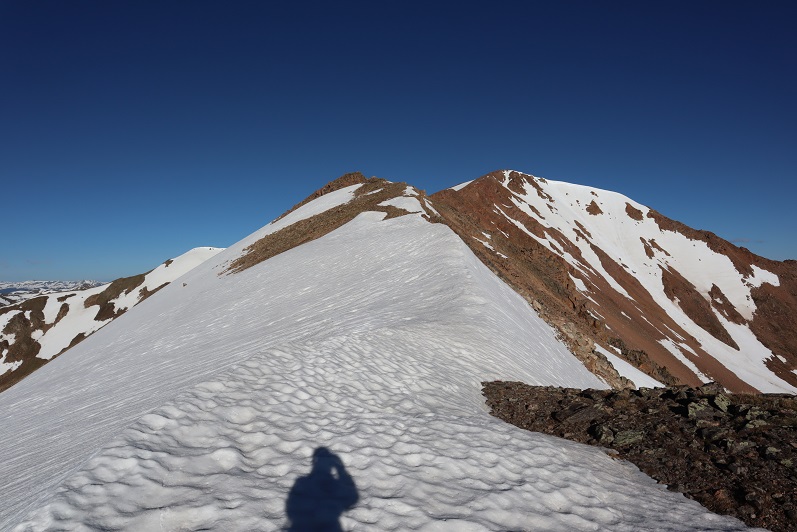
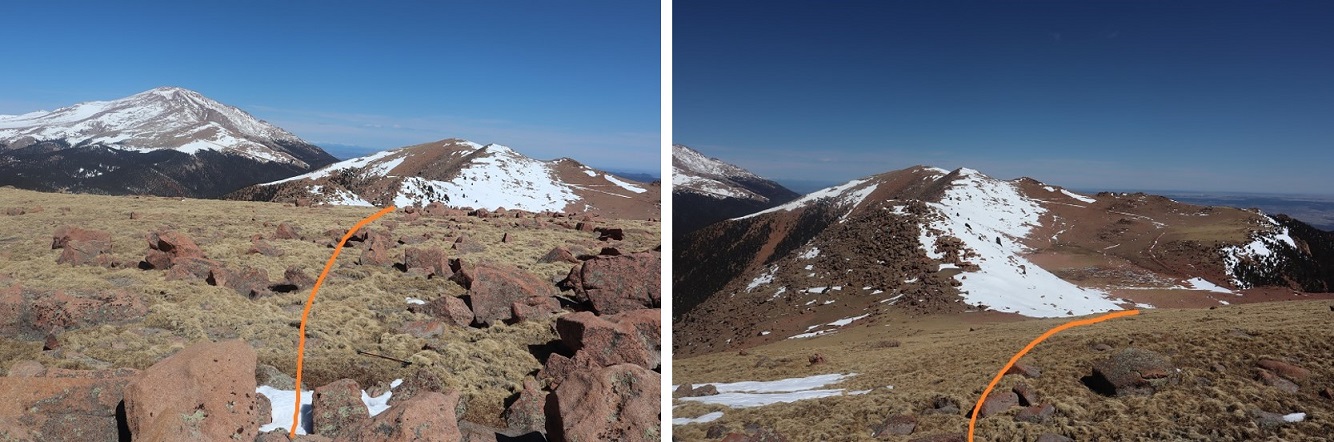
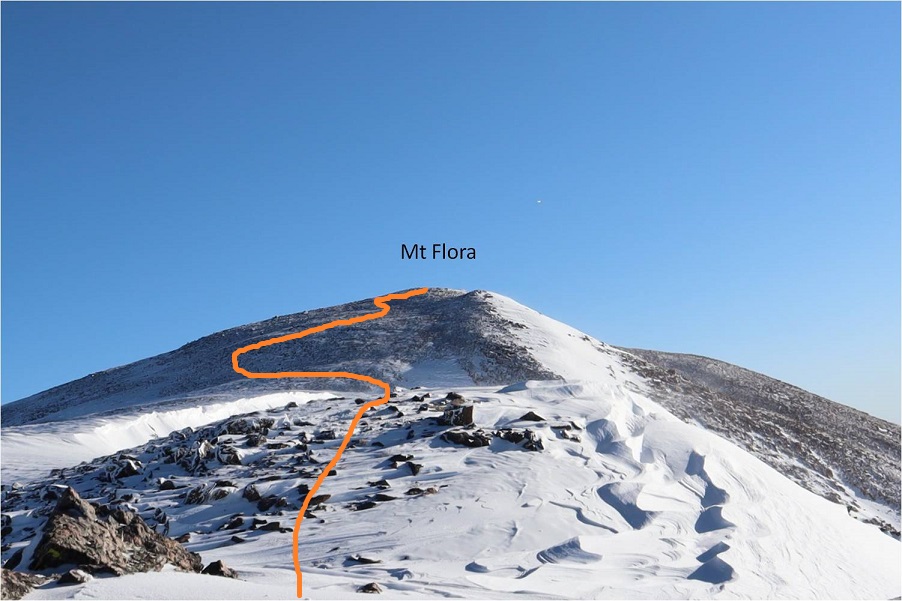
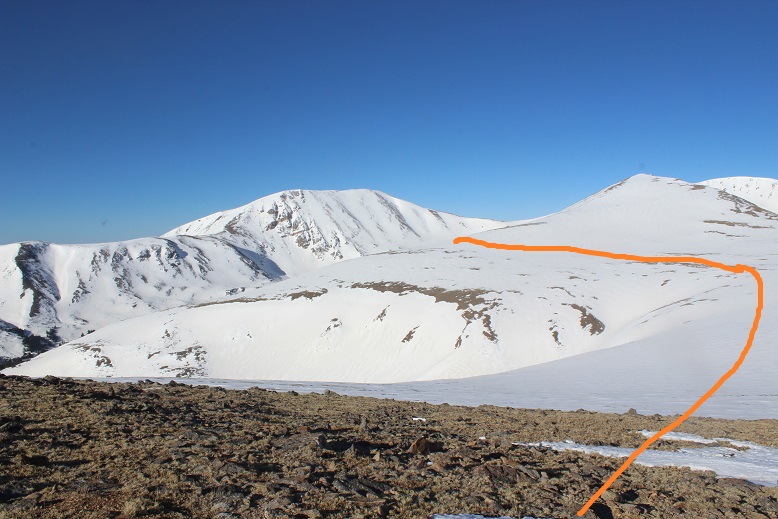
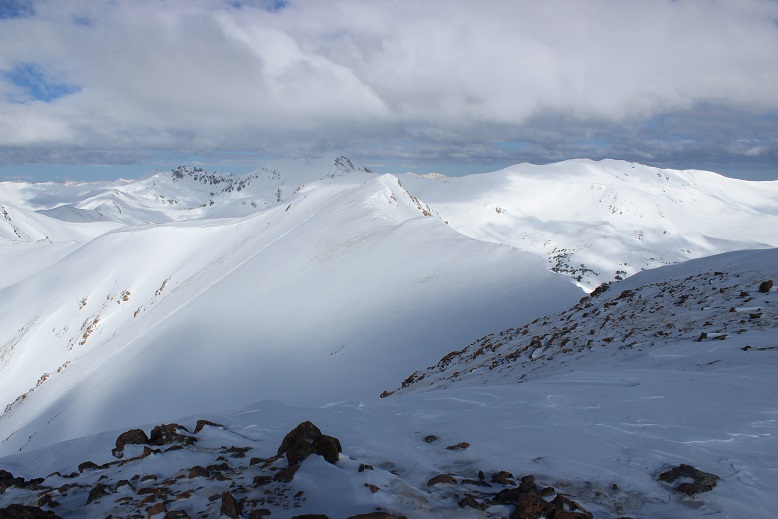
The entire hike to the saddle I kept my eye on “Epaulie” and tried to decide on the route I wanted to take to the summit

28

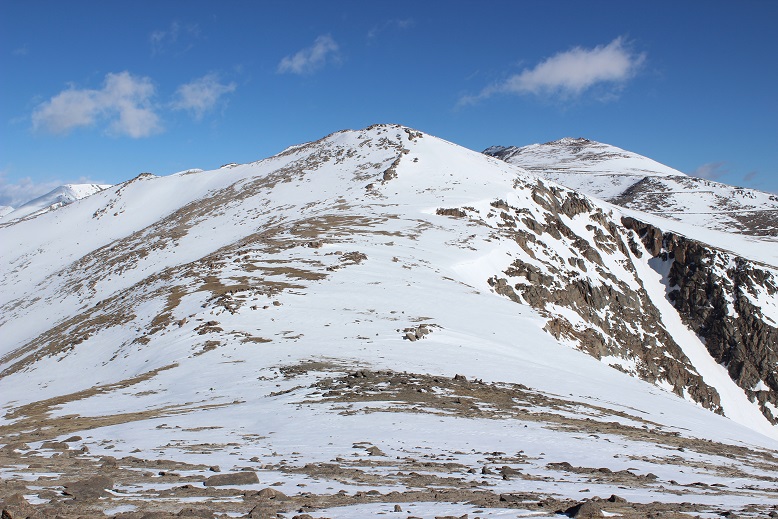
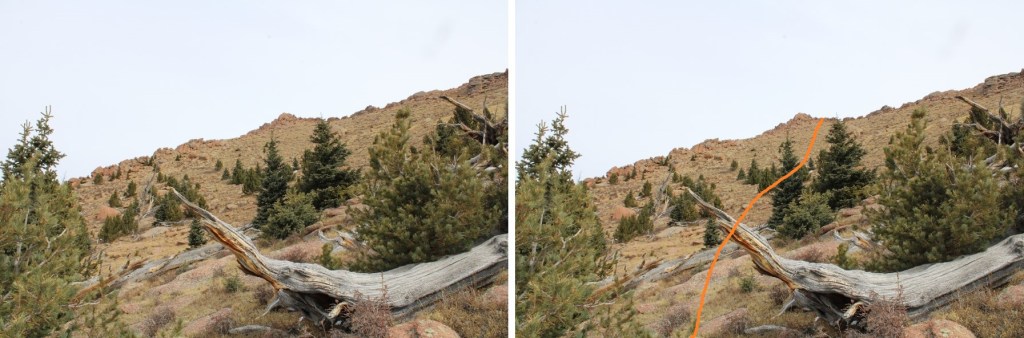
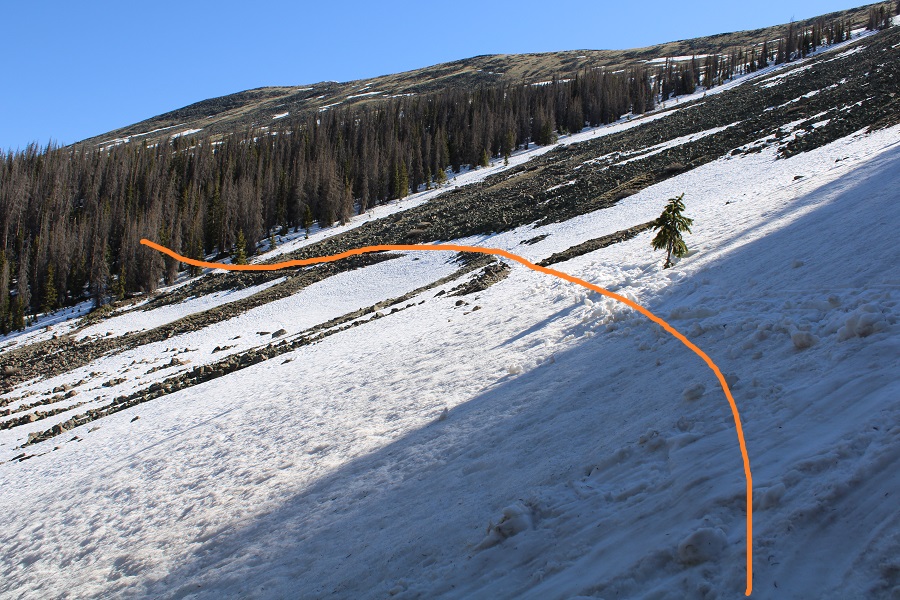
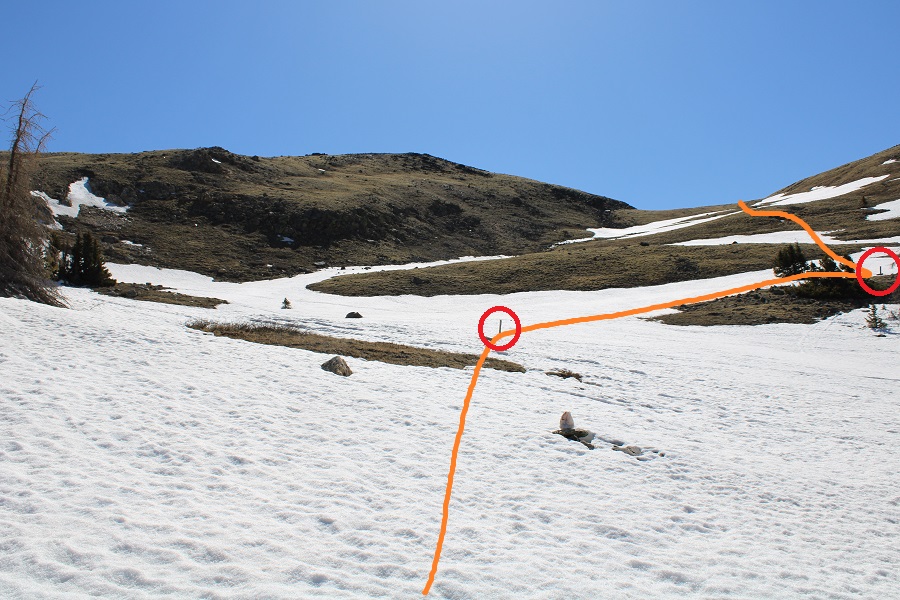
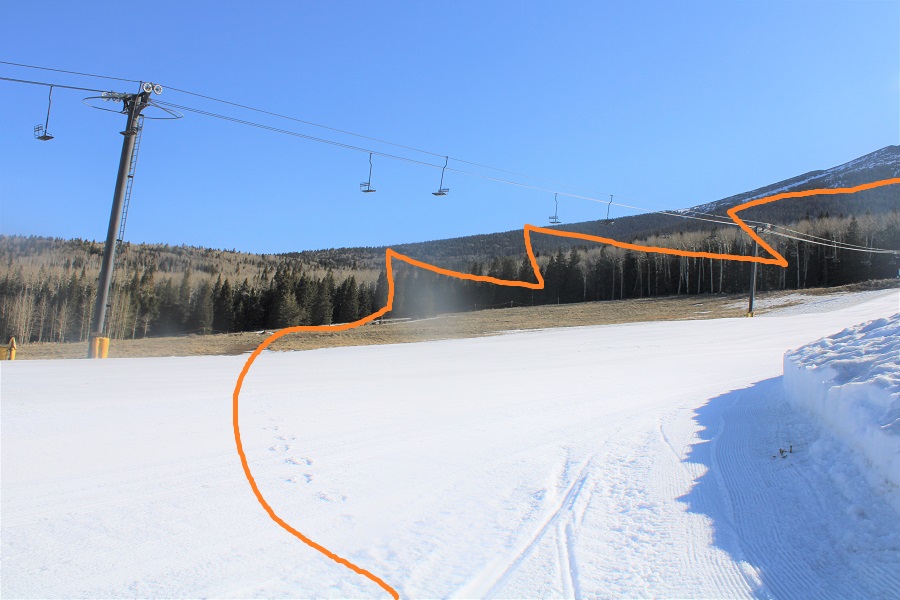
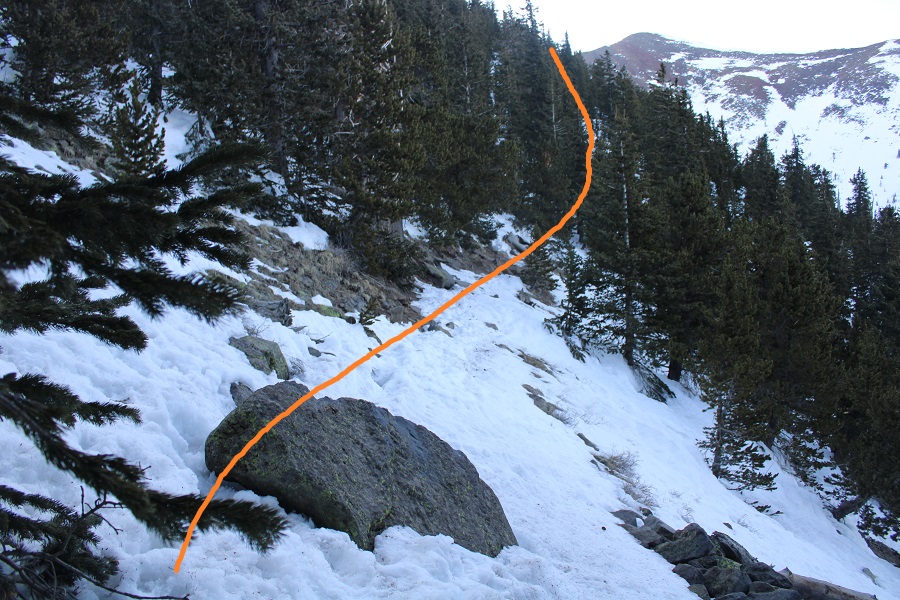
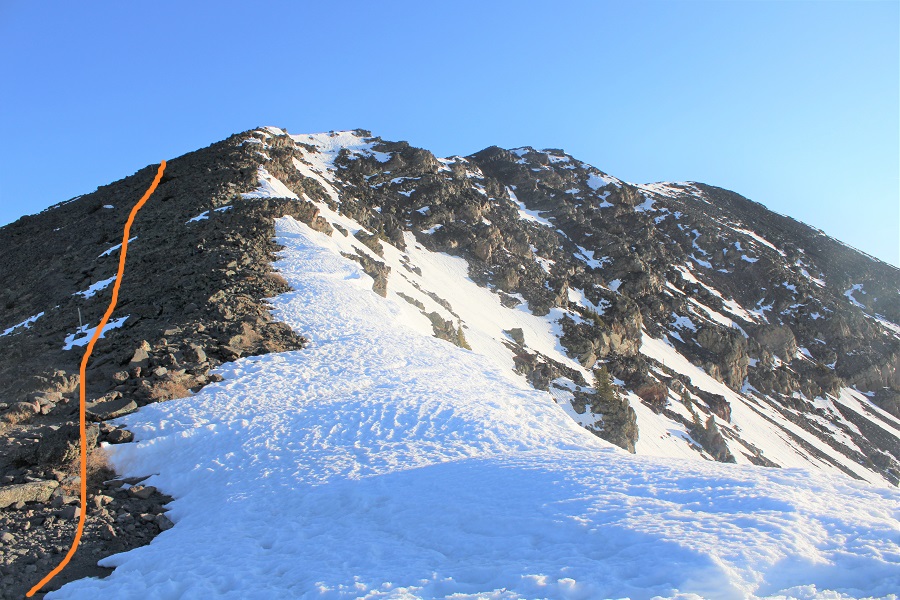
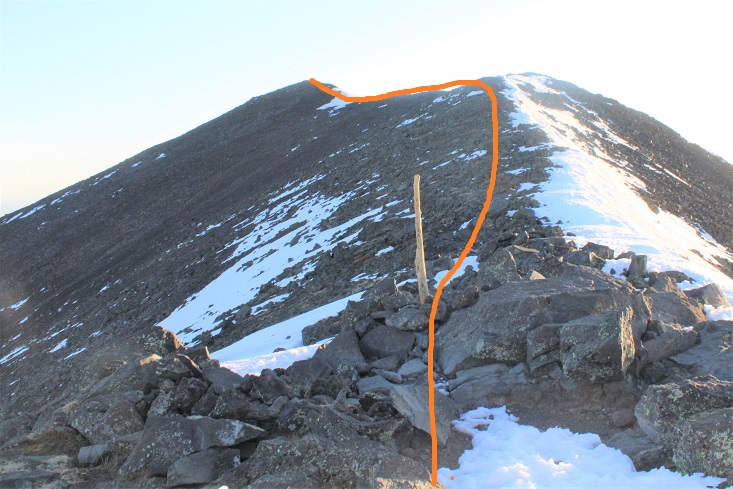
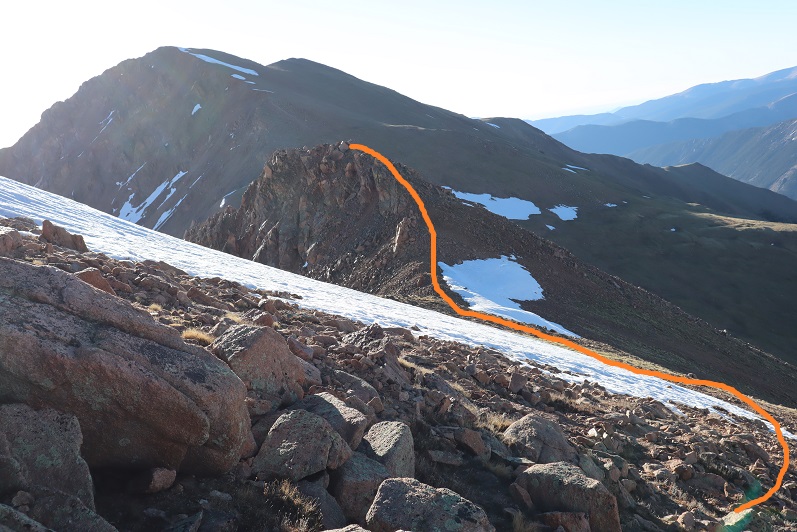
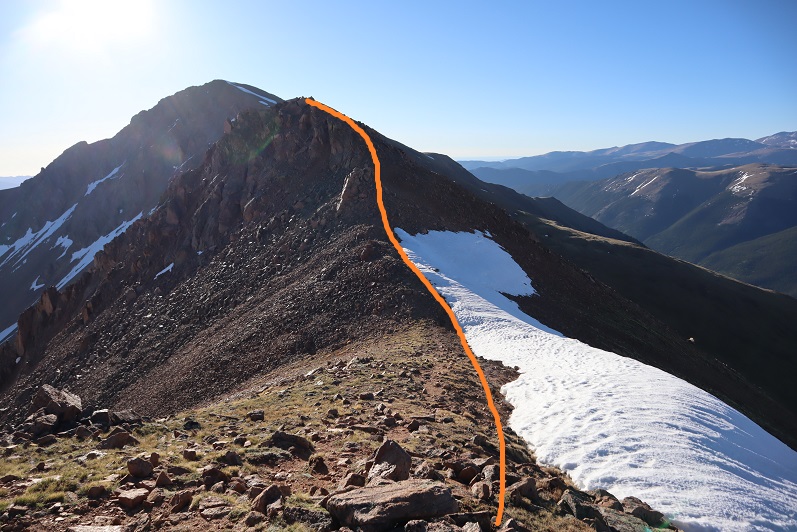
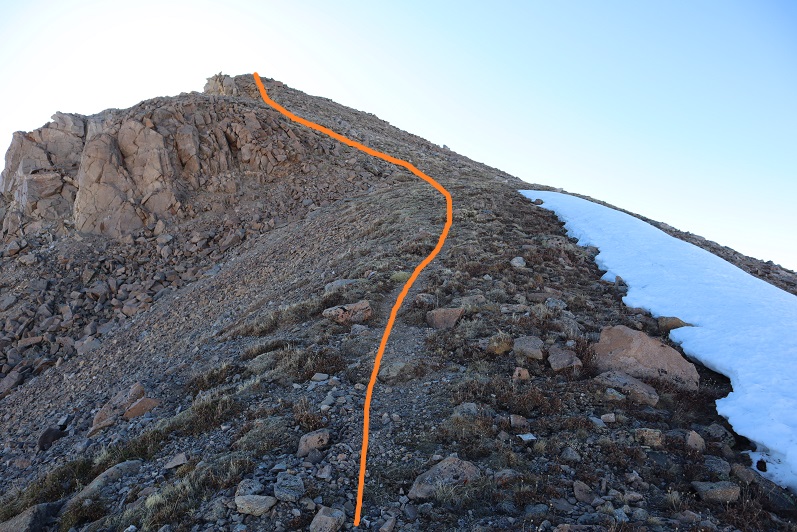
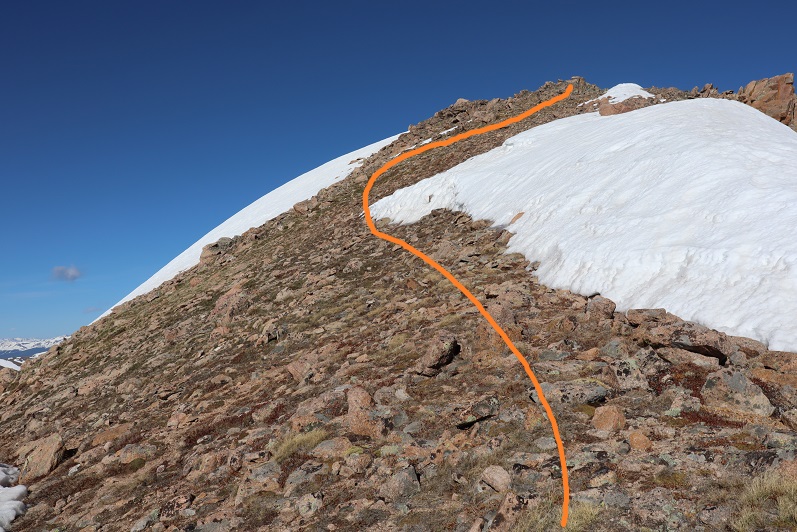
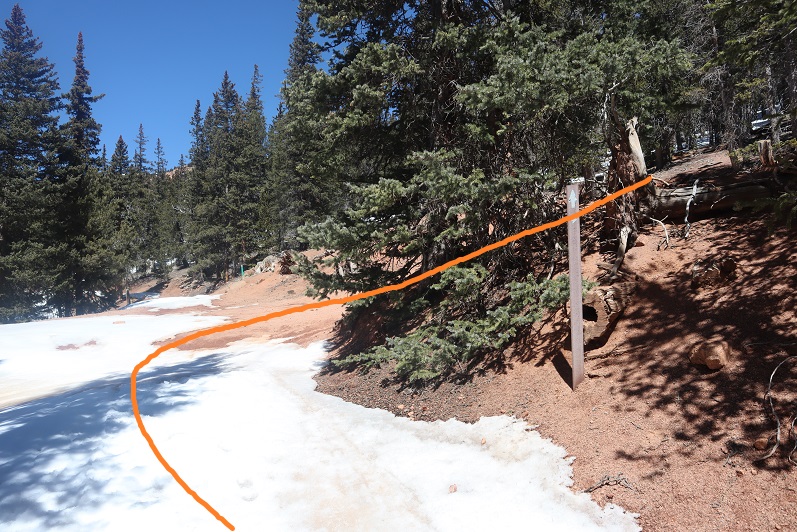
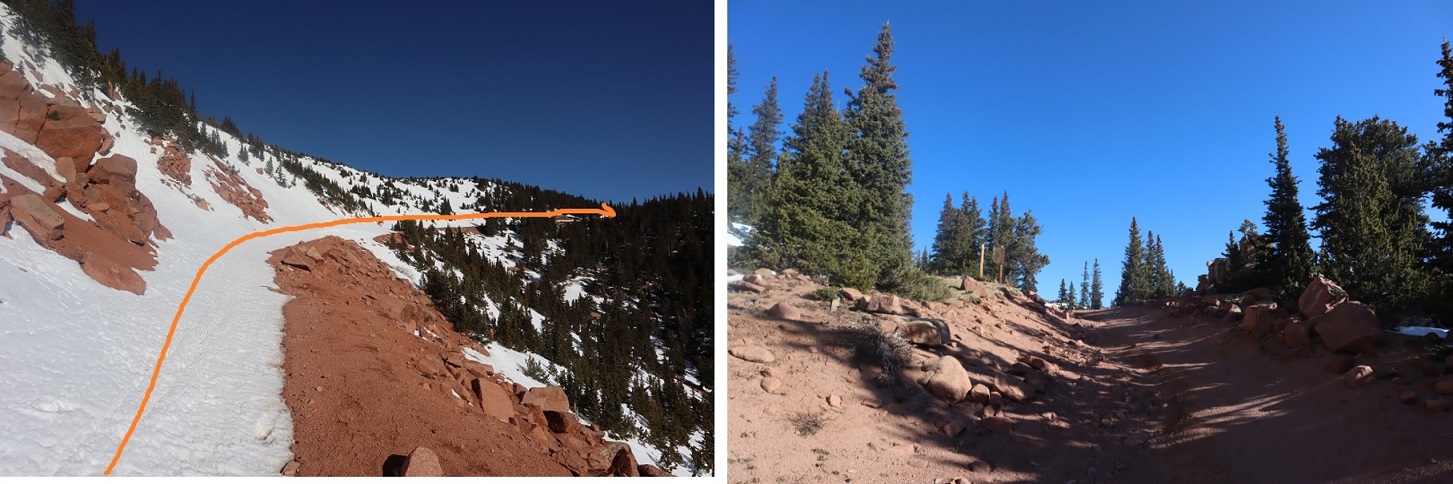
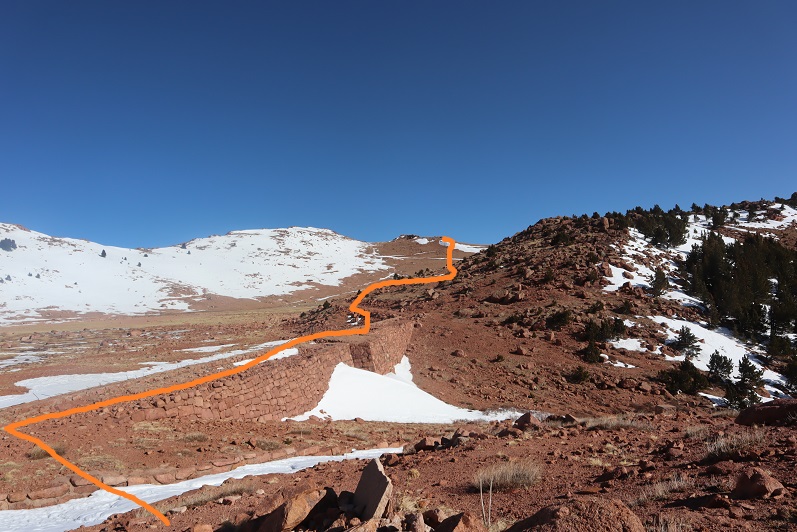
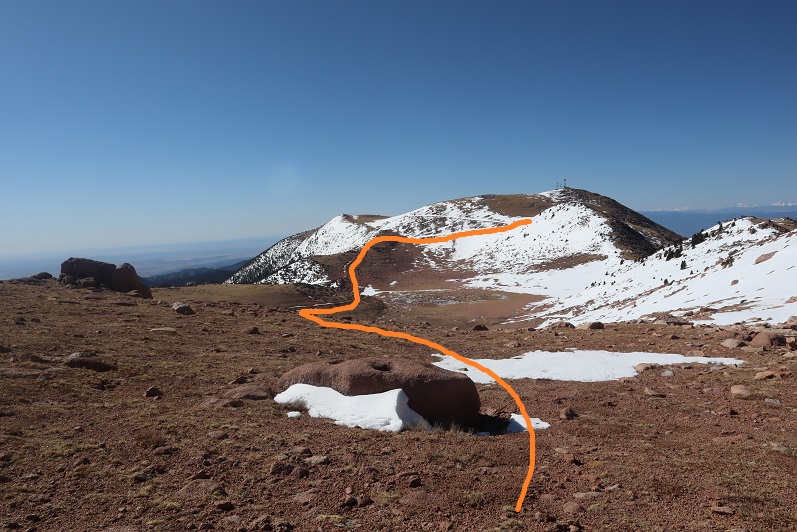
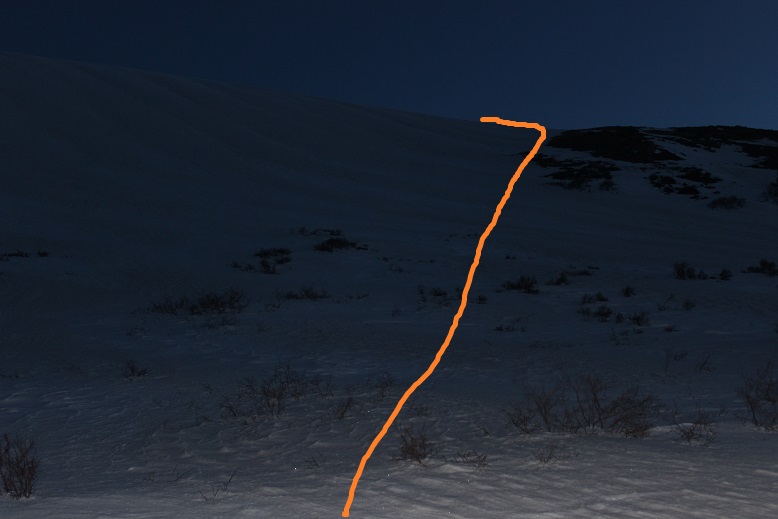
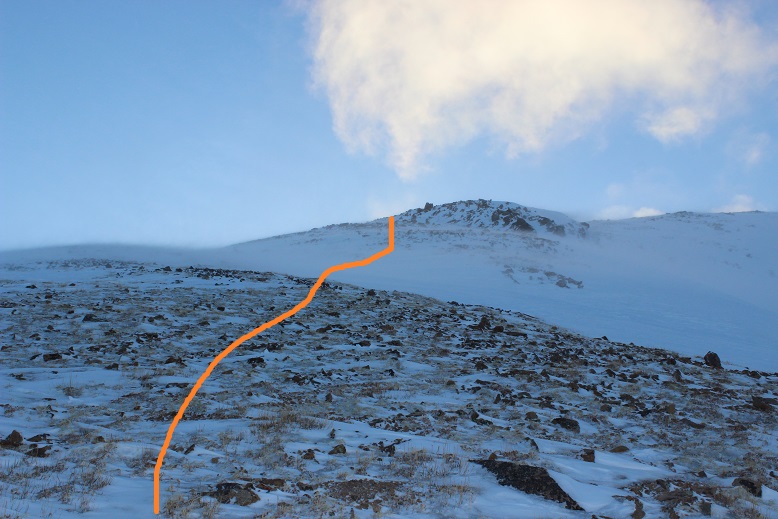
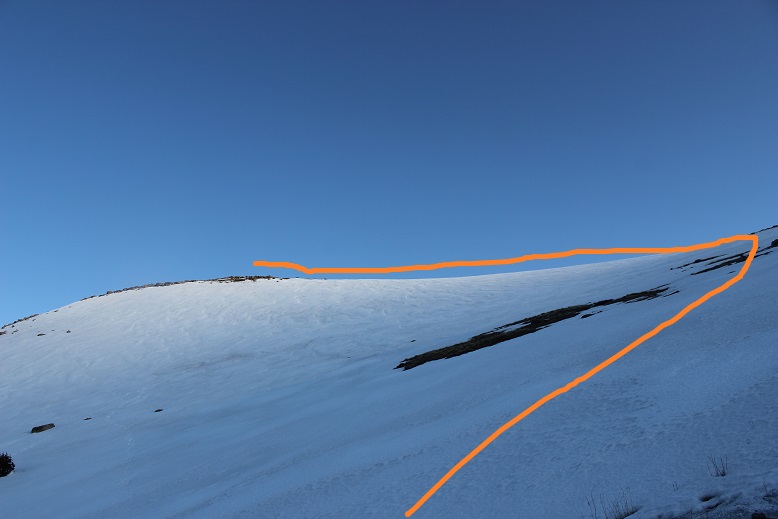
Looking at “Epaulie” from here I thought taking the right side would be a good choice since there was continuous snow, but as I got closer I realized just how steep that snow was and decided to head left instead.  This ended up being a good choice.  Snowshoes and an ice axe were a good choice as well, as the snow was very consolidated, smooth but rock hard, and steep.  Here’s the route I took

29

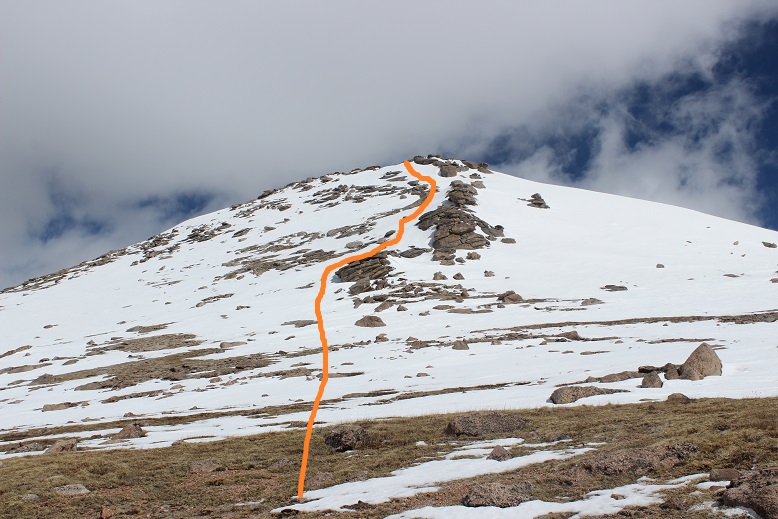
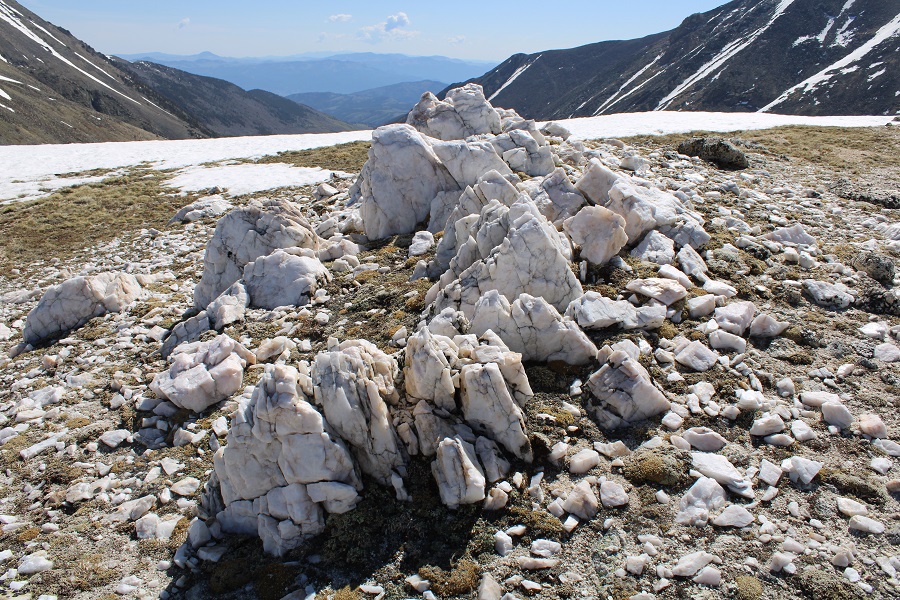
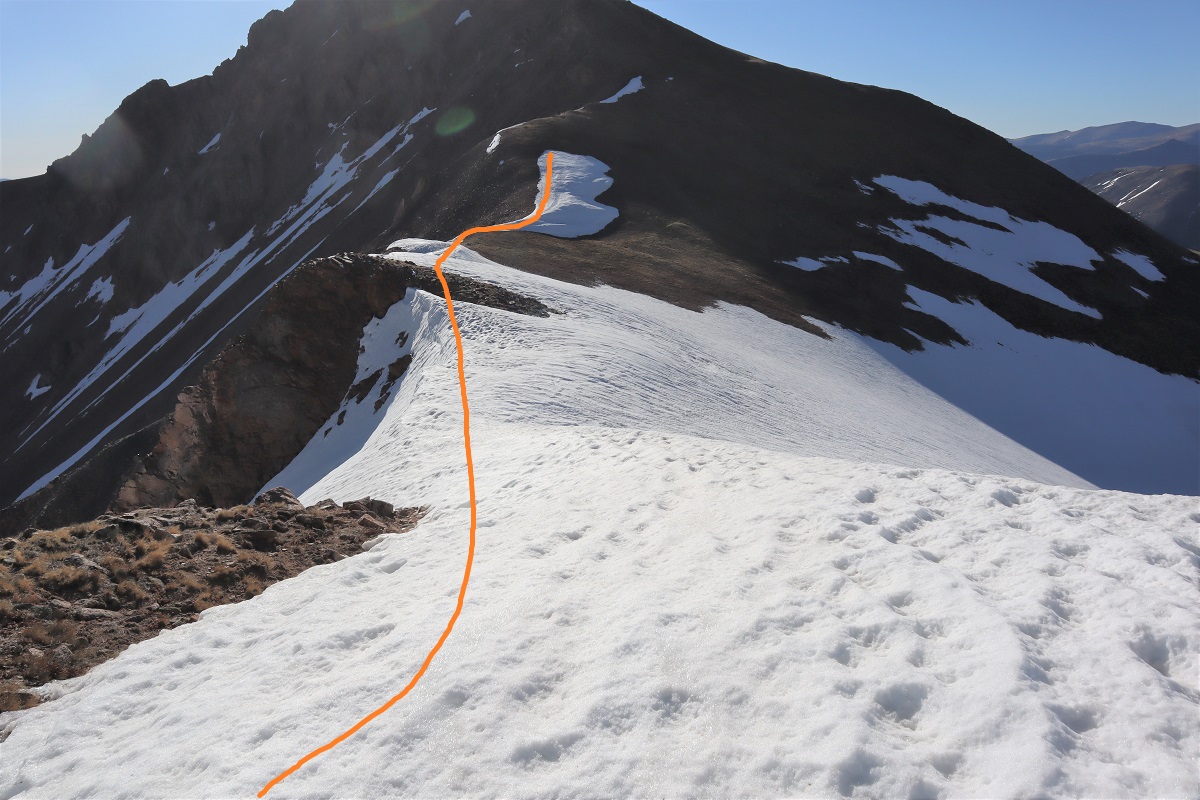
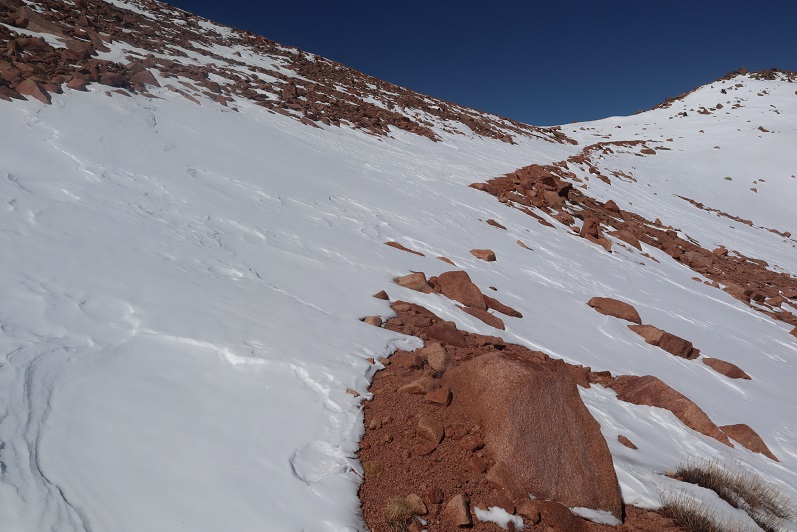
Towards the top the snow gets very steep and I was thankful for my ice axe the last 50-75 feet or so.  And btw, those are very large rocks encases in ice/snow, not dirt.

30

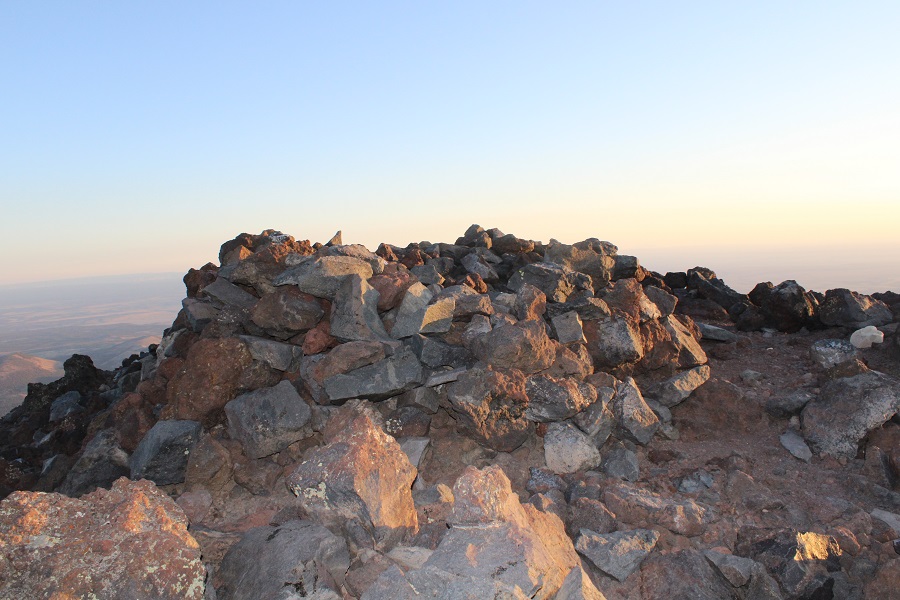
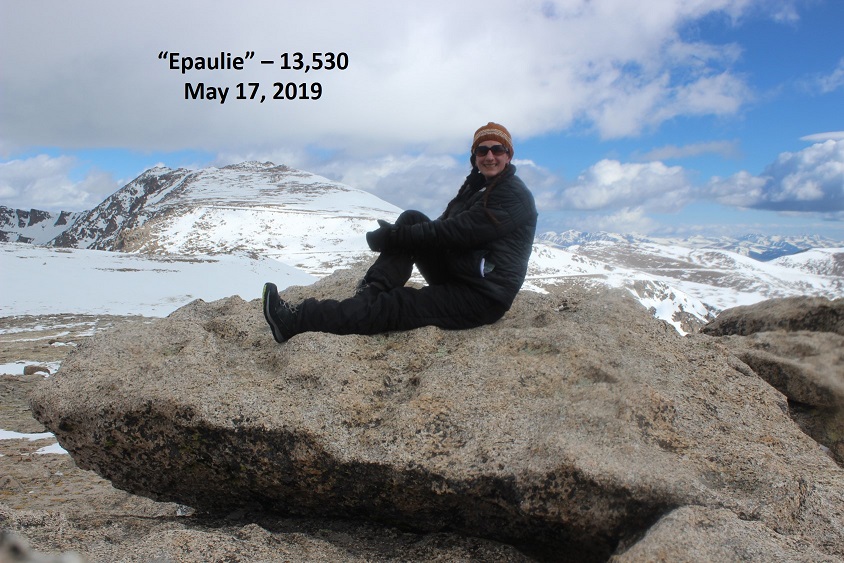
The summit made for some fun bouldering

31

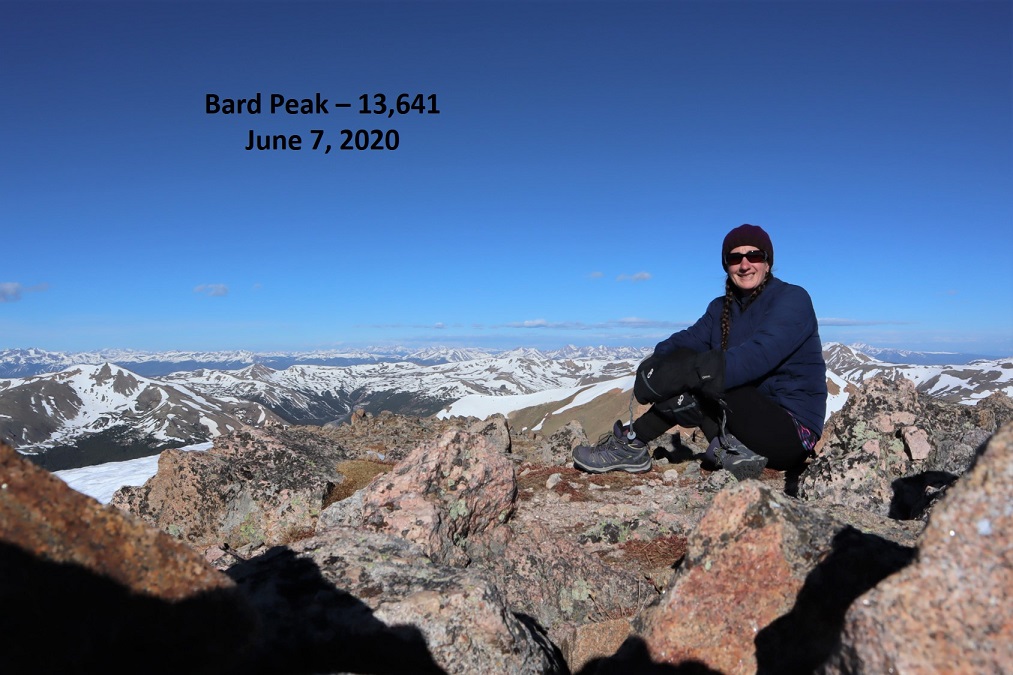
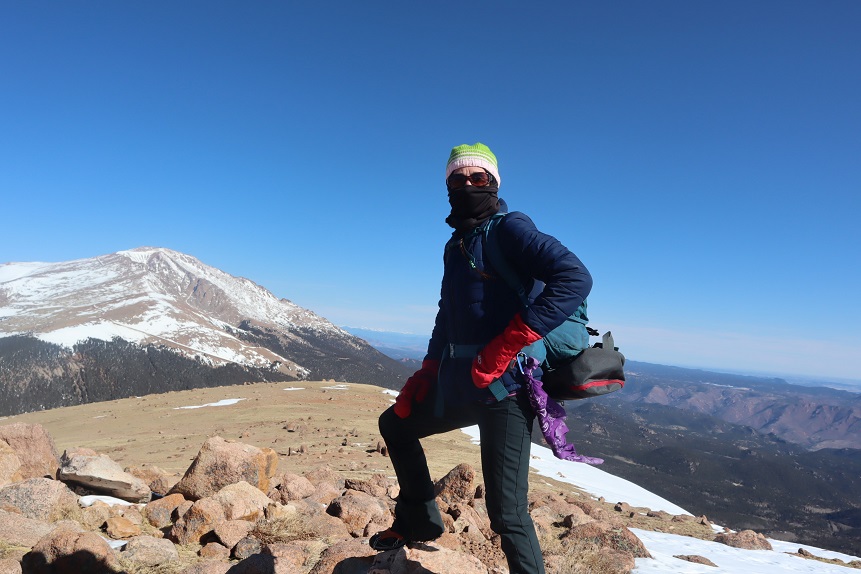
I’m not sure when I summited because it was quite windy and I was keeping an eye on those clouds, which were moving in fast!  I took a summit selfie with my DSLR and kept my cell phone in my pocket.

32

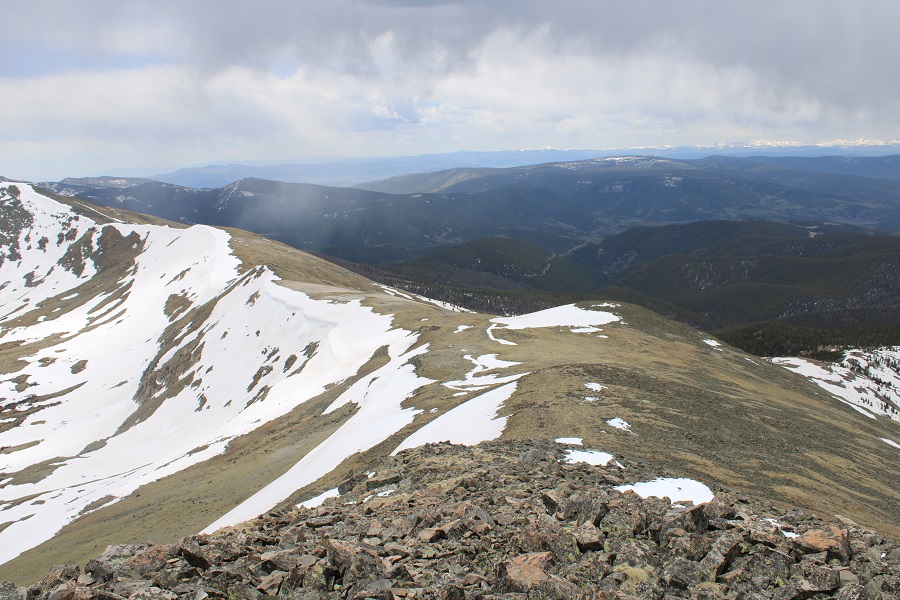
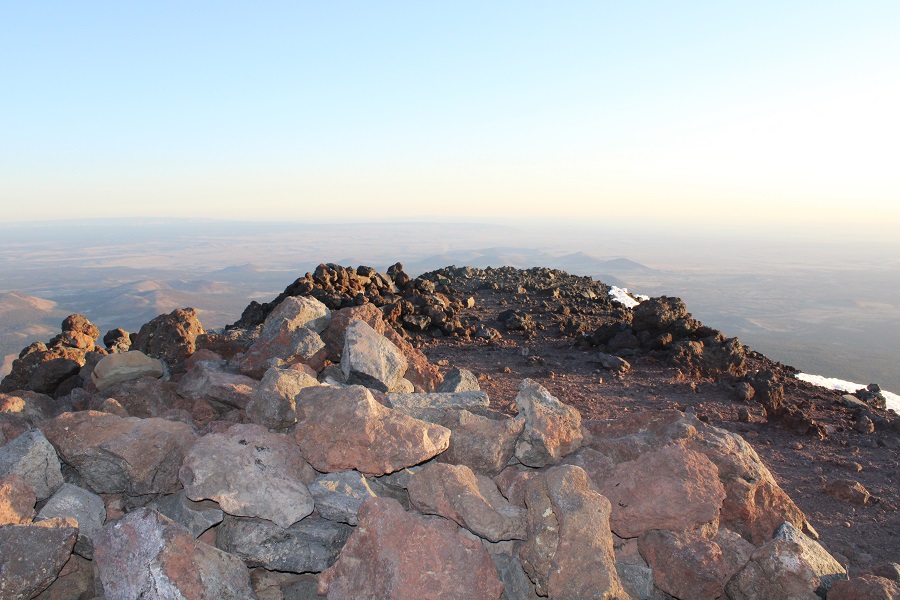
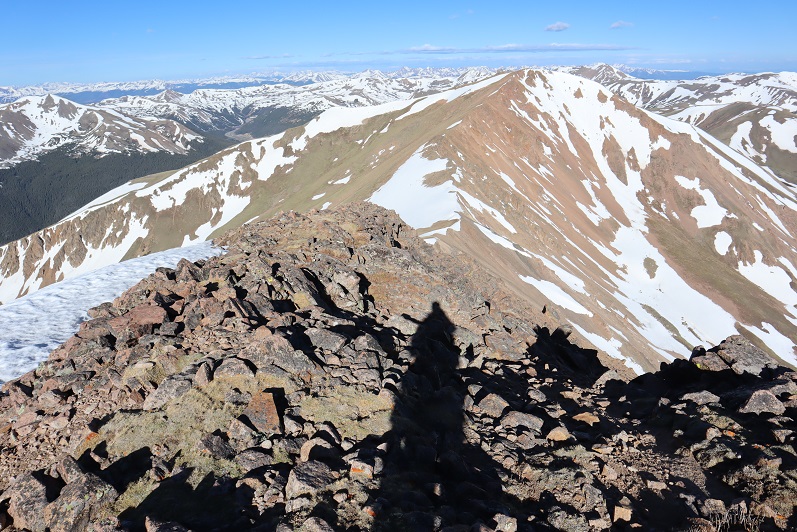
I looked over at Epaulet Mountain.  I’d wanted to summit this unranked 13er also today, and the weather was looking pretty good towards Epaulet, but those clouds back over Rosalie were worrying me.

33

I gave it a quick thought and remembered there was a ranked 12er close to the saddle on my way back down.  In the end I decided not to summit the unranked Epaulet and to instead head back and attempt the ranked 12er (if the weather held out).  I figured it was better to be closer to a bail out point if the weather turned.  It looked like the weather was anxious to get started early this afternoon.

I exchanged my snowshoes for crampons for the way down.  Again, another excellent choice.

I turned around and re-summited the rocky Rosalie (taking off my crampons for this part)

34

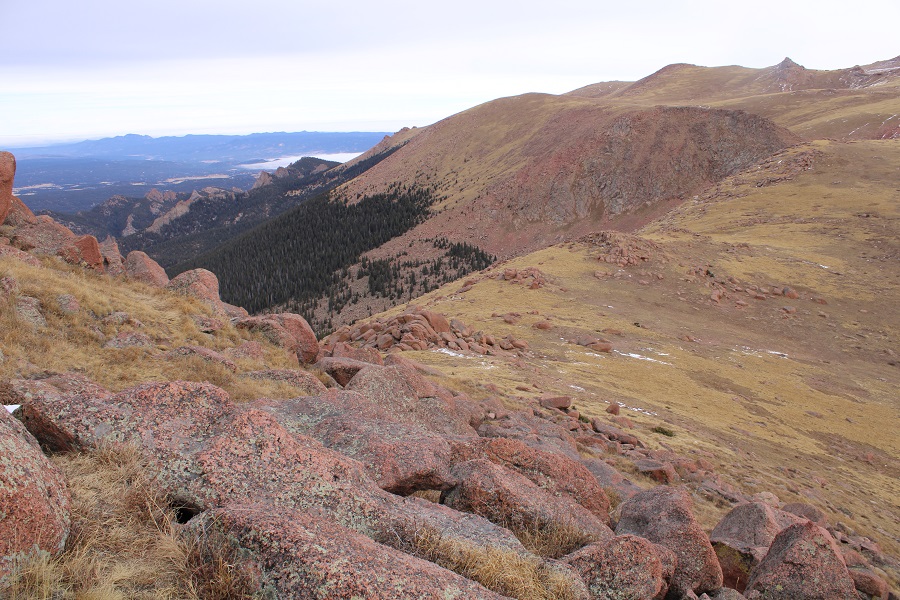
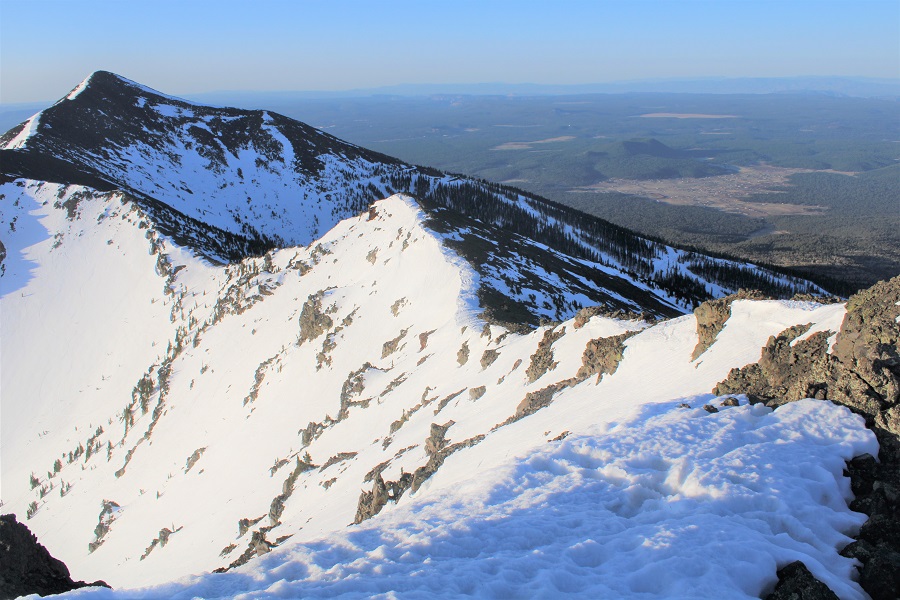
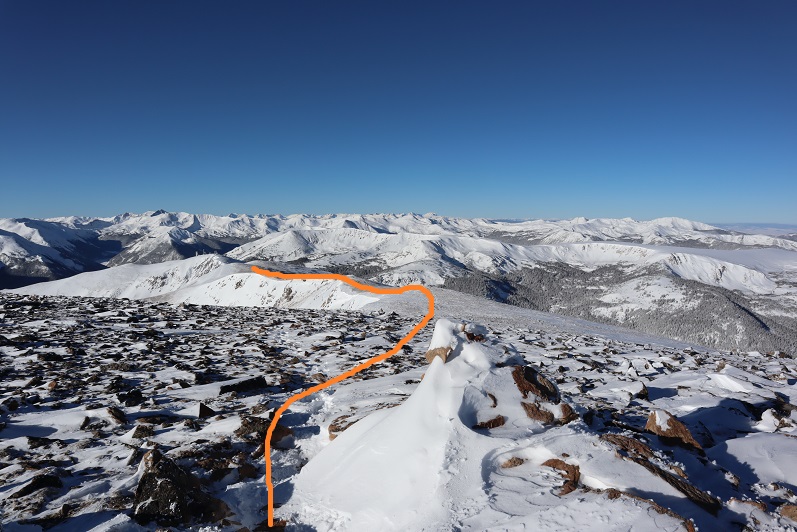
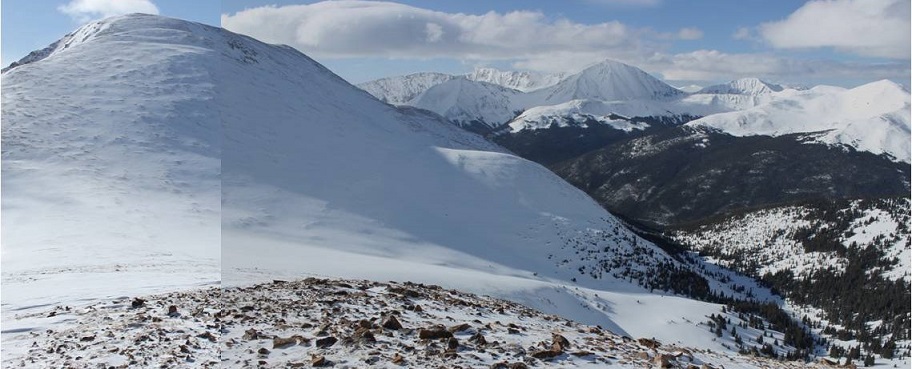
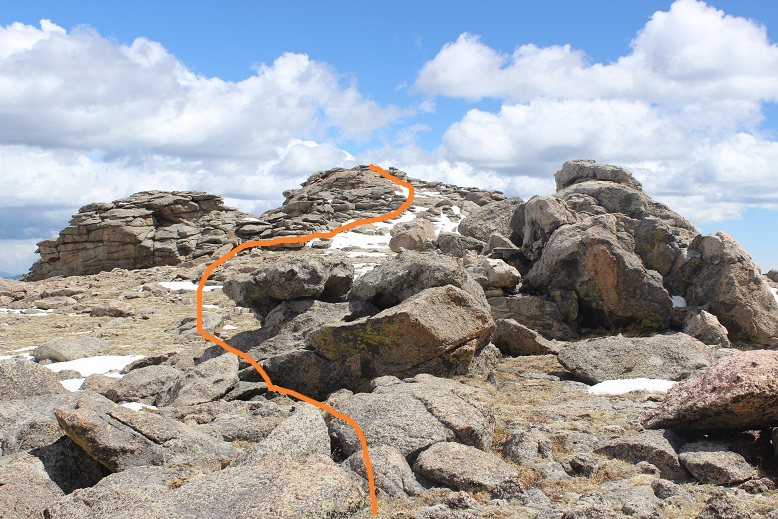
And looked at my intended route towards 12er West Pegmatite Points.

35

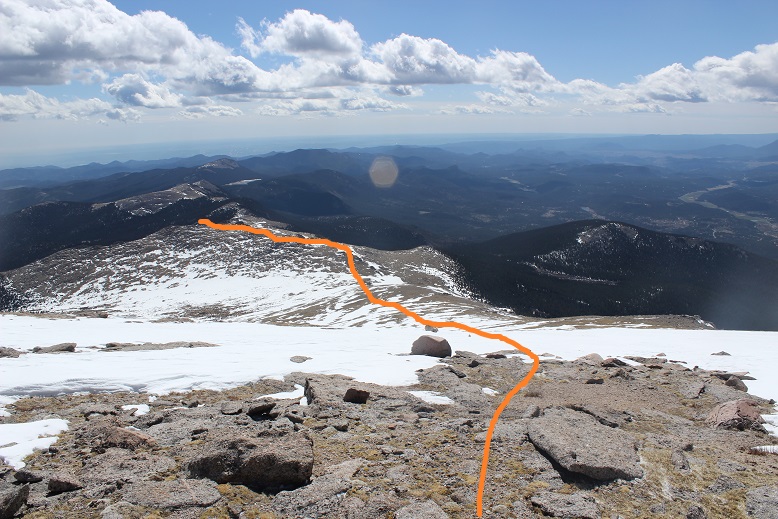
This looked easy enough, and in front of me the path seemed clear of weather (but clouds were increasing behind me).  I headed down towards the saddle and about halfway down felt my backpack give a quick pull, but didn’t think anything of it until about 200 feet later where I decided I should probably check it out.   I took off my pack and it was open!  Drat!  I rummaged around to see if I’d lost anything and only counted one crampon. Ugh… I needed that crampon for Sunday’s hike.   I looked back up the slope and saw something blue and shiny up above.  That was my crampon all right.  I was going to have to backtrack and trudge up to get it!

36

37

I made my way back up the slope and quickly discovered the snow was getting quite slushy.  It couldn’t have been past 10:30am, yet the snow was melting fast!  I needed to get down to that saddle.

38

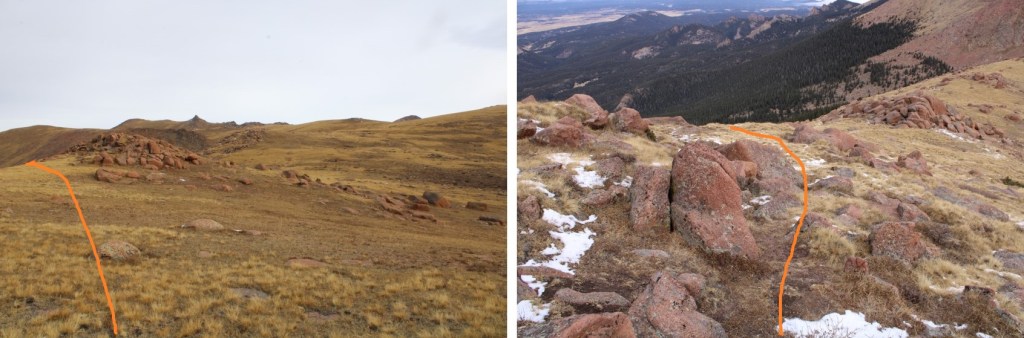
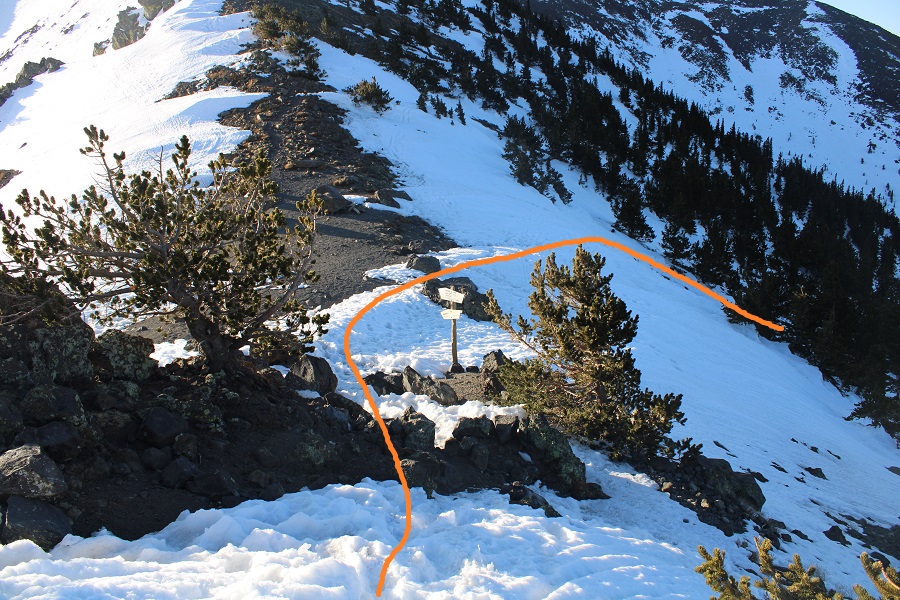
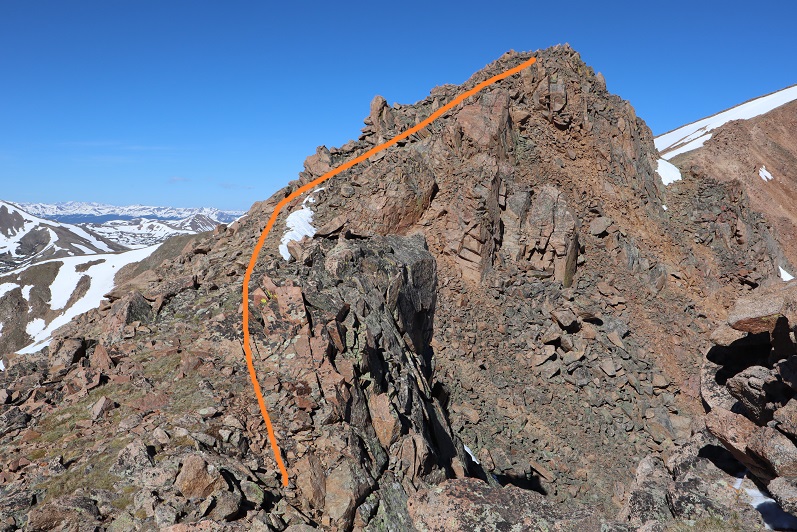
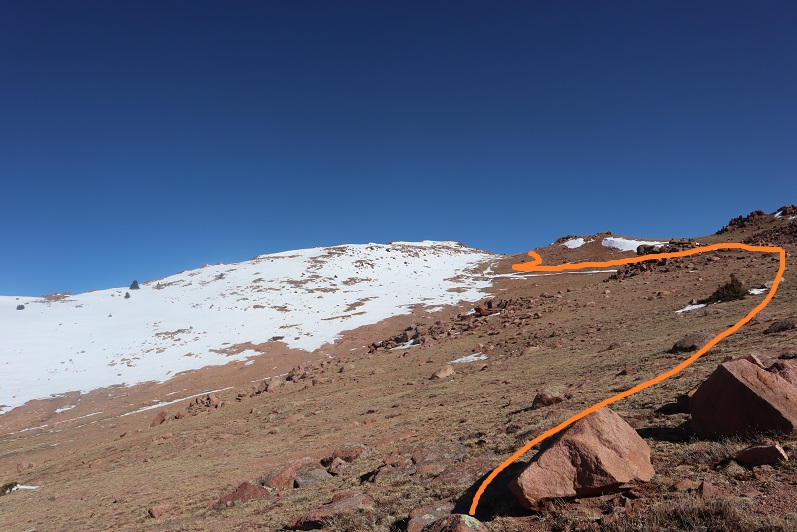
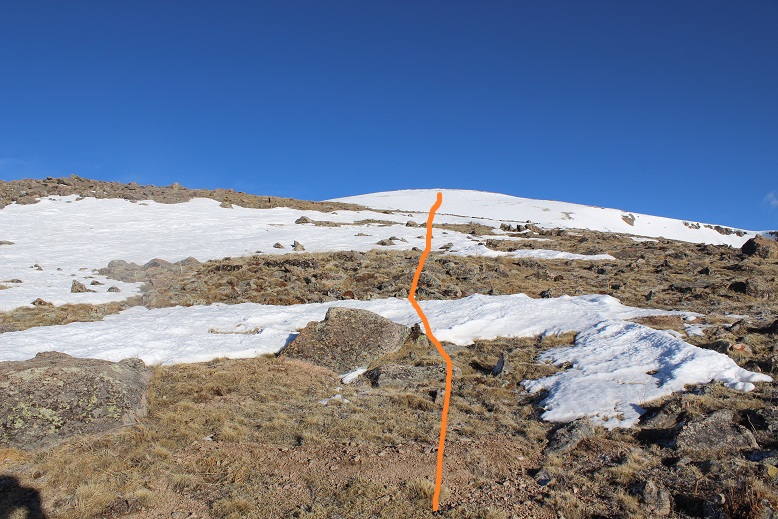
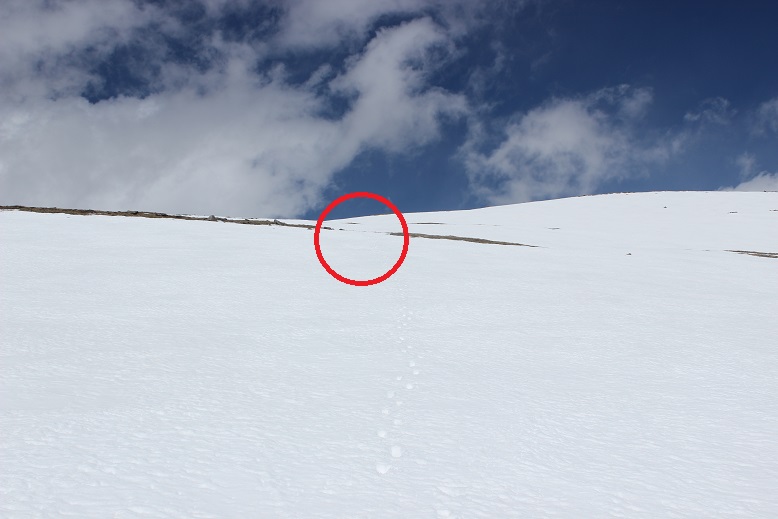
I slogged my way to the saddle and was feeling great so I decided to head over to West Pegmatite Points.  There is no route, so I followed the ridge up and over as far as it went

39

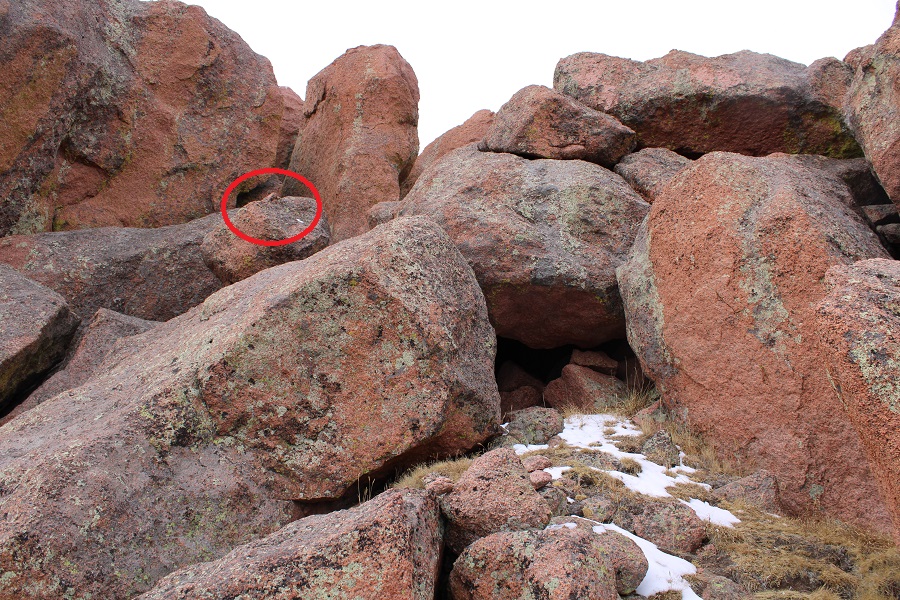
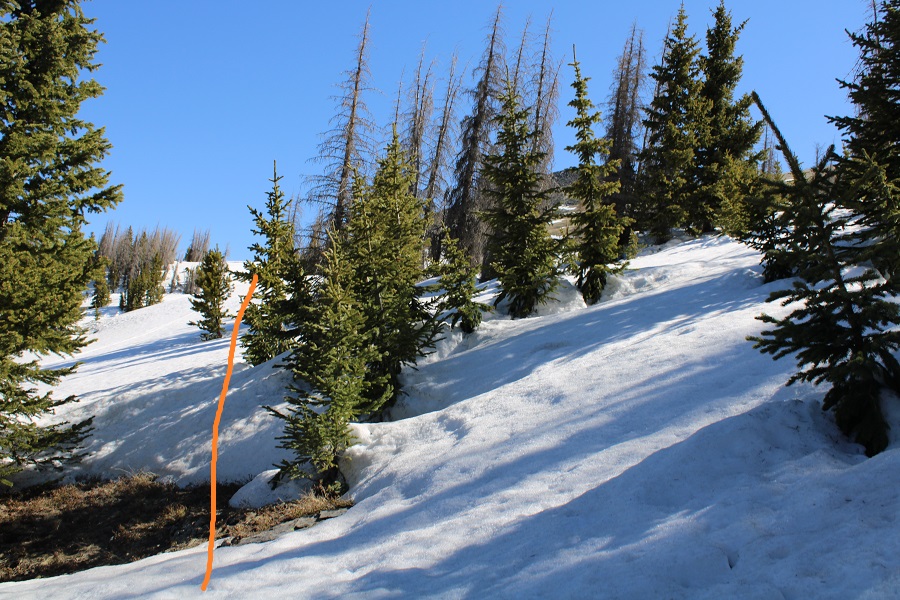
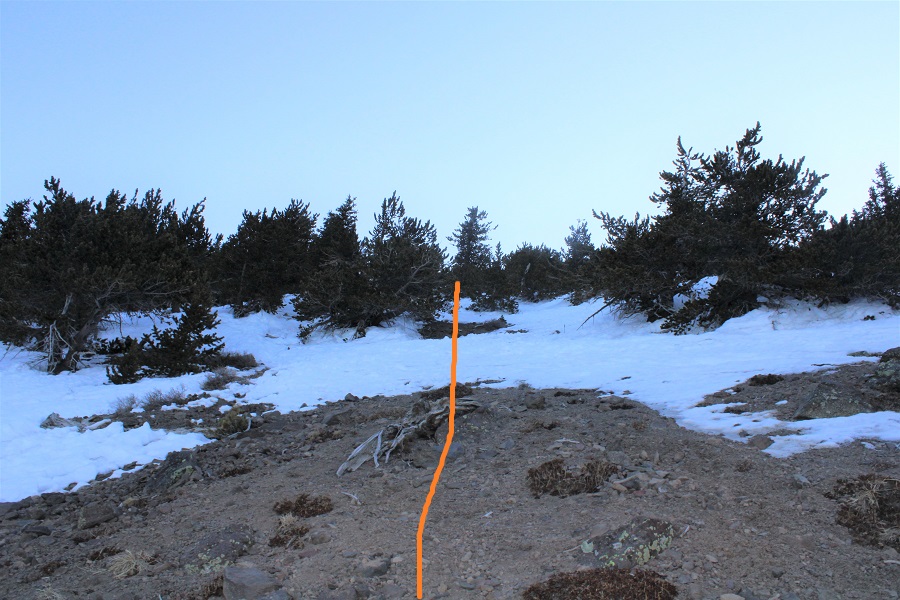
Here’s the path I took, right at these rocks
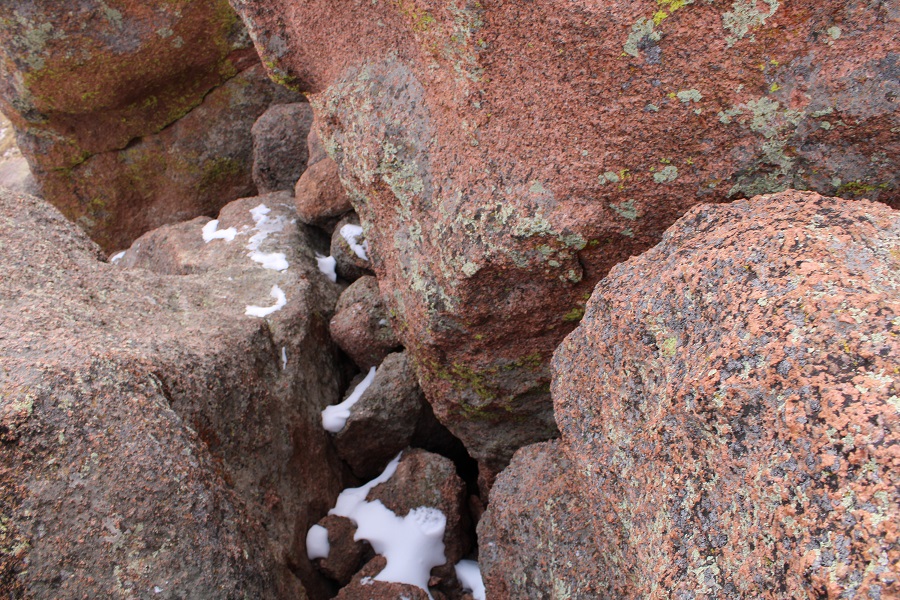
40

And around them

41

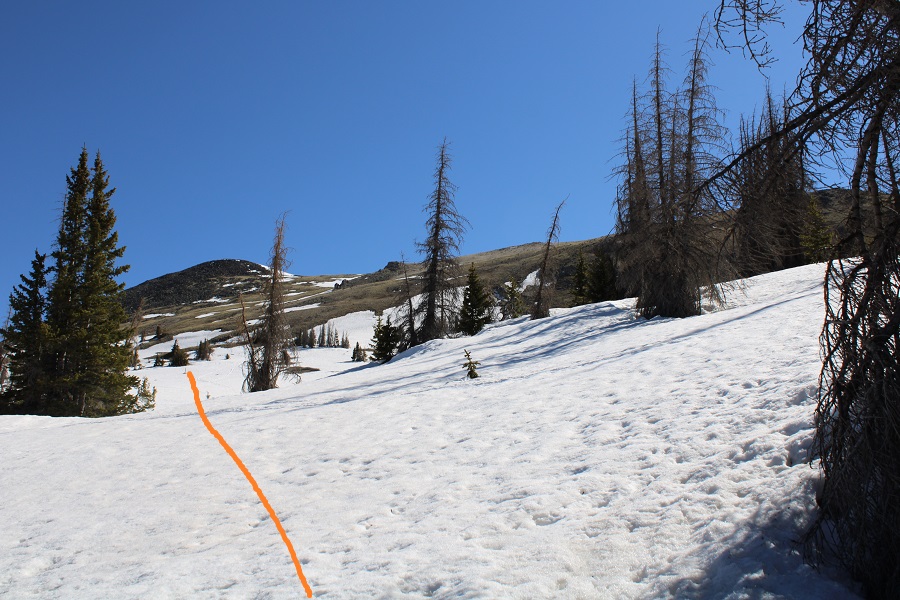
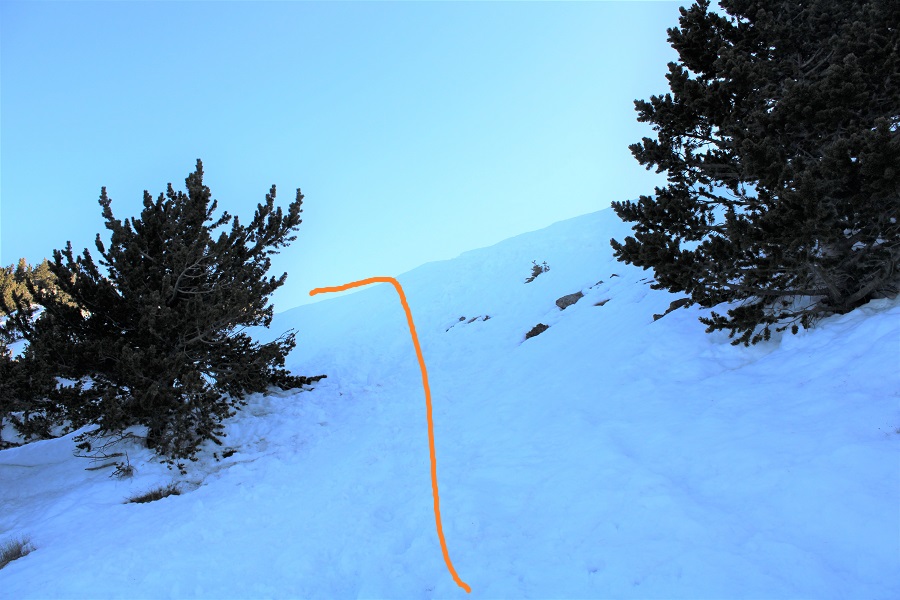
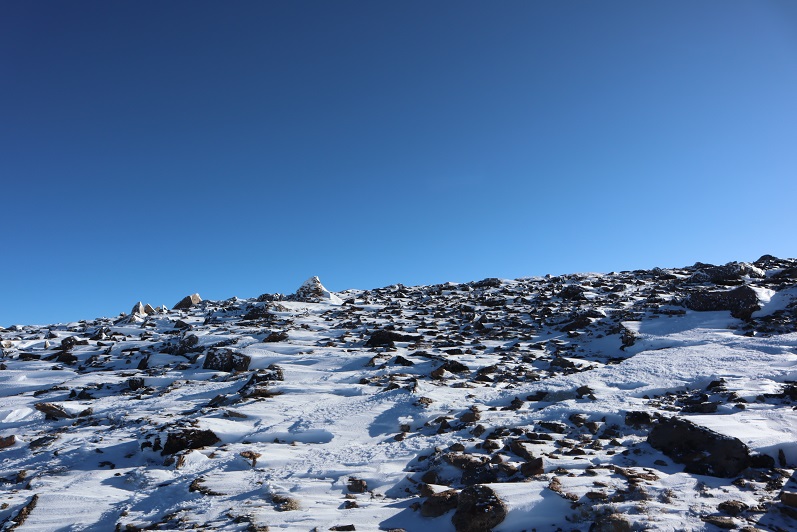
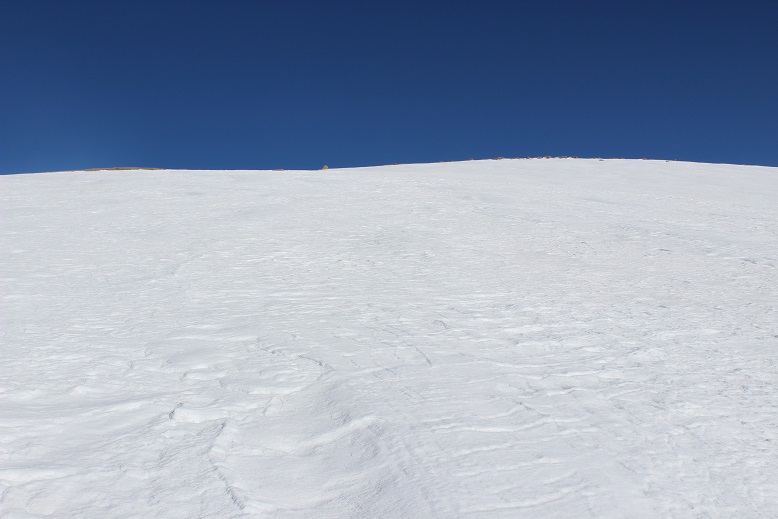
Up a small slope to gain the ridge

42

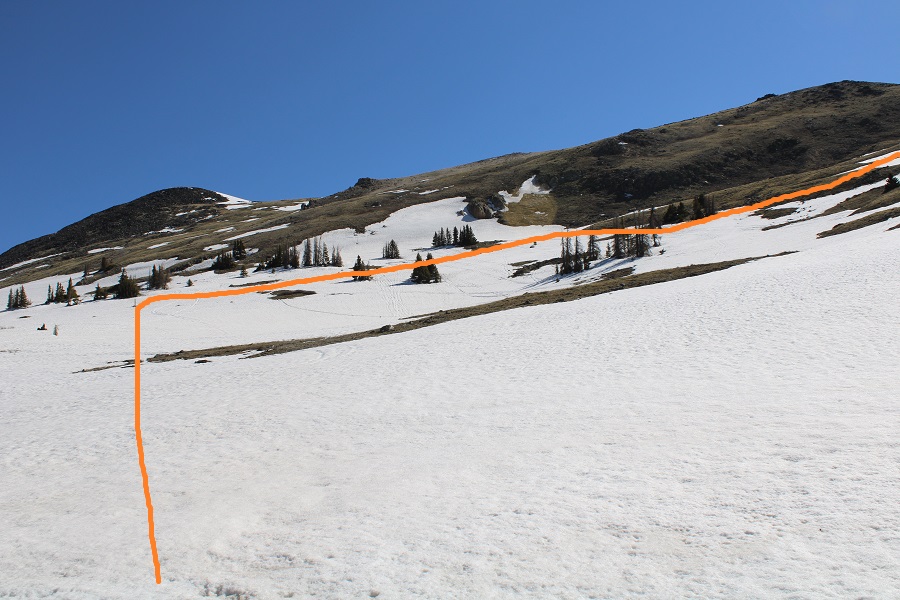
And then across the ridge to the summit.  There was a lot of fun rock scrambling but I’d still keep this at a class 2

43

I took a quick summit photo and the wind told me my half of hair had come undone sometime on the hike.  I was getting strands hitting me in the face, so I quickly re-braided it and without another hair tie just used one to secure both braids. I’m sure I looked amazing…

44

A storm was coming in from the west, and while the above picture doesn’t suggest a storm, right about now is when it actually started snowing.  Just little bits that flew in my face, but I knew more was to come, so I quickly gathered my gear and headed back towards the saddle, aiming for the rock outcropping.

45

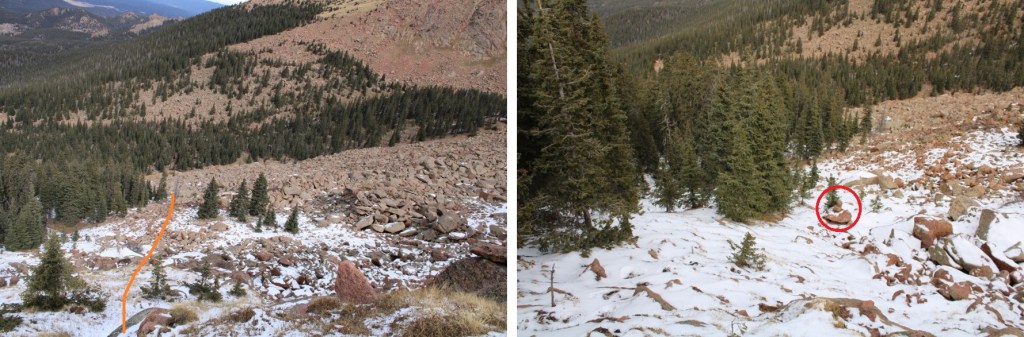
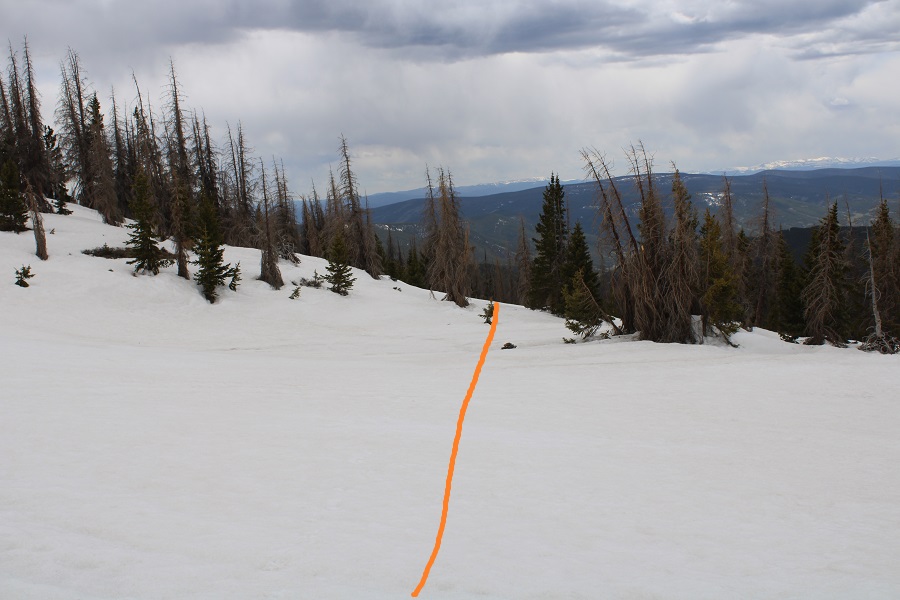
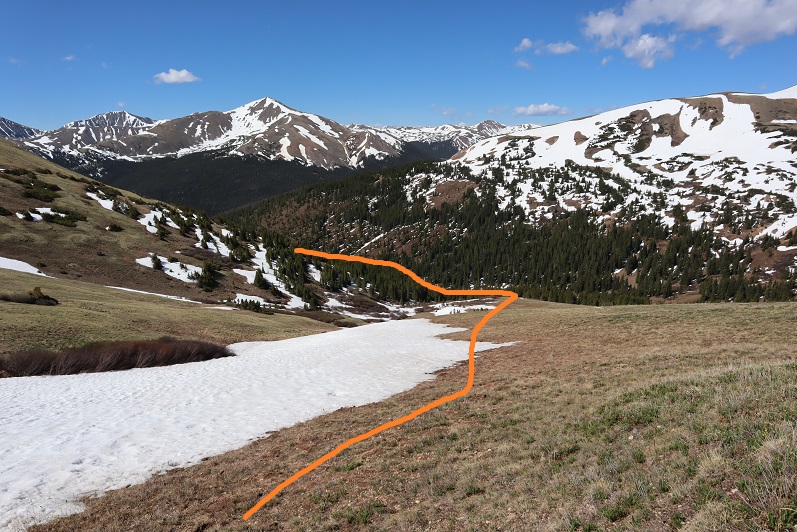
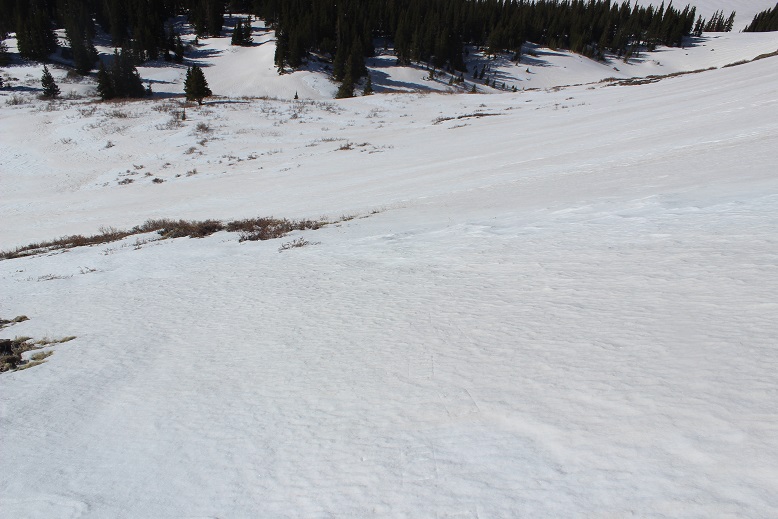
From the saddle I put on my snowshoes and just headed down through the bristlecone pines and willows towards the creek I knew flowed in the trees.

46

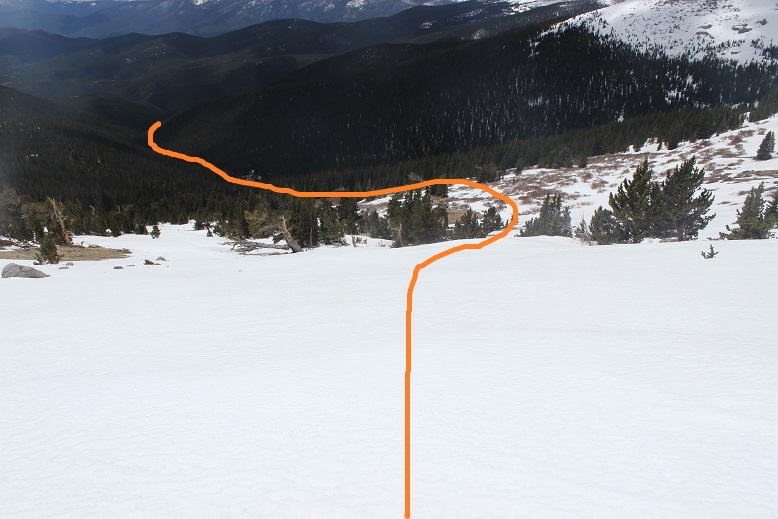
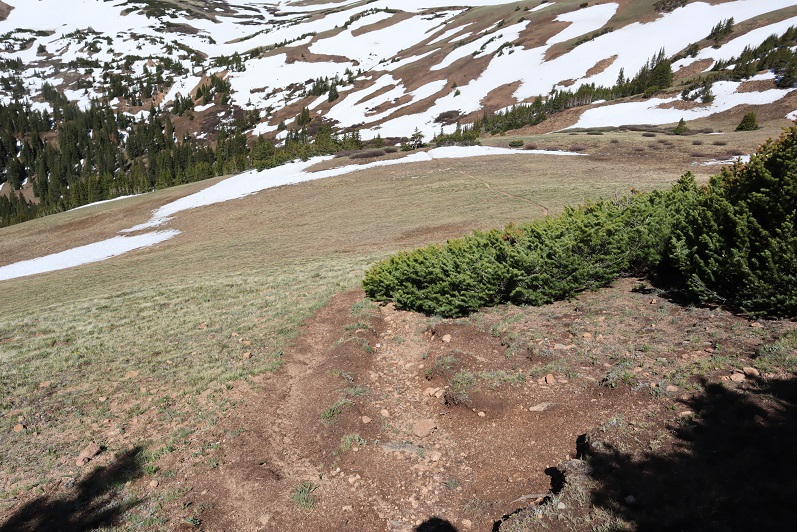
When I made it to the willows I actually found the intended trail and was able to easily follow it all the way back down.  It’s amazing how much easier route finding is in the daylight!

47

I kept looking for those elk/moose, but feared I was making too much noise in my snowshoes and was probably frightening them all away.  The snow picked up and felt absolutely amazing on my face!  I was flushed and seriously considered putting my face in the creek just to cool off (but didn’t…).  Yes, the trail was much easier to follow in the daylight, and I never came upon those downed trees that stumped me before and actually crossed a stream I hadn’t on my way in…

48

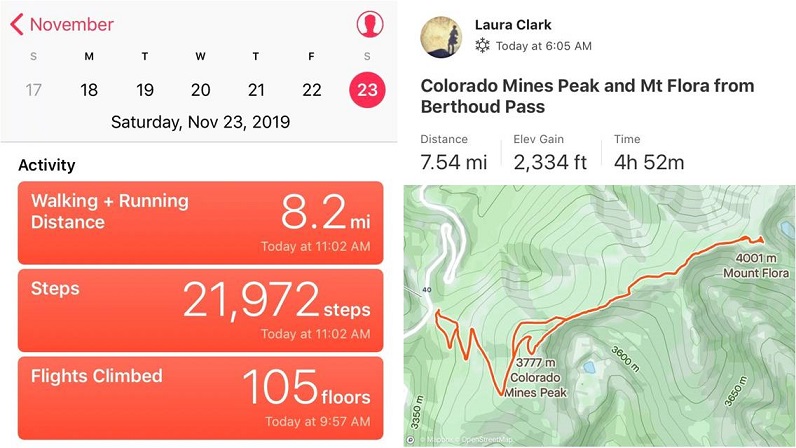
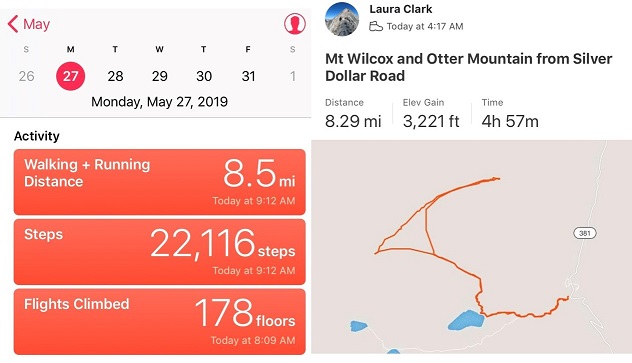
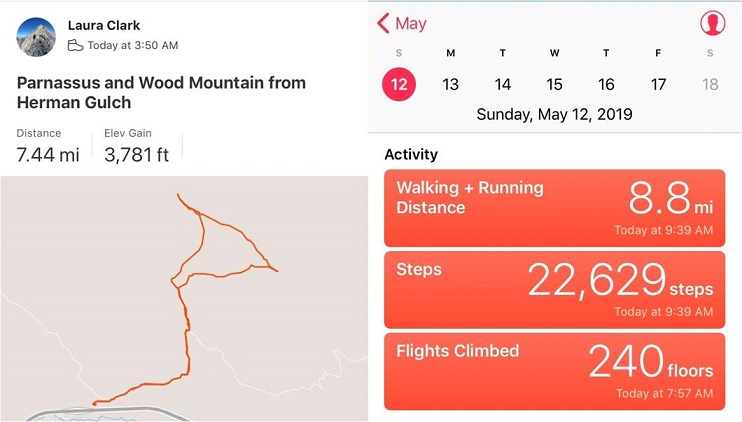
I made it back to my truck at 1:30pm and checked my stats.  Whoa!  I’d been expecting a 10 mile hike with about 4700’ in elevation gain, yet I’d done 14.5 miles with 5920’ in elevation gain In 9 hours!  The best part was I wasn’t even that tired (which I attributed to the relatively “lower” elevation of these 13ers and 12er when compared to the other 13ers and 14ers I’ve been doing lately:  breathing at altitude goes up exponentially and tires you out!)

49

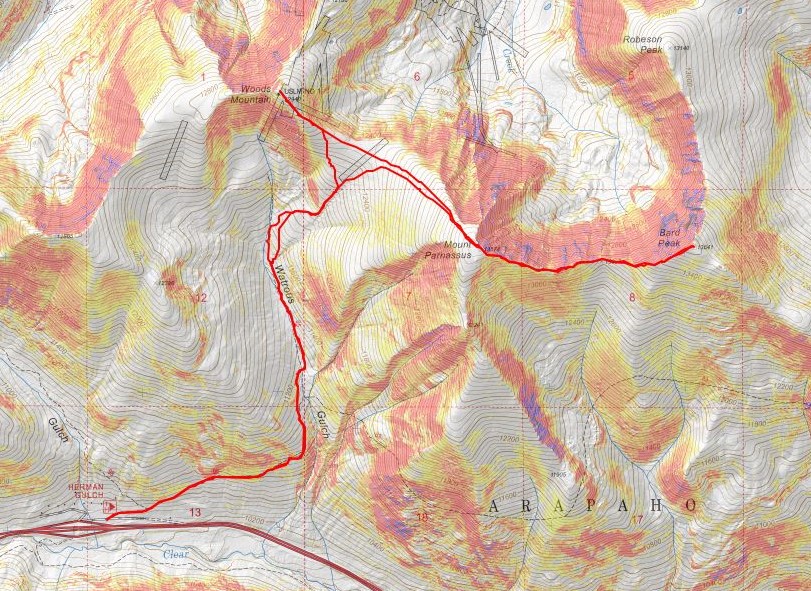
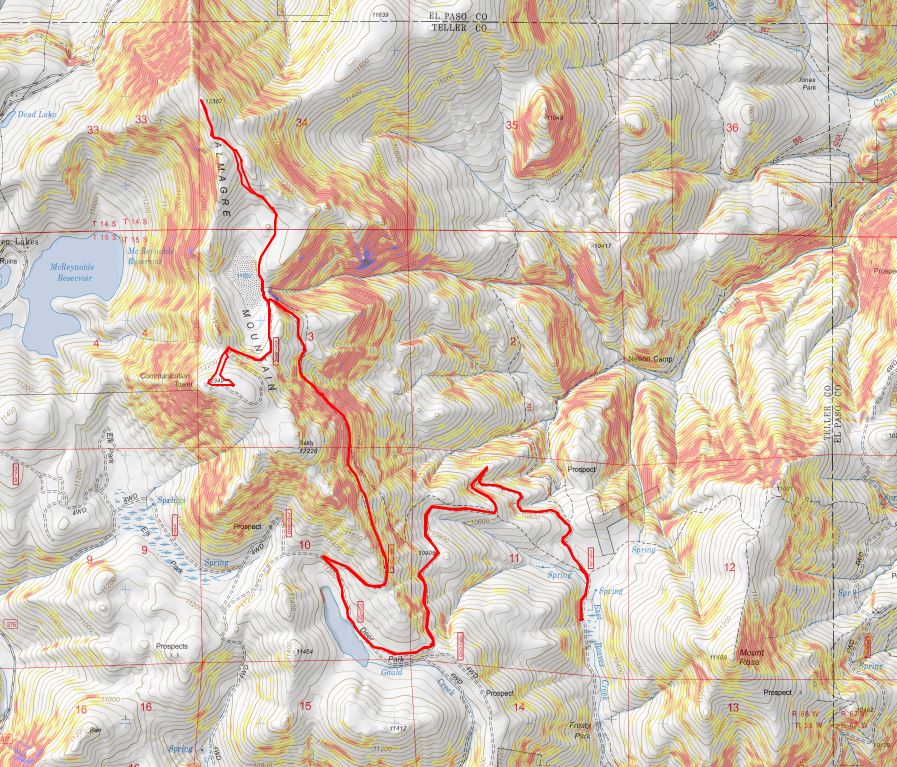
Here’s the Relive: Relive

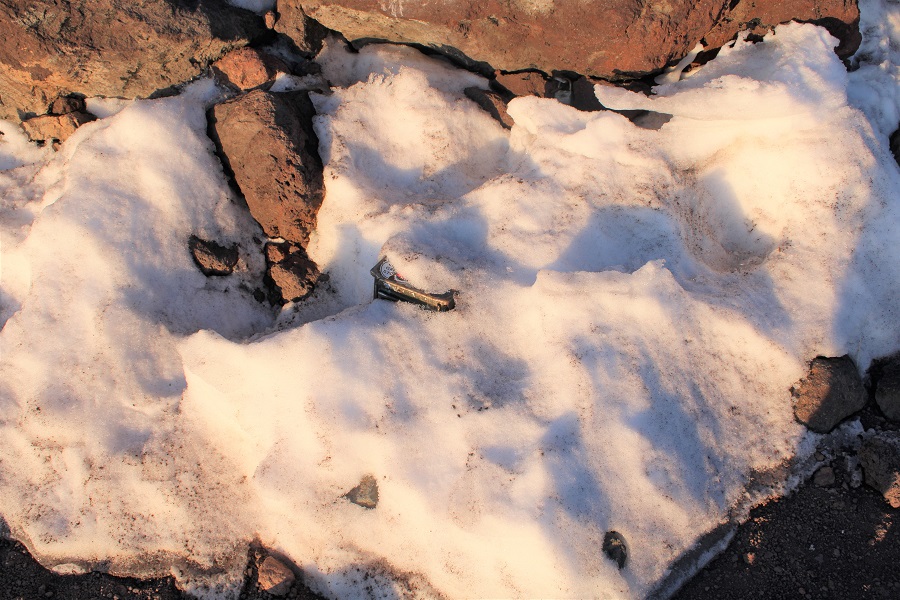
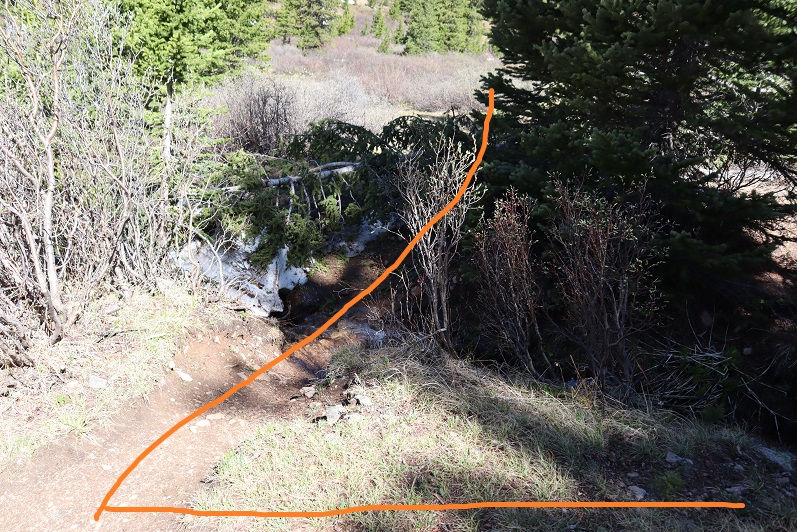
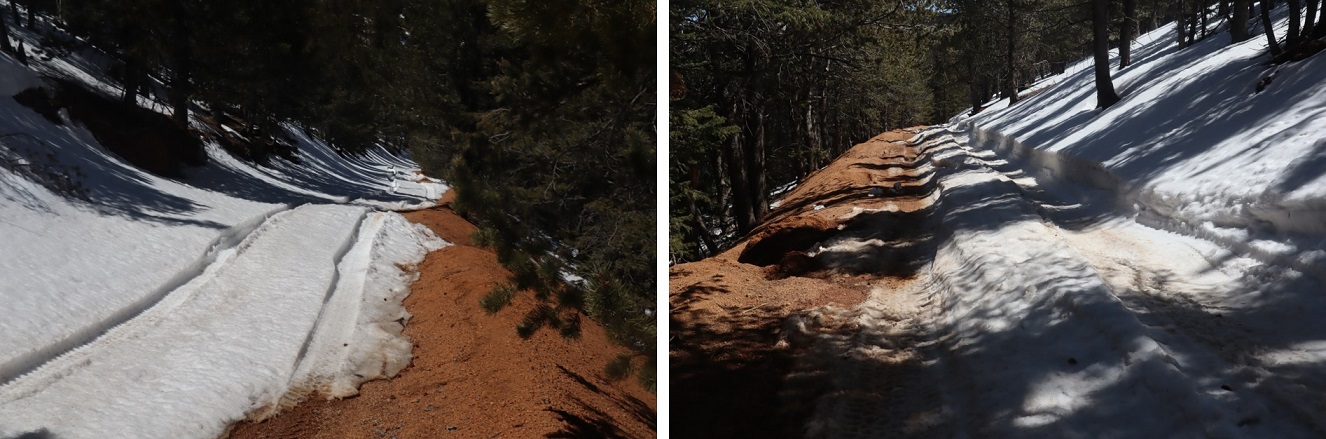
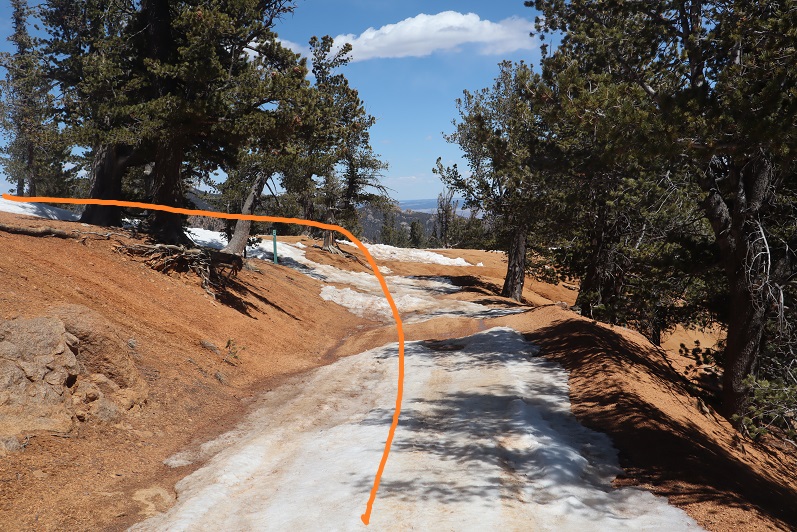
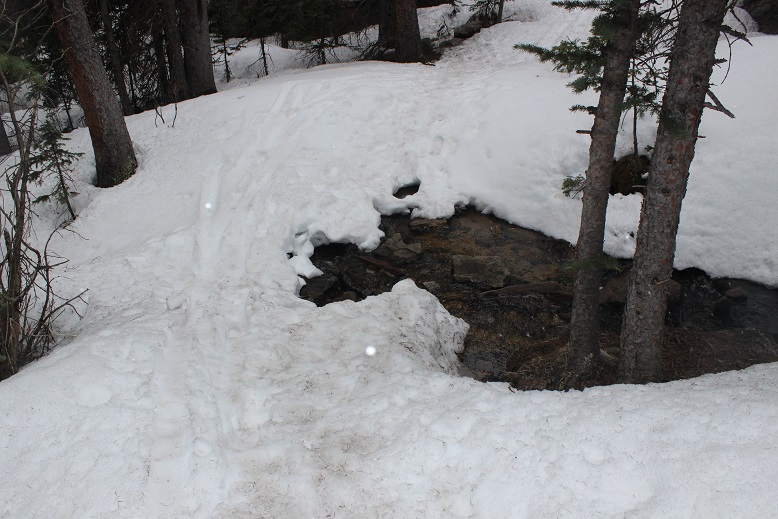
Oh, and there was a small snowbridge to cross just after the snow begins, which was questionable.  It doesn’t look stable and didn’t feel stable either.  I crossed it in snowshoes so if it broke I’d have stability in the water, but be careful with the rising temperatures crossing these things!

50

Also, I was glad I had microspikes, snowshoes, crampons, and an ice axe for this hike.  I kept changing them out (and at times didn’t wear any of them) but felt good having them all.  Oh, and postholing is never fun!

Mt Parnassus – 13,574 & Woods Mountain – 12,940

1

RT Length: 7.5 miles

Elevation Gain: 3781’

Today was Mothers day, and what better way to celebrate than to go on a solo hike above treeline and let my kids sleep in? Yep, that’s what I thought too, so I made plans to be out and back before my kids woke up (they’re 16 and 20… they’ll sleep until 3pm if I let them).

I couldn’t sleep, so around midnight I decided to just get up and go hiking, even if it was a few hours earlier than intended. I made it to what I thought was the Herman Gulch trailhead to a locked gate at 3:30am, got out my gear and began my hike, only to quickly discover I was not hiking the correct trail.  It was immediately obvious and I knew my mistake, so I went back to my truck and re-parked it at the very accessible and open Herman Gulch Trailhead.  There were bright orange signs warning me of avalanche danger.

2

The trail starts just behind the information sign, and follows the Herman Gulch trail west.

3

The trail was free of snow until I made it to the Herman Gulch / Waterous Gulch Junction. From here on out the trail contained continuous snow, but traction wasn’t necessary for a while.   I turned right (east) at the junction.

4

As I rounded the ridge the snow immediately began to pick up, and in the dark I foolishly tried to walk up what turned out to be a path of solid ice. I immediately slipped and tried to catch myself, but ice is like glass and I cut up my right hand trying to brace myself against the impact and to latch onto something I could grab when I fell.  It actually wasn’t that bad, but there was a lot of blood (it hadn’t been cold enough to put on my gloves yet, so my hands didn’t have any protection).  I sat down, took off my pack and put my right hand in my mouth to clean up some of the blood while rummaging around my pack with my left hand, searching for my crampons.  It looked like someone had taken a snowboard down the trail and smoothed it out, which is great for skiers and snowboarders but it made hiking up the path similar to hiking up an ice chute.  Microspikes weren’t going to cut it this morning:  I needed crampons.  At 9000’.

5

I stuck my hand in the snow and it immediately froze and the bleeding stopped. I kept my crampons on for most of the hike, mainly because I was too lazy to take them off and they weren’t getting in the way.  The trail through the trees was easy to follow as this must have been a popular hike yesterday.

6

There were several parallel ski lines, but all tracks led to the same area. There was also evidence of several avalanches in the area.  Most looked to be many years old, but some looked recent.

7

After about 2 miles I crossed over to the Waterous/Bard trail junction. I could hear water flowing underneath me, so this might be a creek in the summertime but it was covered in several feet of solid snow this morning.

8

This is where the ‘trail’ stopped. I turned left and continued on the Waterous Gulch trail for about 1/3 of a mile along the east side of Waterous Gulch

9

10

My research told me to hike up the west slopes of Mt Parnassus to the summit, so I turned right (east) here and started up (in the dark, so I couldn’t tell just how steep these slopes were at the time).  I needed my ice axe, especially just before treeline as this area was loaded with steep snow.

11

What awaited me was 2000’ of elevation gain in about a mile.   I made it past treeline just as the sun was beginning to rise

12

The only downside? This is where the wind picked up, and I mean picked up!  The forecast had called for 15mph winds today, but these were much higher, and sustained. The wind didn’t seem to care about one direction or another:  it kind of swirled around as it blew past.  I put on my balaclava and every time I saw a gust coming turned and braced myself against the mountain, waiting for it to pass.  It was too early to put on my goggles, so shielding my eyes was especially important, as it felt like shards of glass were flying at my face.

13

Every time there was a break in the wind I’d look ahead, find a new landmark, and hike towards it. Here’s the route I took over the first hump

14

And second hump

15

And third hump (these sections are all much longer and steeper than pictures make them look)

16

Until I could finally see the summit!

17

That wind hadn’t let up so I didn’t stay too long on the summit.

18

I took a summit photo that didn’t turn out too well because of the wind and blowing snow

19

And waited for a lull to get a shadowselfie. Check out all that snow!  Amazing for the middle of May!

20

Take a look over at Bard Peak. I’d really wanted to make this a double summit today, but those winds weren’t letting up.  They’d been at it since I’d hit treeline and showed no sign of stopping.  The wind was making clouds out of the snow on the ridge, continuously blowing it up into the air.  This ridge looked spicy without the wind, and with it downright dangerous:  Those cornices were made up of loose snow.  I could tell because the wind was picking it up and throwing it around without too much trouble.

21

Well, that was a bummer. I guess I’d just head back the way I came.  And then it hit me:  Woods Mountain was just across the way, and while it isn’t a 13er it’s a respectable 12er (12,940’).  I’d just head over there and get in a double summit that way.  So I turned and headed northwest towards Woods Mountain (and away from the wind).

22

Almost immediately my crampons became cumbersome, so I took them off and exchanged them for snowshoes. Ahhhh!  Much better!  I turned to look up.  Yep!  That’s steep!

23

I made it down to the Woods/Parnassus saddle in no time and looked back at the way I’d come

24

And my way up Woods Mountain

25

This was going to be easy! The only downside?  The saddle was a bit windy as well.

26

The slope up Woods Mountain was long and gentle and didn’t require any rest.

27

It didn’t feel like it took very much time to summit (and here the winds calmed down)

28

From the summit I looked back at Parnassus and the other 13ers I’d intended to hike today. I sighed:  the wind was still at it.  Oh well, this just means I’ll have to do the Engelmann-Robeson-Bard trek later.

29

I turned and looked at the way I was supposed to head down the mountain, behind Woods’ south slopes, and on to Point 12805, but it just didn’t look…. safe.

30

So I turned and looked back at the Woods/Parnassus saddle and studied the terrain.

31

I got out my topo map and concluded it was safe to head back to the saddle. I took the solid orange line back down to Waterous Gulch.  The dotted orange line is the way I summited Parnassus.

32

Oh, and I could see a solo hiker taking the same route I had up Mt Parnassus. That meant someone else was out here today.  Cool!

33

The wind started picking up again when I made it back down to the saddle.

34

I turned right (west) and headed down towards the gulch.  Just before treeline I turned back around and looked at the way I’d come

35

Video from below saddle: Bard/Parnassus

I turned back towards the gulch and followed the drainage to a small gully

36

37

The bottom of this gully ended in Waterous Gulch, about 200 feet from where I’d turned to start my long trek up to the summit of Mt Parnassus. I quickly came to the realization it would have been much easier to just have used this small gully to gain the saddle between Woods and Parnassus to summit Mt Parnassus rather than to have climbed Parnassus’ west slopes.  I’d recommend just taking the gully.   The dotted line is the way I summited, but as you can see, the solid path works just as well (if not better).

38

Back in Waterous Gulch I picked up my earlier trail and followed it back to my truck, taking pictures in the daylight for future use. The snow had warmed up and the icy section from this morning now gave a little as I descended (so no slipping!).  I made it back to my truck at 9:30am, making this a 7.5 mile with 3781’ elevation gain in 5.5 hours.  I was a bit disappointed I hadn’t made it over to Bard Peak, and with that missing the added mileage and elevation (I wasn’t even tired…) but on the positive side I’d make it home before noon, and it was Mother’s Day, so I should wake up the girls and do something to celebrate.

39

Here’s the Relive: