Clark Peak – 13,579

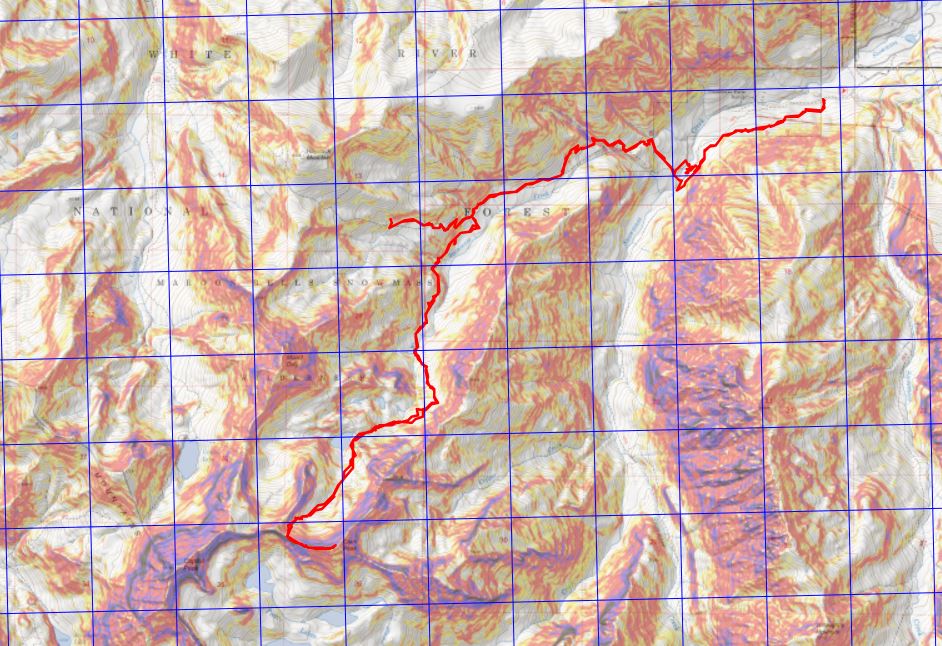
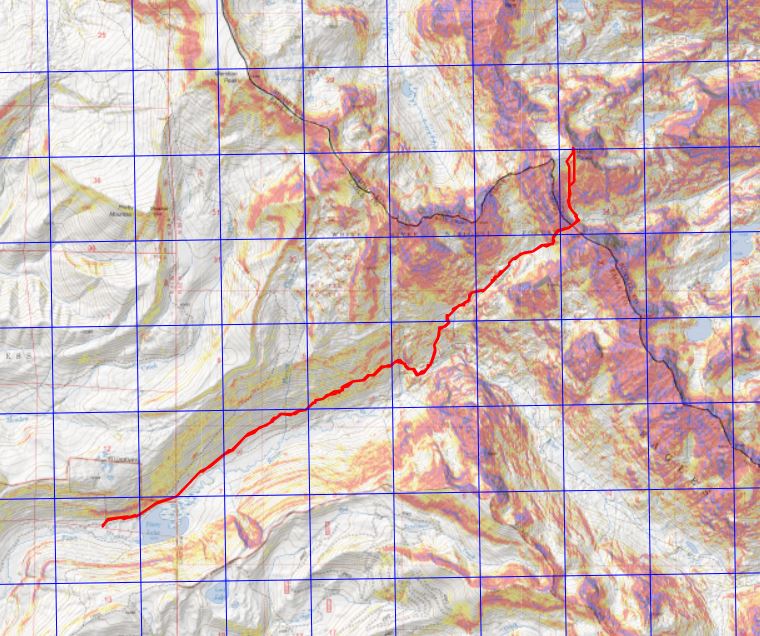
RT Length: 25.36 Miles

Elevation Gain:  6619’

This was my second attempt of Clark Peak.  On the first attempt I’d been unaware there was a creek crossing, and the creek looked too high for me to safely cross in the dark.  A storm was coming in later in the day, so waiting for daylight hadn’t been an option.  I’d turned around and done another peak instead.  This time I was prepared (or so I thought) for the creek crossing.  Also, please don’t make the same mistake I did crossing the creek…

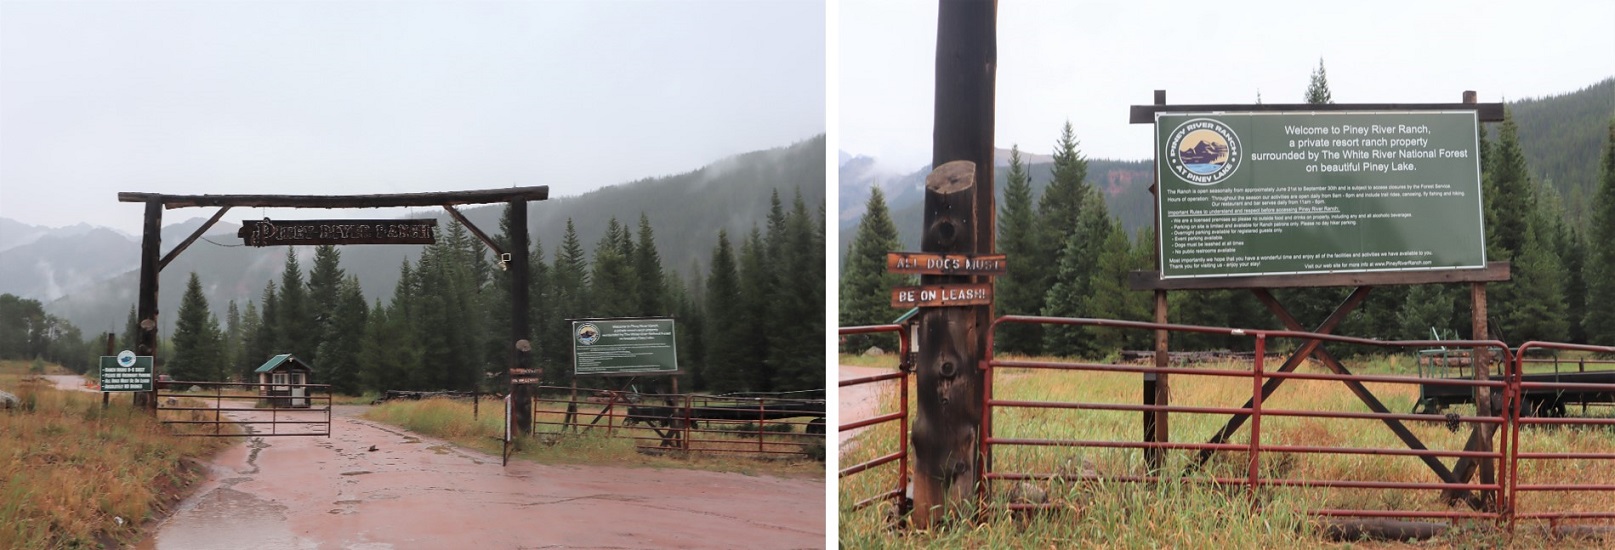
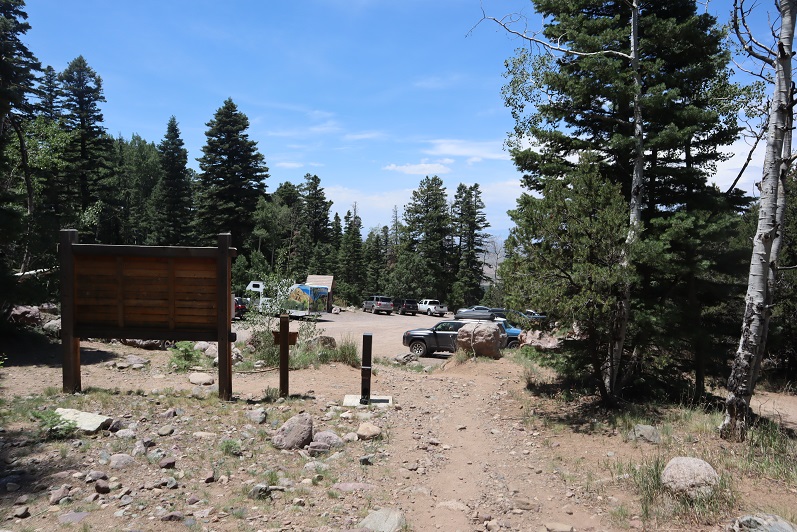
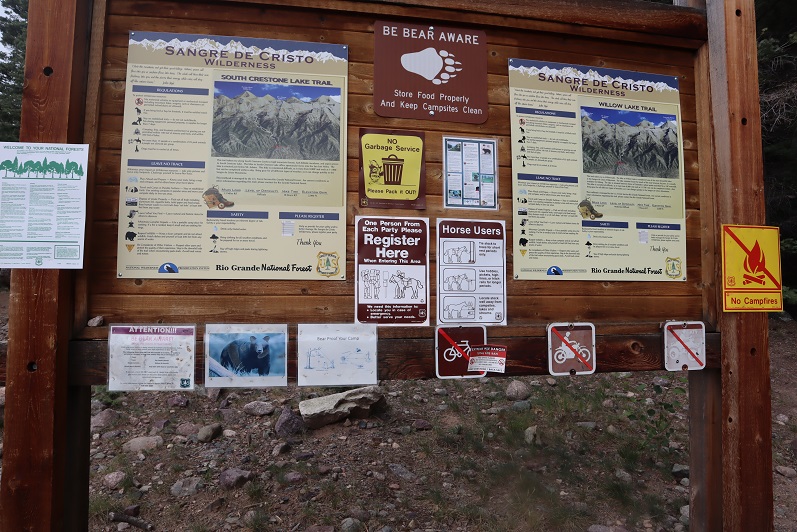
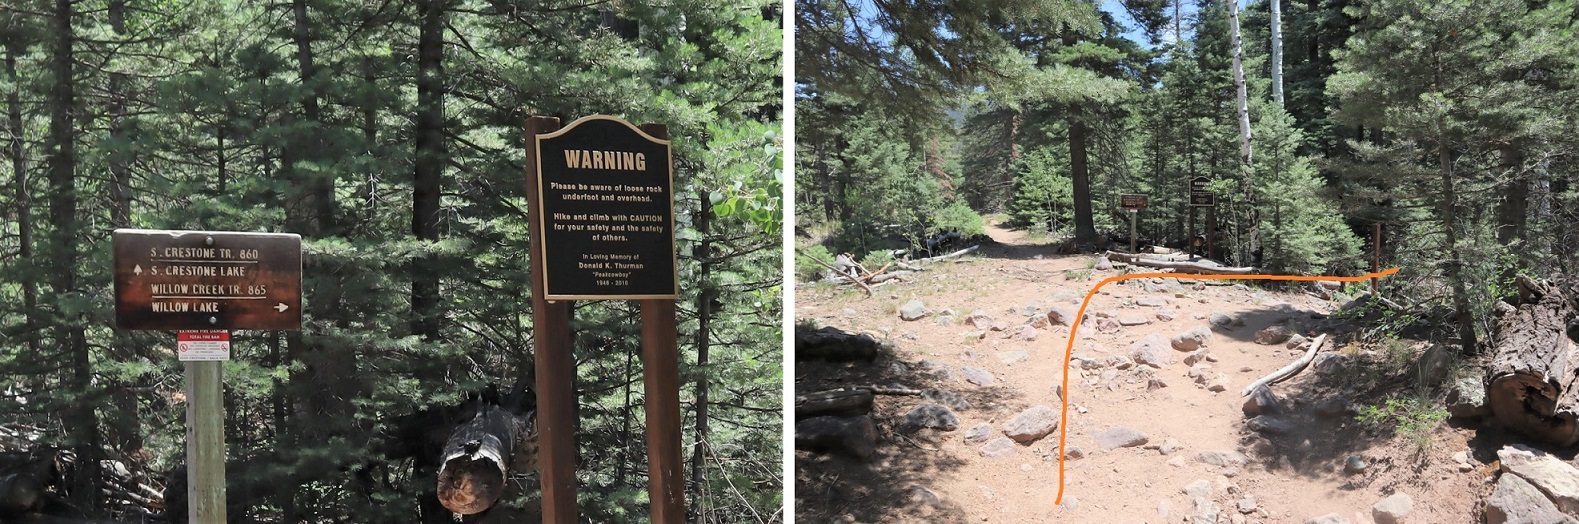
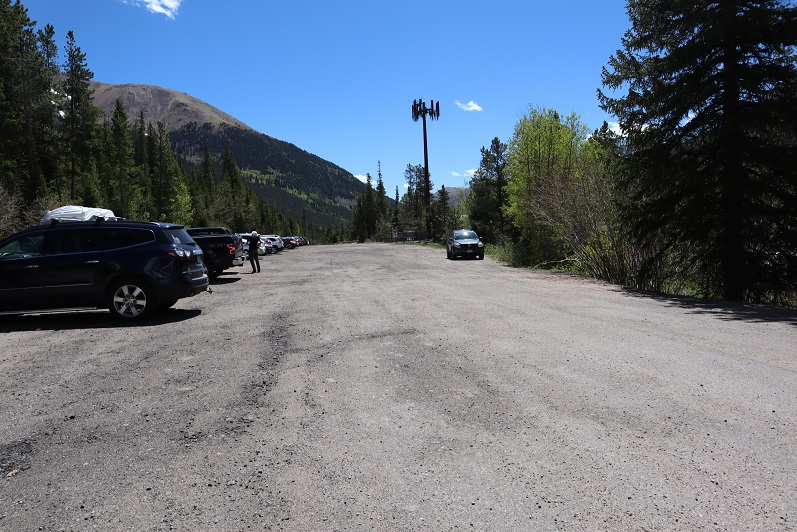
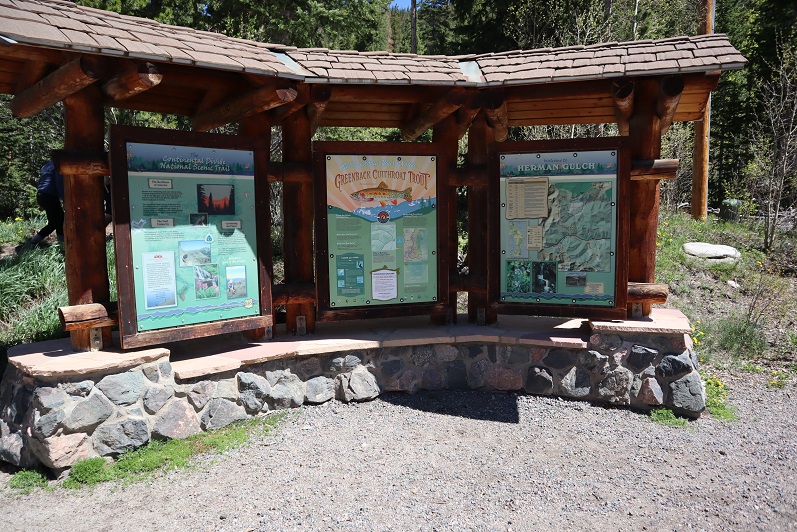
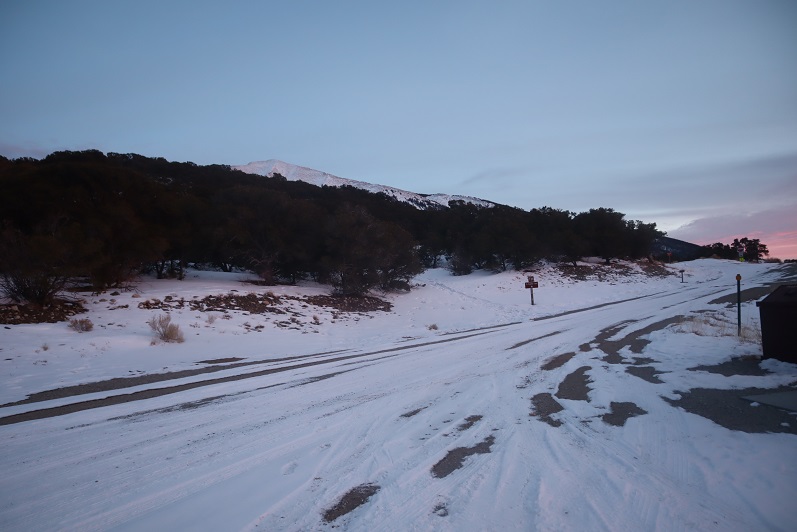
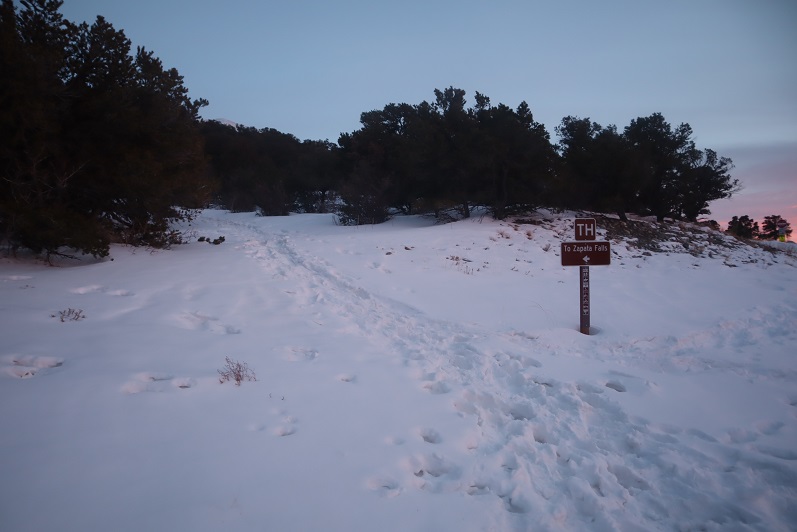
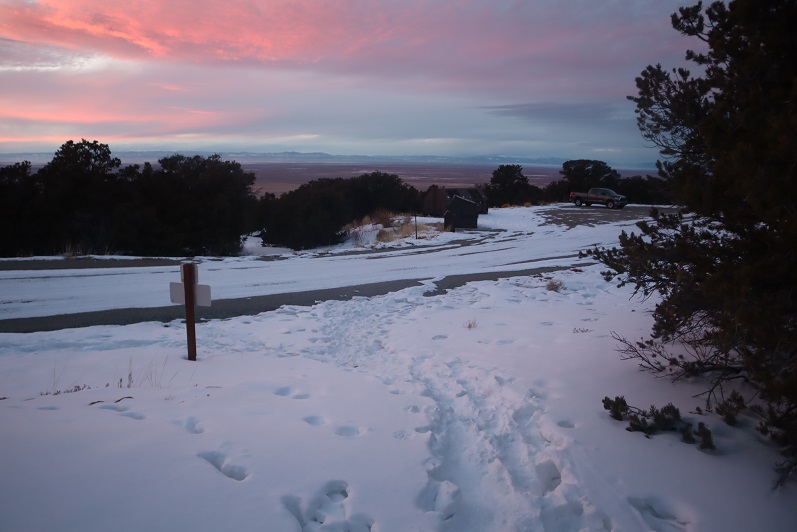
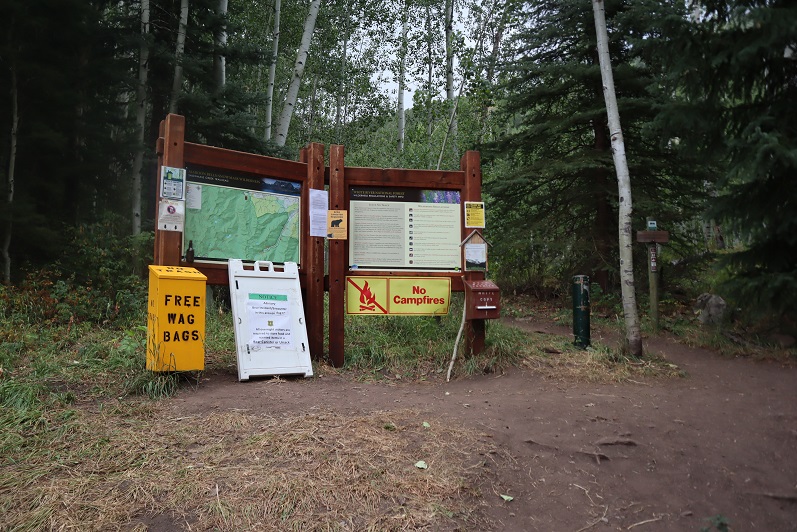
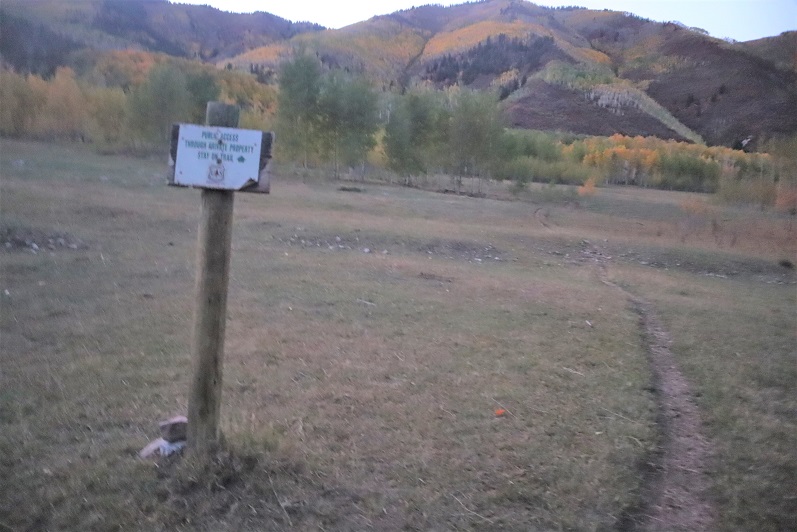
I drove to the trailhead the night before and got a few hours sleep before staring on the trail at 5:45am.  The trailhead has space for about 20 vehicles, and good signage

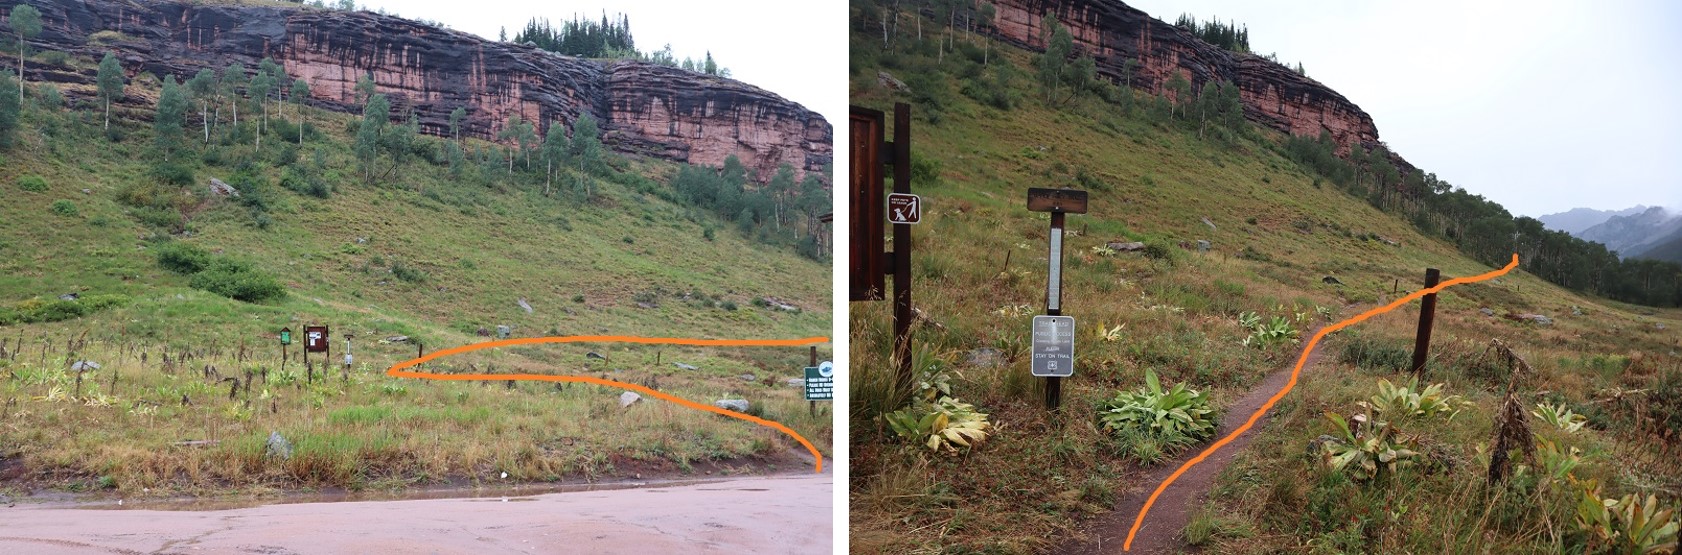
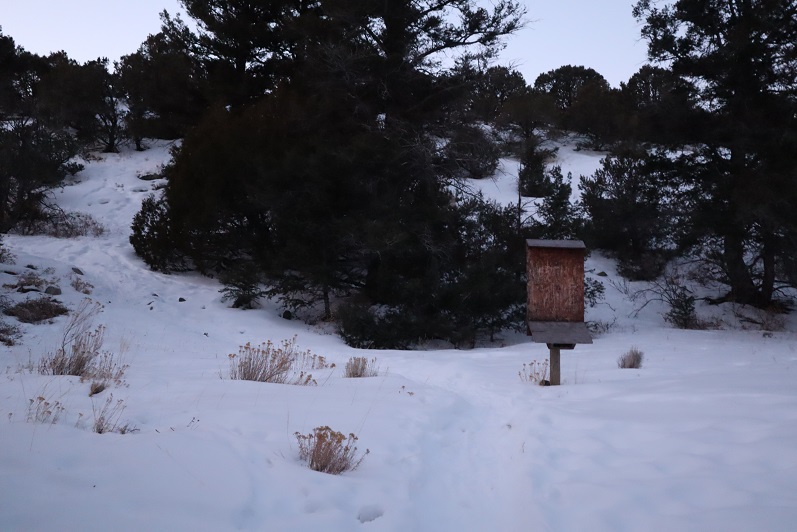
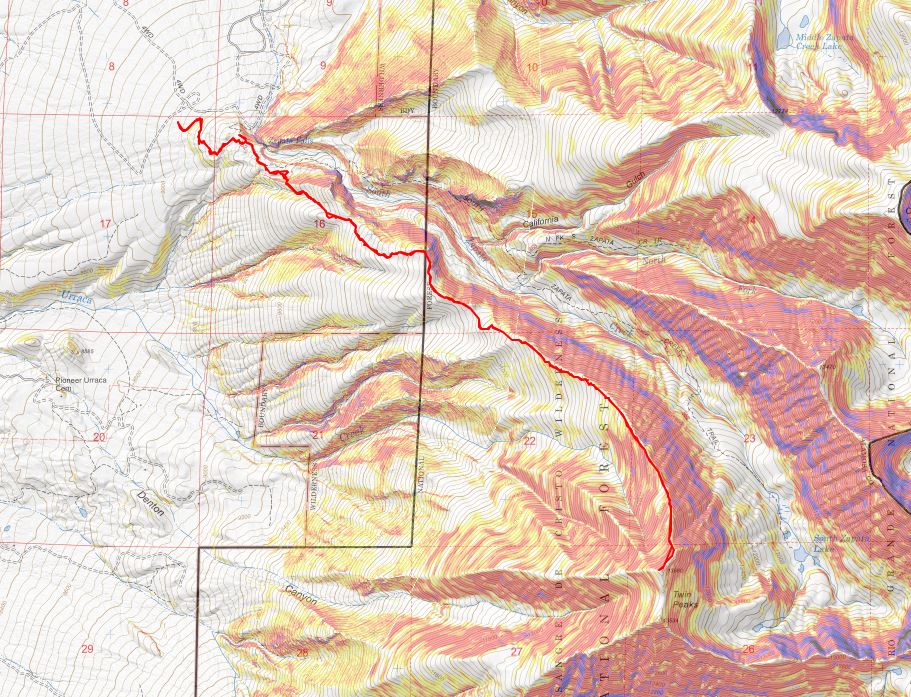
I started off following the Maroon Snowmass Trail south, and then southwest.  I went through two unlocked gates

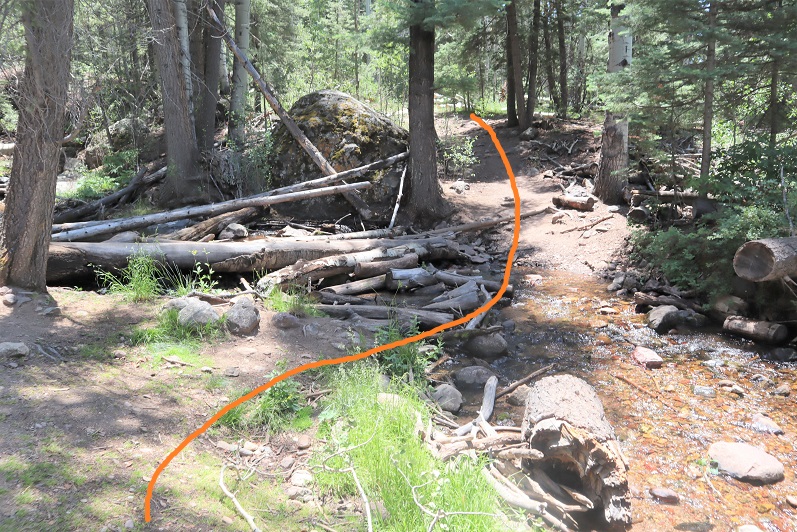
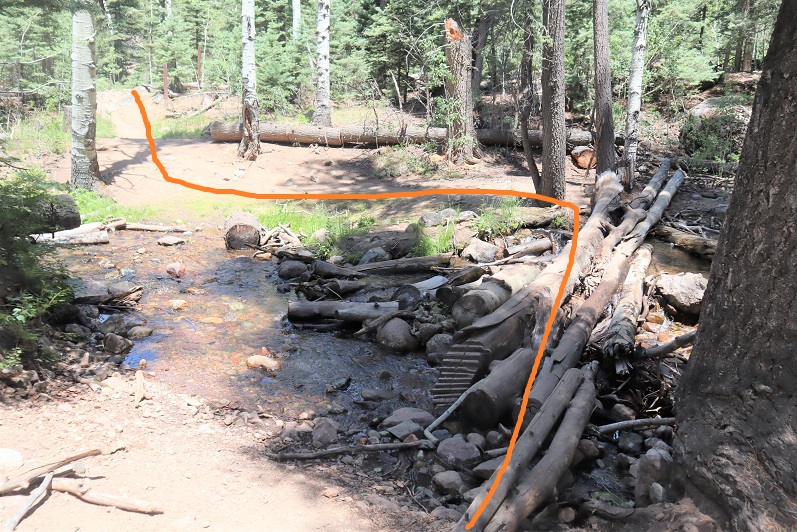
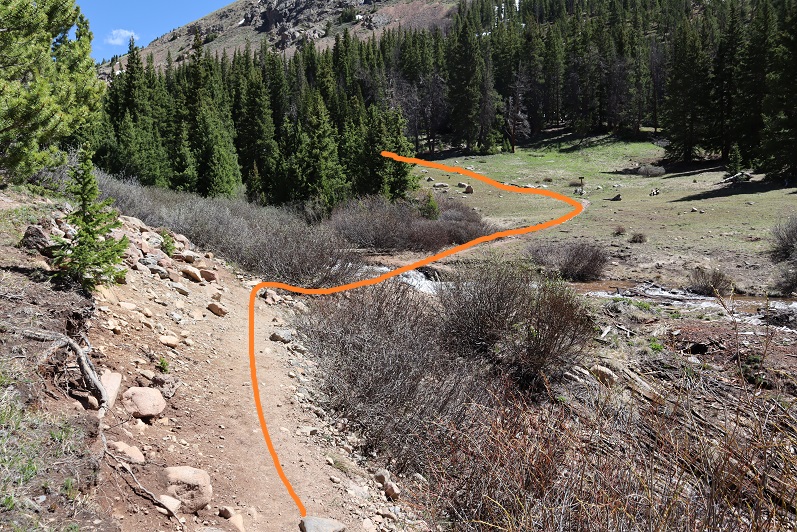
And shortly after the second gate there’s an unmarked side trail that leads down to cross Snowmass Creek. However, after my last failed attempt I’d done more research, and was told I’d gone too far last time and to look for an easier crossing earlier.  So I did.  I ended up crossing the creek and then running into Beaver Ponds about 20 yards long.  I was able to gingerly cross them, stepping through a thin layer of ice while doing so.  I picked up a faint trail on the other side, which brought me to the actual trail, where I noticed last time I’d indeed been in the correct area.  Hmph.  So I’d done all that wading in cold water for nothing.  Here is where you should cross:

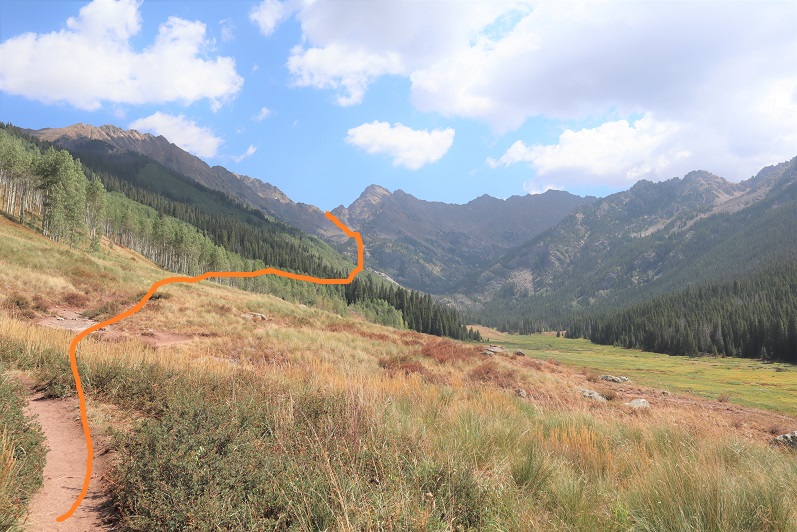
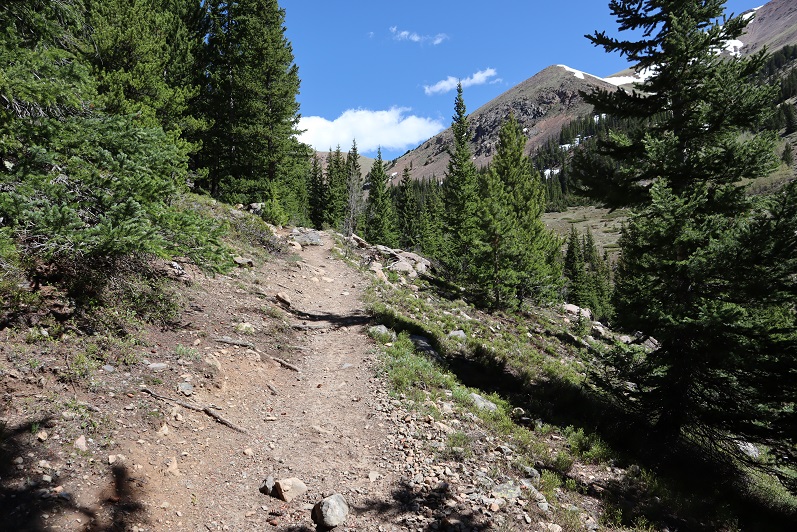
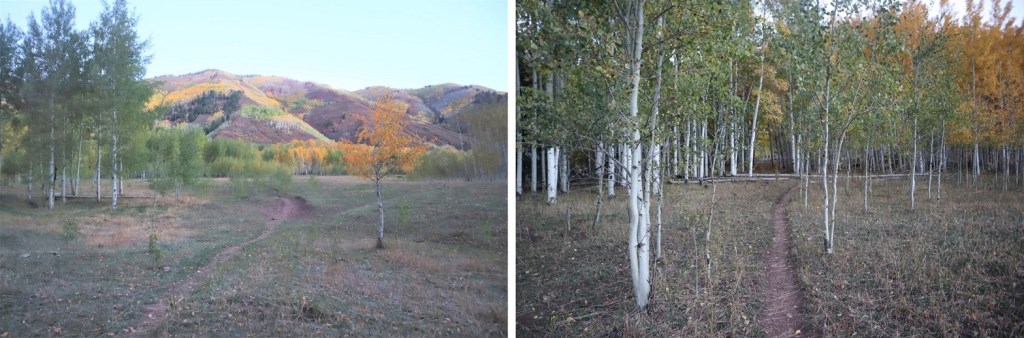
Doing so will bring you to the West Snowmass Creek Trail.  A well-defined, class 1 trail.

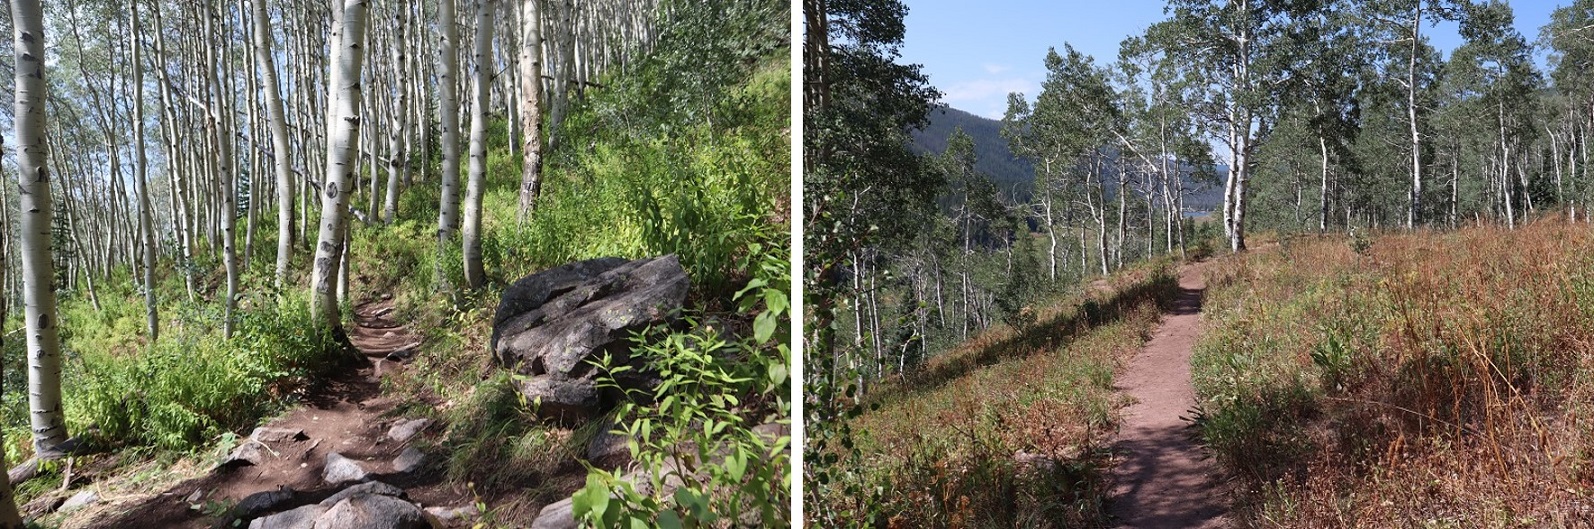
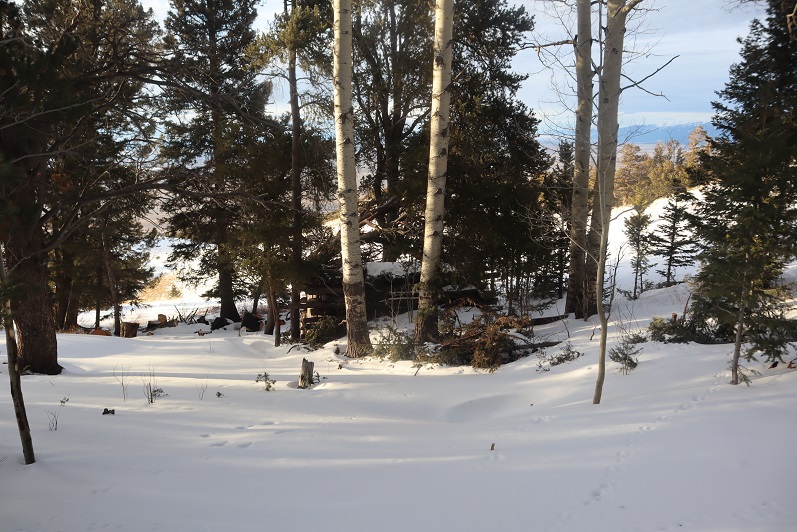
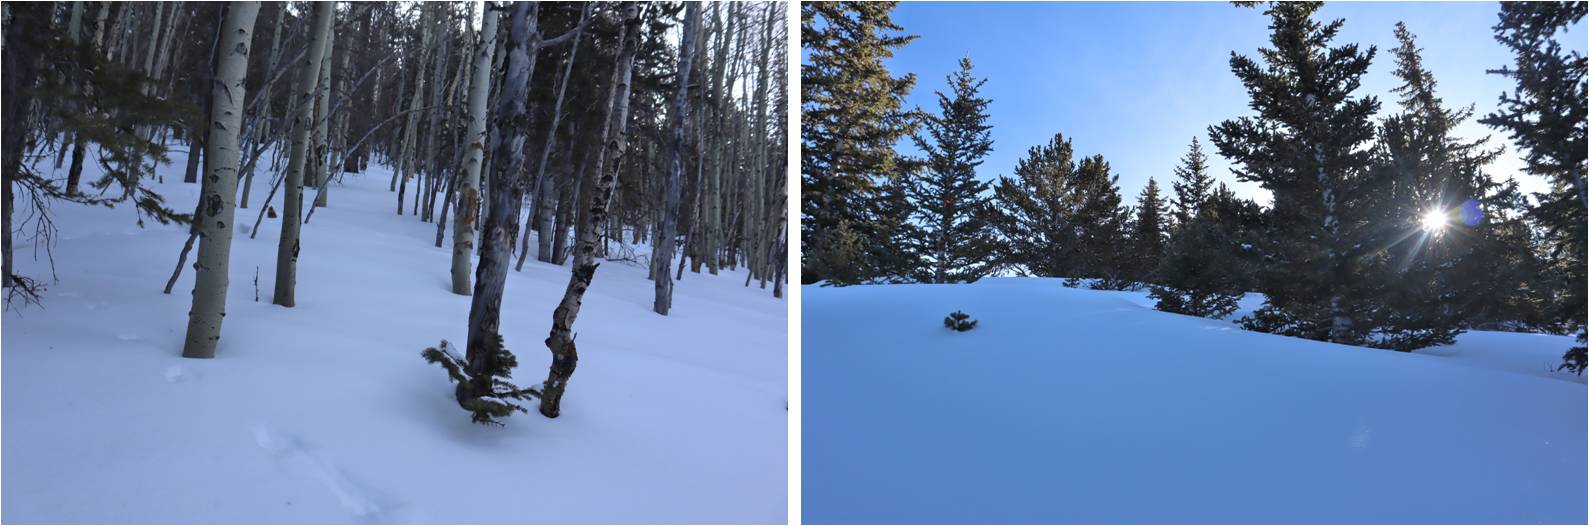
The trees were absolutely beautiful!  It was still early morning, so these pictures aren’t the greatest, but the trees had me daydreaming.

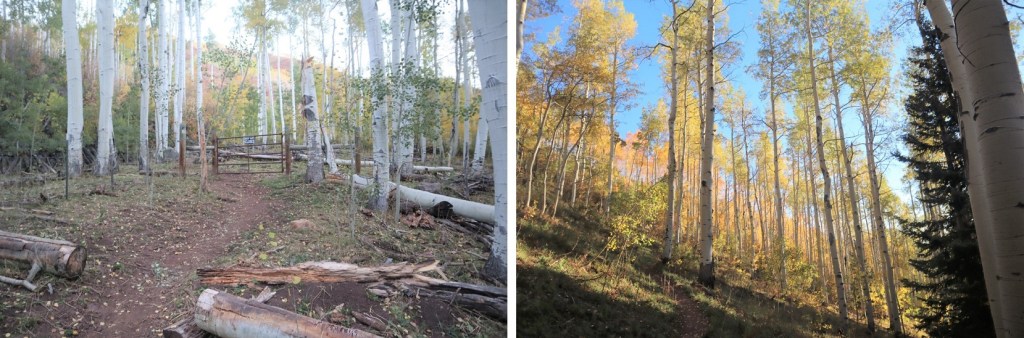
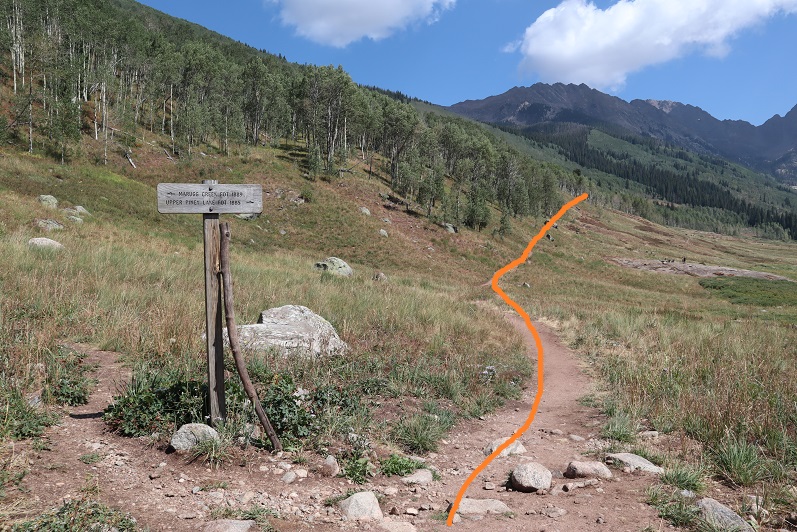
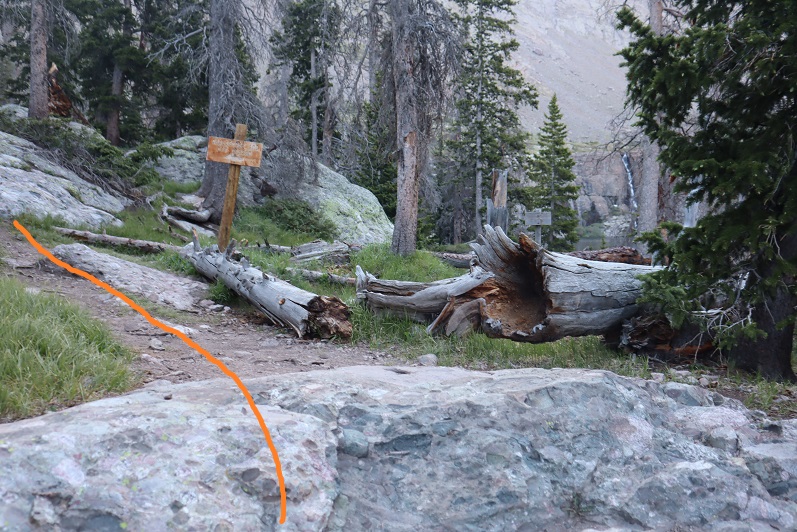
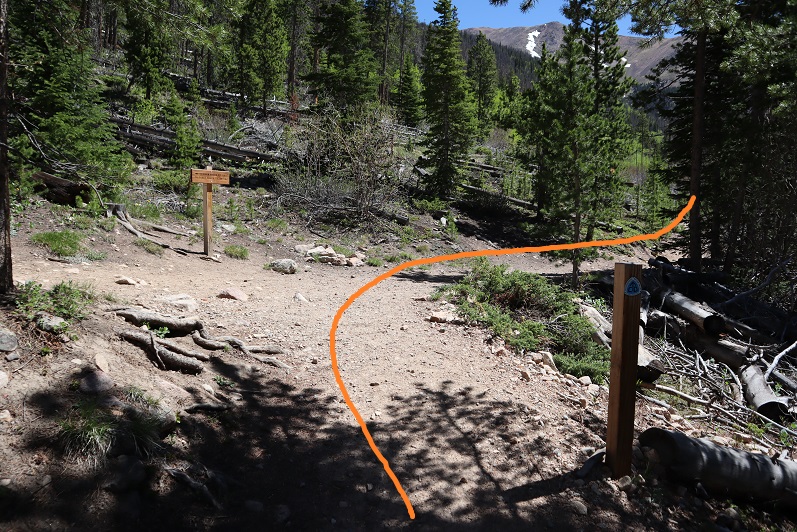
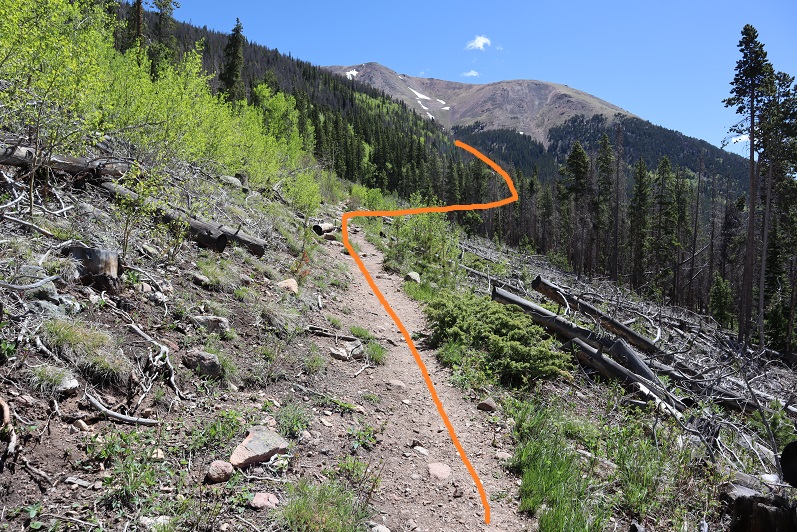
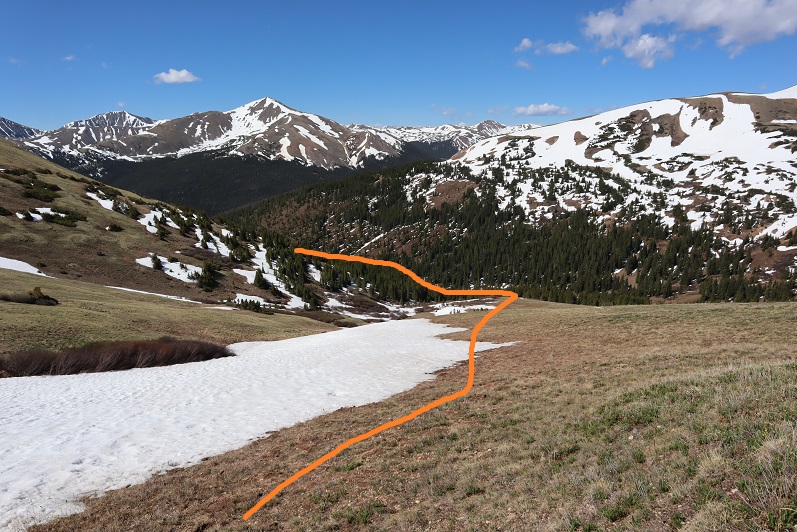
This is where I made my second mistake of the morning:  I missed the cutoff.  The cutoff comes after hiking for just over 4.5 miles.  It’s an obvious junction you can see if you’re not looking up at the trees. And cows (there were cows in the meadow). I ended up hiking quite a ways past this junction, just following the trail.  It wasn’t until I realized I was switchbacking and I wasn’t supposed to be that I noticed my mistake.  This mistake cost me well over a mile and added about 1000’ of elevation to the hike.  Here’s where you turn left

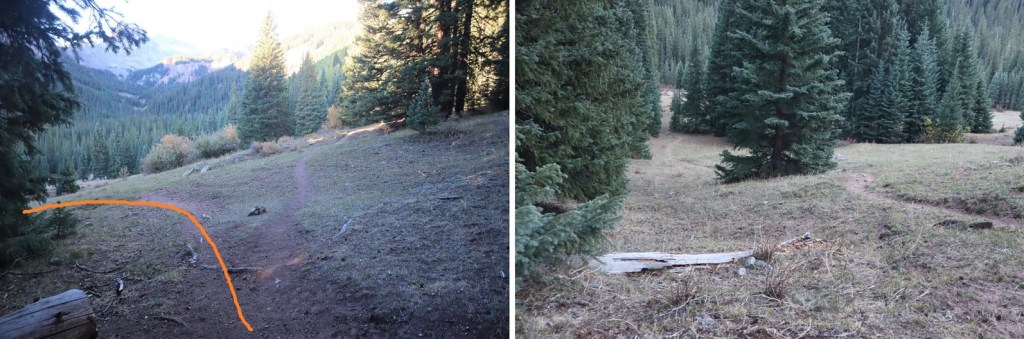
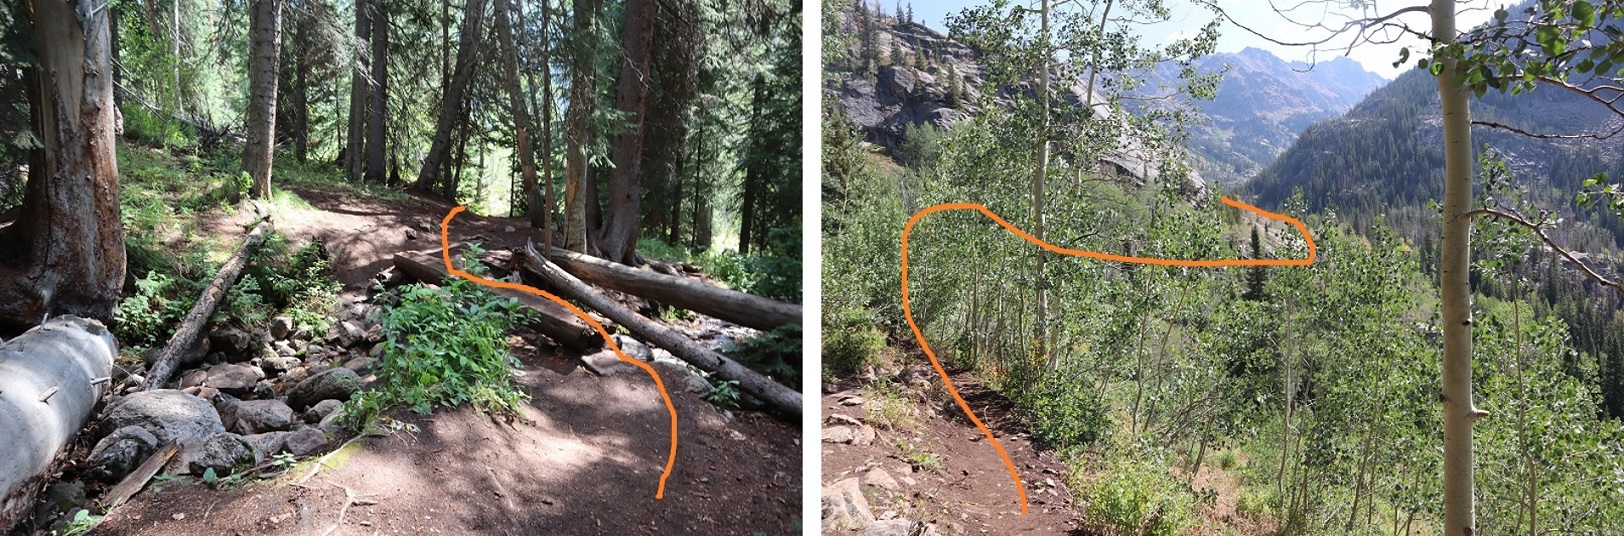
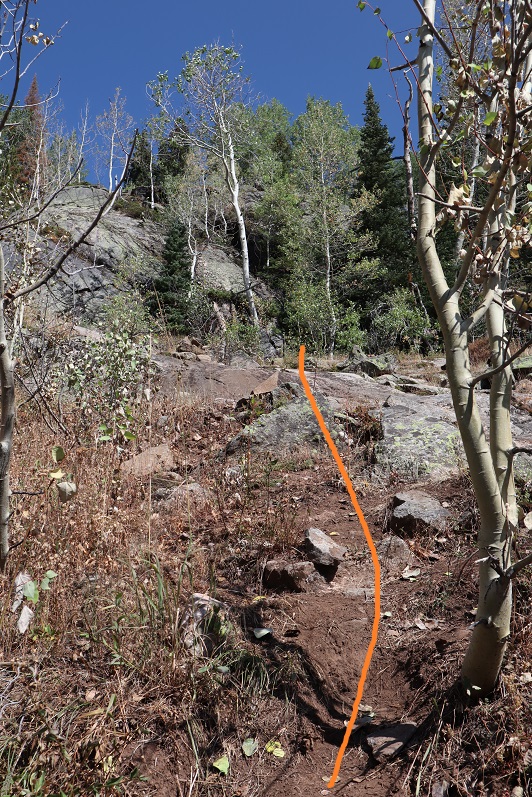
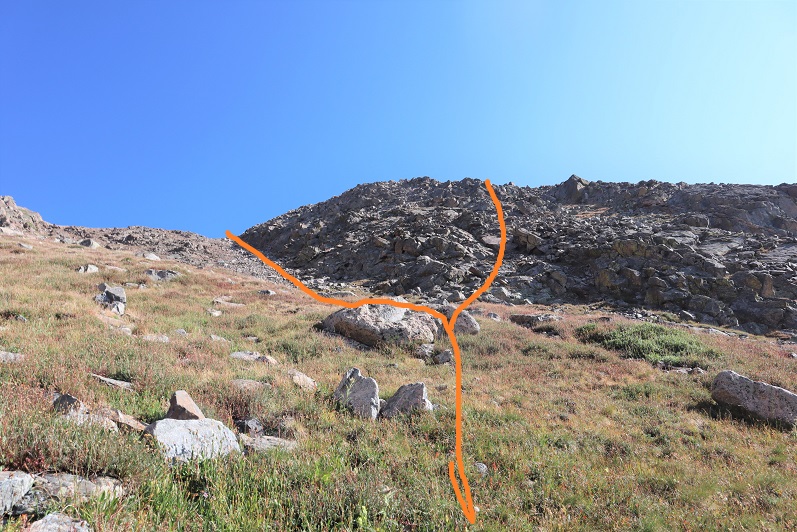
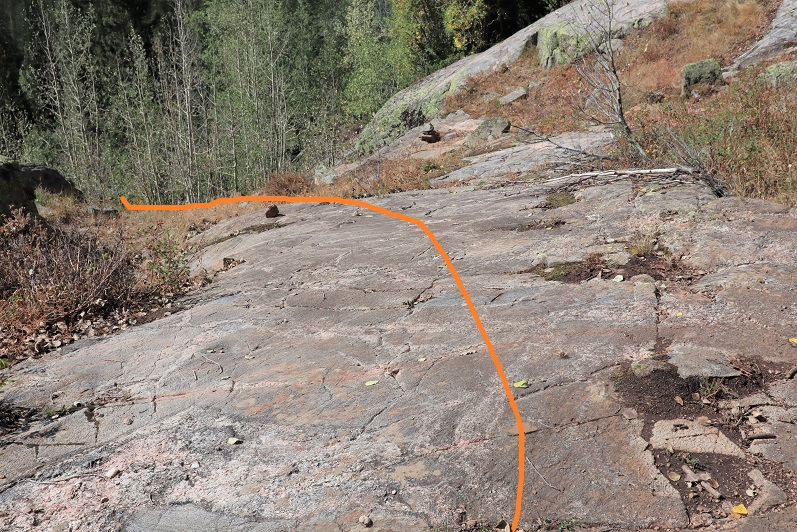
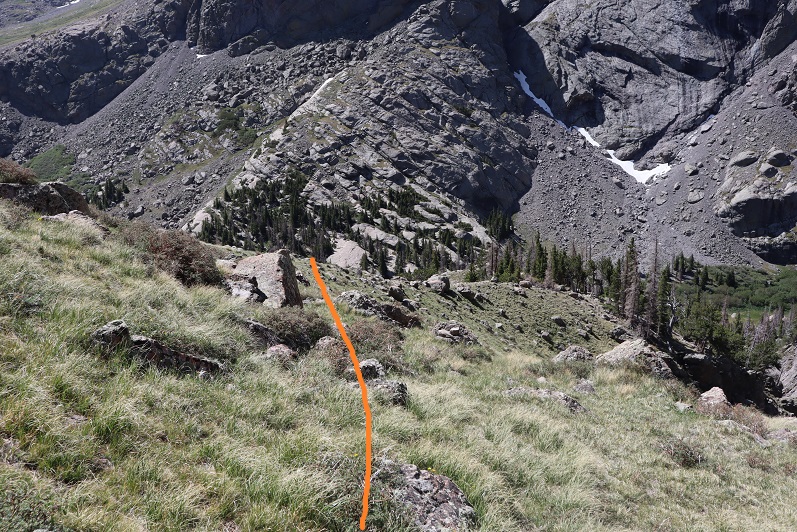
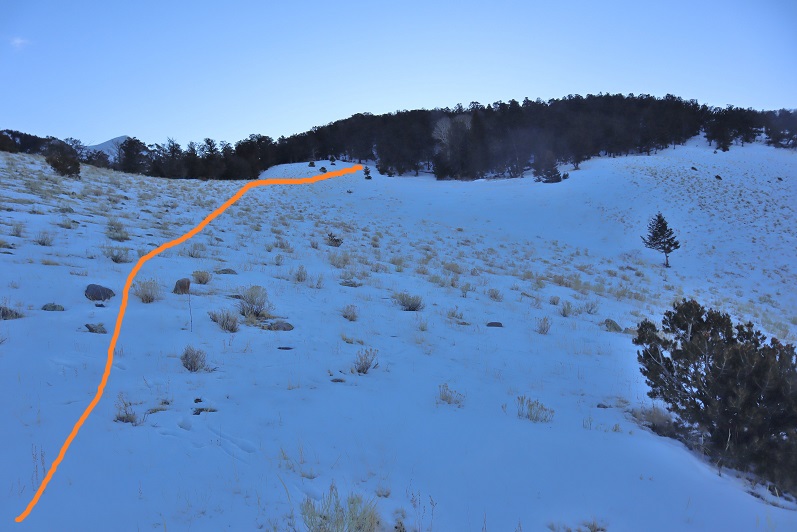
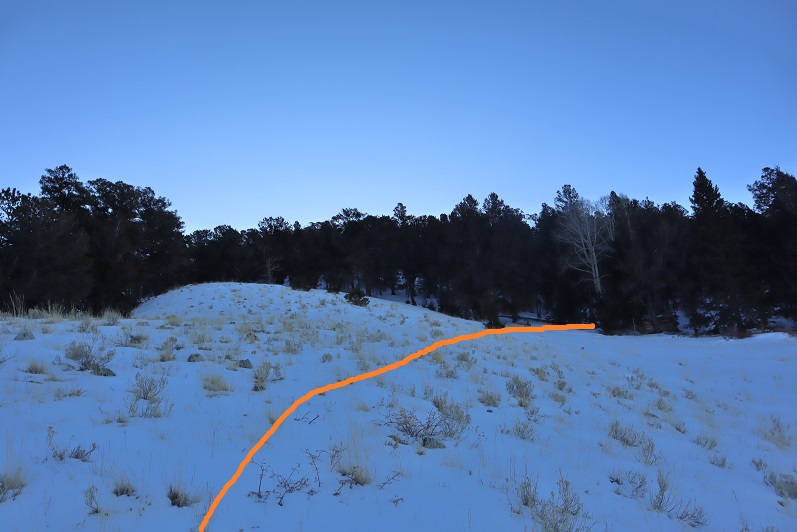
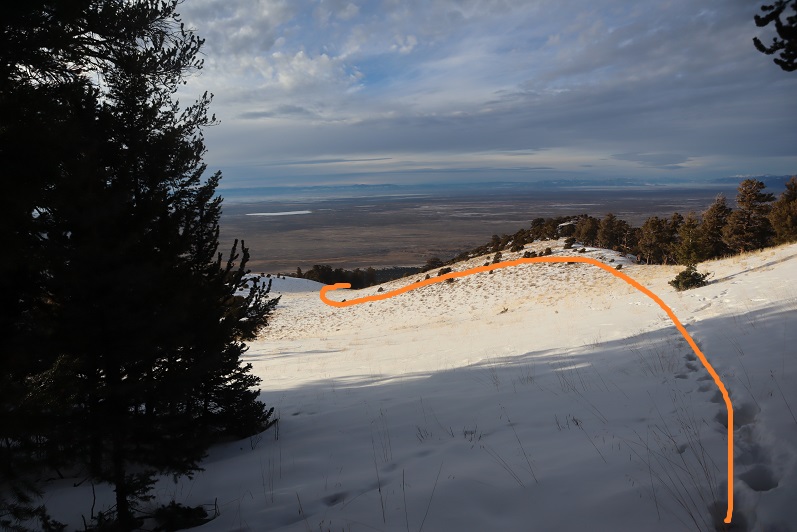
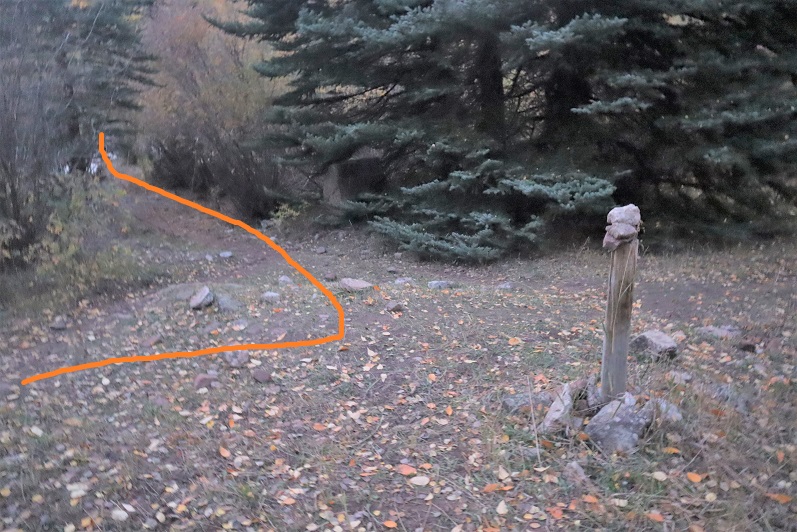
After hiking a few dozen yards south the trail abruptly ends.  When it ends, turn right and head west towards the hillside.  A trail will pick on the hillside.

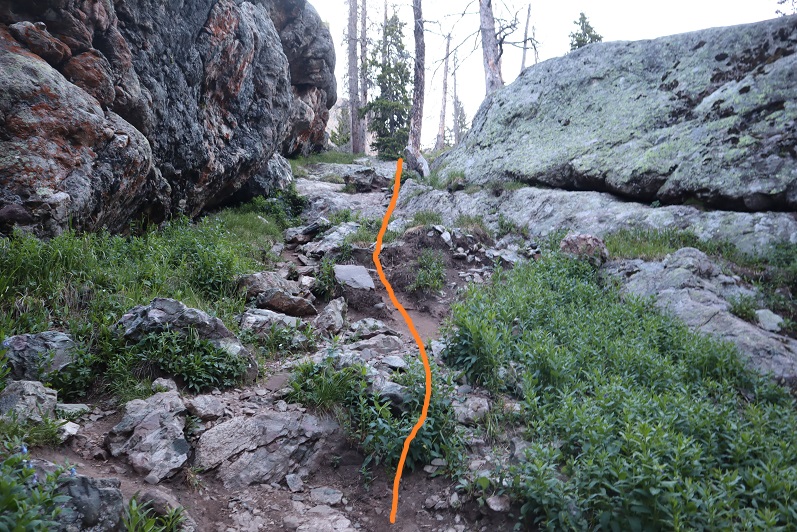
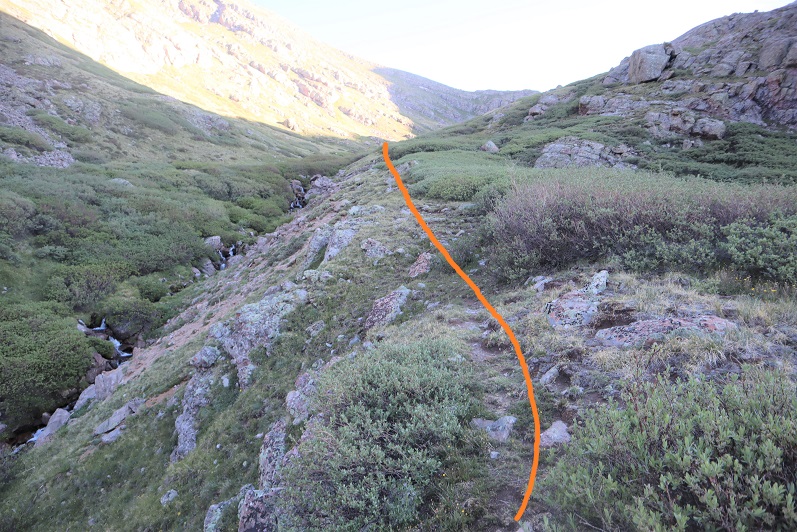
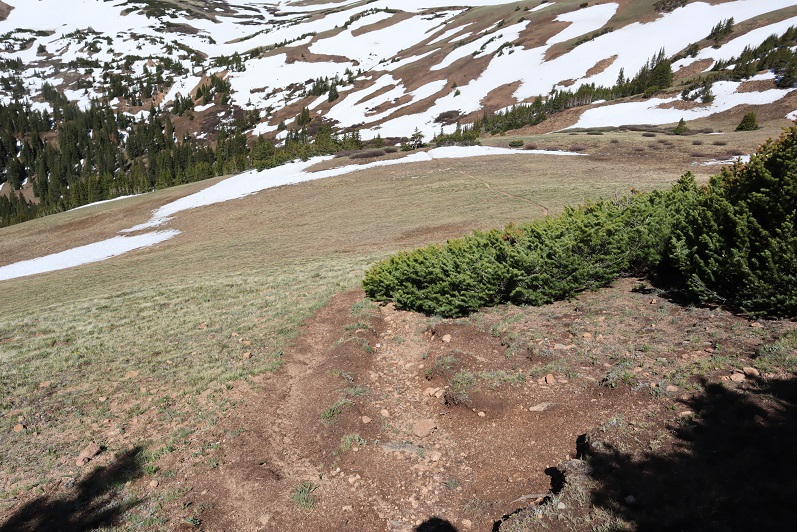
Here’s where I made my third (and final) mistake of the morning:  When you see the path split in two, take the higher one (the lower one is a cow trail that leads you through gooey mud then ends).

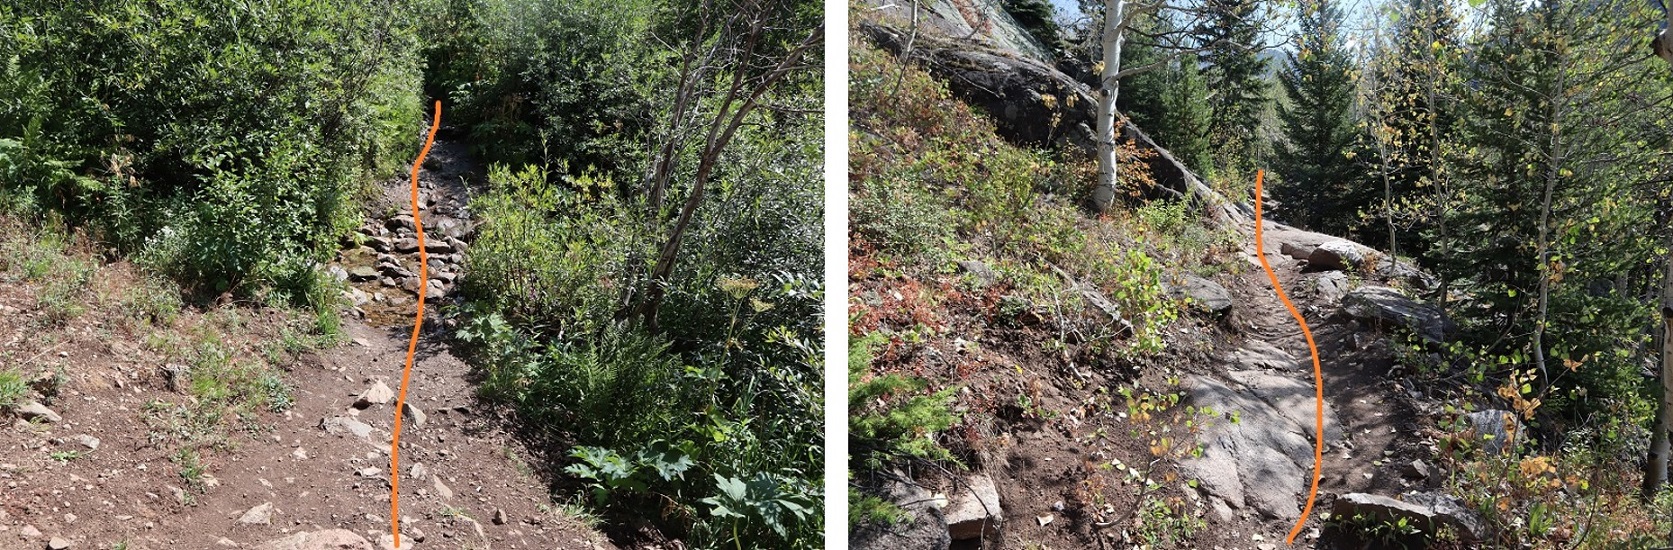
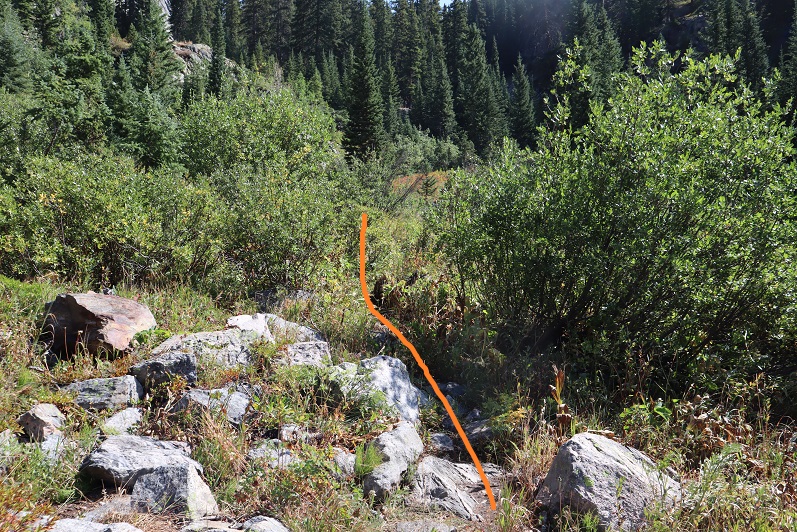
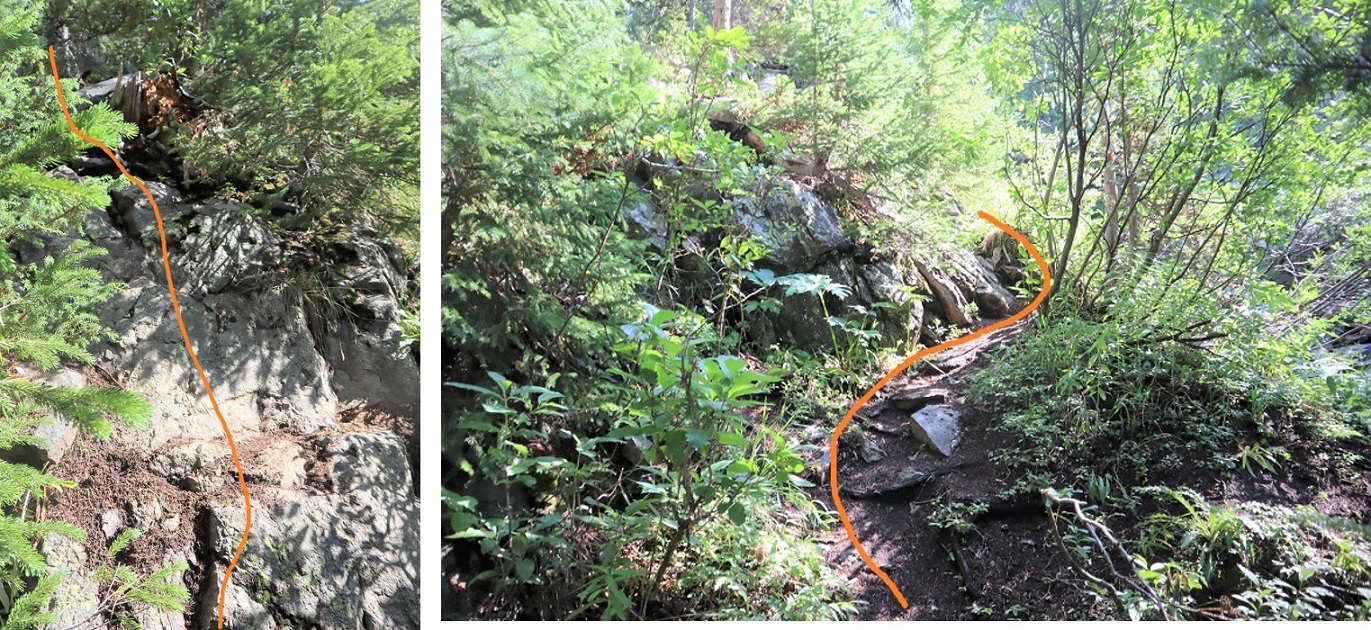
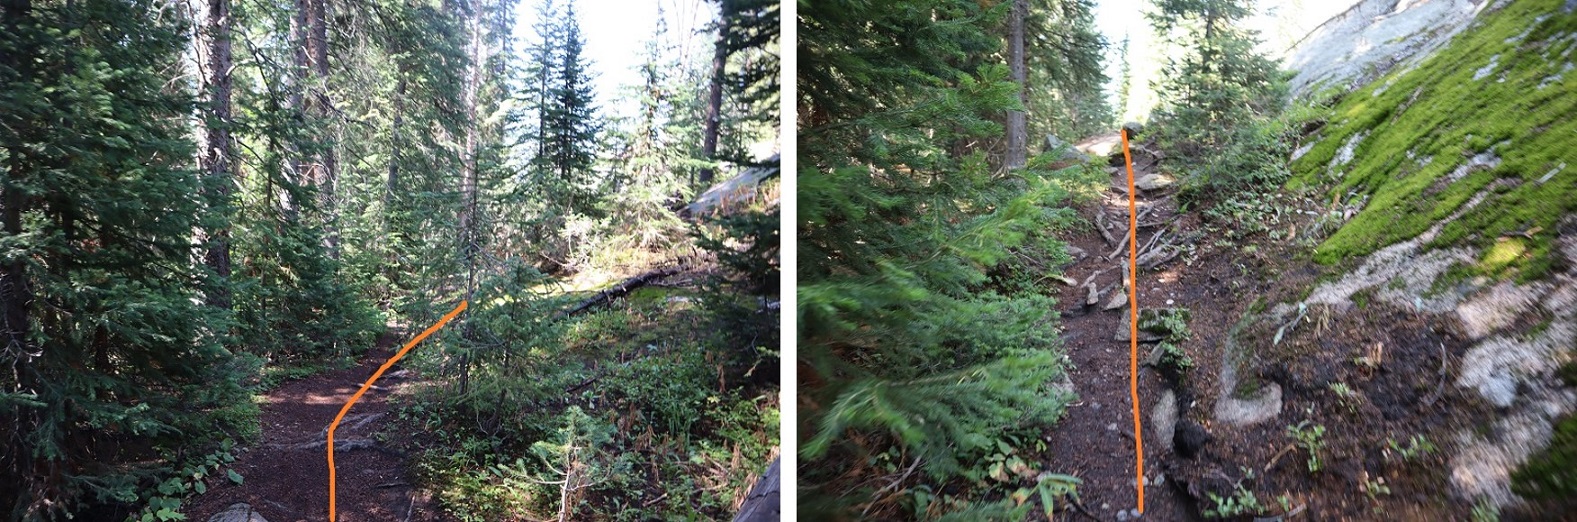
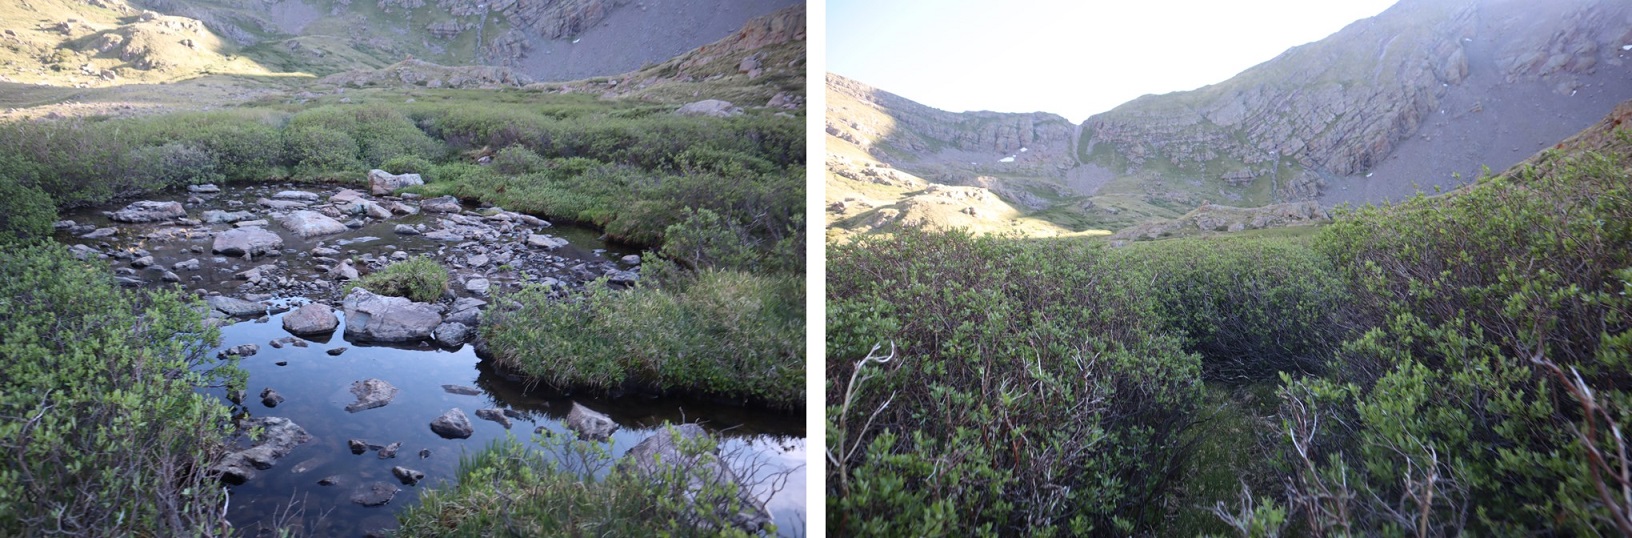
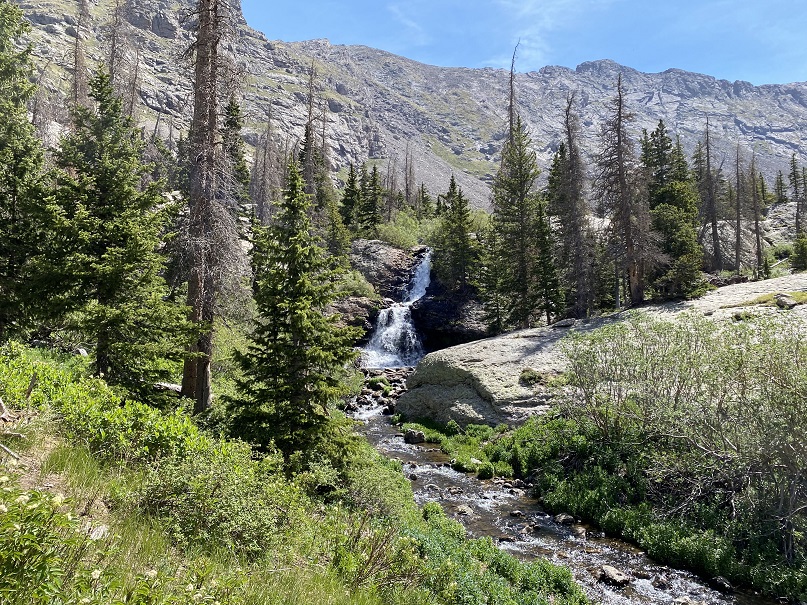
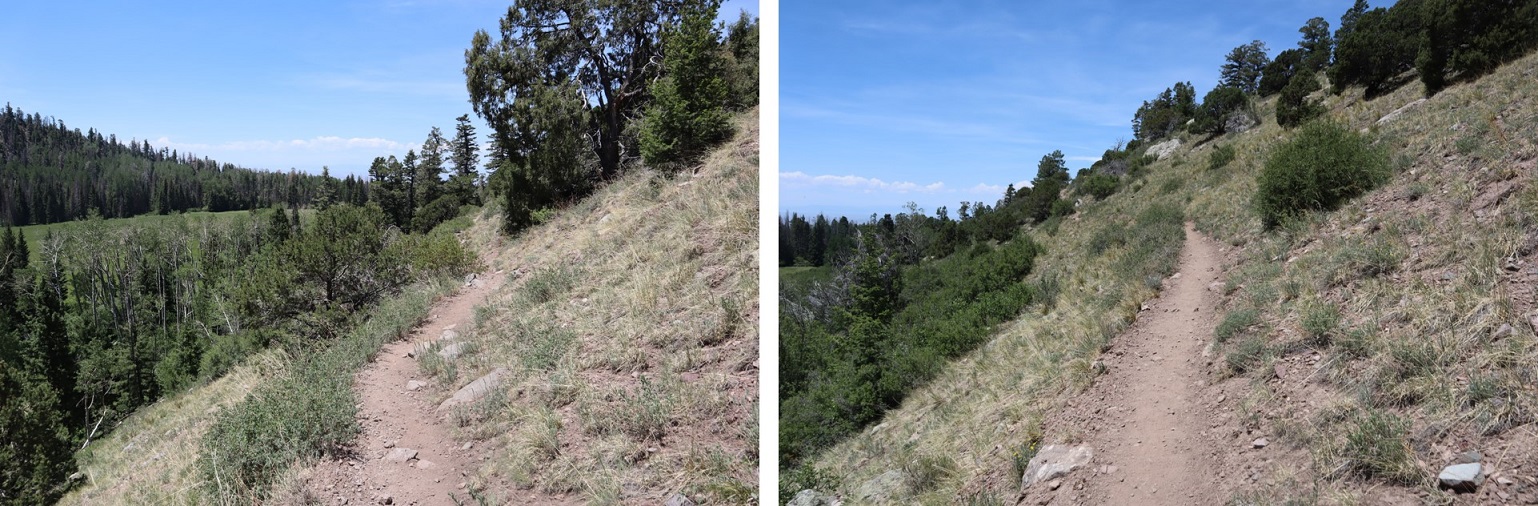
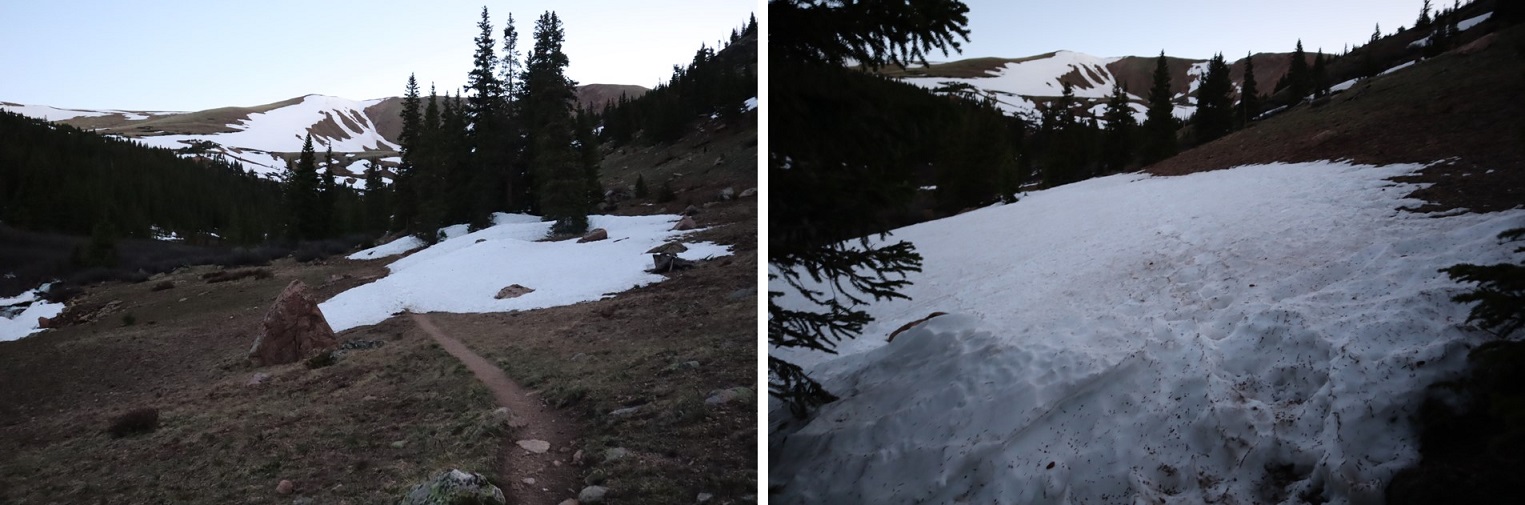
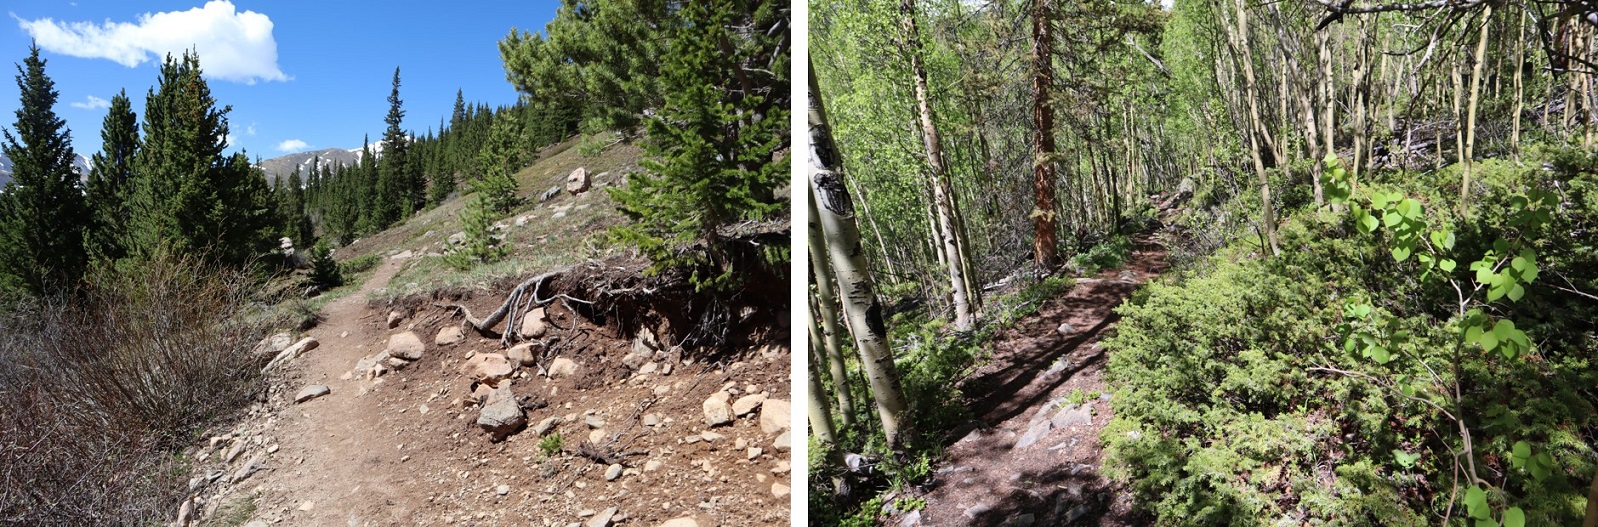
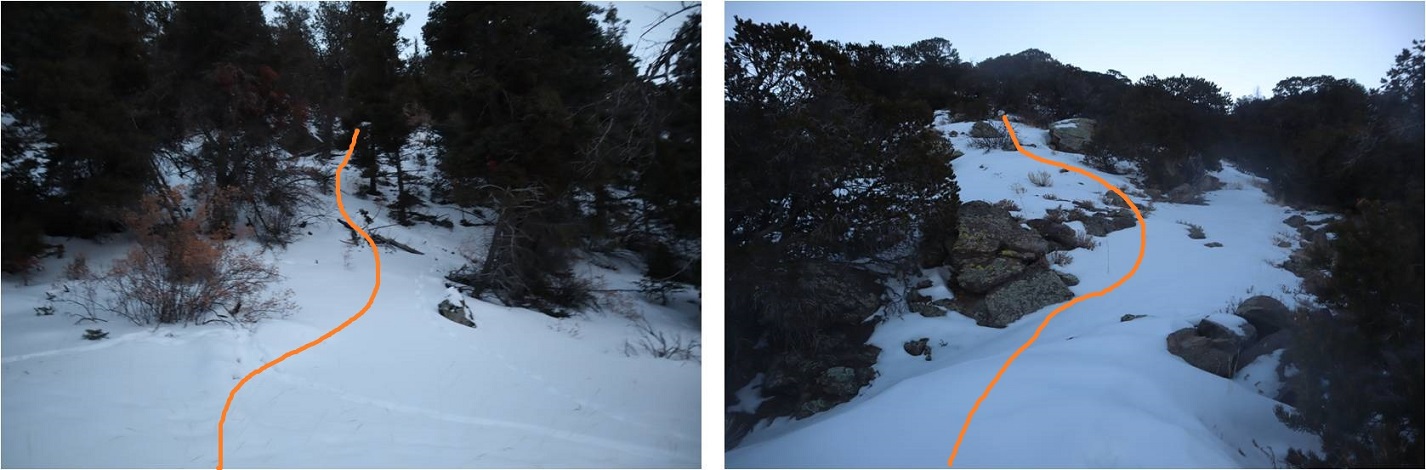
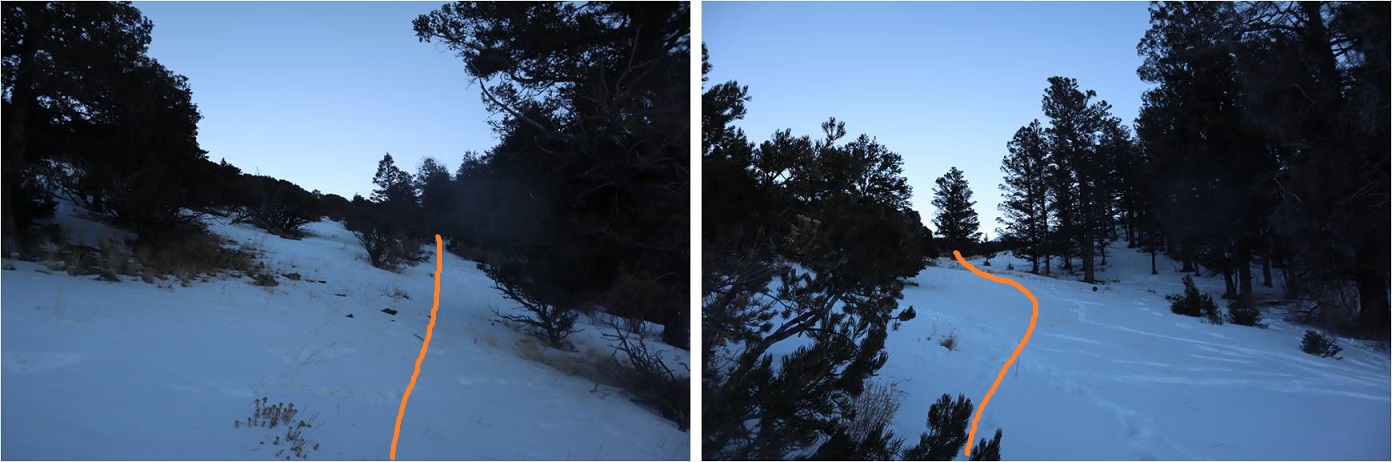
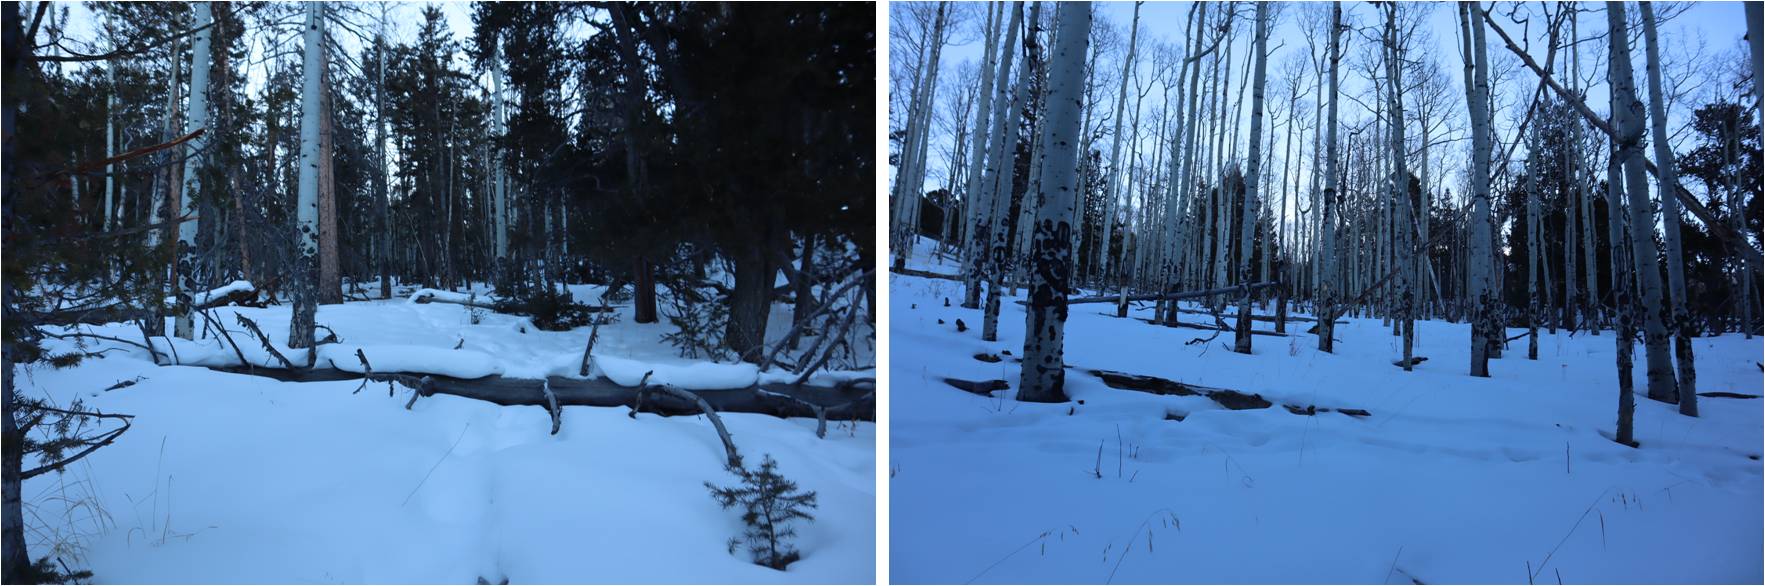
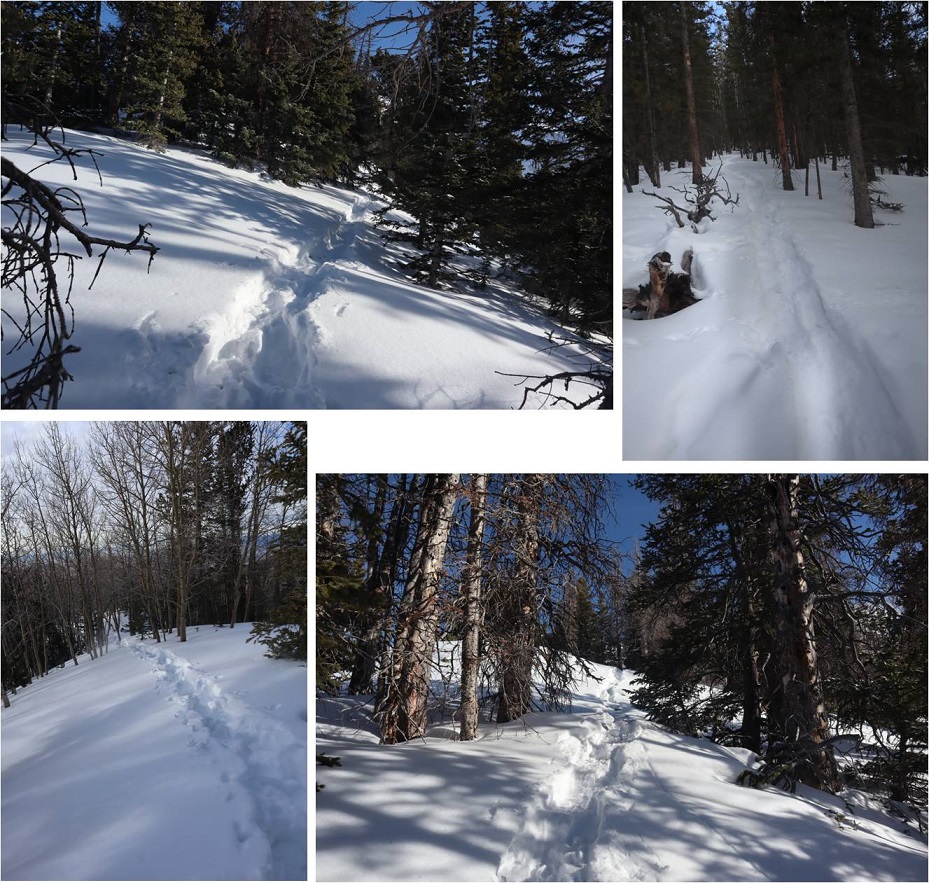
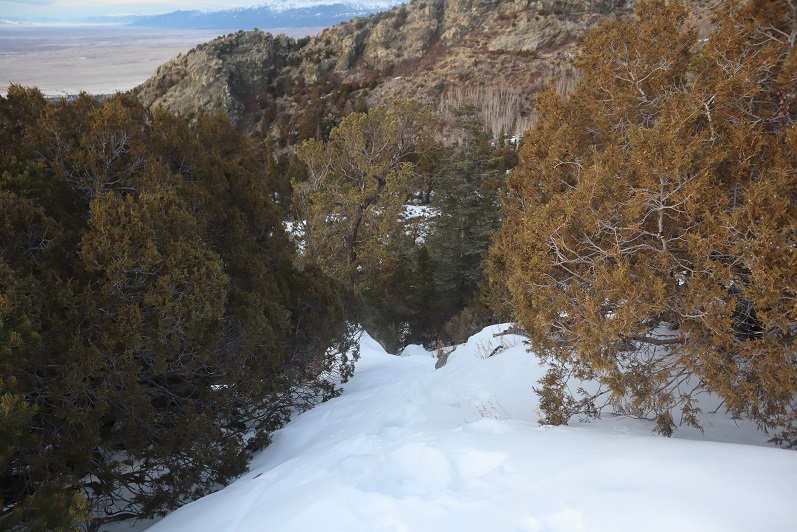
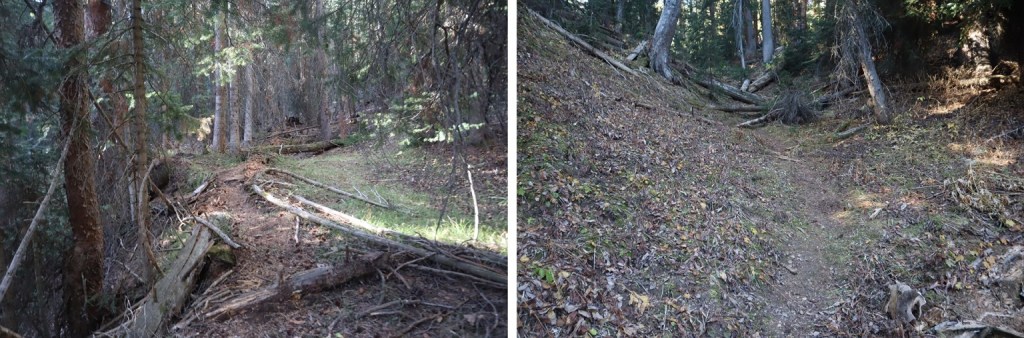
From this point on the trail becomes faint.  At times I questioned whether I was on an actual trail at all.  It will parallel West Snowmass Creek, and stay high.  Here are some photos:

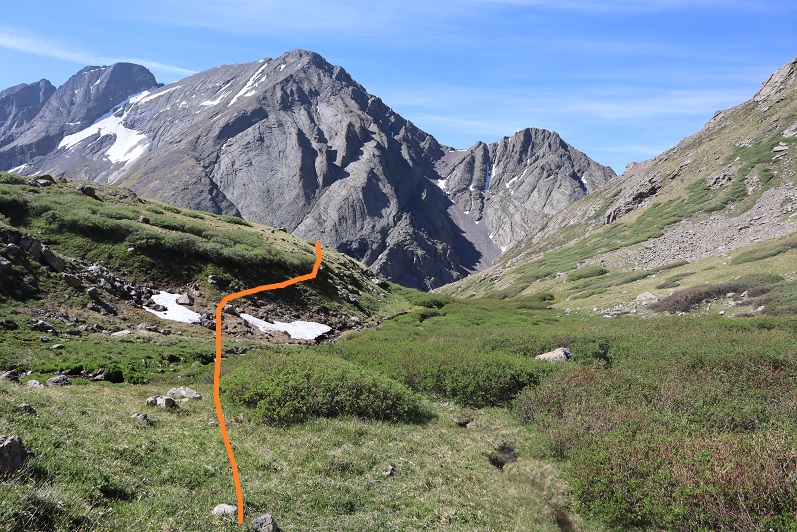
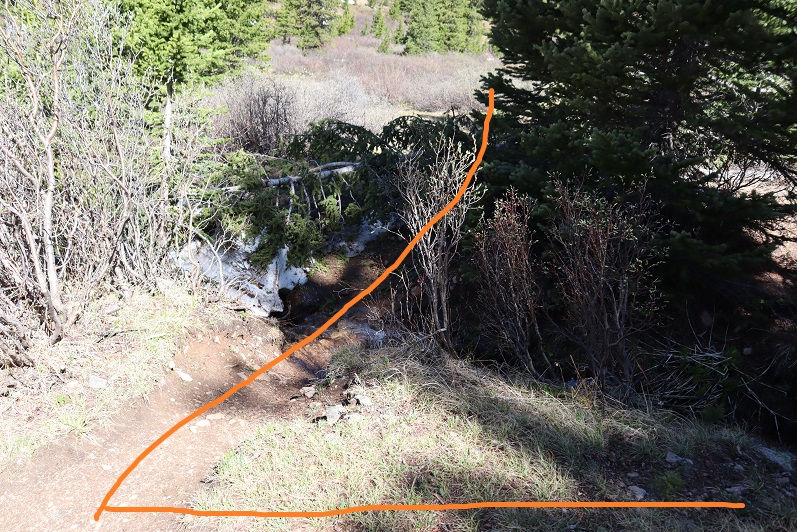
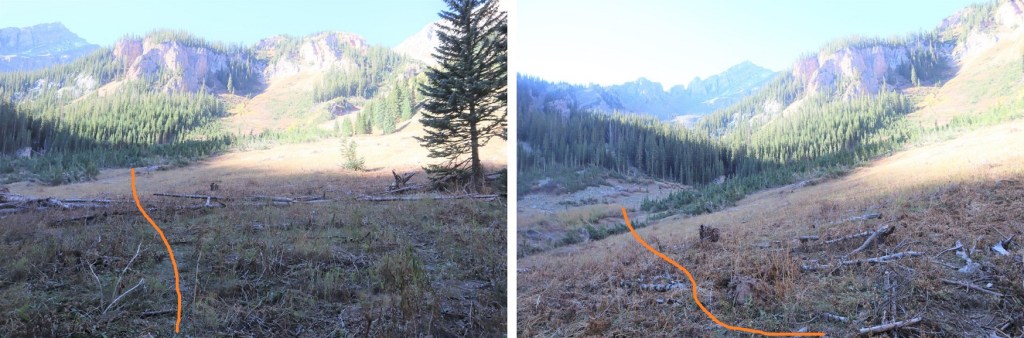
I came to a clearing and headed southeast, crossed West Snowmass Creek, and once again picked up a trail.

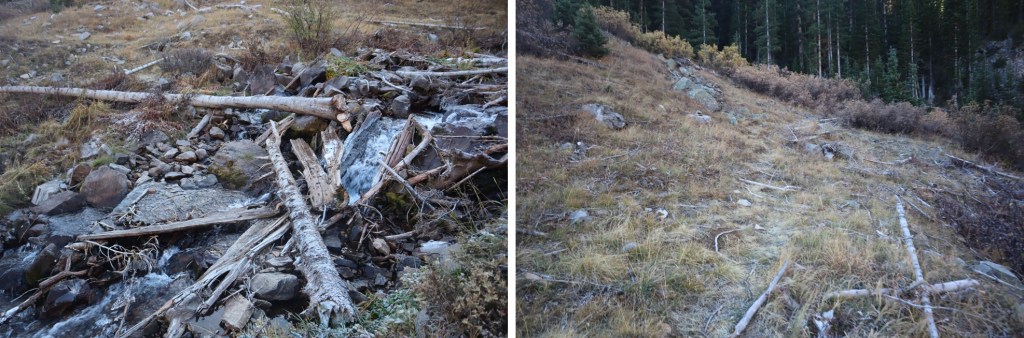
I took this trail to treeline, where it ended. I put pink surveyor’s tape on a tree so I’d know where the trail picked up on my way back.   

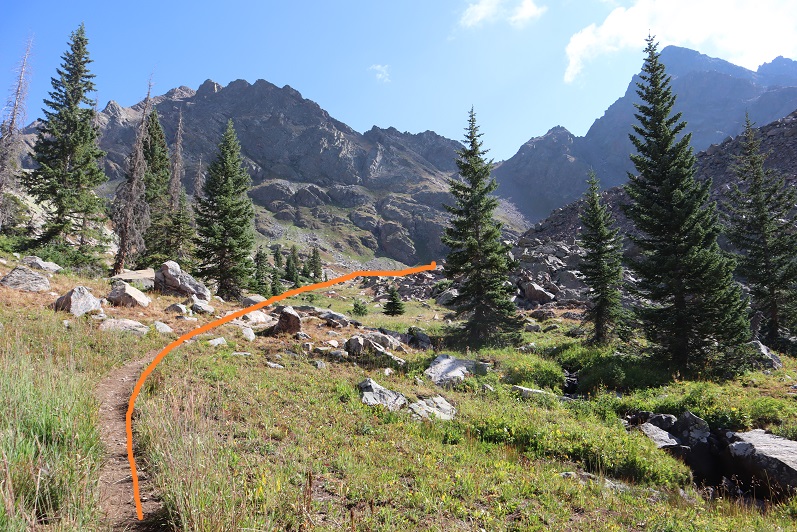
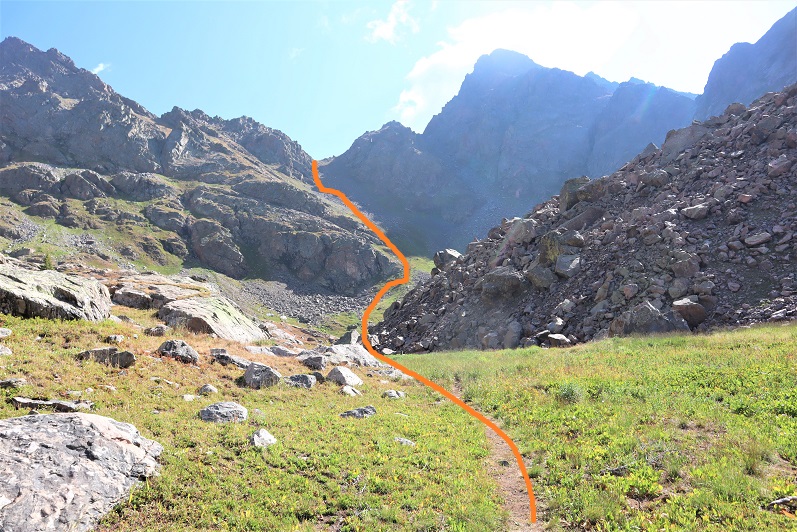
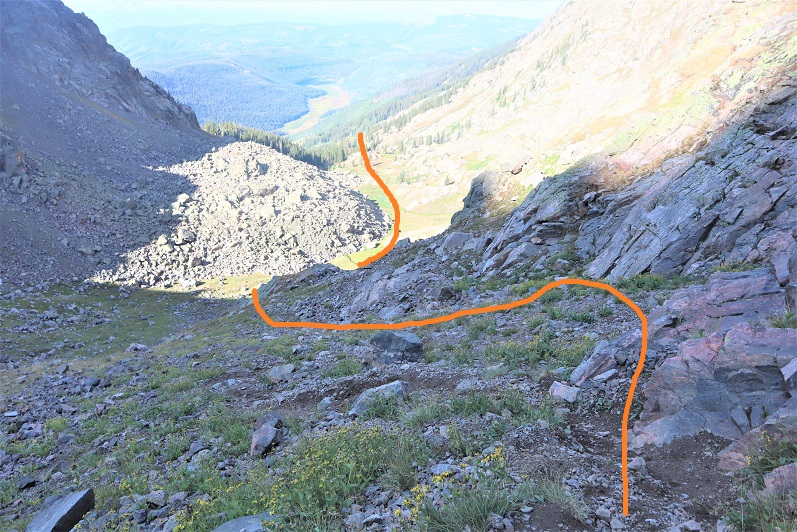
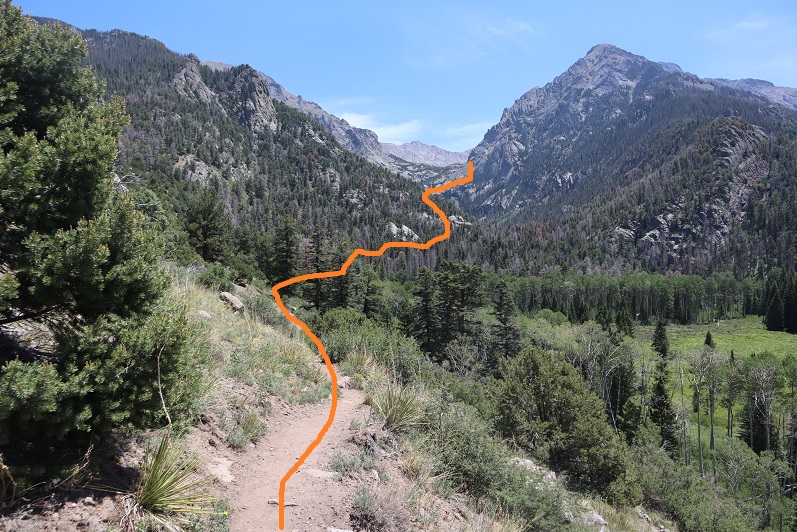
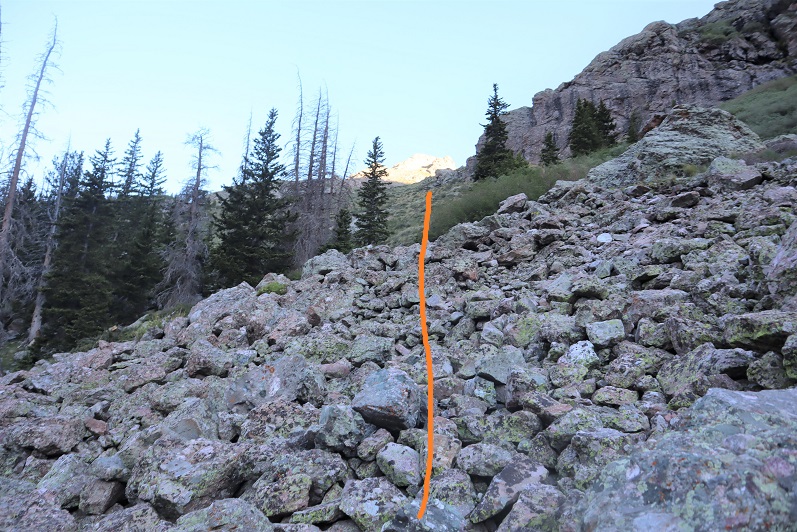
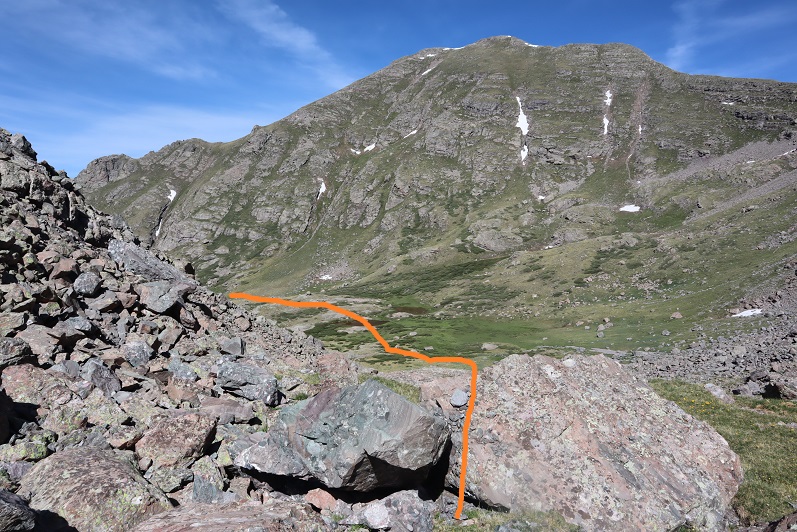
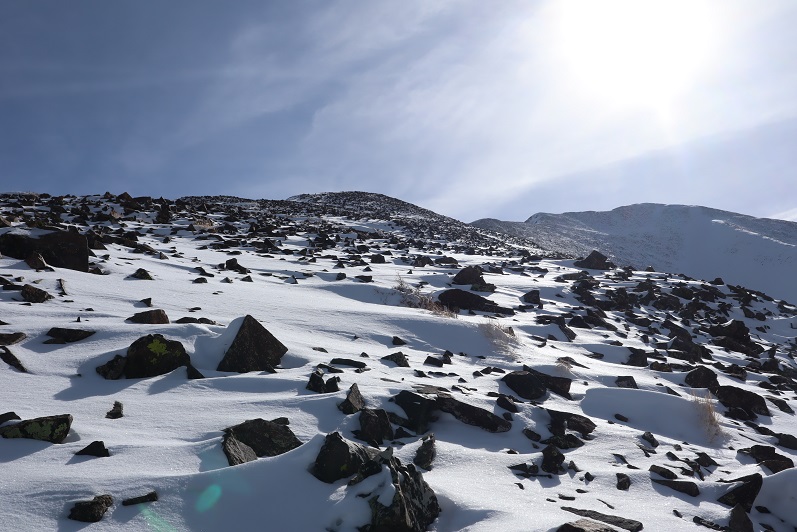
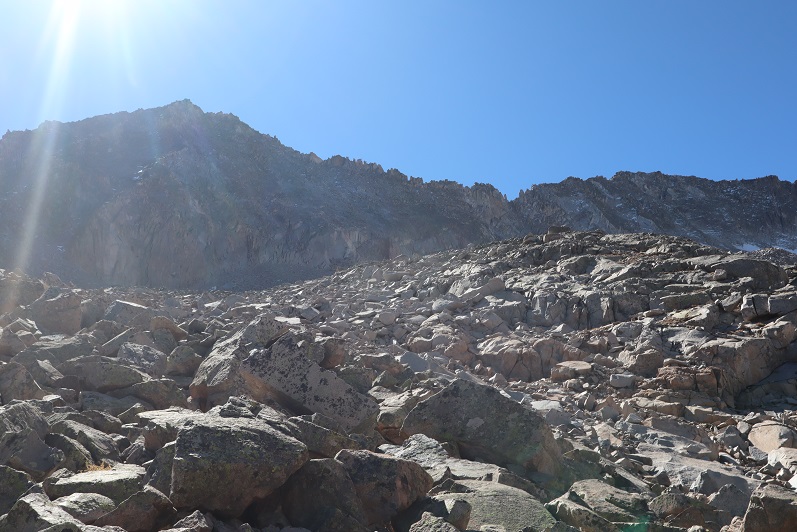
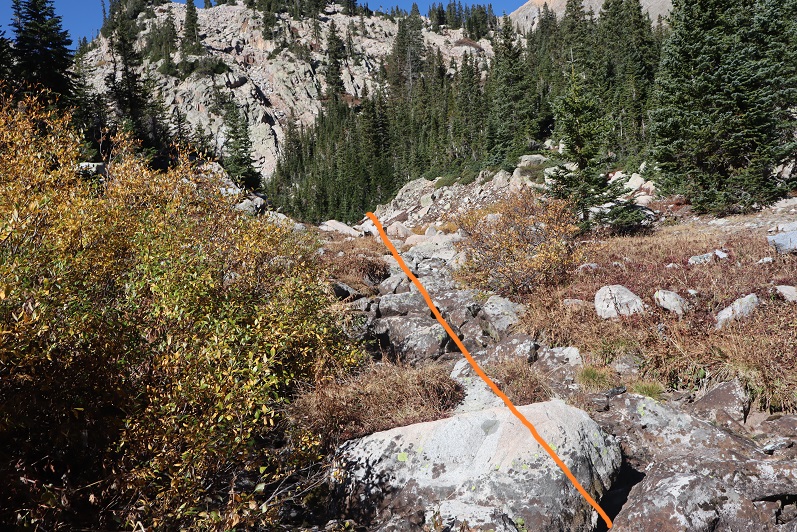
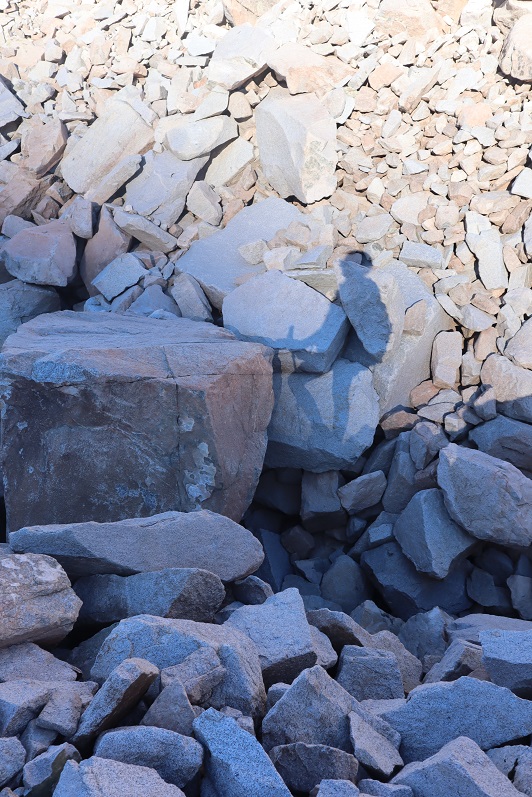
From here the rest of the hike was full of rocks and boulders.  I headed southwest

I lost a little bit of elevation before gaining it again

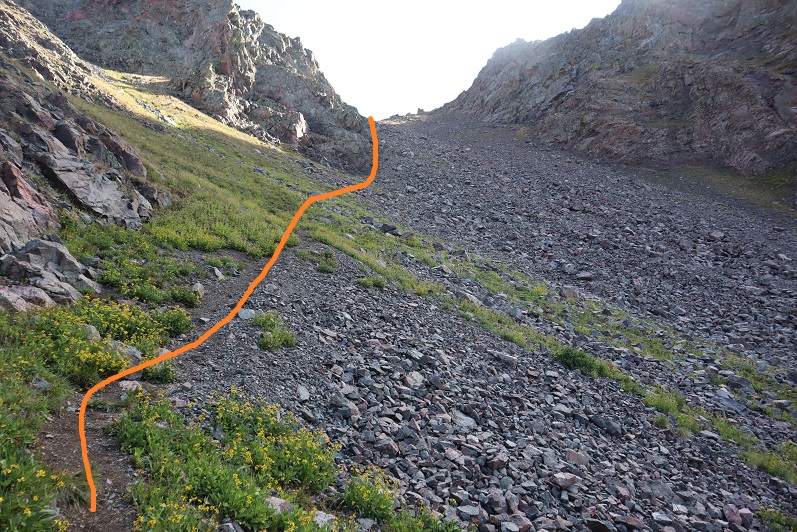
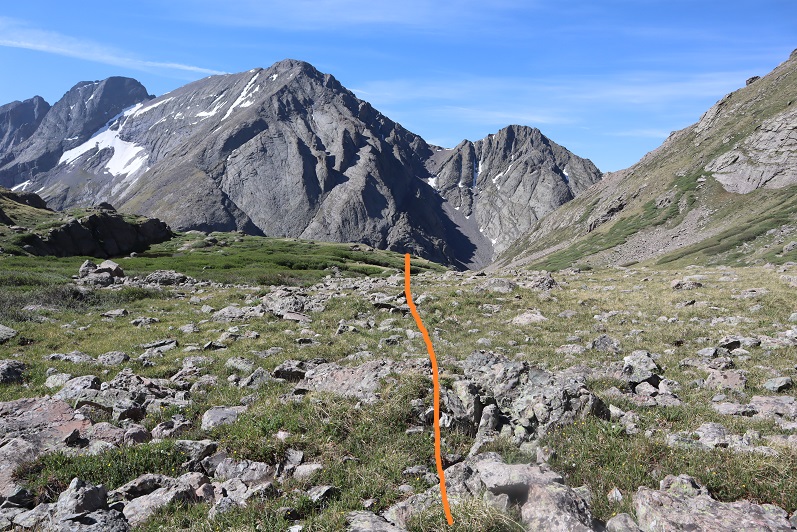
Rock-hopped up this drainage

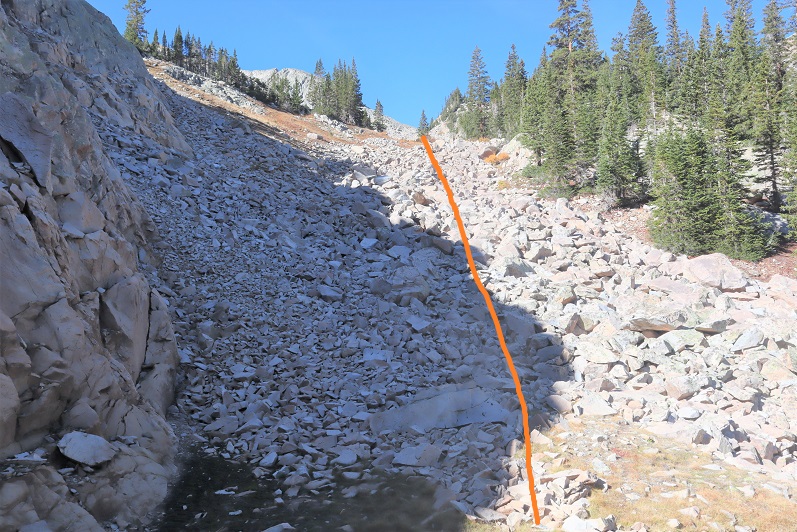
Followed the creek for a bit until it ended

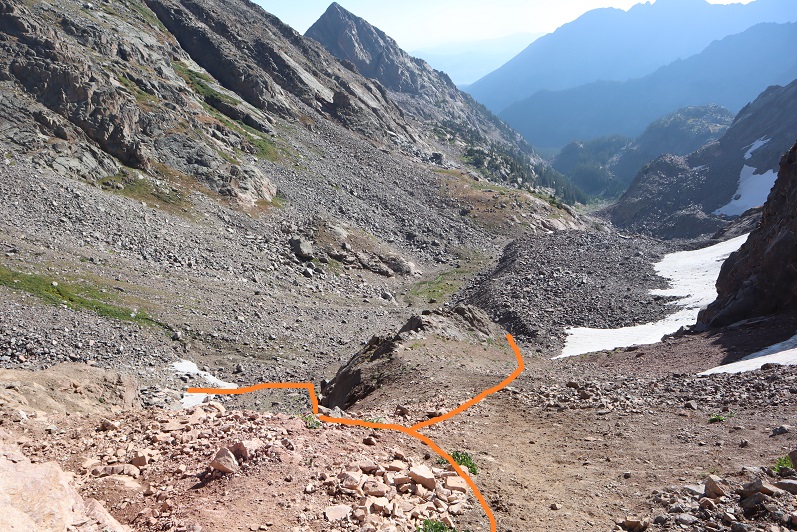
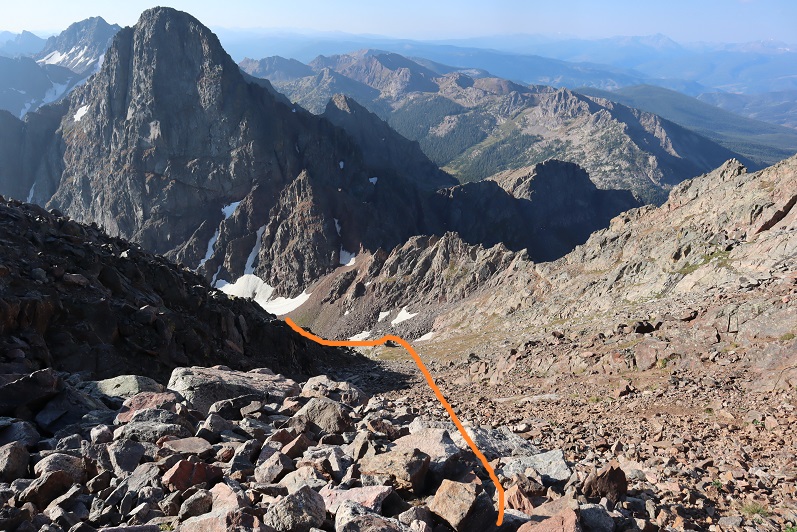
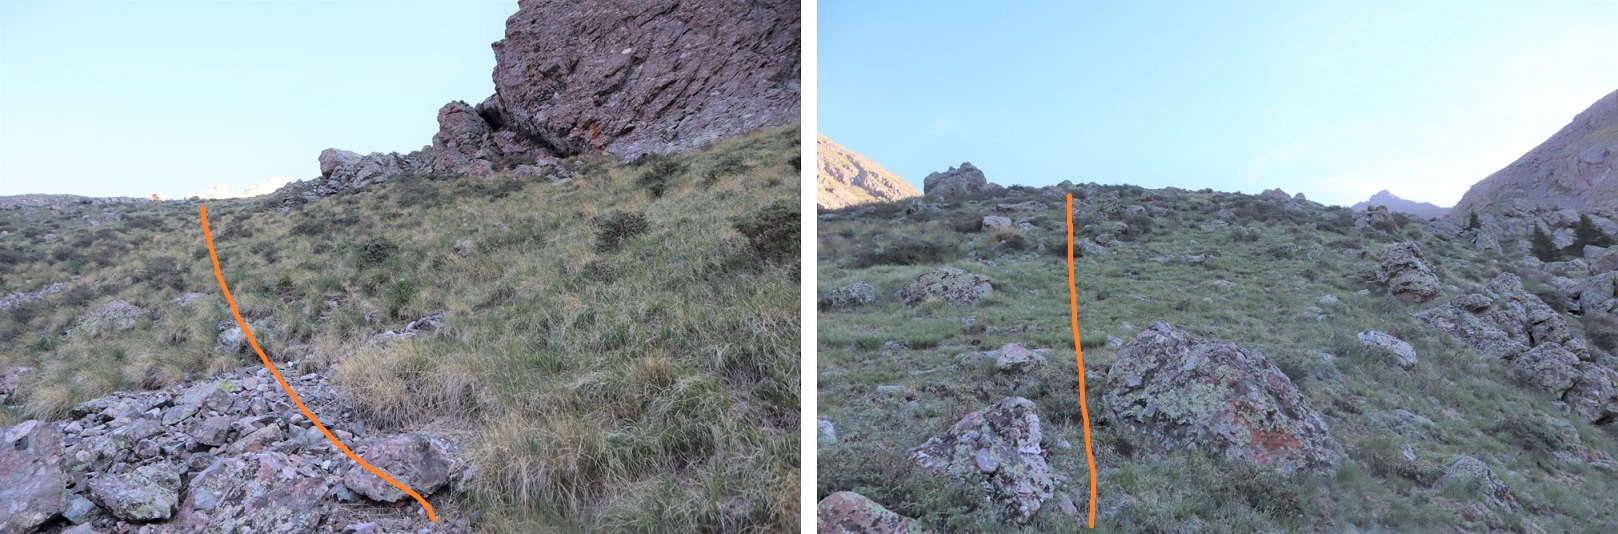
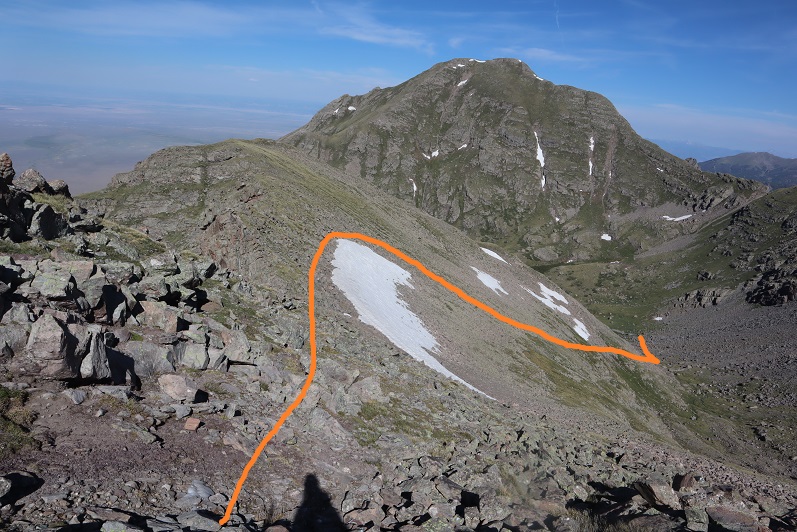
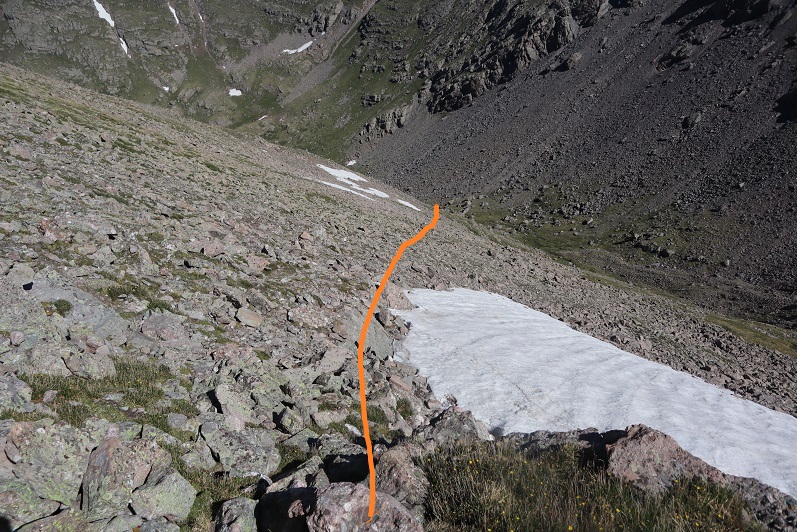
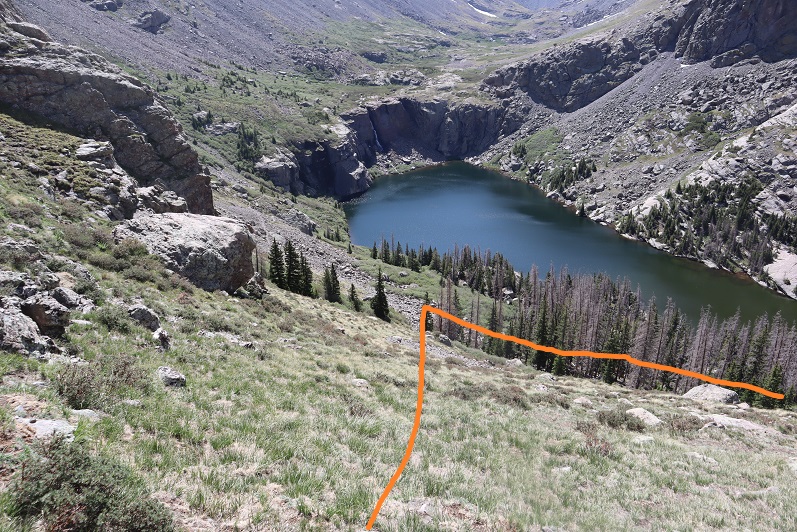
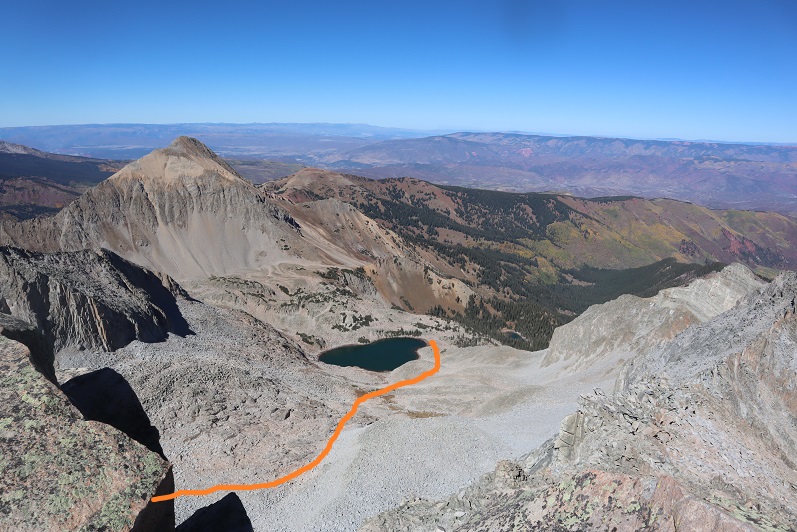
Ascended another drainage and at the top turned left to skirt Moon Lake

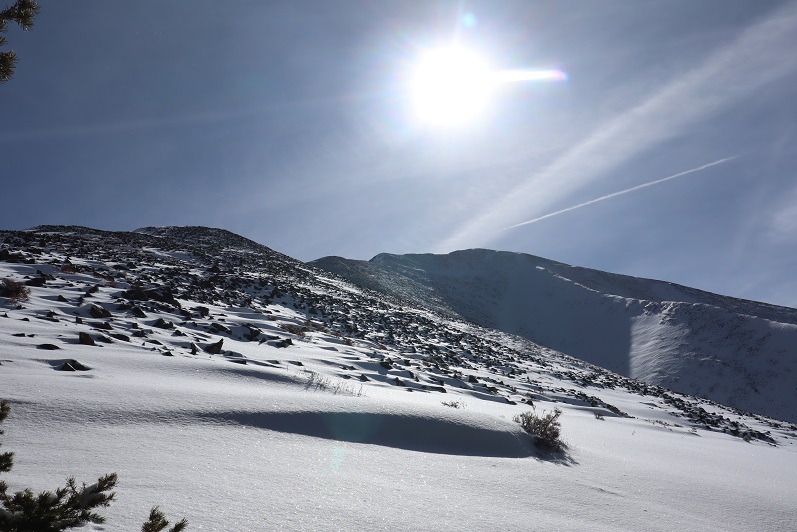
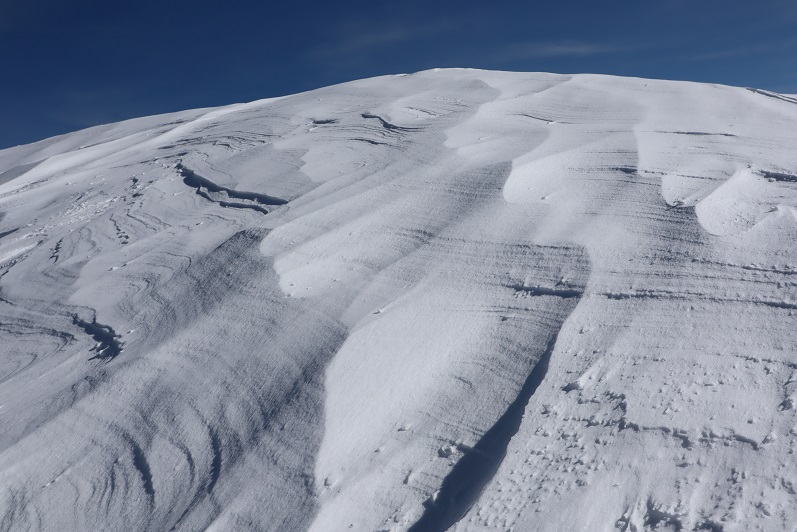
This basin never seems to end!  I just kept heading southwest

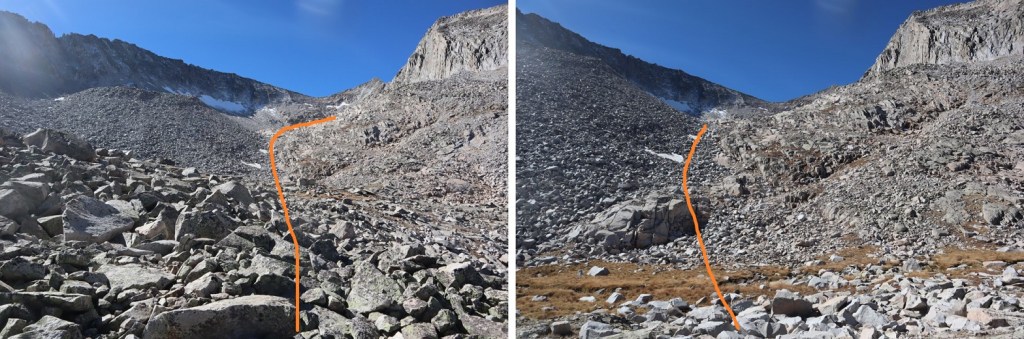
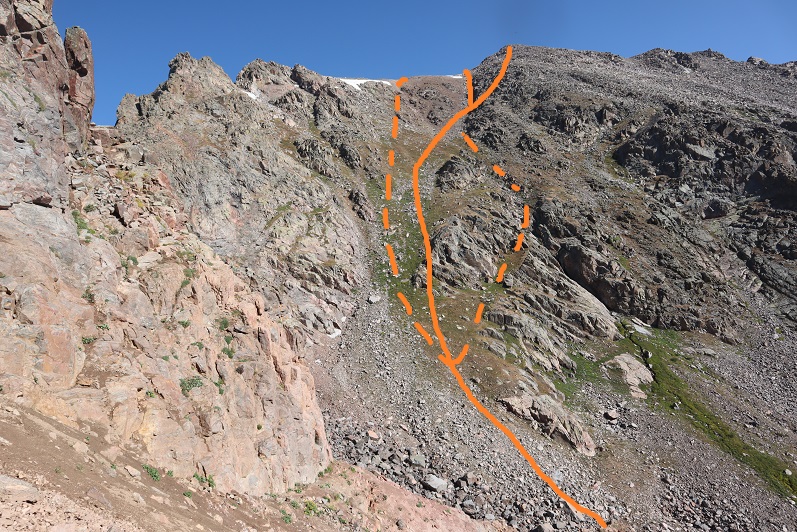
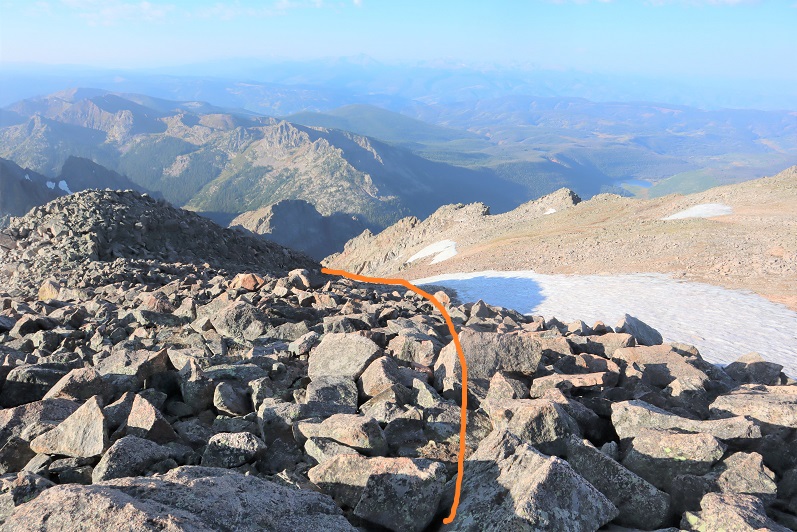
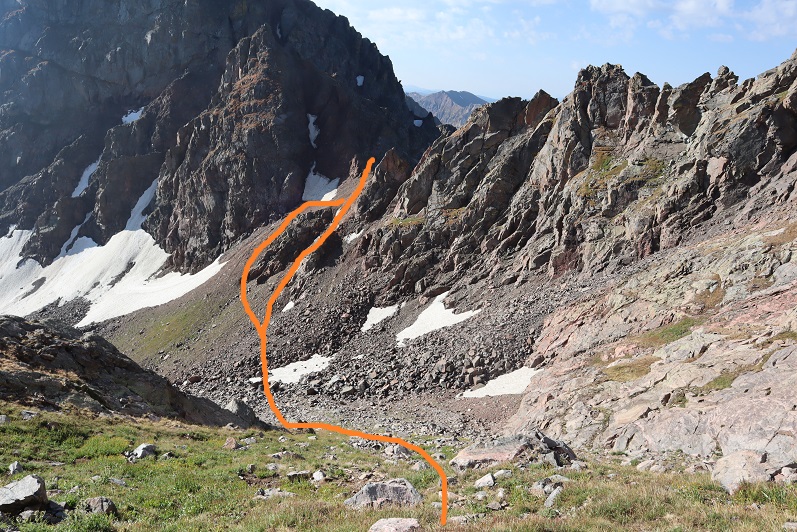
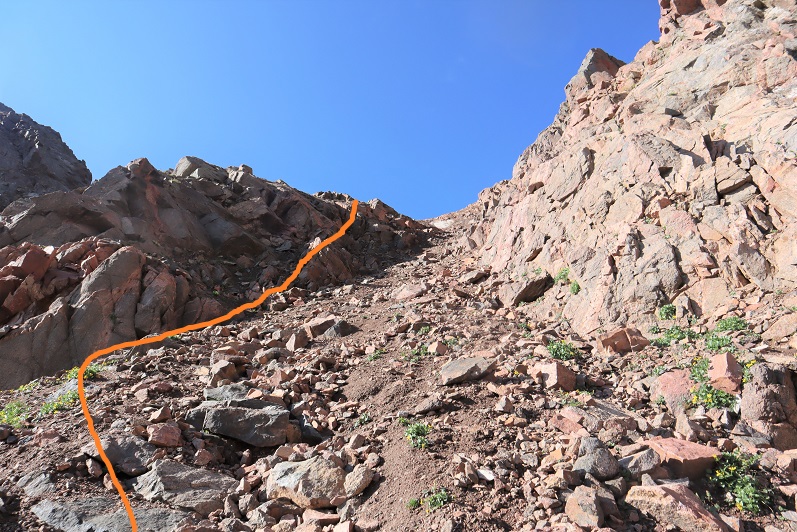
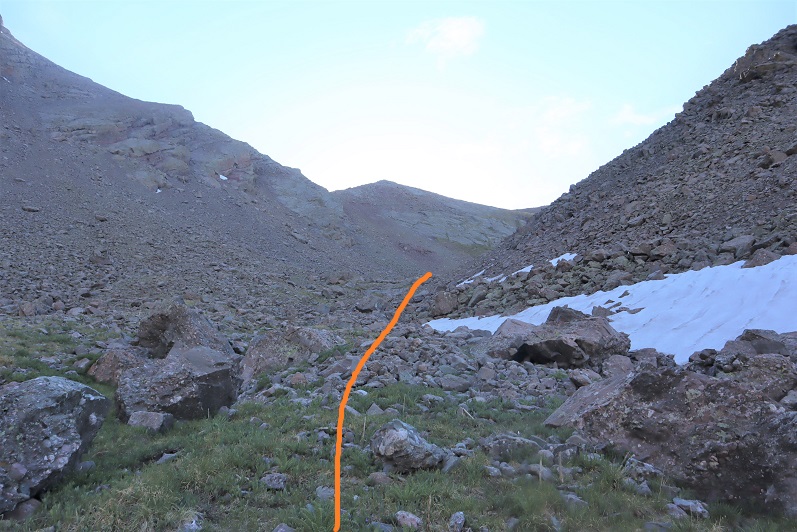
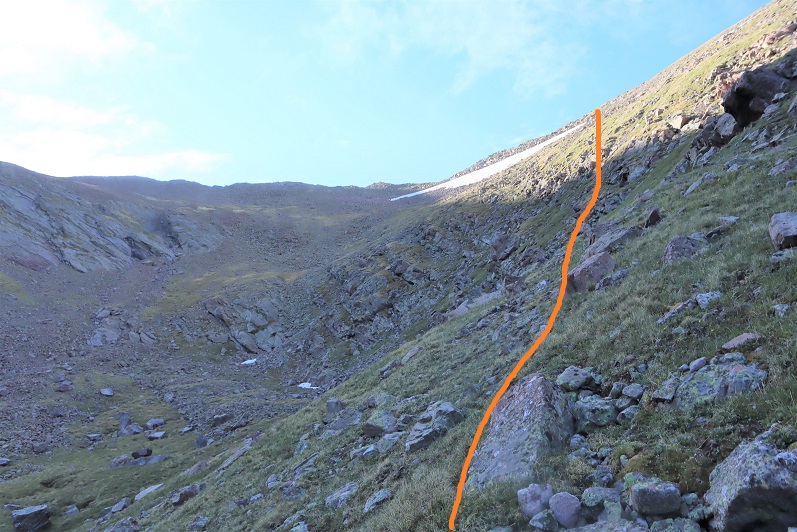
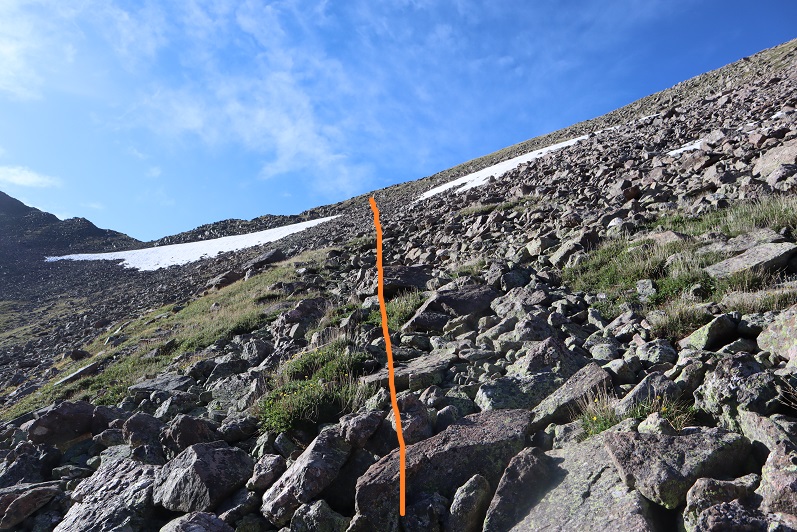
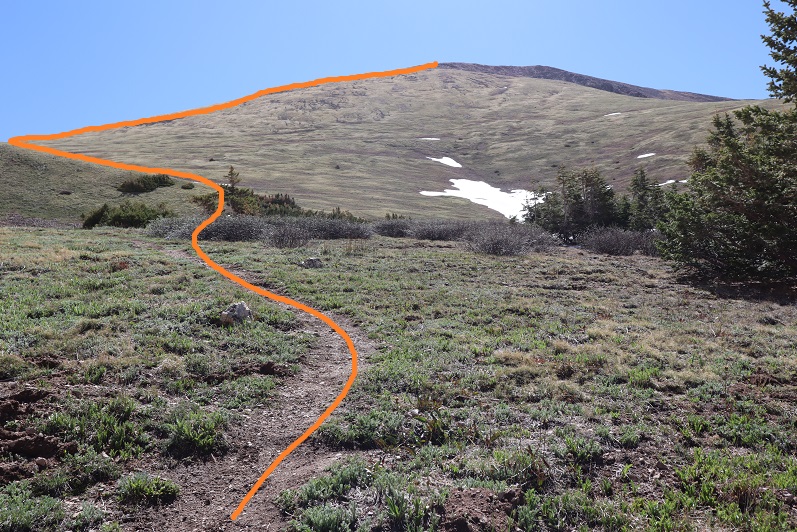
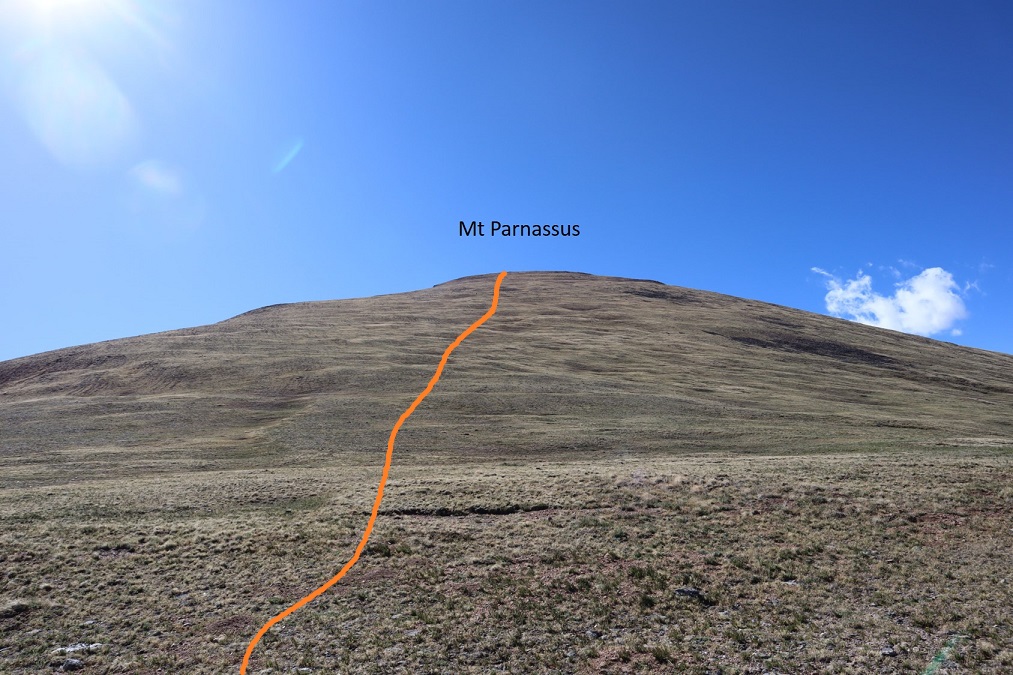
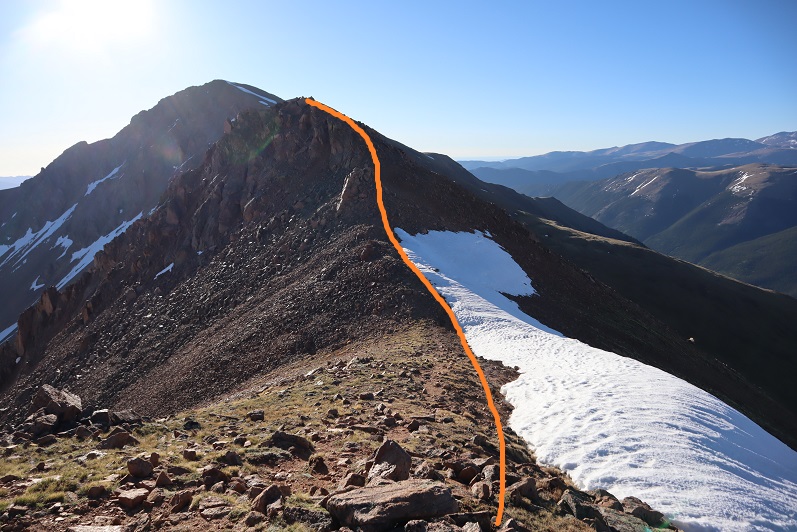
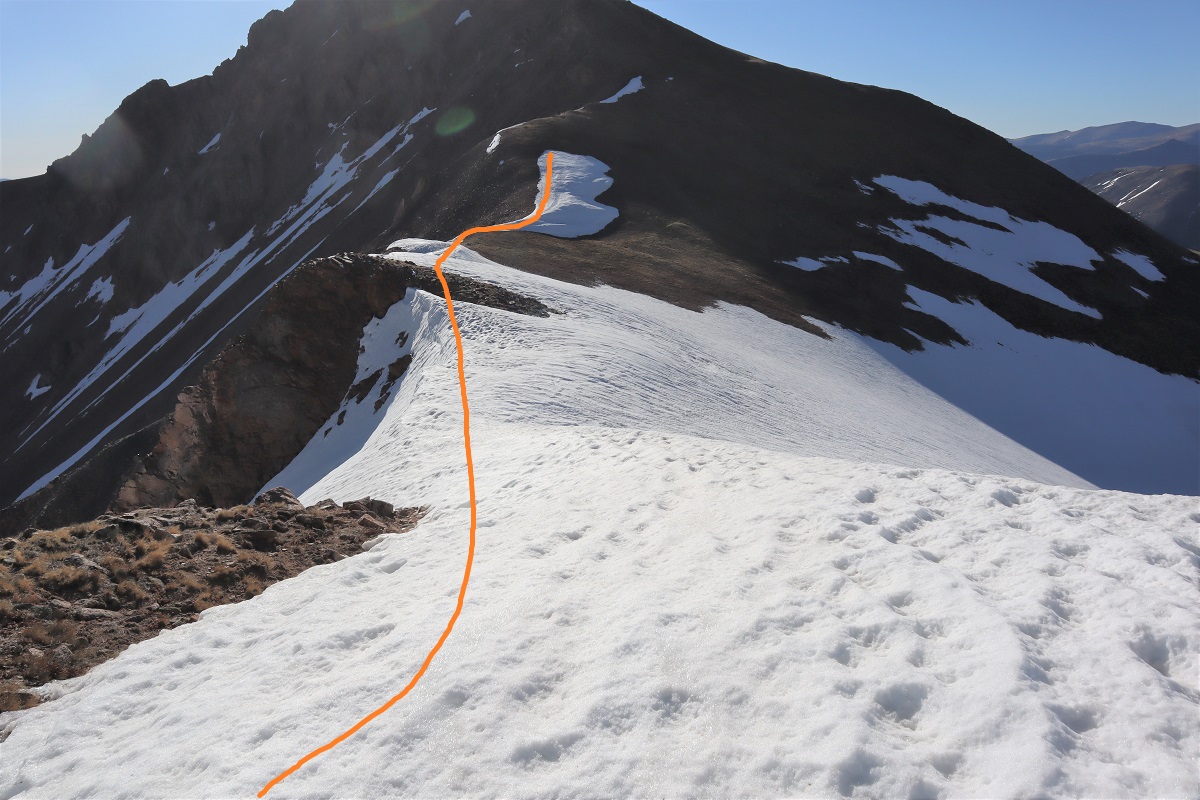
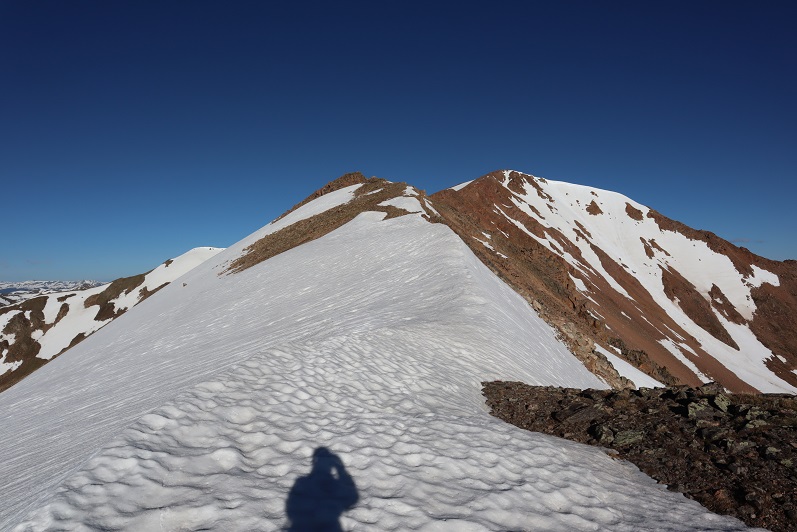
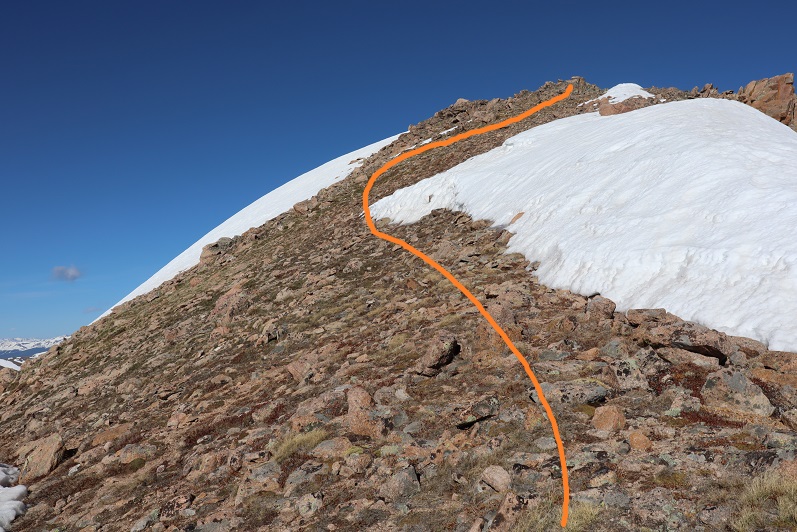
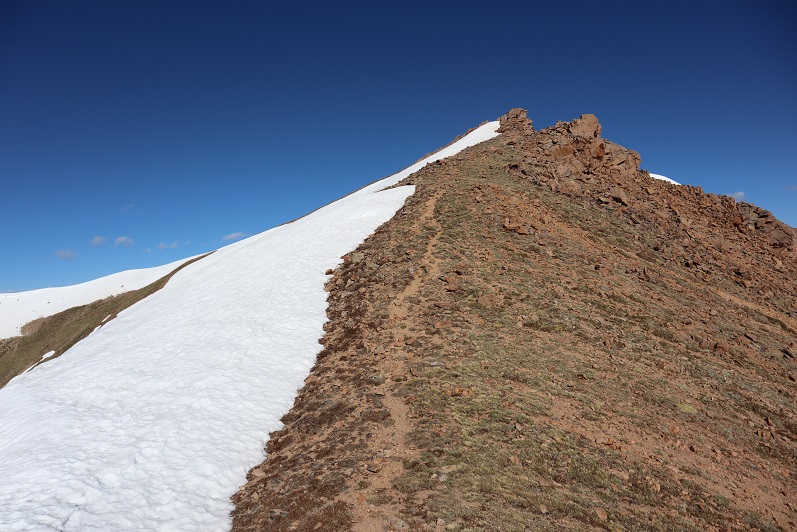
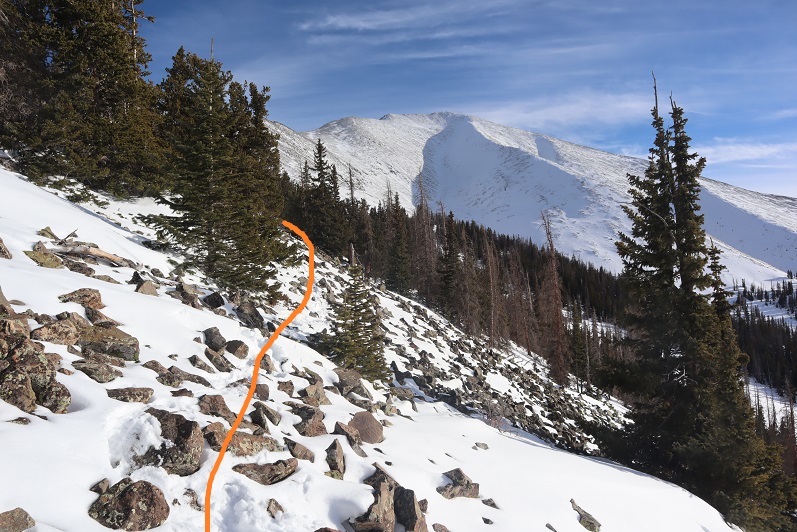
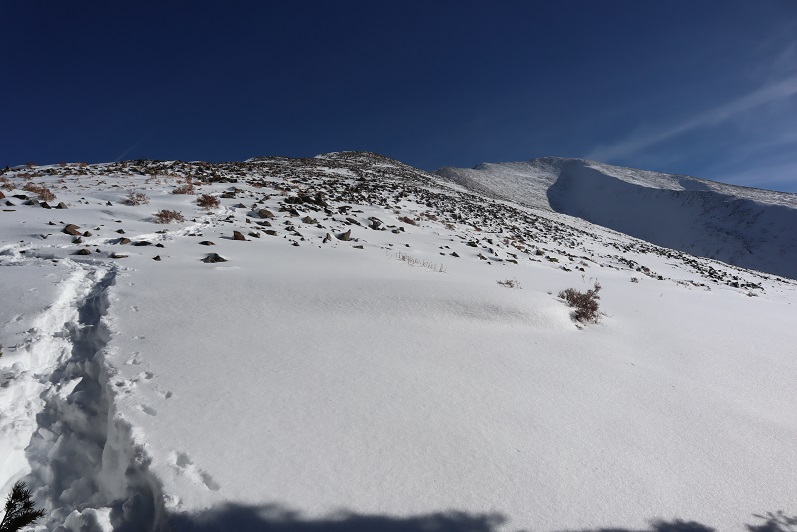
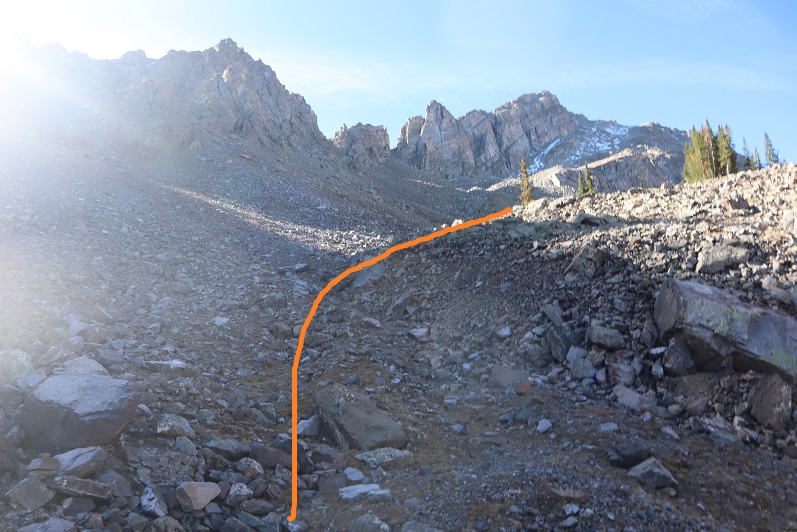
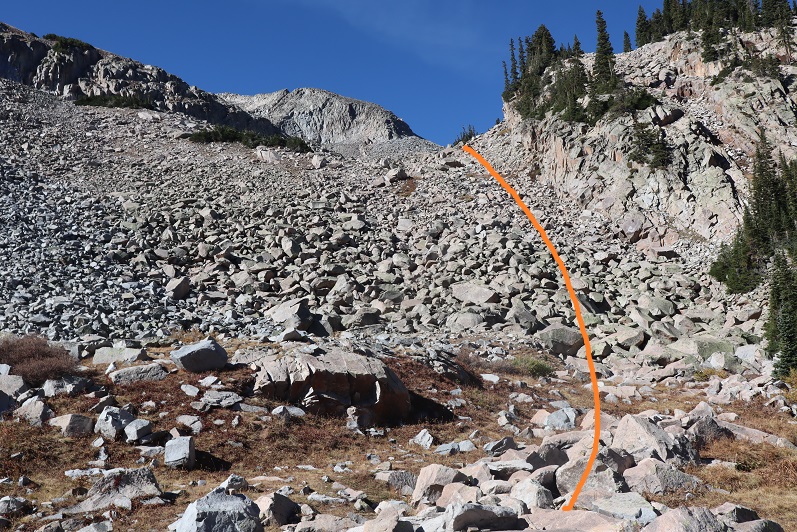
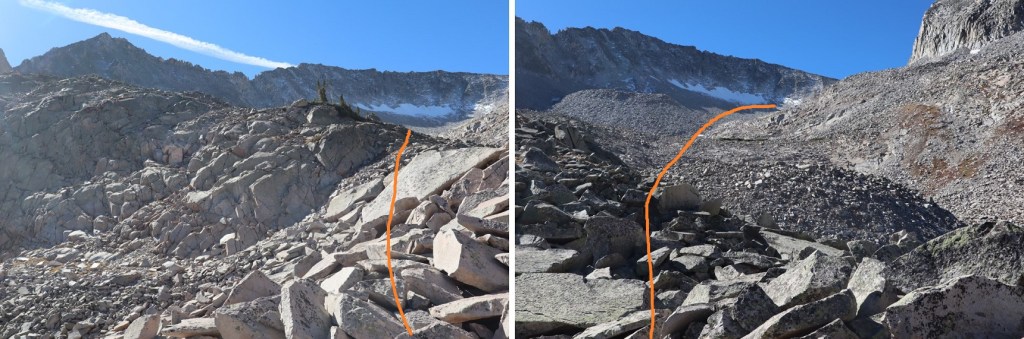
At the end of the basin it was time to gain the ridge.  I stayed right of the drainage. 

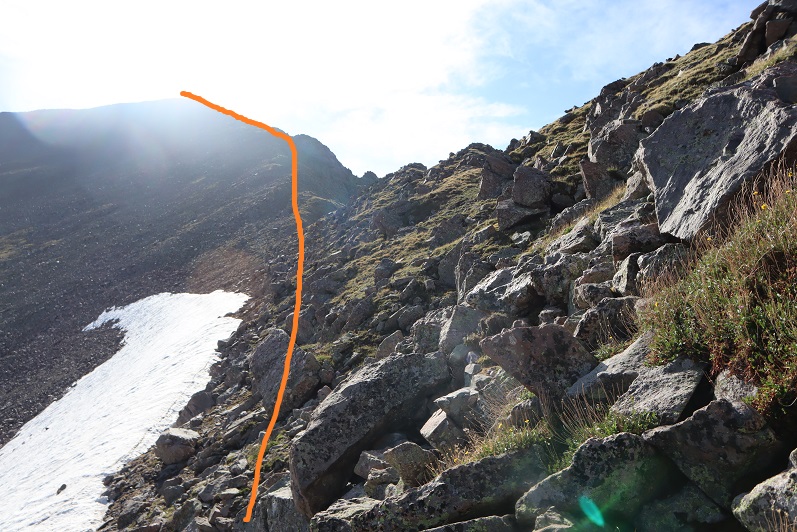
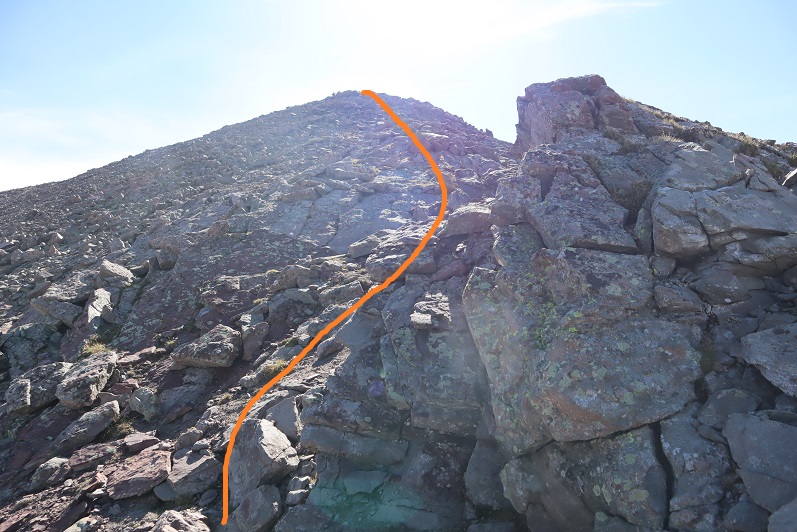
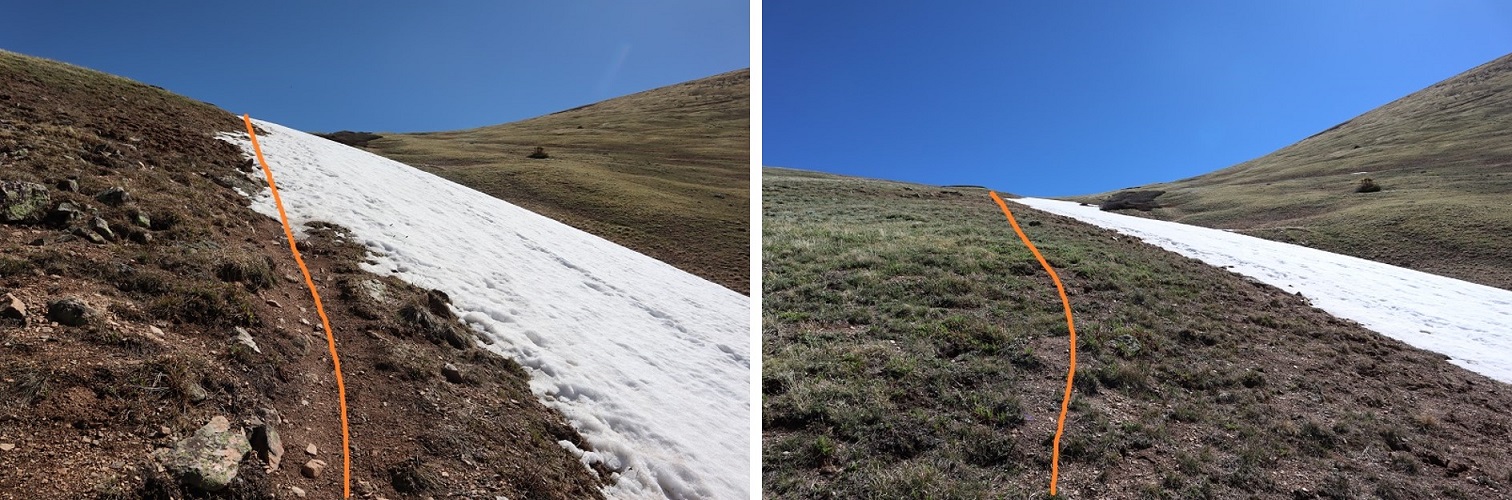
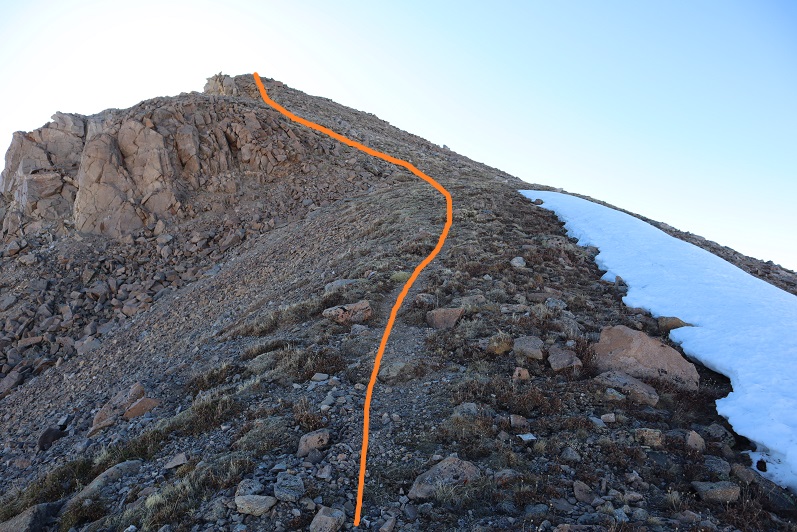
This was mostly class 2, but towards the end became class 3 to avoid the snow

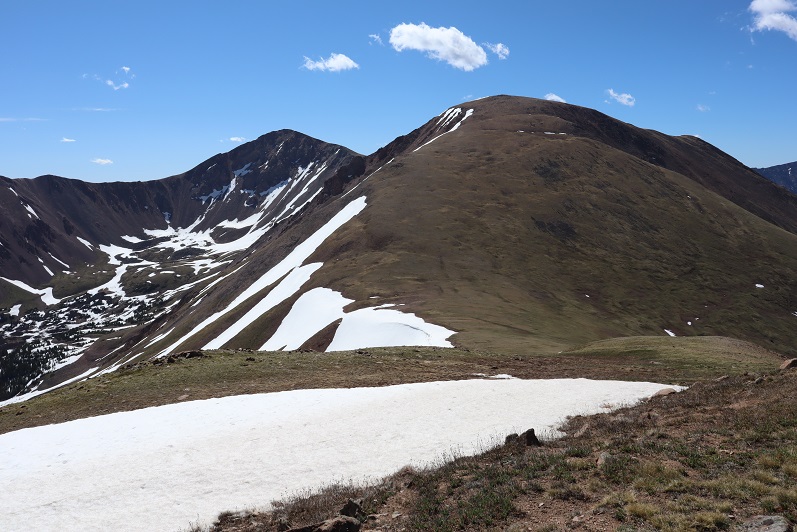
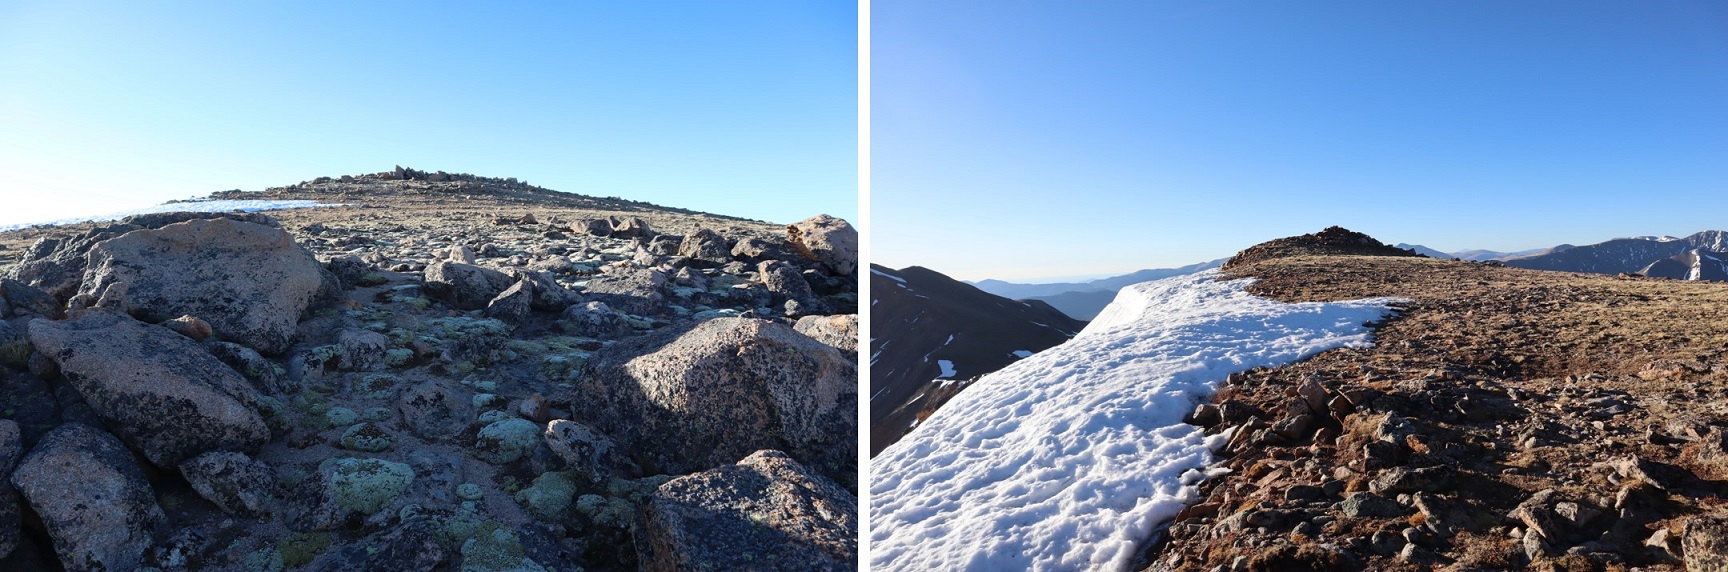
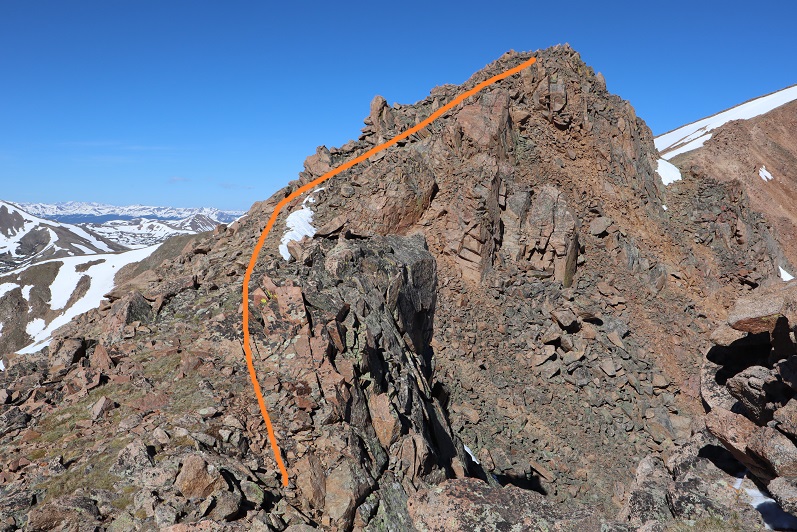
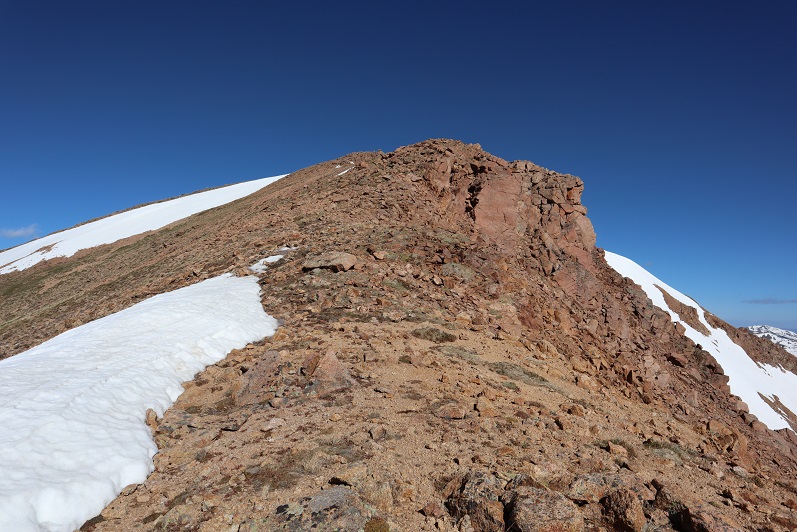
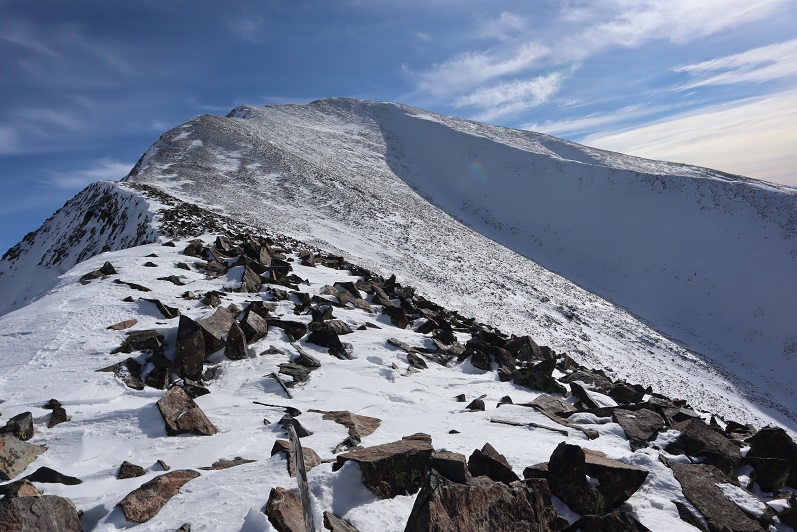
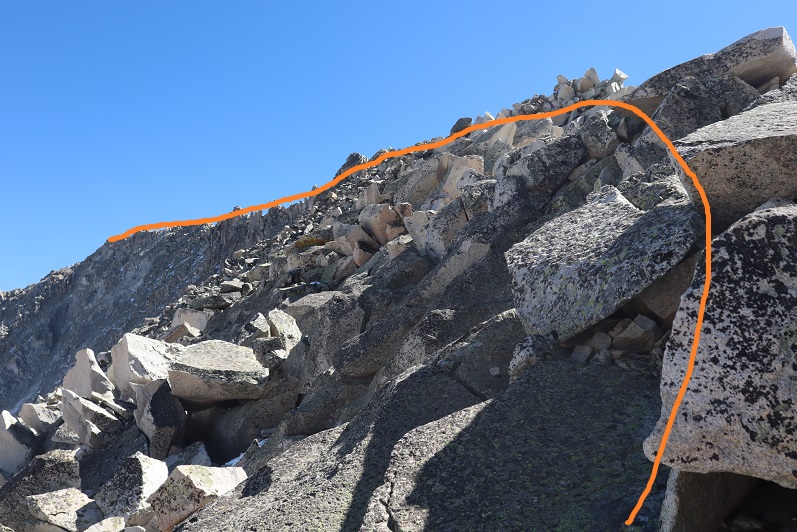
Once I gained the ridge I turned left and followed it to the summit.

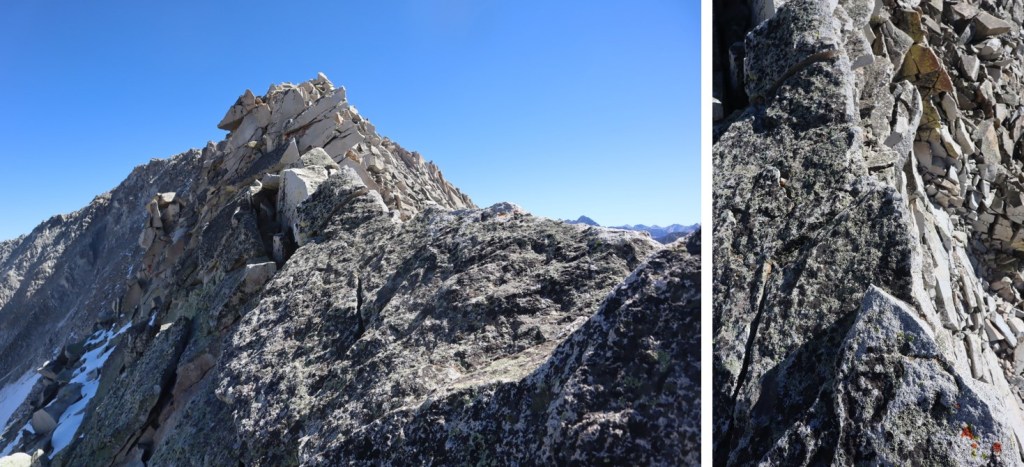
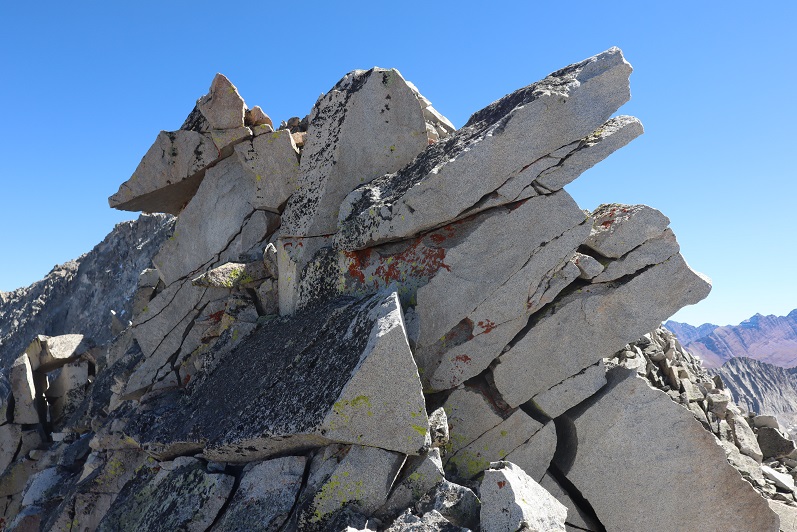
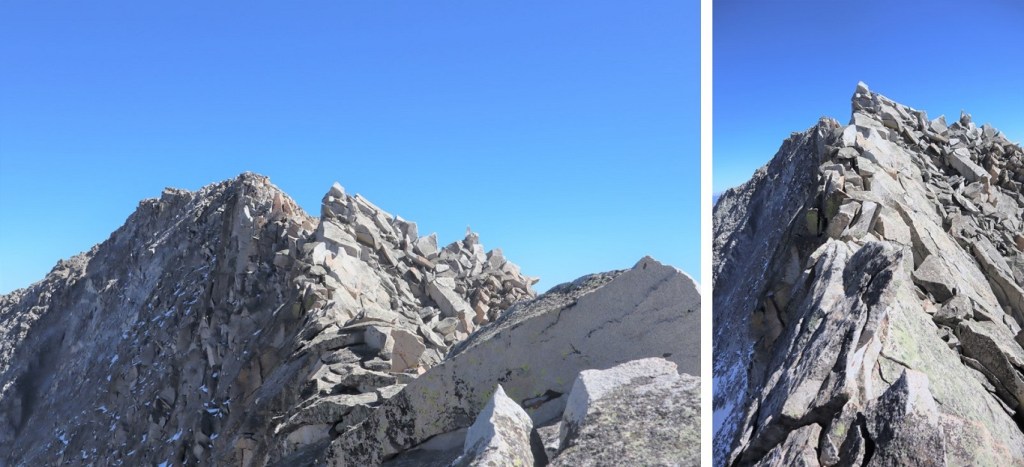
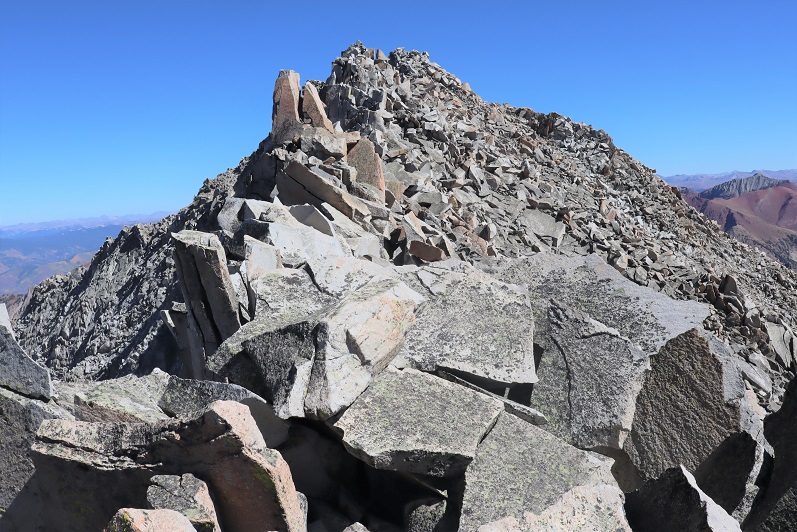
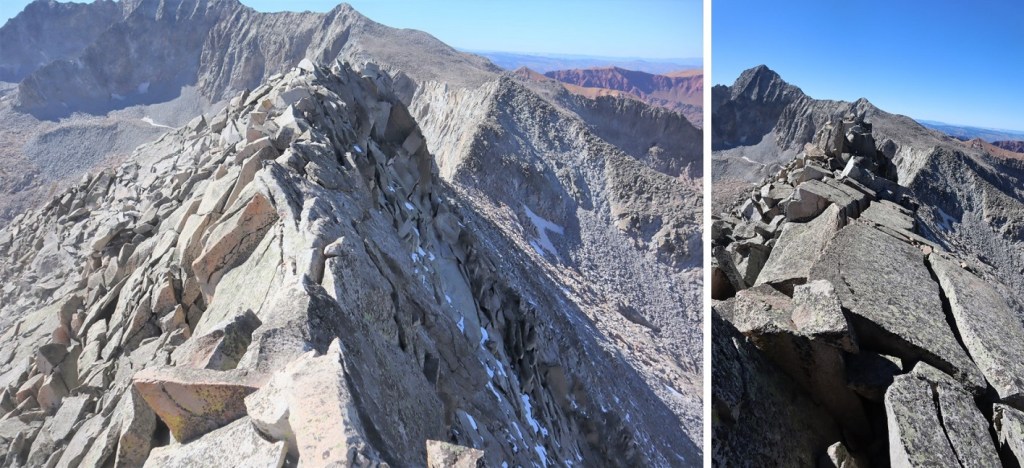
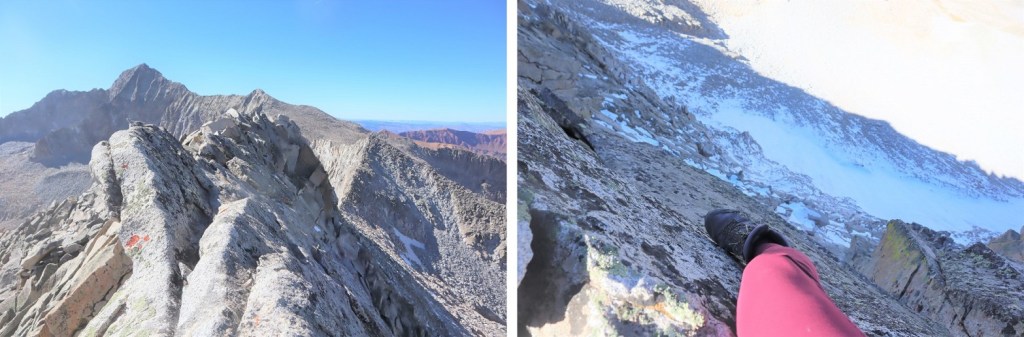
Ha!  That’s an oversimplification.  I did indeed follow the ridge. The ridge proper goes all the way to the summit.  However, it’s a fun scramble to get there, with a lot of exposure, and more than one knife edge.  If you did Capitol Peak and it left you wanting more, this is the peak for you!  Here are some highlights:

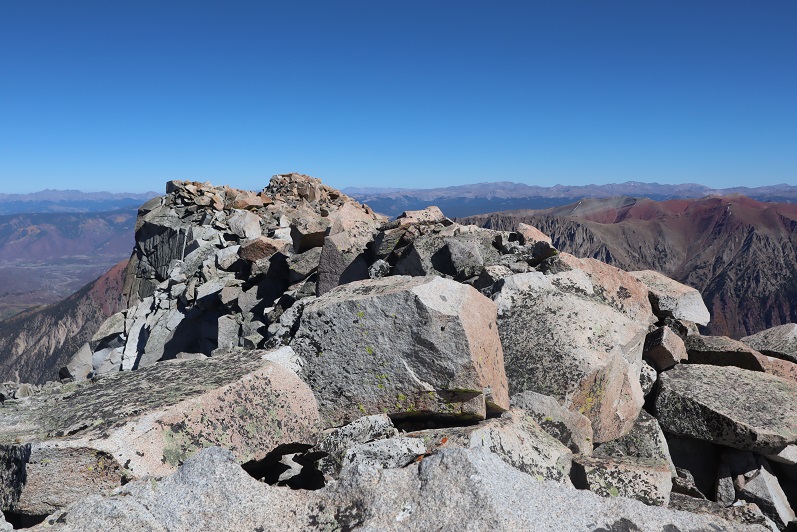
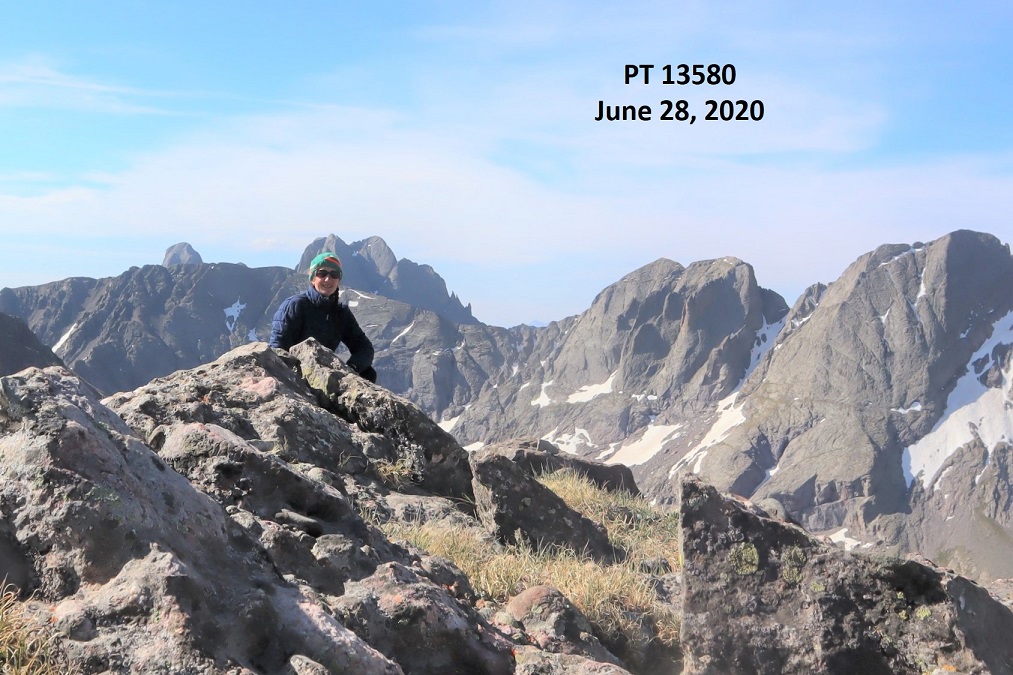
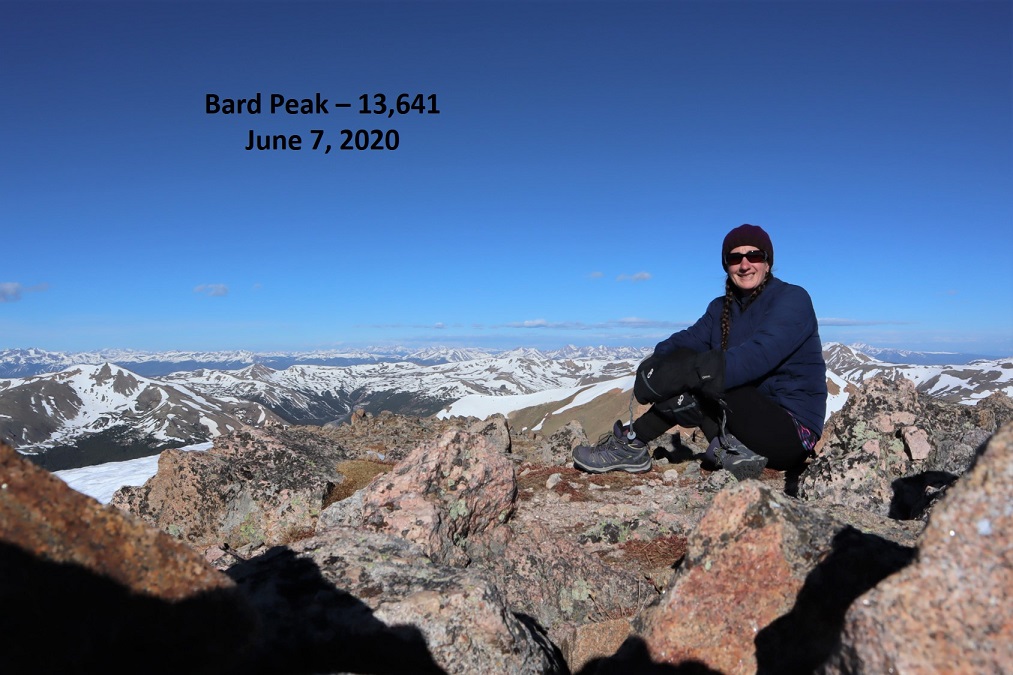
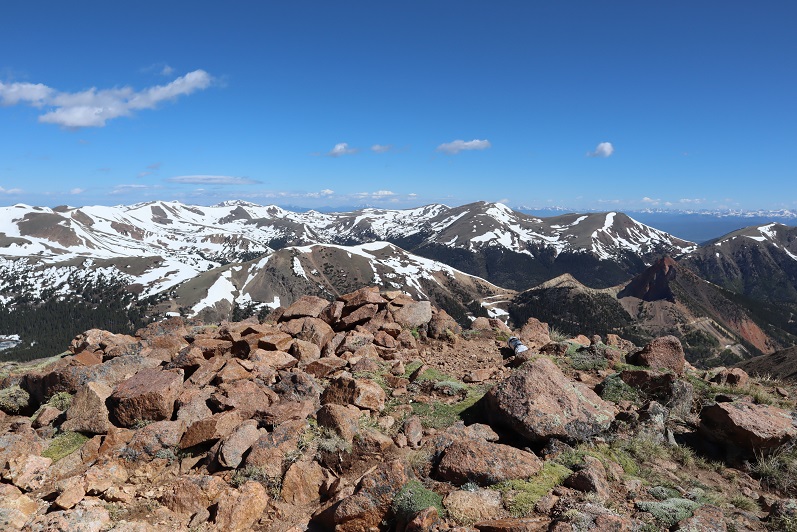
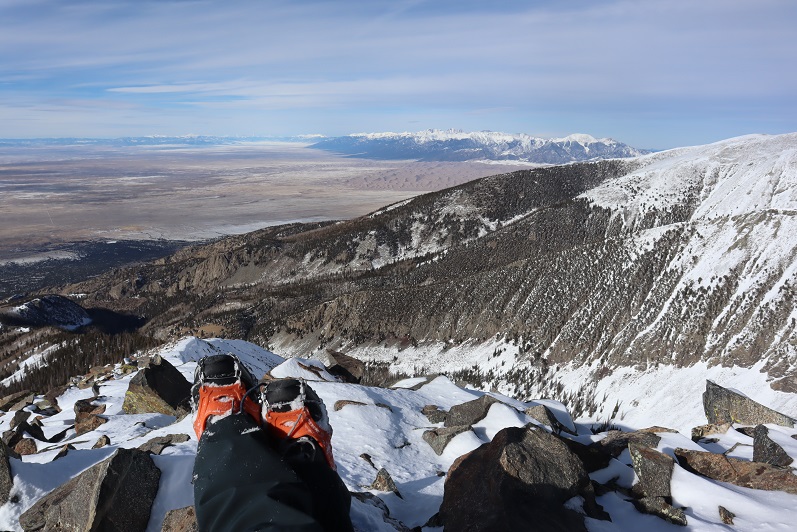
I summited Clark Peak at 2:25pm
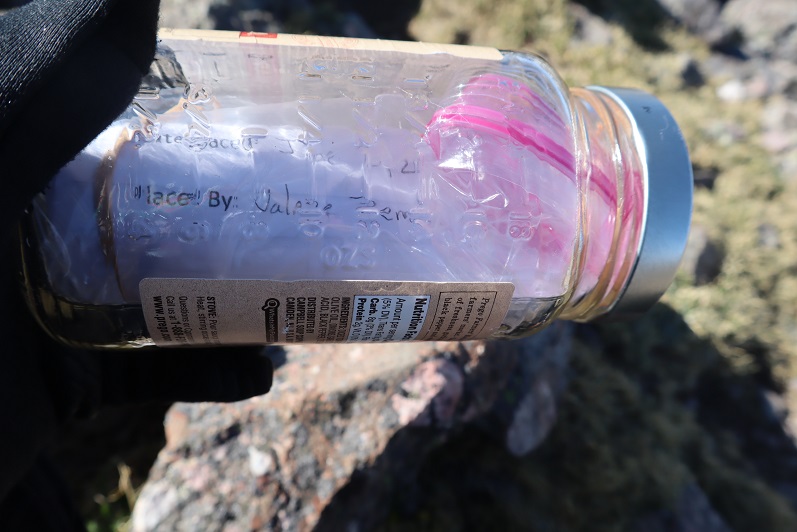
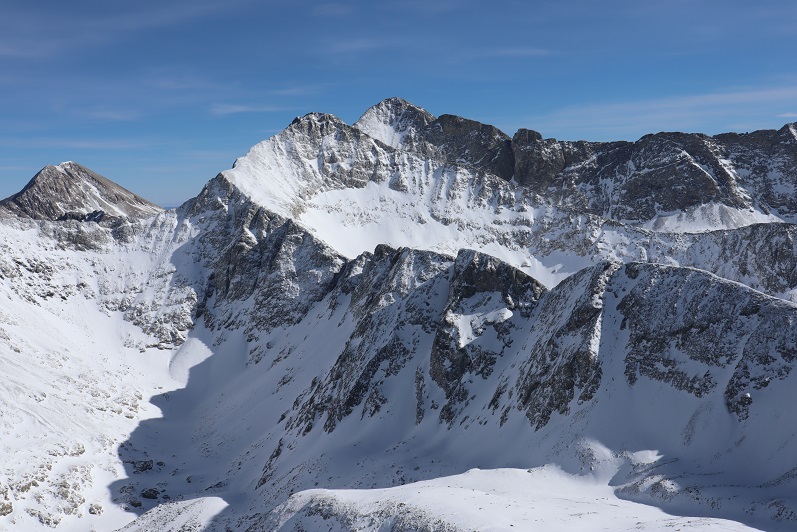
Clark Peak:

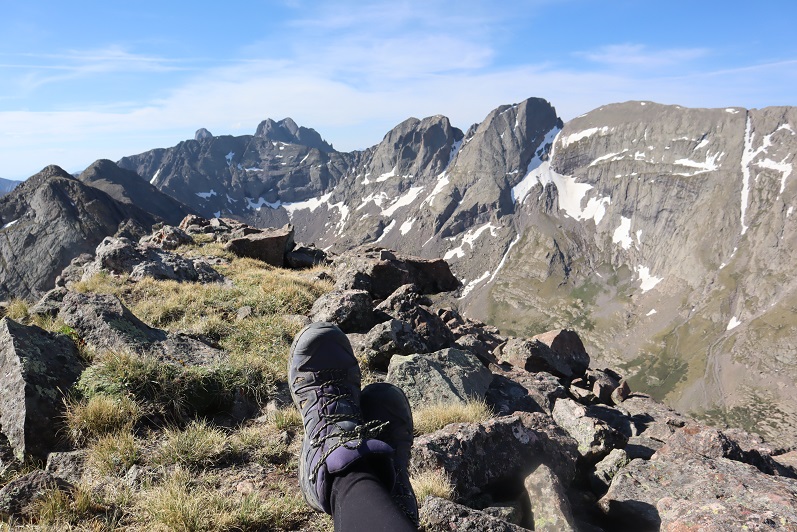
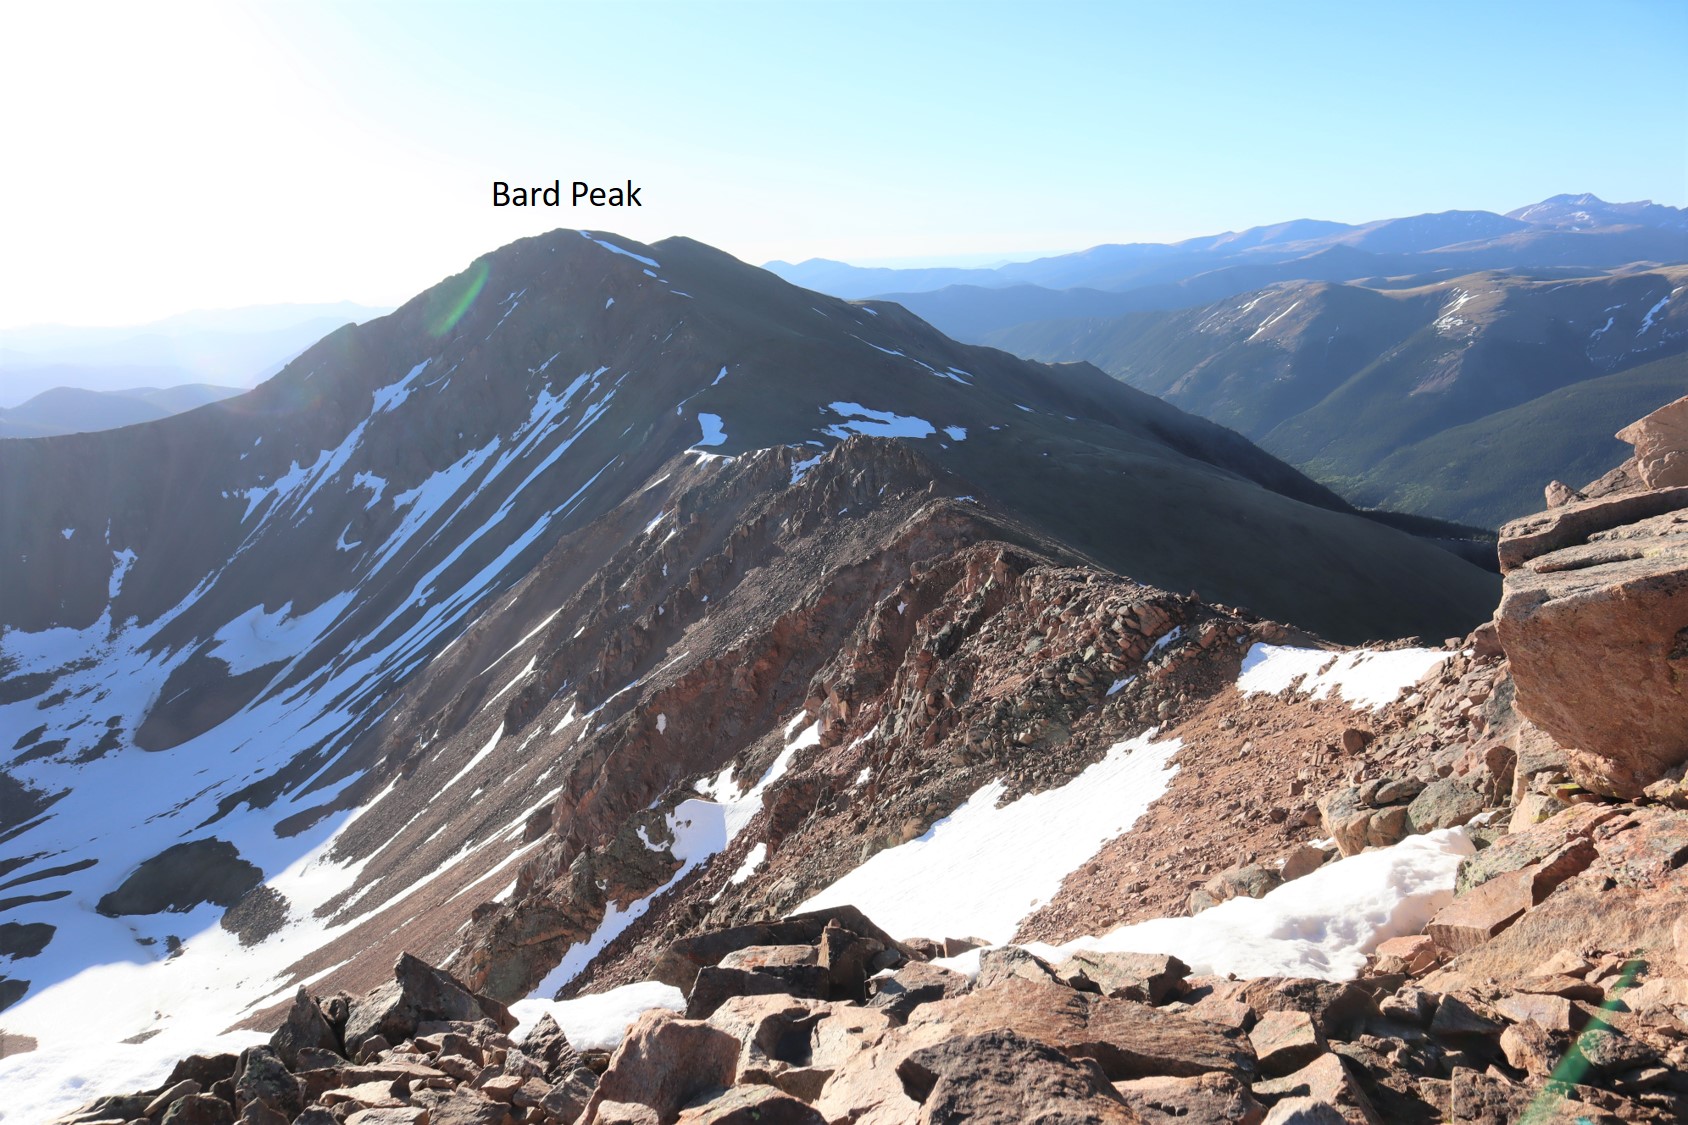
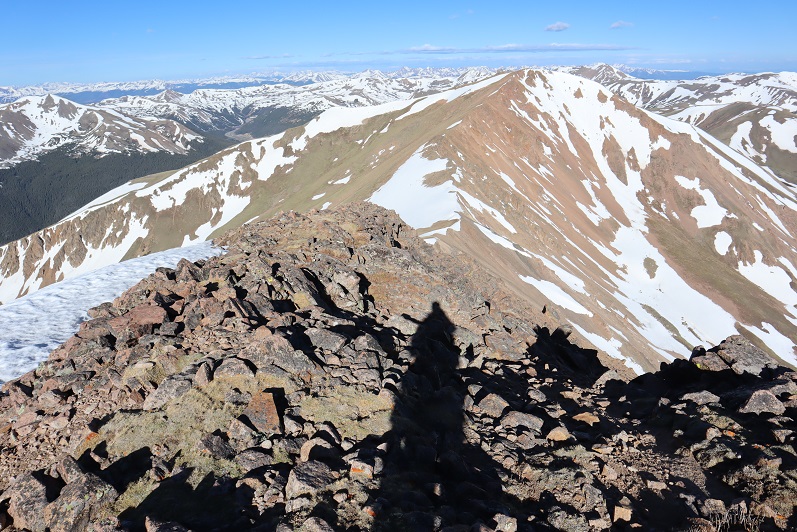
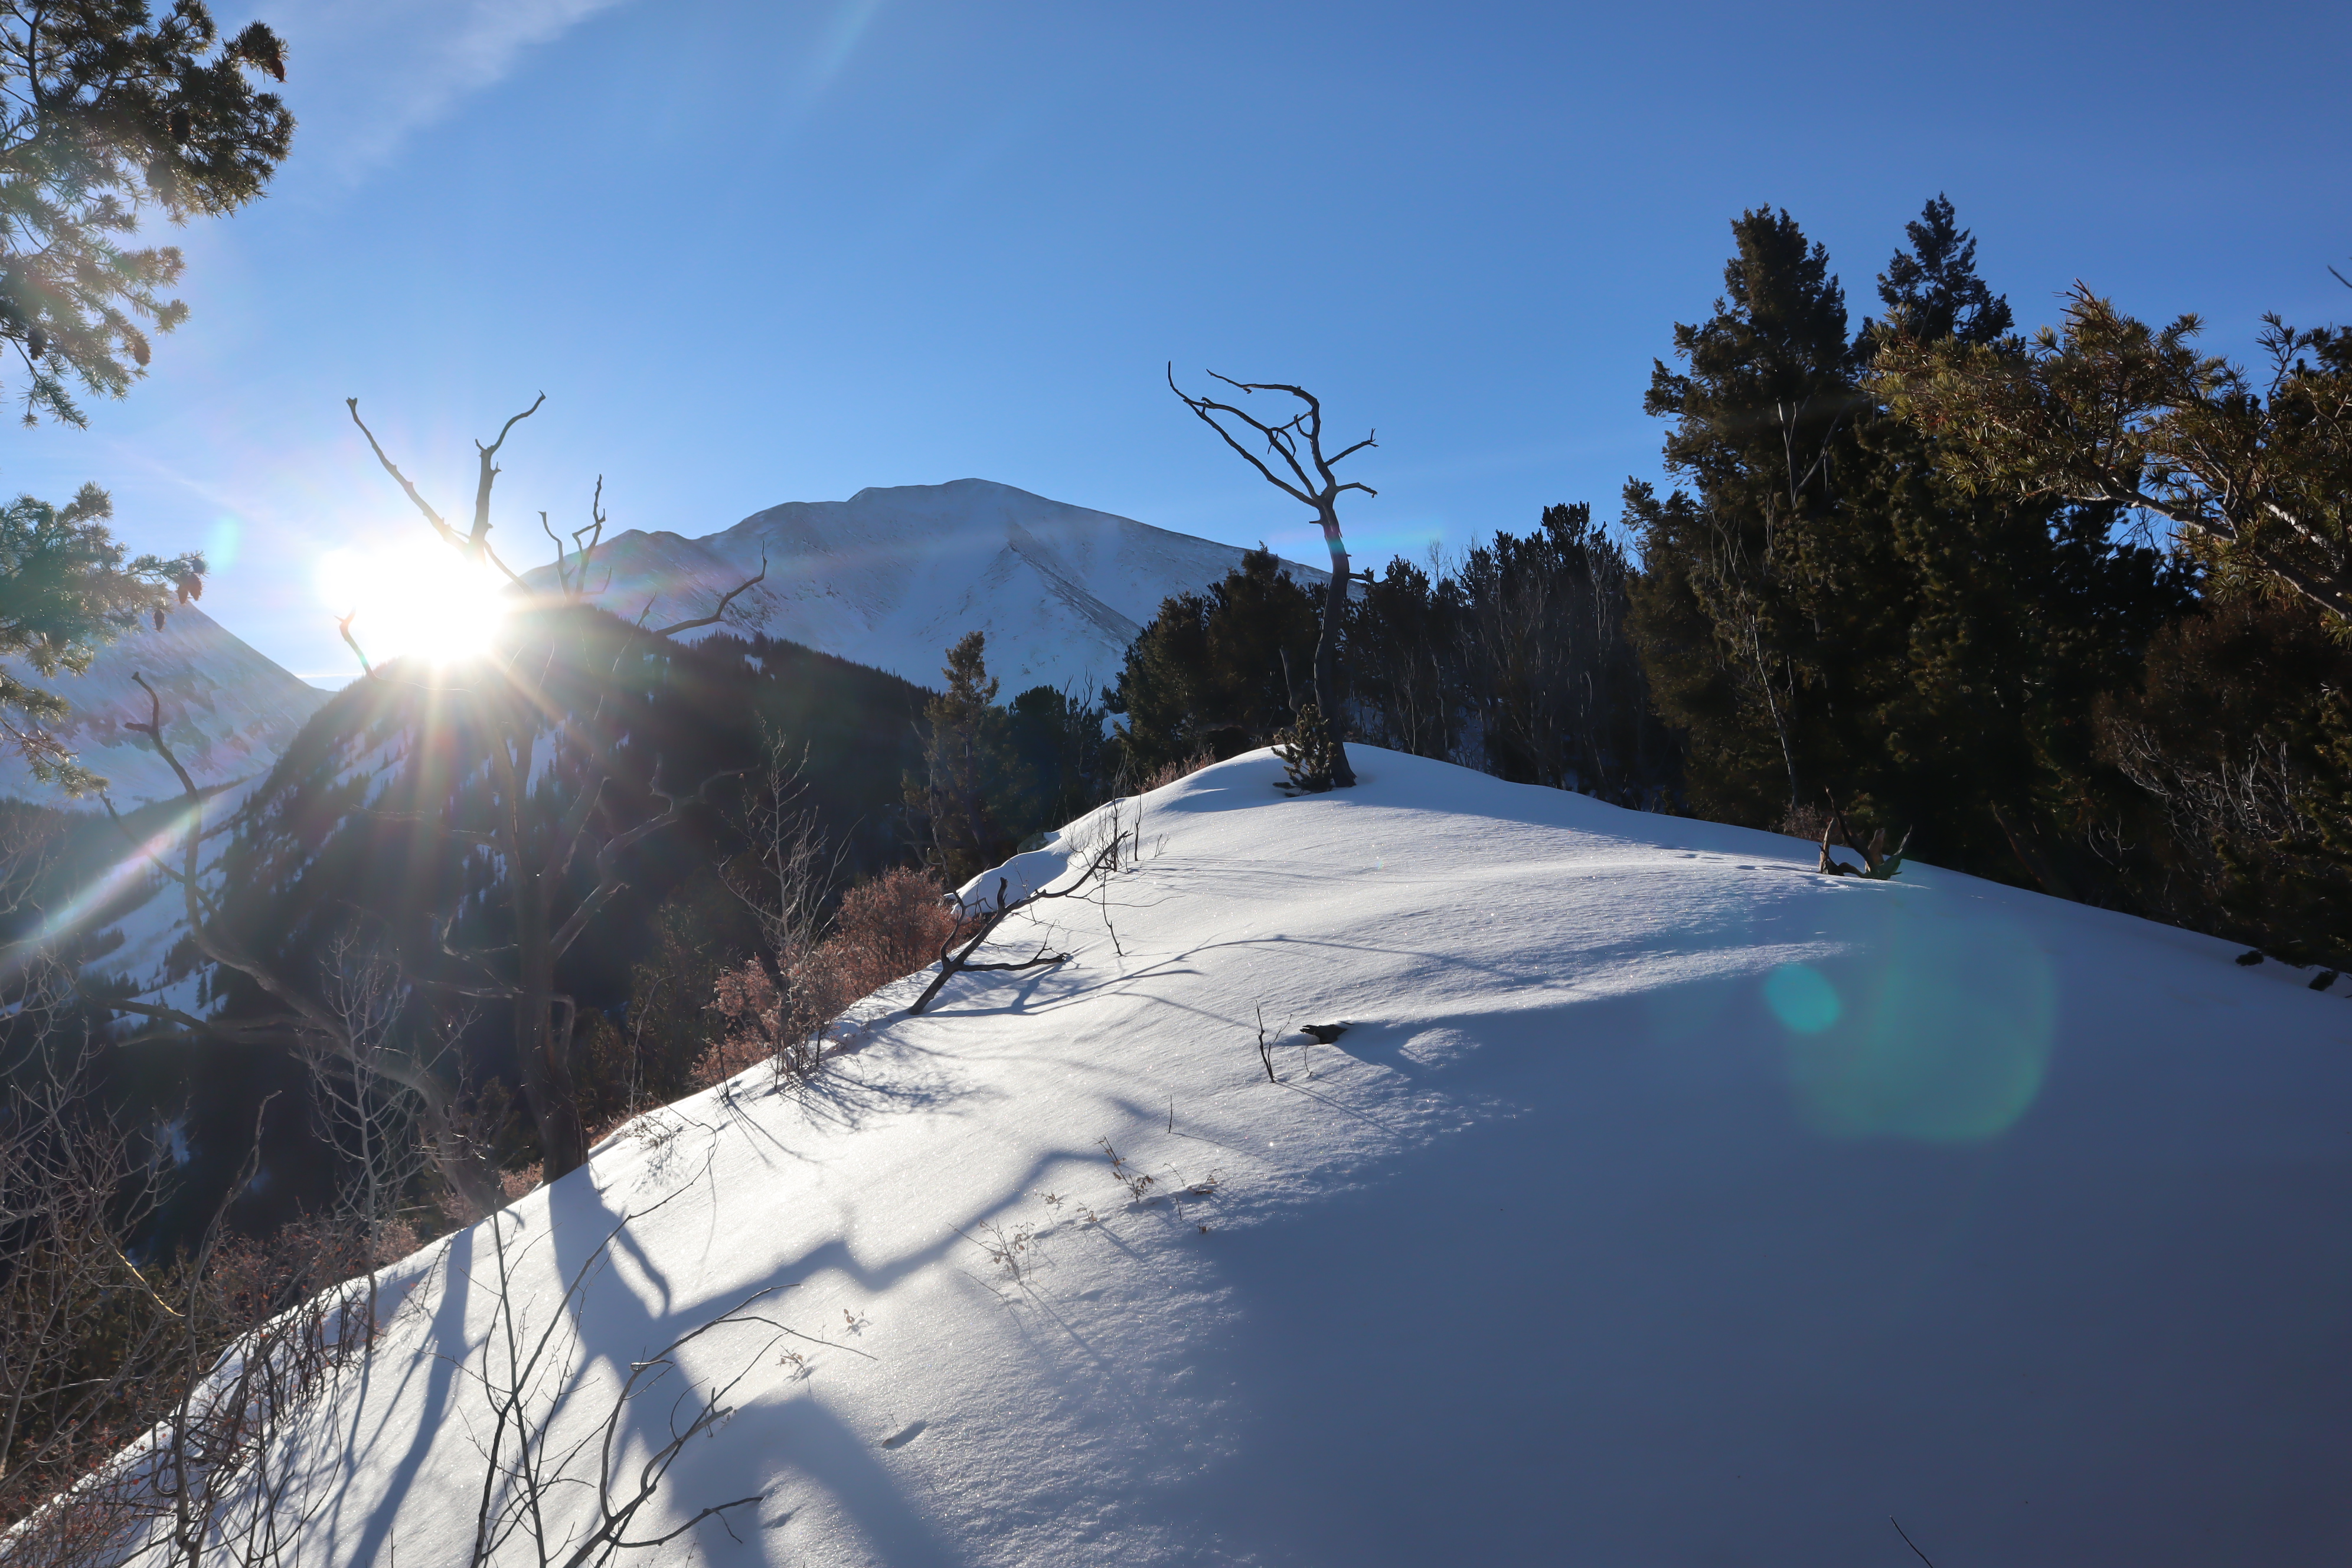
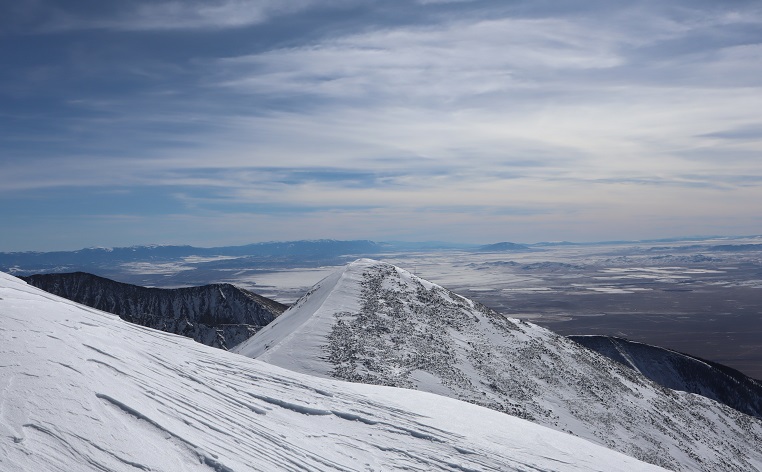
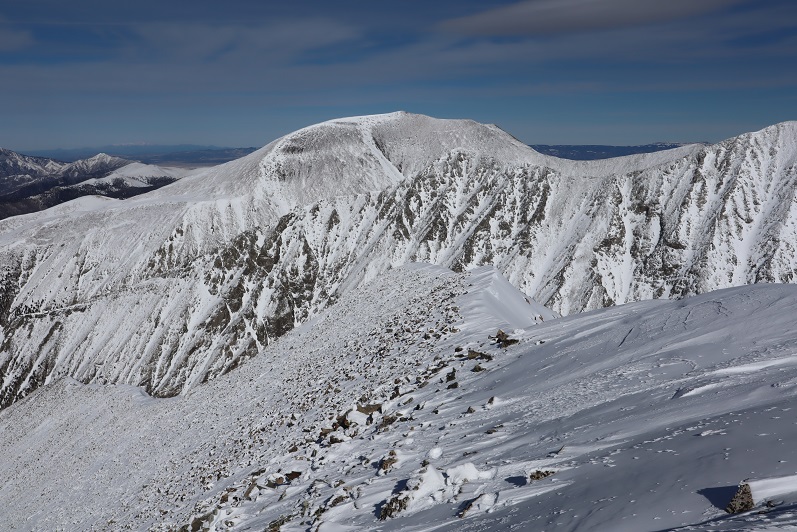
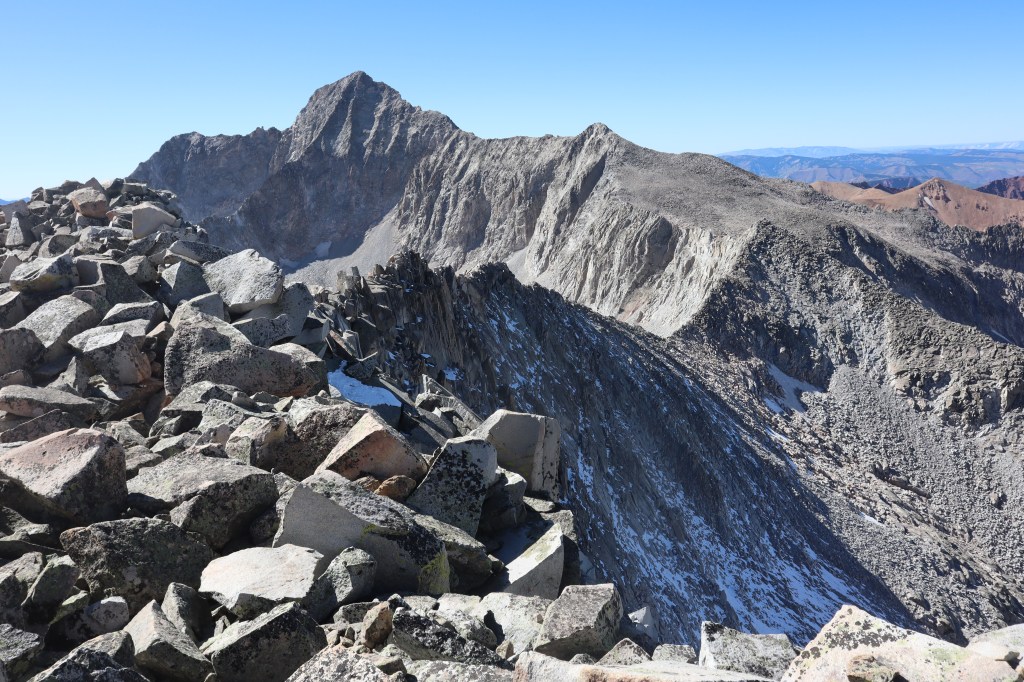
There were some great views of Snowmass and Capitol Peak, and check out the ridge looking back!

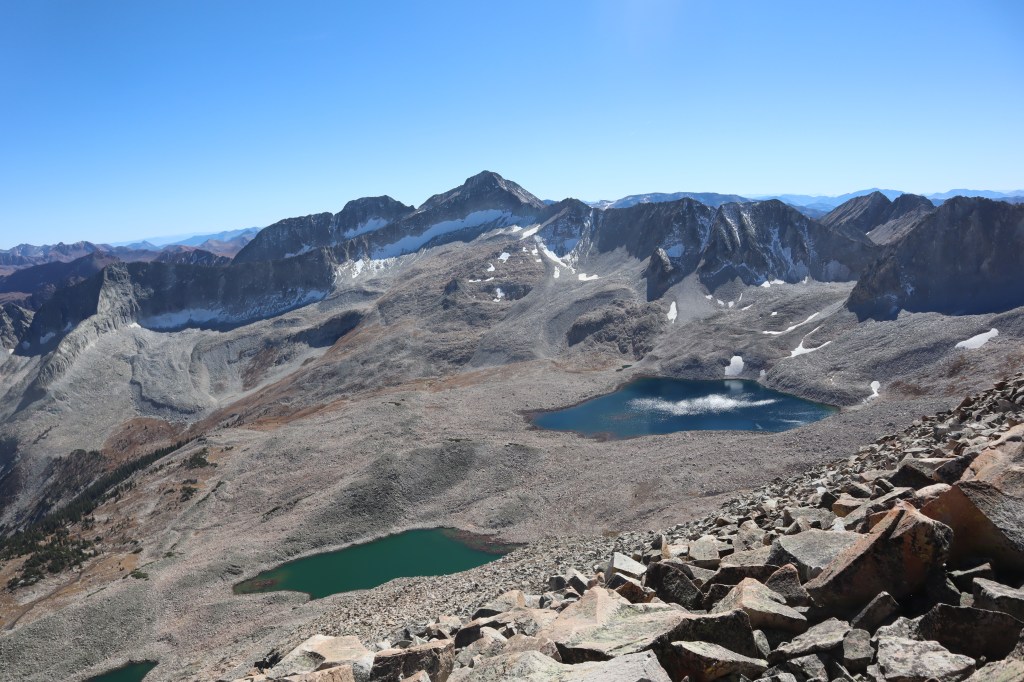
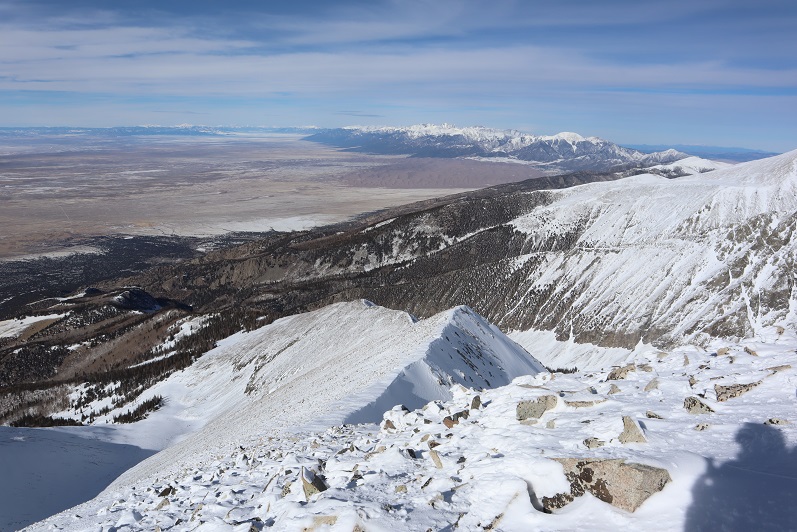
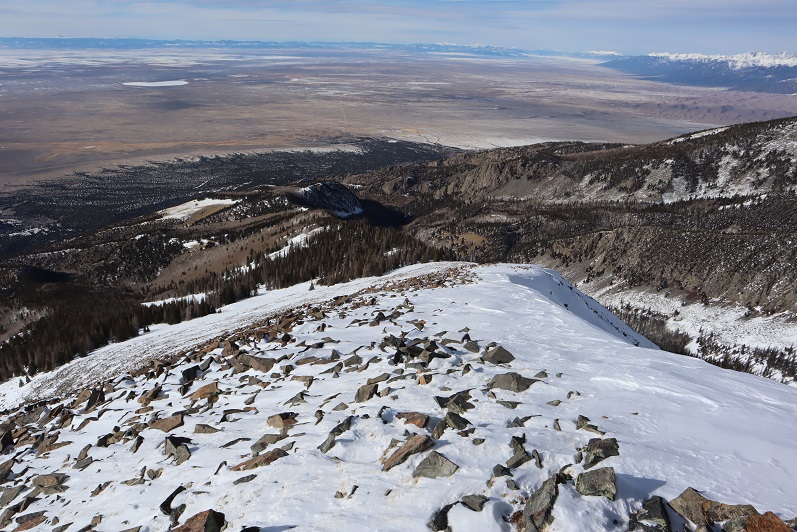
Here’s looking back on the way in through the basin and around Moon Lake

Here are some pictures of the ridge on the way back.  I had fun with the exposure here

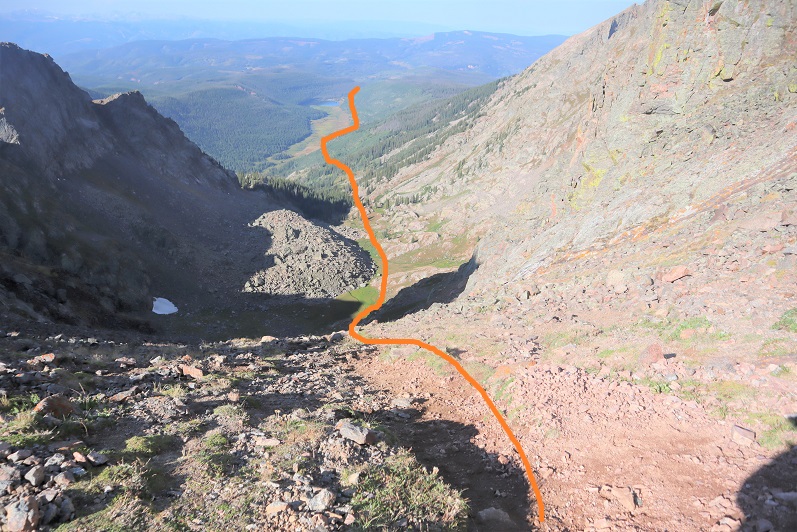
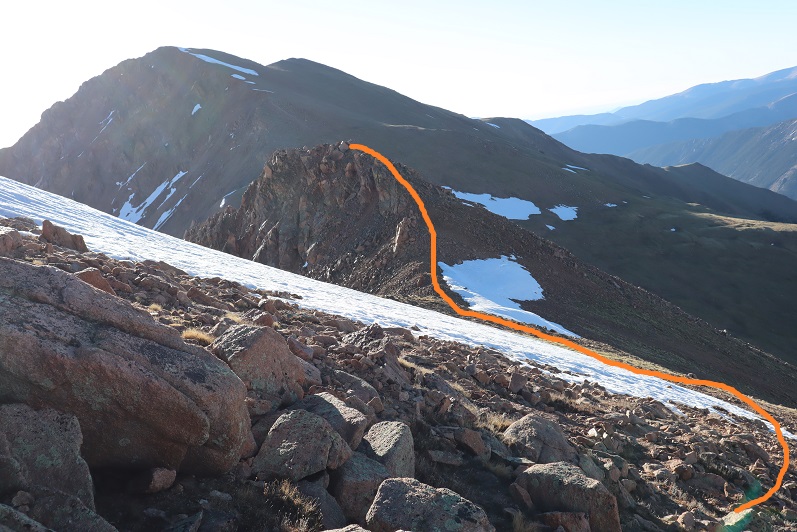
At the saddle I turned right and headed back through the basin

Skirting Moon Lake to the east and back to the trees

Next profile pic?

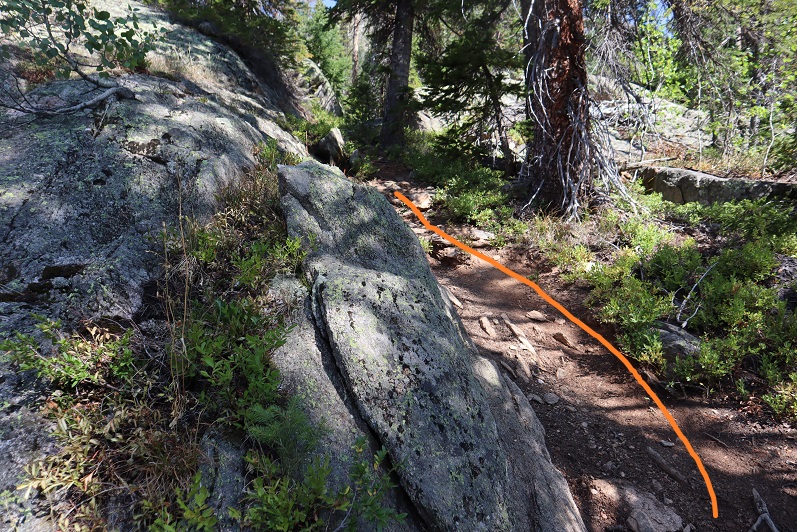
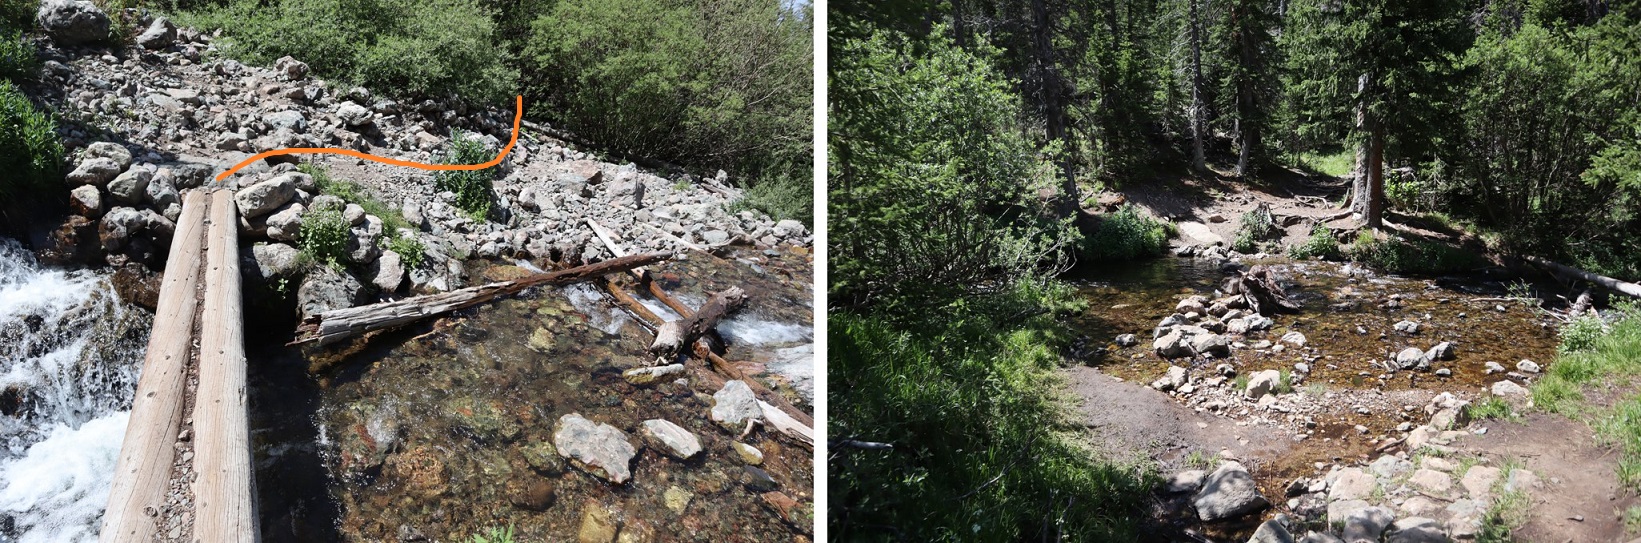
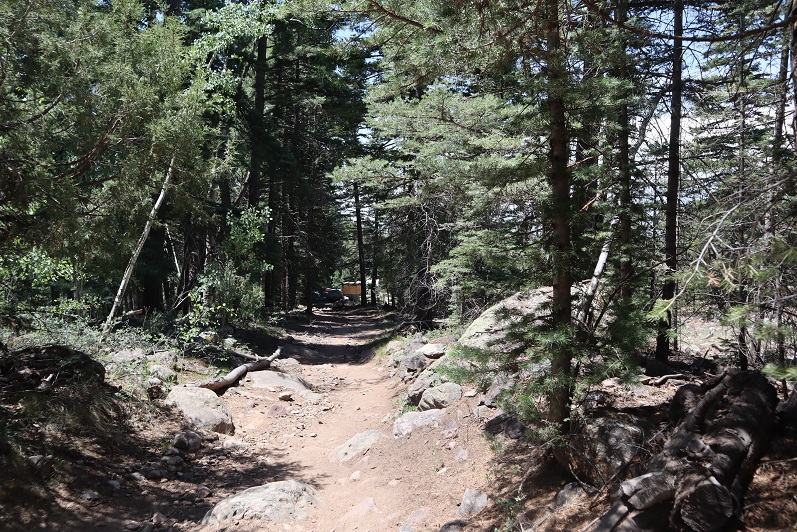
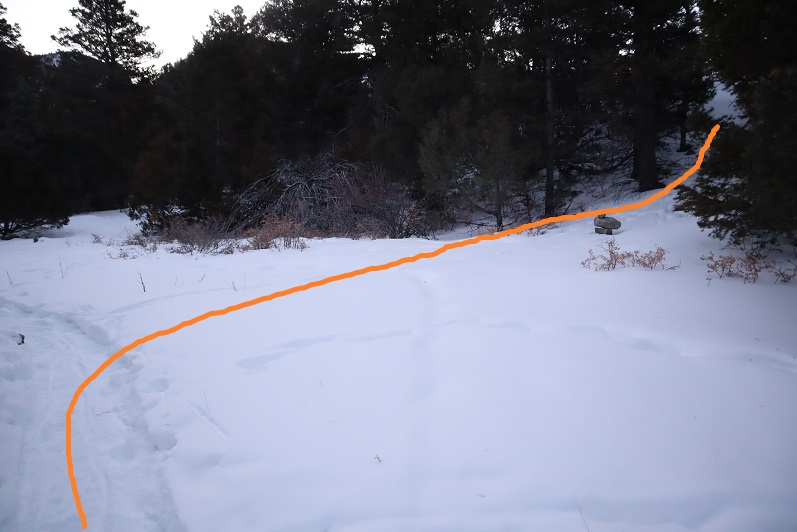
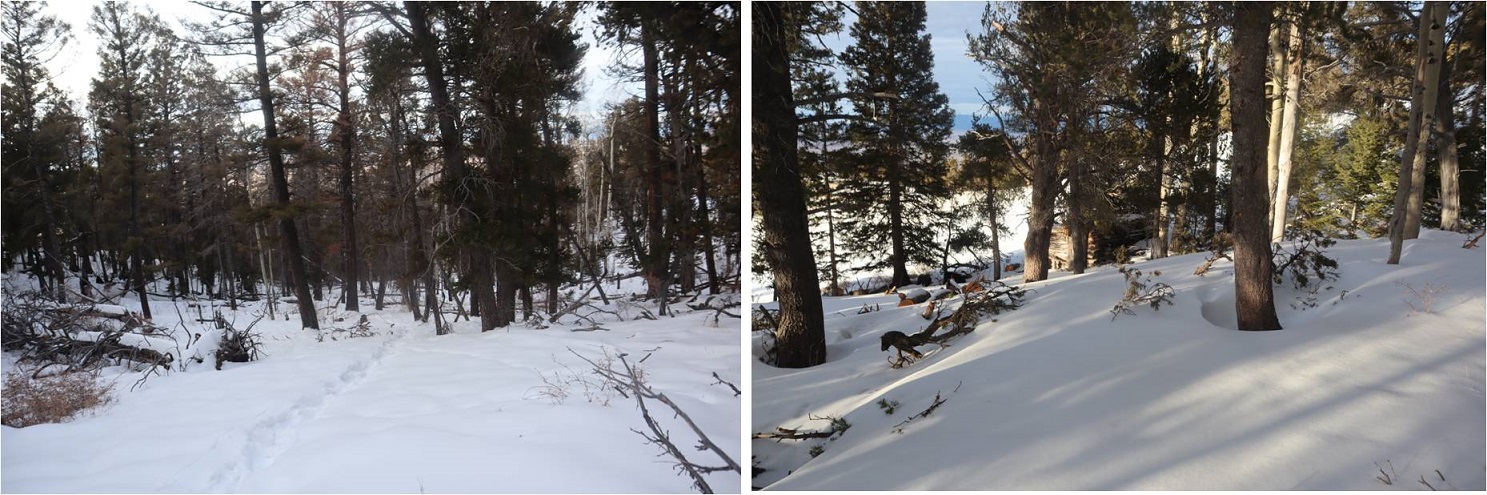
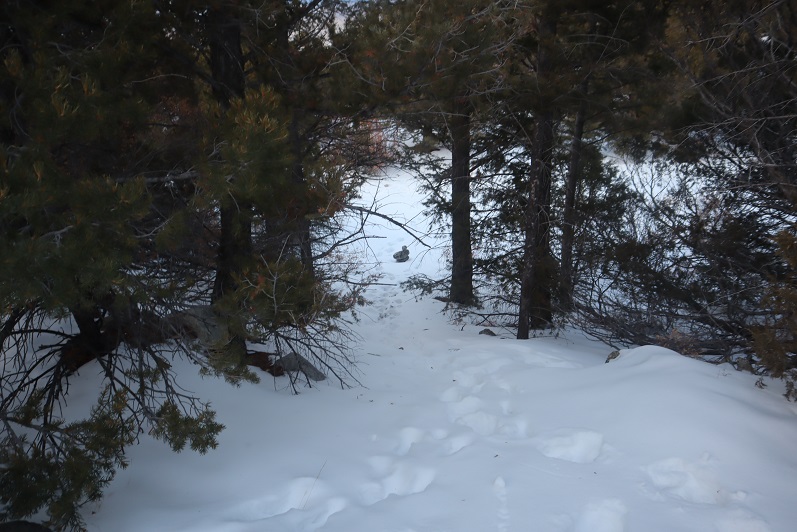
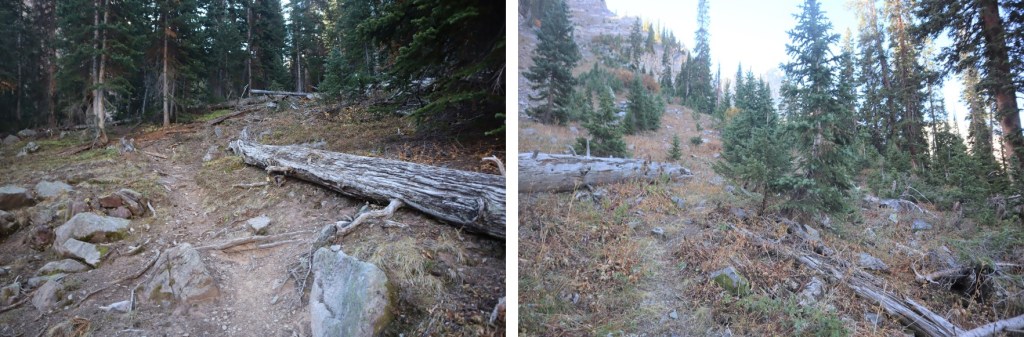
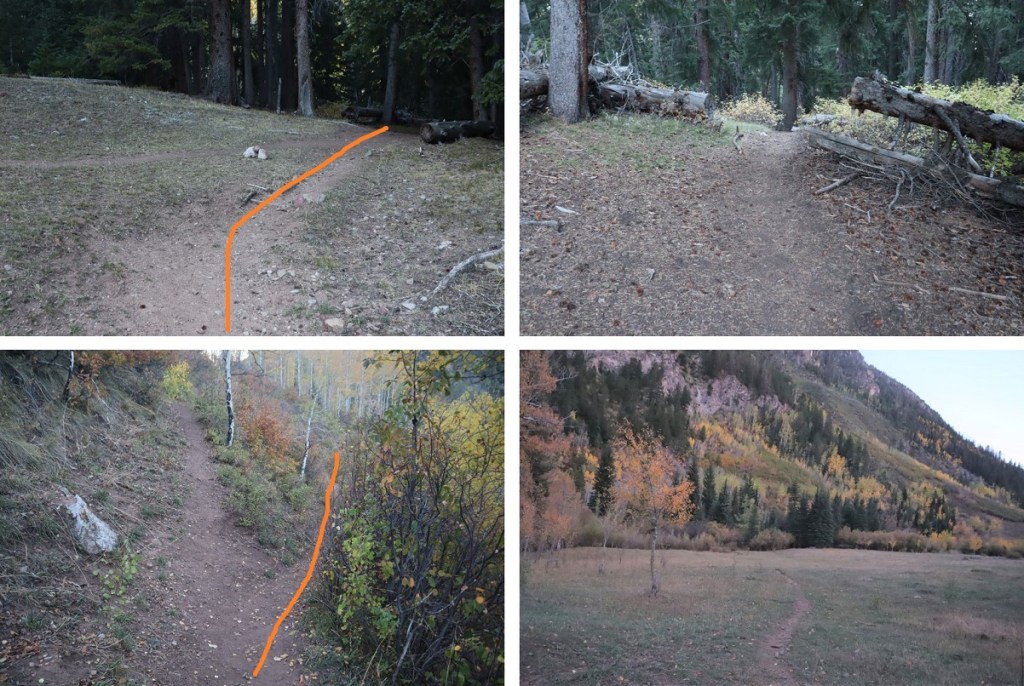
Once at treeline I picked up the trail again.  After crossing West Snowmass Creek I headed for the trees.  The trail picks up again in-between these two trees

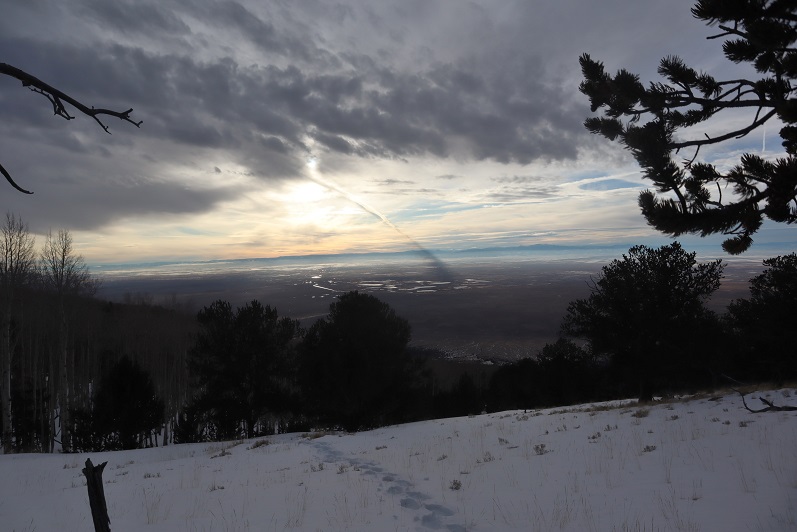
Here are some pictures of the trail back down.  As I was hiking, I heard a faint bugle.  It didn’t sound like a normal elk call:  it sounded close but faint.  Usually when I hear an elk bugling it resonates, it’s crisp, and I can hear it from far away.  This didn’t seem loud enough for being so close. As I reached the meadow I noticed a hunter sitting beneath a tree.  I raised my hand to silently say hi, he did the same, and I continued back to the trail.

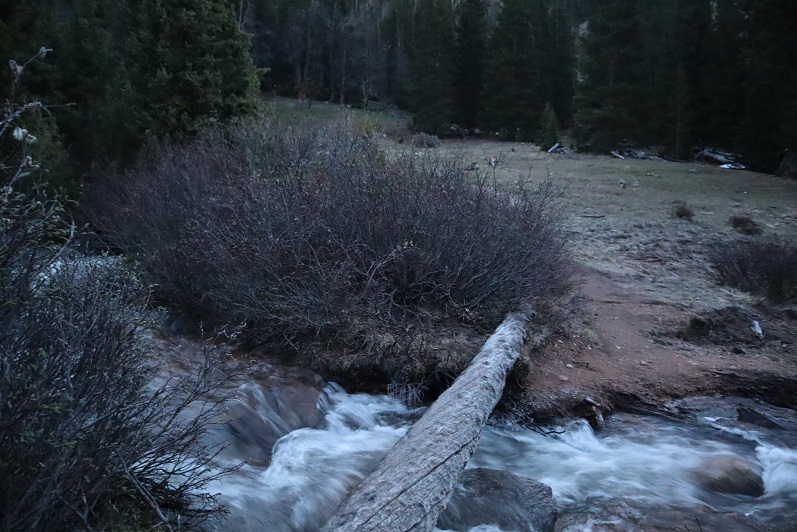
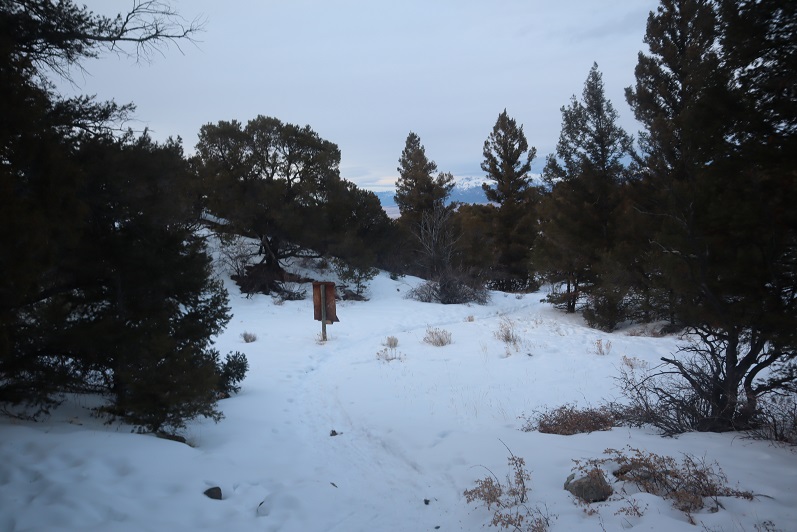
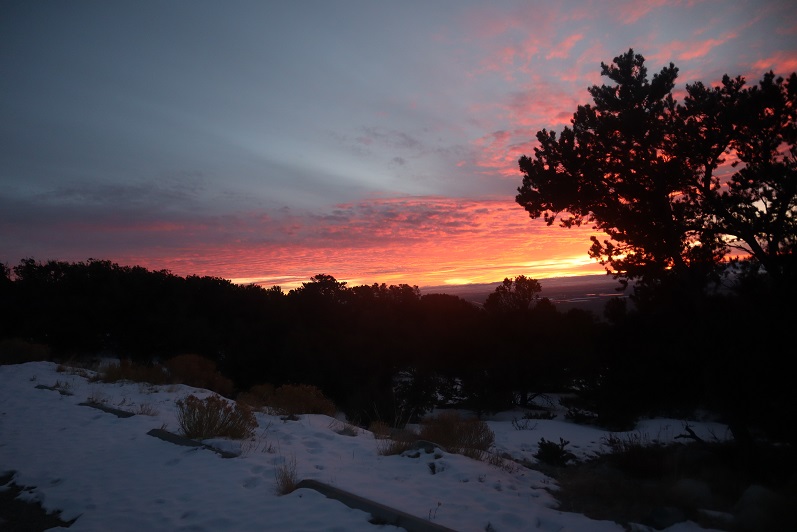
I kept picking up my pace.  Due to this morning’s route finding errors this hike was taking me much longer than I’d anticipated.  It was quickly getting dark, and I wanted to get back to cell service so I could call my daughter and tell her I was ok, just running late.  I ended up using a flashlight for the last two miles of the hike.  Here are some pictures from the rest of the way back to the creek.

I crossed the creek and took Maroon Snowmass Trail back to the trailhead

I made it back to my truck at 8pm, making this a 25.26 mile hike with 6619’ of elevation gain in just over 14 hours.

Mt Powell – 13,556

1

RT Length:  15.92 miles

Elevation Gain: 5039’


I drove to Piney Ranch in the rain. The dirt 2WD road to get there is more like easy 4WD:  tons of potholes make this slow going for 2WD vehicles and 4WD vehicles alike.  Given that it was raining as well it was a slow drive in (the Escalade in front of me was extra cautious, and didn’t seem to mind I was behind them:  gotta love California drivers.  I say this being from California myself, and understanding their driving mentality).  I parked near the gate and ate dinner as I waited for the rain to stop.  It finally did and the sun came out. Woot!  The sun dried up all the rain and I wasn’t going to need to worry about my legs getting wet from water droplets brushing against my pants from the plants on my way in.  This picture is from one of the good parts of the road, just before the ranch.

2

3

I hadn’t planned on hiking this peak today.  In fact, it wasn’t on my list for the net few weeks, but weather earlier today had caused me to alter my plans.  This meant I hadn’t done as much research on this peak as I should have, so I asked everyone arriving back at the trailhead where they’d been to see if I could get more beta.  No one had been hiking Mt Powell.  I did talk to one guy who hadn’t hiked it, but said “That’s one heck of an approach!”  This scared me a bit.  I asked him to be more specific?  I told him I’d hiked all the 14ers, could he compare the approach to any of those?  His reply was “I’ve done the 14ers as well.  Nothing compares”.  It wasn’t lost on me he didn’t say ALL the 14ers, but I figured it couldn’t be that bad or I’d have heard about it by now, even with just some cursory research.

I sat in the back of my truck with a glass of whiskey and finished reading “Death in Yosemite” (the last chapter is ‘Homicides’, and I’d advise against reading that chapter, especially if you’re hiking alone in the dark the next morning:  also, avoid hitchhiking).

I went to bed early, and was woken up around midnight to the sound of rain. Wonderful.  Oh well, nothing I could do about it now.  I fell back asleep for a few hours, woke up and was on the trail by 3am.  The trail starts just to the north of the gate, and heads east.

4

It passes Piney Lake and continues along the basin.  In the morning moonlight I could see the basin was covered in fog.  Such a cool experience!

5

I continued heading east at this sign (after about half a mile). It’s the only junction you’ll come to.

6

Other than that, this is pretty much a class 1 hike all the way to the pass.  There’s a trail that passes rocks/goes up drainages/waterfalls in areas, but it’s difficult to get lost on this trail, especially in daylight.  Here’s the overall route to the pass, with the more difficult parts highlighted

7

and some photos of the trail

8

9

10

This area was a bit tricky for me in the dark, but when the trail ended I really just needed to follow the granite slab up.  There was a cairn at the top, but I couldn’t see it from below in the dark

11

I went through an area with willows

12

And then some dry waterfall areas (the waterfall stays to your right, and you don’t ever cross it).  If you come to large boulders, they’re ALL passed to the right on the way up. If I ever lost the trail, it was because I was supposed to climb up the rocks (nothing other than class 2).

13

14

I passed a camping area.  (There are 3 in total, this was the first).  From far off I could see a green tent lit from inside with a flashlight, and someone standing with a headlamp.  It was now about 4:30am.  I was sure this person could see me too, because I was right in front of them and I had a flashlight as well.  Apparently, he was groggy, because as I got closer I realized he was peeing.  He didn’t notice me until it was too late.  He also didn’t bother to recognize I was there (I’d have been embarrassed too).  He turned away and went back to his tent.  I’m only saying this to reiterate to everyone out there:  don’t pee by your tent, instead head for the trees, and turn your flashlight off while you do so!  Just assume someone can ALWAYS see you (I had a pair of hunters follow me with binoculars once in the middle of nowhere.  They watched me for over a mile just to talk with me when we met up.  Good thing I hadn’t stopped out in the open to pee….).  Just before entering the upper basin there’s a large boulder.  This gave me some pause in the dark.  Yes, you do traverse a few feet above the ground here, and then the trail picks back up

15

It’s now back to class 1.  There’s also a camping area here.  If I were backpacking, this is where I’d camp (at 11200’ after 5.25 miles of hiking).

16

Imagine my surprise when, upon entering the upper basin, there was still a trail!  In fact, there was a trail up the gully as well.  I thought back to what that man had told me last night about this being a difficult approach and laughed.  The only thing ‘difficult’ was it seemed to take forever to get to treeline (over 5 miles, it seemed like I would never get there, and it was all up).  Other than that, I’d been following a trail the entire way.  I smiled and continued on.  Here’s the trail to the top of the gully

17

The scree here wasn’t even that bad.  You could just go up the middle directly, but the scree there looks loose.  I kept to the left.  If there were snow I’d most likely have gone directly up the center.

18

At the top of the gully I was thrilled to discover the snow was avoidable.  I’d seen several trip reports where there was unavoidable snow until September, but luckily the snow today was avoidable.  I decided to descend 150’ and keep this class 2 instead of traversing the ledges.  I went down to the right, and came back up to the left.  Since it had rained last night the scree was easily navigable, but is most likely a nightmare when dry:  bring microspikes for the dry scree.

19

Then I dipped down a bit, crossed the ravine, and headed back up.  All of these gullies go to the top, and the short saddle is relatively flat.  However, I found when I’d summited there was still about 200 feet of snow/ice at the top. To avoid this, take the gully as far right as possible.  By this time it was getting windy:  the cold, early morning wind was coming straight down the gully and that spells disaster for my Raynaud’s.  Also, I was done with gullies (I’d done 13631 the day before with, like, 10,000 gullies) and decided to rock-hop the last bit of the way to the summit.  This was all class 2 and went easily to the summit (and I was now working different muscles so my legs thanked me). I went right on the way up, left on the way down. Dotted lines are alternate routes. They all go, and there are most likely many more lines that go as well.

20

Here’s what the rock-hopping looked like.  Most of the rocks, especially the larger ones, were stable. Once again, all class 2.

21

The last bit up to the summit was especially easy, and needs to be climbed if you take the gully or ridge

22

I summited at 8am

23

Mt Powell:

It was windy and cold so I didn’t spend a lot of time on the summit:  I couldn’t feel my fingers and wanted to get down as soon as possible.  I chose to take the gully down.  There was still snow at the top, but it was avoidable.

24

25

Here’s looking back up the gully.  I took the route to the right up, left down

26

Here’s a look back up to the pass.  I went left on the way down (less steep but I lost elevation) and right back up (steeper, just a tad bit of ice left at the top but will be gone in a day or two).  All snow was avoidable

27

Here’s a look at the gully I went up on my way back.  It’s more solid to the left

28

Also, there were mountain goats here

29

I made my way back up to the pass on muddy scree (thanks to the rain)

30

And back down into the upper basin

31

32

33

Here are some pictures from the class 1 trail back down to the trailhead

34

Here’s looking down that rock slab that had given me trouble earlier in the dark…

35

Back around the rocks and across the stream

36

37

And back to the ranch

38

39

I made it back to my truck at 12pm, making this a 15.92 mile hike with 5039’ of elevation gain in 9 hours.

40

So, in the end I got 2 peaks this weekend, and only 1 of the 5 I’d planned for, but I consider it a success just the same.  Also, any day above treeline is a great day!

PT 13580

1

RT Length: 13.38 miles

Elevation Gain: 4934’


I chose this peak for today because it was the closest one on my list of unfinished bicentennials to Cielo Vista Ranch, where I’d just spent the morning hiking. I drove to the Willow Creek Trailhead and backed into the only available parking space. Vehicles were parked and double parked in each space, as well as several hundred feet down the road on the drive in. This is a popular trailhead and it was a Saturday afternoon.

It was raining a bit as I got out and looked around. There is an open and stocked bathroom here, and lots of signage.

2

3

I opened the trail register container and was disappointed to find another full register. Every page was so full people were just writing in the margins of past pages. This one is from 2019. There were probably 7 pages total, which could probably get filled up here in a week. How are these useful when they aren’t kept up to date? Signing these seems useless.

4

I went back to my truck and got my stuff ready for the hike tomorrow. I didn’t have a flashlight so I decided to use my phone’s flashlight app. That meant conserving battery, so I put it in airplane mode. Then I people watched. There was a man hiking with a small dog in a basket, a group of about 20 high school aged backpackers returning from what looked like their first outdoor experience, and two men hiking in to Willow Lake to summit Challenger and Kit Carson tomorrow. I spent a good 30 minutes watching a man trying to turn his pulled trailer around in the parking lot. He must’ve been looking for a dispersed camping spot and wasn’t able to find one before the trailhead. Turning his rig around in the parking lot of the Willow Lake trailhead was his only option, and it took dozens of attempts. His rig was loud and he set off several car alarms in the process. It was all quite entertaining.

When the mosquitoes came out I decided to call it a night and went to bed early. I woke up at 2:30am, decided I was way too comfortable, and went back to sleep. The only bad thing about having a bed in the back of my truck is I don’t seem to want to get up in the mornings. I was on the trail by 4am.

The trail starts at the east end of the parking lot and almost immediately comes to a junction. I turned right here, crossed a creek, and continued on a sandy trail.

5

6

7

During the first mile of this hike, as I was hiking in the dark, I kept hearing chirping. It sounded like one of those bird boxes that’s put in the middle of nowhere to monitor birds and chirps every few seconds was out there somewhere, and broken. It wasn’t chirping on my way back, so it either ran out of battery or was an actual bird going crazy at 4am. The Willow Creek Trail is a class 1 trail that switchbacks all the way up to Willow Lake. Here’s an overview

8

And some pictures of the trail

9

There are a couple of streams to cross, each with bridges/rocks

10

Before making it to the lake there’s a camping area. Someone has set up communal bear bag hanging areas, which I think was a brilliant idea. What’s even better is people actually seem to be using them. I saw two such areas, but there may be more.

11

After the camping area it’s a short distance to Willow Lake. I went up this rocky area

12

And was greeted by this sign and the lake. I turned left at the sign

13

I made it to Willow Lake after 5 miles of hiking

14

I continued following the trail until just before the boulder field. At this point I left the trail, turned left and continued north/north west up the hillside

15

16

17

There is no trail, but the route is easy to follow, as after I gained this small ridge I kept the creek to my left and willows to my right and continued north up to the basin.

18

It’s important to try to stay as much in the center here as possible, as to the right there are willows and shallow ponds to contend with. (I made this mistake on my way in, but was able to avoid it on my way out. I scared several deer out from willows in the process.). At the end of the basin you turn right and head east

19

20

This area was a bit mushy, so I went to the right around this rock/water to avoid getting wet, and then entered another basin

21

There were a lot of friendly deer here who didn’t seem to mind my hiking past them. I gave them room, but they let me get within 20 feet of them with no problem.

22

I headed east into the second basin, which was full of large rocks

23

There are a lot of ways to summit this point. I decided to gain the ridge and follow it to the summit of PT 13580

24

25

26

Once on the ridge it was an easy hike to the summit. The only problem was the sun was rising directly in front of me as I was hiking and I couldn’t see anything due to the glare. These pictures are from the way back down. While hiking up this ridge I heard someone from over on the Kit Carson/Challenger side yell “rock!” every couple of minutes. It’s amazing how sound carries out here.

27

28

I summited PT 13580 at 8:45am, after 6.8 miles of hiking

29

13580:

There was a summit cairn at the top, as well as a summit register. I didn’t open it, but I could read through the glass it was recently placed there (6/20/2020?)

30

It was a beautiful day and I stayed for a long time on the summit, enjoying the views

31

When it was time to go I retraced my steps back down the ridge into the basin. Here’s an overview, with Willow Lake to the south

32

And step by step…

33

34

Staying higher and dryer this time in the lower basin

35

36

It was easier this time to avoid both the willows and the creek

37

38

Once Willow Lake was in view it was easy to make my way back down to the trail

39

There are some beautiful waterfalls here

40

I made it to the camping area and was startled to see bighorn sheep just off the trail. The camping area was full of tents but the hikers were all out hiking. It seems while everyone is out hiking for the day the sheep came to play. They posed for me while I took a few pictures. Yes, they were a little unkempt, but friendly enough.

41

Here are some shots of the class 1 trail back down to the trailhead

42

43

44

45

I made it back to my truck at 12:30pm, making this a 13.38 mile hike with 4934’ of elevation gain in 8.5 hours.   Here’s a topo map of my route. Oh, and just for reference, using my iPhone’s flashlight took up 66% of it’s battery in 2 hours (while on airplane mode).

46

I drove back home, cleaned up, and noticed I was full of mosquito bites. Curiously, they were only on the left side of my body.

Mt Parnassus – 13,580, Bard Peak – 13,641 & Woods Mountain 12,940

1

RT Length: 10.25 miles

Elevation Gain: 4965’

This was my third attempt going for Bard Peak. The first time I made it as far as Parnassus, but the wind and cold temperatures (and Raynaud’s) prevented me from going any further. My second attempt was from the Berthoud Falls area, and the snow just wasn’t cooperating. Imagine my surprise when I found out today this is actually an easy trail when not in full winter conditions!

I parked at the Herman Gulch trailhead and was on the trail by 4:30am. This trailhead has tons of parking, but beware: it fills up fast. There was a full moon and I could see by looking at the mountains I wouldn’t be needing snowshoes today, so I left them in my truck.

2

The trail starts in the middle of the parking area. I took the Herman Gulch trail to begin, which is just behind the information signs.

3

4

After hiking .2 miles I turned right (east) at this junction to follow the Waterous Gulch Trail.

5

This trail is an easy, class 1 trail all the way to the basin. Last time I was here the area was covered in snow and I had no idea there was a trail that went that far. Today the hike was easy! No real route finding below treeline.

6

7

After hiking for about 1.5 miles I came to a creek crossing in Waterous Gulch, crossed the creek on an icy log by sitting down, straddling the log, and shimmying across (due to the ice I would definitely have slipped if I’d tried to cross standing up). I turned left and headed north through the gulch on a great trail (still the Waterous Gulch Trail).

8

9

10

Starting here there was snow on the trail, but just enough to be annoying: I could still figure out where the trail went

11

I crossed a small stream and continued on the trail. Note: You can also choose to go right and not cross the stream here and take a parallel trail that leads you to the exact same place as the Waterous Gulch trail. I stayed straight here and continued to the end of the gulch on the way in and took the parallel trail on the way out. They were similar, but the one that follows the gulch also follows the stream, which was nice.

12

I followed the class 1 trail to the end of the gulch, and after 2.2 miles of hiking turned right and continued following the trail up to the saddle of Woods/Parnassus. There are a lot of ways to gain the summit of Parnassus. Last time I hiked further south, avoiding the saddle, and I would not recommend that route. Instead, take the easy gully and aim for the saddle and go as far as you can before turning right and heading southeast towards the summit. This is where the intense wind started and didn’t stop. Forecasted winds were 17-24mph, but those winds don’t knock you over. For the rest of this hike I was using my trekking pole for stability, hiking sideways into the wind.

13

The trail stopped here somewhere under the snow. I paralleled the snow to the saddle

14

At the saddle I turned right and headed southeast towards the summit of Mt Parnassus. This is an easy hike on tundra.

15

The terrain gets a bit rockier near the top.

16

The summit is relatively flat. I summited Mt Parnassus at 6:40am, after just over 3.5 miles and 2 hours of hiking. Since this is my second summit of Mt Parnassus I’ll spare you the selfie and let you watch the summit video instead.

Mt Parnassus:

Bard Peak is just over a mile east of Mt Parnassus.

17

There’s a bit of a trail from Parnassus to Bard. I followed it where I could. It was faint, so sometimes I lost it, but mostly followed the ridge. It’s important to follow the ridge when snow is present. This ridge is easy class 2 ‘scrambling’. Just watch for loose rocks. I could see a faint trail go to the right of the ridge (south), but it became covered in snow and would have been difficult to cross. Here’s an overview of my route

18

And some close-ups in order:

19

20

21

When I got to this section I did not feel comfortable traversing without crampons and my ice axe (luckily I had both). I sat down, strapped on my crampons, and crossed the snow. The snow was slippery at this time in the morning (not mushy, more like icy). You could probably traverse this section with just microspikes if you were here at the right time of the day.

22

Because I could I kept the crampons on until the last of the snow.

23

Here’s looking back on the section you want to avoid, and the reason I stuck to the ridge. You can also see a slip here would take you a ways.

24

After taking off my crampons and putting them away I headed up to the summit of Bard Peak, keeping close to the ridge

25

26

I summited Bard Peak at 7:50am, after 4.7 miles of hiking.

27

Bard Peak:

There was a broken summit register and a benchmark on the summit

28

Now to head back to Mt Parnassus. I backtracked down to the saddle, put on my crampons again, got out my ice axe, and crossed the snow.

29

30

31

It was easy to avoid the snow on the rest of the way back to Parnassus

32

33

34

35

From the summit of Mt Parnassus I descended the way I’d summited, back down to the Woods/Parnassus saddle

36

When I made it to the saddle I still wasn’t tired so I decided to summit 12er Woods Mountain as well. This summit doesn’t require much guidance: it’s an easy tundra stroll to the top. This added 460’ of elevation gain to the hike. This is where the wind became the most intense (yes, it was still blowing). It was so windy I was hiking sideways with each step, and had to over-compensate each step to stay in a straight line, crisscrossing my steps as I went.

37

I reached the summit of Woods Mountain at 9:40am. I’ll spare you the selfie of this one as well, since I’ve already summited this peak. Here’s the summit register and a video

38

Woods Mountain:

This wind was insane! Time to head back down to the saddle and back down to the gulch

39

40

41

I followed the trail back down the gulch, over the log bridge, and back to the trailhead. This is where I started seeing a lot of other hikers. When I made it to the trailhead the large parking area was completely full.

42

43

44

I made it back to my truck at 11am, making this a 10.25 mile hike with 4965’ of elevation gain in 6.5 hours. Here’s a topo map of the route:

45

I felt really good about the hike today: The weather had been warm, no clouds, not much route finding, and when I made it back to my truck I wasn’t even tired yet. The only thing that could have been better was the wind. It’s amazing how good conditions can change the outcome of a hike!

Twin Peaks A – 13,584

1

RT Length: 9 miles

Elevation Gain: 4625’

Any time your hike begins in the Piñon Pines and Junipers you know it’s going to be a long day. I arrived at the South Zapata Creek Trailhead after mistakenly being directed to a gated community a few miles away (Google Maps was taking me to South Zapata Creek, not South Zapata Creek Trailhead:  I’d suggest putting in Zapata Falls as it will direct you to the campground and trailhead).  No worries though, I was free all day and this only put me back about 15 minutes from schedule.  The 4WD road to the correct trailhead was a little rough in the beginning with a lot of softball-bowling ball sized rocks, but after the first mile or so it smoothed out.  I parked my truck just before the campground entrance and was on the trail at 6:30am.

2

I followed the trail that led to Zapata Falls for .85 miles

3

Just past a defunct trail register

4

And at this cairn left the trenched trail and turned right and headed up the hill.

5

From here on out I was ‘off trail’. At this point I should have put my snowshoes on, but I tend to be stubborn about such things and kept hiking in just my microspikes.  My next objective was to gain the ridge to the south.  This ridge was steep and I kept sliding backwards in the snow.  Yep, snowshoes would have been a good idea.  Here the snow was soft but I was only postholing about a foot at a time.  To make things easier I did my best to follow recent game tracks.  It looked like there were a lot of deer in the area.

6

From the top of this ridge I followed the drainage up to a small plateau. Once again, there were tons of deer tracks here and it looked like they’d bedded down in the area last night.  I even saw a buck bounding away as I arrived.

7

I also got my first view of Twin Peaks A

8

The view was short lived however, as I dipped back into the trees again.

9

In the trees I came upon an unexpected cabin. It looked old but well kept up.  I would have taken a closer look but the snow was really deep here.  I broke down and put on my snowshoes.

10

11

From here on out the snow just kept getting thicker and stayed sugary. I kept heading southeast, this time through some thick aspen groves. Shout out to the deer/elk that helped me by breaking about 250 vertical feet of trail:  I followed their tracks through the trees until they disappeared over the ridge.

12

This route mainly follows the ridge, but it takes forever to get to treeline. Well, it took me forever because I was trenching the entire time.  This was the most challenging trench I’ve ever put together:  the snow was deep, unconsolidated, and never ending.  Several times the snow was so deep I couldn’t go forward and I had to get creative and zig-zag my route to make it possible to continue.  This type of trenching is tiring!

13

14

I’d make it to what I thought would be the treeline, only to find more trees ahead of me. Here’s a look at the route from one such area

15

More trenching through the trees

16

And I came to an area so thick with snow it was untrenchable. I was exhausted and seriously considered turning back:  where was treeline anyway?!?!  Last week I’d had to turn back on Rinker Peak due to unconsolidated snow, and I really didn’t want to repeat the same scenario twice. I decided instead of continuing along the ridge to descend a little to the south to see if the terrain was any easier, and it was!  I came across a rocky area and easily traversed a little below the ridge and then regained the ridge (to more snow)

17

I (finally!) exited treeline and had just a little bit more trenching to do before taking off my snowshoes and tackling the rest of the route in just microspikes. Up until this point I wasn’t sure I was going to complete this hike:  all that trenching had worn me out and I thought I’d never make it to treeline.   Several times I’d thought about turning back, but I’d put in so much work I didn’t want to give up.  This clear view of the peak renewed my spirits and I was ready to go.

18

I could see the summit ahead of me and it was a nice day: warm with no wind.  I thought taking off my snowshoes would be a good idea and could also save some valuable time.  In the beginning, this was a good idea.  I was able to quickly rock-hop up the ridge

19

After gaining the first bump however, things changed. The snow was no more consolidated here than it had been before treeline.  In fact, the snow was 4-6 inches deep:  a thin layer over rocky terrain.  The snow never held my weight and I frequently postholed in areas where I could easily have twisted an ankle.  I was cursing myself for taking off my snowshoes, and would have put them back on except the wind had now kicked up and I was afraid to take off my gloves because of the exposure.  I was just going to have to be careful and rock-hop whenever possible.

20

I followed the ridge as closely as possible, but those cornices were weak. I kept postholing in the shallow snow and my feet were becoming frozen.  I wasn’t giving up though:  I could see the summit!

21

Here’s a look at Twin Peaks B (unranked) and Twin Peaks A. There was a lot more snow at the summit than I’d been able to see from below, those cornices are bigger than they look, and once again, hollow.  I followed the ridge to the summit.

22

I took a few steps up the cornice to try and get as high as possible and heard a hollow sound below my foot. I quickly retreated: In no way was I going to climb to the top of the cornice.

23

I found the summit wind break, set up my camera on top of my backpack, got a (terrible) picture, and decided to book it back down. I wasn’t going to play with that cornice.

24

I had no desire to climb Twin Peaks B today as well: The cornices were hollow and I would need to go over one just to start, that wind was becoming insane, and I could no longer feel my feet.

25

Time to head back down the ridge

26

27

There were some great views along the way of Lindsey, Ellingwood Point, Blanca, and Little Bear

28

29

And also the Sand Dunes

30

Here’s the rest of the route down the ridge and back into treeline

31

And a look from treeline up the ridge

32

I stopped to put back on my snowshoes at treeline and headed back to the trees, carefully retracing my steps and making my tracks into a solid trench. This is more tiring than it sounds.

33

I followed the ridge and in a small clearing between hills saw what looked like a reverse shadow far ahead of me. Anyone know what this is?

34

I made my way back to the cabin

35

And decided to keep my snowshoes on for the rest of the trek back to the trailhead. Here’s the way down the ravine

36

And down the ridge

37

Back to the Zapata trail

38

It had been a long day, and it was starting to get dark. I’d originally wanted to visit Zapata Falls while I was here, but looking at the time I wouldn’t make it there until after dark.  I’ll just have to come back when I’m here later this season. The trail was easy to follow from here

39

Back to the trailhead.

40

I watched an absolutely stunning sunset as I broke down my gear and got ready to head home.

41

I made it back to my truck at 5:30pm, making this a 9 mile hike with 4625’ of elevation gain in 11 hours. This was by far the most tiring day I’ve had trenching ever, but totally worth it!

42