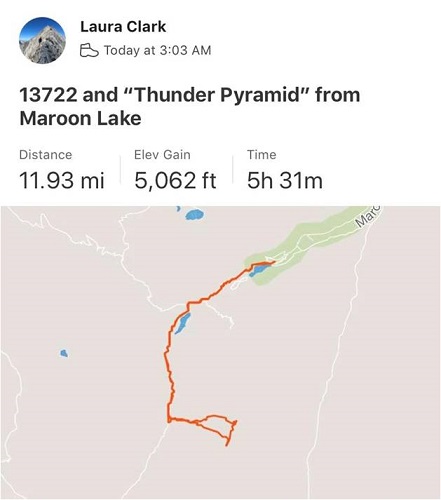
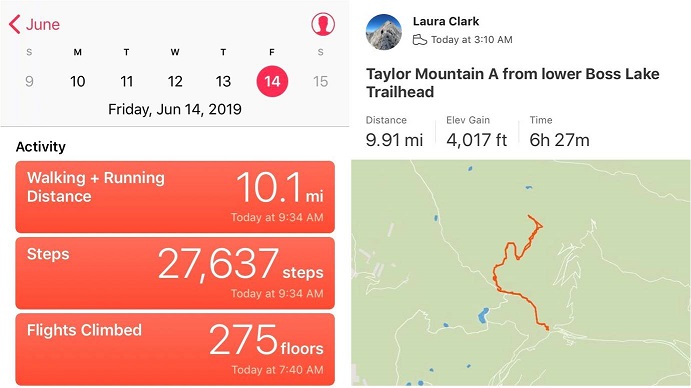
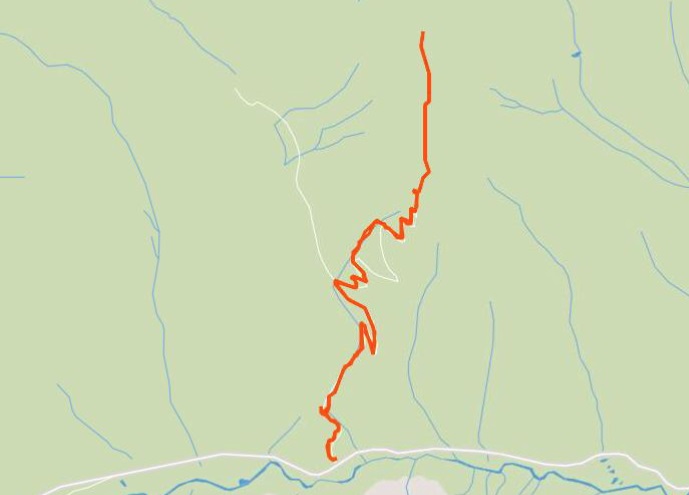
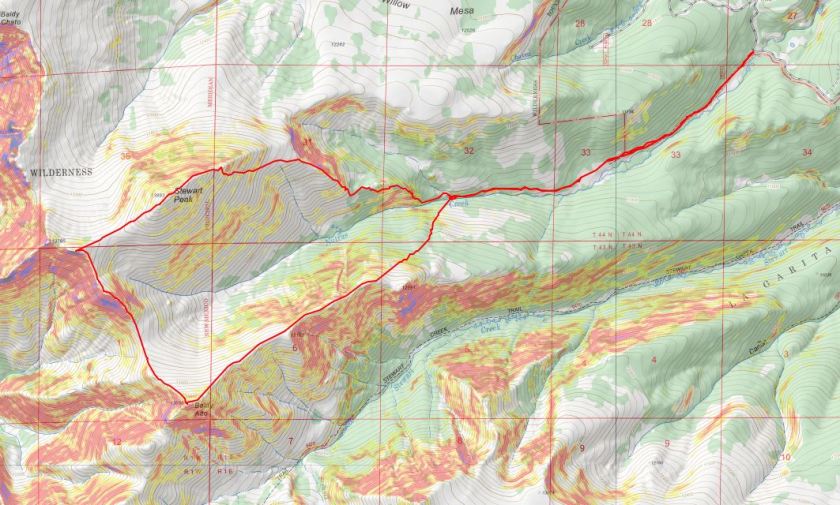
Baldy Alto – 13,698 & Stewart Peak 13,983

1

RT Length: 11 miles

Elevation Gain: 3961’

Colorado had it’s first measurable snow Thursday and Fridays are my hiking days. Of course I paid extra close attention to the weather and it looked like the San Juans were going to be cold and windy but the snow would be negligible.  I had a few other peaks in mind closer to home, but I’ve learned the hard way while the trail may be snow free, it’s unlikely the roads/highways would’ve been snow plowed at the early times I like to hike.

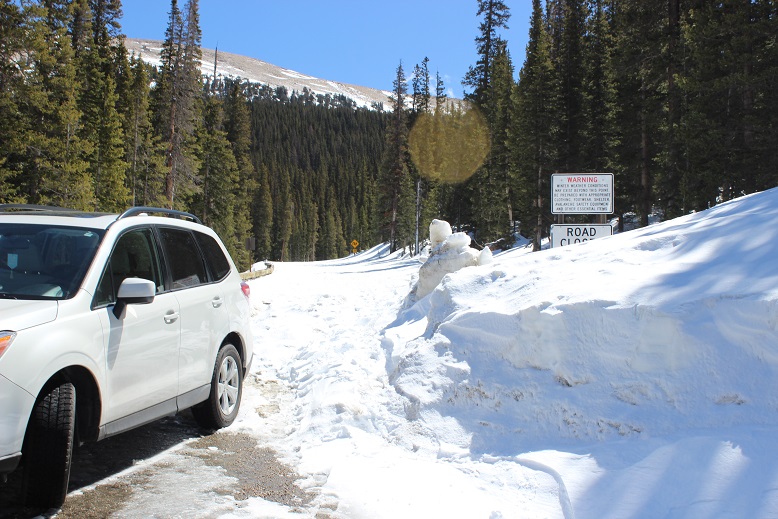
I’d thought about sticking closer to home but didn’t want to waste a full free day when I could be above treeline, summit or no. Also, I had some new winter gear I wanted to test out and the area with the best forecast for the entire state was near the Eddiesville Trailhead in the San Juans.  I made it a late start because (at the trailhead) it was supposed to be 1* until 7am, when it jumped to 7*.  It was going to be cold, and I figured sunlight would help.

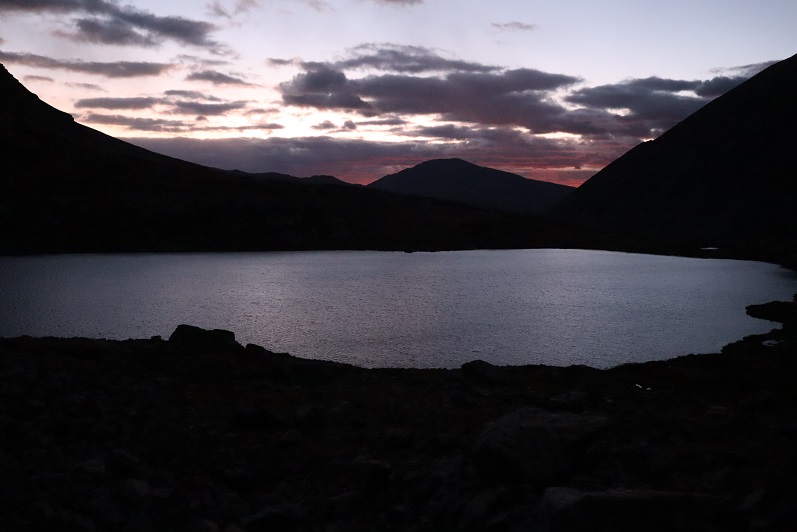
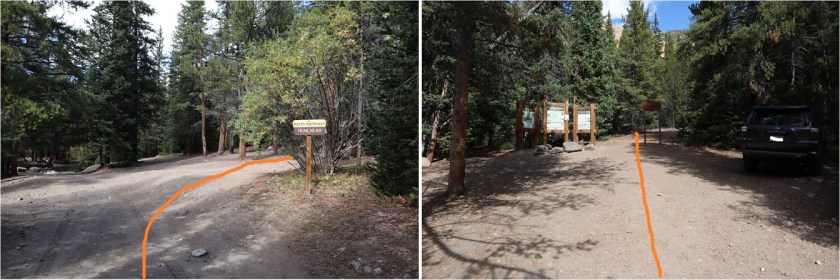
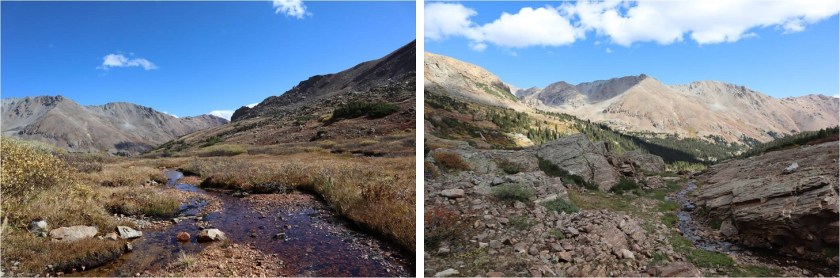
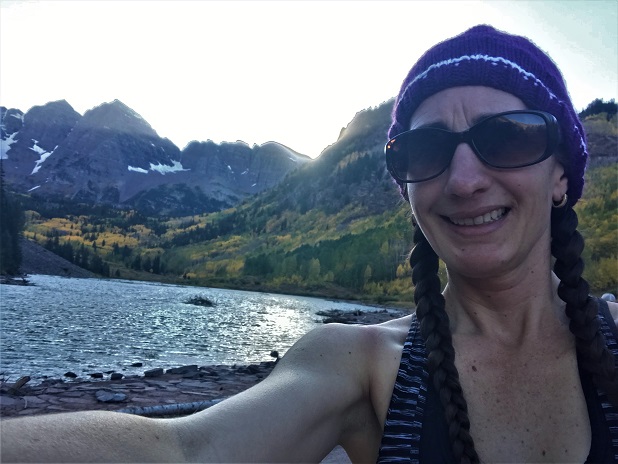
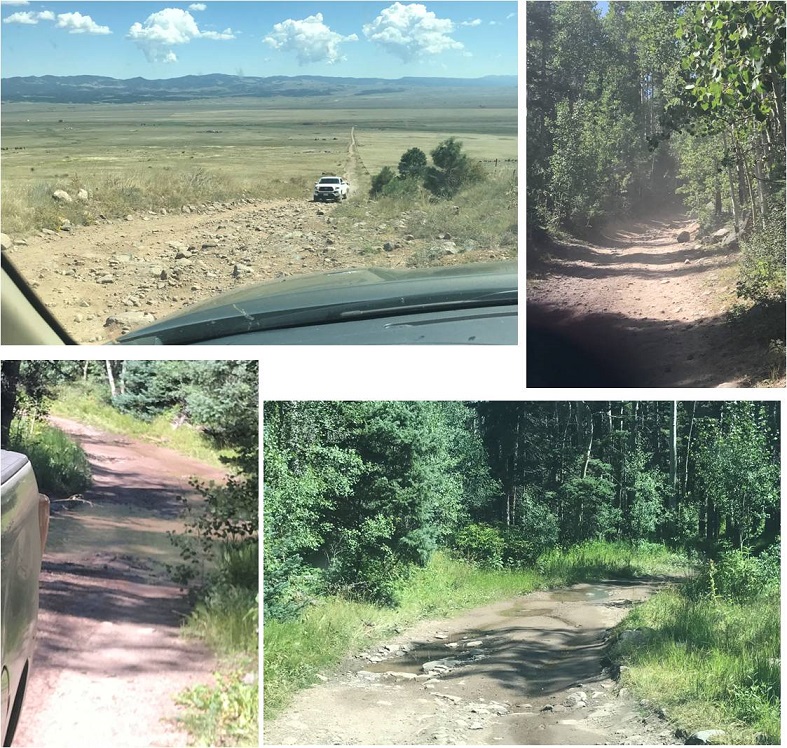
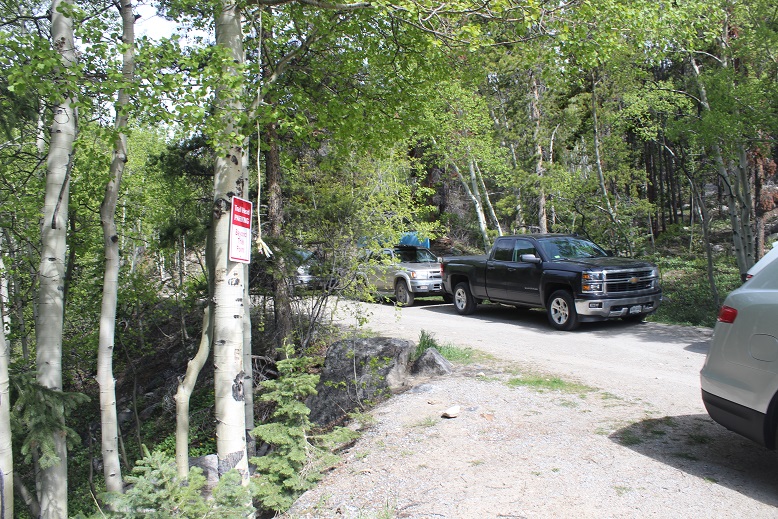
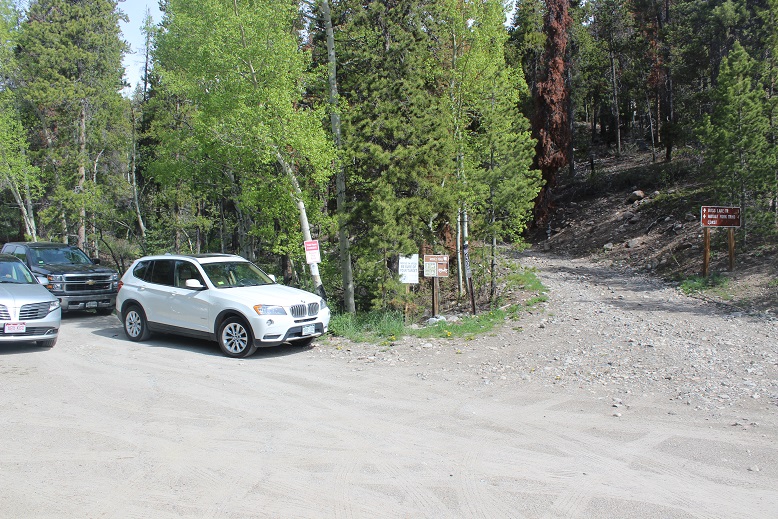
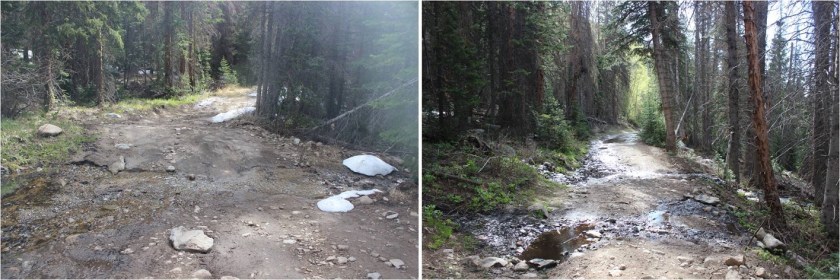
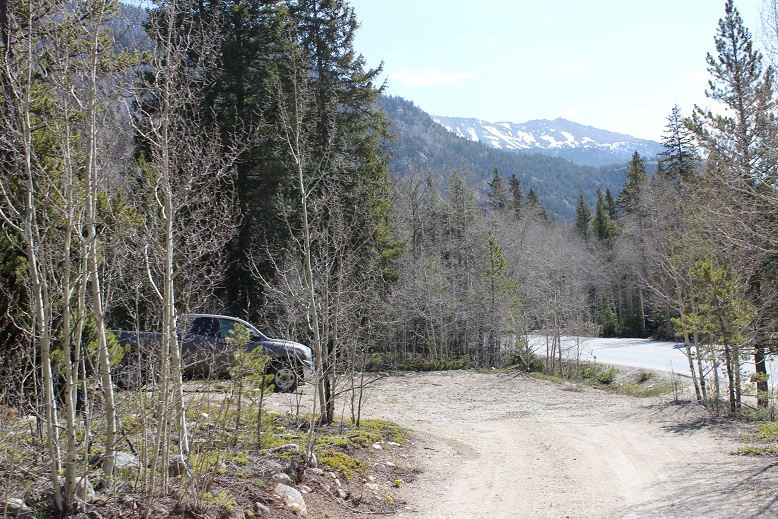
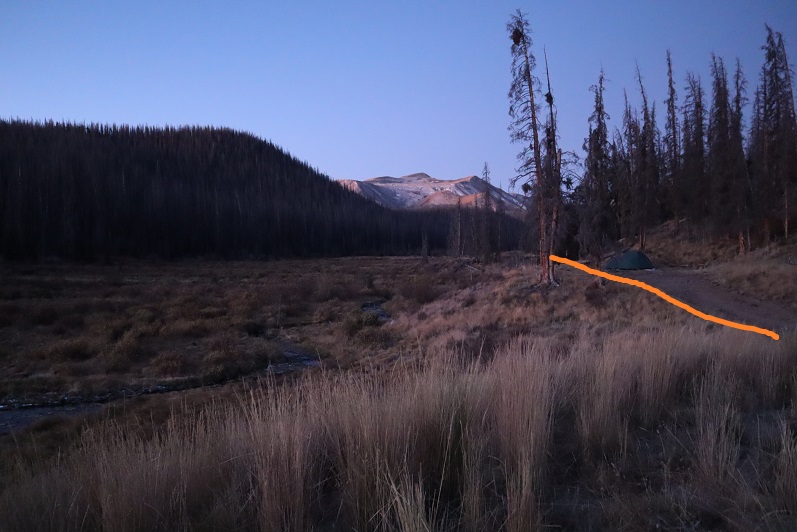
I left my house at 1:30am and arrived at the Nutras Creek Trailhead at 6:30am, surprised to see a tent set up near the trail but no vehicle. It’s a 24 mile drive on a dirt road to this point, and I wondered how they made it here?  My dashboard said it was 14* and I already considered today a win (to be fair, it went all the way down to 0* on my drive in and back up to 14*, so the forecast was in the correct range).  The creek crossings were negligible, just a trickle at the first and completely dry at the second.

2

Not knowing how much snow had actually fallen here yesterday I’d brought both my summer and winter hiking boots. It was icy on the way in and there was a sprinkling of snow on the peaks nearby so I opted for the winter hiking boots, just to err on the side of caution.  The last time I was here to summit Stewart Peak it had rained and my feet had been soaked in the first 10 minutes and were solid blocks of ice on the peak.  I didn’t want that to happen again.  The winter boots were overkill but also the correct choice.

I’ve needed new gear for a while, and this year saved up money to purchase better winter equipment. All of the centennials I hiked in cold conditions I did so wearing a snow bib I’d bought for $2 at a garage sale in 1998. After an intense winter/spring hiking season this year the bottom half were ripped to shreds thanks to my wonderful microspikes and snowshoes.  The jacket I’ve been wearing was a great jacket from a great brand, but I’ve sewn up over two dozen holes and it no longer keeps me warm/waterproof.  I need to wear compression socks when I hike (and basically for any activity that requires shoes) and I wear wool socks over them but the ones I’ve been wearing haven’t been keeping my feet warm.  My goal this winter season is “no blue toes” so I was trying out a new pair of socks (over my compression socks).  Also, gloves.  By far my most expensive purchase was when I splurged on a new pair of Alti Mitts last month:  I’m super excited to try them out.  These would be cumbersome but could be game changers.

So, I bought new socks, gloves, and ski pants (woot! No more taking off half my layers to use the restroom!).  Roxy makes a pair of outdoor snow pants that almost fit me.  The smallest size they make is one size too big for me, but I found they fit better if I wear yoga/moisture wicking pants underneath them.  Bonus: They’re not from the kids section and they kind of make it look like I have a figure instead of looking like the Michelin Man.

Finally, a new jacket. I’ve been in the market for a long time for a new winter mountaineering jacket but I’m frugal and don’t want to spend $500+.  I’ve gone to REI, Sierra Trading Post, and several other outfitters looking for something that would keep me warm without breaking the bank and came up empty.  I was in an online forum for people with Raynaud’s and someone very highly recommended a simple mountaineering jacket. I was exceedingly suspicious due to the (very low) price and because it was synthetic and made in China, but I purchased it on Amazon and figured I’d give it a go early in the season.  When it arrived I was doubly skeptical:  It came in a small 12x12X4 inch plastic case and didn’t look robust enough to keep me warm.  I left the tags on it in case it didn’t perform as advertised so I could return it and try again.

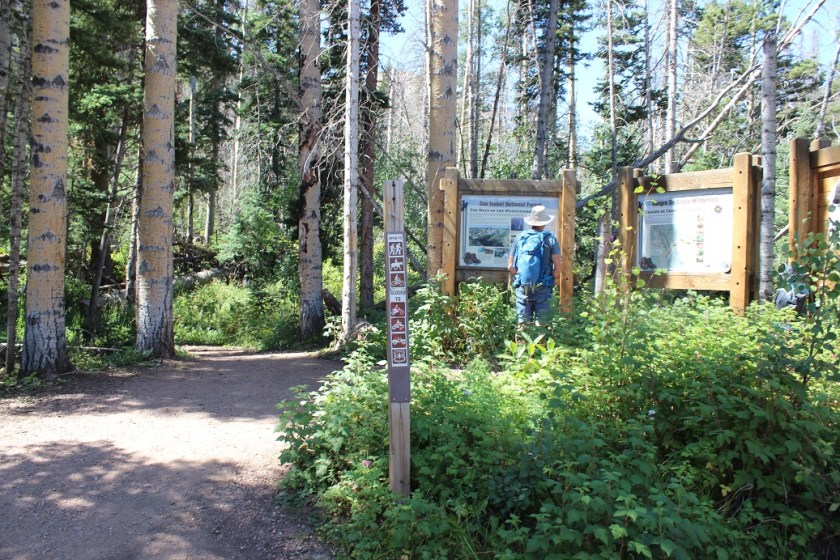
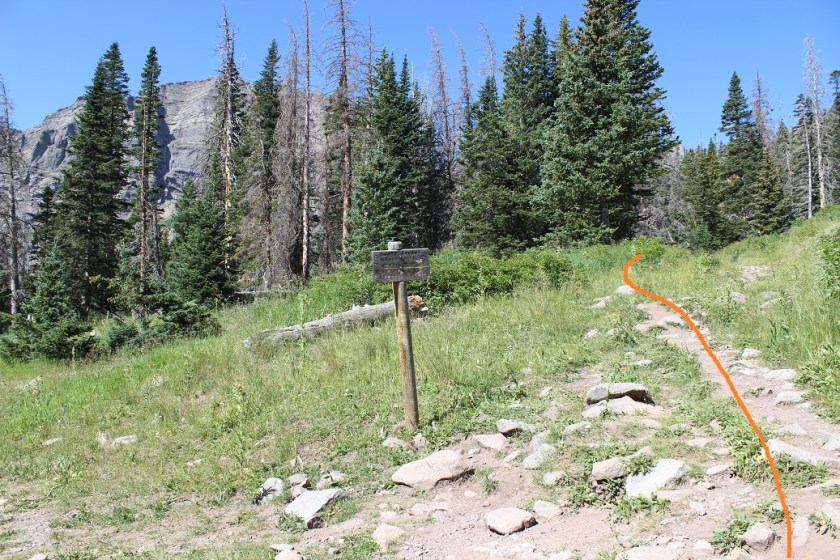
Fancied out in all my new gear I hit the trail at 7am, being careful to be quiet since the campers were not yet awake.

3

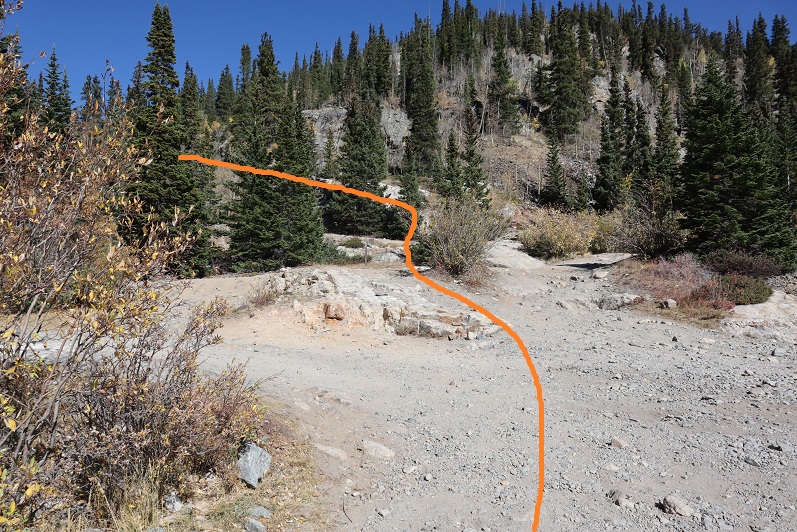
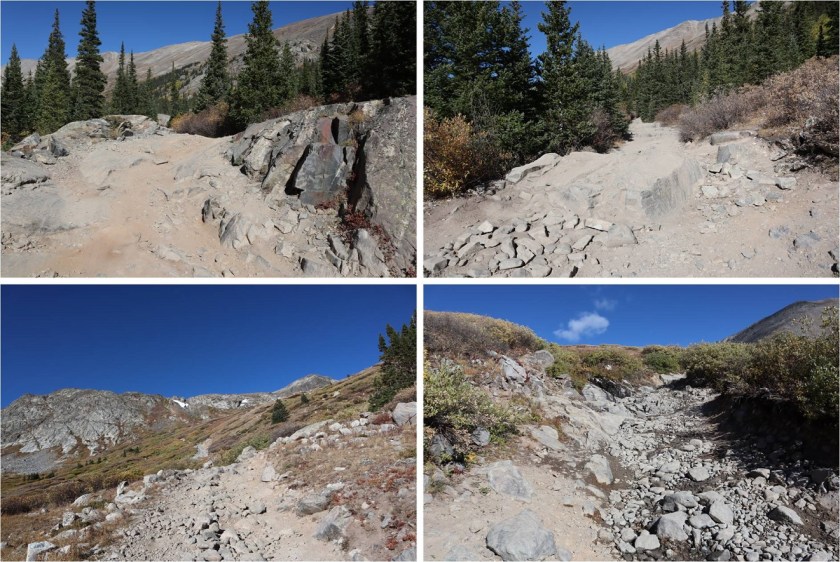
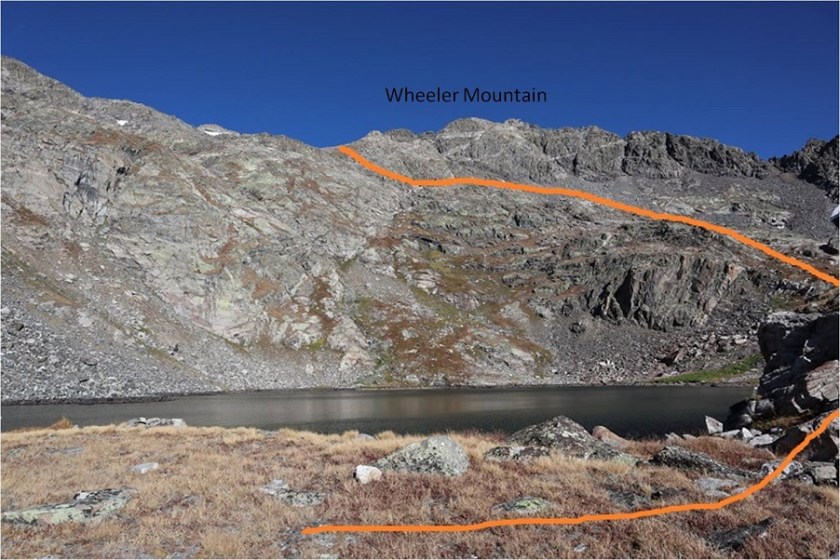
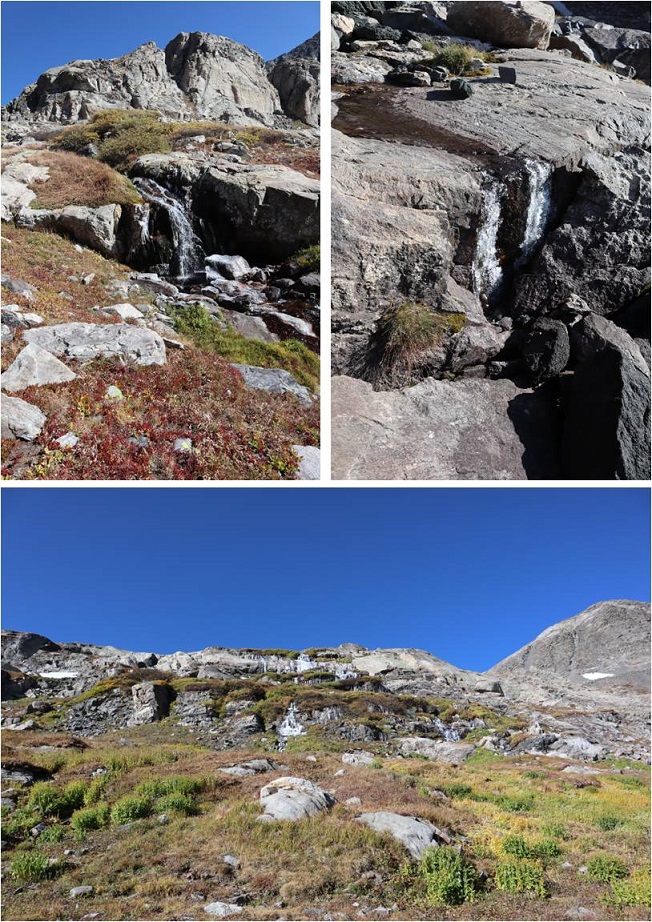
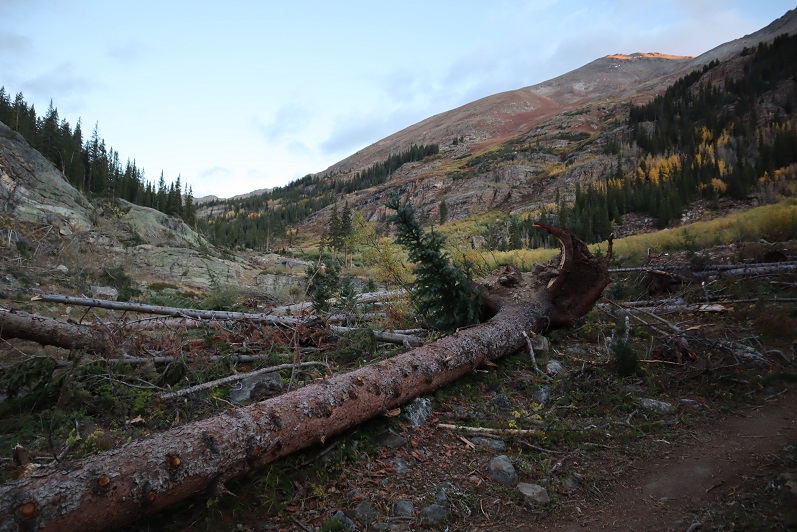
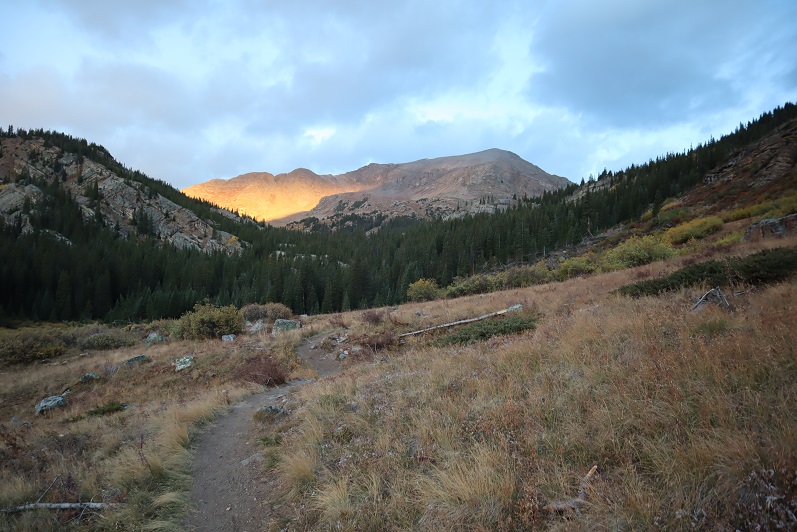
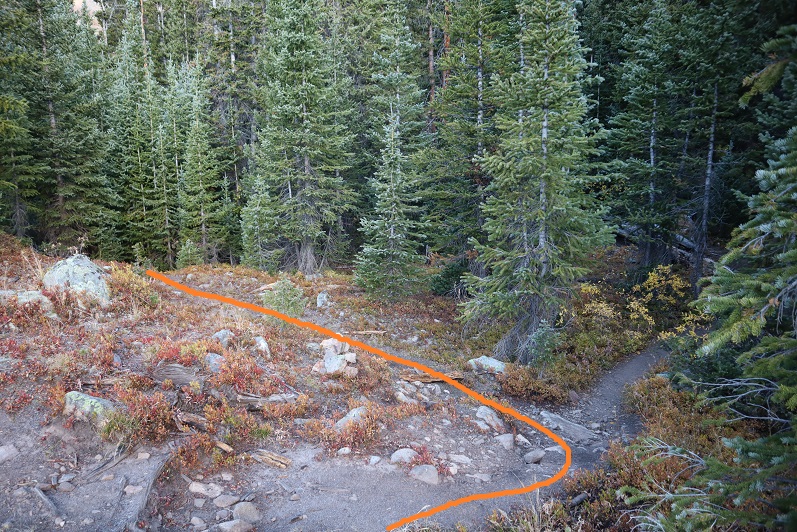
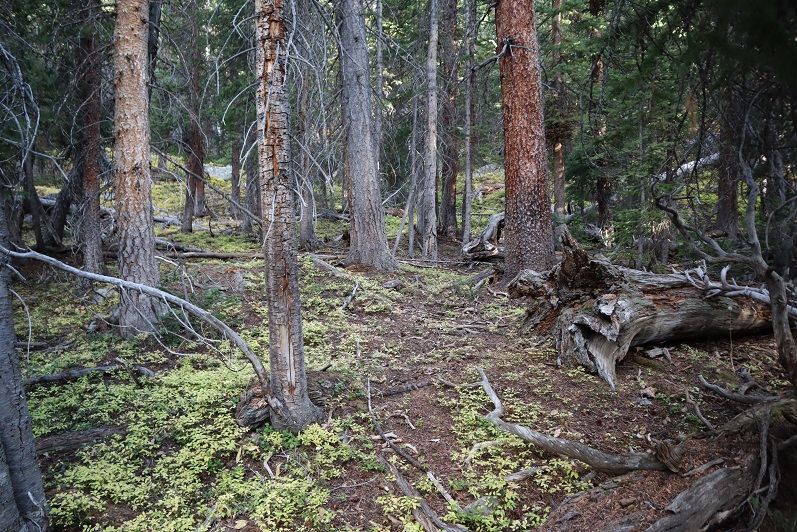
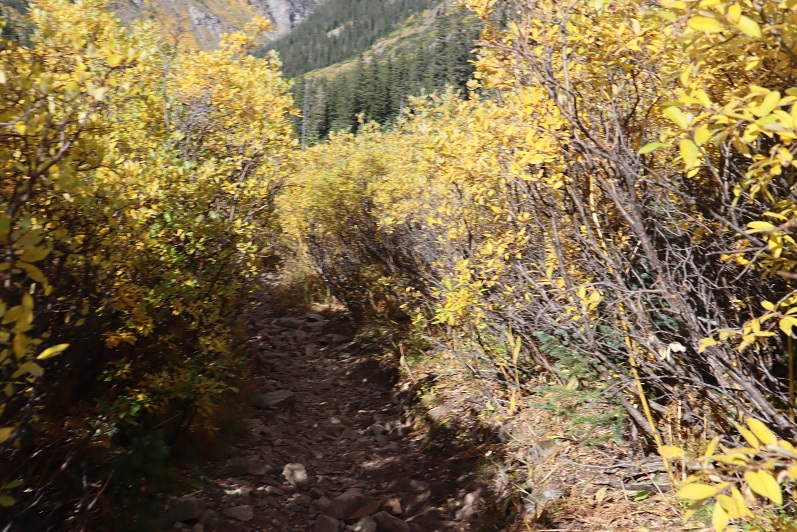
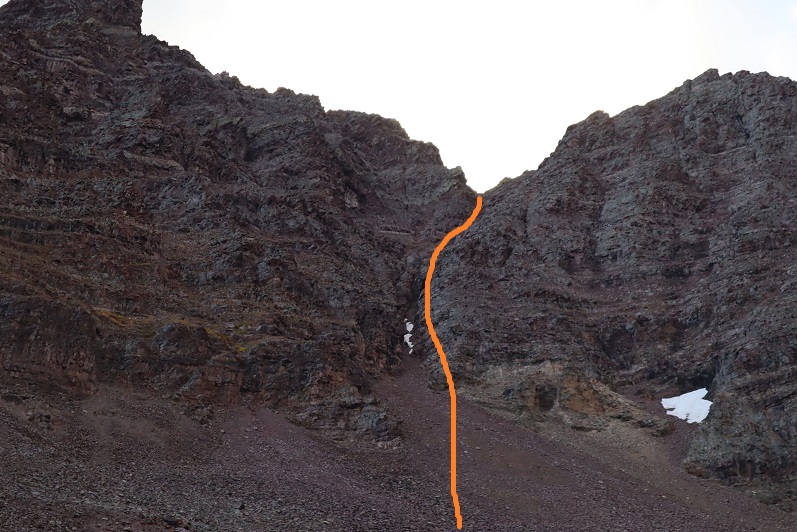
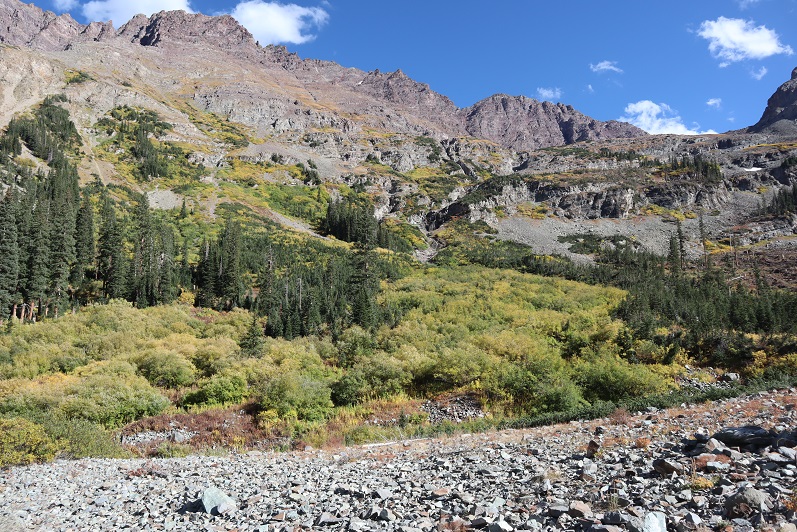
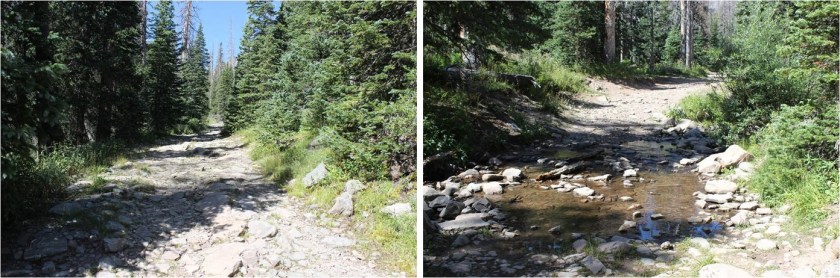
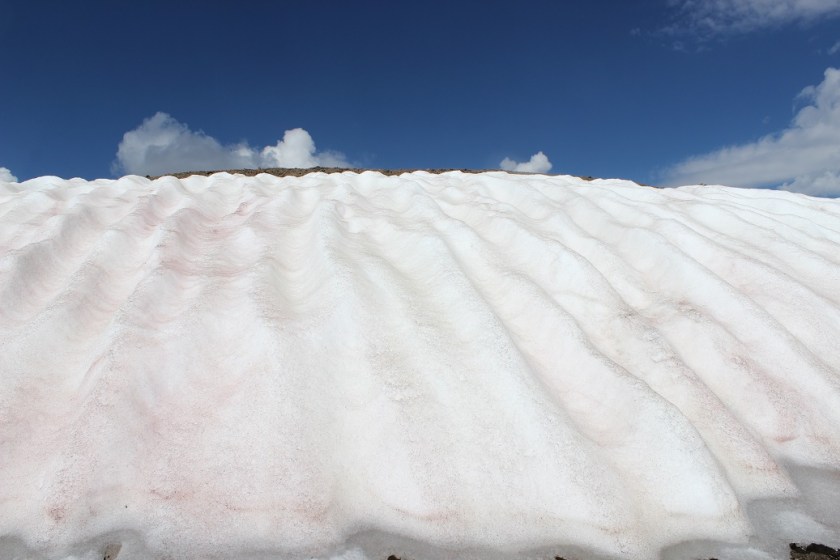
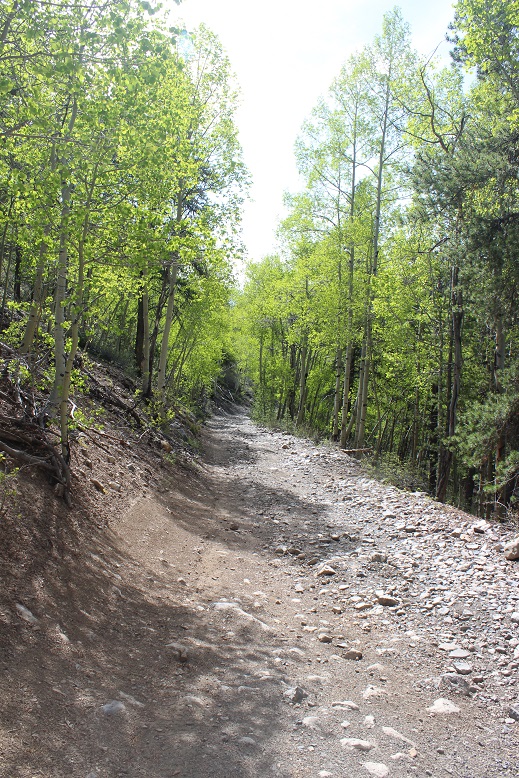
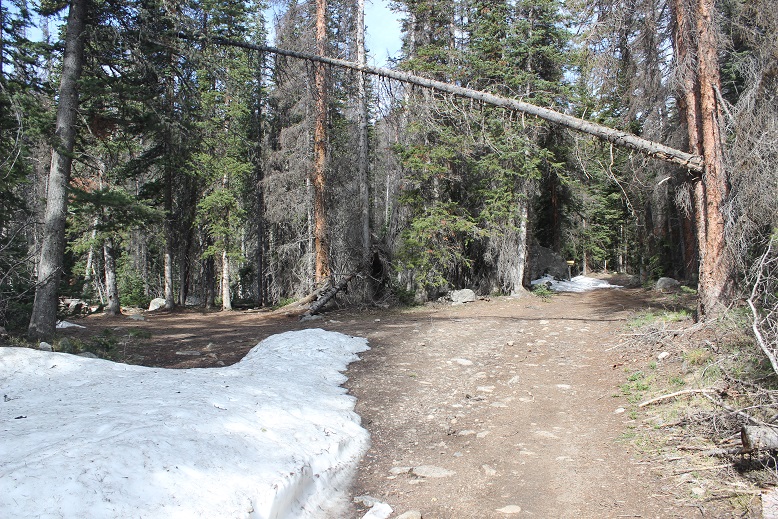
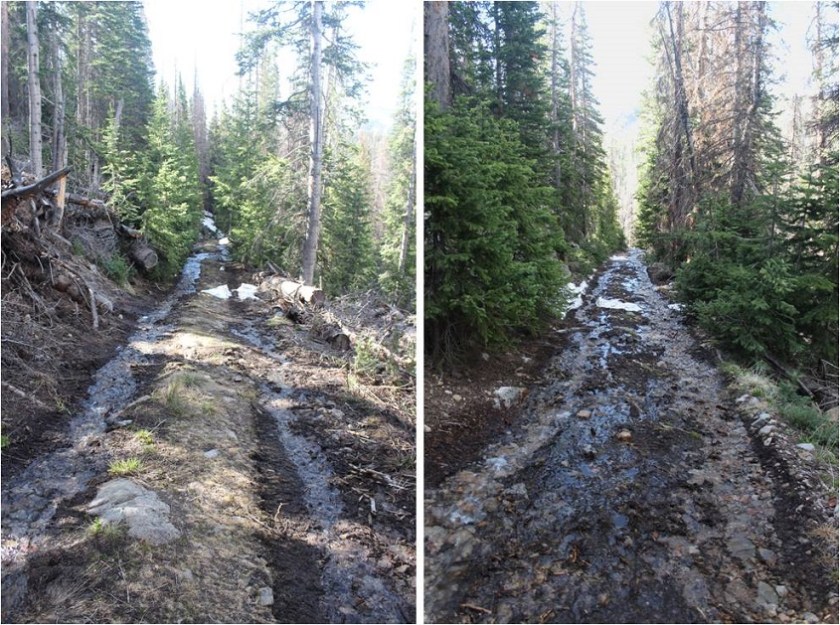
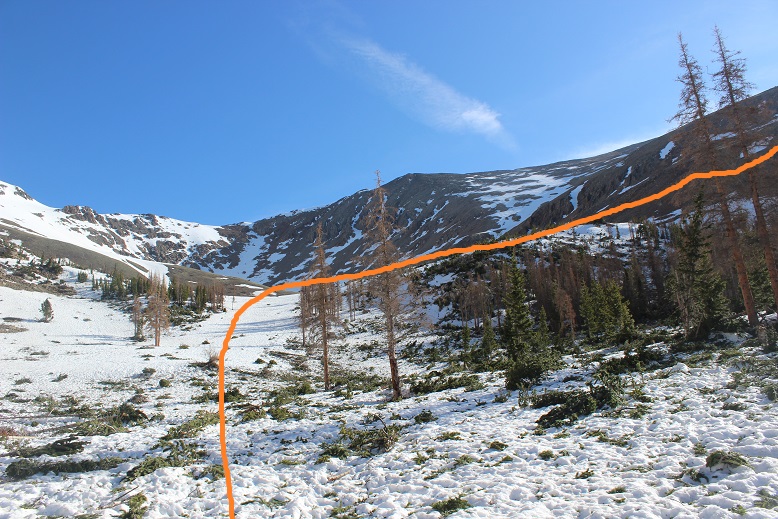
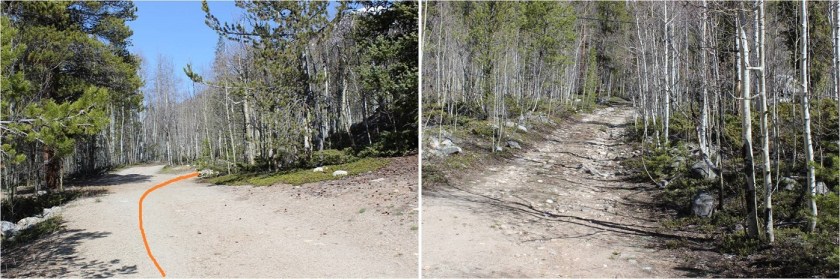
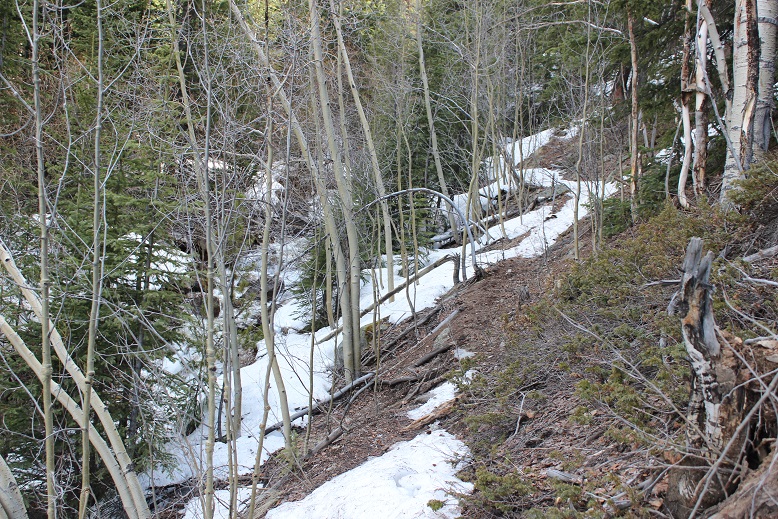
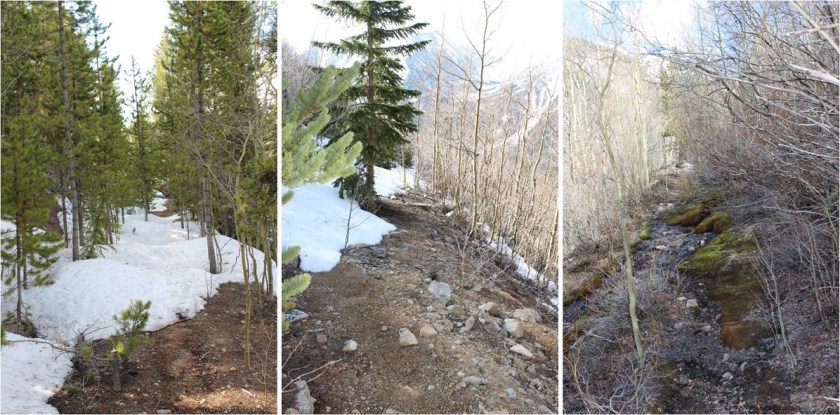
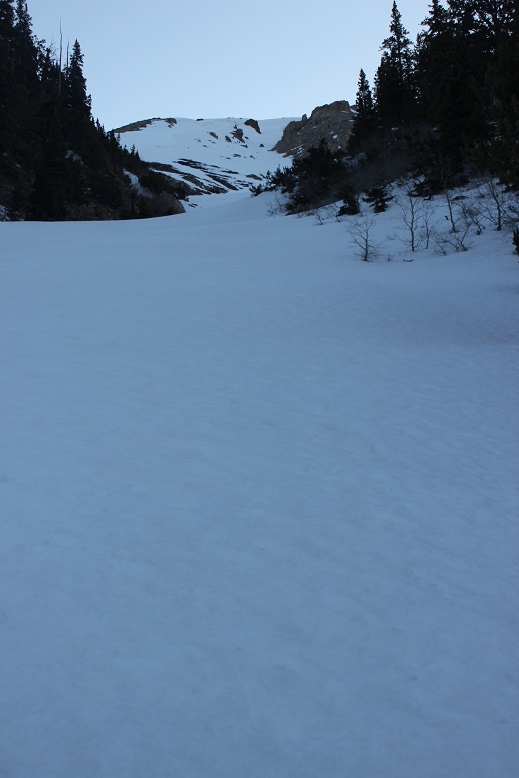
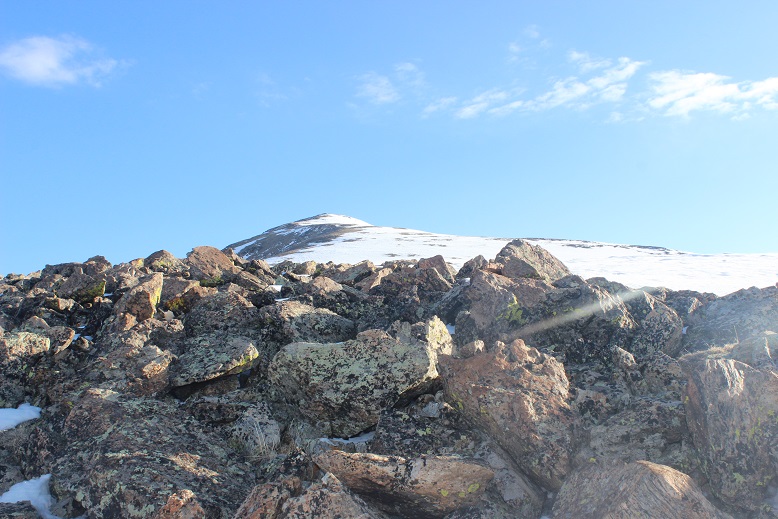
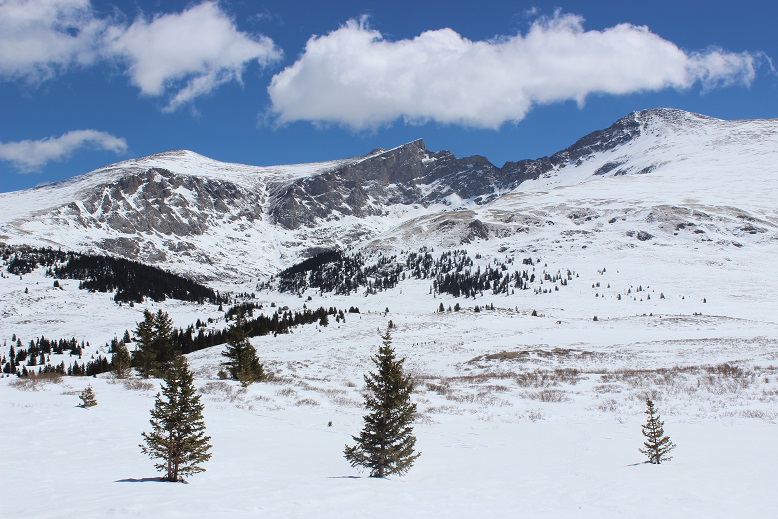
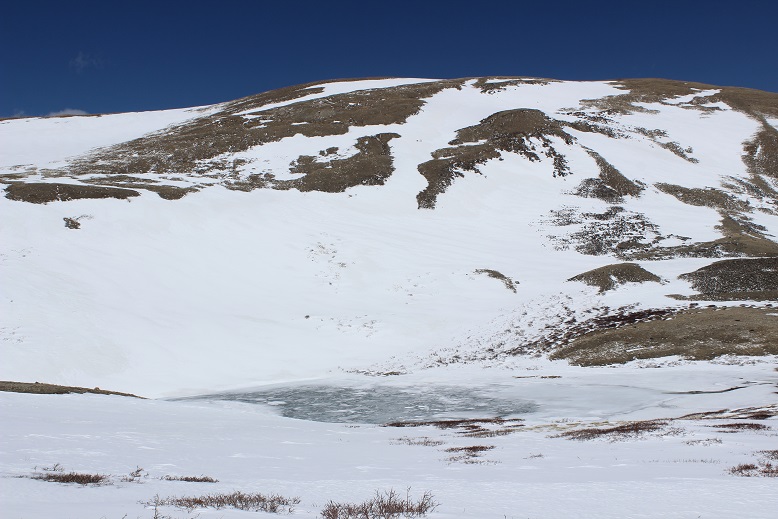
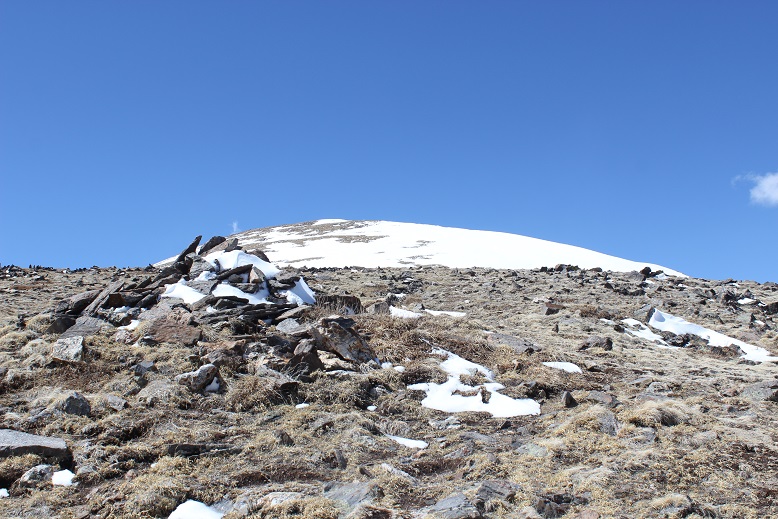
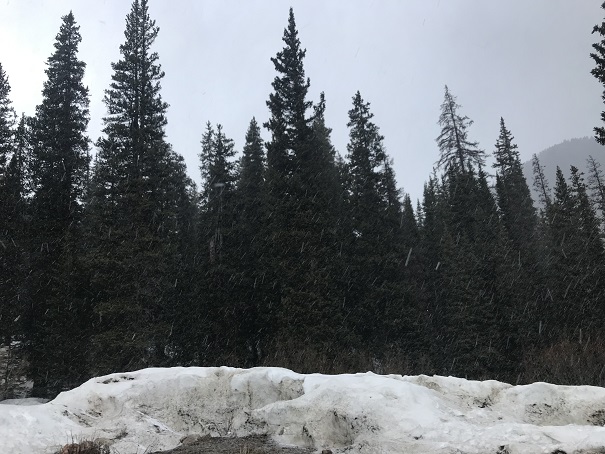
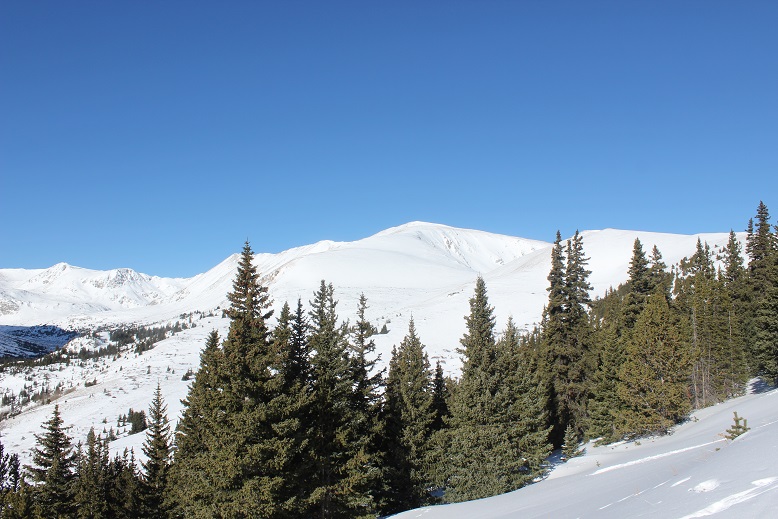
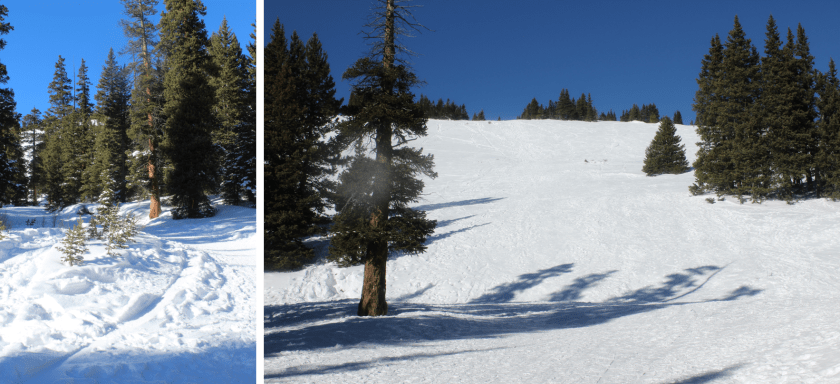
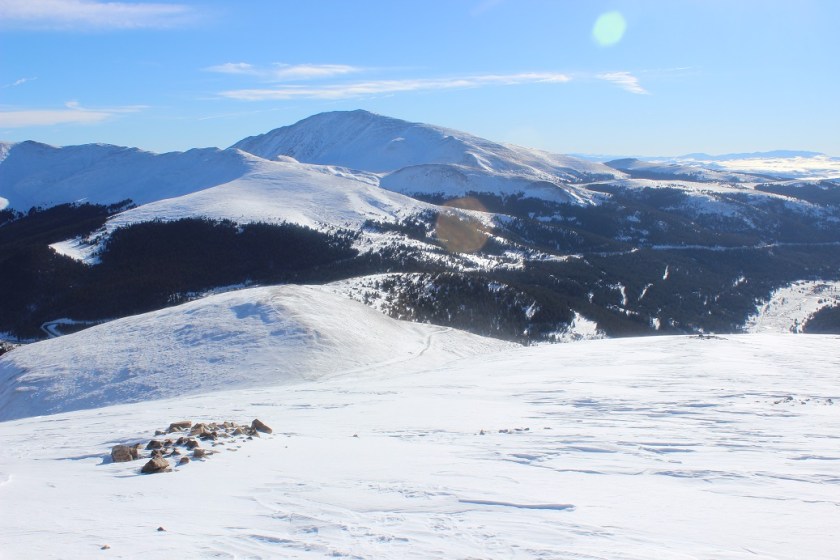
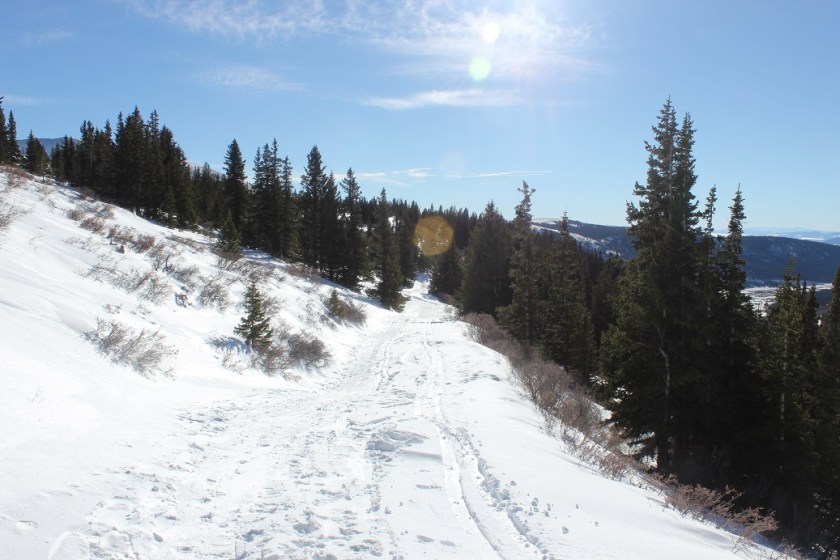
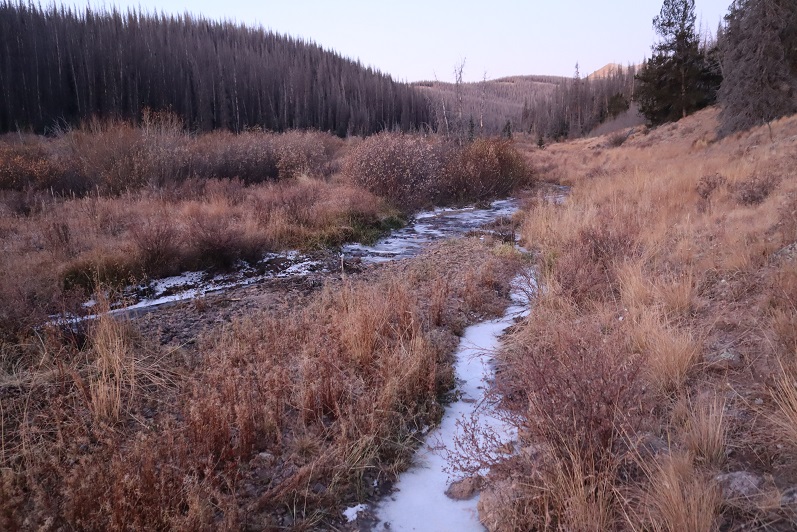
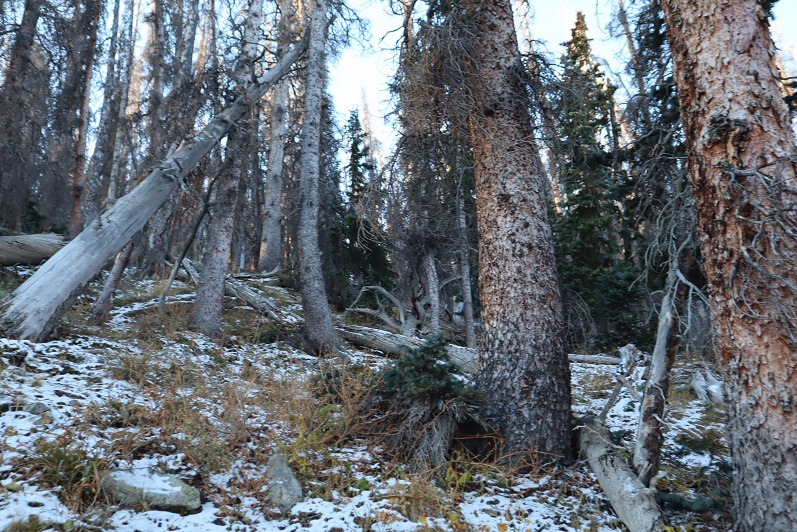
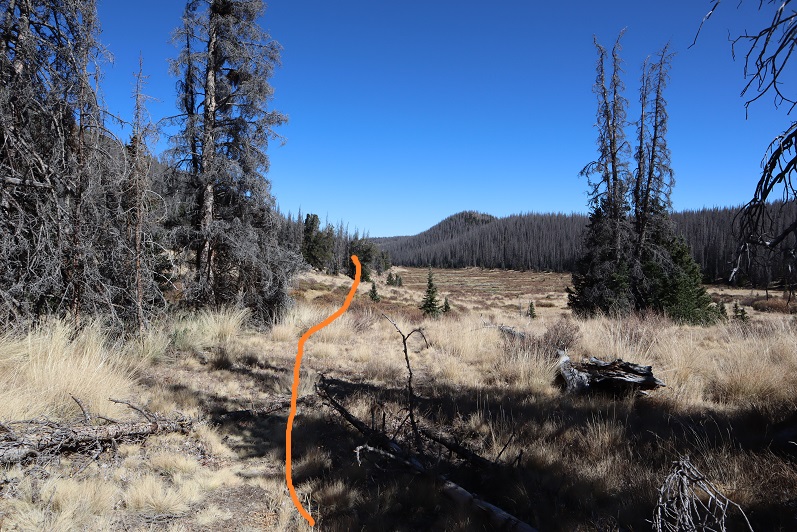
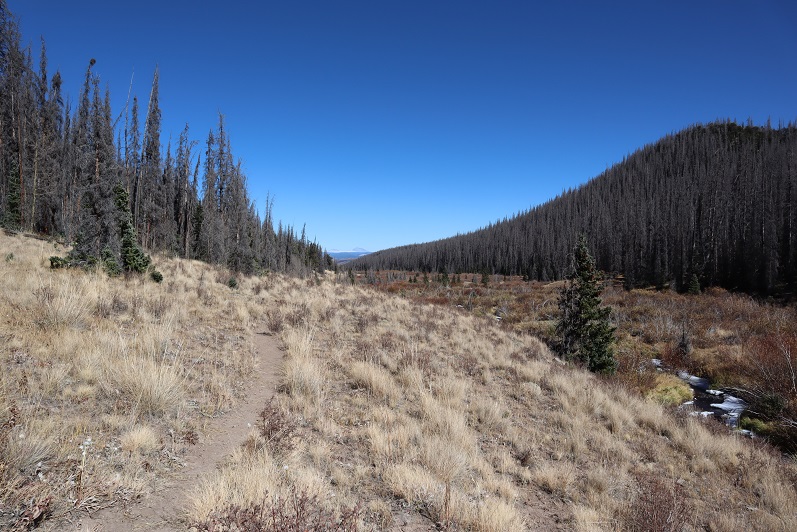
The first 2 miles of this trail follow Nutras Creek southwest on an easily identifiable trail. I could see a light dusting of snow on the nearby peaks.

4

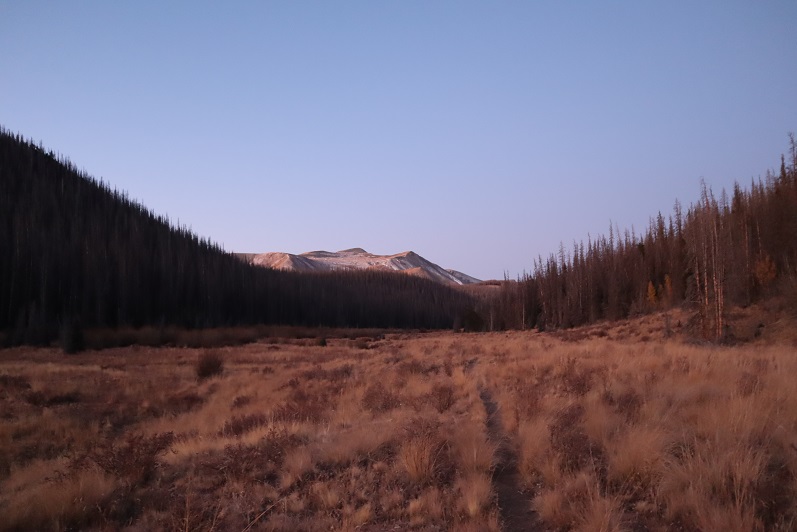
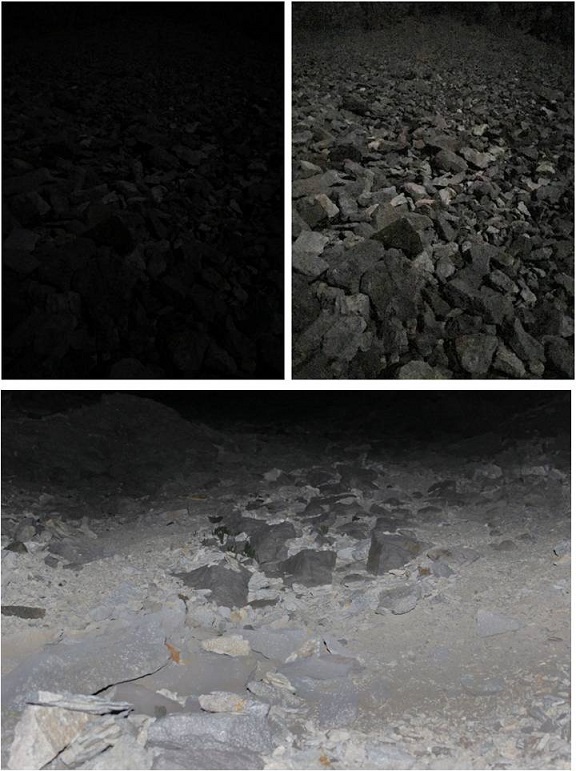
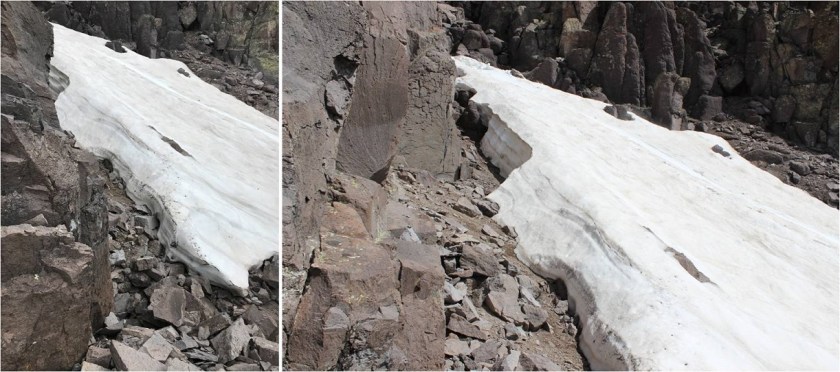
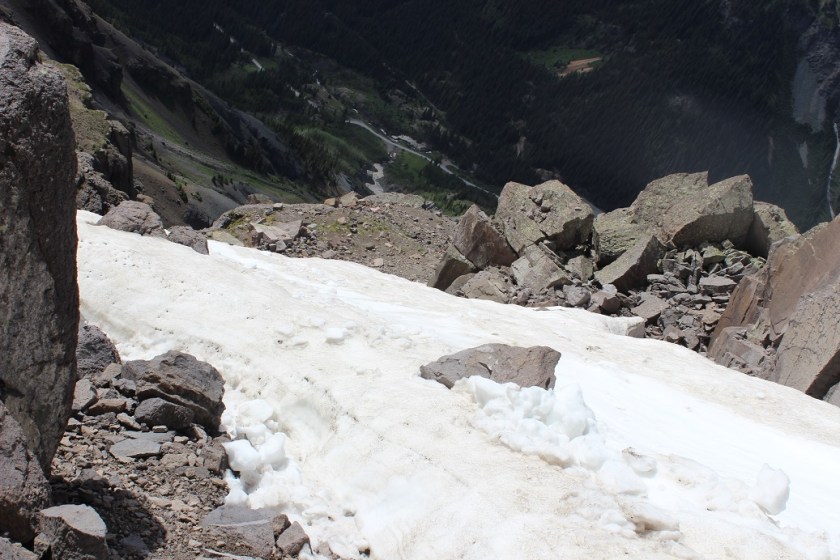
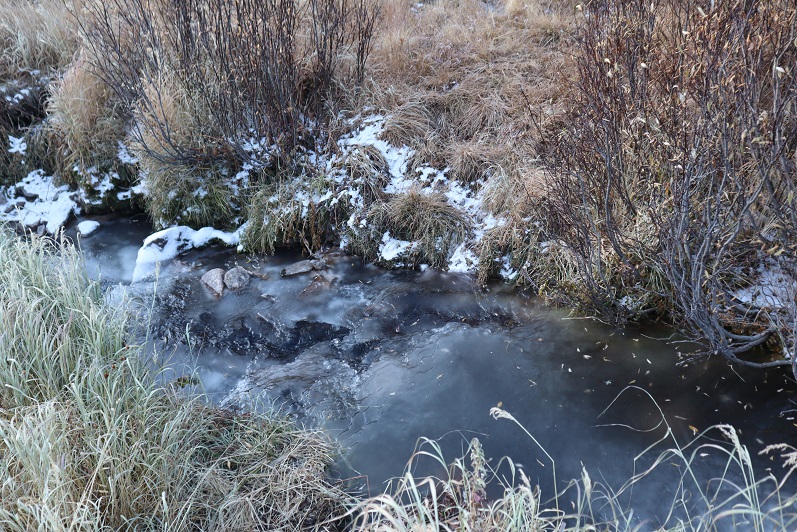
Anywhere there was water or where water accumulated there was ice

5

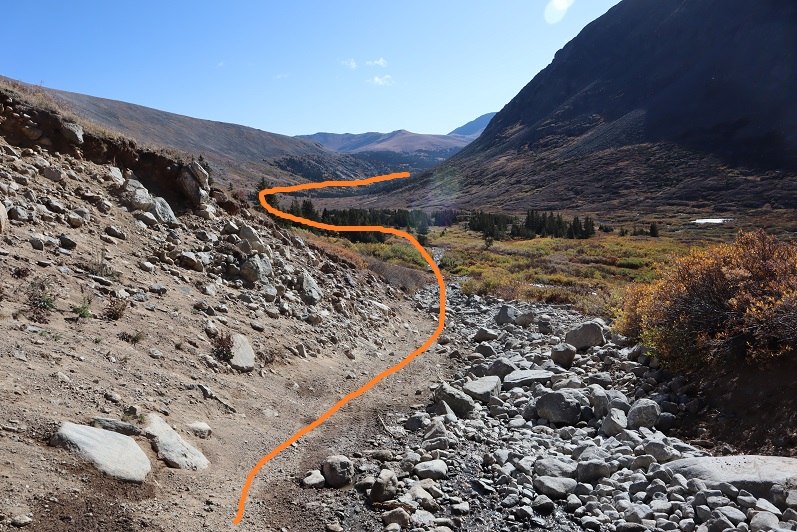
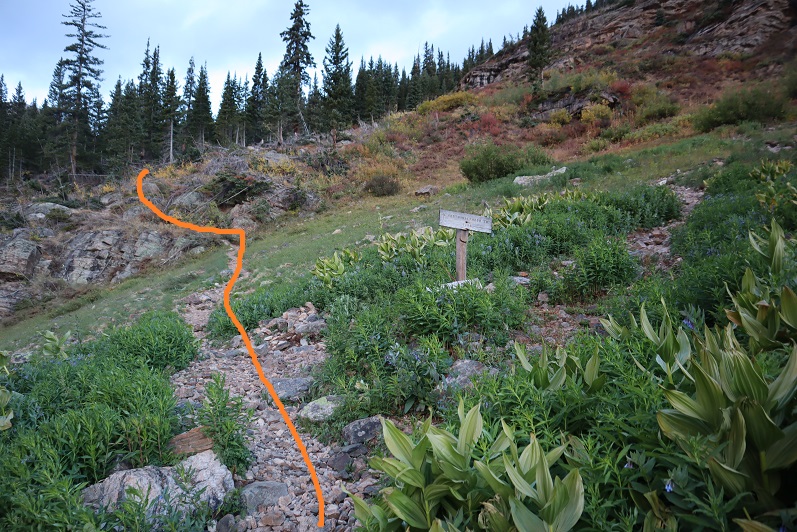
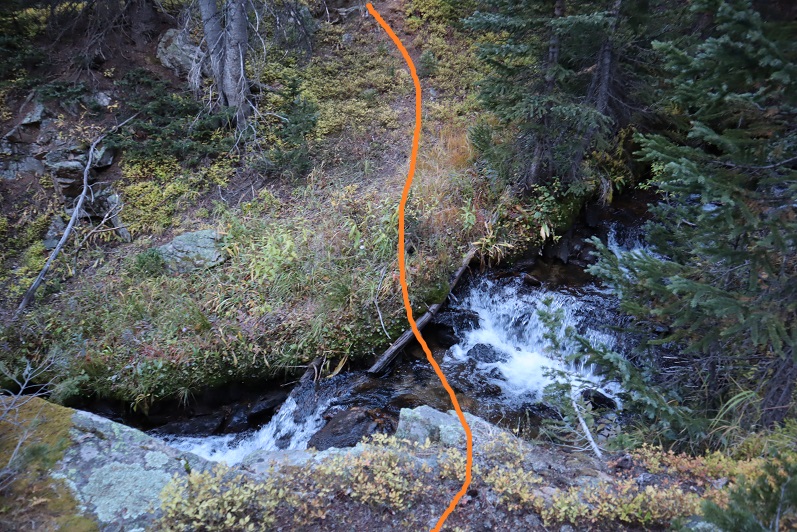
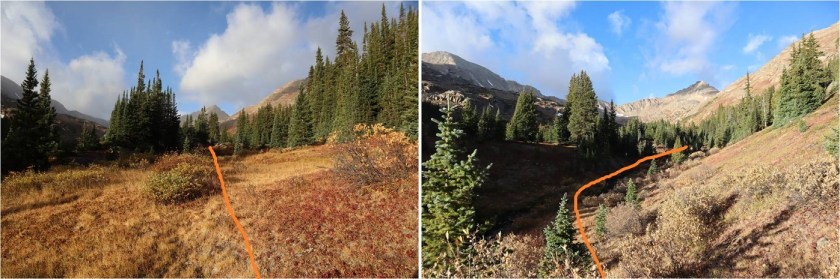
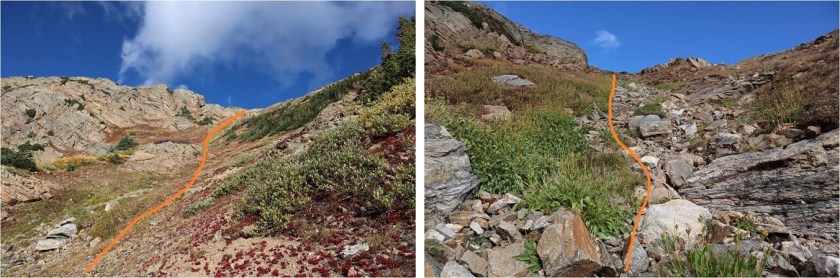
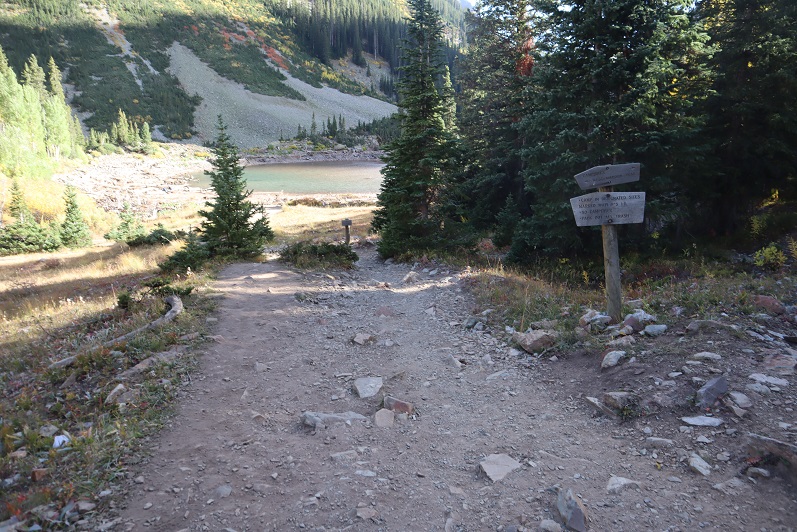
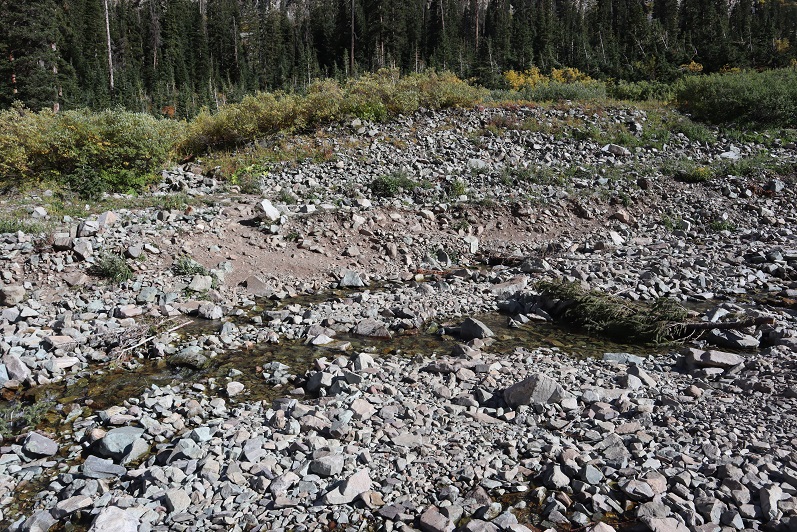
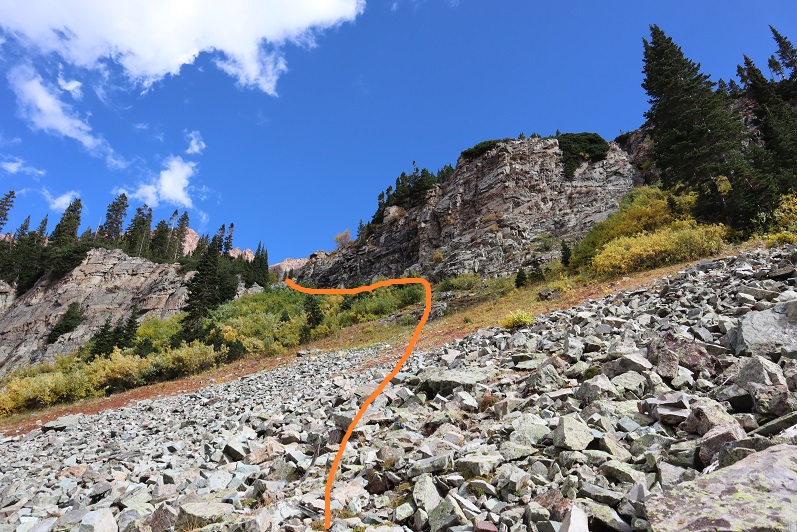
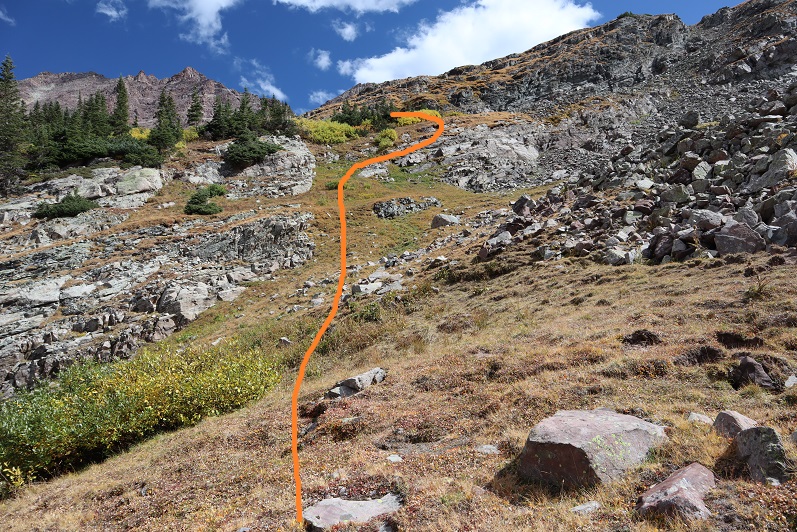
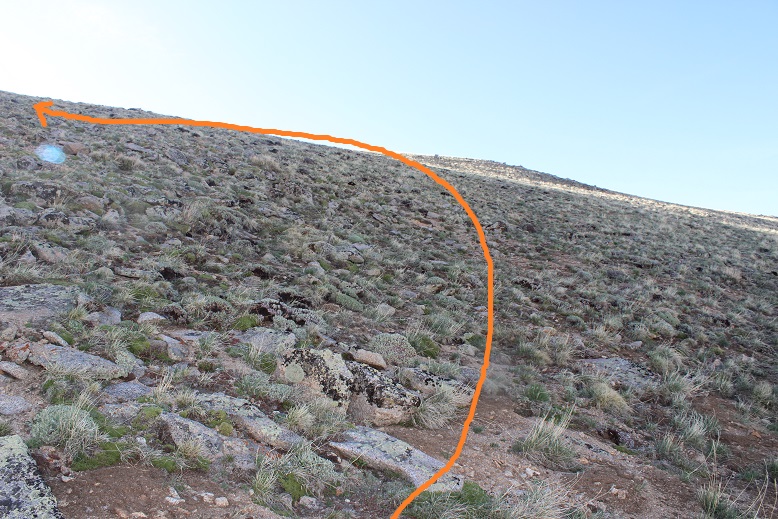
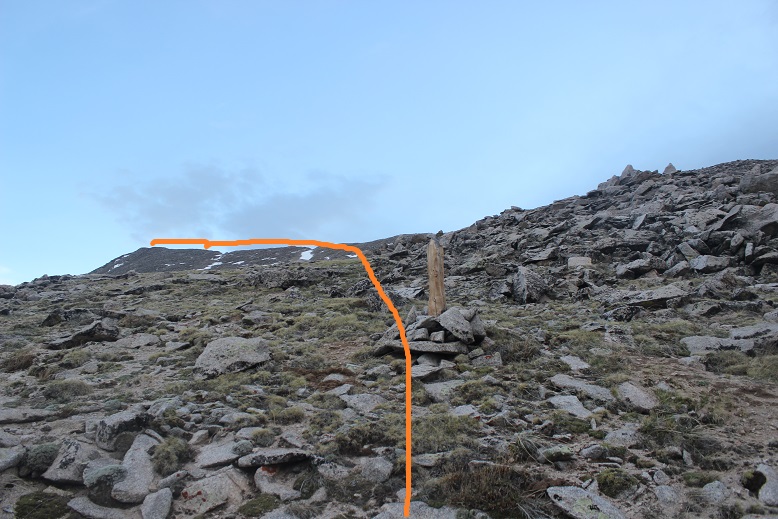
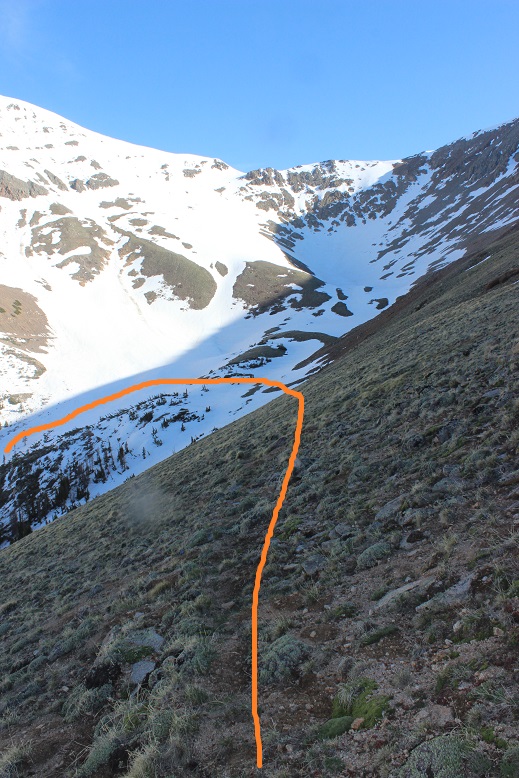
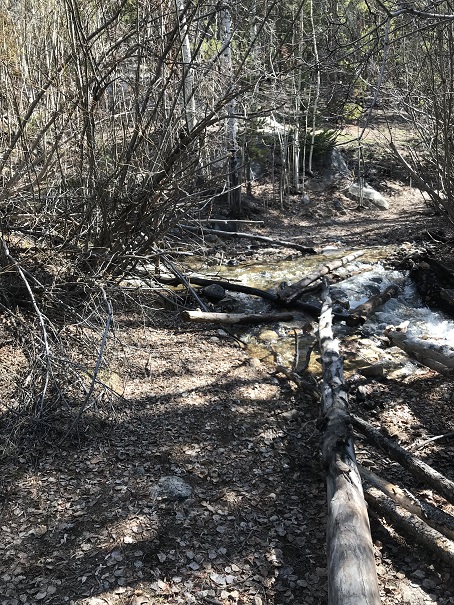
After 2.2 miles of hiking on an established trail I came to an area where I was close to the creek and it looked easily crossable. I’d need to be on the other side to summit Baldy Alto. I chose to summit Baldy Alto first today because I’ve already summited Stewart Peak and I wasn’t entirely confident my new gear would allow me to summit more than one peak today. The creek looked frozen solid until you stepped on it and then you plunged into the water, realizing it wasn’t more than an inch or two thick.  At its lowest point about 5 feet across.  My little legs weren’t going to be able to make that jump so I walked up and down the creekbed looking for a better way to cross (a log, large rocks, etc.).  When I couldn’t find one I added a few medium sized rocks to the creek and made my way across.

6

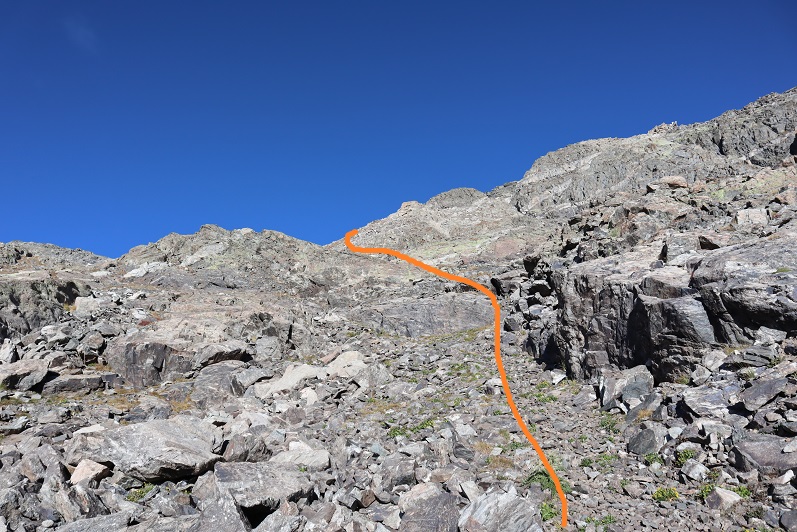
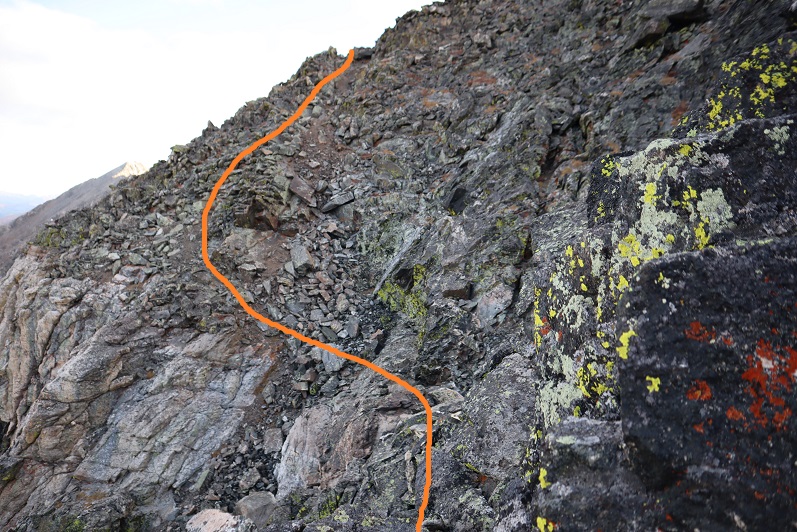
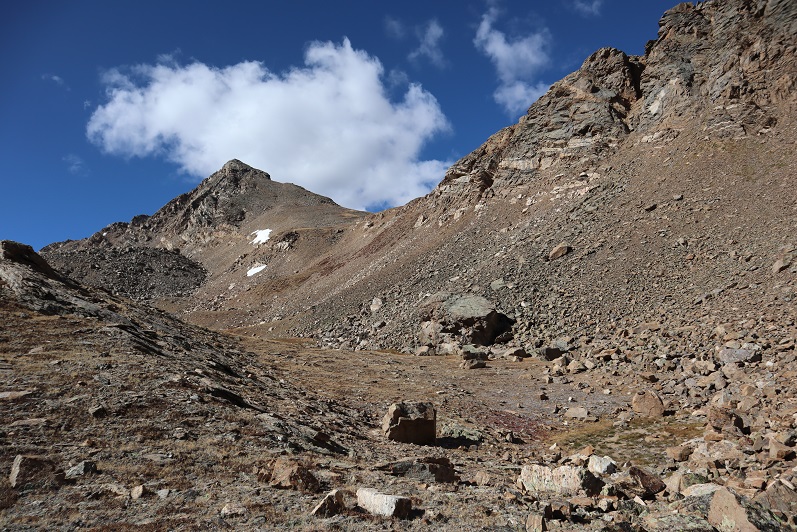
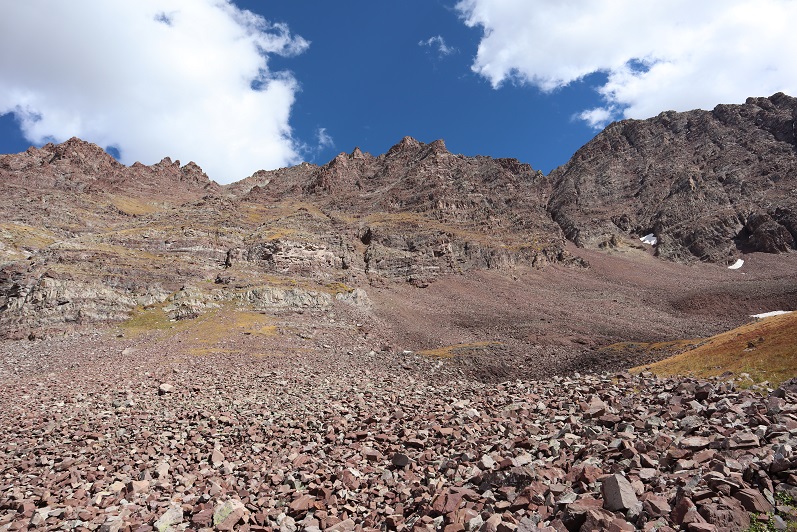
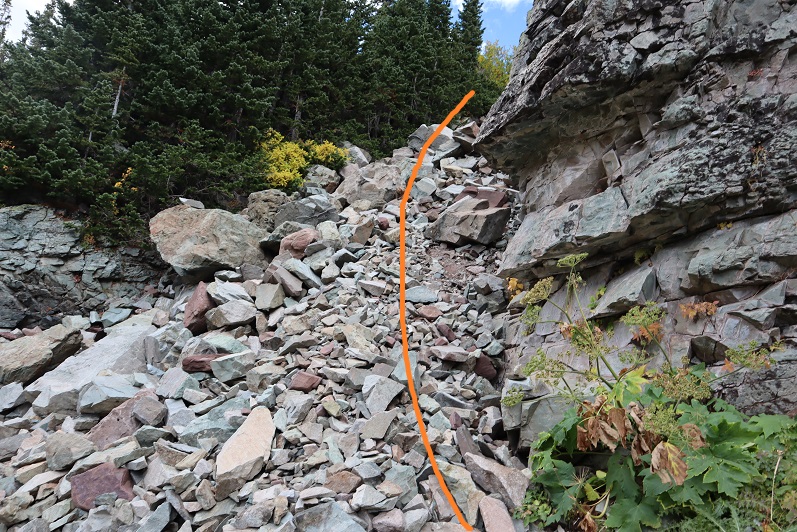
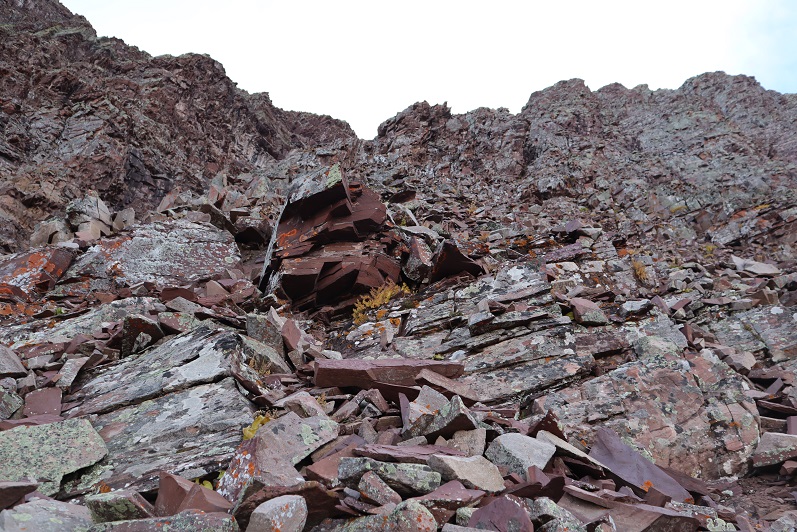
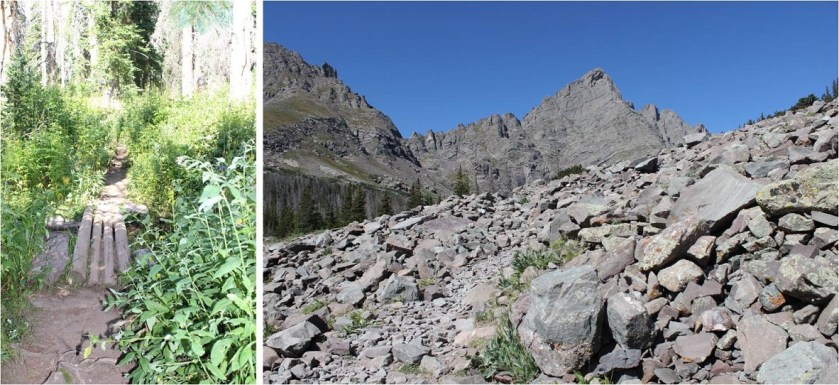
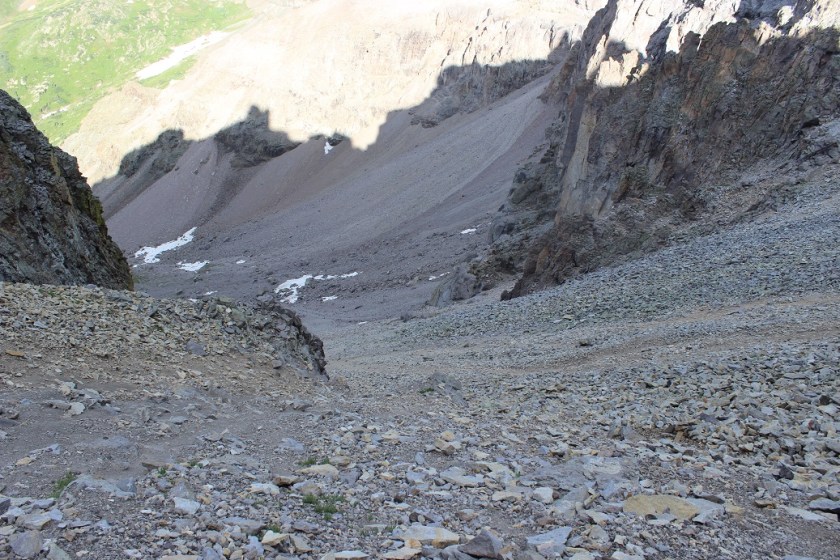
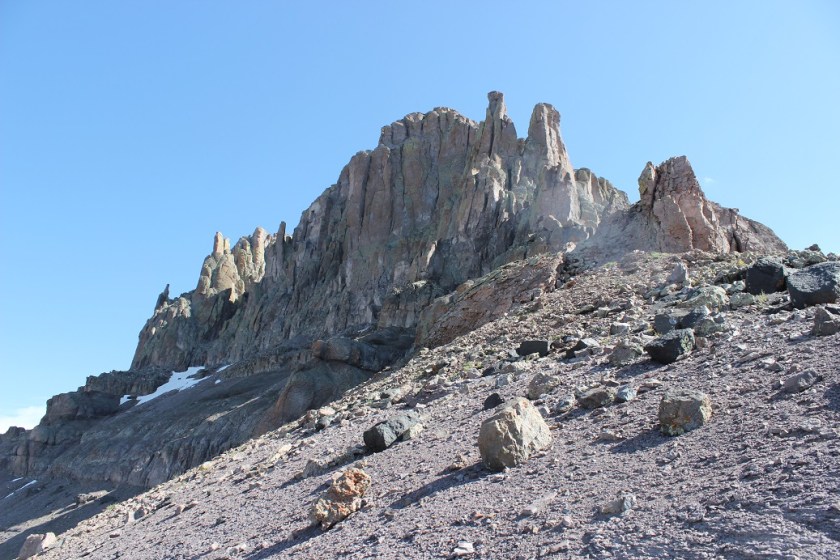
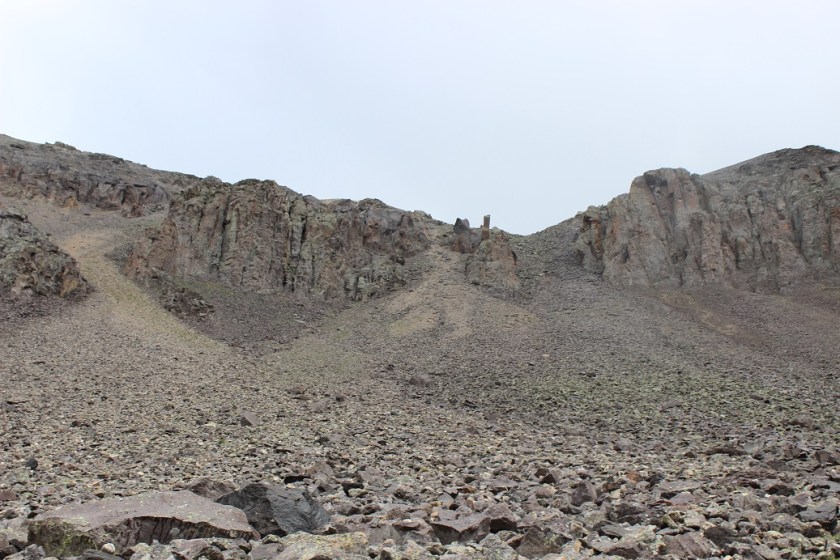
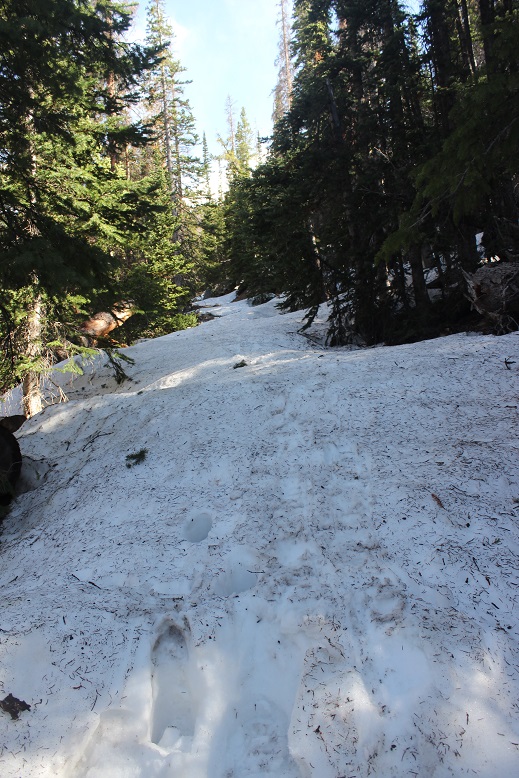
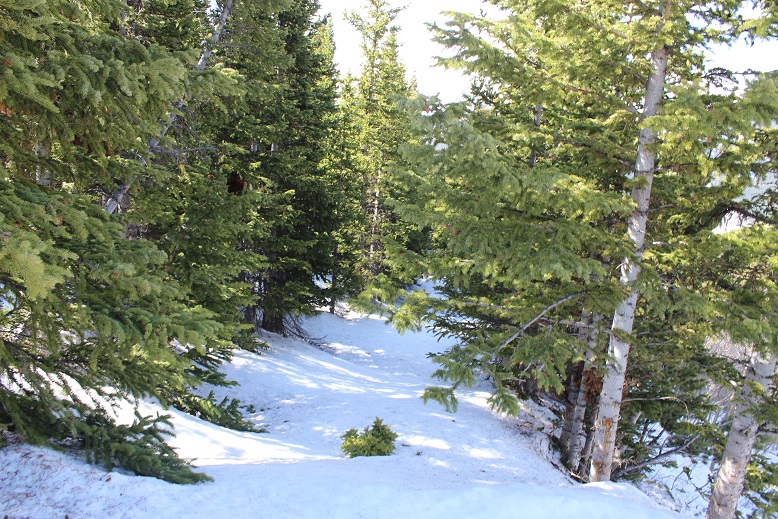
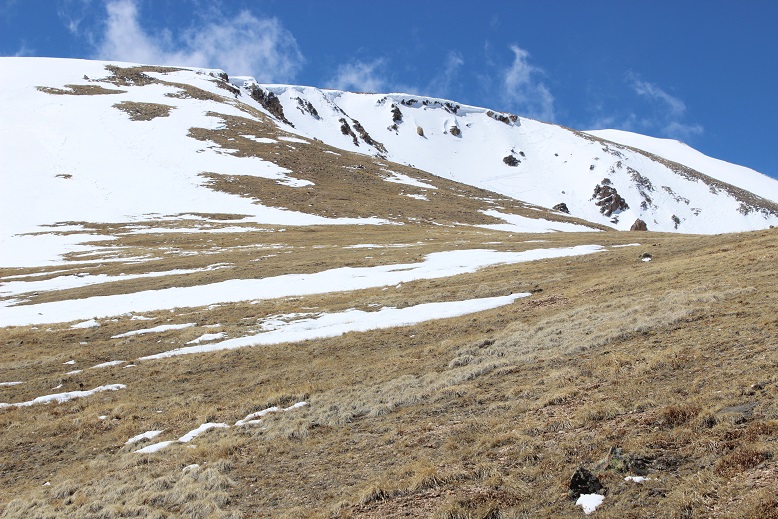
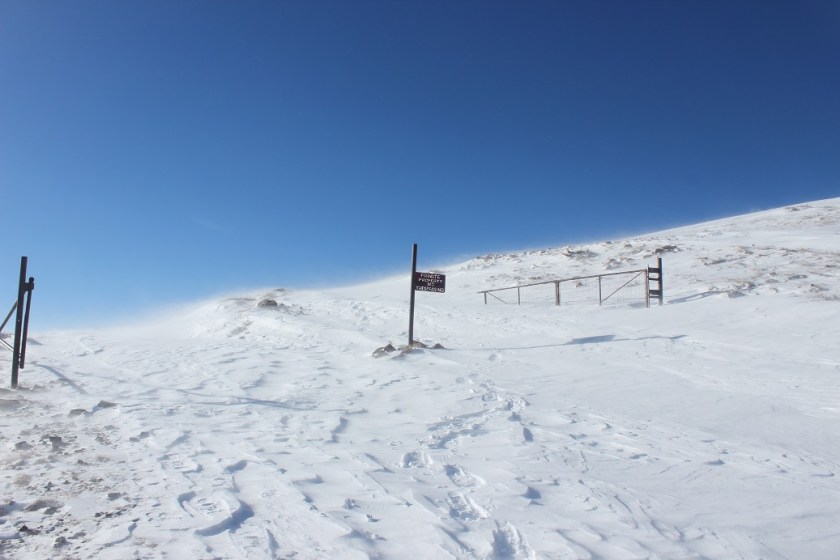
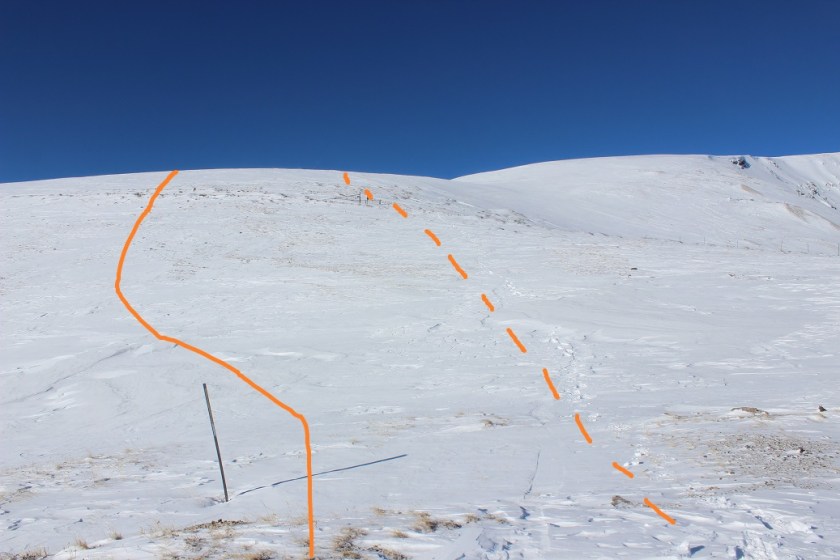
There was loose talus on the other side. My goal was to make it to the trees and then up to treeline.

7

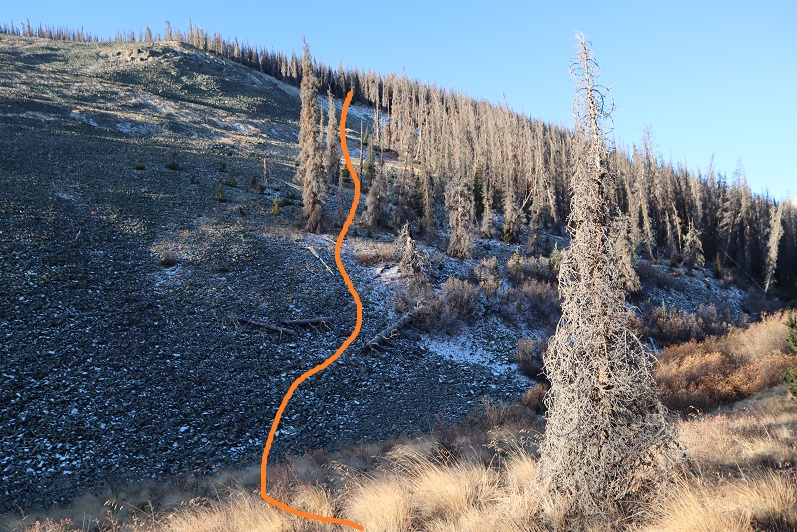
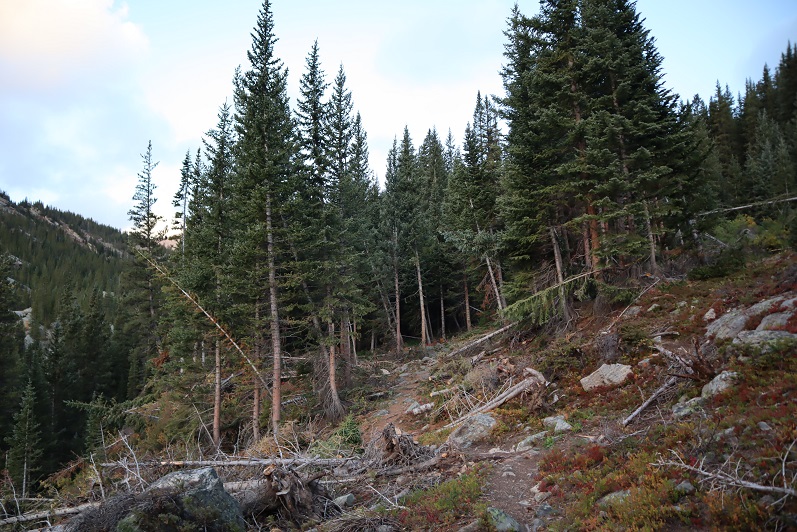
There was no trail, and once again the talus was very loose and would slide out from underneath me when I took a step. Once in the trees I just kept aiming southwest, looking for treeline

8

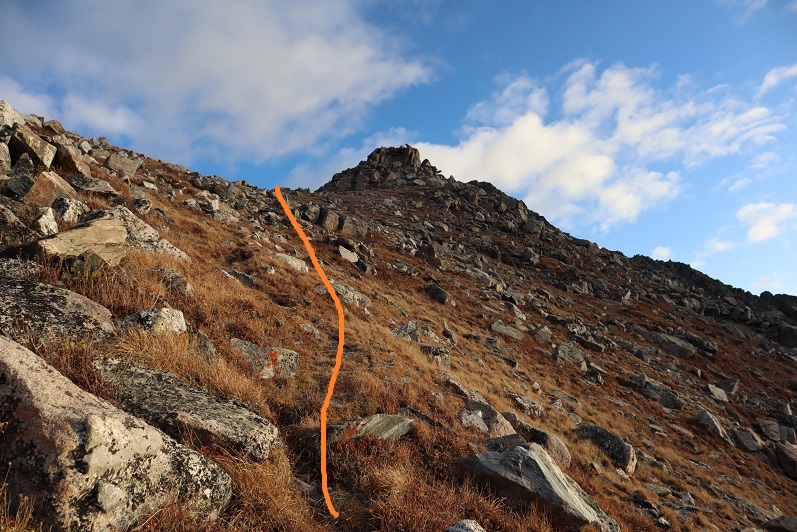
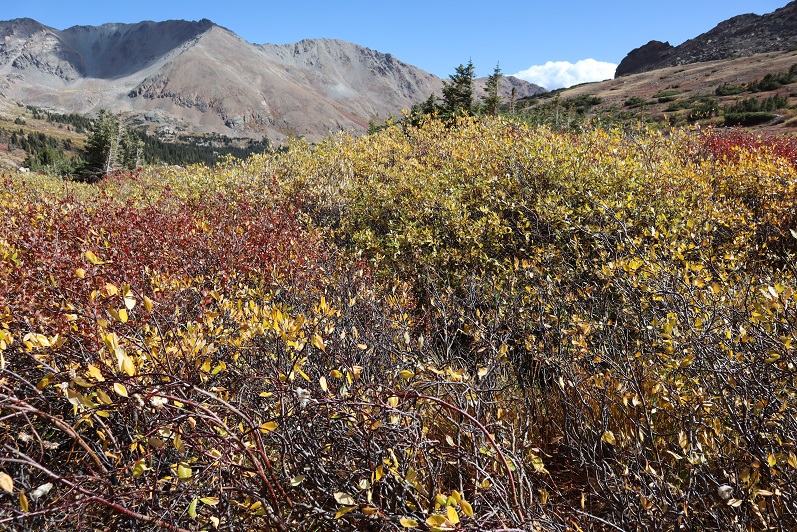
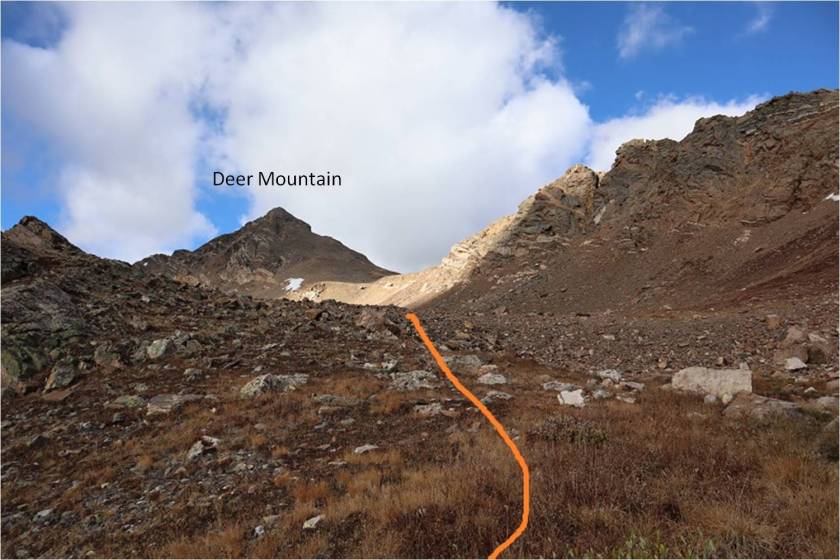
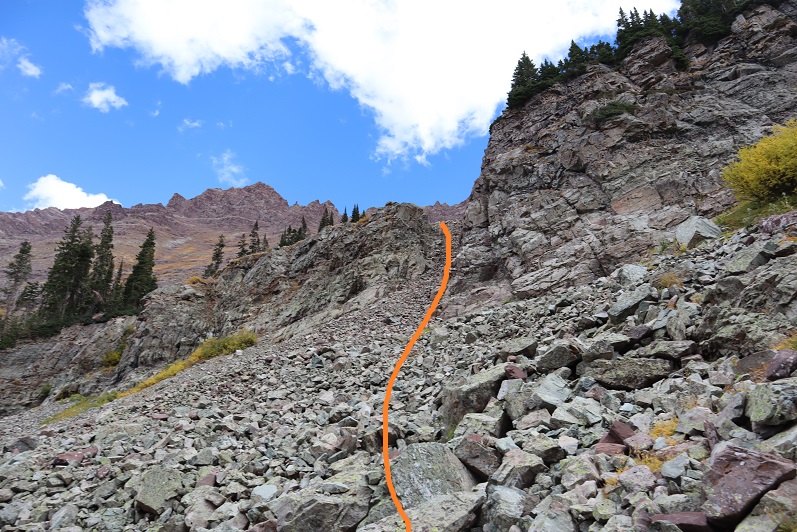
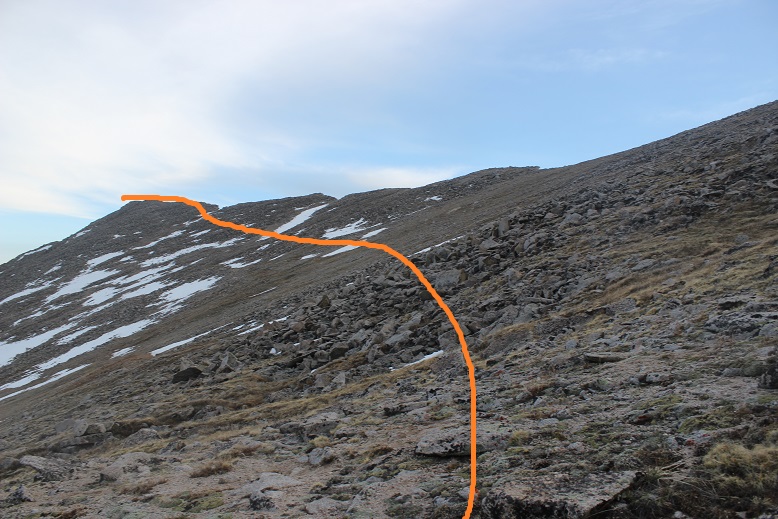
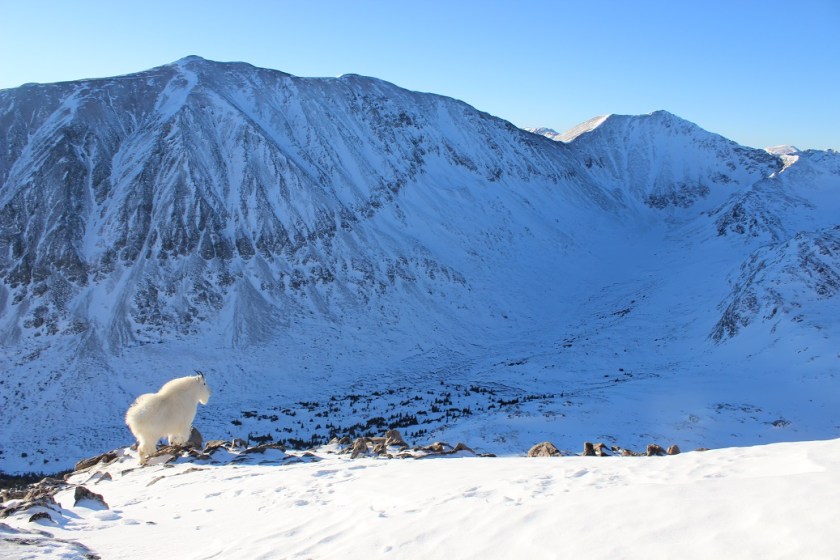
Just before treeline I came across an area where it was obvious elk frequently bedded down for the night. It felt special just to be hiking through the place.  Treeline actually came fast and I aimed for the ridge, knowing most of this hike would be above treeline.  Here I passed willows through game trails and some lose rocks (all class 2)

9

10

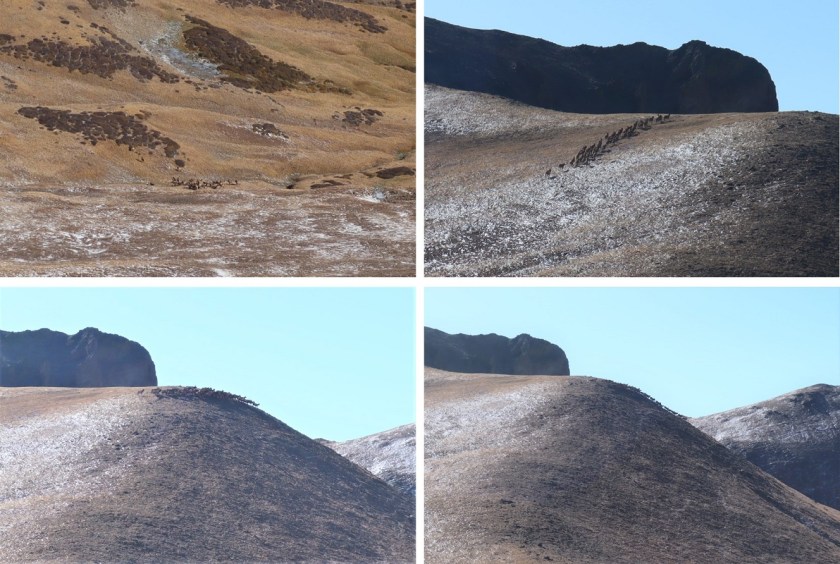
I was about halfway up the slope when I heard what sounded like a flock of seagulls conversing with a group of horses. Curious, I turned and noticed a herd of elk coming down the slope of Stewart peak. So cool!  They were making trails through the willows like nobodies’ business.  I followed them with my eyes, watching where they were headed.  I’d half expected them to make their way to the bedding area I’d just passed, but they turned and headed west, following the drainage.  I kept an eye (and ear) out for them as I made my way up the ridgeline.

11

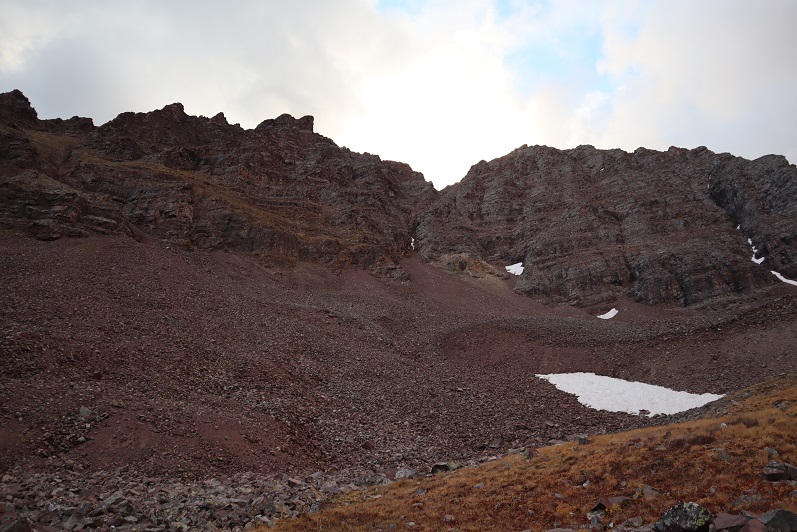
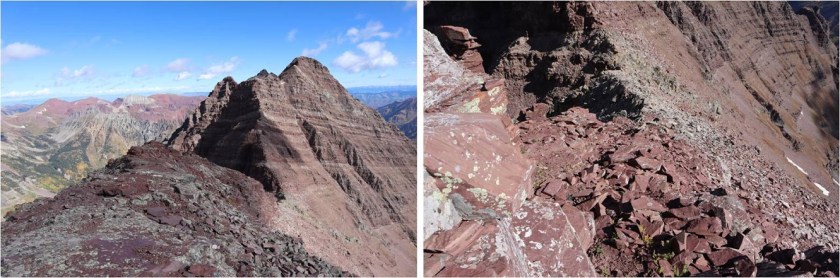
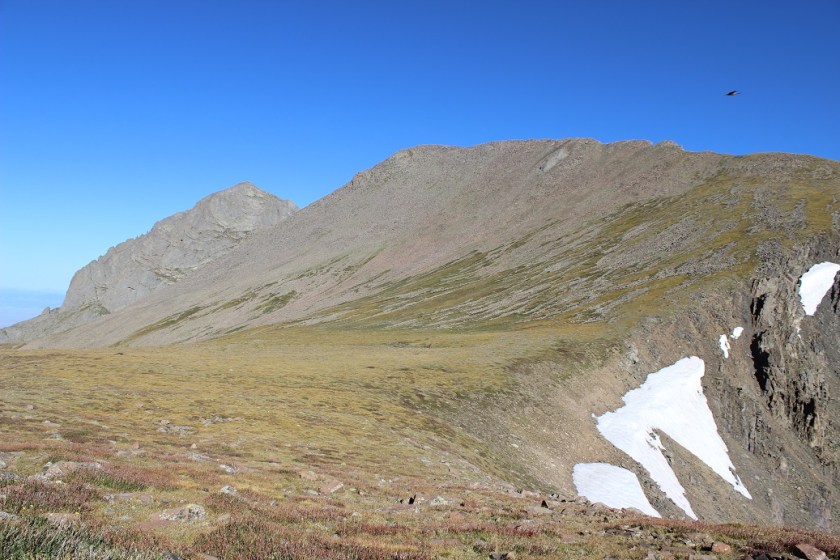
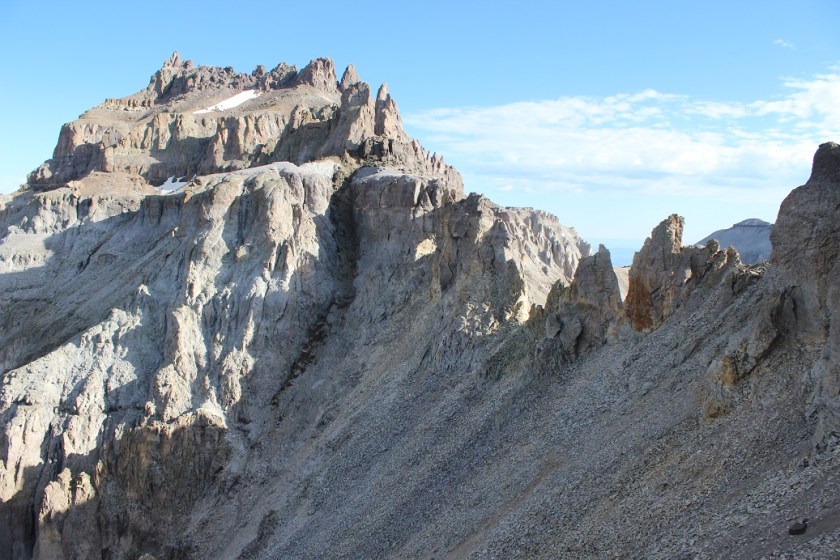
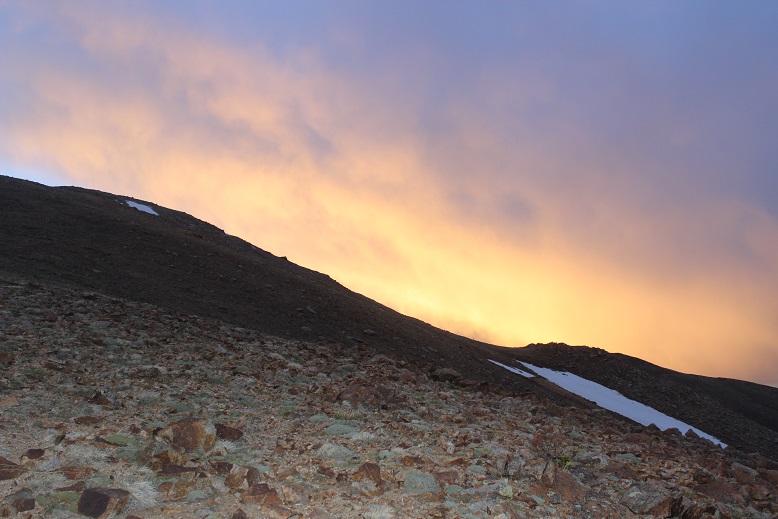
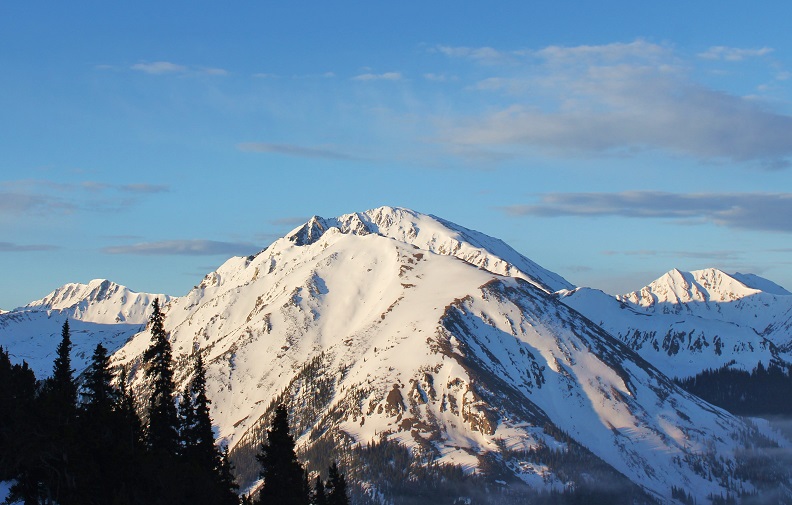
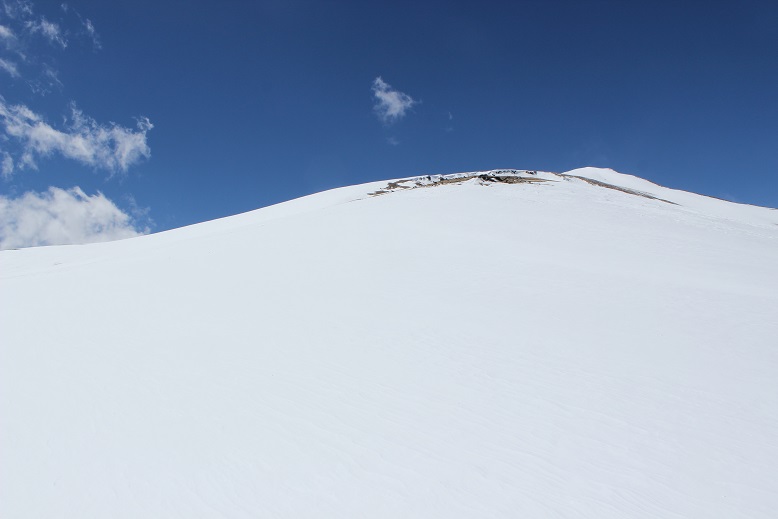
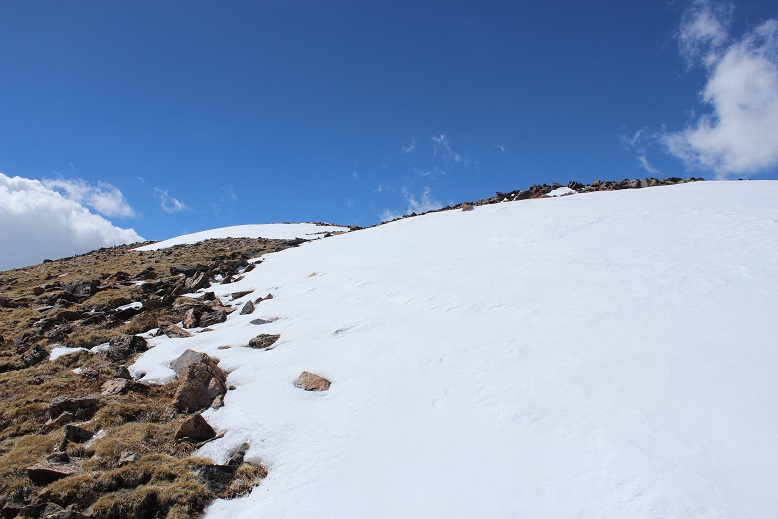
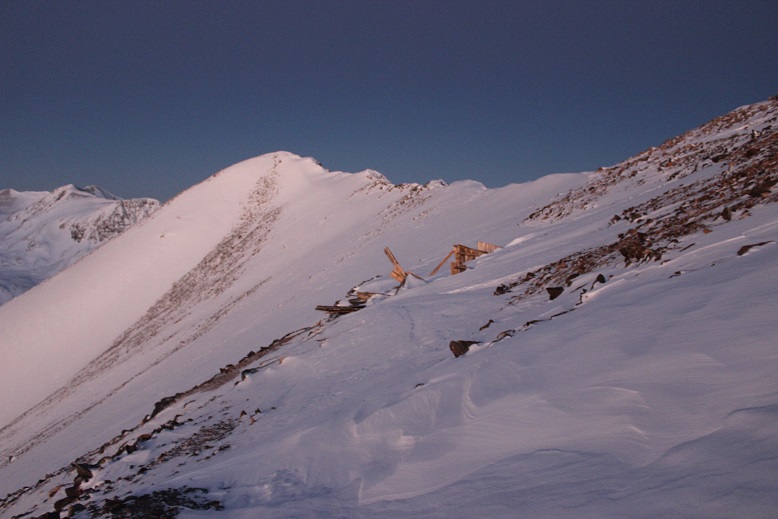
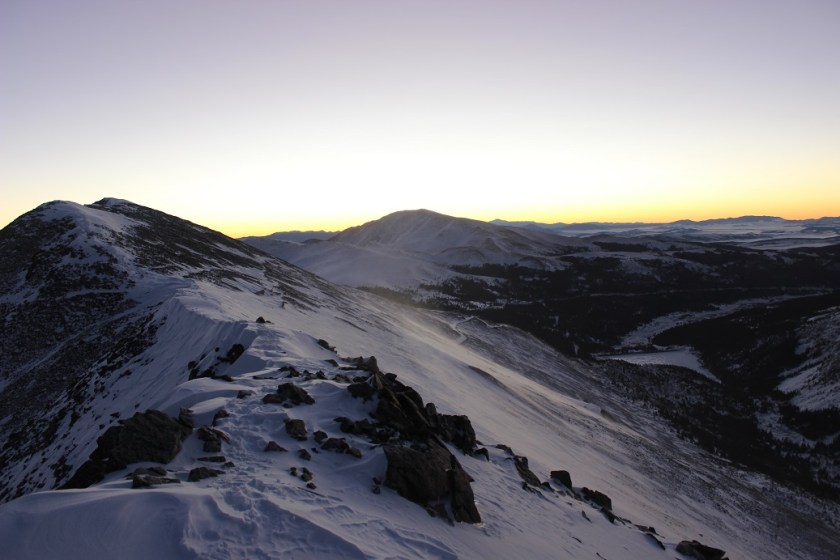
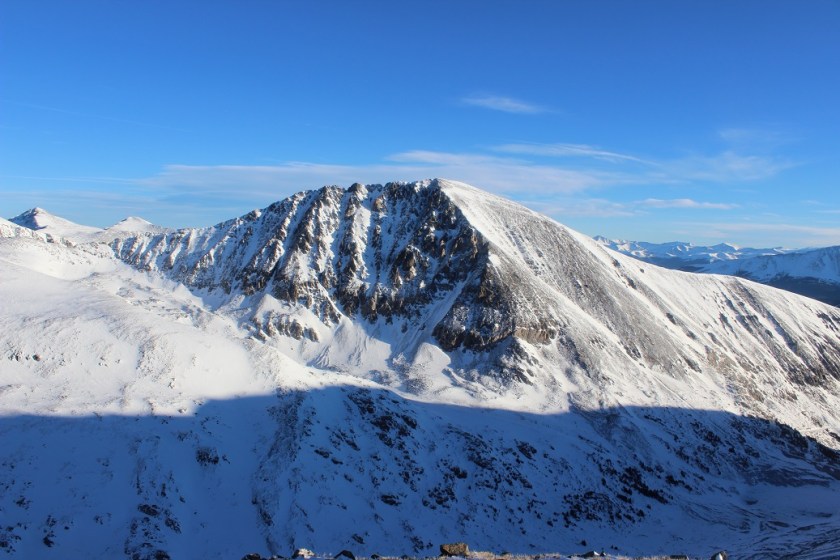
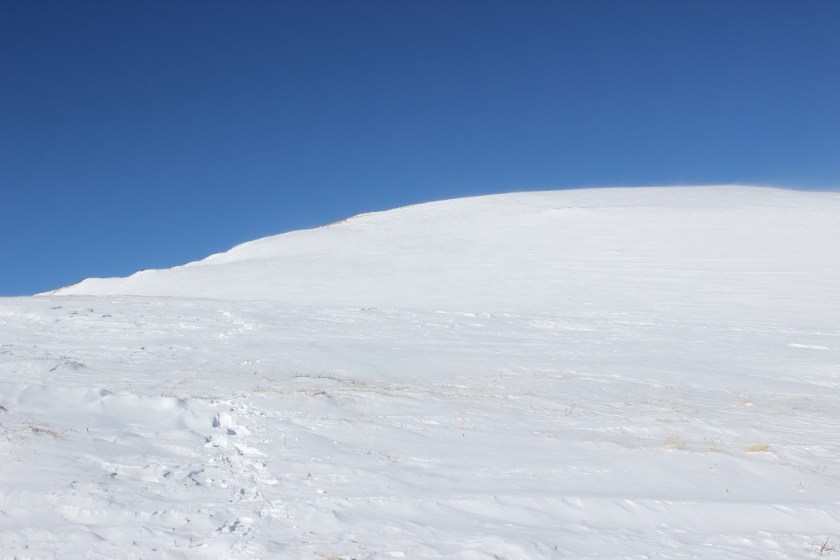
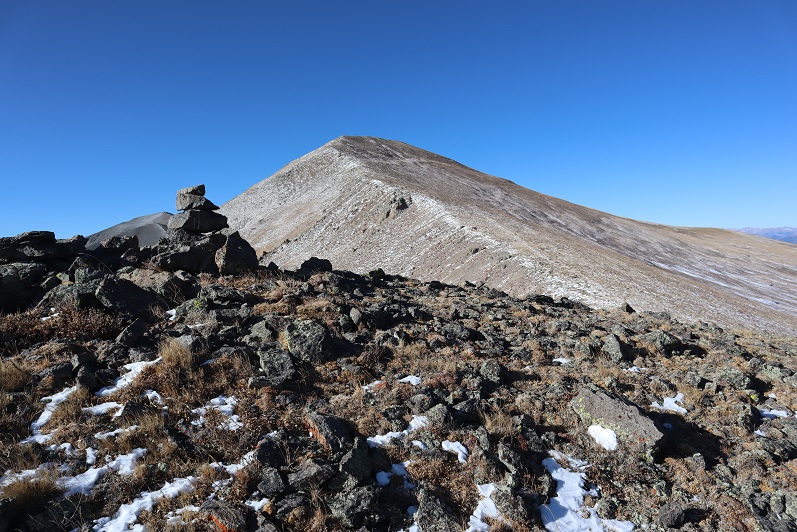
Last time I was here I hadn’t been able to see the summit due to clouds, so I wasn’t sure where the actual summit was. That ridge was long.  It felt like it took forever to climb, and every time I thought I was at the summit I realized it was a false summit and it was over the next hill.

12

The worst part? The wind.  Those 20-30mph winds never stopped.  The wind never got below 20mph, and several times I was knocked down by a gust.  I’m assuming the gust would have to be over 50mph to make that happen, so the forecast had been a bit off.  Wind chill with 30mph winds was forecasted today at -20, so it was cold, cold, cold.

The best part? My winter gear was working fabulously!  There was no way I’d still be hiking in these conditions if I was wearing my old jacket/gloves.  No way.  I could tell the wind was frigid but it was tolerable.  Snot was freezing to my balaclava and the top of my jacket which was a little annoying but I wasn’t miserable. I’ve found a lot of hiking is about being in a constant state of some sort of discomfort and getting past it to obtain your goal. Cold, yes.  Miserable, no.  Woot!  I have found gear that works!

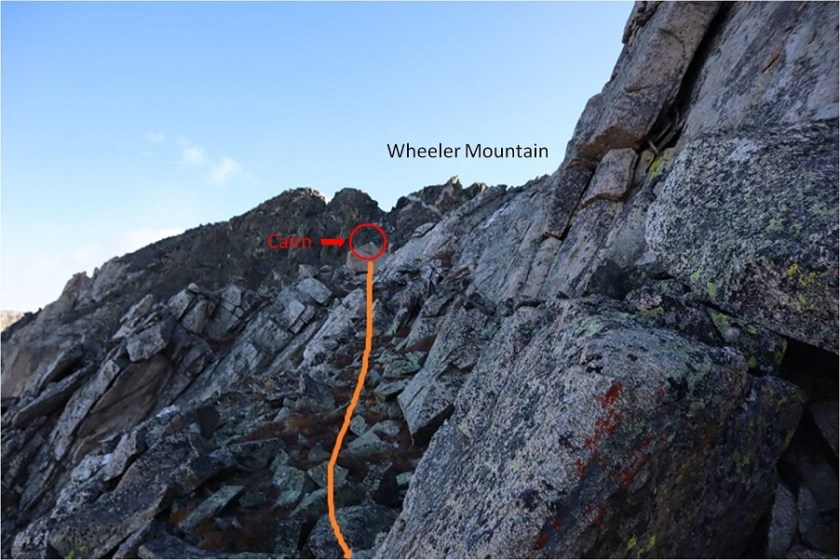
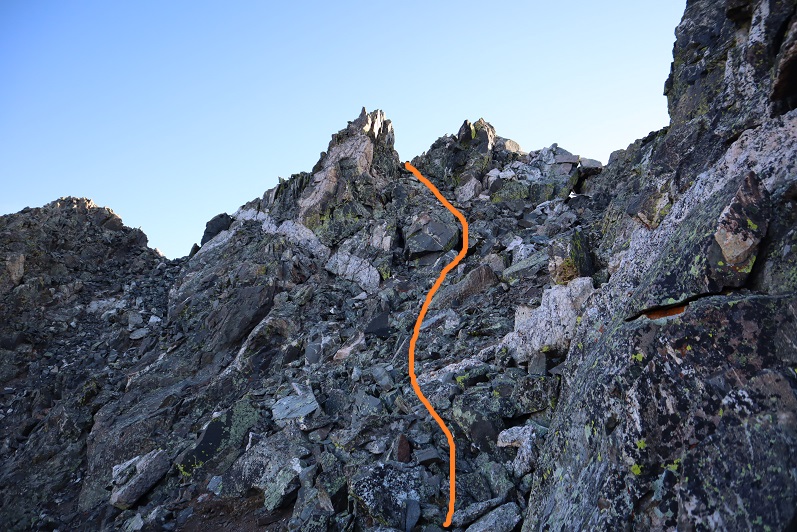
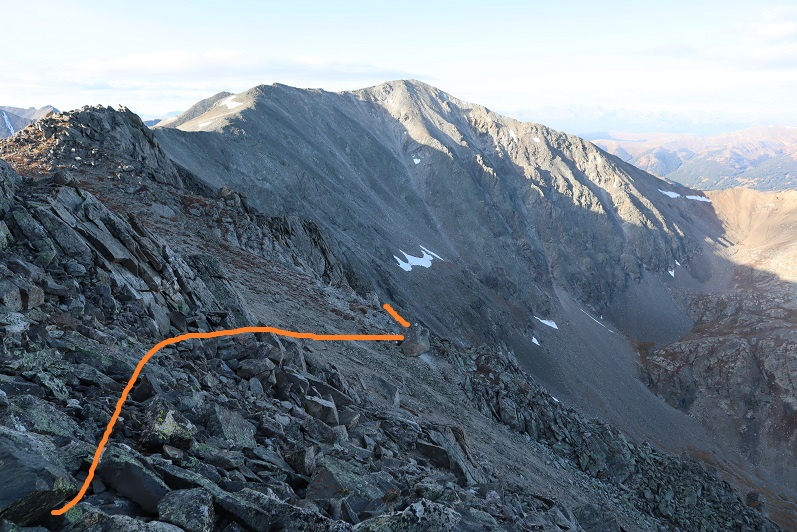
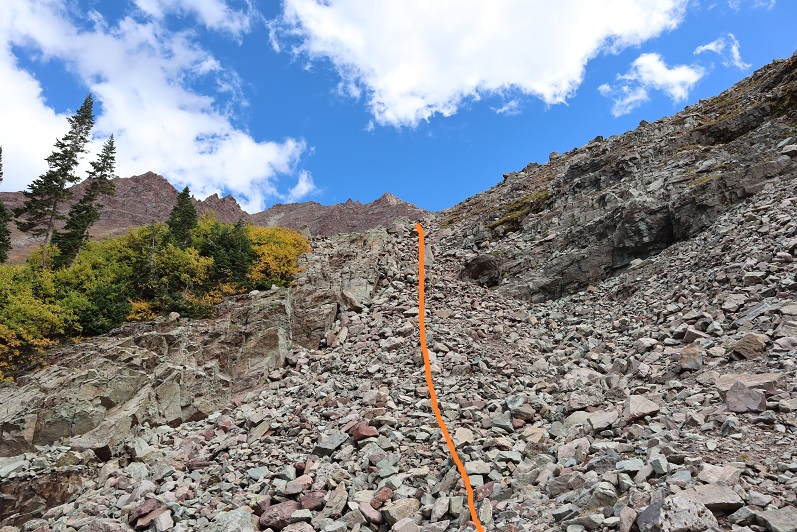
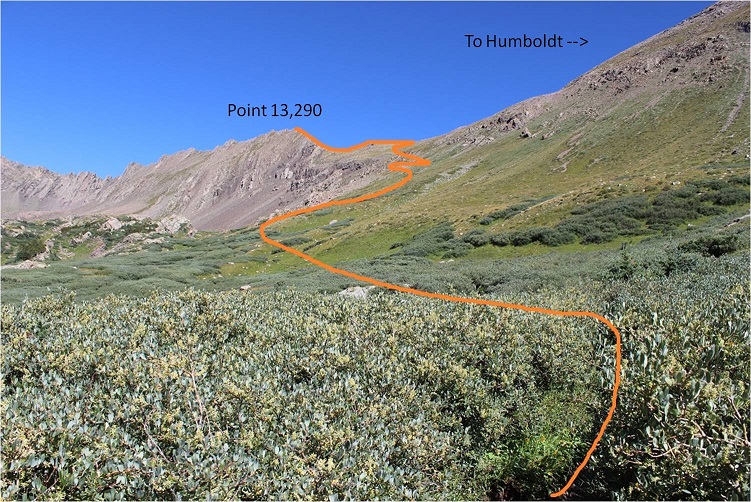
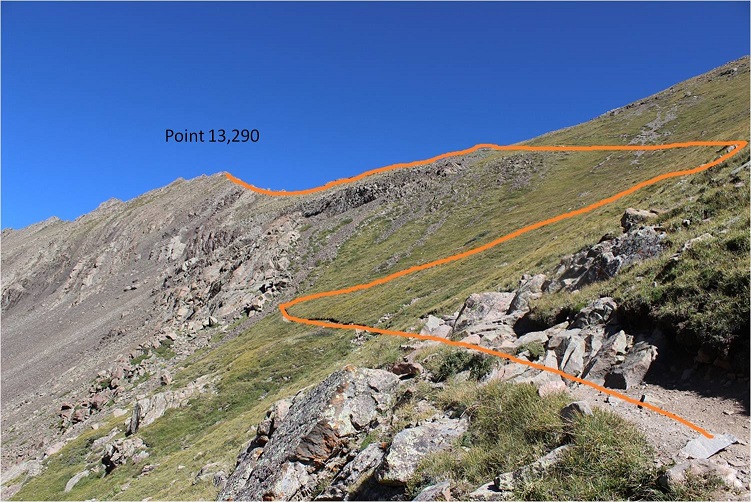
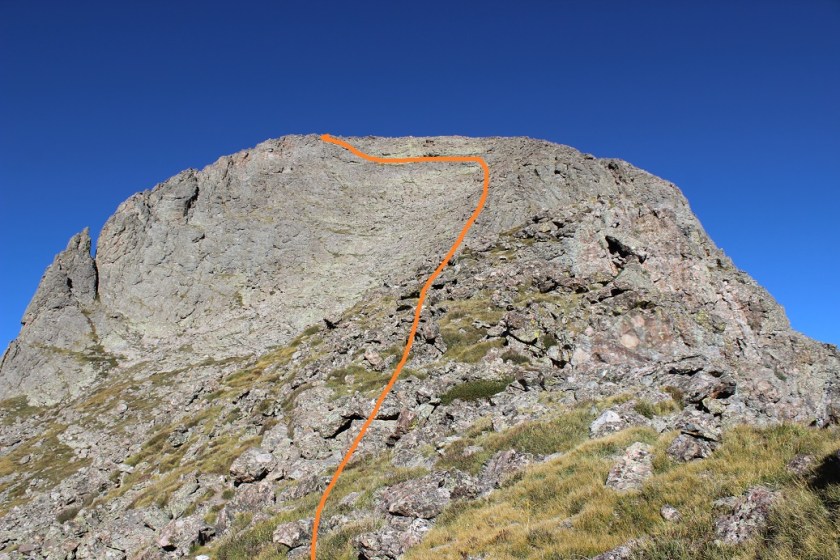
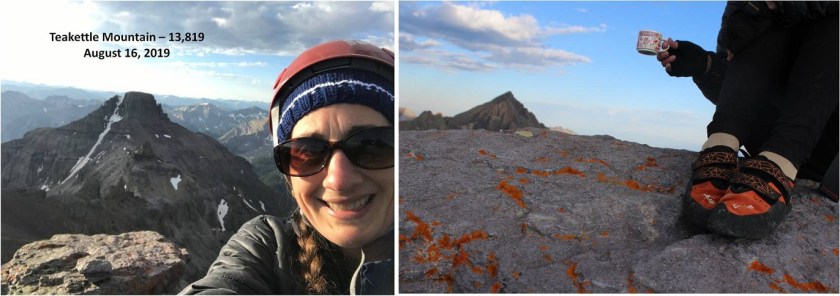
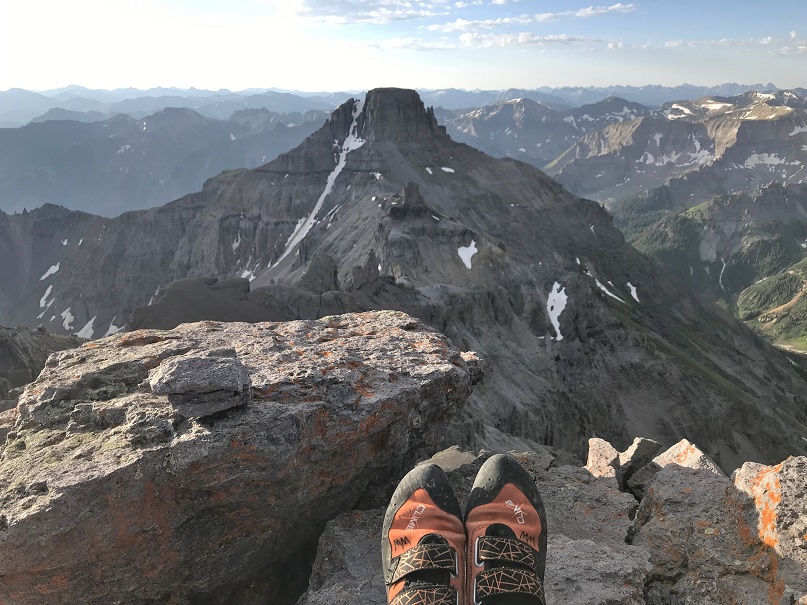
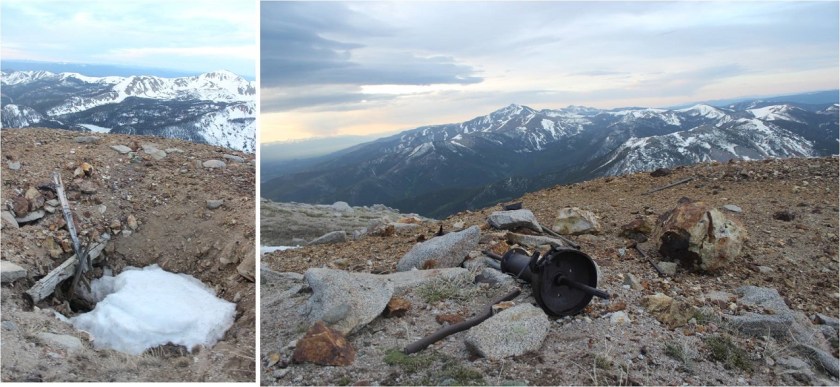
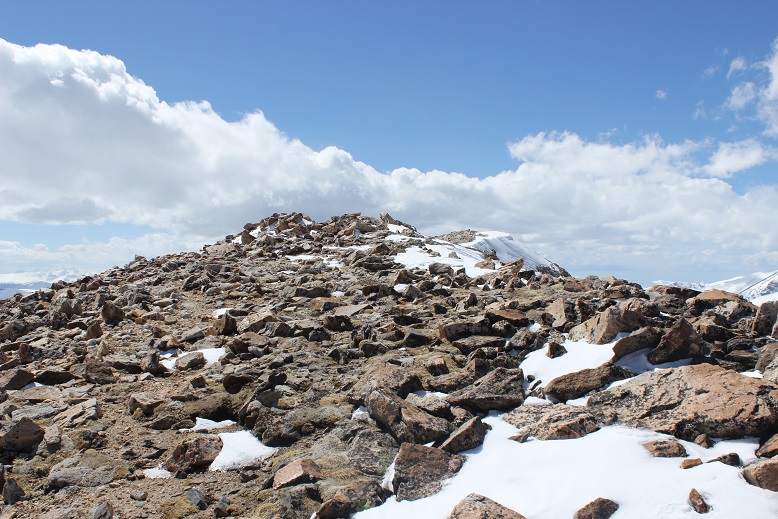
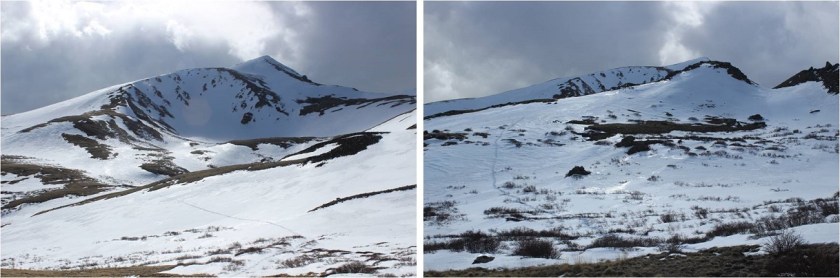
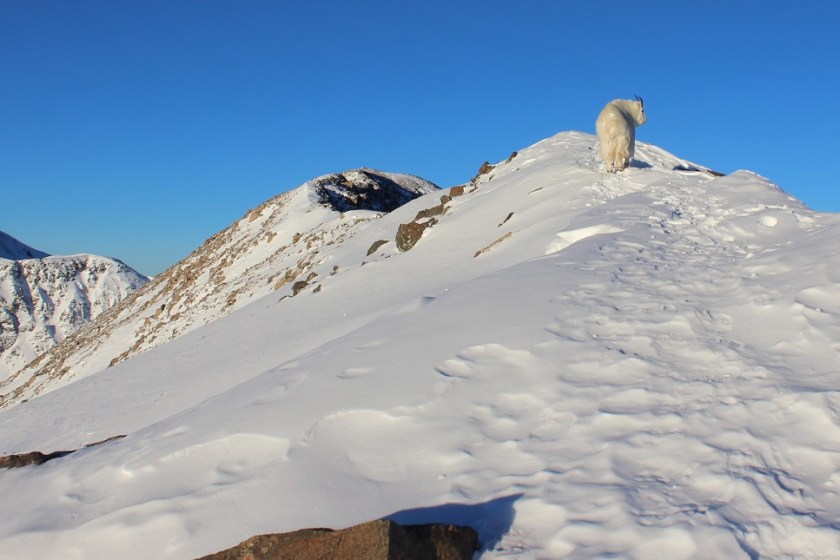
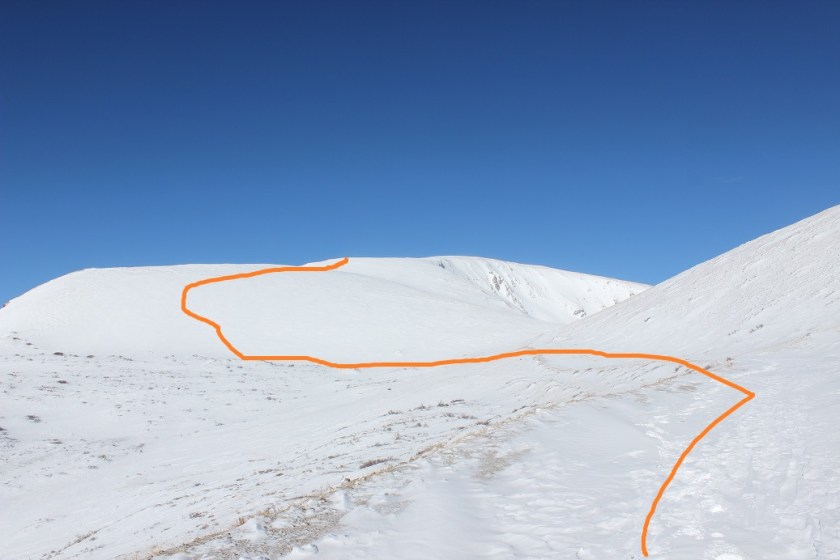
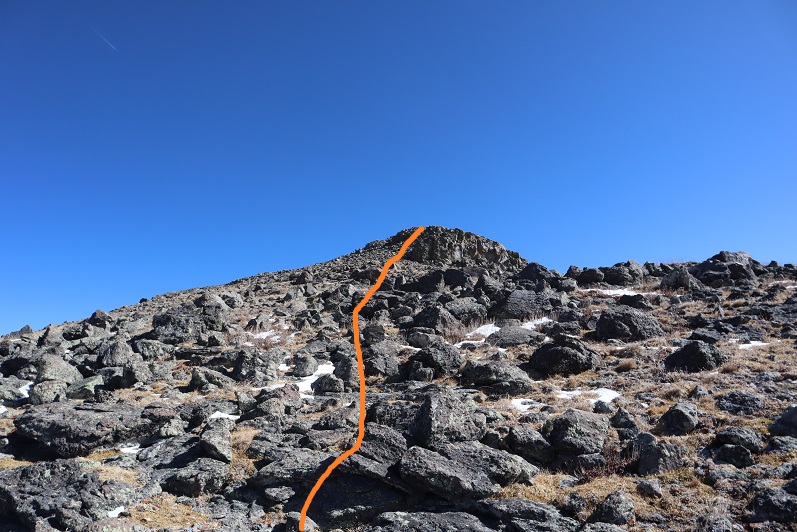
Finally, after 3 or 4 false summits I made it to a cairn and I could tell I was almost to the actual summit of Baldy Alto

13

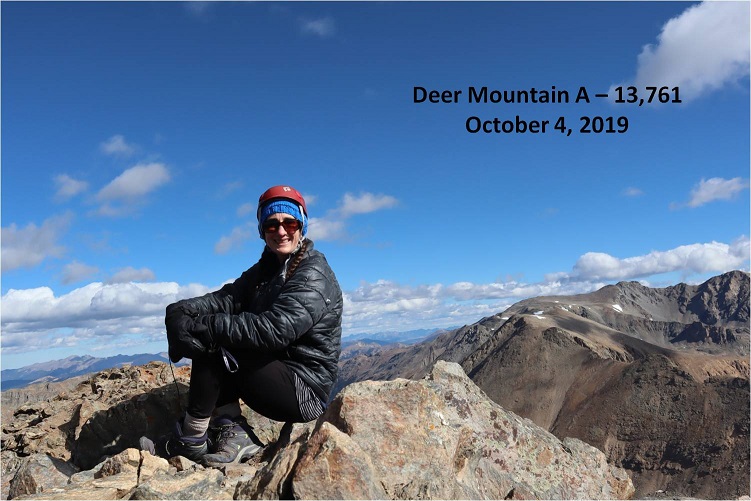
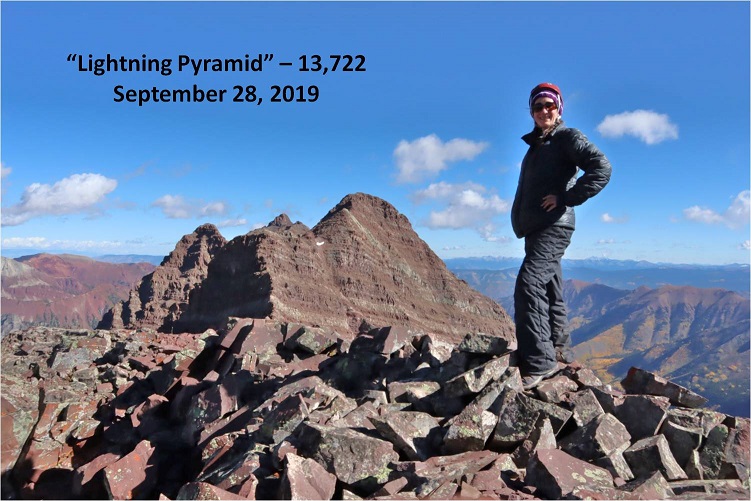
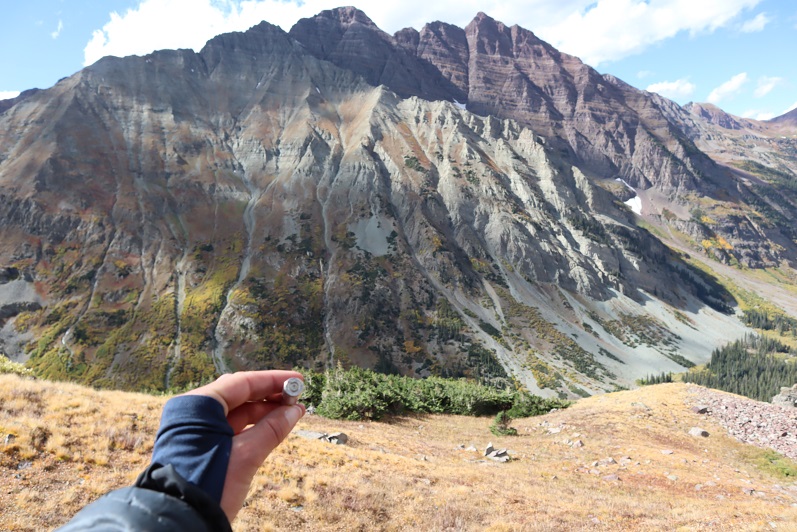
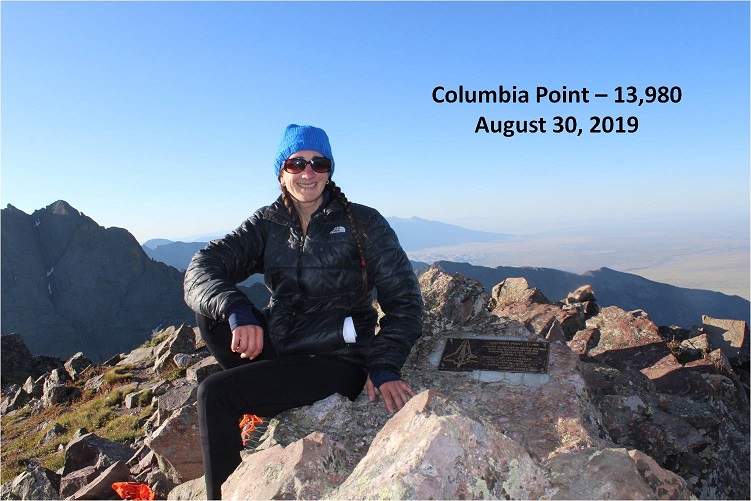
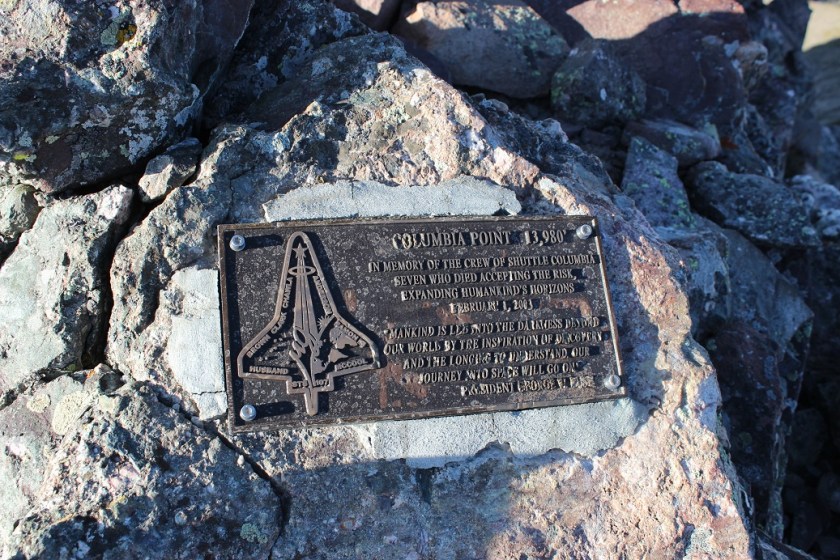
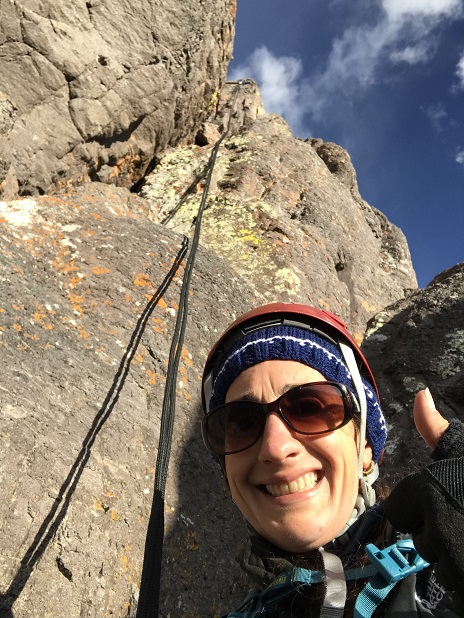
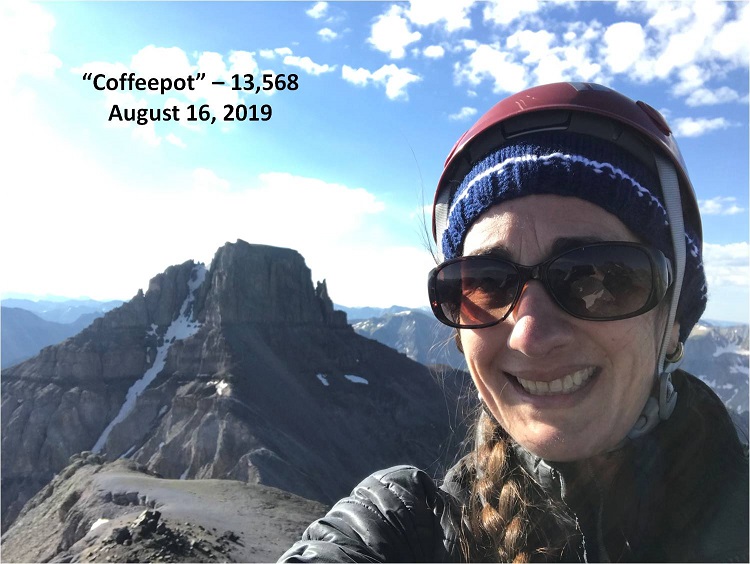
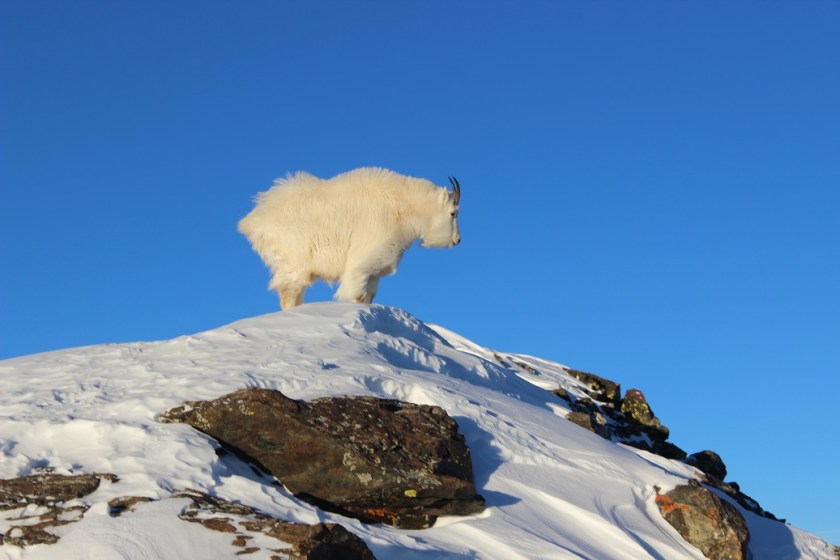
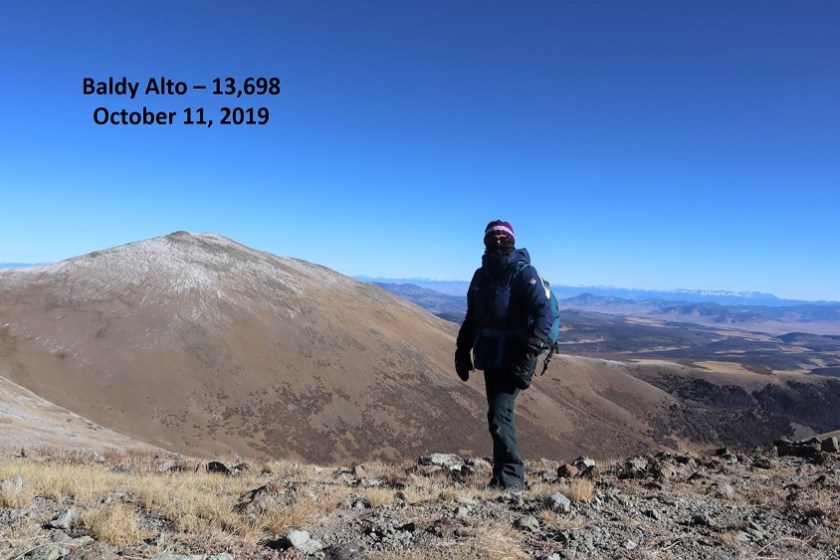
I’m not sure when I summited (I feared taking off my gloves for any reason due to the cold/wind to check my phone/time/etc), but I found with my new camera if I had a tool I could manipulate the buttons to take timed photo without taking off my gloves like I’d needed to with my last one. I found a pointy rock and made it happen (those buttons are small!).  It took about 15 minutes, but it worked!  High-Five to my new gear for making this possible!  Not sure how to take a video yet in these conditions (but I’m working on it).  There was no summit register.

14

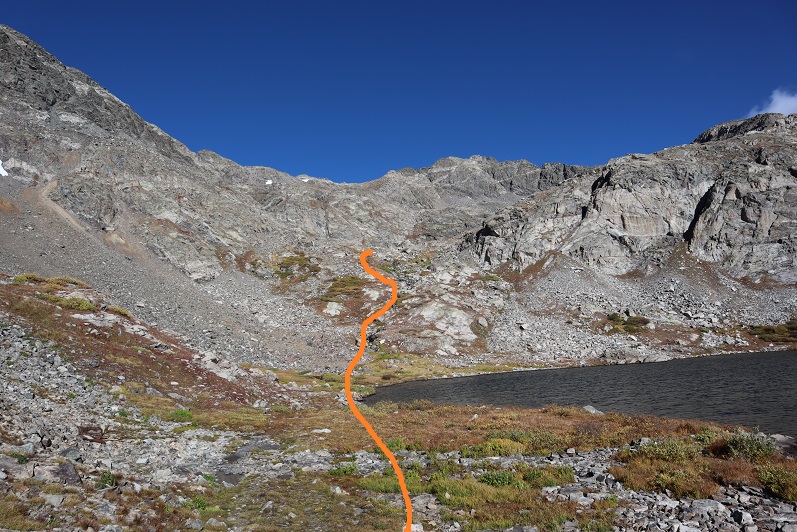
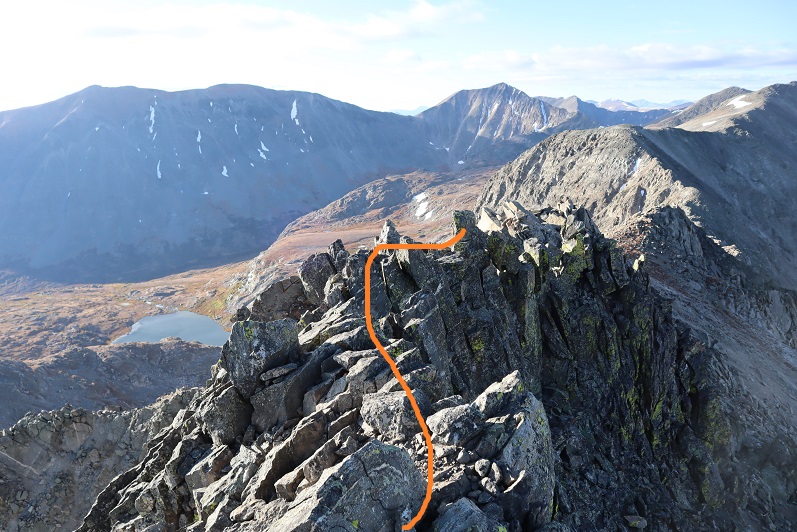
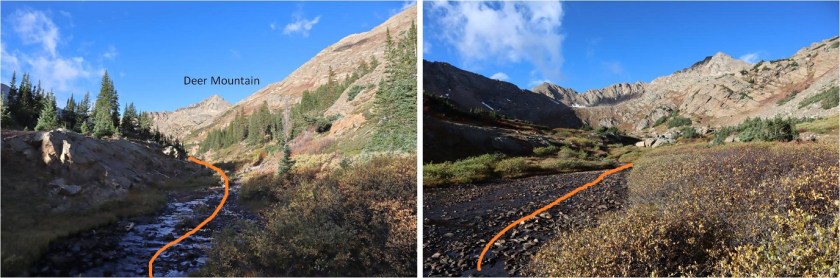
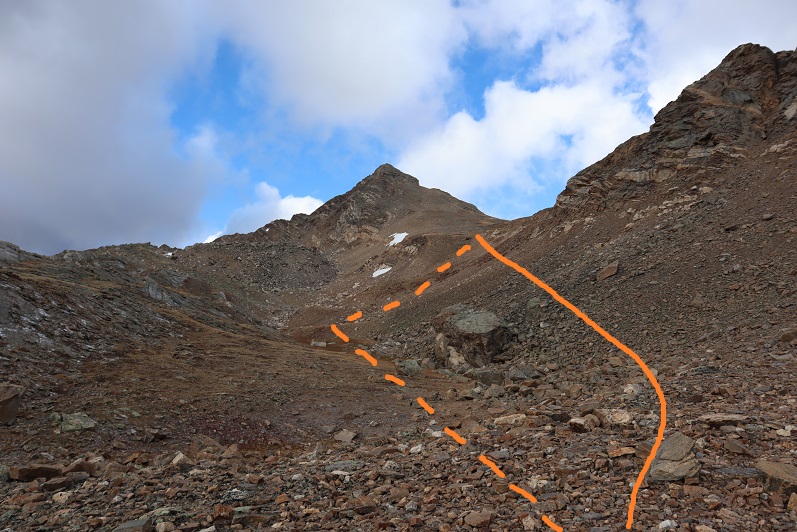
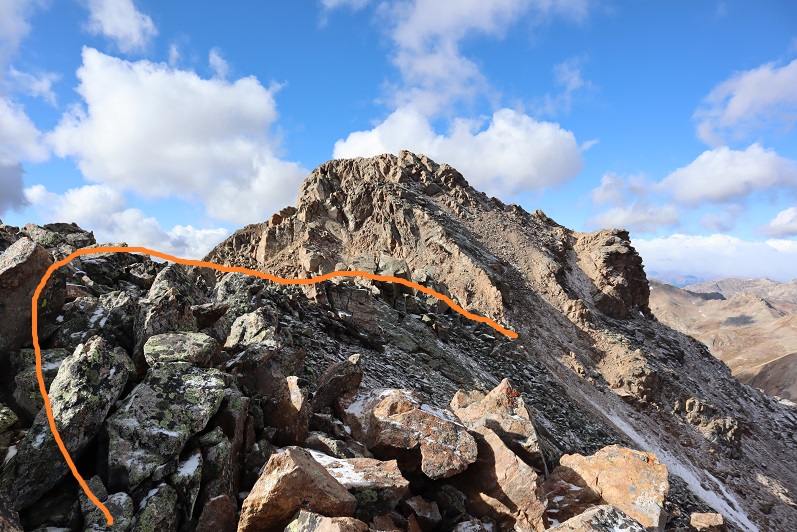
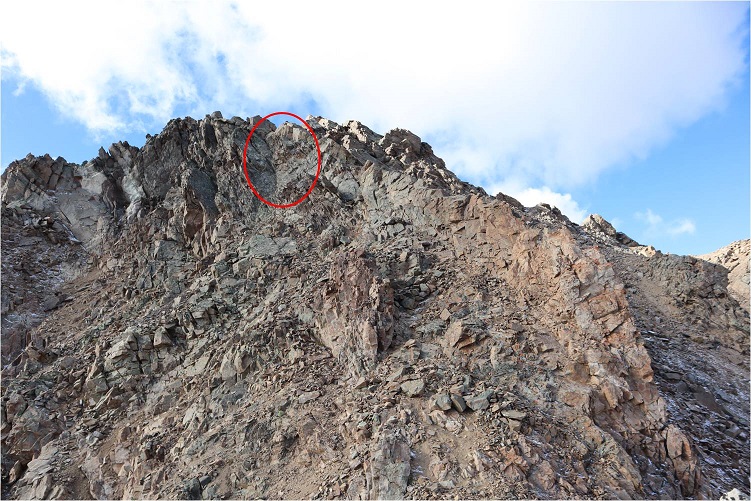
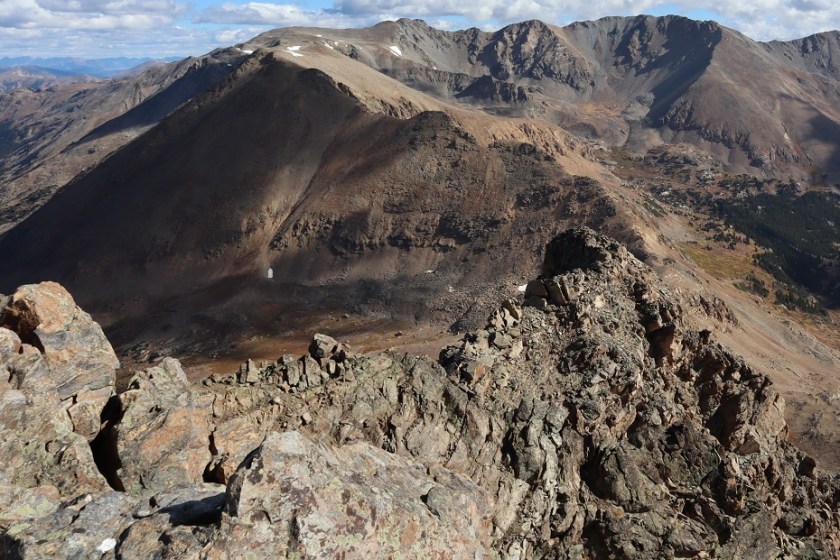
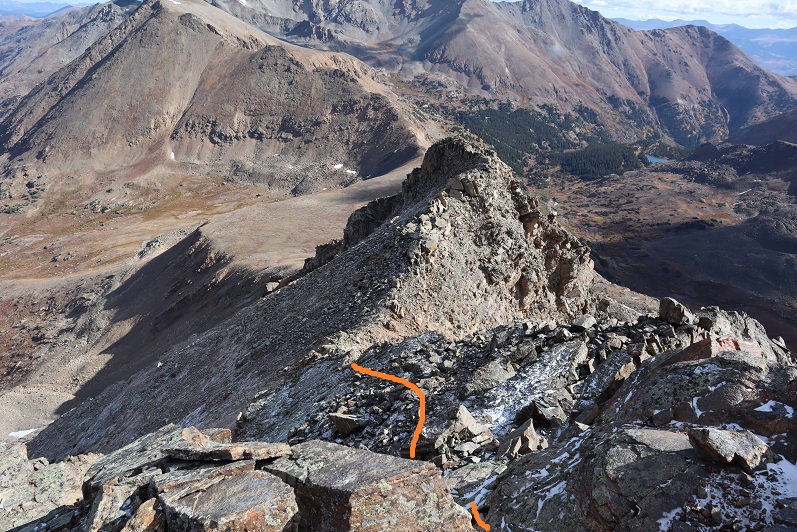
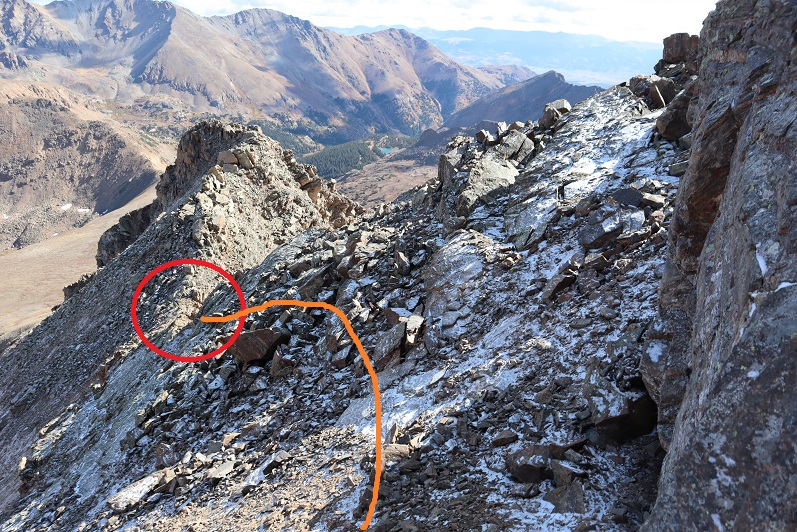
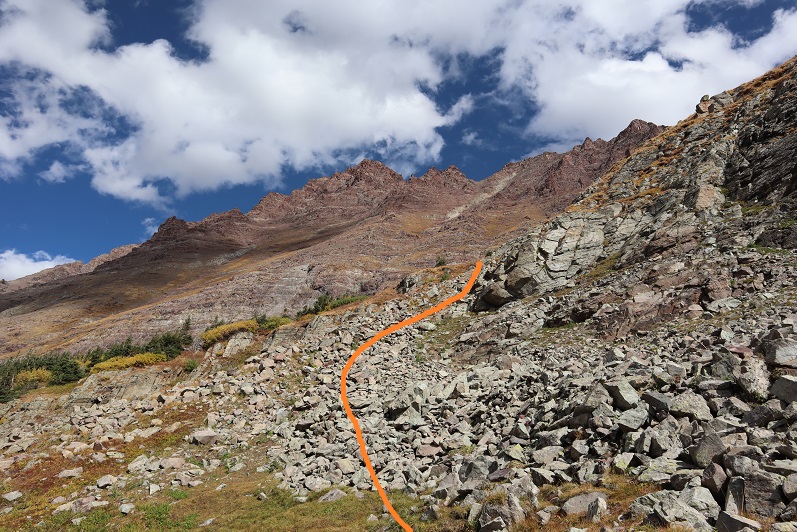
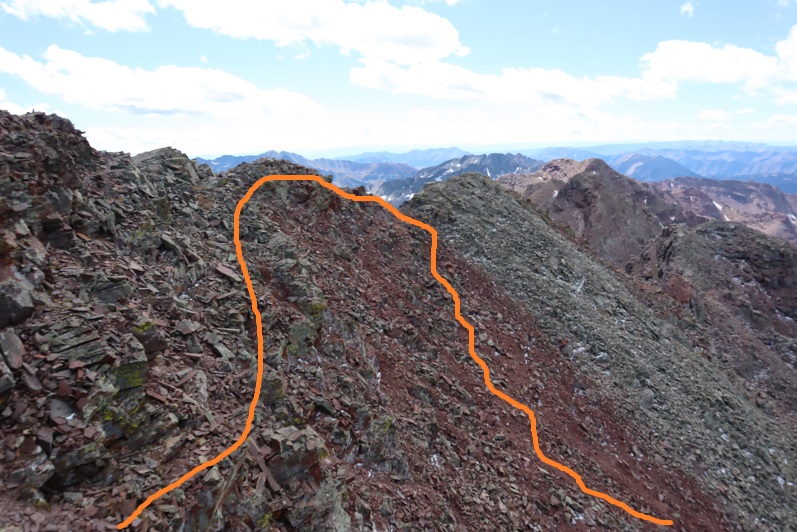
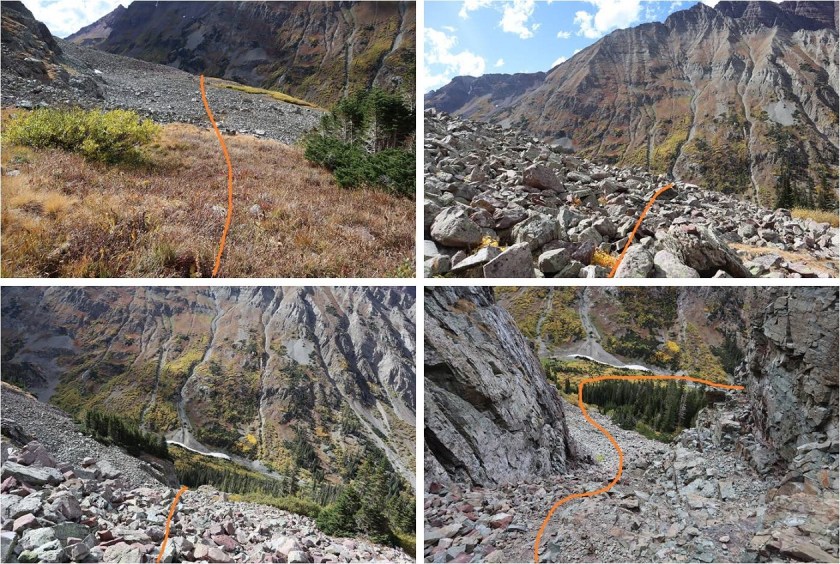
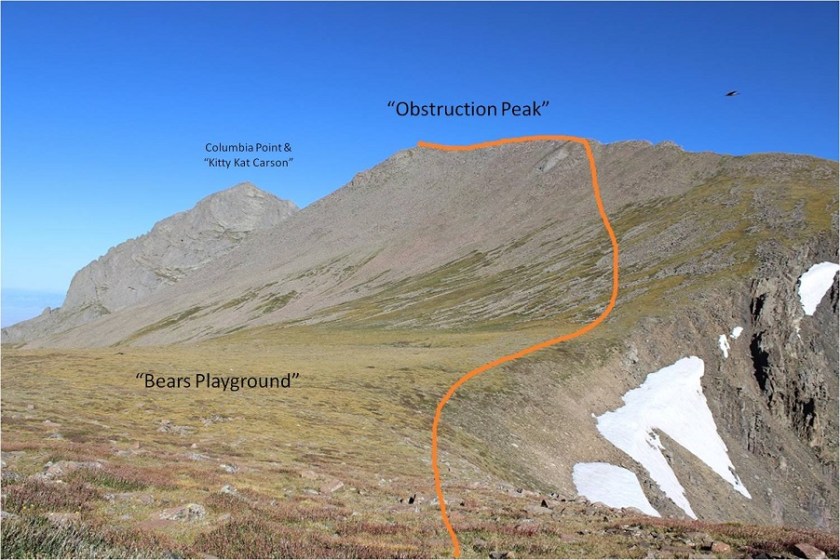
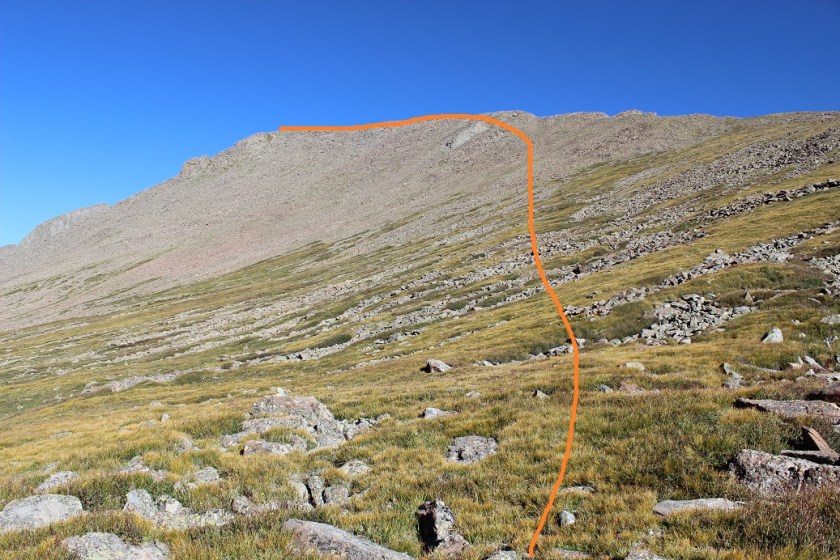
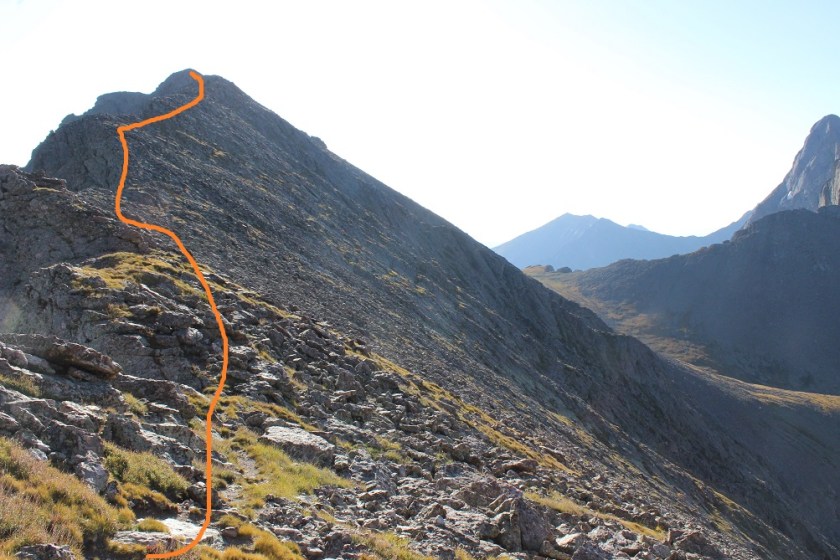
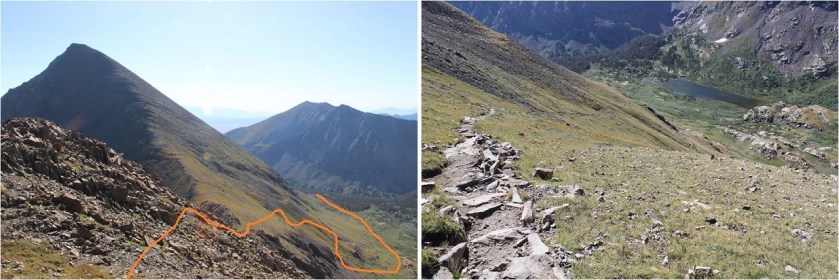
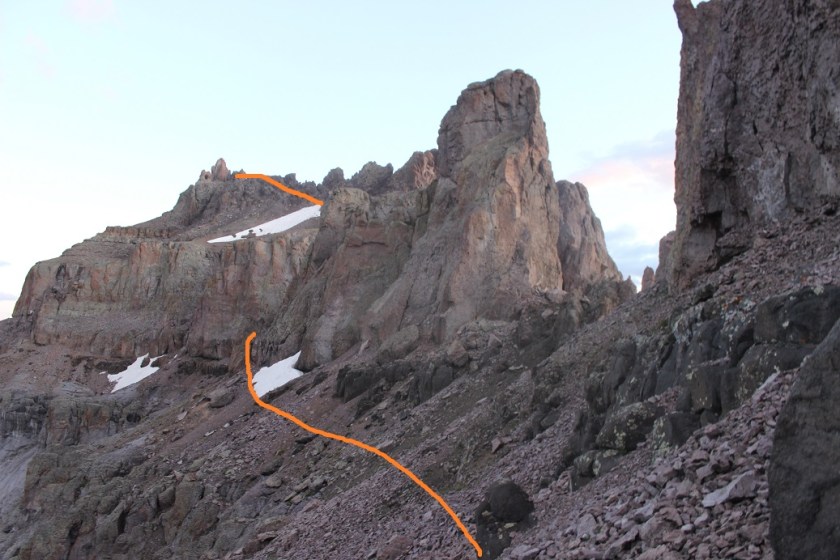
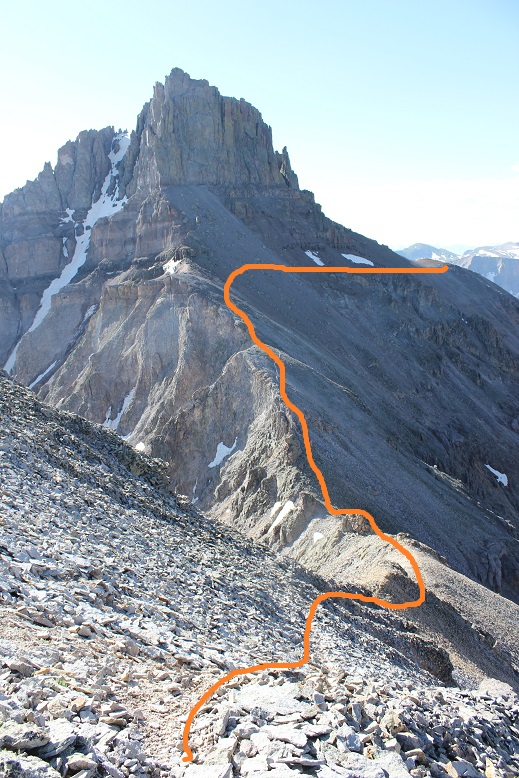
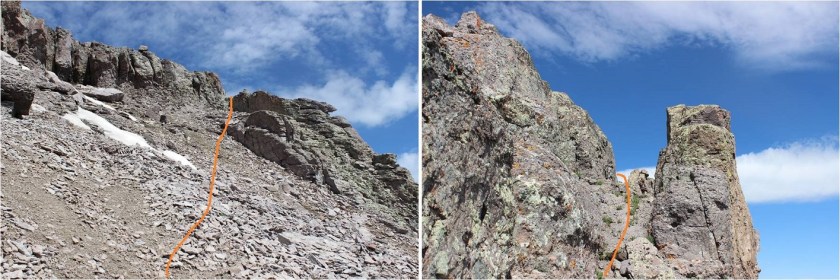
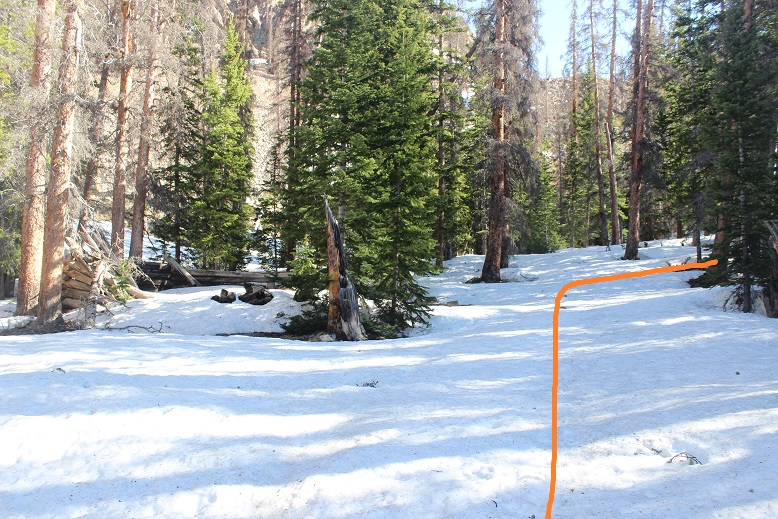
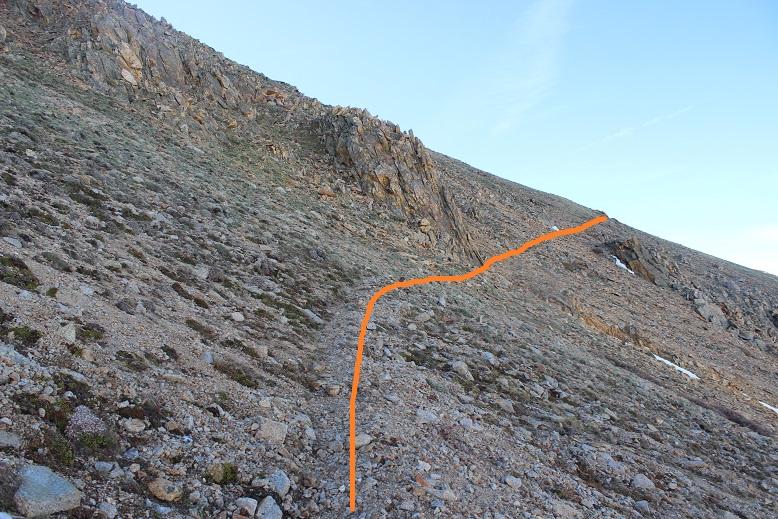
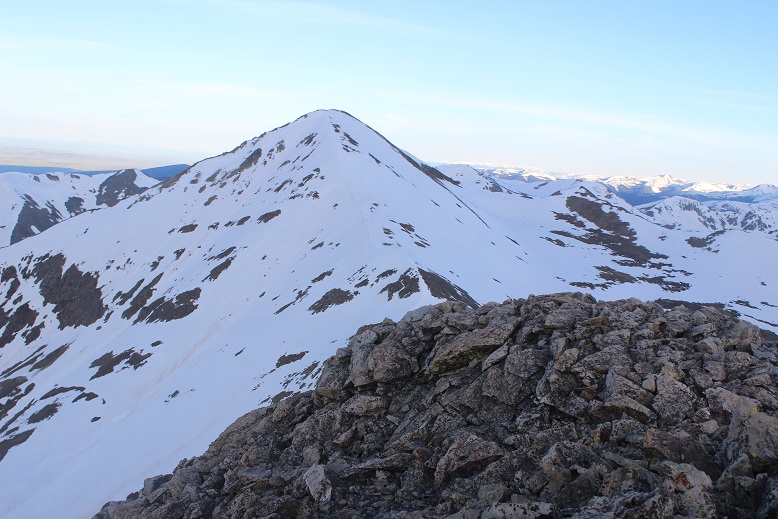
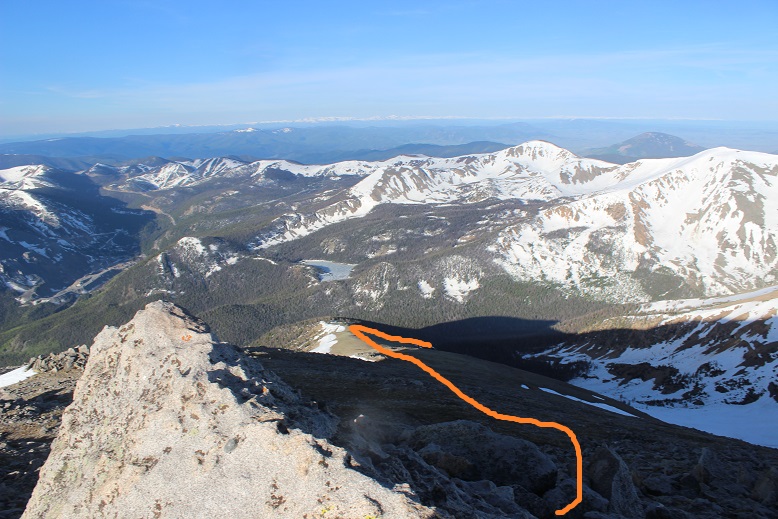
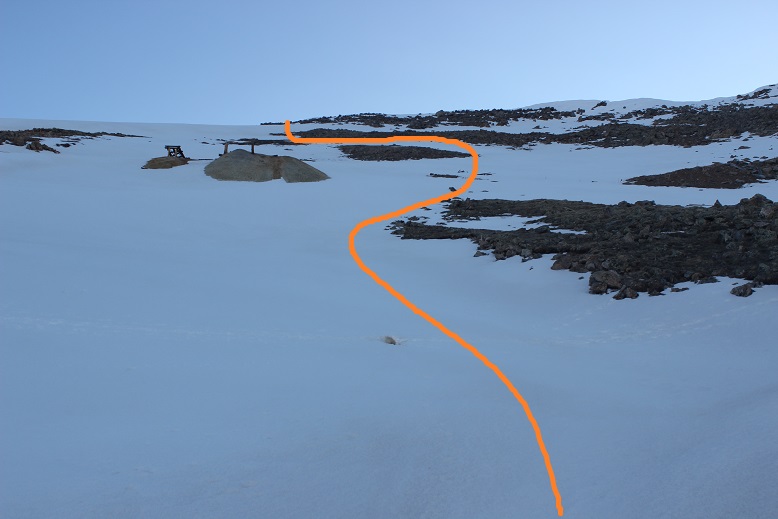
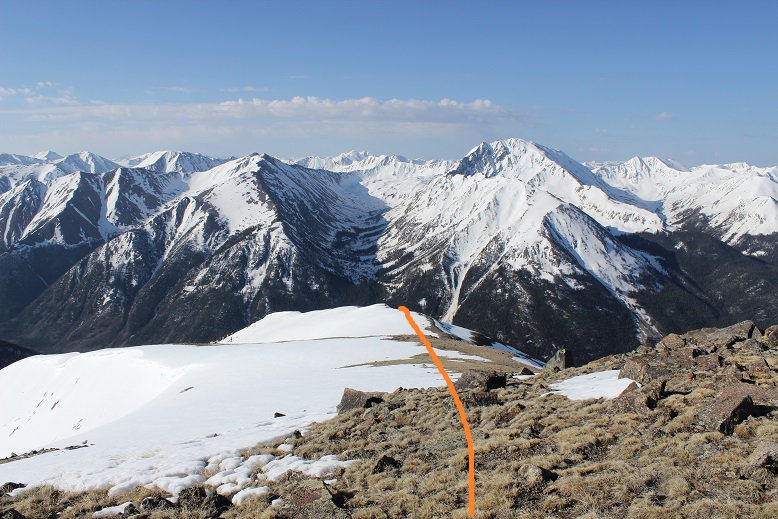
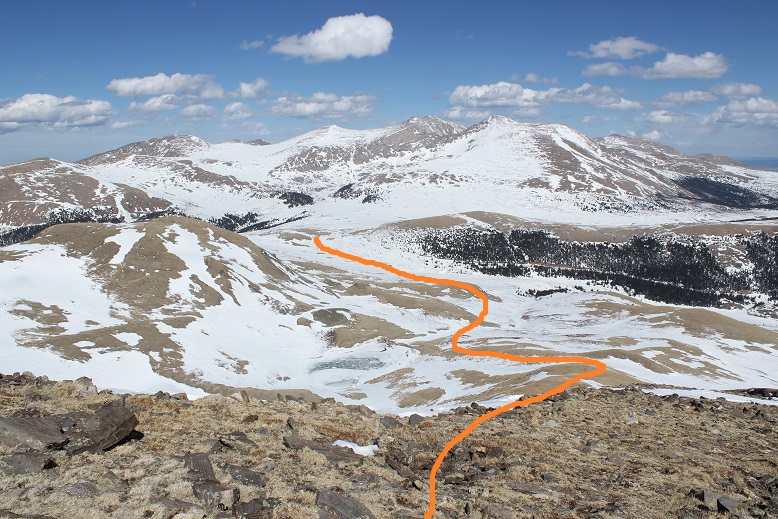
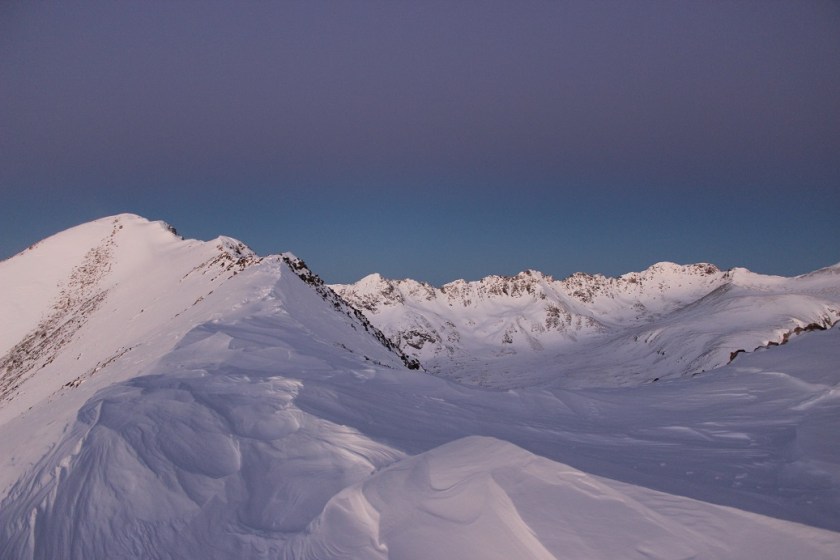
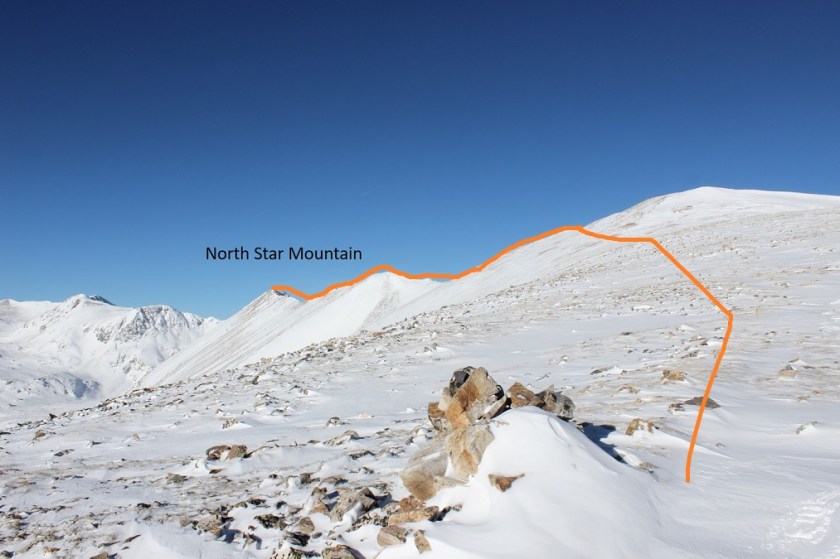
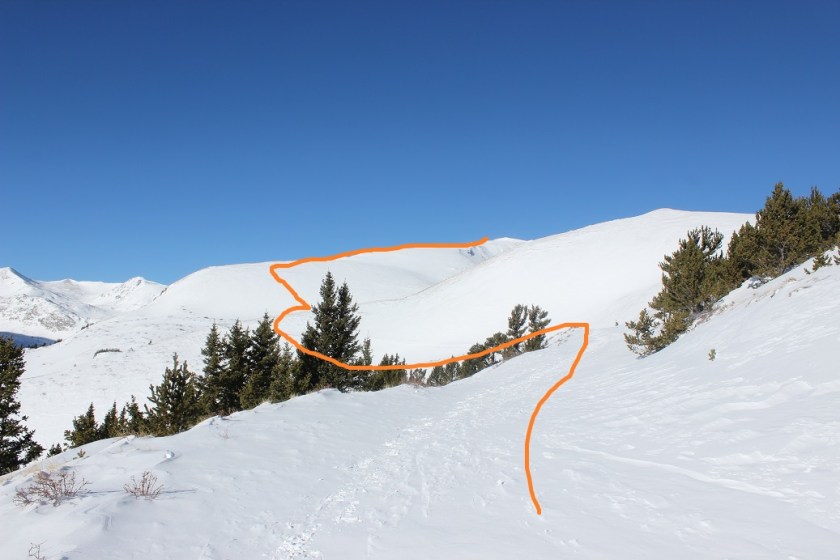
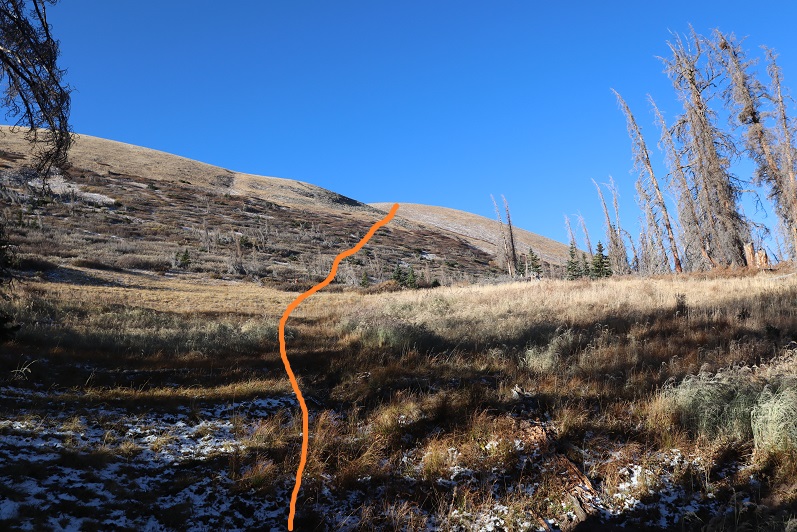
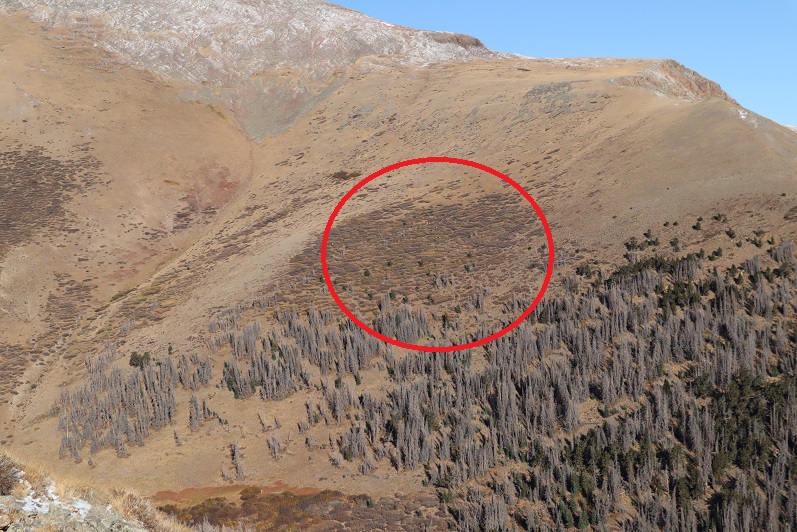
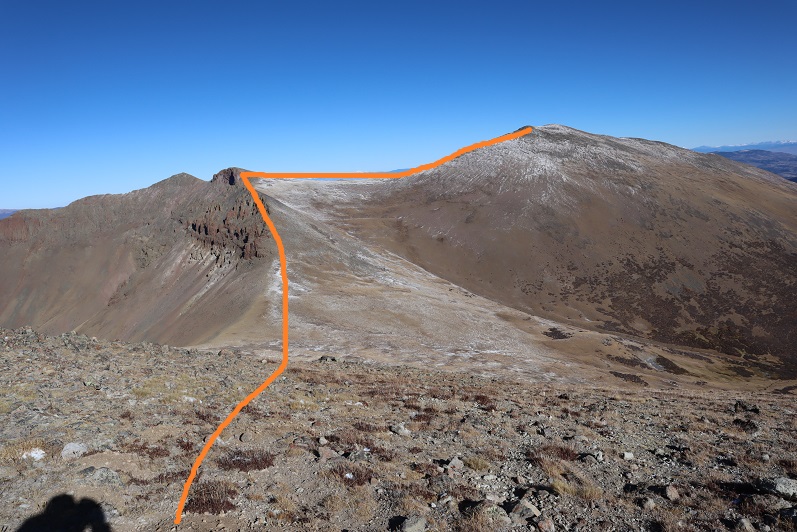
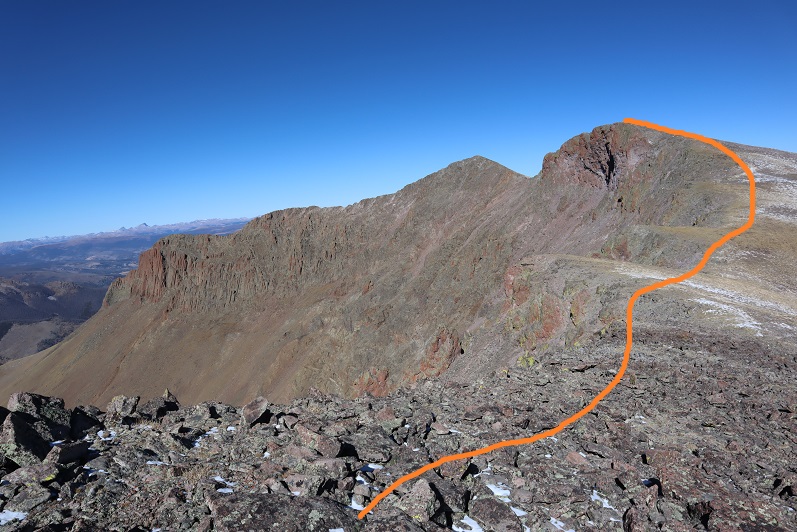
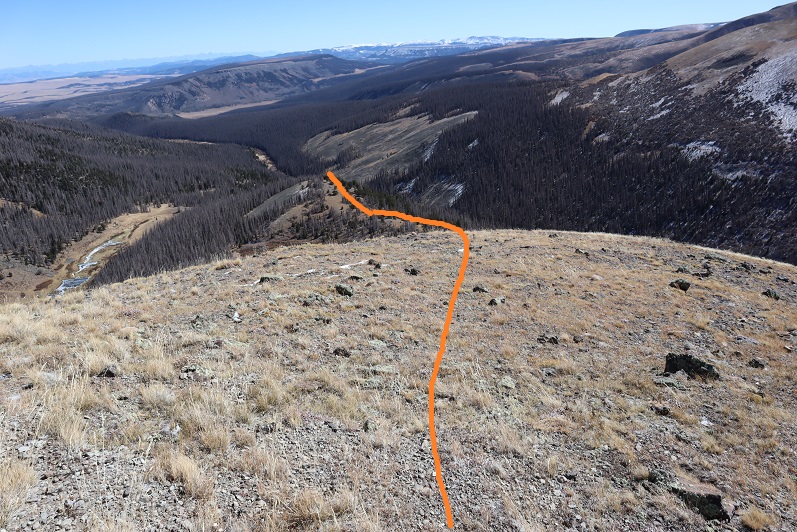
Despite the unrelenting winds I wasn’t unbearably cold and due to the minimal elevation gain/trail length I wasn’t tired yet at all, so I decided to take the ridge over to Stewart Peak. This is the route I took.  The elk are in the red circle at this point.  I could see but not hear them (the wind drowned out all other noises except its own howls).

15

16

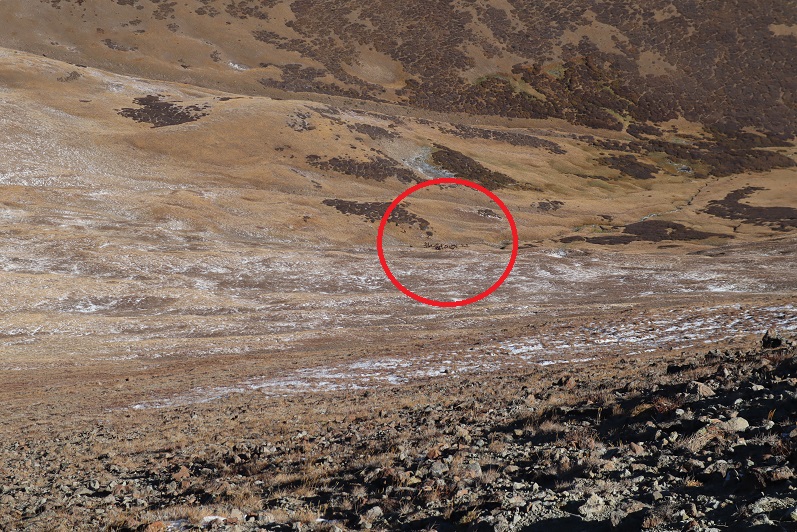
I aimed for the saddle. I’d been watching the elk for about 3 hours and thus far they hadn’t noticed me because I was downwind from them, but as soon as I hit the saddle that changed.  They could smell me now (if it hadn’t been for the intense wind headed their way the fact I’d been sweating for the past few hours meant I’d be hard to miss at this point even in lesser winds).  Their heads picked up and then each one looked at me and quickly fell into a procession.  They started moving together as one up the basin and onto the ridge I’d just crossed.  I found it intriguing a herd of elk would be intimidated by a single person.  They were all eyeing me, trying to sneak past me like a freight train.  I stood in awe for a moment, and then fumbled for my camera in the -10-20* weather (maybe colder with the higher than anticipated winds?). Knowing pictures would never do the experience justice I held the camera at my chest and just kept shooting, leaving my eyes free to take it all in.  It was magnificent, like something you’d see watching a documentary on National Geographic but on a much grander scale because I was in the middle of it and the reason behind their behavior.  I saw their eyes staring at me, their hooves stomping the dirt to dust, their heads moving up and down, the warm breath puffing from their noses into the cold air, and the muscles in their legs charging them forward.  They each looked at me individually but moved as one, up and over and down the hillside.  Wow.  Just… wow.  I didn’t want the experience to end, but they’d moved on and it was time for me to do so as well. The pictures really don’t do justice to the occasion.

17

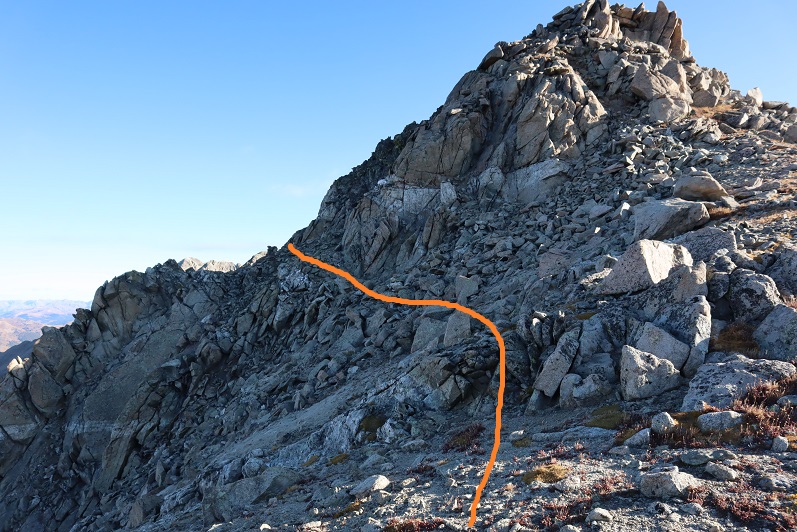
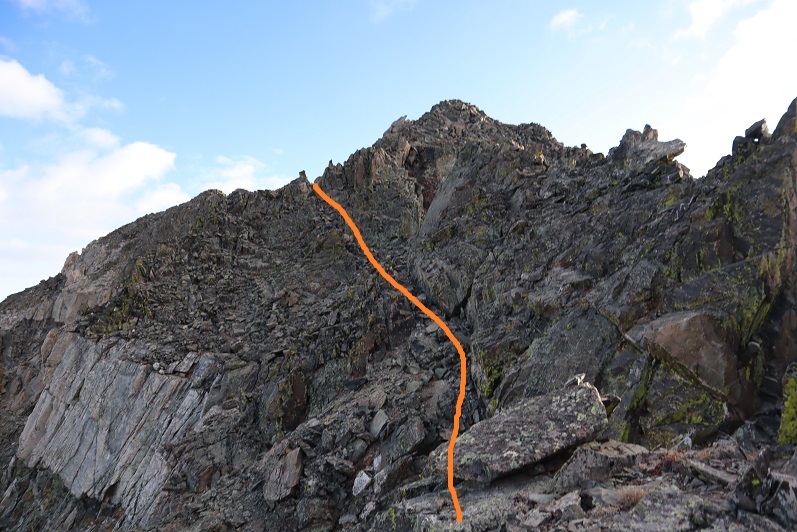
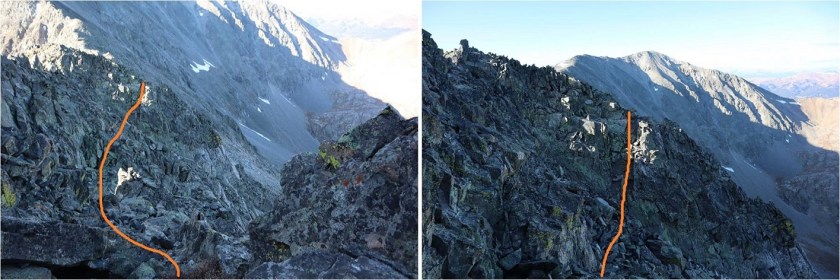
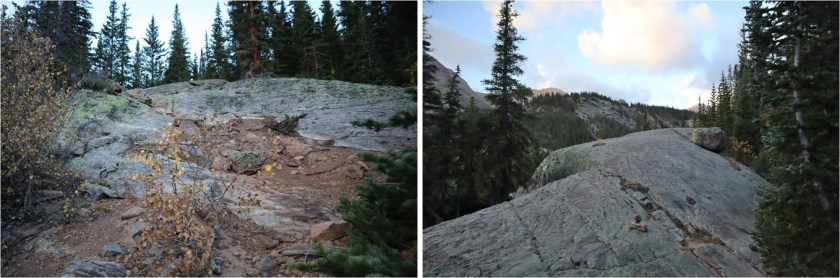
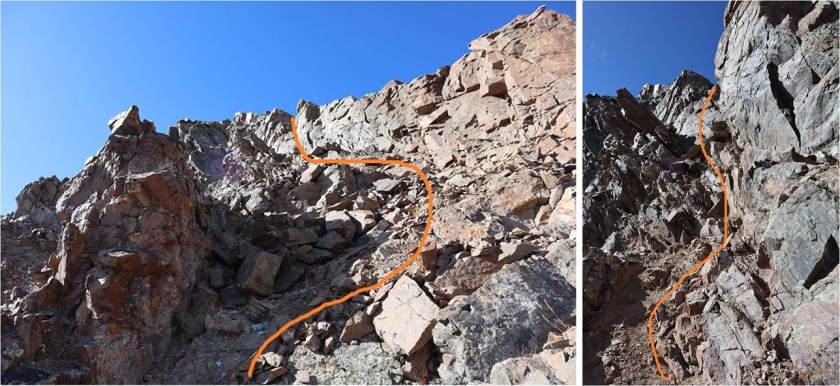
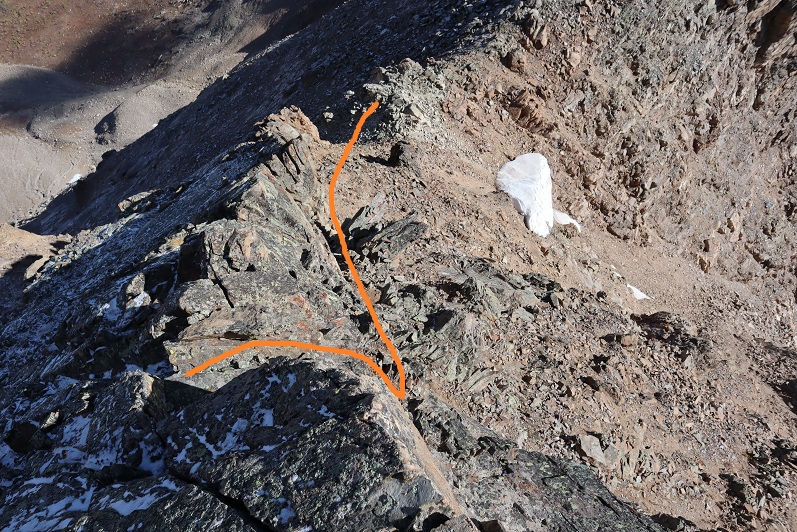
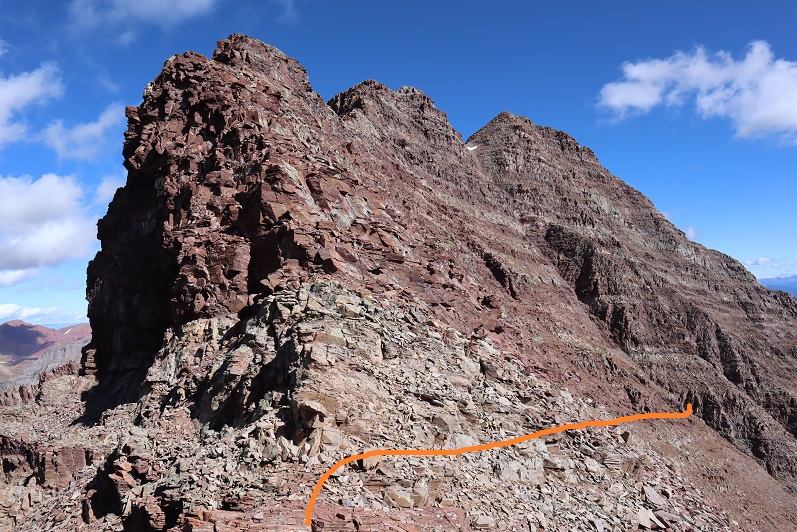
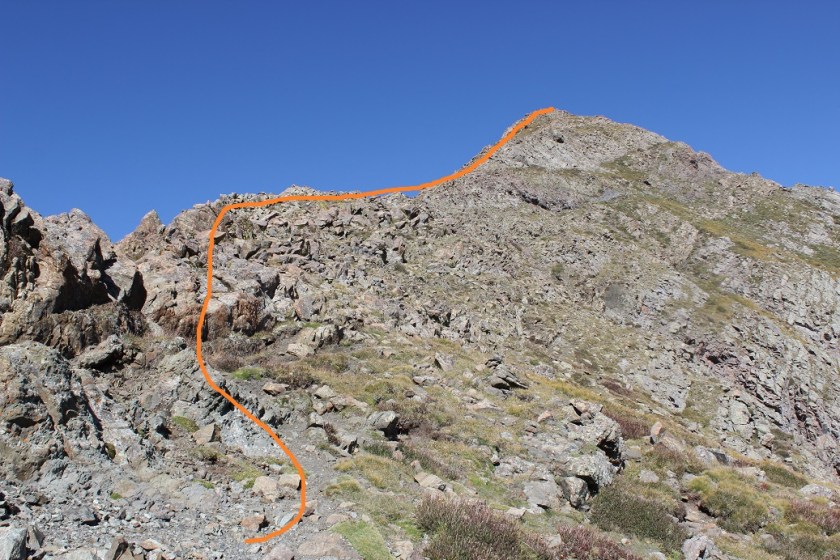
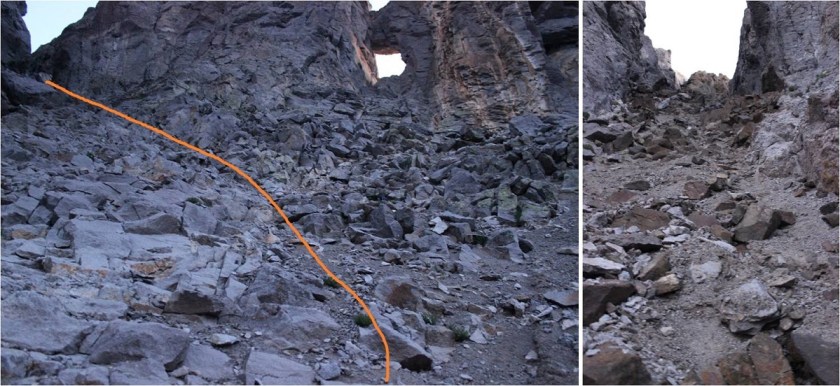
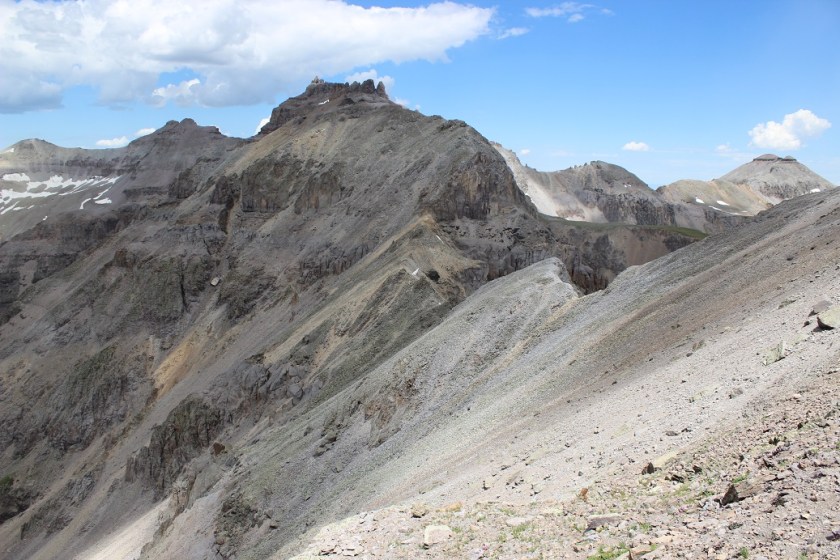
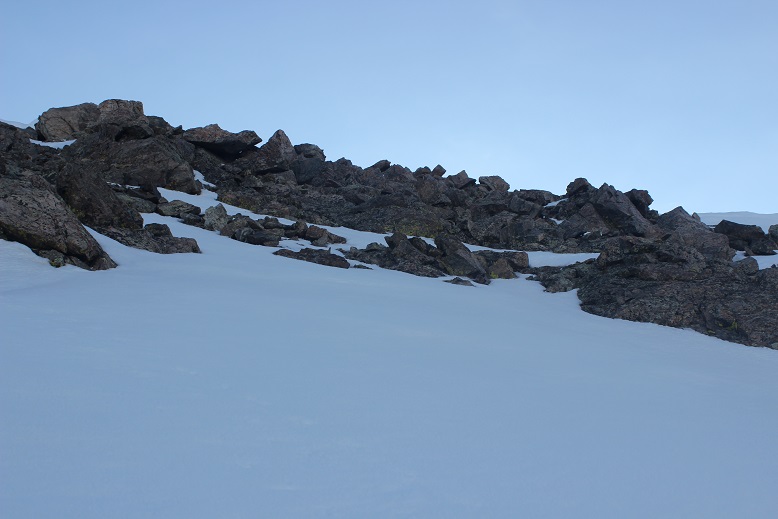
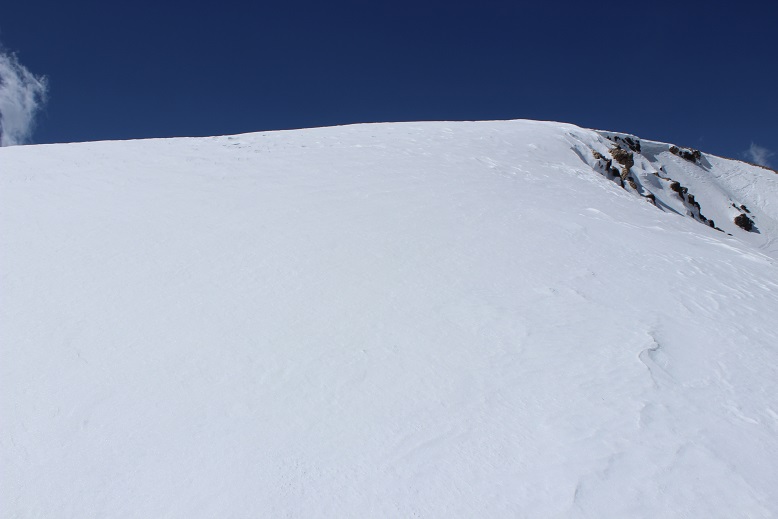
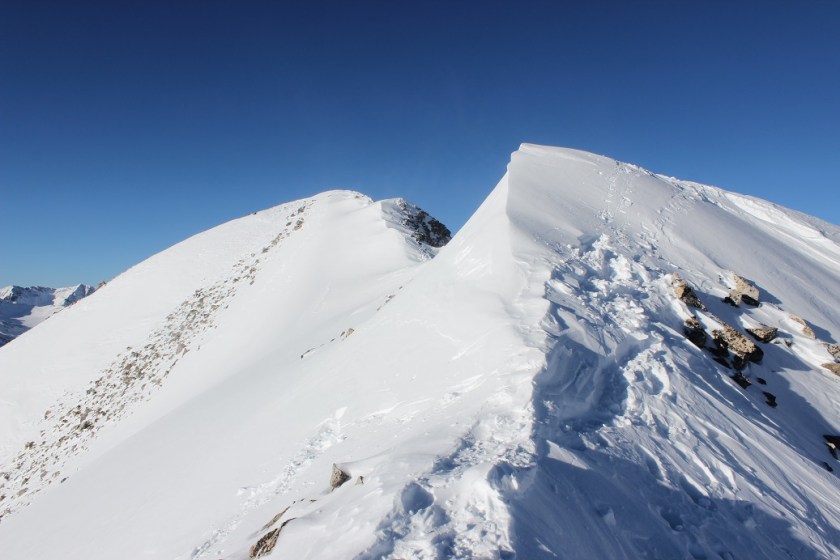
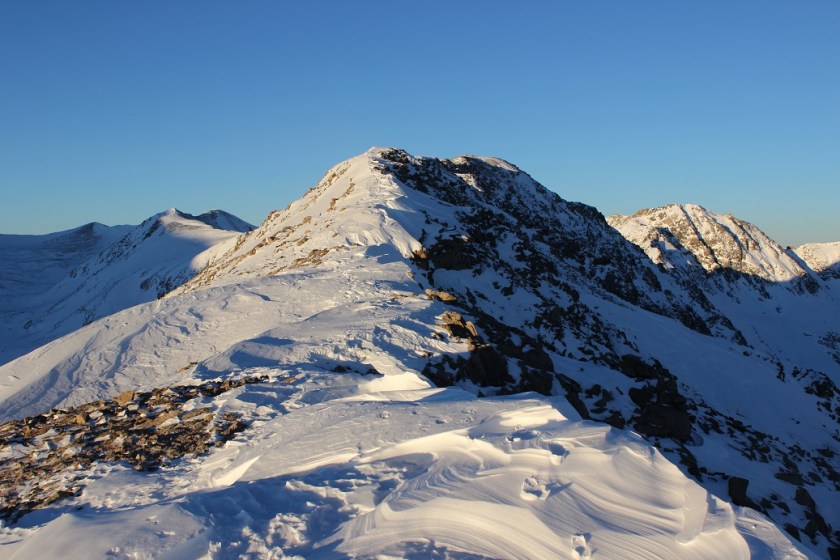
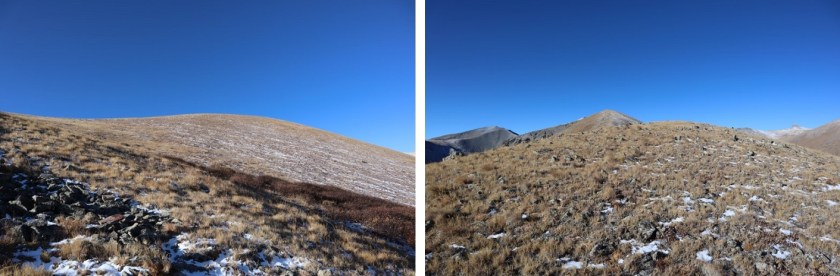
This next part of the hike was class 2, up and over the ridge on large, loose talus.

18

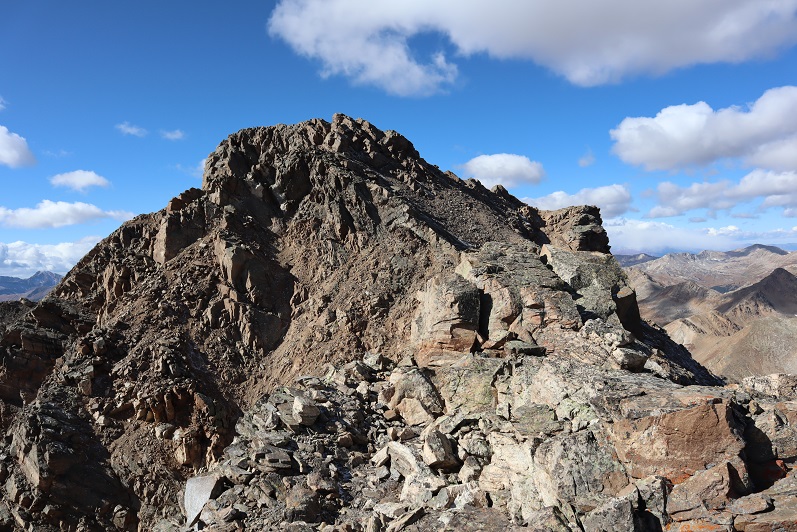
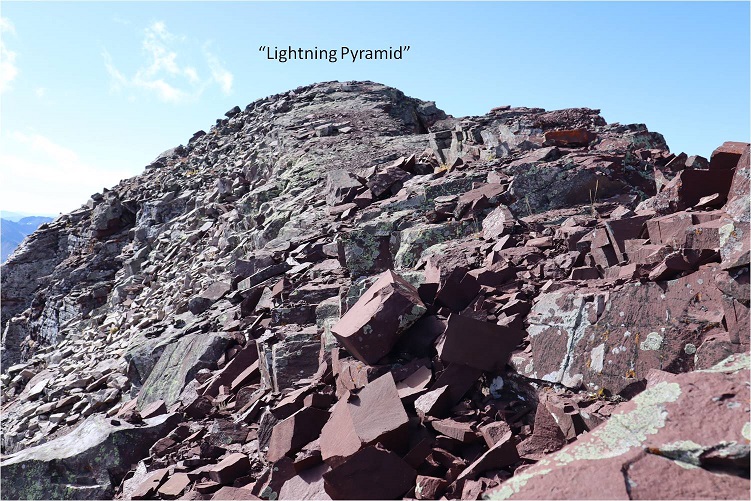
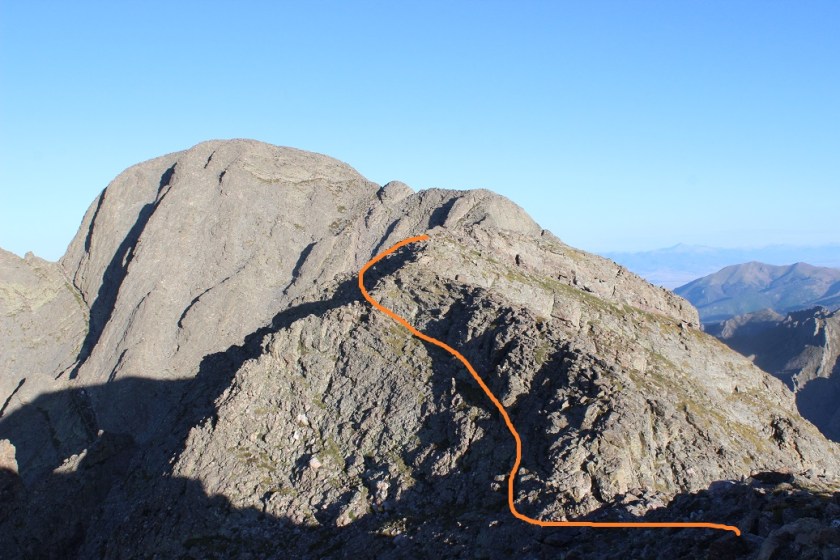
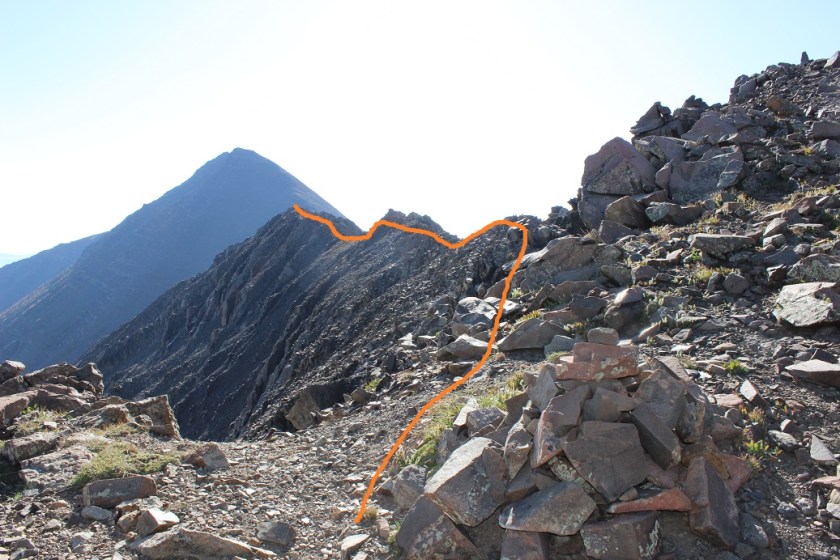
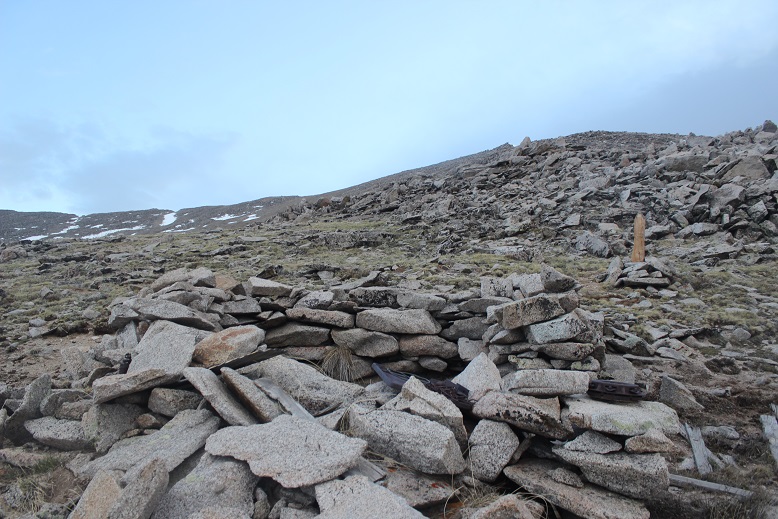
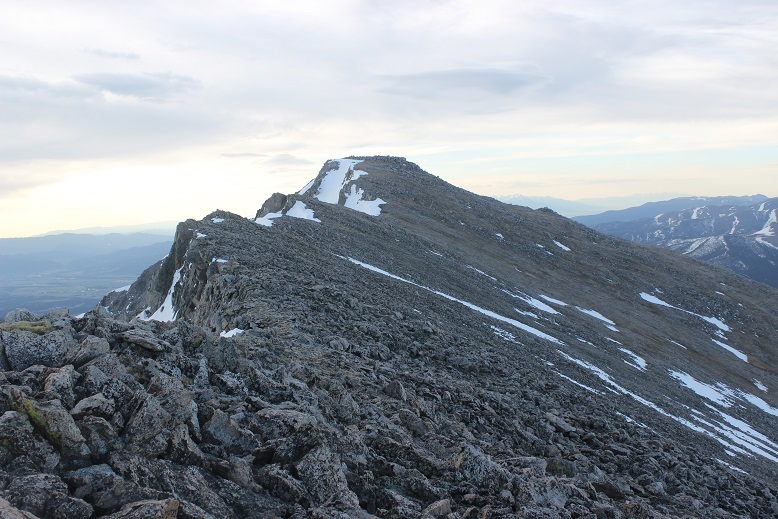
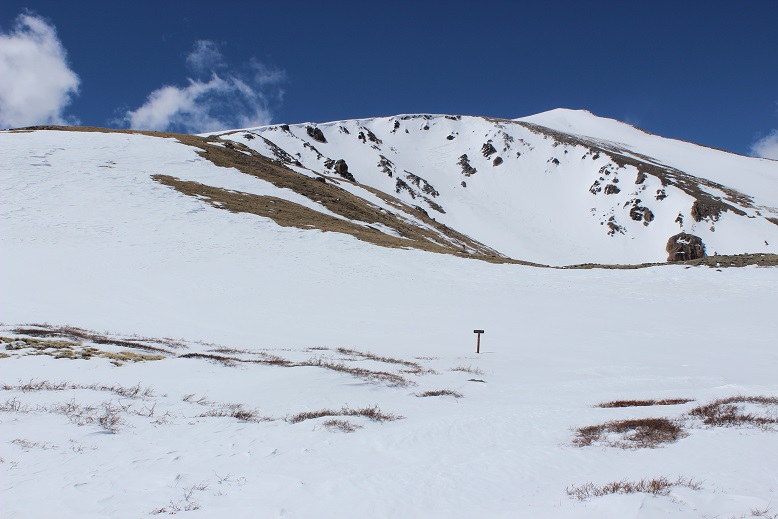
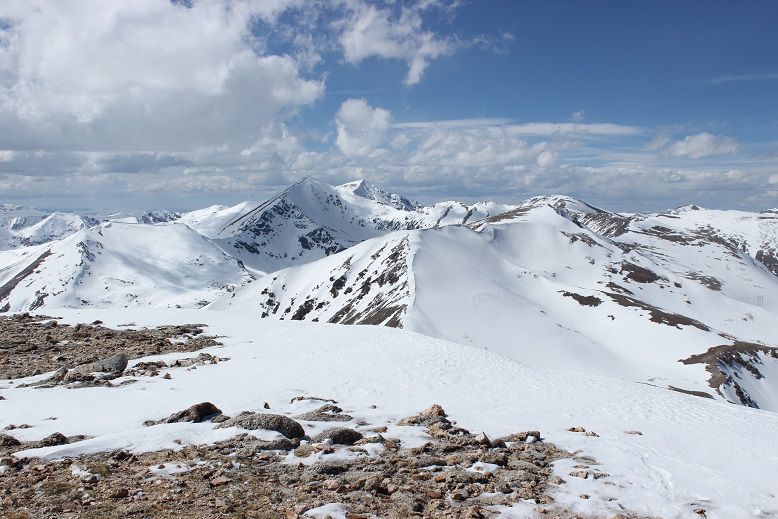
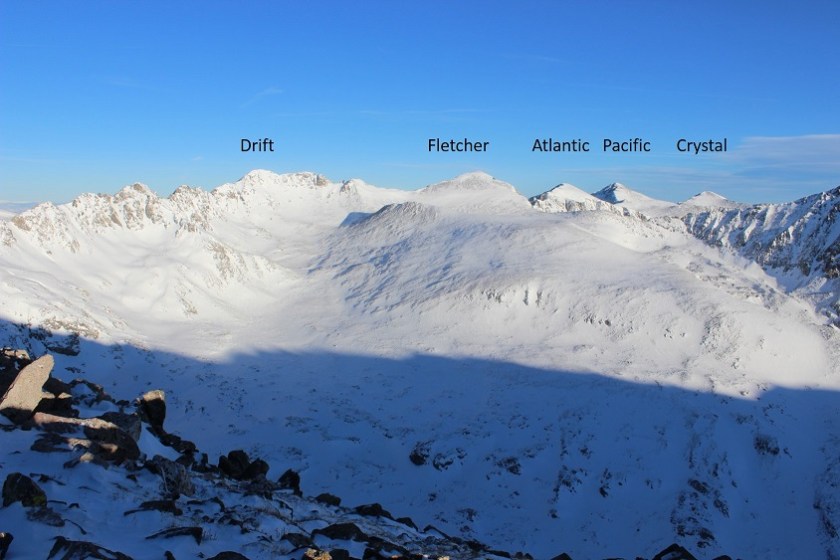
I continued along the ridgeline to this point. I’d thought this was Column Ridge and the point beyond was Point 13,795, but apparently the point beyond is the only one that’s a 13er (it’s not ranked).

19

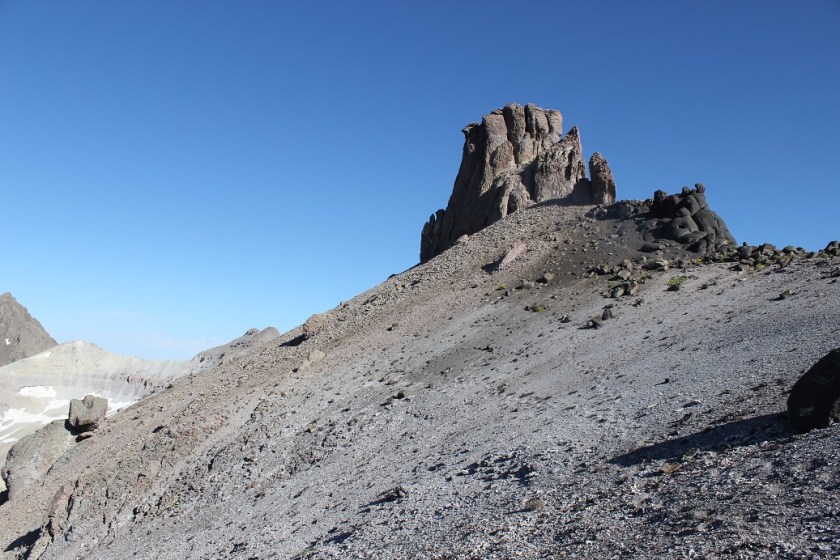
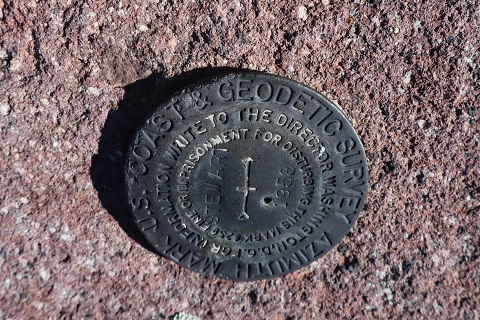
Oh well, that’s what I get for not taking out my map. There was a marker here though…

20

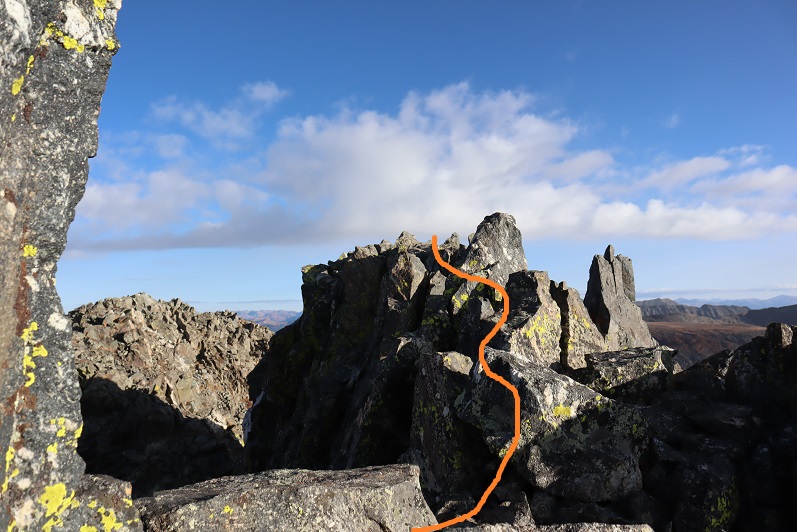
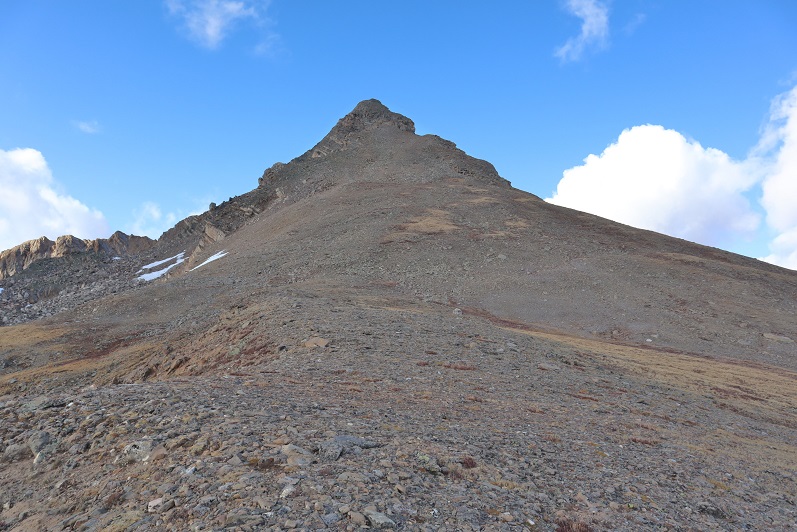
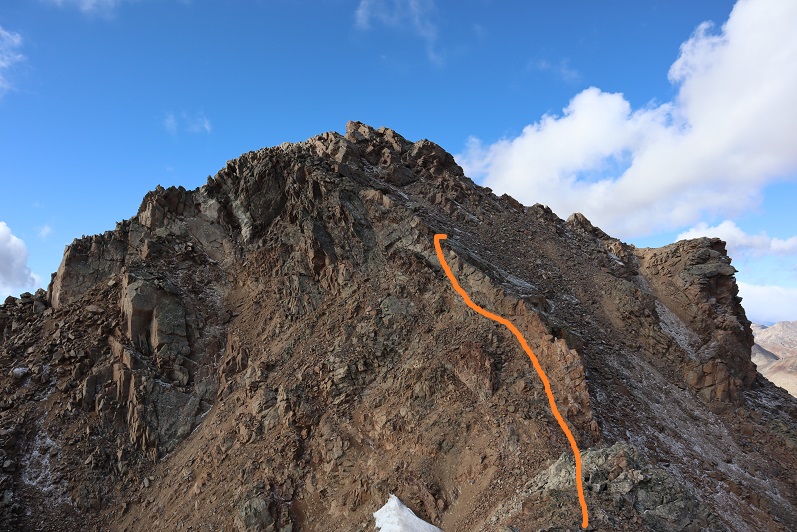
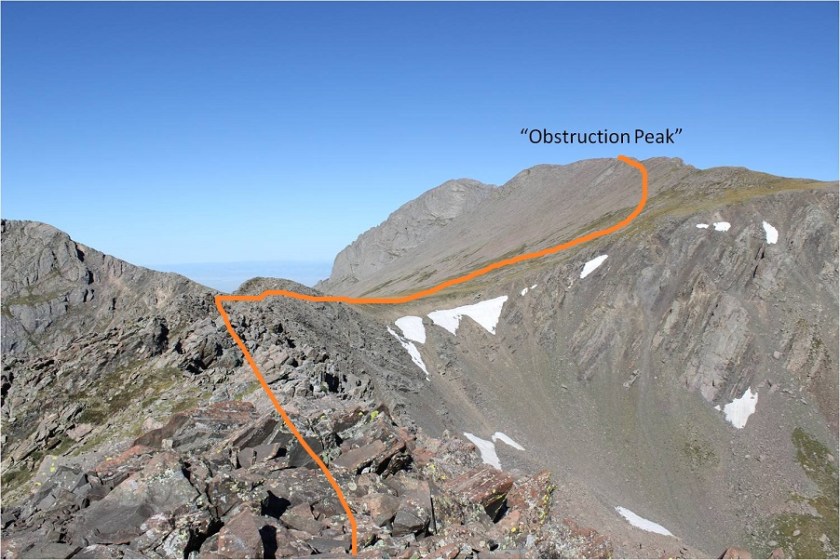
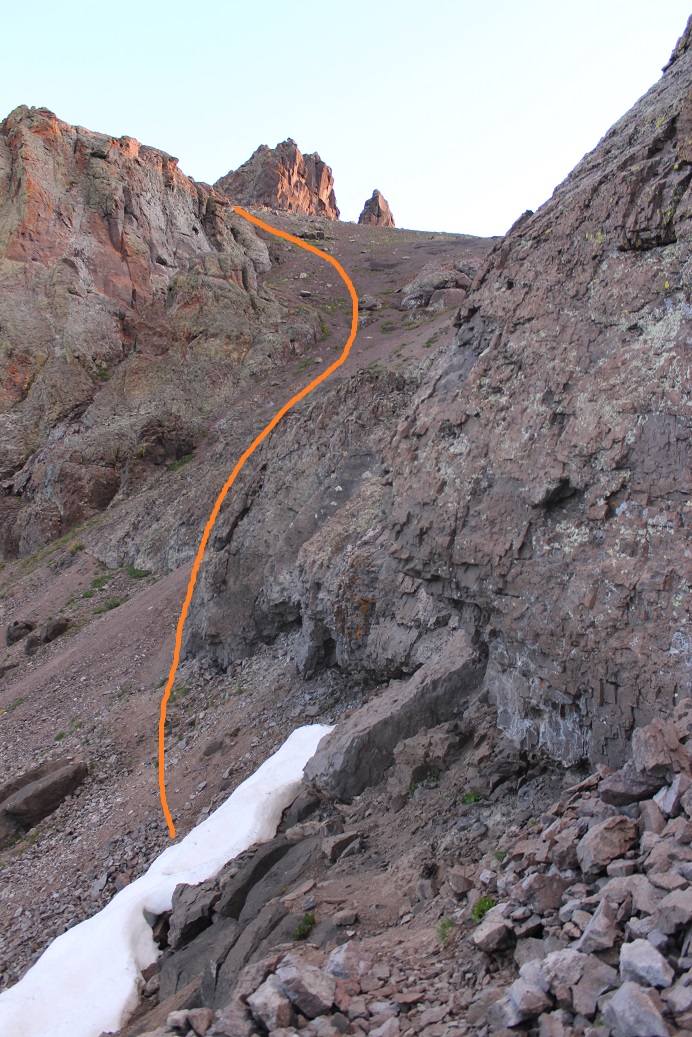
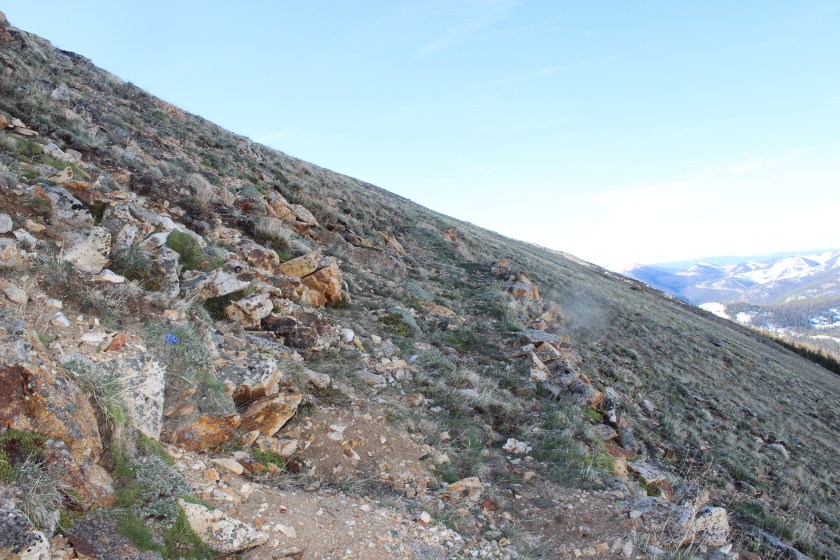
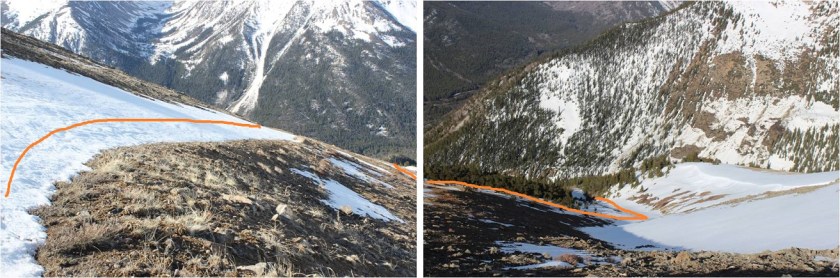
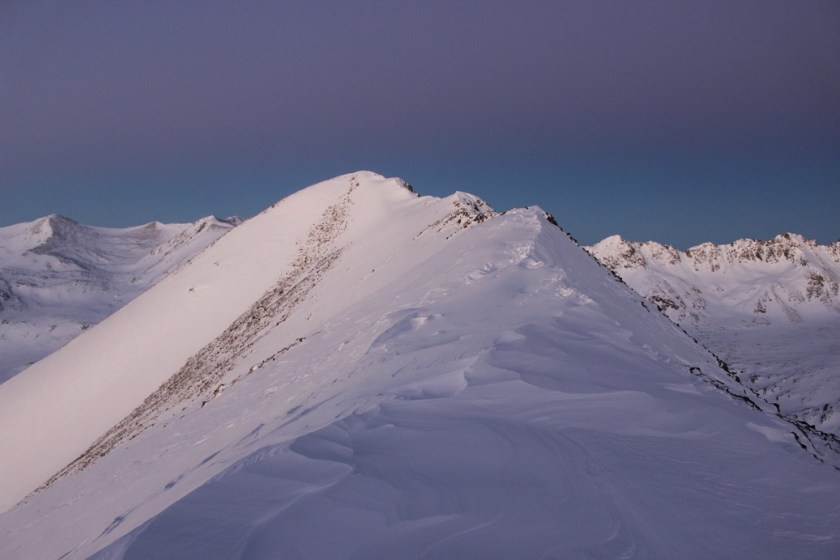
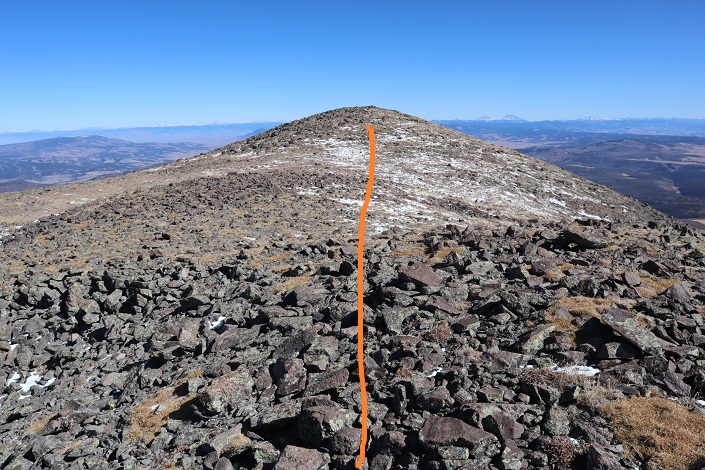
Time to head over to Stewart Peak. This was an easy trek

21

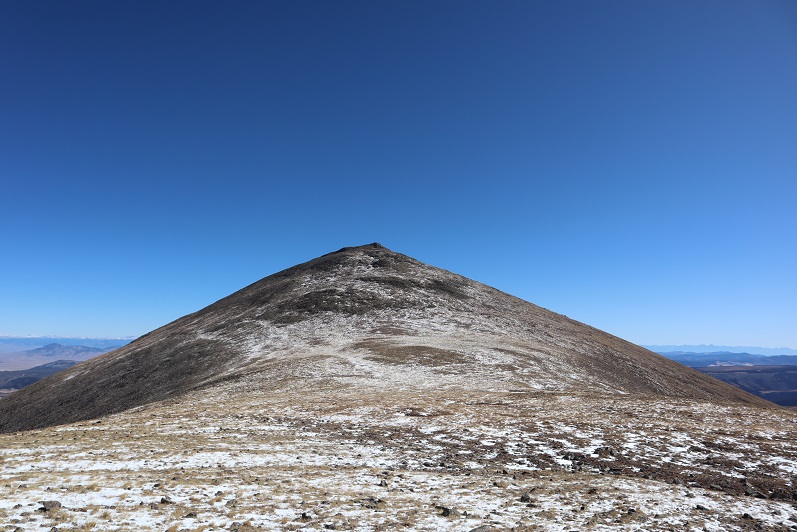
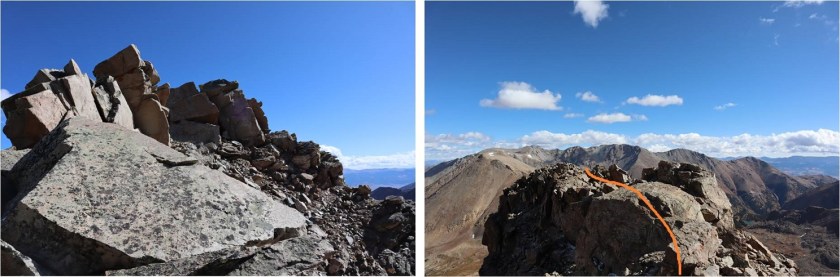
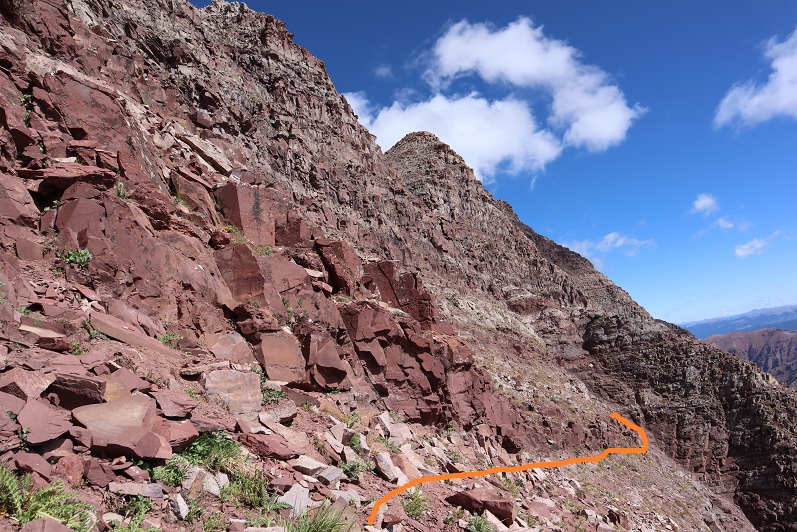
The last part looked like it might be tricky, but it wasn’t. I just continued up and over class 2 terrain

22

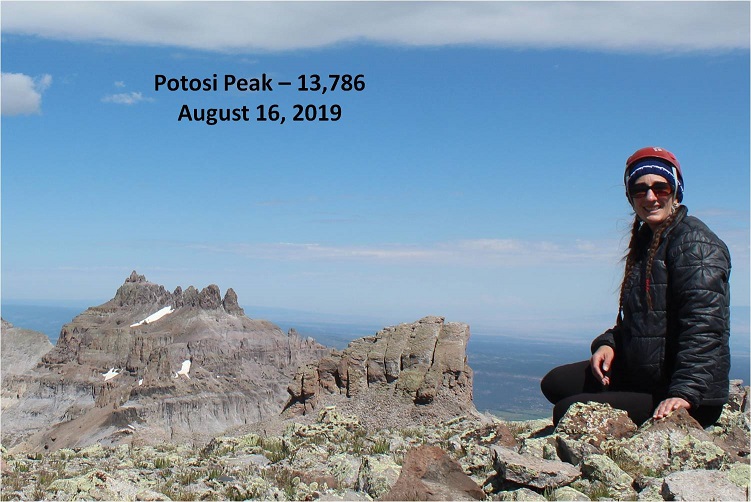
And then walked the rest of the way to the summit.

23

No videos today of the summit(s) due to cold/wind. I was able to get another summit photo again using a pointy rock.  I had a pencil and stylus in my pack, I just didn’t want to take off my pack to get them out because my gloves are cumbersome.  I’m thinking I’ll keep them a little more handy next time, and this week I’m going to attach longer strings to the zippers of my pack so it’s easier to open/close with my bulky gloves.  Also, I’m smiling in this picture.

24

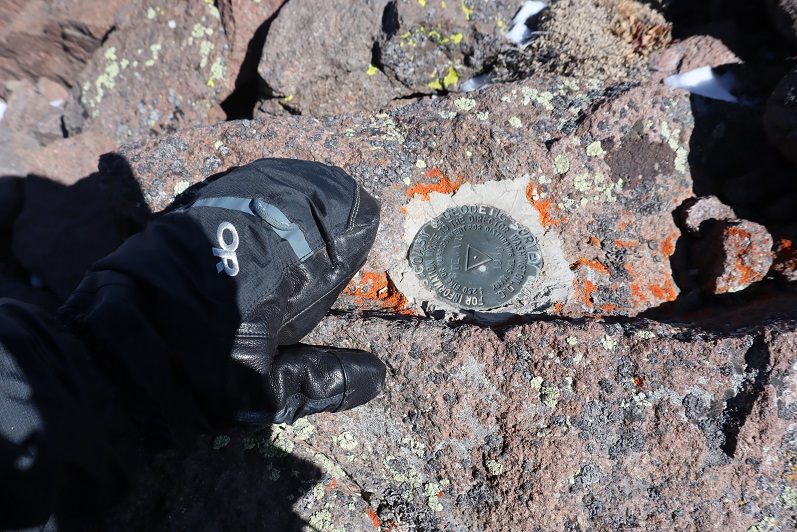
There was a summit marker here too… but no summit register

25

The hike today had seemed too easy. The most difficult part was dealing with the insane wind.  I hadn’t thought about it before starting out, but I didn’t know how to tighten the strings around the hood of my new jacket to make it fit my face, and once out there hiking I wasn’t able to figure it out without taking my jacket off.  Since I wasn’t about to take my jacket off in these conditions I resorted to placing my hand on top of my head to keep the hood from blowing off when hiking into the wind.  Not ideal, but it worked.

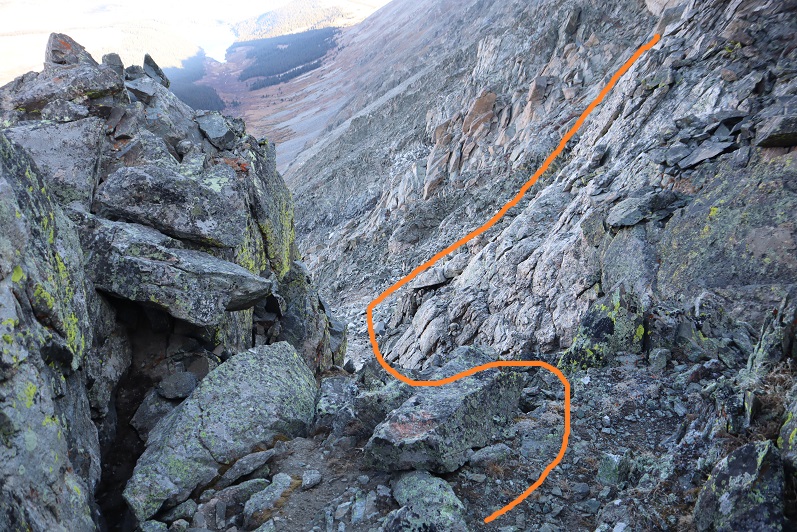
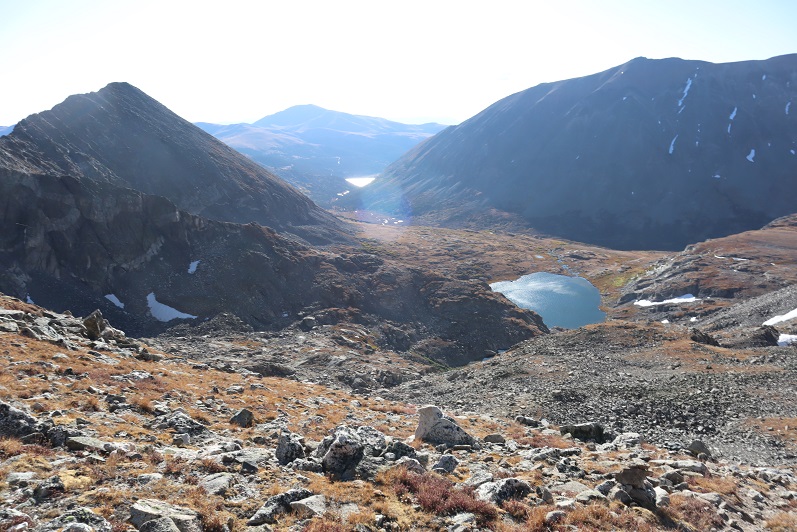
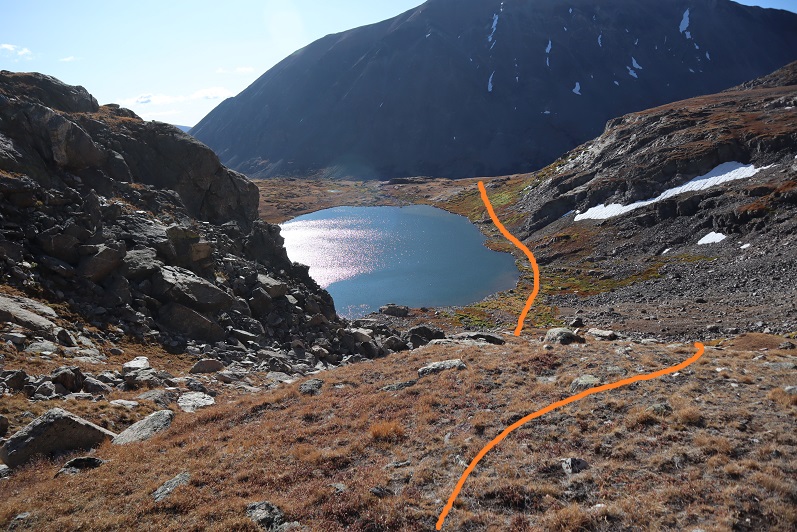
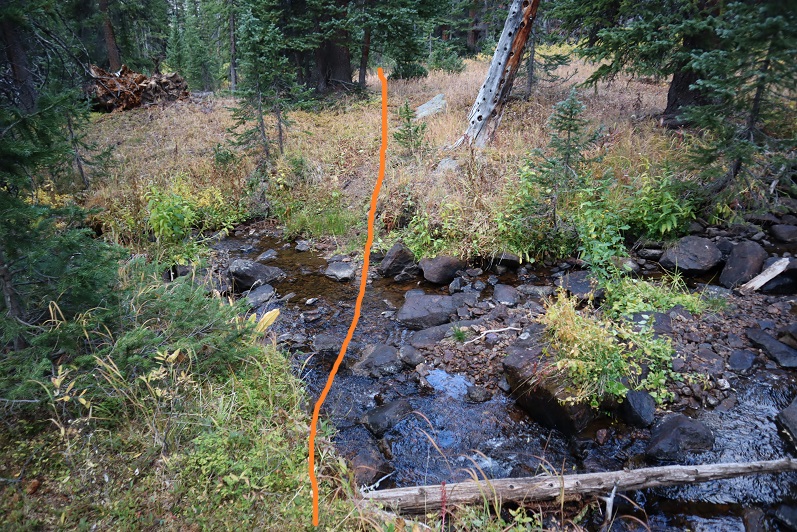
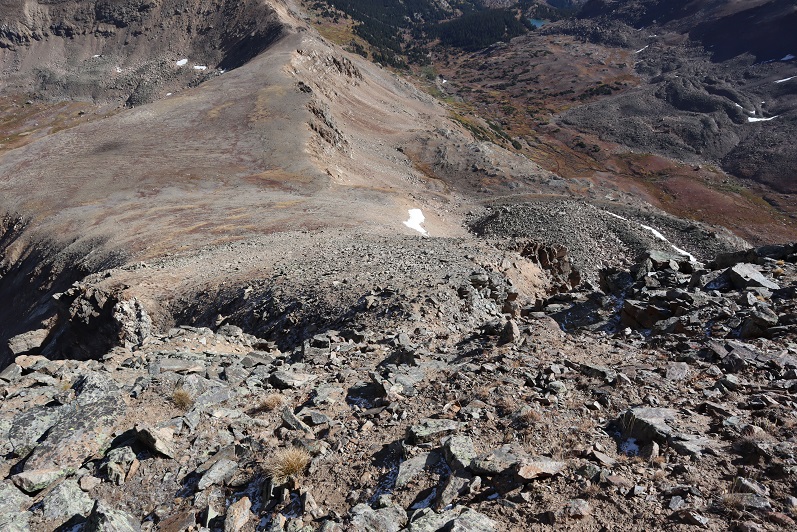
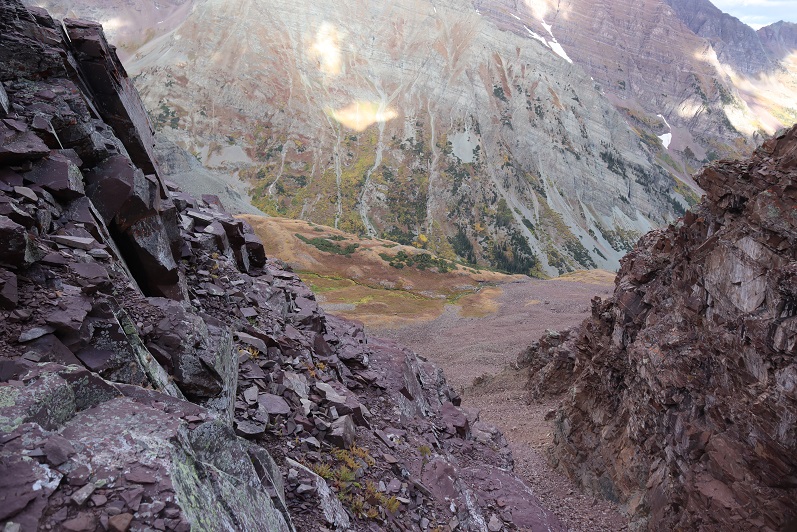
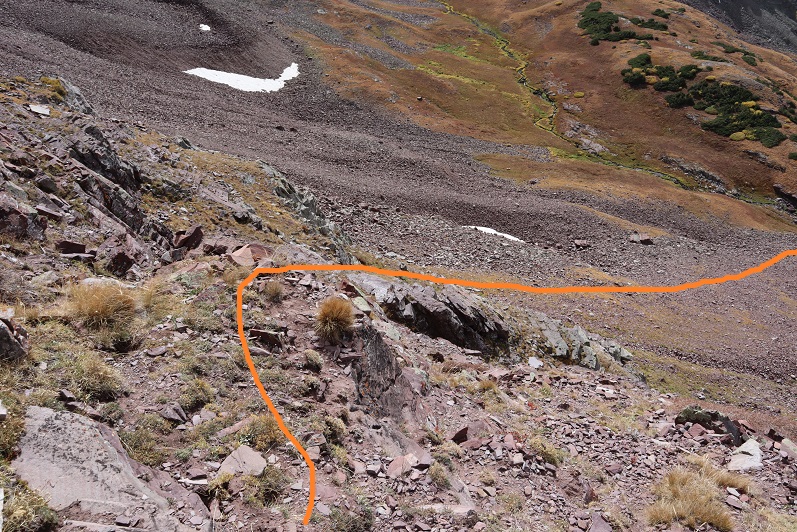
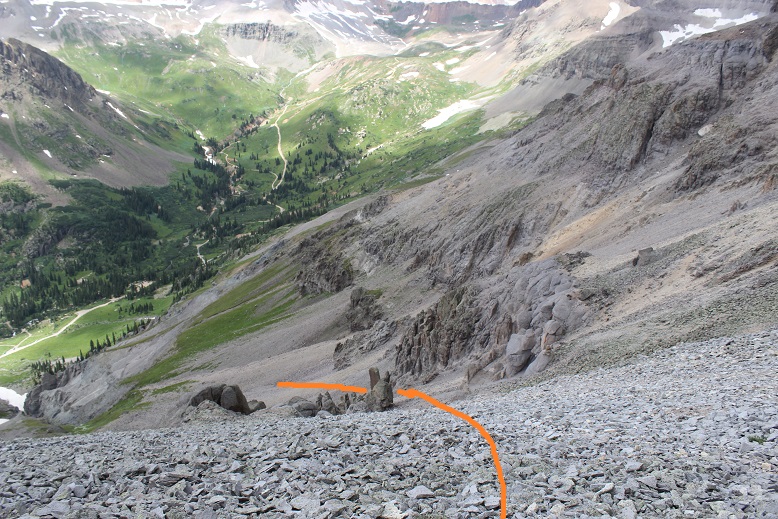
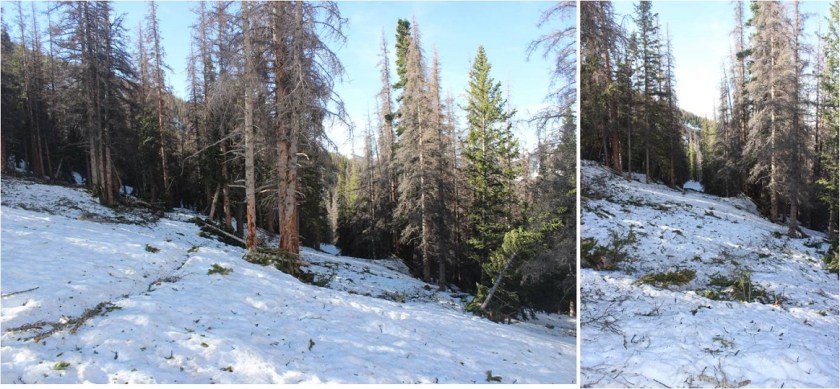
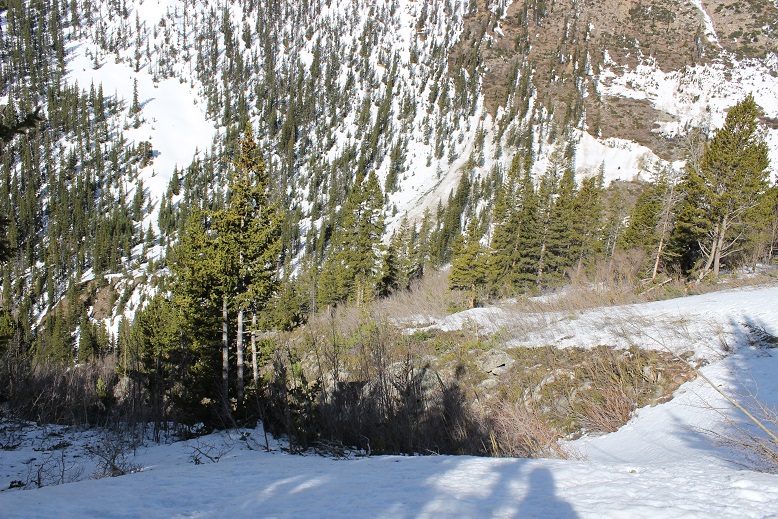
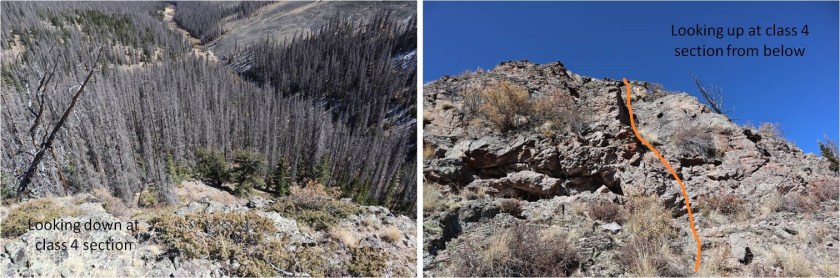
The trek down from Stewart Peak was actually kind of fun. I decided to just “wing it” since I’d been here before, and I didn’t take out my topo/etc.  I just followed the ridge to the end and aimed for the creek, knowing it would lead me eventually to the trail.

26

27

28

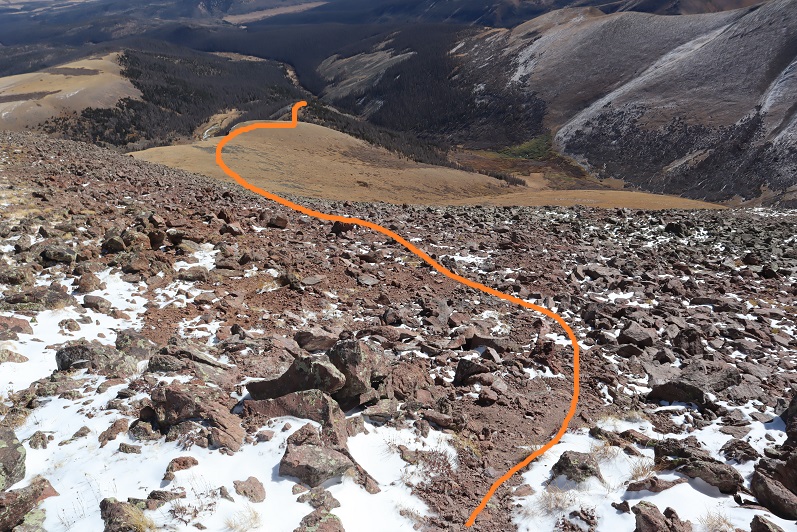
I’m not recommending this approach unless you have good route finding abilities and you like to rock climb because I made it to a section I’d label as class 4. I love to boulder so I went through this area with vigor instead of looking for another way around, but if this not your cup of tea follow the standard approach down Stewart Peak to the creek.

30

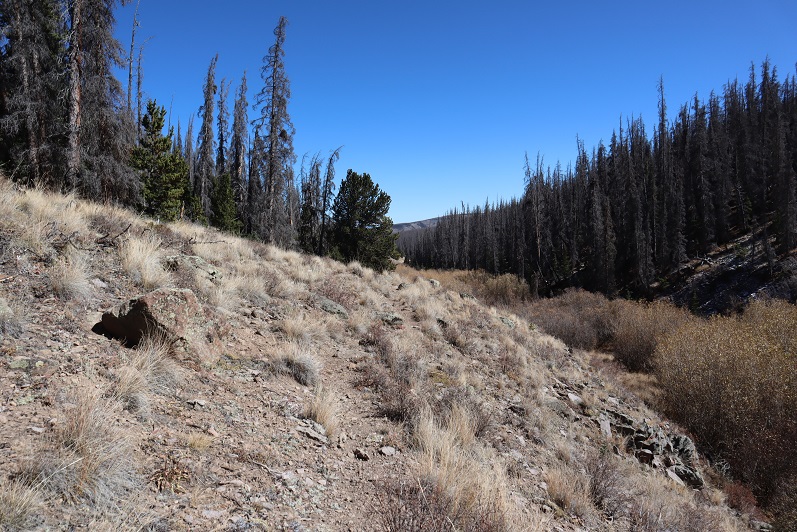
Also, there are tons of game trails here that look like actual trails but lead nowhere. It’s a bit… misleading.

31

By keeping the creek in sight I was easily able to link up again with the trail out.

32

33

34

The entire time down I was thinking of how much easier this hike had been taking Baldy Alto first instead of Stewart Peak: the elevation gain had been more gradual and if I were to do this loop again I’d start with Baldy Alto. Once I made it to treeline the wind stopped and I could hear elk conversing with each other through the area I’d hiked that morning.  That got me wondering if there’s more than one herd up there, or if it was split up?

I made it back down to the trailhead and there was more gear at the campsite than when I’d passed it this morning. There was a young gentleman of about 25 years sitting in a camp chair, dressed head to toe in camo.  There were guns and archery equipment propped against the trees and a second tent set up.  He stood up when he saw me and said hello and asked me where I’d been.  I could tell by his accent he was from the south and my heart melted a little bit.  Apparently the check engine light had gone on in their vehicle so the rest of his party had gone to Gunnison to get it checked out.  They were here hunting elk and had spent last week in Wyoming hunting antelope.  He dripped of congeniality.  I’m a sucker for a well bred southern man and if he’d been around 40 years old and single I would have prolonged the conversation by telling him where he could find those elk.  Instead I wished him good luck and went back to my truck to clean up and head home.

I started at 7am and finished at 2pm, making this an 11 mile hike with 3961’ of elevation gain in 7 hours.

35

36

Please don’t judge me (too harshly) and know no one is paying me to say this, but the jacket I got was the Wantdo Waterproof Ski jacket (I’m not yet sure if it’s actually waterproof but others tell me it is).  It worked so well and exceeded my expectations, especially for such a low cost jacket (under $100).  I’m not sending it back and look forward to an awesome winter adventure season!  The gloves and socks and pants were phenomenal as well.

Wheeler Mountain – 13,698

1

RT Length: 9.5 miles

Elevation Gain: 2810’

My alarm clock rang and I hit snooze. Today’s worry:  starting too early.  I wanted to be home from the hike around 1pm because that’s when my daughter would be home, but I didn’t feel the need to start too early when this was a short hike with minimal elevation gain.  I didn’t think it would take me more than 5 hours.

After trying to fall back to sleep for 20 minutes I gave up and drove to the Montgomery Reservoir trailhead, arriving at 4am and taking my time getting ready. It was much colder than I’d anticipated and I put on my winter gloves from the beginning.  The drive in was uneventful and I was the only one in the parking area when I arrived.

2

I was on the trail at 4:30am. It starts at the east end of the parking area (you pass it when you drive in).

3

The trail passes the Magnolia Mine and follows an extreme 4WD road for 3.3 miles to Wheeler Lake. If your vehicle can make it to the top of Lake Como you have a chance in being able to navigate this road, but you should probably just hike the 3 miles.  This is my third time on this trail, and I can tell you it’s much easier to follow without snow.

4

In the dark I saw a bunch of flickering lights and wondered what they were? They looked like gas-powered lights, fire and all, and I figured they were probably from a mine.  In the daylight on my way out I realized they belong to a house/structure on private property.

5

There are some flat areas and very bumpy parts to this road, making a quick pace nearly impossible.

6

It was windy and cold and I wasn’t ‘feeling it’ today so I trudged along, hiking slower than usual. Windy is normal here (it’s a basin after all) but the cold along with the wind made this easy part of the hike more challenging.  After hiking for 3.3 miles and an hour and 45 minutes I made it to the lake, just as the sun was beginning to rise.  I still needed my flashlight but aimed it away from the lake, as there appeared to be campers there.  I could see a tent and heavy-duty 4WD vehicle parked beside the lake.

7

There’s a trail along the left side of the lake that’s used for both the Clinton-McNamee-Traver hike and Wheeler Mountain, so it’s easy to follow. The only downside?  It was iced over and slick. In fact, any part of the road/trail thus far that had held water had been iced over.

8

The trail up past Wheeler Lake towards Wheeler Mountain is less traveled and more difficult to find. Here’s the path I took, staying to the left of the waterfall.  It passed around the outskirts of the willows.

9

I passed someone’s getaway vehicle along the way

1

At the top of this gully there’s another small lake. This time I skirted the lake to the right, following well placed cairns.  Oh, and the wind stopped!  This was fantastic!  I was finally starting to warm up a bit.

11

12

Once above the second lake the trail is faint but the cairns are helpful. The trail turns and heads northwest.  The goal here is to gain the saddle.

13

14

I felt there were just the right amount of cairns here to keep me headed in the right direction, but basically I was just aiming towards the saddle. During the last bit the trail goes left and then angles back right over a grassy area

15

Once I gained the saddle the wind picked up intensely. It wouldn’t have been so bad if it had been a normal wind, but this wind was a steady 40mph and icy.  It was like an arctic blast was blowing directly against me as I hiked.  I turned right at the saddle and headed northeast.  Instead of going up and over the ridge (which doesn’t look possible) I skirted it to the left, following the cairns.

16

There aren’t very many cairns here, but they are all placed in helpful areas. If you can’t see a cairn, you’re off trail.  This is not something I’d want to attempt in the snow.  I skirted several gullies

17

18

19

I found myself at the top of a particularly sketchy gully where it looked like I was going to have to lose some elevation and I didn’t think I was headed the right way. Also, I couldn’t see any more cairns.  The wind picked up dramatically and I seriously considered turning back.  My fingers were frozen and finding the “Y” in the ridge that indicated the summit was taking a lot longer than I thought it should.  I looked all around but wasn’t sure where to go?  I started jumping up and down to get warm, and that’s when I saw it:  a cairn just over the next rib.  Woot!  I just hadn’t been tall enough to see it.  So yes, I went down this gully, and then back up and around, aiming for the cairn

20

21

I was so glad I hadn’t decided to give up! The summit was in sight, and there were enough cairns leading the way so I didn’t need to do too much route finding.  Here’s the way I took to the summit

22

There was a rock gully to climb

23

And then I turned left (north) and did some fun rock climbing the last way to the summit. Well, it would have been fun if I hadn’t been frozen and if the wind would have stopped.  This part was exposed and I stayed low on the rocks to avoid the gusts of wind, worried they’d knock me off balance and I’d fall over the edge.

24

I finally knew I was on the summit when I found the summit register (which I never sign, but it’s nice to know they’re there)

25

It was far too cold for me to take off my gloves to set my camera up to take a good photo, and there honestly wasn’t much room to set it up, so I just took a selfie. I have no idea what time it was (I couldn’t pull out my cell phone to check) and sorry, but no video either (I take those on my cell phone as well).

26

I didn’t stay on the summit any longer than it took to take a few pictures. I returned the way I came

27

Back down the rocky gully, aiming for the cairn

28

29

Heading back was much quicker because I was sure of the correct way and had no problem locating cairns. I was in a hurry to thaw out.

30

Once back at the saddle I located the cairn that told me where to descend, and turned and headed back down to the lake(s)

31

32

33

And back down to the 4WD road

34

In the daylight I could see all the waterfalls were a bit icy. I completely understood:  It was cold, even without the wind (which hadn’t yet let up).

35

The campers I’d seen at the lake in the morning were gone, and their vehicle had crushed all the ice along the road as it drove out. I saw several modified vehicles on my way back:  probably 10 or more, all part of a caravan. I was hoping to see wildlife, but with all the vehicles I realized that wasn’t likely.  I didn’t see any hikers the entire day.  Here’s looking at the way back to the reservoir.

36

The wind never let up but it did get a bit warmer as the sun rose. I never took off my gloves.  It looks like it’s time to bring out my heavy-duty winter gear!  I started this hike at 4:30am and made it back to my truck at 11am, making this a 9.5 mile hike with 2810’ of elevation gain in 6.5 hours.

37

38

I was a little bummed it had taken me so long because the elevation gain was minimal, but I knew it was due to the cold and that bit of route finding on the ridge.  This peak all in all was much easier than I’d thought it would be, yet took me a bit longer than I’d thought to complete.  Despite the wind and cold, today was a fantastic day!

Deer Mountain A – 13,761

1

RT Length: 10.5 miles

Elevation Gain: 3737’

Immediately I knew something was wrong. It was still dark outside, but my alarm hadn’t gone off.  I threw back the covers and grabbed my phone:  it was 3:24am.  Drat!  If I were the kind of person to swear several choice words would have been uttered.  I had set my alarm correctly for 11:45pm, and wasn’t sure why it didn’t go off? I need a new phone because stuff like this keeps happening.

I’d wanted an extra early start today because I was meeting a friend to go Raft-packing tonight and wanted to get there with plenty of rafting in the sun time. Oh well.  I sent a quick text to my friend saying I’d be a little later than intended and was out of the house by 3:30am.

I made it to the North Halfmoon Creek Trailhead at 6:10am. Well, almost there.  Someone had put large rocks in the last ‘difficult’ area before the trailhead (most likely an owner whose vehicle shouldn’t have been out here in the first place because it didn’t have enough ground clearance).  In any event, I just got new tires yesterday and didn’t want to subject them to those pointy rocks (mentally grumbling because I wouldn’t have thought twice about this section if the rocks hadn’t been there).  So I made a 30-point turn and parked just below the trailhead on the side of the road.  When I came back another driver with a competent vehicle had done the same.  I put on my helmet and started on the trail at 6:30am.

2

3

As I got out of my truck it started raining. Luckily it didn’t last too long.  There was a 4Runner in the lot when I got there (the only other vehicle I saw all day).  The North Halfmoon Creek Trailhead has wonderful signage.

4

It was weird starting this hike in the daylight: I haven’t started a hike this late in a very, very long time. It made route-finding so much easier!  There were a bunch of small avalanche areas along the trail which had been cleared so they were easy to walk through.

5

The first part of the trail is very easy to follow

6

I continued straight at the Mt Massive turnoff

7

Through a small forested area

8

Up a large rocky area

9

And came to this junction. Here I went left, even though it’s ‘blocked off’.  I believe going the other way takes you to Mt Oklahoma.

10

Here the trail ends and the fun begins! I traveled west, crossed a small stream

11

Continued across an open area back into the trees

12

And crossed another stream

13

Back into the trees the ‘trail’ looks like this

14

I angled southwest down the mountainside, losing about 100’ in elevation. There were tons of game trails here, but not one that were consistent.

15

After losing about 100’ of elevation I came to a recent avalanche area. It hadn’t been cleared and there’s no straight path through the debris.  It started to snow.  At this point I was glad I’d started late because this wouldn’t have been fun to traverse in the dark.  Luckily it wasn’t too difficult in the light of day.  I just looked for the path of least resistance, crossed, and then headed down to North Halfmoon Creek.  The snow ended before I reached the creek.

16

17

When I made it to the creek I followed it to the end of the basin. At first I walked through the willows, but (obviously) this wasn’t ideal

18

After a few dozen yards I looked over at the creek, noticed the top of the rocks were dry and decided to just walk along the creek to the end of the basin. This ended up being a fabulous idea and saved me quite a bit of willow-time.

19

At the end of the basin the creek becomes a small trickle. Here I turned right (northwest) and headed up a grassy gully and then another, more rocky gully. The grassy gully was full of terribly mean-prickly plants.

20

Here the terrain became rockier, with loose talus and unstable rocks. At the top of the gully I turned left (west).

21

The goal from here is to gain the saddle. I took the solid line up (thinking it would be easier) and the dotted line down.  The dotted line down the gully was much easier.  If I were to do this again I’d take the dotted line both up and down the saddle.

22

At the saddle I turned left again. My goal now was to gain this point (which is a false summit).  Once again, with no trail I just headed towards the peak.  This is steeper than it looks, but still class 2

23

Until you get here, and then it becomes a class 3 chimney. There are several chimneys to choose from.  I went straight up the center.  It was a little loose, but there were plenty of hand/foot holds.

24

At the top of the class 3 chimney I still wasn’t there: I continued along this ridge.  The best option here is to stick to the right.

25

As you can probably tell by the photos, here’s where it started to get icy. What you can’t see is that it was quite windy as well.  I made it to the final ridge section and had a choice:  I could turn back now and attempt Deer Mountain A at another time, or be extra-super careful and continue on.  I kept going, but slowed down my pace so I could be extra careful where there was snow/ice.

26

This ridge is short but packs a punch (especially with wind, which there was). The boulders here are very large and unstable, with huge gaps between them you could fall through.  Also, there’s exposure.  I’d liken it to Halo Ridge but add larger drop spaces and tons of exposure.  I would not want to do this in winter where the snow would make invisible the huge gaps between the boulders.  Somewhere along this ridge the wind swept the paper I had made with instructions on how to attempt the final summit push out of my pocket.  Lovely.

27

Once across the ridge I came to the most difficult part of the climb. This is class 4, and took me a few attempts to figure out (I hadn’t quite memorized the instructions I’d just lost).  At first I started with the circled area, but about ¾ of the way up came to a place that felt way too committing to be class 4 (even for someone short like me) so I retreated and tried again.

28

I took another look behind the ridge and decided this was not the better option, as this side was much icier than the one I wanted to climb. I tried again in another area and this time was successful making it over the ridge.  I had to take off my mittens here to climb, and my fingers were becoming numb: I kept putting them on and then taking them off again to climb. Here’s the route I took.  This felt solid class 4.

29

30

Once on top of the ridge I wasn’t happy to see all the ice (it’s pretty much invisible in these photos, but it’s there). I once again committed myself to being extra careful as I mapped out the safest route.  This is the route I took (sometimes on my hands and knees on the rocks to avoid slipping)

31

32

From the top of this area it was a short walk to the summit

33

I summited at 10:20am

34

Deer Mountain A Summit:

The wind was still a steady 30-40mph at this point and I didn’t want to stay long because I was worried about my fingers. Here’s a look back at that ridge after the class 3 section.

35

Ok, time to head back. Here’s the route I took back to the class 4 section, aiming for a small notch in the ridge

36

37

Here’s what it looks like heading back down the class 4 area. You can see why I didn’t want to take the icy area up or down: it was flat, unclimable rock due to the ice

38

Back over the ridge with the large boulders

39

From here you can see the rest of the route back. Oh, and amazingly enough I spotted my instruction paper stuck under a rock.  It took some fancy footwork, but I retrieved it and, no longer needed, I put it in my pack.

40

Here’s looking down the class 3 chimney

41

And the class 2 section back down to the saddle

42

At the top of the gullies I aimed for the creek and headed out. This is where my fingers started to thaw.

43

I followed the creek most of the way

44

While following the creek, about halfway to the avalanche area I came across a male hiker, surprised to see anyone this far off trail. I asked him where he was headed (expecting him to say Deer Mountain).  “Mt. Oklahoma” he replied.  He’d never heard of Deer Mountain.  I wished him luck and was on my way.  I’d hiked on over a quarter of a mile before thinking much of it, but he’d passed the route I’d taken to summit Oklahoma about half a mile before reaching me. I know there are several ways to summit each mountain, and hoped he knew of a different route.  Otherwise, he was off track. I wished I’d had a way to let him know, but he also looked like a competent hiker and it was still early in the day with no chance of storms, so if he was off route he had time to figure that out.  I got a picture of his vehicle at the trailhead (the only other one there) just in case.

I made it back to the avalanche area, crossed the streams, and found the trail with no difficulties. The rest of the hike out was uneventful.

45

46

I started at 6:30am and ended at 1:30pm, making this a 10.5 miles hike with 3737’ in elevation gain in 7 hours.

49

48

And now to meet my friend for some early October rafting/camping along the Arkansas River!

Lightning Pyramid – 13,729 & Thunder Pyramid – 13,944

1

RT Length: 12 miles

Elevation Gain: 5062’

After summiting Vestal Peak I changed in my truck into new hiking clothes. I re-braided my hair, ate a packet of tuna and drove to Maroon Lake.  It rained the entire 5 hour drive there and I was seriously worried my hike in the morning would be in danger. Originally I’d planned on hiking, taking a day off to rest, and then hiking again on Sunday but the weather forecast for Sunday called for 80-90mph winds so I decided to alter my schedule a bit.  I was not impressed with the rain.  It was raining when I fell asleep in the cab of my truck but I thankfully I awoke to a clear, starry sky at 2:30am.

The parking lot was full of both hikers and photographers eager to get a glimpse of the fall colors. I debated going back to sleep for a few minutes but in the end decided I should probably get going.  I was on the trail at 3am.

I followed the trail to Crater Lake

2

And then followed the West Maroon Creek Trail until I’d made it 3.7 miles.

3

This trail is so much nicer to walk when there’s no snow! Route finding was negligible

4

After 3.7 miles I crossed the West Maroon Creek (which didn’t have much water)

5

And headed east through the willows

6

Until I reached the base of the slope to the first access gully. This was difficult to figure out in the dark: The last time I was here the willows were completely covered in snow and I just climbed right up, but today those willows were taller than I was.

7

8

At the top of this gully is another gully

9

And at the top of this gully (you guessed it) another gully

10

Now the rocky gullies started including areas of tundra

11

Now I was almost to the upper basin.

12

Once in the upper basin the sun started to rise and I had a good view of “Lightning Pyramid”. Traditionally you climb this peak as a couloir climb in the winter/spring, but obviously that wasn’t an option for me today and I’ve already been here in winter conditions:  I wanted summer.  I headed across the rocky basin, aiming for the couloir.

13

This next part in italics is personal and has no relevance on the trip report. Feel free to skip it if you’re just here for route information.

I’m going to summarize this as quickly as possible: I don’t consider myself to be an overly religious person.  I grew up in the church but no longer attend (please don’t invite me to your church: I have personal reasons for why I don’t go).  I do believe in God and find him more in the mountains than in a building surrounded by people.  Often when I hike I have conversations with God.  I do most of the talking, but surprisingly I started to feel him talking back (rarely, but it happened).  I’m going to be honest here:  If someone told me God spoke to them I’d think they were daft, so I totally understand if you think that of me, but I think what I’m going to say needs to be said (for me at least).  Also, once again, I’m not a ‘preachy’ person and will most likely never mention anything like this again in a trip report. 

For some reason I’m a ‘people-pleaser’. I have a need to be liked and I go out of my way to be friendly and helpful. I feel I need to be ‘perfect’. I don’t do well with rejection.  I’ve always been an avid hiker but started seriously tackling peaks after I got a divorce.  My ex had supervised visitation of the kids one day a week and on that day I’d go hiking.  After my 13th summit of Pikes Peak I met someone on the way down who asked me which other 14ers I’d done.  My response: “What’s a 14er?”

Obviously I was immediately hooked and after about 20 14ers I was hiking and talking to myself/God about how amazing Colorado and the mountains and hiking (etc) are and felt God speak back to me. He told me to hike all of the 14ers in Colorado solo.  This idea intrigued me:  I was both excited and scared.  I wasn’t sure I could do it.  Also, I didn’t really know why I should?

After hiking about 30 14ers solo I was sitting in a Girl Scout board meeting and Girl Scouts had just partnered with The North Face. We were brainstorming fundraising and marketing ideas and suddenly it all became clear:  I could be the first woman to solo all the 14ers!  Girl Scouts focuses on first women to do ‘stuff’.  We could market this jointly with The North Face, the girls would get exposure to outdoor experiences and(hopefully) some free gear.  It all seemed clear now:  This must be why I was doing this!  I felt I had purpose and direction. 

I was so excited when I summited all 58 14ers solo because I felt I was doing it for a cause. Anyone who follows the 14ers site knows what a disaster that turned out to be, and honestly I just wanted it all to go away. 

I kept hiking because I like to hike. On my first centennial after finishing the 14ers I felt God telling me to keep hiking the rest of the centennials solo and I balked.  Once again, I wasn’t sure I could do this (hello class 5?) but after mulling it over I was willing to give it a shot.  I knew I’d write up trip reports and post them to my website because that’s what I do, but he told me to keep posting to the 14ers site as well (I did not want to do this, but I did). 

If you were to ask me why I was hiking all of the centennials solo I’d tell you I didn’t know. I honestly didn’t know, but I also wouldn’t have told you it was because “God told me to” because then you’d think I was totally nuts.  But that was why I was doing it:  Because God told me to.

Then Thunder Pyramid happened. At first I was confused because I knew I’d summited, and then embarrassed, angry, and frustrated.  Why was this happening to me?  Not only were people commenting on the 14ers site, but they were going through my LinkedIn page and challenging my accomplishments, posting negative comments on my website, facebook, and Instagram (sorry David for ghosting you:  I honestly thought the feeling was mutual).  People unfriended me both online and in person.  They made up reasons to ‘prove’ I was lying and if they couldn’t find negative information they assumed or made it up. The dislike button was hit on my trip reports and I took it all very personally. 

The hardest part was just because they were loud didn’t mean they were right. I knew I wasn’t lying but I couldn’t change their minds.  I’m also sure they think their behavior was justified.  I think it bordered on harassment.  It was definitely bullying.   

So here I was, halfway to the summit of PT 13,722 and all of this was going through my head, in addition to the anti-climatic day I’d had yesterday when I’d finished hiking the centennials solo and didn’t ‘feel anything’. I was asking God why I just couldn’t get excited about finishing the centennials solo?  I didn’t want to post anything on the 14ers site because I didn’t want to go through the drama again.  I mean, I know I shouldn’t care what other people think about me…

That’s when it happened. As soon as those words went through my head everything stopped and suddenly it felt as if I was getting the biggest, warmest, most enveloping hug I’d ever had. Overwhelmed I broke down and started crying big crocodile tears, taking huge breaths in and out between sobs. 

That was it: I wasn’t hiking for a cause or to help others but because God wanted to teach me a lesson. He wanted me to realize it doesn’t matter what other people think.  He just chose to show me that lesson through something I love:  hiking. 

“Wow” I thought: “He had me hike all the centennials solo to teach me not to care what other people think”. A simple lesson we teach out kids and that everyone knows but that I have difficulty accepting.  This moment was so powerful I got out the altimeter/compass on my phone and took a picture of where it happened.  I thought about just saying it was at 12K but ultimately figured that diminished the experience. 

48

I wiped away my tears, looked at the mountain in front of me and thought to myself “So, if it doesn’t matter what others think of you why don’t you just turn back and go home?”

The answer? “Because I Love to hike” 

With light shoulders and a renewed purpose I started off again. It took about 10 steps before another thought overcame me: “Why did God think I needed to learn this lesson?  What is he preparing me for where I need to be ok with not caring what other people think about me?”  (I squinted and closed my eyes, crossed my fingers and repeated:  Please not politics, please not politics, please not politics).

Ok, moving on…

I trudged up the talus towards the couloir. This talus was nasty and each step hurt my ankle (not sure what I did to it yesterday, but it felt bruised).  I made it to the base of the couloir and had a decision to make:  How was I going to ascend this thing?  It looked like it contained (more) nasty scree, so I decided to take the rocky rib to the right.  This is the route I took:

14

I need to stress this might not have been the safest way to ascend. The rock was extremely loose and I had to check and re-check hand and foot placement with every step.  It was sustained class 4 bouldering for a good 1000’ of elevation.  It was slow going, but I love bouldering and that’s just what this was.

15

I stayed closely to the right of the couloir for as long as I could, but eventually I had to enter the couloir for the last part of the climb. This area was very loose and I’d suggest you stay as close to the rib on the right as possible.

16

Here’s looking back down the rock rib/couloir and into the basin

17

I made it to the top of the couloir and turned right (south), carefully climbing up the ridge

18

This was actually much easier than it looks (and easier than the climb to this point). I made it to the top of the ridge and saw an easy path to the summit of “Lightning Pyramid”

19

I summited at 10:20am

20

Lightning Pyramid summit:

Ok, now time to head over to my old friend, “Thunder Pyramid”. I couldn’t find a lot of specific information about this traverse, so I had a lot of figuring out to do.  I’d heard heading straight up and over the ridge wasn’t fun, and it in fact didn’t look like much fun, so I decided to scope out another way.

I headed back down to the saddle

21

Once there instead of hiking up the ridge I decided to stay level with the saddle and hike across the right (east) side of the mountain. This was surprisingly easy

22

Here’s looking back at “Lightning Pyramid”

23

I stayed at the same level as the saddle until I came to a gully. This area took some careful footwork but little climbing.  It may have risen to class 3, but realistically was class 2

24

Next I came to a gully. This gully was very loose and I kept to the left side for stability, holding onto rocks and handholds in the boulders where available.  This felt like class 3

25

At the top of this gully was another gully. I just aimed for the snow.

26

27

At the top of this gully is where the route picks up with the standard route up “Thunder Pyramid”. I turned right (north) and ascended the ridge

28

The top of the ridge wasn’t the summit however. I took the solid route up, the dotted route down.  If I were to do this again I’d take the dotted route both ways because it doesn’t lose elevation.

29

I summited “Thunder Pyramid” at 12:15pm. It took me just under 2 hours from “Lightning Pyramid”. Unfortunately, most of the pictures I got at the summit I realized were blurry when I got home (still figuring this new camera out)

30

But I did get one “ok” picture

31

Thunder Pyramid summit:

Up until this point doubt had crept into my mind: maybe what others were saying was true and I hadn’t really summited “Thunder Pyramid” last time. Maybe I’d ended up close but not exactly there?  I’d been in a hurry because I’d been having a Raynaud’s attack and I didn’t take my normal number of summit photos/videos (I don’t usually get videos in winter conditions because it’s a death sentence for me to take off my gloves to operate the camera).  So today I walked all over that summit, looked around and confirmed what I already knew:  Yes, I had indeed summited the last time I was here.  Also, the weather today was absolutely perfect!  Those 50mph winds never materialized.

I decided to head back down the way most people hike up. I made my way back to the ridge and down the gully

32

Check it out! Now I know why it’s called the “White Gully” (Last time everything was white)

33

The descent down “Thunder Pyramid” was no more fun than the ascent up “Lightning Pyramid”, and considering both the gullies and couloir I’d say it’s probably easier to do Thunder first and then traverse over to Lightning. Also, I know this is usually done as a snow climb, but I felt much safer on the scree and talus than I had on the snow.  When it was covered in snow I felt like if I slipped I’d fall and never stop sliding.  Here I knew I could slip but I wouldn’t fall very far.  This climb wasn’t ‘easy’ but it definitely wasn’t as difficult as I’d anticipated.

Hiking down was like déjà-vu (as it should have been)

34

35

I made it almost to the bottom of the gully and turned left

36

And descended the slopes into the basin

37

38

Also, I found a shell

39

I made my way back to the West Maroon Creek Trail and hiked out, loving the fall colors in the daylight.

40

41

42

There were a ton of people around Maroon Lake when I got there, all enjoying the fall colors. The base of the lake resembles the Snowmass log jam

43

While the 50mph winds never materialized on the summit(s) today it was really very windy at the lake. I decided to head to my truck to clean up and then watch the sunset.  There was a line of cars waiting for a parking spot and I had to tell no less than 50 of them I wasn’t leaving.  None of them took it well, but it had been a long day, and I figured I’d earned watching a good sunset.

I made it back to my truck at 5:15pm, making this a 12 mile hike/climb with 5062’ in elevation gain in 14 hours.

44

45

I enjoyed the sunset

46

And as soon as it was over I hopped in my truck to drive home. There was a line of vehicles waiting for a parking spot that lasted for over half a mile down the road.  The shuttle had stopped for the day and I drove 2 people down to the bus stop because they’d missed the last bus.  They were a nice couple from Georgia who were happy not to have to walk those 13 miles back to their hotel.  I hope they enjoy Colorado as much as I do!

47

Columbia Point – 13,986, “Obstruction Peak” – 13,812, & “Kitty Kat Carson” 13,980

1

RT Length – 14.5 miles

Elevation Gain – 5304’

It’s officially High School Football season which means late Thursday/Friday night games. Luckily for me my daughter performs at half time and can drive herself home so I was able to get in 2 hours of sleep before waking up at midnight to drive to the trailhead.

And what a drive it was! This is my 6th or 7th time at the South Colony Lakes Trailhead, and the last 3 miles were the worst I’ve ever seen them.  The drainpipe was actually one of the easier parts.  Because of the rough road I drove a little slower than I normally would and wasn’t on the trail until 2:30am.  (Sorry, these pictures are of the easier areas, as I needed both hands on the wheel to navigate the tougher ones).

2

One side of the parking lot was completely full: I was the first to park on the opposite side.

3

I followed the South Colony Lakes trail, which starts at the west end of the parking area

4

There’s a register to sign and then immediately I crossed a bridge and headed left (west) along an old 4WD road that’s no longer maintained.

5

There were a few mud puddles here and some running water, but nothing that actually got my boots wet.

6

After hiking for 2.6 miles I came to this junction and went right to follow the Humboldt Peak / South Colony Trail.

7

Here the road ends and it actually becomes a trail, crossing a few minor bridges and a small boulder area

8

before entering the South Colony Lakes Basin. Here the willows were overgrown and made the trail ‘fun’ to follow at night (spiderwebs).

9

In the daylight it’s easy to see where you’re headed: Follow the well defined Humboldt Trail to the saddle of PT 13,290 and Humboldt

10

11

Making it to the saddle was straightforward, but here the trail ended. I turned west (left)and continued on towards point 13,290

12

I followed the ridge to the top of the point

13

From here you can see the rest of the route up to “Obstruction Peak”, but I couldn’t because it was still dark

14

This ridge is NOT fun to cross in the dark. I wasn’t able to see much of what was ahead of me, which made route finding tricky.  I also couldn’t tell how much exposure there was, which was positive at times.  I mentally wished for my helmet and just stuck to the ridge, doing my best to anticipate the proper route and backtracking and trying again when necessary.  On my way back I could clearly see a class 2+ path, but in the dark it was slow going.

15

Here’s the ridge

16

After crossing the ridge I crossed a relatively flat area known as “Bears Playground” and headed northwest up towards “Obstruction Peak” first over tundra and then rocky areas

17

18

It was actually difficult to tell exactly where the summit of “Obstruction Peak” was so I decided to make it to the ridge early and just walk across the entire ridge. I’m pretty sure the true summit is at the most westerly point.

19

I summited at 6:45am

20

“Obstruction Peak”:

As I turned and looked east I could see the sunrise

21

From the summit of “Obstruction Peak” the path to “Kitty Kat Carson” and “Colombia Point” was clear

22

I hiked down “Obstruction Peak” towards “Kitty Kat Carson”. The ridge down was rocky but stable

23

Once at the saddle “Kitty Kat Carson” looked imposing, but wasn’t too much of a challenge. There were a lot of cairns here, especially towards the top, which made them useless.  I stayed to the right for most of the ridge, and then headed left to summit

24

The terrain here was classic Crestone: lots of steep, grippy rock

25

I summited “Kitty Kat Carson” at 7:28am

26

“Kitty Kat Carson”:

It took me less than 10 minutes to traverse from “Kitty Kat Carson” over to Columbia Point, losing about 50’ in elevation and then regaining it back. This was all class 2+ climbing

27

I summited Columbia Point at 7:39am

28

Columbia Point:

There’s a plaque at the summit commemorating the crew of the shuttle Columbia

29

Here’s looking back on “Kitty Kat Carson”

30

Time to head back. Here’s the route towards “Kitty Kat Carson”

31

And down the saddle and back up to “Obstruction Peak”

32

33

Once at “Obstruction Peak” I made my way back down Bears Playground and over to the ridge. That had been quite a time in the dark!

34

I was so glad to be able to see the route in the daylight. I didn’t need to stick to the ridge the entire time, and mainly stuck to the left/north when I wasn’t on top of the ridge.  I found this was a rather quick traverse when I could see what was in front of me.

35

36

What took longer than I’d remembered was the hike down from Point 13290 and back to the Humboldt Saddle

37

Here’s the route to the South Colony Lakes area

38

The hike back was rather uneventful. I saw over a dozen hikers and was reminded how popular the 14er trails are.  I stopped and talked to several people intent on Humboldt, and even saw a few friends intent on some of the other 14ers.  I was in a rush though:  I had to be home by 2pm to take my daughter camping, which meant I had to make it back to the trailhead no later than 11:35am.  It was a beautiful day and I wasn’t carrying a full pack so I was able to hike pretty quickly.  I made it to the bridge crossing and saw some raspberries.

39

I decided to try one: it was sour, and unfortunately not as good as the ones from Purgatory, so I only ate one and left the rest for woodland creatures to enjoy.  I made it back to the trailhead at 11:30am, making this a 14.5 mile hike with 5304’ in elevation gain in just under 9 hours.  The best part (besides making it home at 1:58pm)?  No mosquitoes!!!

40

41

Teakettle – 13,815, “Coffeepot” – 13,568 & Potosi Peak 13,793


1

RT Length: 6 miles (seems fake but I’ll take it)

Elevation Gain: 4168’

This climb was several years in the making. Knowing if I wanted to complete the Centennials (etc.) I’d need to have rock climbing skills I started going to a rock climbing gym once a week a few years ago.  While I enjoyed the climbing and the skills I learned helped immensely with scrambling on class 3+ peaks, I didn’t get a lot of experience with actually setting up/taking down ropes and anchors.

I bought books on mountaineering and watched YouTube videos, but there isn’t a lot of information out there on self-belaying/rappelling (I wonder why?). So I turned to friends I knew who rock climbed and picked their brains.  A couple even offered to take me out and show me the ropes.  I took them up on their offers, and by mid-summer this year I felt confident enough to go out and try this peak on my own.  Please note, I’d already gone out dozens of times and set up anchors and rappelled locally, this was just the first time I was going to do so solo and, well, without anyone to help if needed.

I arrived at the Yankee Boy Basin restroom area at 3:30am and was on the trail by 3:45am.

2

I put my helmet on before I left the truck, and my pack was curiously not as heavy as I’d anticipated. I considered this my first win of the day.  I walked about 1/10 of a mile down the road, realized I’d left my DSLR in the front seat and quickly turned around to retrieve it.  I’d been a little worried about my bruised tailbone from last week, and while I have a good 5 inch bruise on my backside my pack wasn’t bothering it as I hiked.  Second win of the day!

Camera retrieved I hiked northwest along the dirt road, crossing a large mud puddle and turning right.

3

Note: I chose this route because on a topo map it looked easier.  After completing the hike I have my doubts, and believe this is the correct entry point:

4

The elevation gain begins immediately and doesn’t quit. I headed northwest up a steep grassy slope, enjoying the meteor shower and a herd of either goats of sheep watching my ascent (in the dark I couldn’t tell which they were, but could see them watching me).

The grassy slope turned to large rocks and talus as I entered a basin.

5

In the moonlight I could see my goal: this steep scree section at the base of the black gully. I’ve lightened these pictures up for detail, but this is where I was headed.

6

The ascent was a grueling climb over steep scree, made marginally easier when I put on my microspikes. The worst part was getting all those small rocks inside my shoes.  I couldn’t help but think I should be wearing gaiters to keep the rocks out.  Don’t they make something for this for runners so they don’t get rocks in their shoes?  Anyway, the terrain was not ideal in the least:  some of the worst scree/talus/etc.  I’ve ever encountered.  At times I was literally grasping the dirt for traction with my hands.

7

I exited climbers left out of the black gully. The black gully is class 2+ climbing, and much easier than the scree/talus I encountered before the gully.  I was pleasantly surprised with how easy it was to climb.

8

Here’s a look back down the black gully. You can see “Coffeepot” in the upper left corner

9

Here’s a look at the route from the top of the black gully

10

I followed the rock rib around until I came to another gully, climbed up, and turned left

11

From here there’s some rock scrambling. I kept heading northwest towards the summit tower

12

Ok, easy part over. Now it was time to get out my gear and mentally prepare for this climb.  Looking at the route it didn’t look that difficult.  I felt confident I could climb both up and down without needing ropes (ha!).  I changed into my rock climbing shoes, put on my harness just so I wouldn’t need to at the top, and left my trekking pole and hiking boots at the base of the climb: no need to carry unnecessary equipment.

Here’s the route up

13

The first half of this climb was indeed straightforward, but as soon as I crossed over to the ‘actual’ climb things got a little more hairy and I quickly came to the realization I was not going to be able to downclimb if I continued, and if I were to go any further, I would need to fully commit. It was either downclimb now or I was doing this all the way.  My legs started to shake so I took a steadying breath and reminded myself I’d trained for this and it was within my abilities.  I looked up and steadily climbed to the top, being careful with each hand/foothold I chose.  I couldn’t help thinking to myself (over and over again) how much easier this would have been if I’d been a few inches taller.  I’m happy with being 5’4”, but at times like this being 5’6”+ definitely would have its advantages.

I made it to the top and looked back down on what I’d done. Woot!  I’d made it!  I dropped my gear and tried to get a few pictures.  This wasn’t working, mainly because the summit just wasn’t big enough.  So, selfies it is again.  I did get a video and a few pictures to prove I’d summited (you’d be surprised how much some other people care…).  I summited Teakettle Mountain at 7:15am

14

Summit Video:

Oh, and I know that’s not a teacup but an espresso cup. I don’t own any teacups and I was planning on climbing “Coffeepot” today as well, so I compromised (also, this is Teakettle, not Teacup… and btw I do love all those teacup photos, not throwing shade here, just rambling).  Mississippi is a nod to family.  Also, there may or may not be whiskey in that cup.  Ok, there was, but only a sip.  I still had to make it back down but still felt a bit like reveling:  I’d climbed up without a rope!

15

Now for the true test: setting up an anchor and rappelling back down.  There were several anchors already set up, and while I’d love to trust someone else’s’ anchor (let’s face it, the odds are in their favor here) I didn’t know how long they had been there, so I decided to set my own anchor up and attach it to the ones already in place.

I was worried I’d forget something. Not that I didn’t know what I was doing, but I was at altitude, hadn’t had any food/water besides a sip of whiskey (personal choice on 99% of my hikes to prevent nausea) and had done a lot of physical activity and I didn’t want to mess up here, so I checked and re-checked everything twice and then a third time and made sure to secure my sling(s) before even beginning. Luckily there was a stable rock behind the anchor for me to use during set-up as well.

Anchor all set up I uncoiled my rope, attached it to the anchor, and threw it in the position I wanted for a rappel.

16

OK, moment of truth. I put back on all my gear, attached the belay device, leaned back and everything held, so I unhooked my slings, took a deep breath, and leaned back.  It all went smoothly and faster than I’d anticipated.  So much so that I stopped about 10 feet from the ground and played with the side of the wall, pushing my feet off the rocks and bouncing back and forth for a bit before finishing the rappel.  Yes, I was pretty proud of myself when my feet hit the ground safely, and even more so after I’d retrieved and recoiled my rope.

17

After changing back into my hiking shoes and putting all my gear away I figured it was a good time to celebrate: I actually took a full shot of whiskey (now that the hard part was over) and decided to play a bit with the rock formation.  It would have been really cool to get one of those pictures with me in the hole, but there was no way I could set up my camera and make it back into position in time, so I settled for one of my shadowselfies.

18

I spent a lot more time here than I usually would at a ‘summit’ but I was celebrating: This climb had been several years in the making, I’d put a lot of energy and effort into all this climb entailed, and (with the training help of friends) I’d successfully summited solo.  I was going to celebrate!!!

After a few minutes of fun I turned and headed back towards the Black Gully. From the Black Gully here’s the look at the route over to “Coffeepot” (and the route I would have taken over to the Black Gully had I not taken the scree route up)

19

Here’s a look in the daylight back down the scree route up

20

From the bench below “Coffeepot” here’s a look back at the Black Gully

21

From here I turned left (east) and decided to check out “Coffeepot”. It doesn’t much look like a coffeepot from this angle, does it?  It’s basically a quick class 3 climb over some rocks, and a short class 5.0-5.2 climb (per Roach) up a chimney.

22

I made it about ¼ of the way up the chimney and realized I didn’t fit with my backpack on, so I retreated, set down my pack at the top of the class 3 part, and tried again sans gear. It was much easier this time and reminded me of when I was younger and would climb through a tree hollowed out by lightning.  It was a tight fit but I felt very secure as I twisted around and topped out at the top of “Coffeepot”.  I summited “Coffeepot” at 8:45am

23

Video:

Back down was a bit tricky because I had to go over an overhang to get back into the chimney, but in today’s conditions I felt in no way was a rope necessary (I did hold onto the anchor a bit as I was steadying myself in the beginning, but it wasn’t necessary).

24

It you feel comfortable at class 4 climbing and are considering trying “Coffeepot” I’d say go for it. Here’s a look at the climbing side of “Coffeepot”

25

From here I could see Potosi Peak, my next objective.

26

I was feeling pretty good at this point, having completed two Class 5 climbs. However, this peak actually proved to be difficult because there were some unexpected obstacles in the way.  Here’s the initial route down and back up the ridge, over to the corner of the cliffs

27

From the Coffeepot/Potosi saddle up the ridge was full of very loose talus. I’d encourage you to keep your helmet on for the entire hike, even though some of this stuff is labeled at 2+

28

The traverse around to the corner of Potosi took much longer than anticipated, but was straightforward.

29

At the corner I turned left and headed northeast up and over some more loose talus and rocks

30

And around the south side of Potosi until I came to a gully. This area was well cairned until the gully.

31

As I rounded the corner and came to the gully I was surprised to find a large mass of snow blocking the route up. This snow was at least 4 feet thick, 30 feet across, and 50 feet vertical, turning the class 2+ gully into a class 3 climb over large, unstable and loose rocks to get around the soft snow.

32

Here’s looking back down on the snow filled gully area

33

After the snow there was more class 3 climbing to get to the top of the gully. To be fair, it looked like there had been quite a bit of recent rockfall, including several large boulders.

34

About 100 feet before the top of the gully I headed up and over this rocky area. The rock is stable but covered in a lot of small rocks, making it slippery to climb.  There were cairns here as well.

35

Almost done, I headed up through more loose talus, through a notch, and turned left for the short push to the summit

36

There was a bit of snow here, surrounded by squishy mud: the kind that will suck your shoes off if your foot settles on it for any length of time, so I quickly traversed this area to the summit

37

I summited Potosi Peak at 11:05am

38

Summit Video:

The summit was relatively flat

39

I pulled out my phone and checked my tracker. It said I’d gone 3.9 miles so far today and that seemed like a lie.  I thought to myself I’d need to delete and re-download the app because last week it had stopped on me unexpectedly during my last hike and now it wasn’t tracking accurately… it must need a reboot.

I quickly headed back down the gully, around the side of Potosi, and back towards the Potosi/Coffeepot saddle. This is where I made my first mistake:  I had the option of climbing back up to Coffeepot and taking the traditional way down, or going straight down from the Potosi/Coffeepot Gully.  I chose the gully (I’d advise you to instead head back up to “Coffeepot” and then down).

40

In any event, I made it to the saddle and turned to head down the gully, aiming for the most stable sections of scree, navigating between rock formations

41

Here’s a look back up at the decent route I took from the saddle

42

When I got to the base of the rock formations I looked ahead and could tell I did not want to continue straight: The gully turned into a waterfall and I could see snow at the base.  It did not look safe.  (Solid line).  That was ok though because I had beta from a friend telling me I could just traverse over the hillside and I’d eventually run into the trail that led up “Coffeepot” (dotted line).  I figured nothing could be worse than the talus on the ascent, right?

43

Here’s what I was trying to avoid

44

Let me tell you, this beta was FALSE! Even though it looks like you can traverse over, you cannot.  Well, I did, but went through a lot of very sketchy terrain.  Visually it looks like you can cross on tundra the entire way but there are rock gullies you can’t see from here, and in fact can’t see until you’re right up on them.  Yes, I checked beforehand it looked like it went on a topo, but on the ground it wasn’t working. There were gullies everywhere that were extremely difficult to cross.  Every time I made it over one I’d encounter another.  I didn’t even feel comfortable stopping to take pictures.  It was frustrating because I could clearly see where I needed to be, I just couldn’t get there. Please don’t take this way. It looks like it goes, and maybe it does in winter, but it wasn’t safe. My advice is to skip this decent route all together and hike back up to “Coffeepot” and then down.  It took me a lot longer than it should have to descend, and there were many times I almost turned around and retraced my steps back up to the saddle (which I was very close to doing before figuring out the route). Oh, and there was graupel involved.  I was ecstatic when I finally did link up to the ascent route and made my way down to the parking lot.

45

Here’s a look from the road at the route I don’t advise you to take

46

I made it back at 3pm, making this a 6 mile hike/climb with 4168’ in elevation gain in just over 11 hours. And yes, my tracker was correct (it just felt like so much longer due to all the elevation gain).

47

48

All in all, I considered today a great success: I’d summited Teakettle solo, tagged “Coffeepot” and Potosi, and learned a lot about trusting someone else’s’ beta.  I drove the 6 hours home, took a bath, and then took my daughters out to a late dinner to celebrate my oldest being home from drum corps and my youngest completing her first week as an upperclassman.

Taylor Mountain A – 13,651

Taylor Mountain A – 13,651

1

RT Length – 10 miles

Elevation Gain – 4017’

I’ve been listening to a lot of Taylor this week, so it was only fitting I chose to hike Taylor Mountain A today.  I made it to the snowmobile area (lower trailhead) around 3am, and decided to park here.  There was one other vehicle when I arrived, and 7 when I left.  This area can hold about 10 vehicles if everyone parks nicely.  Be sure to park behind the red and white signs.

2

One of the deciding factors for parking here was the sign indicating the trailhead was only 1 mile away. This was only supposed to be a 7 mile hike, so I welcomed the added 2 miles distance.  Note:  The trailhead is actually 1.4 miles up this road, which isn’t a big deal unless you’re hiking and worried you ‘missed’ the turnoff in the dark.

3

The trail started off dry-easy-4WD, and stayed that way until I made it to the Boss Lake Trailhead. I could have easily driven my Tundra here.

4

About ½ a mile before the Boss Lake trailhead there was avy debris that had been cleared just enough to let a vehicle through

5

From here the road got a little muddy, but it wasn’t something that would stop a 4WD vehicle from making it to the trailhead.

6

I was very excited when I made it to the upper trailhead (I hadn’t past it in the dark!). There was a little bit of snow here, and no vehicles parked.  There was room for about 4 vehicles total.

7

I followed the 230 for another quarter mile or so, realized I’d missed the turnoff to the 230C in the dark, and turned around. The turnoff was about 1/10 of a mile away from the trailhead.

8

The road became increasingly rockier but was still dry

9

On my way back I took a picture of the turnoff to 230C. It’s on the right side of the road. The intersection is easy to see in the light, but easy to miss in the dark, and as you can tell, the signage is well off the road (20 feet down 230C after the turn).

10

This is where the road really started to get muddy

11

There were tire tracks from an ambitious off road driver all the way to about 10,880’.

12

I started needing snowshoes around 11,000’, and didn’t see any other tracks in the snow

13

The road was easy to follow until it ended at the cabin area, and from here to treeline I was breaking trail. I turned right at the last cabin and navigated my way northwest through the trees, keeping the creek to my left and hugging the mountainside to the right.

14

15

I never came to a meadow, but this is most likely due to a recent (small) avalanche in the area. I just followed the avy debris to the bottom of a small basin

16

And followed the small gully to the top. The snow here was well consolidated, and even a bit icy.

17

At the top of the small gully I turned right

18

And looked for a trail that hugged the mountainside…

19

This was more difficult than it sounds. There wasn’t actually a defined trail.  Well, maybe there was one 50 or 60 years ago, but I’d venture to guess this ‘trail’ hasn’t been use more than a handful of times recently.  It’s more of a goat trail, completely overgrown with tundra.  I took off my snowshoes here and didn’t need them until I made it back to this point.

20

Can you see the trail? Here’s a clue, go this way, under the rock and up the hillside

21

22

Eventually you’ll reach the ridge and turn left to ascend Taylor’s long ridge

23

I made it here just as the sun was beginning to rise. I got a nice view for a minute, but the sun quickly hid behind clouds for most of the rest of the morning

24

The rest of the route up Taylor Mountain A is a straightforward hike up the ridge.

25

I passed several neat mining sites on the way up

26

The terrain got increasingly rockier, but nothing too difficult.

27

I was actually hoping to make this hike a double summit and attempt Mt Aetna as well. However, I didn’t have any good beta on the ridge below Mt Aetna towards Taylor Mountain.  I knew it usually holds snow, but I’d been hoping the ridge was clear enough to trek without snow on part of the ridge.  Worried the snow would soften up too much for me to be able to climb Mt Aetna, I decided to check out the conditions there before summiting Taylor.  I headed left, to towards the Aetna/Taylor Saddle

28

29

I made it to the ridge, and even before walking all the way to the end became disappointed: the wind had held at a steady 20-25mph all morning, but on this ridge I kept getting knocked down.  The wind here was most likely well above 50mph, and while the route up to Mt Aetna looked to be in great climbing condition, I didn’t feel comfortable crossing the ridge in all this wind.  I wasn’t entirely sure I could do it before the sun warmed up the snow either.

30

So I turned around and looked at the path back to Taylor Mountain.

31

This didn’t look too difficult, and indeed, it wasn’t. A bit rocky, and a few of the rocks were loose, but they weren’t going to tumble down below me or cause a rockslide.  The most they could do is put me off balance.  I navigated the rocks along the ridge

32

Stopping in the middle to take a picture of the route through the avalanche area to the basin and up the ridge

33

I summited at 7am

34

Summit Video

Almost immediately the sun came out from behind a cloud, and I was pleased with my decision not to attempt a summit of Mt Aetna today, guessing I’d only be making it to the snow now as the sun rose.

35

I turned to head back down Taylor’s South Slope

36

Stopping for a little bit in the mining area to take some more photos

37

Here’s a picture of the ridge between Aetna and Taylor

38

I made it to the ridge, turned right, found the old miner’s trail, and followed it back down into the basin, humming as I hiked

39

I followed my earlier snowshoe tracks through the avalanche area, down through the trees, and back to the trail, where I was able to see remnants of old cabins in the daylight I hadn’t seen in the dark.

40

I made it back to my truck at around 10am, making this a 10 mile hike with 4017’ in elevation gain in just under 6.5 hours.

41

All in all, today was a fabulous day! Now to drive home and take my daughter to the movies before she heads off to camp for a week.

Bull Hill A – 13,758

1

RT Length: 7 miles

Elevation Gain: 3775’

I picked Bull Hill because I needed something easy for today so I could be home by noon to meet a friend. The weather forecast was perfect (no wind, 50s at the summit) and I was tired from Friday’s climb but didn’t want to waste a great opportunity to get out and hike.

This was my third attempt at Bull Hill this year. The first time I got turned around before making it to the trailhead due to unexpected heavy falling snow and a road closure.  The second time I had no problem making it to the trailhead, but even after a hard freeze I was postholing up to my waist and couldn’t find the trail.  I ended up turning around shortly after the creek crossing.  Today I learned what a great choice that had been!

The trailhead is easy to get to but difficult to find. It’s located at exactly 12.5 miles down the 82 from Granite.  Turn right and there’s a small parking lot that will hold 4 cars if you all play nice.

2

I started at 4am. From here walk about 10 yards and turn north on an unmarked trail.

3

This trail is super easy to follow, as it’s an old 4WD road. There’s quickly a stream to cross that gave me some pause in the dark.  I couldn’t tell how deep it was and it seemed to be flowing pretty fast.  I walked up and down a bit, looking for a better area to cross, but this was it.

4

I decided I was wasting too much time on this: I had on winter climbing boots, so I decided to just walk across the stream.  I started out the hike with wet feet but they quickly dried.  The trail followed the stream, and here was where the “fun” began

5

And by fun I mean postholing. This was by far the worst experience I’ve ever had postholing.  Every step I took on snow for about 2.5 miles I postholed.  Over and over and over again.  I knew this was a possibility going into this hike (it had happened to me last time, even with a hard freeze) and I just gritted my teeth and continued on, sinking to my knees with every step.  Yes, I was wearing snowshoes, which helped, but they weren’t needed 100% of the time.

6

They were needed just enough to make taking them off not worth it

7

I followed the ill defined (due to the snow) trail to a gully, and took switchbacks up the south ridge. The switchbacks seemed unnecessary.

OK, so postholing isn’t fun, and I was getting tired of it. I came to an unexpected avalanche (although this year they seem to be the norm) and considered what to do?

8

9

It looked like this area went straight up the slope, but I wasn’t entirely sure the path was safe, so I continued on for another few switchbacks, the snow getting deeper and the postholing getting more aggressive as I went.

10

I switchbacked over to the gully once again and took another look.

11

This time it looked like it went all the way to the mine, and the snow in the gully was very consolidated. It didn’t take me long to pick consolidated-snow-gully over postholing-switchbacks.  Yes, this was the way to go!  I turned to look back over my shoulder and thought this was a cool view of La Plata and Ellingwood Ridge

12

I took the gully until it met up again with the road below the mine. The road here was covered in snow, but not a lot of the surrounding terrain had snow.

13

I stopped for a bit at the mine to rest. My quads were killing me! That type of postholing had been the 4 letter word type of postholing.  I was not looking forward to a repeat of that on my way down.  After applying sunscreen (yes, I did get sunburned on Friday’s climb of Thunder Pyramid) I took a look at my next step:  To gain the ridge in front of me. I decided it was best to keep my snowshoes on and looked for a line that would get me to the ridge

14

There was just one rocky area to climb over

15

And by looking left I could see the rest of the route before me

16

This was by far the easiest part of the entire day. The slope was gentle and had enough snow for me to keep my snowshoes on.

17

The only downside was a false summit that took me by surprise, but it was close to the actual summit so I didn’t mind too much.

18

I summited at 7:45am

19

20

Summit Video:

I was amazed at how calm everything was! There wasn’t any wind, which was amazing.  This is the first summit this year I haven’t needed to wear snow clothes to hike, but where there was still a ton of snow!

21

I turned to head back down, making sure to stay right (the ridge to the left goes the wrong way and has a massive cornice, but they look similar, so stay right)

22

23

Halfway down the slope I made a new friend! Ptarmigans have great camouflage.

24

From the ridge here’s a look back down at the mine and the route I took back to the gully

25

There was a busy marmot running to and from its den

26

I decided to have a little fun at the Last Chance Mine, just because I could and I knew I had postholing to look forward to (ok, I was stalling)

27

28

Doesn’t it look like a lot of fun?

29

I again followed the snow covered road back to the gully

30

And hiked back down to where I’d entered the gully earlier

31

I briefly considered taking the gully all the way back down to the stream, but wasn’t sure if it went the entire way. I found out it didn’t, so if you plan on taking the gully instead of the switchbacks you need to wait until the last set (see map)

32

33

The postholing was actually a little better on the way down because I could re-step in my previously made postholes, which meant more stability. The creek crossing wasn’t too bad in the daylight.  My feet got wet again but I was close to my truck and warm socks so I didn’t mind.

34

I made it back to my truck at 9:30am, making this a 7 mile hike in 5.5 hours: I blame it on the excessive postholing and the Last Change Mine.  You should be able to complete this hike in much faster time.

35

Relive:


Square Top Mountain A – 13,799

1

RT Length:

Elevation Gain: 3252

I’m going to summarize, but if you’re interested in details you can read the entire story here

After yesterday’s summit I drove 4 hours to the next Trailhead, slept, woke up at 1:30am to 3 inches of snow, snowshoed for 3 miles, postholing up to my knees the entire way, came across an avalanche and crossed it, came to a second one that was impassable in the dark and was forced to turn back. I postholed 3 miles back, got back to my truck while it was still dark and it wouldn’t start, so I scraped 3 inches of snow off the hood, lifted it, fiddled with the battery and was on my way to the next trailhead when I saw a sign for Hanging Lake. I decided to turn my day around and check off an item on my bucket list at the same time! Now: off to my next adventure!

I arrived at the Guanella Pass Campground to a full parking area at 11am. I noticed a group ready to leave, so I waited around and snagged their parking spot when they left.  I was hungry from this morning, so I quickly boiled some water and prepped a Mountain House meal.  While I waited for it to cook I pulled up the weather report I’d saved from earlier in the morning (when I had reception at a truck stop down the road).  Wow.  The forecast had changed quite a bit in the two days I’d been mountaineering.  The weather for tomorrow was now very similar to the weather right now, except 20 degrees cooler.

I took a bite of the meal while I considered what to do. (Yuck! At this point I was forcing myself to eat, but this was really bad.  It tasted… old).  It was 11am, and while I’d already done 10 miles and 3000’ of elevation gain today and another 6 miles and 3600’ of elevation gain yesterday, I was feeling pretty good.

OK, so looking at the forecast I can either head out now while I’m tired but the weather’s warm, or try to get some sleep (I don’t have much luck of that at trailheads) and try tomorrow after I’ve “rested”. But it’ll be cold and windy tomorrow.  Both days had 44mph winds.  I took another bite (disgusting!) and threw the meal away.  Those things are nasty!

I made the obvious choice: I was the last one on the trail at 11:15am.  I figured I had a 50/50 shot at the summit, but I’d make that choice when I made it to the upper trailhead and could see the conditions/weather first hand.  The road was covered in many feet of snow and since it was late in the afternoon I needed snowshoes immediately.  I didn’t take them off the entire hike.

2

3

The views of Bierstadt, the Sawtooth, and Evans were beautiful, dusted with snow

4

It wasn’t lost on me I was the only one hiking up the road, while I saw at least a dozen hikers on their way down, finished with their hikes (presumably of Bierstadt). Check out the snow in the parking area!

5

I followed a hikers trail to the Bierstadt trailhead, then crossed the road and found the trailhead at the top of Guanella Pass.

6

7

The trail starts directly behind the bathrooms. Looking at the current weather and trail conditions and measuring my present state of fitness I decided the hike was a go.  I searched my pockets for the topo map and route description I’d put together a few days ago and came up empty:  I’d left them on the dash of my truck.  Drat.  Well…. I was going for it anyway.

Here’s the route I took

8

Those willows though! There are wooden bridges in the area and presumably a trail, but with all the snow I wasn’t able to find either of them.  So I trekked through the willows and headed towards Square Top, mindful not to trek too fast lest I fall into a willow hole.

Did you know there’s a trick to hiking through willows in the afternoon when the snow’s soft? It’s quite simple really:  Figure out which way the wind blows and hike behind the individual willows. If you hike on top of them you’re violating LNT, so try not to do that (even though that works too) but if you hike behind them you hike where the snow has piled up and is more compact.  In front of the willows there’s an air pocket from the snow blowing in the wind and you’ll sink.

So I trudged across the willows, only sinking up to my waist 4 or 5 times and aimed for the ridge.

9

Every so often I’d look back for a frame of reference, trying to find the bathrooms and remembering my intended route back.

10

Before getting to the ridge there are several small hills to climb over, which had more snow and were steeper than anticipated

11

Eventually I came to this sign, and something in my head said to go left here, instead of straight (must have been the prepping I did earlier, because this was correct).

12

Just for reference, directly behind the sign is a small lake.

13

So I turned left at the sign and continued to a small saddle and turned right and began my trudge up the ridge

14

There were no signs, and no cairns (I’d been expecting them?)

I just kept heading up and up and up, and actually started drinking water. For me, this is never a good sign.  When I start drinking water it’s just the beginning of everything going downhill.  But I hadn’t eaten all that much (2 spoonfuls of that Mountain House Chili and the same this morning of an egg and bacon MH ‘meal’) and I’d hiked a lot in the past 24 hours, so I figured I should drink.

I reached another small saddle and had a pretty good view of the cornices below Square Top

15

From here is where I started struggling. The wind picked up and so did the elevation gain. I kept sipping water and I even ate some dried strawberries I’d brought along (those were fantastic!).  No worries though, I could see my path to the summit and just had to keep trekking.  From my views earlier I knew this wasn’t the summit…

16

But I thought surely the summit was just behind this bump, right? Oh look, a cairn!  That must be the summit behind…

17

I was moving slowly now, and my quads were burning (as opposed to my calves yesterday). I’d take 50 steps, and then stop to rest for 10 seconds, and then continue on

18

I made it to this bump, thinking surely this was it, but nope, another hill in the distance! Ouch!  Ok, now I was down to 30 steps with 10 seconds to breathe.  And lots and lots of sips of water.  I. Was. Almost. There!  I just had to keep pushing on.

19

I made it to the top of this bump and wanted to curse! Why, oh why was the Lord punishing me?  There was another bump and a ridgeline and another summit in the distance.

20

Well, there was nothing for it. I continued on, thankful at least the intense elevation gain had lessened.  Unfortunately the wind was insane here, and blowing directly at me.  Oh, and that wasn’t the summit either:  This is the summit

21

Also, it includes losing elevation a bit and then regaining it back. Joy.

22

23

Now, this wasn’t a particularly challenging hike, but I was tired to start, and I seriously worked for this ‘easy’ summit. It was cold, windy, and I was sore all over.  It was all mental and totally worth the effort!

24

I’m not sure what time I summited because it was too windy/cold for me to take out my phone, but I did get a few summit photos with my DSLR

25

I’d originally kind of wanted to make this a loop with Argentine and Wilcox, but I’d already done Argentine Peak earlier this year, and after looking at the elevation gain/loss involved today, this was a big nope.

26

I decided to turn around and make this an out and back hike.

27

That wind never let up, and here it knocked me down a few times

28

(Looking back at the final push to the summit)

29

I made it back to where I’d originally thought the summit was and got a good view of the route I took up

30

The route down was steep but felt much better on my quads

31

This hike was slow going. I wasn’t setting any records today, and I was going slower by the minute.  And that wind was causing my nose to run and run and run, making it raw, raw, raw.  Ouch!

32

The wind was bringing in a storm. Here you can see the tracks I made on my way back down to the willows and eventually the upper trailhead area.  One of the good parts about descending so late in the day was the snow had begun to re-freeze in the willows area, actually making it firmer than it was on my trek in.

33

34

When I made it to the Guanella Pass Trailhead I knew I only had less than 2 miles left to go, but I was exhausted. I followed the road back down to my truck, trying to beat the snow.  I lost, and it snowed the last mile of the hike.

35

That last mile was brutal. My whole body was screaming for me to stop, but it was snowing and I was almost done and stopping was not an option.  I did allow myself to crouch down a few times and grunted audibly as I stood up again (I know better than to rest like this, but it felt so good!).  During this time I kept telling myself 2 things:  I could do this, and there’s a bottle of Knob Creek waiting for me in my truck.

I made it back to the campground at 6:45pm, making this a 10.5 mile hike in about 7.5 hours (But I’d like to add in the past 36 hours I’d done 10,000’ of elevation gain in 26 miles, so my body had gotten quite a workout in the past day and a half).

36

Relive Video

When I got to my truck there were 2 other vehicles in the parking lot, but they looked like they were from tours intending to be out in the mountains overnight.   I took a quick wet-wipe bath and changed my clothes in the back seat of my truck.  As I was doing so it felt so good to just lie down.  Amazing. Euphoric even.   It’s been a few months since I’ve tired myself out this much on a hike and I just wanted to enjoy the feeling.  I was numb all over, my body was humming, and I hadn’t even had a shot of whiskey yet.  Or eaten.  Oh yeah, I needed to do that.  So I finished getting dressed and looked at what I had:  The uneaten Mountain House meal… 2 uncooked Mountain House meals, a sleeve of saltine crackers, and some Ritz crackers.  I was seriously missing my beef jerky!  I make an amazing beef jerky that’s my staple on these longer hikes, but my kids raided it and I didn’t have any to bring with me this weekend.  Ugh.  Ok, Whiskey and crackers it was for dinner.  I had 2 shots of whiskey, 2 Ritz crackers, and fell asleep.  Only to wake up at 12:30ambecause of the wind, needing to pee.  I sat there for 10 minutes trying to fall asleep but it was no use.

OK, I had options again. I could go outside where it was windy and snowing and jump back in my truck, and then spend the next 4 hours trying to get back to sleep. Or I could just get up and drive the 2 hours home now, and take a bath and be in bed by 3am.  This meant I’d need to work out tomorrow (a personal rule of mine) but it seemed the better option.  I was on the road and home by 2:30am, very pleased with myself.  This is why I like hiking solo:  I can make these kinds of decisions (like pushing on to the summit or leaving in the middle of the night) and no one has to agree or be put out by them.  The only downside?  Once I made it home I couldn’t sleep… so I started brainstorming better meal ideas.  I’ve got to eat better so I don’t crash, and Mountain House isn’t doing it for me.  Apparently I’d rather starve…

North Star Mountain – 13,614

1

North Star Mountain – 13,614

RT Length- 9 miles

Elevation Gain – 2400’

First hike of 2019!  I’d spent the past week at sea level and once again my time was constrained (I needed to be back by 2pm because my daughter had her final driving lesson) so I chose something I knew I’d be able to complete before noon:  minimal elevation gain with moderate mileage at an open trailhead seemed a good choice, just to get me back out above treeline.  I was debating doing Quandary to get in my first winter 14er of the year, but the wind looked more favorable just a little to the south on North Star Mountain, so I decided to save Quandary for later.

Monitoring the temperature while driving I was a bit put off when it reached -2* around Hartsel but felt better when it rose to 27* in Alma (it was 20* when I arrived at the Hoosier Pass trailhead).

I arrived at 4:45am to an empty parking lot full of ice and decided to just put on my snowshoes while sitting in my truck (with spikes underneath so if I needed them I wouldn’t need to take off my gloves to put them on).  For Christmas I bought myself a new pair of snowshoes (EVO ASCENT MSRs) and was anxious to try them out.

I started on the trail just after 5am.  The 4WD road was blocked off by plowed snow, but easy to follow and packed down by previous hikers/skiers/snowboarders/etc.  The road starts just beyond this sign.

2

This part of the trail was great, as it followed a well packed and wide 4WD road.  I followed it as it curved to the left.  It was sill dark out, but I could faintly make out the sledding/skiing hill ahead of me.

3

I stopped briefly to fix my snowshoes (the band had come loose on one of them).  It was cold but clear and every time I looked up I saw meteors from the Quadrantid Meteor Shower.  I kept stopping to watch and just absorb the night and finally had to kick myself in gear and tell myself to get going:  I was on a time schedule.

As many of you know, route finding is different when it’s dark:  there aren’t many visible landmarks, and even the easiest route can cause you trouble when you can’t see what’s ahead of you.  Following the road around 12,000’ I suddenly found myself on the side of a mountain, road gone.  I looked at my map and compass, knew I was heading the right way, and continued on.  It seems the road was covered in snow, making it indistinguishable from the hillside.  This made me a bit uneasy as it was exactly where the avalanche danger was forecasted for today, and I couldn’t quite make out the angle of the slope or consistency of the snow.  I got out my caltopo map, noticed it was less than a 20* angle, and just decided to be careful and stay as close to the road as possible.  Bonus points if I could actually find it (which I could once in a while).  Once again I looked down, and the band had come undone on my left snowshoe, so I put it back into place.

As I rounded the corner the road became visible again and I breathed a sigh of relief, until the wind picked up.  It started out strong and didn’t let up until I made it back to that spot on my way back down.  Here’s where the route finding truly got fun.  I still had over an hour of darkness, and with the wind I could no longer see clearly what was ahead of me as the wind was ferociously blowing up the snow and made everything appear… grey.  When I turned around and looked back at Mt Buckskin I could see much better. The sun was rising and there wasn’t much wind behind me to obscure my view, so I kept looking back to give me a visual reference for later.  I took out my camera and kept trying to get a picture of the moonrise as well (just to the right of Buckskin), but the camera had a hard time focusing with all the wind.

4

OK, back to route finding.  I was now at the 4WD parking area, although I didn’t know it.  In the dark and with the wind I couldn’t’ see much, so I just kept heading west.  Good news:  I came to a road!  Bad news:  it was the wrong road.  So was the next one, and the next.  Apparently there are tons of mining roads in this immediate area, all parallel with each other, and none of them were the correct “road”.  However, heading up and west seemed to keep me on the right track, so I did so, even though I couldn’t see much.

I lightened this video on my computer to give it more visibility, but here’s an idea of the terrain and mild wind in the dark (well, I guess not “dark” because I lightened it, but this shows where I was at)

VIDEO

At about this point my phone shut off.  I’d been trying to take videos/pictures, and it decided it was too cold to continue.  Hmph.  I stuck it in my backpack to let it ‘warm up’ and hoped it’d turn on again later, looked down, and once again fixed the band my snowshoe (both sides this time).

Up and west ended up being the correct navigation, and soon I was at the top of North Star Mountain’s shoulder.  The snow was about a foot thick in most places and consolidated. It was perfect for a winter hike:  Not tiring or difficult at all.  I never did see the gate that was mentioned, or the ‘parking area’ but it was getting lighter out and I could now see the rest of the route before me

5

I had several options, but decided to head towards the old mine

6

When I got there the mine was mostly covered in snow.  I traversed above it to the ridge.

7

Wow.  I mean, just.  Wow.  I needed to cross this ridge to make it to the summit, and I was excited!  From a physical standpoint this had been an easy hike so far, and I wasn’t even close to being tired:  I was ready for a challenge.  Due to the wind, most of the snow had accumulated on the south side of this slope.

8

Check out my morning view of Quandary!  I kept thinking to myself the wind on Quandary HAD to be better than the wind I was experiencing on North Star Mountain.  It just had to be.

9

I turned around to look at the route I’d taken and was surprised to see a well established mining road.  Hmph!  I wondered if it led to the old mine I’d stopped at?  In any event, I’d taken the higher trail to get to where I was now, and took it on my way back as well

10

Woohoo!  The sun began to rise!  Oh, and did I mention that wind?!?!  It hadn’t let up yet… and each one of those ice crystals is deceptively a chard of glass, waiting to cut you down. Luckily I was wearing goggles and my balaclava.

11

VIDEO

OK, back to the ridge.  This is what I got to follow

12

Traversing this ridge was tricky, as in many places the passable area was no more than a foot wide.  I decided to keep on my snowshoes (after fixing them once again), even though they obviously weren’t needed or indeed helpful for the entire route.  I started and looked down:  ugh!  They’d come undone AGAIN.  I stopped and put them back into place.

I knew I was straddling the Park and Summit county lines, and when safe decided to hop back and forth as often as I could, just because it sounded fun.  I kept encountering several different kinds of snow, from soft and sugary to tough and consolidated, and most of it was wind blown.  At this point I started seeing goat tracks and could tell they weren’t very old (due to depth of prints, current wind conditions, etc).  There must be a goat ahead of me!  Awesome!  I also encountered several medium sized cornices, and this one as well (picture taken on the way back down)

13

This cornice gave me pause, and I wasn’t entirely sure I wanted to continue.  I stopped and traded my trekking pole for my ice axe.  I could see the cornice from earlier on the ridge, and I’d been mentally planning out my route.  I’d wanted to traverse under the cornice, as it didn’t look that steep, but when I actually got there and started my horizontal traverse I realized what a terrible idea this had been!  The snow was soft, and I could tell if I made a trench I’d be undermining the stability of the cornice.

Immediately I turned back and thought about my options.  This seemed to be the ‘crux’ of this route.  I felt if I could cross this cornice the rest of the route would be wind blown in enough areas to make traversing it easy.  But I wasn’t sure about the stability of the cornice.  As with most of my hiking decisions, I didn’t actually make one until I was close to the issue. I ended up going over the top to the right where it was easy to climb up and delighted to find it eventually became consolidated and climbable with crampons and an ice axe.  I’d been following a goat’s fresh tracks this morning and could tell the cornice was eventually consolidated because the goat hadn’t sunk in the snow:  however he was more comfortable on the cornice and went even further right.  I was up and over it in 20 seconds and mentally thanked myself for keeping those snowshoes on (with built in crampons).

I was super proud of myself for making it over that obstacle, hiked about 20 yards further to the next ledge, and looked at the rest of the route before me

14

This looked very doable, and like a lot of fun!  The only downside?  The wind!!!  I’d known to expect wind, but this was insane, and much more than the anticipated 14-18mph

Video

I stopped here because I was actually being blown a bit sideways.  This was not good.  I was close to the summit but worried about the wind.  With a light pack (5-10lbs?), myself weighing 105lbs and winds stronger than forecasted I just didn’t weigh enough to keep from being blown sideways.   I decided to pick up some rocks to add weight to my empty pack (I’m guessing about 30lbs worth).  That seemed to stabilize me a bit.

My weight and confidence up again I kept traversing…. And came across the goat!

15

I stopped and enjoyed the experience.  This is the first time I’ve seen a mountain goat while climbing in winter, and I intended to enjoy it.  We looked at each other and sized each other up.

16

I didn’t want to disturb the goat, but also wanted to traverse the ridge, so I slowly kept inching forward, stopping every once in a while to fix my snowshoe (this was seriously getting annoying!).  Eventually the goat looked back at me as if to say “are you joining me or not?” and continued across the ridge.  I took my time (and the opportunity to take dozens of photos).  The wind was intense and I was trying to get the goat/wind thing, but in still pictures you just can’t really tell how windy it is…

17

18

I followed quietly behind, and the goat didn’t seem to mind.  I spent much more time than necessary slowly following in its tracks, careful not to disturb it but thankful for the photos.  Just before the final summit push it seemed to have had enough and deviated off the ridge.  I took advantage of the photo opp…

19

20

And finished the short distance to the summit on my own

21

I summited at 8am

22

Video

I dropped my bag to get out my phone for a video and realized I’d lost my trekking pole at some point on the route.  Drat.  I’m assuming the wind had blown it out of my pack.  Next time I need to be sure to clip it on with a carabineer.  Luckily my phone wasn’t so cold anymore, and I was able to get a quick video of the summit before it died again, but on the downside my DSLR was showing low battery now as well.  Drat!  So I only took the time to take one summit photo and decided to start taking photos of the peaks around me to help out friends who wanted to hike in the area tomorrow.  Here’s what I got…

The ridge to Wheeler

23

Drift, Fletcher, Atlantic, Pacific & Crystal Peaks

24

Quandary

25

Democrat, Traver, McNamee, & Clinton

26

OK, time to head back.  I took a look at the route back across the ridge.  It looked so much easier from this angle!

27

I looked down at my snowshoe and thought fixing it again was more trouble than it was worth.

28

I appreciated the fact it was easy to ‘fix’ while wearing gloved but was disappointed I’d needed to do so so often. I left them undone for the rest of the hike down.

On the way back I took a picture of one of the fun cornices I saw on the way in

29

And another at the exposure… not too terrible, but those rocks wouldn’t be fun to land on if a gust of wind decided it was necessary (hence loading my pack with rocks)

30

On my way back I took some pictures of some of the more fun small ridges I gained

31

And once I was done with ridges a look back on the way I’d trekked…

32

Here I unexpectedly found my trekking pole lying on the ground trapped between some rocks.  Woot!  This was great!  Not only had I found my trekking pole, but I didn’t need to pay penance for leaving something on the mountain.  I clipped it to my backpack, took out the rocks, and headed down the slope.  The sun was great on the way down, even if the wind decided to join her.  I mostly just followed the tracks that were still there (surprisingly with the wind I could still follow most of them).  Oh, and there were cairns!  Imagine that!  In the dark I hadn’t noticed any of them, but once I made it back to the shoulder in the daylight I could clearly see large ones placed about 200 feet apart.

33

Here’s looking back on the route I took to the summit

34

On my way back I kind of followed the cairns to the end of the shoulder, and looked over at the rest of the route before me.  The gate and road were clearly visible in the light of day

35

And looked back at the way I’d come.

36

I found that gate I’d missed in the dark.  It was actually two very large gates, and looking back, I seemed to pass them unseen by taking a path to the south of them and then just gaining the ridge.

37

Here’s my path up (solid) and down (dotted)

38

I found some pretty cool inverted tracks on the descent

39

Here’s looking at the route I took.  Notice how traversing too far to the right (north) would have ended badly in the dark?

40

And here’s a view of the unstable area I was worried about at 12,000’:   It didn’t look stable in the daylight either, but at least I could see a road.

41

Here’s a great view of most of the lower route (once I got back to the road the wind stopped)

42

I didn’t see anyone all day until I made it back down to about ½ a mile before the trailhead.  There I saw several skiers, a few snowshoers, and about a dozen hikers enjoying the morning out.

43

I made it back to my truck at 10am, making this a 9 mile hike with 2400’ in elevation gain in 5 hours.  I’d made it back 2 hours ahead of schedule.  I was a bit bummed to find I’d forgotten to pack my beef jerky (I make a fabulous jerky for hiking and must have left it in the bread box) but overall pleased with today’s hike.

44

I took off my snowshoes and was a bit upset to notice they’d taken more wear than I’d anticipated from such a short hike and such expensive snowshoes!  The plastic bottoms were ruffed up in a lot of places, but at least the metal pieces were completely intact.  I’m still not completely sure they’re worth the money.  I didn’t use the heel lifts (they weren’t necessary today), but overall they didn’t work any better than the $50 pair of trekkers I put 200 miles on and enjoyingly destroyed this year.  I had to continually re attach the straps, and missed the ratcheted bindings of the cheaper model that didn’t need to be continually adjusted.  I’m a bit worried I paid too much for a nice pair of snowshoes I’ll destroy in a year, when I could have paid just $50 and destroyed another pair of cheap snowshoes this year.  This is something I’ll closely monitor:  I’d rather destroy a $50 pair of snowshoes every year rather than “baby” a $200 pair of snowshoes that still end up needing to be replaced in a year.

But back to the peak:  In the summertime this would be a great intro hike for someone looking to get into easy ridge climbing.

Also, my phone “died” several times due to the cold, but it wasn’t actually that cold, just windy (which made it cold).  Do phones suffer from “wind chill factor” as well?  It kept turning back on again after some time being in my backpack, but it was annoying when it kept dying during a video, etc. especially when it wasn’t that ‘cold’ out.   Also, it lost track of my navigation when it turned off, so I don’t have a track for this hike.