I’d attempted this peak a few weeks ago but had to turn back due to high winds above treeline. Today I was ready to try again, armed with a beautiful weather forecast and a full night’s sleep.
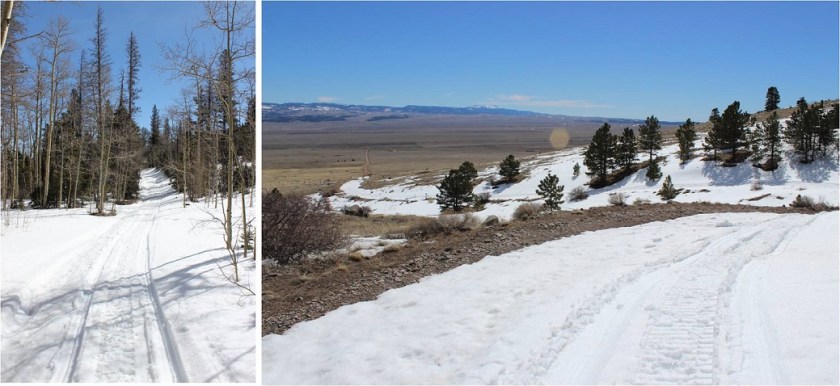
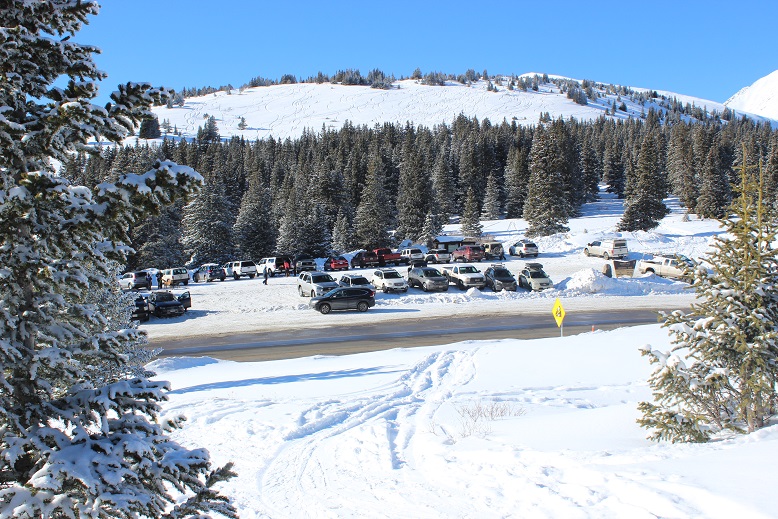
Since I’d been here 2 weeks ago and knew it had snowed here quite a big since then I didn’t even attempt to drive to the upper South Colony Lakes trailhead. I made it to the South Colony Lakes lower 2WD trailhead at 4am to one other vehicle in the lot. It looked as if someone was sleeping in their truck. I got together my gear and was on the trail around 4:15am. After hiking about 100 yards I came upon snow on the 4WD road and was glad I’d parked in the lower lot.
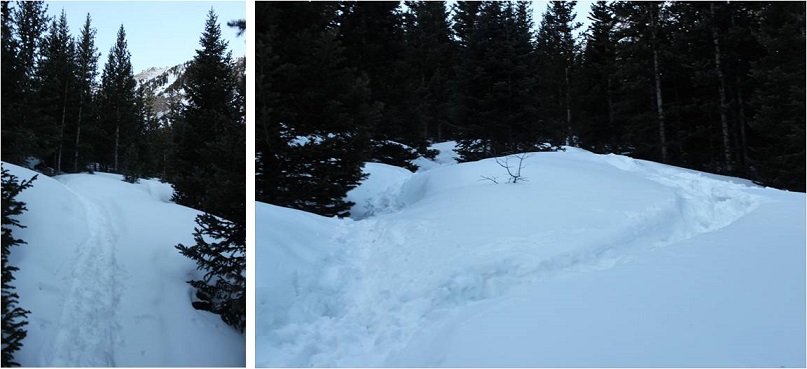
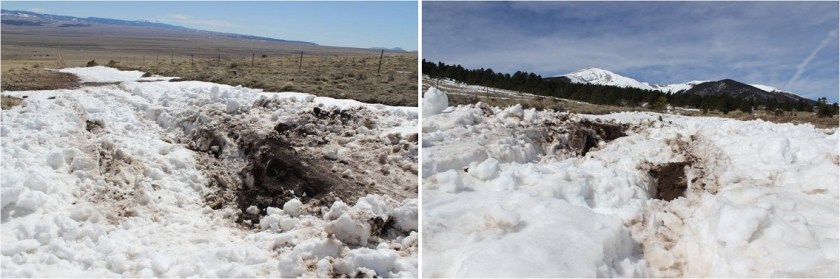
Unfortunately, it looked like someone had attempted to drive up the road in the past few days. When the road got too much snow on it they drove off the dirt road, kept driving parallel to the road, and then when they felt there was less snow went back to the main road.
This tears up everything people! Don’t do this! It also looks like they learned their lesson because they got stuck in a snow drift. I’m guessing there’s about 4 feet of snow here. Not only did they get stuck, they tore up the road trying to get out, which will make it more difficult for drivers to make it to the upper trailhead once conditions actually improve.
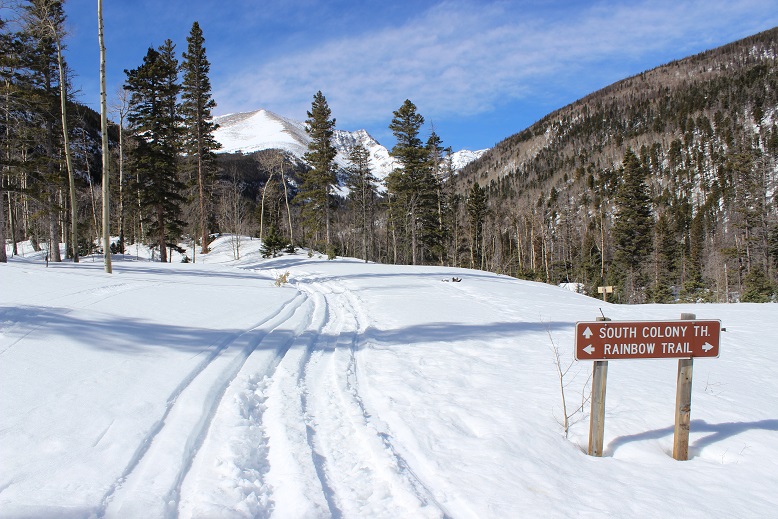
The road in was well packed in areas, soft in others, and covered in 2-6 feet of snow. It was still dark so I kept looking over my shoulder to see if anyone drove in behind me or was hiking with a flashlight but didn’t see anyone. I put on my snowshoes at the Rainbow Trail Trailhead.
This trailhead is still inaccessible by vehicle and covered in snow.
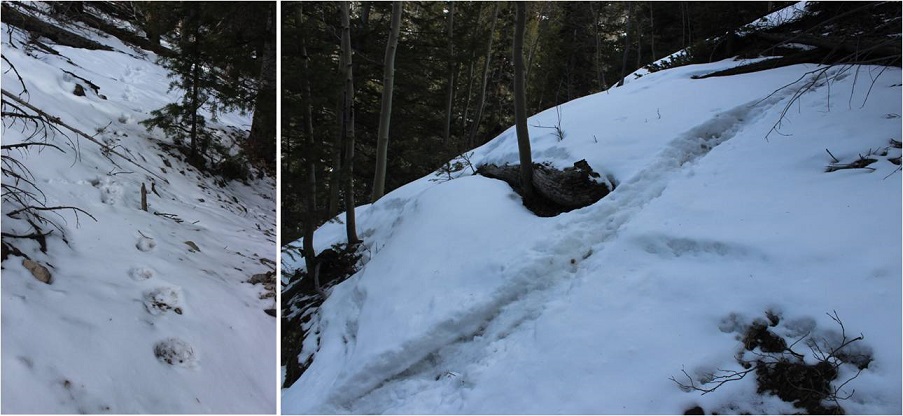
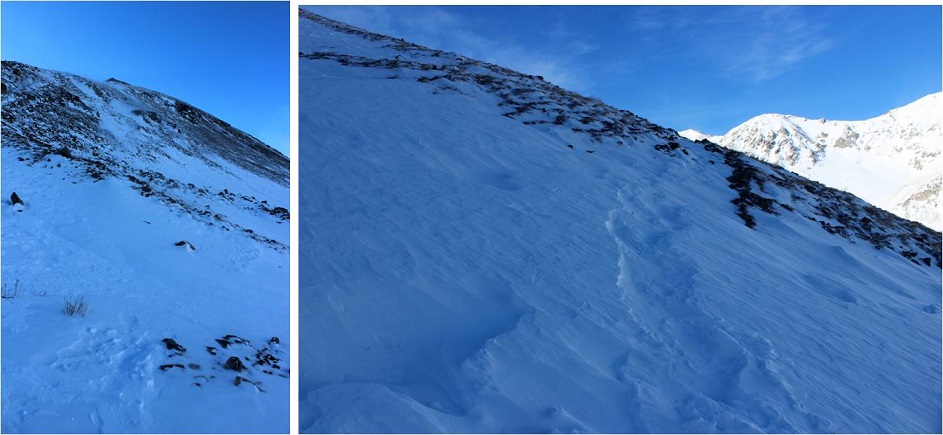
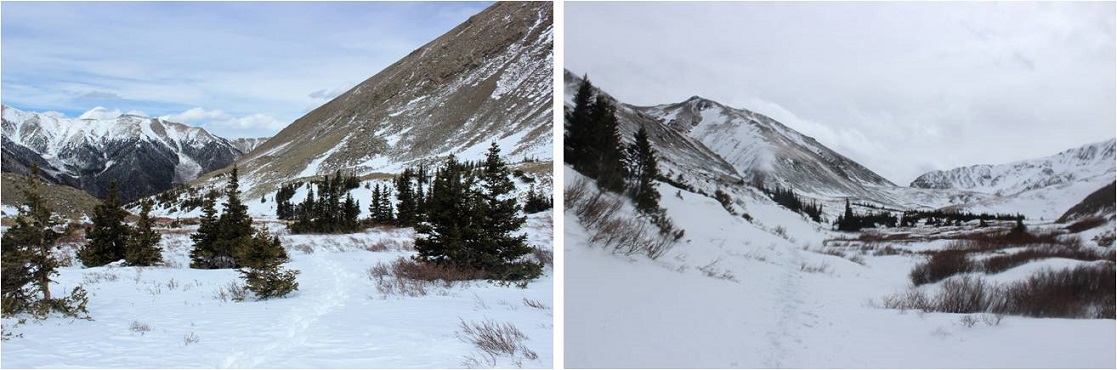
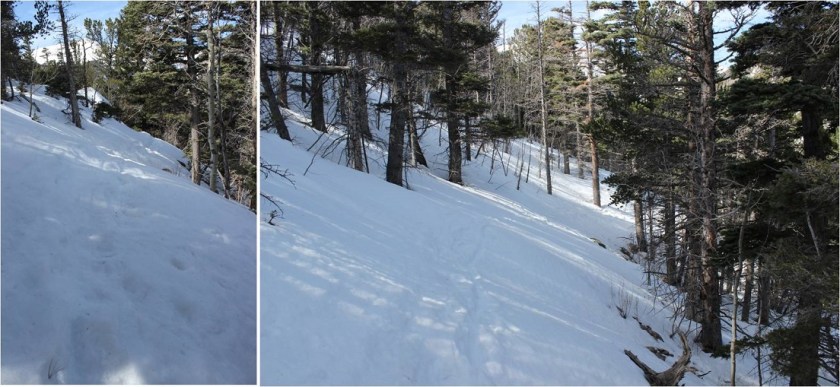
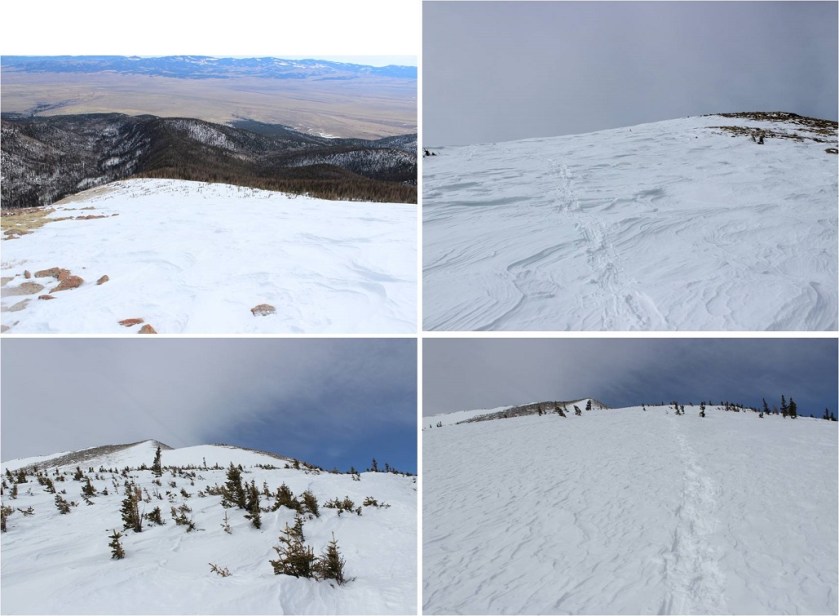
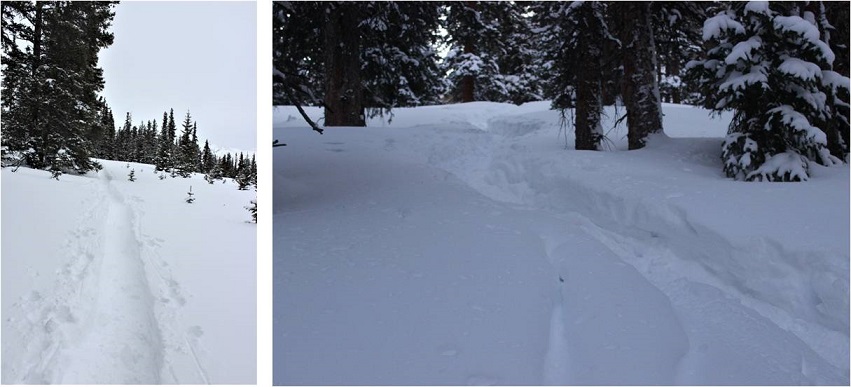
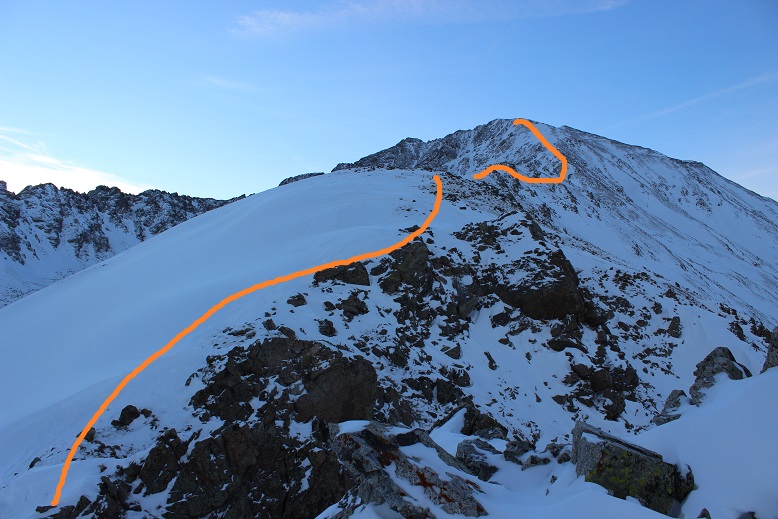
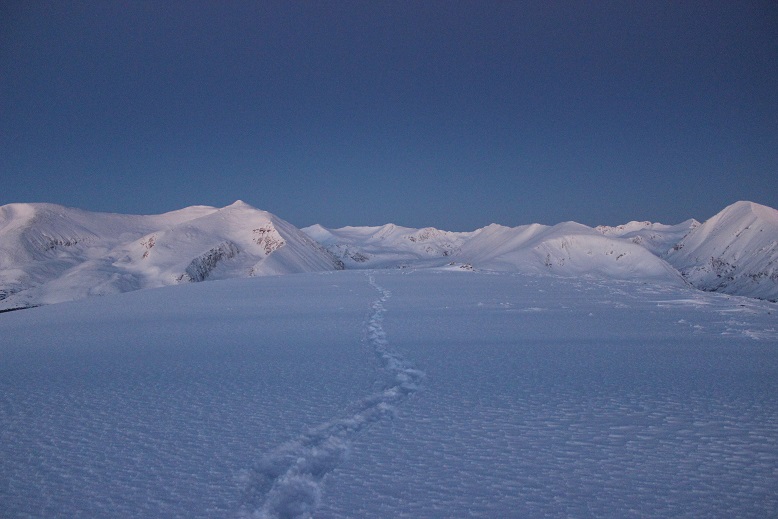
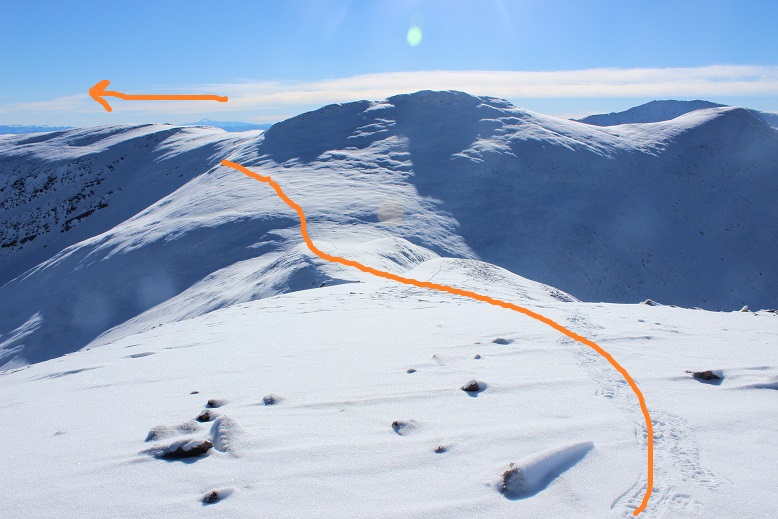
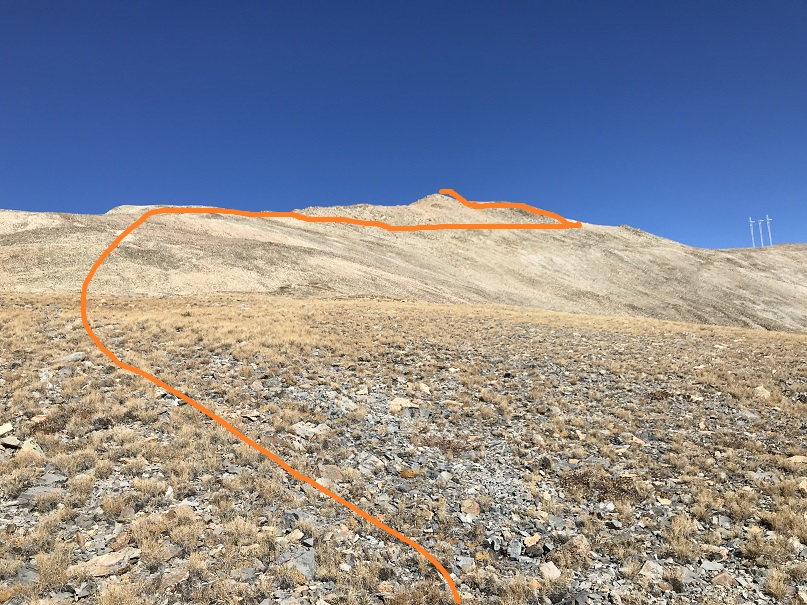
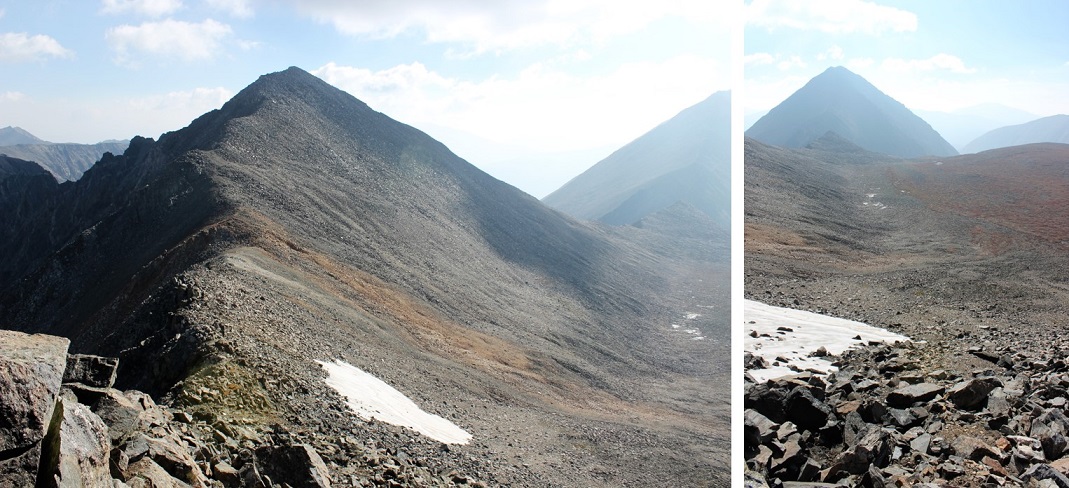
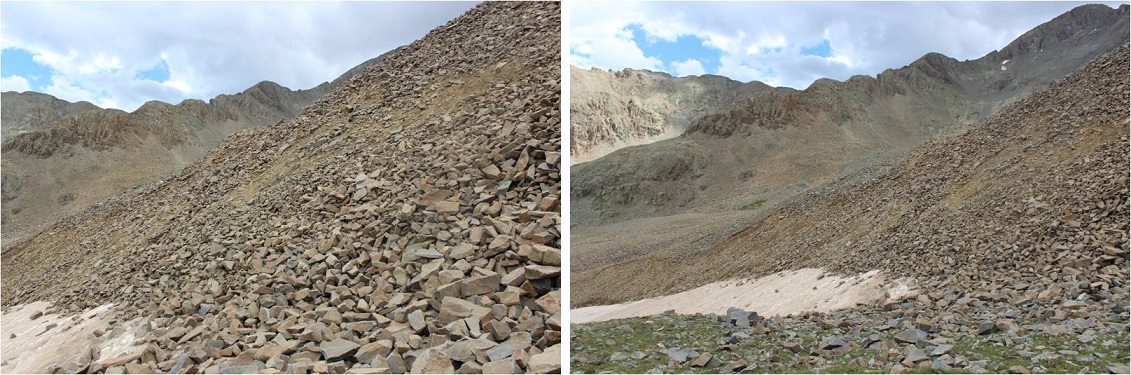
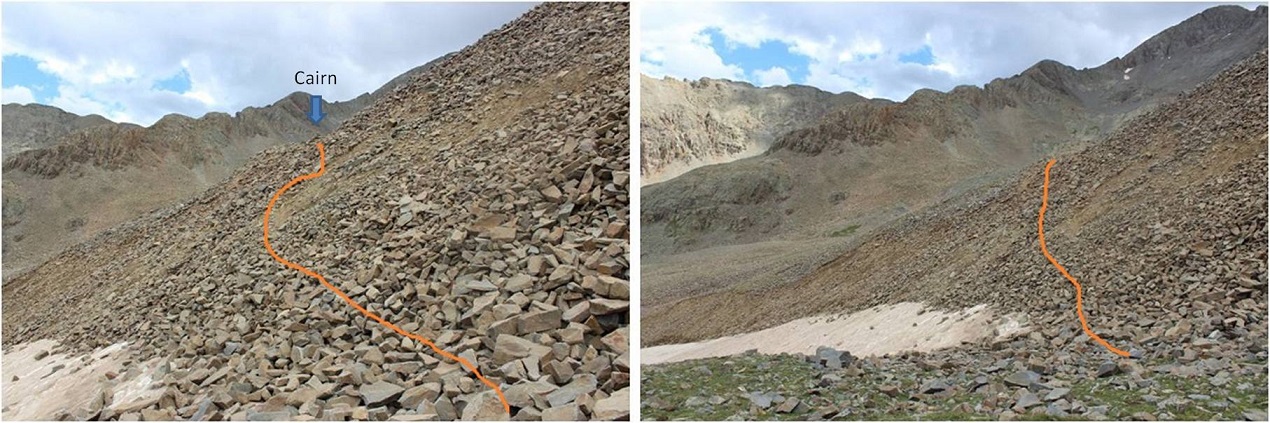
I had a map with me, but since I’d just done most of this hike 2 weeks ago I never took it out of my pack. From the Rainbow Trail I turned left (northeast) and followed the slope up to the ridgecrest. Here the tracks I’d put in earlier were still in place, and it looked like a few others had been here since then, so there was a faint trail to follow
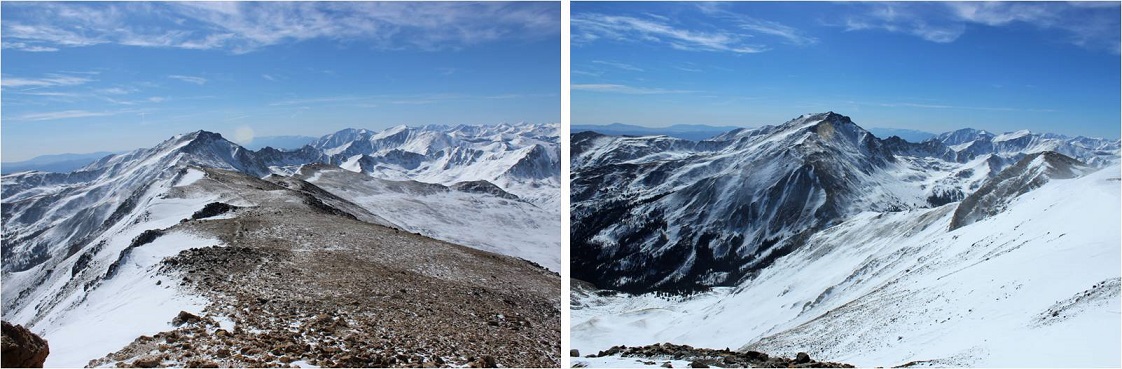
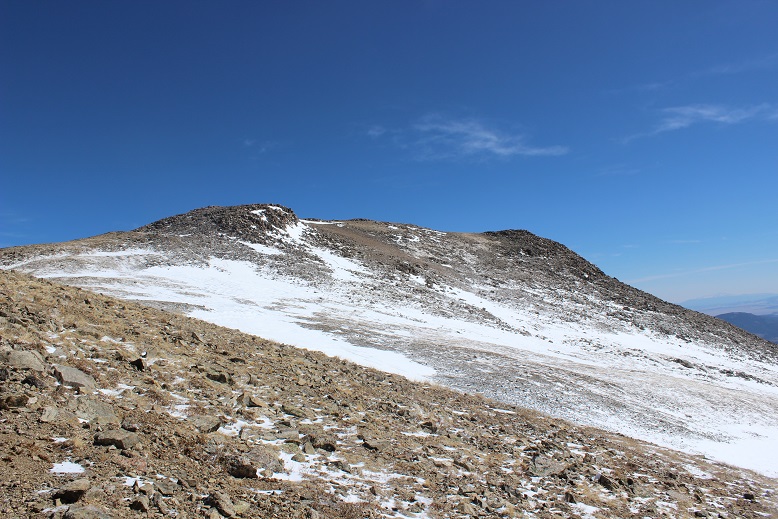
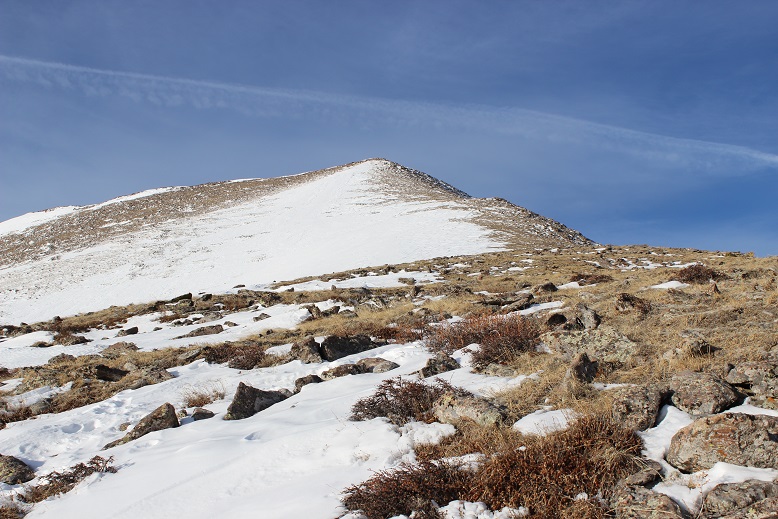
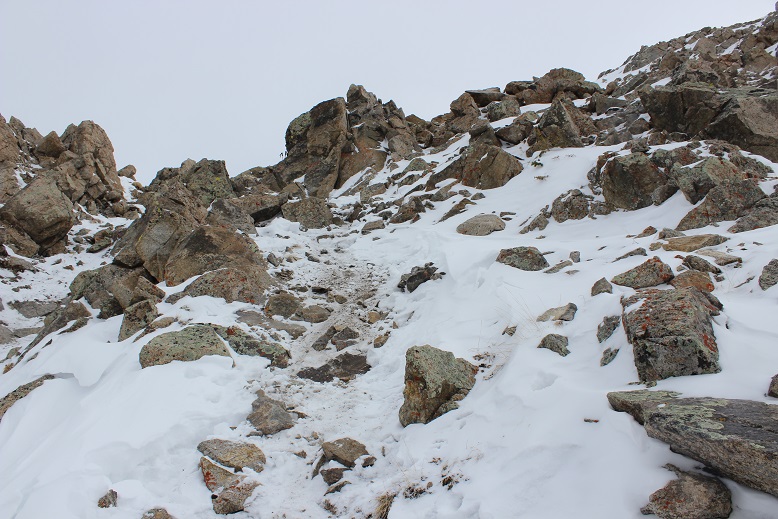
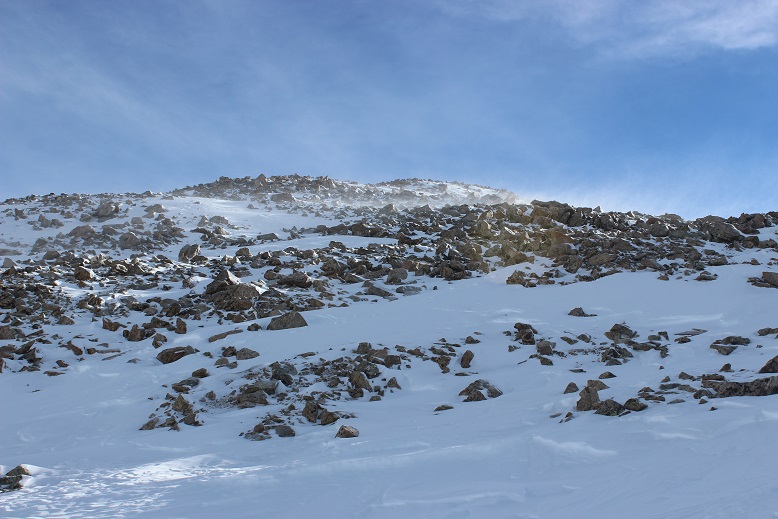
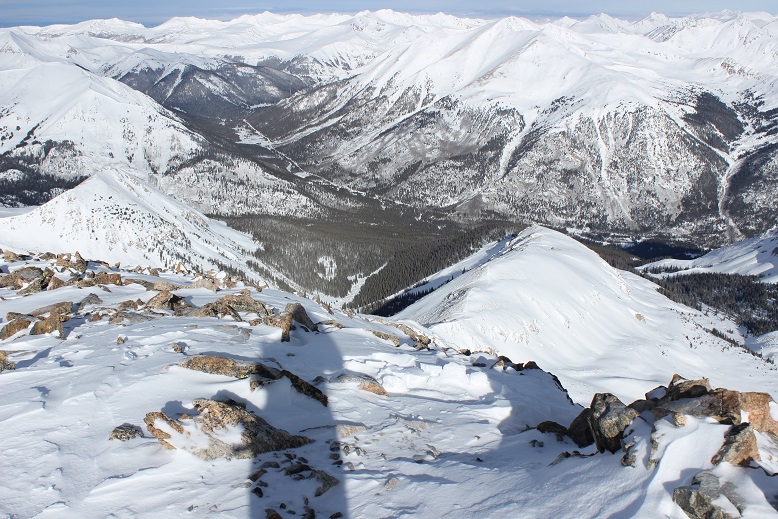
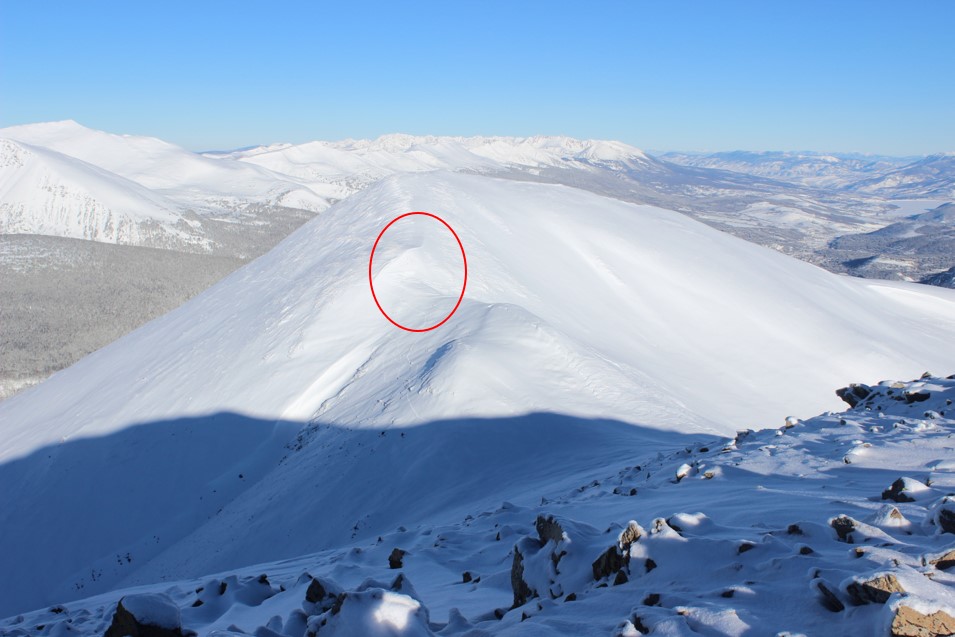
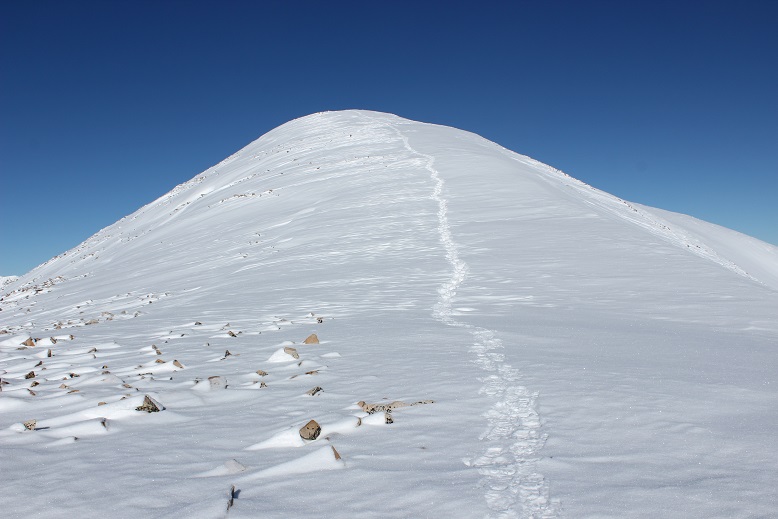
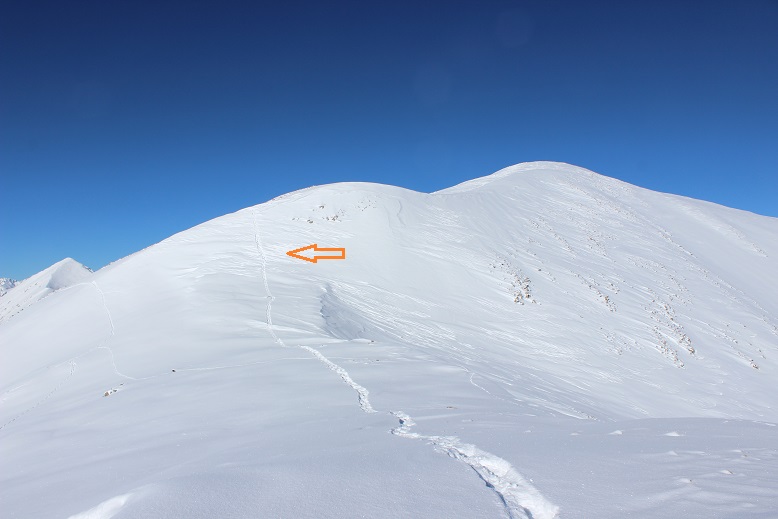
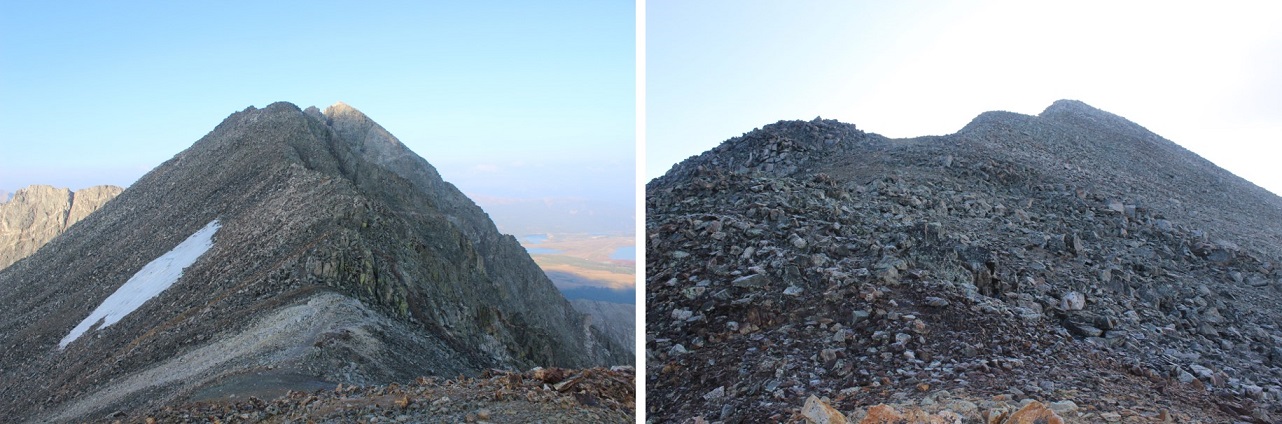
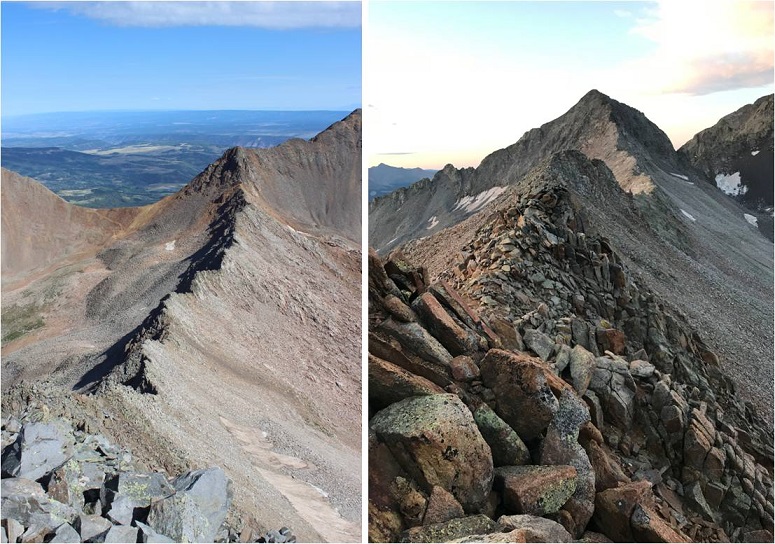
At the top of the slope I immediately turned right and followed the ridge. The ridge looks mostly flat, but does gain in elevation, all except for one area where it dips down a couple hundred feet and then inclines again.
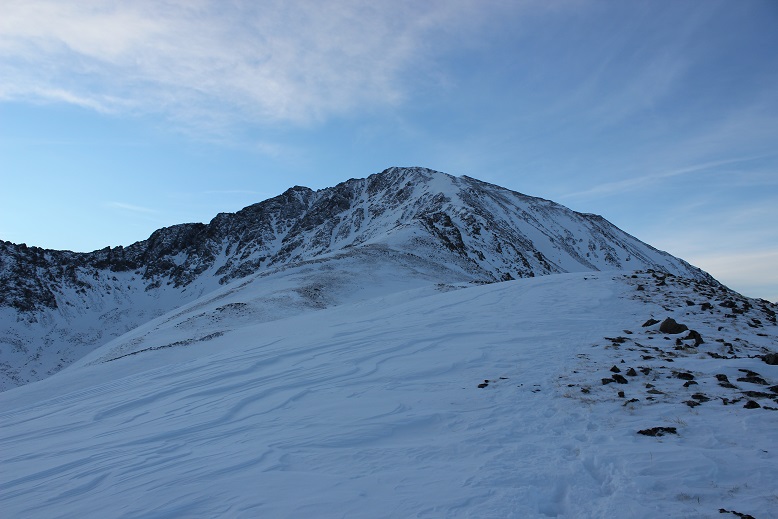
This was supposed to be a 7-10 mile hike, with about 3500’ in elevation gain, but for some reason it felt like a lot more than that. It seemed I was below treeline for much, much longer than I should have been, yet I knew I was still on track because as the sun rose I could see Humboldt peeking at me through the trees to my right.
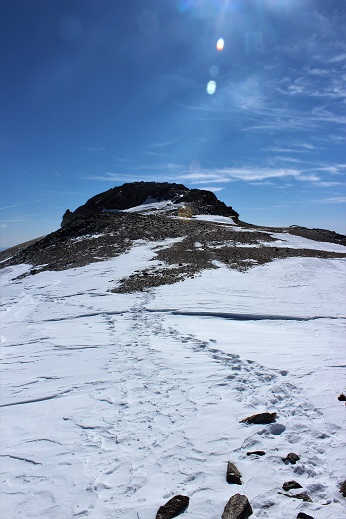
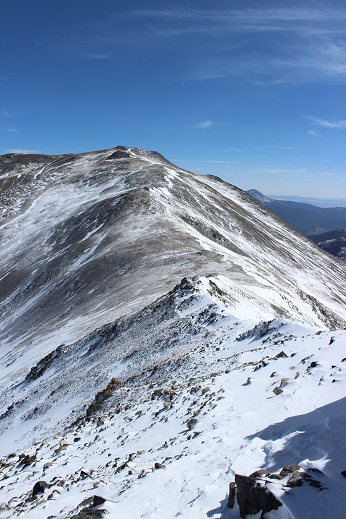
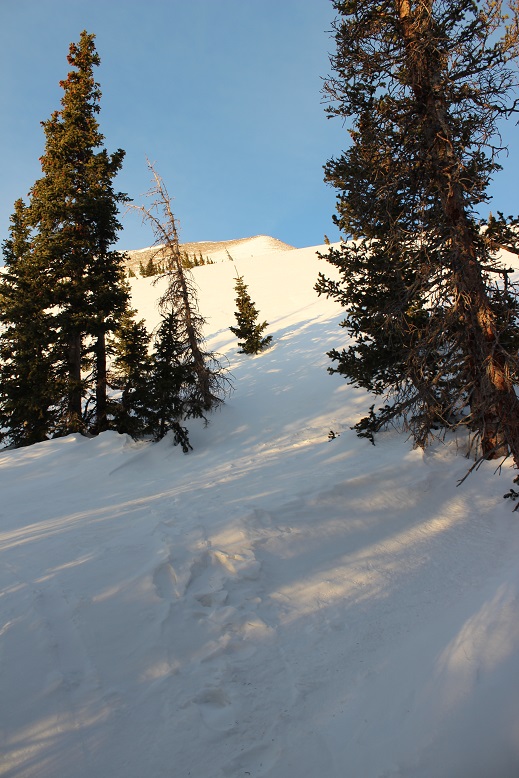
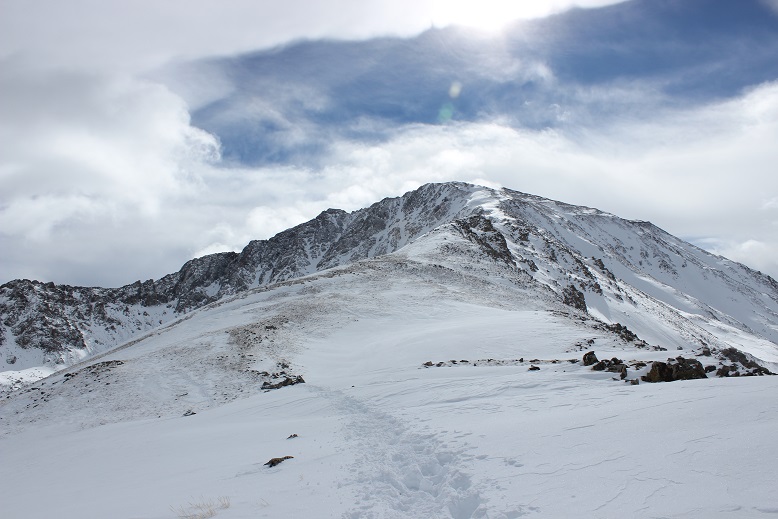
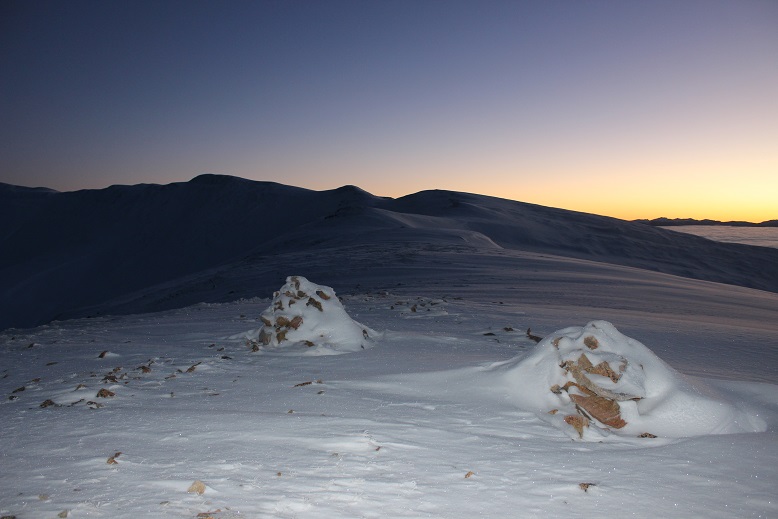
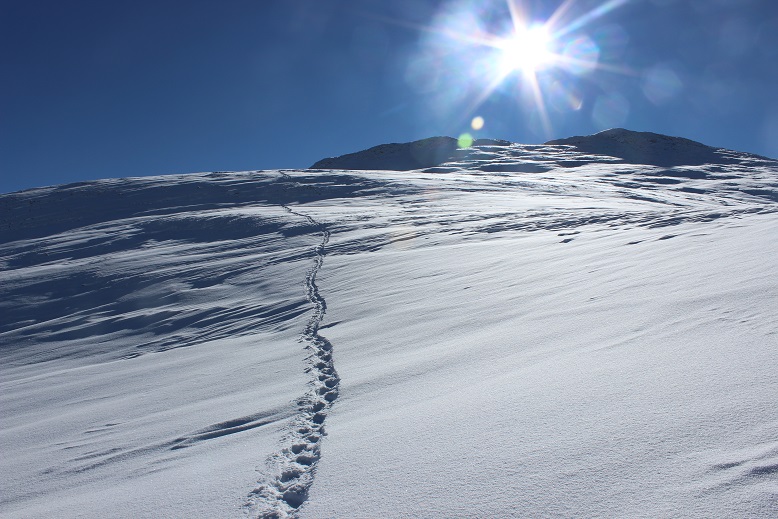
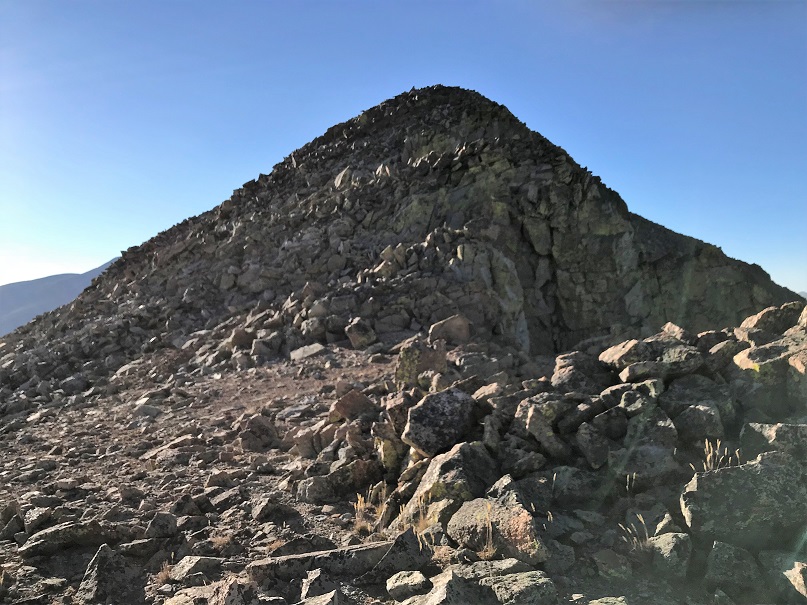
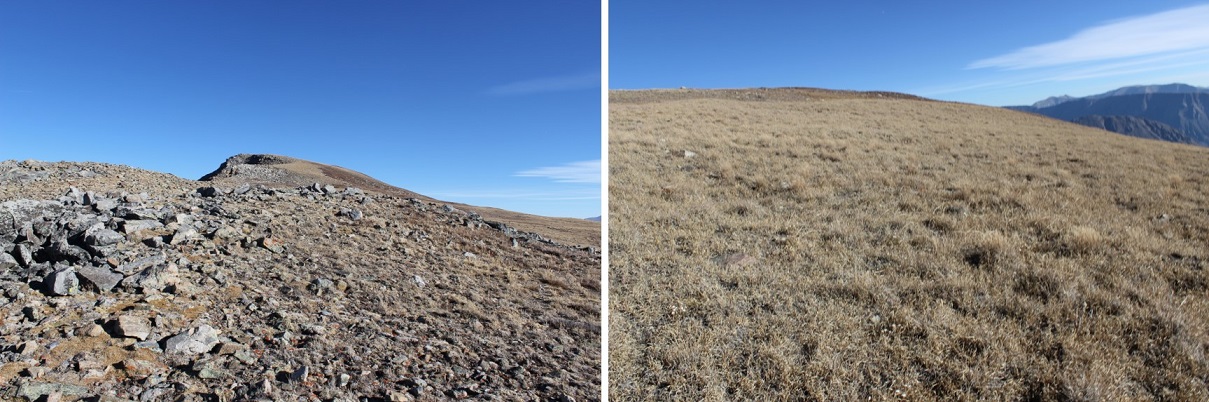
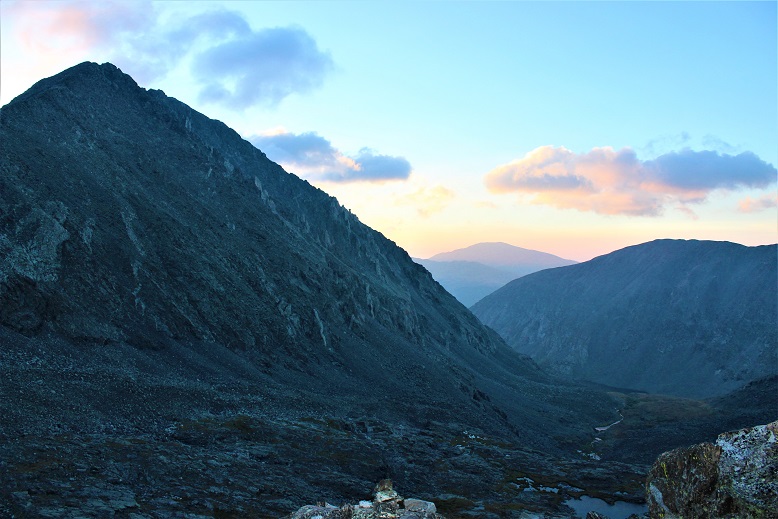
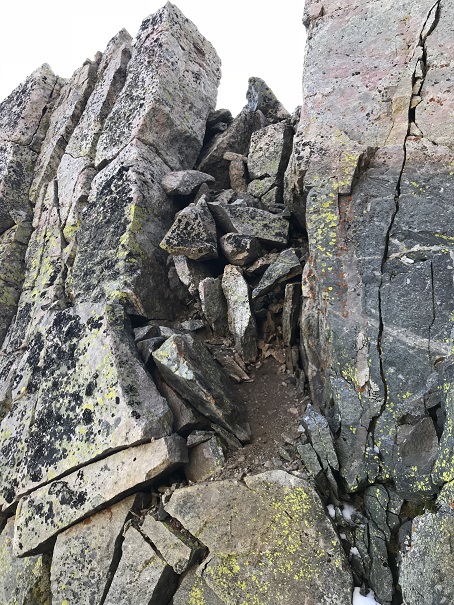
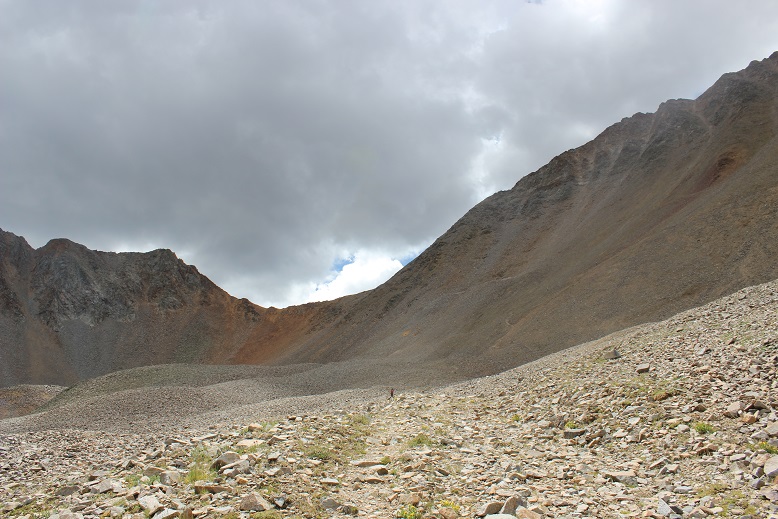
Finally (and I mean finally) I crested a vertical slope
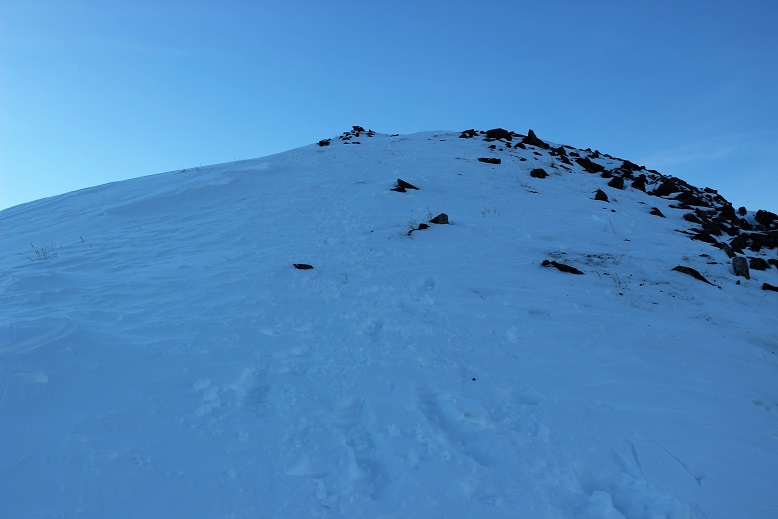
And made it to treeline.
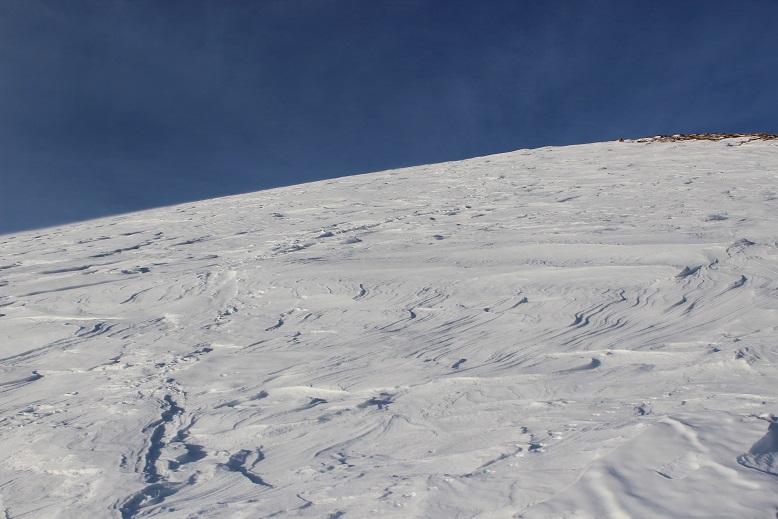
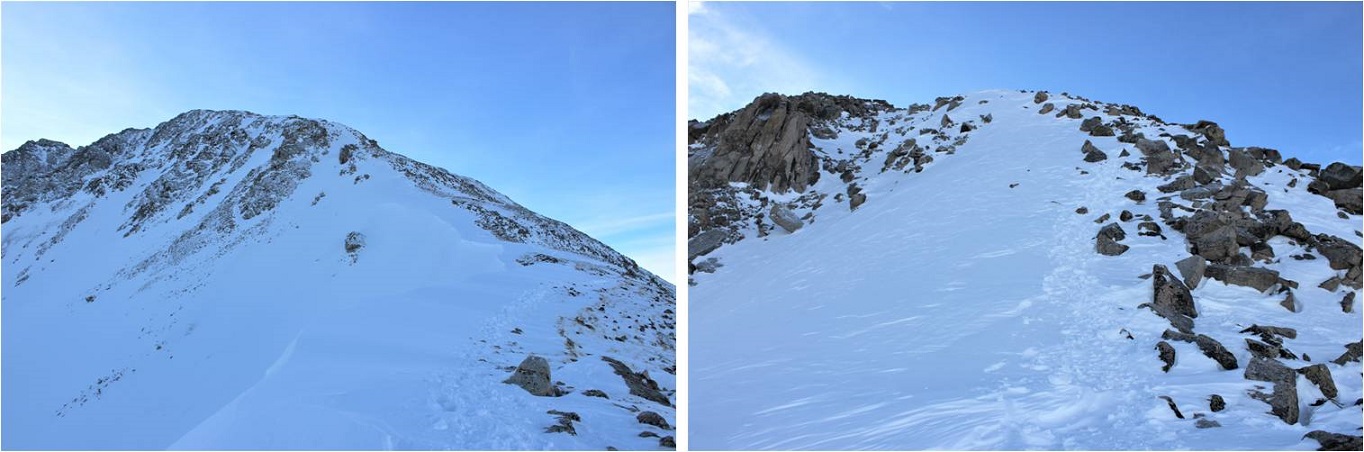
Here the snow was hard packed and I was glad I had snowshoes (crampons would have been necessary otherwise). I traded my trekking pole for my ice axe and started up the hill.
The wind picked up, and remained a steady 15mph until I made it back below treeline. In this area it was impossible to avoid the snow
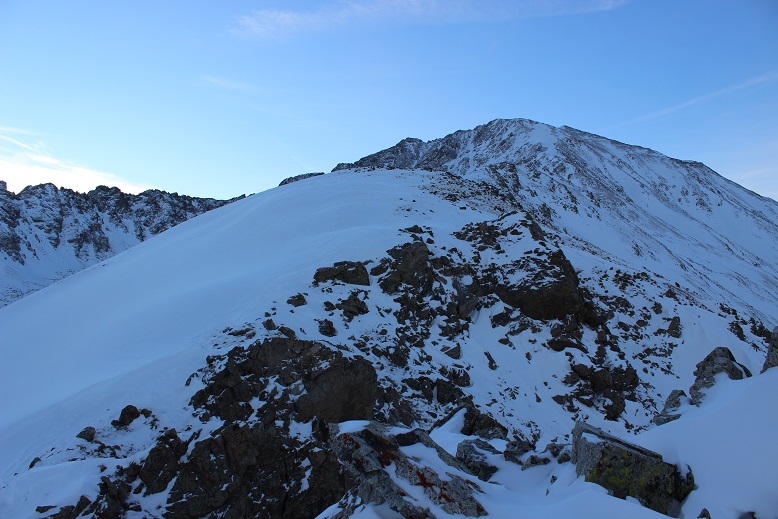
But as soon as I was up over this hill I had the option to stick to the snow or hike on tundra instead. I was tired of the snowshoes, so I took them off and kept to the right, following the ridge.
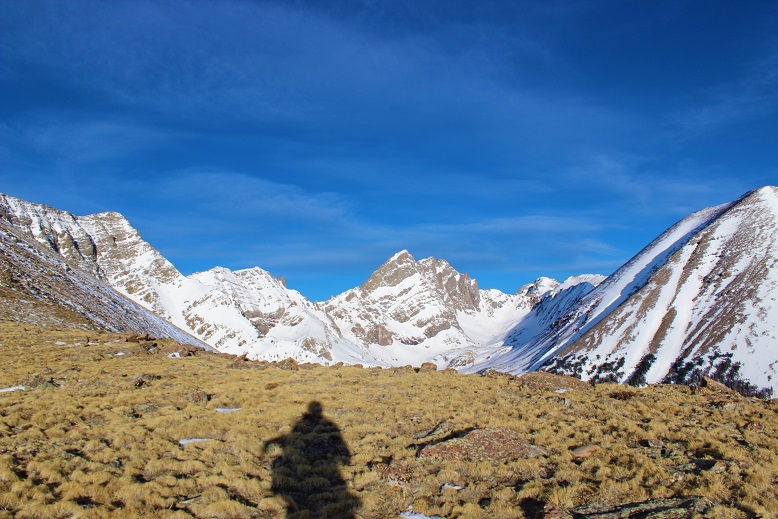
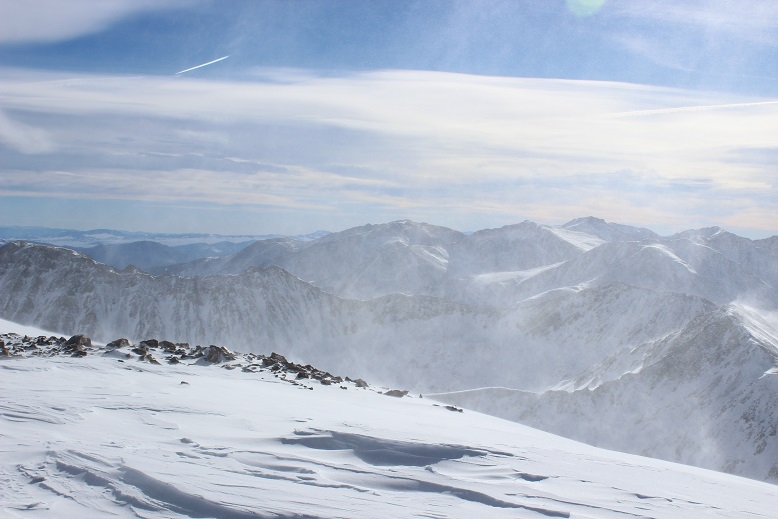
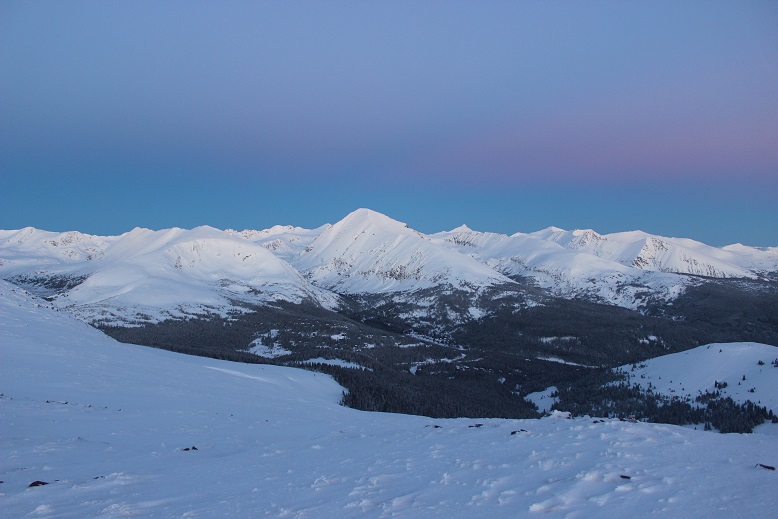
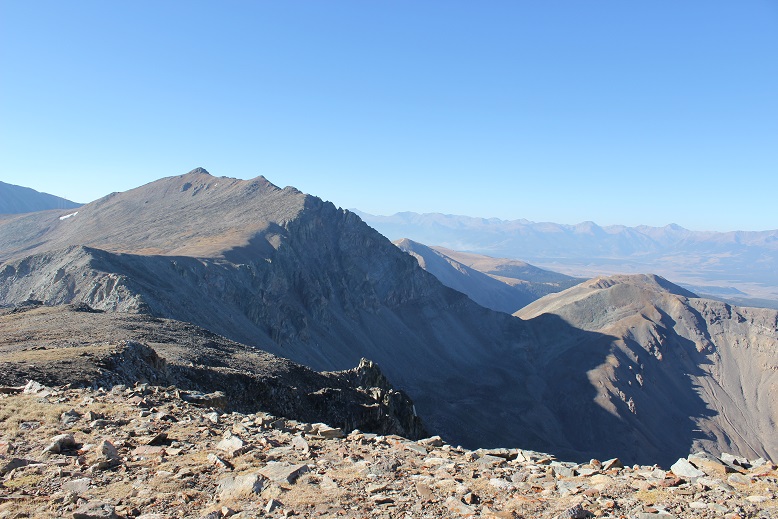
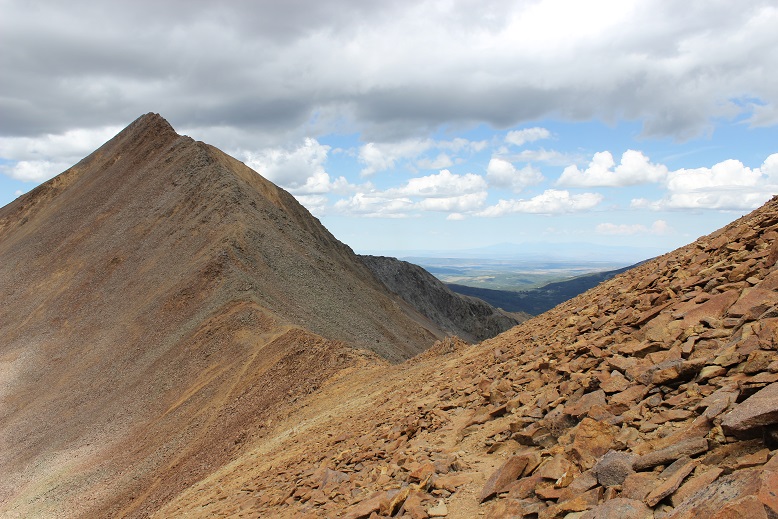
The view of the Crestones and Humboldt was beautiful!
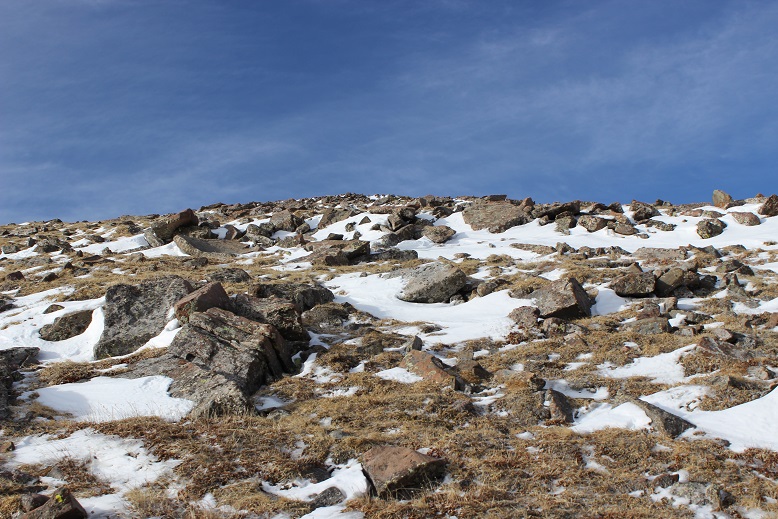
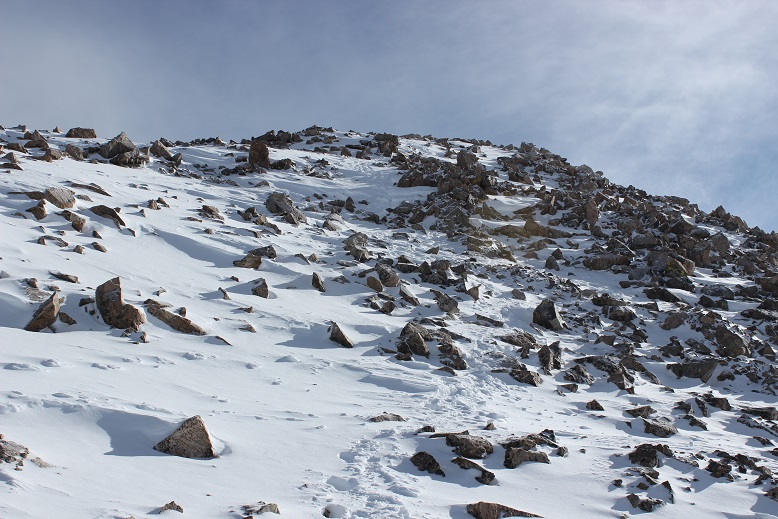
The rest of the route was pretty straightforward, but I was curiously more tired than I should have been for just 3500’ in elevation gain. I was seriously worried I was losing my touch, or that I was getting out of shape? As I neared the summit the terrain became more rocky and steep. I found myself zig-zagging my way up, doing my best to avoid the random snow patch that had me post holing up to my thighs
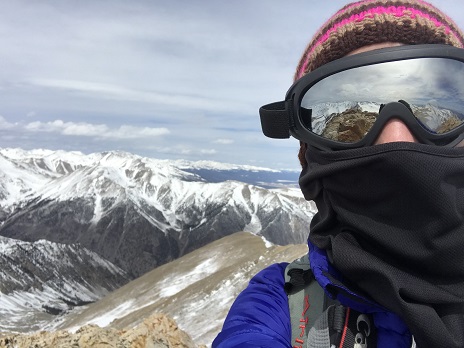
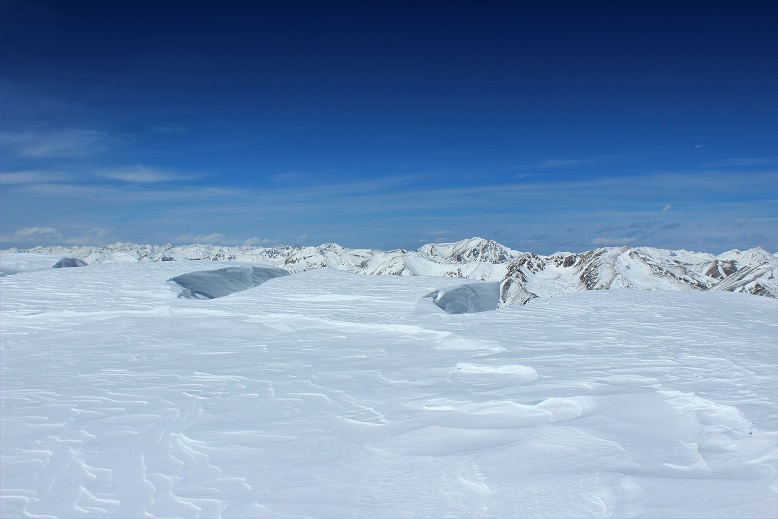
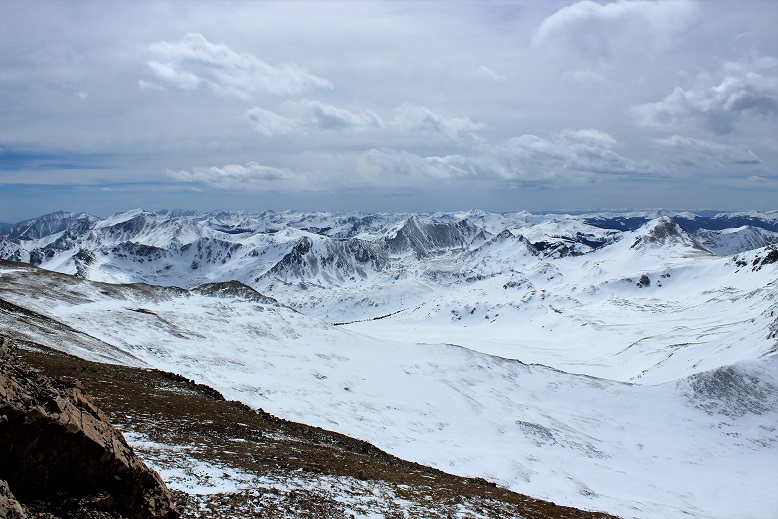
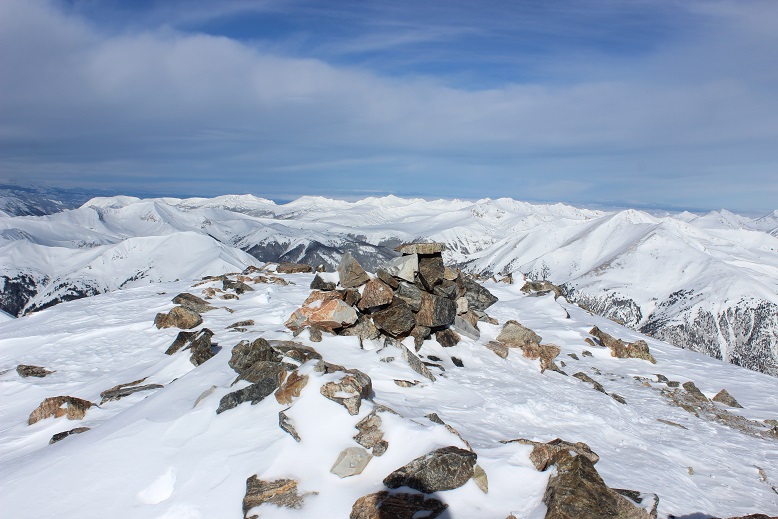
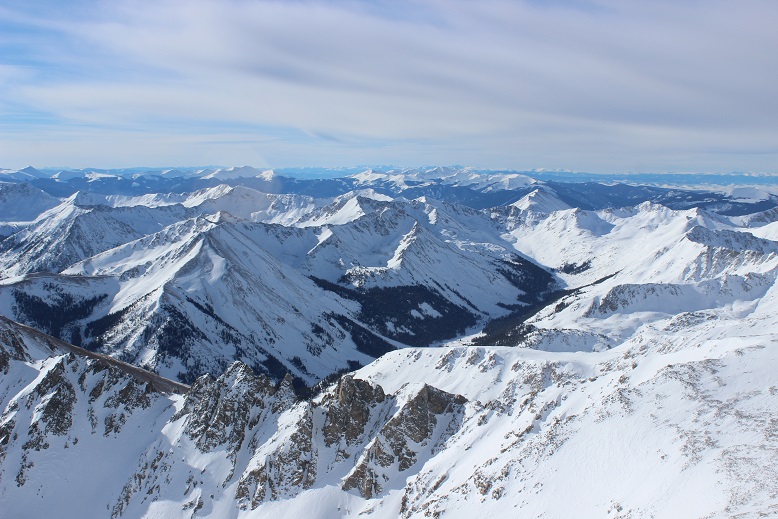
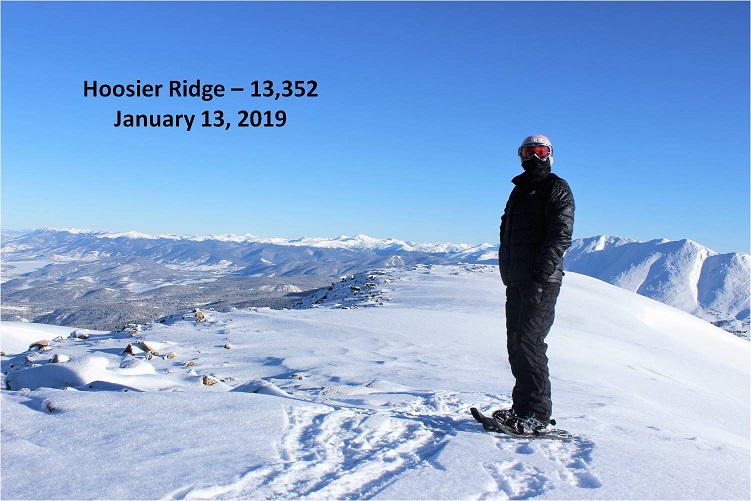
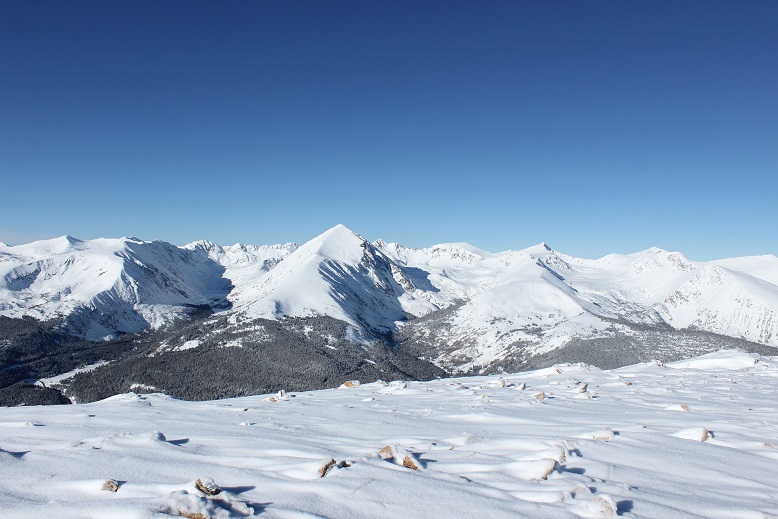
I summited to some amazing views of Humboldt, the Crestones, and a bunch of 13ers!
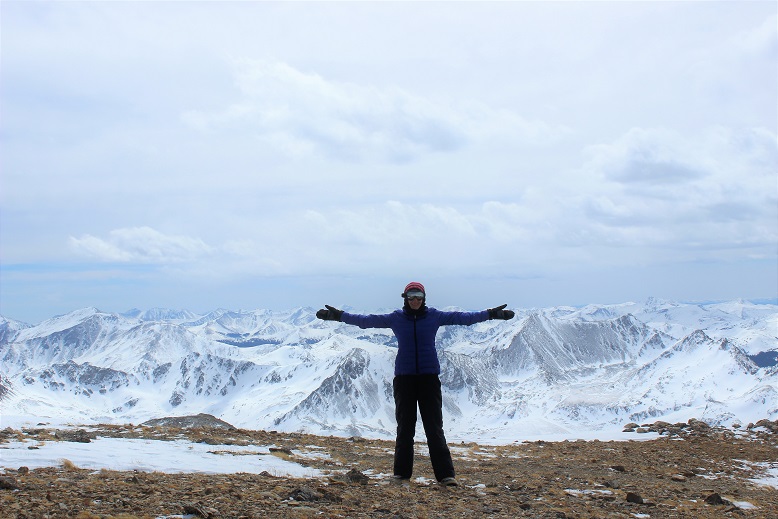
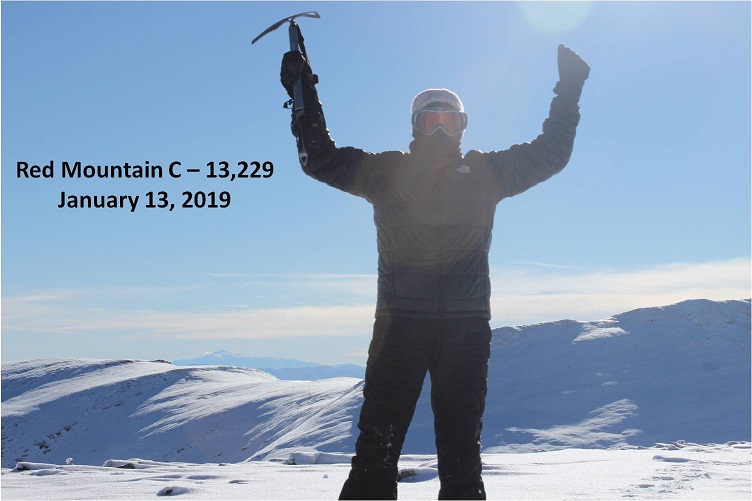
Here’s my summit photo
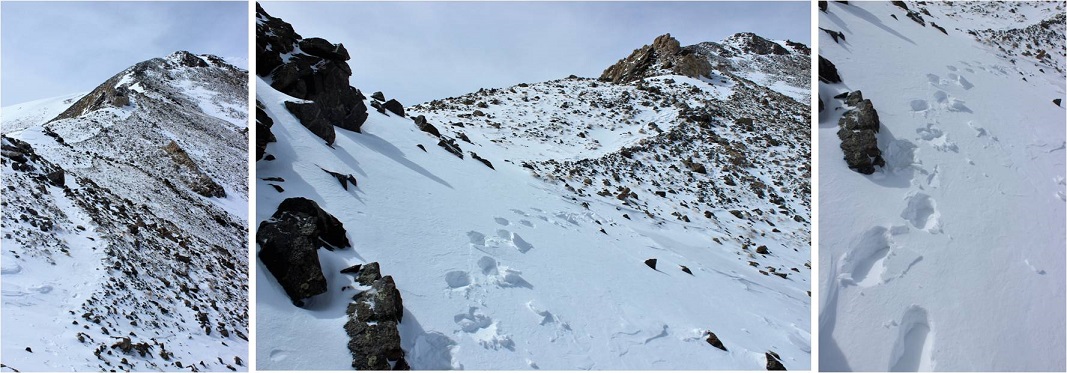
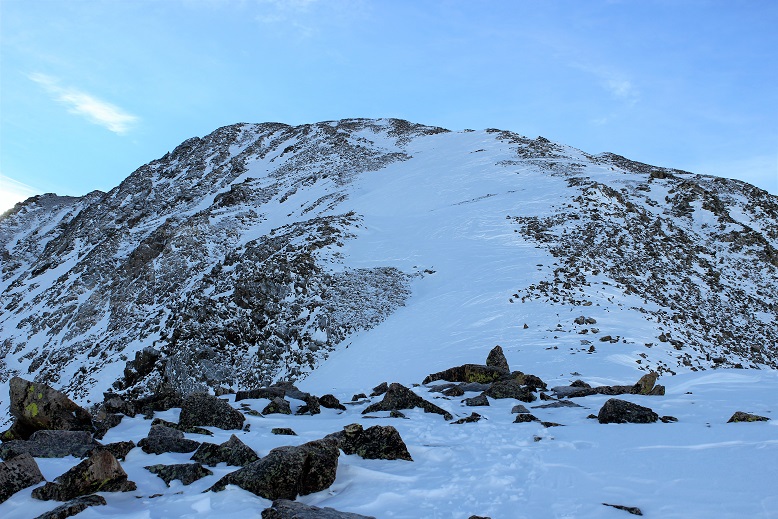
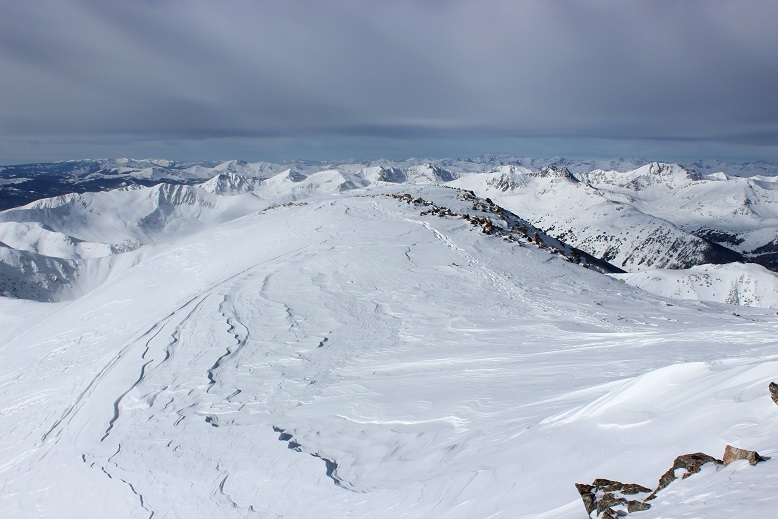
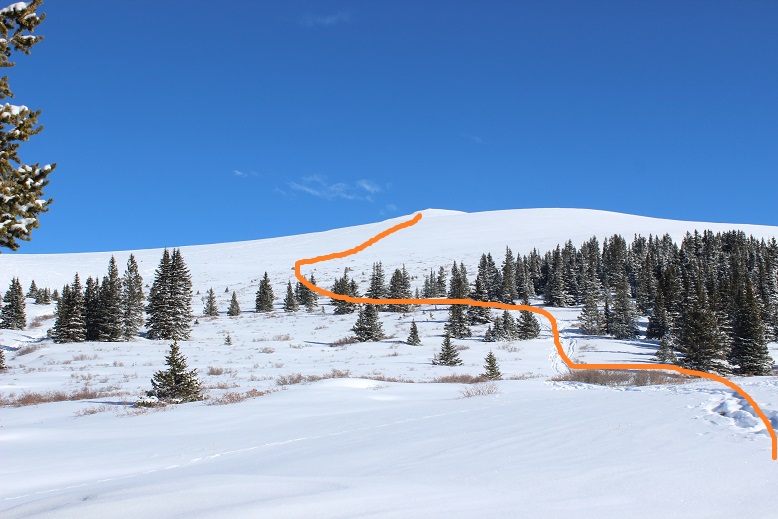
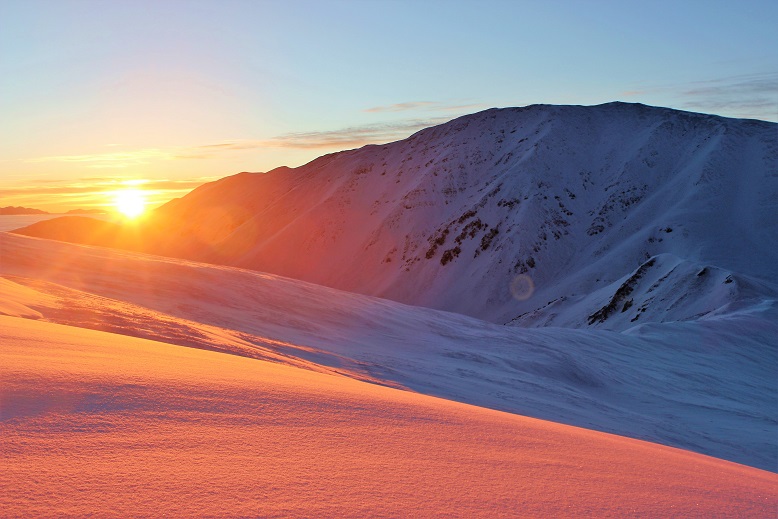
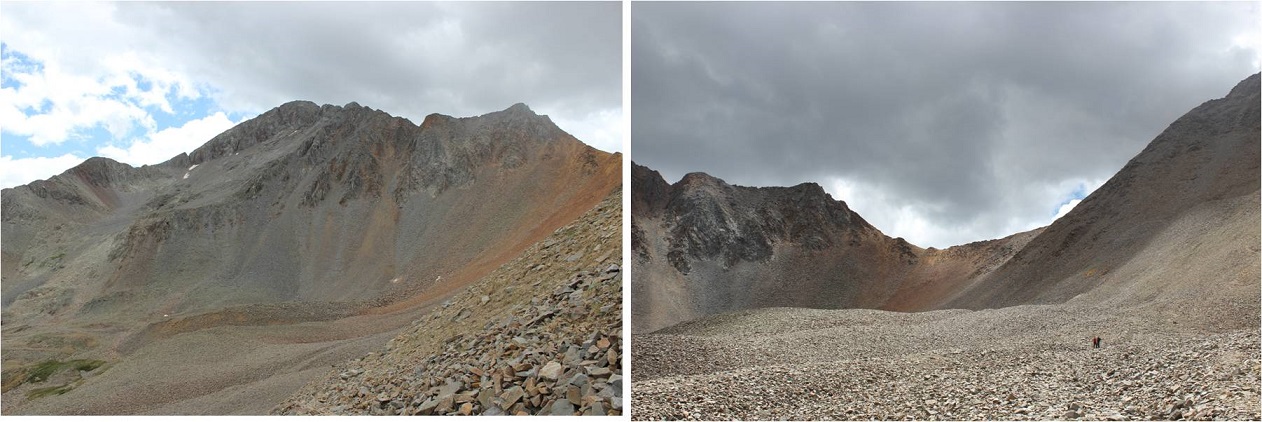
It was a beautiful day, but that wind made it cold and my fingers were starting to burn so I turned around and headed back down the slope. Here’s a look at the way I came
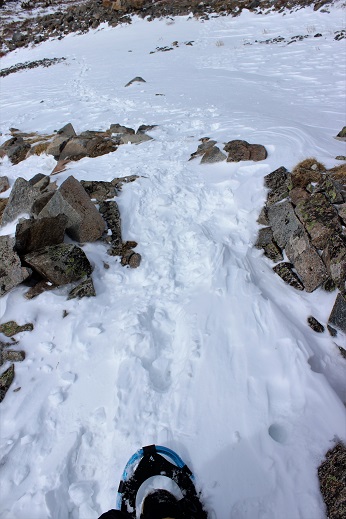
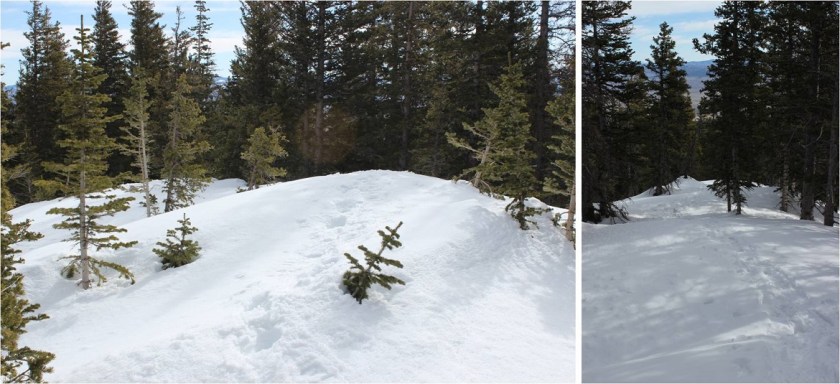
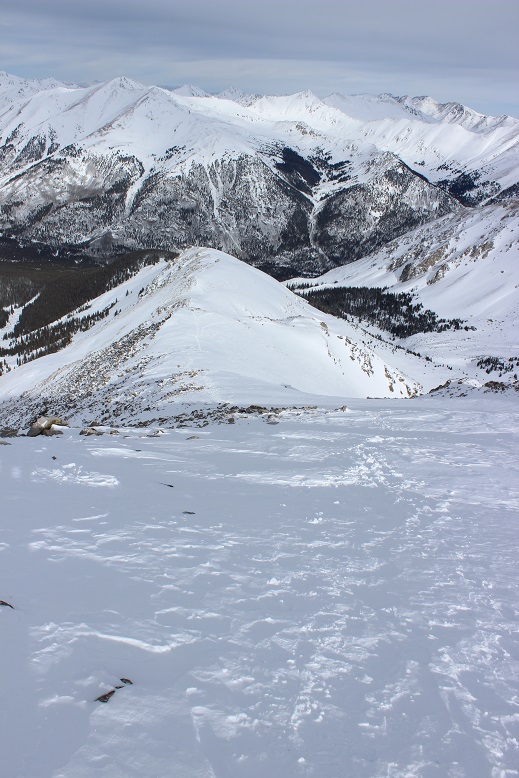
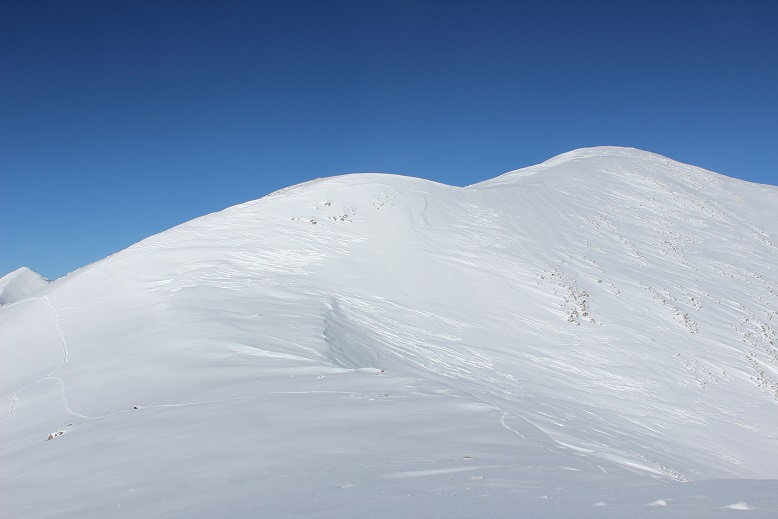
Here’s what it looks like just above treeline. Snowshoes were helpful (and here I put them back on). I appreciated the full coverage of snow
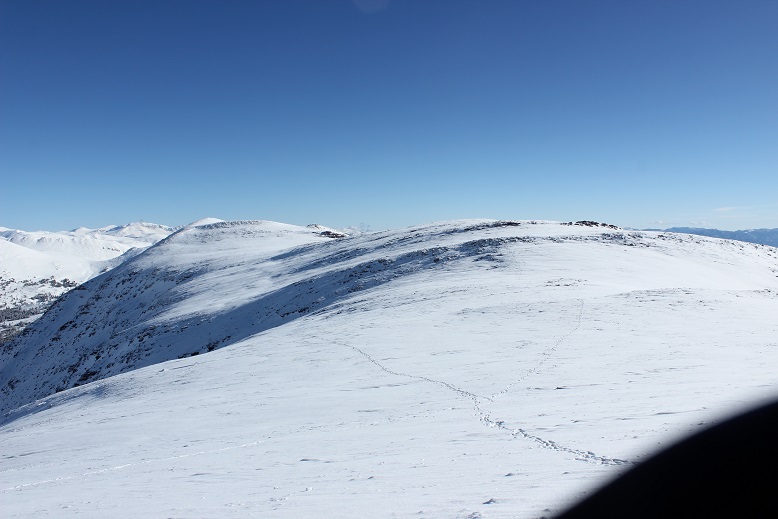
The ridge back once again seemed to take longer than necessary. It felt like I was in the trees forever! I was still glad I had my snowshoes
The wind stopped below treeline and the temperature increased dramatically. I took off my hat and gloves and noticed my hands had some minor damage, but nothing that wouldn’t heal in a few days. I saw a couple of early season mosquitoes on the ridge, which were easily distinguishable against the white backdrop of snow. I made it back to the Rainbow Trail and followed it to the Lower South Colony Lakes trail, noticing the temperatures had warmed up the snow quite a bit and once again praising my snowshoes: The road was becoming a slushy mess.
I fully expected to see people hiking up the trail or skinning, or something, but I never did. I didn’t see another person the entire day, and as I rounded the corner and could see the parking lot it became apparent why: my truck was the only vehicle in the lot! I’d had the entire mountain to myself today!
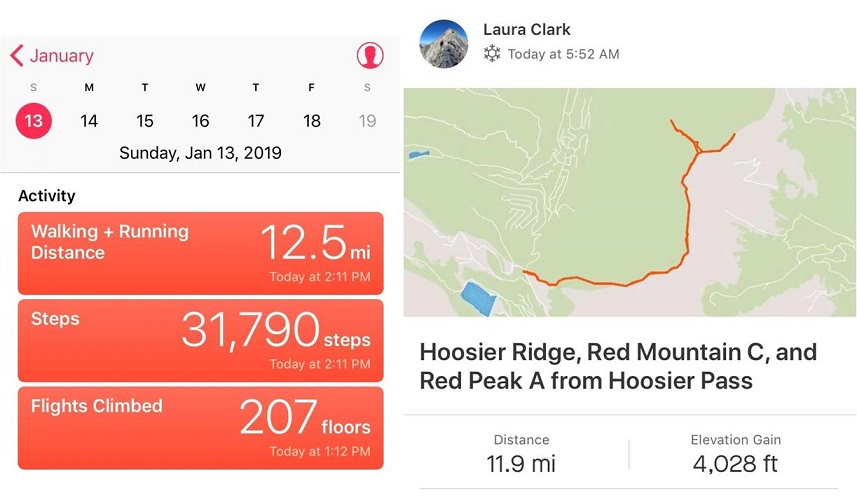
It had been a beautiful day to hike: Little wind, warm temperatures, and solitude. When I checked my tracker it said I’d gone 11.6 miles and gained 4682’ in elevation in 6.5 hours. No wonder I’d felt out of shape! I’d expected a 7-10 mile, 3500’ elevation hike. As I’d been hiking I’d begun to doubt my physical fitness, but these new numbers seemed much more accurate.
Here’s my Relive (which I like this time because it portrays the snow above treeline)
I have a goal of completing 5 winter 14ers this season, but that’s going to be more difficult to accomplish than it sounds. The weather hasn’t been cooperating on my hiking days, so I’ve been highpointing and sticking close to home the past couple of weeks (Manitou Incline over and over again & summiting the 9K mountains behind). I’ve only done one other winter 14er (Quandary) and my time is about to get seriously limited. This happened on Friday:
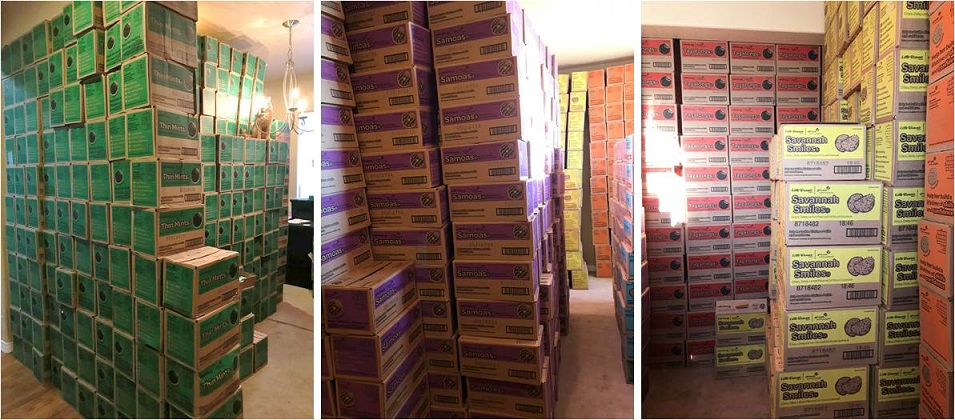
I volunteer as a cookie cupboard from mid-January through mid-March. This means Girl Scout Troop leaders come to my house to get cookies for their girls to sell. I have 2 semi trucks full of cookies delivered to my house twice a week, and those cookies are all gone by the next delivery date. (Think 20,000 cases of cookies, twice a week, in my living room, that have to be unloaded, sorted, and then loaded again when Troops come to pick them up). It’s intense, insane, and a full time job on top of my already full time job: I love it! Oh, and my house smells amazing right now! The only downside is it seriously limits the time I can allot to hiking. I had to give up my Friday hike for a delivery but the weather looked good for Sunday so I just switched days. I’m hoping to get in one more hike before sales start on February 3 (crossing my fingers).
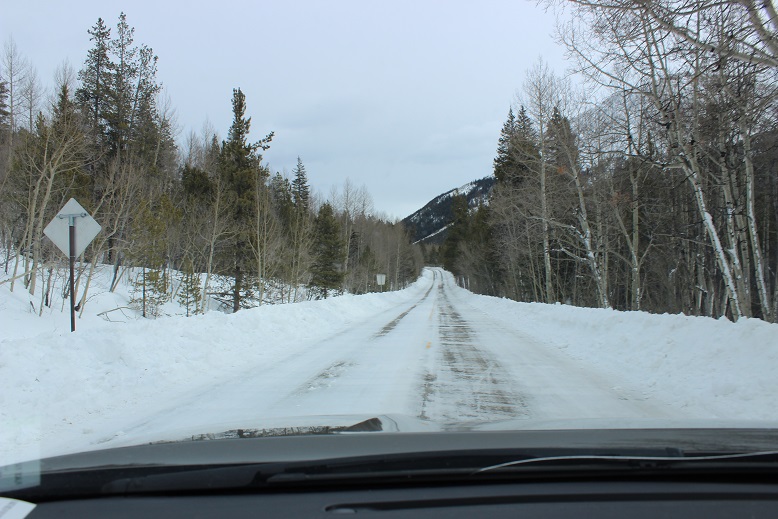
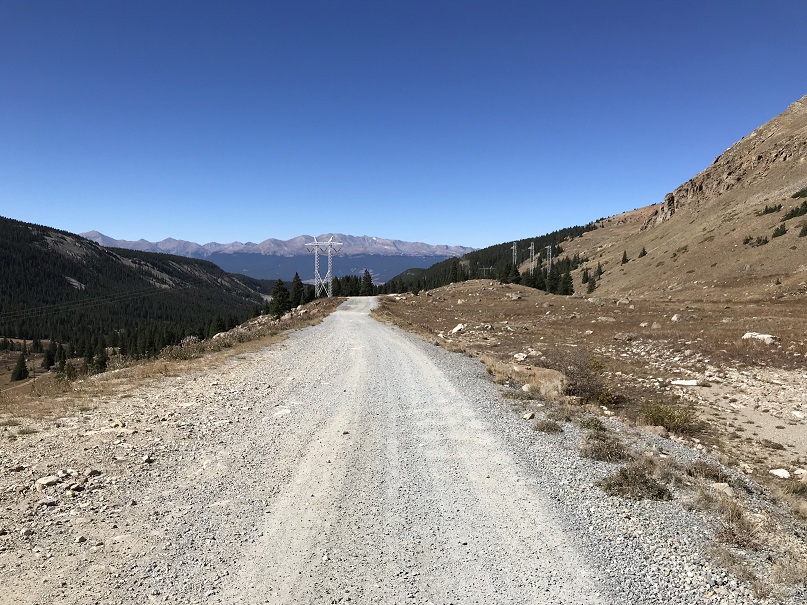
OK, back to business. I arrived at the trailhead at 5:30am, a little later than expected. The drive in on Colorado 82 was a bit icy but manageable with no one else on the road.
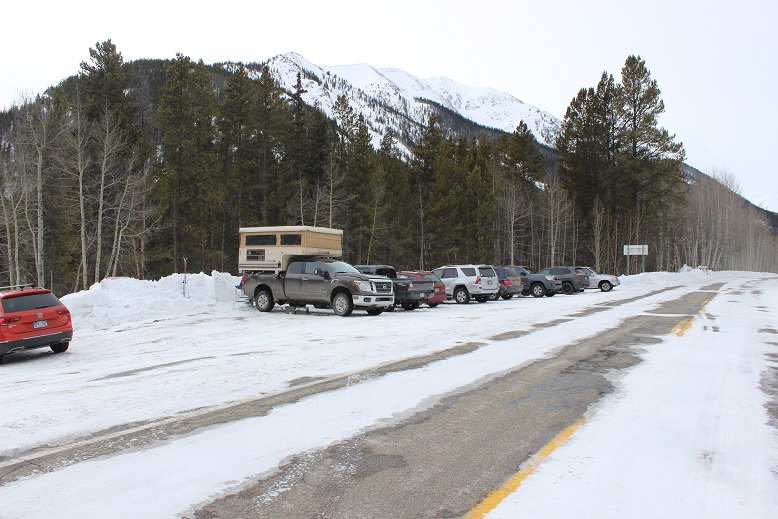
La Plata Trailhead was full when I arrived. I’m pretty sure I got the last spot. It looked like several groups had slept at the trailhead overnight and were just now getting ready to hike (brave, brave souls to sleep at a trailhead in this 10* weather).
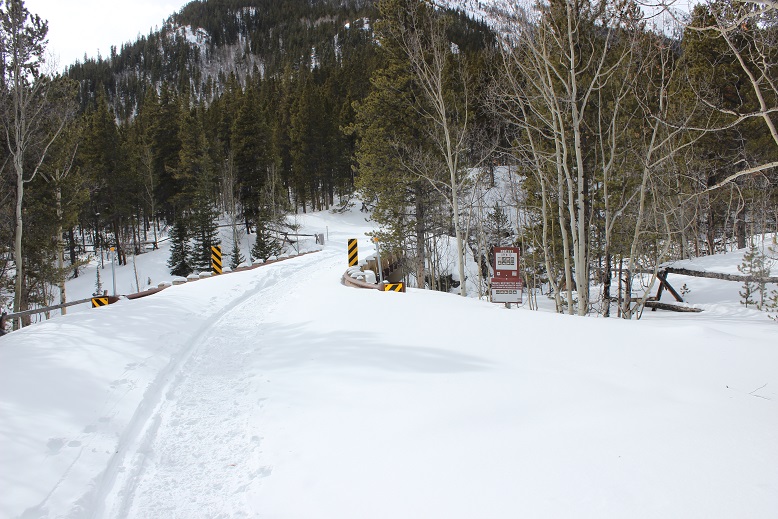
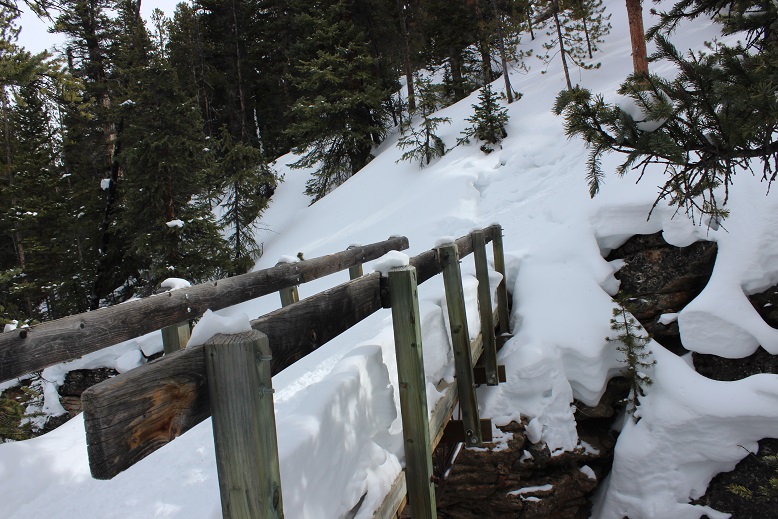
I was on the trail by 5:45am. The trail follows FSR 391 over a bridge and to the left. The bridge was covered in at least 2 feet of snow, making the railings irrelevant.
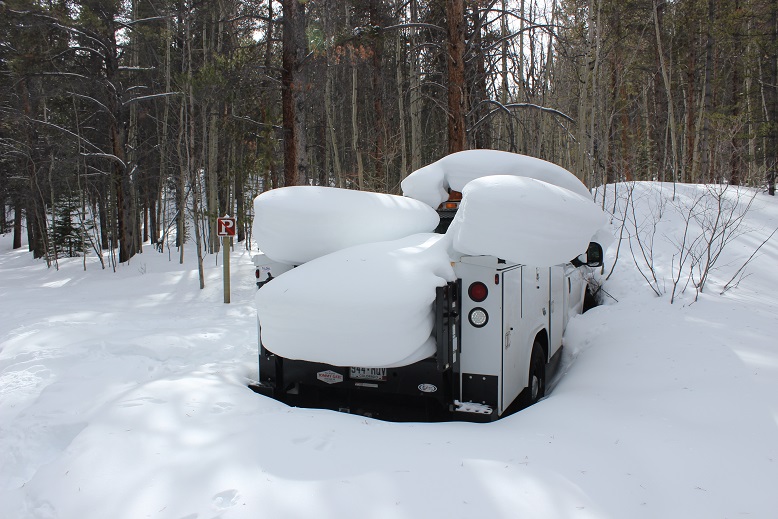
I passed an abandoned utility truck along the way and thought “that’s unfortunate”. I’m not sure if it was left here on purpose but it isn’t going anywhere anytime soon. I’m fairly certain several rodents and small animals have taken up residence under the vehicle.
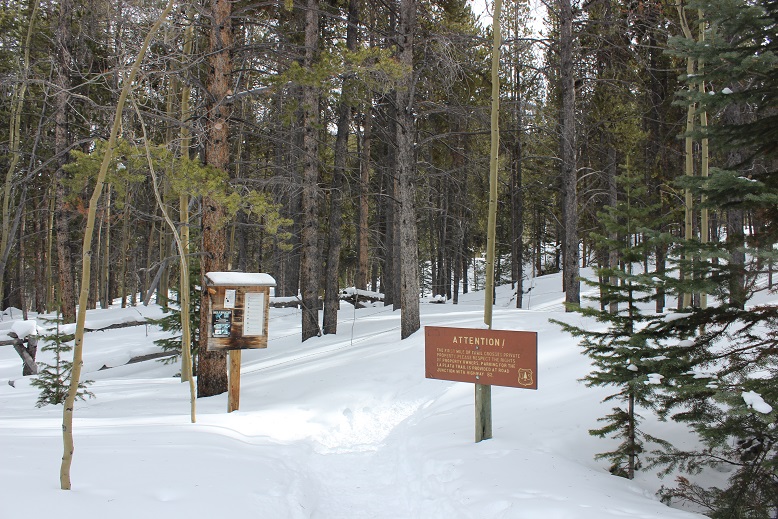
I continued on until I came to the trailhead on the left.
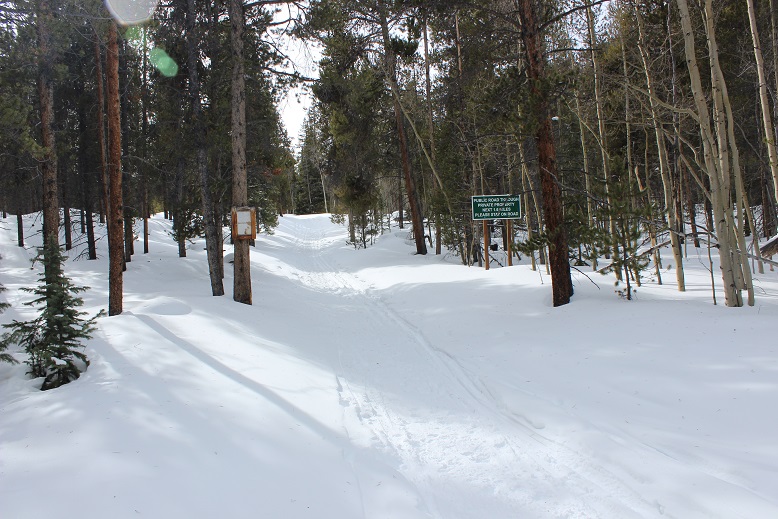
If you see these signs, you’ve gone too far
It was still dark, but knowing exactly where the trailhead was made finding it so much easier this time. The last time I took this route I’d missed the trailhead and ended up hiking at least a mile in the wrong direction. The trailhead was also easier to find now because of the fabulous trench already in place. This trench went from the parking lot just about to the summit, and made route-finding very, very easy.
I crossed another snow-filled bridge
And shortly thereafter a snow covered log bridge. I remember this was very difficult to find in the early summer when it was overgrown and filled with new leaves. No problem this time!
From here I never saw the log/stone steps as they were most likely covered in snow. I followed a trench that went straight up the ridge. About halfway up the slope I smelled smoke and got a bit nervous (forest fire?) until I ran into two hikers taking a smoke break (no comment). The sun started to rise just as I was exiting the trees, but I wasn’t yet high enough on the mountain to enjoy the alpenglow.
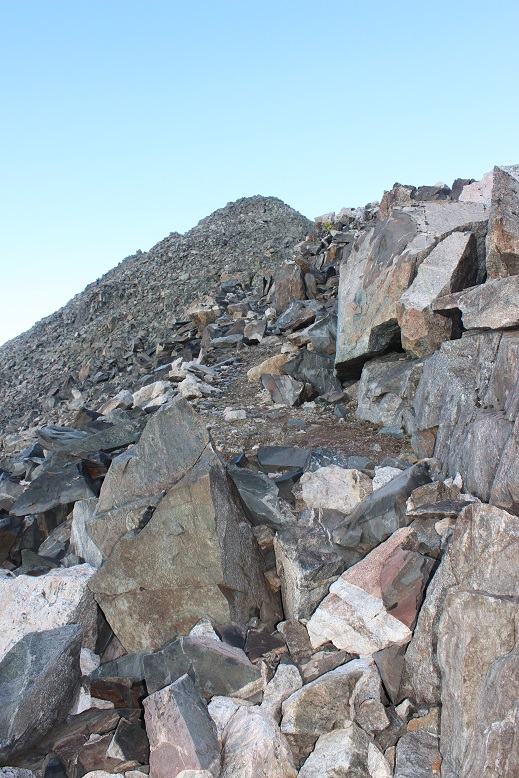
The trench up this part of the hillside was a bit sketchy at times because it was on a steep portion of the mountain, but it did lead me here
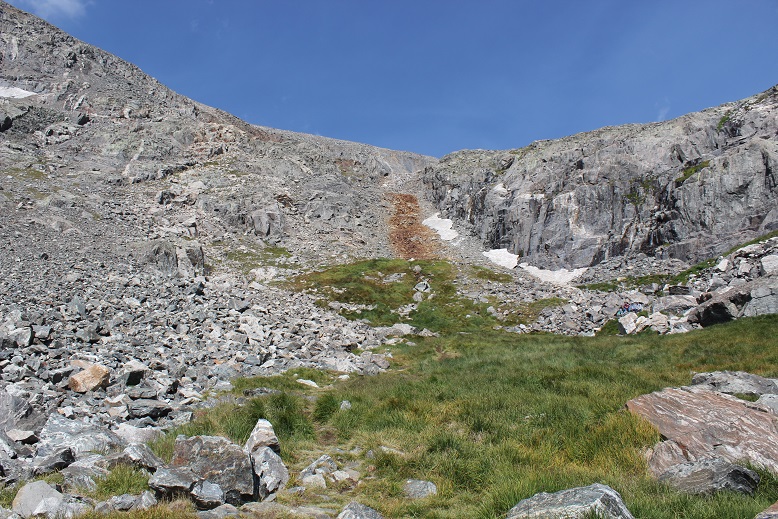
From here I had to gain the ridge. I hadn’t expected a gully? This wasn’t too terribly difficult, but it had been unanticipated. Here’s the route up
The gully was much steeper than these pictures make it look. Here there was no trench, but instead a mixture of scree, snow, and unstable rocks that didn’t provide much traction. Wearing my snowshoes helped.
Here’s a look back down from the top
And my view as the sun continued to rise
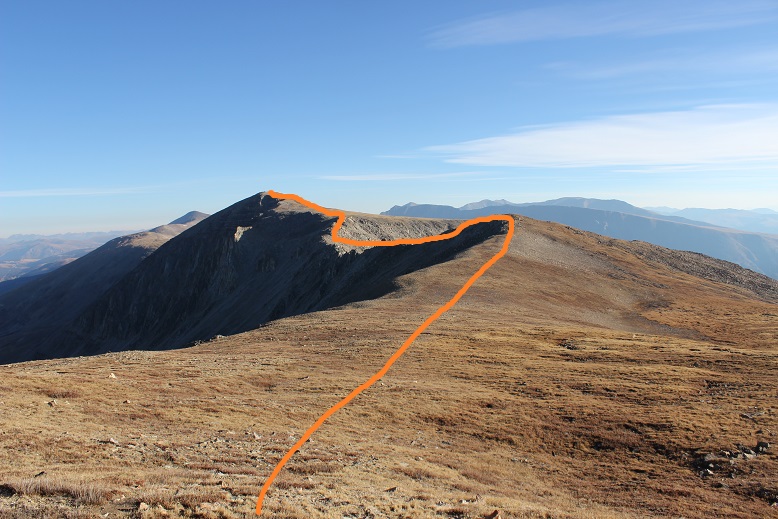
The sun never fully rose today, as it stayed behind La Plata and the ridge for hours after sunrise and then hid behind clouds. From the top of the gully the ridge was just beginning. Here’s the first obstacle
And from there the rest of the ridge
Here’s the route
This ridge is much longer than it looks, with a few ups and downs along the way. Besides the trench there wasn’t a visible trail, but luckily it is very straightforward and all you need to do is follow the top of the ridge.
I came upon some spots where my ice axe and the crampons on my snowshoes were helpful (side note, the straps my snowshoes are still a major pain).
At about this point the wind started picking up. I wasn’t physically tired but I was having trouble breathing. Because my balaclava was covering my mouth I wasn’t getting a full breath of air, making each breath only half as effective as it normally would have been.
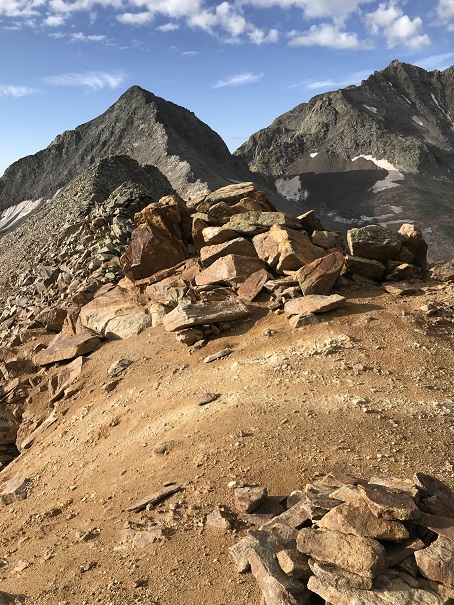
I kept trudging on, knowing I wasn’t in a hurry today so I could take as much time as I wanted. When I reached this cairn I turned left and wondered if the hill to the right had any significance?
From this point the wind really kicked into high gear. I was having difficulty standing up at times but wasn’t worried about falling (there was no real danger of falling anywhere that would send me very far)
I headed up this small rocky stretch
And came to a flat(ish) summit area
I’m not sure what time I summited because I’m doing this new winter hiking thing where I don’t take out my phone unless it’s an emergency, but it was most likely between 9-10am.
I’d thought about summiting East La Plata today but once I got a good view of the way there and considered the current wind conditions I thought twice about my intended second summit. It’ll have to wait for another time.
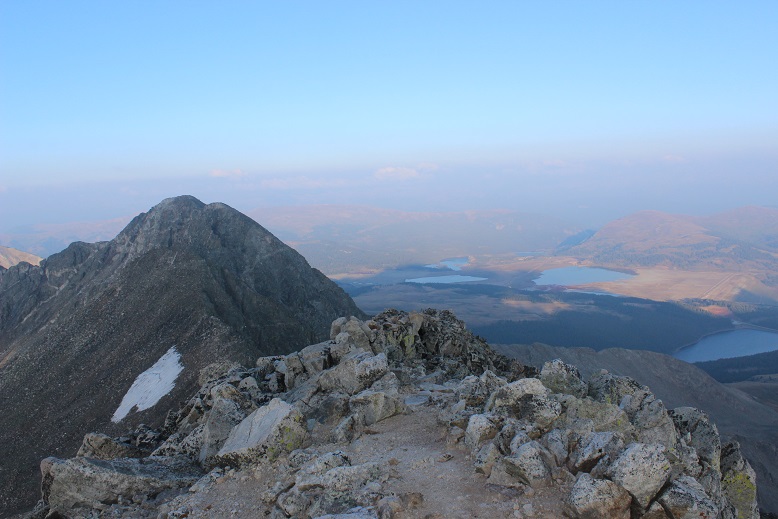
The views from the summit of La Plata were breathtaking
Because of the wind I didn’t stay too long at the summit. It also looked like snow was coming in: Not on La Plata, but the surrounding mountains. Here’s a view from the summit of the ridge
OK, time to head back
Just for fun I decided to climb the little hill before heading back down the ridge
Here’s a look at the summit of La Plata from that hill
Here’s a better look at the ridge and my way back
The sun never quite made it out all the way: it kept hiding behind thin clouds. It was about here I caught up with the two hikers (now a party of 4) I’d seen taking a break on my way up. They only had on microspikes but seemed to be doing just fine (my snowshoes were most likely overkill on the ridge). A little bit further down I saw where they’d stashed their snowshoes.
As I kept descending I started running into more hikers. I thought this was a cool pic of a young man starting his trek up to the summit
The rest of the way back was fairly straightforward. The ridge had a great trench by this point and I could tell where those who’d ditched their snowshoes or hadn’t worn them had post-holed up to their waist on several occasions. The short descent down the gully made me wish I’d brought a helmet, as now bowling ball sized rocks were set loose both above and below me as I made my way down. I breathed a sigh of relief when that was over and I followed the trench back to my truck.
Once I made it to treeline the sun stayed behind the clouds and I could tell it was snowing on nearby peaks. Despite the summit wind it had been a very nice and quiet hike. I didn’t see any animals or very many animal tracks in the snow. I made it back down to my truck at 1pm, making this a 9 mile hike in just over 7 hours. Oh, and total bonus for today: My hands didn’t freeze! They didn’t even get cold. In fact, they were sweating in my mittens when I made it back to my truck. Two of my toes were blue, but nevertheless I’m considering today a huge success in the ‘cold’ department!
2 winter 14ers down for the year, 3 to go!
Just because they’re fun… here’s my Relive (I thought it was interesting this says my elevation was at 14,338 when La Plata’s elevation is 14,336): https://www.relive.cc/view/2107811469
I was really excited to get to go out above treeline for the second time in as many days, but my feet were not. They still hadn’t recovered from yesterday’s trenching up Quandary. The entire drive to the trailhead my left pinky toe kept cramping up and I had to wiggle it to get the sharp pains to stop. It was still a bit swollen, red, and tender to the touch. This is normal for me the day after a winter hike and it’s usually better within a few days, just in time for my next hike. I’d recently bought some toe guards and new compression socks I was hoping would help today.
The roads this morning were much better than yesterday but due to ice I still didn’t make it above 40mph for much of the drive. I realized when I was about halfway there I’d forgotten to take my vitamins before I left the house. I hope that didn’t come back to haunt me later. I arrived at 5:30am and was on the trail by 5:45am. I put on my snowshoes in the truck with my microspikes on underneath once again (I’d not worn spikes with my snowshoes yesterday and the straps had still come undone, so I decided wearing microspikes didn’t have an effect on the snowshoes).
While it was 1* outside I was happy to discover my toes stopped hurting before I’d even crossed the street to start on the trail, and they didn’t bother me for the entire hike. I quickly warmed up as I started hiking.
Today I planned on trying out an experiment. I was going to keep my phone in my pocket on airplane mode and I wasn’t going to use my phone today for any reason until I made it back to the trailhead. I wanted to see if this helped retain battery life in the phone. The downside of this is I wouldn’t know what time I summited or have the ability to take videos of the summit. (side note: my phone is normally on airplane mode when I’m hiking).
While I was hiking Quandary yesterday I studied Hoosier Ridge. It was snowing lightly on the summit so I knew even if there had been a trail it was gone now. Also, the conditions looked favorable for a climb.
I was pleasantly surprised to find someone had trenched a trail through the willows yesterday, and it was intact until I made it to the towers area. This made the beginning of the hike easy. From here I zig-zagged and trenched my way up the slope to the beginning of the ridge.
At the top of the slope I followed the ridge. At the top of each bump there are cairns, making route finding easy.
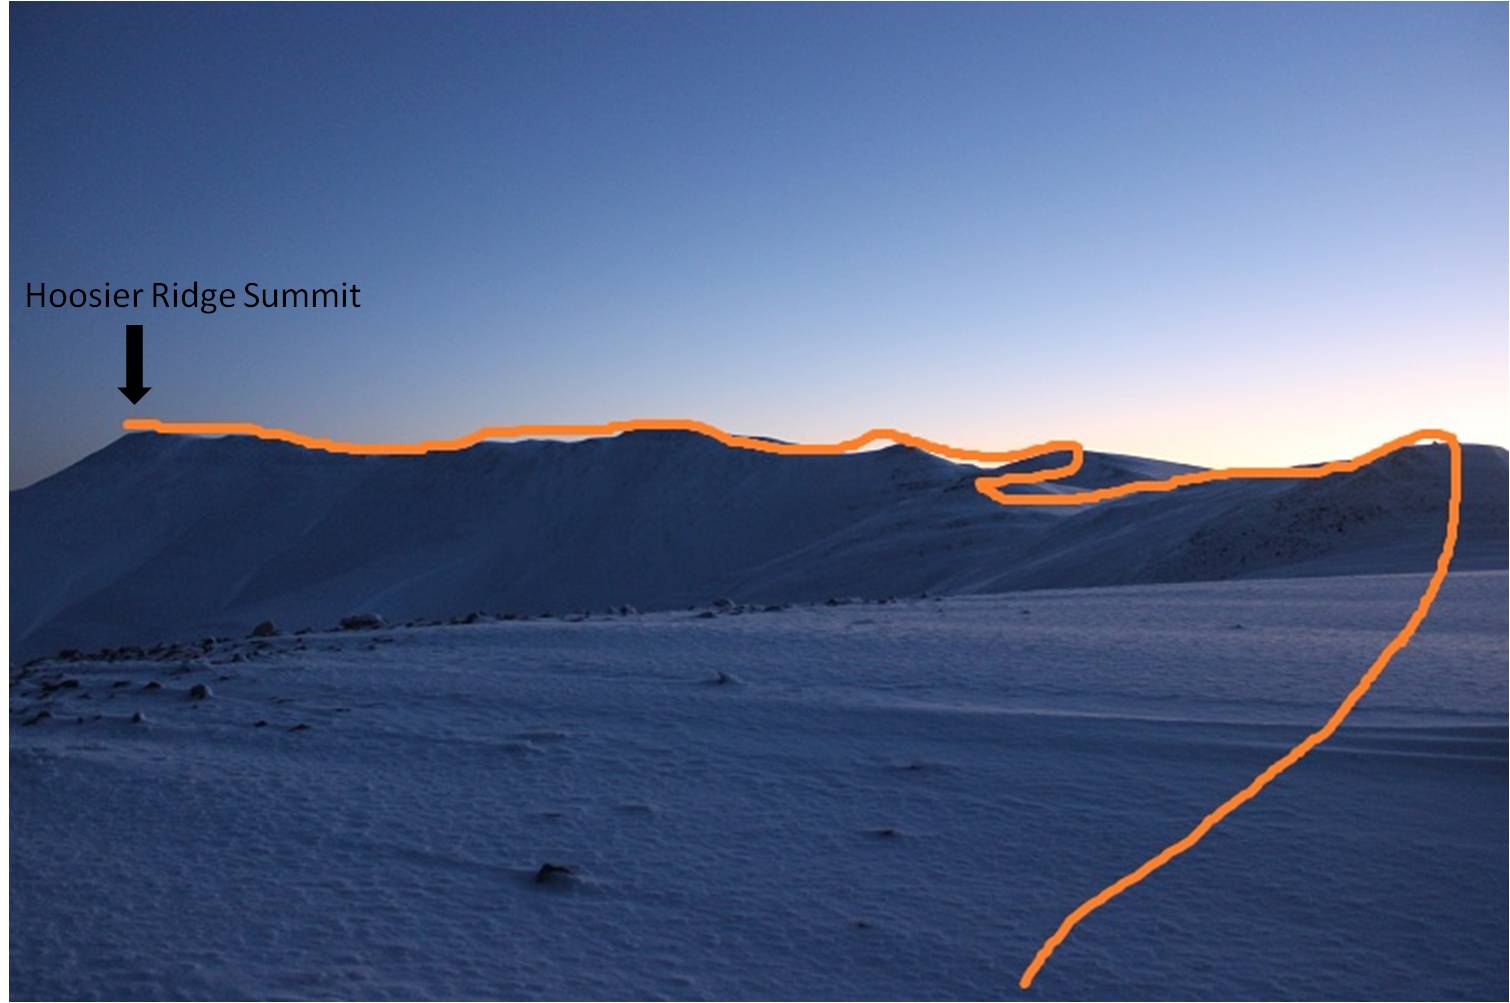
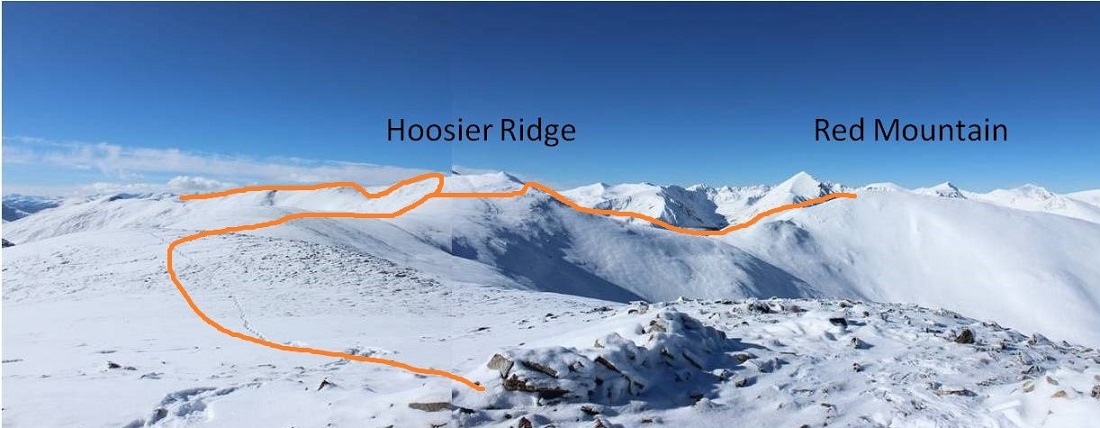
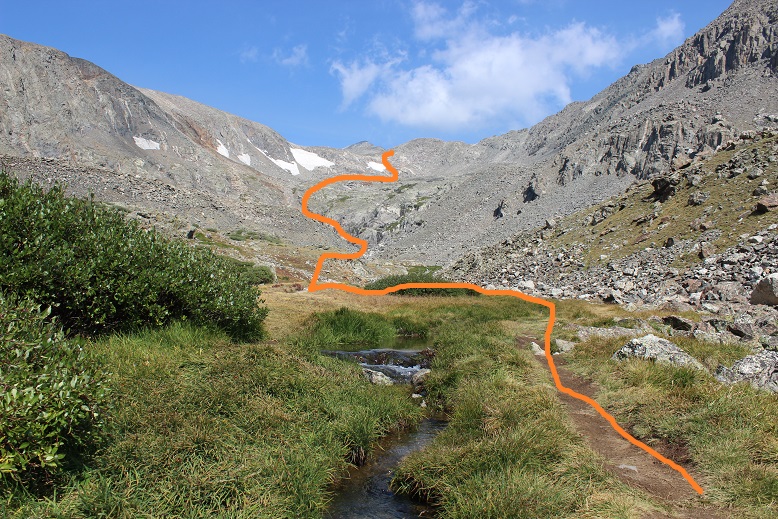
Here’s the route I took along the ridge.
There weren’t any tracks to follow for the rest of the hike, but the snow wasn’t too deep, making trenching easy.
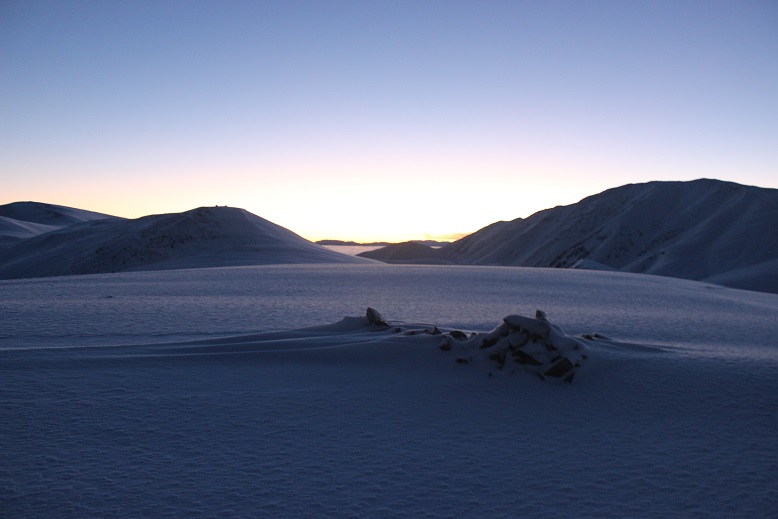
I looked back over my shoulder as the sky lightened. The mountains were amazing this morning!
I reached the top of the slope just as the sun was beginning to rise over Mt Silverheels. I love alpine sunrises!
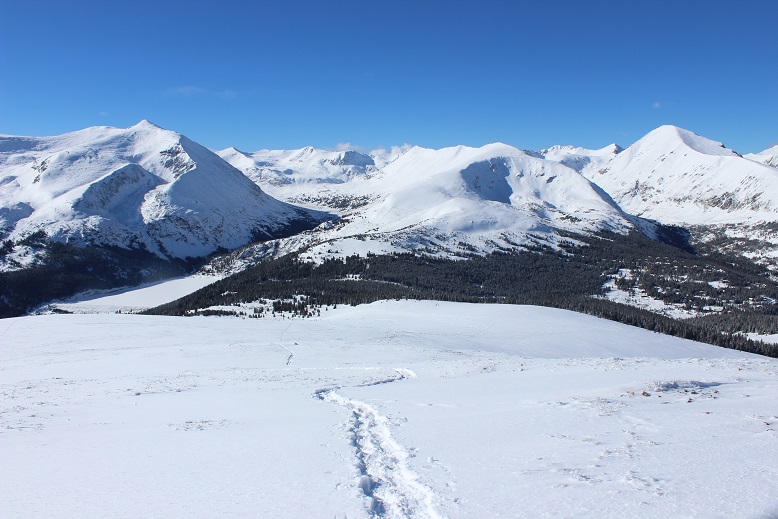
As I said before, I just followed the ridge… and kept following it, and followed it some more. There are tons of ups and downs on this hike. With each new bump in the ridge I kept thinking I’d made it to the summit: it’d felt like I’d hiked far enough, and the cairns/rock shelters must mean I’d summited. I’d take a picture, take out my map and look around, just to realize I still had more of the ridge to go. This happened twice. Oh, and those little bumps go up and down in elevation about 200’ each. Here’s a photo for reference…
Here’s a false summit
And another one
Oh look, a few more…
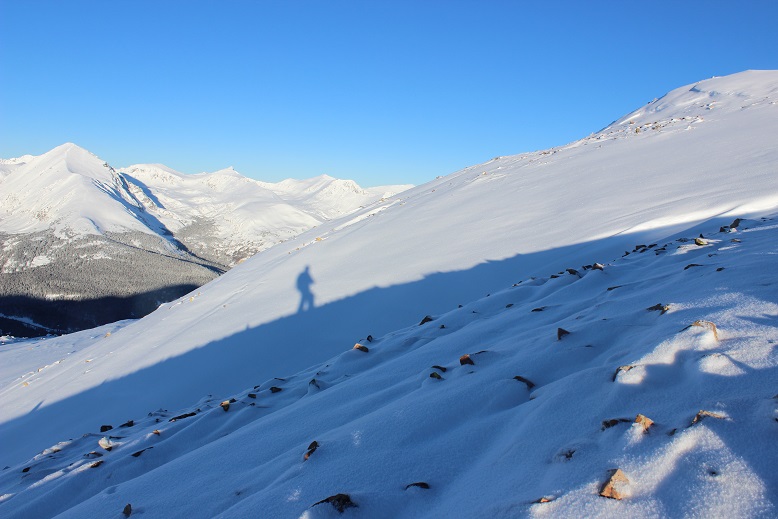
The ridge is longer than it looks, but there’s nothing technical about it. The only downside is all those hills! Every time I’d head down one I just knew it was going to haunt me on my way back. One cool part were the shadows all the slopes created. Of course I took a shadowselfie
Here’s a look back on that ridge
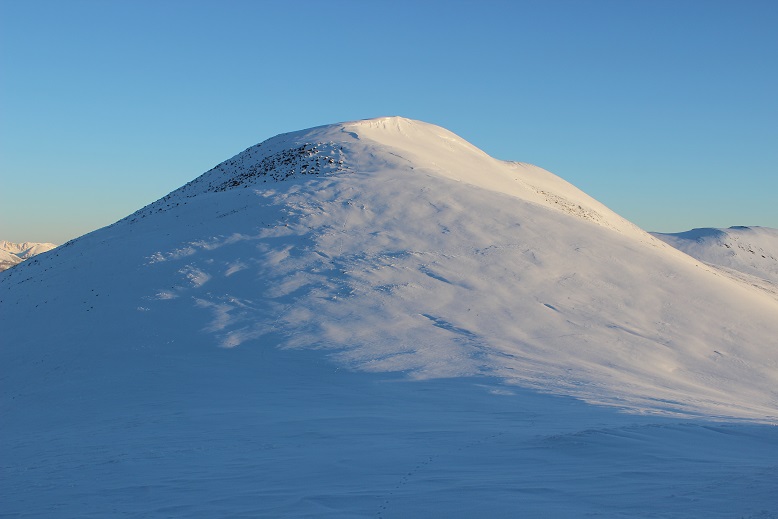
And here’s the final push up Hoosier Ridge
Woohoo! I summited!
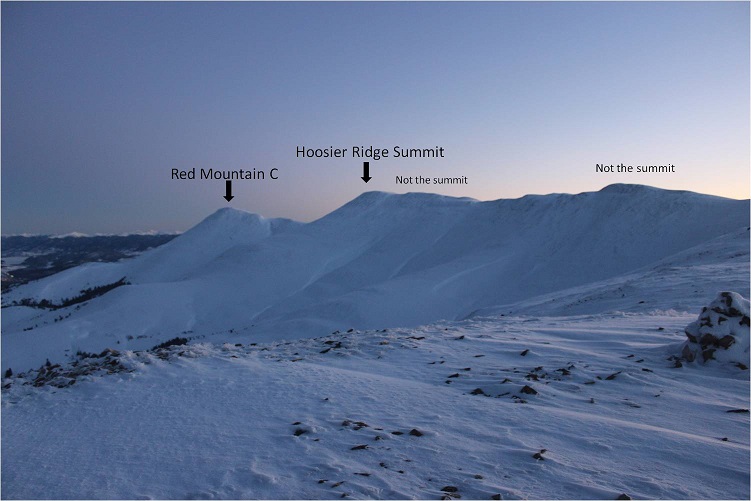
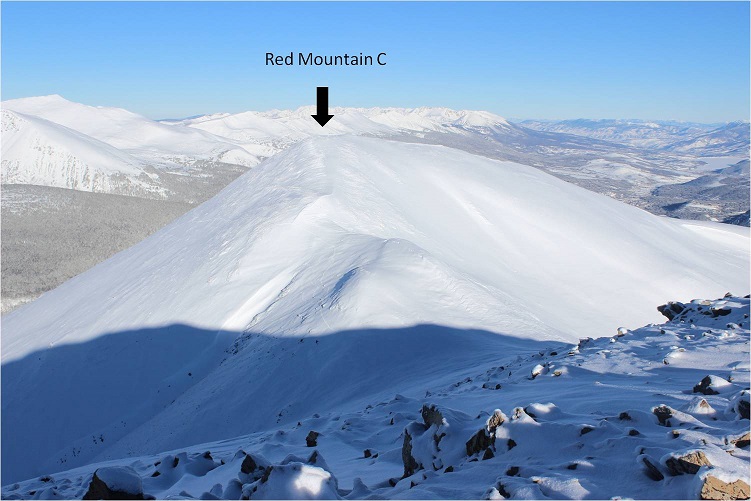
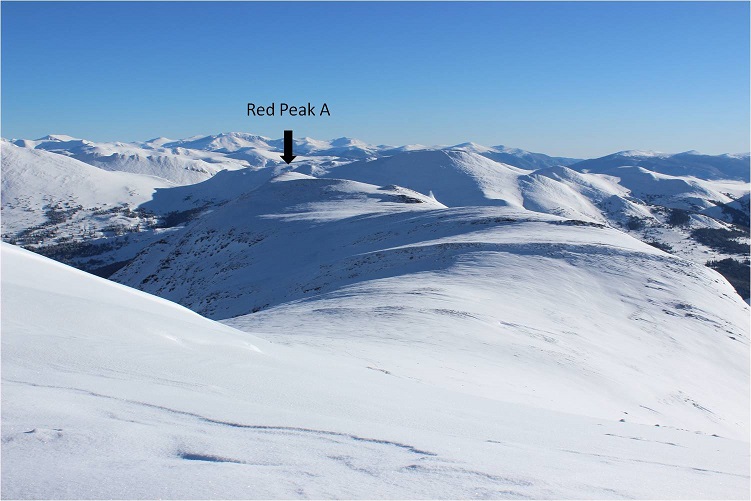
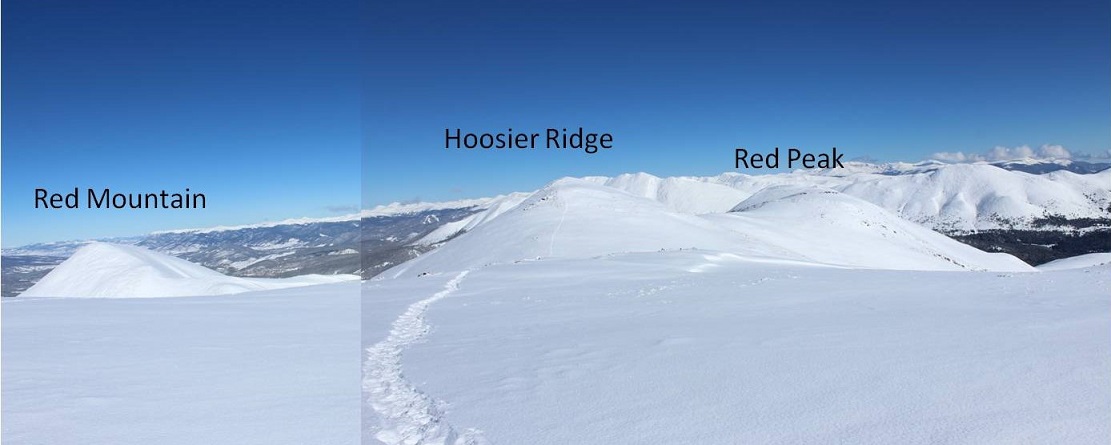
I knew I was at the summit this time because I could see Red Mountain C and Red Peak in their correct positions on my topo map (one of the reasons I’d known I hadn’t summited prior to this was their absence).
Side note: Couldn’t they have been more creative than “Red Mountain” and “Red Peak”? Seriously.
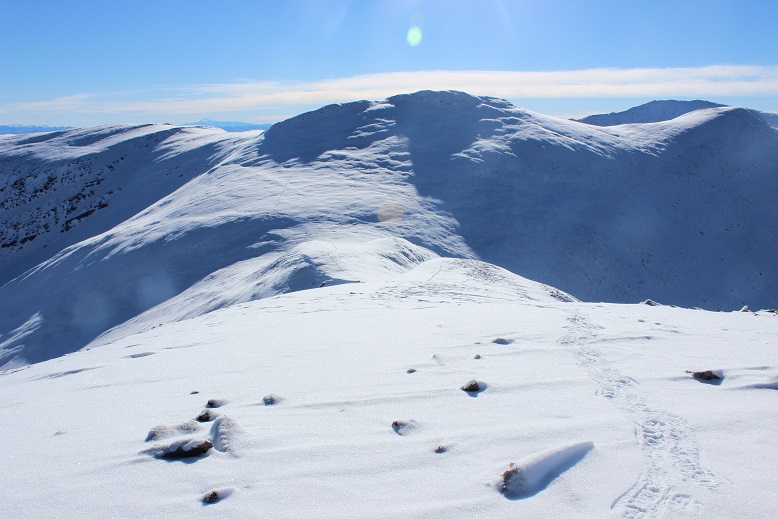
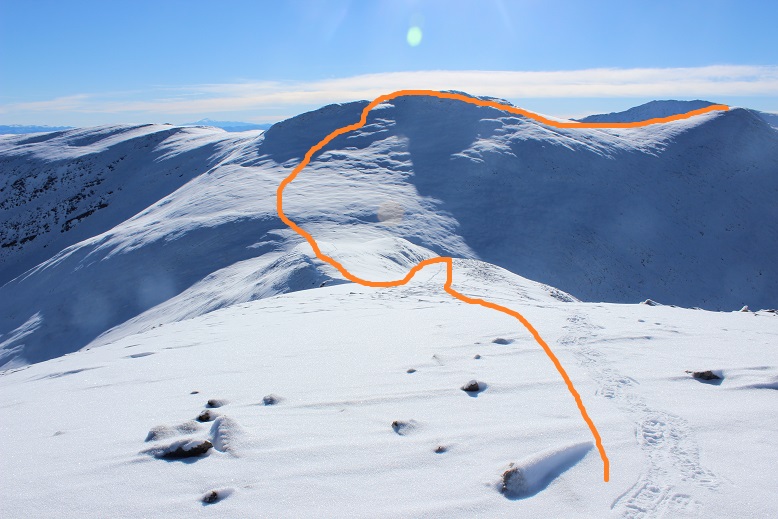
From the summit of Hoosier Ridge looking at Red Mountain I could see I was going to run into some difficulties and considered not even attempting the summit. It had already been what seemed like a long day. There was more snow than I’d anticipated on the route up Red Mountain, and from where I was I couldn’t tell if it was stable or not. I could see a bunch of goat prints along the mountainside. As with all of my hiking decisions, I like to wait until I’m right up against a problem to make a judgment, but from this elevation I started devising my plan. I intended to hike down to the saddle (a good 500’ elevation drop) and then traverse to the slope. From here I wanted to ascend the slope along the ridge. Here’s my intended route.
I was worried about the stability of the snow, but knew from my research I shouldn’t need to worry too much about avalanche danger here today. Still, I planned on being careful and staying alert to my surroundings. I deviated from my route a bit due to snow conditions, but was happy with my choices.
Everything went to plan until I reached this area.
It was much steeper than I’d originally thought
I stood here for a few minutes and contemplated what I wanted to do. The goats had traversed further southwest, but if I took their route and slipped I’d keep falling for hundreds of feet, if not more. I saw the same consequences with going to the east. That meant I’d need to climb straight up this wall of snow, given that if I accidentally slipped I wouldn’t have far to fall and the snow I’d land on wouldn’t be filled with rocks.
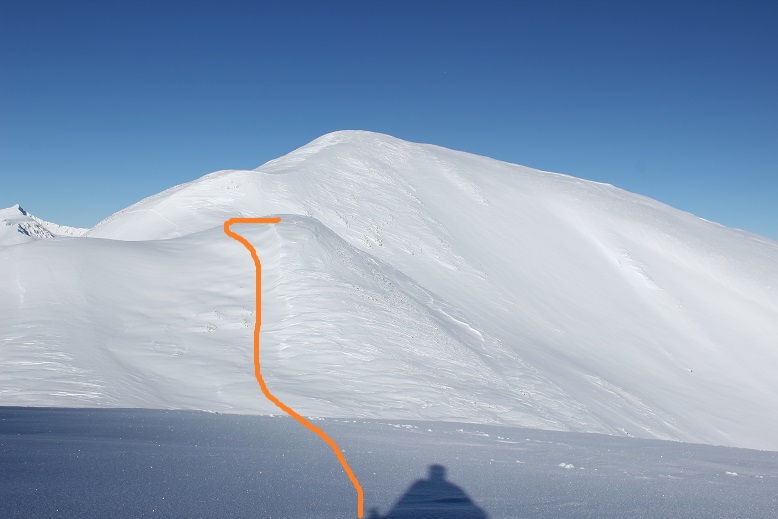
I made my way towards the wall. It kept getting steeper the closer I got. Not only steeper, but softer as well. The sun was warming up the mountainside and the snow was quickly condensing under my snowshoes. I made it about halfway up the slope and slid down about 10 feet. Frustrated, I made my way back down and considered calling it a day. I looked back up on what I’d done.
This was frustrating. I knew if I could just make it over this wall the rest of the hike would be easy (don’t ask me how I knew this, I just knew). I was mad at my situation and got to thinking: I had an ice axe, and I’d been holding onto it and kind of using it. Why wasn’t I using it more aggressively like I was supposed to? This in no way compared to the difficulty I’d faced on Little Bear or Snowmass. I wasn’t trying hard enough.
The sun wasn’t getting any cooler: If I was going to do this I was going to have to do it now. It was time to turn around and try again. So I got out my ice axe and went to work. Crampons would have been much more helpful than my snowshoes, but I made it work. I’d drill a hole for my left hand, kick one of my snowshoes in, plug my ice axe in a little higher, and hauled myself up one step at a time. It was work, but I had the best feeling when I made it over that wall! I’d done it! Woot! And I was right, the rest of the hike up the ridge to the summit was a piece of cake.
I haven’t felt that good about earning a summit in what feels like a long time. I was exhilarated and thrilled with myself for not giving up.
Here’s a look back at the route
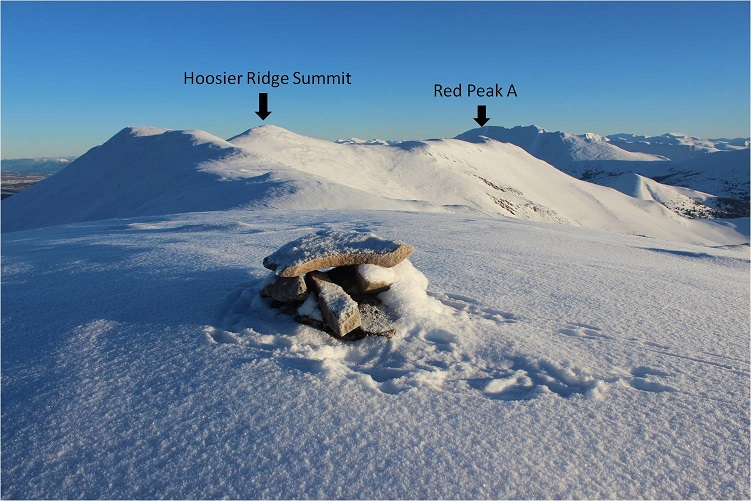
I was excited to head over to Red Peak, but didn’t want to re-summit Hoosier Ridge in order to do so if it wasn’t absolutely necessary. Here’s the route I intended to take around Hoosier Ridge and over to the Red Peak saddle.
As I was heading back to the Hoosier/Red Mountain Saddle I looked back on the route I’d taken. It looked so much easier from this angle! The arrow shows where I stopped and re-started again.
For the first time today I put up my heel risers. Those things are amazing!
Traversing to the Hoosier/Red Peak saddle didn’t work quite as planned. I was trying to avoid the rocky area altogether, but as I got closer I found there was a ridge that with snow was steeper than it had looked on the map, so I had to ascend further than I’d originally anticipated, but I was still able to make it to the saddle without backtracking.
Once I gained the saddle I followed some goat tracks to the summit
This was the easiest part of my day by far
Here’s a look at the route I took from Red Mountain and the route I took back
At about this time I heard a buzzing sound and saw a flight for life helicopter heading towards Quandary. This was never a good sign. I said a silent prayer and began my hike back.
Re-summiting Hoosier Ridge wasn’t difficult, but by this time I was getting tired. I made it to the top of the ridge and started traversing. Once again heard the helicopter.
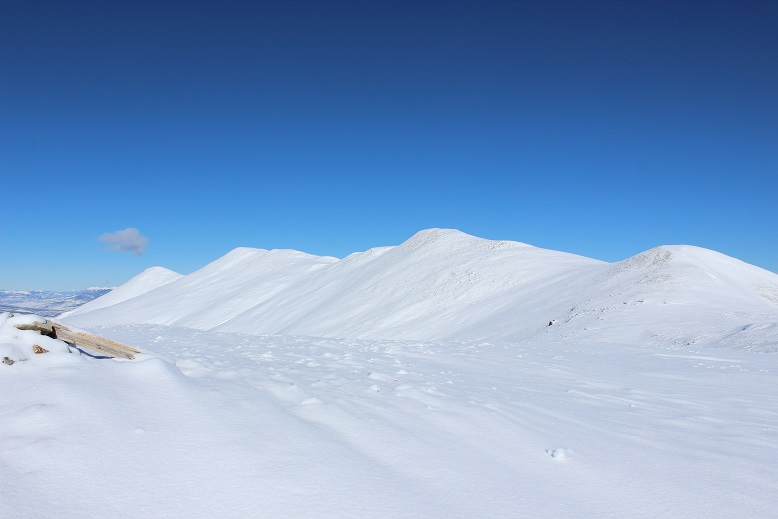
I turned back and got a good view of all 3 summits
The ridge back took what seemed like forever to cross.
Remember all those ups and downs from the ridge before? Well, they were still there and I got to re-summit each of those little slopes. Again.
Just as I was almost done with the ridge I came across a pair of hikers who were on their second hike of the day. They’d attempted Drift Peak earlier this morning but due to multiple cornices were unable to safely summit, so now they were attempting Mt Silverheels. I thought to myself “maybe that’s why it’s called ‘Drift Peak’?” and mentally wondered why no one had posted a recent conditions report? These were the third people I’ve heard from this week stating Drift Peak isn’t summitable, yet no one had added a conditions report. I wondered how many others had attempted and turned back as well? I wish more people would put in condition reports instead of just talking about the conditions to their friends online.
In any event, luckily someone had started after me and it looked like they’d veered off to summit Mt Silverheels, so these two hikers would have a trench to follow. They seemed in good spirits, despite already hiking since 4:30am. I wished them luck and was more than ready to finish my hike.
It was a lovely day, sunny, with no wind. I wasn’t the only one who’d thought so: the trench I’d made on my way in was now very well packed down, and there was evidence of skiers everywhere.
I made it back to my truck at 2pm, making this a 12 mile hike in just over 8 hours. The parking lot was full.
I looked at my tracker: It had worked! However, today’s hike had felt like more than 4000’ in elevation gain. I’d actually thought it was closer to 5000’, but maybe that was just leftover Quandary talking from my hike yesterday.
My phone said I had 22% battery and hadn’t turned off once the entire time I’d been out. Usually when it’s cold it it turns itself off each time I take it out of my pocket. When I plugged it in it immediately went to 77%. What I’ve learned is when it’s cold the phone isn’t out of battery, it just doesn’t operate well in the cold, so it shuts itself off (even though it really has plenty of batter life left). The only way to keep it from “running out of battery” and turning off is not to take the phone out/use it.
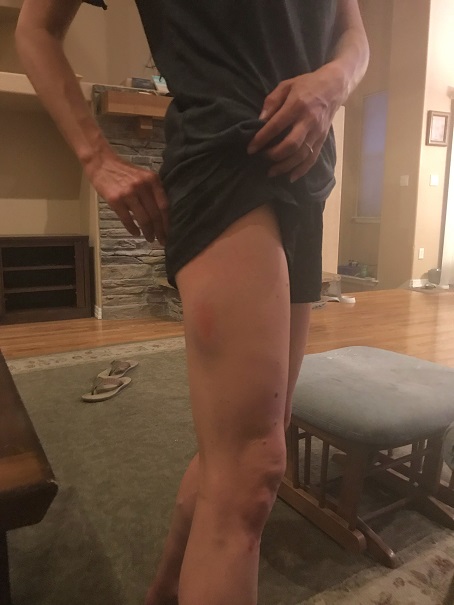
I quickly took off my outer layers and put on my sandals for the drive home. As soon as I pulled out of the parking lot I felt a sharp pain in my left pinky toe. Ow! Ow! Ow-Ow-Ow!!! It felt as if I’d been stung by a scorpion! Immediately I pulled over to the side of the road to inspect my foot. My pinky toe was completely blue but as I watched it slowly turned to a bright red, starting from the base of the toe and moving up like a thermometer. What had felt like venom spreading like fire through my toe was actually just the blood re circulating through my feet. Though my other toes were partially blue, they didn’t hurt. Bright red is normal for me after a hike. I sat there fascinated as I watched my toes turn colors, and belatedly thought to take a picture. (This picture was taken about half way through the process).
The pain was intense, but within a few minutes my foot was back to normal and I drove the rest of the way home. It seems the reason my toes hadn’t hurt during my hike was because they’d had an attack as soon as I’d started hiking this morning. Also, my new tricks (toe guards, compression socks, etc.) hadn’t done their job. Or maybe the attack was because I’d forgotten to take my vitamins this morning? In any event, I’m going to have to watch my toes this week, especially the pinky. It’s currently in the same condition it was in before today’s hike (red and swollen and a bit painful to the touch), but this is ‘normal’.
A man died on Quandary today. It’s a sober reminder the mountains aren’t forgiving of mistakes. Make good choices and wear your helmet friends. Sending prayers to all involved.
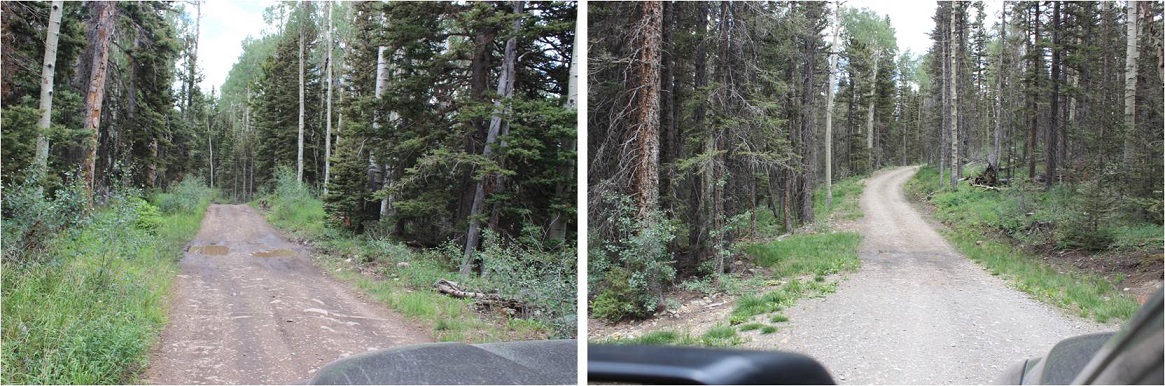
I woke up at 2am and made it to the Lower Iowa Gulch Trailhead at 5:15am, which was much earlier than I’d anticipated. The drive in is easy on a 2WD dirt road.
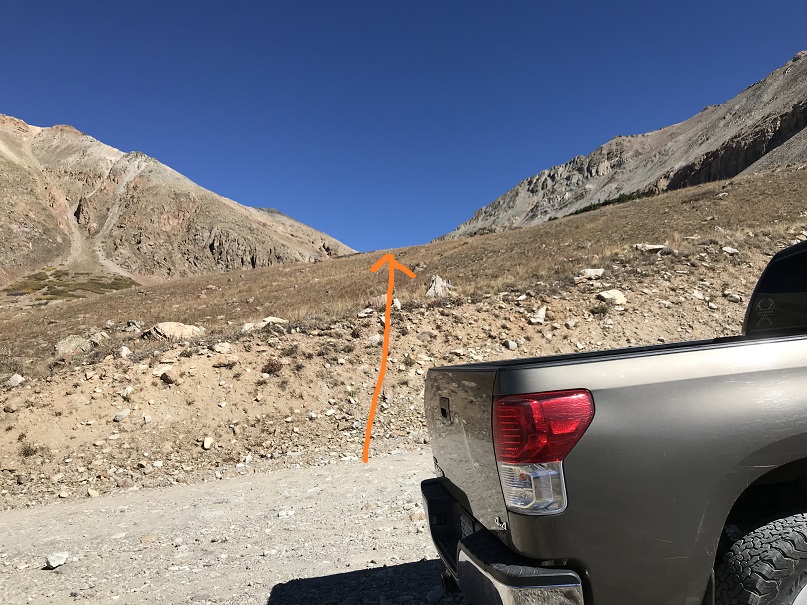
There is no official trailhead, so I parked near a tree, gathered my gear, and headed northwest through the base of the amphitheater towards the West Dyer/Dyer saddle.
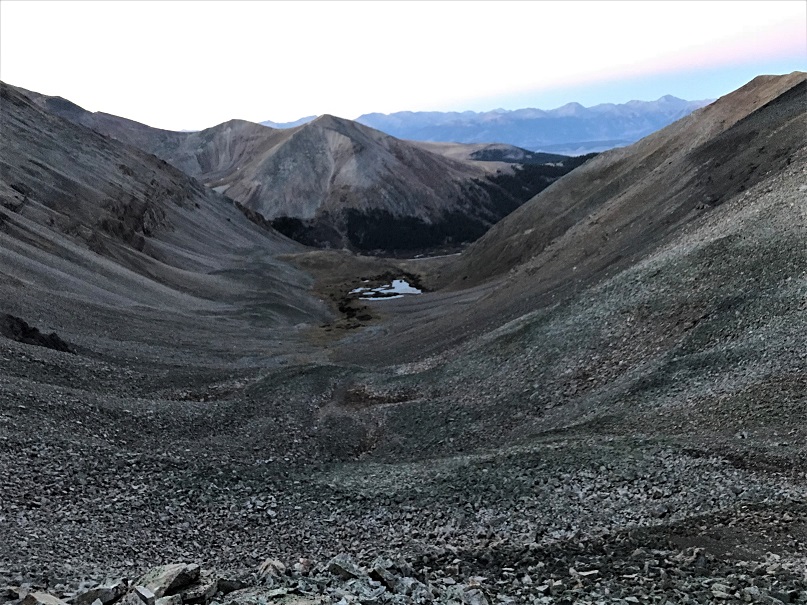
It was only 1.3 miles to the base of the West Dyer/Dyer saddle. There isn’t a trail, but the route is fairly obvious, even in the dark. Just keep heading for the saddle. Here’s a look back on the basin from the saddle
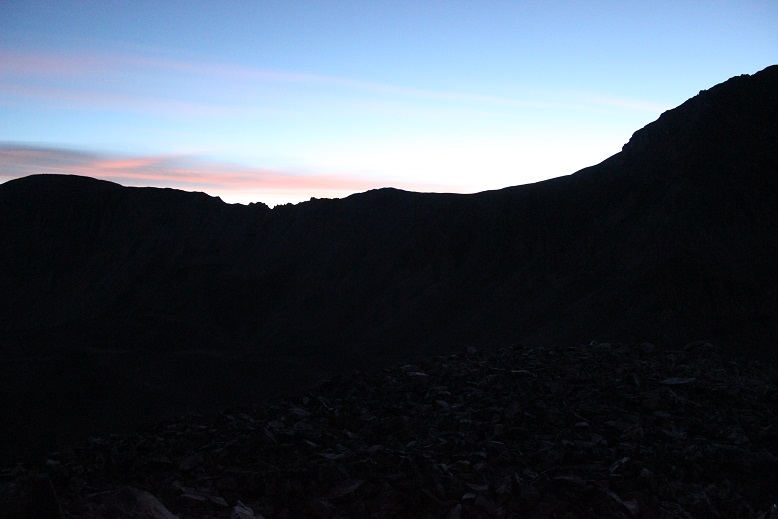
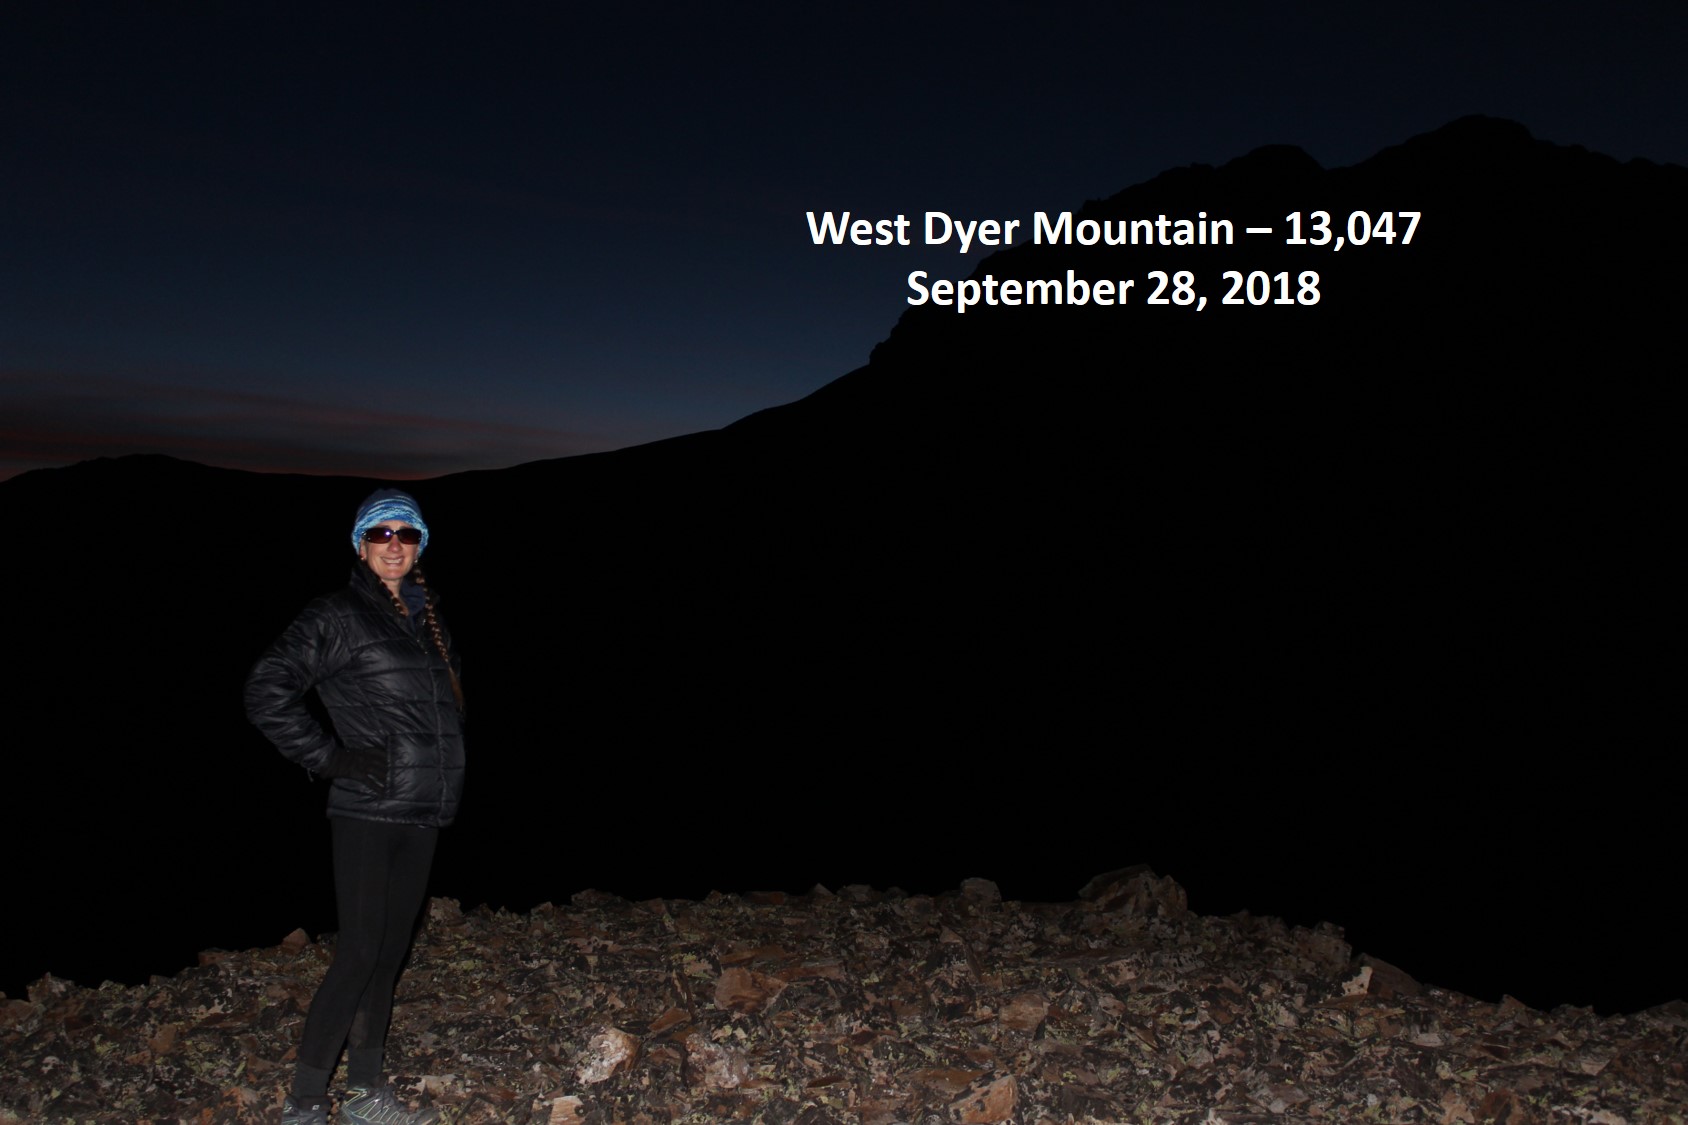
From the saddle I chose to summit West Dyer Mountain first, an unranked 13er. I chose my route to reflect my time constraints and sunrise/daylight limitations. For me it’s a delicate balance between hiking in the dark/daylight (pictures turn out better in the light) and being back at the TH by noon.
It takes so long for the sun to rise in the fall! I wanted to summit and get pictures, but I also needed to be back at my truck by noon so I could drive home in time to pick up my daughter from school and start our day. So while I was hiking slowly because I wanted to get pictures from the summit in the daylight, I also wanted to get in as much hiking as possible today. In any event, after the saddle I turned west and hiked .2 miles to the summit of West Dyer Mountain, slowly, willing the sun to rise. I summited at 6:20am, while it was still dark. I took some pictures of the summit and waited for the sun to rise. But it just wasn’t happening.
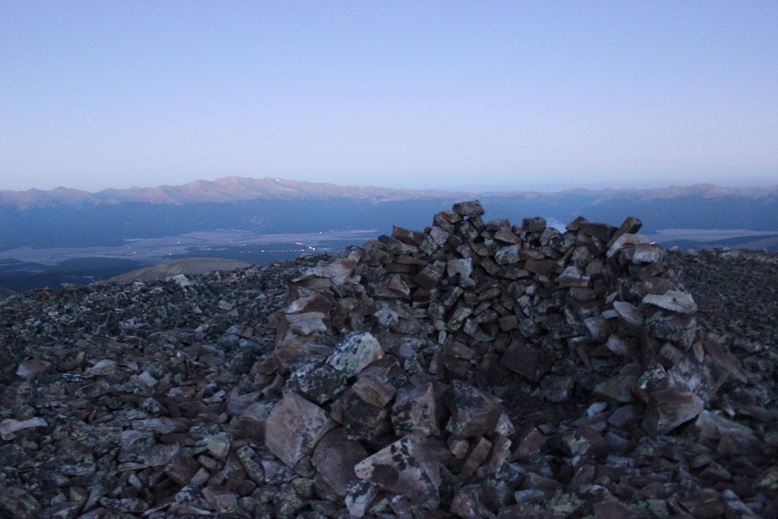
West Dyer:
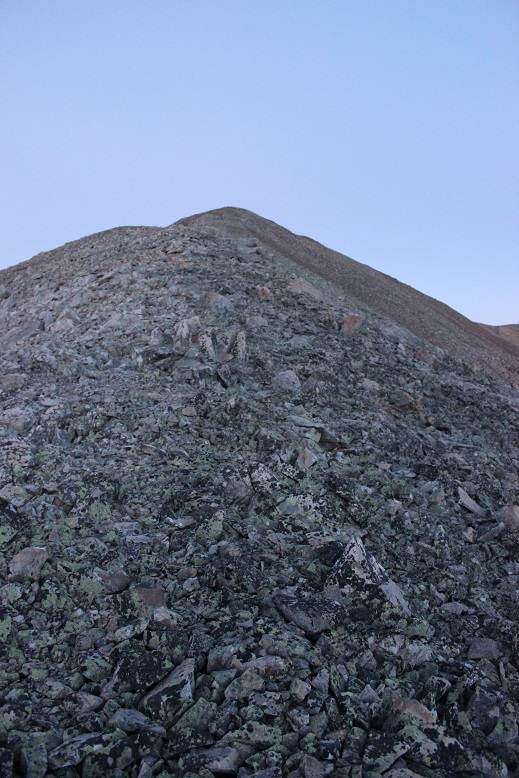
So I turned back towards the West Dyer/Dyer saddle and put on my helmet.
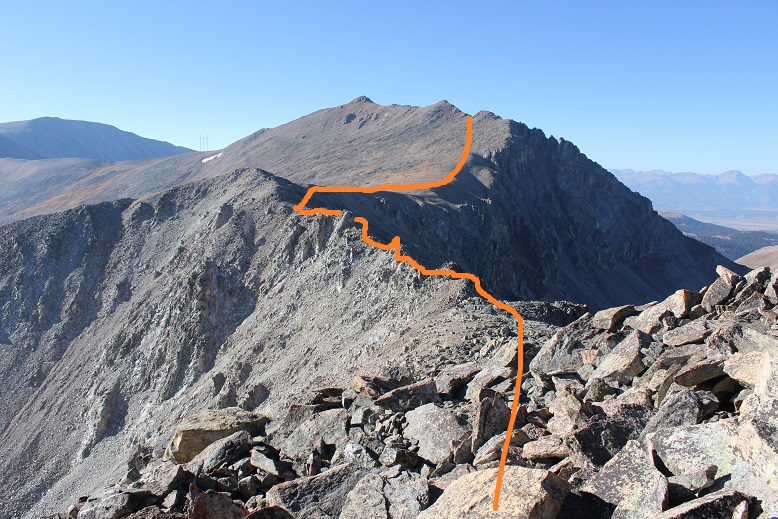
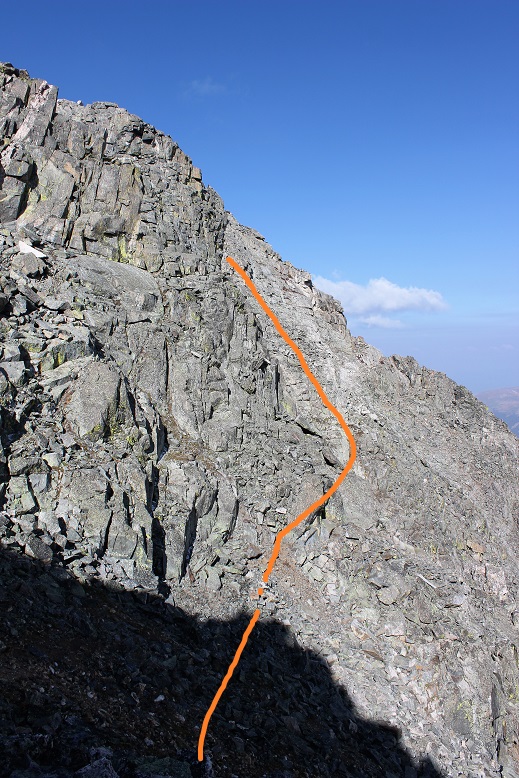
It was still dark and hard to make out the path I was supposed to take up Dyer’s West Ridge. I was hoping it would be more obvious as I got closer to the route. Here’s a look back on West Dyer from the saddle
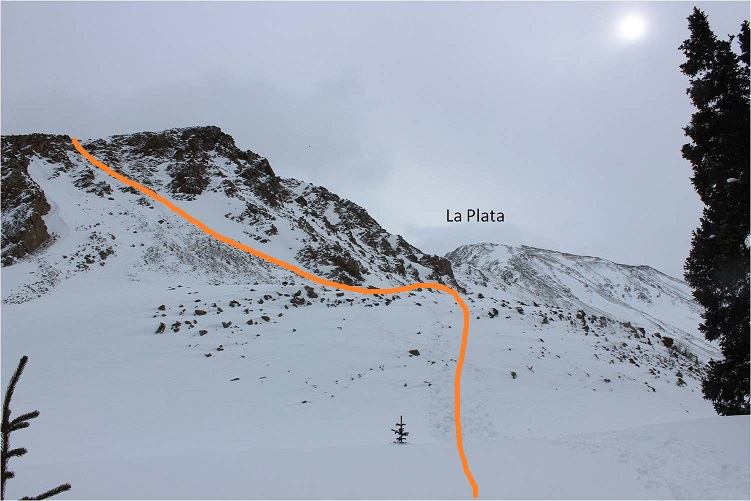
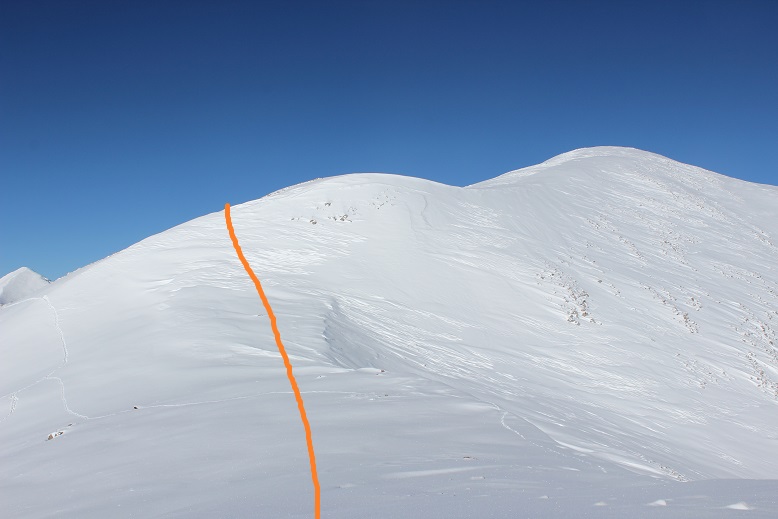
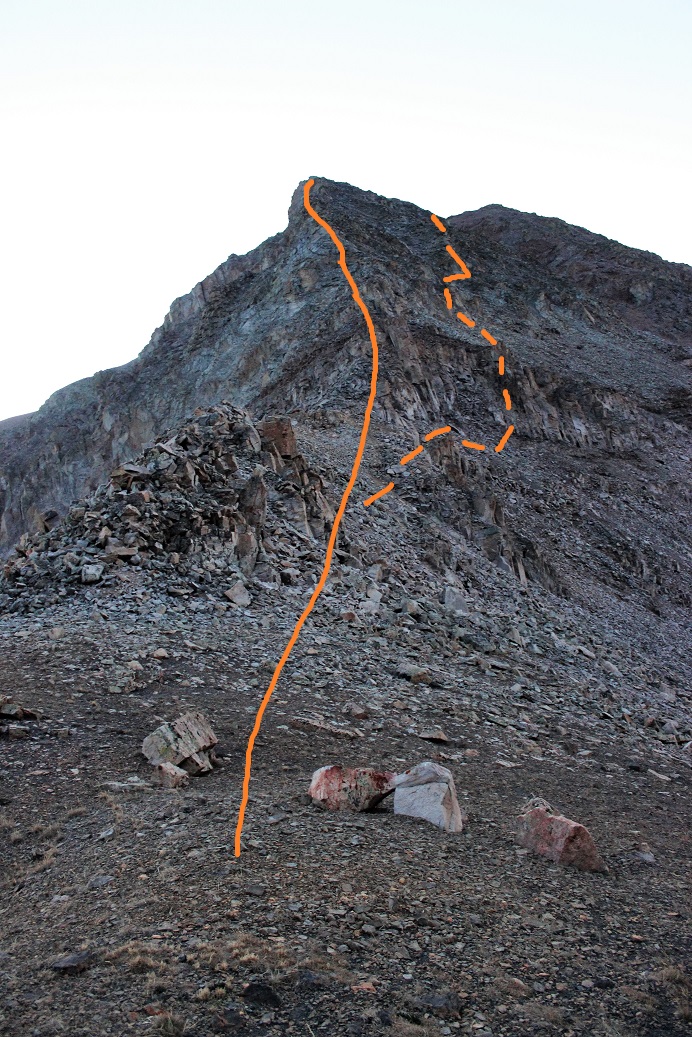
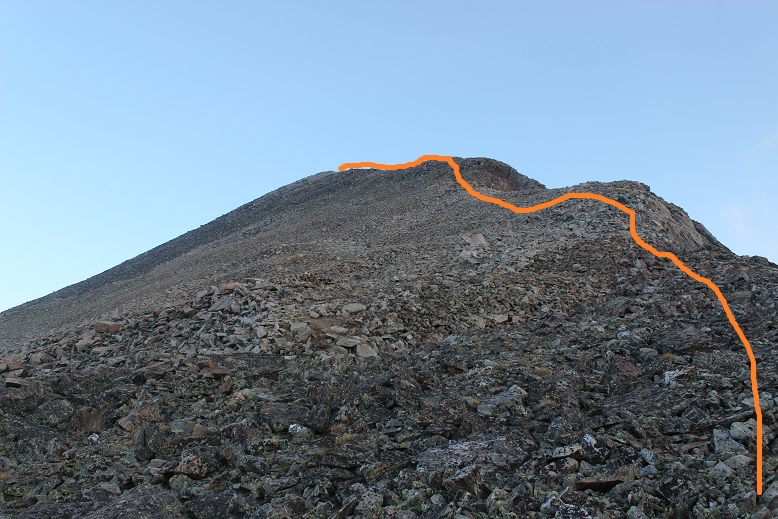
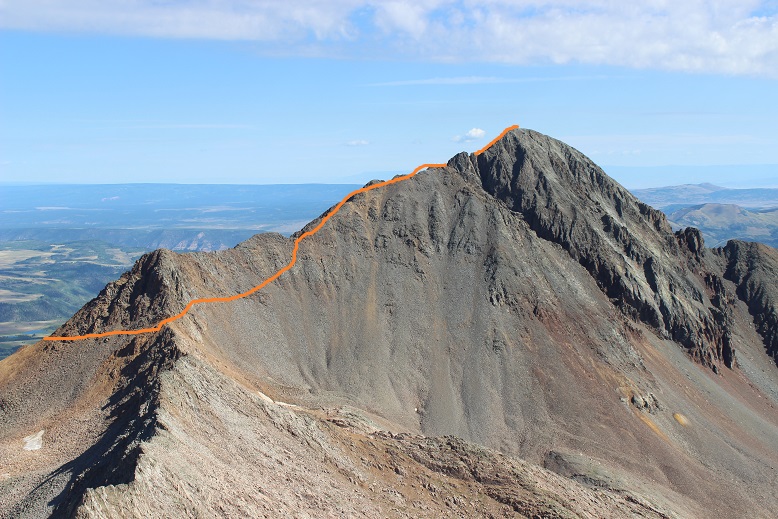
The route up Dyers West Ridge is a class 4 route. I knew I was supposed to look for the chimney to the right, climb it, and then stick to the right of the ridge to the summit. That didn’t happen. In the dark I never found the chimney, but I also didn’t look too hard. I was expecting a class 4 route, and I discovered if I stuck to the ridge, and once or twice went to the left when necessary (just a little to the left, not much) I was able to follow the ridge all the way to the false summit. Here’s the route I took (solid orange) and the suggested route (dotted line)
It was class 4 the entire way, but doable, spicy, and FUN!
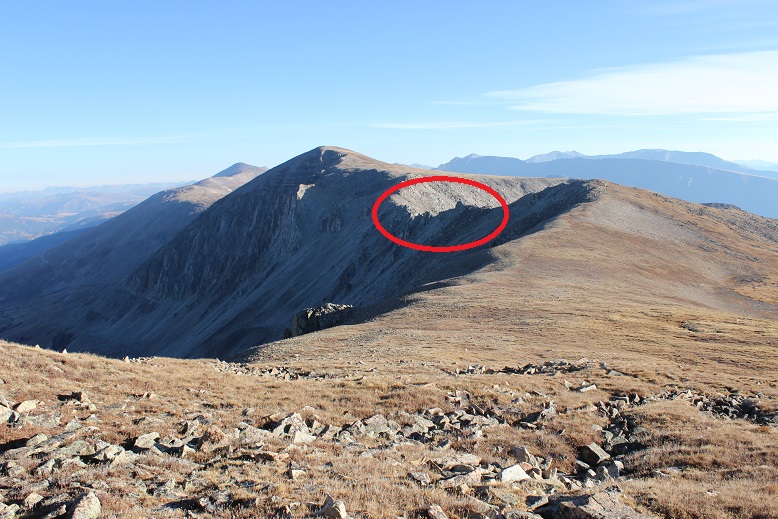
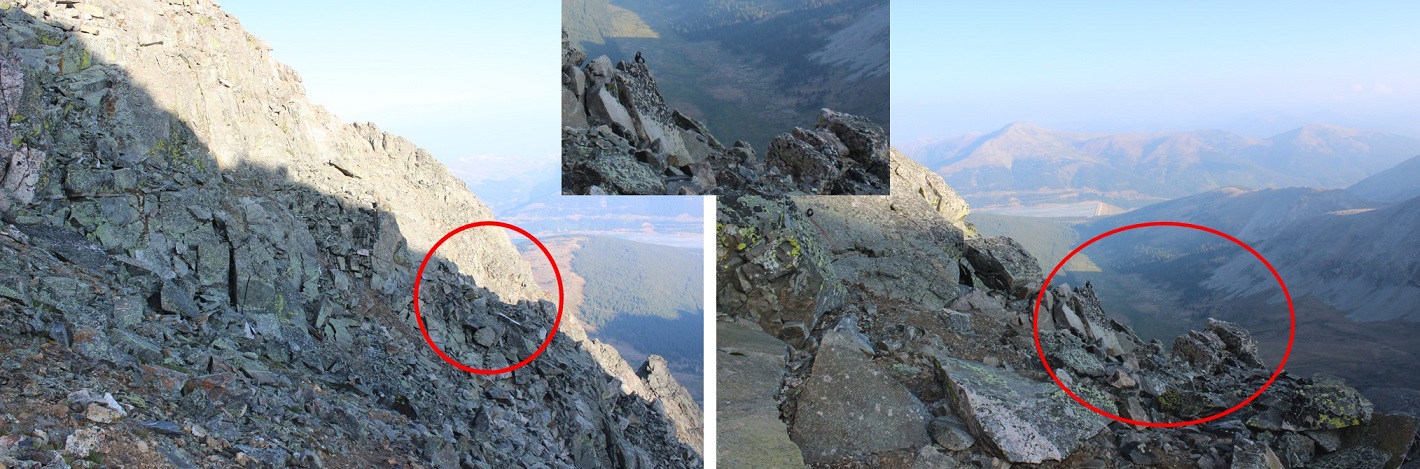
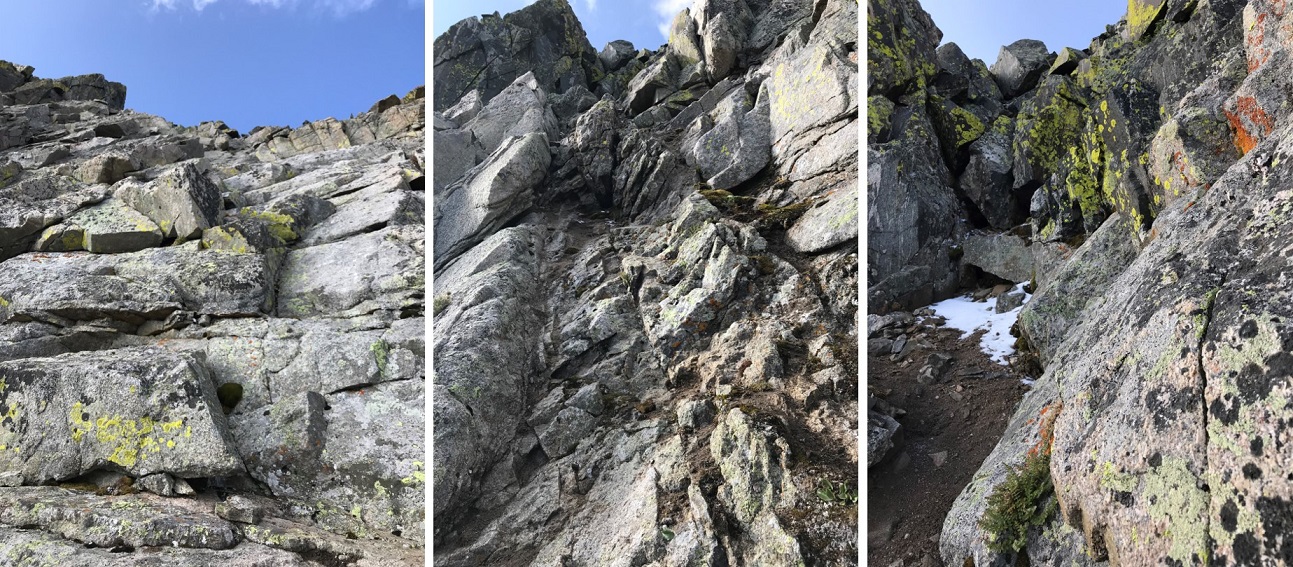
In fact, I kept expecting to cliff out somewhere, and to need to retrace my steps and head more to the right, but that never happened.
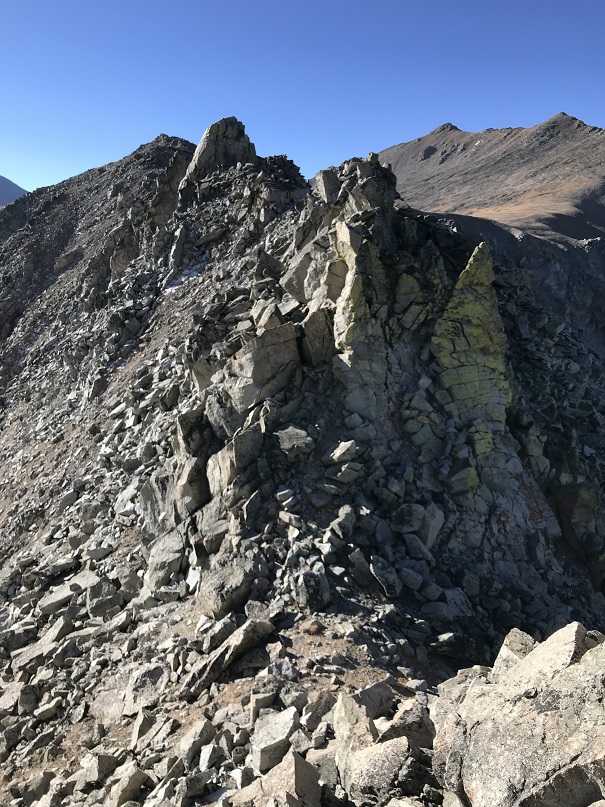
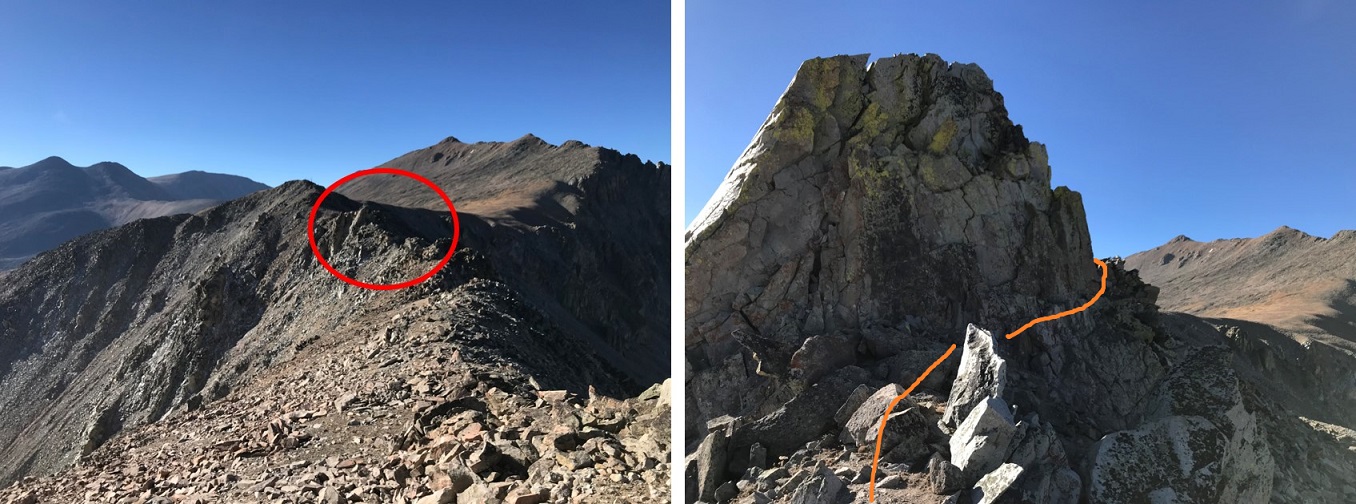
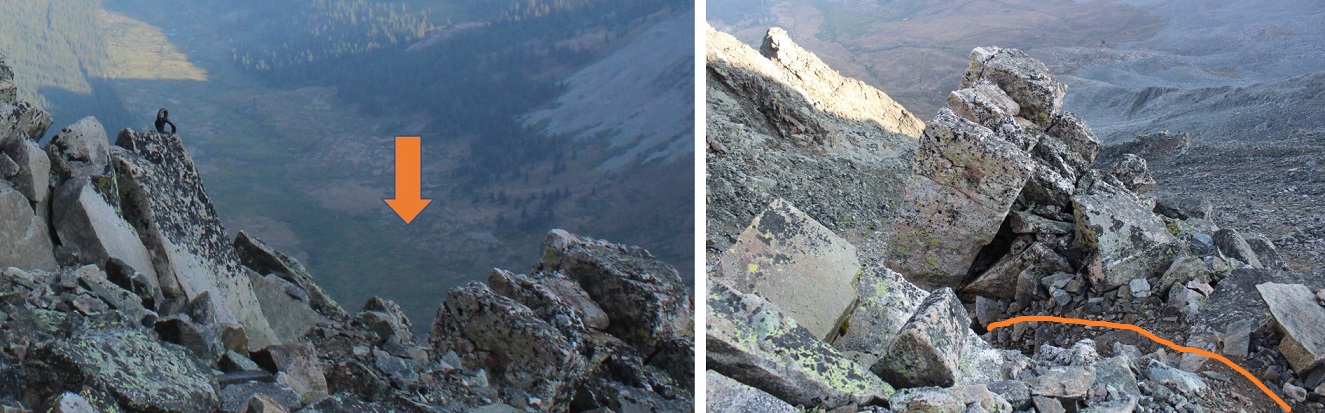
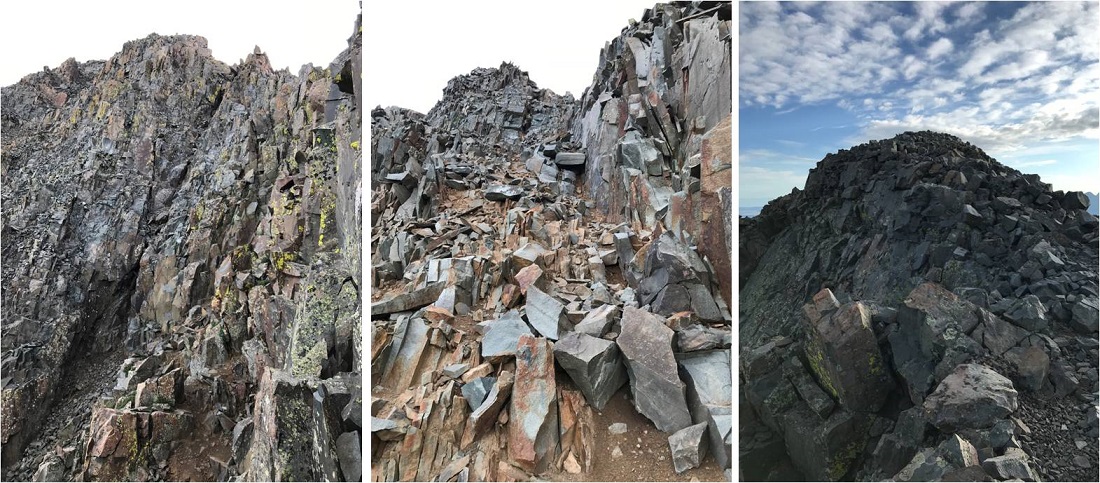
It was serious exposure and solid class 4 climbing for the entire ridge. I met up with the regular class 4 route here, just before the false summit. This area has much more exposure than it looks, and is both the most difficult climbing and also the end of the difficult climbing. This picture (below) doesn’t do the exposure justice: The dirt pyramid on the bottom is a 15 foot drop from where I was standing, and actually where two gullies meet, each dropping down on either side to an unclimbable area. I wish I had better pictures of the exposure, but honestly this was all class 4 and I needed my phone in my pocket and my hands gripping the rocks at all times.
After navigating this area (to the left) I was quickly deposited at a false summit, with a great view of Mount Evans B
And Dyer’s false summit
Dyer Mountain was the closer 13er, but I didn’t want to summit it twice today. I’d intended on making this hike a loop, and Mount Evans B was my next goal. Unfortunately, there isn’t much beta on the ridge between Mount Evans B and Dyer Mountain. From where I was it looked doable, and I know it’s been done in the past, so I kept on my helmet and headed towards the ridge.
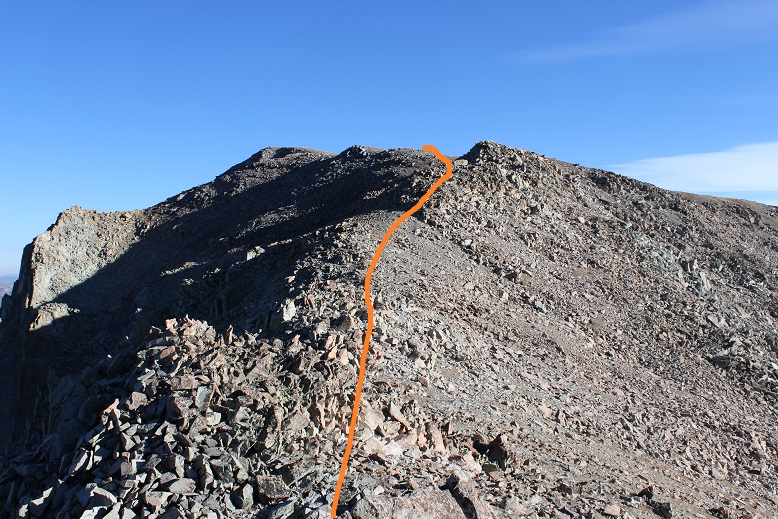
Here’s the route I took
I followed the ridge crest most of the way, only once or twice navigating to the left or right around some large boulders. This is a class 3 move where I hugged the wall as I traversed a crack in the rock. (There’s another picture later in the report that shows the other side of this wall and my route)
As you can imagine, climbing after point 13,383 is the crux of the route, but it stays at a class 3
After the most difficult climbing is over it’s a class 2 hike up the ledge
To a long grassy slope to the summit
I summited at 8:55am
VIDEO: Mount Evans B:
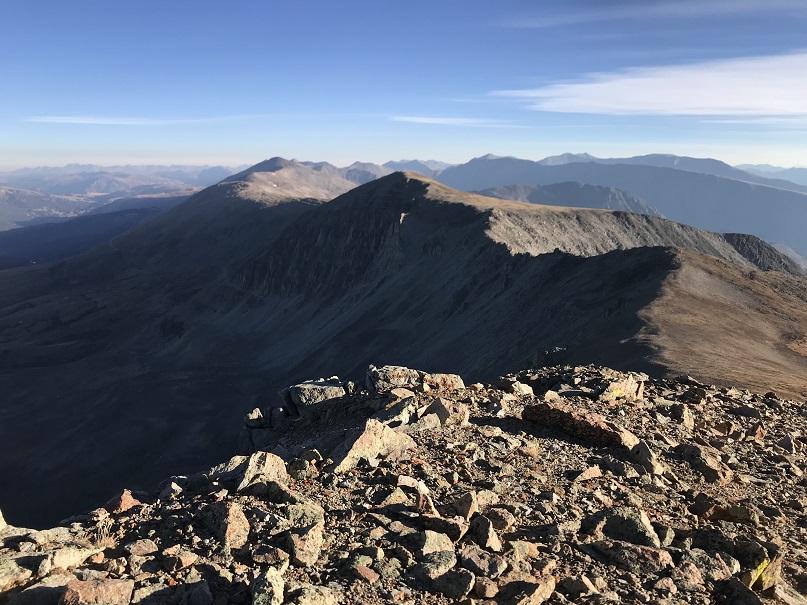
It was an absolutely beautiful day! Besides the wind it was perfect. Here’s a look back on the way I’d come, and the way I’d now need to retrace my steps to summit Dyer.
Here’s a look back on the Dyer/Mount Evans B Ridge
And the route I took
Here’s the class 3 part and the way I navigated around it
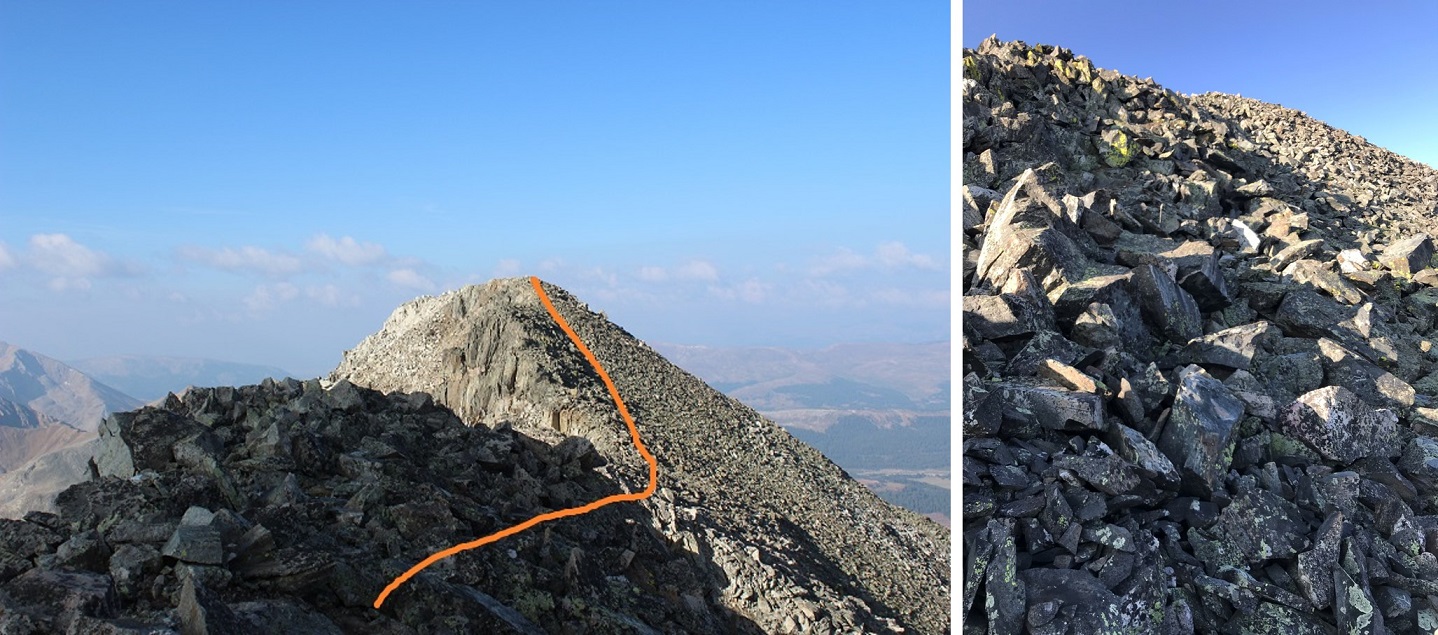
I decided not to re-summit point 13,383 but instead cut it to the right.
And headed up to the Dyer Mountain ridge and followed the ridge to the summit
As I ascended the ridge the rocks became loose and mixed with unstable gravel, but it was navigable.
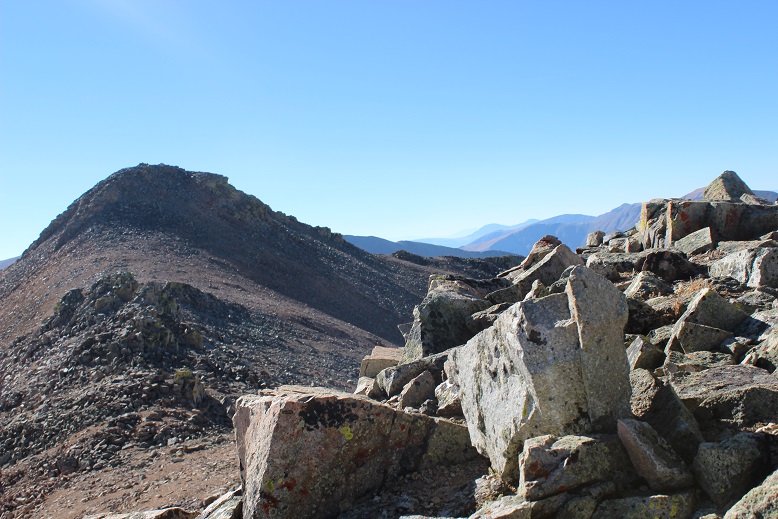
Here’s a look at Dyer Mountain from the ridge
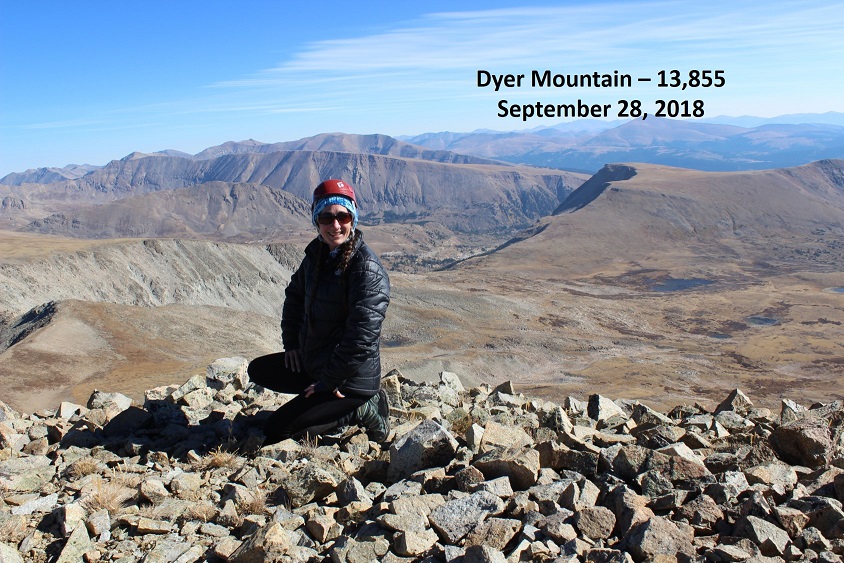
I summited at 10am
Dyer Mountain:
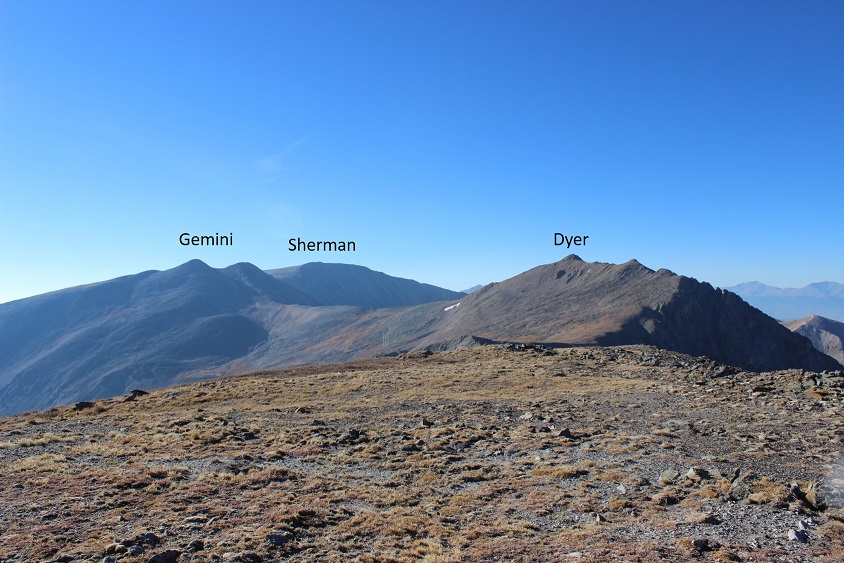
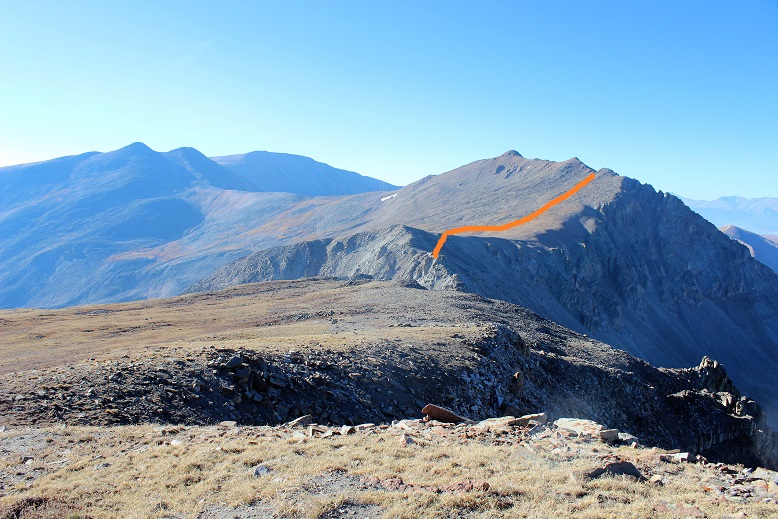
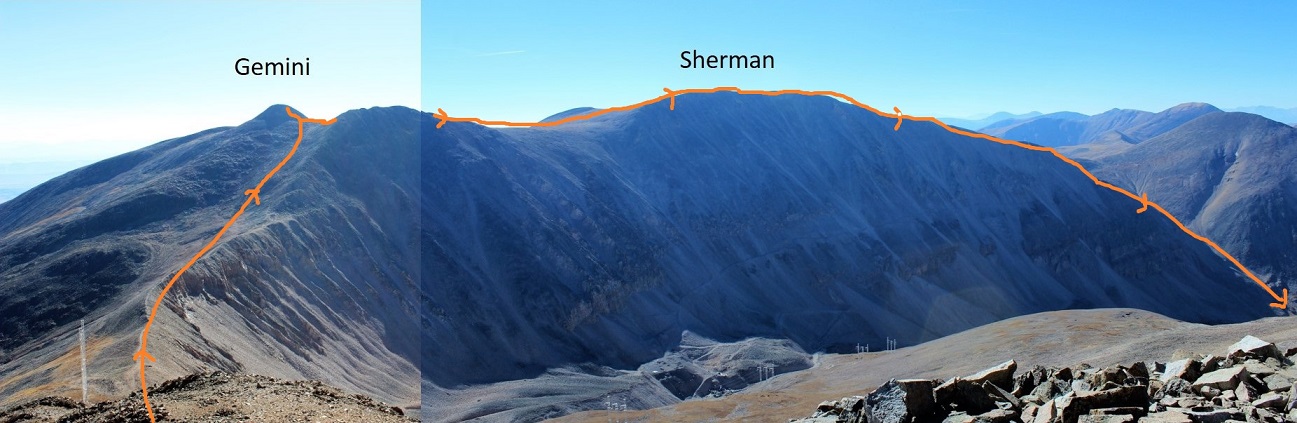
My next goal was Gemini, and then a trek over to Mt Sherman, and finally make it a loop back down to Iowa Gulch.
I made it about halfway down towards the Gemini/Dyer saddle, almost to the radio towers, when I pulled out my phone to take a picture and looked at the time. 10:10am! Whoops! I needed to turn back! Looking at my intended route there was no way I could hike the mile up to Gemini, .7 miles across to Sherman, and 2.5 miles back down to the trailhead before noon. Hmph! I was a bit mad at my circumstances, mainly because it was an absolutely beautiful day and I wasn’t even beginning to get tired. But I reminded myself in another few months my youngest would have her license and I’d rarely see her again (I know, it happened with my older two), so I’d better get a hustle on and enjoy the time I still have with her now. Besides, I’ve already summited Sherman, and combining it with Gemini would make for a good winter climb. I’d be back.
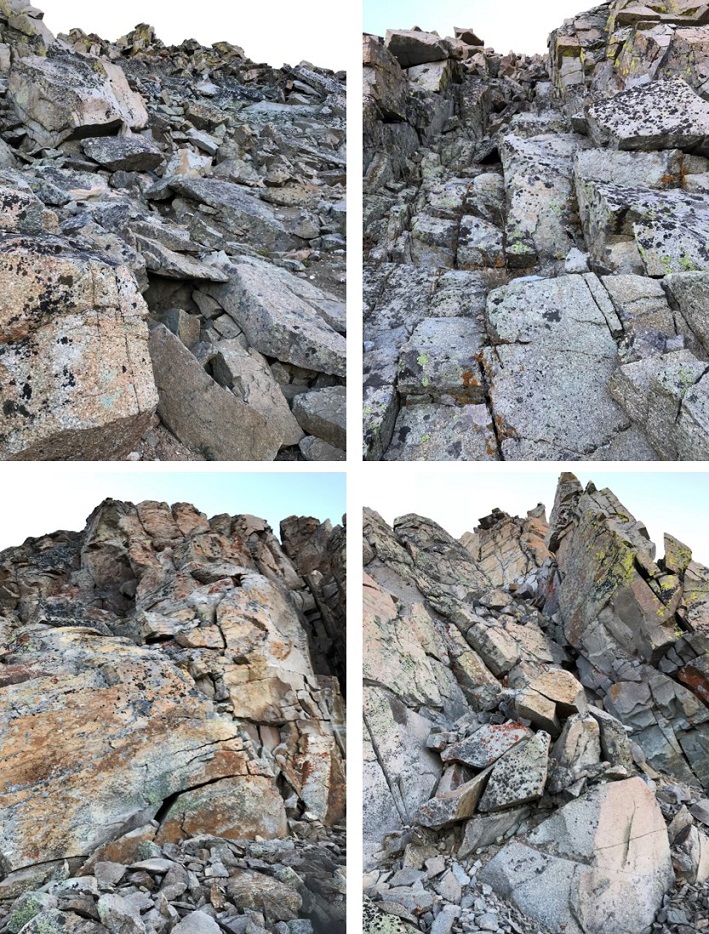
I was in a weird spot on the mountain when this realization occurred. I’m not entirely sure why, but instead of just heading towards the basin I cut across the mountain to the south, trying to link up with the south slope route off of Dyer Mountain. I hadn’t realized there wasn’t any established trail off the mountain, but did as soon as I linked back up with the route. Traversing back was time consuming through very large, loose rocks. Several microwave sized rocks slid below me, doing their best to take me with them.
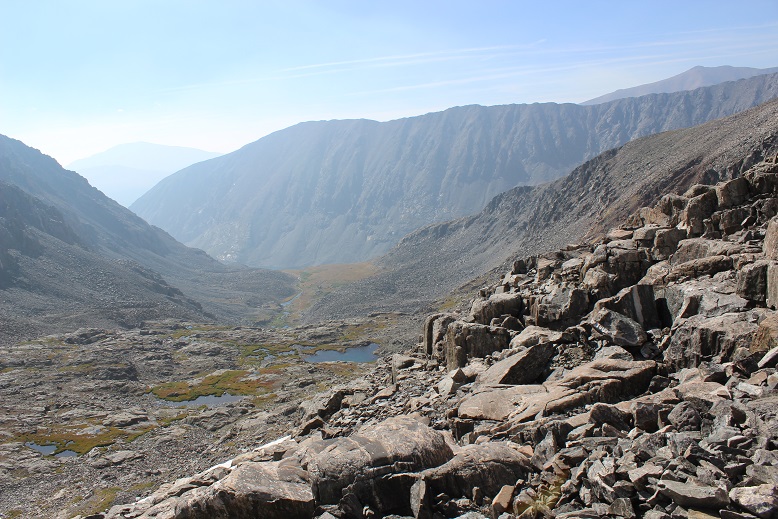
As soon as I reconnected with the correct ridge I just aimed towards the road in the basin and the towers. It’s important to link up with the road in the correct place because otherwise you’ll end up needing to cross a drainage area
I saw some pretty amazing rocks on the way down
Once I met up with the road I followed it back to my truck. Here’s a look at the upper Iowa Gulch Trailhead
And where I parked my truck at the lower Iowa Gulch Trailhead
I made it back to my truck at 11:40am, making this a 7.5 mile hike/climb with 3350’ in elevation gain in 6.5 hours.
I made it home in time to pick up my daughter from school, take her to ice skating lessons, make dinner, and then headed over watch one of my Girl Scouts cheer at her High School Homecoming Football game, making this a very long day, but totally worth it!
I was a bit worried about today’s hike. After hiking Stewart Peak with frozen feet last Tuesday I found this rock in my right hiking boot.
I’m not sure how long during the hike it had been there, but it had apparently rested under the ball of my right toe for quite some time. I know this because for the past 2-3 days I’ve had a hard time walking without pain. My foot wasn’t red or swollen, but I couldn’t walk on it normally, and it hurt to massage it. I researched my symptoms, and Google told me I did something to the joint. Ironically the way to treat it was to either exercise it, rest it, or take Ibuprofen. I don’t rest and I don’t take medication if I can avoid it, so I decided to get some exercise (but not too much).
So for today I picked a moderate class 3 hike that was supposed to be about 6 miles in length with around 3000’ of elevation gain in a heavily trafficked area so if something went wrong I’d have a better chance of finding help.
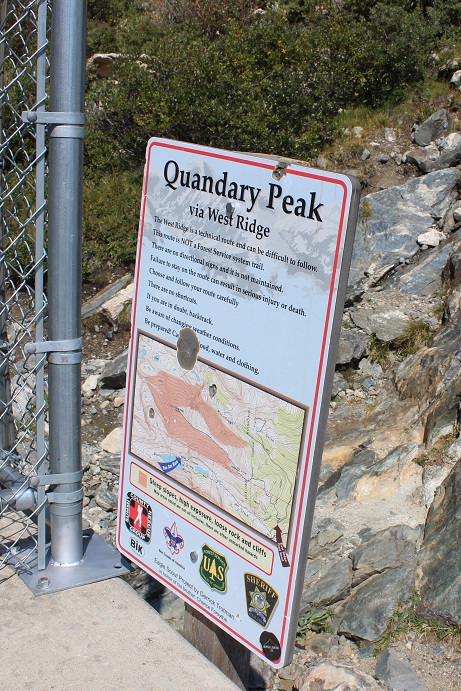
I woke up at 2am (woohoo! It’s like I slept in!) and made it to the trailhead at 5am. There was one other car in the parking lot but as I was getting ready someone pulled up and asked me if we were at the Quandary Trailhead. Technically we were, but it’s the trailhead for the more dangerous West Ridge route, and I figured by looking at them they were looking for the East Ridge Route, so I gave them directions back to the lower trailhead. For so many reasons sorry not sorry if I’d been wrong.
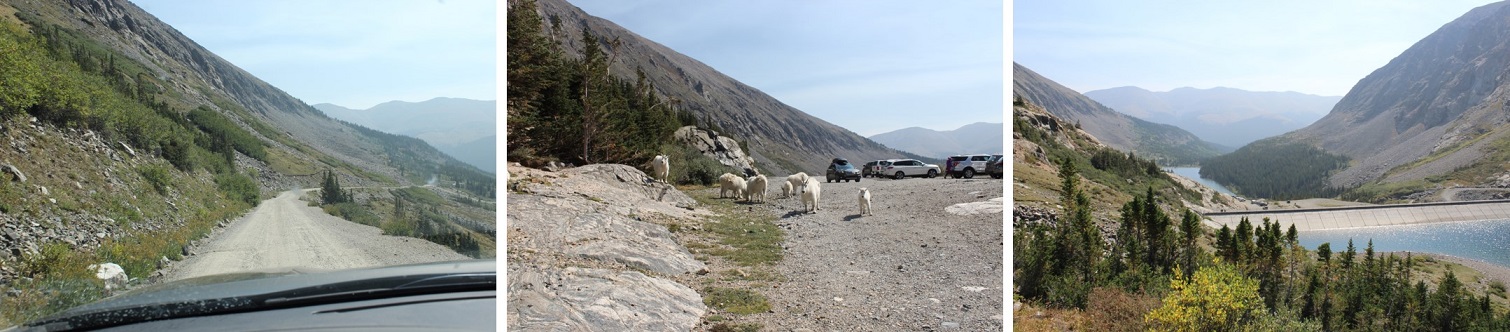
Here’s a view of the 2WD dirt road in and the parking area
It was dark when I started out. I crossed my fingers and started my new tracker, walked to the right to the hill where the gate and dam meet and noticed this sign:
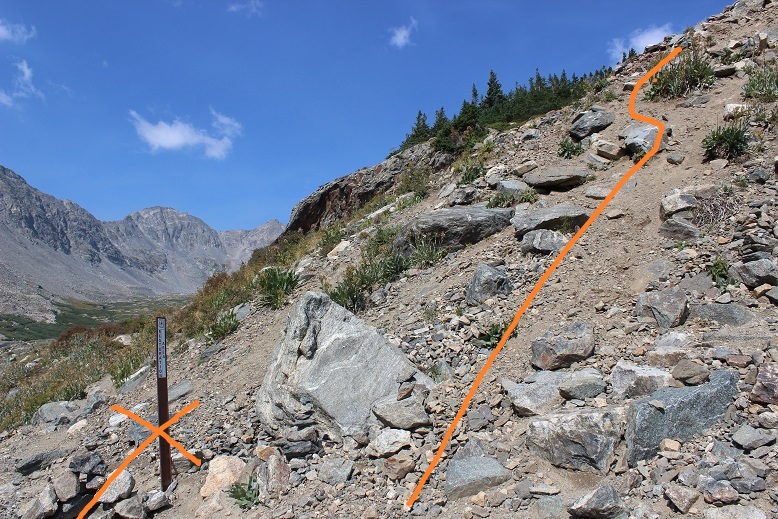
There’s a trail here that follows the lake. I took it for longer than I should’ve and quickly noticed my mistake: I was too far south. In the dark where I was supposed to turn didn’t look safe so I’d continued along the lake looking for another trail that headed up. Luckily there were several social trails that headed north towards the correct trail. I found one that was most likely more difficult than the first and was soon back on route. Here’s where you’re supposed to turn right and climb the hill.
Here’s where I joined the trail
The trail up through the basin is easy to follow (even in the dark). The trail gained elevation very gradually and my right foot throbbed with every step.
Here’s the route I took through the basin and up over to 12,500’
Once the trail ends it’s heavily cairned and easy to follow, even in the dark. I wasn’t able to see the red gully, but it was still the obvious trail to follow. As I gained in elevation and the route became steeper my foot curiously stopped hurting.
After the red gully there were large boulders and rocks to hike around, with lots of carins to help out with route finding.
When I reached the top of the basin I turned around. Quandary’s west ridge looked amazing in the morning light!
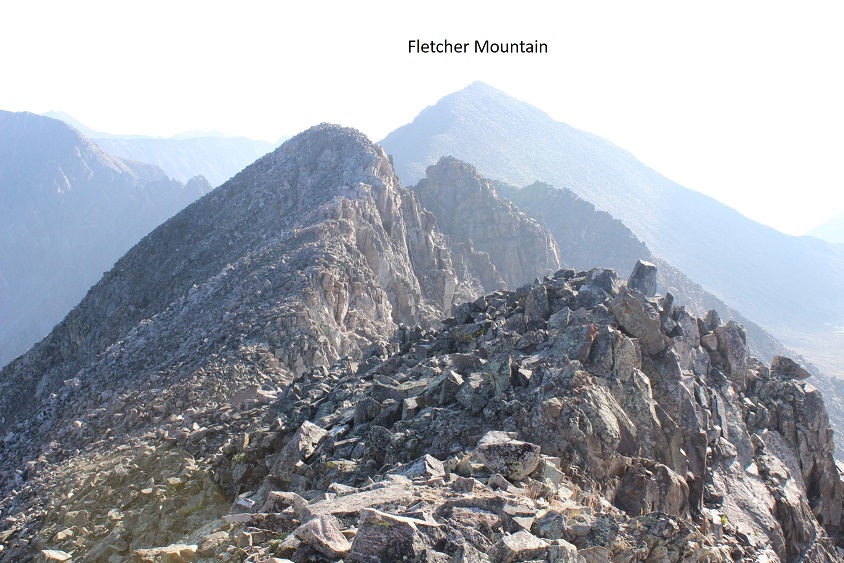
Ahead of me I could see Fletcher Mountain
There was no trail, but the route to the summit was obvious. Here’s the route I took
You want to stick to the left of the ridge because there are steep drop offs to the right. The rocks aren’t stable but they won’t fall on you either, they’ll just roll. About half way up it started getting tricky: I was curiously slipping with every step! That wasn’t right? I have great shoes that usually grip everything. It seemed there was a thin layer of ice on the rocks I couldn’t see but which made hiking without slipping nearly impossible. Yes, I resorted to a kind of forward crawl where I had at least 3 points of contact the entire time. I probably looked silly with my butt in the air but I wasn’t slipping and falling. And there wasn’t anyone around to see…
I made it to the summit at 7am and had a great view of Quandary (it looked cold up there!). The wind was intense and made it much colder than it should have been. Here’s my summit photo
And video:
The cloud above Quandary worried me, but the wind was blowing east and I was headed west so I decided to just keep an eye on the weather. Otherwise it was a perfect morning!
I looked to the southeast at my next goal
The hike down Fletcher towards the saddle was just as awkward as the hike up (I kind of spider crawled due to the ice) but by the time I’d made it to the saddle the ice was pretty much gone. Here’s the view of Drift (left) and Fletcher (right) from the saddle
This is a great place to put your helmet on (and keep it on until you make it back here). The beginning part of the ridge for Drift wasn’t too difficult. I just gained the ridge and followed it
From the picture below you want to stop following the ridge and turn right (north) to bypass the crux of the route (if you continue on the ridge you’ll encounter steep drop-offs and need to turn around)
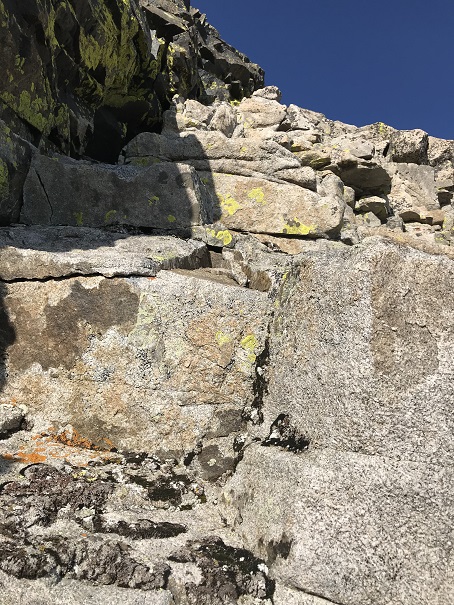
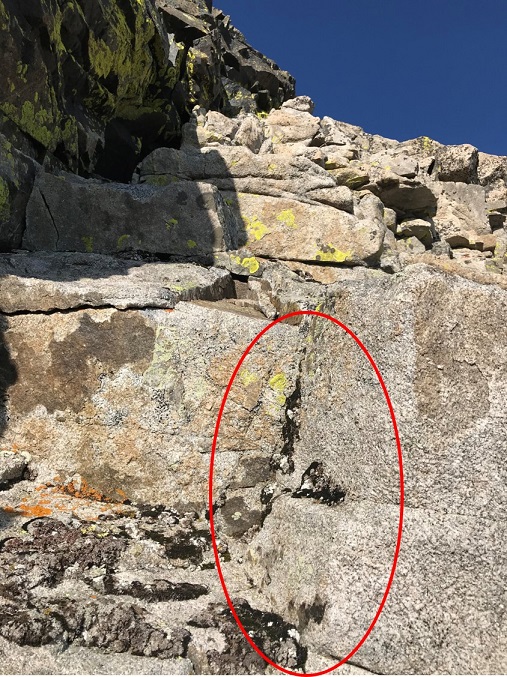
You’re looking for and aiming towards a large round bolt in the route. It’s about 5 inches in diameter, and visible from a good ways away if you know where to look. I’ve circled the bolt in the pictures below
When you make your way to the bolt you’ll see by facing north how to drop into the gully.
This is kind of a chimney, and gets you ready for the more serious climbing ahead
Oh, did I mention the rocks were now icy again? Here’s a better view of the ice
From here I had to re-gain the ridge. I crossed the gully, located the lighter gray colored rocks, and headed up.
There are several routes to regain the ridge but if you stay on the lighter gray rock you should be fine. Did I mention this was steep? Seriously steep and slippery (due to the ice) and definitely Class 3+. Several times I thought how helpful a rope wouldn’t been…
But once I gained the ridge all I had to worry about was ice and wind as I crossed the easy path to the summit. The rocks weren’t stable but they weren’t a problem to navigate. Just be careful for rolled ankles.
Well, easy if the wind wasn’t blustering at 40mph and there wasn’t a thin layer of ice on the rocks. I was very cold and honestly crab-walked over the slippery rocks to the summit, afraid with the wind and ice I’d slip and fall. But I made it! I summited at 8:15am. I couldn’t smile because my lips were frozen… I tried though.
Video:
Here’s a look back at the ridge
I was cold and my fingers were starting to freeze so I didn’t stay on the summit long. I knew I’d need some dexterity in my fingers to make it back down the light gray rocks. I followed the easy ridge back and braced myself to downclimb back into the gully. The first few sections were fun and I was easily able to navigate the large boulders. Until I reached this point
This is where I fell. Well, I didn’t actually fall, more like slid for about 4 feet (scarier when it’s actually happening than it sounds reading about it). You see, everything was once again covered in a thin layer of ice, and there were no foot/hand holds available. None. I know, I was looking. I was in a spot that (due to the ice) offered very little in the way of help for the situation I was in. There were a few patches of moss that I tried to use, but naturally they weren’t stable and quickly crumbled out from under my shoes. And that ice didn’t help at all! I knew I was going to slip and slide eventually, so I tried to minimize the acceleration as much as possible before and as it happened by hugging the rocks and leaning forward. When I slid I was able to stop myself on a ledge about 3 inches wide and 6 inches long, stabilize myself, take a deep breath, and continue downclimbing. I’d bruised my right shin (just a little scrape with minor bleeding) and I had a hole in my pants at my shin, but I was proud of myself for not turning this into a worse situation. Here’s the section where I slid. From top of the circle to the bottom is about 10 feet.
I couldn’t go to the left or right because it was actually steeper in those sections and led to larger drop-offs. This looked less steep when I was first climbing down, and the moss and lichen looked to be on larger/actual holds, or I wouldn’t have attempted it. In hindsight, before I was downclimbing this area I should have retraced my steps to where I climbed up (as I knew there were adequate hand and footholds in that area).
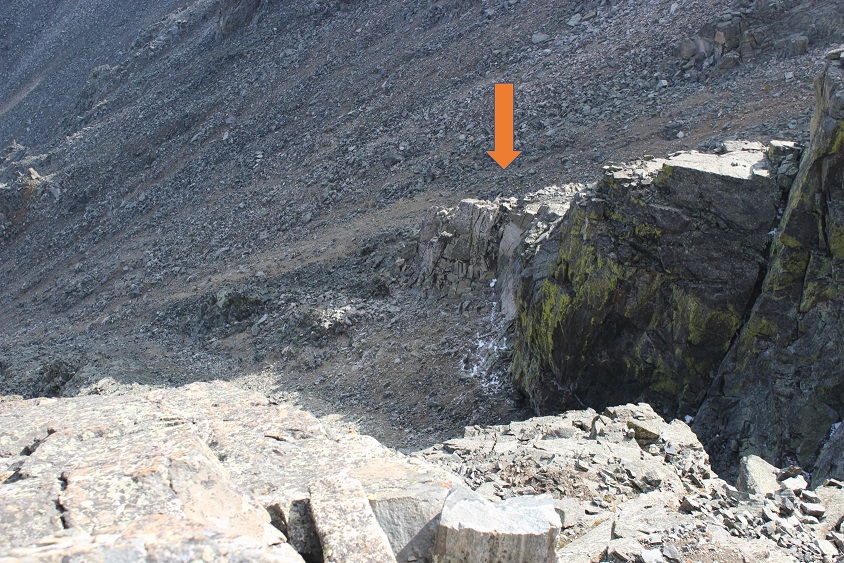
Once I was on more stable ground I took a look around: I needed to find that chimney to head back. Here you can see it from across the gully
I headed towards the chimney, climbed it, turned right and headed back to the ridge, knowing the worst was behind me. I made it back to the saddle and saw no reason to re-summit Fletcher, so I turned right and headed down the middle of the basin towards Quandary.
Once again, no trail, just rocks. Luckily, while the rocks weren’t stable they also weren’t icy. I felt humbled by the enormity of the rock field and my small place in it.
VIDEO:
As I descended into the basin the beauty caused me to pause. This is truly a gorgeous area! I’ll be coming back to attempt Quandary’s West Route someday.
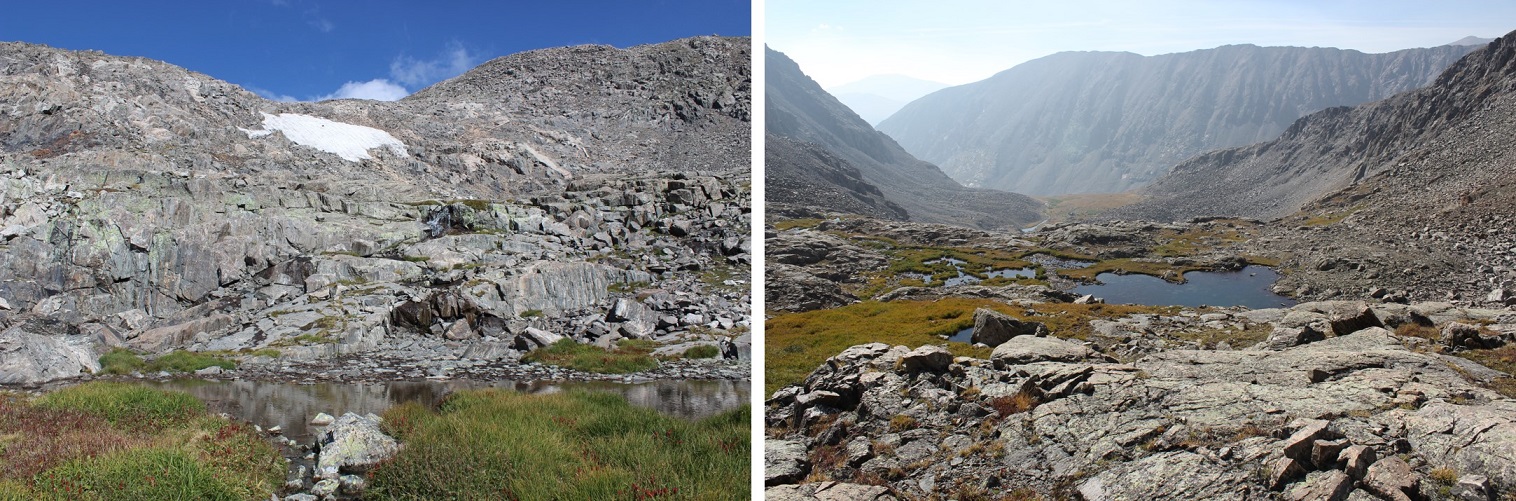
I followed the cairns down and around the several small ponds I’d missed in the dark.
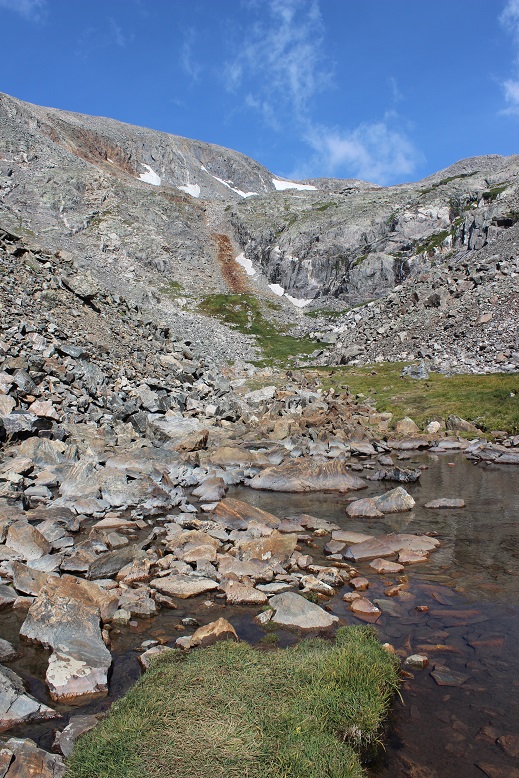
I stayed here much longer than I should have, but it was worth it for the views! The red gully was clearly visible in the daylight
And those ponds and streams are much deeper than they look. For such narrow streams at a high elevation I was surprised they were 4-5 feet deep.
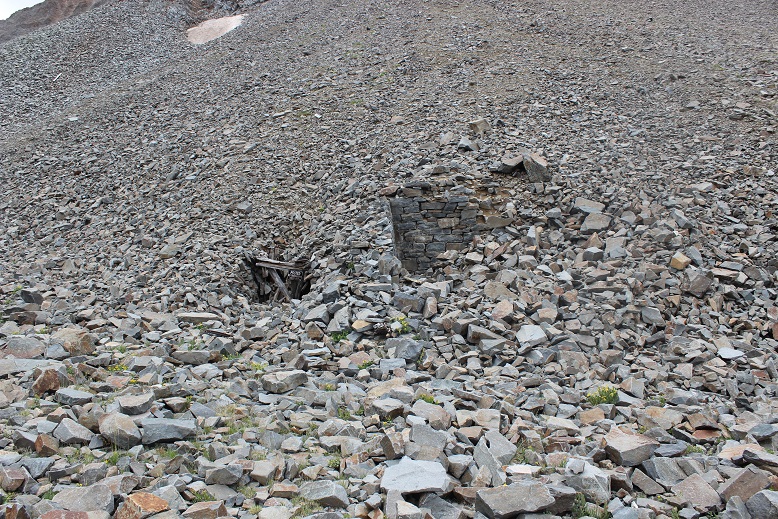
Exiting the basin was an easy walk. At this point I noticed my foot didn’t hurt anymore. I guess exercise was the answer! I passed an old mine
Turned the corner to take one last picture of the basin (I may frame this)
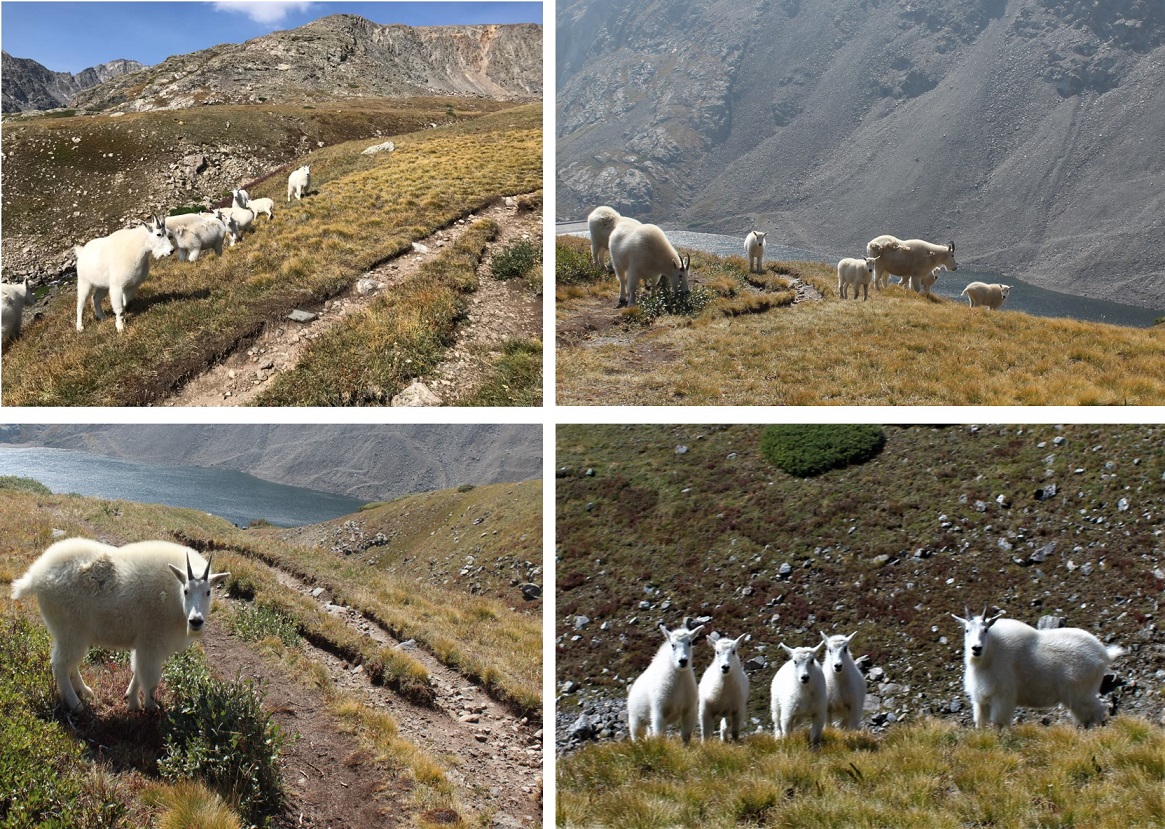
and: Goats! I love running into goats on the trail! This herd had several kids. All adorable
Video:
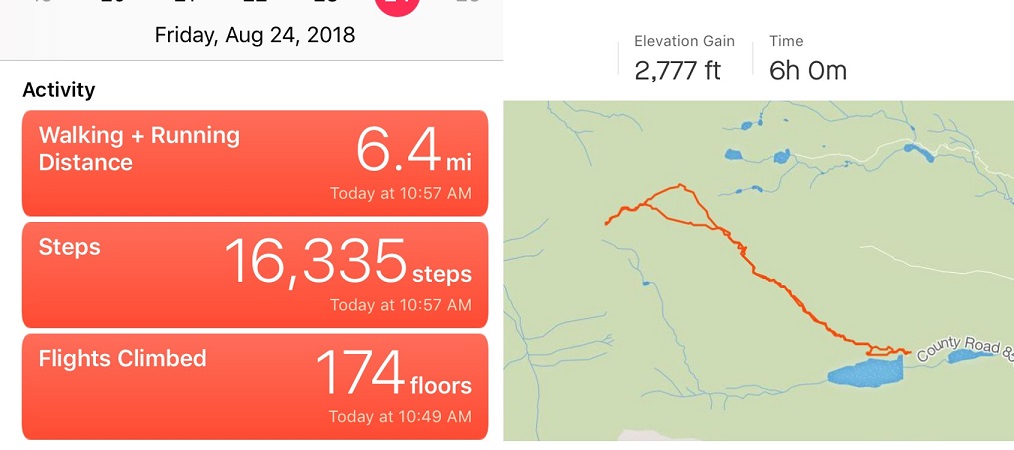
I made it back to my truck at 11am, making this a 6.4 mile hike/climb in 6 hours. Oh, and my tracker had worked! It said I’d climbed 2777’ in elevation, which I thought was pretty close to the 2800’ I’d been expecting. Now I just need to figure out how to save and transfer the GPX file to my computer. I was not happy with my time, but considering I’d crawled for a good portion of it due to ice I wasn’t too upset either. And I’d stayed safe. And I’d seen goats!
The weather looked better in the San Juan’s than the Elk’s, so I decided to go for Wilson Peak this time. I left my house at 8:30pm and made it to the trailhead at 3am.
The best part about the drive? Listening to 105.7 ‘The Range’ on the radio after I pass Gunnison. I’ve always been an old soul, but in a previous life (High School) I used to love ‘old’ country music (Lorrie Morgan, Reba, Charlie Daniels, Patsy Cline, George Jones, George Strait, Garth Brooks, Travis Tritt, Pam Tillis, etc.). I’d go dancing every week at our local country bar (another story for another day: How a 14 year old gets into a bar…), and this radio station plays all the classics from the 1950s up through the 1980s. The same ones I grew up dancing to, and thankfully without many commercials. I like a lot of different types of music, but this was a relaxing way to fill a few hours driving. Yes, singing was involved.
The 8 miles on the dirt road to the Rock of Ages trailhead took me at least half an hour to navigate. It wasn’t a particularly rough drive, just slow going with a lot of little mud puddles.
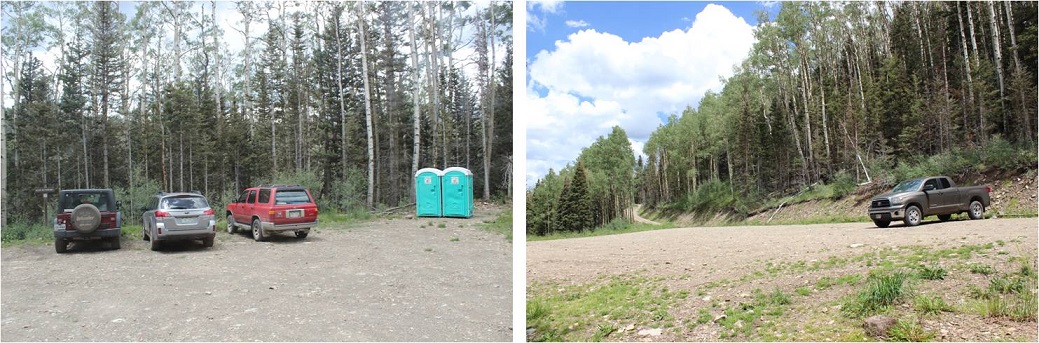
The trailhead had plenty of parking space, two porta potties, and only one other vehicle in the lot when I arrived. There was a sign that said “Head in Parking” and since it didn’t also say “only” I backed my truck into a space. I’m a Girl Scout and I was a park ranger for a while, which means I never head into a parking space. Ever. It’s just not efficient in an emergency. If there’s an emergency I want to be able to get out of there as fast as possible, so I always either back in or pull through when I park my truck. No exceptions. It’s been drilled into me…
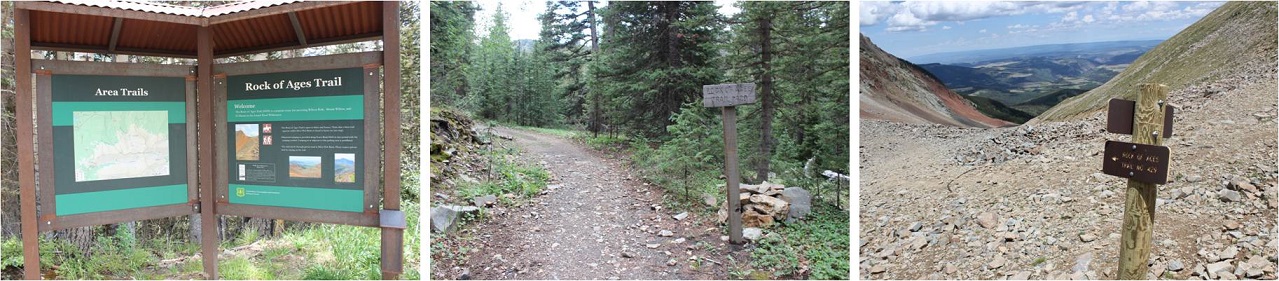
The trail starts here (note, no trail register)
I was on the trail at 3:15am. The moon had already set, so I had a great view of the stars as I started my hike through the trees. The ground was very wet, most likely from all the rain the San Juan’s have been having this week. This was great because it allowed me to look for recent human and animal tracks. I didn’t see any animal tracks (just a few from horses) so I didn’t anticipate seeing any wildlife on this hike. (I didn’t).
And this trail had great signs! All the way to the basin I knew I was on the Rock of Ages trail (that’s where the signs stopped).
Between the two basins (Elk and Silver Pick) you go up a hill, and then actually lose a couple hundred feet in elevation. I remember thinking as I was hiking in how this wasn’t going to be fun hiking out (it wasn’t).
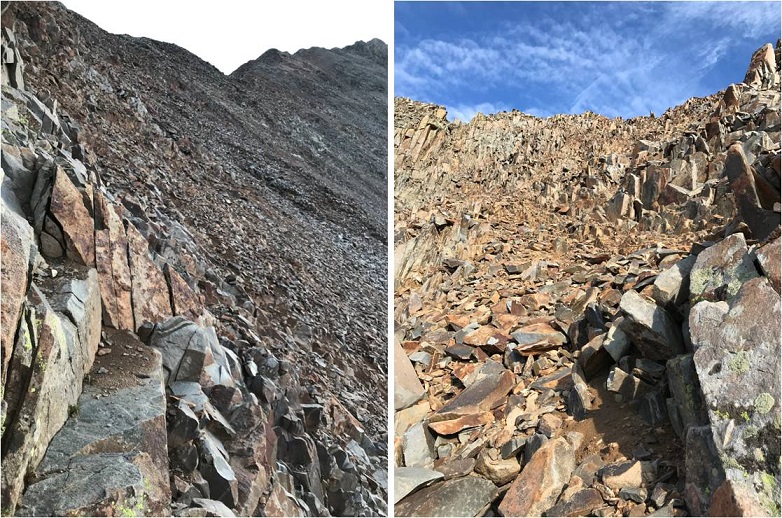
The only thing wrong with this trail? It was made up of lots and lots of talus. The entire basin and in fact 90% of the route was made up of talus. I’m not a fan of talus in general, mainly because I don’t pick up my feet enough when I walk. Even though I’m light I’ve always walked heavy. I could never sneak up on someone, and I recall “Laura, stop stomping like an elephant” being a common phrase in our house, even though I wasn’t actually trying to be obnoxious. Since I walk fast lots of talus for me = lots of tripping. I had to consciously think about each step I took to keep myself from tripping on the talus. This was more of an issue on the way out. It’s also more difficult to follow a talus trail in the dark. During the day route finding is a non-issue, but in the dark everything looks the same (sadly, no CFI stairs here).
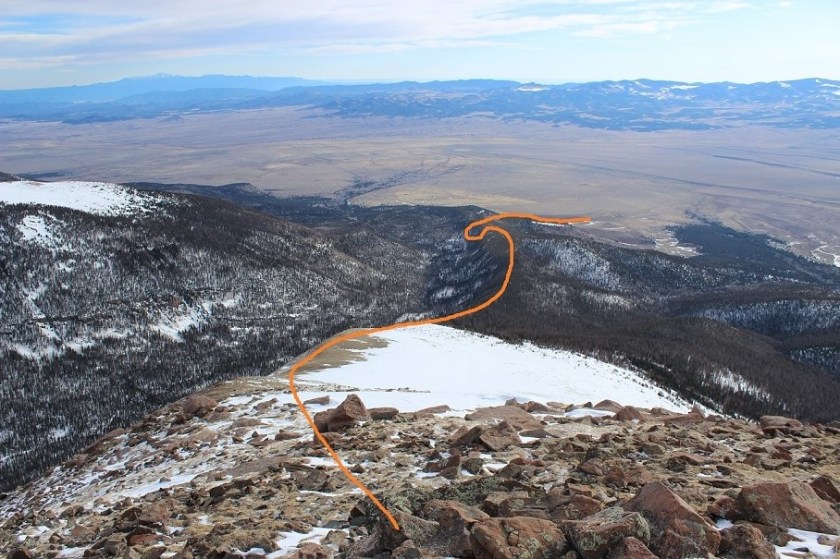
Here’s where talus at night became an issue. I’d been following the service road when it suddenly ended and cairns began. I’m a big fan of cairns, but these seemed to go in a circle, not leading anywhere. Also, the trail ended. I got out my topo map, and knew I was supposed to head straight over the hill into the upper basin, but when I started up the hill the rock was dangerously loose so I backtracked. I hiked up and down the hillside, looking for an alternate route, but there didn’t seem to be one. There was a snow bank without footprints, so I knew that wasn’t the correct way, and I kept coming back to the cairns. My flashlight wasn’t much help, as everything looked the same in the shadows. I honestly tried to find the route for at least 20 minutes, and finally decided to just go for it and trudged up the hillside, navigating carefully through the loose rock. This ended up being the right thing to do, as a cairn invisible in the dark from below awaited me at the top. Here’s what the route looked like
In the light of day the route was obvious (see below), but in the dark I wasn’t able to decipher between the trail and talus. There had been a rockslide of sorts over the direct trail, so there wasn’t a solid trail to follow. Here’s the route you’re supposed to take:
I hiked up and around the rest of the basin towards the Rock of Ages Saddle and noticed I was sweating a lot more than normal. My entire lower back was wet, which was weird? I felt around my backpack and noticed it was drenched. My water bladder was leaking. Well, this wasn’t ideal. I fixed my water bladder with a piece of duct tape and made a mental note to get another one before my next hike. Considering I’ve had it since 2003 it’s probably about time for a new one. The only downside? If the wind picked up I’d have to cancel my hike. Right now there was no wind, but that could change once I made it to the saddle. If it did, my Raynaud’s might start up and I’d get cold have to turn back. Hopefully that wouldn’t happen. The good news? I had on black yoga pants so while it felt like I’d wet my britches if I came across other hikers no one would actually be able to see that my pants were wet in all the wrong places: Let’s focus on the positive here!
Woot! I made it to the saddle, and no wind! The sun was just beginning to rise and I had a great view of the north sides of Mt Wilson and El Diente Peaks.
Here’s what the saddle looks like.
I stashed my trekking pole, turned left, and hiked toward the Wilson Peak / Gladstone Peak saddle.
From the saddle I put on my helmet, turned left again, and started my trek to the summit. I ended up hiking too high on the initial ridge and had to back-track because I got into an area I couldn’t traverse. Here’s the route you should take: Aim for the dip in the ridge, and then follow the ridge towards the summit.
Here’s another view… aim for the small saddle in the ridge. You don’t want to climb too high or you run into lots of choss, i.e. very, very loose talus that isn’t easy/possible to traverse.
Wilson Peak has a false summit. The cool part about this is it’s where the climbing fun begins. You get to climb up a wall, descend, and then climb up again to the true summit.
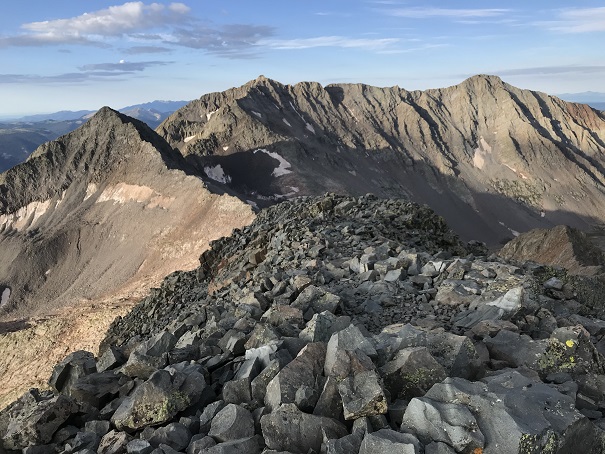
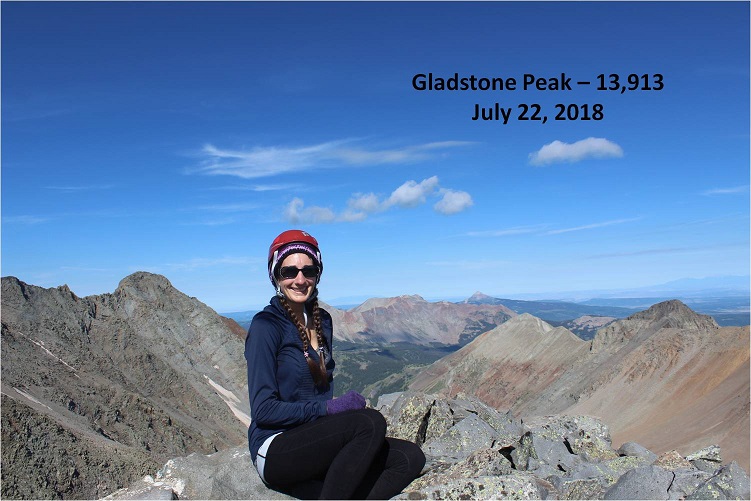
It was 7am. From the summit I could see Gladstone Peak, Mt. Wilson, and El Diente Peak
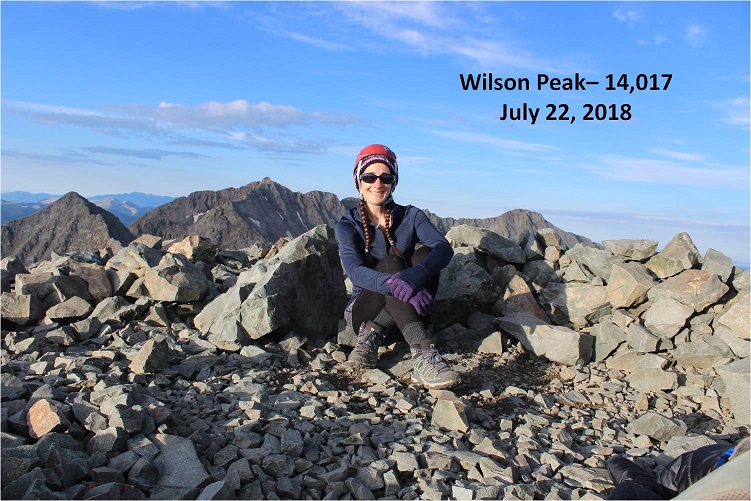
I took a summit selfie to prove I’d summited
And started on my way back down. The trail was much easier to follow now that I knew what to look for.
I made it back to the area I’d climbed too high at and had to backtrack, but this time at the correct elevation. I heard climbers above me and called to them, letting them know they were too high as I’d been. I placed a cairn where I was so they could see where they needed to be and wished them luck.
I made it back to the Gladstone/Wilson saddle. It was almost 8am, and the skies were pretty clear. It’s a centennial, and I was here, and the weather was nice, so I decided to attempt Gladstone Peak. I took off my (now dry) backpack to get out the directions I’d made up. Drat! Apparently I’d accidentally printed two sets of directions for Wilson Peak and none for Gladstone. Hmmmm. No worries, I had my GPS. I pulled up the route and drat again! When I pulled it up it kept me in the basin for the entire hike (and I knew that wasn’t right). I looked at the mountain before me and considered.
I’d put the directions together, so I tried to recall what they’d said. I remembered this was a class 4 hike, I was supposed to stay mainly on the ridge, only dropping down once to class 3 terrain to avoid a more difficult section, if the rocks are too loose you’re off trail, and if I had to go off the ridge to go left.
Well, I was here, so I decided to attempt Gladstone. I followed the saddle to the beginning of the ridge and did my best to stay on the ridge. I’m sad to say I failed almost immediately. There were no cairns. I quickly became a wuss and didn’t think I could stay on the ridge, so I dipped down and when I felt safe again climbed back up to the ridge. That meant I was going up and down loose gullies to avoid exposure. This happened over and over and over again. I knew I was off route and making this harder than necessary, but I kept looking for easier terrain (and not finding it). This was actually the more dangerous option.
The rock was all unstable, loose and shifting as I tried to step on it. I had to be careful with each step I took. I was frustrated but slowly making progress. When I got past point 13,341 I heard someone shout enthusiastically from the summit. Apparently someone else was on this mountain! He seemed pretty excited with himself. I watched him descend and aimed for where he was on the mountain. At one point a rock about the size of a microwave I was going to stand on let loose and cracked and tumbled down into the gully below me, producing a lot of noise and that fire and brimstone smell that comes from such an event. I took a deep breath and continued on.
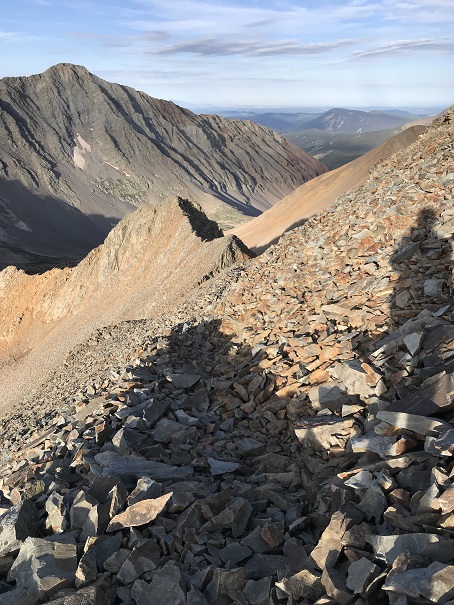
When the climber was about 50 feet above me I called out to him. I wanted his advice on the trail back since the trail I took in hadn’t been all that pleasant. I called three or four times before I realized he had ear buds in. Why anyone would willingly take away one of their senses on a class 4 hike is beyond me, but I did applaud him wearing ear buds instead of blasting his music. Oh well, I was close, I could make it the rest of the way on my own and re-assess the route from the summit. I don’t think he ever knew I was there. Here’s the final push to the summit.
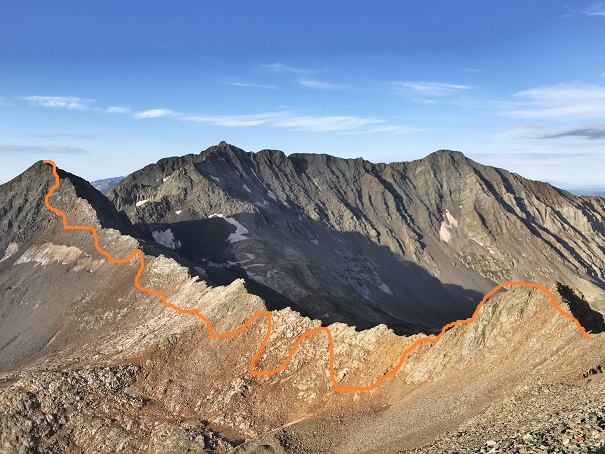
This is the path I followed (kind of… I probably went up to the ridge and down a gully a few more times). Please, please, please don’t do what I did. I realize this is a total mess.
But I did it! I summited at 9:30am and knew why ear bud guy was so excited: That was one tough climb! Here’s my summit selfie
From the summit I could see the ear bud guy had trekking poles (WHY on a class 4 route?!?!?) and was following the ridge. After point 13,341 he disappeared and I never saw him again. Nothing nefarious, I was just focused on the weather/views and wasn’t able to locate him again when I looked towards the ridge.
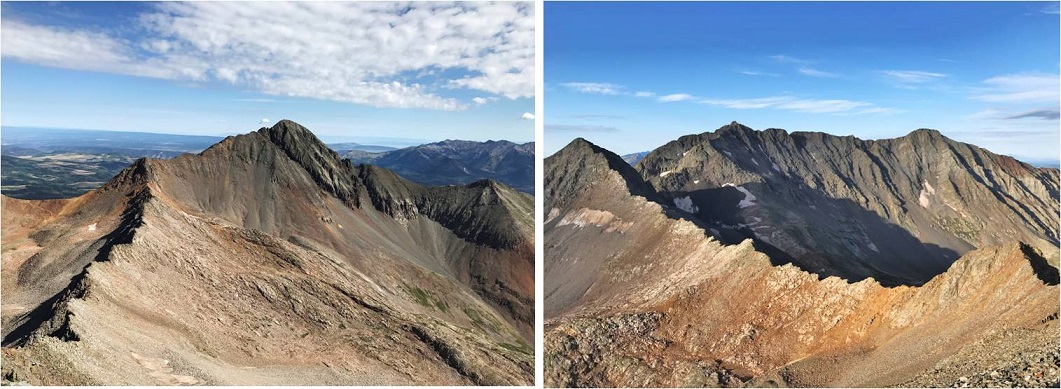
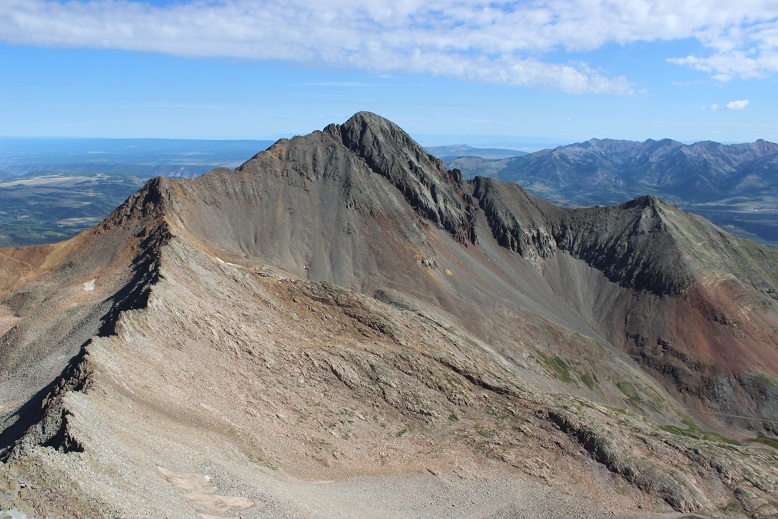
Here’s the view from Gladstone Peak, looking at Wilson Peak
Wow! What a mountain! OK, now it was time to head back down. I made the decision to do my best this time to follow the ridge, no excuses. I’ve done class 4 before, I know I can do this. And so I started down, doing my best to follow the ridge. Here’s what the beginning looked like
I began scrambling. Luckily the rock, although unstable, was sticky on the ridge. There was a lot of exposure but as long as I focused on the task at hand it didn’t bother me. The weather however did. The clouds were moving in fast, and this was slow going. I religiously stuck to the ridge, and you know what? It was doable! Scary as hell, but doable. I could do this! I was climbing up 30 foot rock faces, balancing on ledges, stuffing my hands into cracks and balancing my feet on thin lines that shouldn’t have been possible, but I was successful with every step. I just kept thinking to myself “If I can do this in the gym I can do it here”. Check out the view from the base of Gladstone looking at what I’d just accomplished, and what I had left
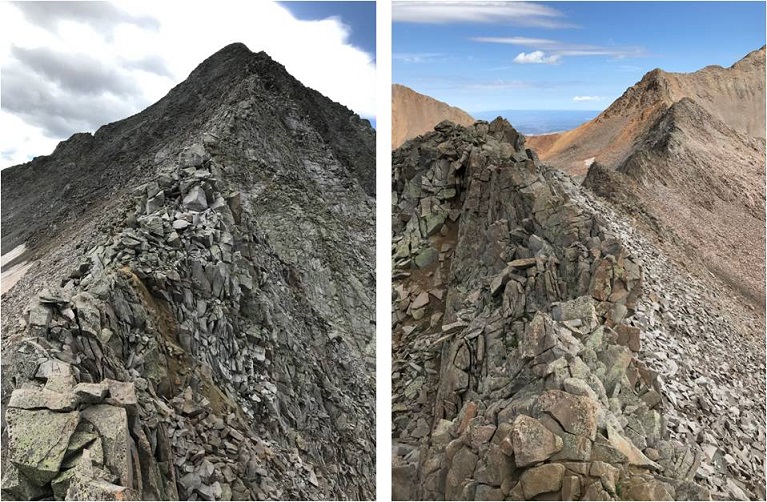
Here my confidence soared. I started picking up speed, still careful to make sure my placements were stable before using them. I was making great time and I was actually having quite a bit of fun with each new obstacle. I’d look at something, think “no way” and then go for it. Here’s the route I took back… I just followed the ridge.
I made it to the Gladstone/Wilson saddle and did a happy dance. Woot! I’d done it! Class 4 all the way baby! Let me tell you, Gladstone Peak gives Capitol a run for its money.
I learned a lot about myself on that ridge about what I can do. It’s ok to be scared because that’s your body’s natural response to a dangerous situation: Do it anyway.
The clouds were rolling in as I made it back to the basin. The basin was busy, filled with hikers coming in from multiple trails. I felt a few sprinkles, but nothing seemed too ominous or threatening. It was weird hiking through the basin in the daylight where I could clearly see the trail.
I could also see a bunch of abandoned mines I hadn’t known were there in the dark
And remember the 20+ minutes of route finding I had to do? That was a cinch in the daylight! The hillside is right next to the old rock house and yes, those cairns do lead to nowhere but in a circle.
I made it back to my truck at 1:15pm, making this 13 mile double summit hike/climb in 10 hours. Not bad considering I lost quite a bit of time to route finding both on the trail and on the ridge.
I decided to let my truck play in the mud puddles on the dirt road back to the highway, getting her dirty in the process. No worries though, because it rained the entire way home, so in the end I came home with a clean truck.
I didn’t make it home until 8:30pm, making this a 24 hour trip door to door. I immediately took a shower, and was confused at how many large bruises I had I didn’t remember earning, mostly on my shins, thighs and forearms. I guess the ridge bites back!
Oh, and push-ups were a killer this morning! I must have really used my arms yesterday…
I’ve been saving this hike as a practice hike for winter conditions, since the route is relatively straightforward and it has a 2WD trailhead. Unfortunately I don’t have much time in the winter to actually hike, so it had to wait until early spring.
I woke up at 3am and drove to the Missouri Gulch trailhead. There were a few easily manageable mud puddles to avoid, but nothing anyone would get stuck driving through. I made it much faster than I thought, as I was honestly waiting for daylight for this hike. After seeing a herd of elk on 390 I made it to the trailhead at 5:45am. There was one other vehicle in the parking lot, and it looked like it hadn’t been there long (no frost on the windows, etc). This would make my family happy, knowing there was someone else out on the trail today. They hate that I hike alone.
I usually love hiking well before sunrise, but today for several reasons I decided to sit in my truck for a bit and wait:
I’m not a fan of hiking by graves in the dark. Does anyone else think it’s weird the baby’s grave is so far away from all the others? I mean, it’s across the street and up the hill and everything…
I really didn’t want to play ‘leapfrog’ with whoever was already hiking on the trail. I figured I’d give them some time to get far enough ahead of me so we wouldn’t need to pass each other/hike together the whole time.
I’ve heard reports there’s a mountain lion that frequents the area, and I’d rather not run into one in the dark. (side note: I’m not afraid of mountain lions, in fact I’d love to see one while hiking, I’d just rather it be in the daylight)
But seriously, that baby grave in the dark freaks me out.
I debated for a while which hiking boots to wear (my regular ones or my winter ones) and whether or not to bring my snowshoes. There wasn’t a recent conditions report in the past week or so, and the last one said none were needed. I left the snowshoes in the truck and headed out at 6:15am in my snow boots and winter gear. It was still dark.
I made it about .25 of a mile when something told me to turn around and go back and get those snowshoes. It’s tough to head back after you’ve already started, but the feeling was strong and I thought how mad I’d be at myself if I made it up the trail 3 or 4 miles and needed to turn back because I didn’t have the proper gear. So I hiked back to my truck, pulled them out, and was on my way again.
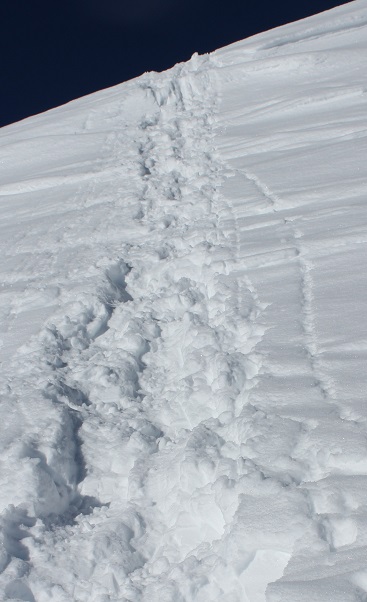
The trail was covered in slush that quickly turned to packed snow. As I looked on the ground I could see clearly defined mountain lion tracks (noted by size and lack of claw marks) on the trail. Cool! I also saw trails made in the snow that were obviously from a large animal (the mountain lion?) that detached from the main trail and went off into the hillside. The tracks were going the opposite direction, but that didn’t stop me from looking all over for signs of animal life/more tracks. After about 1.5 miles in the tracks disappeared.
20 minutes into my hike I passed the couple belonging to the truck. They didn’t look like they had snowshoes and I felt a bit foolish for carrying mine. The trail was pretty hard packed here, and snowshoes didn’t seem necessary. I briefly asked them if they’d seen the animal tracks, they had, and I was on my way. I never saw them again.
I crossed a small stream and decided the snow was thick enough to put on those snowshoes I’d been carrying.
The snow got thicker, but luckily others had been here in the past few days because there was a pretty good trench all the way to the cabin.
I made it to the cabin much faster than I’d anticipated. I took this trail on my way to Missouri Mountain last summer, and from what I’d remembered it had been a long slog full of switchbacks. But for some reason today it didn’t seem to take me much time at all. The cabin was surrounded in snow.
From here on out snowshoes were mandatory. There was no trail from the cabin through the willows/gulch area, so I had to make my own trail. Luckily I kind of knew how the trail went, since I’d hiked this area before. It was really cool to be breaking my own trail, and doing so successfully! This was the first real time I’ve broken trail: I hiked Humboldt Friday and broke a little bit of trail, but mostly followed others’ tracks. In fact, this was only the second time I’ve ever been snowshoeing, and I kind of liked it! It was so cool to be 5 or more feet above the trail in the snow, traversing over willows instead of around them. There was no way I could have done this a year ago, and I was proud of my route finding.
When I turned around I saw the alpine glow of the sunrise
I stayed by the creek and headed towards the Elkhead Pass/Belford Summit Junction.
The sun was really starting to come up, and the view of Missouri Mountain was fantastic!
This is where the wind really started to pick up. It was relentless for the rest of the day, hovering around 35mph. It looked like all that snow in the gulch was directly blown down from the mountains.
I looked at the route before me up Belford, and as I was ascending thought not for the first time how grateful I was to have gone back for those snowshoes.
The hike up Belford took forever. It just kept going and going and going up, up, and up. And that wind! Without the sunlight that wind was chilling. I just kept moving, pretending it was the Manitou Incline, and trudged up that mountain wearing those snowshoes, breaking trail.
There were several false summits to Belford, which were a bit annoying but anticipated.
Finally (and I mean finally, as I was exhausted) the real summit of Mt Belford came into view and I thought to myself: 4500’ in snowshoes for 4 miles was exhausting!
I was frozen, but set up my gorillapod and camera and took a summit photo.
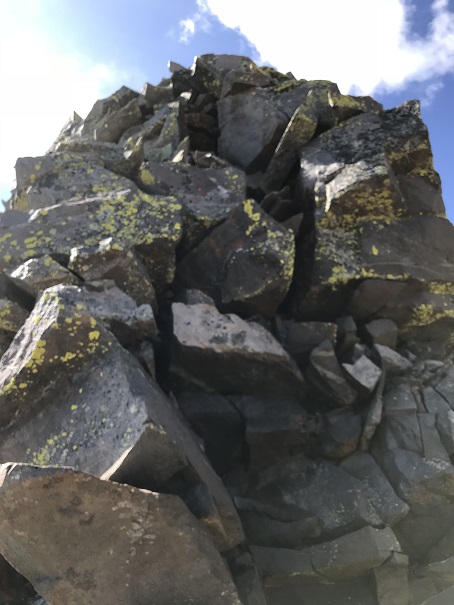
and just because it was there (they usually aren’t) a photo of the summit marker
I took a look around. The view was magnificent!!!
I didn’t take out my instructions/map, but remembered the route to Mt. Oxford would be clearly visible from this location. It was just 1.5 miles away. I followed the clearly defined path with my eyes and my jaw dropped.
No way! There was no way I was doing that today in these conditions! That’s when I took a closer look, realized I was looking at Mt. Harvard (which I’ve already hiked), breathed a sigh of relief and looked east. There I saw the second summit I was after today: Mt. Oxford.
It looked doable in today’s conditions. That is until I made it to the ridge. The ridge down from Belford to Oxford was covered in snow. There weren’t any tracks to follow (either no one had taken this trail in the past few days or that relentless wind had covered the tracks with snow). As with any hiking/climbing challenge, I don’t make a decision to hike/climb until I’m right up next to the obstacle. I often find it’s easier than it looks when you’re up close. I decided to just take this ridge one obstacle at a time, and if I felt uncomfortable gave myself permission to turn back. This was supposed to be an easy winter 14er, so I should be able to do this, even in these conditions.
I looked for the areas with the least exposure and least snow, and began my descent. It was really cool making tracks! I carefully made each foothold by drawing a line with my trekking pole and stamping it down with my boot, making sure I had a firm stance before traversing.
It was more than I’d anticipated running into today, but nothing I couldn’t handle. Microspikes/snowshoes weren’t needed.
I made it down to the saddle and looked back up at Belford, and then up at Oxford. Wow.
The saddle was dry and came with absolutely amazing views! I stowed my snowshoes and was off.
To the north there was a small cornice that provided interesting views as well.
I looked ahead of me at the route up Oxford. Piece of cake. And it was.
The summit was actually closer than I’d anticipated (the first outcropping, not the second). I took a summit photo.
And another one of the summit marker (because it had one too!)
I turned around to see what I’d accomplished thus far today. What a view of Belford!
I started back, ready to tackle that ridge again head on, and this time uphill. I gathered my snowshoes and kept an eye on the weather, since it was supposed to snow after 3pm (it was currently around noon). While all morning it had been windy and clear the clouds were now starting to form. I hiked back up the ridge using the footsteps I’d made on my way down. It took a while but I was successful!
At the summit of Belford the second time I stopped for a bit to really take in and enjoy the view. Since now the hardest part of the hike was behind me, I felt I could afford to rest for a bit. I sat down at the summit marker and took a deep breath.
After a grueling and extremely windy 6000 feet in elevation gain in 6 miles (in snowshoes) I sat at the summit of Mt Belford, my 3rd 14er Peak today (out and back, so 2nd time here today). Suddenly the wind stopped and all was still. This is what I saw.
Immediately tears came to my eyes. It was like God knew I was the only person in the world with this view and he wanted to show off just for me. I was absolutely mesmerized by the intense beauty before me. It’s the closest thing to a religious experience I’ve ever had. All the hard work of the day and the frozen extremities that came with it was worth it! I sat there for 5 minutes before he picked up the wind again and reminded me to get my butt off that mountain: a storms coming in.
Of course I took another photo, trying and failing to capture the beauty around me.
I walked over the summit and took a look at the rest of the route down to the gulch. It looked like the sun had melted some of that earlier snow.
I was making good time, so I decided to have a little fun and use my remoteness from any other human being to practice some winter skills without embarrassment. Much of the earlier snow was gone, so I was able to safely practice glissading and running down the snow without worrying about sliding too far or out of control. I did this for most of the hike back down, laughing as I went.
Back down at the gulch, this was my view back down towards the cabin and back up at the route I’d come. As you can see, clouds were just beginning to form for that storm anticipated for tonight.
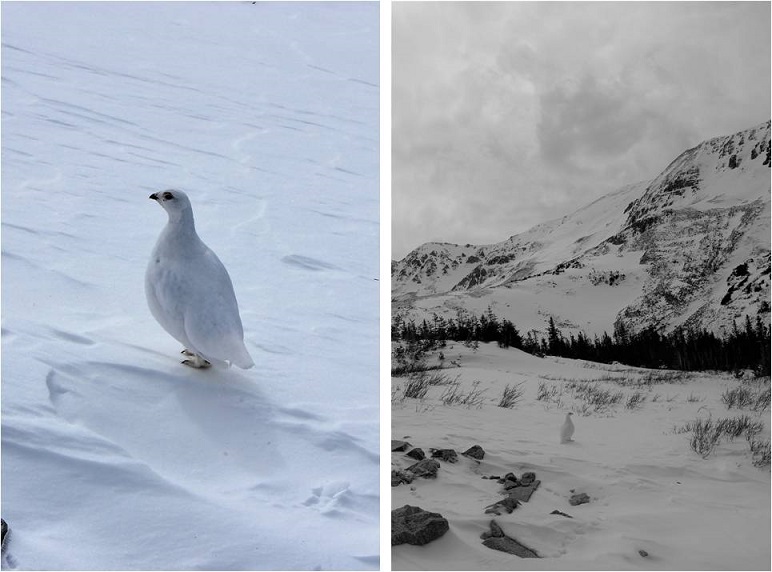
I put my snowshoes back on, crossed a frozen river of ice, and waiting for me on the other side was a ptarmigan. I knew he was a male because he had a red stripe over his eye. He just stood there, looking at me, and then slowly turned towards Missouri Mountain and looked over his shoulder, as if he was beckoning me to follow.
I took several pictures, thanked him for being so cooperative, and followed my snowshoe tracks back through the gulch and down the mountain. It looked like several people had actually hiked up to the gulch today, as around the cabin there were several new ski and snowshoe marks, but no people to be seen. The trench was also a bit more compact than it had been earlier.
The hike back down seemed longer than the hike up, and I kept my snowshoes on for most of it. Somewhere along the way I lost my beanie which was unfortunate (I’ll make another one). As I was nearing the end of my route I kept looking for signs of a mountain lion (nope) or any other form of wildlife (again, nope). As I approached the area with the grave in the daylight I realized I was ‘told’ to get those snowshoes exactly as I passed the grave… Hmmm.
I crossed clear creek and my days hike was over.
On my drive home I thought about the details of today’s hike, and how this is something I wouldn’t have been able to accomplish a year ago. I was glad I’d saved these ‘easy’ 14ers for winter-like conditions, as it allowed me to apply the knowledge I’ve learned thus far (snowshoeing, traversing ridges covered in snow), while giving me time to practice more intense skills in a safe environment (glissading, self arrest, running down a snow field).
Here are some summit videos. The views were amazing!


 Relive:
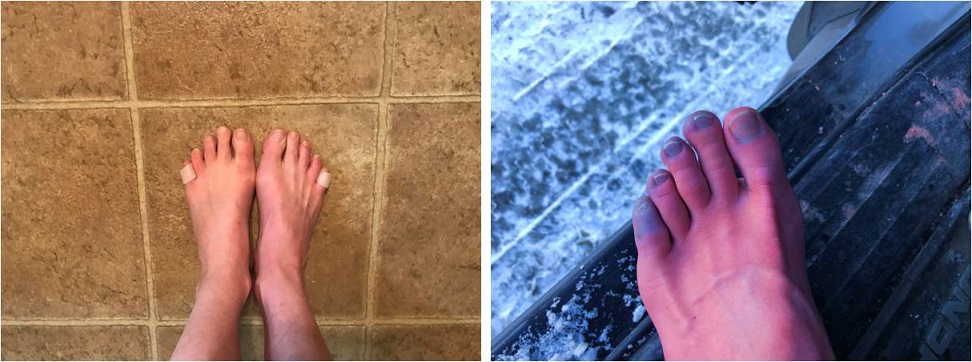


 RT Length: 11 miles