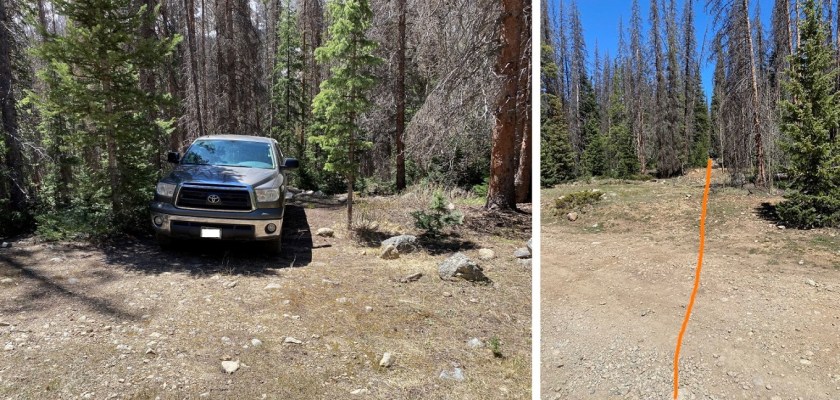
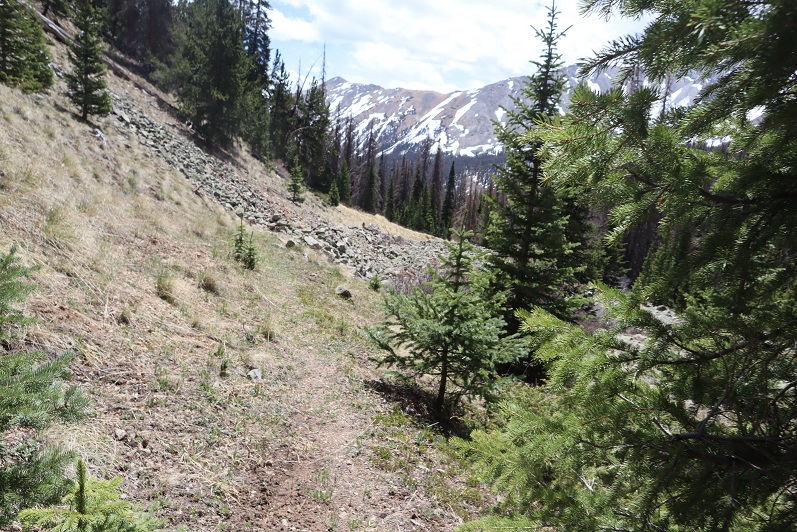
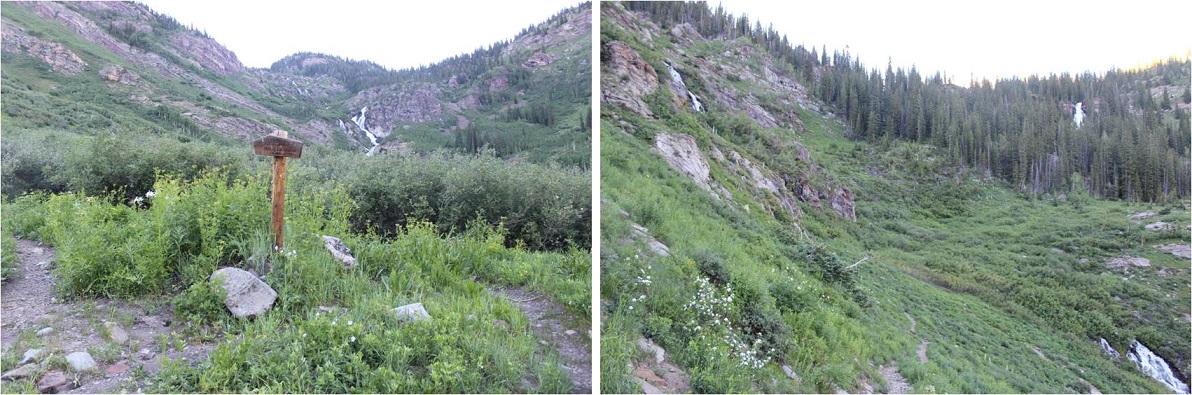
I made it to the 1 vehicle trailhead early the day before after hiking another peak in the area. I had a lot of time to kill before heading to bed for the night and enjoyed every minute. The Cyclone Creek Trailhead is located at 10750’, where the Cyclone Creek and CR 240 meet. It’s located 8.25 miles after turning onto CR 240 from HWY 50. The road is 4WD (not too rough, any stock 4WD should be able to make it).
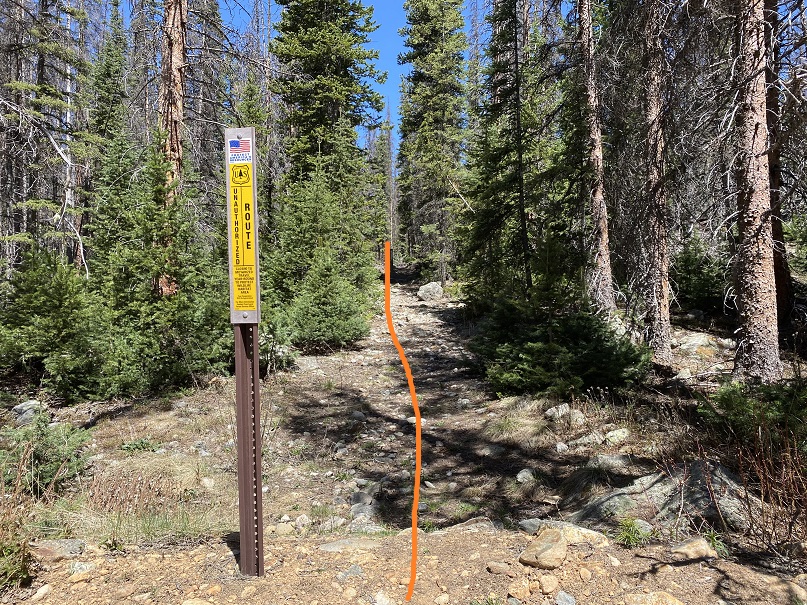
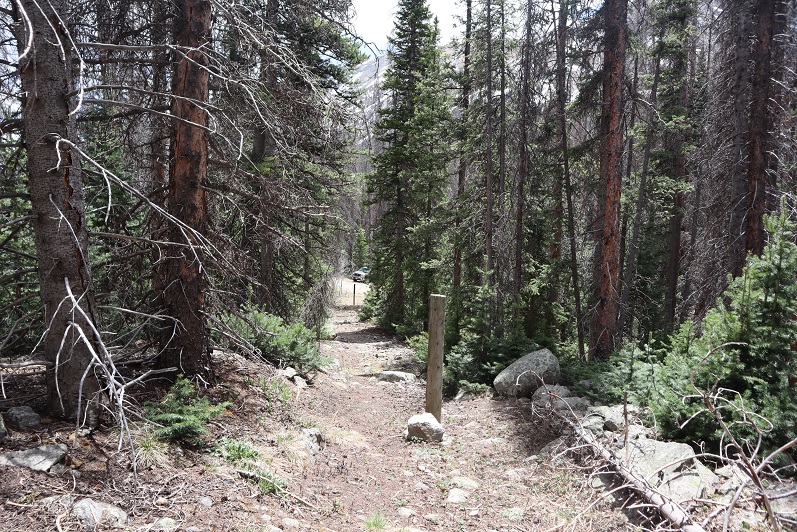
Since I made it here early I decided to check out the area. The trail starts just on the other side of the road, but isn’t marked well. In fact, the sign just says “closed to motorized vehicles”
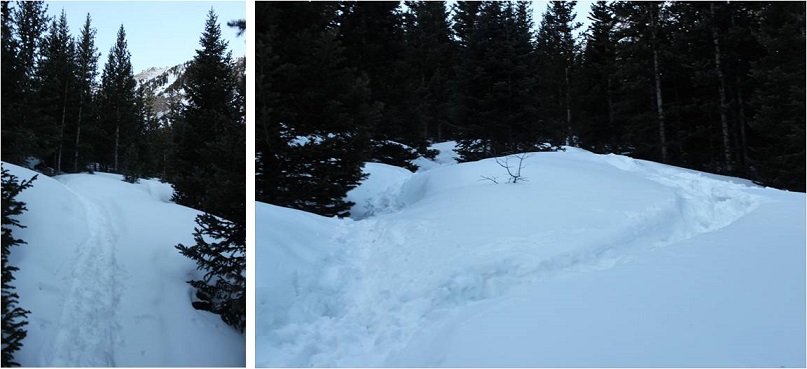
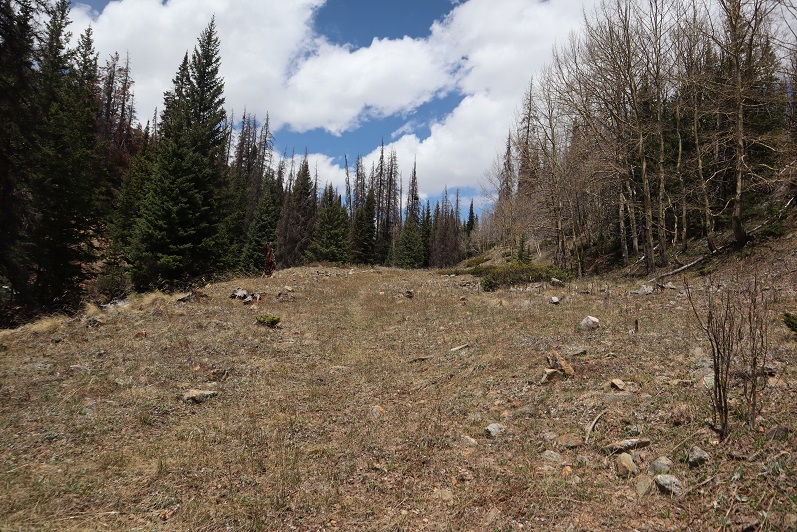
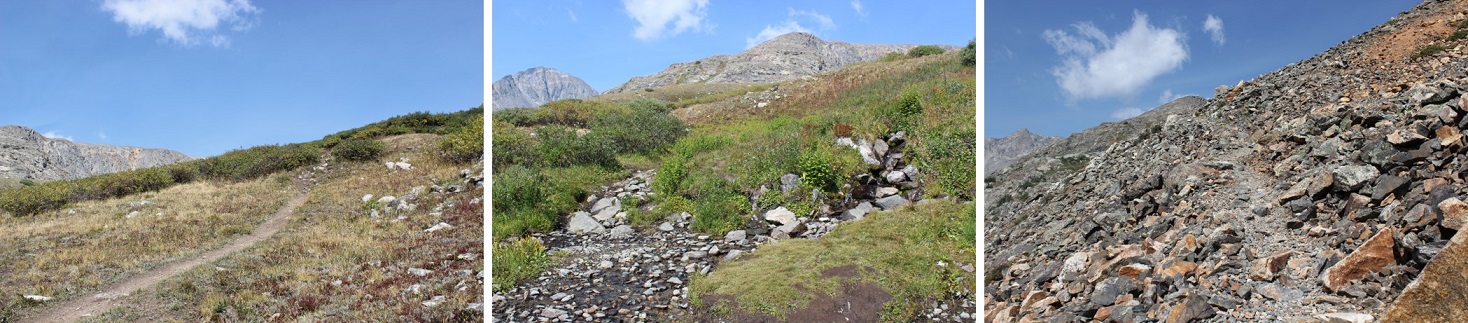
I woke up at 2:45am and was on the trail by 3am. The trail started out decent, but quickly deteriorated and became difficult to follow.
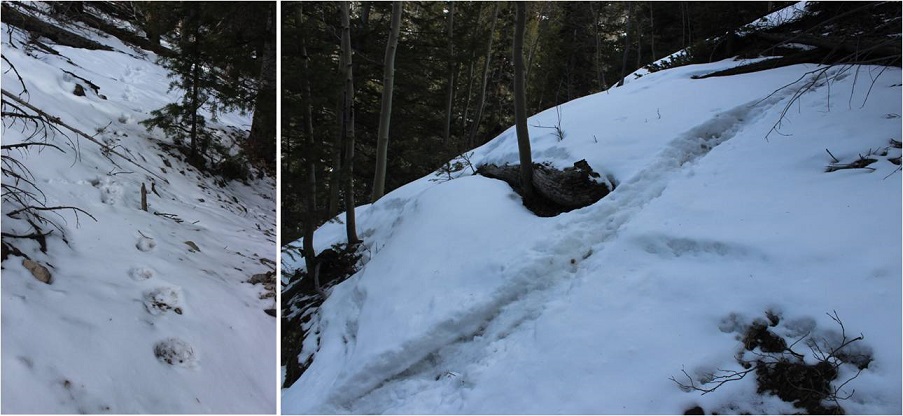
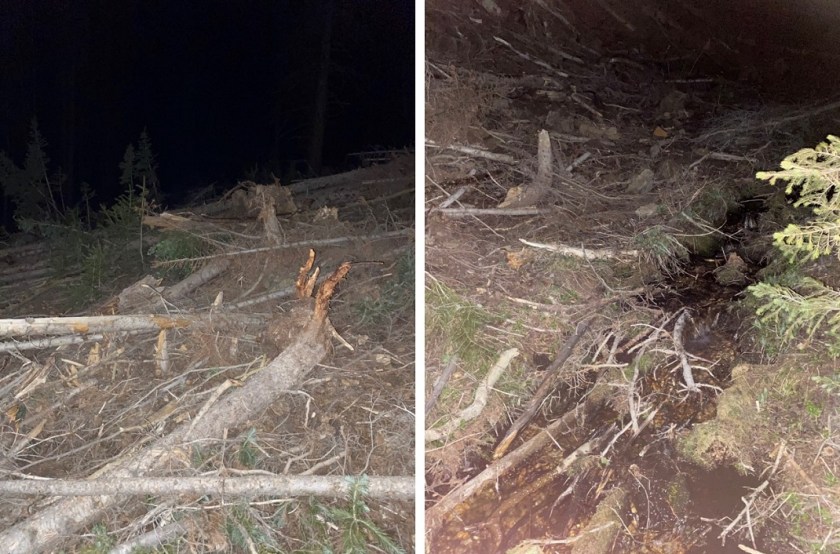
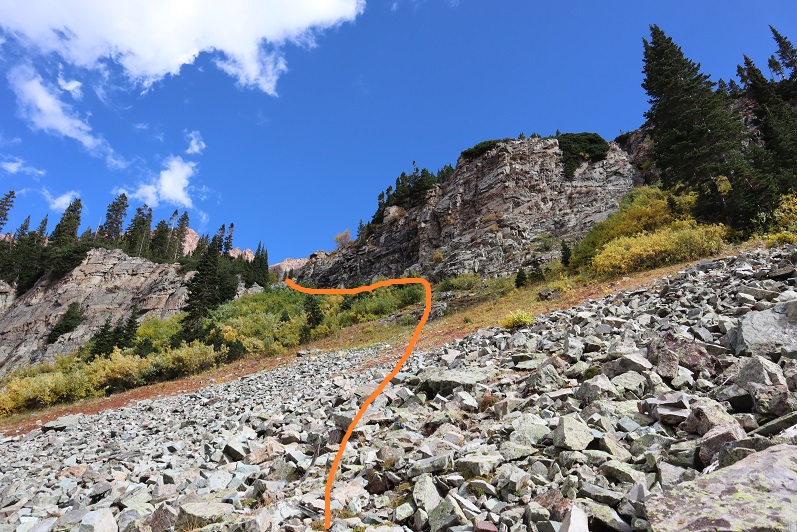
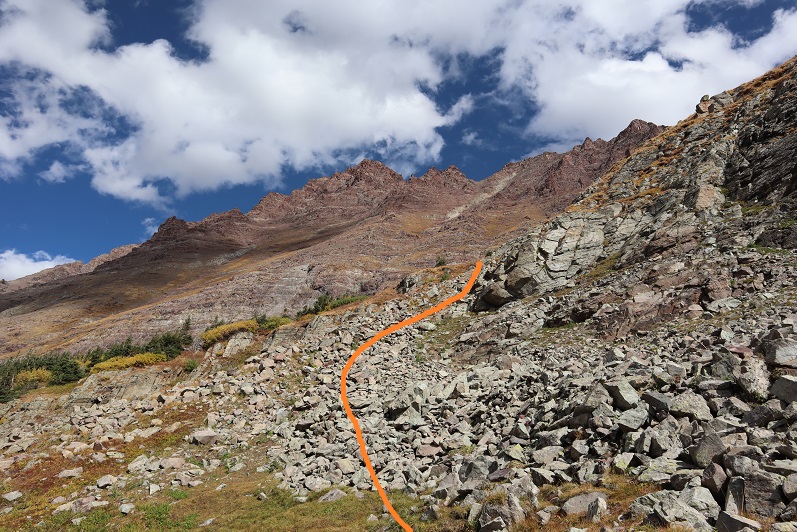
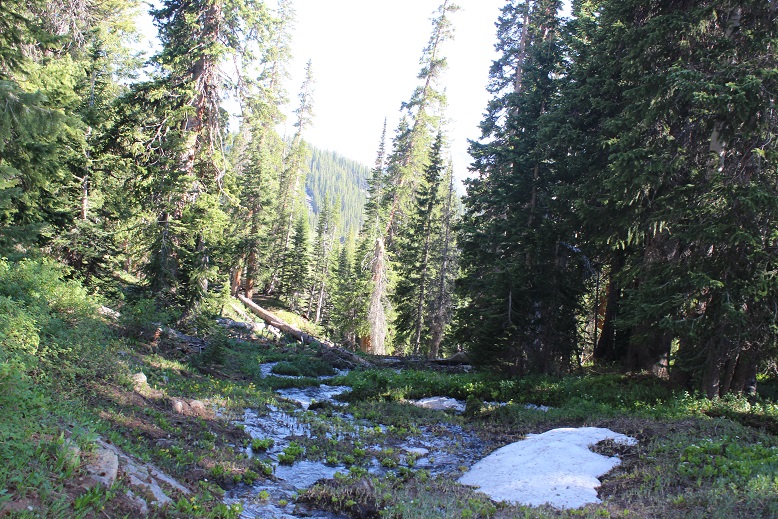
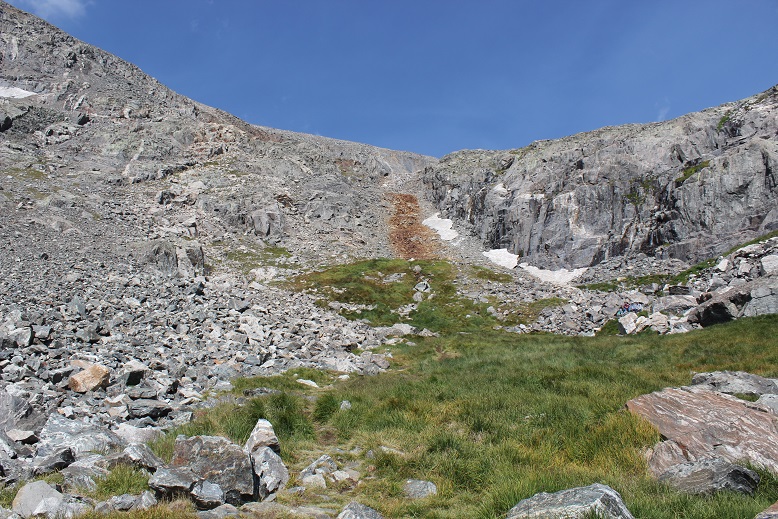
After hiking for about half a mile I turned right (east) and headed up the side of the mountain. There was no trail here and it was dark so route finding was tricky, especially in the avalanche area (11,150’). I found a small stream and followed it until it went away, right at about treeline
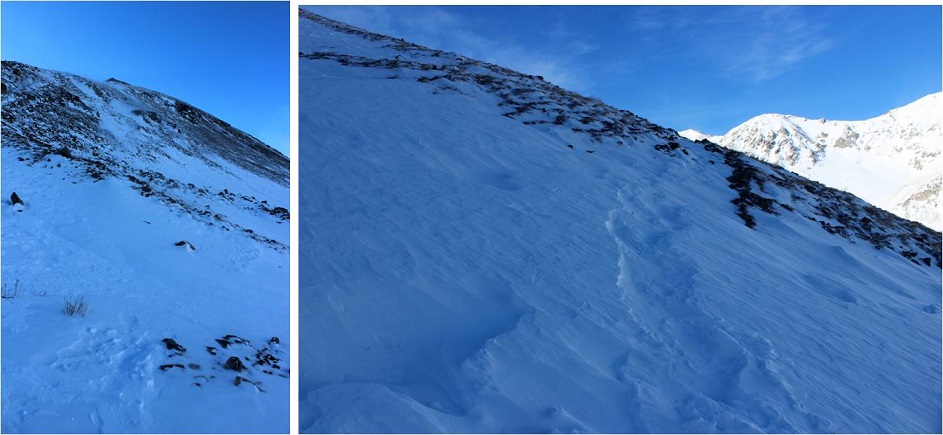
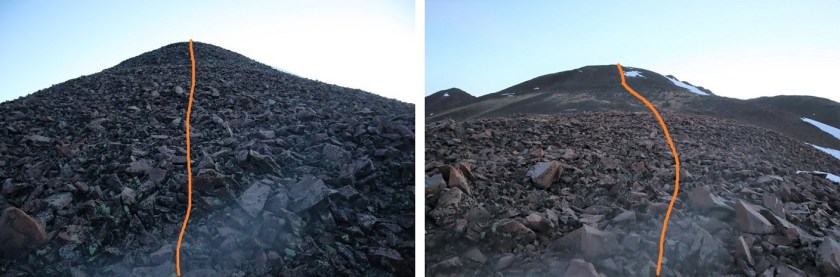
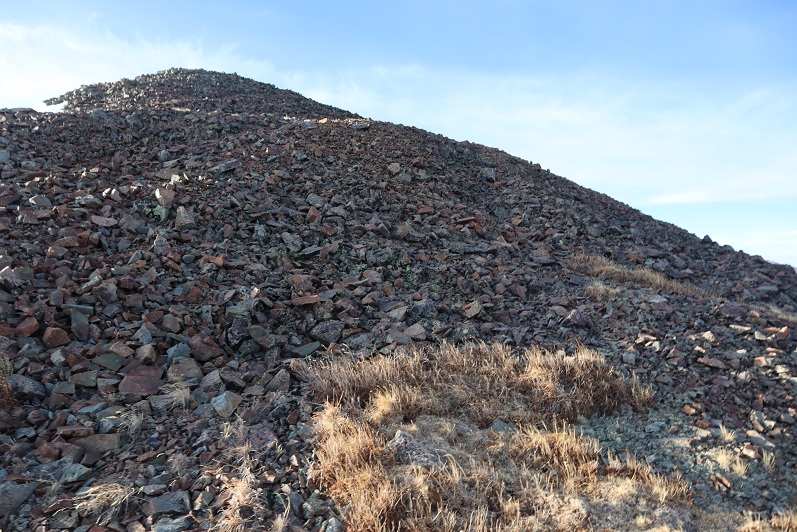
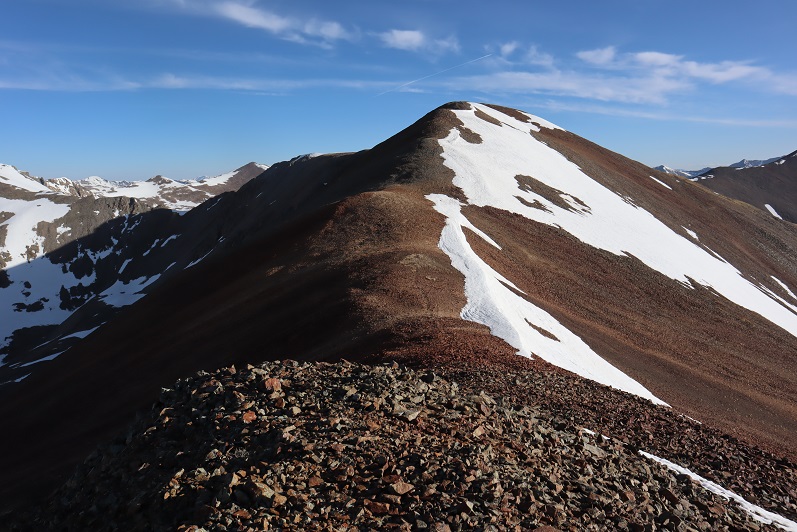
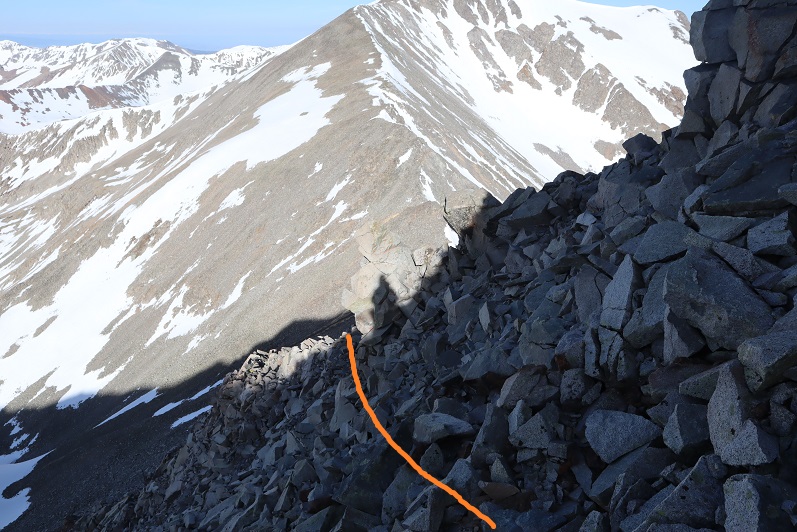
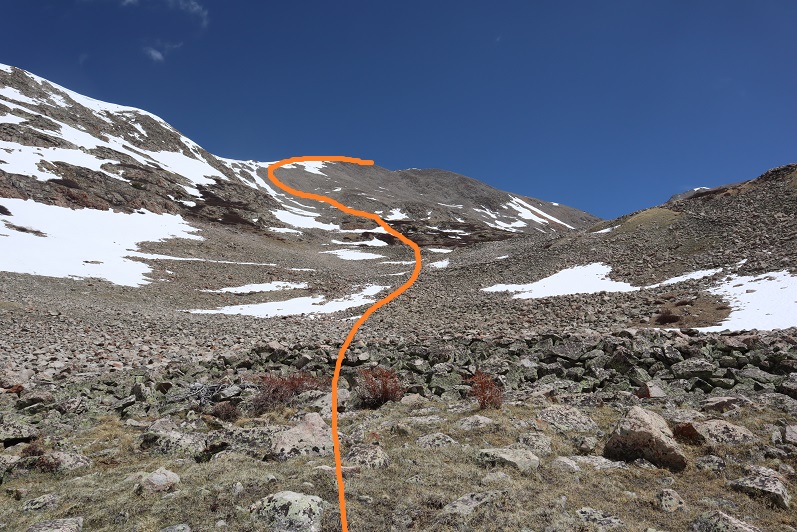
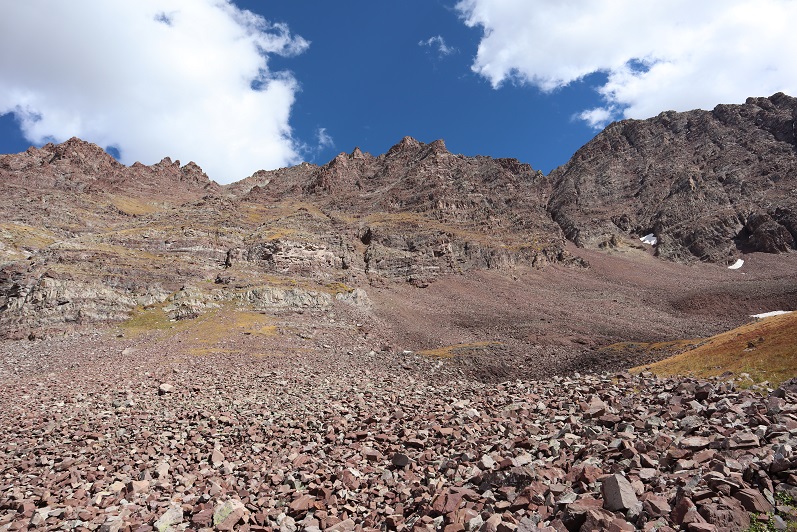
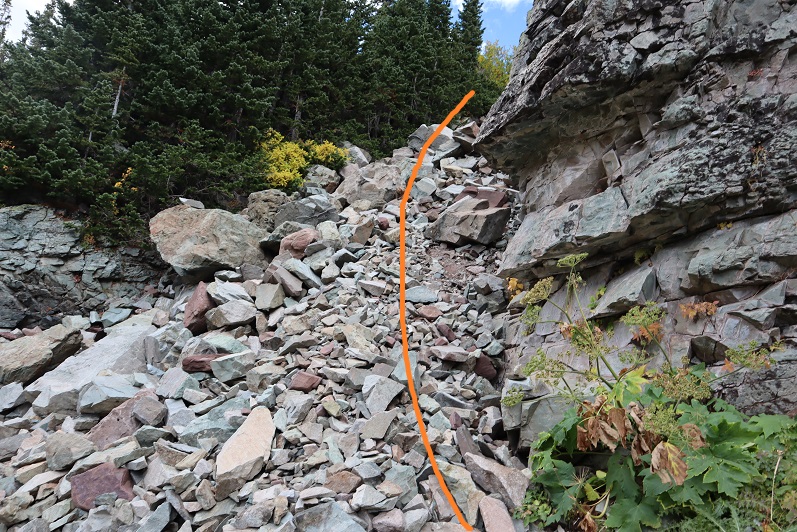
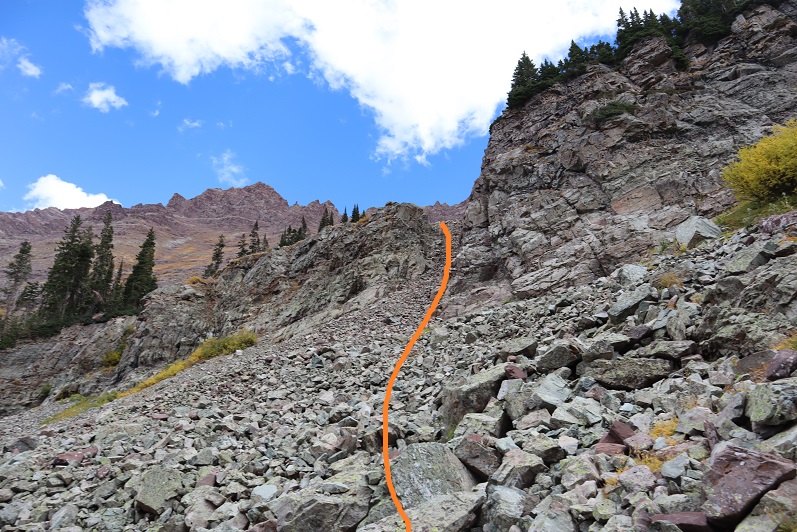
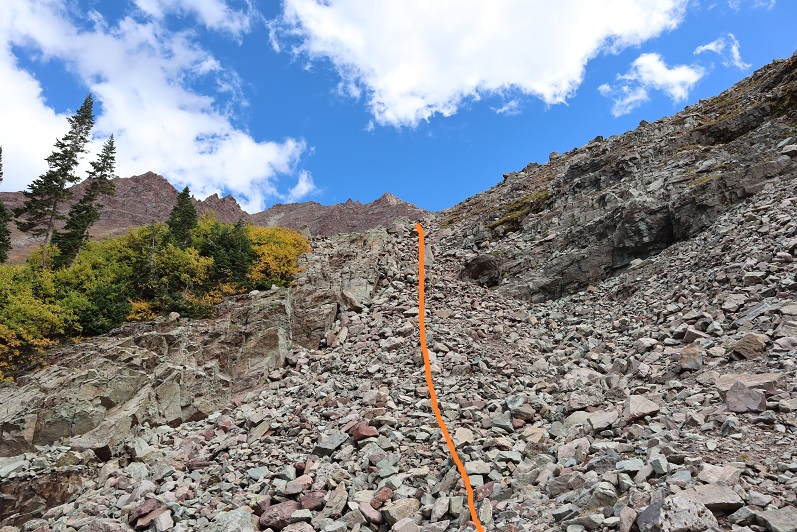
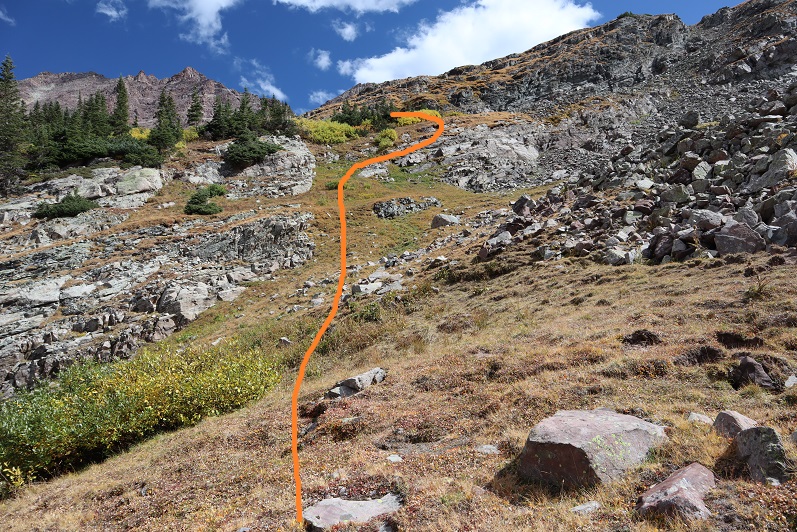
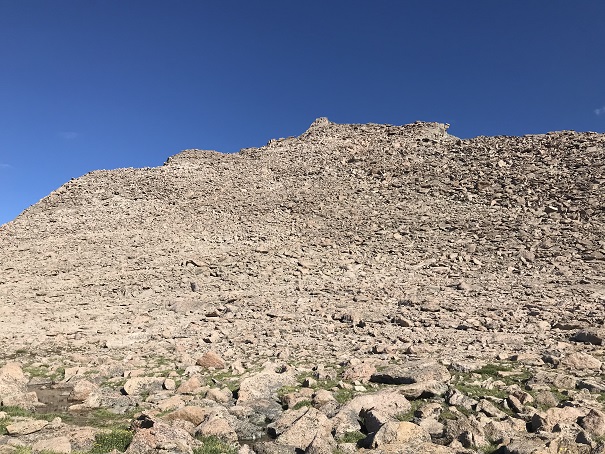
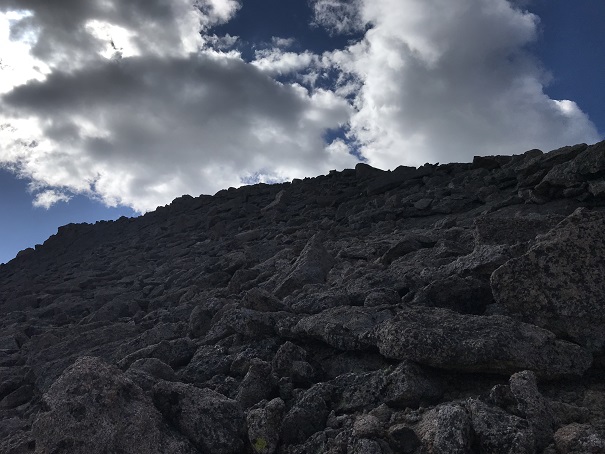
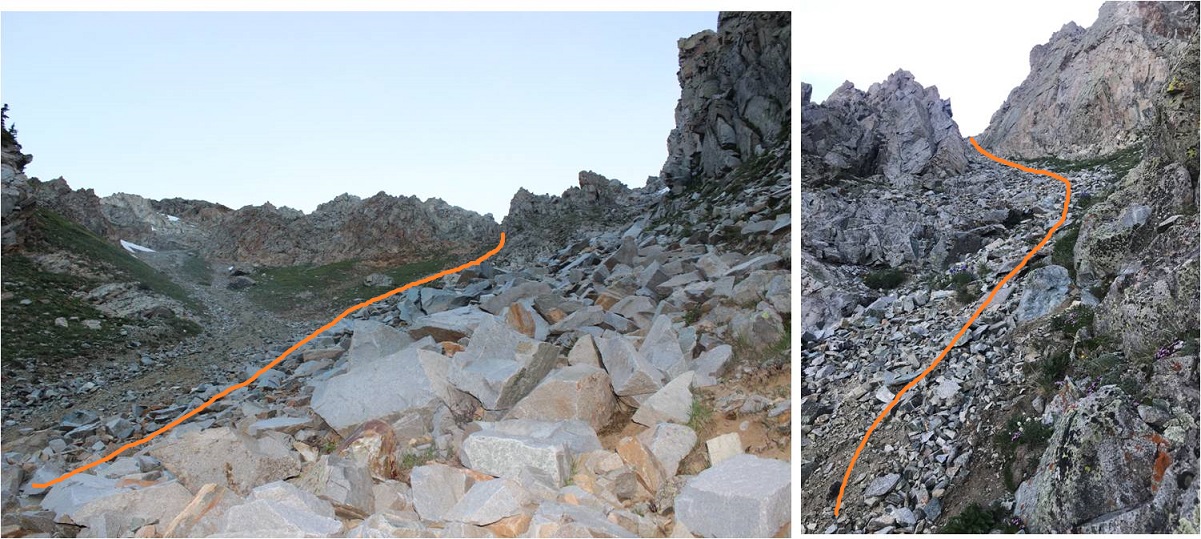
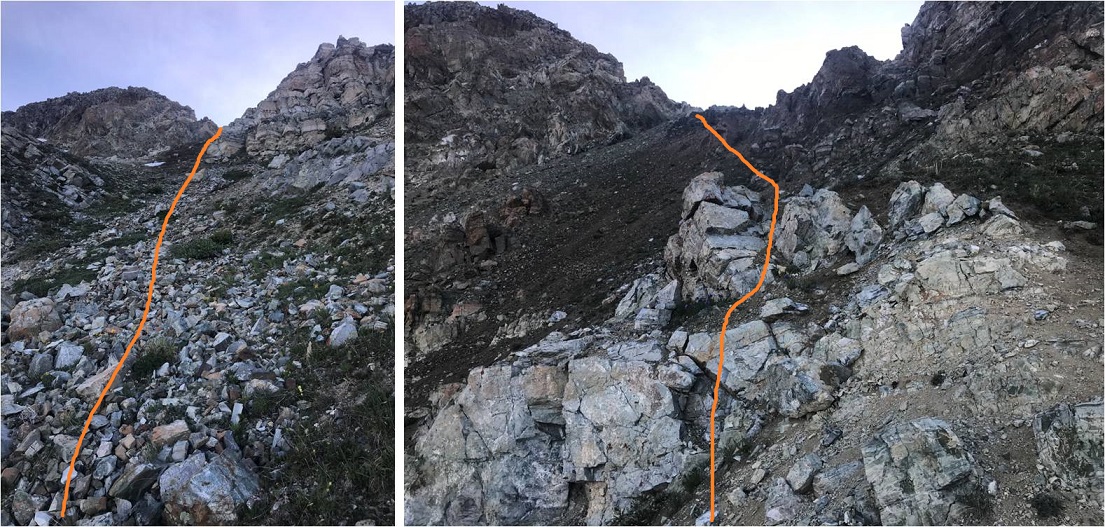
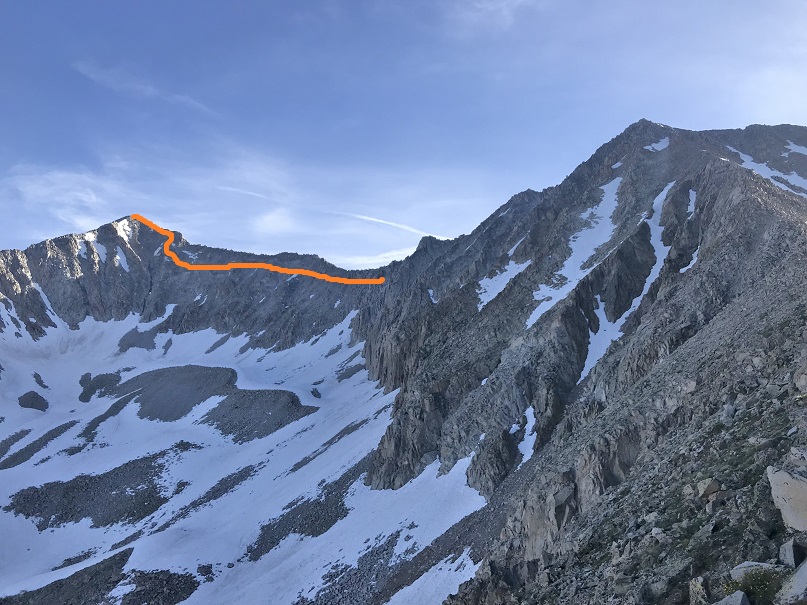
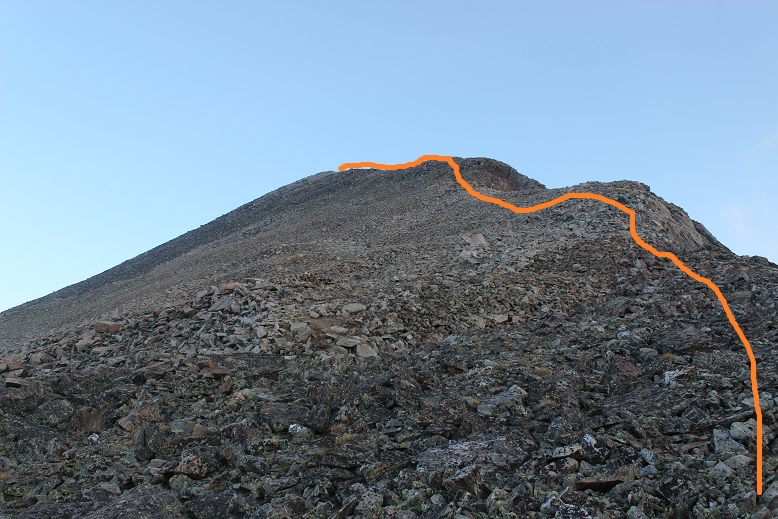
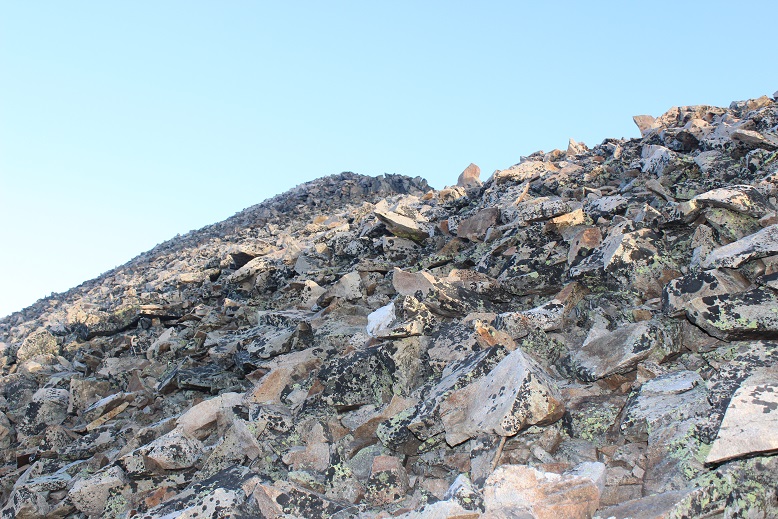
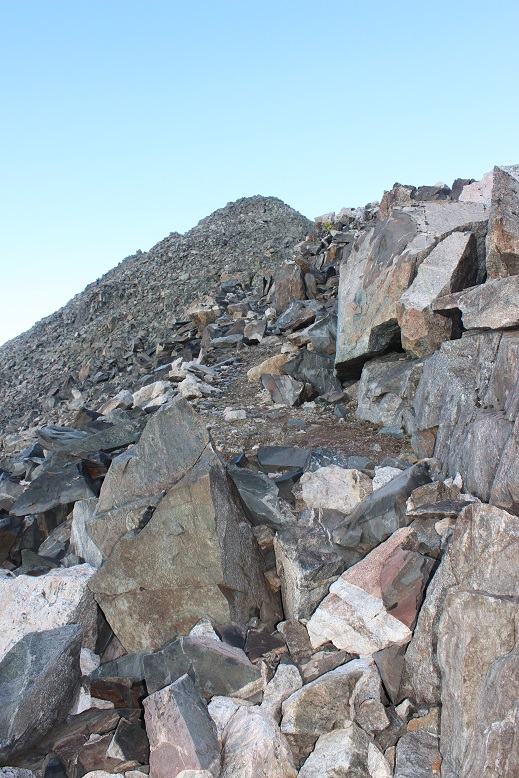
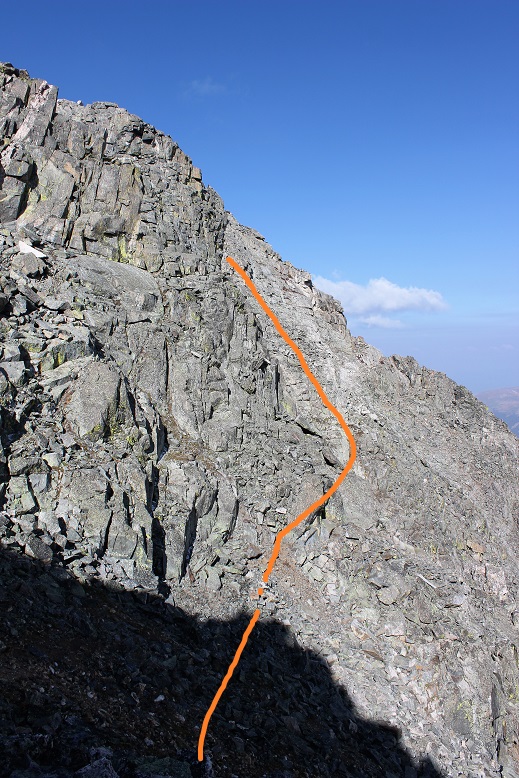
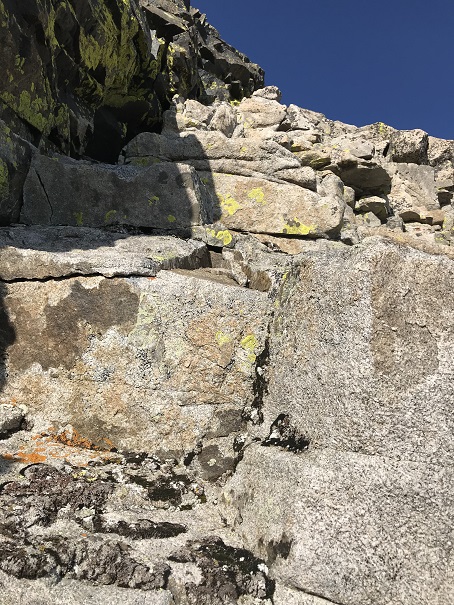
Here the terrain became very, very steep (scree) and at times I crawled to continue moving forward. The wind was intense and cold, cold, cold. My nose started dripping like a faucet and yes, that’s snot you see on the lens at the bottom of the next few pictures. The scree gave way to some of the loosest talus/rubble I’ve ever experienced as I made my way towards the ridge thinking “there has to be a better way to ascend the ridge than what I’m doing, there just has to”. I probably would have altered my course a bit if it were daylight and I could see.
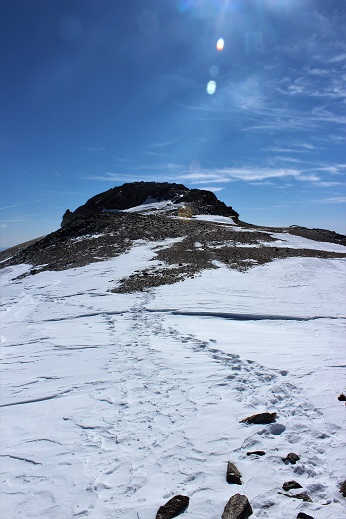
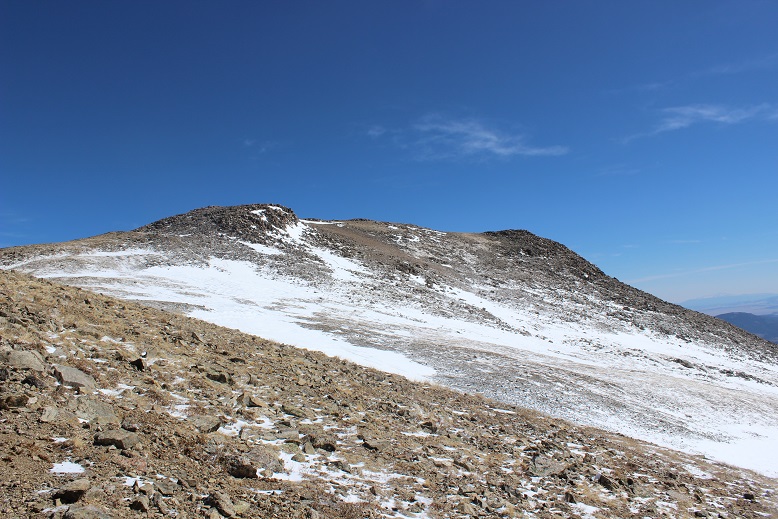
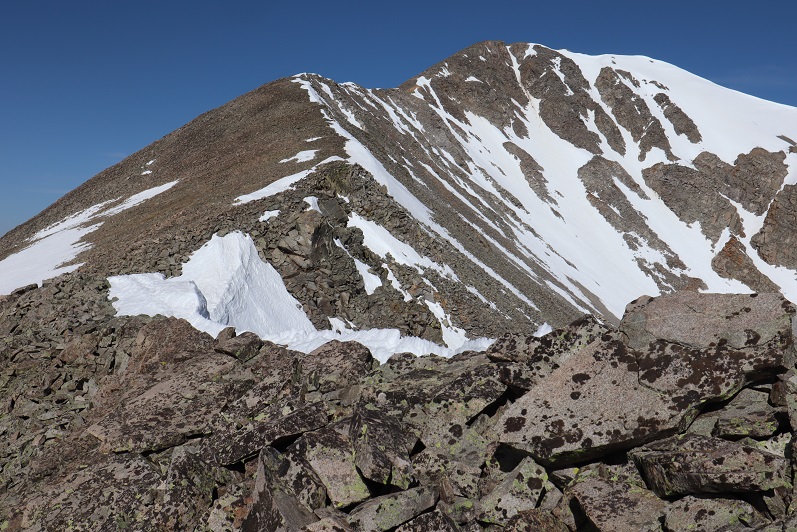
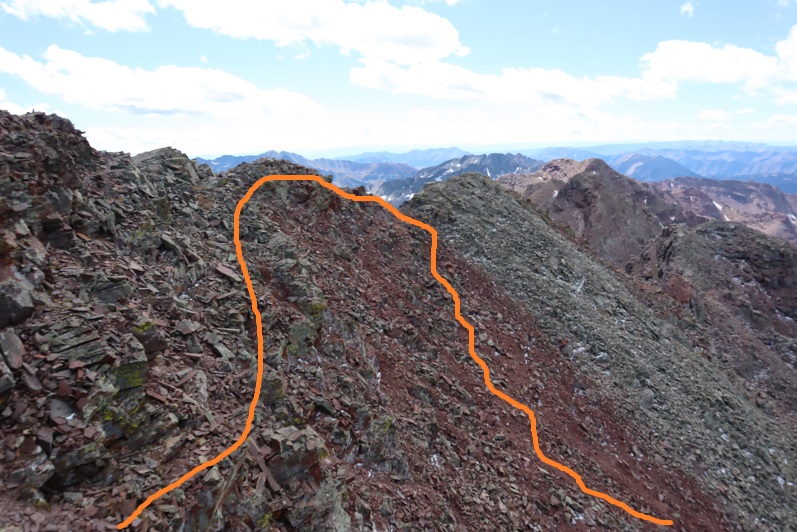
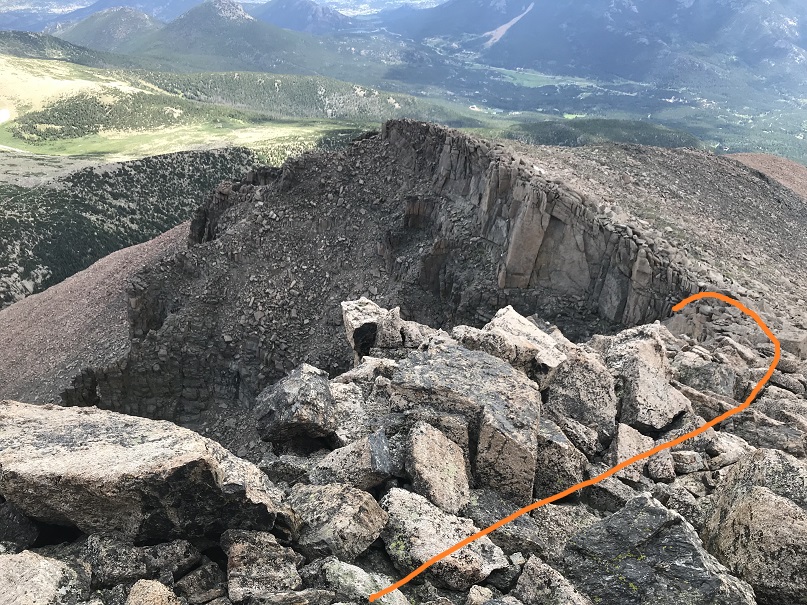
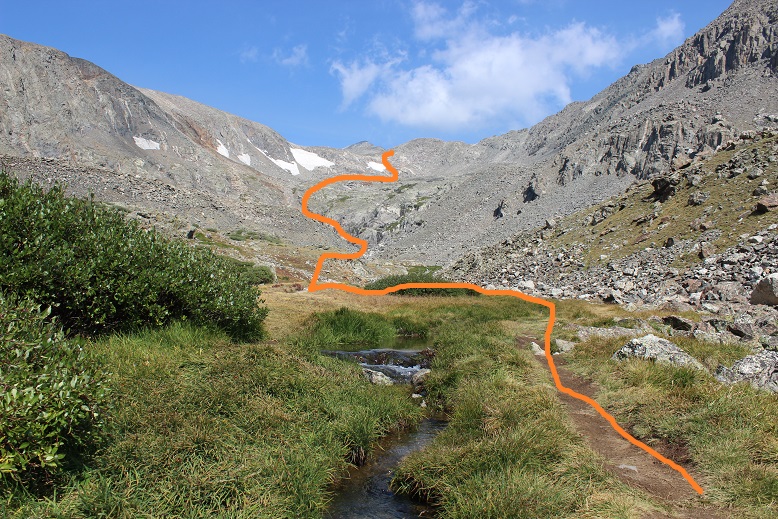
This ridge seemed to last forever, with a few small false summits
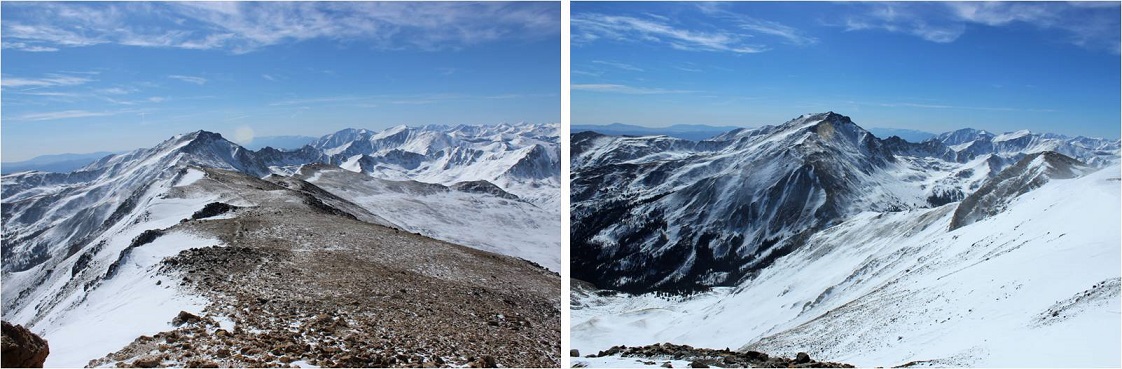
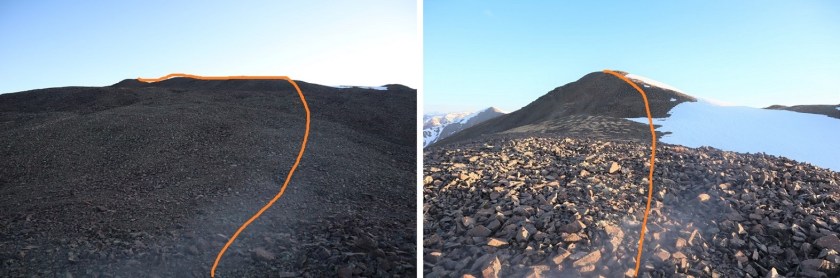
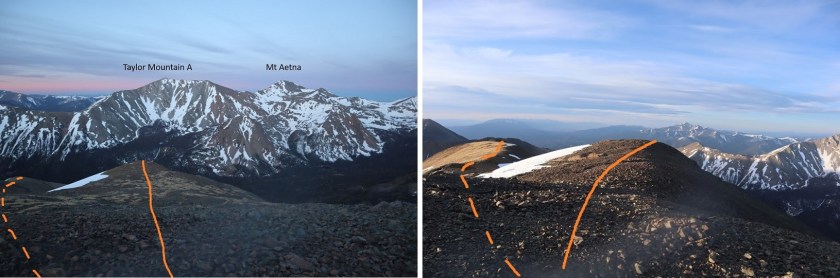
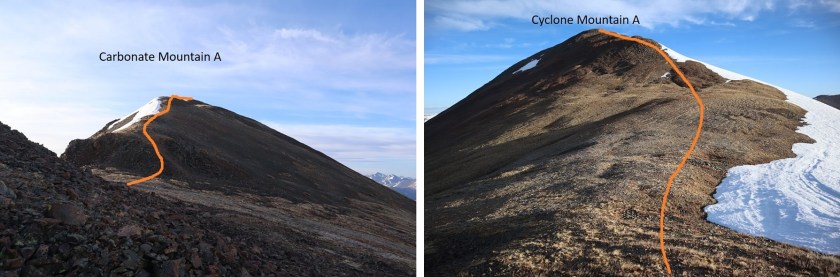
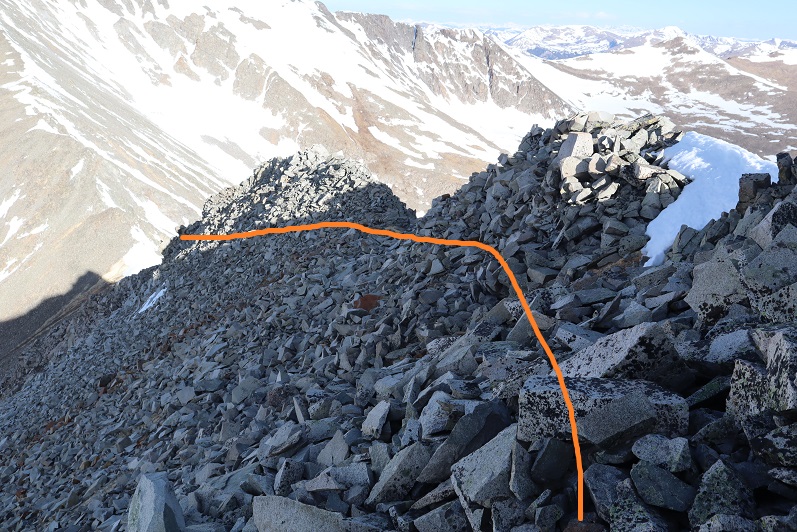
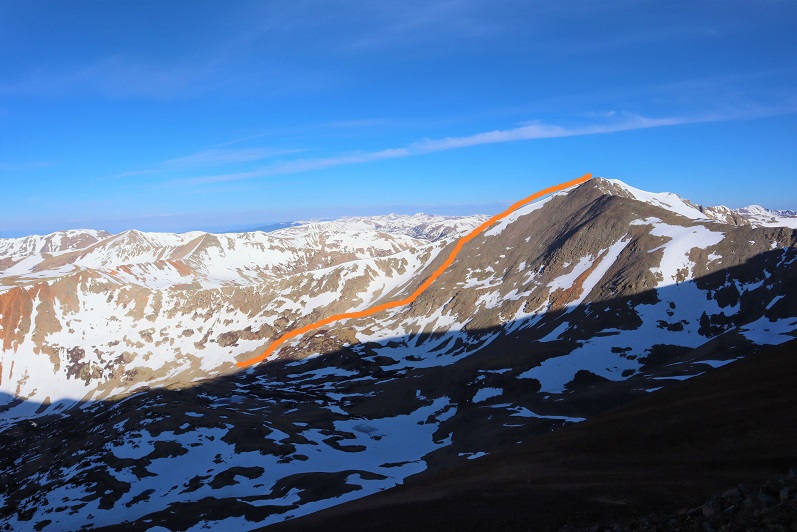
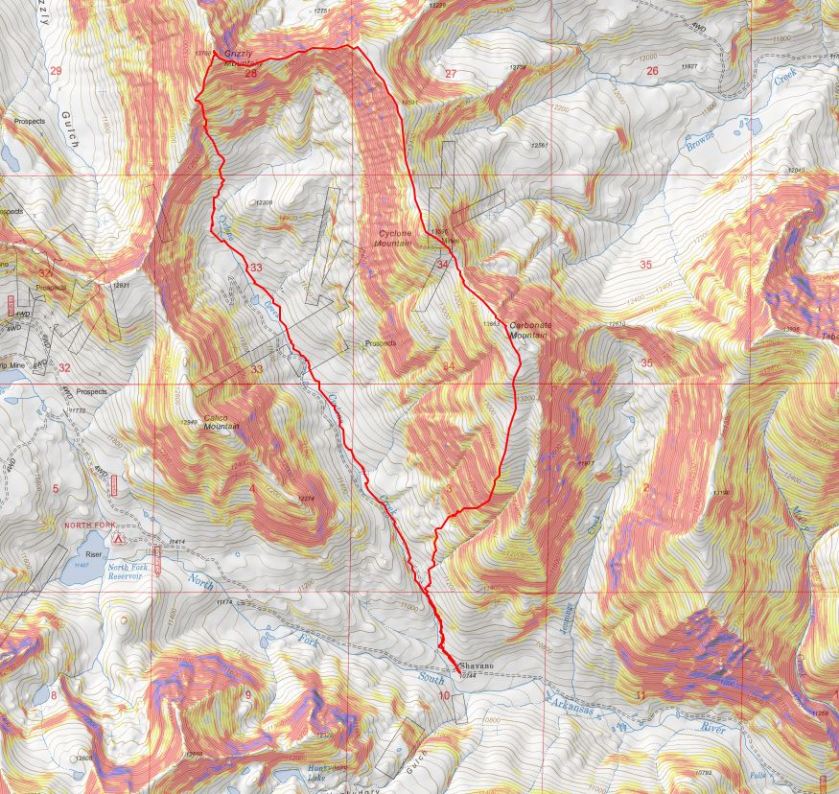
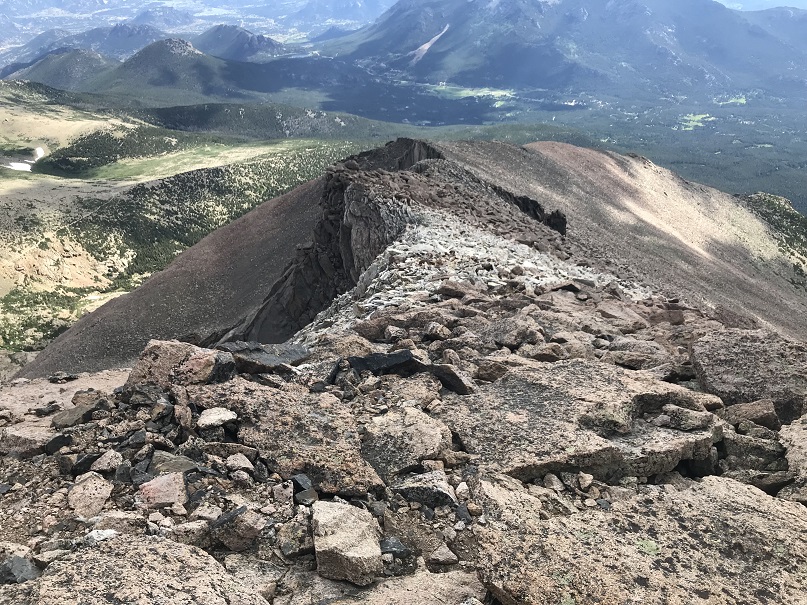
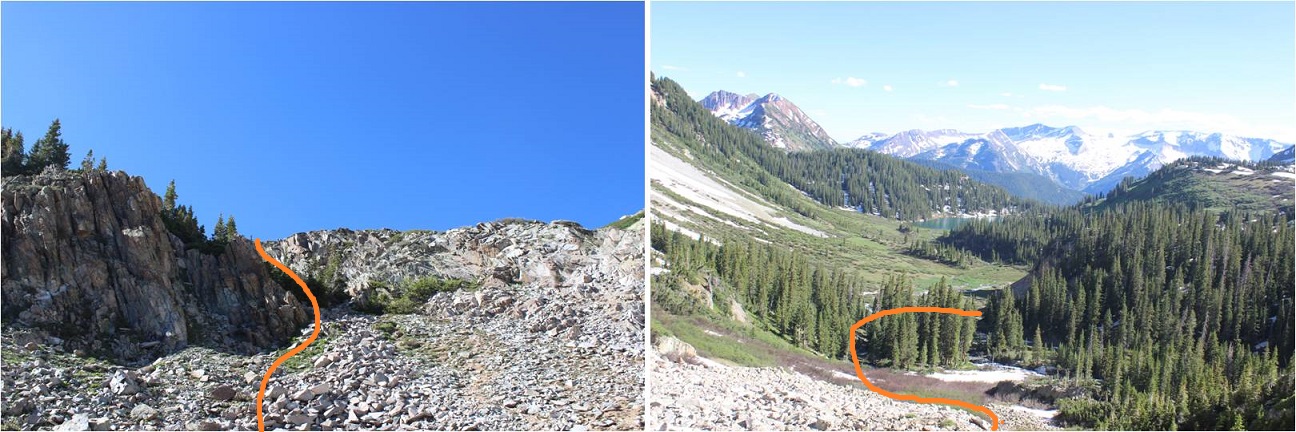
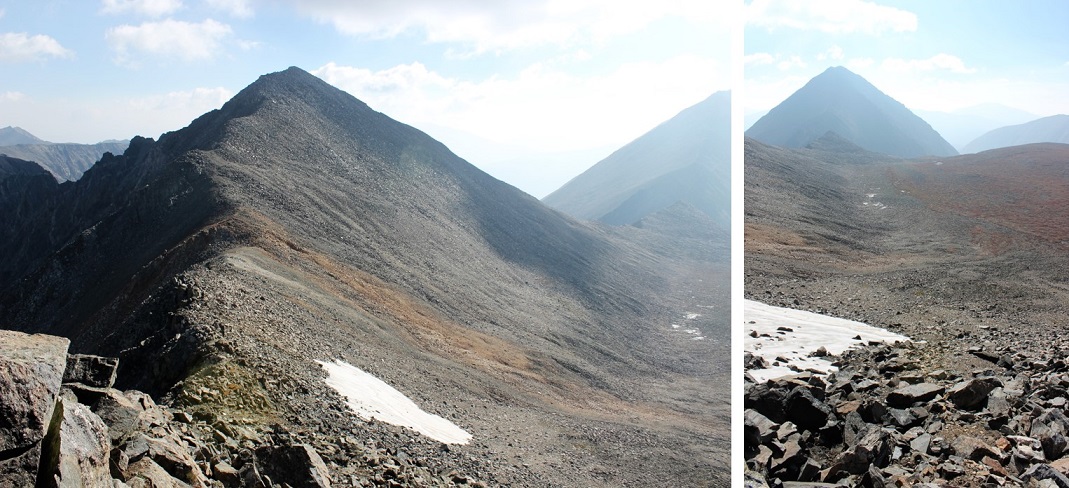
I’m not sure I’d ascend Carbonate this way again: I’d instead ascend the ridge to the right (start ascending directly from where I parked my truck). Here’s looking back at the way I ascended. The dotted line is how I’d do it if I were to do this again.
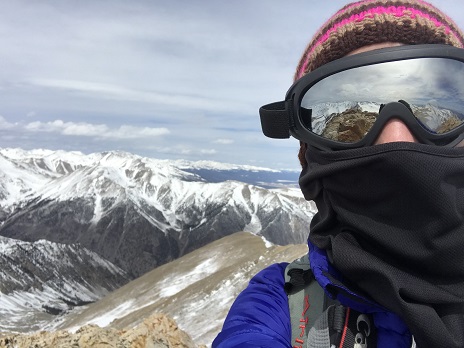
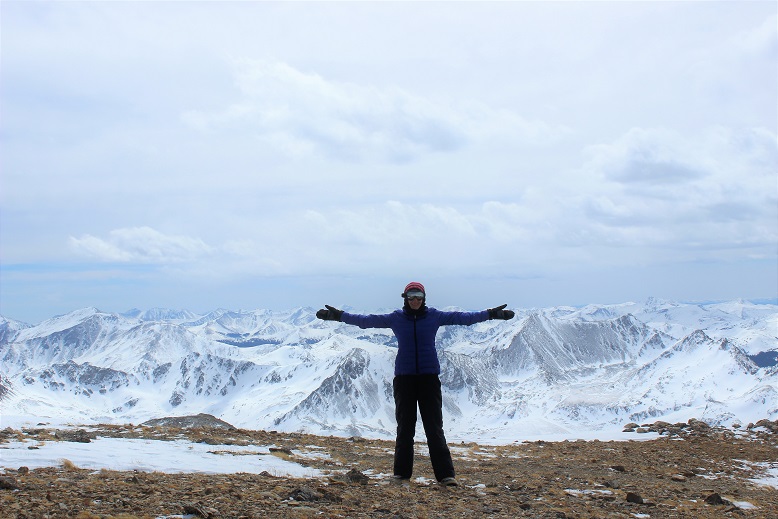
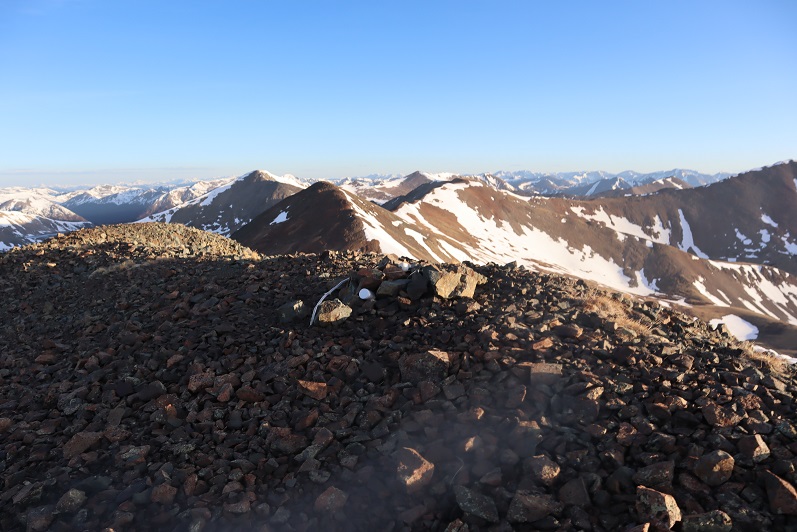
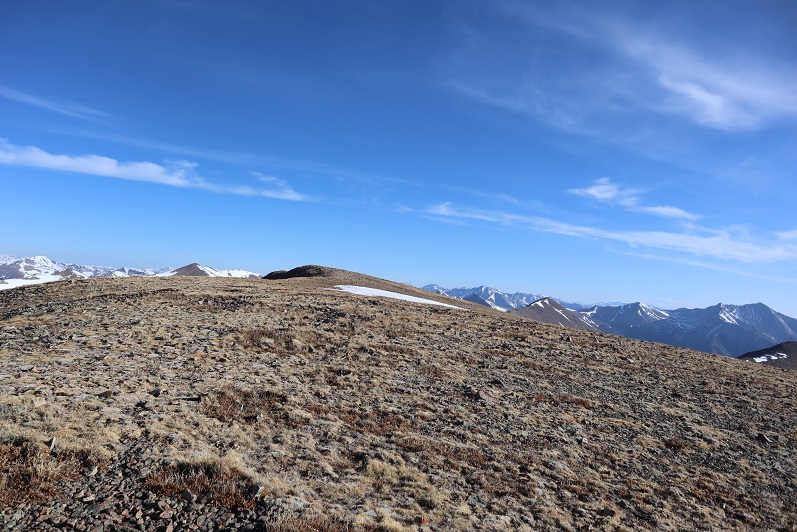
I summited Carbonate Mountain A to frigid winds that just wouldn’t quit. There was a summit register, but I didn’t even try to open it.
I couldn’t feel my lips or fingers and decided I’d just take a quick selfie with my camera and not stop to set the camera up for a better shot. This is also when I noticed the snot on my camera lens and cleaned it off…
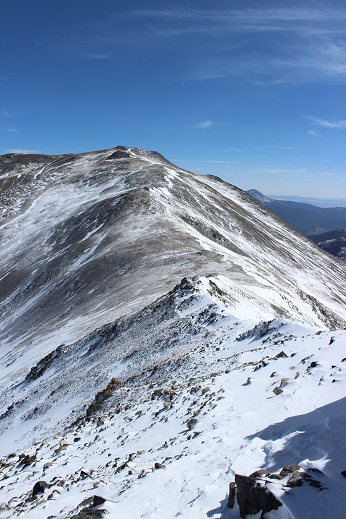
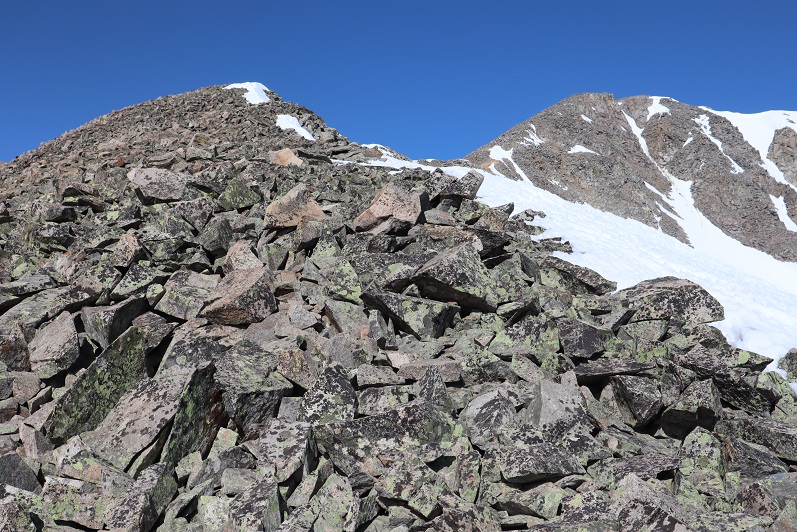
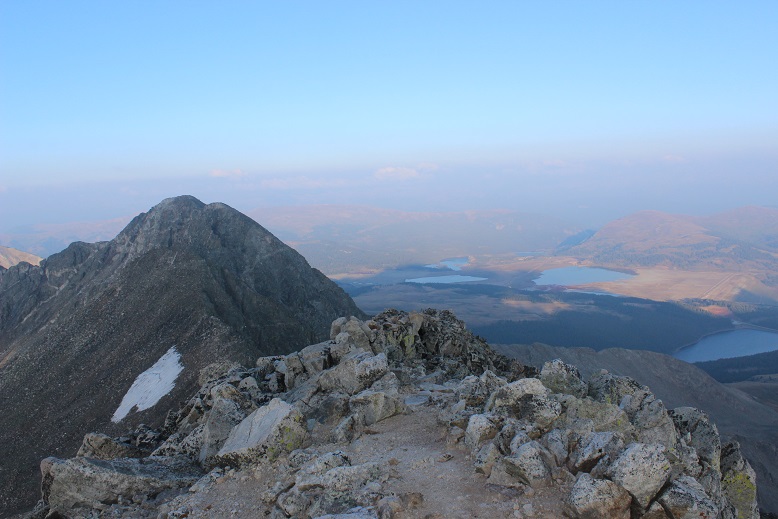
I needed to keep moving and I needed the sun to warm things up and the wind to die down. The only thing I could control was my pace, so I kept moving. I followed the ridge north to Cyclone. The terrain was full of loose rocks but was straightforward
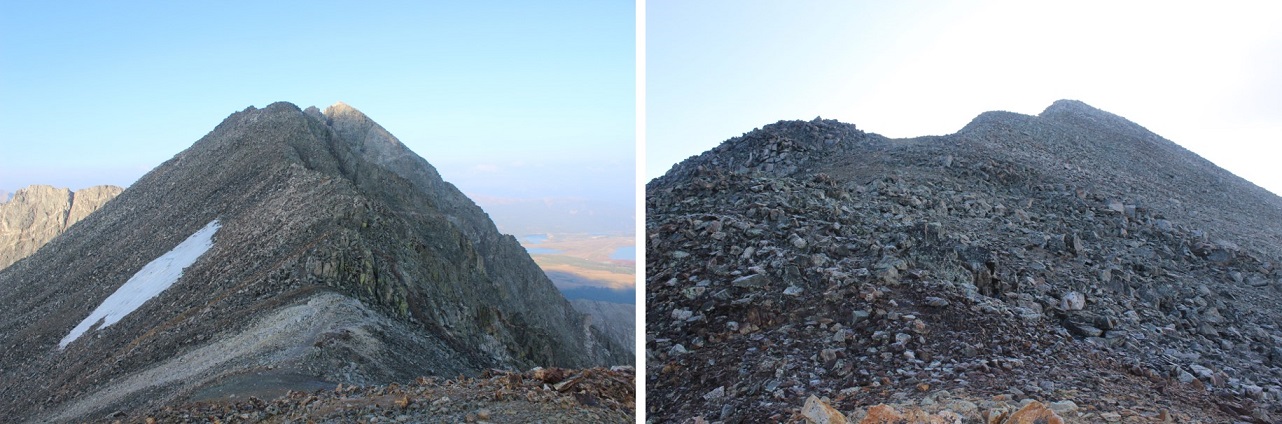
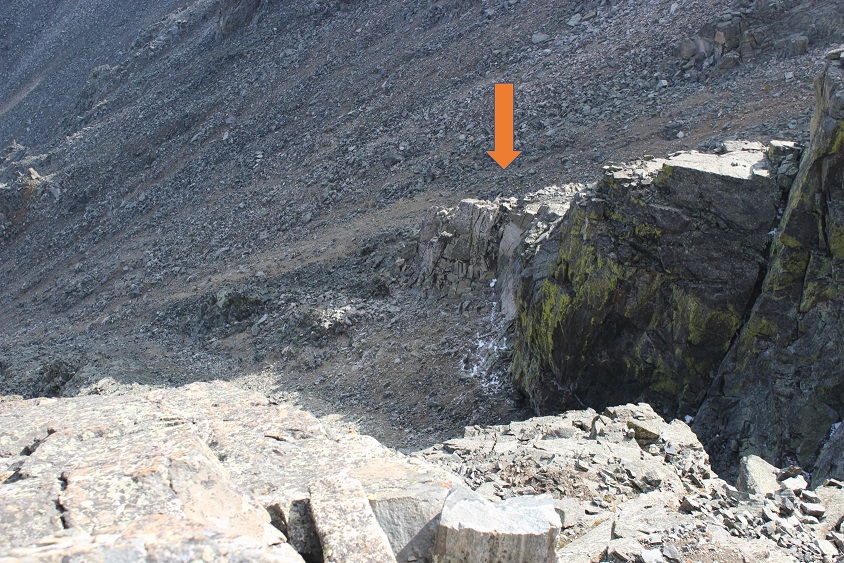
This was easier than it looked and didn’t take much time. Here’s looking back at the decent off Carbonate Mountain, and the ascent route up Cyclone Mountain
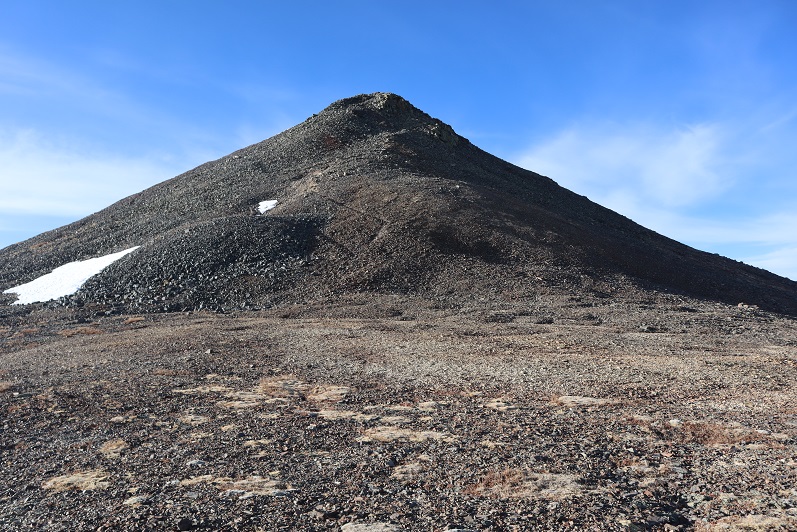
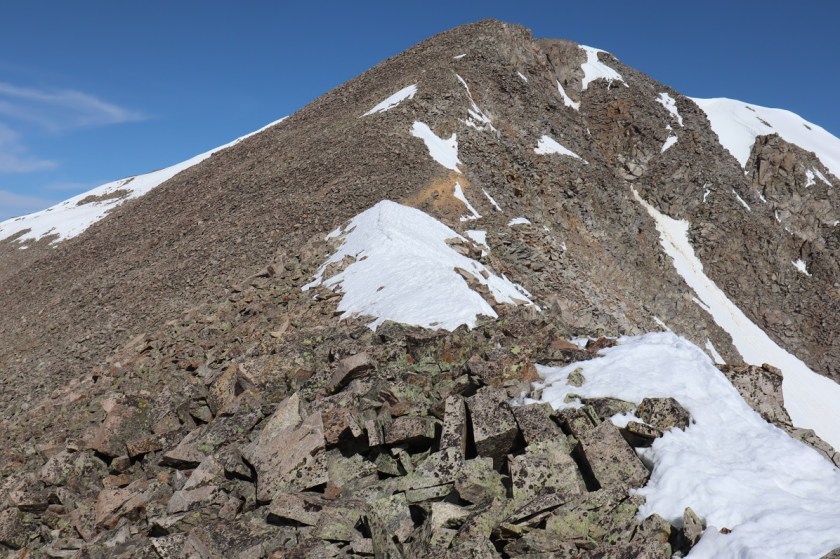
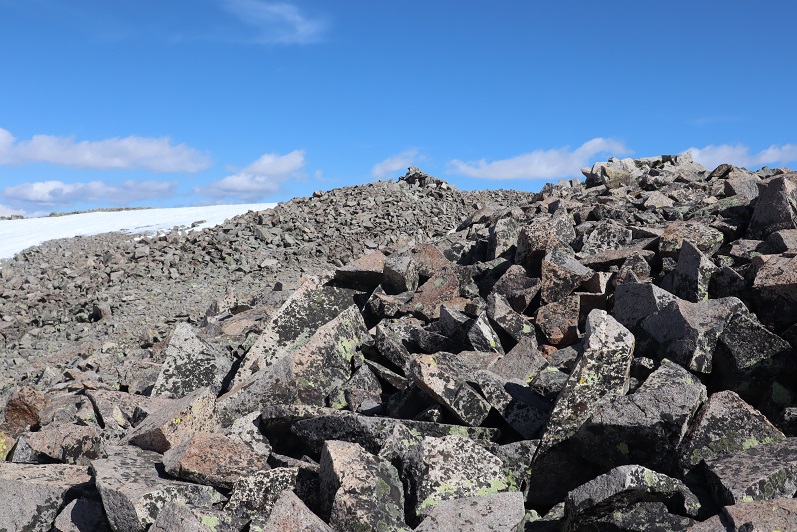
Somewhere along this route I stopped to put on my balaclava, and things immediately warmed up a bit. Here’s the talus filled final push up Cyclone
There was a summit register but it was open and empty. The wind hadn’t stopped but I was a tad bit warmer. I set up the camera, but only took one shot. This is what I got
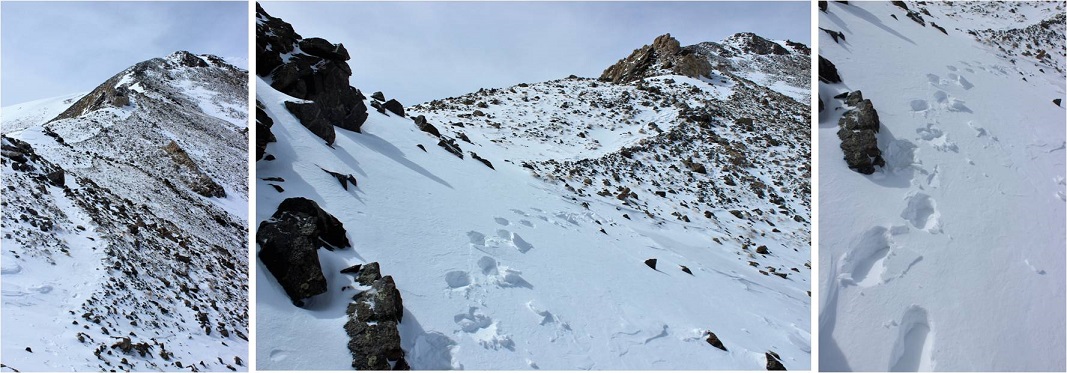
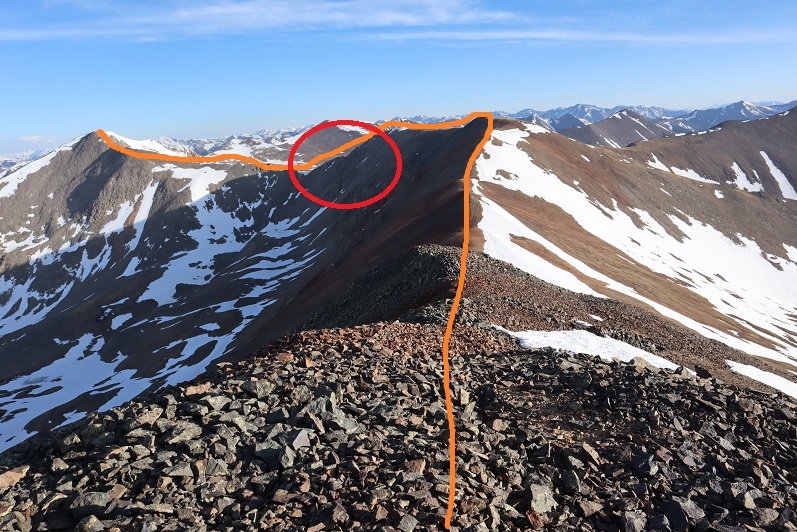
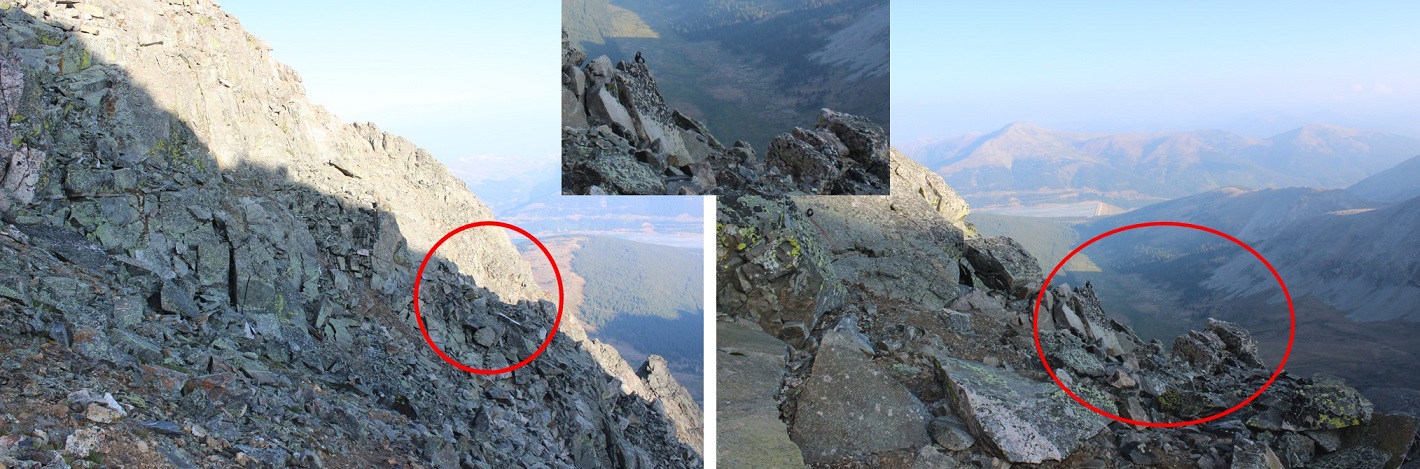
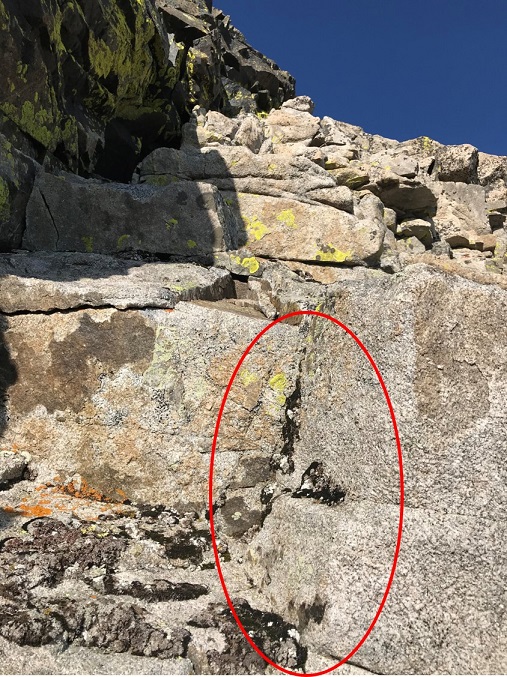
Here’s the route to Grizzly Mountain. I was especially concerned with the area circled in red, as that’s the scrambling section and I was worried it had some snow I couldn’t see from my view atop Mt Aetna yesterday.
It looked good from this angle. I kept going, looking for possible bail out routes should I need one. I descended Cyclone Mountain, which was once again composed of steep and loose rubble
The rest of the trek was on more stable ground as I headed towards the traverse.
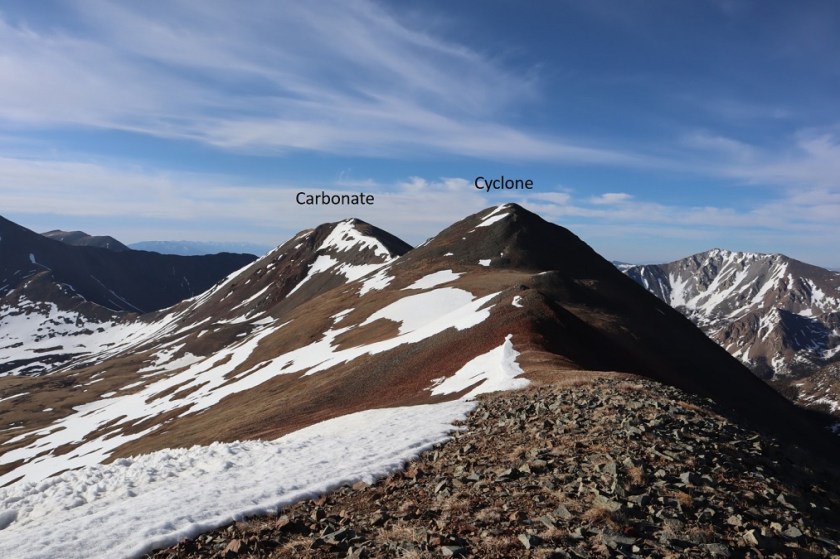
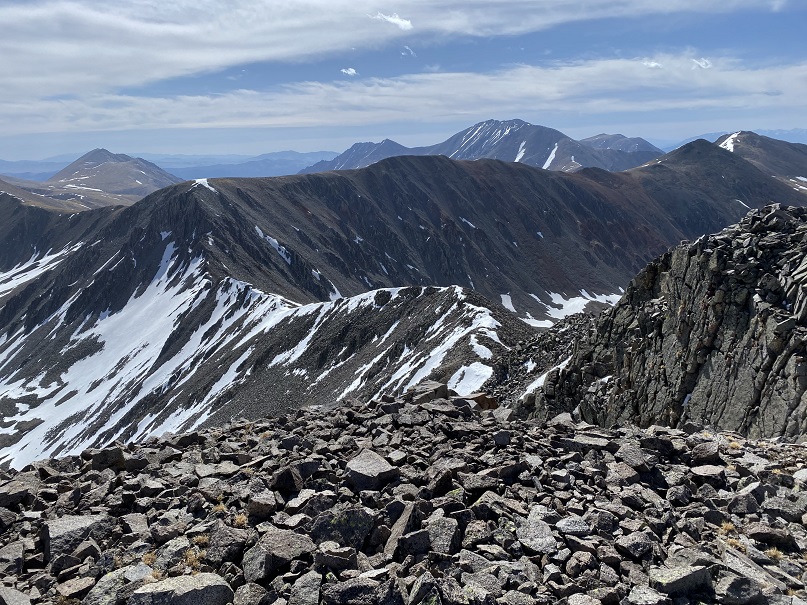
Here’s looking back on Carbonate and Cyclone
From the beginning the traverse over to Grizzly Mountain doesn’t seem that intimidating
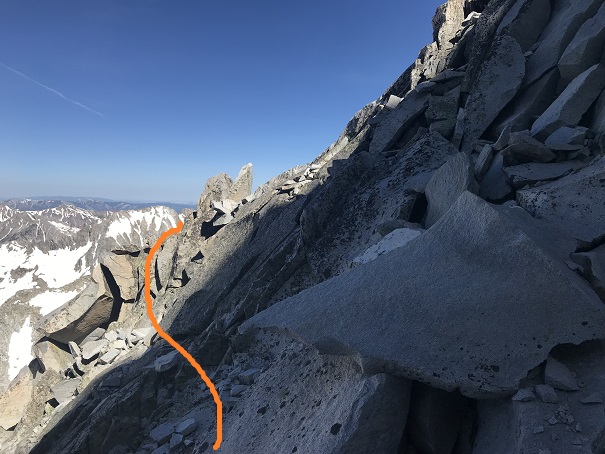
But as soon as you round the first corner things get interesting. I began by sticking to the ridge
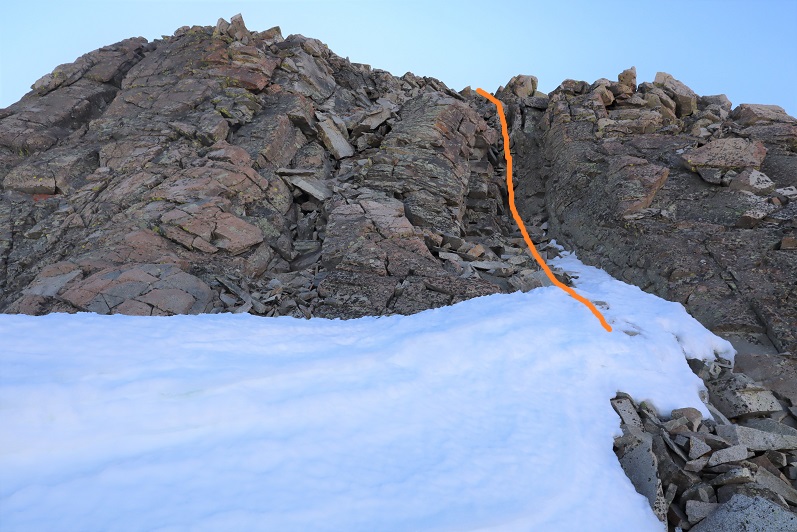
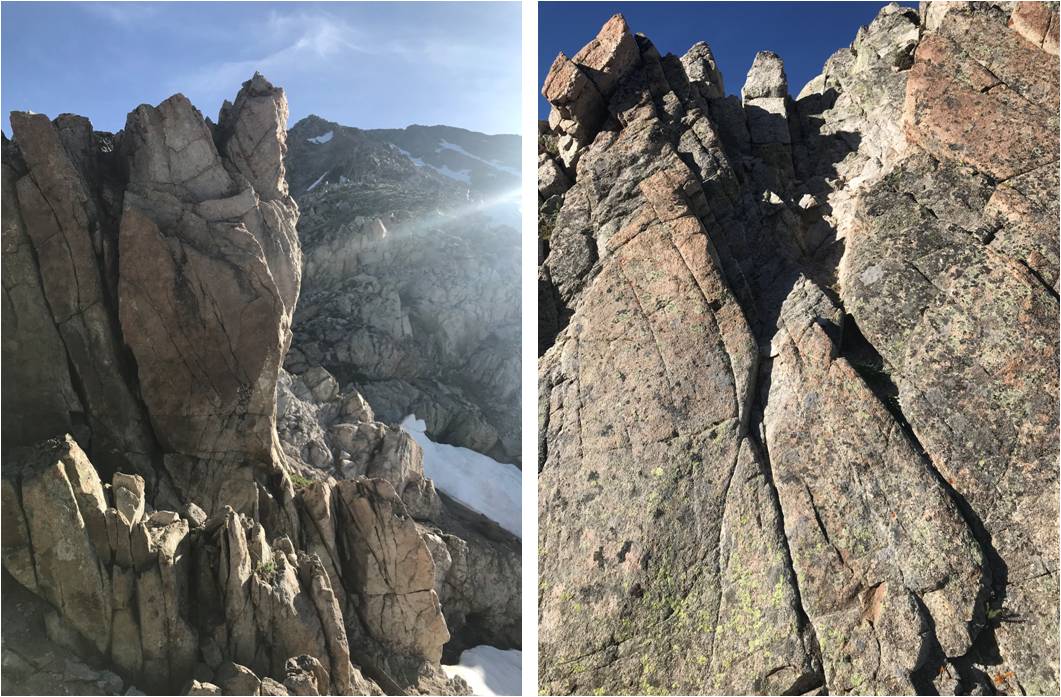
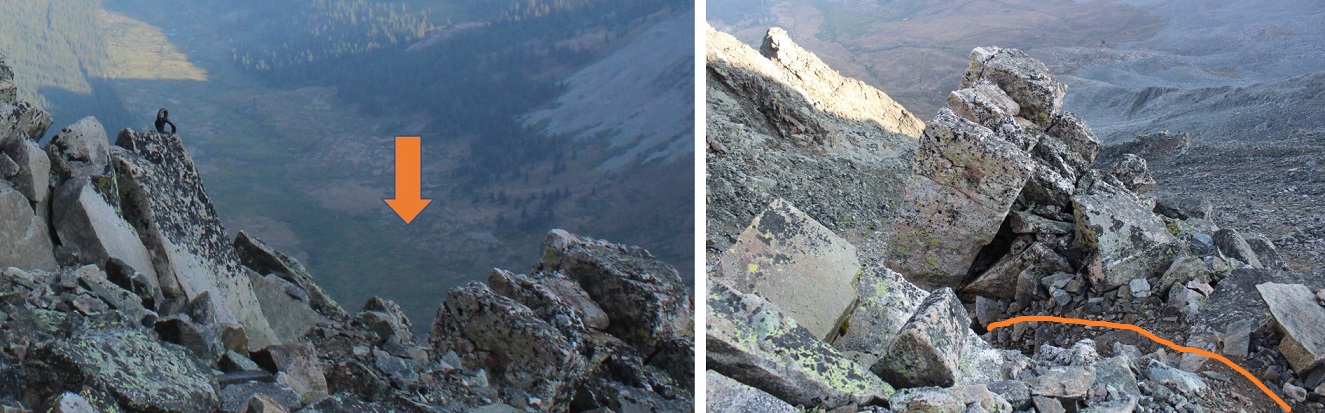
But that quickly became impossible. The rock here is very, very loose, large, and ready to fall. There are tons of rock-filled gullies and route finding can be tricky. I stayed to the left of the ridge the entire time because the right side was full of varying amounts of snow. I definitely experienced some class 4 sections. Here’s the way I went:
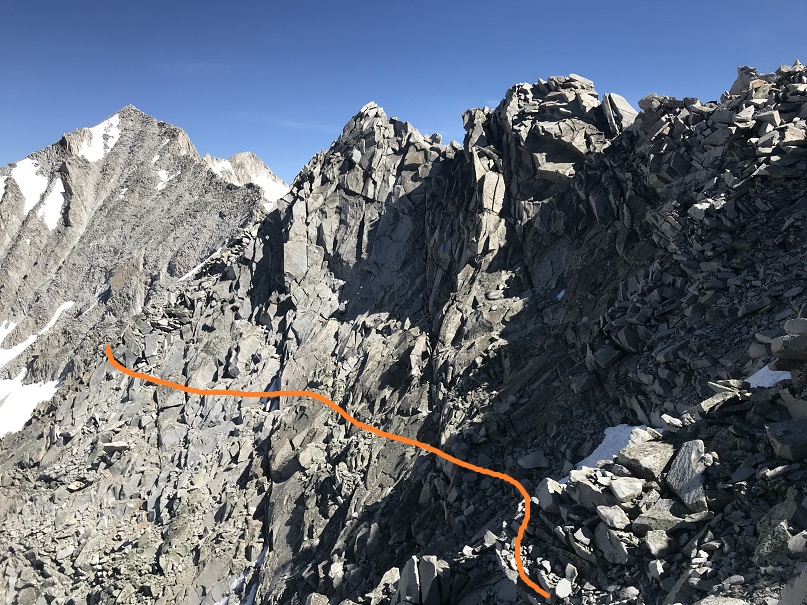
Here things got spicy, as I encountered a gully with several options for descent. There seemed to be three possible lines. I felt the safest route was the middle route and aimed for the snow
It’s steeper than it looks. Here’s looking back at the route I took. I’m thinking it was about 35 feet of downclimbing
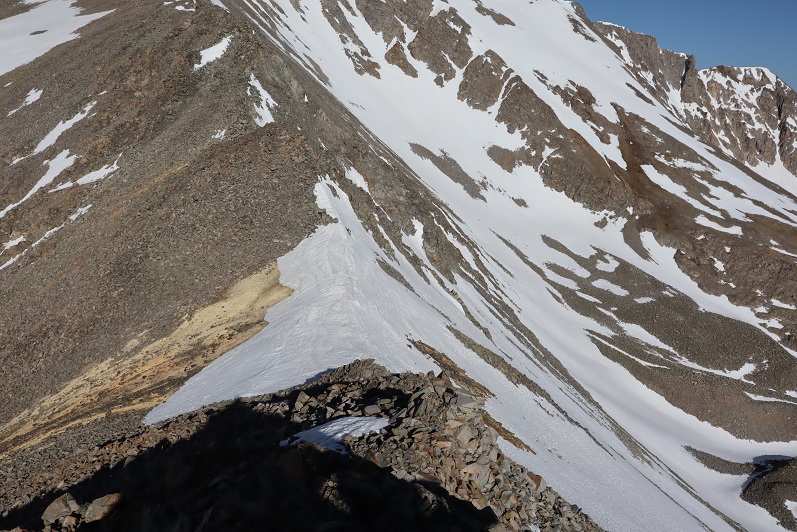
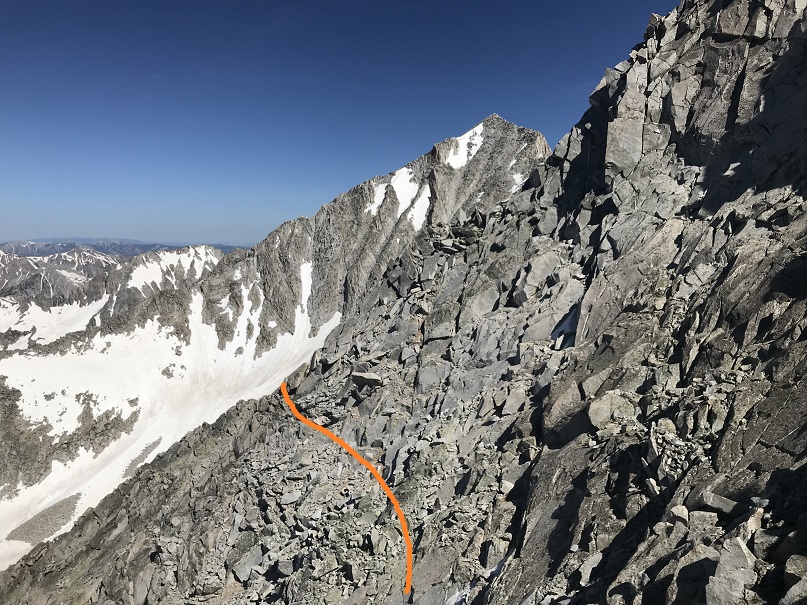
I continued to make my way down towards the snow filled saddle. Luckily it was firm and easy to cross. I breathed a big sigh of relief when I made it here, but the dangerous part wasn’t over yet
Here’s an overview of my way to the saddle (looking back on my route)
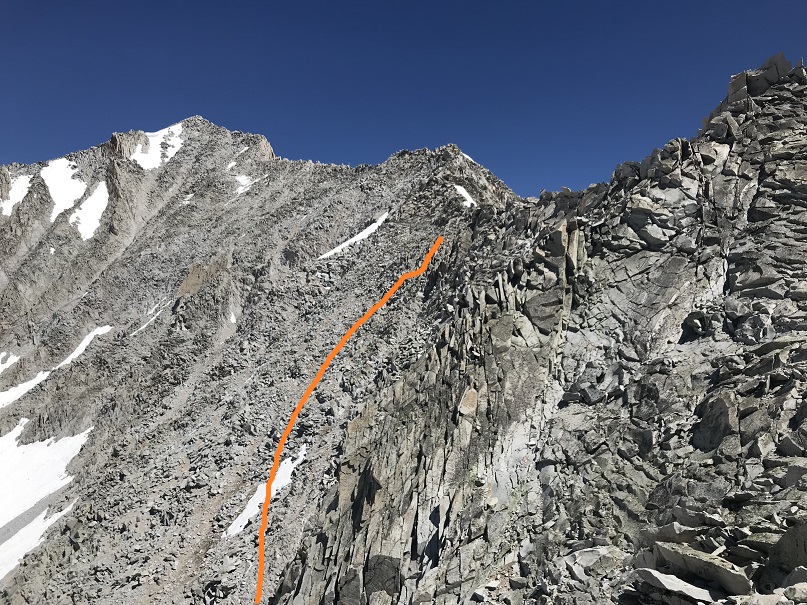
The rock was still loose and I had to be careful to triple check every hold so as not to dislodge a rock. I went slowly here, carefully choosing my route.
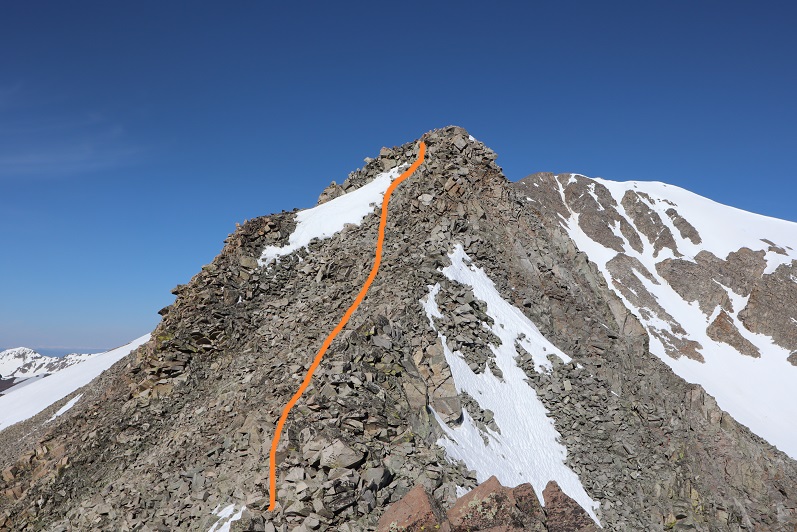
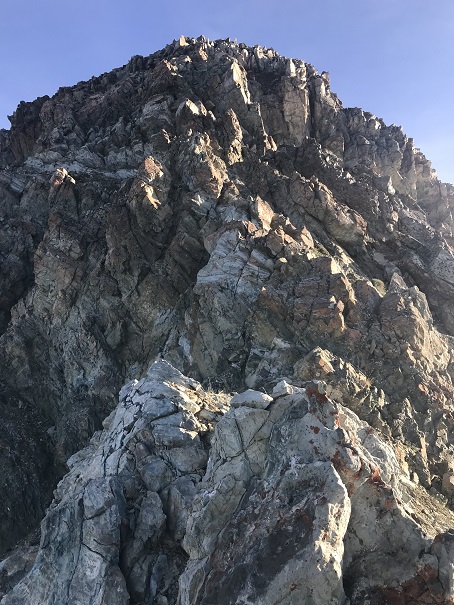
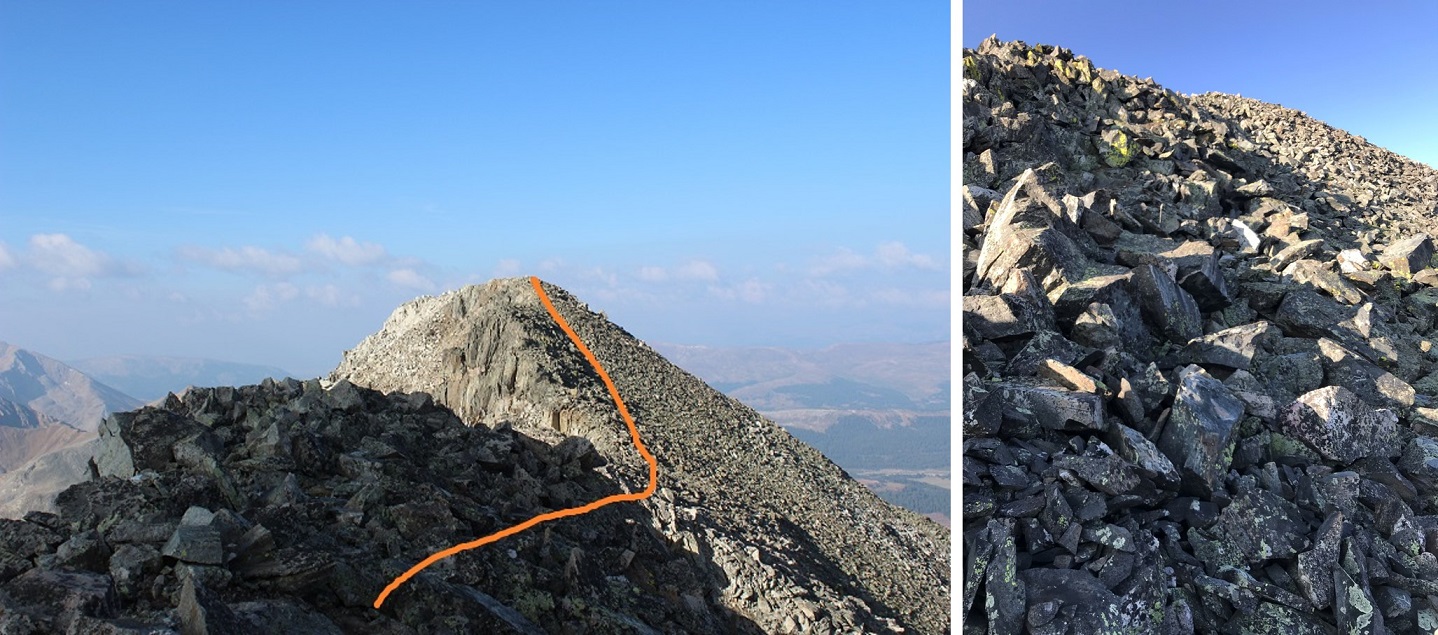
Here’s the final route up Grizzly. The terrain became more stable as I continued, but the rocks were always loose
I summited Grizzly Mountain at 9:30am.
Grizzly Mountain Summit:
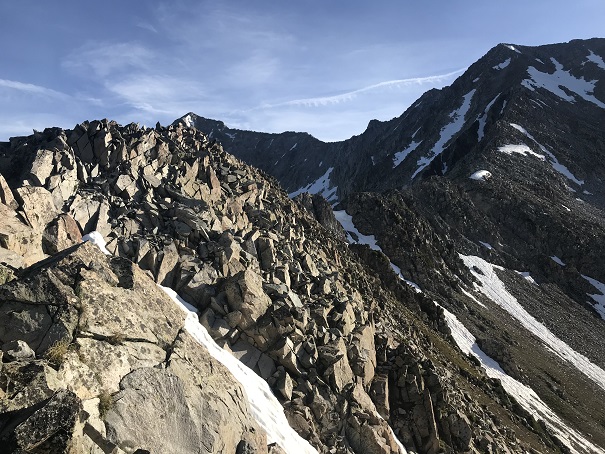
Here’s a look back at the ridge traverse as seen from the summit of Grizzly Mountain
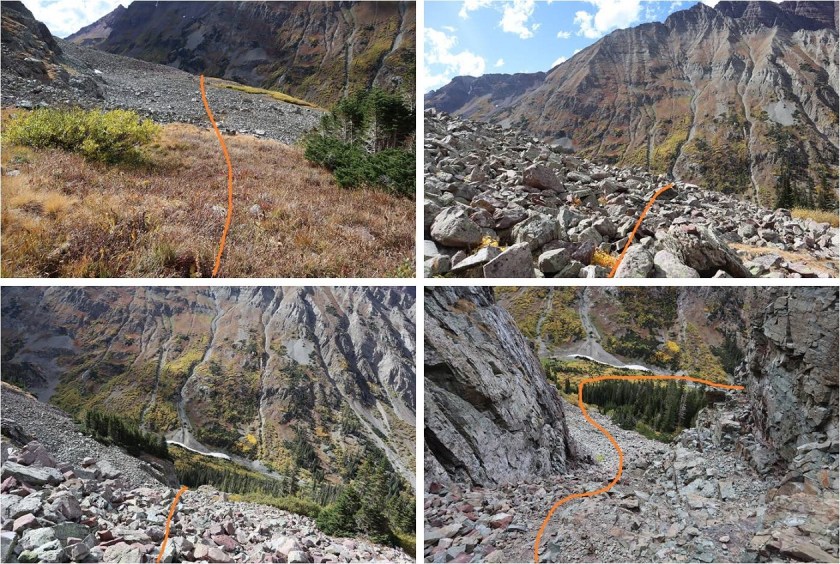
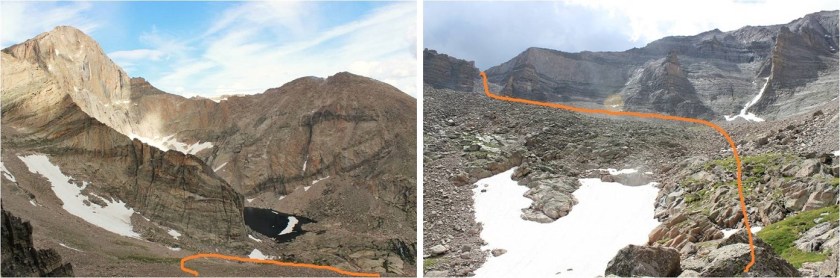
While on the traverse I’d studied my intended route down. I was able to avoid most of the snow to head down into the basin.
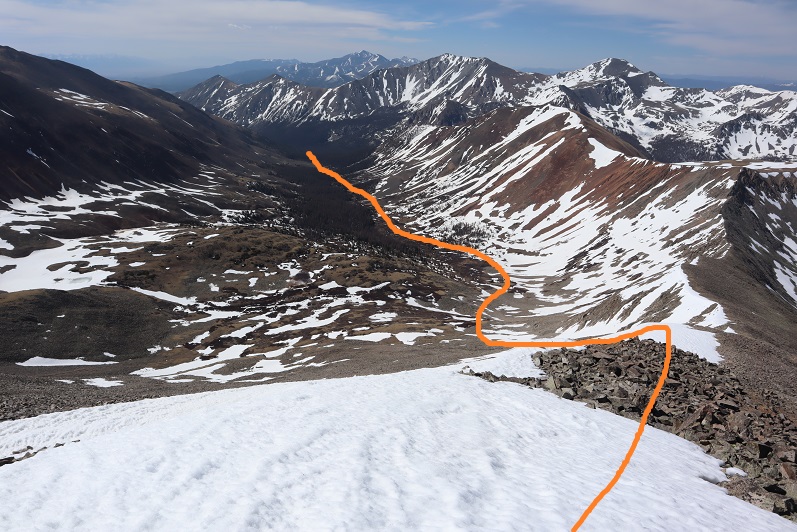
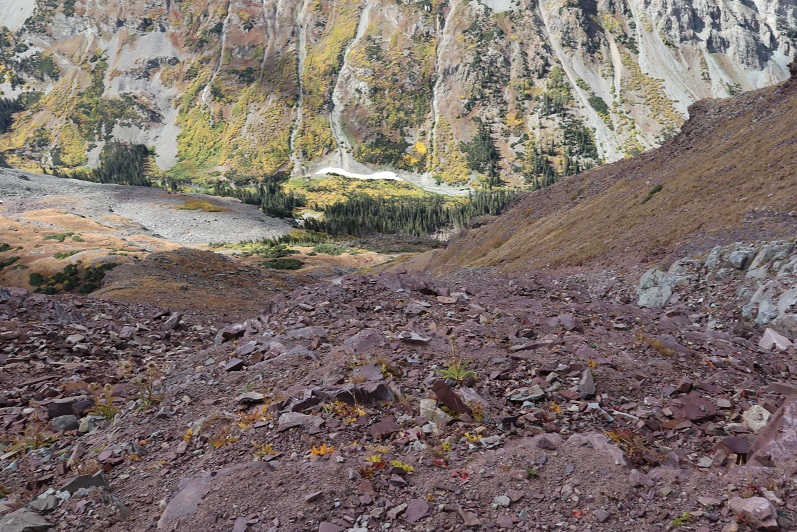
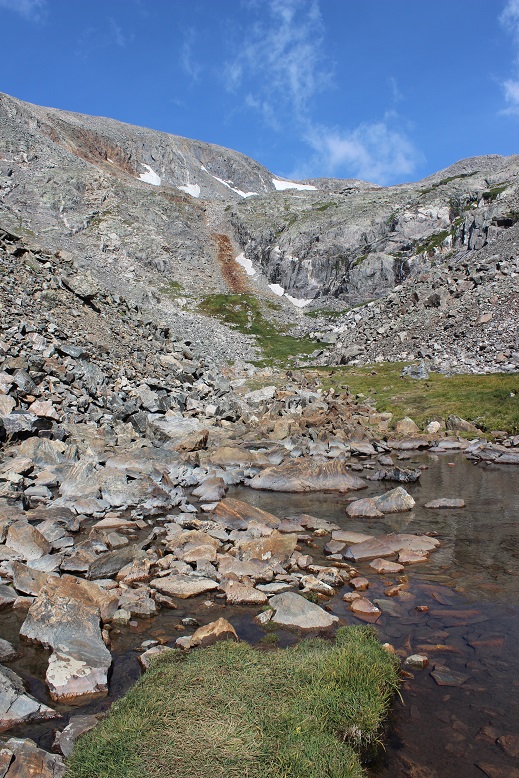
While avoiding the snow I instead descended on scree and loose rock: I wasn’t sure which was worse, the ascent up Carbonate or the descent down Grizzly. I took it slow to avoid rolling an ankle and headed towards the basin. Here’s the route out:
I did have a little snow to contend with, but only for about 100 feet or so. The conditions were perfect to cross without traction.
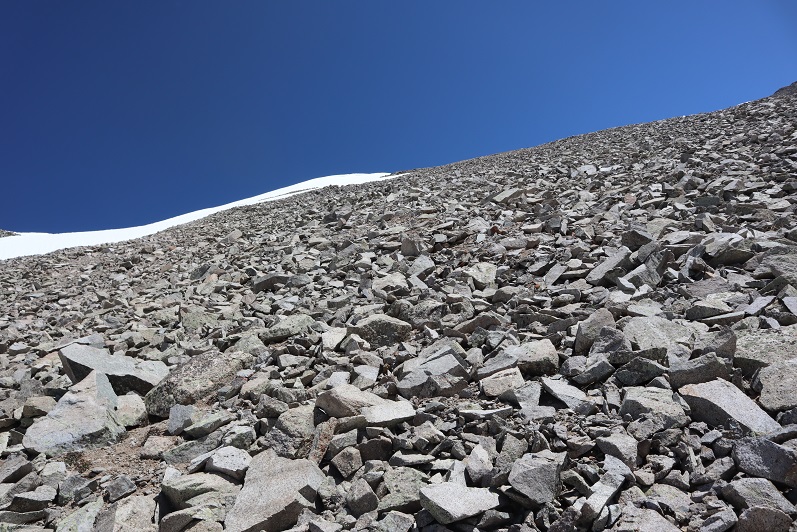
Here’s a look at the rubble
And a look back at my descent route.
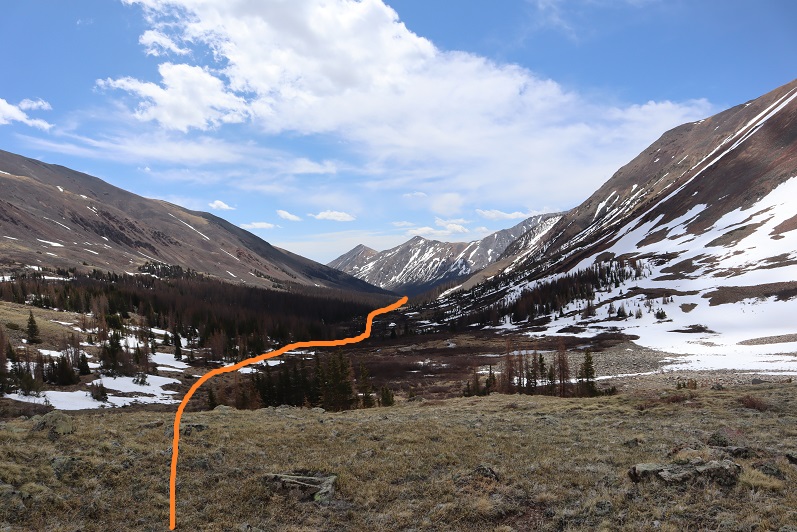
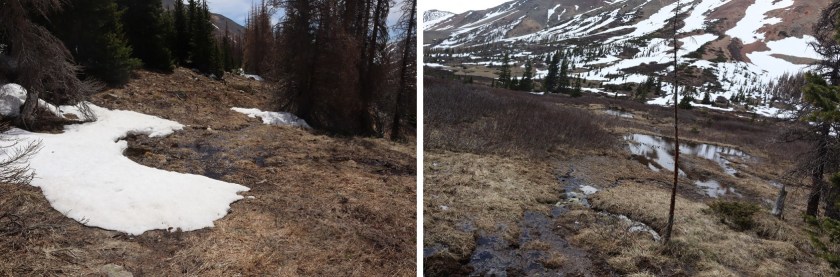
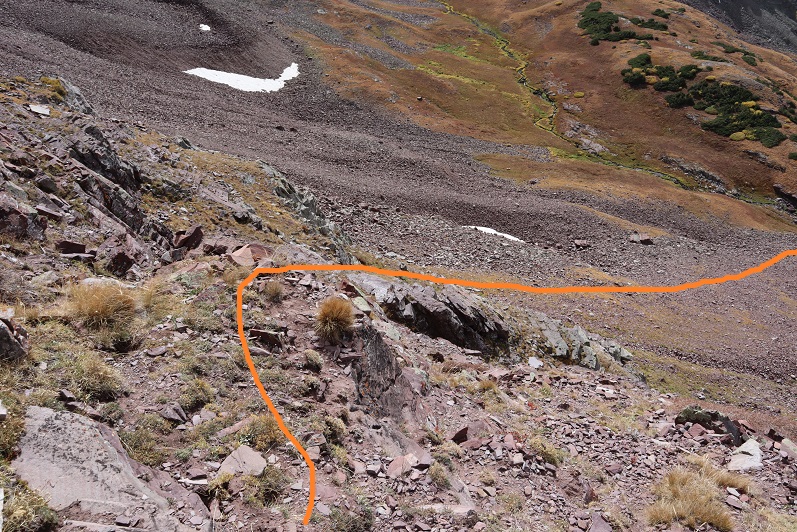
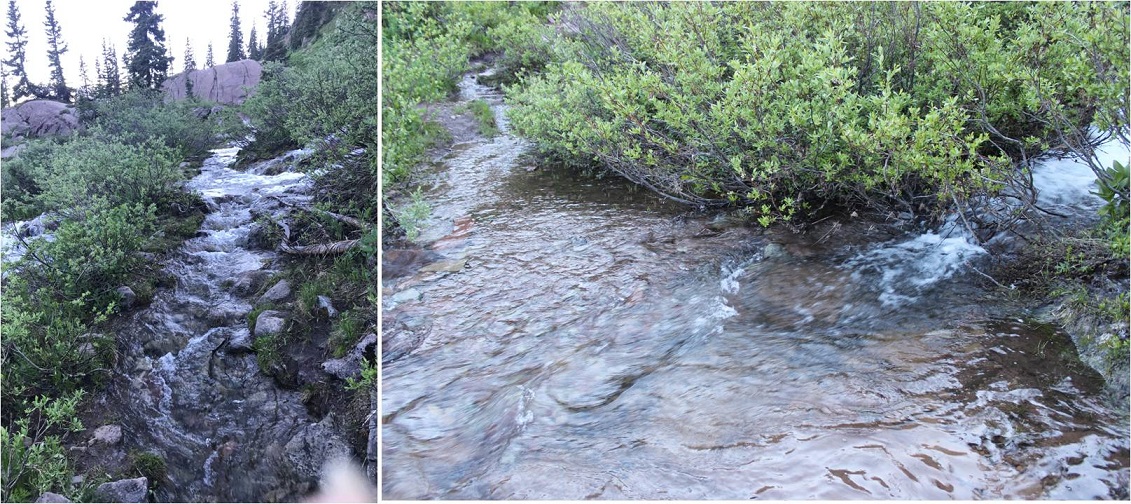
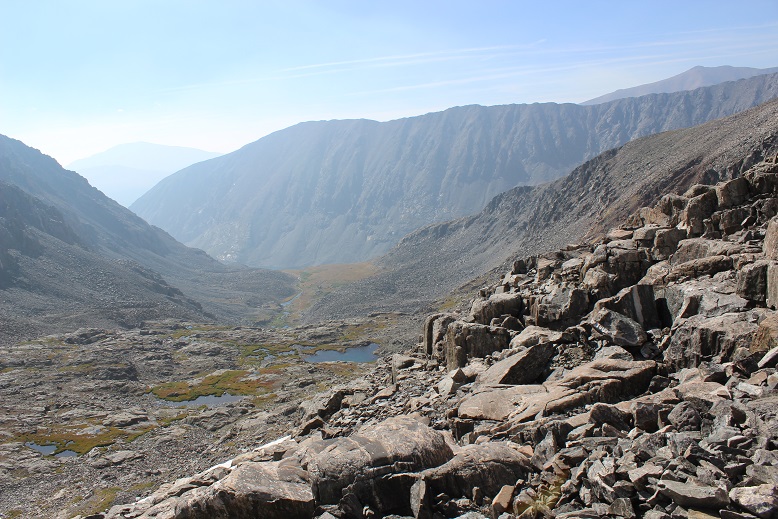
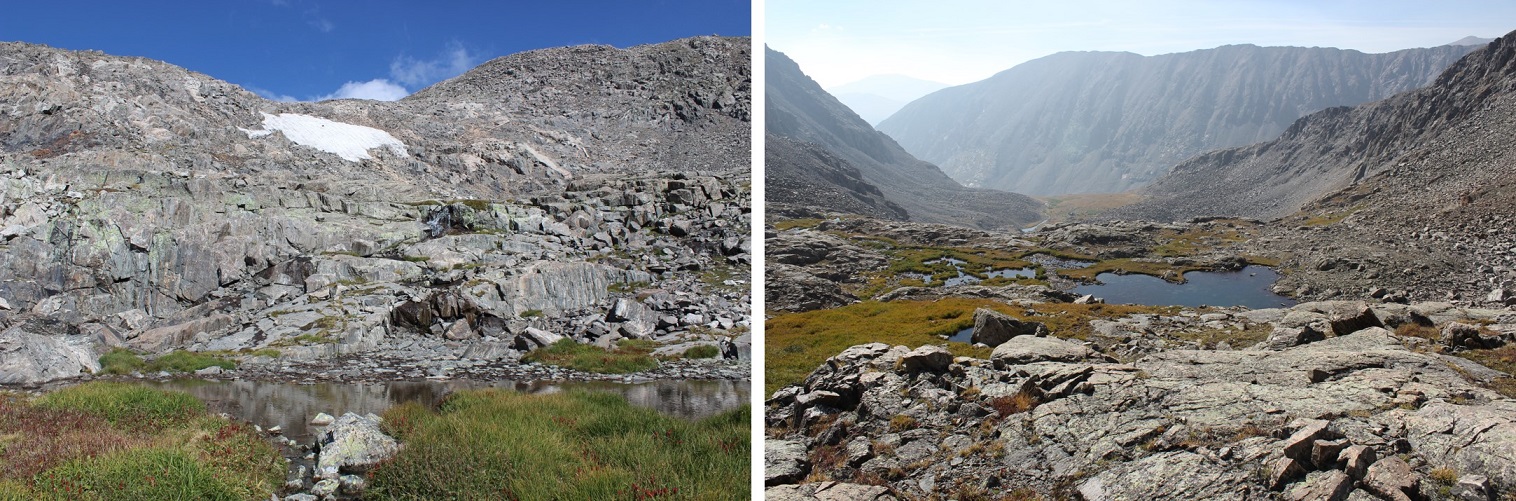
Once in the basin I knew I wanted to stay just to the right of the trees and follow the creek back to my truck. There was supposed to be a trail here, but I was unable to see it from above. Either that or it was under one of the dozens of small streams of water. What I hadn’t known until I’d made it down into the basin was the ‘dry’ area between the trees and the creek was actually a boggy mess! The mountains were melting out. It was impossible not to get my feet wet. For a while I tried hiking in the trees but the snow was just soft enough to make postholing miserable and snowshoes overkill. So I stayed in the marshy area, following game trails through the willows. I even saw two elk bounding away from me as I sloshed along.
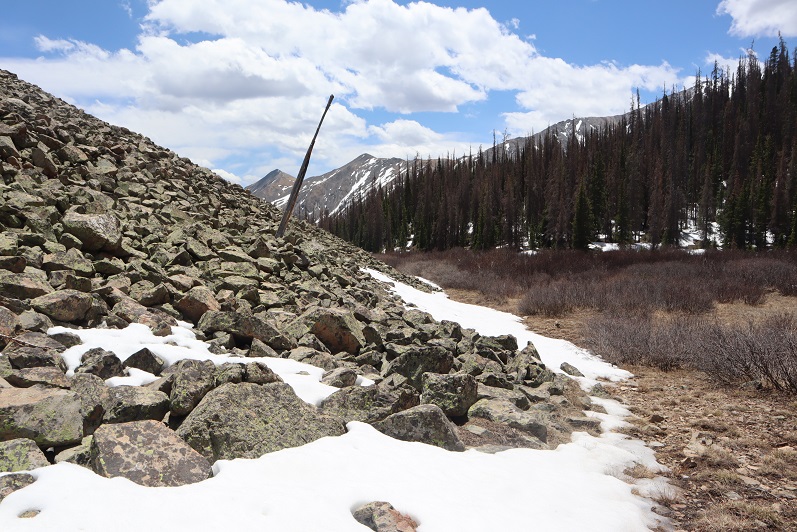
I passed an avalanche area (not the same one as in the morning) and rounded a small boulder field, always keeping the creek to my right
In this area I was almost done with the hike but somehow I came across an actual trail and followed it back to my truck.
I made it back to my truck at 1pm, making this an 8.75 mile hike with 4090’ of elevation gain in 10 hours.
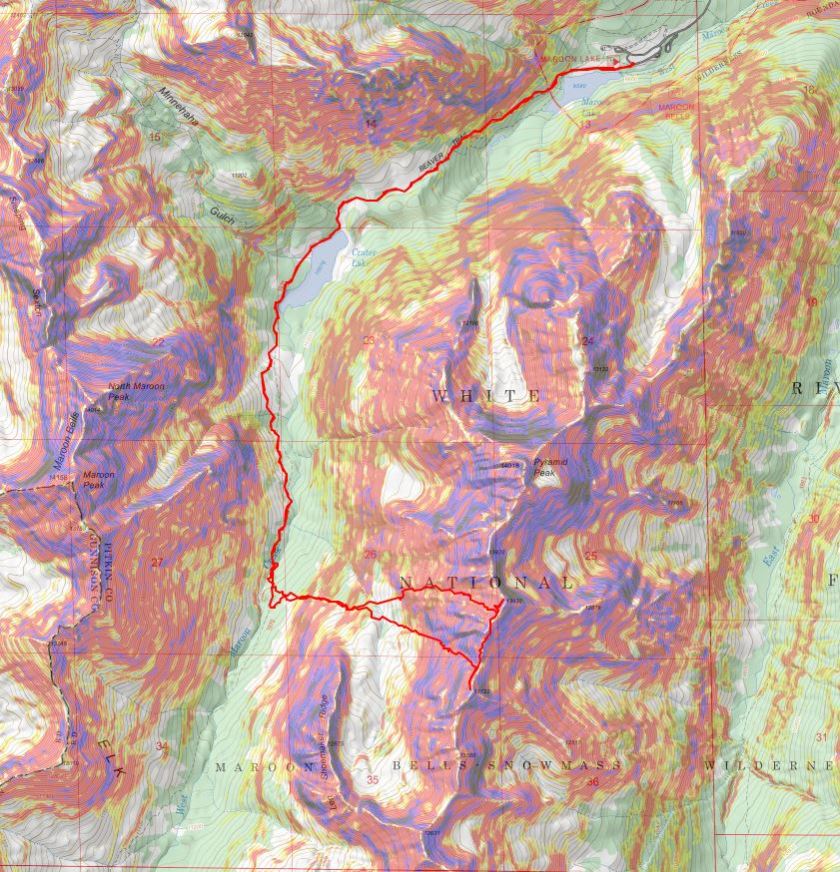
Looking from Mt Aetna, here’s an overview of the route
After summiting Vestal Peak I changed in my truck into new hiking clothes. I re-braided my hair, ate a packet of tuna and drove to Maroon Lake. It rained the entire 5 hour drive there and I was seriously worried my hike in the morning would be in danger. Originally I’d planned on hiking, taking a day off to rest, and then hiking again on Sunday but the weather forecast for Sunday called for 80-90mph winds so I decided to alter my schedule a bit. I was not impressed with the rain. It was raining when I fell asleep in the cab of my truck but I thankfully I awoke to a clear, starry sky at 2:30am.
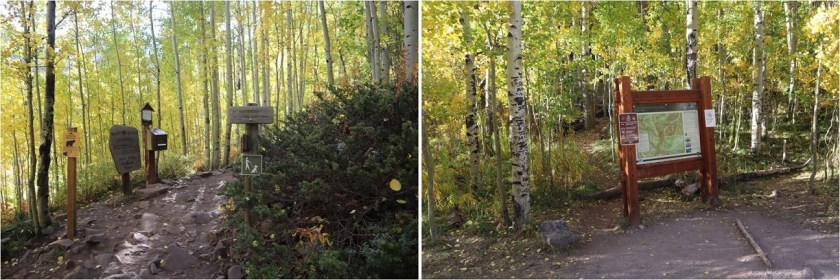
The parking lot was full of both hikers and photographers eager to get a glimpse of the fall colors. I debated going back to sleep for a few minutes but in the end decided I should probably get going. I was on the trail at 3am.
I followed the trail to Crater Lake
And then followed the West Maroon Creek Trail until I’d made it 3.7 miles.
This trail is so much nicer to walk when there’s no snow! Route finding was negligible
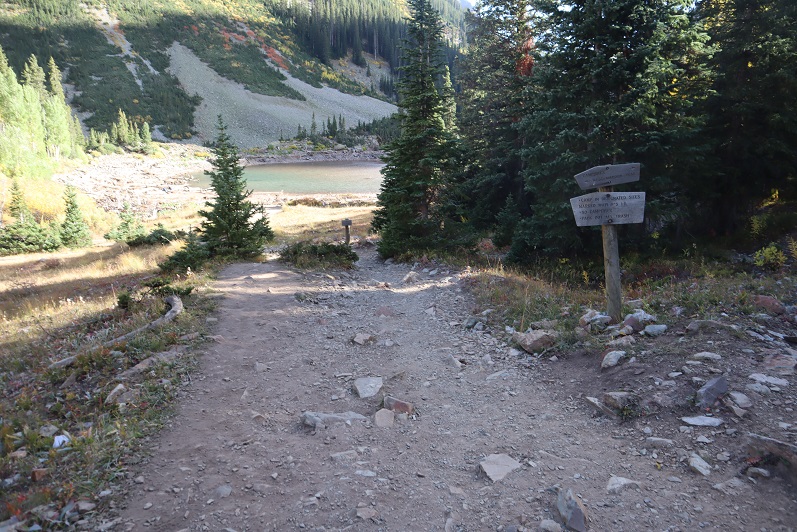
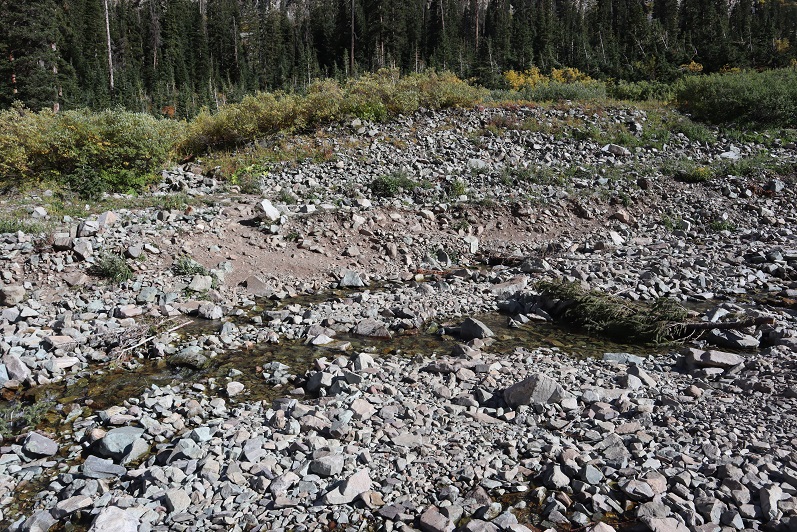
After 3.7 miles I crossed the West Maroon Creek (which didn’t have much water)
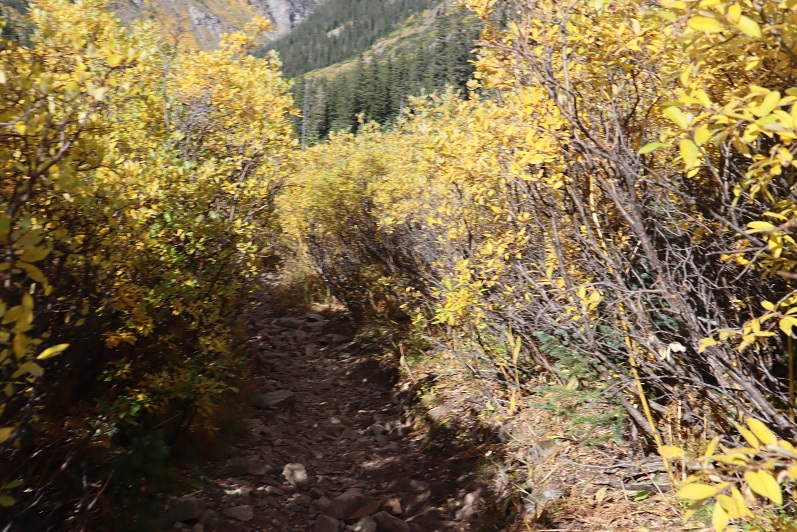
And headed east through the willows
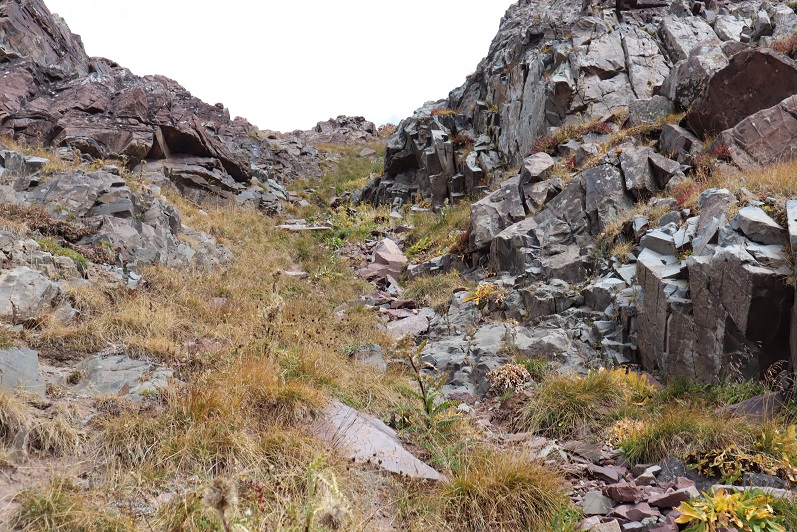
Until I reached the base of the slope to the first access gully. This was difficult to figure out in the dark: The last time I was here the willows were completely covered in snow and I just climbed right up, but today those willows were taller than I was.
At the top of this gully is another gully
And at the top of this gully (you guessed it) another gully
Now the rocky gullies started including areas of tundra
Now I was almost to the upper basin.
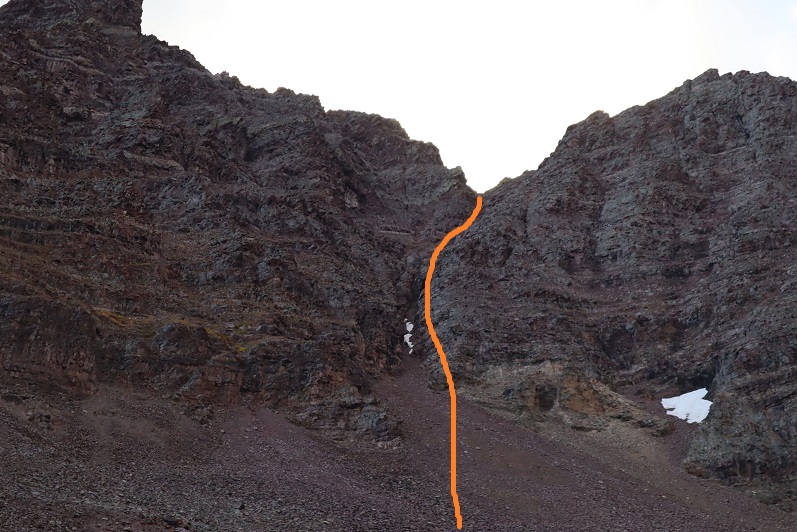
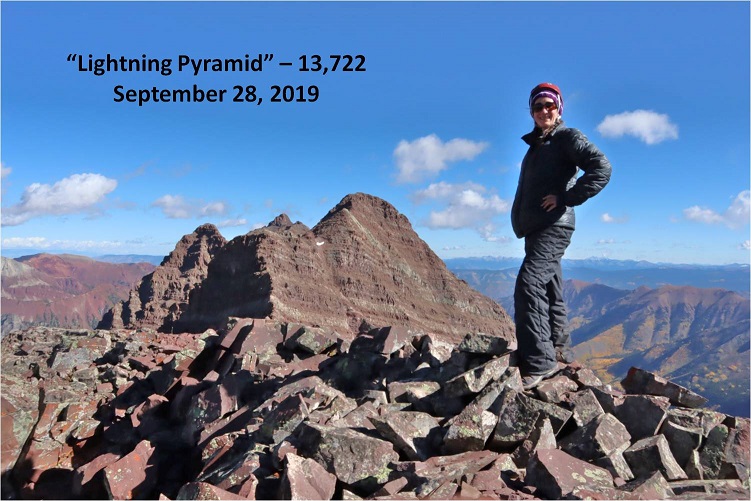
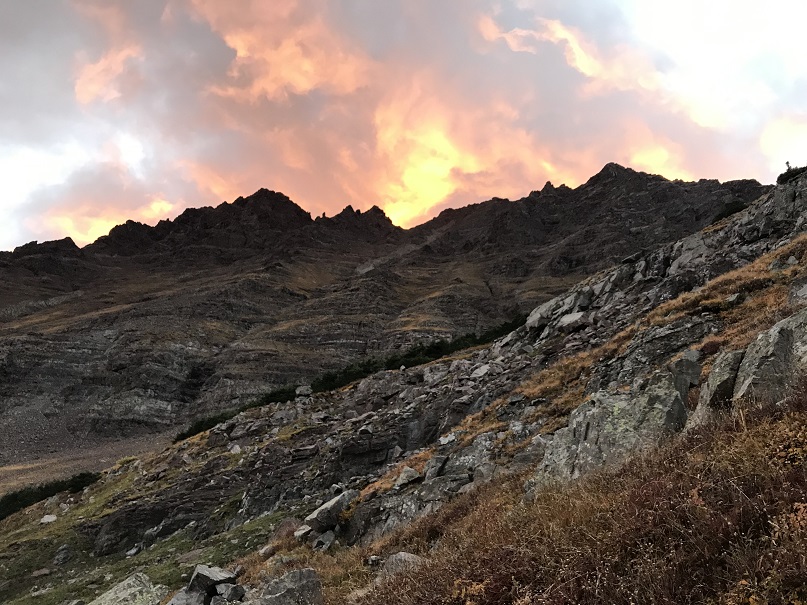
Once in the upper basin the sun started to rise and I had a good view of “Lightning Pyramid”. Traditionally you climb this peak as a couloir climb in the winter/spring, but obviously that wasn’t an option for me today and I’ve already been here in winter conditions: I wanted summer. I headed across the rocky basin, aiming for the couloir.
This next part in italics is personal and has no relevance on the trip report. Feel free to skip it if you’re just here for route information.
I’m going to summarize this as quickly as possible: I don’t consider myself to be an overly religious person. I grew up in the church but no longer attend (please don’t invite me to your church: I have personal reasons for why I don’t go). I do believe in God and find him more in the mountains than in a building surrounded by people. Often when I hike I have conversations with God. I do most of the talking, but surprisingly I started to feel him talking back (rarely, but it happened). I’m going to be honest here: If someone told me God spoke to them I’d think they were daft, so I totally understand if you think that of me, but I think what I’m going to say needs to be said (for me at least). Also, once again, I’m not a ‘preachy’ person and will most likely never mention anything like this again in a trip report.
For some reason I’m a ‘people-pleaser’. I have a need to be liked and I go out of my way to be friendly and helpful. I feel I need to be ‘perfect’. I don’t do well with rejection. I’ve always been an avid hiker but started seriously tackling peaks after I got a divorce. My ex had supervised visitation of the kids one day a week and on that day I’d go hiking. After my 13th summit of Pikes Peak I met someone on the way down who asked me which other 14ers I’d done. My response: “What’s a 14er?”
Obviously I was immediately hooked and after about 20 14ers I was hiking and talking to myself/God about how amazing Colorado and the mountains and hiking (etc) are and felt God speak back to me. He told me to hike all of the 14ers in Colorado solo. This idea intrigued me: I was both excited and scared. I wasn’t sure I could do it. Also, I didn’t really know why I should?
After hiking about 30 14ers solo I was sitting in a Girl Scout board meeting and Girl Scouts had just partnered with The North Face. We were brainstorming fundraising and marketing ideas and suddenly it all became clear: I could be the first woman to solo all the 14ers! Girl Scouts focuses on first women to do ‘stuff’. We could market this jointly with The North Face, the girls would get exposure to outdoor experiences and(hopefully) some free gear. It all seemed clear now: This must be why I was doing this! I felt I had purpose and direction.
I was so excited when I summited all 58 14ers solo because I felt I was doing it for a cause. Anyone who follows the 14ers site knows what a disaster that turned out to be, and honestly I just wanted it all to go away.
I kept hiking because I like to hike. On my first centennial after finishing the 14ers I felt God telling me to keep hiking the rest of the centennials solo and I balked. Once again, I wasn’t sure I could do this (hello class 5?) but after mulling it over I was willing to give it a shot. I knew I’d write up trip reports and post them to my website because that’s what I do, but he told me to keep posting to the 14ers site as well (I did not want to do this, but I did).
If you were to ask me why I was hiking all of the centennials solo I’d tell you I didn’t know. I honestly didn’t know, but I also wouldn’t have told you it was because “God told me to” because then you’d think I was totally nuts. But that was why I was doing it: Because God told me to.
Then Thunder Pyramid happened. At first I was confused because I knew I’d summited, and then embarrassed, angry, and frustrated. Why was this happening to me? Not only were people commenting on the 14ers site, but they were going through my LinkedIn page and challenging my accomplishments, posting negative comments on my website, facebook, and Instagram (sorry David for ghosting you: I honestly thought the feeling was mutual). People unfriended me both online and in person. They made up reasons to ‘prove’ I was lying and if they couldn’t find negative information they assumed or made it up. The dislike button was hit on my trip reports and I took it all very personally.
The hardest part was just because they were loud didn’t mean they were right. I knew I wasn’t lying but I couldn’t change their minds. I’m also sure they think their behavior was justified. I think it bordered on harassment. It was definitely bullying.
So here I was, halfway to the summit of PT 13,722 and all of this was going through my head, in addition to the anti-climatic day I’d had yesterday when I’d finished hiking the centennials solo and didn’t ‘feel anything’. I was asking God why I just couldn’t get excited about finishing the centennials solo? I didn’t want to post anything on the 14ers site because I didn’t want to go through the drama again. I mean, I know I shouldn’t care what other people think about me…
That’s when it happened. As soon as those words went through my head everything stopped and suddenly it felt as if I was getting the biggest, warmest, most enveloping hug I’d ever had. Overwhelmed I broke down and started crying big crocodile tears, taking huge breaths in and out between sobs.
That was it: I wasn’t hiking for a cause or to help others but because God wanted to teach me a lesson. He wanted me to realize it doesn’t matter what other people think. He just chose to show me that lesson through something I love: hiking.
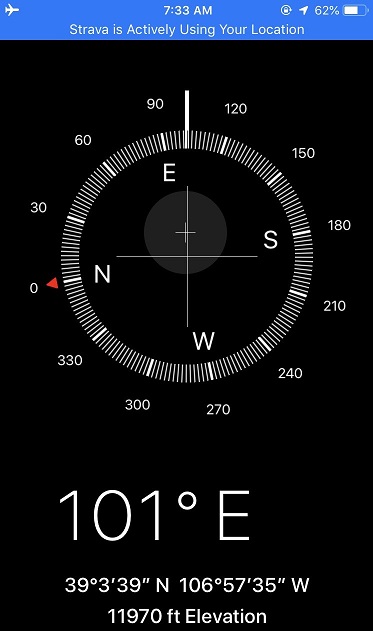
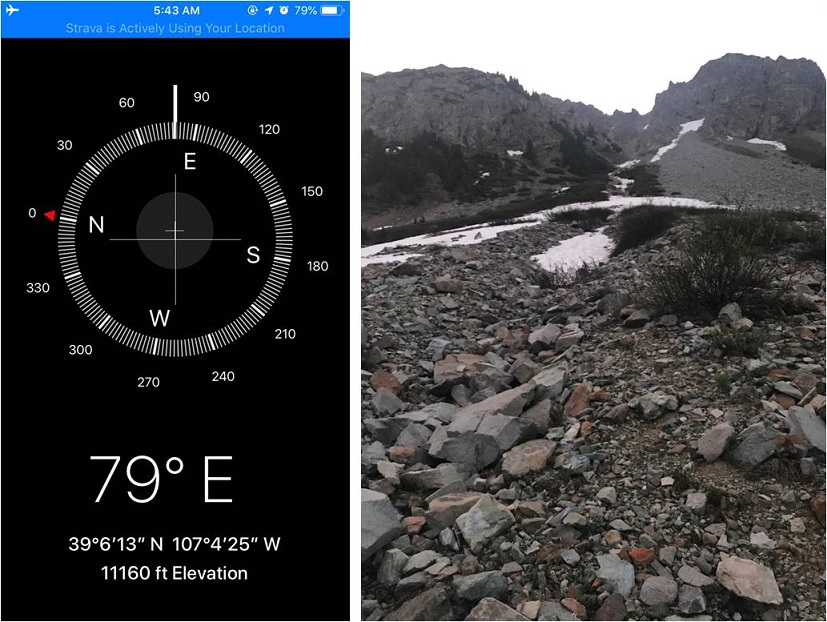
“Wow” I thought: “He had me hike all the centennials solo to teach me not to care what other people think”. A simple lesson we teach out kids and that everyone knows but that I have difficulty accepting. This moment was so powerful I got out the altimeter/compass on my phone and took a picture of where it happened. I thought about just saying it was at 12K but ultimately figured that diminished the experience.
I wiped away my tears, looked at the mountain in front of me and thought to myself “So, if it doesn’t matter what others think of you why don’t you just turn back and go home?”
The answer? “Because I Love to hike”
With light shoulders and a renewed purpose I started off again. It took about 10 steps before another thought overcame me: “Why did God think I needed to learn this lesson? What is he preparing me for where I need to be ok with not caring what other people think about me?” (I squinted and closed my eyes, crossed my fingers and repeated: Please not politics, please not politics, please not politics).
Ok, moving on…
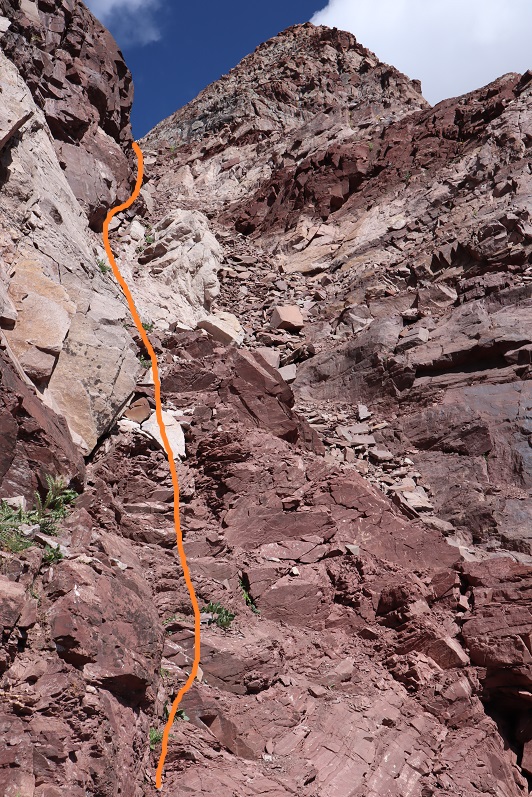
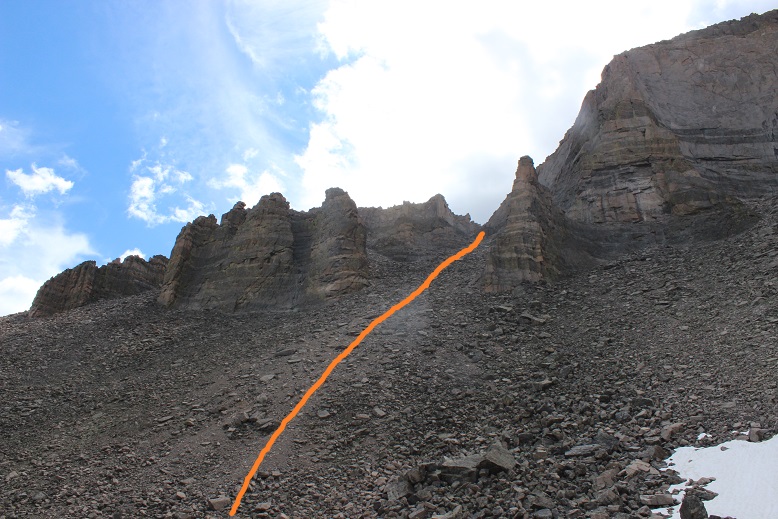
I trudged up the talus towards the couloir. This talus was nasty and each step hurt my ankle (not sure what I did to it yesterday, but it felt bruised). I made it to the base of the couloir and had a decision to make: How was I going to ascend this thing? It looked like it contained (more) nasty scree, so I decided to take the rocky rib to the right. This is the route I took:
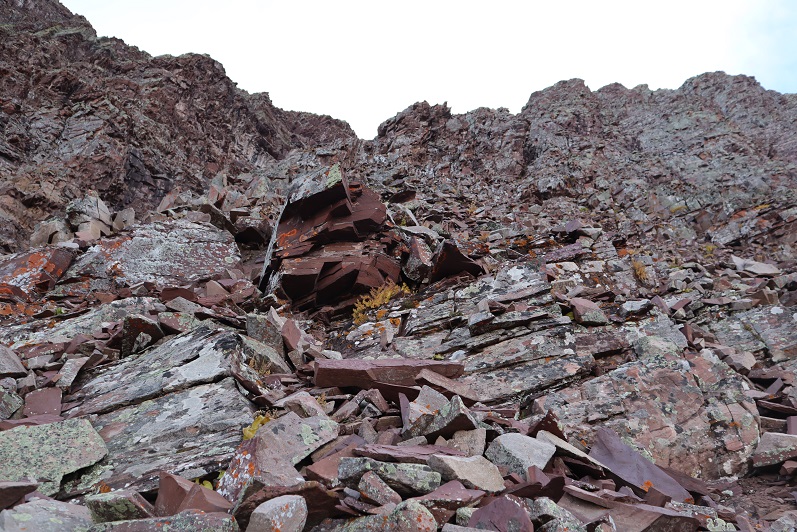
I need to stress this might not have been the safest way to ascend. The rock was extremely loose and I had to check and re-check hand and foot placement with every step. It was sustained class 4 bouldering for a good 1000’ of elevation. It was slow going, but I love bouldering and that’s just what this was.
I stayed closely to the right of the couloir for as long as I could, but eventually I had to enter the couloir for the last part of the climb. This area was very loose and I’d suggest you stay as close to the rib on the right as possible.
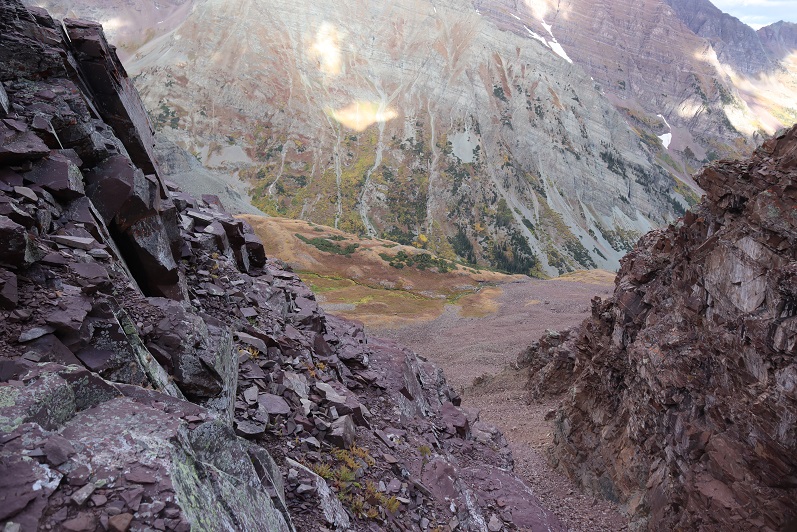
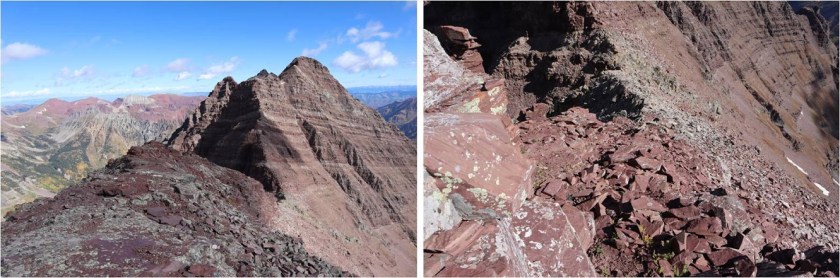
Here’s looking back down the rock rib/couloir and into the basin
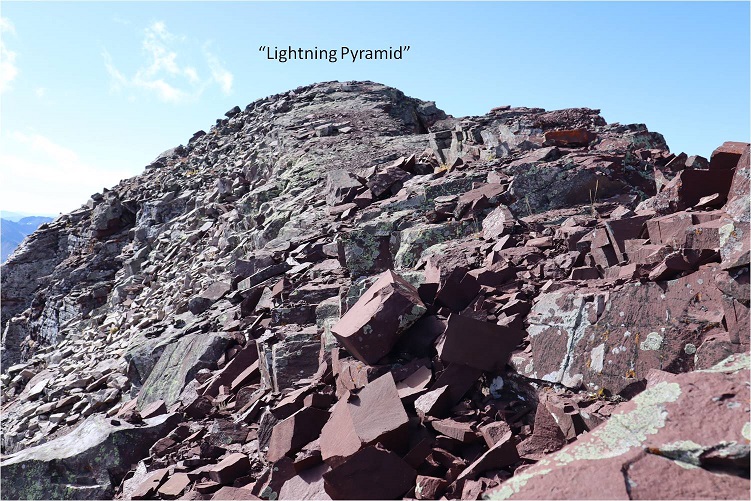
I made it to the top of the couloir and turned right (south), carefully climbing up the ridge
This was actually much easier than it looks (and easier than the climb to this point). I made it to the top of the ridge and saw an easy path to the summit of “Lightning Pyramid”
I summited at 10:20am
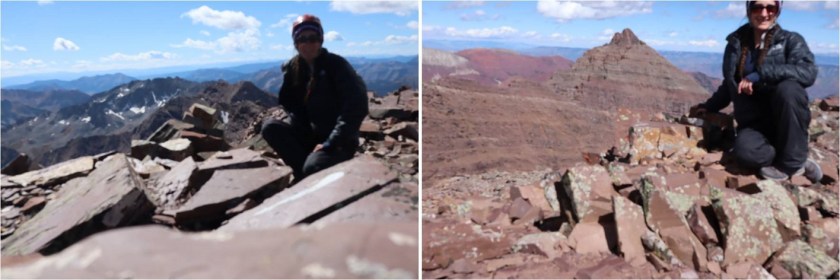
Lightning Pyramid summit:
Ok, now time to head over to my old friend, “Thunder Pyramid”. I couldn’t find a lot of specific information about this traverse, so I had a lot of figuring out to do. I’d heard heading straight up and over the ridge wasn’t fun, and it in fact didn’t look like much fun, so I decided to scope out another way.
I headed back down to the saddle
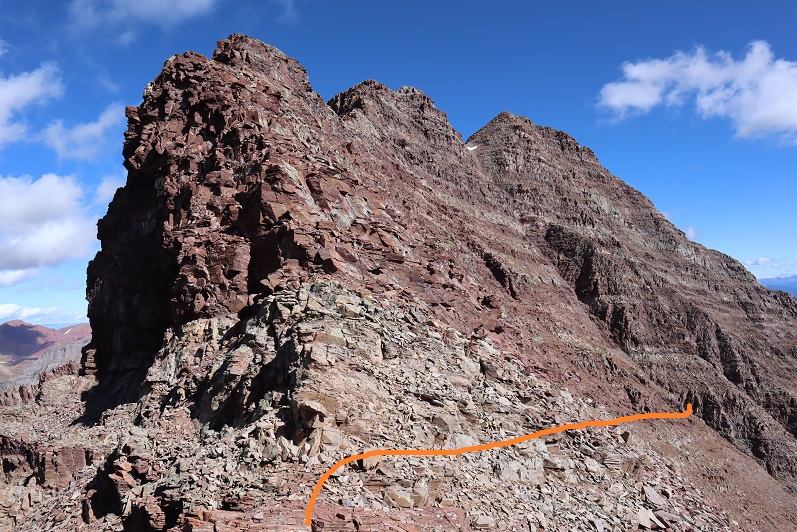
Once there instead of hiking up the ridge I decided to stay level with the saddle and hike across the right (east) side of the mountain. This was surprisingly easy
Here’s looking back at “Lightning Pyramid”
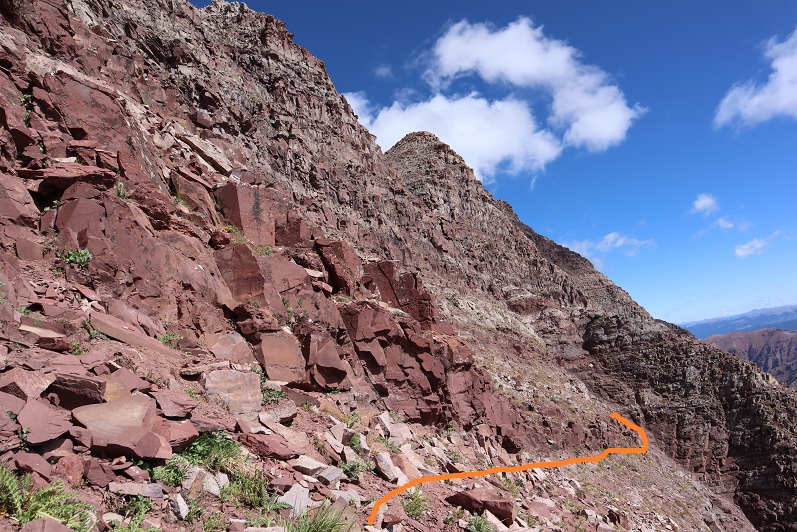
I stayed at the same level as the saddle until I came to a gully. This area took some careful footwork but little climbing. It may have risen to class 3, but realistically was class 2
Next I came to a gully. This gully was very loose and I kept to the left side for stability, holding onto rocks and handholds in the boulders where available. This felt like class 3
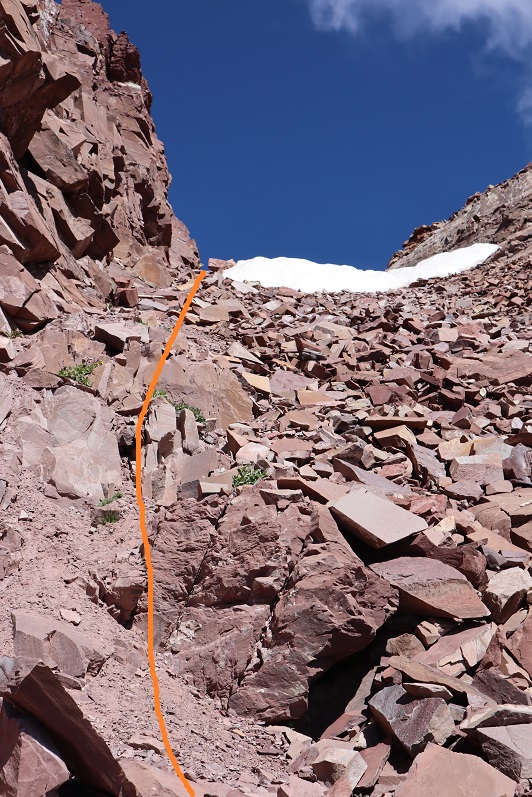
At the top of this gully was another gully. I just aimed for the snow.
At the top of this gully is where the route picks up with the standard route up “Thunder Pyramid”. I turned right (north) and ascended the ridge
The top of the ridge wasn’t the summit however. I took the solid route up, the dotted route down. If I were to do this again I’d take the dotted route both ways because it doesn’t lose elevation.
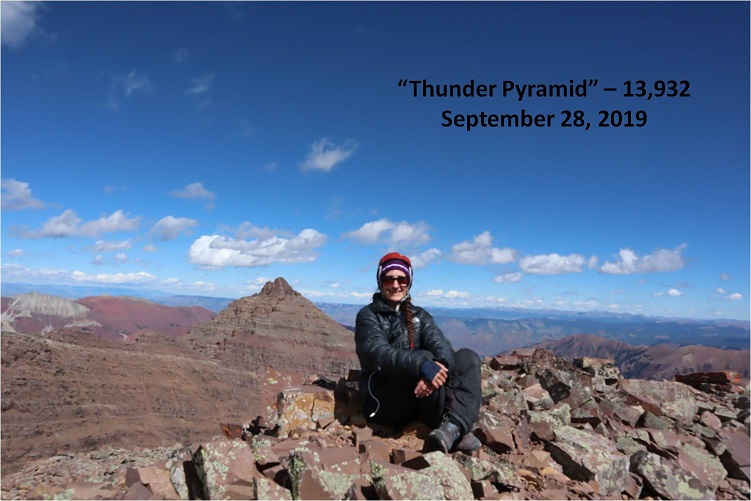
I summited “Thunder Pyramid” at 12:15pm. It took me just under 2 hours from “Lightning Pyramid”. Unfortunately, most of the pictures I got at the summit I realized were blurry when I got home (still figuring this new camera out)
But I did get one “ok” picture
Thunder Pyramid summit:
Up until this point doubt had crept into my mind: maybe what others were saying was true and I hadn’t really summited “Thunder Pyramid” last time. Maybe I’d ended up close but not exactly there? I’d been in a hurry because I’d been having a Raynaud’s attack and I didn’t take my normal number of summit photos/videos (I don’t usually get videos in winter conditions because it’s a death sentence for me to take off my gloves to operate the camera). So today I walked all over that summit, looked around and confirmed what I already knew: Yes, I had indeed summited the last time I was here. Also, the weather today was absolutely perfect! Those 50mph winds never materialized.
I decided to head back down the way most people hike up. I made my way back to the ridge and down the gully
Check it out! Now I know why it’s called the “White Gully” (Last time everything was white)
The descent down “Thunder Pyramid” was no more fun than the ascent up “Lightning Pyramid”, and considering both the gullies and couloir I’d say it’s probably easier to do Thunder first and then traverse over to Lightning. Also, I know this is usually done as a snow climb, but I felt much safer on the scree and talus than I had on the snow. When it was covered in snow I felt like if I slipped I’d fall and never stop sliding. Here I knew I could slip but I wouldn’t fall very far. This climb wasn’t ‘easy’ but it definitely wasn’t as difficult as I’d anticipated.
Hiking down was like déjà-vu (as it should have been)
I made it almost to the bottom of the gully and turned left
And descended the slopes into the basin
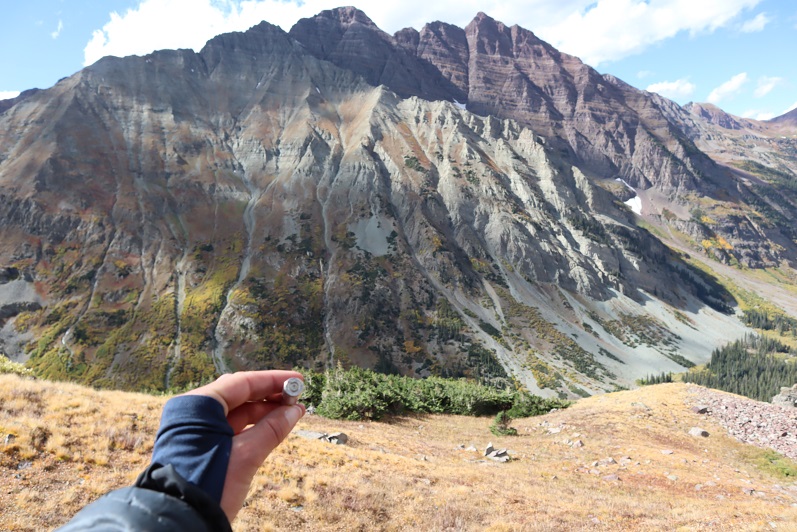
Also, I found a shell
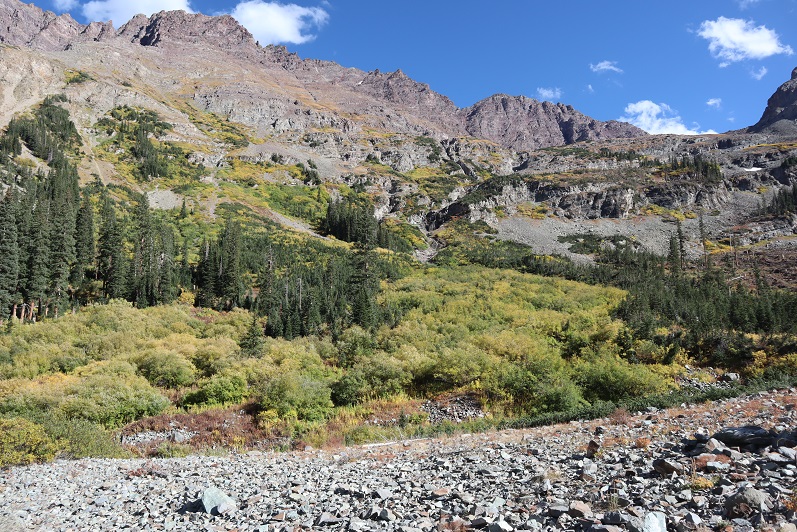
I made my way back to the West Maroon Creek Trail and hiked out, loving the fall colors in the daylight.
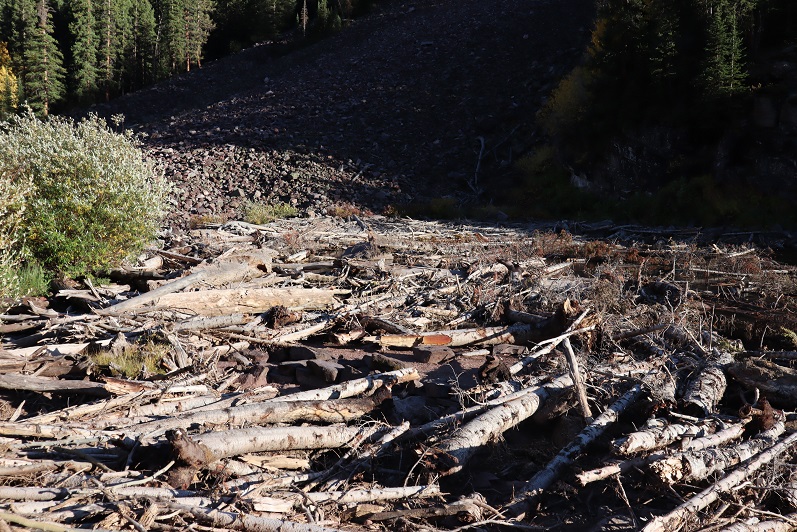
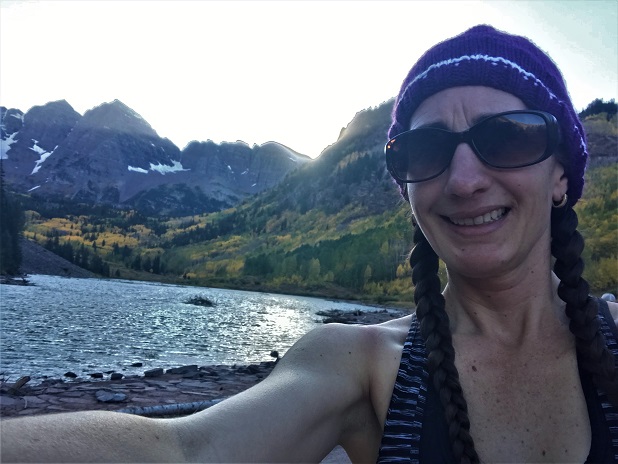
There were a ton of people around Maroon Lake when I got there, all enjoying the fall colors. The base of the lake resembles the Snowmass log jam
While the 50mph winds never materialized on the summit(s) today it was really very windy at the lake. I decided to head to my truck to clean up and then watch the sunset. There was a line of cars waiting for a parking spot and I had to tell no less than 50 of them I wasn’t leaving. None of them took it well, but it had been a long day, and I figured I’d earned watching a good sunset.
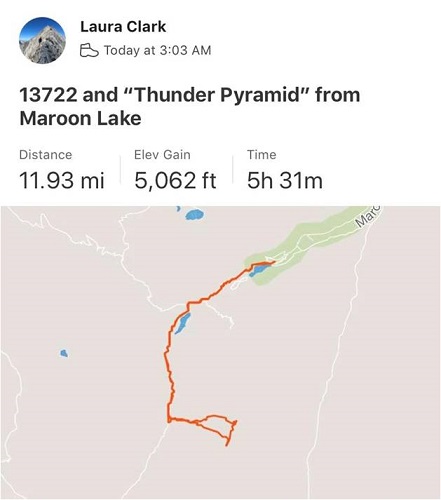
I made it back to my truck at 5:15pm, making this a 12 mile hike/climb with 5062’ in elevation gain in 14 hours.
I enjoyed the sunset
And as soon as it was over I hopped in my truck to drive home. There was a line of vehicles waiting for a parking spot that lasted for over half a mile down the road. The shuttle had stopped for the day and I drove 2 people down to the bus stop because they’d missed the last bus. They were a nice couple from Georgia who were happy not to have to walk those 13 miles back to their hotel. I hope they enjoy Colorado as much as I do!
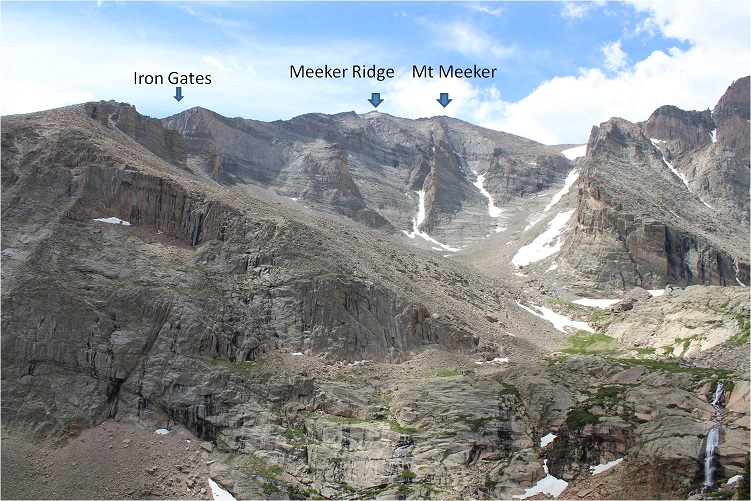
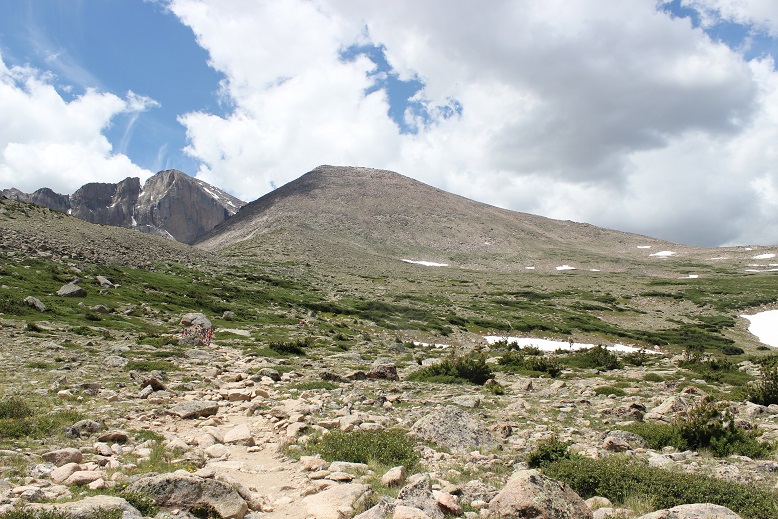
There are so many routes up Mt Meeker, and some have pretty cool names: Flying Dutchman, Dream Weaver, Dragon’s Tail, etc. I chose the Iron Gates route because for some reason it sounded cool to climb through The Iron Gates. I was also told this route had the best views of Longs Peak (I wasn’t disappointed). Plus… the knife edge between Meeker Ridge and Mt Meeker sounded like fun, and I wanted to find out what a “flying buttress” was.
I was surprised with how many vehicles were in the Longs Peak Trailhead parking area when I arrived. It’s a large lot, and was at least halfway full. Several hikers were readying their gear. Last time I was here was the Friday before a Labor Day weekend, and I hadn’t seen very many people at all. I saw dozens of hikers on the trail this morning.
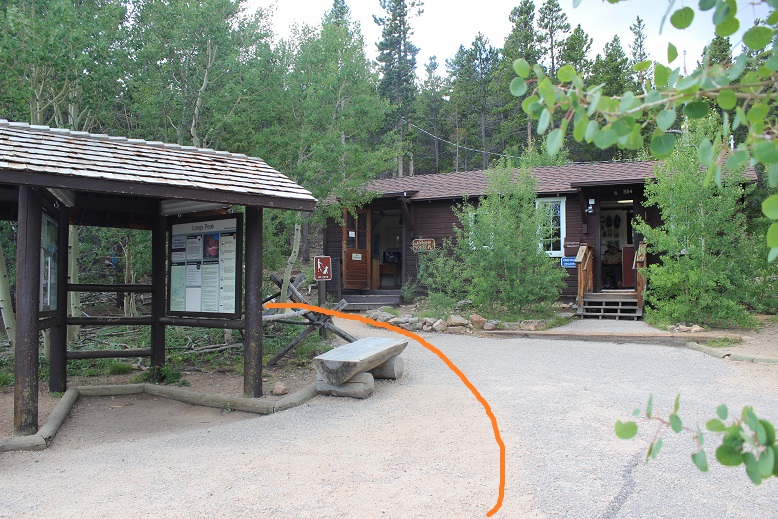
I arrived at the parking lot at 2:30am and was on the trail by 2:40am. I chose to take the Chasm Meadows Approach from Longs Peak Trailhead. The trail starts to the left of the Rangers Station.
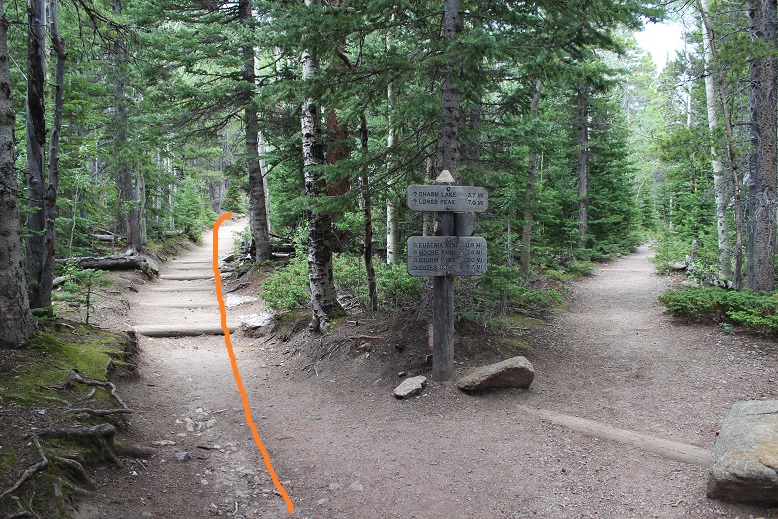
I could see headlamps shining brightly ahead of me, and passed four groups of hikers before making it to the first junction about ½ a mile from the trailhead. Stay left here
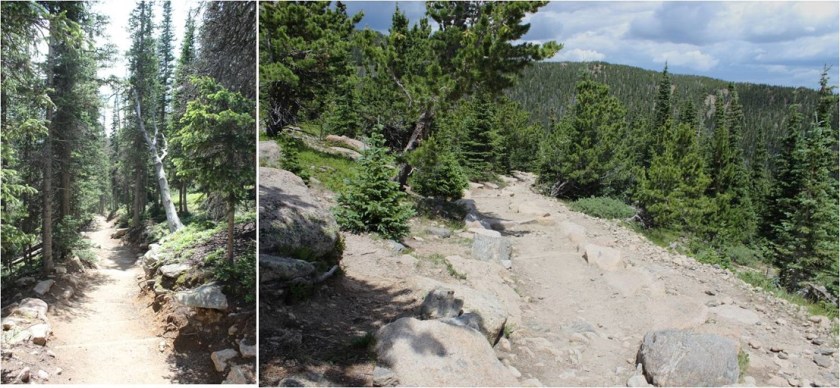
The trail is definitely class 1 all the way to Chasm Lake. I saw multiple groups ahead of me, all intent on Longs Peak. They had very bright headlamps. Very bright. In fact, at times they were almost blinding, especially as I got closer to a group of hikers and they’d turn around to look at me. I realized this morning just how dim my flashlight actually is (but I like it that way: sometimes a bright flashlight gives too much information).
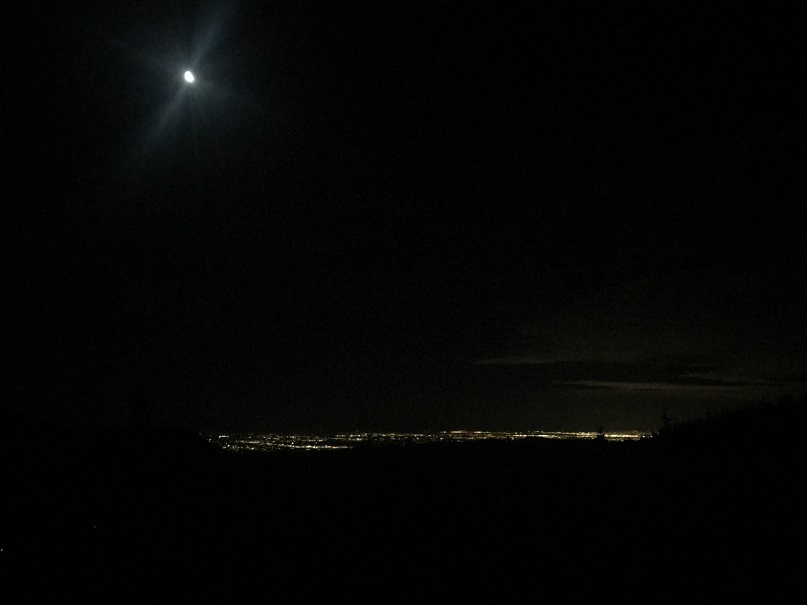
Around treeline I could see the full moon with city lights in the background.
After making it to treeline there’s still 1.7 miles left to Chasm Lake. Stay left here as well.
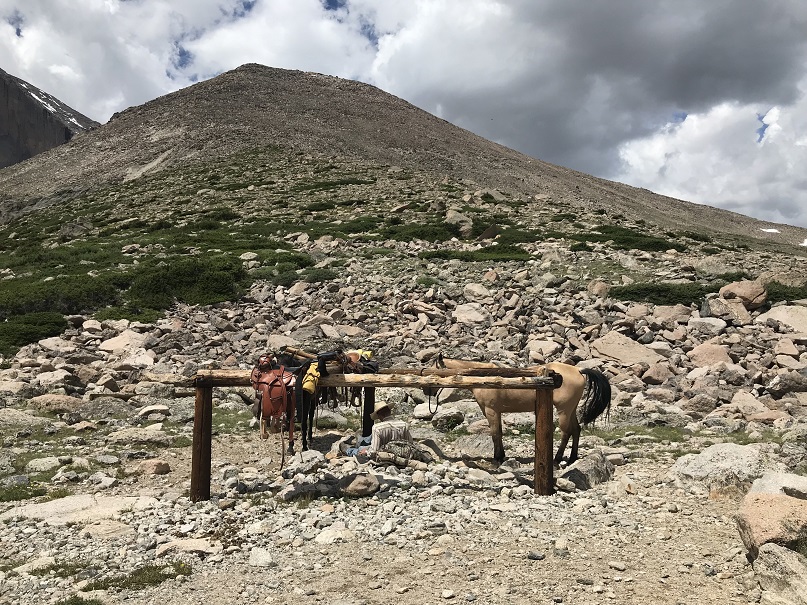
About a mile before reaching chasm lake there’s a trail junction where you can stop for a bit to use the privy and let your horses rest.
Having to do neither I continued on towards chasm lake, a little disappointed to lose a couple hundred feet in elevation in the process.
Here there were a couple of small snow areas to cross that were quite slippery in the morning, but easy to navigate in the afternoon.
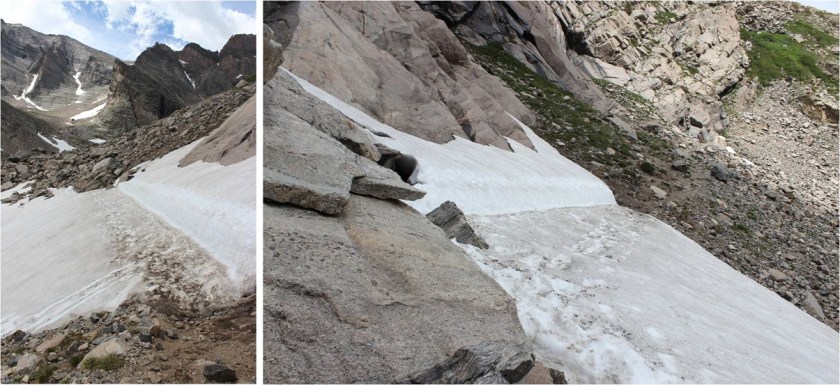
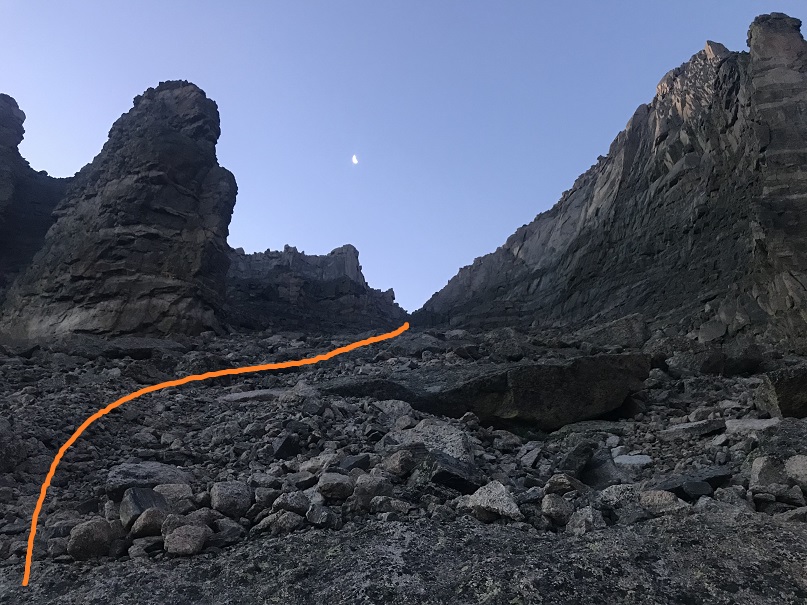
Just before Chasm Lake the trail ended. I made it to this area while it was still dark and it looked like there was a lot more snow than there actually was. The dotted line is the route I took up the gully, the solid one is the route I took on my way back down. This ended up being a good approach, as the solid way down went through a waterfall that would have been messy in the dark.
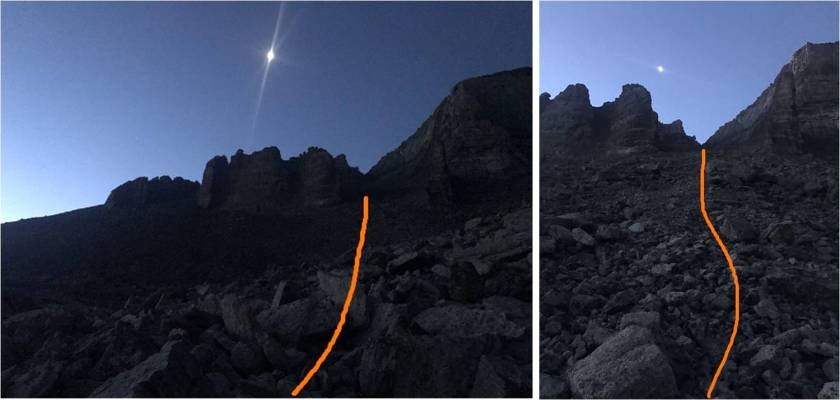
My goal was to make it to the Iron Gates. In the dark I couldn’t see much and while I knew I was headed in the correct direction I didn’t have a visual yet of the Iron Gates.
The terrain at the base of the Iron Gates was very loose scree, mixed with small rocks. As I climbed higher the ground became loose talus that became more stable until it eventually turned into solid rocks. I headed straight through to the back of the Iron Gates
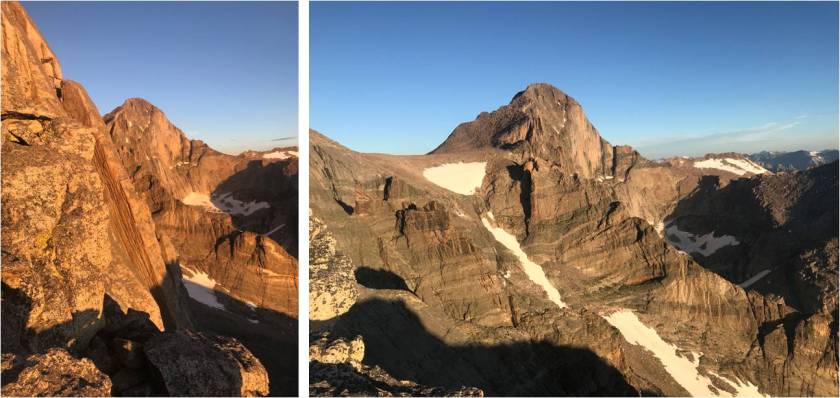
Here the sun began to rise and I was able to see why this route is said to have great views of Longs Peak
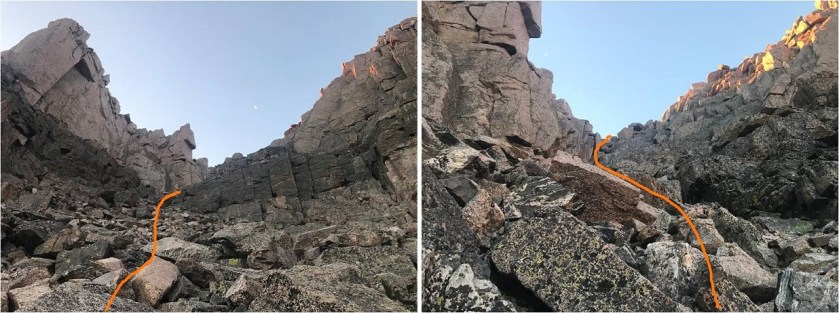
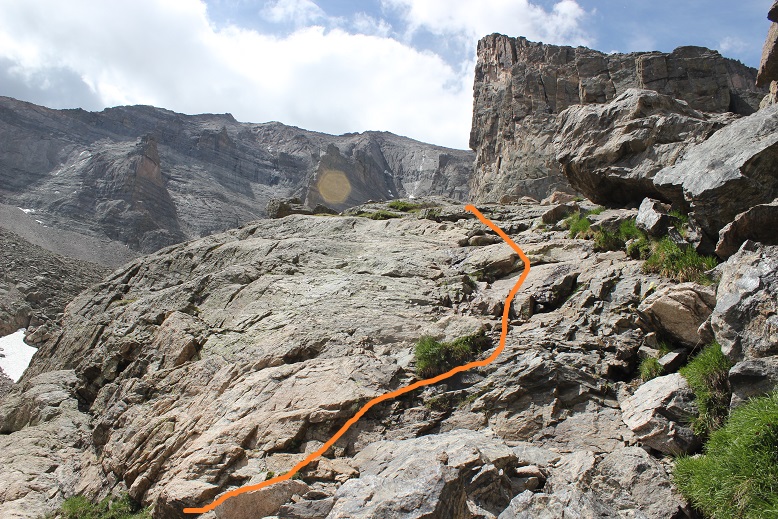
At the end of the Iron Gates there’s some class 3 scrambling to gain the ridge
There’s a cairn at the top I made a mental note of to help me find the entrance on the way back down
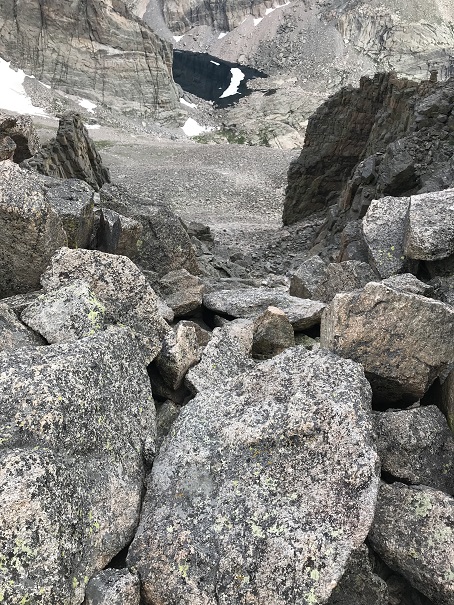
Here’s a look back down the Iron Gates at Chasm Lake
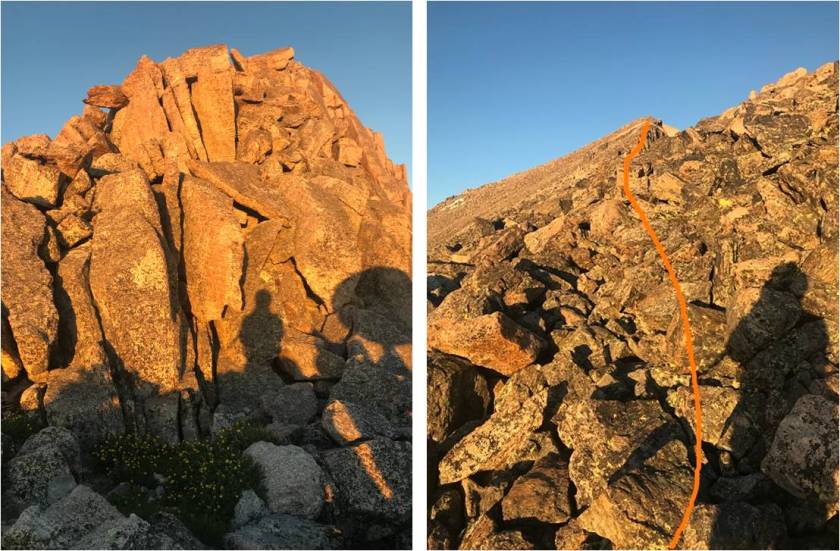
At the top of the Iron Gates I turned right (south) and climbed the northeast ridge to Meeker Ridge (the unranked peak, not the ridge itself)
Yes, there were some pretty awesome views of Longs Peak
I made it to Meeker Ridge at 6:45am. I got a quick selfie and video at this unranked 13er
Meeker Ridge:
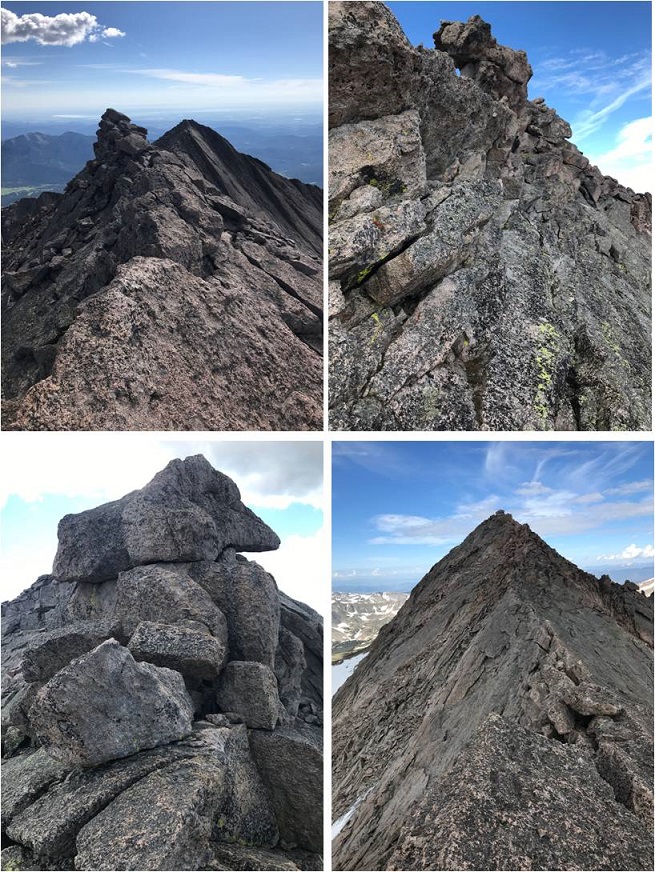
Up until this point the hike had been easy, but now it was about to get a little spicy. It was time to traverse the short ridge between Meeker Ridge and Mt Meeker. This ridge has a ‘mini-knife edge’ similar to the one on Capitol Peak. I was able to stick to the ridge for this short traverse, dropping down to the right only once when absolutely necessary. This is a solid class 3 ridge with exposure.
Here’s a tip for the knife-edge part: It’s very similar to the one on Capitol Peak, and would make for a great practice run if you’re hesitant to try Capitol but feel solid with class 3 climbing. While on Meeker’s knife edge you can cross and use your right foot for balance by placing it on the rock beneath the ledge. This rock is underneath the knife ledge and difficult to see, but a few inches wide, solid, and you can use it for extra balance if needed. The rock here felt more solid than on Capitol.
Here’s looking back at Meeker Ridge
And some of the climbing/exposure on route
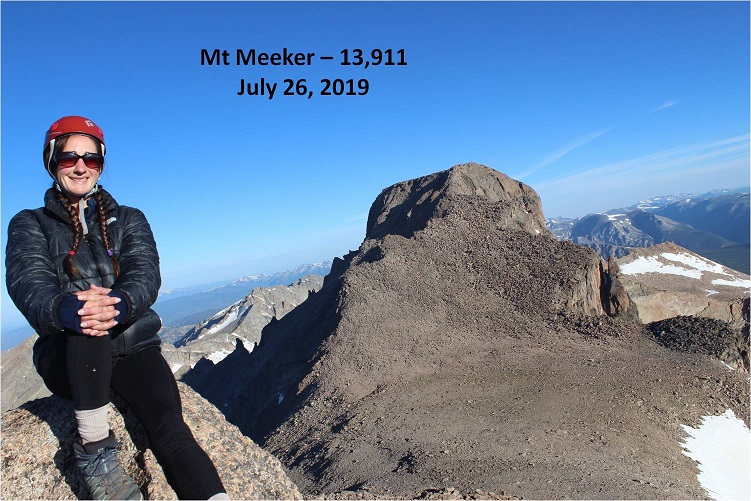
I made it to the summit of Mt Meeker at 7:15am, or what I thought was the summit of Mt Meeker. At the top of the traverse there were two points about 40 feet apart that both looked like the true summit. I sat on top of the first point, but the second point looked higher. So I went over and climbed to the top of the second point, but from there the first point looked higher. So I decided to take a video from the middle of both points and pictures from both.
Mt Meeker:
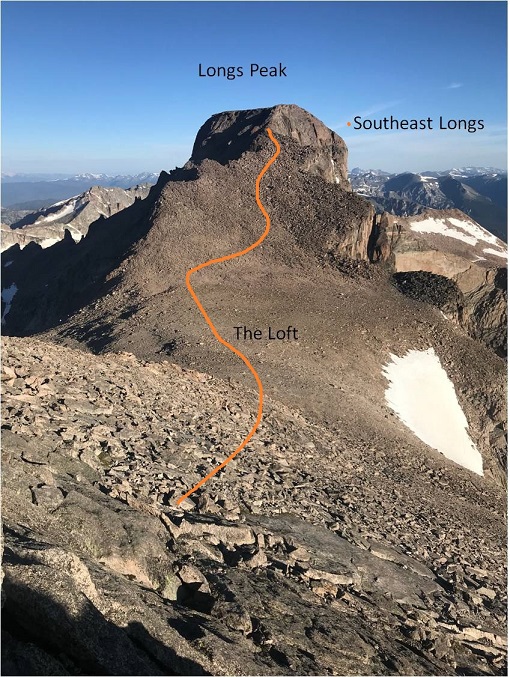
It was still early in the morning and the weather was holding out nicely. I decided to descend Mt Meeker and cross the Loft towards Longs Peak. Longs Peak wasn’t my goal, as I’ve already summited Longs, but I wanted to get a look at the Notch route up Longs and summit Southeast Longs (an unranked 14er sub summit). Southeast Longs is where the orange line ends.
To get there I descended 450’ to the loft, and then gained 600’ to the top of Southeast Longs.
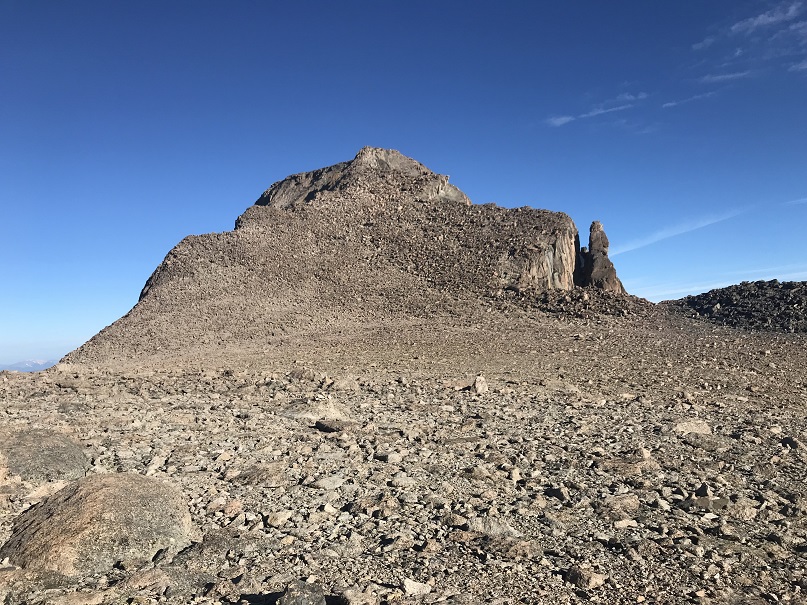
The rocks here were solid and much larger than they looked from Mt Meeker. There were a bunch of social trails here so I just took the path of least resistance to the top.
I made it there at 8:25am. You can see Longs Peak Summit in the background
Curious as to what the Notch and path to Longs Peak looked like from here I descended to the cairn that indicated the entrance to the Notch and looked over. It looked like a class 3 scramble that would lose a couple hundred feet in elevation, and then re-gain it on the other side, connecting with the traditional Longs Peak Route just before the final pitch.
I briefly thought about attempting Longs Peak as well, but did some mental calculations and figured it would get me back around 3-3:30pm, and I really wanted to be back around 1:30pm, so I decided to save Longs Peak round 2 for another day. Also, there were a ton of people queued for the final push on Longs (I could see/hear them) and a lot of people on the summit as well. I’m not a fan of crowds, especially on peaks. In any event, I still had some more climbing to do myself, as I needed to re-ascend Mt Meeker to head back. I did not want to make this a loop.
The clouds were starting to build as I gained Meeker’s ridge
While they looked ominous at first (especially for being so early in the day) nothing came of them. The clouds did hide the sun for most of my return back to the trailhead and I did get a few drops of rain here and there, but I was never worried about thunderstorms.
Time for knife-edge part 2. I felt much more confident the second time around, and the traverse went much faster. I was well aware of the group of 15 or so people on top of Longs Peak watching me make the traverse. I could hear them talking to each other as I climbed up boulders and balanced on the ridge.
Just as I made it back to Meeker Ridge I met a young man beginning his attempt of the traverse. He’d had a long day, starting from Sandbeach Lake. I wished him luck and was on my way back down the Northeast Ridge towards the Iron Gates
As Chasm Lake came into view I could hear loud shouts that sounded like a large group was down there having fun. A group was paddleboarding. It seemed like a lot of work to me to get multiple paddleboards up to Chasm Lake, but hey, they must really be into the sport. I wondered to myself if it was legal to paddleboard there? I descended into the Iron Gates and had no problem on the larger rocks/talus. However, descending the scree was a bit of a small nightmare. I was so glad when I made it to the bottom of the Iron Gates and turned around to see them in the daylight
I followed the gully more to the west this time and descended via a wide waterfall area with small rivers of water flowing throughout
This brought me to the base of Chasm Lake, where I picked up the trail back to Chasm Meadows. This is also where I met up with a group of 12 or so campers from a nearby camp. I could tell immediately they weren’t Girl Scouts because there was only 1 adult with them, the girls were all wearing shorts and did not look like they’d been “roughing it”. I asked them where they were from and wished them well as I hiked out.
A few minutes later as I reached the Jims Grove area I could hear the girls behind me, their counselor yelling at them every 10 seconds or so to “hurry up” even though they were setting a fast pace. Long story short, she pushed them too hard and one of the girls clipped and fell. She’s alright and just scraped her knee, but I hope the counselor learned her lesson and slowed down a bit.
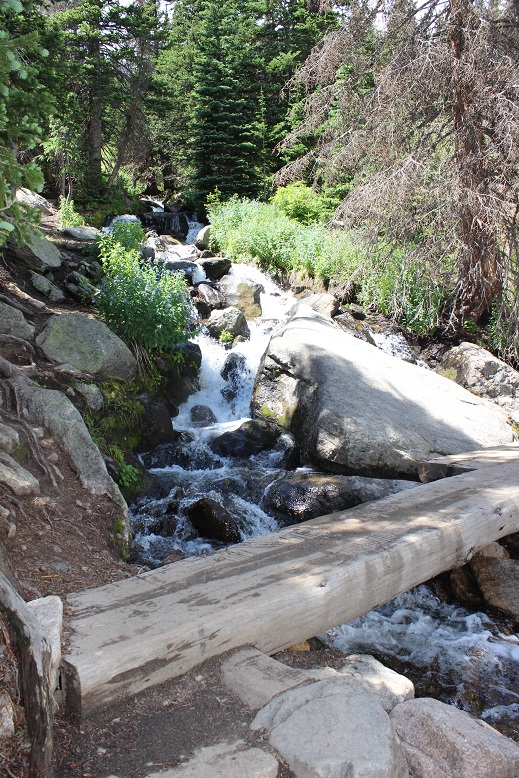
It was great seeing the waterfall crossing areas on my way down in the daylight.
I made it back to my truck at 1:15pm, making this a 13.5 hour hike with 5764’ in elevation gain in 10 hours 30 minutes
Today’s hike was absolutely beautiful! I can’t wait to head back here to tackle a few more 13ers…
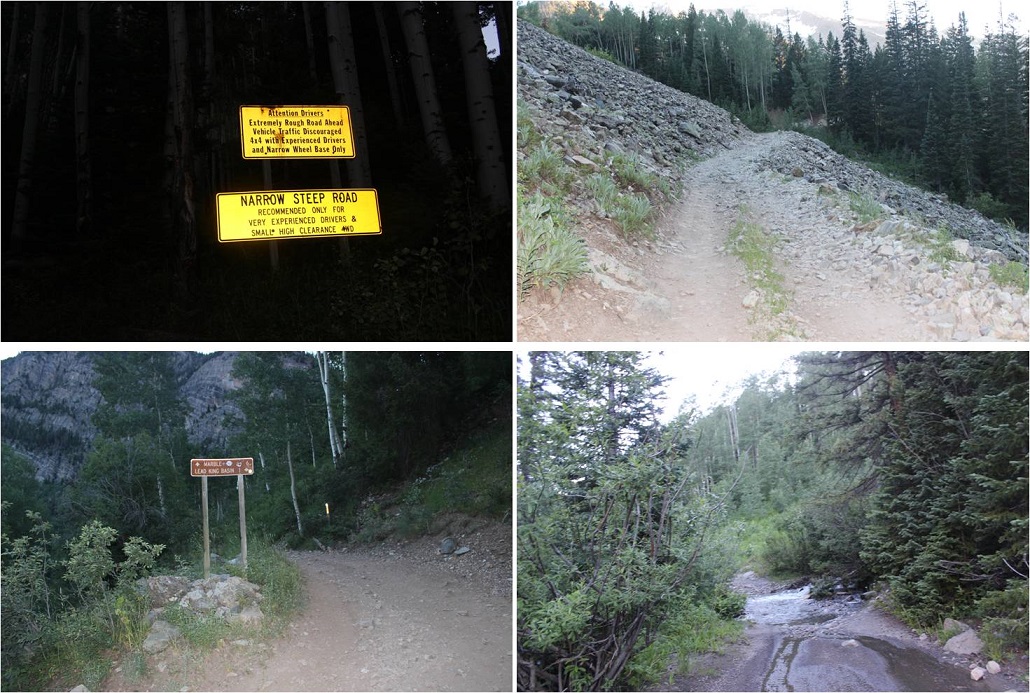
After my failed attempt last week I decided to do more research and try Hagerman again today. I learned the upper road to Lead King Basin had an avalanche about 1 mile after the stream crossing (very close to where I’d parked) so I decided to take the lower road from Marble to Crystal instead. I’d heard a lot of conflicting reports on this road, but when I searched it online I found this video, which was very helpful.
The road itself wasn’t that difficult with a 4WD (I wouldn’t attempt in a 2WD), and my Tundra handled it just fine. The only problems I can foresee would be passing other vehicles. Luckily there are a lot of small turnout areas on this road, especially before and after the committing areas. I drove in at night to ensure I wouldn’t need to pass oncoming vehicles, which I knew would be problematic in my big truck, no matter the size of the other vehicle.
Since I drove in when it was dark I wasn’t able to see the Crystal Mill, but I expected to see it on my way out the next day.
I made it to Crystal around 10pm on a Thursday night and all the lights in the ‘city’ were out. As I passed the Crystal Mill I saw a sign saying Lead King Basin was closed, so I dimmed my lights and parked at the east end of town, mentally calculating the extra mileage and what time I needed to start in the morning. Looks like I was getting about 3.5 hours of sleep.
As I was preparing to go to bed (my lights were out) I saw the lights go on in the second story windows of a cabin across the street. The two story 18th century style wood cabin had two tiny windows upstairs, covered in lace curtains. The light from the windows was glowing pale blue, and I saw the silhouette of a woman walking around. She was wearing a long nightgown and her hair was pinned up in a bun. The woman slowly walked around the room, picking up objects and setting them back down. Then the lights went out.
I set my alarm for 2am. When I woke up I crawled from the back seat into my front seat and started putting on my shoes. I didn’t need to turn on any lights because the full moon was shining bright enough to allow me to see. I saw a fox run down the center of the road, and then noticed the lights in the second story window of the house across the street turn on. Once again I saw the silhouette of a woman walking around. She was wearing a long nightgown and her hair was pinned up in a bun. She slowly walked around the room, picking up objects and setting them back down. Then the lights went out.
Whoa. That was spooky. I knew I hadn’t woken her up because I hadn’t made any noise, opened any doors, turned on any lights, etc. I was going to have to investigate that house in the daylight upon my return because that was just… weird. I mean, what are the chances she was up at 10pm and 2am, just like I was? Also, how many women still wear nightgowns to bed?
Ok, so I was on the trail at 2:15am. It was a 2 mile hike to Lead King Basin along a 4WD road that didn’t offer many turnouts, but was indeed open and my truck could have made it just fine to the trailhead. Oh well, I was getting in 4 extra miles today.
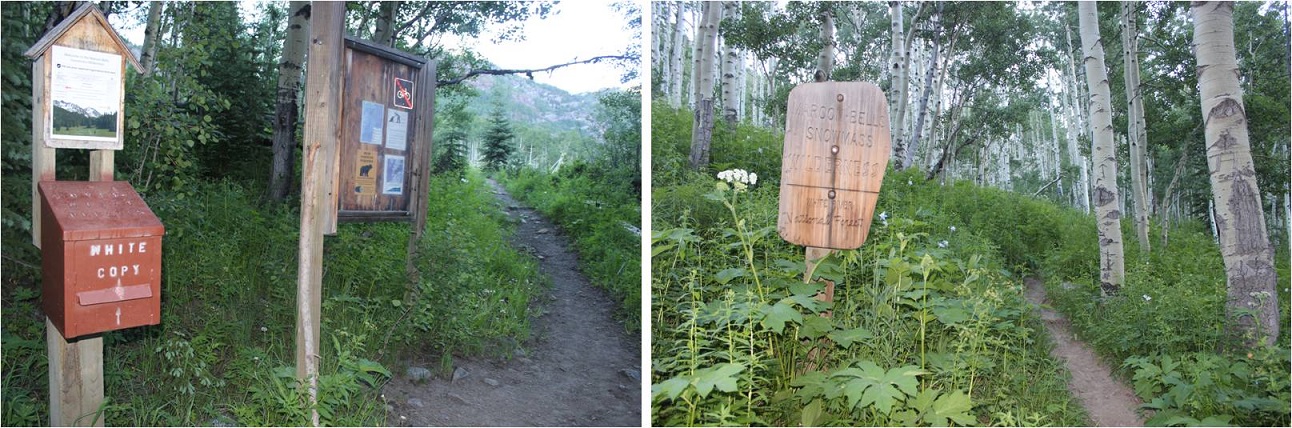
The trailhead was about 2 miles from Crystal. I didn’t see any of this in the dark (these signs seriously need reflective elements to them for us who start before daylight).
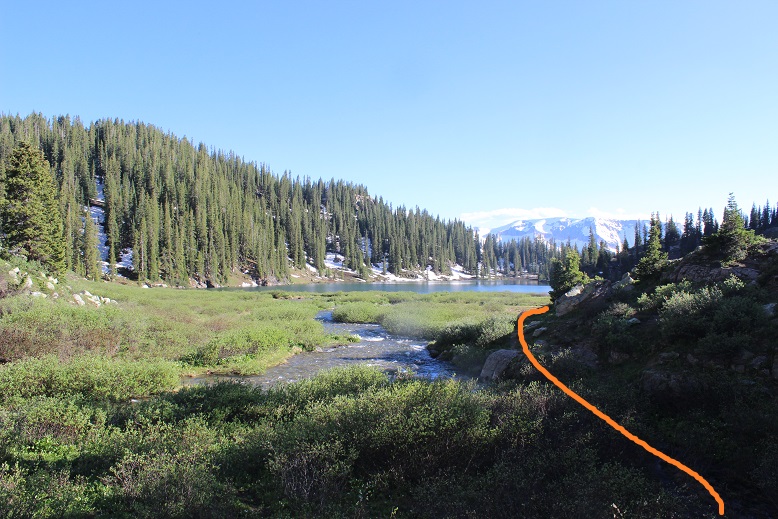
There’s a nice junction where you turn left to head up and around the north end of Lead King Basin to Geneva Lake
Here the trail was quite overgrown with flowers, plants, and trees. I thought to myself how it felt a little like being in a rainforest, and how much fun the flowered areas would be on my way back (I’m not a fan of flying-stinging insects, so I was being sarcastic). On the positive side: no mosquitoes!
It was in this area I saw my first ever porcupine on the trail. I see them along the side of the road when I’m driving to trailheads quite a bit, and one time I heard one under my truck at the Grizzly Gulch trailhead and had to fend it off in the middle of the night, but this was the first one I’d encountered on the trail.
He was just sitting there, staring at me. So I talked to him to get him to move. He turned around and waddled ahead of me, staying directly in the middle of the trail. I didn’t really want to follow a porcupine to the lake, so I talked a little louder to him. He scurried into the bushes and I immediately realized the error of my ways: now I couldn’t see him and didn’t know where he was. I didn’t want to experience porcupine quills and all that entails, so I nicely talked to the porcupine in a sing-song voice as I passed where I’d last seen him, crossing my fingers I hadn’t made him mad/scared and that he wasn’t sitting in the bushes: poised to shoot.
Mission “pass the porcupine” accomplished I continued on to the lake. The moon was full and bright so I conserved flashlight battery and hiked by the moonlight. Just as I made it to the lake I heard a faint barking in the distance. I was worried there was a lost dog out there somewhere (hey, it’s happened) but as I rounded the bend to the lake the barking got louder, and then I saw a flashlight turn on. The owner was pointing the flashlight in the direction opposite of me, and the dog was starting to bark really loud. I yelled up at them “It’s just a hiker!” I received no response, but the dog stopped barking and the flashlight turned off. It was about 4:45am. I immediately felt more secure hiking in the dark: I was pretty sure there wasn’t another animal in the area, as that dog would have been alerted to it.
Just north of the lake the trail continues north and then there’s a stream crossing. There were tons of areas to cross here, and all required taking off my shoes. At times the water was knee deep (I’m 5’4”), but mostly it was just high on my shins. Also, it was cold. When I was done my water shoes were quite muddy so I left them on a rock to dry and to pick up later.
This is where my trip report diverges from some of the more popular field guides. I took the 1st west side gully to the southwest ridge.
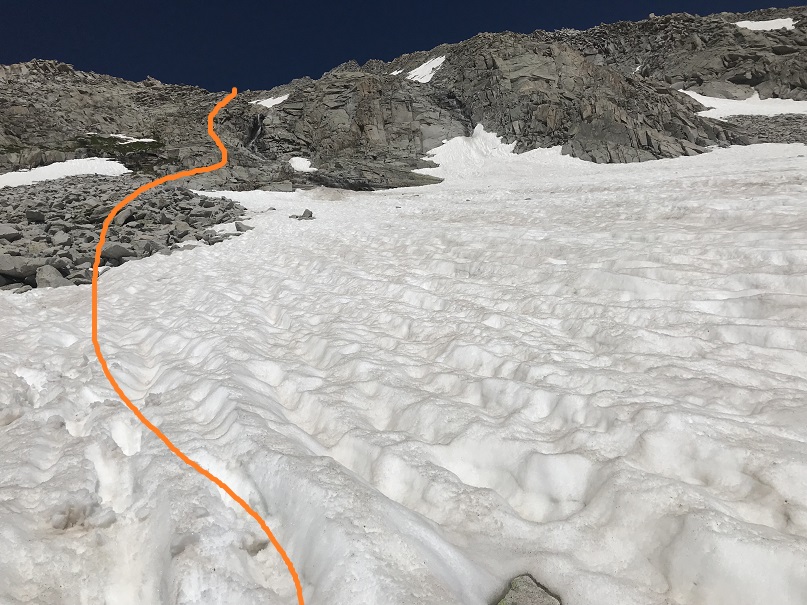
I crossed the creek and headed north for about 100 yards, looking for a gully to my right (west gully). I’d seen pictures of the access gullies on the east that were still full of snow, so by taking the west side I was hoping to avoid any snow filled gullies. I wasn’t disappointed. Here’s the gully I took:
This gully was steep and loose. I did not feel comfortable sticking to the scree in the middle, so I stuck to the right side where the rocks were larger.
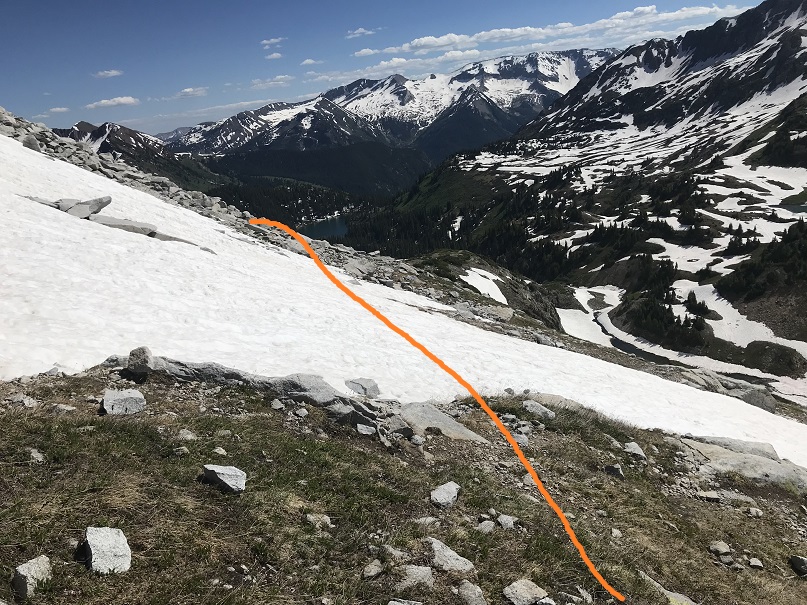
My goal was to gain the ridge as quickly as possible, aiming for this small saddle
Here’s looking back on the route
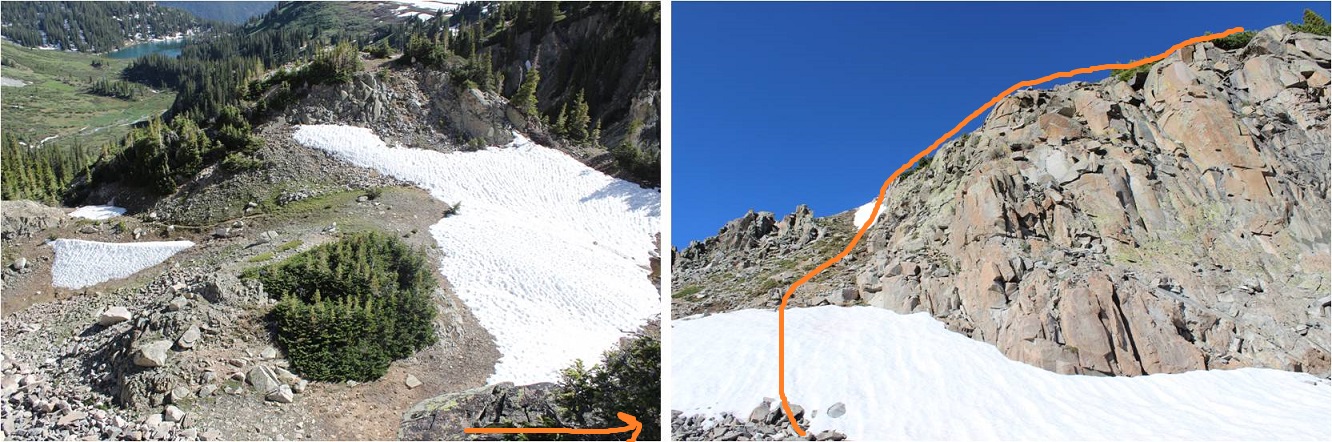
From the small saddle you can see Hagerman Peak
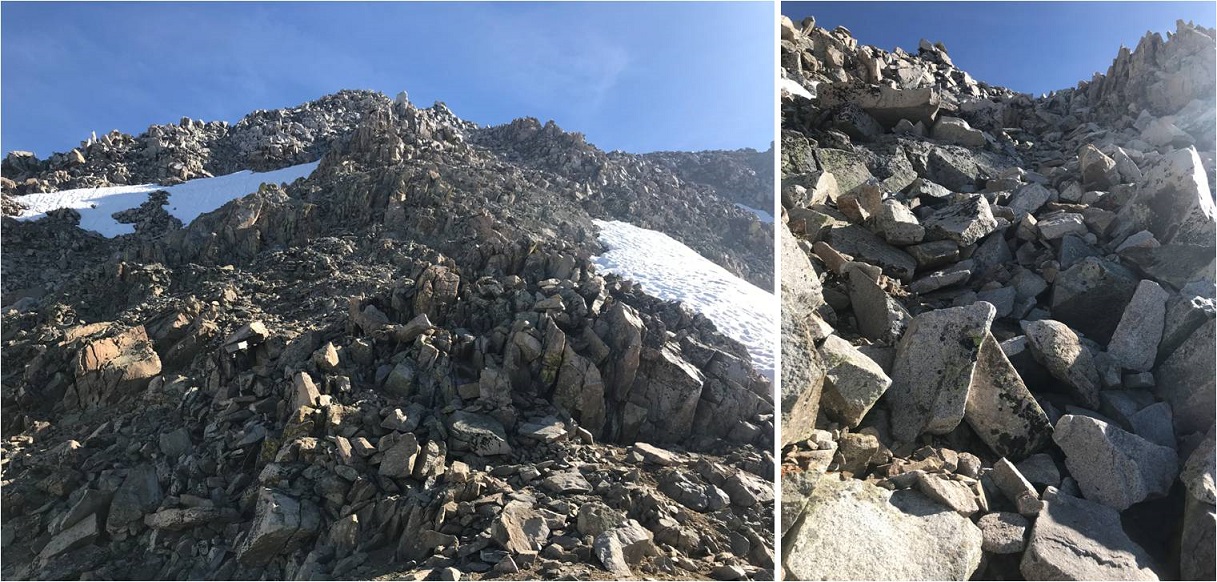
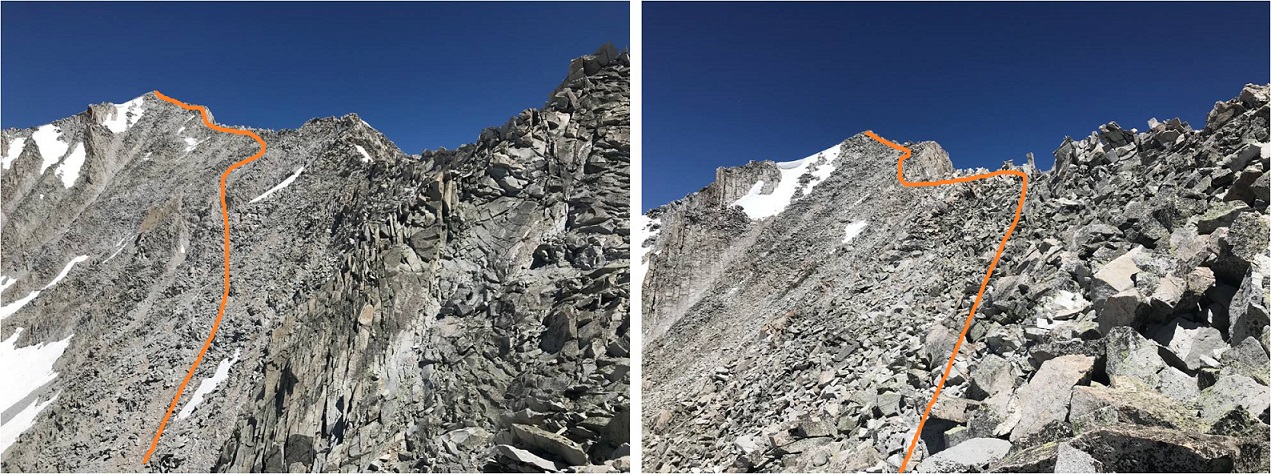
I turned left (north) and faced a class 3 section and headed up and over the ridge.
At the top of this point I could see the rest of the route before me
It’s important to note if you’re attempting this ridge to start early and make sure you have a large weather window. This ridge is very committing. I went at it slowly and carefully. The rocks here crumble: I’d find a hand hold, grip, and the rock would crumble in my hands. I had to make sure to test out each hold several times before using it to secure myself. Luckily, the ridge was snow free.
This is definitely a ridge you take by… sticking to the ridge. I was able to go directly up and over most areas, dipping to the left or right just a couple of times. As I ascended the rocks stopped crumbling and started tipping a bit (nothing fell, but not much was stable). Here’s the final push to the summit.
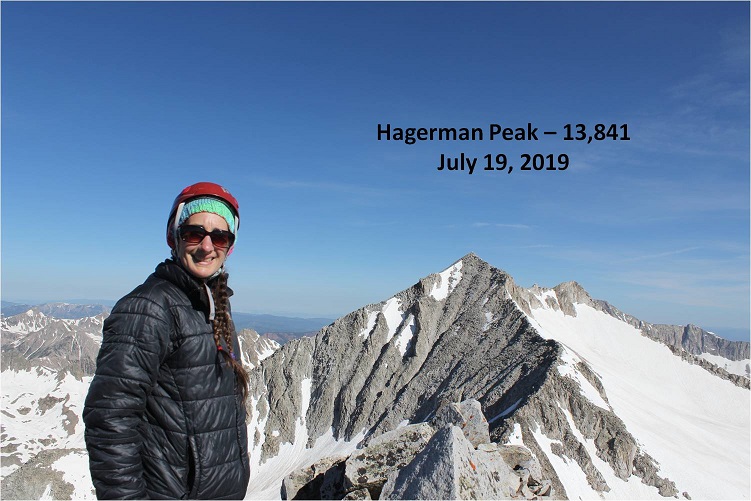
I made it to the summit at 9:10am
Hagerman:
I started the ridge at 7:15am and ended at 9:10am, making this a 2 hour ridge to cross. Here’s looking back at the route
The day was absolutely beautiful and it was still early morning so I considered traversing over to nearby 14er Snowmass Mountain. I’d done a lot of research and came up pretty empty with details, but I knew it could be done. I spent quite a bit of time looking around at possible paths before deciding if I was going to attempt traversing or not. I looked at Snowmass Mountain’s east side: nope, that was a no go. Tons of snow and no way I could see to begin from the summit. Next I looked to the left (west). A lot less snow but the shadows weren’t helping much.
I stopped and did a lot of thinking here. I knew the traverse was possible. The rock looked loose, but I could also see goat trails (or maybe those were gullies…). I was confident I could find traction in the dirt. I mentally calculated how much time I had, the weather, and looked for exit strategies in case I got to a place where I couldn’t continue. I decided both time and weather were in my favor today so I decided to go for it.
Note: This may not be the safest way to traverse from Hagerman to 14er Snowmass Mountain. For me and my abilities, it was the safest way on this particular day.
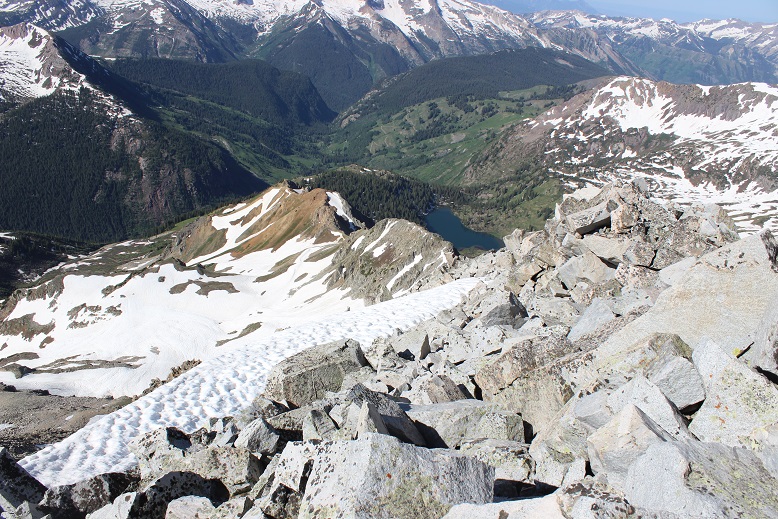
The first move committed me to the traverse: I down climbed about 50 feet of… this. I’m not sure I could have climbed back up this wall. (Ok, I could have or I wouldn’t have climbed down, but it would have been a lot of work).
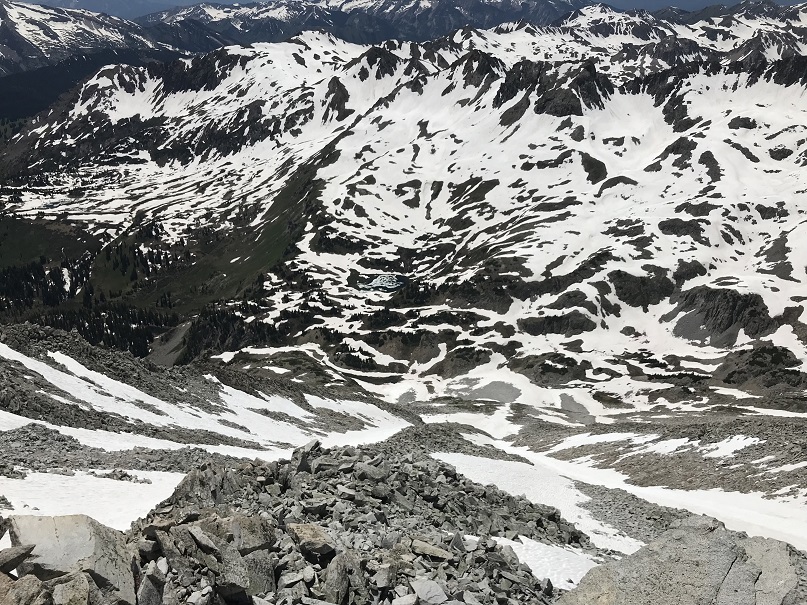
I turned and looked towards Snowmass Mountain. This is what I saw. So I headed northeast and rounded the corner.
I was taking this one section at a time, focusing on what was directly in front of me but glancing up at the rest of the route every so often to make sure I was on course. I found myself trying to stick to the ridge, but that is not the way to do this traverse: you need to drop down much lower than you want to. Every time I tried to regain elevation I was forced to head back down.
My advice is to descend lower than the saddle, and then take the scree line up to where the trail connects with the east route. The best terrain was consistently 100-200 feet below the ridge.
Once you connect with the ridge where the east route links up you can easily follow the cairns to the summit.
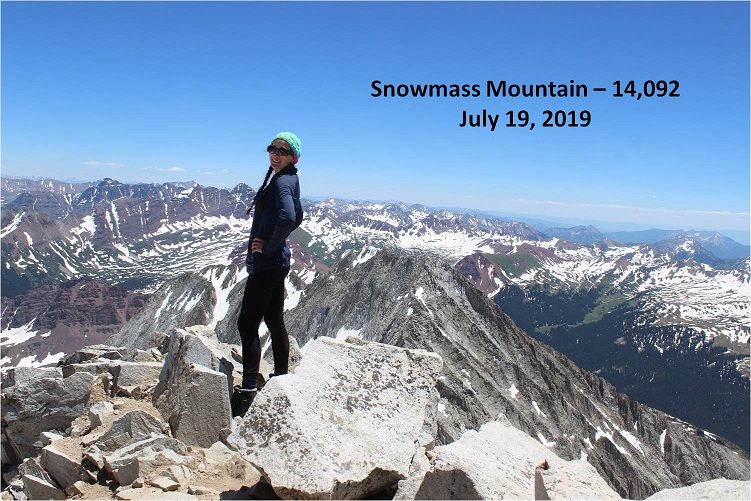
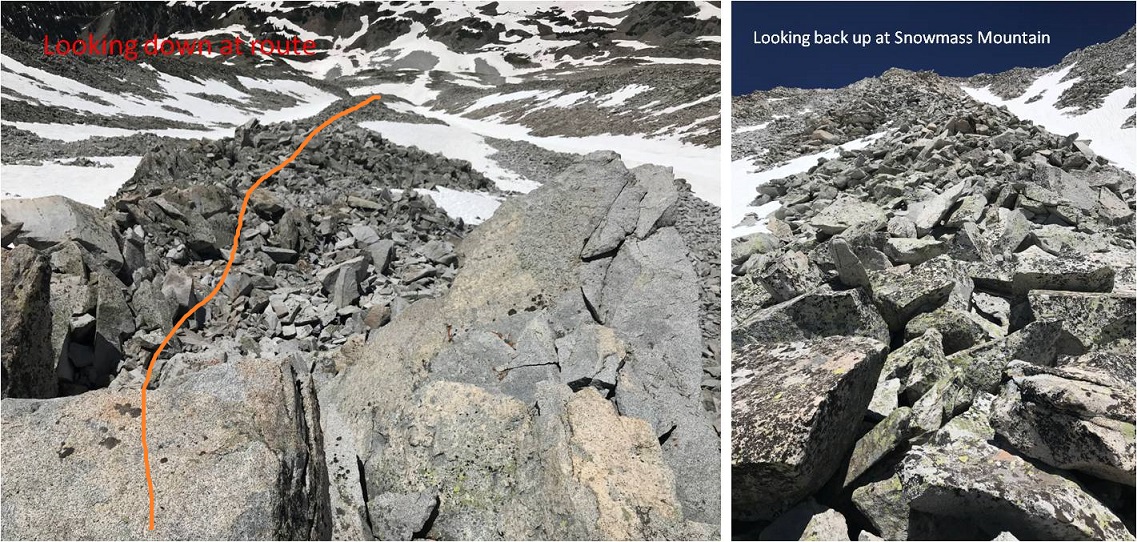
This was a very slow climb. Everything was loose and what wasn’t loose was scree. I took extra time to be careful with each and every step, and kept the entire route in view as often as possible. I most likely made this take longer than necessary, but I stayed safe. I made it to the summit of Snowmass Mountain at 12:50pm, making this a traverse that took over 3.5 hours to complete. Here’s looking back at the route
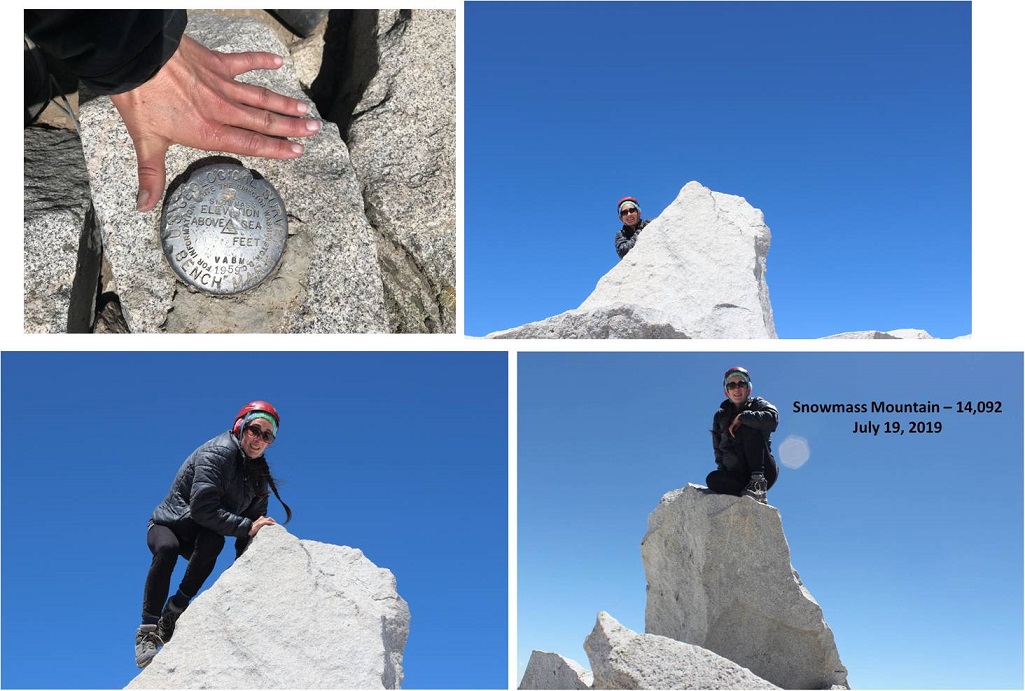
Summit photo
Summit Video
I spent a lot of time on this bluebird day taking pictures. It’s harder than you think to set an automatic timer and then scramble up to the summit block. It took a few tries… and the ones that actually turned out were fuzzy, so I gave up.
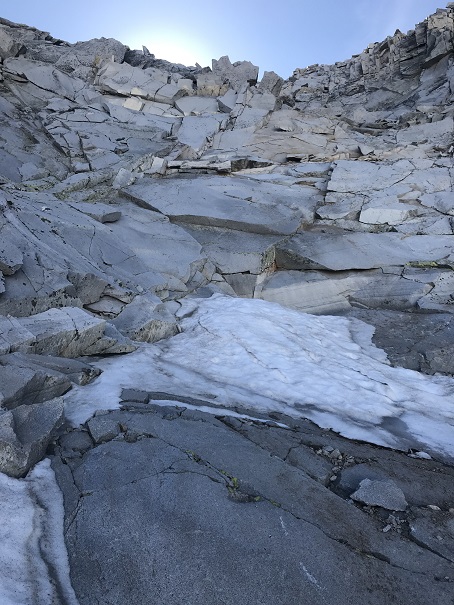
After spending much more time on the summit than necessary I needed to make the decision of how I was going to head back down. I’d been hoping, similar to the west side of Hagerman, that the west side of Snowmass Mountain would be free from snow. No such luck. There was still snow in the gullies.
I did not want to do the traverse back to Hagerman because that and another 3 hour traverse would have been exhausting. I could tell the gullies on the west side of Snowmass Mountain ended/cliffed out in a waterfall area, but I could also see bare rock I could traverse either north or south to connect up where I needed to be. I decided to head down Snowmass Mountain’s west side, but for safety I would slightly alter the traditional route. It was too late in the day to safely take the gullies, so I was going to take the rock rib that wasn’t a rib but a bunch of loose rock that bulged from the mountainside. Here’s the route I took
Do not let these photos fool you: this is where I encountered the loosest rock of the day. These rocks are the size of refrigerators and tables. Every 3rd rock would tip, and I would think to myself: “That’s a lot of rock to tip!” Luckily not one rock actually tipped/fell/tumbled/caused a rock slide.
This was a very slow process but eventually I made it to the waterfall area. My feet were starting to hurt at this point from all the rock work.
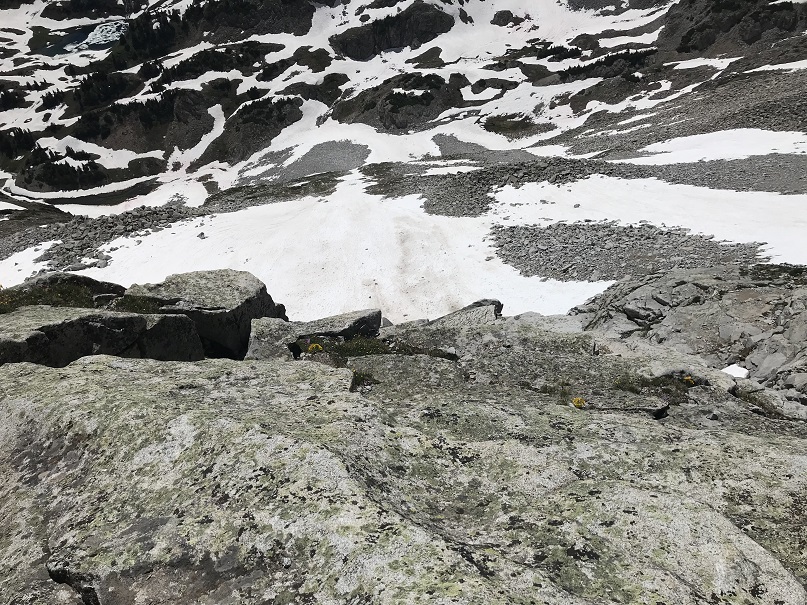
The snow ended just at the waterfall and surprisingly I crossed the waterfall pretty easily here and headed down. I made it down to this area at 3:30pm.
The snow started up again after the waterfalls
From here I looked down at the basin, and unfortunately there was a lot of snow covering the trail I was supposed to take back to Geneva Lake. That snow was going to be several feet of mush at this time of day so I decided to traverse south along the mountainside, looking for a safer route down.
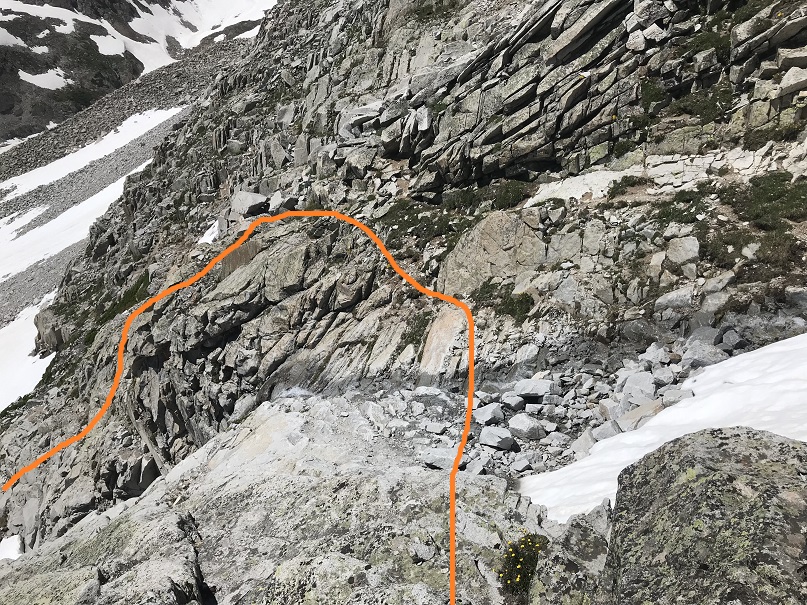
I made it here and unfortunately cliffed out yet again… but I could see where I needed to be: That goat trail should get me down.
After searching around for a bit I was able to find a way off this spot by circling the area to the north and down the small cliff
From here I followed the goat trail that went down a forested gully and came out ready to exit and head towards Geneva Lake.
The area through the trees to the stream crossing was wet.
At the stream crossing I reconnected with my water shoes. They were now dry but had been scattered and were now no longer sitting on the rock together but in the grass a few feet apart. I changed out of my shoes into my water shoes and crossed the creek
I’m ashamed to say the creek ate my water shoes. Seriously. The banks were quite muddy and during the last two steps my water shoes got sucked off my feet and into the muck. I spent 20 minutes trying to dig them out with my ice axe, but no dice. I couldn’t find them. They were buried in the banks of the stream. Ugh. From here I sat and put on my shoes and new, dry socks. I looked back at the route I’d taken to Hagerman.
My feet were hurting, and I still had 4 miles to go. Time to hit the trail. I skirted the lake and headed back towards Lead King Basin.
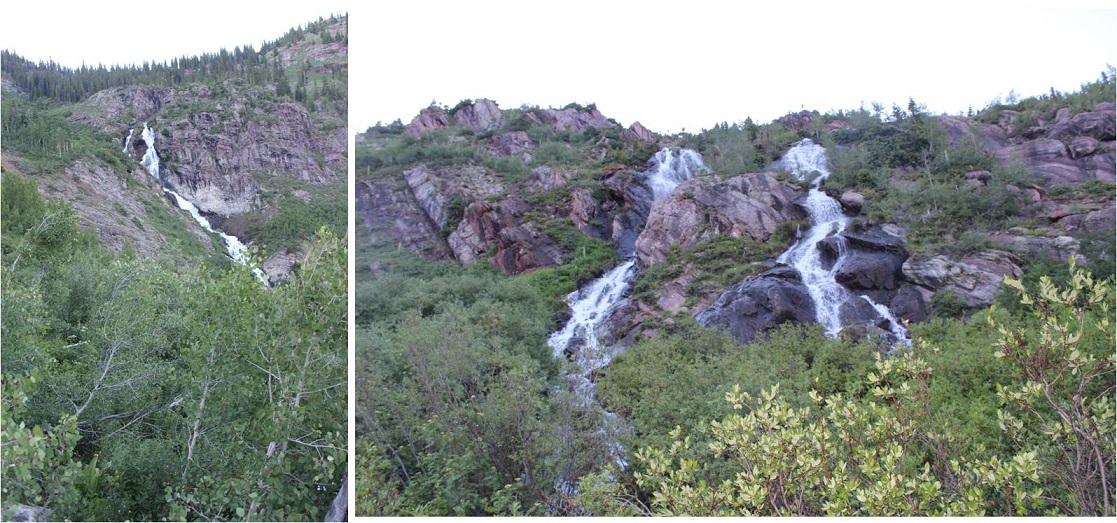
One great part of this hike was being able to see the waterfalls. And, since it was so late in the day: no bees!
At the base of the waterfalls the trail was running with quite a bit of water.
In the daylight I could see the upper 4WD trail to Lead King Basin
This is where my feet really started burning. I was surprised, since I’ve done more challenging hikes with greater mileage/elevation gain than this one, yet my feet were very sore. I made it past the Lead King Basin trailhead as the sun set and each step I took hurt more than the last. I wanted to cry. I’ve never felt foot pain like this. Also, I’d been hoping to stop in Carbondale tonight to get Subway for dinner, but it looked like I wasn’t going to make it back in time for that to happen.
It seemed as if it were taking forever to reach Crystal. I eventually came across a sign that said “Private Property next 2.5 miles” and mentally freaked out for a second. There was NO WAY it was 2.5 miles to Crystal! Not only could I physically not make it 2.5 more miles (My feet! My feet!!!) but I was pretty sure it had been 2 miles to the upper trailhead. Had I been wrong and it’d been 4? Ugh, I needed rest and I needed calories because my mind was playing tricks on me. Luckily it was only half a mile past that sign to the town of Crystal. I finished this hike at 8:45pm, making this a 15.5 mile hike/climb with 6211’ in elevation gain in 18.5 hours.
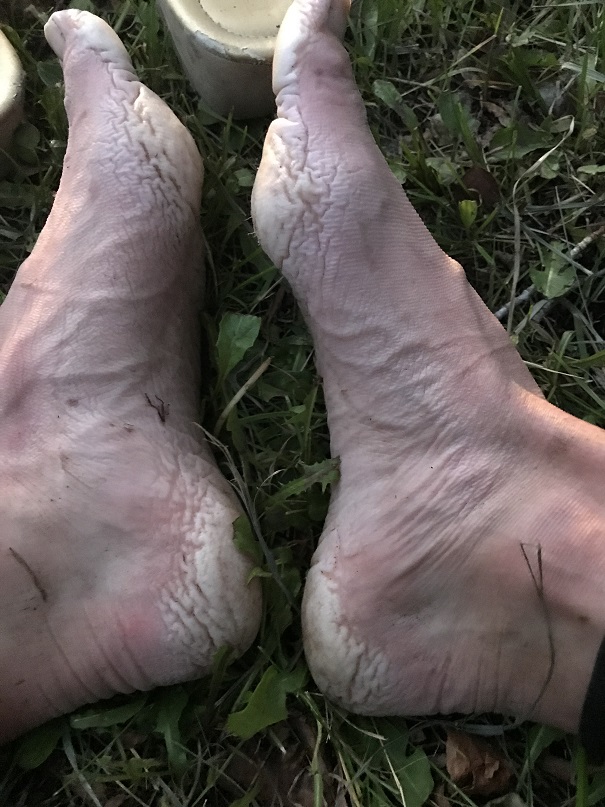
Read on for gross feet pictures and segue into the next hike…
I limped to my truck and sat down by a small access creek about 1 foot wide on the side of the road. I took off my shoes and gasped: Yuck! My feet had never looked like that before! The heels and pads were completely swollen and red/gray, and very painful to the touch (no blisters though).
I decided to wash them off in the water. I placed them both in at the same time and immediately felt relief, and then 2 seconds later started screaming because they started burning as if I’d placed them into a pot of boiling water. My feet turned bright red and were rendered useless. Seriously.
I couldn’t walk the 5 feet to my truck so I sat there for half an hour in the wet creek bank and thought about what I was going to do. I was supposed to drive to the next trailhead for my hike tomorrow, but doing the math if I left now I would get there and only have 1 hour to sleep before starting again. This hike had taken much longer than anticipated. I’d only had 3 hours of sleep last night so it was a bad idea to try to drive and then hike at this point. Also… my feet. I wasn’t sure they’d function tomorrow. They needed time to dry out. But long distance runners/thru hikers have this stuff happen, right? They just tape them up and hike/run anyway. I decided I was really, really tired and should sleep before attempting anything. I’d adjust my schedule as needed.
I had pain killers but decided not to take them: I wanted to be sure of an accurate pain level when I woke up so I could plan my day accordingly. Unfortunately, I never really made it to bed. I crawled into the cab of my truck, thankful I hadn’t rolled up my sleeping bag this morning. I tried to nap but even though I was exhausted I couldn’t get myself to fall asleep. After 2 hours I gave up and decided to drive home, with the added bonus of doing so in the dark late at night so I most likely wouldn’t need to pass anyone on the shelf road out. My feet had dried out a bit and were raw but less sore. They still overreacted every time I tried to use them. My right foot was healthier than my left; I couldn’t press down on the pedal very hard, so I drove slowly, but I made it.
Oh, and since I’d returned in the dark I never got to see the Crystal Mill, or get a good look at that old house with the lady in the windows…
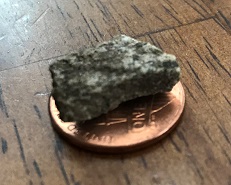
I was a bit worried about today’s hike. After hiking Stewart Peak with frozen feet last Tuesday I found this rock in my right hiking boot.
I’m not sure how long during the hike it had been there, but it had apparently rested under the ball of my right toe for quite some time. I know this because for the past 2-3 days I’ve had a hard time walking without pain. My foot wasn’t red or swollen, but I couldn’t walk on it normally, and it hurt to massage it. I researched my symptoms, and Google told me I did something to the joint. Ironically the way to treat it was to either exercise it, rest it, or take Ibuprofen. I don’t rest and I don’t take medication if I can avoid it, so I decided to get some exercise (but not too much).
So for today I picked a moderate class 3 hike that was supposed to be about 6 miles in length with around 3000’ of elevation gain in a heavily trafficked area so if something went wrong I’d have a better chance of finding help.
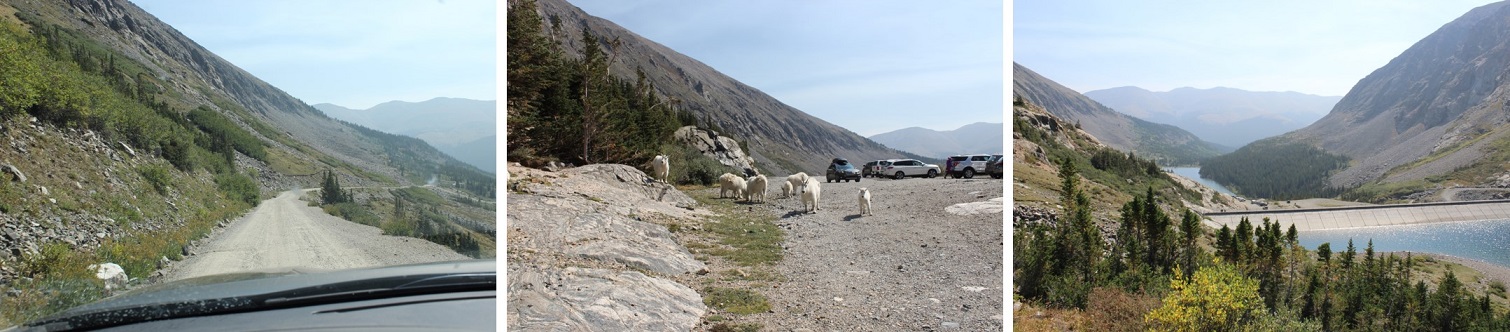
I woke up at 2am (woohoo! It’s like I slept in!) and made it to the trailhead at 5am. There was one other car in the parking lot but as I was getting ready someone pulled up and asked me if we were at the Quandary Trailhead. Technically we were, but it’s the trailhead for the more dangerous West Ridge route, and I figured by looking at them they were looking for the East Ridge Route, so I gave them directions back to the lower trailhead. For so many reasons sorry not sorry if I’d been wrong.
Here’s a view of the 2WD dirt road in and the parking area
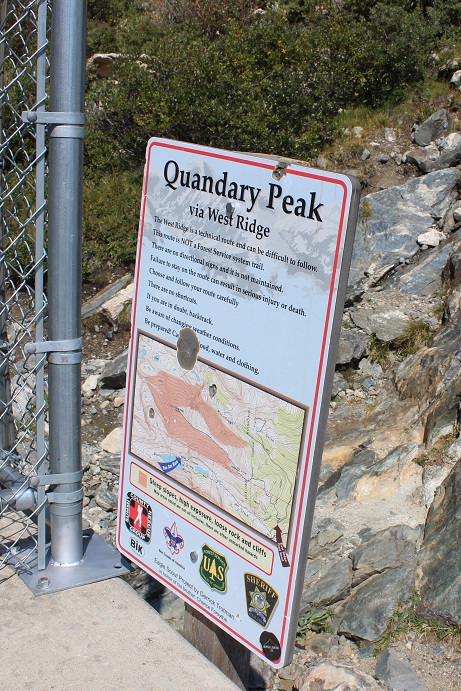
It was dark when I started out. I crossed my fingers and started my new tracker, walked to the right to the hill where the gate and dam meet and noticed this sign:
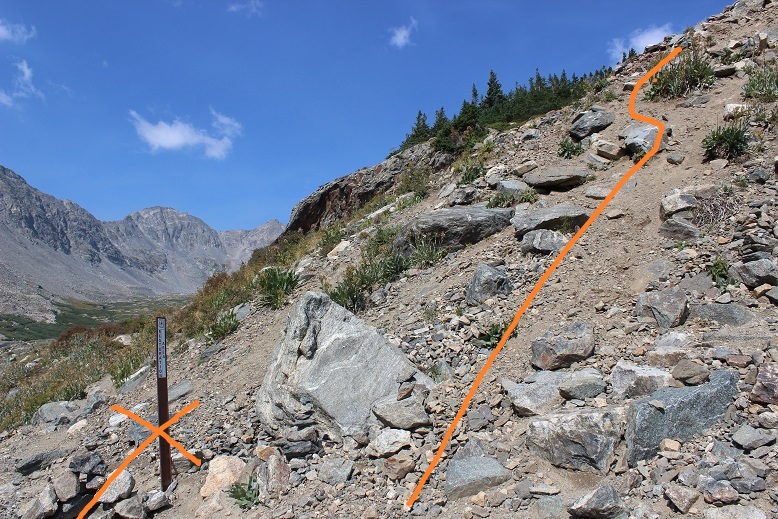
There’s a trail here that follows the lake. I took it for longer than I should’ve and quickly noticed my mistake: I was too far south. In the dark where I was supposed to turn didn’t look safe so I’d continued along the lake looking for another trail that headed up. Luckily there were several social trails that headed north towards the correct trail. I found one that was most likely more difficult than the first and was soon back on route. Here’s where you’re supposed to turn right and climb the hill.
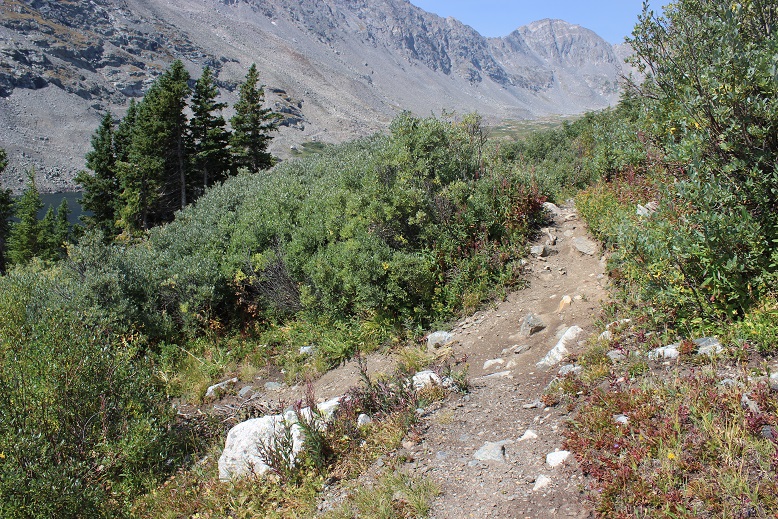
Here’s where I joined the trail
The trail up through the basin is easy to follow (even in the dark). The trail gained elevation very gradually and my right foot throbbed with every step.
Here’s the route I took through the basin and up over to 12,500’
Once the trail ends it’s heavily cairned and easy to follow, even in the dark. I wasn’t able to see the red gully, but it was still the obvious trail to follow. As I gained in elevation and the route became steeper my foot curiously stopped hurting.
After the red gully there were large boulders and rocks to hike around, with lots of carins to help out with route finding.
When I reached the top of the basin I turned around. Quandary’s west ridge looked amazing in the morning light!
Ahead of me I could see Fletcher Mountain
There was no trail, but the route to the summit was obvious. Here’s the route I took
You want to stick to the left of the ridge because there are steep drop offs to the right. The rocks aren’t stable but they won’t fall on you either, they’ll just roll. About half way up it started getting tricky: I was curiously slipping with every step! That wasn’t right? I have great shoes that usually grip everything. It seemed there was a thin layer of ice on the rocks I couldn’t see but which made hiking without slipping nearly impossible. Yes, I resorted to a kind of forward crawl where I had at least 3 points of contact the entire time. I probably looked silly with my butt in the air but I wasn’t slipping and falling. And there wasn’t anyone around to see…
I made it to the summit at 7am and had a great view of Quandary (it looked cold up there!). The wind was intense and made it much colder than it should have been. Here’s my summit photo
And video:
The cloud above Quandary worried me, but the wind was blowing east and I was headed west so I decided to just keep an eye on the weather. Otherwise it was a perfect morning!
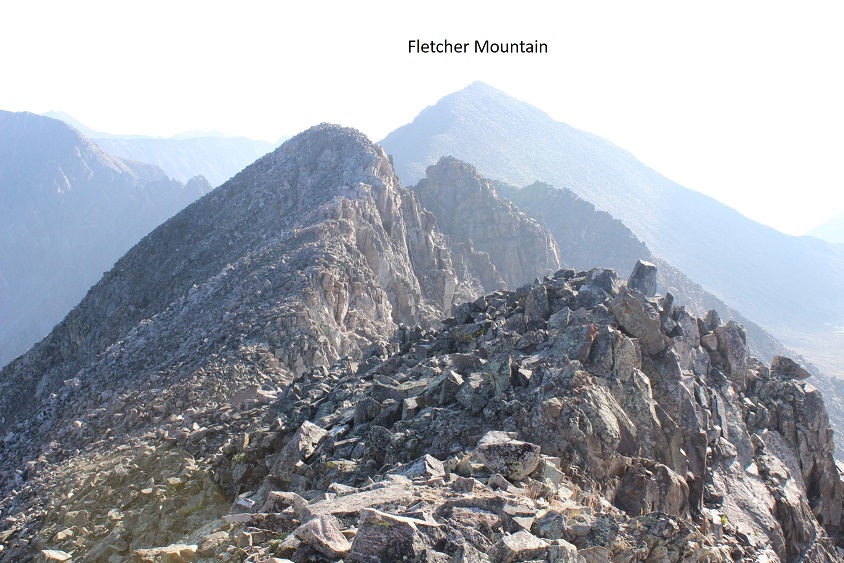
I looked to the southeast at my next goal
The hike down Fletcher towards the saddle was just as awkward as the hike up (I kind of spider crawled due to the ice) but by the time I’d made it to the saddle the ice was pretty much gone. Here’s the view of Drift (left) and Fletcher (right) from the saddle
This is a great place to put your helmet on (and keep it on until you make it back here). The beginning part of the ridge for Drift wasn’t too difficult. I just gained the ridge and followed it
From the picture below you want to stop following the ridge and turn right (north) to bypass the crux of the route (if you continue on the ridge you’ll encounter steep drop-offs and need to turn around)
You’re looking for and aiming towards a large round bolt in the route. It’s about 5 inches in diameter, and visible from a good ways away if you know where to look. I’ve circled the bolt in the pictures below
When you make your way to the bolt you’ll see by facing north how to drop into the gully.
This is kind of a chimney, and gets you ready for the more serious climbing ahead
Oh, did I mention the rocks were now icy again? Here’s a better view of the ice
From here I had to re-gain the ridge. I crossed the gully, located the lighter gray colored rocks, and headed up.
There are several routes to regain the ridge but if you stay on the lighter gray rock you should be fine. Did I mention this was steep? Seriously steep and slippery (due to the ice) and definitely Class 3+. Several times I thought how helpful a rope wouldn’t been…
But once I gained the ridge all I had to worry about was ice and wind as I crossed the easy path to the summit. The rocks weren’t stable but they weren’t a problem to navigate. Just be careful for rolled ankles.
Well, easy if the wind wasn’t blustering at 40mph and there wasn’t a thin layer of ice on the rocks. I was very cold and honestly crab-walked over the slippery rocks to the summit, afraid with the wind and ice I’d slip and fall. But I made it! I summited at 8:15am. I couldn’t smile because my lips were frozen… I tried though.
Video:
Here’s a look back at the ridge
I was cold and my fingers were starting to freeze so I didn’t stay on the summit long. I knew I’d need some dexterity in my fingers to make it back down the light gray rocks. I followed the easy ridge back and braced myself to downclimb back into the gully. The first few sections were fun and I was easily able to navigate the large boulders. Until I reached this point
This is where I fell. Well, I didn’t actually fall, more like slid for about 4 feet (scarier when it’s actually happening than it sounds reading about it). You see, everything was once again covered in a thin layer of ice, and there were no foot/hand holds available. None. I know, I was looking. I was in a spot that (due to the ice) offered very little in the way of help for the situation I was in. There were a few patches of moss that I tried to use, but naturally they weren’t stable and quickly crumbled out from under my shoes. And that ice didn’t help at all! I knew I was going to slip and slide eventually, so I tried to minimize the acceleration as much as possible before and as it happened by hugging the rocks and leaning forward. When I slid I was able to stop myself on a ledge about 3 inches wide and 6 inches long, stabilize myself, take a deep breath, and continue downclimbing. I’d bruised my right shin (just a little scrape with minor bleeding) and I had a hole in my pants at my shin, but I was proud of myself for not turning this into a worse situation. Here’s the section where I slid. From top of the circle to the bottom is about 10 feet.
I couldn’t go to the left or right because it was actually steeper in those sections and led to larger drop-offs. This looked less steep when I was first climbing down, and the moss and lichen looked to be on larger/actual holds, or I wouldn’t have attempted it. In hindsight, before I was downclimbing this area I should have retraced my steps to where I climbed up (as I knew there were adequate hand and footholds in that area).
Once I was on more stable ground I took a look around: I needed to find that chimney to head back. Here you can see it from across the gully
I headed towards the chimney, climbed it, turned right and headed back to the ridge, knowing the worst was behind me. I made it back to the saddle and saw no reason to re-summit Fletcher, so I turned right and headed down the middle of the basin towards Quandary.
Once again, no trail, just rocks. Luckily, while the rocks weren’t stable they also weren’t icy. I felt humbled by the enormity of the rock field and my small place in it.
VIDEO:
As I descended into the basin the beauty caused me to pause. This is truly a gorgeous area! I’ll be coming back to attempt Quandary’s West Route someday.
I followed the cairns down and around the several small ponds I’d missed in the dark.
I stayed here much longer than I should have, but it was worth it for the views! The red gully was clearly visible in the daylight
And those ponds and streams are much deeper than they look. For such narrow streams at a high elevation I was surprised they were 4-5 feet deep.
Exiting the basin was an easy walk. At this point I noticed my foot didn’t hurt anymore. I guess exercise was the answer! I passed an old mine
Turned the corner to take one last picture of the basin (I may frame this)
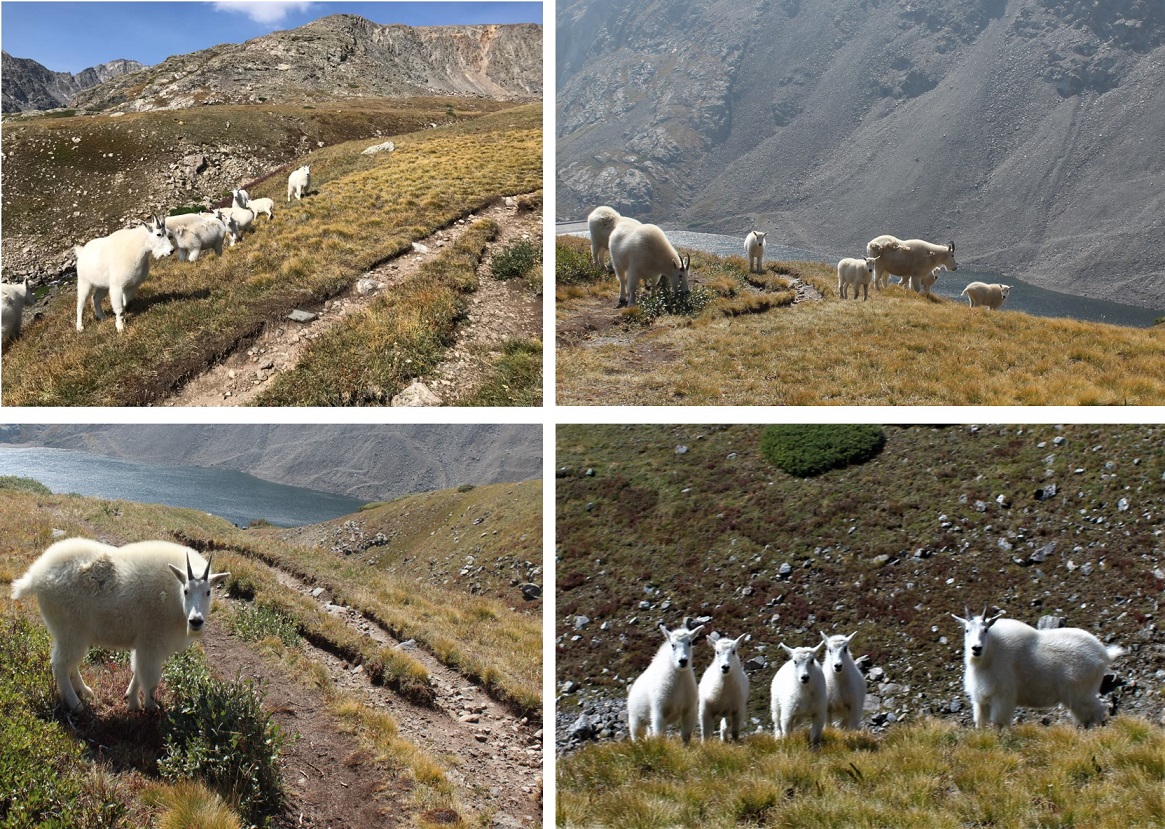
and: Goats! I love running into goats on the trail! This herd had several kids. All adorable
Video:
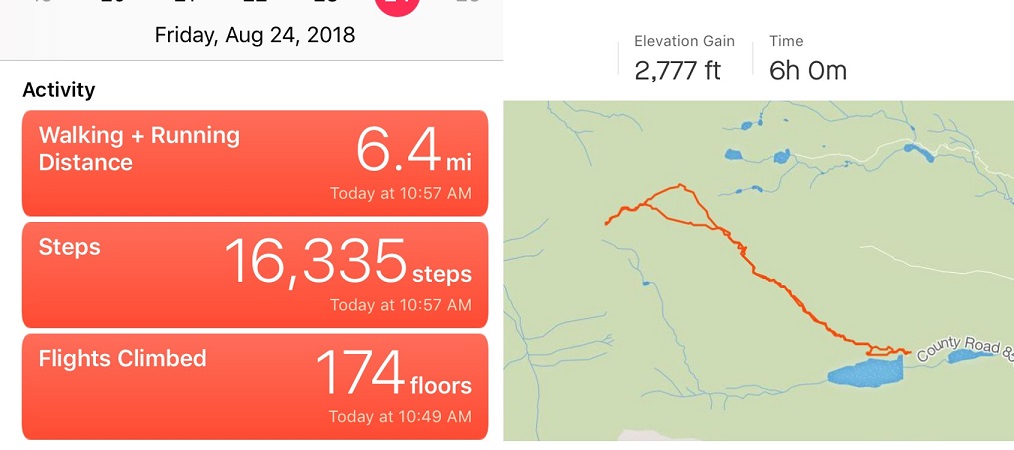
I made it back to my truck at 11am, making this a 6.4 mile hike/climb in 6 hours. Oh, and my tracker had worked! It said I’d climbed 2777’ in elevation, which I thought was pretty close to the 2800’ I’d been expecting. Now I just need to figure out how to save and transfer the GPX file to my computer. I was not happy with my time, but considering I’d crawled for a good portion of it due to ice I wasn’t too upset either. And I’d stayed safe. And I’d seen goats!
I’ve been saving this hike as a practice hike for winter conditions, since the route is relatively straightforward and it has a 2WD trailhead. Unfortunately I don’t have much time in the winter to actually hike, so it had to wait until early spring.
I woke up at 3am and drove to the Missouri Gulch trailhead. There were a few easily manageable mud puddles to avoid, but nothing anyone would get stuck driving through. I made it much faster than I thought, as I was honestly waiting for daylight for this hike. After seeing a herd of elk on 390 I made it to the trailhead at 5:45am. There was one other vehicle in the parking lot, and it looked like it hadn’t been there long (no frost on the windows, etc). This would make my family happy, knowing there was someone else out on the trail today. They hate that I hike alone.
I usually love hiking well before sunrise, but today for several reasons I decided to sit in my truck for a bit and wait:
I’m not a fan of hiking by graves in the dark. Does anyone else think it’s weird the baby’s grave is so far away from all the others? I mean, it’s across the street and up the hill and everything…
I really didn’t want to play ‘leapfrog’ with whoever was already hiking on the trail. I figured I’d give them some time to get far enough ahead of me so we wouldn’t need to pass each other/hike together the whole time.
I’ve heard reports there’s a mountain lion that frequents the area, and I’d rather not run into one in the dark. (side note: I’m not afraid of mountain lions, in fact I’d love to see one while hiking, I’d just rather it be in the daylight)
But seriously, that baby grave in the dark freaks me out.
I debated for a while which hiking boots to wear (my regular ones or my winter ones) and whether or not to bring my snowshoes. There wasn’t a recent conditions report in the past week or so, and the last one said none were needed. I left the snowshoes in the truck and headed out at 6:15am in my snow boots and winter gear. It was still dark.
I made it about .25 of a mile when something told me to turn around and go back and get those snowshoes. It’s tough to head back after you’ve already started, but the feeling was strong and I thought how mad I’d be at myself if I made it up the trail 3 or 4 miles and needed to turn back because I didn’t have the proper gear. So I hiked back to my truck, pulled them out, and was on my way again.
The trail was covered in slush that quickly turned to packed snow. As I looked on the ground I could see clearly defined mountain lion tracks (noted by size and lack of claw marks) on the trail. Cool! I also saw trails made in the snow that were obviously from a large animal (the mountain lion?) that detached from the main trail and went off into the hillside. The tracks were going the opposite direction, but that didn’t stop me from looking all over for signs of animal life/more tracks. After about 1.5 miles in the tracks disappeared.
20 minutes into my hike I passed the couple belonging to the truck. They didn’t look like they had snowshoes and I felt a bit foolish for carrying mine. The trail was pretty hard packed here, and snowshoes didn’t seem necessary. I briefly asked them if they’d seen the animal tracks, they had, and I was on my way. I never saw them again.
I crossed a small stream and decided the snow was thick enough to put on those snowshoes I’d been carrying.
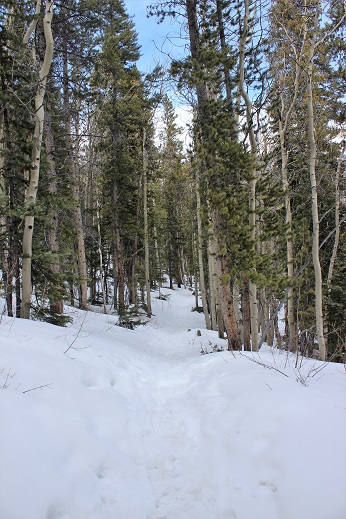
The snow got thicker, but luckily others had been here in the past few days because there was a pretty good trench all the way to the cabin.
I made it to the cabin much faster than I’d anticipated. I took this trail on my way to Missouri Mountain last summer, and from what I’d remembered it had been a long slog full of switchbacks. But for some reason today it didn’t seem to take me much time at all. The cabin was surrounded in snow.
From here on out snowshoes were mandatory. There was no trail from the cabin through the willows/gulch area, so I had to make my own trail. Luckily I kind of knew how the trail went, since I’d hiked this area before. It was really cool to be breaking my own trail, and doing so successfully! This was the first real time I’ve broken trail: I hiked Humboldt Friday and broke a little bit of trail, but mostly followed others’ tracks. In fact, this was only the second time I’ve ever been snowshoeing, and I kind of liked it! It was so cool to be 5 or more feet above the trail in the snow, traversing over willows instead of around them. There was no way I could have done this a year ago, and I was proud of my route finding.
When I turned around I saw the alpine glow of the sunrise
I stayed by the creek and headed towards the Elkhead Pass/Belford Summit Junction.
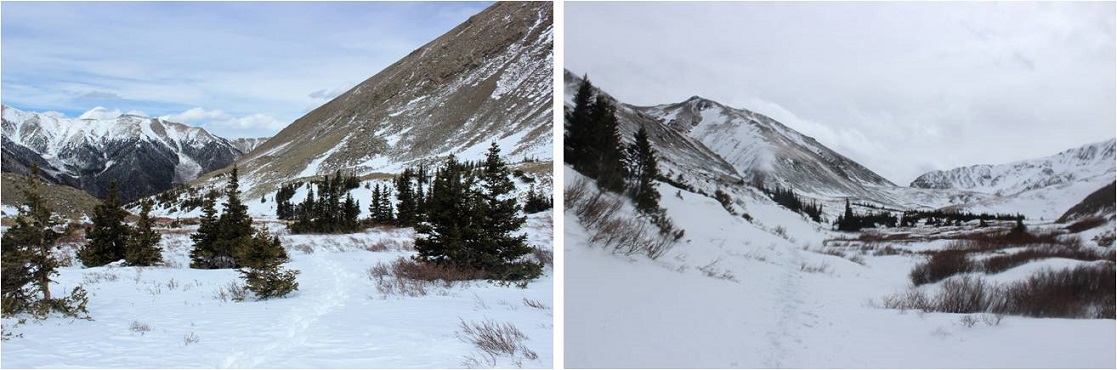
The sun was really starting to come up, and the view of Missouri Mountain was fantastic!
This is where the wind really started to pick up. It was relentless for the rest of the day, hovering around 35mph. It looked like all that snow in the gulch was directly blown down from the mountains.
I looked at the route before me up Belford, and as I was ascending thought not for the first time how grateful I was to have gone back for those snowshoes.
The hike up Belford took forever. It just kept going and going and going up, up, and up. And that wind! Without the sunlight that wind was chilling. I just kept moving, pretending it was the Manitou Incline, and trudged up that mountain wearing those snowshoes, breaking trail.
There were several false summits to Belford, which were a bit annoying but anticipated.
Finally (and I mean finally, as I was exhausted) the real summit of Mt Belford came into view and I thought to myself: 4500’ in snowshoes for 4 miles was exhausting!
I was frozen, but set up my gorillapod and camera and took a summit photo.
and just because it was there (they usually aren’t) a photo of the summit marker
I took a look around. The view was magnificent!!!
I didn’t take out my instructions/map, but remembered the route to Mt. Oxford would be clearly visible from this location. It was just 1.5 miles away. I followed the clearly defined path with my eyes and my jaw dropped.
No way! There was no way I was doing that today in these conditions! That’s when I took a closer look, realized I was looking at Mt. Harvard (which I’ve already hiked), breathed a sigh of relief and looked east. There I saw the second summit I was after today: Mt. Oxford.
It looked doable in today’s conditions. That is until I made it to the ridge. The ridge down from Belford to Oxford was covered in snow. There weren’t any tracks to follow (either no one had taken this trail in the past few days or that relentless wind had covered the tracks with snow). As with any hiking/climbing challenge, I don’t make a decision to hike/climb until I’m right up next to the obstacle. I often find it’s easier than it looks when you’re up close. I decided to just take this ridge one obstacle at a time, and if I felt uncomfortable gave myself permission to turn back. This was supposed to be an easy winter 14er, so I should be able to do this, even in these conditions.
I looked for the areas with the least exposure and least snow, and began my descent. It was really cool making tracks! I carefully made each foothold by drawing a line with my trekking pole and stamping it down with my boot, making sure I had a firm stance before traversing.
It was more than I’d anticipated running into today, but nothing I couldn’t handle. Microspikes/snowshoes weren’t needed.
I made it down to the saddle and looked back up at Belford, and then up at Oxford. Wow.
The saddle was dry and came with absolutely amazing views! I stowed my snowshoes and was off.
To the north there was a small cornice that provided interesting views as well.
I looked ahead of me at the route up Oxford. Piece of cake. And it was.
The summit was actually closer than I’d anticipated (the first outcropping, not the second). I took a summit photo.
And another one of the summit marker (because it had one too!)
I turned around to see what I’d accomplished thus far today. What a view of Belford!
I started back, ready to tackle that ridge again head on, and this time uphill. I gathered my snowshoes and kept an eye on the weather, since it was supposed to snow after 3pm (it was currently around noon). While all morning it had been windy and clear the clouds were now starting to form. I hiked back up the ridge using the footsteps I’d made on my way down. It took a while but I was successful!
At the summit of Belford the second time I stopped for a bit to really take in and enjoy the view. Since now the hardest part of the hike was behind me, I felt I could afford to rest for a bit. I sat down at the summit marker and took a deep breath.
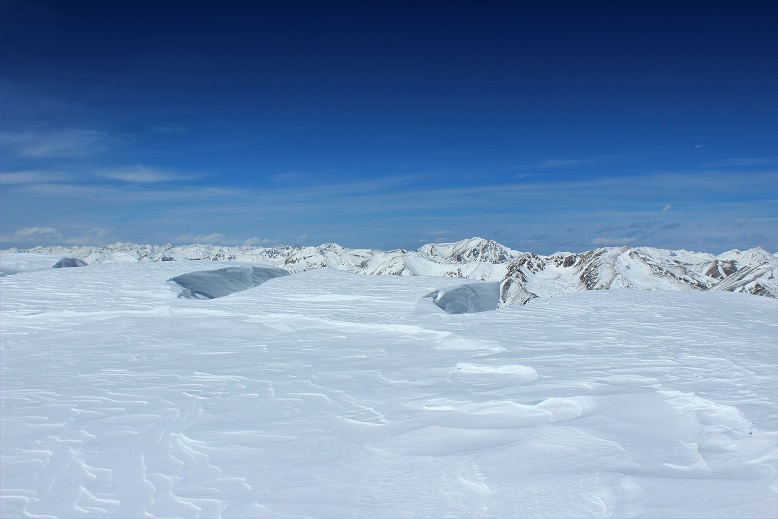
After a grueling and extremely windy 6000 feet in elevation gain in 6 miles (in snowshoes) I sat at the summit of Mt Belford, my 3rd 14er Peak today (out and back, so 2nd time here today). Suddenly the wind stopped and all was still. This is what I saw.
Immediately tears came to my eyes. It was like God knew I was the only person in the world with this view and he wanted to show off just for me. I was absolutely mesmerized by the intense beauty before me. It’s the closest thing to a religious experience I’ve ever had. All the hard work of the day and the frozen extremities that came with it was worth it! I sat there for 5 minutes before he picked up the wind again and reminded me to get my butt off that mountain: a storms coming in.
Of course I took another photo, trying and failing to capture the beauty around me.
I walked over the summit and took a look at the rest of the route down to the gulch. It looked like the sun had melted some of that earlier snow.
I was making good time, so I decided to have a little fun and use my remoteness from any other human being to practice some winter skills without embarrassment. Much of the earlier snow was gone, so I was able to safely practice glissading and running down the snow without worrying about sliding too far or out of control. I did this for most of the hike back down, laughing as I went.
Back down at the gulch, this was my view back down towards the cabin and back up at the route I’d come. As you can see, clouds were just beginning to form for that storm anticipated for tonight.
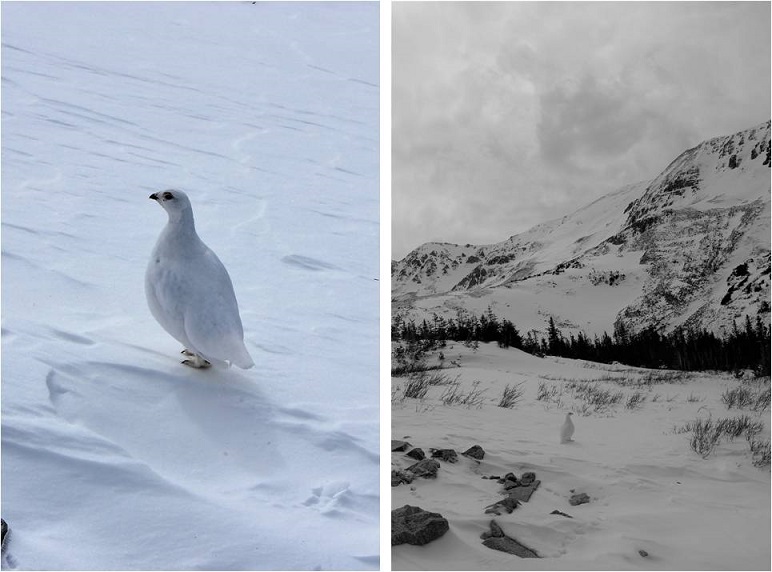
I put my snowshoes back on, crossed a frozen river of ice, and waiting for me on the other side was a ptarmigan. I knew he was a male because he had a red stripe over his eye. He just stood there, looking at me, and then slowly turned towards Missouri Mountain and looked over his shoulder, as if he was beckoning me to follow.
I took several pictures, thanked him for being so cooperative, and followed my snowshoe tracks back through the gulch and down the mountain. It looked like several people had actually hiked up to the gulch today, as around the cabin there were several new ski and snowshoe marks, but no people to be seen. The trench was also a bit more compact than it had been earlier.
The hike back down seemed longer than the hike up, and I kept my snowshoes on for most of it. Somewhere along the way I lost my beanie which was unfortunate (I’ll make another one). As I was nearing the end of my route I kept looking for signs of a mountain lion (nope) or any other form of wildlife (again, nope). As I approached the area with the grave in the daylight I realized I was ‘told’ to get those snowshoes exactly as I passed the grave… Hmmm.
I crossed clear creek and my days hike was over.
On my drive home I thought about the details of today’s hike, and how this is something I wouldn’t have been able to accomplish a year ago. I was glad I’d saved these ‘easy’ 14ers for winter-like conditions, as it allowed me to apply the knowledge I’ve learned thus far (snowshoeing, traversing ridges covered in snow), while giving me time to practice more intense skills in a safe environment (glissading, self arrest, running down a snow field).
Here are some summit videos. The views were amazing!


 RT Length: 11 miles